


king derelict
-
Posts
3,295 -
Joined
-
Last visited
Content Type
Profiles
Forums
Gallery
Events
Everything posted by king derelict
-
Thanks OC. I've liked the Vallejo putty in other applications. Looks like I have a full armoury now. Alan
- 460 replies
-
- 5
-

-
- Finished
- Flower-class
- (and 1 more)
-
Thanks Bill I just ordered some micro balloons on your suggestion. I'll experiment to find the best solution. Thanks again Alan
- 460 replies
-
- 5
-
-
- Finished
- Flower-class
- (and 1 more)
-
Looking very good OC. Looking quite peaceful now; the calm before the storm Alan
-
I knew there was going to be a reason I shouldn't have thrown those early failed prints away. 😄 A test piece is definitely a good idea Alan
- 460 replies
-
- 5
-
-
- Finished
- Flower-class
- (and 1 more)
-
The gesso is a great idea. Thank you very much for the suggestion. sanding looked like it would be messy and tedious. Its bad enough cleaning up the brim lines. Alan
- 460 replies
-
- 5
-
-
- Finished
- Flower-class
- (and 1 more)
-
Thank you Lou. Its quite a thrill to see the hull assembled. The gesso is a great idea. I even have some in hand from the Penelope diorama. Alan
- 460 replies
-
- 5
-
-

-
- Finished
- Flower-class
- (and 1 more)
-
Thanks OC. Putting the hull sections together was an exciting moment. I do make 3D beer, but so far without squirting it out of the printer. The latest batch of ginger beer has just been bottled. Alan
- 460 replies
-
- 5
-
-
- Finished
- Flower-class
- (and 1 more)
-
Thank you Yves. You have been a huge help getting me to where I am now. I have a small lake behind my house which also has frogs, turtles and also an occasional visiting alligator. So I'm still undecided. I need to price out the RC equipment and see if that influences a decision. I foresee several days of sanding and fairing of the hull to get it tidy. I'm reluctant to use any form of rotary tool sander because of the low melting point of the plastic. I am going to need some putty for some of the less than perfect joins. I only have the Vallejo plastic putty which my work but I would be grateful if anyone has any better suggestions for filling the thin gaps between a few of the hull sections and a few print gaps. Thanks Alan
- 460 replies
-
- 5
-
-
- Finished
- Flower-class
- (and 1 more)
-
Thanks Craig Its still a huge learning experience and the printer continues to throw up surprises. At least the levelling seems to be working out now that I have a routine and upgraded the bed springs. Alan
- 460 replies
-
- 5
-
-
- Finished
- Flower-class
- (and 1 more)
-
Thanks Egilman; seeing the hull come together has justified the aggravation of getting the initial prints to work. Good Luck with the new printer. Its a whole new world - or an enormous rabbit hole. Alan
- 460 replies
-
- 5
-
-
- Finished
- Flower-class
- (and 1 more)
-
It's a hard block inside the jar so I think it's going to last a long time. I rough cleaned the brushes with water to get most of the paint off, wiped them on a paper towel and then wiped them on the surface of the block until I got a lather and then shaped them with my fingers to make a point. I think it will be a good routine to get into. Alan
-
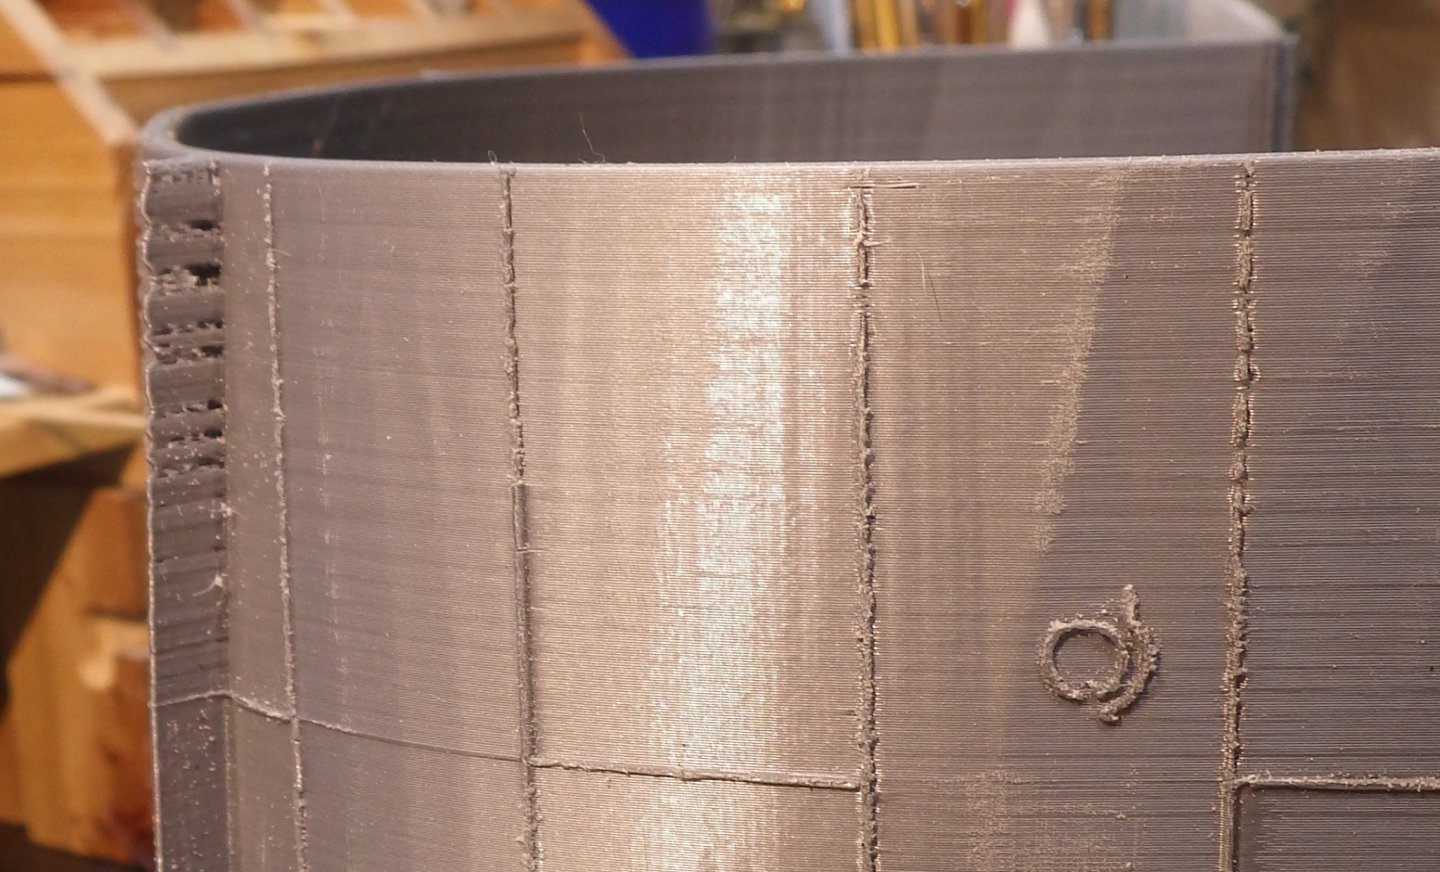
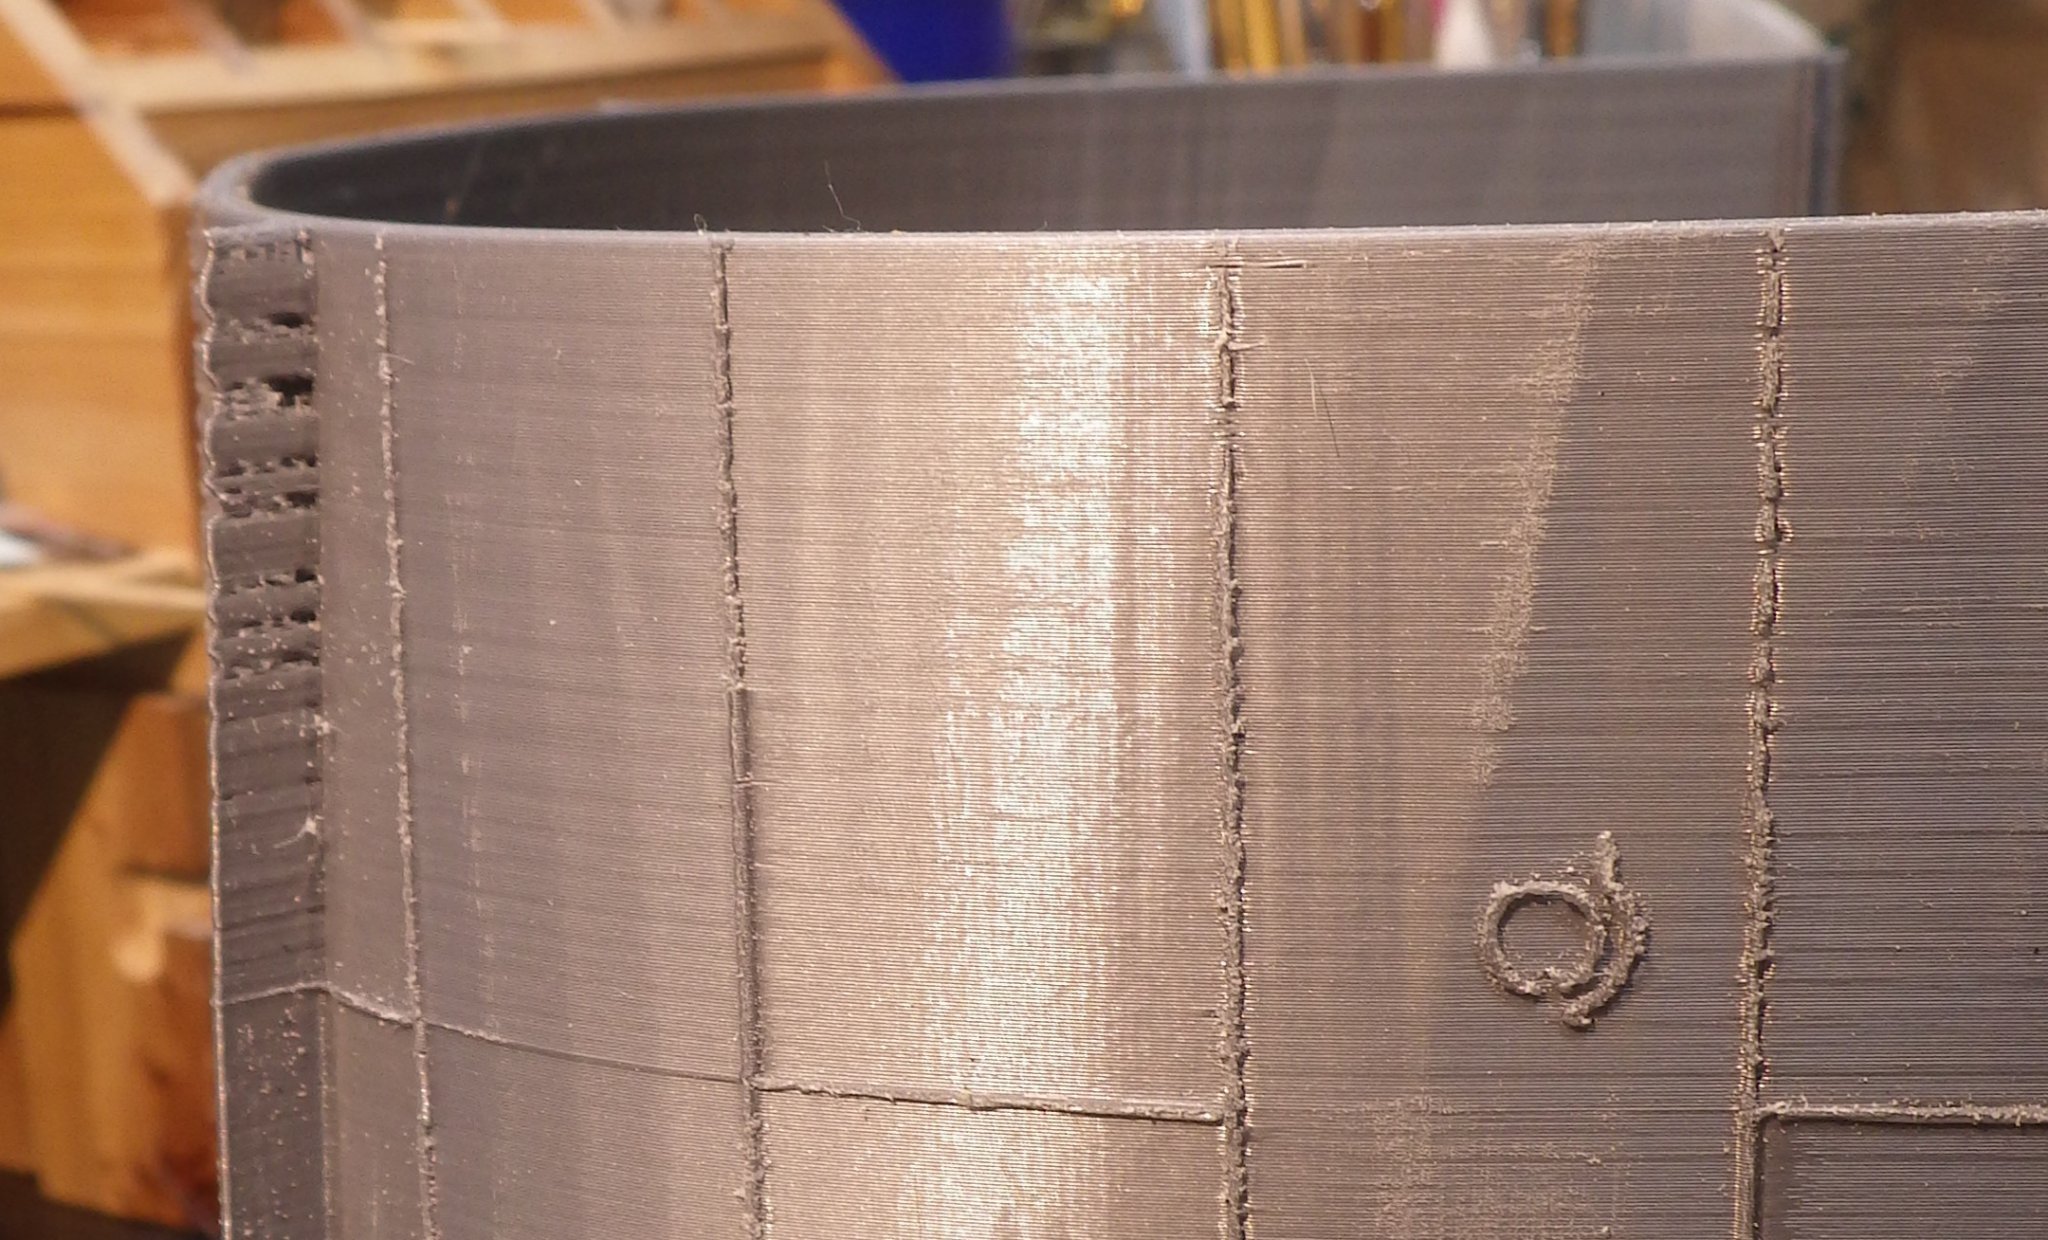
Well. it was time to blow the dust off this build now that the Geisenau is safely in a display case. I trimmed the brims off the hull sections and hull connectors, at this point concentrating on the inside faces of the hull and the outer surfaces of the connectors to get best fit of the hull sections. The connectors are a tight fit in the bow and stern so any imperfections need to be shaved off. This PLA plastic is evil to work with. It is very hard to sand or cut with a knife. The brims actually were easier to remove by peeling the majority off by hand and then scraping the remaining lip down and finally sanding. I only did a rough job on the exterior surfaces because I want to try to get the interface between the two sections as good as possible. Now that I am working on the hull sections I can see the imperfections in the printing. The rib has printed with gaps on one section and the port hole brow is distorted in the same piece On another section the port holes themselves are only partly printed and the weld lines are missing in places There is generally quite a lot of plastic fluff on teh exterior surface details which I have been gentlt sanding off The ledge that engages with the hull connectors and I assume sets the decks printed with gaps and detached from the hull on completion of the print Looking at Yves hull, it looks a lot neater. Its interesting that the same machine using the same settings and the same filament printing the same files can produce differing results. The lack of repeatability is something I am still trying to come to terms with and improve on. I removed the support from the rudder well by running a drill down the support and the torque was sufficient to tear the support cleanly out of the shaft. That's a tools you don't often see on the work bench in 1/700 land I glued the connectors into the relevant hull sections after carefully dry fitting and checking that I had the hull sections all oriented correctly and the hull connectors also the right way round. I marked them all before separating them to glue. The MEK solvent rather scared me, not helped by reading the MSDS sheet for it. My work area is not easy to ventilate as much as I think would be necessary. I decided to use 5 minute two part epoxy, mixing a fresh small batch for each connector. It seems to be holding well so far although I don't like epoxy glue too much. I find it difficult to use neatly and having been born with the messy gene i seem to transfer sticky patches everywhere, usually the unmixed resin so it doesn't even set and remains sticky forever. I swabbed the work surface off with alcohol at the end of the session. Most of the hull has been assembled. The sections went together well with little gap between sections and generally looking like a clean up of the interfaces and some light filling will produce a good hull. The connectors seem to have worked well it setting the sections in position to give a straight hull. The captain is checking progress and wondering where the stern is I was so engrossed in Geisenau that I didn't print the deck pieces so they will now be started. I'm still undecided about making it an RC model. Thanks for looking Alan
.thumb.jpg.84ccfe675e5e92743a272ca8d951e264.jpg)
.jpg.17f123b3452e69034056cb4651563f6d.jpg)
.jpg.f680cac792908a2ea670f1c94601df2e.jpg)
.thumb.jpg.75ff8e674e99a6a15dad7174e147b357.jpg)
.jpg.a3f94f103fd038b5ec2eb3005fb124c2.jpg)
.thumb.jpg.2ab5191c99df89516a051666c5b249f2.jpg)
.jpg.48a9bd44b5fb66509638129c3cd2ae68.jpg)
(720x1280).thumb.jpg.65f980a16b4a4cc8d85515e63b2570c4.jpg)
- 460 replies
-
- 10
-
-
- Finished
- Flower-class
- (and 1 more)
-
The grass looks very good. I think the vegetation is going to blend the buildings and the walls together and soften the lines to make it look spectacularly realistic. Its coming together beautifully. Alan
-
Thanks OC. I appreciate the positive support. This has been my biggest and most complicated kit to date and I thought it might be too much at my skill level but I have learnt a lot and enjoyed it immensely. I need to be tidier and I want to try some basic rigging but there was just too much fragile stuff around on this one to risk experimenting. Alan
-
Thank you Craig, praise from the experts is something to treasure. I plan to look into our Dollar Tree tomorrow and grab some material for a photo box. I got the Masters brush cleaner today and gave my old brushes the "restoring" treatment to see if it helps get a point back. Alan
-
The figures look very good. They really add to the car making it seem to move. The car paint looks great. Alan
-
The swastikas were completed on the ensigns and the staffs added to the deck. I used the PE stays but felt the staffs were too flat looking and used the plastic ones. The railings were finished and I did some basic shading on the hull and rusting around the anchor hawse and lower portholes. I'm still learning the techniques and am keeping it simple and not too excessive. Its easy to swamp a 1/700 model. I need to make a light box for better photos for the next model. Thanks for looking in and all the helpful and kind comments throughout the build. I think this is complete. I don't want to risk rigging and ruining the result. Maybe on a simpler model Thanks Alan
.jpg.a68bf135d309e4c51b89a7162bd4c5cf.jpg)
.jpg.28abcf9459d9fcf3b44714f68d9da983.jpg)
.jpg.a869bfd68b7659269ccff65cad994da5.jpg)
.jpg.52cb9f6272155ac8b895c8211fbdf16f.jpg)
.jpg.55105152ef7478edce1d8718c07f8c8d.jpg)
.jpg.8a3e11315a1a8080a6fdbf05f399461d.jpg)
.thumb.jpg.1ae9ab41913b0513ba07796c4f881772.jpg)
.jpg.93eff8dd716d245ce326c16a1332a8b2.jpg)
.jpg.daee0ddfaeee660bbe137573e7bd52dc.jpg)
-
They do look good. Looking at the Kolinsky sable brush prices on Dick Blick you may be right that these are "friends of" but as long as they perform they will be an upgrade for me. I did get some brush cleaner and restorer to see if I can keep them pointed nicely. Apologies for hijacking your thread. Alan
- 143 replies
-
- 10
-
-
I just ordered those brushes. My current (cheap) ones won't hold a point and have random loose hairs. The Kolinsky ones look very good. I got a set of the Army Painter dry brushes to try. A video says they perform as well as the Artis Opus ones but may not last as well. I'll see how I get on with them and upgrade later if they are getting a lot of use. What do you use to clean your brushes? Thanks Alan
-
Thank you Craig It seems its a bit of a lottery these days. I used the same source as I used before for Flyhawk kits that aren't stocked in the US and he did well with them. The XY chains from Hong Kong arrived quickly too. I bought a couple of books from Black Eagle in Russia in June and still no sign of them. I suspect the problems are with the postal systems rather than the vendor. I just checked the tracking number for the Hood and there was an entry two days ago so who knows, they may still arrive. I try not to have too much money tied up in each order. Alan
-
Thanks Craig that is fascinating stuff. Some very useful techniques. It seems it would work well on AFVs too. Their brushes look nice but pricy. Your figures are developing very well. With OC too there is some real master class work to learn from. Alan
-
Thanks OC. its been a great kit to build. I understand that Hood and Prince of Wales are even better so I look forward to seeing their builds kick off. Mine are still in transit - or lost. Tracking has been silent since the start of August. That will teach me to think I could beat the delivery time from an in country store. Alan
-
After important diversions like undercooking the burgers and filling the GFs house full of smoke from the grill we return to the calm waters of the Geisenau build. The anchor chains were added. These came with teh wooden deck and I like them better than the two dimensional PE that were provided with the kit. I installed most of the railings. This is the first time I have done 100% of the railings using Gators Grip glue. I followed Craig's technique of cutting the longer sections into shorter pieces and found that much easier and its also less weight for the glue to hold while its drying. I also applied the glue and let it set up for a few minutes before installing the railing; the grip was much better that way and after a bit of fiddling with the first piece the rest went on quite well. I'm trying to avoid CA glue as much as possible; I have a nasty feeling I am getting sensitised to it. I finished painting the Arado and added the decals (well, alright not the swastikas on the tail) and placed it on the catapult. Much to my huge surprise the machine gun is still in place in the rear cockpit of the Arado i placed the flags on their staffs and started on the swastikas. So far so good. Just the flags to complete and install, the railings to finish and the weathering of the hull. Thanks for checking in Alan
.jpg.7b0b3b2fdb077984dc3fa94c7da2278e.jpg)
.jpg.f3a544a96b3941d670a148dc782d8824.jpg)
.jpg.7fcb519aa296feec03cd8f01ced5016a.jpg)
.jpg.9a80bea47d2e8389f9e8b51ee89b843d.jpg)
.jpg.d7625a4fe3e6c91773c7ecbd6730ed07.jpg)
.jpg.b13d55989a11b886211e5c6436c8d517.jpg)
-
The face on the middle guy is spectacularly good (the others are also really good). A real expression. Alan
.jpg.77c76beebb61e0859501a0f9aa226309.jpg)
.jpg.db91e7718e36df04d8cd6a20911ee630.jpg)
.jpg.bf4dbe4f6884a825808251fff9bac62c.jpg)
(720x1280).jpg.c9ae02fc7000badb8033aa0a45e5d61f.jpg)
.jpg.f3a2debf29e9790ec4ab4cca22729d70.jpg)