king derelict
-
Posts
3,295 -
Joined
-
Last visited
Content Type
Profiles
Forums
Gallery
Events
Everything posted by king derelict
-
Thank you very much Roger, your comments are much appreciated and I'm glad you find useful items in the log. I'm still very new to model building with about a year of experience now and I am still learning a lot with each build. I can't imagine tackling the Geisenau six months ago. PE is still a huge challenge to me; trying to keep it neat and sharply folded. Some of the parts seem to be a deliberate challenge to the builder rather than necessarily enhancing the model! With all the tiny stuff on Geisenau I am increasingly using a cocktail stick with the end rubbed in beeswax to pick up and set the parts in place. It gives me more control of positioning the part than the big wax pencils and you can use a lighter application of wax to make sure the glue pulls it off the stick. My two biggest issues are 1 - no looking far enough ahead in the build sequence and making some later steps harder than they should be and 2 - situation awareness. I get so focussed trying to get perfect positioning as I add a part to the model I ignore the feeling that something is touching my fingers until I realise I just bent or knocked something else off the model. On Geisenau I am deliberately leaving everything off the bows and stern to allow me two places for my stubby fingers to go. Alan
-
Thank you Lou It feels like its going slowly working with the details of the Arado and the ships boats but I'm taking my time. Alan
-
I know the feeling. The top yard of the aft mast is my bête noir. I have knocked it off so many times. I actually found it on teh floor yesterday while I was looking for something else and hadn't realised that I had done it again. Thanks for the kind comments. Looking at your Scharnhorst photos I think I got the easier of the sisters to build. Alan
-
There are some parts in the PE fret that I look at and think - its not going to happen. The Flyhawk plastic provides so much detail anyway so apart from masts, railings, gun barrels the majority of the PE can be ignored. I chose to use the plastic hose reels on Geisenau because although the reel end pieces of the PE are nice the detailed hose in the plastic is a better look to me. Mashed up and bent PE looks much worse than a decent plastic part too.
-
The pond water came out really nicely. Looks very wet! Alan
-
The pond looks great OC - sorry - darn autocorrect Alan
-
The pond looks great OF Alan
-
I hate plumbing work. It always seems to involve fittings that have frozen in place after thirty years and the damage created in getting them off leads to an even bigger job before it's finished. Alan
-
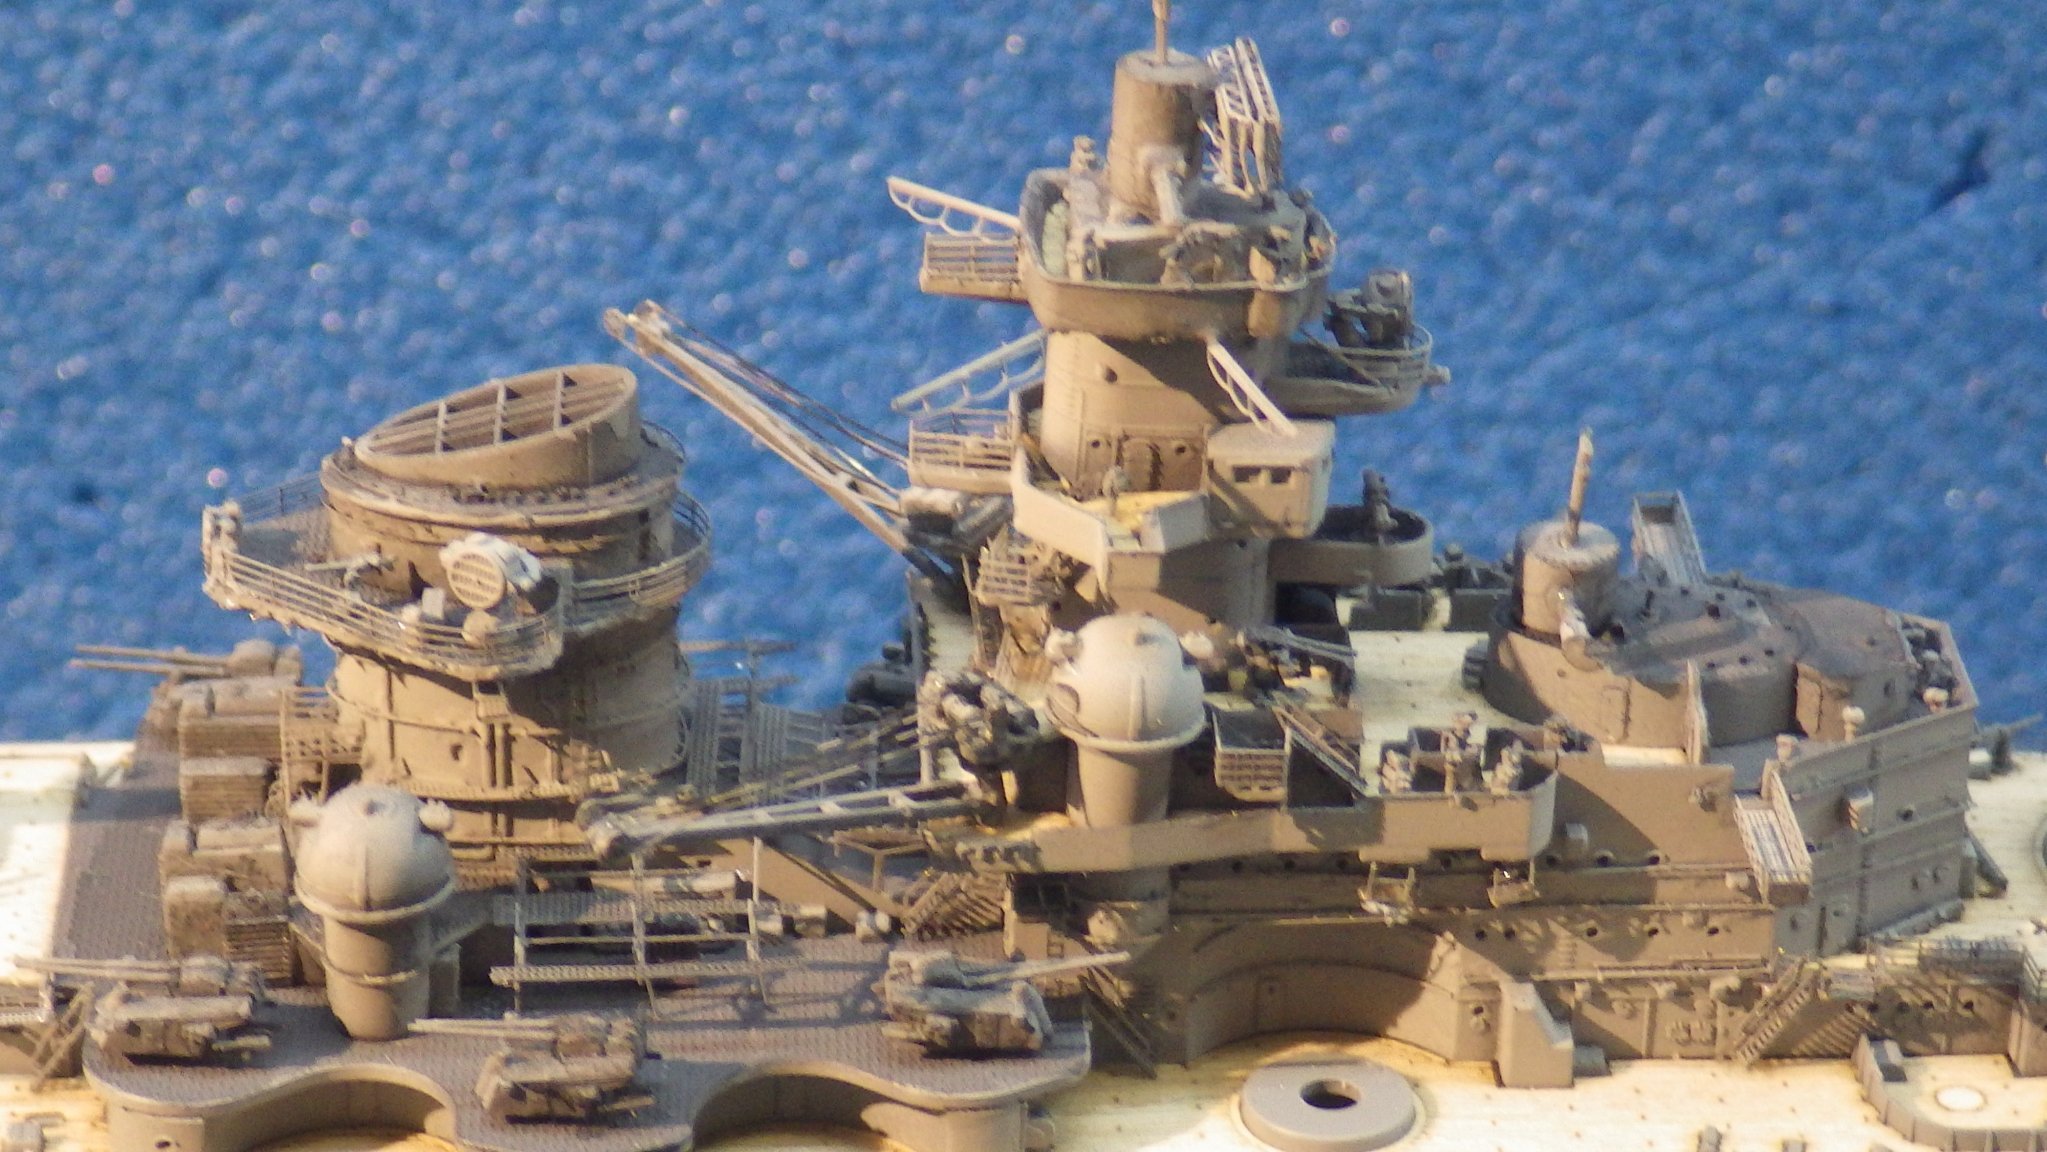
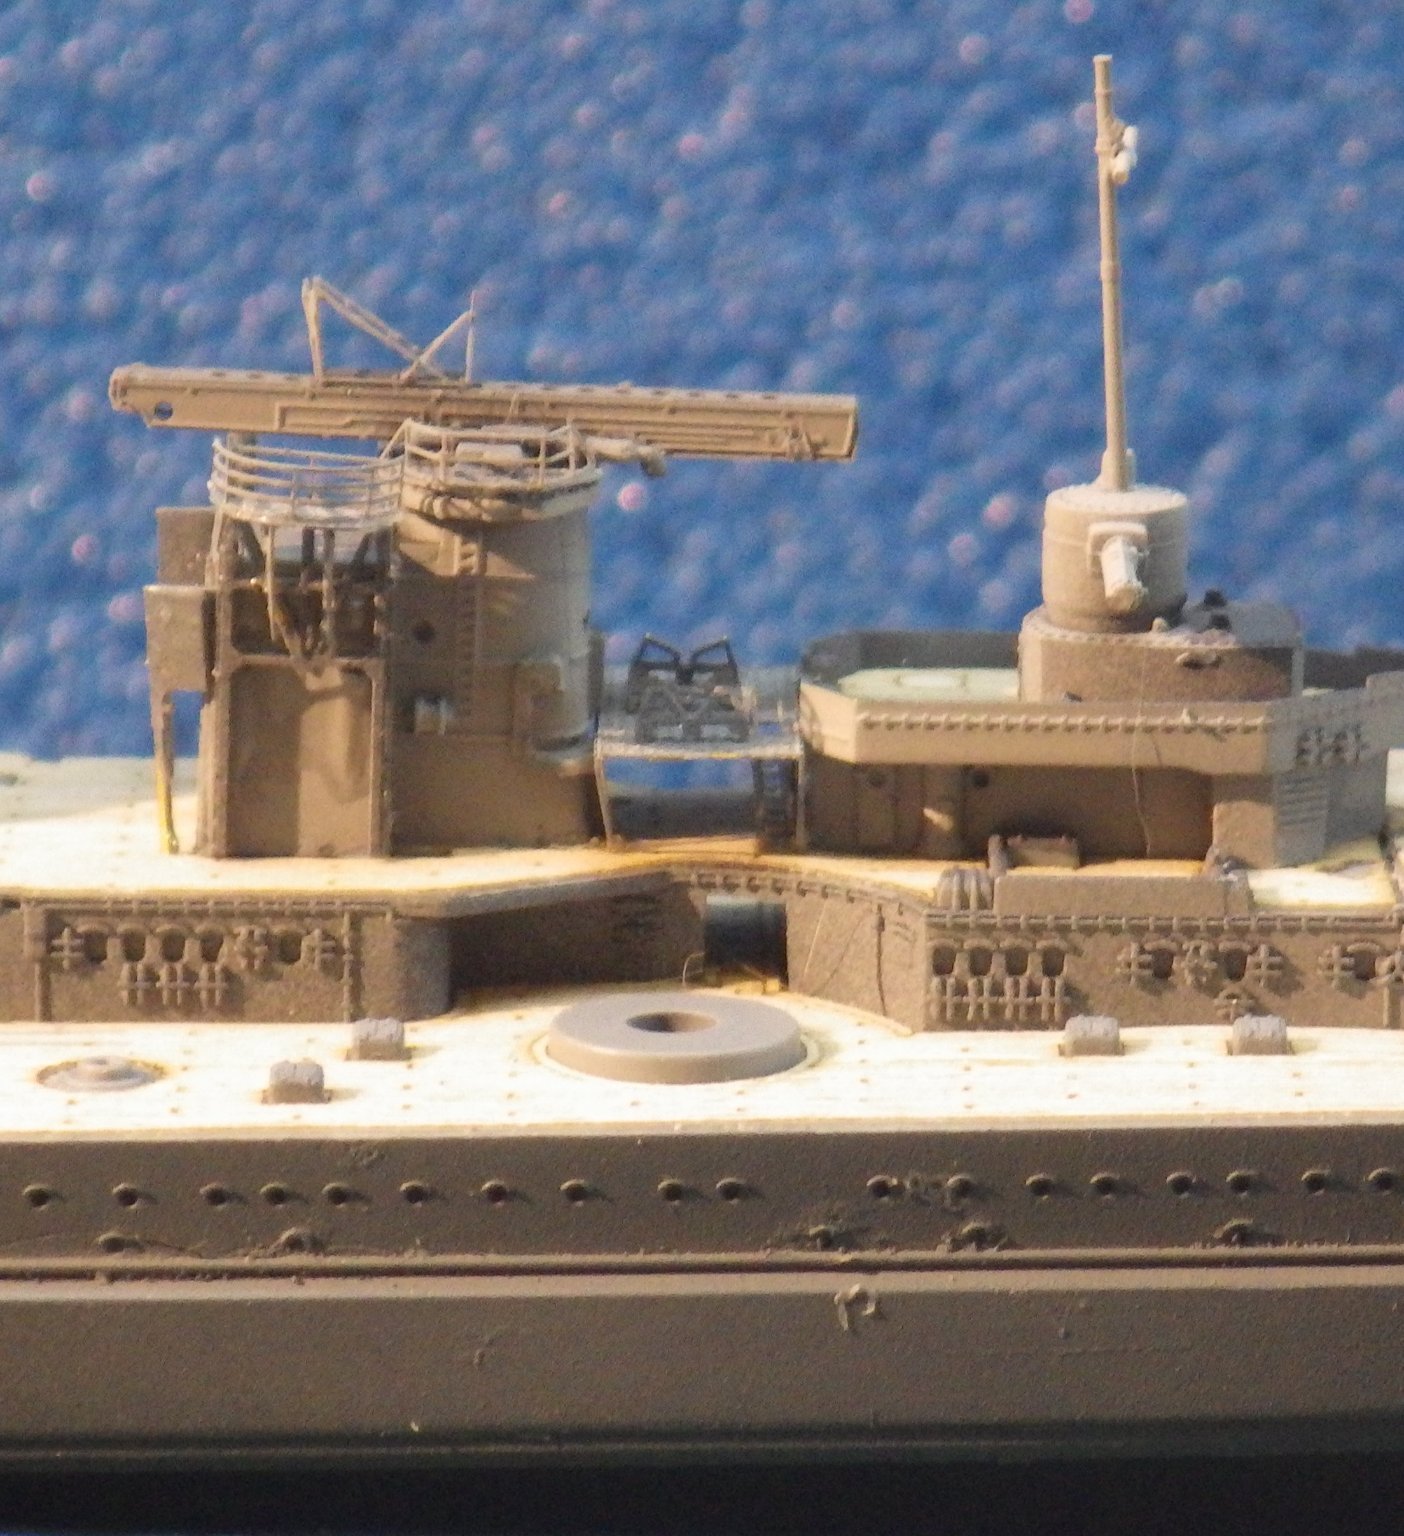
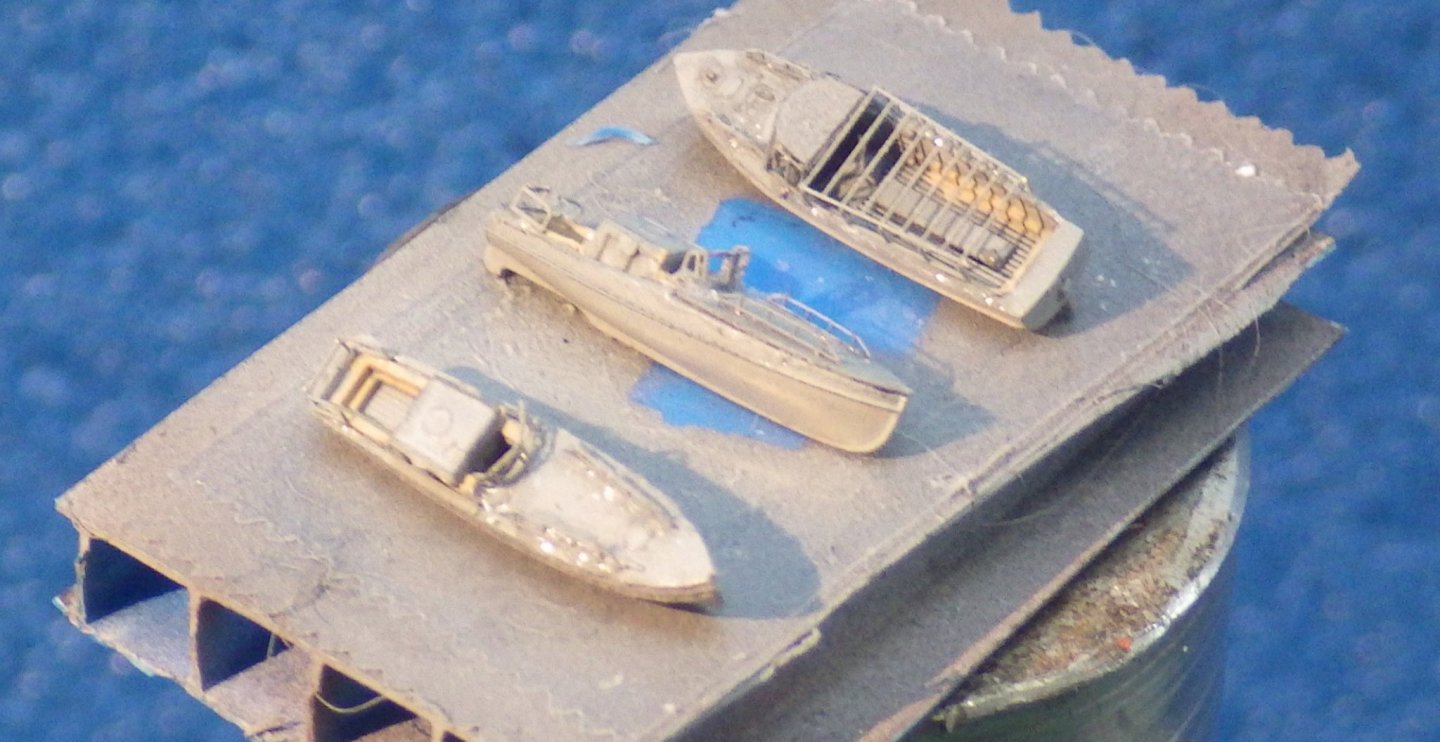
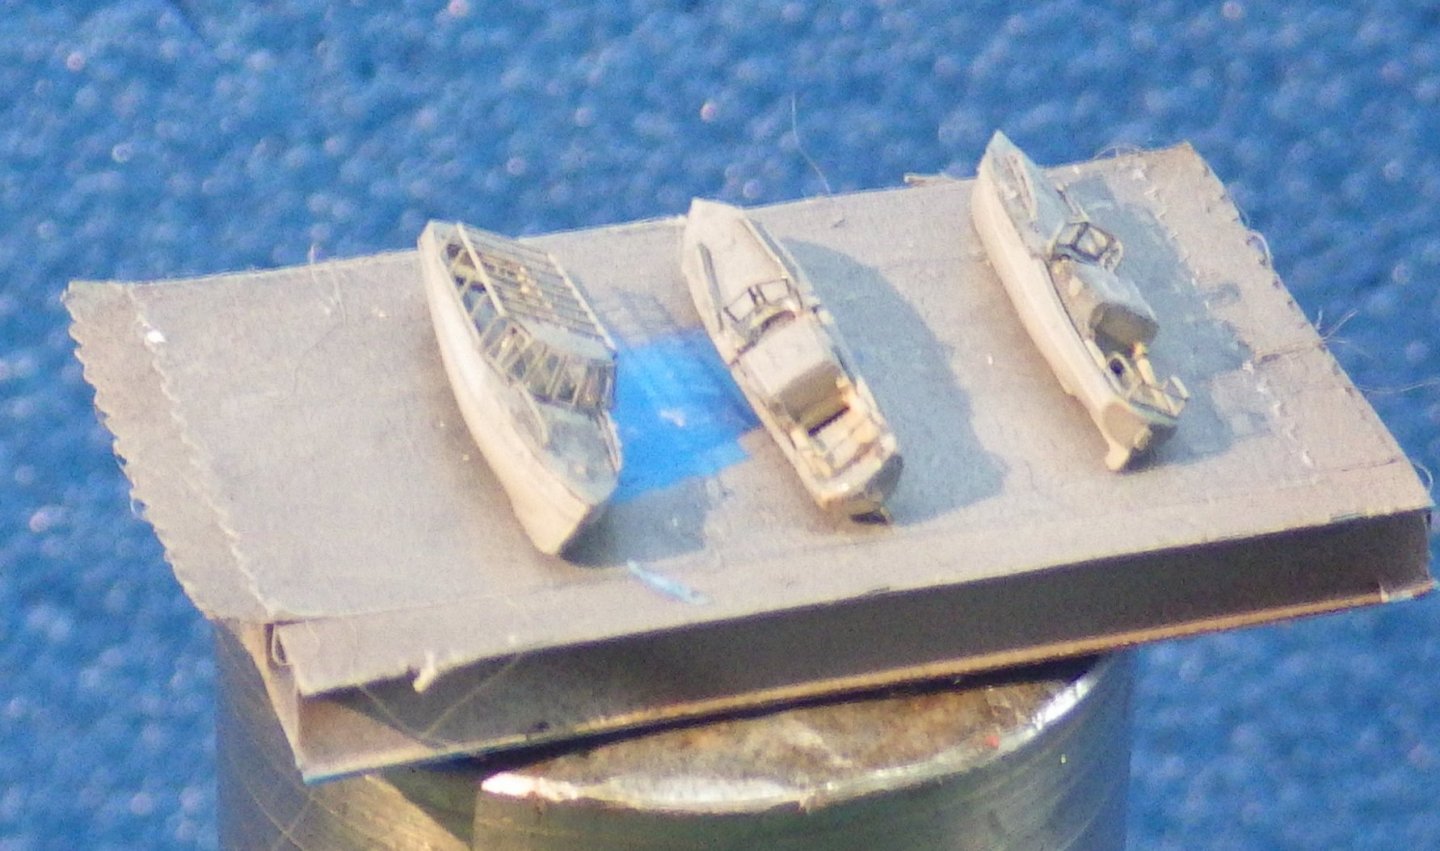
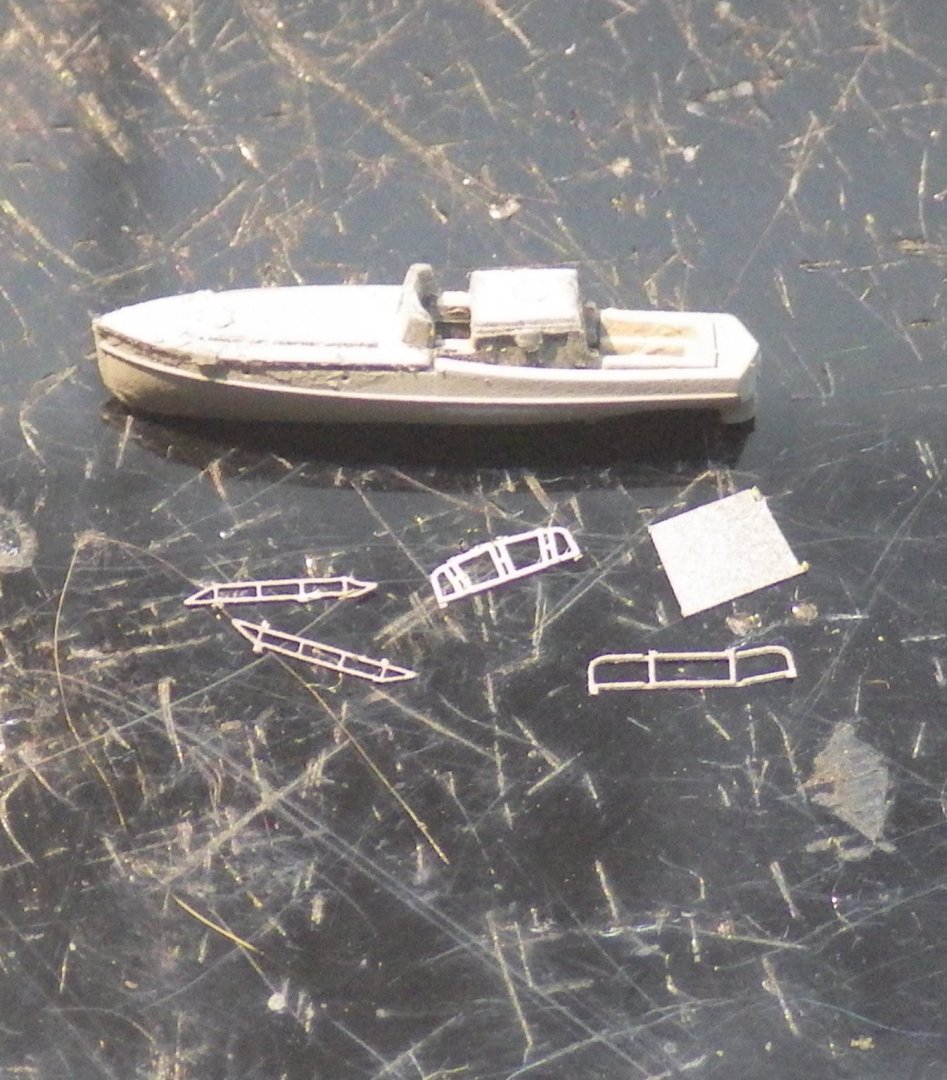
I'm still working away in the details of the ship. I started the ships boats. There are several very small PE parts to enhance the boats. Some of it may be a bit excessive. I'm not sure I see the value of adding the brass cabin roof. Its plain; just like the original. I omitted it but the windscreen, rails and canopy rails dress the boats up quite a bit Detail painting to finish them and some PE life rings. to add The last boat racks were added to the edge of the upper deck. I'm a bit confused about them. The instructions show railings running along the deck edge in the same place so I'm not sure if I have this wrong but it seems to match the diagrams in the instructions and there are notches in the deck for the boat racks where I installed them. I think I will have to cut the length of railings short to cater for the boats. Guns are slowly being added. I'm trying to complete the areas that will difficult to access when teh railings are added and adding the railings before other parts make them vulnerable. I'm leaving the bow and stern bare until last so I have somewhere to hold without ruining the delicate stuff. I have started with thin black weathering washes and to help with the shadow detail. The main runs of railings and the ships boats will be next to be added. Its starting to get busy. Thanks for checking in Alan

.jpg.c73ece6e6a8dbeed178ea79faf283d2b.jpg)
.jpg.95f11fce9ae1f8a7830a99e9ce52a809.jpg)
- 132 replies
-
- 10
-

-
The view through the front gate looks like a real farm yard photo already Alan
-
OC, You probably know all this but if the resin is anything like the one I used for the Penelope diorama its a good idea to "tent" the pond with a cardboard box or sheet of cardboard over it to stop dust (or in my case cat hair) drifting into the setting resin. Watch for bubbles and pour slowly to avoid them. Its going to look great. Alan
-
The brickwork always looks so good. Very realistic Alan
-
Its looking very nice. The doors are very good Alan
-
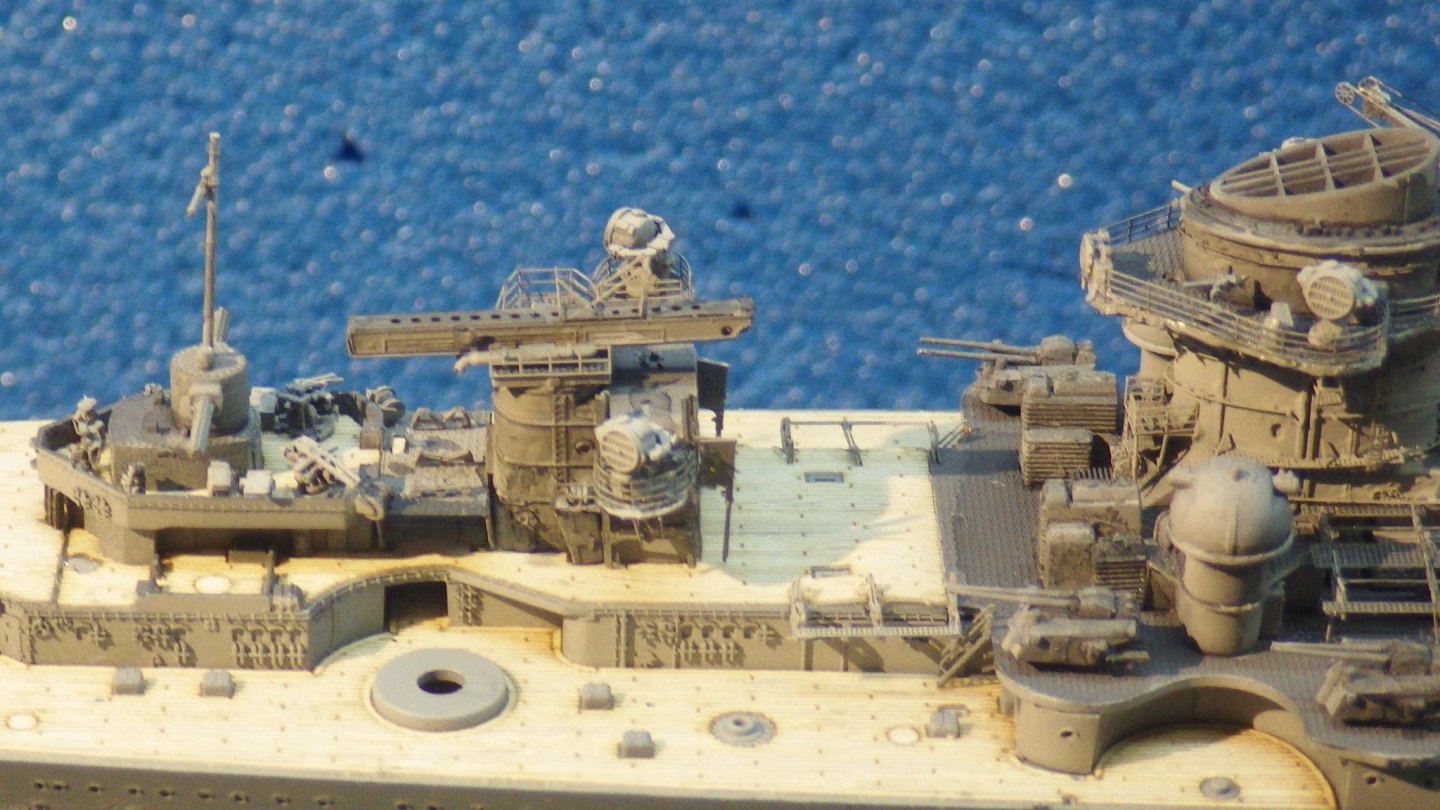
Not as much progress as I would have liked today. I built the PE boat rack that sits between the rear two structures and started to move it into place. It was a tight fit and as i added a bit of a nudge the rear structure popped off. I guess the wood deck was too tight and it wasn't really glued down fully onto the deck below. It did allow me to place the boat rack and then press the structure back into place. Unfortunately this had the effect of popping the forward structure off which has the catapult and all the other PE on it. It was not a good moment watching it bounce across the work surface. Luckily it seemed to land on the few substantial parts of the piece and little real damage was done. I was able to restore it to its place on the ship without any damage beyond the need to touch up some (more) paint. I decided to go off and do something else after that excitement So I went and brushed the cats. That will teach them! Have a great weekend all Alan
.jpg.2eff405602fe83b69a6526a0e747f576.jpg)
- 132 replies
-
- 10
-
-

-
Wishing her a speedy recovery. I'm sure she is badly shaken as well as bruised. My 95 year old dad did exactly that two months ago. Badly bruised also and nothing broken. Very miserable for the first days; couldn't find a comfortable way to sit or lie in bed. He made a full recovery and was digging the garden two weeksd later and walking his daily four miles by the end of the month. Alan
-
I've been using Vallejo black and grey primer in my air brush since I started ship modelling a year ago and it has been fine (to my inexperienced eyes). It goes on smoothly and stays on (plastic and brass) and the coat is thin enough to not obscure detail. I have been using it in the air brush undiluted or with a few drops of their thinner. I'm almost at the end of the bottle and will try the Mig One Shot next. Alan
- 174 replies
-
- 7
-
-
- prinz eugen
- trumpeter
- (and 2 more)
-
Thank you for the encouragement OC. My plan is to finish the Geisenau which is suddenly looking like the end is coming. Lots of details still but I think I may have it completed in a week or so. As a change in scale I will work on the corvette hull see how that comes together and finally make up my mind about whether to make the corvette a RC kit. Then print the next stage while returning to the world of 1/700 for a bit. Lots of fun Alan
- 460 replies
-
- 5
-
-
- Finished
- Flower-class
- (and 1 more)
-
Thank you for the comments about the value of an auto levelling system. I think that levelling is at the core of the problems I have (and still do at a lesser rate) experienced. The Creality auto levelling kit doesn't seem too expensive and their video makes it look easy to install so I think I will give it a try. Thanks again for the input. This is still all a bit of a black art to me. Alan
- 460 replies
-
- 6
-
-
- Finished
- Flower-class
- (and 1 more)
-
Yves That looks spectacular. It is a great spur to keep me moving forward with mine. I'm sitting the fence about whether to make mine a static or RC model. Initially I had planned to go for a RC model; especially as I have a lake behind my garden fence and I have never made an RC model. Seeing your wonderful results has me swinging towards a static model. I suppose the obvious answer would be to build two! Alan
- 321 replies
-
- 5
-
-
- Finished
- Flower-class
- (and 1 more)
-
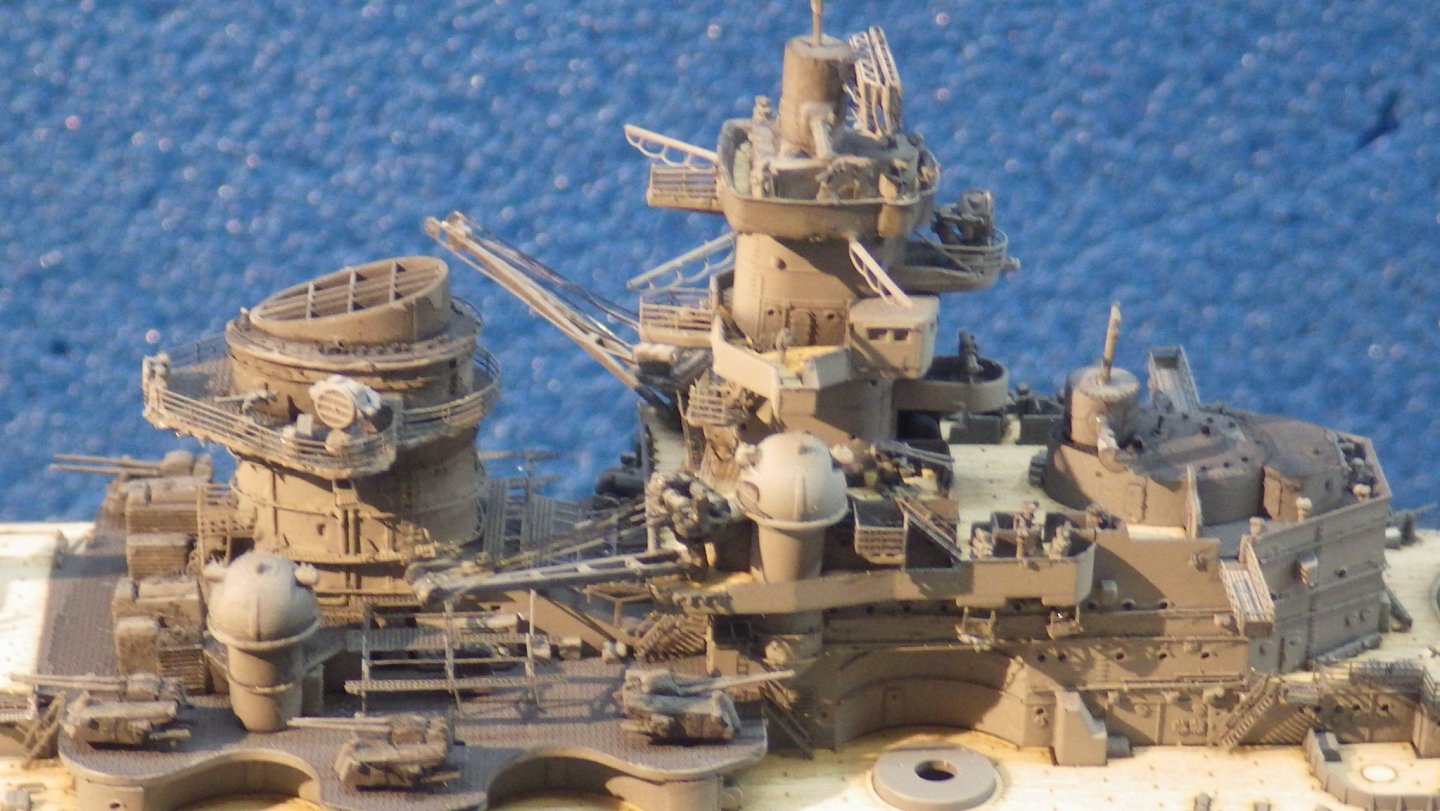
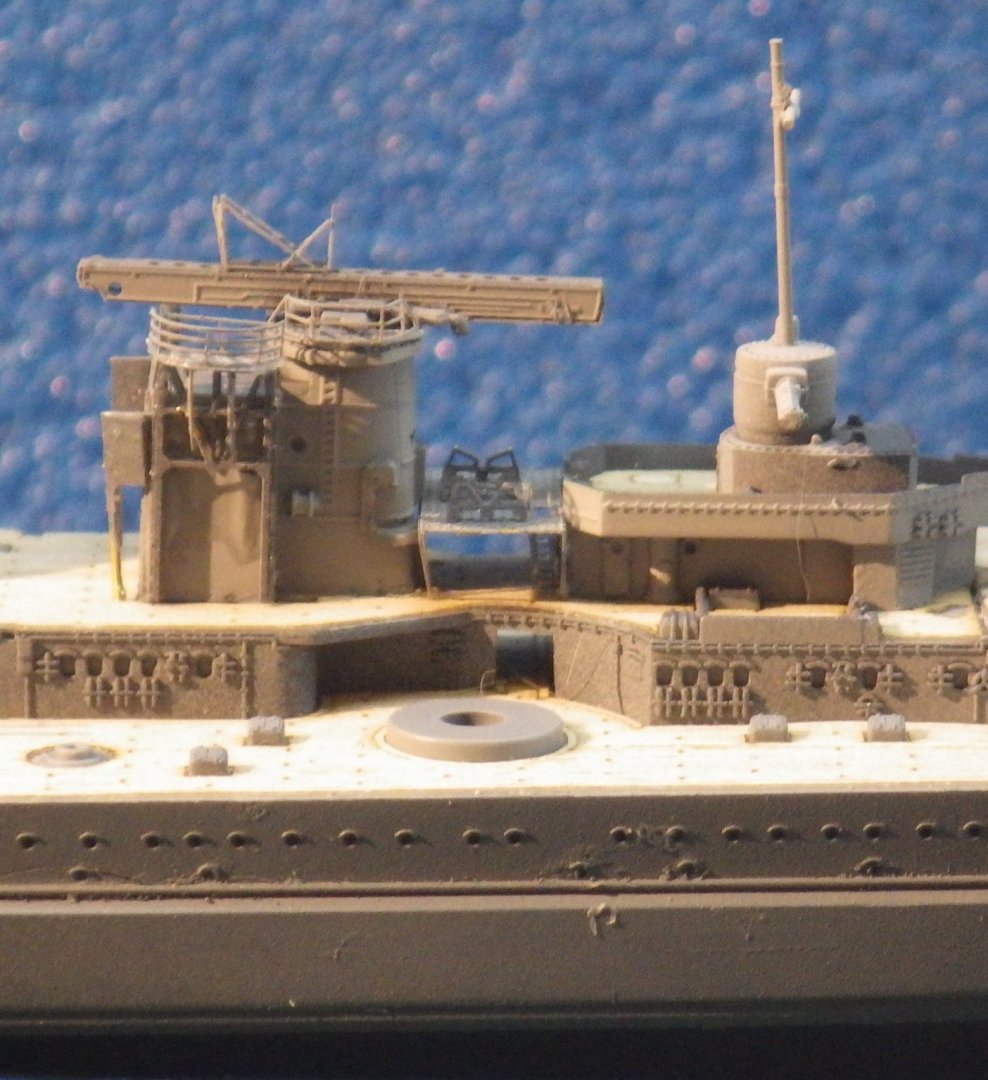
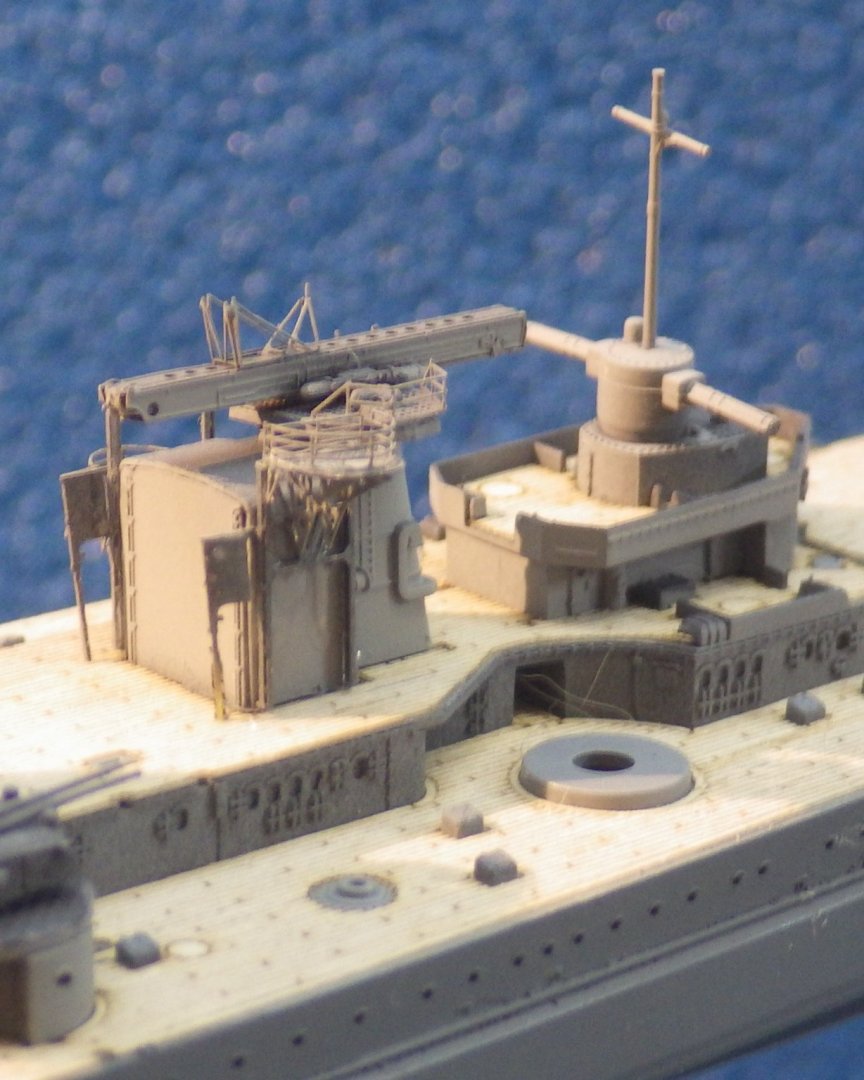
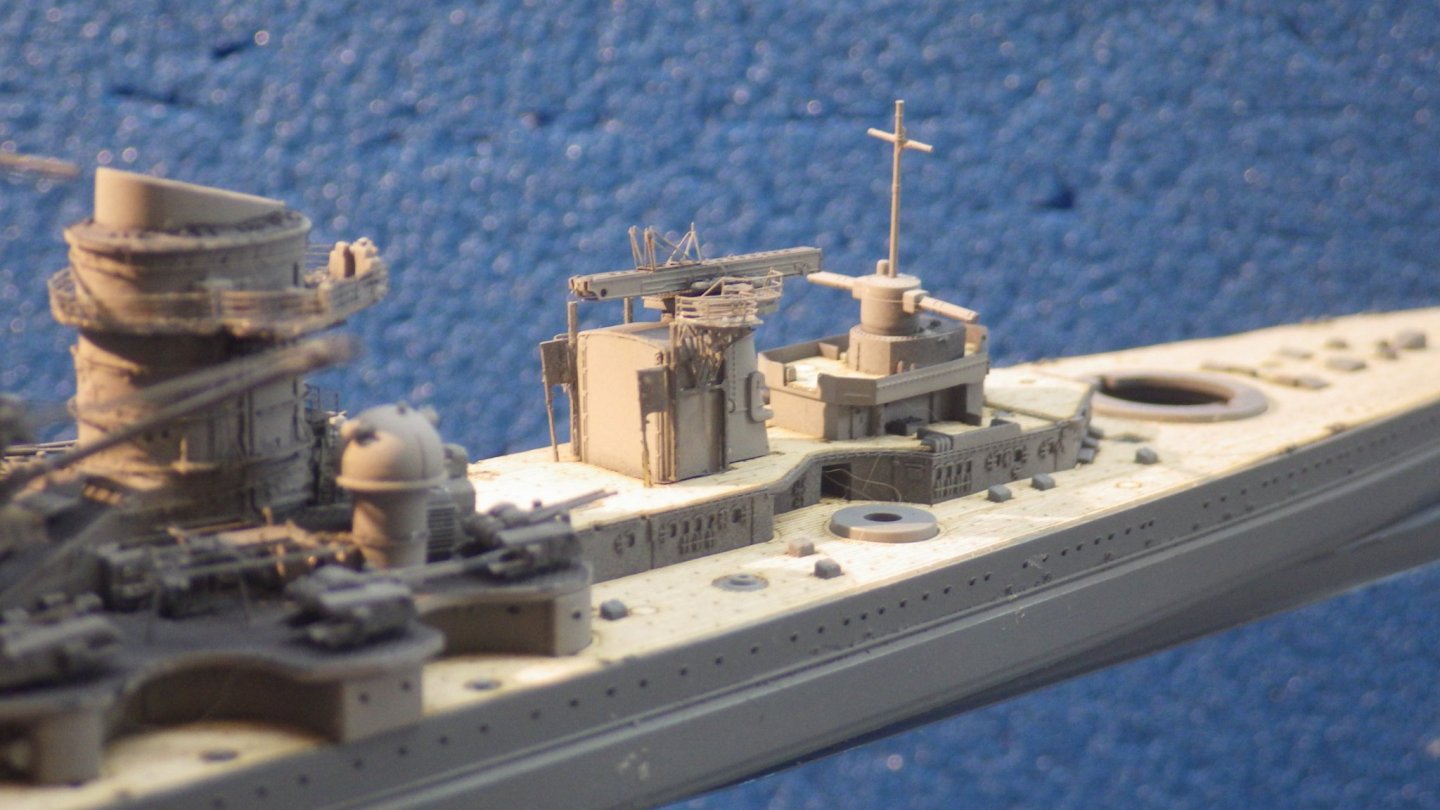
The last pieces of superstructure were added and the PE enhancements began. The platforms are mounted on girders made out of two PE with the edges bent and them glued together to form a box structure. The bending tool was a huge help to get the thin section to bend cleanly to 90 degrees. The railings and platforms were added and the assembly installed. More boat racks to add around the area but i was PE-ed out for the day Thanks for looking Alan

.jpg.6fcc7a56224563948e96ee3ae8aebcda.jpg)
- 132 replies
-
- 10
-
-
Thank you for the kind comment OC. The parts and PE still to install seems to be going down but there is a lot a lot of stuff still to install. No rush; its fun working on a new area each day. Alan
-
Thank you Grant I was beginning to think I was in the wrong part of the hobby for a while. Alan
- 460 replies
-
- 5
-
-
- Finished
- Flower-class
- (and 1 more)
-
Thanks Per I think I have been learning the hard way that the levelling is crucial, very sensitive and for me took quite a while to evolve a methodology that suited me and was repeatable. I am looking at tinkering with the print speeds. I have been slowing down the initial layers to improve bed adhesion but I plan to look at the effect of lower speeds throughout the print on the smaller parts where experimentation isn't going to lead to huge investments in time. Thanks for the link; there are some really good tips in it. My colleague has the bushings under the bed instead of the upgraded springs and he is happy with them. The manufacturer supplied springs are well worth replacing regardless. I think the gold springs has made the level setting much more repeatable for me. The alignment features look like a good idea to ensure a straight hull. Those Haze Grey ships are beautiful Alan
- 460 replies
-
- 5
-
-
- Finished
- Flower-class
- (and 1 more)
-
Thanks Craig. I think I might have given up but getting support from the people on this forum helped keep my morale up and give it my best shot. I think those hull prints are a work out for the machine. This sections and close to the edges of teh bed. I'm printing a 6 x 4 lithophane box as a bit of a change of speed and it is printing nicely with no supervision. I am looking at upgrades for the Ender and was wondering about their auto leveling system, I need to read some reviews Thanks for the help and advice Alan
- 460 replies
-
- 5
-
-
- Finished
- Flower-class
- (and 1 more)
-
Thanks Yves. I'm very grateful for your support through the trials of learning to use the Ender. Alan
- 460 replies
-
- 5
-
-
- Finished
- Flower-class
- (and 1 more)