MORE HANDBOOKS ARE ON THEIR WAY! We will let you know when they get here.
×


Guillermo Eduardo Madico
-
Posts
78 -
Joined
-
Last visited
Content Type
Profiles
Forums
Gallery
Events
Everything posted by Guillermo Eduardo Madico
-
 Thank you Chuck, Jean-Paul and Rusty. I enjoyed the challenge it was worth it to do the tabs. I finished both the port and sea sides gun ports next the whales. I was planing to place the center plank first taking measurements fro the plans and add the other 4 planks; two each side. Will that work? Best, G
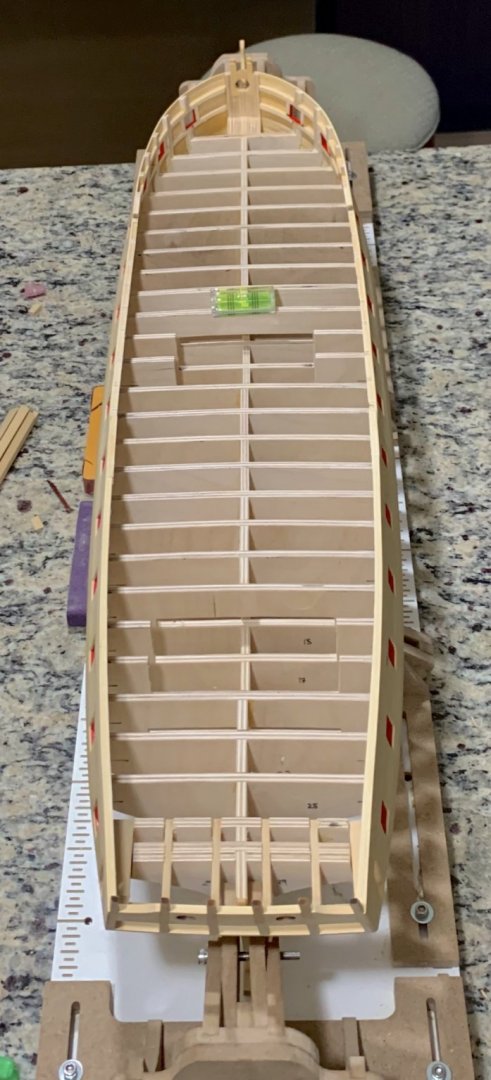

-
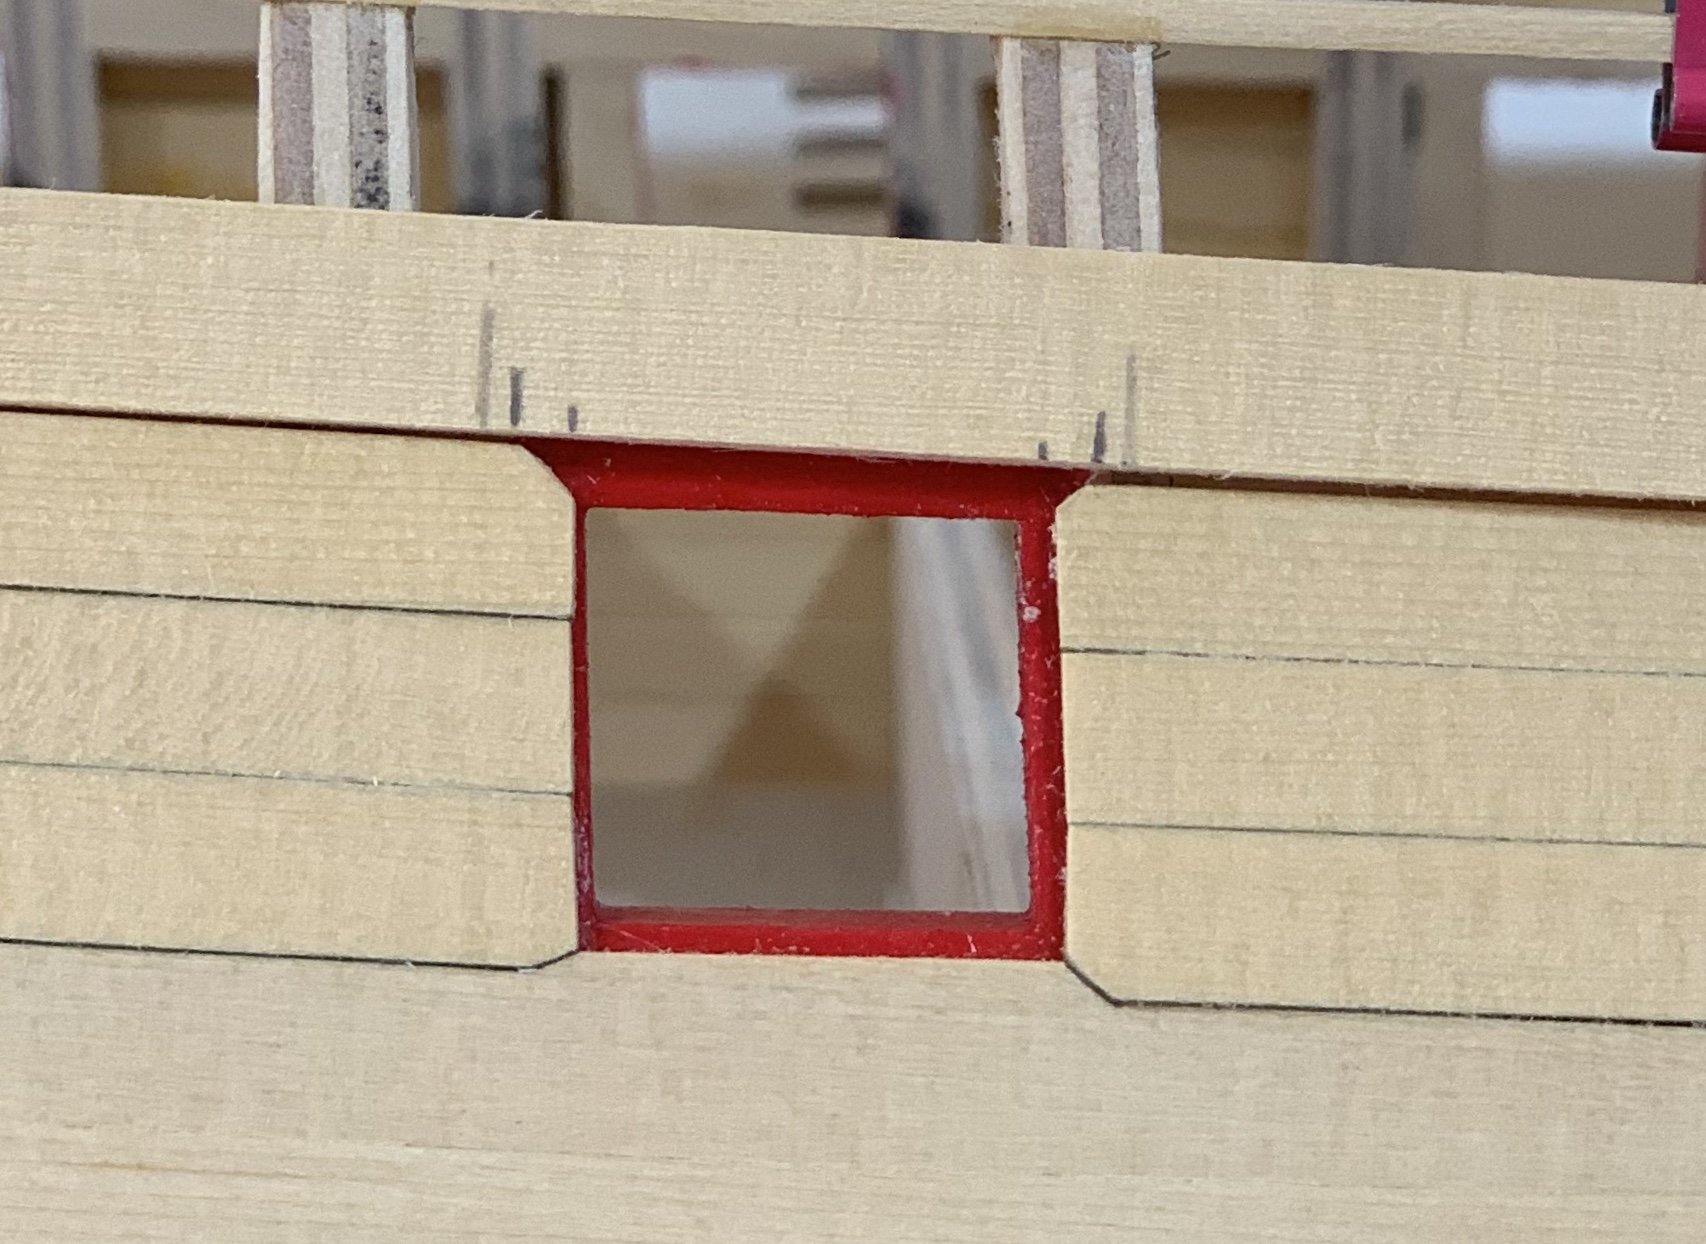
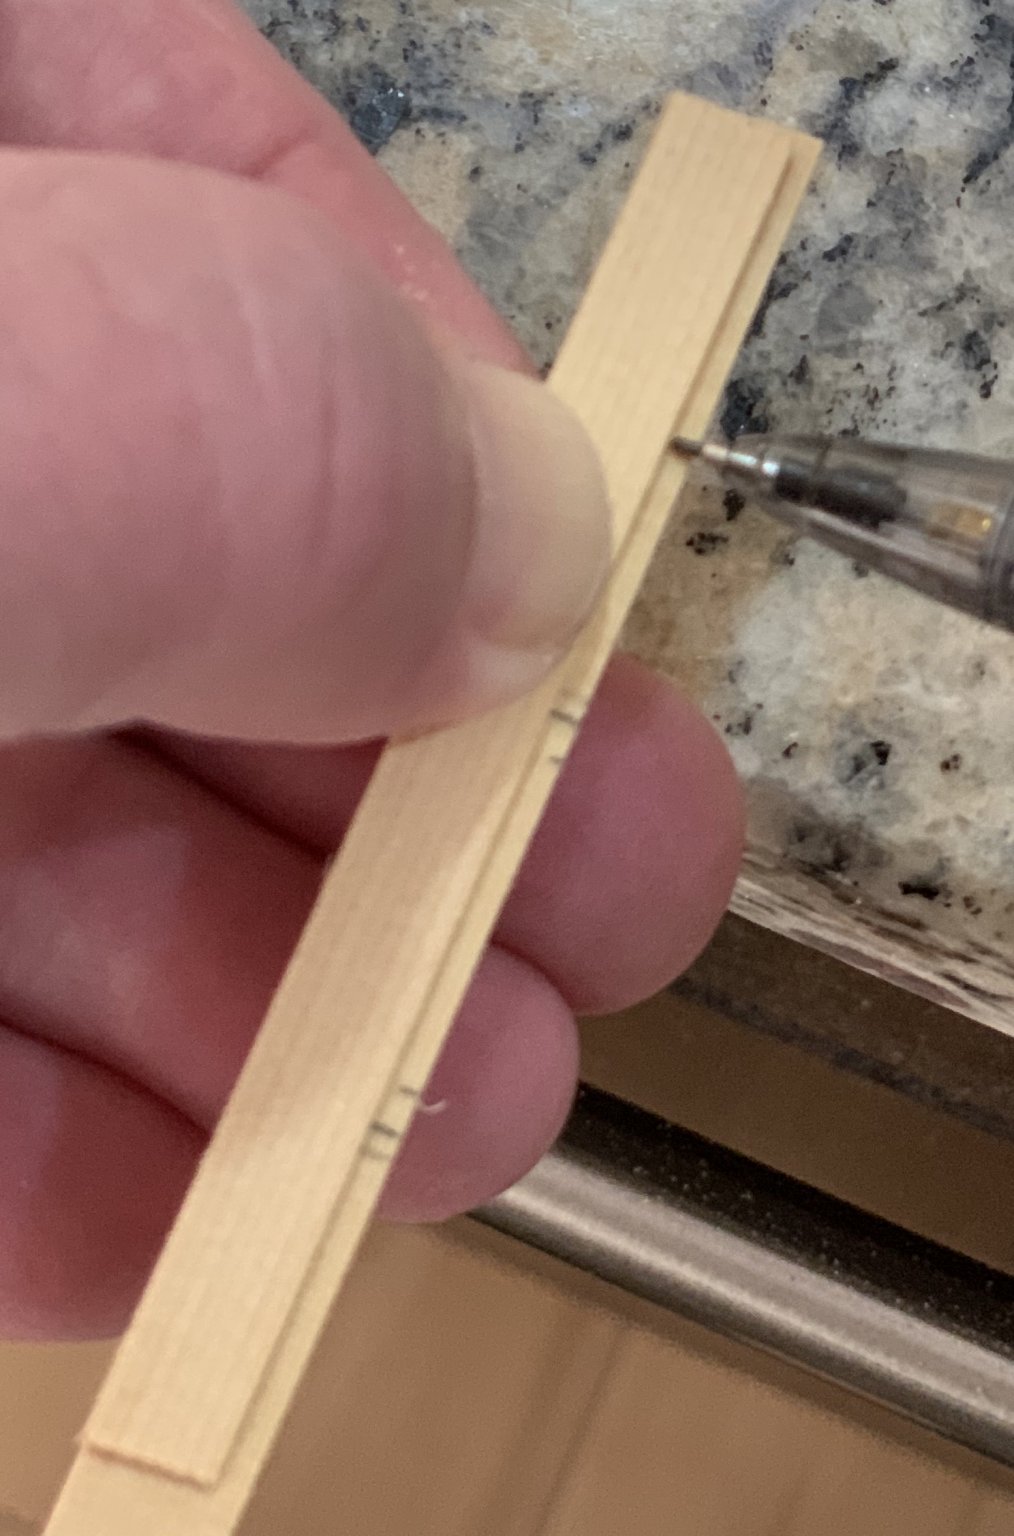
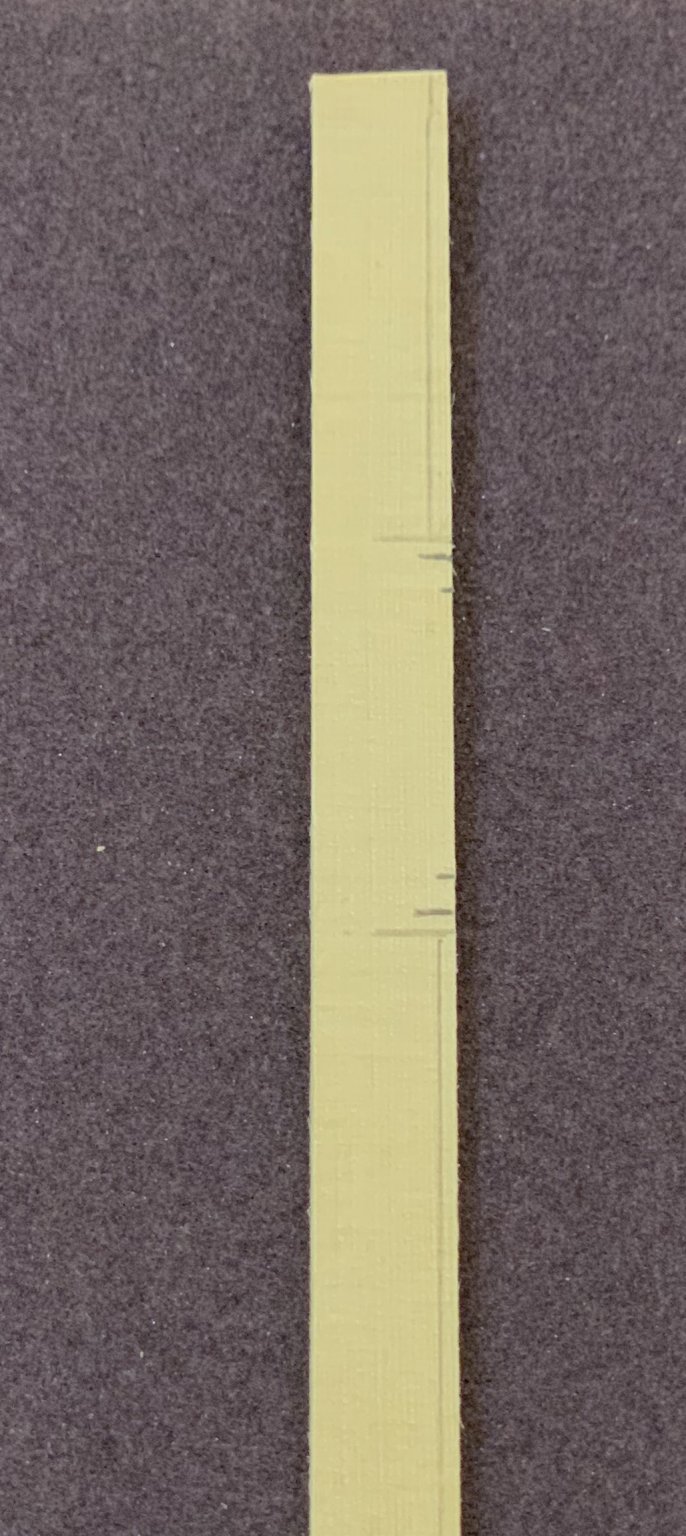
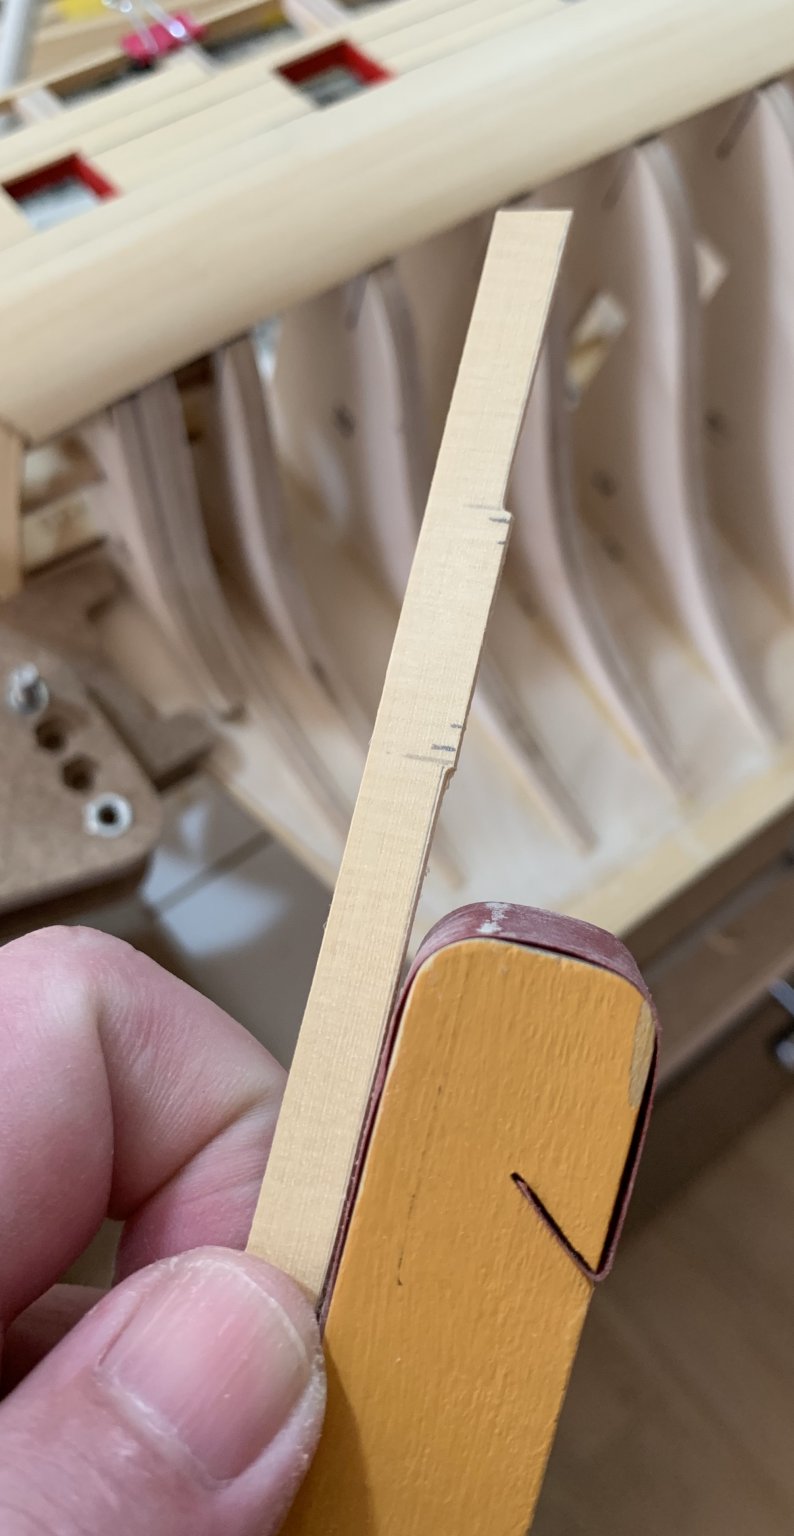
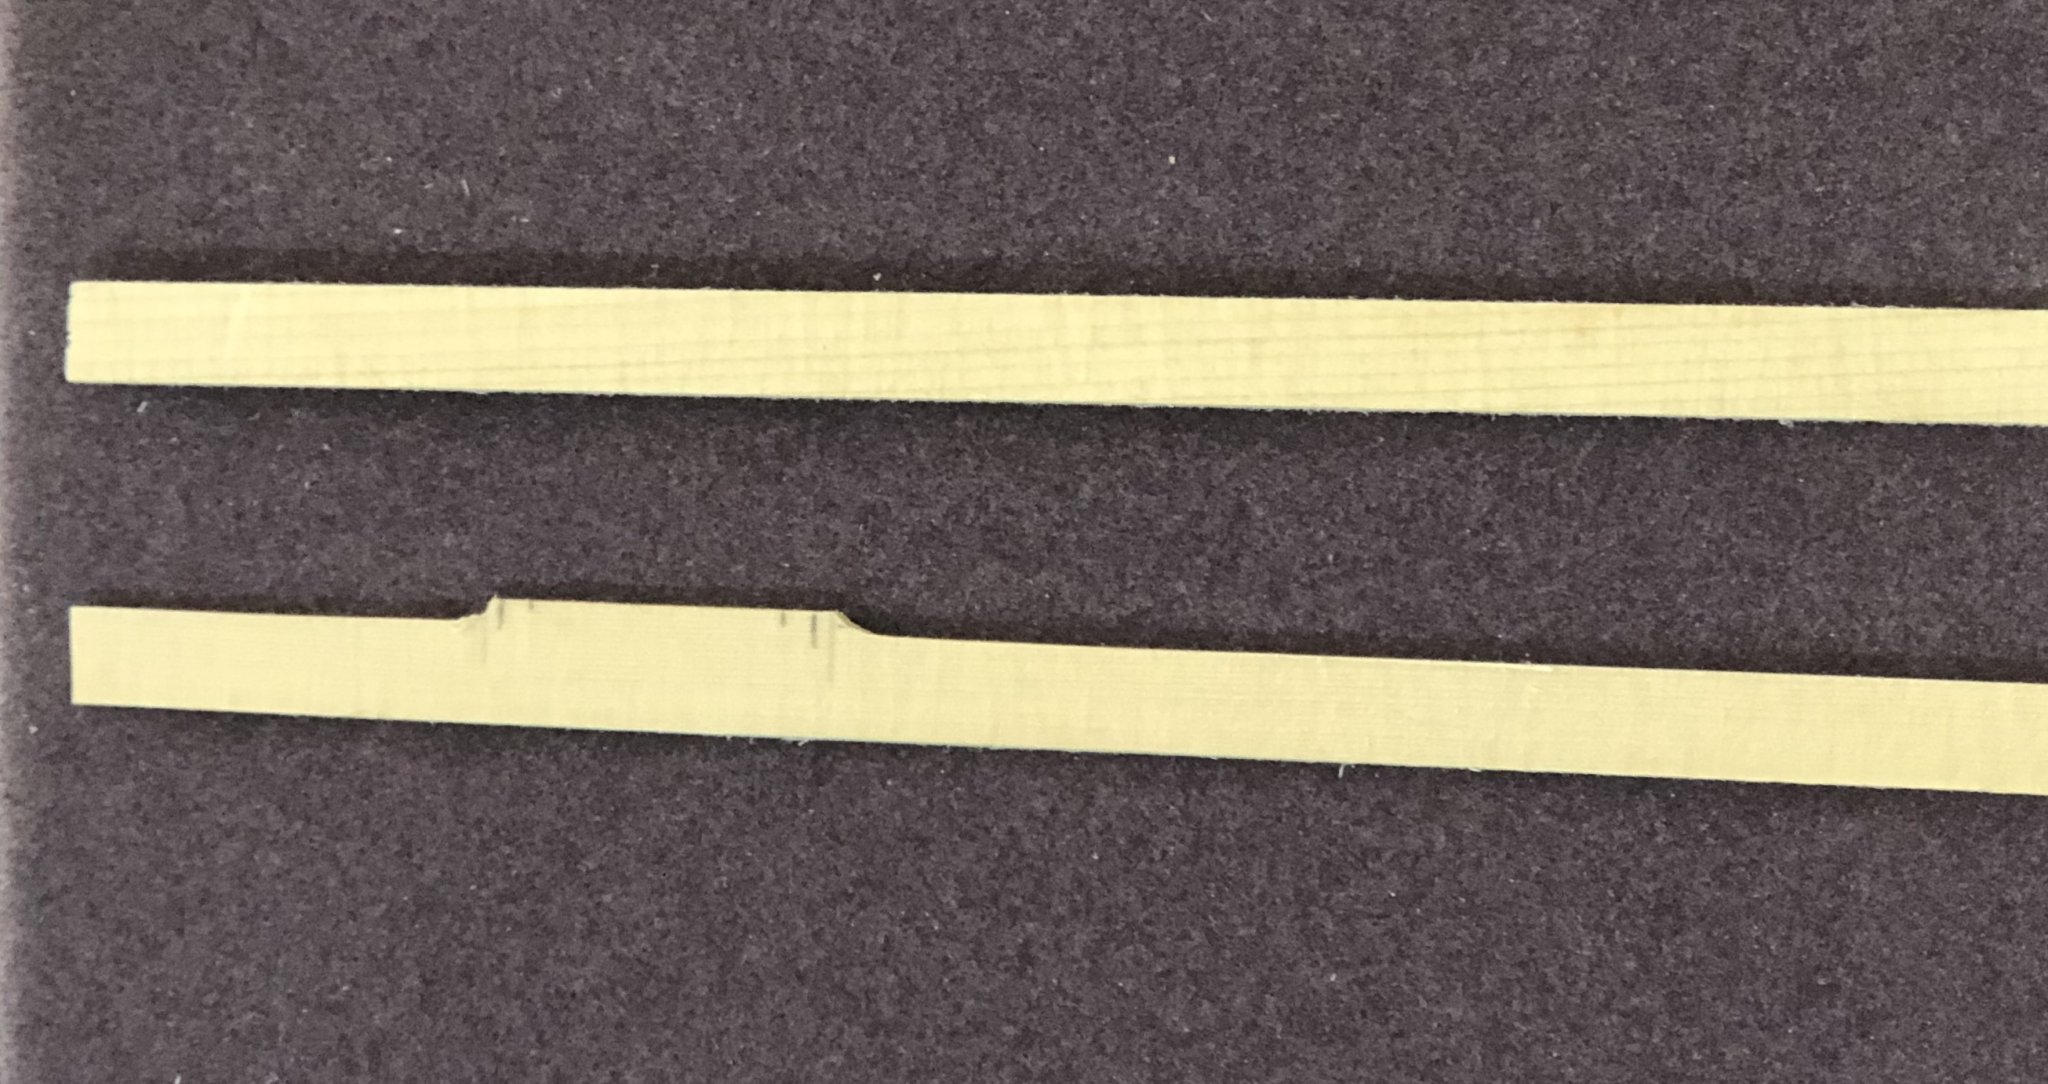
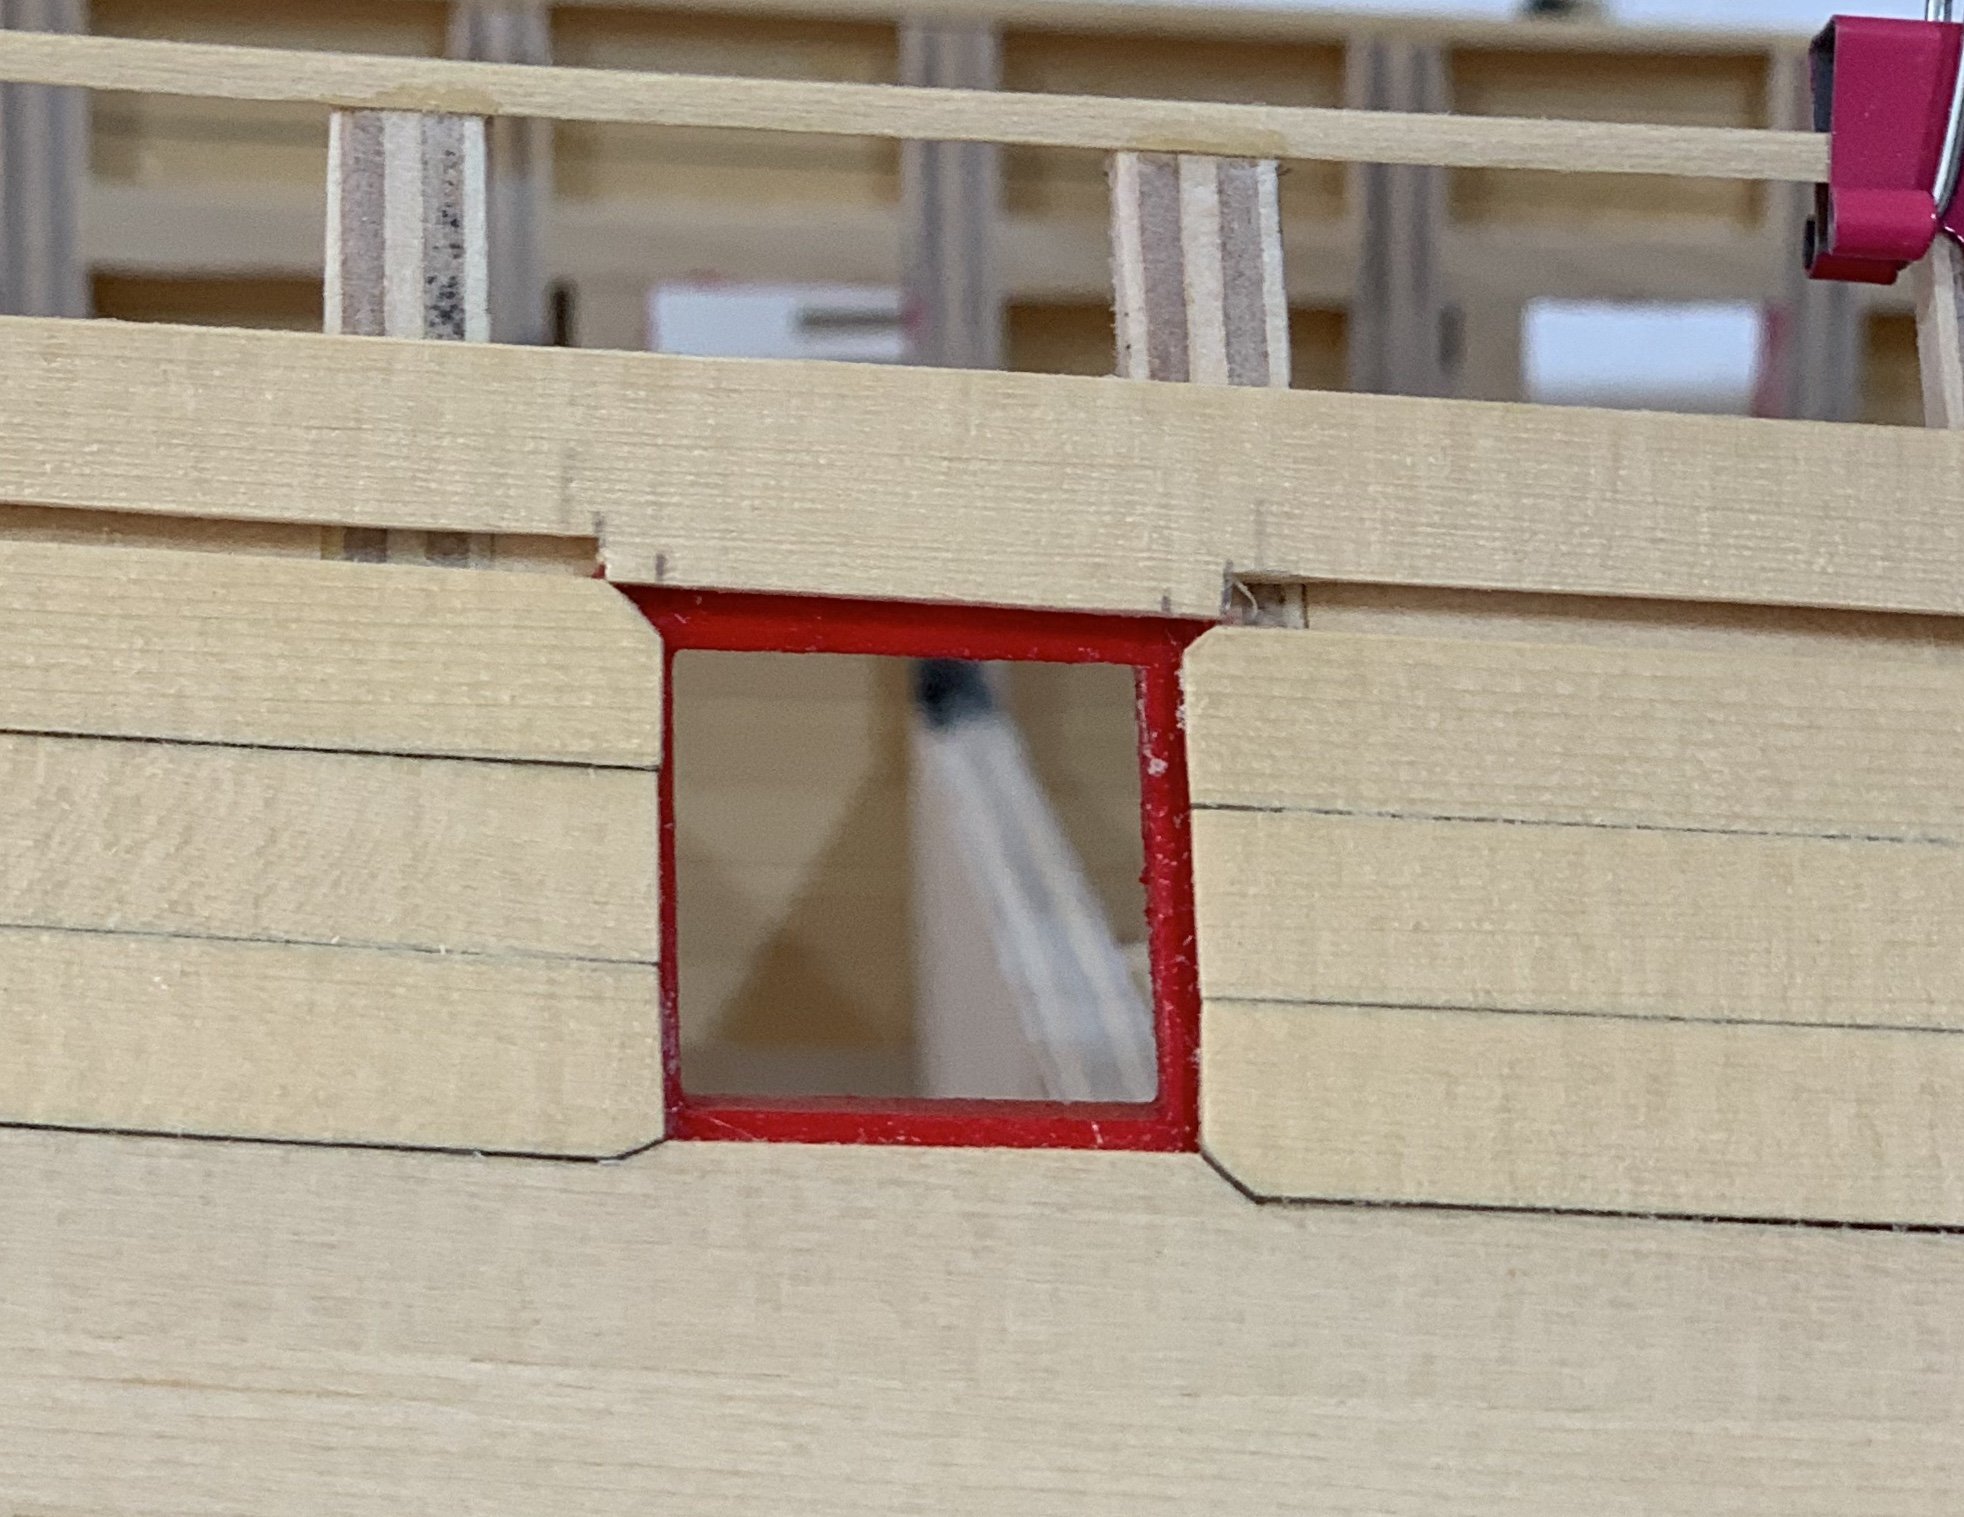
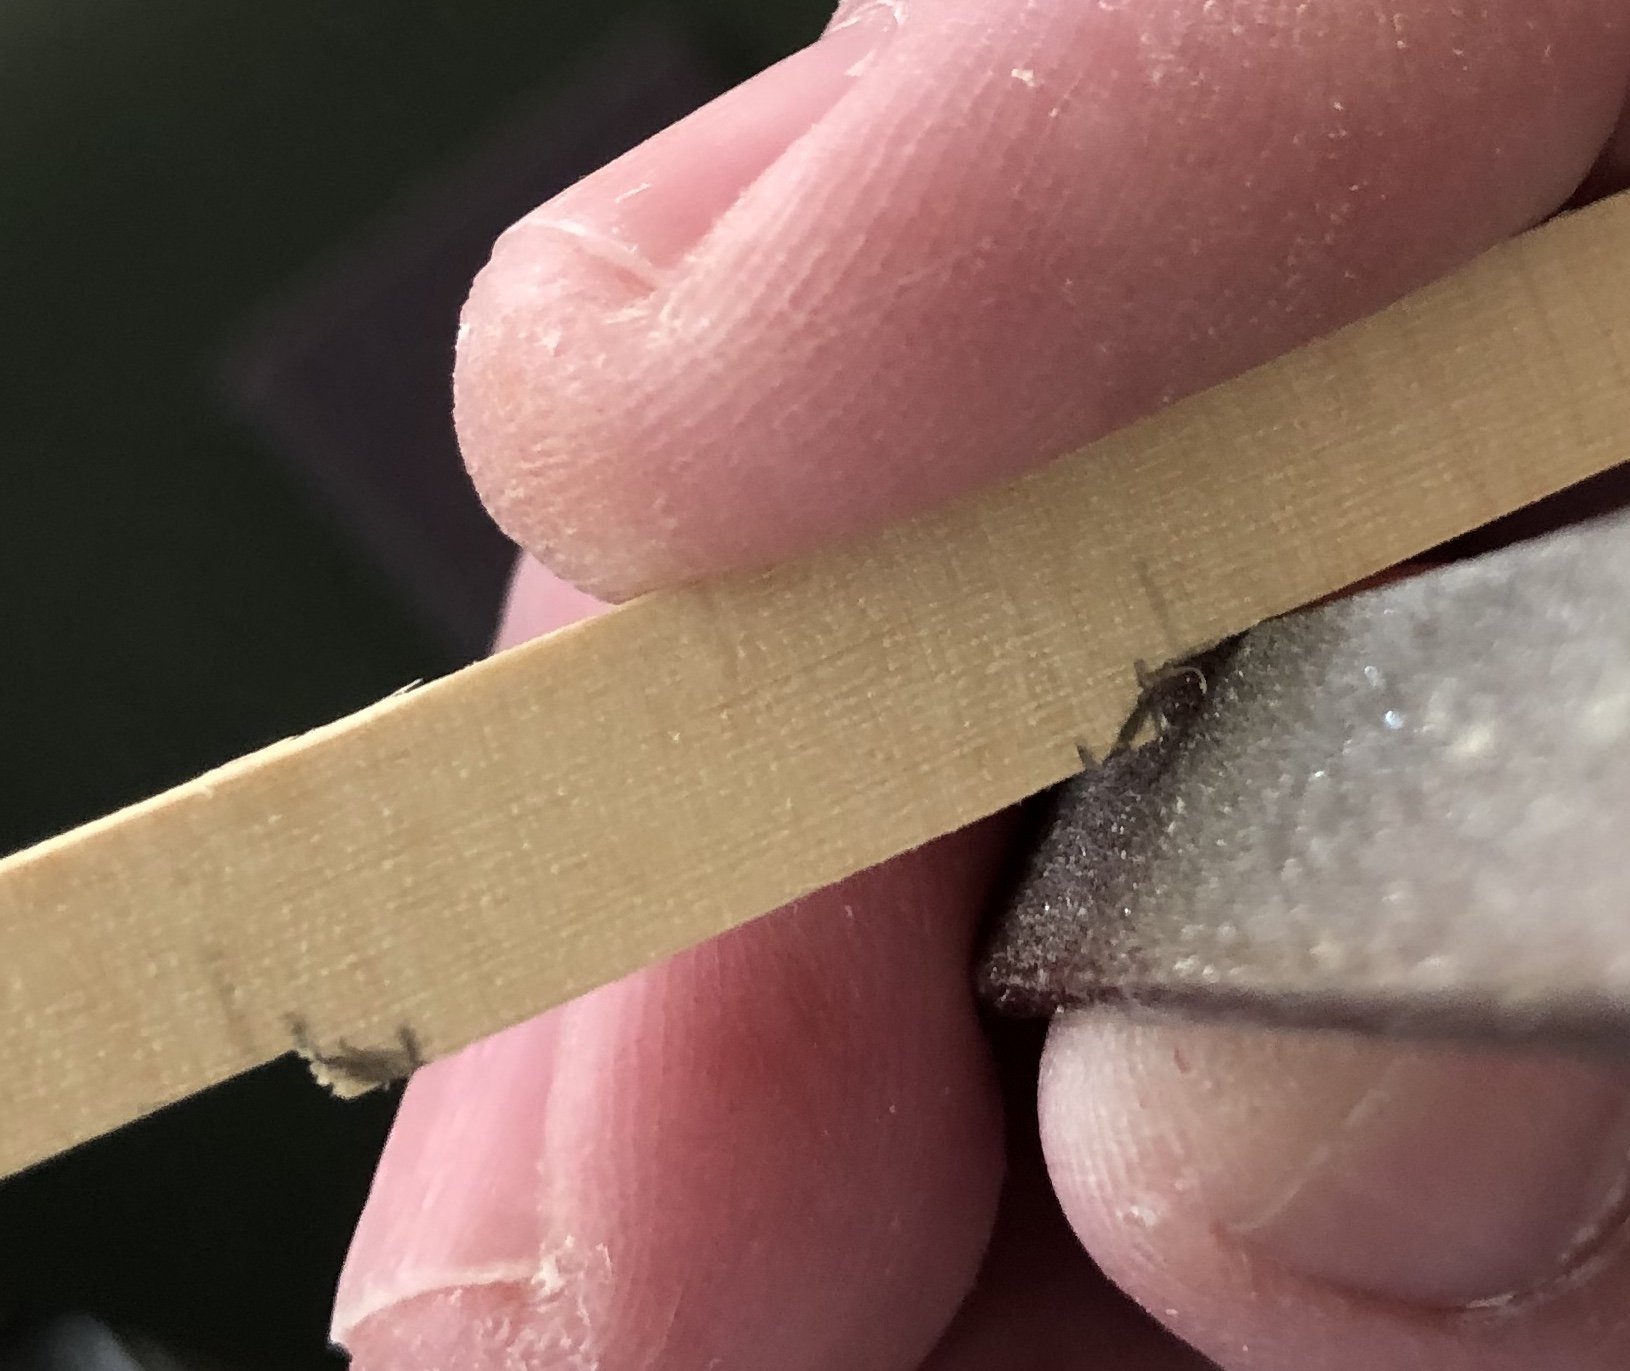
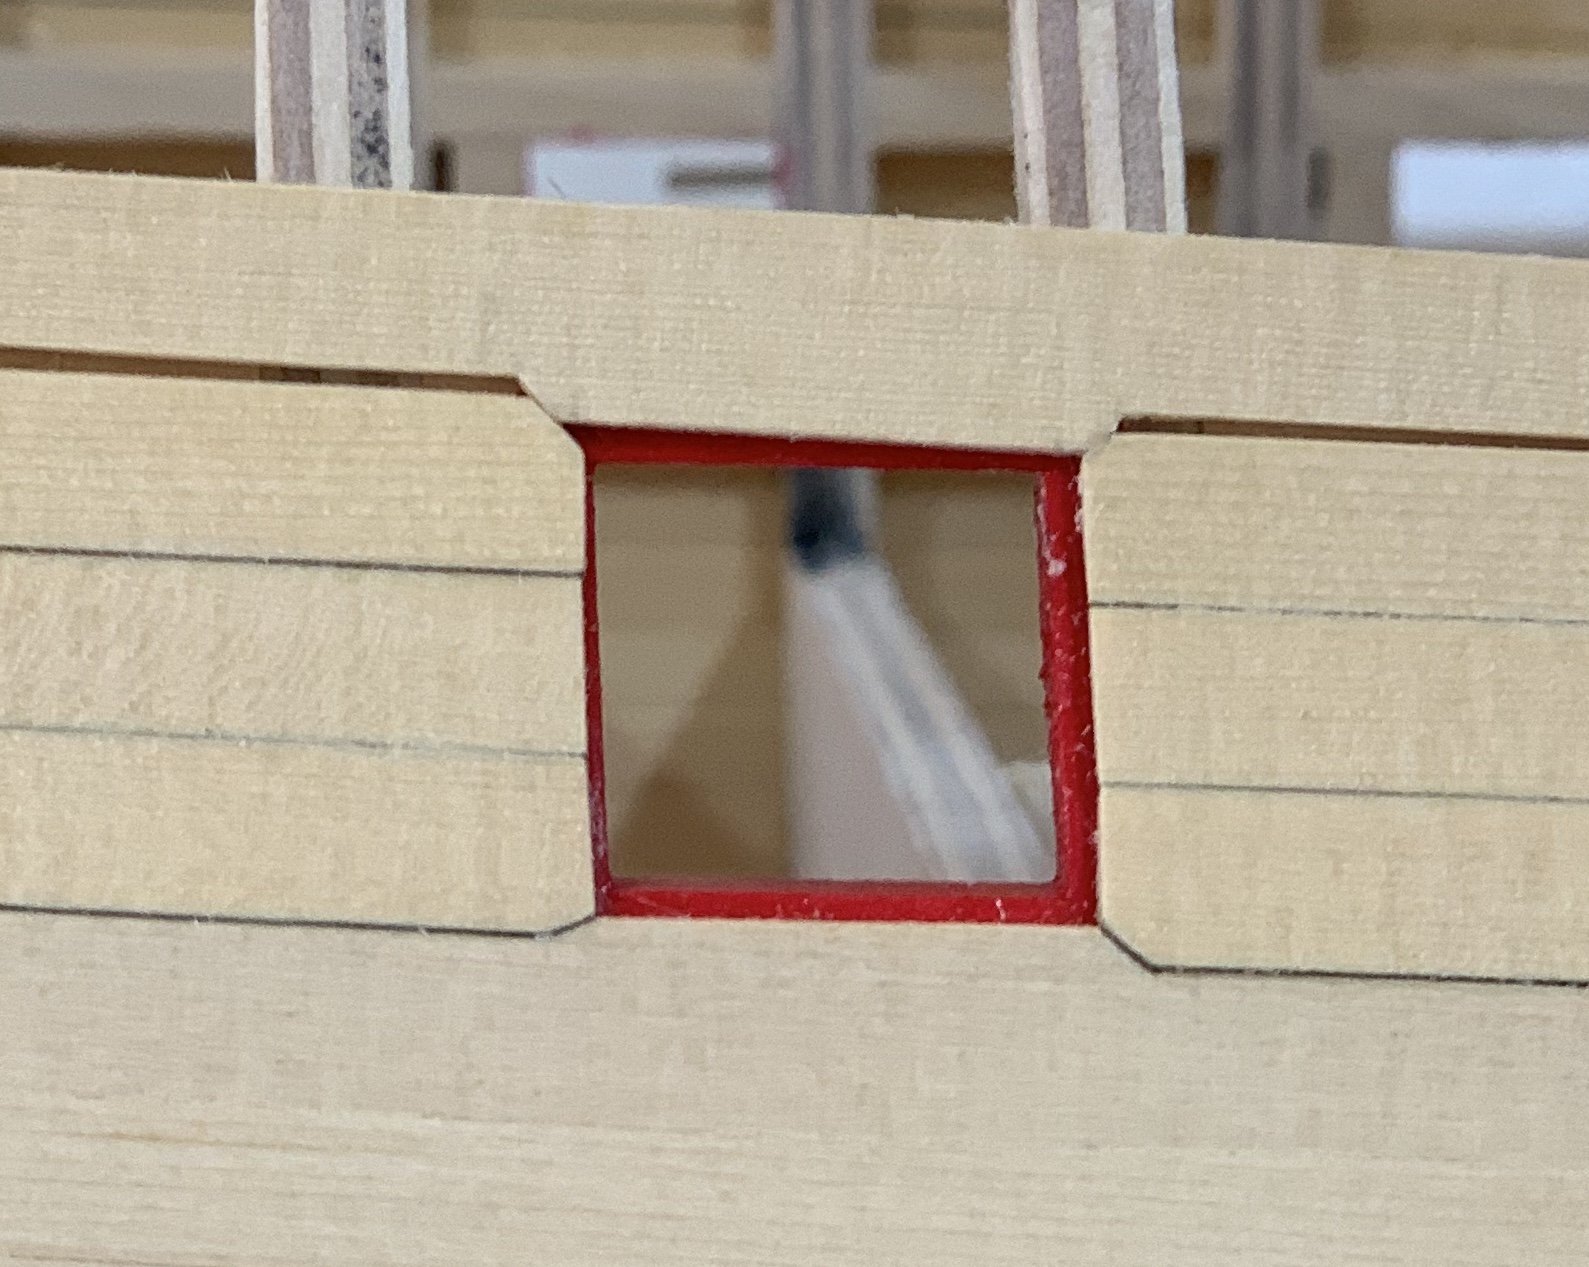
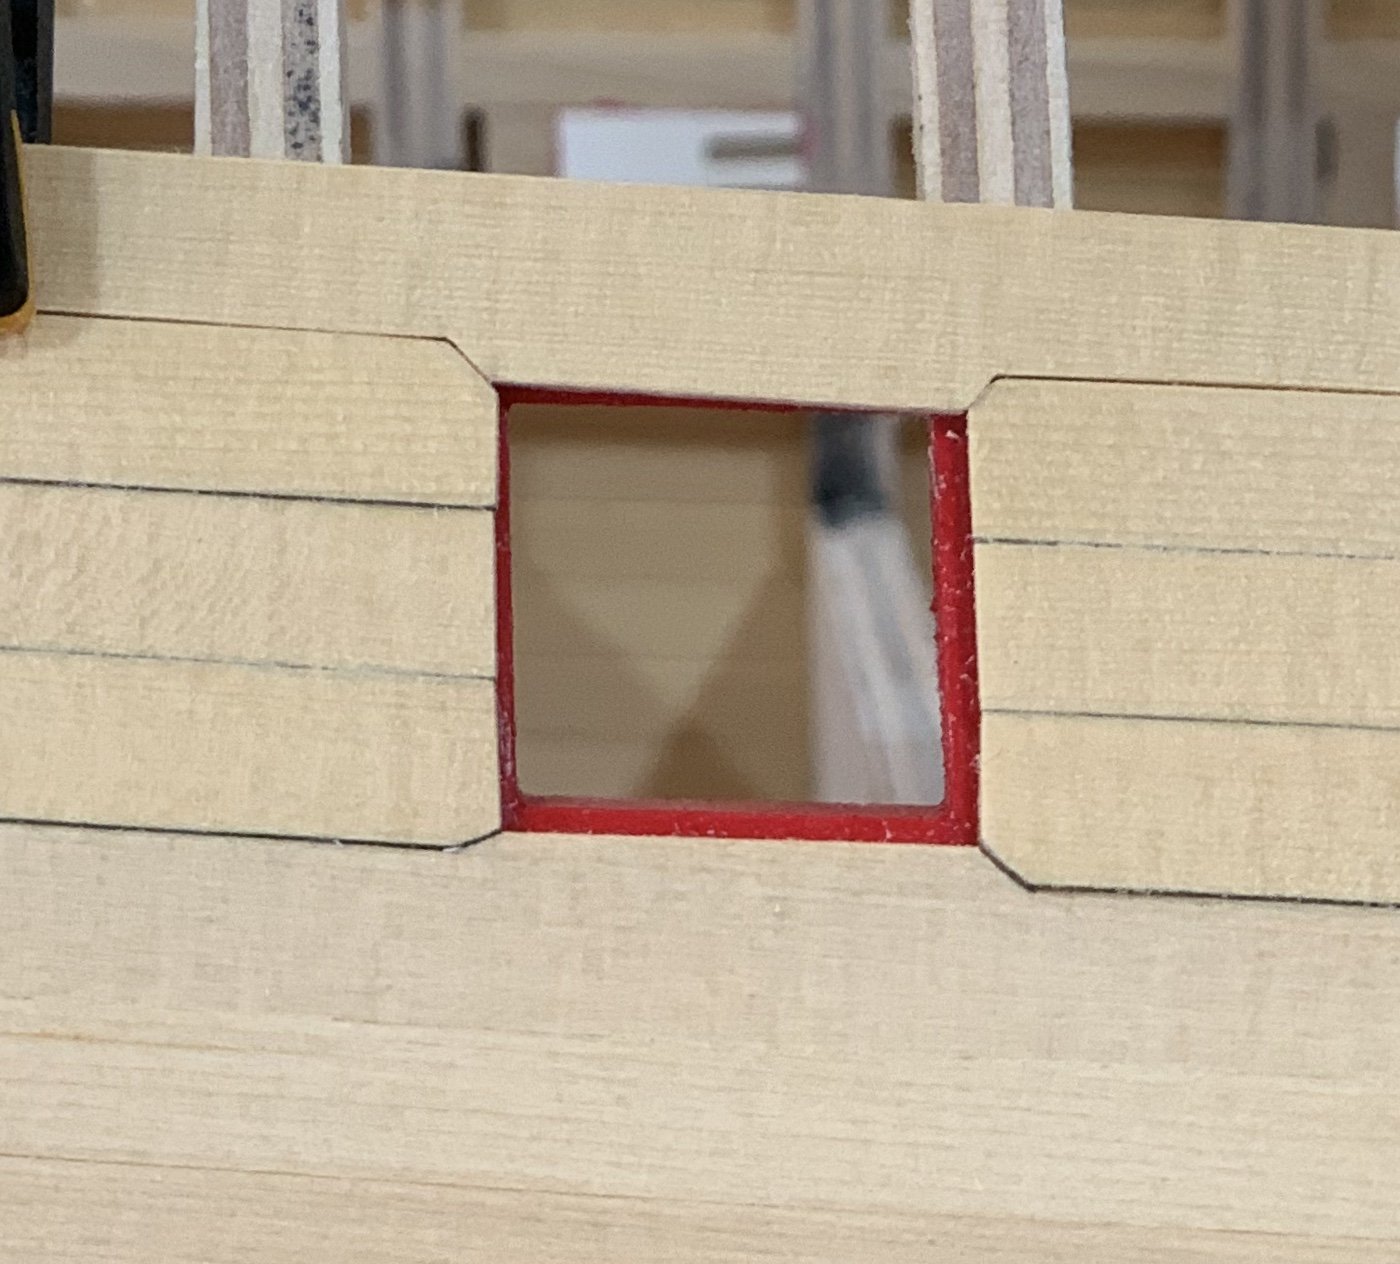
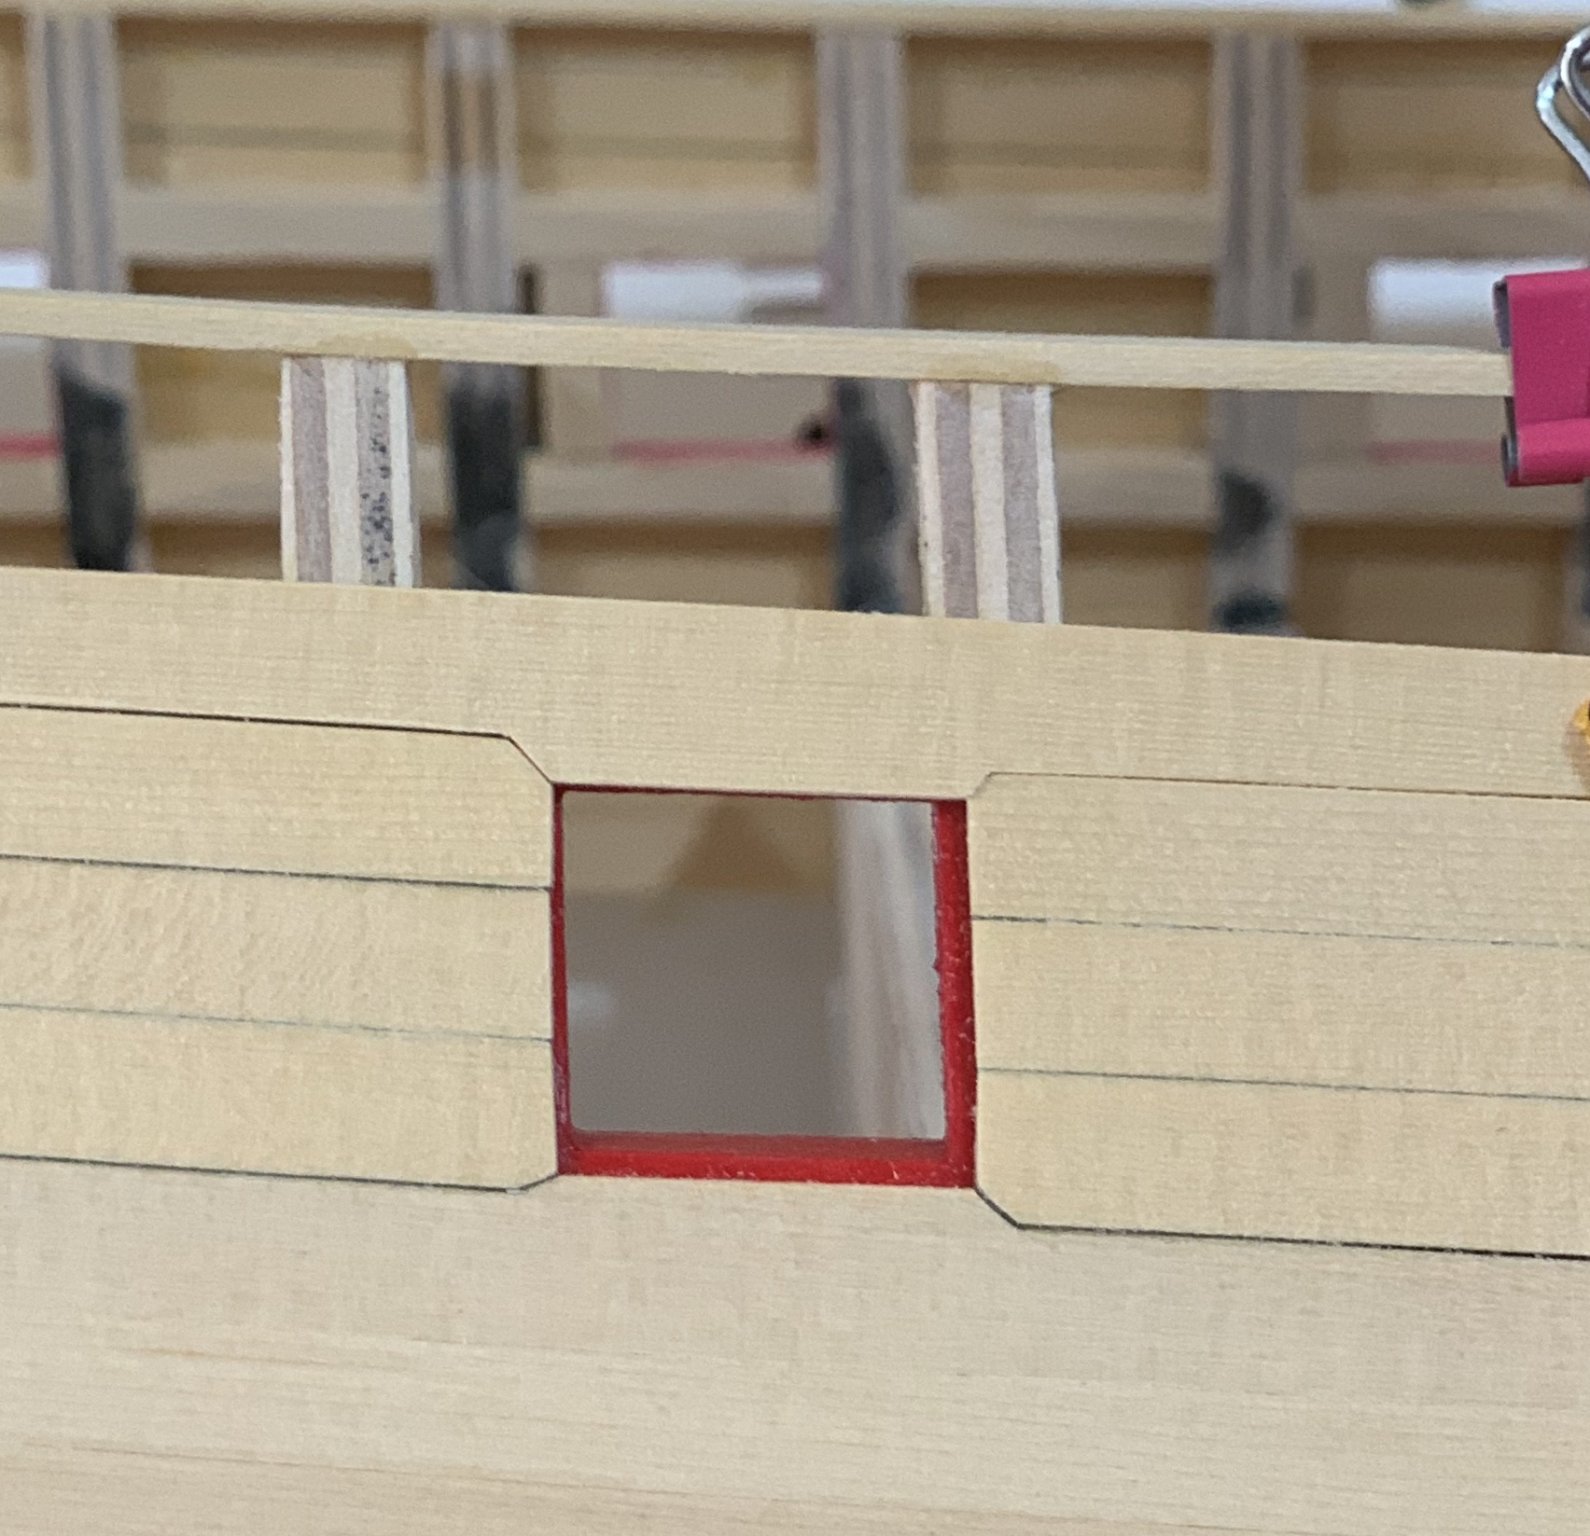
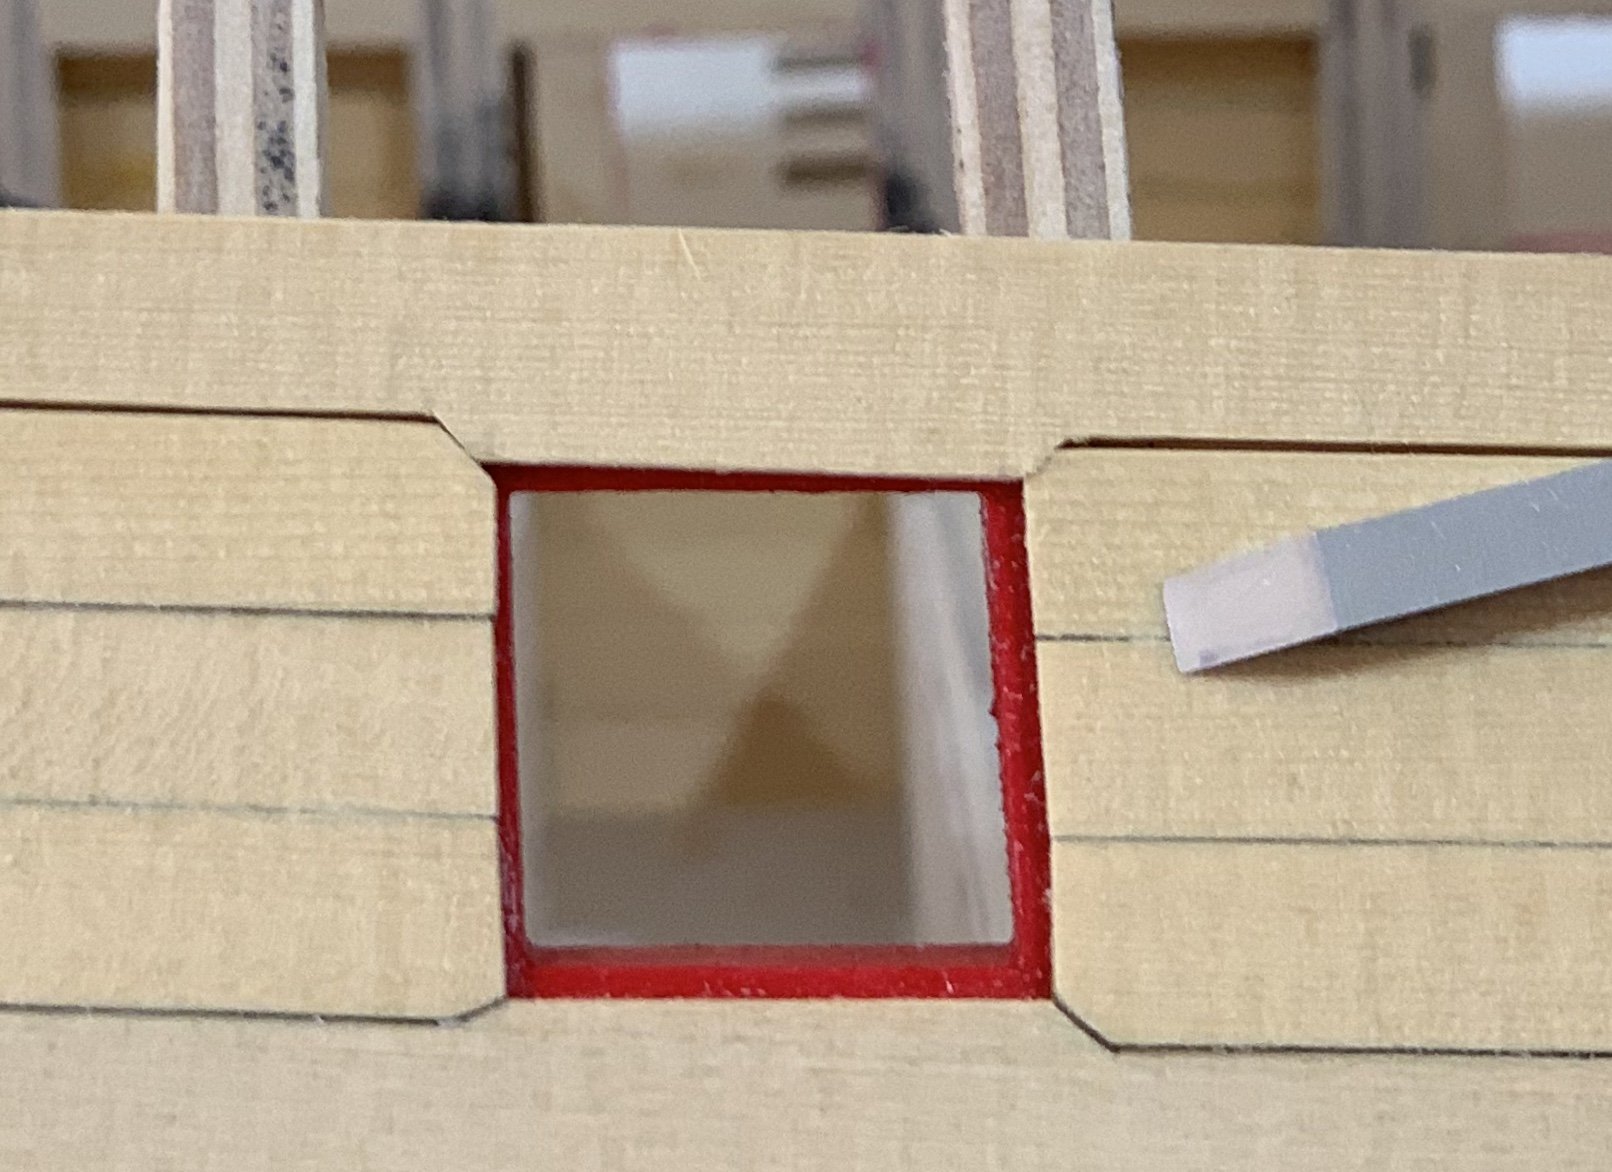
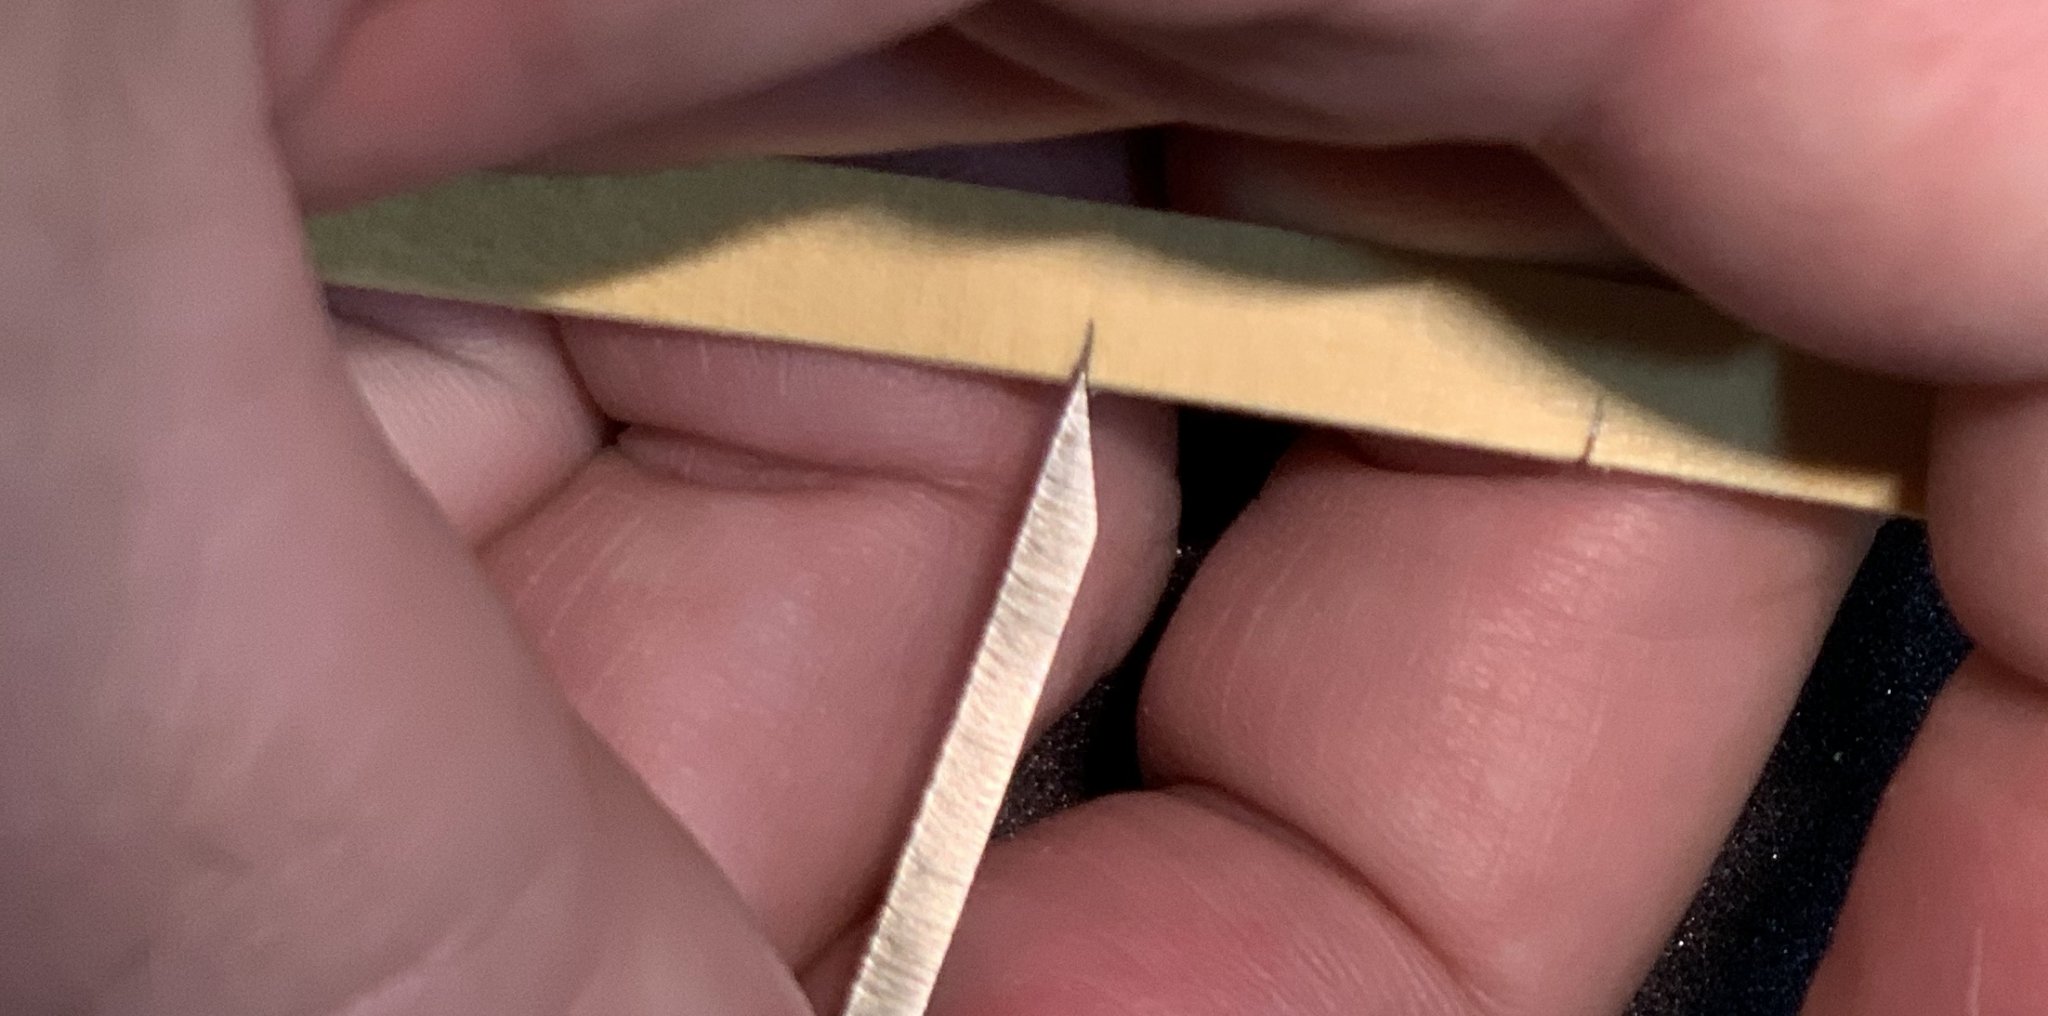
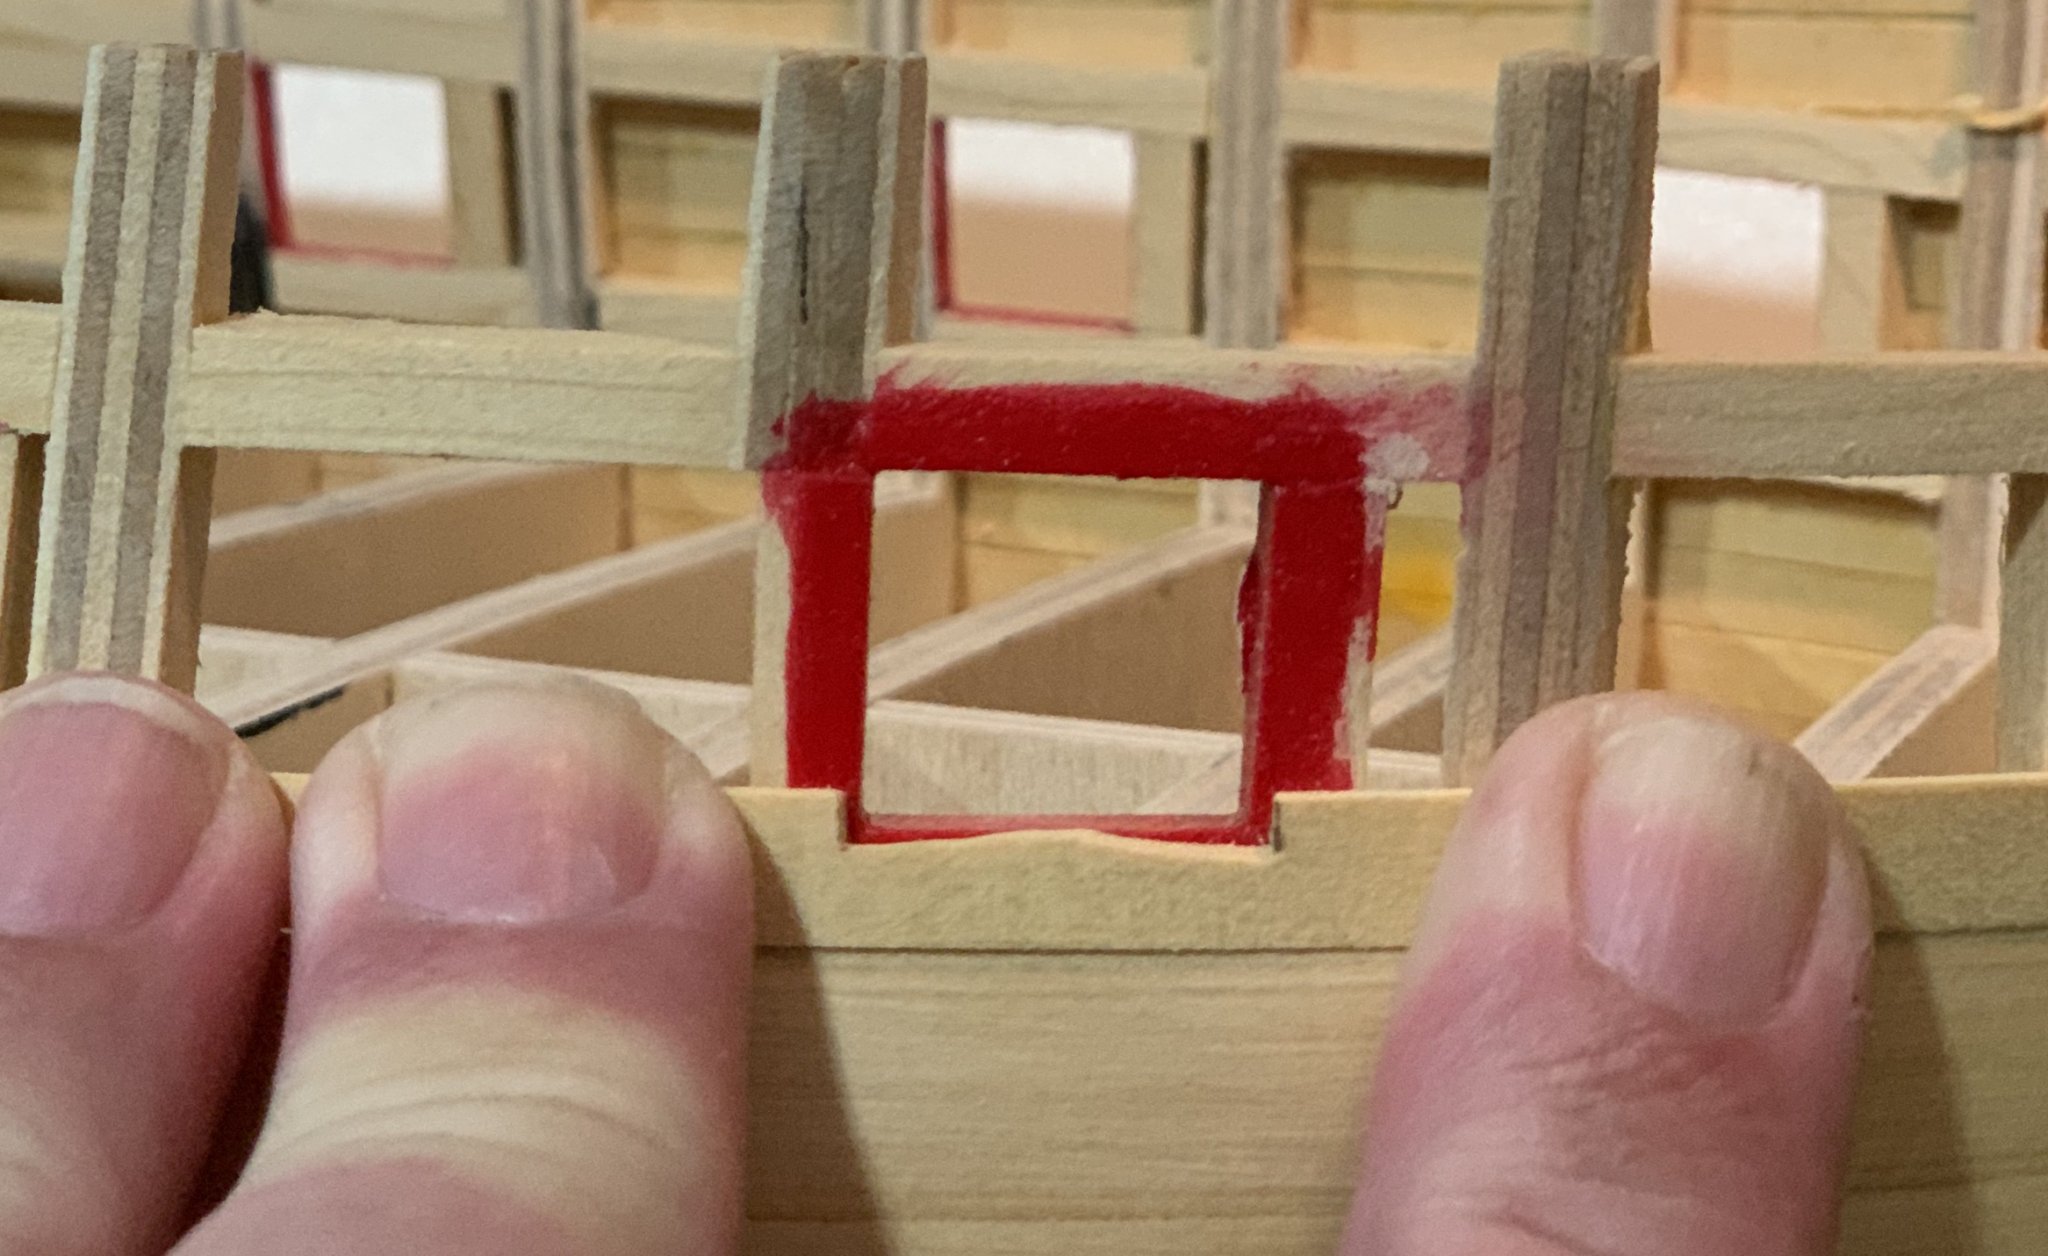
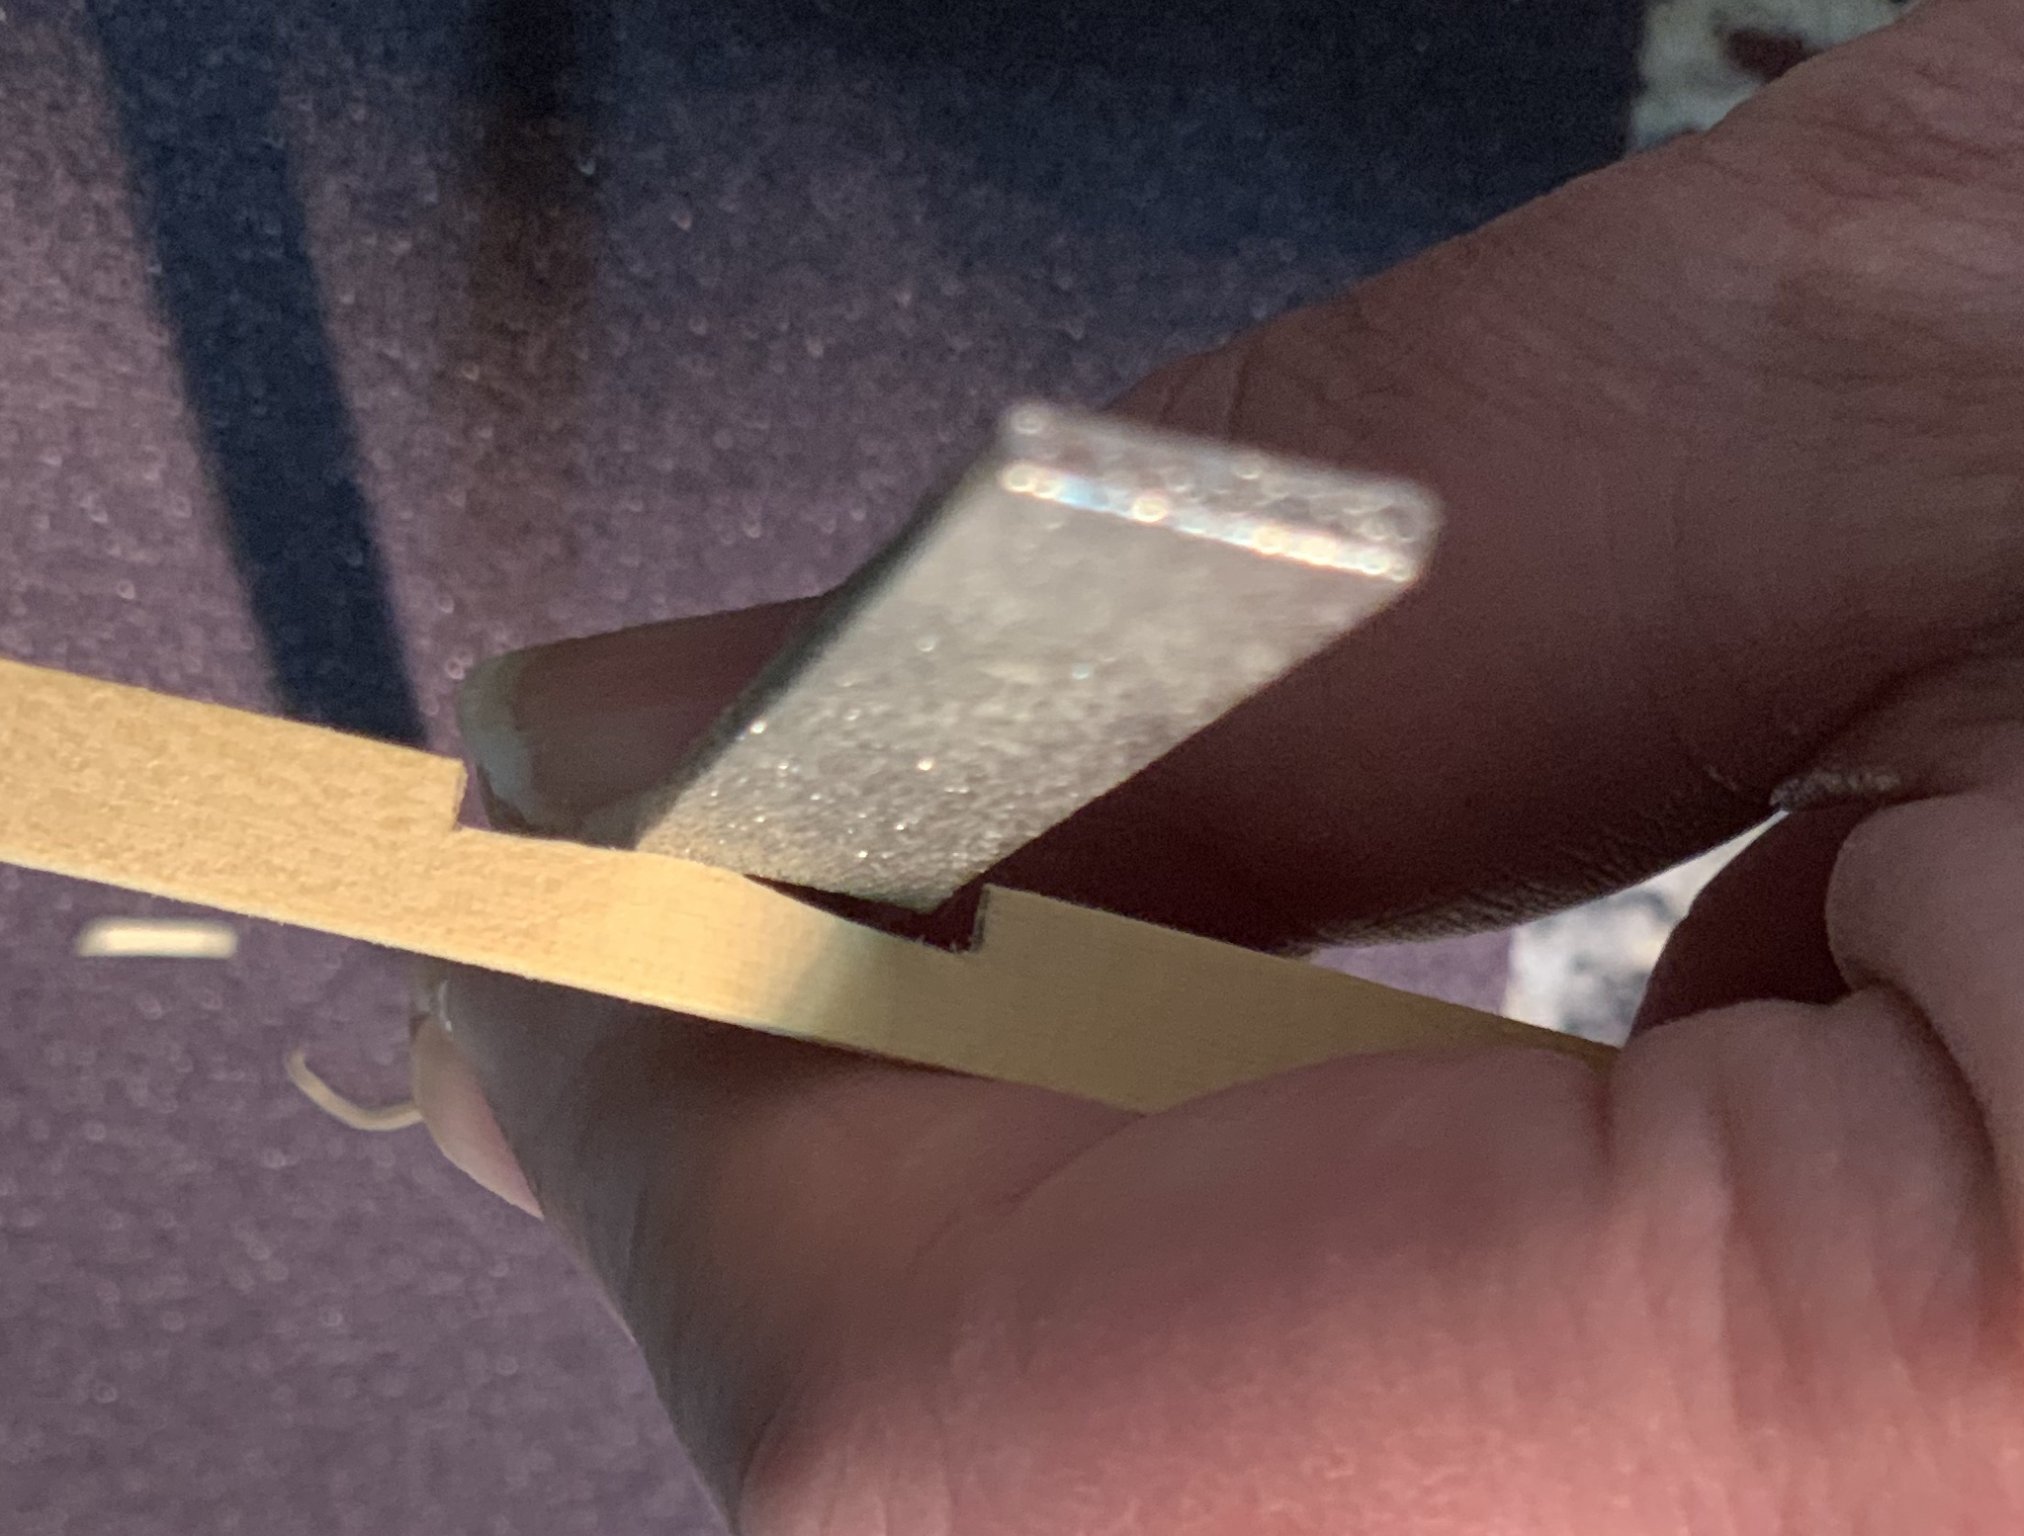
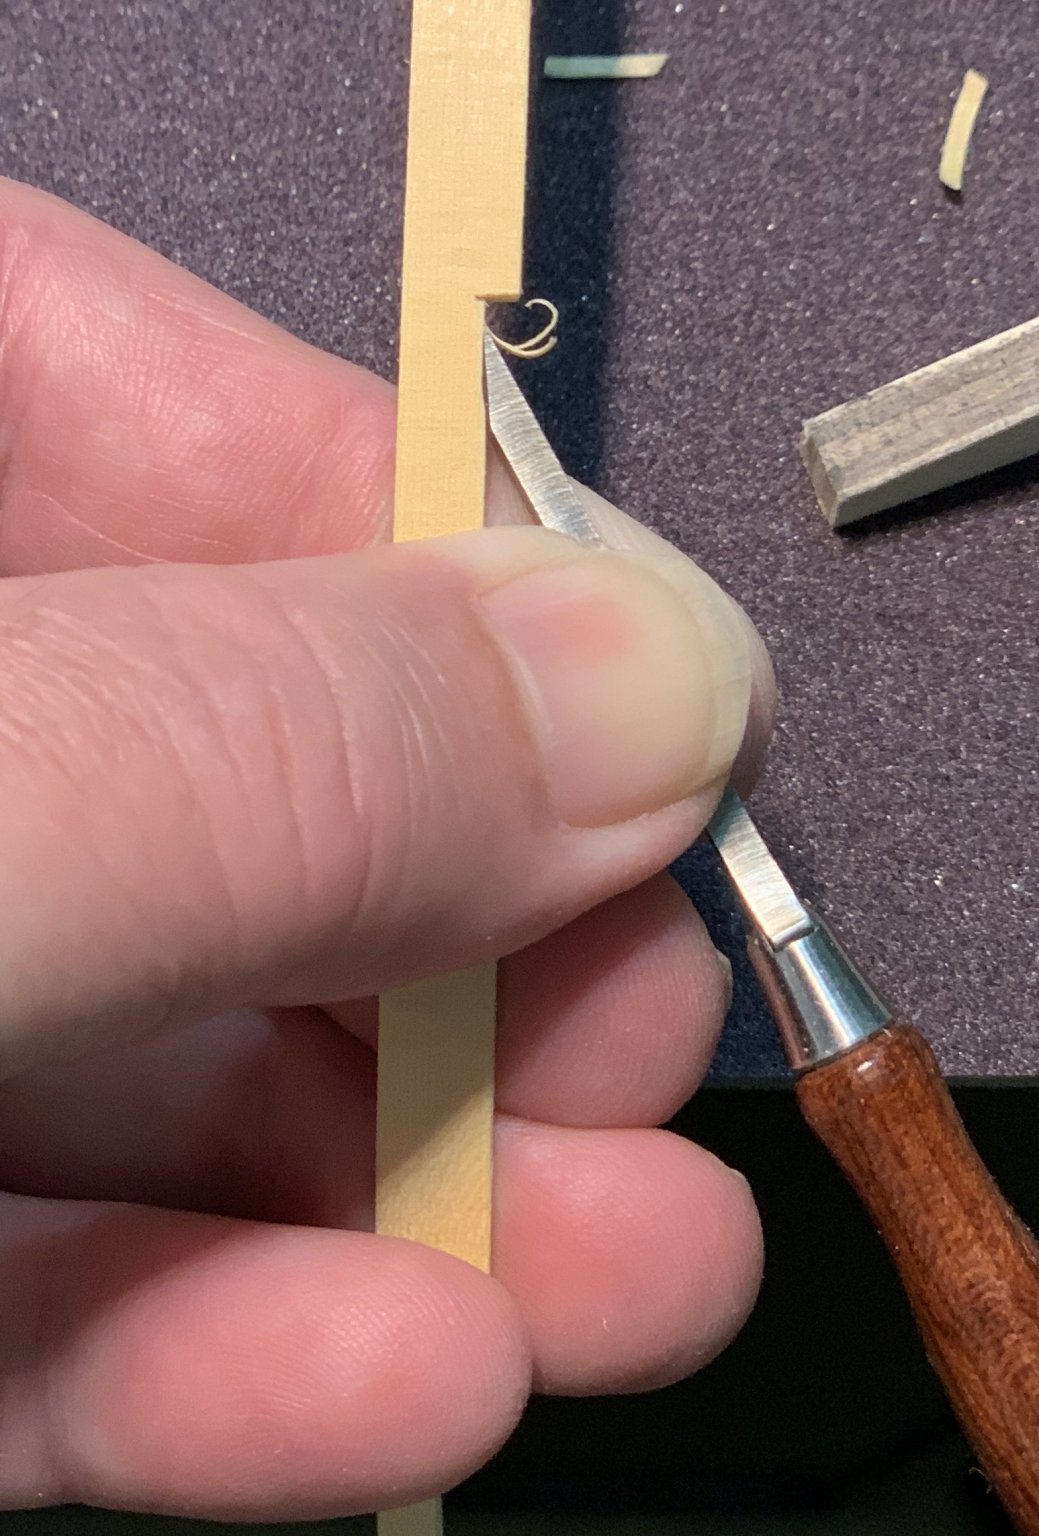
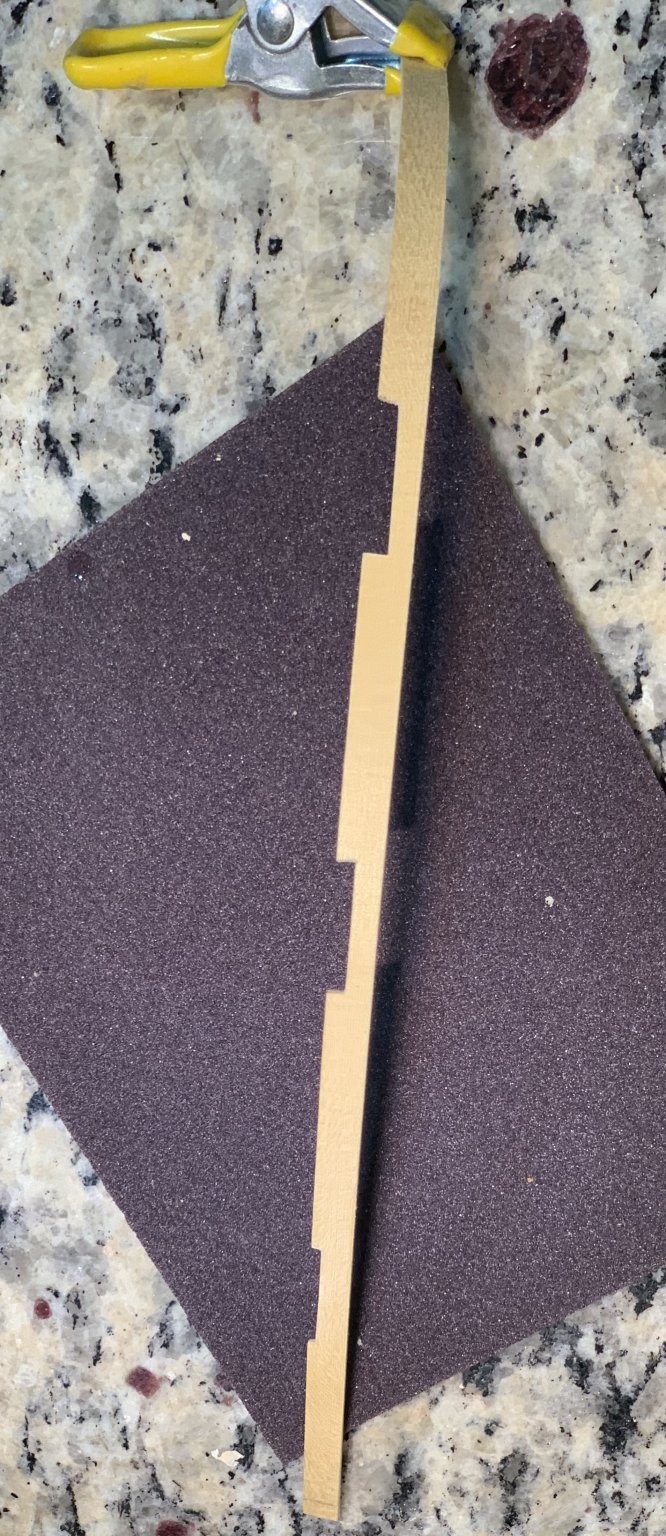
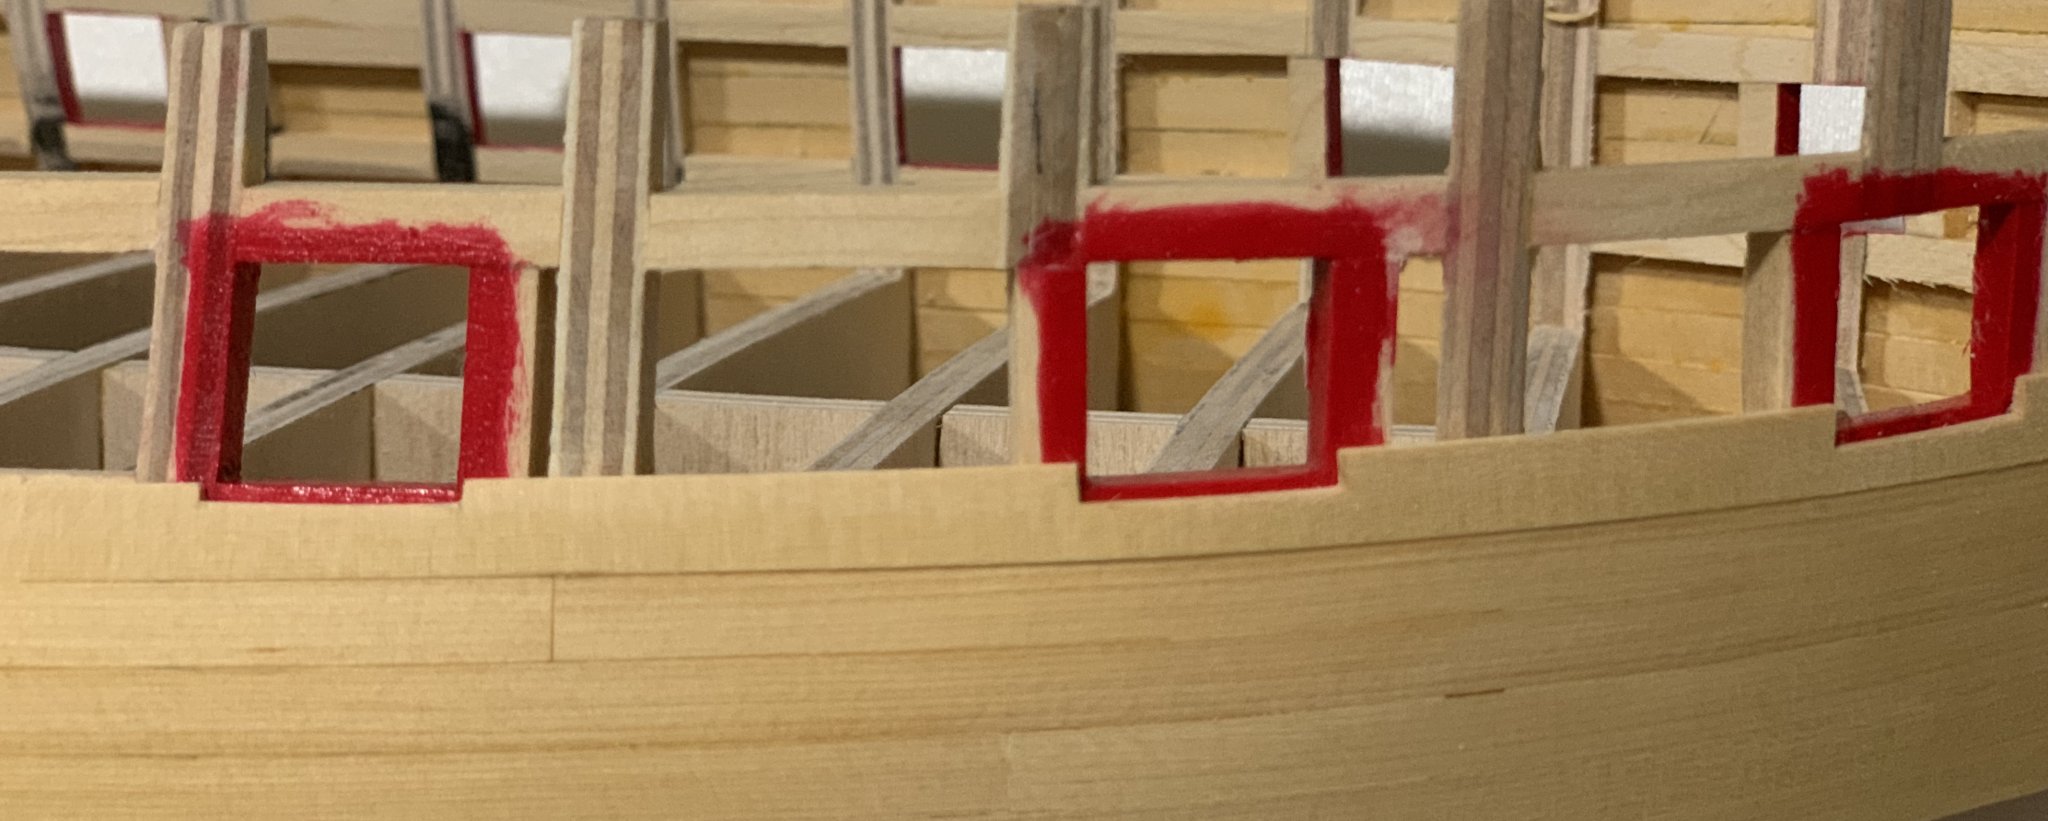
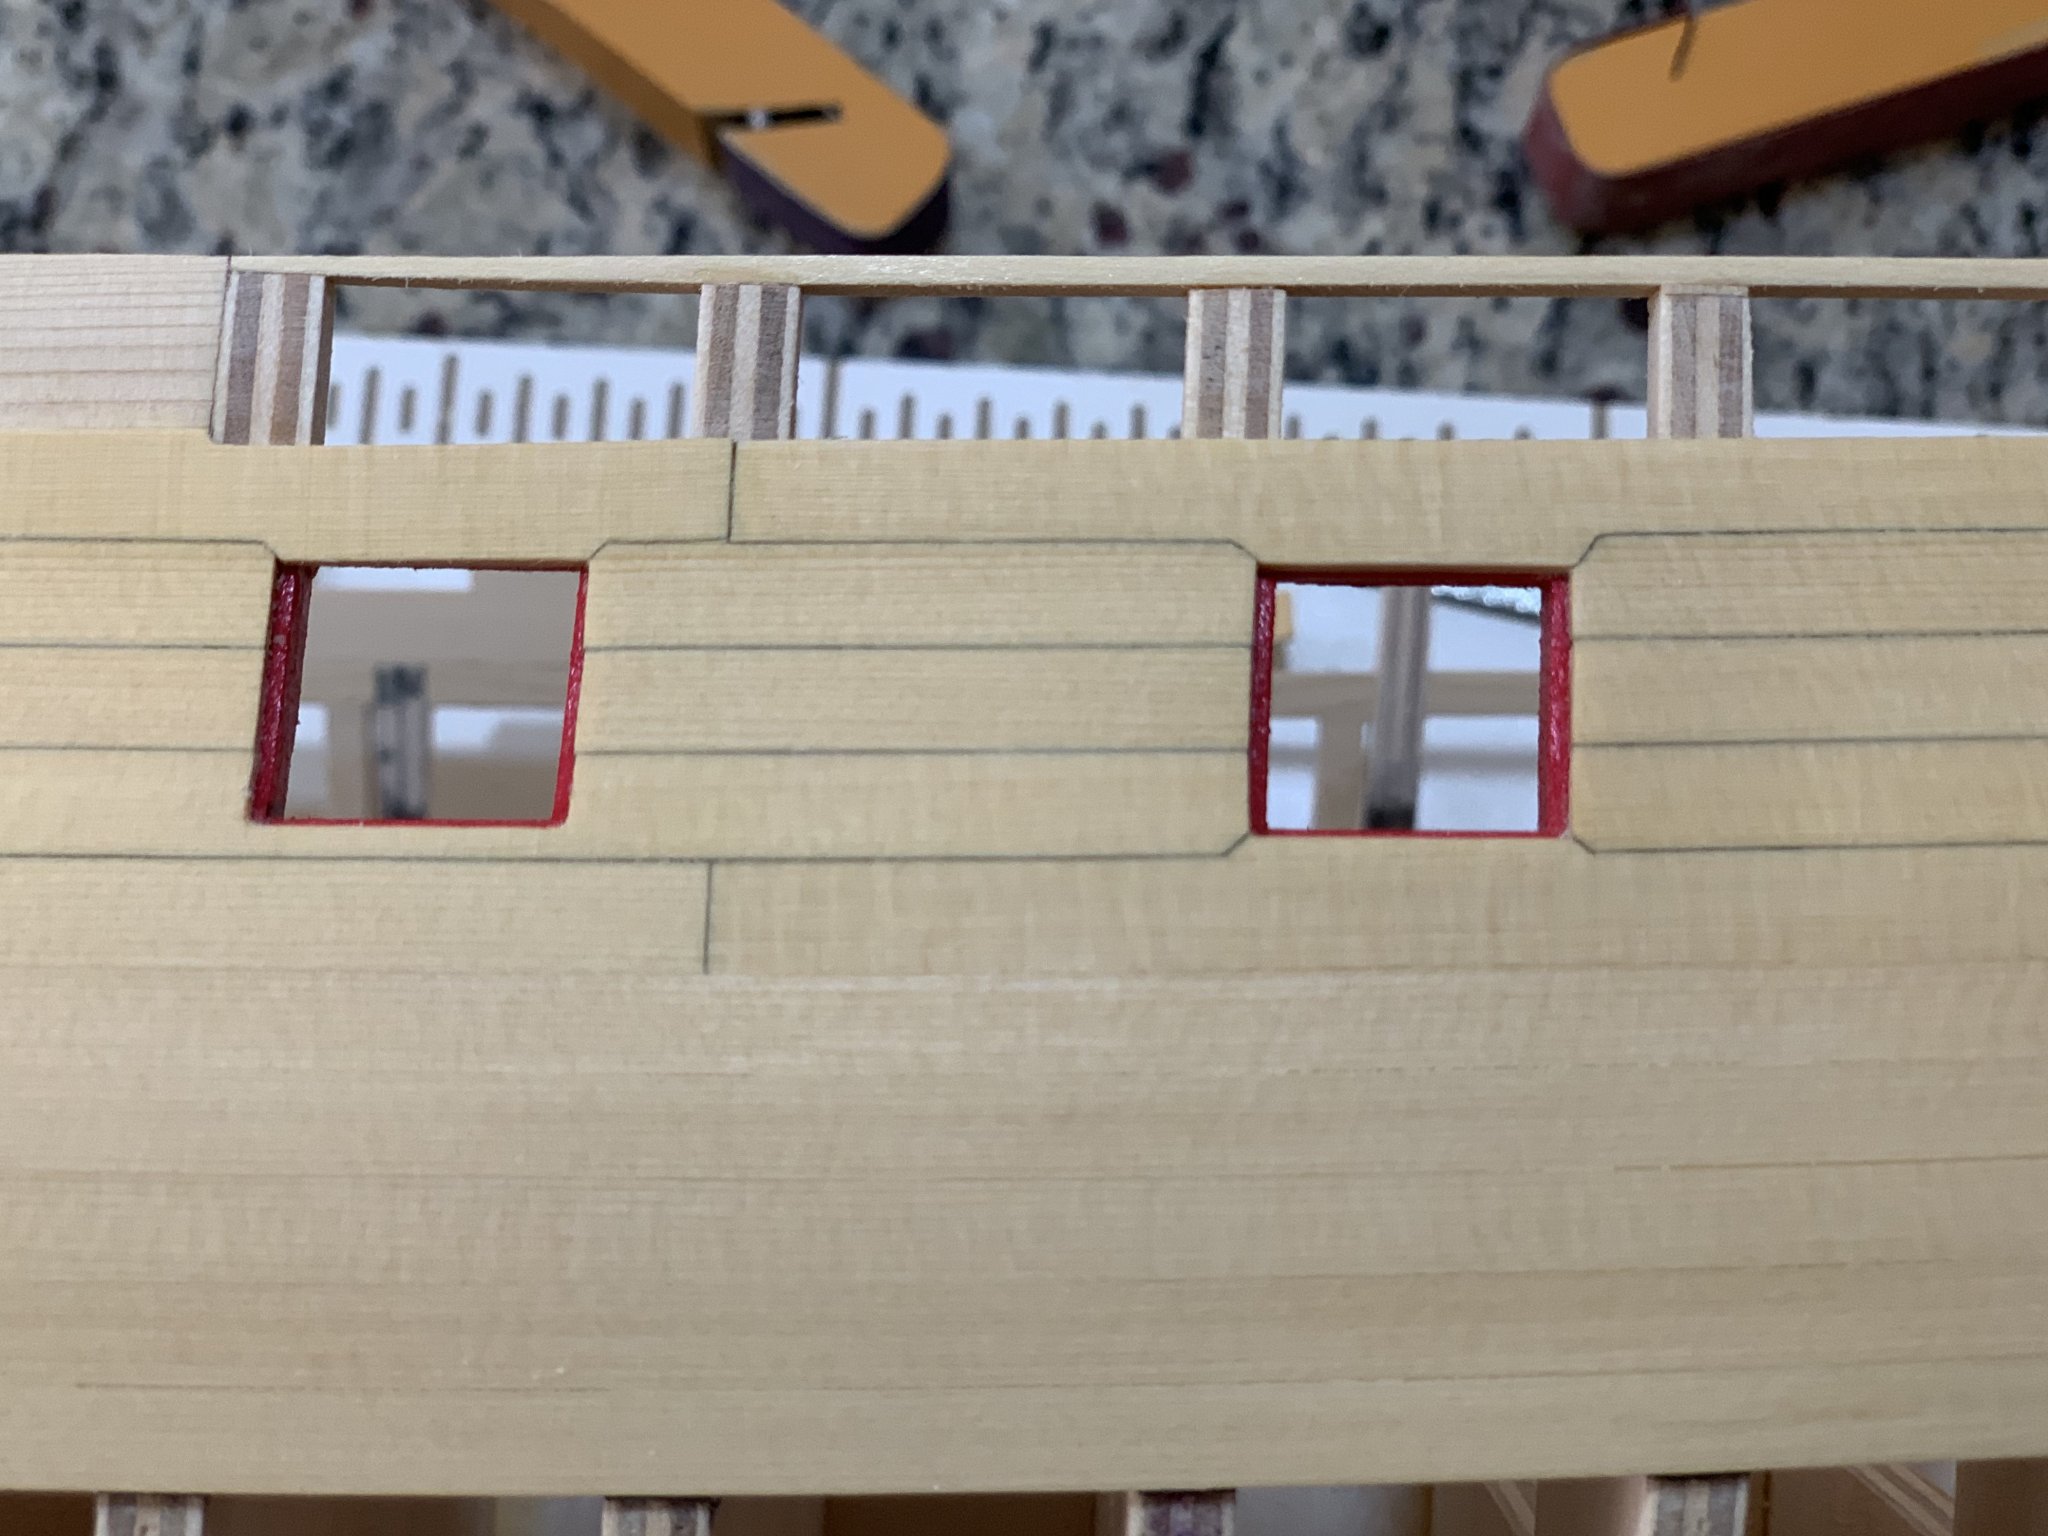
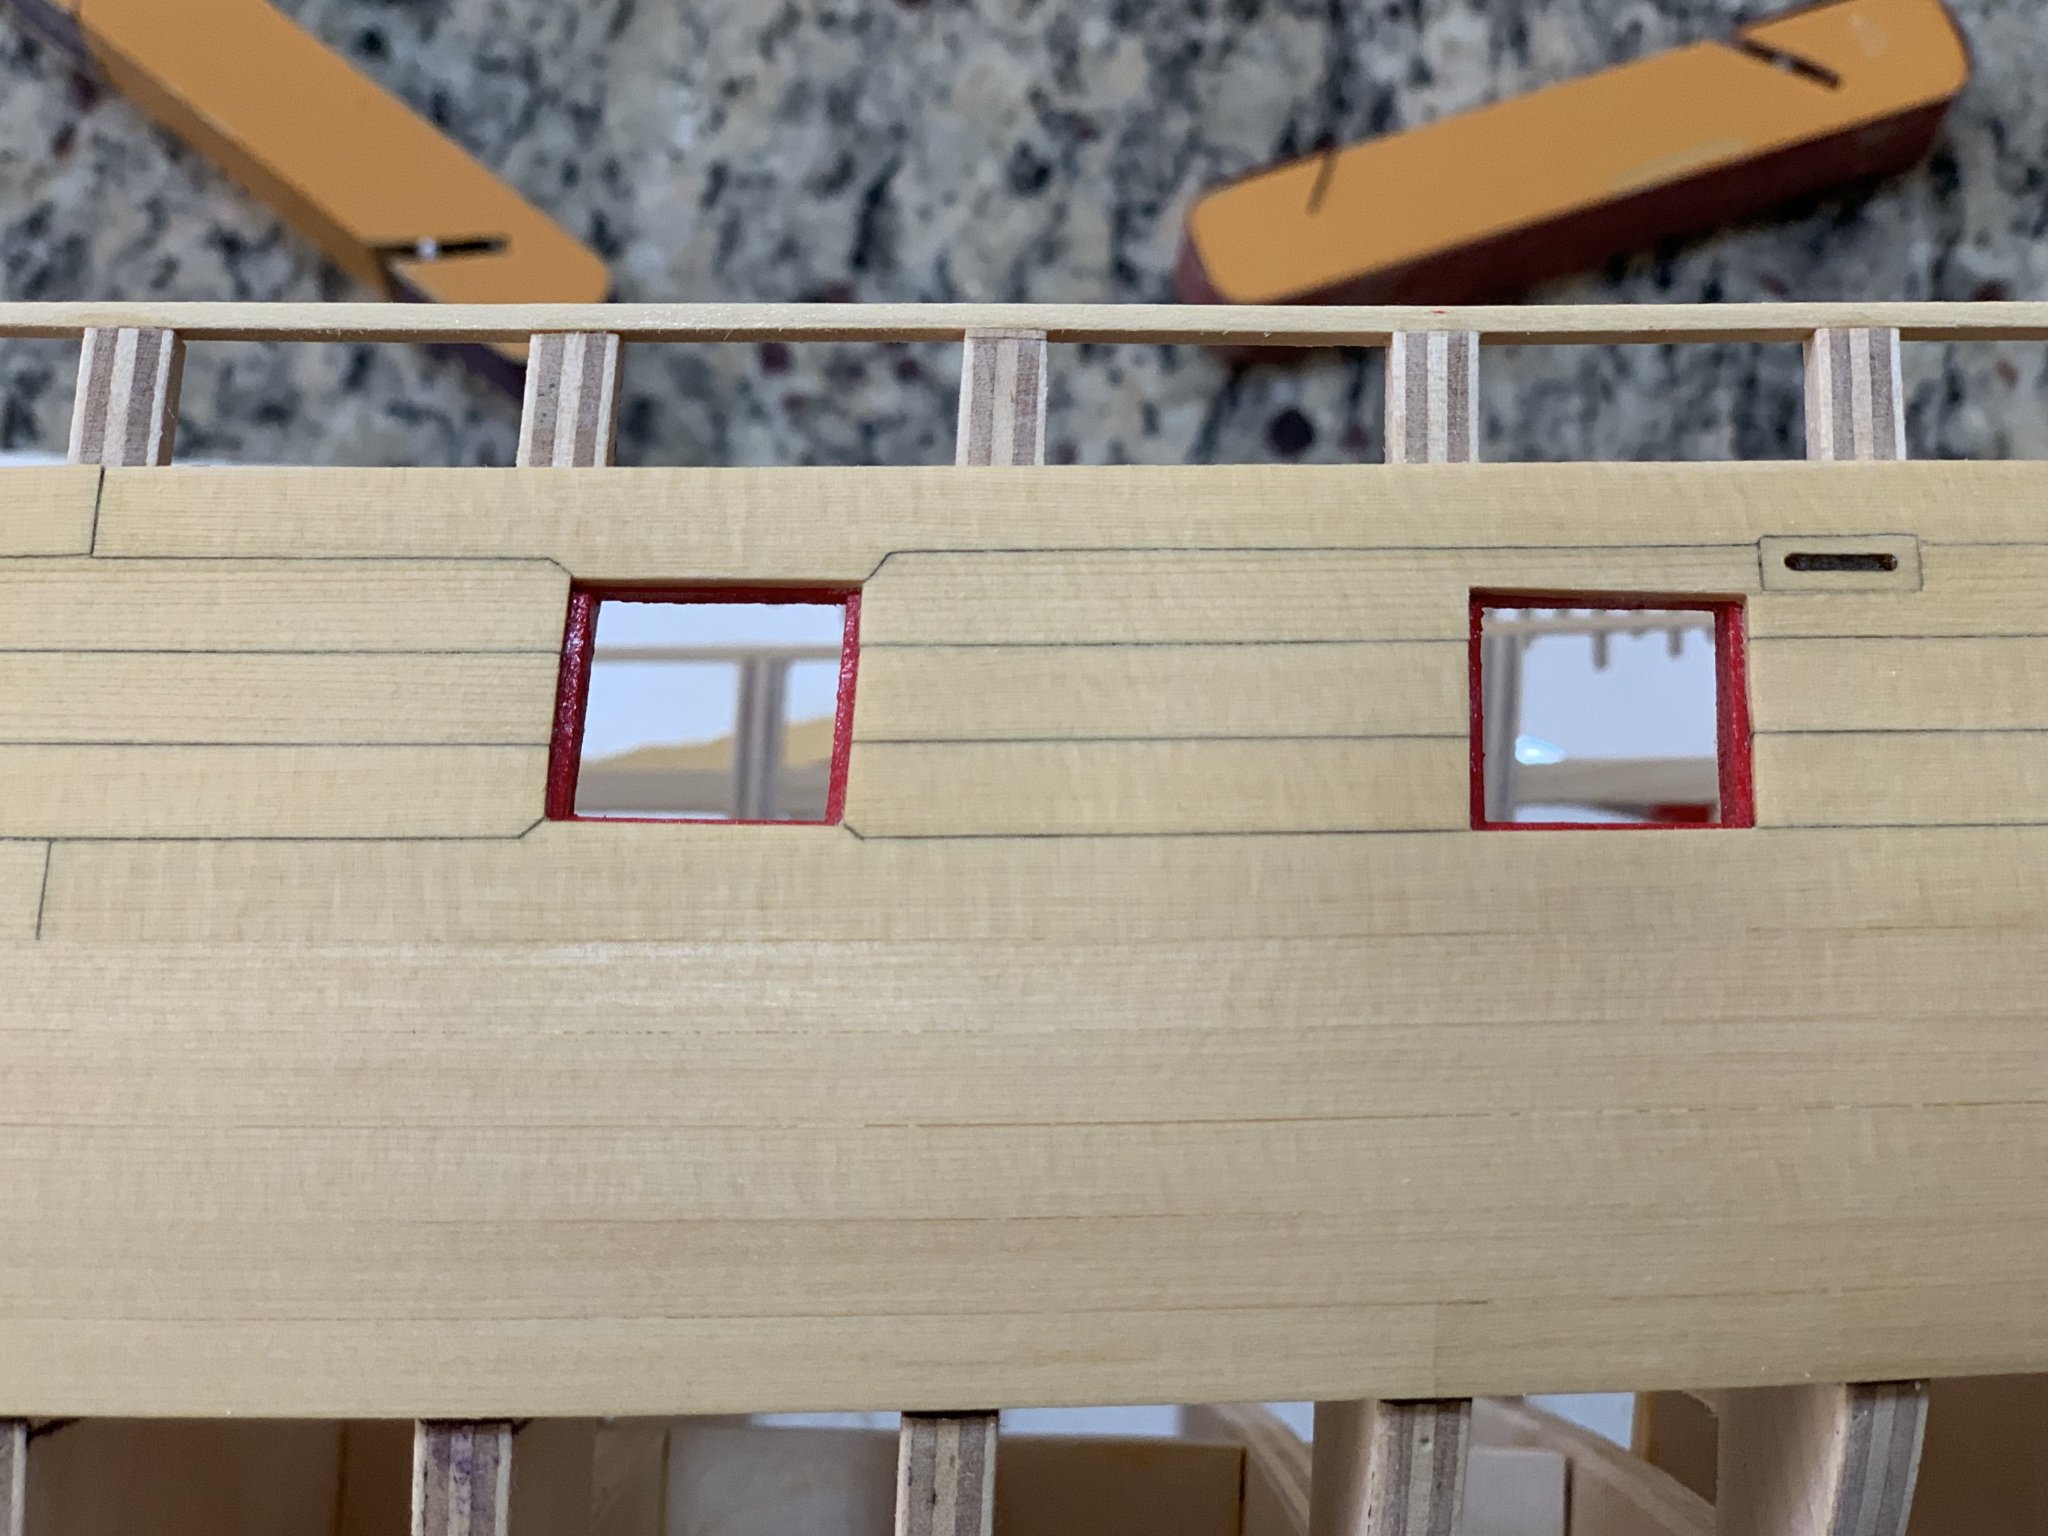
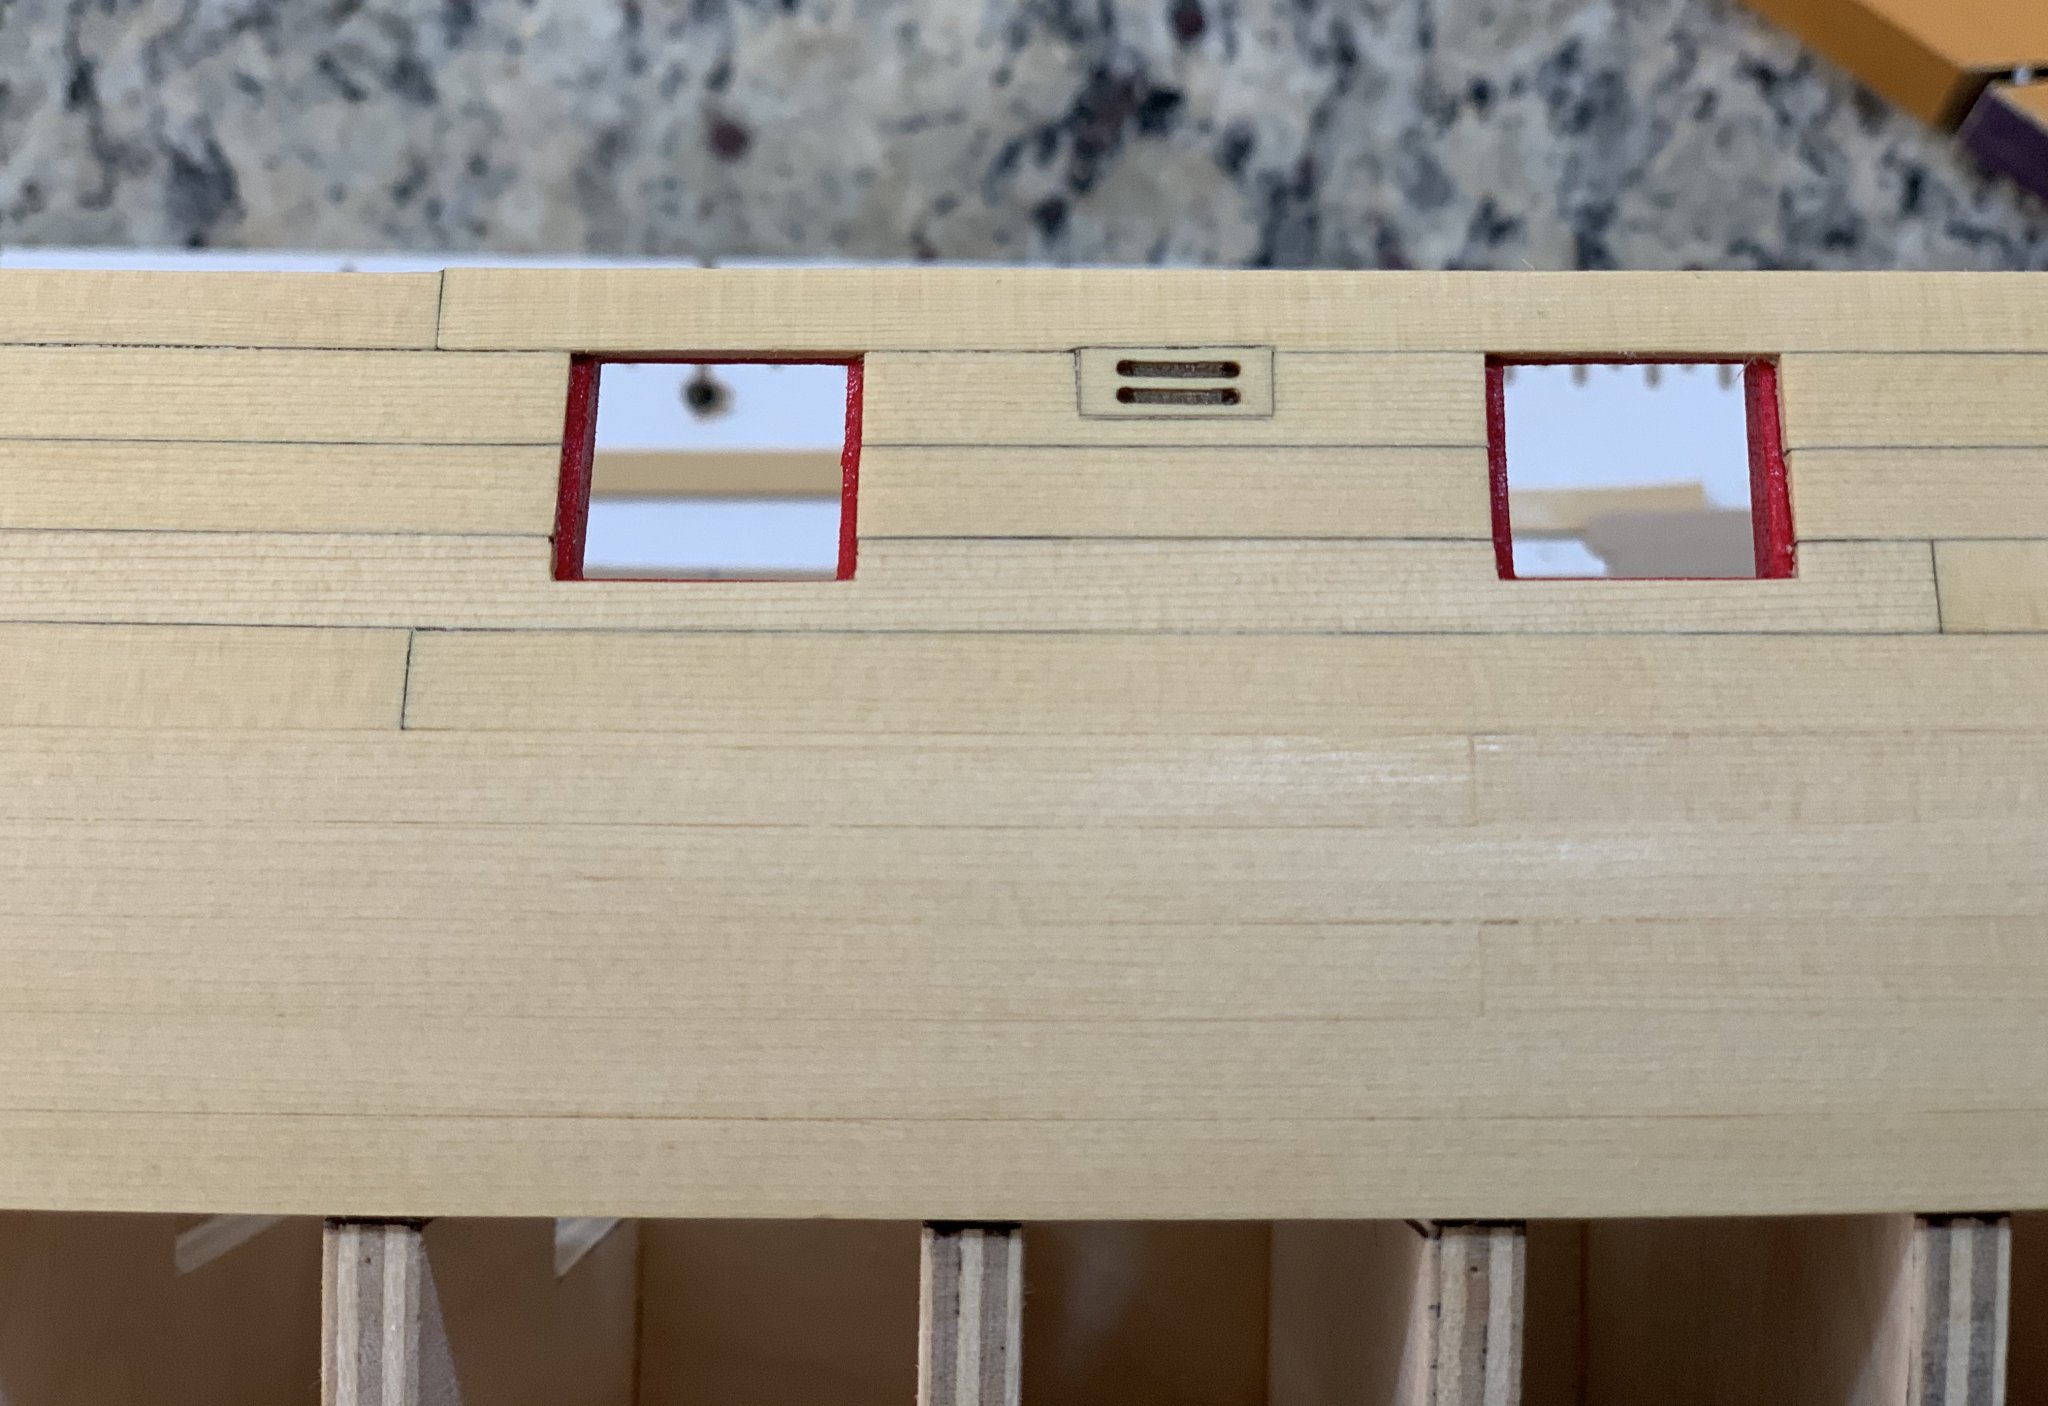
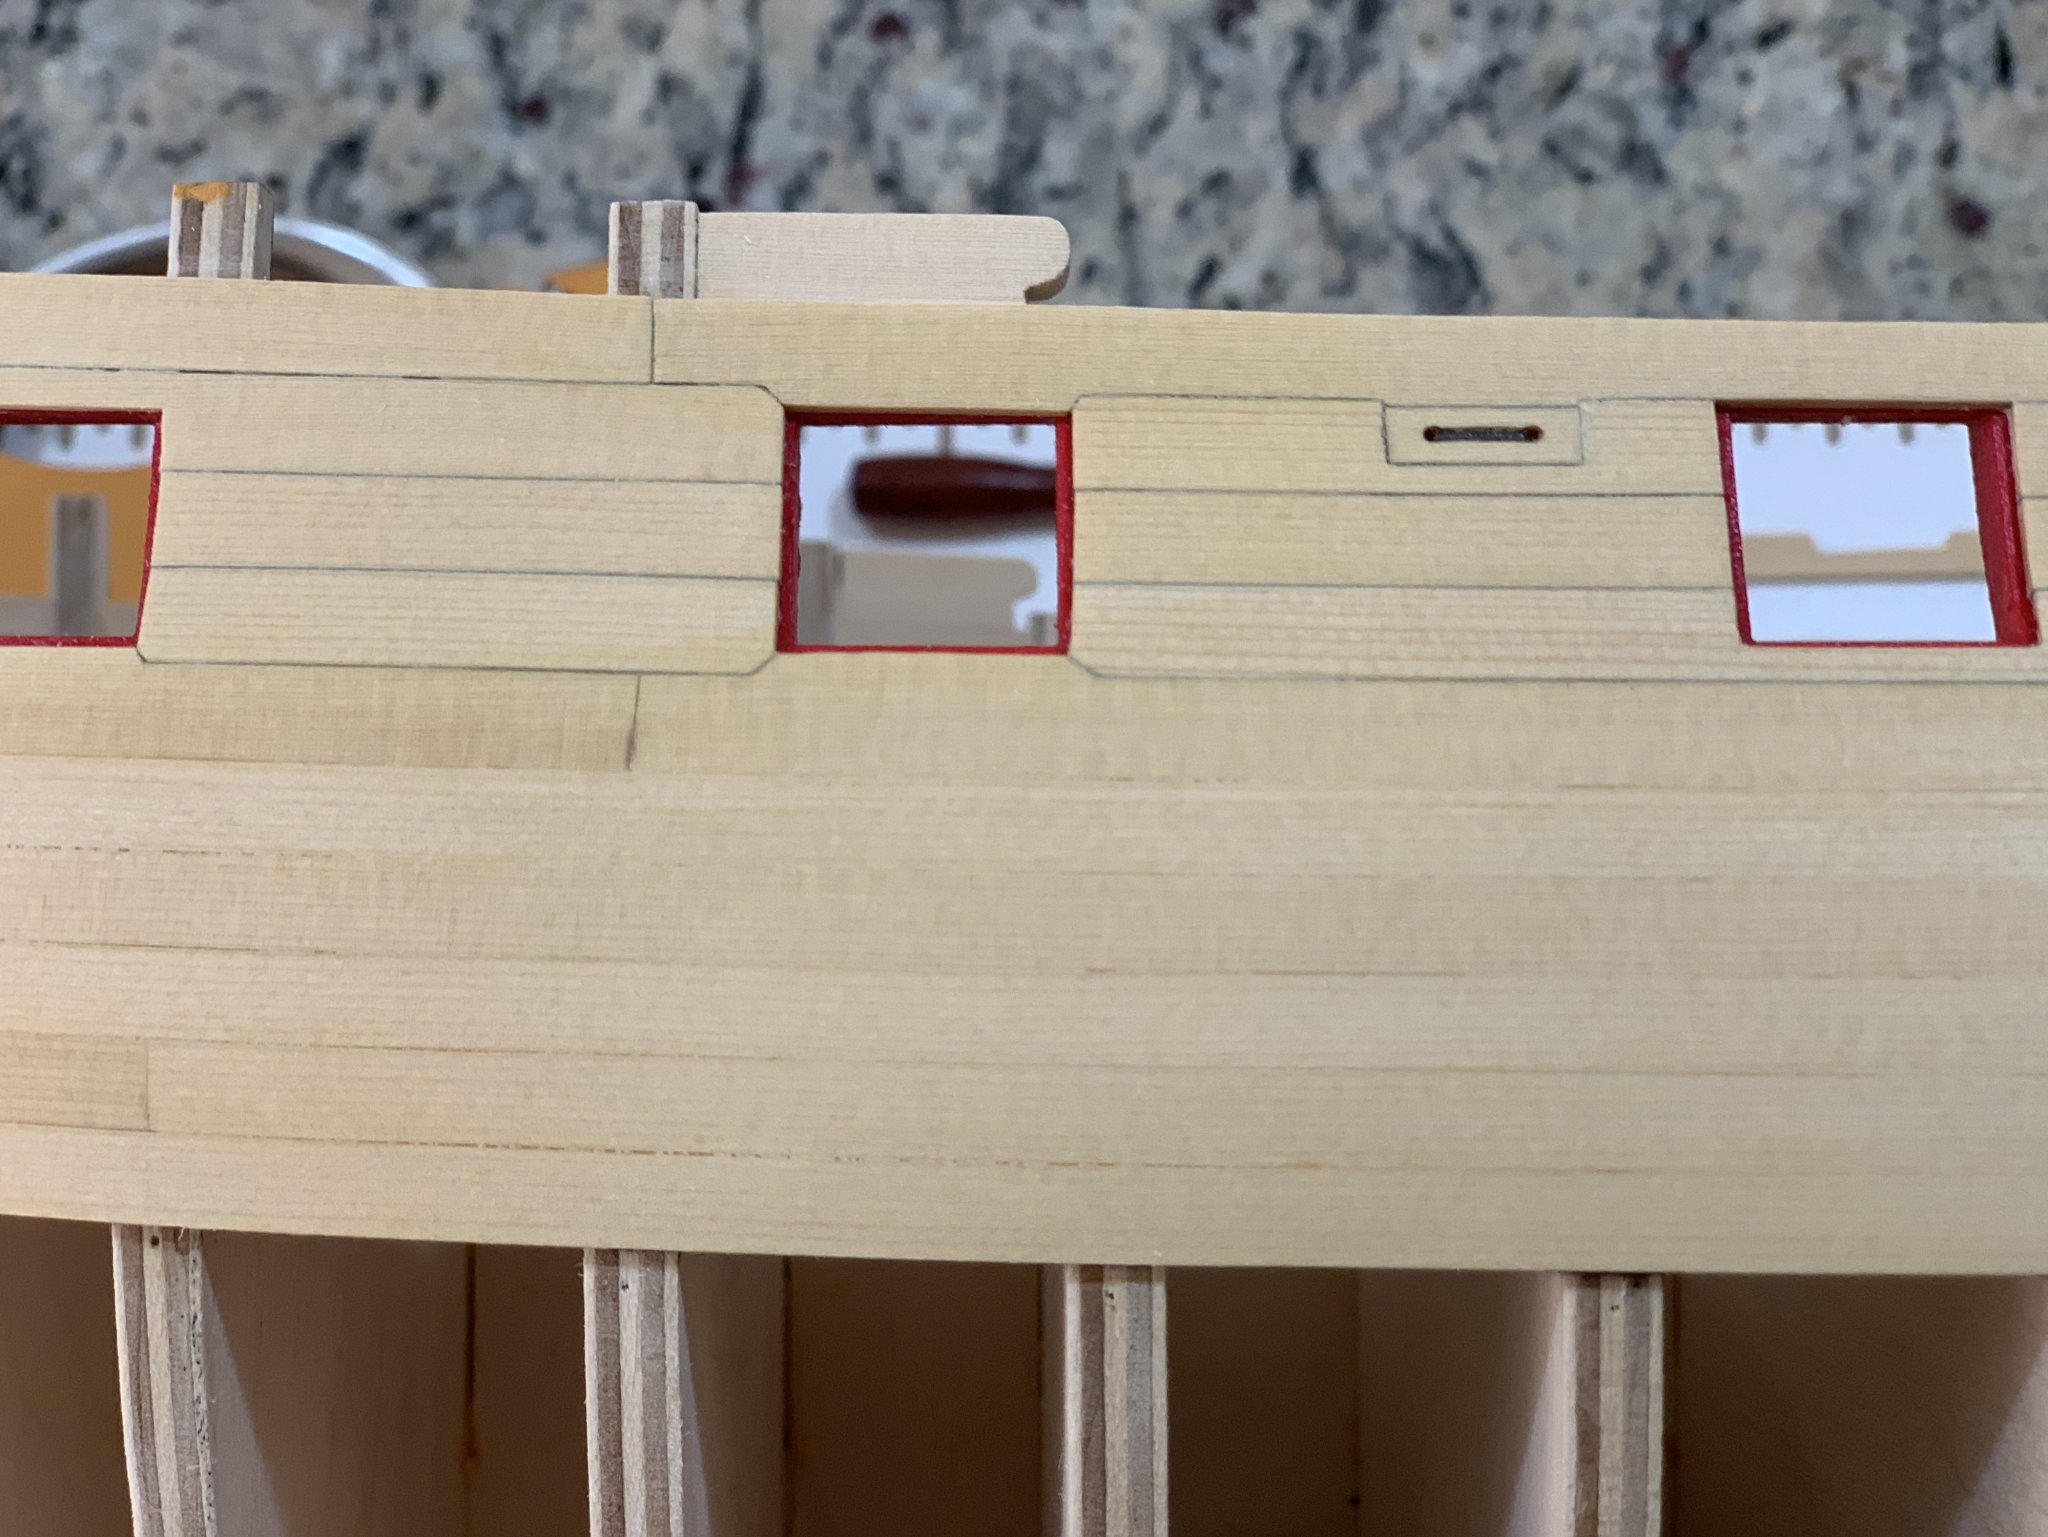
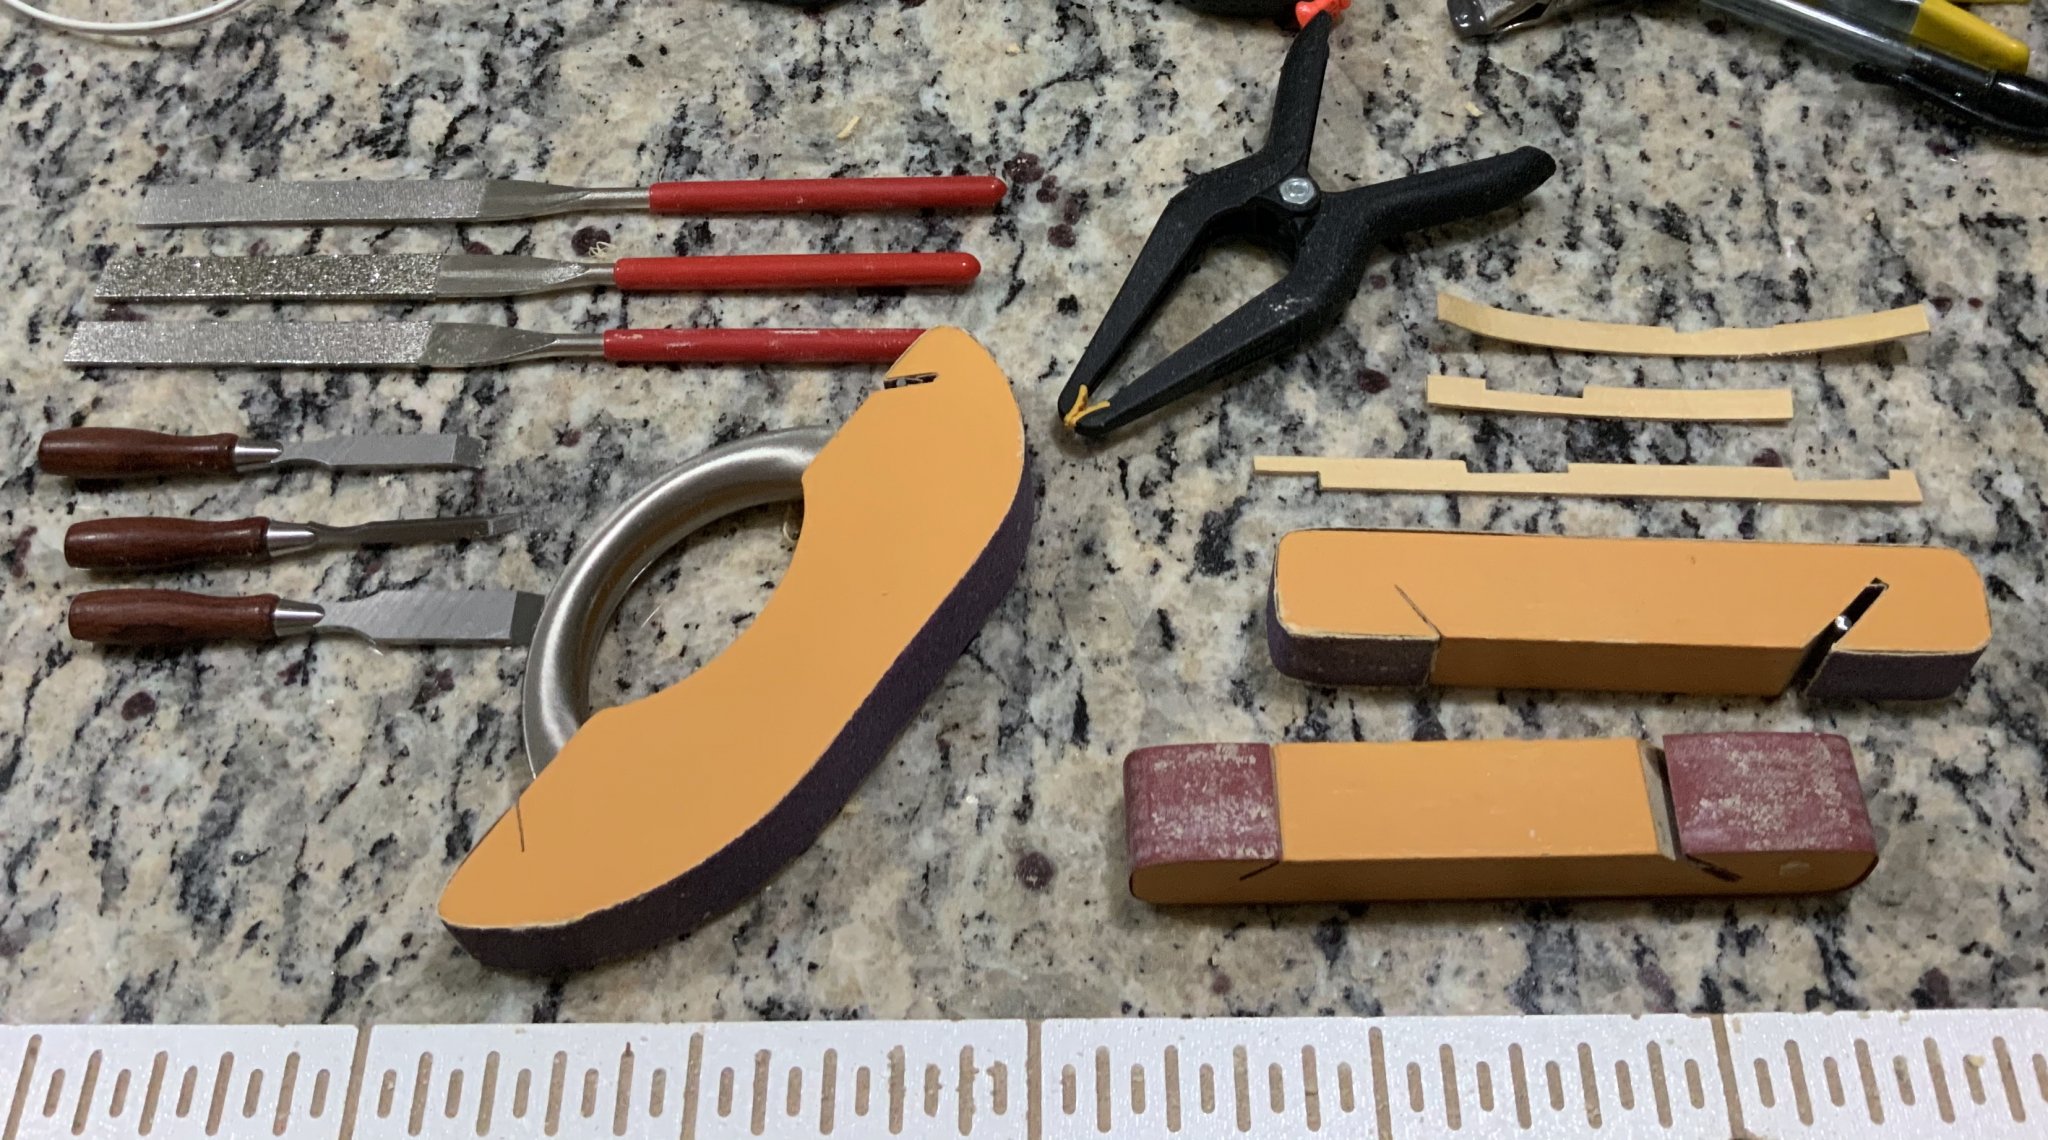
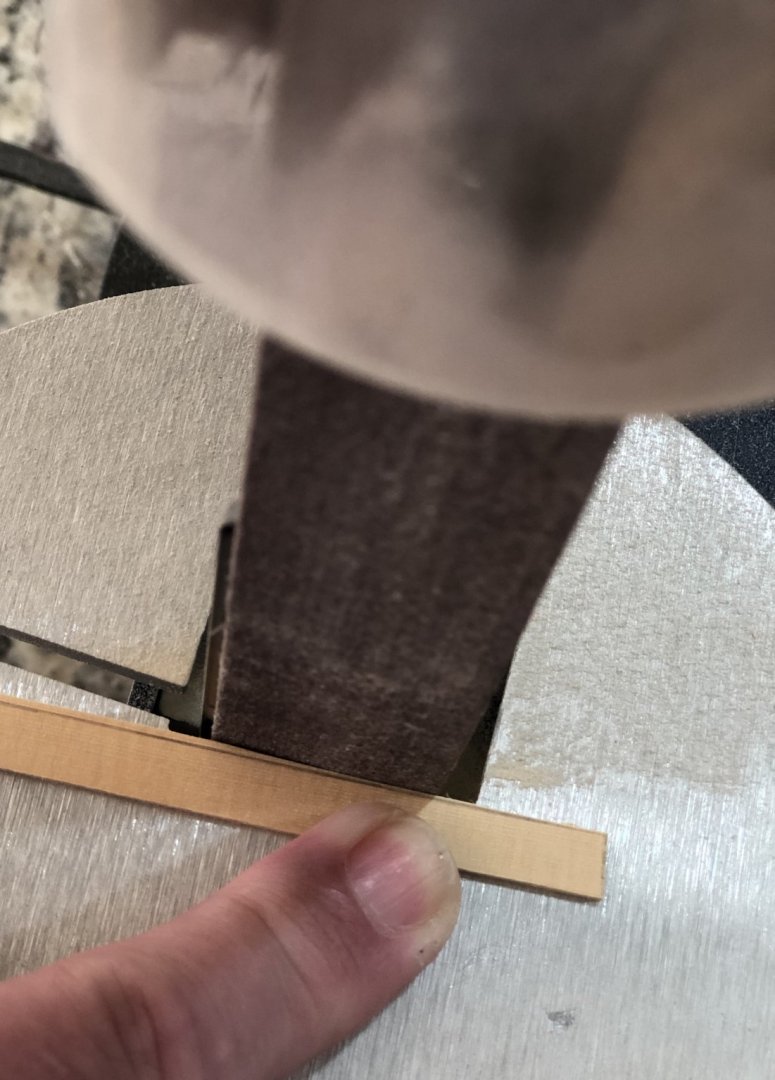
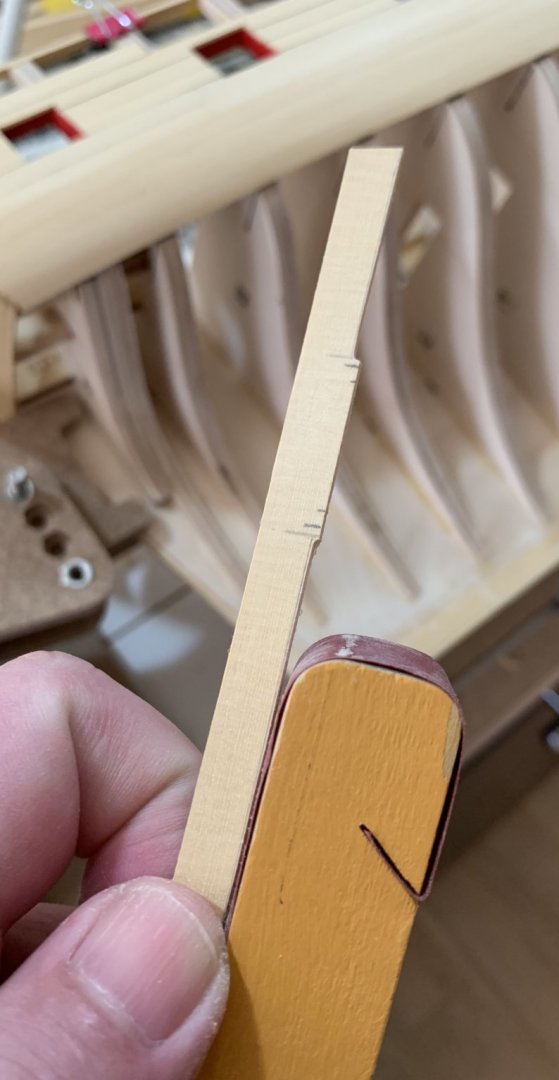
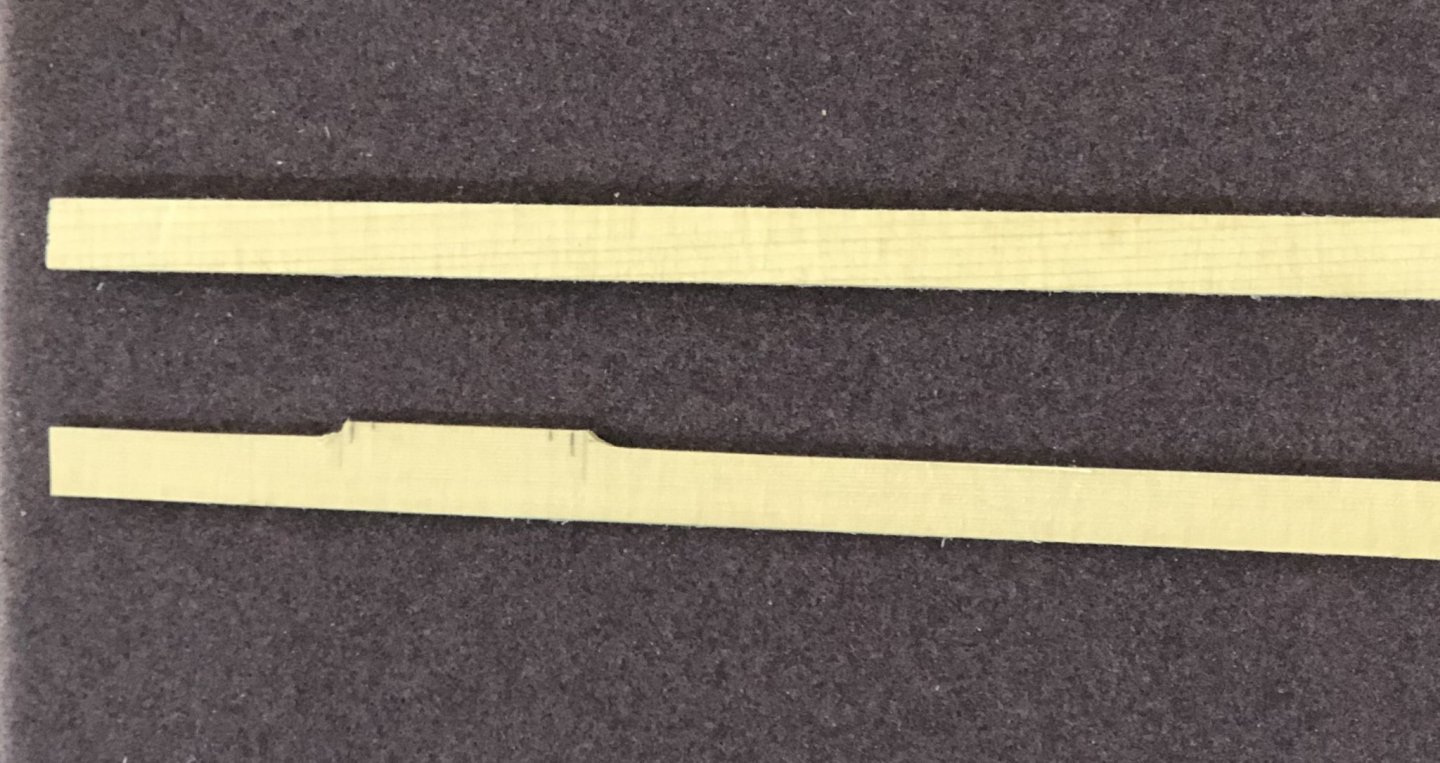
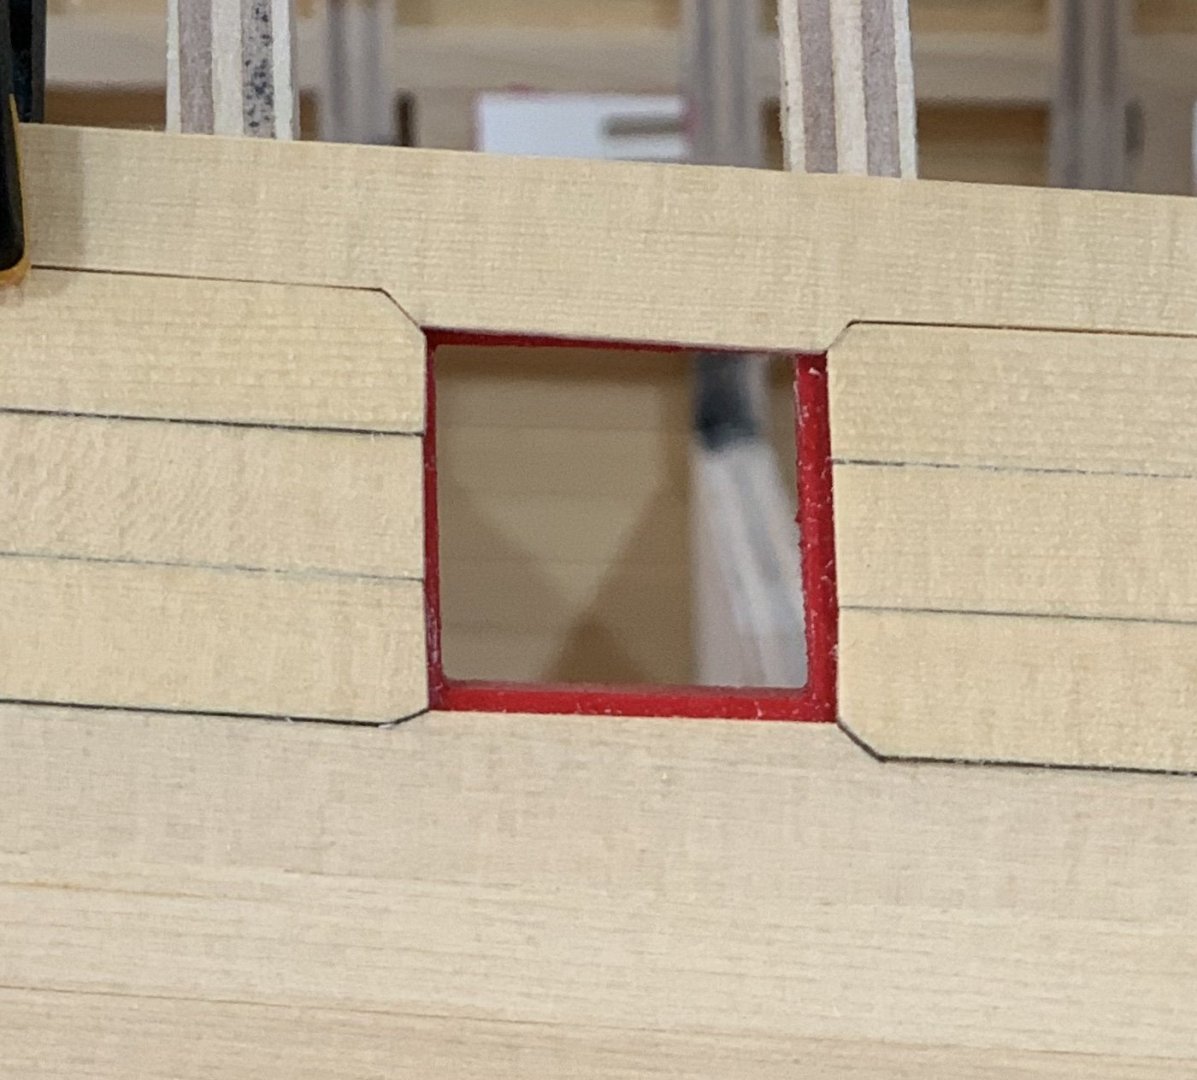
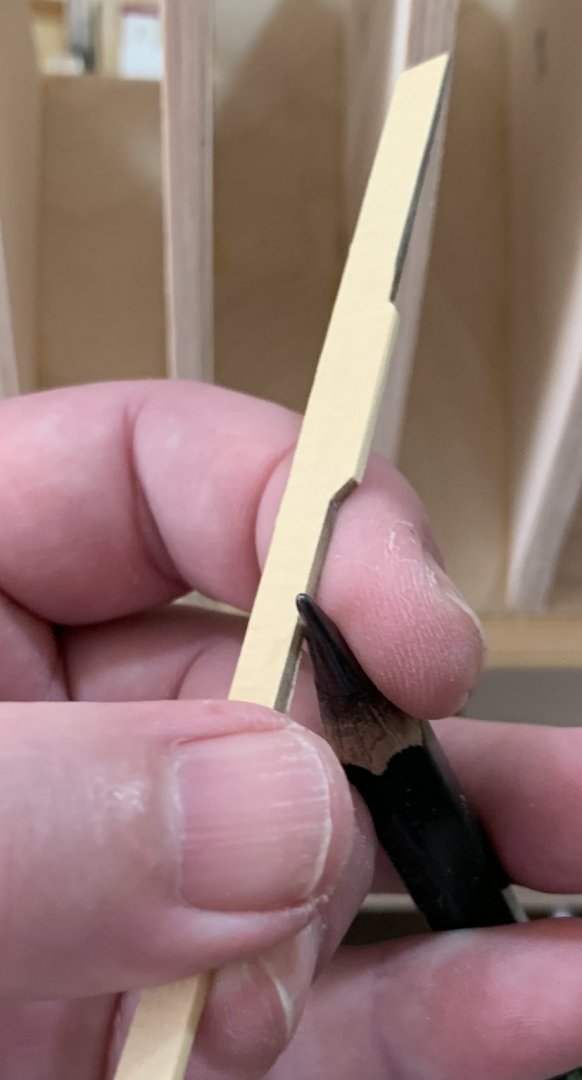
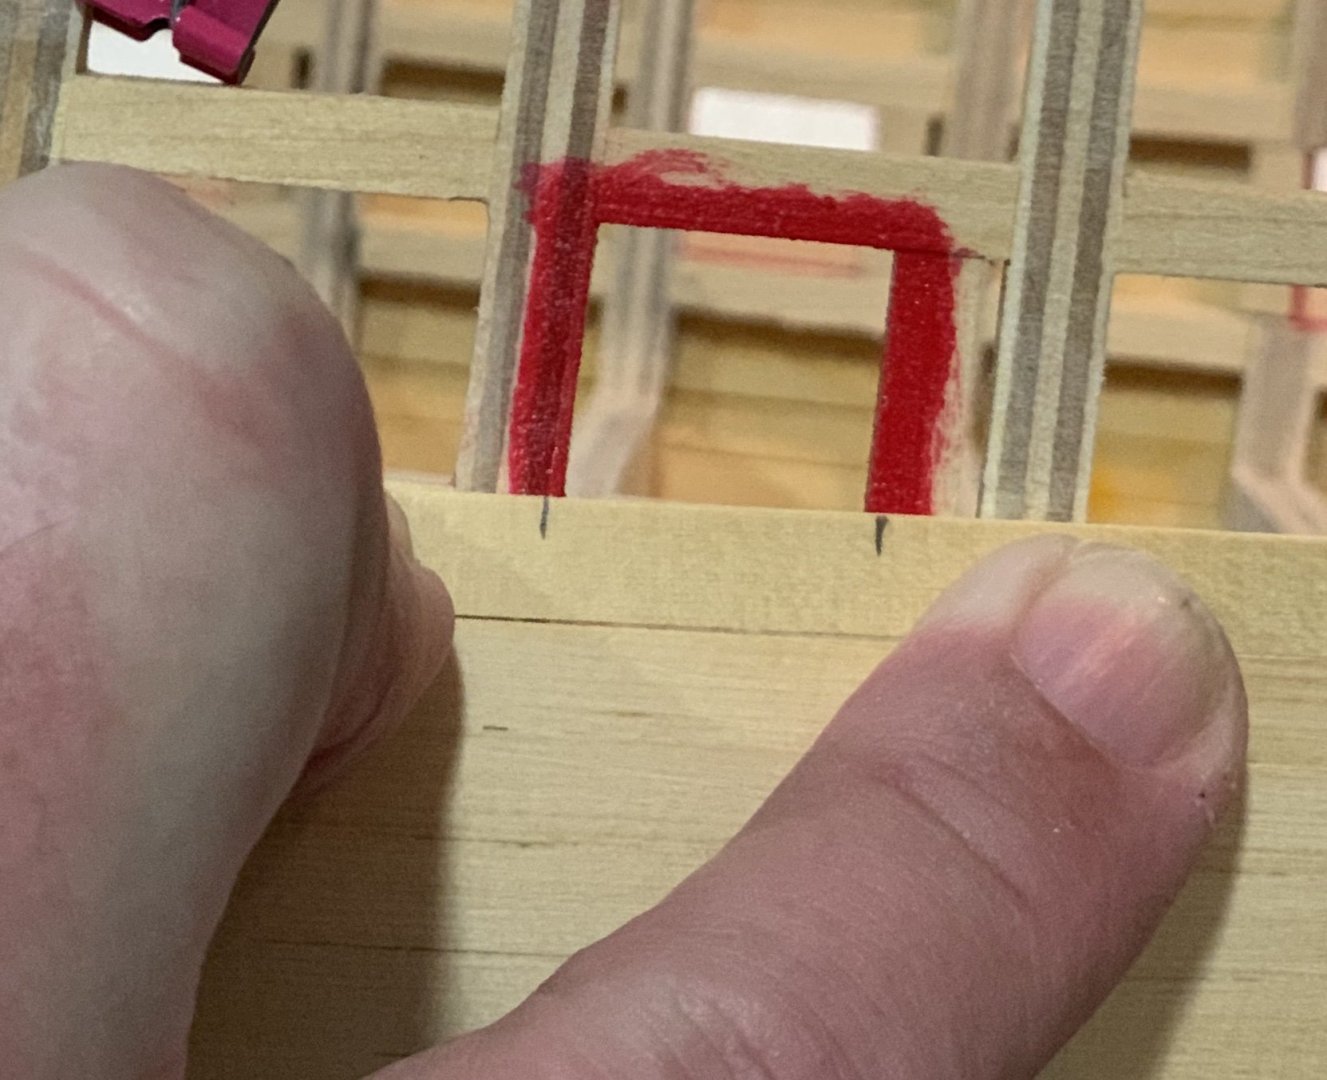
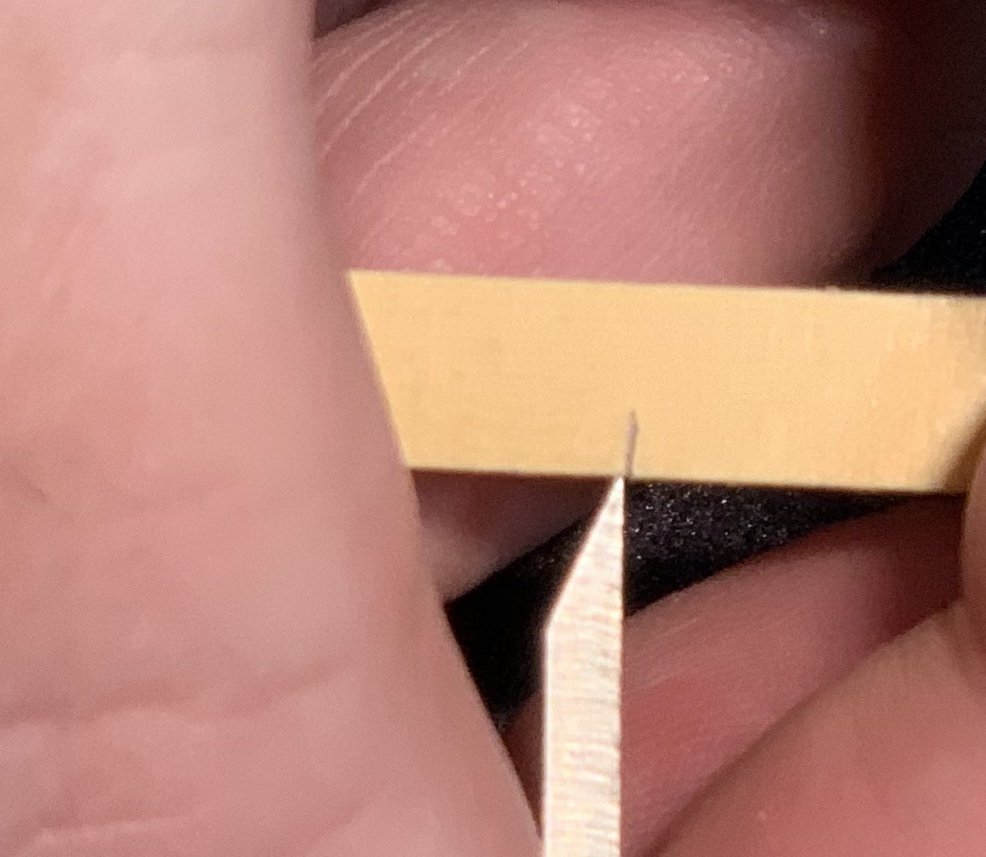
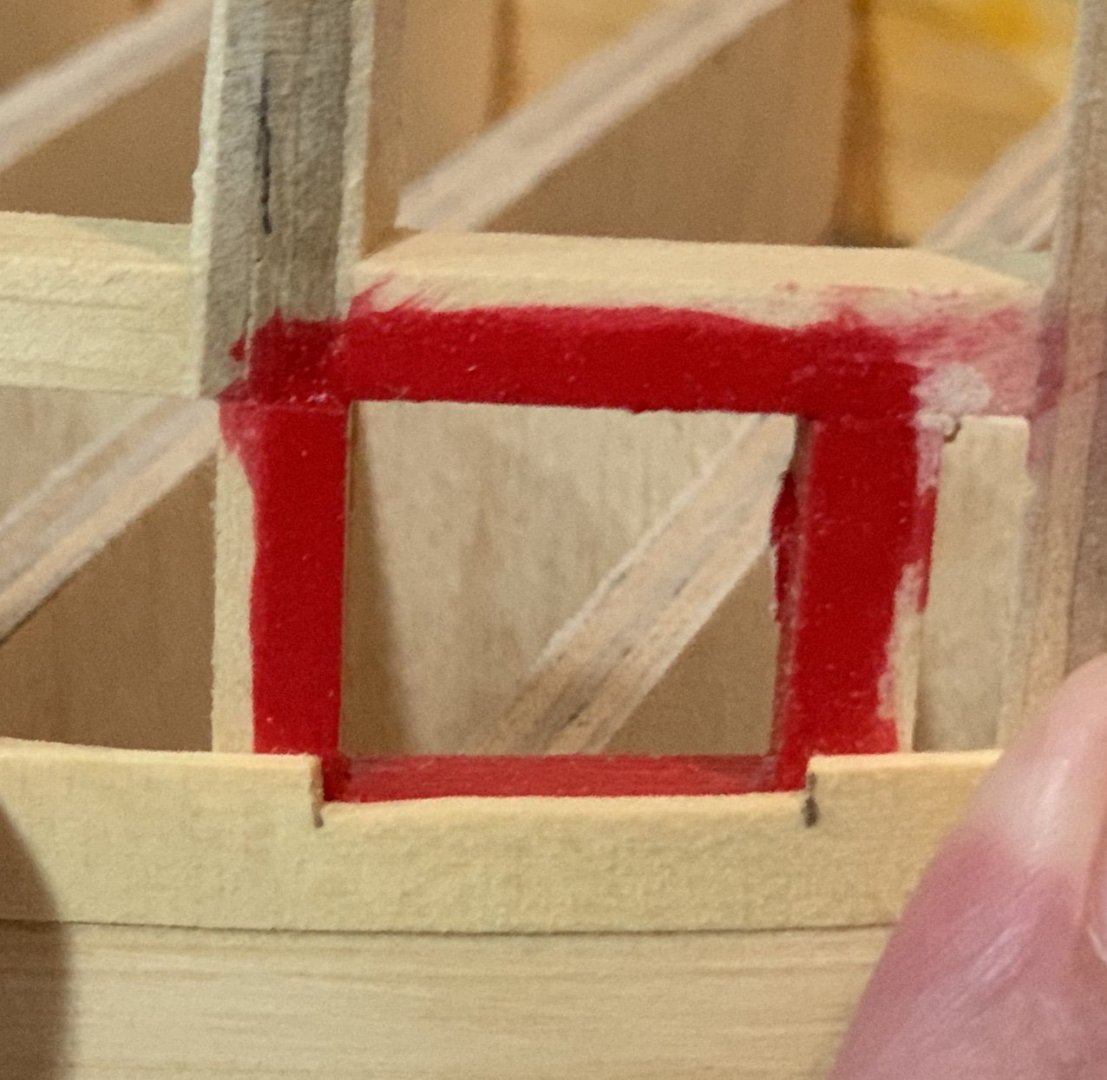
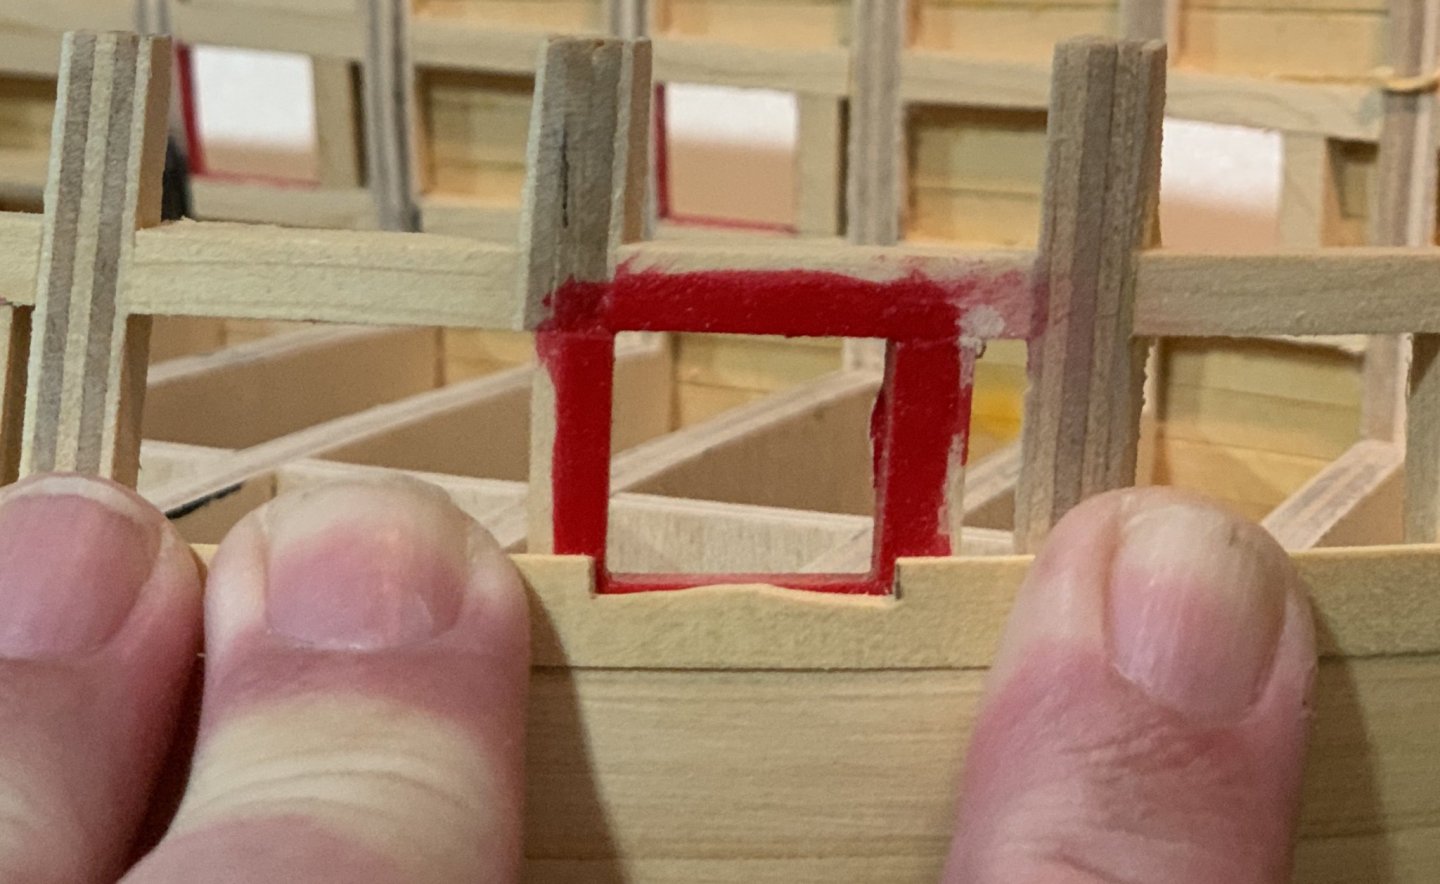
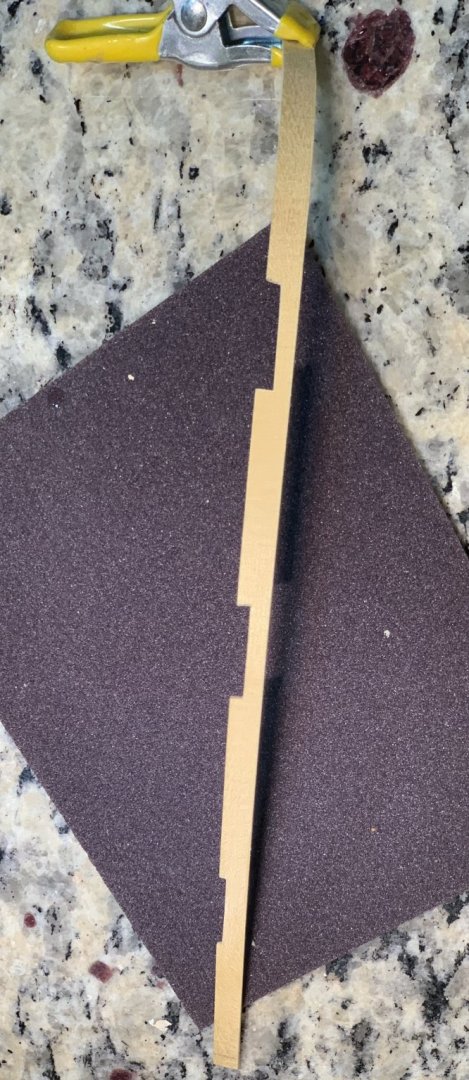
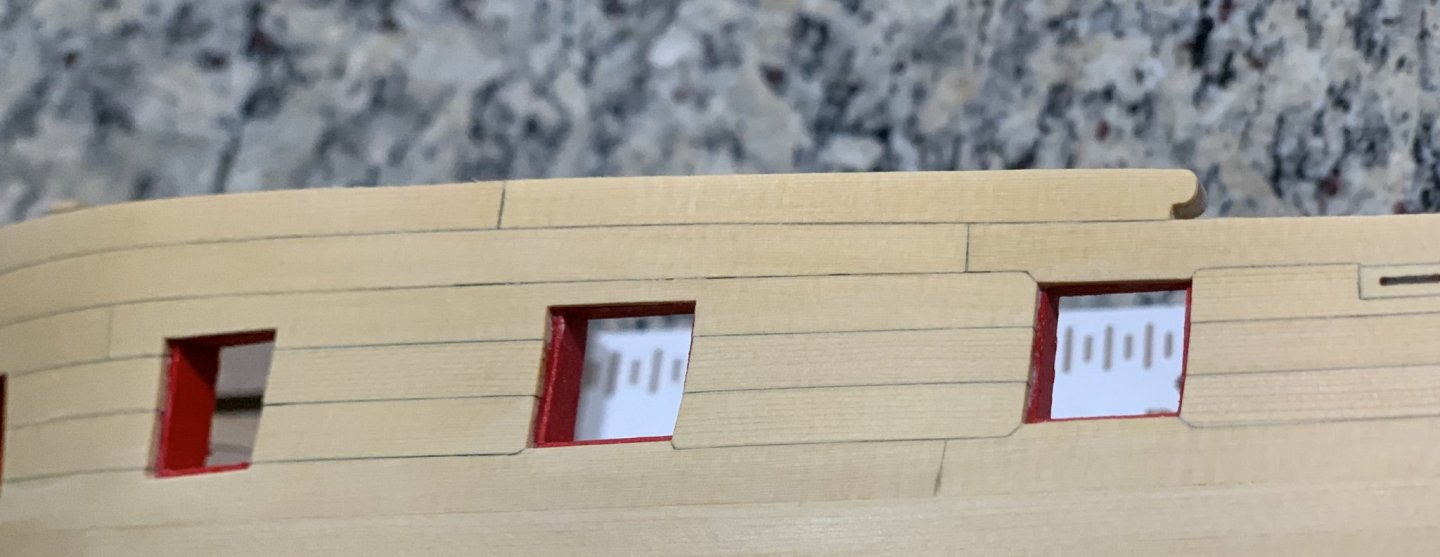
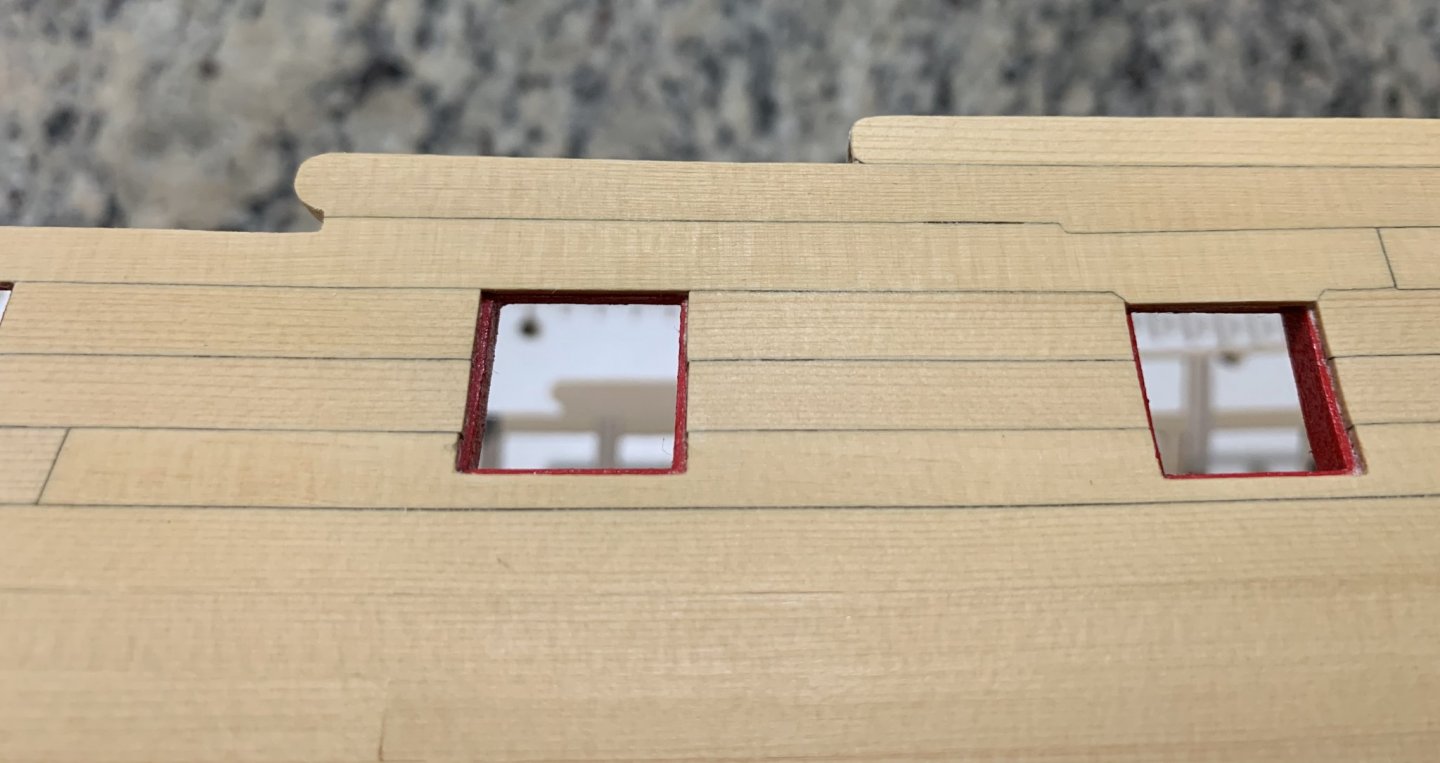
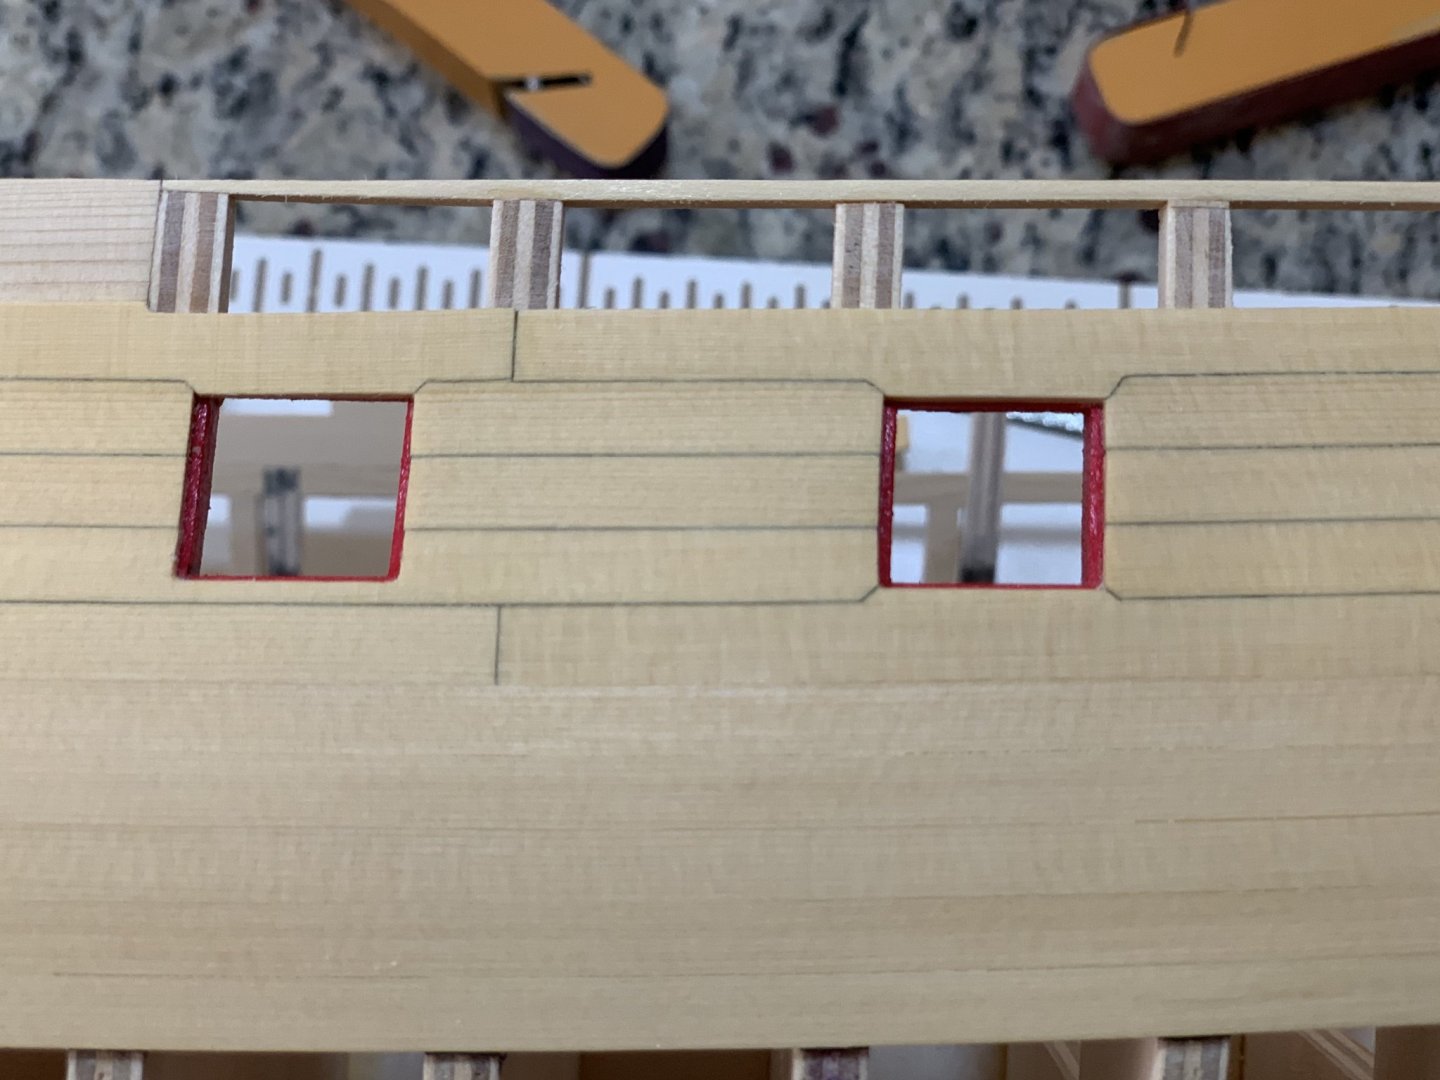
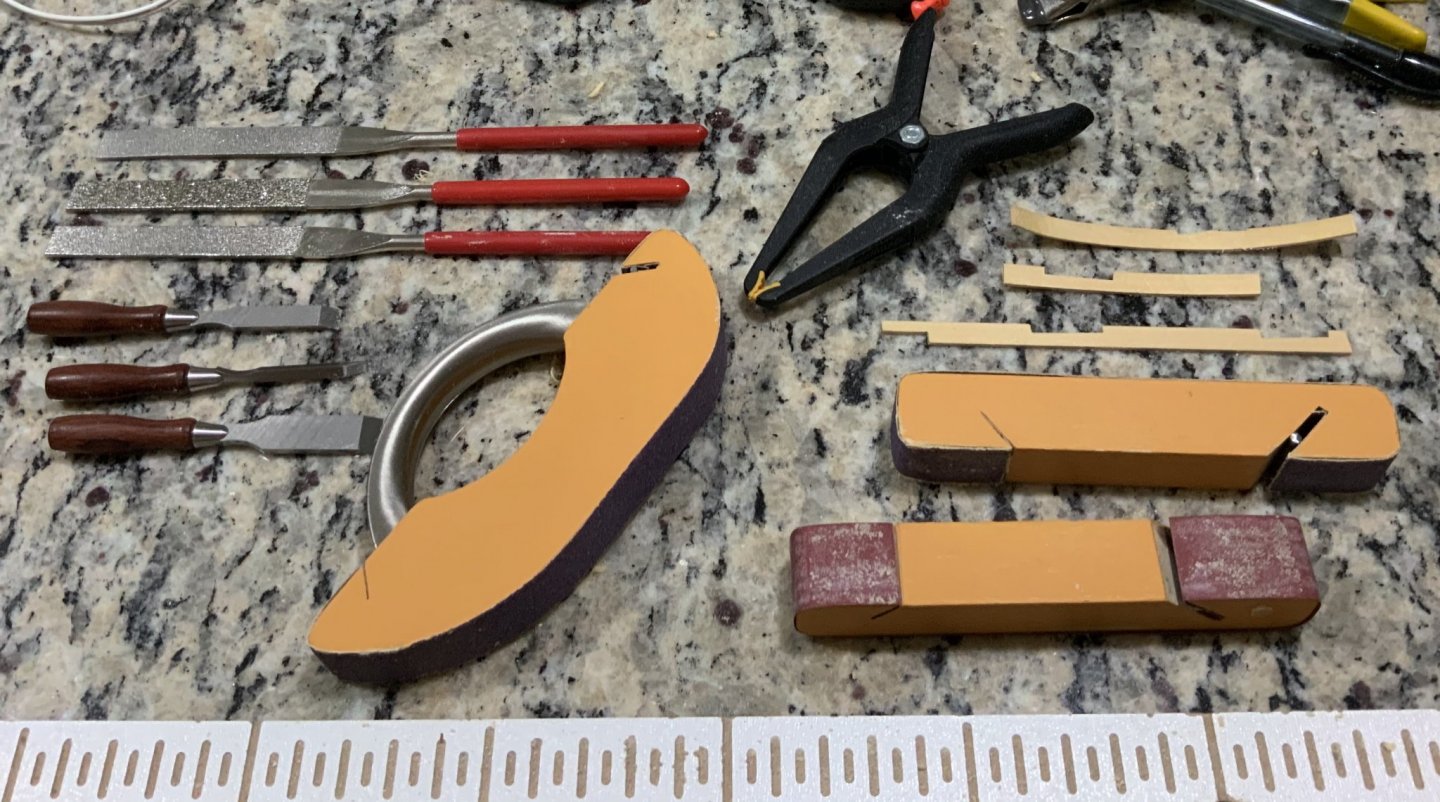
I am advancing the second side of the gun ports and doing the top tabs. I made 3 marks: the inner aligned with the vertical of the port, the second at the end of the diagonal cut, and the outer just for margins of error. This tabs tend to move right or left as you work them an need some room to adjust. I am using a wider plank (5/16 per Chuck instructions). Don’t cut the plank to exact length for this same reason. I marked with a pencil the with of the plank to fit the run. I used a 1/4 plank as reference. My belt sander got read of the excess wood close to the pencil line I used a diamond file and sanding block remove all the rest of the wood pass the pencil like The placed the 5/16 and 1/4 plank side by side to use the 1/4 plank as a template and sanded the 5/16 plank until both planks widths matched. I used a mini chisel to remove wood from the corners up to the middle mark to start the tab. Sorry about the pictures, they are one handed with my phone. I marked the diagonal cut shied of what needed an use a file to remove the wood from the corners. What ever amount you are thinking to remove, divided it in 3 and remove only a 3rd. It is easy to go over and remove too much. In the picture above, the left side is almost there but the right side needs more wood to be removed. I turn now to the mini chisel but the diamond file will do. I want to keep chart edges. I removed less than 1/64 of wood in the right side. The objective is to close the gap between the planks evenly (it is now about 2mm). The gap between the planks in the picture above is 1mm. I removed a little form both sides with the chisel. The picture below shows that the tab now fits the gap. It is almost done but notice that the top edge of the gun port need to be adjusted to follow the horizontal of the gun port. For this port I needed to remove wood from the horizontal part of the plank in the left side to bring the tab down a little (~ 1mm). I sanded a little more that side for a better fit and used the pencil to simulate caulking. Final test before gluing. The glued plank below before sanding. I am curious to find out how others made this tab top tabs. I may be over complicating this. best, G


-
Hello Chuck: Looks fantastic. I really like the gratings. Could you if possible show side by side the cedar and the boxwood versions for the gratings? Do they look different? Love the slate pattern. G
- 1,784 replies
-
- 1
-

-
- winchelsea
- Syren Ship Model Company
- (and 1 more)
-
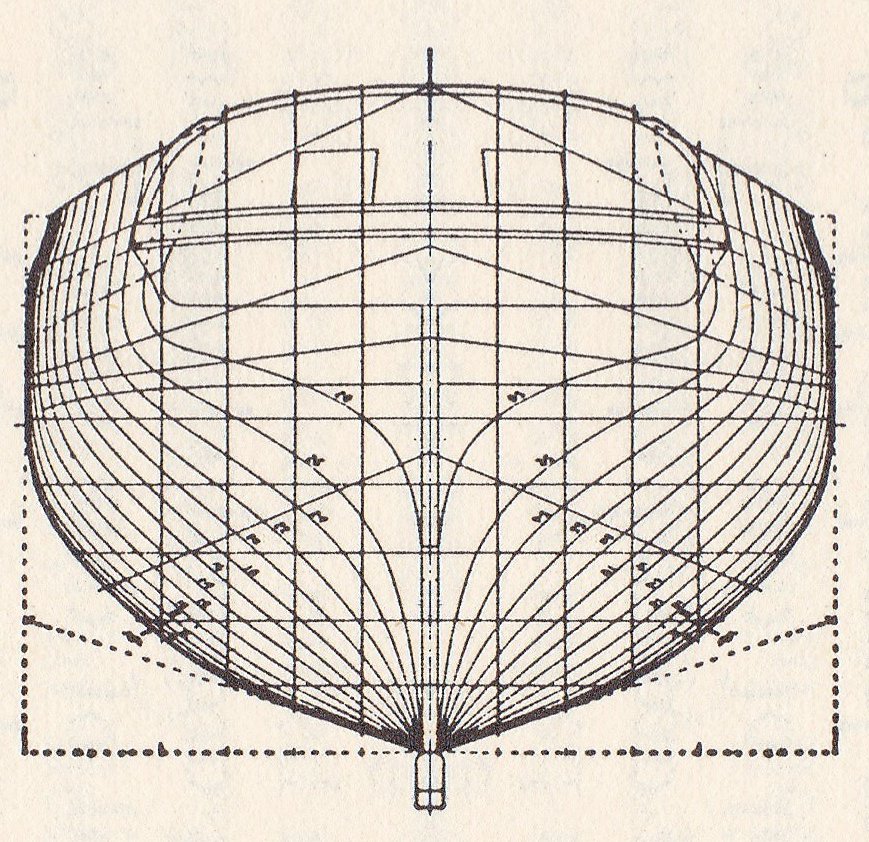
Hello Chuck; I found this in another forum post for Hornet plans for 1811 the link for the post is https://forum.game-labs.net/topic/7707-american-ship-collection-with-plans/page/6/ Hope they are helpful. G
- 1,784 replies
-
- 4
-
-
- winchelsea
- Syren Ship Model Company
- (and 1 more)
-
Hello Chuck: The “S” shaped frames look really cool in you cross section project. Designing the piece to be cut by laser must have been challenging. best, G
- 1,784 replies
-
- 1
-
-
- winchelsea
- Syren Ship Model Company
- (and 1 more)
-
Thank you Mike, I am considering other options, maybe hand painting, just grey-blue paint, and other ideas but has not settle for any. I was hopping others will adventure changes or opinions to evaluate my possibilities and to figure out if they are beyond my abilities. G
-
After sanding with 120 follow by 1000 sand paper. I sand as I go; I can not resist. Best, G

-
Hello Jaceck: I use to do it that way and it worked perfectly. The chisel cuts down the time significantly. I did all 3 cuts in the time I will have done one. The chisel also give you charmer corner quickly which takes time with the file. Diamond cover files are also faster than conventional files unless you have those Swiss made beauties that cut like butter. G
-
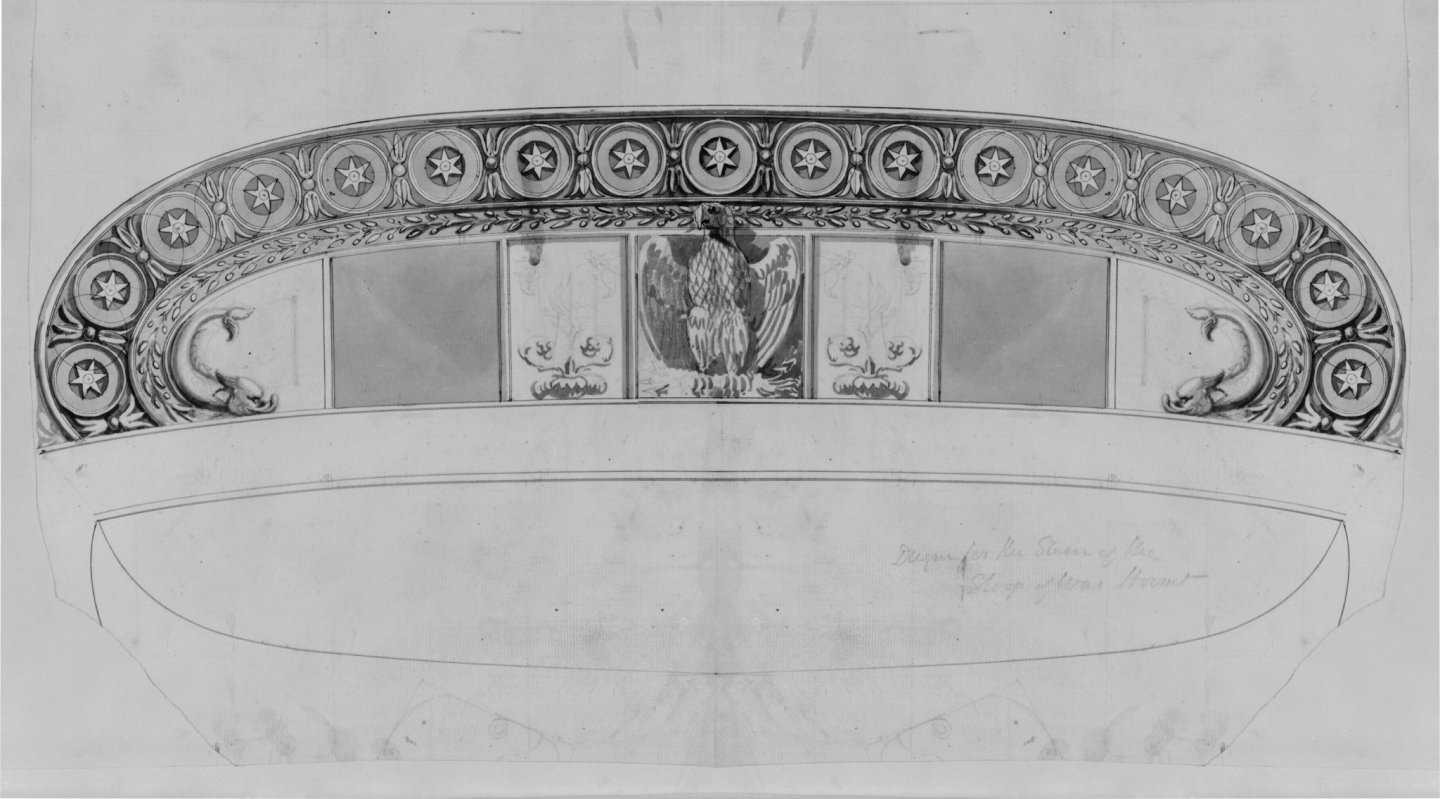
Agree, the frieze will cover the counter. G
-
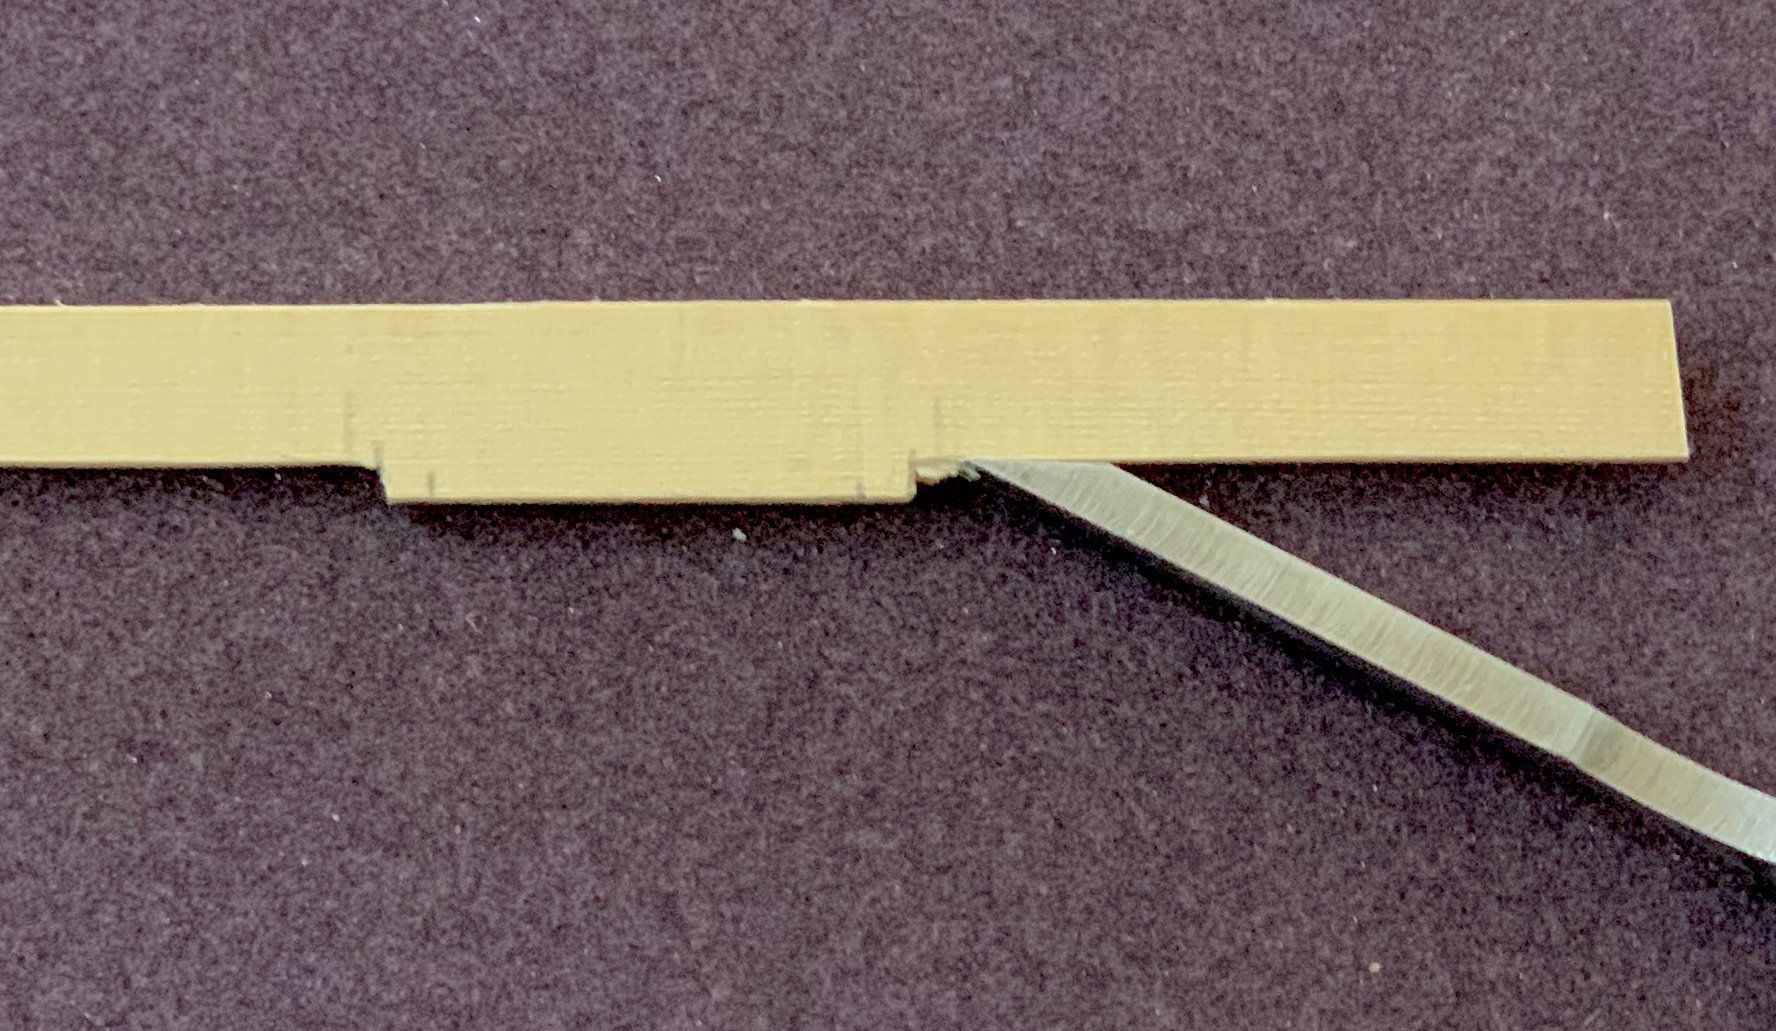
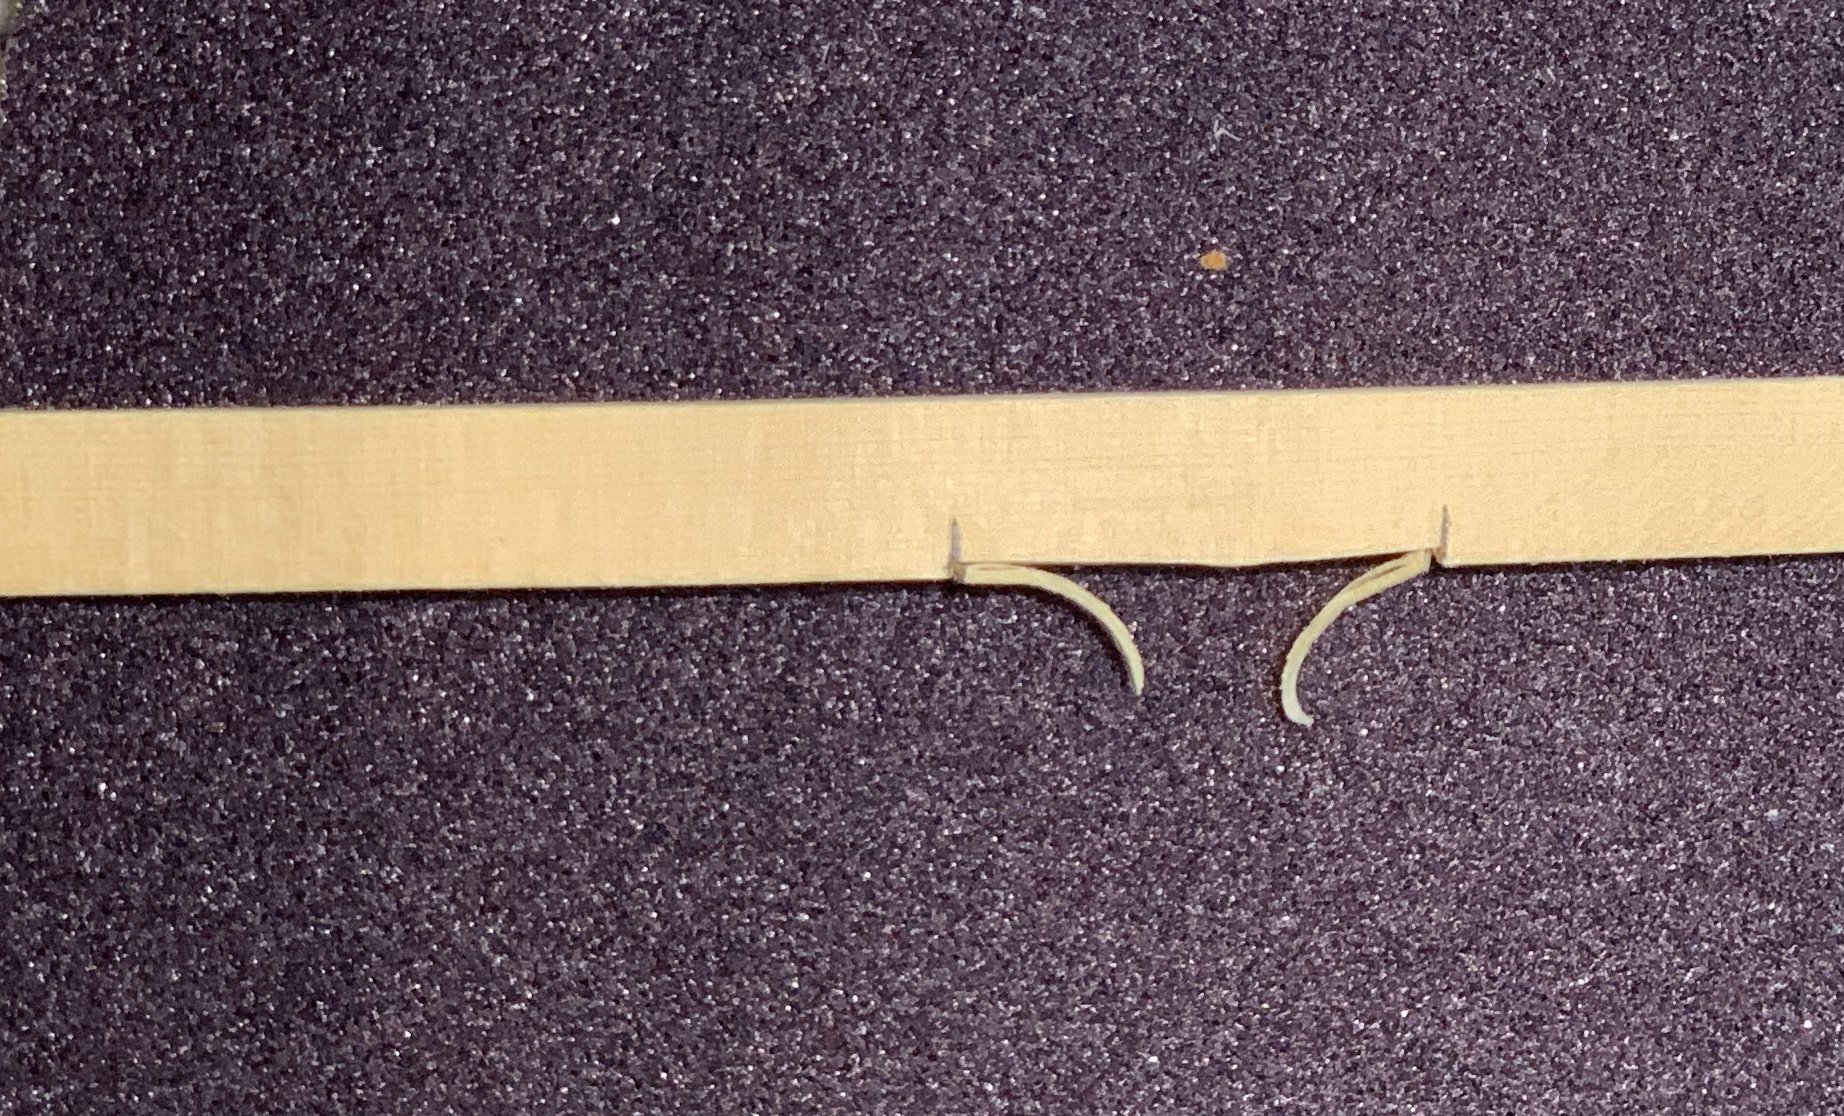
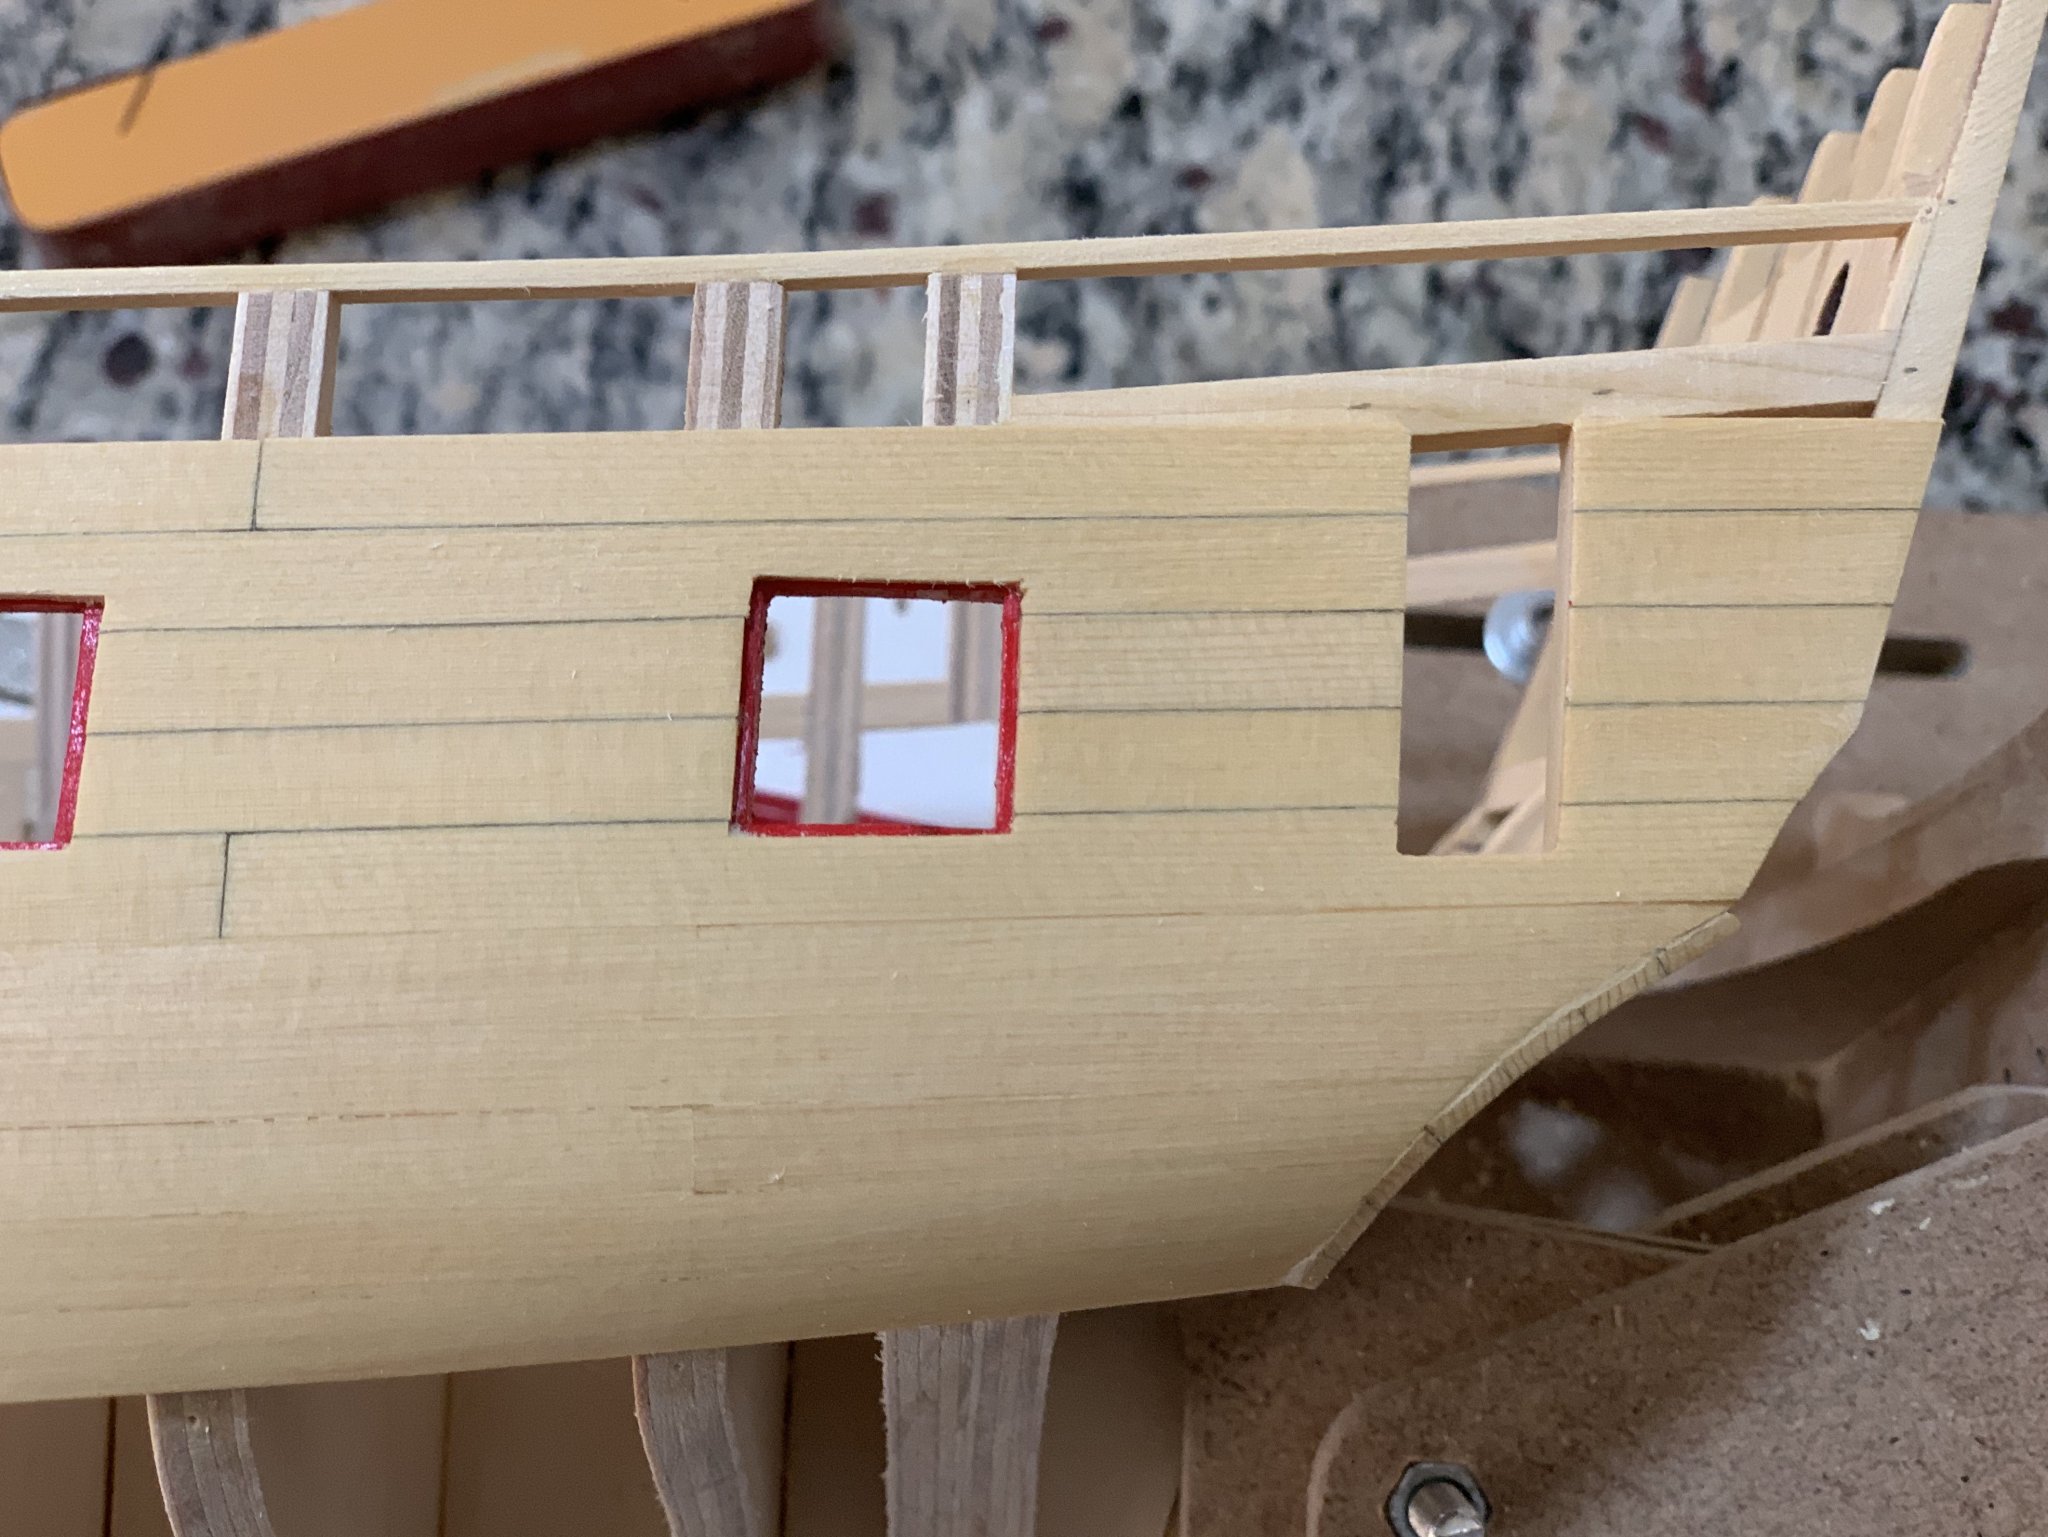
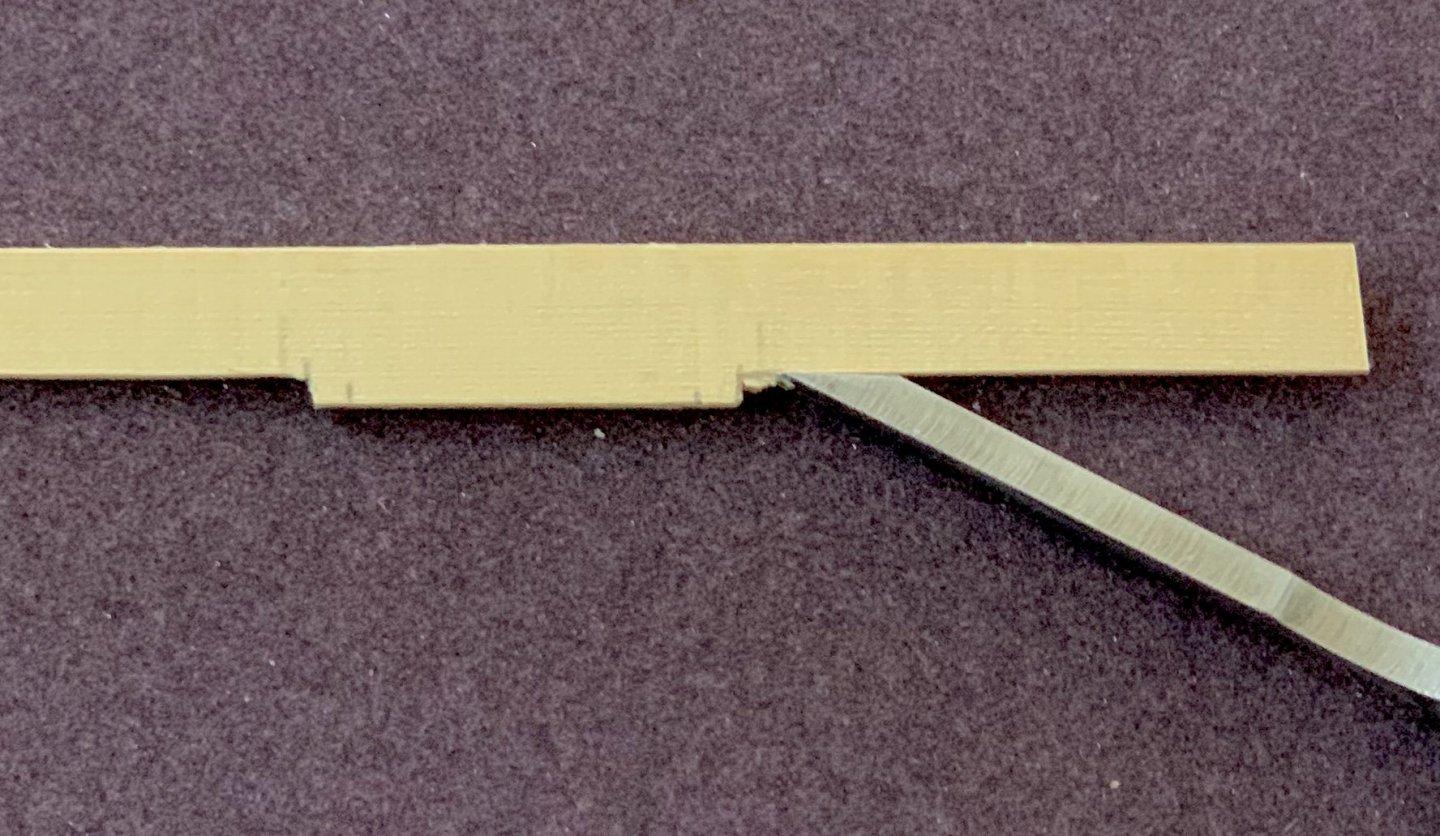
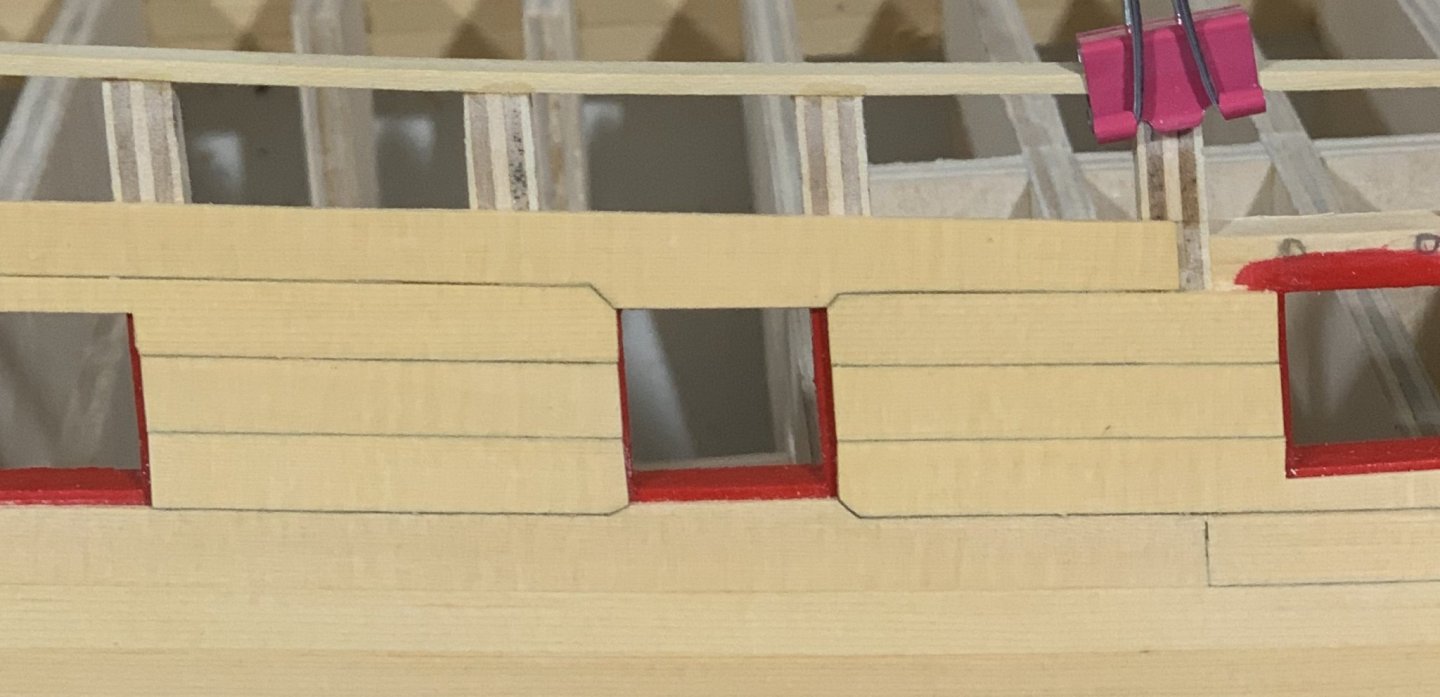
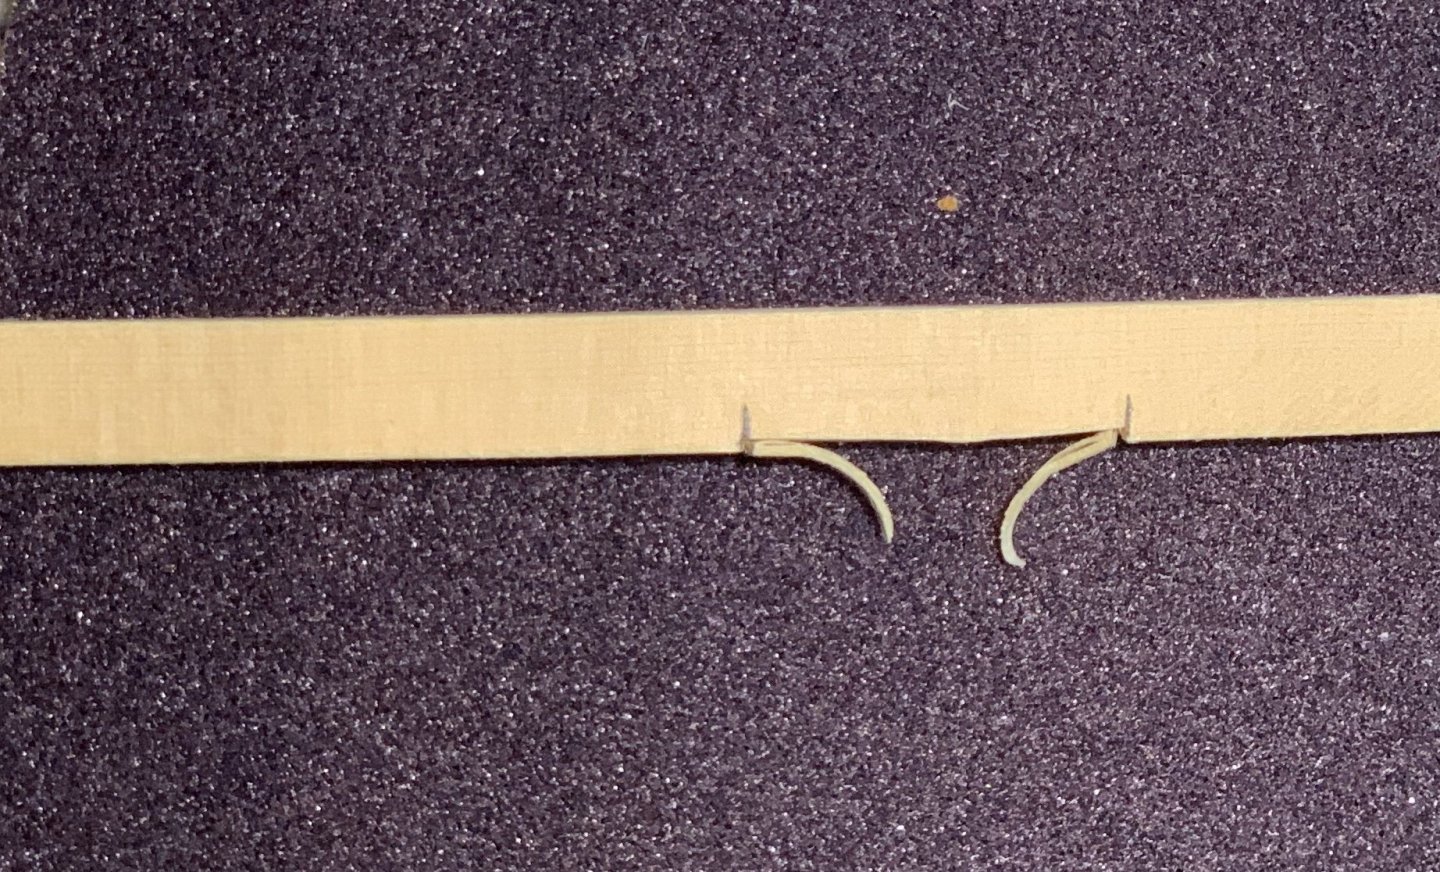
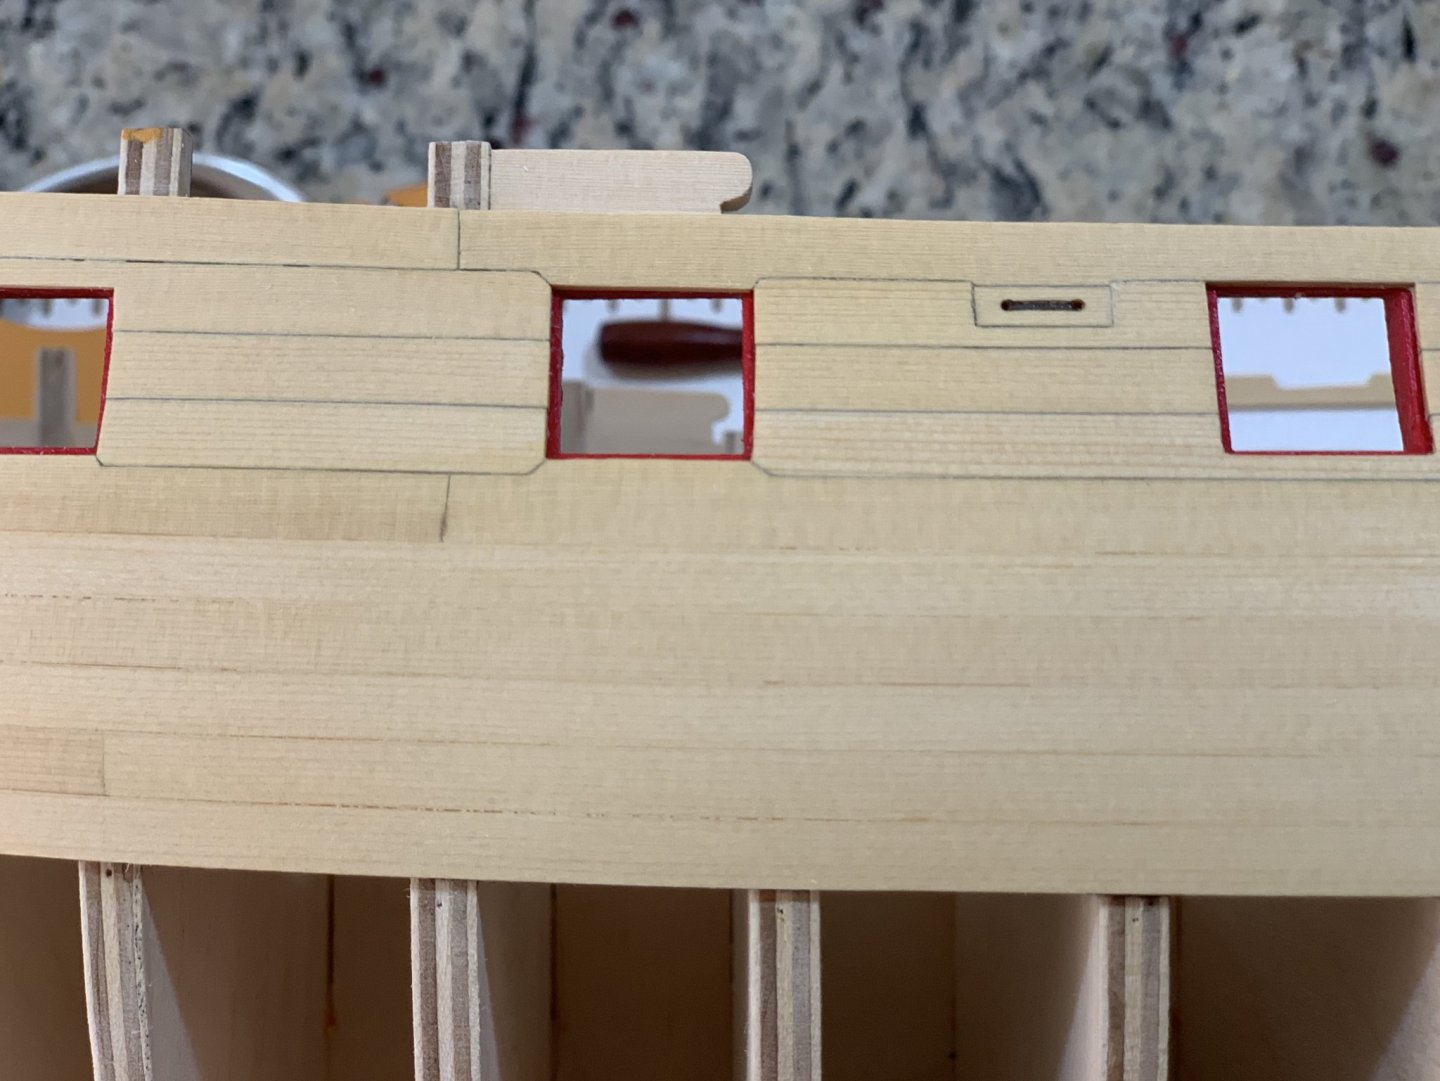
I started the other side of the gun ports. first I mark where the port meets the plank. I then make a cut with a mini chisel about 1/16 deep in each side. Notice the position of the chisel blade. both sides cuts I use the mini chisel to remove the wood towards the first cut until I reach the end of the cut. I test the plank. It is almost there I cut with the mini chisel 1/64 deeper and measure again The corners now have reached the right death. I use a file to remove the rest of the wood been careful hot to file close to the corners. Sorry about the pictures they are one handed with my phone. I touch up the corners with the chisel if needed This is the final plank with 3 cuts fort the gun ports The plank glued in place before sanding. This do not pretend to be the way to do this; it is just one way to do it and I hope it inspire others to share and compare techniques so that we all learn from each other. Best, G


-
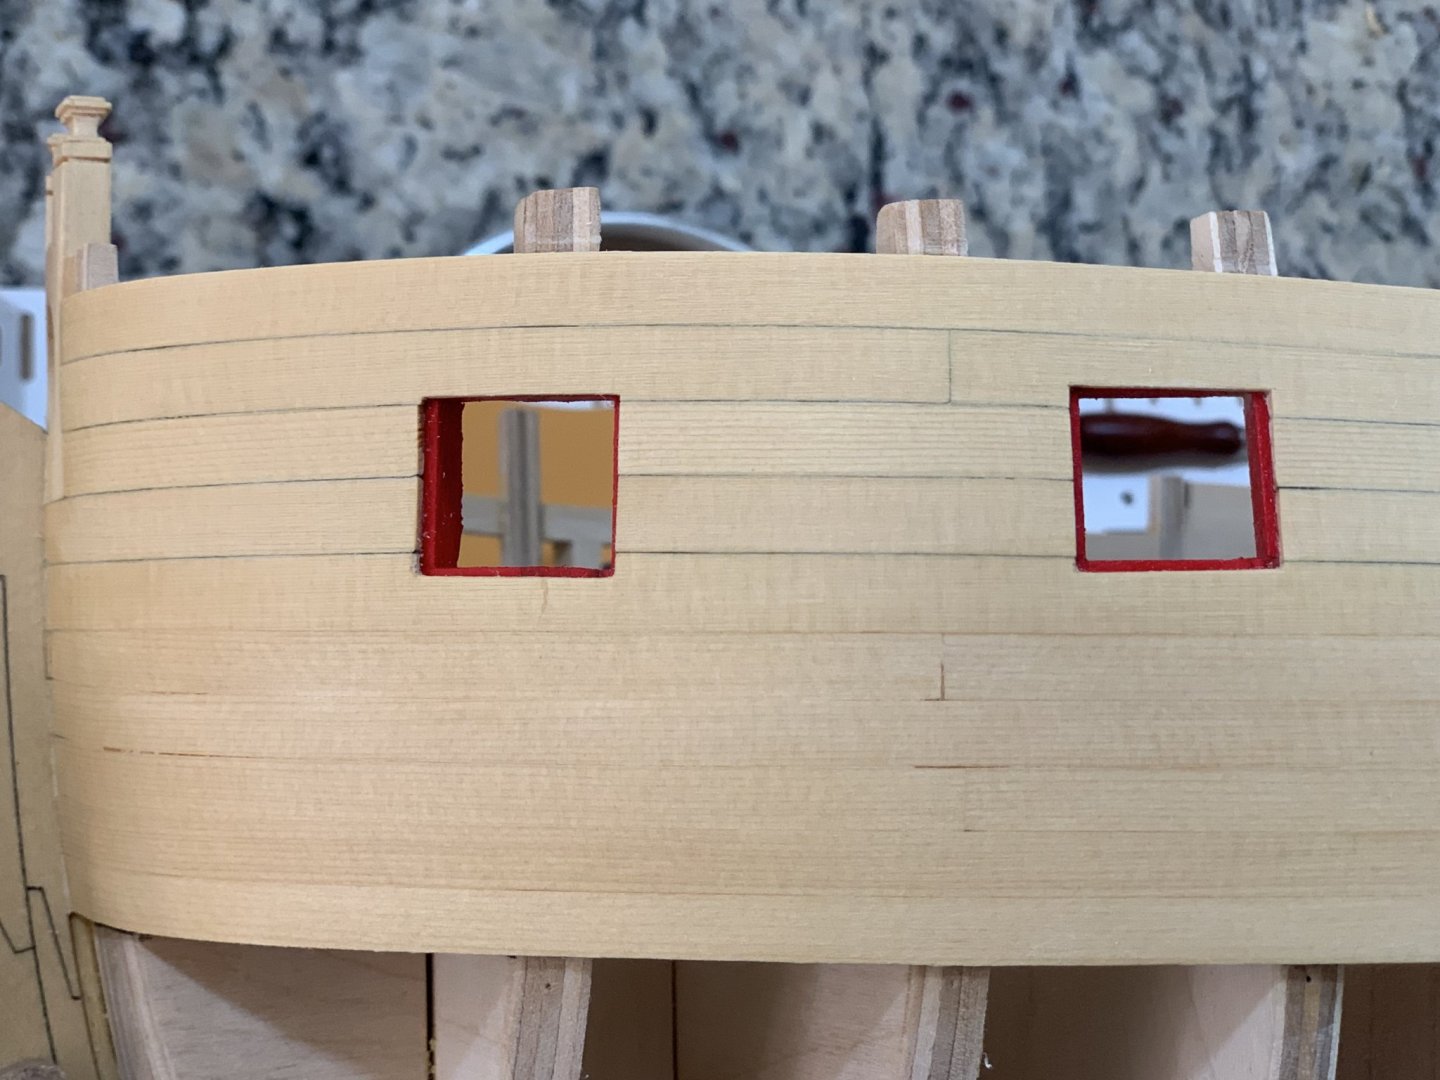
Chuck and Jorge are correct. I modified the way to plank it. I don’t like the way the double planking of the wales look in models. I prefer to plank the counter over the first layer of whales and them the second layer of wales cover them. In this way only one layer of wales shows in the counter side. The wale looks thinner than expected but I prefer this more realistic look compared to two layers of wales showing. hope this makes sense. i will remember to post a picture when I reach the second layer of wales. best, G
-
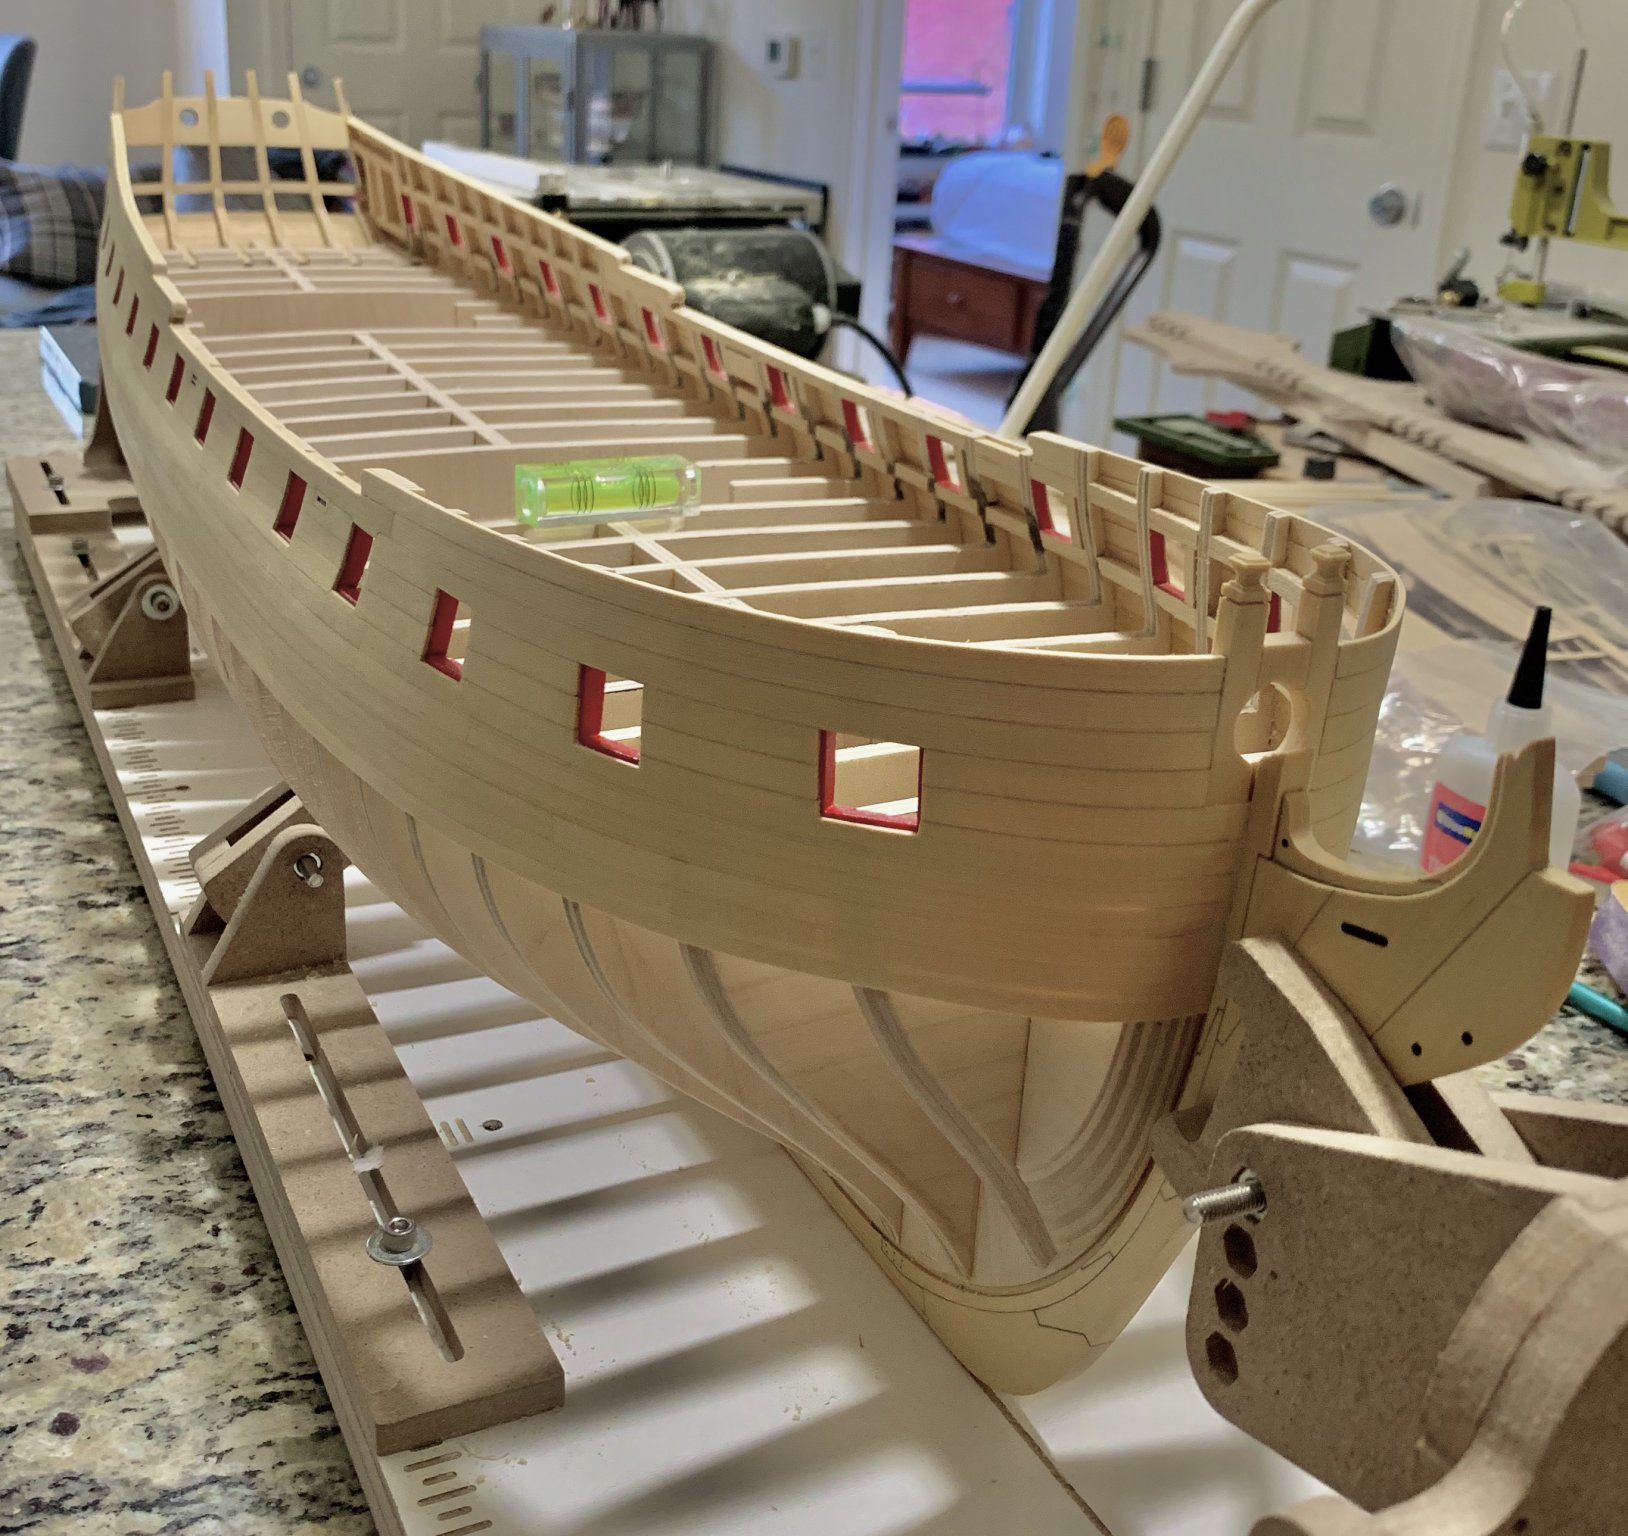
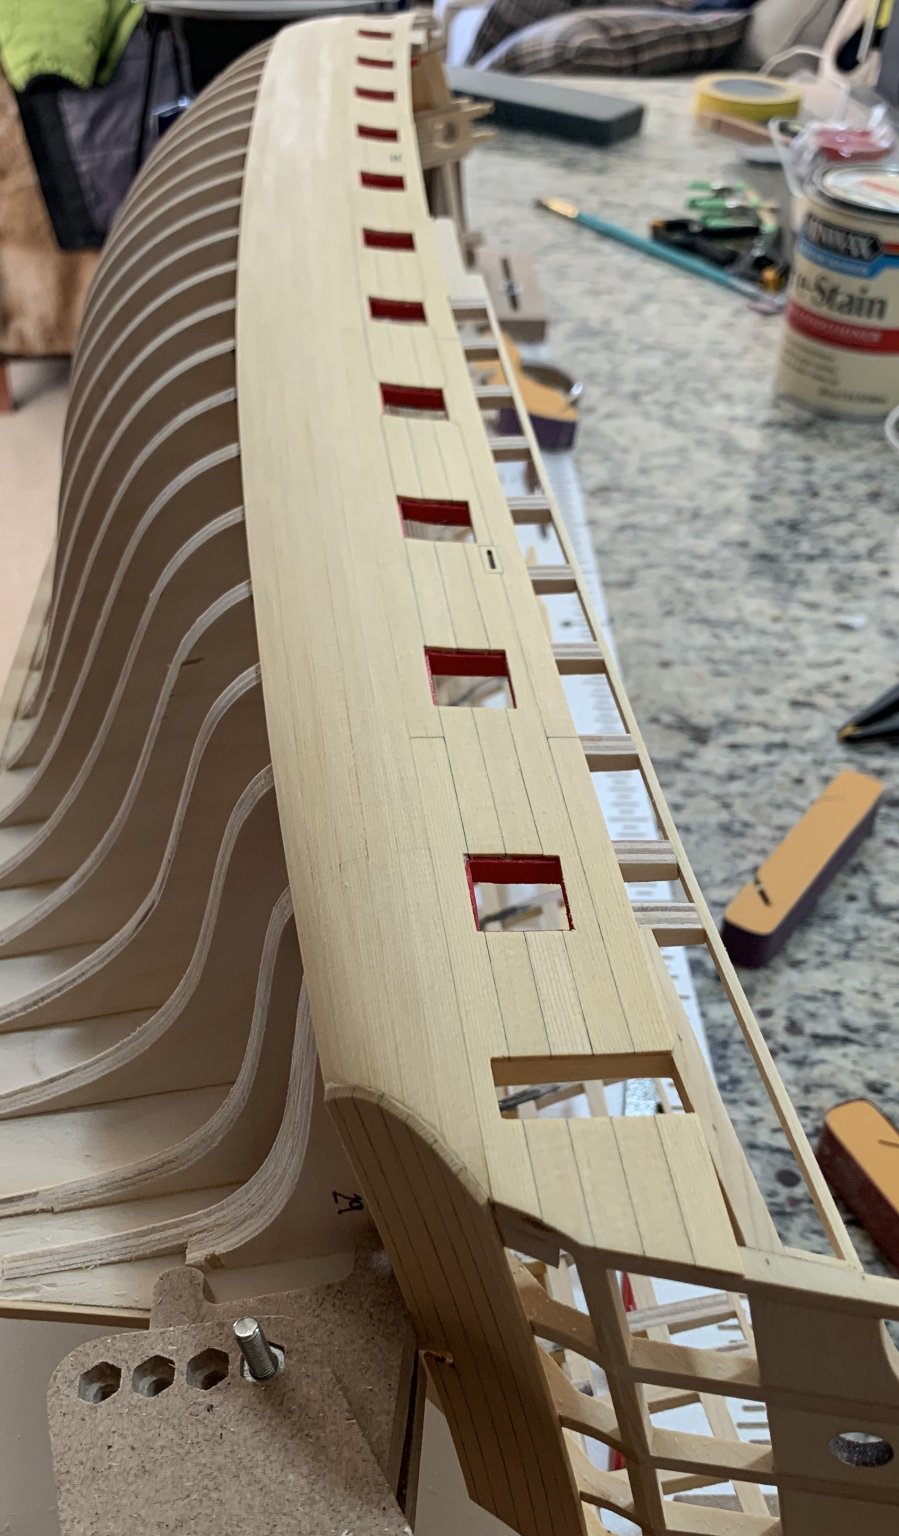
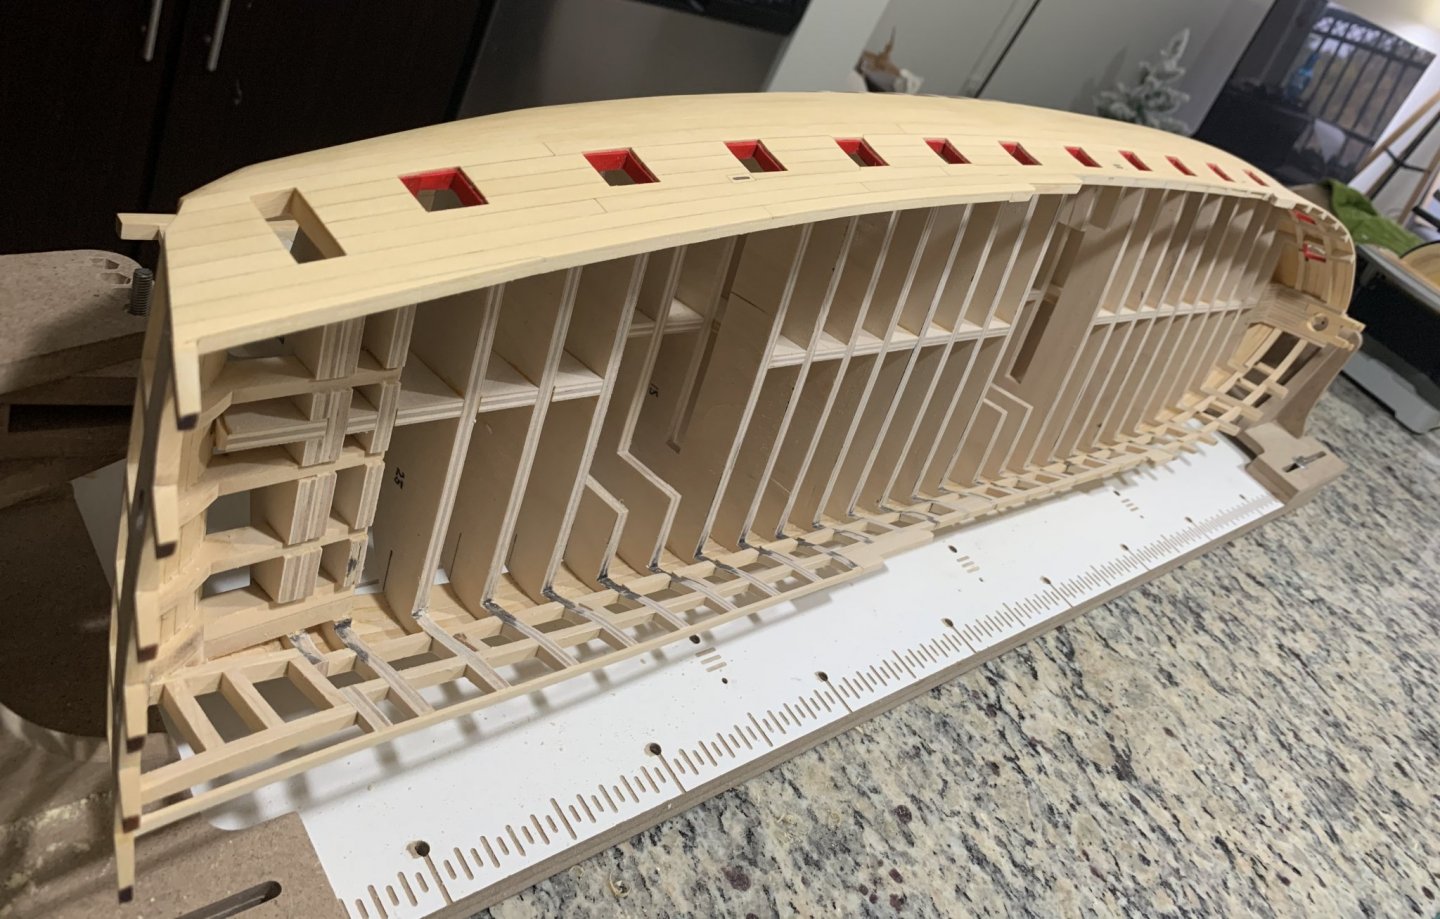
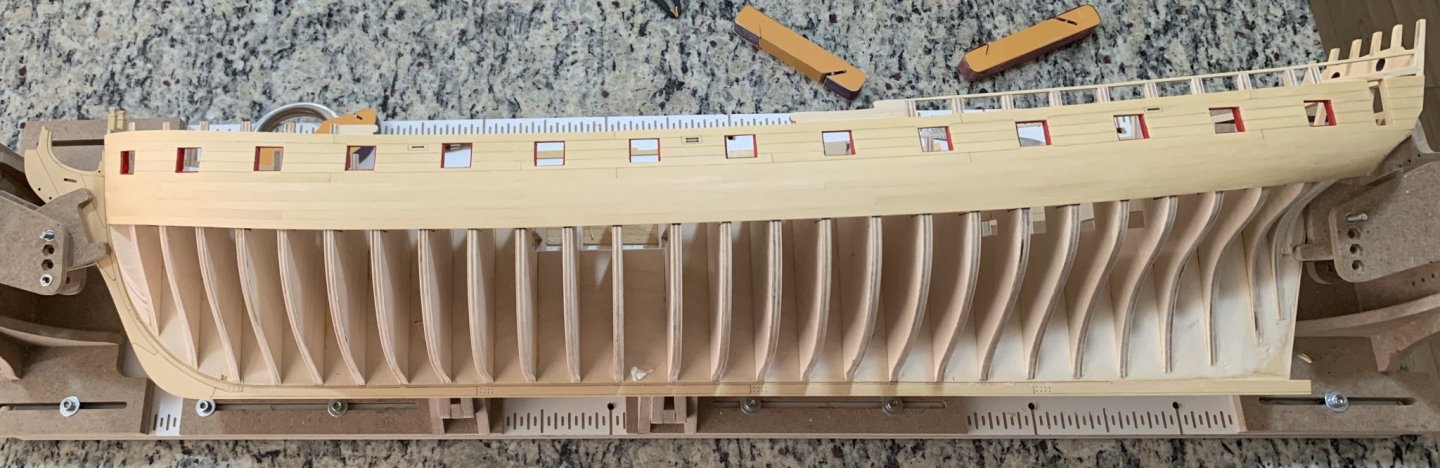
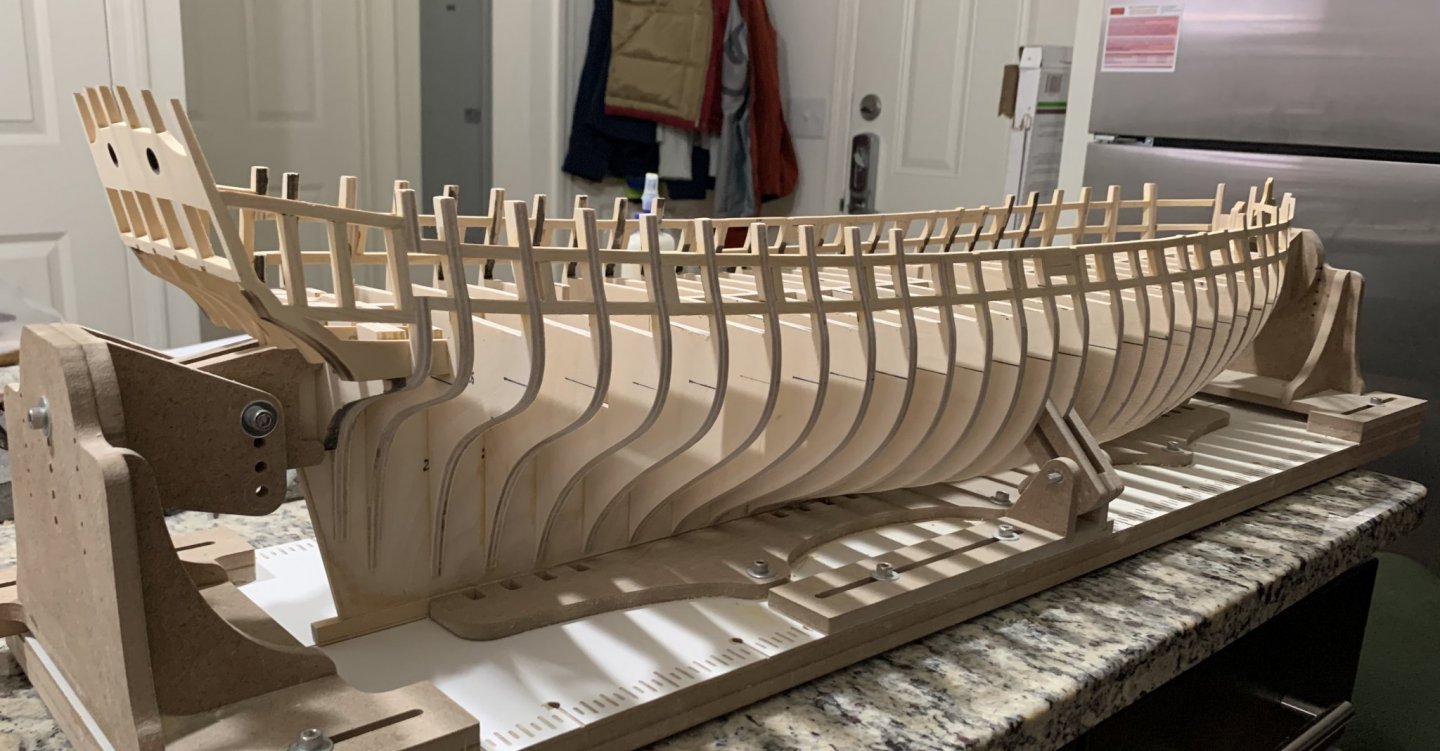
Thank you for the complements, they are really appreciated. a small update. I have completed the planking up to the rails. Next do all over again in the other side. Enjoy the weekend and stay safe, G
-
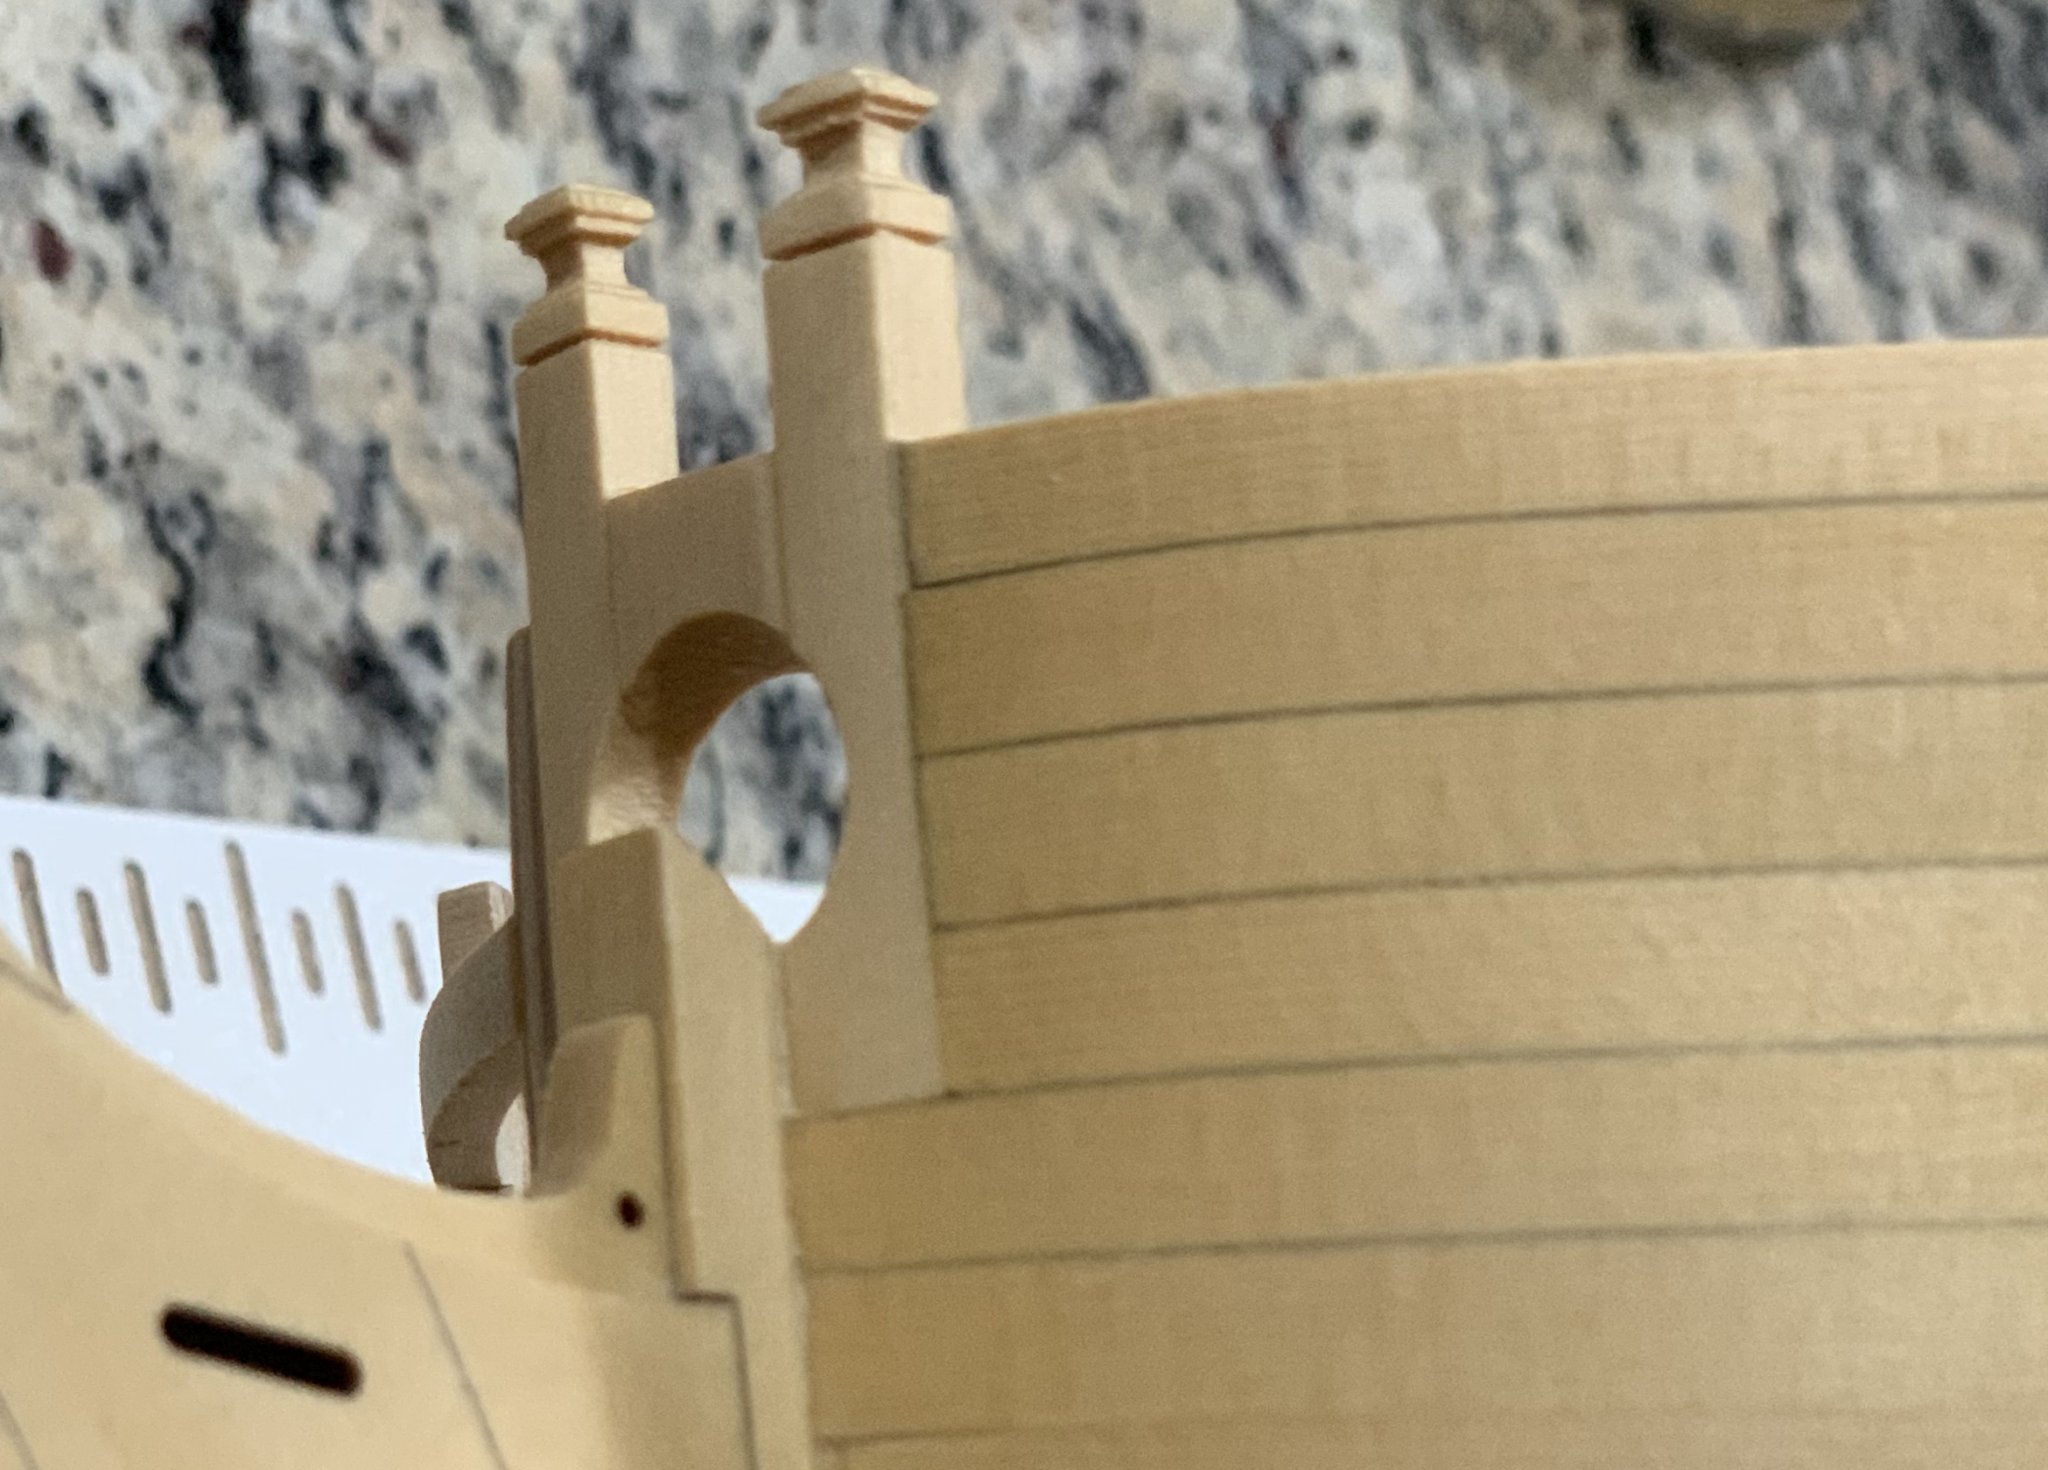
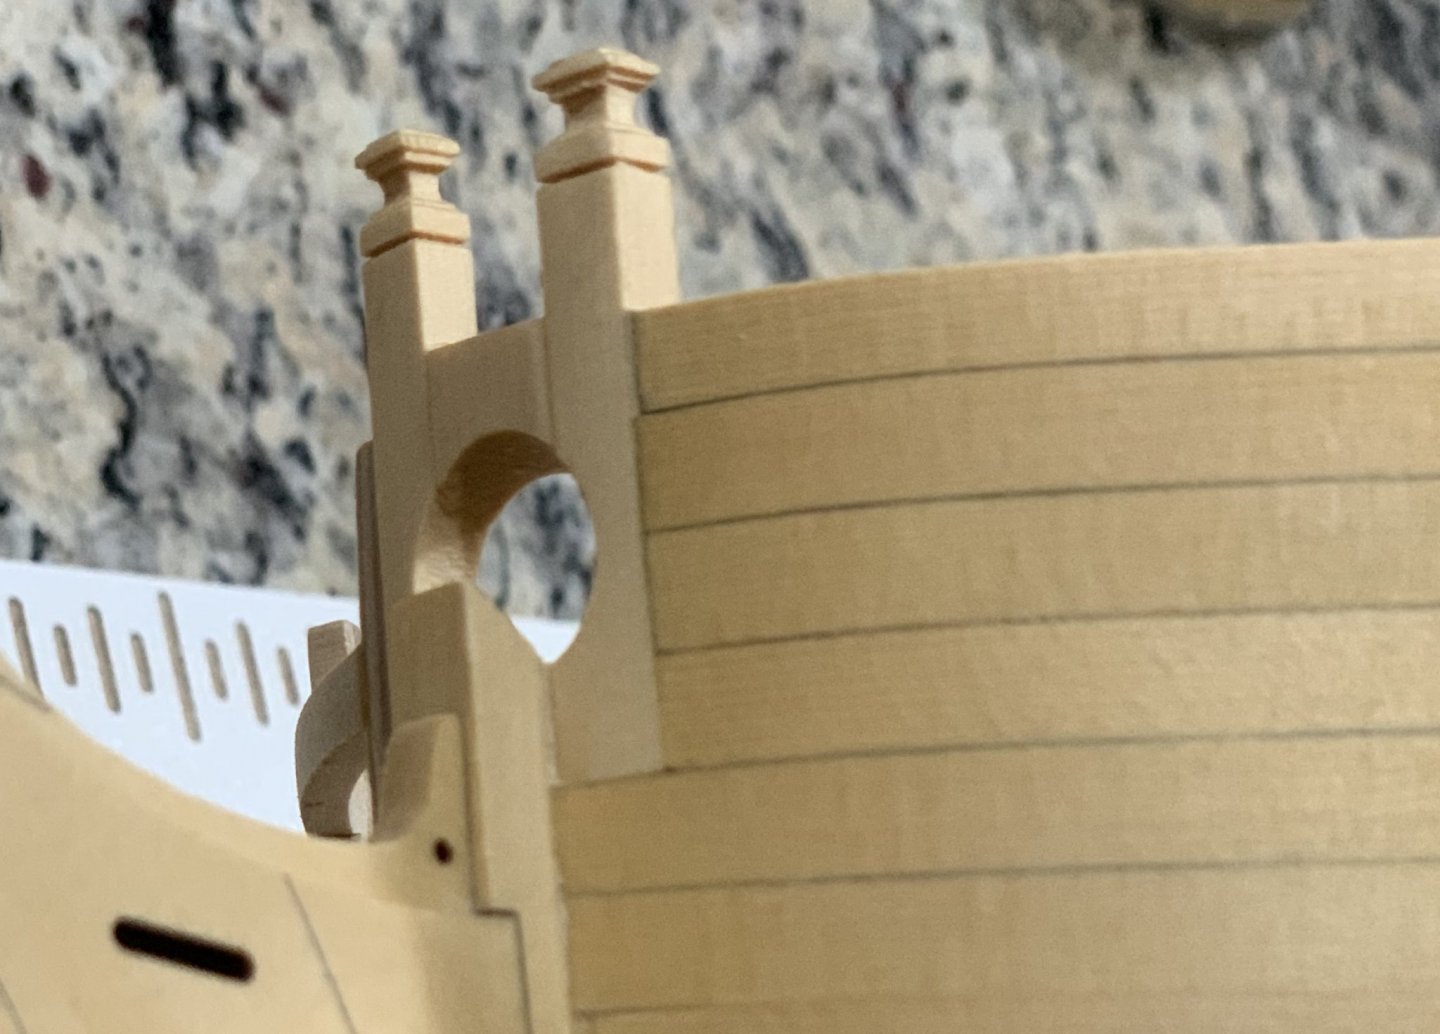
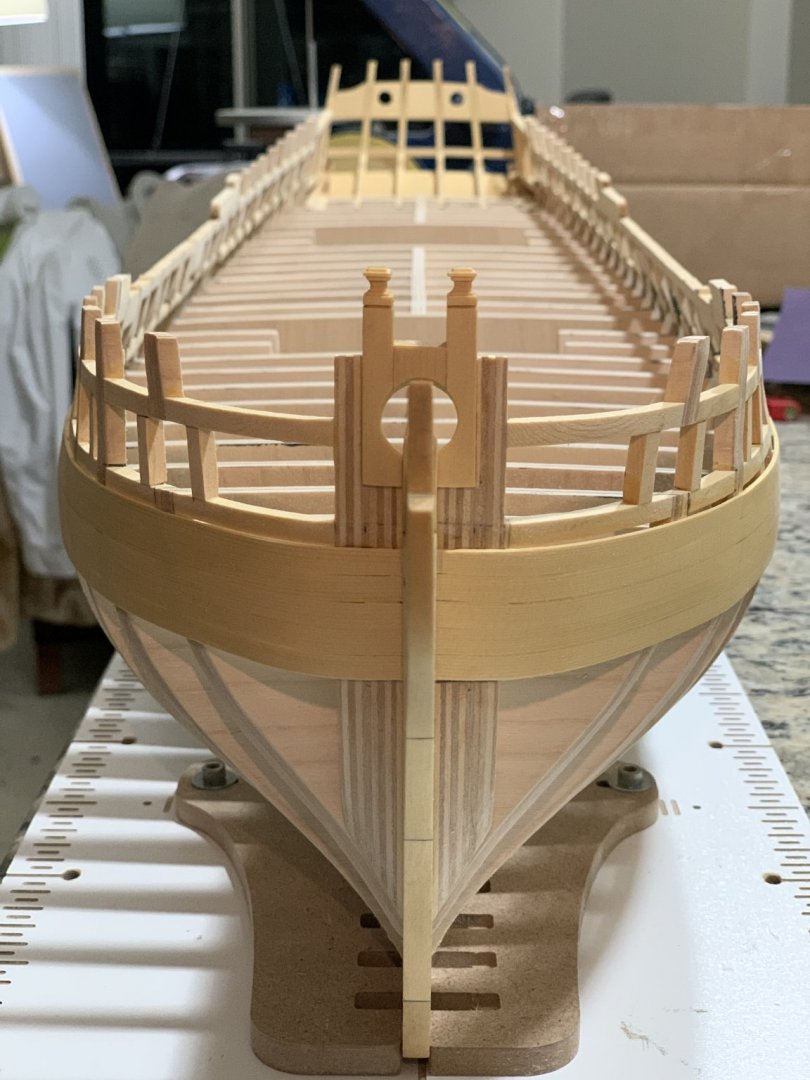
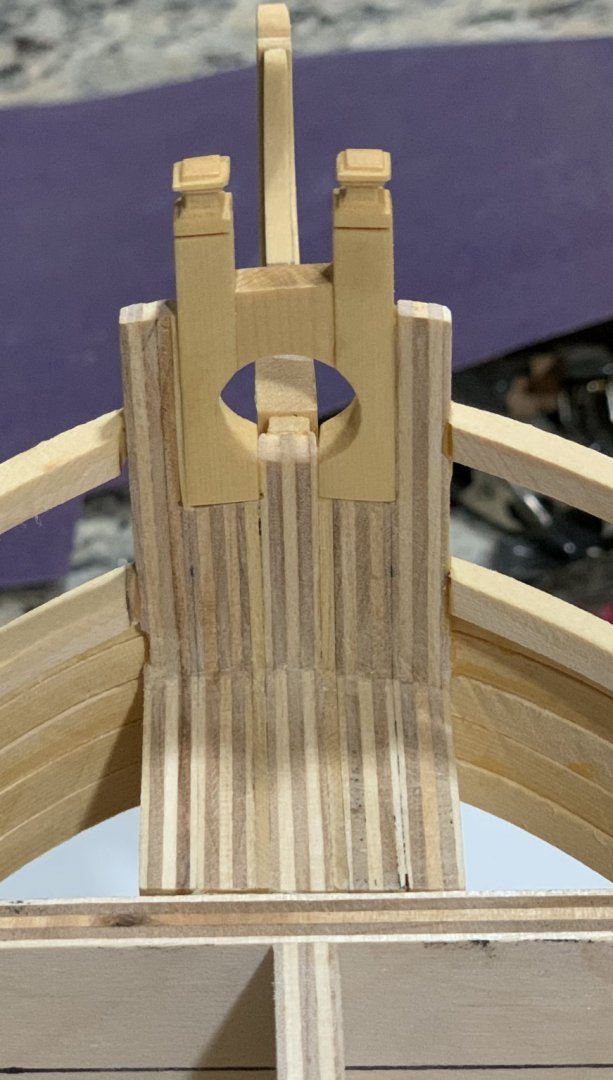
Hello Chuck, I have a question about the height of the cap rail in relation to the bollard timbers In the contemporary model the connecting part between the bollard timbers is at the same height as the cap rails. Does this matter? G
- 1,784 replies
-
- 1
-
-
- winchelsea
- Syren Ship Model Company
- (and 1 more)
-
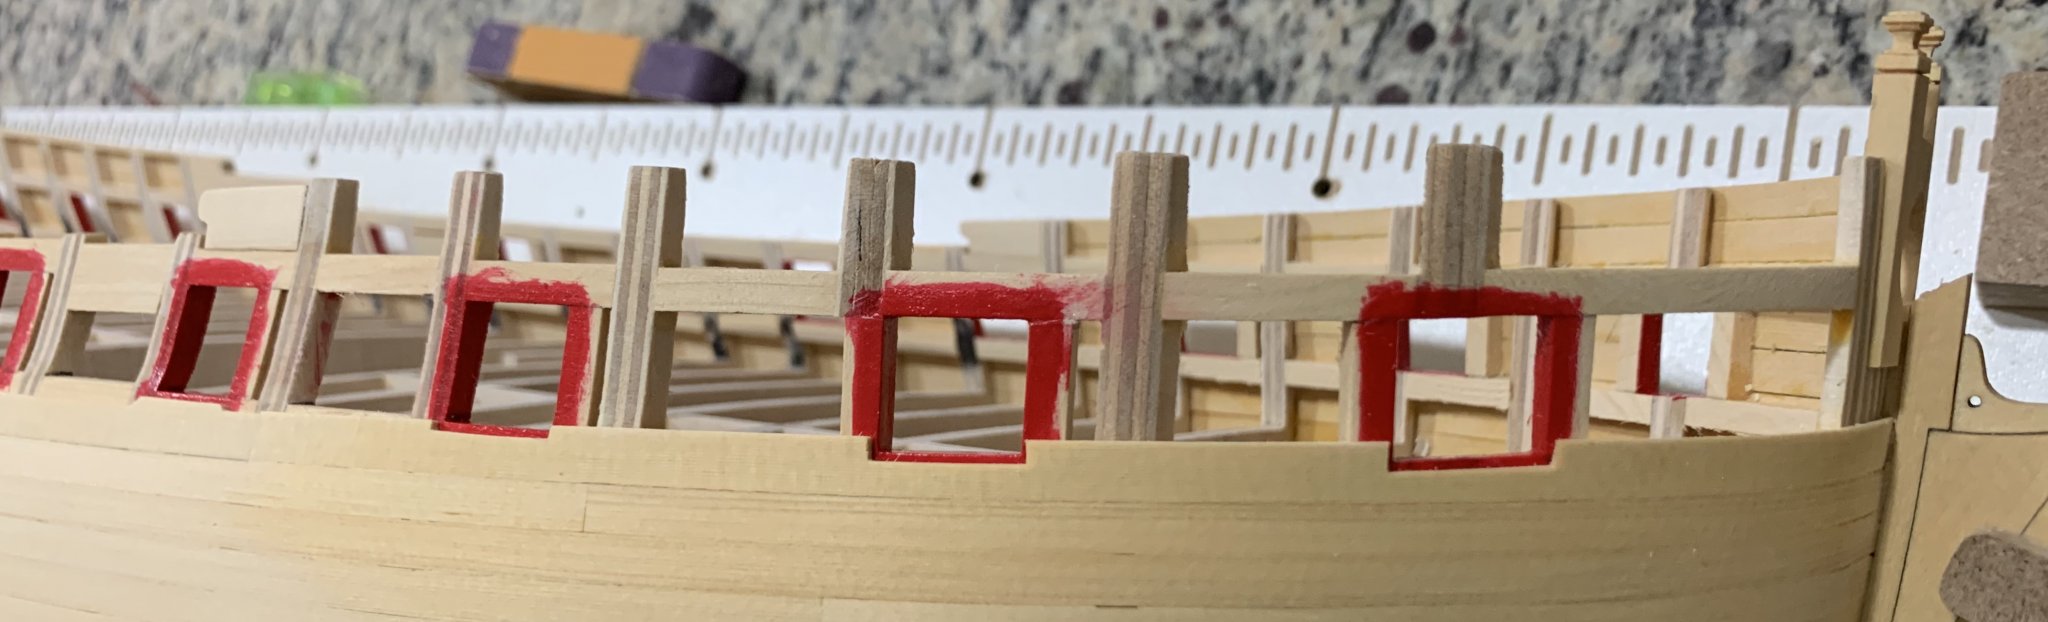
Thank you Chuck it means a lot coming from you. I finished one side of the gun ports using tabs. It has being an entertaining and challenging experience. I am sure that without Chucks model as a reference I will never have attempted it. Lots of planing ahead but very rewarding. I used a mini chisel to carve the corners of the gun ports and medium size diamond files of different grains to help me smother the lines. A curve sanding stick was used to keep the lines of the ship true to the design. Than you Chuck for all your measurements in the design. It is a pleasure to build it. having fun, G


-
Hello Chuck: now that is all painted red, I was wondering if the planks around the gun parts were also painted red before placing the panels?
- 1,784 replies
-
- 1
-
-
- winchelsea
- Syren Ship Model Company
- (and 1 more)
-
Panels look great! Chuck in the 4th picture, the bottom part (horizontal) off the 1st panel is wider than the top part. in the next two pictures, It looks the opposite (Top part wider than the bottom part).
- 1,784 replies
-
- 4
-
-
- winchelsea
- Syren Ship Model Company
- (and 1 more)
-
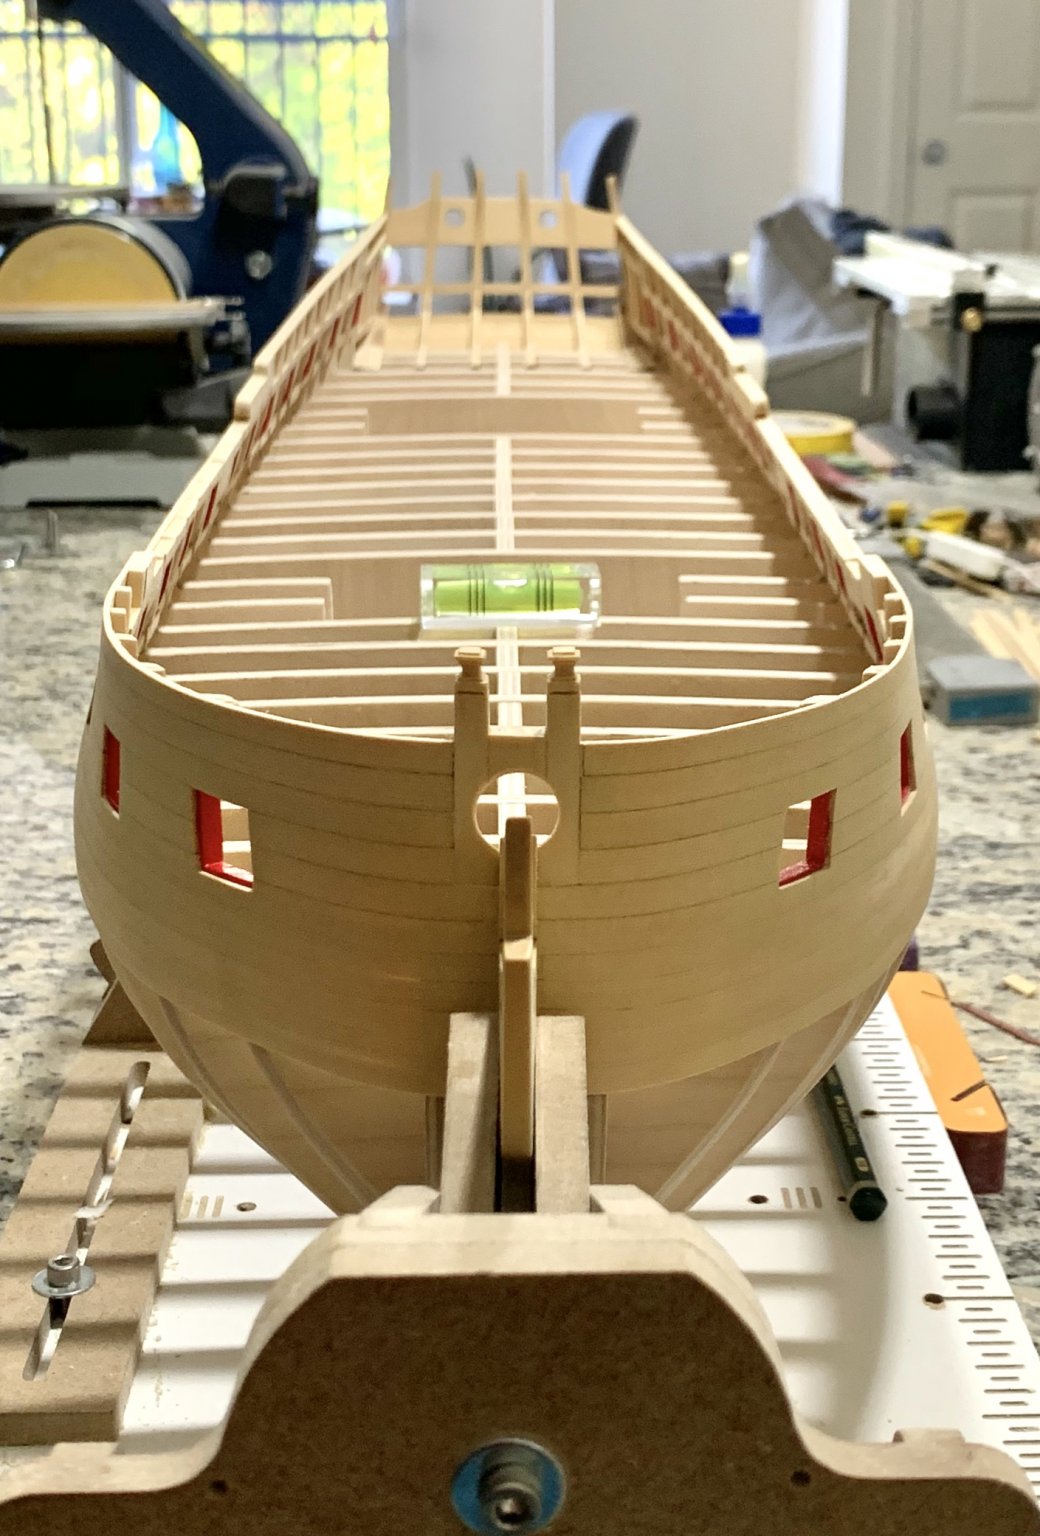
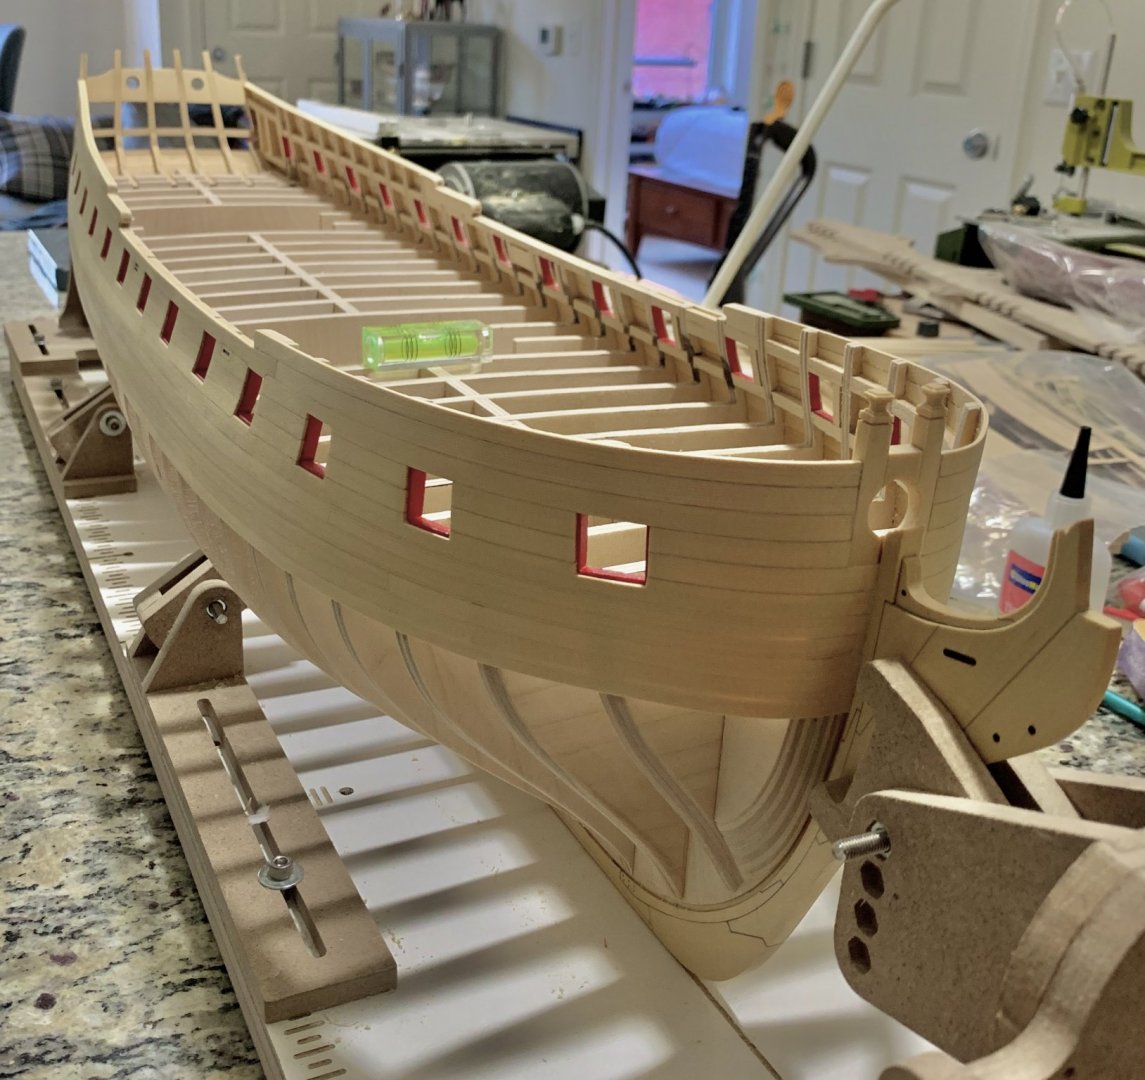
Small update. I painted the ports and started the planking. I chose not to add a pencil line to the lower plank next to the black strake. After adding the second layer of wales the pencil line peaks on top of the black strake in some places and I don’t like the look. I am taking my time with these tabs as they will be very visible and it is paying off. Not so bad for my first time adding tabs. Hope all the others will look as good as this one. Best, G

-
Hello Jeff i placed the center filler to high but did not wanted to remove it so I added a small peace uf wood at the bottom and filed down the top. You could spot the change here. I used diamond cover files a a small chisel closer tithe edges to keep the angles sharp hope this helps. G
-
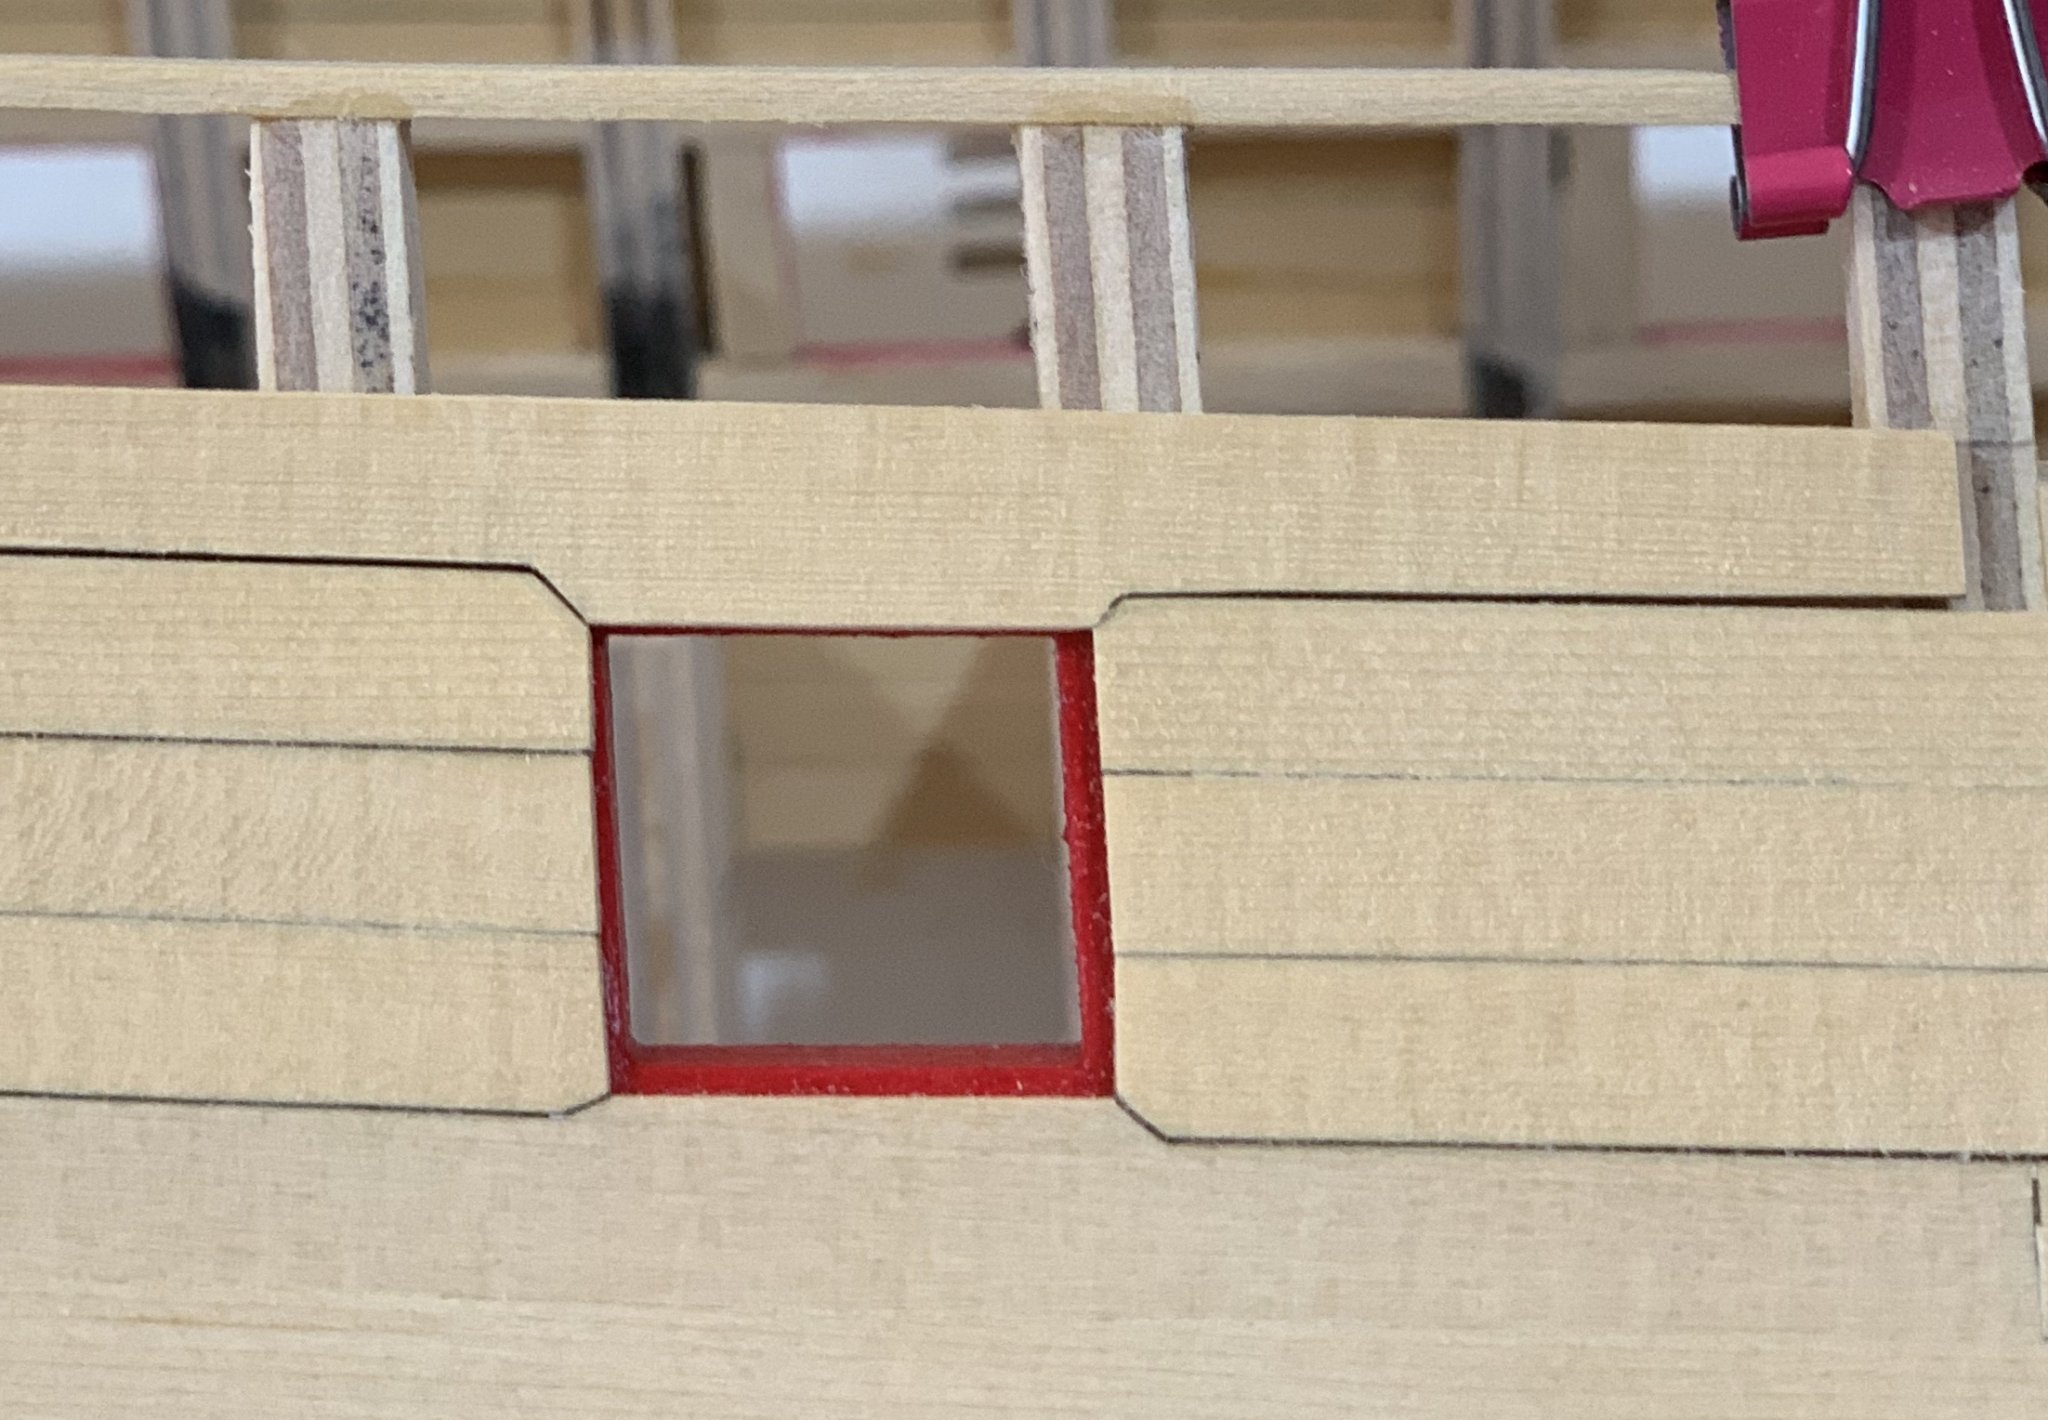
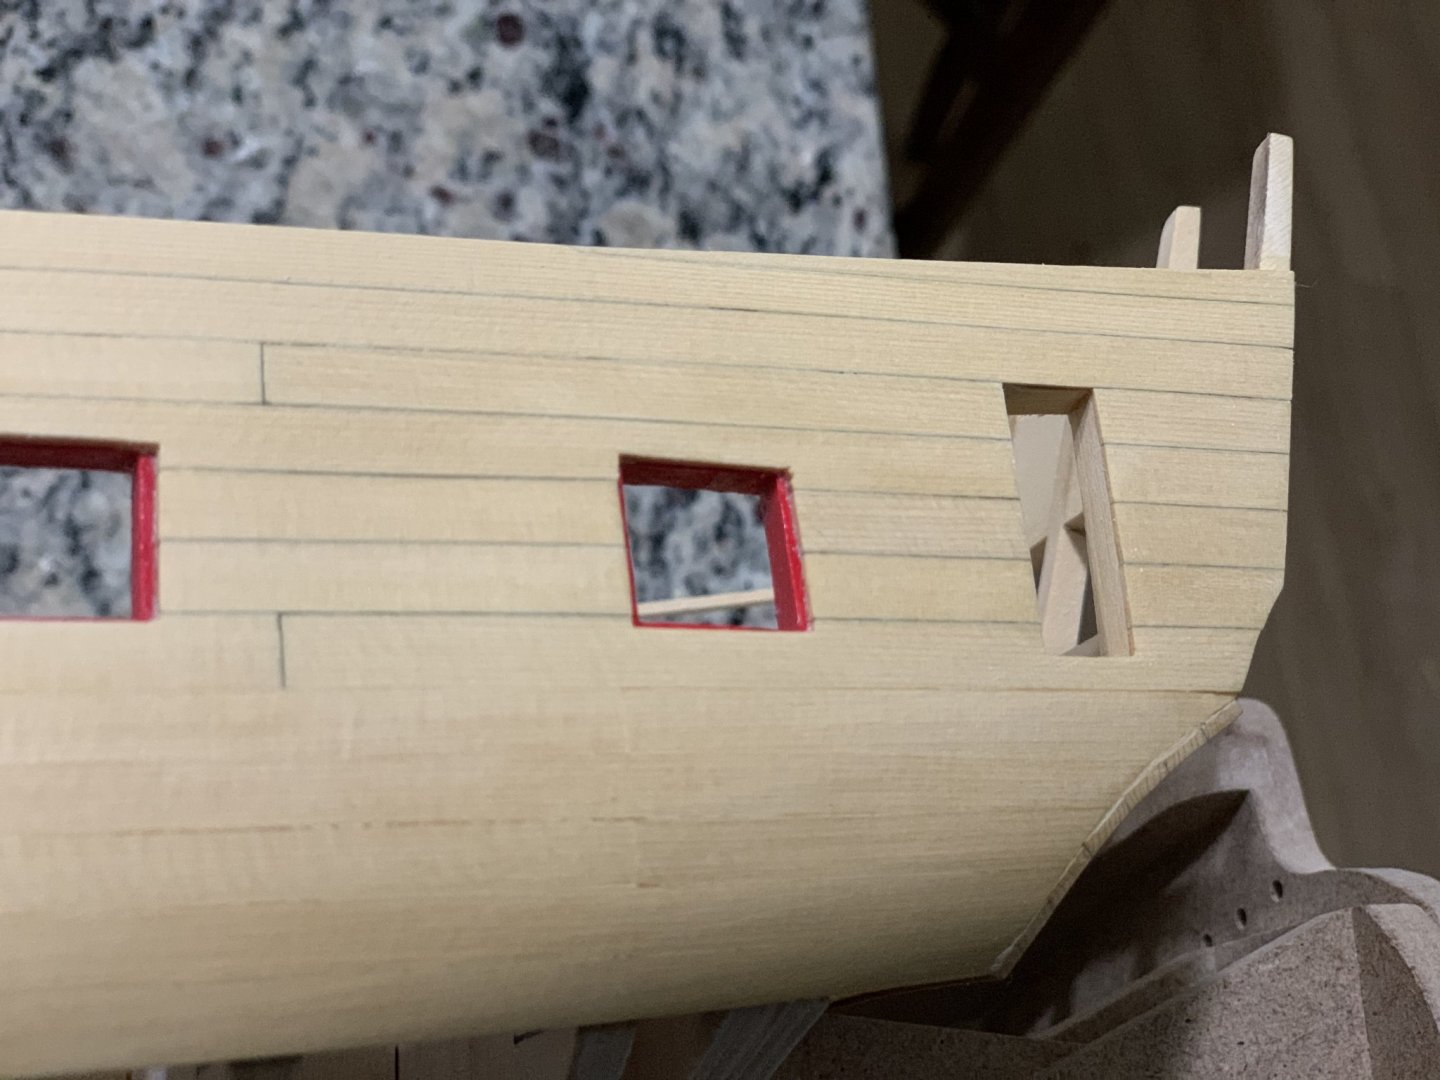
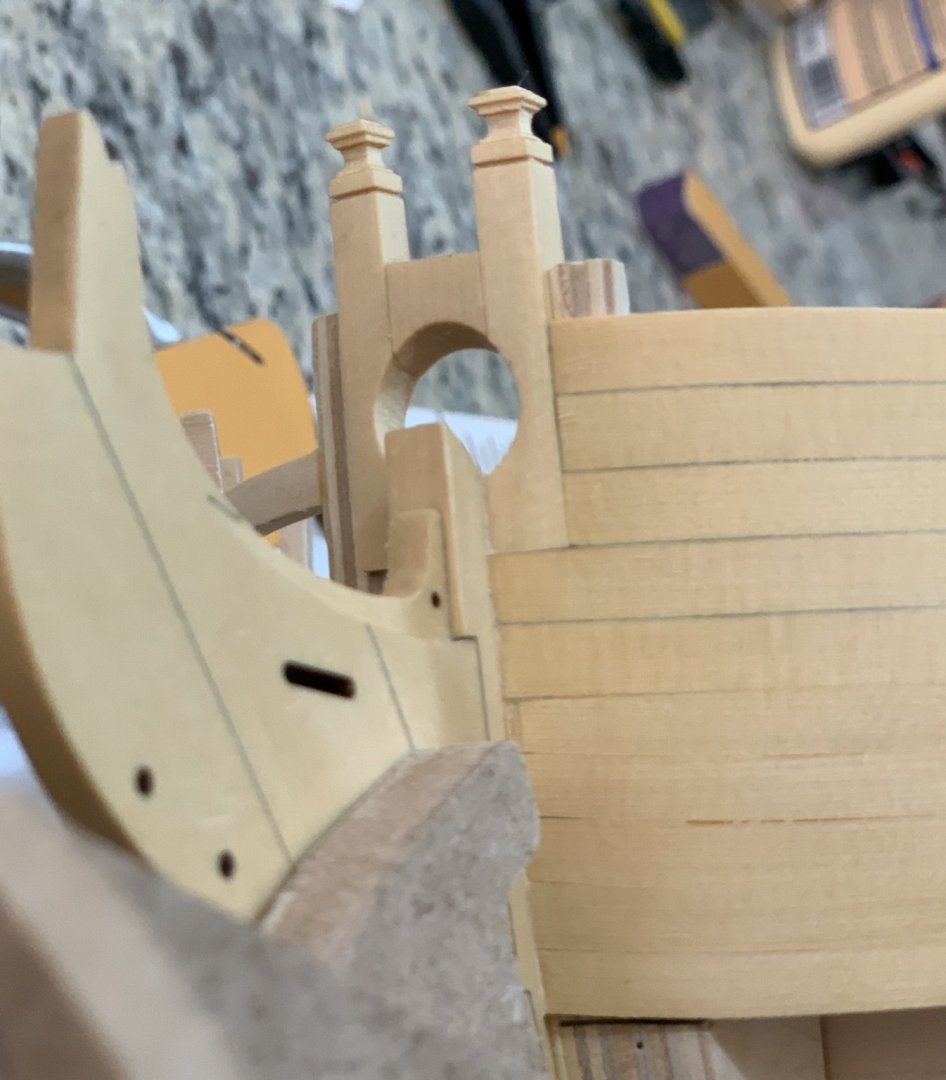
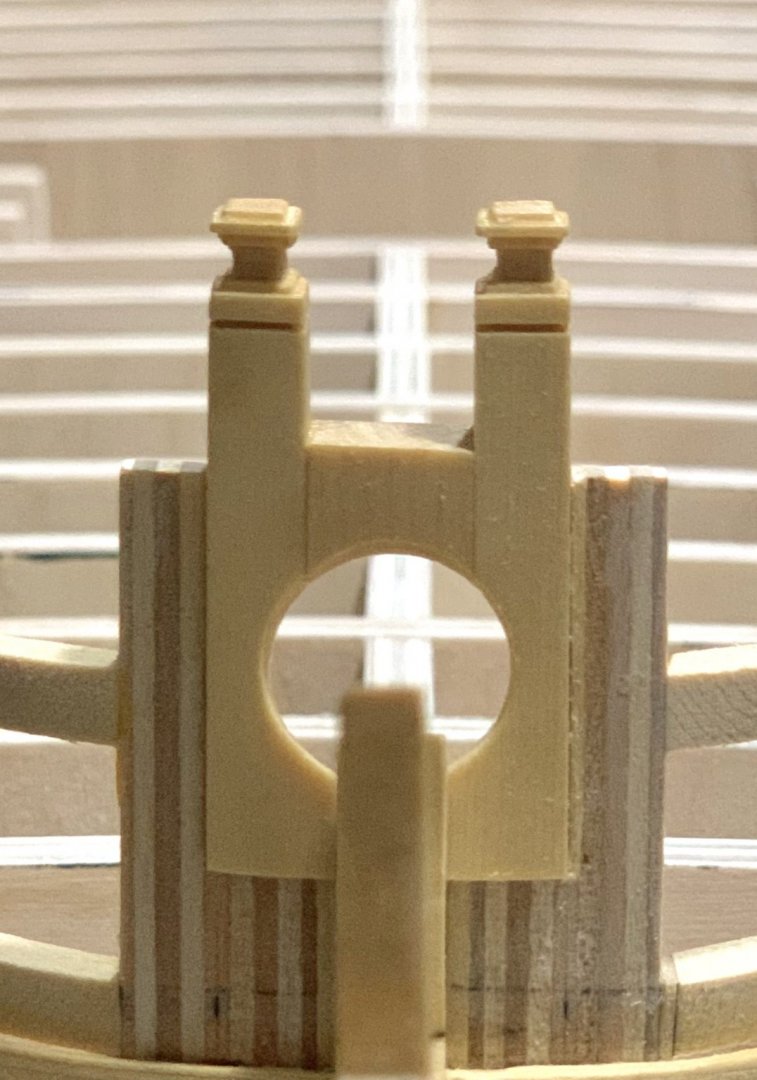
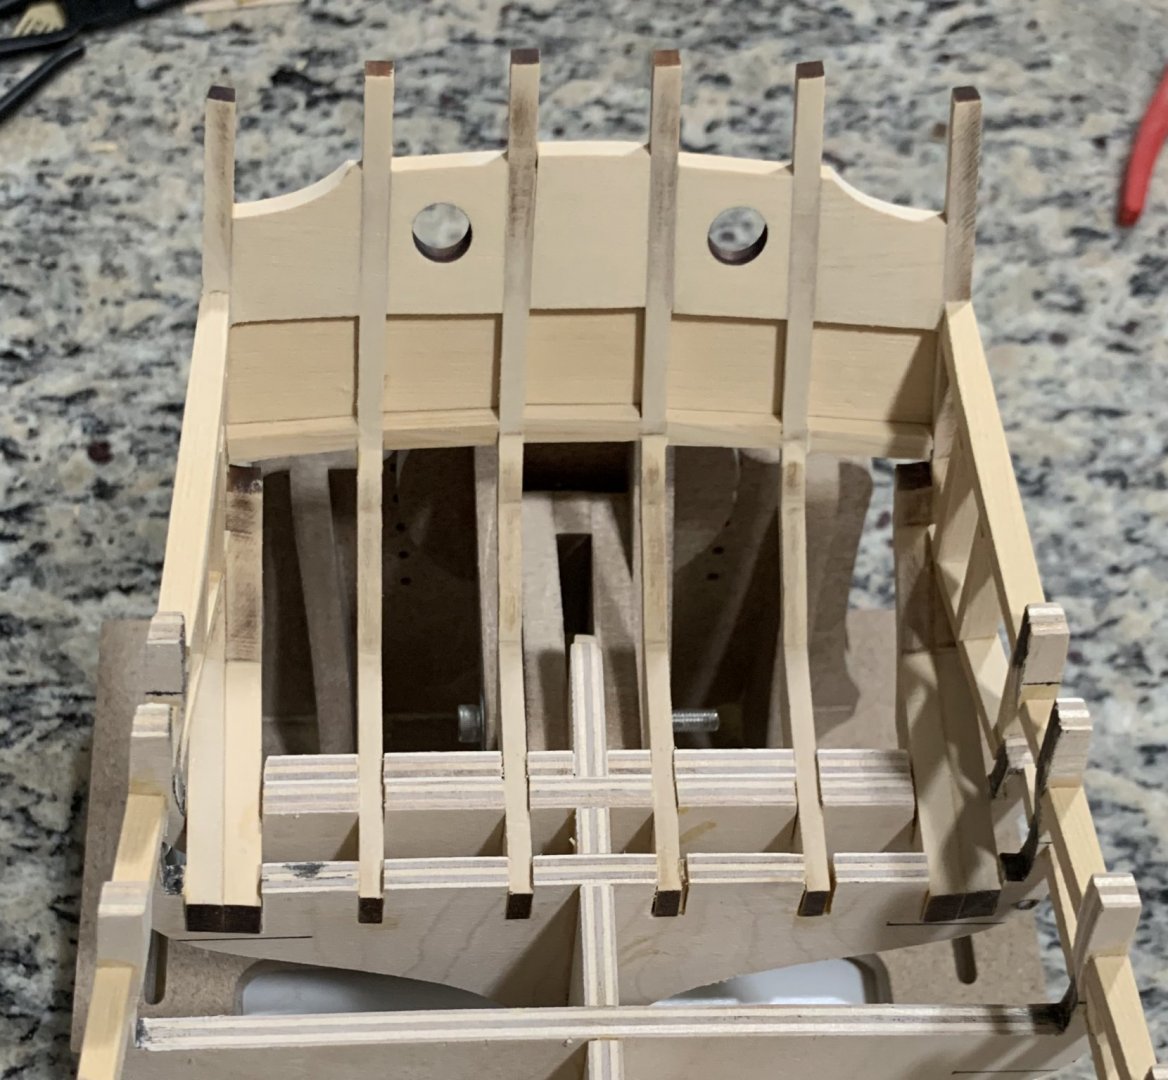
Thank you Chuck. I corrected the central window. She just needed some sanding and love. 😁 I used the Byrnes table saw and sliding table to make the bollard timbers after I sanded them to shape. I used the thinnest blade I have, adjusted the hight and used the stops to place the cuts. I have a dummy timber to do the cut fist and adjust before switching the keeper for the final cut. Thank goodness Chuck gave us 3 sets. Hope this makes sense. Happy to give more details if not. Best, G


-
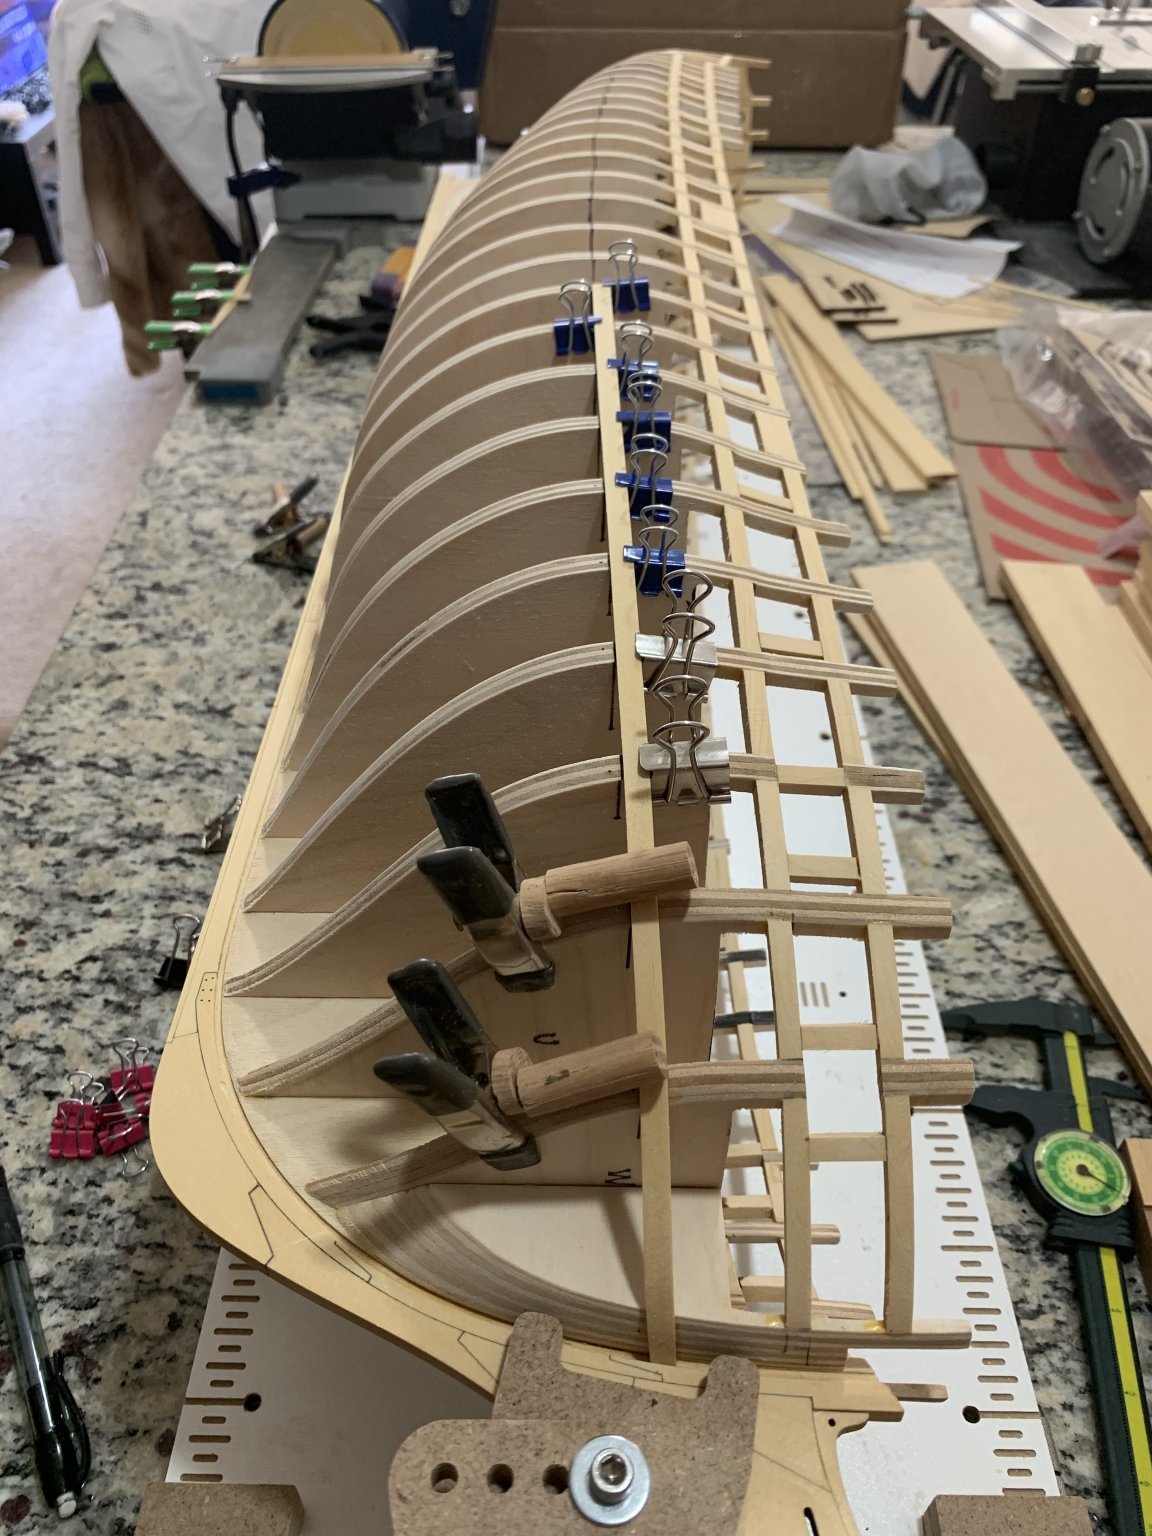
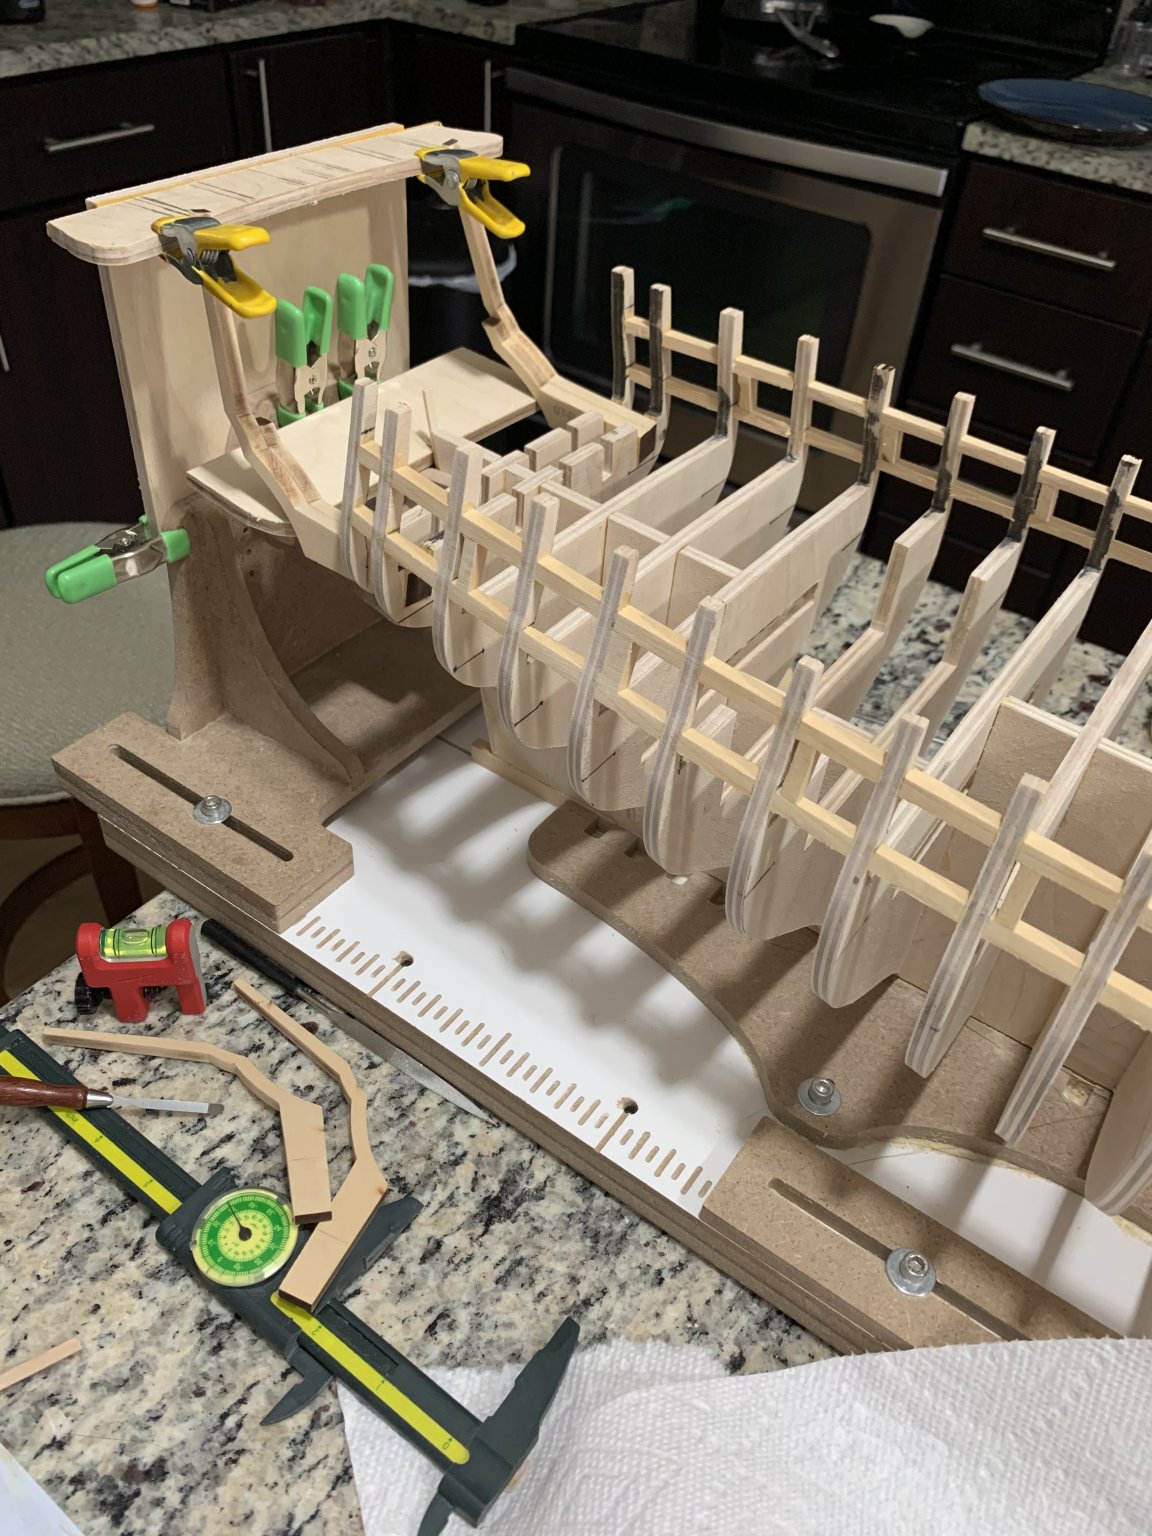
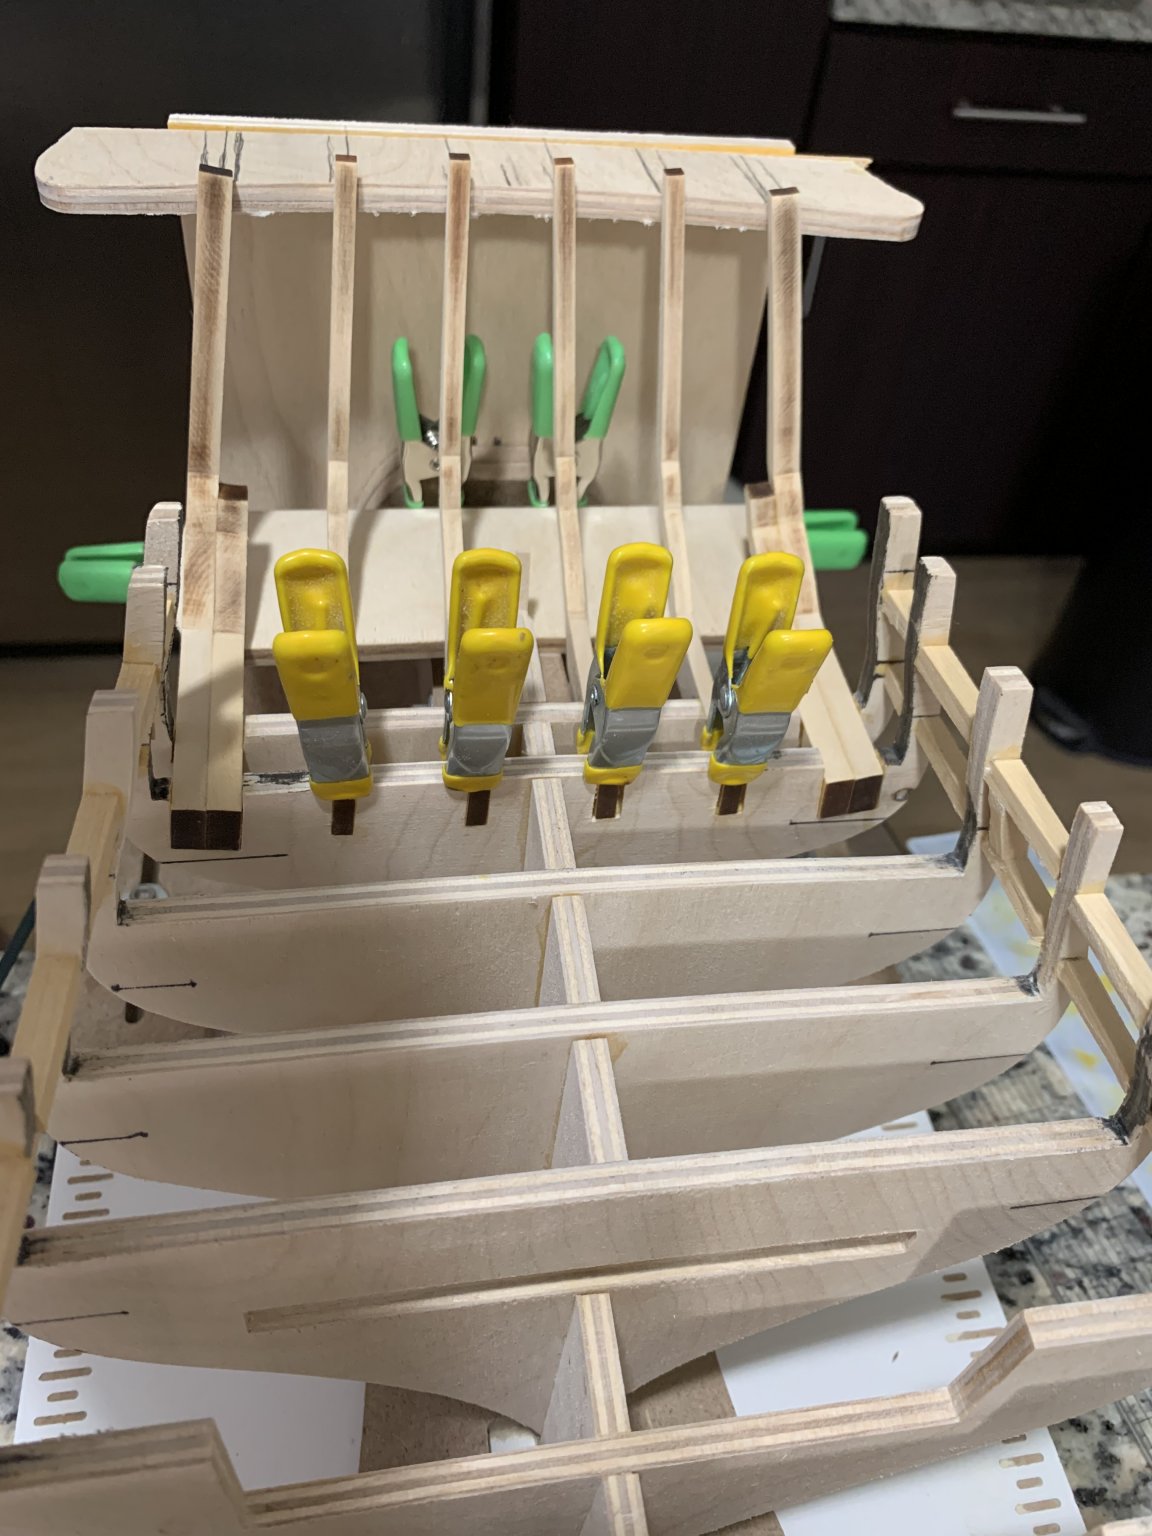
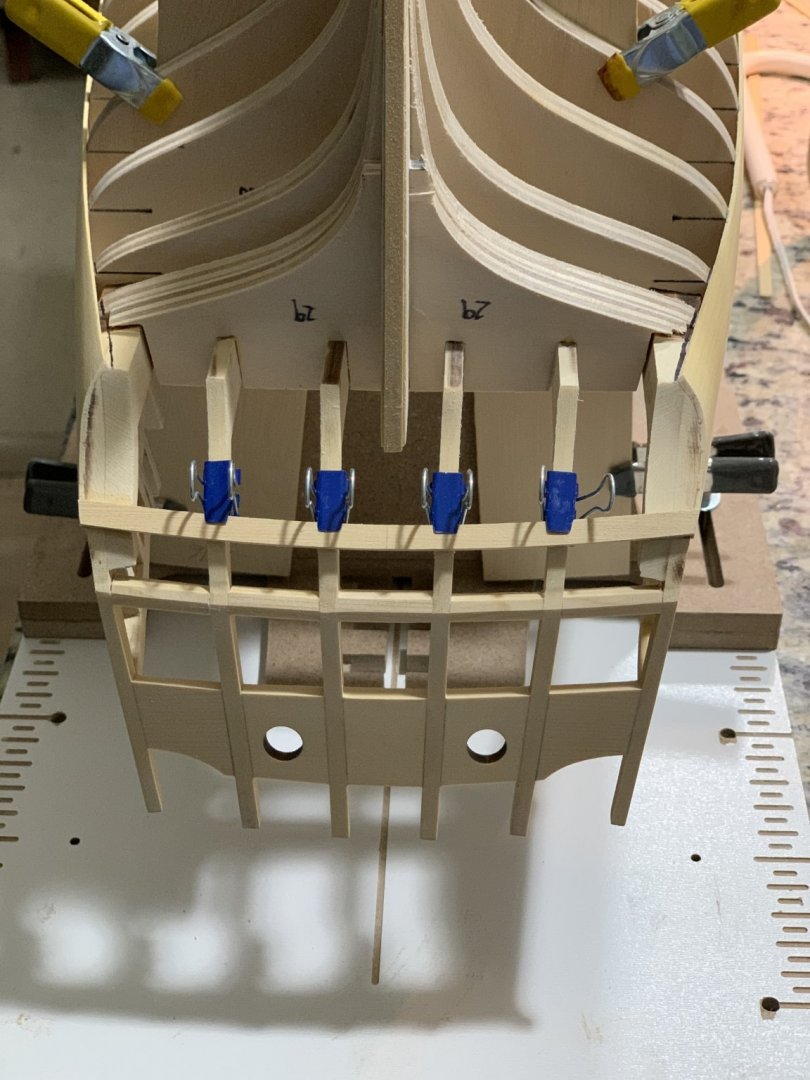
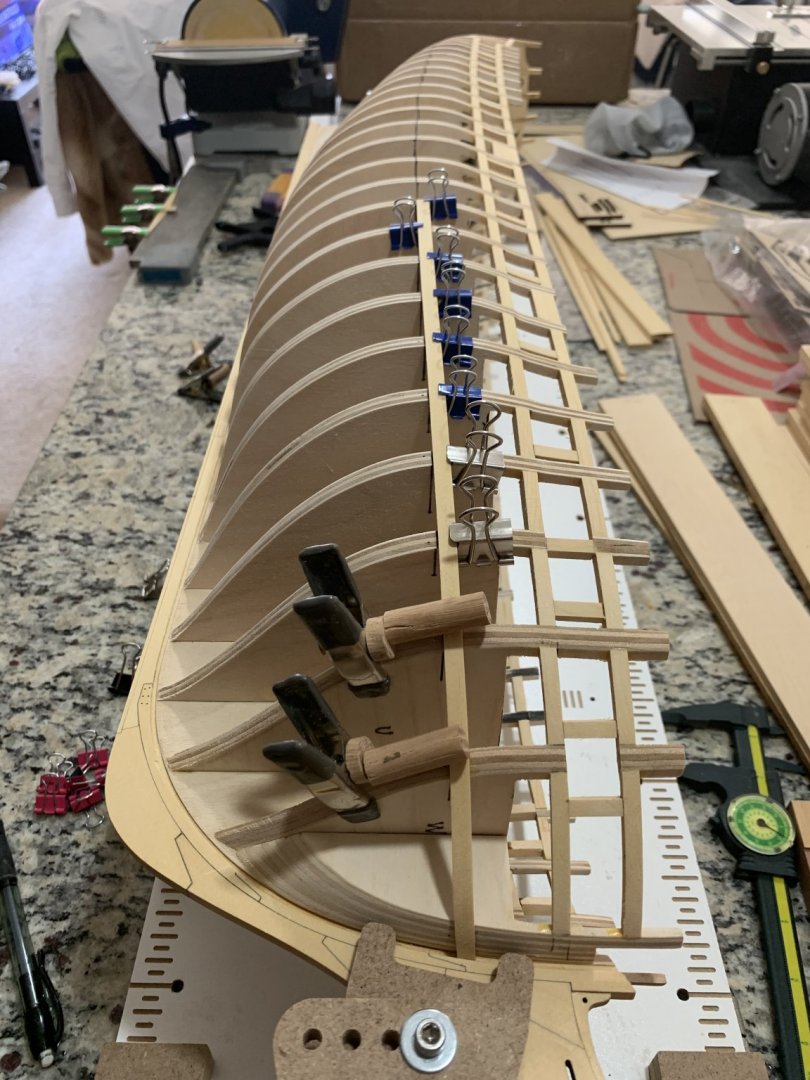
Next I did the wales. It helped me sand to shape the lower corners of the counter. thank you for the words of encouragement and pointing to things to improve. This are holders I came up to hold planks in weird places. The axis in the wood parts are eccentric and when rotated they put pressure in the plank. The paper binders were shaped and filed to hold the planks gently and avoid marking the wood. I remove the after a few minutes. I used cyanoacrylate glue and wood glue for edges. I used the method of Chuck to bend the planks to shape with a travel iron. I like to use a peace of metal (old sharpening plate) for the base to heat more the top and cool the wood plank faster. Worked like a charm. Next step, fix the error in the central window. best, G

-
I see it! Thank you Chuck for your advise. Will correct both.
-
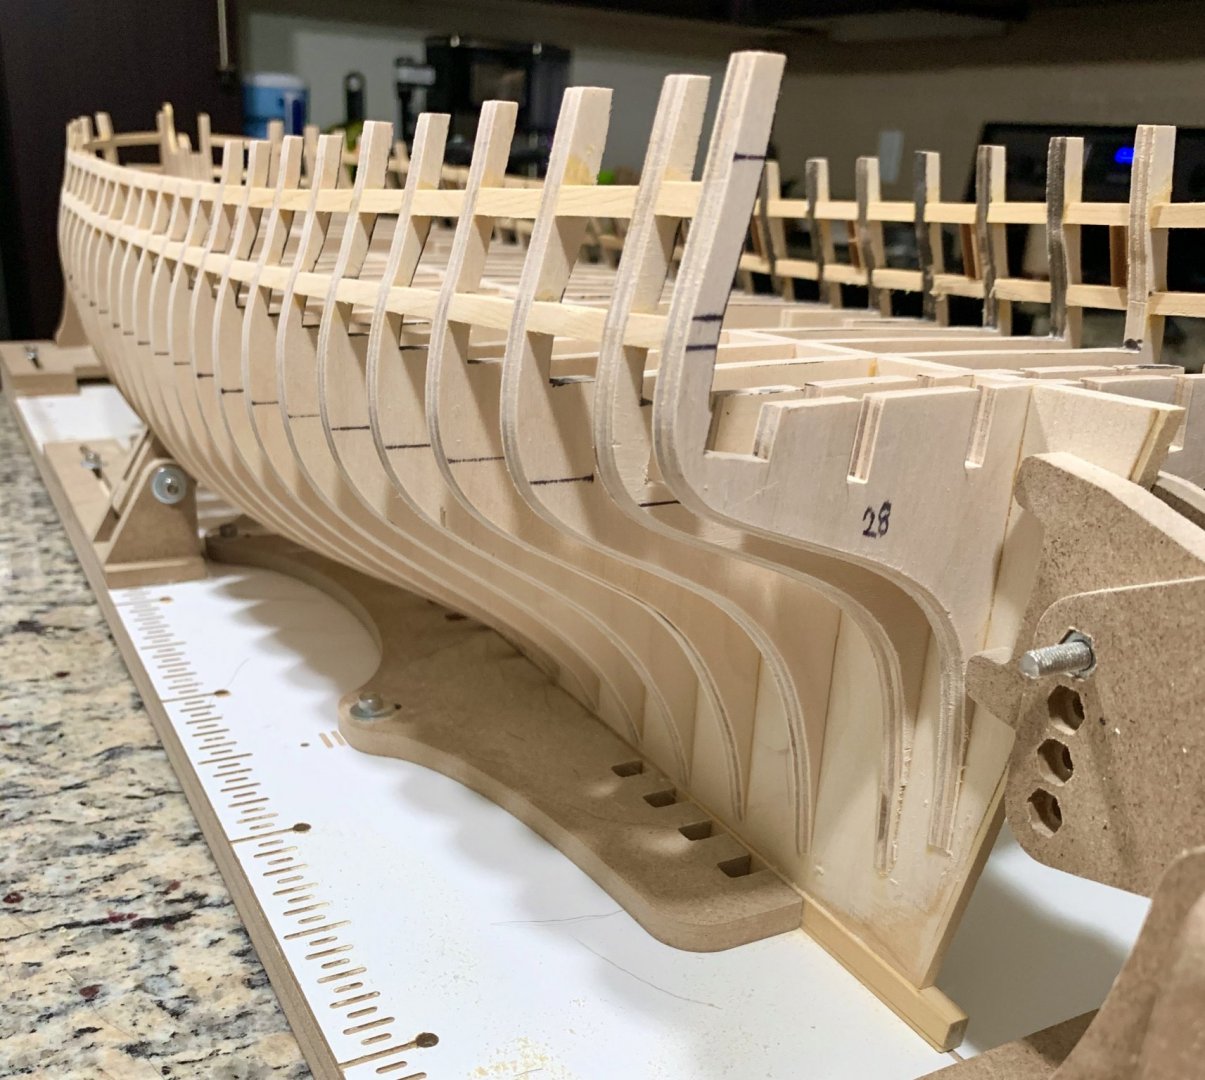
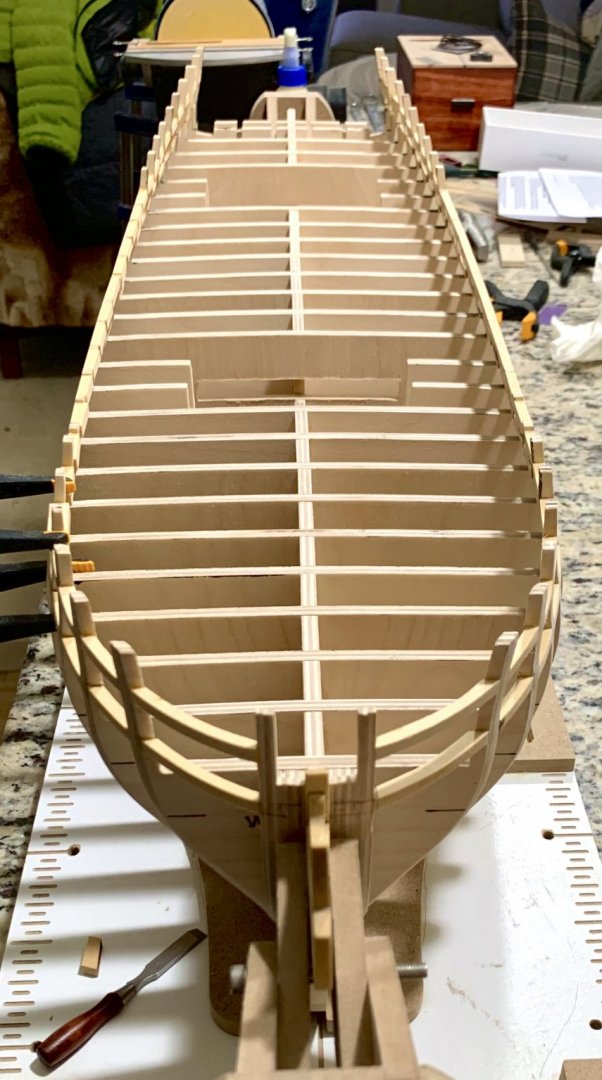
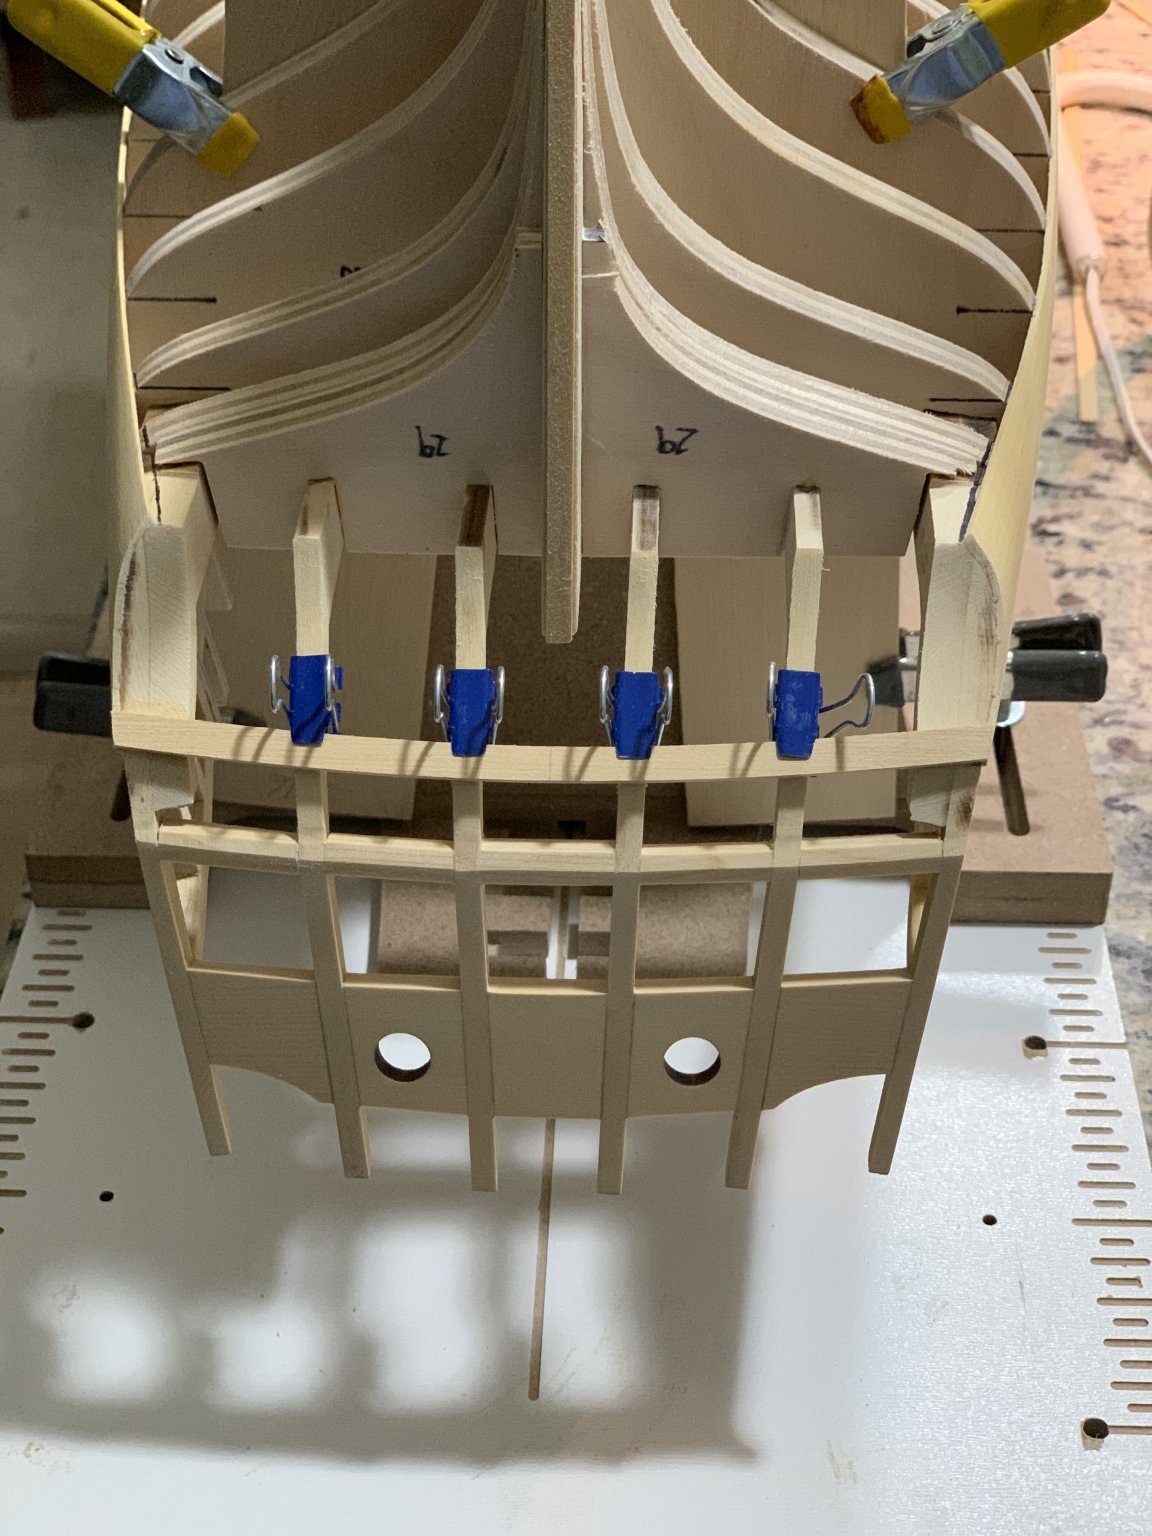
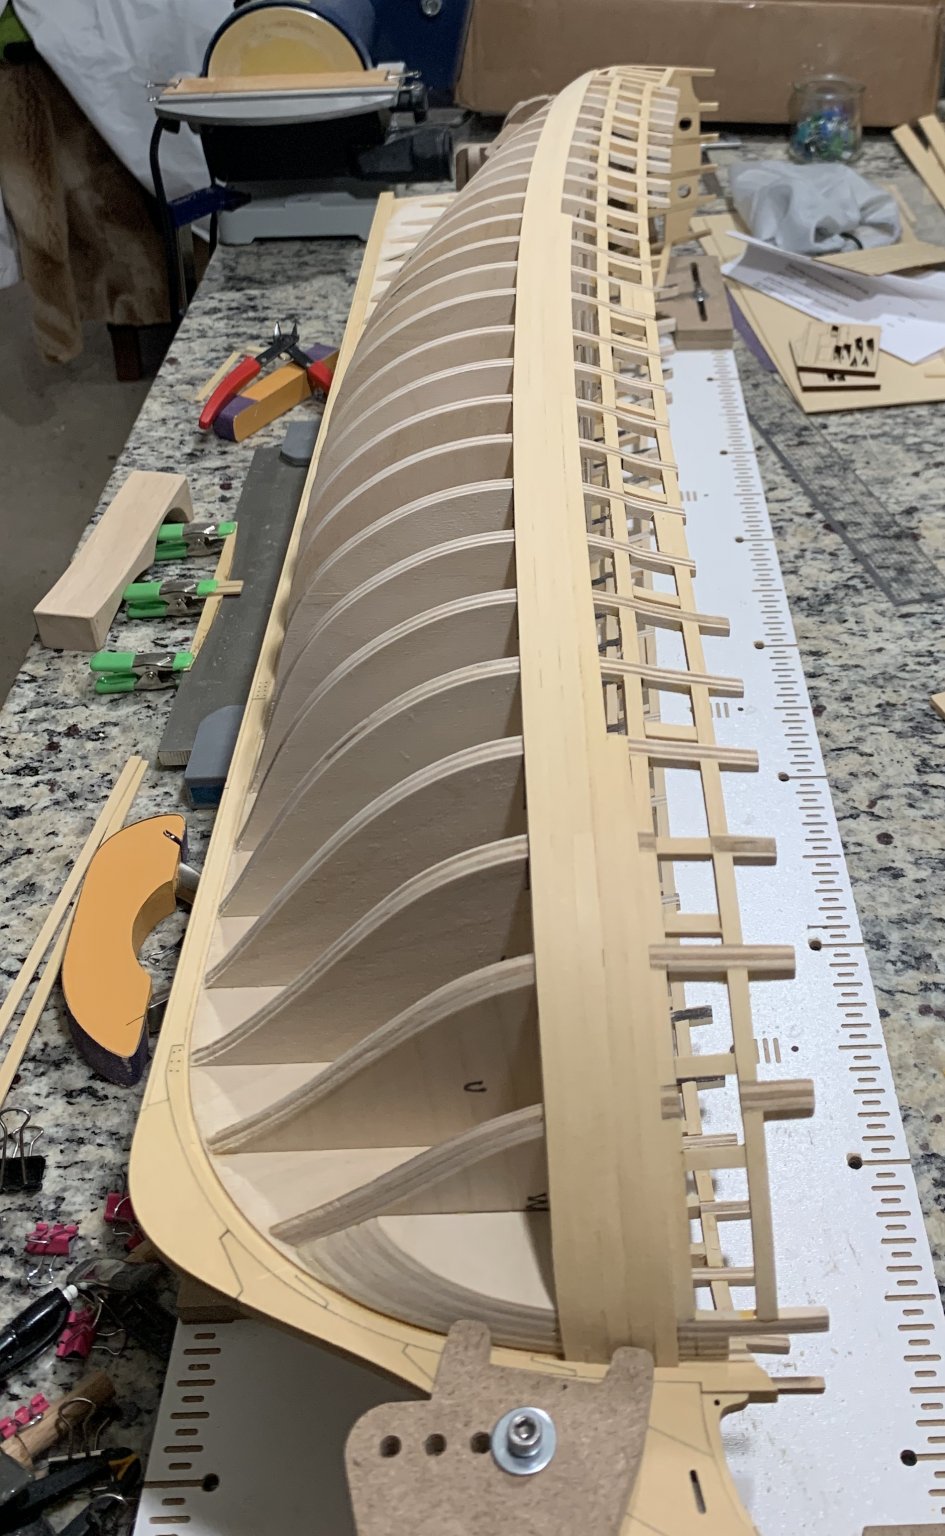
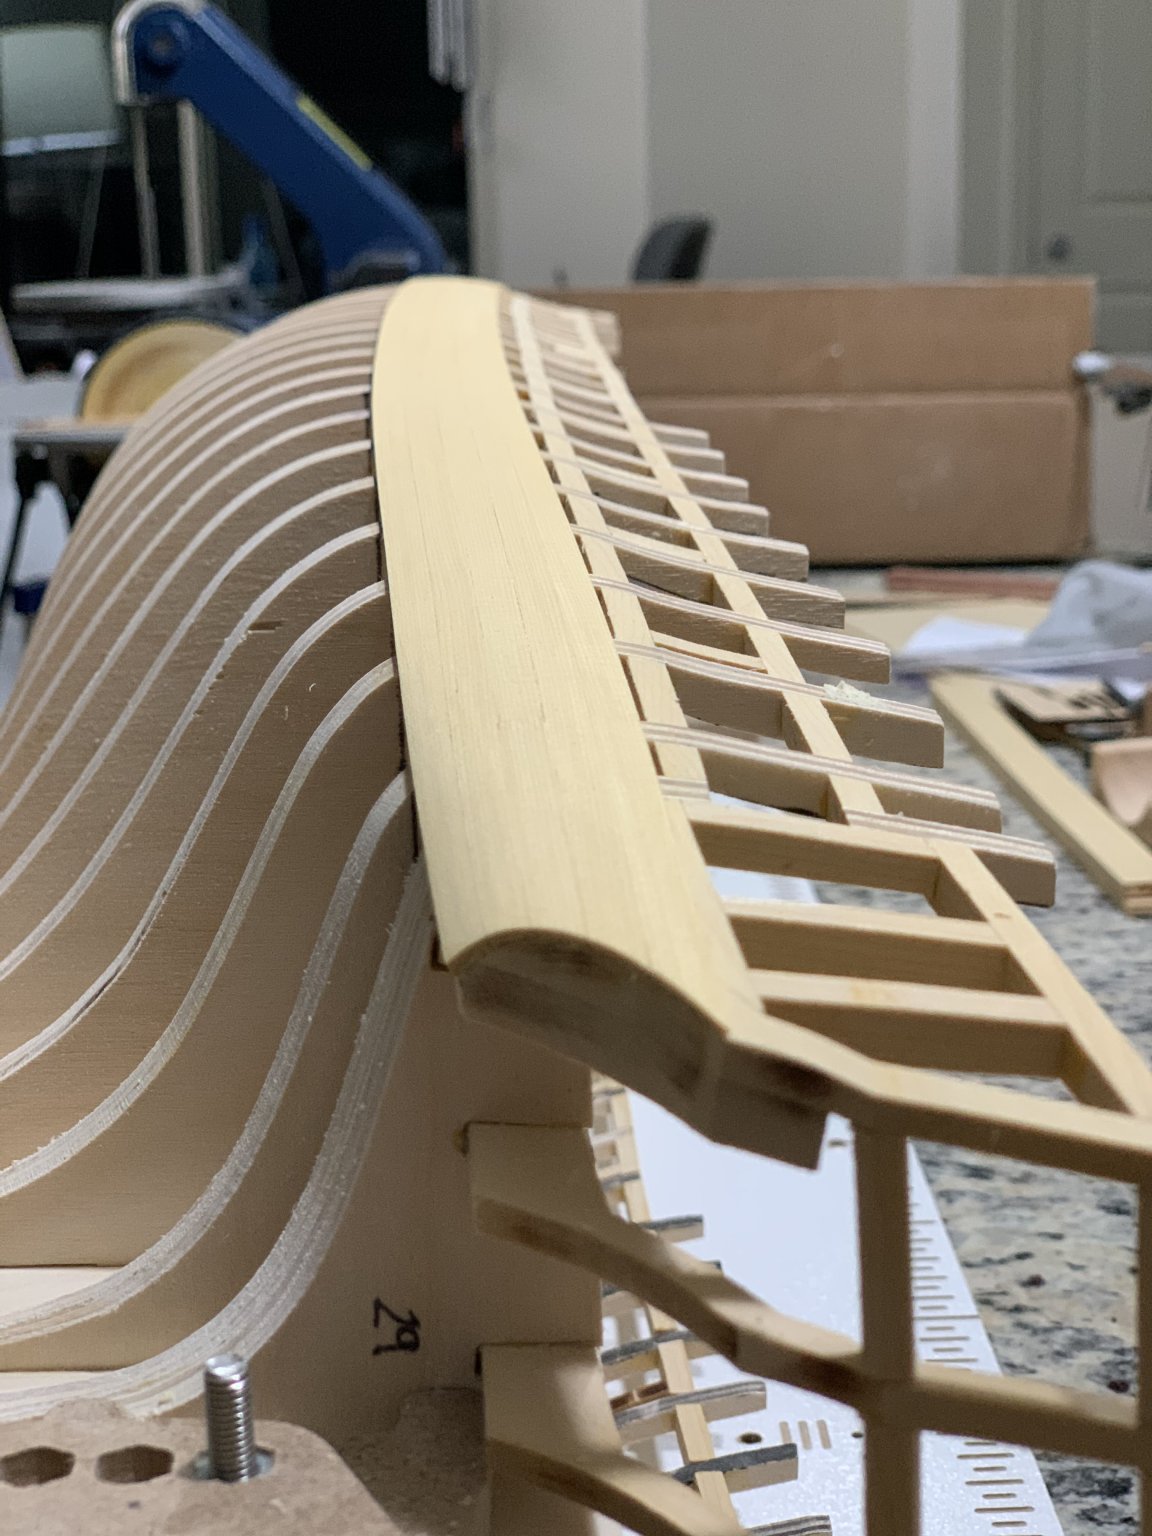
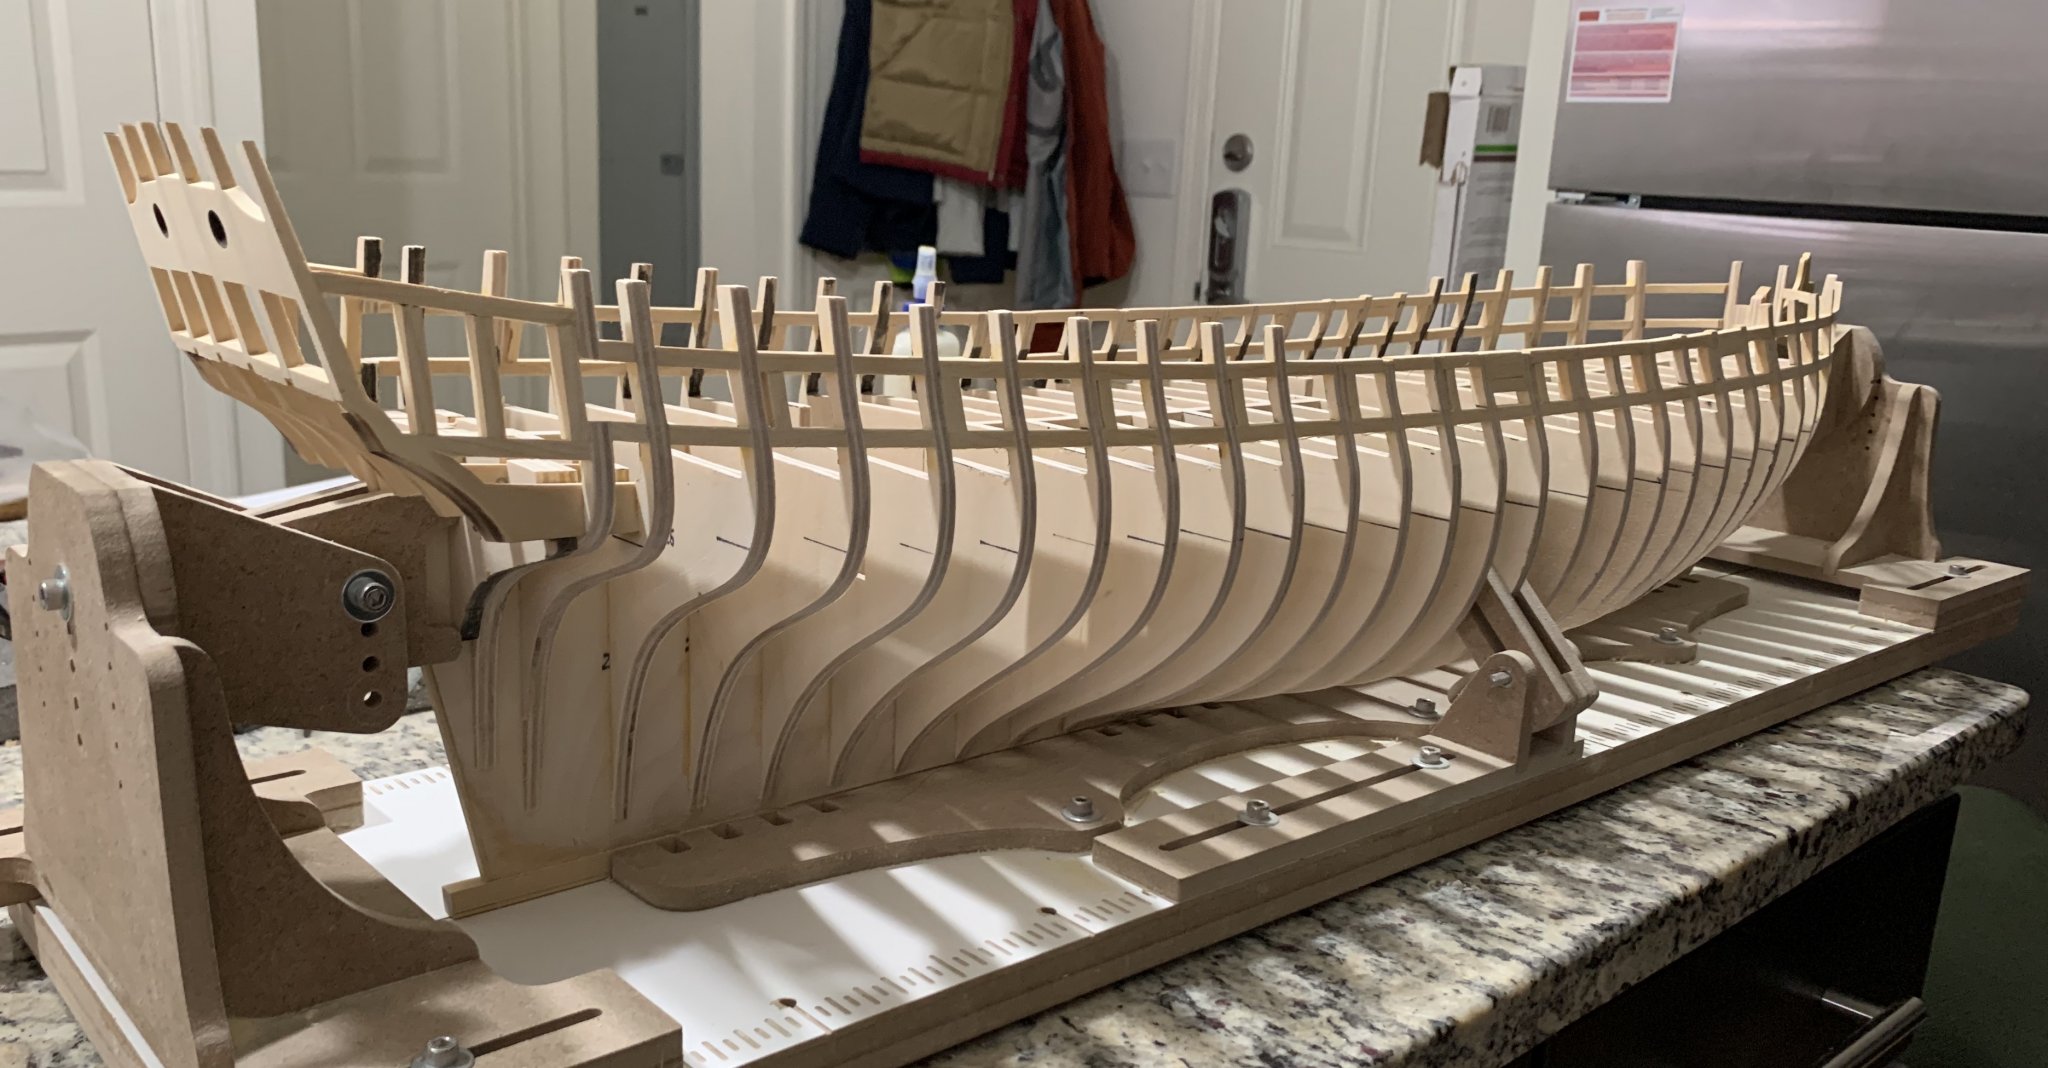
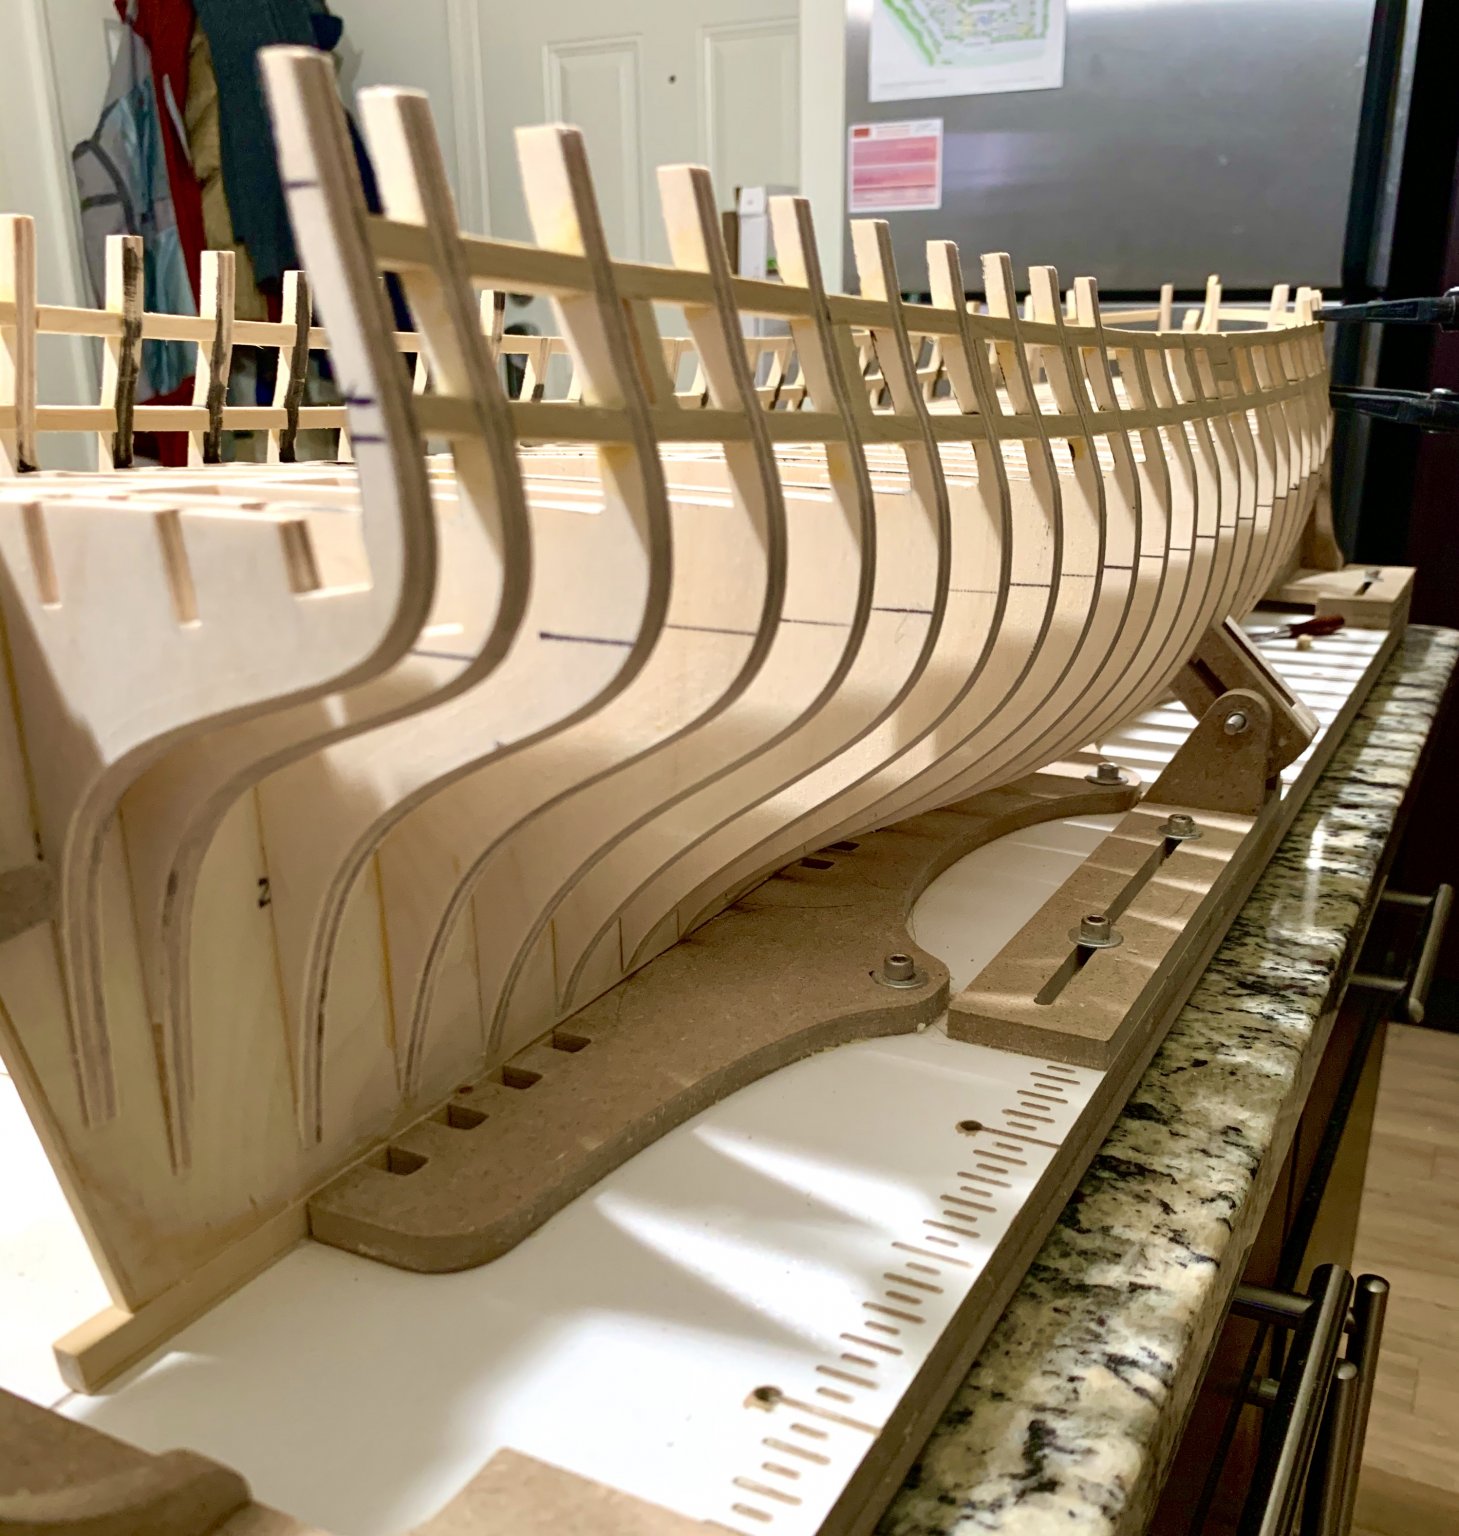
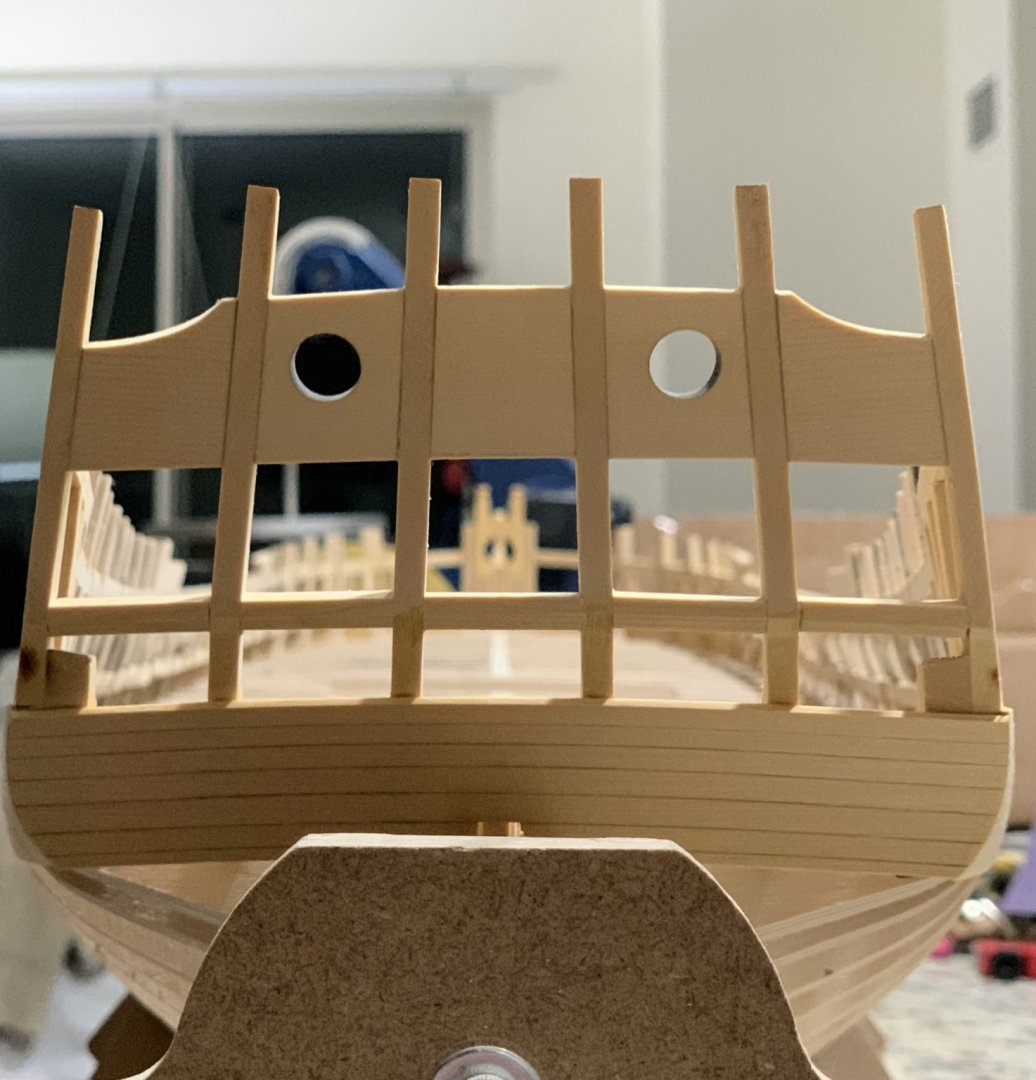
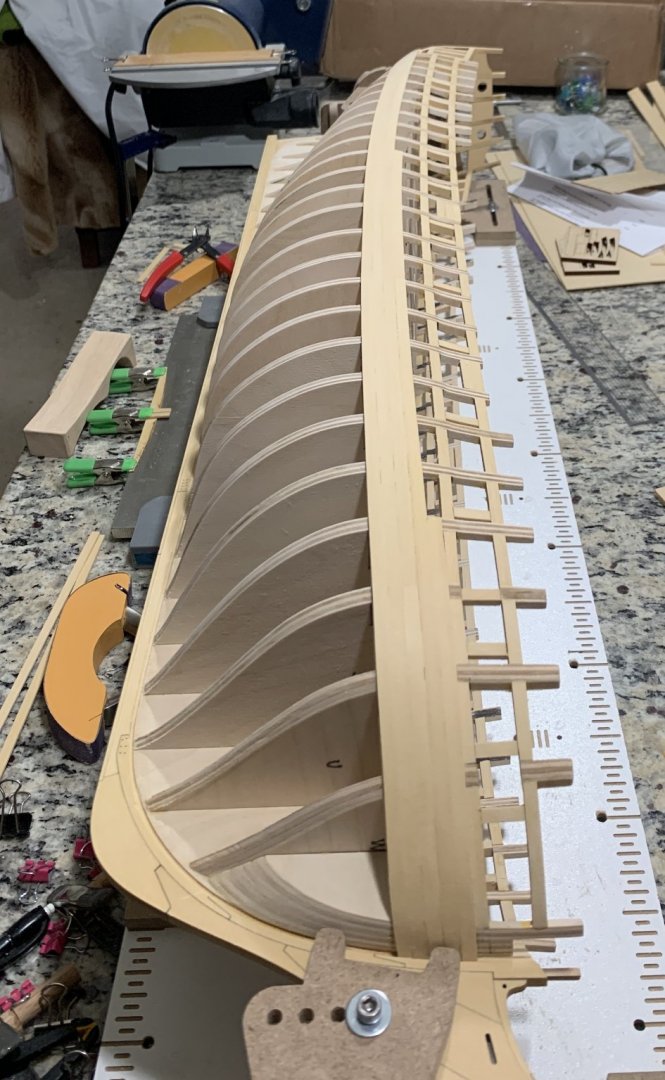
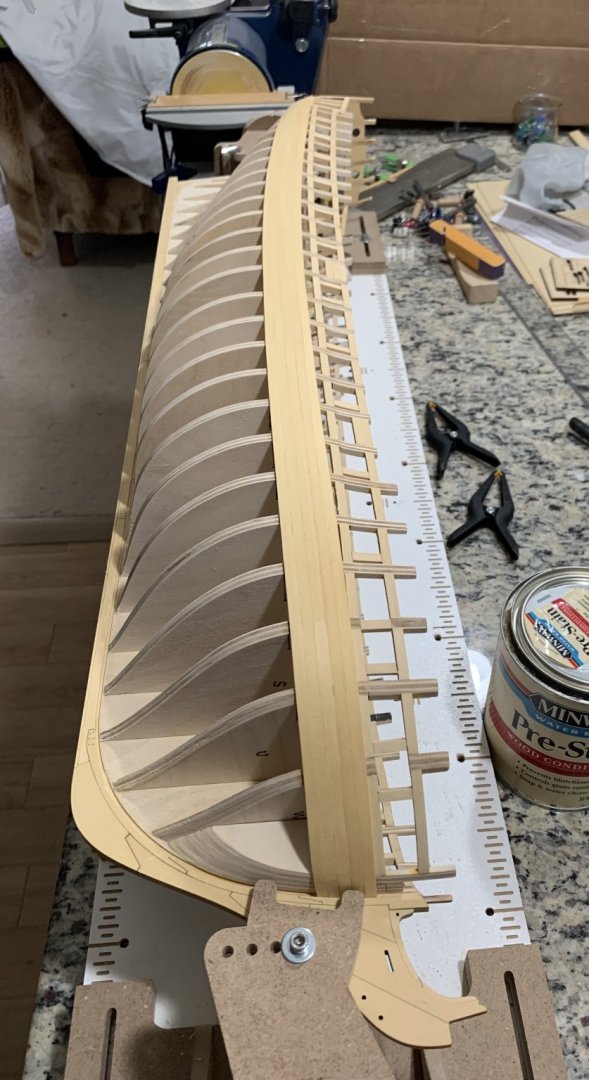
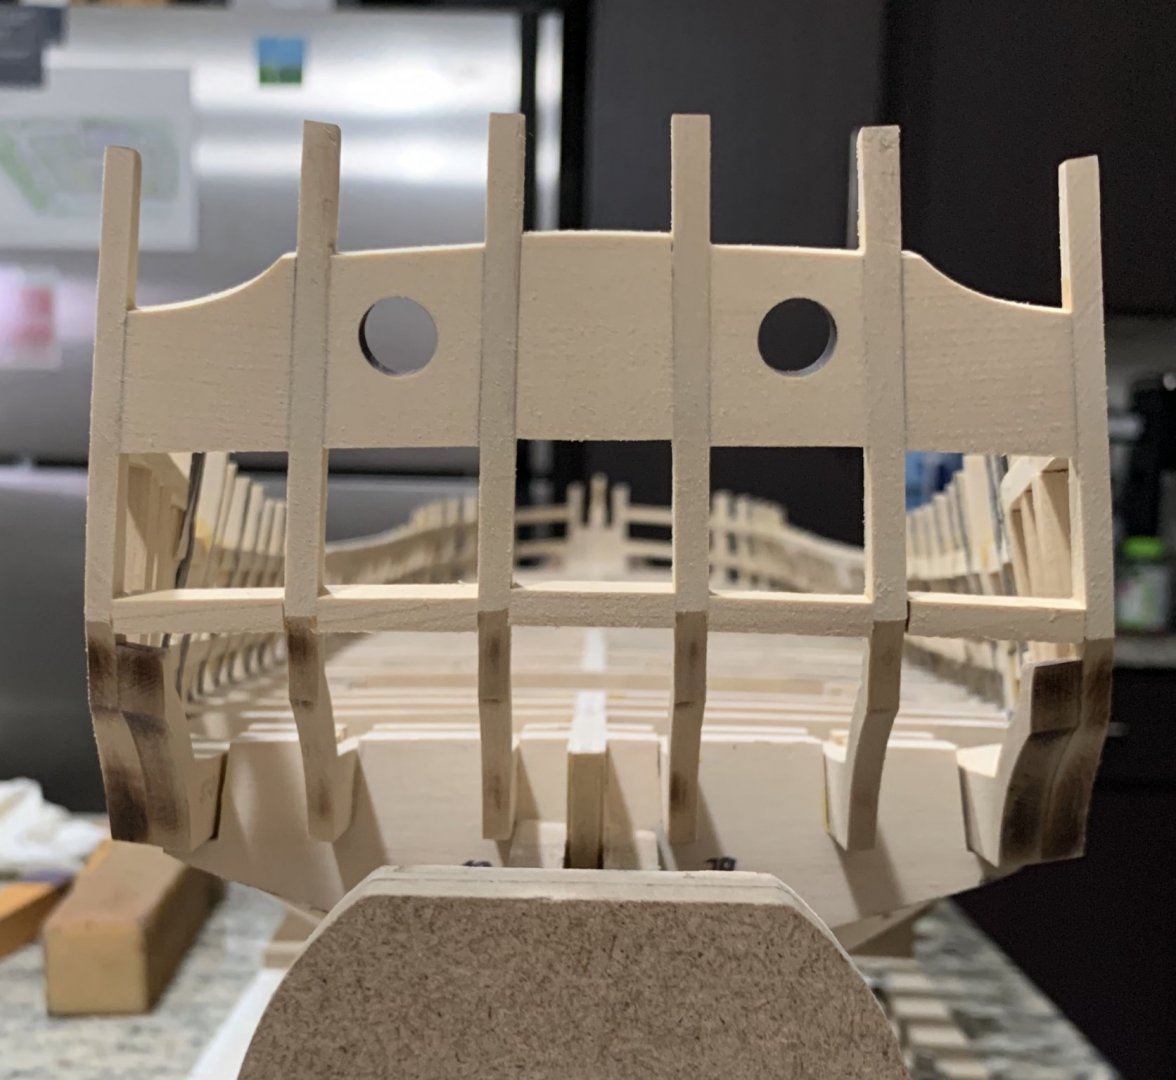
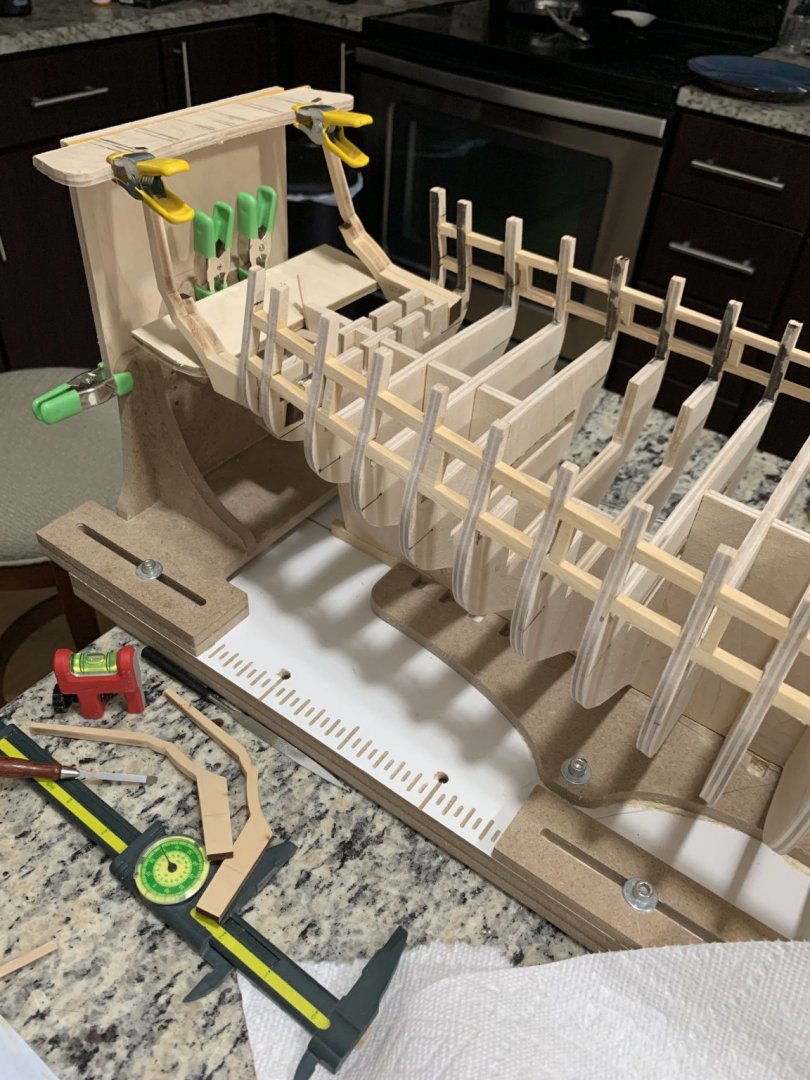
Everything aligned nicely. I added part 29 last to strengthen the structure. Part 29 needs to be shaped. Next the wales.


-
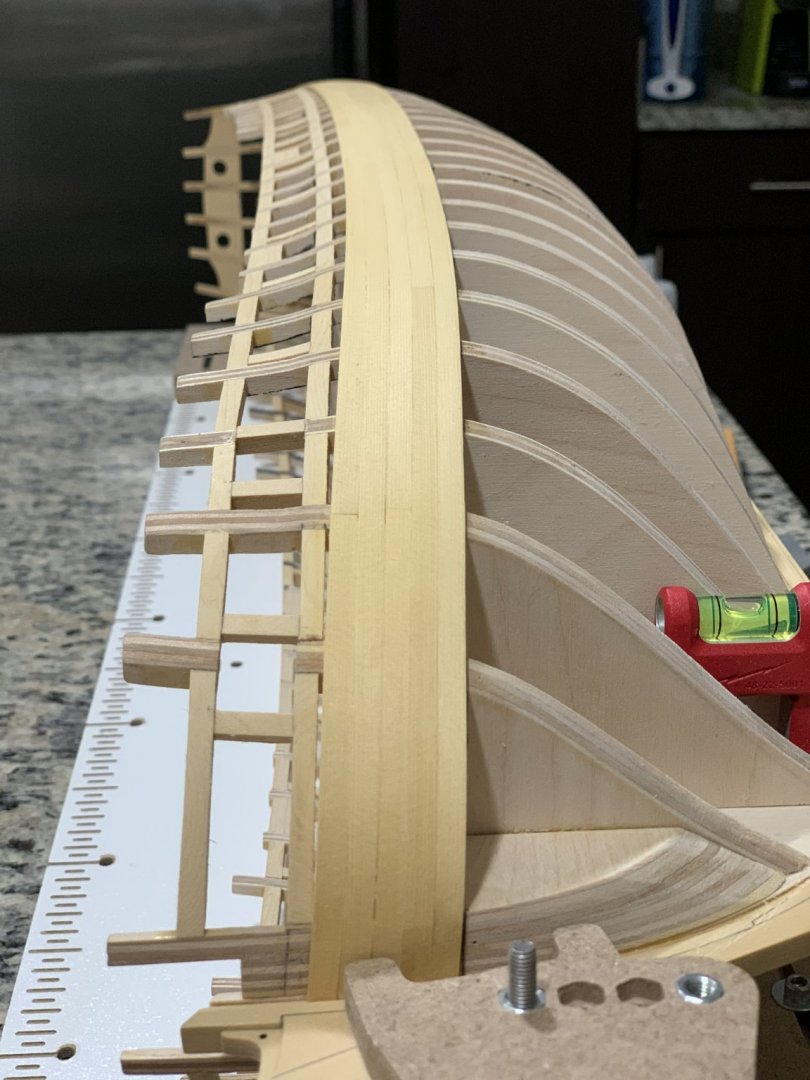
This may help. I used every inch of 25 strips (3” left) and completed the first layer of both wales (5 strikes each).
-
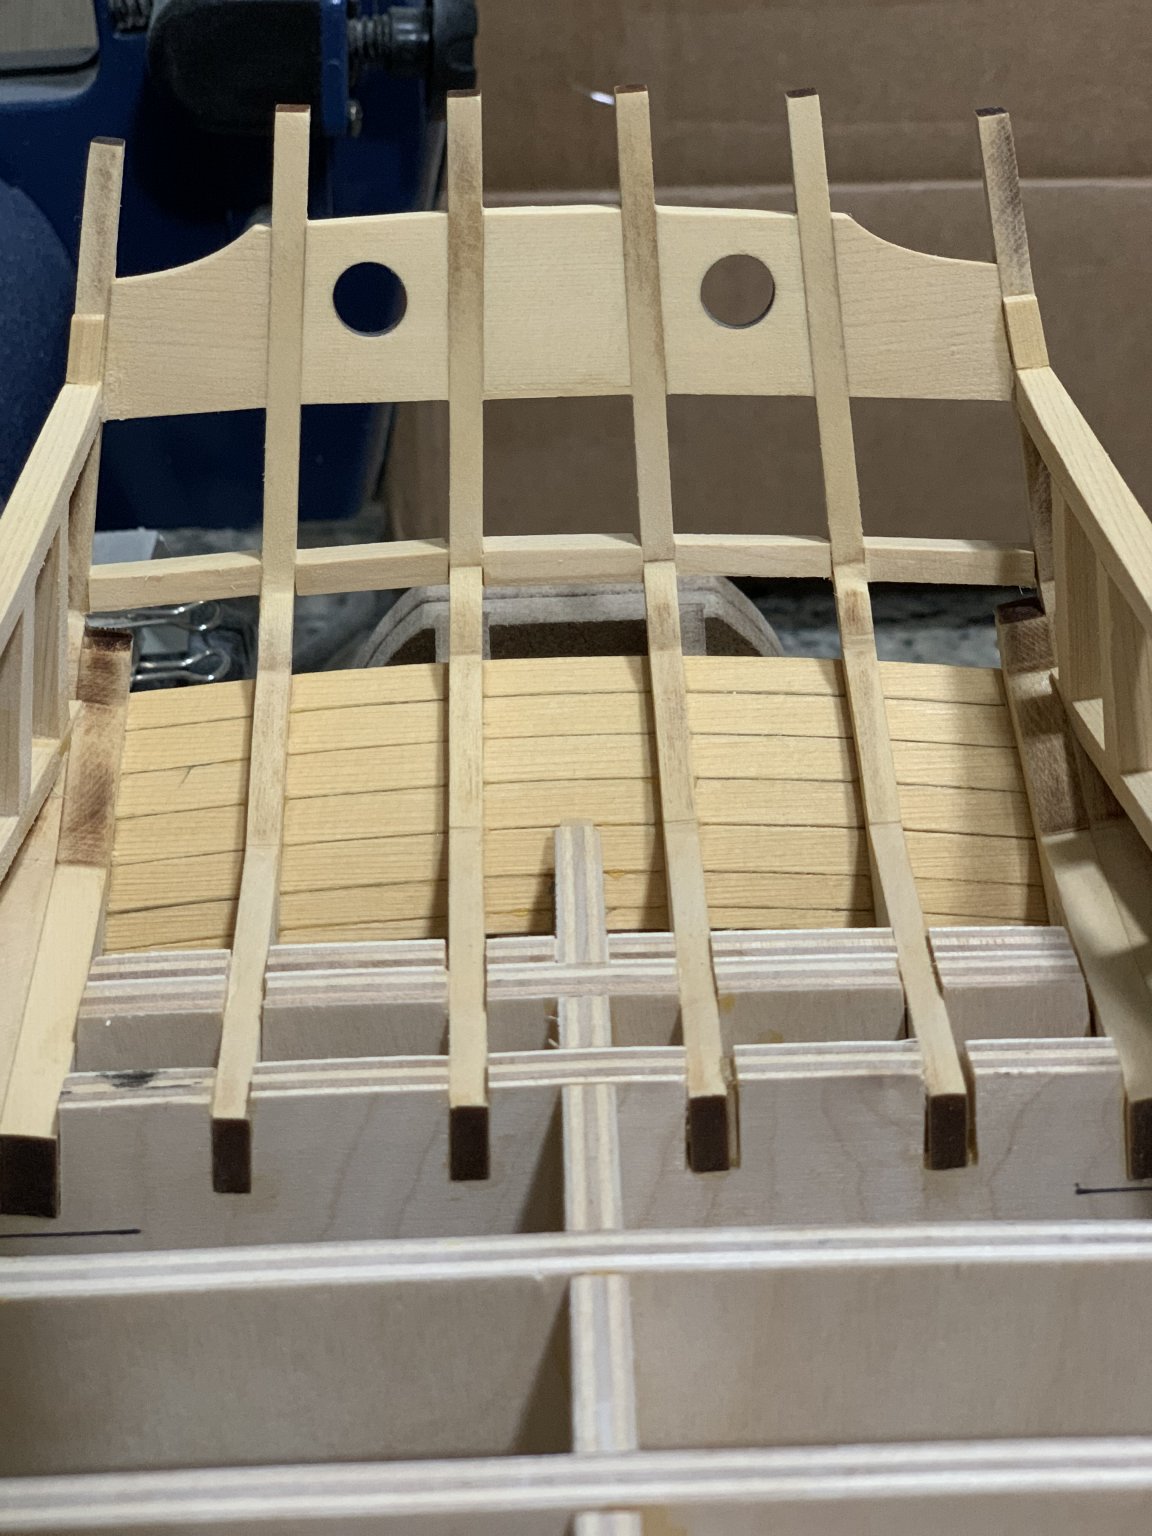
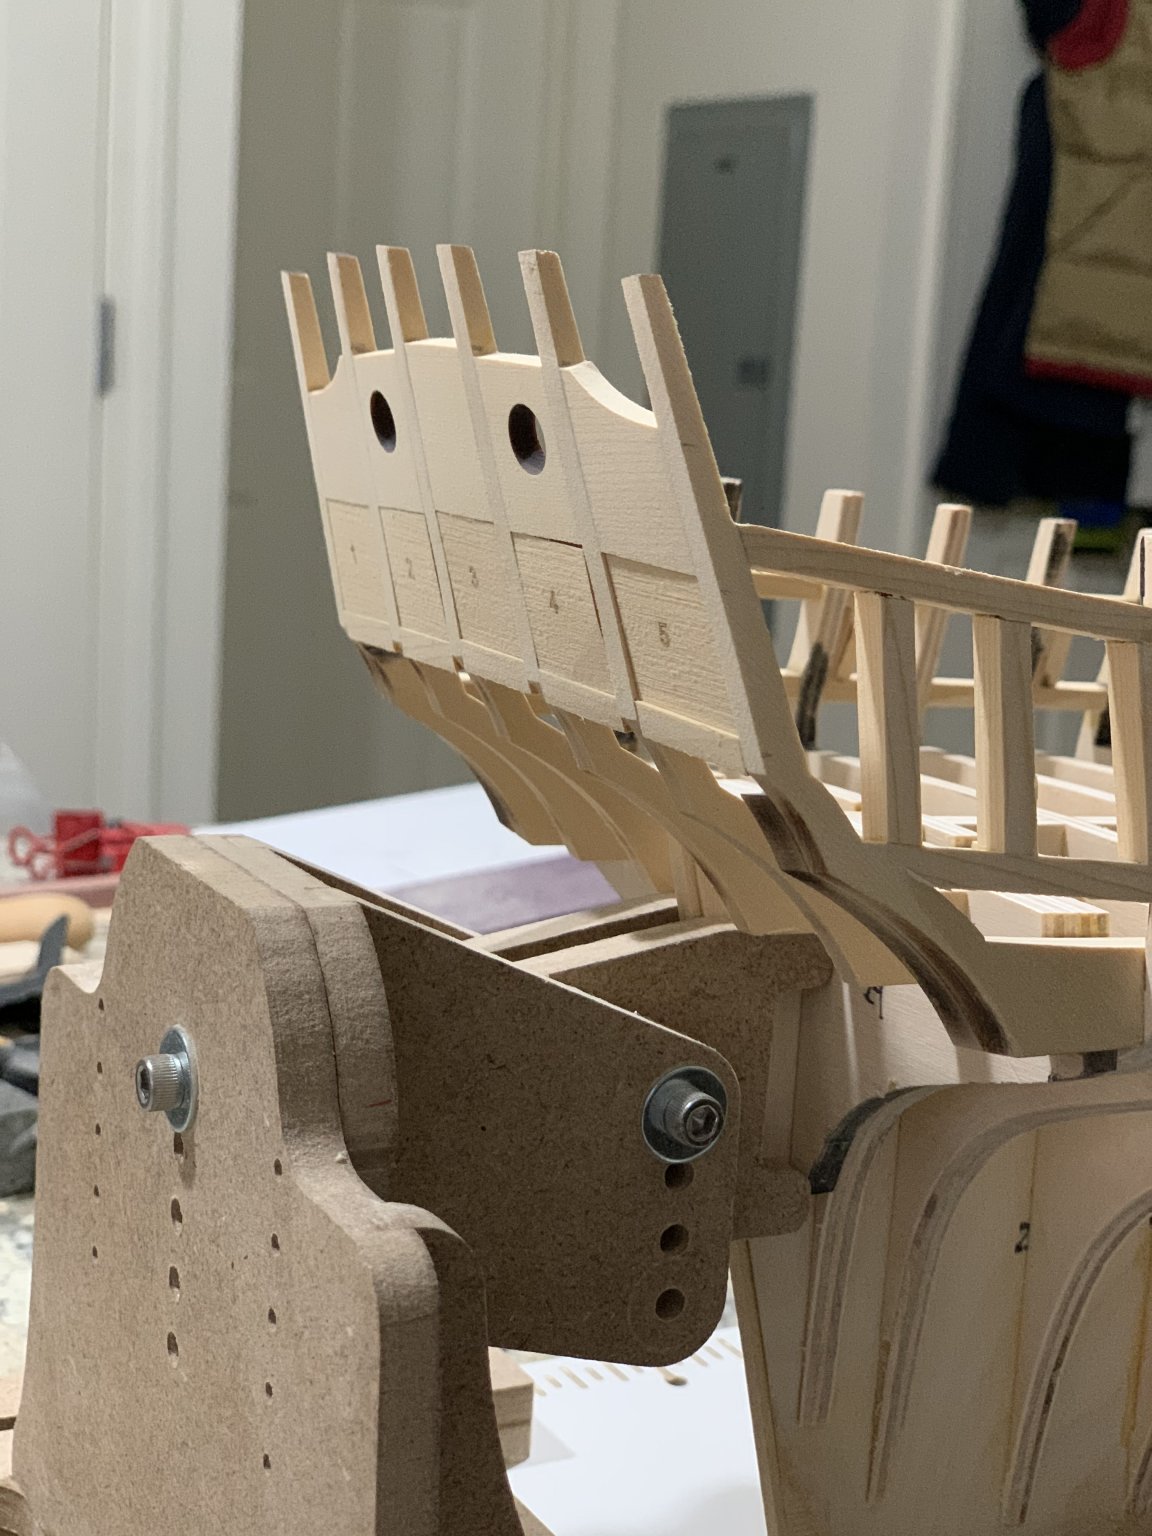
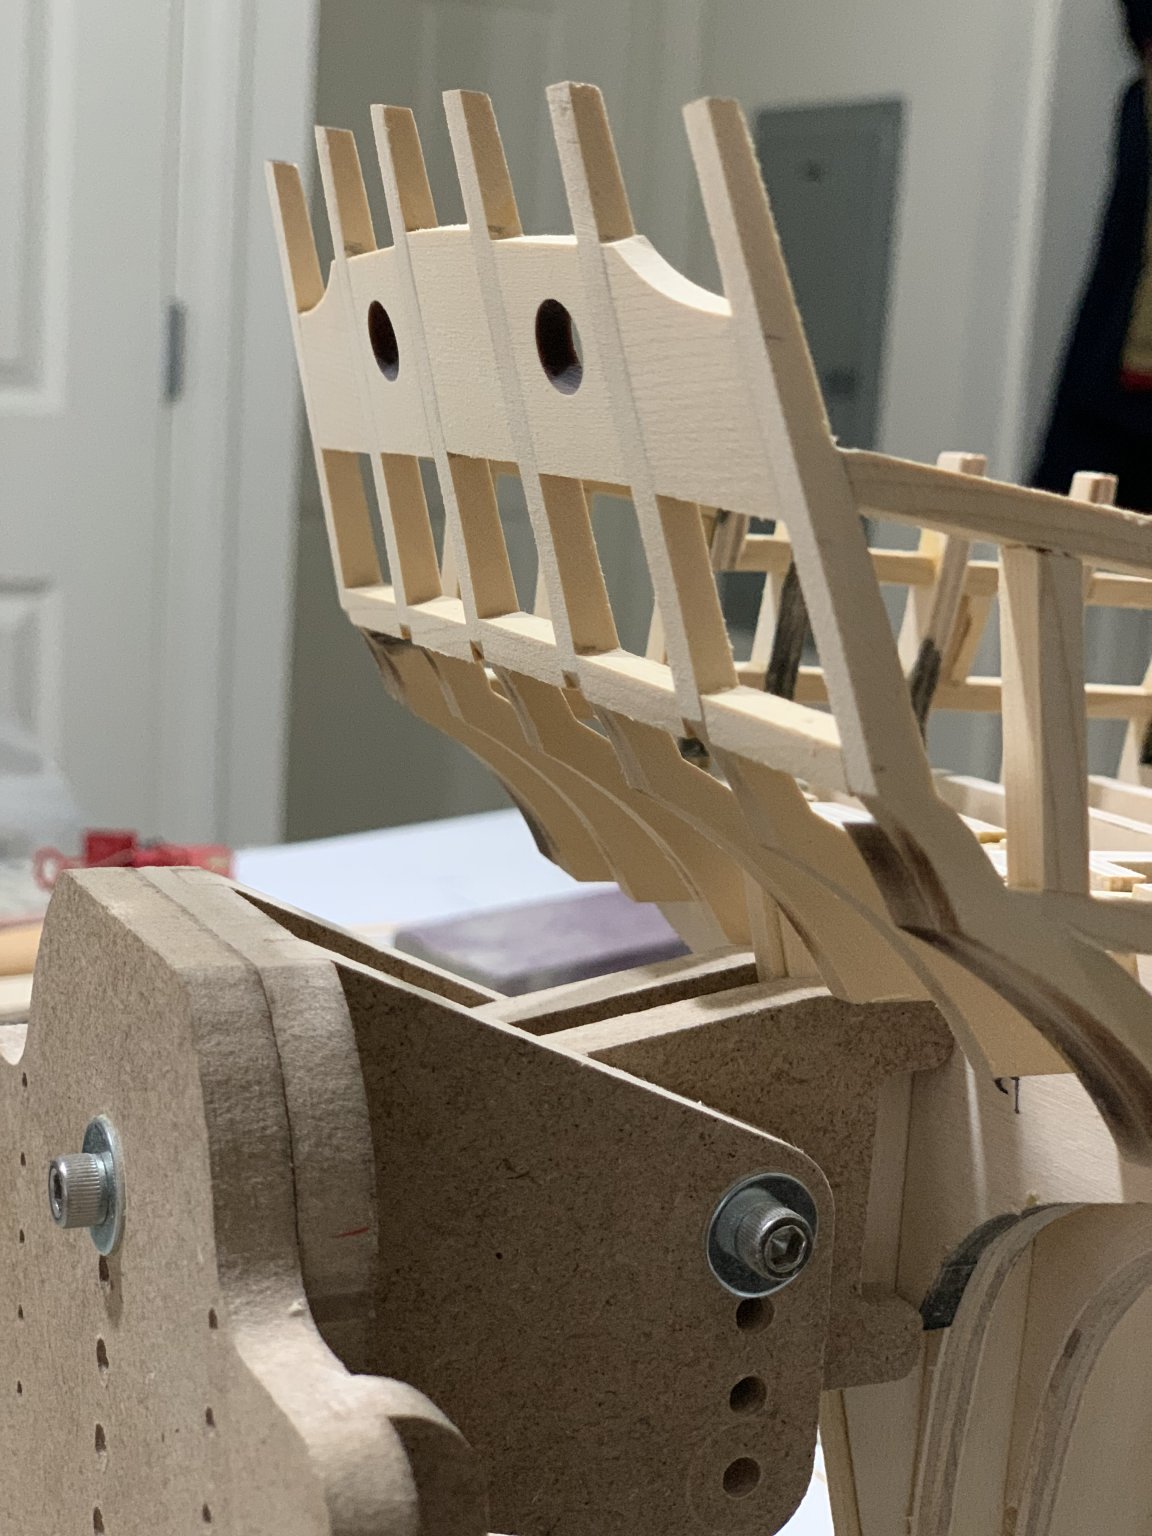
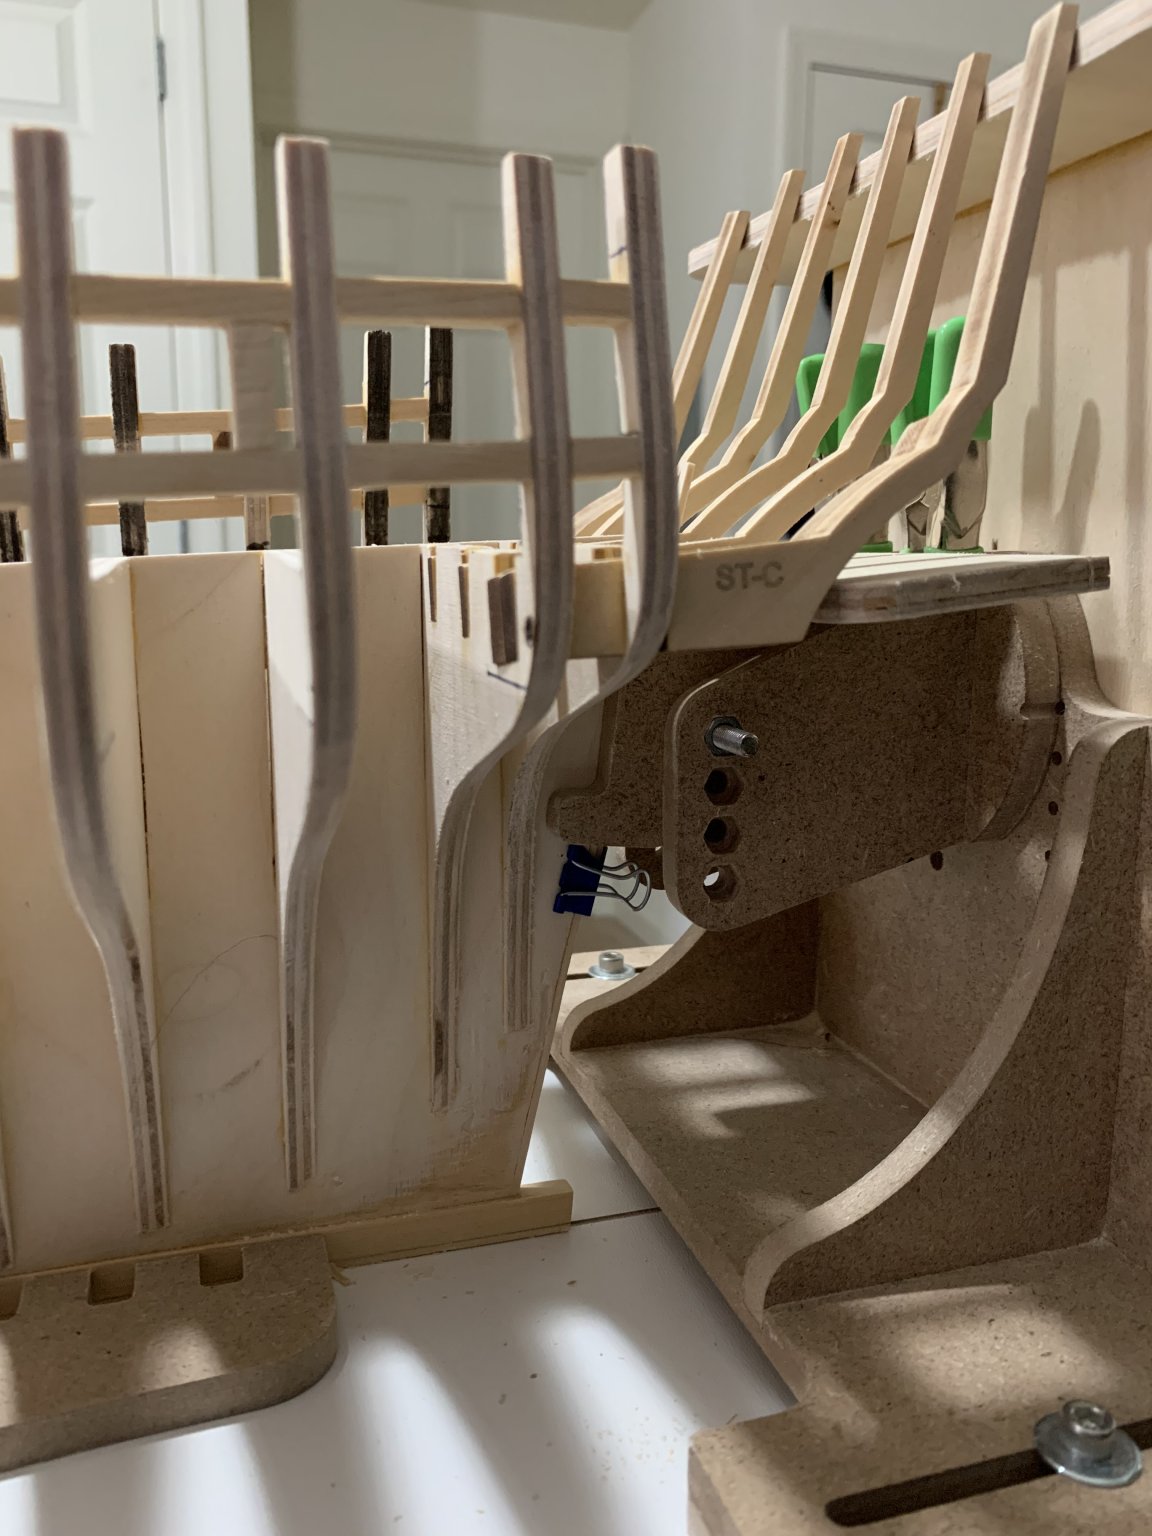
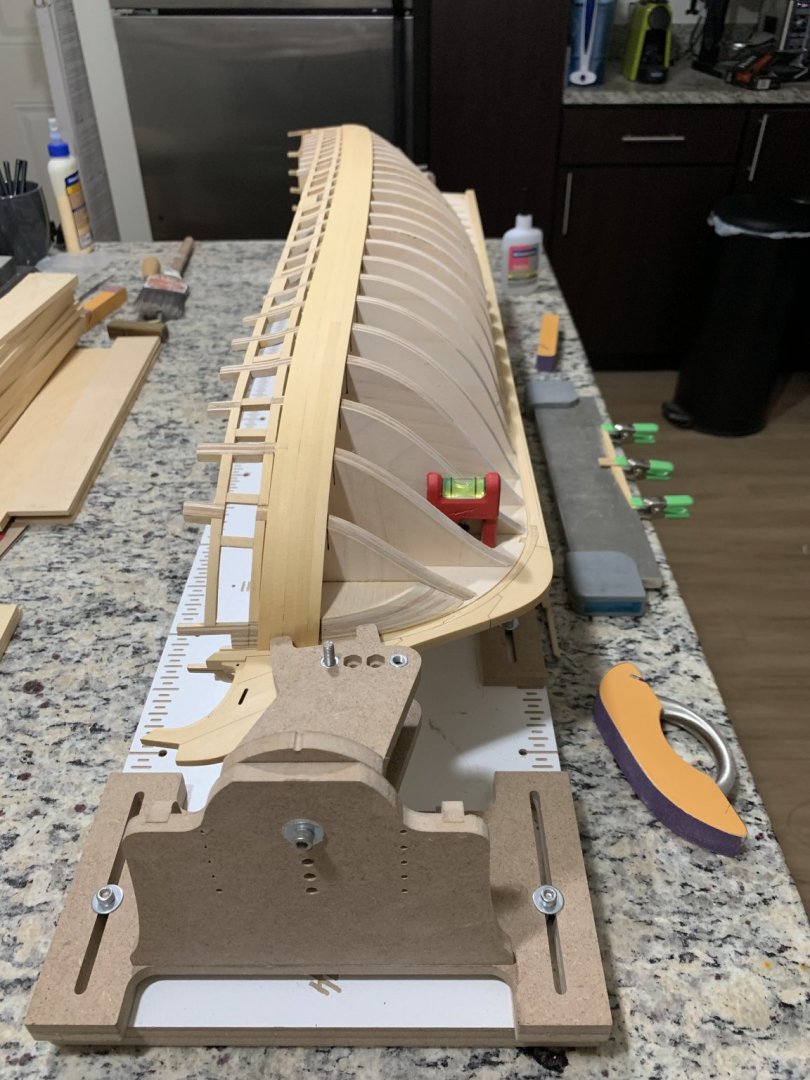
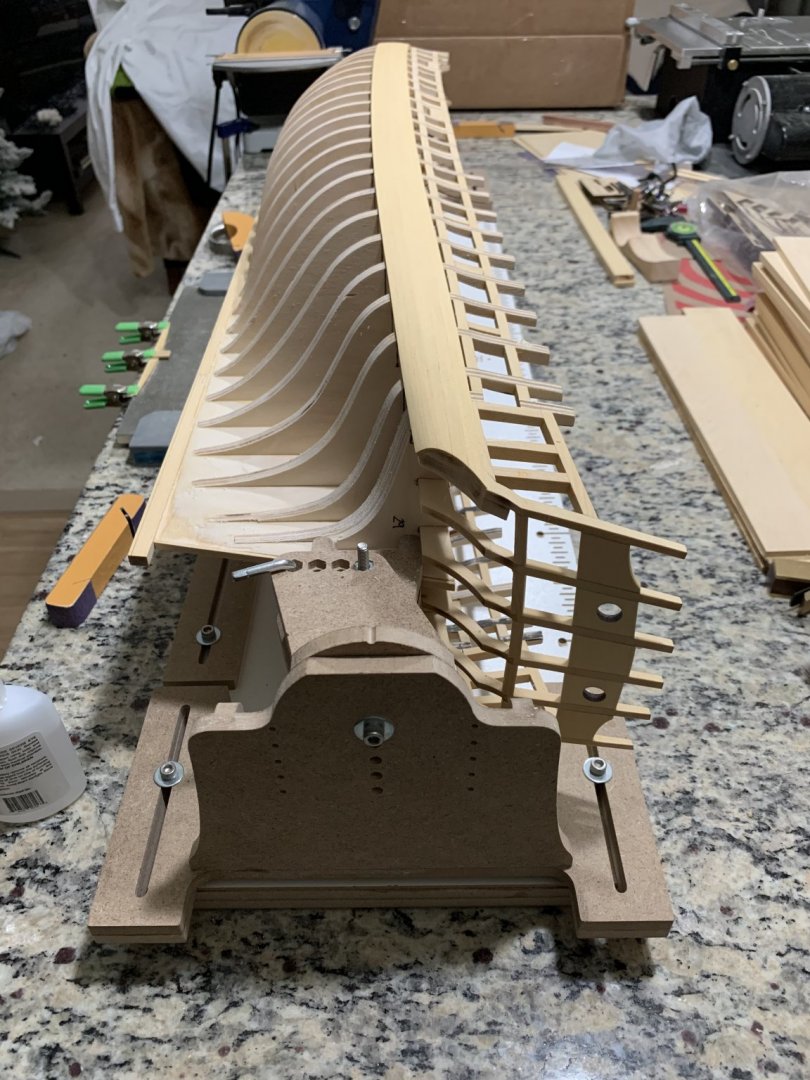
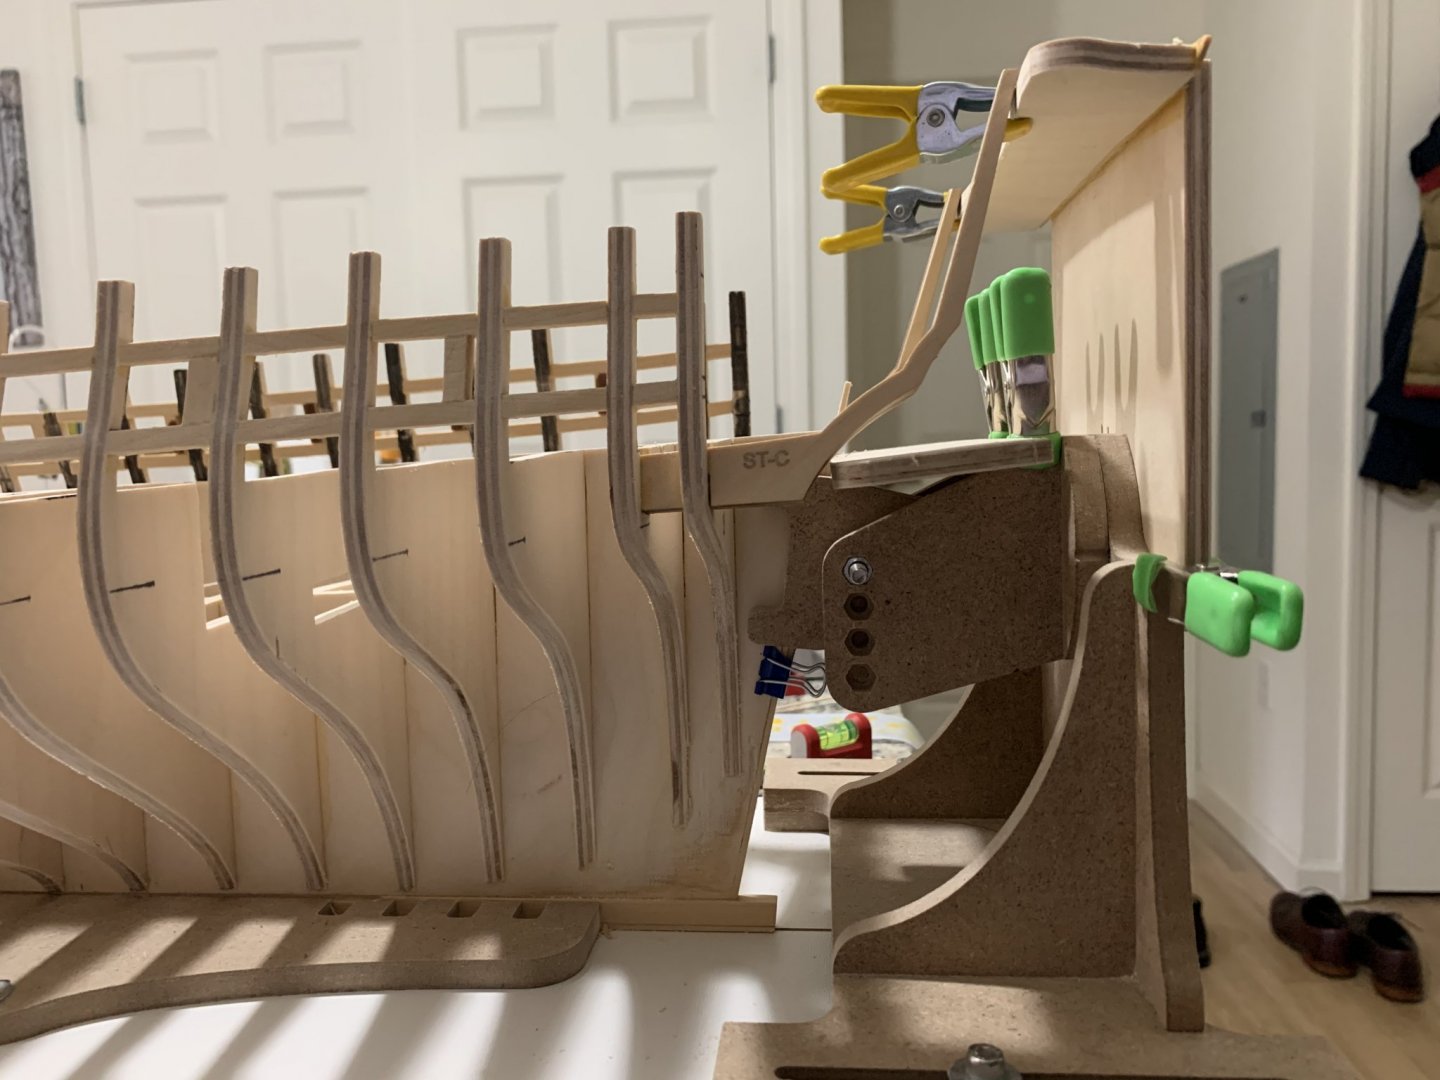
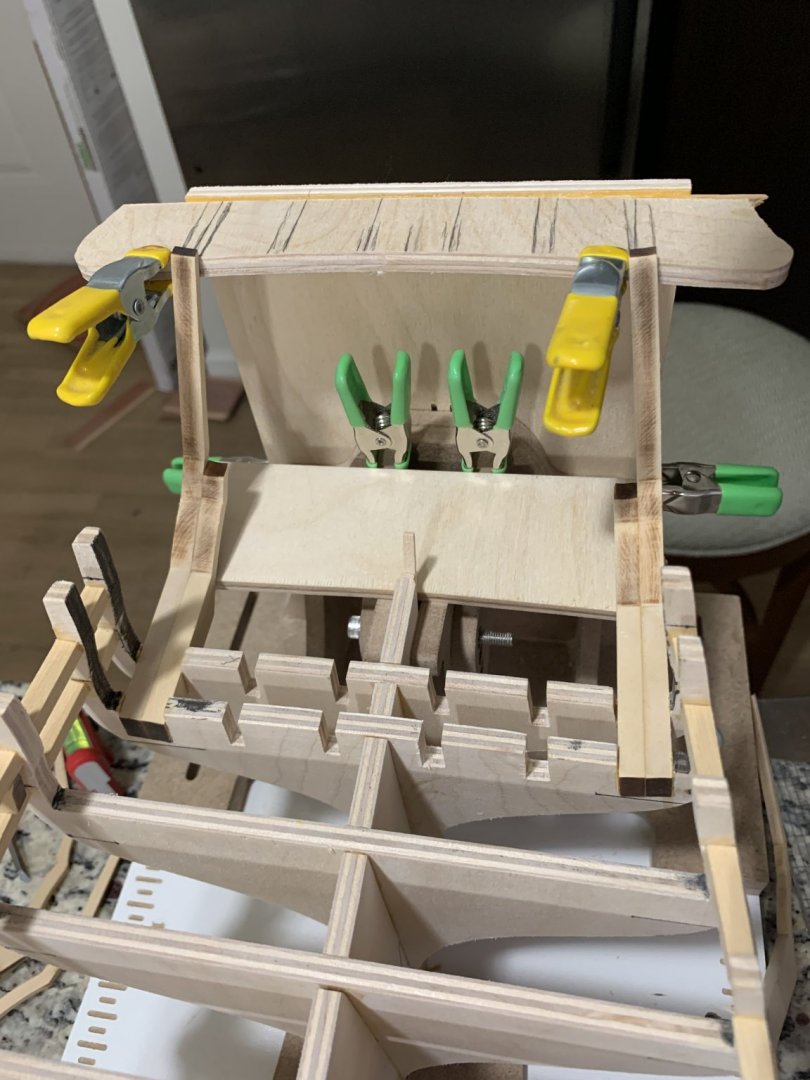
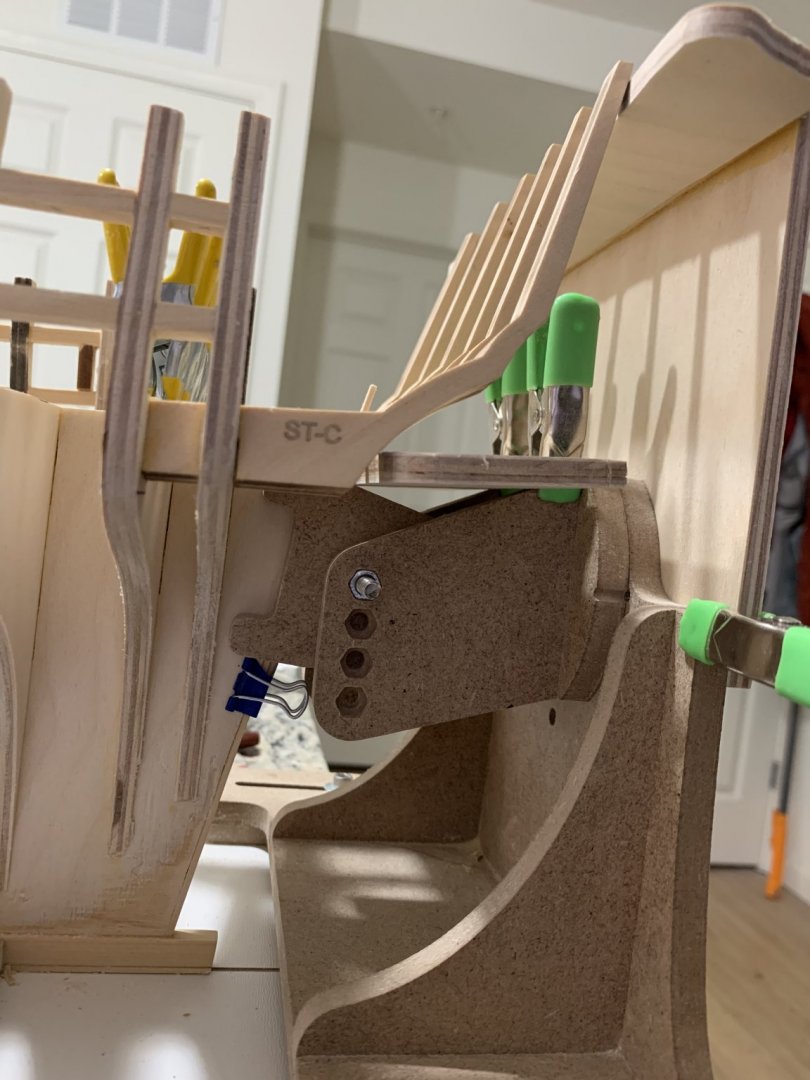
I used the slay to build up a structure to keep the angles right. Notice there are two pieces of triply holding. The profile of both follow the correct arch. Glued all in place


-
I have been catching up wit the group build. I discovered moths after it went life. I have been following your progress and has been quite useful. So far I have not manage to get my self in trouble thanks to your posts. I put to good use my coping saw and got a slay from Hobby Tools to ensure the structure will be straight.