MORE HANDBOOKS ARE ON THEIR WAY! We will let you know when they get here.
×


Guillermo Eduardo Madico
-
Posts
78 -
Joined
-
Last visited
Content Type
Profiles
Forums
Gallery
Events
Everything posted by Guillermo Eduardo Madico
-
 Hello JJ: I think the placement it is perfect. The lower portion of the template corresponds to the first horizontal piece. The fore line is the tip of that first piece once you add the trapezoidal cover where the freeze is placed. The aft line is where the horizontal piece for the window goes. I highlighted the box the I marked on my build and the position looks exactly as yours with respect to the last gun port. Hope this help, G
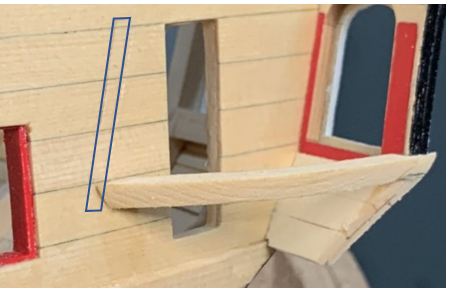
-
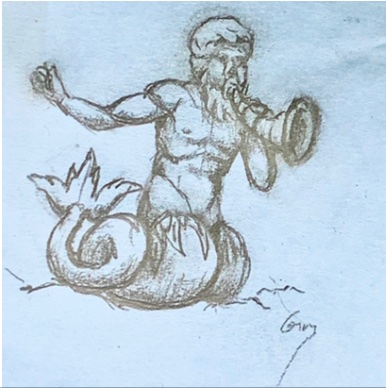
Wow, thank you Michael, Jean-Paul, JJ, and Rusty for your comments. Rusty, you have mentioned you used holly for decking before. Are there do’s and dont’s for Holly? Does the same blade in the table saw used for Yellow Cedar, will work? I worked today in a draft for the Qgallery freeze. Bellow is my starting point. Which me luck to turn this into a 4 color rendition with paint a brushes. The pencil draft is at 5X scale. Best G
-
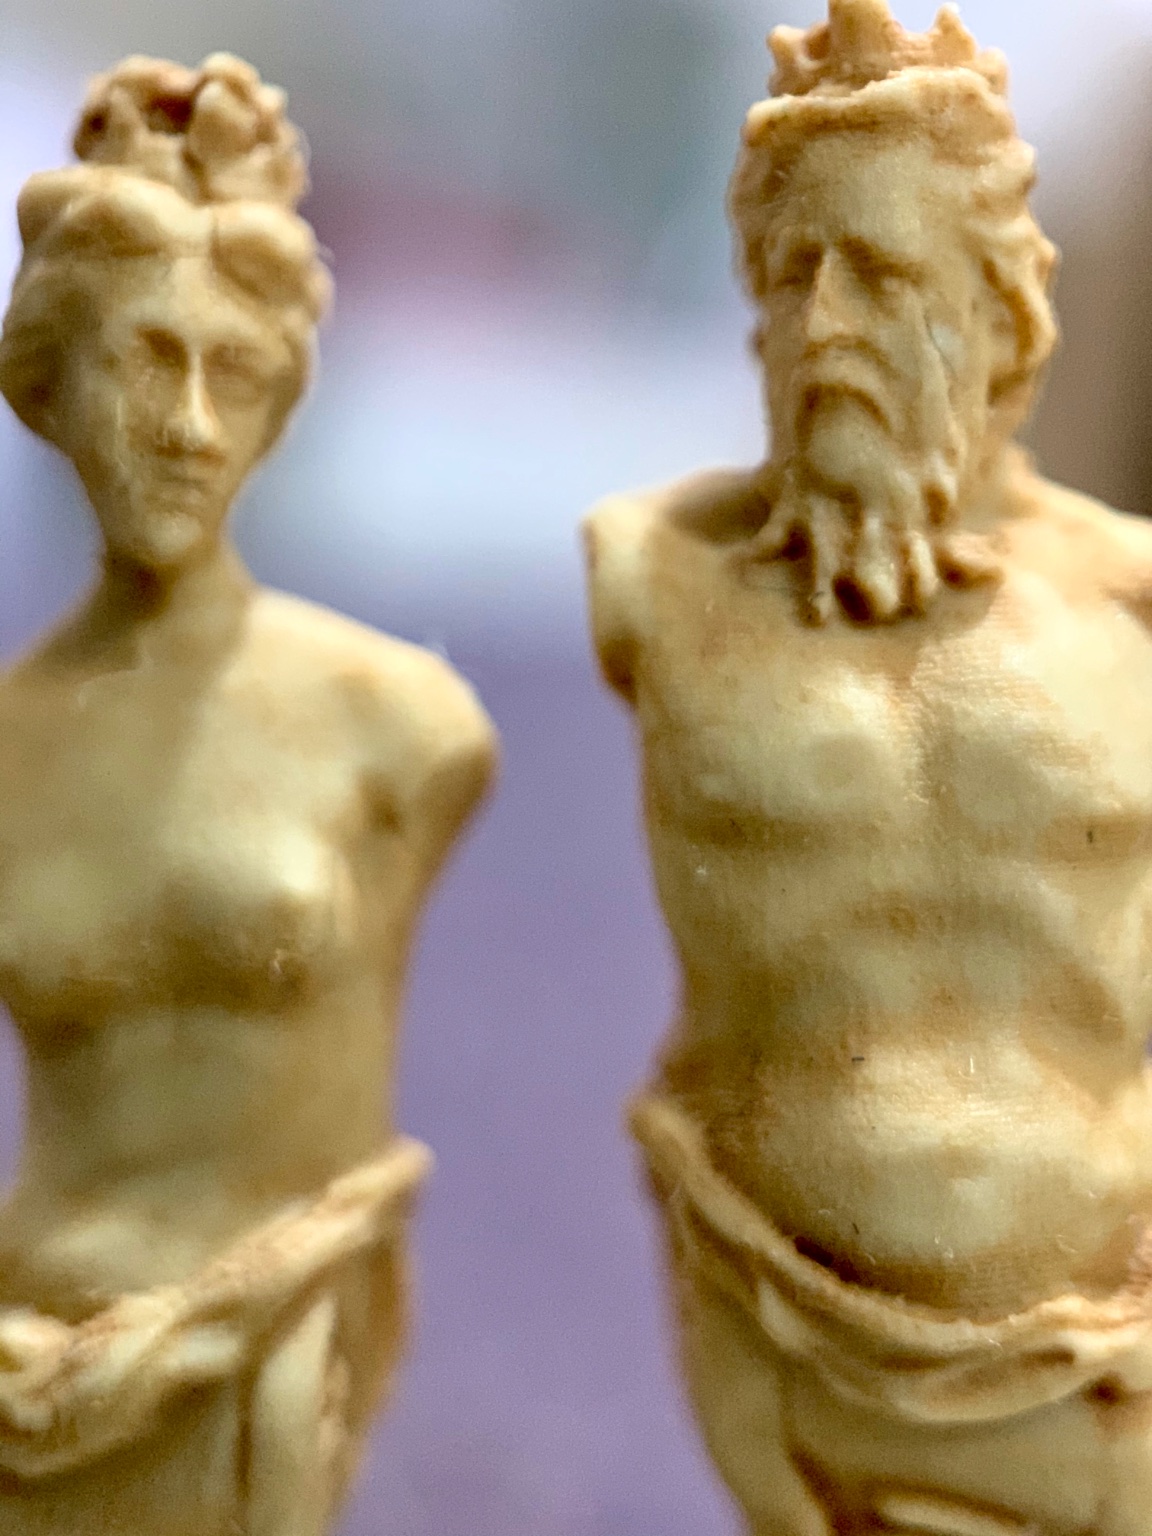
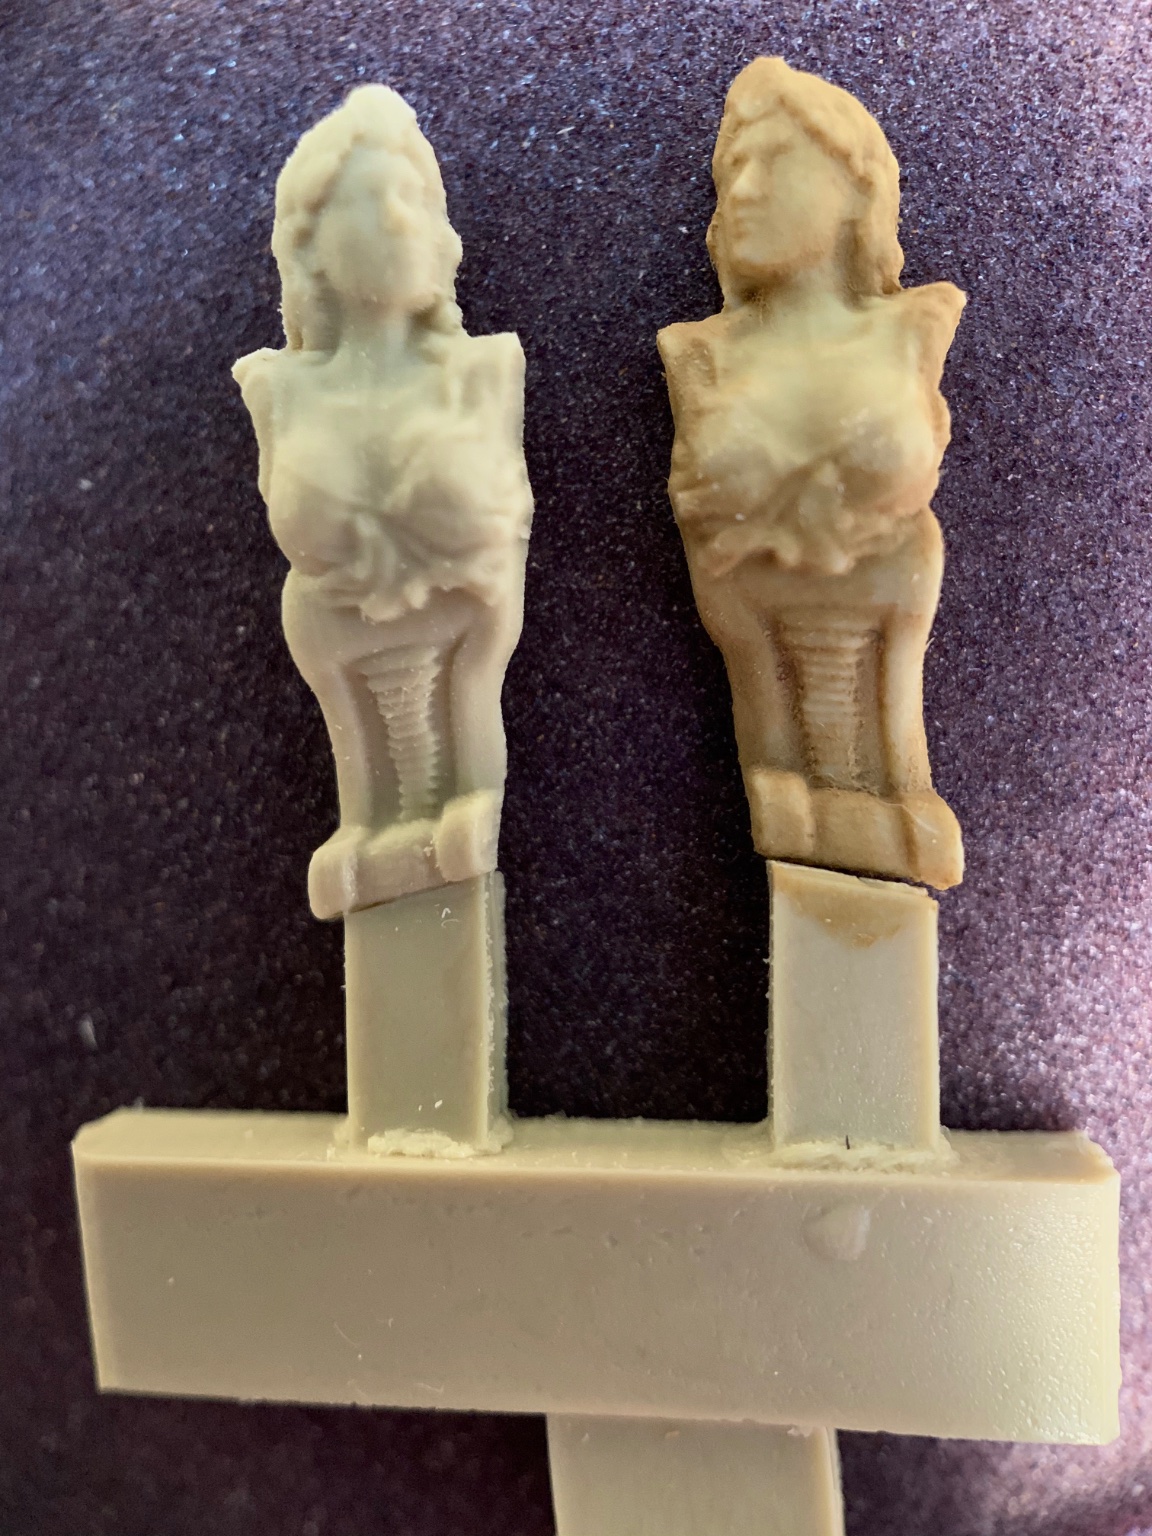
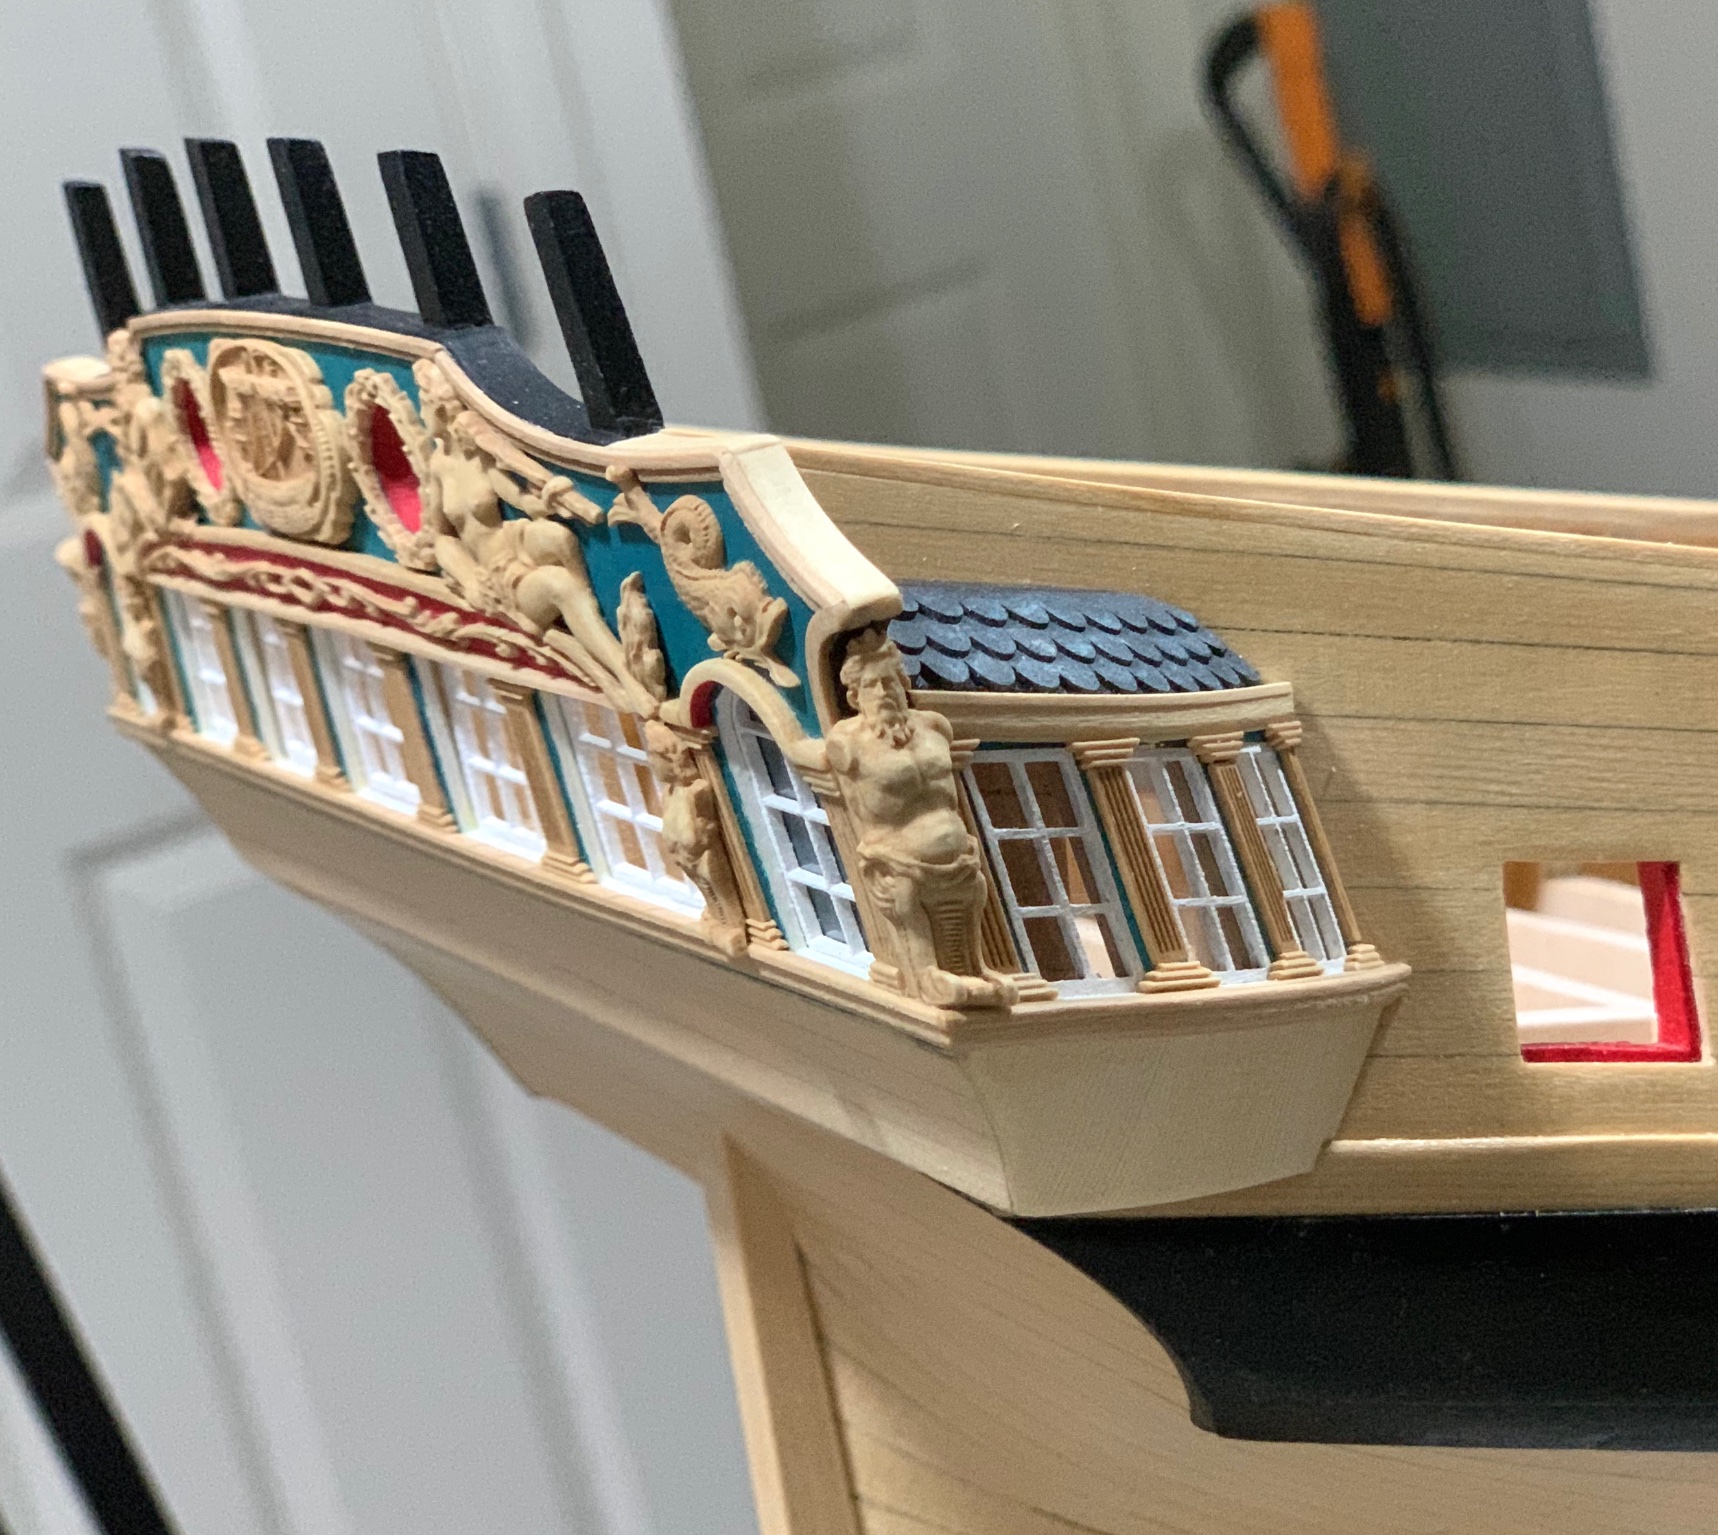
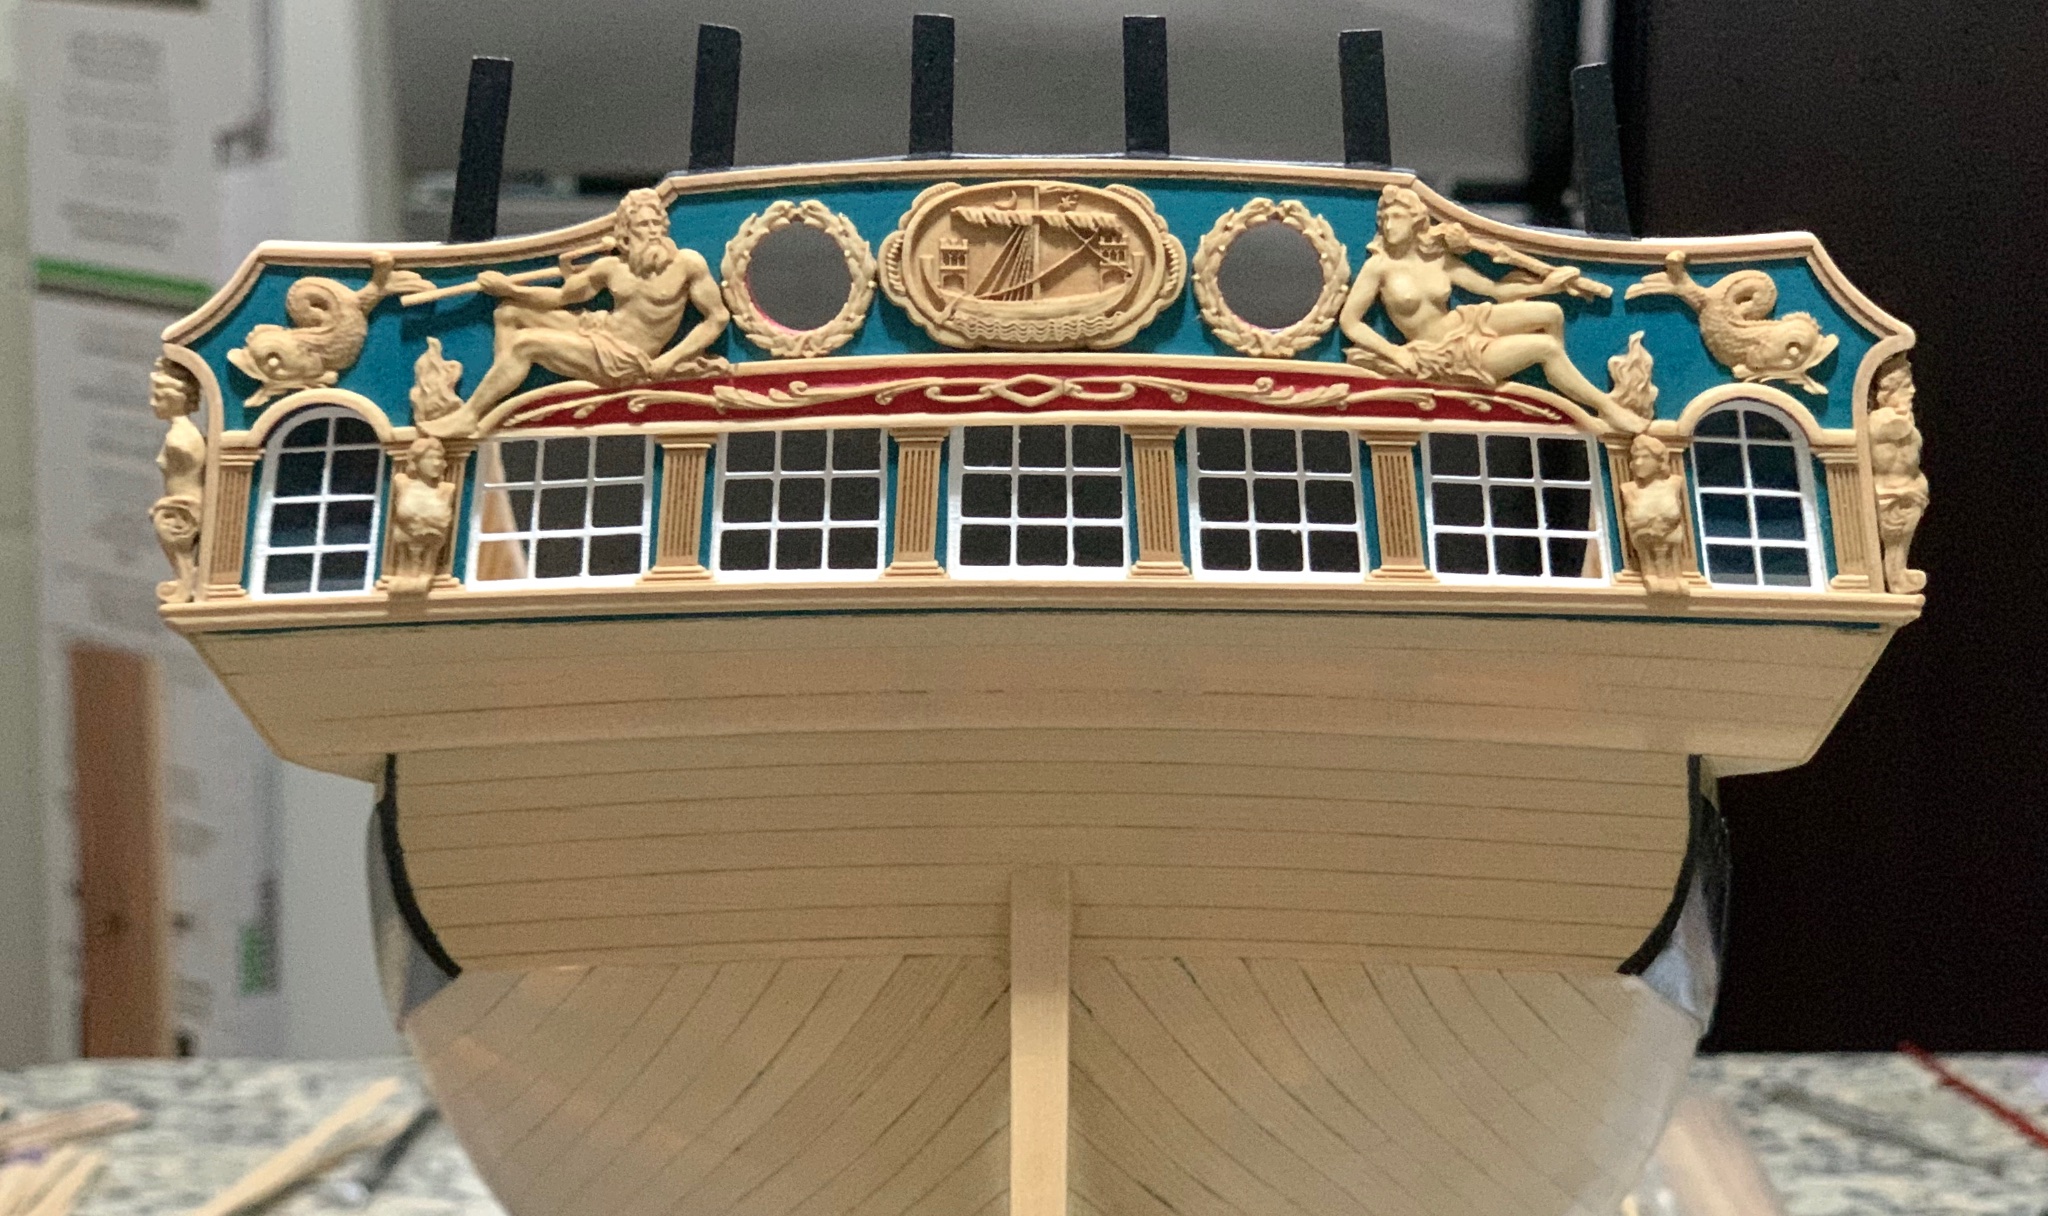
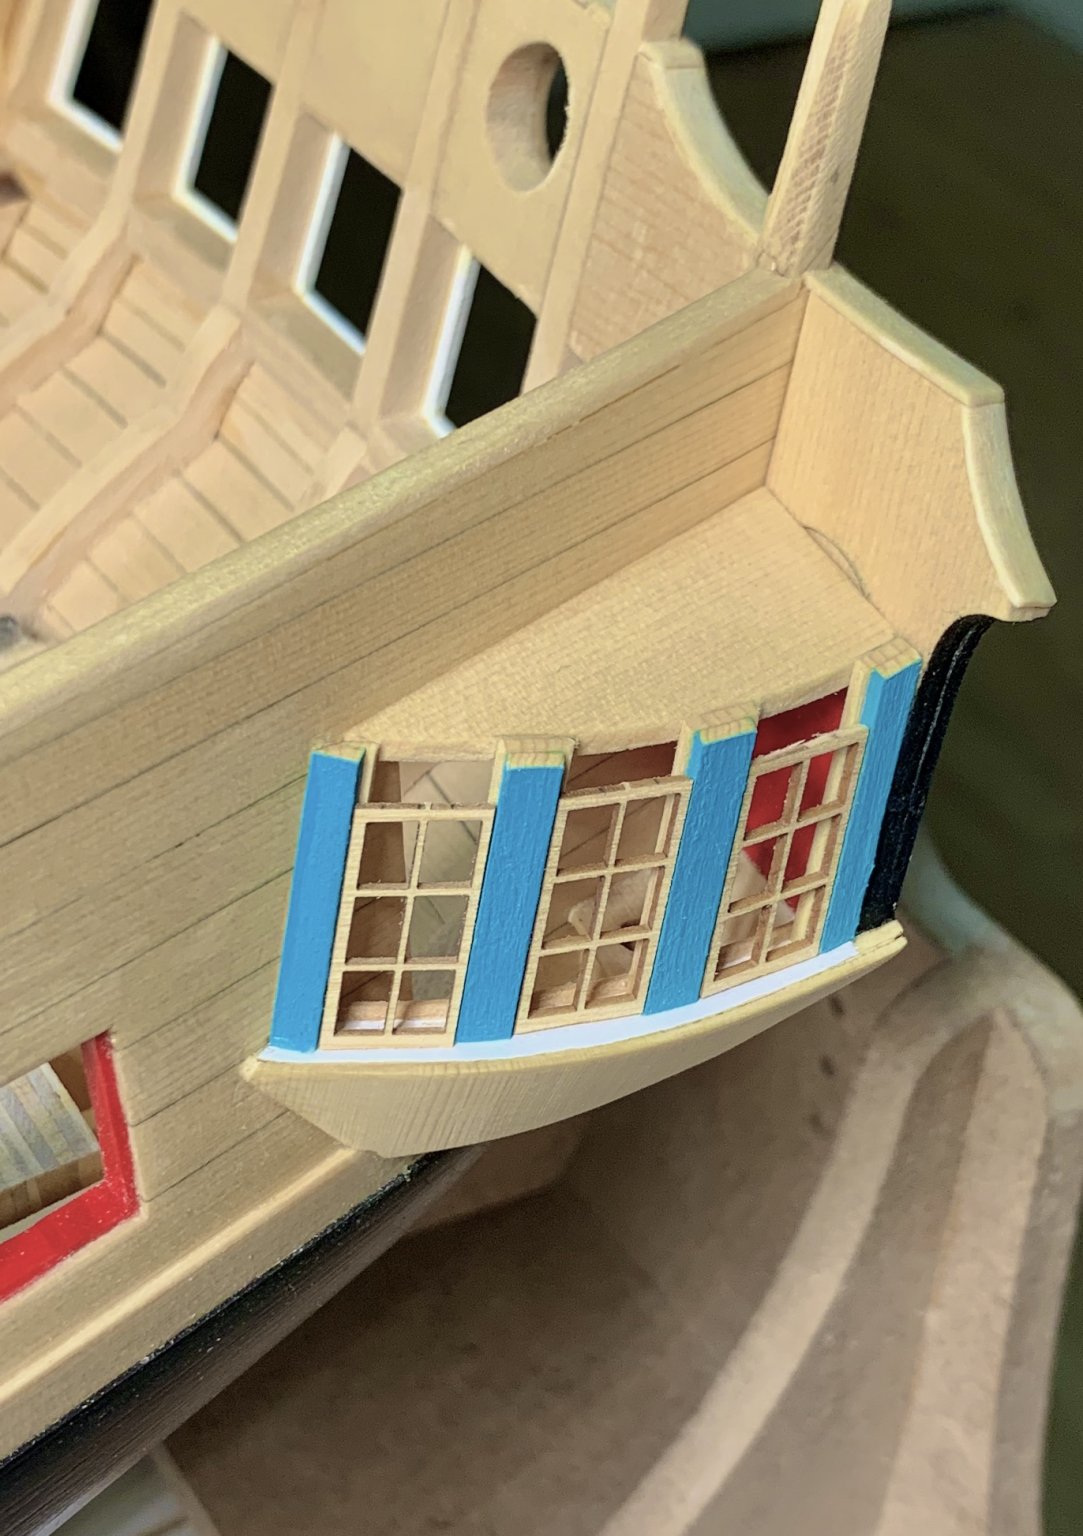
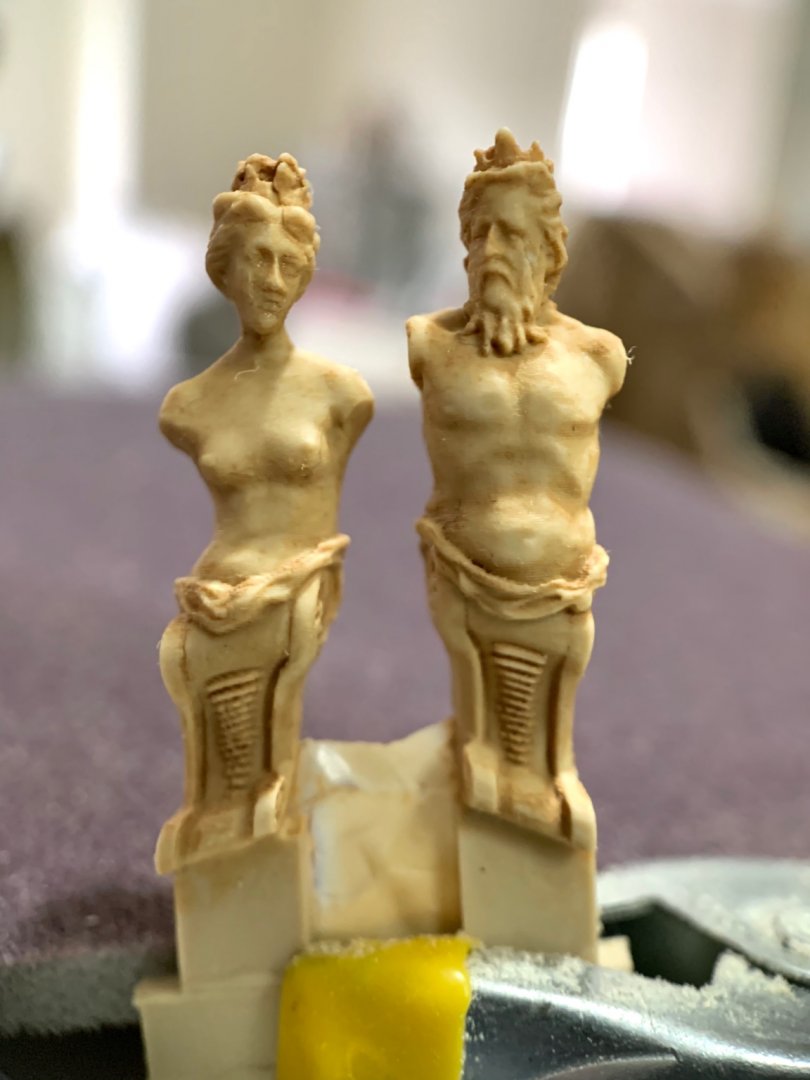
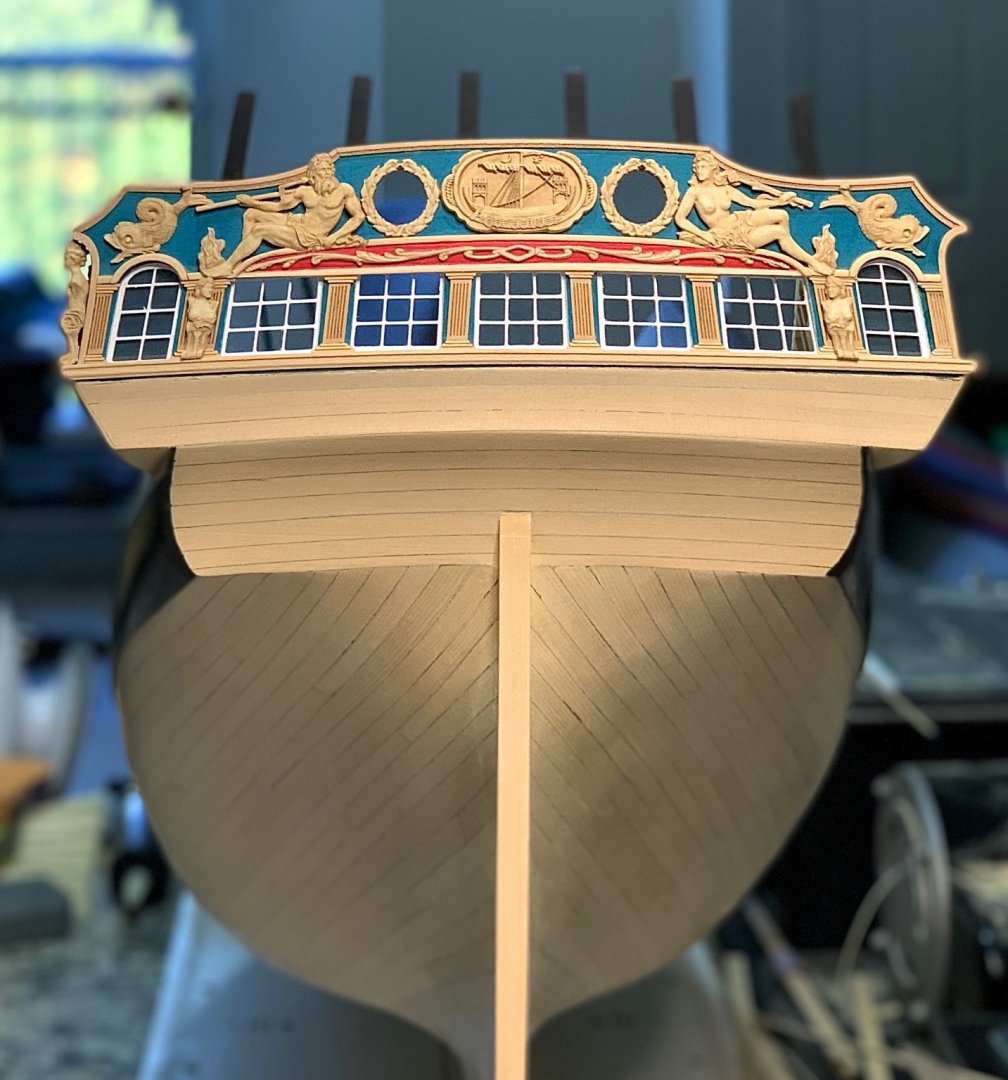
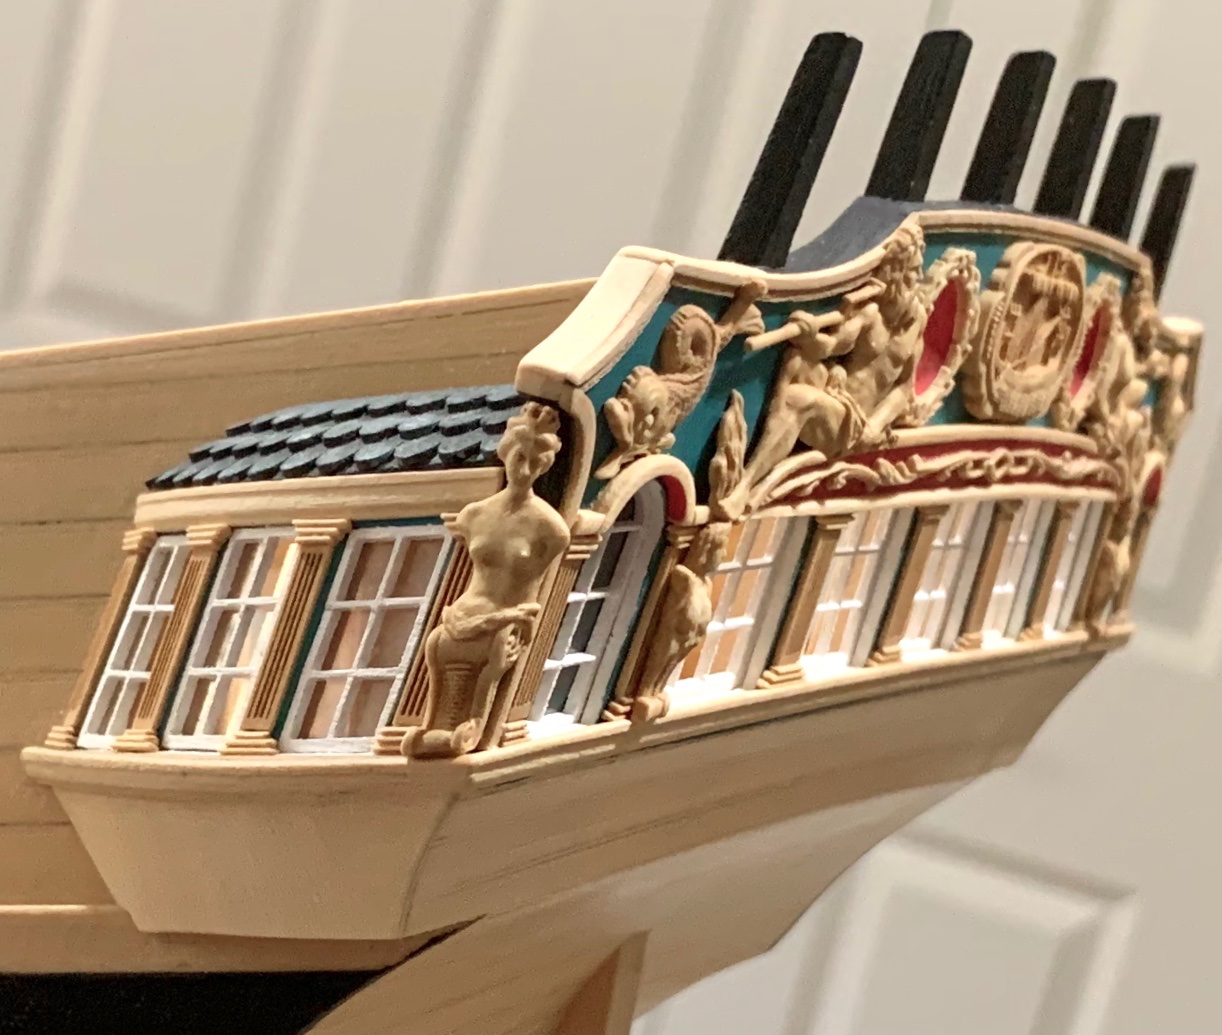
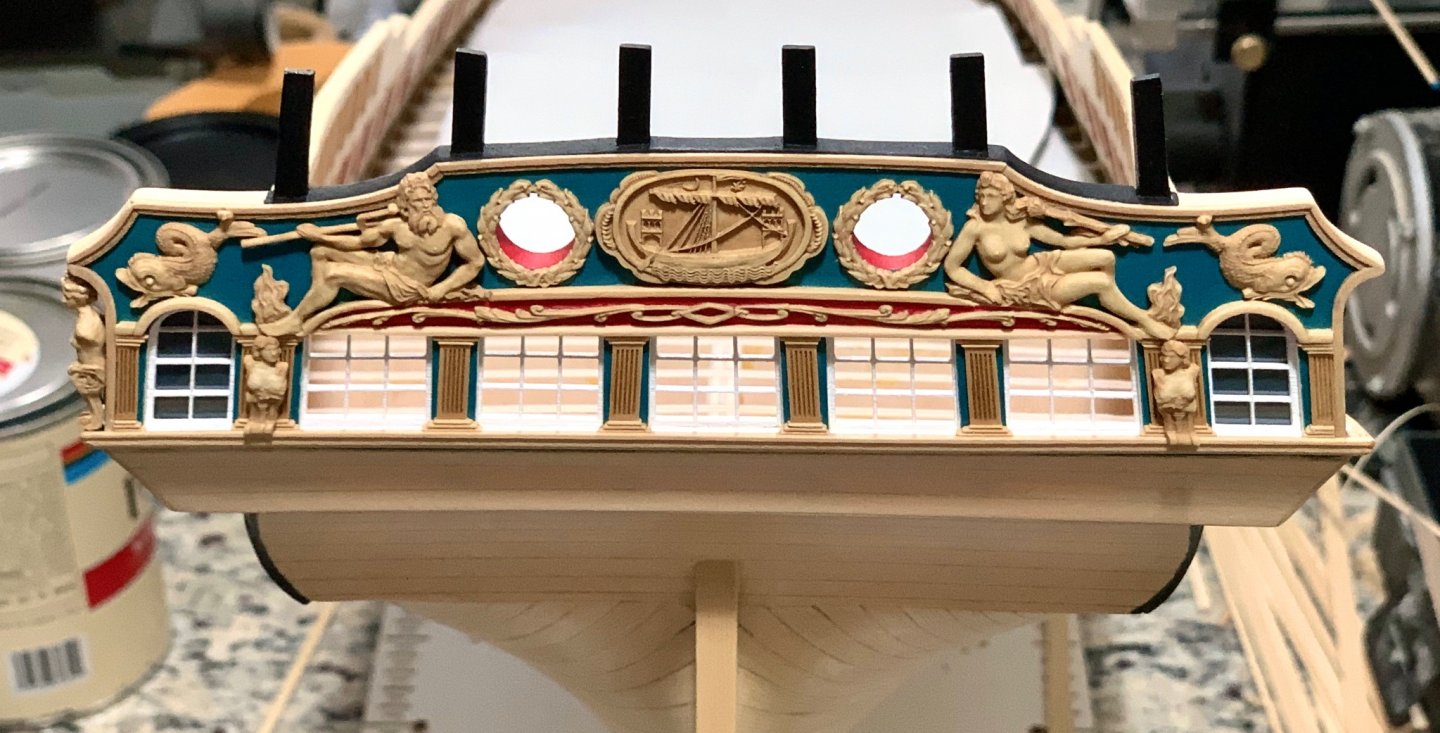
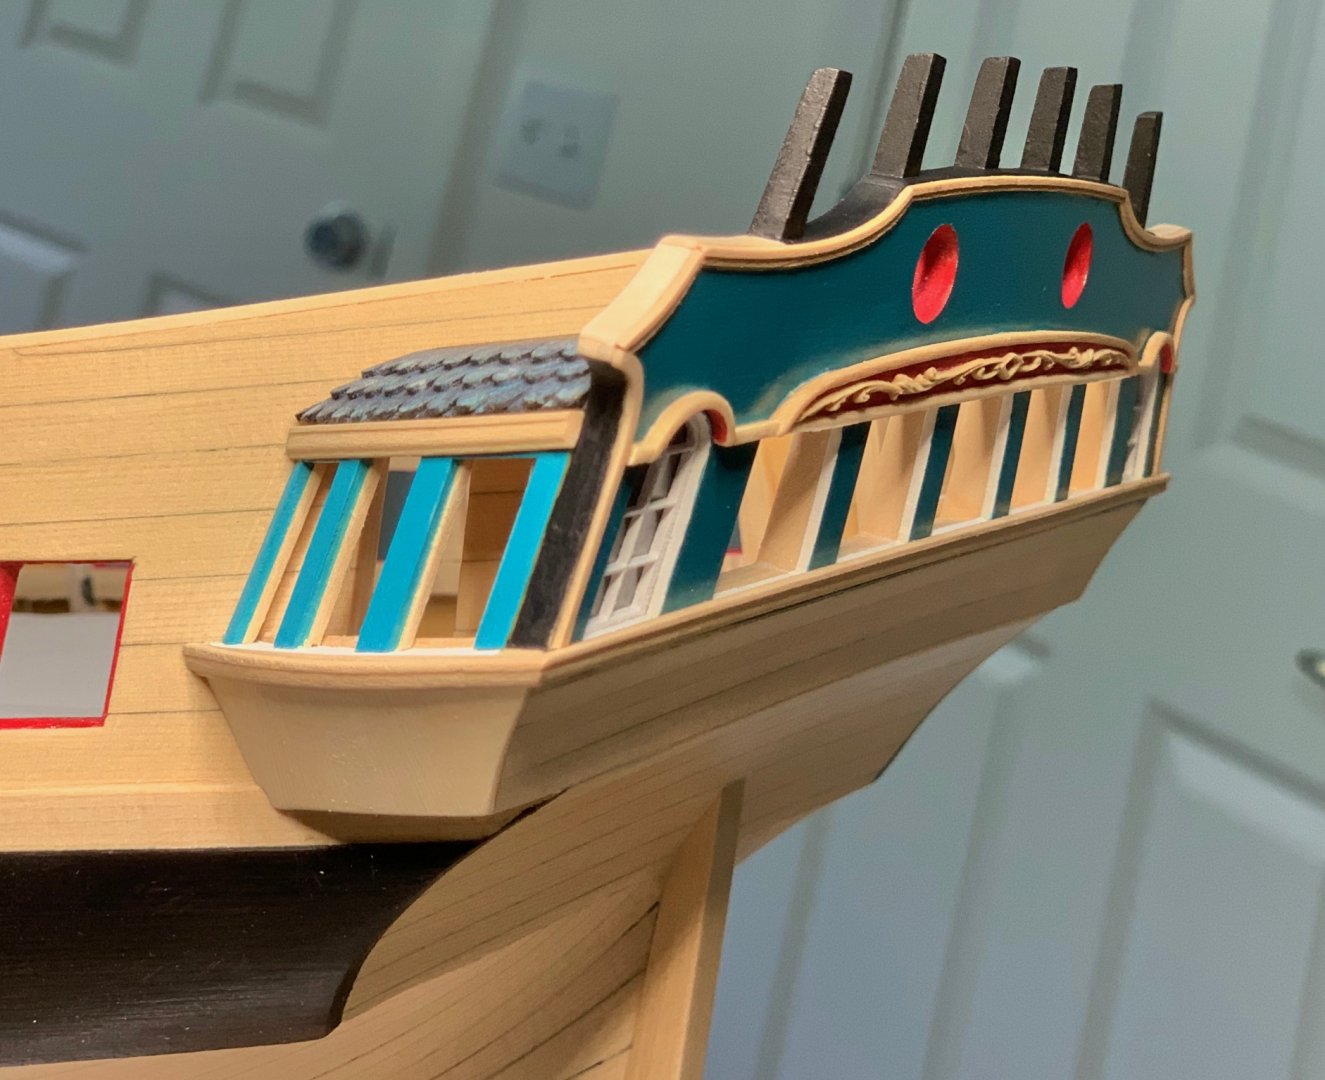
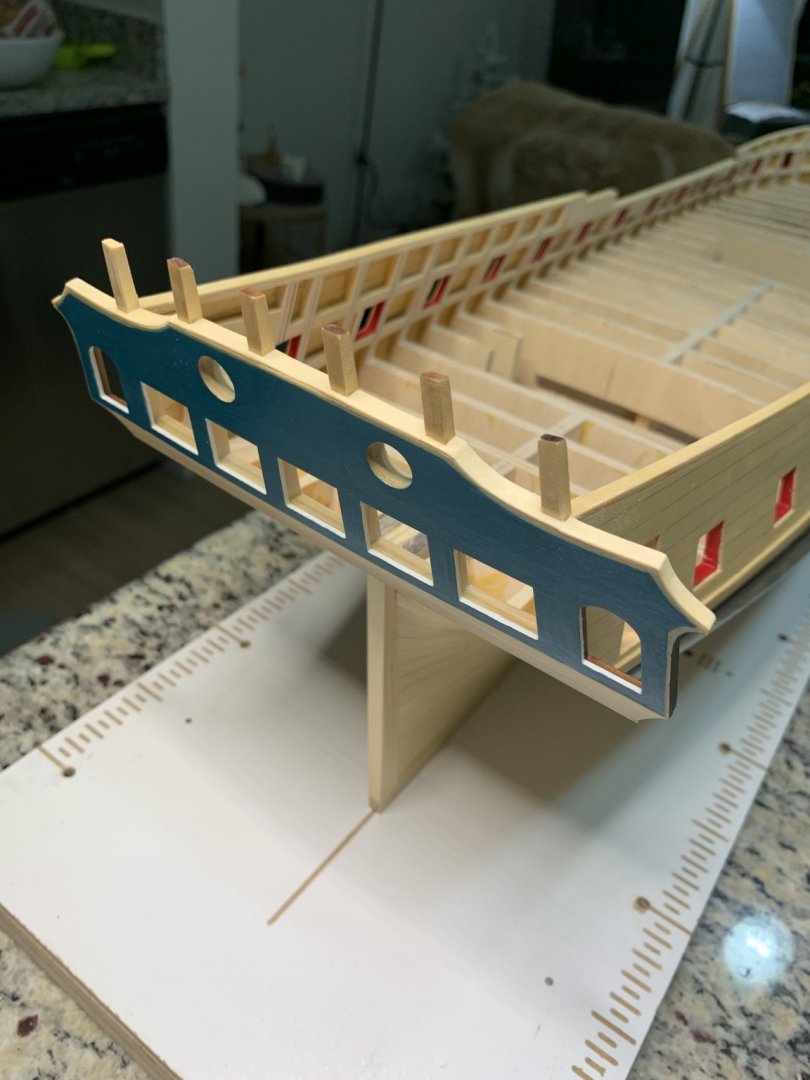
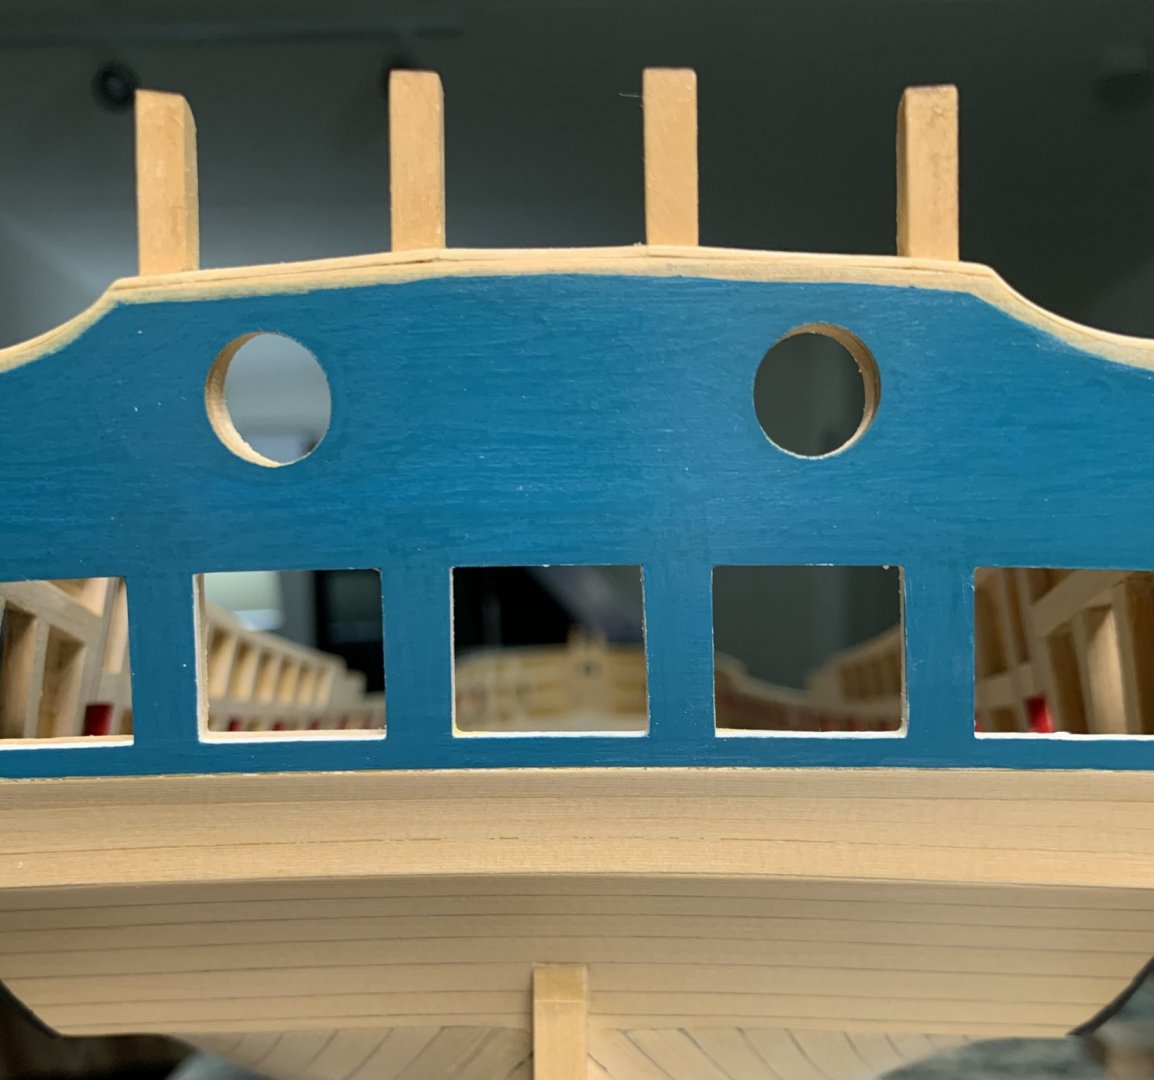
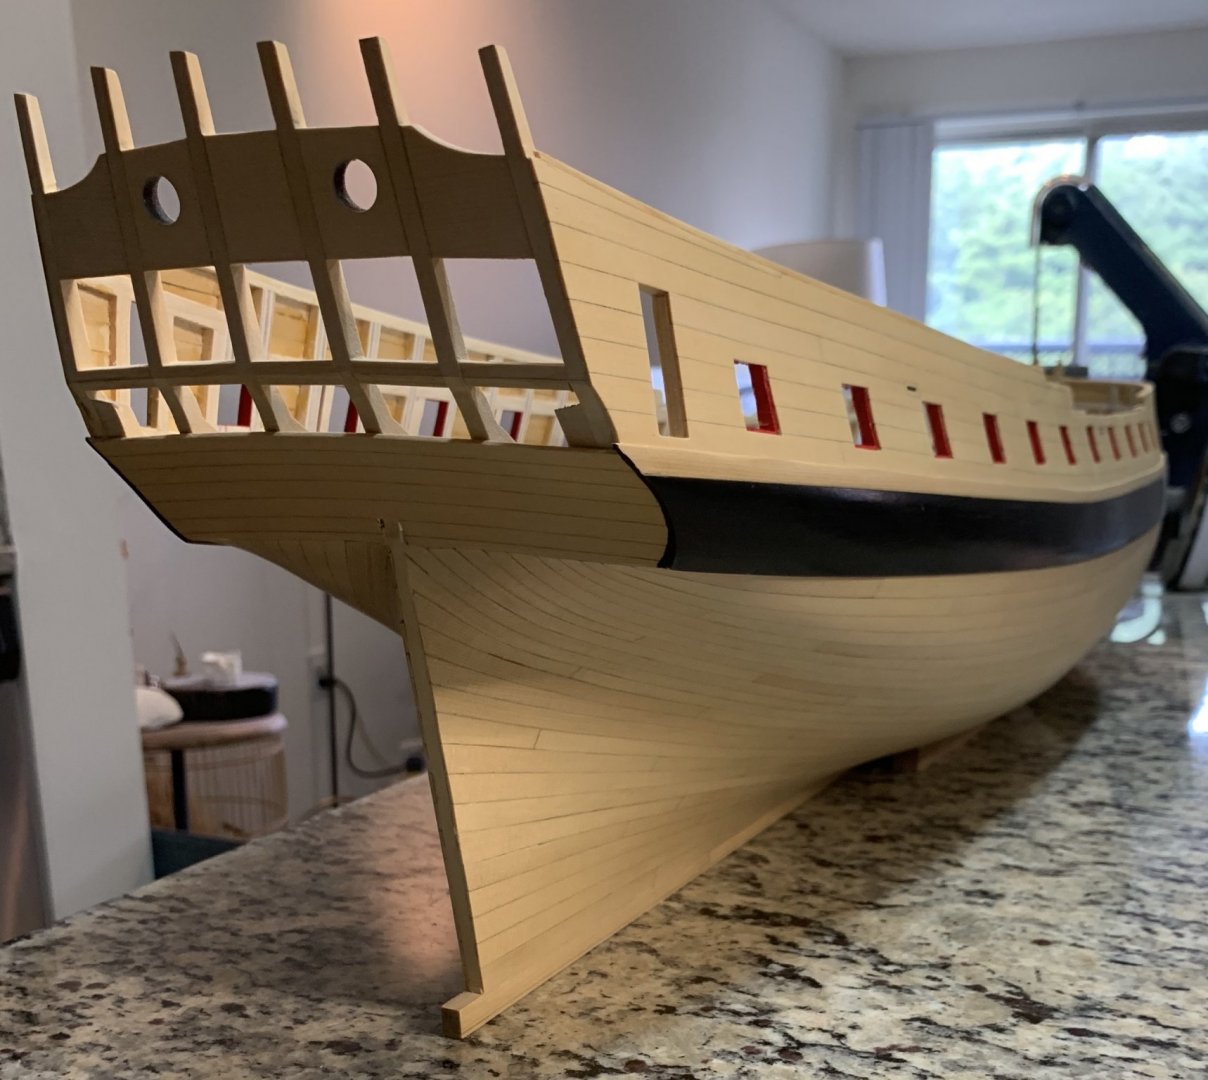
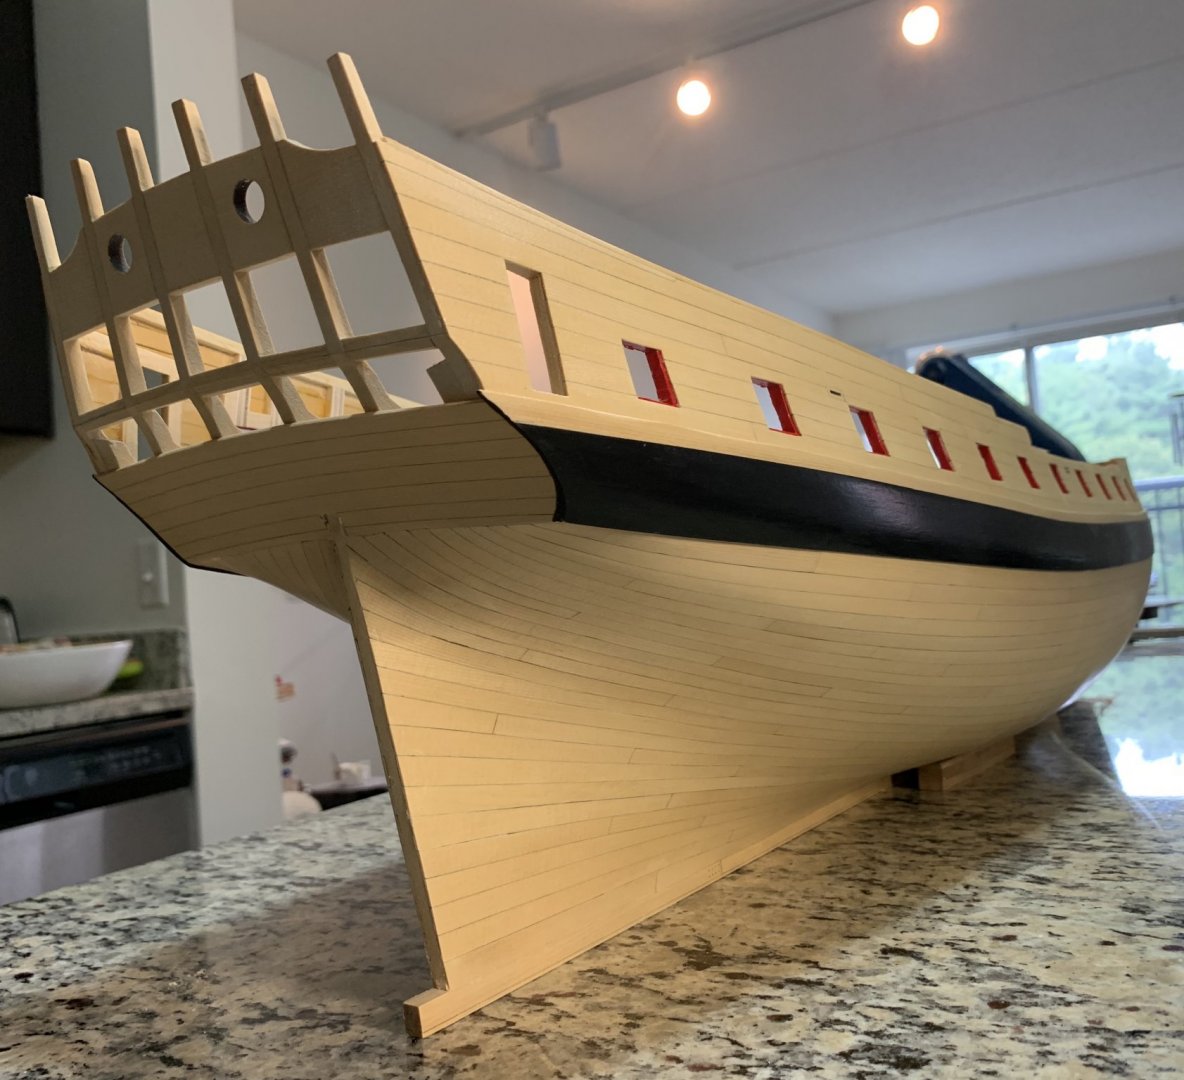
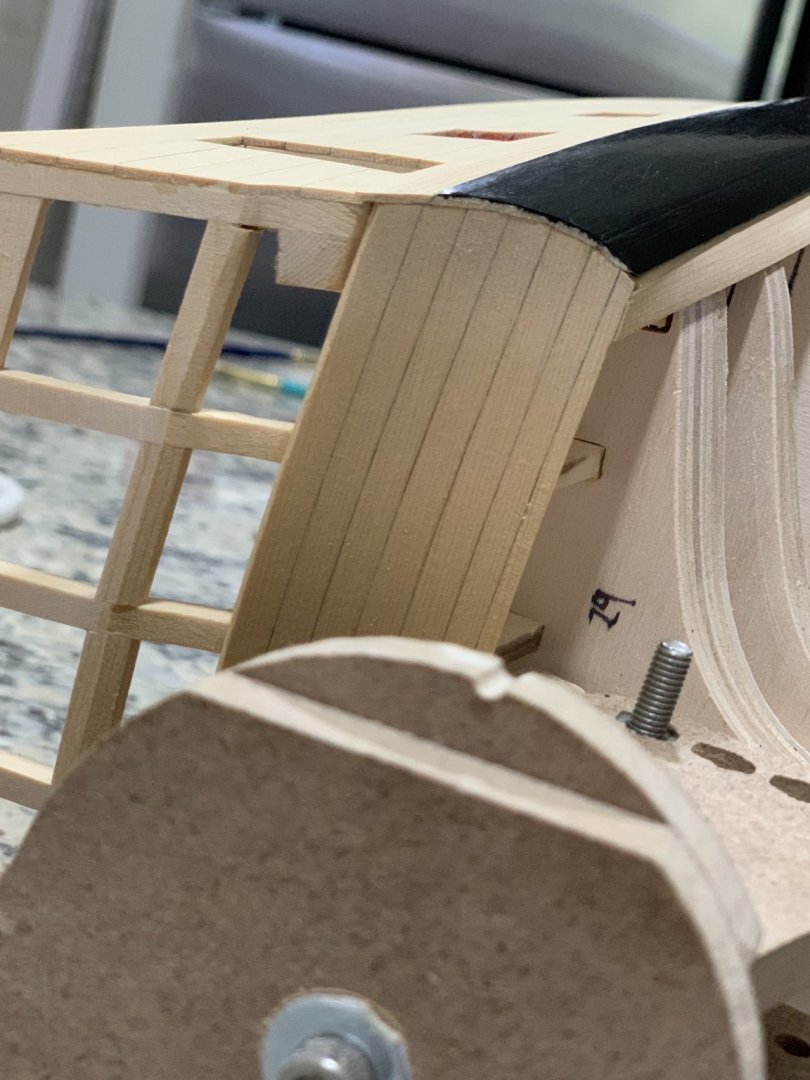
Thanks Matt, most of the credit goes to Chuck’s beautiful design. Thank you for those that are following my posts and for all the likes. I added the columns to the galleries. This was a lot of delicate work wit mini chisels and diamond files. The resin figures were painted as recommended by Chuck. I used an artist brush to add the stain into the shadow areas of the figures. Then I removed the stain to create highlights with a silicon artist brush. After 24 hours the figures were sealed. I got a macro lenses for my phone, you could see where the stain accumulated. In some areas you could see doted lines which are left by 3D printing or Jack’s 3D carving. The picture below shows a before and after to show best the effect. My intend was to match as much as posible the colors of the surrounding wood. The detail of this carvings are amazing; for example the leave Coronas around the circular gun ports are not identical but rather mirror image of each other. Jack’s attention to detail shows up very clear. The windows fit was perfect thanks to those spacers used during construction. The quarter galleries got the same treatment. I added the acetate film after cleaning the laser char with alcohol. I glued the windows before adding the top and bottom parts of the columns. In the picture bellow, you could see how nicely the gallery and Qgallery windows align. Gallery windows are not glued. I paid special attention to the placement of the feet and heads of the main figures and carved the moldings whit mini chisels to accommodate them. I noticed that Jack rolled the tail fin of the fish to fit the molding so I followed the placement of the fish as in the plans. Everything got sealed with Testor’s matte seal. I chose to paint black behind the corner figures to enhance the contrast and it payed off. The molding around the figures were carved with mini chisels for a title fit Once the darks behind the gallery windows build up the white paint will show best. I am planning to use a little white here and there in the model because I will plank the deck with holly. Next I will add the hand painted freezes. I have collected a bunch of Mer figures that I will add. Best, G


-
Hello Reg, Very nice work! Nice color choice of the Kauri wood. What sizes of resin cannons did you used? Have you put any finish on them? Best, G
- 137 replies
-
- 1
-

-
- winchelsea
- Syren Ship Model Company
- (and 1 more)
-
Hello Greg: Best tools for doing this, including the bulkwards: battery operated Dremel at low speed with a cone cutter (the base cuts fast but the tip cuts slowly), and a Japanese cut file (iwasaki 150 medium cut) to finish it up (cuts fast and leaves a smooth surface). Hope this helps, G
-
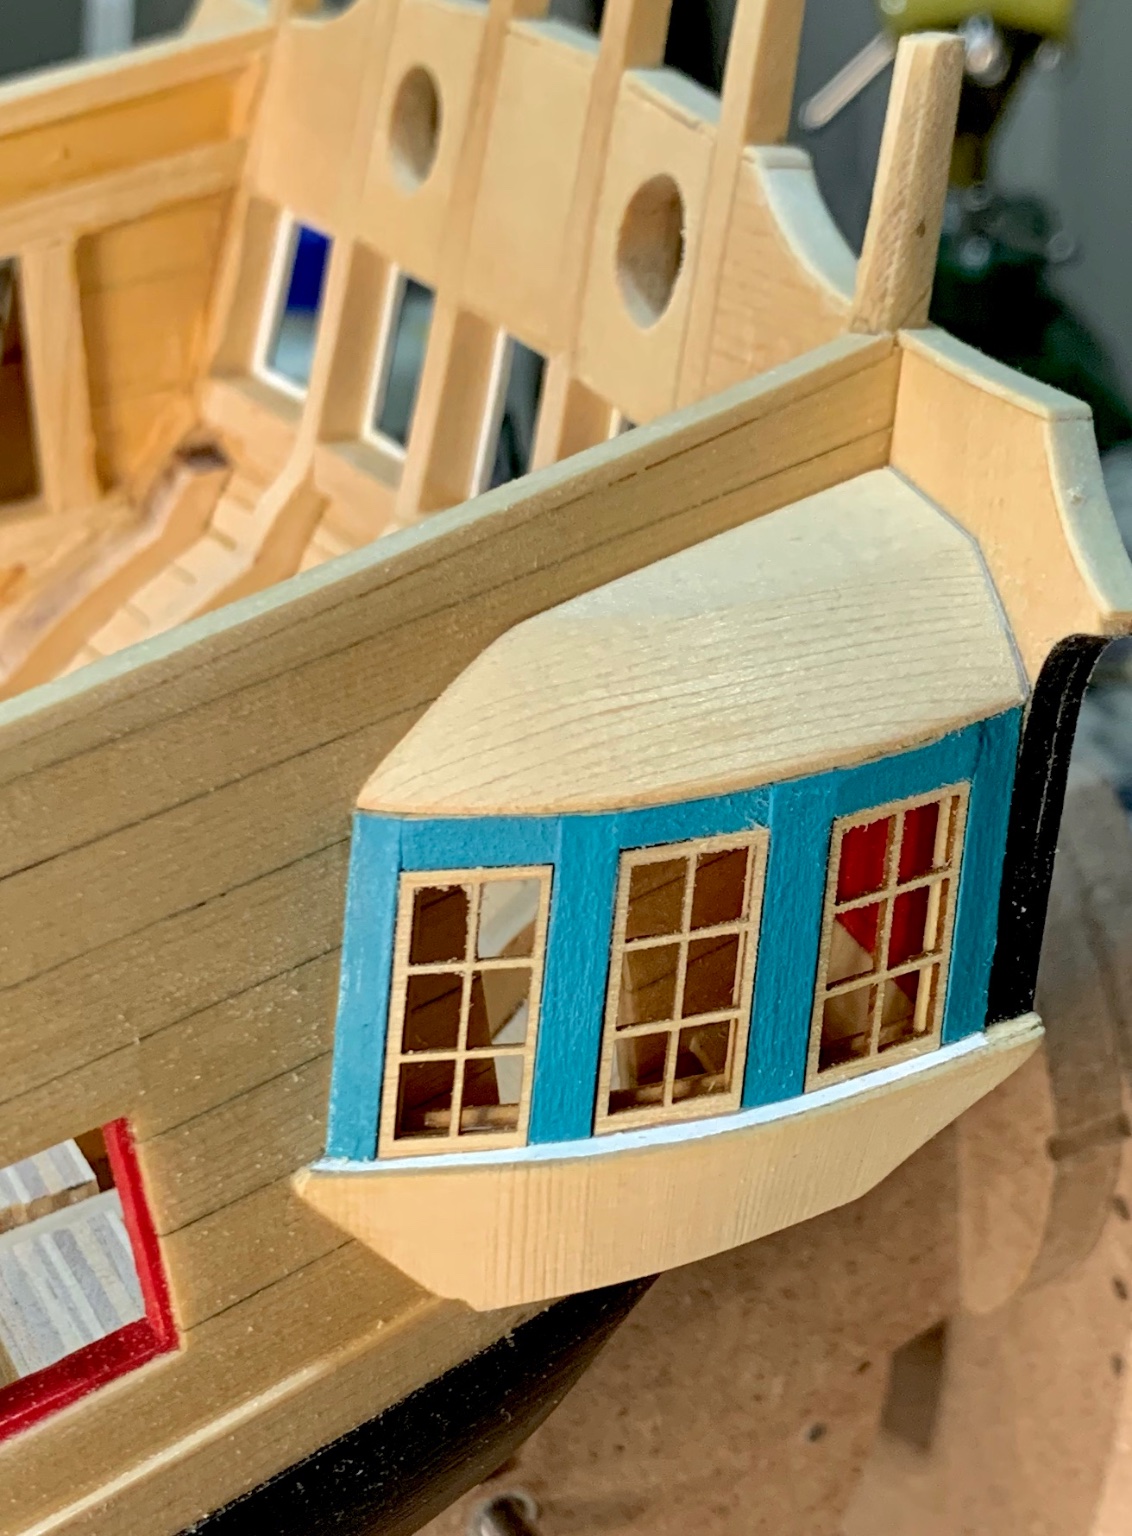
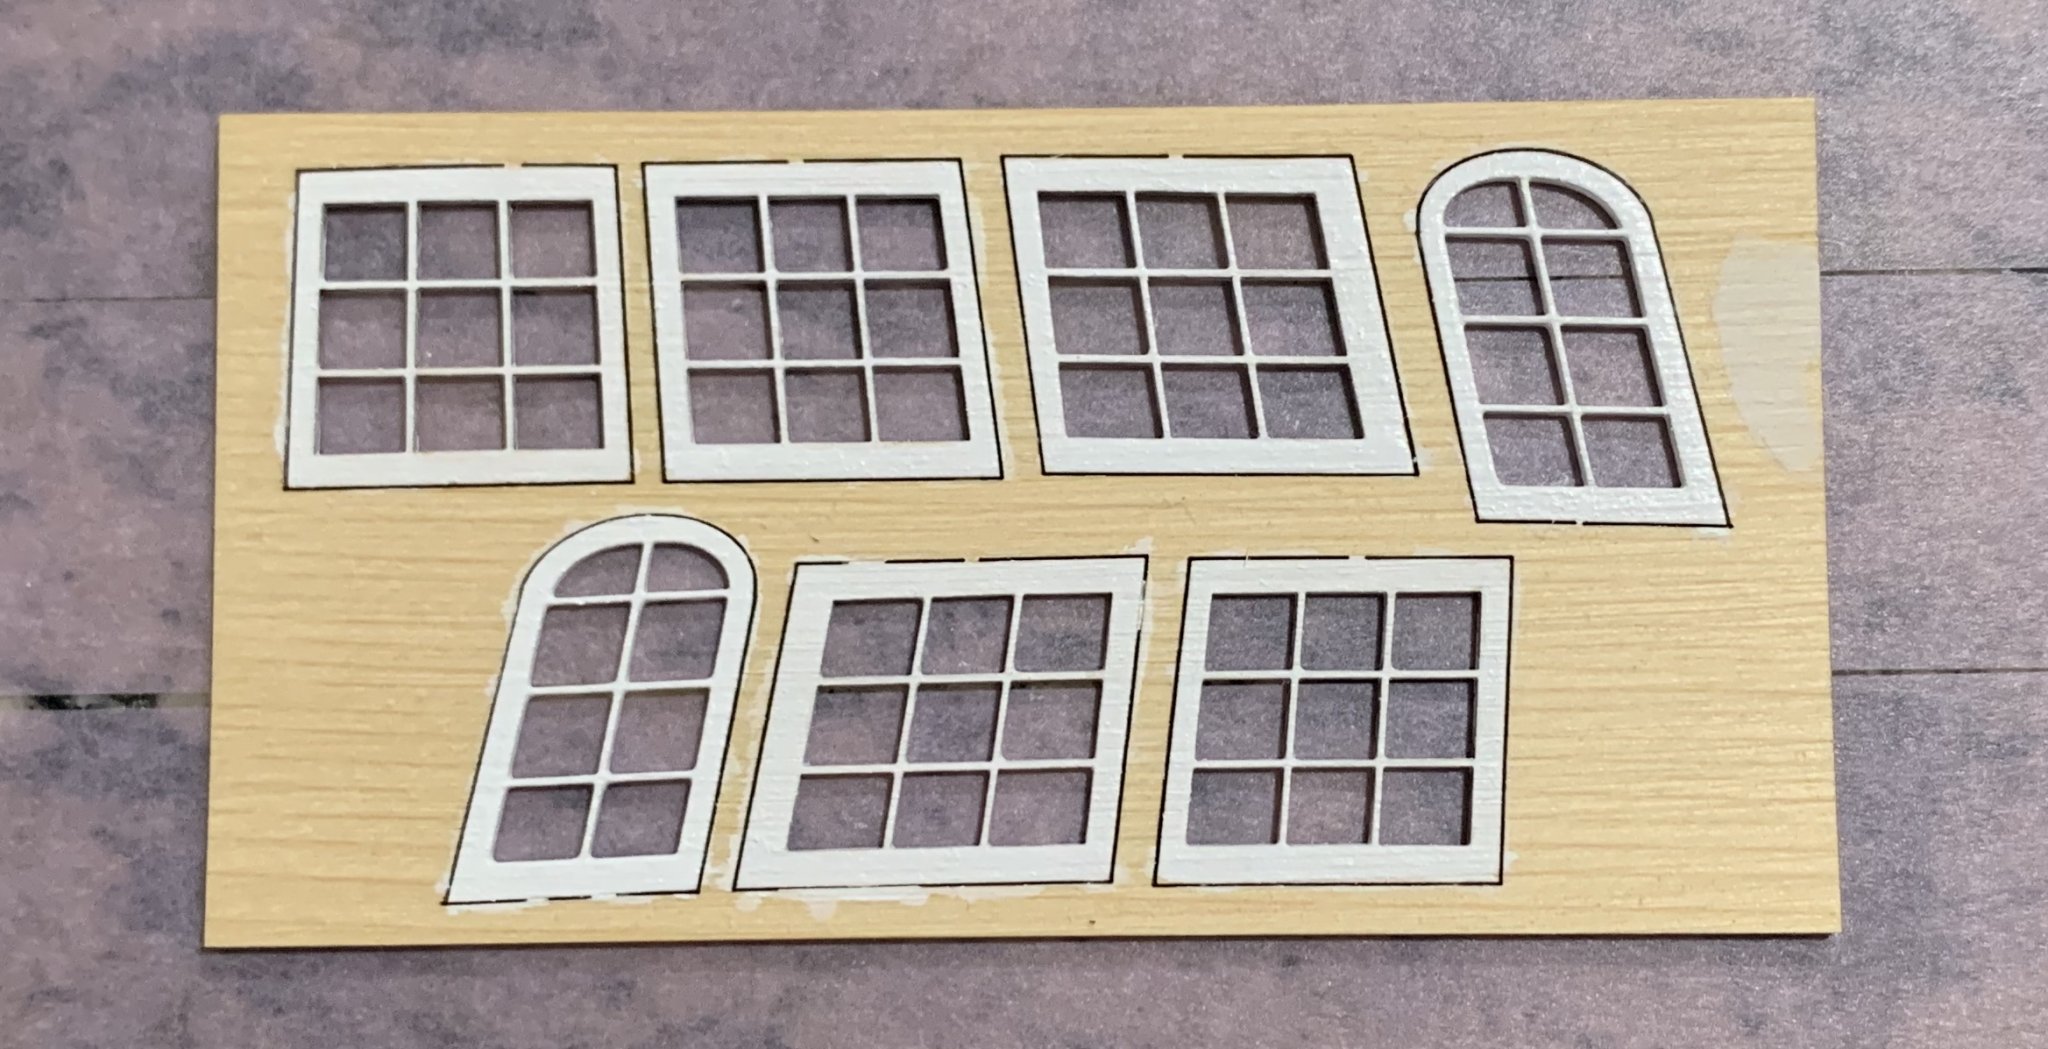
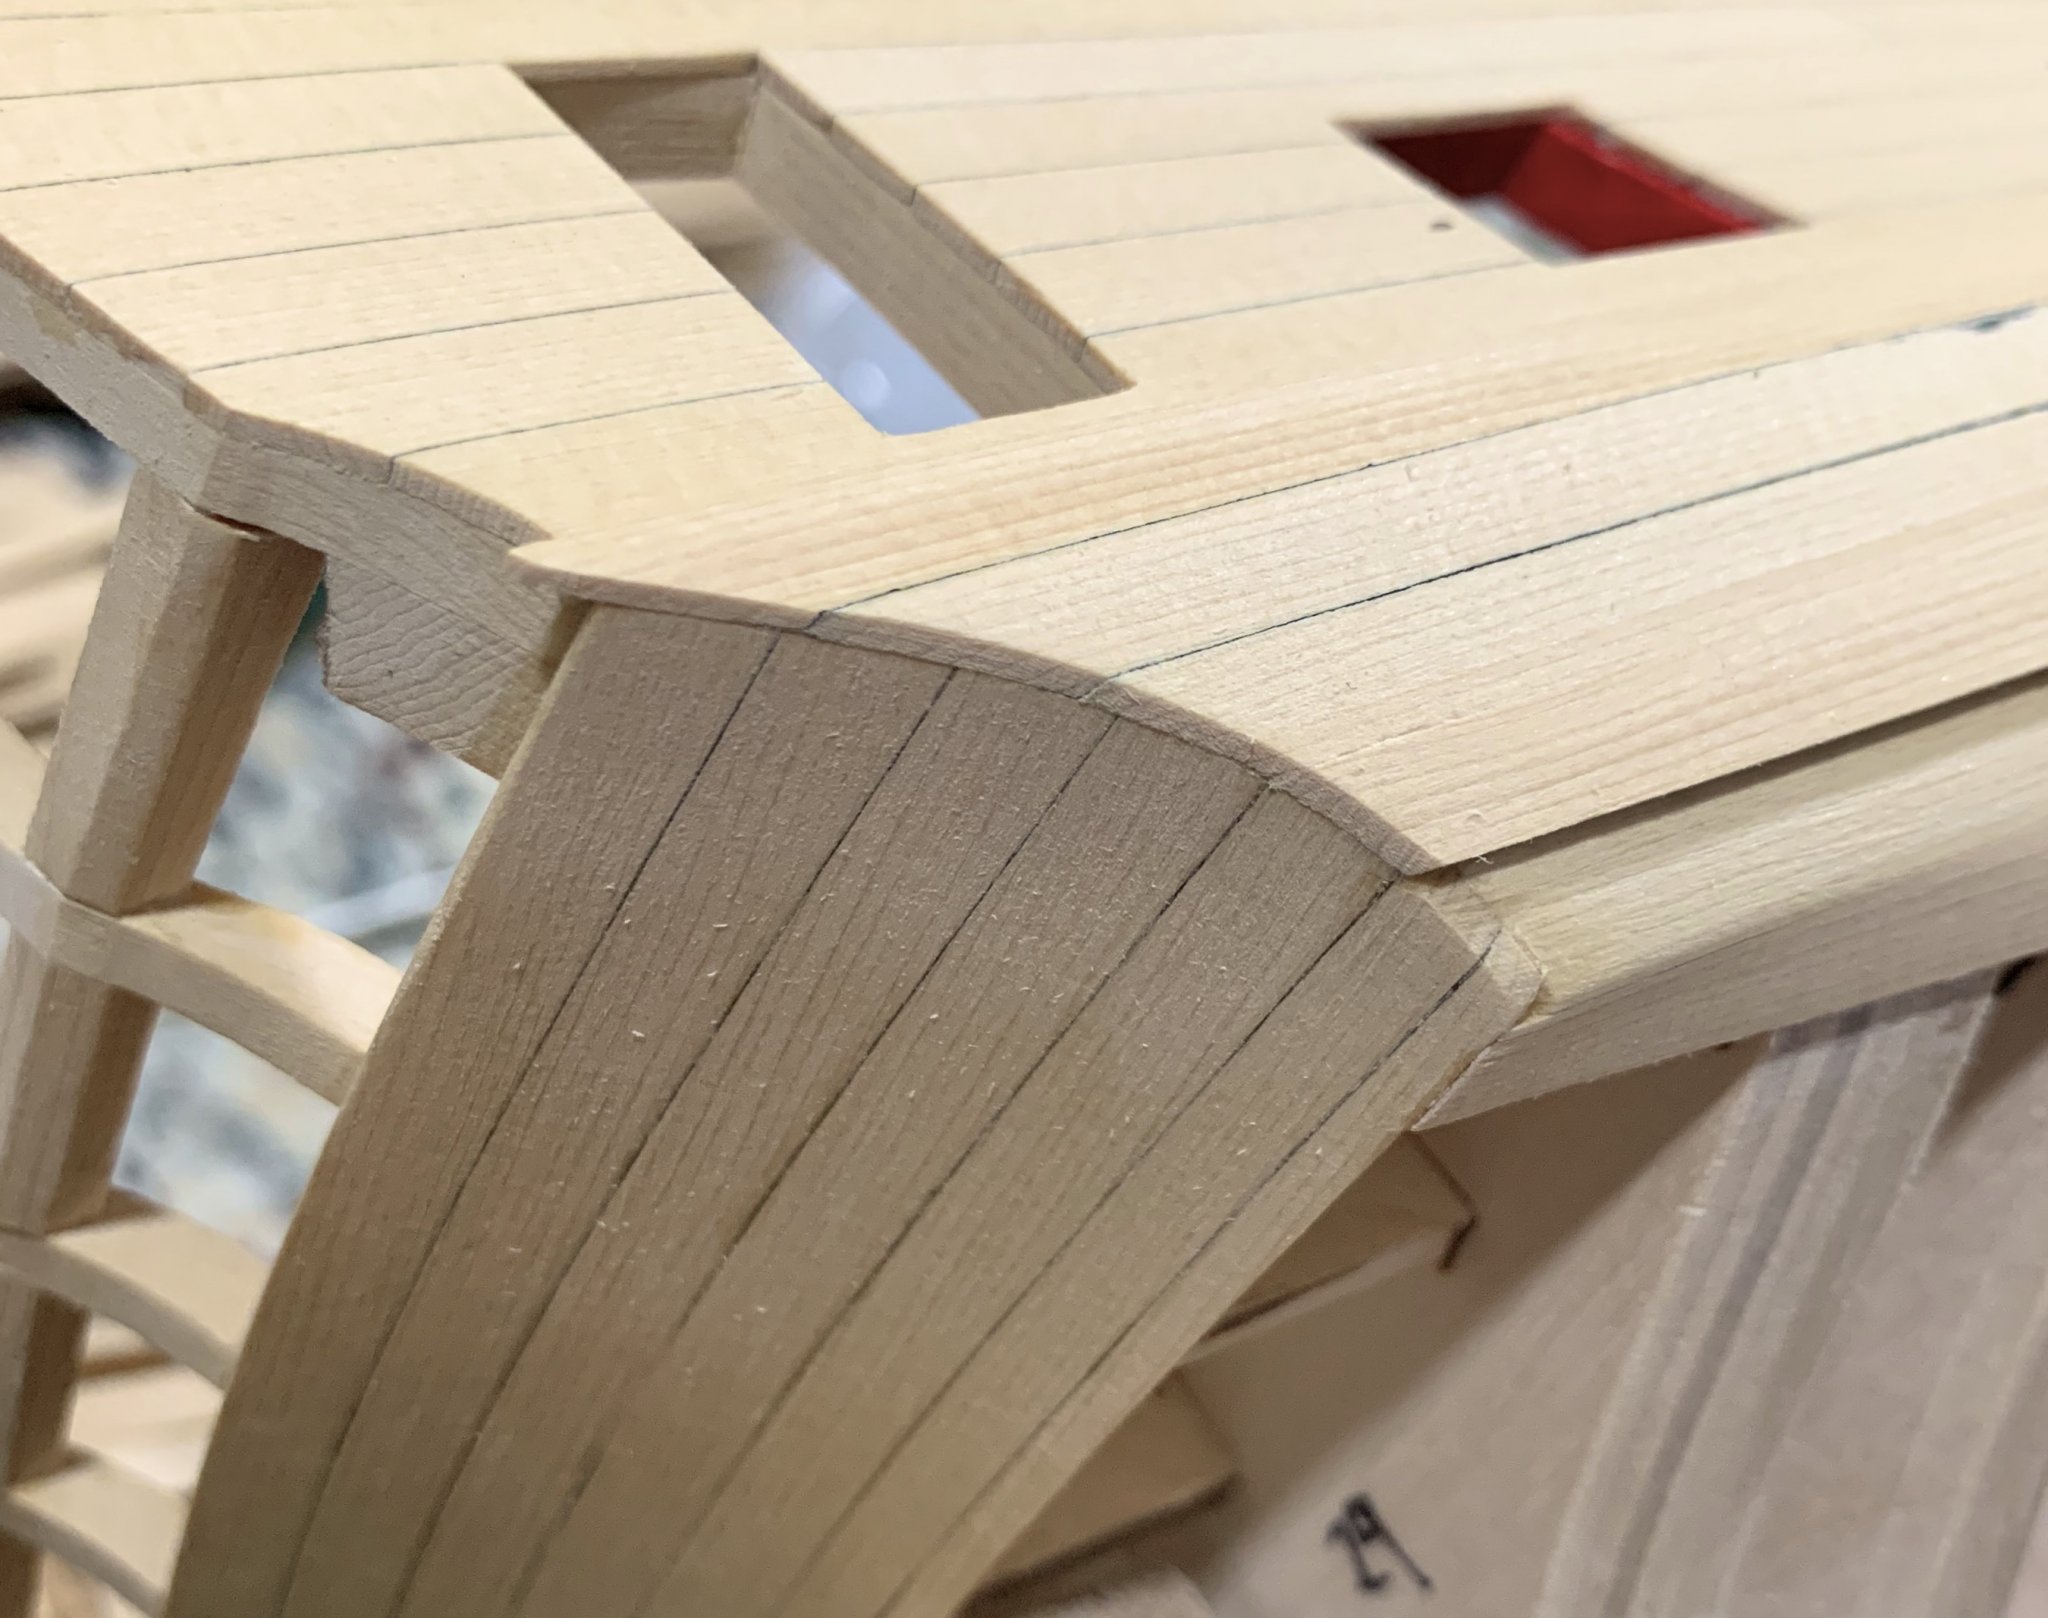
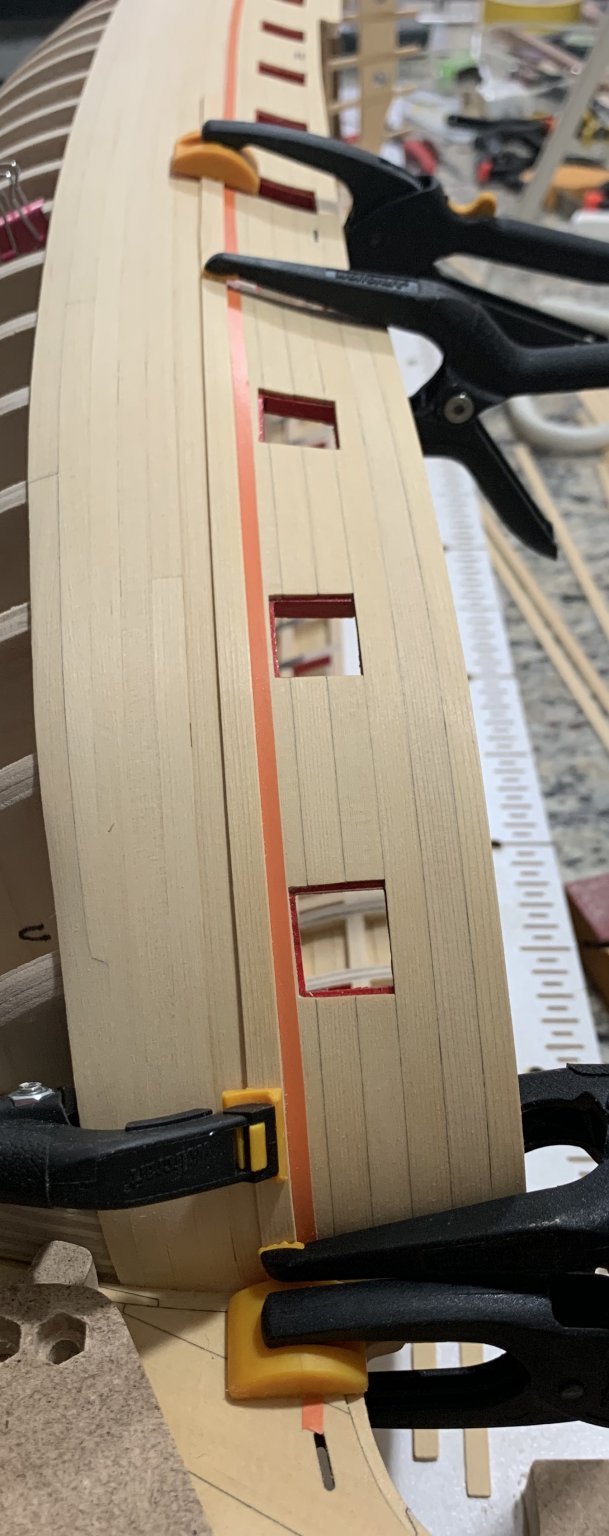
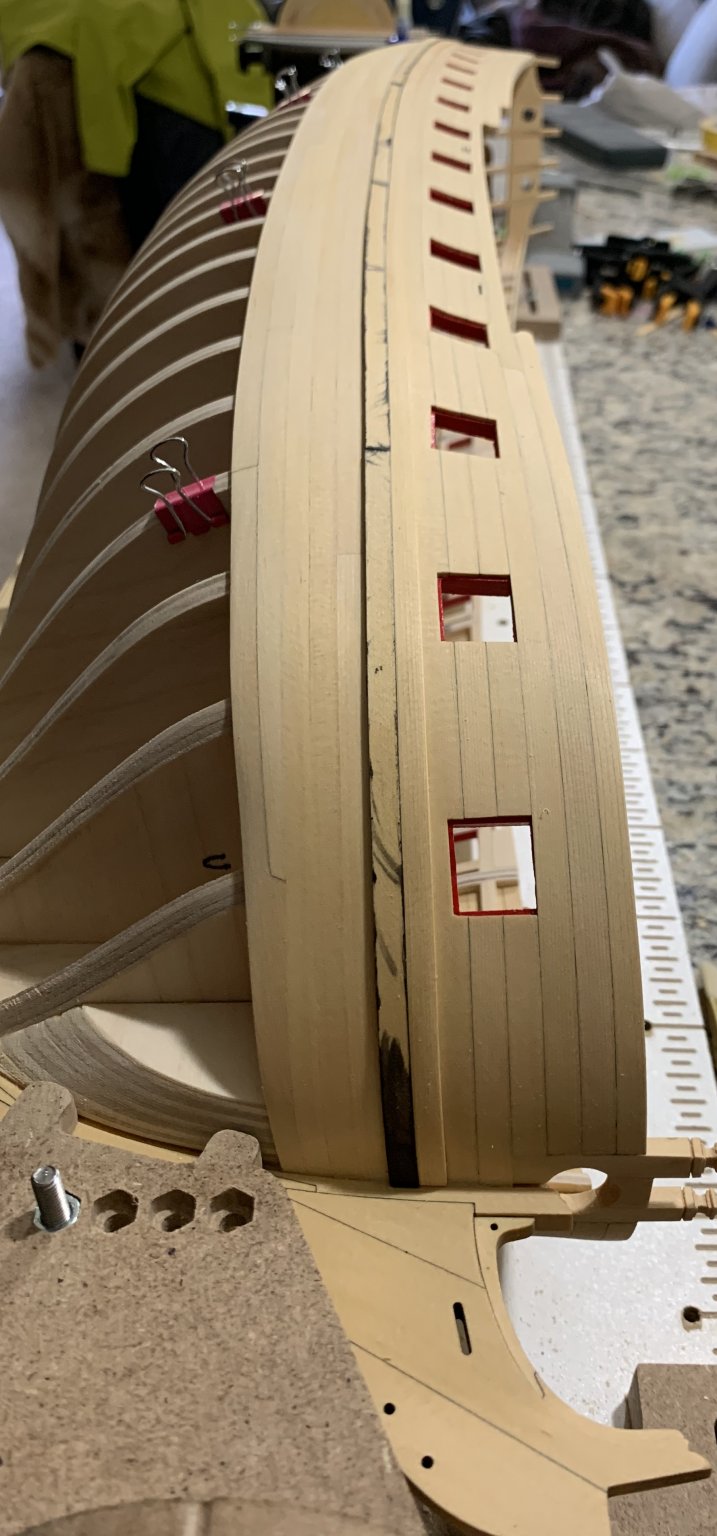
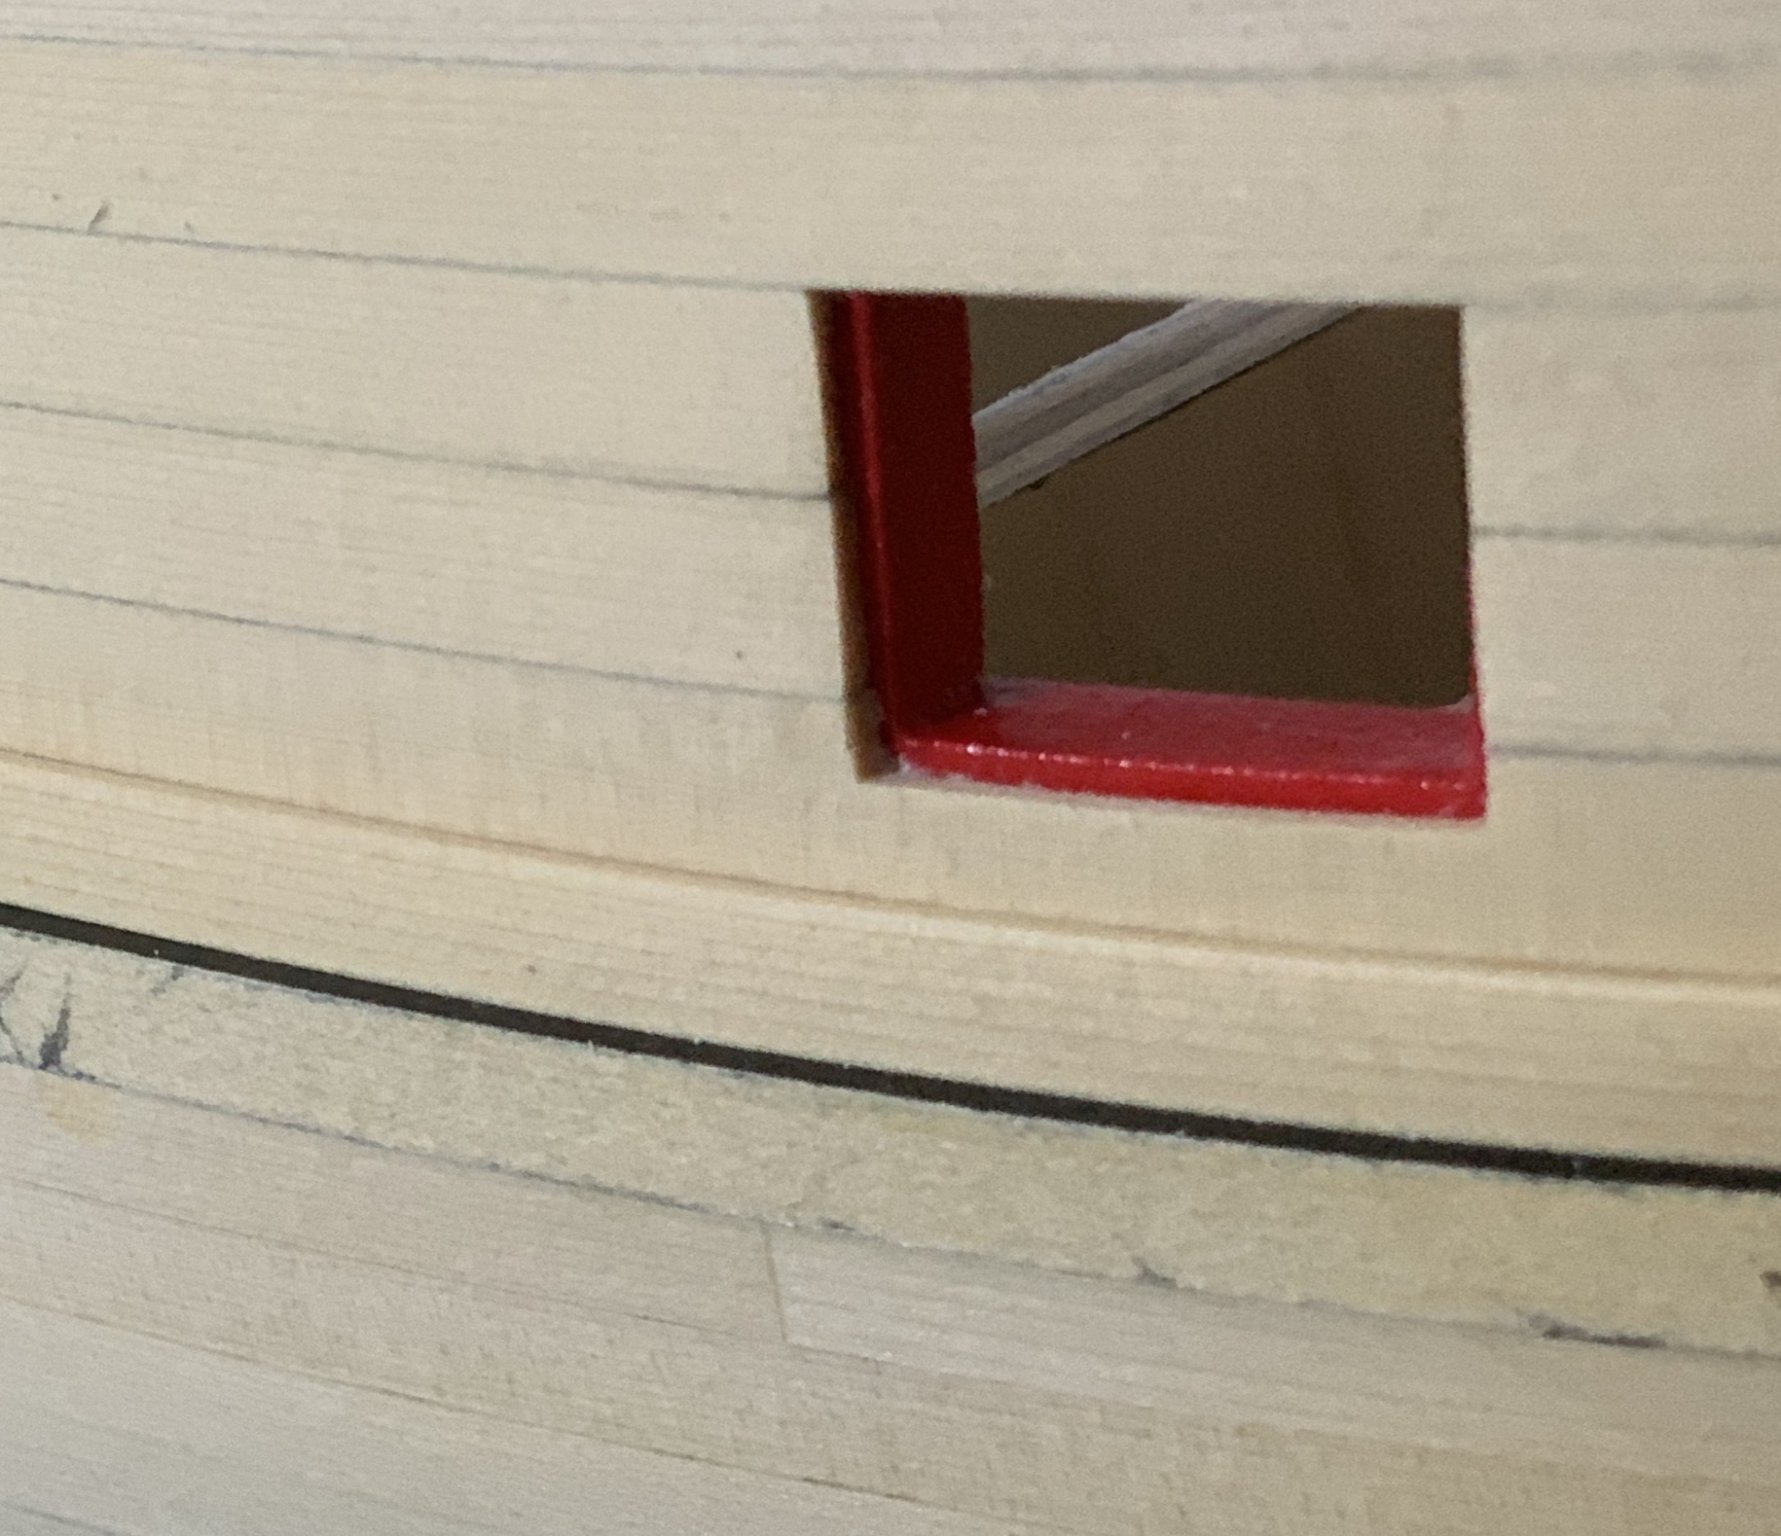
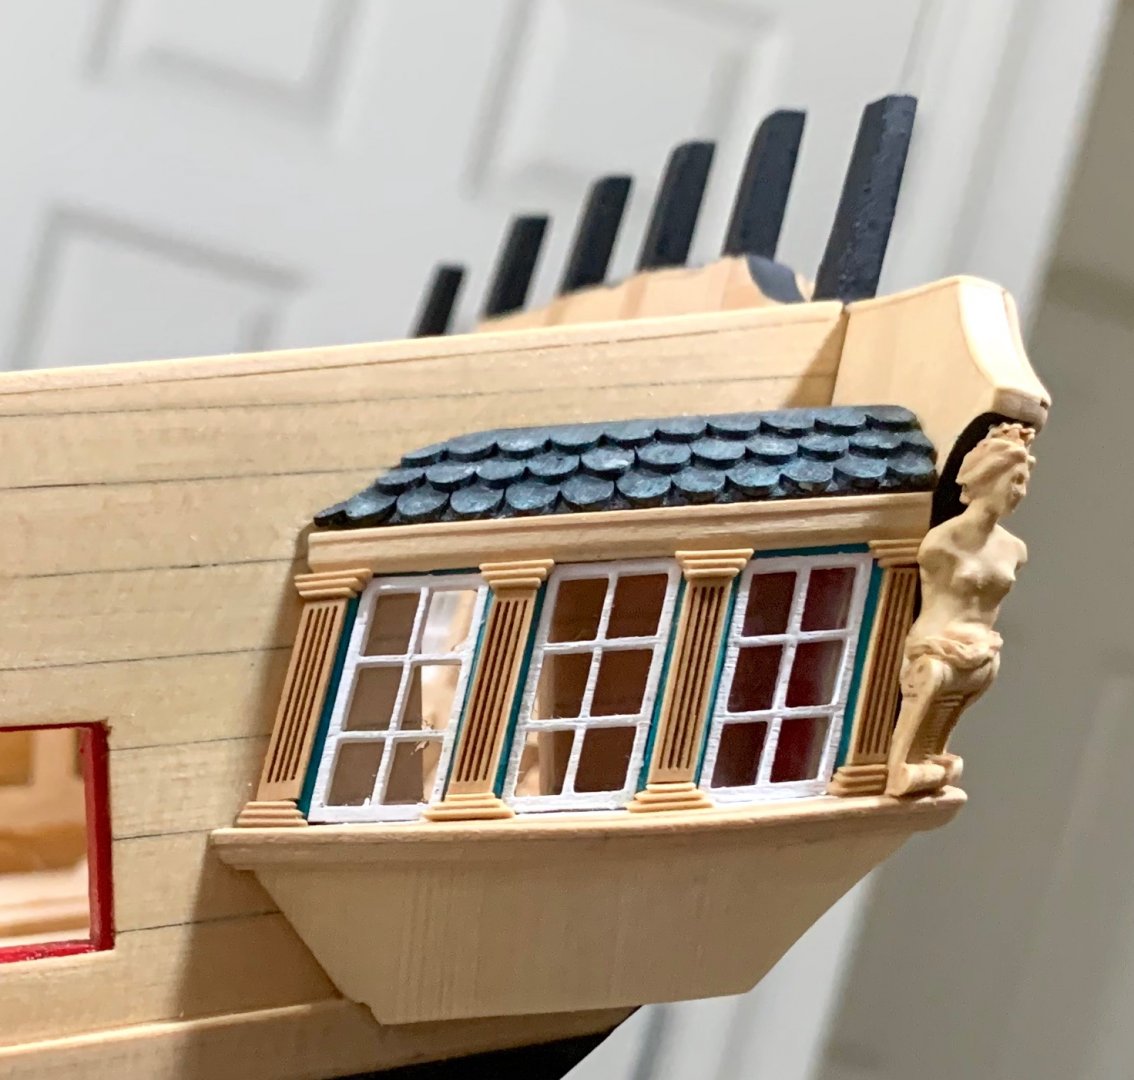
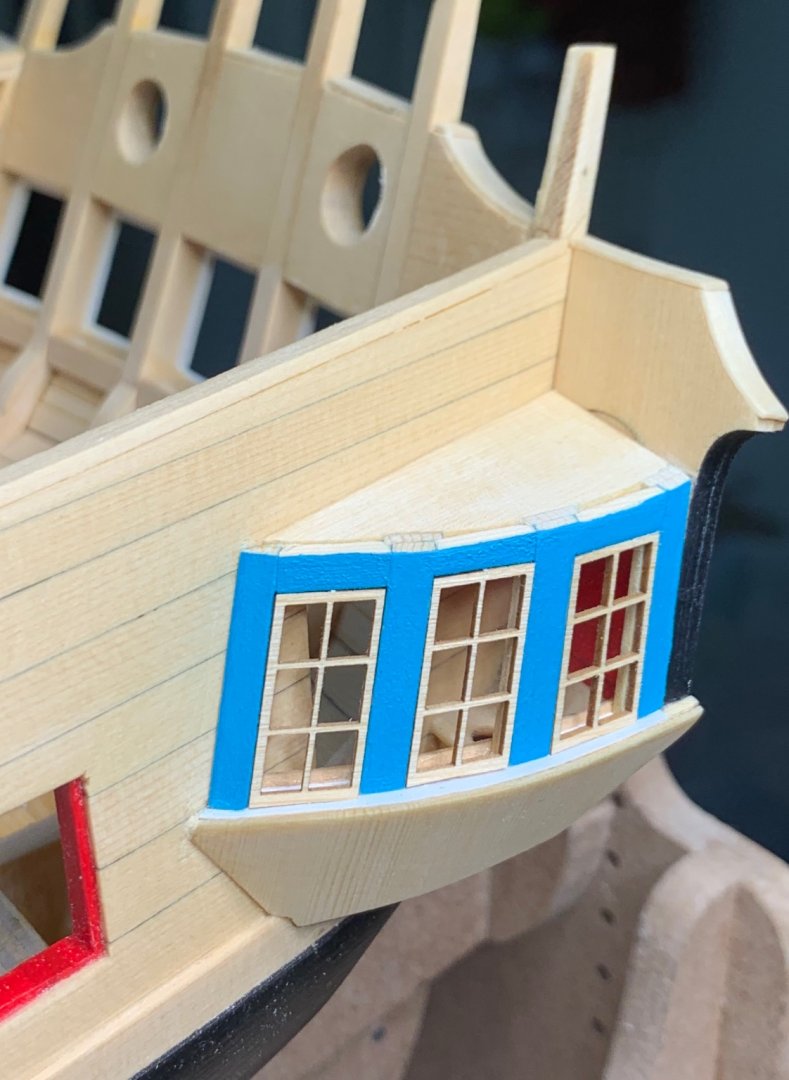
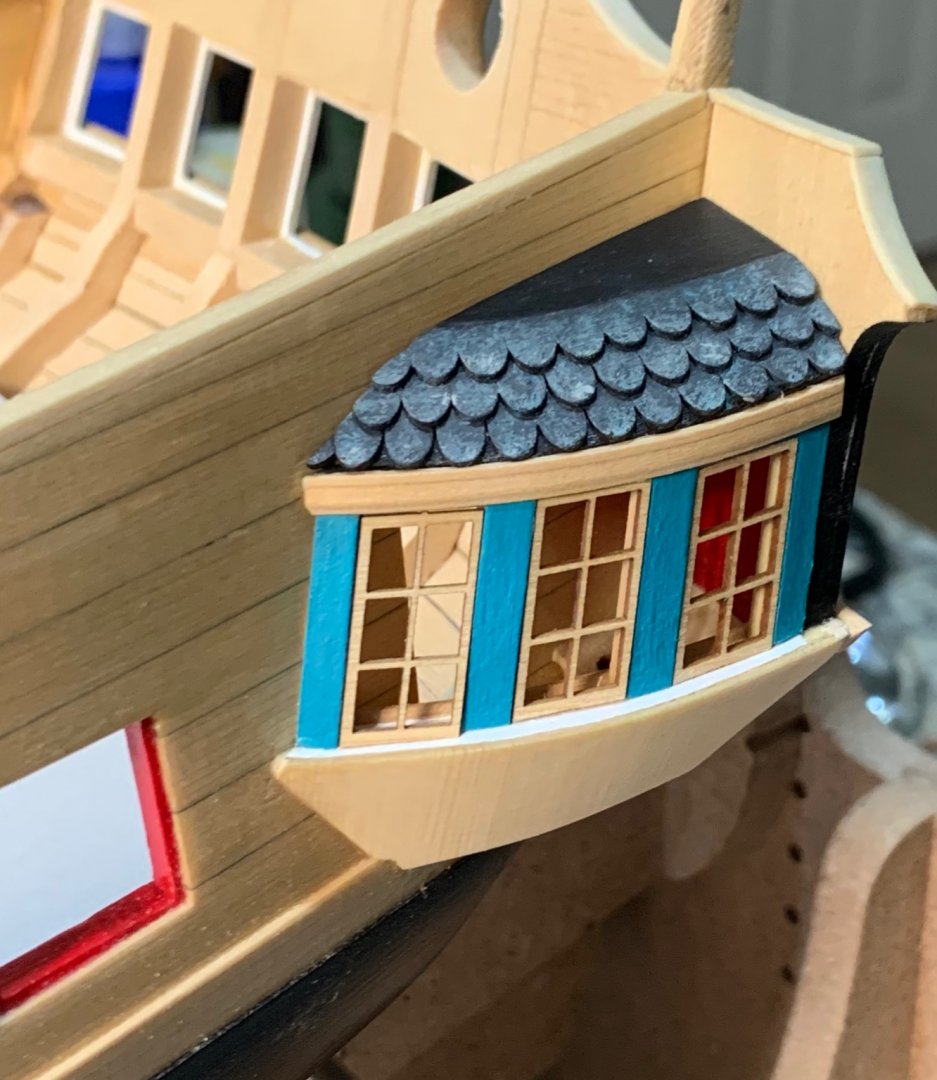
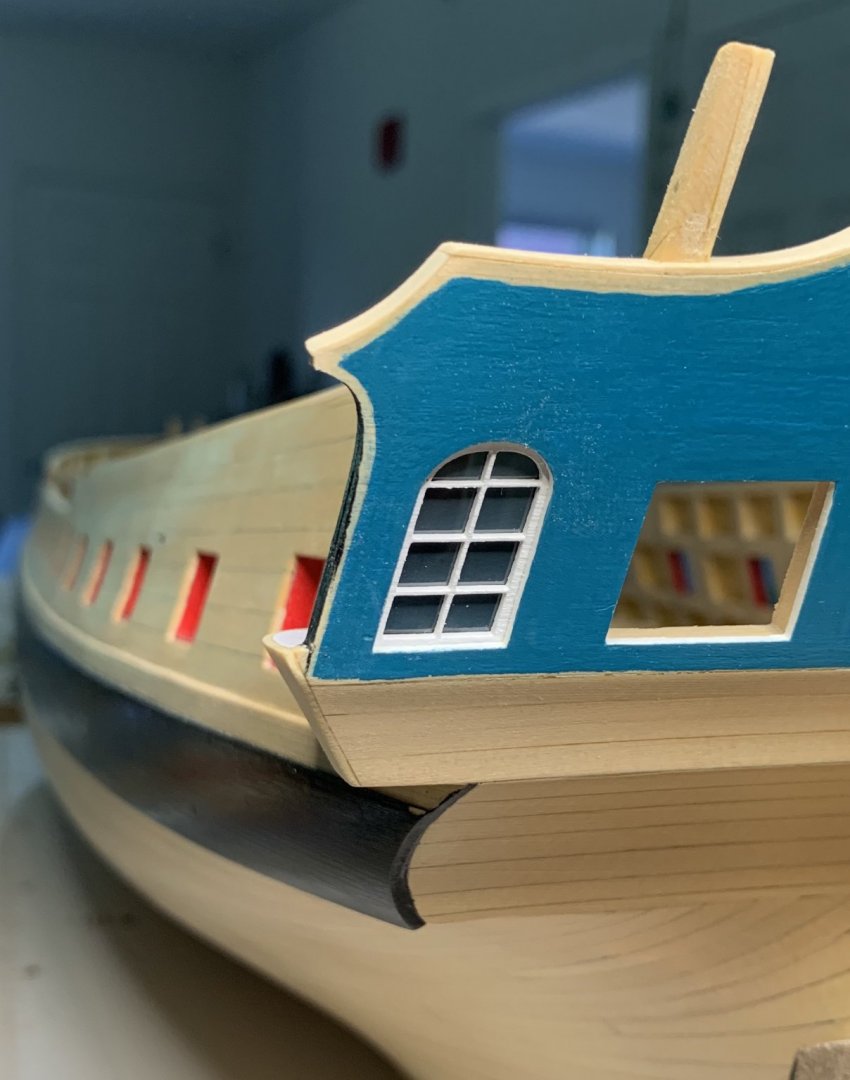
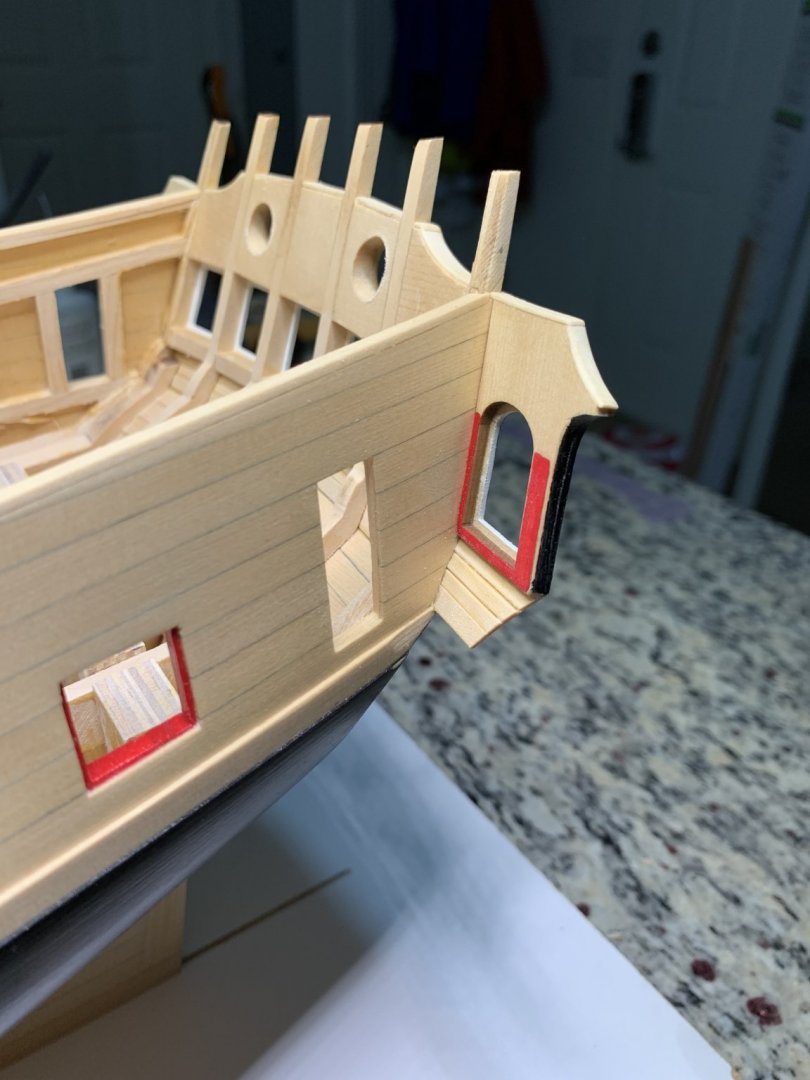
Thank you Fred and for all the likes. My plan is to draw and hand paint the figures at 3x to 5x and turn them into digital images I could shrink to size and place to fit the freezes. I have collected a bunch of images I like from sculptures and I am drafting them. I will post the paintings as I go. here is another drafted in an office PosIt at about 3x Bellow I adde the window seals The roof piece goes in Slate shingles with some weathering looking paint This help me build the Transom more confortable. All the moldings are in and the red decoration on to of the window frames; need to touch up the paint a little. Painted black the top of the frames. A good view of the moldings. I added some read on the arches in the side windows. I have seen that in contemporary models. I am holding on with some moldings which I will add when the freezes are ready. Next the widow columns. Best, G


-
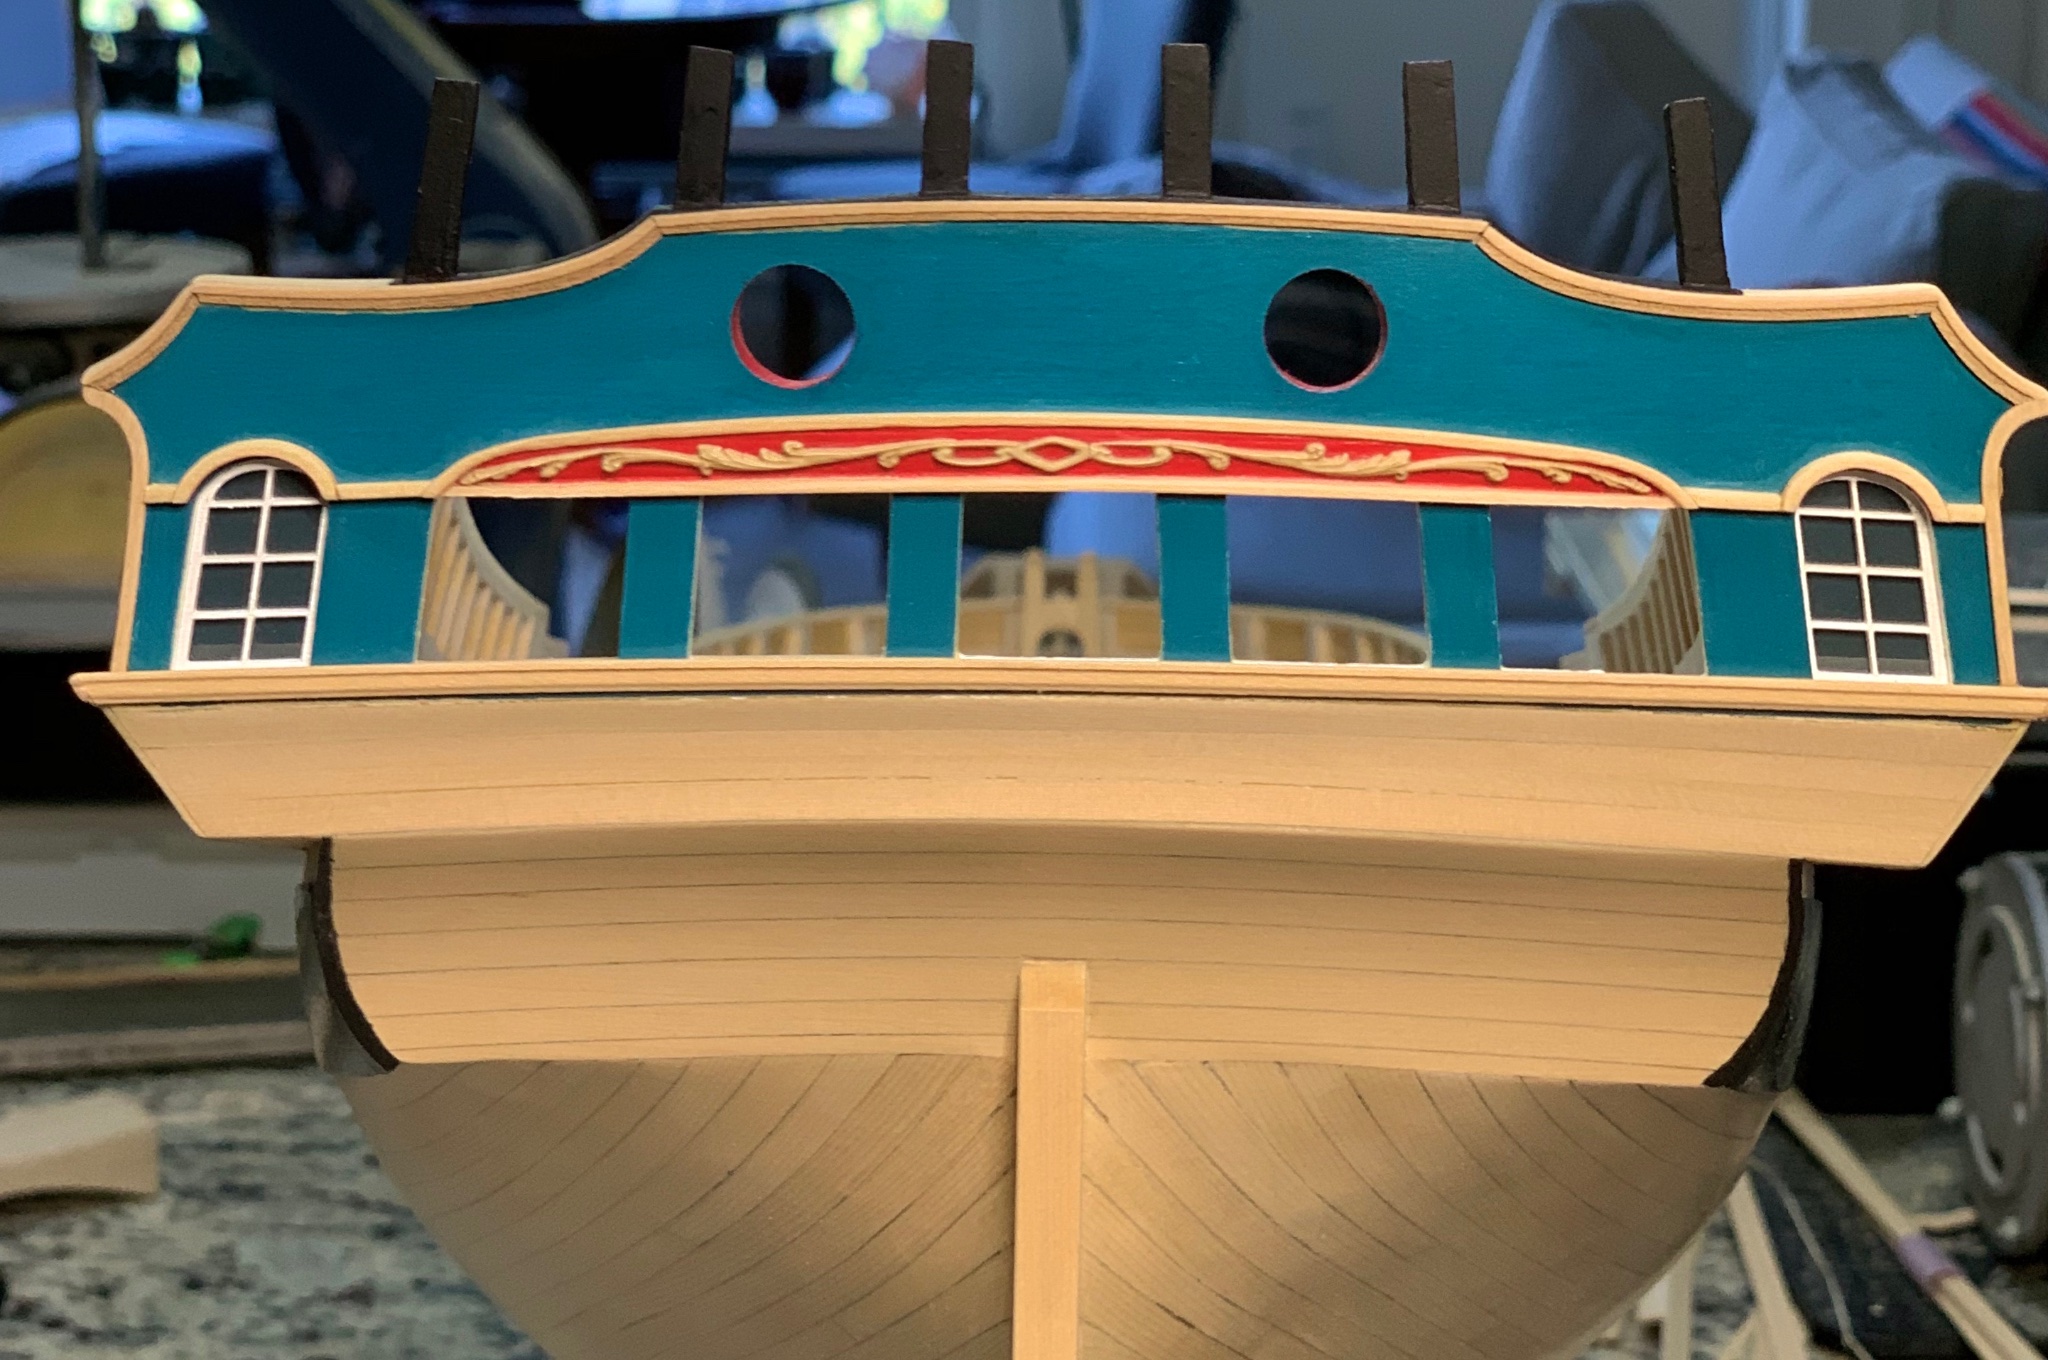
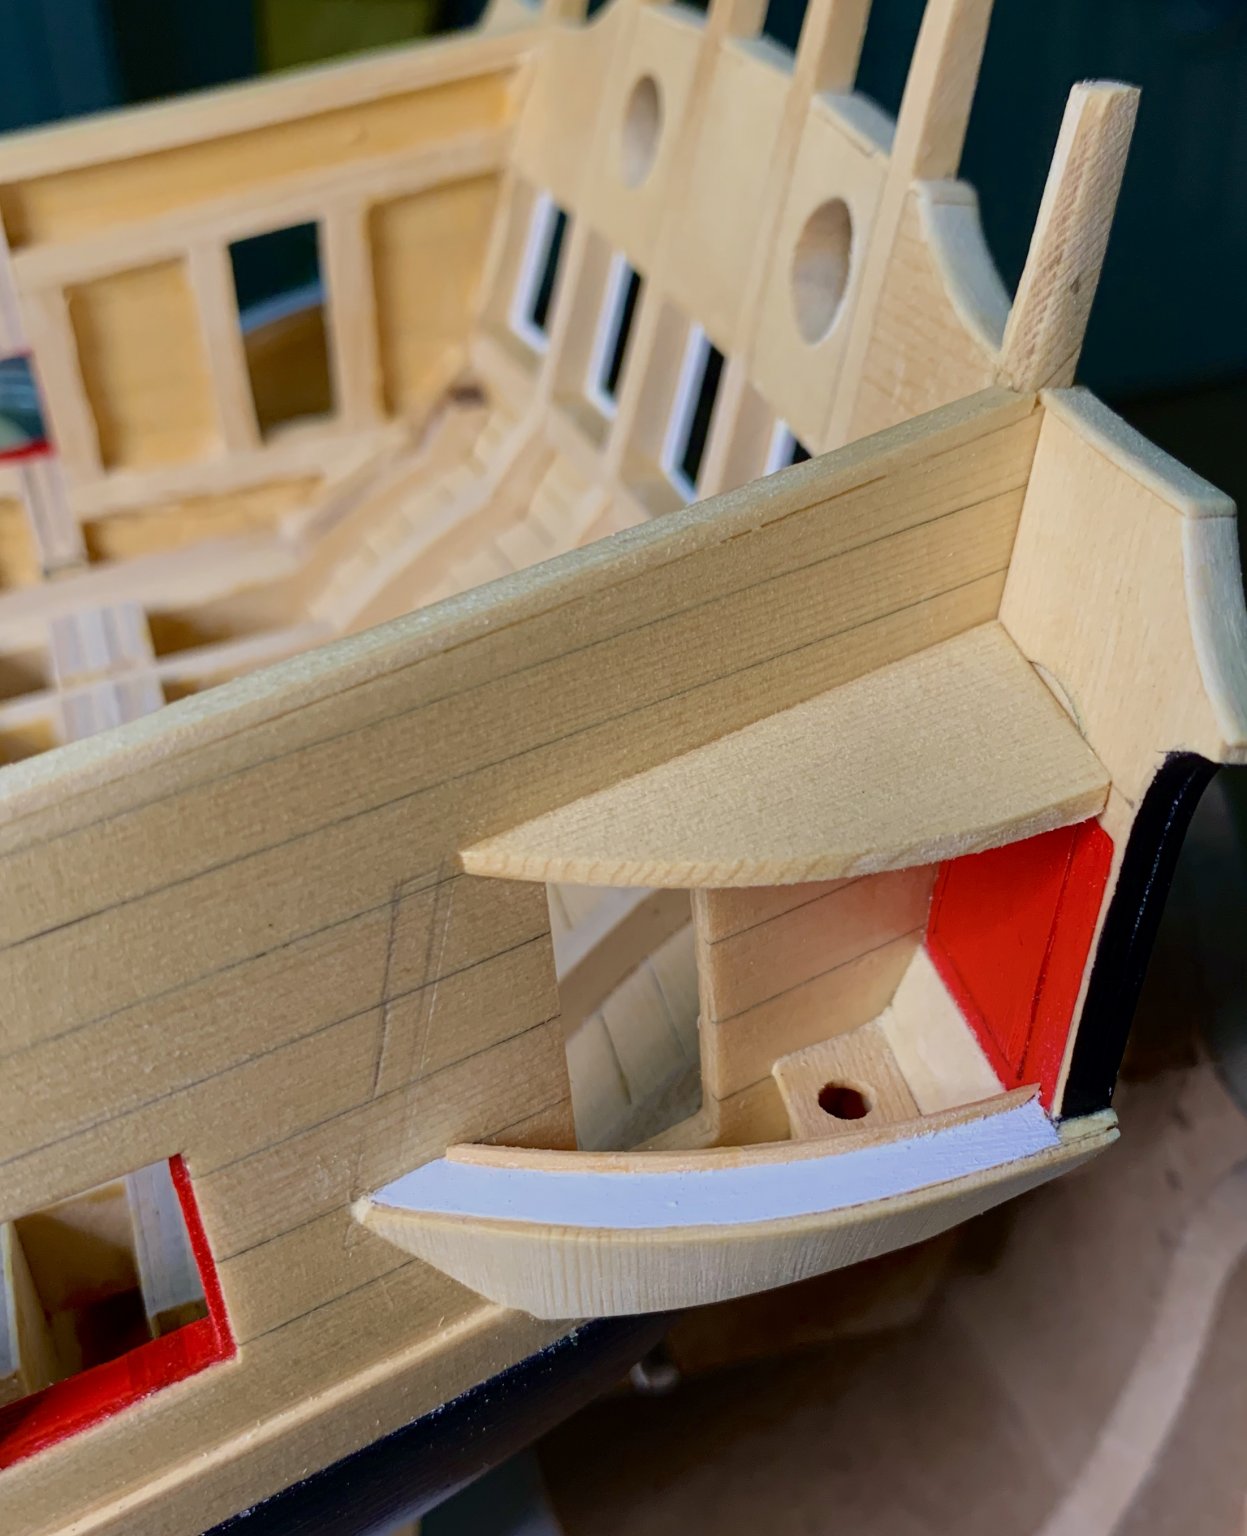
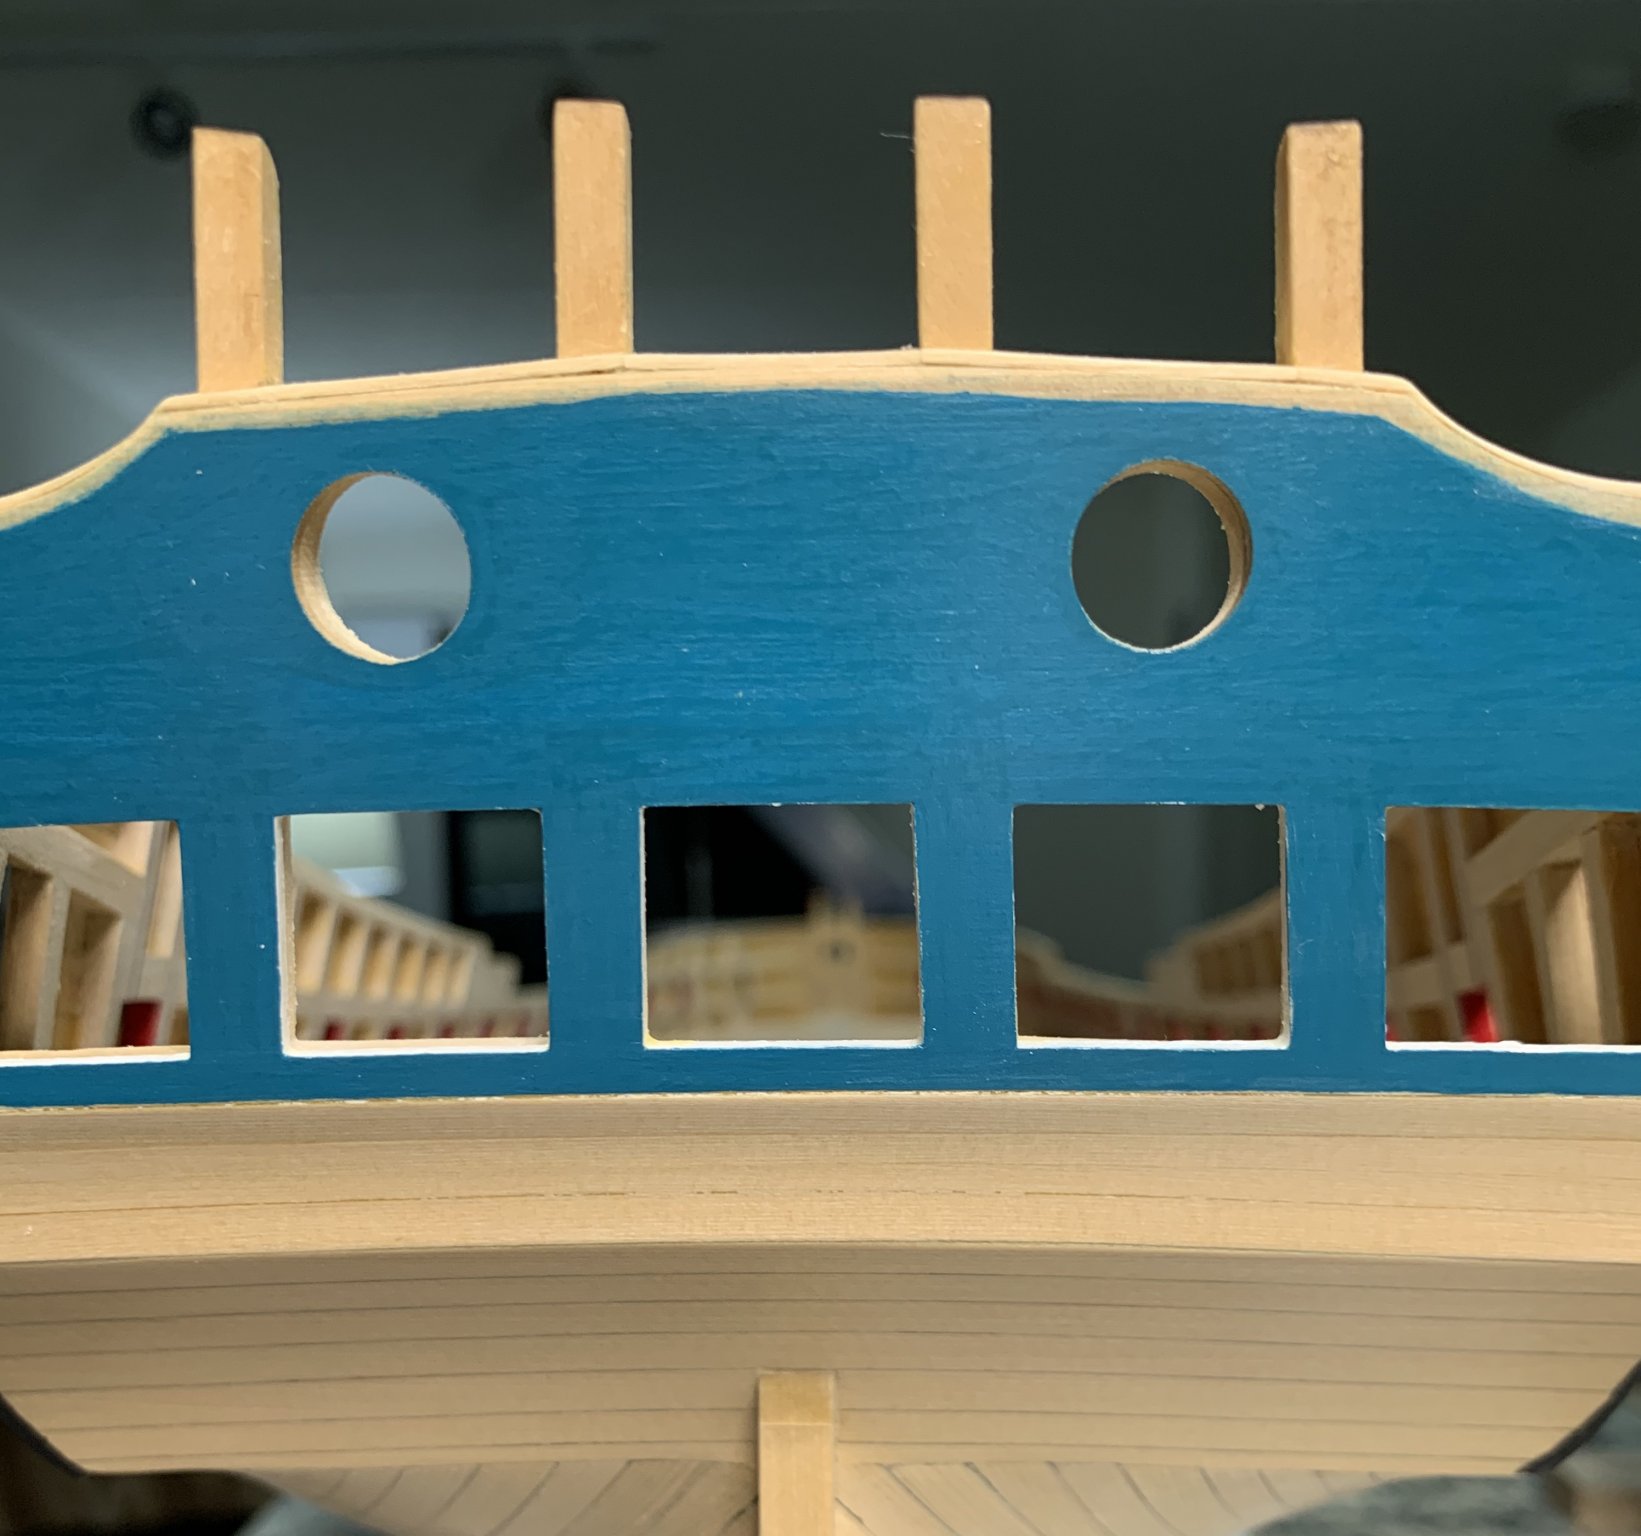
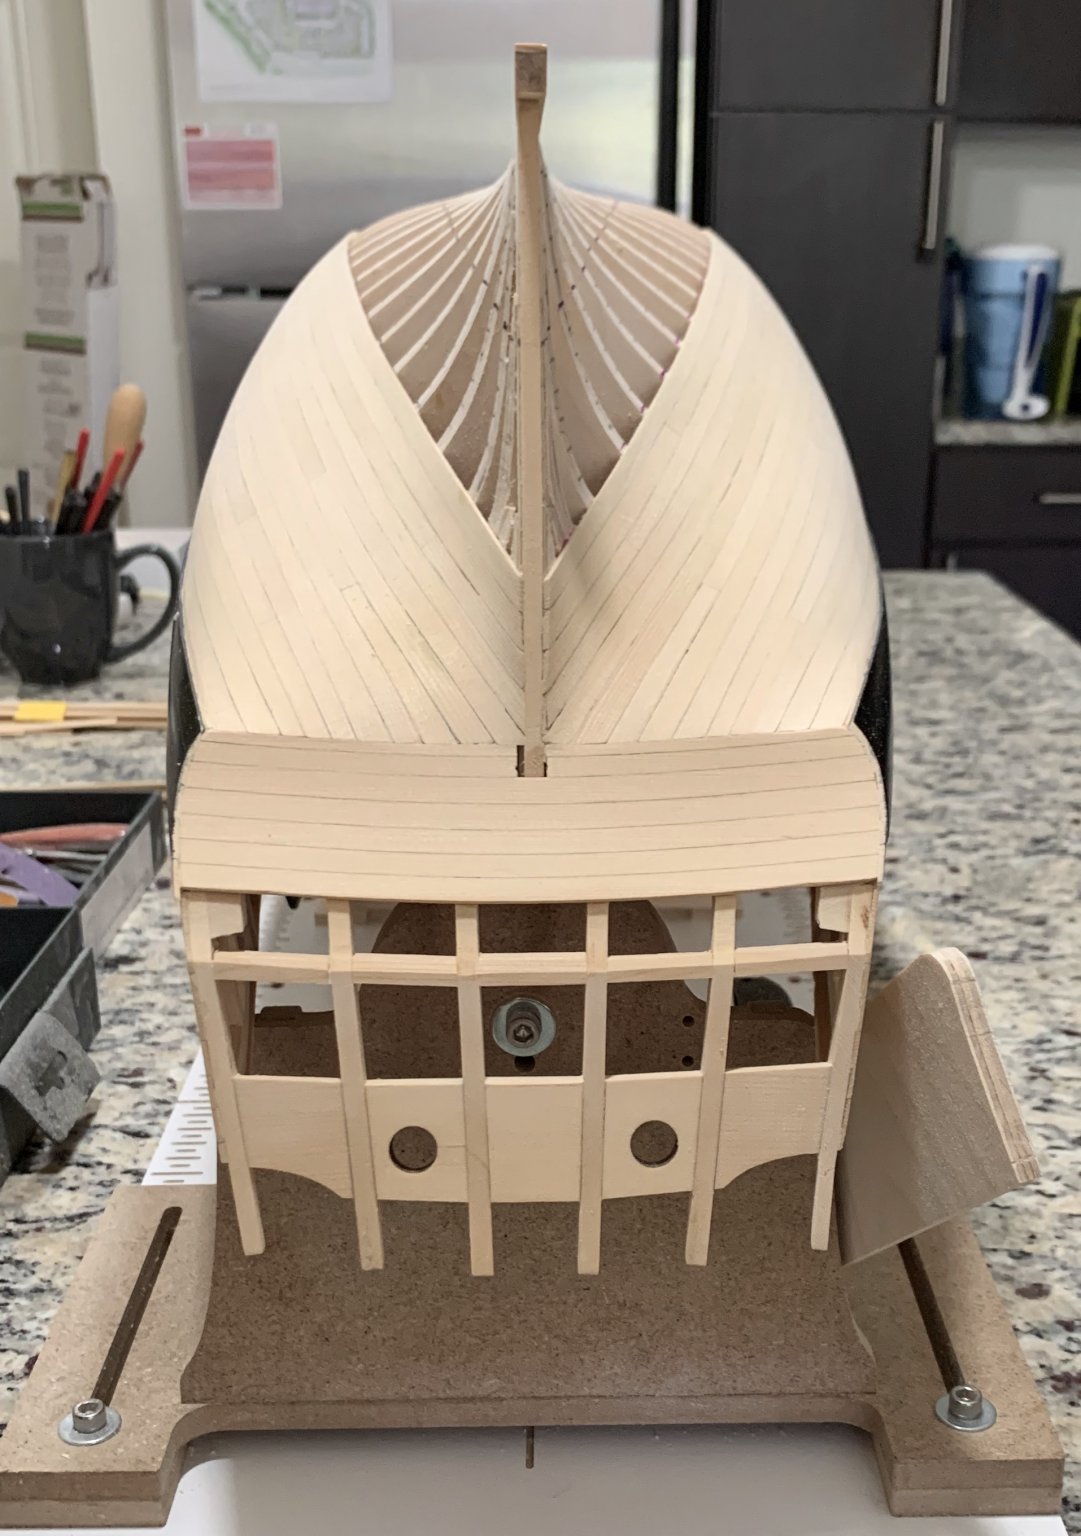
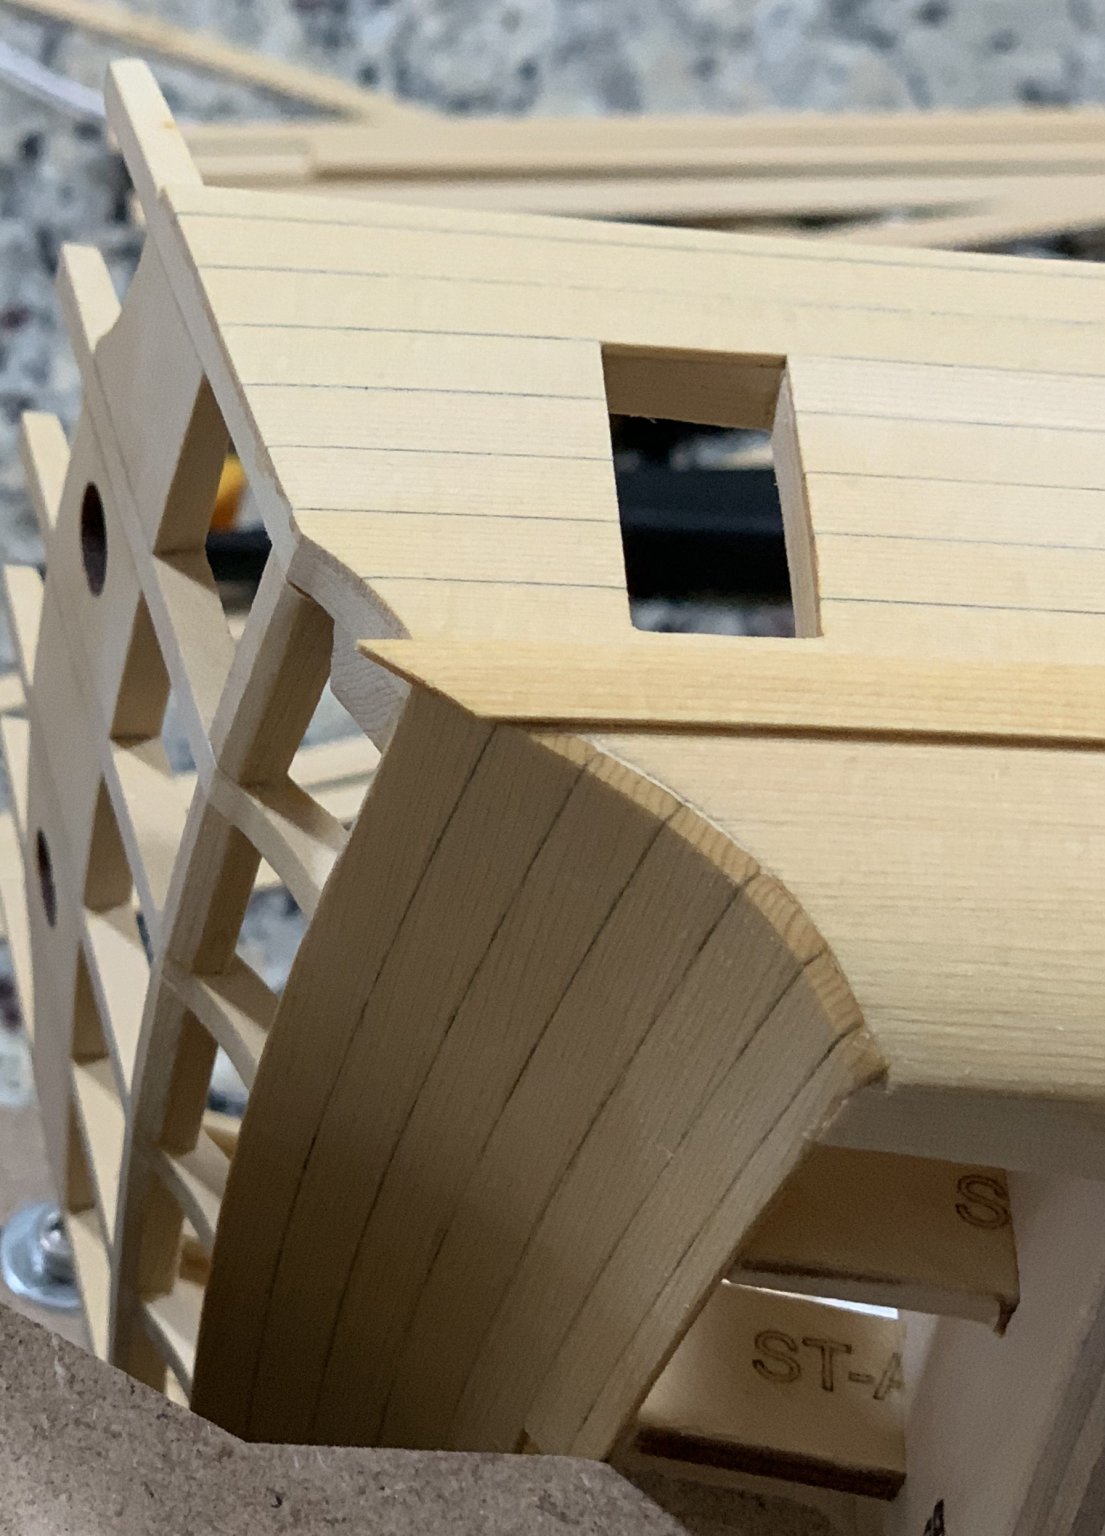
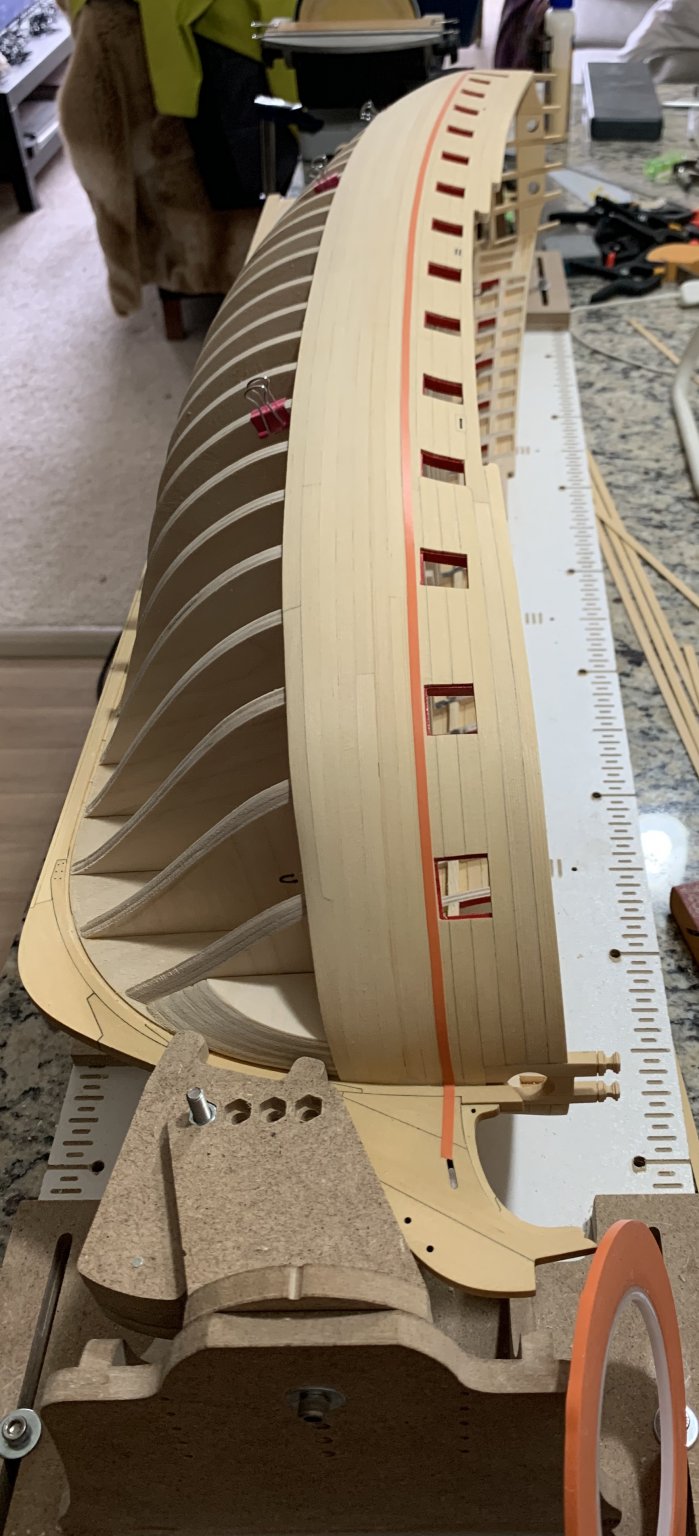
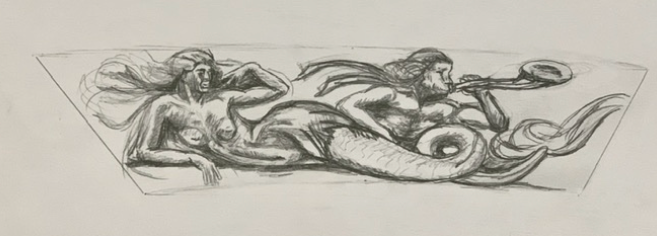
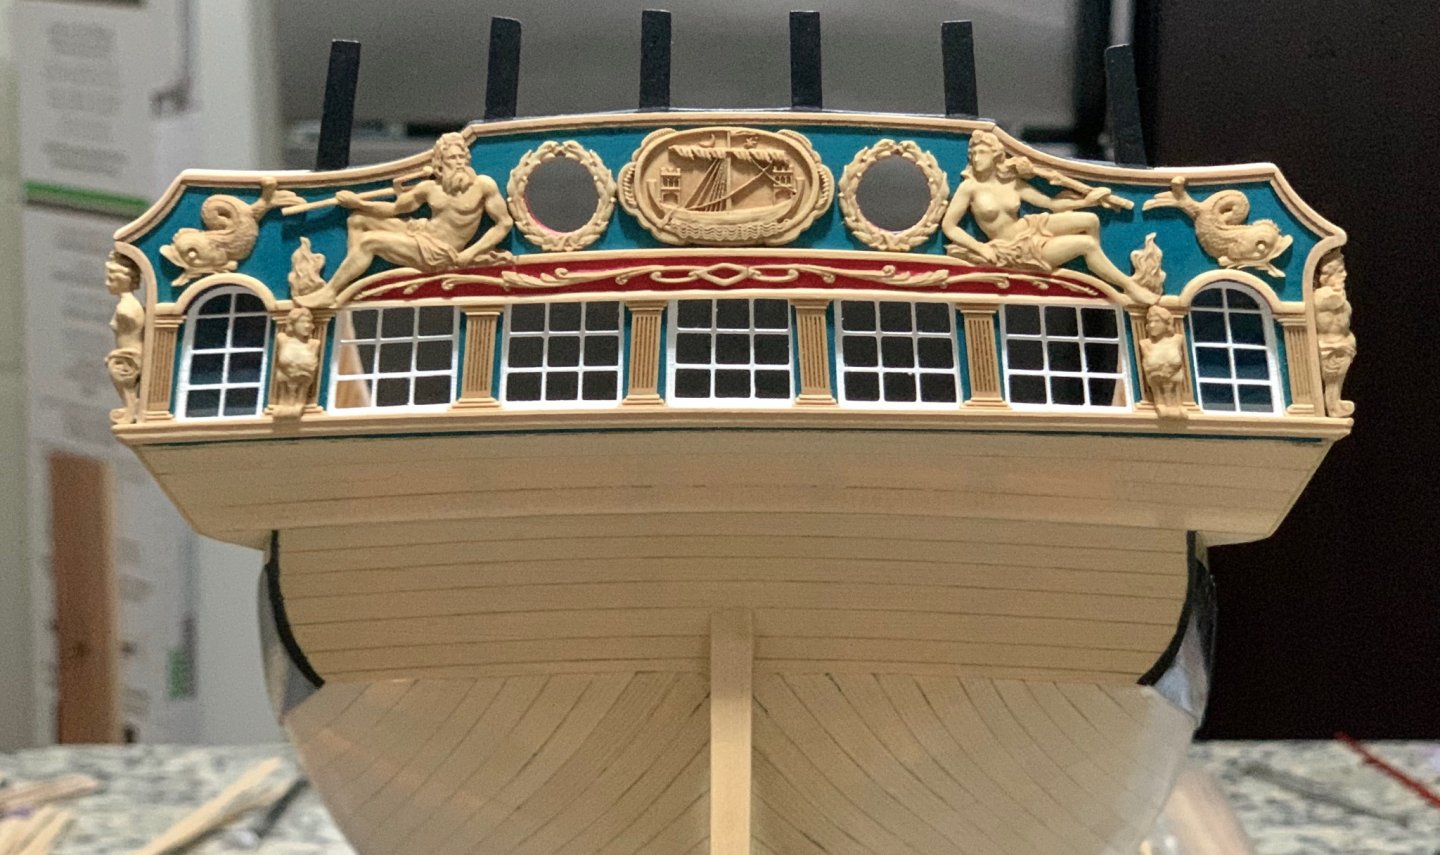
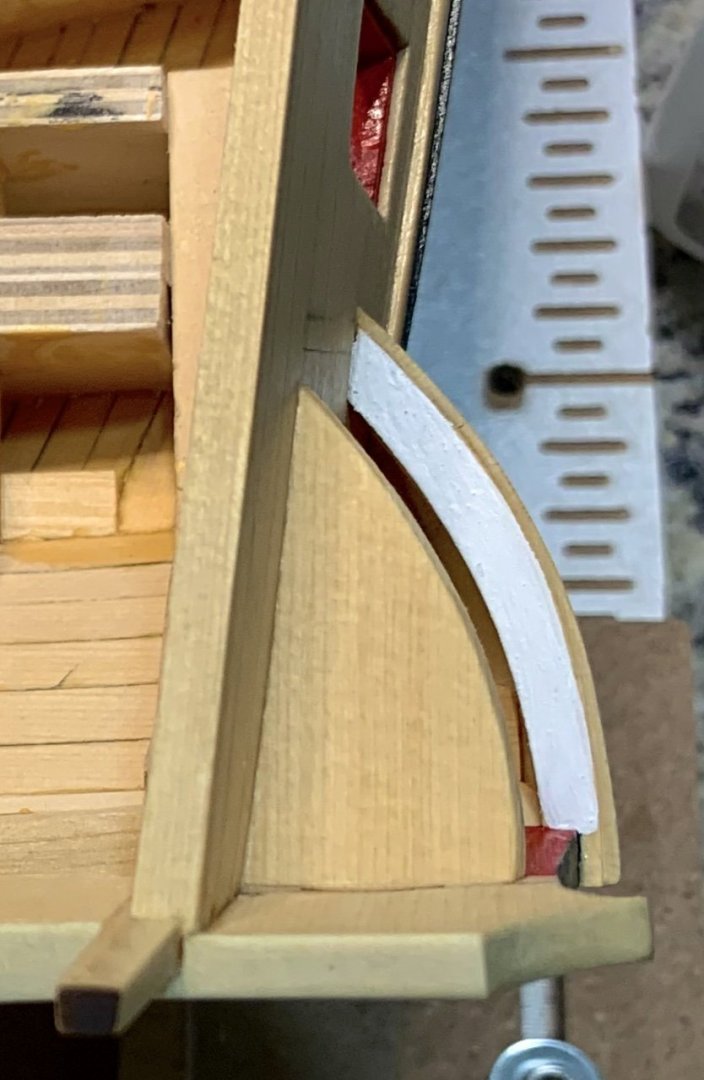
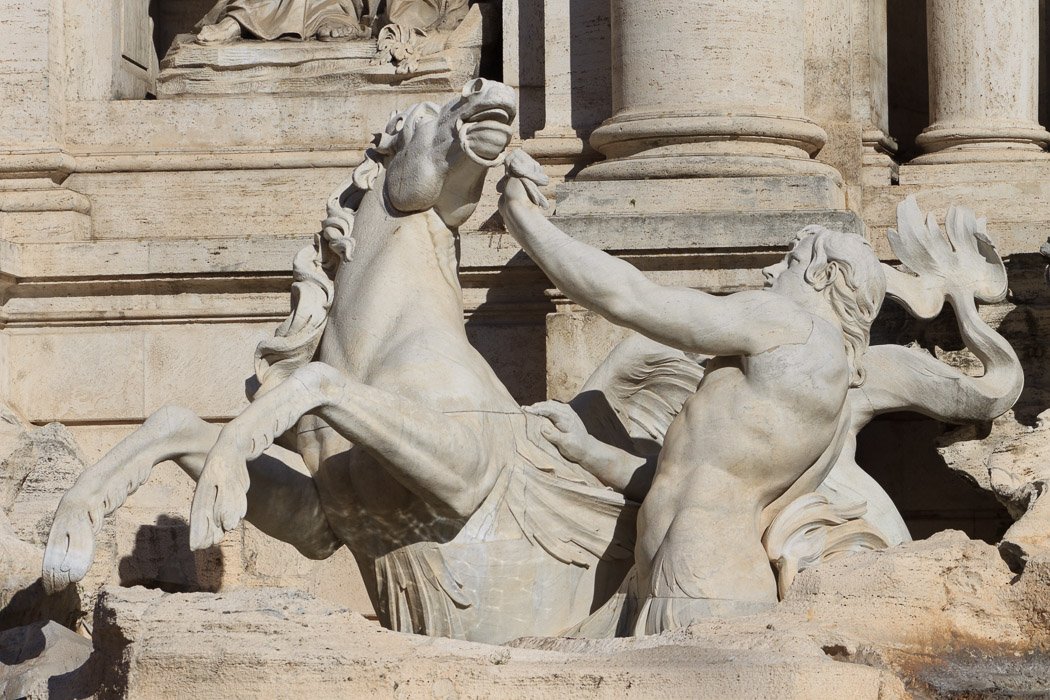
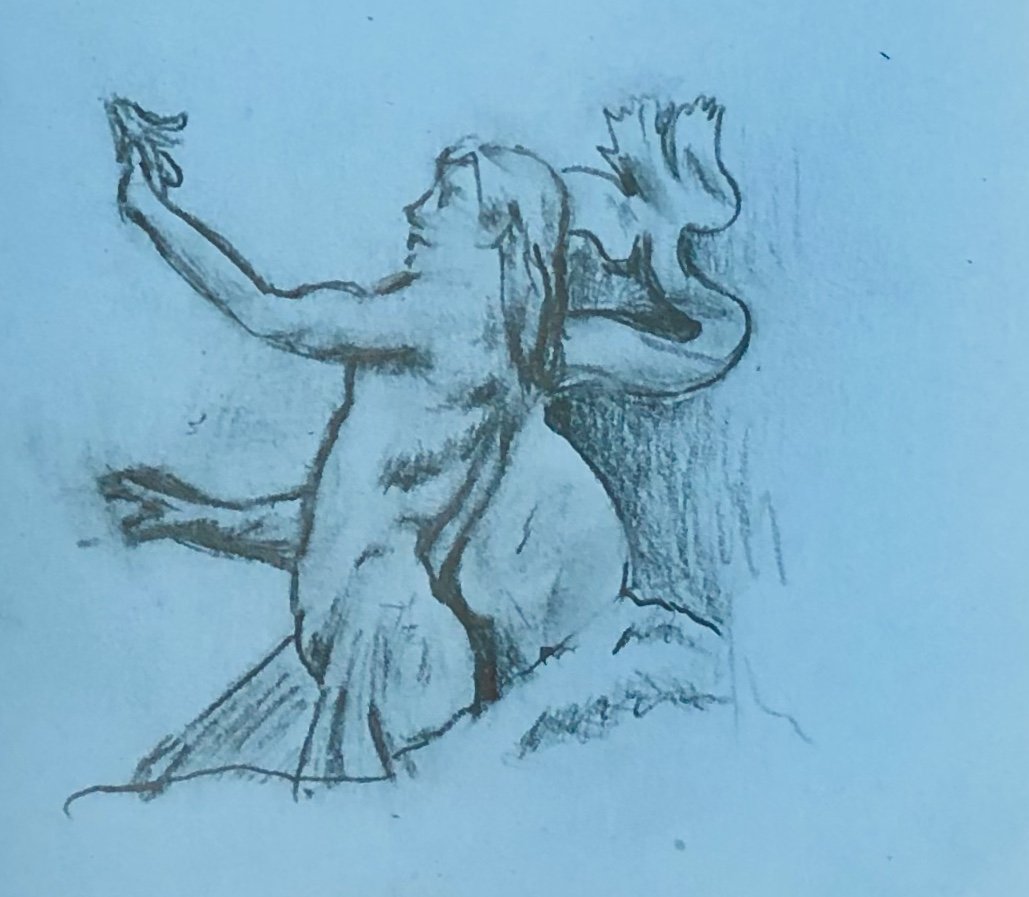
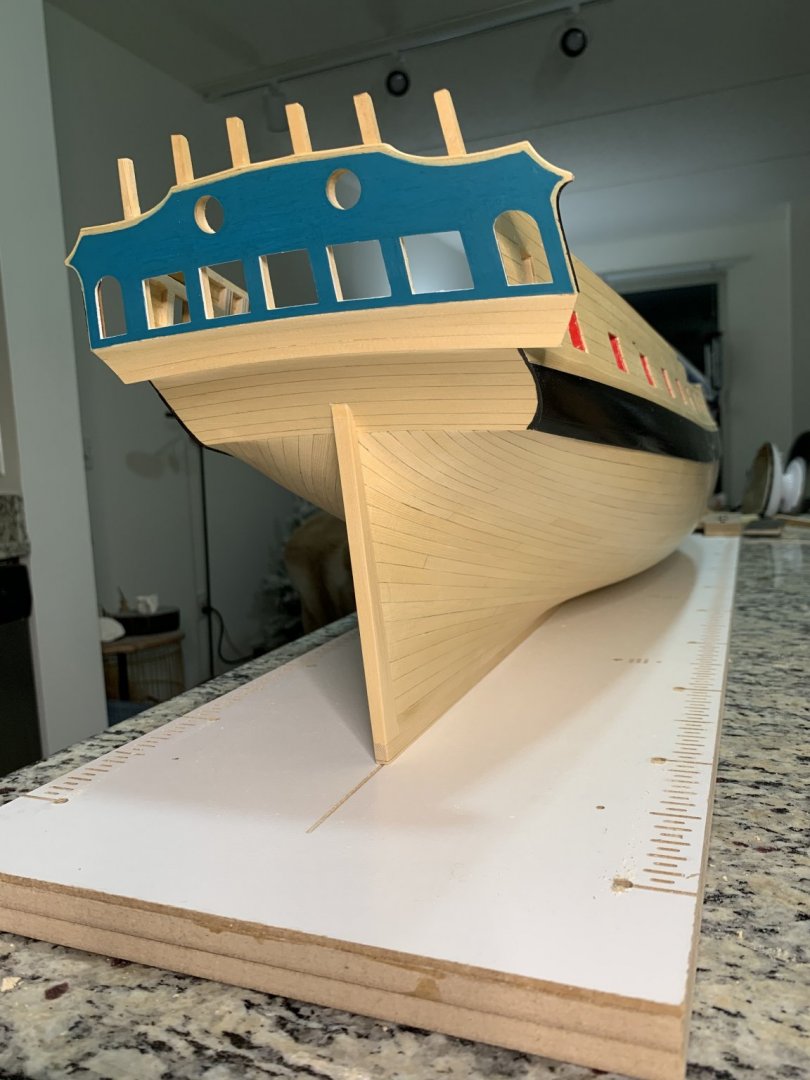
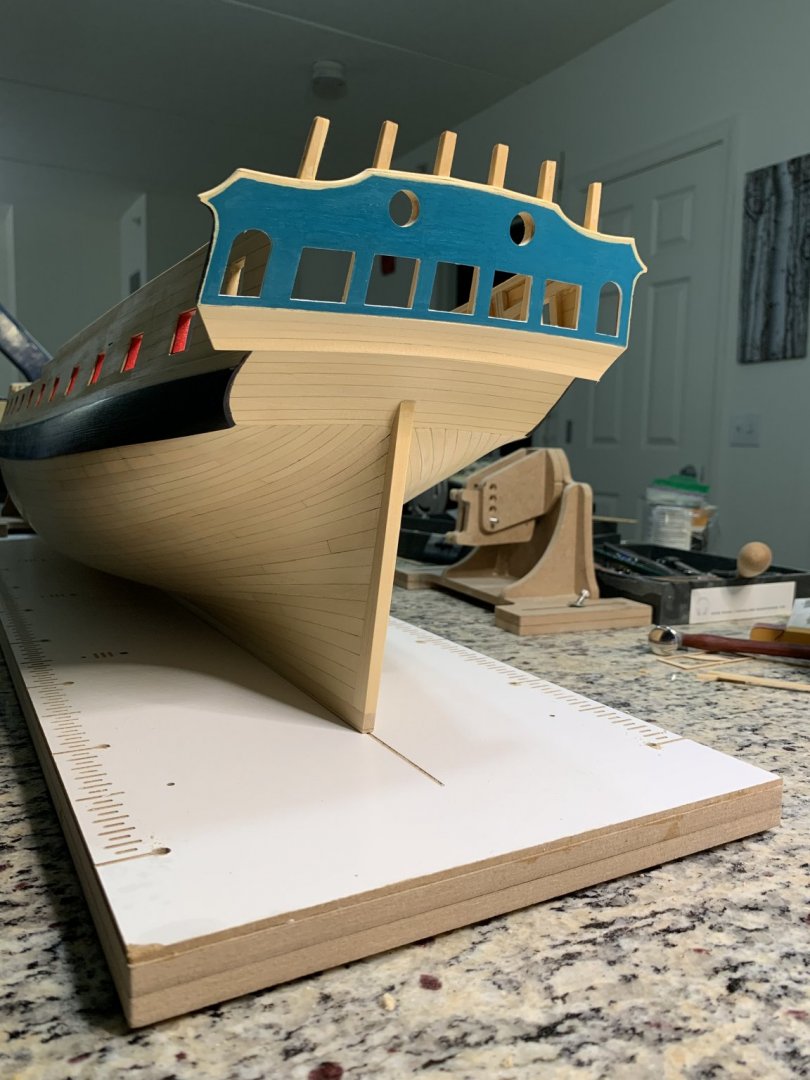
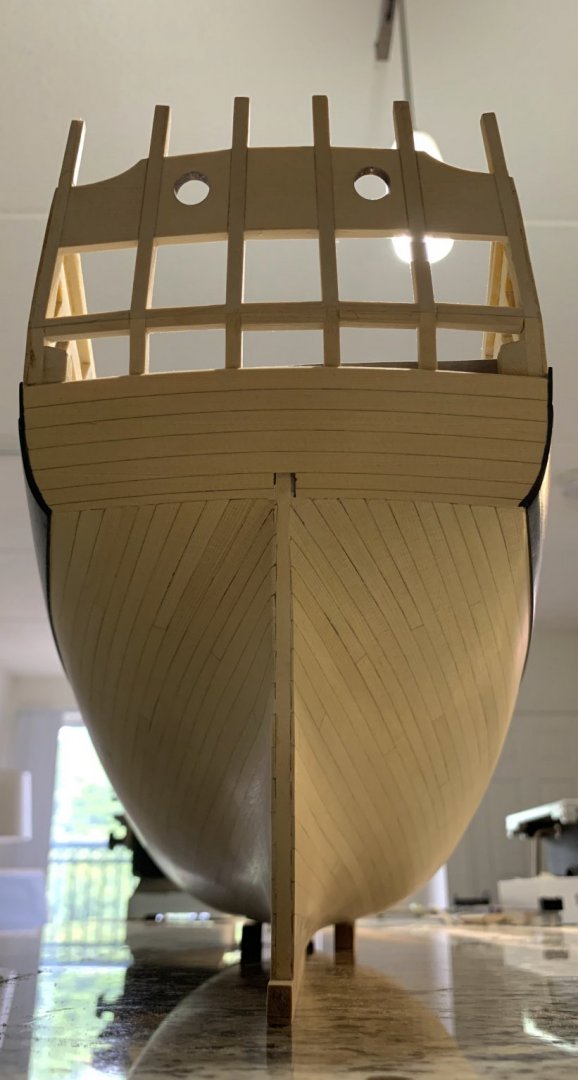
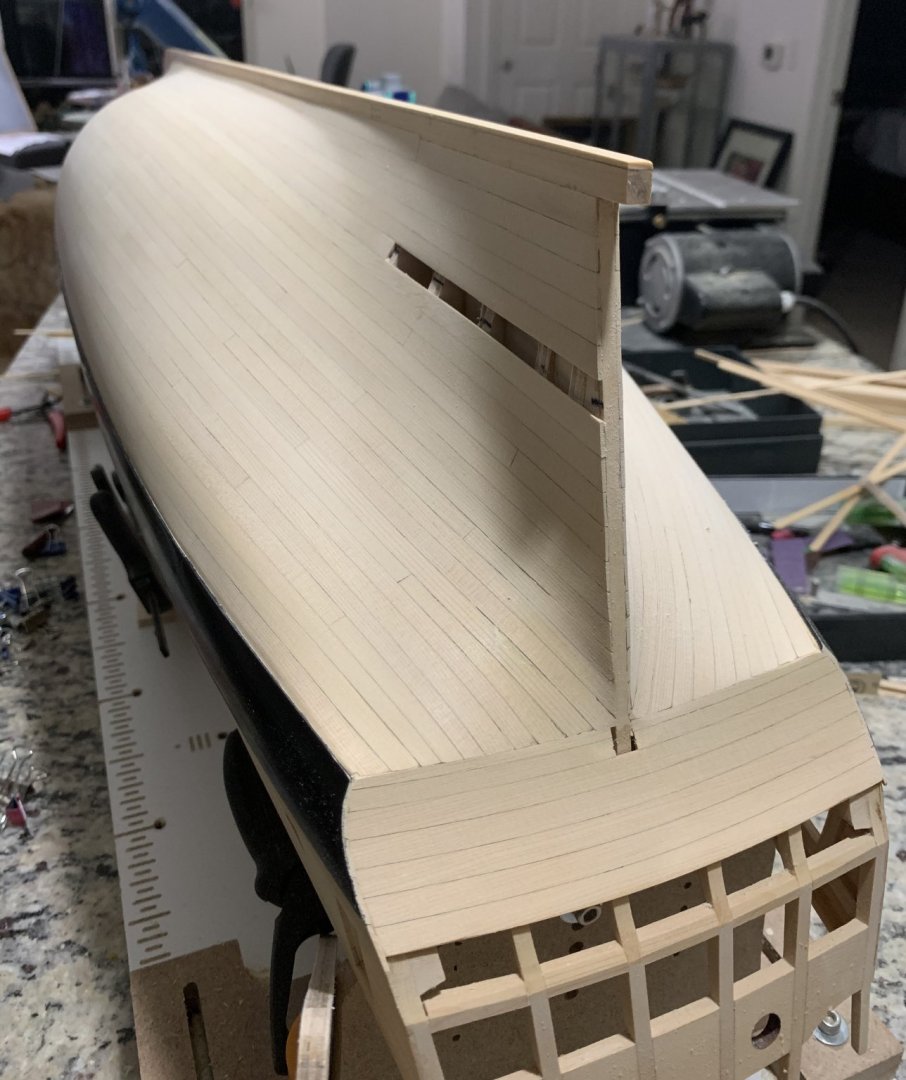
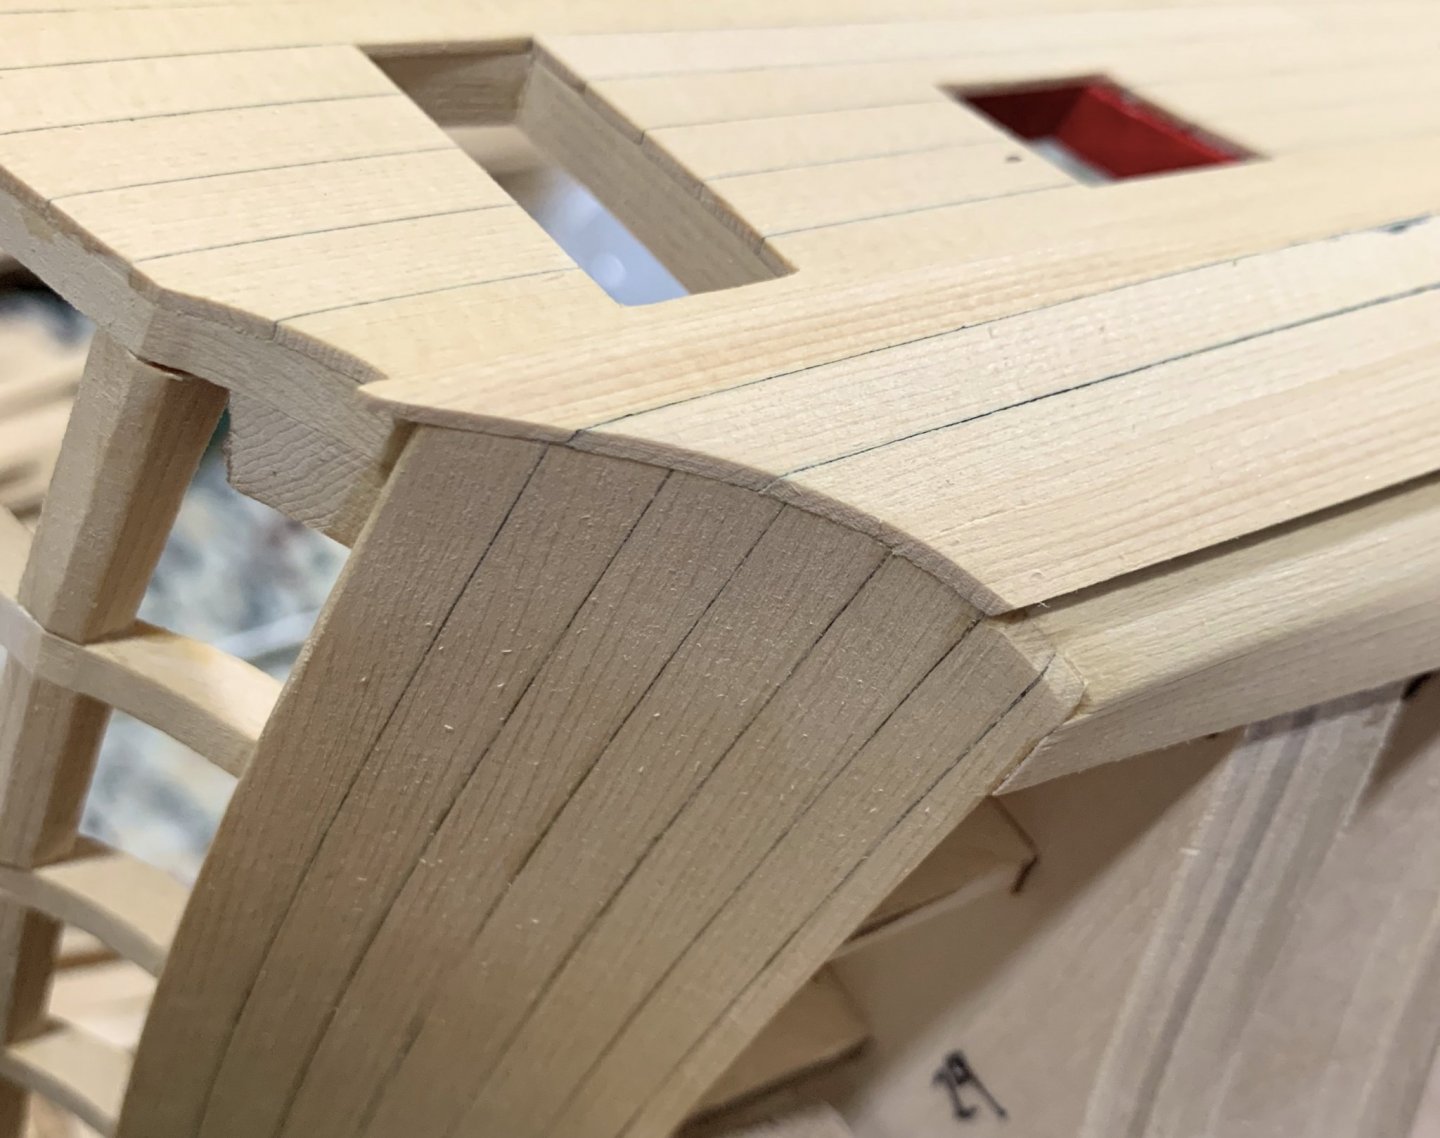
Thank you Rusty, Steve and Jorge and for all do click the likes. I do agree she is a beauty but most of the credit goes to Chuck’s wonderful design. I started the Qgalleries, I used the guide to mark the placement of the first peace. I found that the lower part of the Qgallery was easier to build upside down. The false window in the Transom was added next. I decided to paint the windows white. Not as fancy as Beckman’s ivory windows but they look ok. The toilet, upper part for the ceiling and the little stop peace were added next (thank you Chuck for giving us multiple copies of this peaces). Looking from the top to be sure it was aligned as Chuck instructed. The pillars for the windows went next (probably 4 hours to get this right). Windows are not glued and will be painted white. lots of thinking and going slow was the best strategy as Chuck have suggested. I am working in drawing the freezes by hand. Thank you Beckman for giving me you PDF files. They contain most of the model elements. I realized the figures are Mer people inspired by mermaids and fish that appeared in 18th century cartography and are represented in Europe’s fountain sculptures. The Fontana di Trevi is a good example. I will use those to improve the figures in the freezes. My first pencil draft is bellow, simplified to be a freeze component, Best, G


-
Hello Jeff Your planking looks great! This is how I solved that area. Notice the wider planks. Hope it helps. G

-
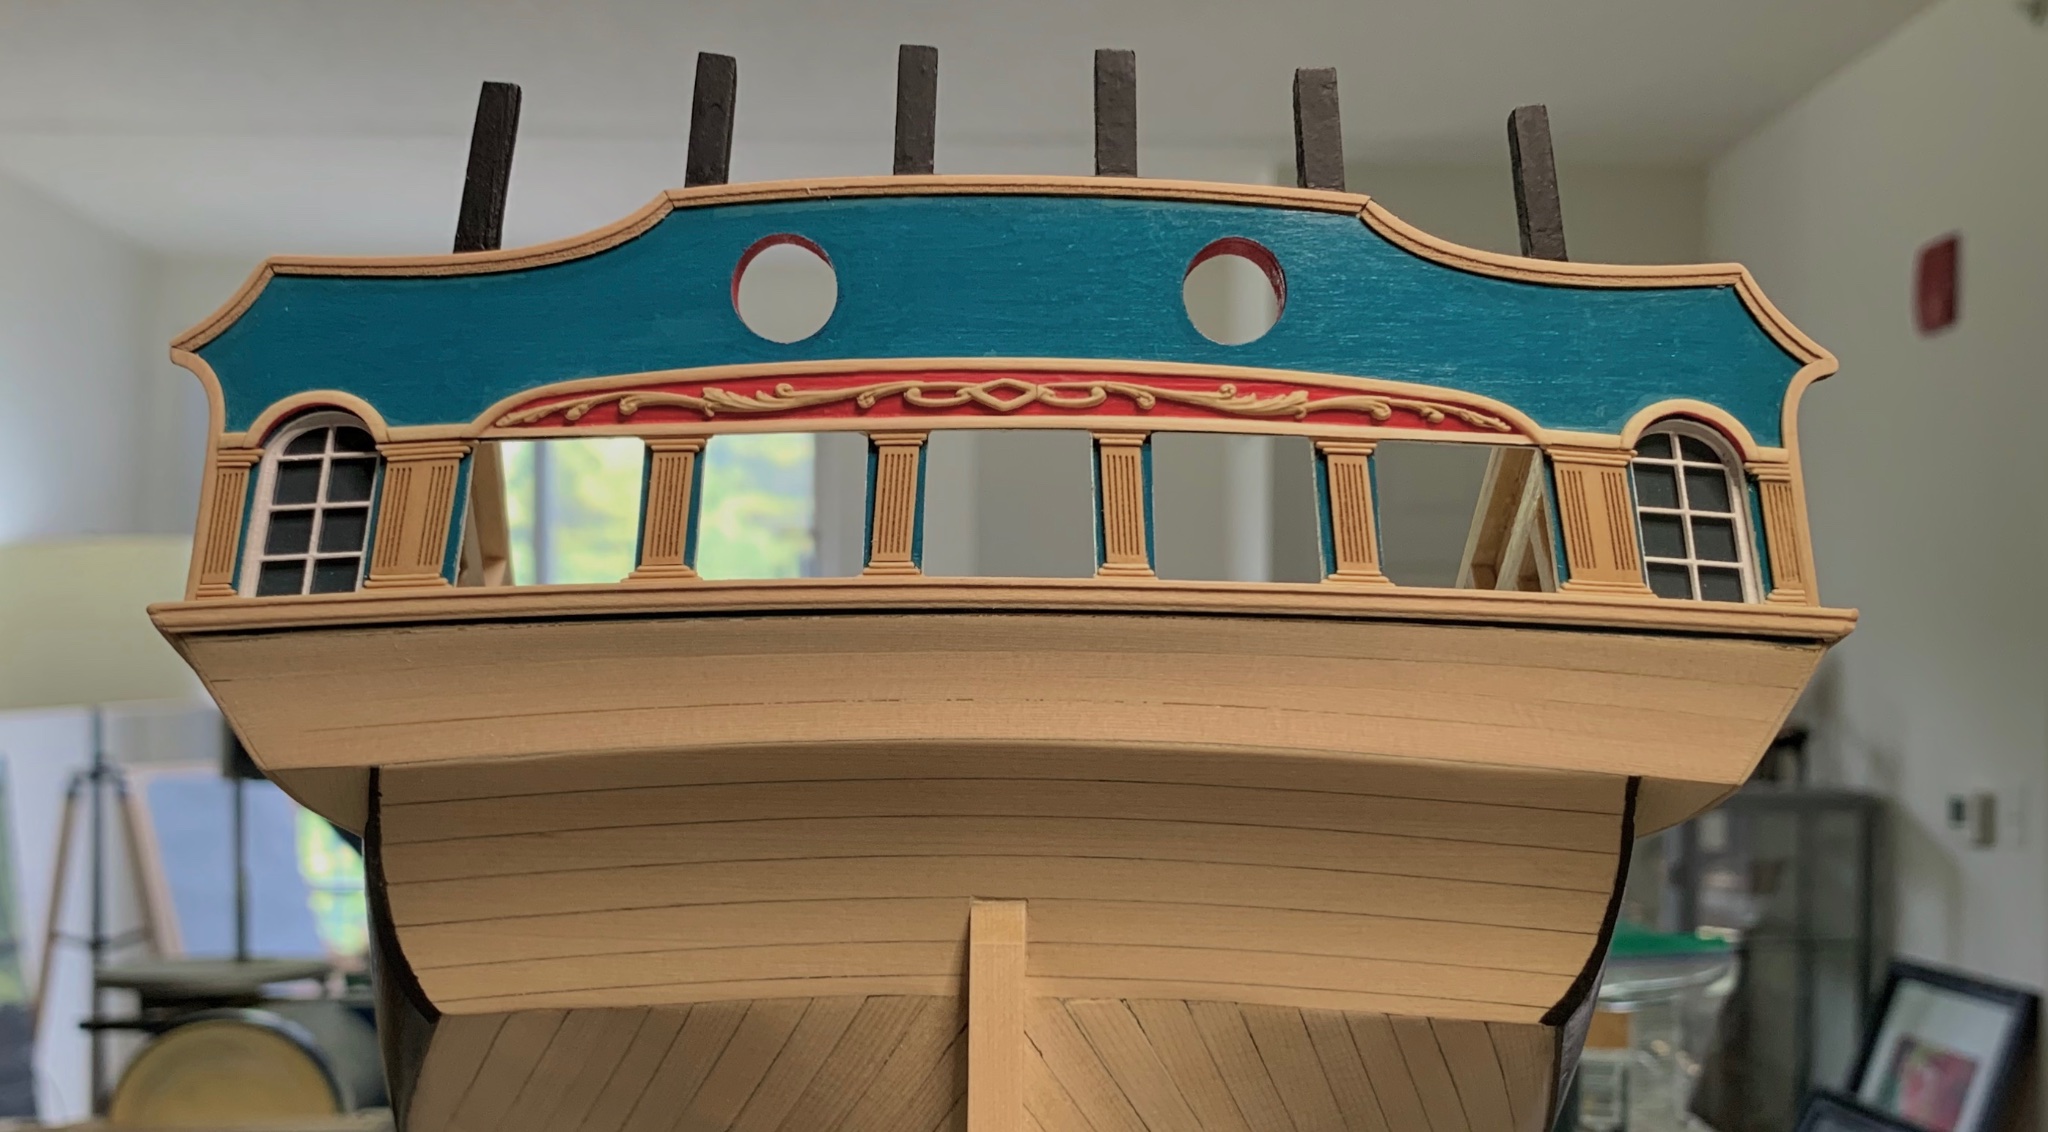
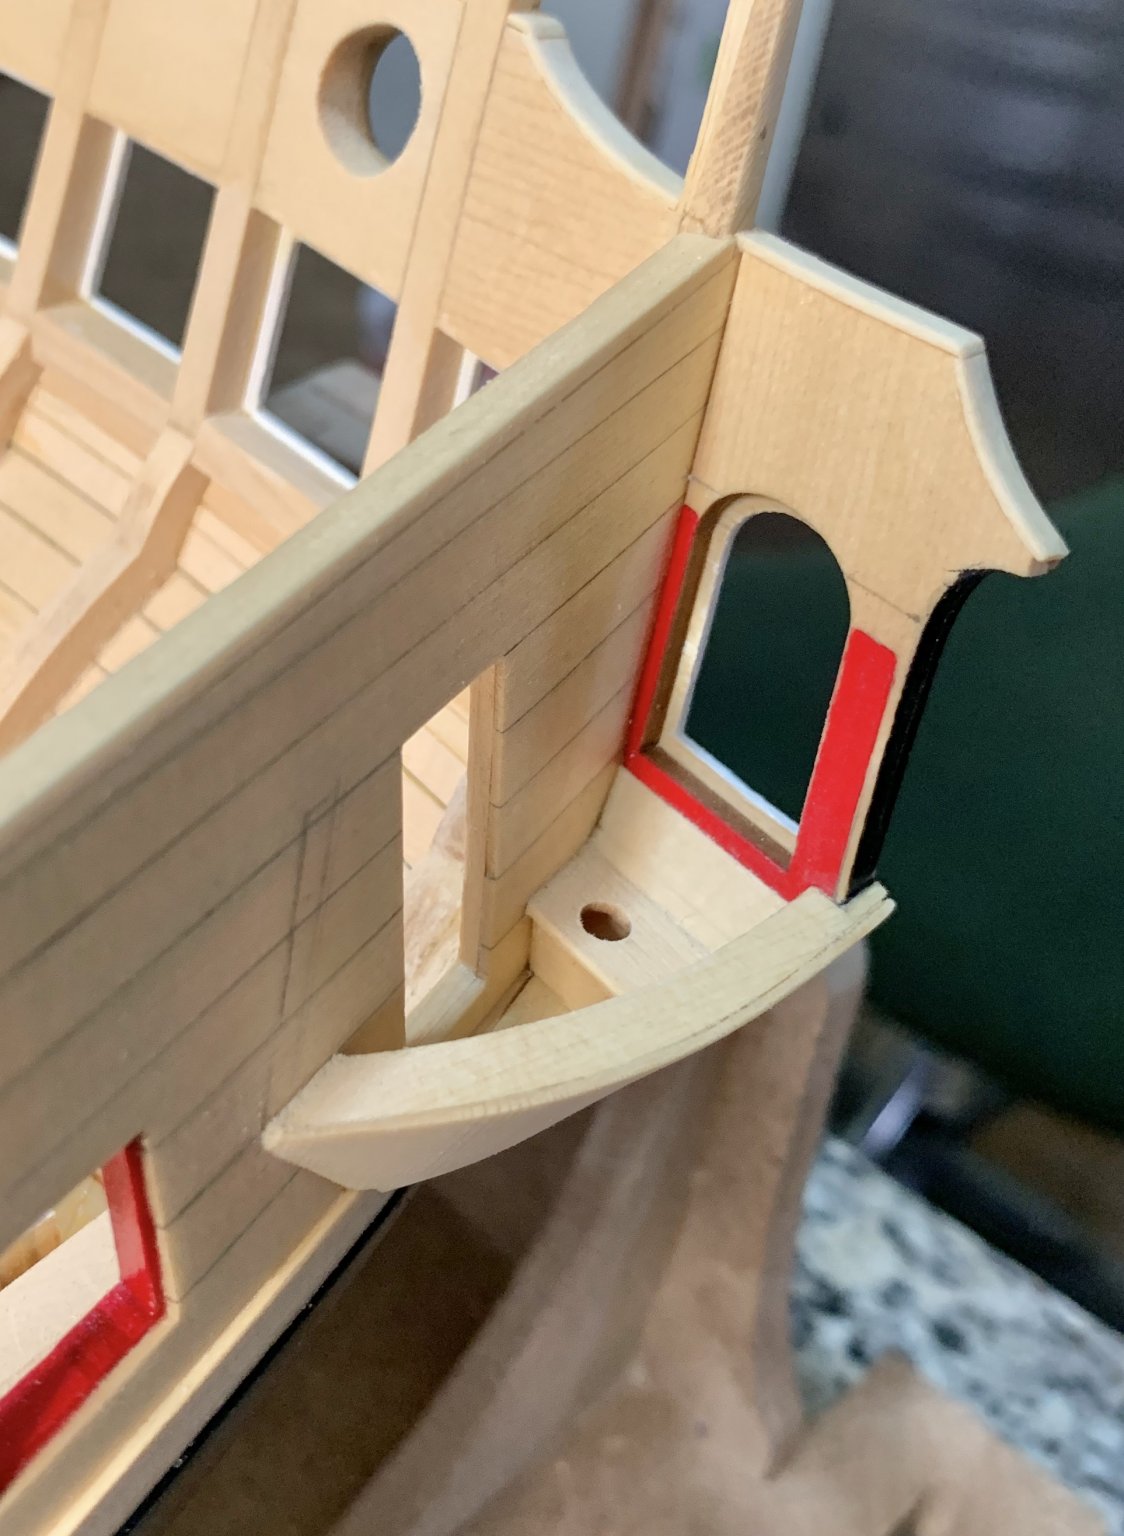
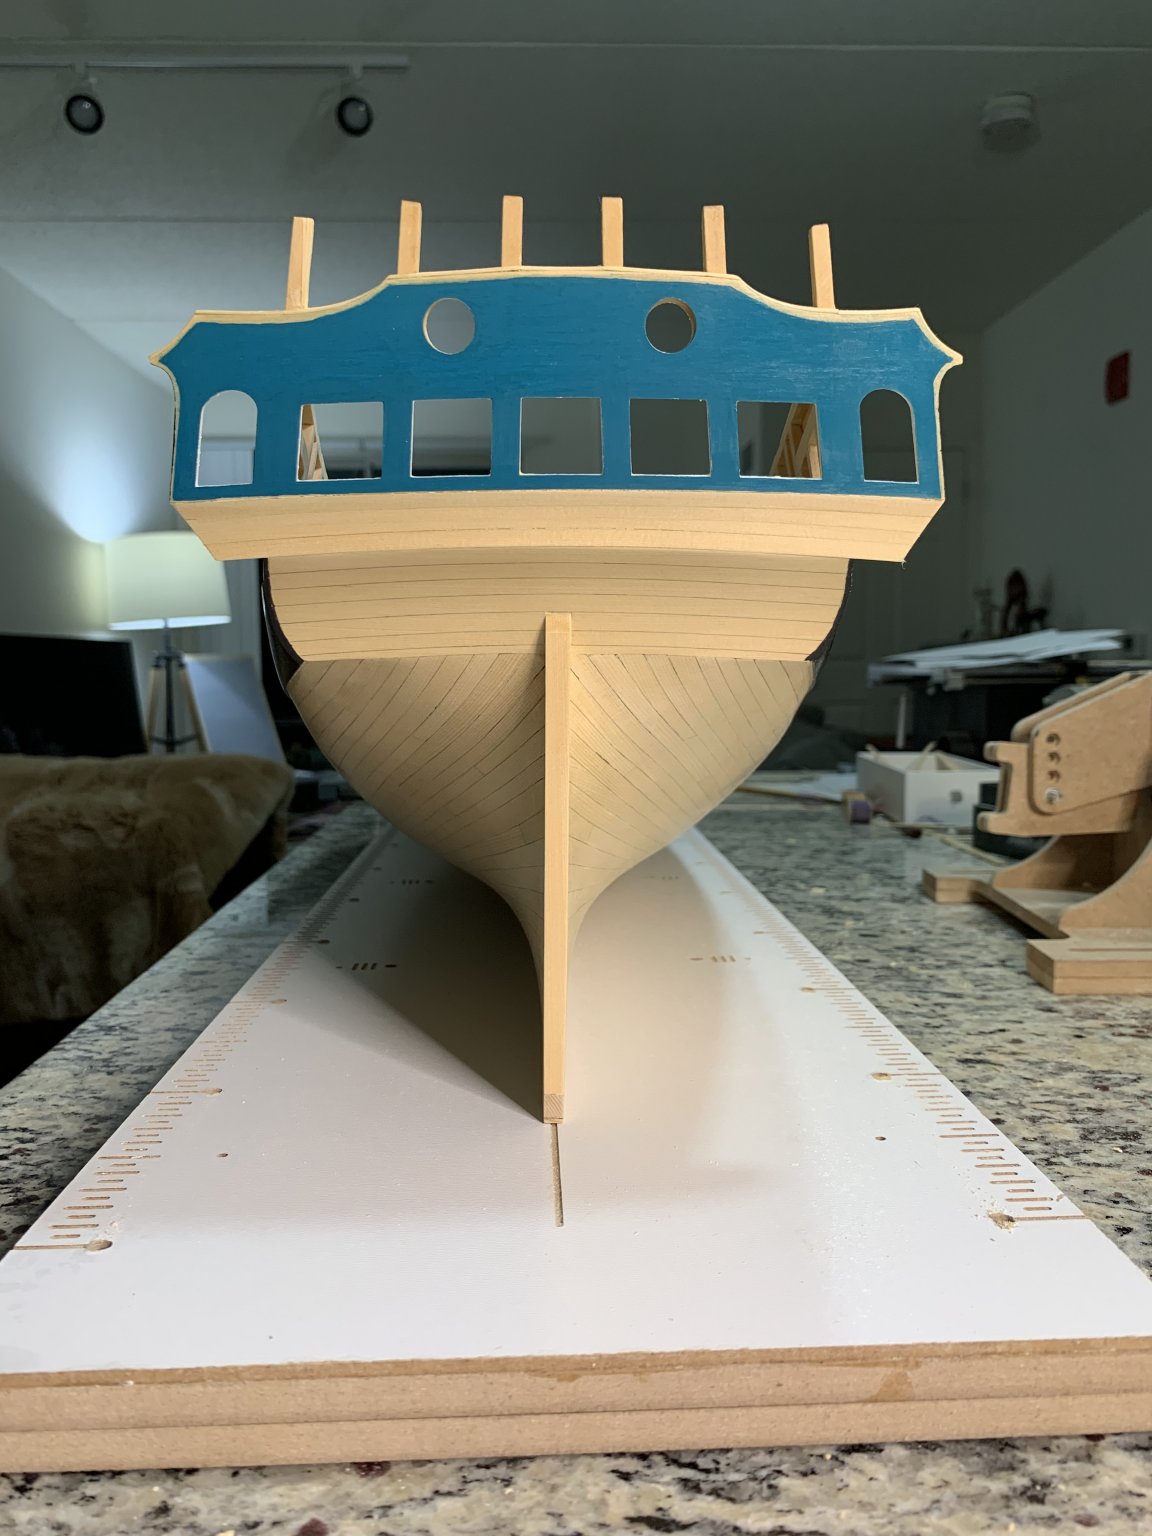
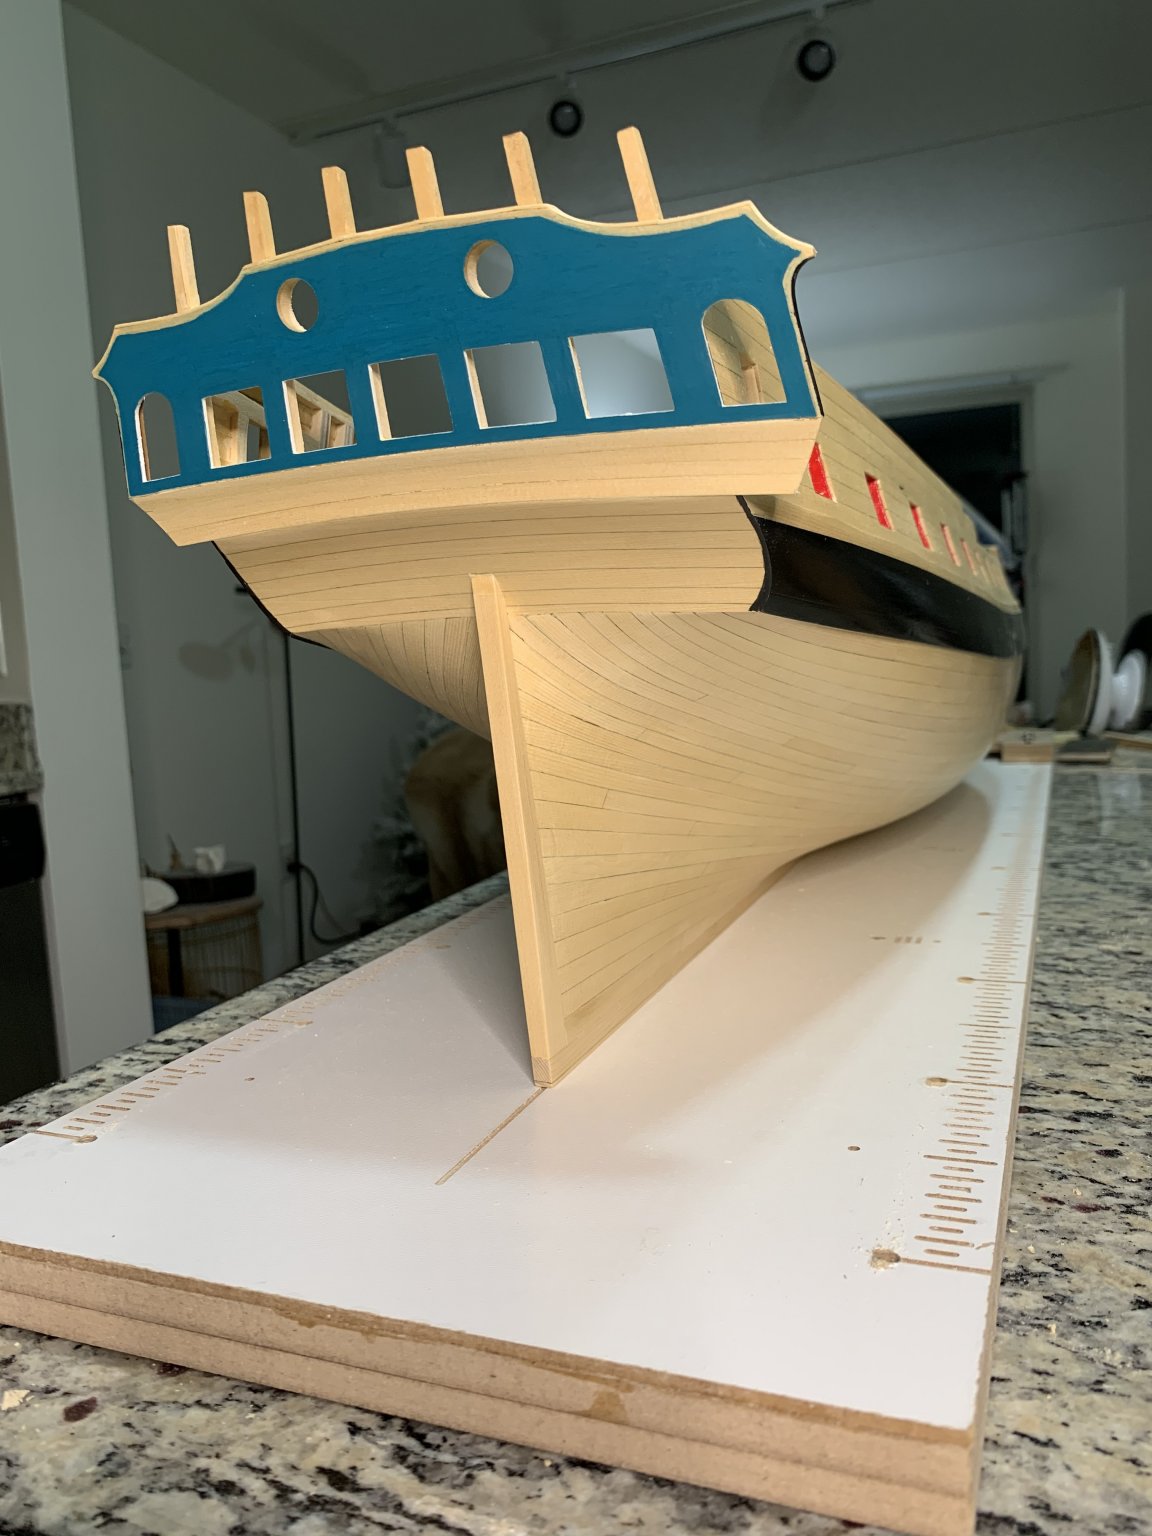
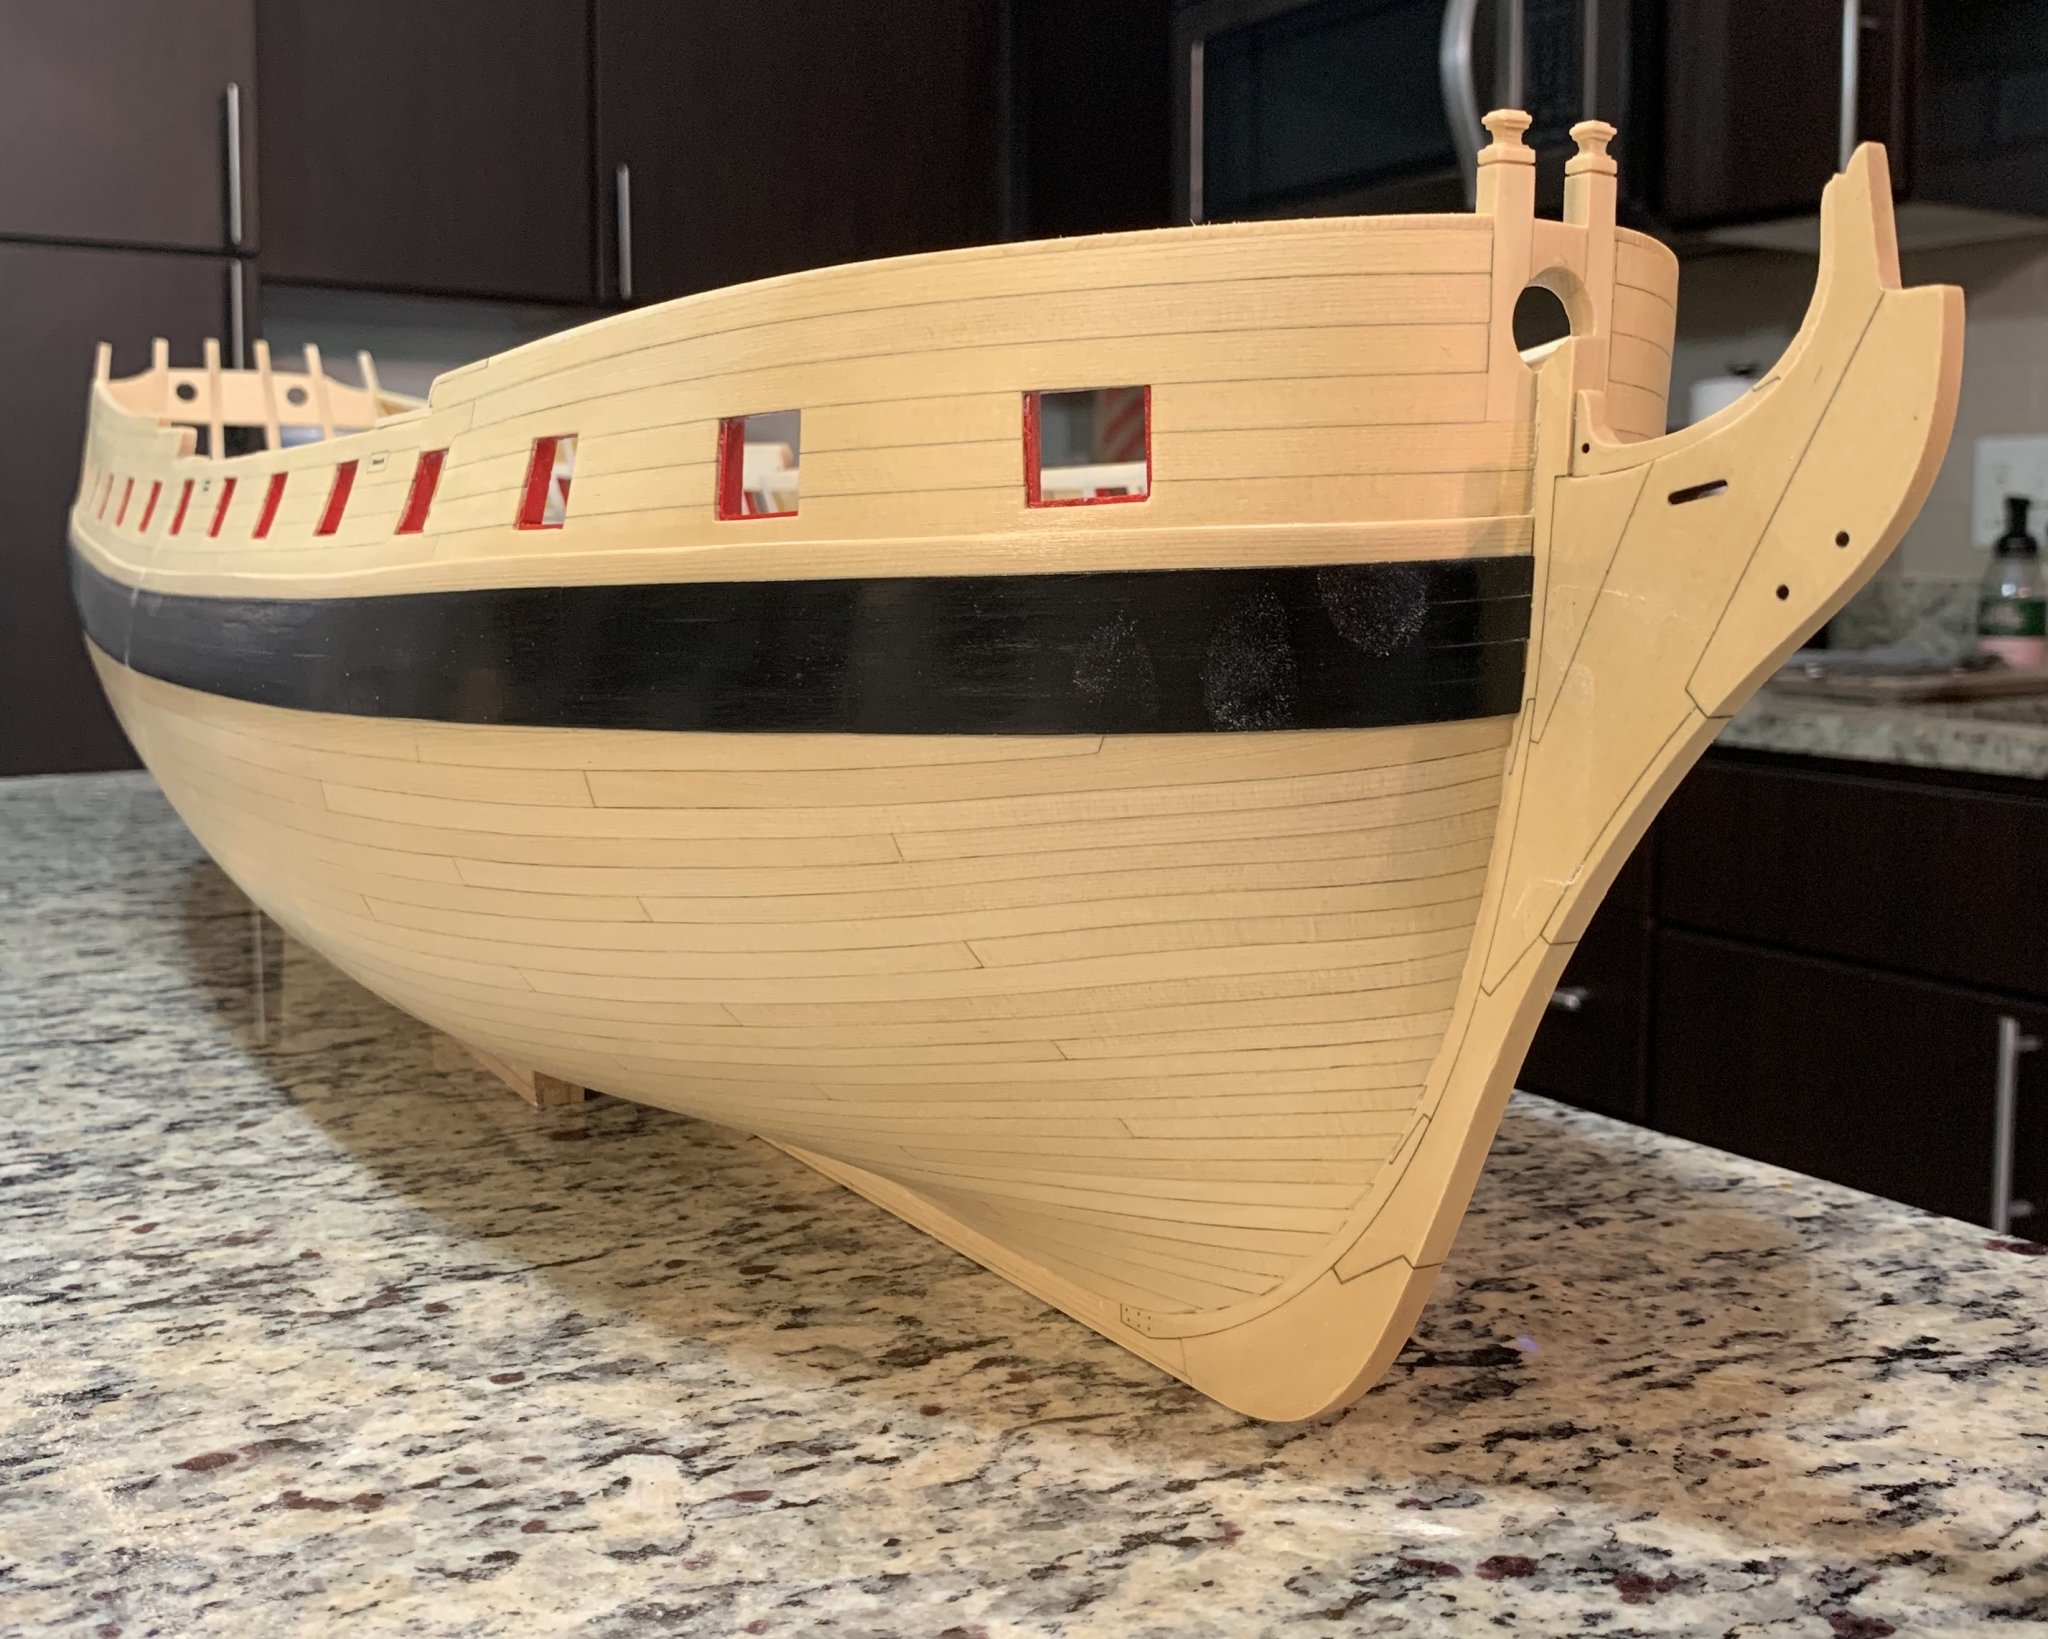
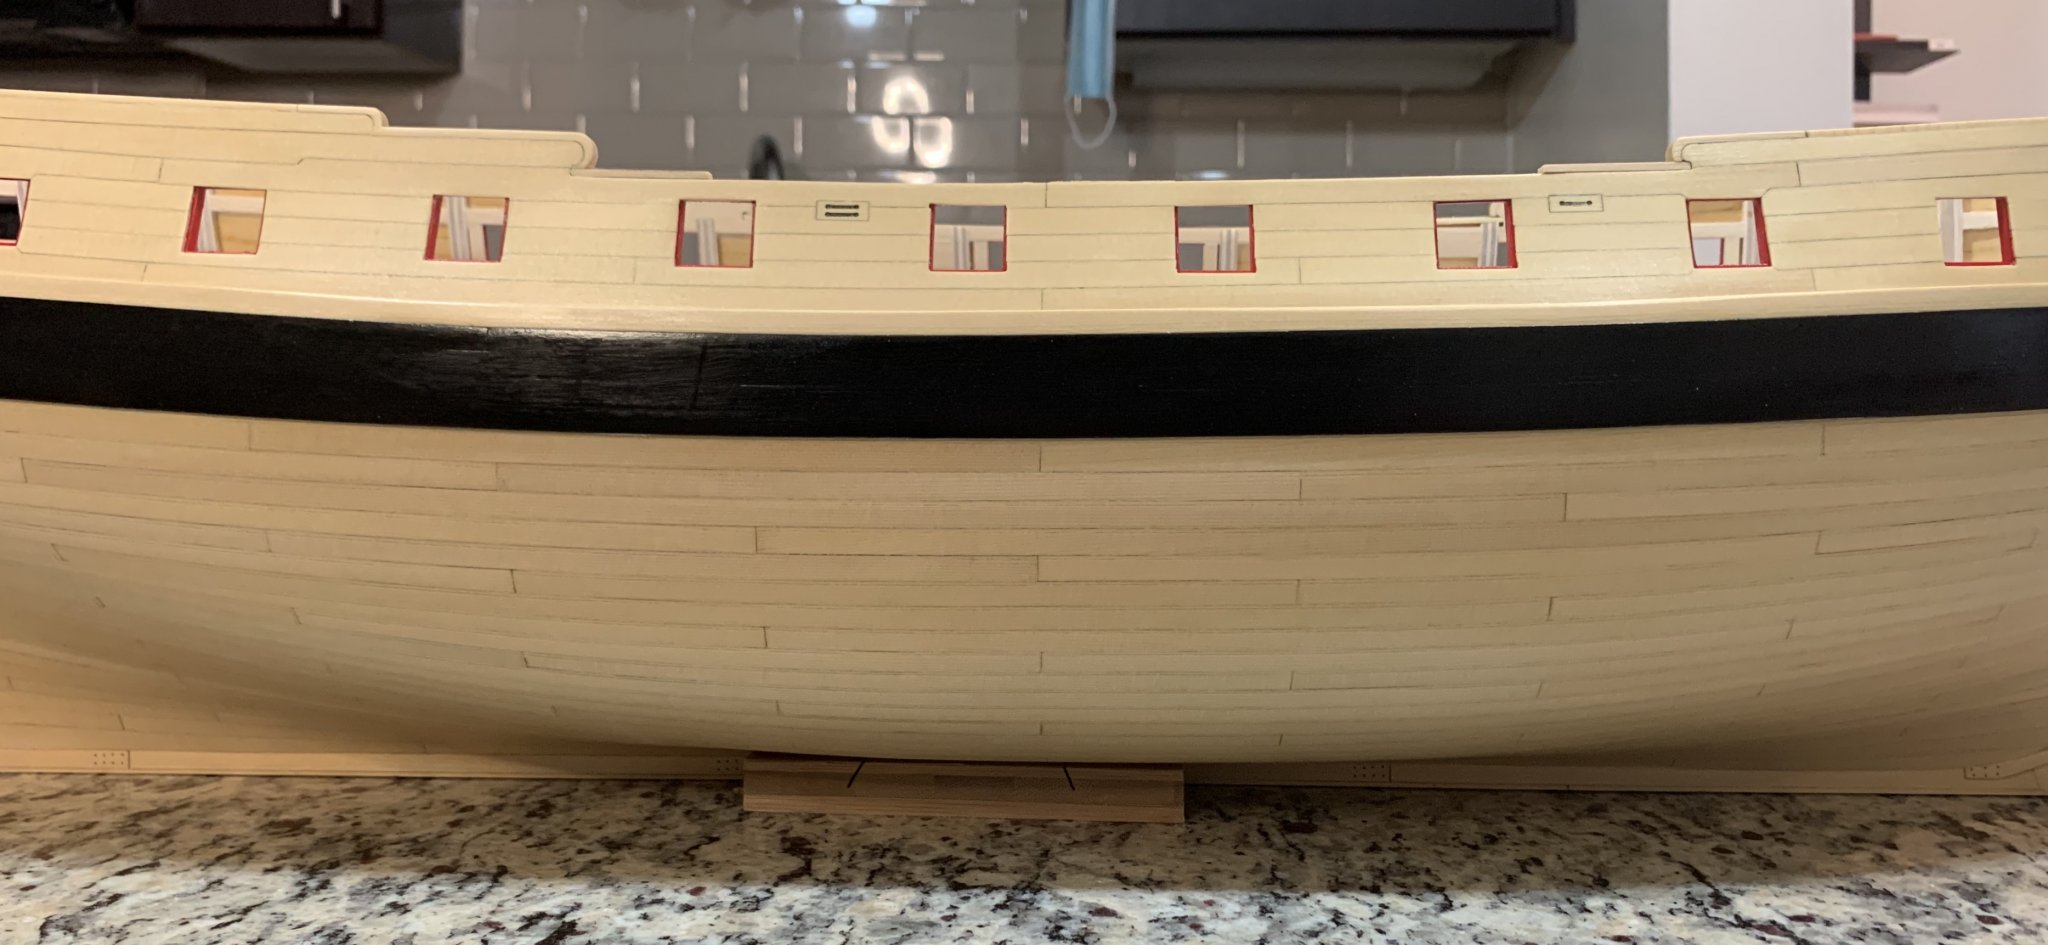
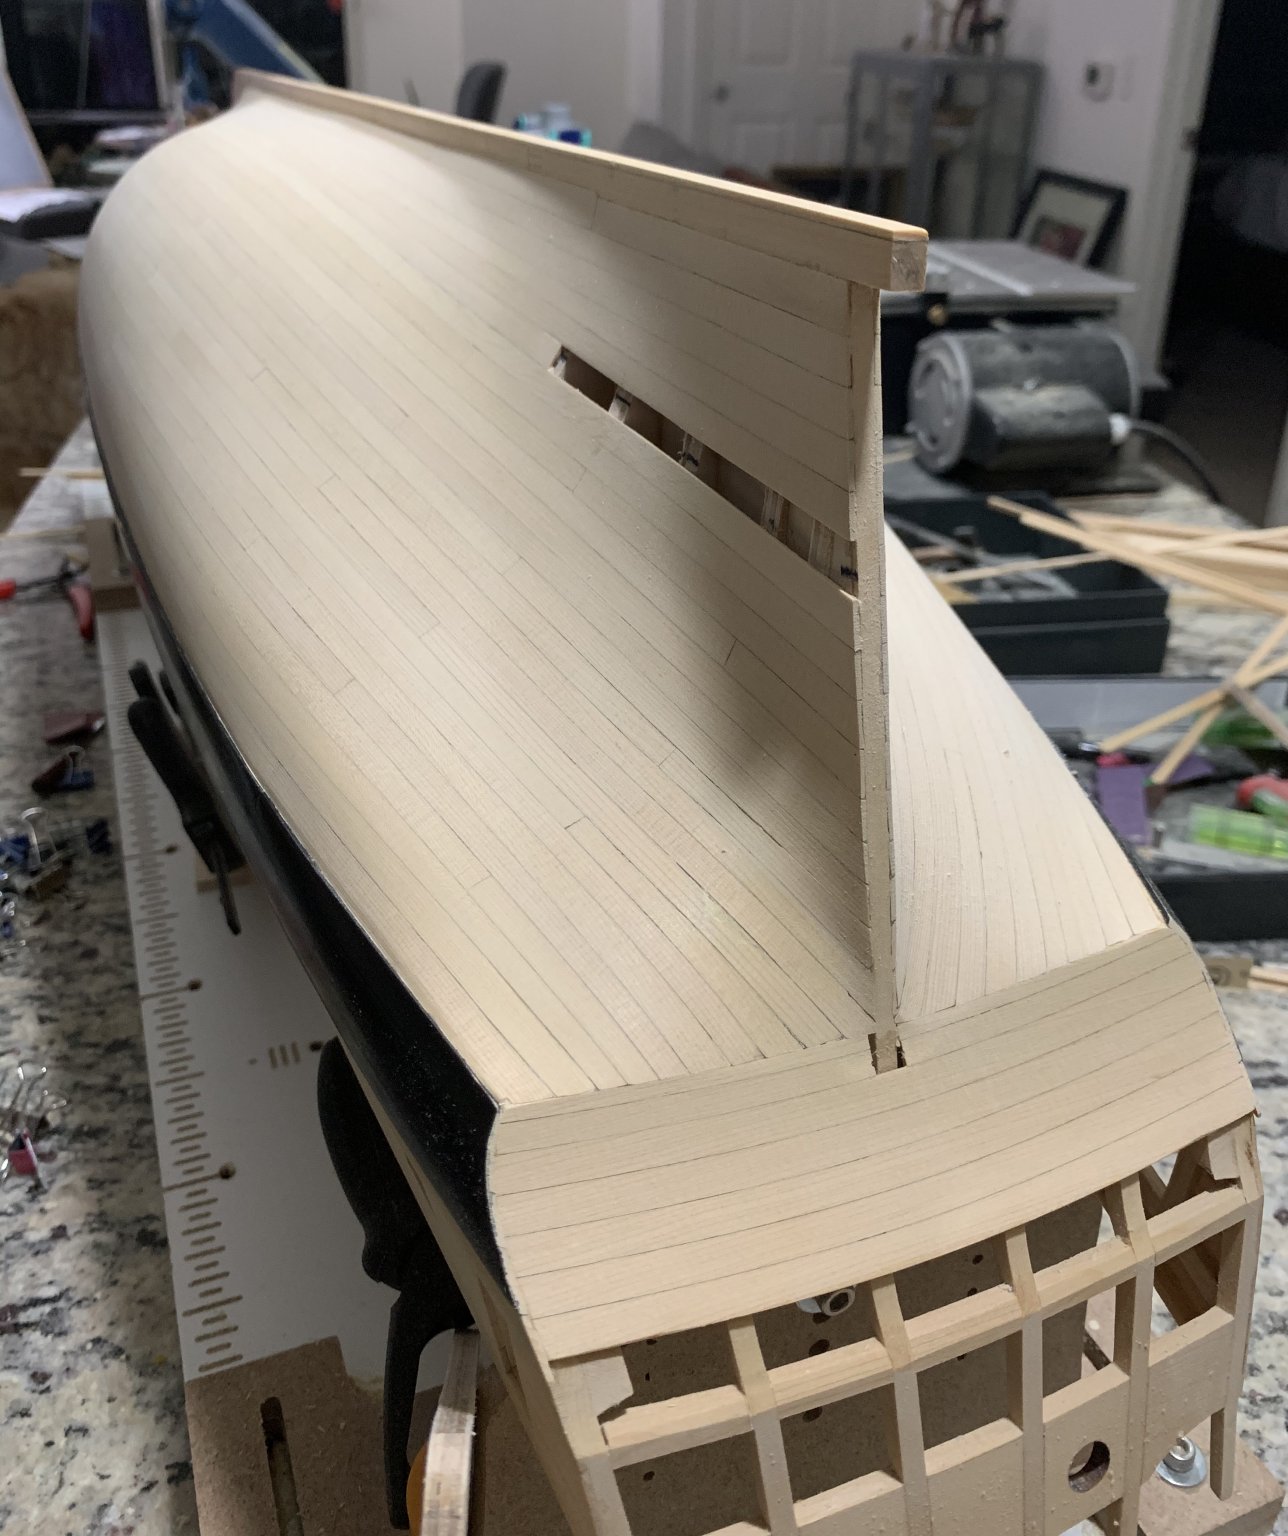
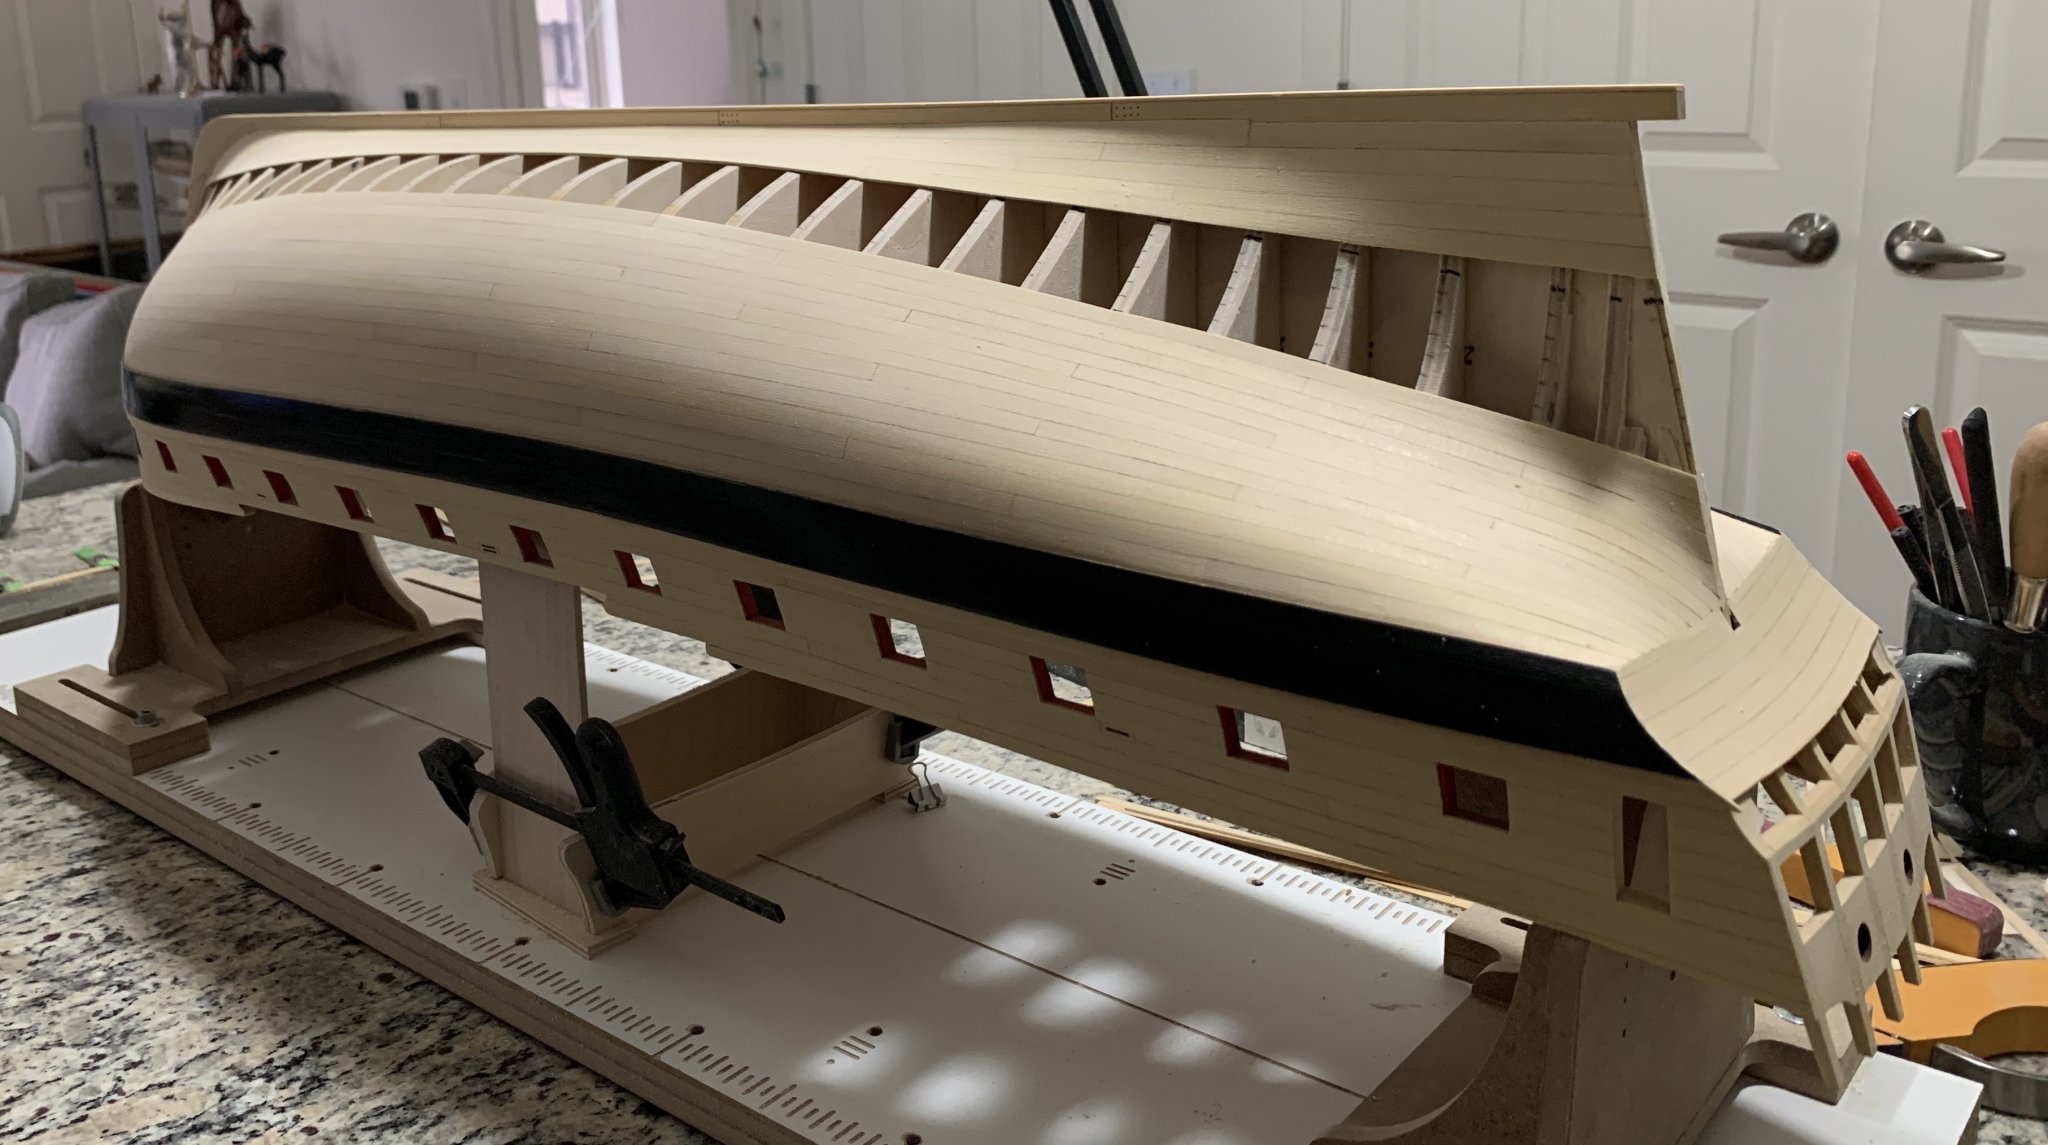
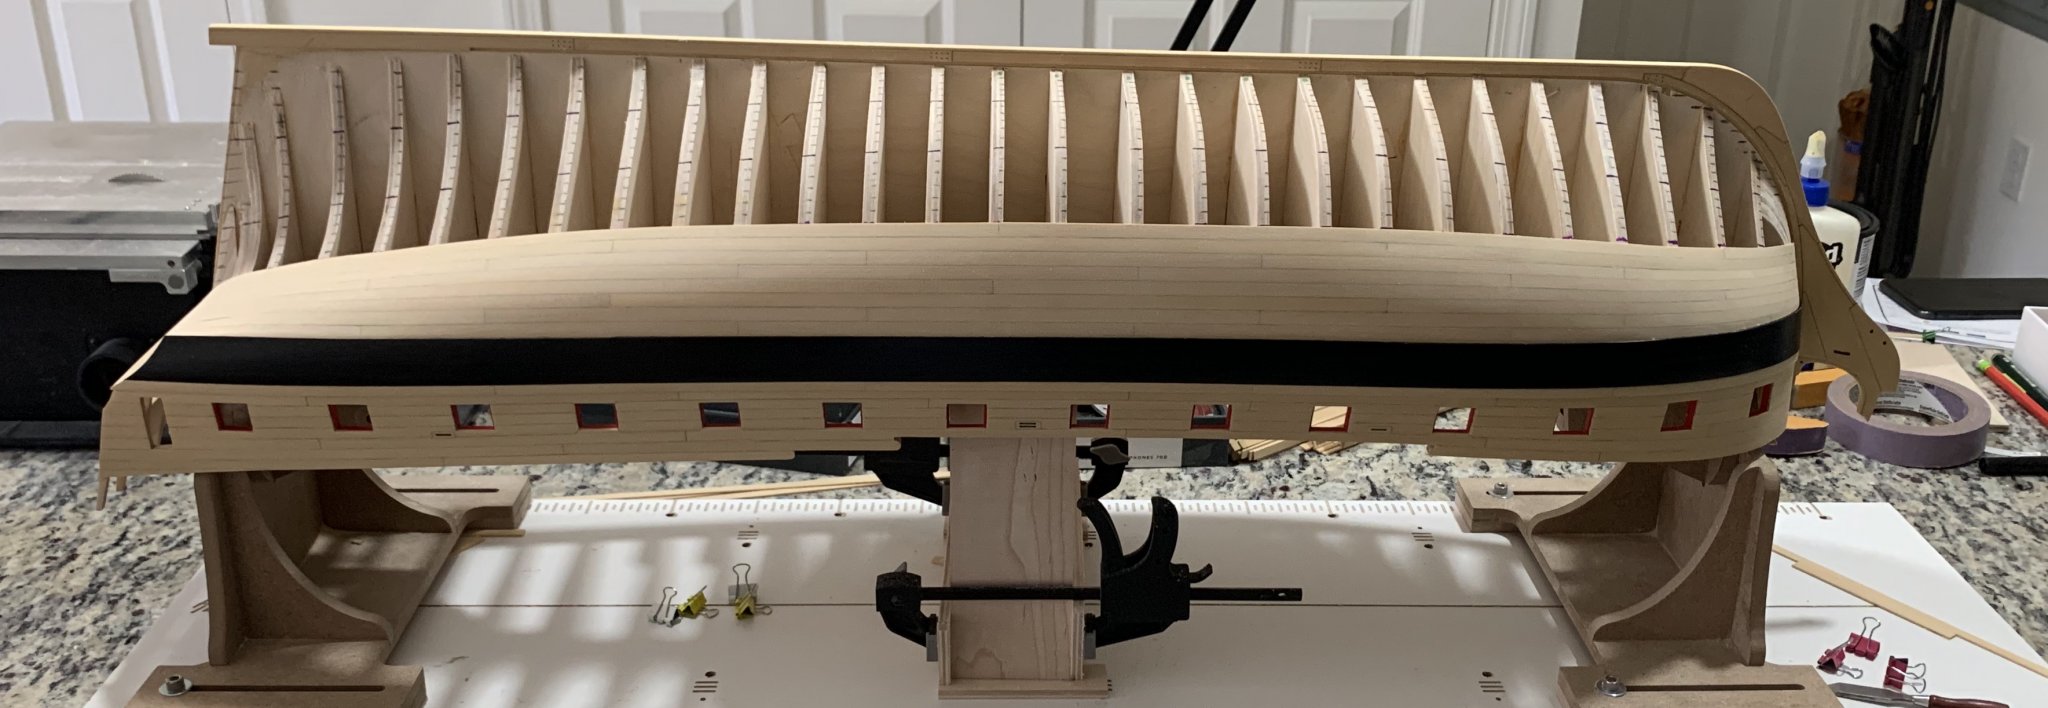
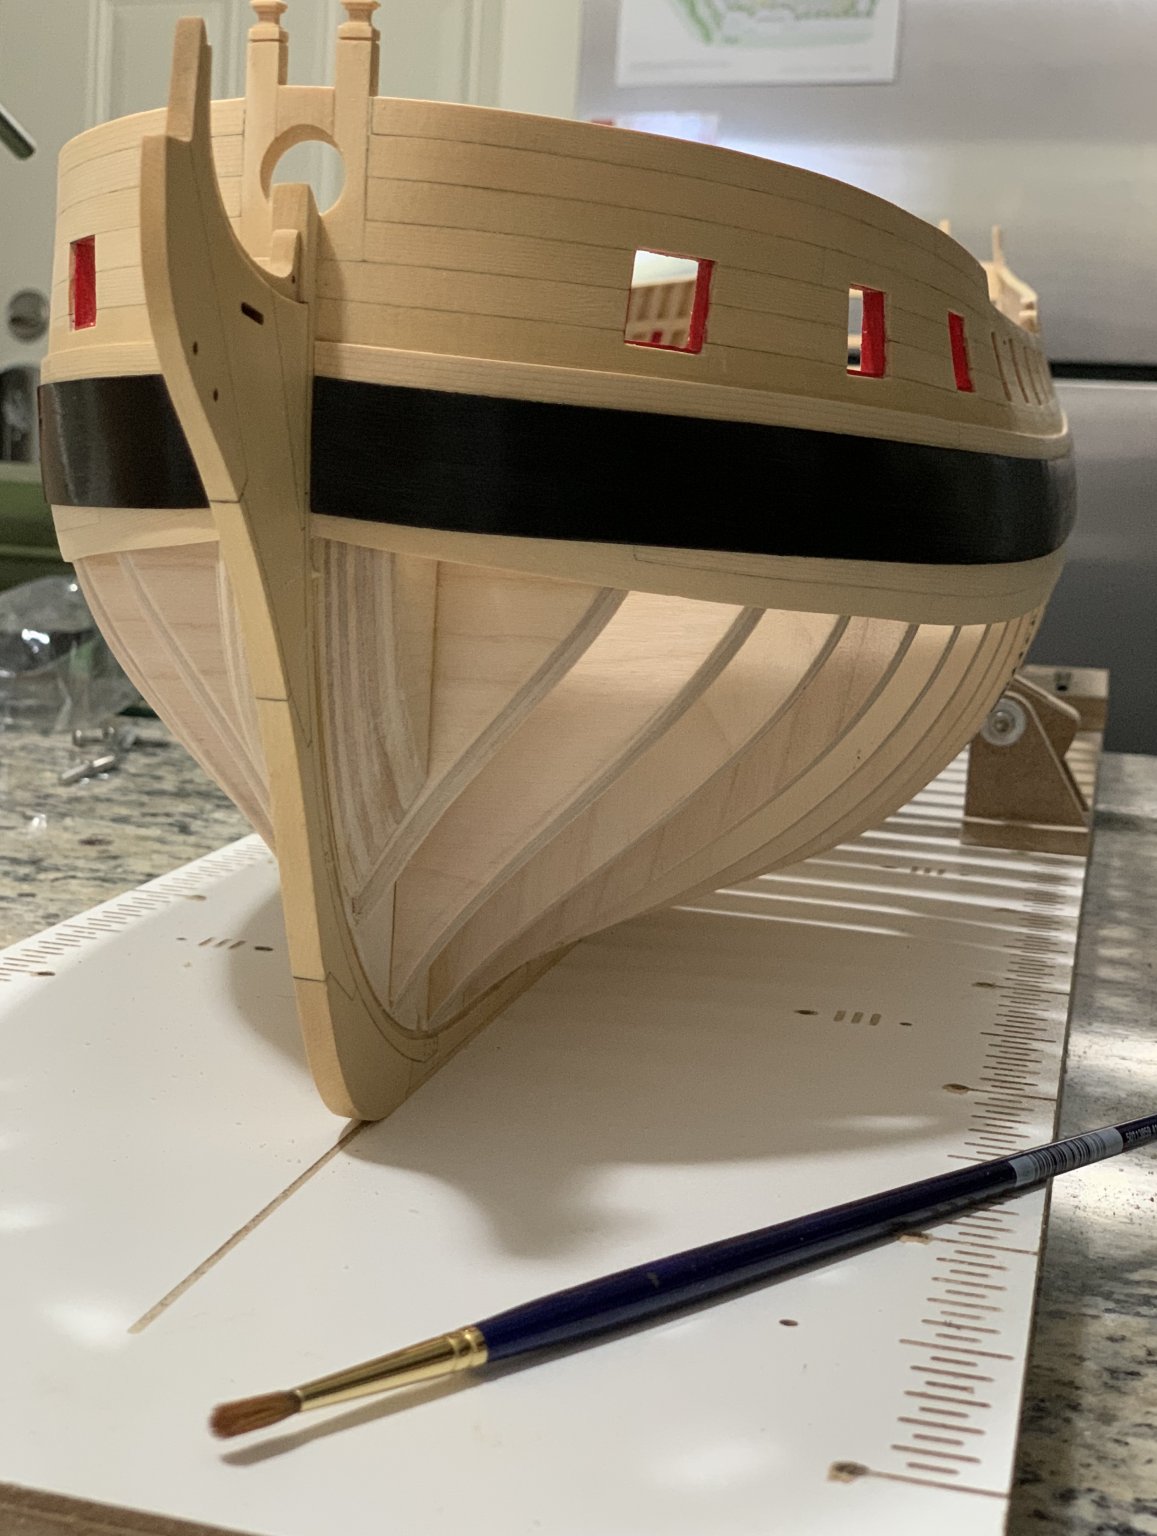
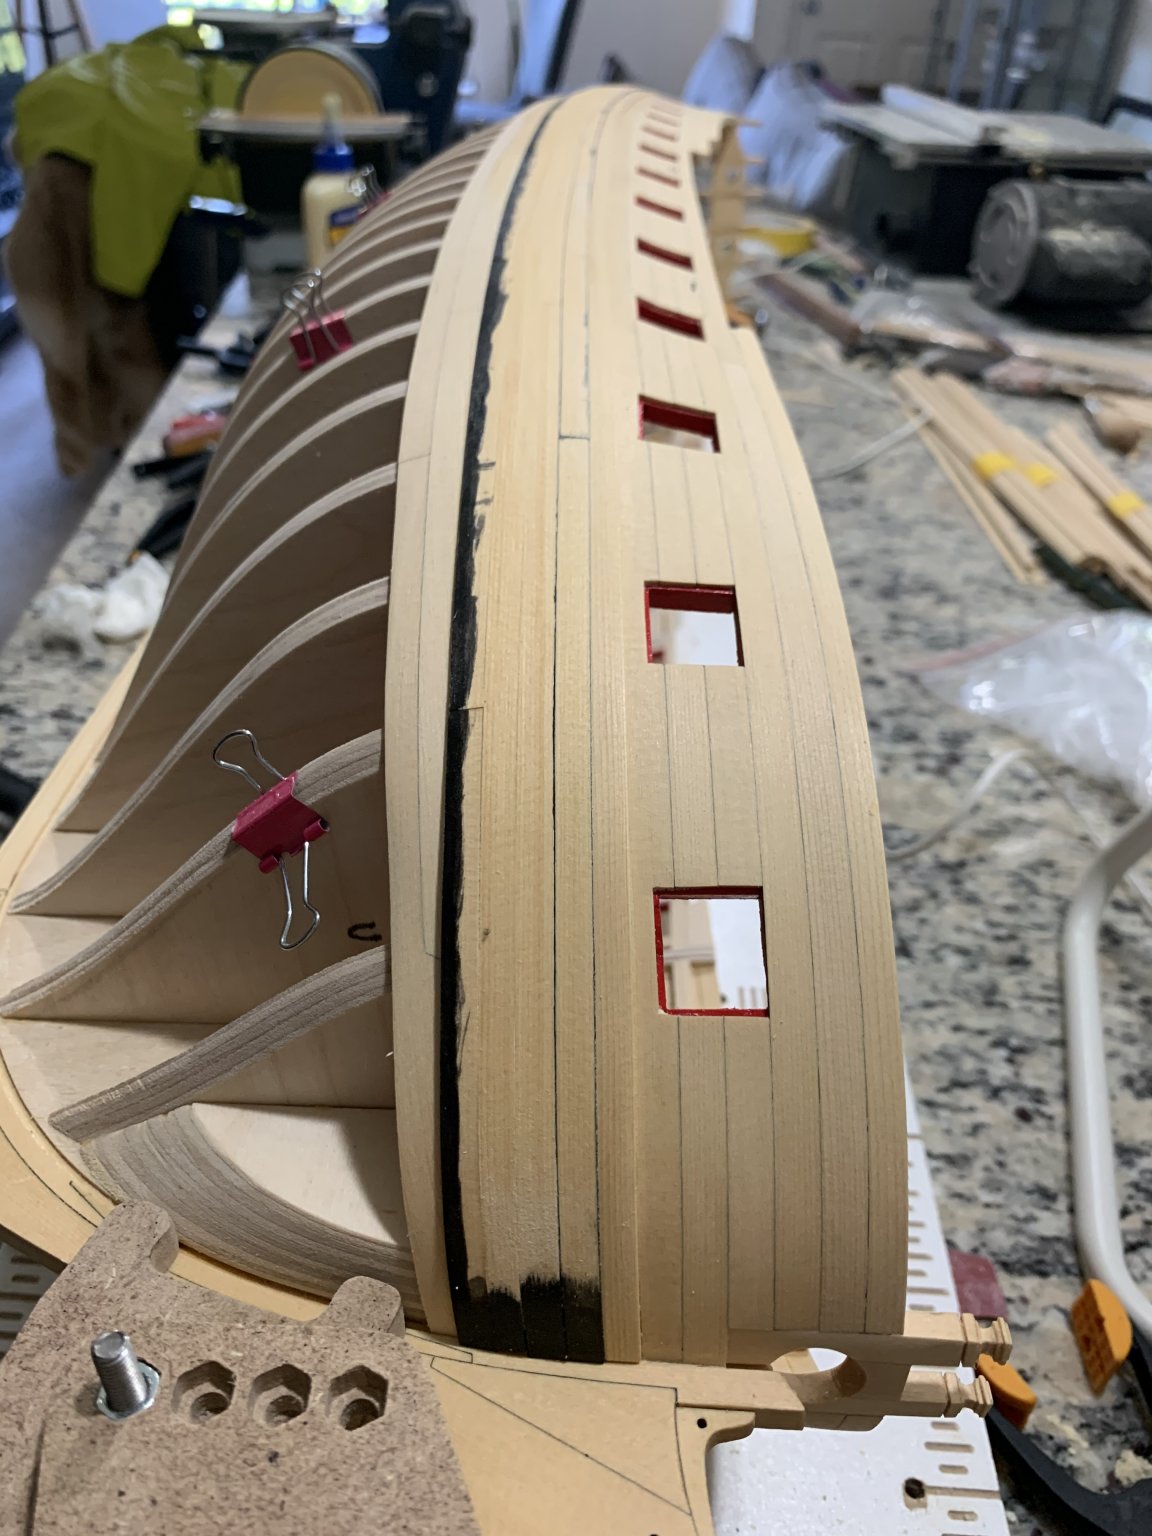
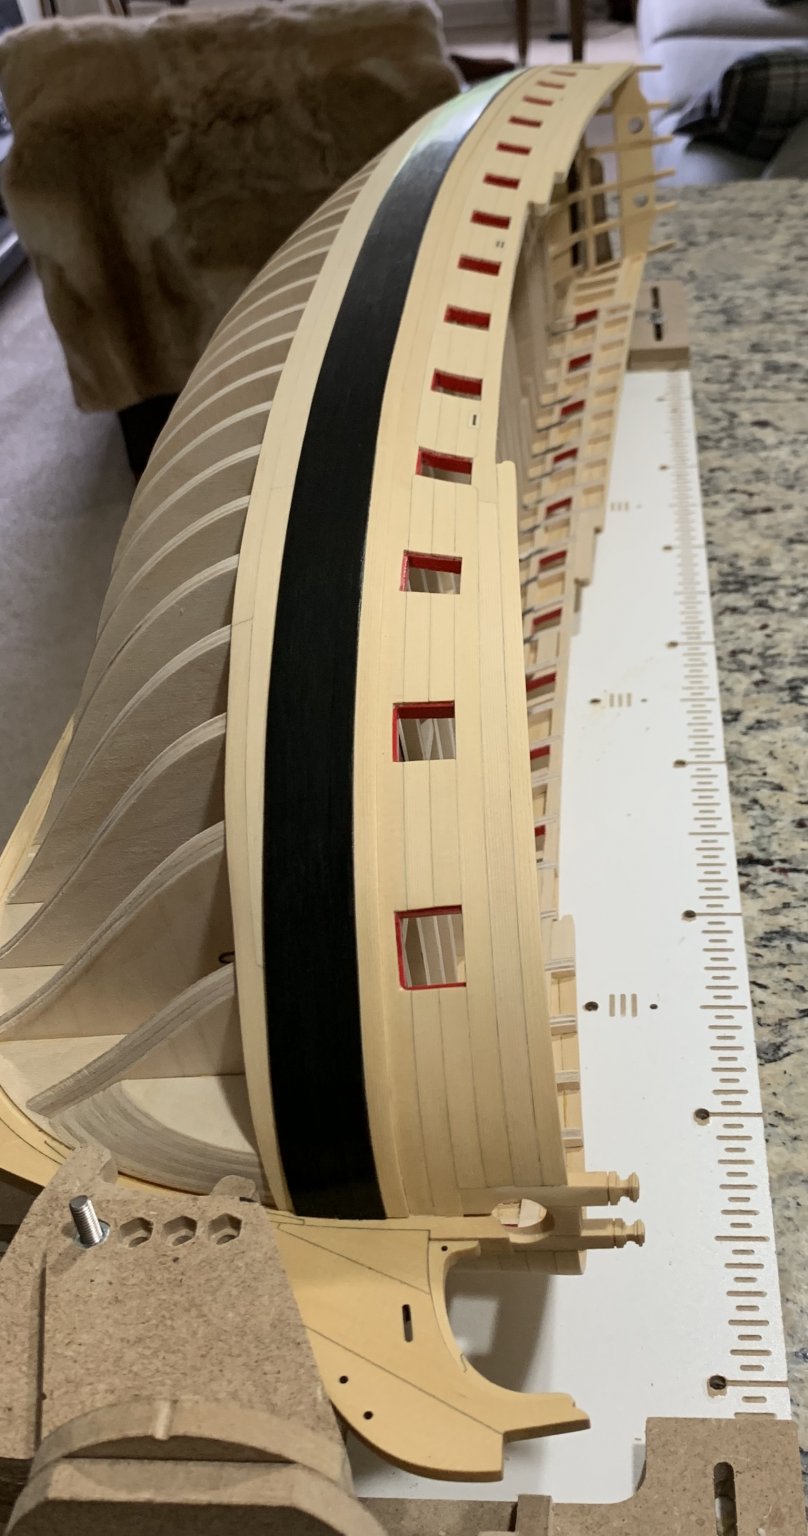
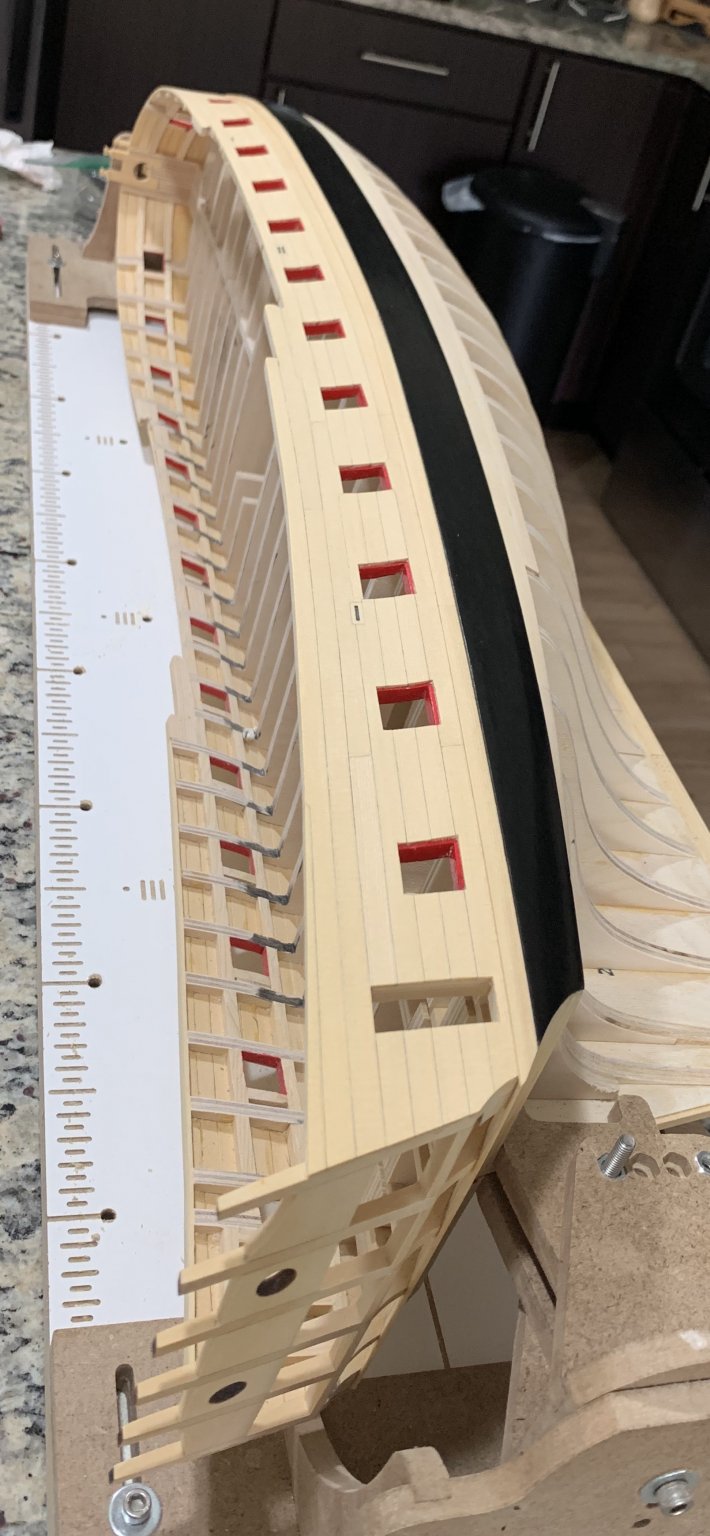
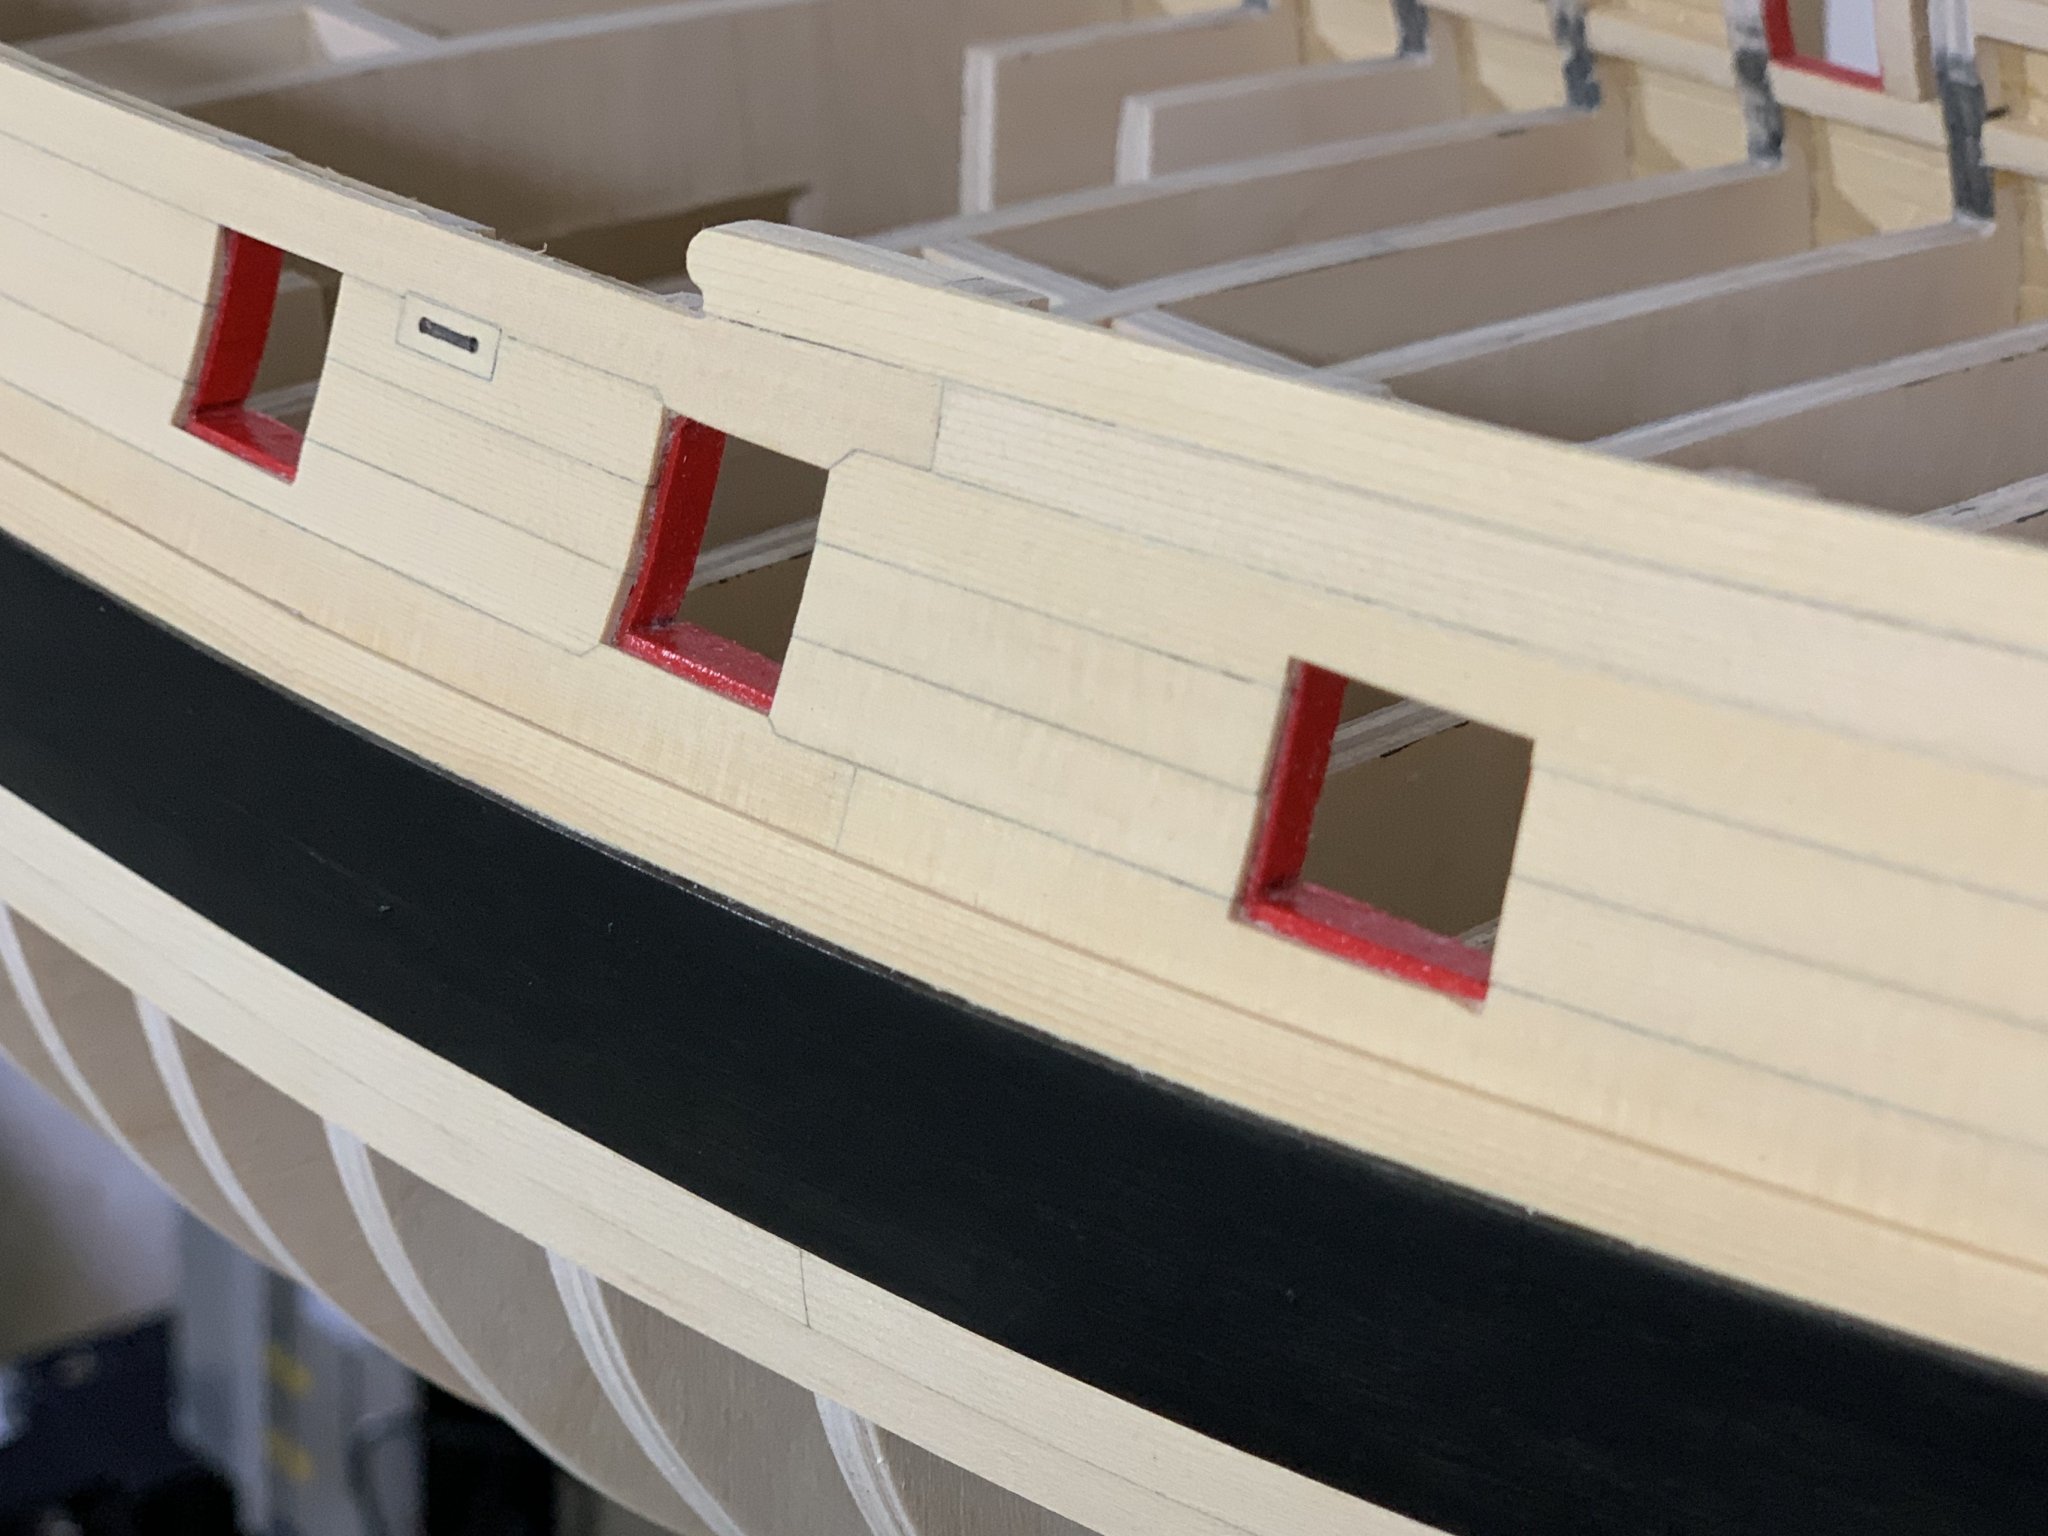
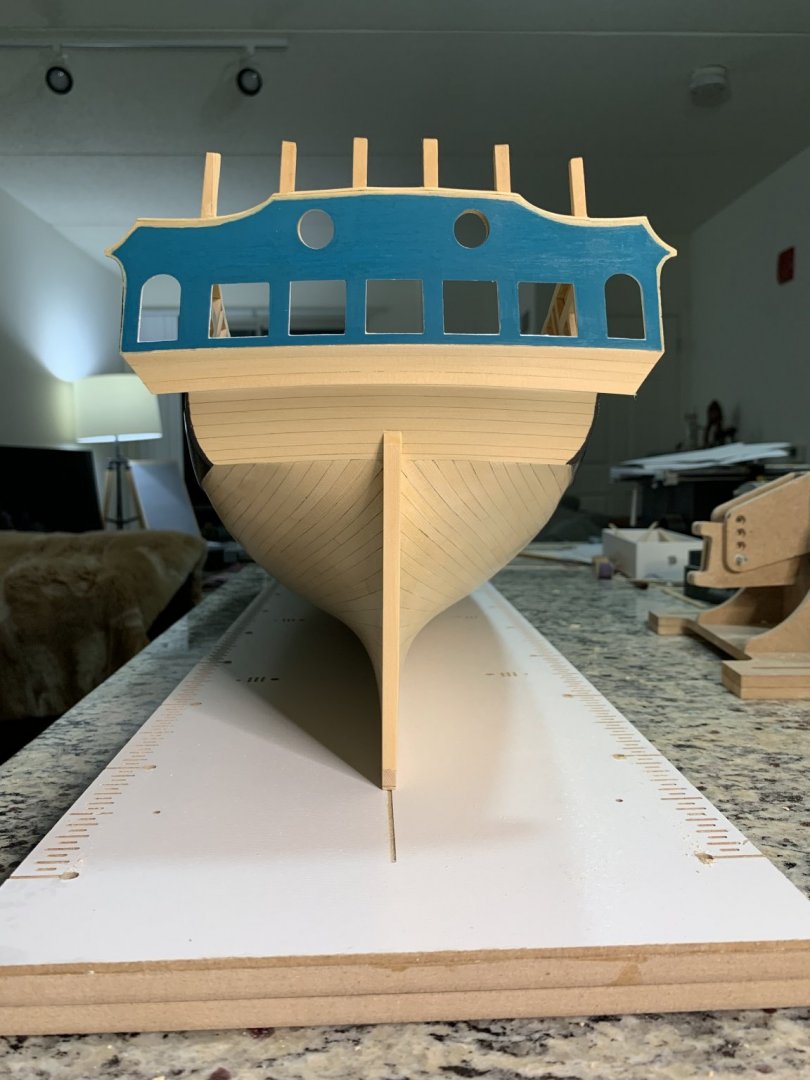
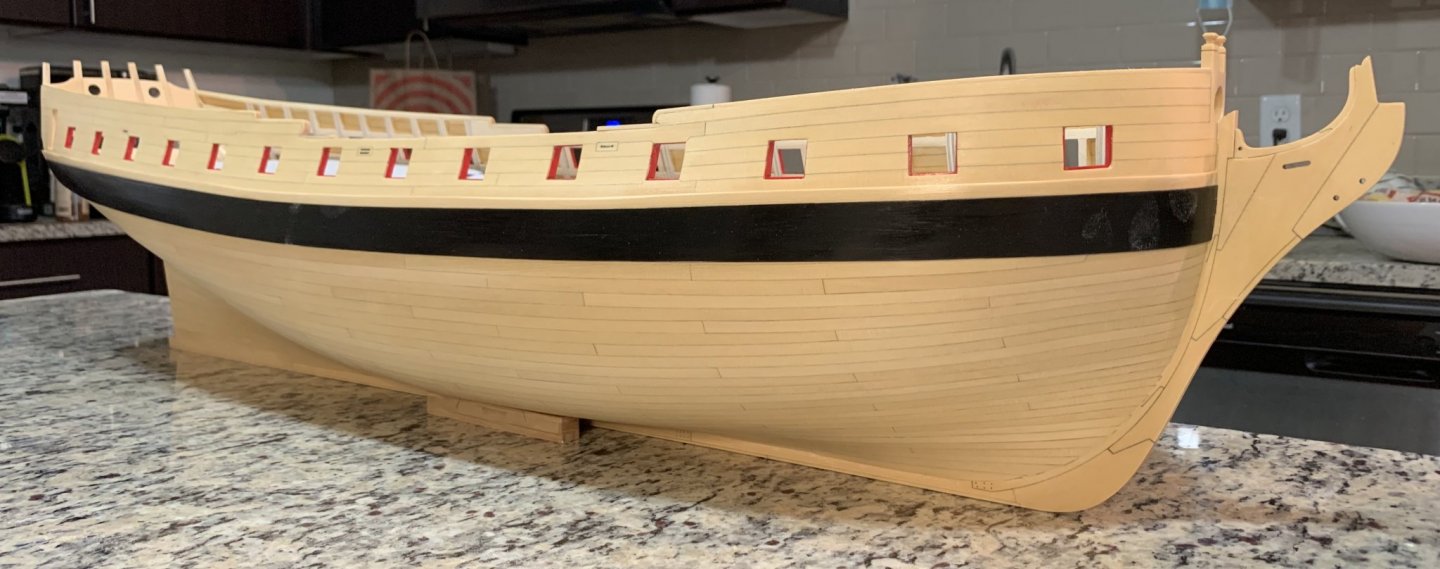
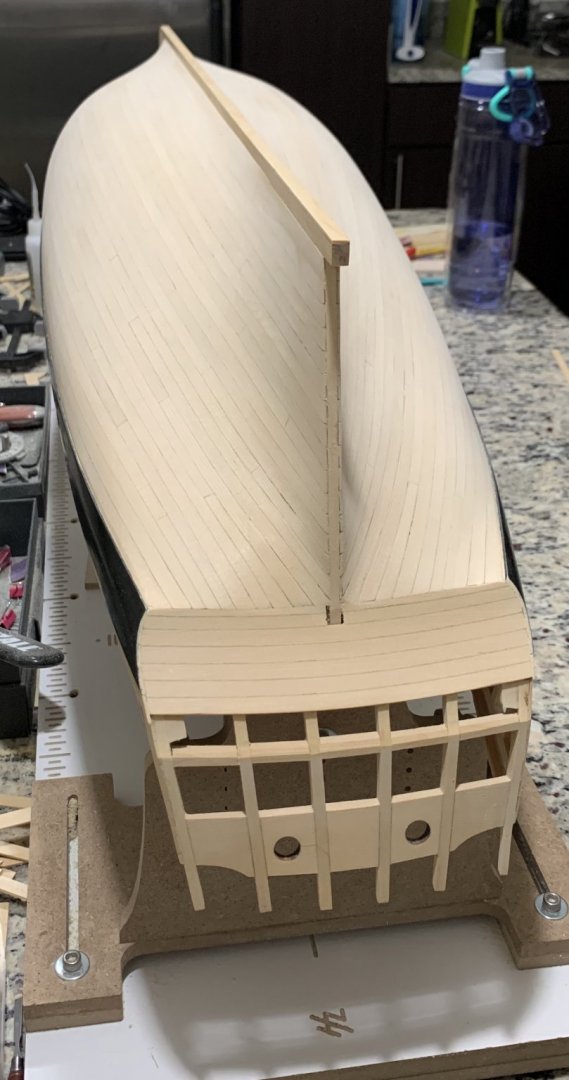
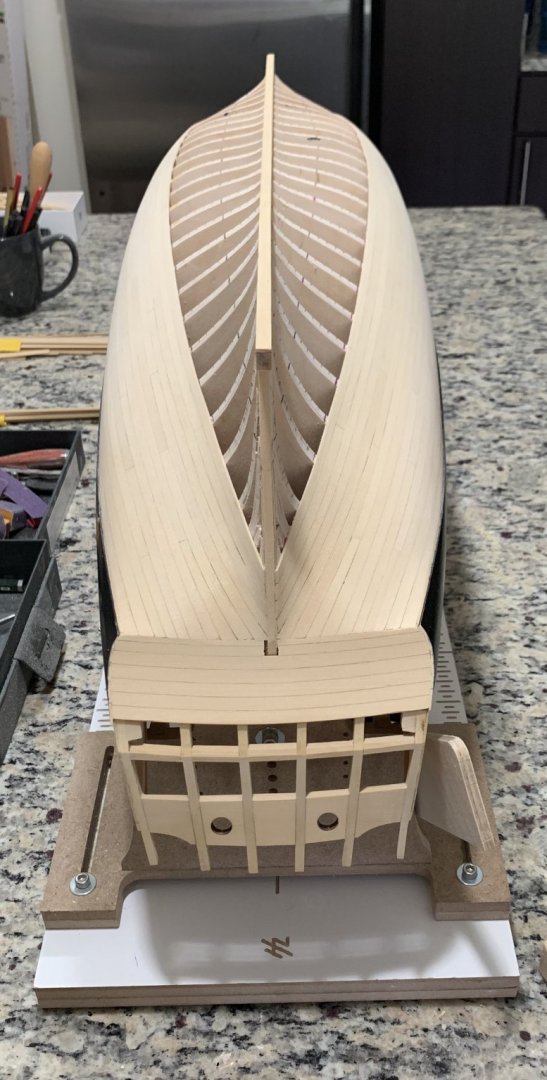
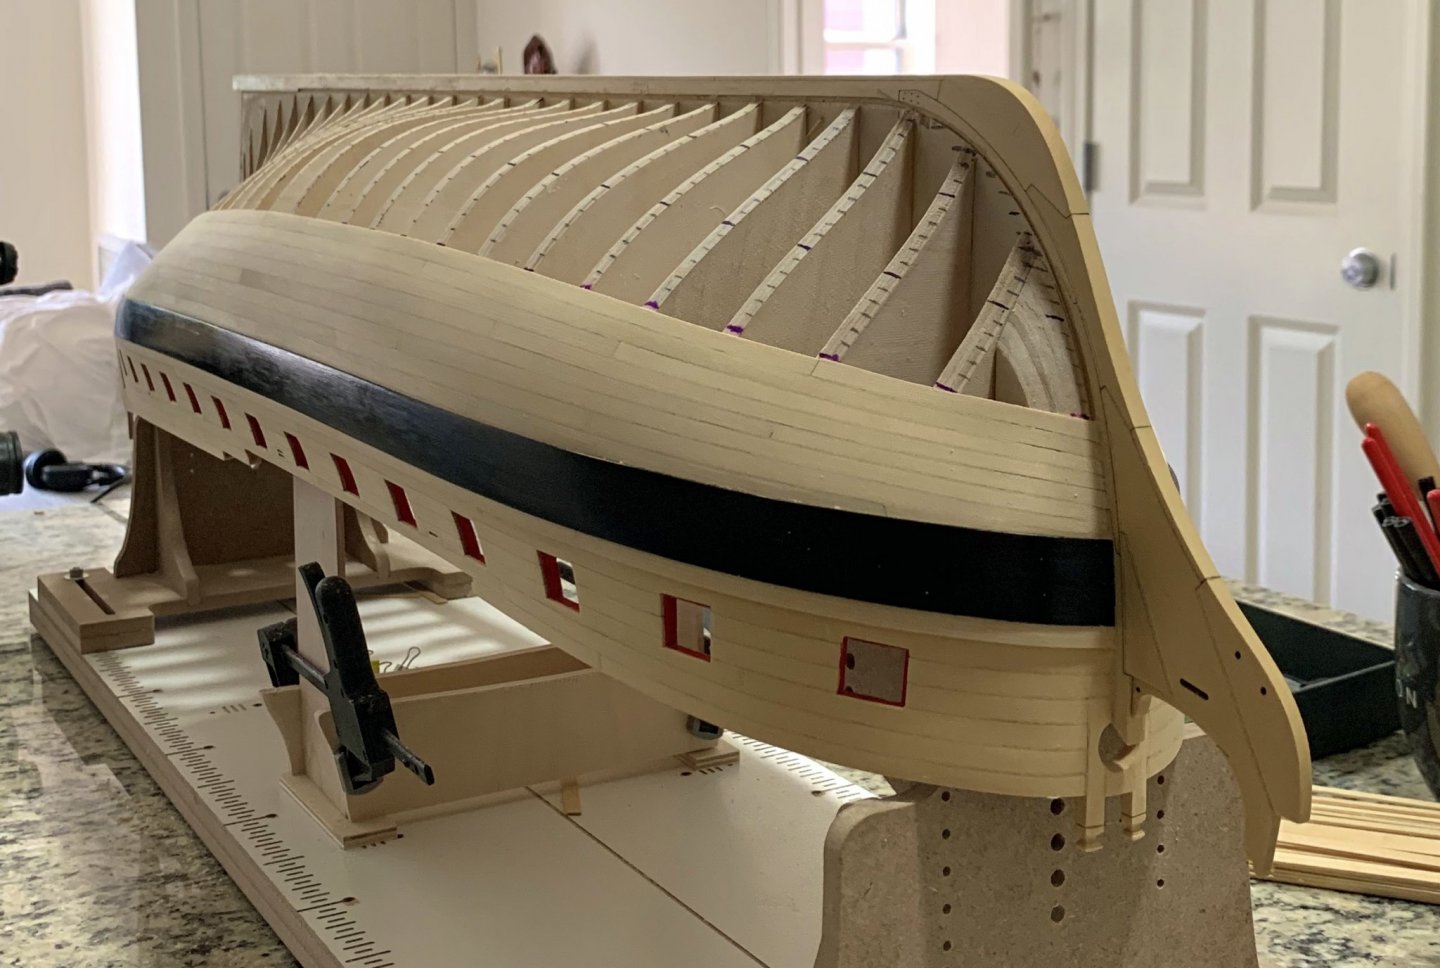
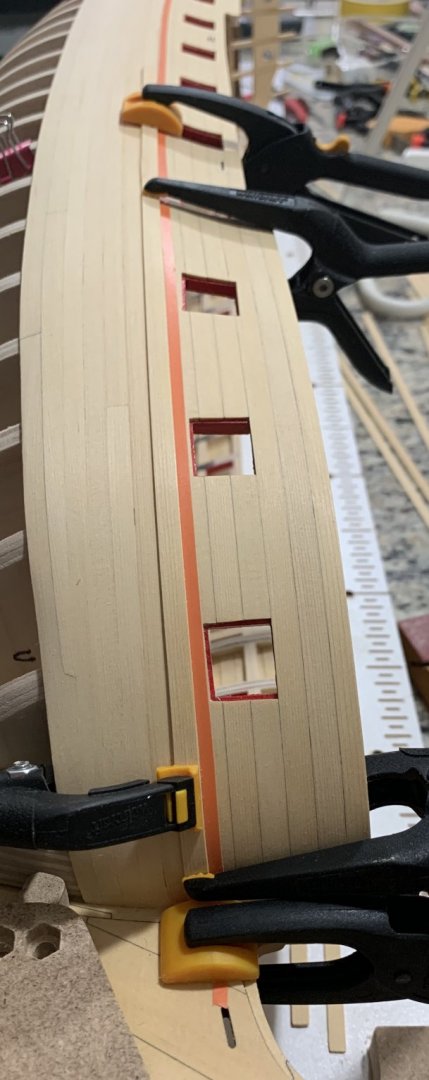
Thank you Reg, Don and Bob and for the likes. I assure you there are plenty of flaws but I think they are ok. I added the stern post the transom and upper counter. I have planned the painting patter ahead of time and some sections were painted before they were glued. The cap rail on top of the transom took a long time but the effort was wort it. The circular ports were enlarged to match the transom plate. Next reinforce the upper counter to start the Qgallery. Best, G
-
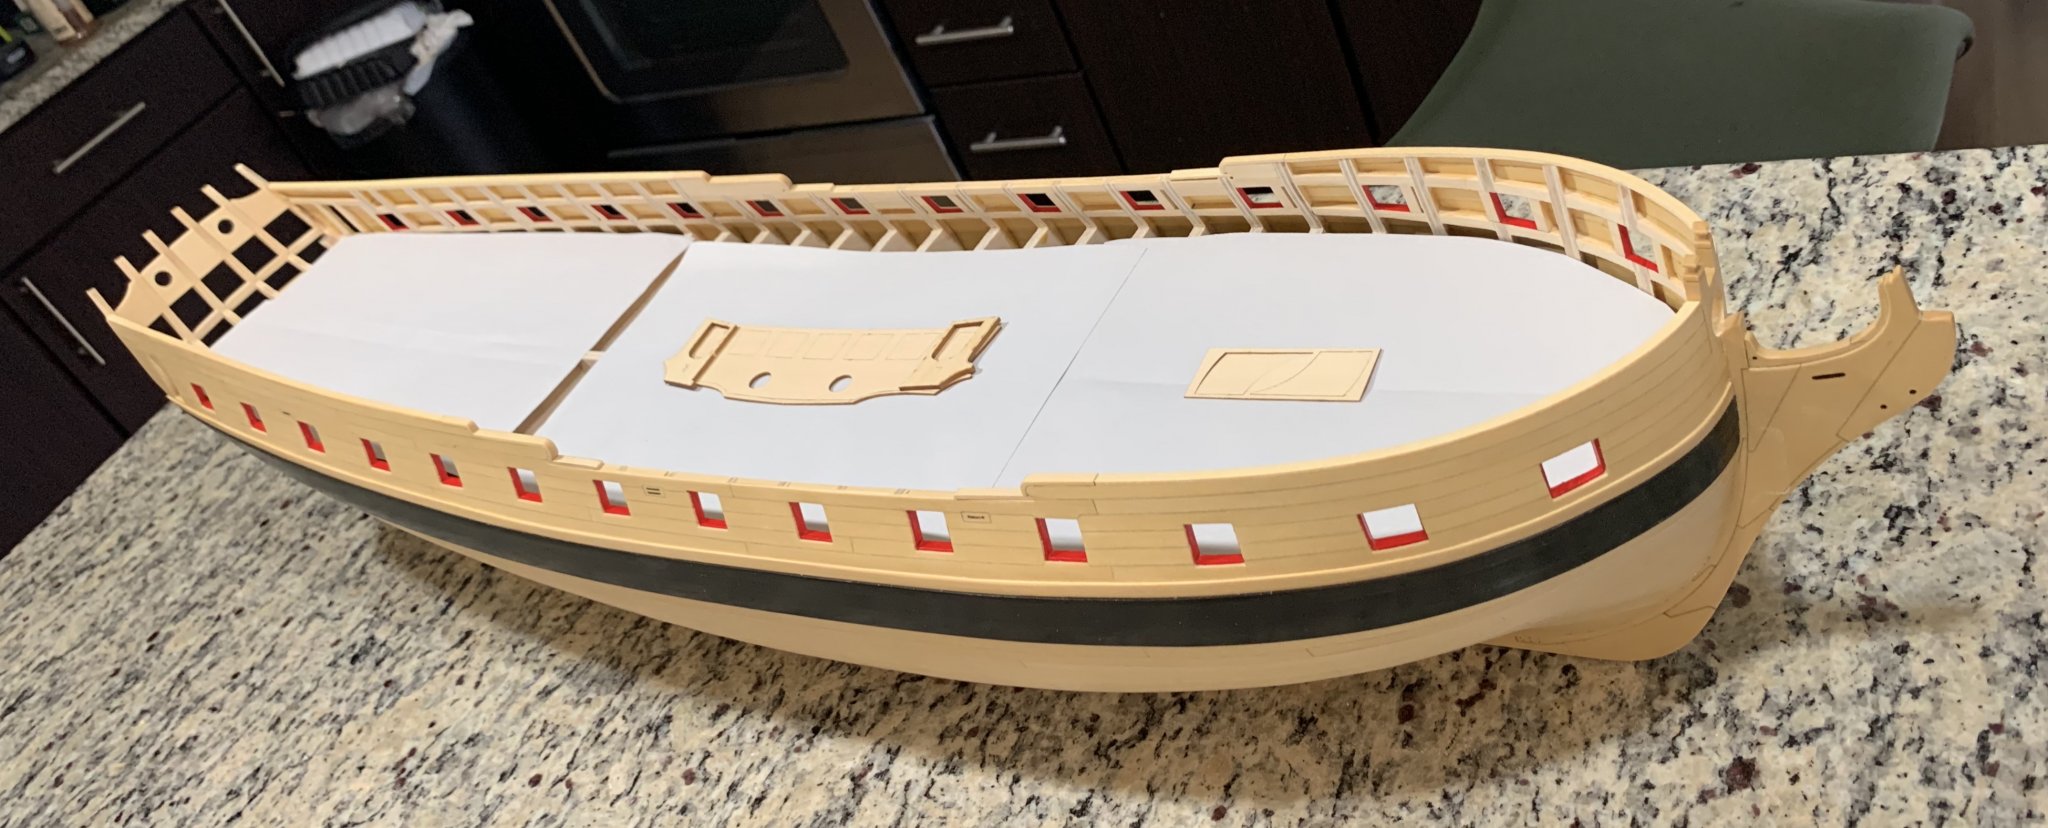
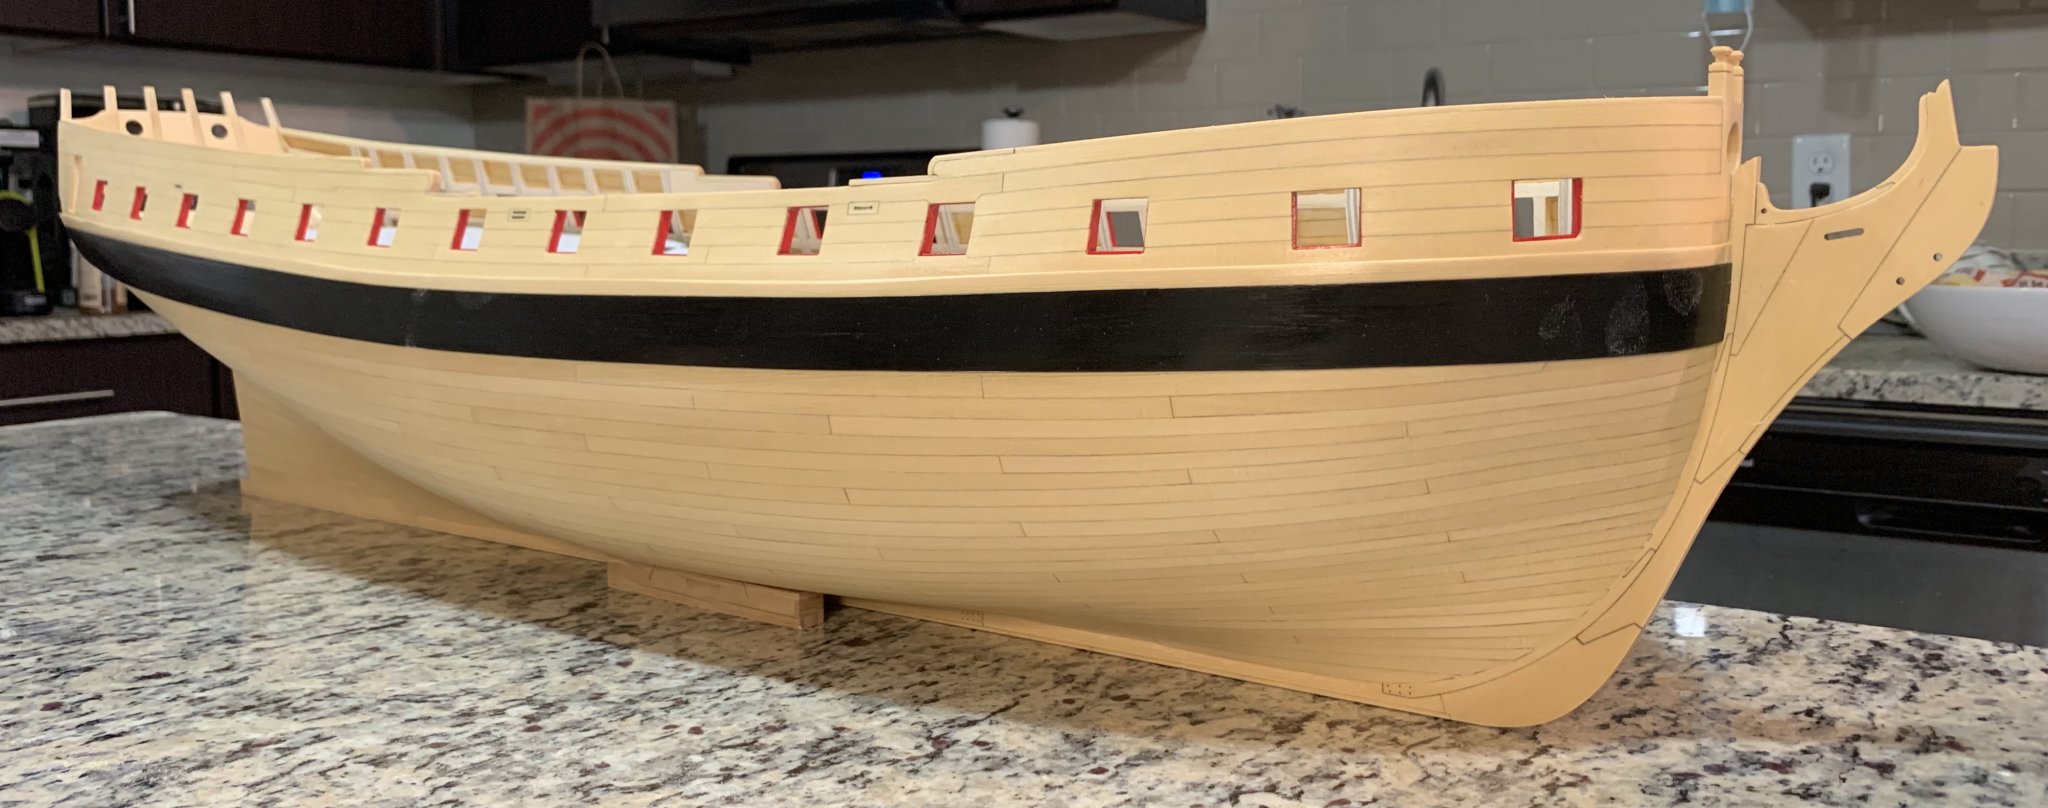
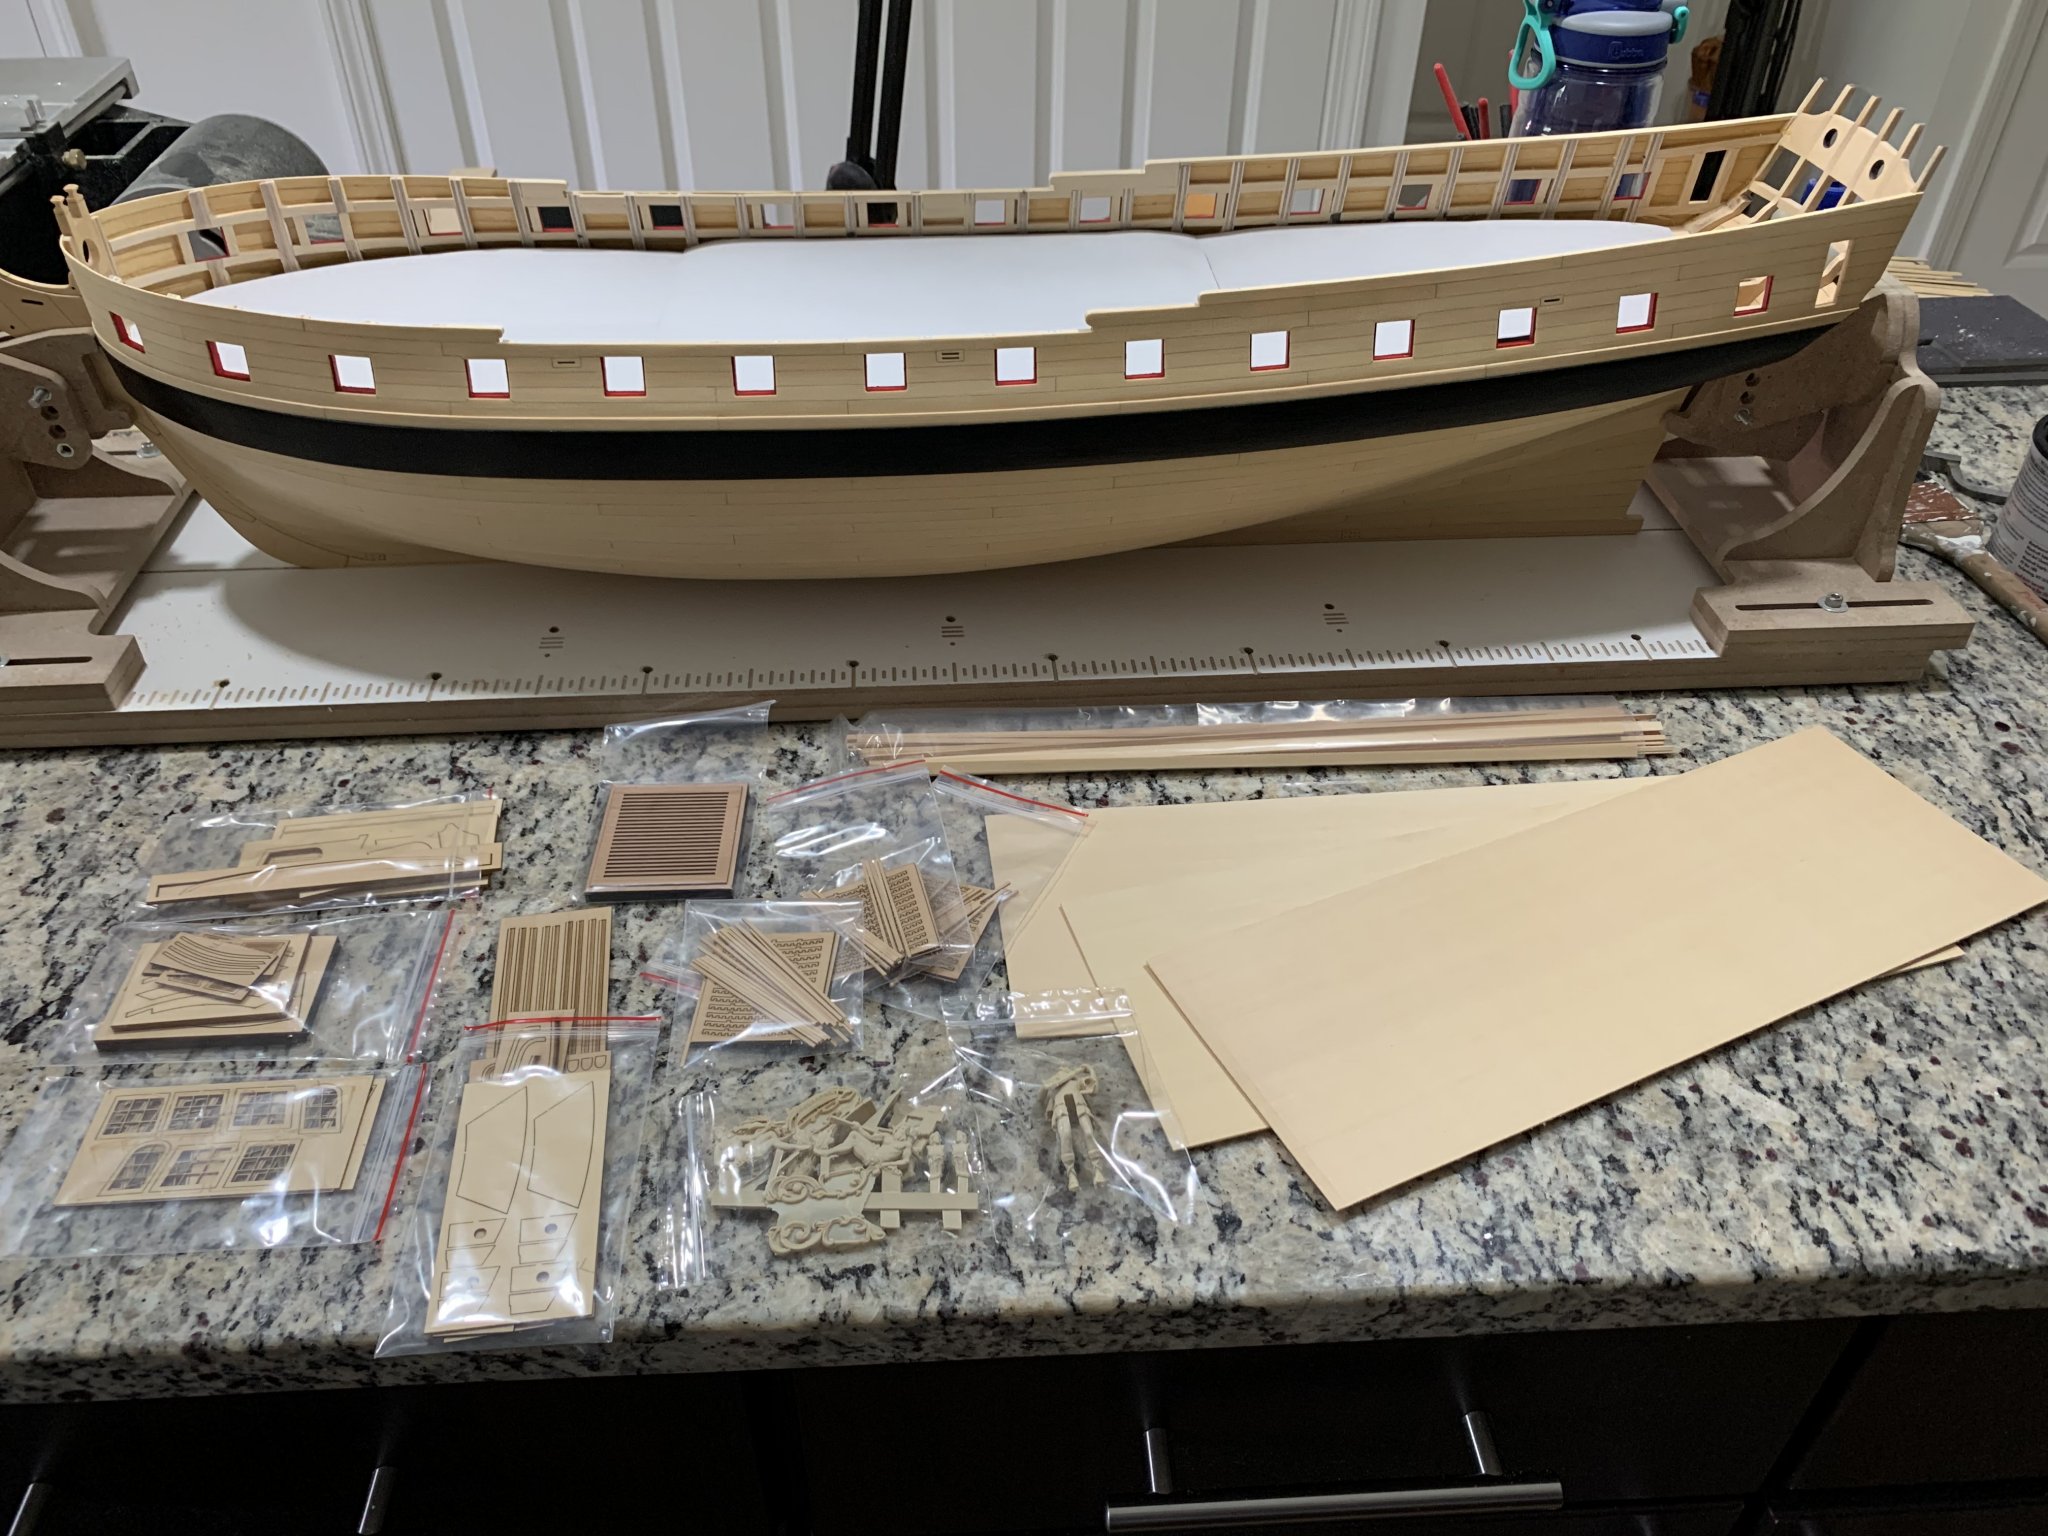
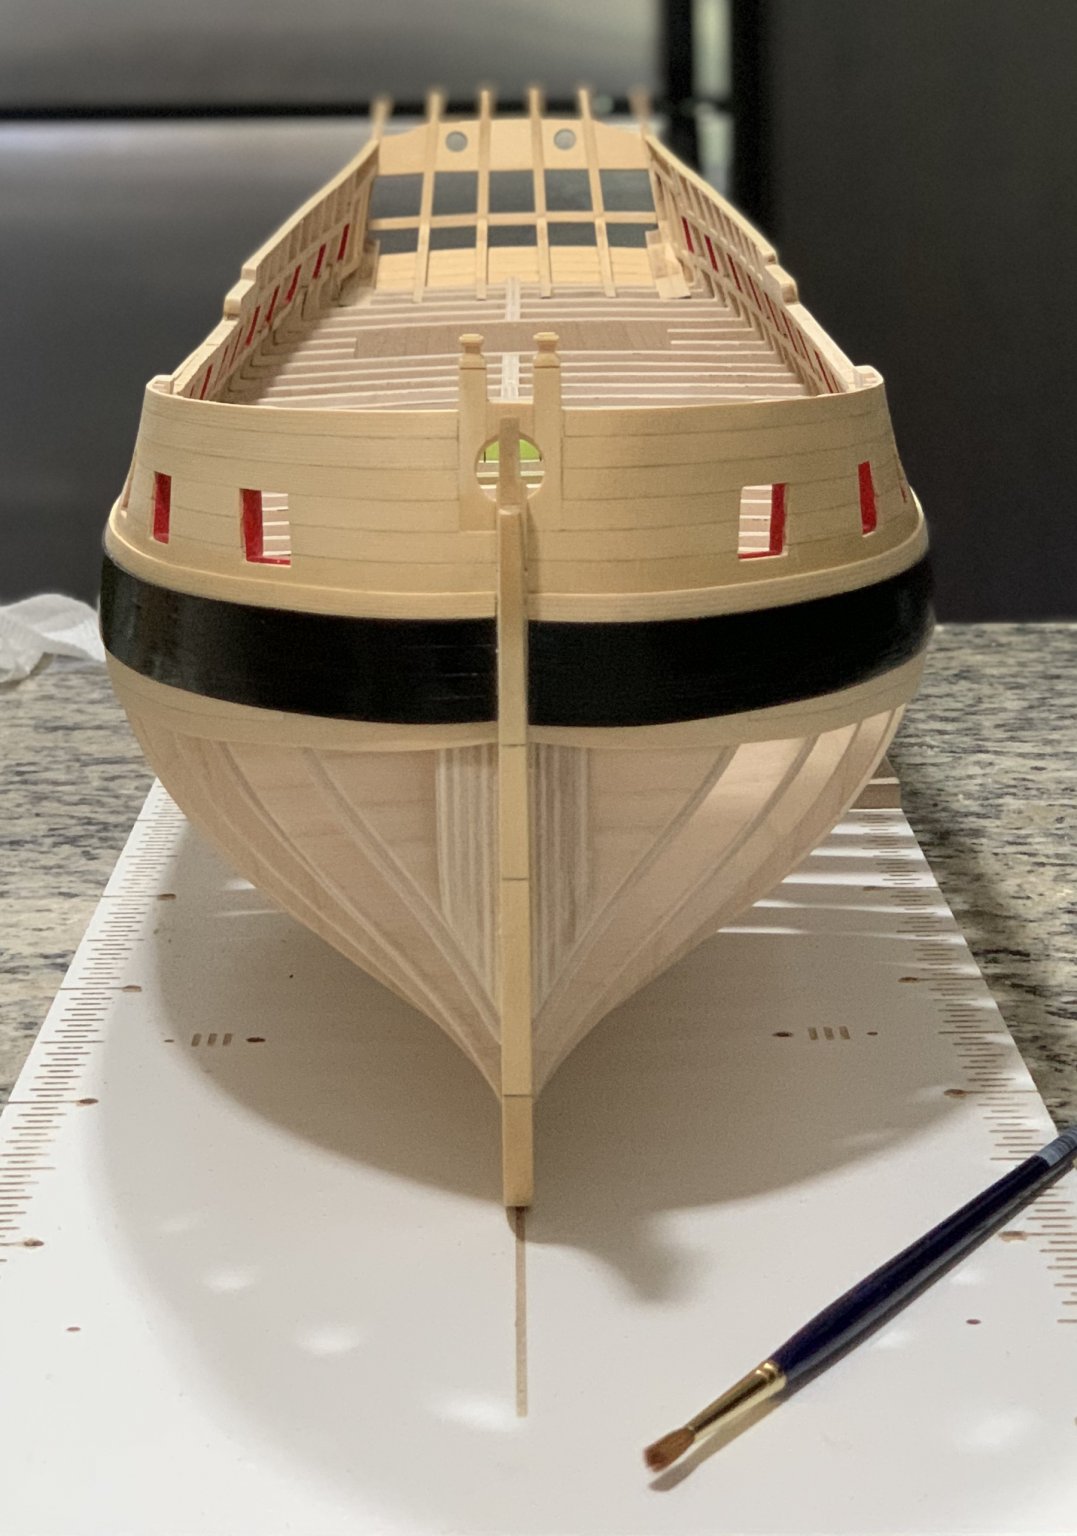
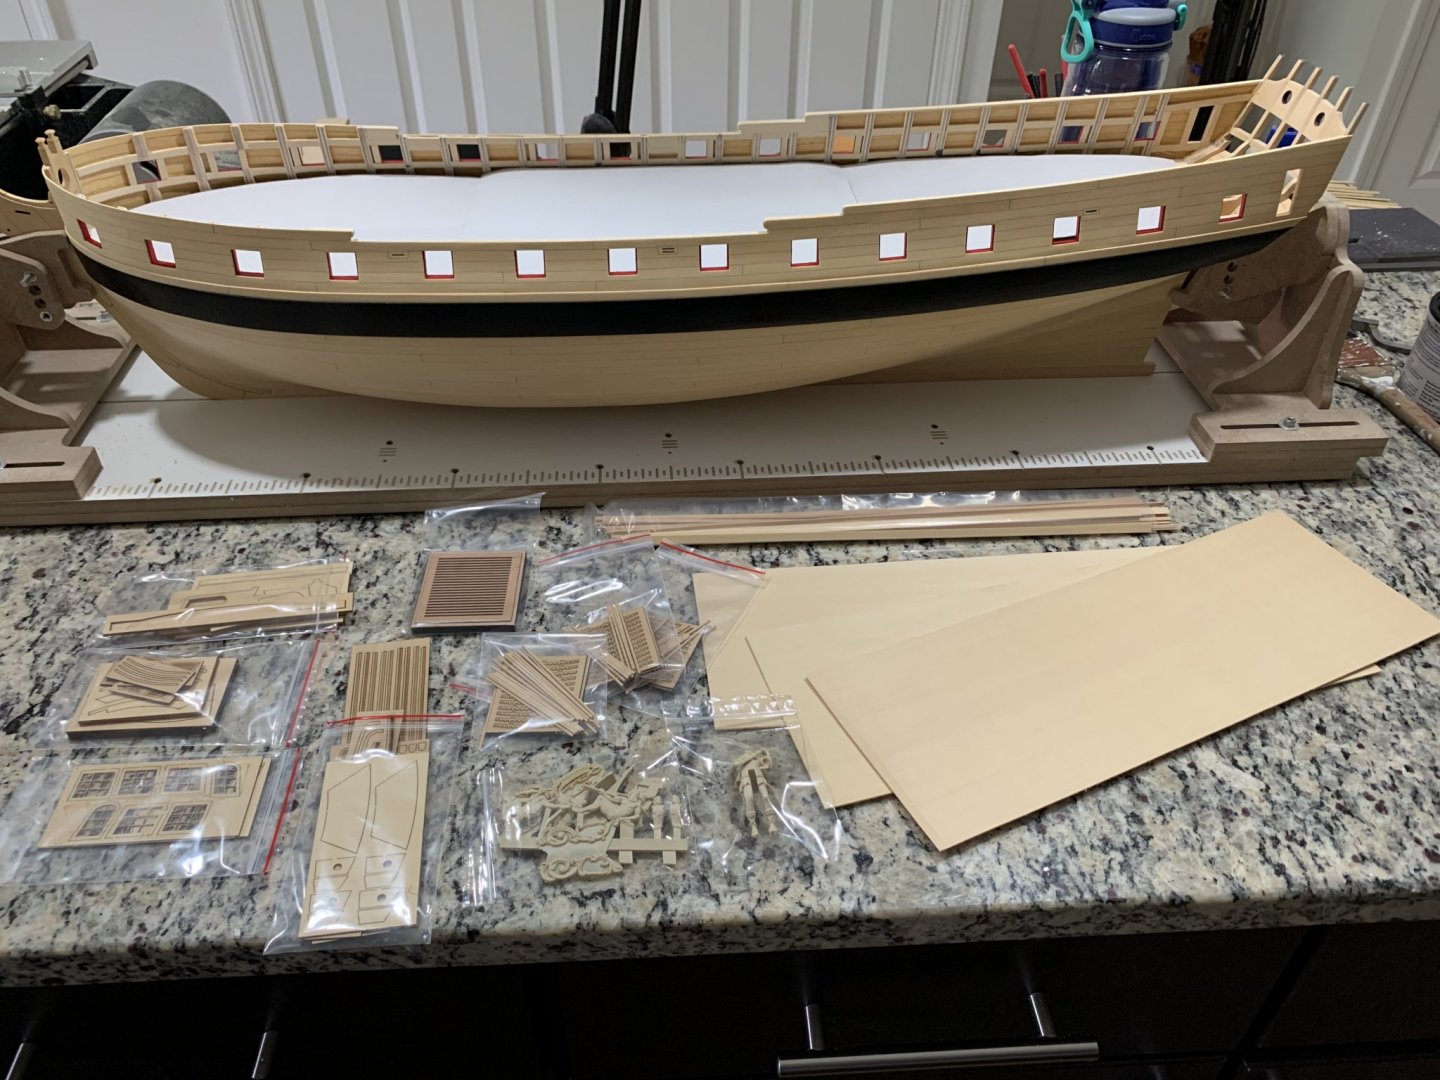
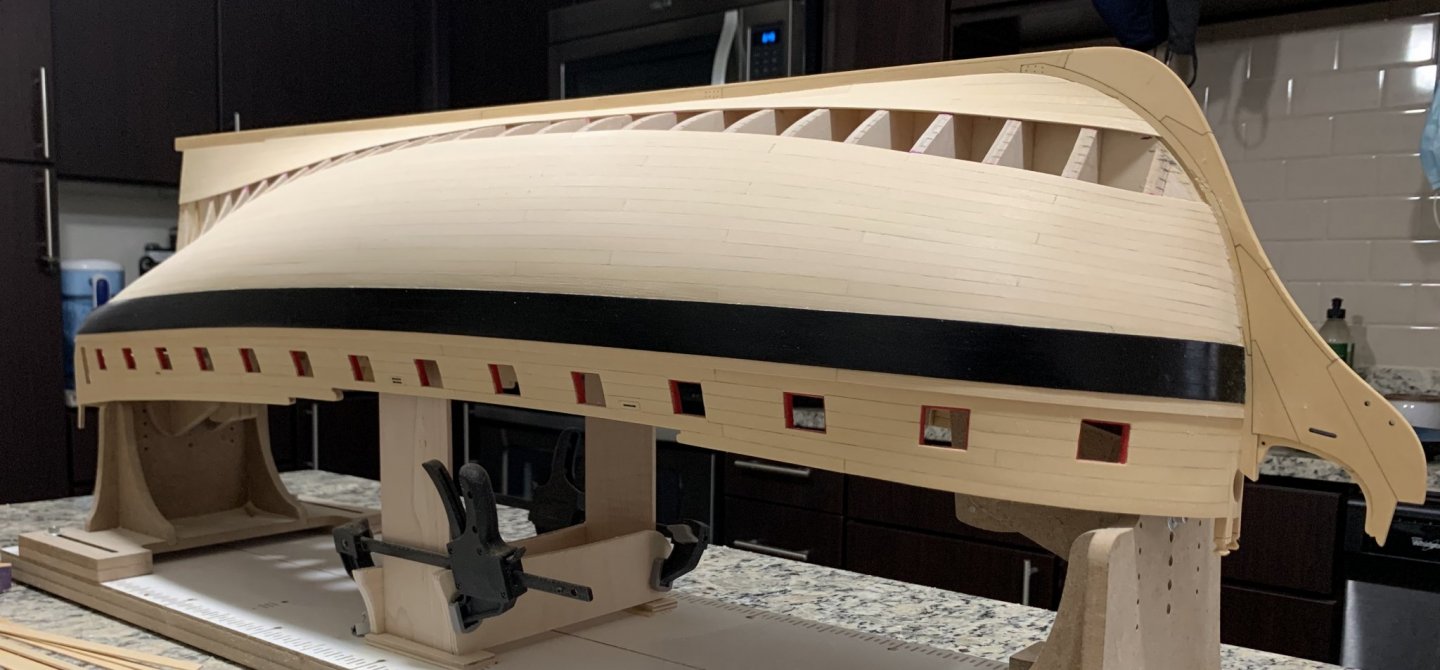
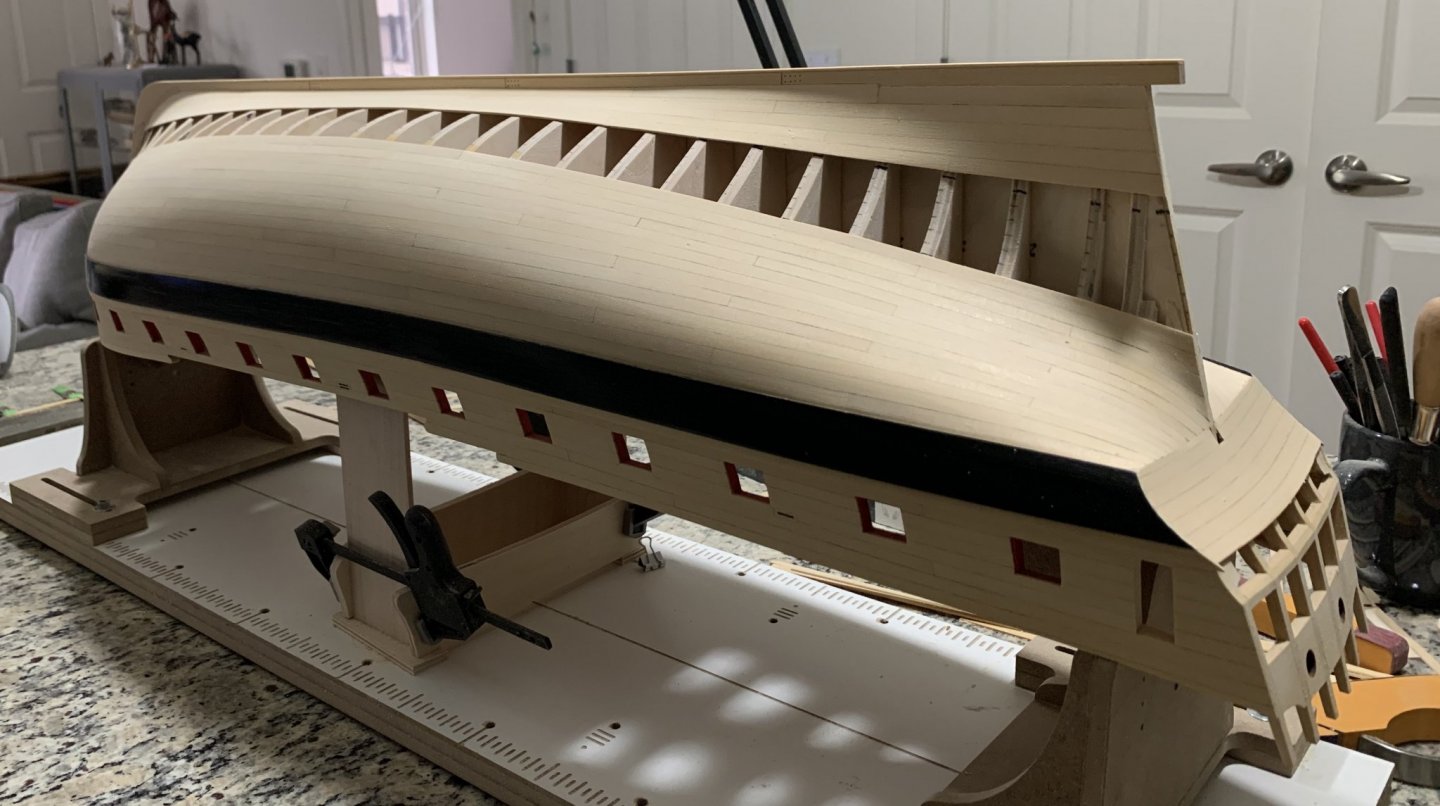
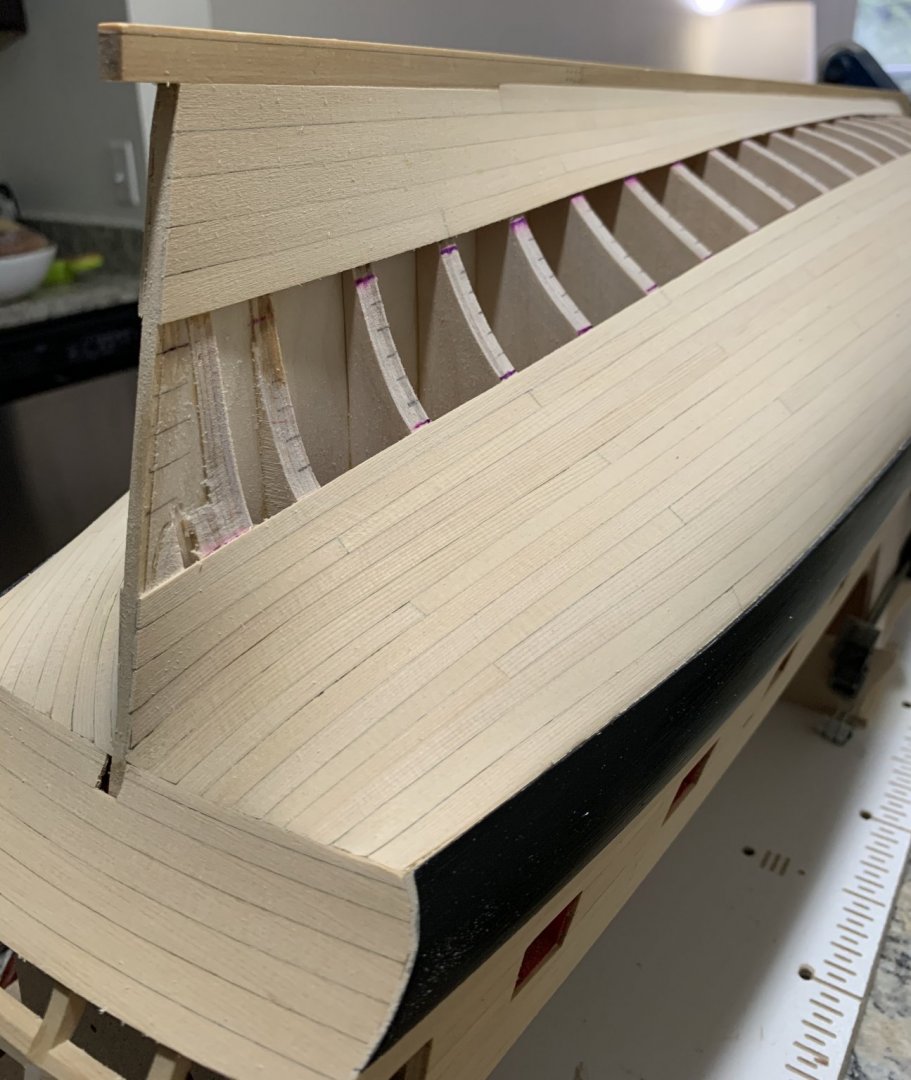
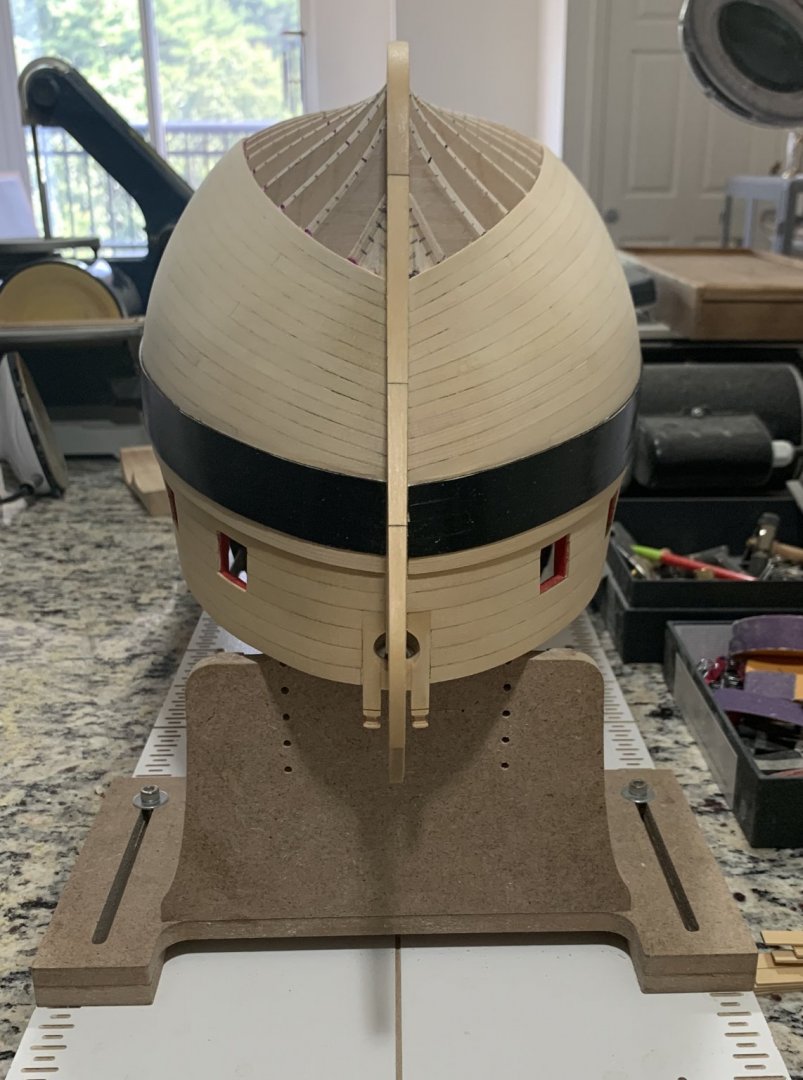
Thank you Eduard an for all the likes. I have sanded the hull to 400 grid an give it 3 coast of water base satin latex translucent paint. I sanded the bulk guards as per instructions and added the reference cap rails except for the waste. Thought I will remove the slay to get better pictures. Best, G


-
Thank you Chuck, Rusty and JJ. I am doing the final coats to the model and will post more pictures. In the mean time, Christmas in summer, new materials from Syren arrived. Thank you Chuck Best, G
-
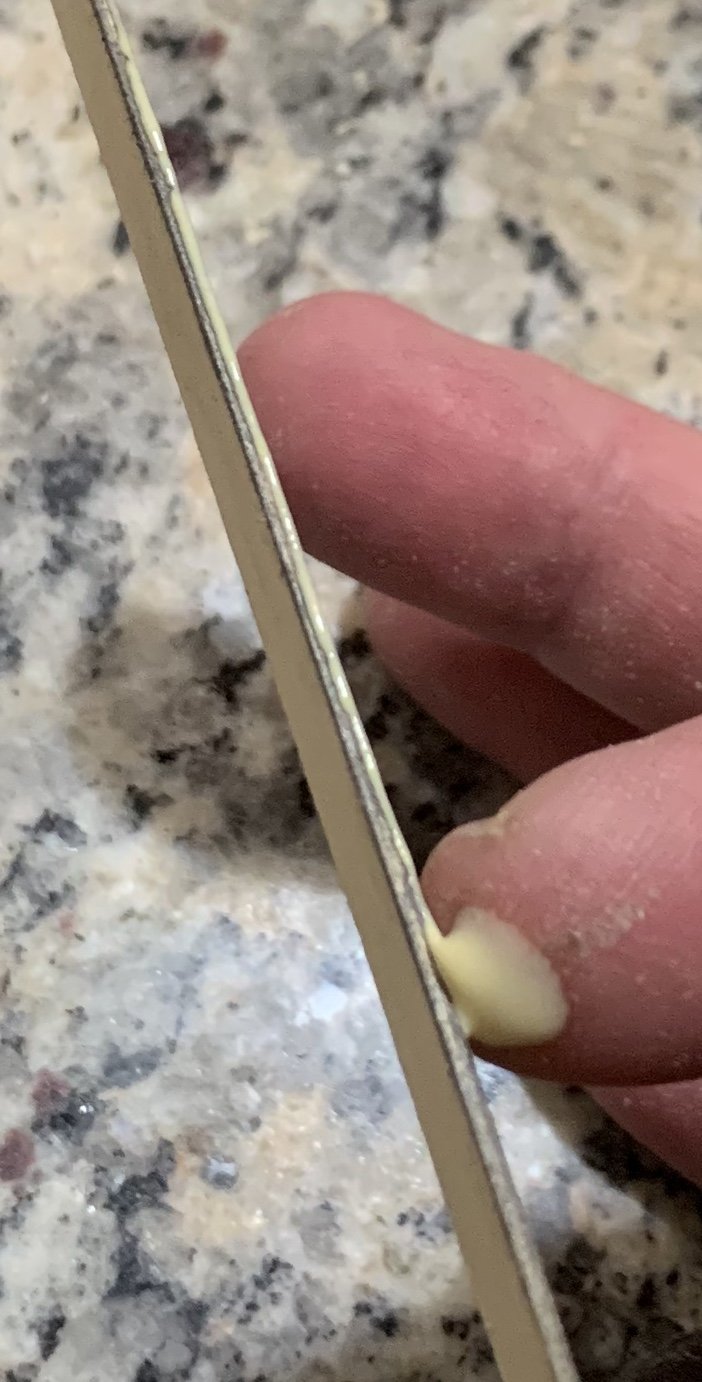
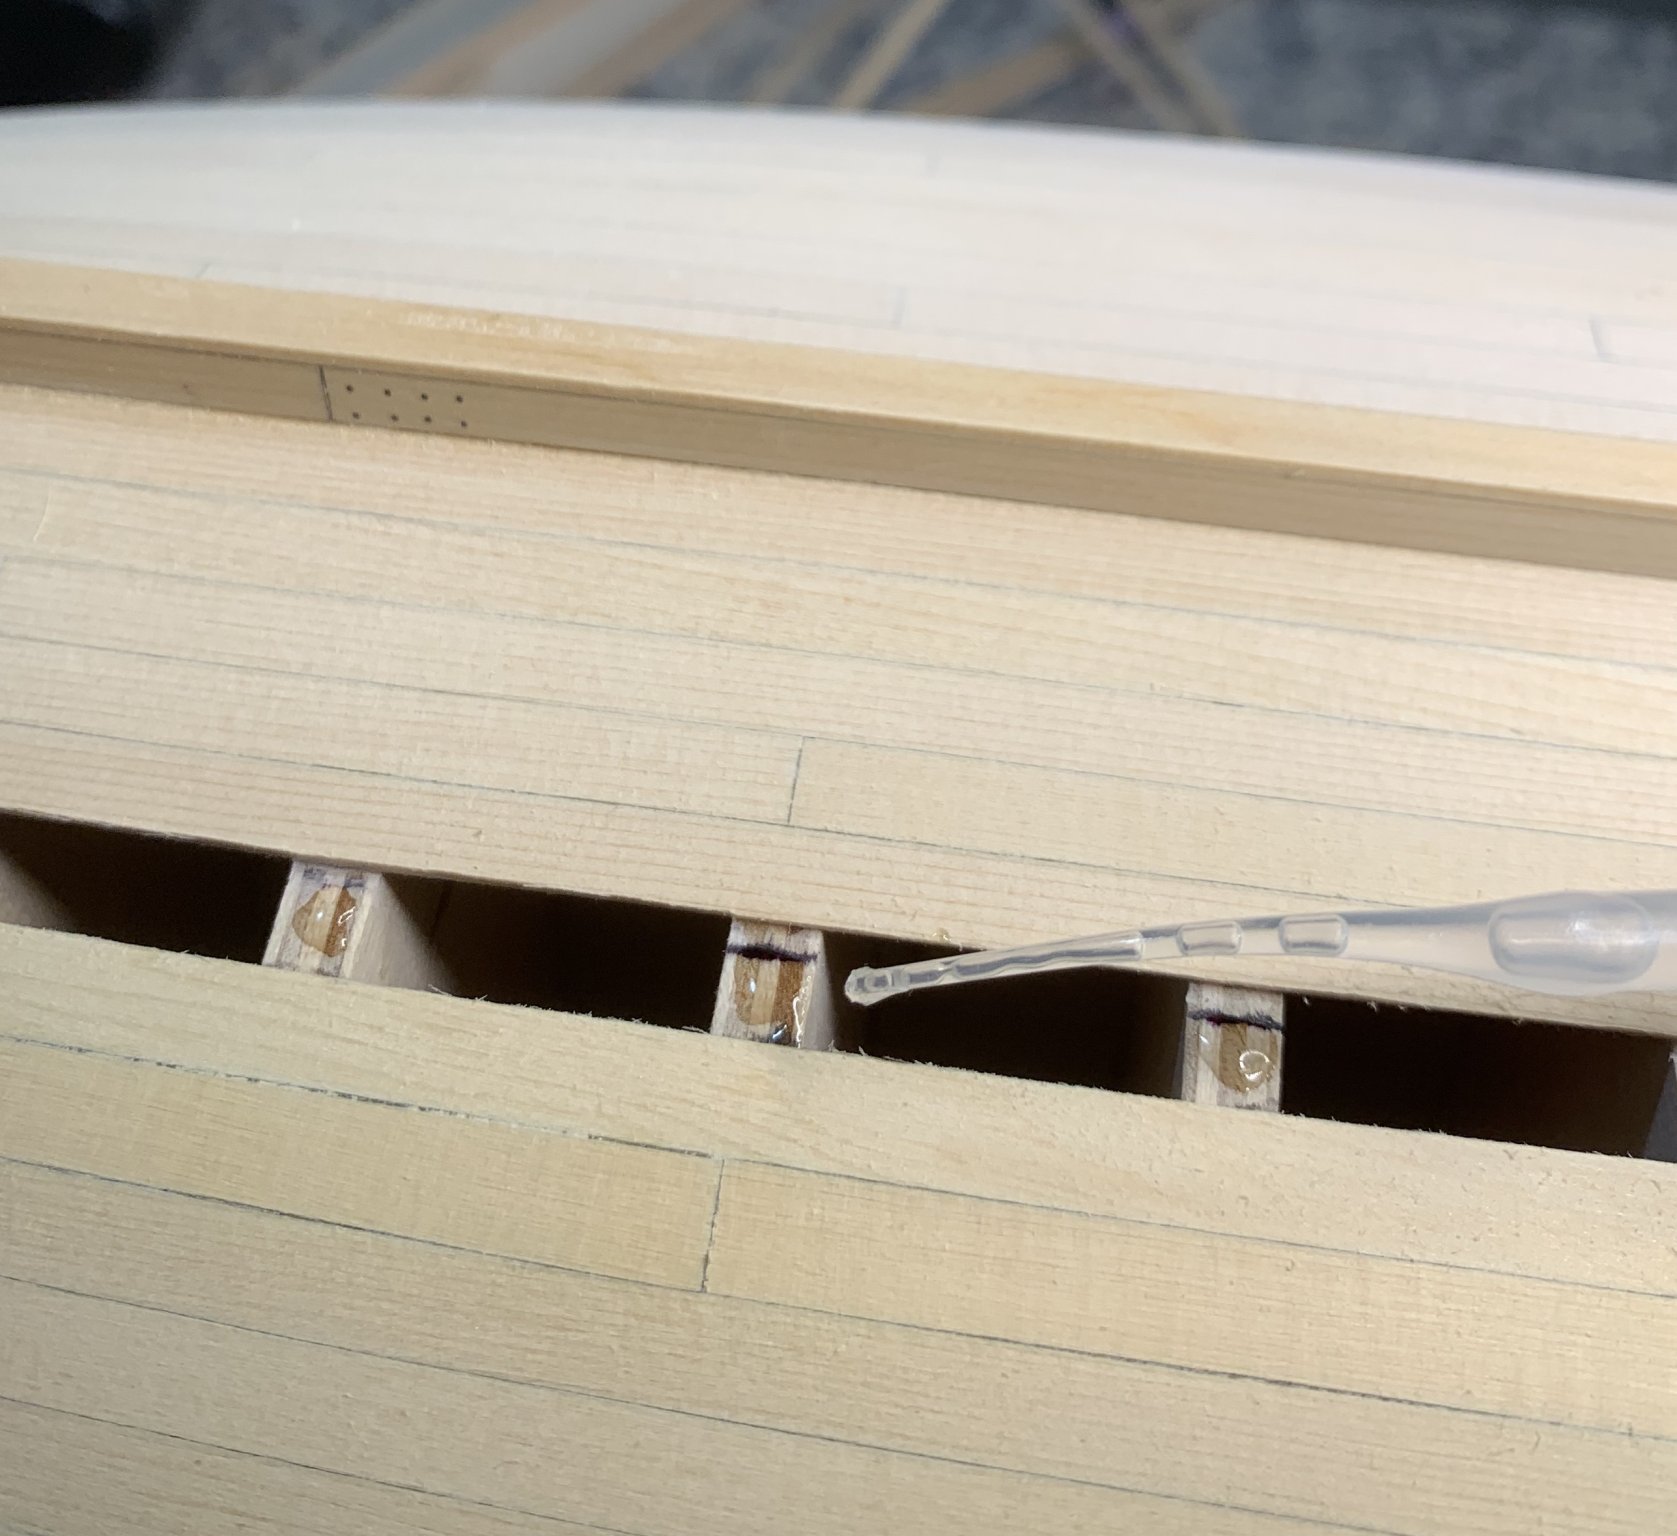
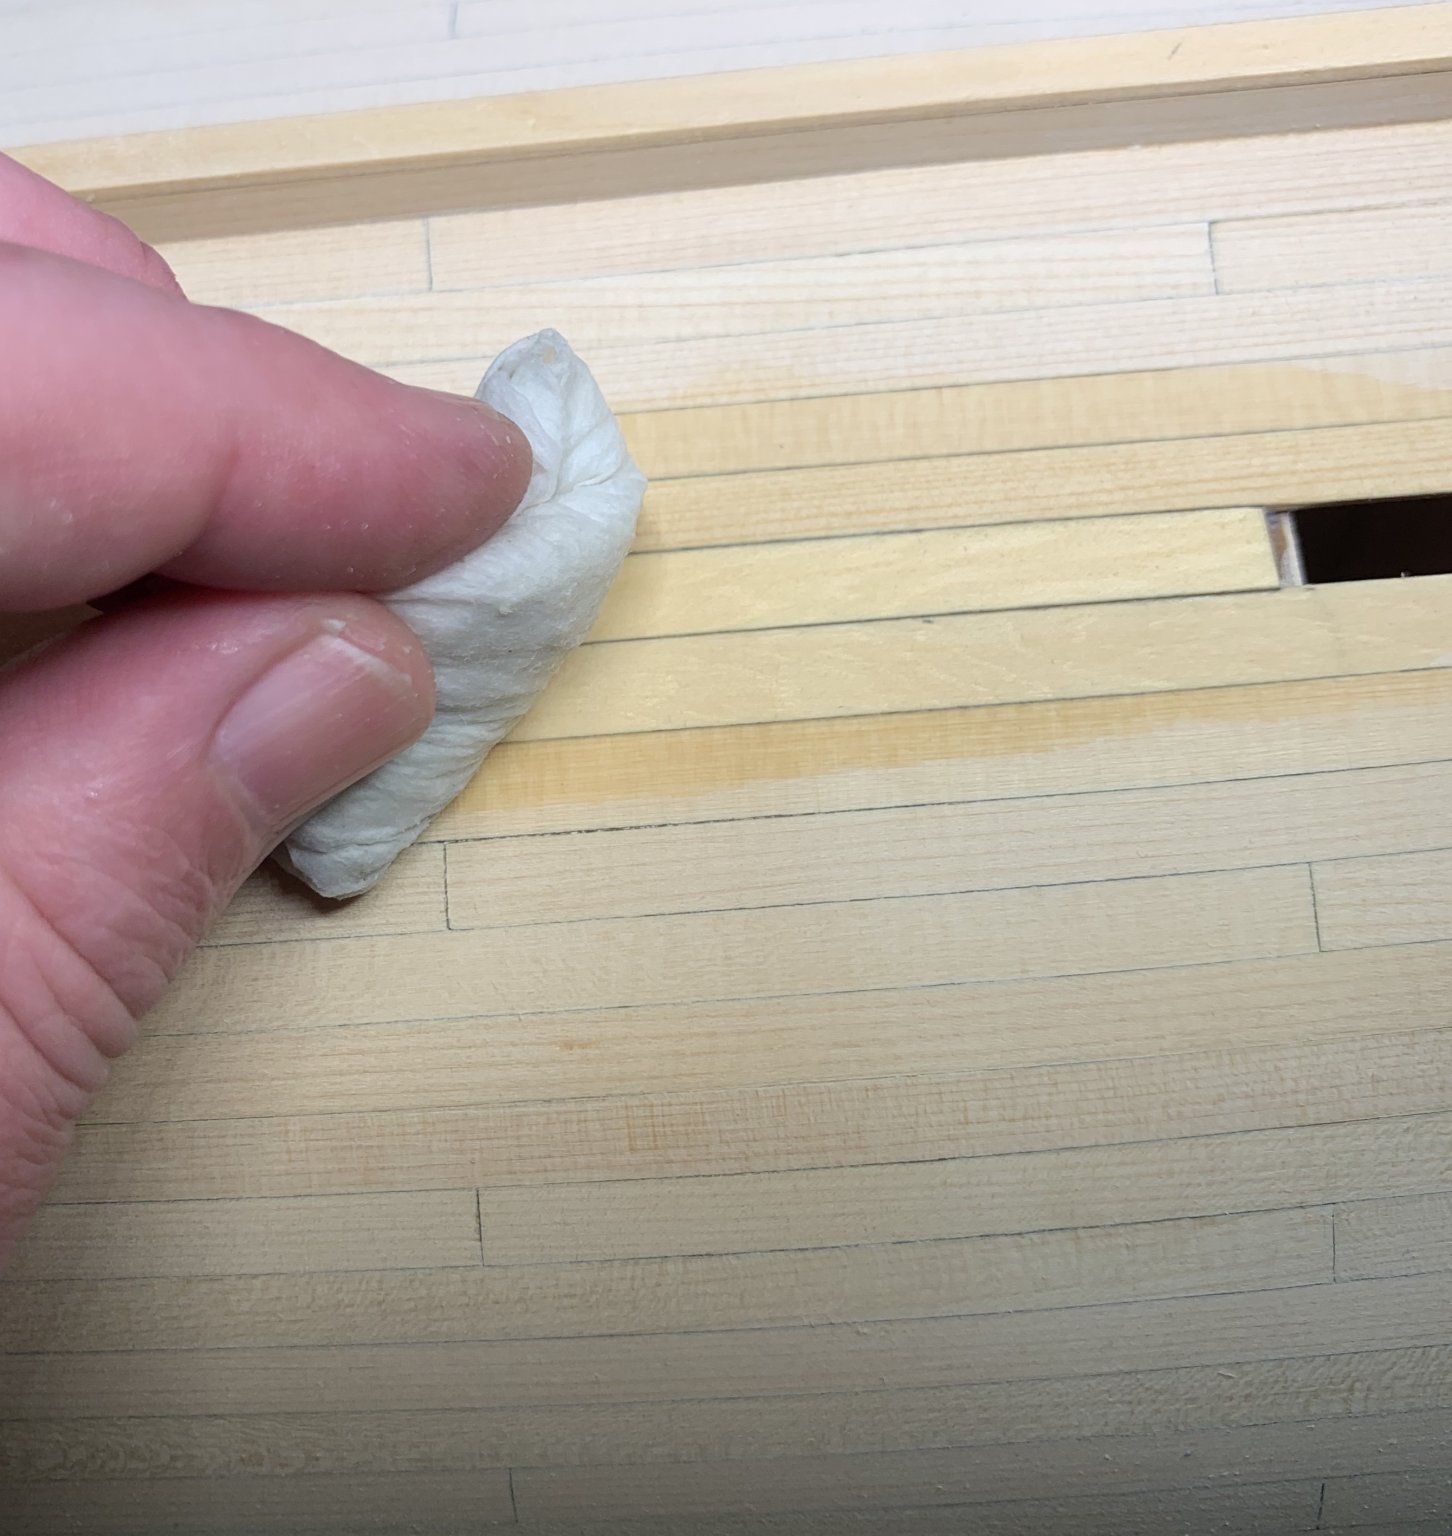
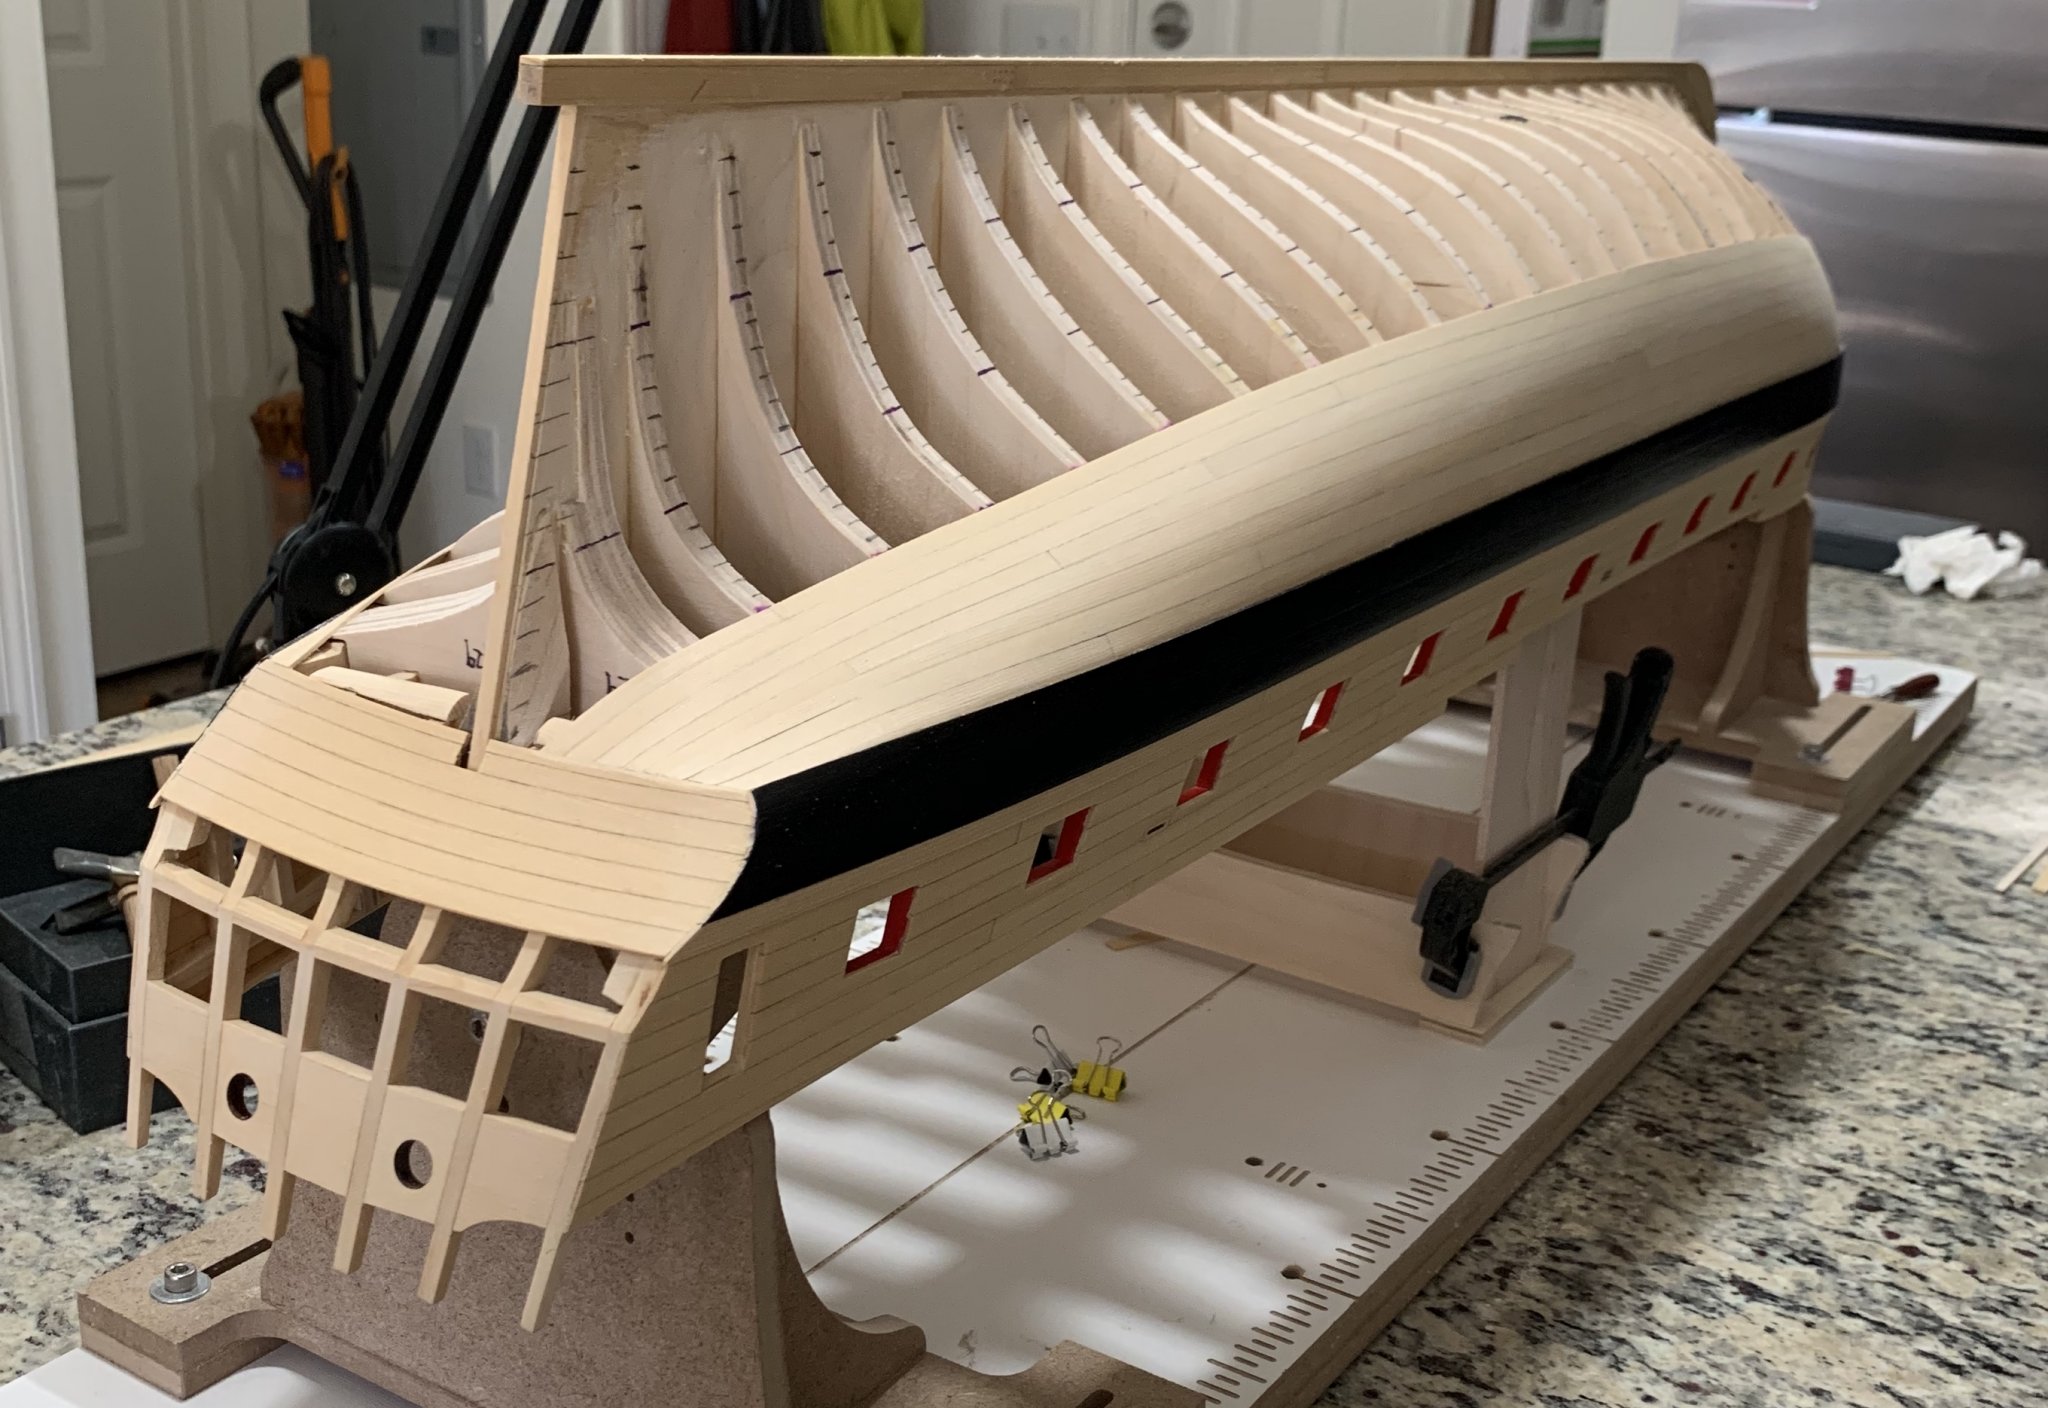
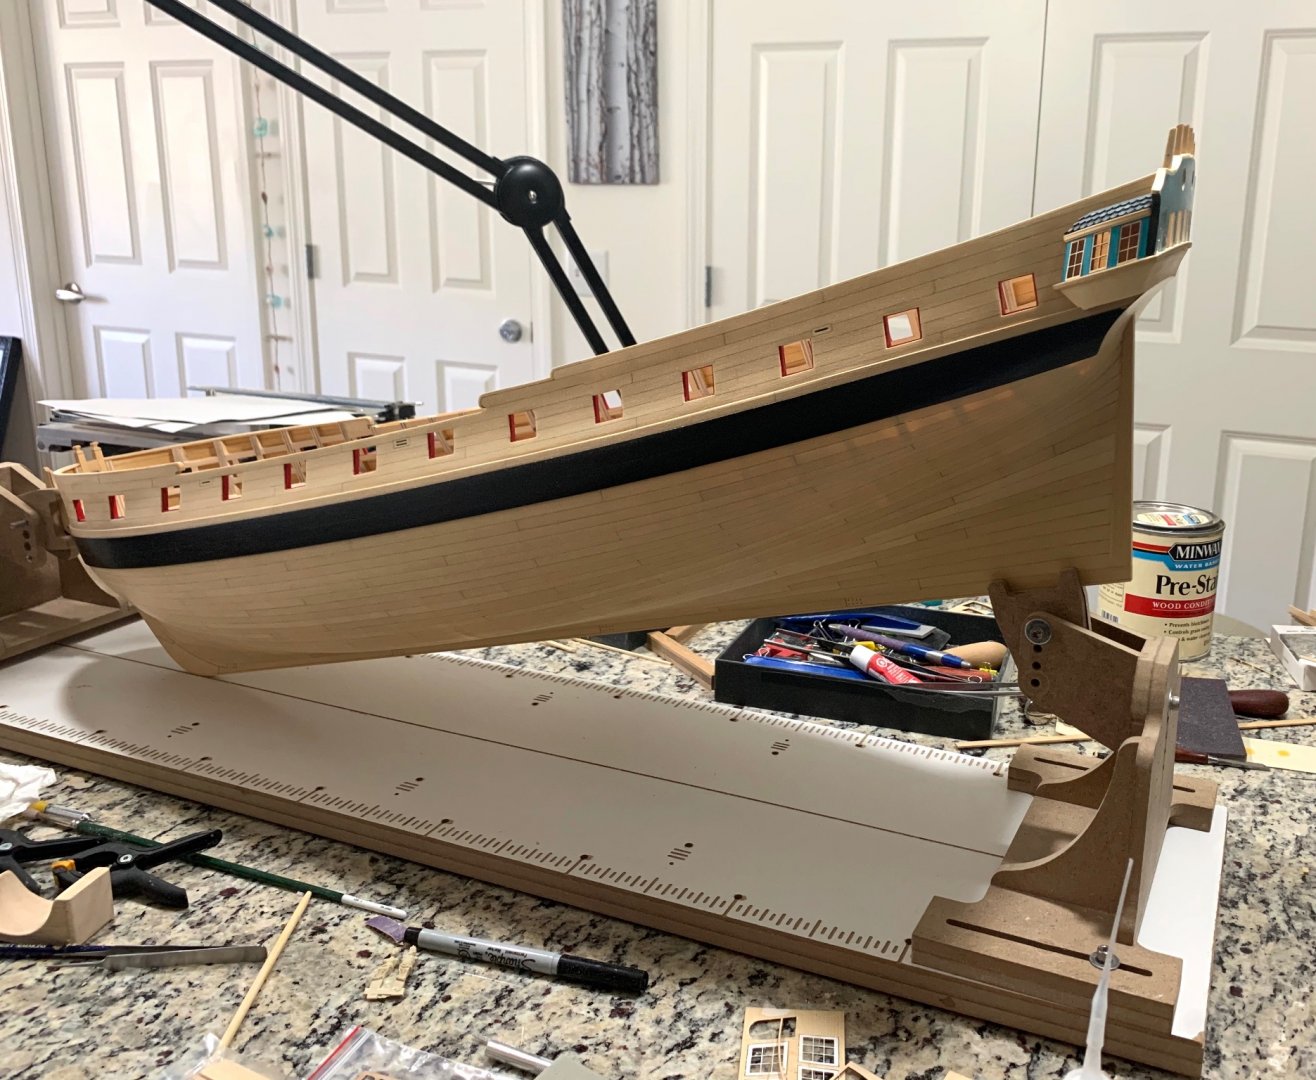
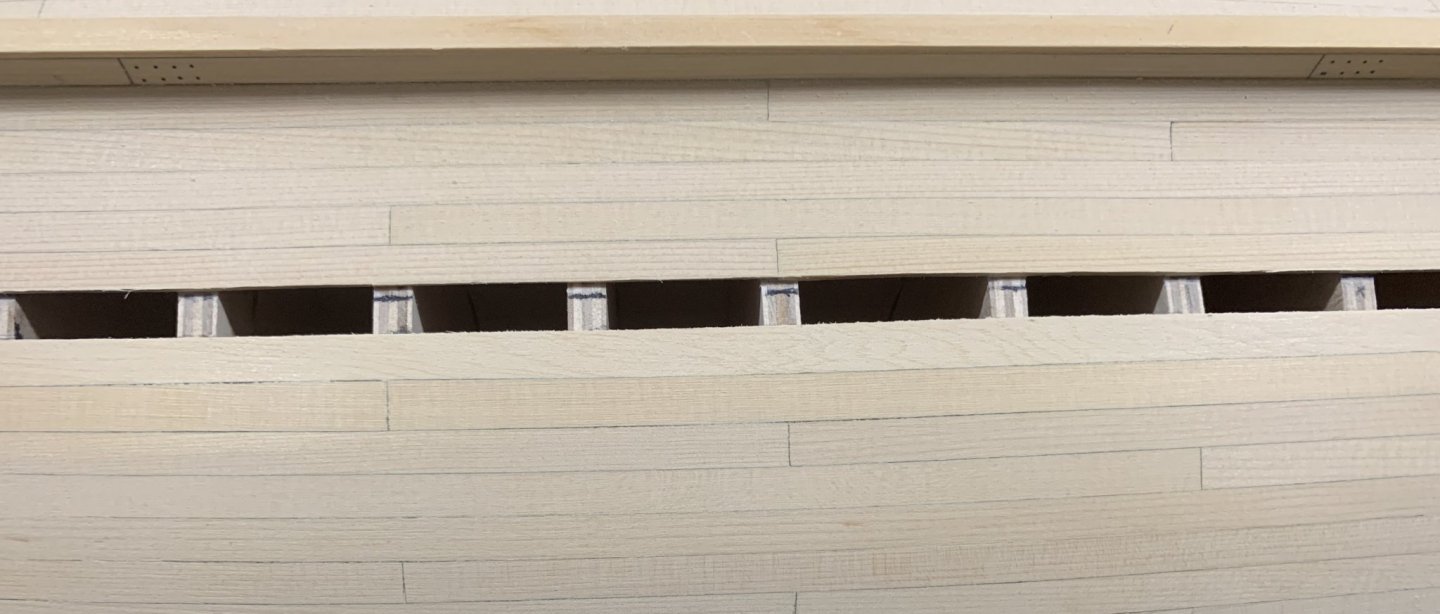
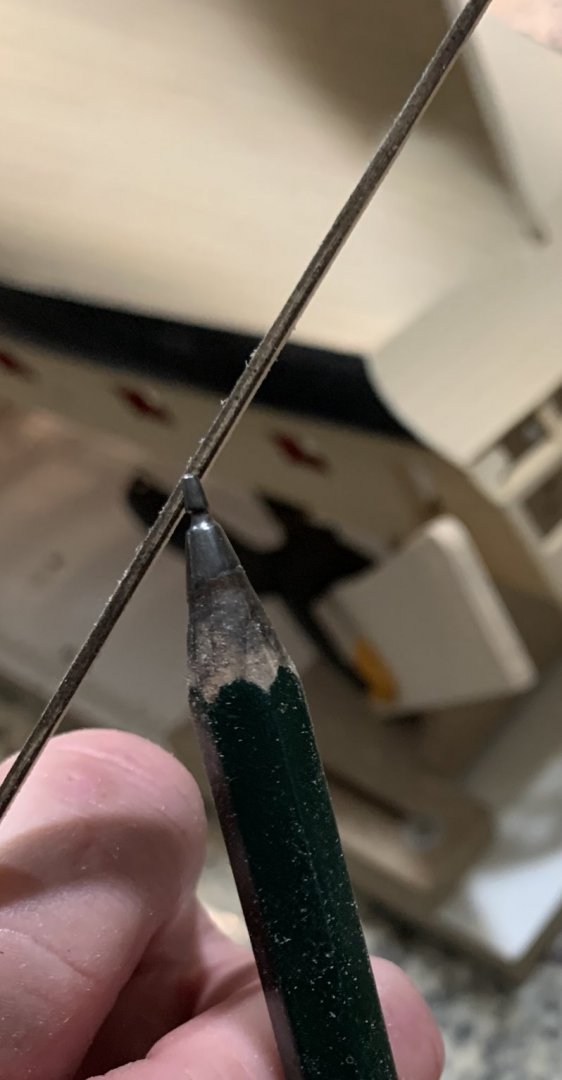
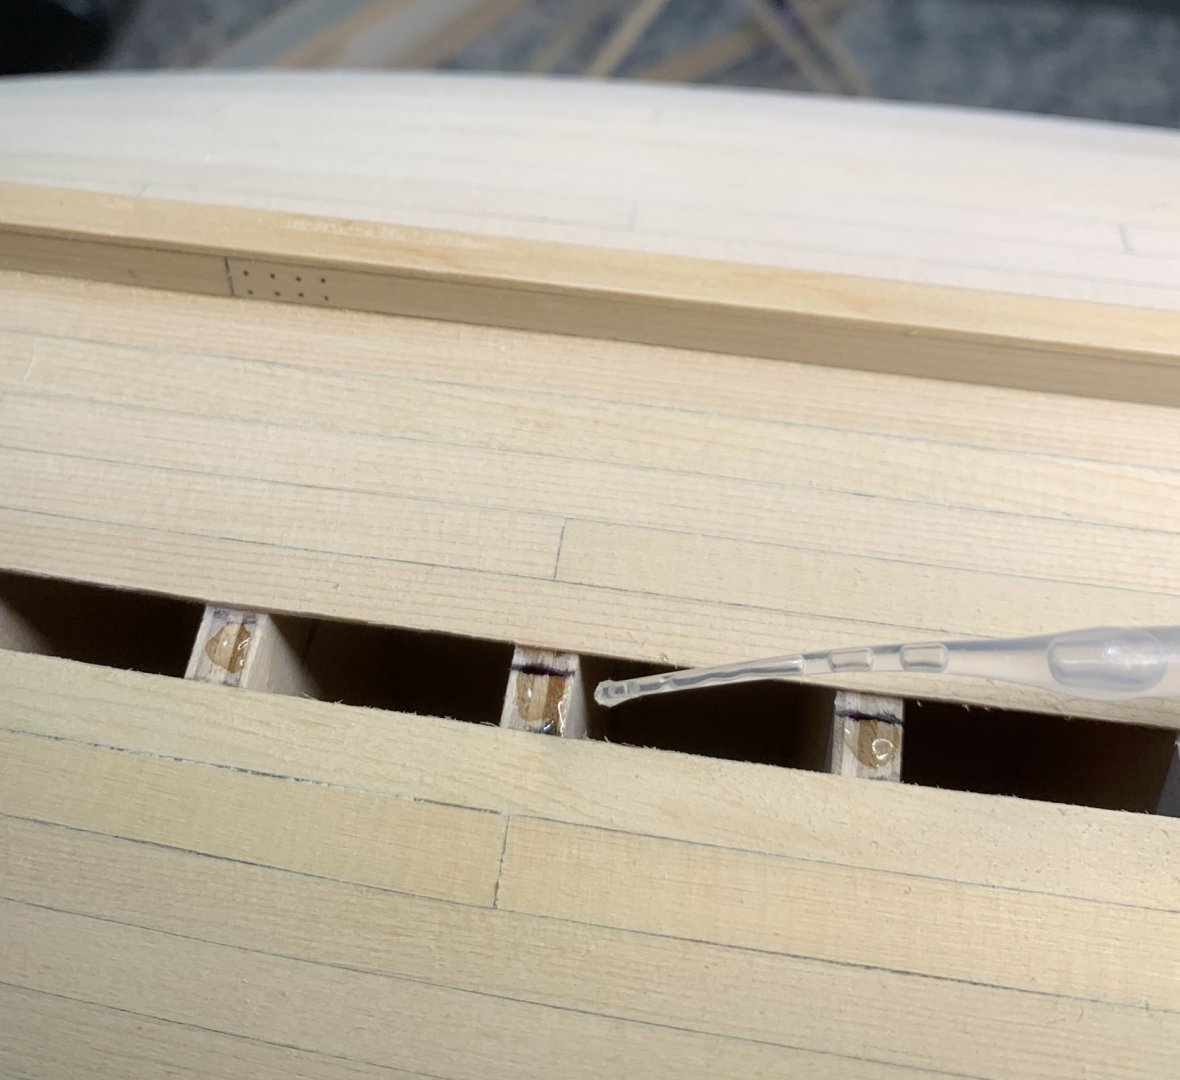
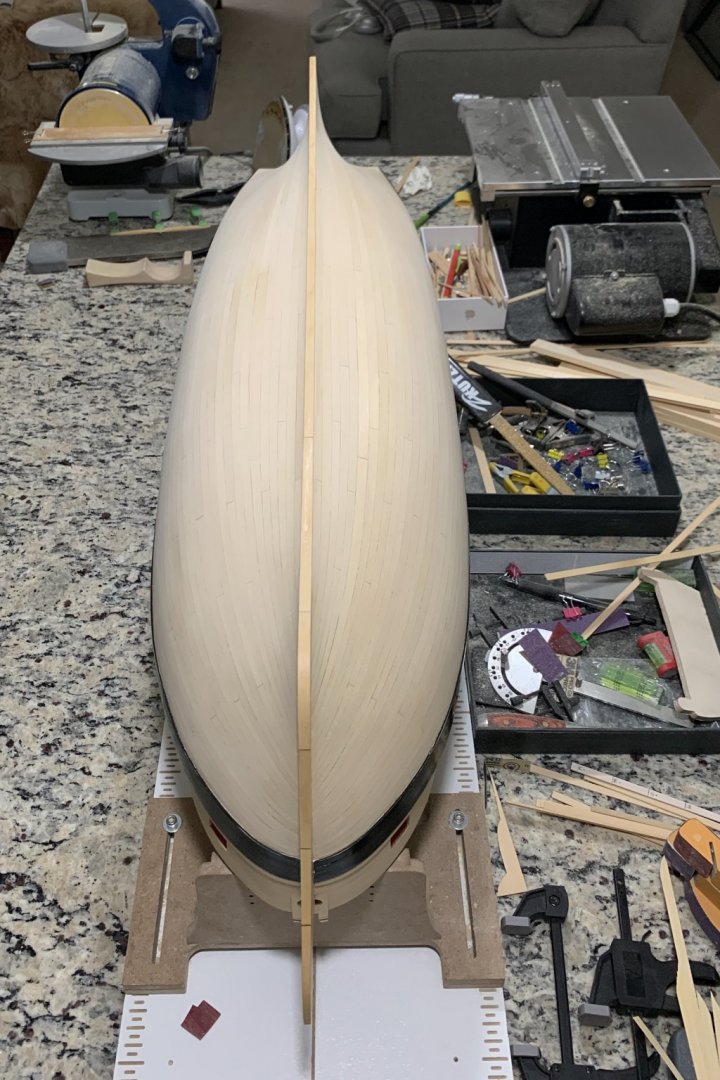
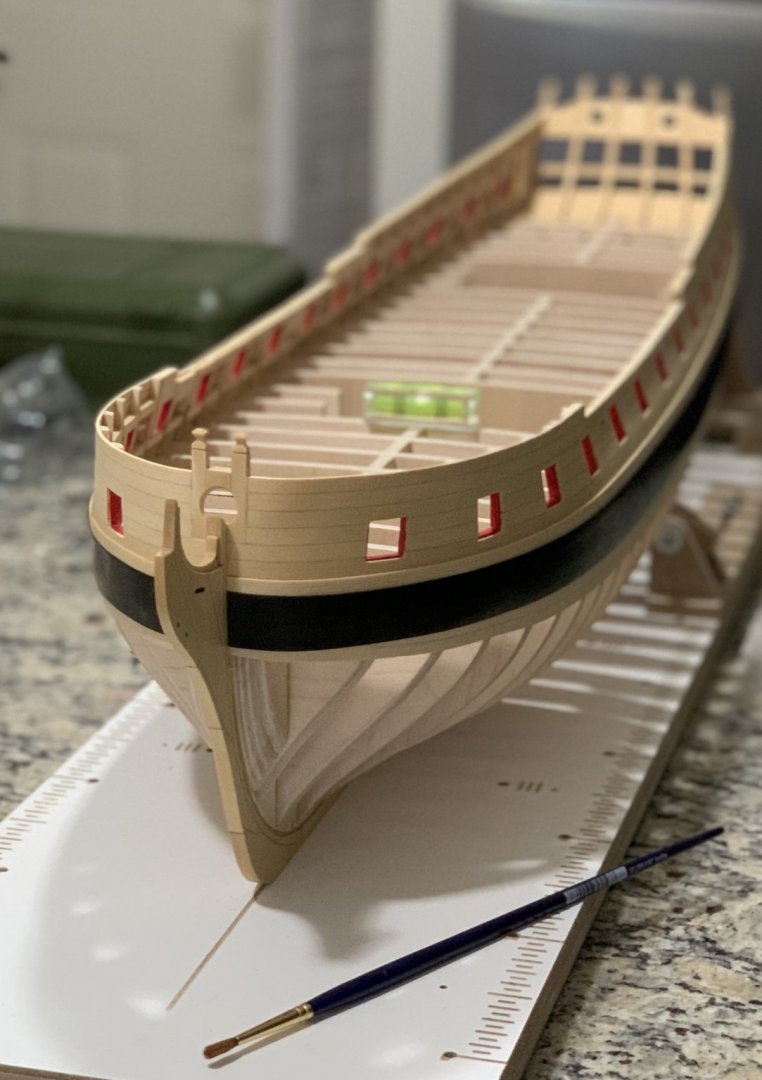
Thank you JJ, Chuck and Wahka for your complements. Wahka you made me laugh; you are a funny guy 👍🏻. I have finally reach the pint for the last hull plank. Thought I will share the process. As Chuck recommended, I measured at every frame and tapered the planks. The plank needed was wider than 1l4. Then both edges were beveled about 10 degree angle. The corners facing down were sanded a little to led the glue run out (about 45 degree angle). Pencil was used (both upper and lower edges) to simulate caulking (I use a Jumbo HB Fabre Castle pencil). I put a bead of glue in the facing down edge. See below, by tuning my finger down and forward the bead is created. This helps for less glue to squeeze out while gluing the plank. I Also use CA glue in every frame. The plank is put in place and held down for 60 secs (now clamps because is the last). With a wet paper towel, excess glue and pencil marks are wiped clean. I used both hands but one is holding my phone for the picture. The very last one at the stern. DONE! Next steps, final sanding, wood sealer and finish. Best, G


-
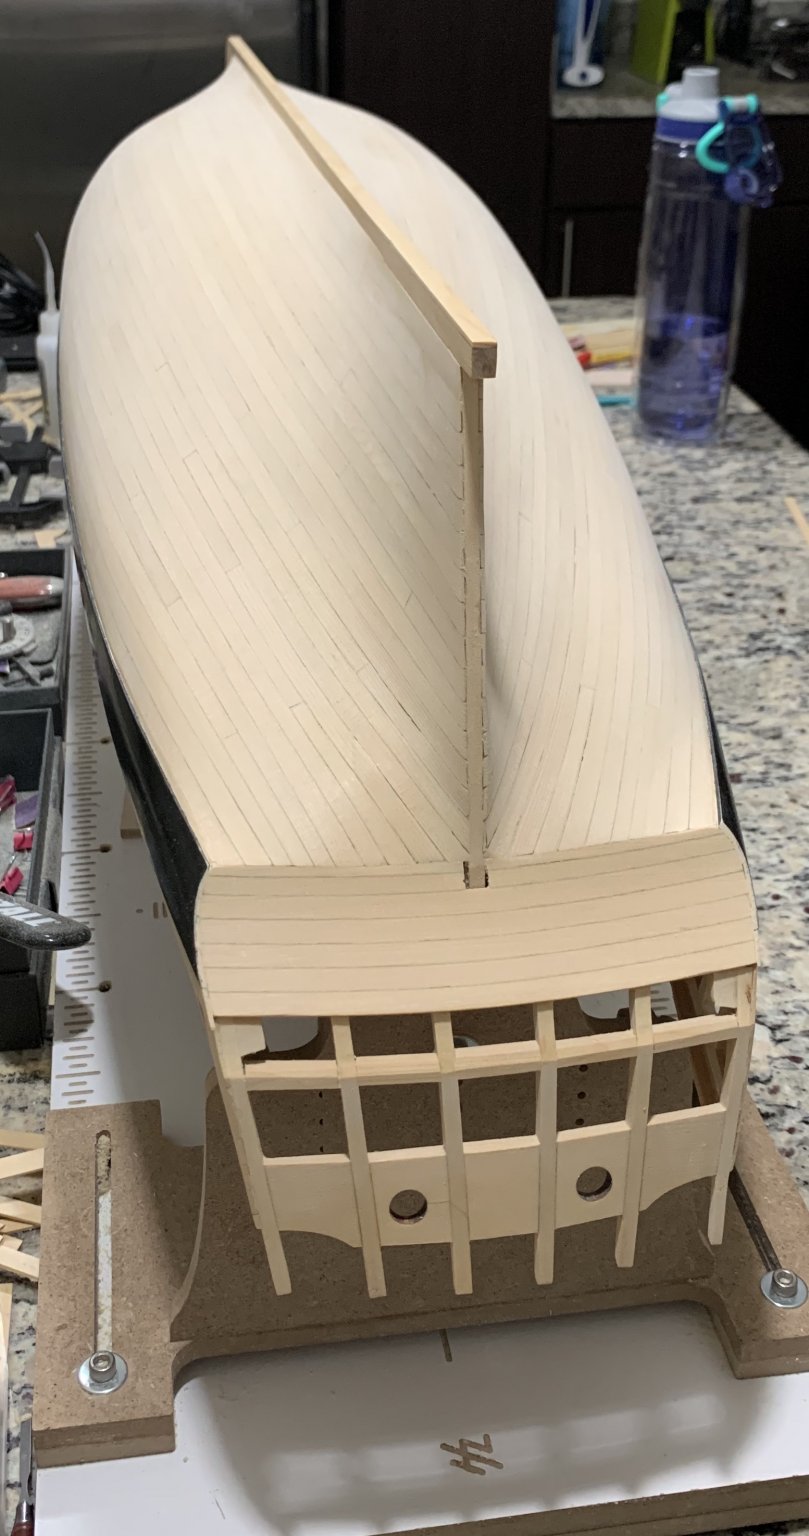
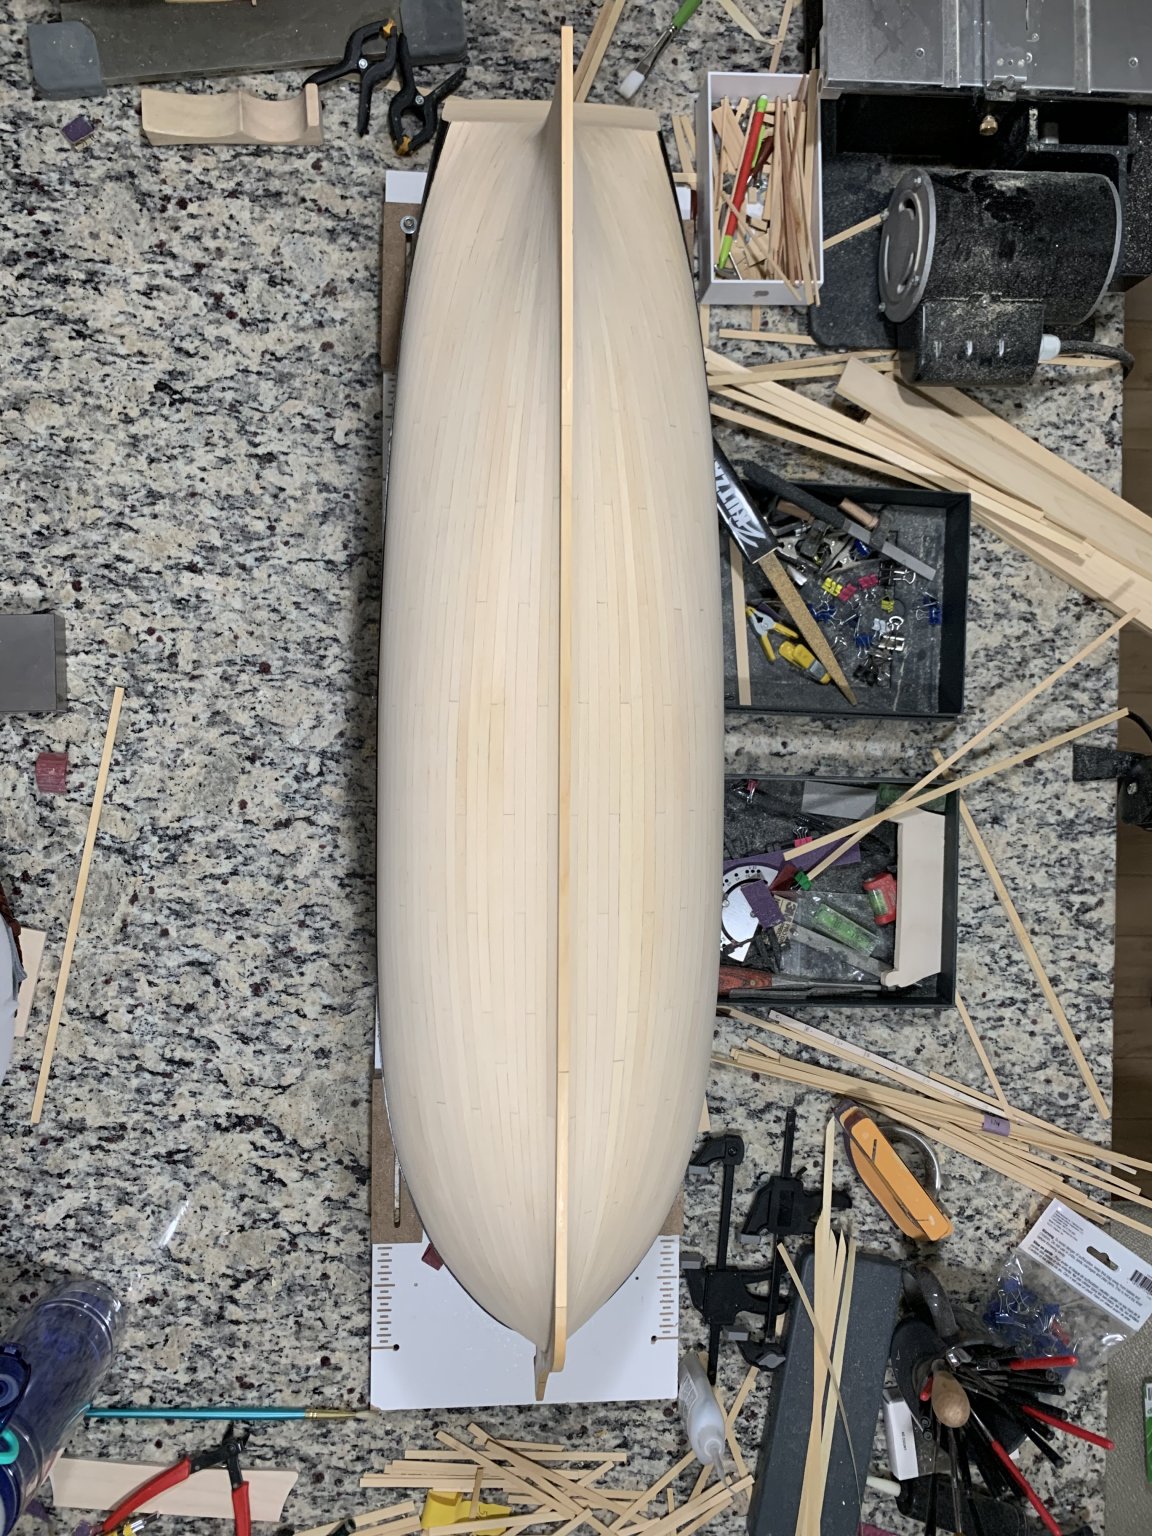
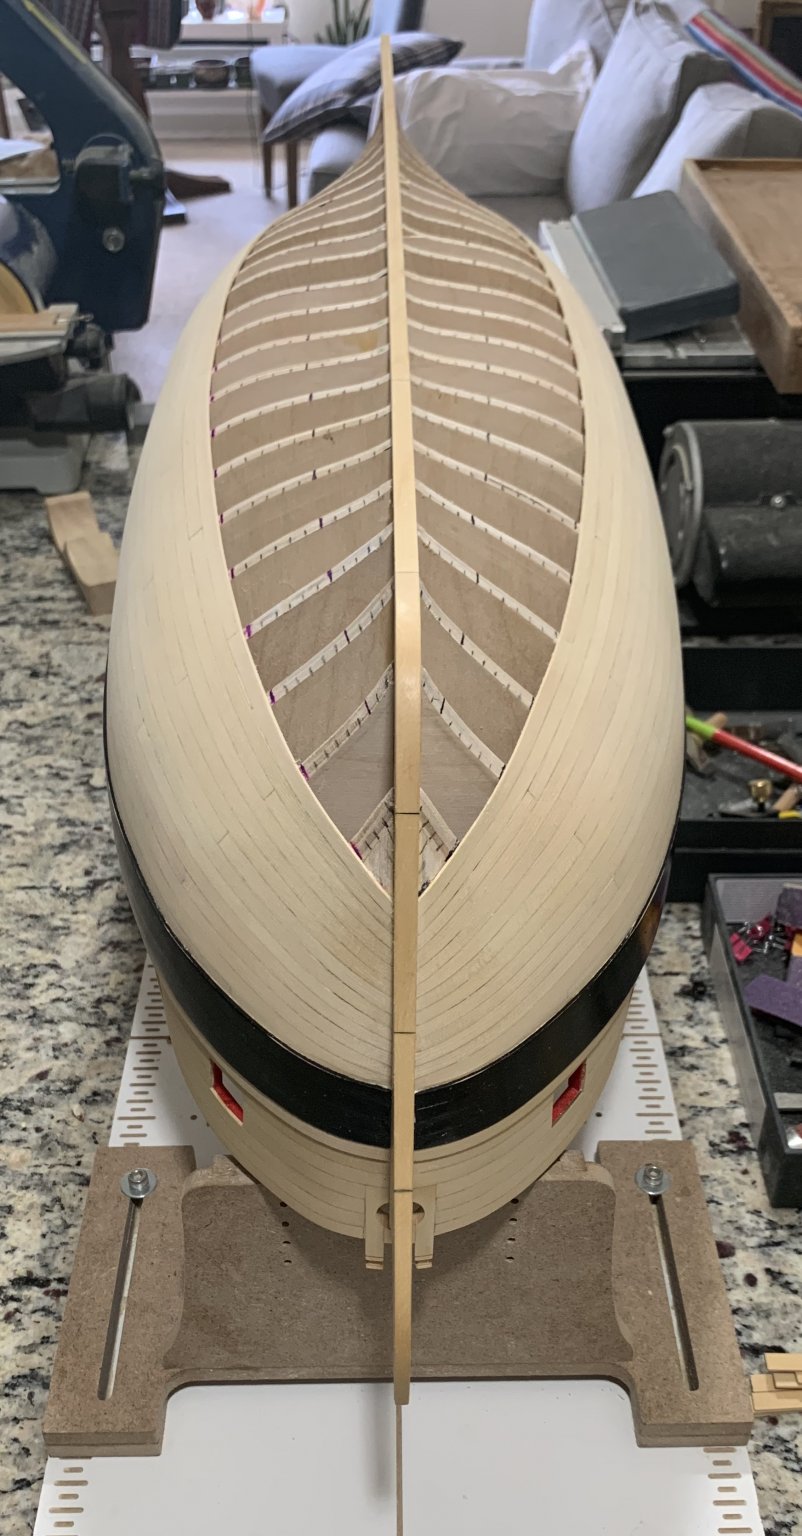
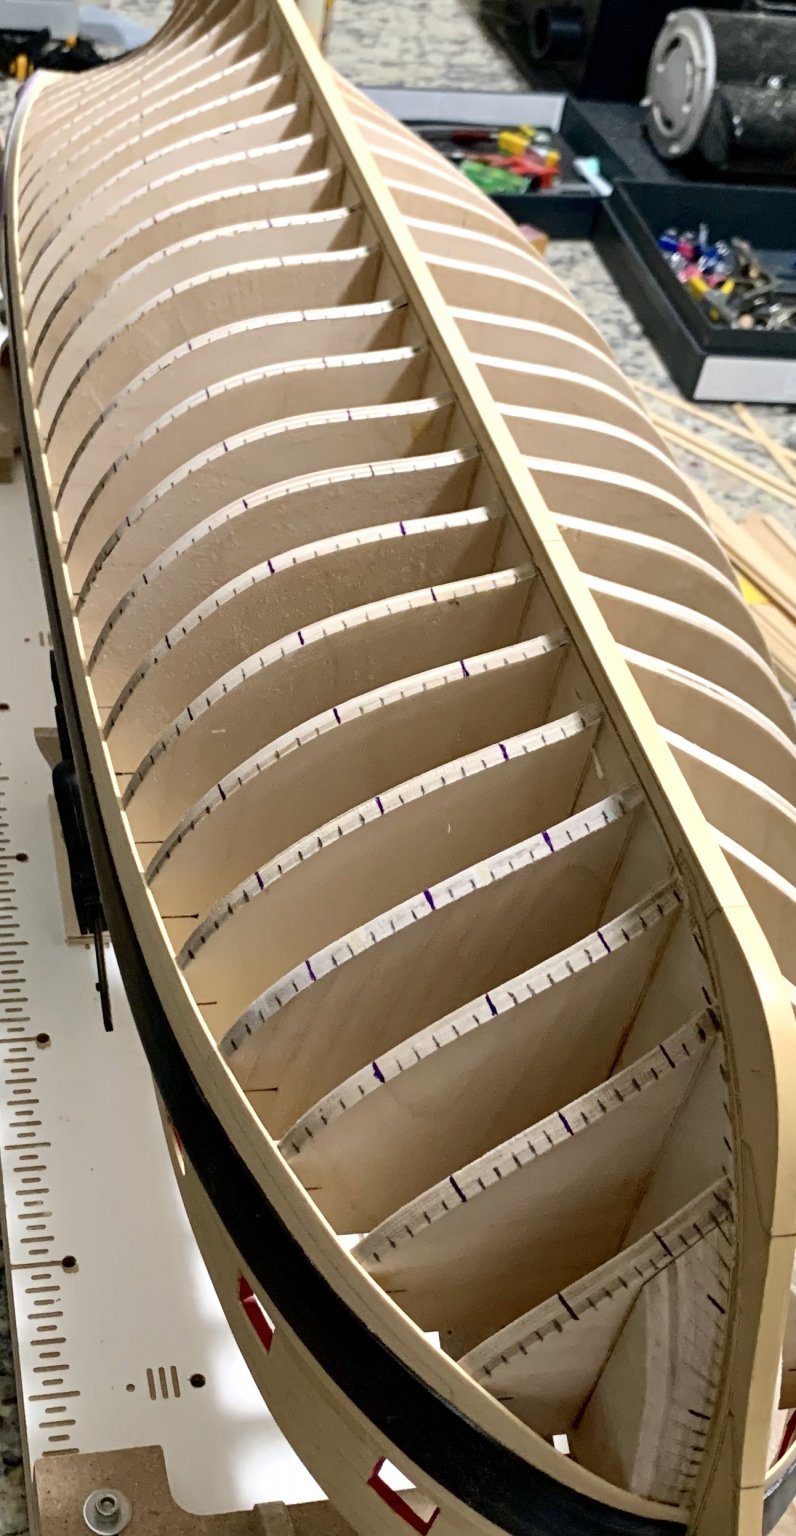
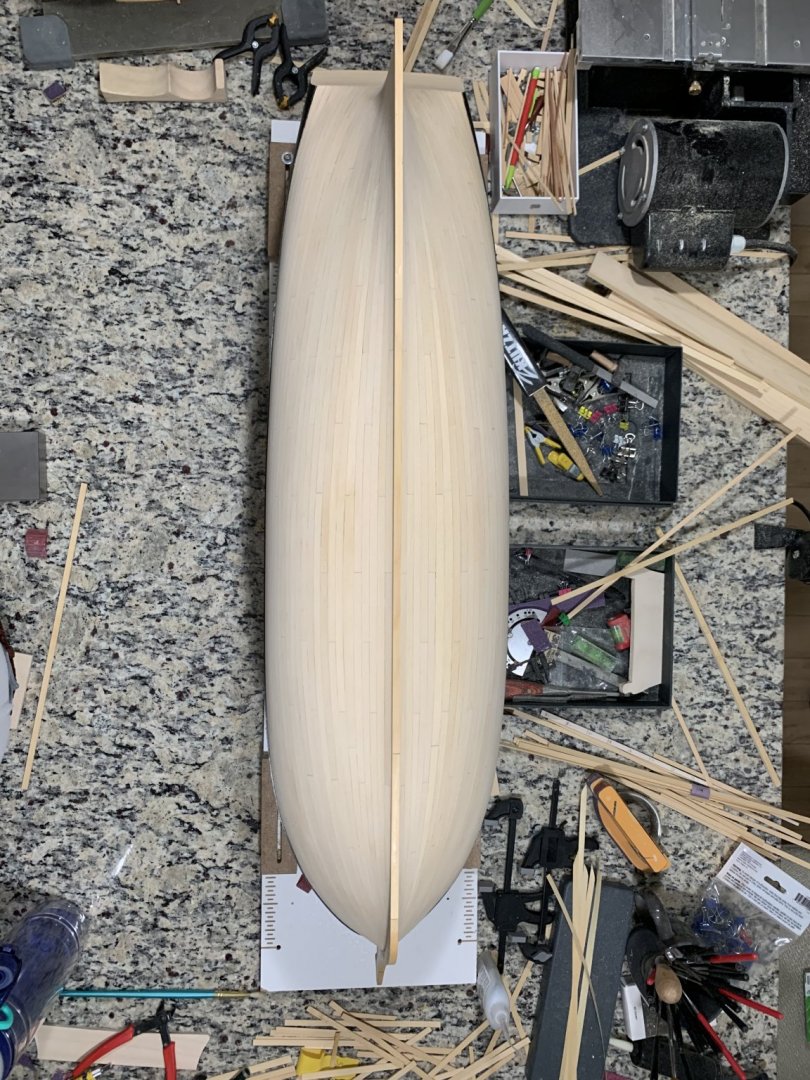
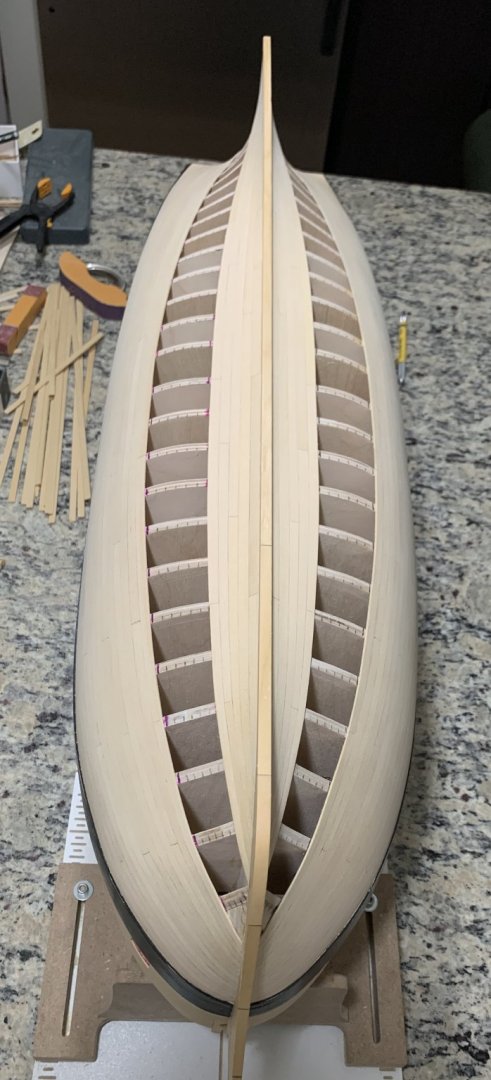
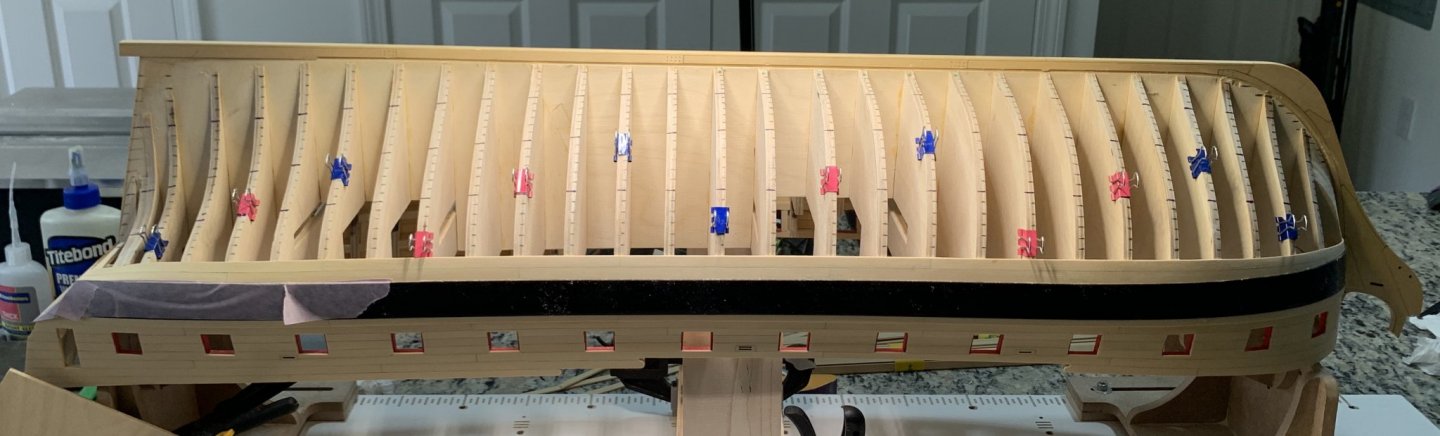
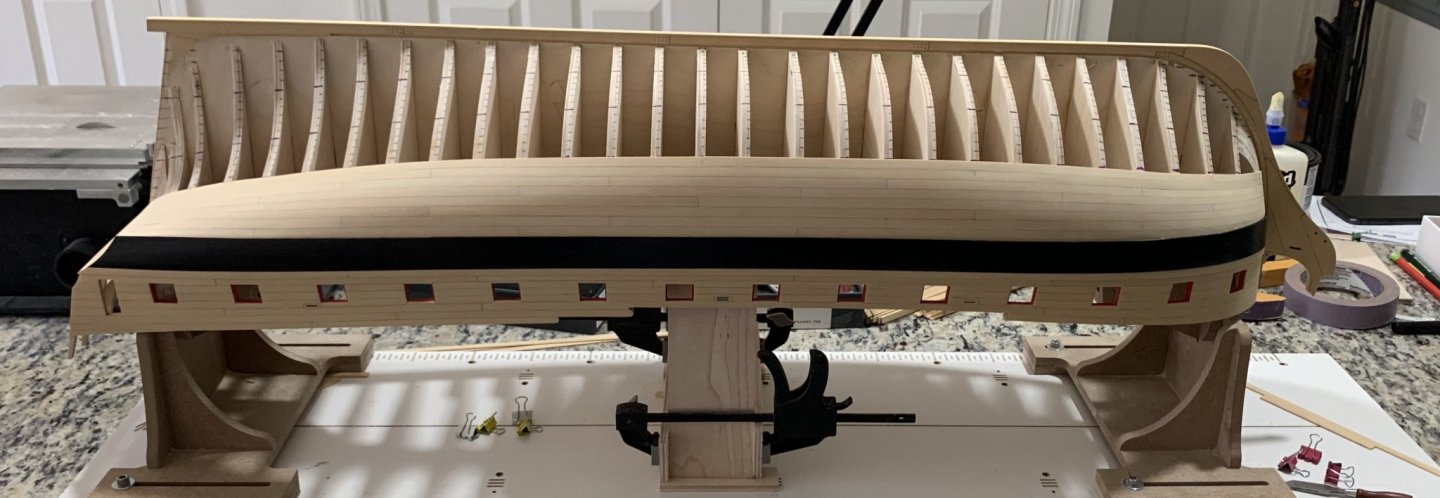
Thank you Rusty and all For the likes. I am getting closer to finish the hull. So far so good, symmetry have survived and the lines look clean. I have sanded it with 220 grid almost to the finish stage. Best, G
-
Thank you Chuck, I am glad I asked, I will not add those planks. G
- 1,784 replies
-
- 3
-
-
- winchelsea
- Syren Ship Model Company
- (and 1 more)
-
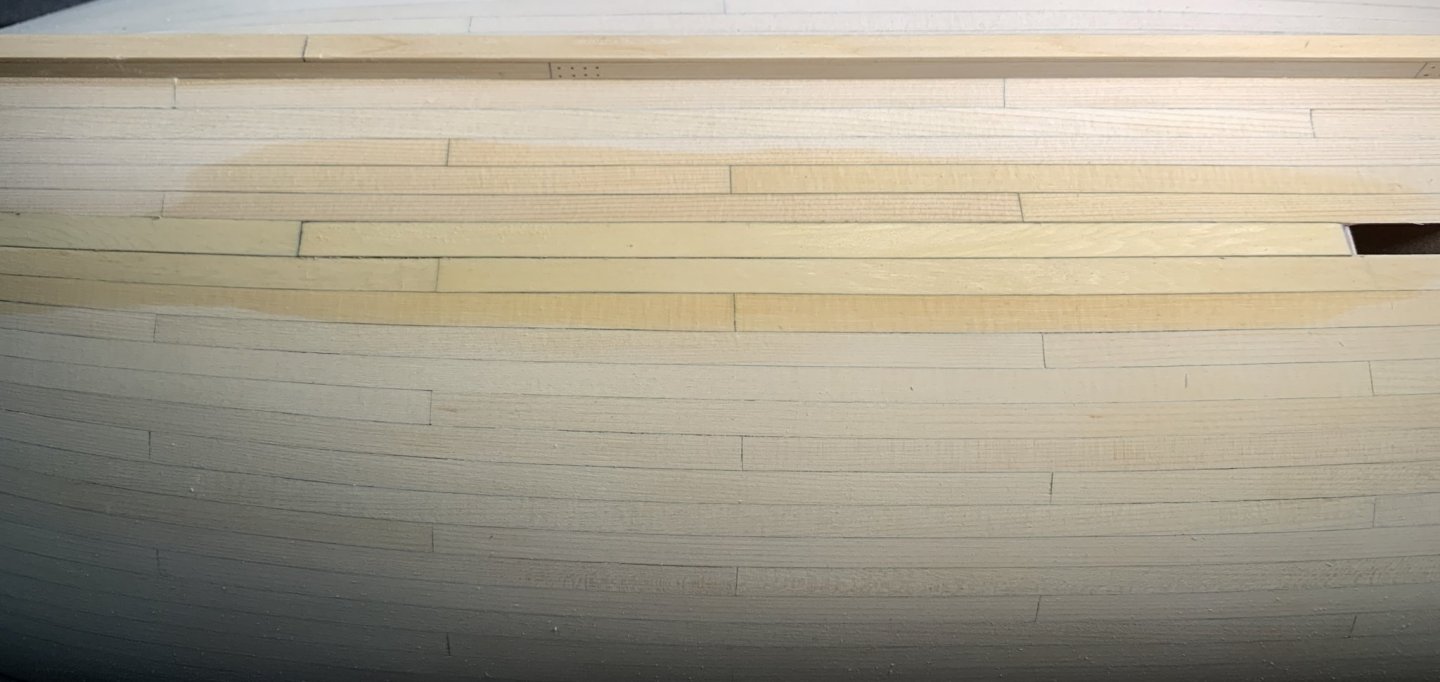
Hello Chuck: I am interested in adding two darker color strikes to the deck planking. These will correspond to the tabbed planks (4th from the center). I have seen this in some models. Would that be something to avoid? Best, G
- 1,784 replies
-
- 2
-
-
- winchelsea
- Syren Ship Model Company
- (and 1 more)
-
Thank you Chuck, Rustyj, and C. Hook for your comments. A small update. I am half way there with the hull planking. This is the most challenging par but for me, the most entertaining. Best, G


-
Hello Jeff: Add the last of the 5 strikes in the other side you you could compare both sides. Best, G
-
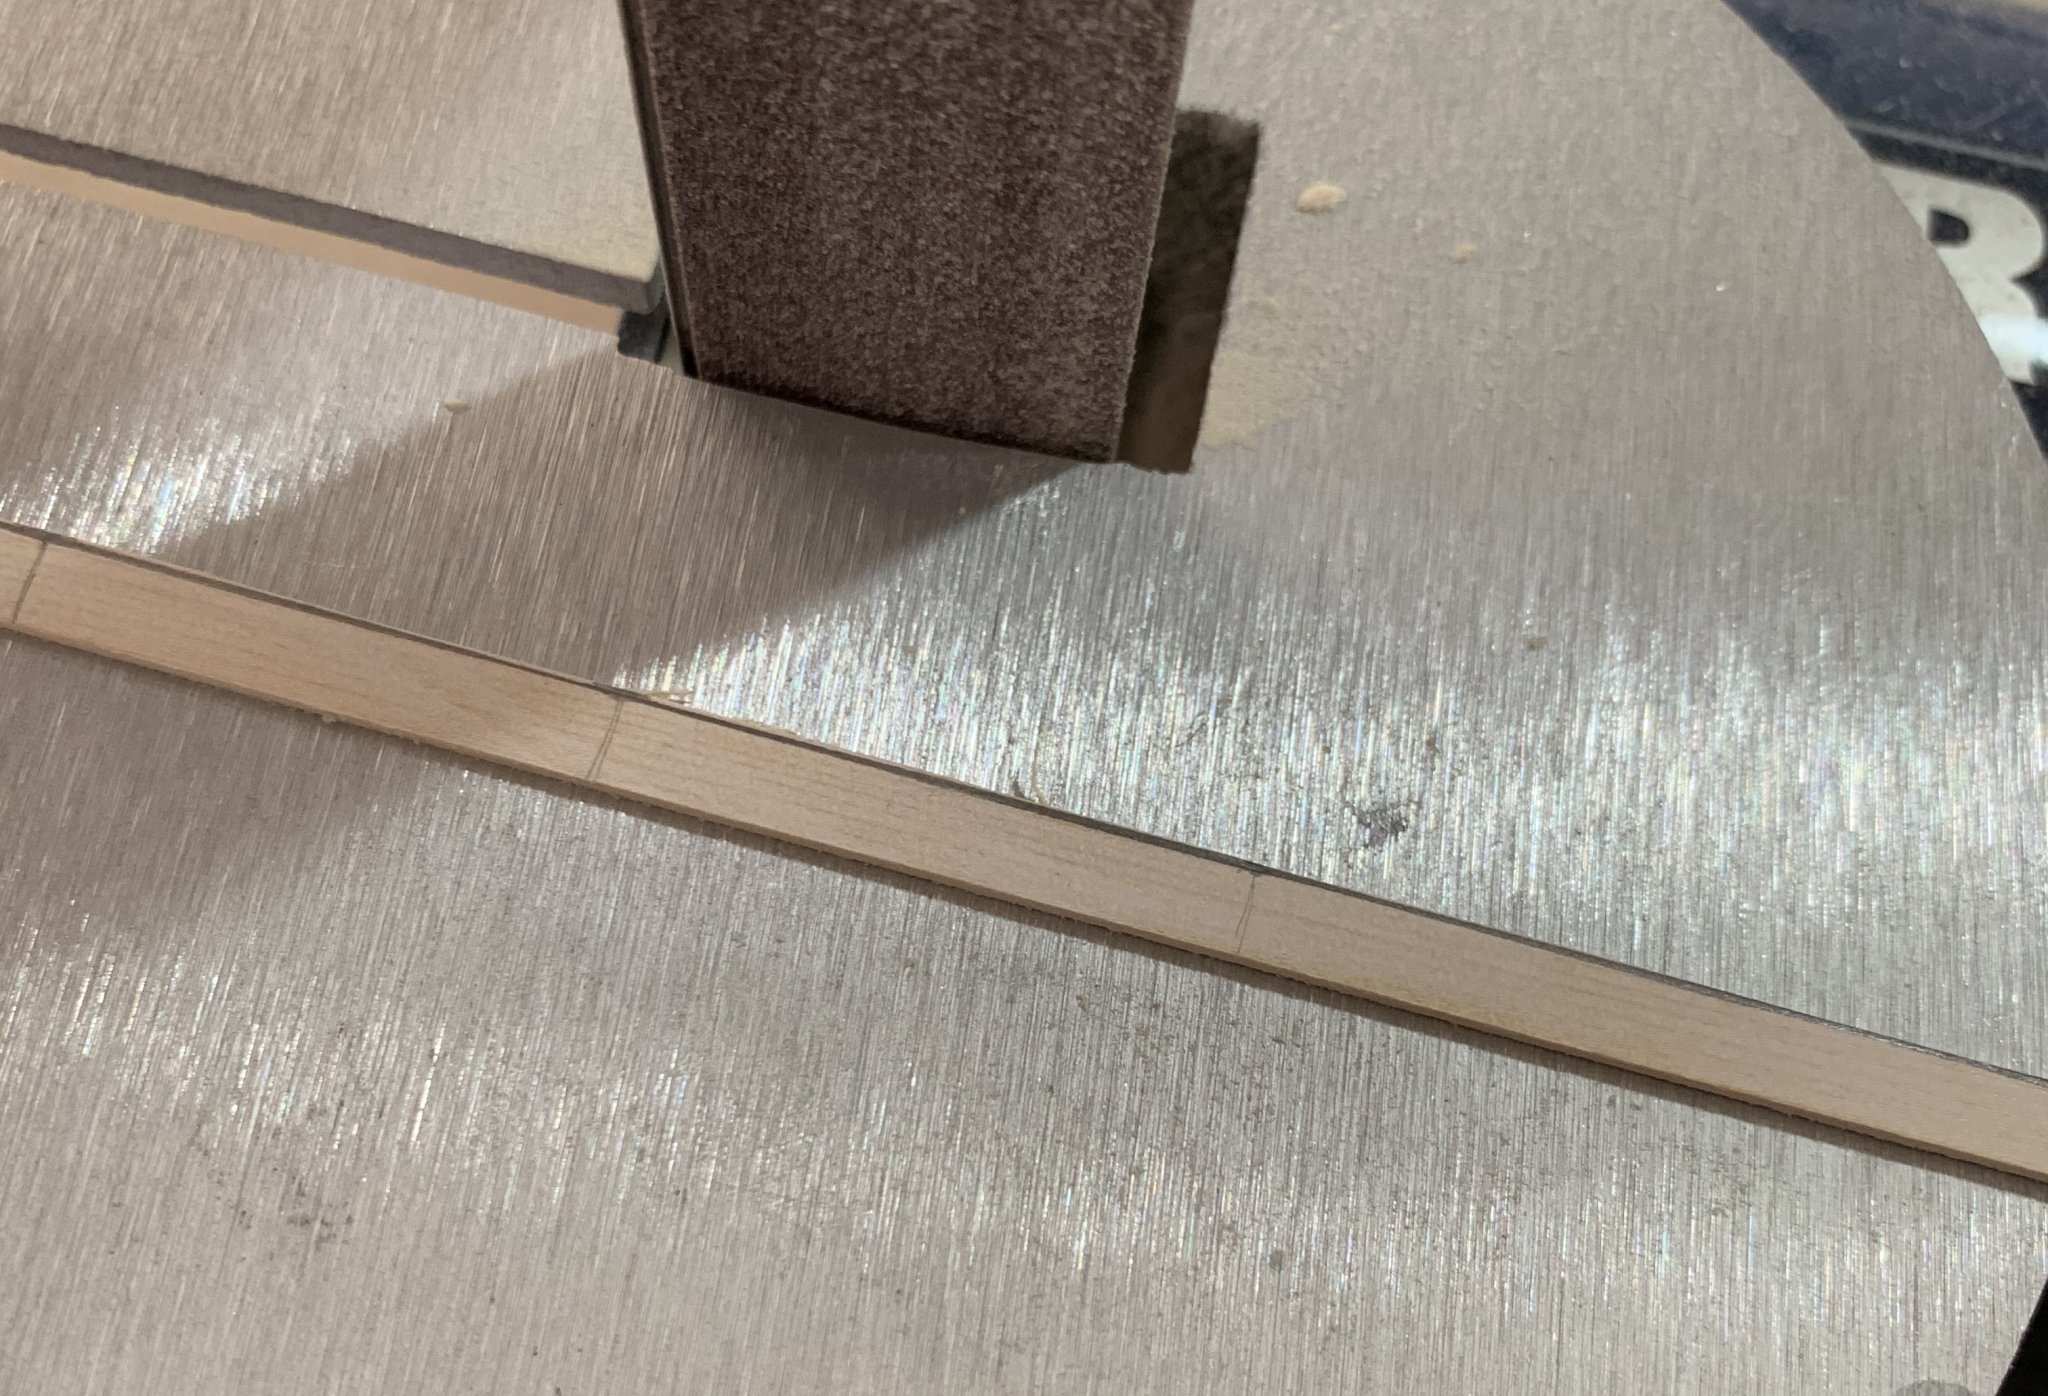
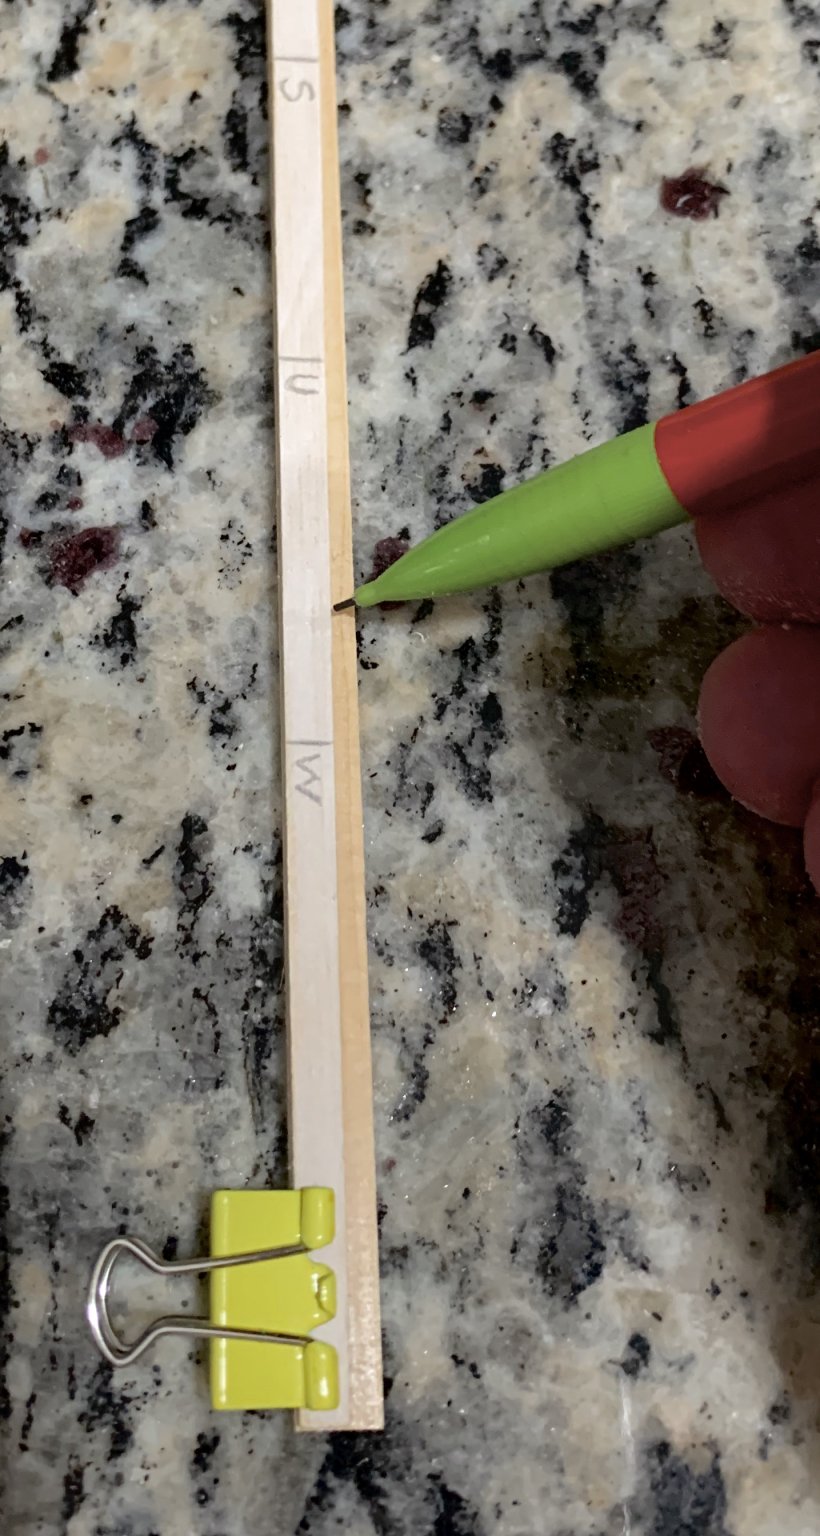
Thank you Chuck and than you for all the likes. I have finished the first belt and thank goodness there were no surprises. I used Chuck´s supplied tick marks templates which saved a lot of time. I marked couple of planks to use them as templates. It is faster this way and I save the templates for the other side. The template is aligned to the plank and copied to the new plank. Then the belt sander removes the Eccles wood to the pencil line. A sand block does the rest. Template aligned with paper holders My plan for the plank joins for the belt displaced with paper holders Next the other side. Best, G


-
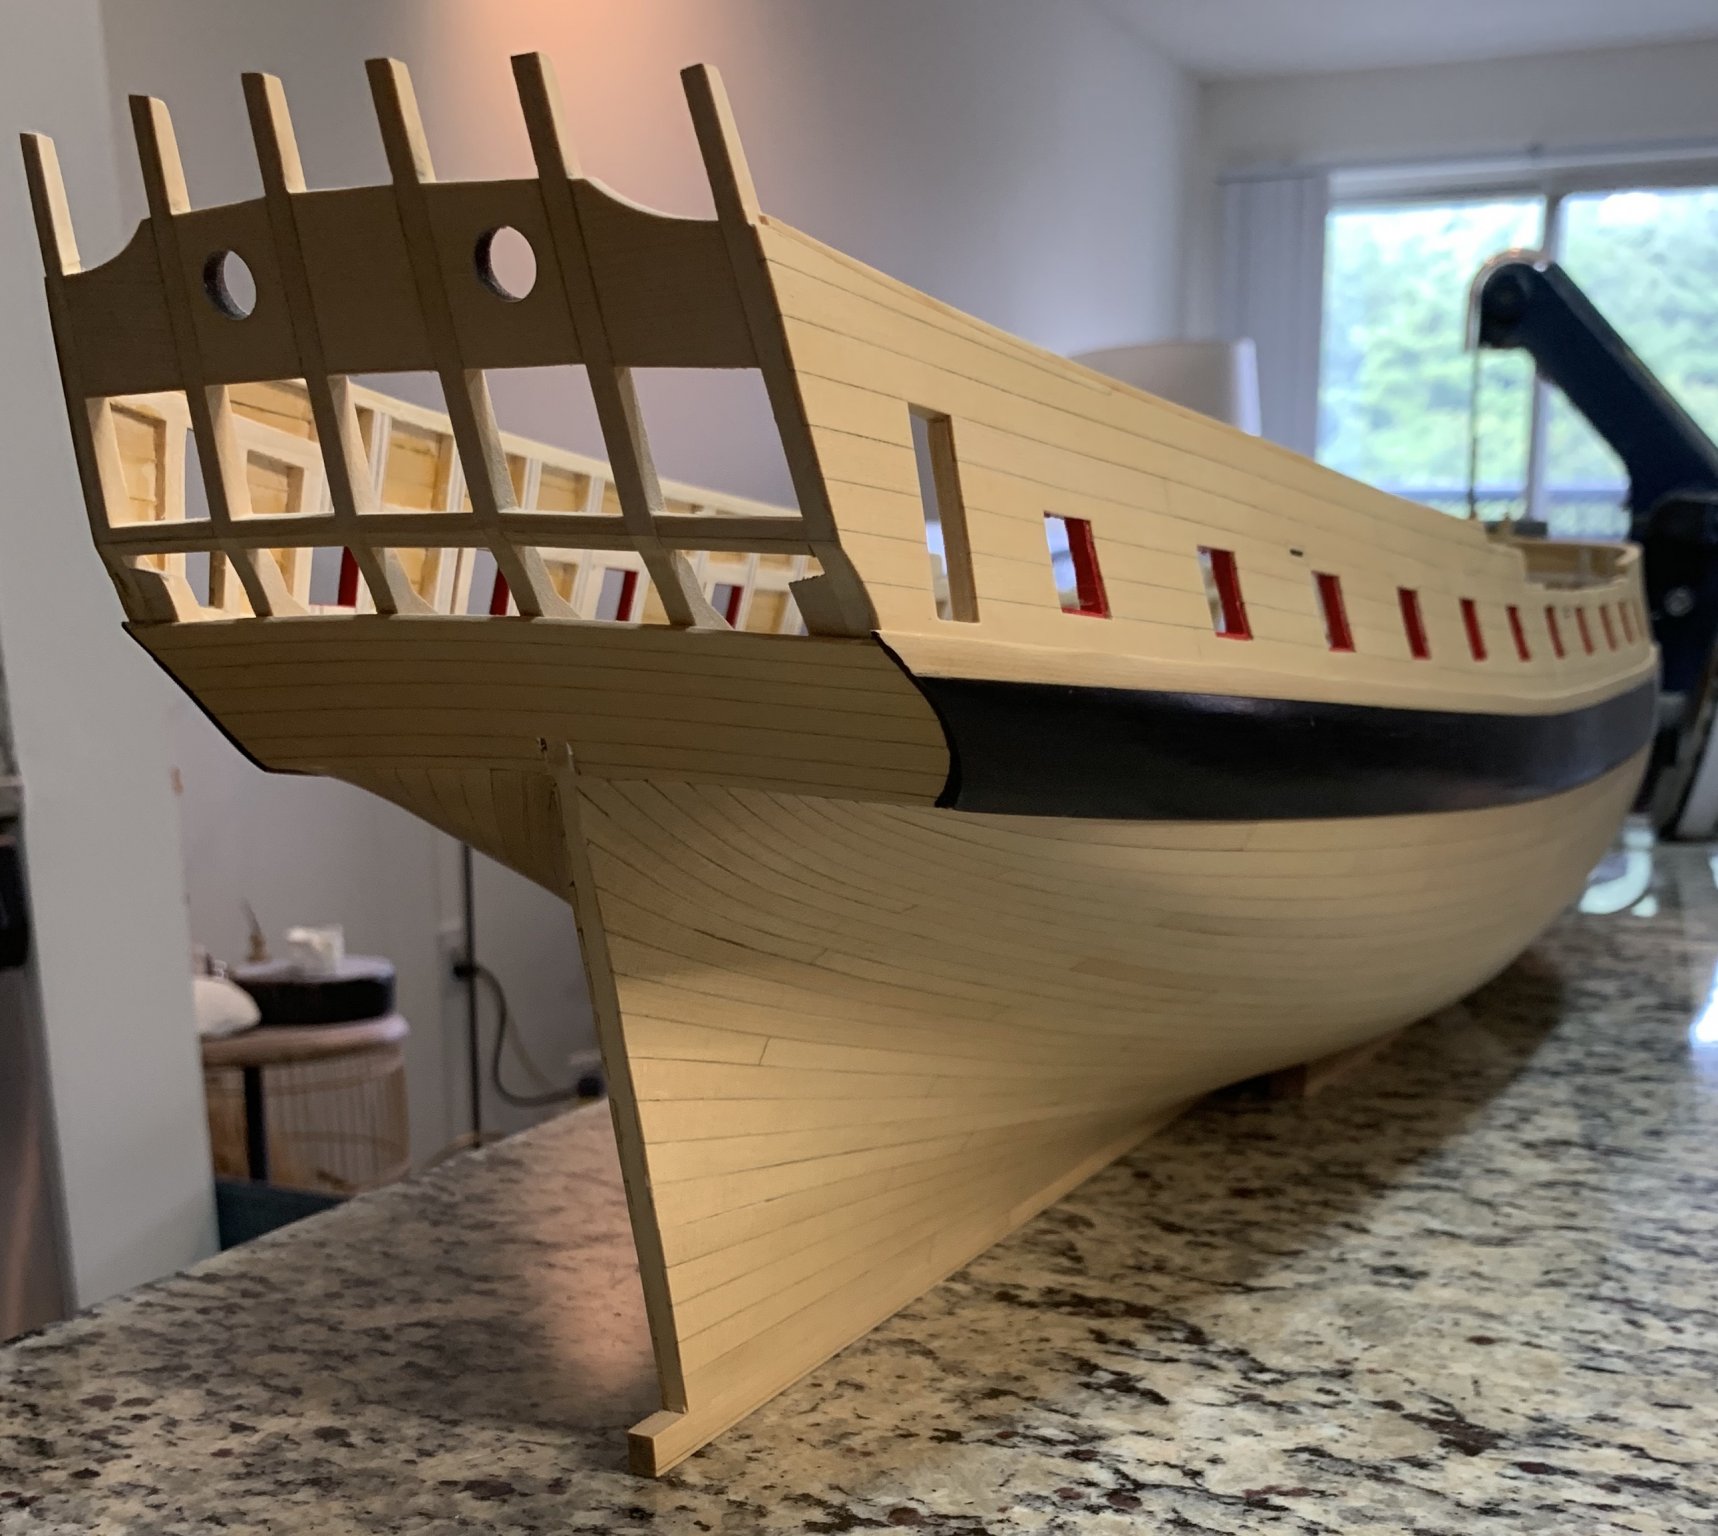
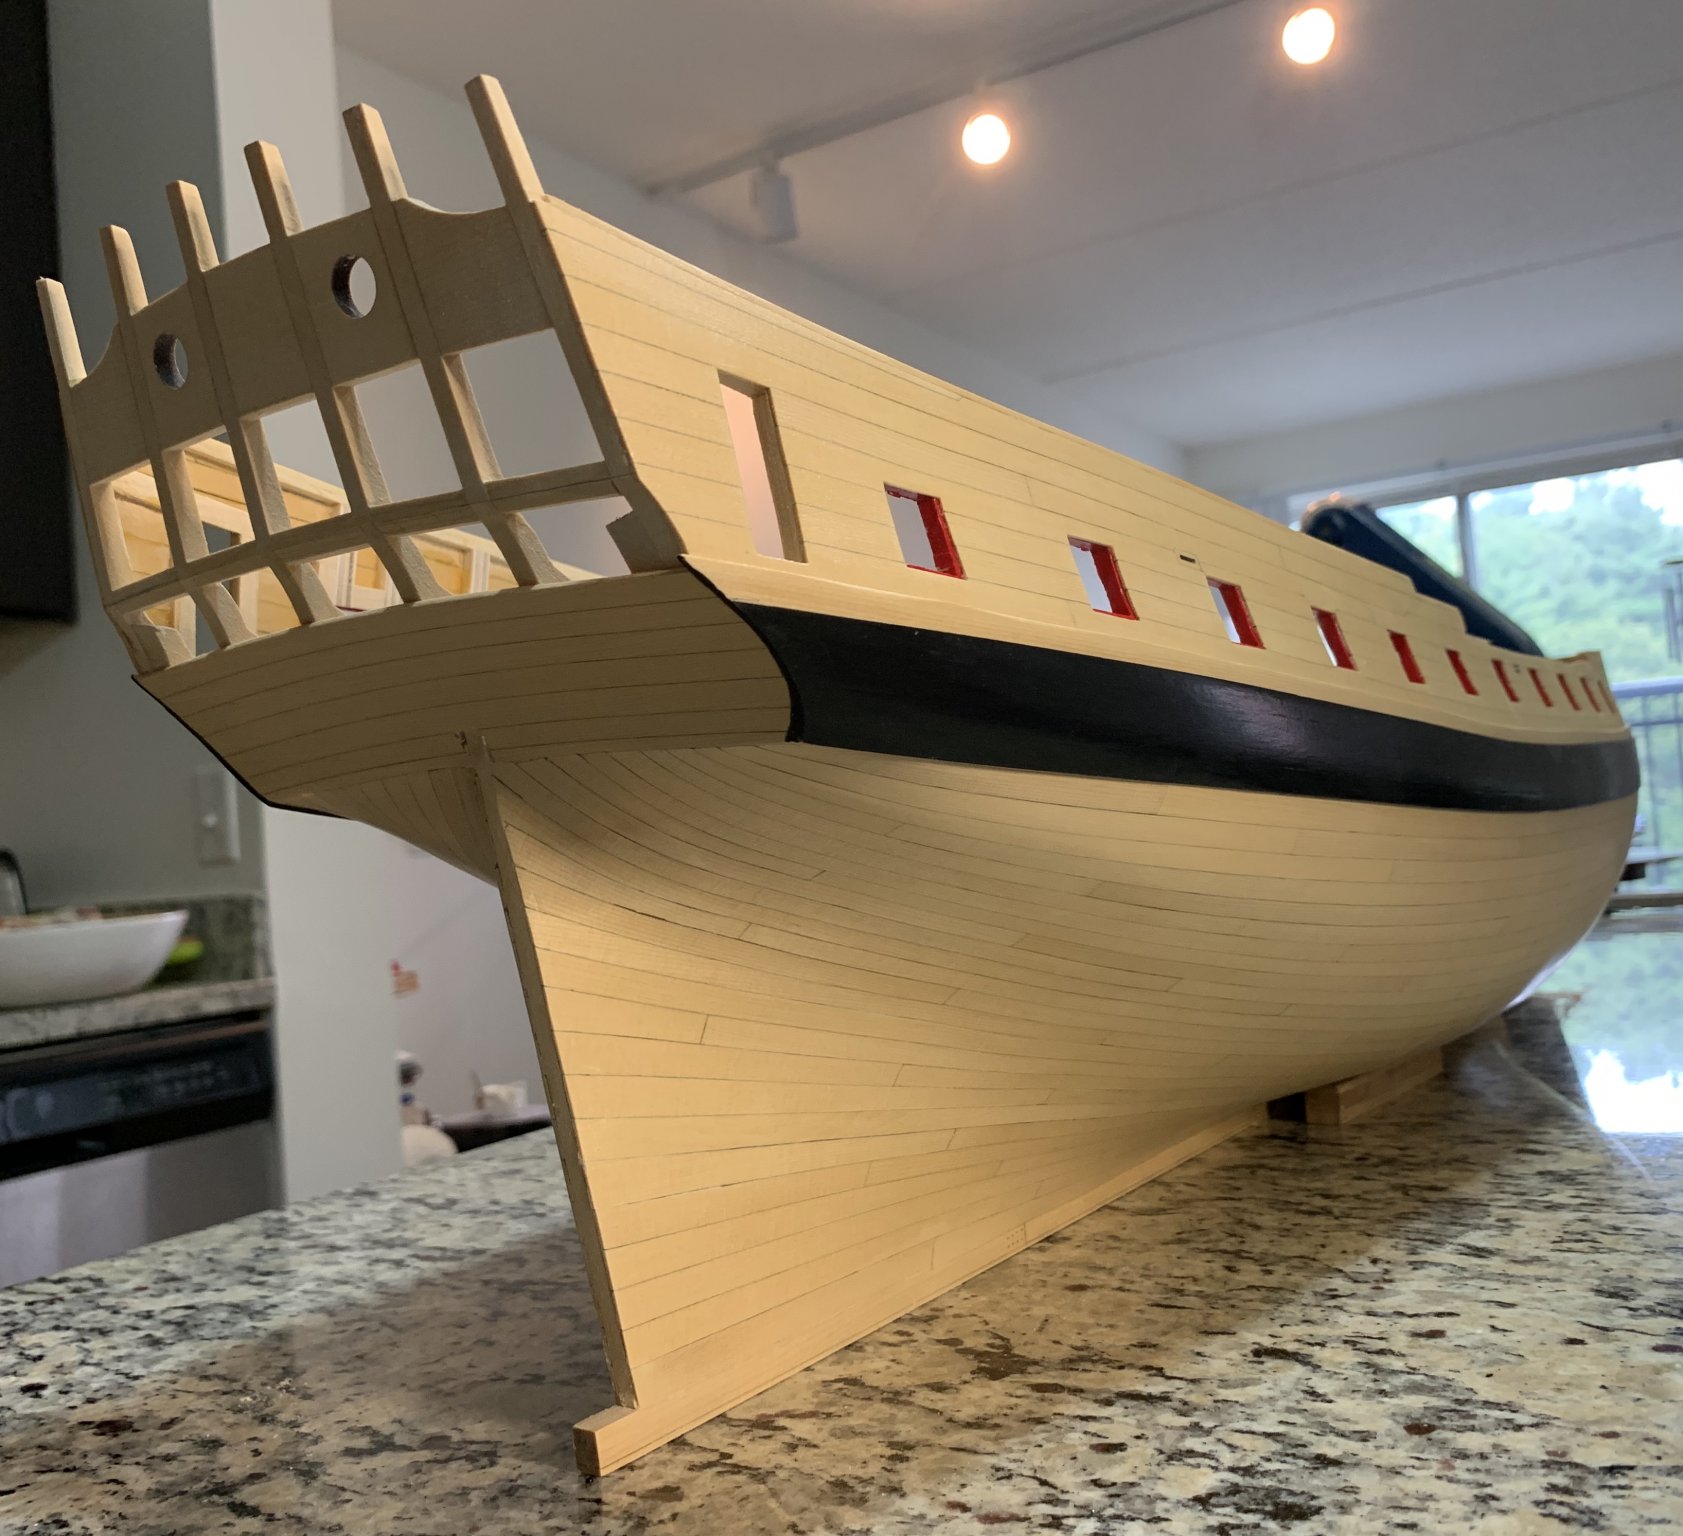
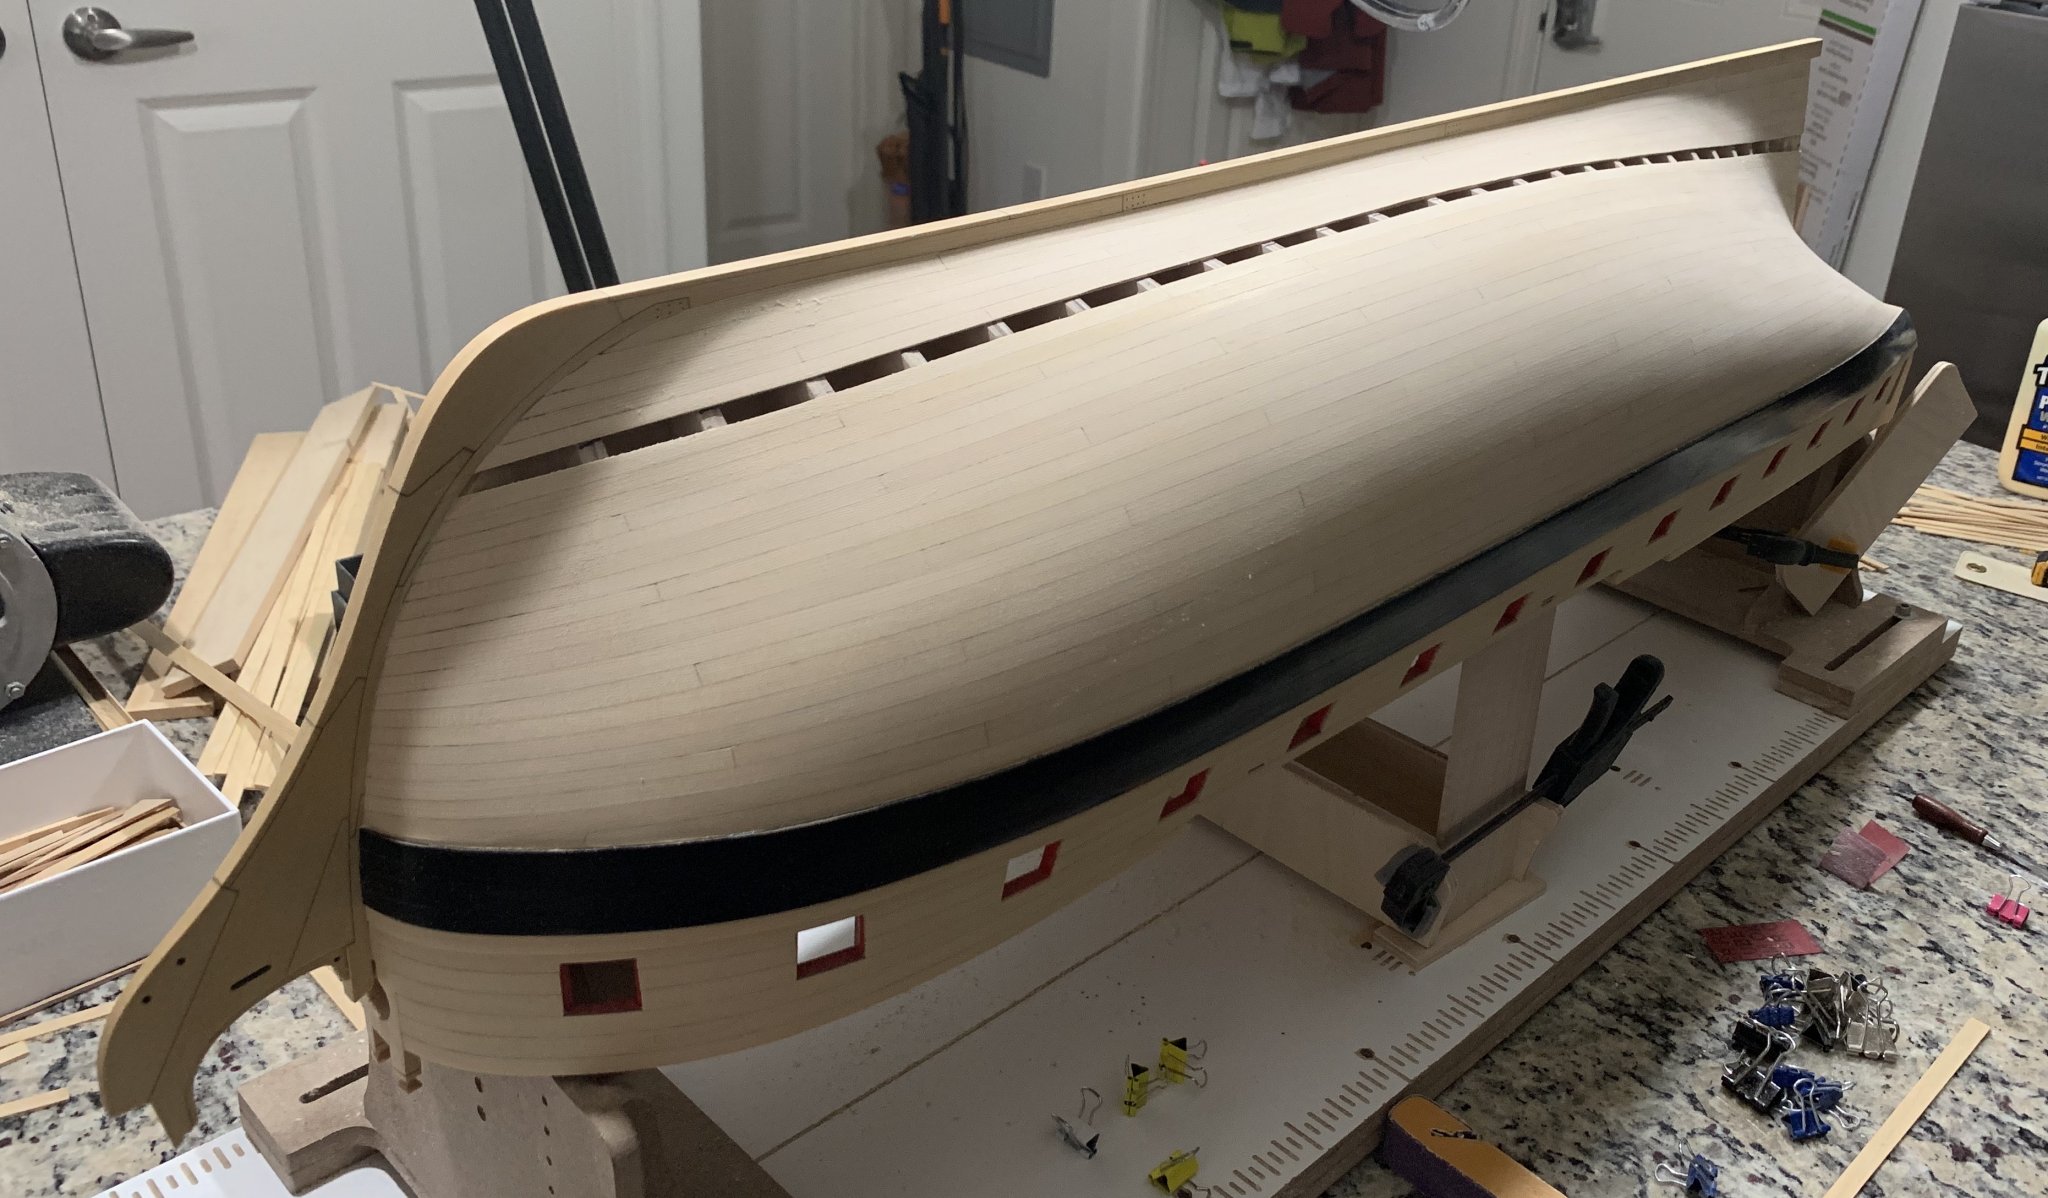
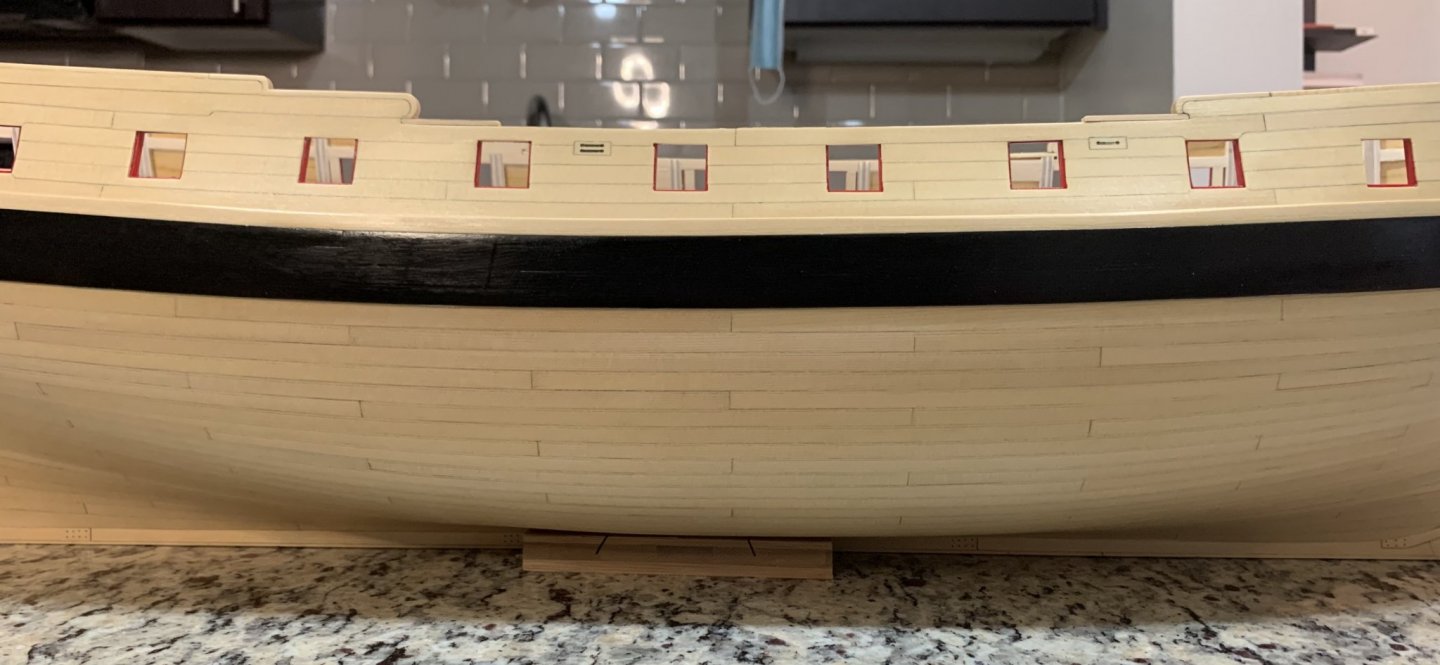
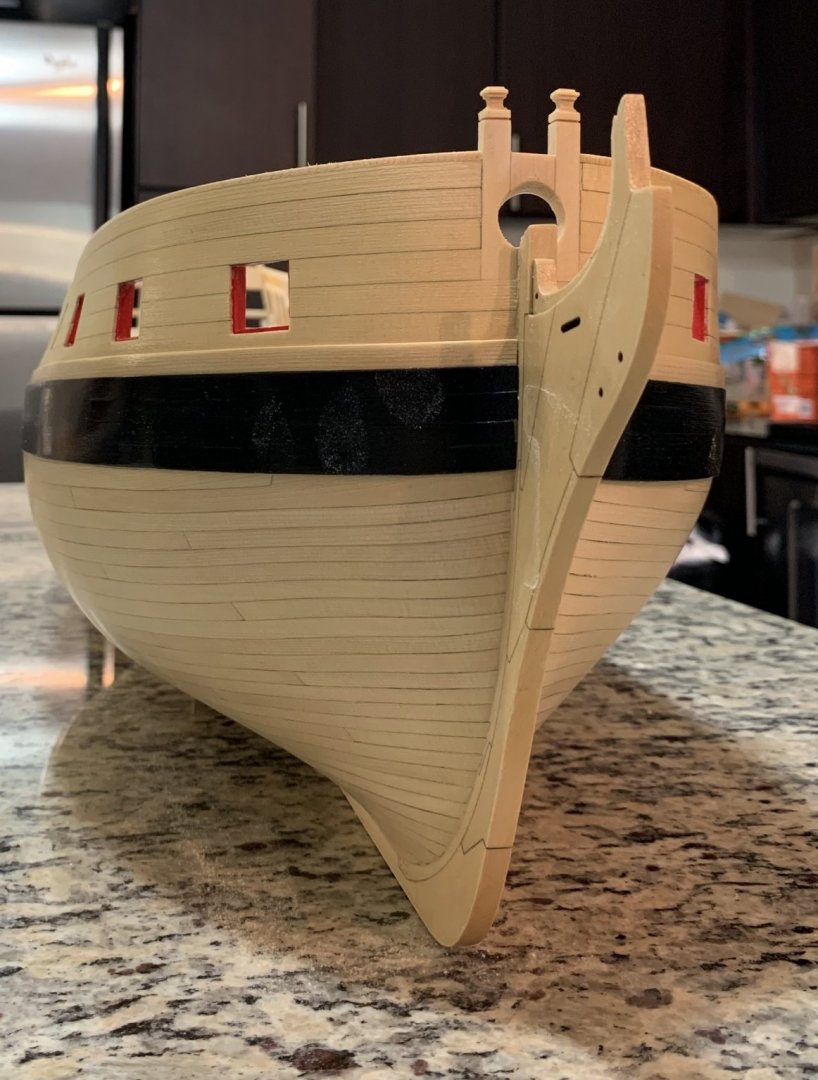
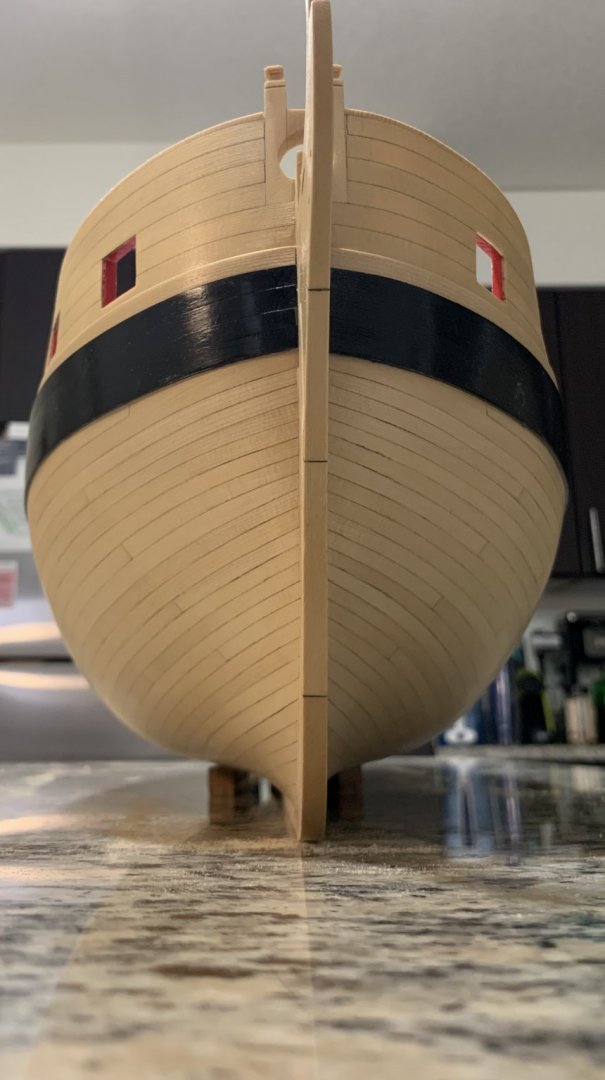
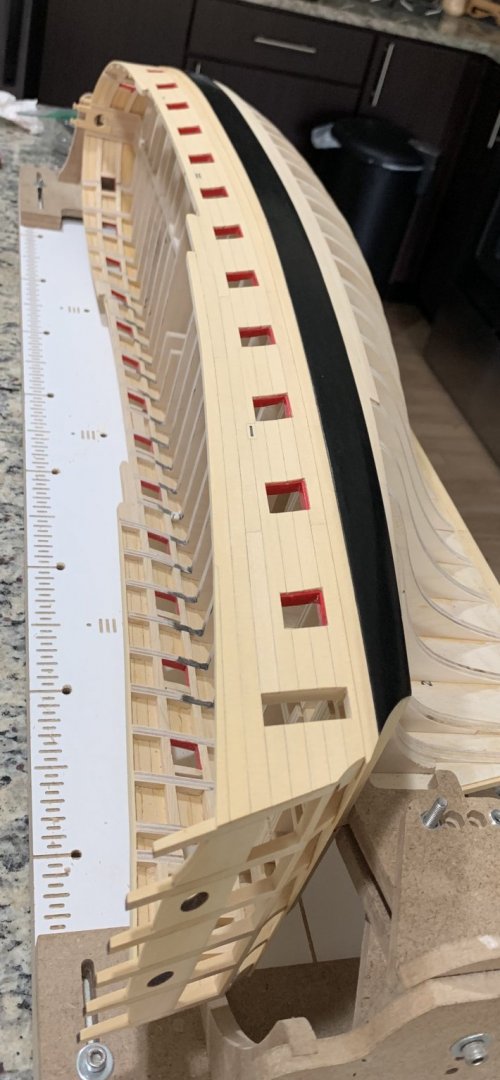
Thank you Chuck; A small update. I have finished both wales. The first plank at the bow was narrowed to match the lower planks (to be added) rather than the black strake. As Chuck mentioned, at this point it starts to look like a frigate. I have used a combination of black water-based wood stain and water-based wood conditioner (1/3 + 2/3) six layers; sanding in between (1000 grid) to paint the wales and get a satin translucent black color reminiscent of ebony. It has just about as much reflective of light. Hope the pictures show it. Best, G


-
I promised Jorge to show the whale near the counter. I planked the counter over the first layer of wales and the second layer of wale over it. It makes shaping the counter edges with a sanding block easy by using the hull lines as reference. The second layer covers the planking edges. Overlapping edges makes for a sound joint and the result is cleaner. Below is the black strike. I use files and a sand block to remove the wood from the end wale strikes next. Notice how sharp the angle is at the lower edge. I have not added the peace to support The rest of the hull planks. I will do that later. The finished edge. I will paint the edge black later. There will be more planking an sanding first. Best, G

-
I have finished the port side wale. I used artist tape as a reference line. This worked great to guide the edge of the plank and to stop the glue from running. I glued the black strake first. I added the next strake but painted the plank edges black This is a detail of the black strake and the first wale strake with the edge painted I added all strakes and sanded it Painted 6 layers of diluted black paint (maybe 7) as Chuck recommends Detail of the finished wale Best, G


-
Forgot to add, may saw blade is 0.036 inch thick. If you use a wider blade you will need to adjust up. G
-
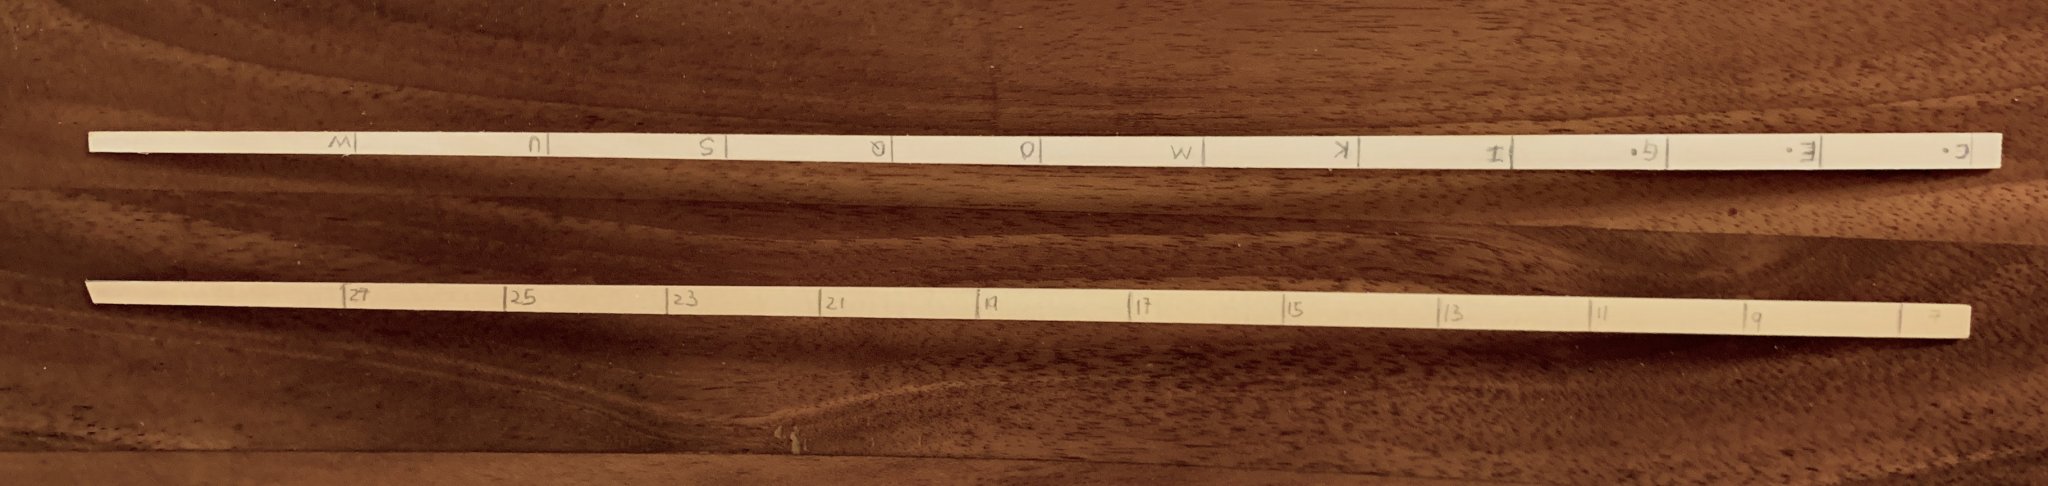
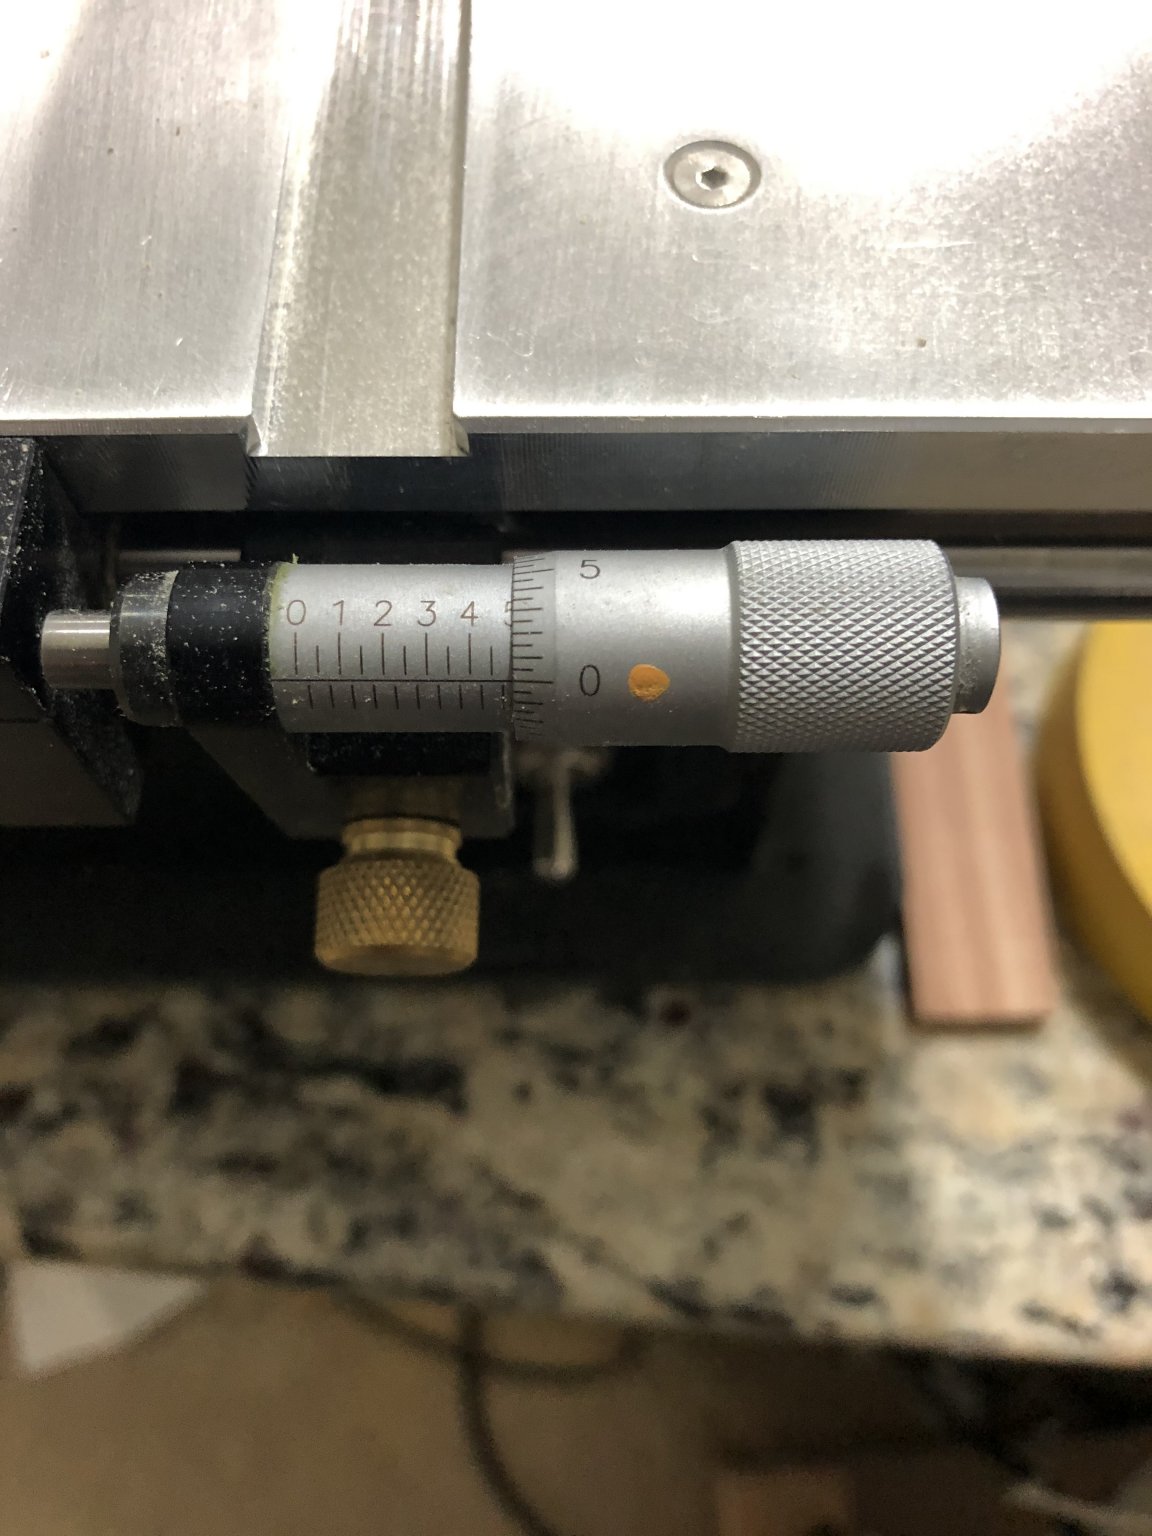
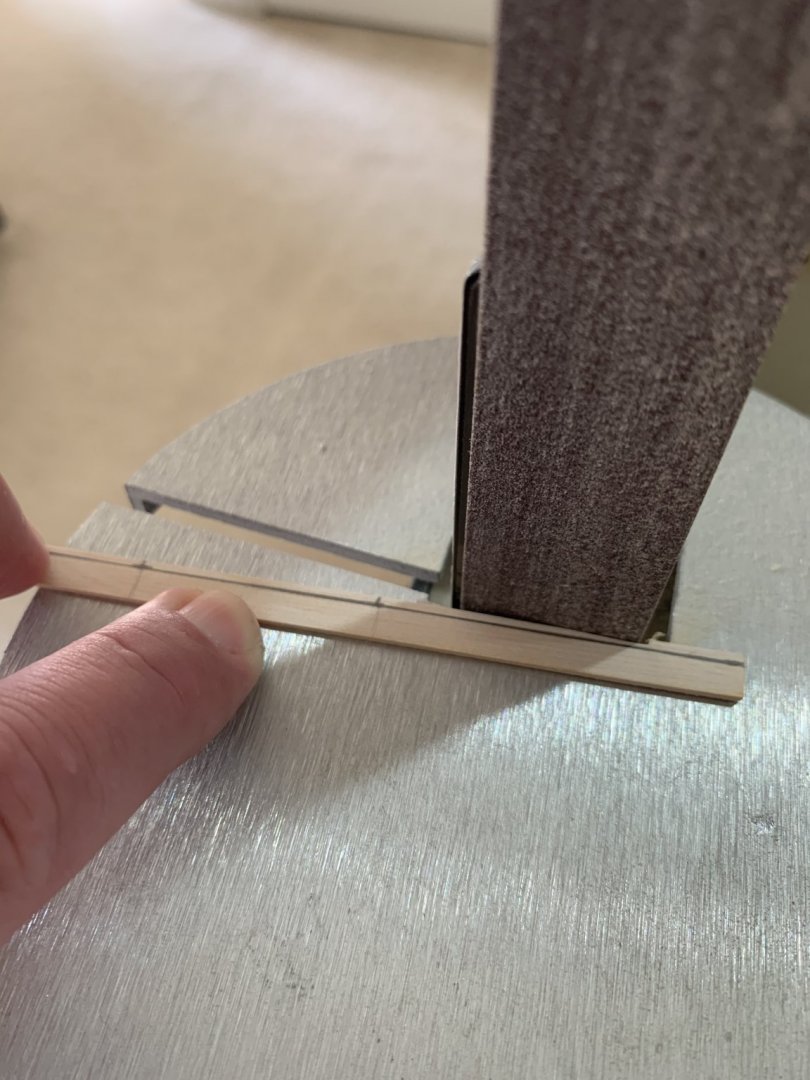
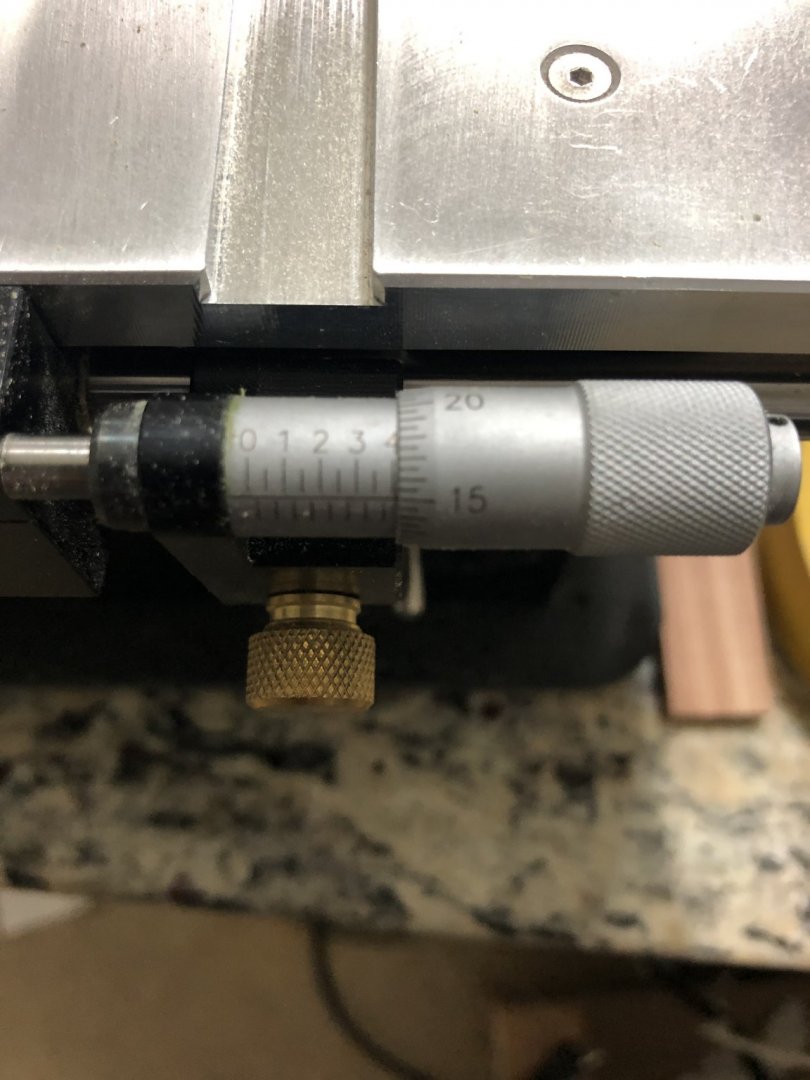
Looks great Jeff I see you got the micrometer with your saw. I have the exact one. Set it to 5 (painted a dot for reference because it takes mor than 3 turns per plank) see bellow then turn up tree full turns (3 times the dot) and the add two more stops until 15 (one full turn has stops at 5,10,15 and 20). This gave me the required thickness plus a little more to account for sanding. I used the recommended 3” diameter saw blade from previous posts and I got really good results. I ripped 1 plank from each billet (10 billets = 10 planks) and re-adjusted a second time (3 full turns up on 15, and two stops more to stop 5). I rip a second plank from each billet again (10 more planks). And so on. This way you only need to adjust the micrometer between plank rips. I got 37 planks per billet; so I only did 37 adjustments in the micrometer to rip all my billets into 3/64 thick planks for a total of 370 planks. When you are near 0 in the micrometer, reset it to 5 again after the last rip (don’t move the fence) readjust the position to touch the fence. Then start again from the beginning (above). hope this makes sense, G

-
Hello Jeff: That bollard timber looks good. Measure the thickness of BS-1 to know how much you need to remove from the top part of BF-3. That will correct the problem. Hope this helps. G
-
Thank you Chuck, I will follow your advise. G