Guillermo Eduardo Madico
-
Posts
78 -
Joined
-
Last visited
Content Type
Profiles
Forums
Gallery
Events
Everything posted by Guillermo Eduardo Madico
-
 Hello Chuck, Those were great modification; both the reduction in size and moving after the top part. Have you consider moving the bottom part/post a little to keep that diagonal line? Same as the top part but in the opposite direction (forward instead of after). The candle will need to stand by it self to stay center. I think the thicker candle also improved the look. In the drawing of the lantern parts, the top part appears rotated 60 degrees to the rest of the lantern (the arista of the top part does not align with the arista of the lantern. I really like the way it is drawn. Although the way you placed the top is the way it appears in contemporary models with the arista aligned, I will follow your drawing in my build. my 25 cents, G
 -
Thank you JJ, Much appreciated, G
-
Hello JJ, Great job! I think you got those at the correct scale. Would you mind sharing the block and rope sizes you used? G
-
Thank you Scrubby, Glenn, Matthias, Rusty, Vladimir and Chuck for your comments. They are good encouragement 🙂 Yes Chuck, having a lot of fun. I will try to free more time to work on her. Best, G
-
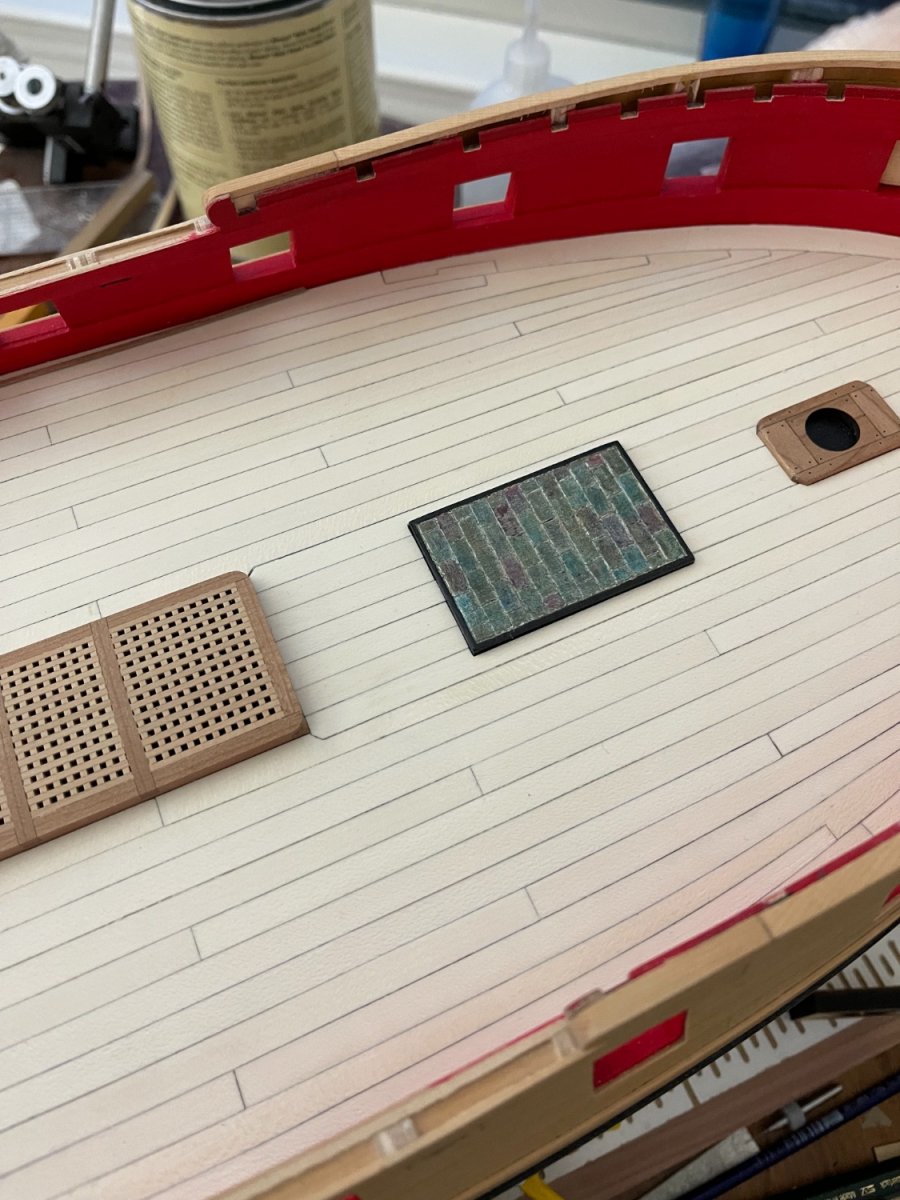
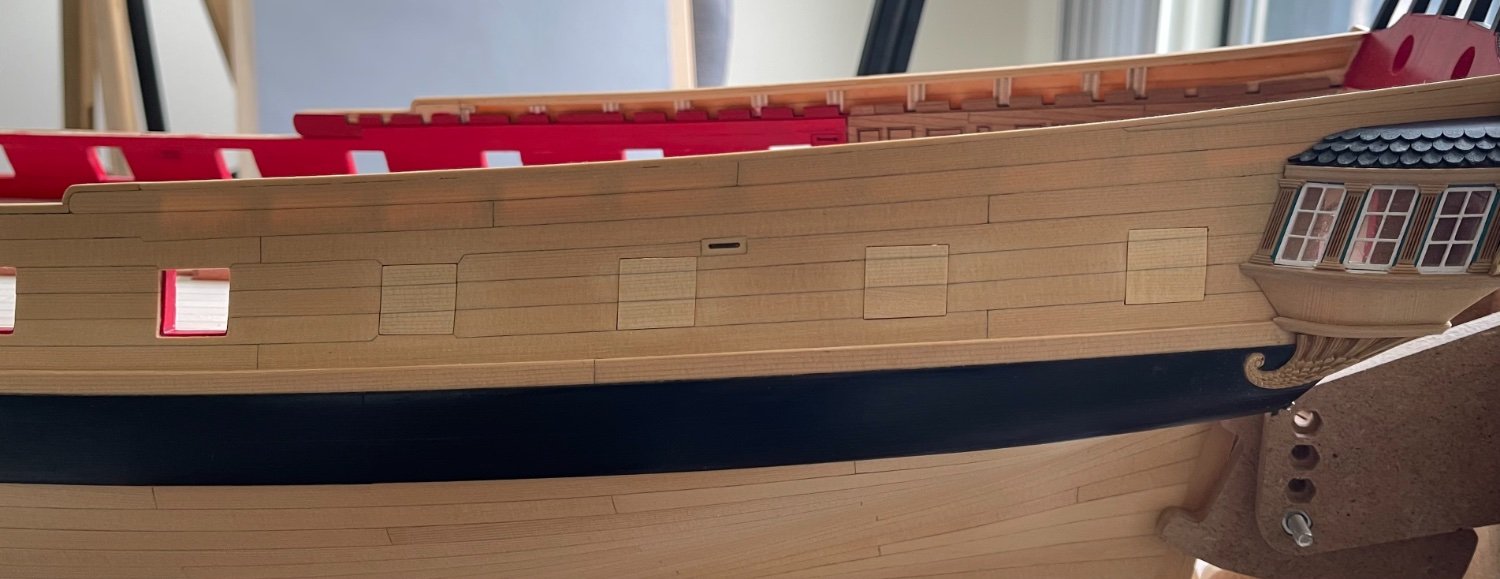
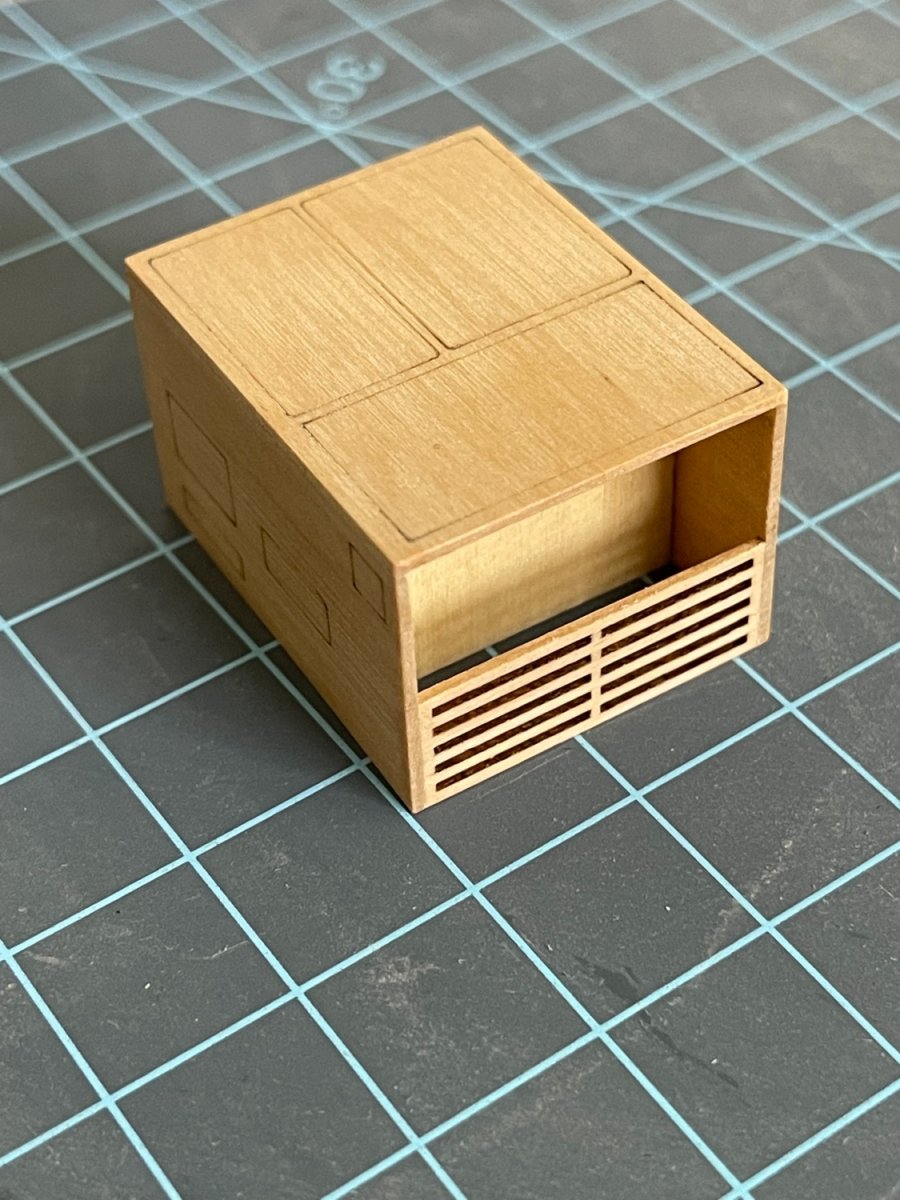
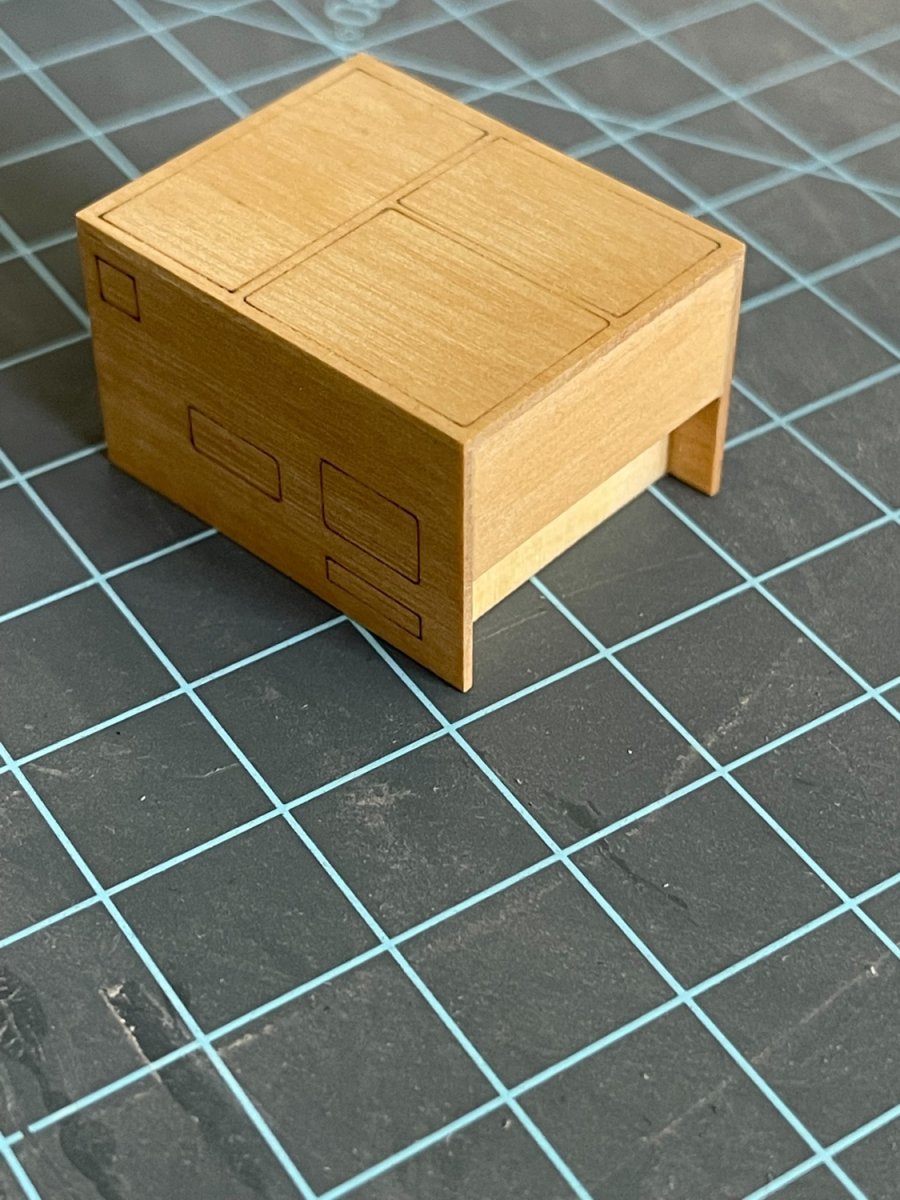
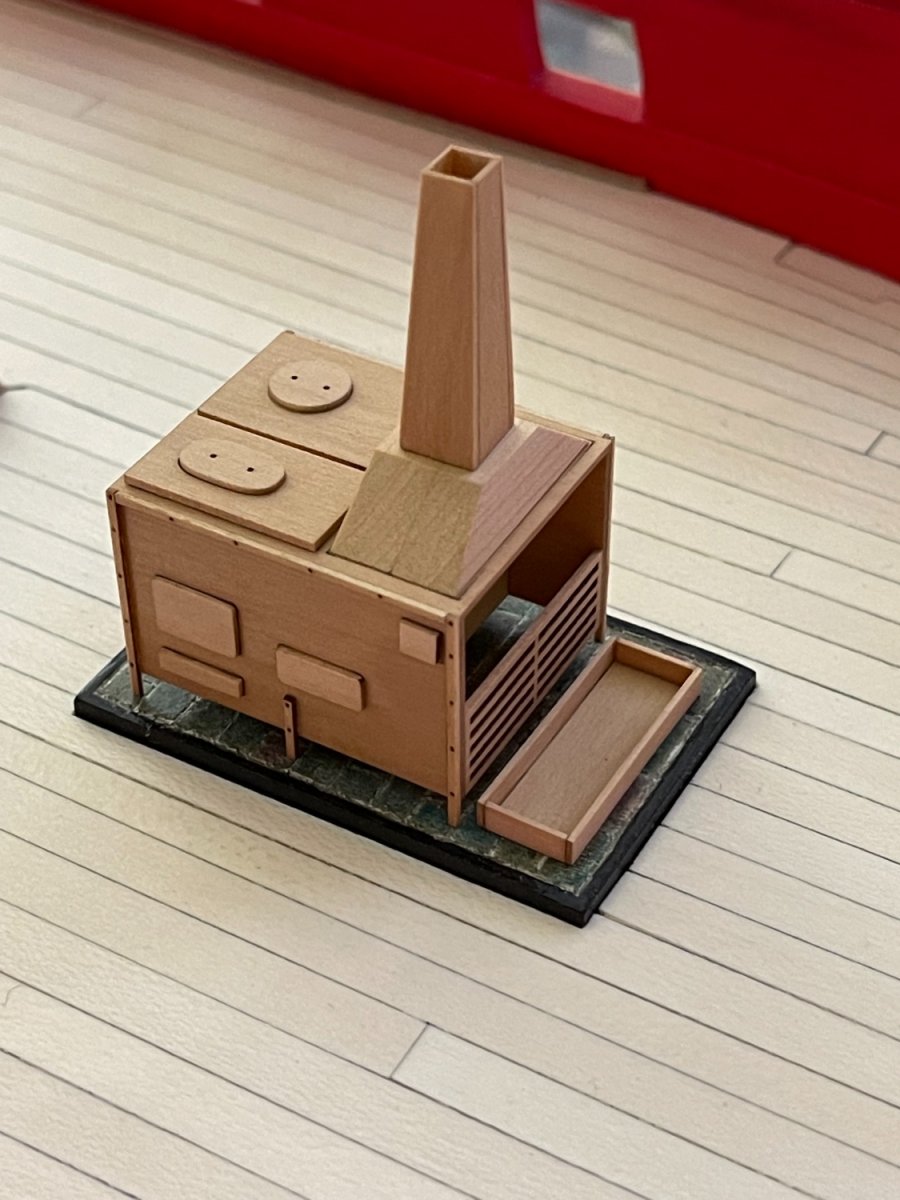
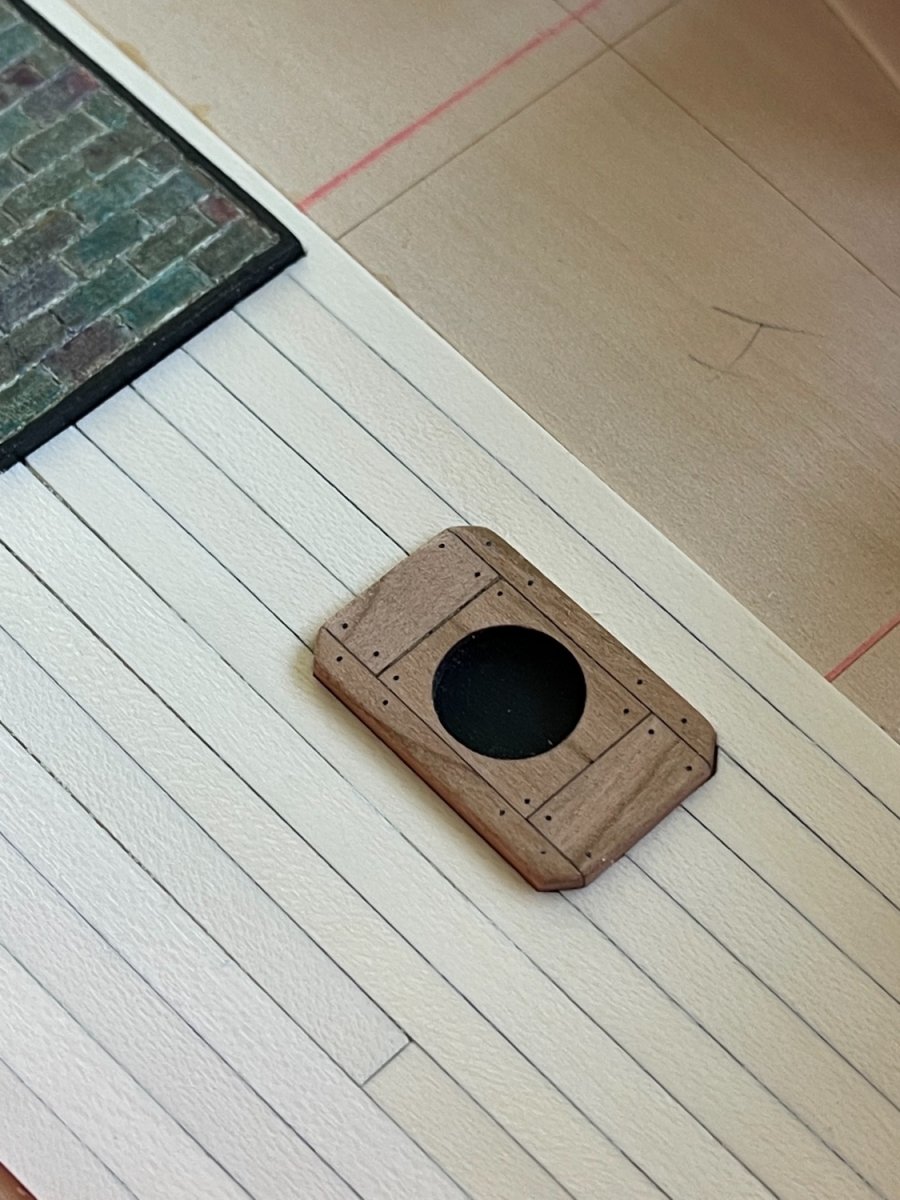
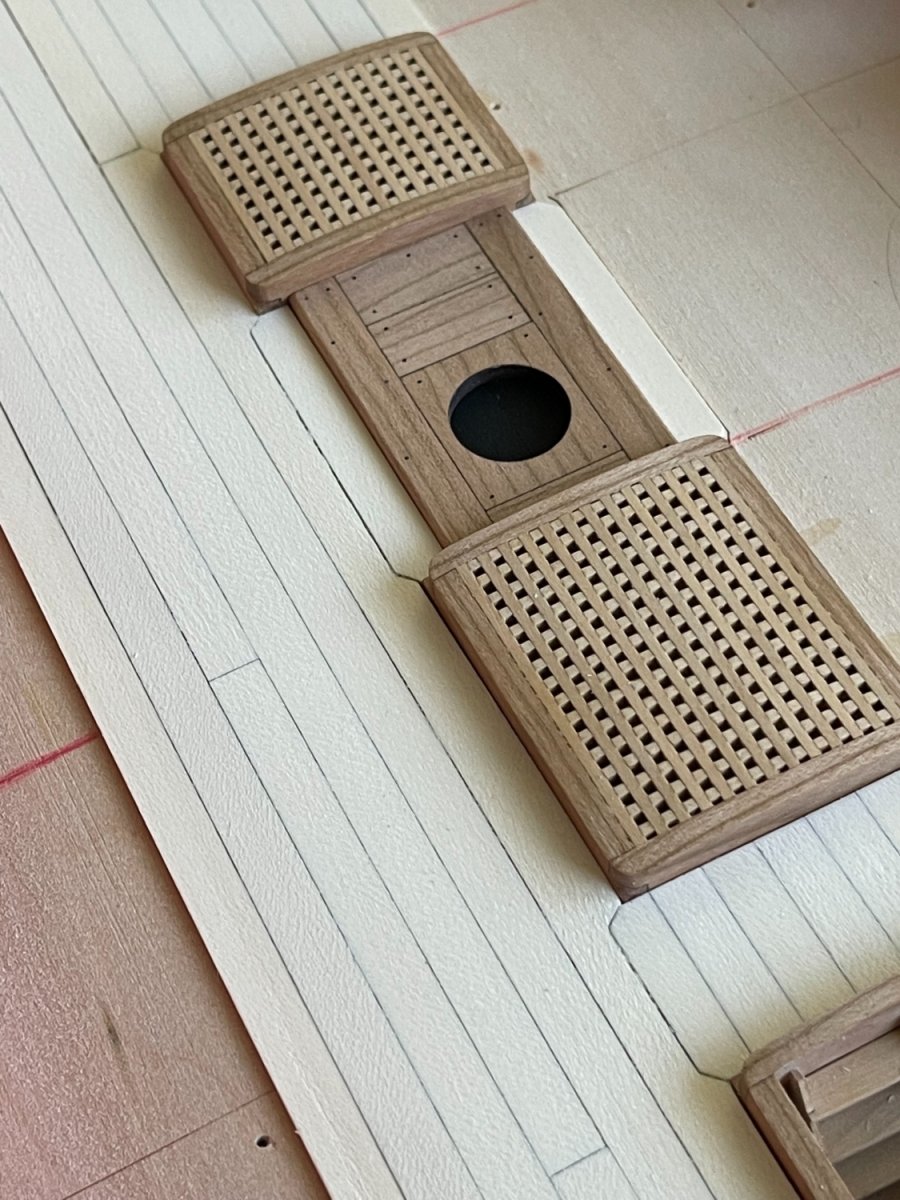
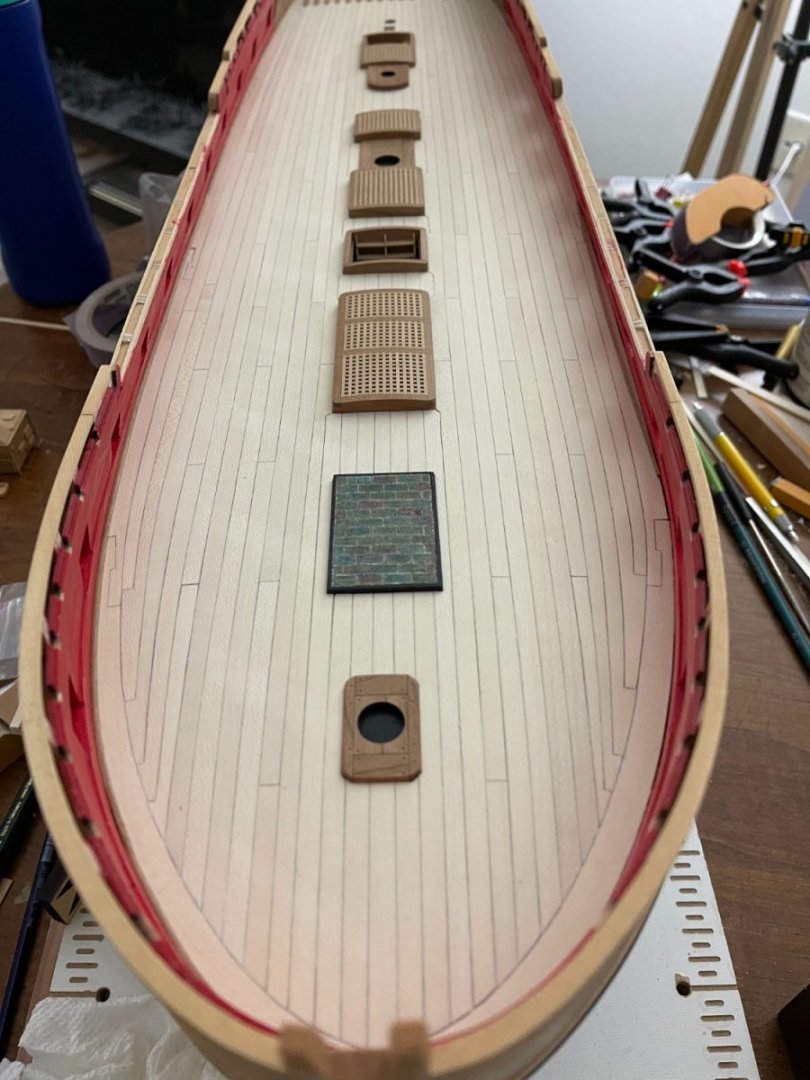
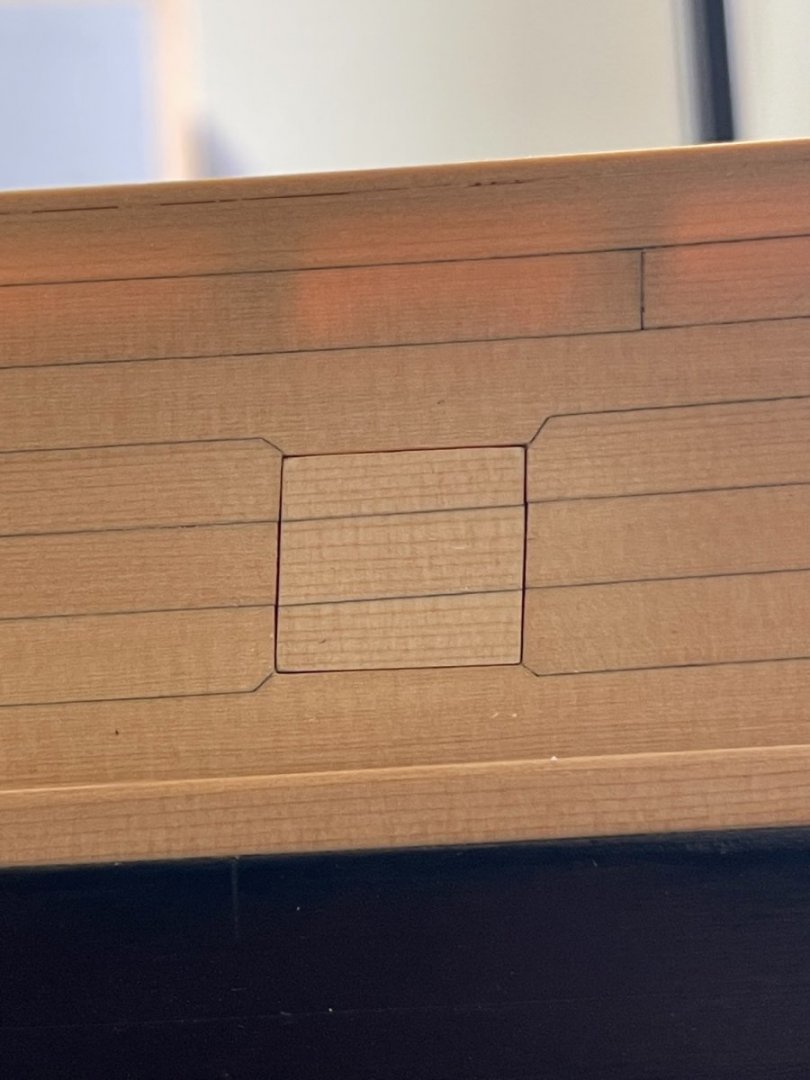
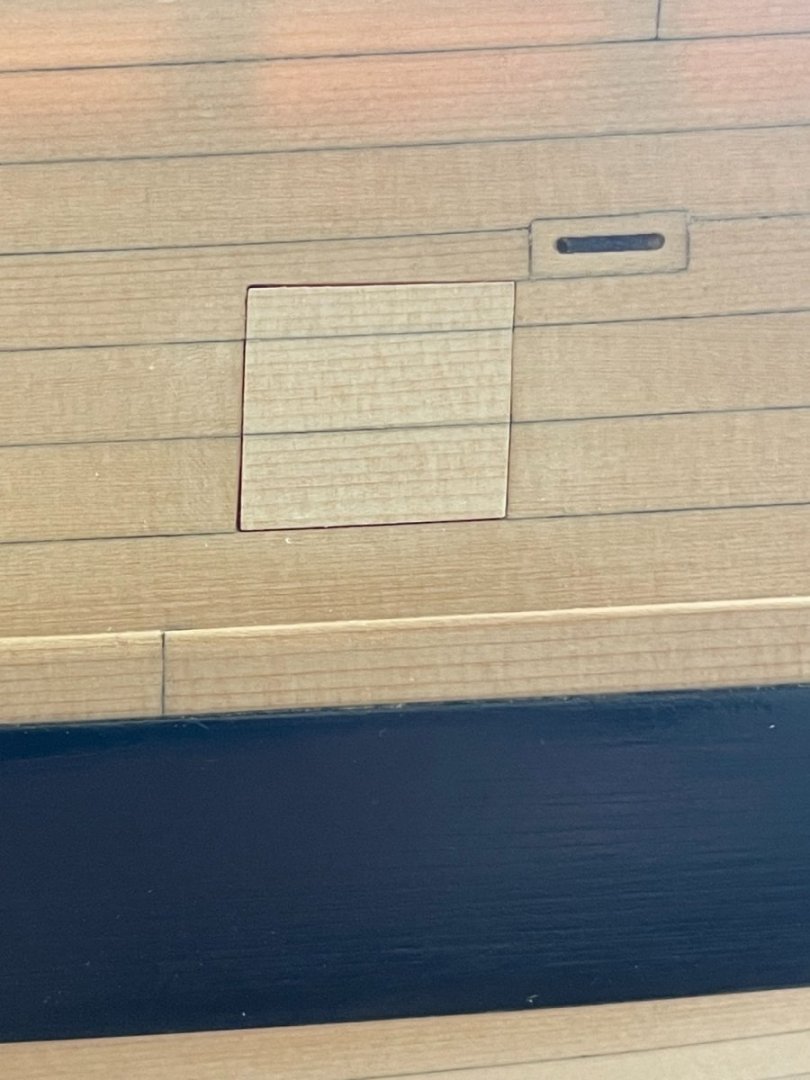
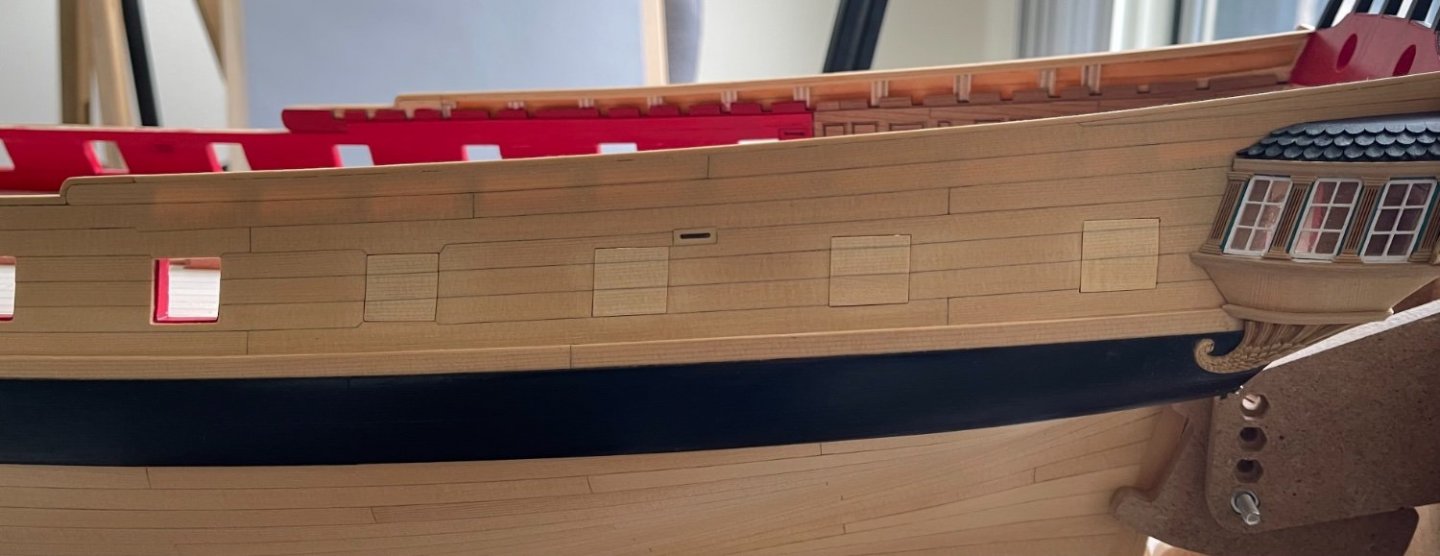
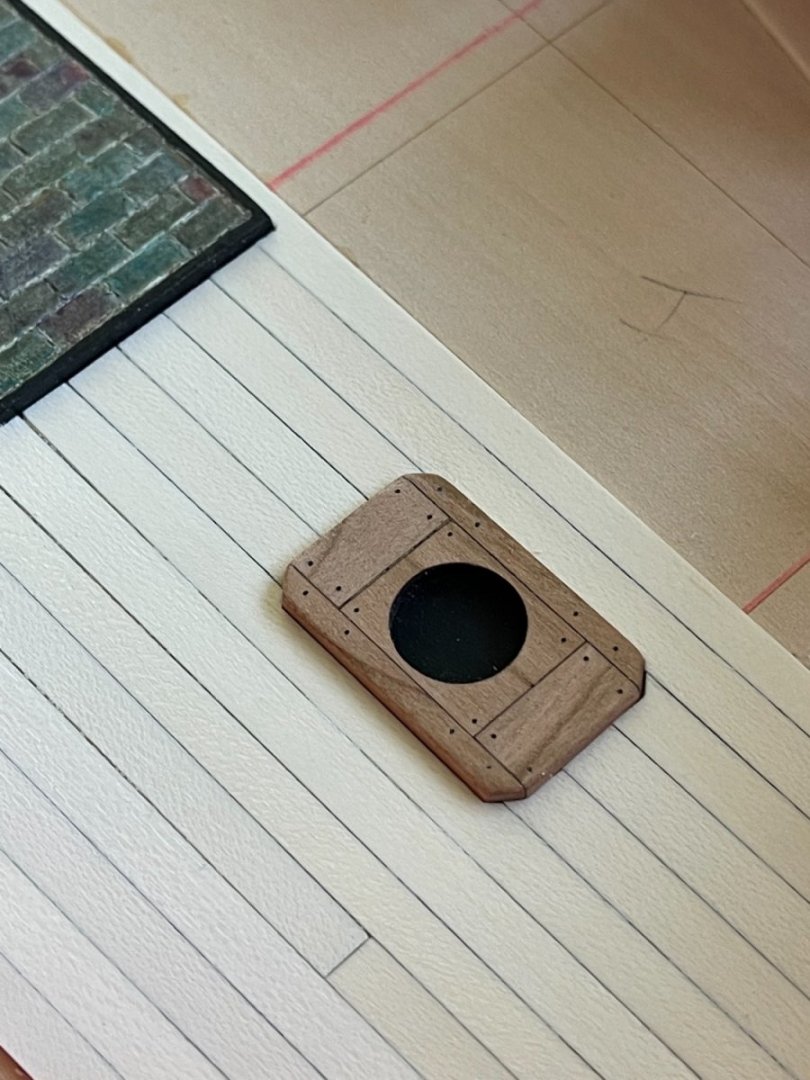
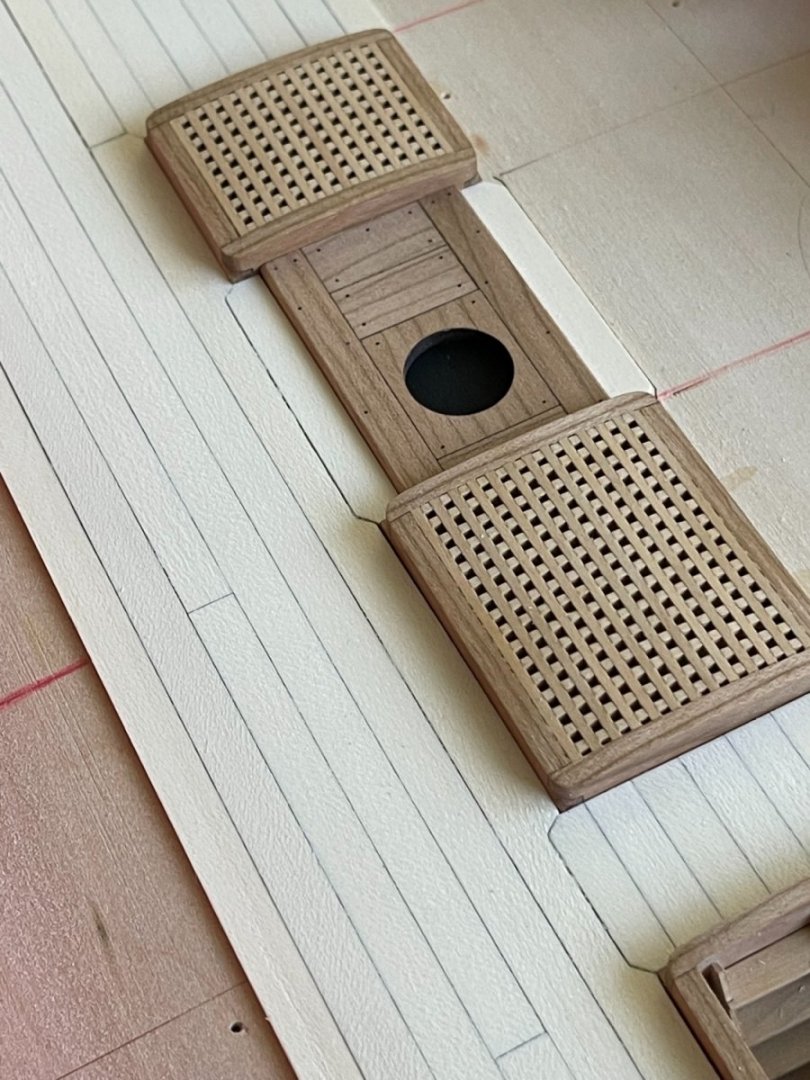
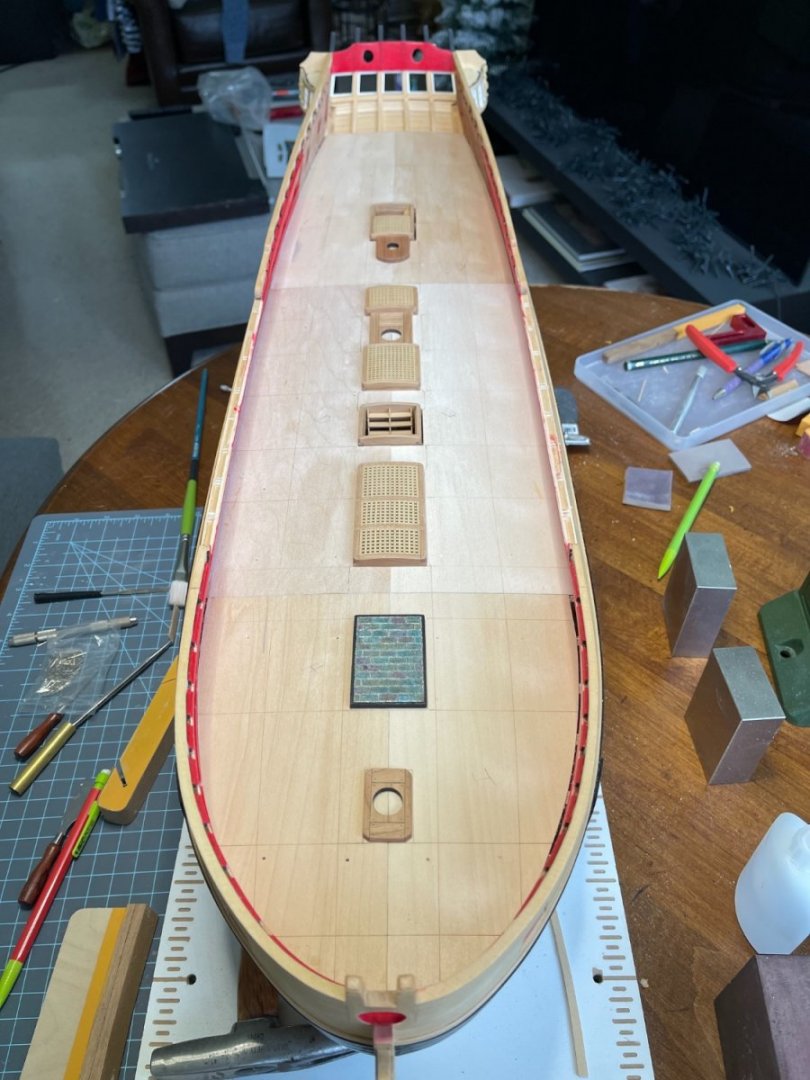
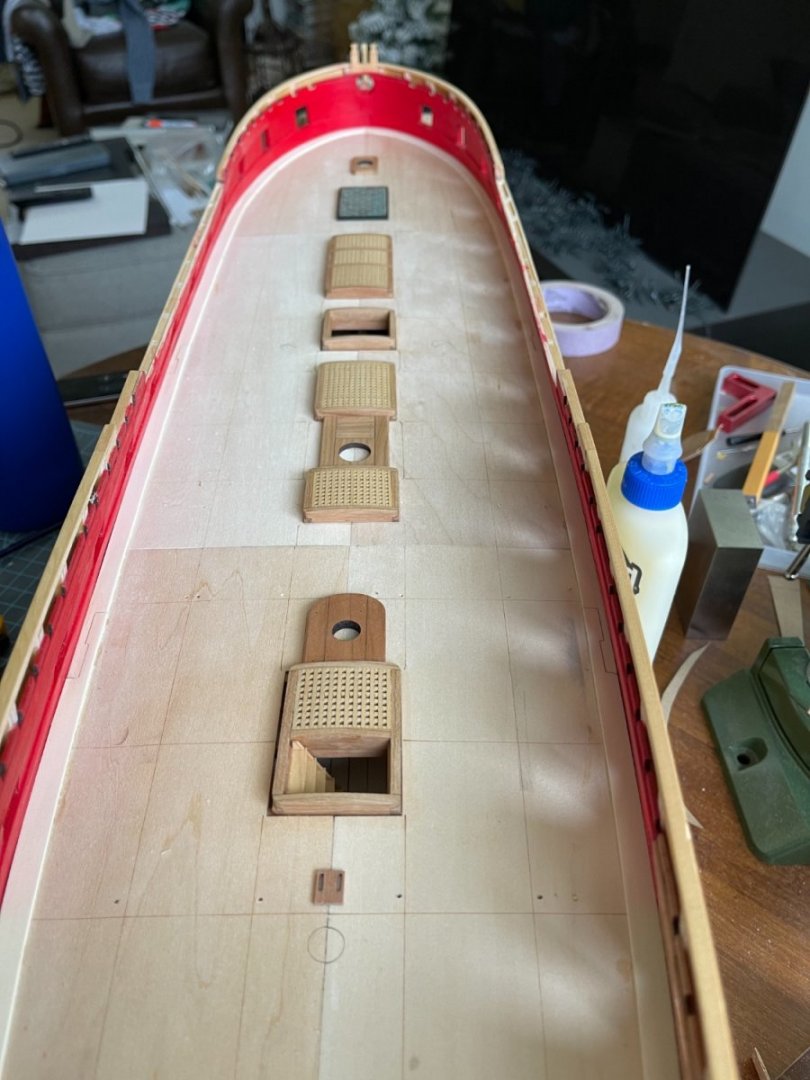
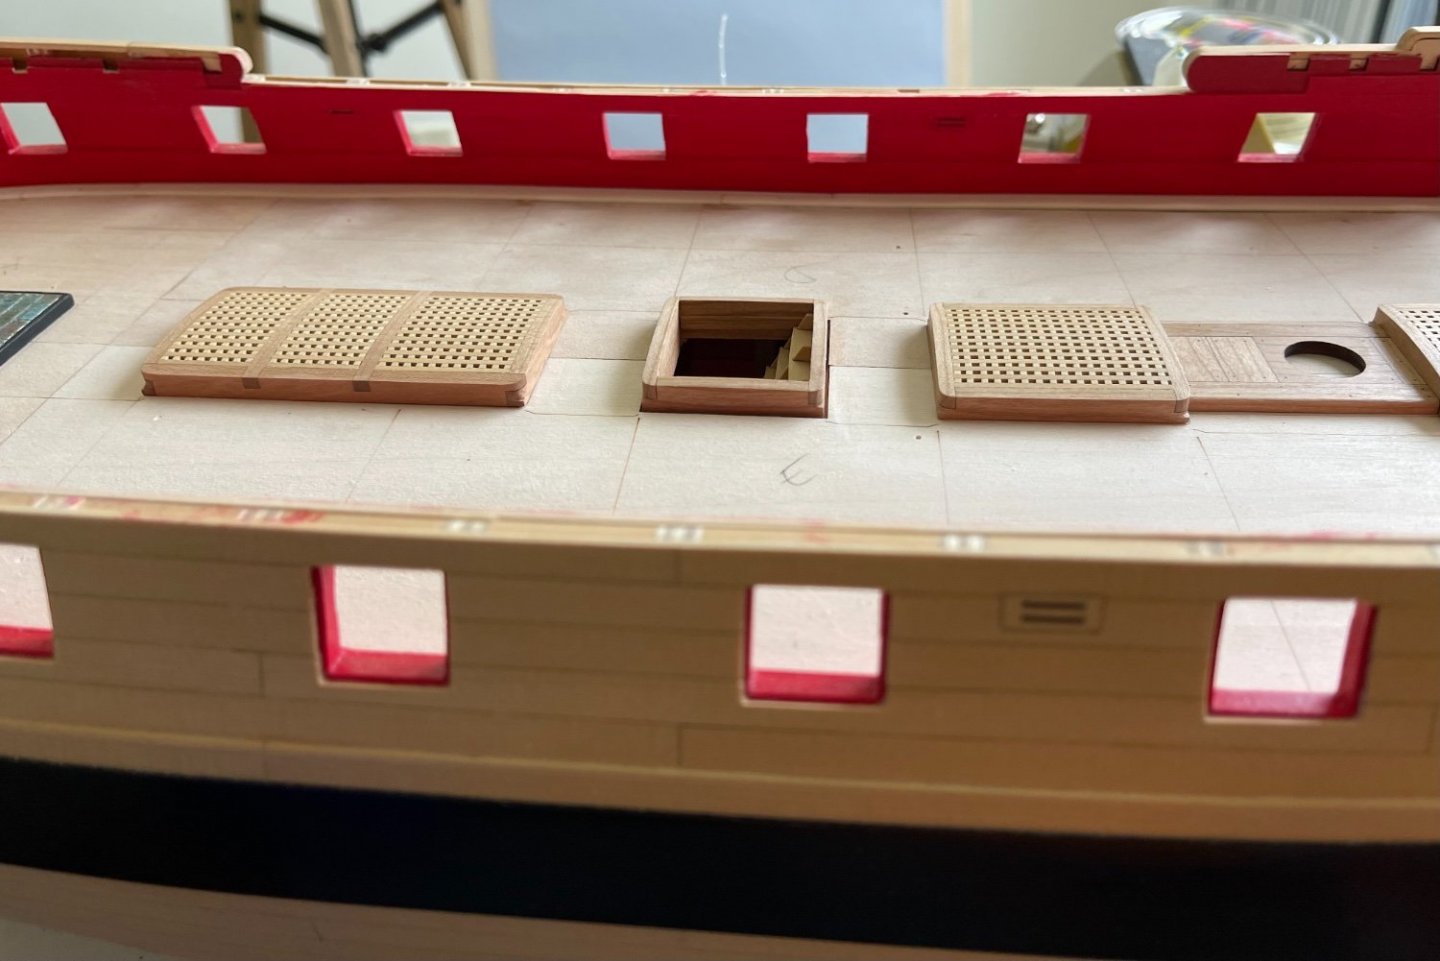
Thank you Everyone for all the likes. I have finished planking the deck. Made all the gun ports and started the stove. Best, G


-
Thank you JJ When working with holly any little mistake shows. I am taking my time to do it right. Best, G
-
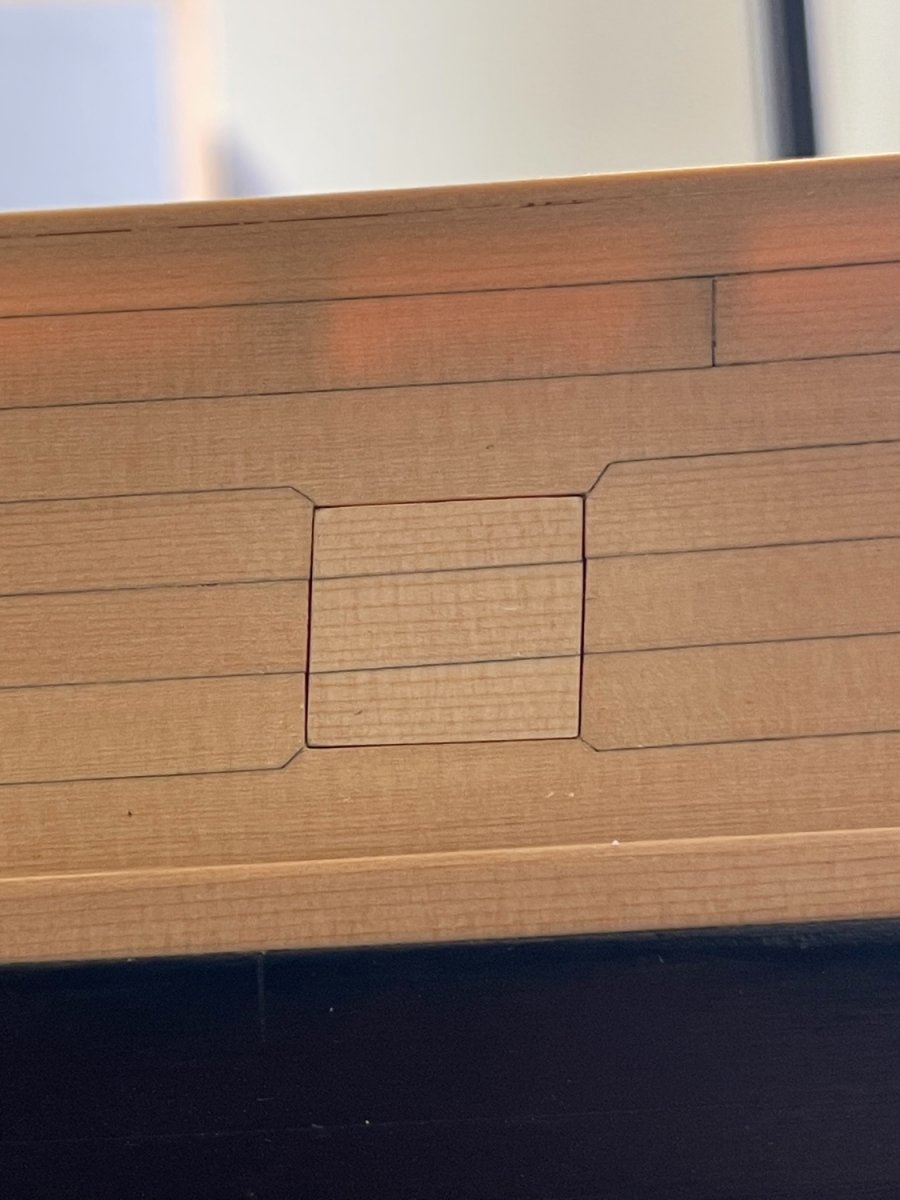
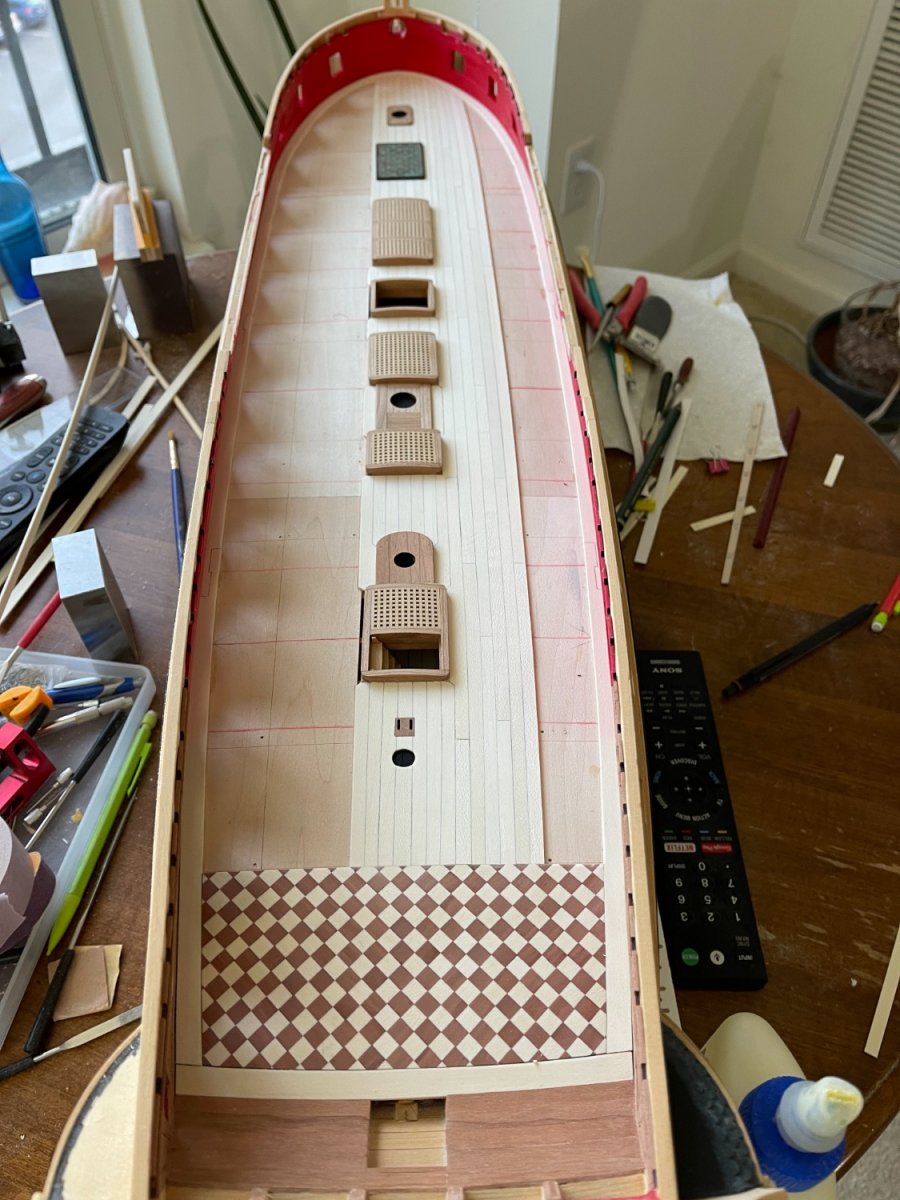
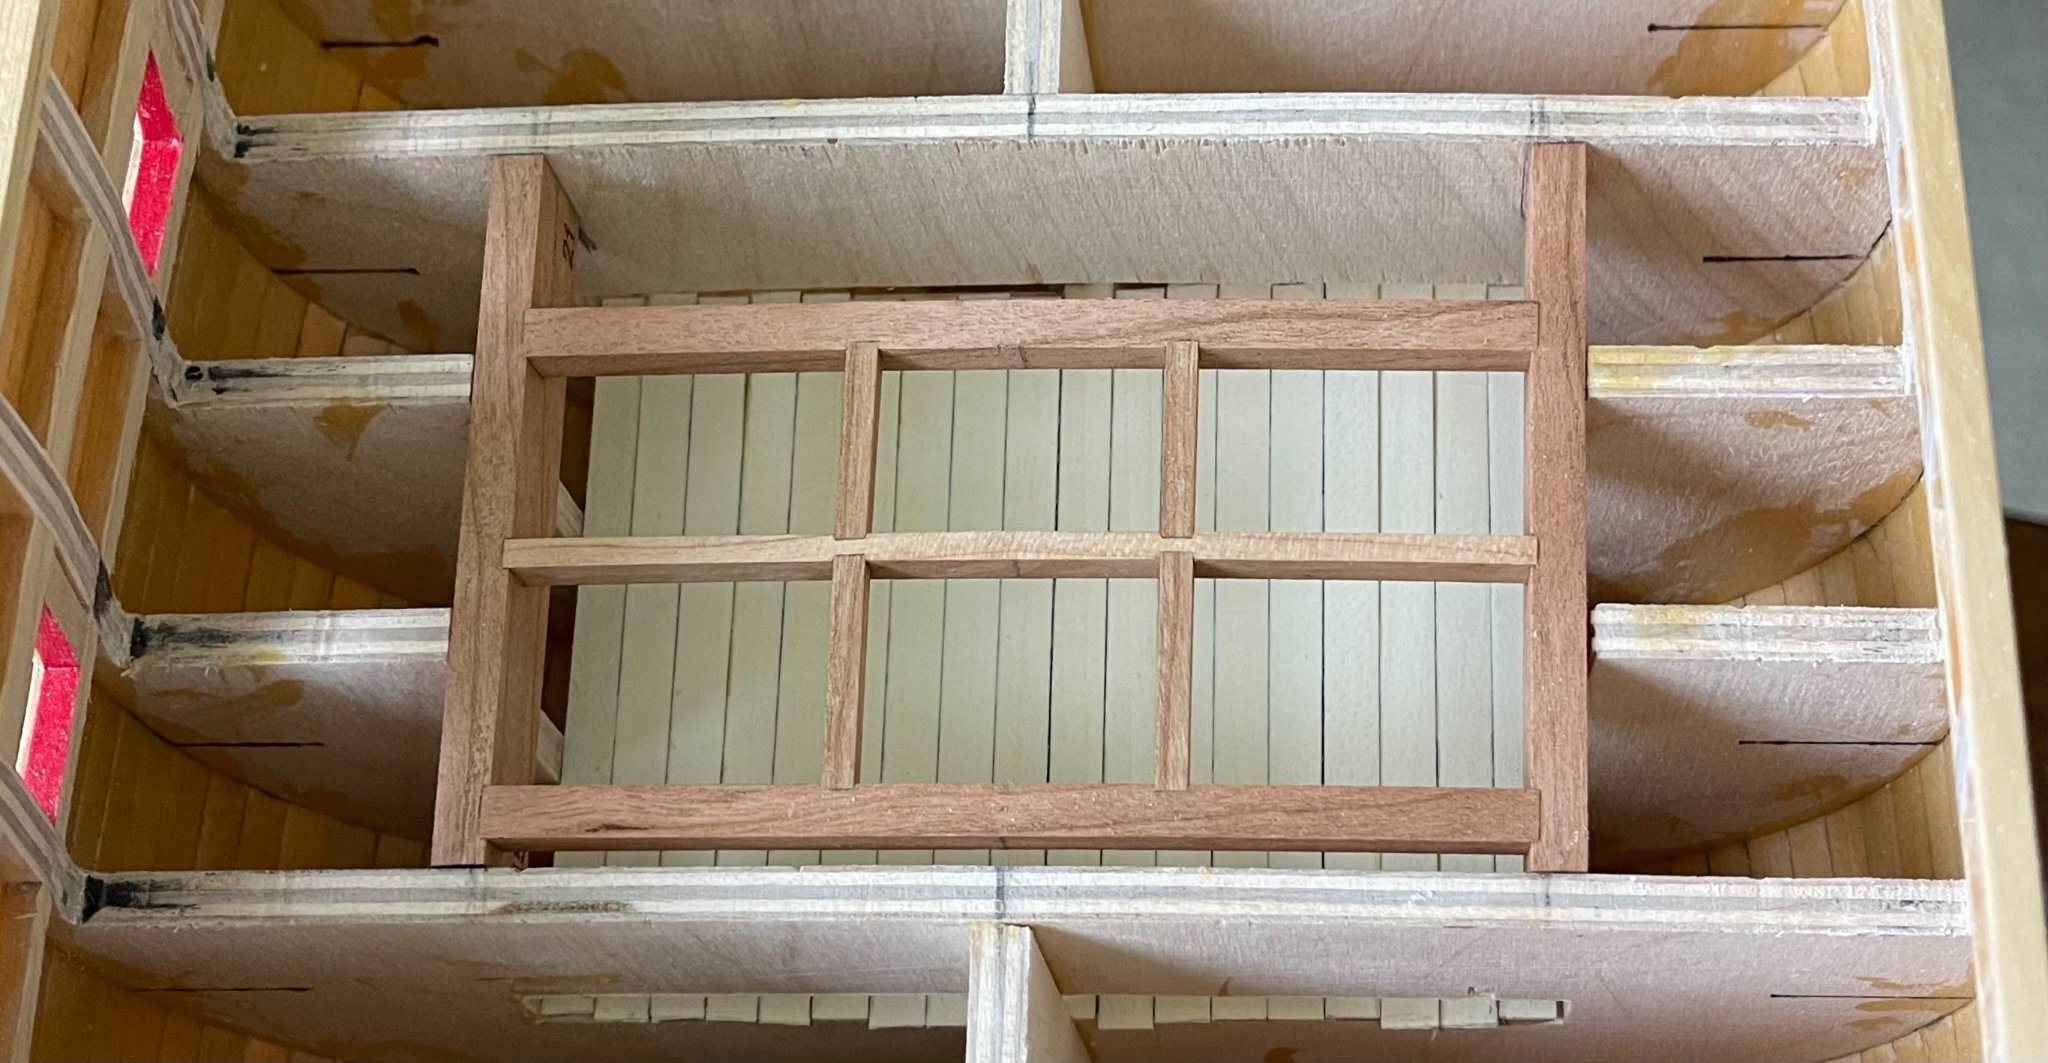
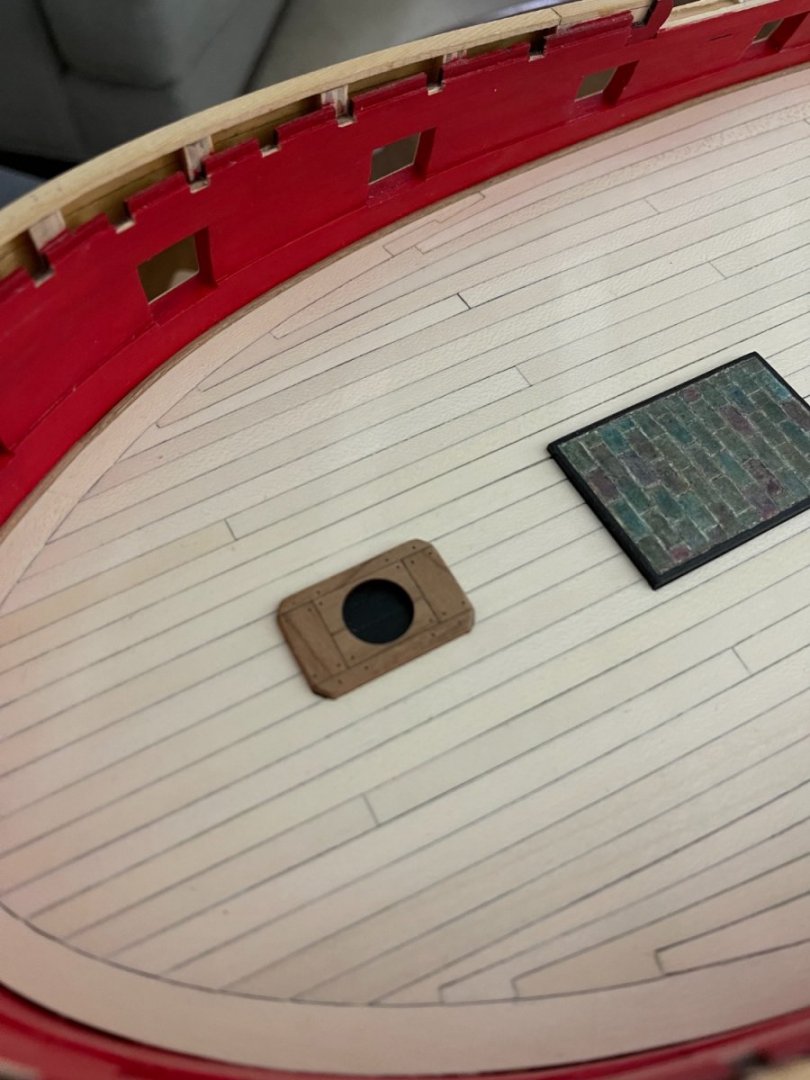
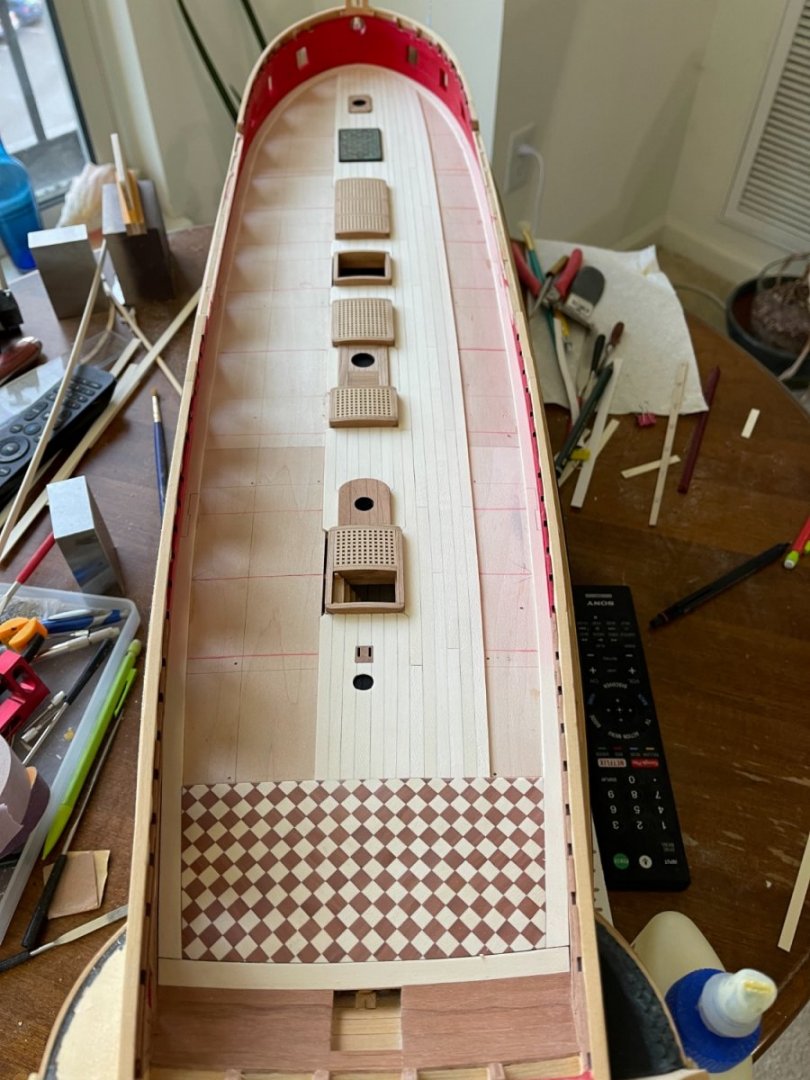
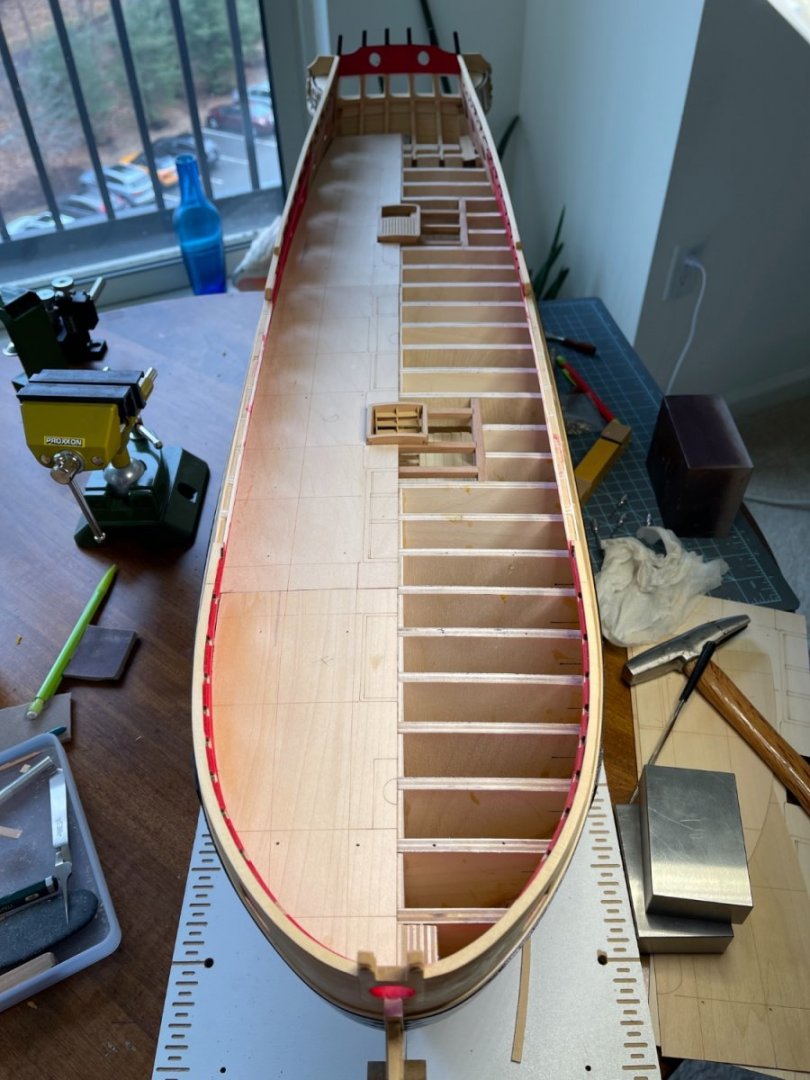
My progress on planking the deck. I am following the plans for placing the joints. Wood is holly. I painted black under the mast partners but also under the comings to increase contrast. Best, G


-
Thank you Rusty, I am following closely your post on your work with cherry wood. Looks great. G
-
In the instructions figures, that piece is added between step1 (3pieces) and step2 (4 pieces). G
-
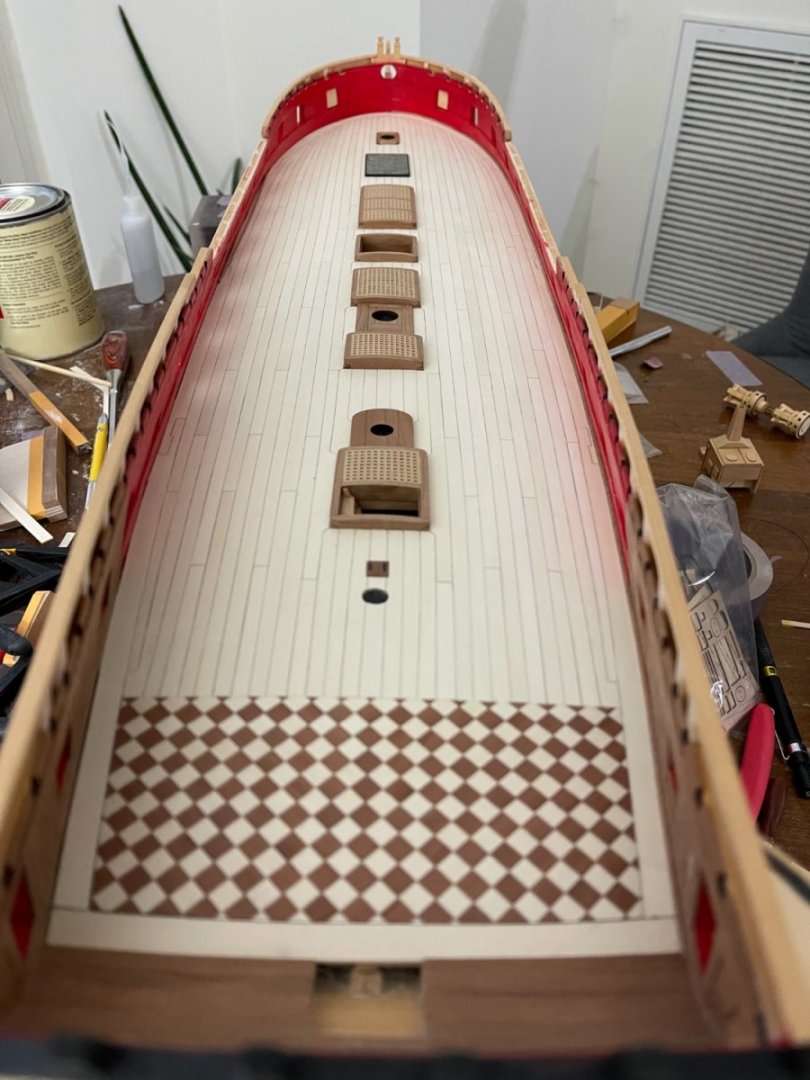
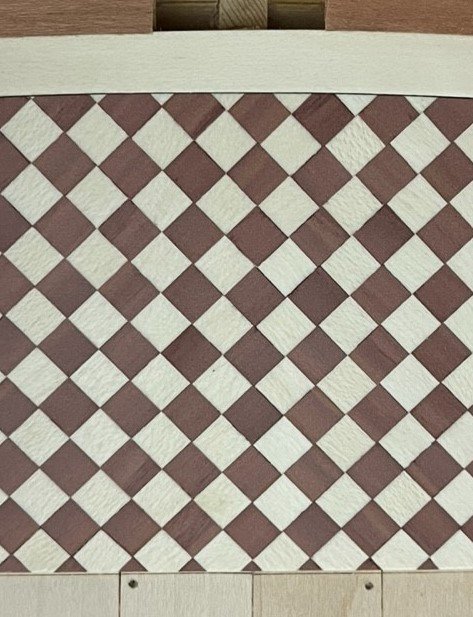
Thank you Vladimir and all for the likes. I finished the captain deck. I followed the method Chuck told us by gluing strips of wood first and cut them again ensuring the the cut is a perfect square. I made a template and glued the strips in a "V" pattern to keep the squares aligned. I use holly and red cedar. Next deck planking. Best, G

.jpg.aafc2ed32ce90d093a21655e0942e5f3.jpg)
-
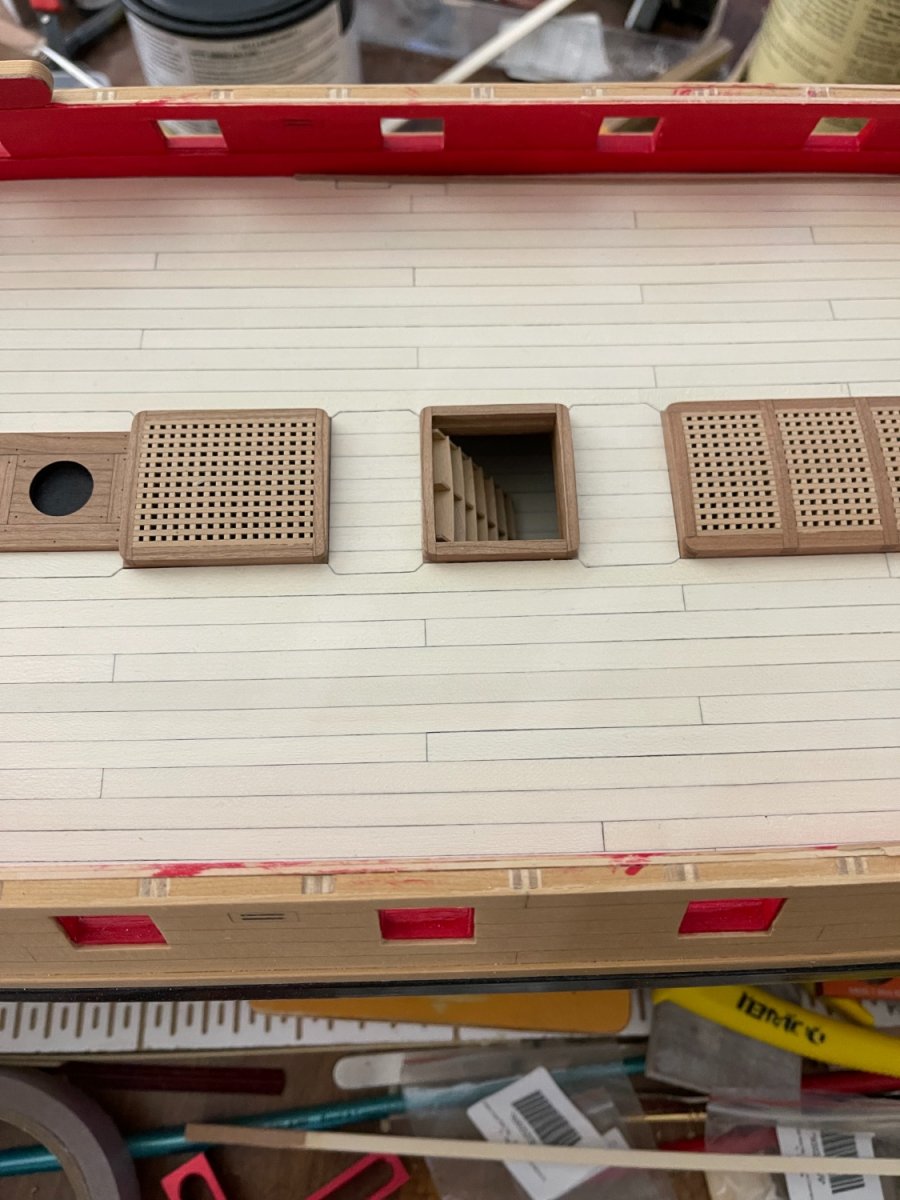
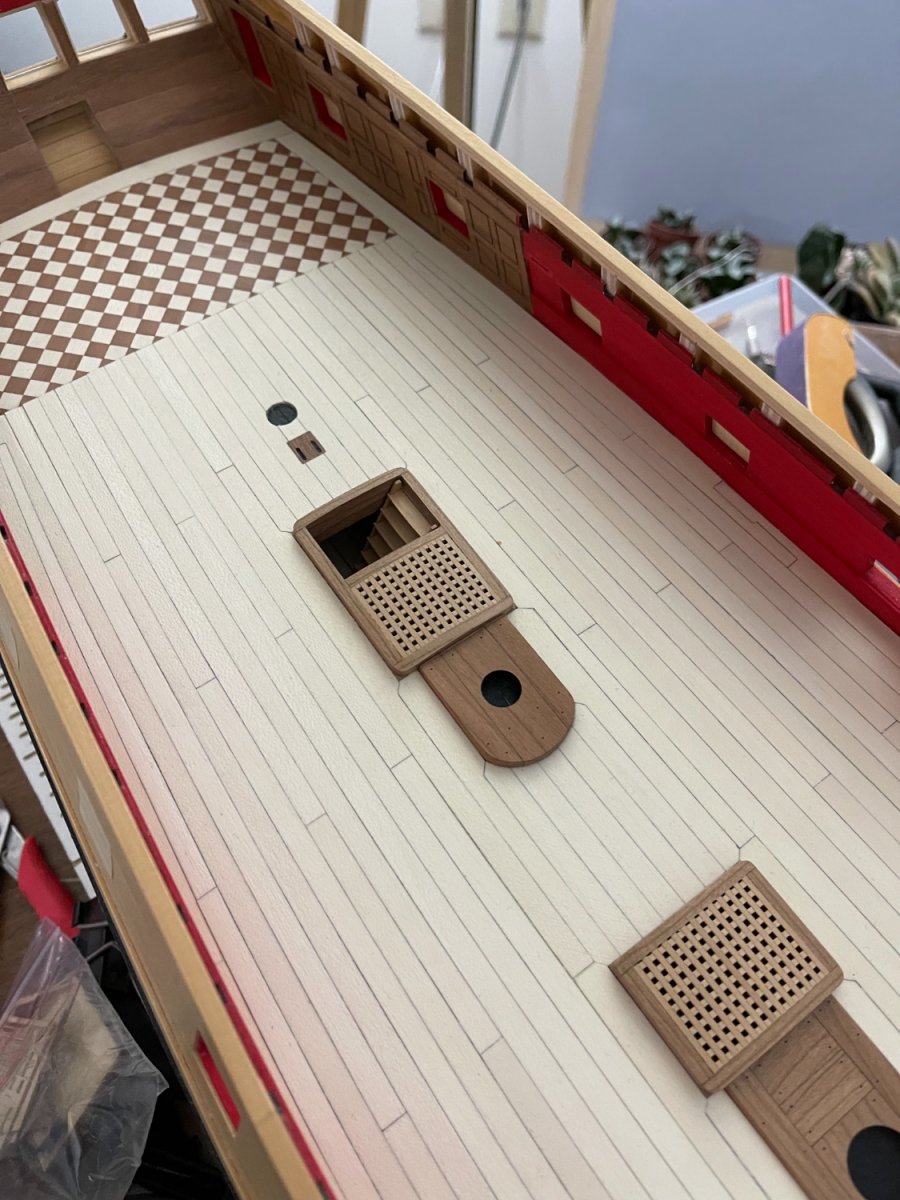
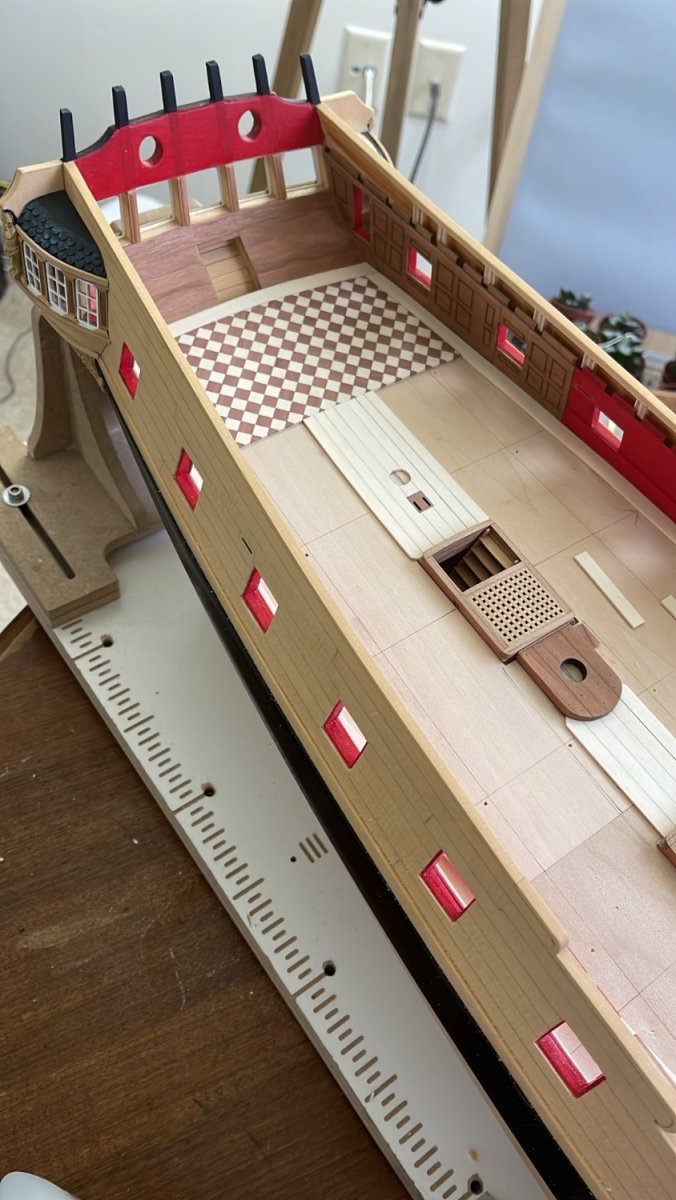
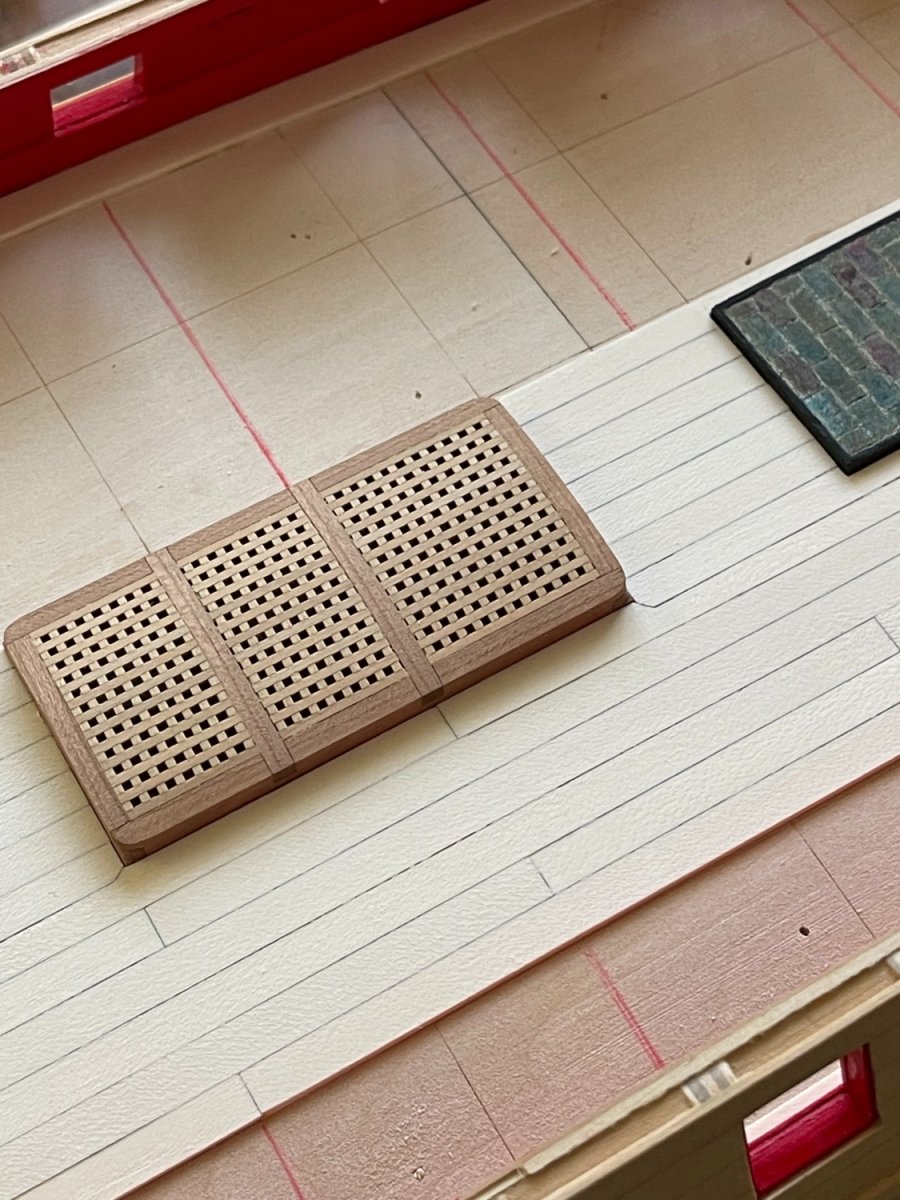
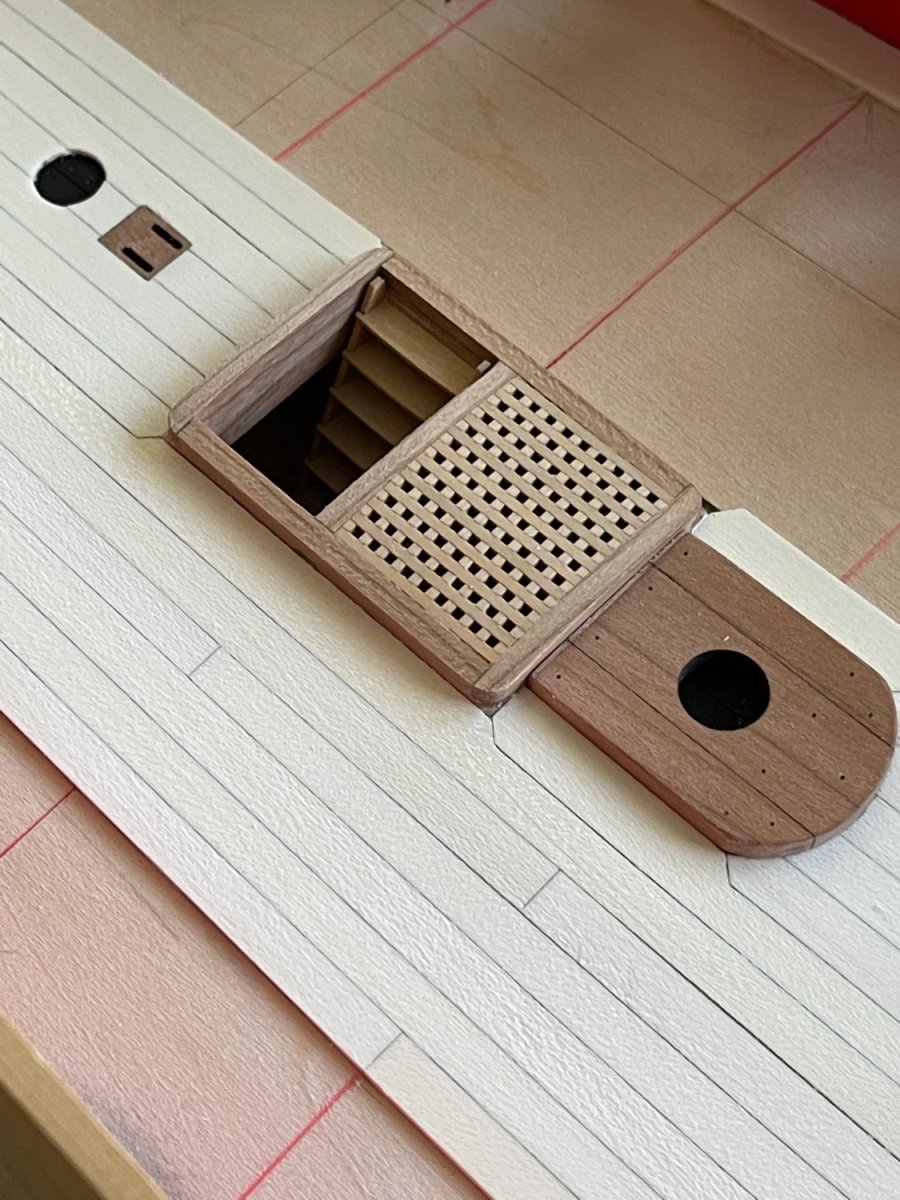
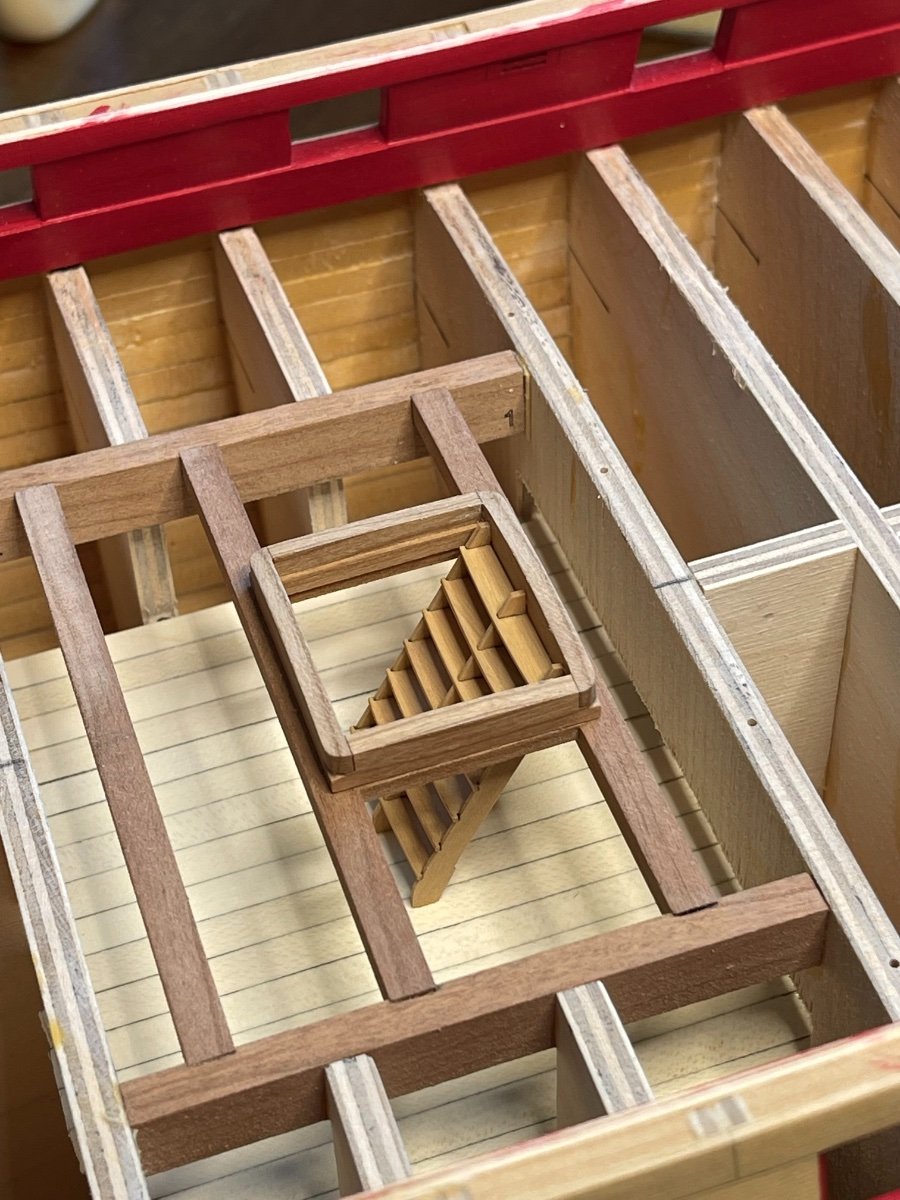
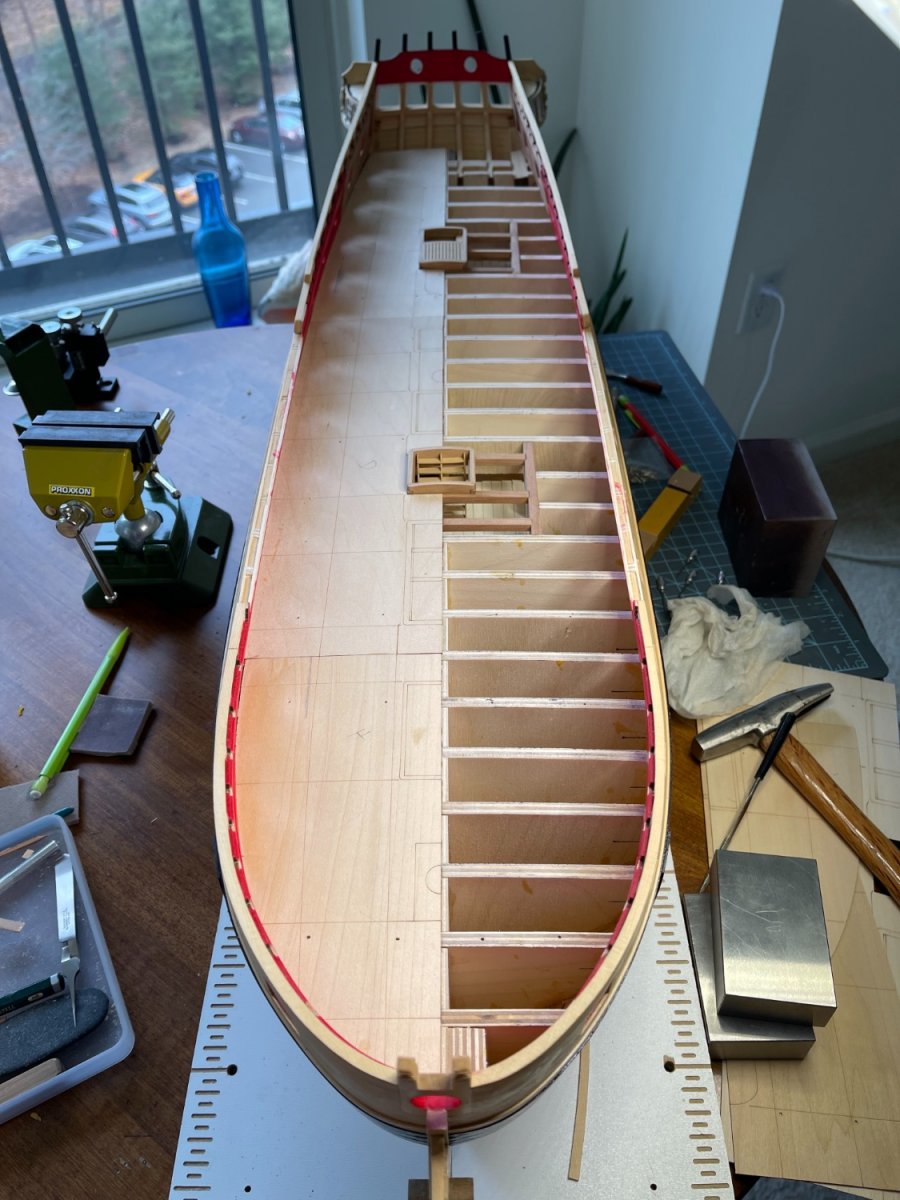
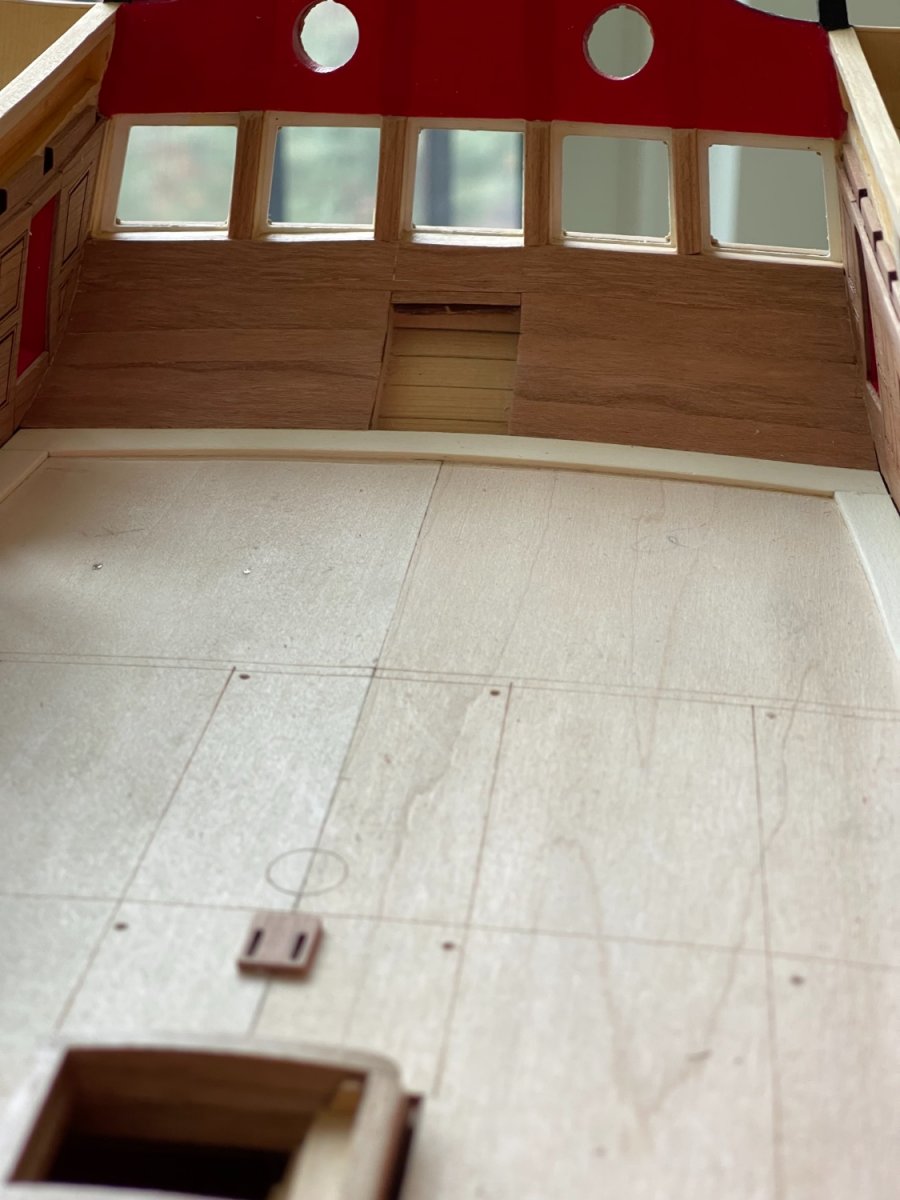
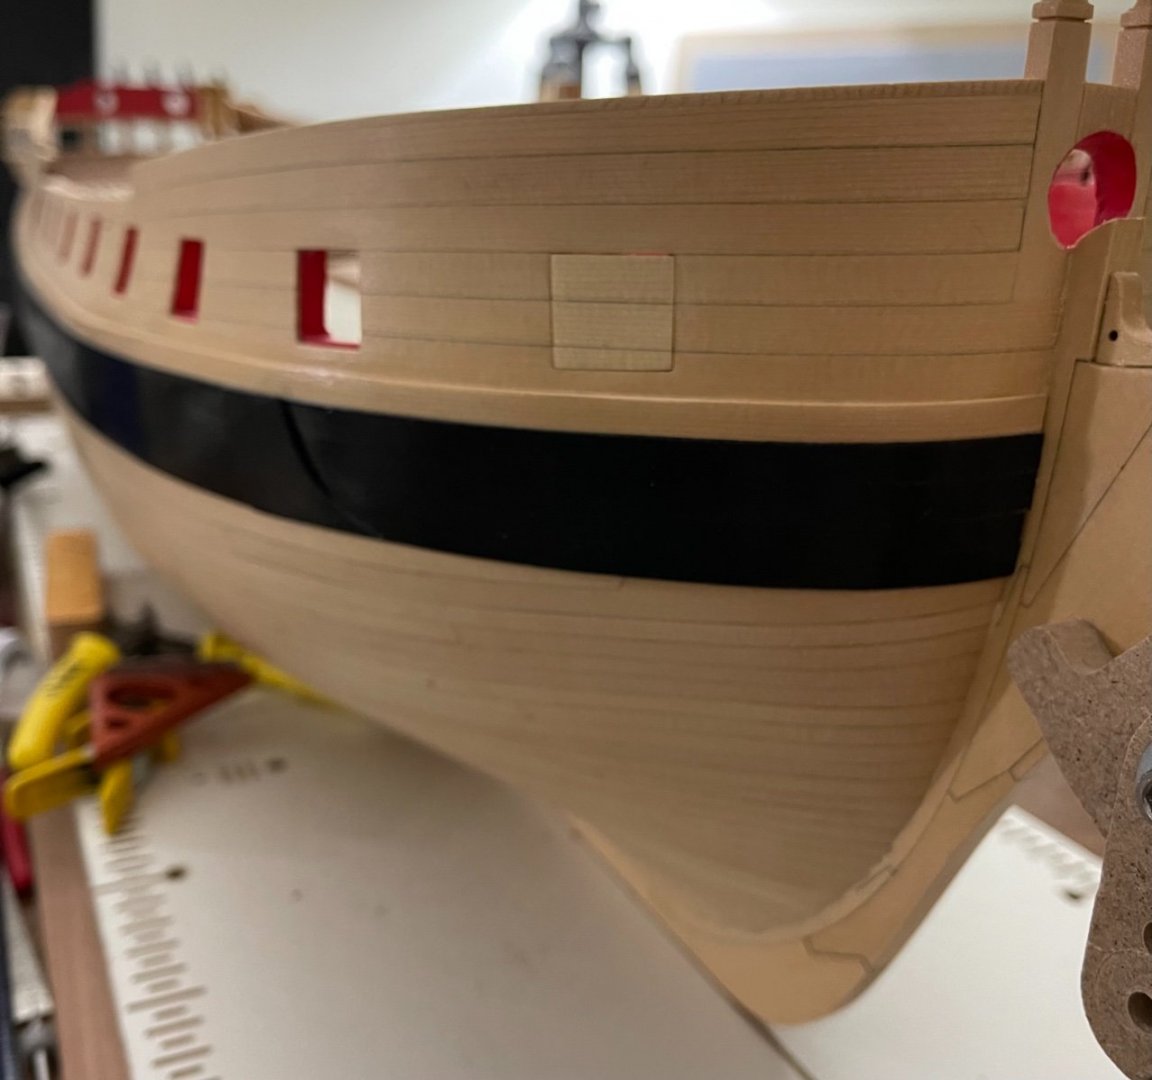
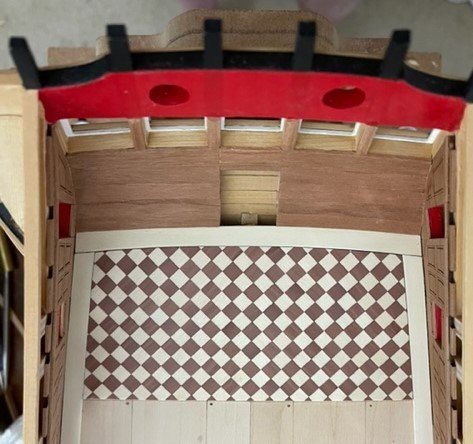
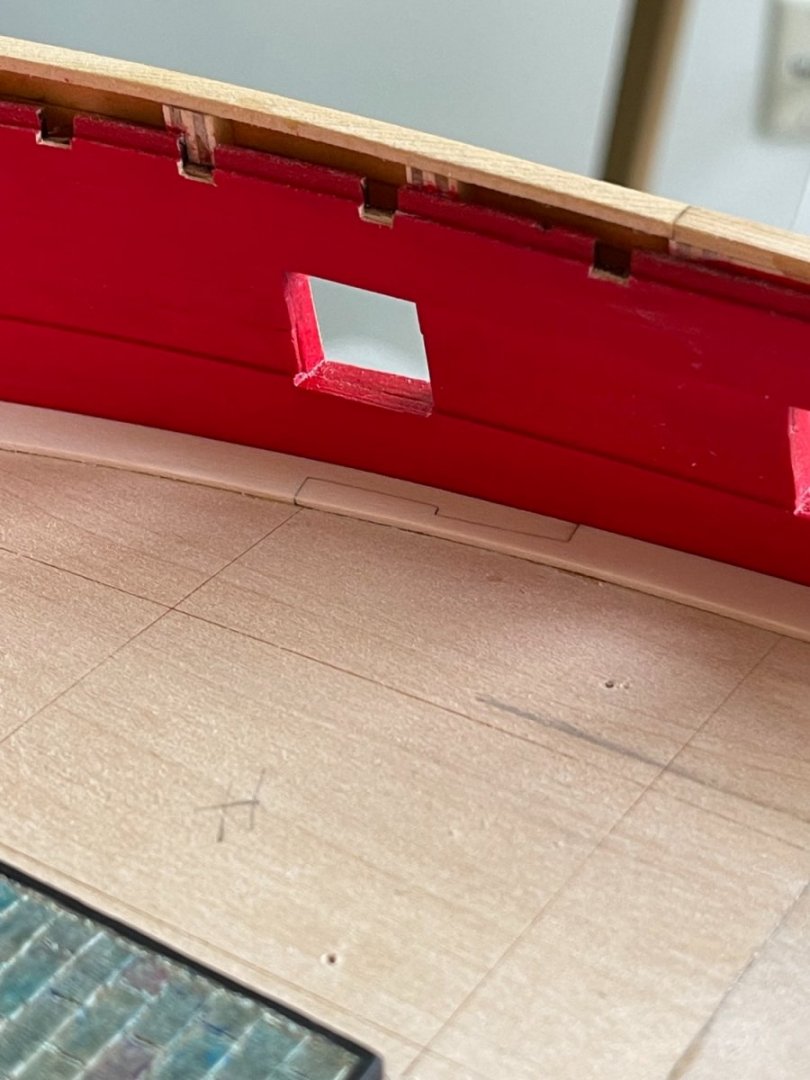
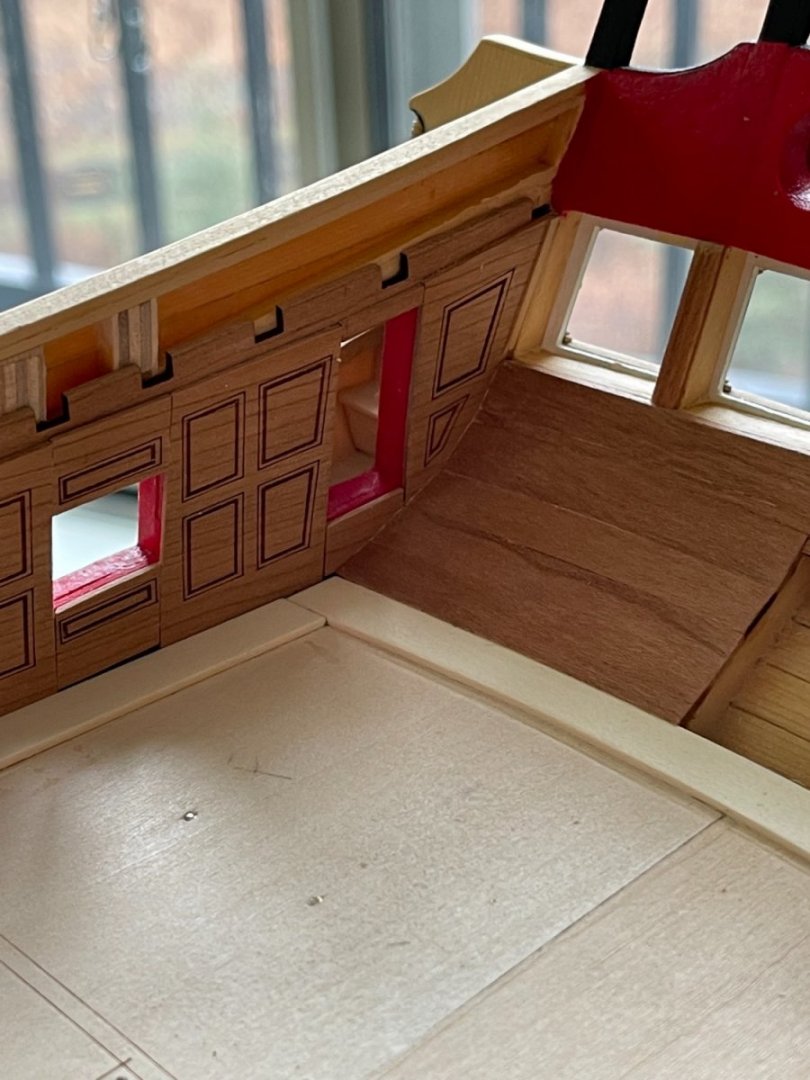
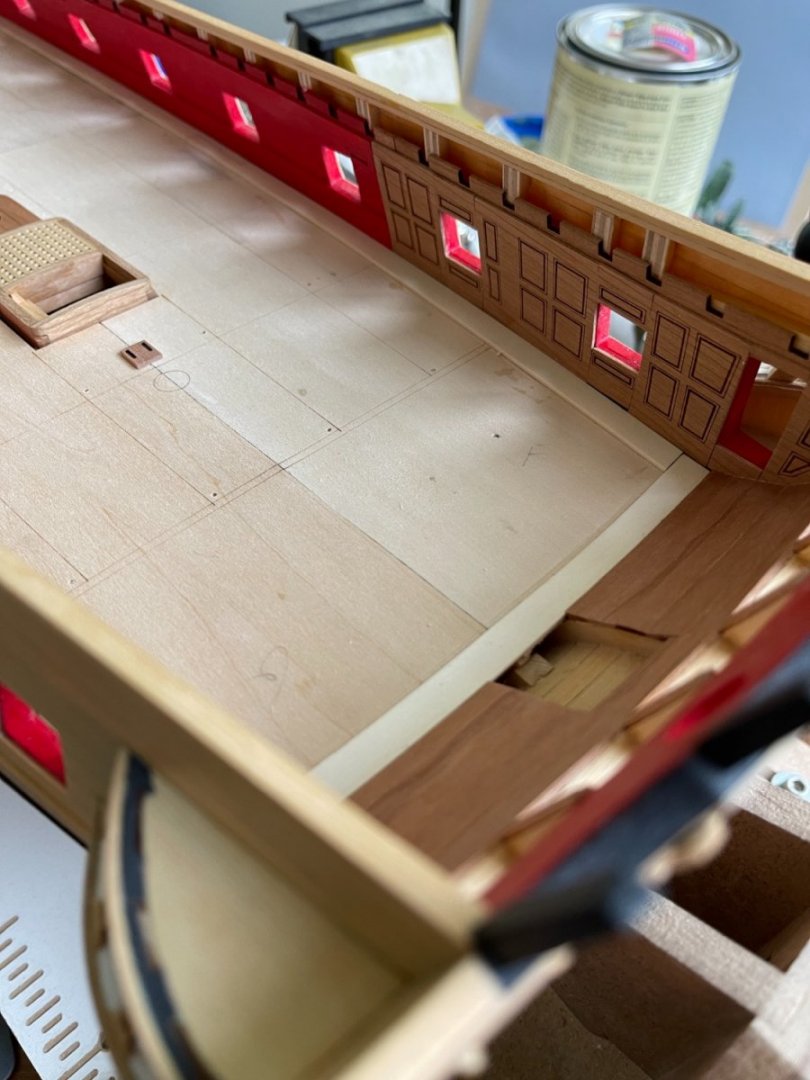
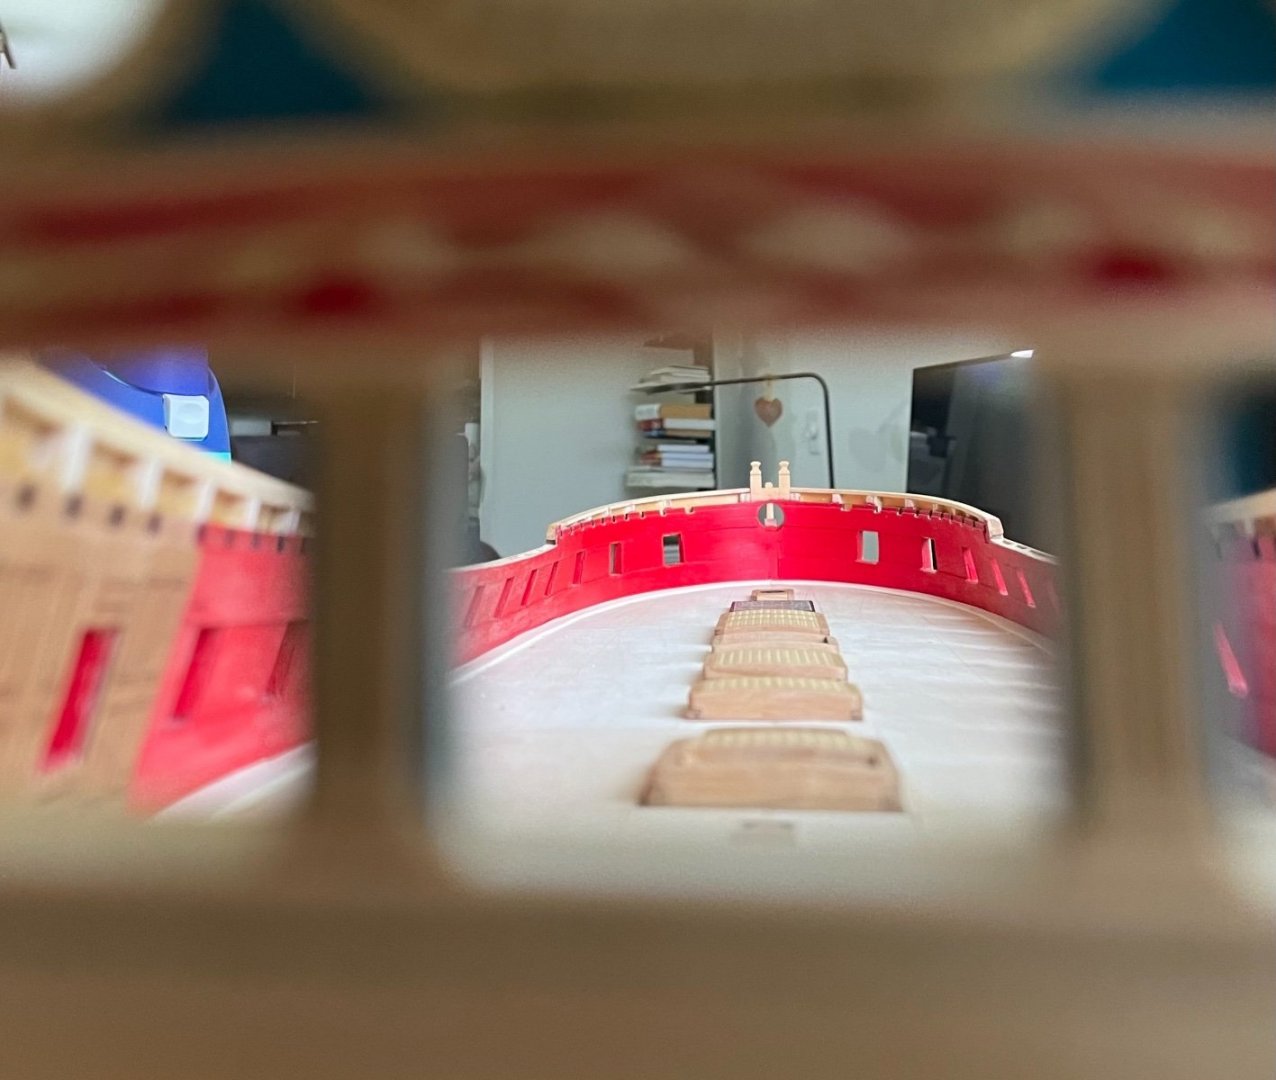
N Thank you JJ, My plan is to use wood for color. Thank you all for the likes. During the Holliday break I completed planking the bulwarks, added the spirketting, clamps, and the panels for te cabin. Before adding the false deck, I finished and placed the ladders. I used cherry for the counter planks, coamings, mast and capstan partners. The base plate for the stove was painted to simulate slate/blue-stone. The stone color was selected to add some of the green color of the freezes in the deck. After painting the bulwark red, I added the margin plank. I used holly and follow the plans for the scarf joins. Next, I will plank the deck with holly. The freezes will be completed after that. Best, G


-
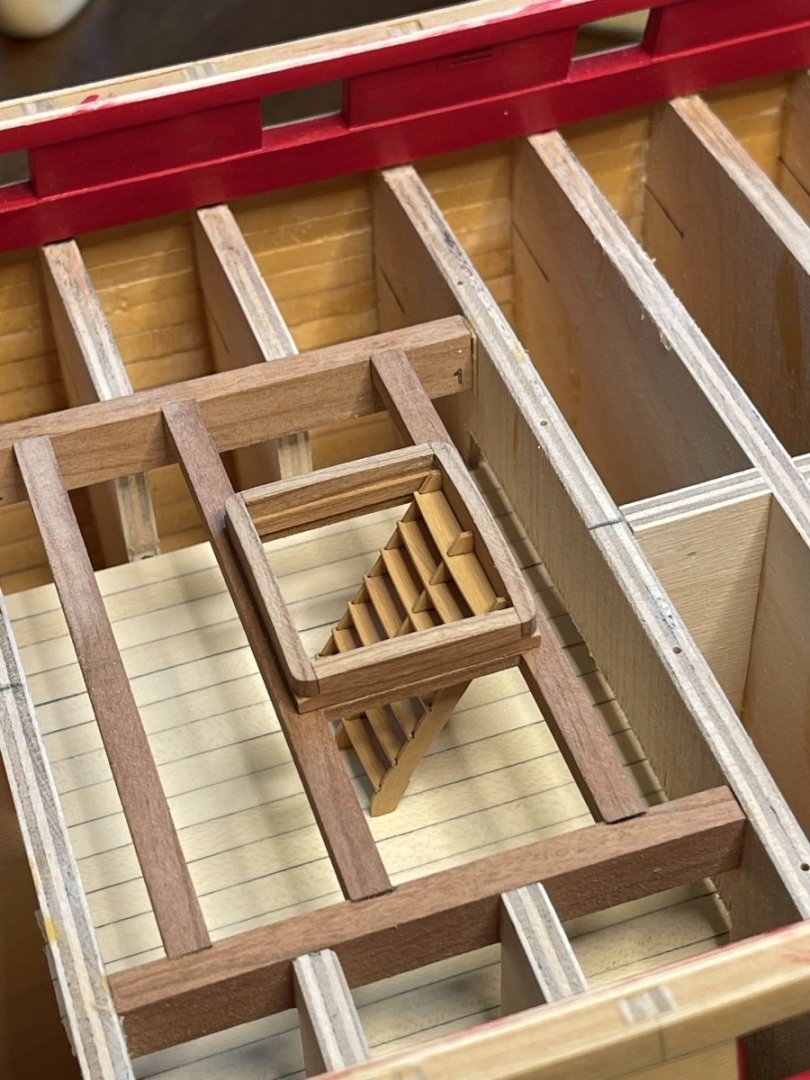
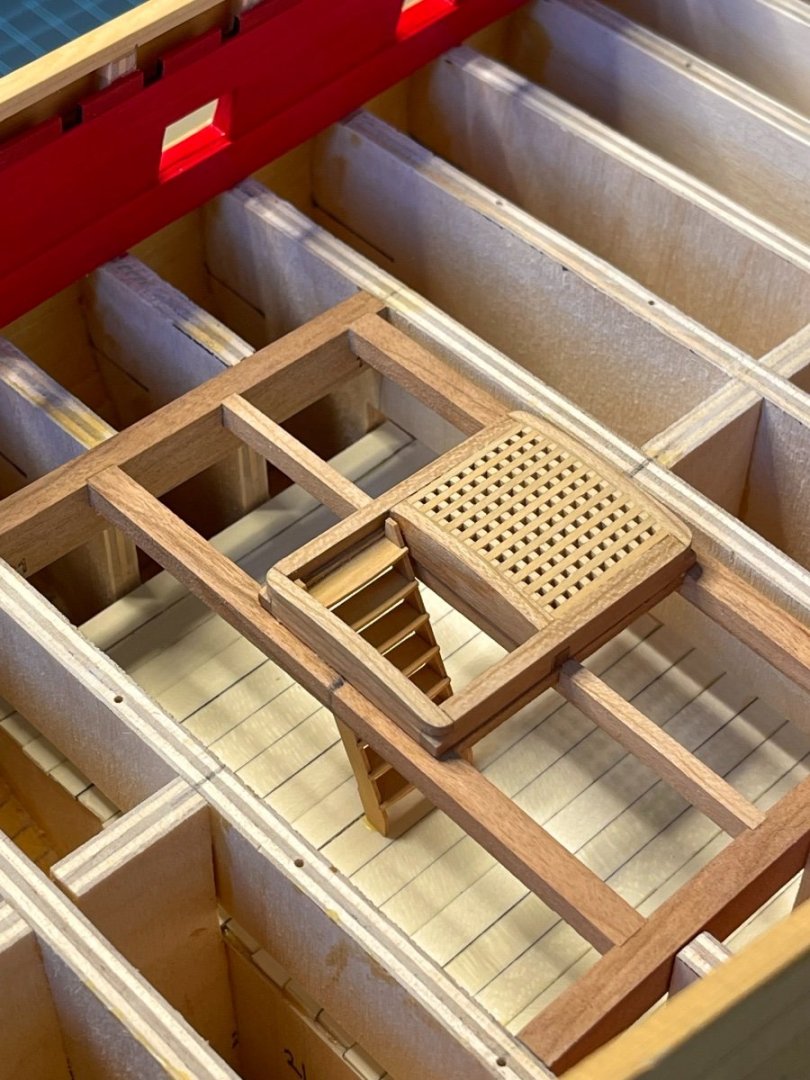
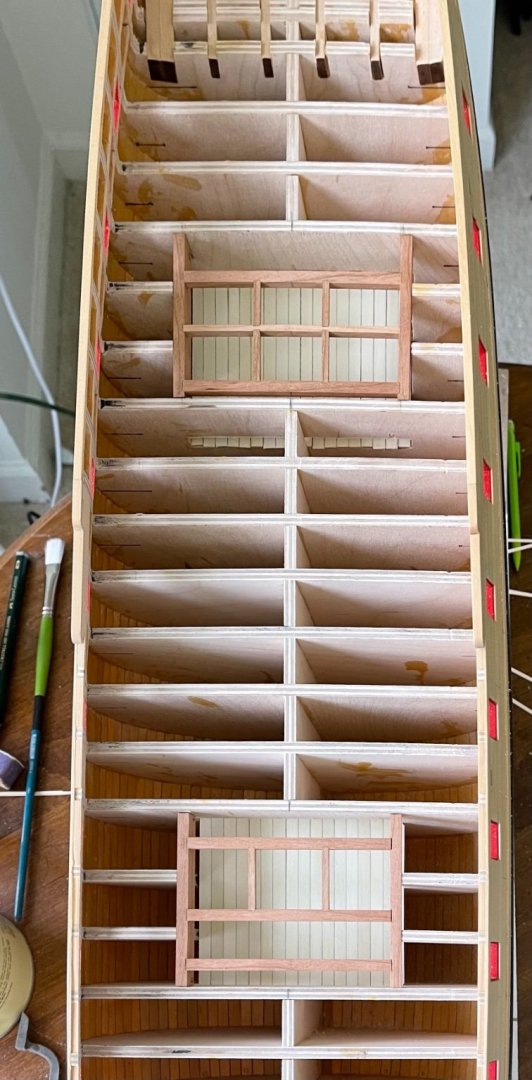
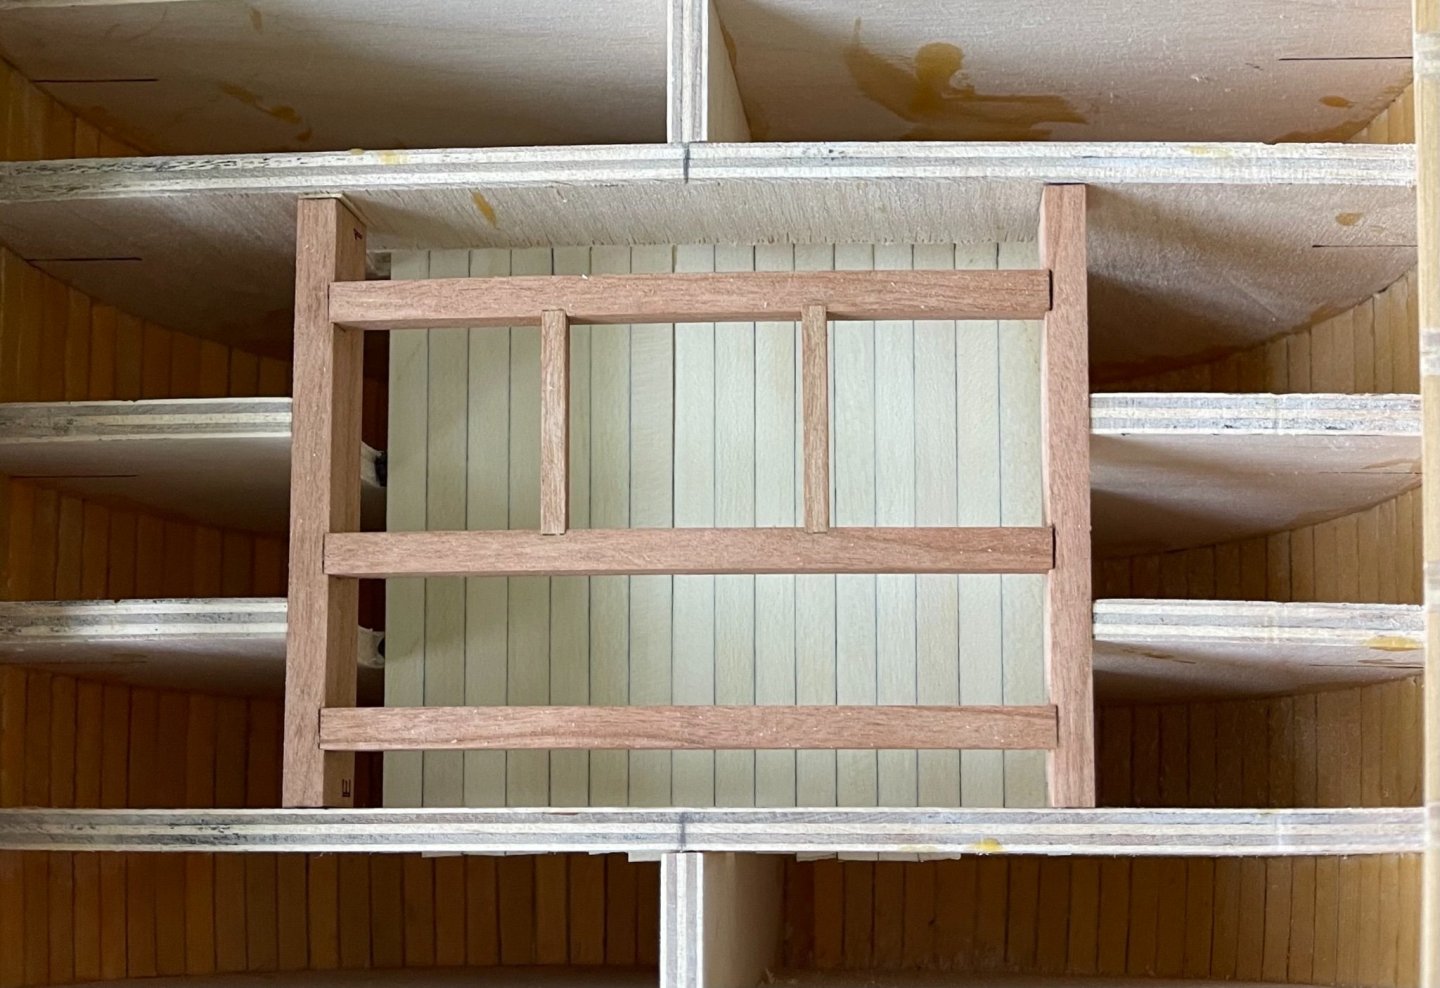
Thank you all for the likes, I decided to build inboard to give strength to all structures before completing the moldings and freezes. It will also give me more time to customize the freezes. I am intentionally mix and matching sedar and sherry wood kits from Chuck's chapter wood installments. The deck planks are holly. I build the sherry parts out of the model to ensure they were squared and placed back into the ship (they are not glued yet). Next, I will add the false deck. Best, G

-
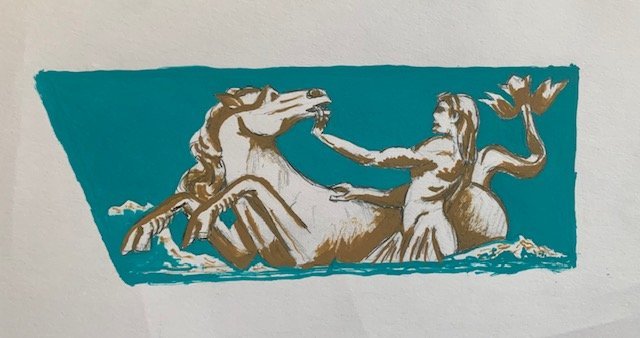
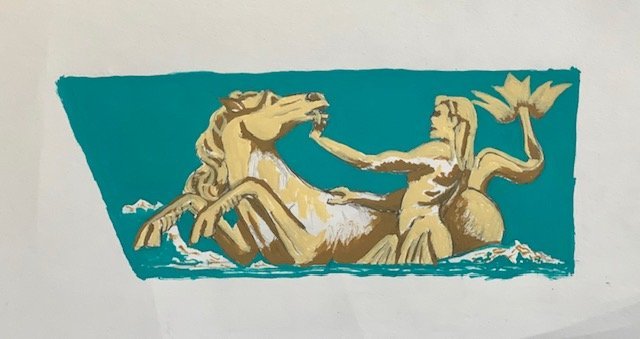
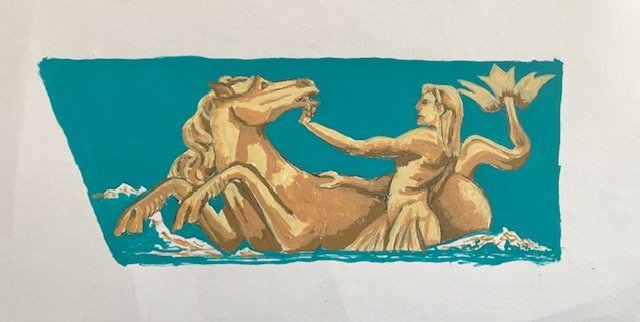
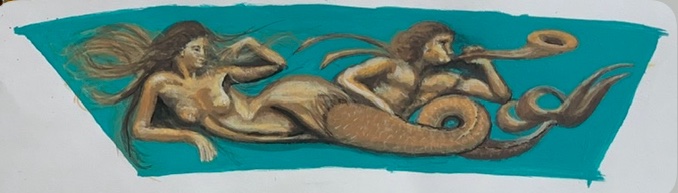
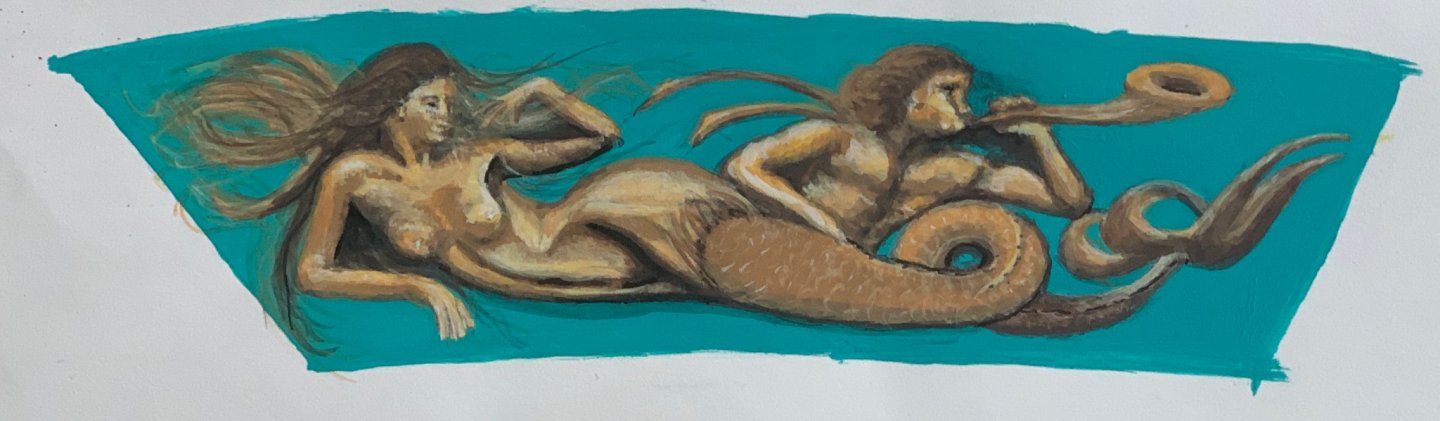
My drawing inspired by the fontana di trevi. Turquoise blue background 1st color 2nd color 3rd color Adding black Two mirror images of this will go next to the ship name. WINCHELSEA Best, G

.jpg.752a85ce3e999324606260baf81a7a5a.jpg)
2.jpg.37186ad2928953a8c8bb34e1f96bd259.jpg)
2.jpg.50ac0496330ebe2035ba8a8b9d50e039.jpg)
-
Thank you so much Chuck. I am glad I did justice to your creation. I probably spent 14 hours total over 5 days; steady work, no rush. It was reassuring to know, it has been accomplished before. Thank you again, G
-
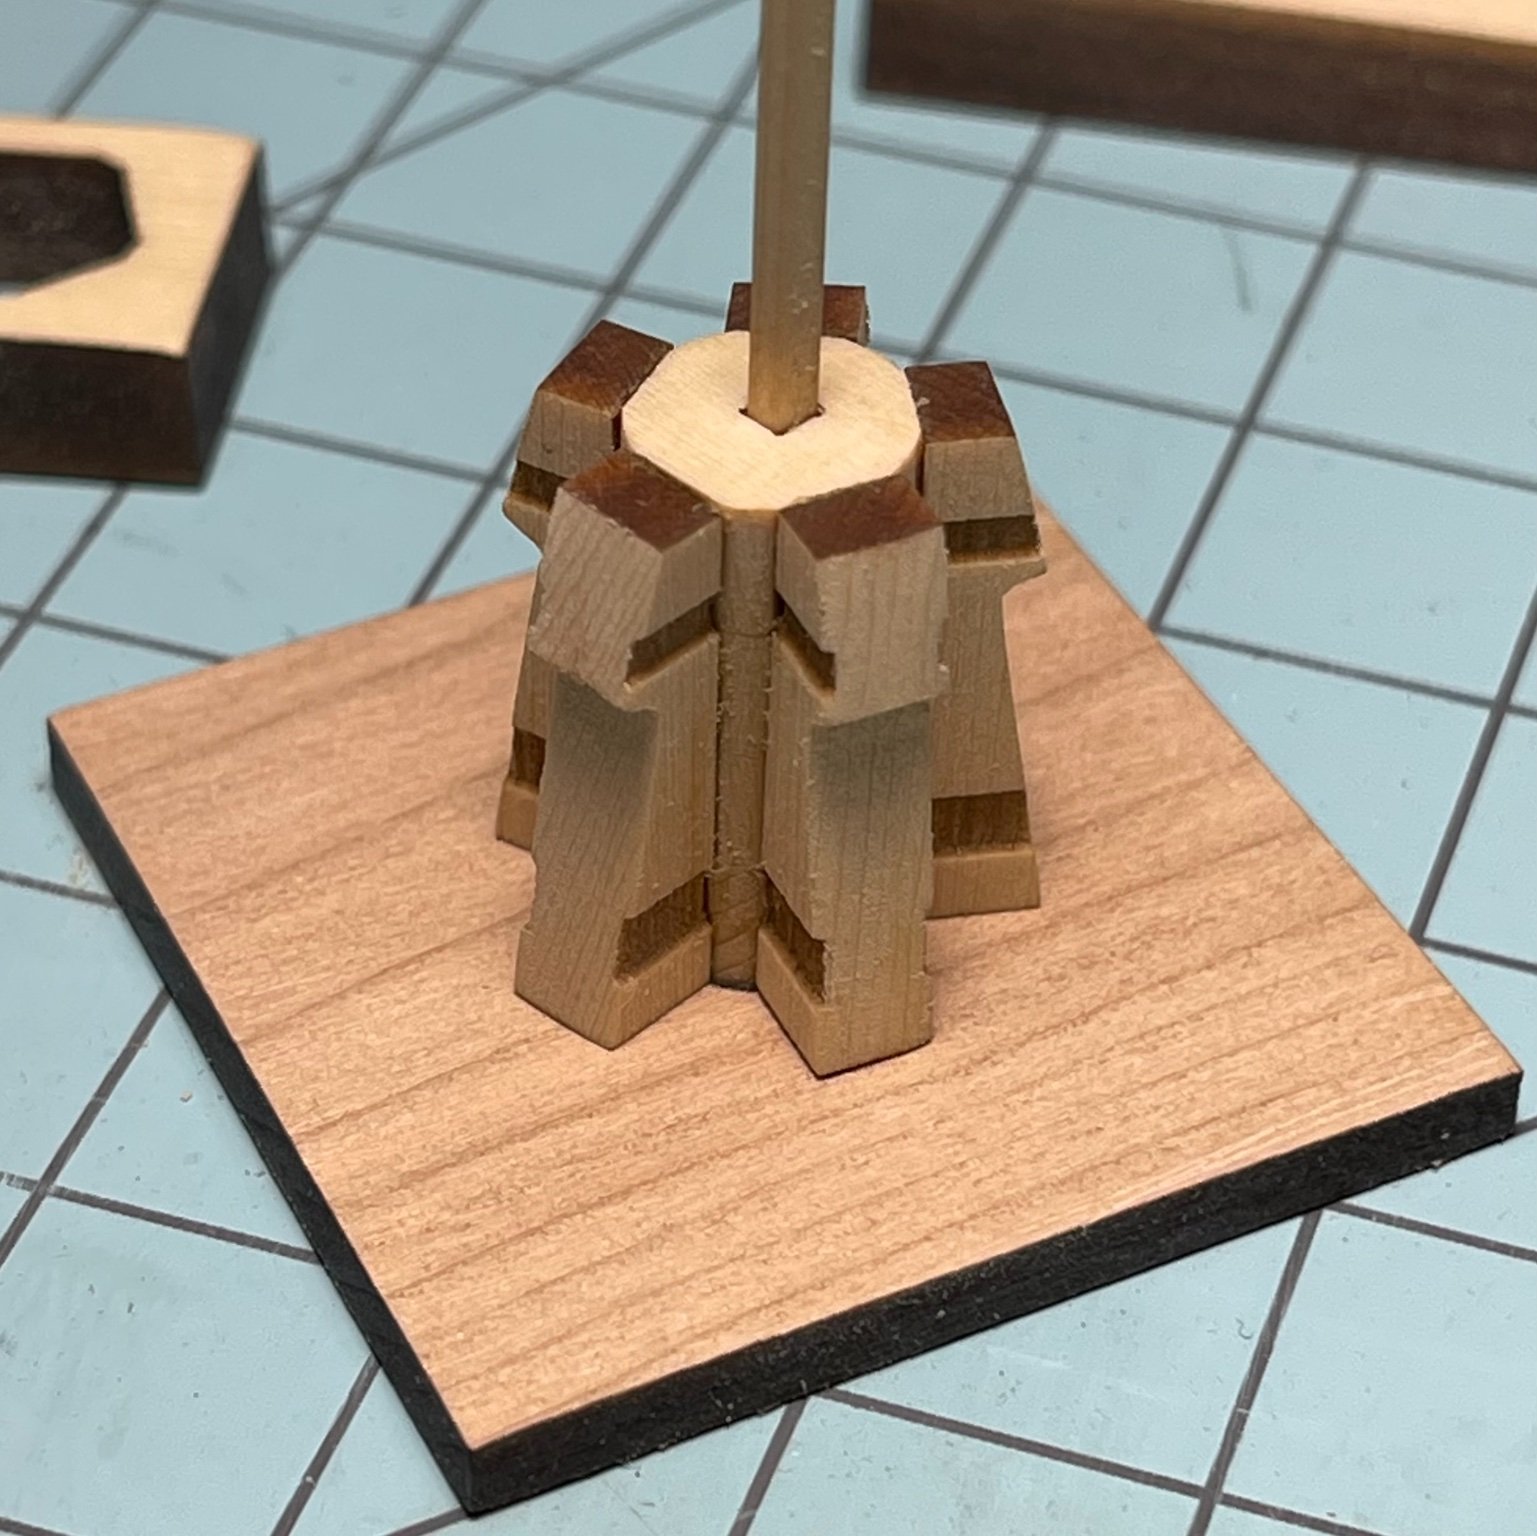
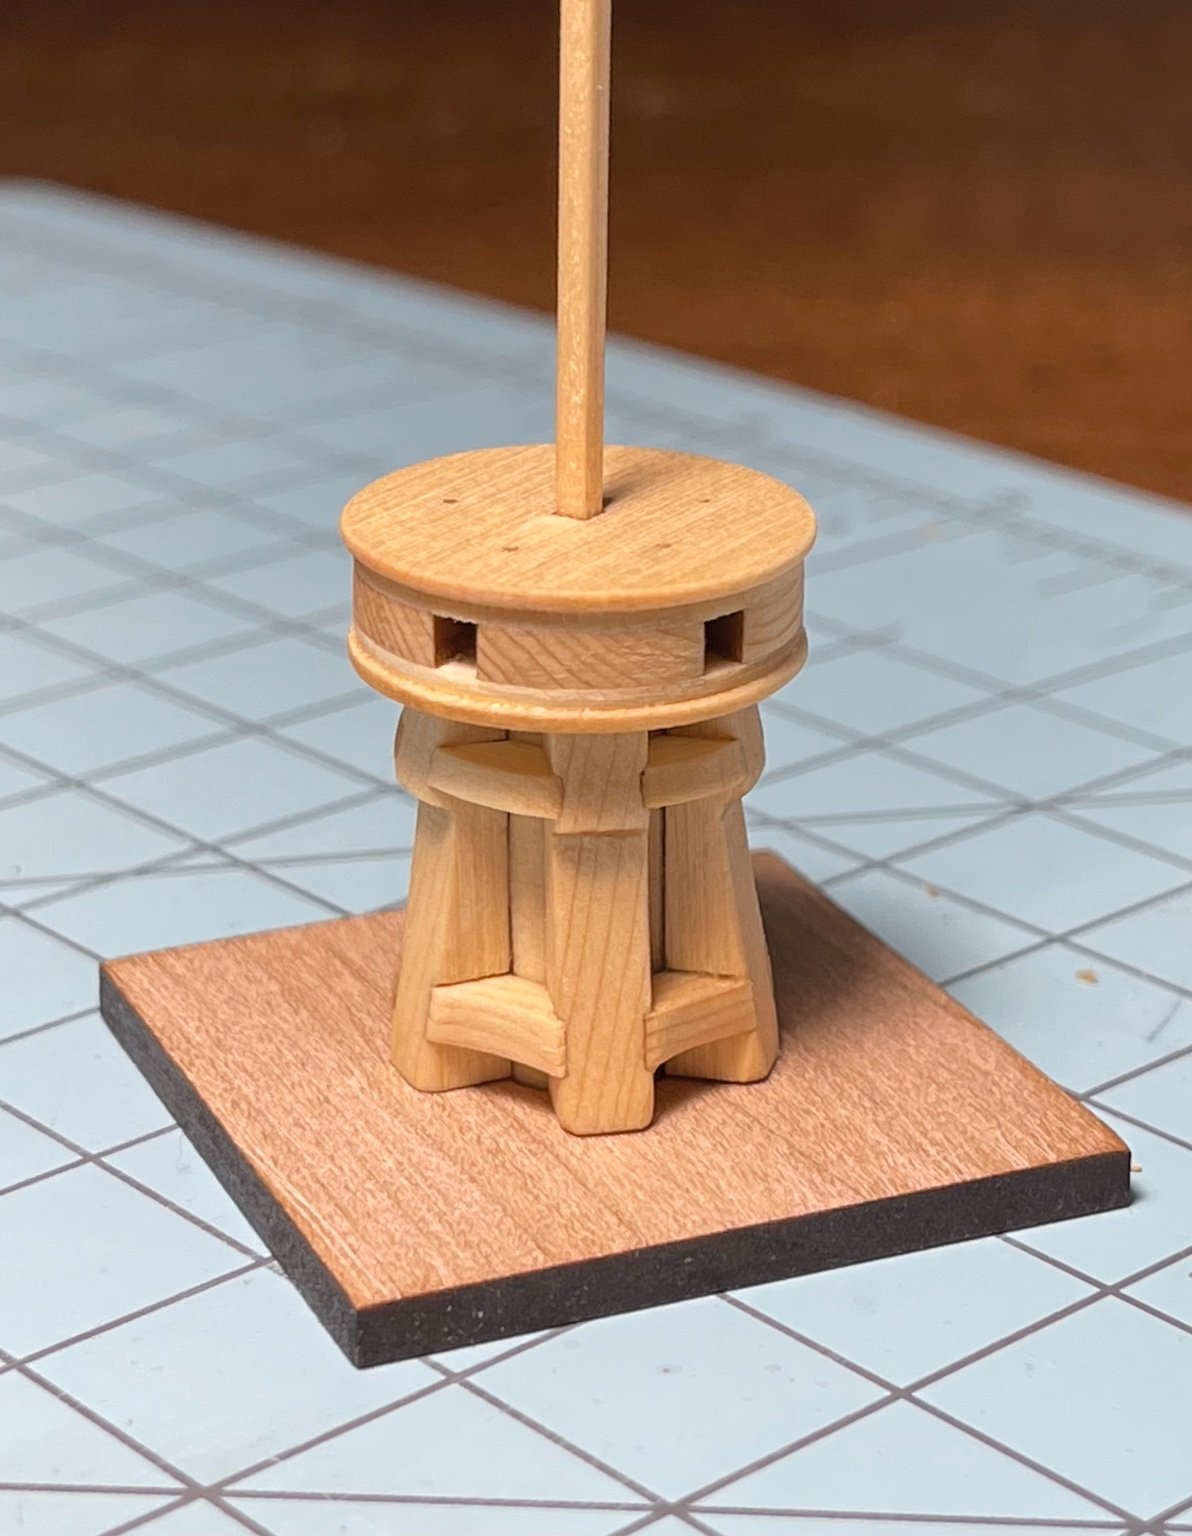
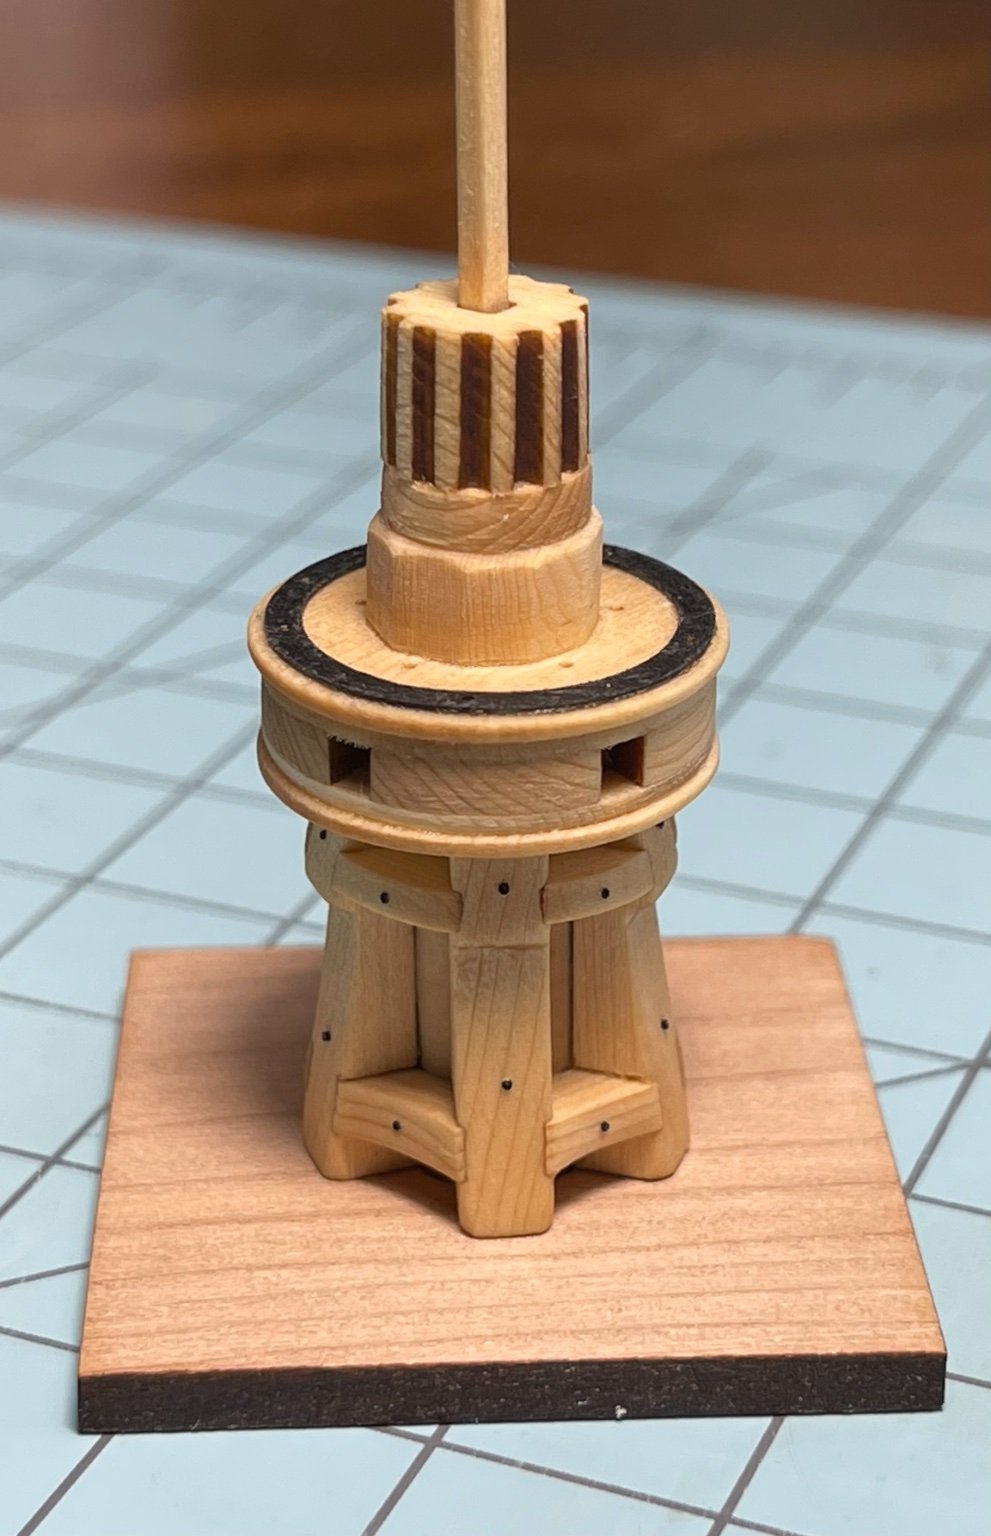
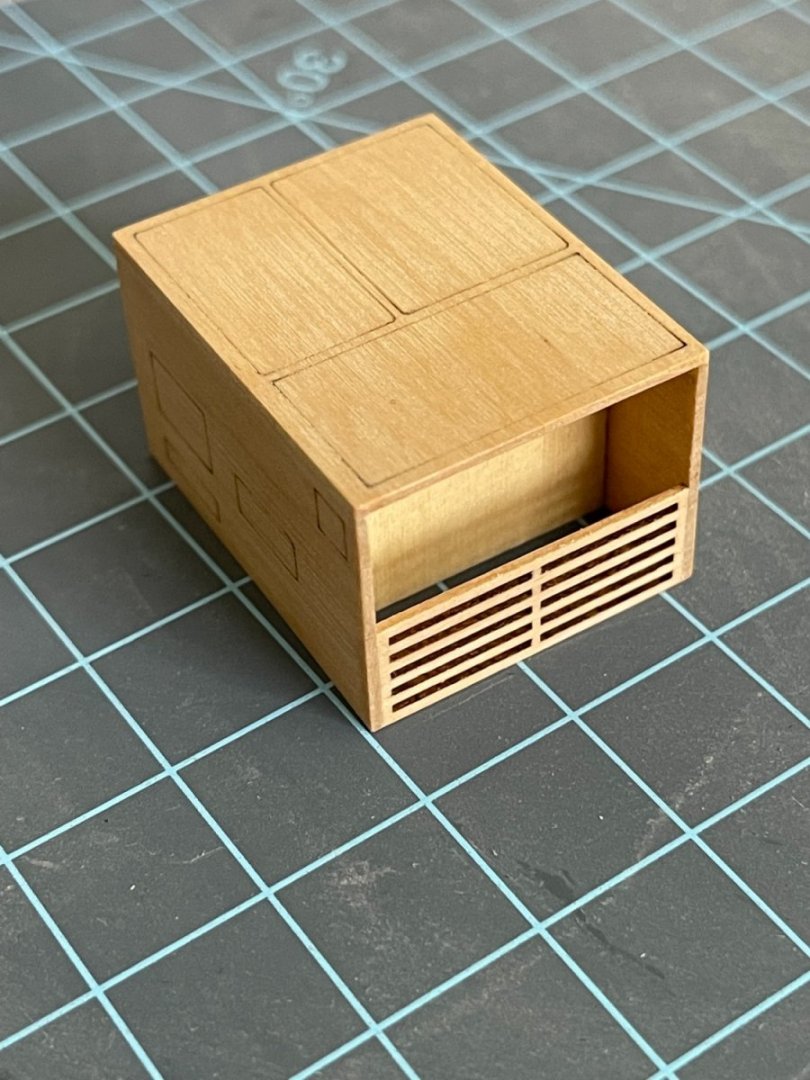
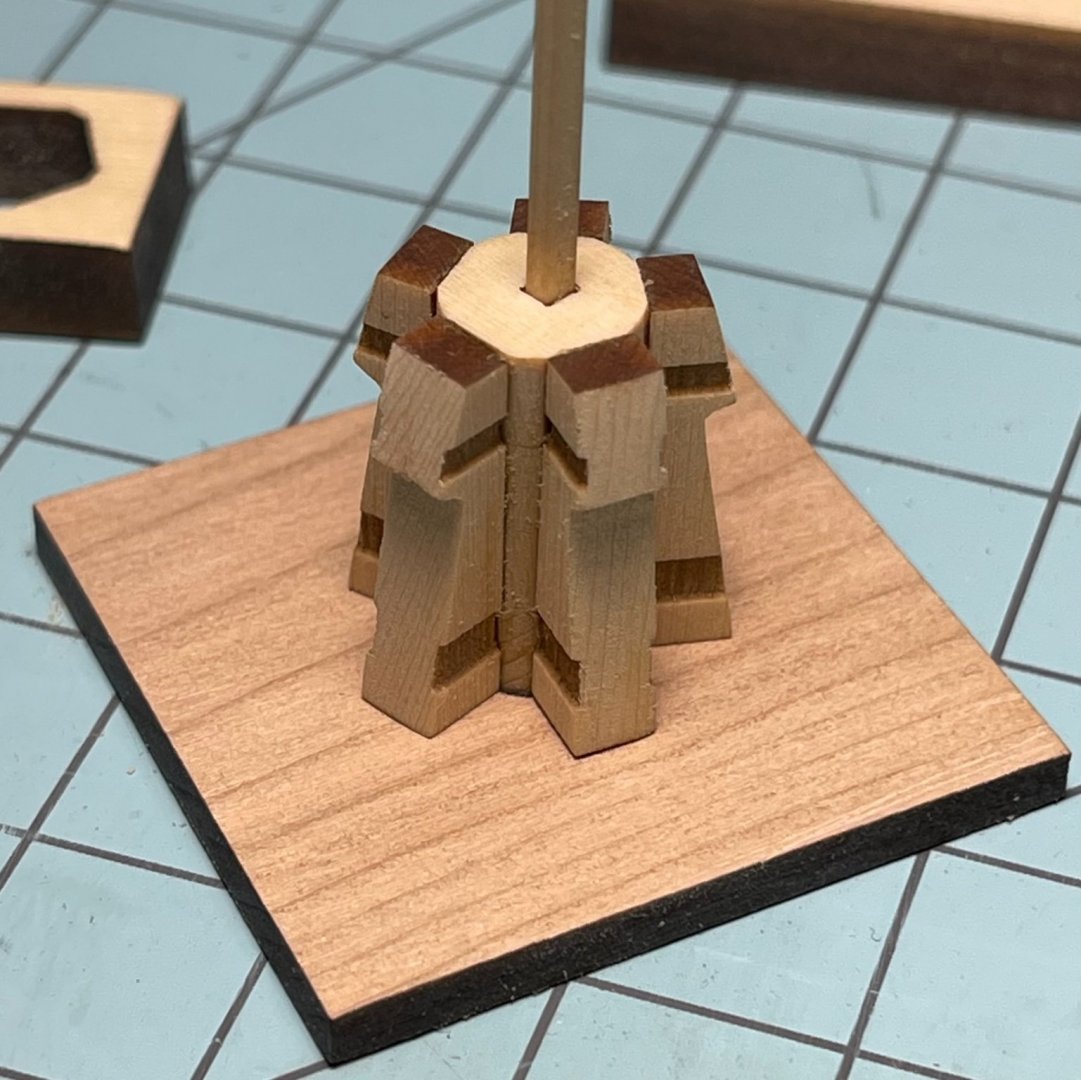
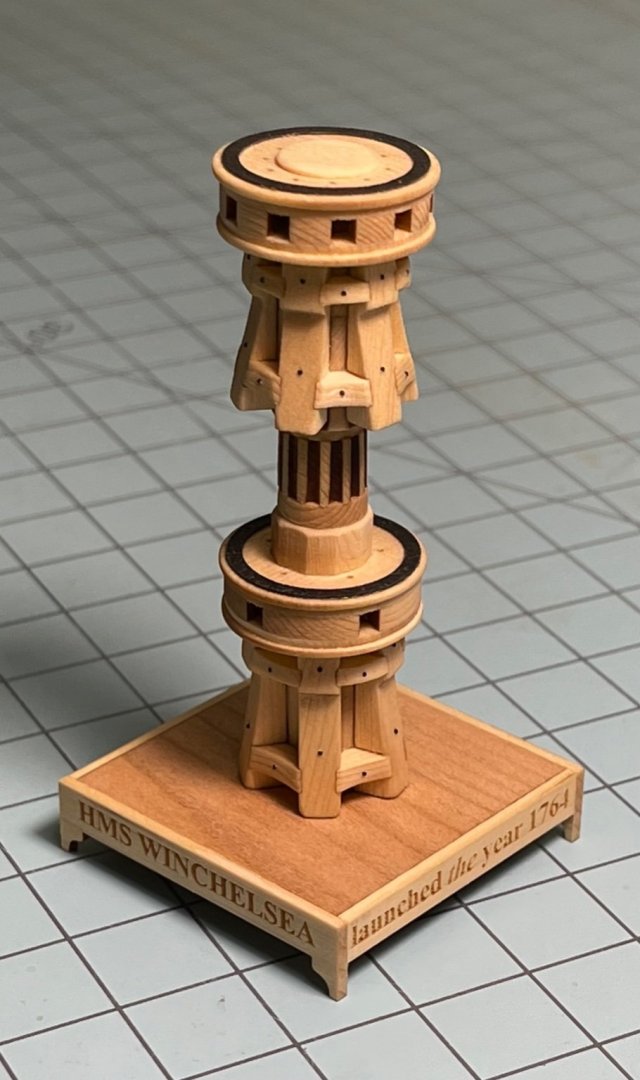
After a long pause, I decided to build the capstan to get back on the horse. it was a lot of fun. Thank you Chuck for the extra pieces. I gave it a finish with water based wood conditioner. I will go back to the model now that i got some practice. G


-
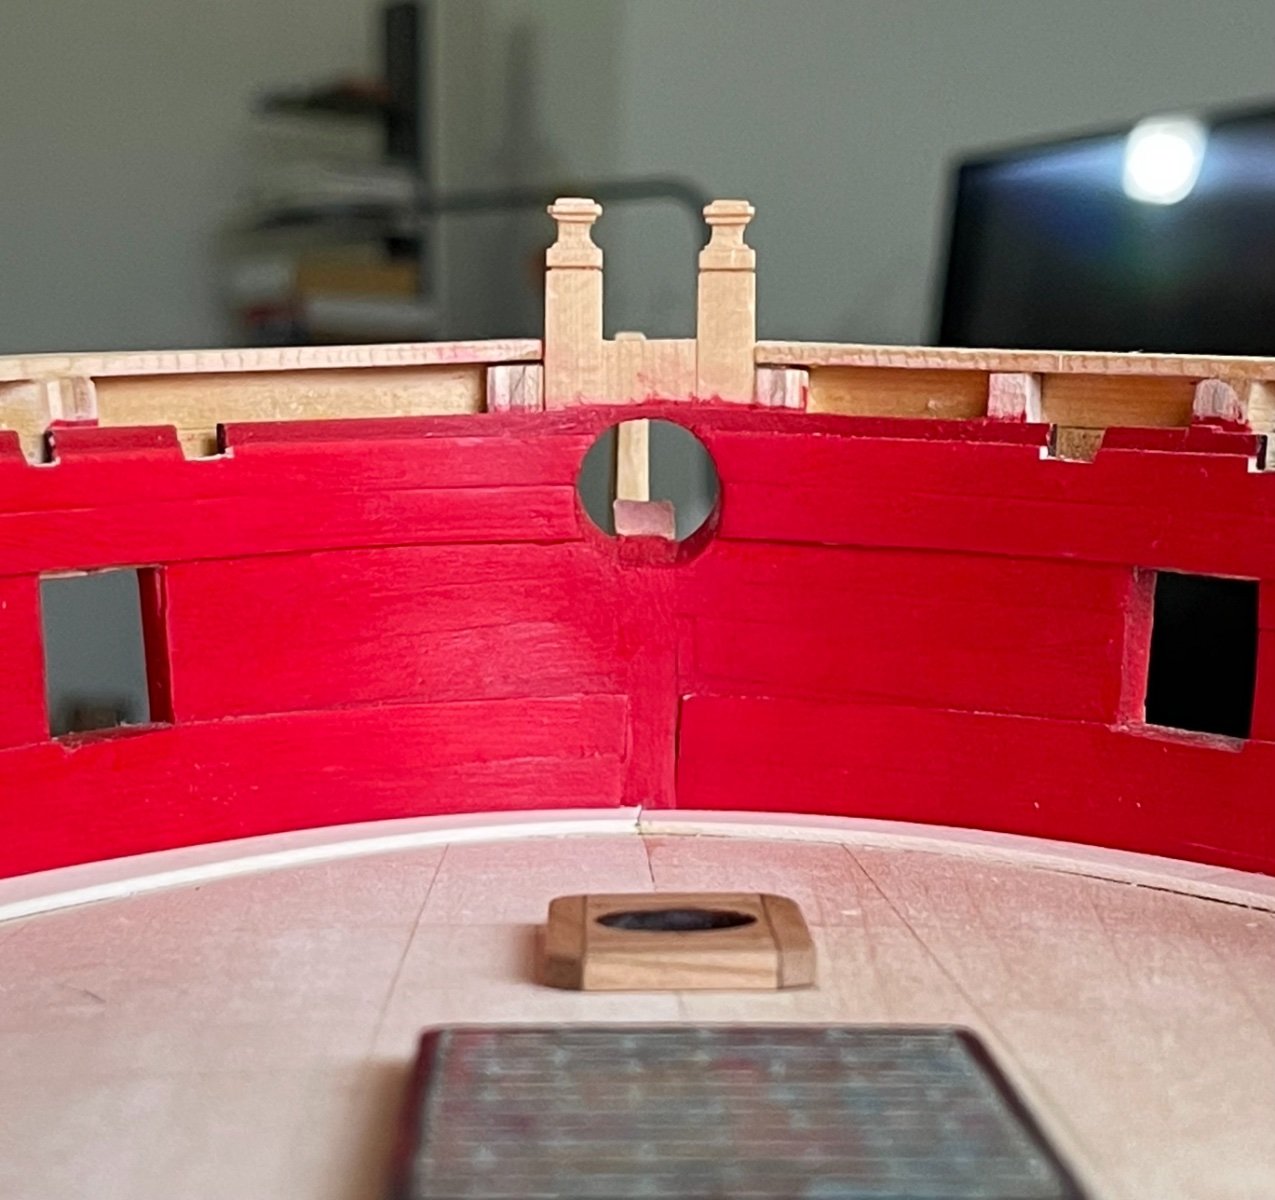
Hello Chuck, I think the curvature of the rail would be correct If you cut 1/8 to 1/4 of the forward end. The after end will tilt forward a little below the freezes top decorative molding. After that, just making the top after portion (above the freezes decorative molding) straight to vertical should do the trick. The bell and housing looks fantastic. Best, G
- 1,784 replies
-
- 2
-

-
- syren ship model
- winchelsea
- (and 1 more)
-
Hello Mike: Looking very good! The floor warped because the water from the glue was absolved quickly in the underside. To prevent this brush some water on the topside. If you add water on the top side after the PVA, it will actually warp back to the right form. Hope this help, G
- 607 replies
-
- 6
-
-
- winchelsea
- syren ship model
- (and 1 more)
-
Hello Chuck, That capstan in the background of the last picture of the lids in the model looks awesome! G
- 1,784 replies
-
- 1
-
-
- syren ship model
- winchelsea
- (and 1 more)
-
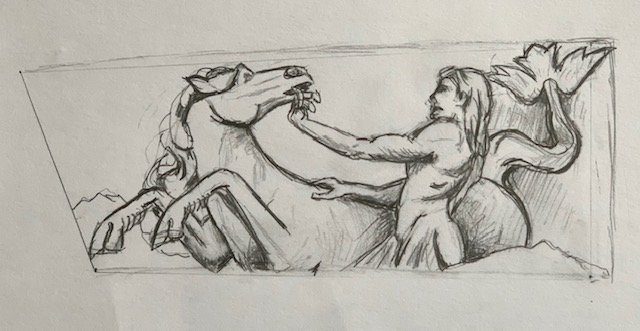
Thank you Rusty. I have completed the Q gallery freeze and I am happy with the result so I will give it a go to paint all. The final freeze will be smaller than the one below. I added some extra turquoise green to the margins to make the picture bigger than needed just in case. The original was painted at 5X and the figure was inspired by a fountain sculpture in Europe. It needs a little touch up but it is almost done. I will make to copies one mirror image for the other Q gallery and insert the image in Chuck’s PDF file to get it to the correct size to print. Next the upper transom Best, G
-
One problem I find with acrylics is that because they dry fast they stay on top of the wood and the paint tend to ship out. I have solved the problem by mixing the acrylic paint with water-based wood stain conditioner. The mixture penetrates the wood in the first coat and never ship, the paint becomes fluid and much easier to apply with a brush, the time to dry is extended by 2 or 3 fold depending on the amount of wood conditioner. A on part acrylic, three part conditioner will require 5 coats to paint (recommended by Chuck) and will leave a finish that will last. The only inconvenient is that the wood conditioner adds a little shine to the finish but I correct this with a translucent matte finish over the paint. hope this help, G
-
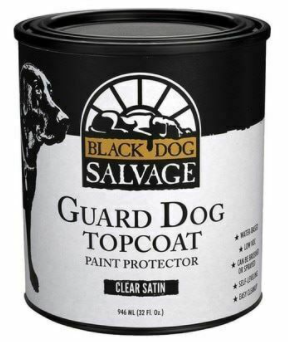
I seal the wood with water based stain conditioner and follow with water based polyurethane. I have tried several brands but recently I used the top coat below. The paints from this brand are absolutely matte and though it was worth a try with the translucent top coat. What I liked the most, is that the finish hardened really well after 2 days and there was no tackiness that you get with most finishes. The hull below the whales is finished with this product in my Whinshelsea log. Best, G
-
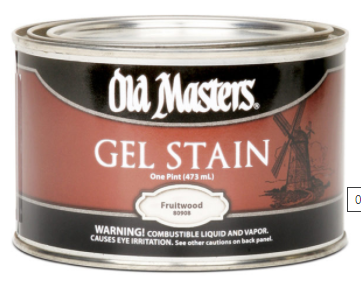
Not all stains are created equal. Cuck recommended using Old Masters fruitwood gel stain. It gives a nice effect that looks like boxwood. I use a silicone art brush to clean dark areas that you want to highlight (available at woodcraft).
-
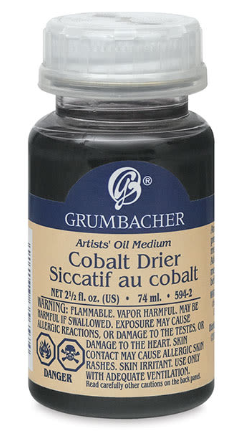
Adding a little of Cobalt Drier will dry oil paint in about 1 hour. It tends to opaque the paint but I find that to be a good quality for ship models. Mate finishes look much better to scale to my eye. My 25 cents, G
-
No problem, That first piece needs to be beveled before it is glued. Once you add the cover and the molding, the fore tip of the Q gallery will be ahead of the fore line. Also once you add the columns, the fore side of the column will touch the fore line. I glued the first piece, and worked the second lower piece with the model upside down. It is easier to work the aft bevel of that piece, the bevel against the hull, and to glue it parallel to the first piece (better perspective when you look from the top; both pieces match). Best, G