HOLIDAY DONATION DRIVE - SUPPORT MSW - DO YOUR PART TO KEEP THIS GREAT FORUM GOING! (Only 69 donations so far out of 49,000 members - Can we at least get 100? C'mon guys!)
×

Zarkon
-
Posts
295 -
Joined
-
Last visited
Content Type
Profiles
Forums
Gallery
Events
Everything posted by Zarkon
-
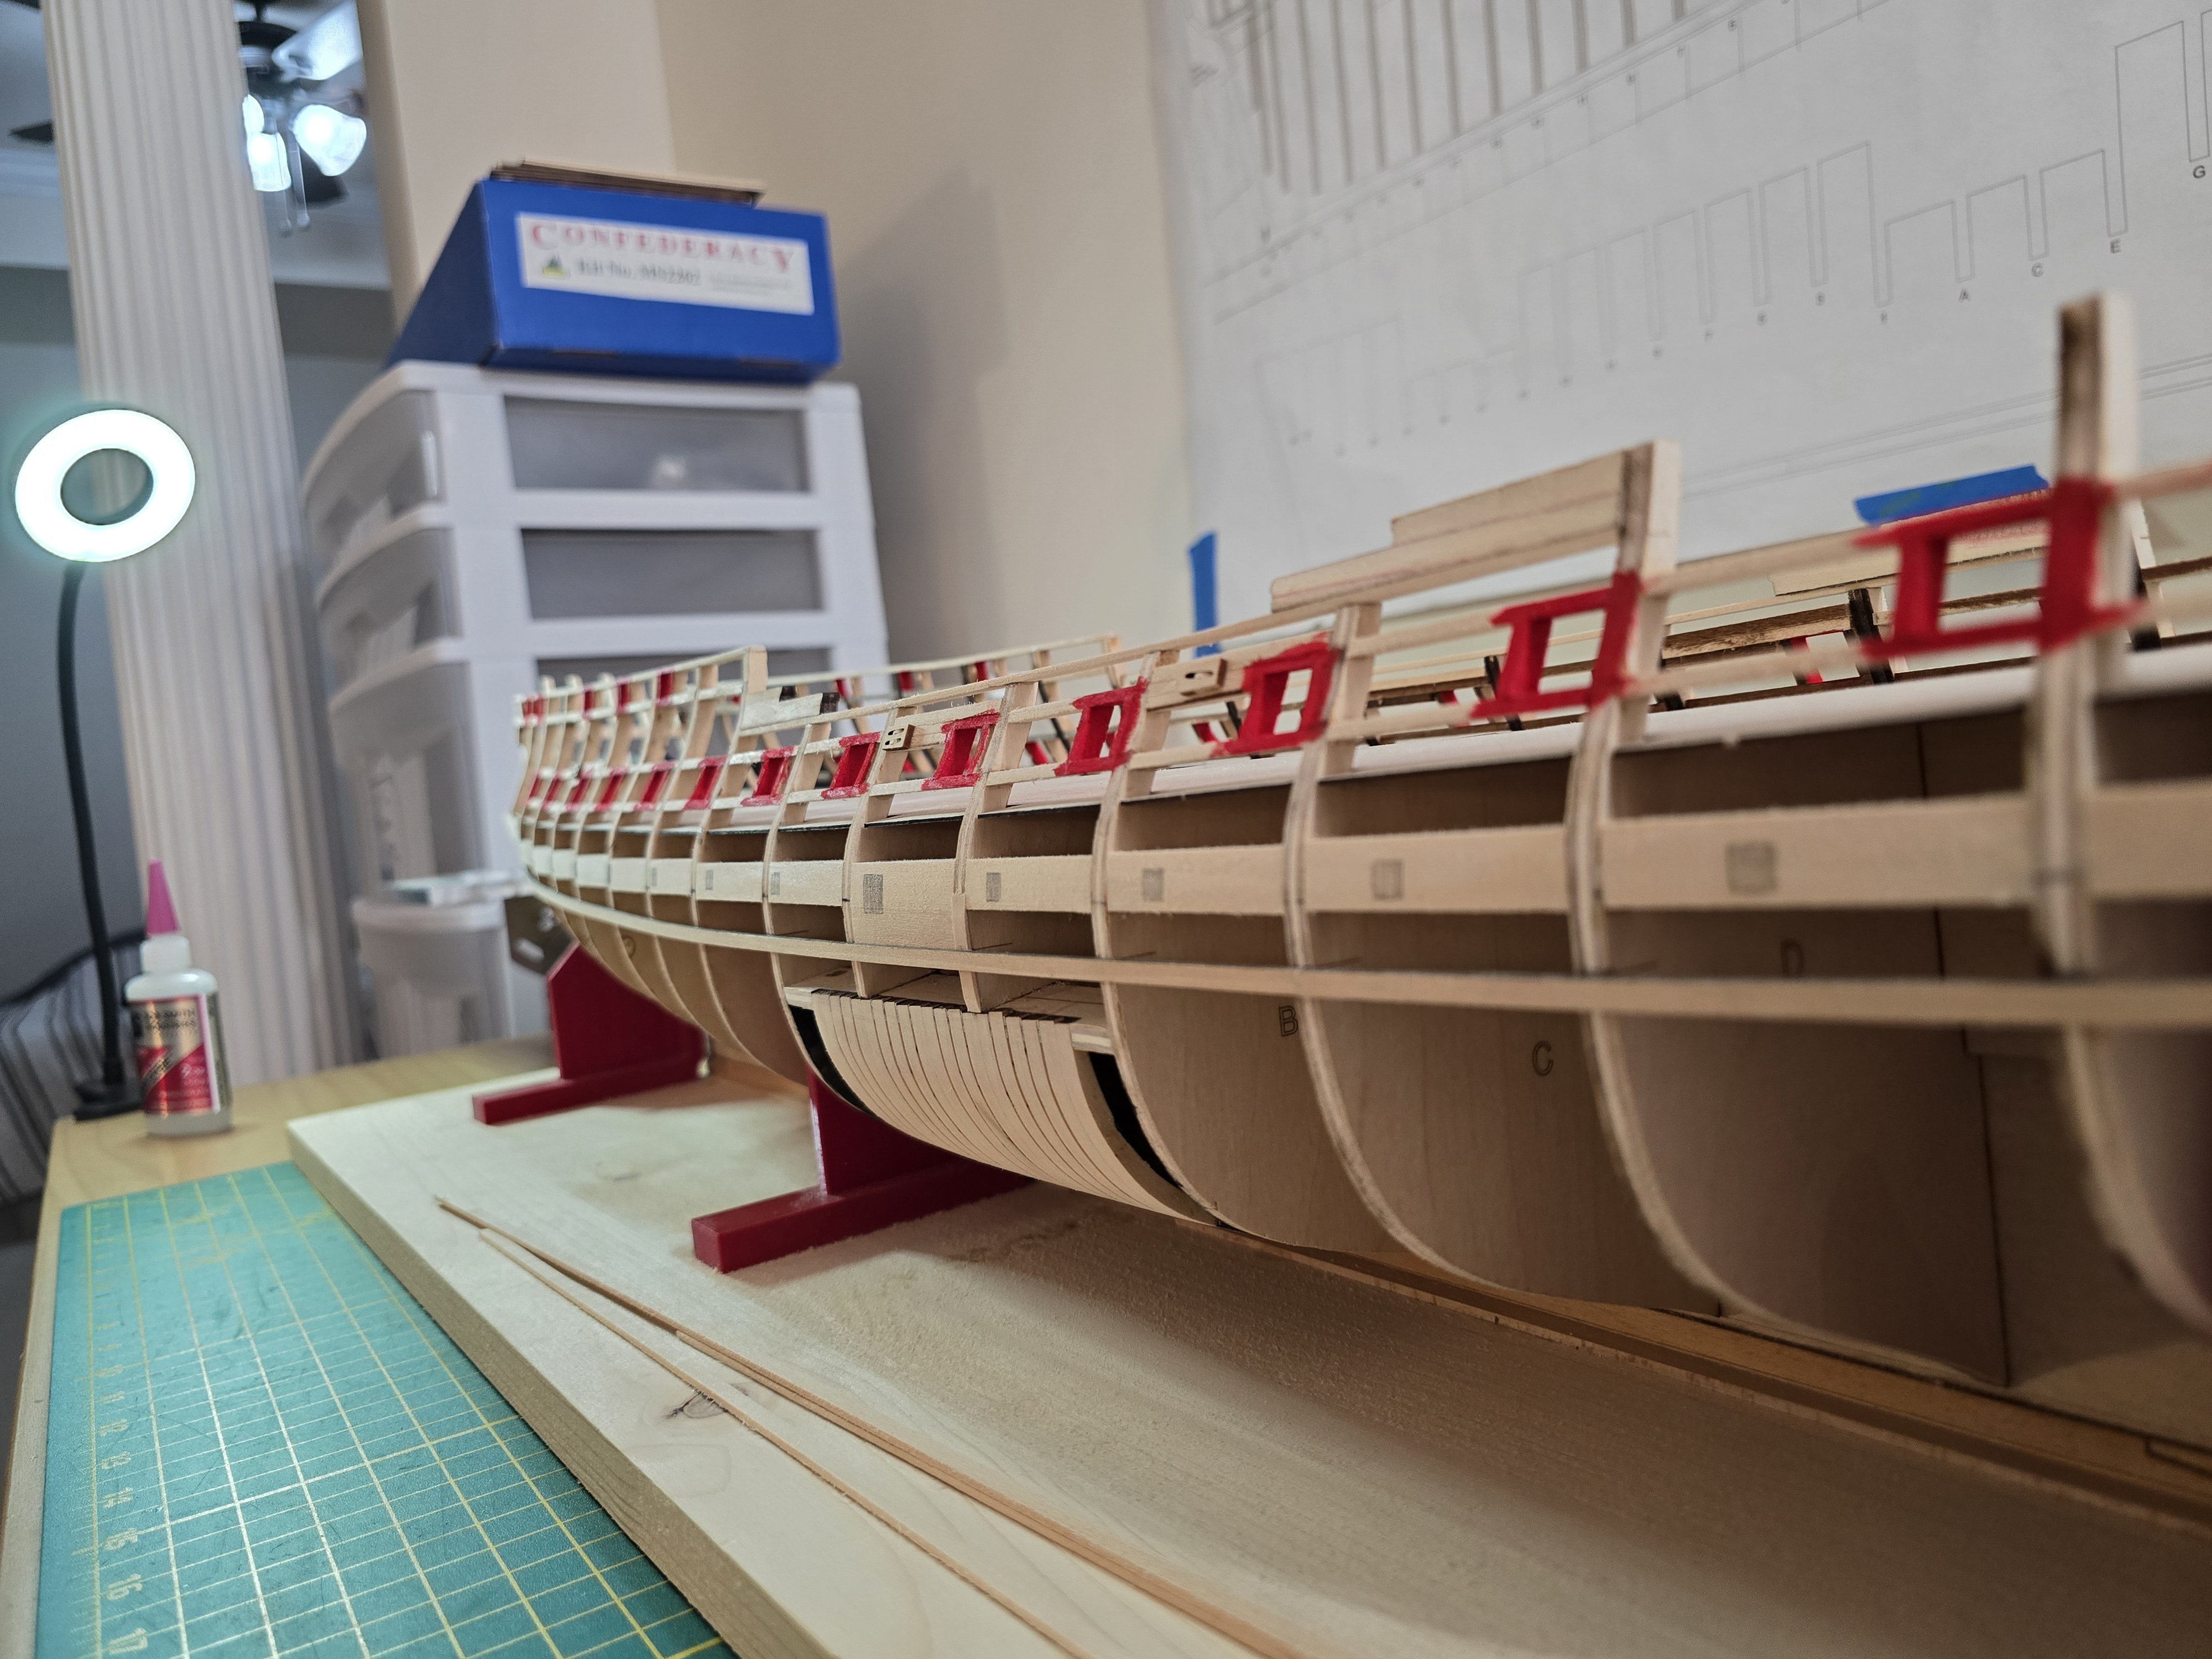
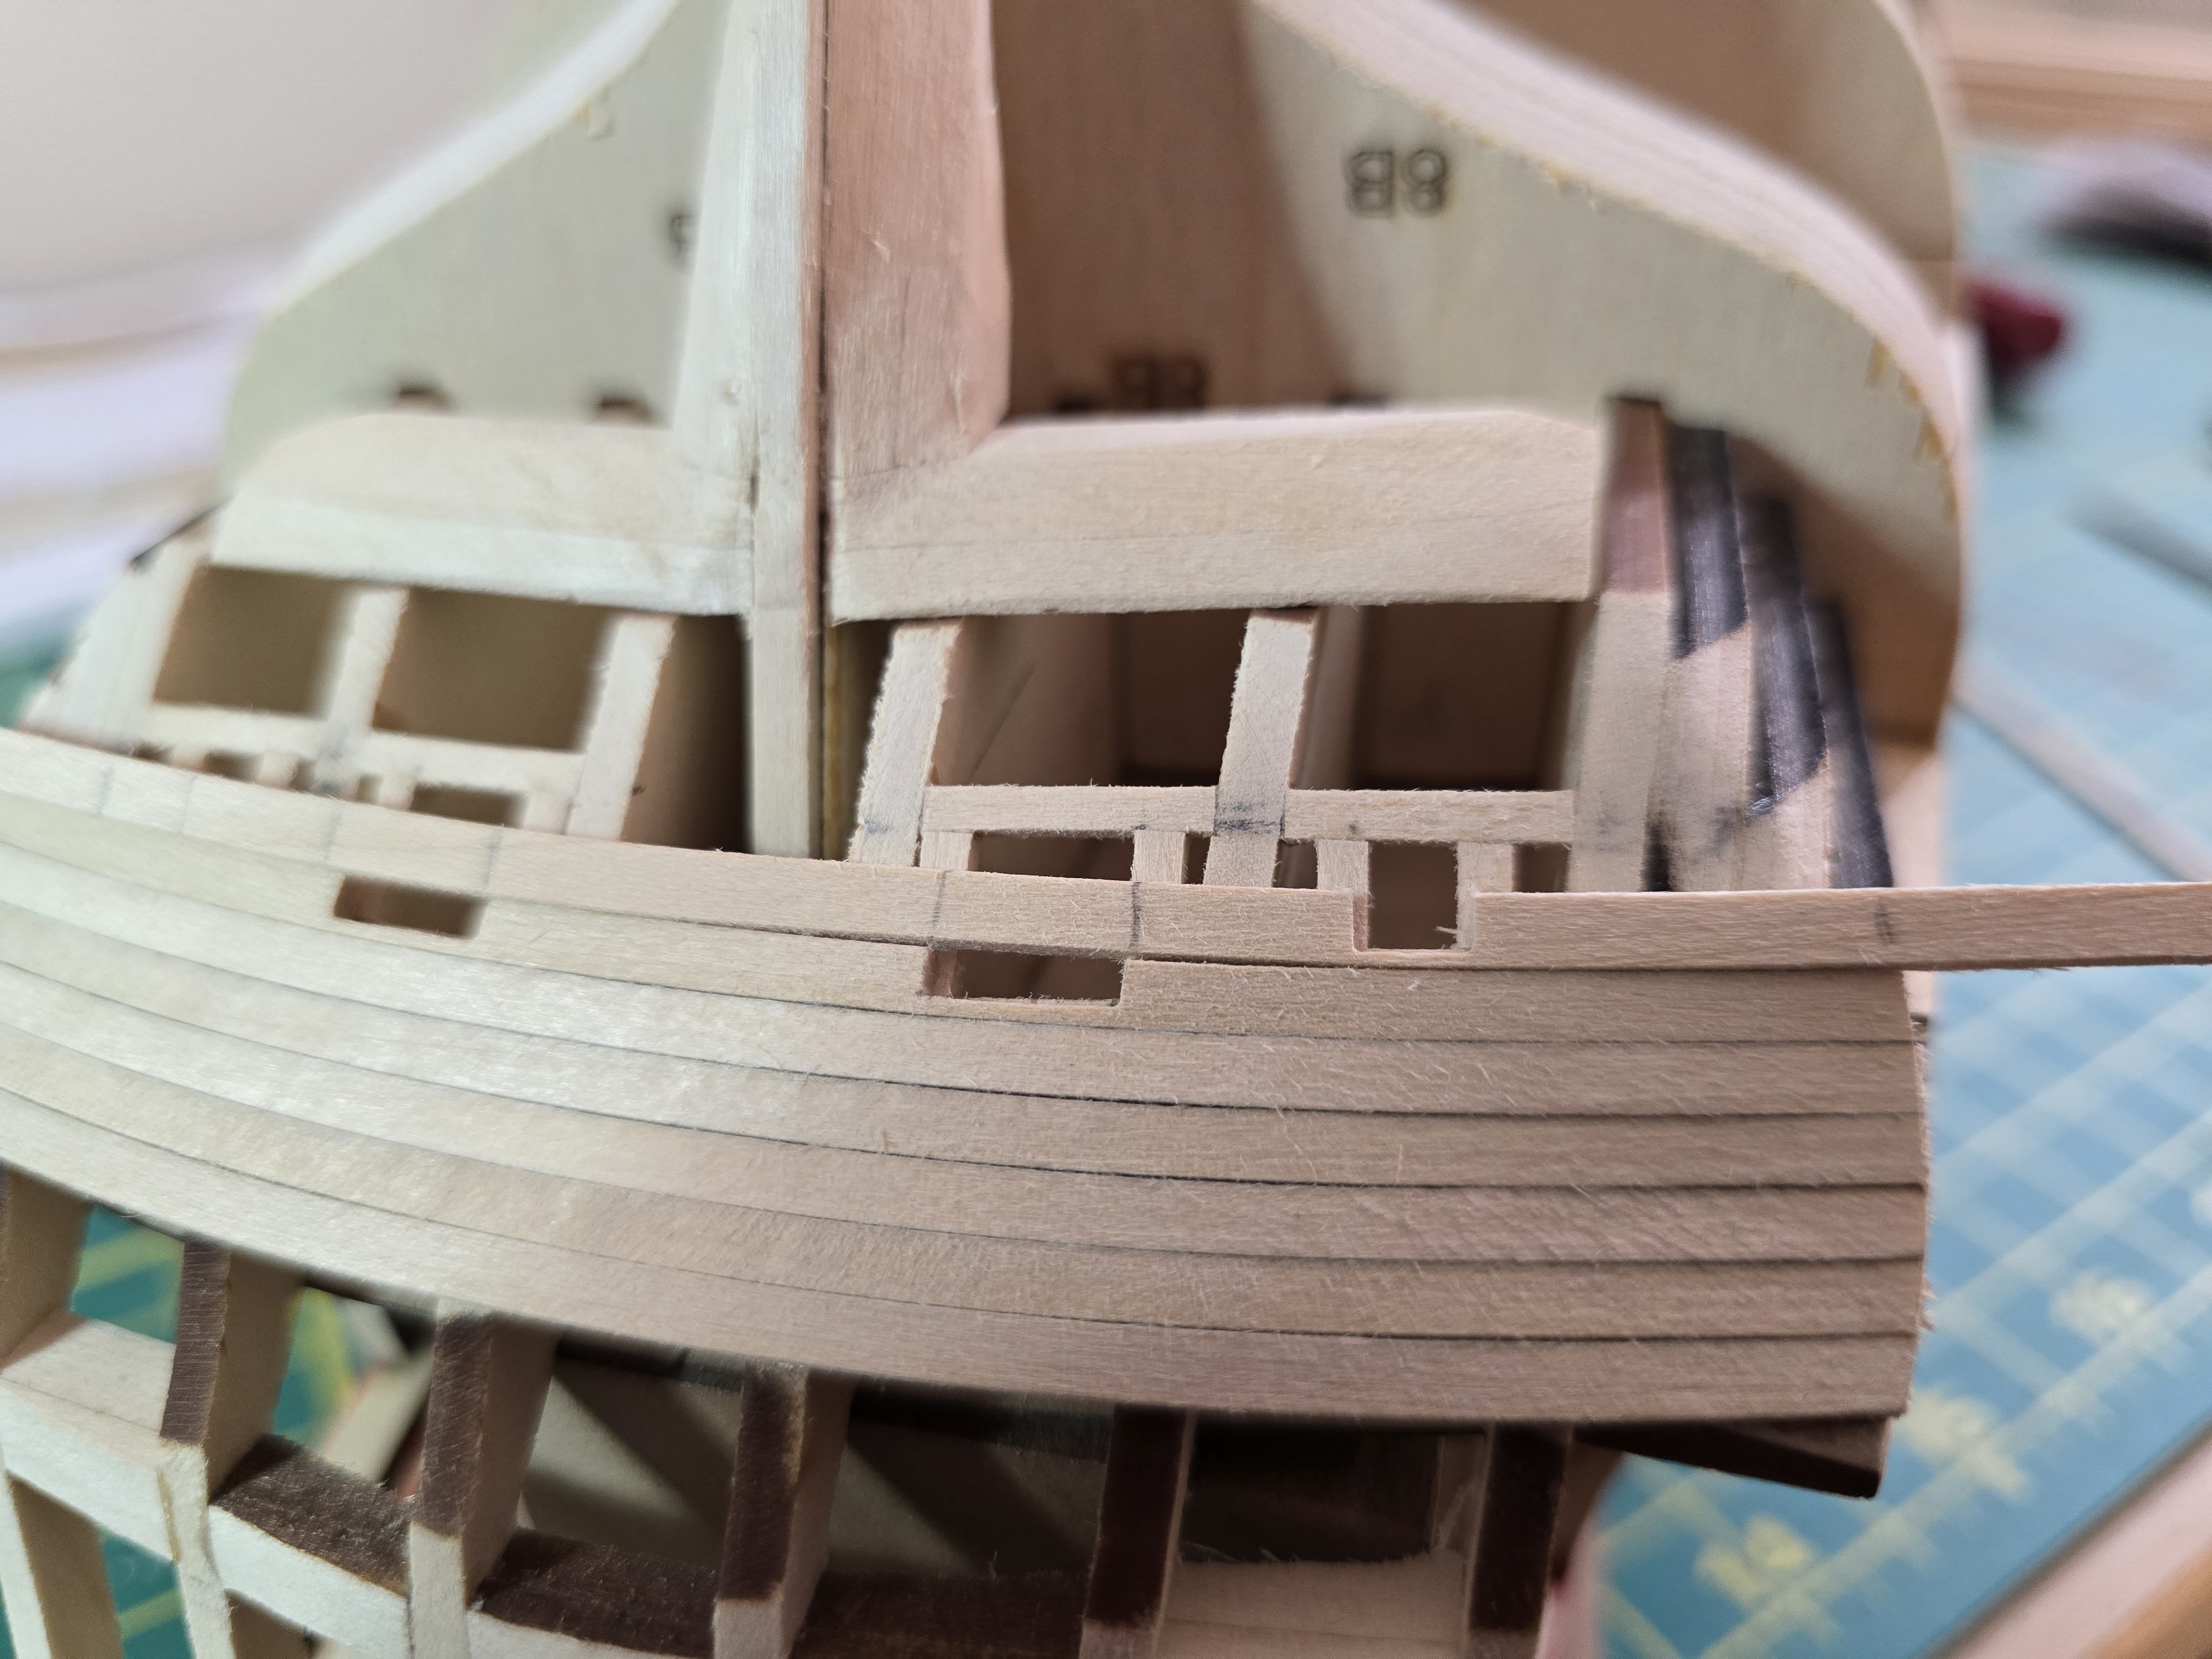
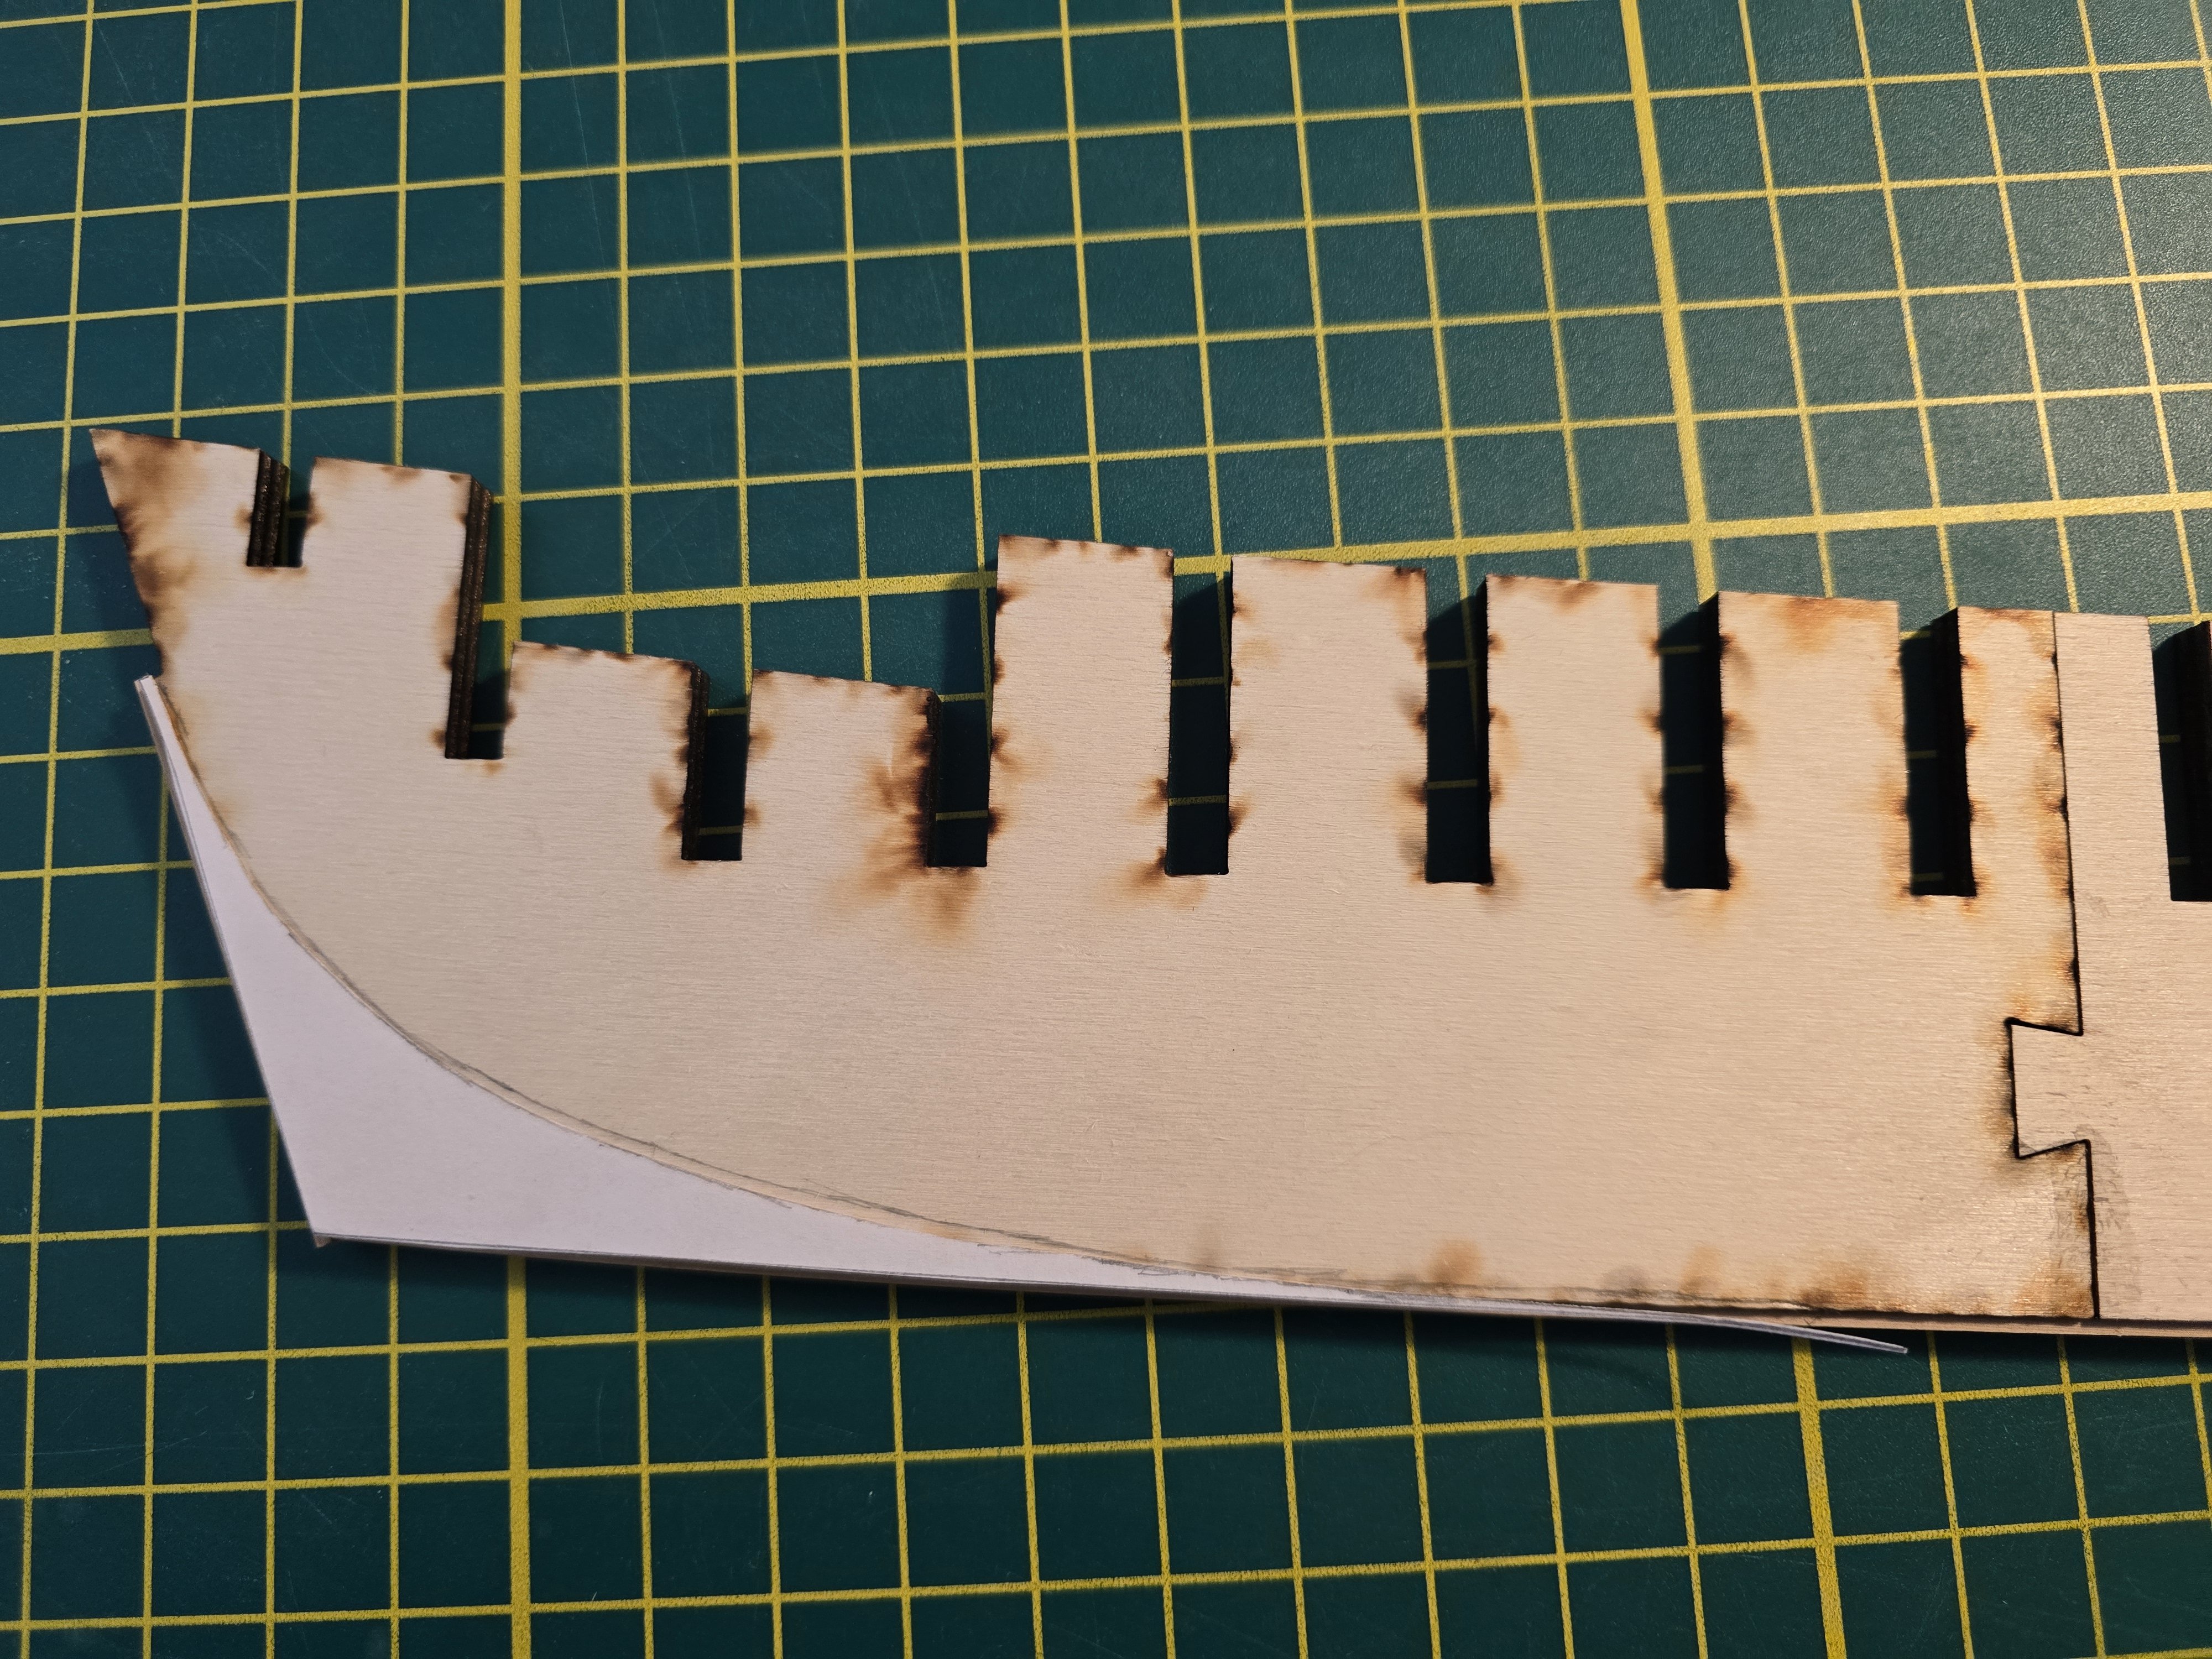
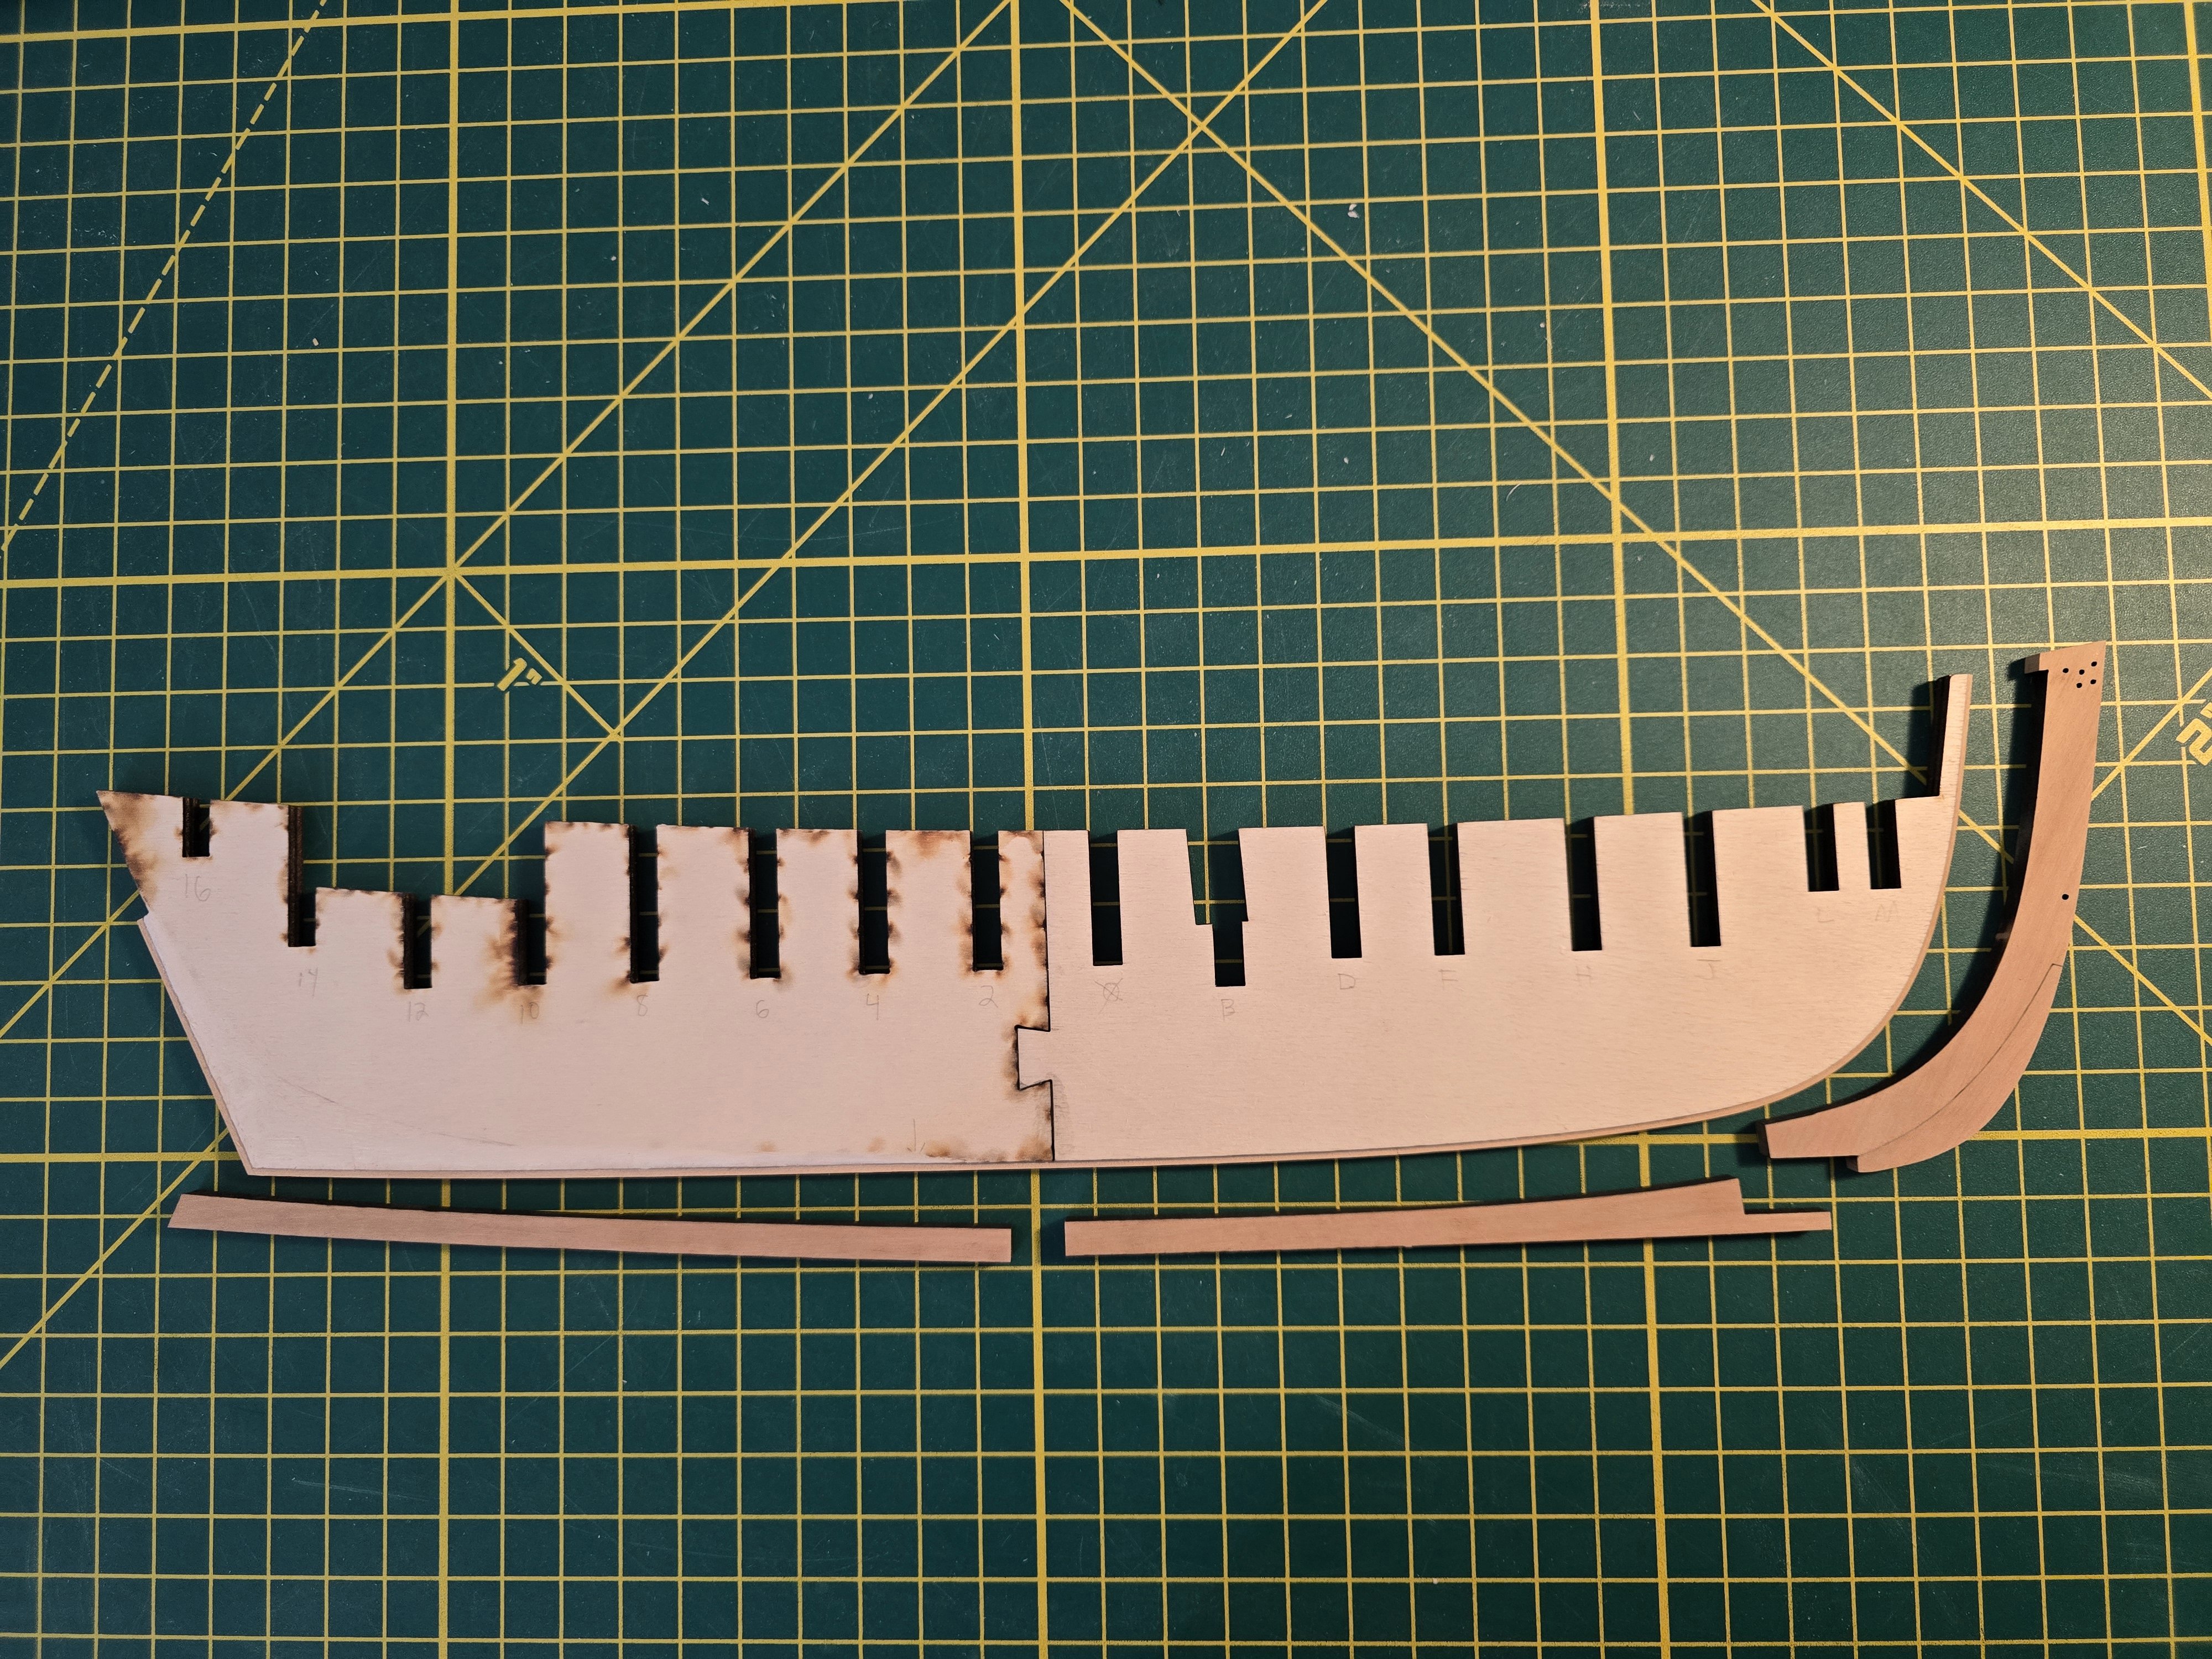
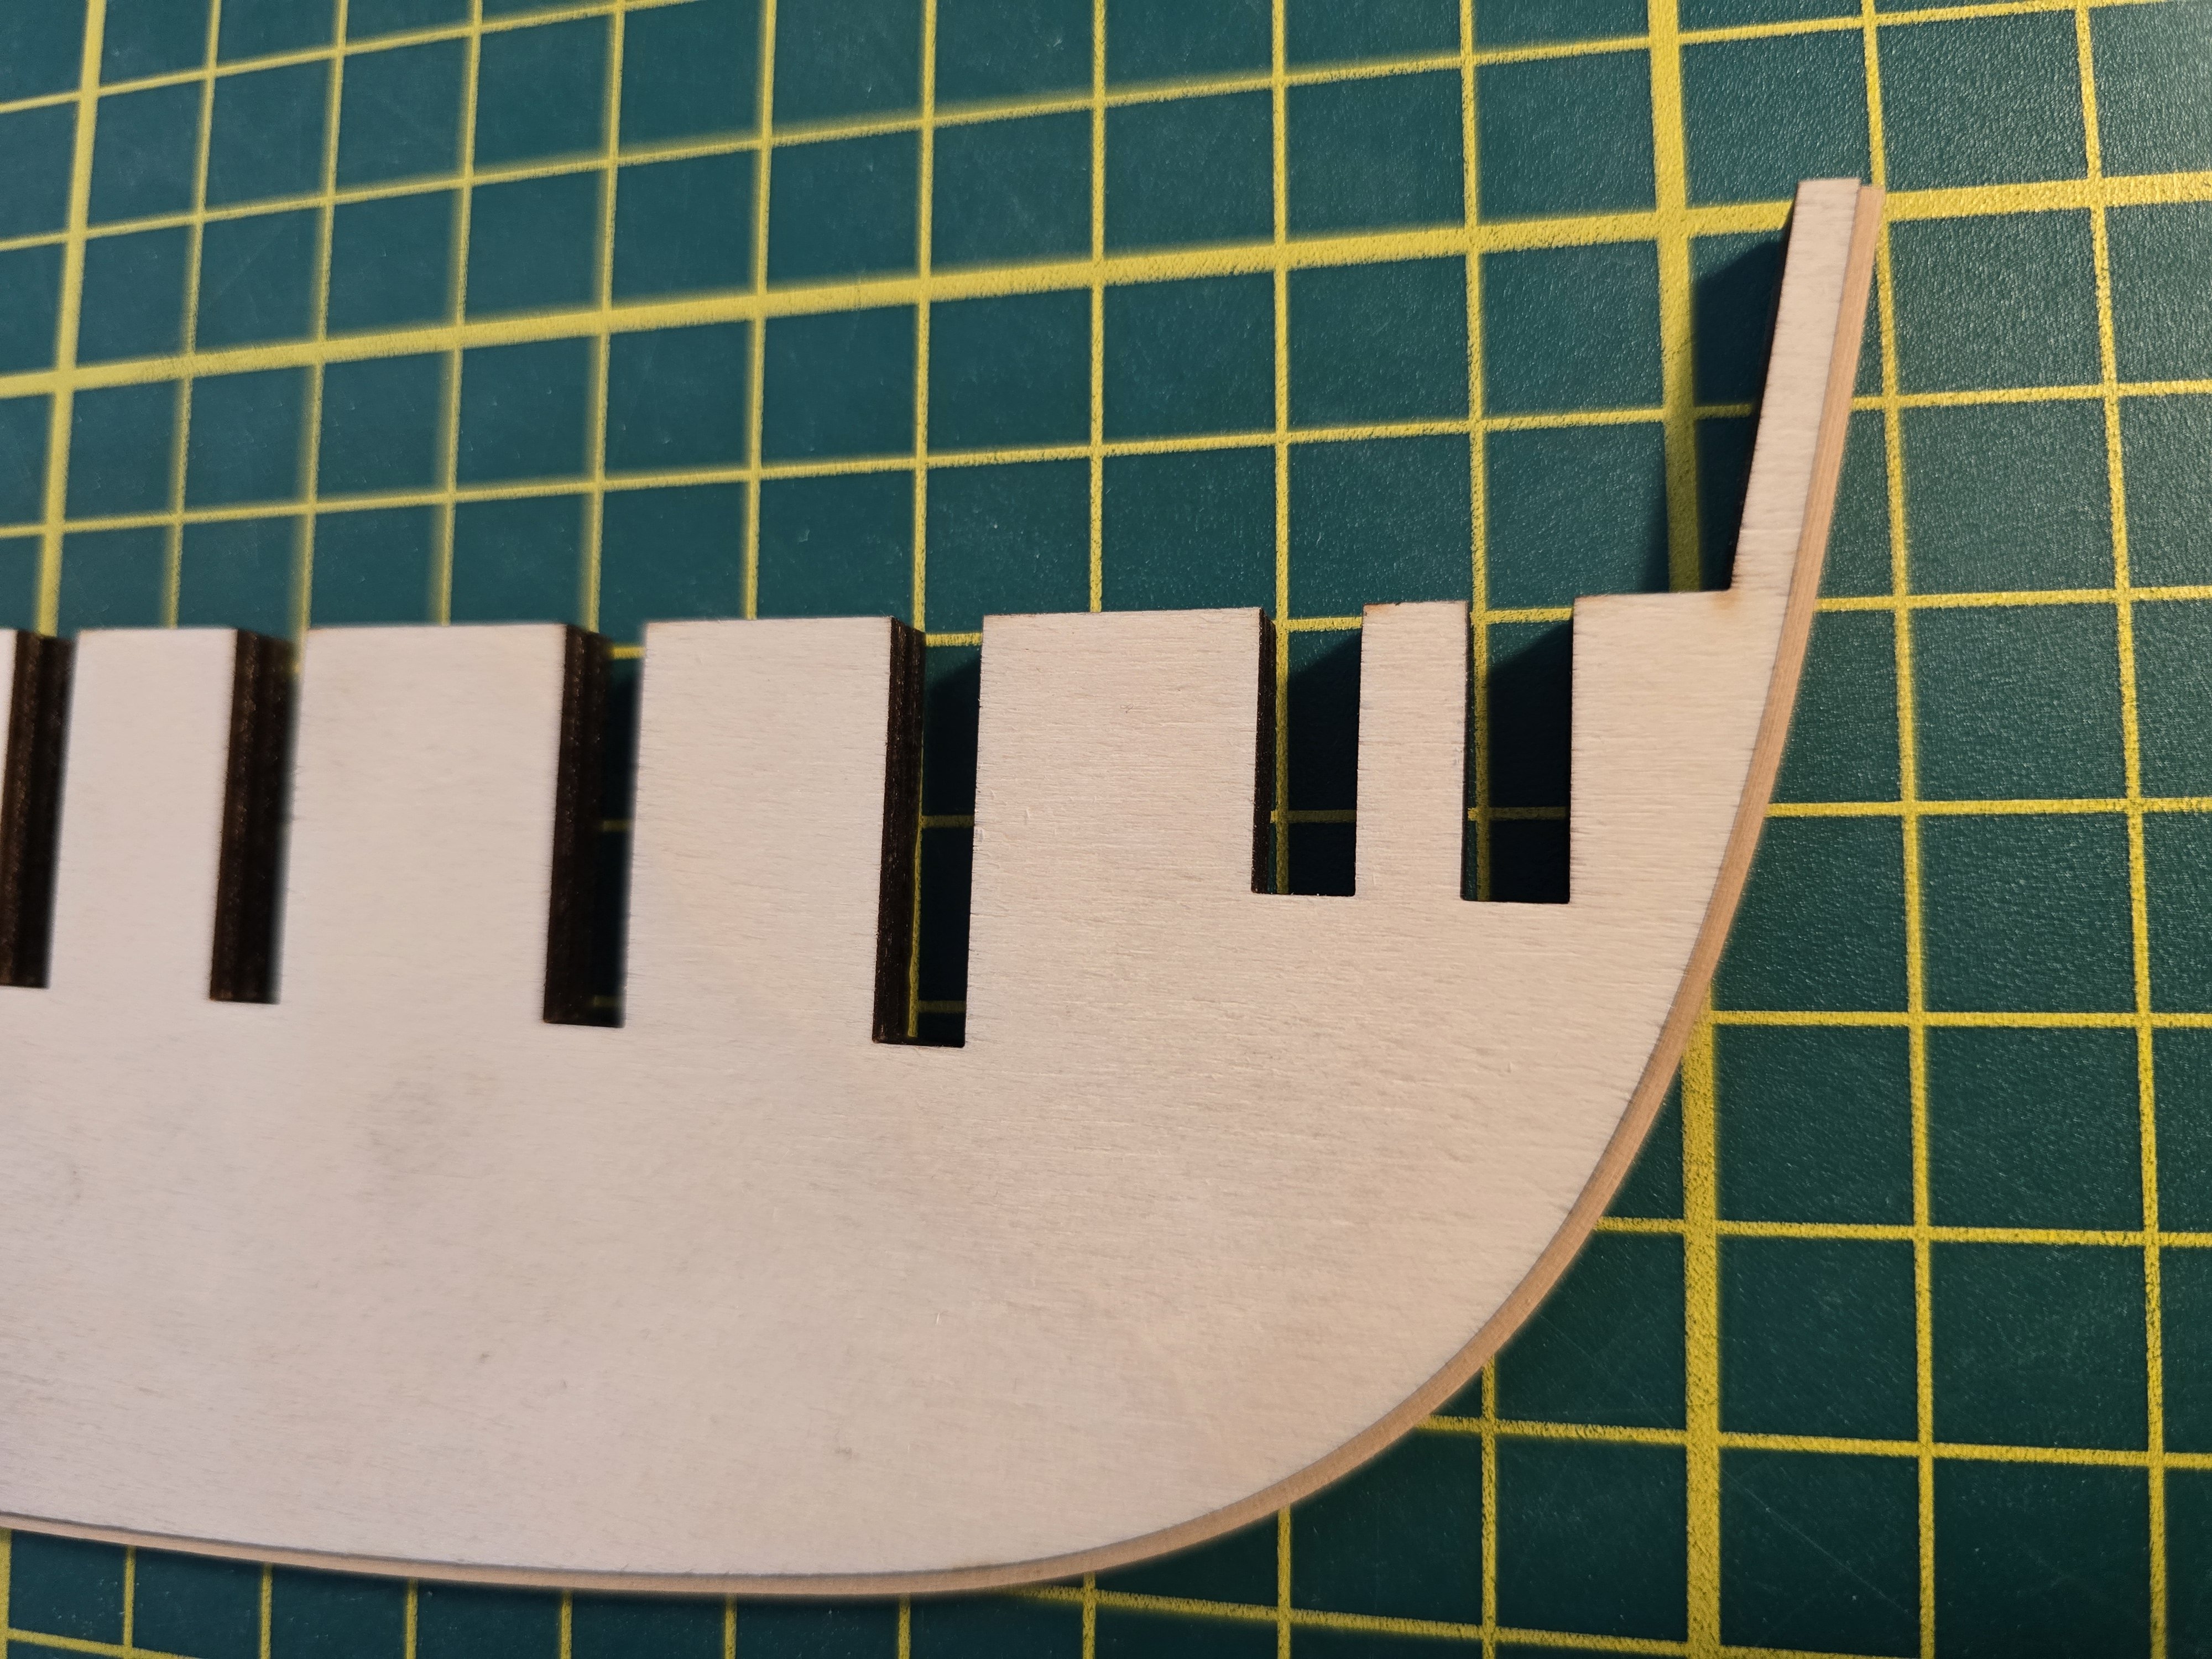
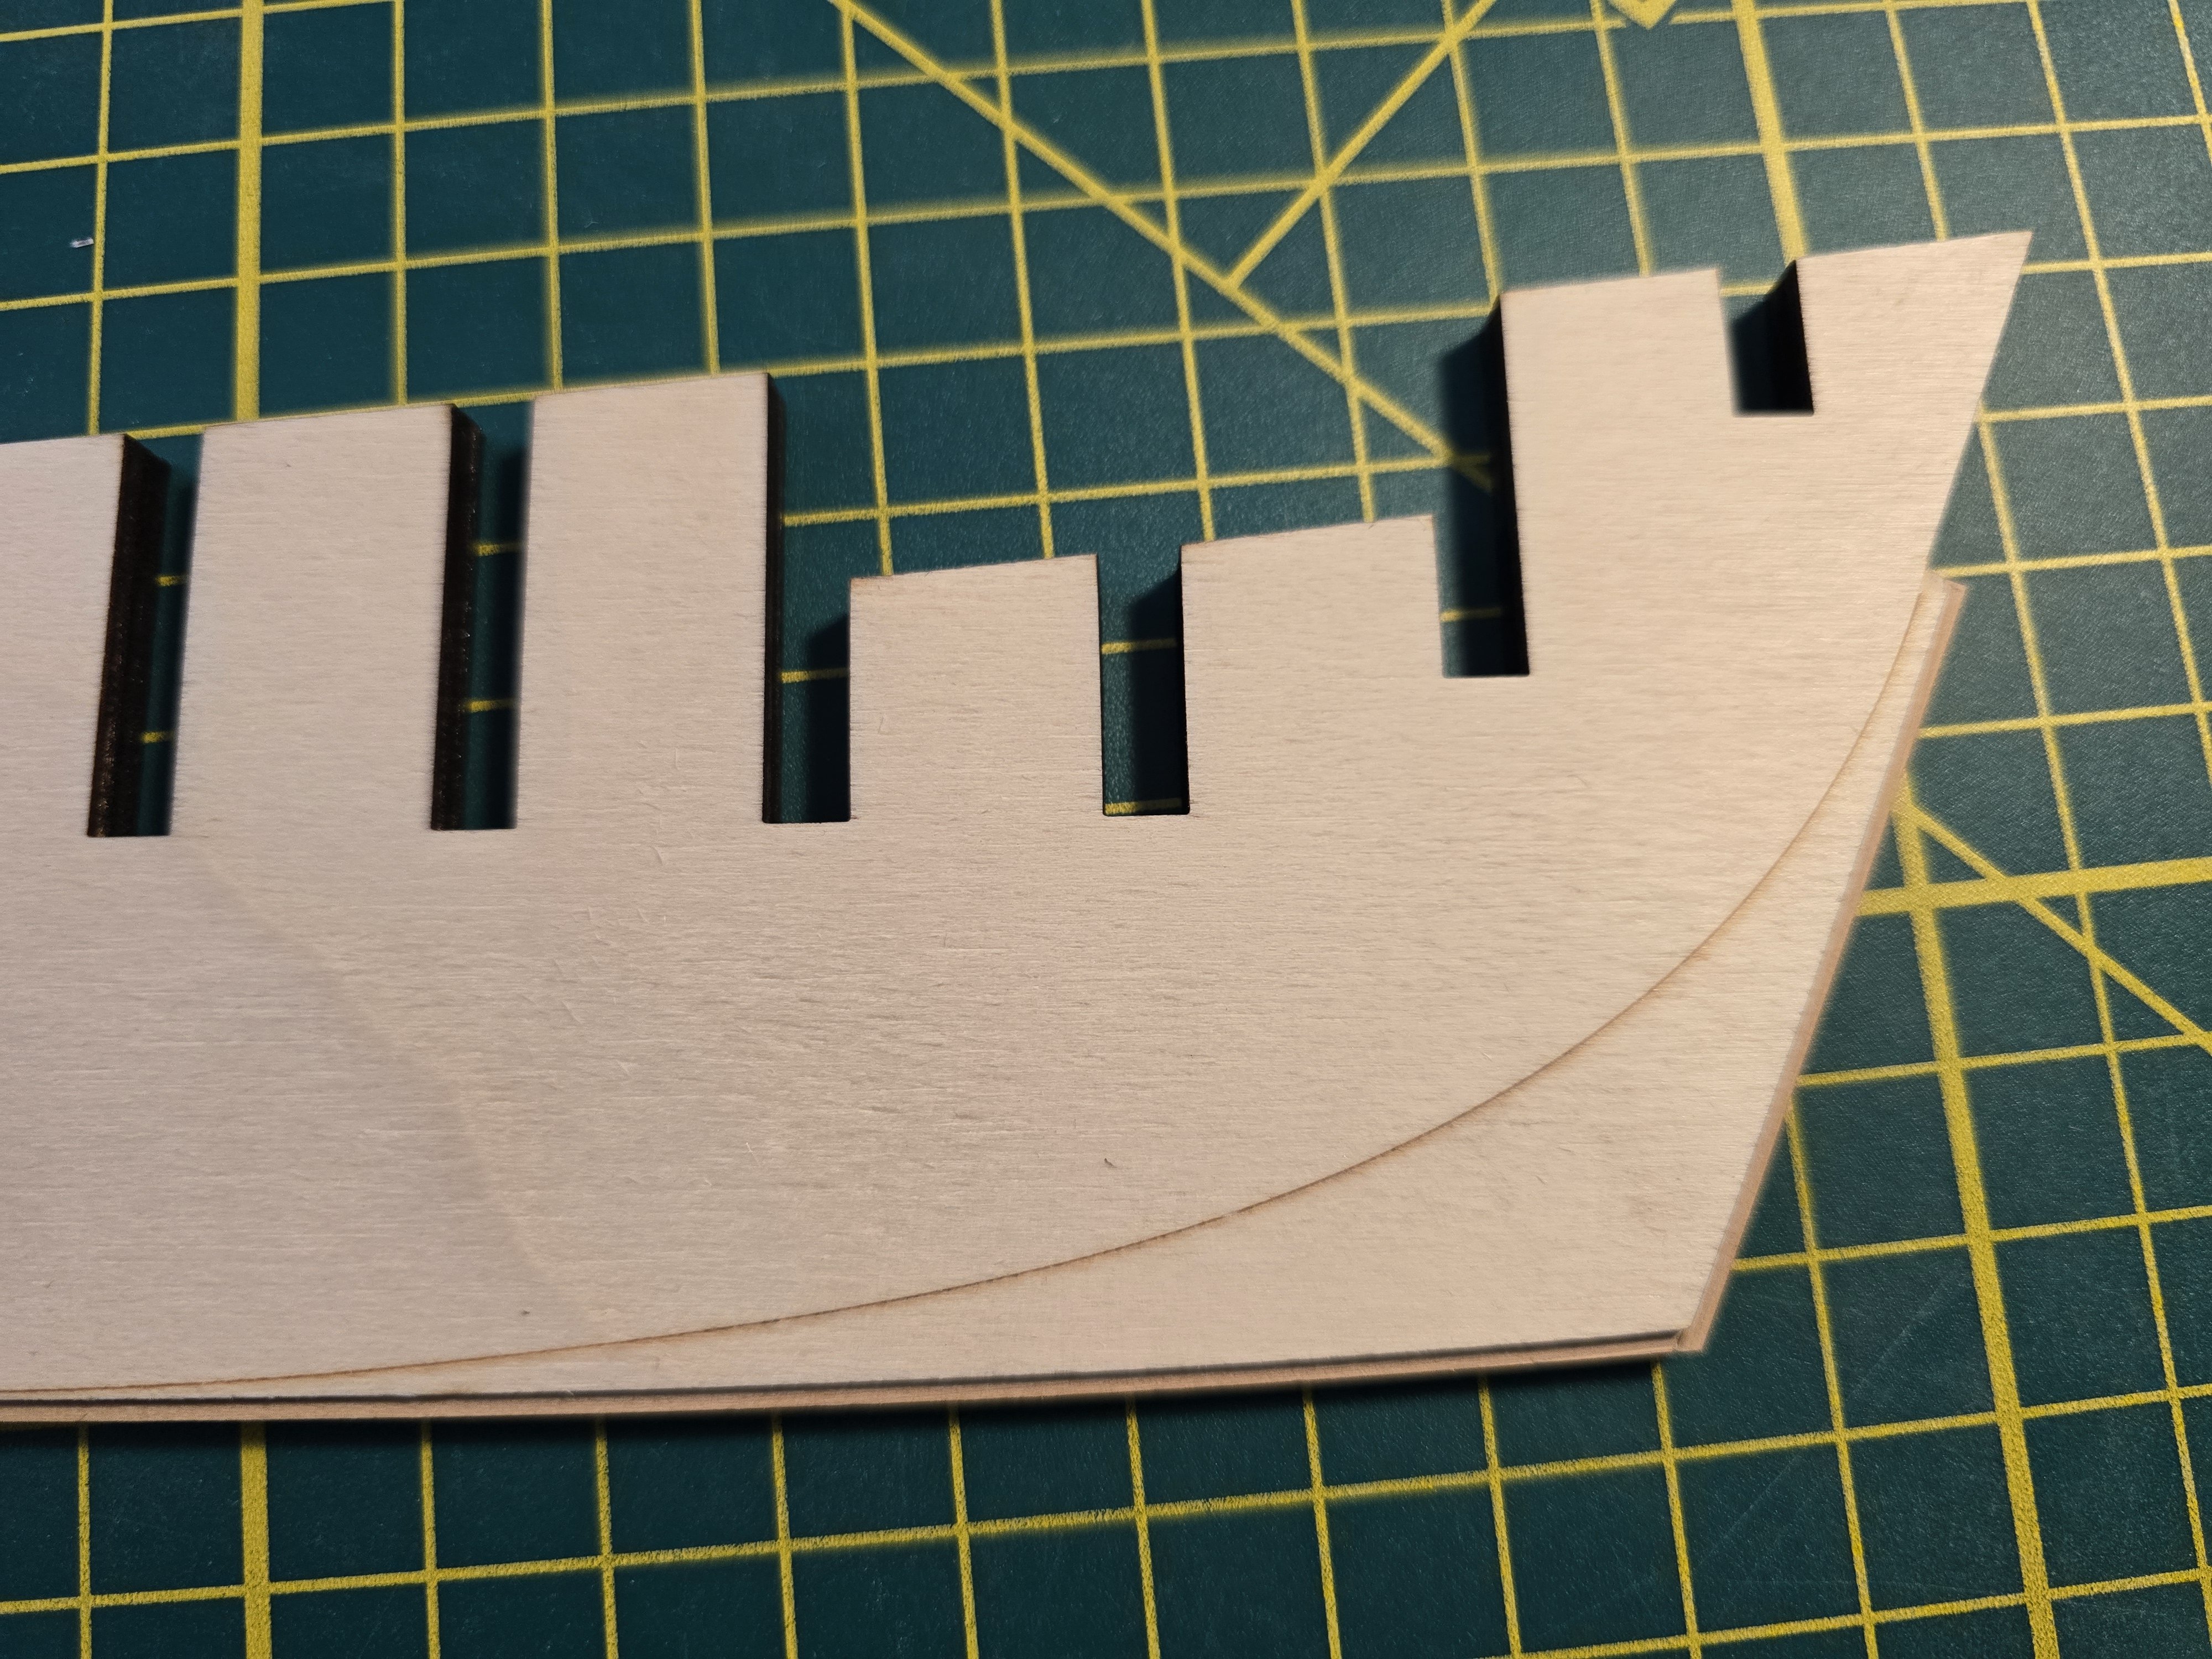
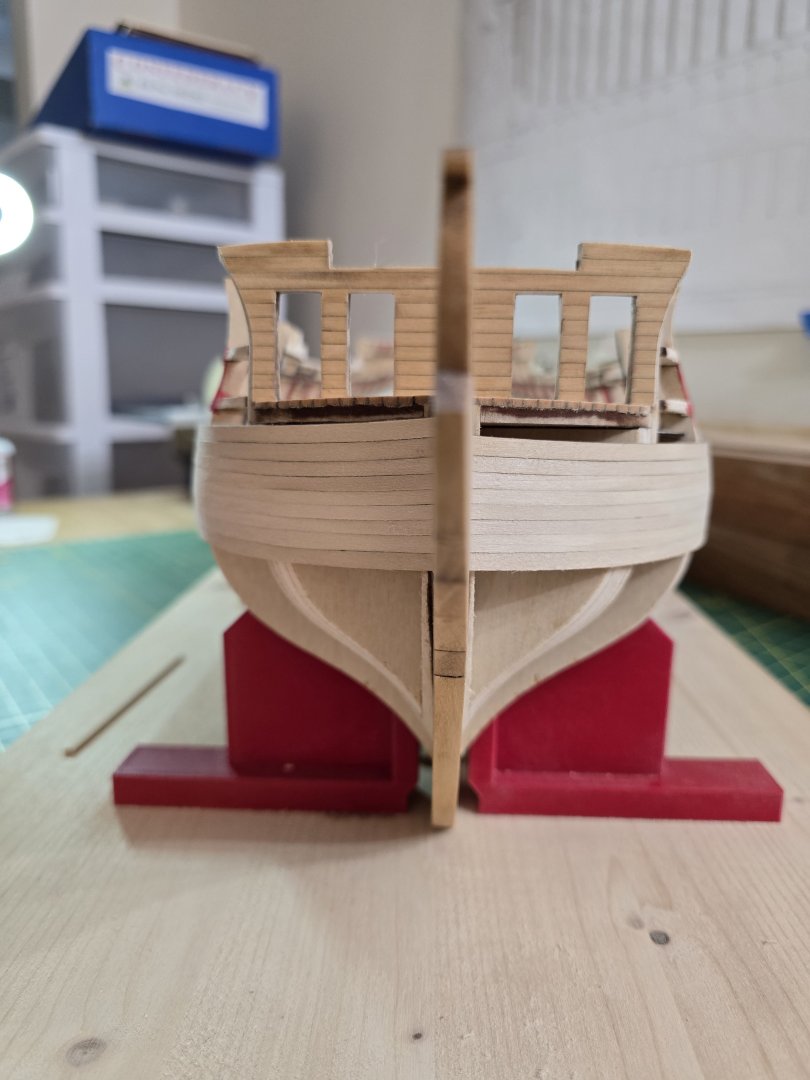
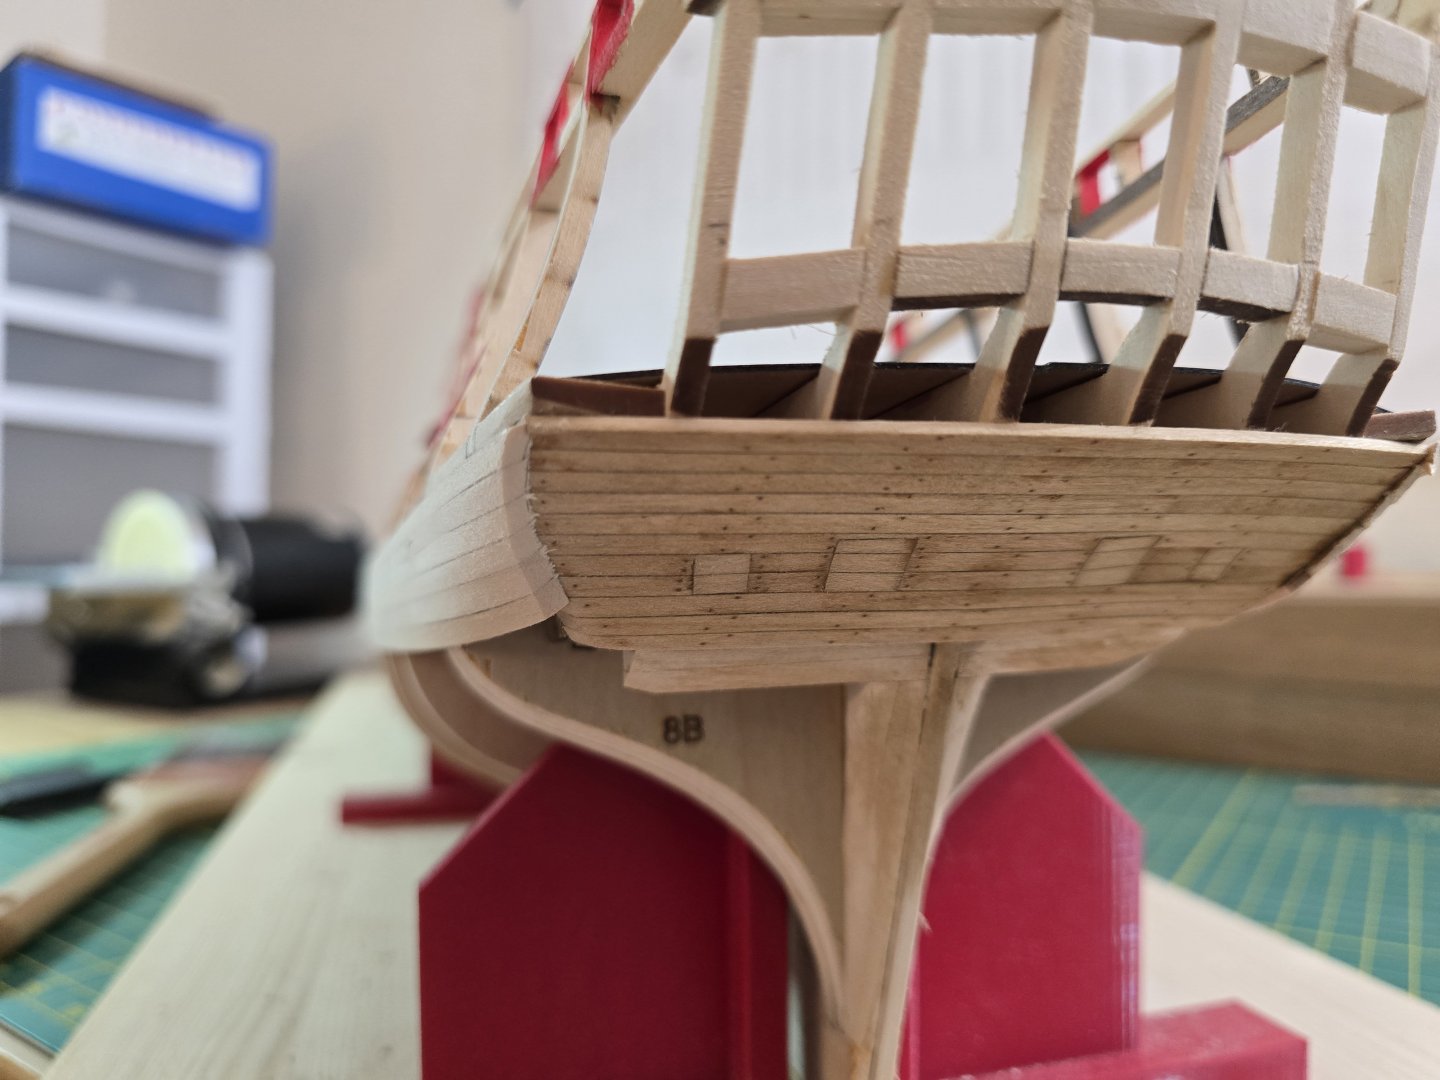
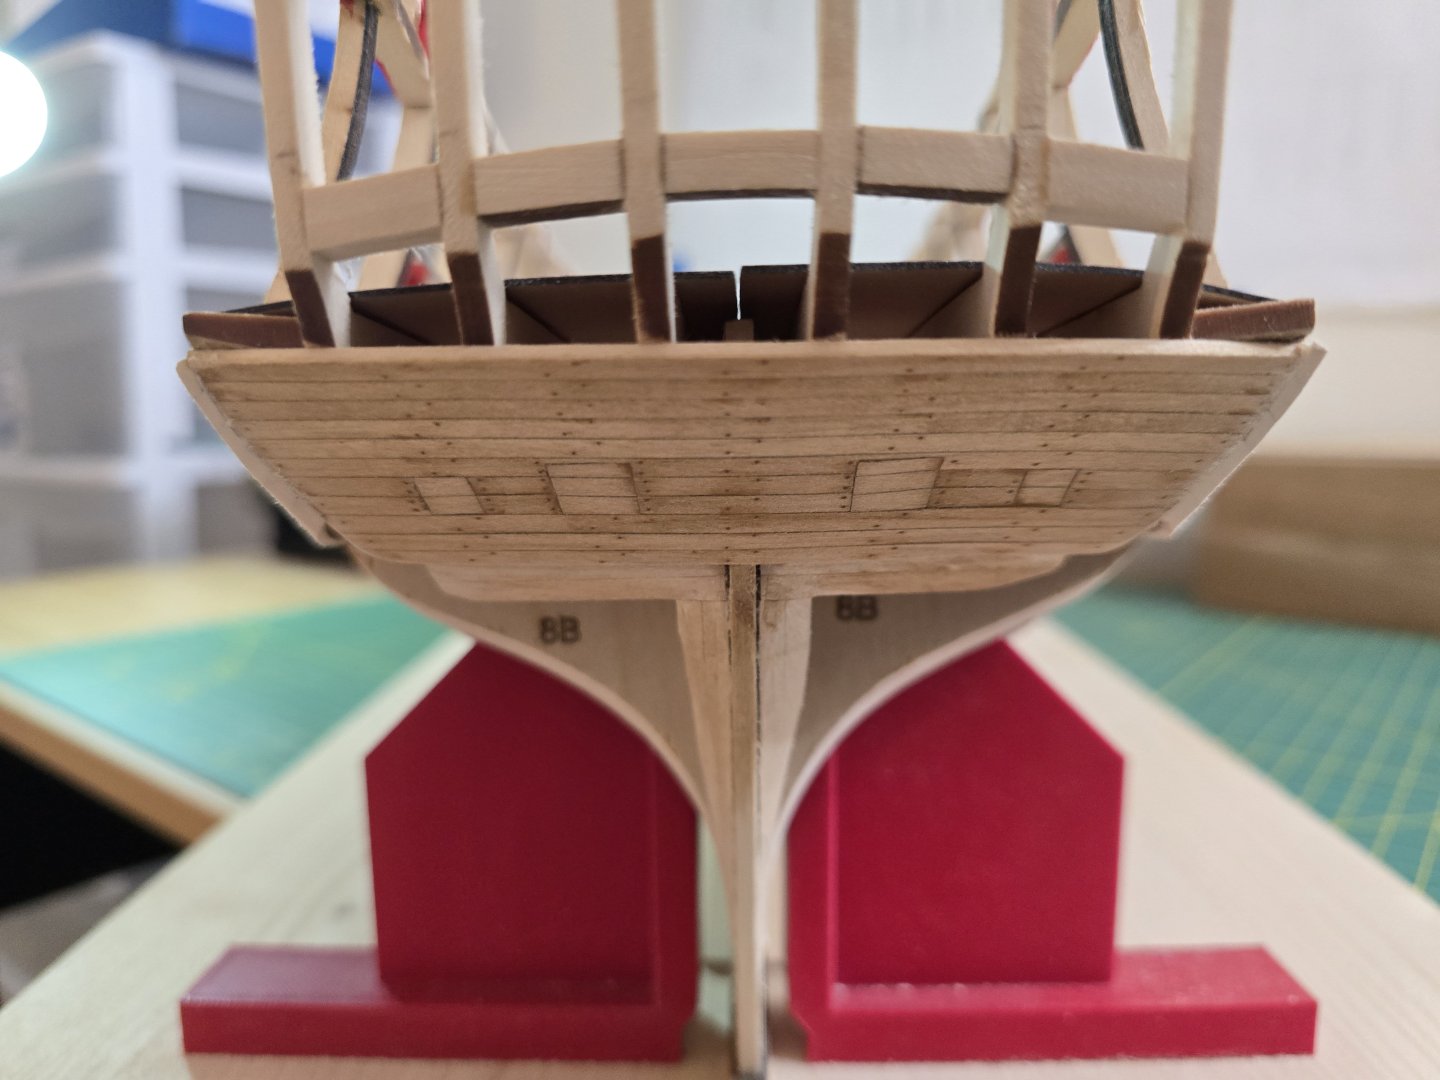
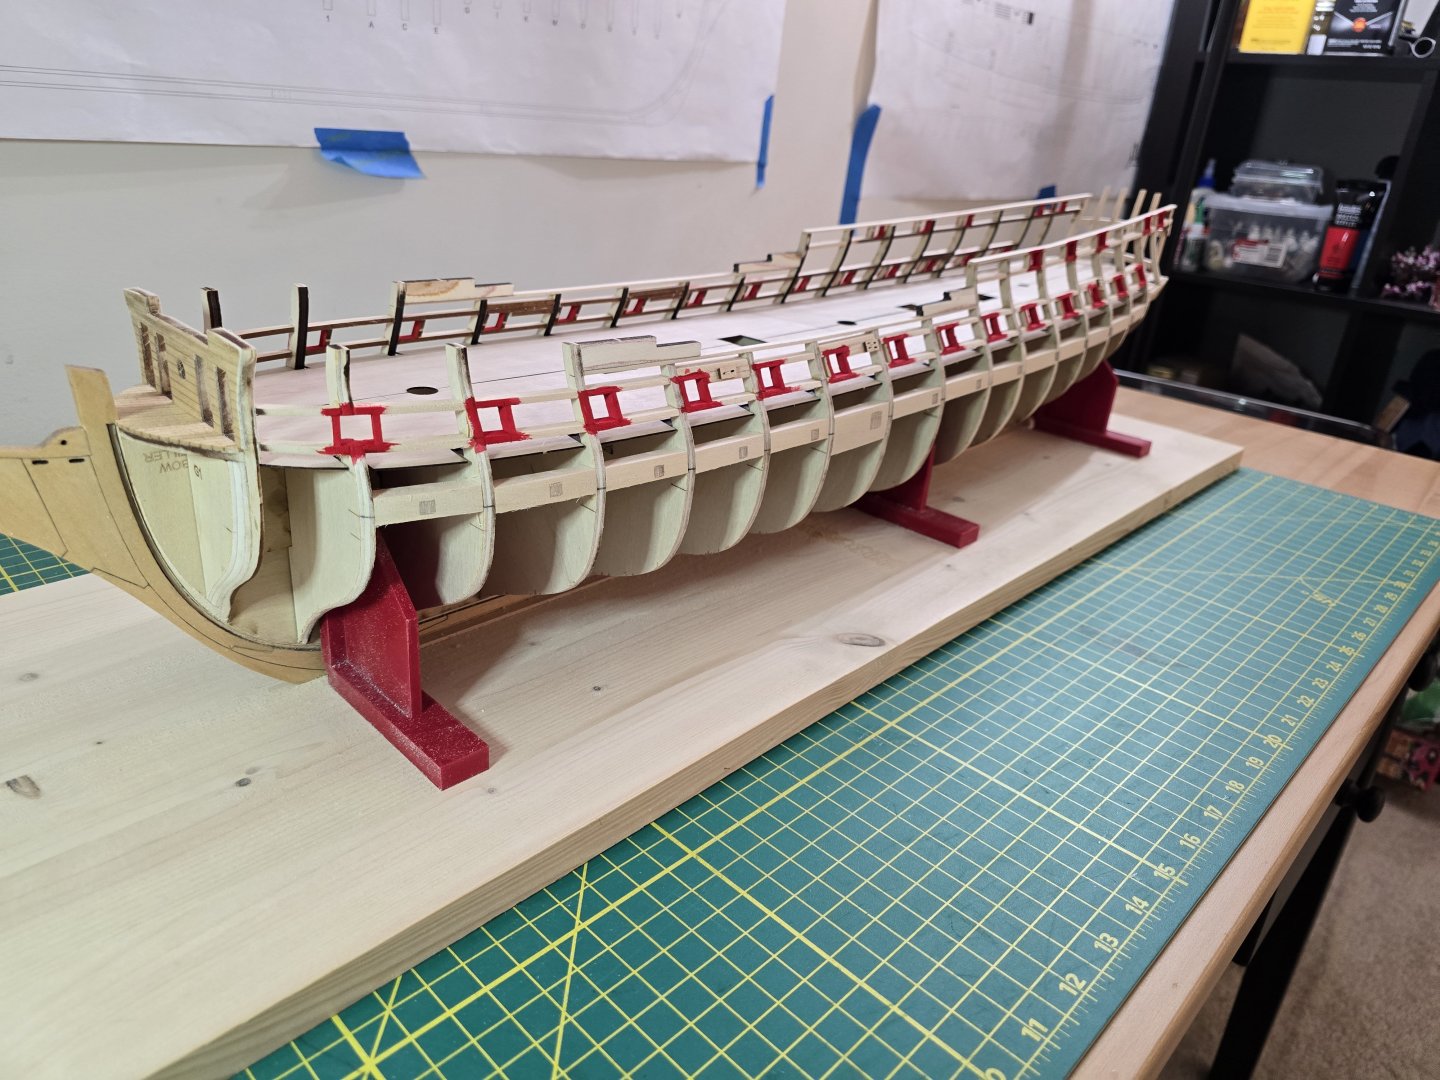
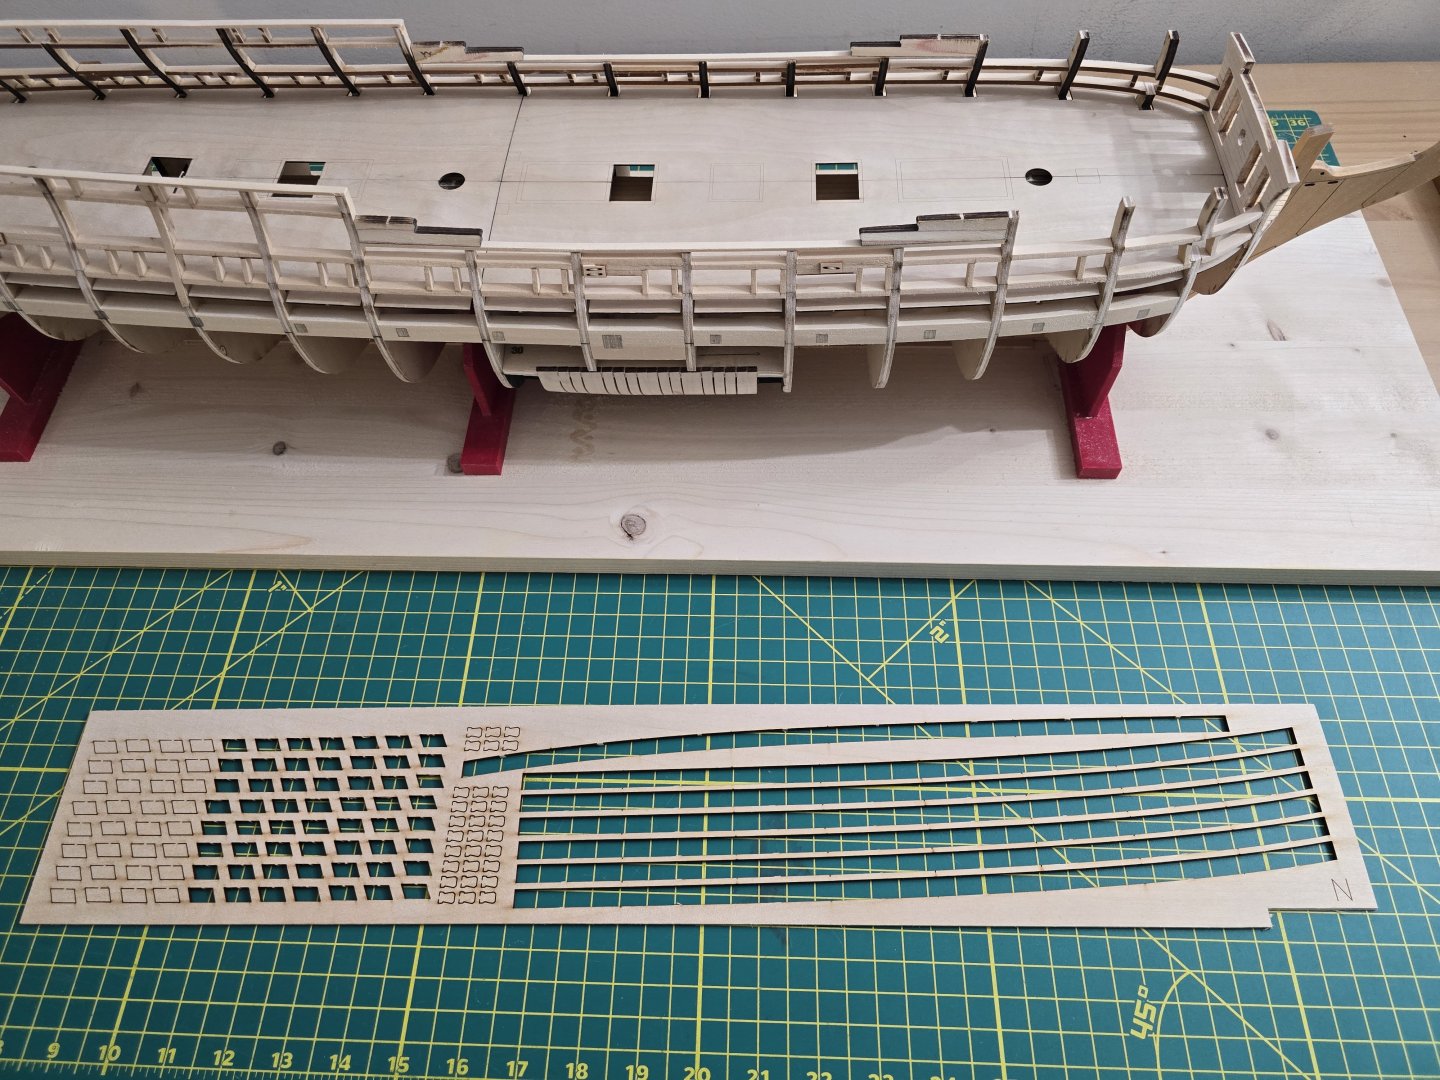
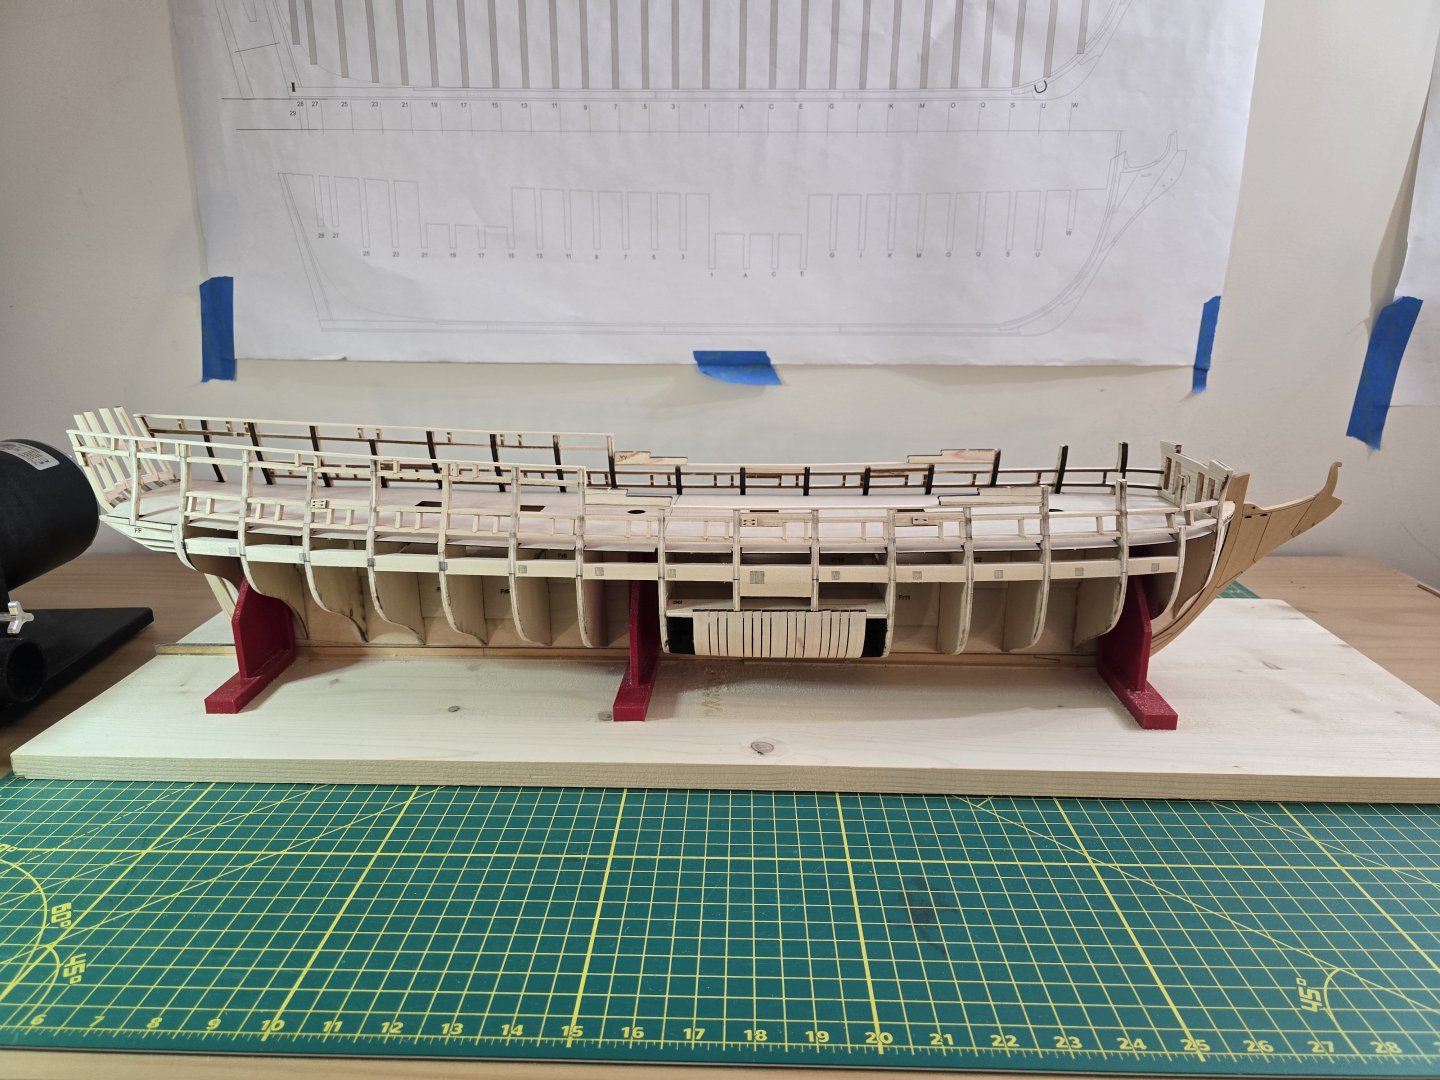
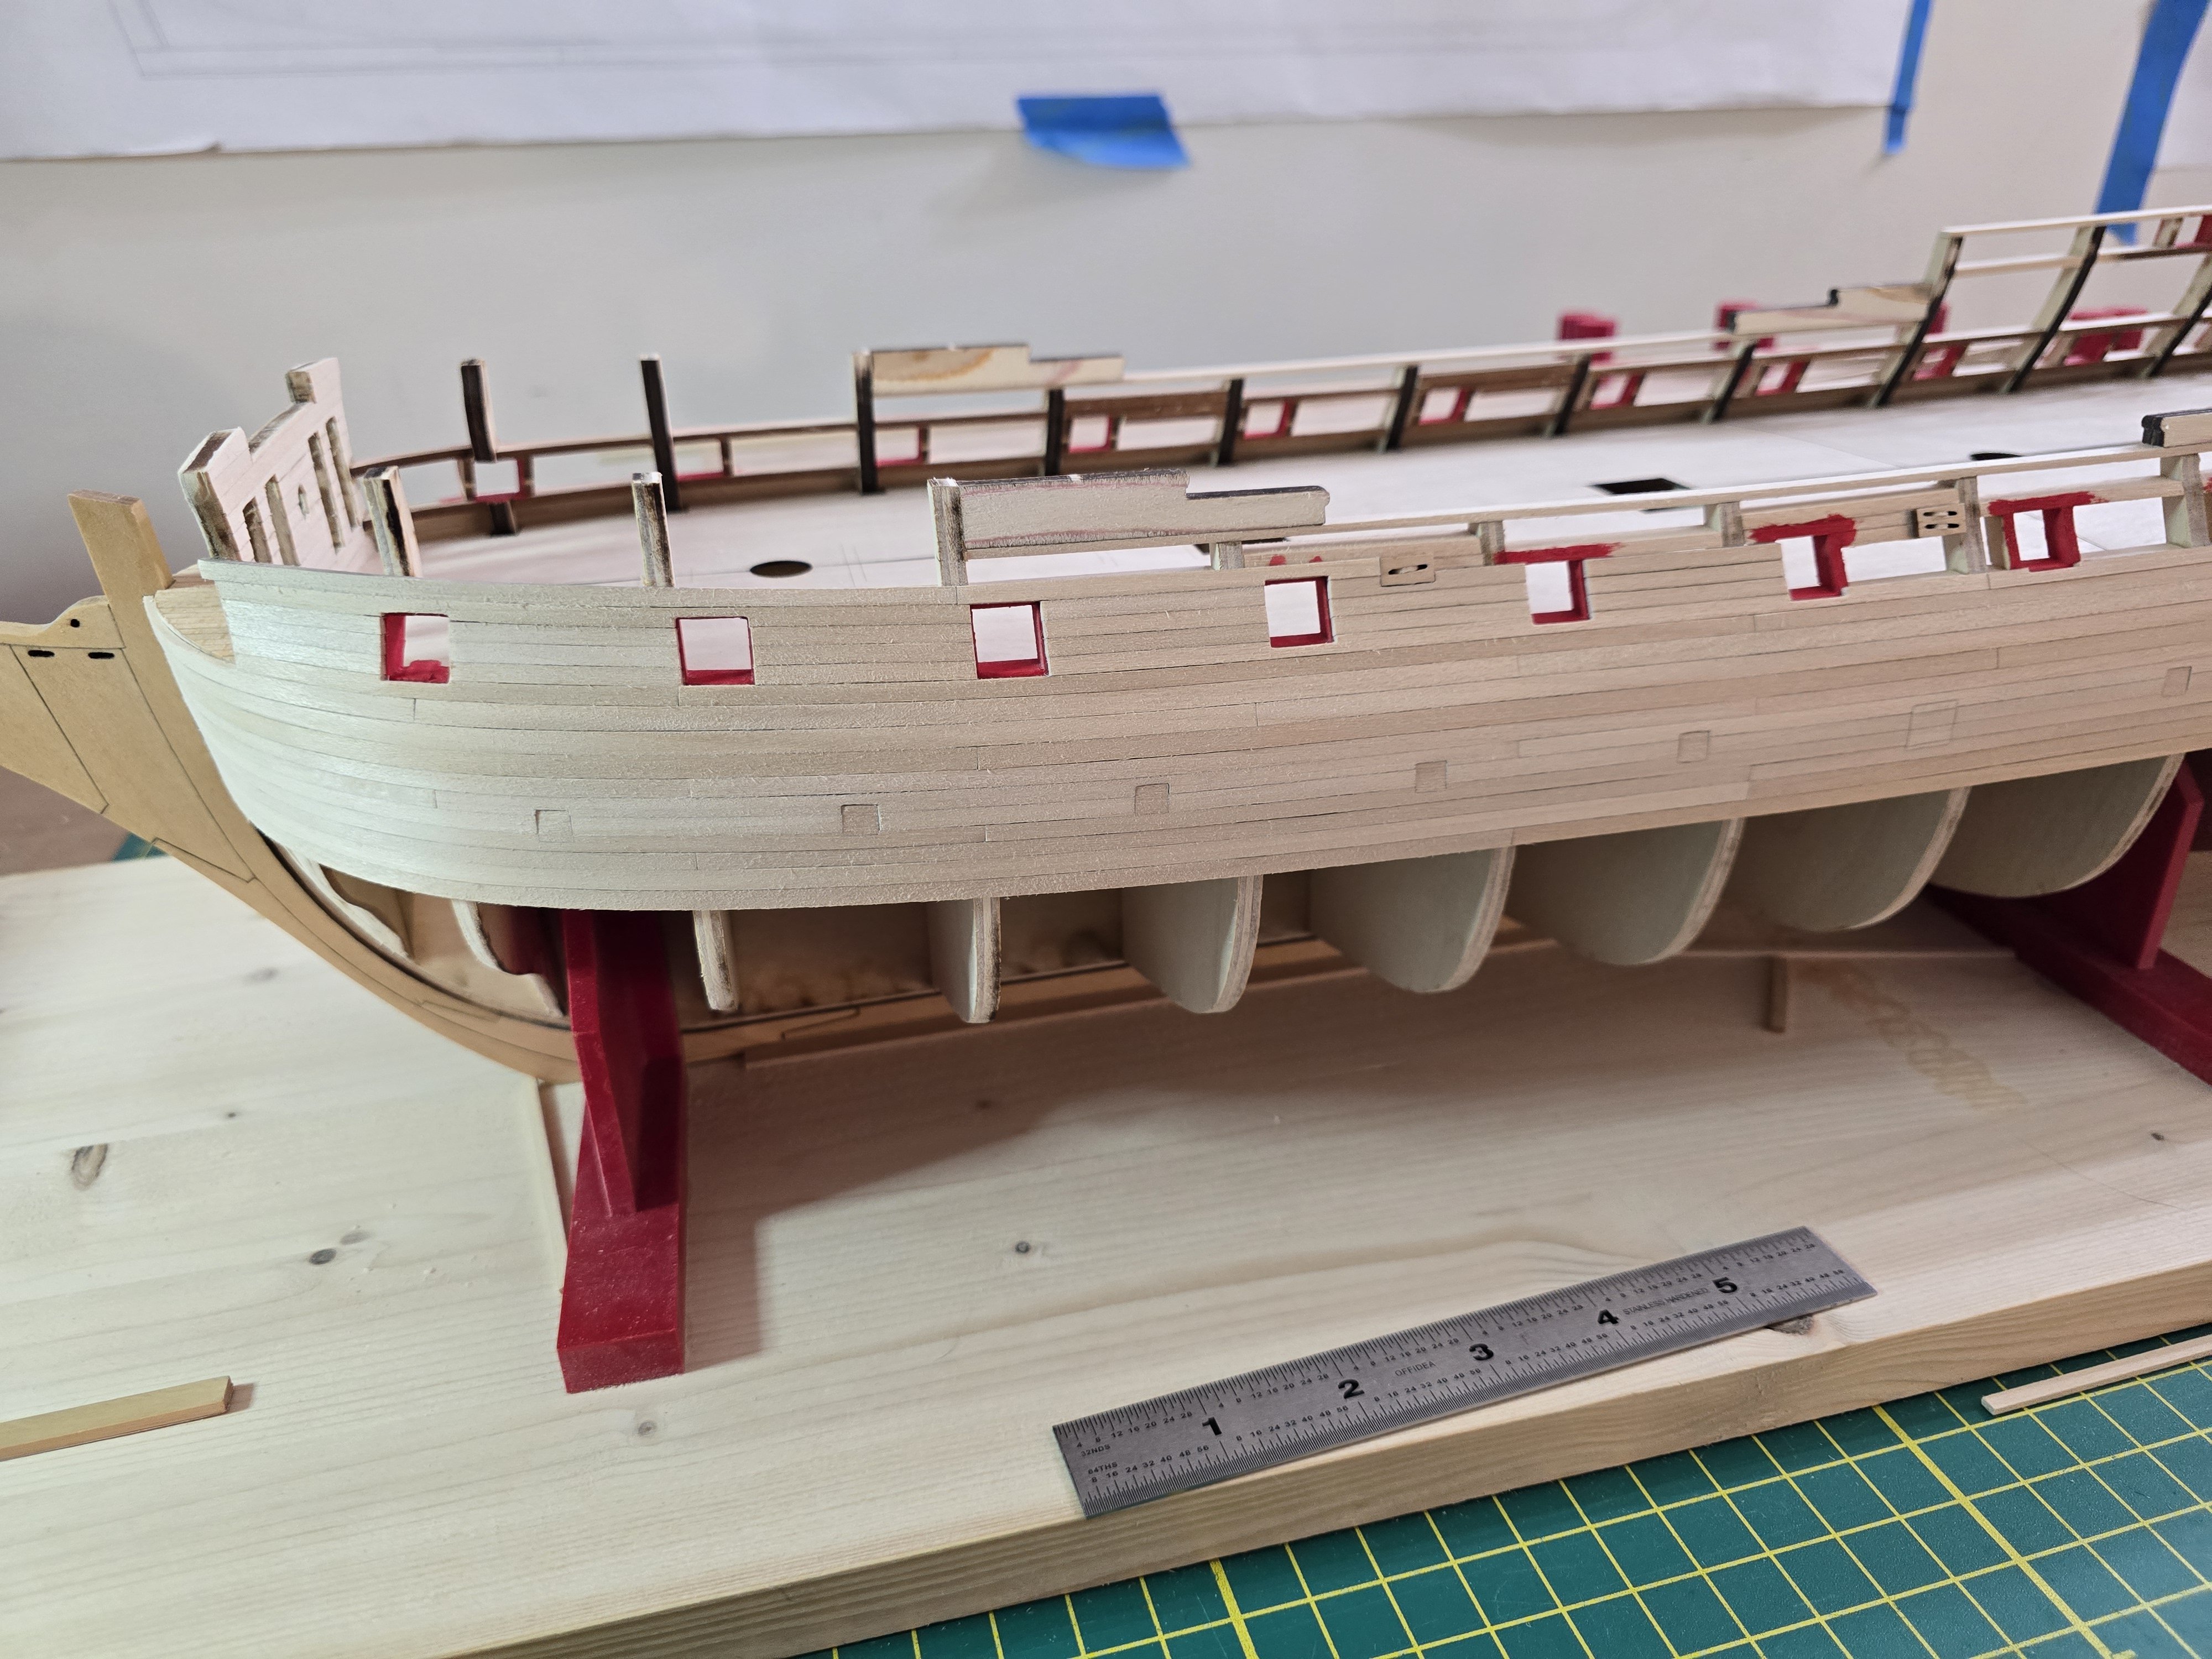
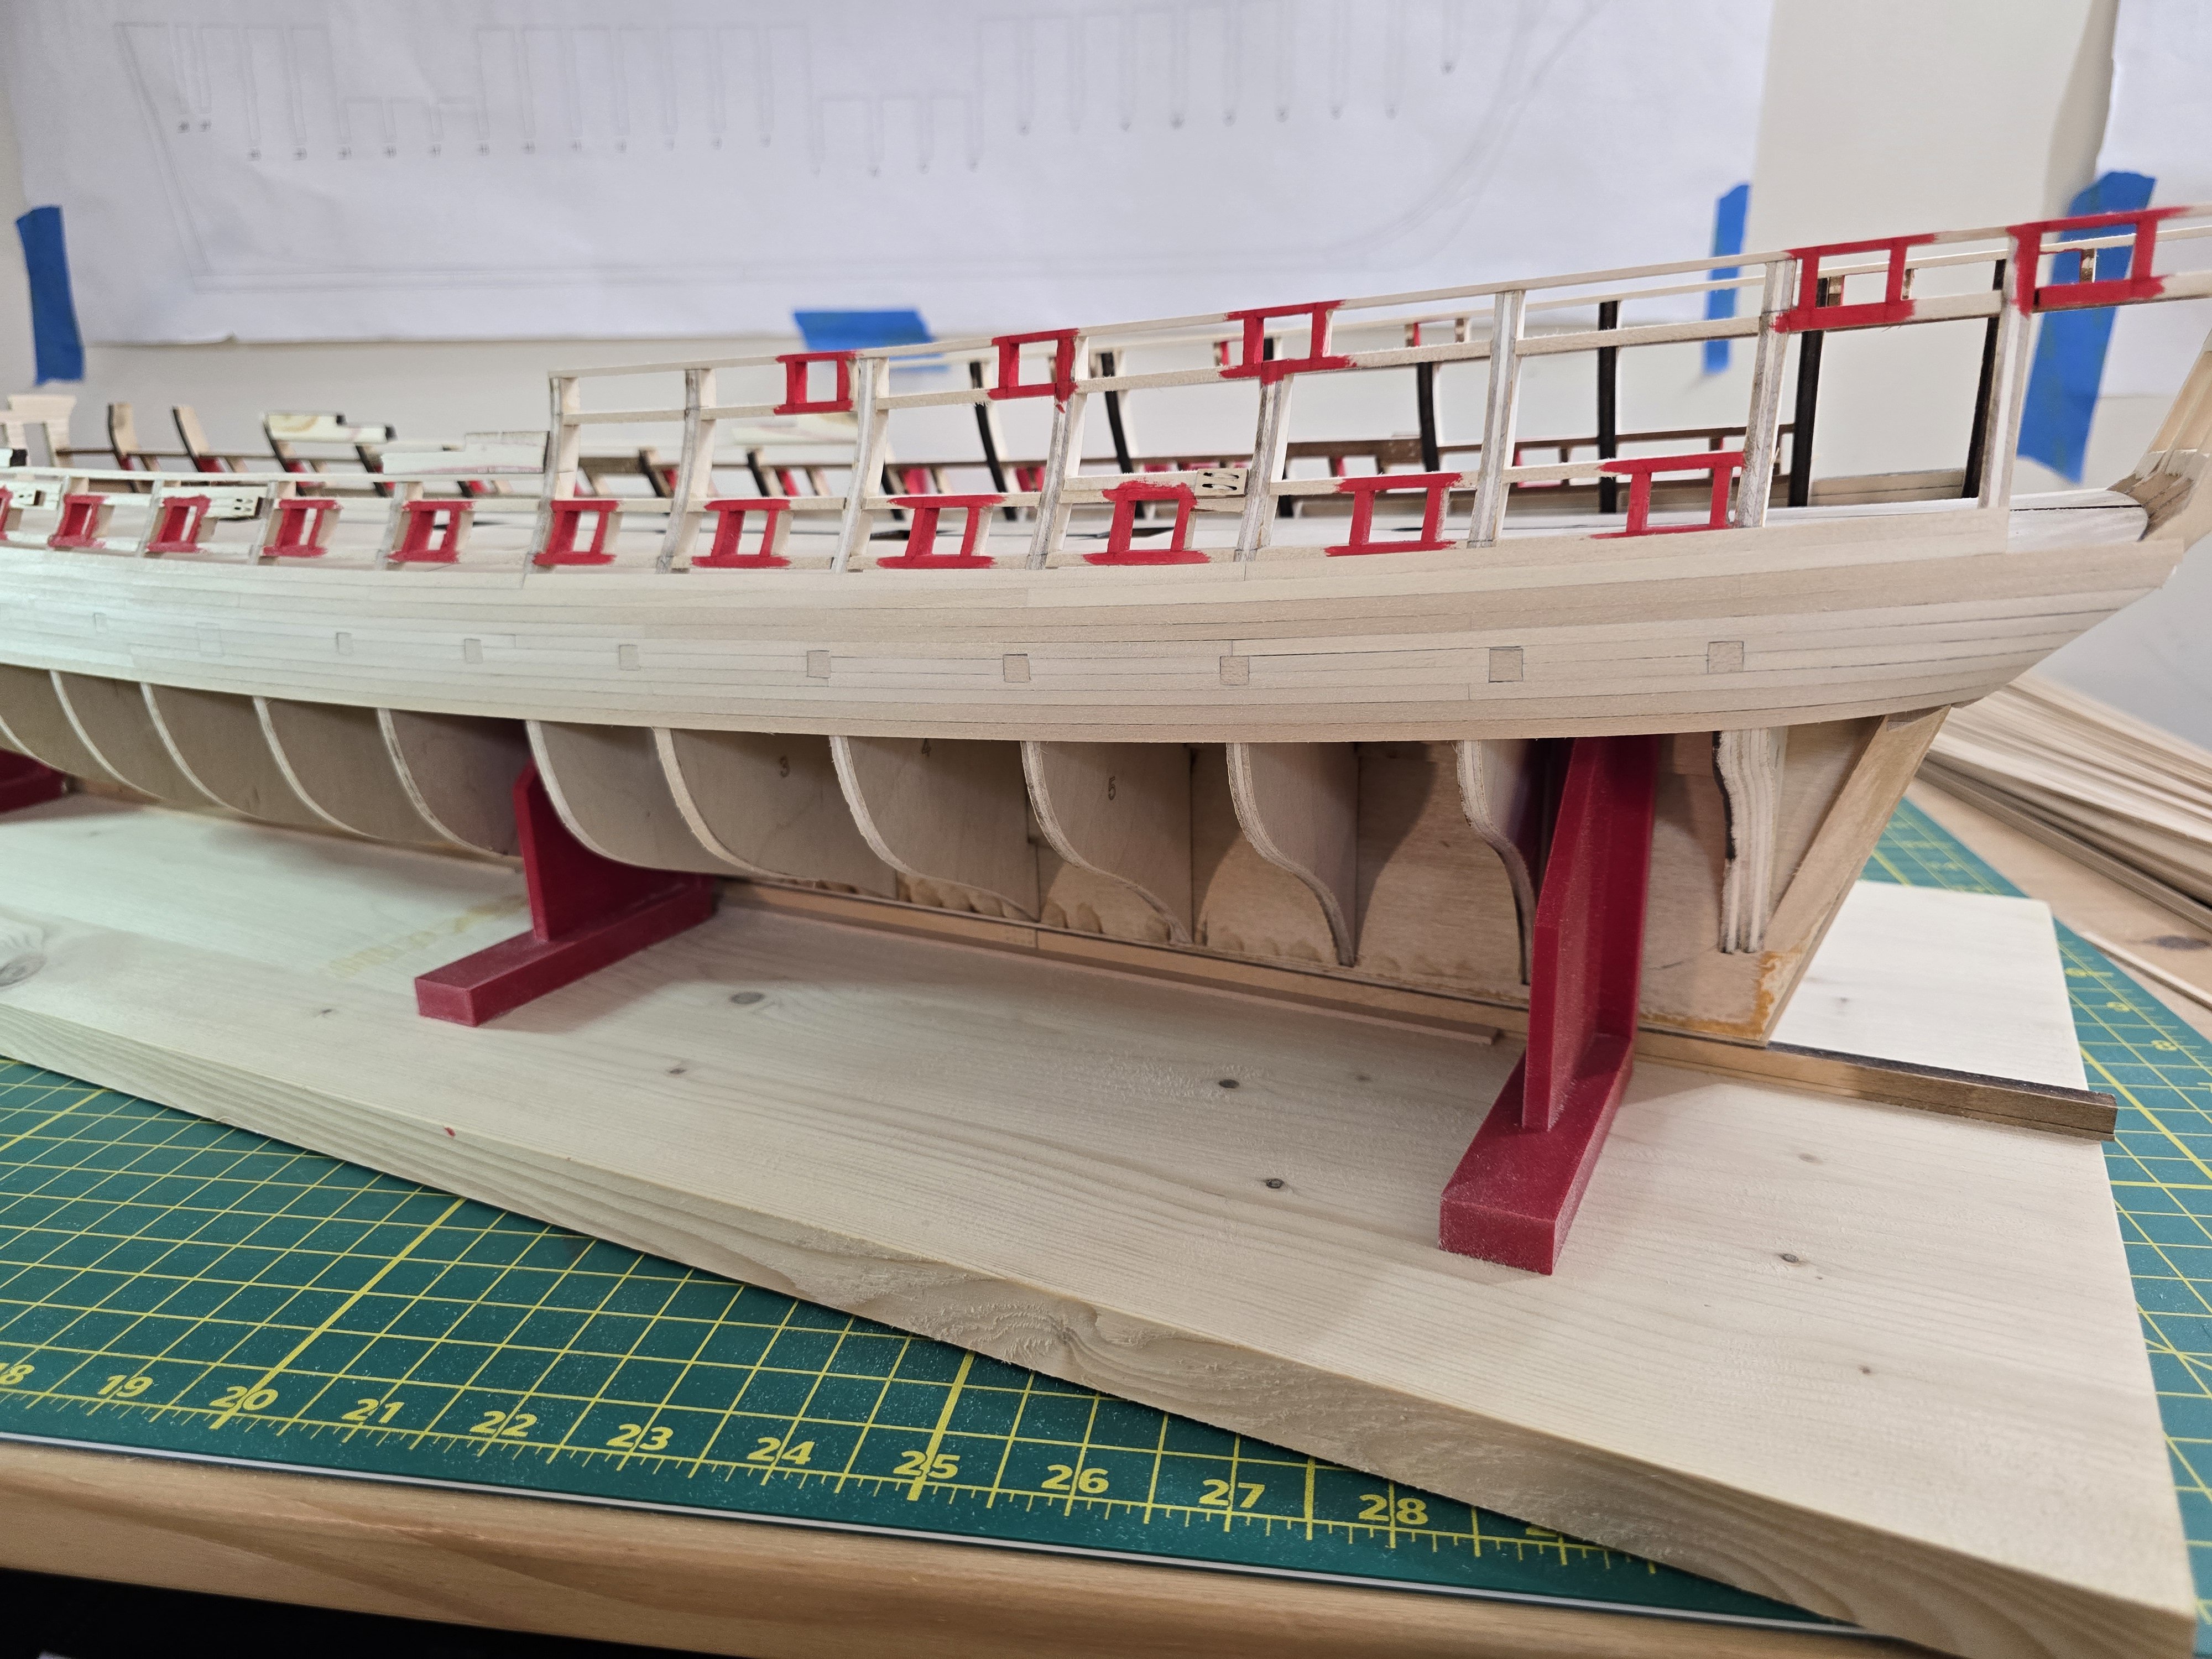
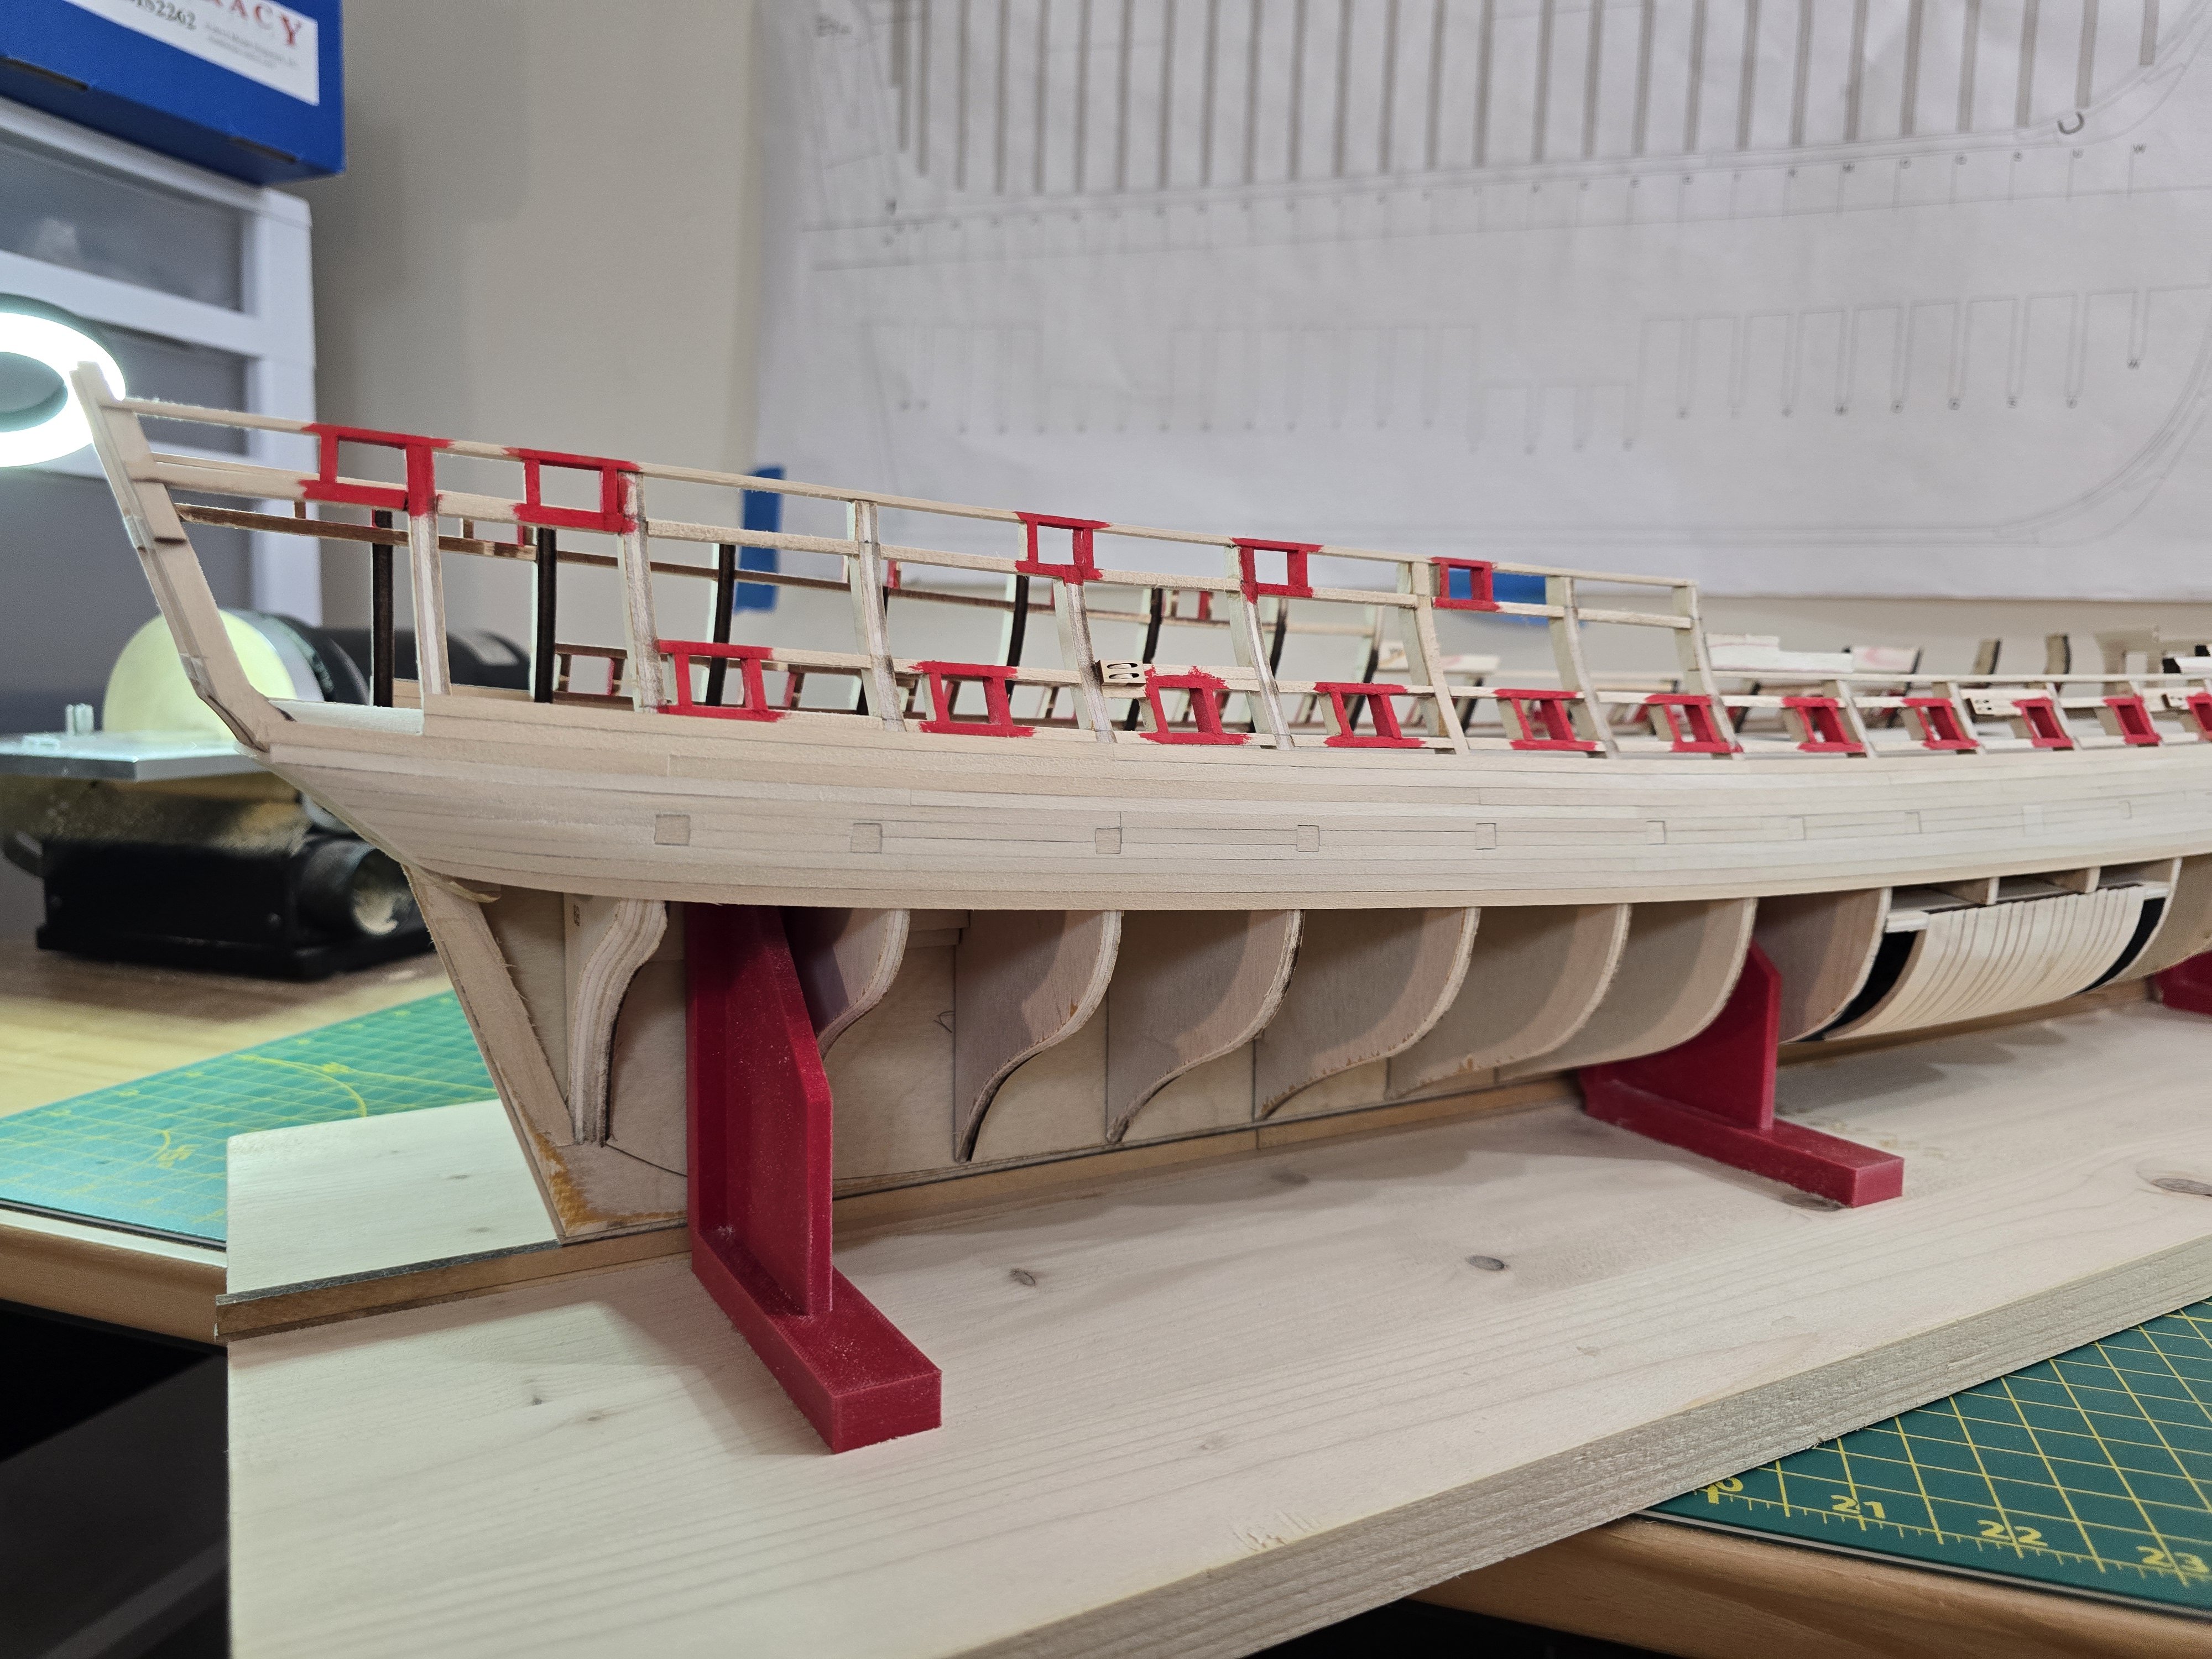
Hey all! Finally an update! I've been busy planking one side of the gundeck. Trying to get the 1/64" rabbet around each port is very time consuming. I can only imagine doing this on something like the HMS Victory! Haha... Here is how I planked around the sheaves. First I took a strip and cut out with a knife the shape of the sheave shell and used various sanding stick and files to make sure it has a good fit. I didn't cut off the correct length of the strip until i knew it fit properly between the sheave shell and the previous row of planking as shown. This is so that if I do not get the shape correct around the sheave shell (which happens quite a bit honestly!) I can easily cut it off the strip and try again. So after it fits, I then marked the correct angles for each side of the strip and cut/ beveled the strip to the correct shape. This takes a long time because it is very easy to over sand by accident and make the strip too short. This pic shows me testing the angle of the strip for the gunport. What I normally do, is plank the gun port one at a time. I would get the correct angle for thr gunport (shown in the pic), then make 2-3 more strips with the same angle and tested all 3 together on the gunport to make sure the angle is correct. To make the bevel correctly, I would set my disk sander to the correct angle and sand all 3 strips. This saved me time and material as I didn't want to measure the angle for every strip. I would then do the same thing on the right side of the strips in the same manor. I think it worked out pretty well. I planked the gunports bow to stern on one side at a time. Maybe I'm really slow, but for me, I could plank about 2 gunport frames (not counting the tops of them) every night. This is a out 6-8 small strips between the gunports per day. I hope these next picture look good as it took me almost half a month to complete this much. Please let me know what you guys think! I need to order more glue, so I might take a day off of planking. I still have the quarterdeck gunports to go too! But at least these do not need the 1/64" rabbet. Thanks all! Jeff


-
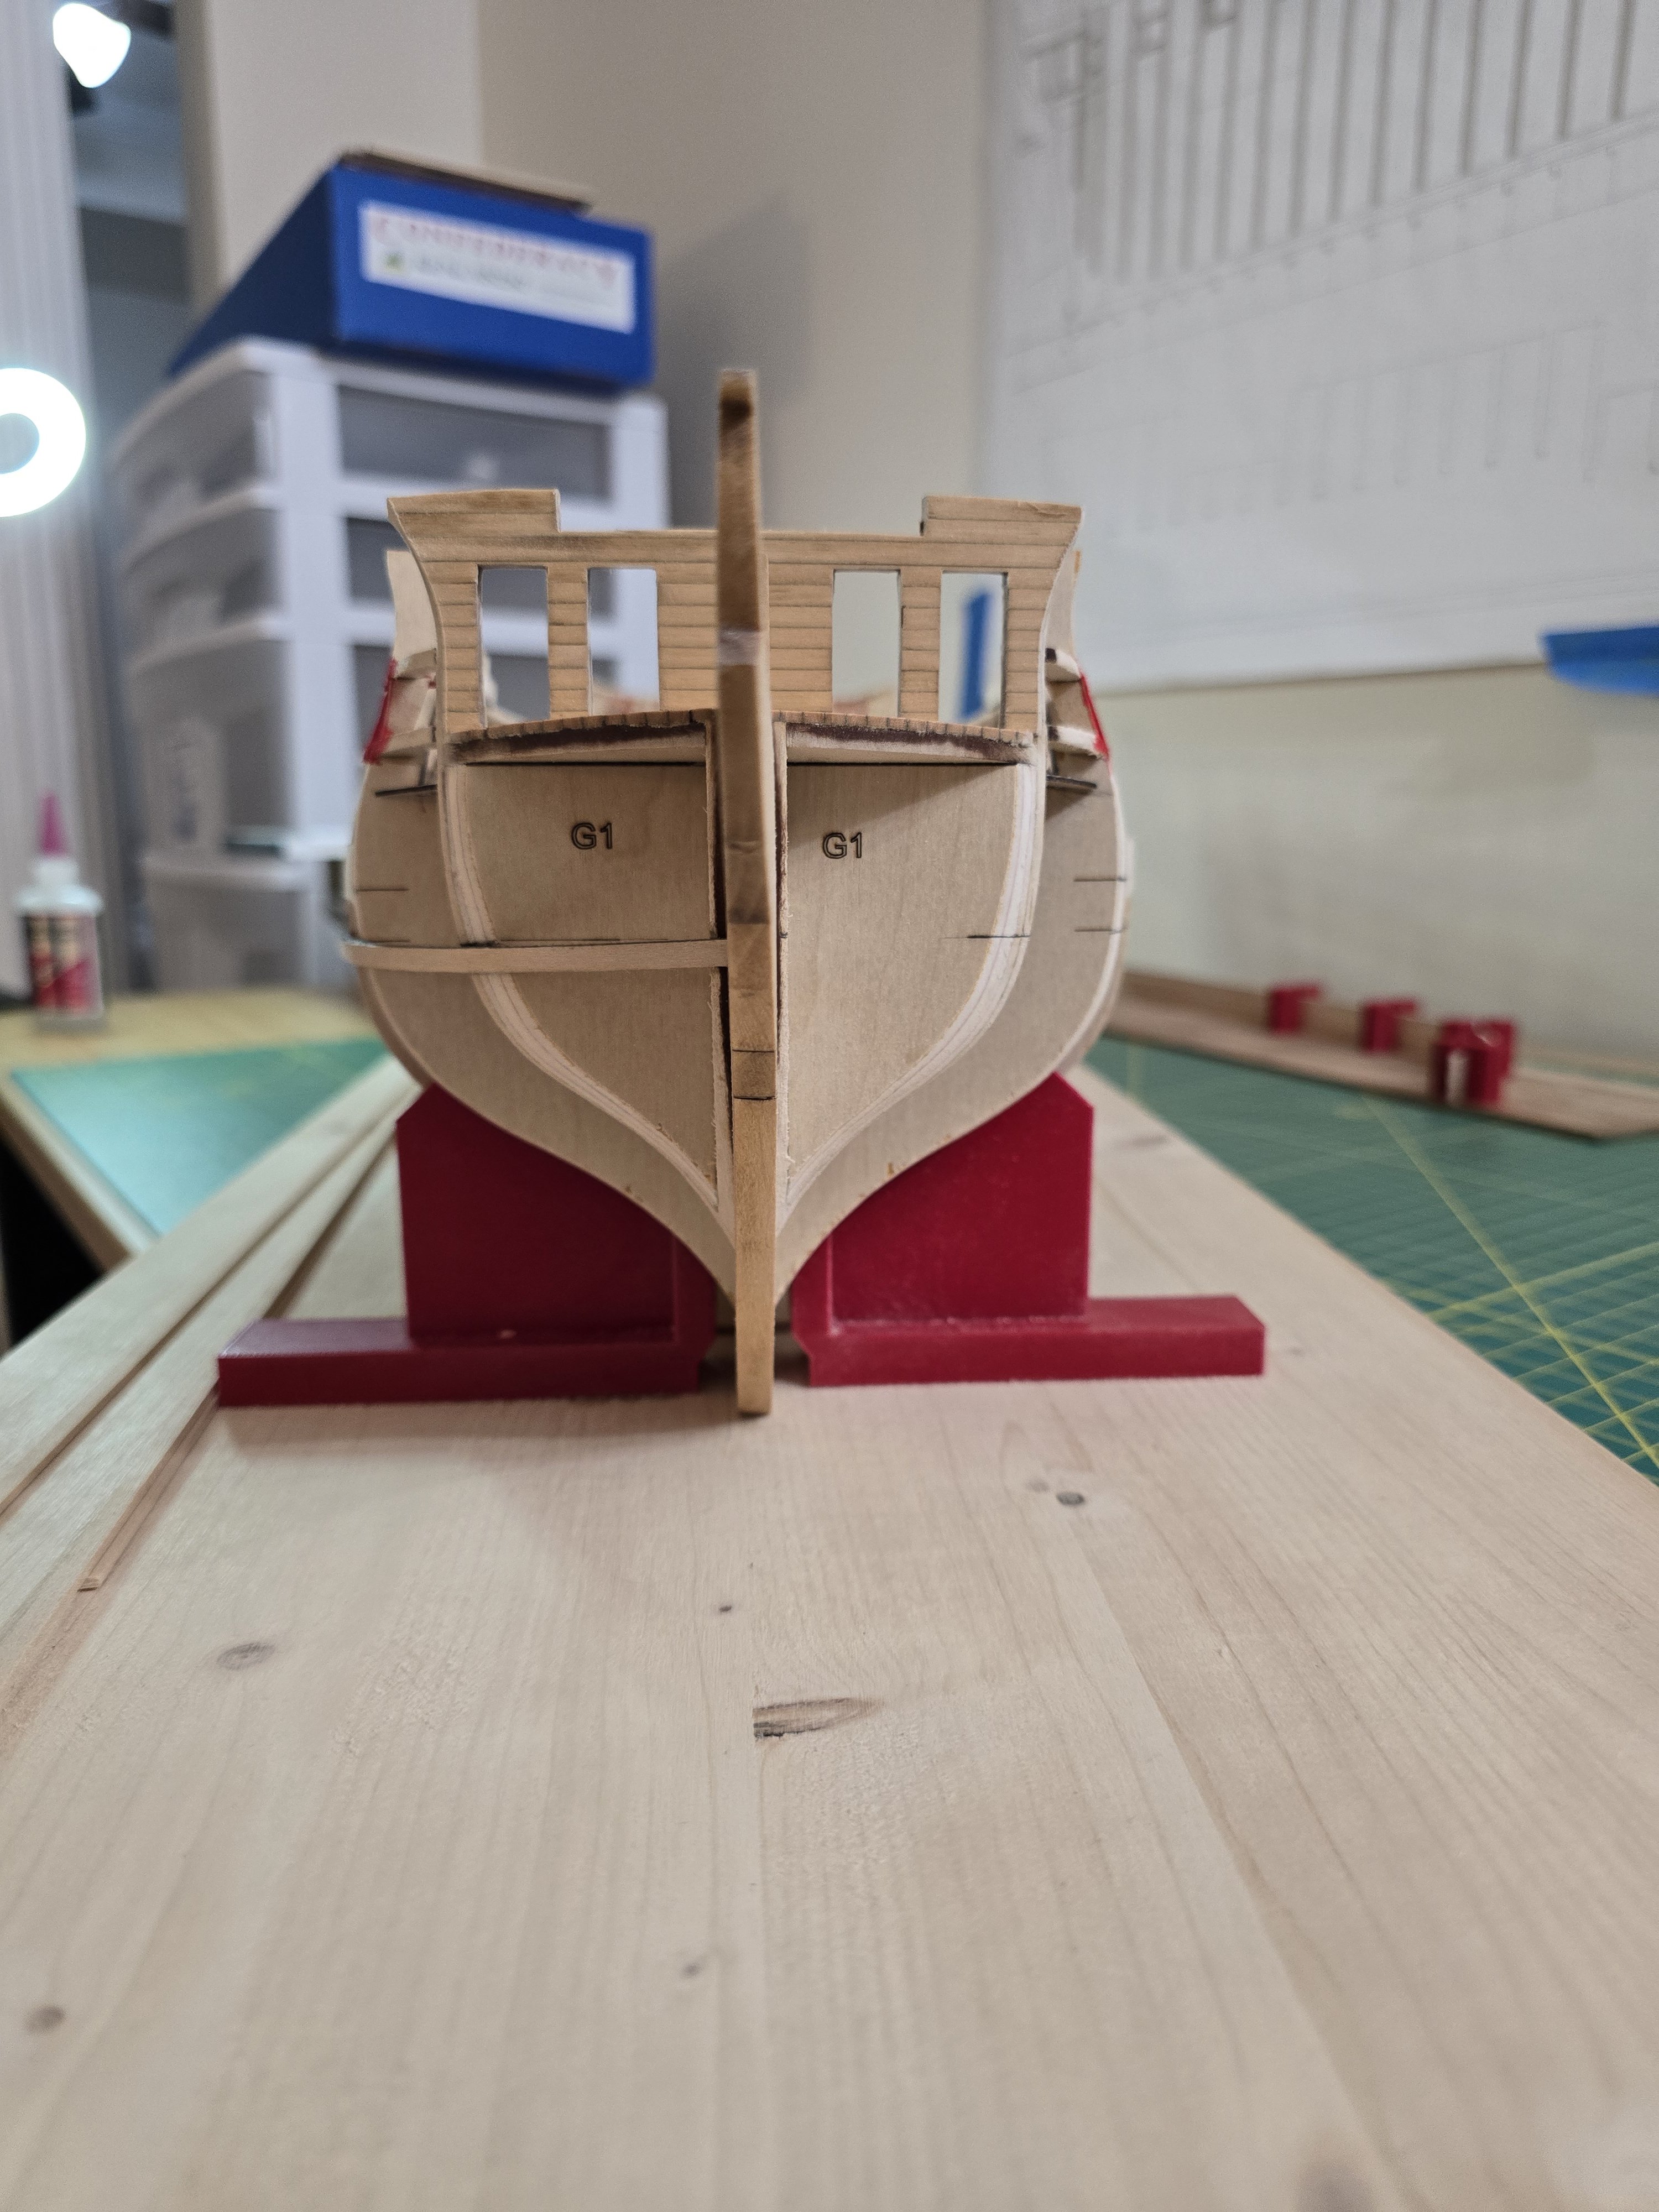
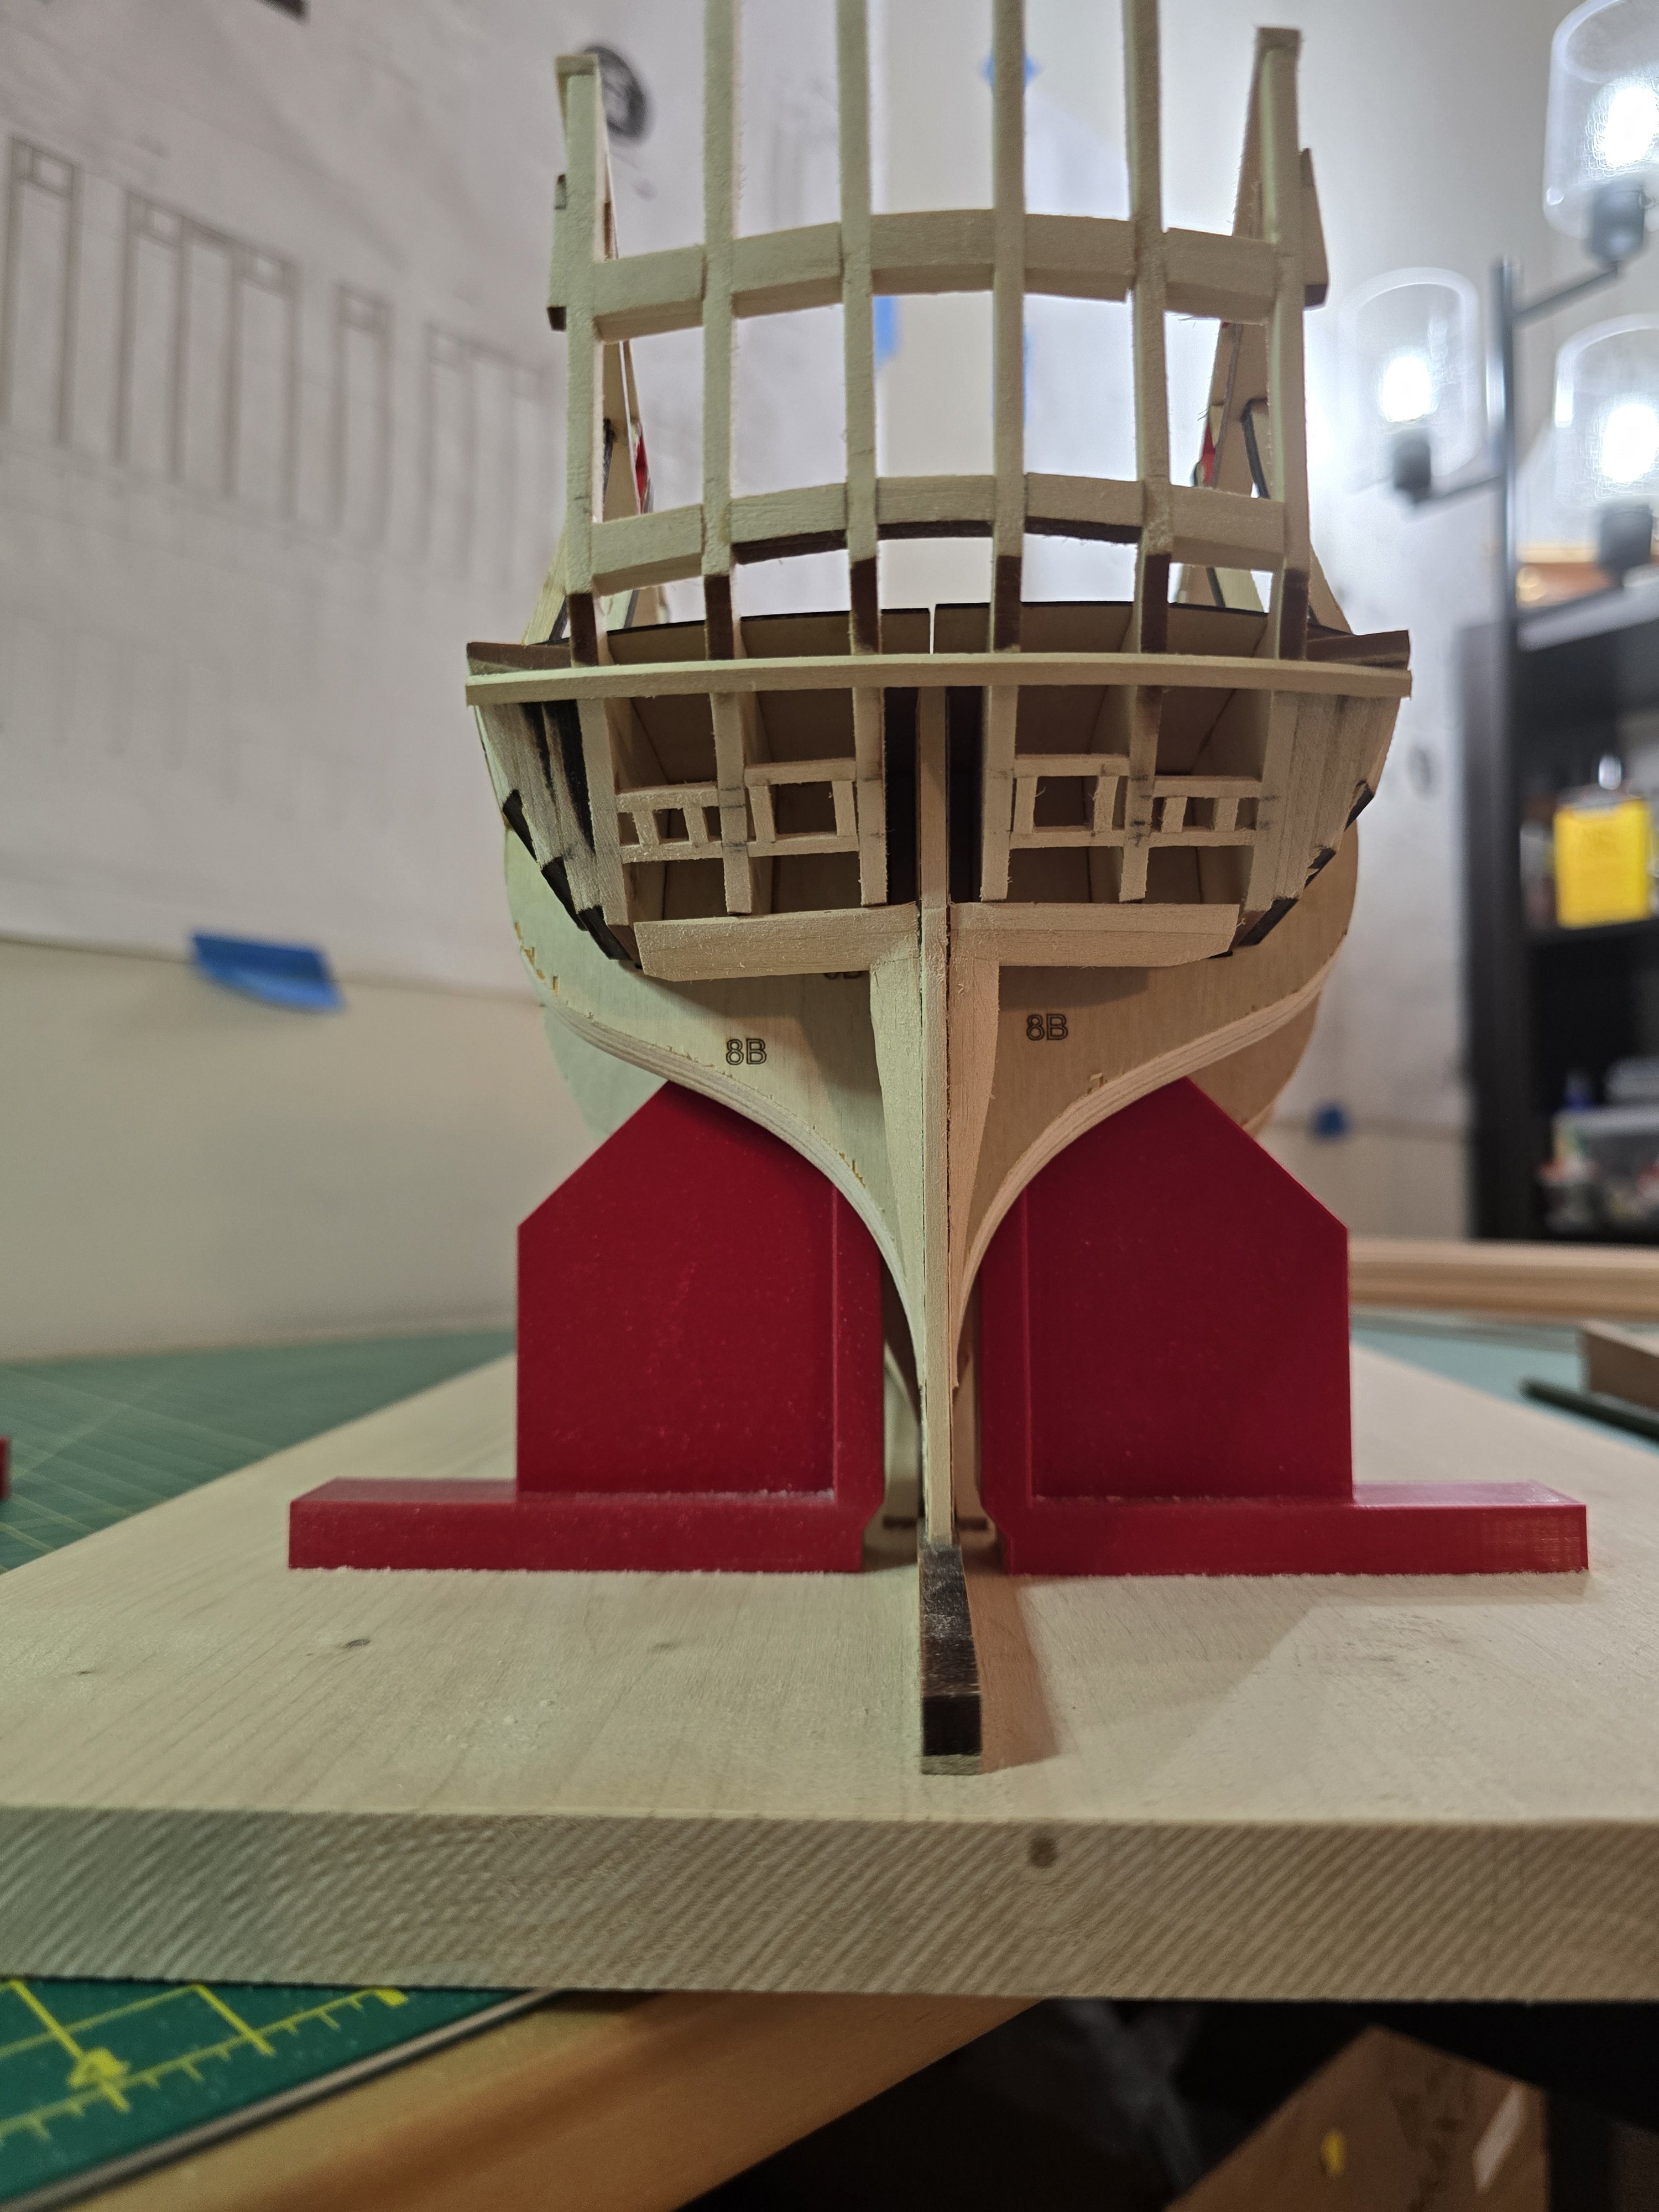
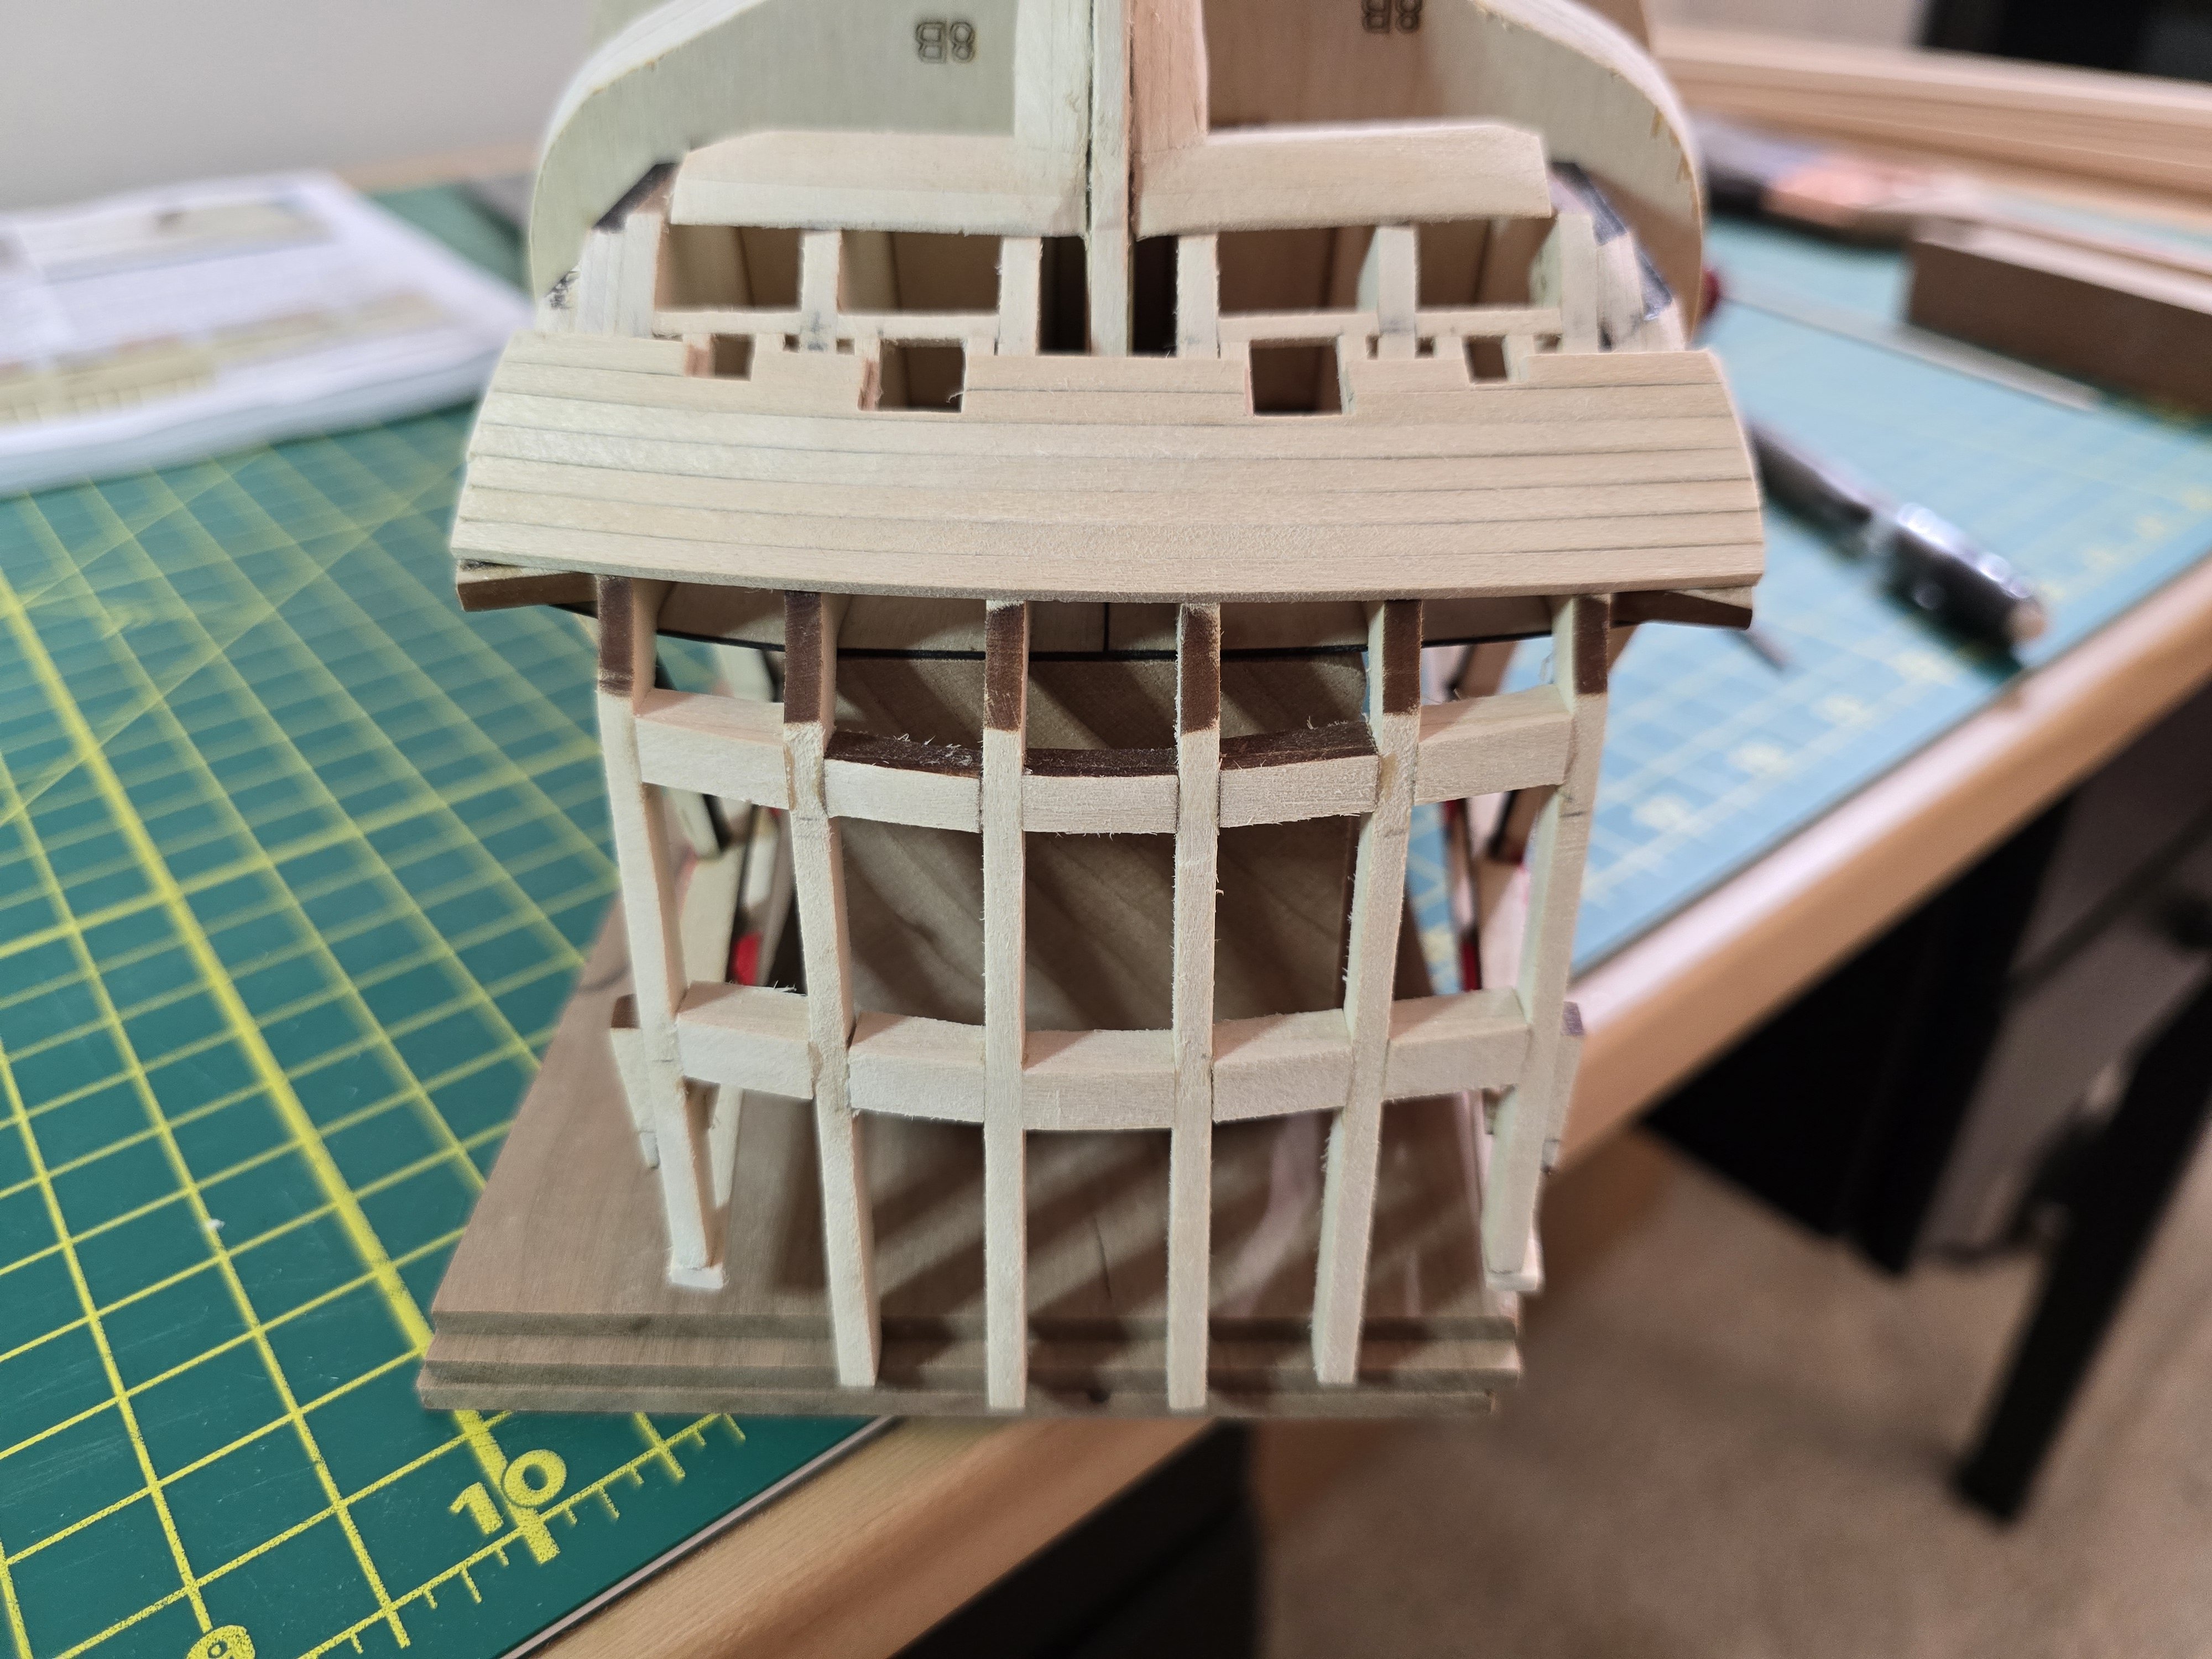
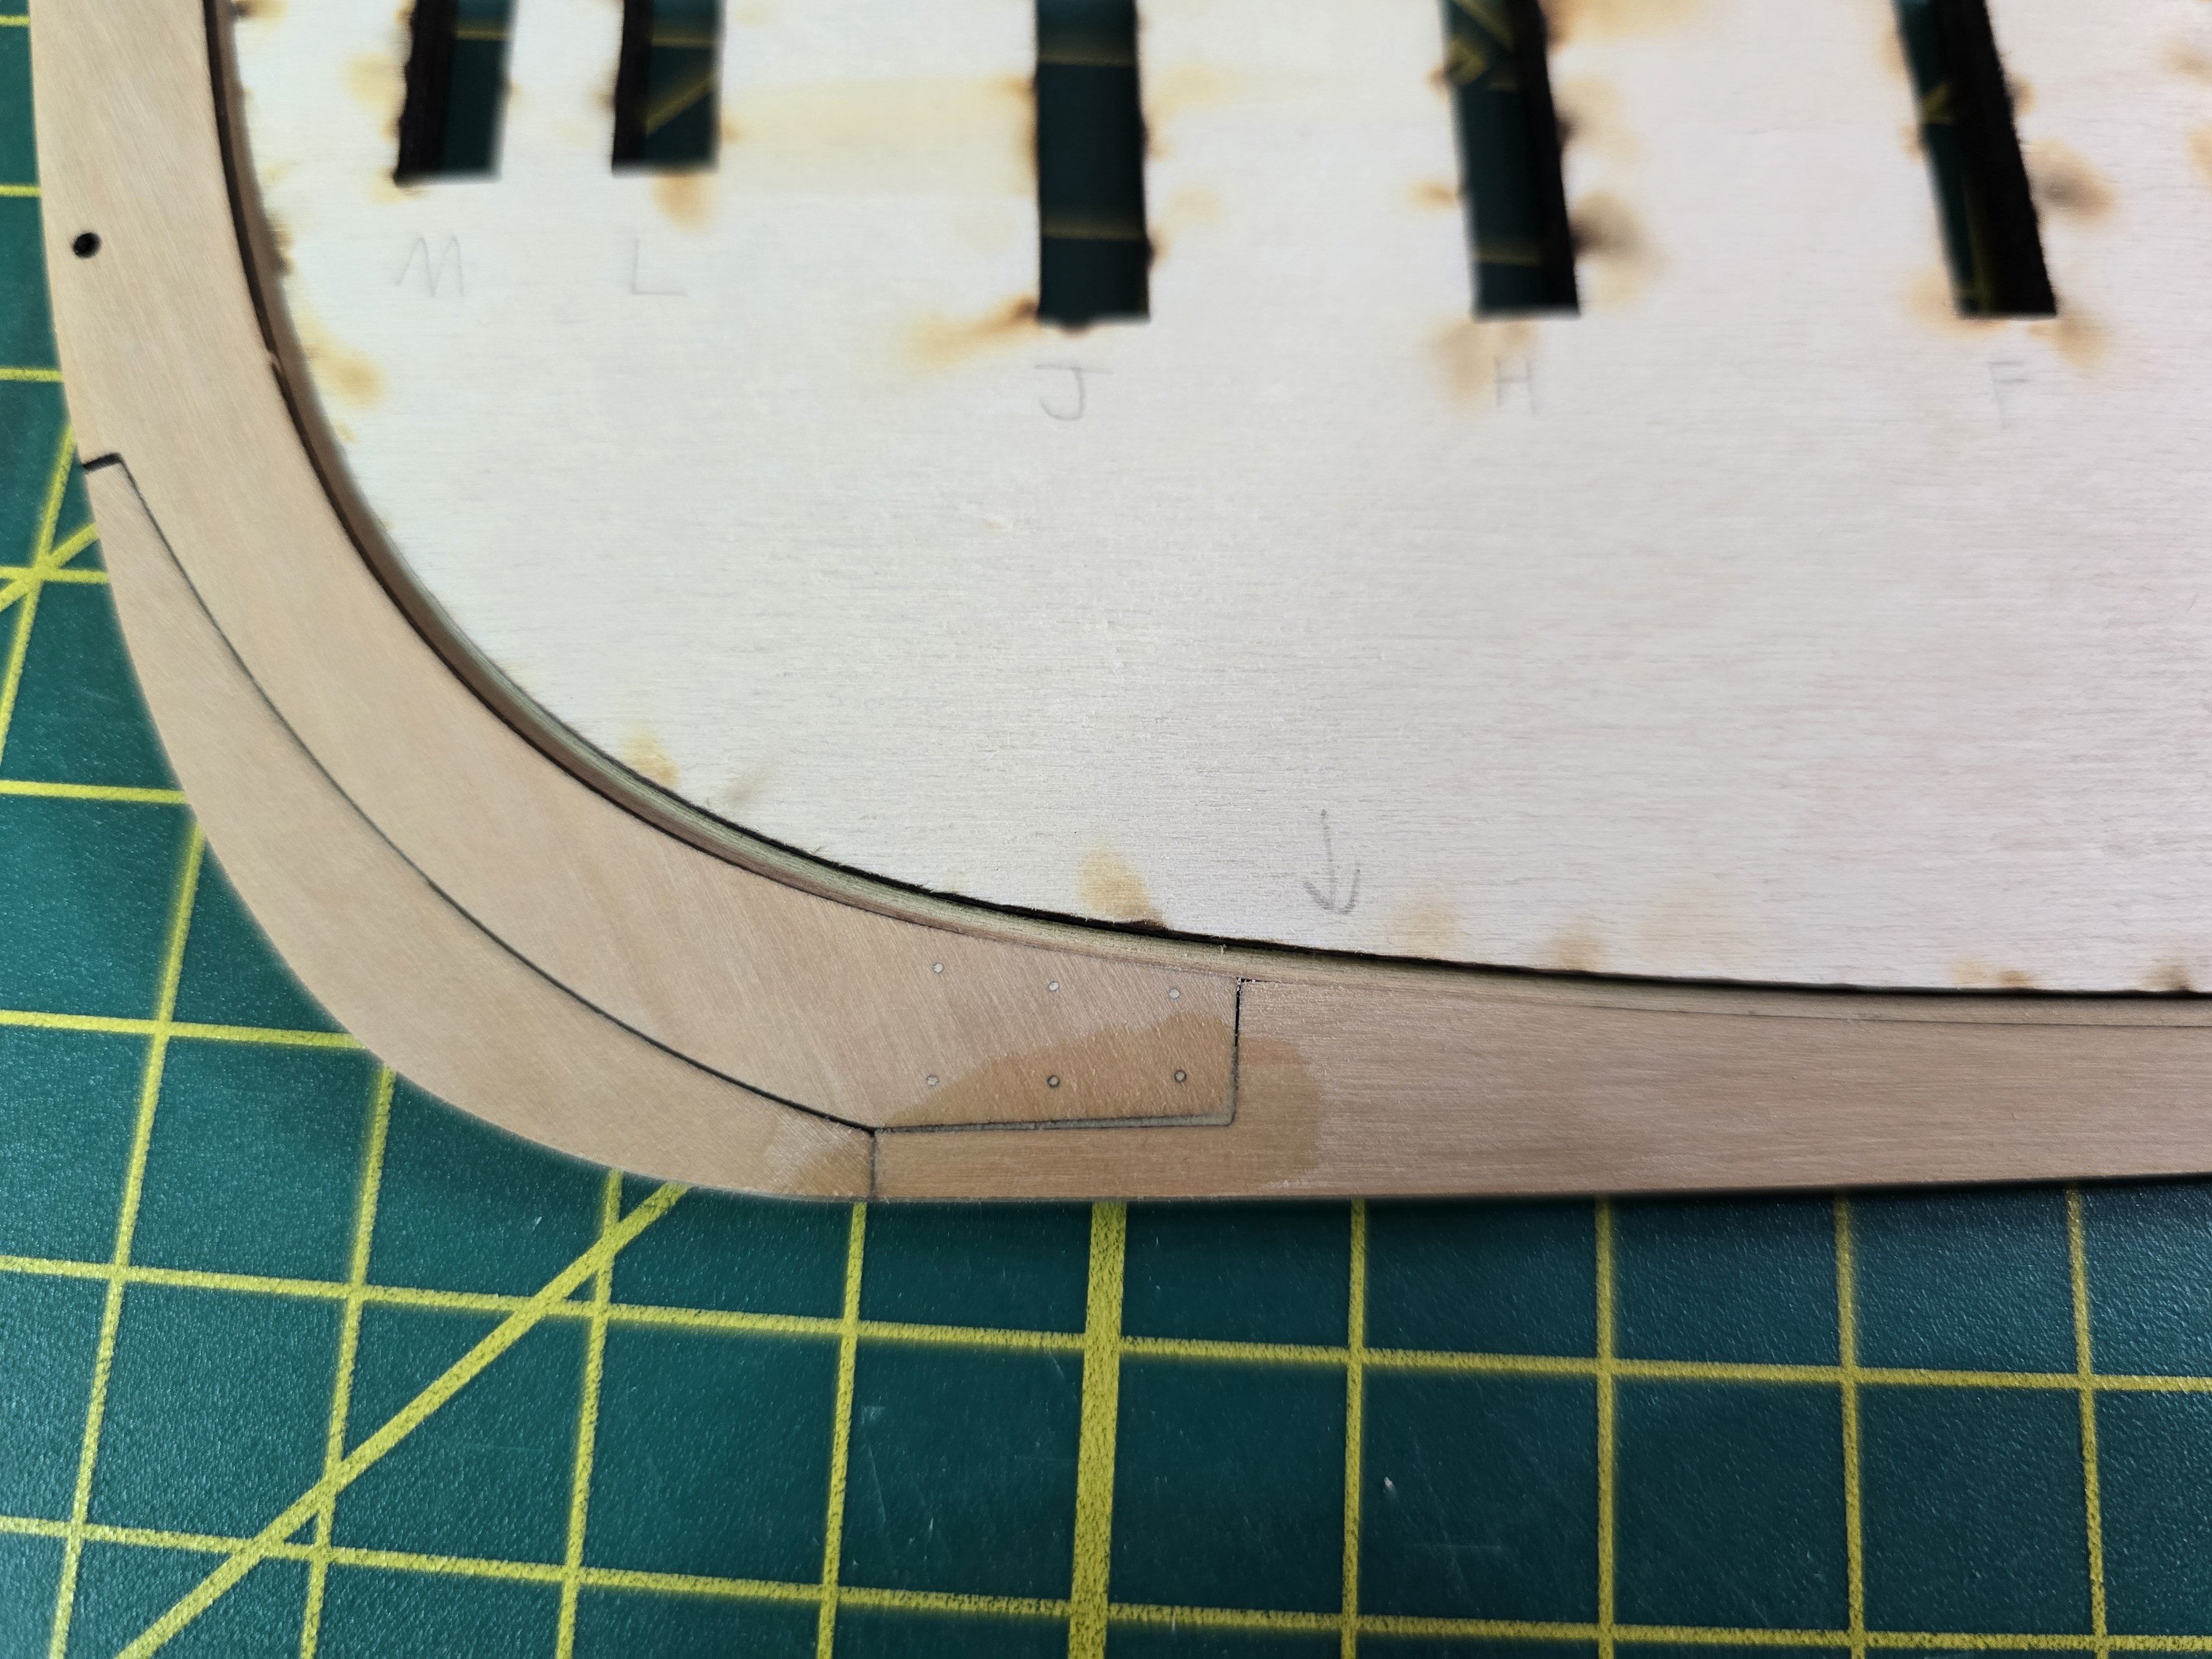
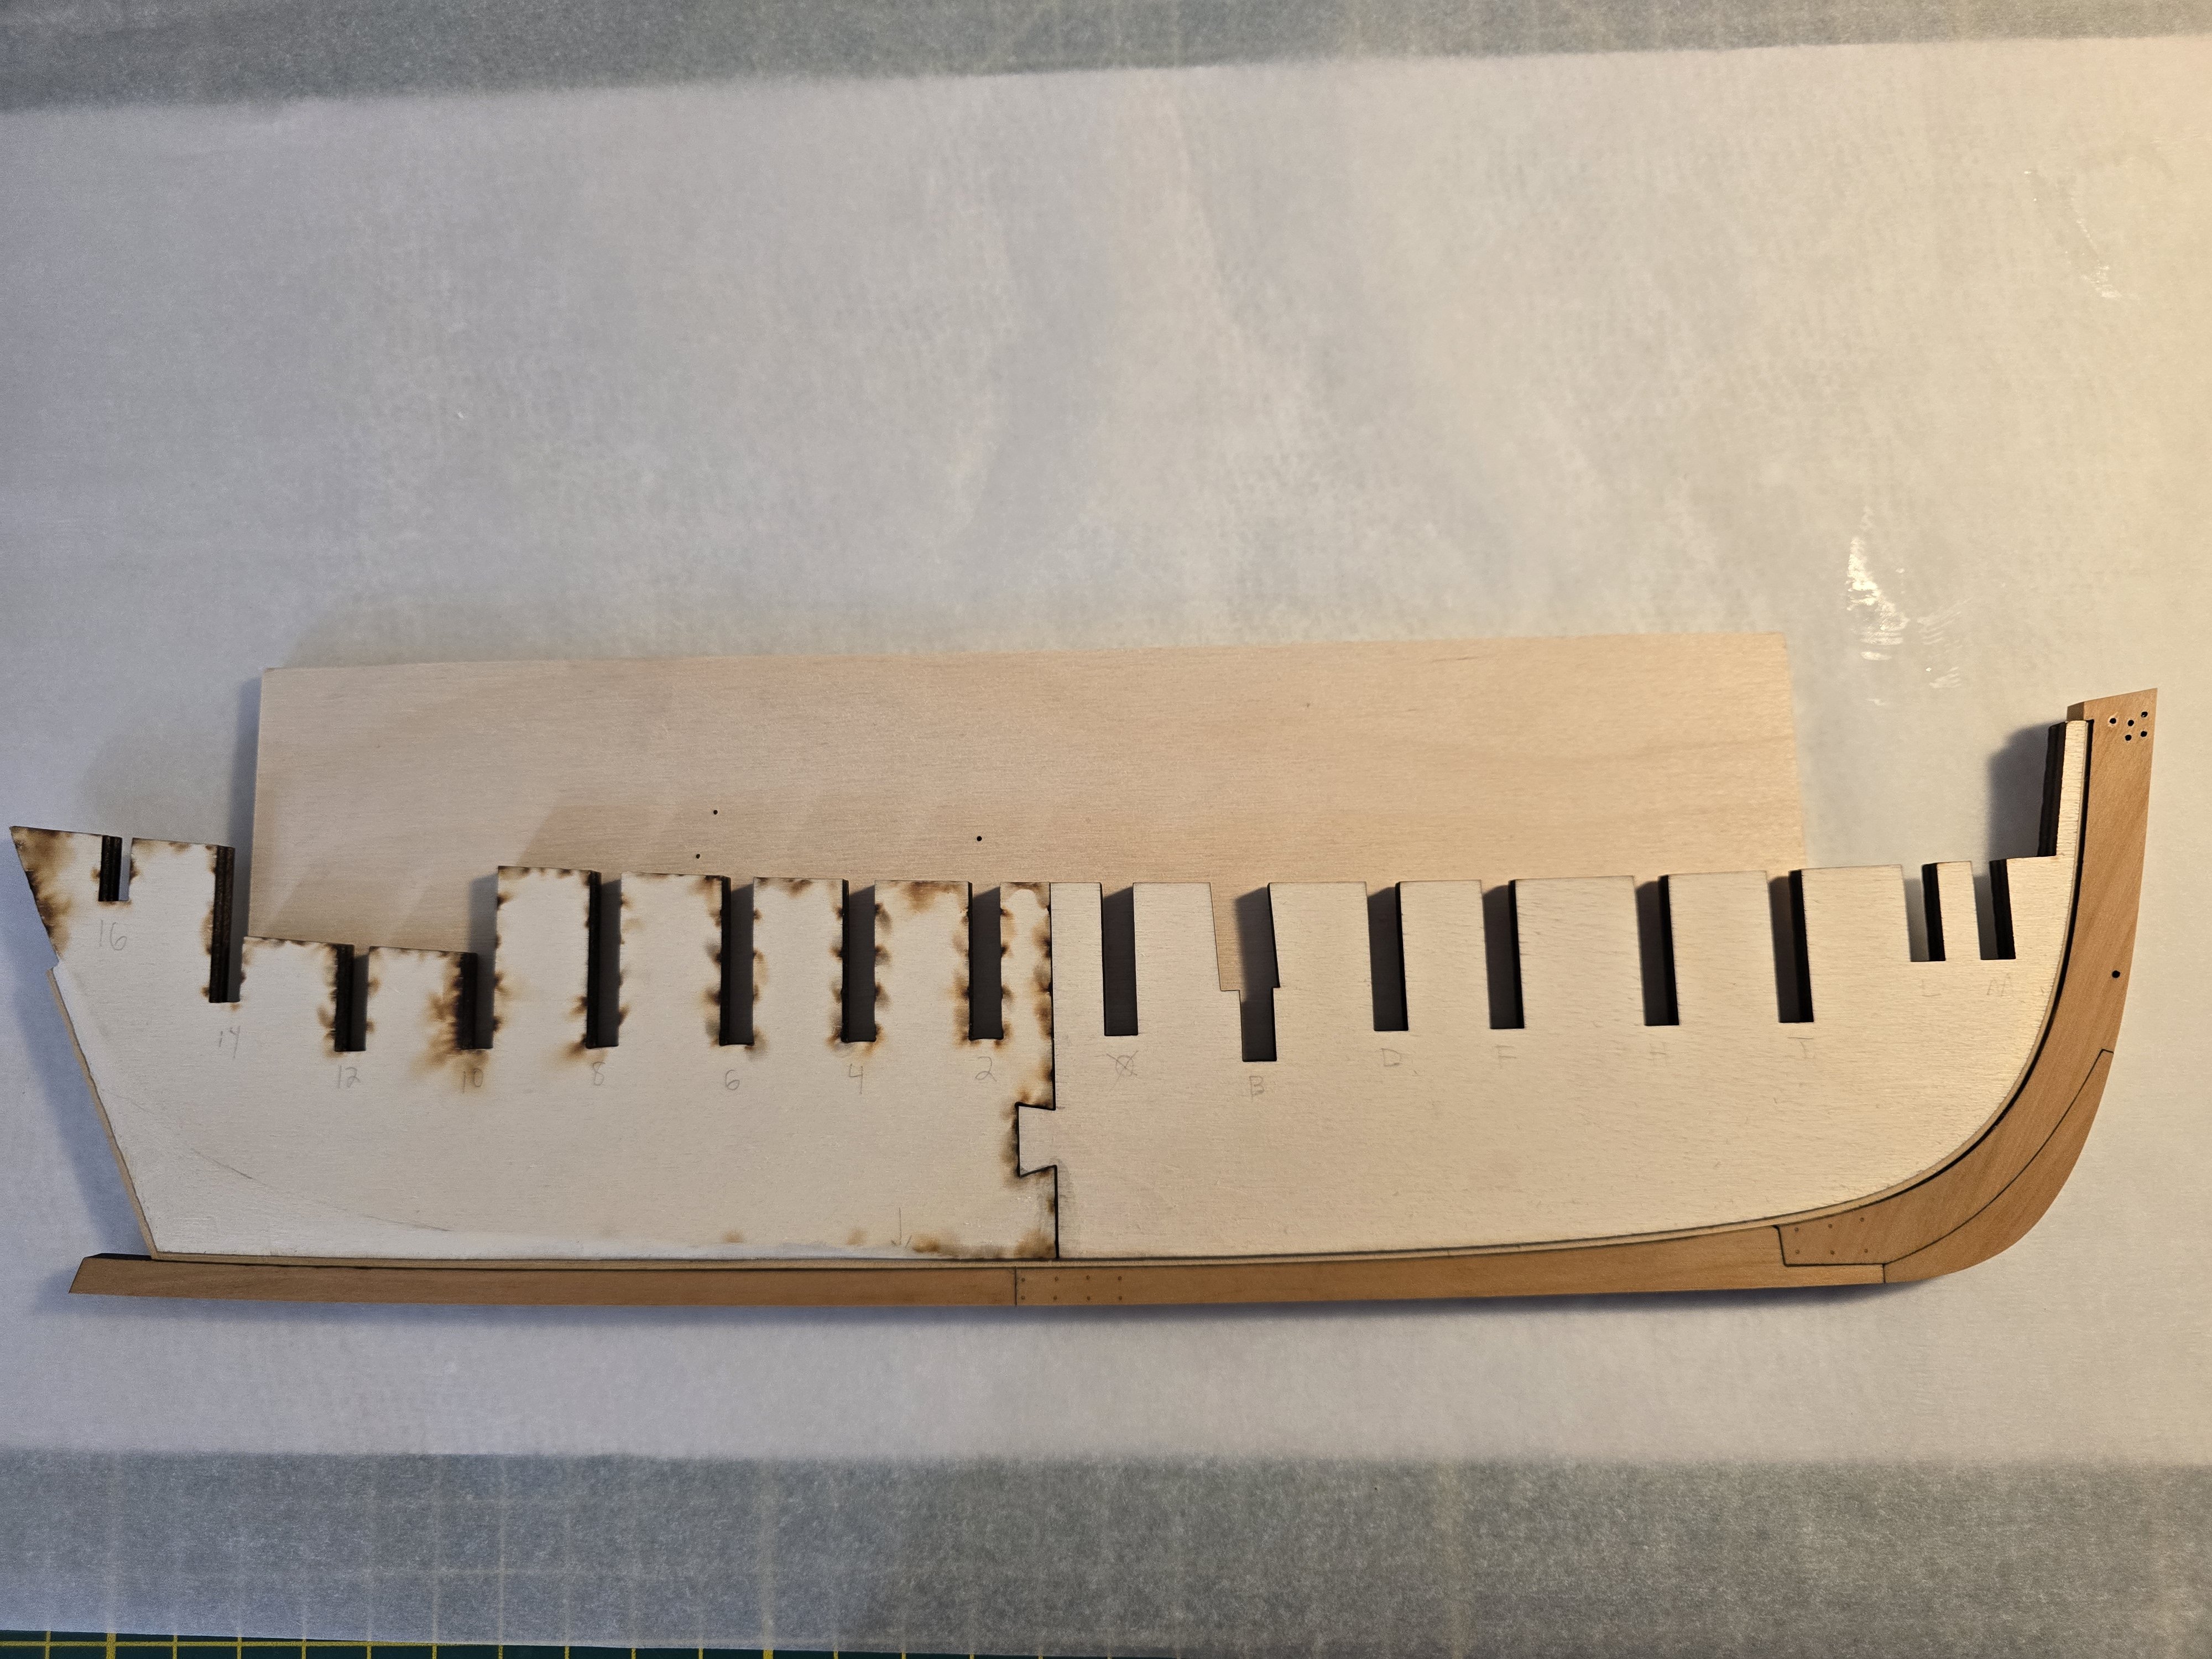
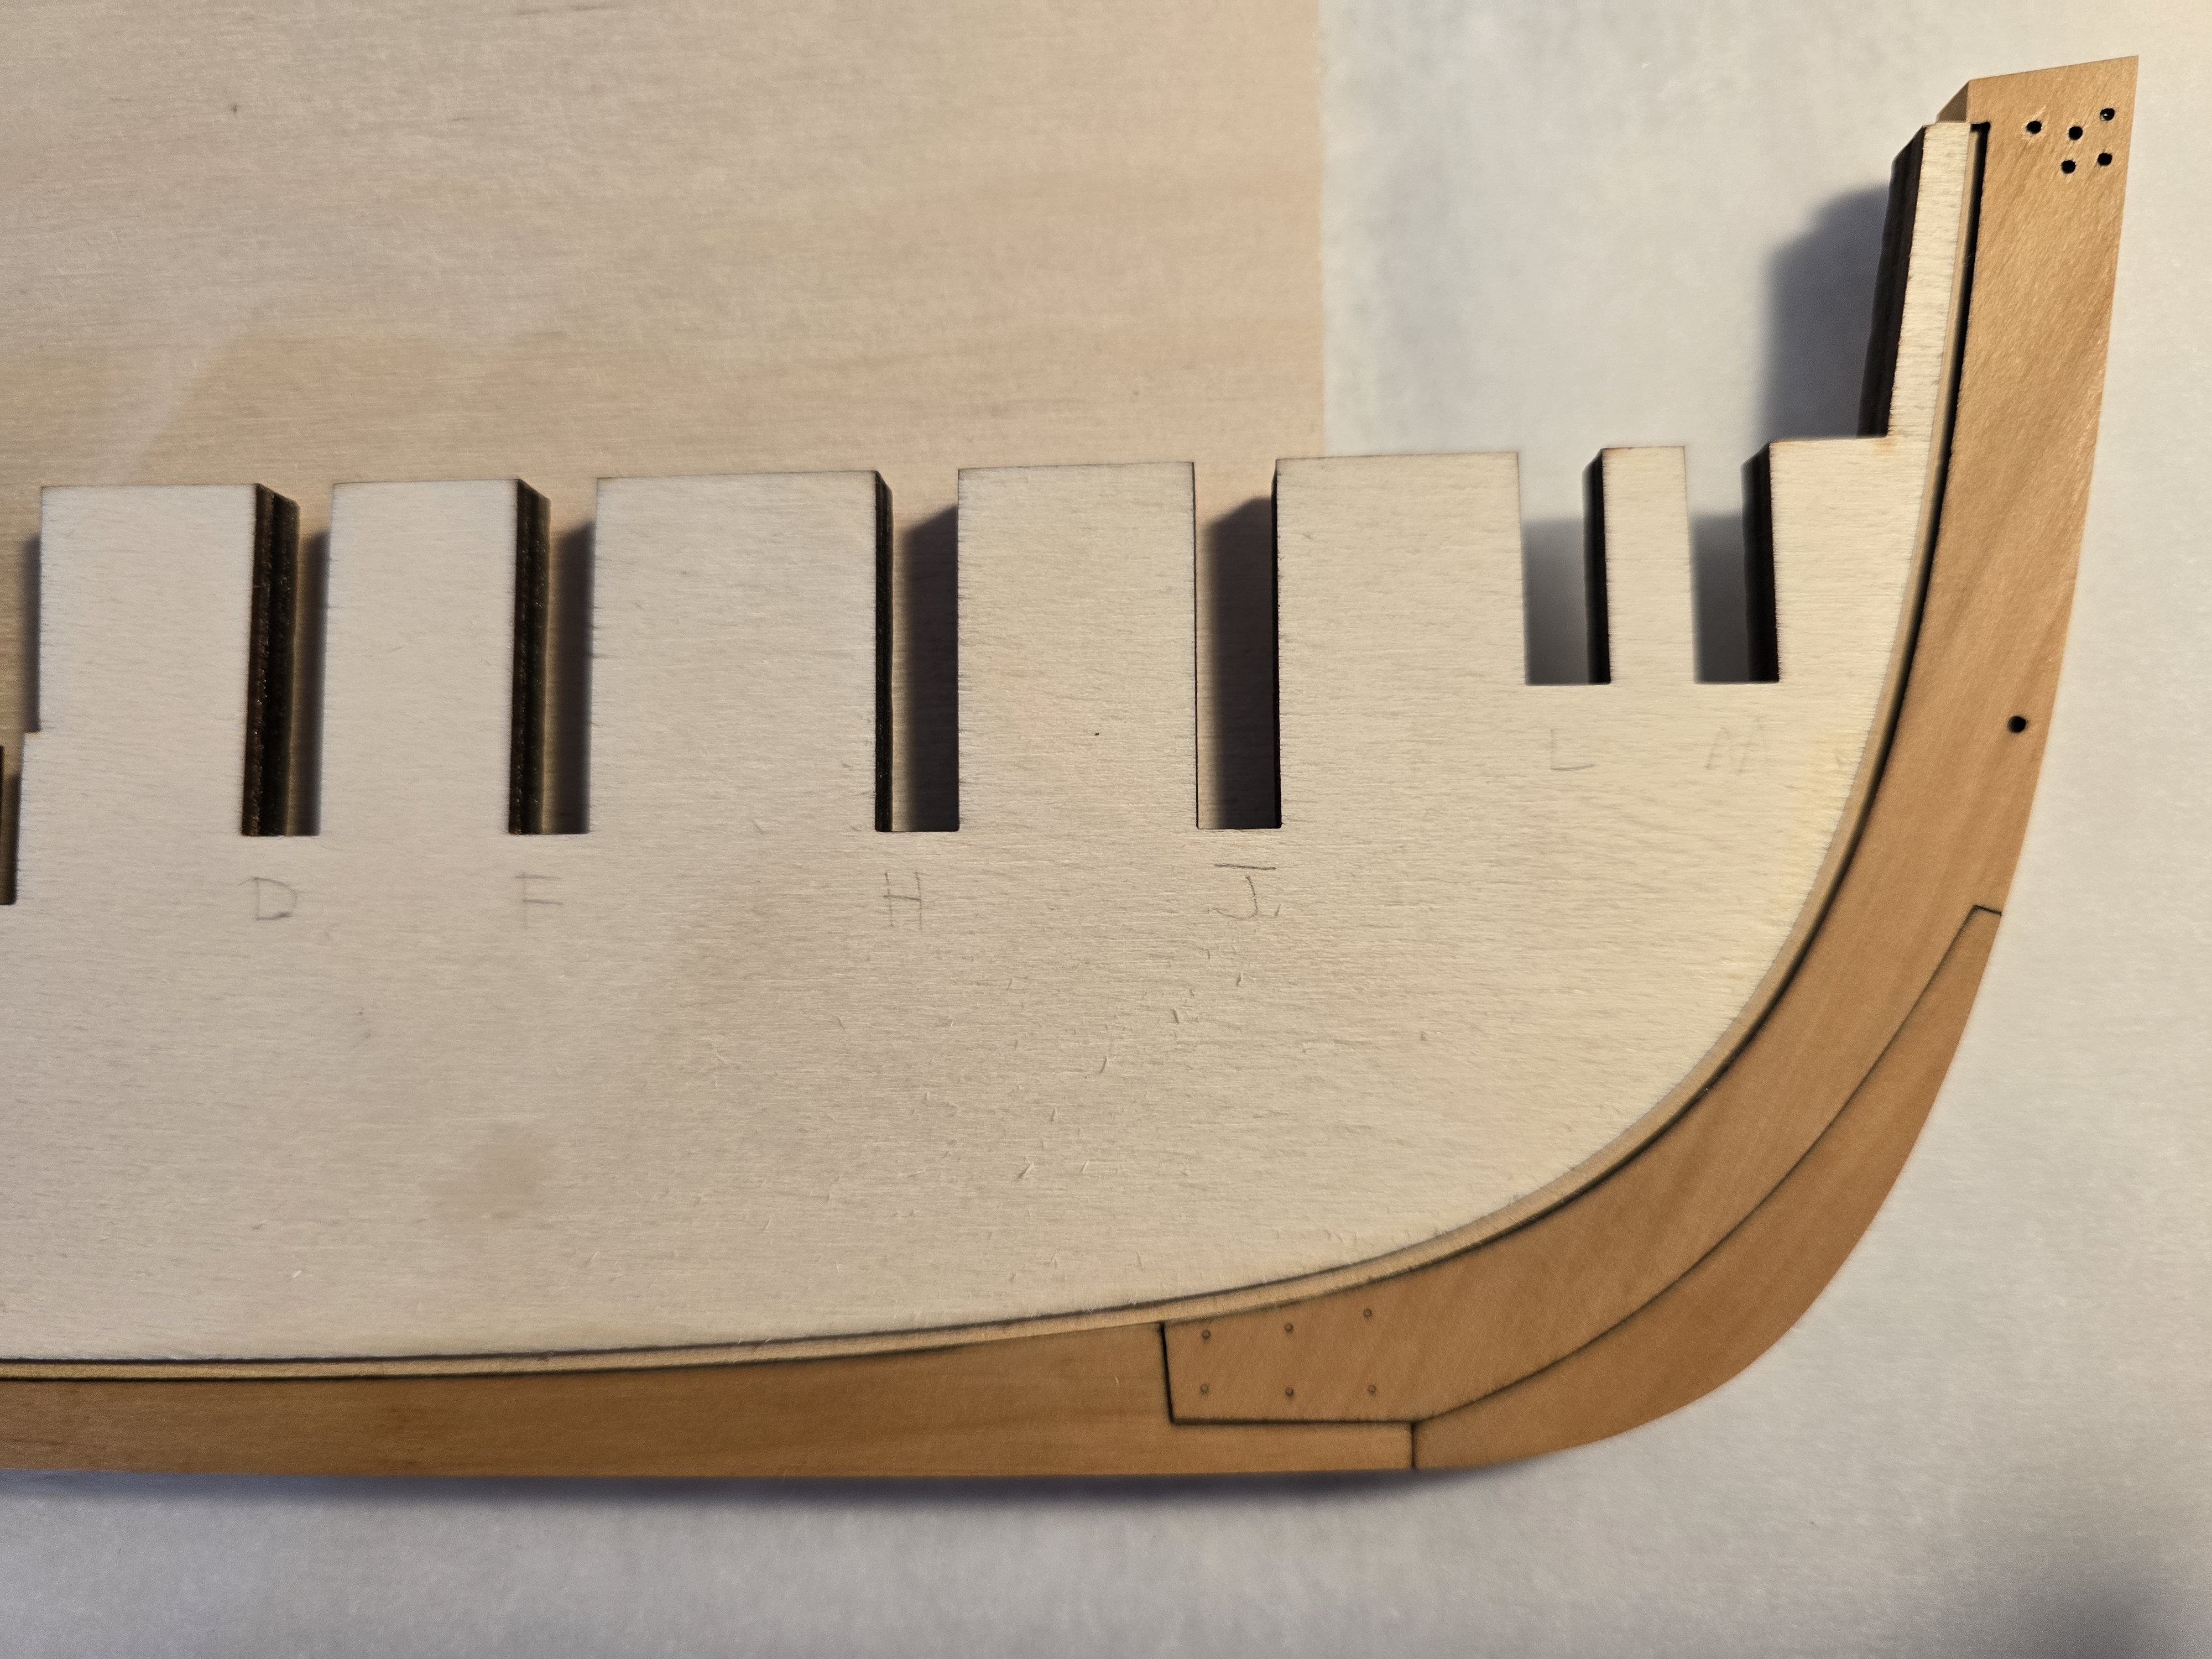
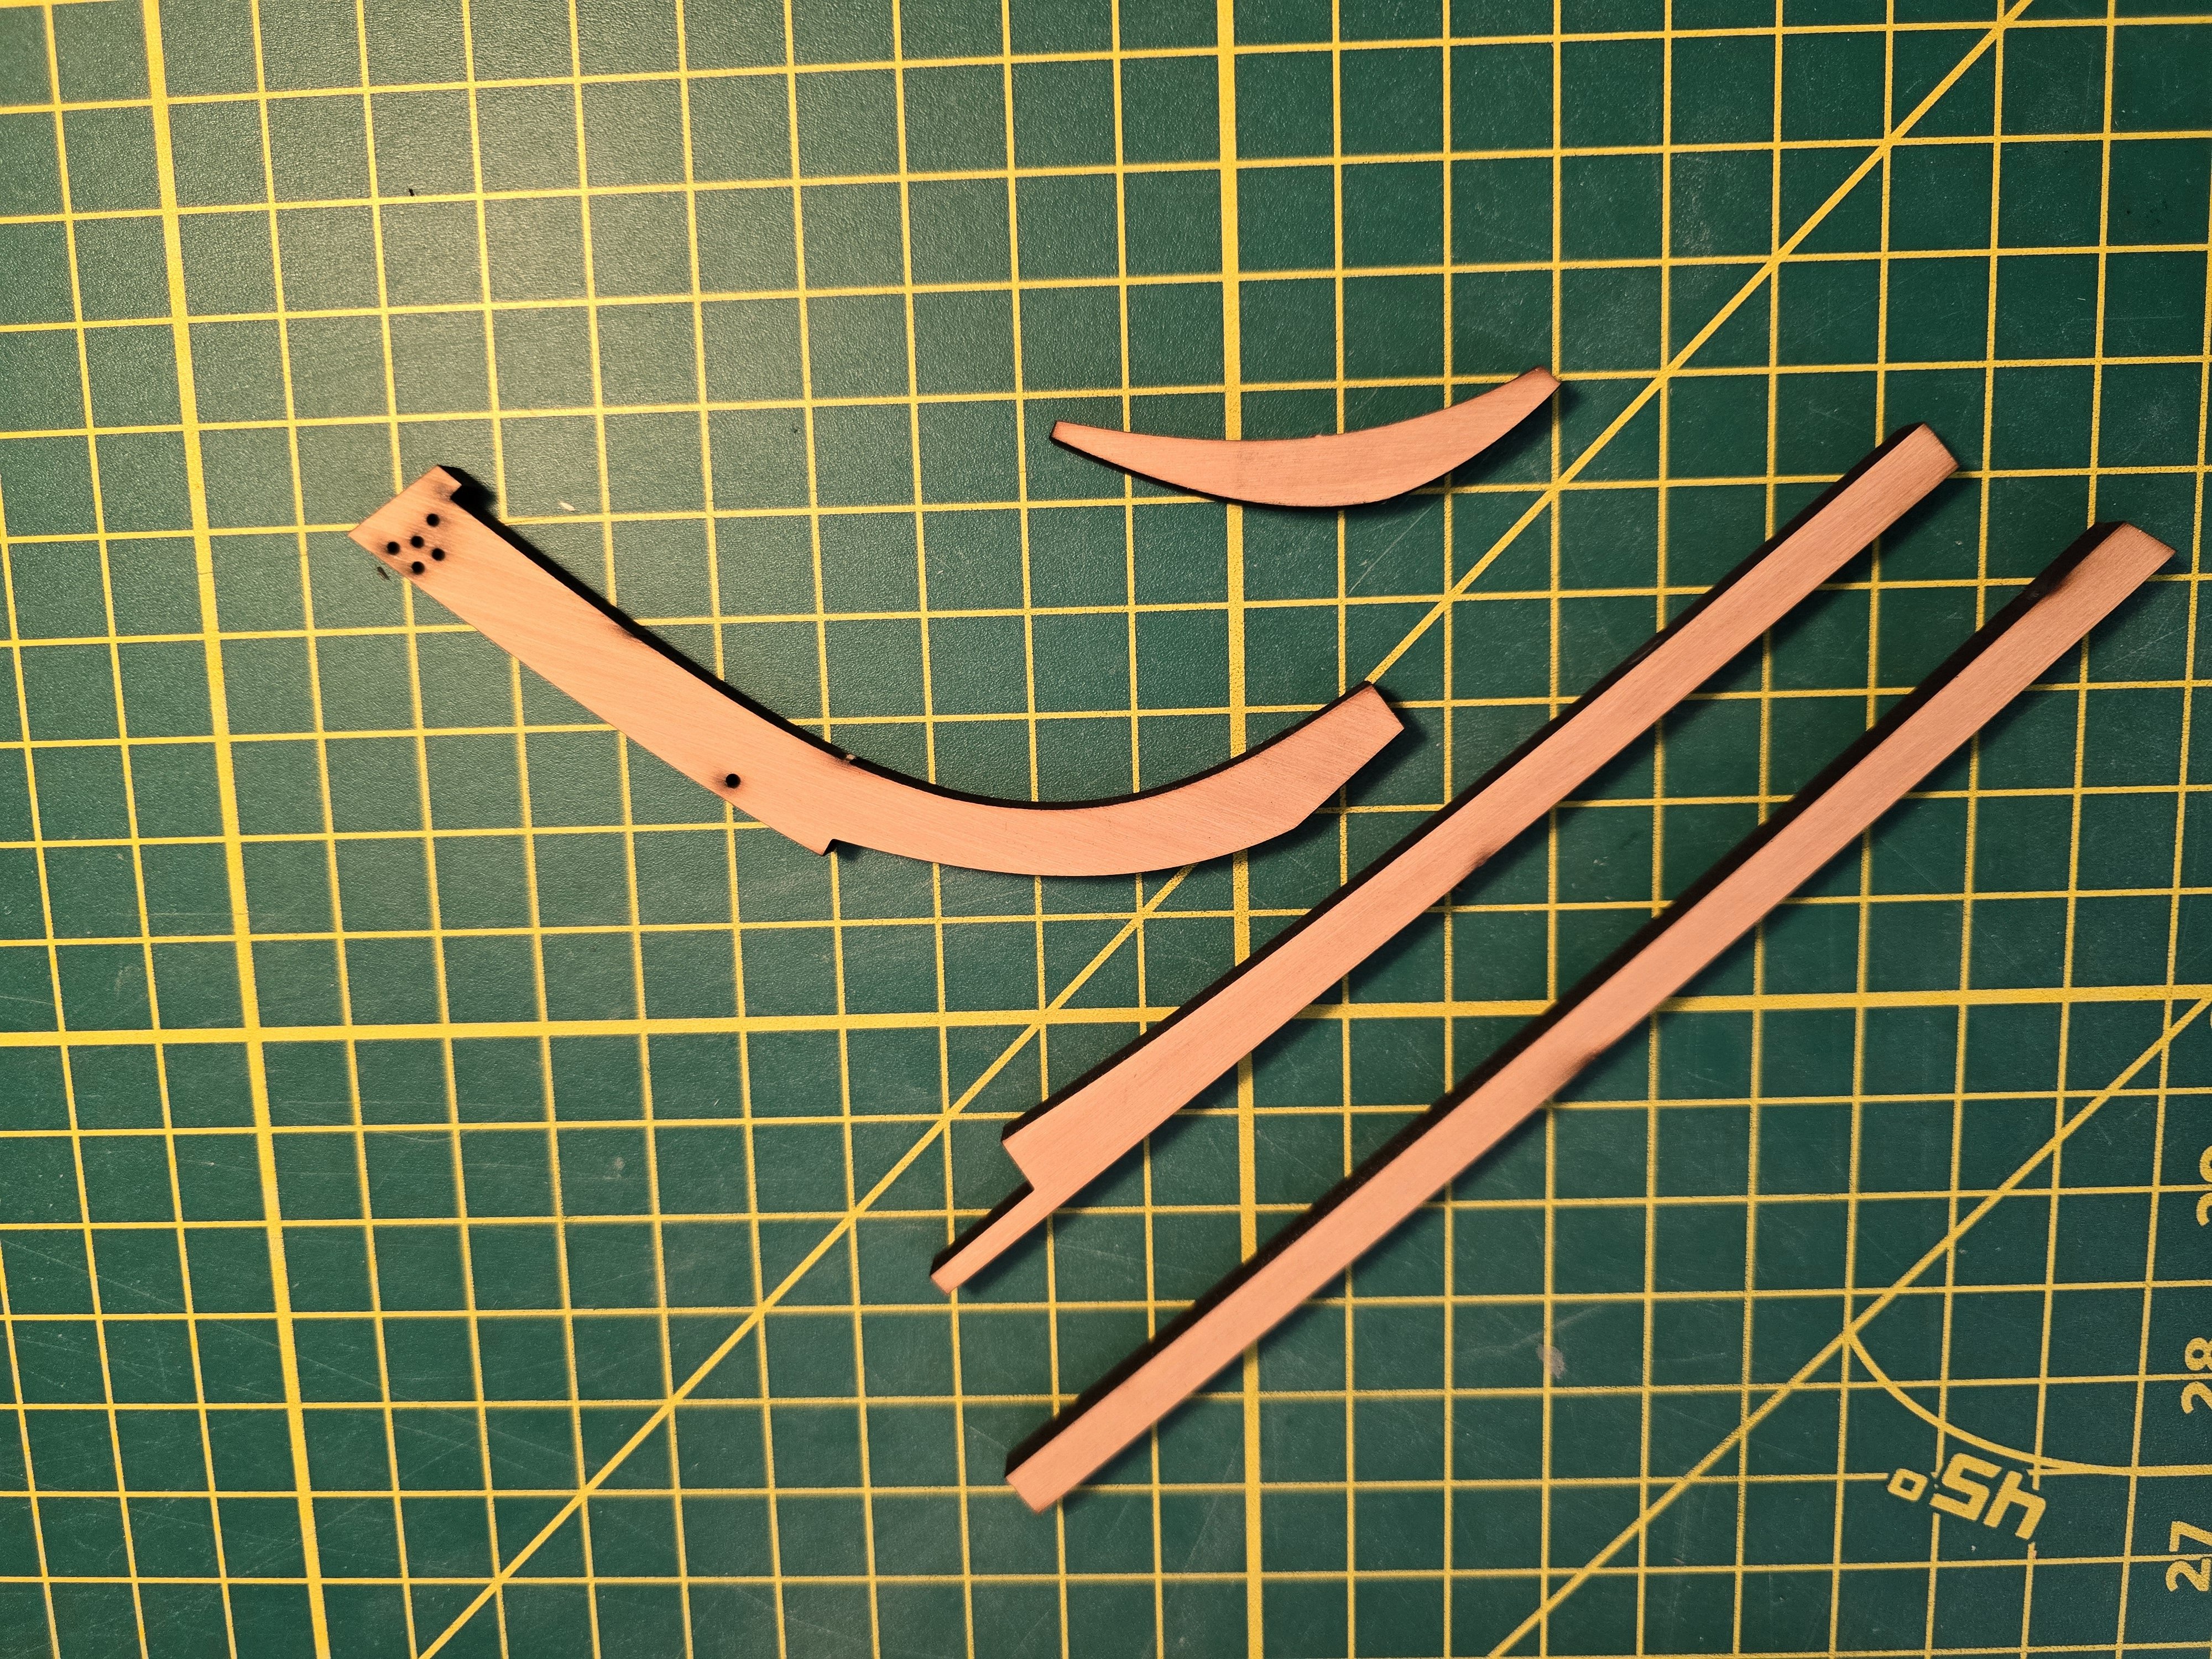
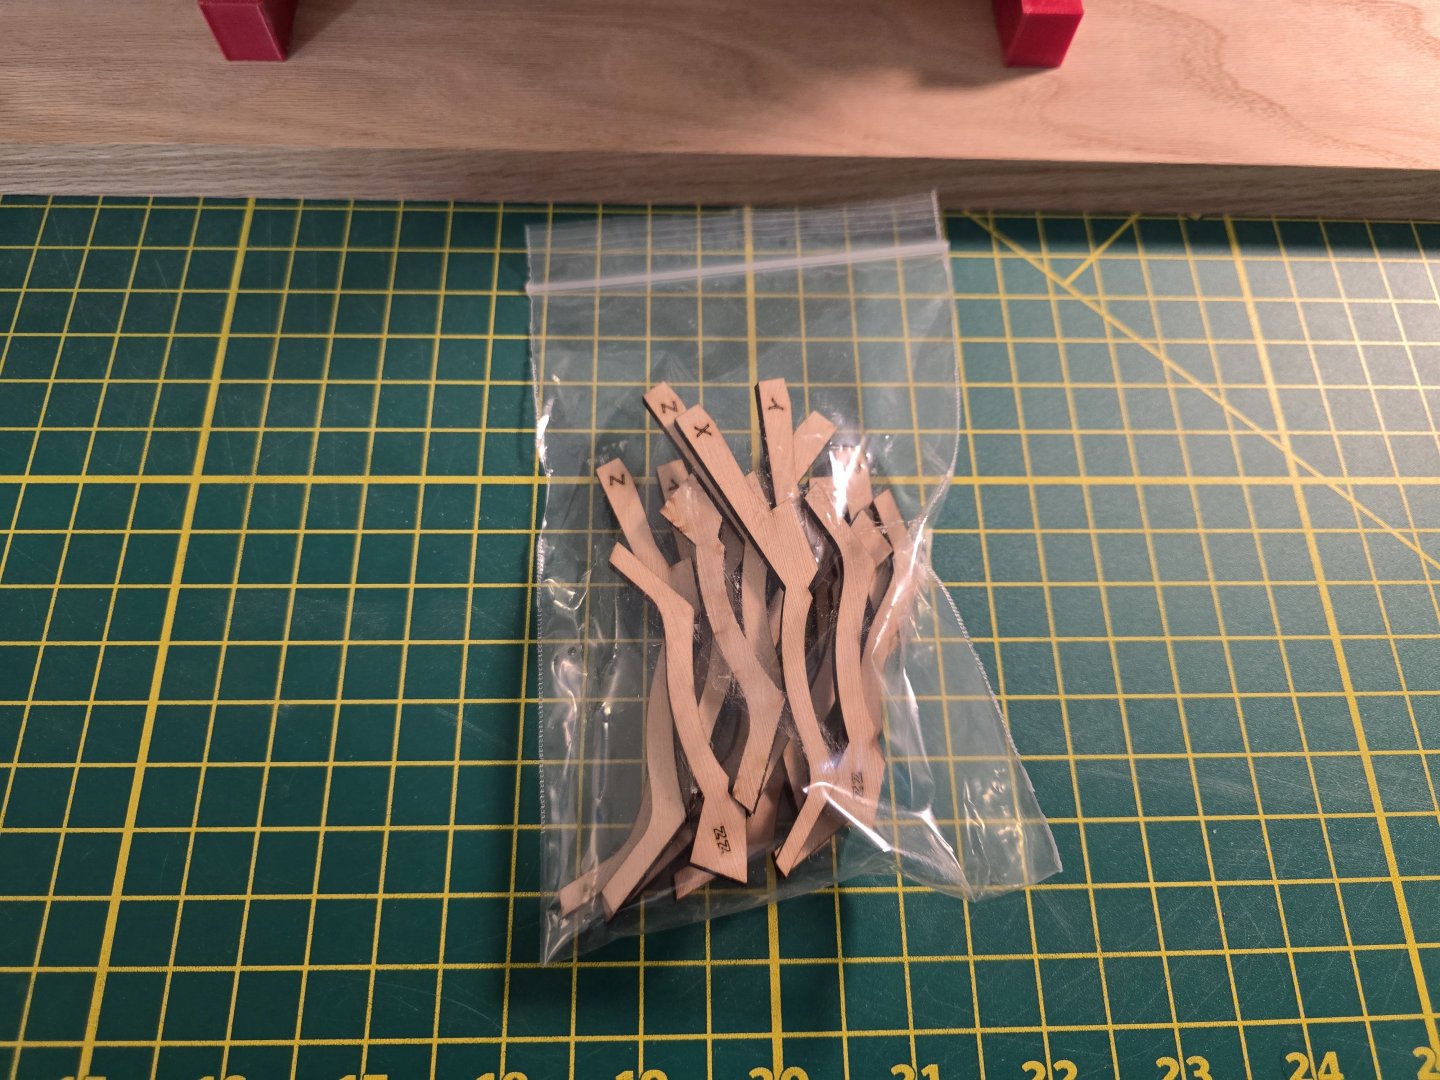
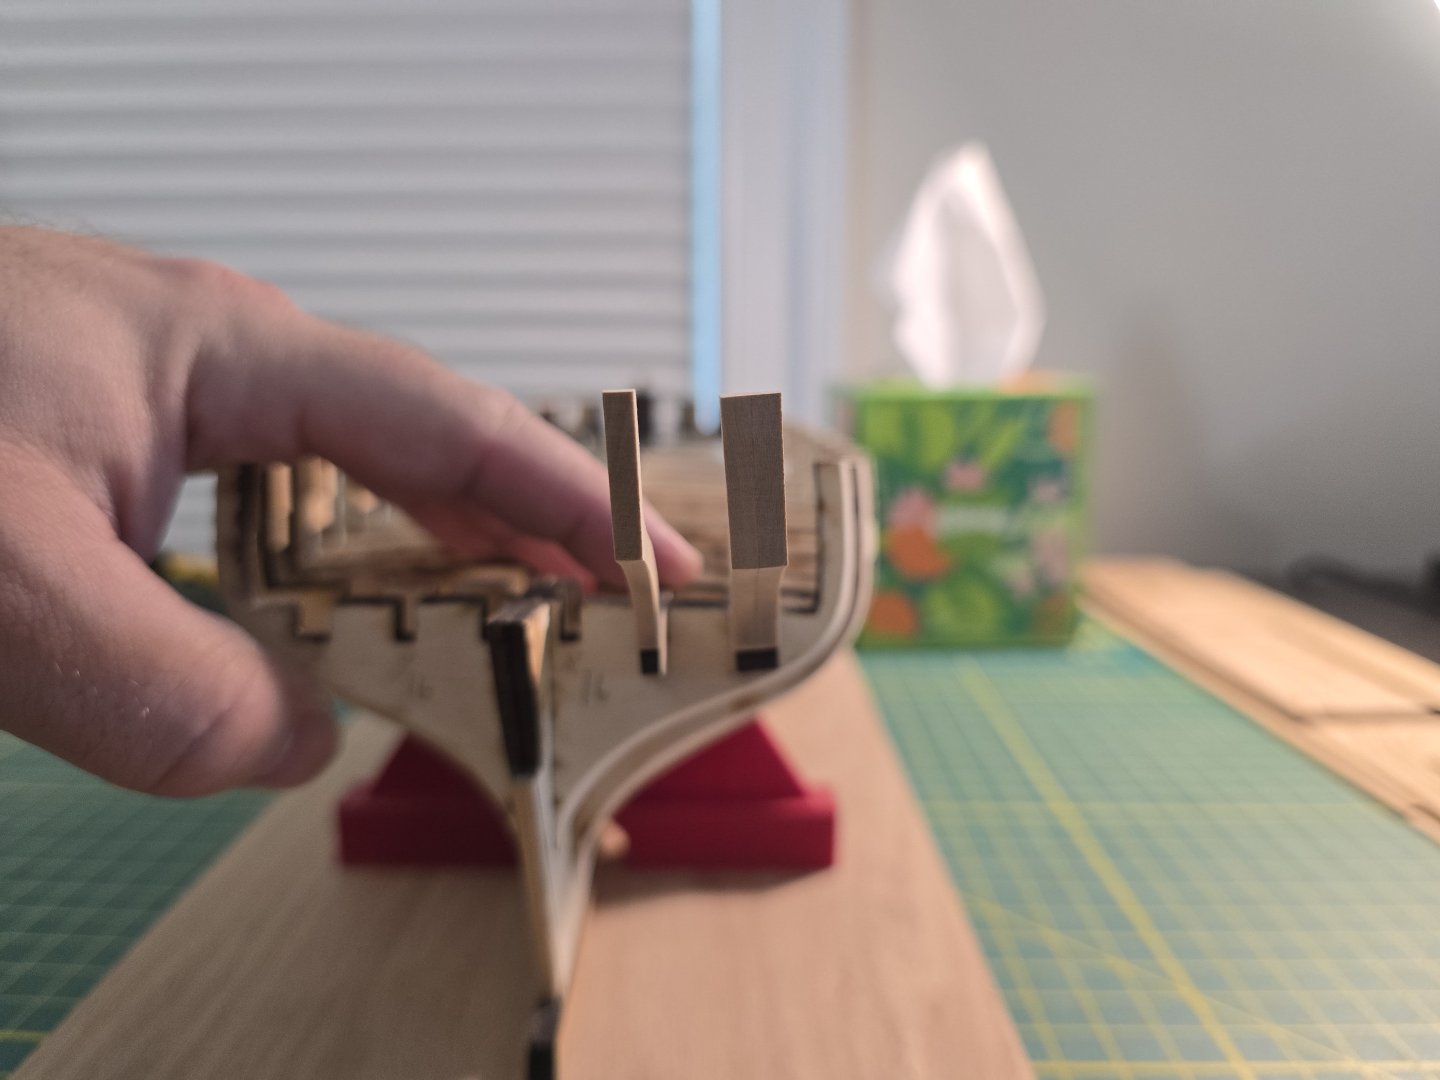
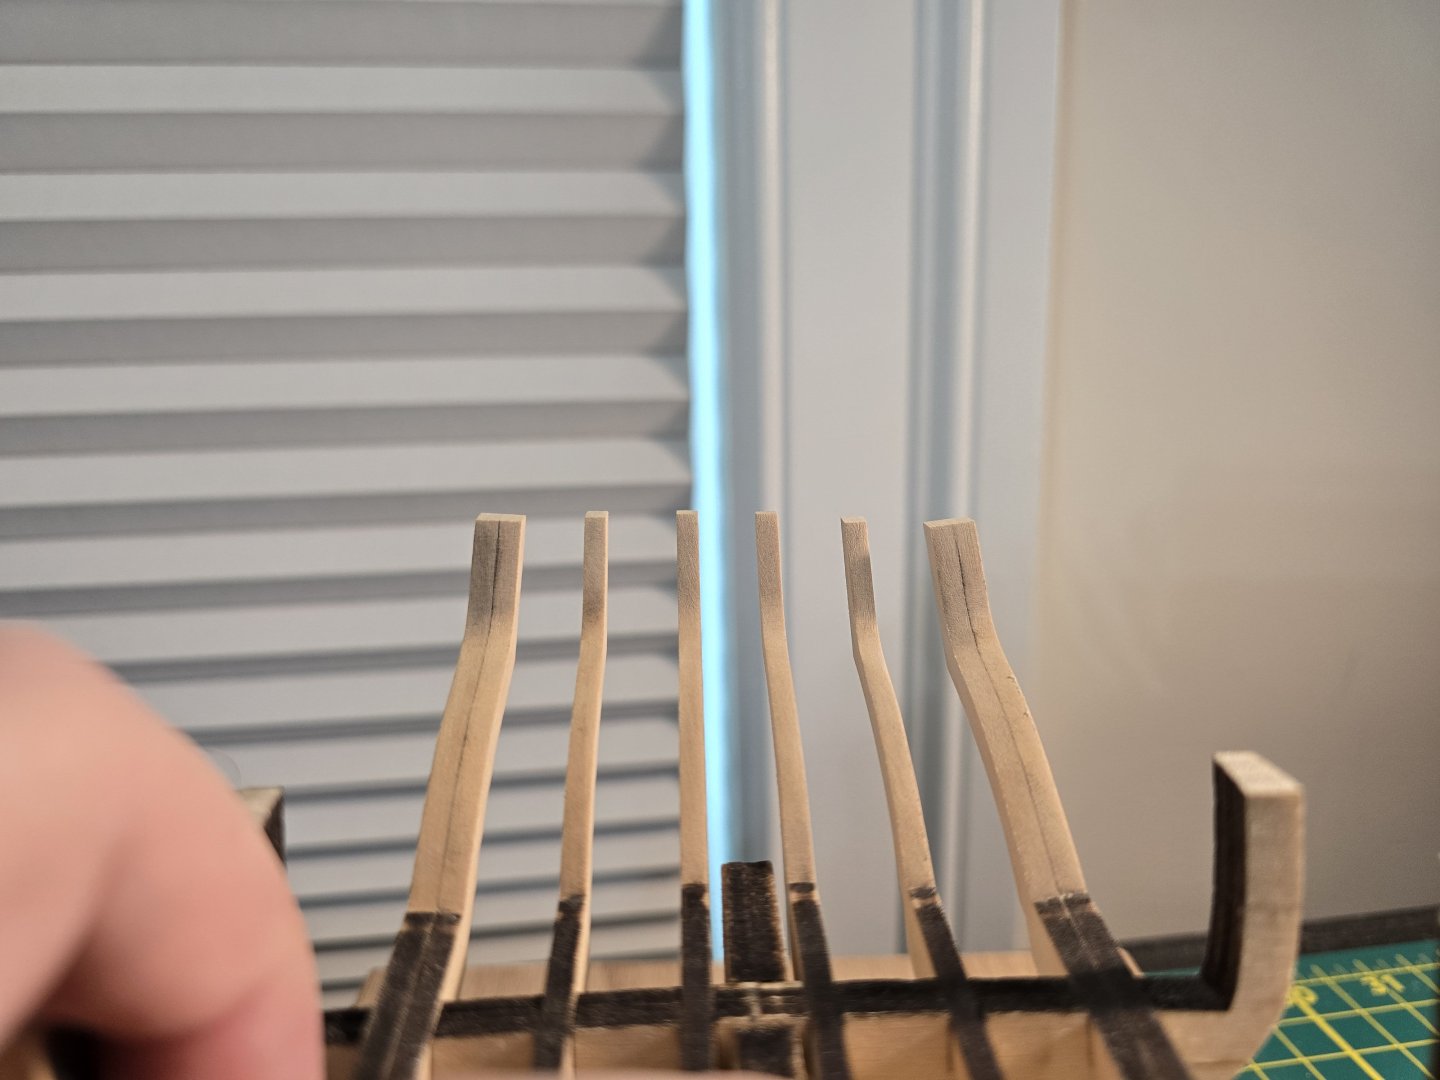
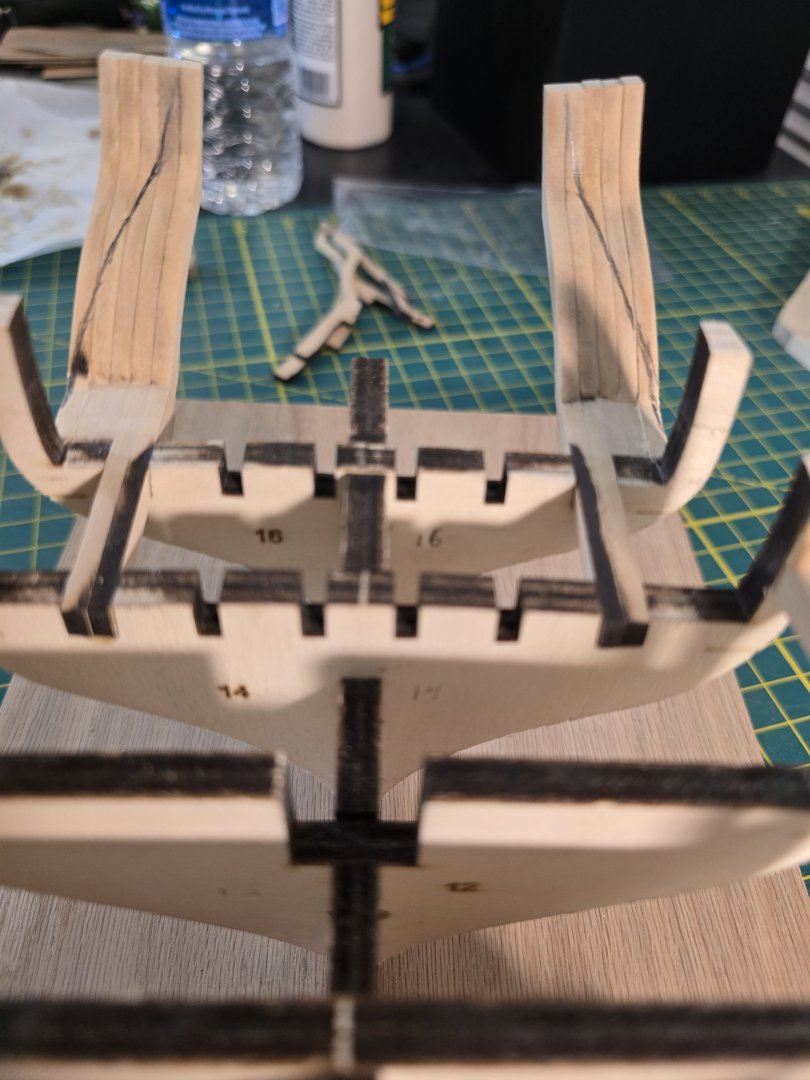
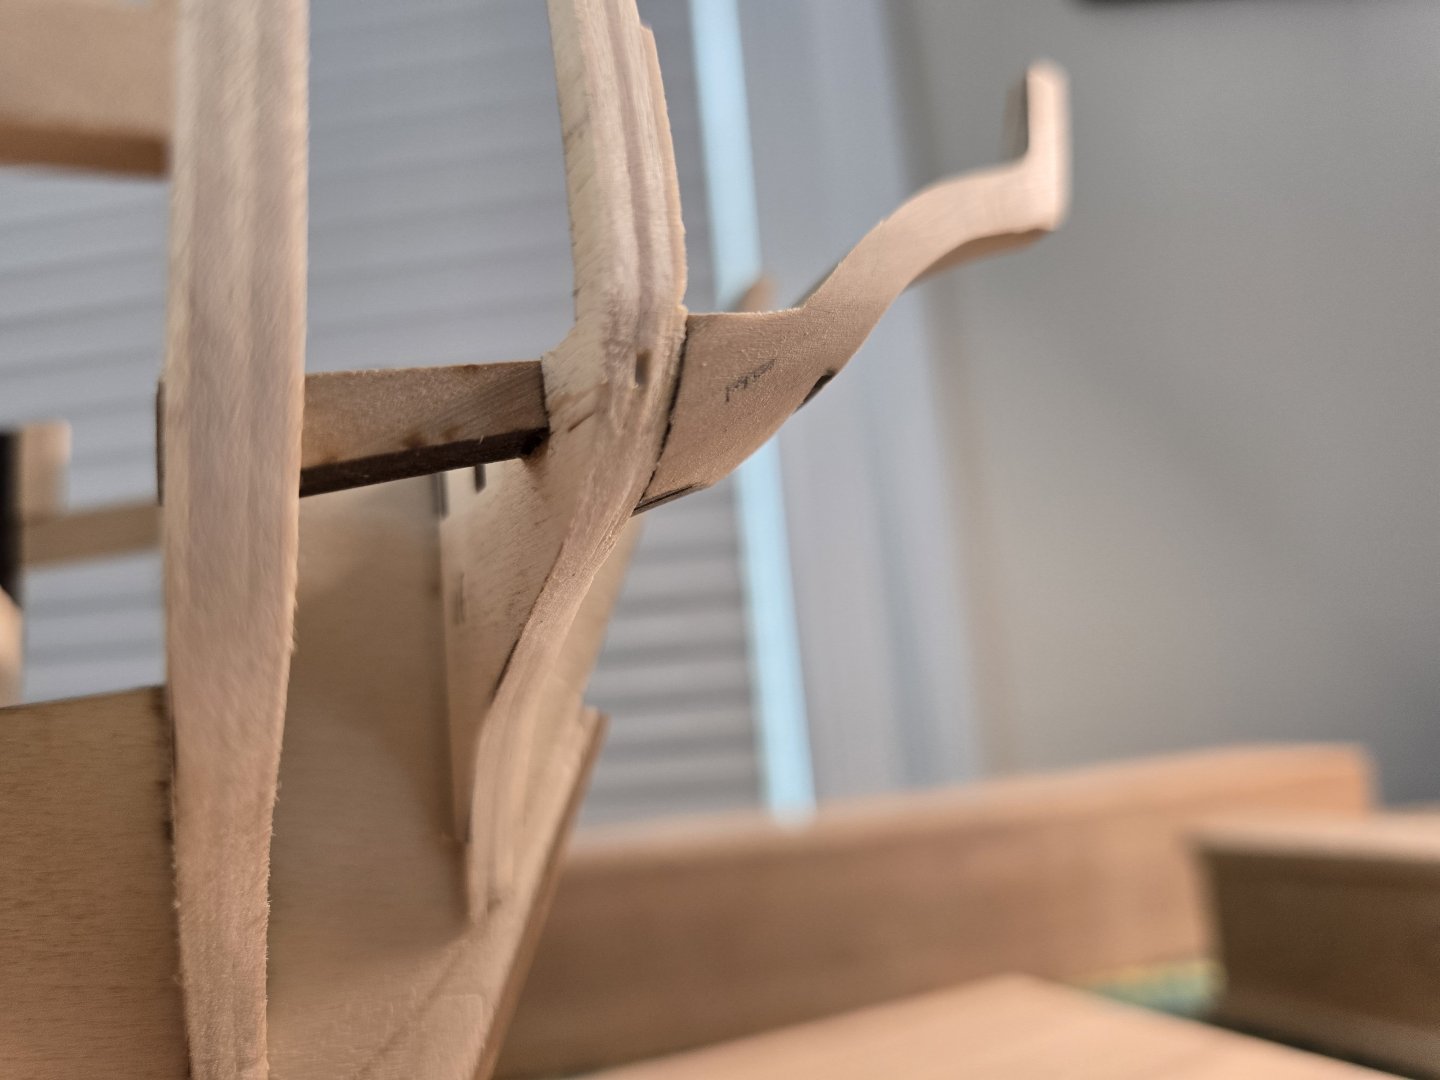
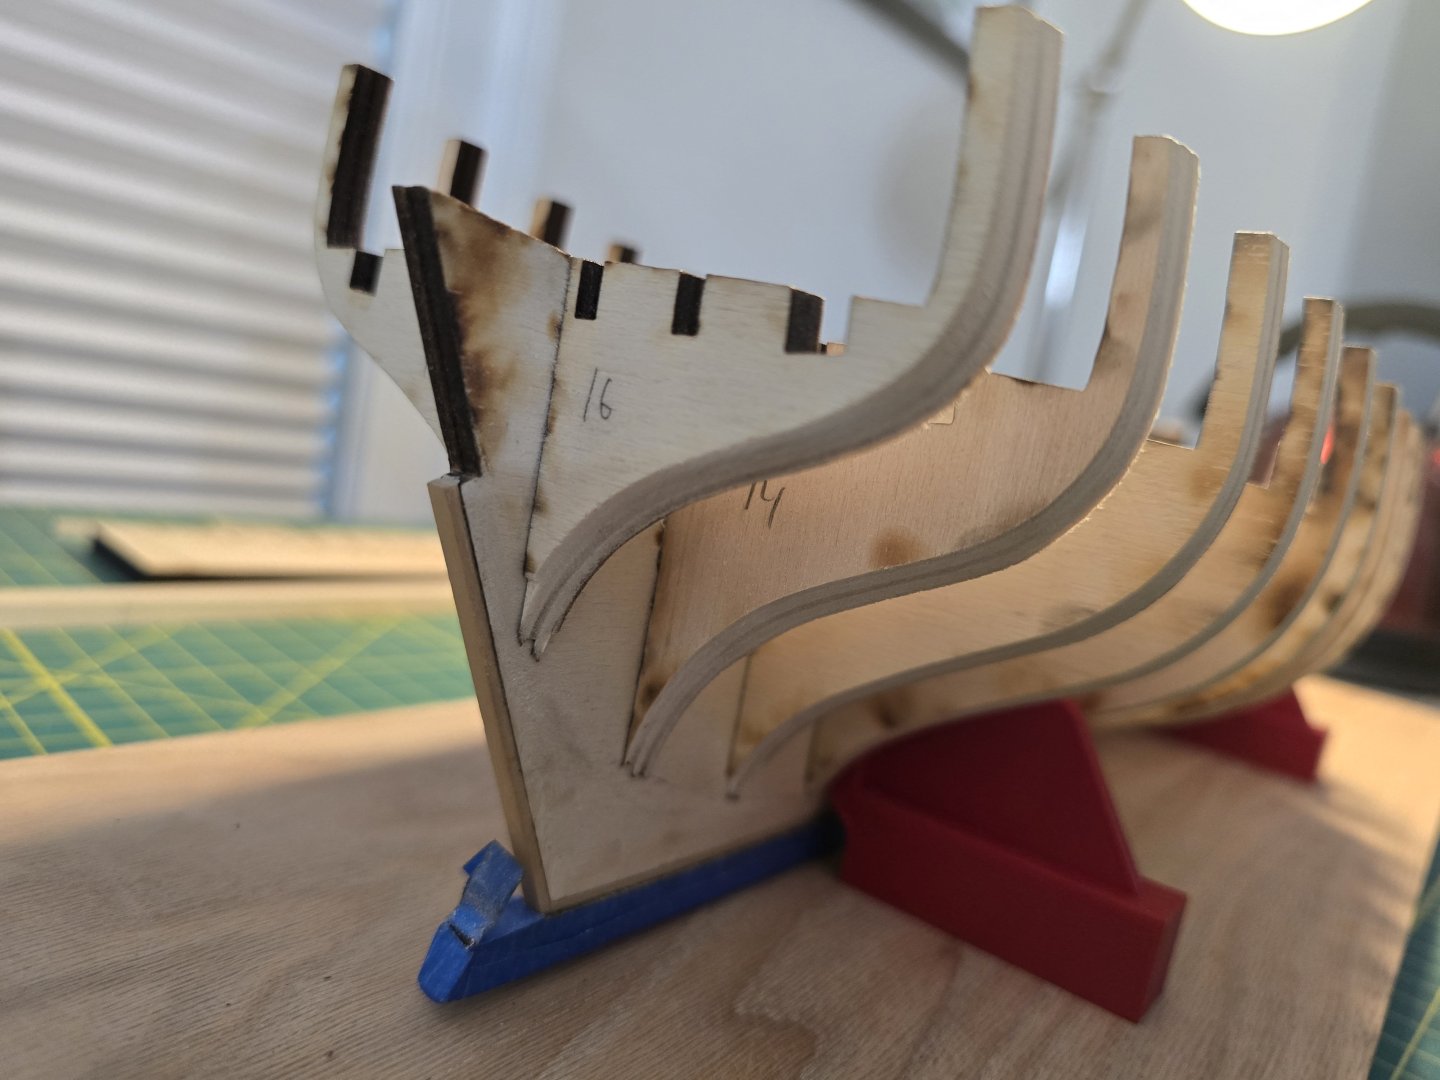
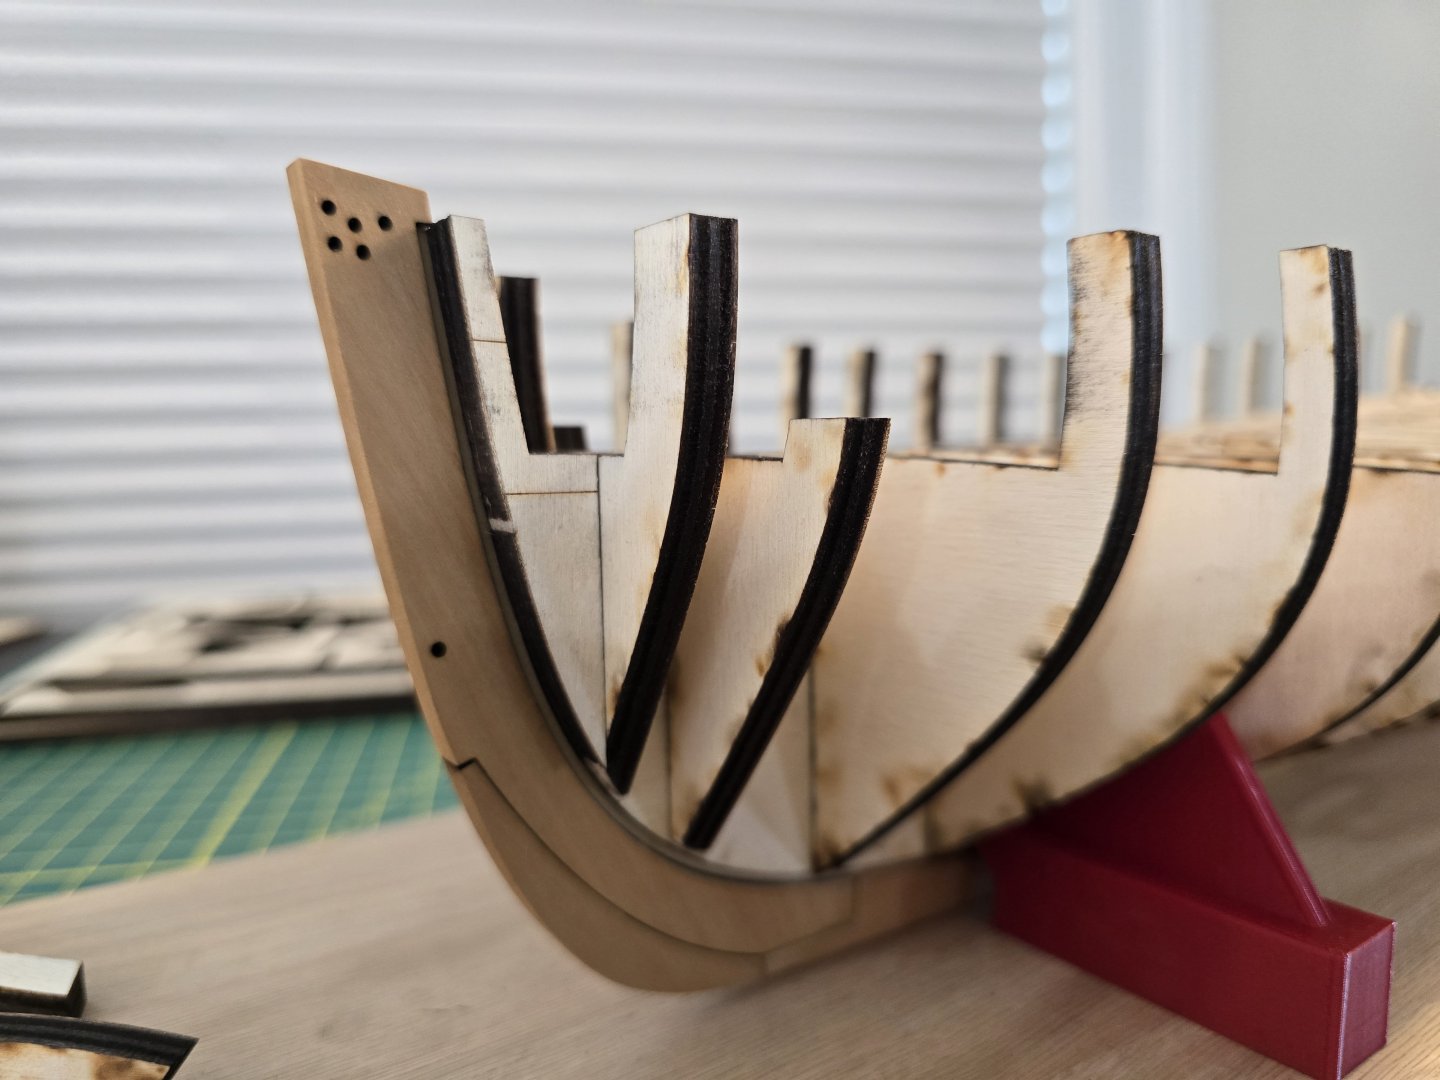
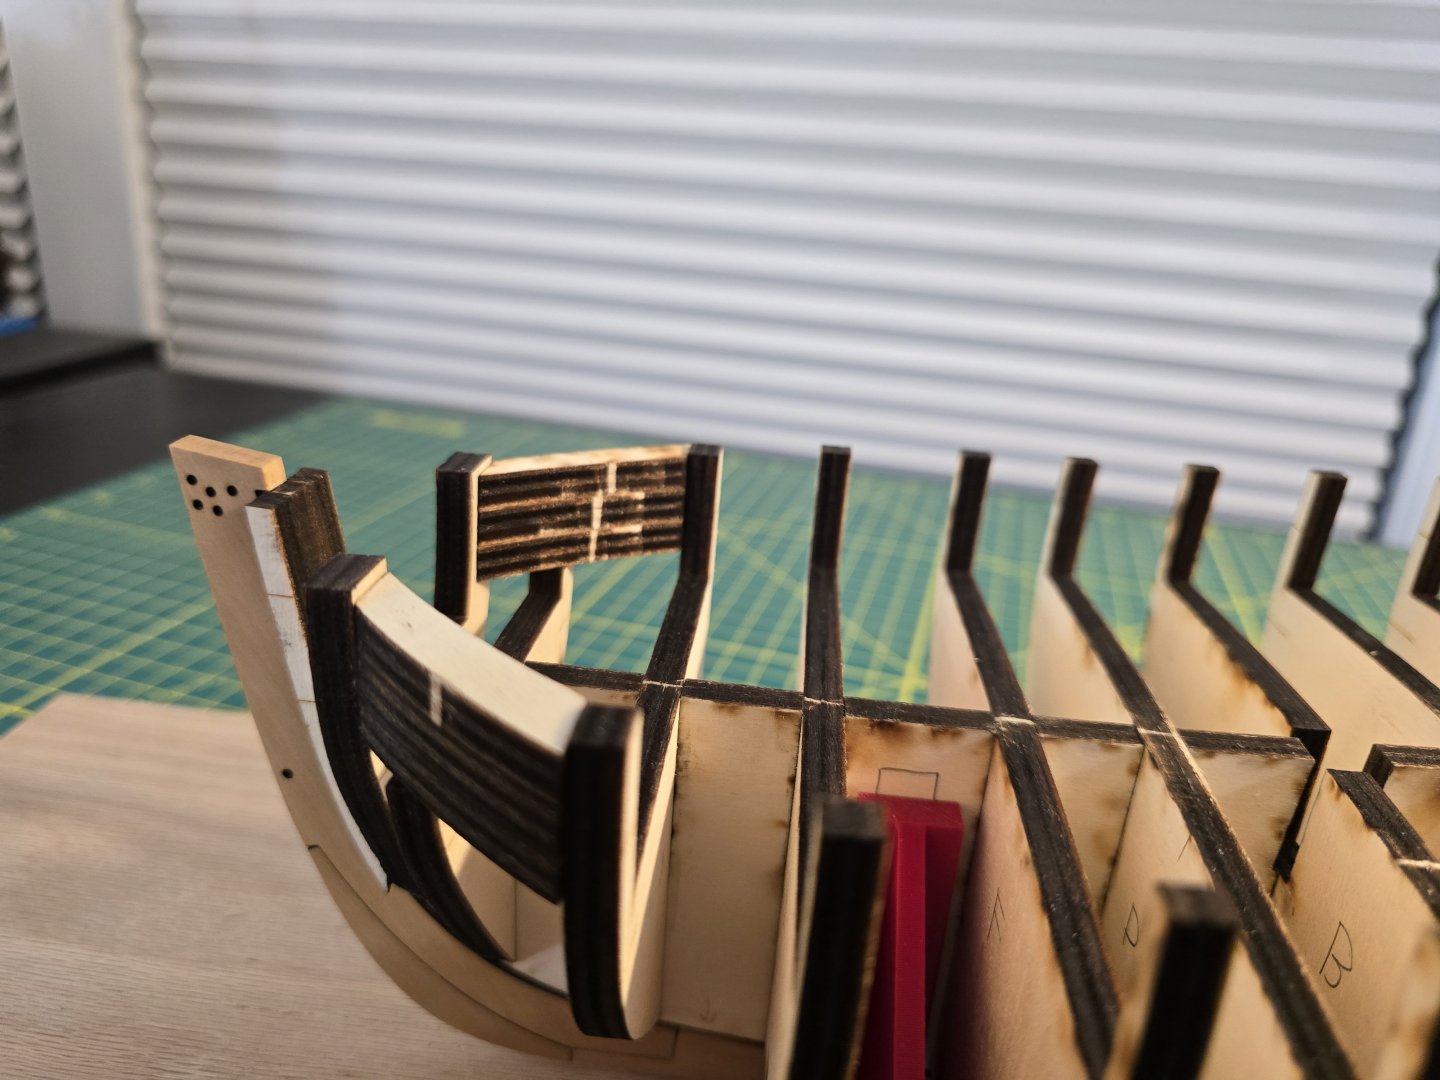
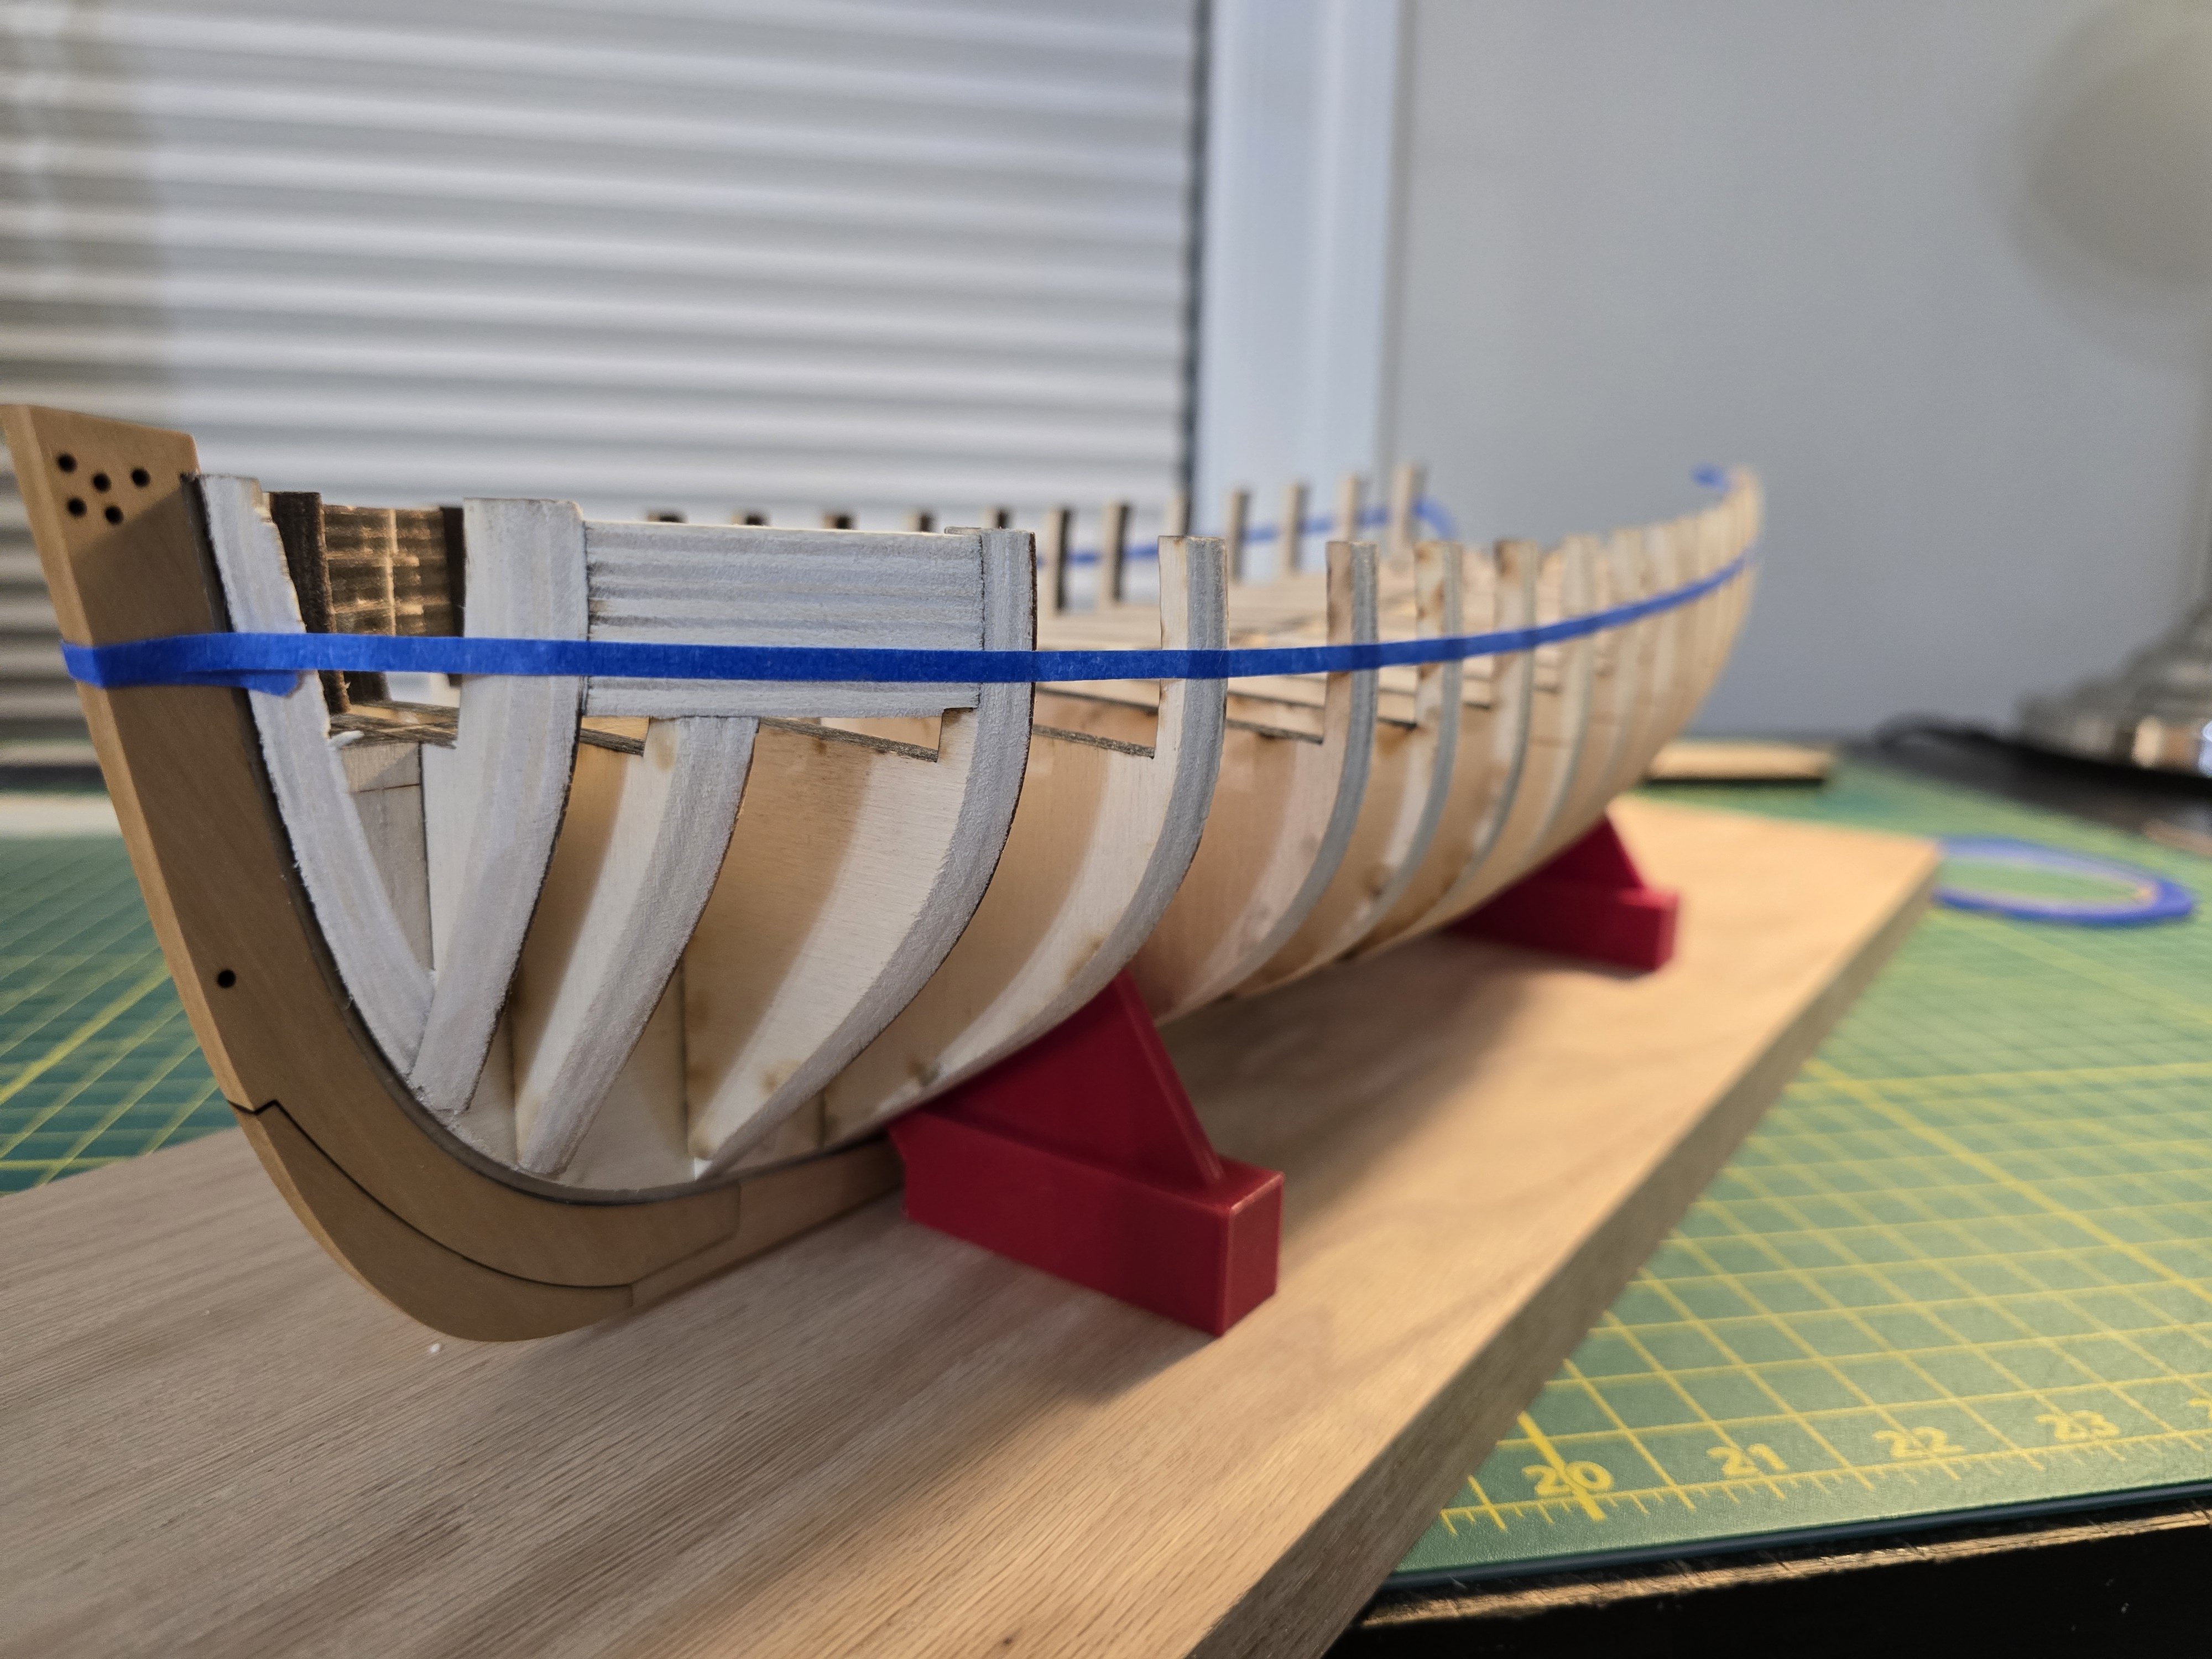
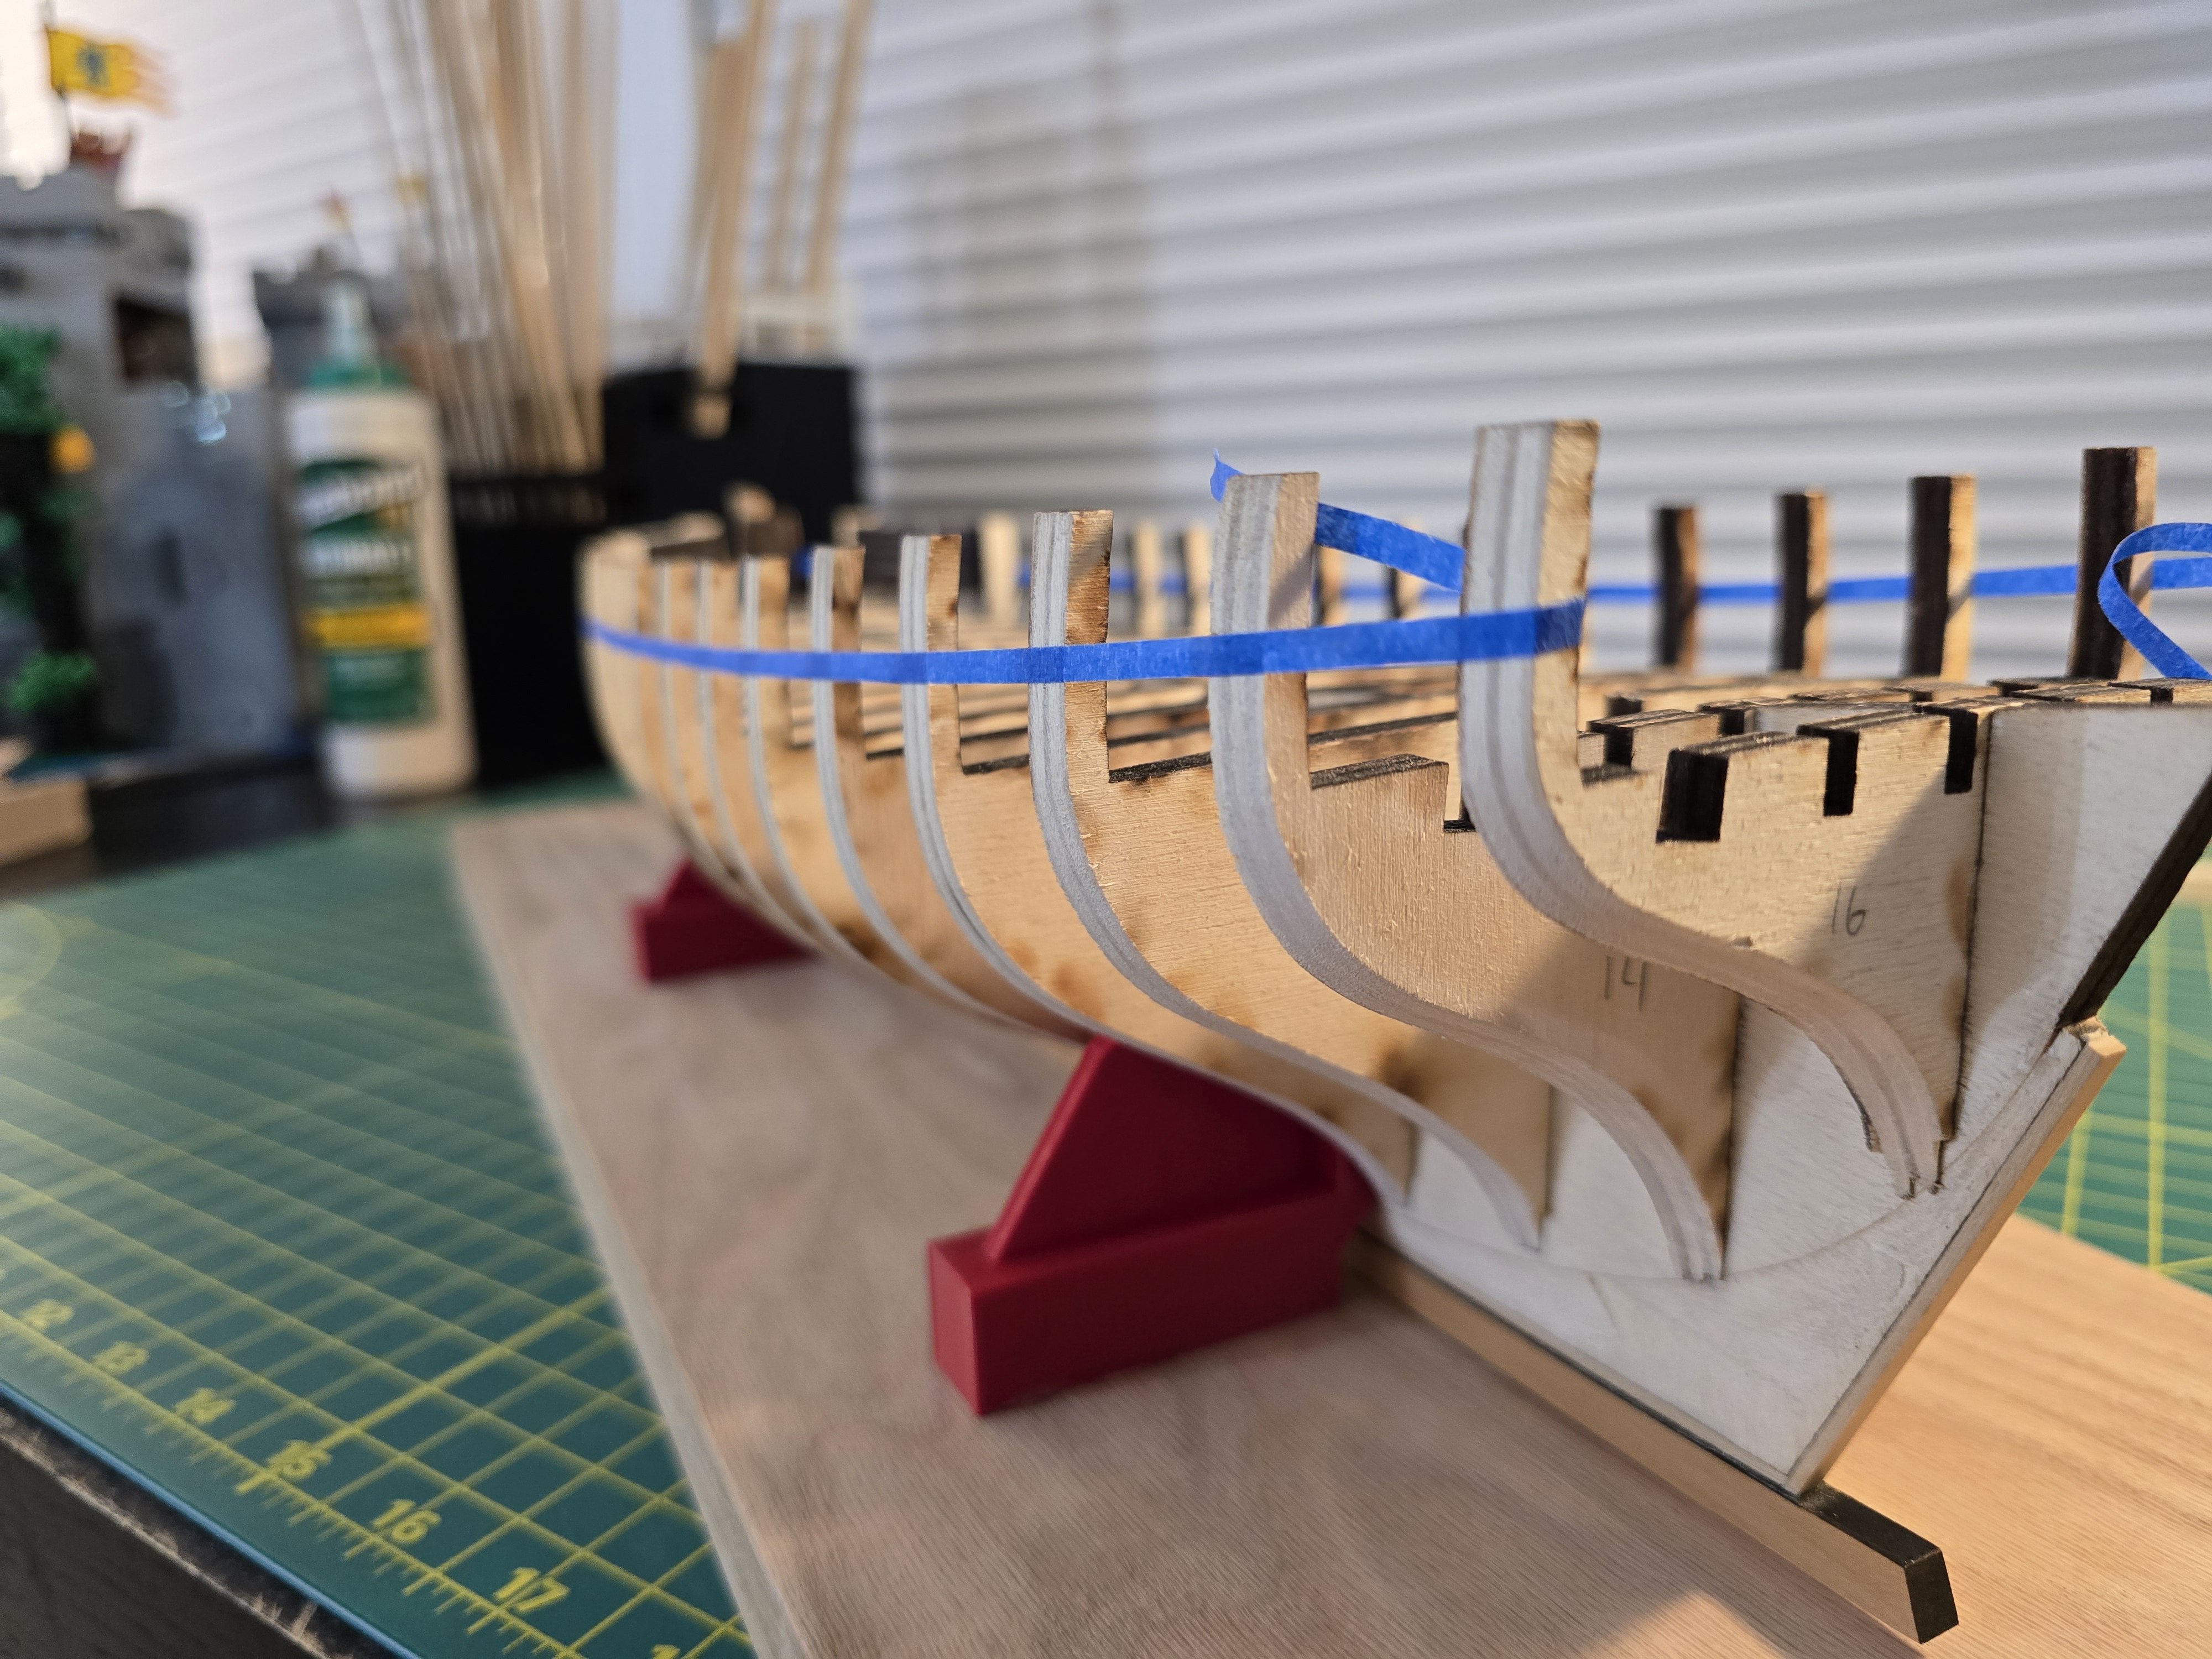
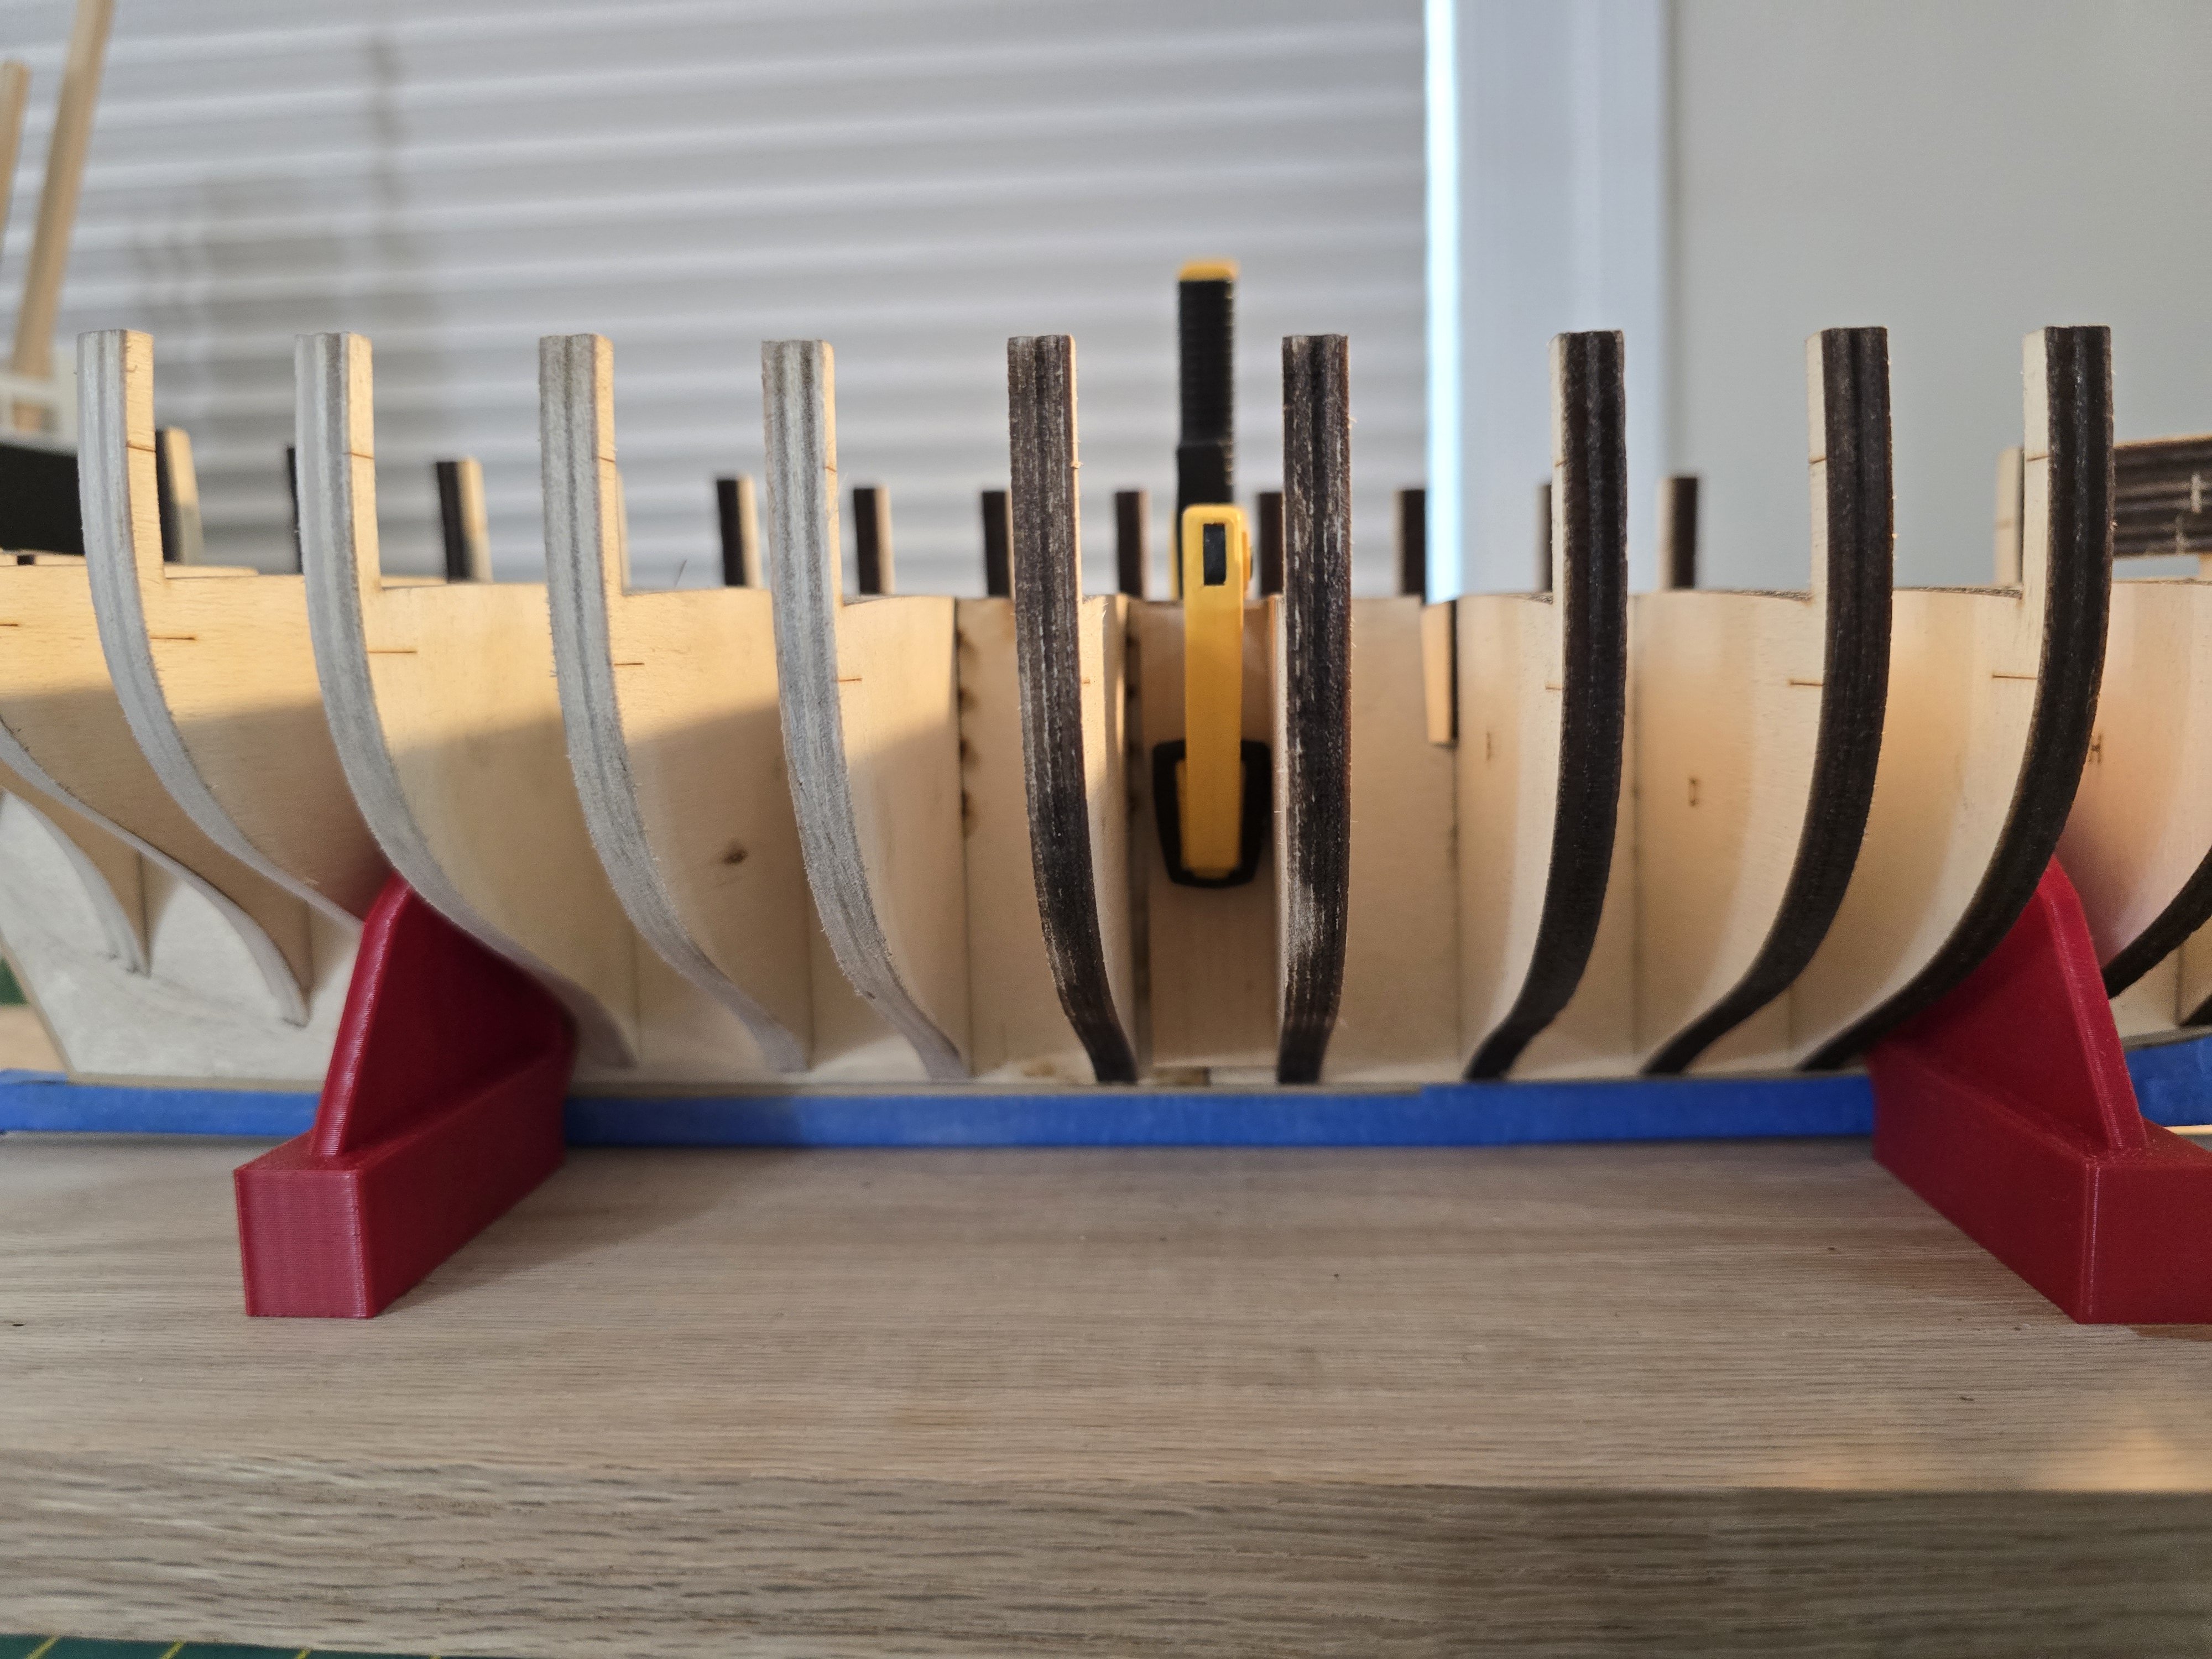
Thank you Cisco! I started adding the stern frames. The instructions say to add the Z frames first, then the ZZ frames going outboard. Before I started that, I tried to remove the char off of all the stern frames. To get the char off the frames, I used these sanding sticks and sanding blocks only using 220 grit sandpaper. I looked at the instructions in later chapters and realized I don't have to take all the char off on ever edge. I did sand the sides smooth though. An important point is, I did not sand the char off of stern frames Z until I doubled them up as the instructions specify. I also did not sand the ZZ sides smooth as they are all glued to each other and to stern frame Z. I will sand the bottom (the small knotch) of each frame after they are glued onto the ship and ready to test fit the square tuck a little later in the build. Notice I did NOT sand anything forward of the stern frames curve where it meets the straight part. Same for the sides of each frame. I want to make sure each frame has a nice snug fit into the slots on the bulkhead frames. I then test fitted the stern frames onto the stern. The frames looked good and in the correct positions, so I glued the Z frames onto the stern. I then sanded the Z frames where the deck will be placed to be even to the top of the bulkheads. I continued by gluing on the ZZ frames one at a time. The pic also shows the lining off where the planks will rest against the stern frames. I had to wait until today (Monday) to fair the Z and ZZ frames to match the corr3xt hull shape. This took a bit of time and created a lot of sawdust. That is the reason why I waited until I had time to do this outside. This pic shows how off the planks will lie on the stern frames without adequate sanding. Notice the plank isn't even close to the last bulkhead. After sanding and checking many times, it looks like this when it is very close to being finished. This sanding took a while, but with patience and a lot of checking using some strips, I was able to finish it. There was an issue though. I made a bad move and my sanding stick hit the last bulkhead and broke the top part off. Oops! The good news is, it came off in a way that it's easy to glue back on. When placing it back onto the model, it is important to test a strip over it to make sure the curve and position of the hull is still correct. After it dried, I then added the rest of the frames for the stern. Now I have to let eveeything dry. Then lastly, I will sand down the tops of the other stern frames to match the tops of the bulkheads. Thanks all! Jeff


-
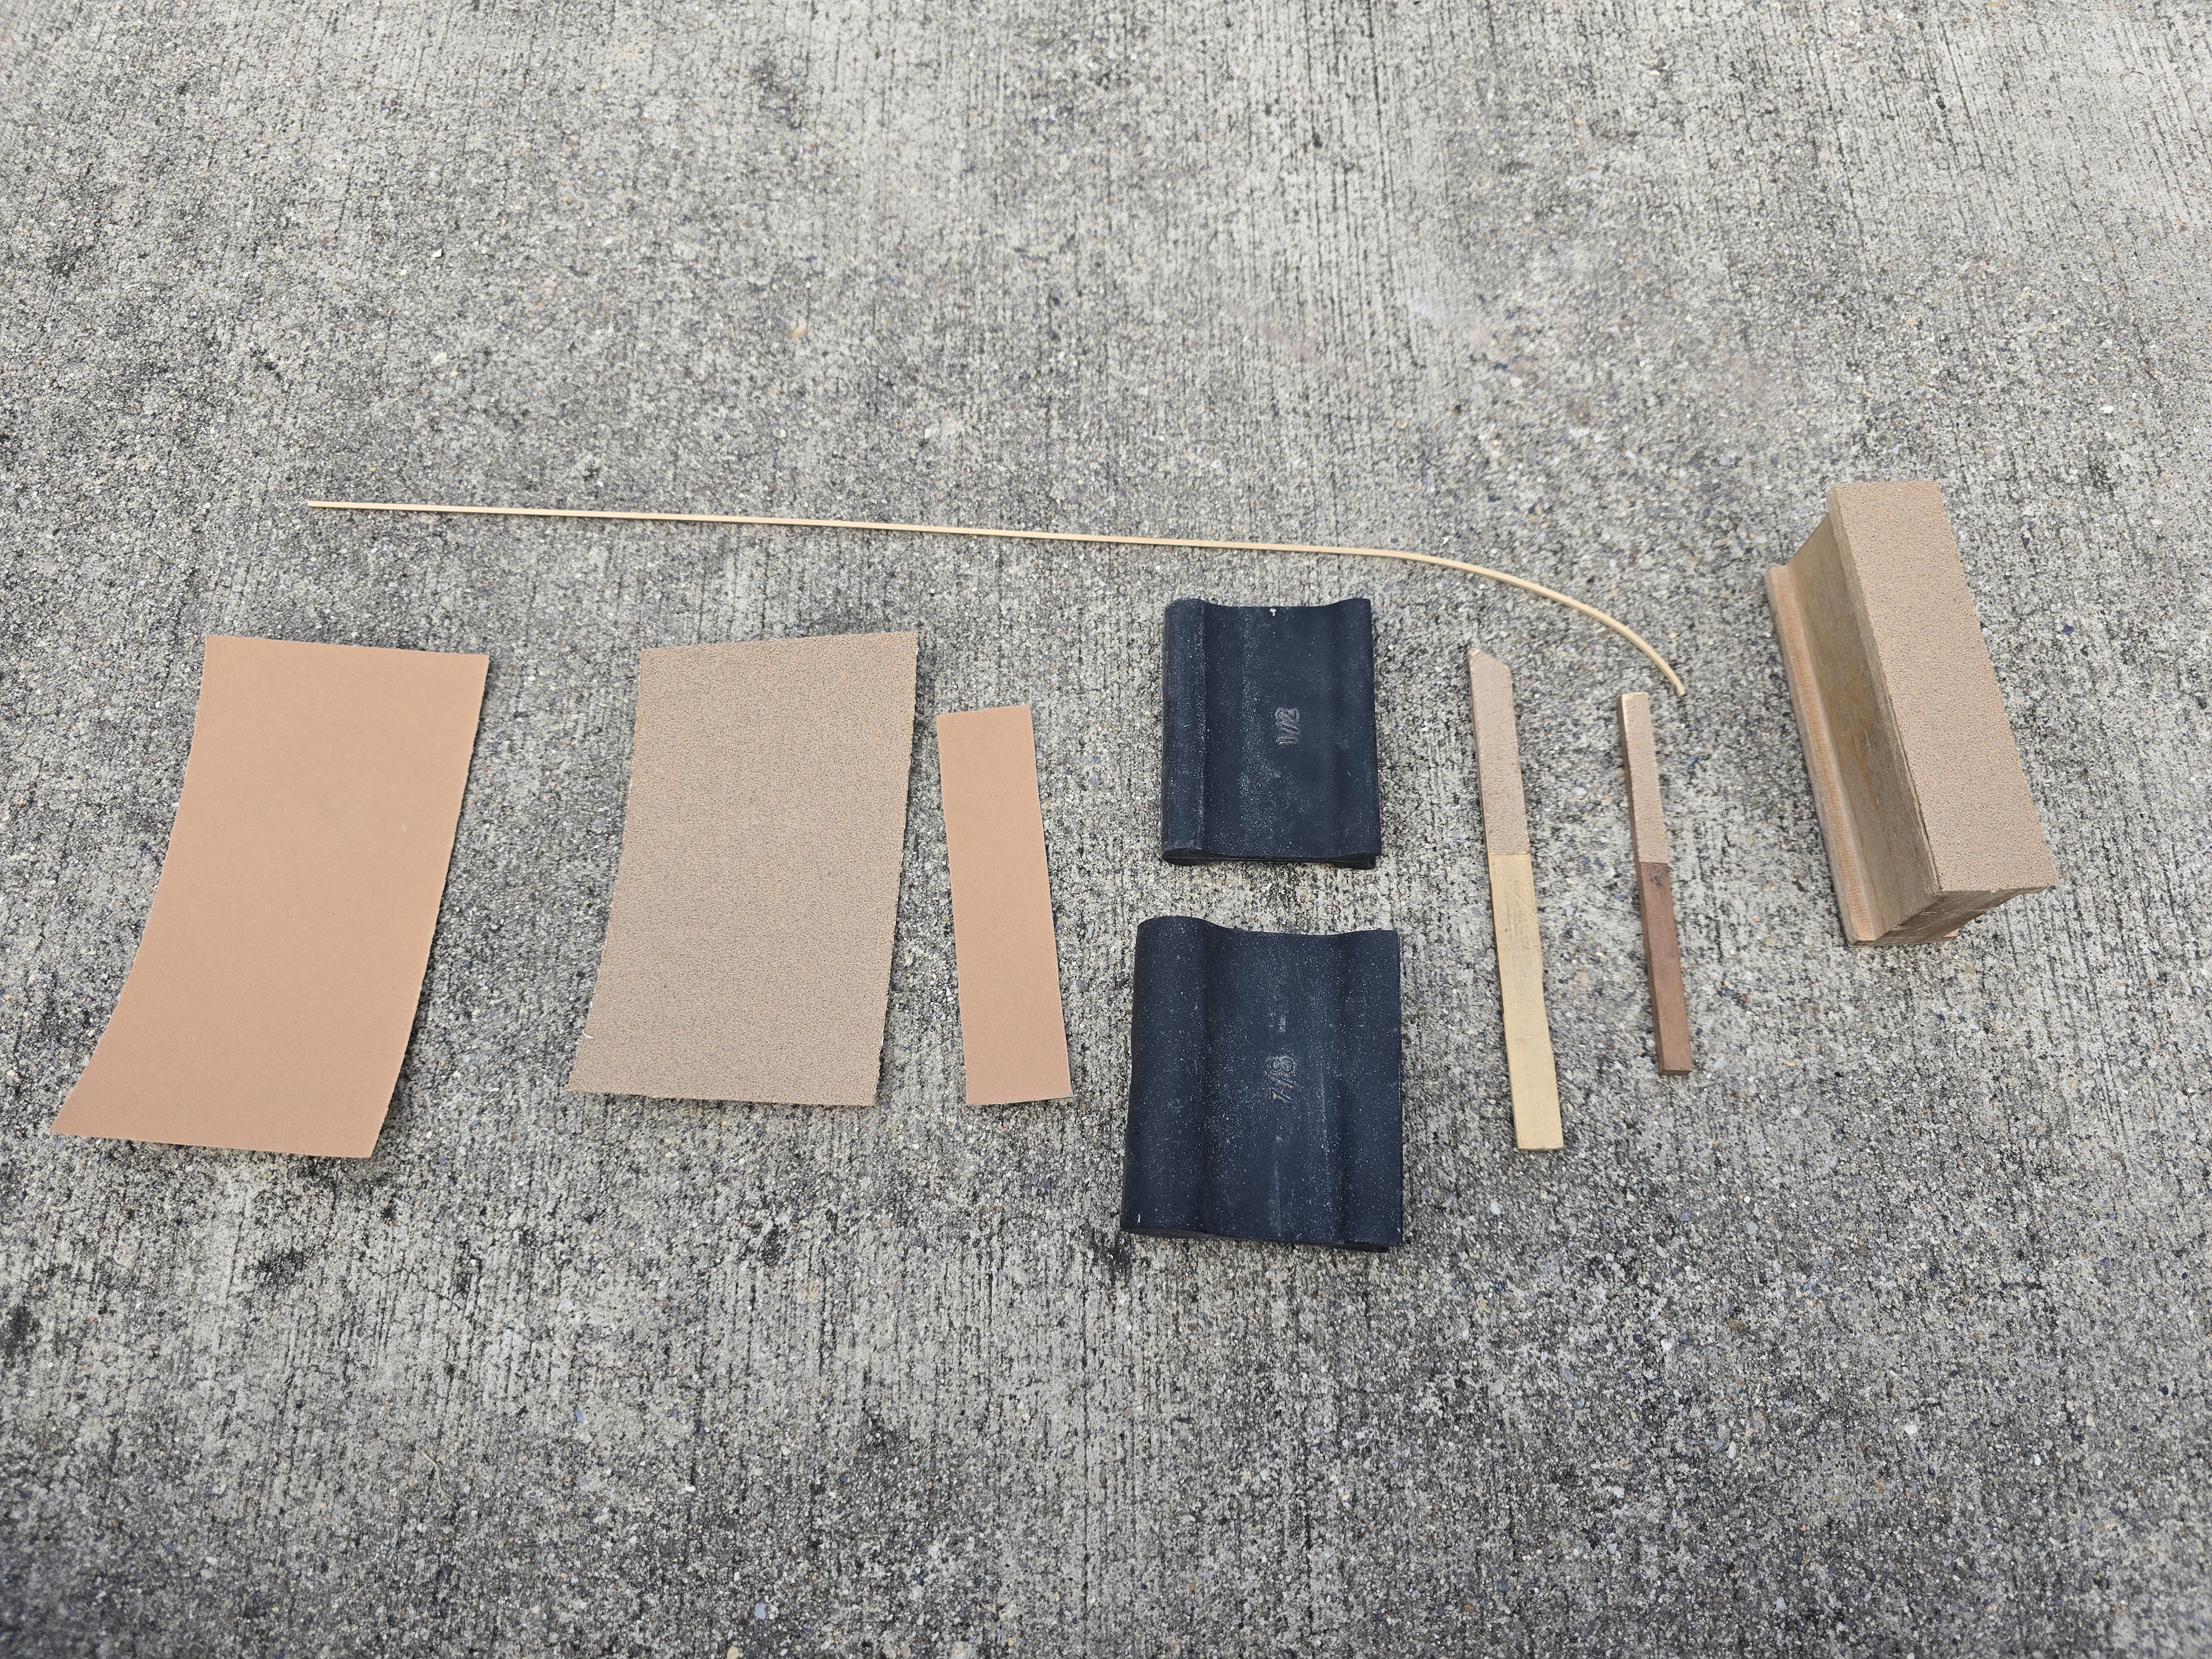
I found them!! I was looking in the wrong part of the kit box. Silly me. They were on the complete bottom of the box within the precut brass sheet! Doh! Well I'm glad I found them. Not only that, it comes with 5 different scrapers for many different shapes! So if you need a lot of standard sized scrapers, this is the kit for you hah! This is a great kit I have to admit. Jeff
-
Thanks for the input! You guys are right that it's more for metric, but it might not be a bad idea to pick one up anyway just in case I need one for another build if it doesn't work on this one. Thanks for the idea Ronald of contacting Modelshipways and ask if it was suppose to come with one. I'll let you all know what they say. If it isn't suppose to come with one, i might have to make one myself lol! (Good luck to me about that!) Jeff
-
Just a quick update. I finished planking the 5/32" strips to finish off the, I guess you would call it the sub-step. I then lightly sanded the planks to help create a smoother run. I noticed a few of my sweep ports were a little too low. Ugh! But it's too late now! I will just have to deal with it. overall though, I am happy with how it turned out! A few questions though before I show pics of my work. I read ahead and on page 40, it states that a scraper is provided in the kit for the molding strips. I looked throughout the kit and I did not find a scraper. Is it suppose to be included in the kit? If not, where could I get one? Second, is the beakhead deck planking suppose to sit even against the outboard planking? This pic shows what I mean. Should I sand the beakhead floor planking, or add a small strip to match its height? Okay. Here are some pics of what I have planked so far! Thanks everyone for your likes and comments! Onto planking the gunports! Jeff


-
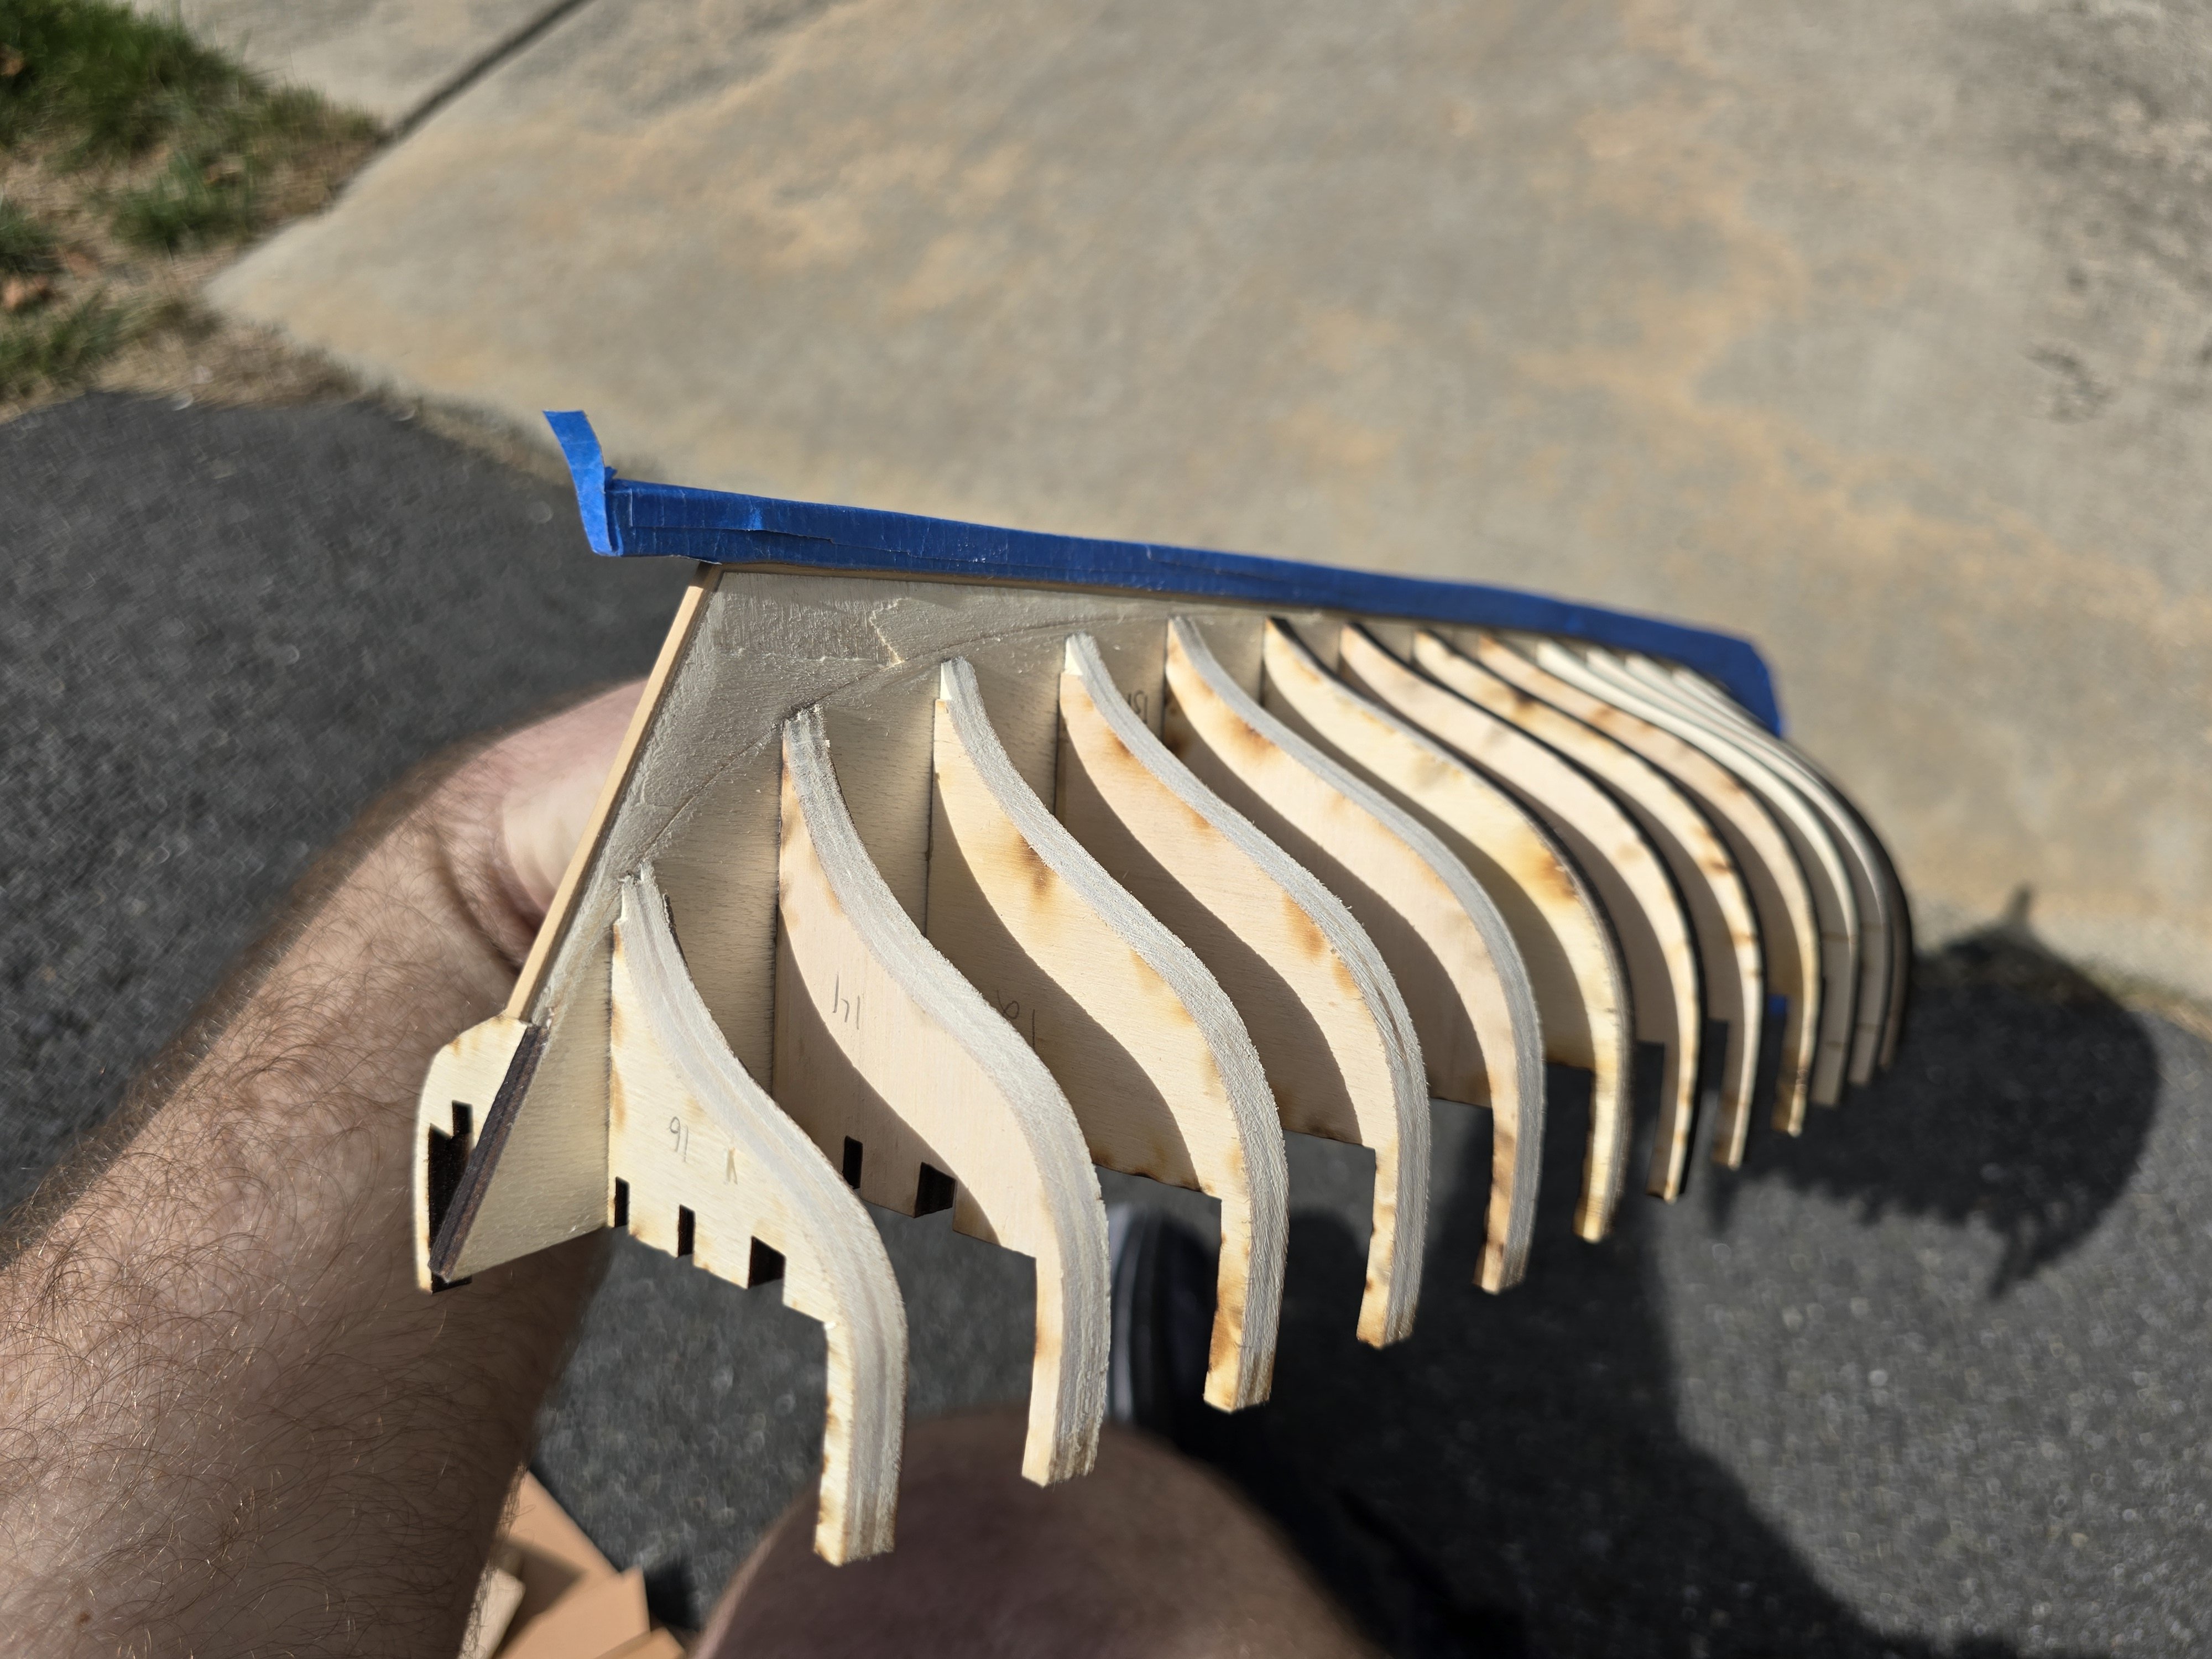
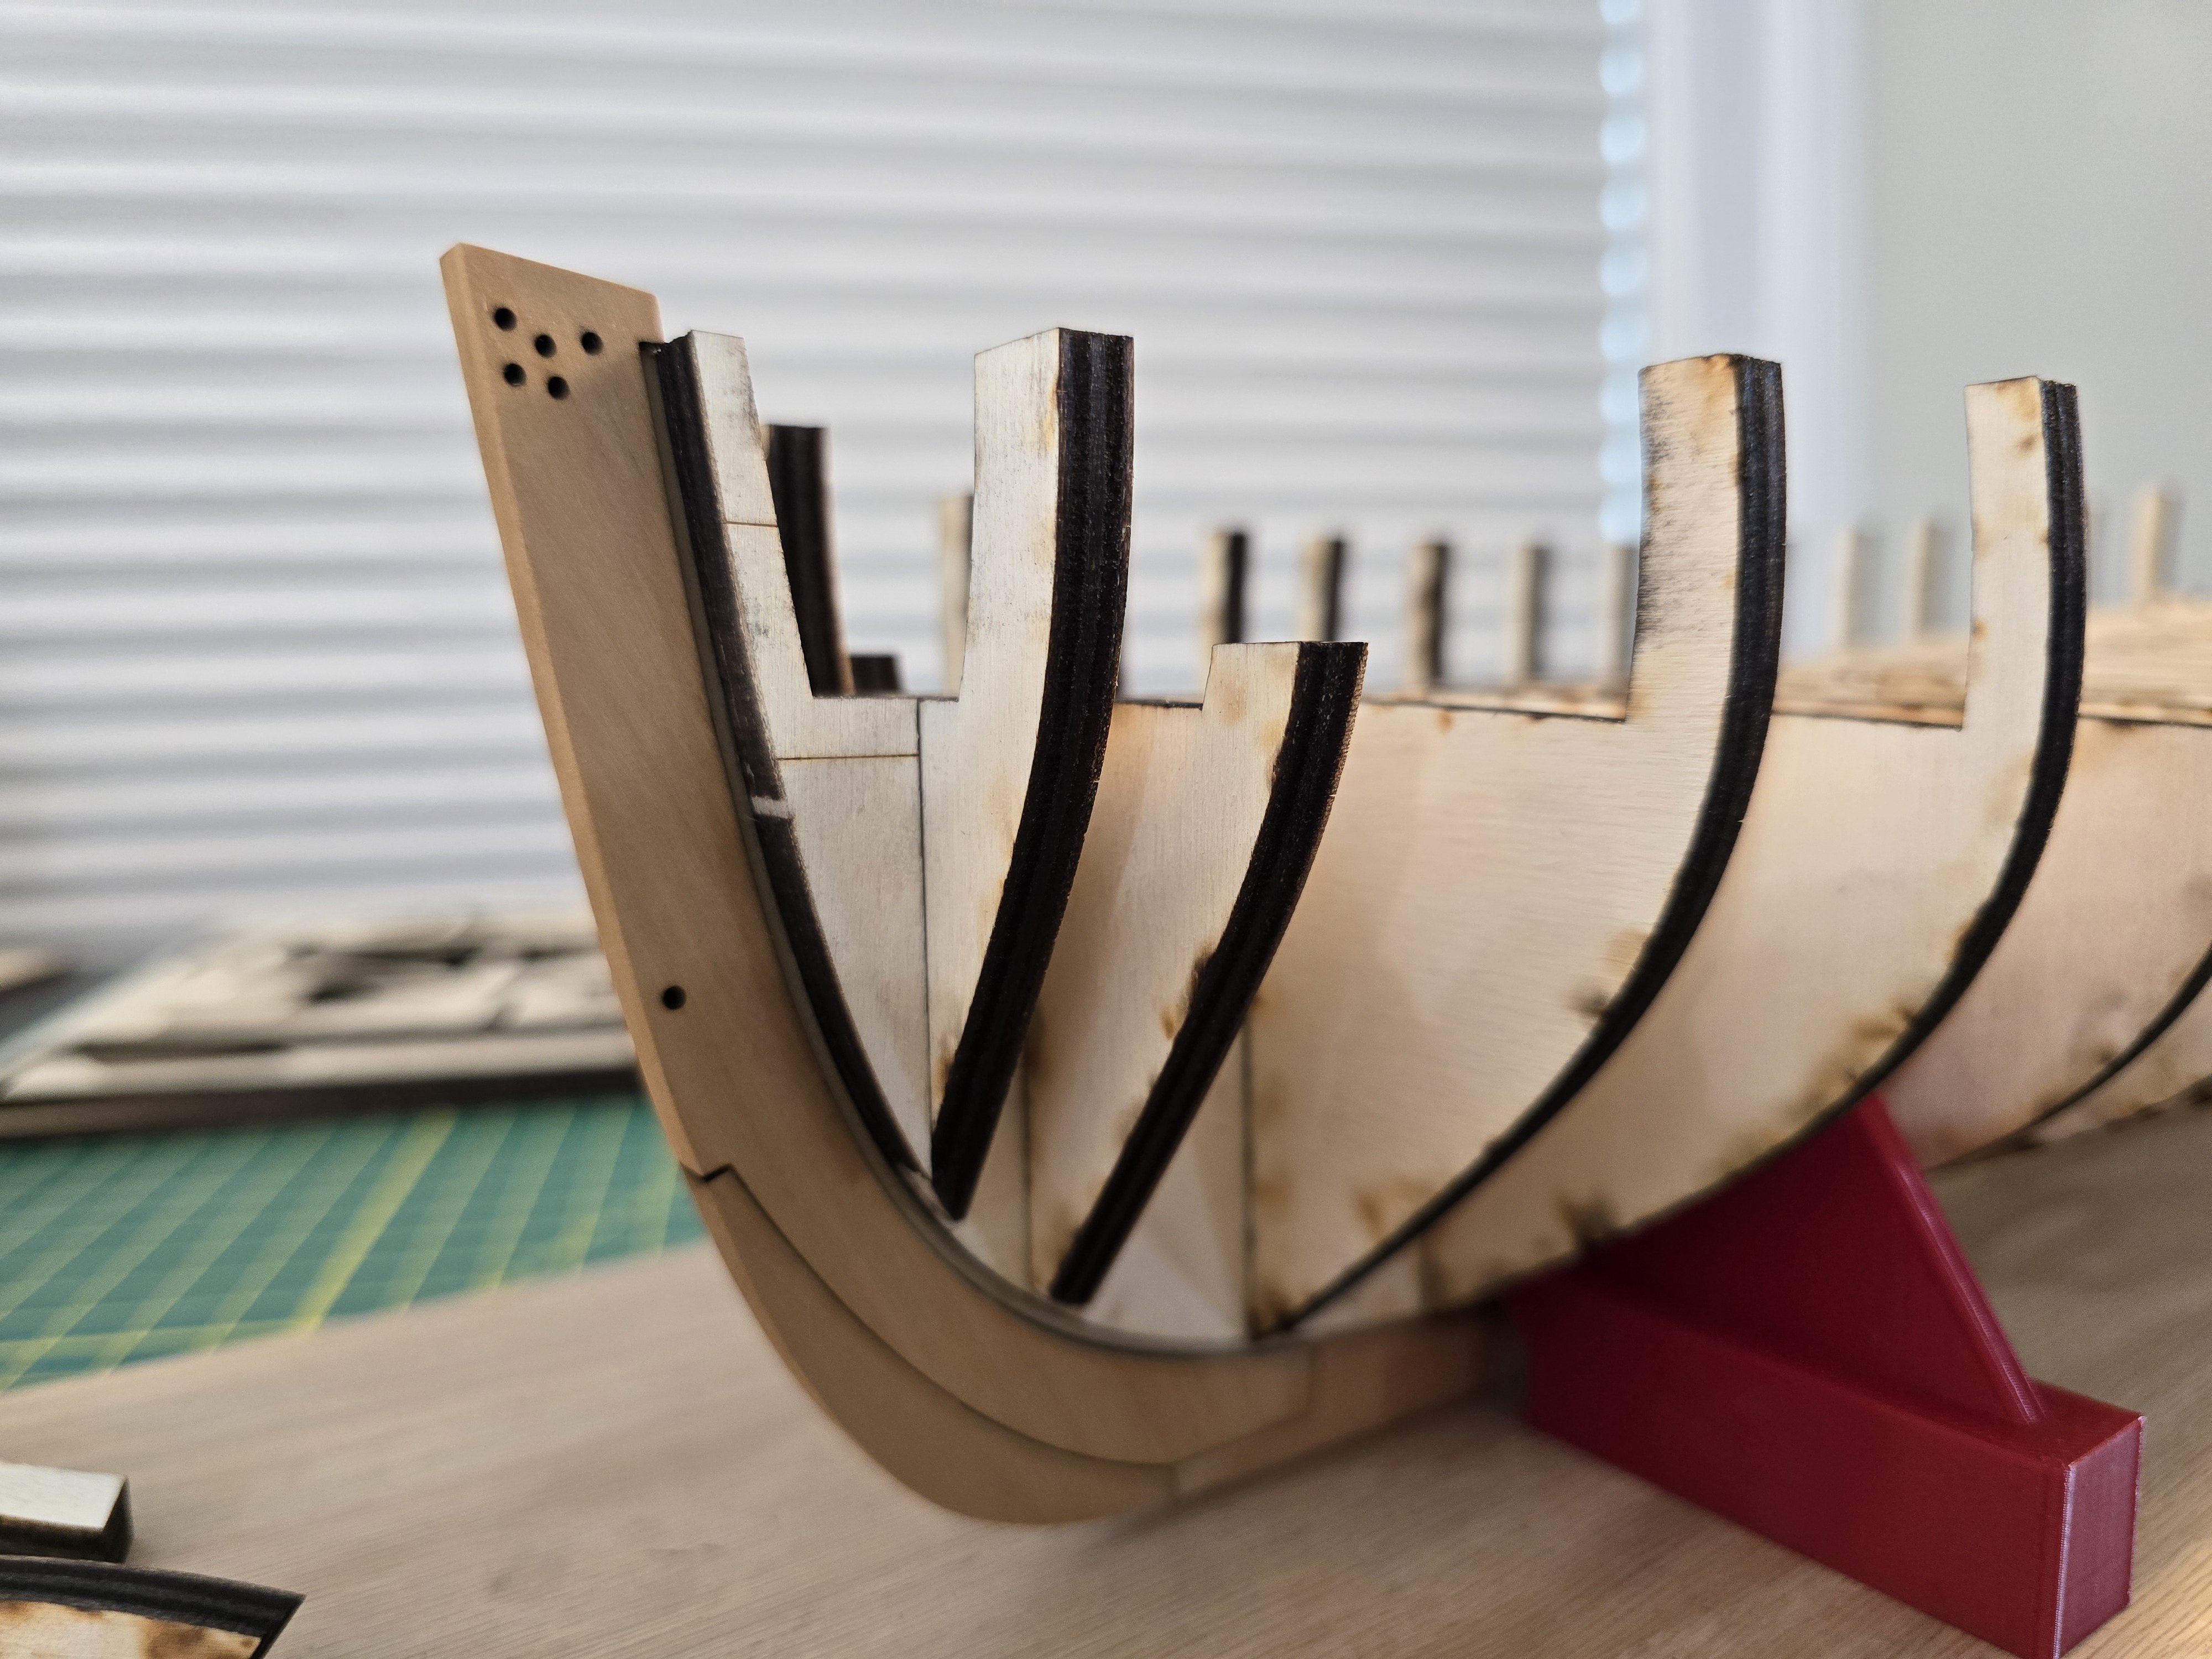
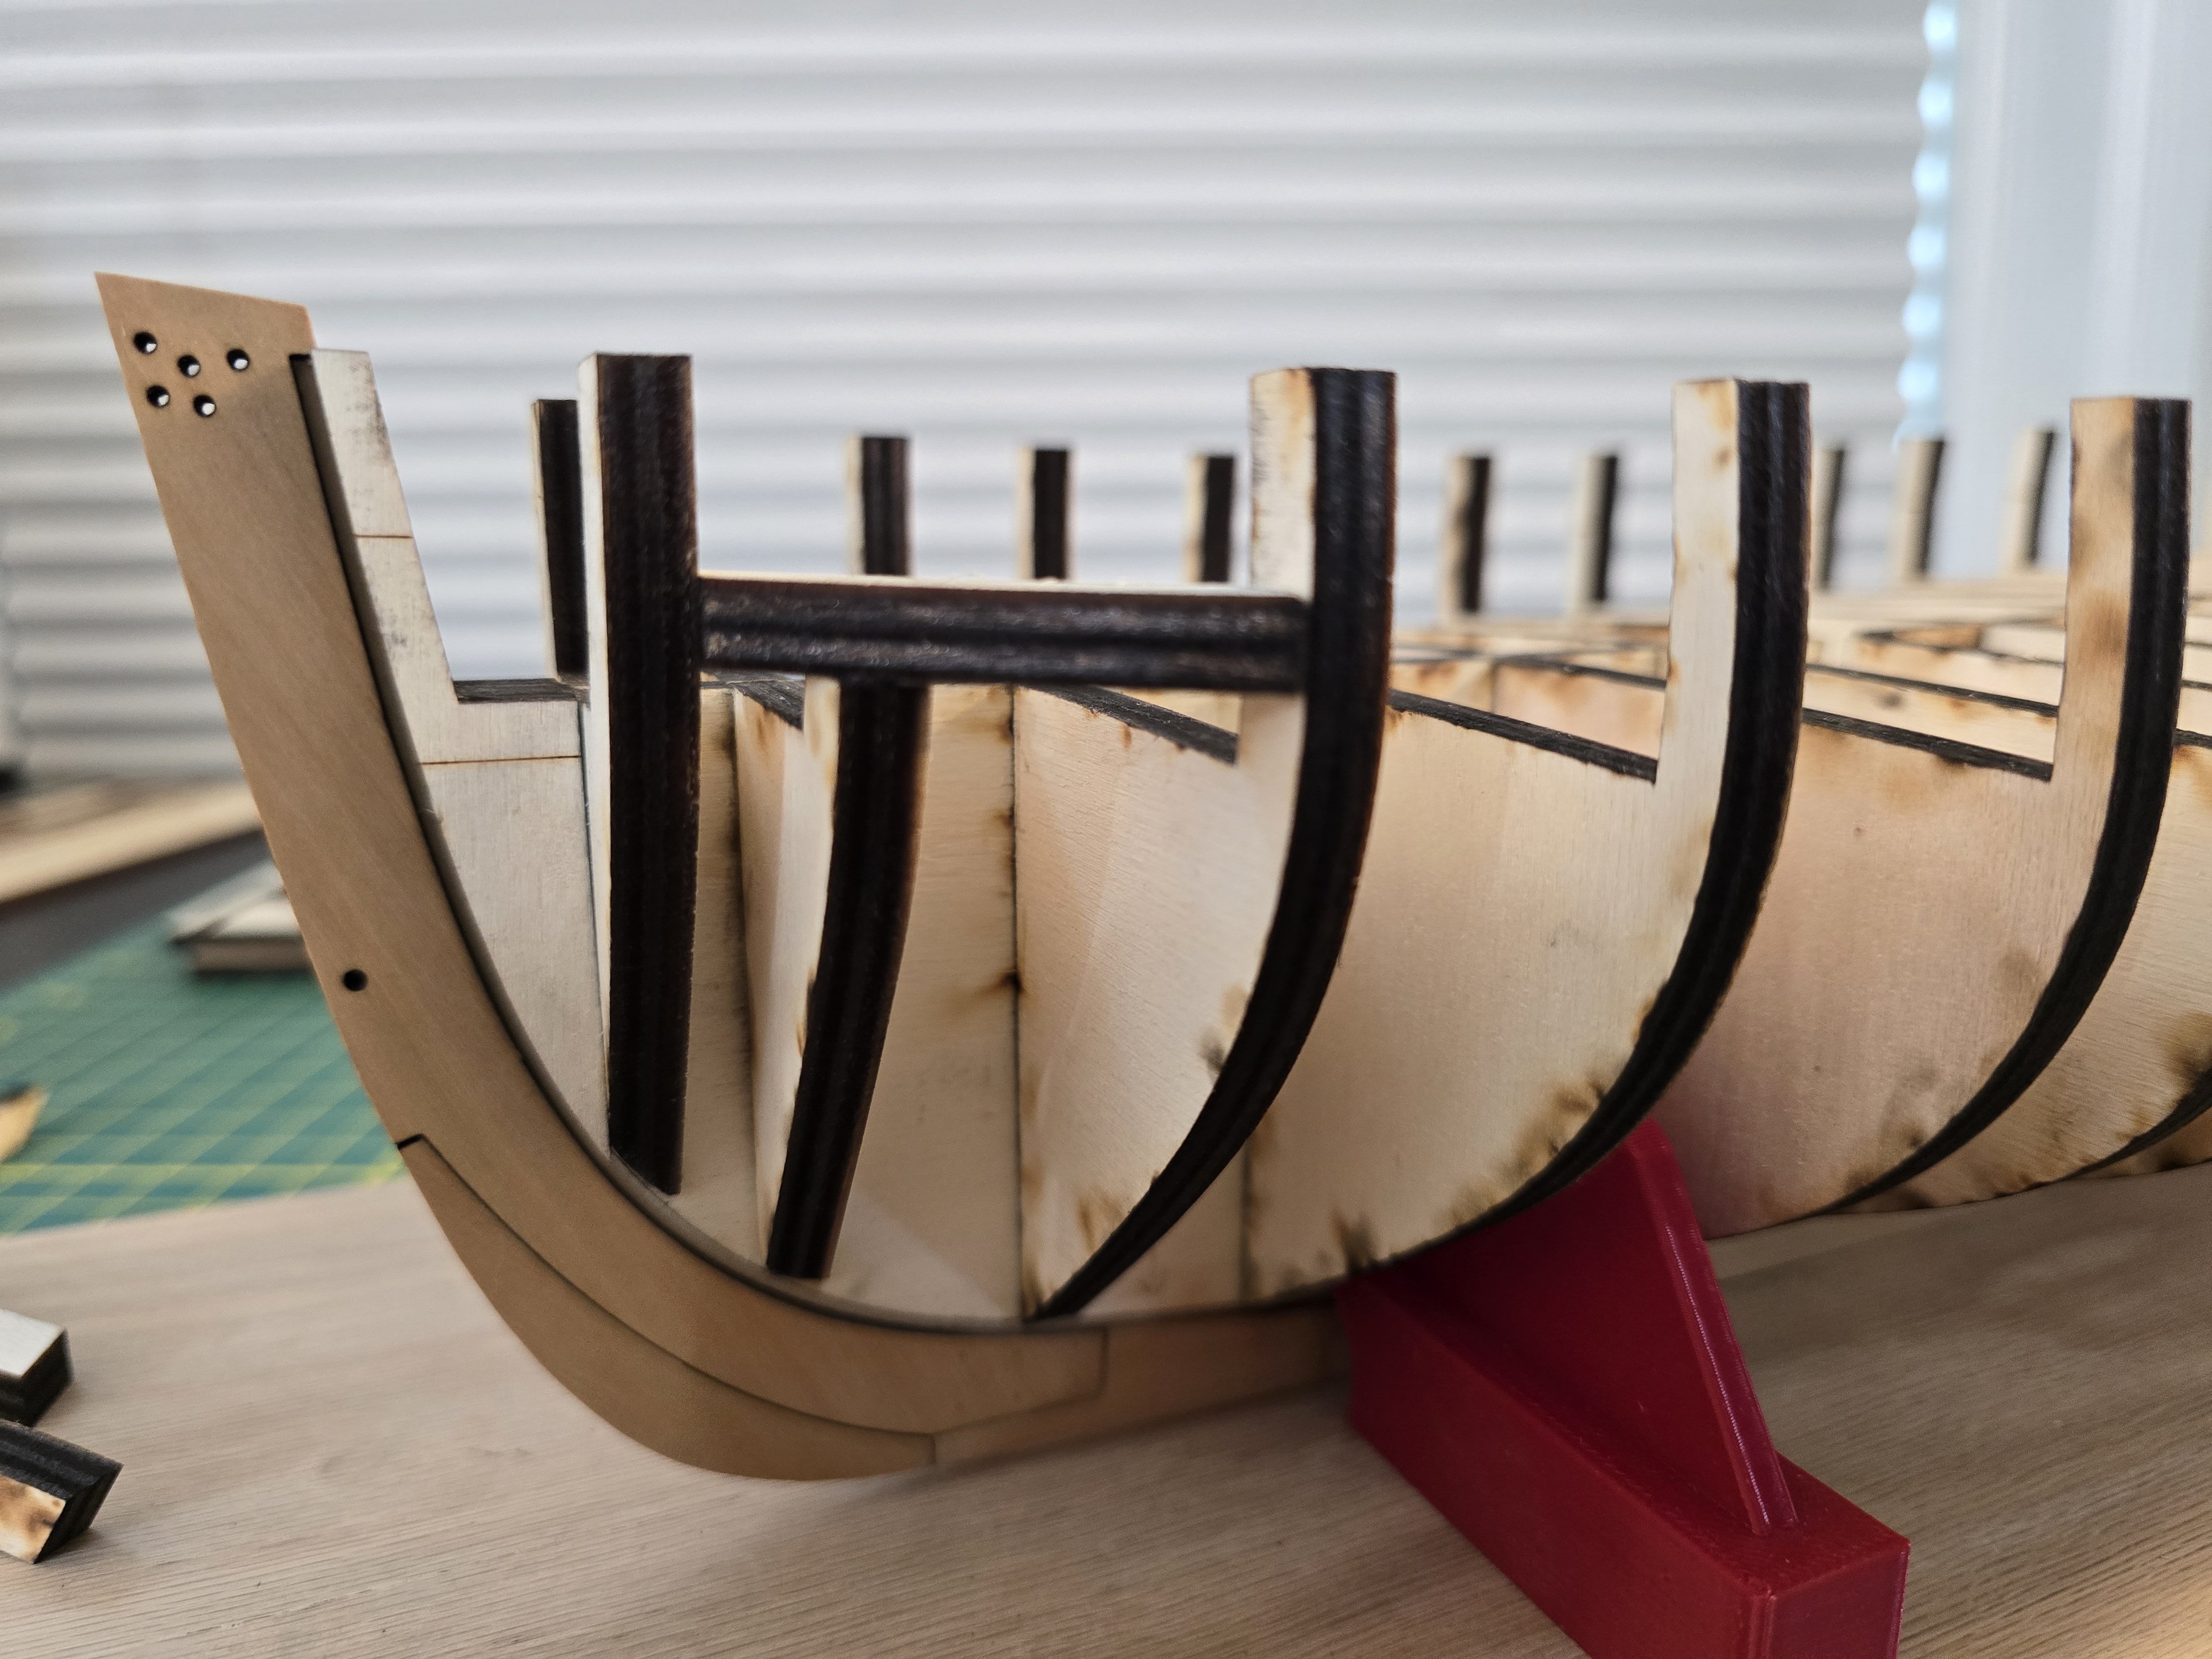
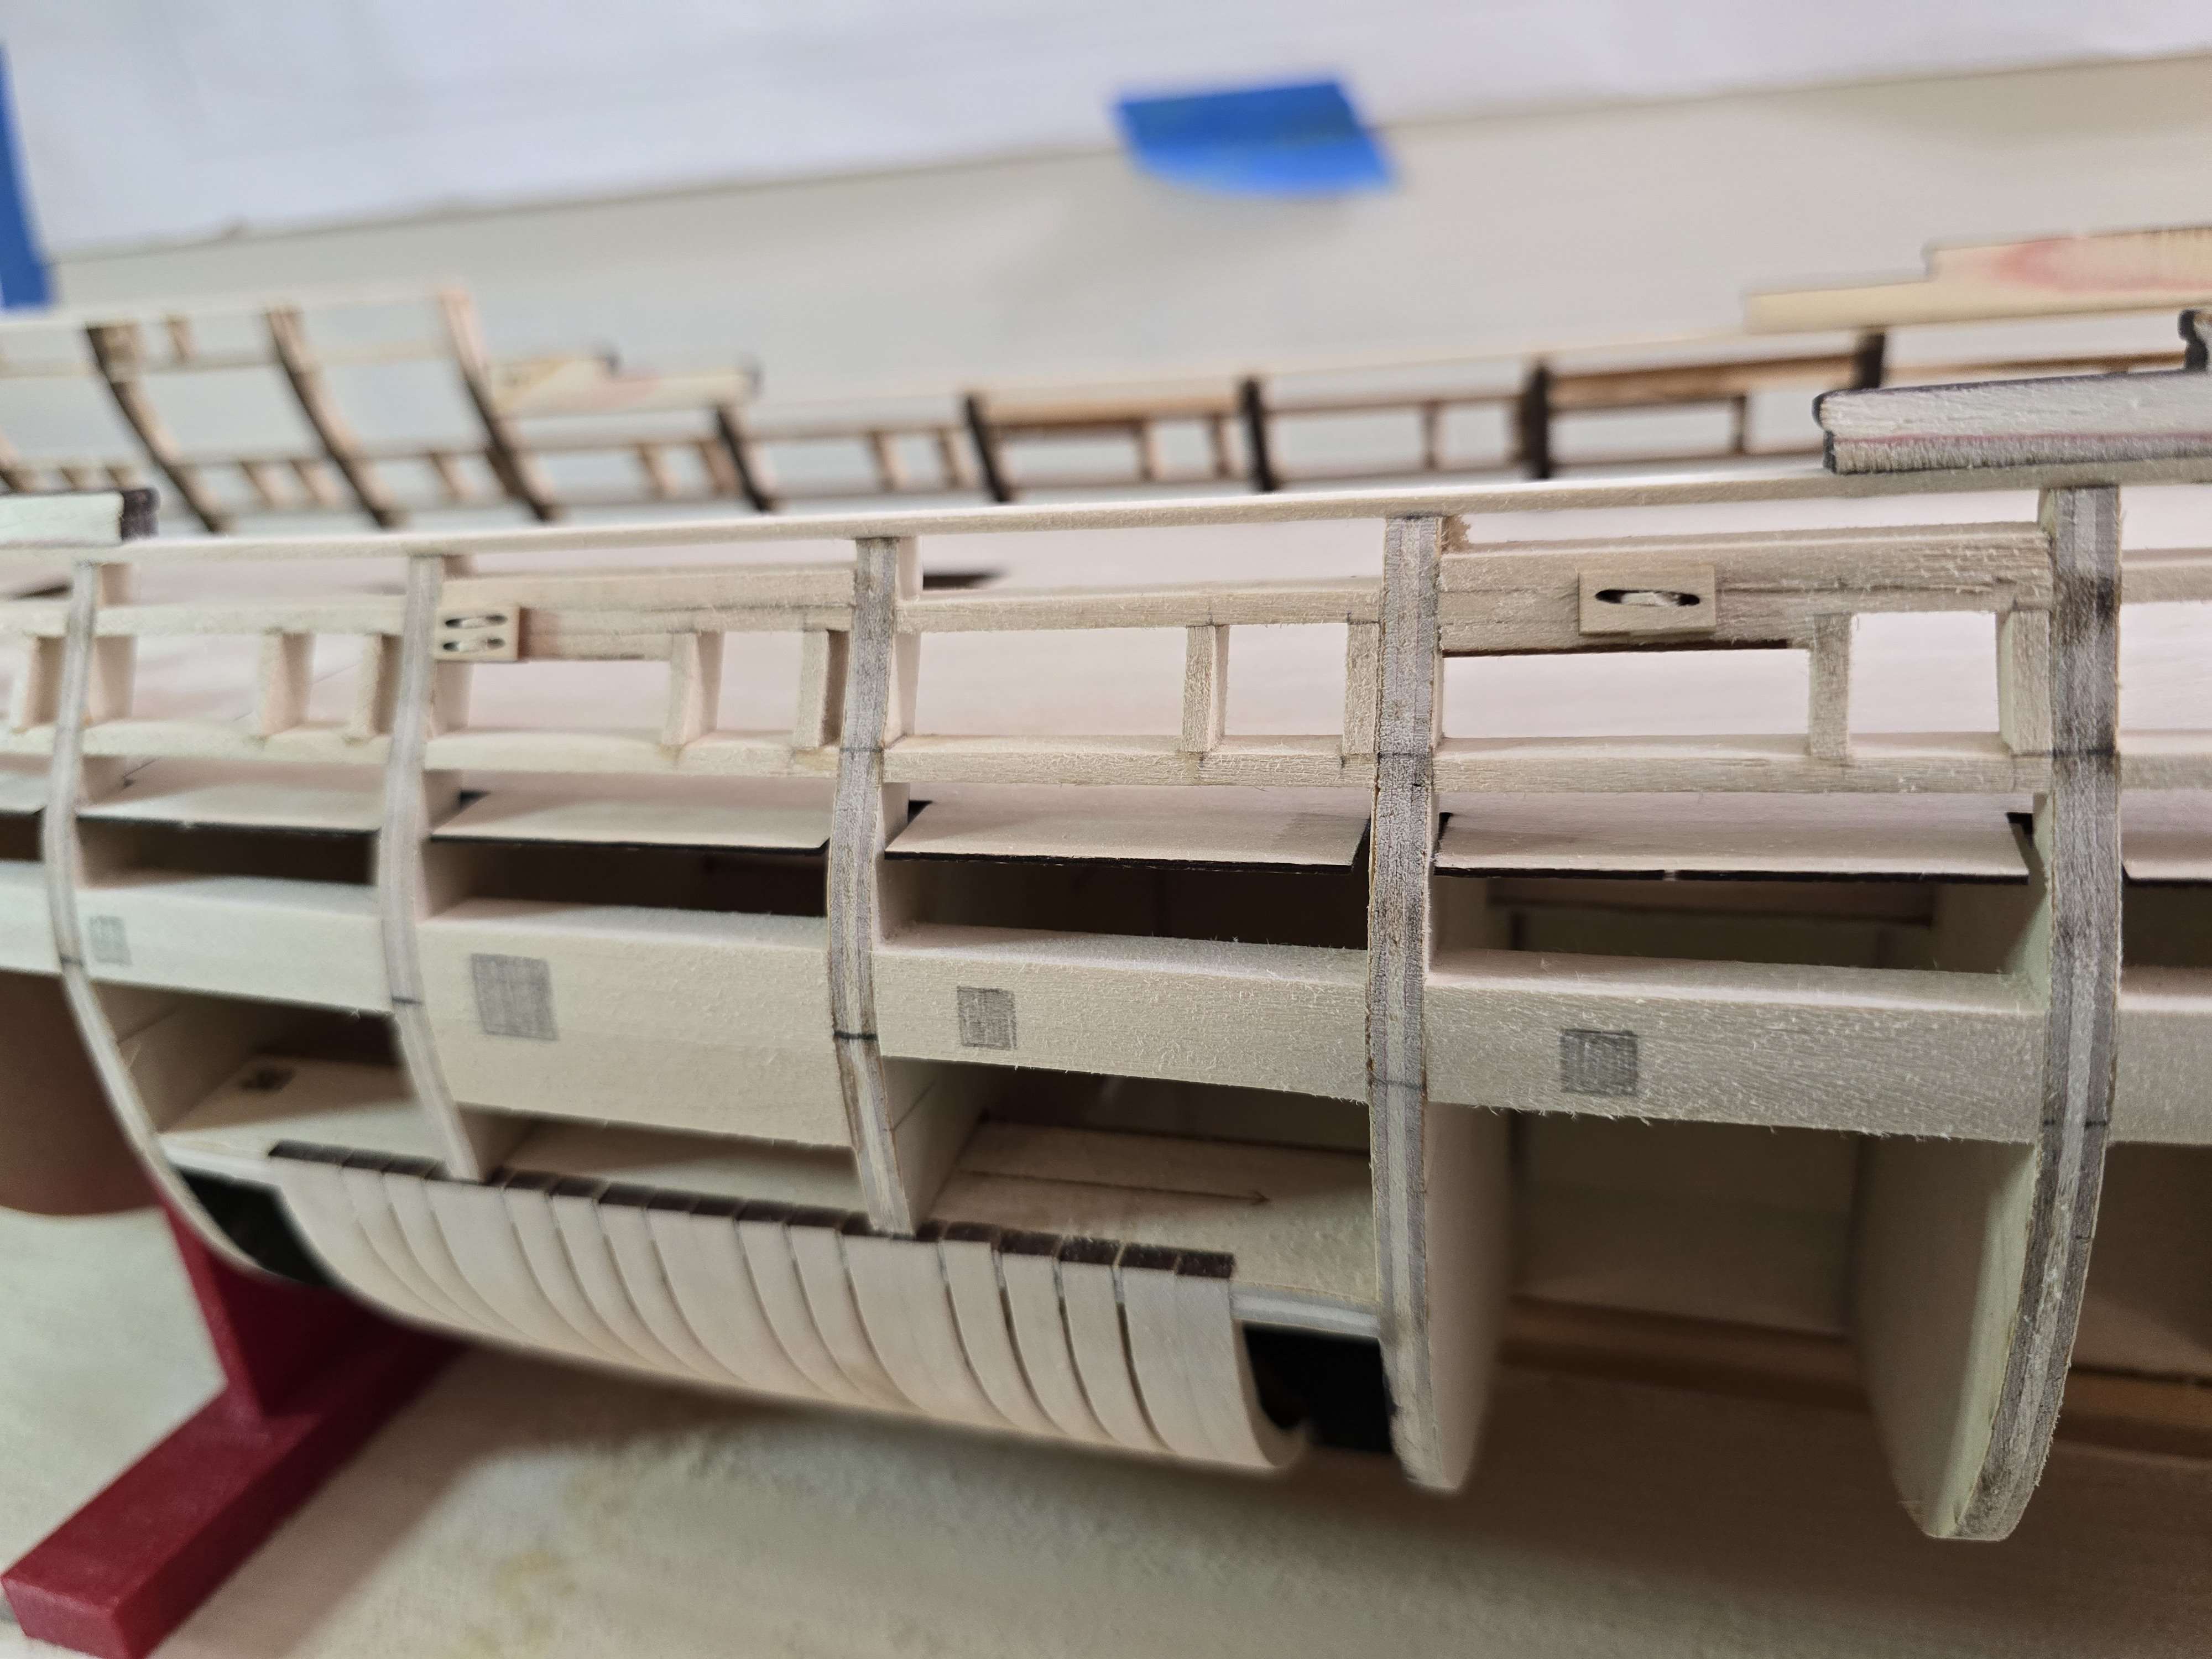
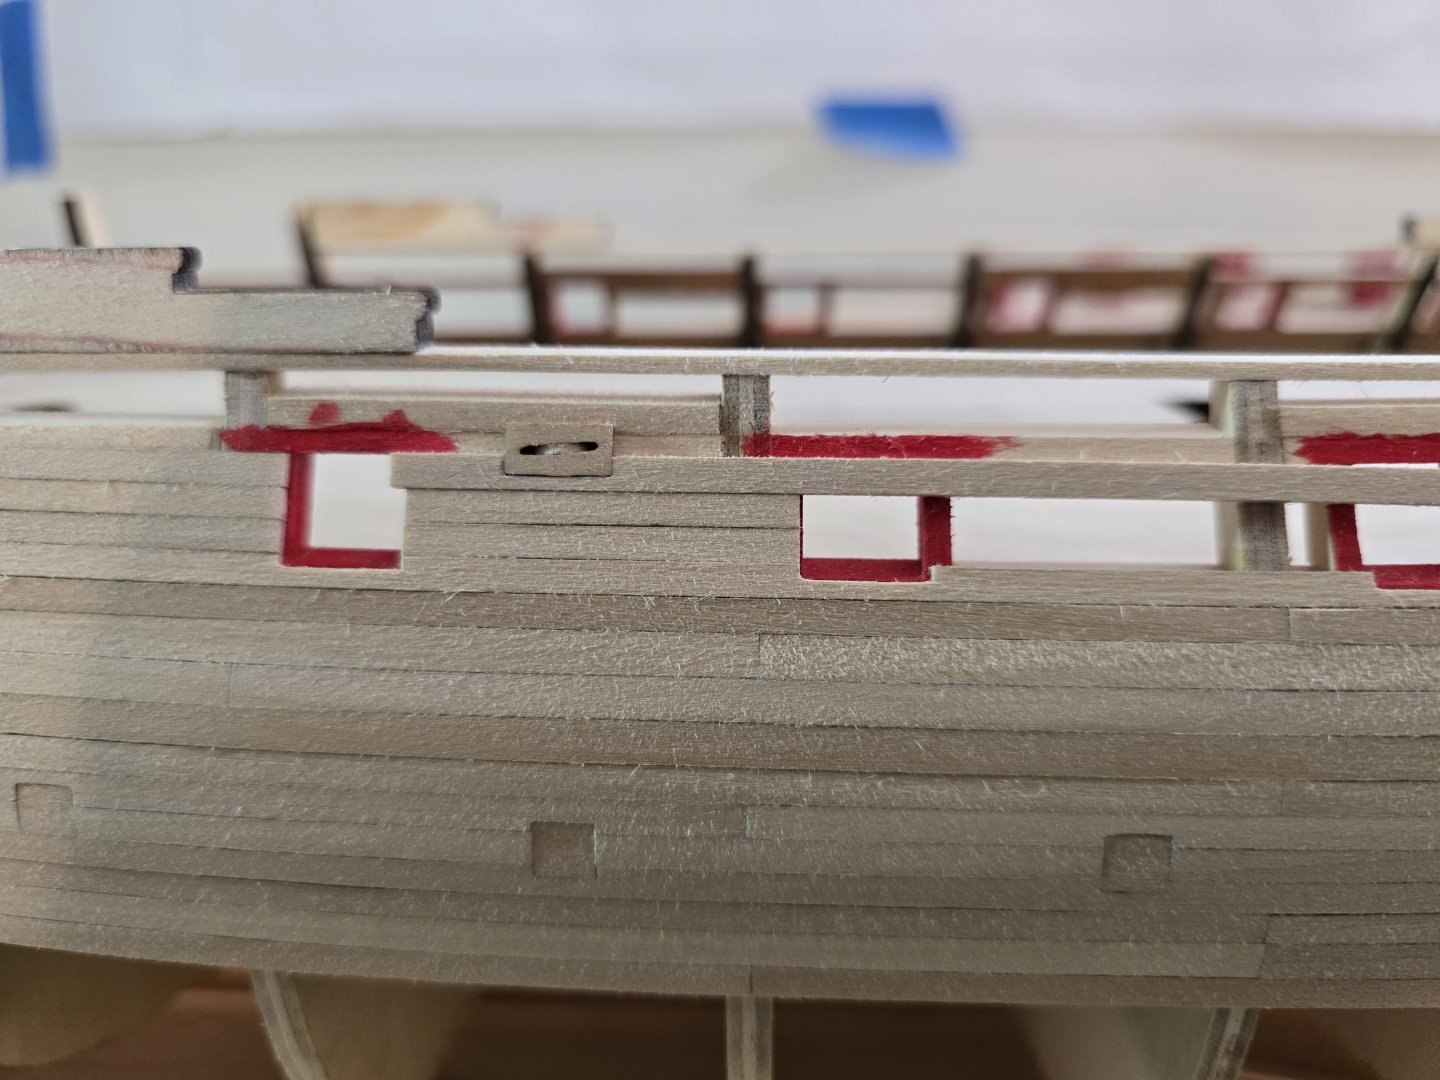
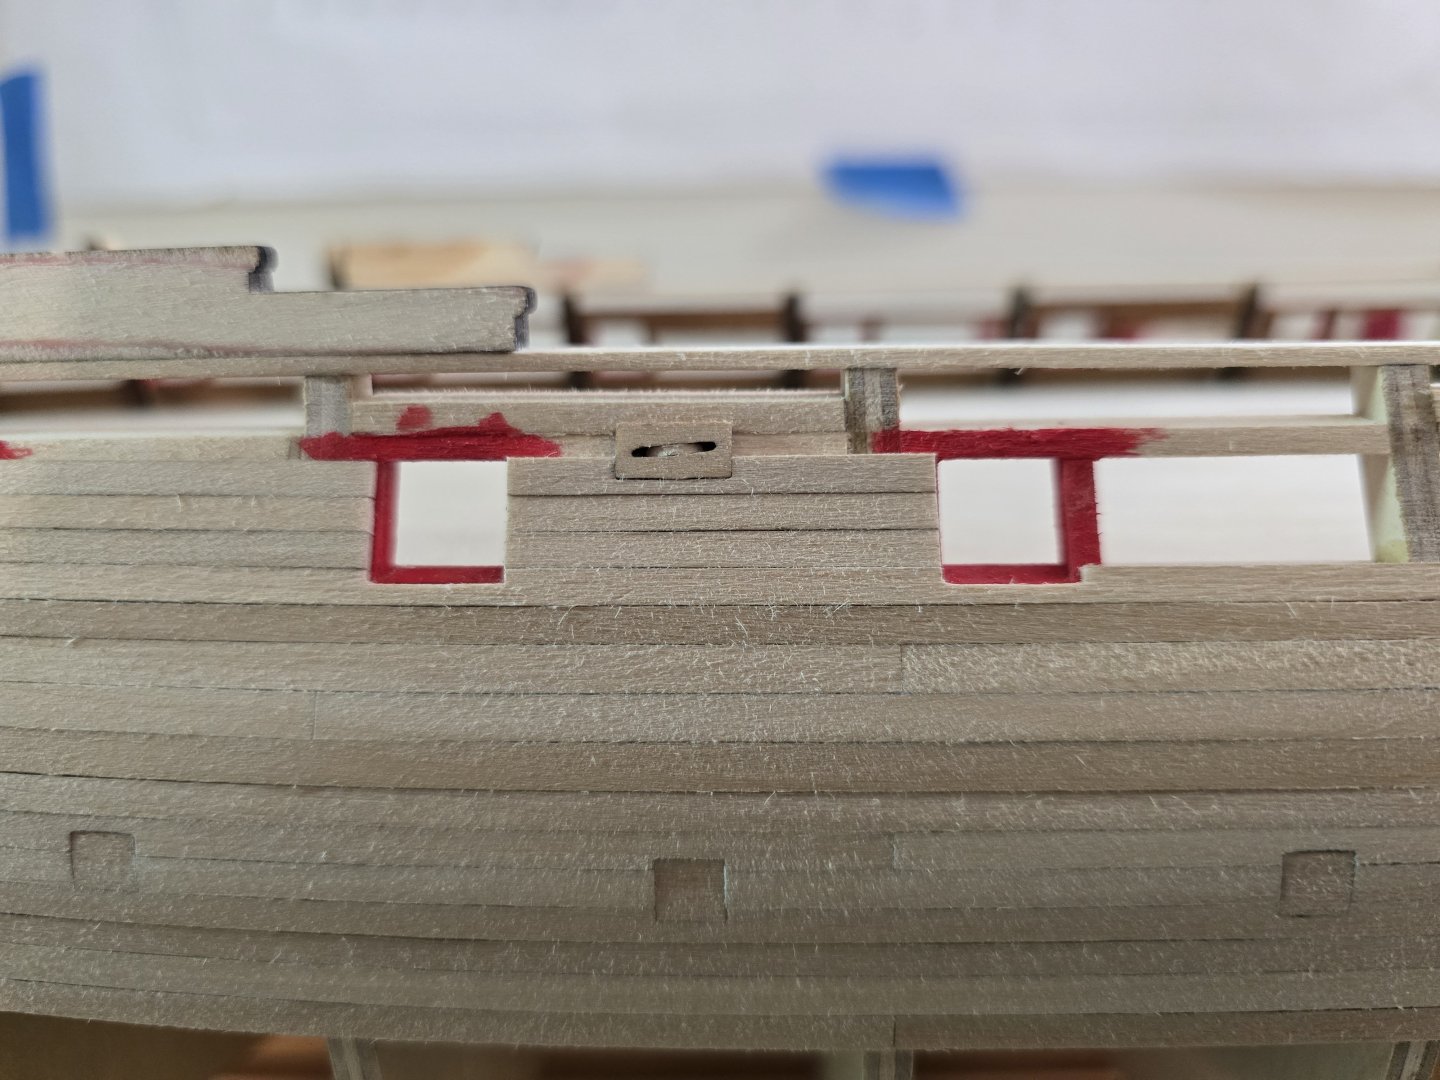
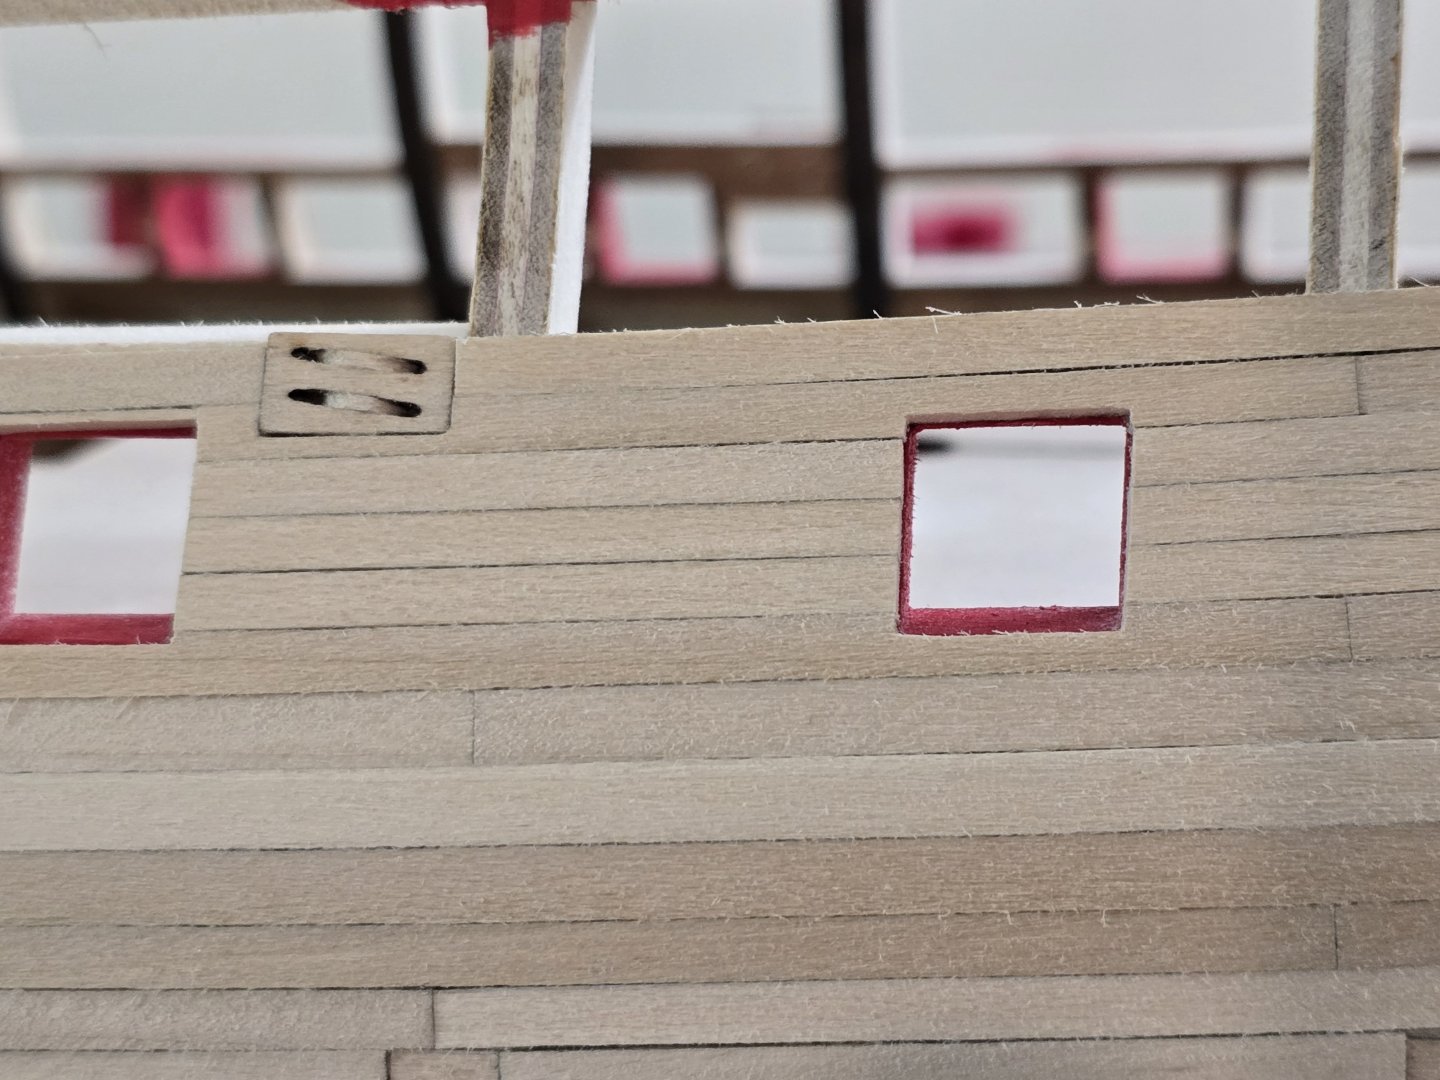
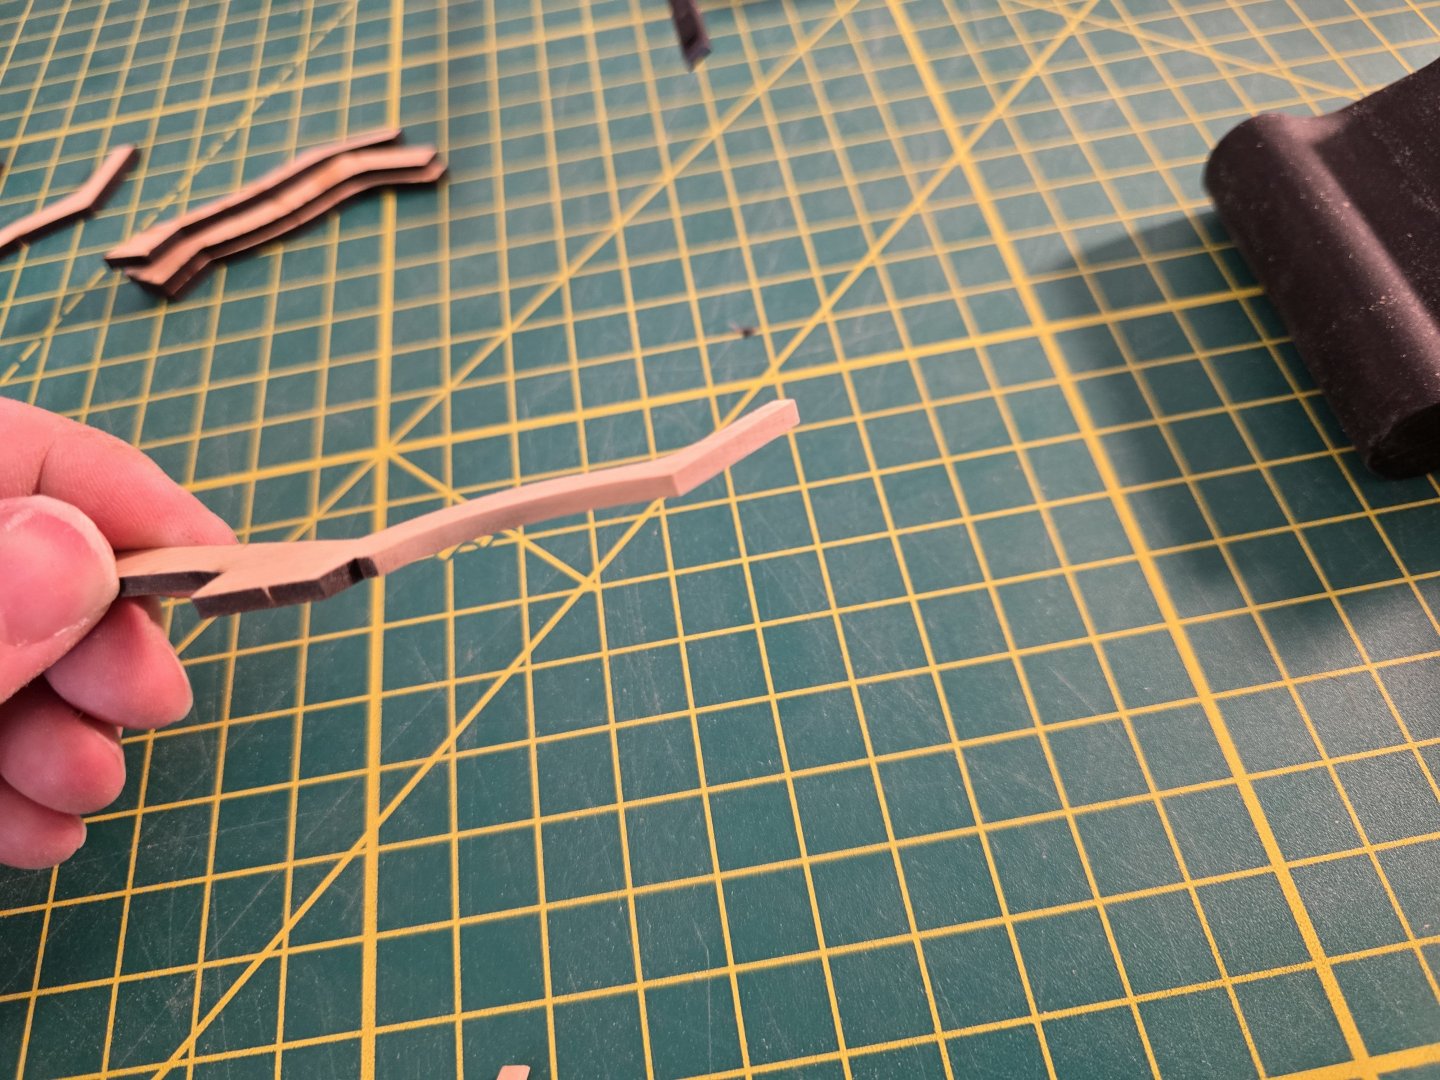
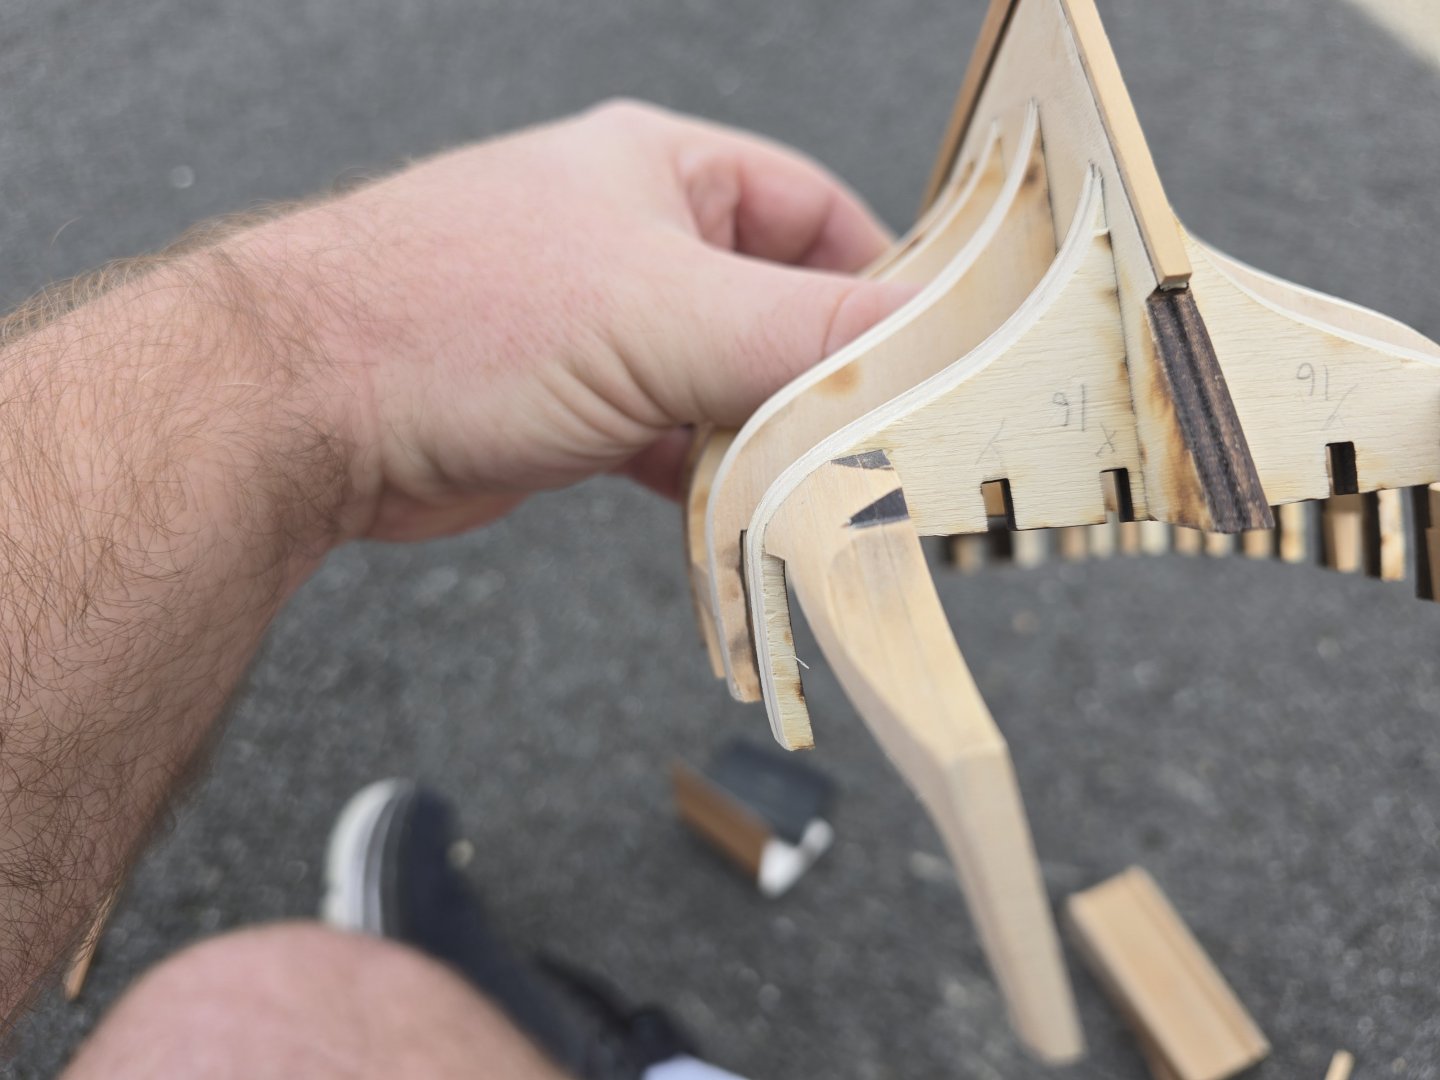
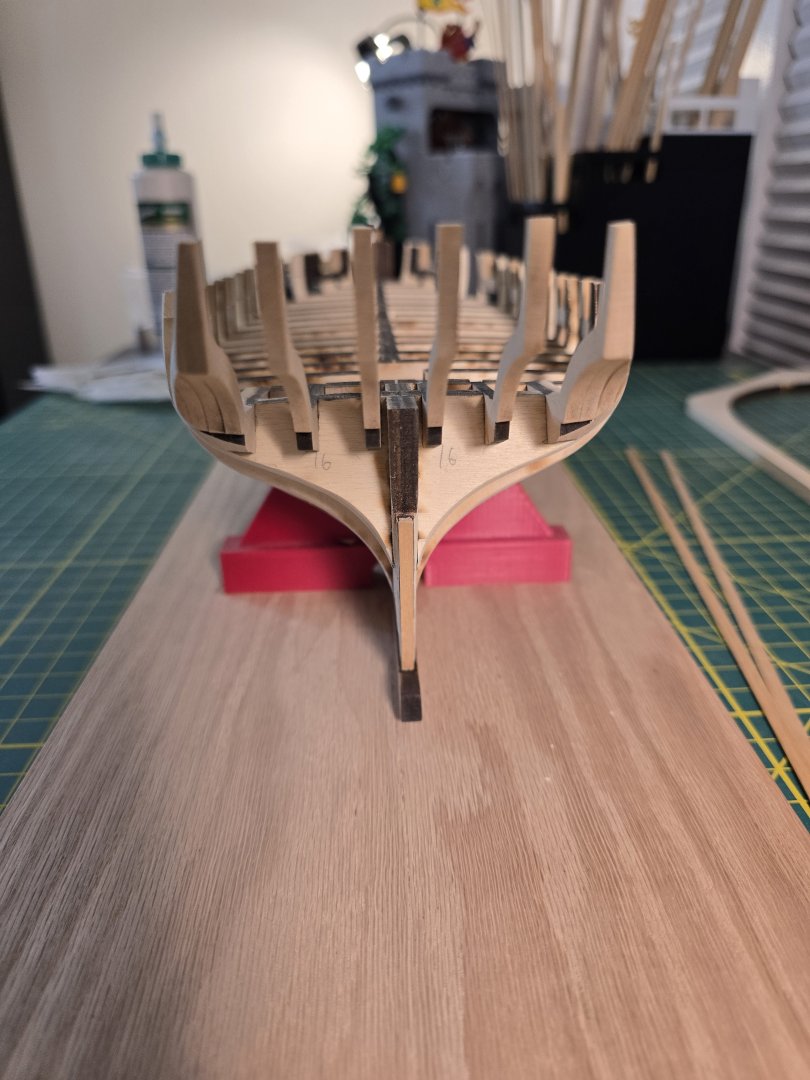
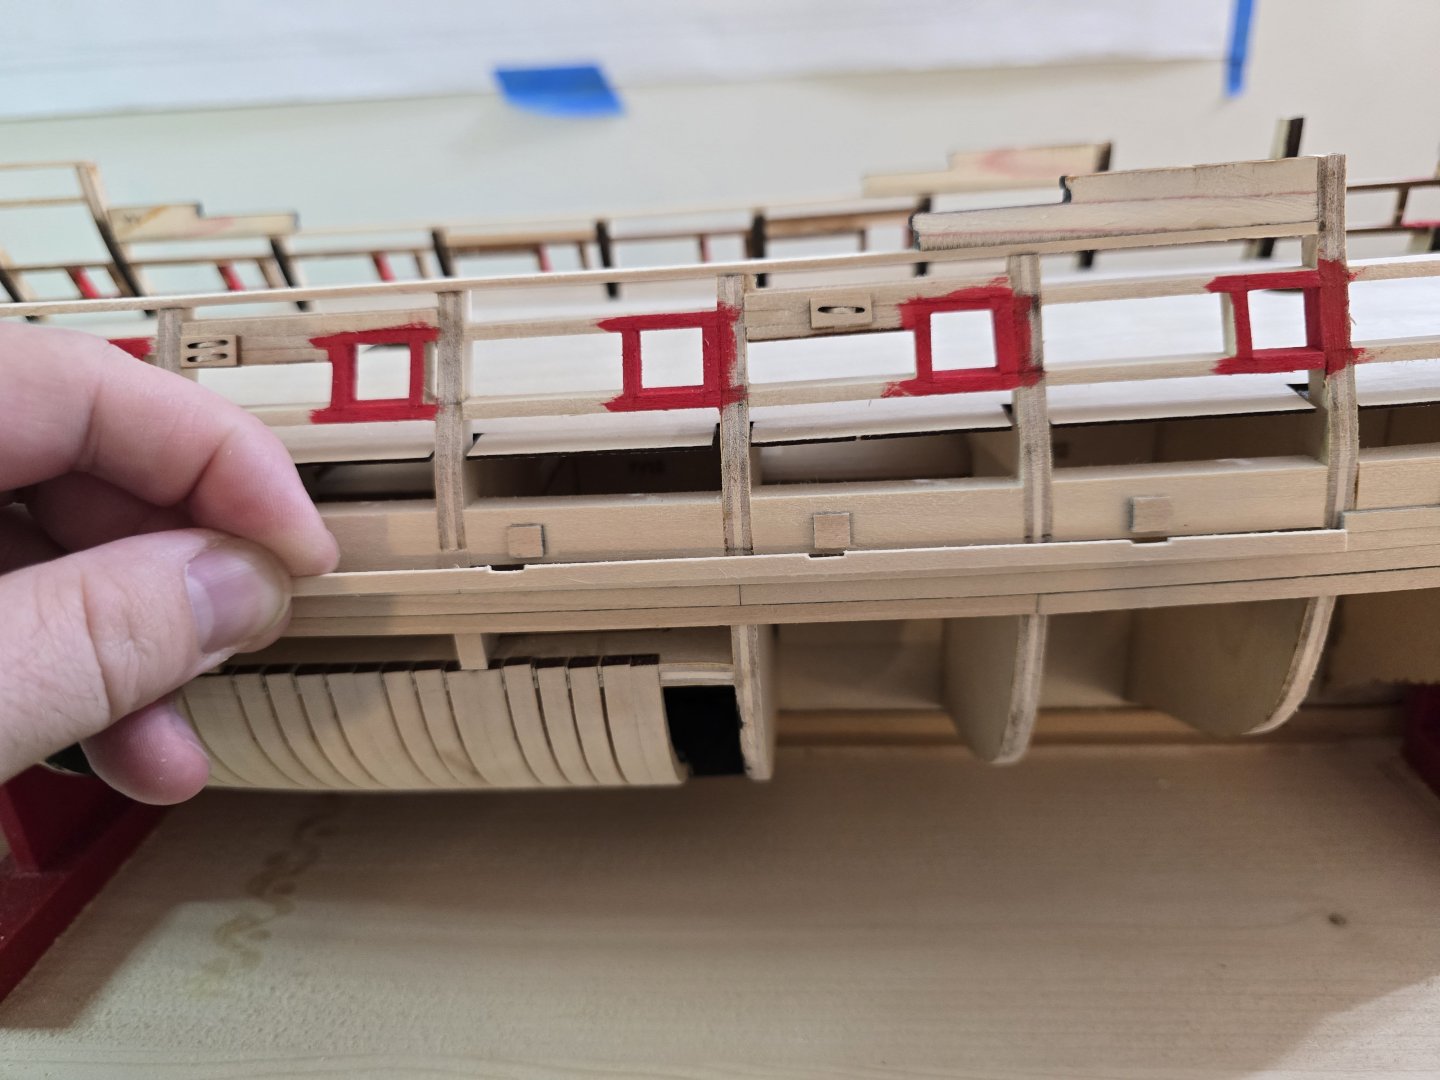
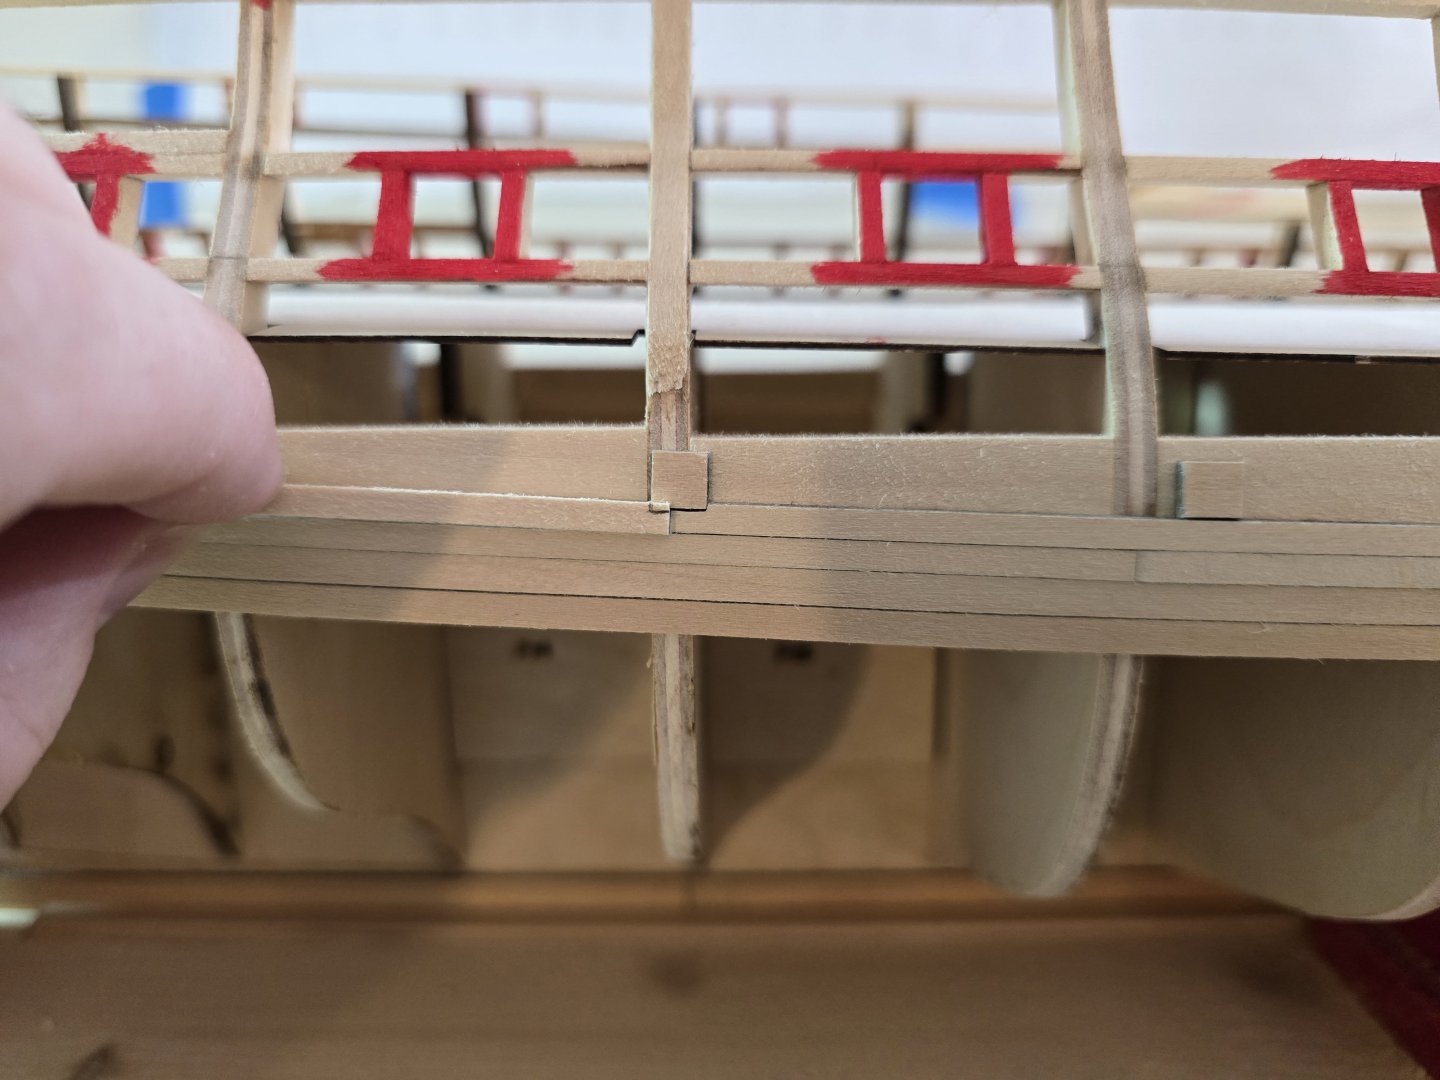
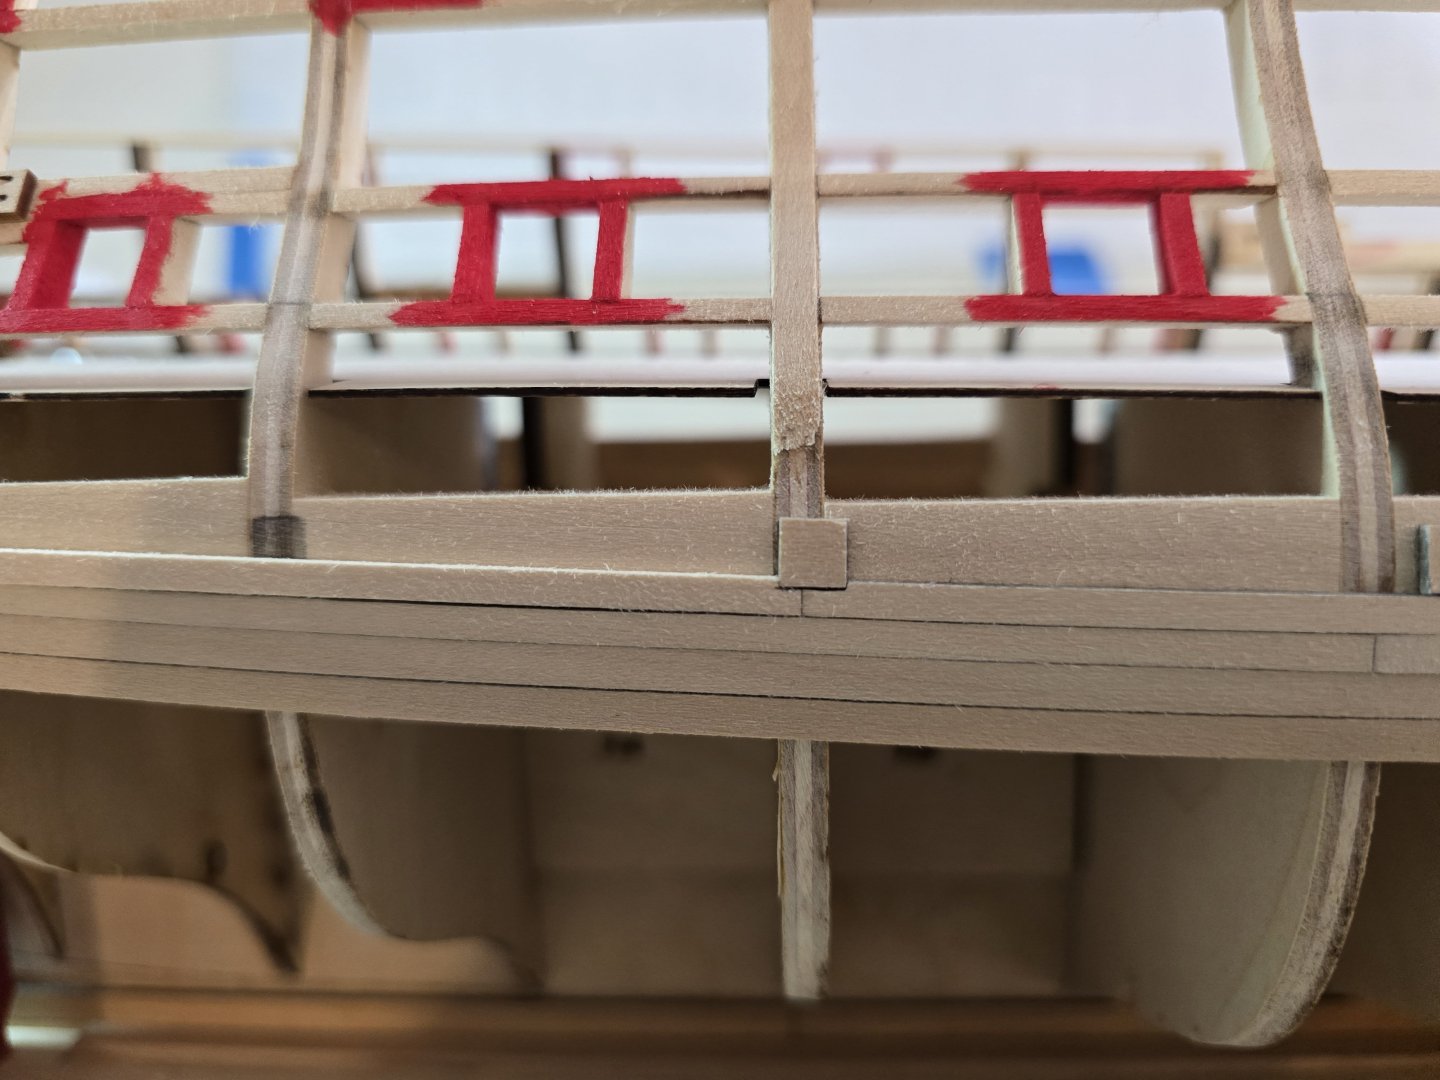
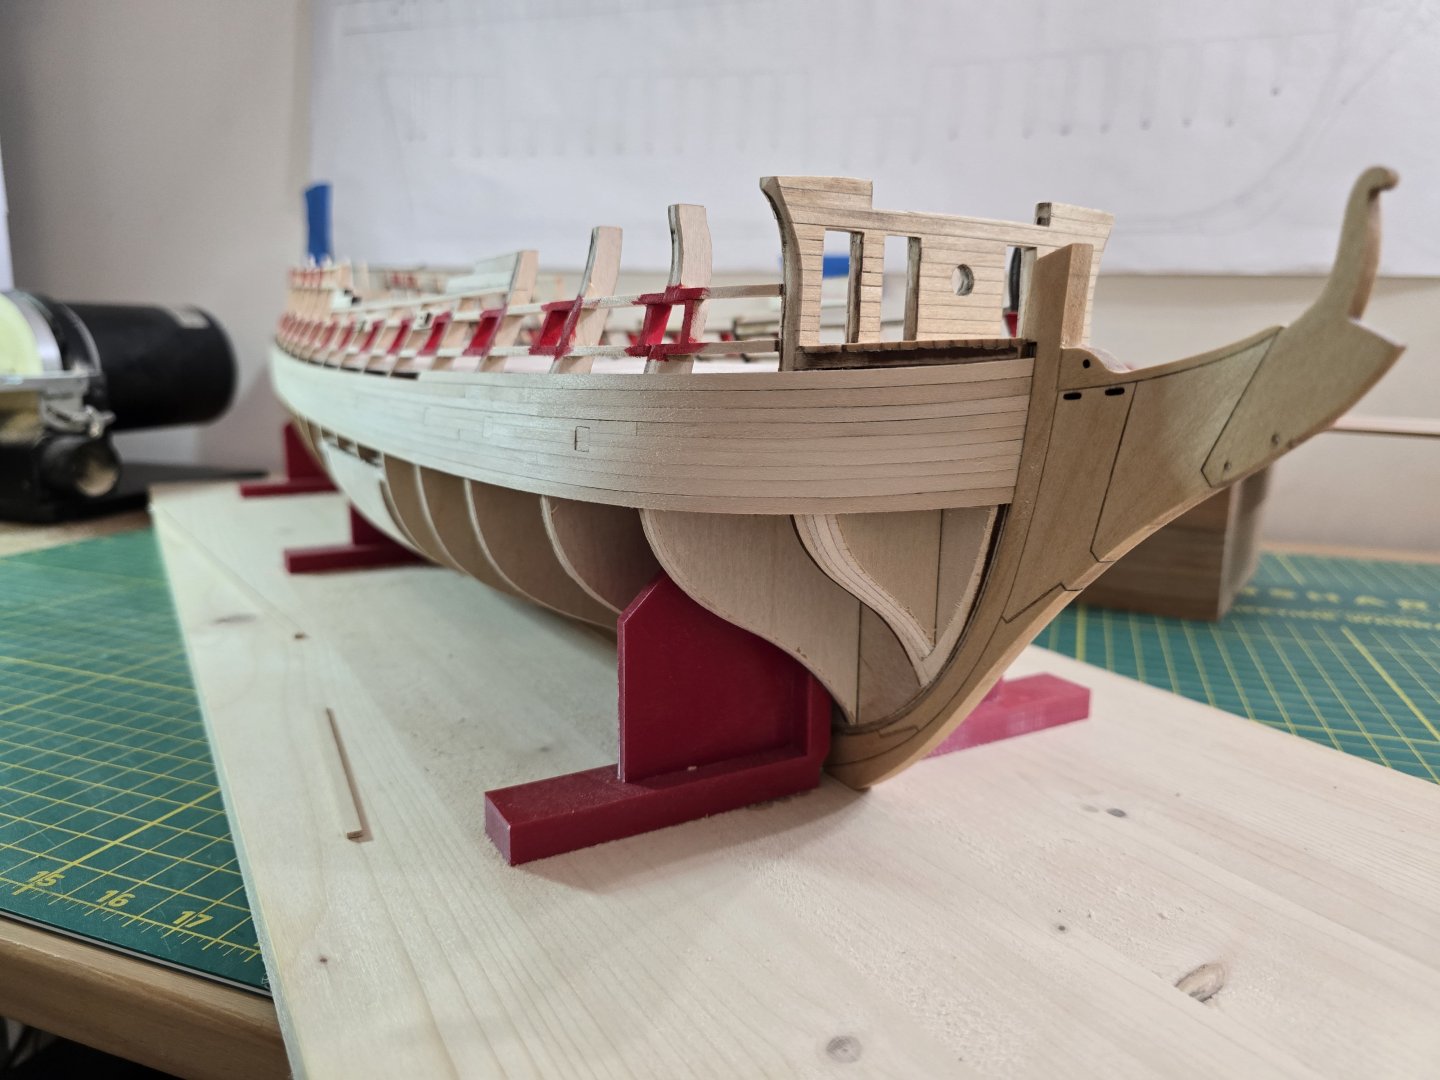
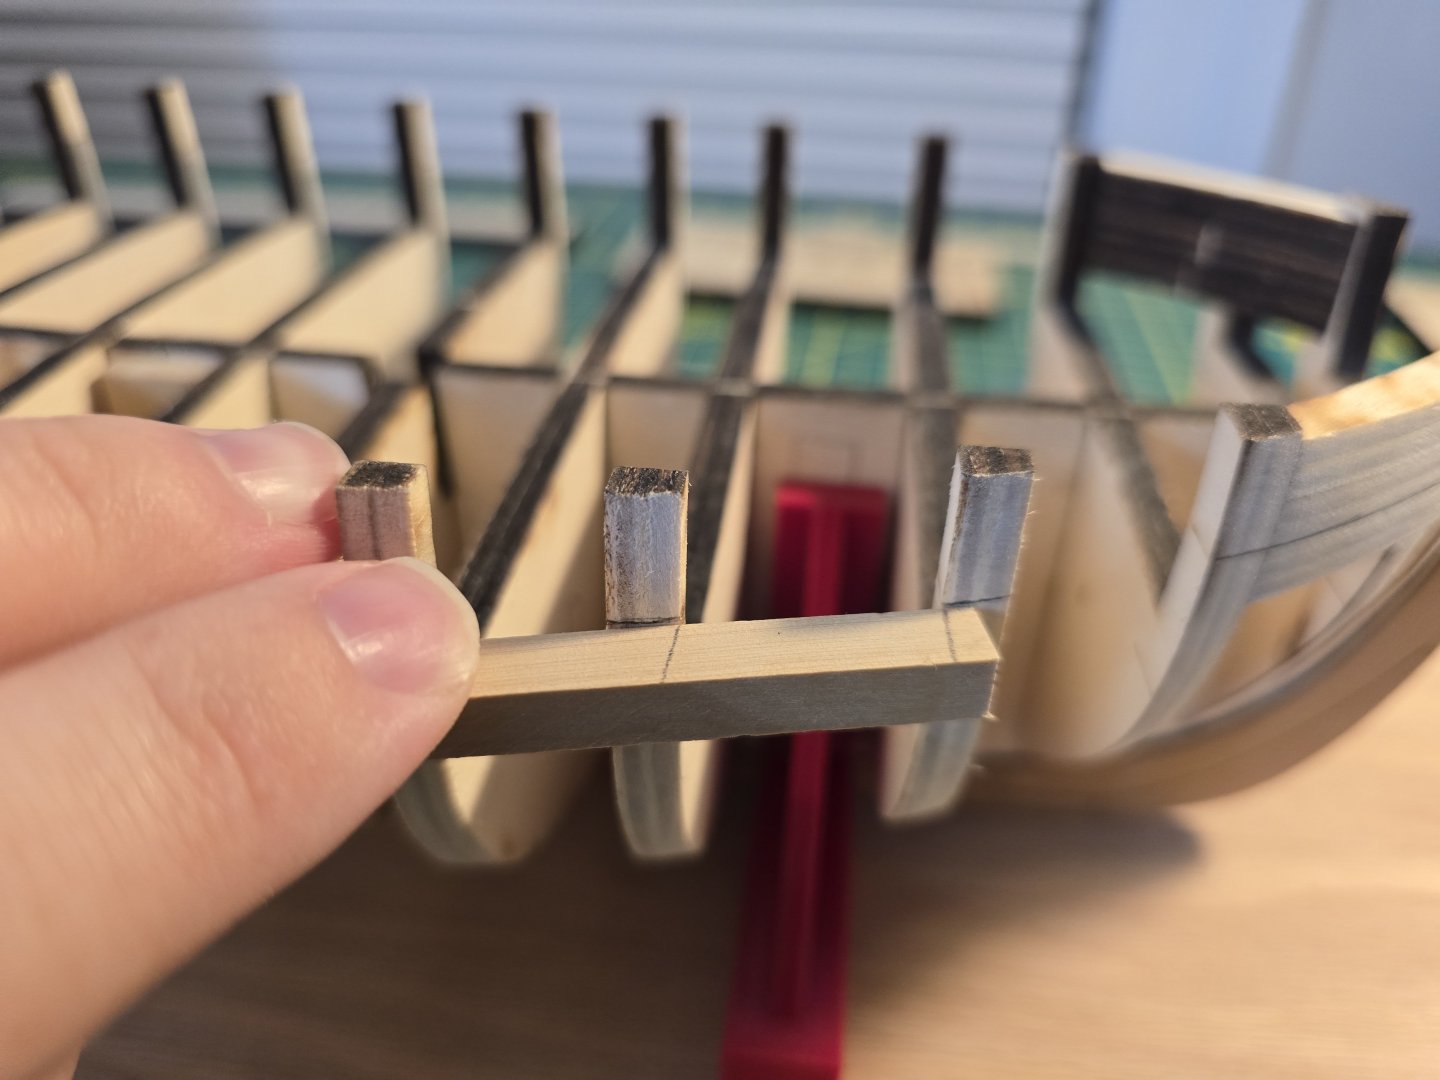
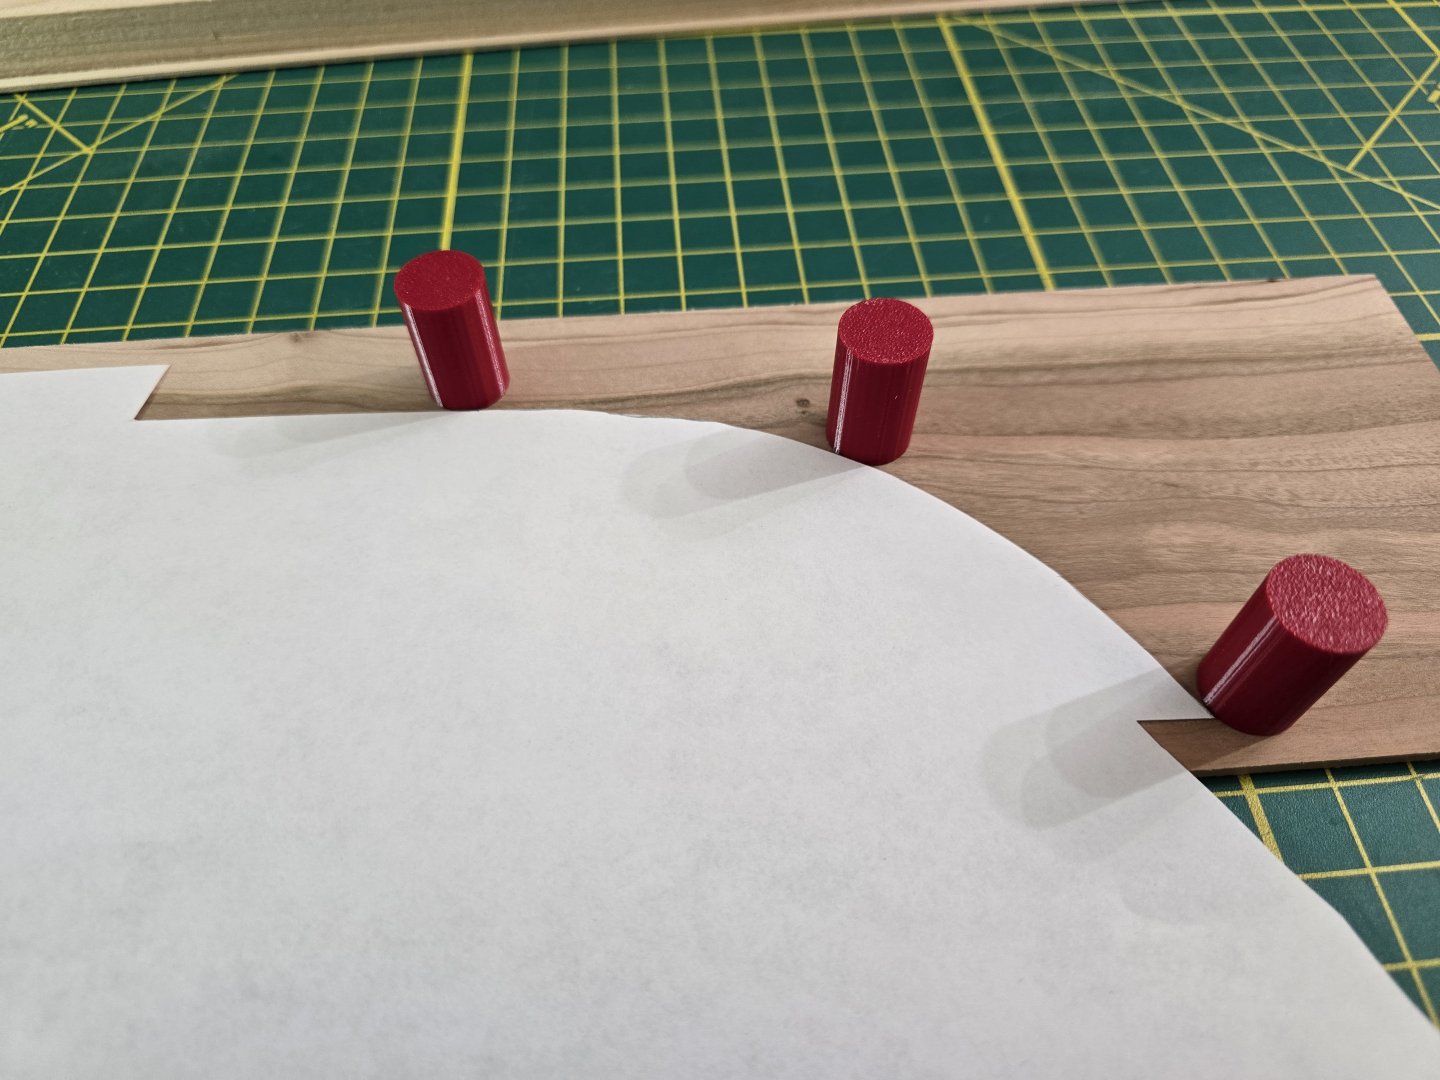
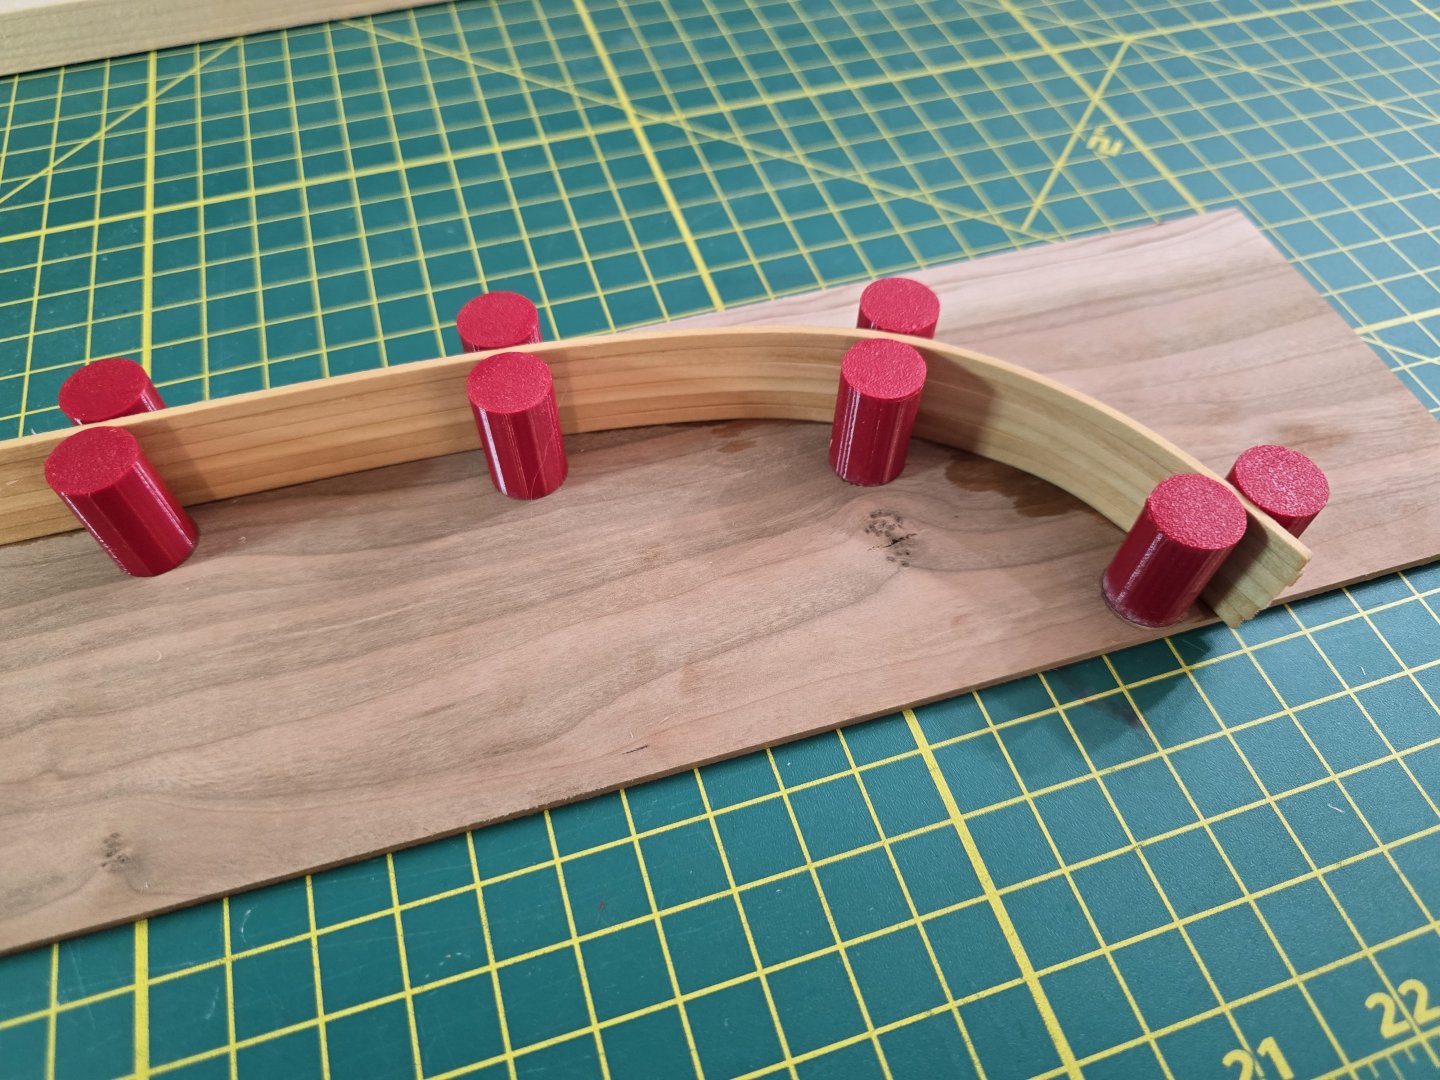
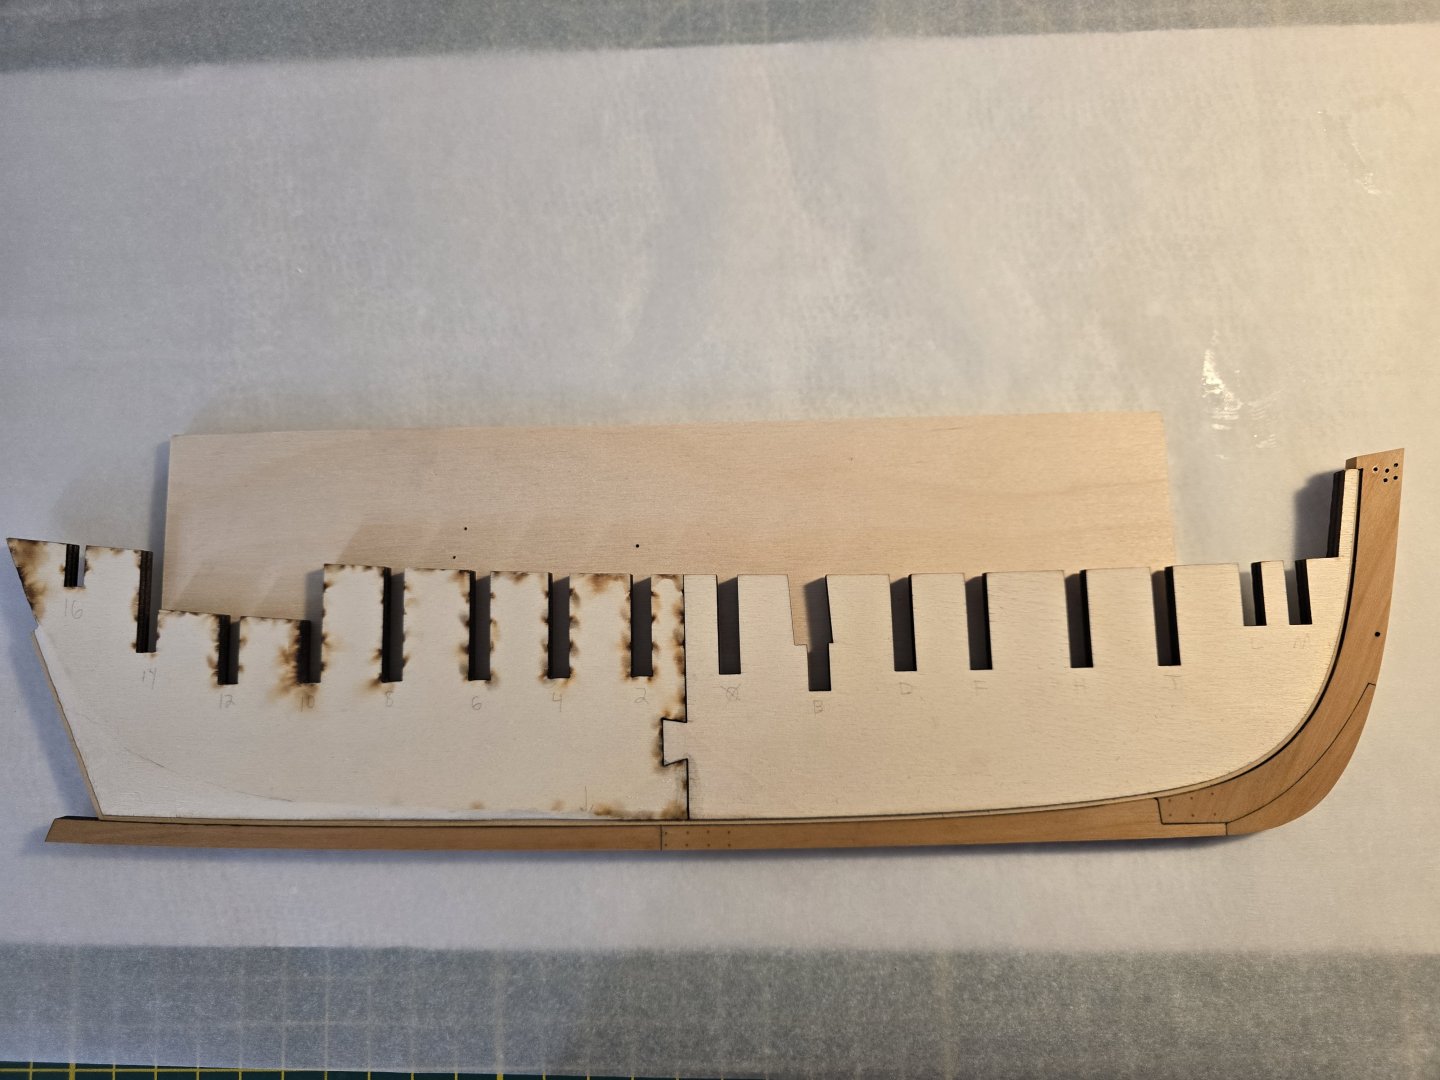
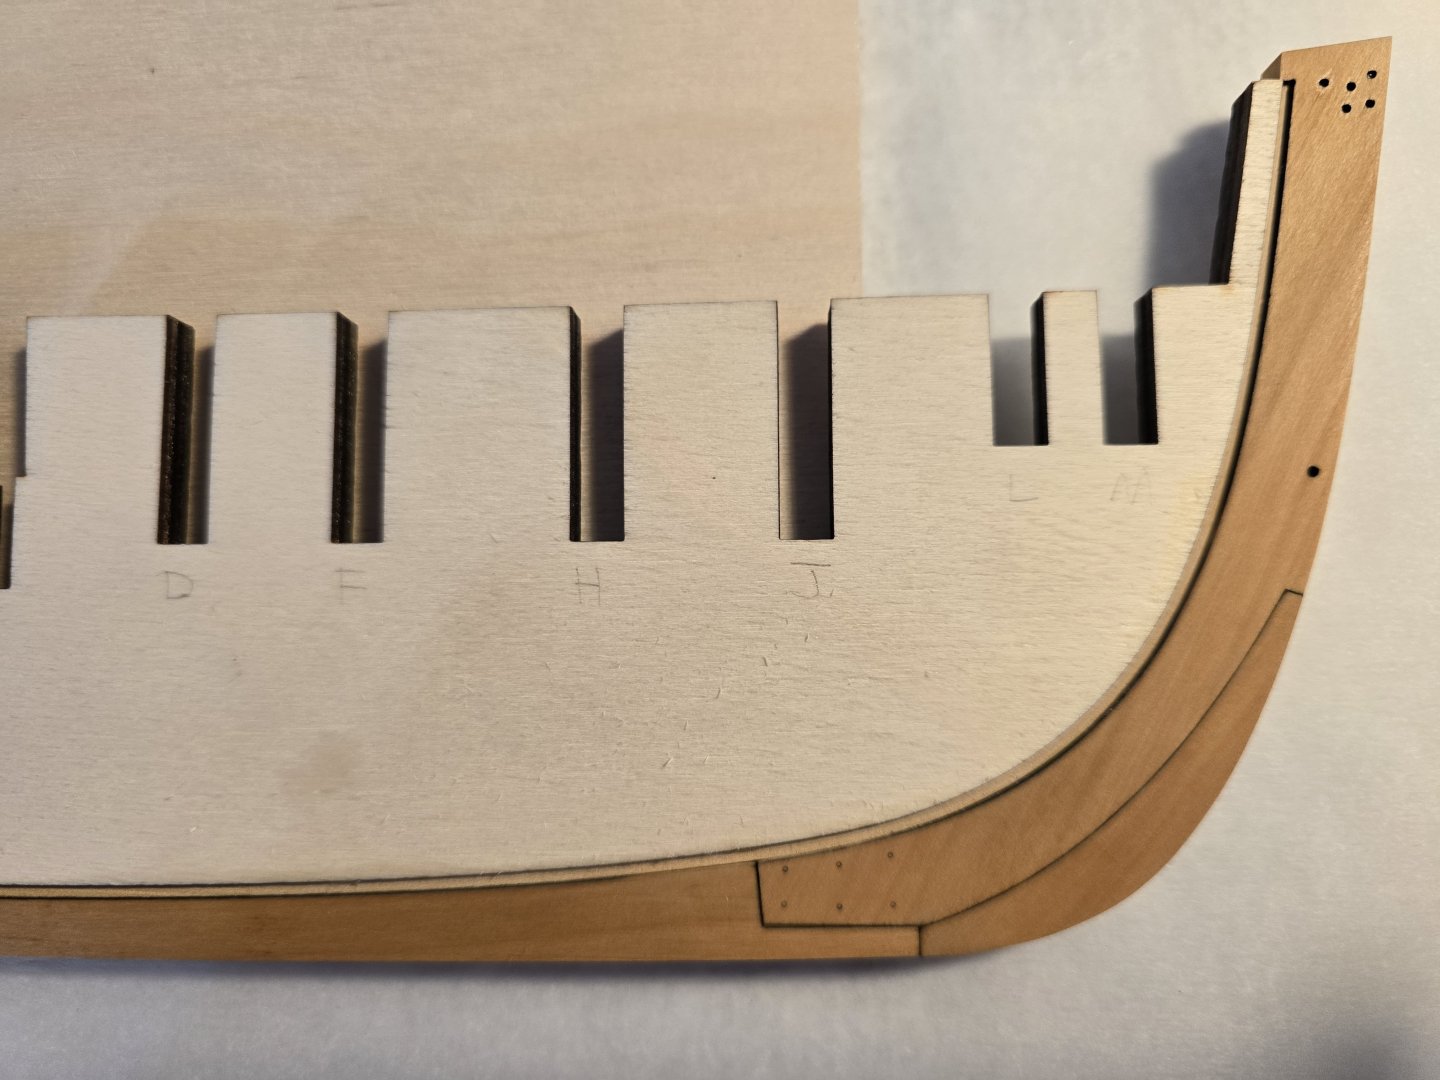
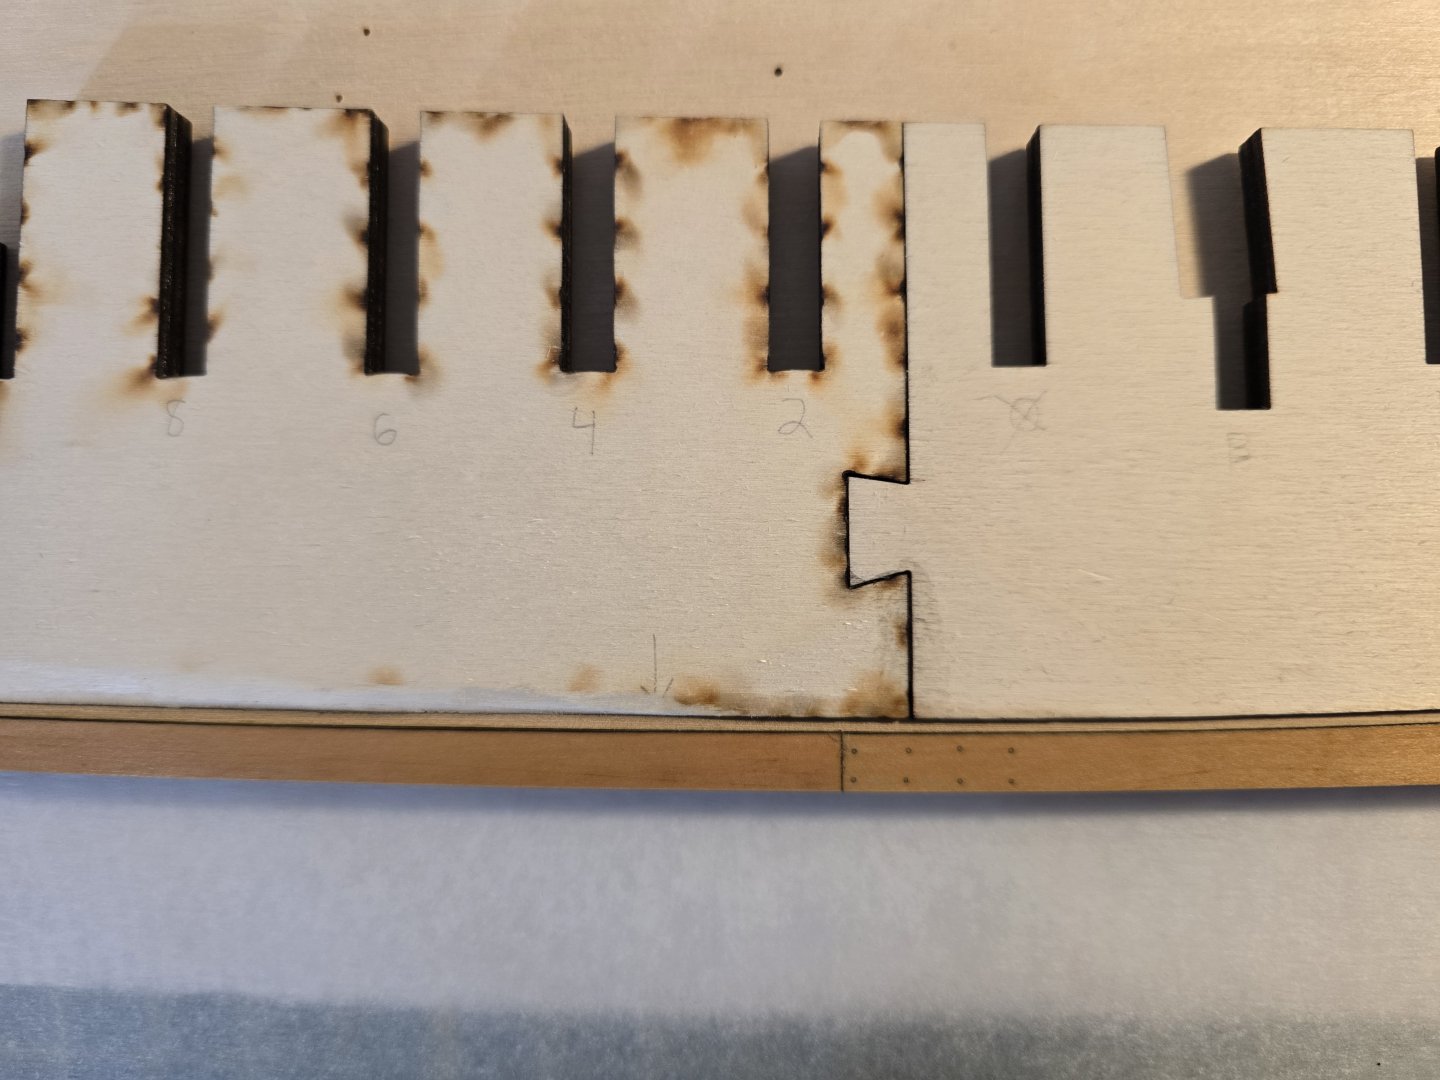
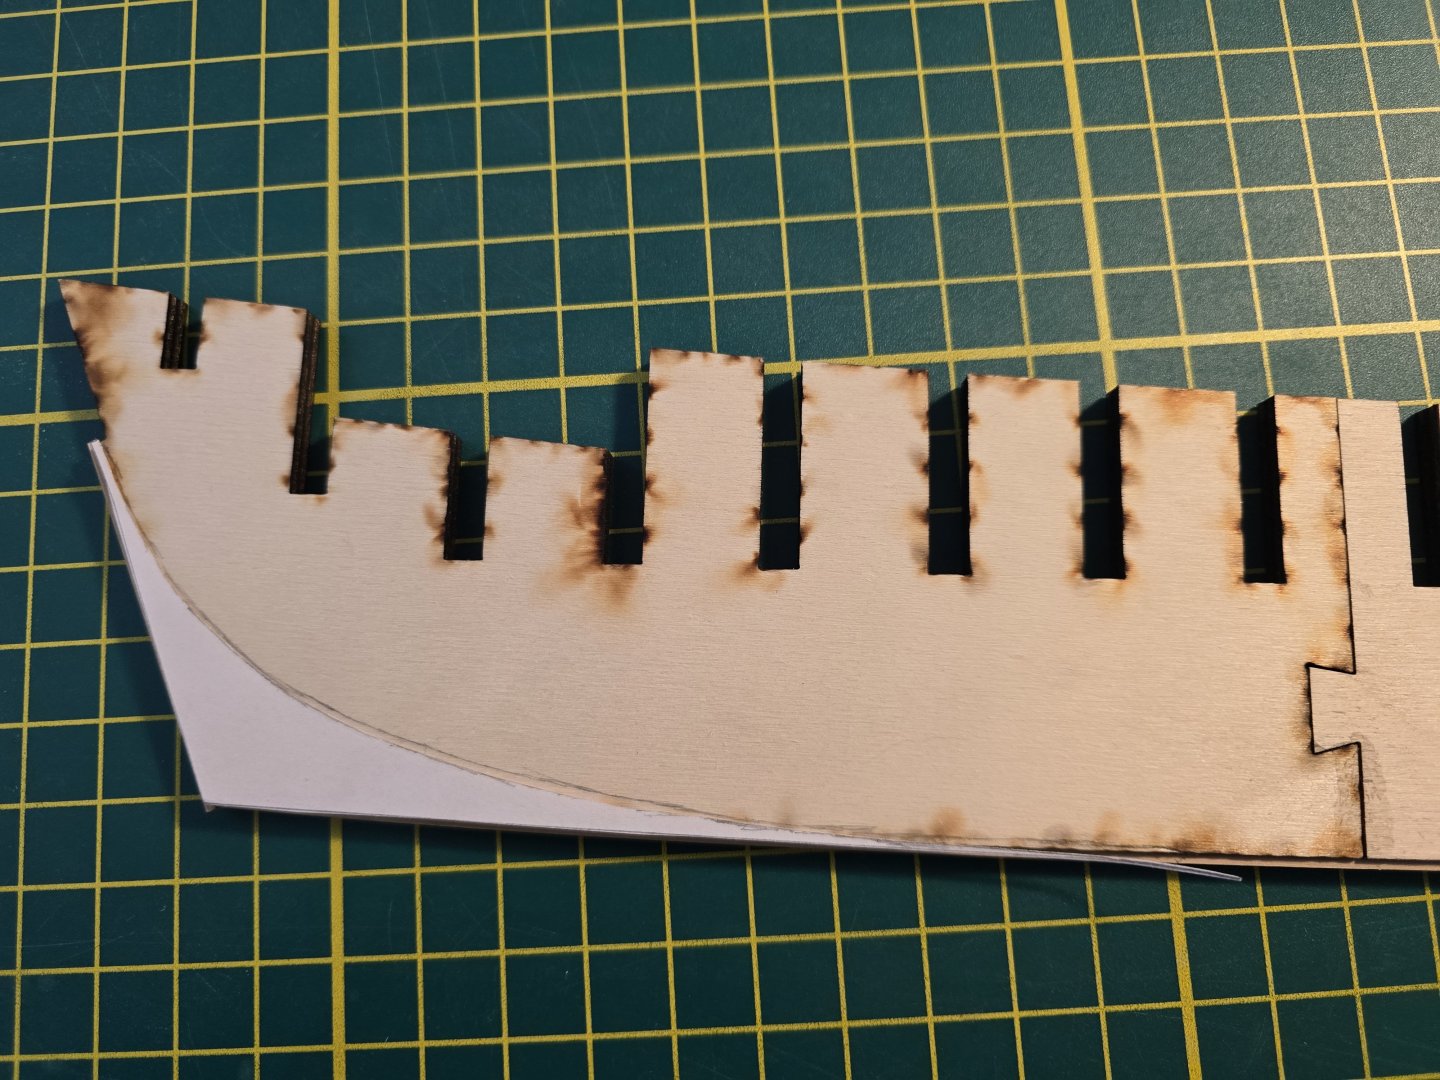
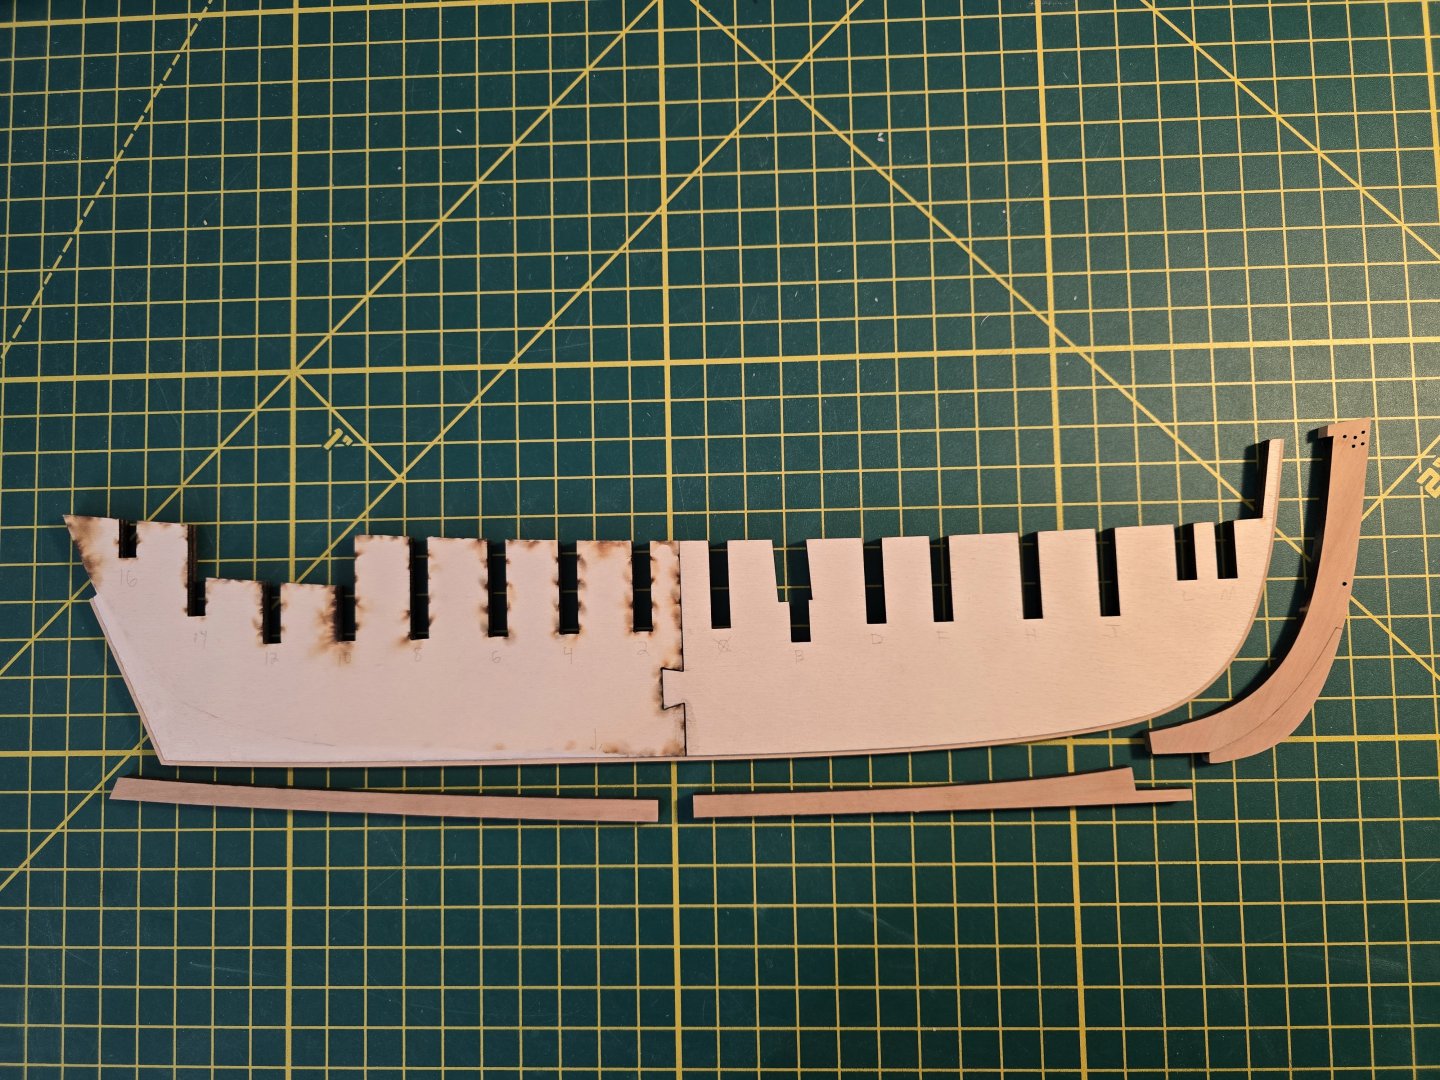
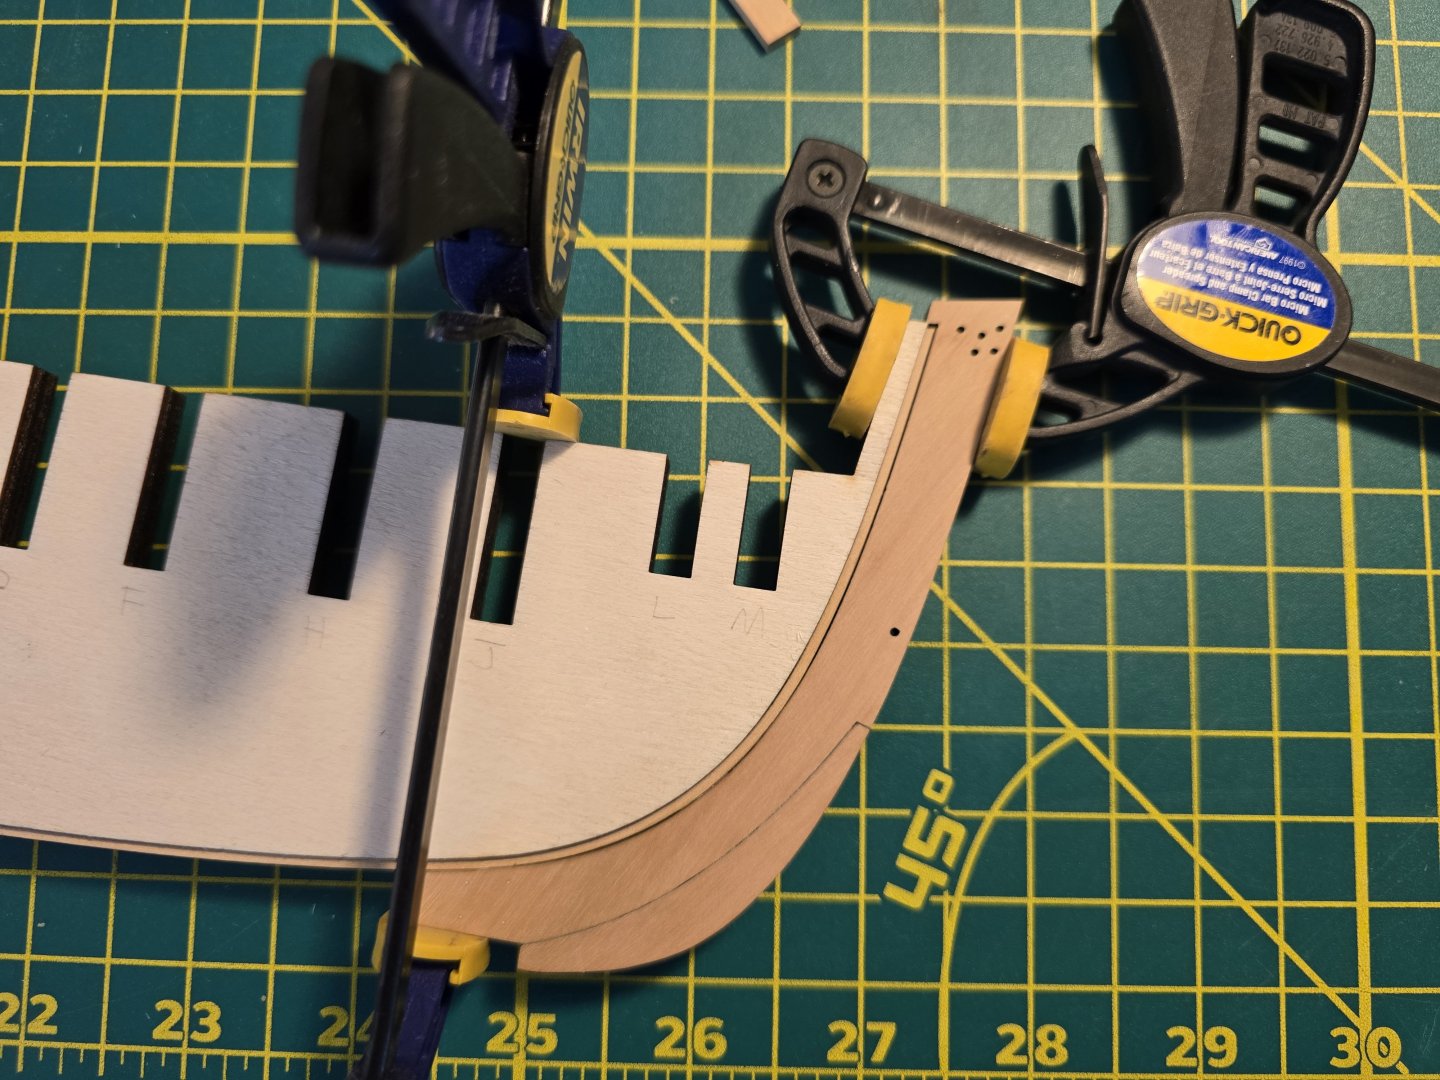
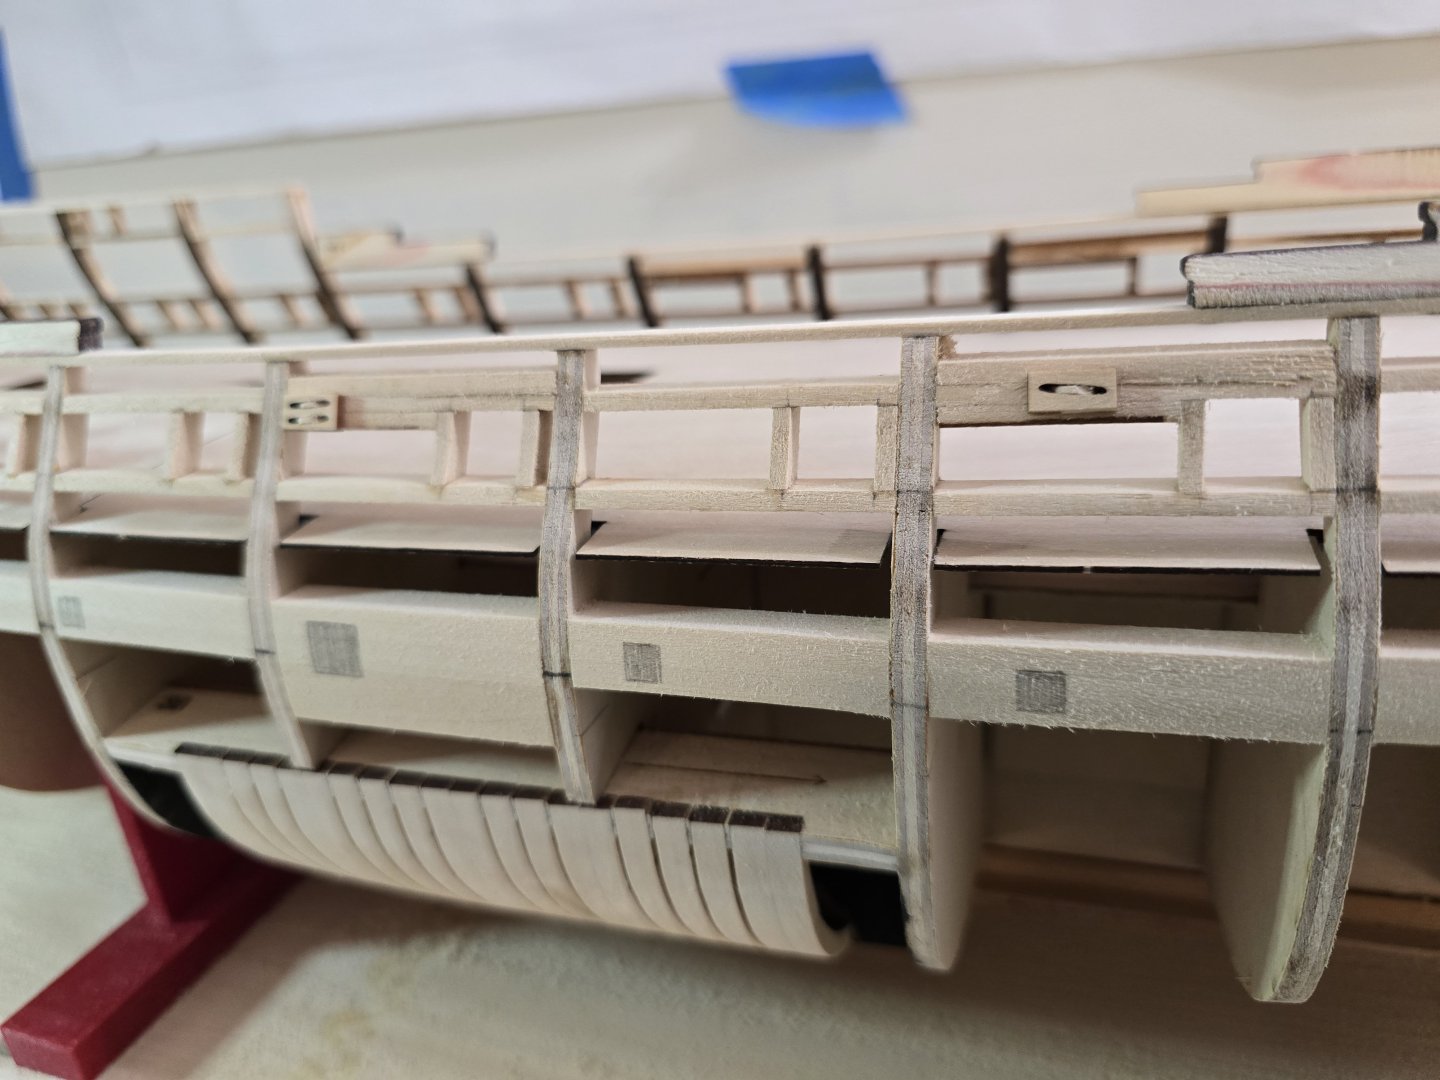
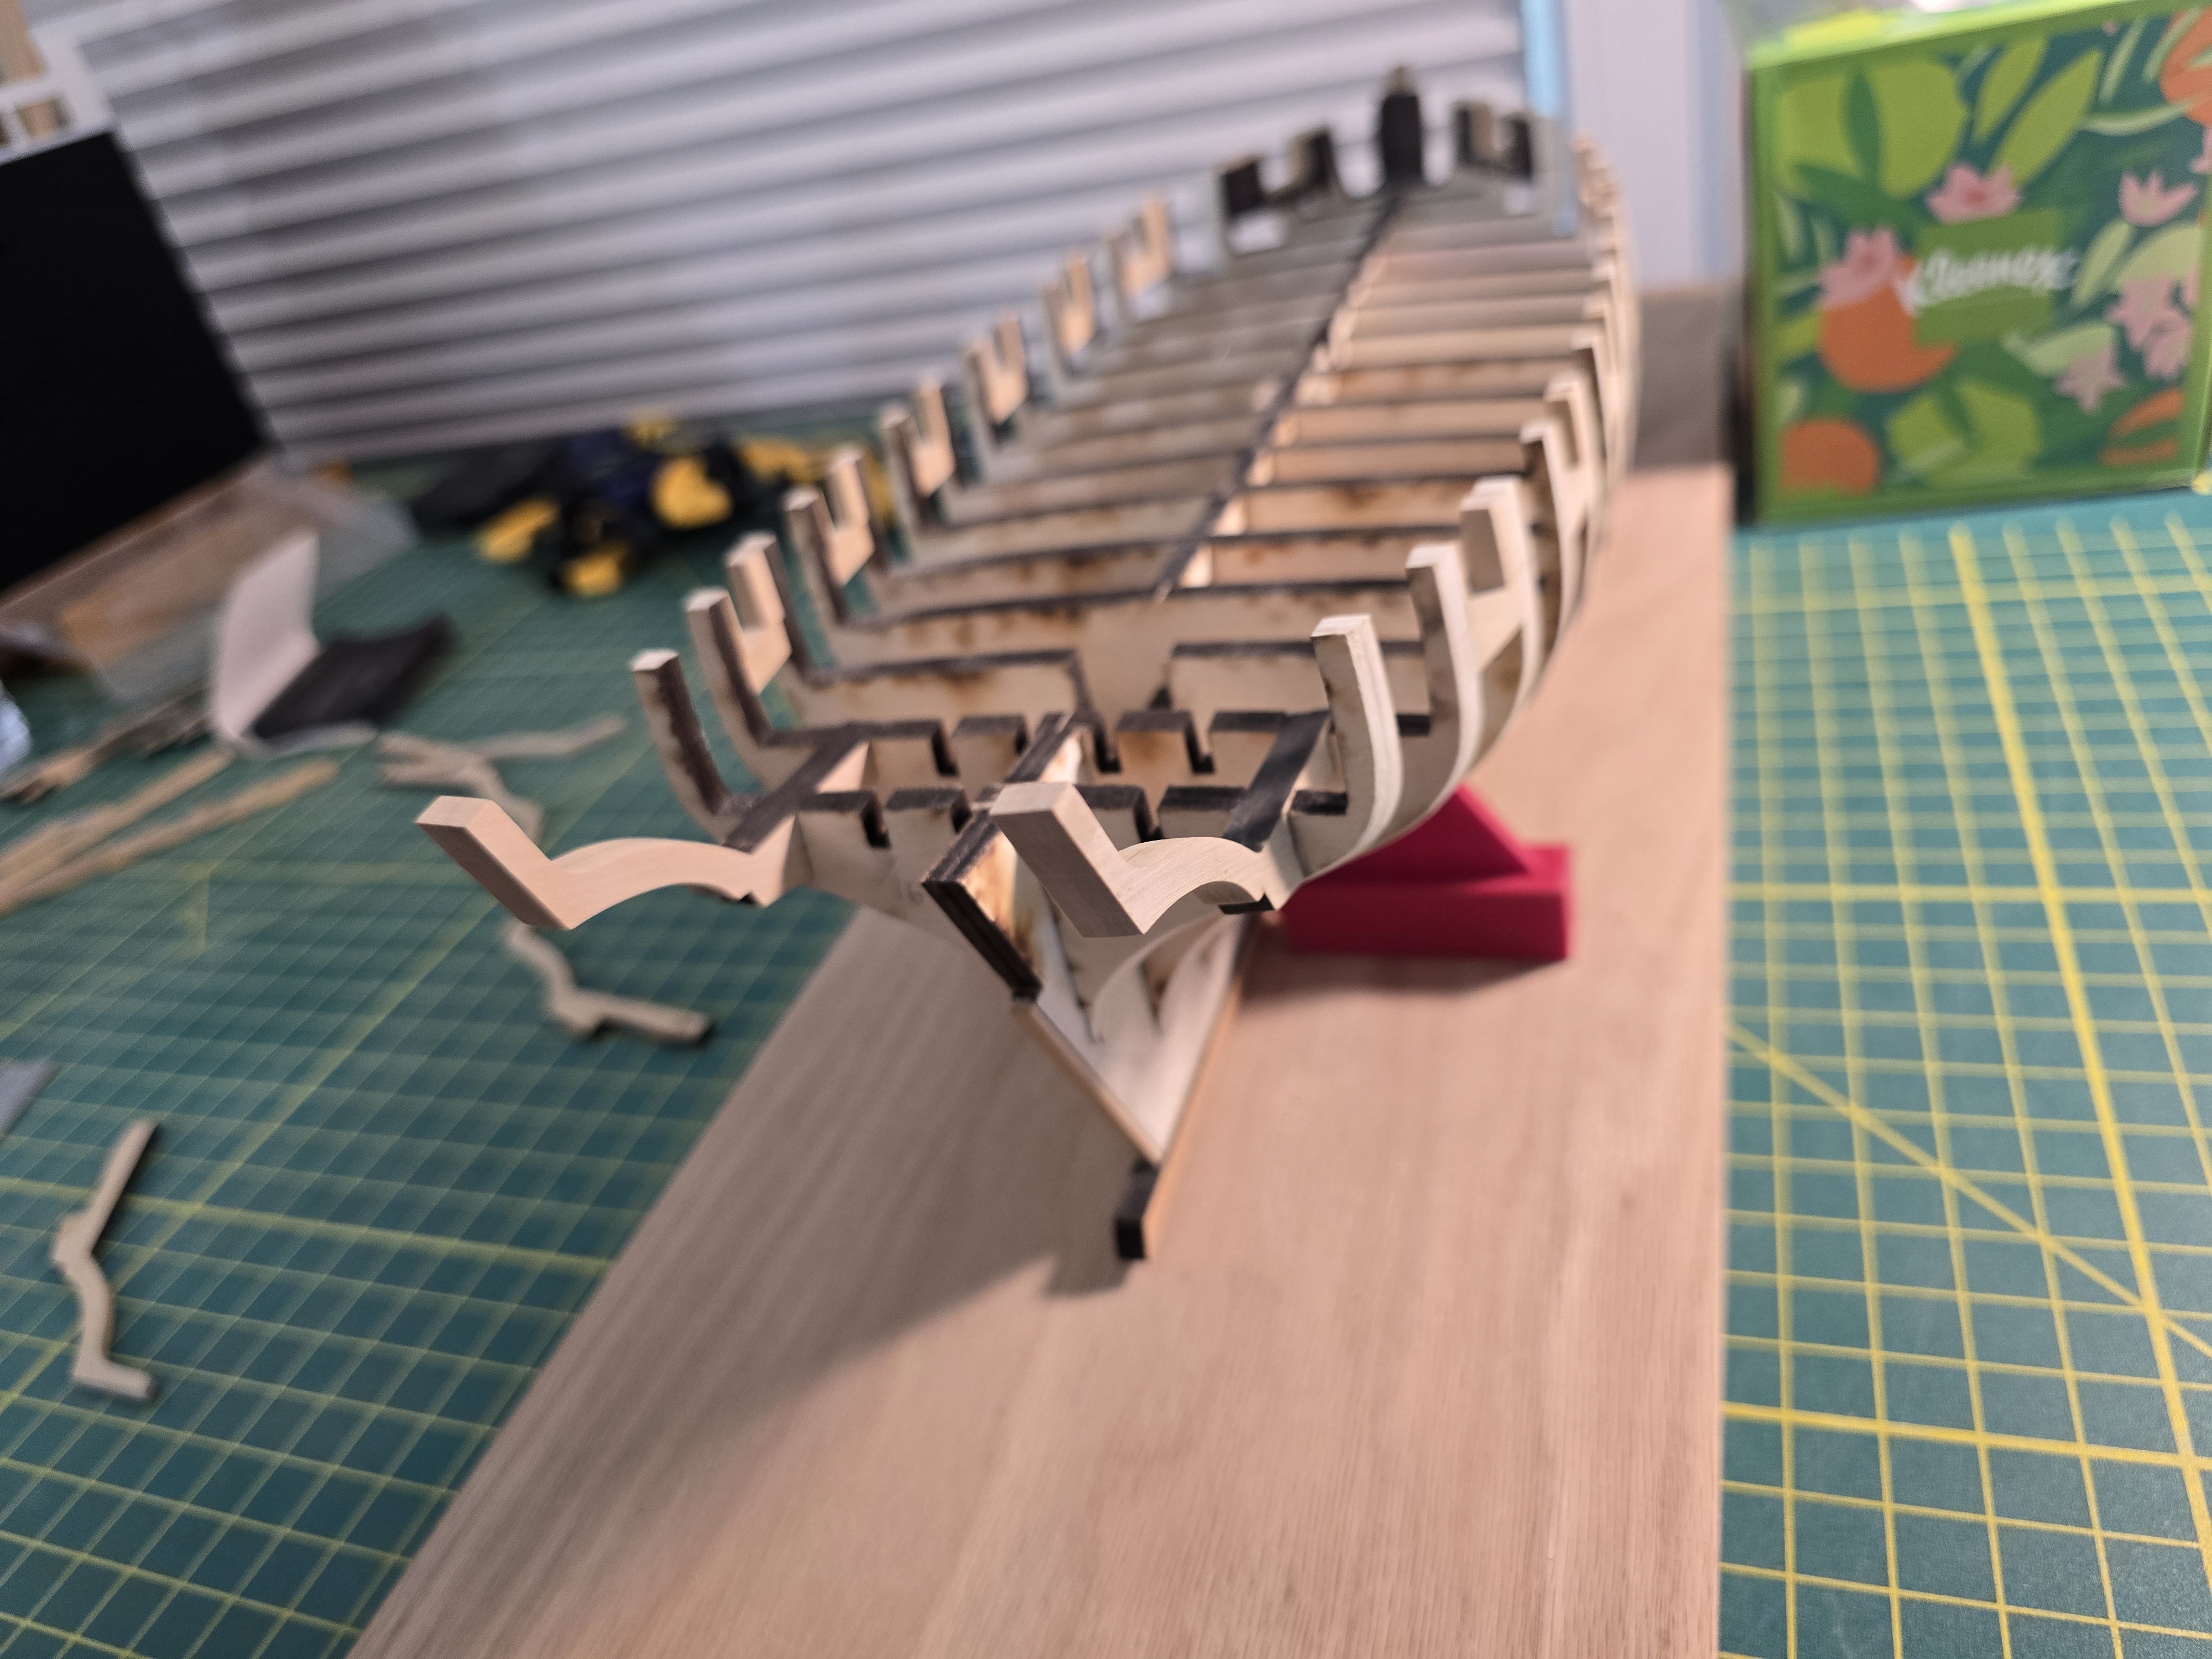
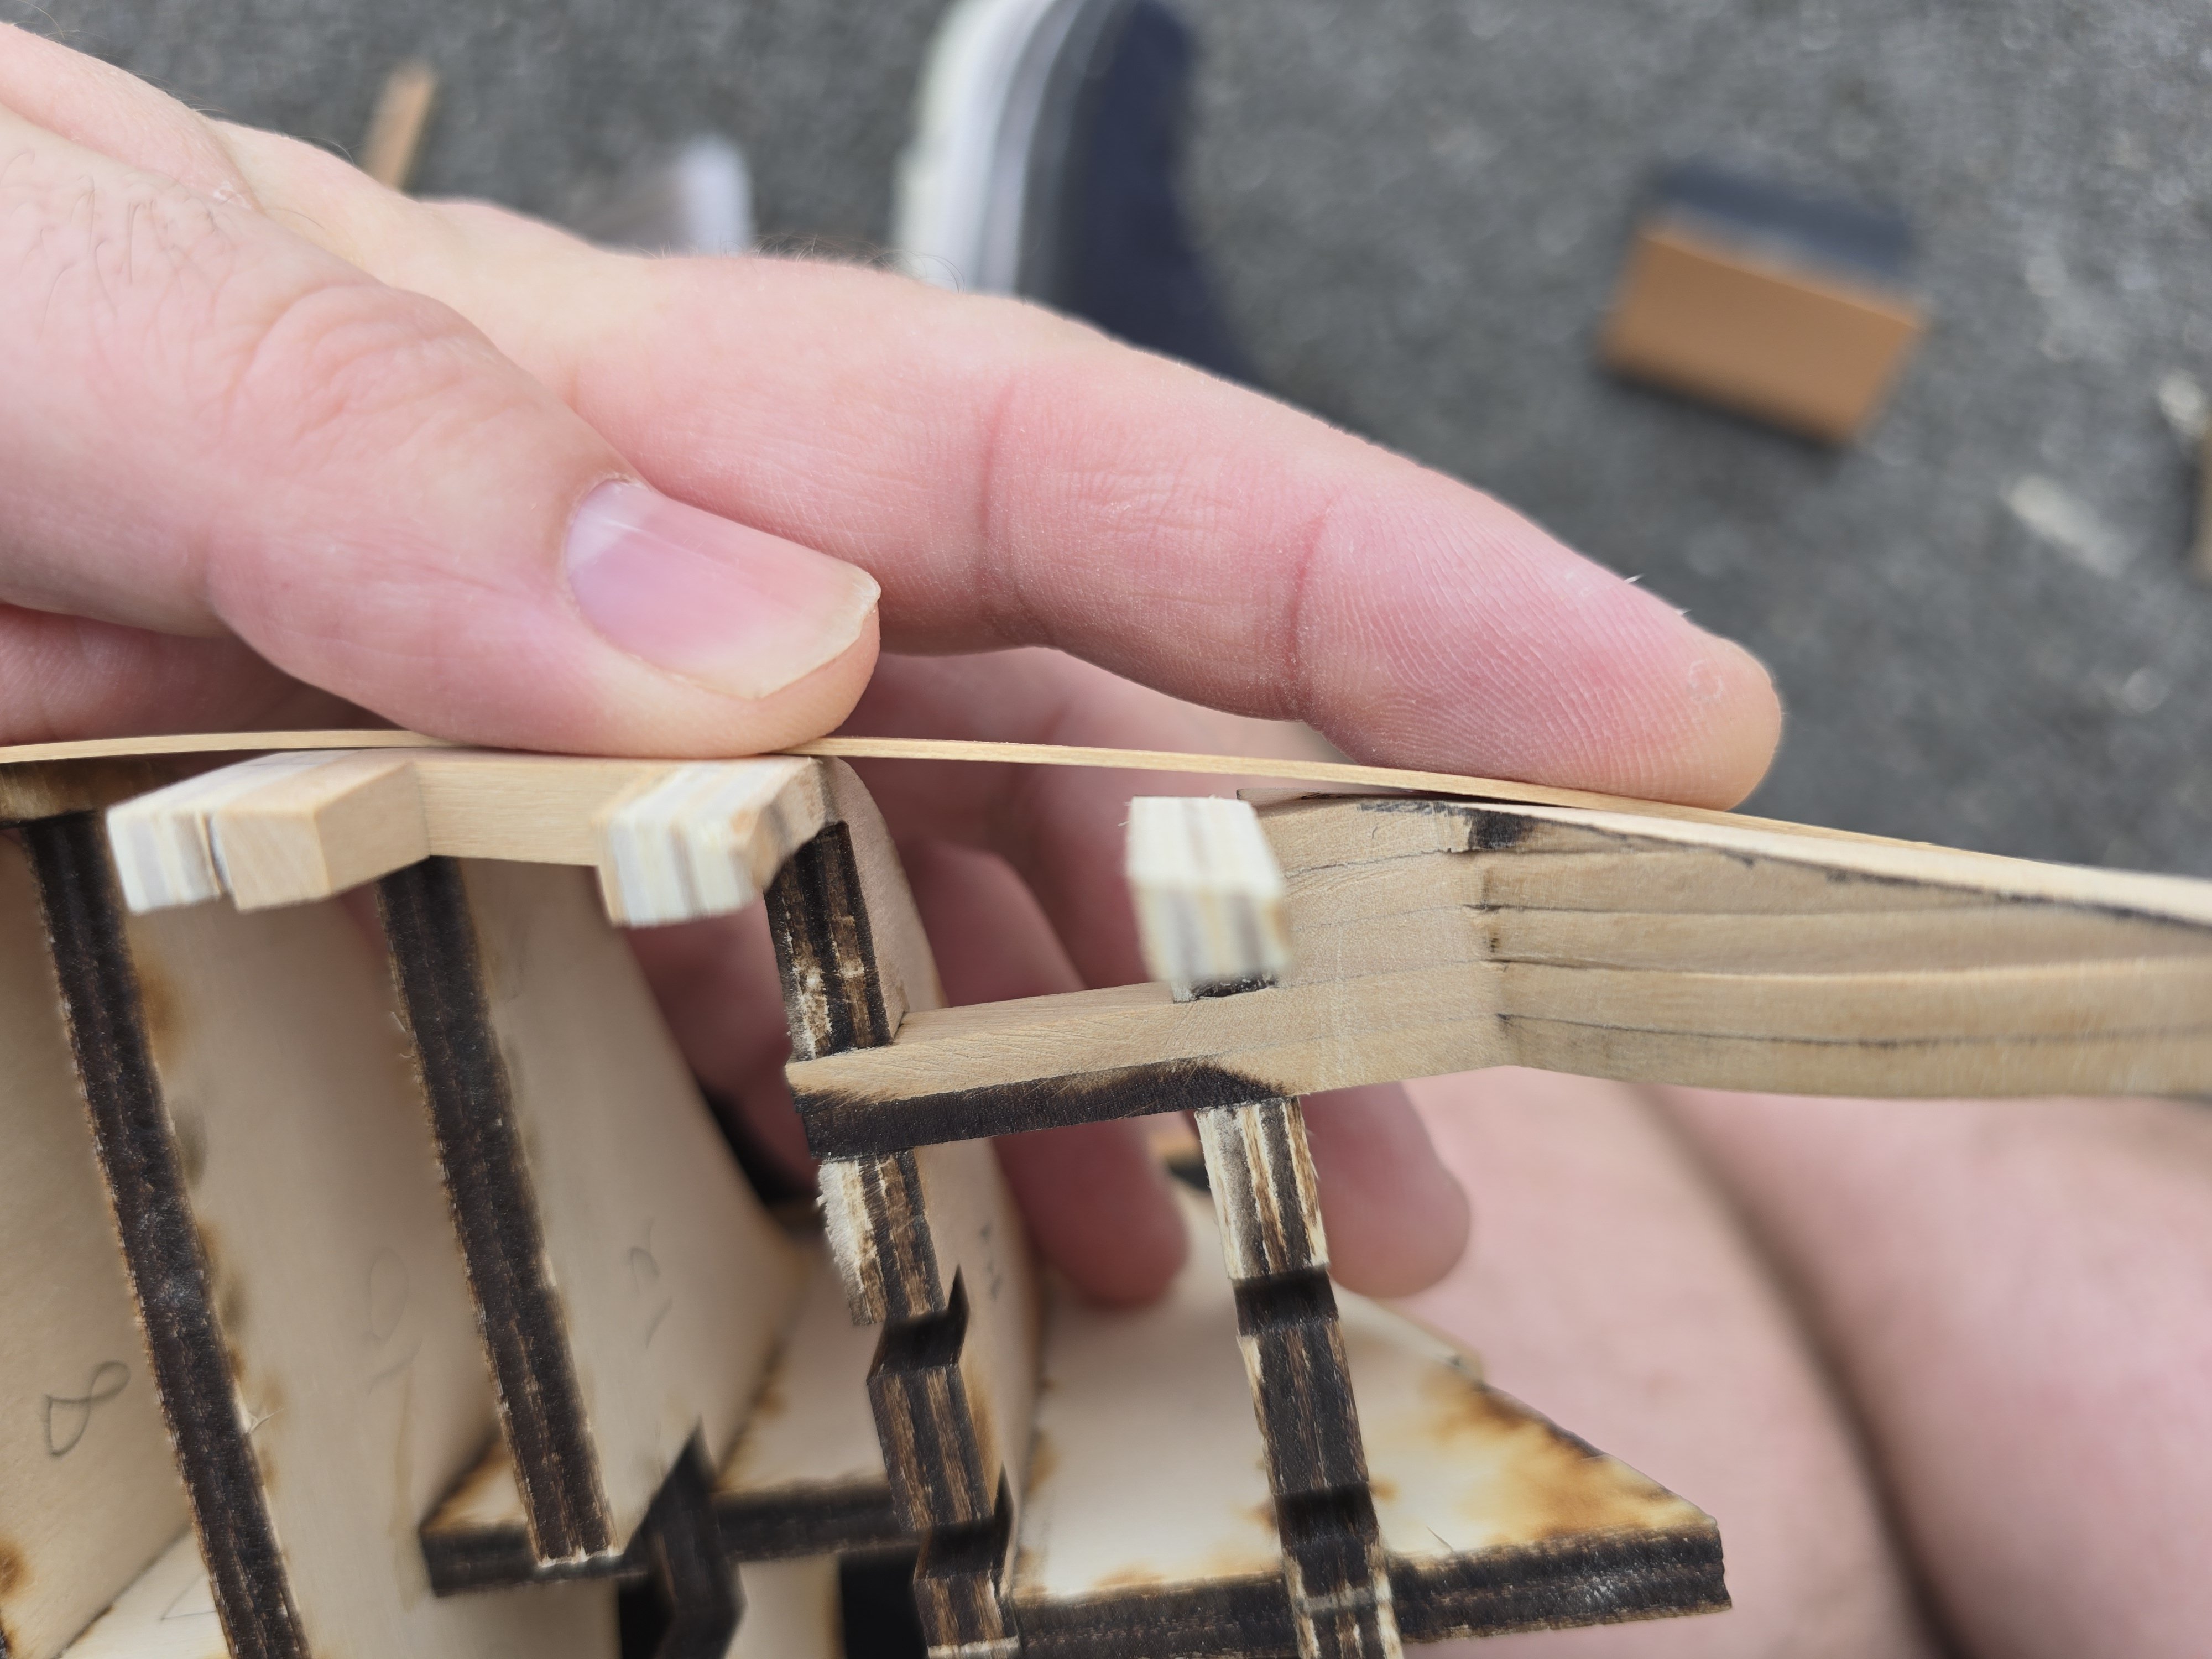
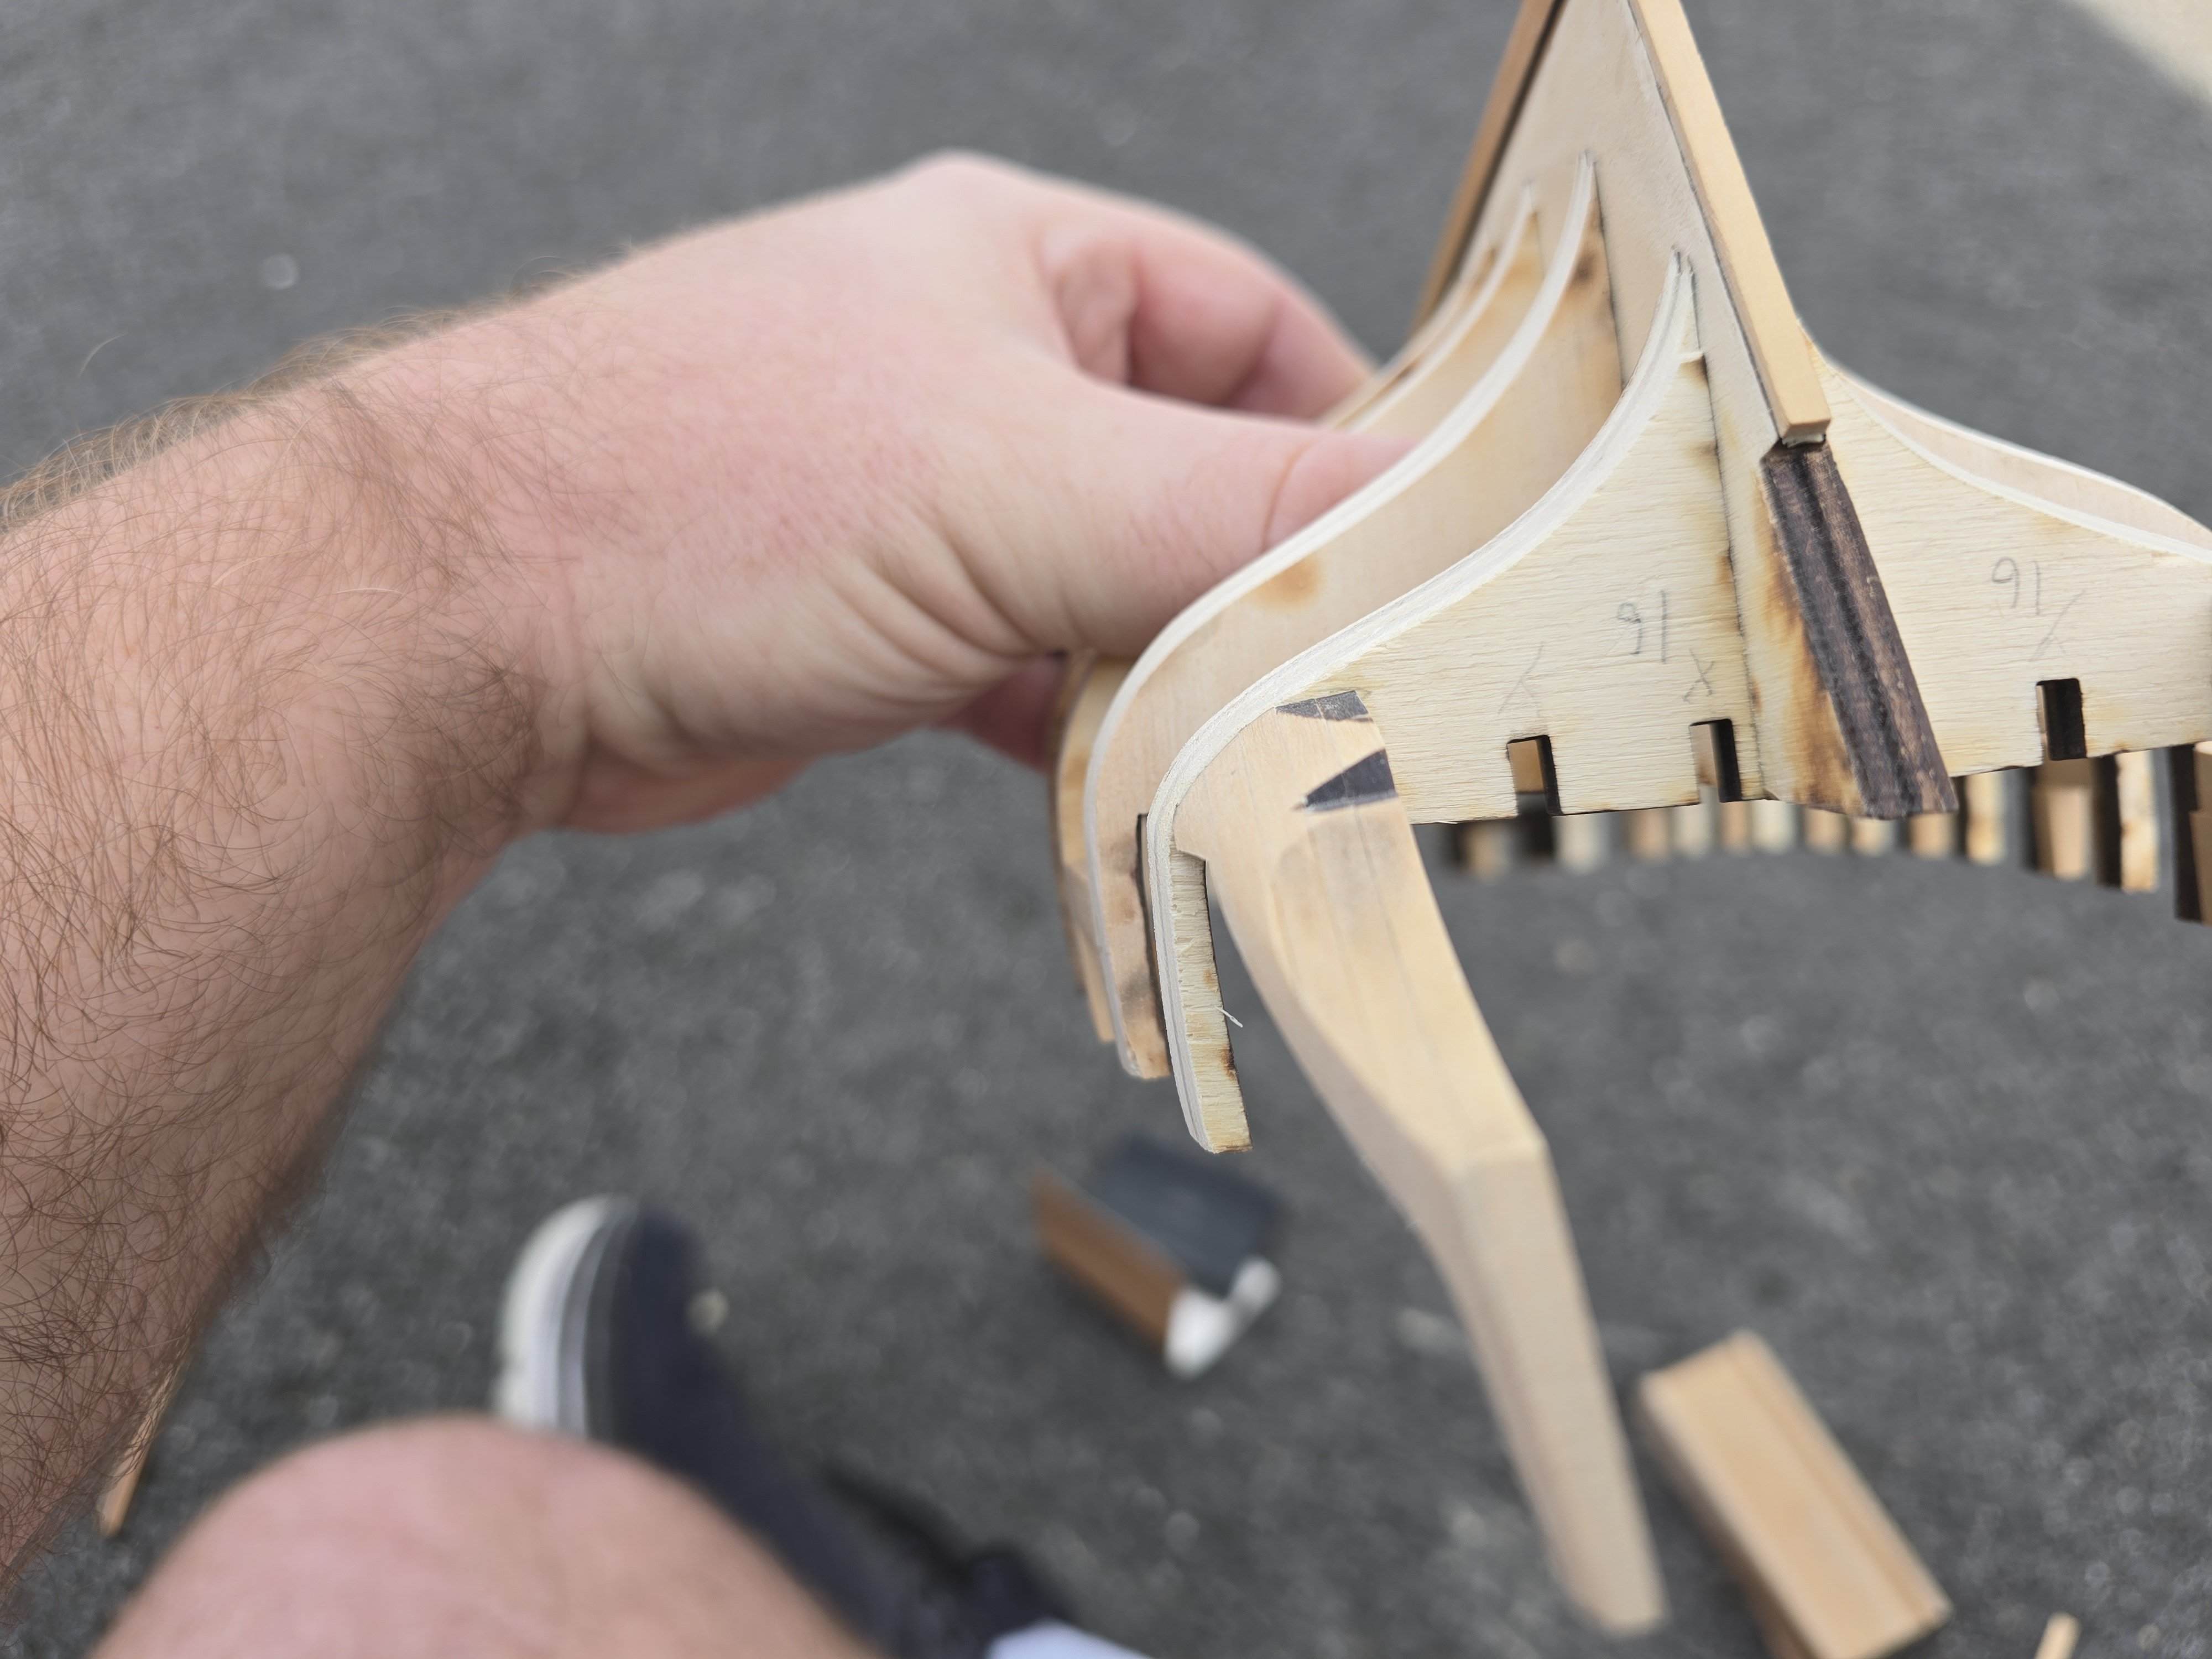
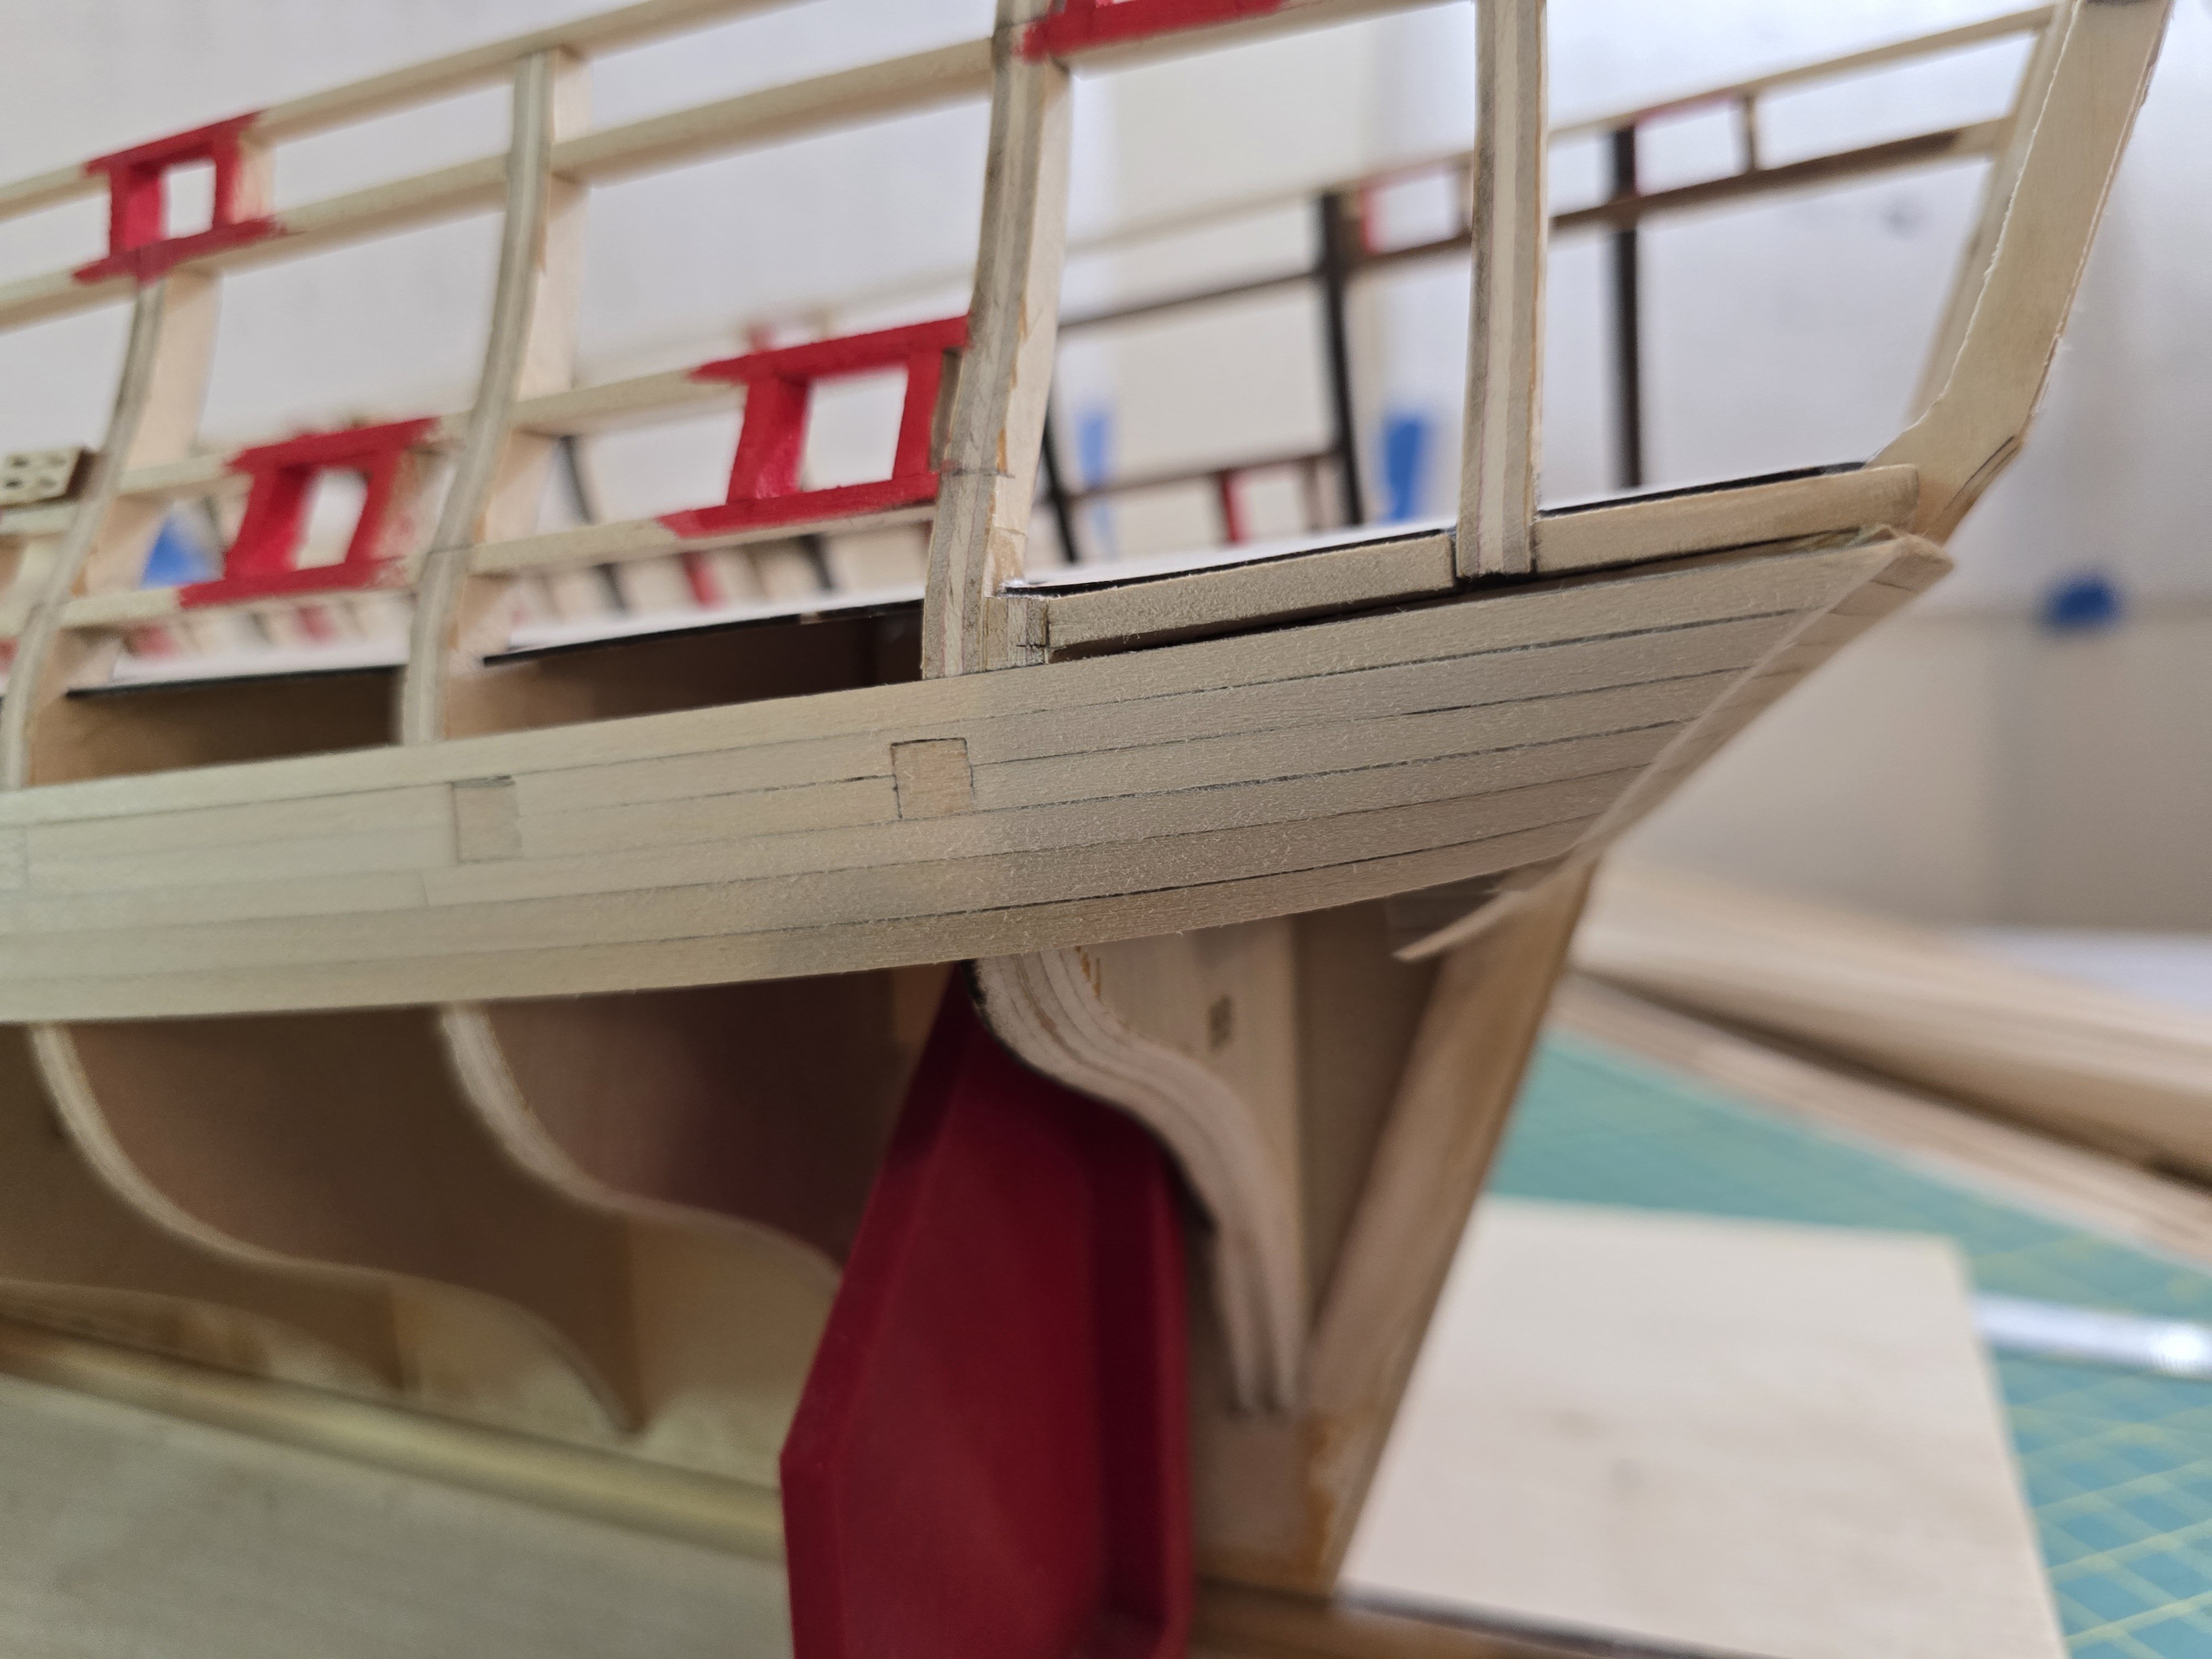
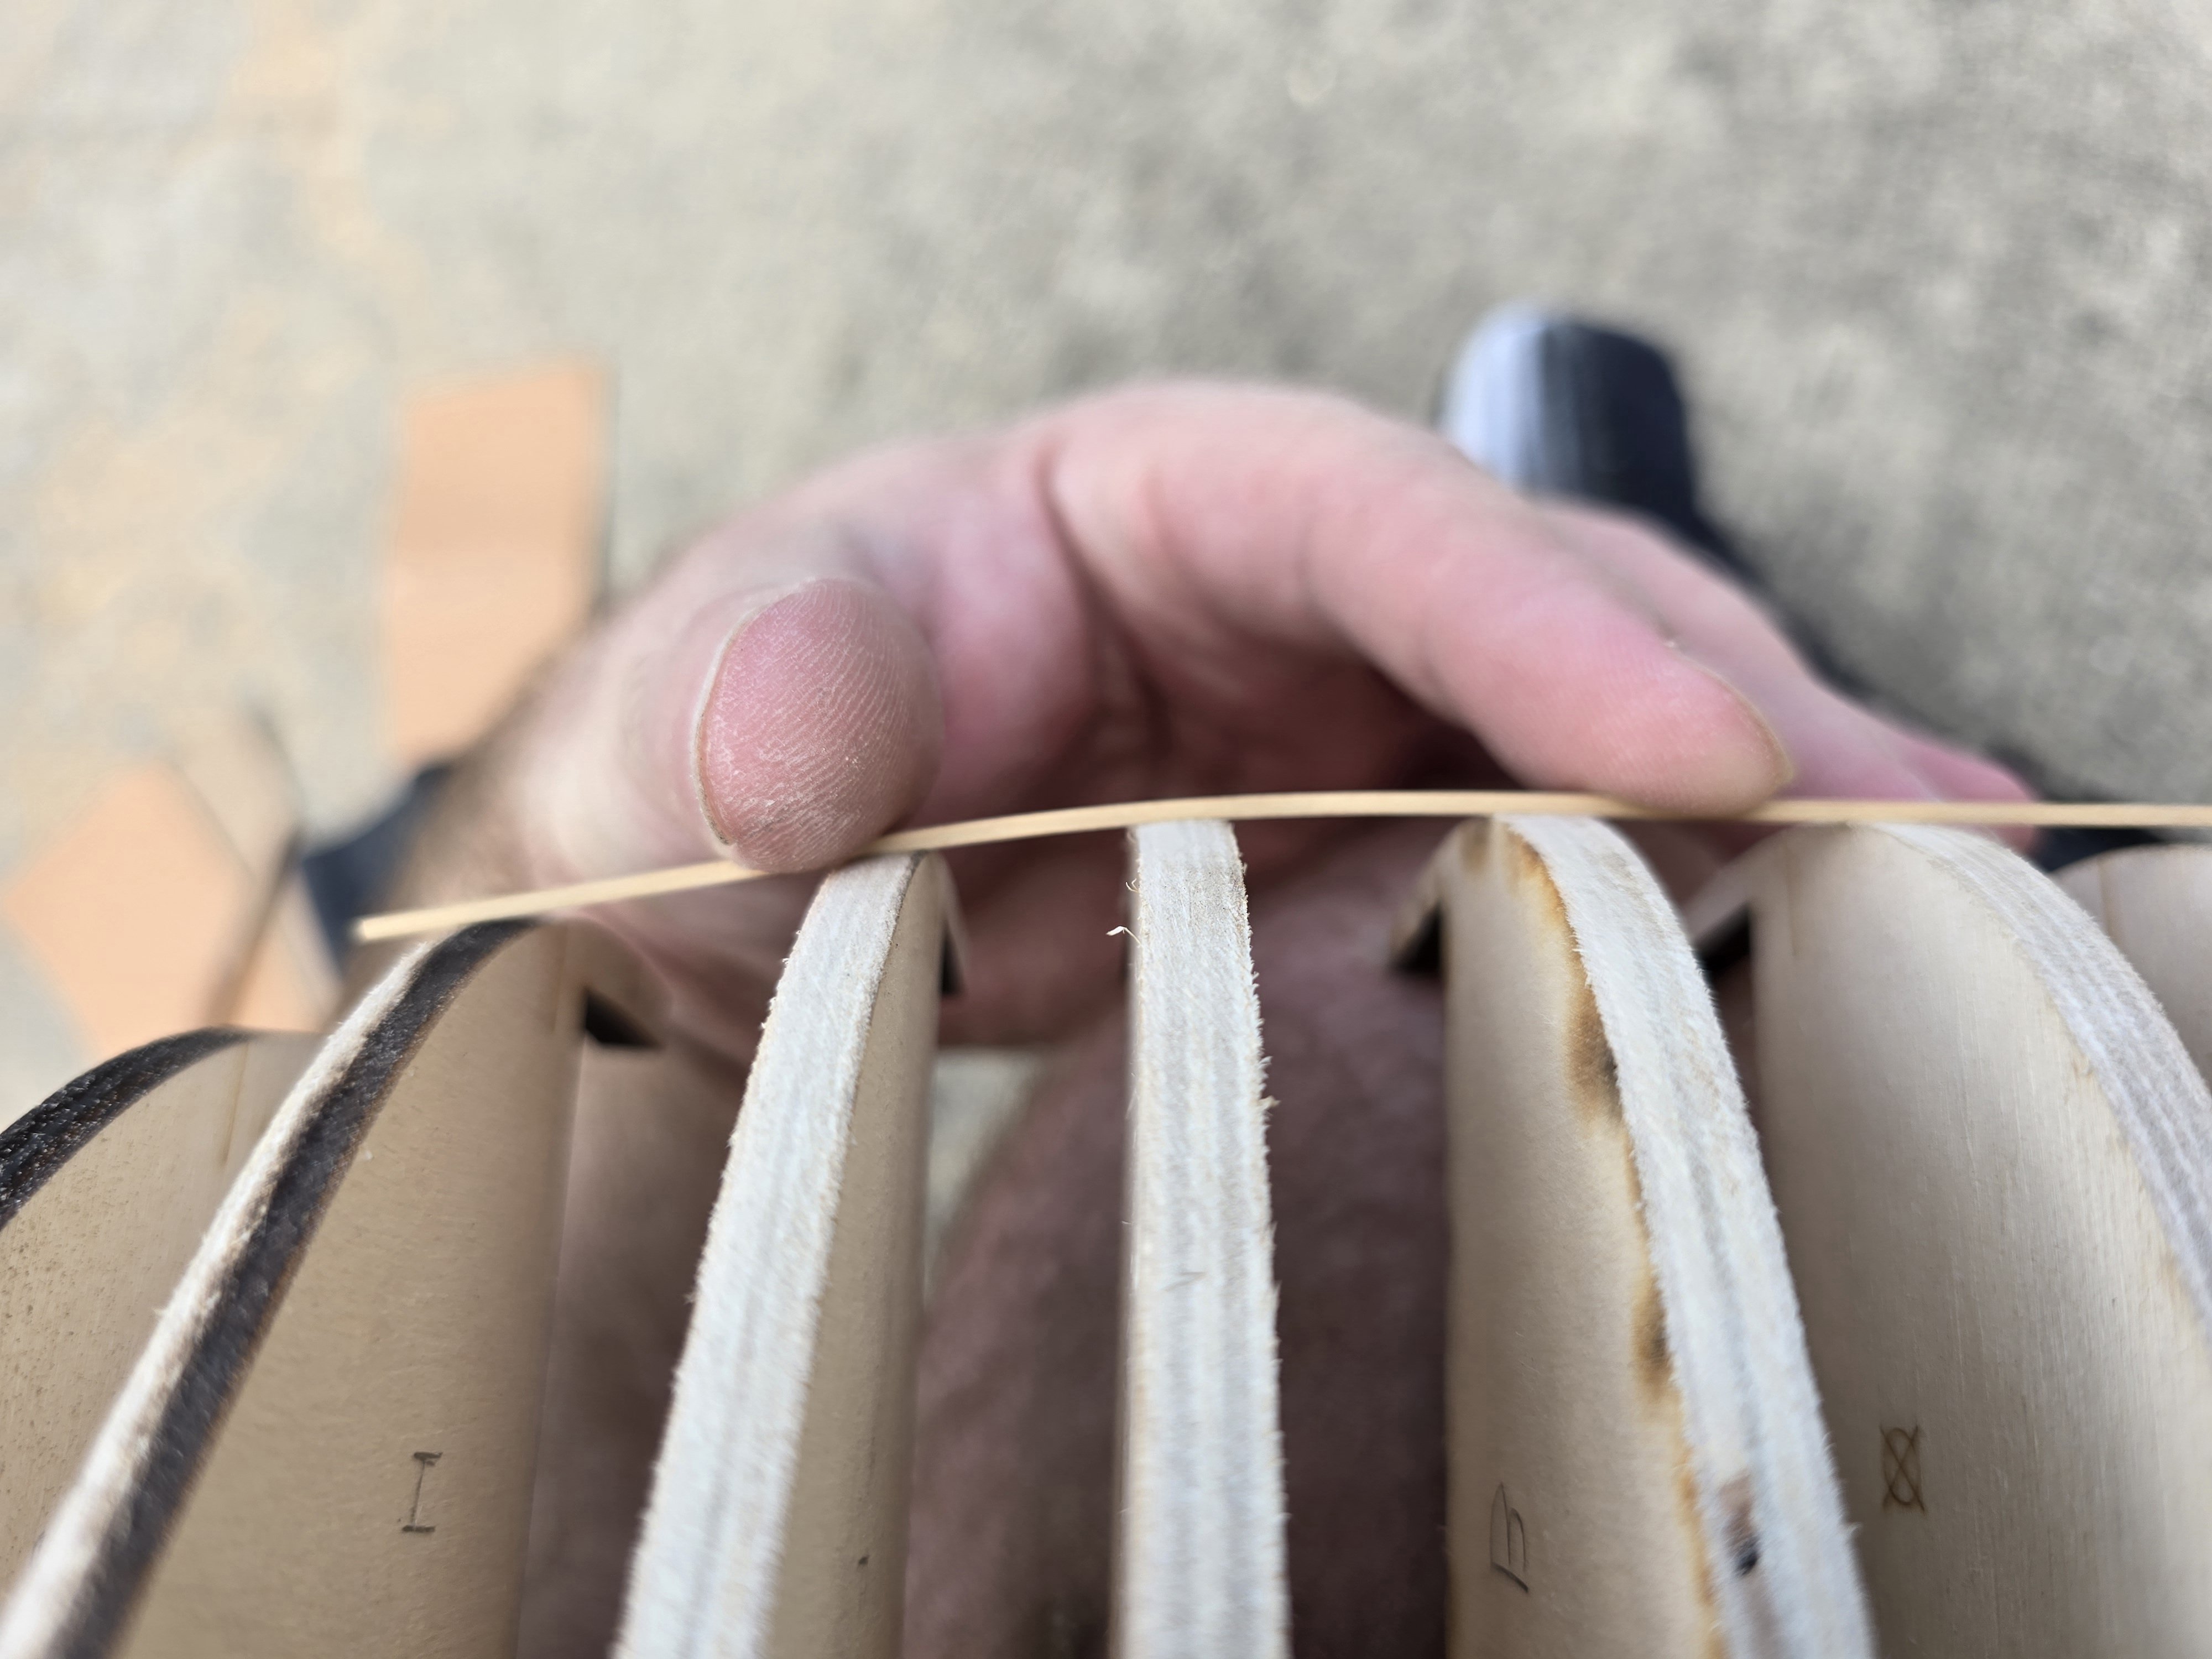
Hello all! Before adding the port frames, I cut a 1/4" x1/4" strip into the length of a gun port (17/32") and placed it on the plans to make sure it's the correct gunport length. I then would use this as a gunport template to make sure all the gunports have the correct length. I noticed there are 4 gunports on each side where the aft facing frame is 1/32" wide. I added those first. After that, I added the rest of the aft facing frames so all 12 gunport frames were framed on the aft side. I then used the gunport template I made to gadge the width of the other frames. Some required me to use 2 different width strips to make sure the gunports are all the same size. You have to make sure each frame is a little bit bigger outboard and height wise so you can match the curvature of the hull properly. You also have to bevel the bottom of quite a lot of the frames so that they sit flat against the sills. This is super important because any gaps between the frames and sills will be very noticeable once it's painted and planked. Doing this correctly means you don't have to add wood filler later and hope to sand the frames/sills correctly such that it doesn't change the shape of the gunport. It took some time making sure the all fit properly but it was worth it. After adding in all 6 gunports on each side, I sanded outboard to match the hull and also sanded the top of the frames into nice curve. While doing so, i checked the curvature by placing the same batten I used while faring onto the hull to check the curve. I needed to do this so I could create the correct measurements on the front gunports. The gunport that we have to cut out was tough but fun! I read the instructions, looked at the plans and marked out the gunports on both sides. Notice i have 2 lines running vertical down the hull. The inner lines are the actual size of the gunport to position it correctly. The outer lines are 1/32" away from the gunport. This is where I will actually cut out the frames. I do this so I can add boxwood sills and frames afterwards. I do not like the look of plywood in my build. BUT most importantly ( and the real reason), I know with my skills, I wouldn't be able to create truly flat and even sills/frames by cutting the plywood alone. So i decided to frame them like the rest. I first indented the top part of the frame with a hobby knife to help start the cutting with the saw. I then cut the outmost lines I created. I forgot to mention that I also marked 1/32" lower of the sill to be able to frame that as well. I cut down 17/32" using the saw. (The gunport is suppose to be 16/32") I next made diagonal cuts with the saw to start removing material. Luckily, because plywood has layers, cutting the diagonal made some of the plywood just come off because of lack of glue between some layers. The picture above had no sanding. The plywood just came off without pulling or anything! I then took my time and cut out the remaining gunport material. I had to make small adjustments and use files to try and place the 1/32" sills down flat. I then added the aft frame first on both sides. This was a 1/32" wide strip. I then used the gunpoet template to figure out what width i needed for the other frame. I then added those and sanded. I think they came out great! Thanks everyone for reading and for all your likes! Jeff


-
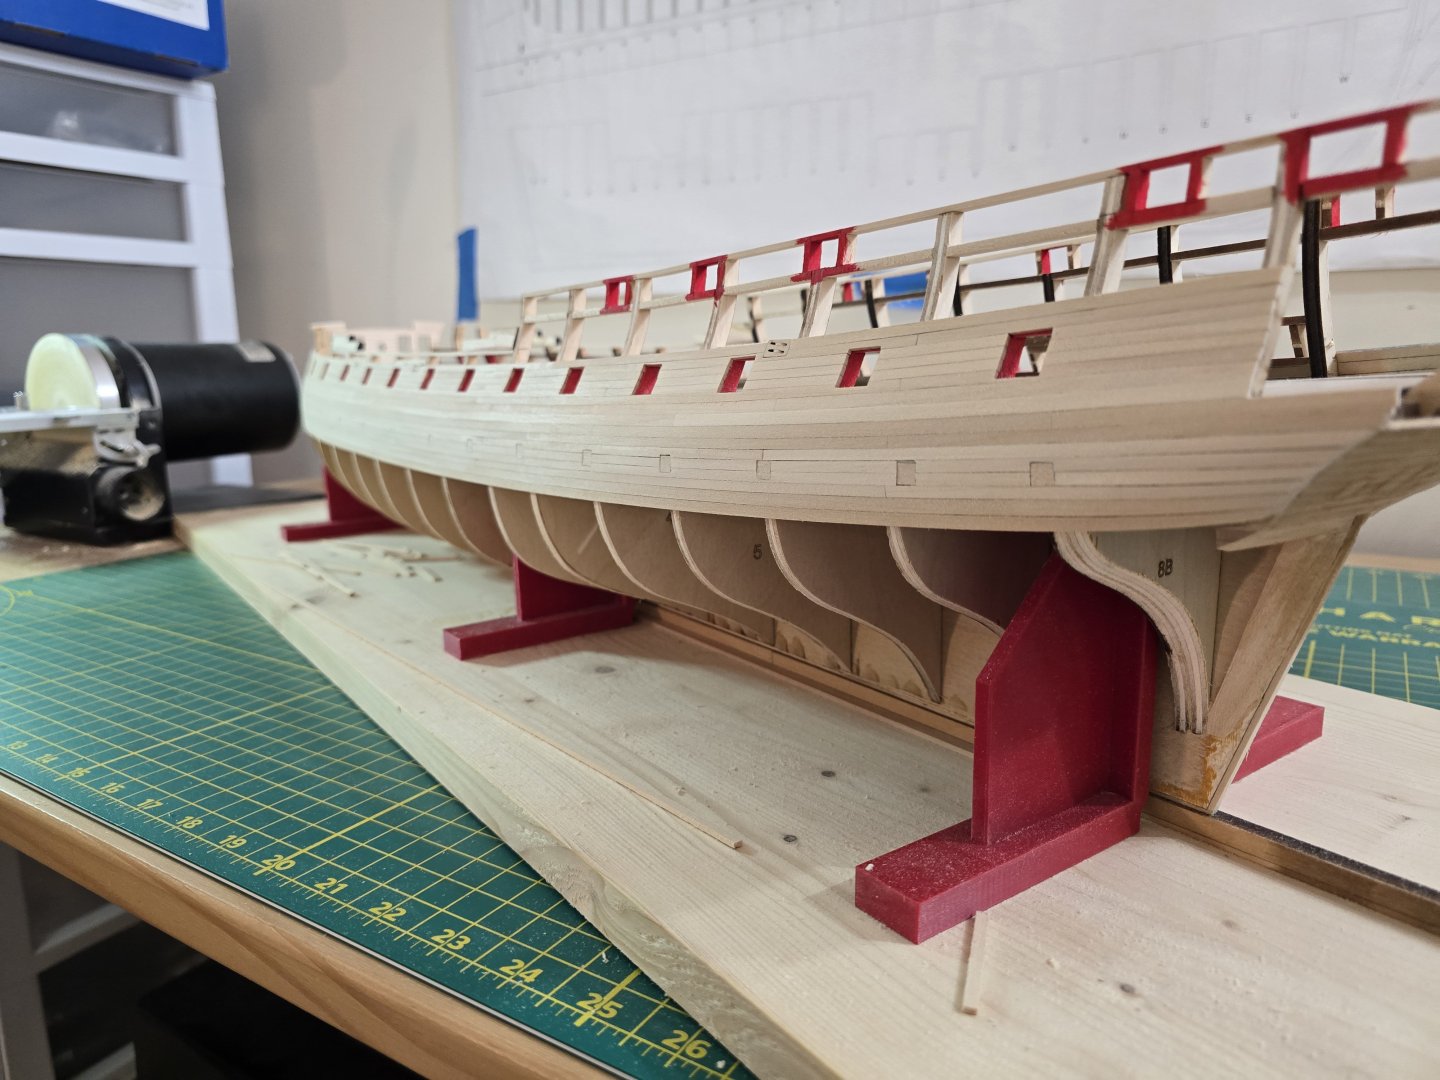
I thought I would give an update to the build. I have to say, framing the sweep ports takes a LONG TIME! Well, for me anyway haha. After thinking about it, I know framing ports isn't my strong suit. I seem to have better frame planking if I have the ports to frame around. So for better or worse, I made the sweep ports before I planked the sweep port frames. The instructions say to plank the frames first, then quite a bit later, make and place thr sweep ports. To create both bigger ports, I glued four strips together. The instructions said to make sure and match the hull planking with these ports. I'll show a pic later how well I was able to match the planking. I then created a lot of sweep ports based upon the size of them on the plans. After making them, I outlined them with a pencil. I then started to plank up the hull getting close to the sweep ports. When I got close to the ports, I glued on the sweep ports before planking around them. How i plank around them is pretty straight forward. I would first mark where the sweep port is on the plank. Then I woukd cut out the ports on the strip. This took a long time as I tried my best on them. I installed the bigger ports slightly differently since the plank pattern needs to match according to the instructions. I didn't glue the port on first. Instead I placed a strip where the port was and measured how much strip I need to show for the port. I temporarily placed the port in place. I then cut the shape out of the plank and installed the plank. So after planking the port, it looks like this. I think I matched the planks with the ports pretty well. I finished planking the 1/8" strips and did some VERY light sanding. I took care not to sand the top nor bottom strip edge so I wouldn't accidentally sand too much. I noticed on the stern, the planks needed to be sanded down to match the lower counter. I was very nervous about that. So I decided to tape up the sides of the lower counter with painters tape (shaped the tape with scissors to match the curve of the hull) I then slowly sanded with 220 grit sandpaper using a rounded sander to help with the curve. I was pretty happy with how this sanding turned out. I was able to sand the planks without sanding the lower counter. I then continued the planking and now I am using the wider strips for the next set of wales. Here is where I am right now with the planking. I hope it looks alright! Thanks everyone! Jeff


-
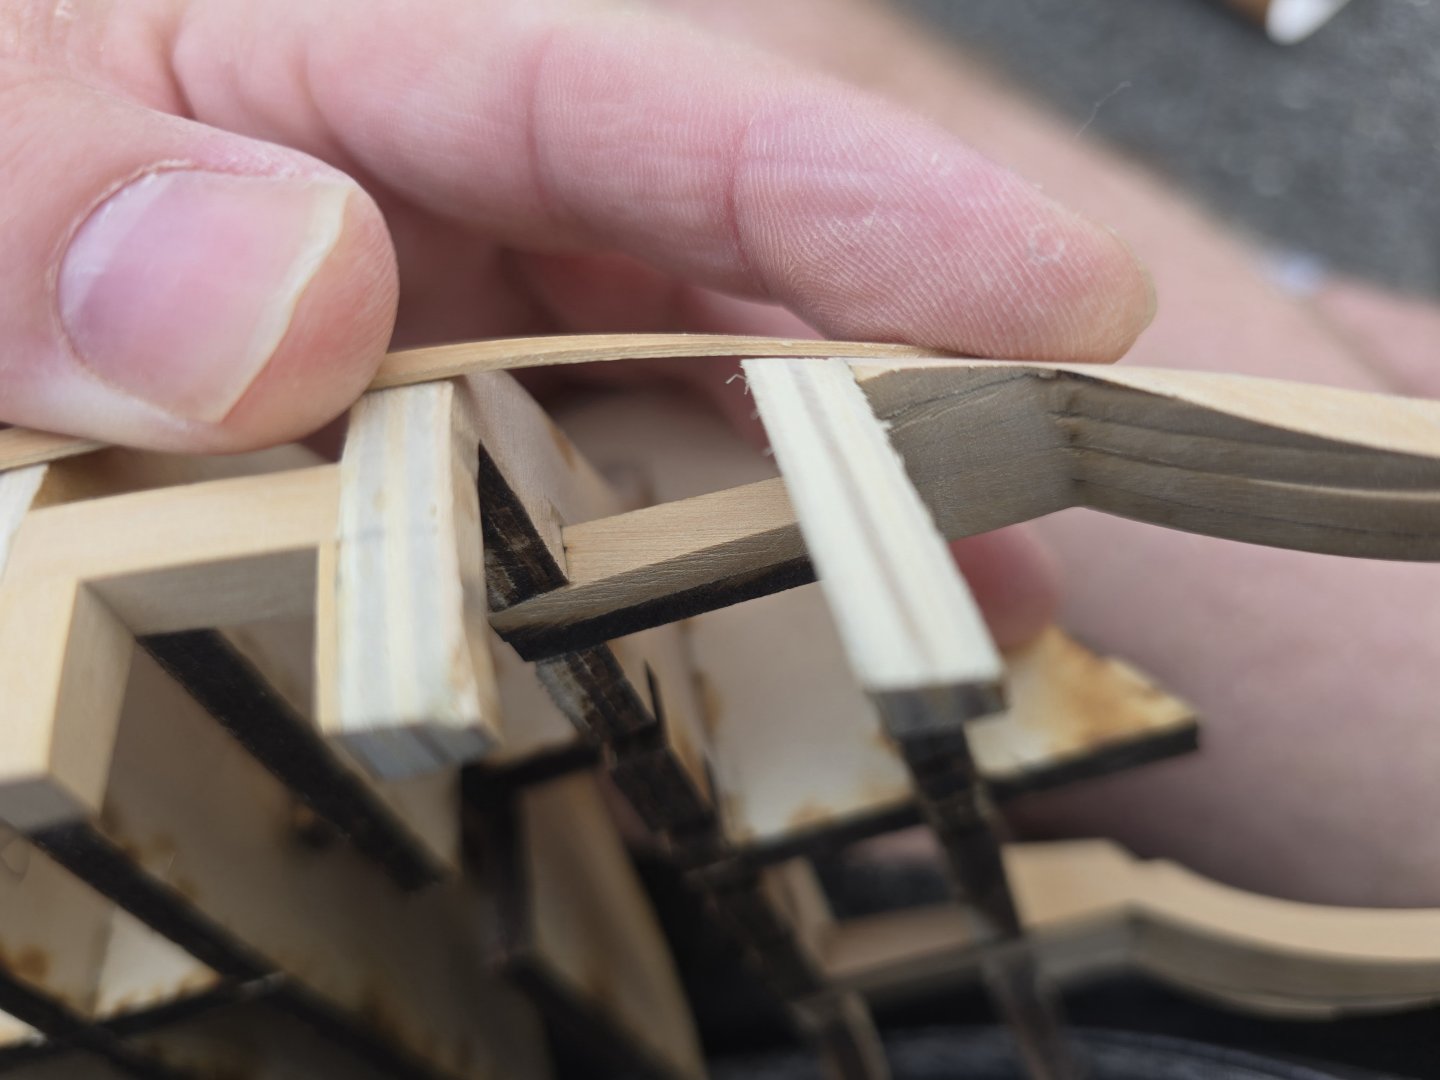
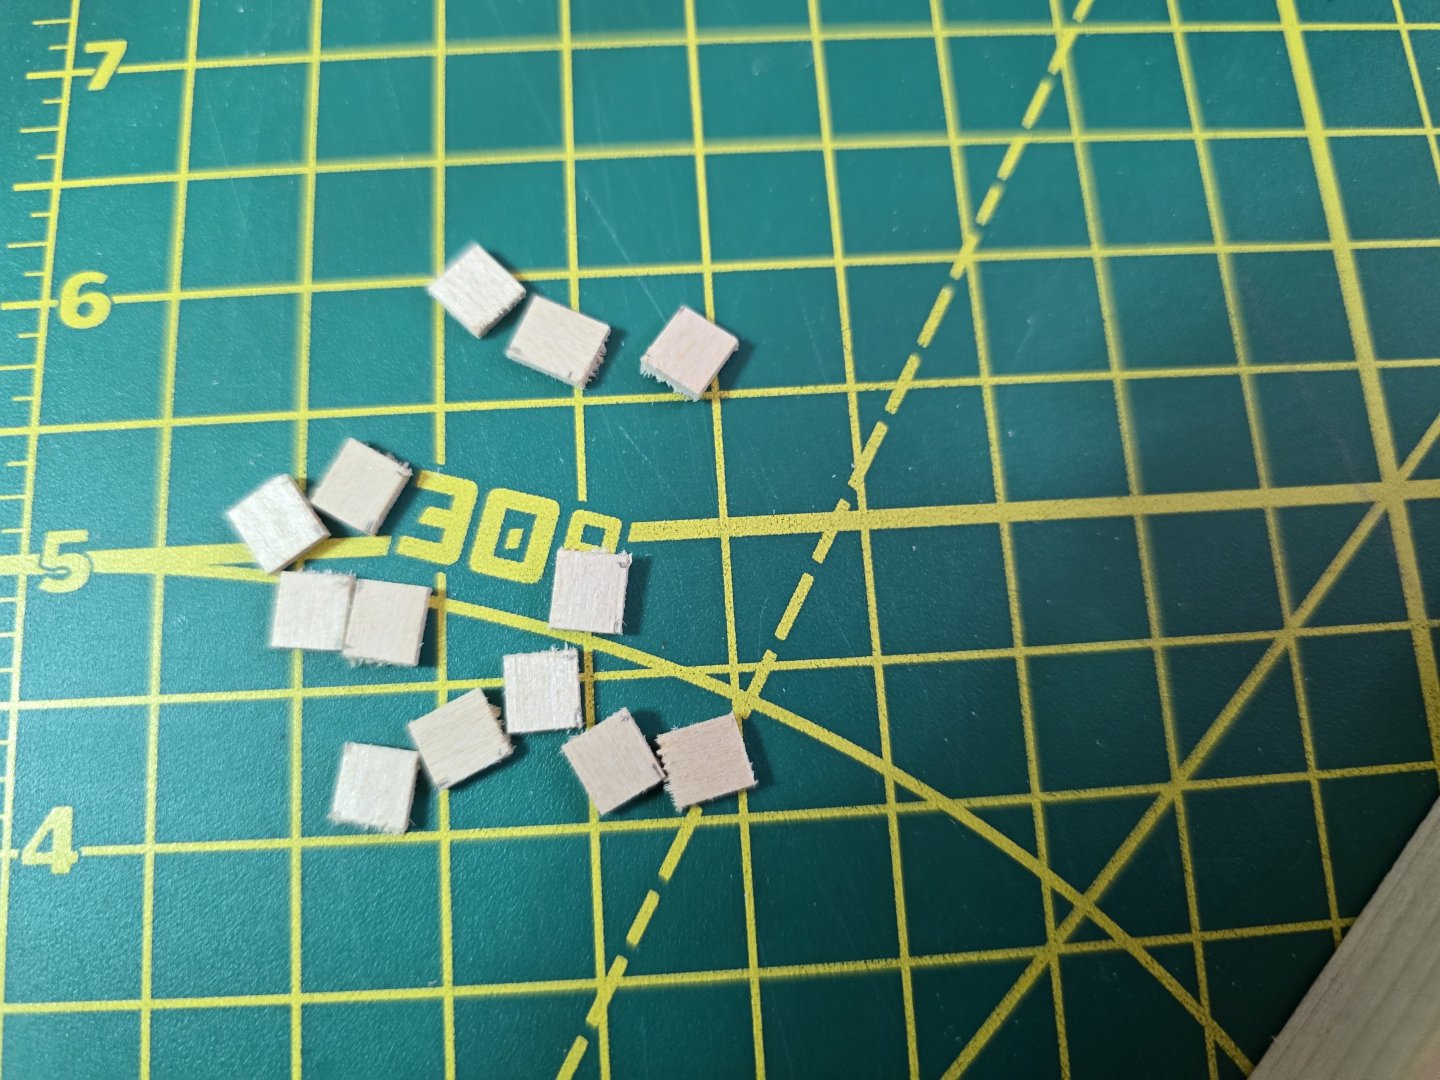
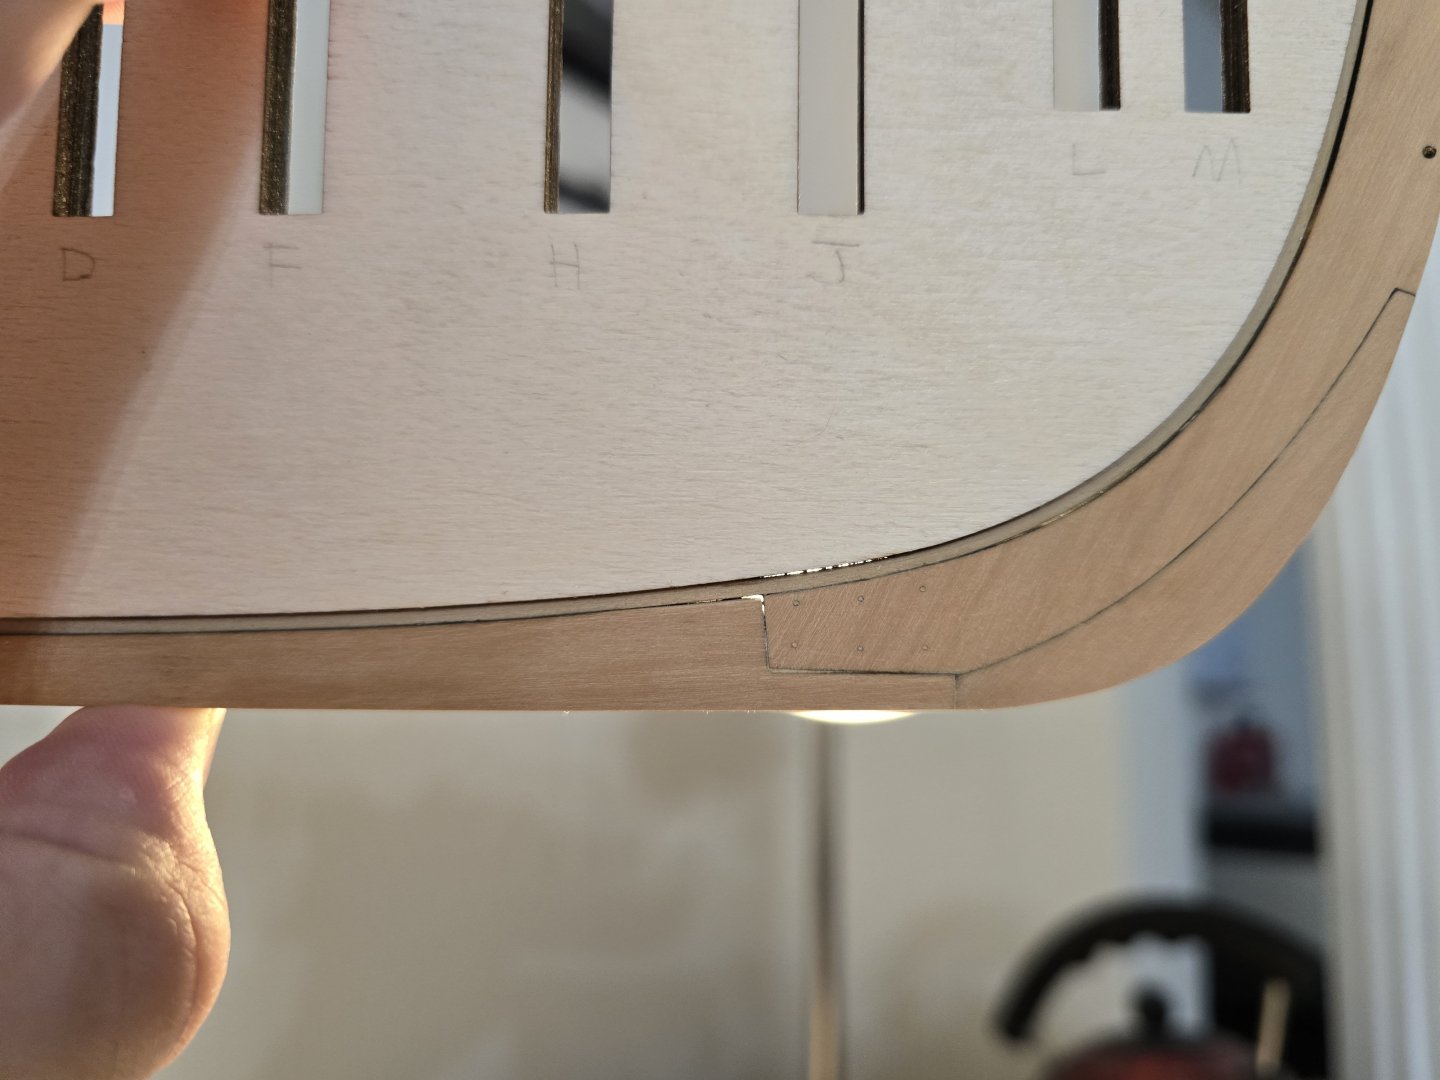
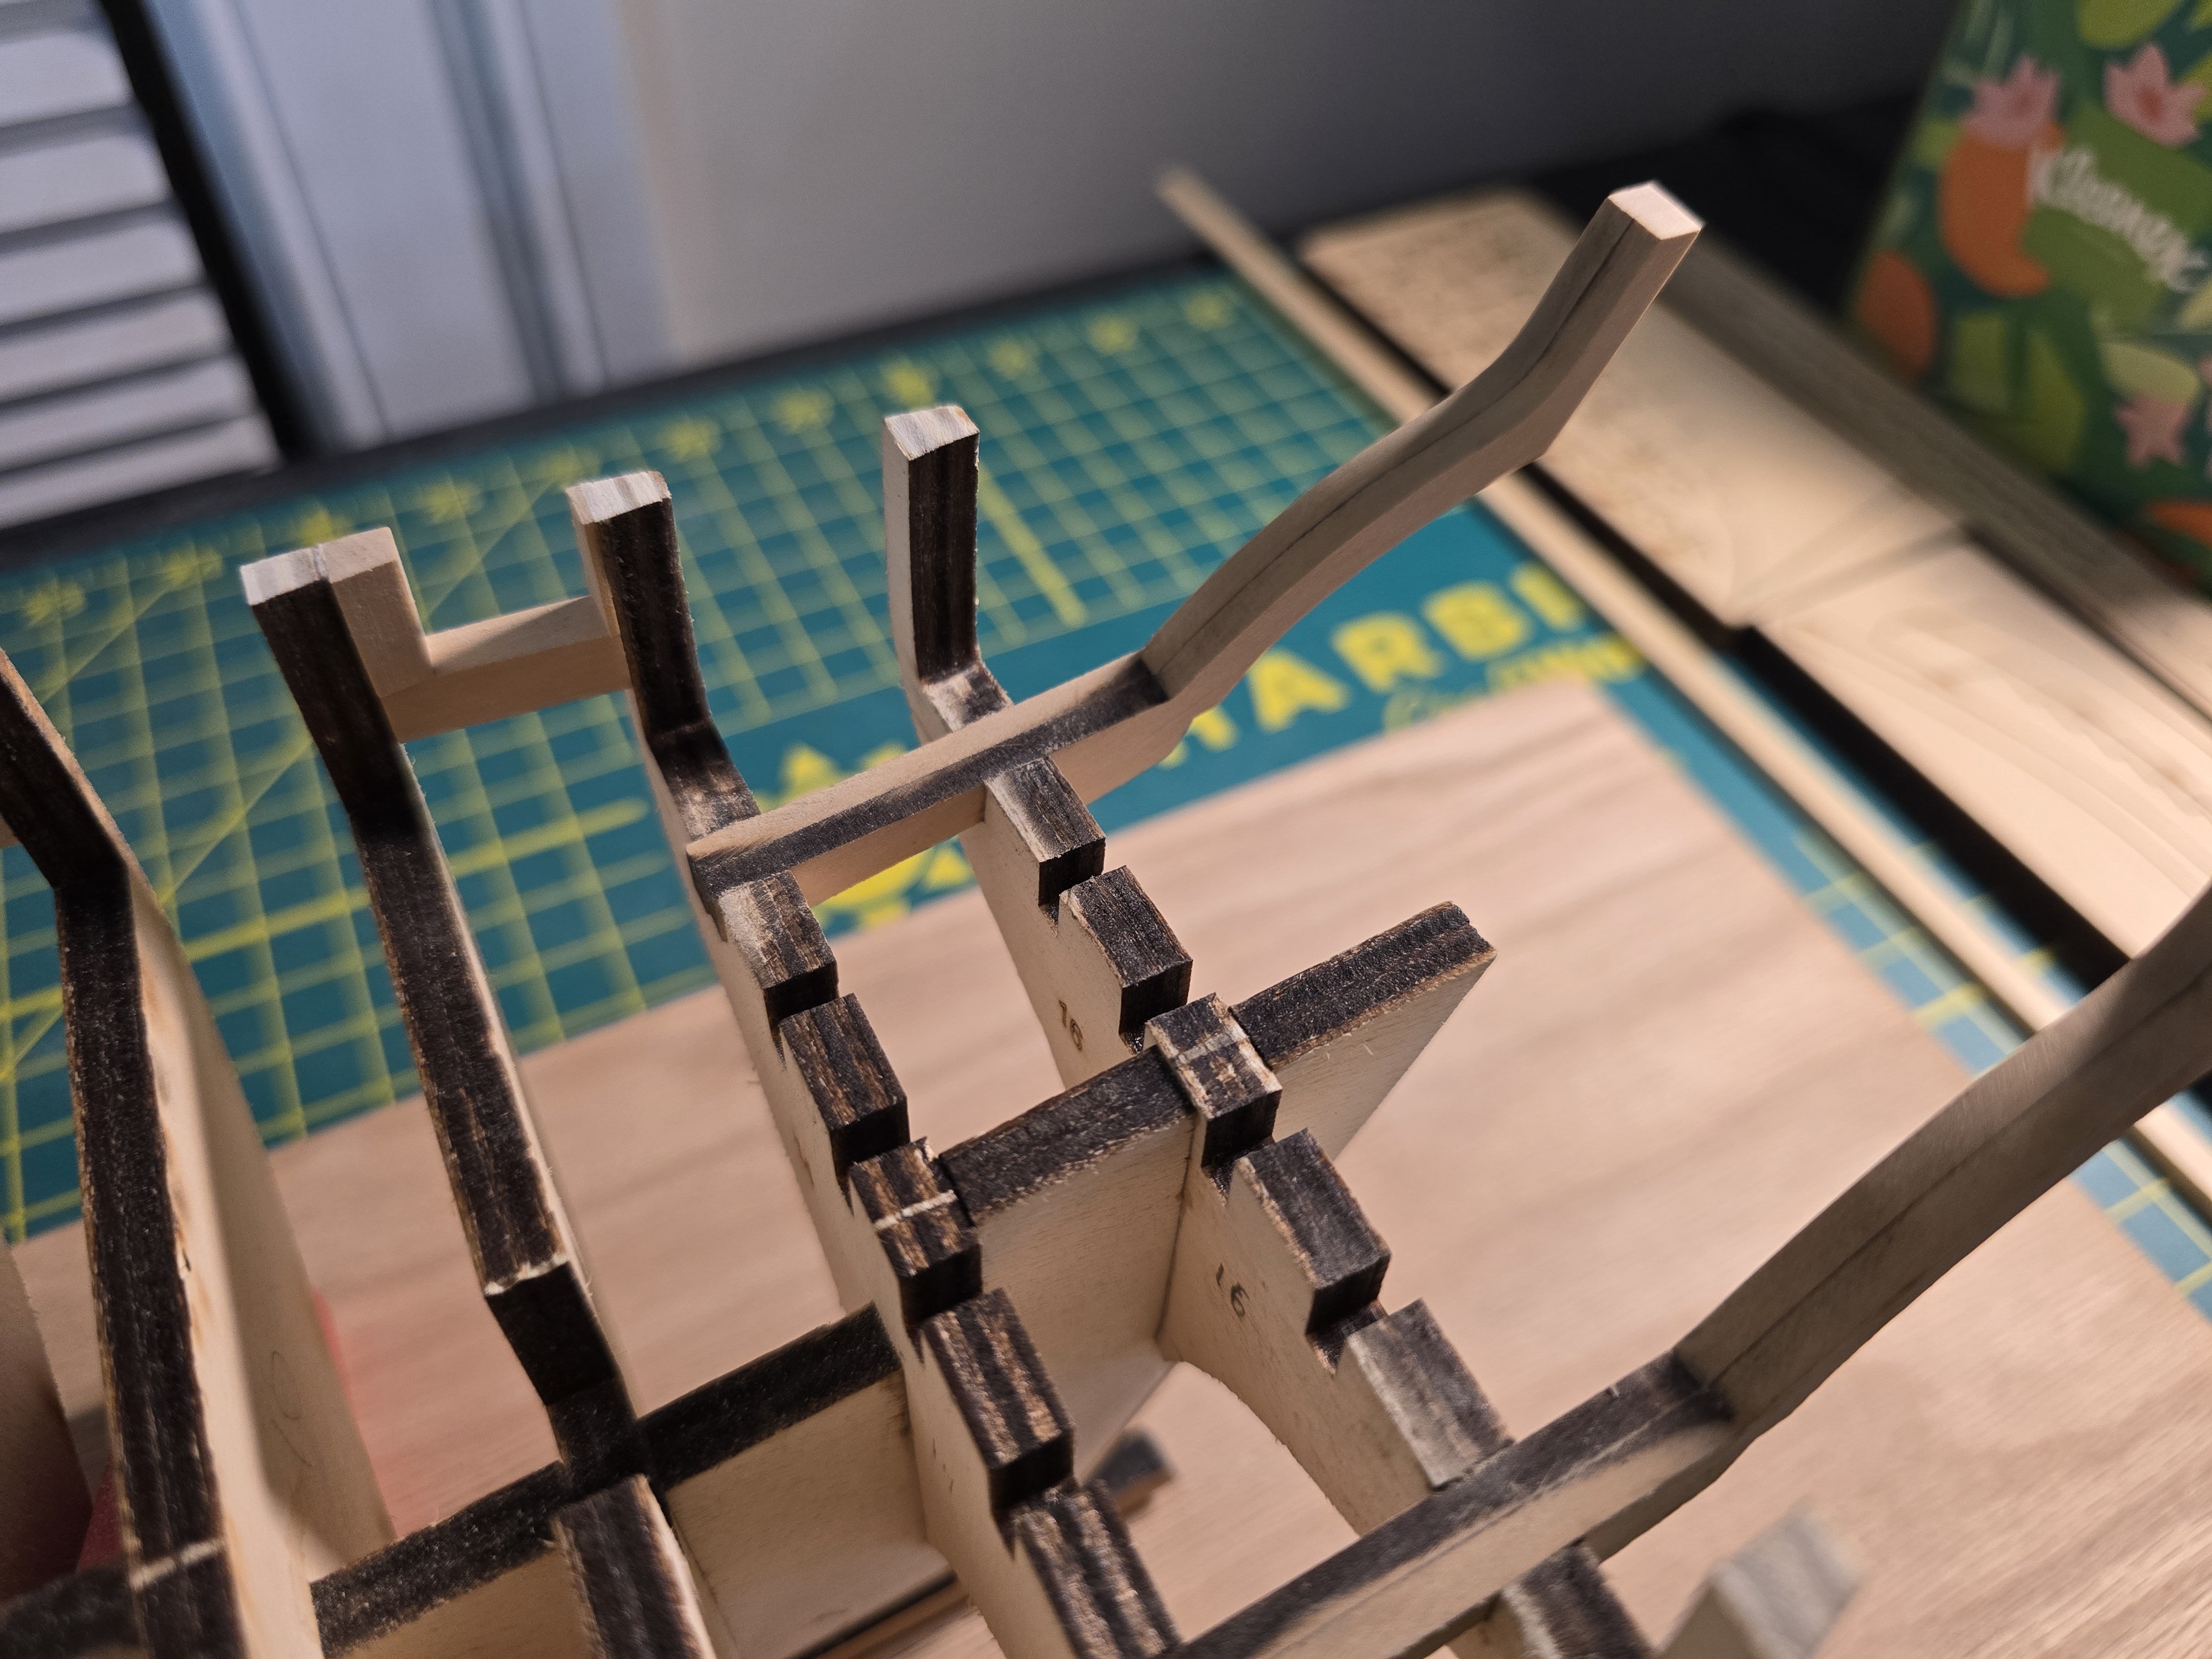
Just a quick update, but I was able to cut out, shape, and glue on the gunport sills. I just wanted to share how I create them. First I would take the 1/4" x 1/4" strip and put it against the hull, and mark the length and the verticle bulkhead. This will produce 2 dimensions of beveling that needs to be completed per piece. I noticed near the bow, there wasn't as much as an angle than at the stern. In this pic, I haven't drawn the verticle lines yet on the strip in the same direction as the bulkhead edges. I then cut the strip and gave a little extra material on the end so I could make sure I am getting the correct bevels in the 2 dimensions. Luckily, I can adjust my disk sander in 2 dimensions. This really helped to make nice crisp straight edges in both bevel dimensions. I wouldn't initially sand up to my guide lines. I would test fit the piece, disk sand a little more, test fit again, and repeat until it was a good fit. The last photo shows that I try to line up the inside edge of the gunframe sill with the inside of the bulkheads. I do this because I know the inside will be sanded to be a lot thinner later in the build. It also makes inboard sanding easier as I don't have to sand off more of the gunport sill. It is more work now, as I will have more sill to remove outboard, but will save some time later. I then measured the plans to make sure the length between the gunport bulkheads match my model. I realized I should be doing this first before cutting / sanding the sill. So after the first set of sills near the bow, I measured the lengths first from the plans. I then made the other side's sill in the same way and sanded the top of the 2 sill pieces with 220 grit sandpaper to get a nice flat surface. I then put glue on both and place them between the correct bulkheads; positioning them based upon the sill lines I made earlier. What I then do, is take a straight 1/4" x 1/4" strip and place it ontop of both sills. I placed a level ontop to make sure they are both the same height. But i make sure i know what angle my table is at first (and the ship) so I know what is even. Sorry my picture isn't straight, but the level shows it's very close to the same height. I completed the same process for the rest of the gunports. The sills near the stern were a lot harder to make as the angles are more dramatic. For a few of the gunports, some bulkheads would be 1/32" too short or too long from each other. To fix this, it was important to measure the correct sill length ( from bulkhead to bulkhead). I would then make the sill length based upon that measurement from the plans. I had to clamp a few because the sill I created was slightly too short for it to sit between the bulkheads properly. This was ok, as it fixed the issue of wrong sized gunport sills. Usually if one side wasn't wide enough, the other side was too wide. This ended up helping to even out both sides at the same time. When I say the sill is too small to fit properly, I mean it's off by 1/32" max. Here is a pic of measuring the distance between bulkeads of a gunport. This particular sill needed to be 21/32". I had to clamp it because it was 22/32" on this side without the gunport sil. You have to be careful to not make the sills too small, as clamping a very small sill can result in a bent bulkhead former, causing your ship to not be straight. I was able to finish installing the sills. Next, I will be sanding the sills to the curve of the hull before adding the gunport frames. I guess this wasn't as quick of an update as I had hoped! Thank you for reading! Jeff


-
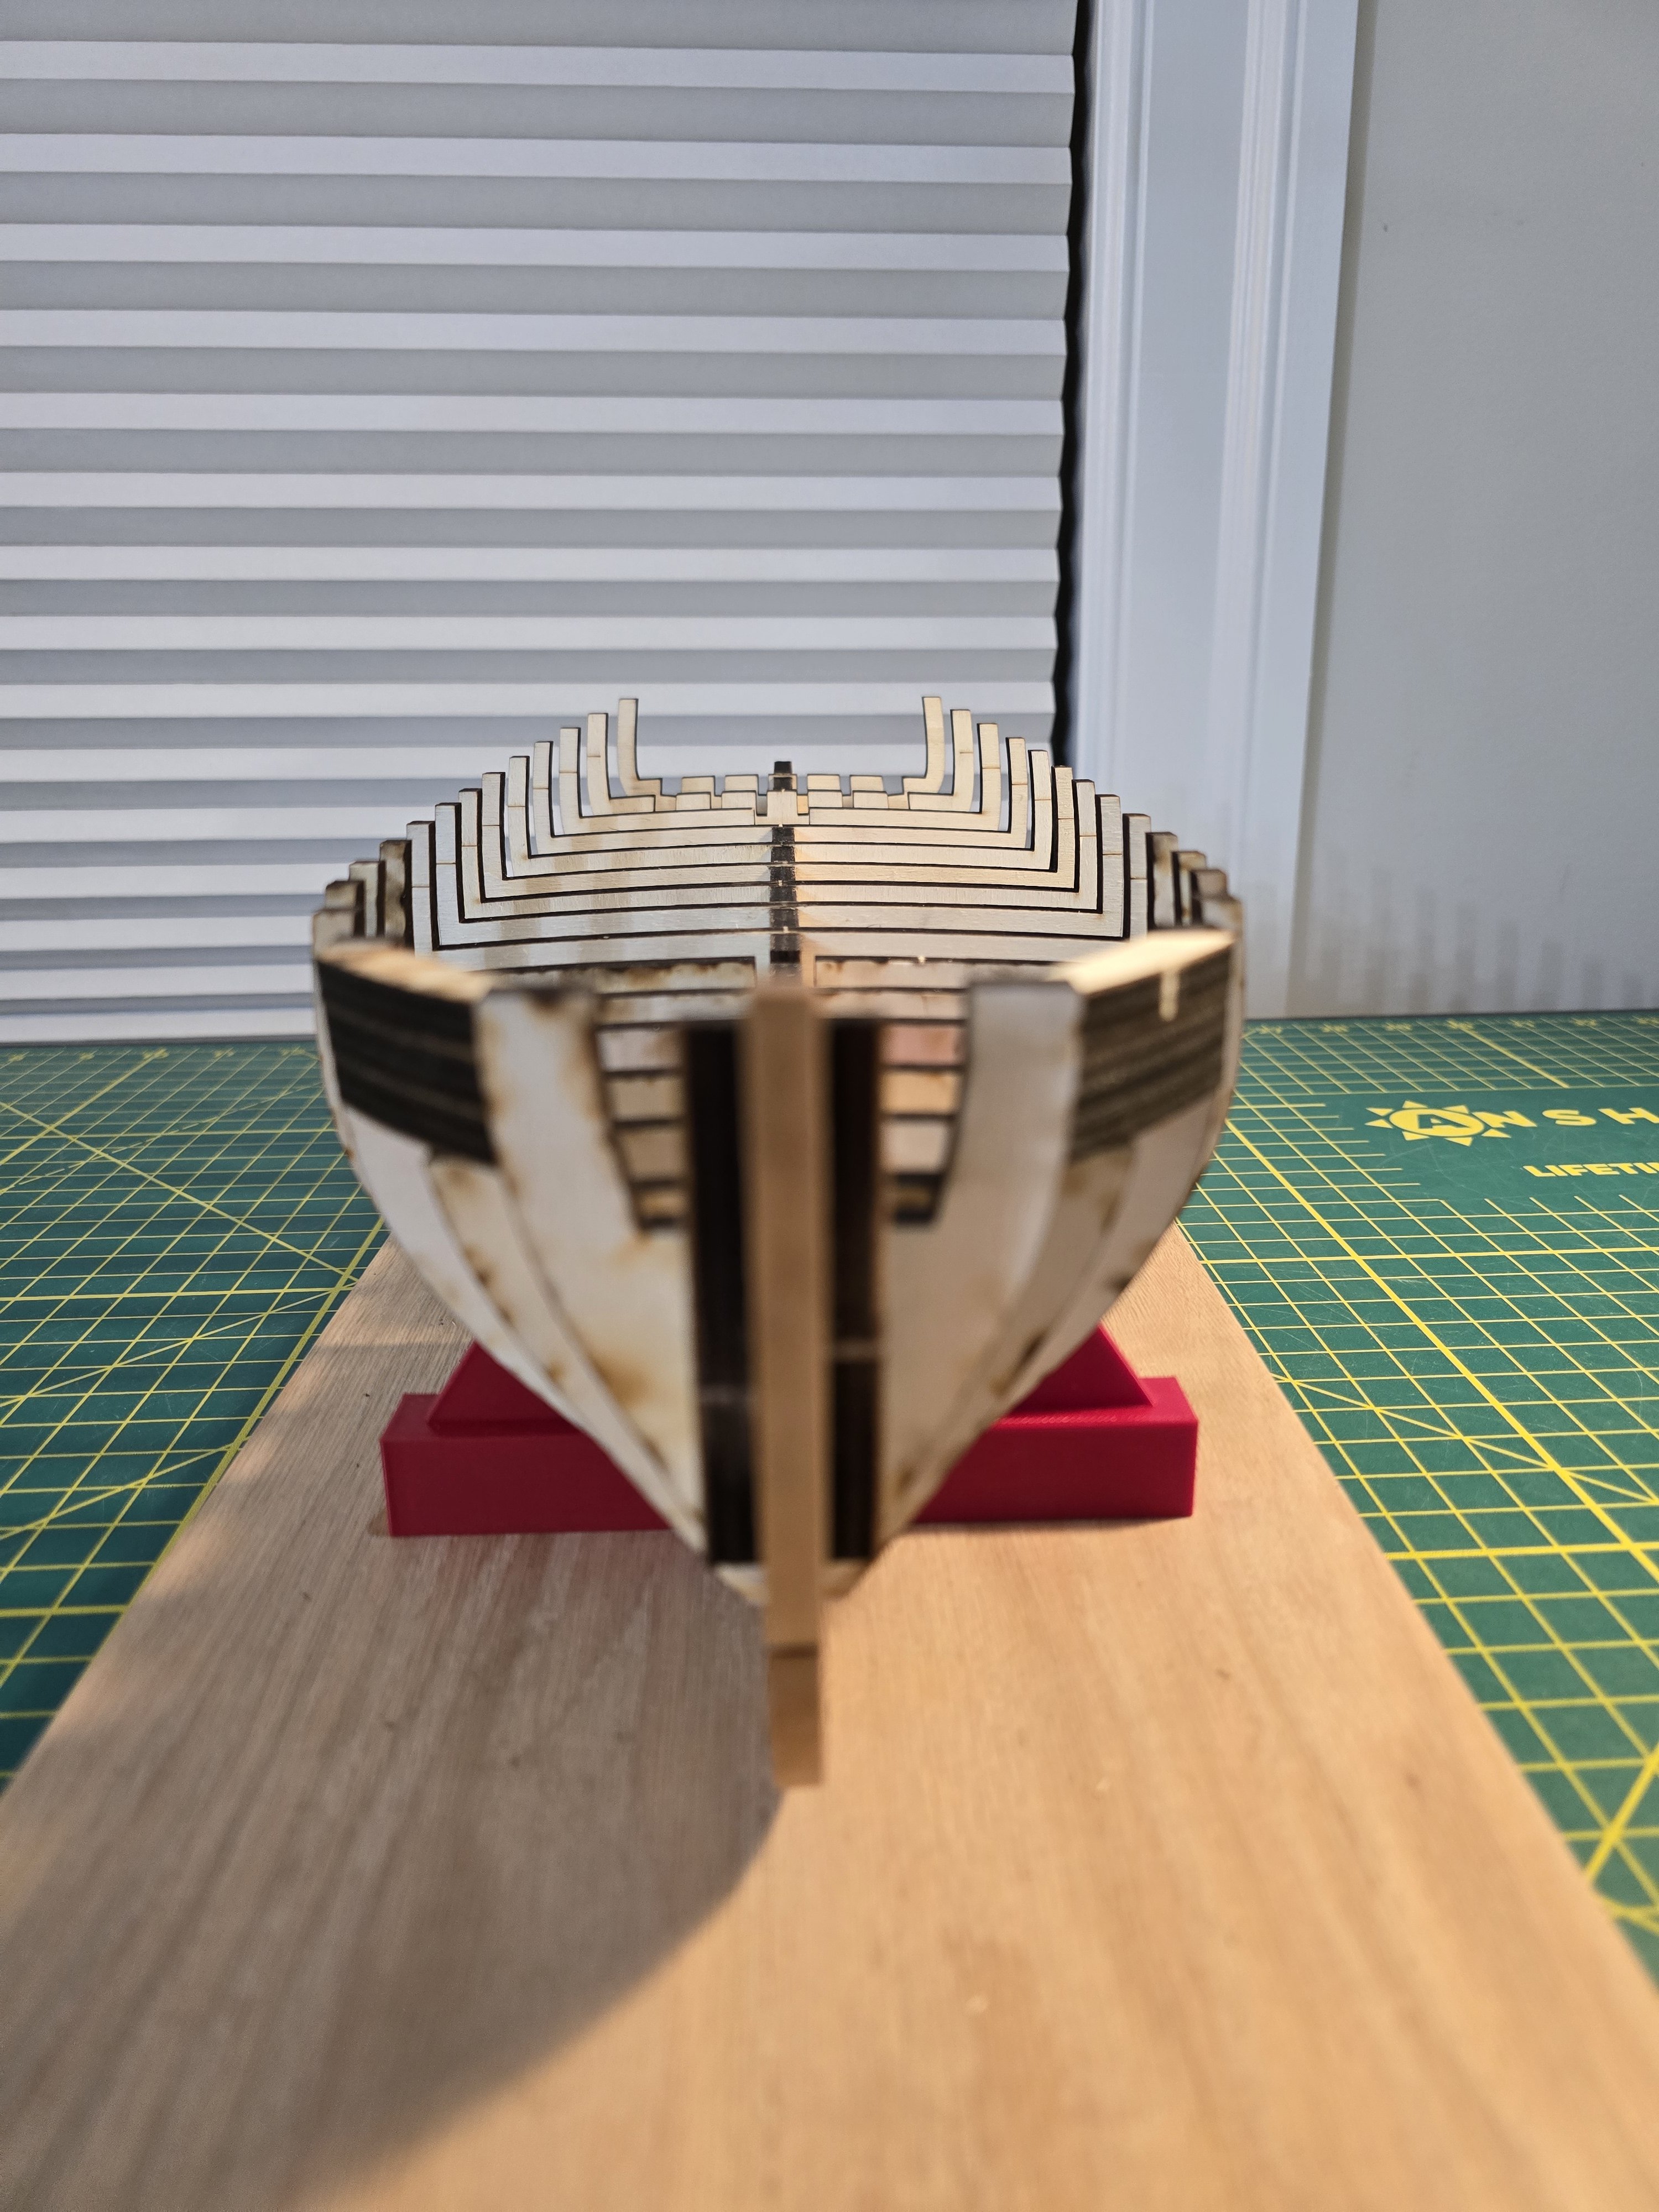
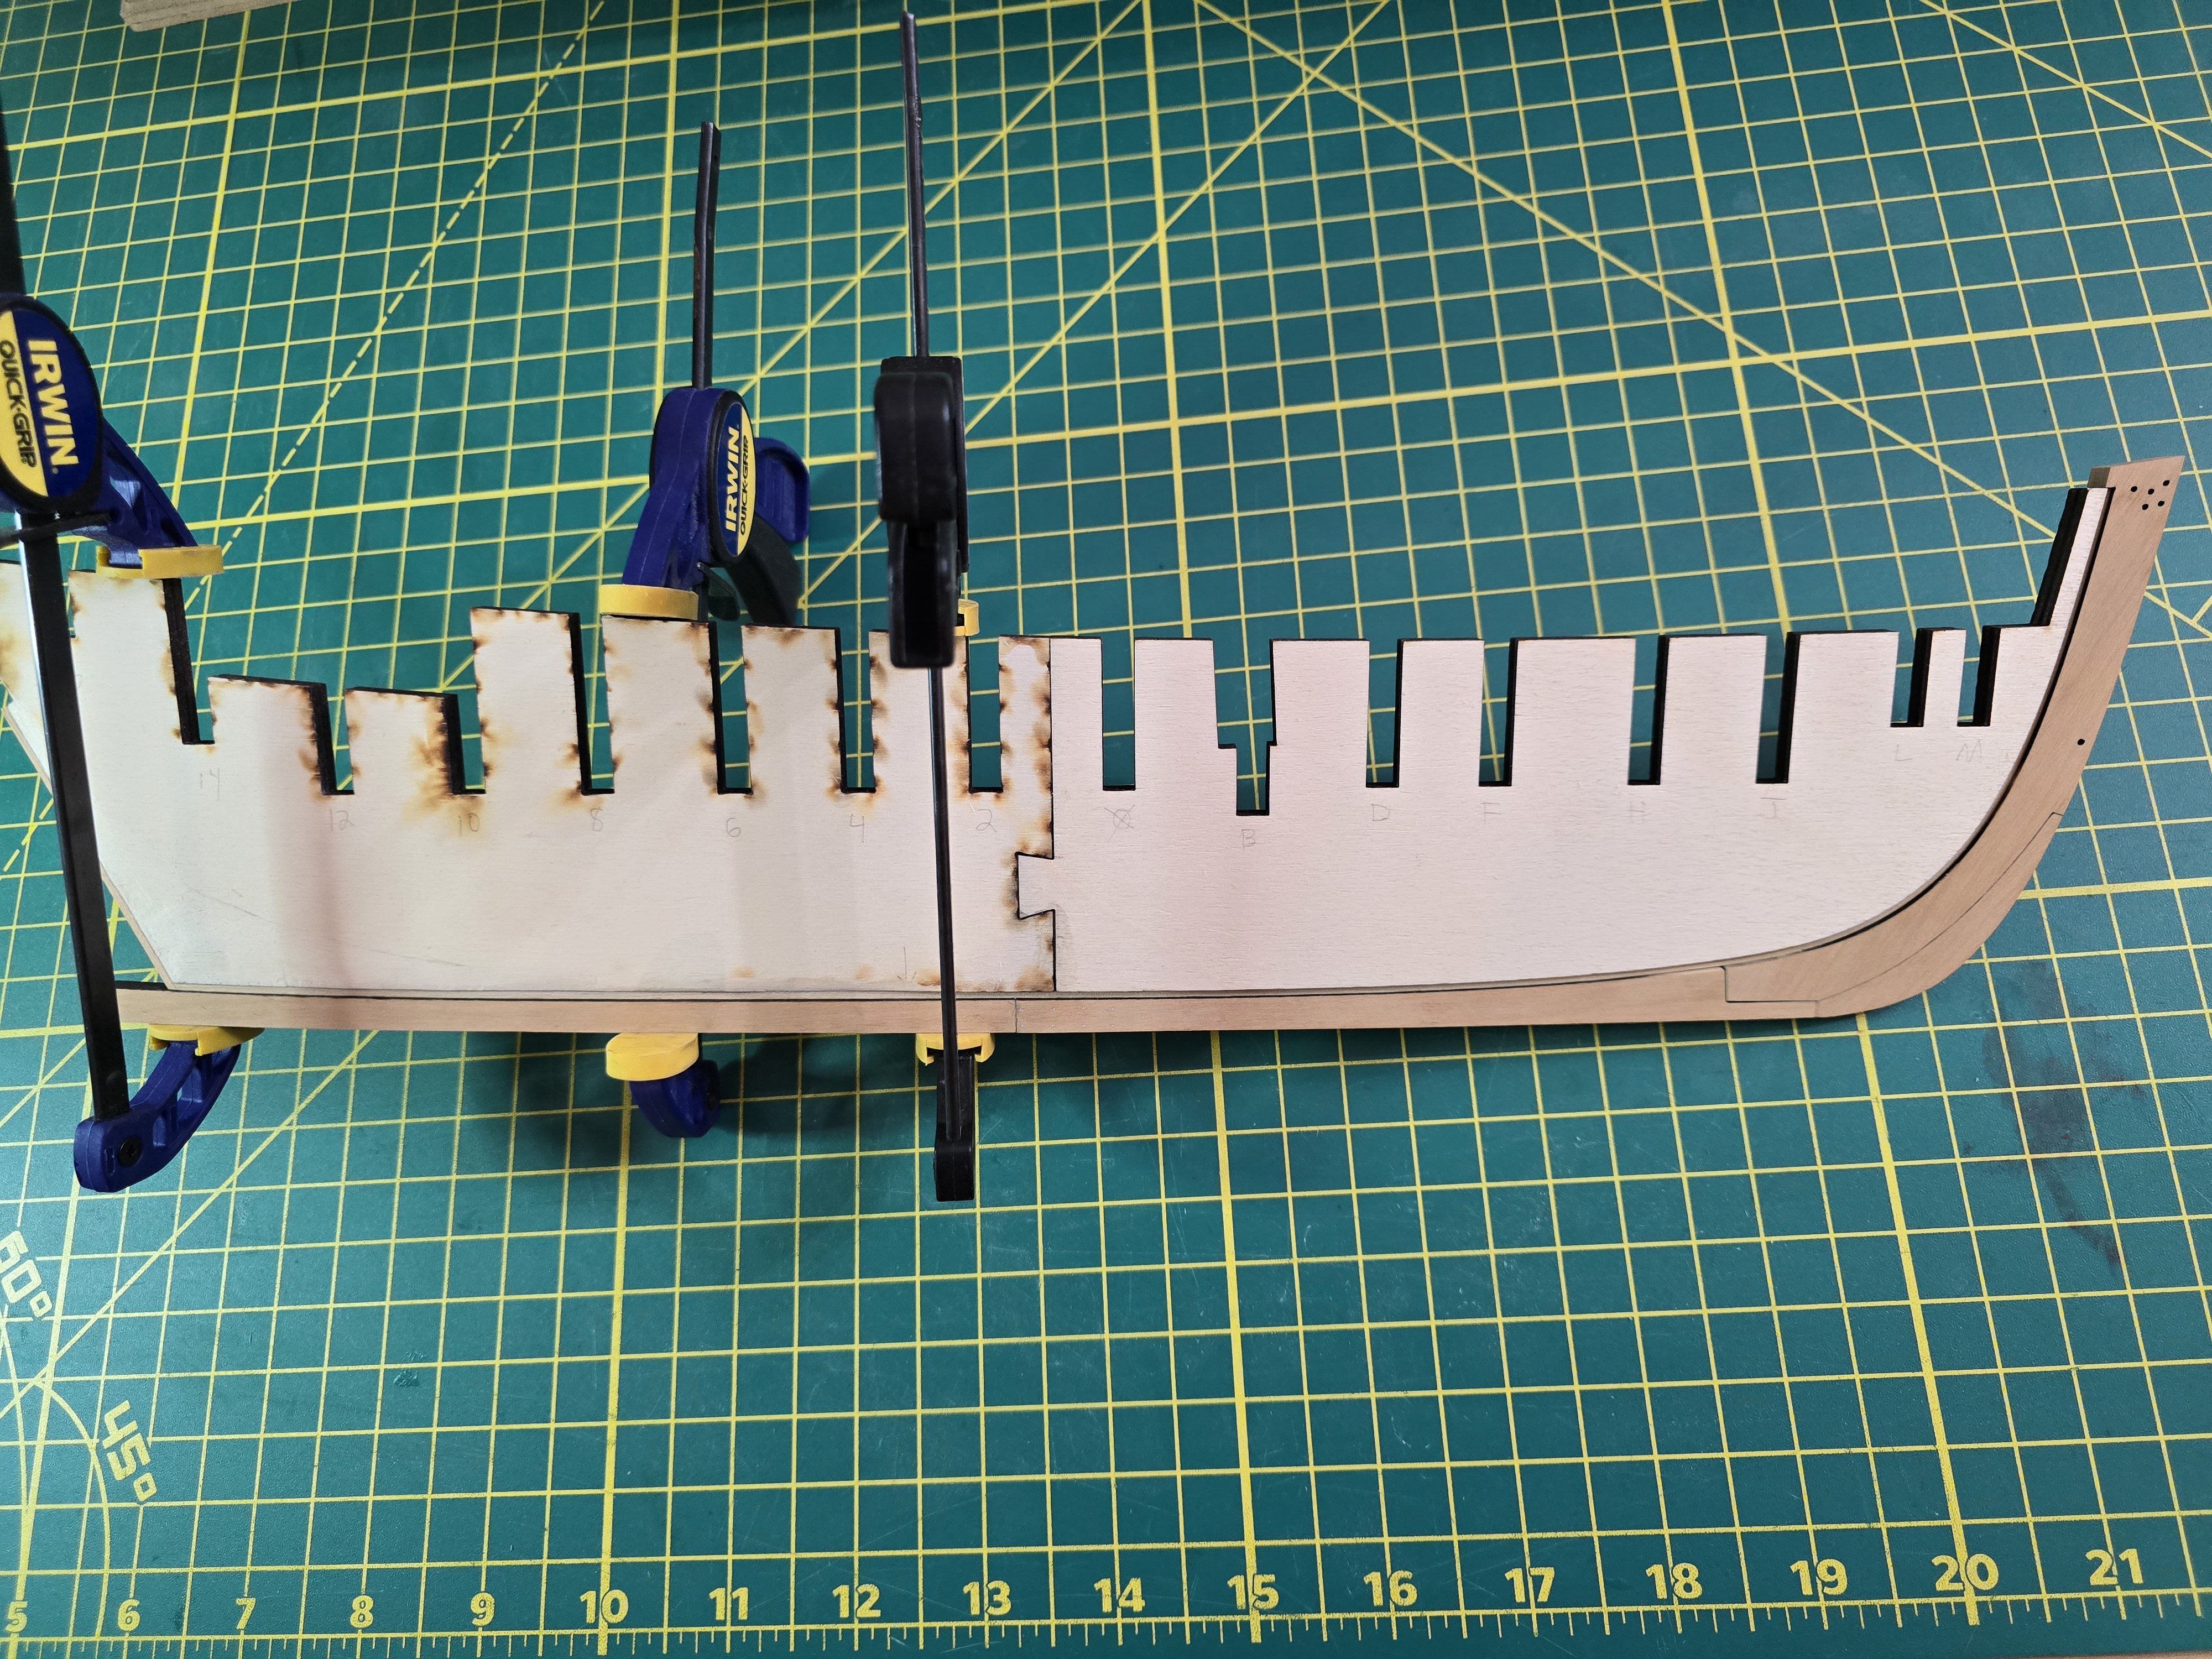
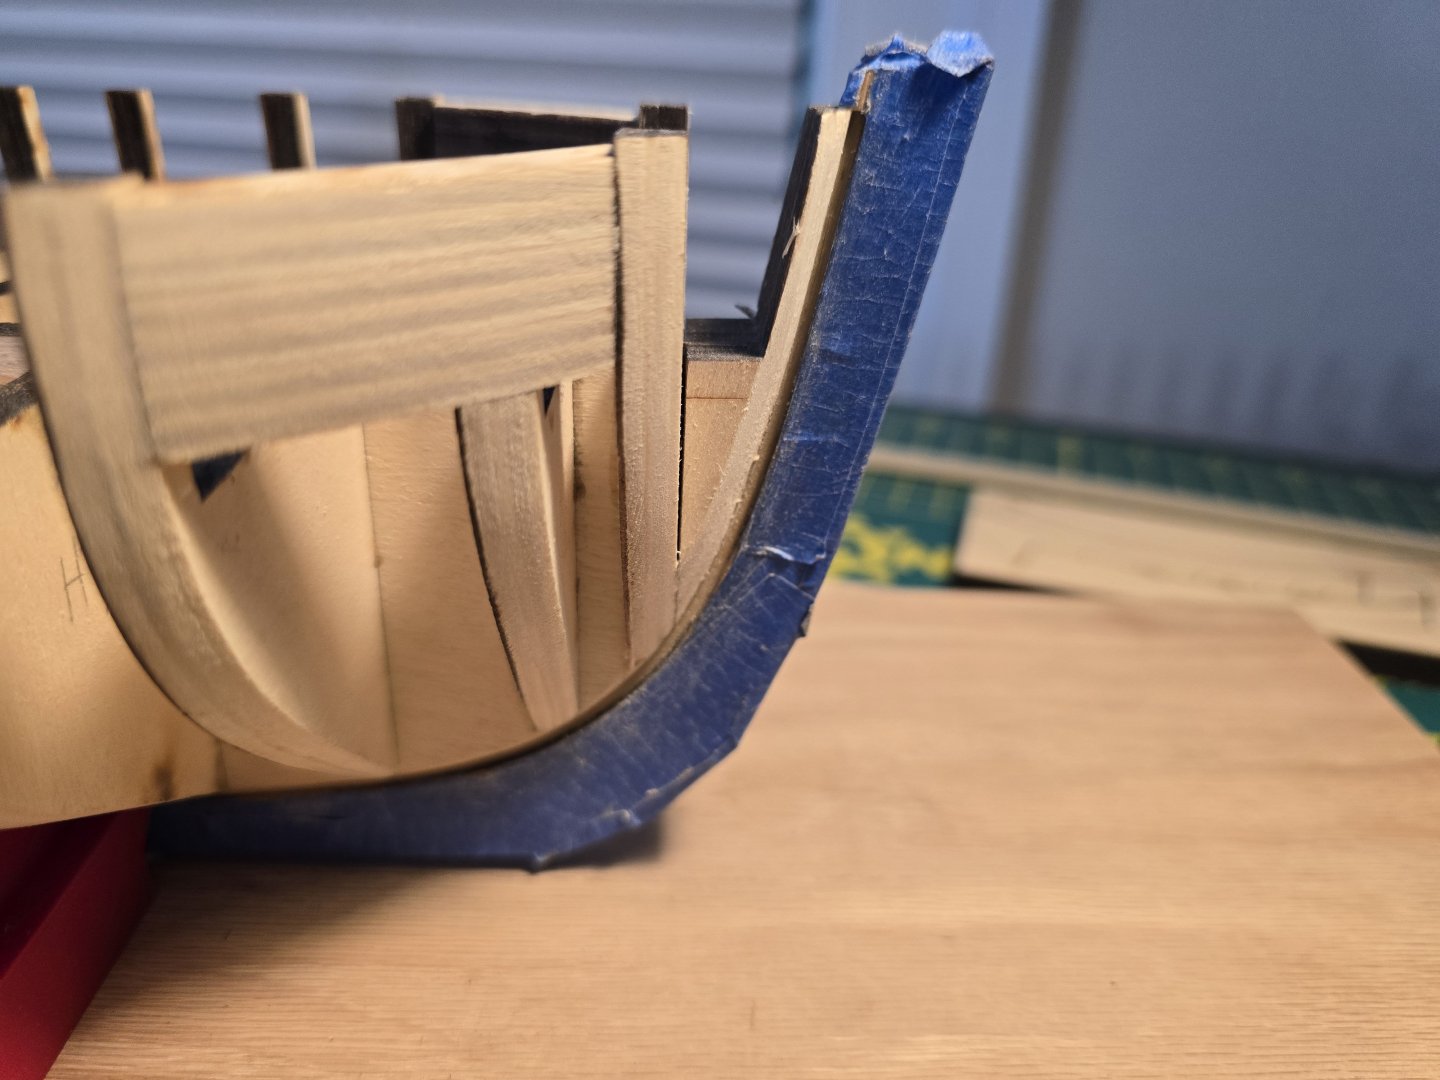
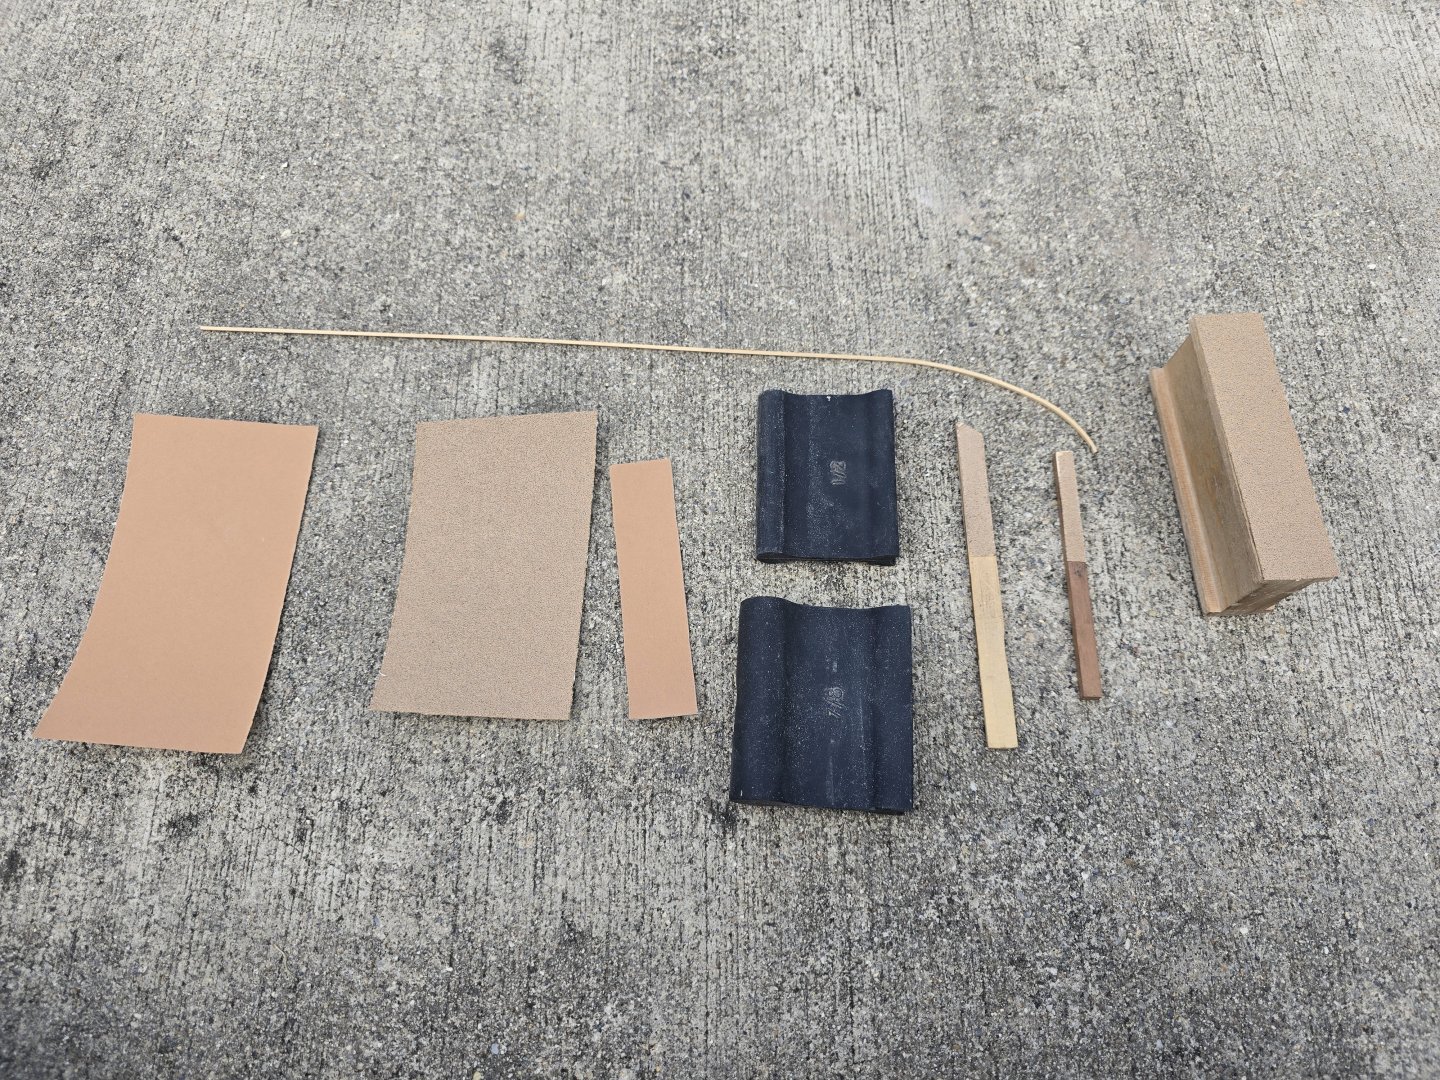
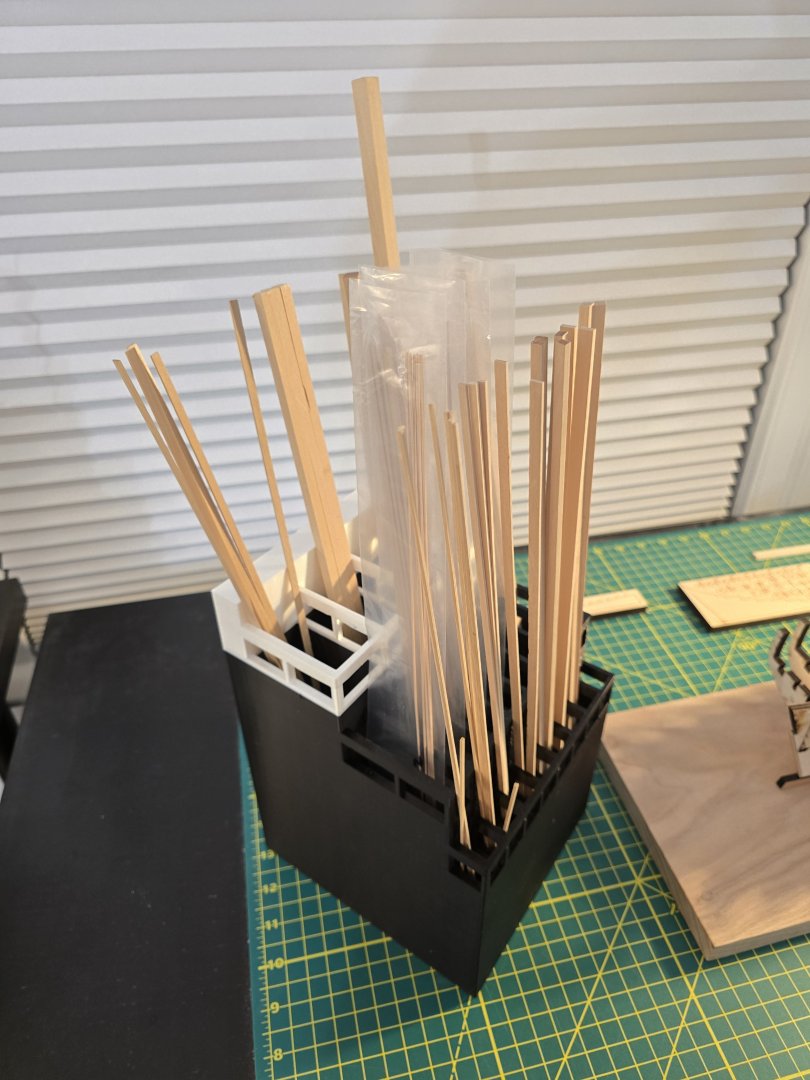
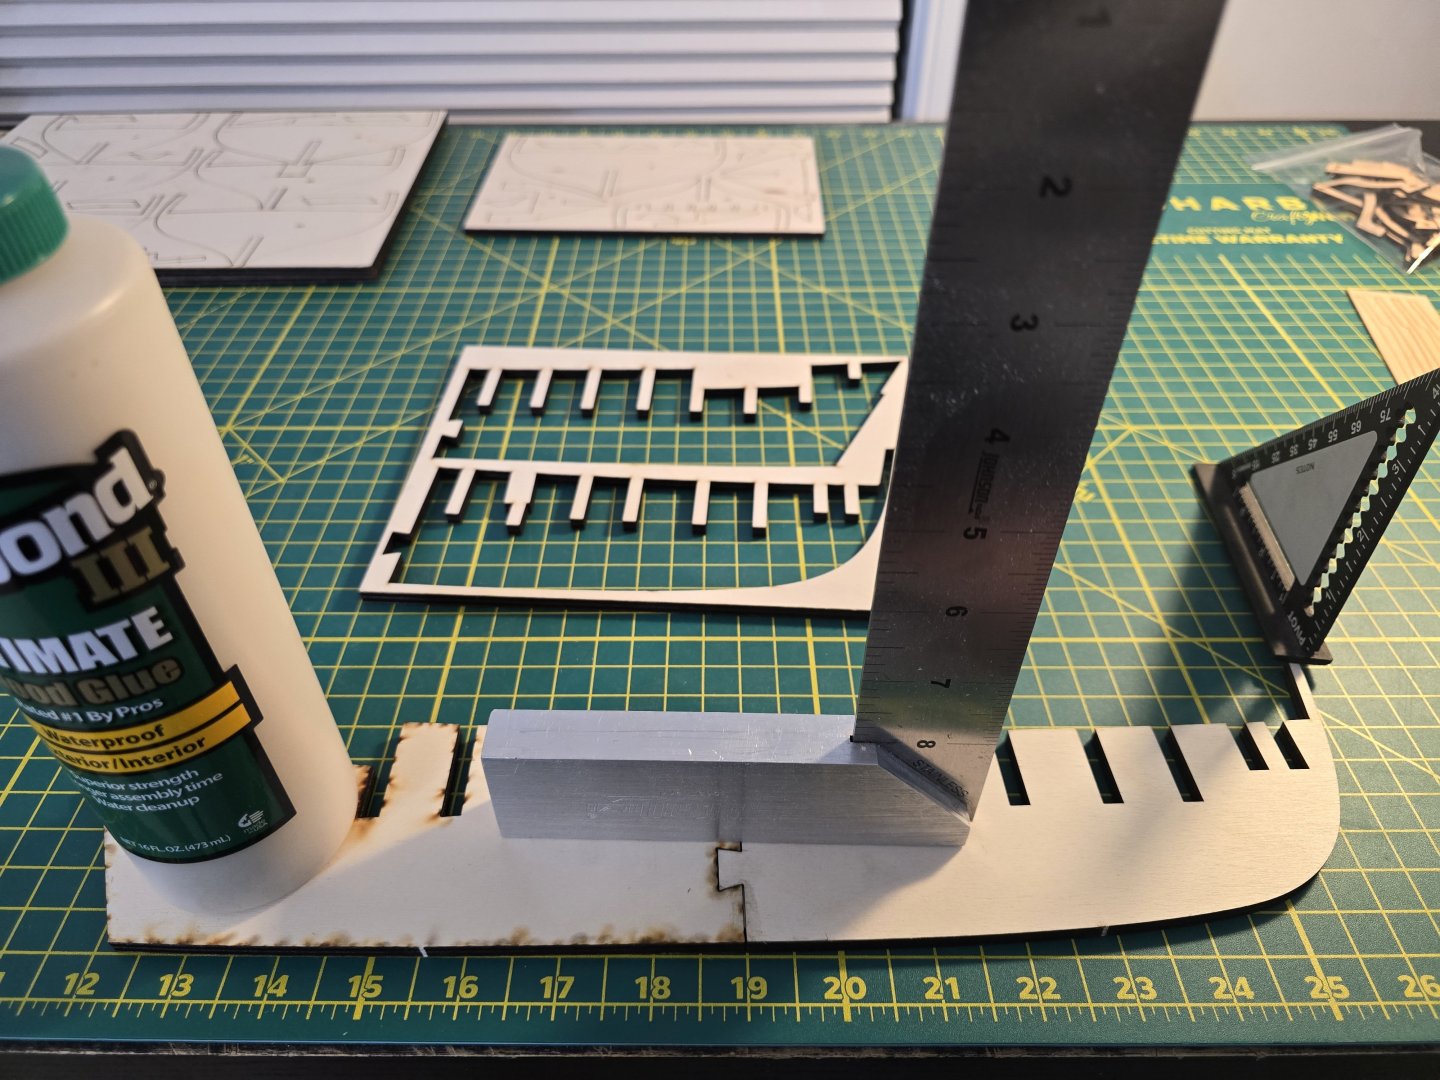
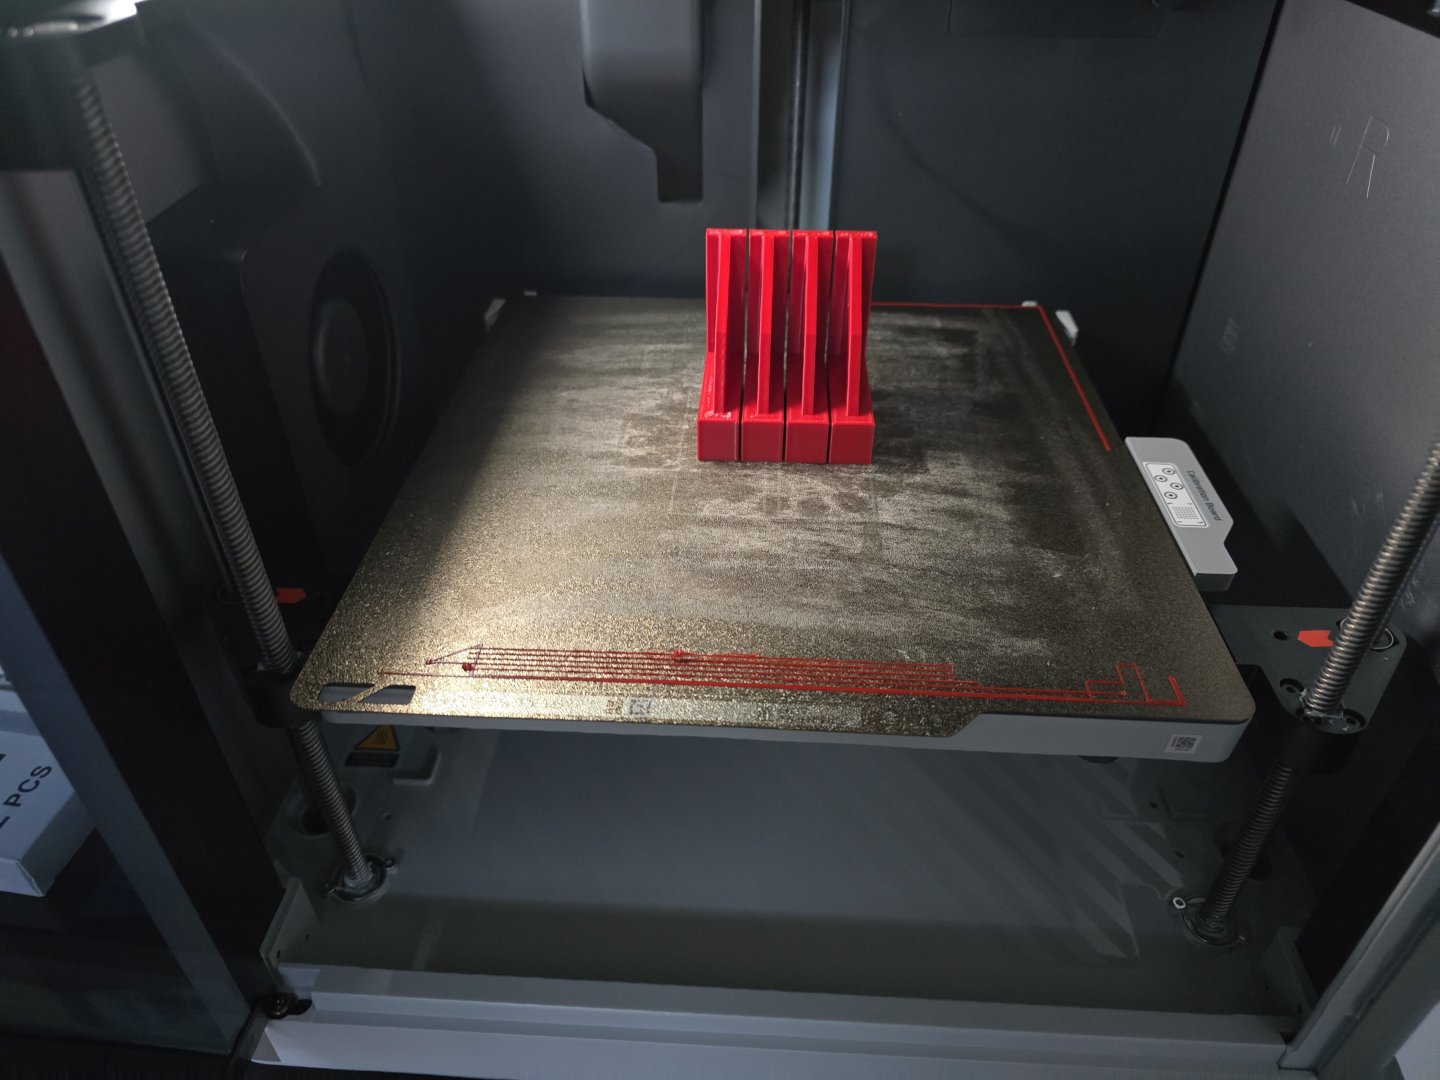
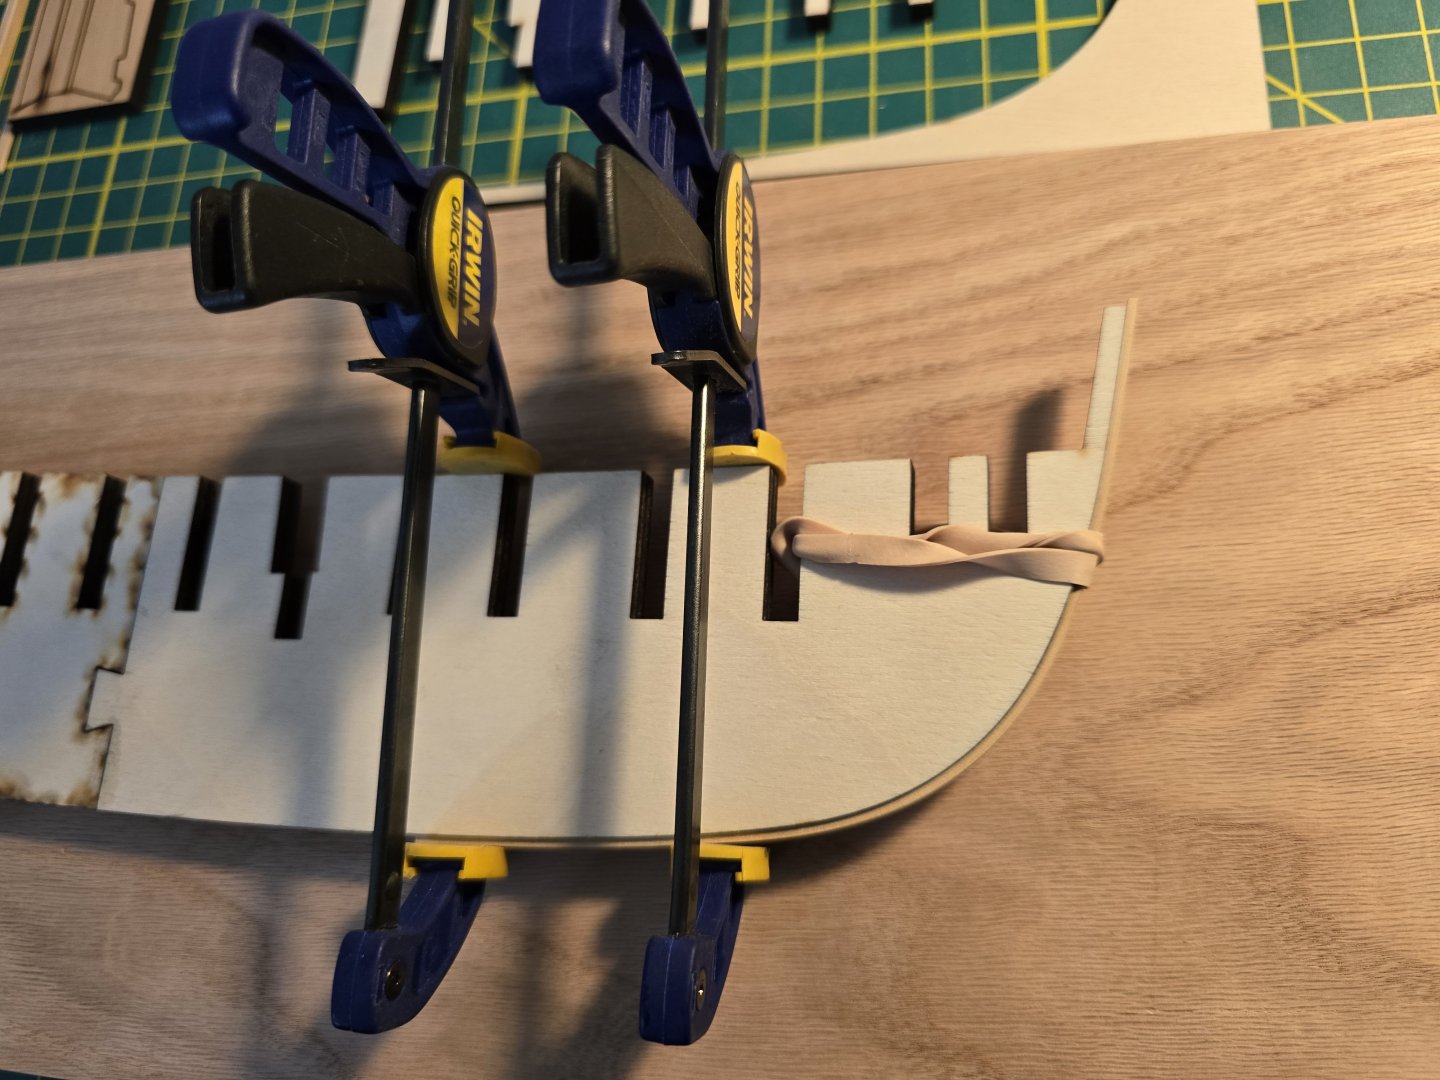
Hello everyone! I was able to complete the fairing today. Here are all the tools (except for the painters tape) I used to fair the hull. Firstly, I need to stress how important it is to protect the stem and keel pieces. I'm glad I put on 2-3 layers of painters tape. It really saved those pieces from all the sanding. This is after I faired the hull. Notice the tape on the stem. Now after removing the tape, the stem looks just fine. Sometimes, I would find bulges like this. It might be hard to see, but that middle bulkhead is bulging out a little bit. The bow was the most time consuming. Using a strake becomes mandatory to make sure you faired enough. It takes more fairing that one would think! Here is what my Cheeful looks like after fairing. As you can see, I also was marking the gun ports. After placing the tape (which is easy to move around) I would place a batten on it to make sure I can match the tape shape with the wooden strip. Next up is putting on the gunports! Lastly, I 3D printed a storage container to hold the milled strips of wood. This was the first time I made something like this, but it really helps to clear off my table! I can add labels to each section so I know what sizes are in which spot. Thanks for reading! Jeff


-
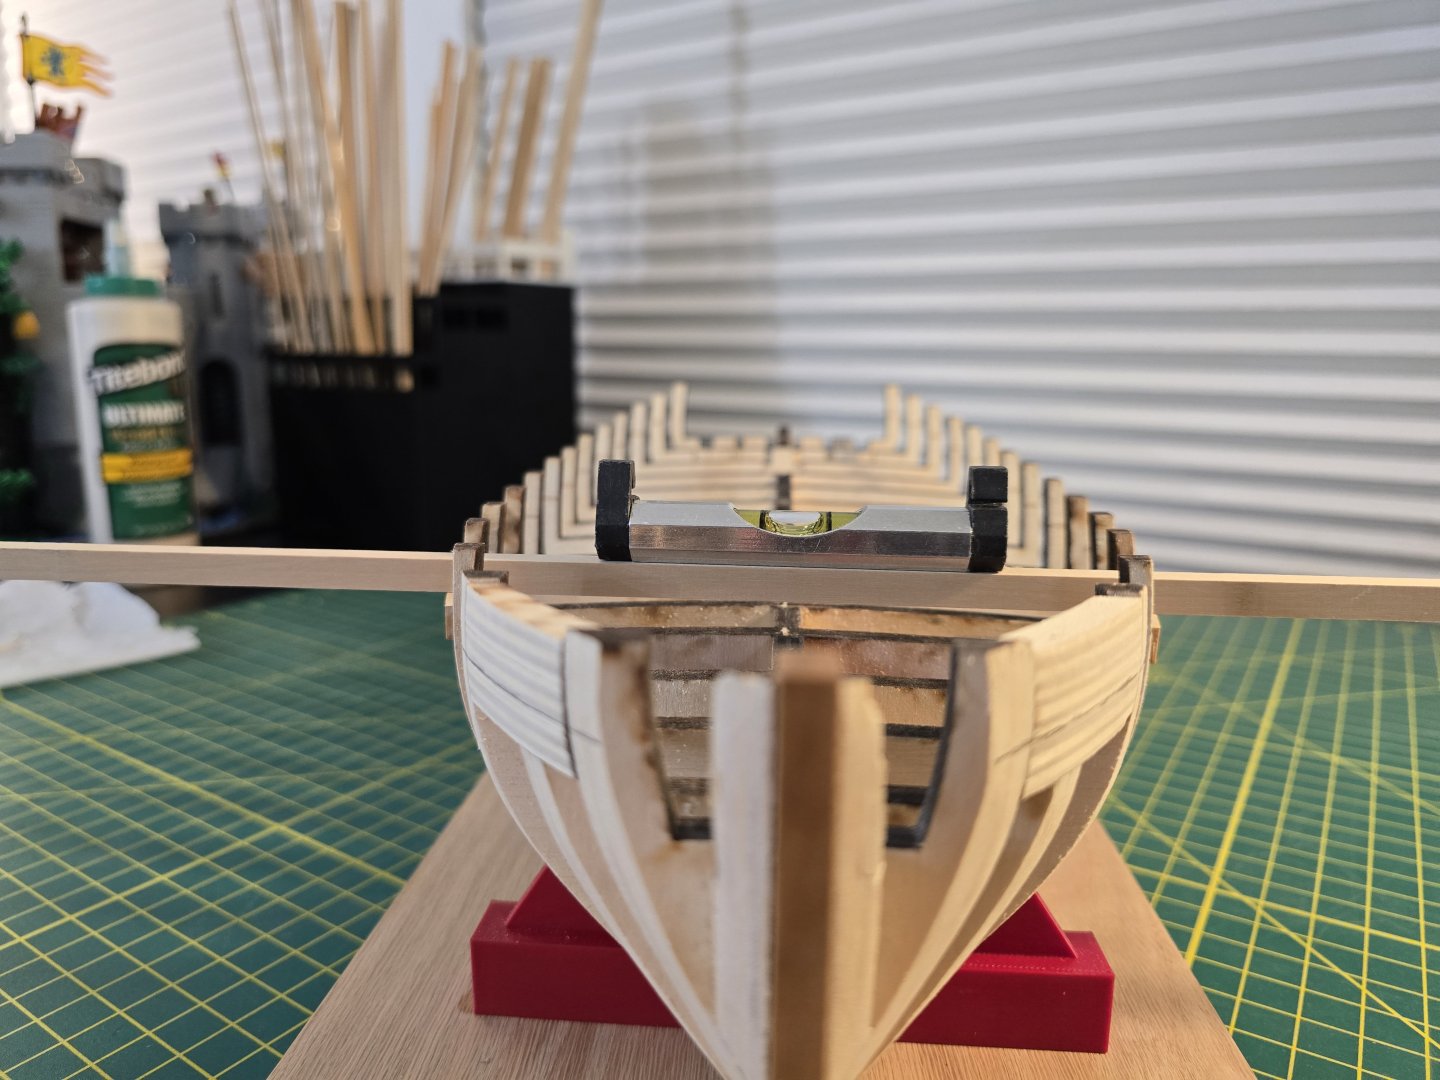
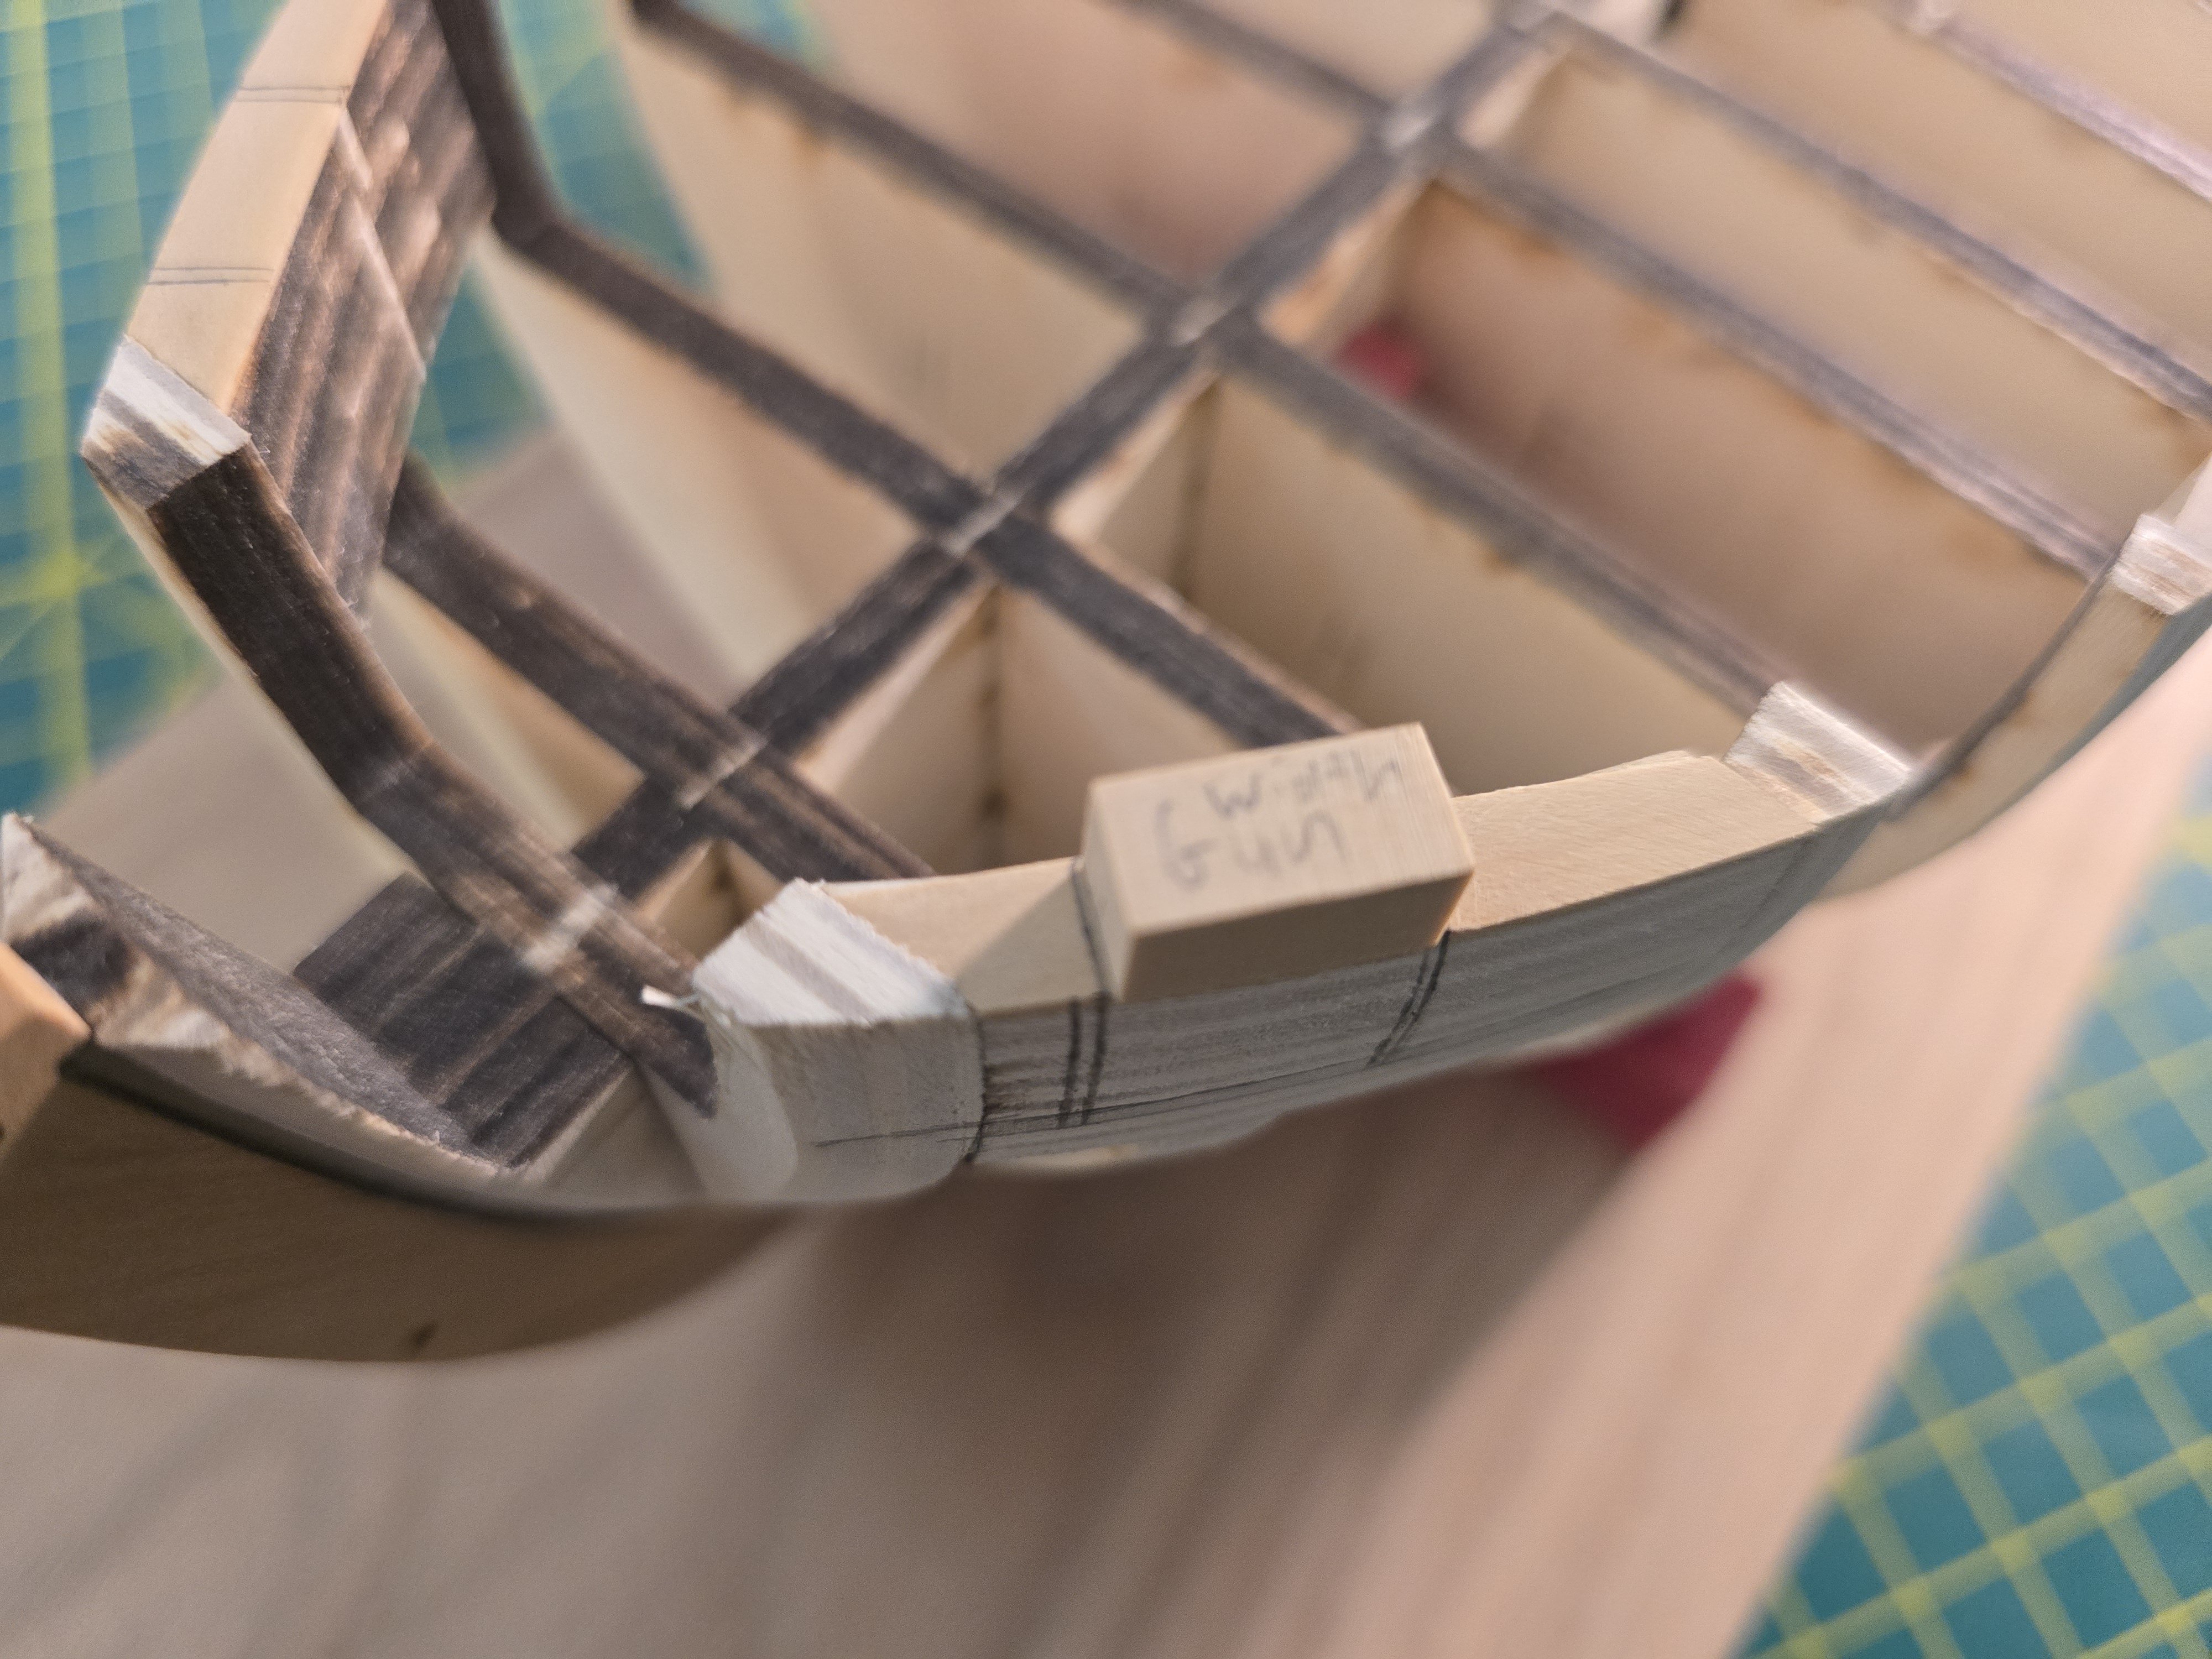
Thank you Glenn for the advice! I'm starting at the stern and moving forward making sure to only take off as much as needed. Like Glenn said, I have a 1/16" x 1/32" strip I'm using to gadge how well the hull is faired. I was home today to help my wife with a Dr's appointment so I had some time to myself after we got back. Before beginning to fair, I placed on painters tape to protect the stem and keel pieces from accidentally being sanded. After the stern fairing today, I was able to get a good run from the strip i was using. I only faired up to bulkhead 2 so I wouldn't feel overwhelmed. I was able to fair both sides of the hull. During my fairing today, I noticed that the bulkhead former joint in the middle of the ship wasn't going to hold. I immediately stopped fairing and made 2 boxwood filler pieces to glue to each side of the bulkhead former joint. I made sure their length would not interfere with fairing the hull near the keel. I then glued them on while my model was on the building board to help keep it's shape as wood glue tends to "pull" wood. I placed a clamp on it while it's drying. Once it's fully dried, I will continue to fair the hull. Thanks all! Jeff


.thumb.jpg.20d6623344db4f40e9a828618aab353a.jpg)

-
Thank you everyone for the comments! I do really appreciate all your feedback! The next step is to fair the hull. This is one of the most important parts of the build as it defines the shape of the hull. I want to give it the time it deserves so I am waiting until I have more time. I will have some free time tomorrow and this weekend so I hope to have it faired by the end of Sunday. The reason I'm waiting is so I can fair the hull outside of the house while there is a lot of sunlight. I don't have much time during the week, so most of the fairing will be this weekend. I'll make sure to post once the hull is faired. Thanks all! Jeff
-
Thanks all for the kind words and likes! I do appreciate them! Continueing with the first step of the planking which includes the 2 first rows ( the top of the wales and black strake), I was able to finish both those rows of planks. How I plank each row was to only glue the strake to up to 4 bulkheads at a time. For me, 4 is about the limit I can comfortably hold correctly as the glue dries. I use super glue as that's what Chuck usually uses for hull planking. It sure saves me a lot of time! I do NOT use much glue per bulkhead. These basswood strips take to the glue very easily and so not much is needed. Also putting less glue on the strip helps me personally not get the glue on the outboard side. Like what Chuck says, even if you sand off the glue, it does change how porous the wood is and can lead to blotches if staining and varnishing. Thanks for the tip Chuck! After gluing the strip to say the first 4 bulkheads, I checked the curve of the strip compared to the lines I marked like so. This is very important for the first strake as it really defines the shape of the hull planking. The hardest part for me was to keep the correct curve from the first strip to the second on the same row. If that makes any sense. I had to take off the aft strip on one side and re position it after the glue had dried because the curve from the first strip to the next didn't flow correctly. Most of this though, just applies to the first strip on each side of the ship. I had other challenges on the second strip which I will get to. Here is the bow with both first strakes on the ship. I think that looks pretty even. On the second strip, i had to be careful at the bow near the stem. This is because it's very easy to have that big bend at the bow either over bent, or under bent compared to the first strake. For the bow, I really glued the strake to the stem and the first bulkhead first so I could try and match the curve between the strakes. I then glued the strake to the next 2 bulkheads. After that, it was more about making sure the top strake was beveled properly to fit ontop of the first planks to make sure the seams looked alright. Here are some pics of the completed 2 rows of planking. I think it turned out pretty well! Next up are the 5, 1/8" rows of planking. I have put some strakes into my strake jig and I'll start planking tomorrow since they will be dry. Thanks all! Jeff


-
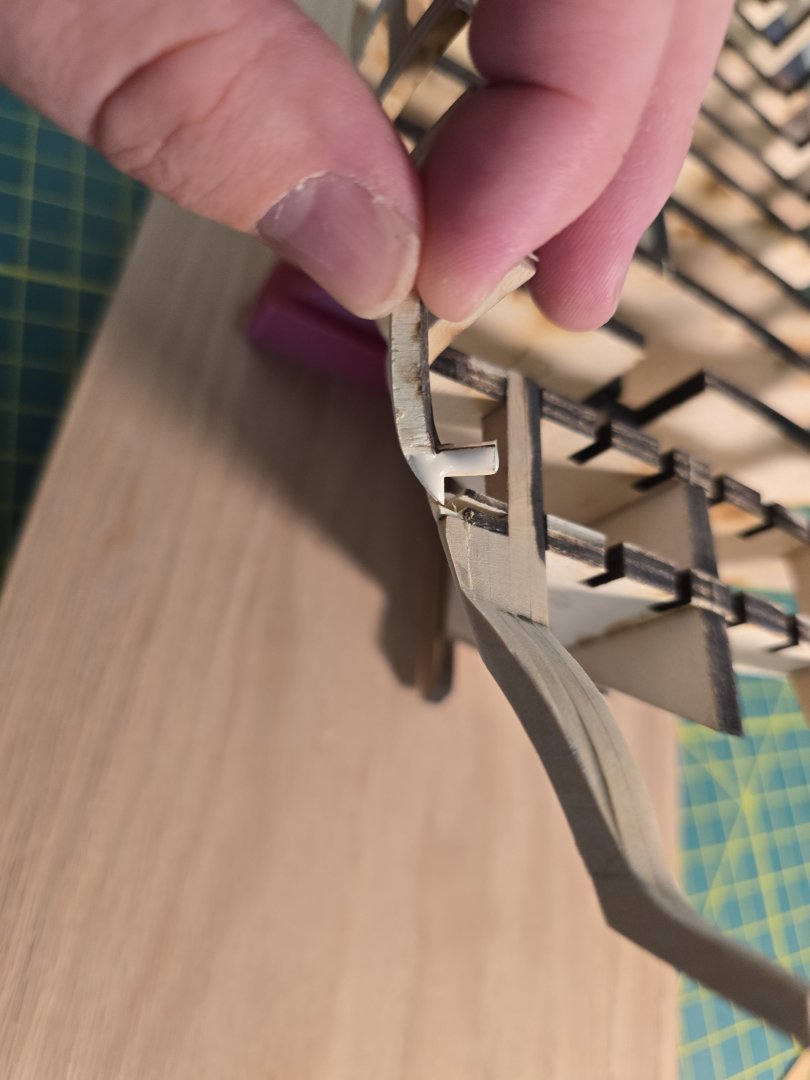
Thank you everyone for the likes and positive responses! They inspire me to do my best and help to push me to be a better Modeler! The first thing i did before starting to plank the top wale strip, was to build a jig to help bend the planks. The instructions showed an example of one, which was very helpful. I first copied the curve of the bow onto a piece of paper from the plans and cut it out. I then 3D printed 8, 1" tall cylinders to help with the curvature of the planks. I then glued the top of the curve first. Then I took a strip and positioned the others below them and glued them into position using the width of a strip as a guide. Once it all dried, I placed 6 strips into water for 5 minutes and carefully bent them one at a time into the jig. I then waited until I was sure they were completely dried before moving onto actually planking. I have to say; it worked! I removed the top strip from the jig, and had very little spring back. It then took me 30 minutes to try and make sure it was in the correct position. Once I was satisfied, I added the simulates caulking and cut the piece shorter since this strake will have a second layer (The wales). Once satisfied, I glued it onto the model I then test fitted the next strake and realized there was a dip in one of the bulkheads that I missed earlier. Notice the gap between the strip and the bulkhead. It looked really bad so I had to fix it! To fix this, I marked the start and end of where the gap was. I then cut and formed a strip of basswood that was the same width of the bulkhead and glued it onto the bulkhead. I then sanded it down to match the curvature of the hull. It looked a lot better after adding this small piece. I then continued with planking the first strip. It took me a while with the second piece as I was trying to make it curve correctly. Please let me know if it looks good and in the right place hah! That took a while for me so I'll start the other side tomorrow. Thanks everyone for the likes and responses! Jeff


-
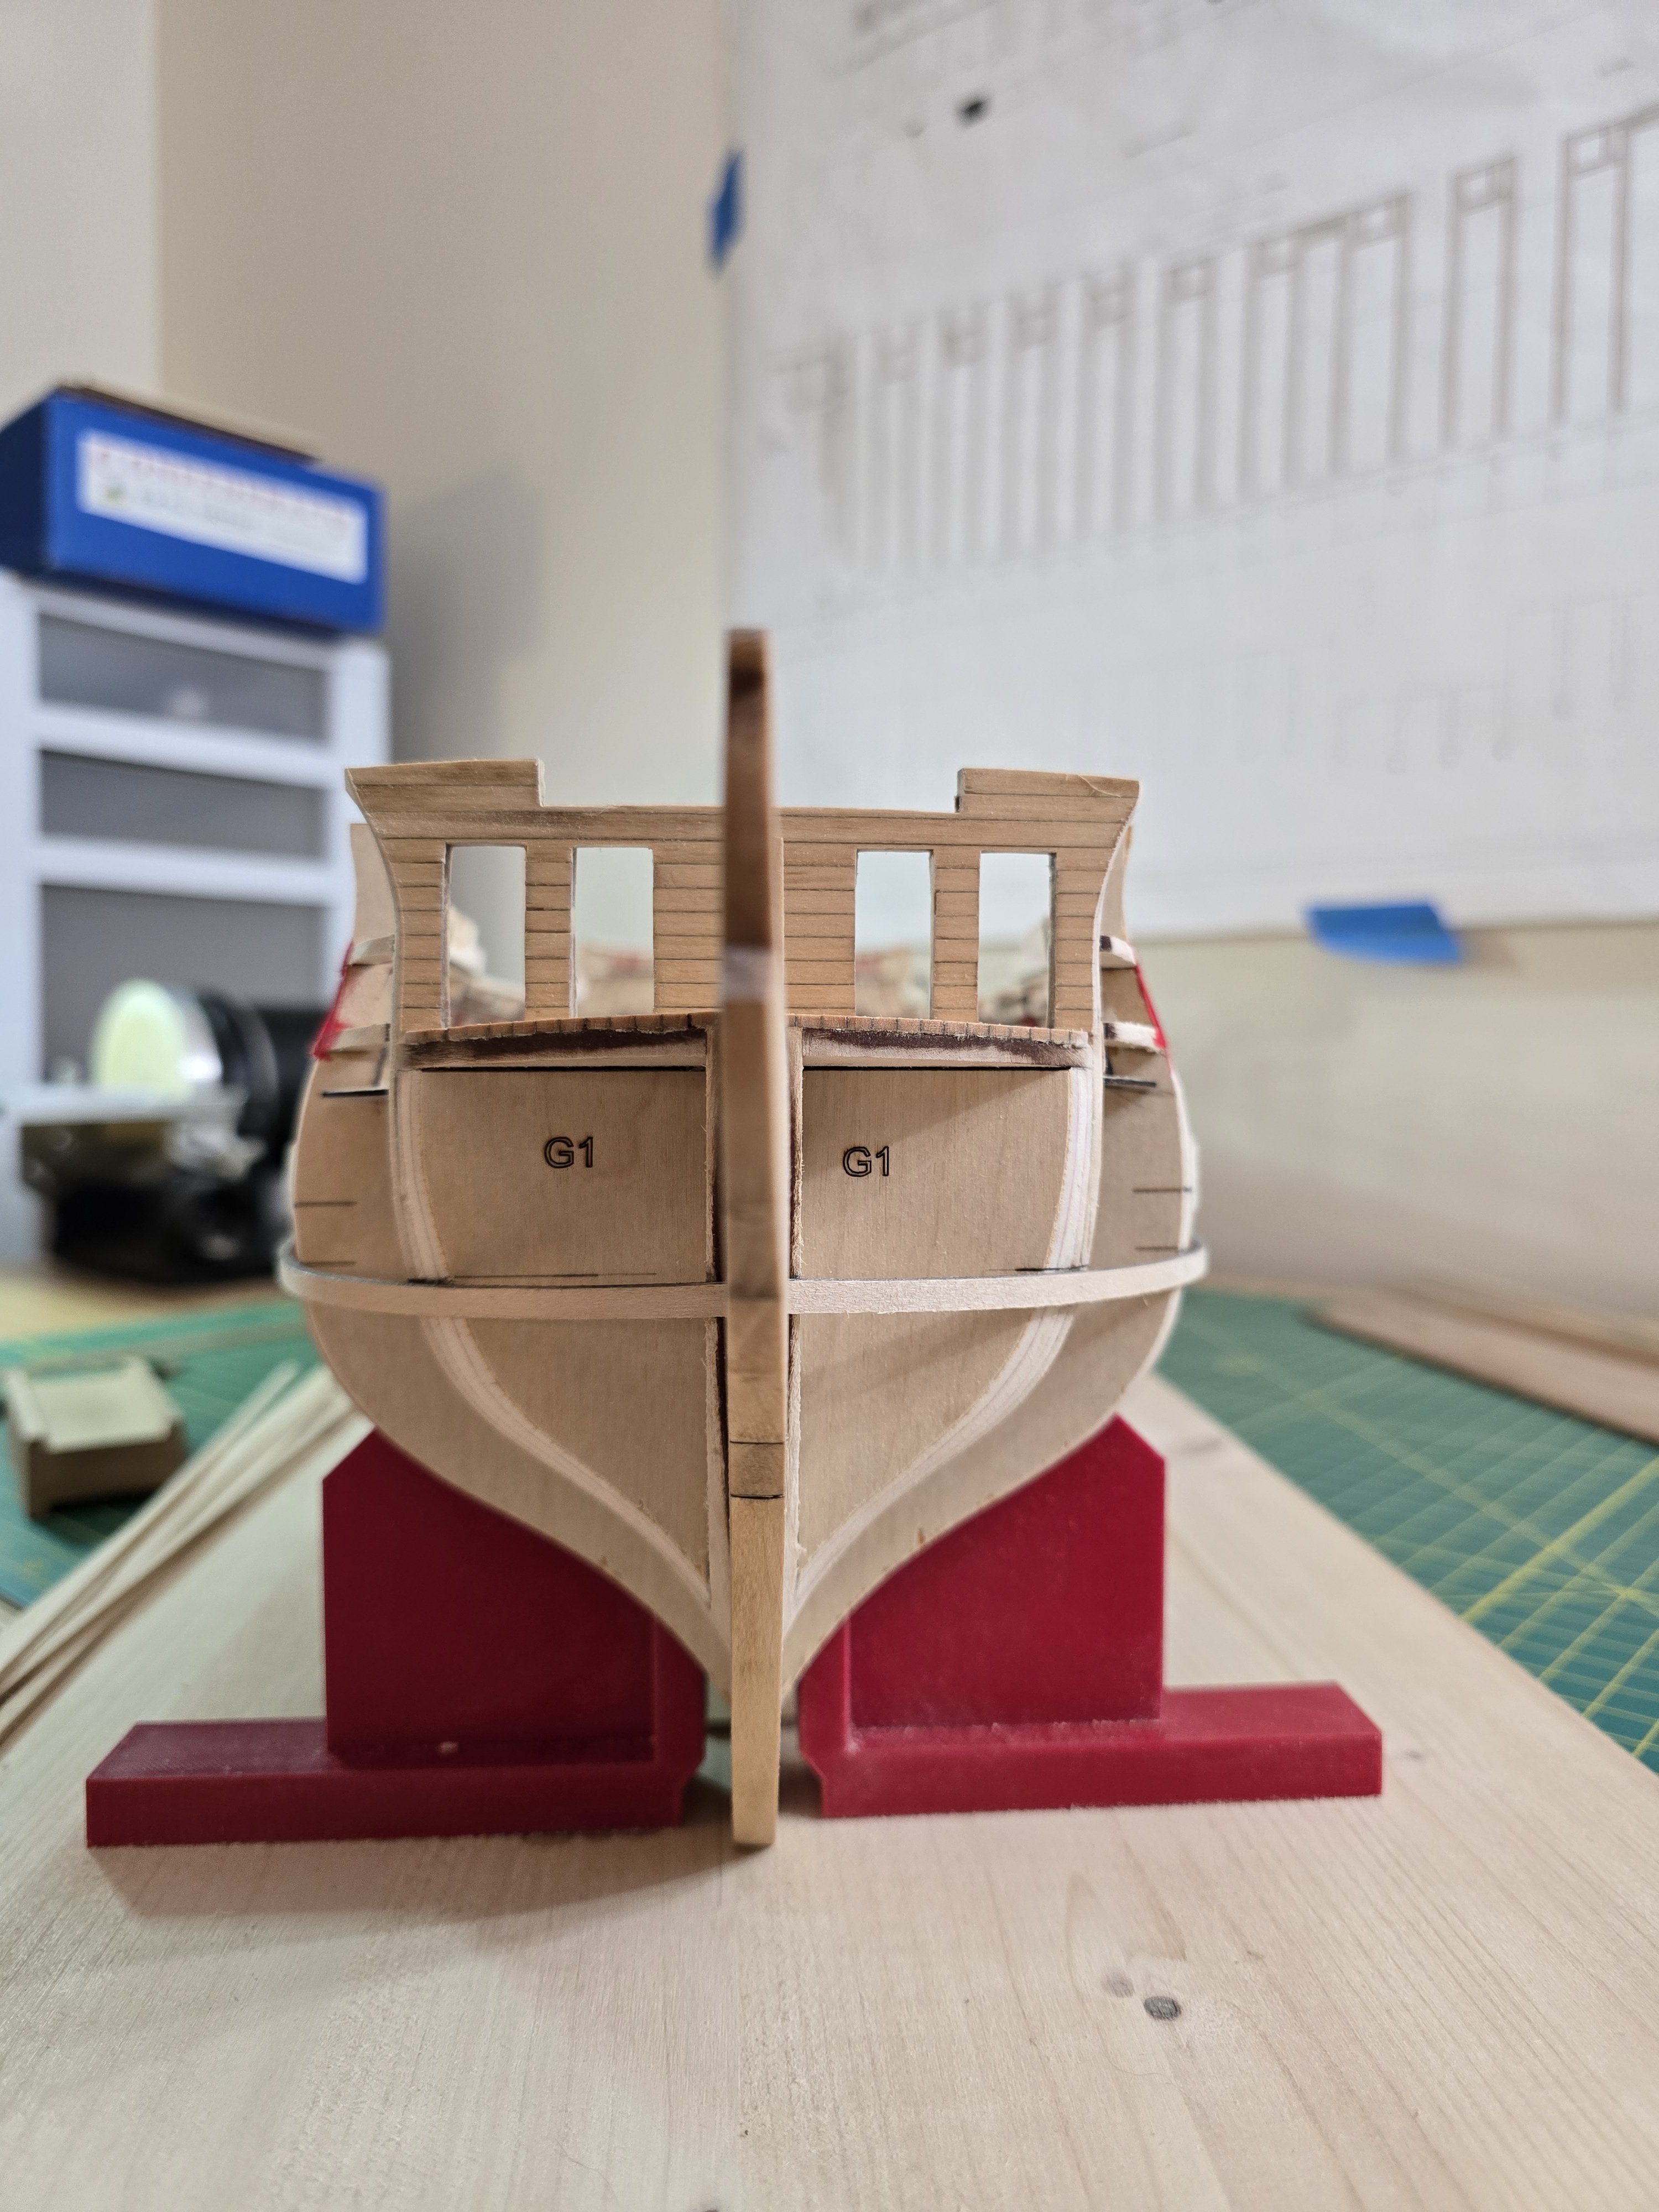
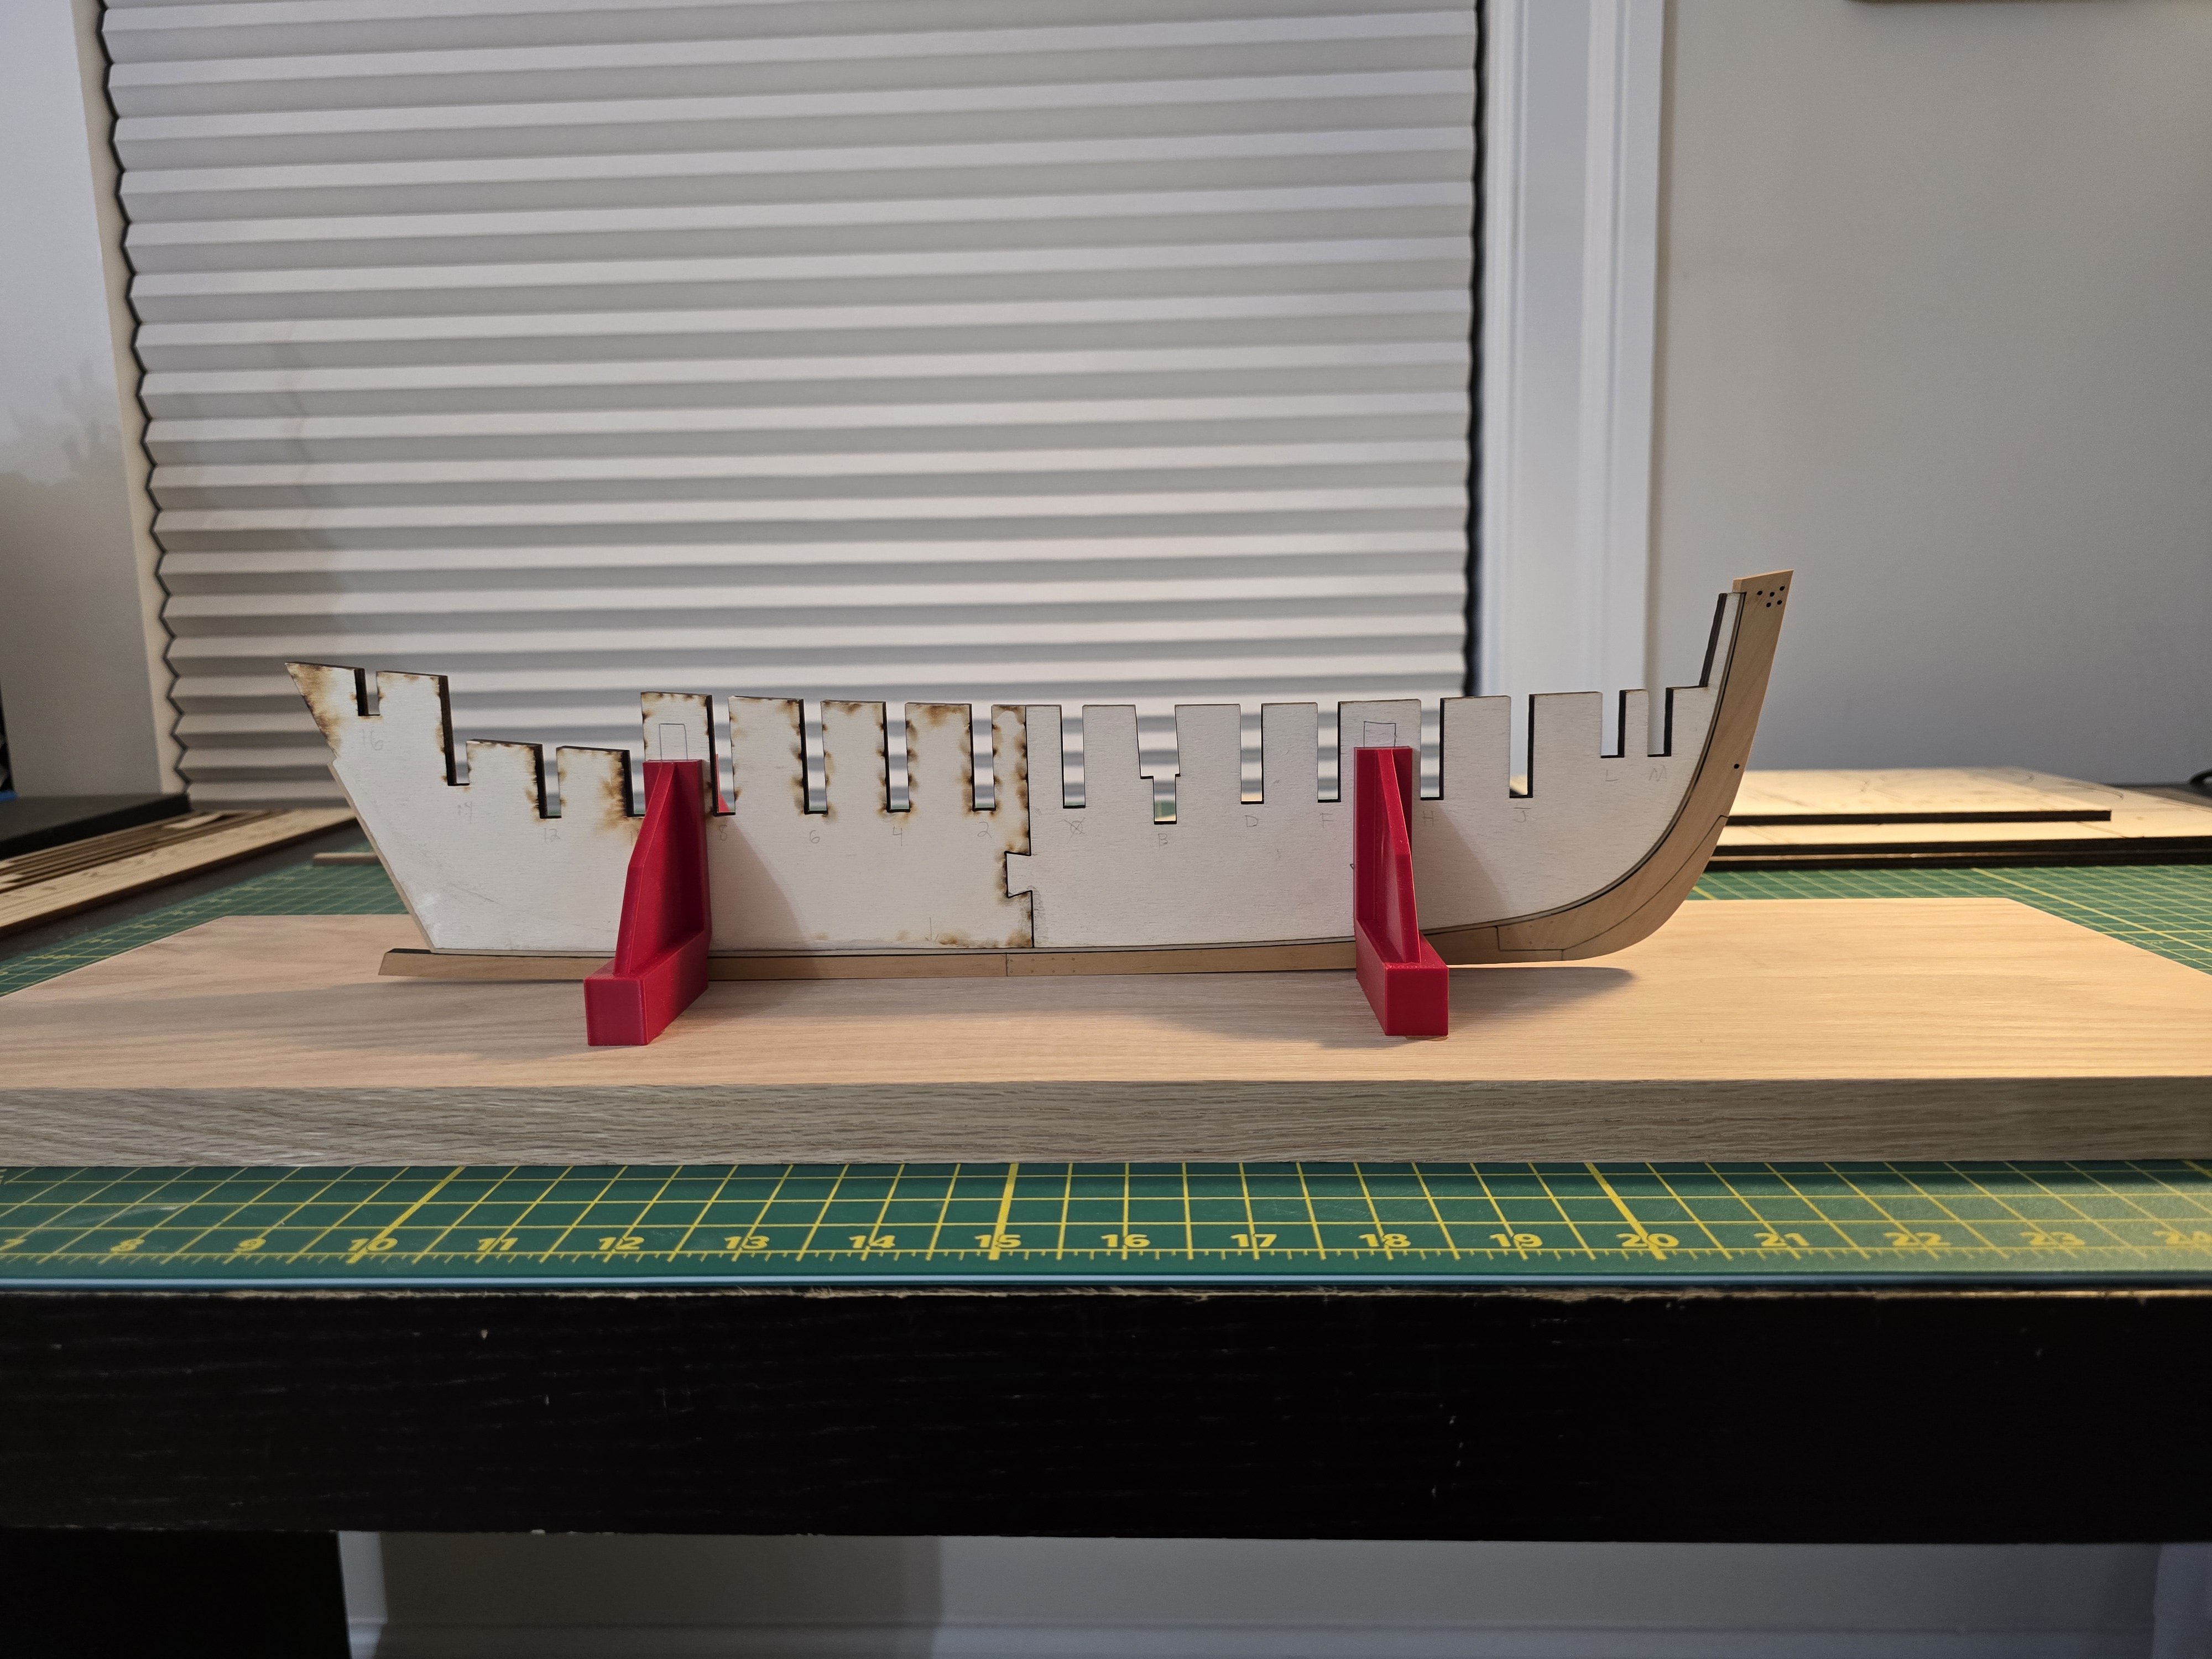
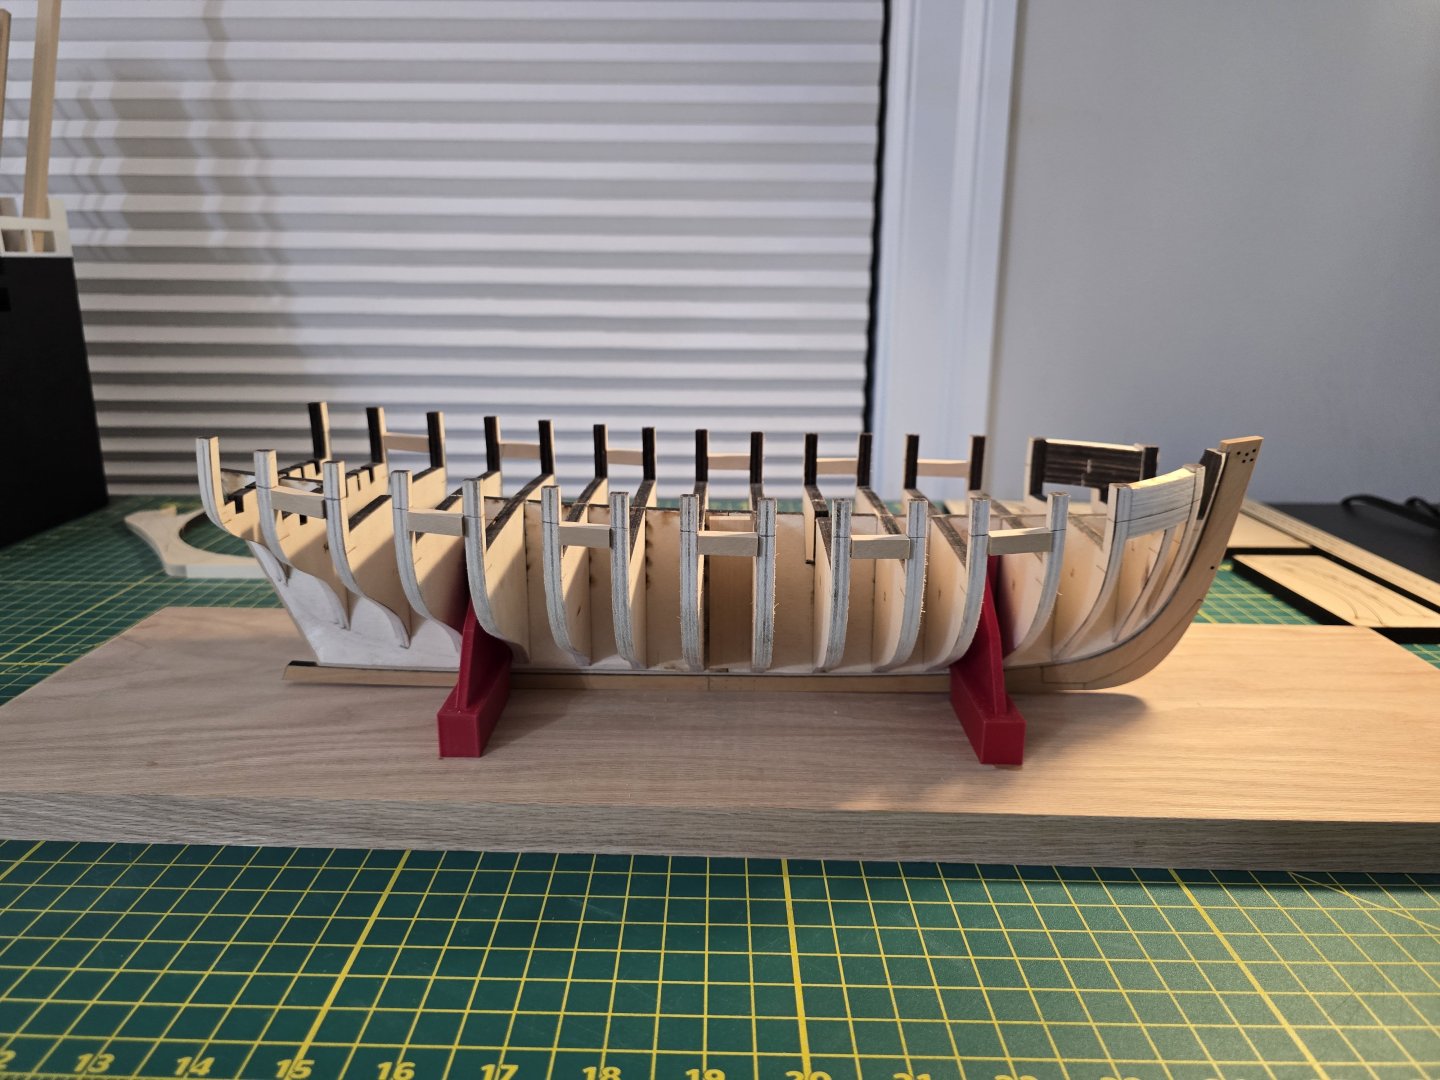
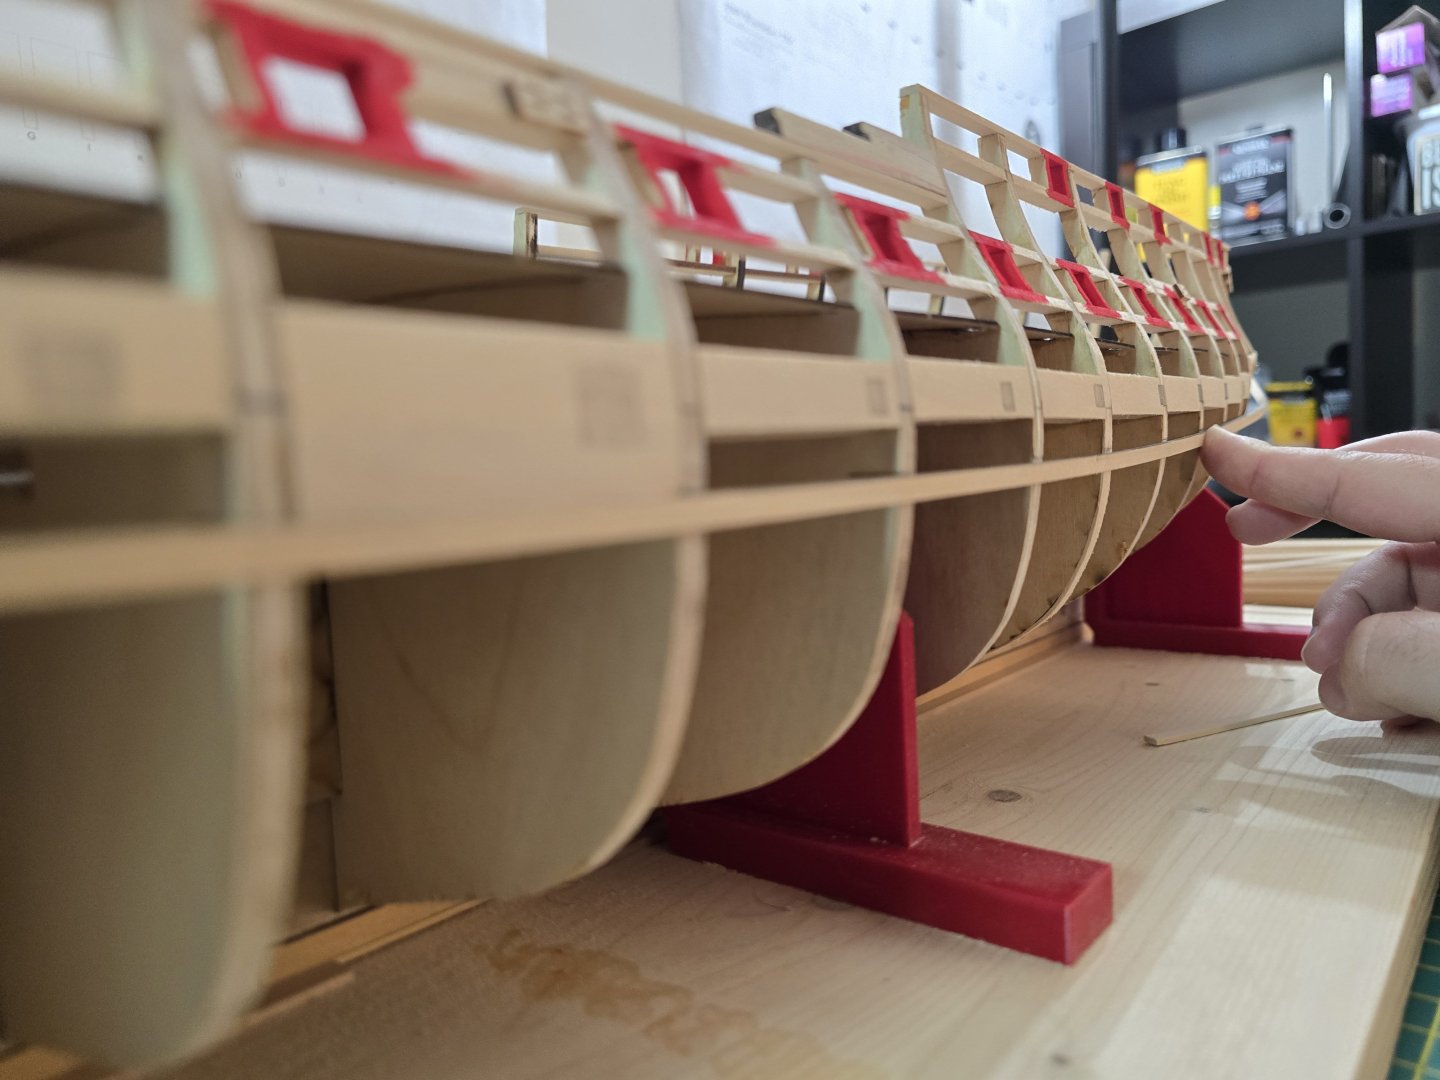
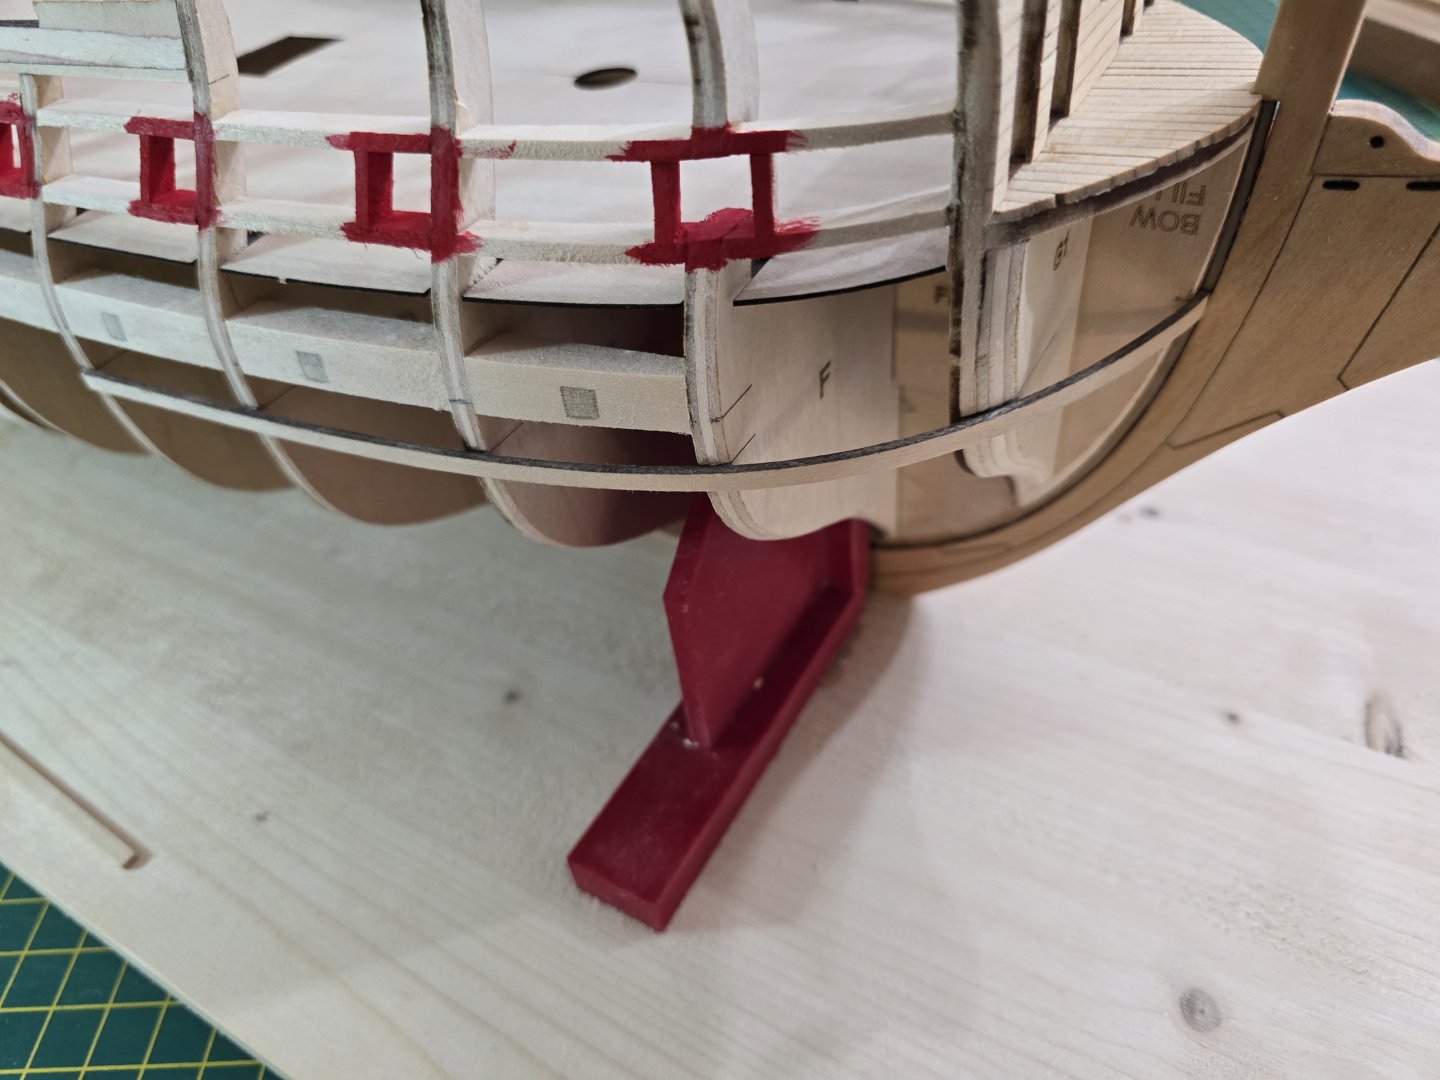
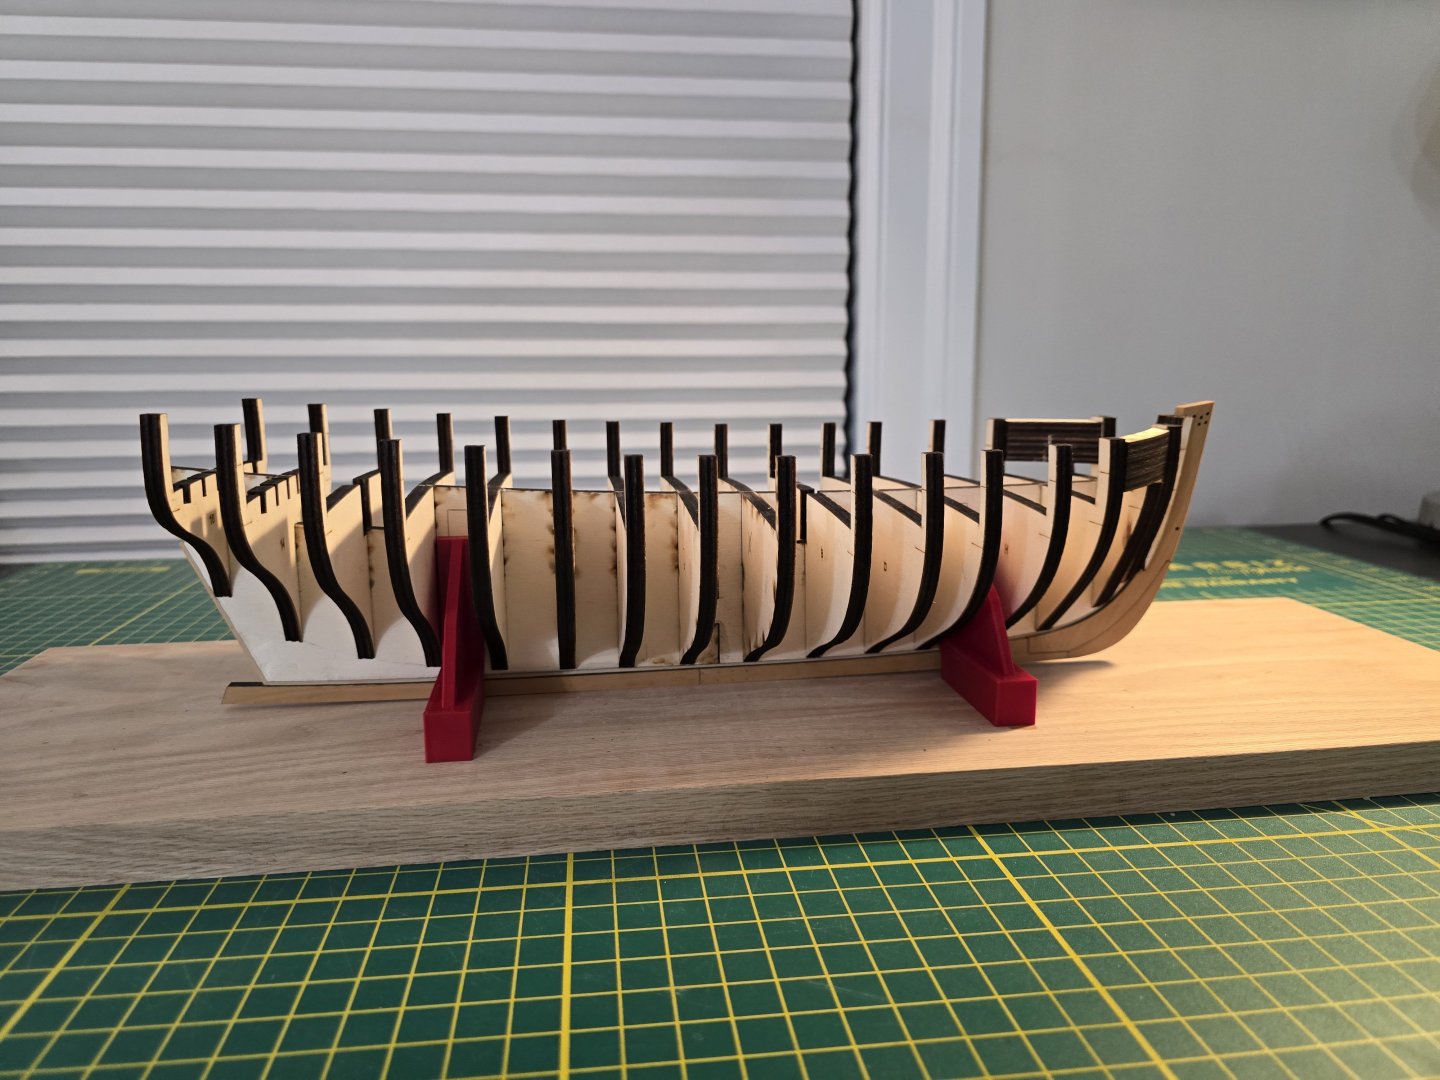
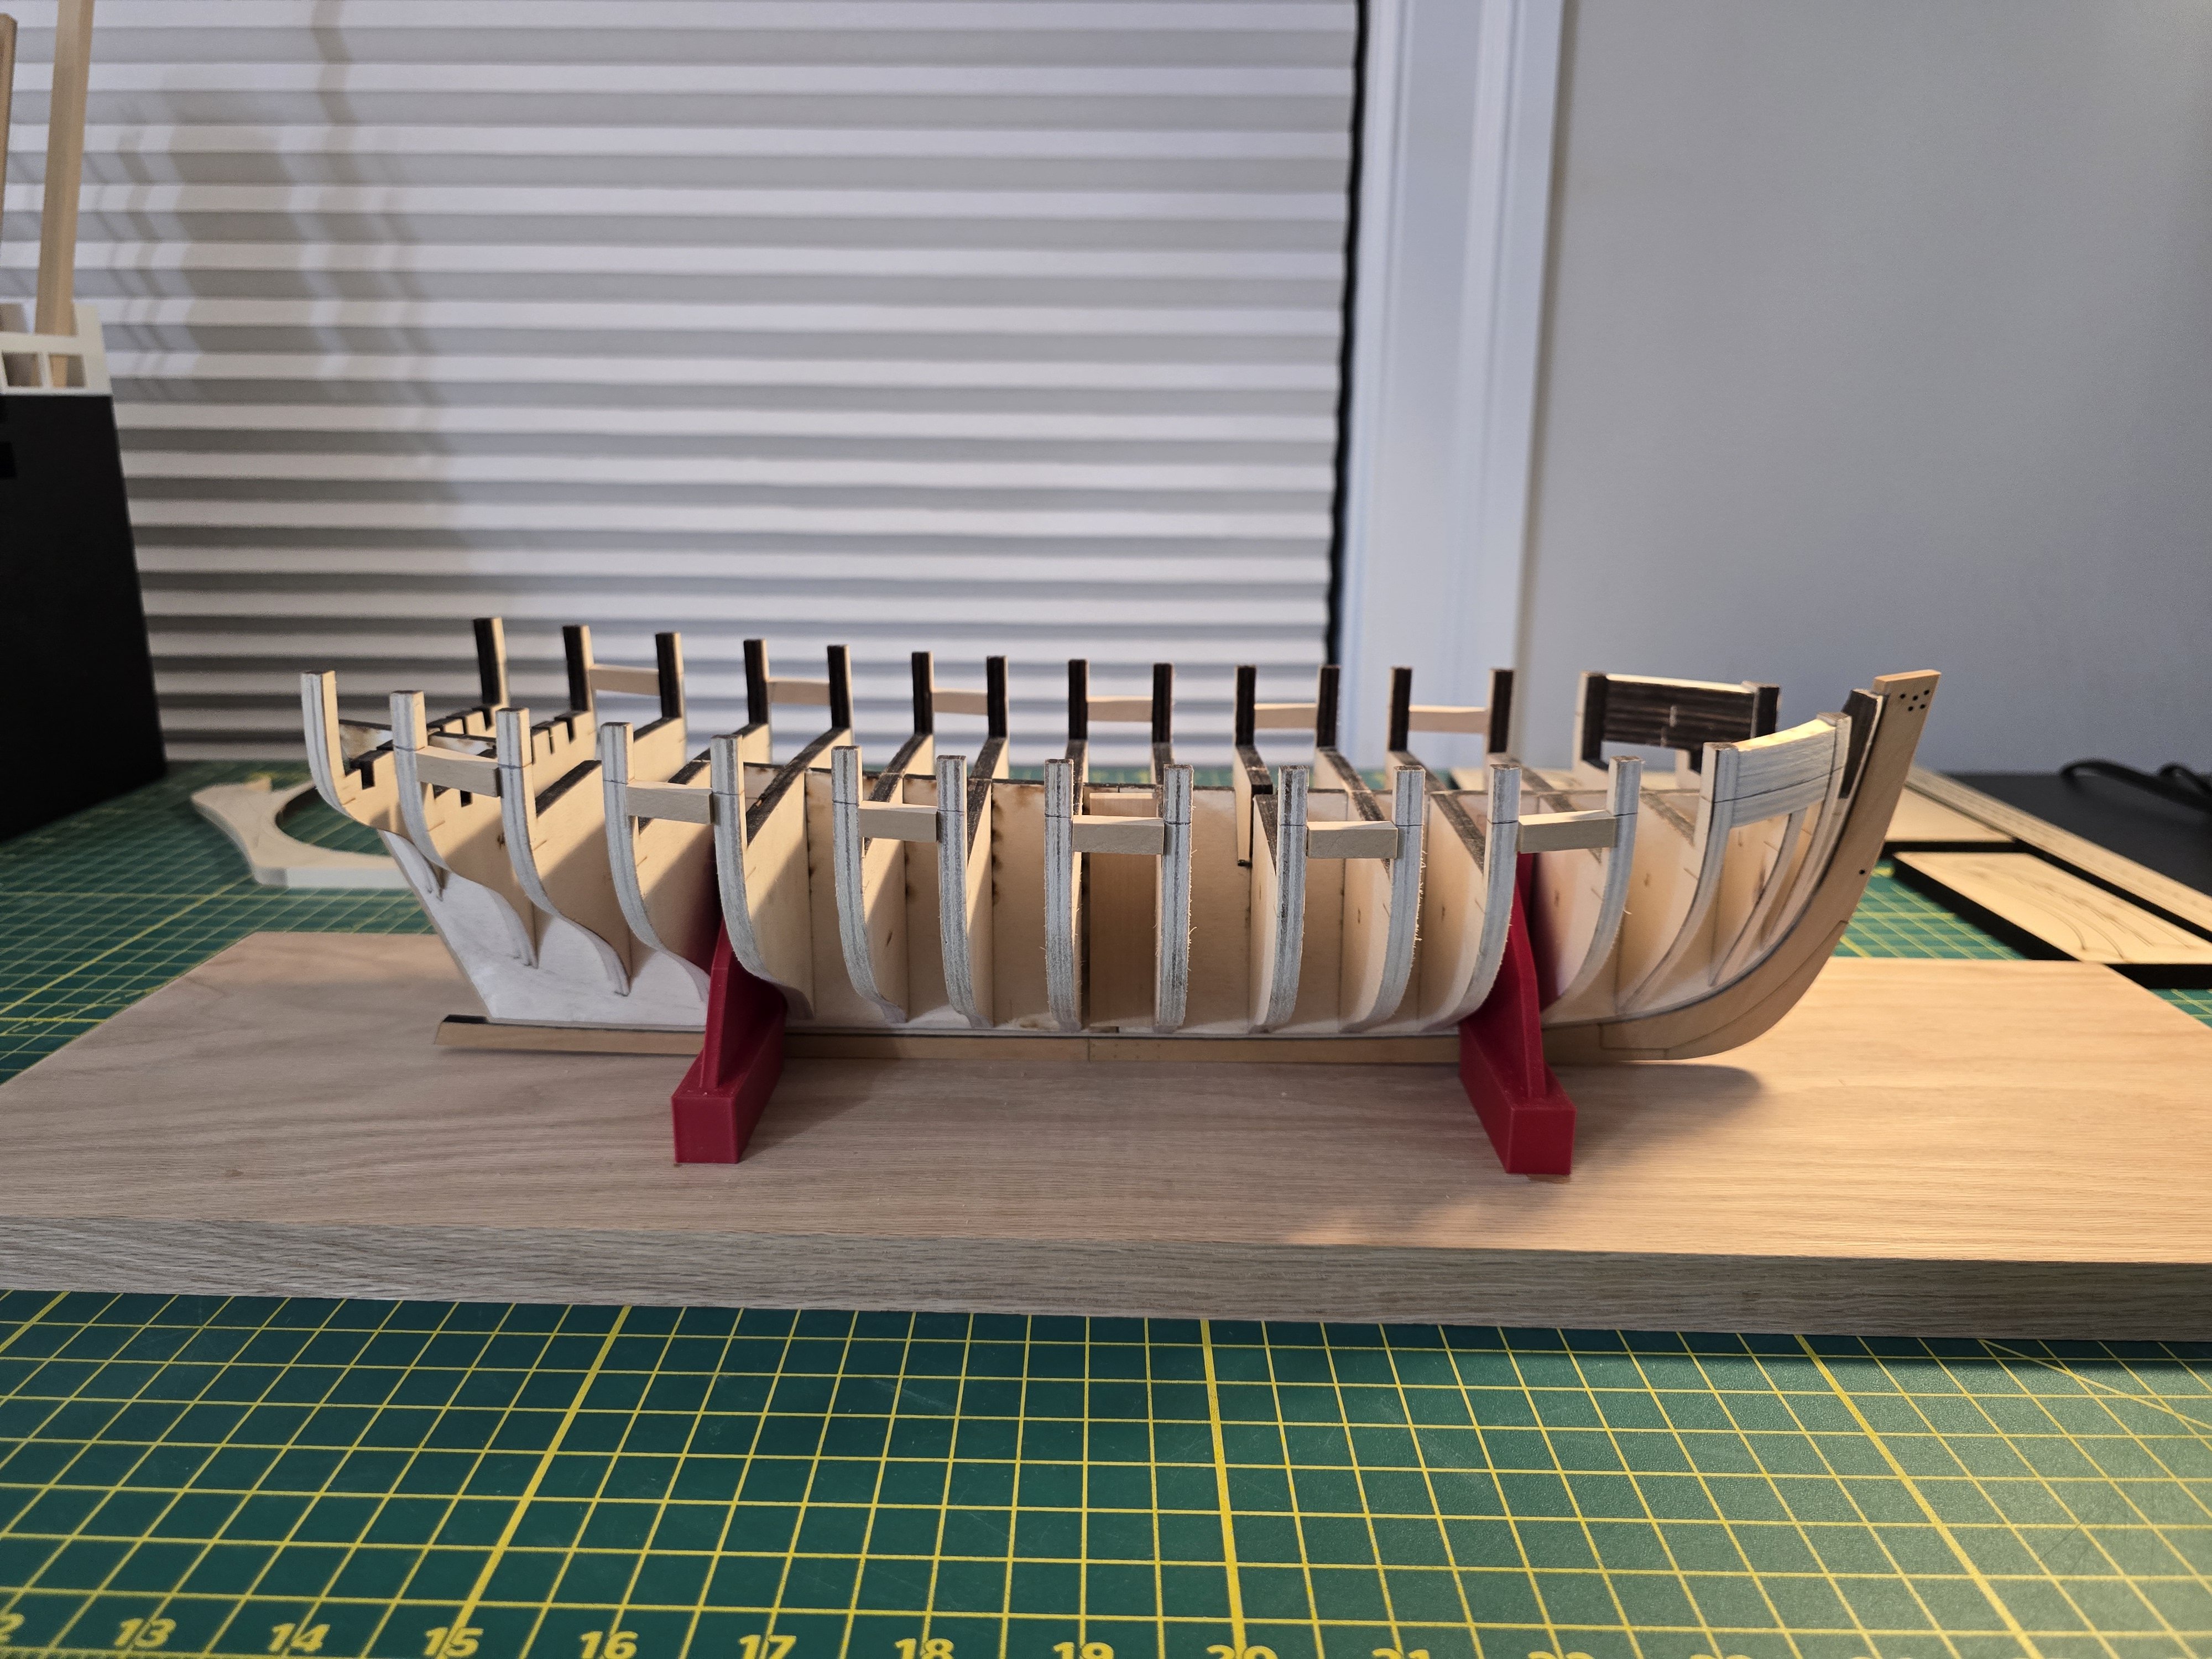
Hi all! I built my building board by getting a 2 foot long red oak board from the hardware store. I tried to get the straightest board I could both length and width wise. They had lots of 2 foot long boards, but most of the ceder and plywood boards were not straight at all. That's why I got the red oak board. It was super straight, but a little more expensive. I then sanded down the top and sides of the the board with 220 grit sandpaper to make it smoother and to remove any sharp edges that could cause splinters. I then used my 3D printer to print out 4 bracers that I designed in Blender and secured them to the board using the model as a guide. I tried my best to make sure the ship wouldn't wobble. The next picture shows how straight the bulkhead formers were from the kit. Wow! I was very impressed by how straight they were! I then slowly added the bulkheads to the model. I used some squares to make sure they were straight. The laser cut bulkheads and bulkhead formers were such a great fit, I honestly didn't need to modify anything during the dry fitting. I used wood glue to secure each bulkhead. I then waited about 30 minutes to an hour before adding the next one. This was to allow the glue to set and not move the bulkhead while I am trying to fit the next one. This makes placing them on take a lot longer, but well worth it as it makes sure none of the bulkheads move. I noticed that the first 3 bulkheads overlapped the stem piece. Because of this, I marked where the rabbet was and carefully shaped the bottom edge of those bulkheads such that they mirrored the shape, and exposed the entire rabbet strip. I did this to help make shaping the hull a little easier and will help me not accidently sand the stem during that process. The picture below shows the first few bulkheads slightly shaped at the bottom to match the rabbet strip curve. It also shows the addition of the bow filler. I then added the first filler pieces. I started by test fitting quite a few of them as the first piece for each side. Once I found 2 I liked the best, I glued those onto the model. I waited about an hour before adding the next piece on top to allow the glue to set. I then continued and added the next filler piece. Then waited another 30 minutes before adding the top piece. After the glue dried, I noticed that the tops of the filler pieces do not match up with the tops of the bulkheads. I will fix this in my next post. Lastly, I checked how straight the model was, and was happy with the results. And here is what Cheerful currently looks like. Thank you everyone for the likes and reading my log! Thanks! Jeff


-
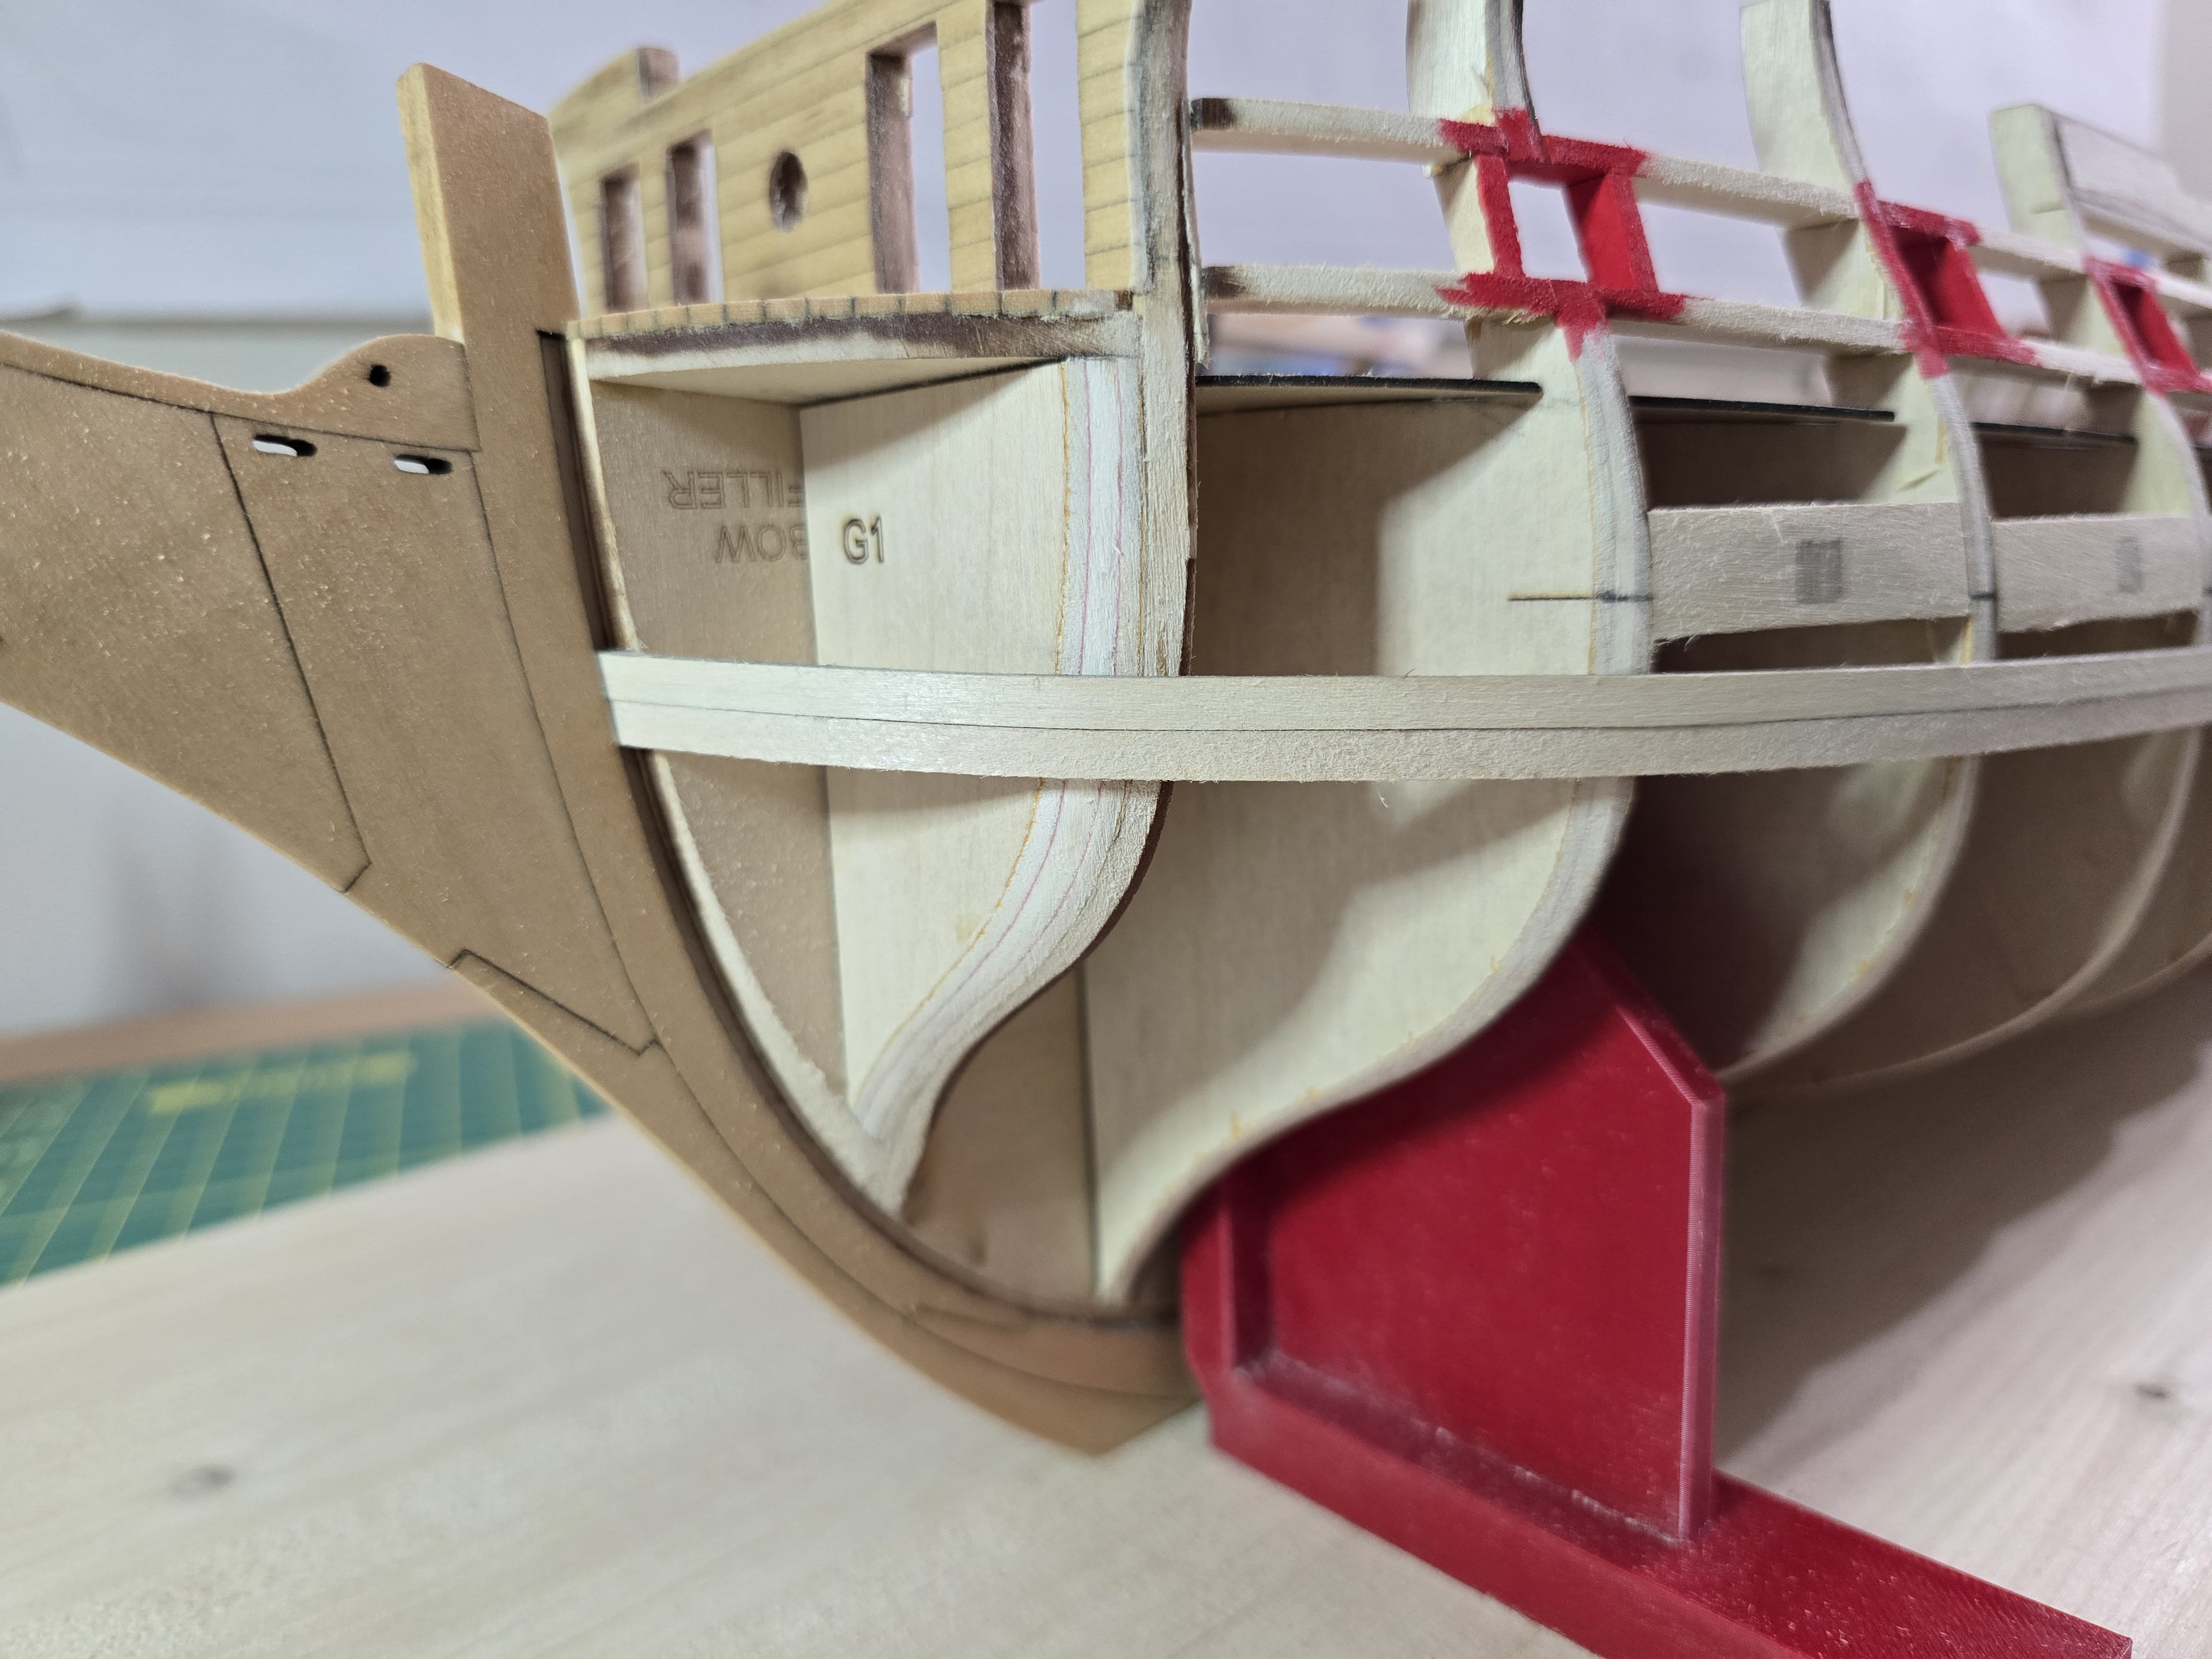
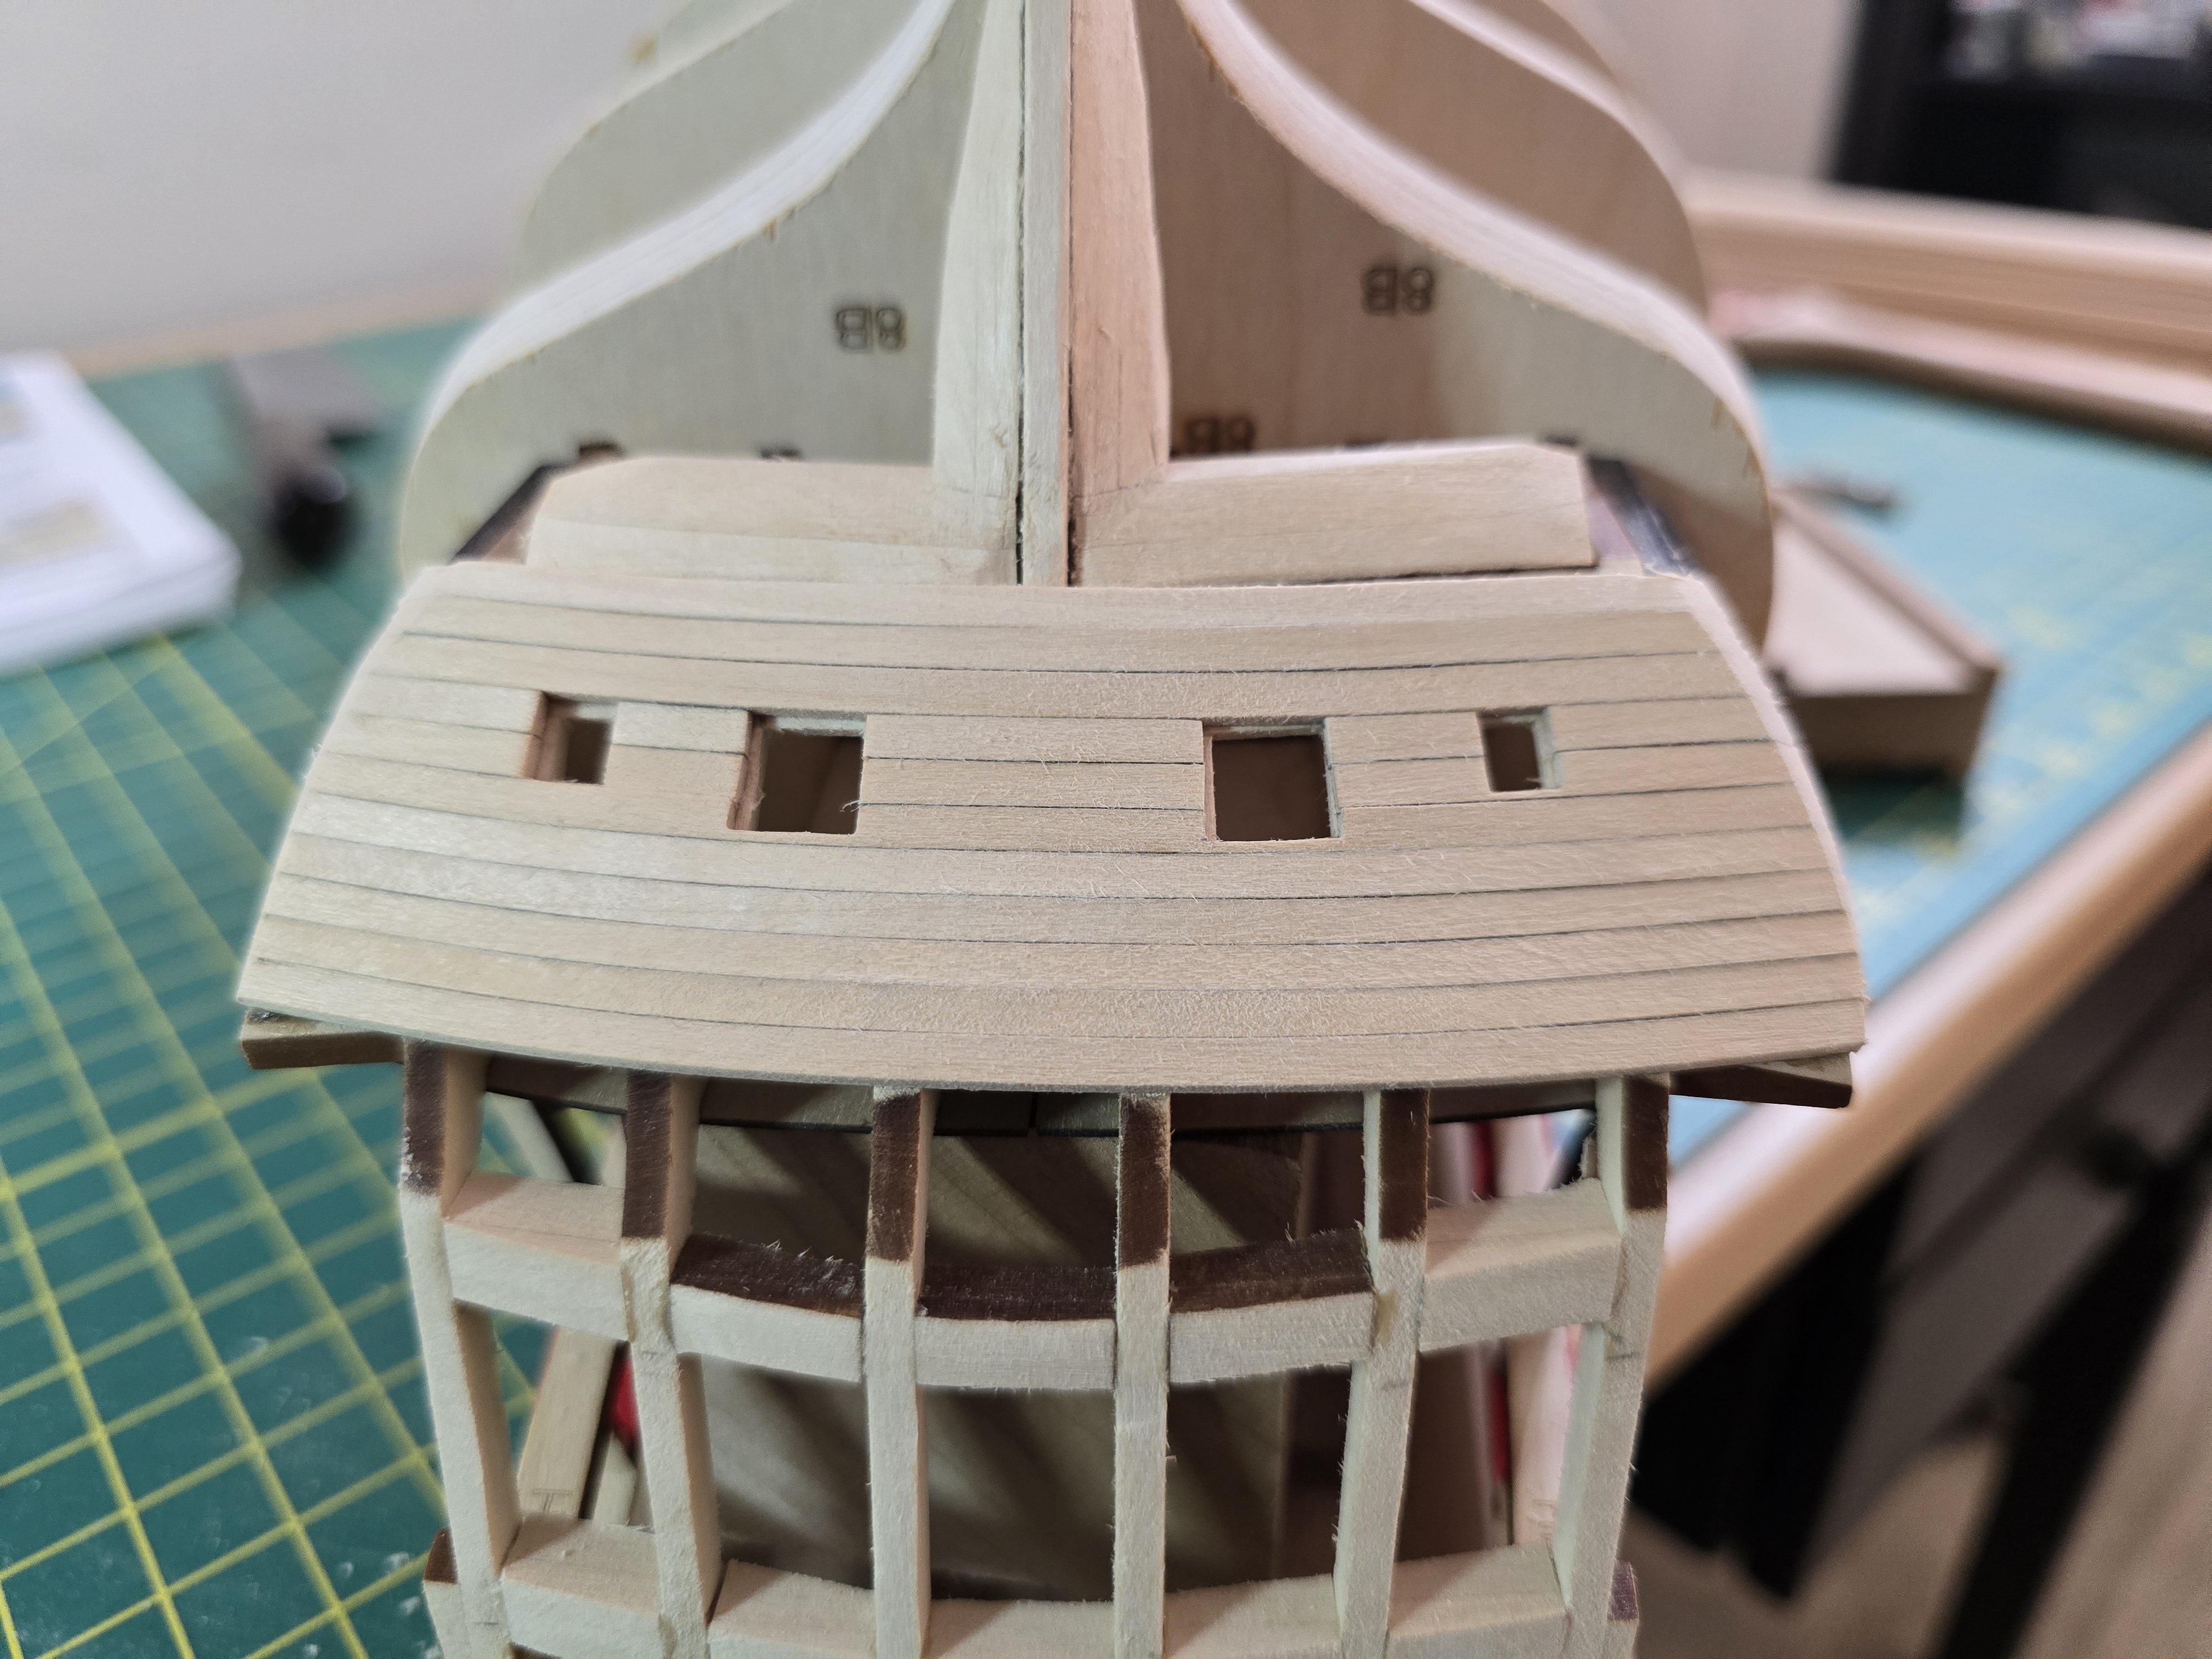
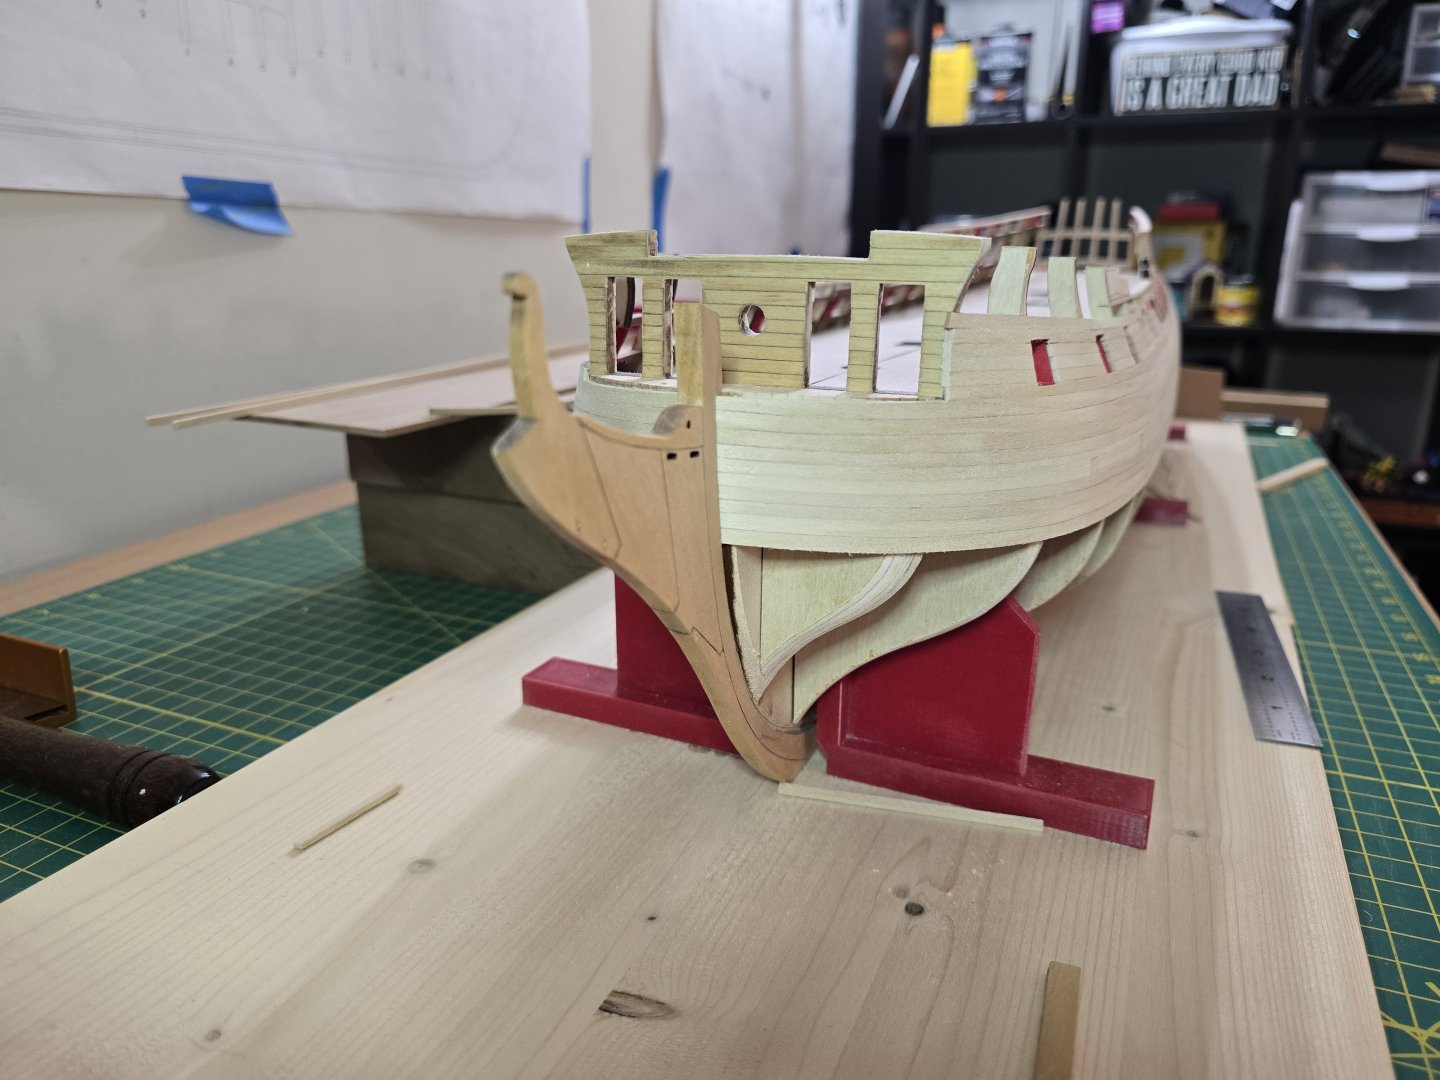
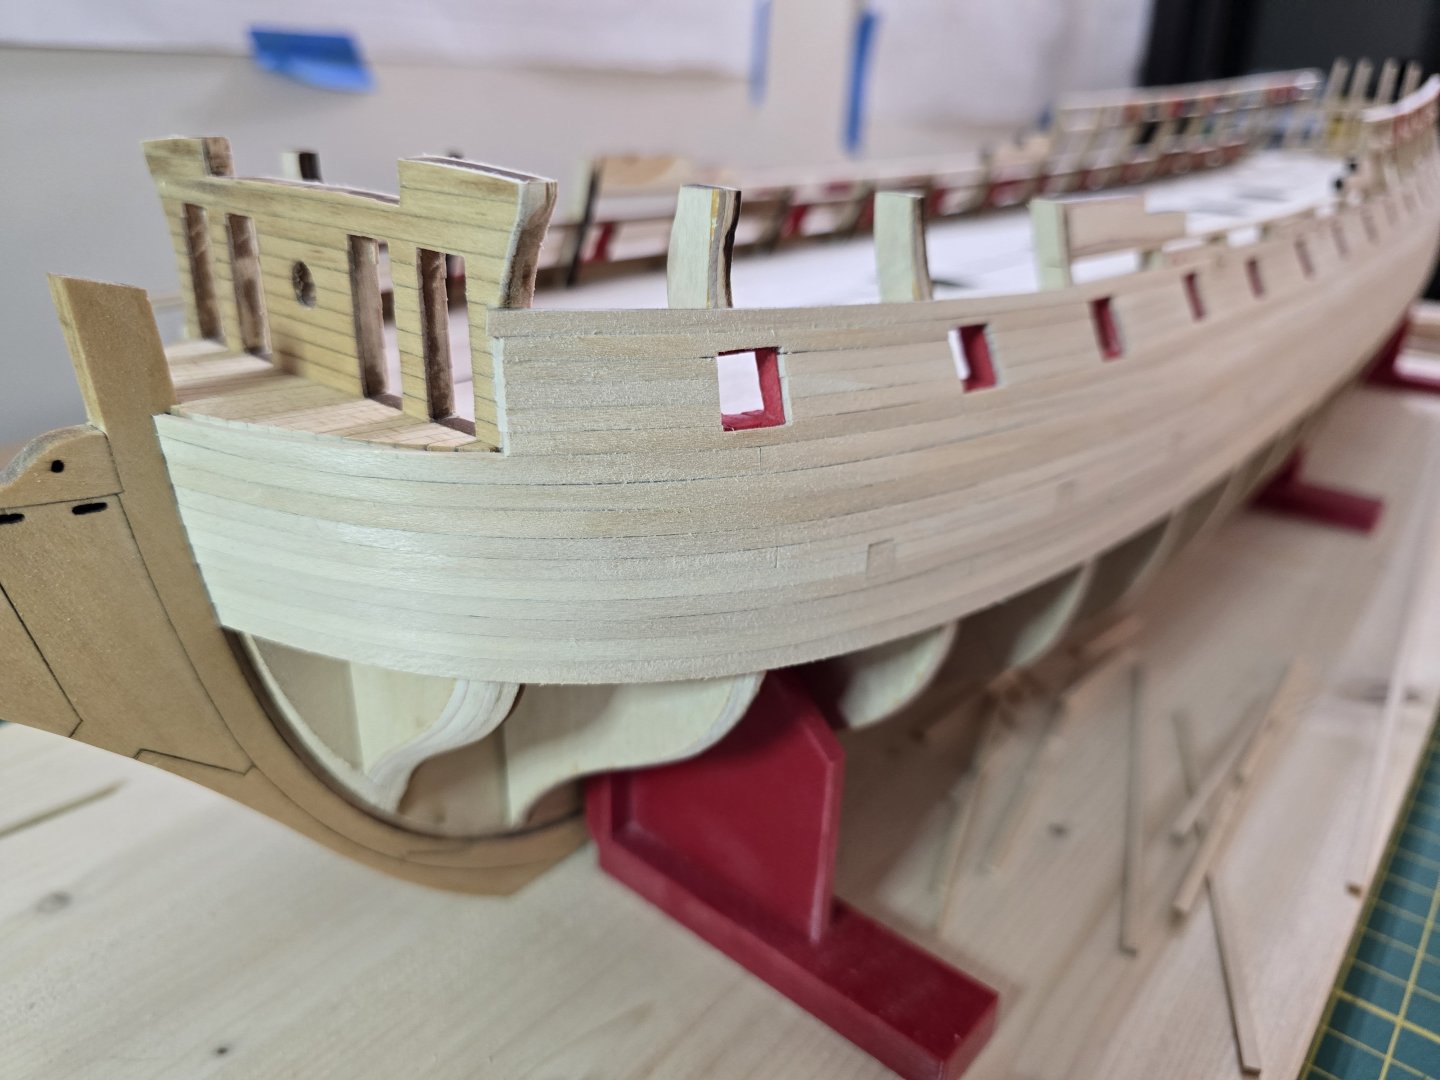
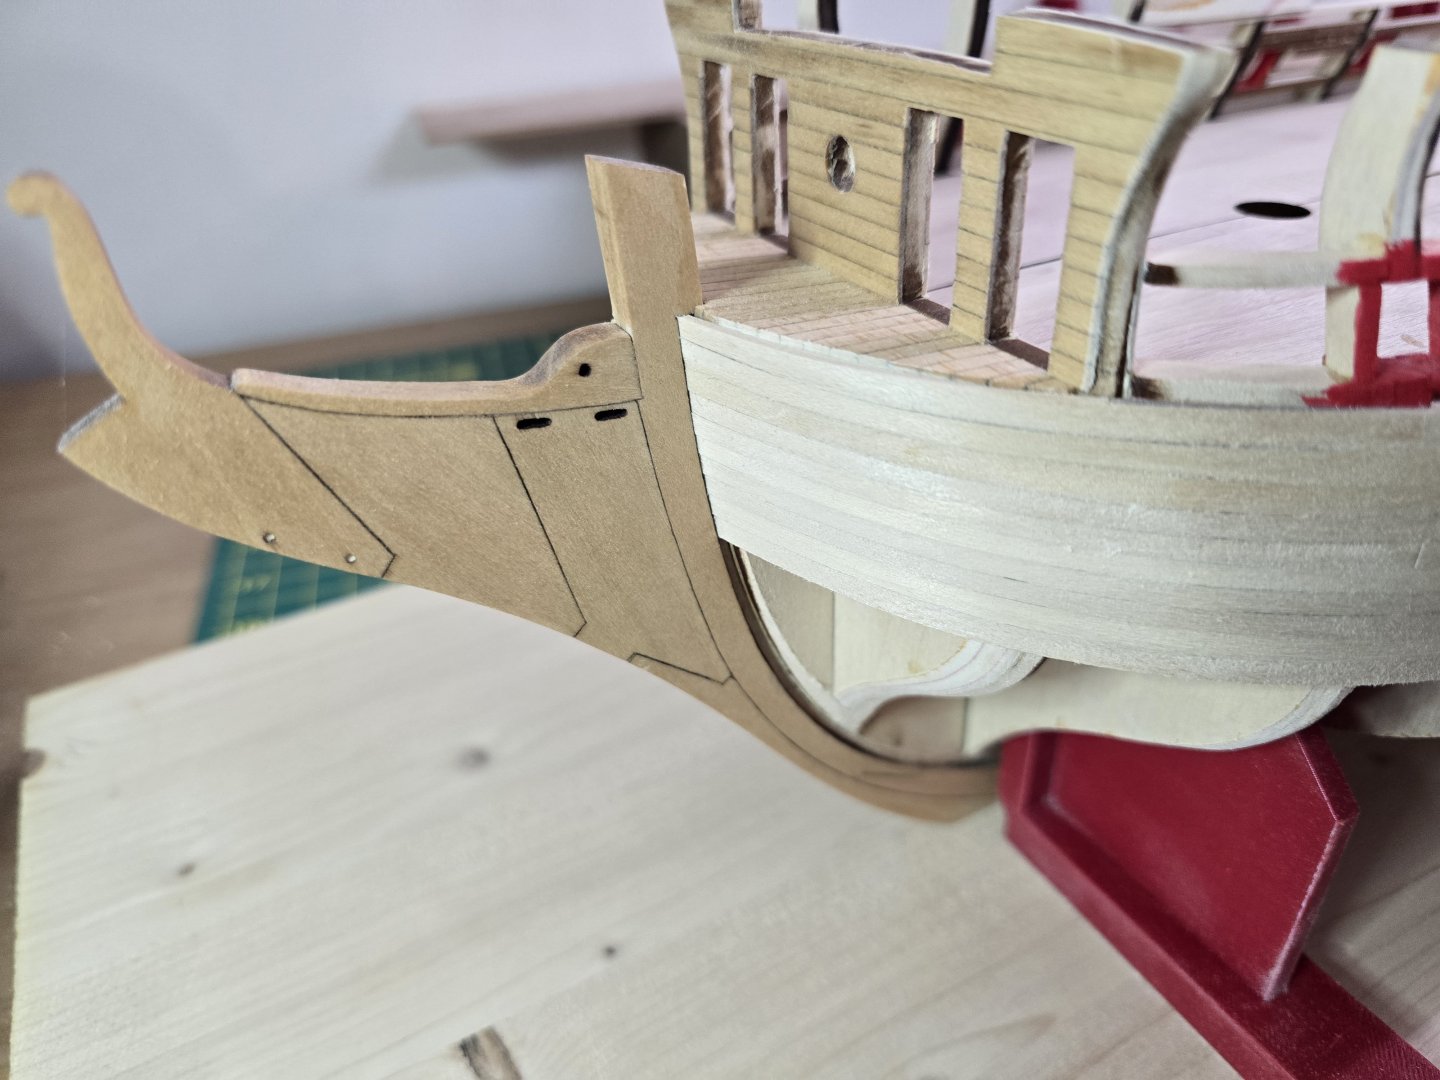
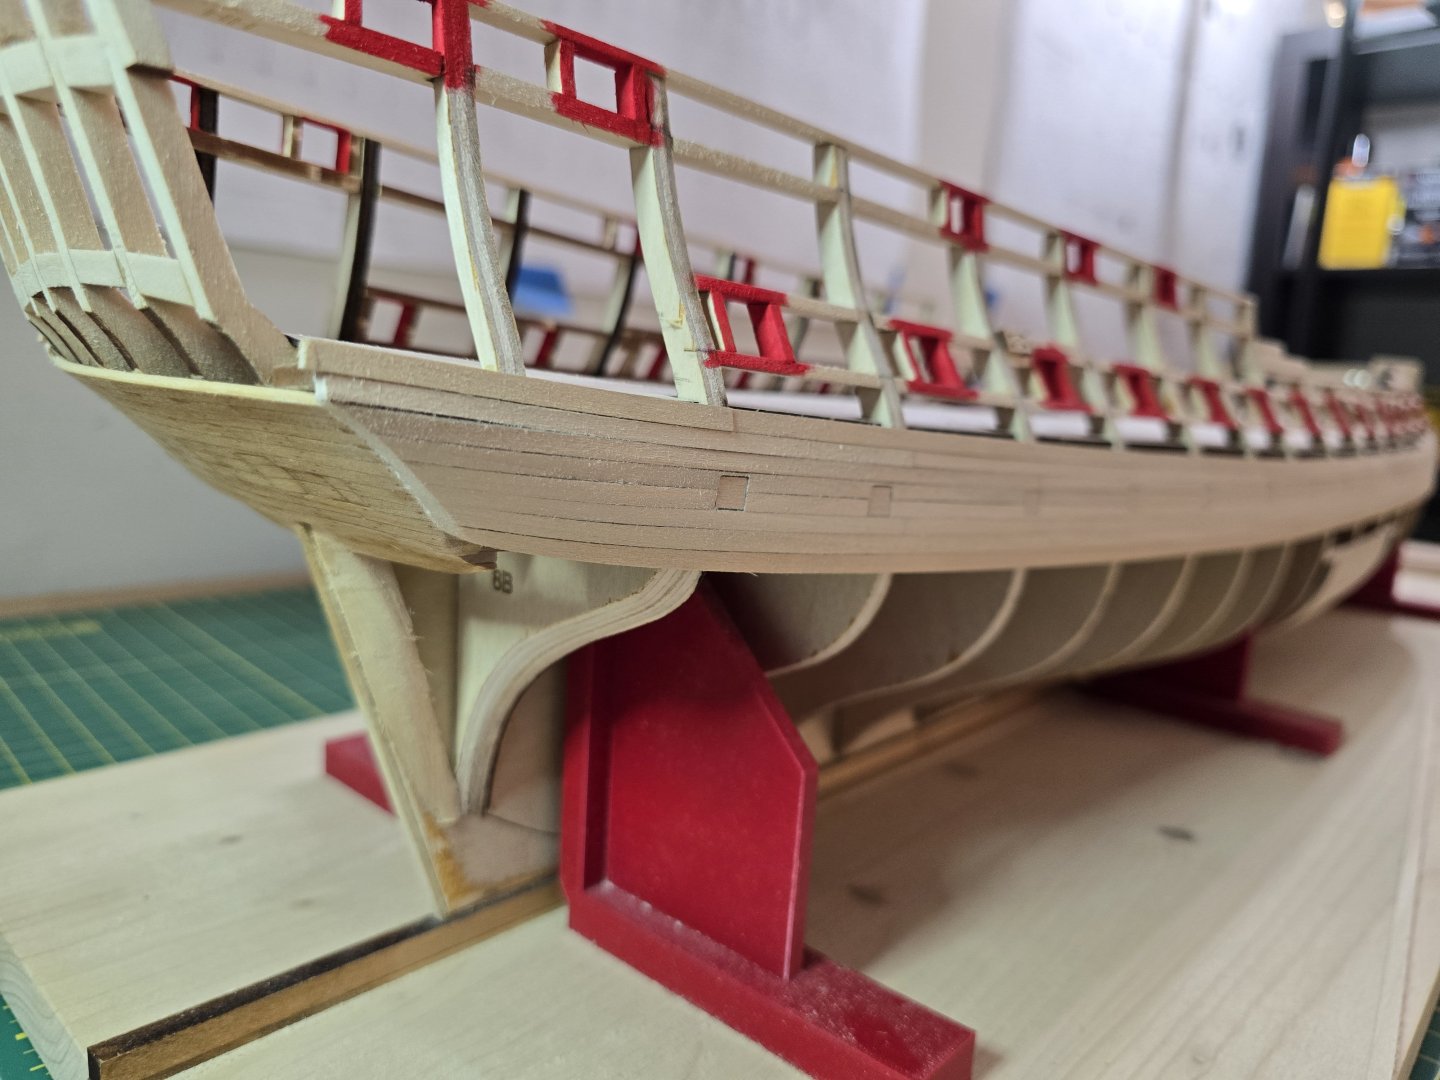
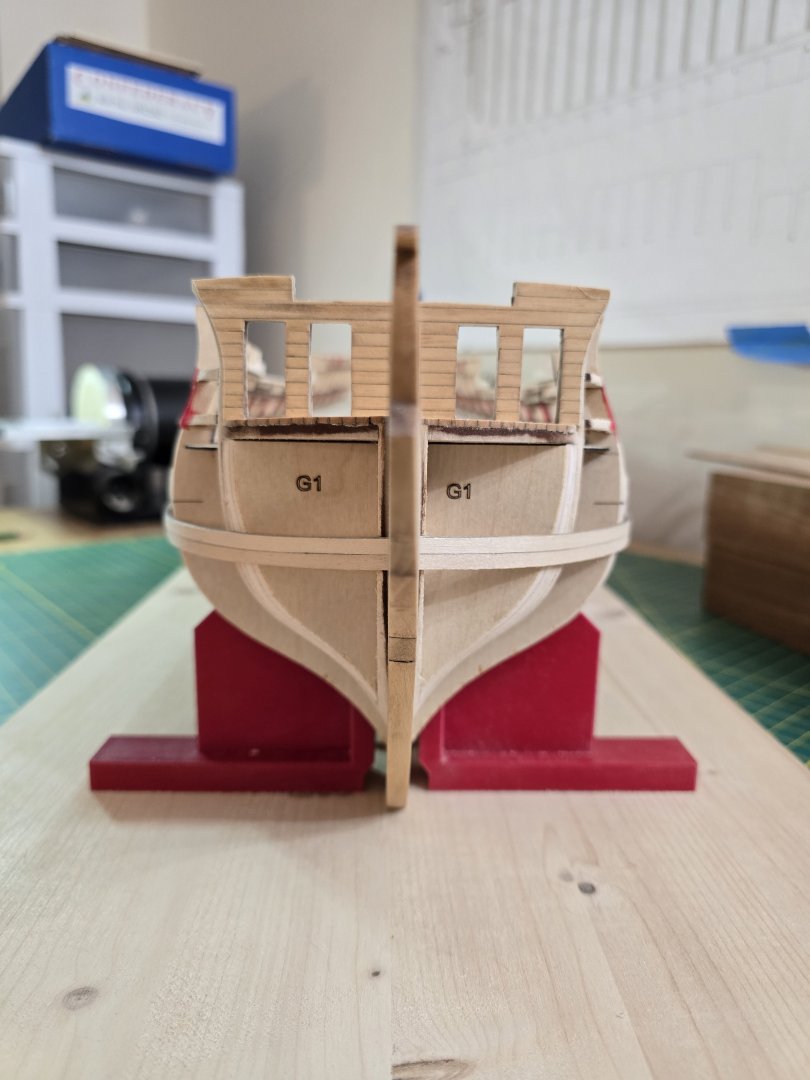
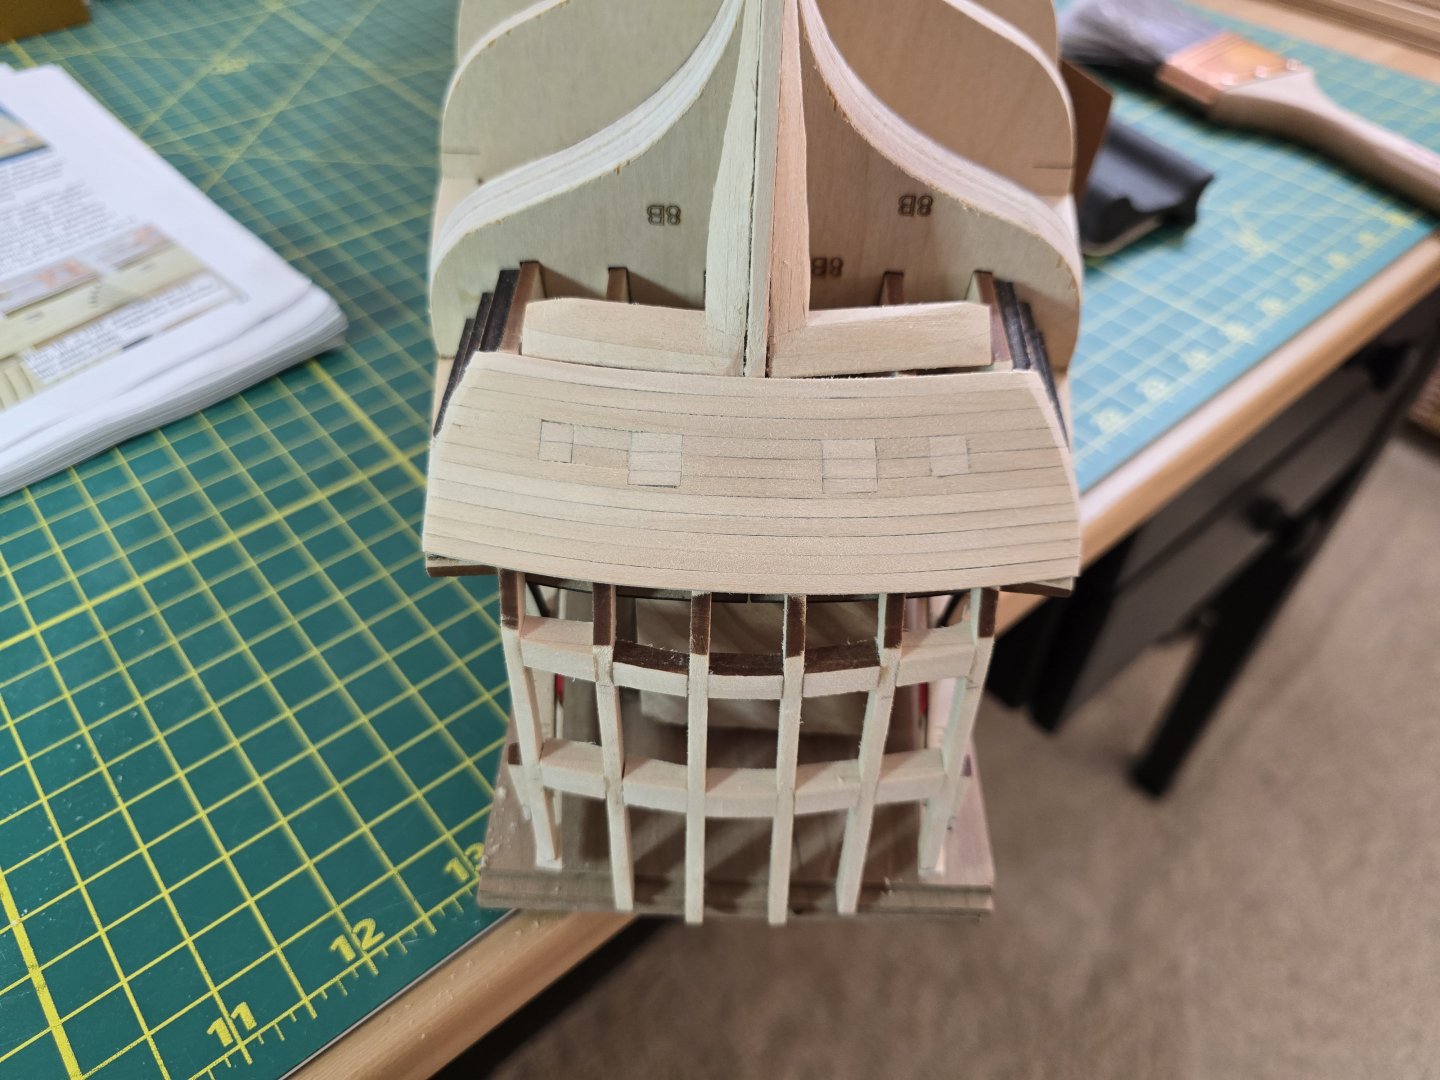
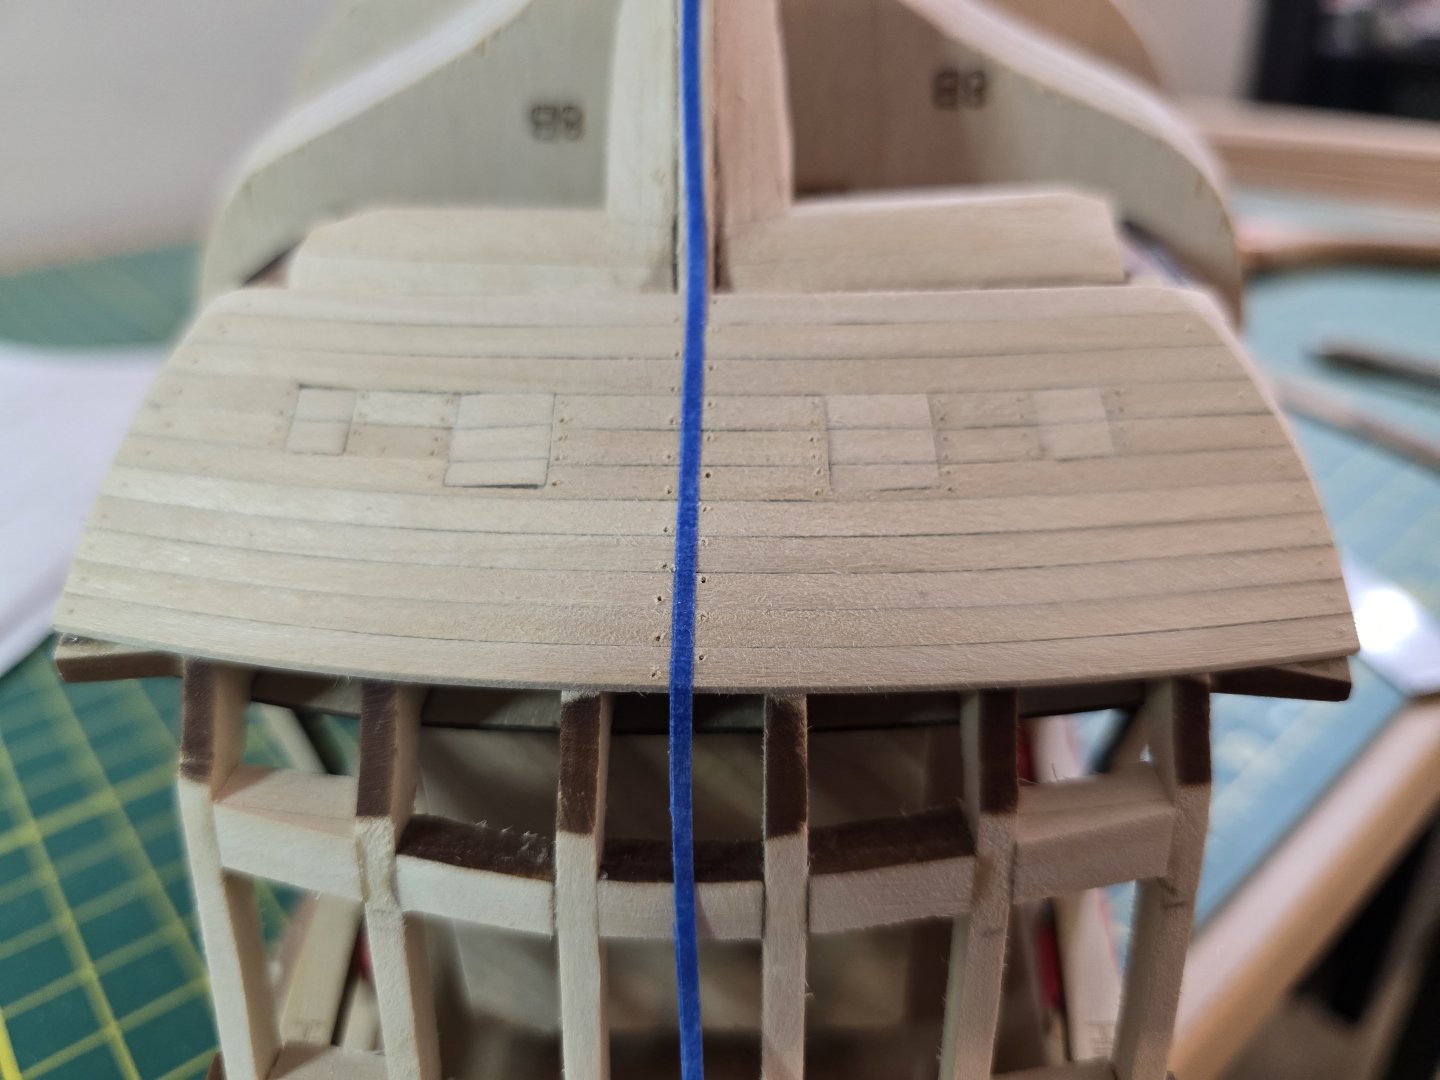
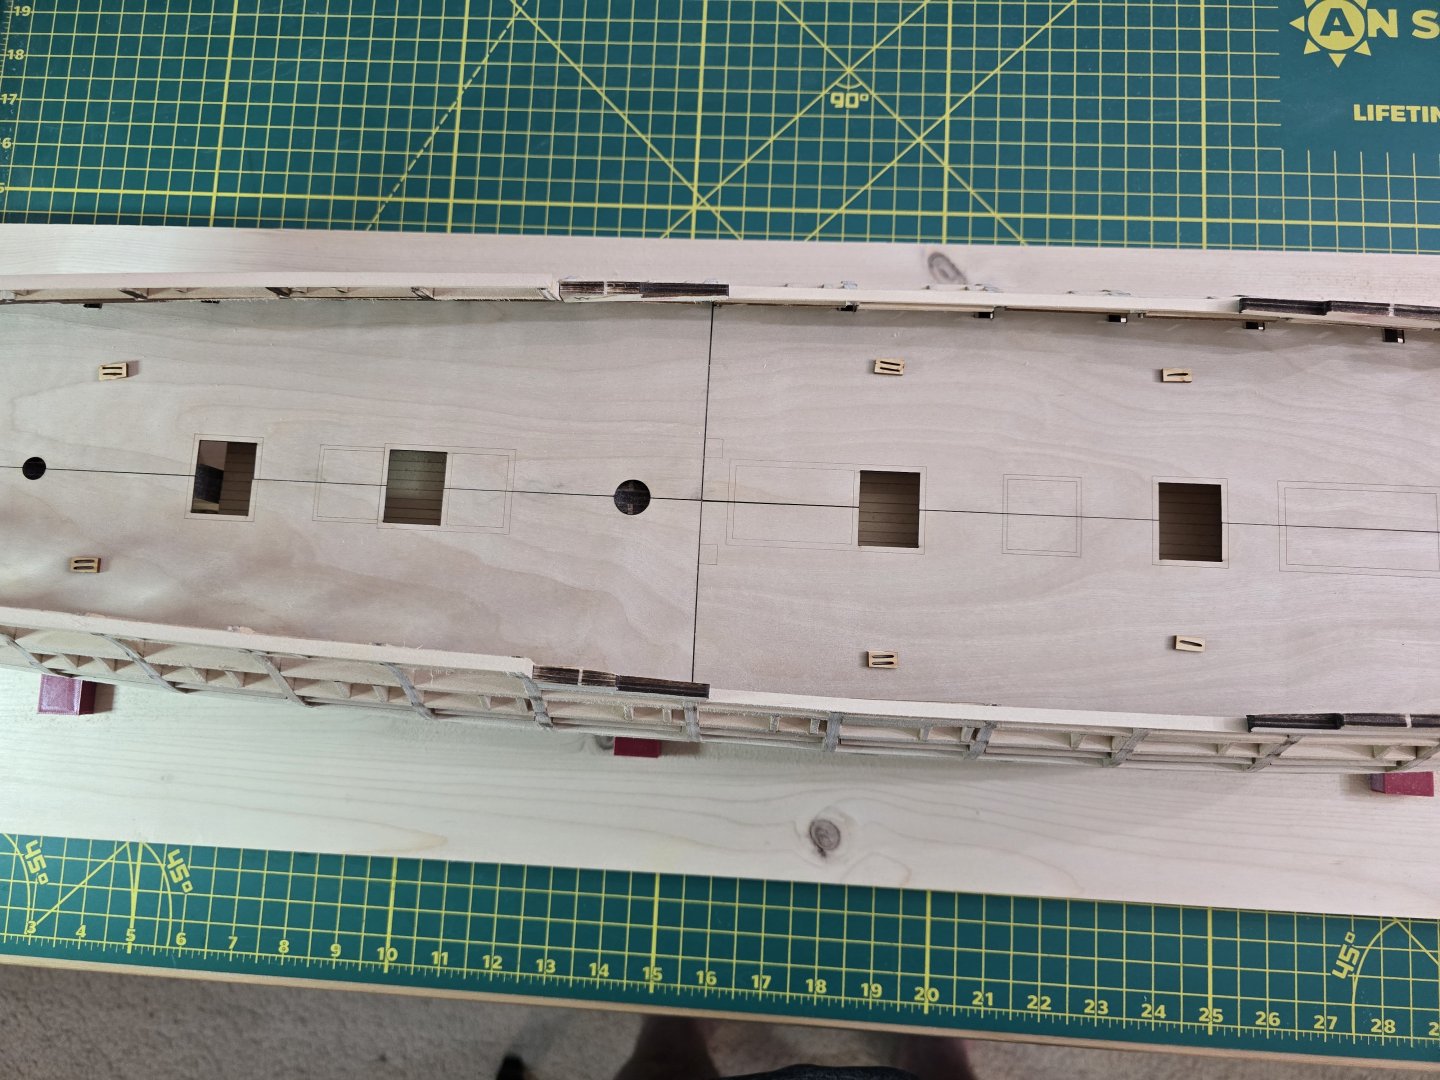
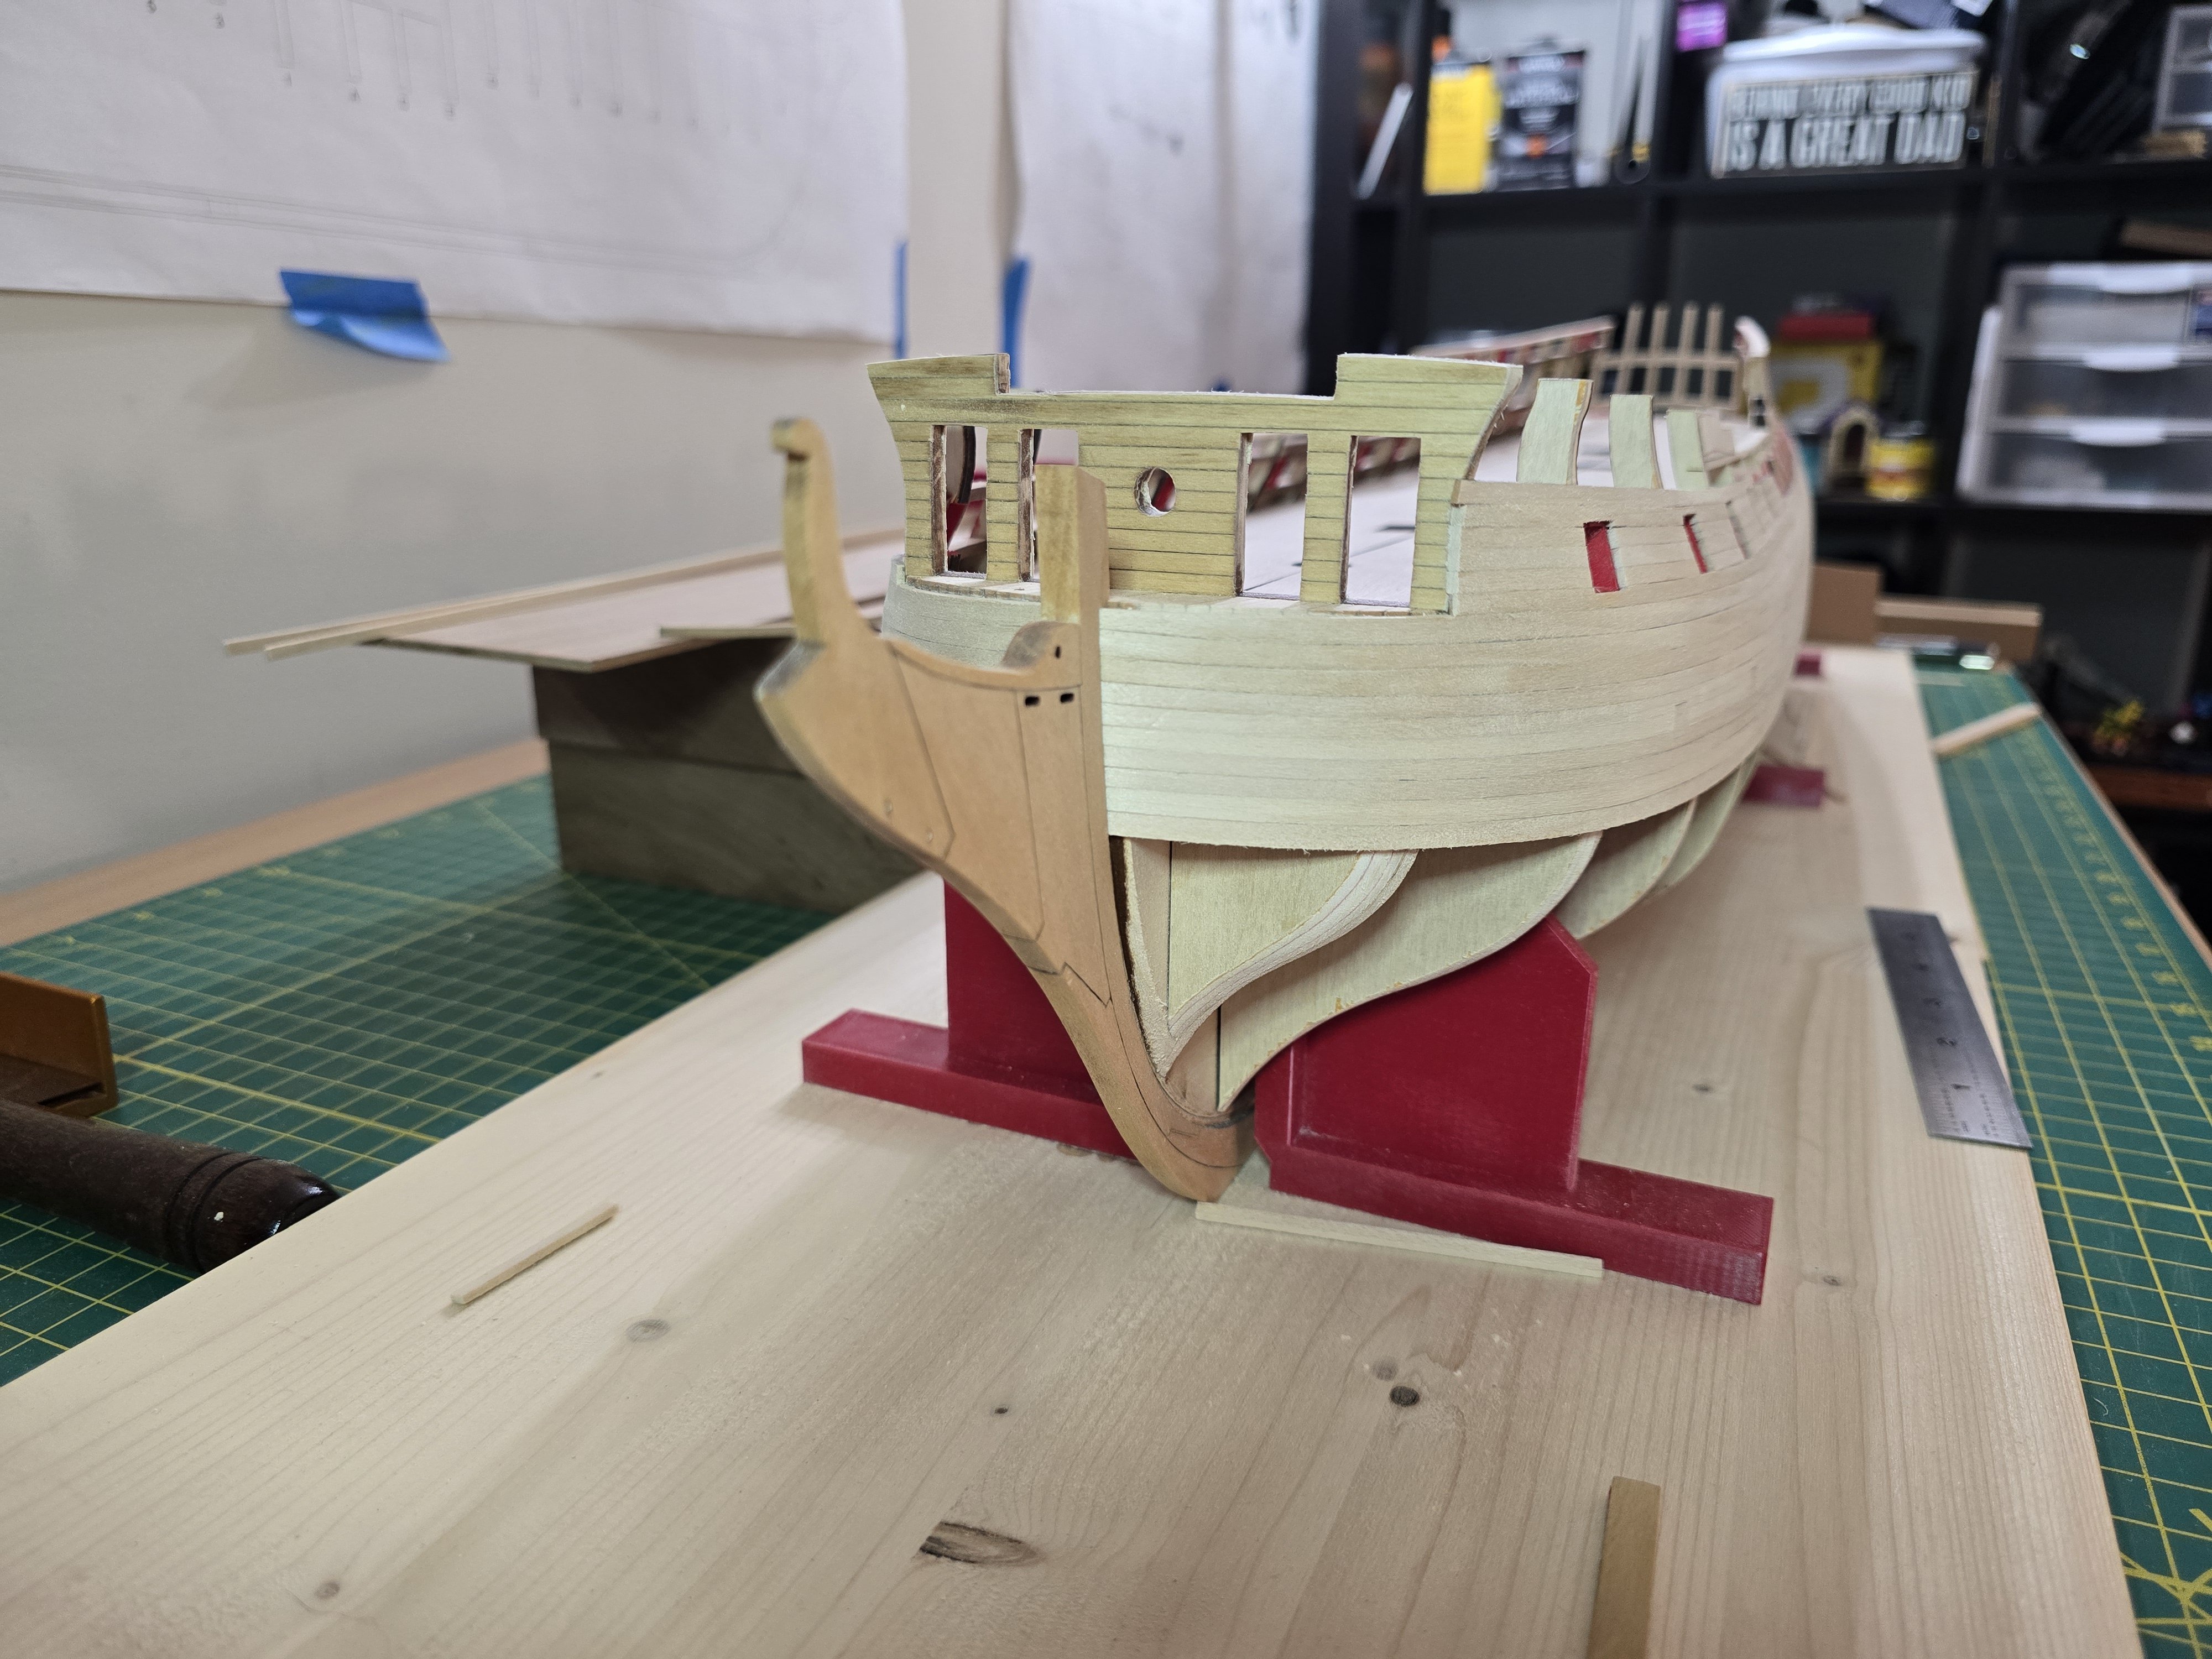
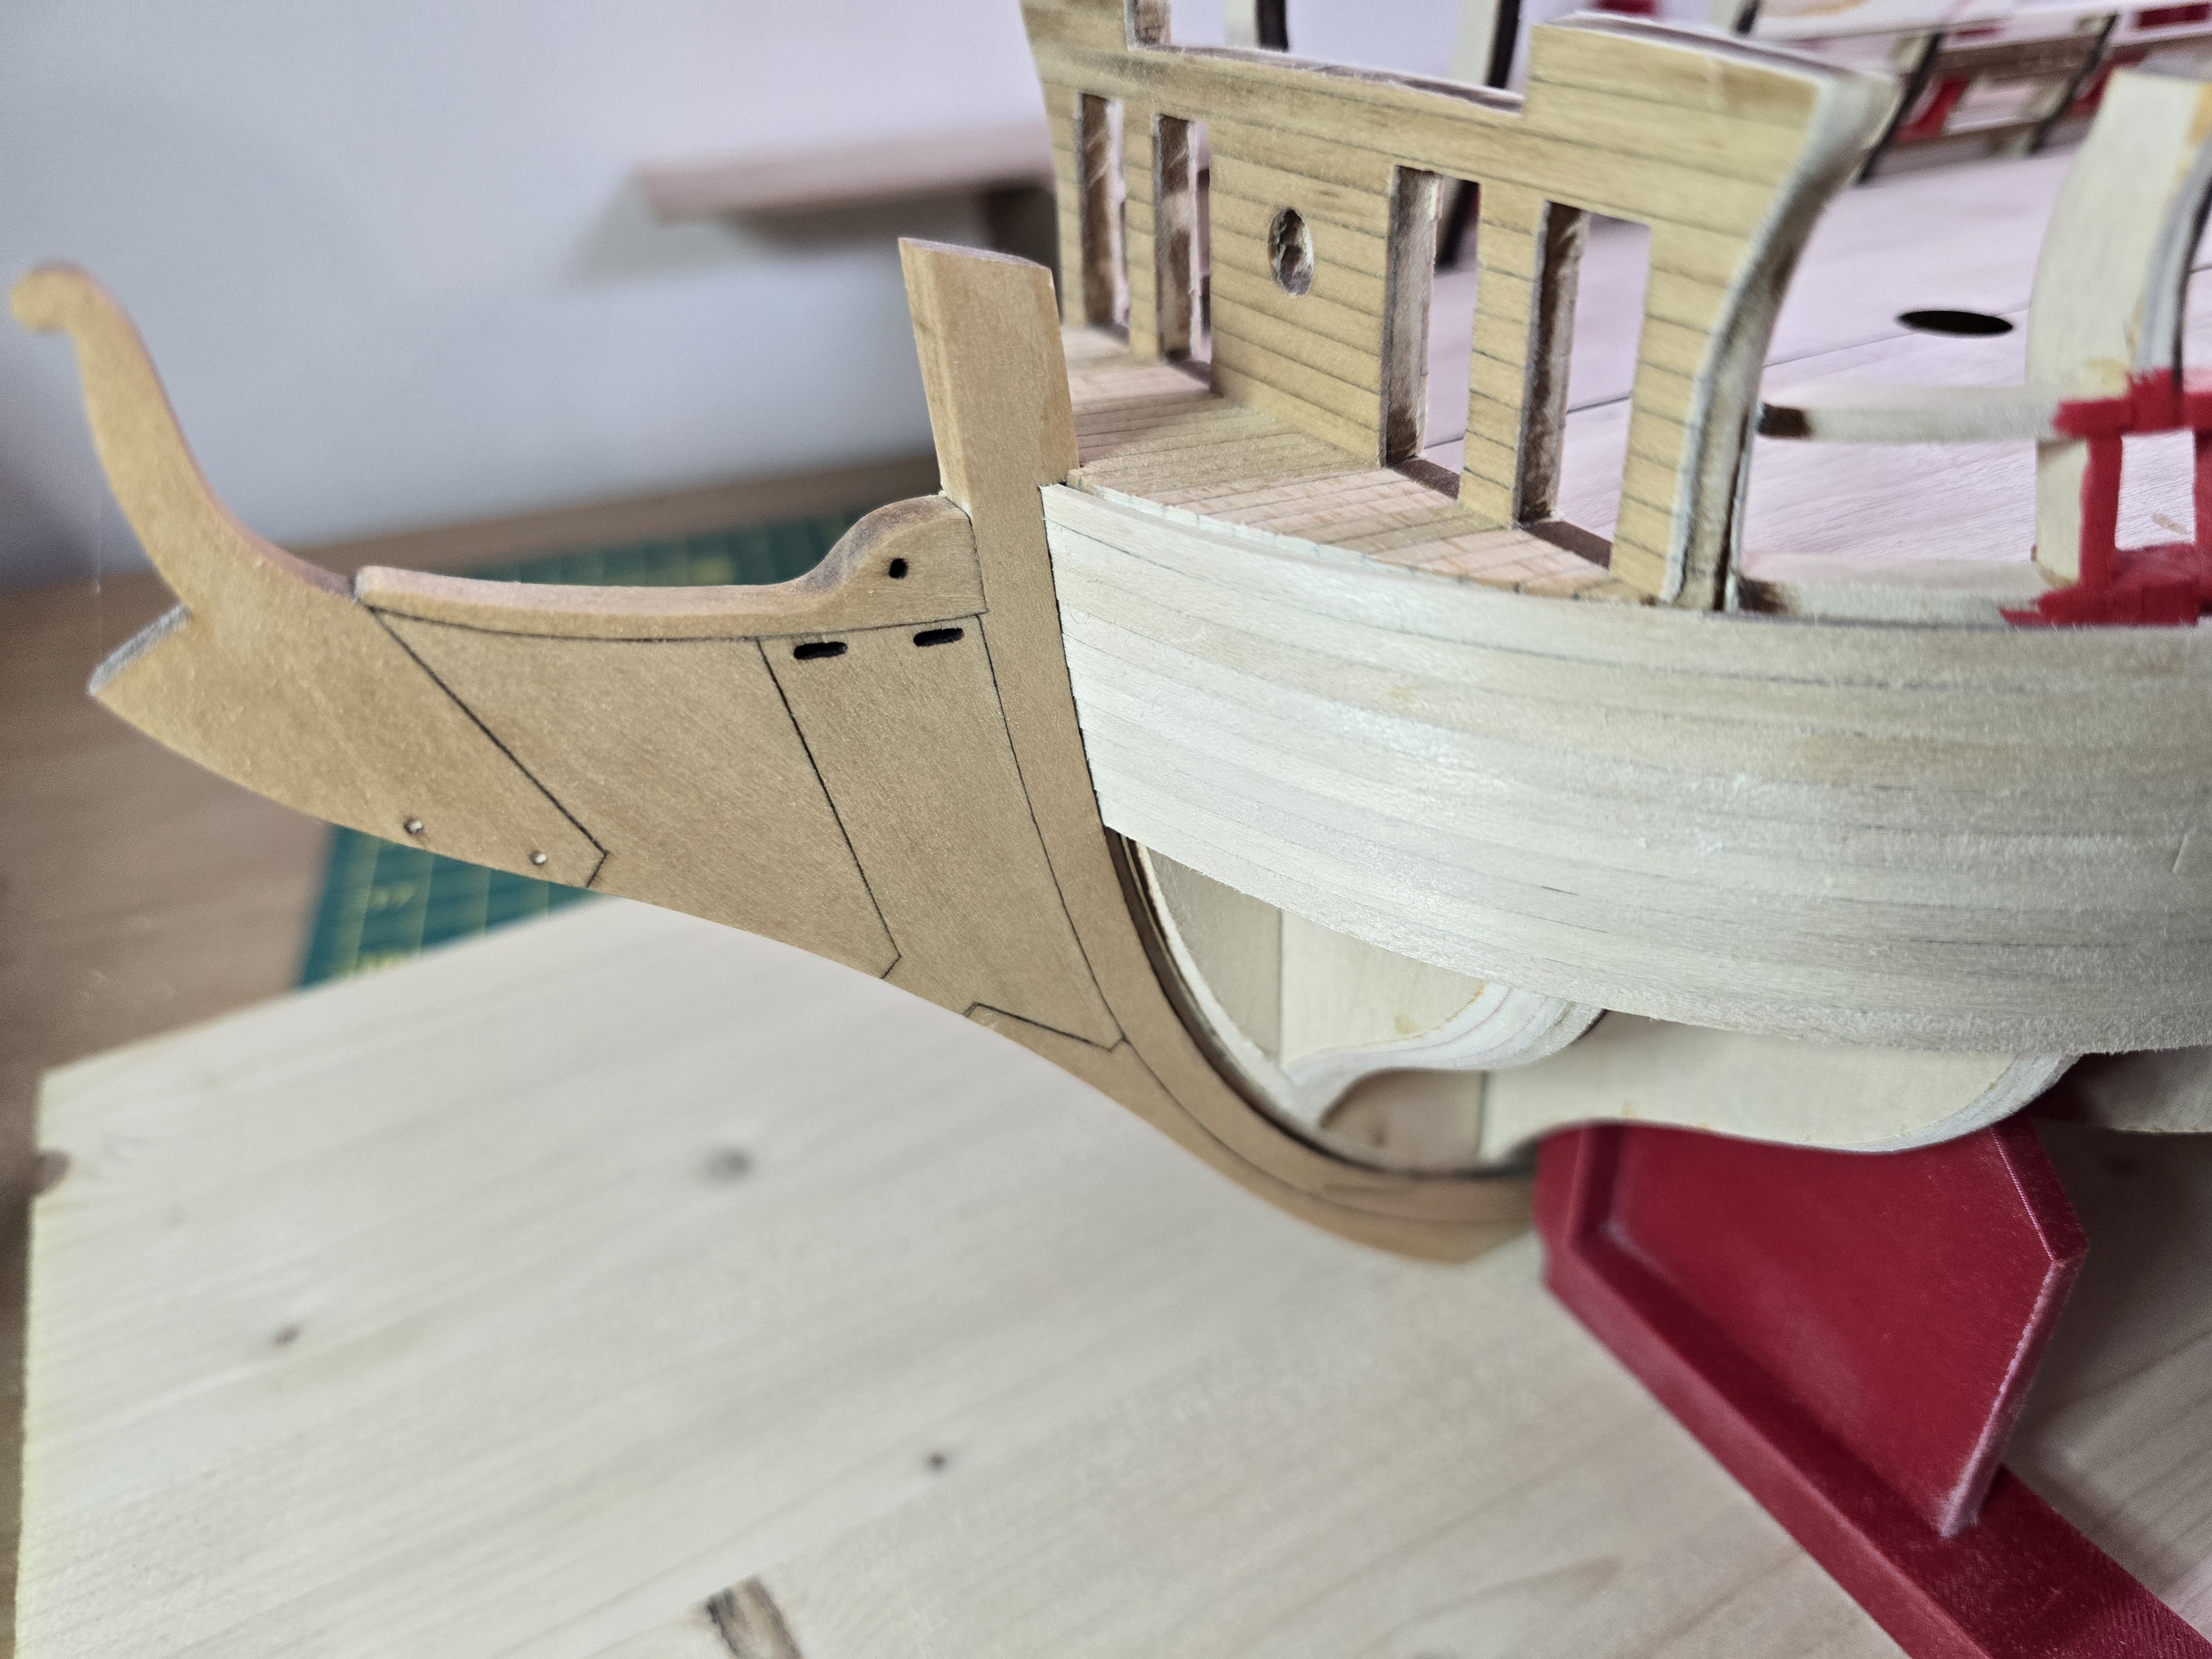
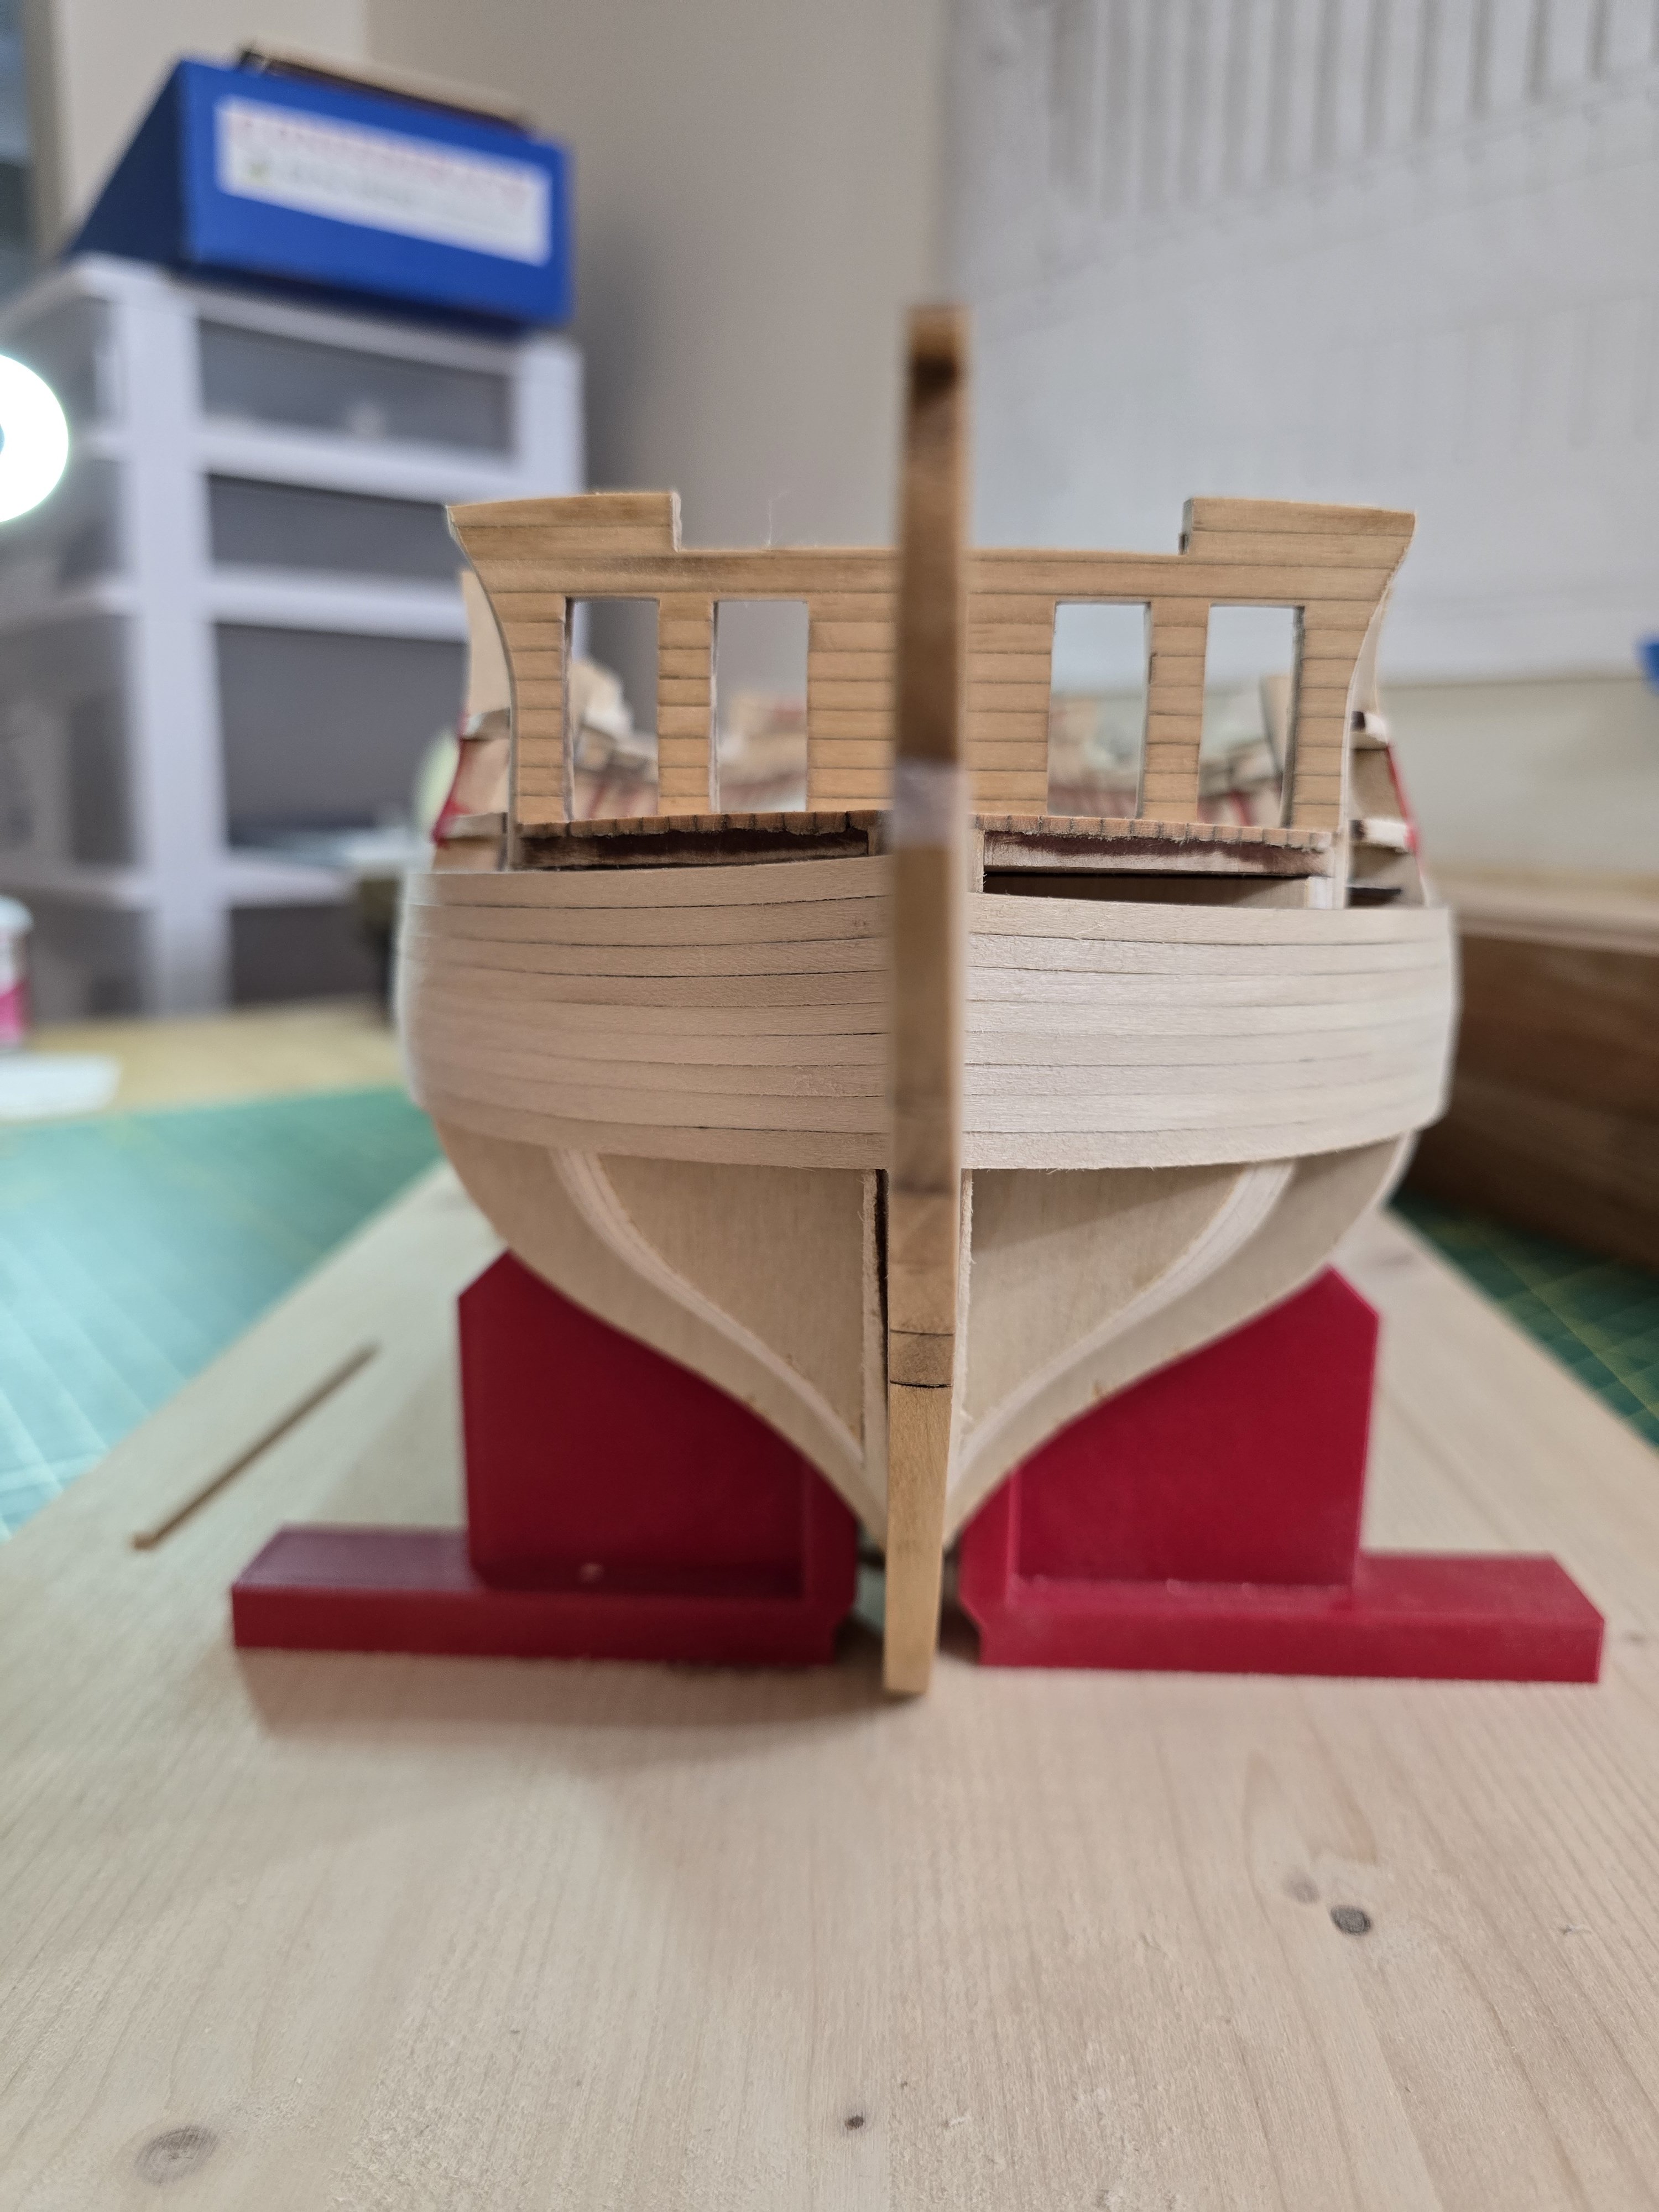
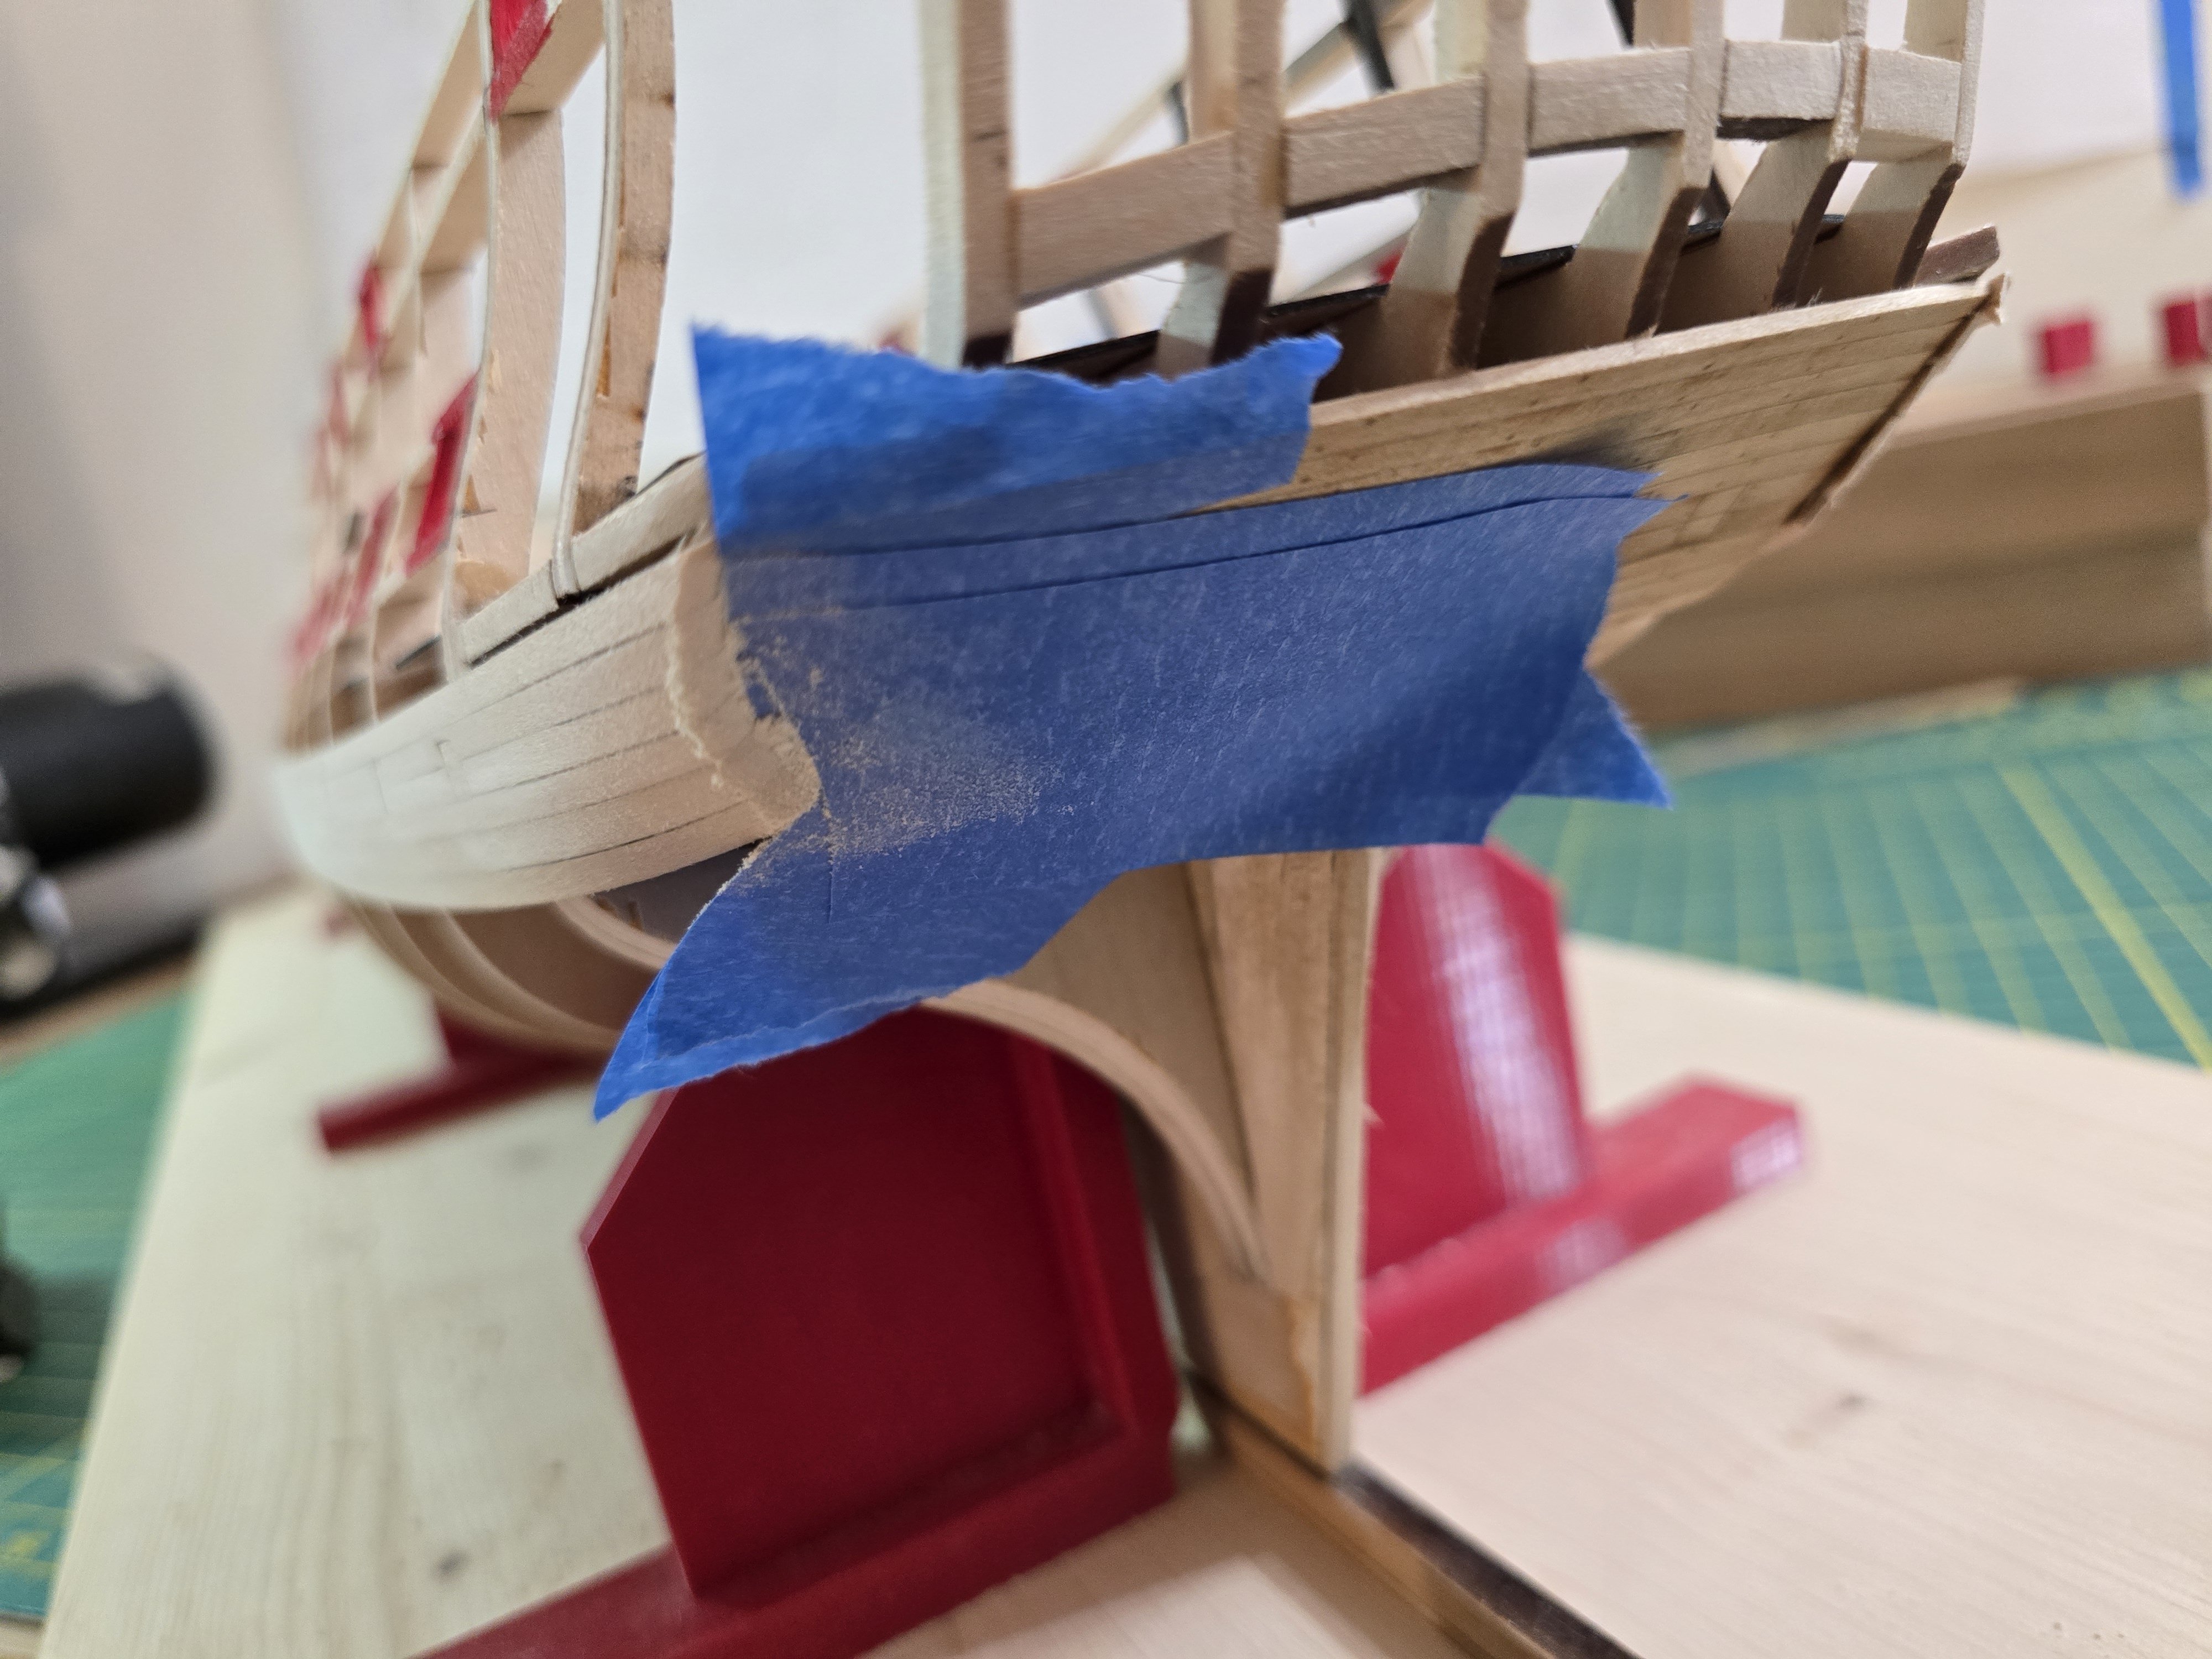
Thank you Werner! I viewed your log, and I am very impressed! You did a fantastic job on your Confederacy! I finished planking the lower counter, then tried my hand at staining. Let me know what you guys think! After i finished all the planking, I tried to sand the sides down to match the hull shape. Like I said in a previous post, I wasn't quite sure how long they should be. I rounded the sides off and tried to use the filler pieces as a guide to how much sanding I needed to do to get thr correct shape and length. I then tried my best to fill in the ports. I hope they look OK. I had to try and enlarge the smaller far right port because I didn't frame it square enough. That was challenging since we wanted to make sure the port frames was still intact so we could place the port lid in it. Then it was time to create the tree nails. I used some painters tape to try and get straight lines for the tree nails. I noticed that after filling the drilled out tree nail holes with wood filler and sanding, i honestly couldnt see them in the basswood. I then tried my hand at staining. I first used a pre-stain wood conditioner and let it try for about 4 minutes before wiping off the excess. After applying it, I could see the tree nails again. So that was cool. I then made a 2:1 ratio of golden oak stain : wipe on poly mix and applied the stain with a lint free cloth. I then waited about 5 minutes and wiped off the extra stain. Please let me know what you think. I looks to me that I wasnt able to sand all the excess wood filler away but I was close! Thanks all! Jeff


-
Thank you Ronald! So far, I've noticed that the basswood included in this kit is high quality and milled well by Model Shipways. Since basswood is a very soft wood, I have to lightly sand the edges of the strips after bending because little pieces of the edge will come up. I'll show you what I mean in an upcoming post. It definitely has an advantage of being able to be bent easier, but also scuffs and dents a lot easier than say other woods like walnut or boxwood. Overall, it's been pretty easy to work with. I'm not a fan of staining wood, but that will be required for this build. I hope that helps! Thanks! Jeff
-
I have started planking the lower counter. Firstly, I know the first strake is the most important. It took me about 30 minutes to decide how much bend I need, how long the piece should be for gluing, etc. I know that sounds like quite a bit of time, but I wanted to give it my best shot! Here is a pic of the first strake glued onto the lower counter. It actually bends in 2 directions, so I used some steam to make the curve for the counter I then took my time adding each additional strip with a little extra material on both sides so I had enough room to make sure each strake was bent properly. When I reached the openings, I had to mark the strake like so after bending it to the correct curve. This particular strake was pretty time consuming. It requires some light sanding to even it out, but I'm pretty happy with how it's turning out! I was only able to finish about half the lower counter tonight, but I will continue it tomorrow! Thanks all! Jeff


-
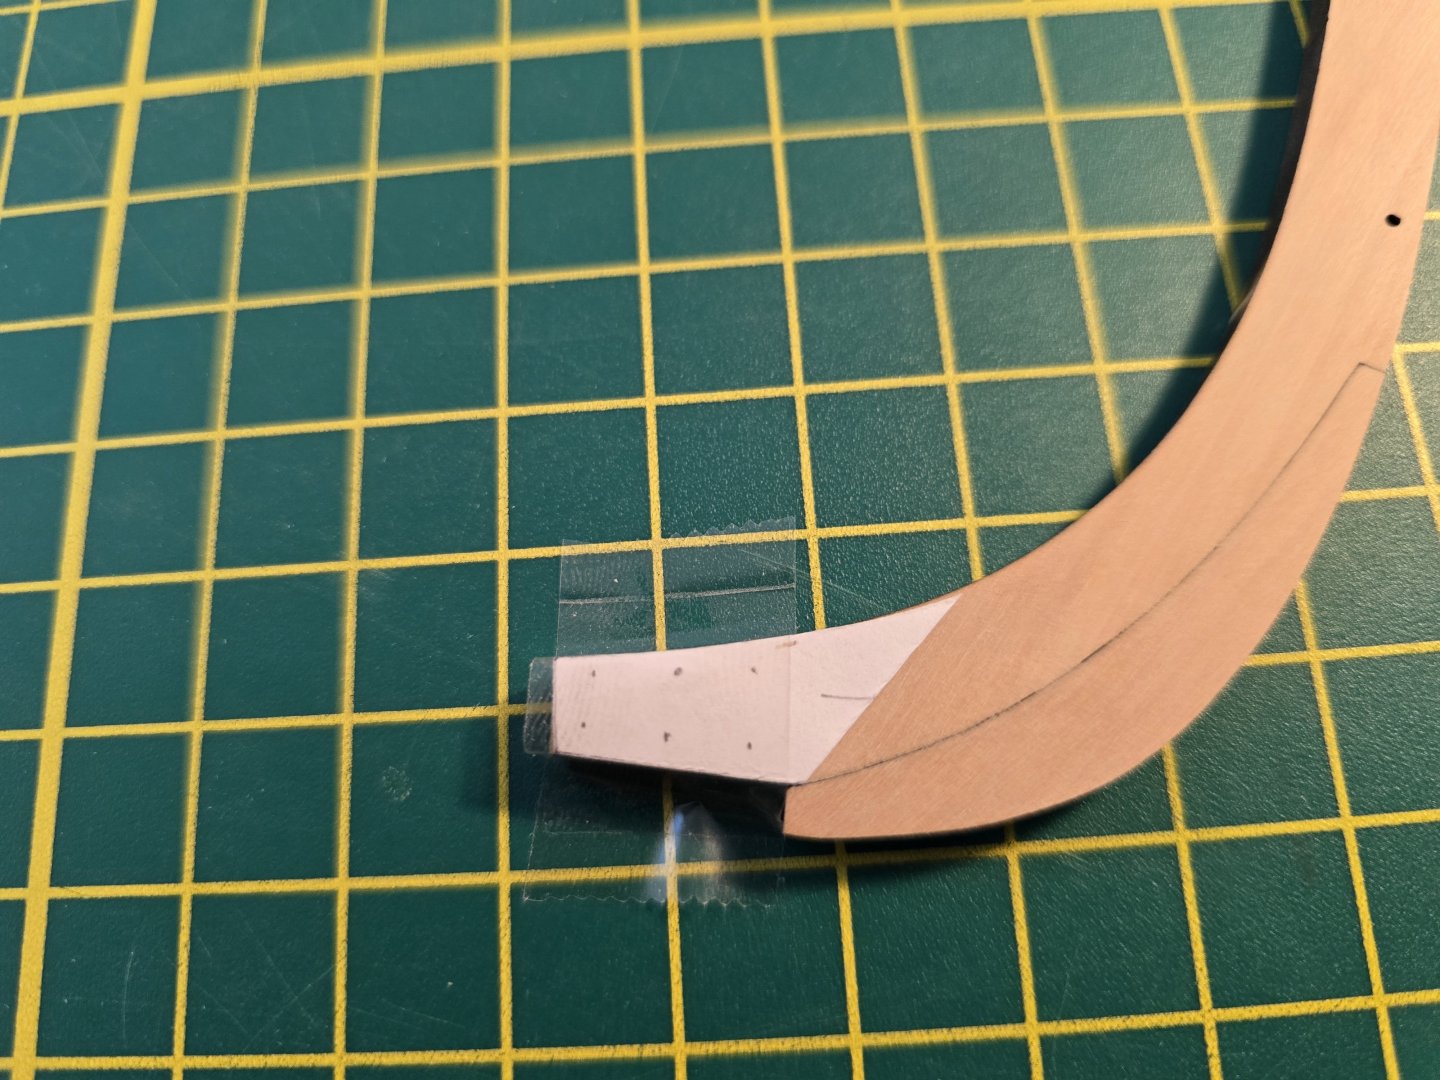
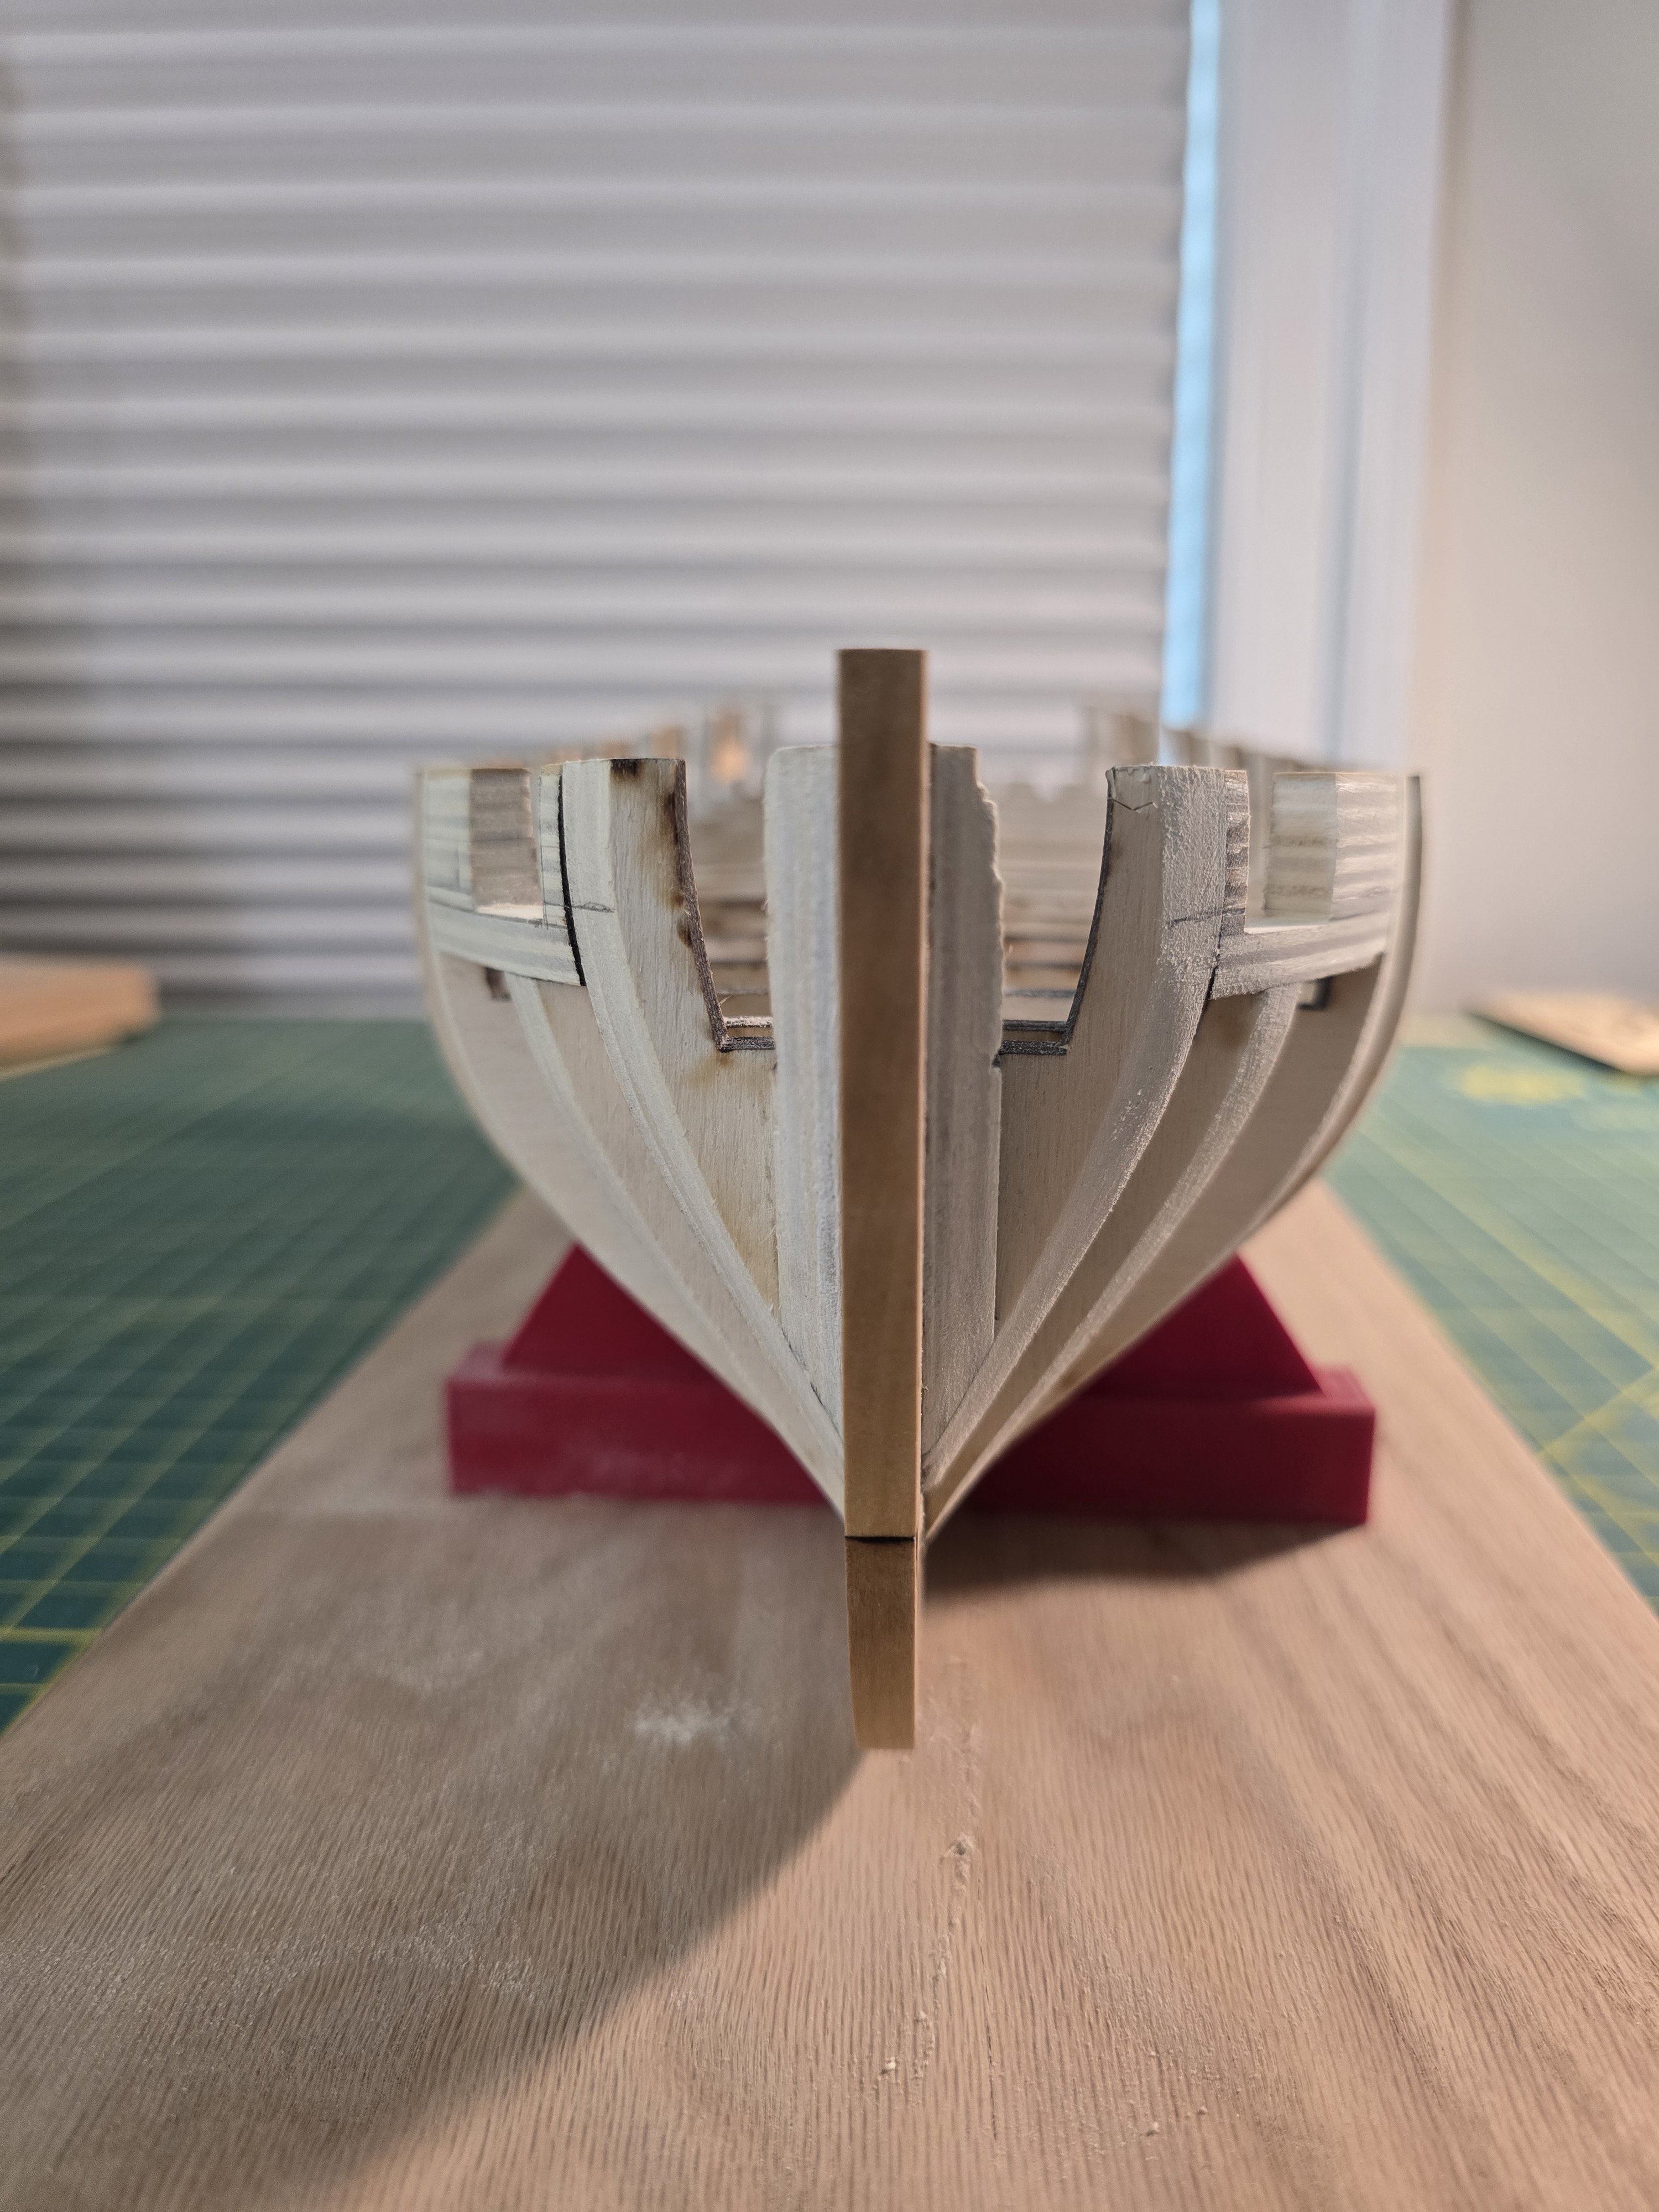
I started by gluing on the stem piece (not varnished yet). The instructions say to varnish the stem first. But because of the gap I need to fix between the stem and then keel pieces, I decided to glue both keel pieces and stem first, then fix the gap. It took a few days to glue them on because I wanted to make sure each piece was secured onto the bulkhead former before gluing the next piece. This allowed me to make sure each piece was centered and secure so it wouldn't move when adding the next piece. I'll show you guys how I know there's quite a gap where the stem meets the keel. I pick up the model, and place it directly in the light of a lamp or other light. As you see, there is a gap at the joint. Yuck. To fix this, I had a milled strip that I sanded down with 220 grit sandpaper to make some sawdust. The left blotch is some glue, and the boxwood dust on the right. I then added about 4 drops of water to the sawdust and mixed until it was almost a paste. I then added a little amount of the glue I had placed near the sawdust. I then mixed it together very well and applied it to the gap using a gap filling hand tool I had. I made sure to apply it on both sides and held it back up to the light to make sure it filled the gap. After it dried, it turned a very light color which I then carefully sanded away. The picture above is after I filled the gap and sanded away the excess. Then I prepared the model for varnishing the keel and stem by lightly sanding where it is needed and wiping off all the sanding dust. I then added some wipe-on poly with gloved, a mask, and a lint free rag. I then waited about a minute or less, then rubbed off the excess. I think it turned out pretty well. It looks like to me this gap filling method worked well! But I will need to inspect it closer after it fully dries so I can then continue with the build. For me, it seems it can take a day or so to dry. I hope you guys think it looks good as well! Thanks for reading! Jeff


-
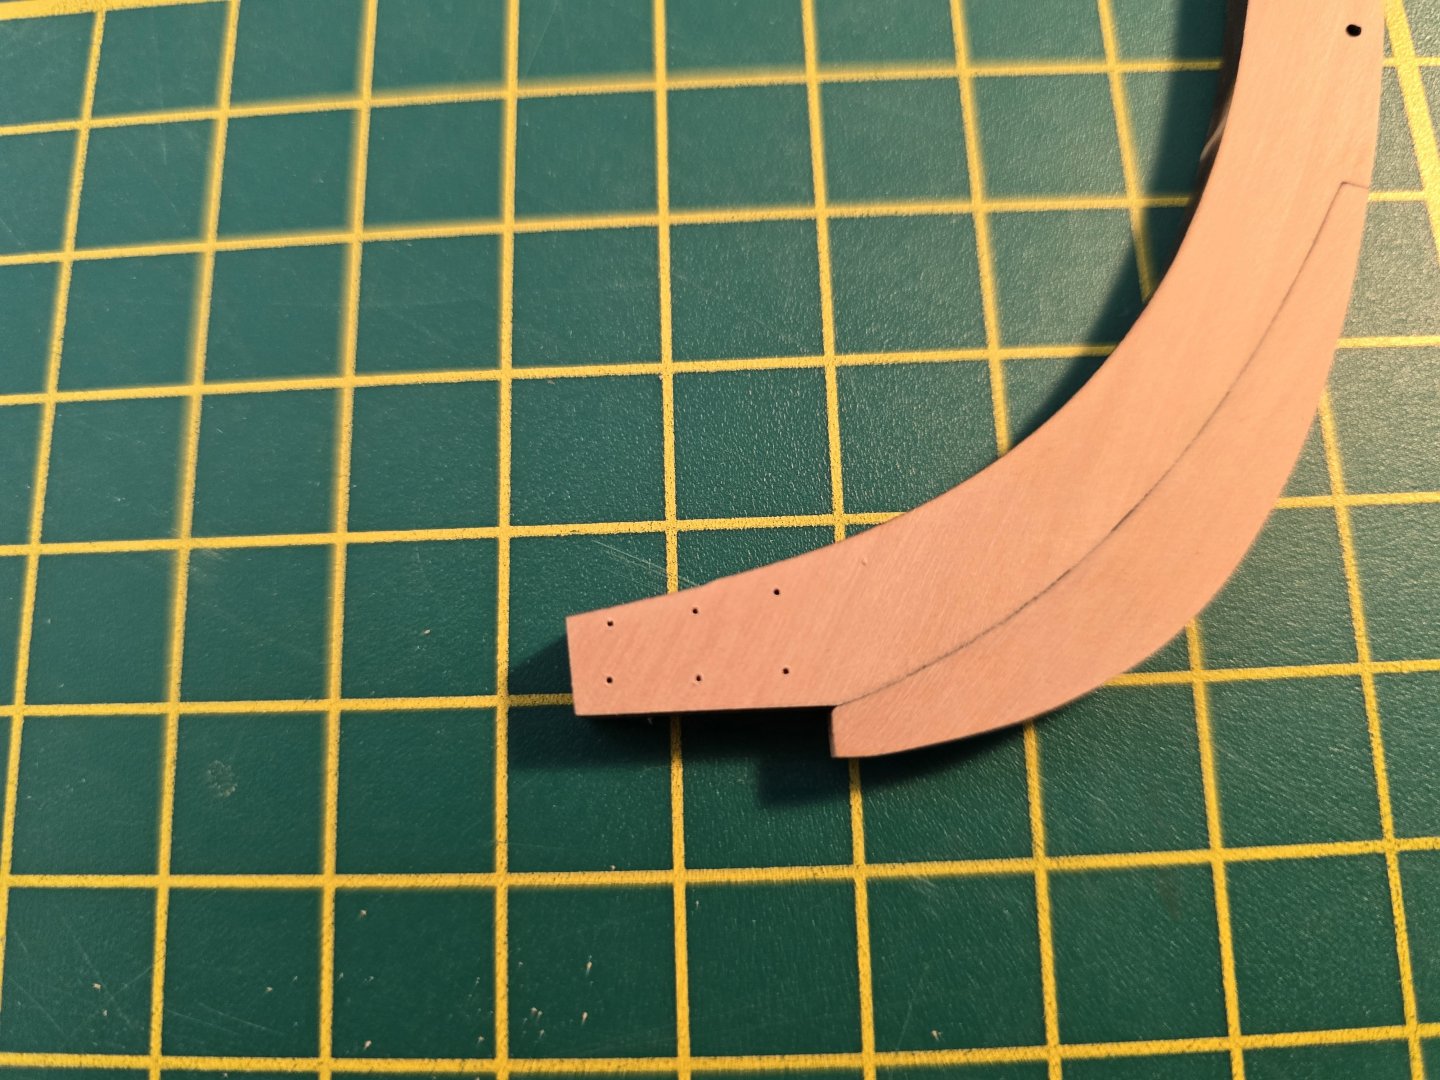
Hello all! Here are some pics of the rabbet I added and has dried. I had to copy the aft bulkhead former line describing where to sand from the picture above to the other side of the bulkhead former. To do this, I took a piece of paper and placed it ontop of the plans of the bulkhead former. I then traced the line as well as the bulkhead former and cut it out. I then placed it on the other side of the bulkhead former and marked it with a pencil. After sanding down the bulkhead former according to the marked lines, it was time to prepare the stem and the keel laser cut pieces. I sanded the char off of each and fitted / glued the two stem pieces together. How i get a tight fit, is to place the 2 stem pieces together and hold them up to a light source. The light shining through shows you where the 2 pieces aren't fitting properly and helps guide you to where you need to sand or make tiny modifications. The laser cut boxwood pieces are very high quality so not much sanding was necessary to make a good fit. I then needed to add the tree nails to the stem and keel pieces. To do this, I traced the tree nail locations onto a piece of paper and cut them out. I also marked the direction of the bow which helped me make sure it's oriented correctly. I then cut the templates out and taped it to the stem and keel respectively. Then I simply used a manual drill to make the tree nail holes. To do the other side, I took off the template I made and cut off the tape around the template. I simply then re taped it to the other side. Since it was already drilled though, those markings were enough to know where to drill the holes. I copied this procedure with the keel piece. The stem holes then looked like this. Lastly, I marked the holes with a sharp pencil. Then I filled the tree nail holes with "Natrual" color wood filler. Once it dried, I sanded the extra filler off. The instructions then say to apply varnish to the stem pieces before gluing it on. I test fitted the stem and keel pieces on the bulkhead former and there were not fitting properly. I had to sand down some edges of the keel piece to get a somewhat decent fit. Unfortunately, it's not perfect, so I have to sand some boxwood and use as a filler to close the small less than 0.5mm gap between the keel and stem pieces (which I will do later) Because of this, I decided to glue the stem piece on first, then the keel piece. I will then fill in the small gap first before I varnish the stem and keel pieces. Tonight, I only was able to glue on the stem piece. That's it for today! Thanks for reading! Jeff


-
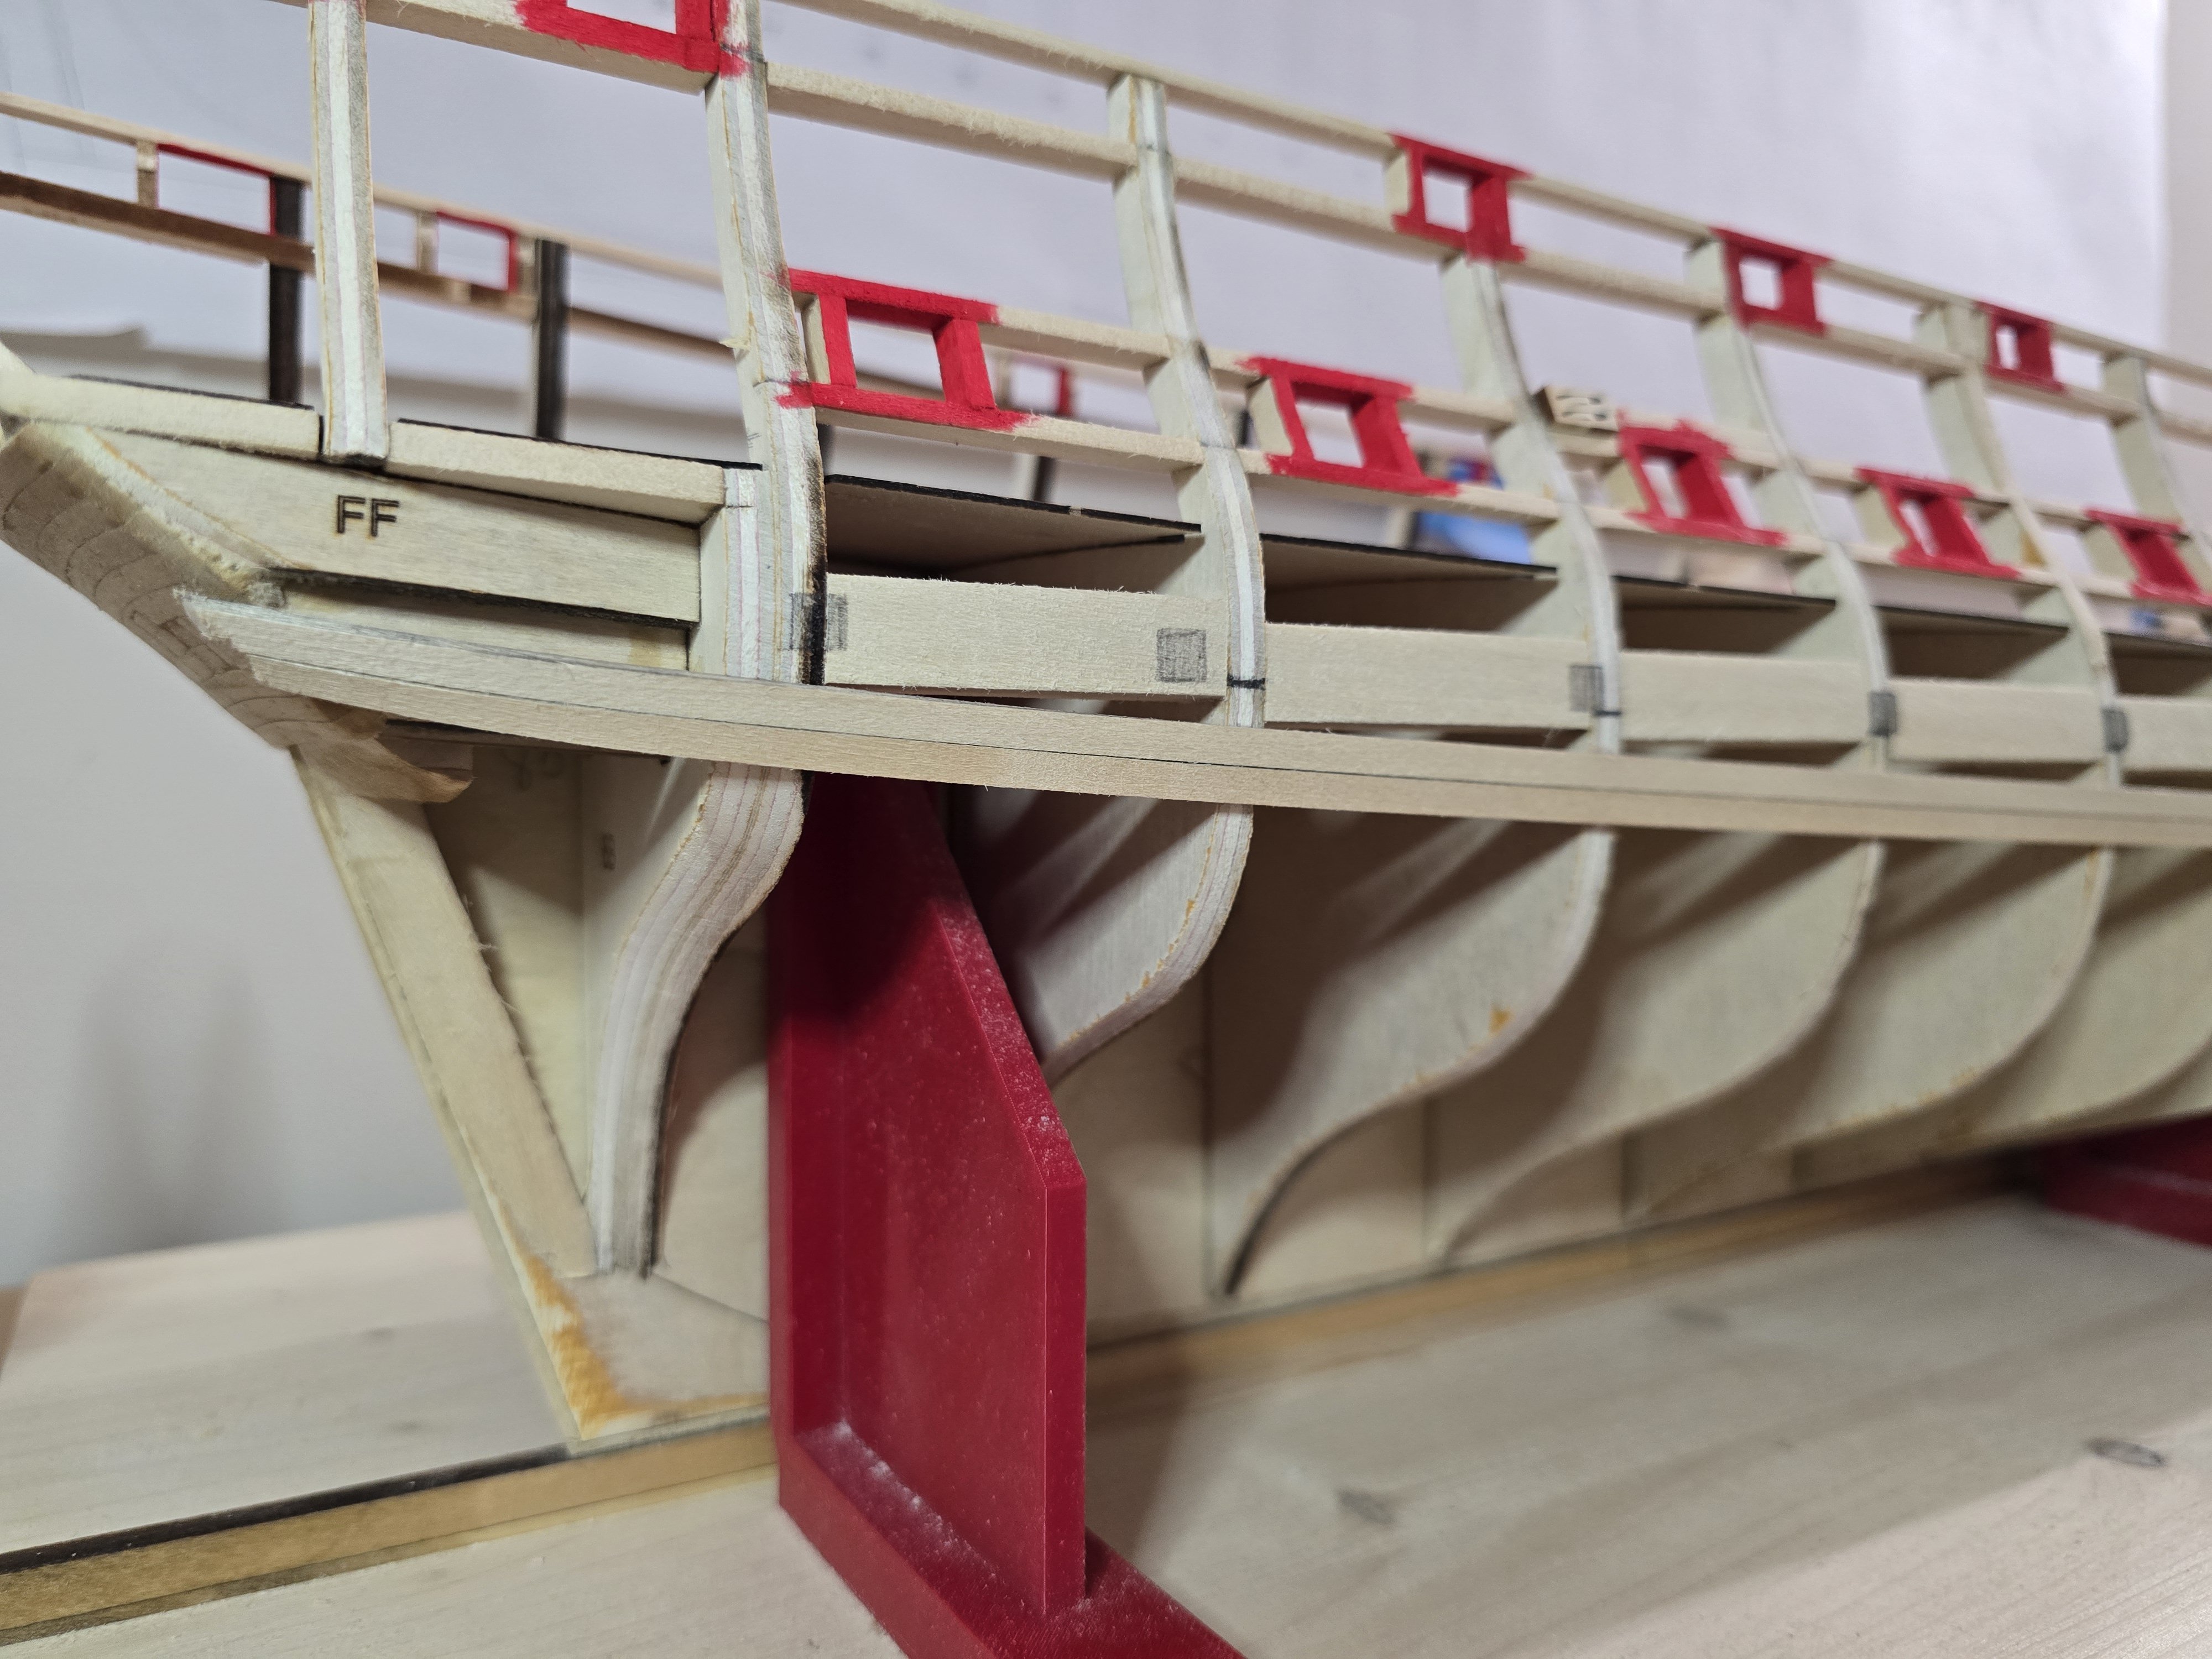
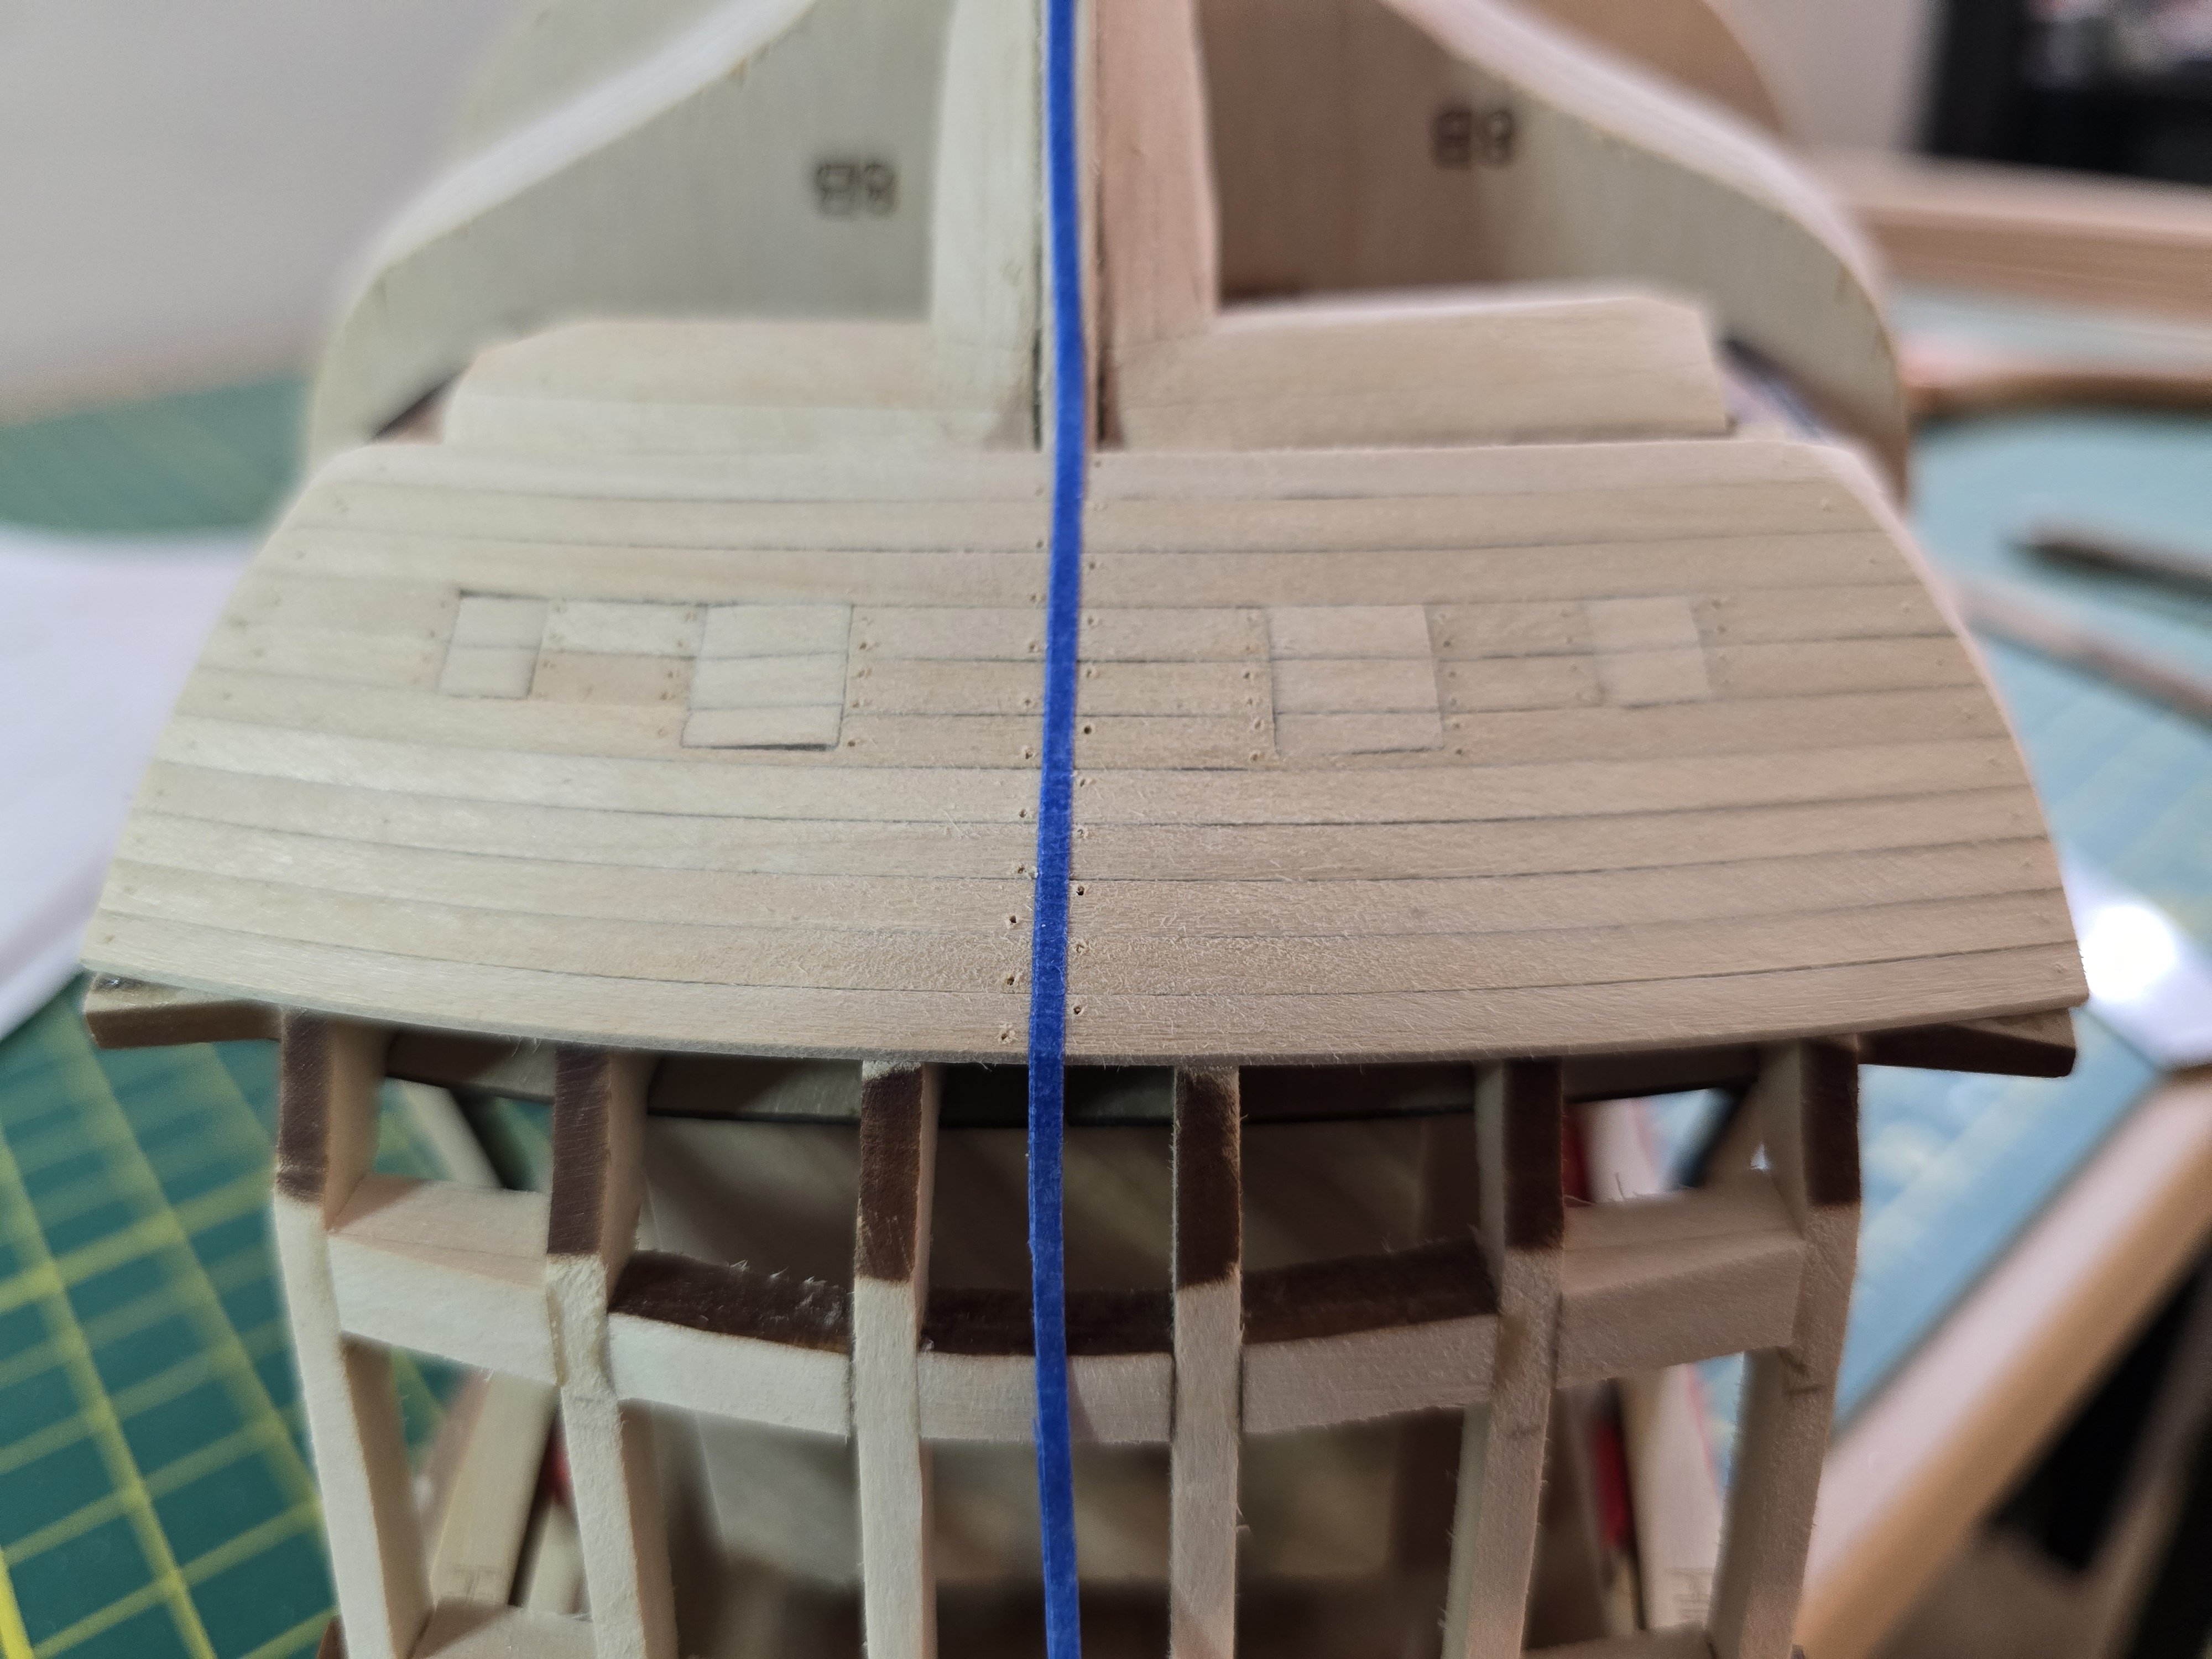
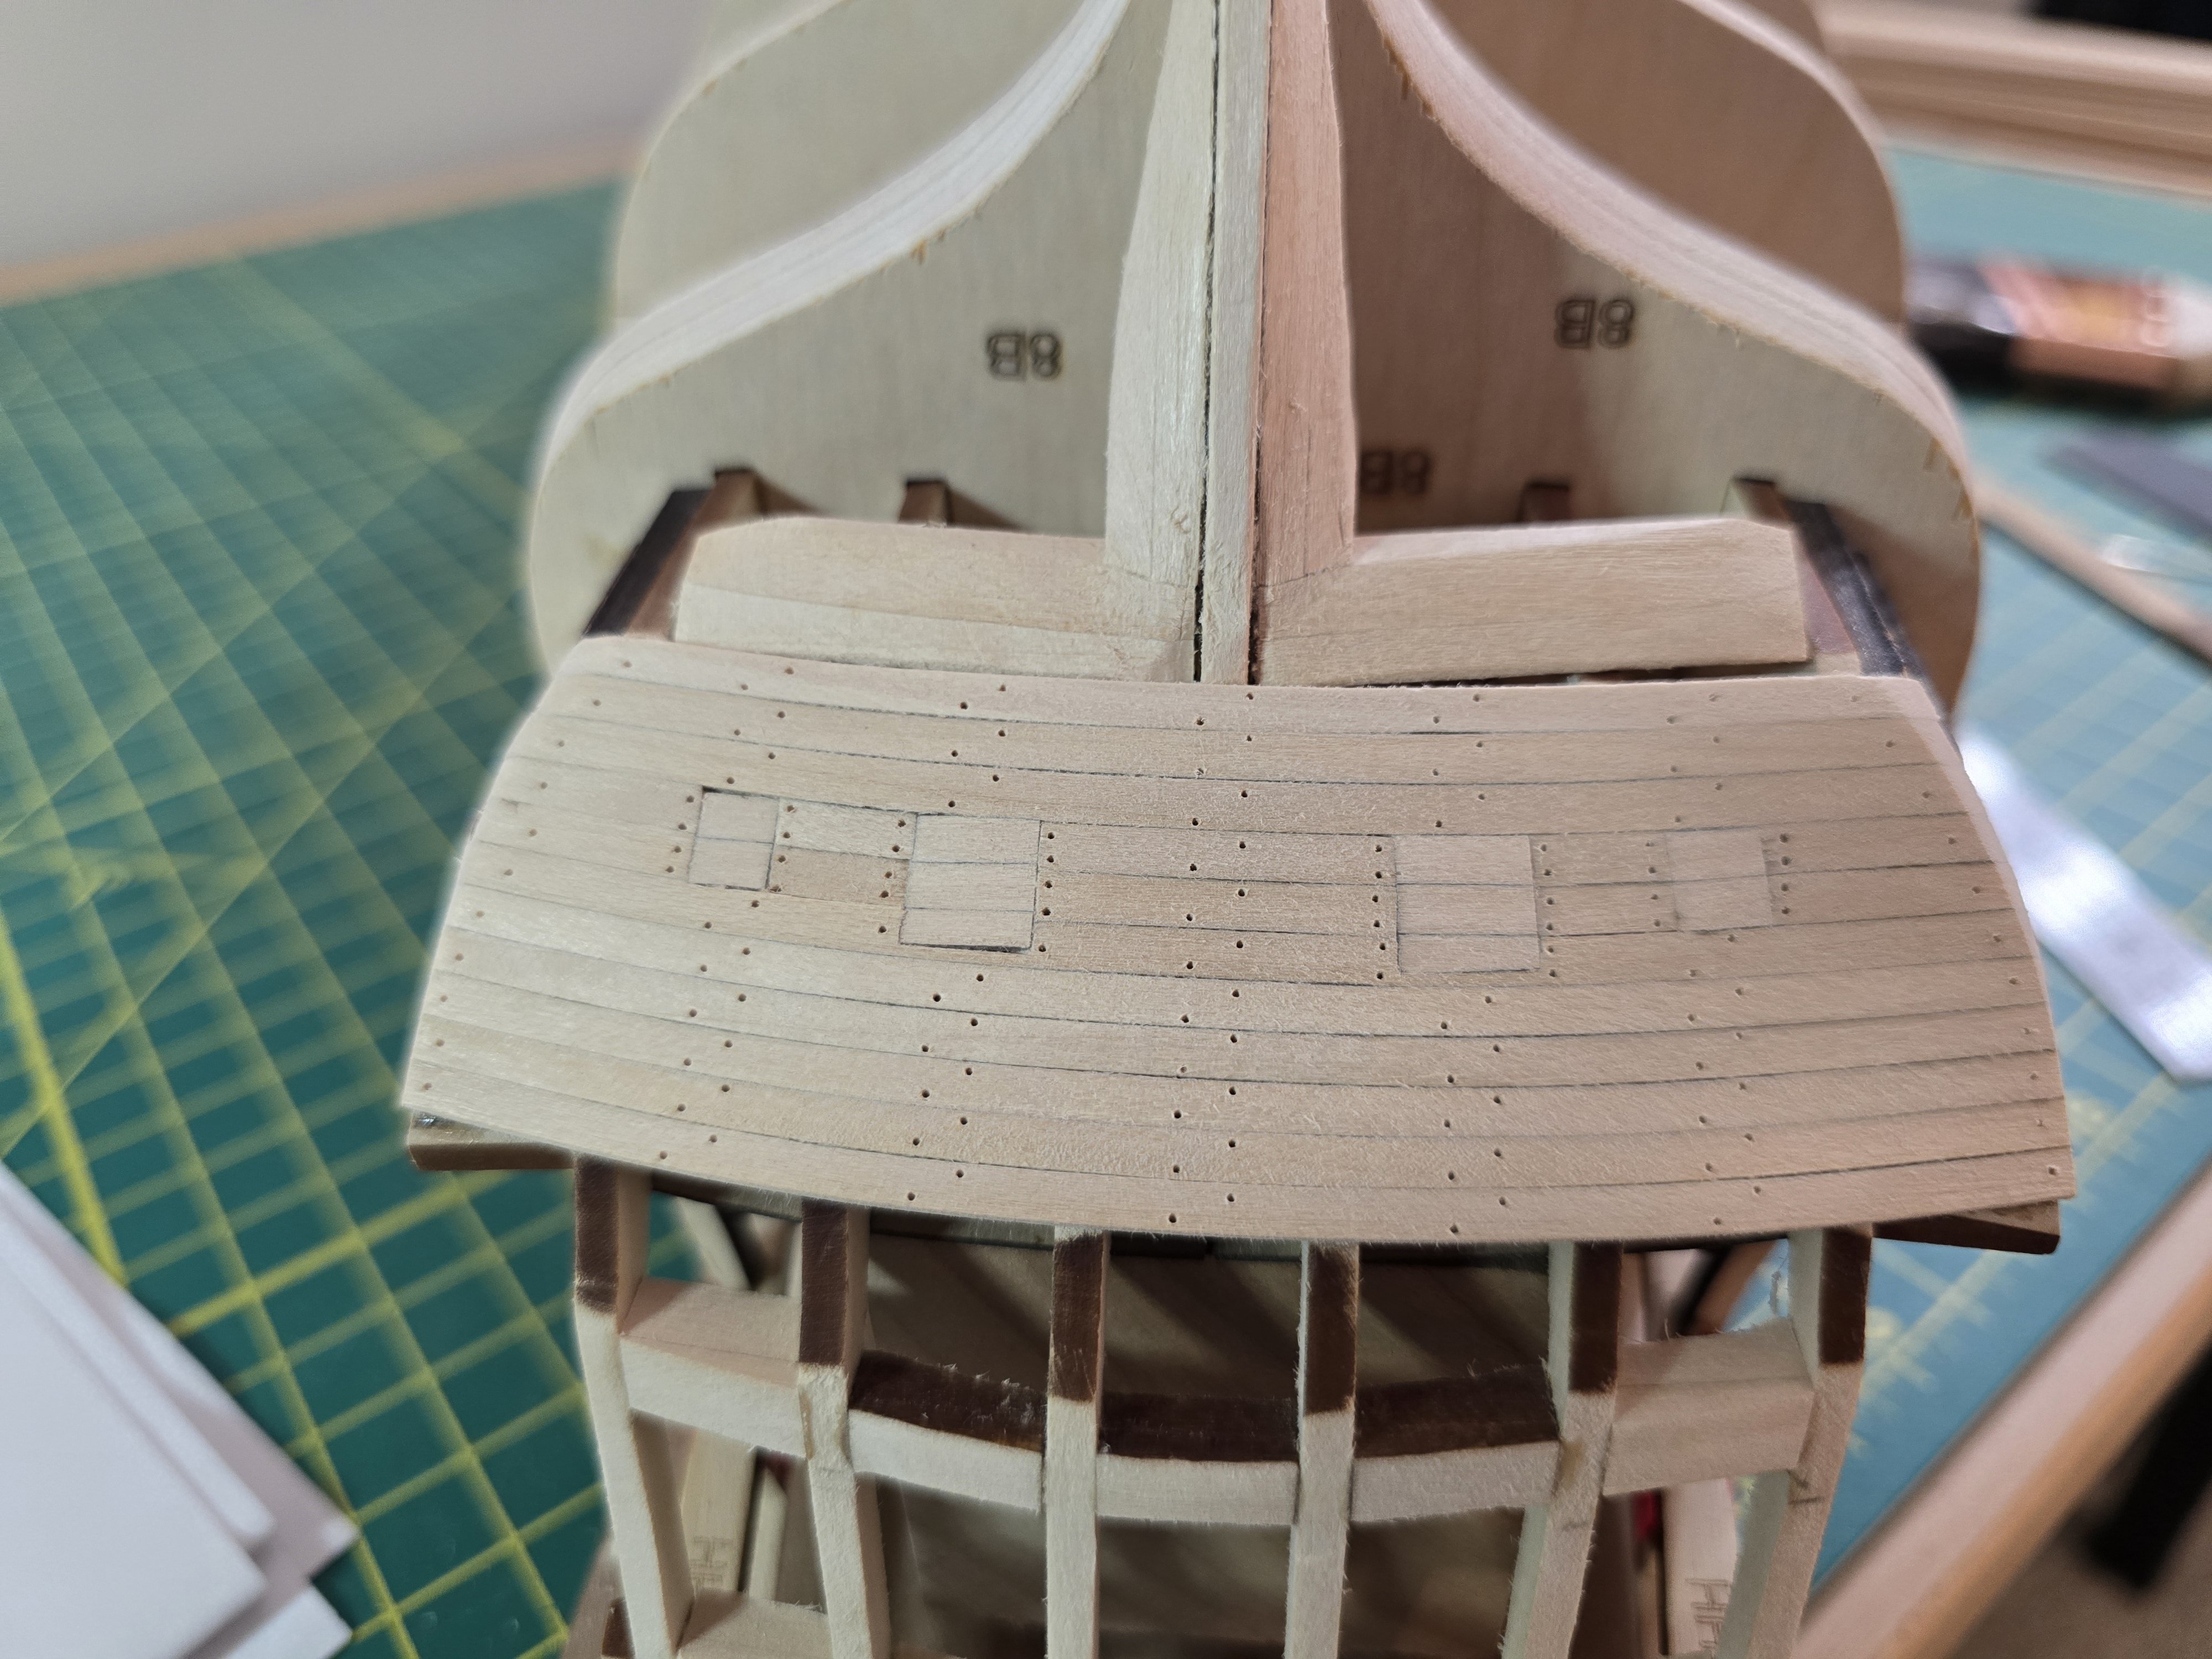
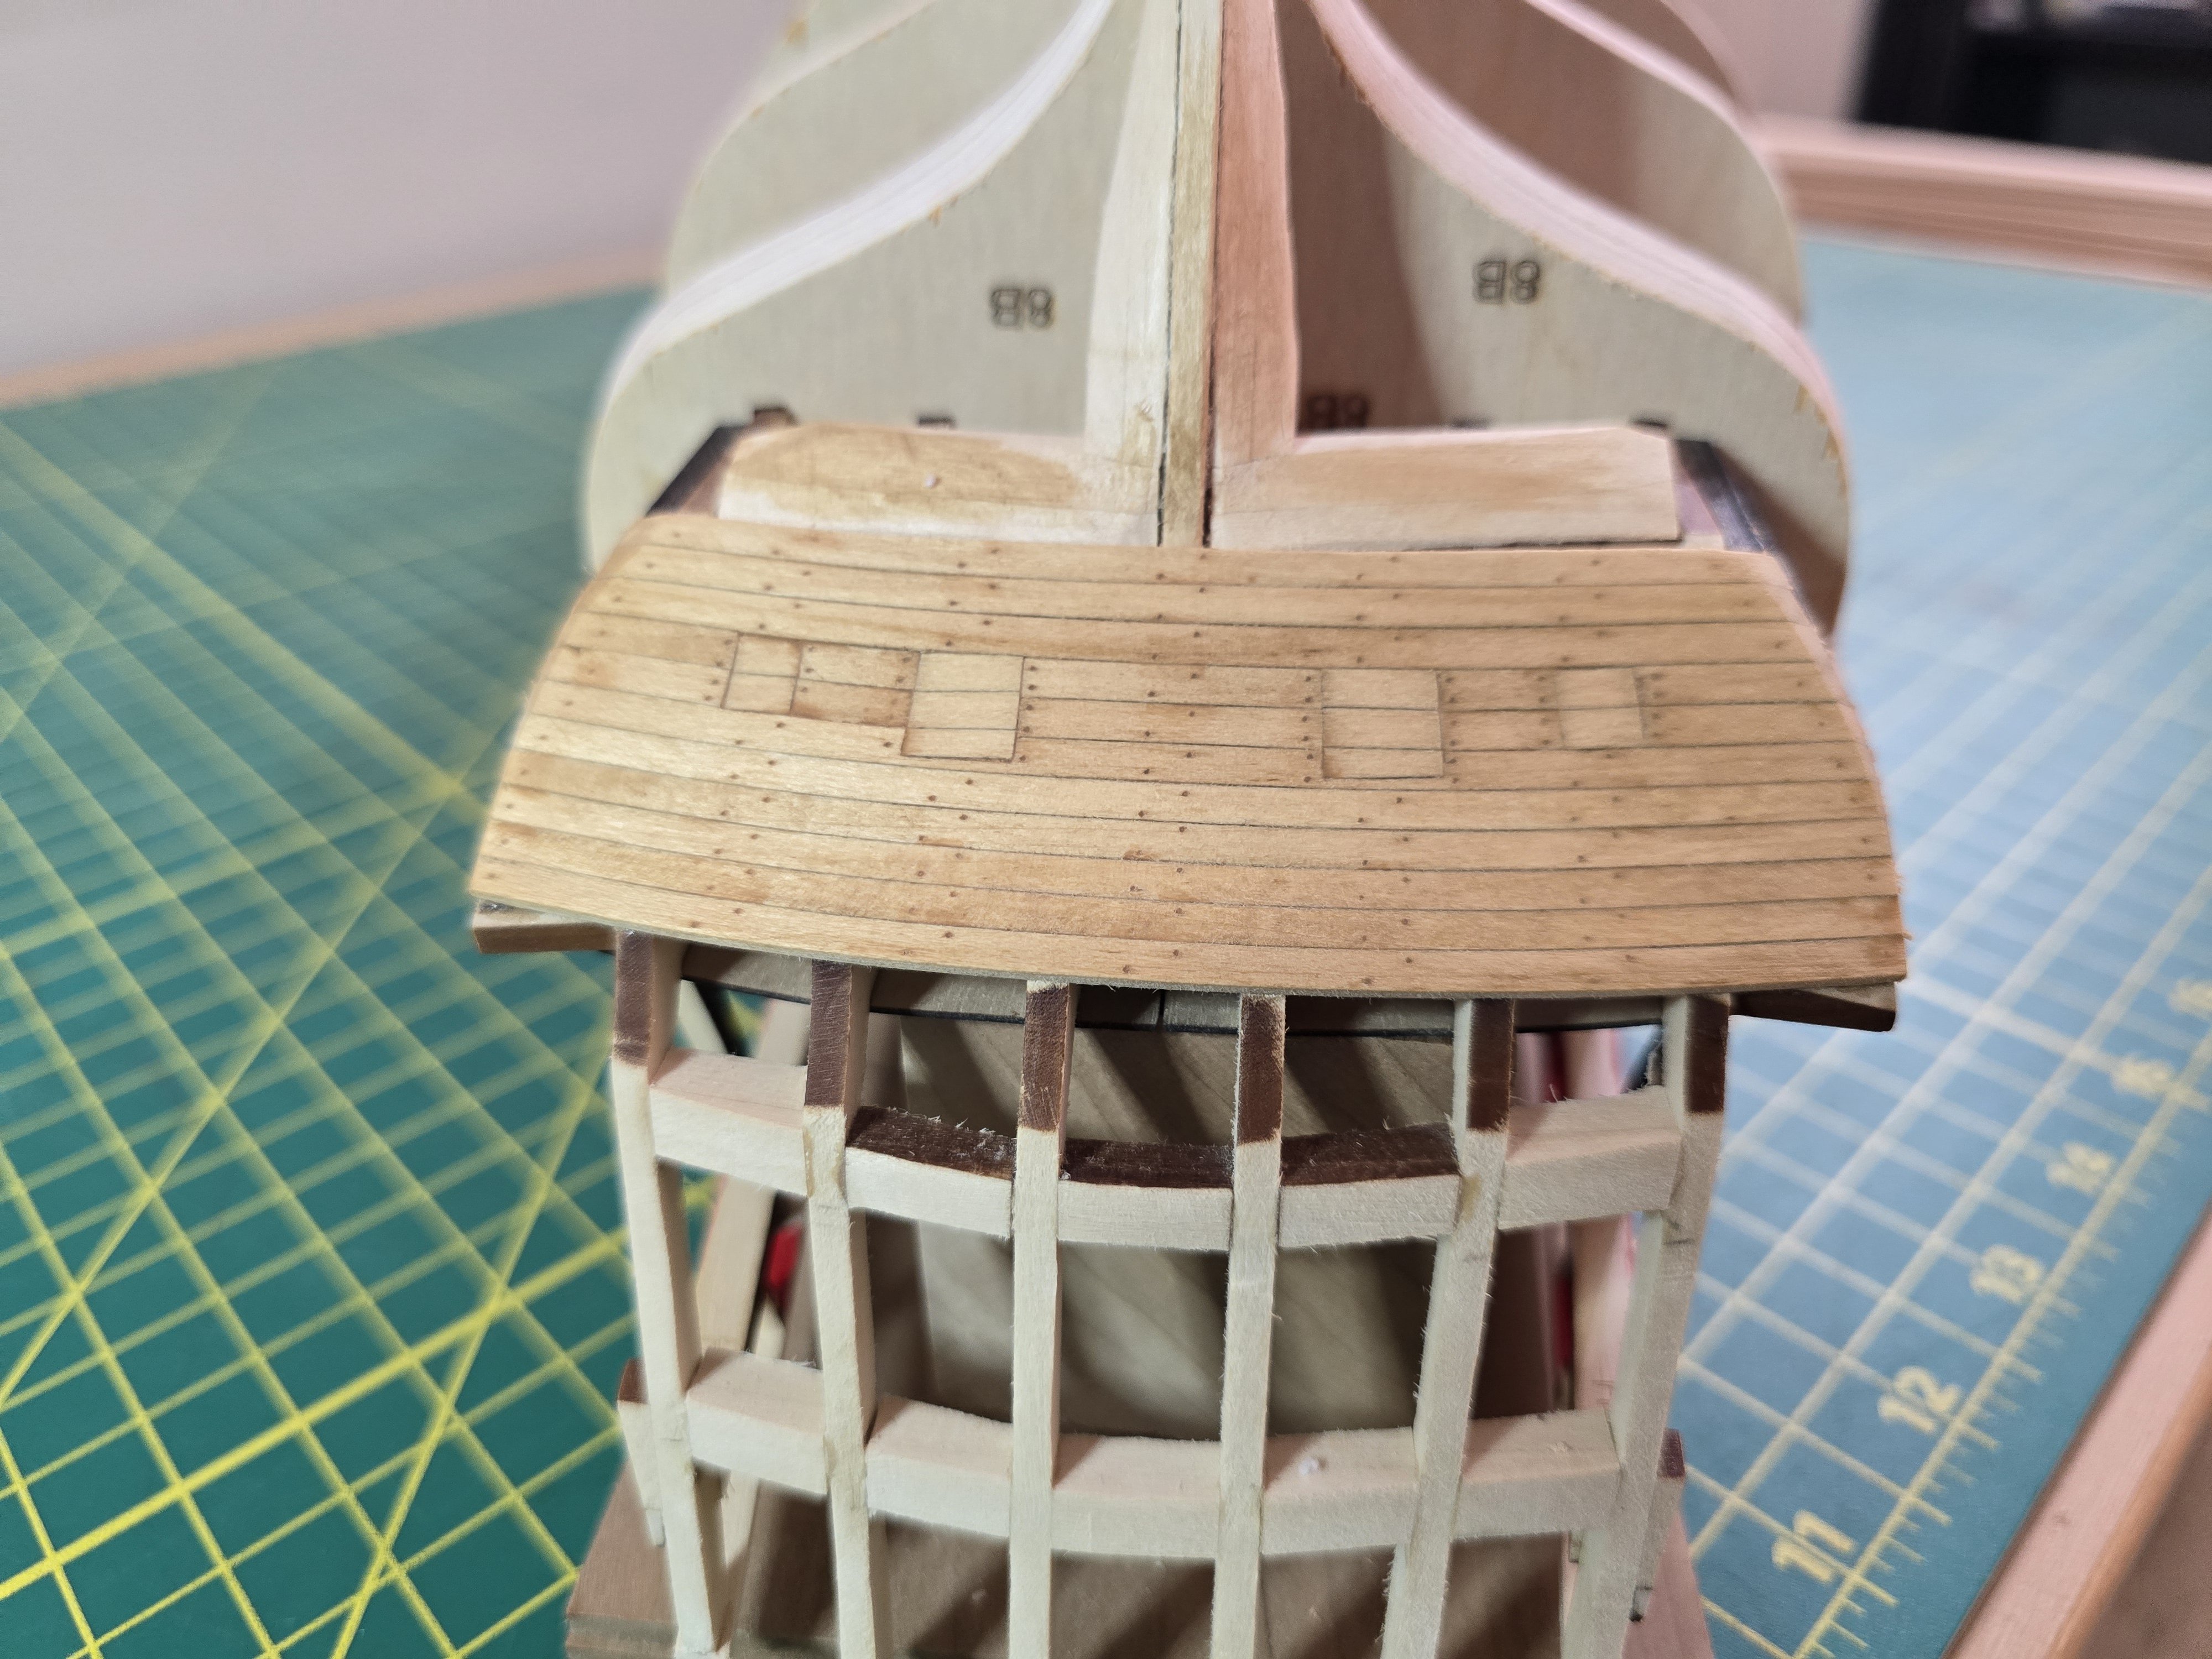
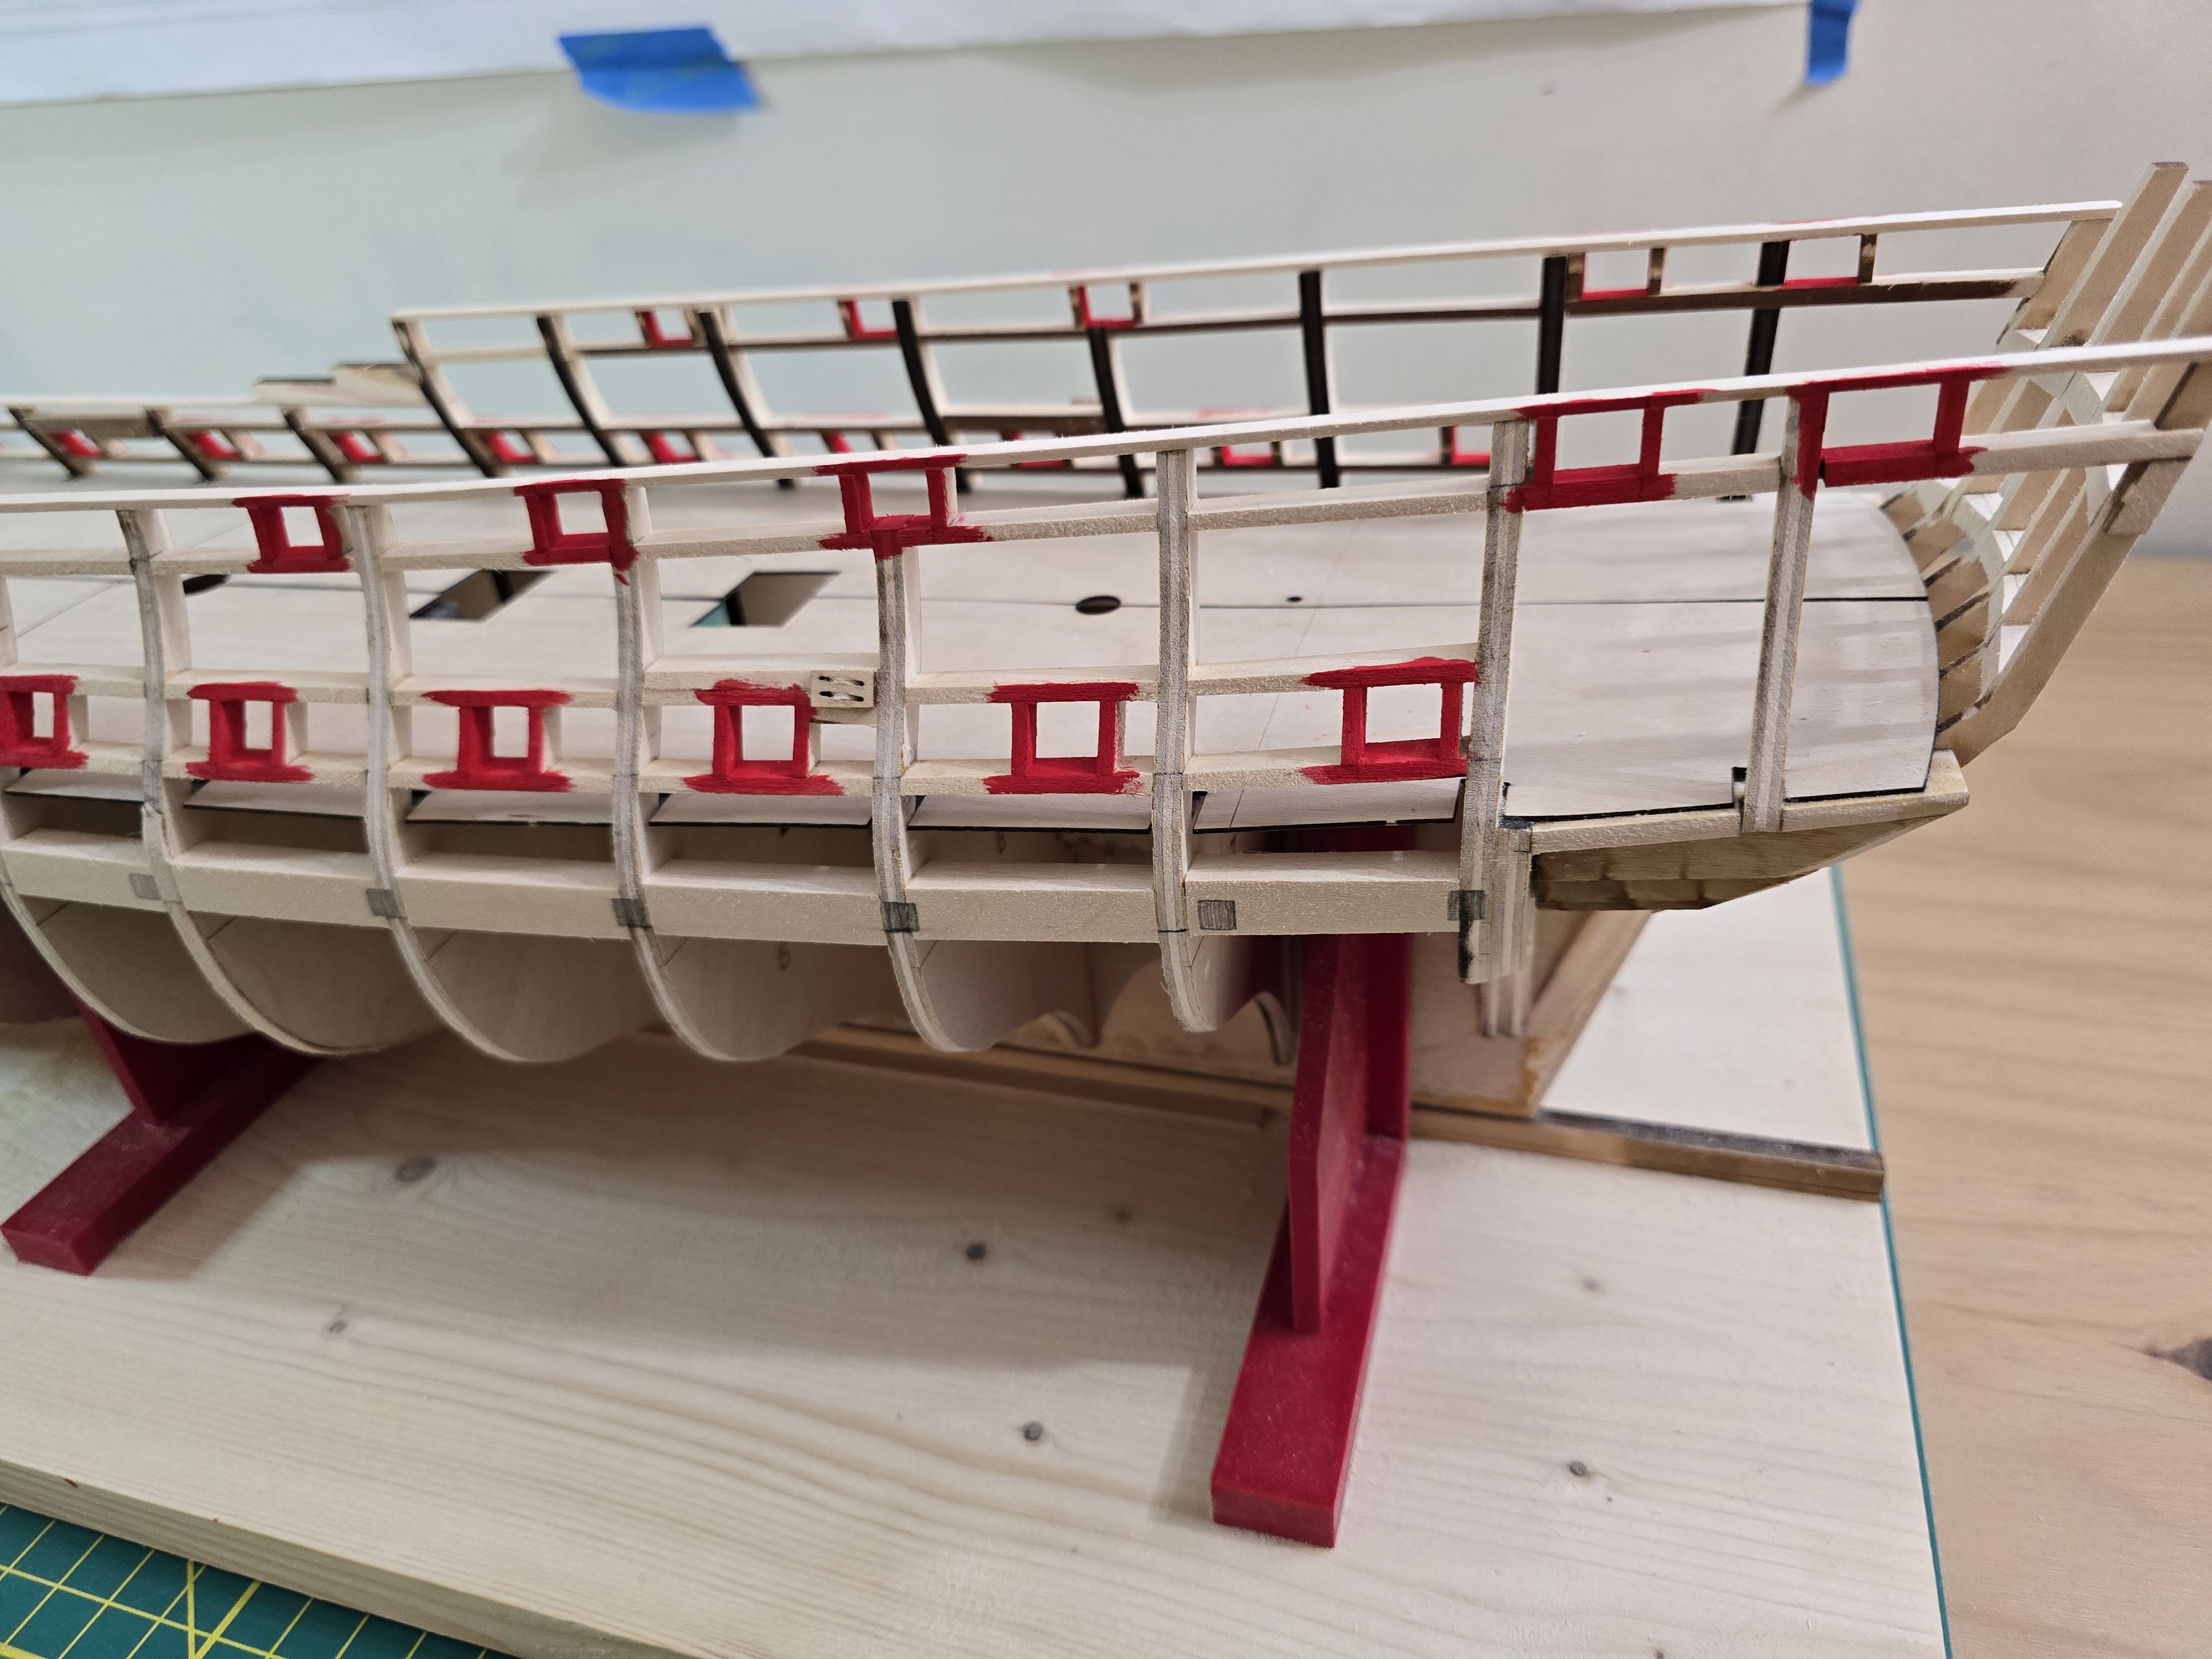
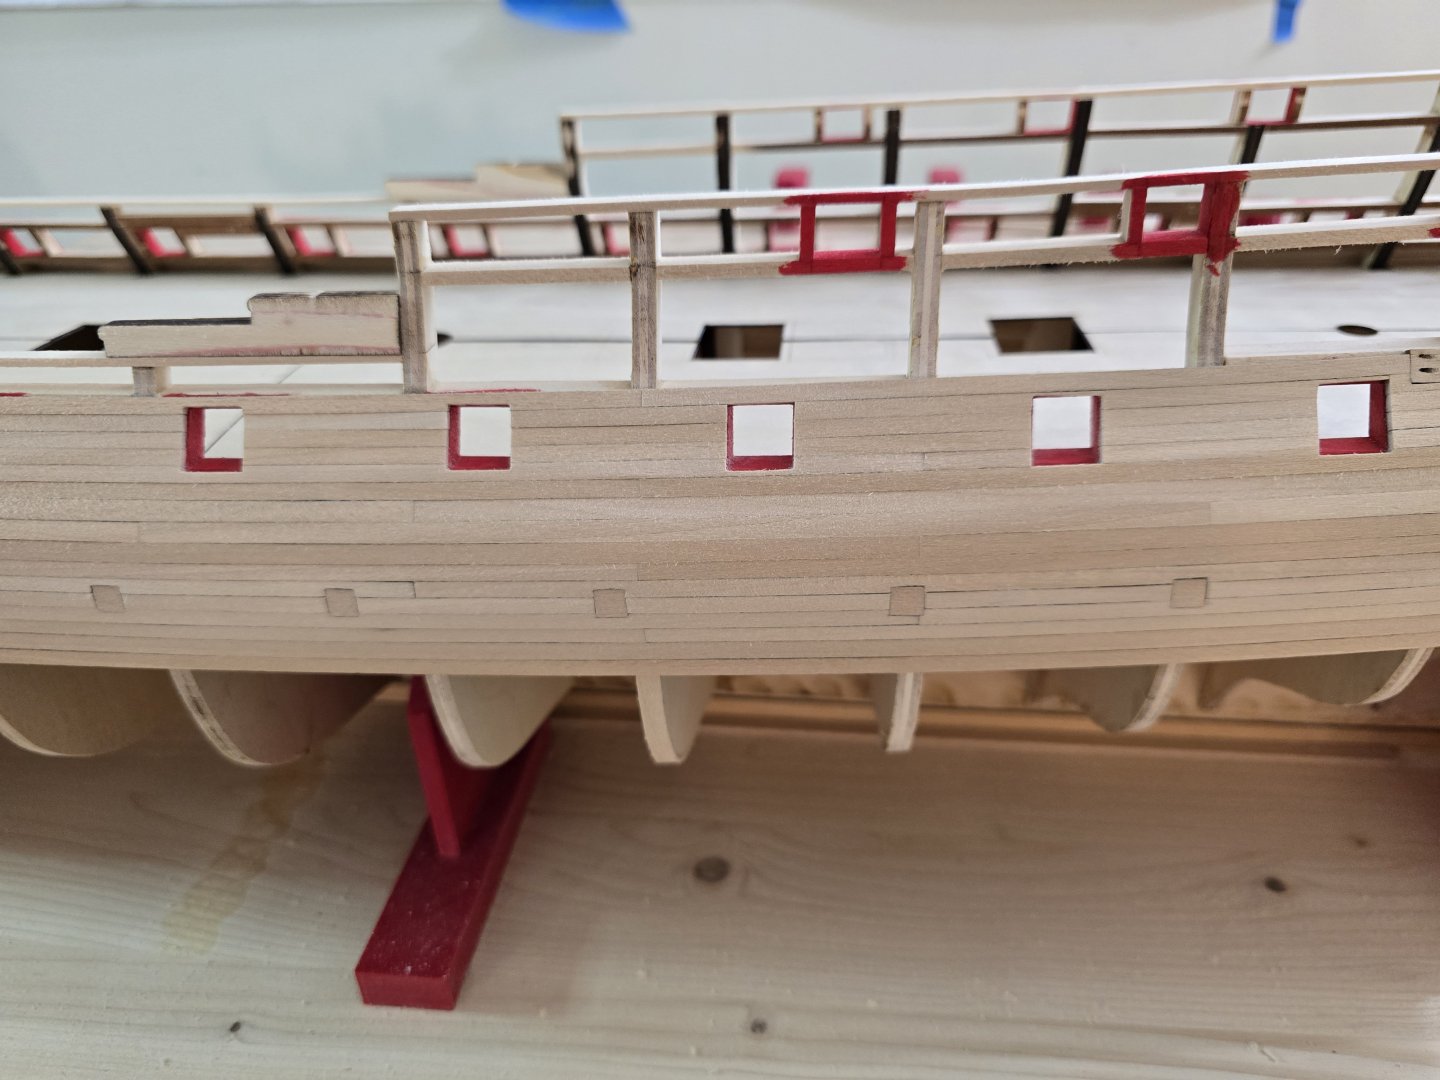
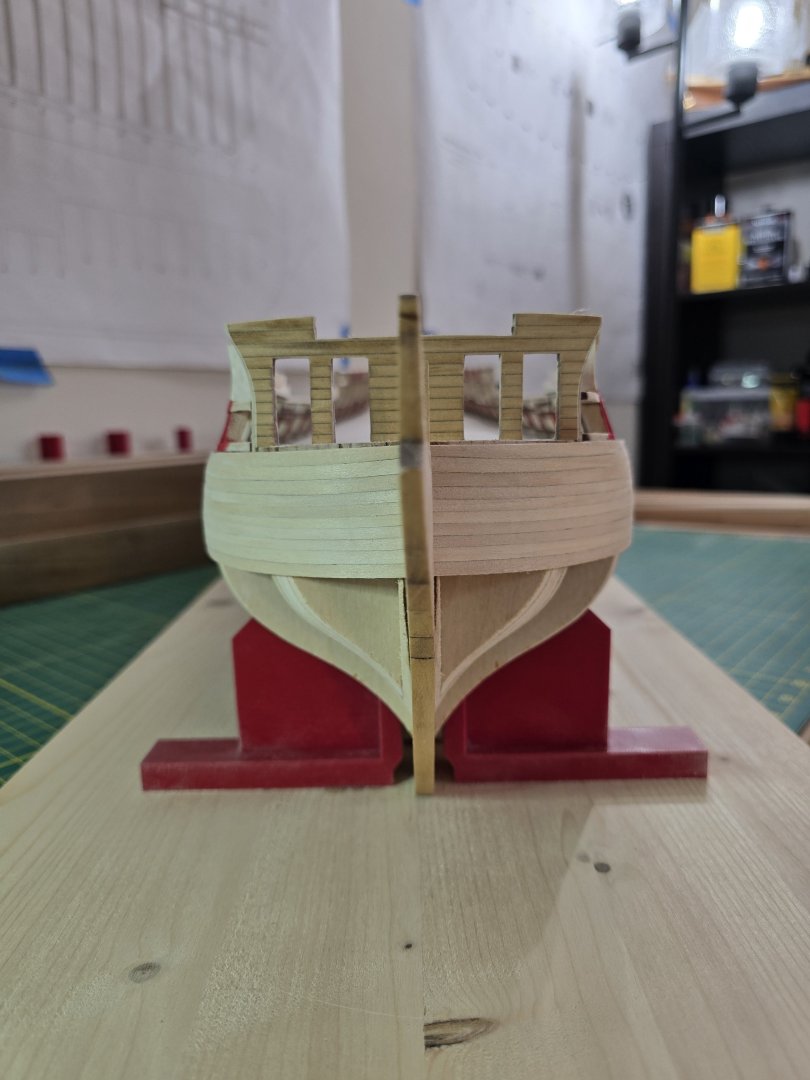
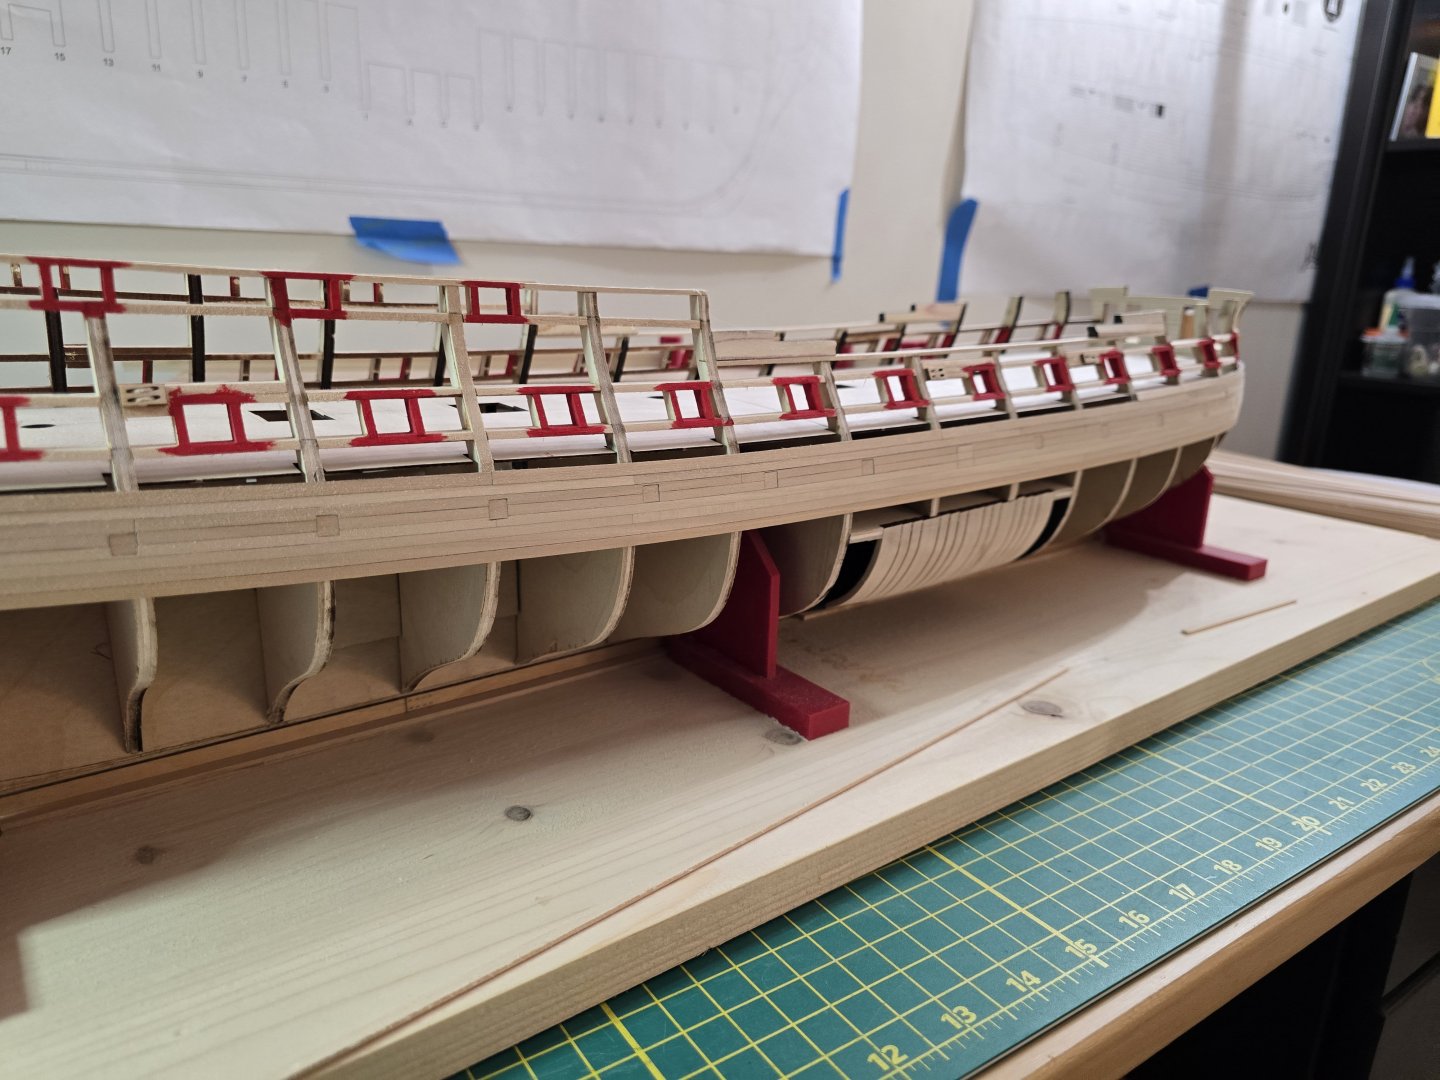
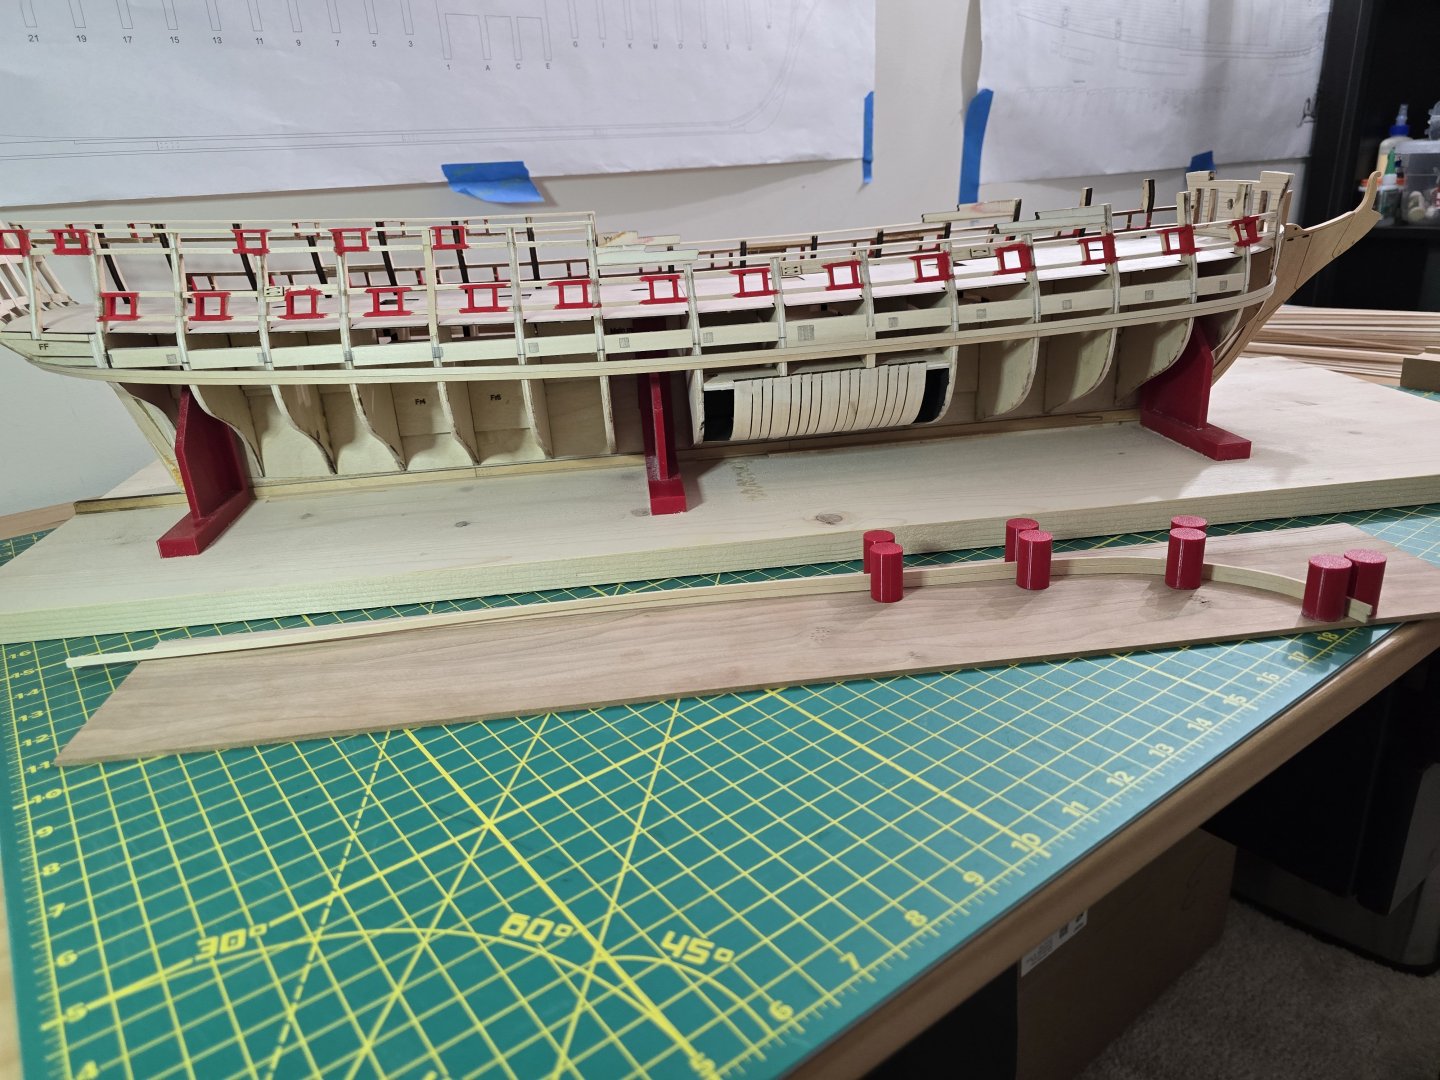
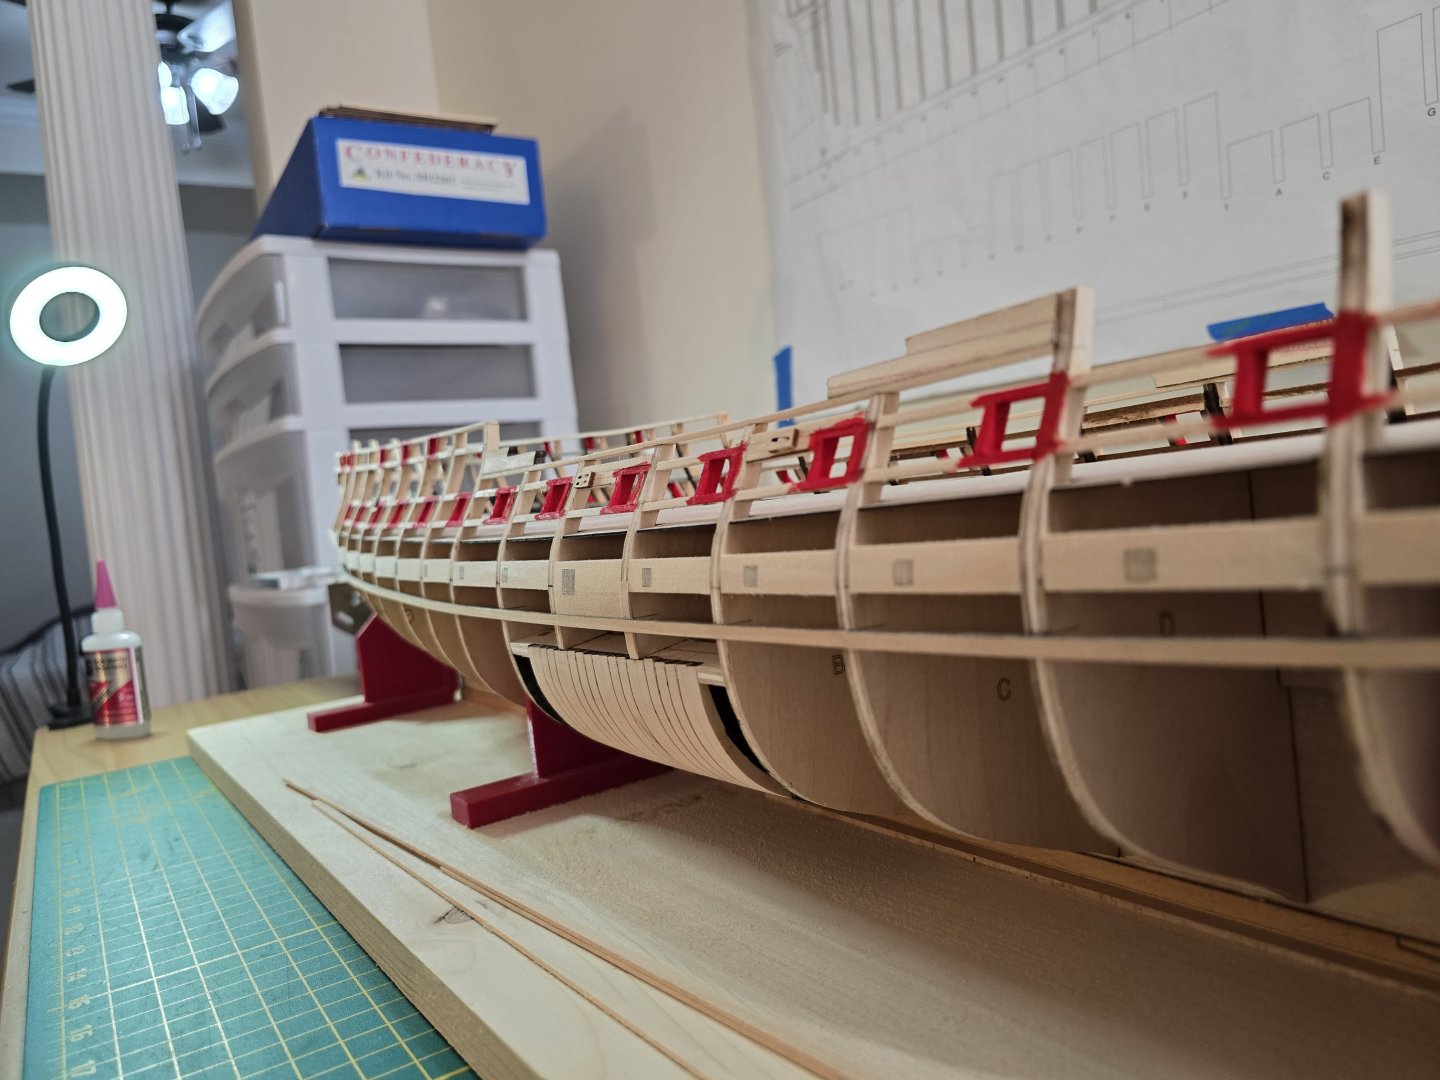
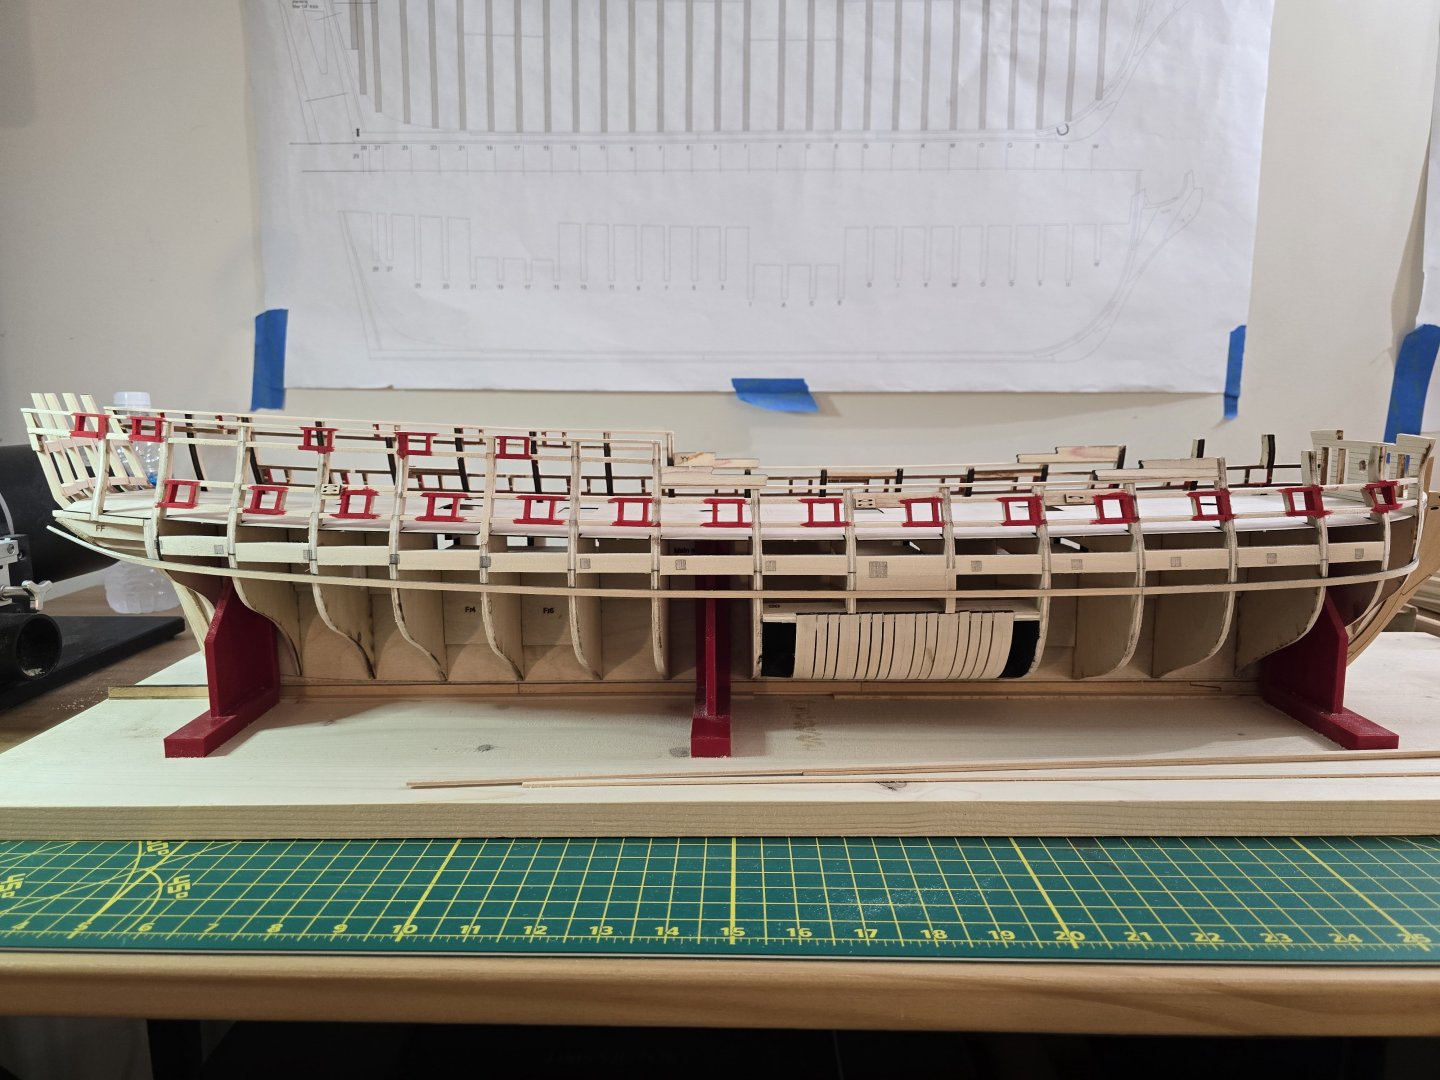
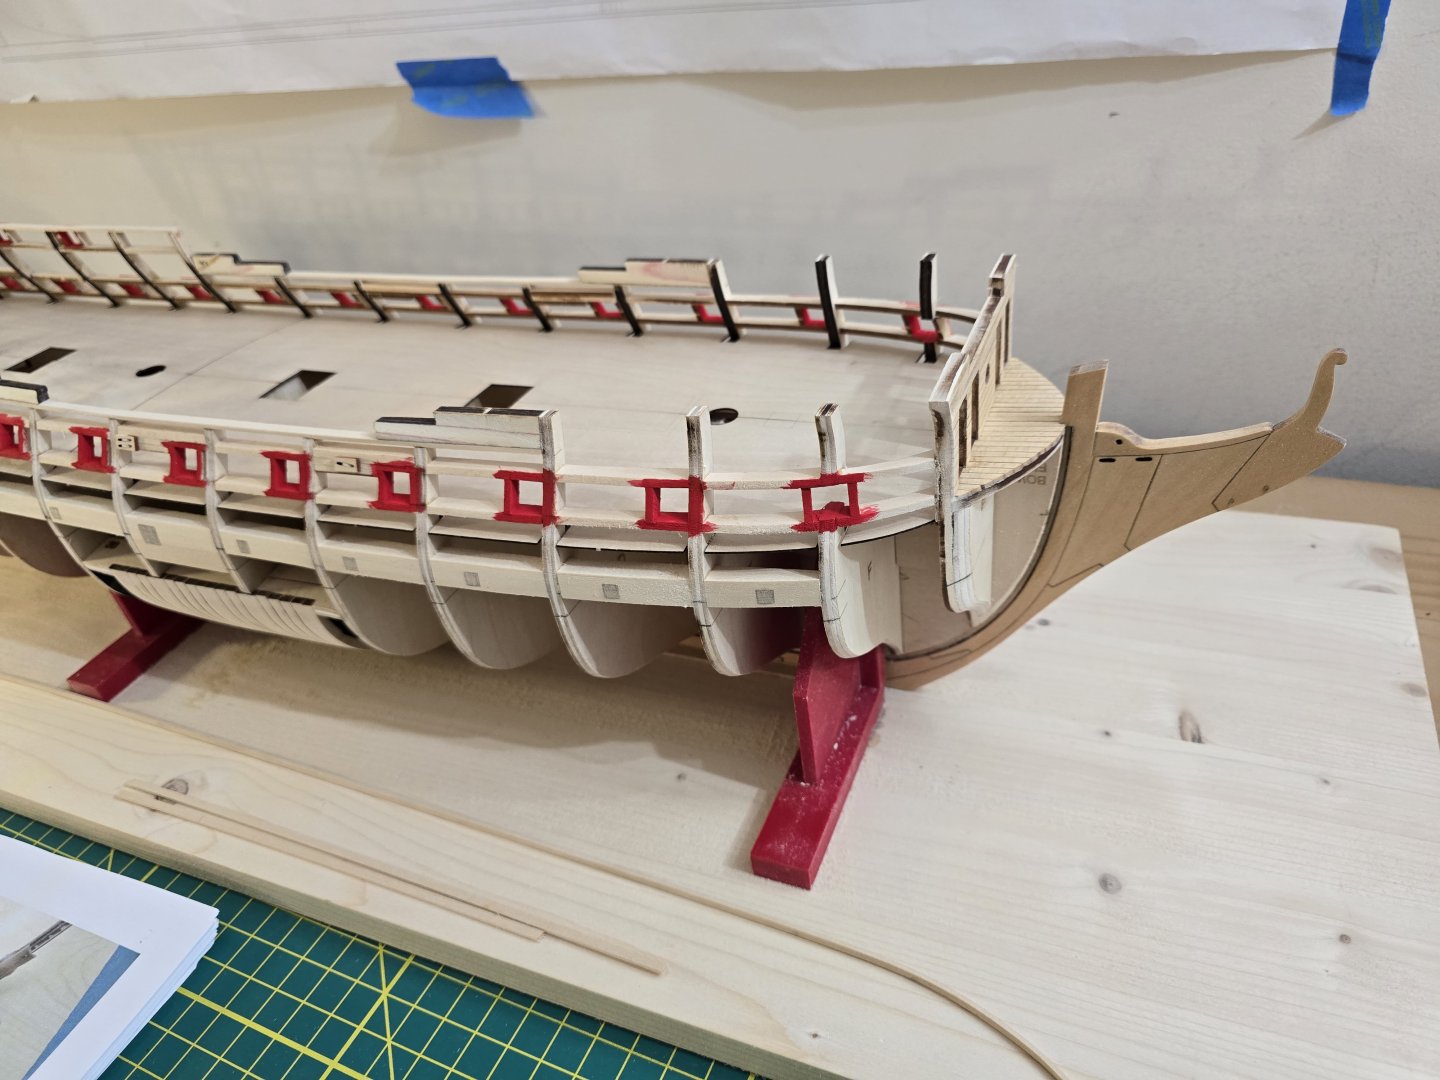
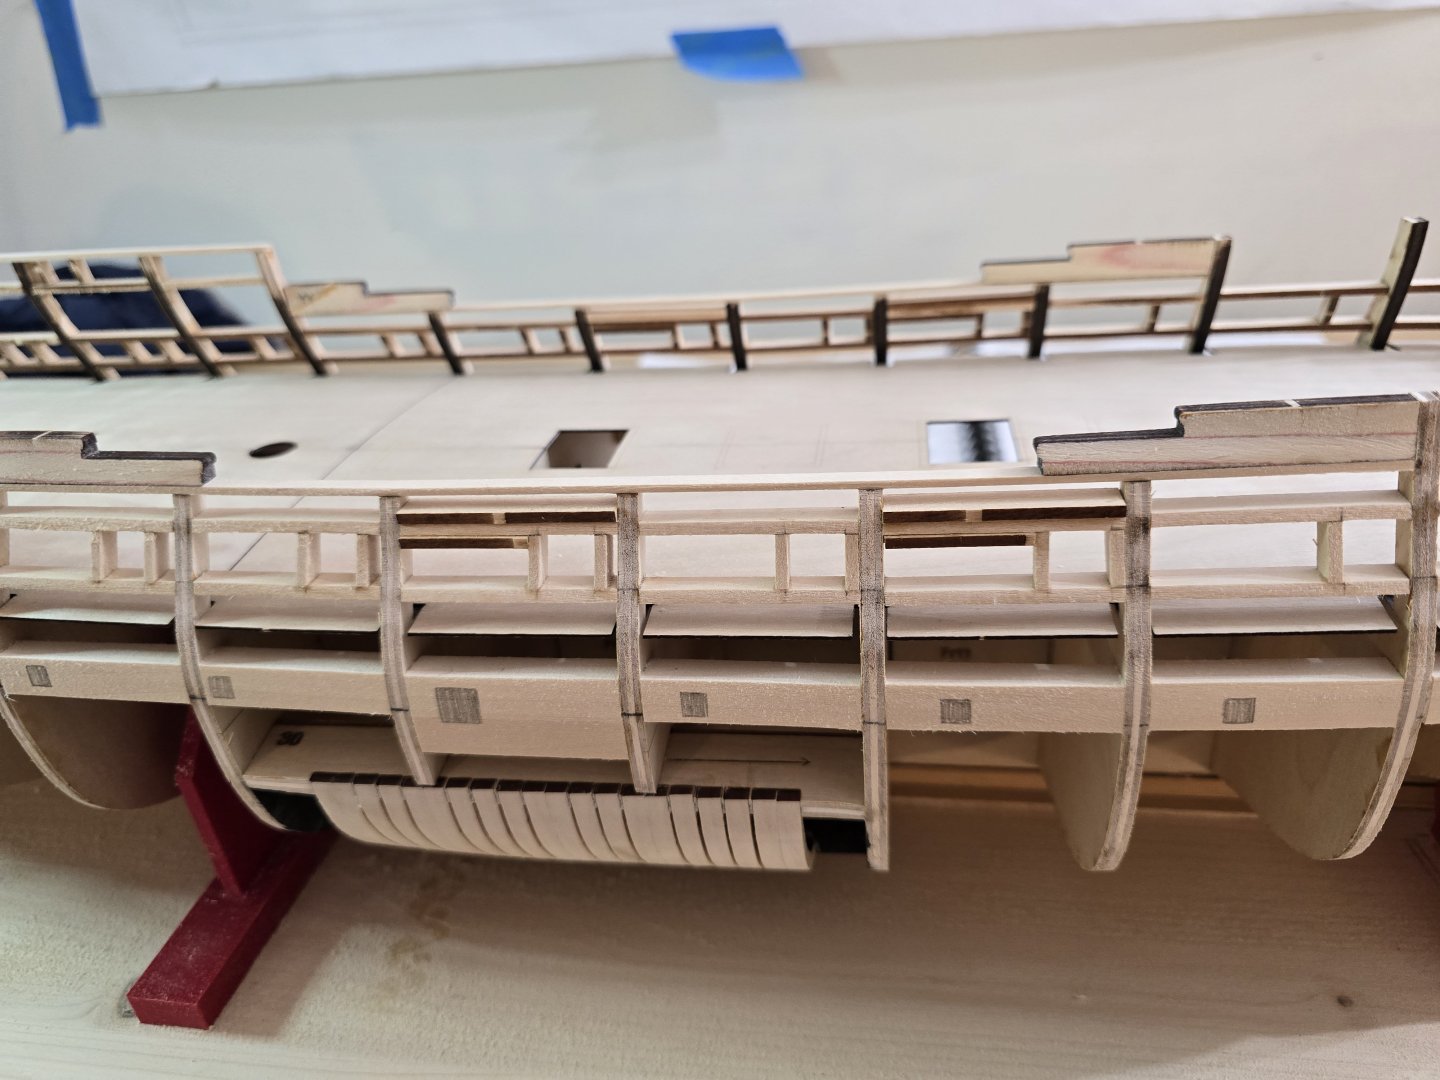
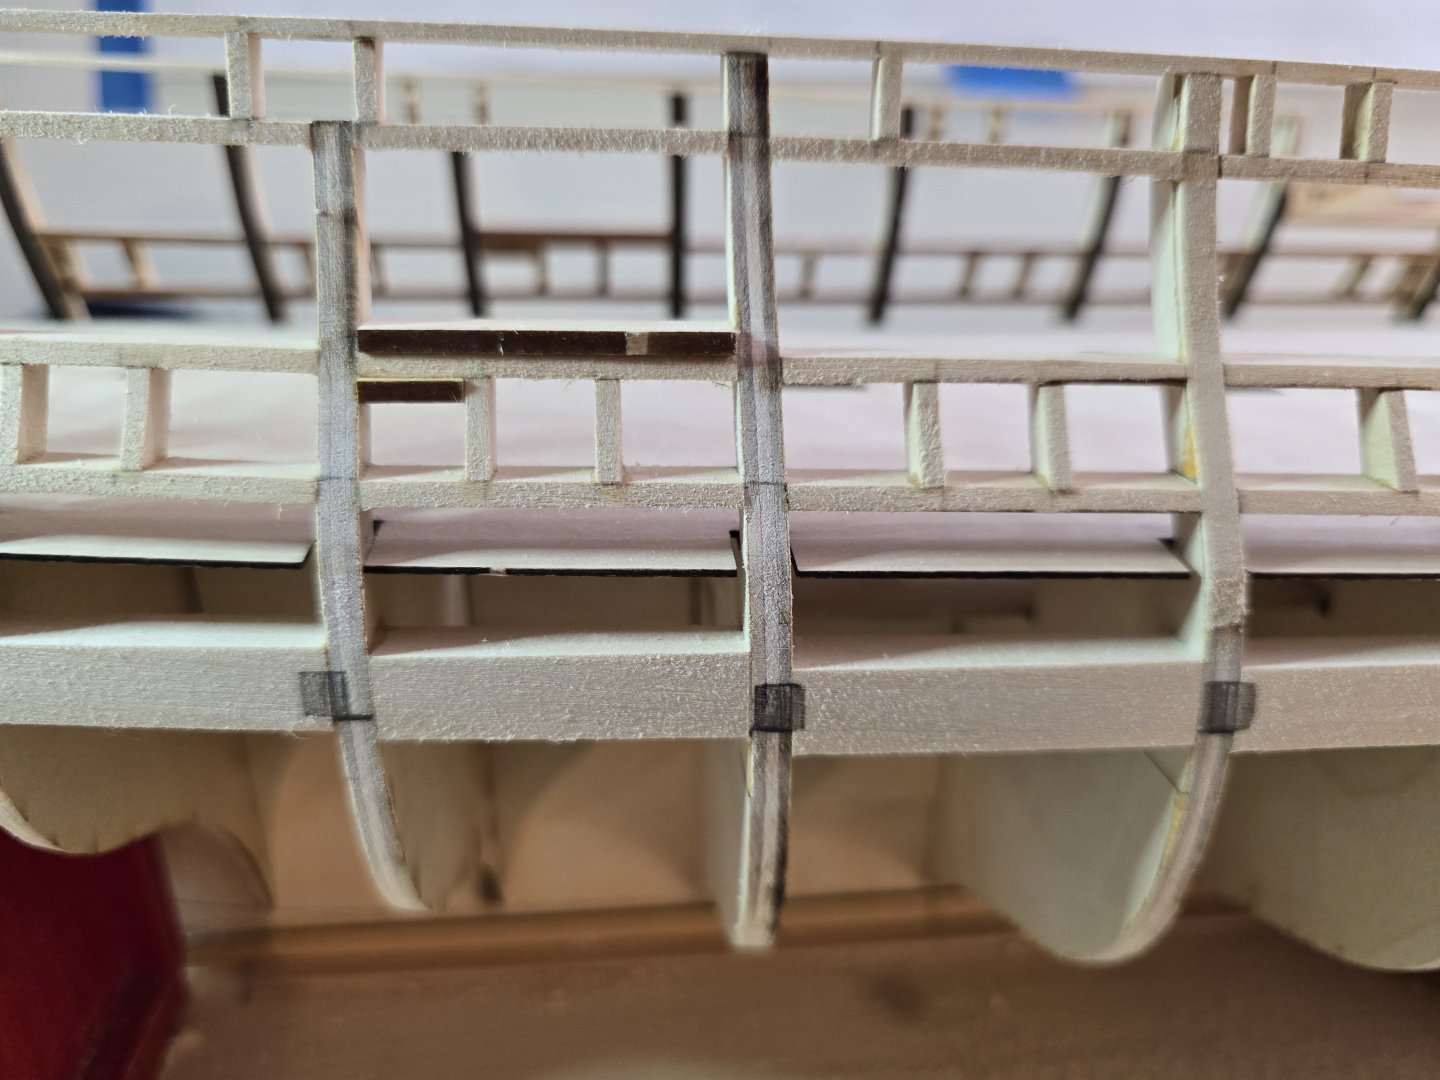
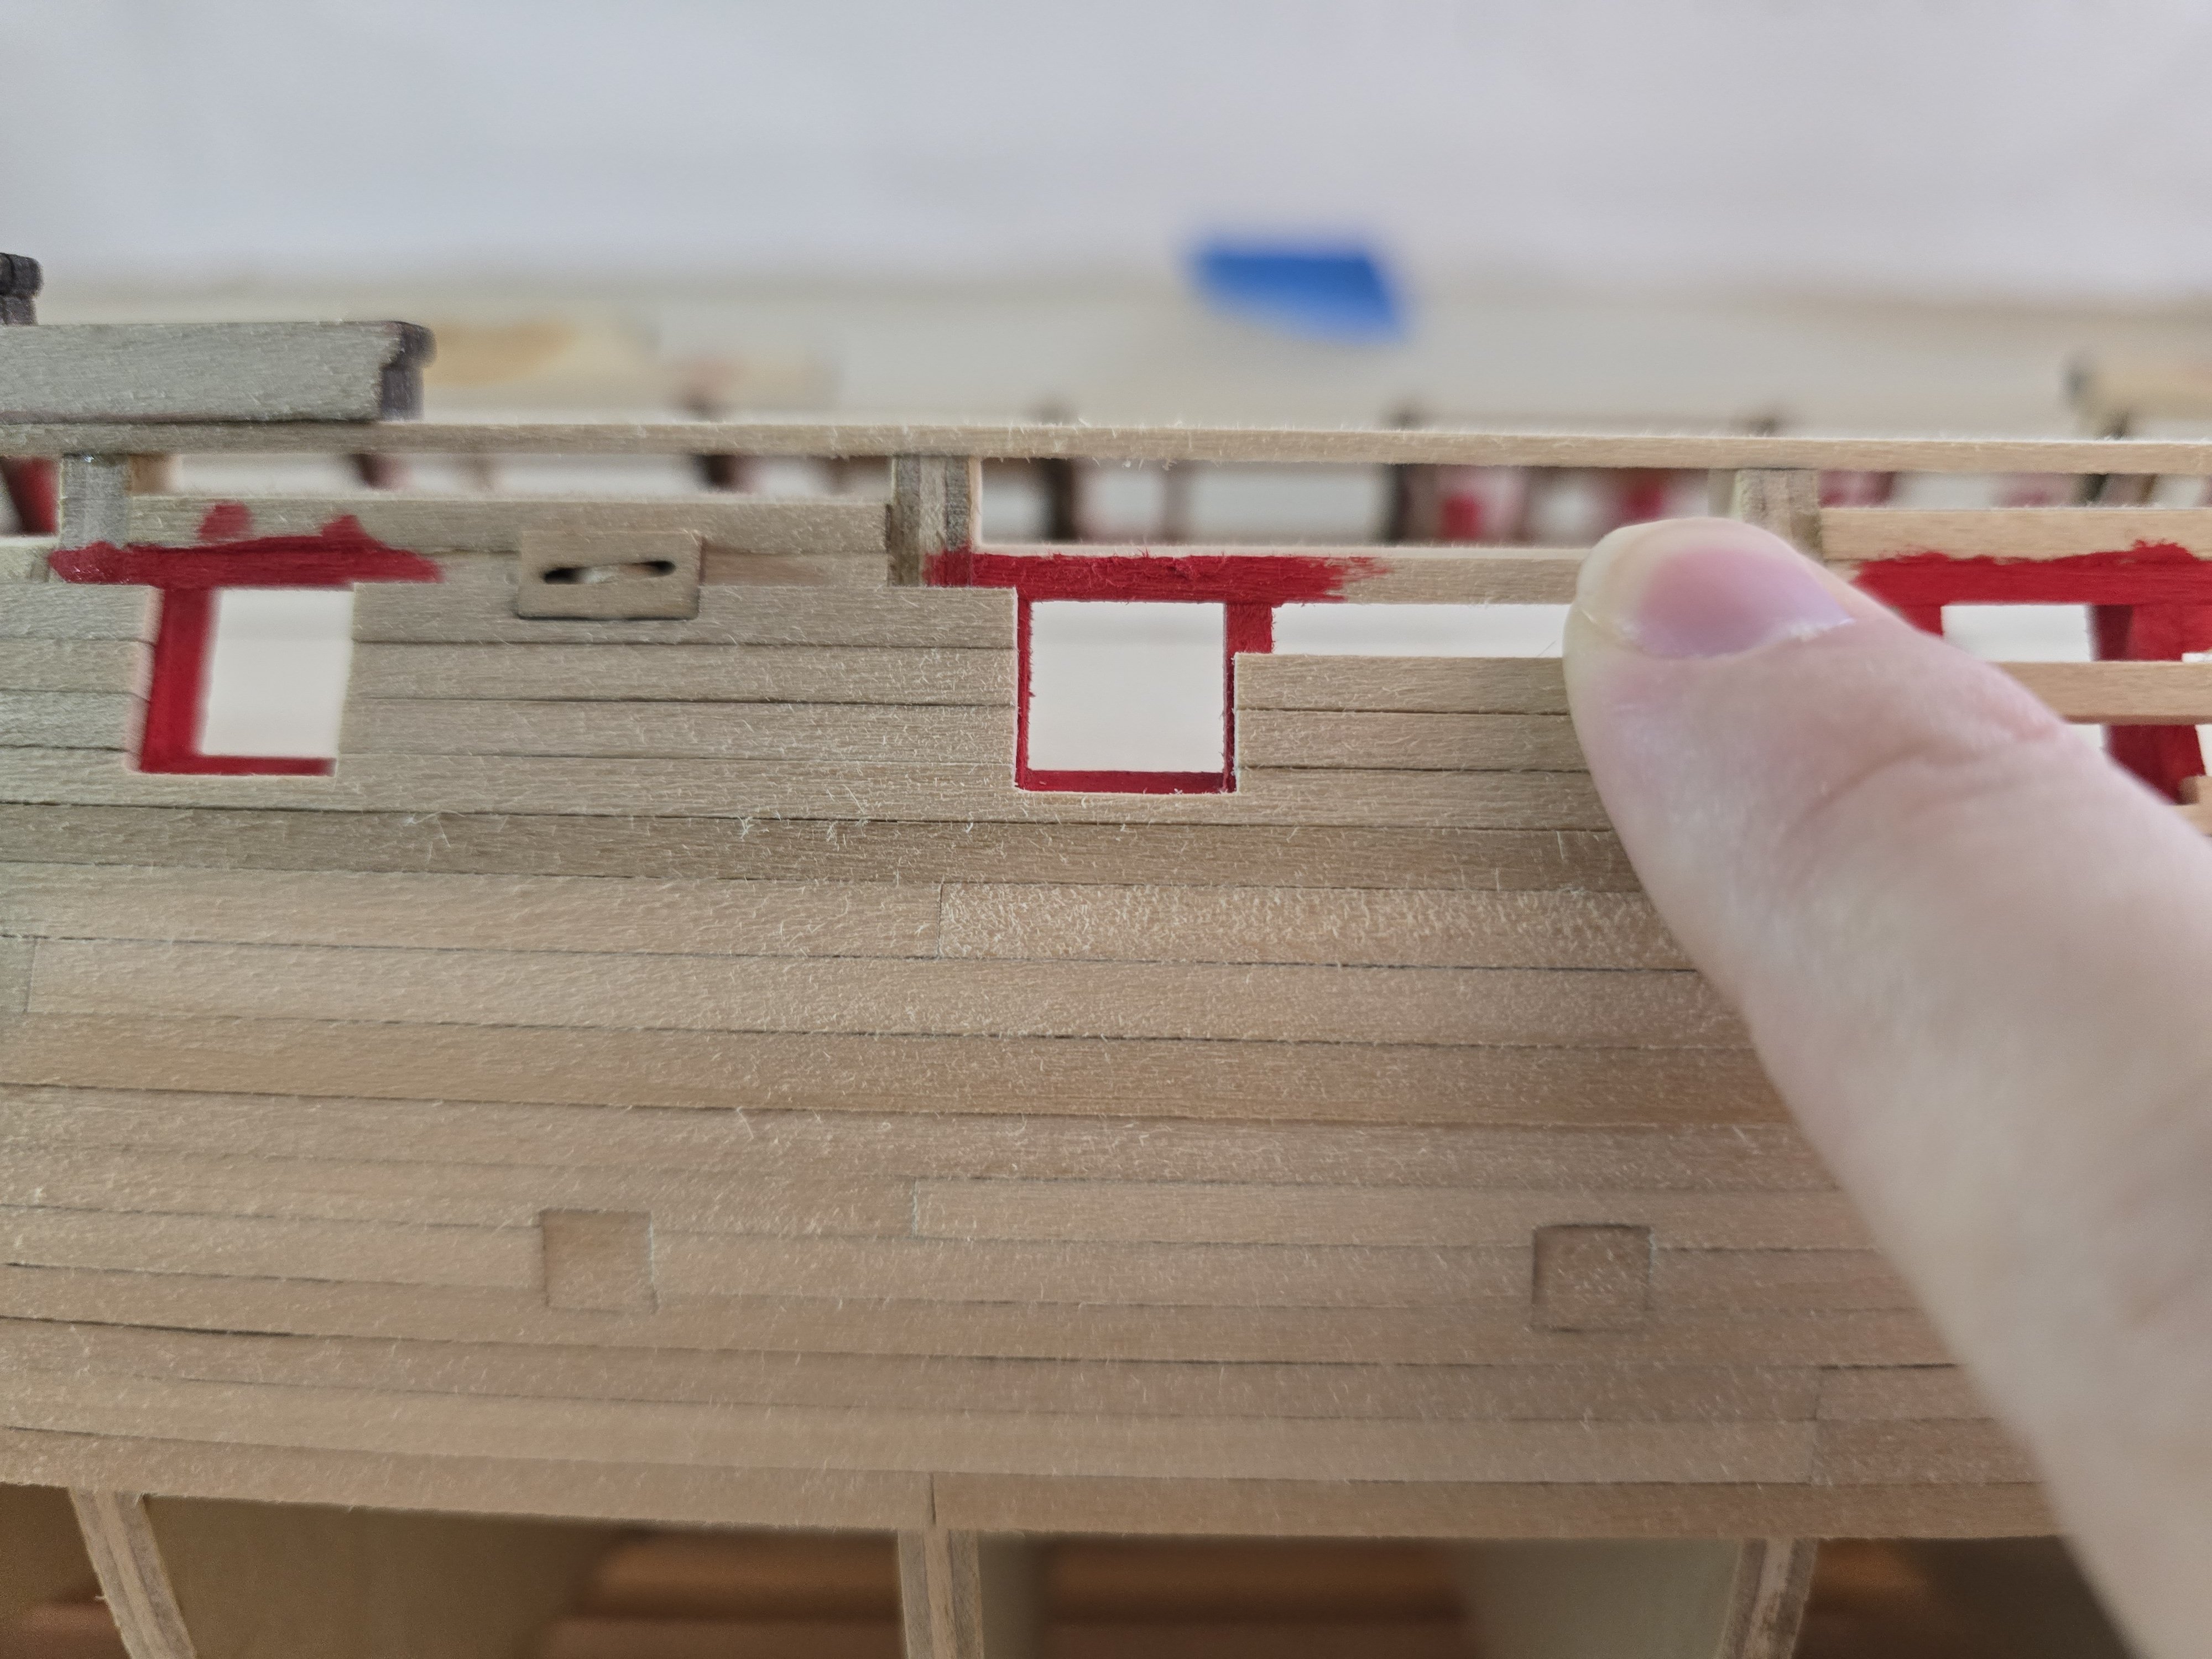
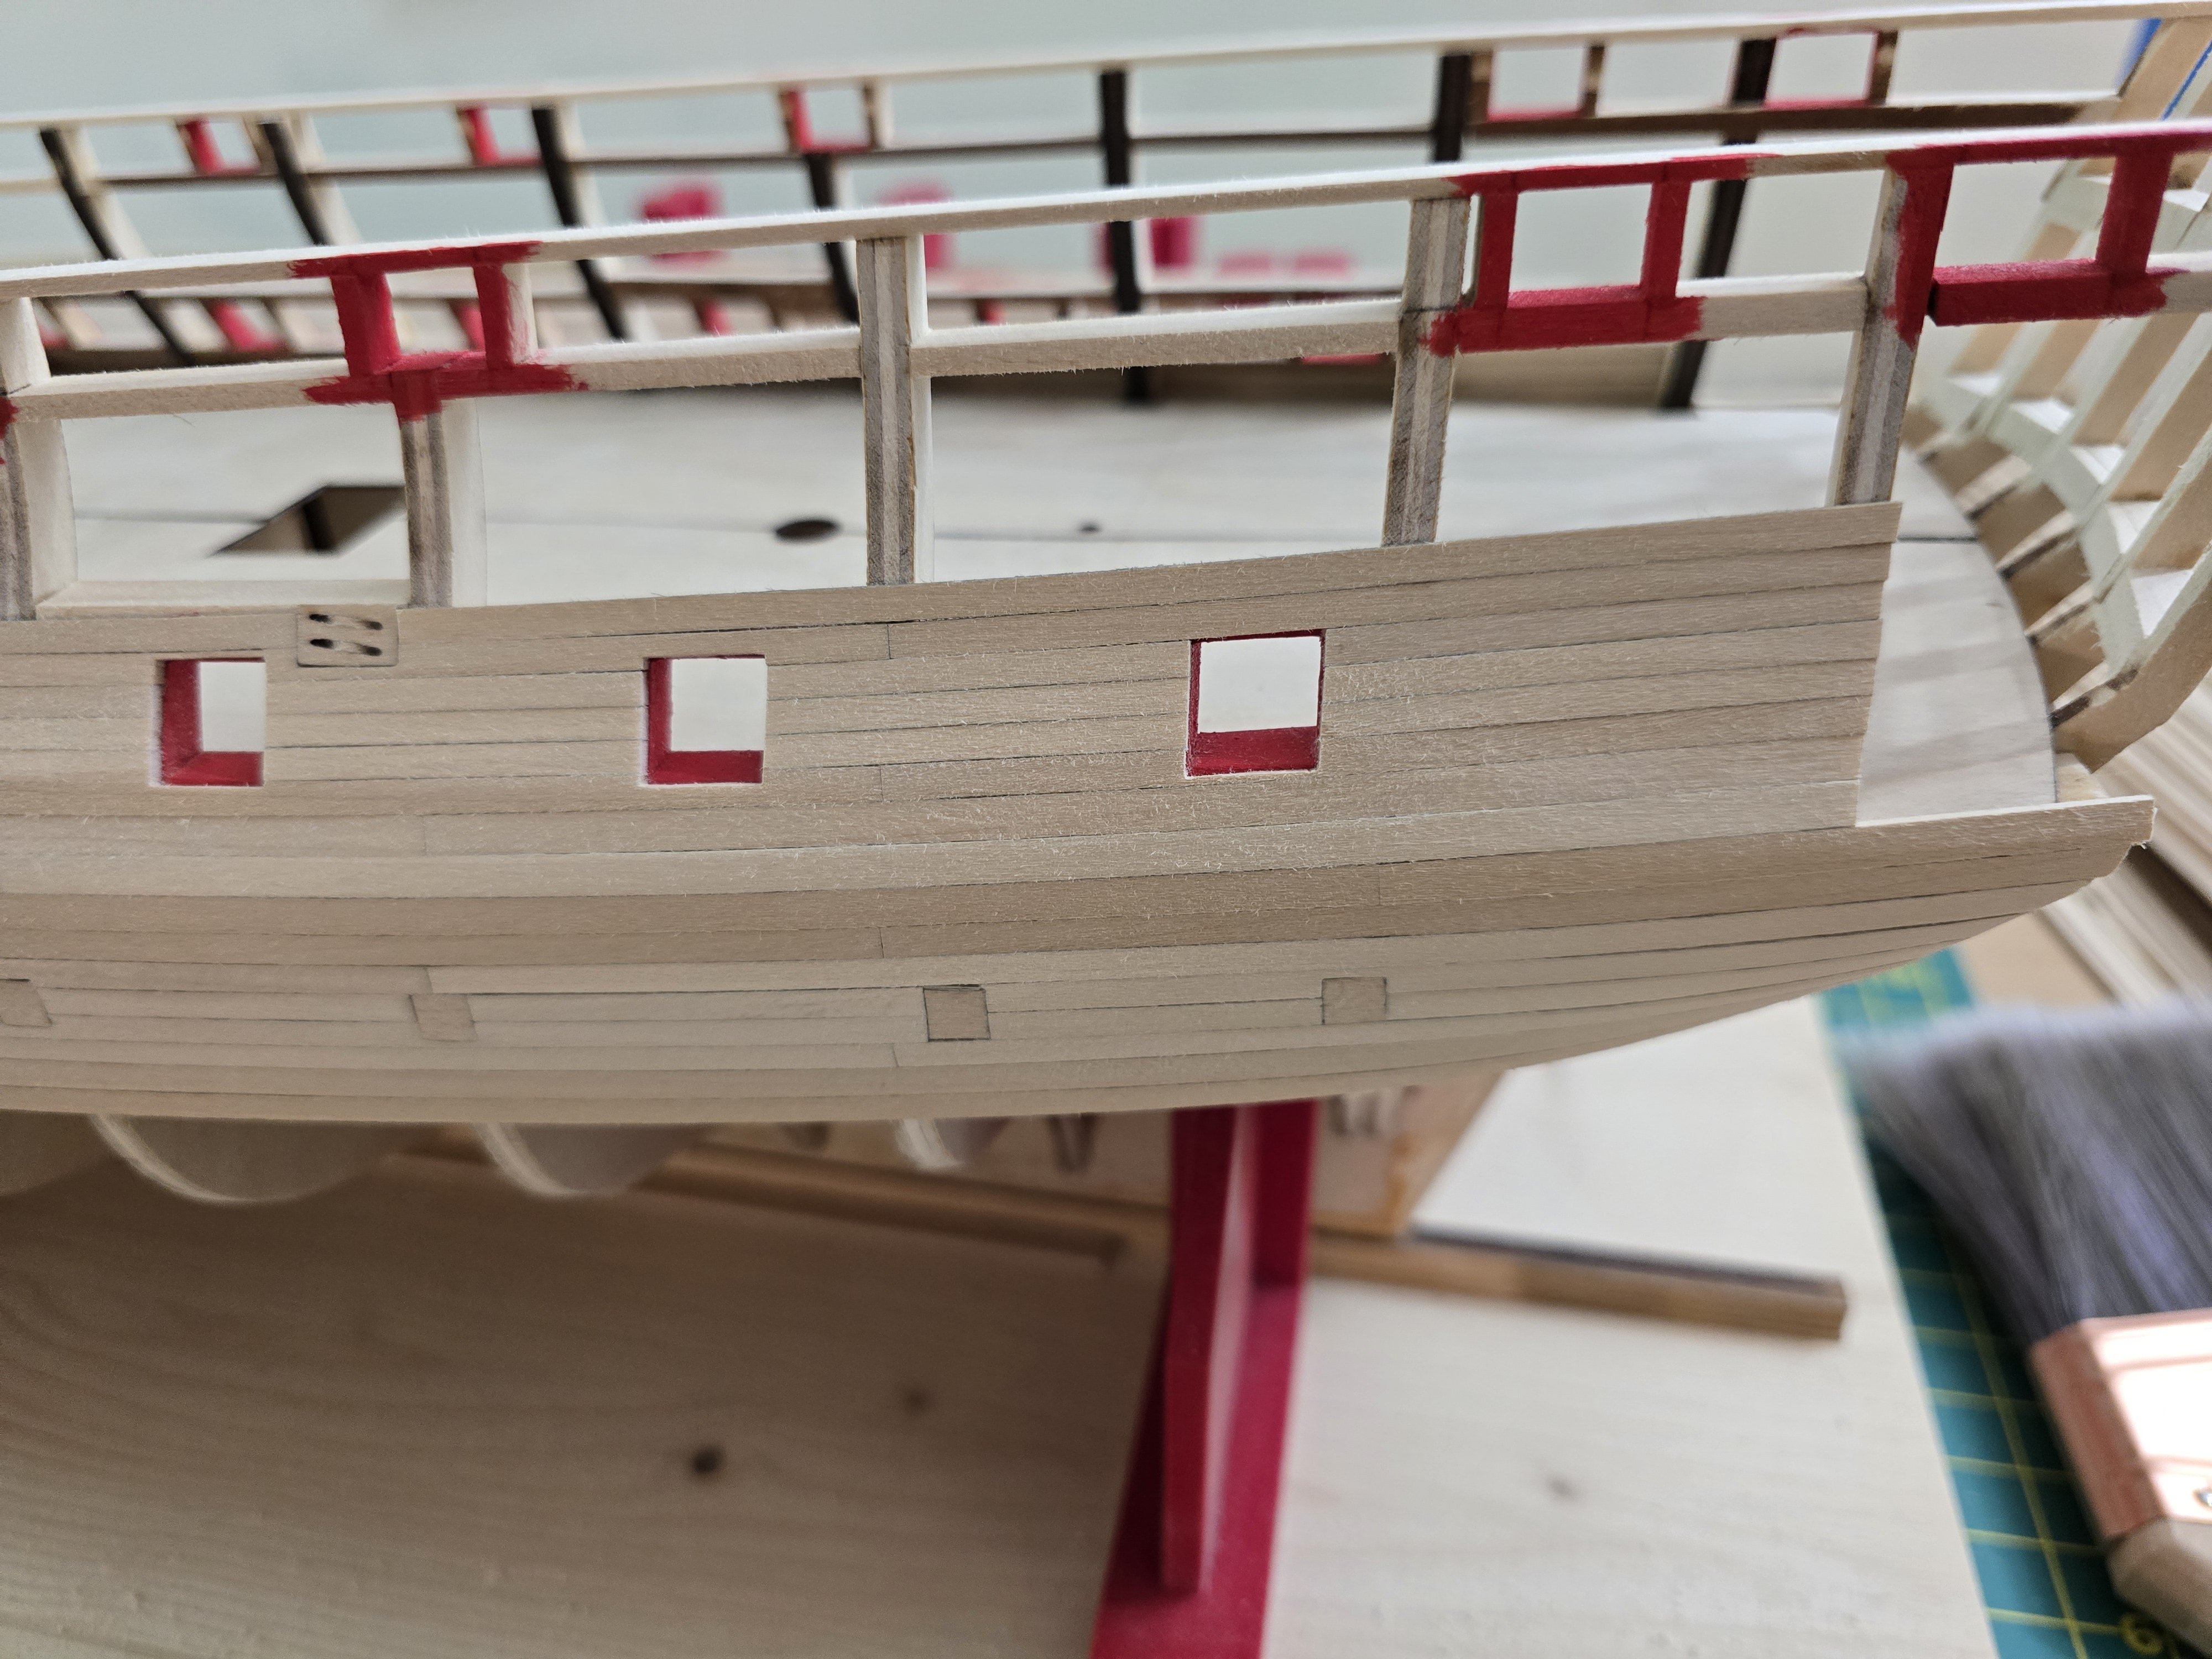
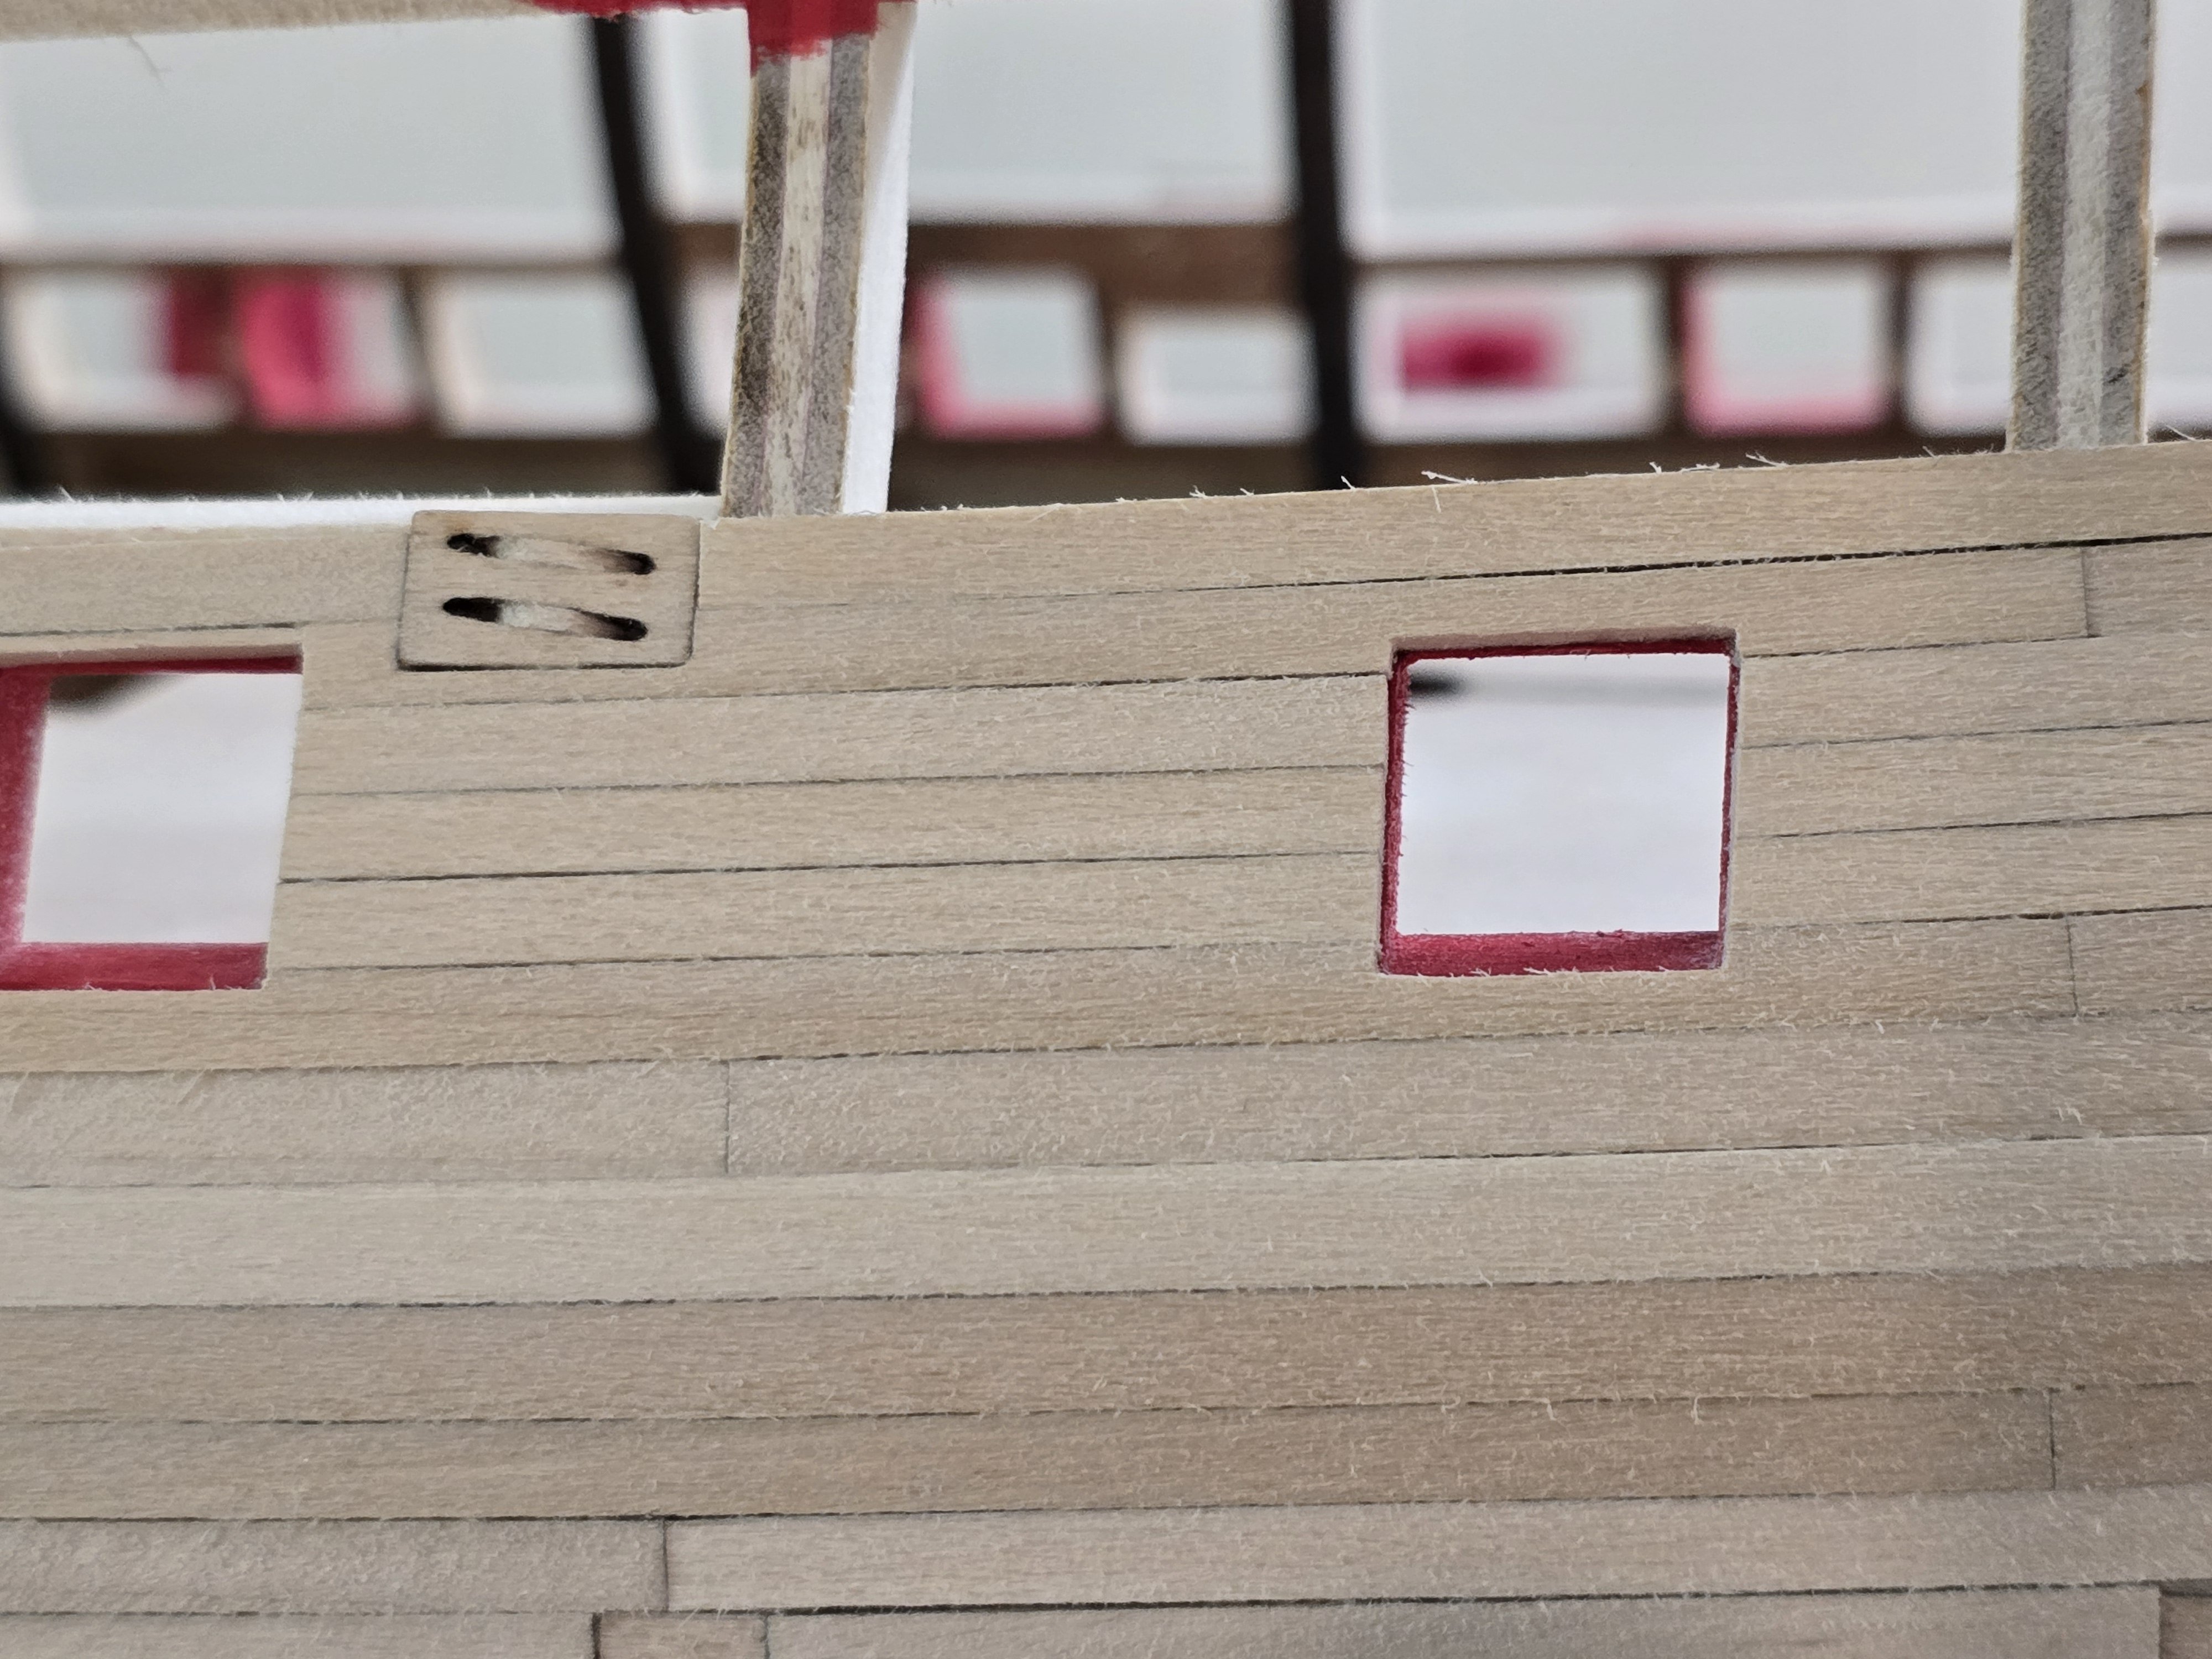
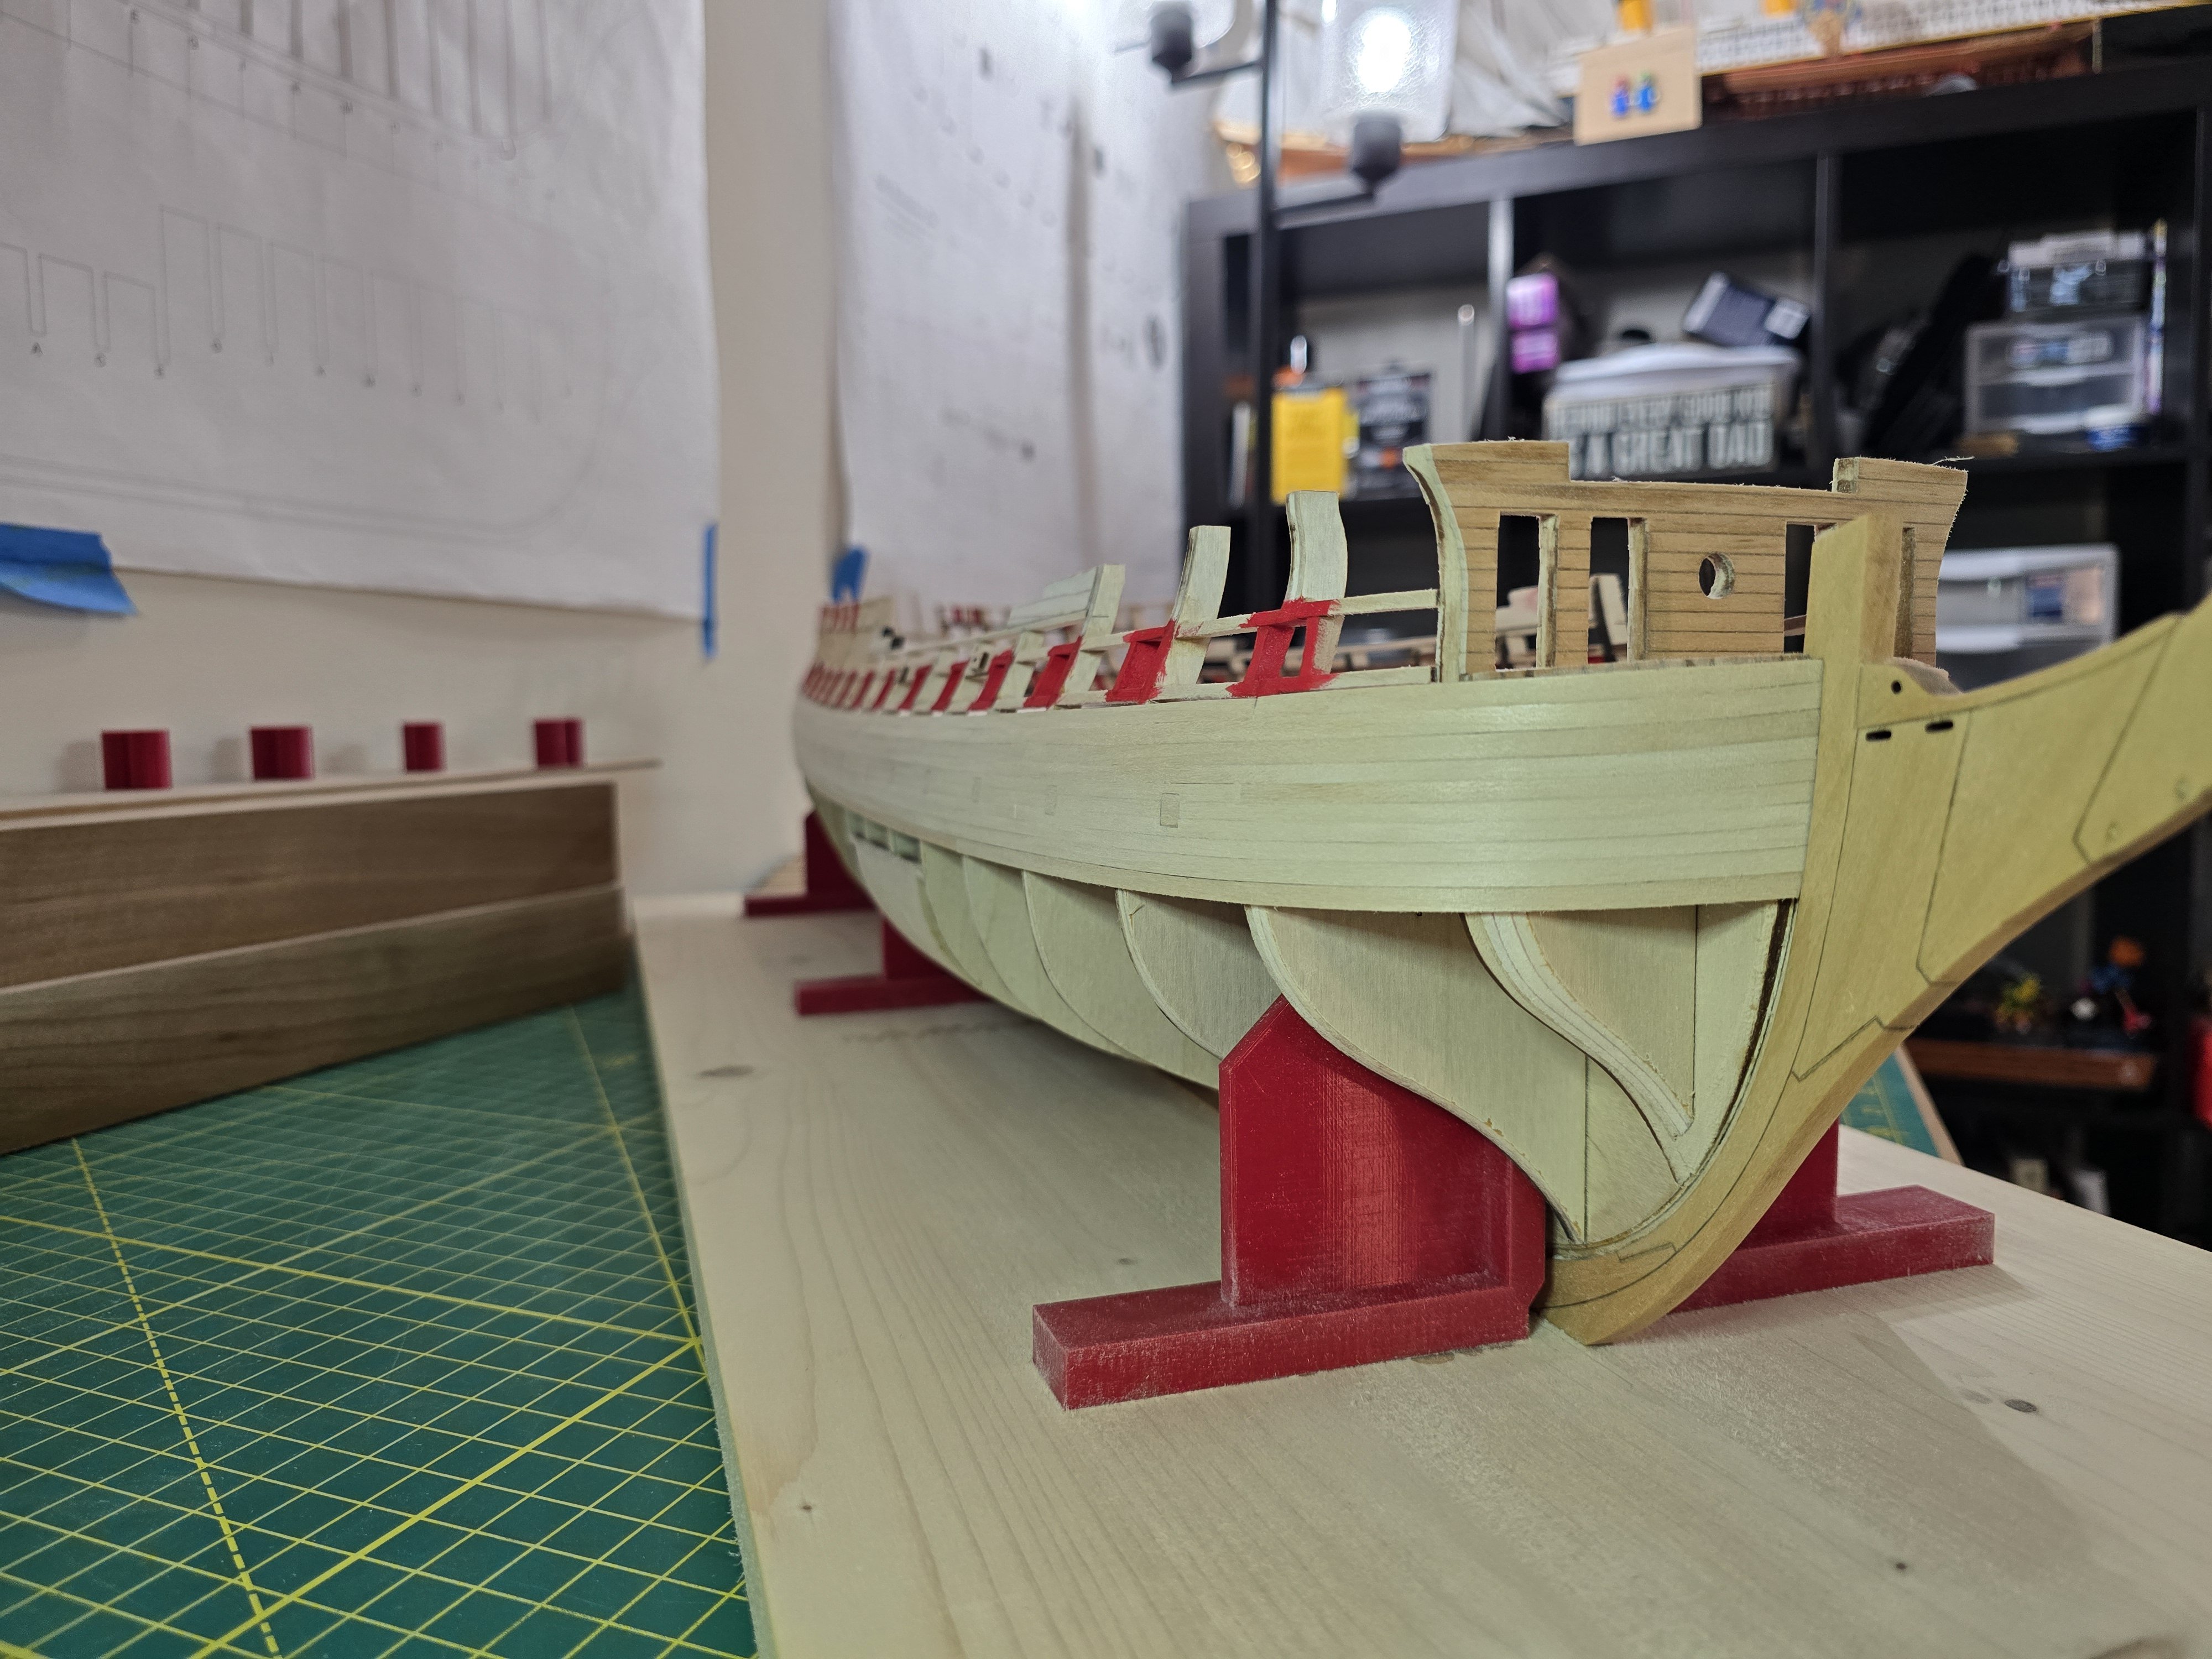
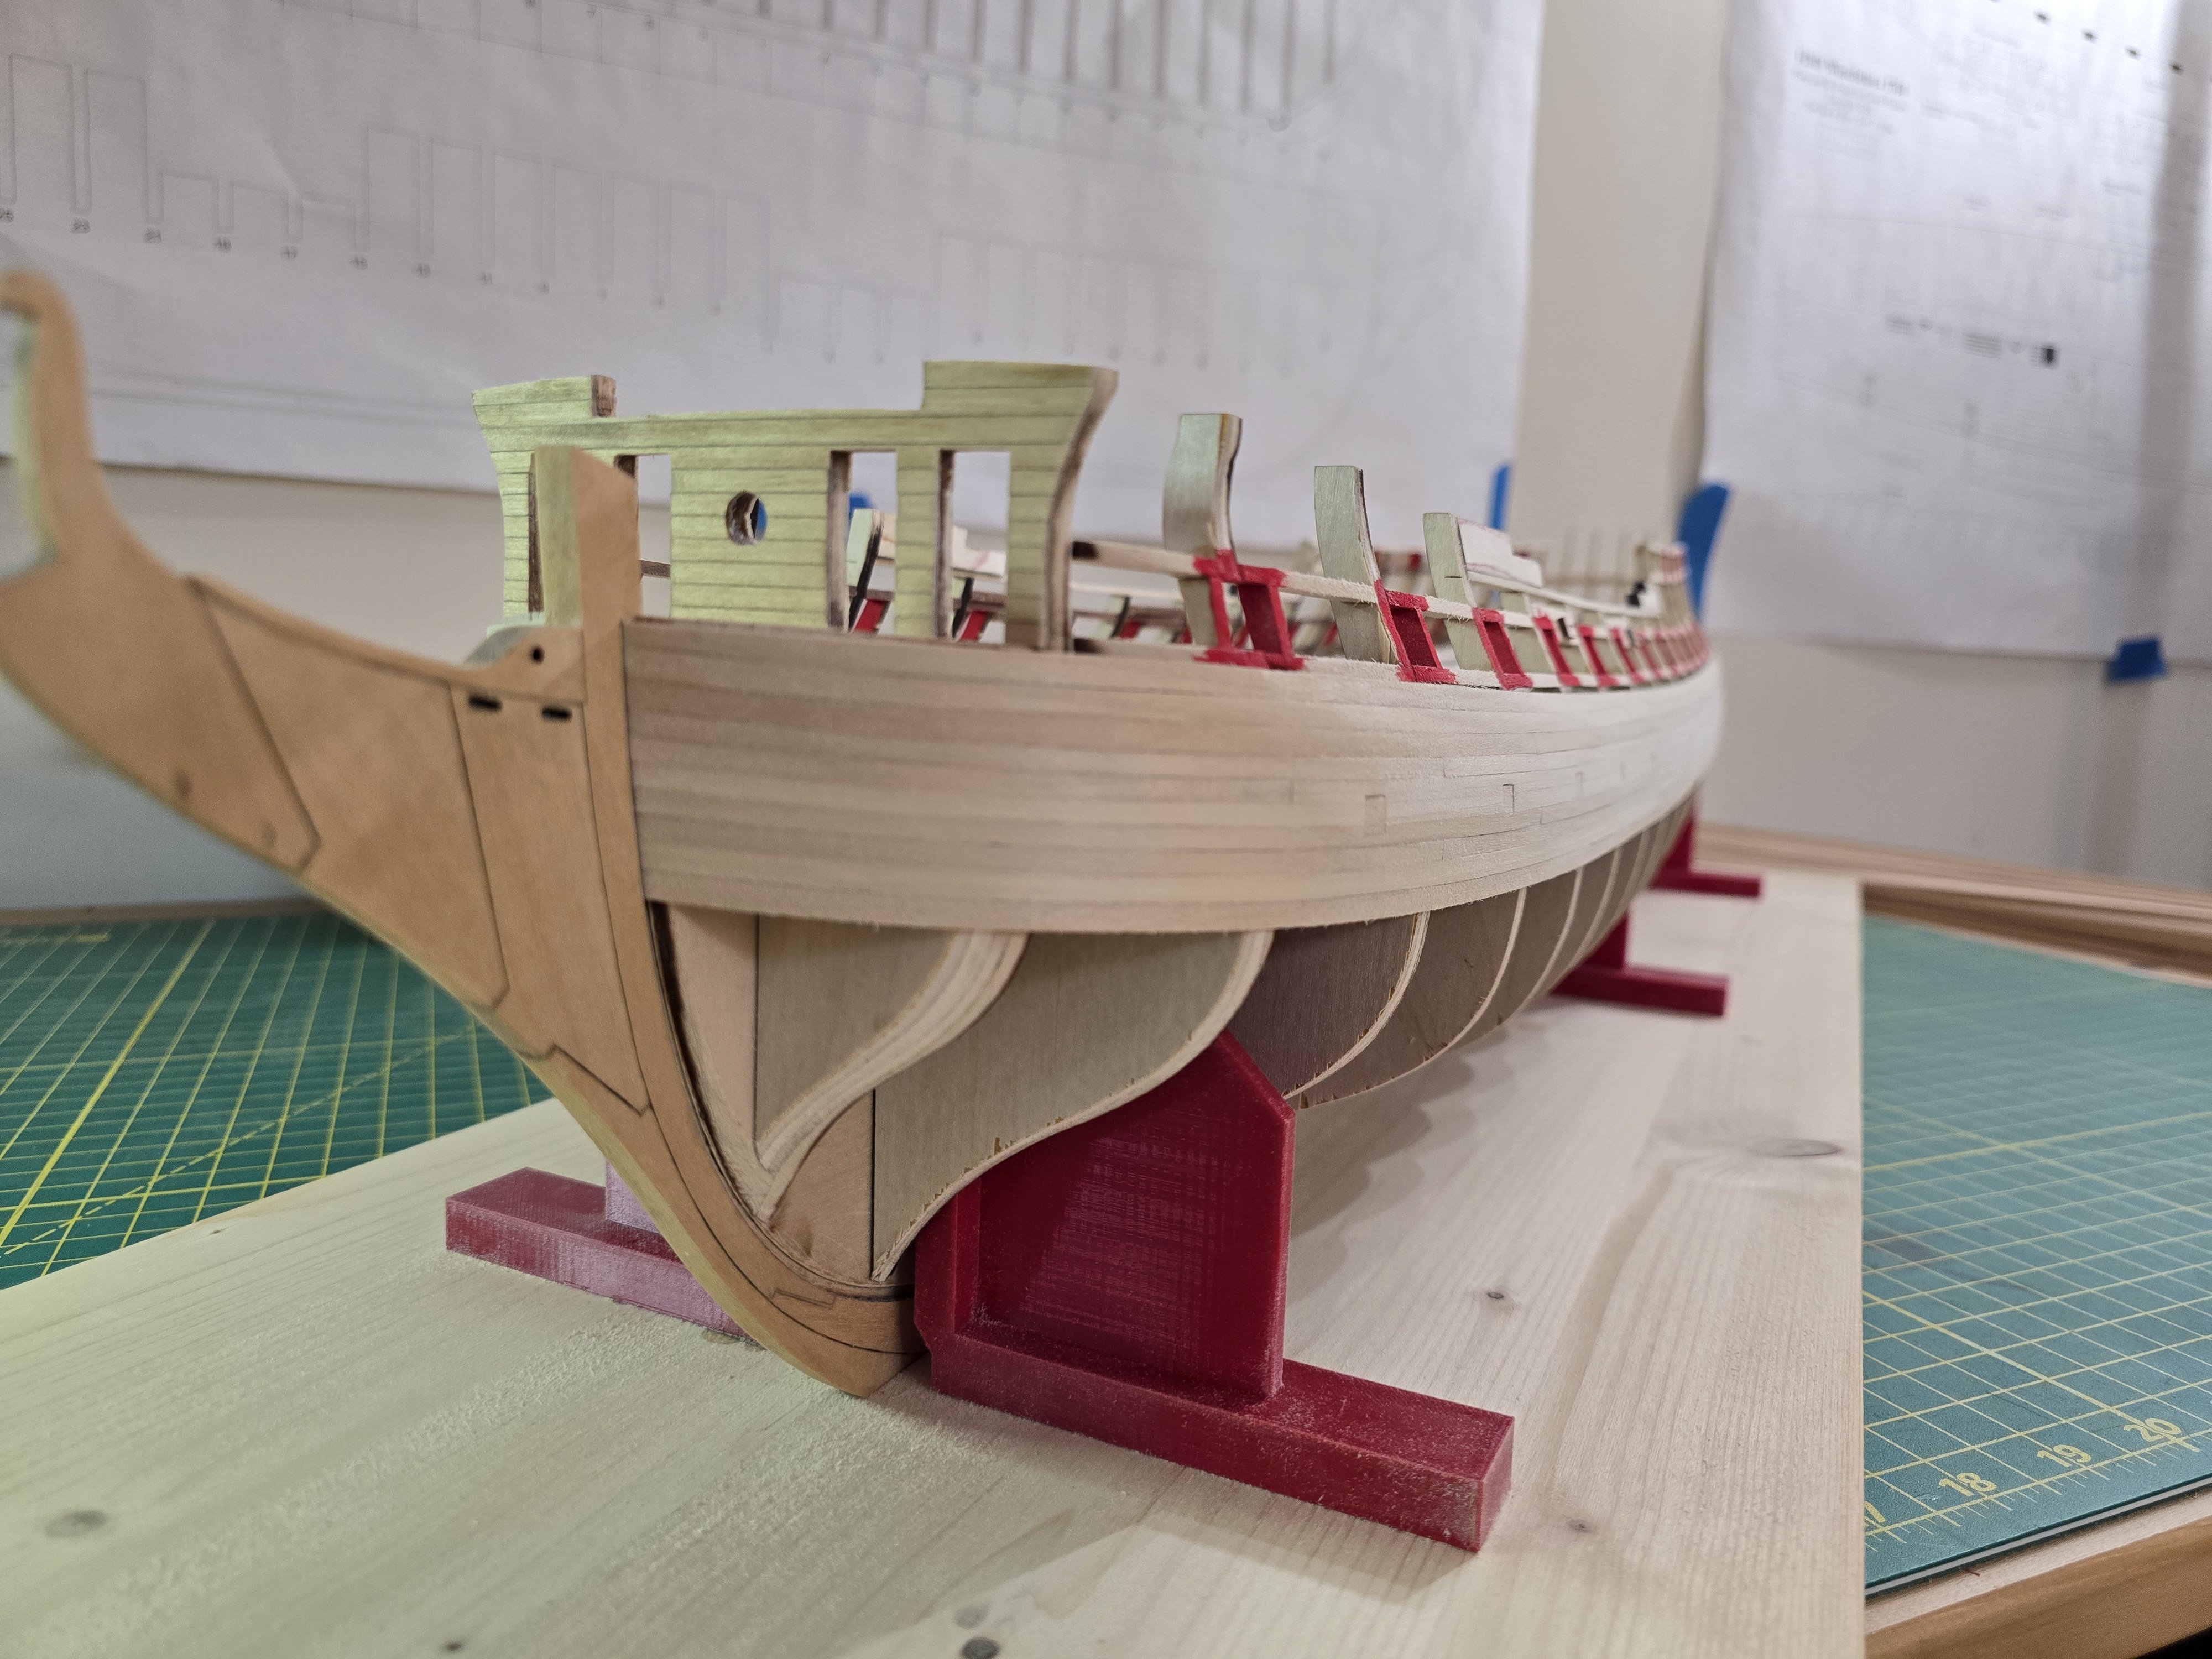
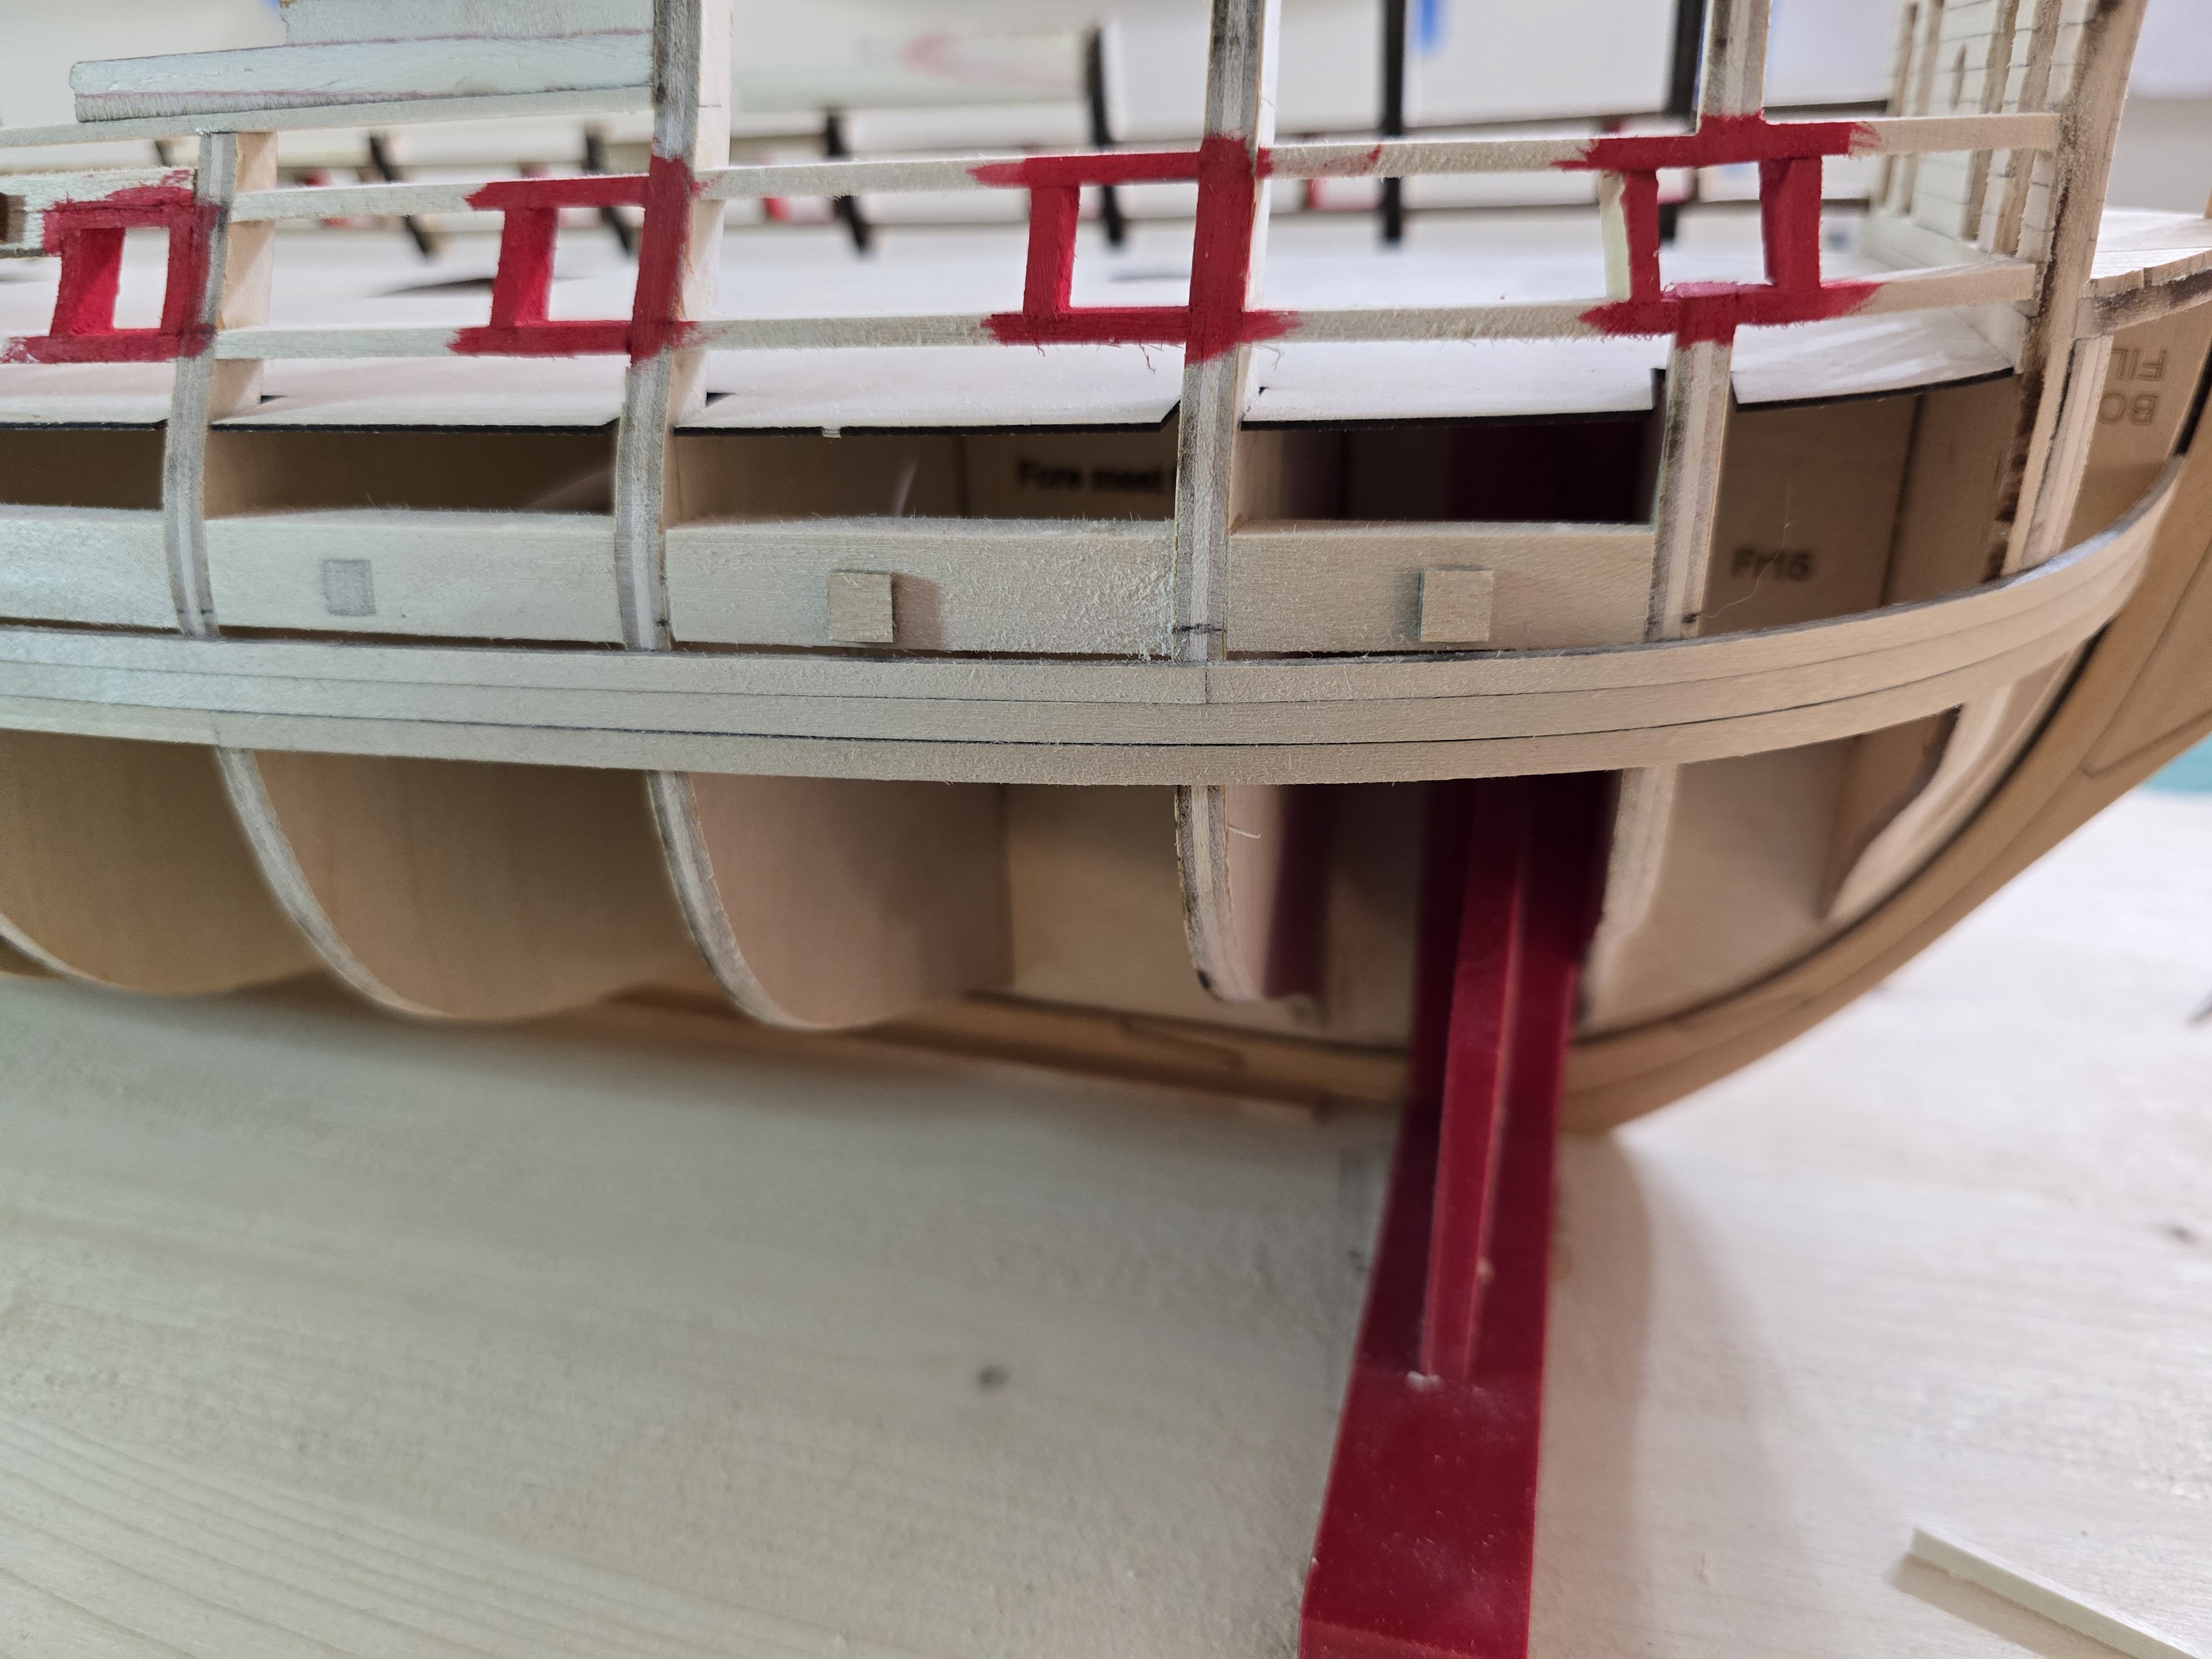
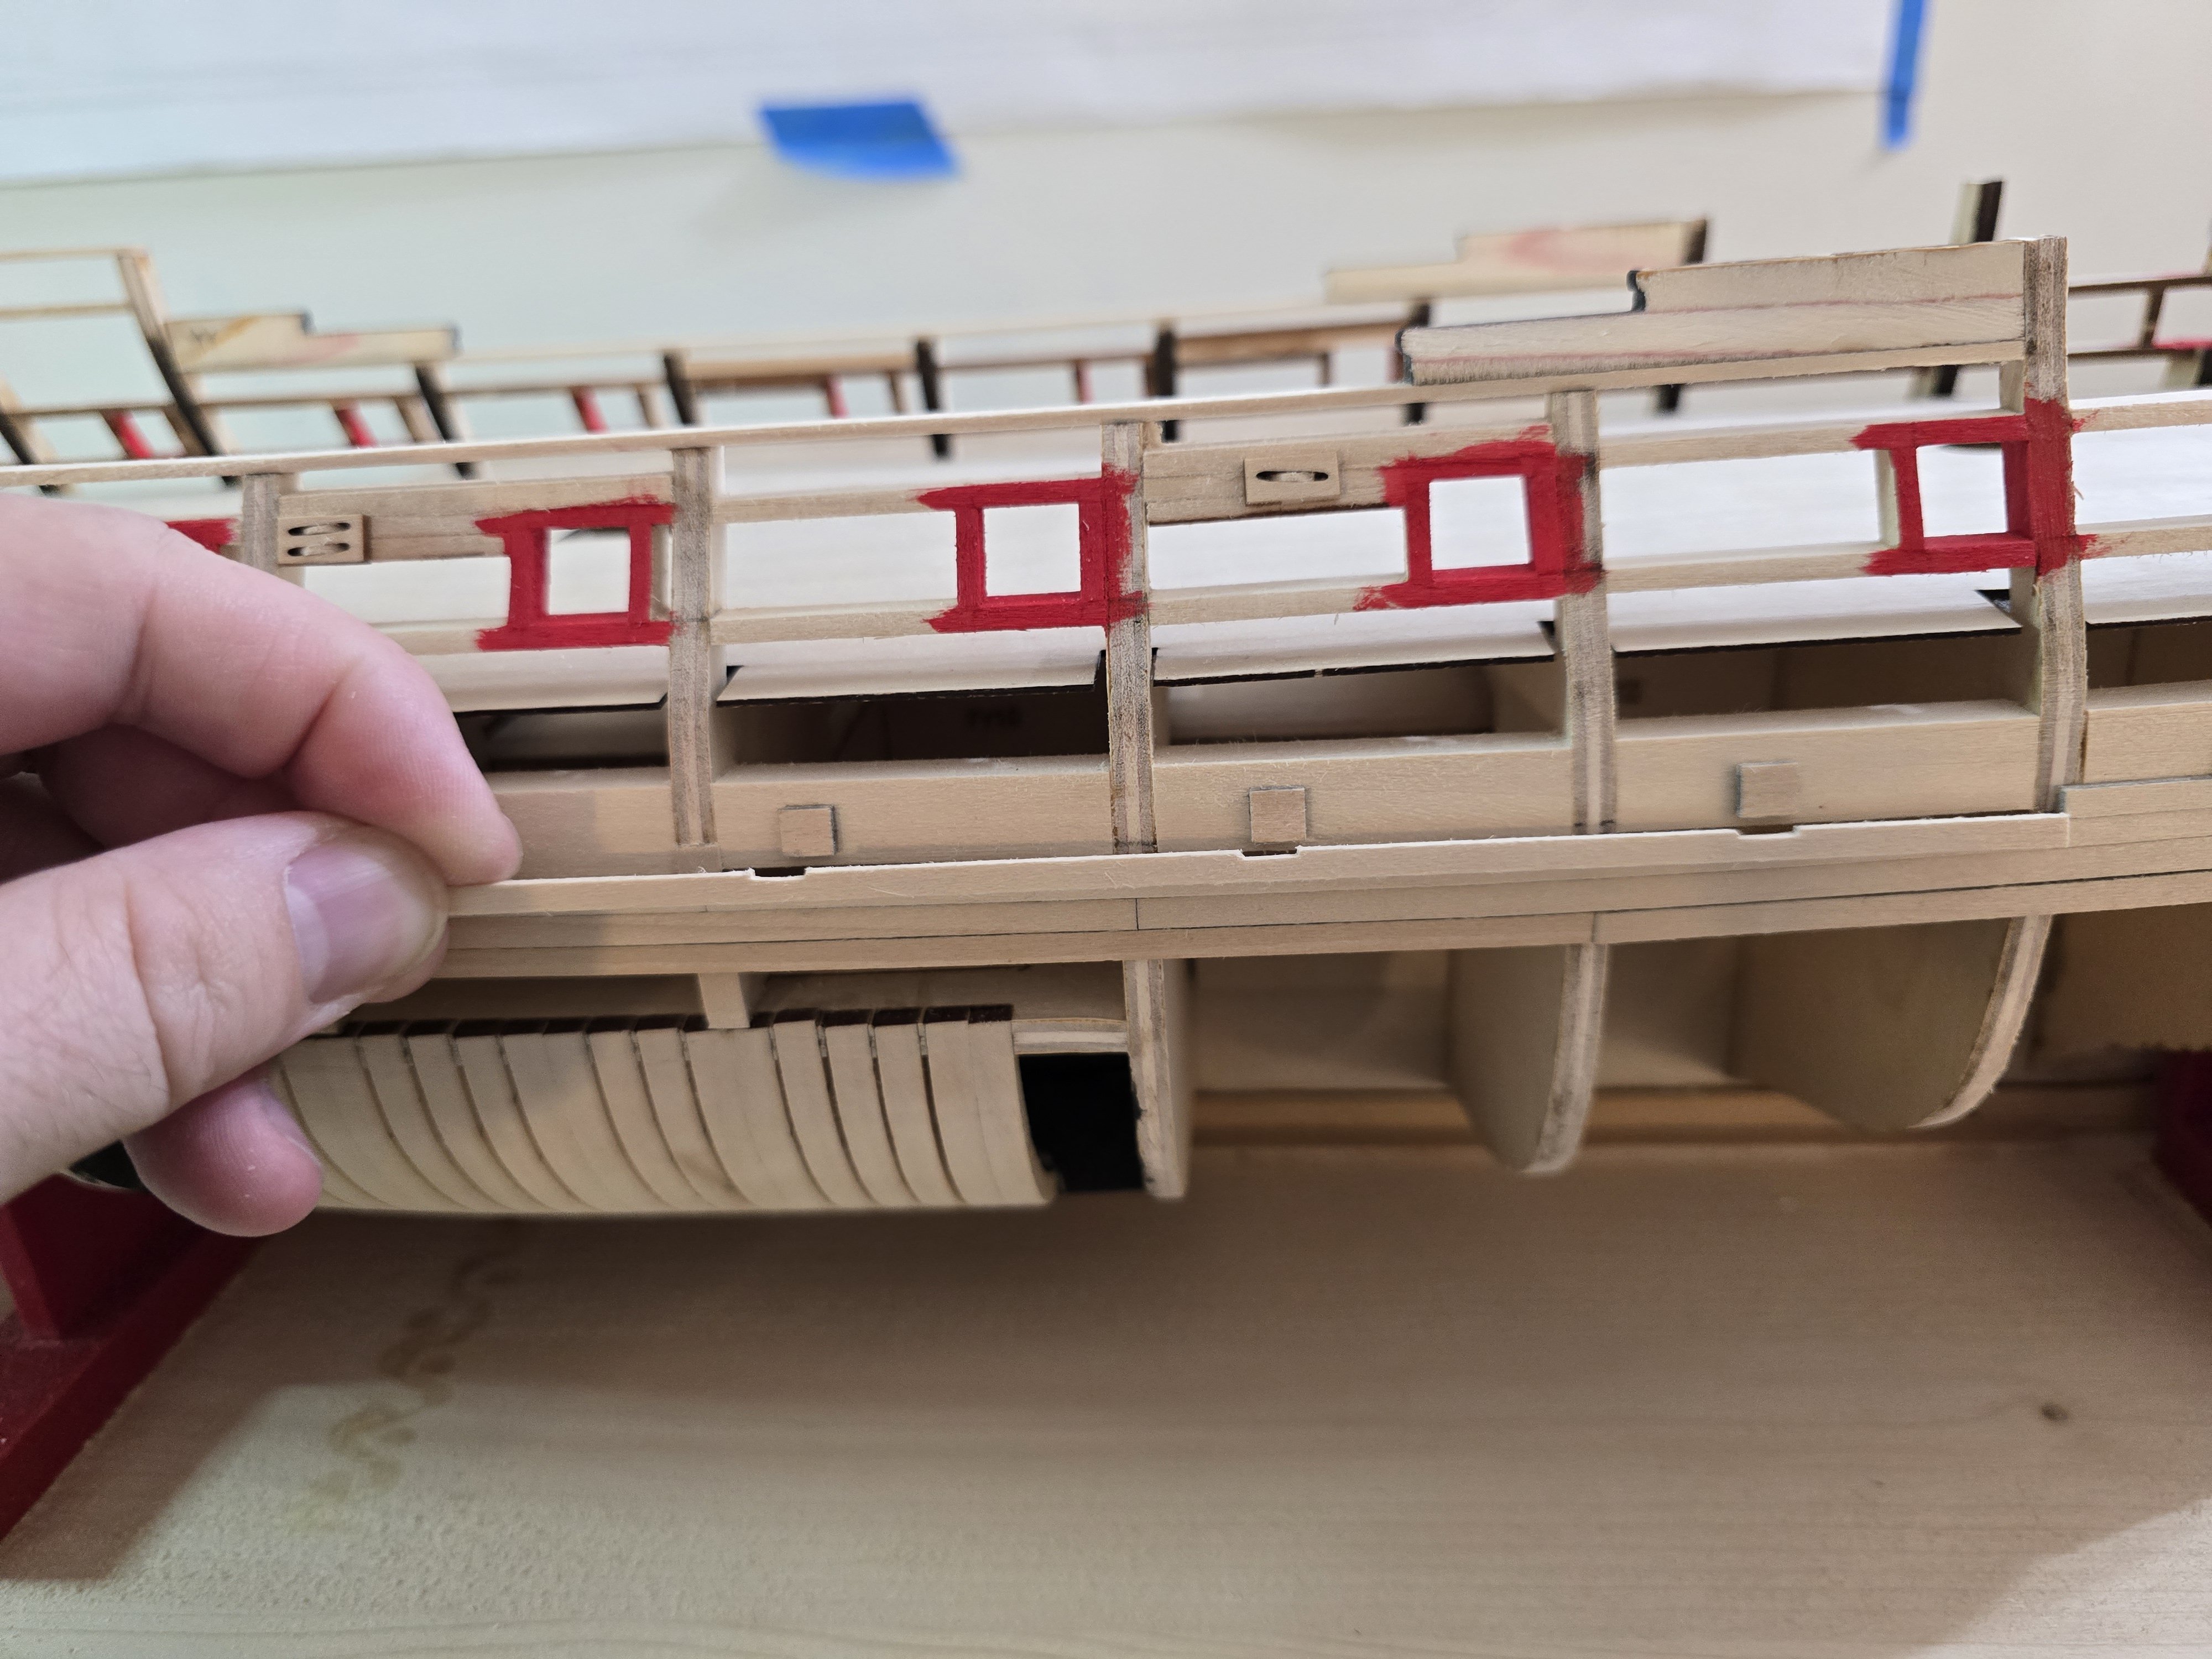
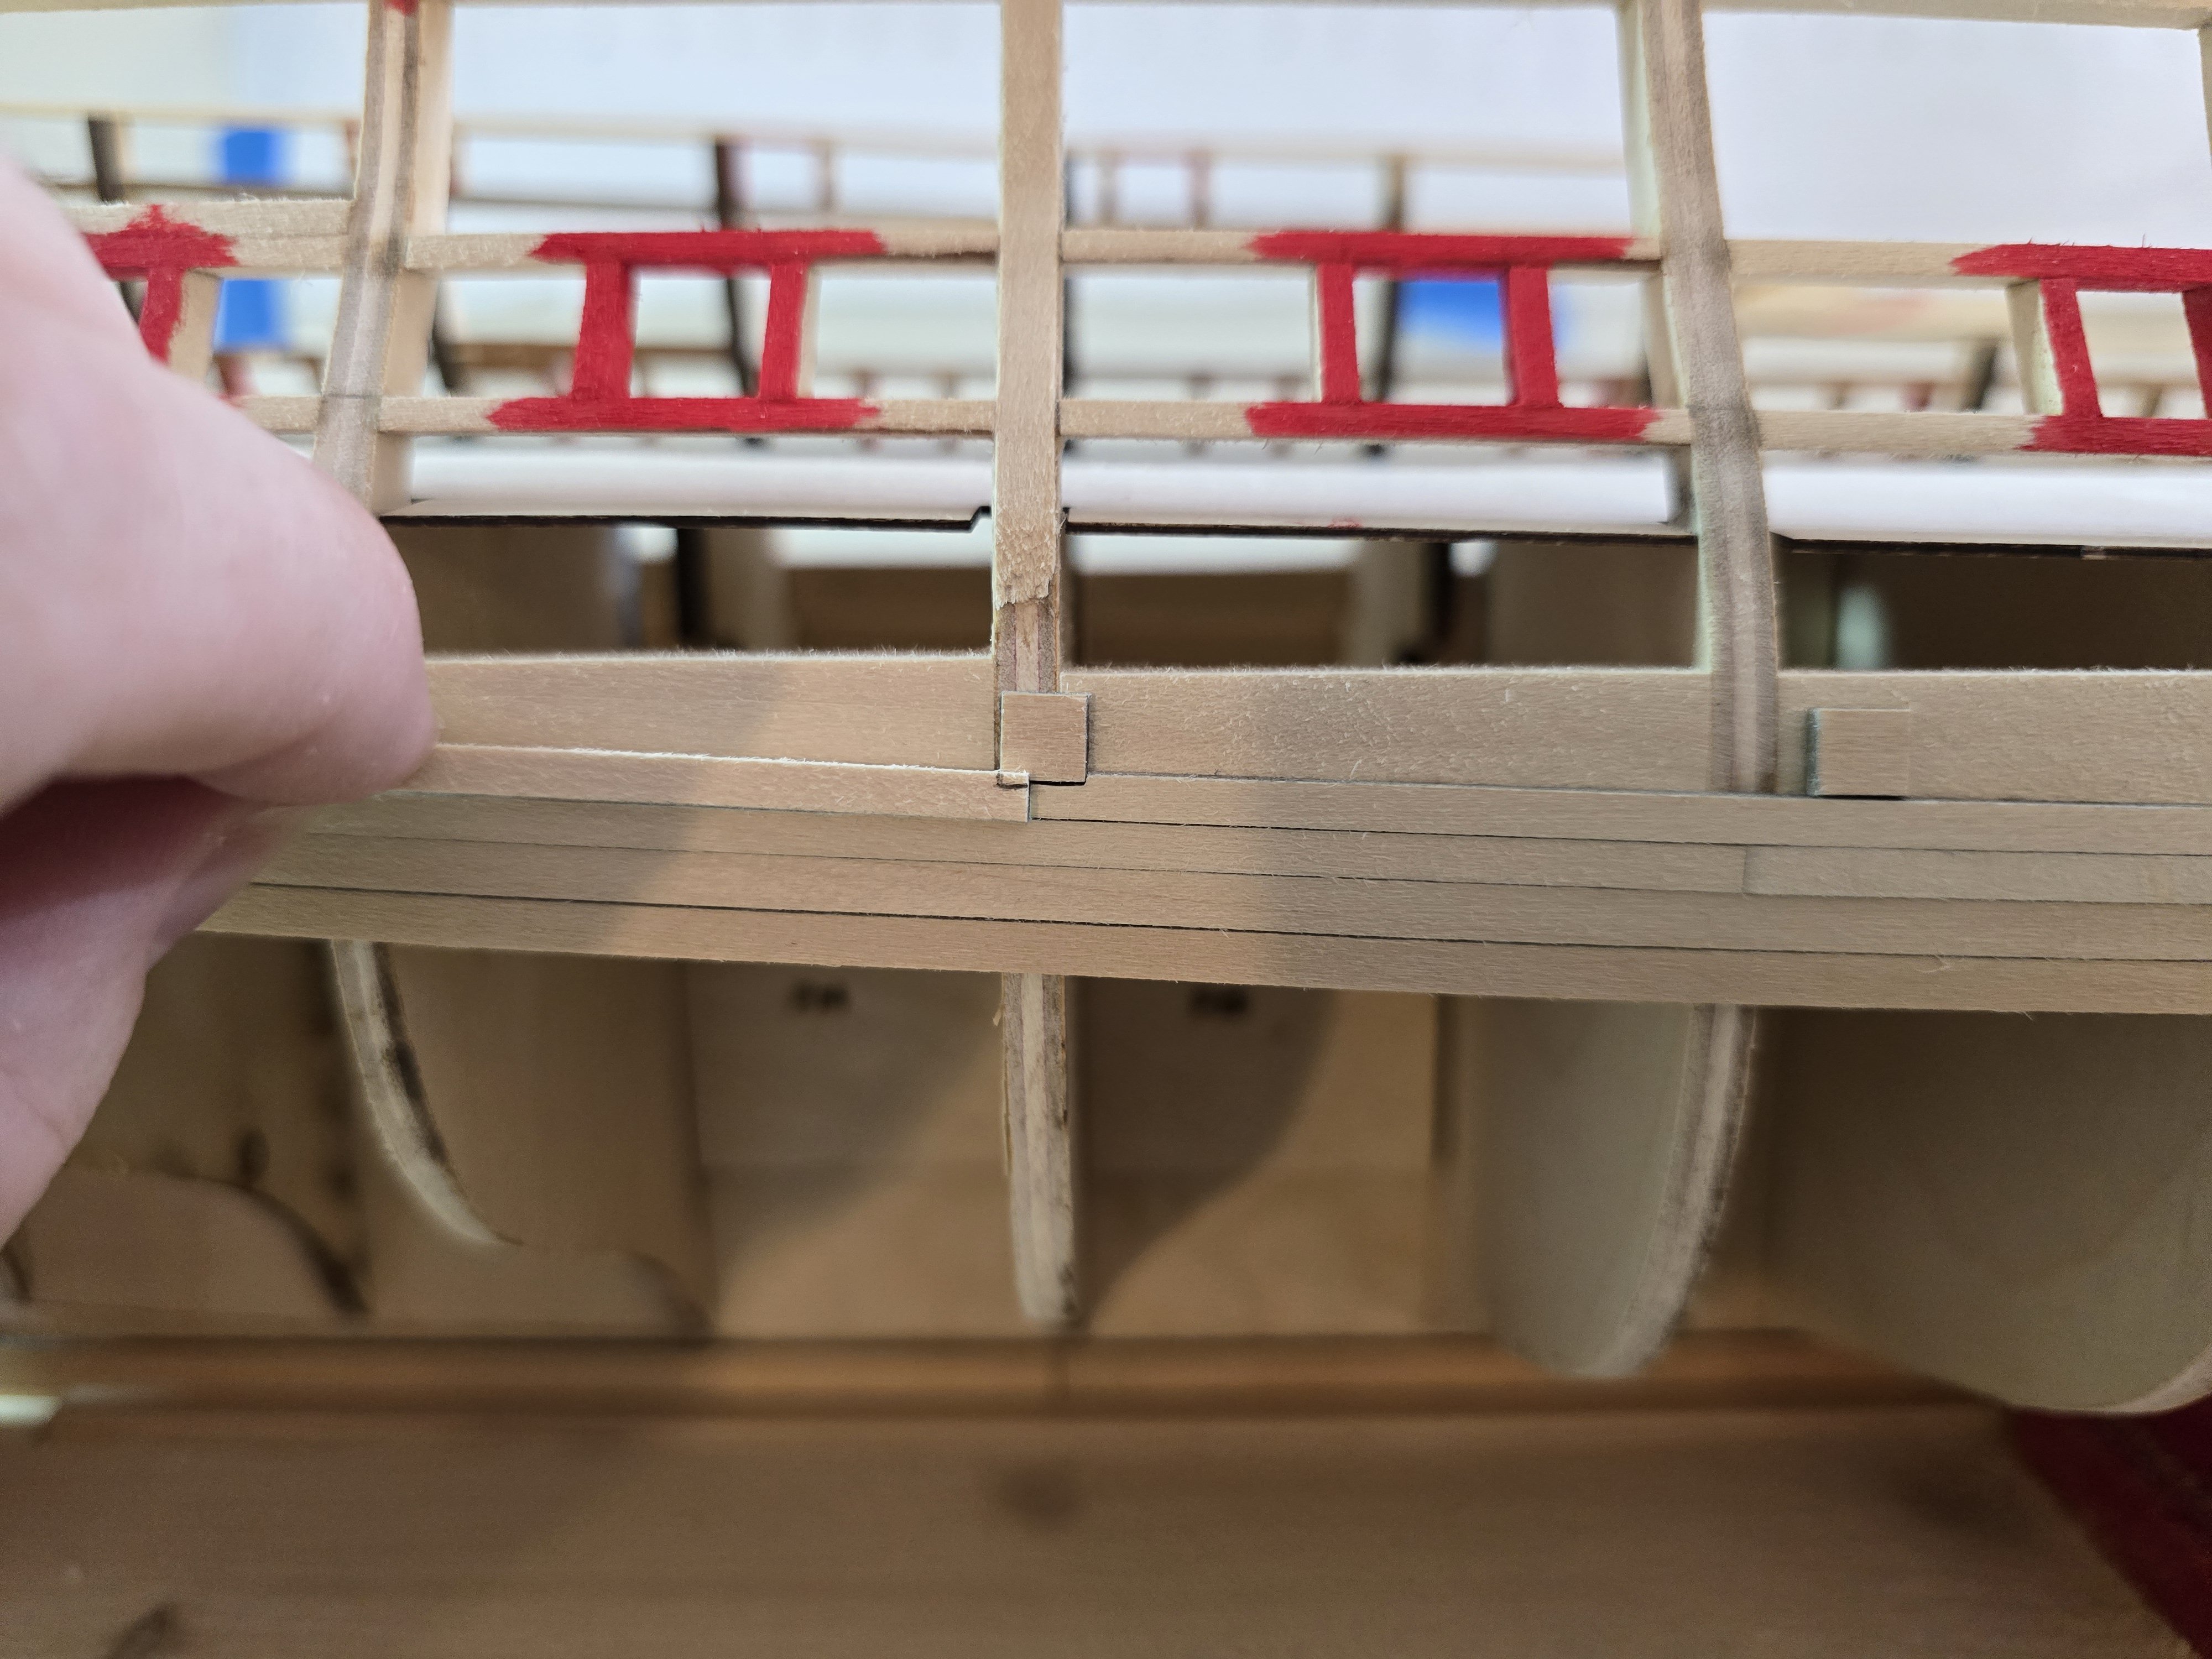
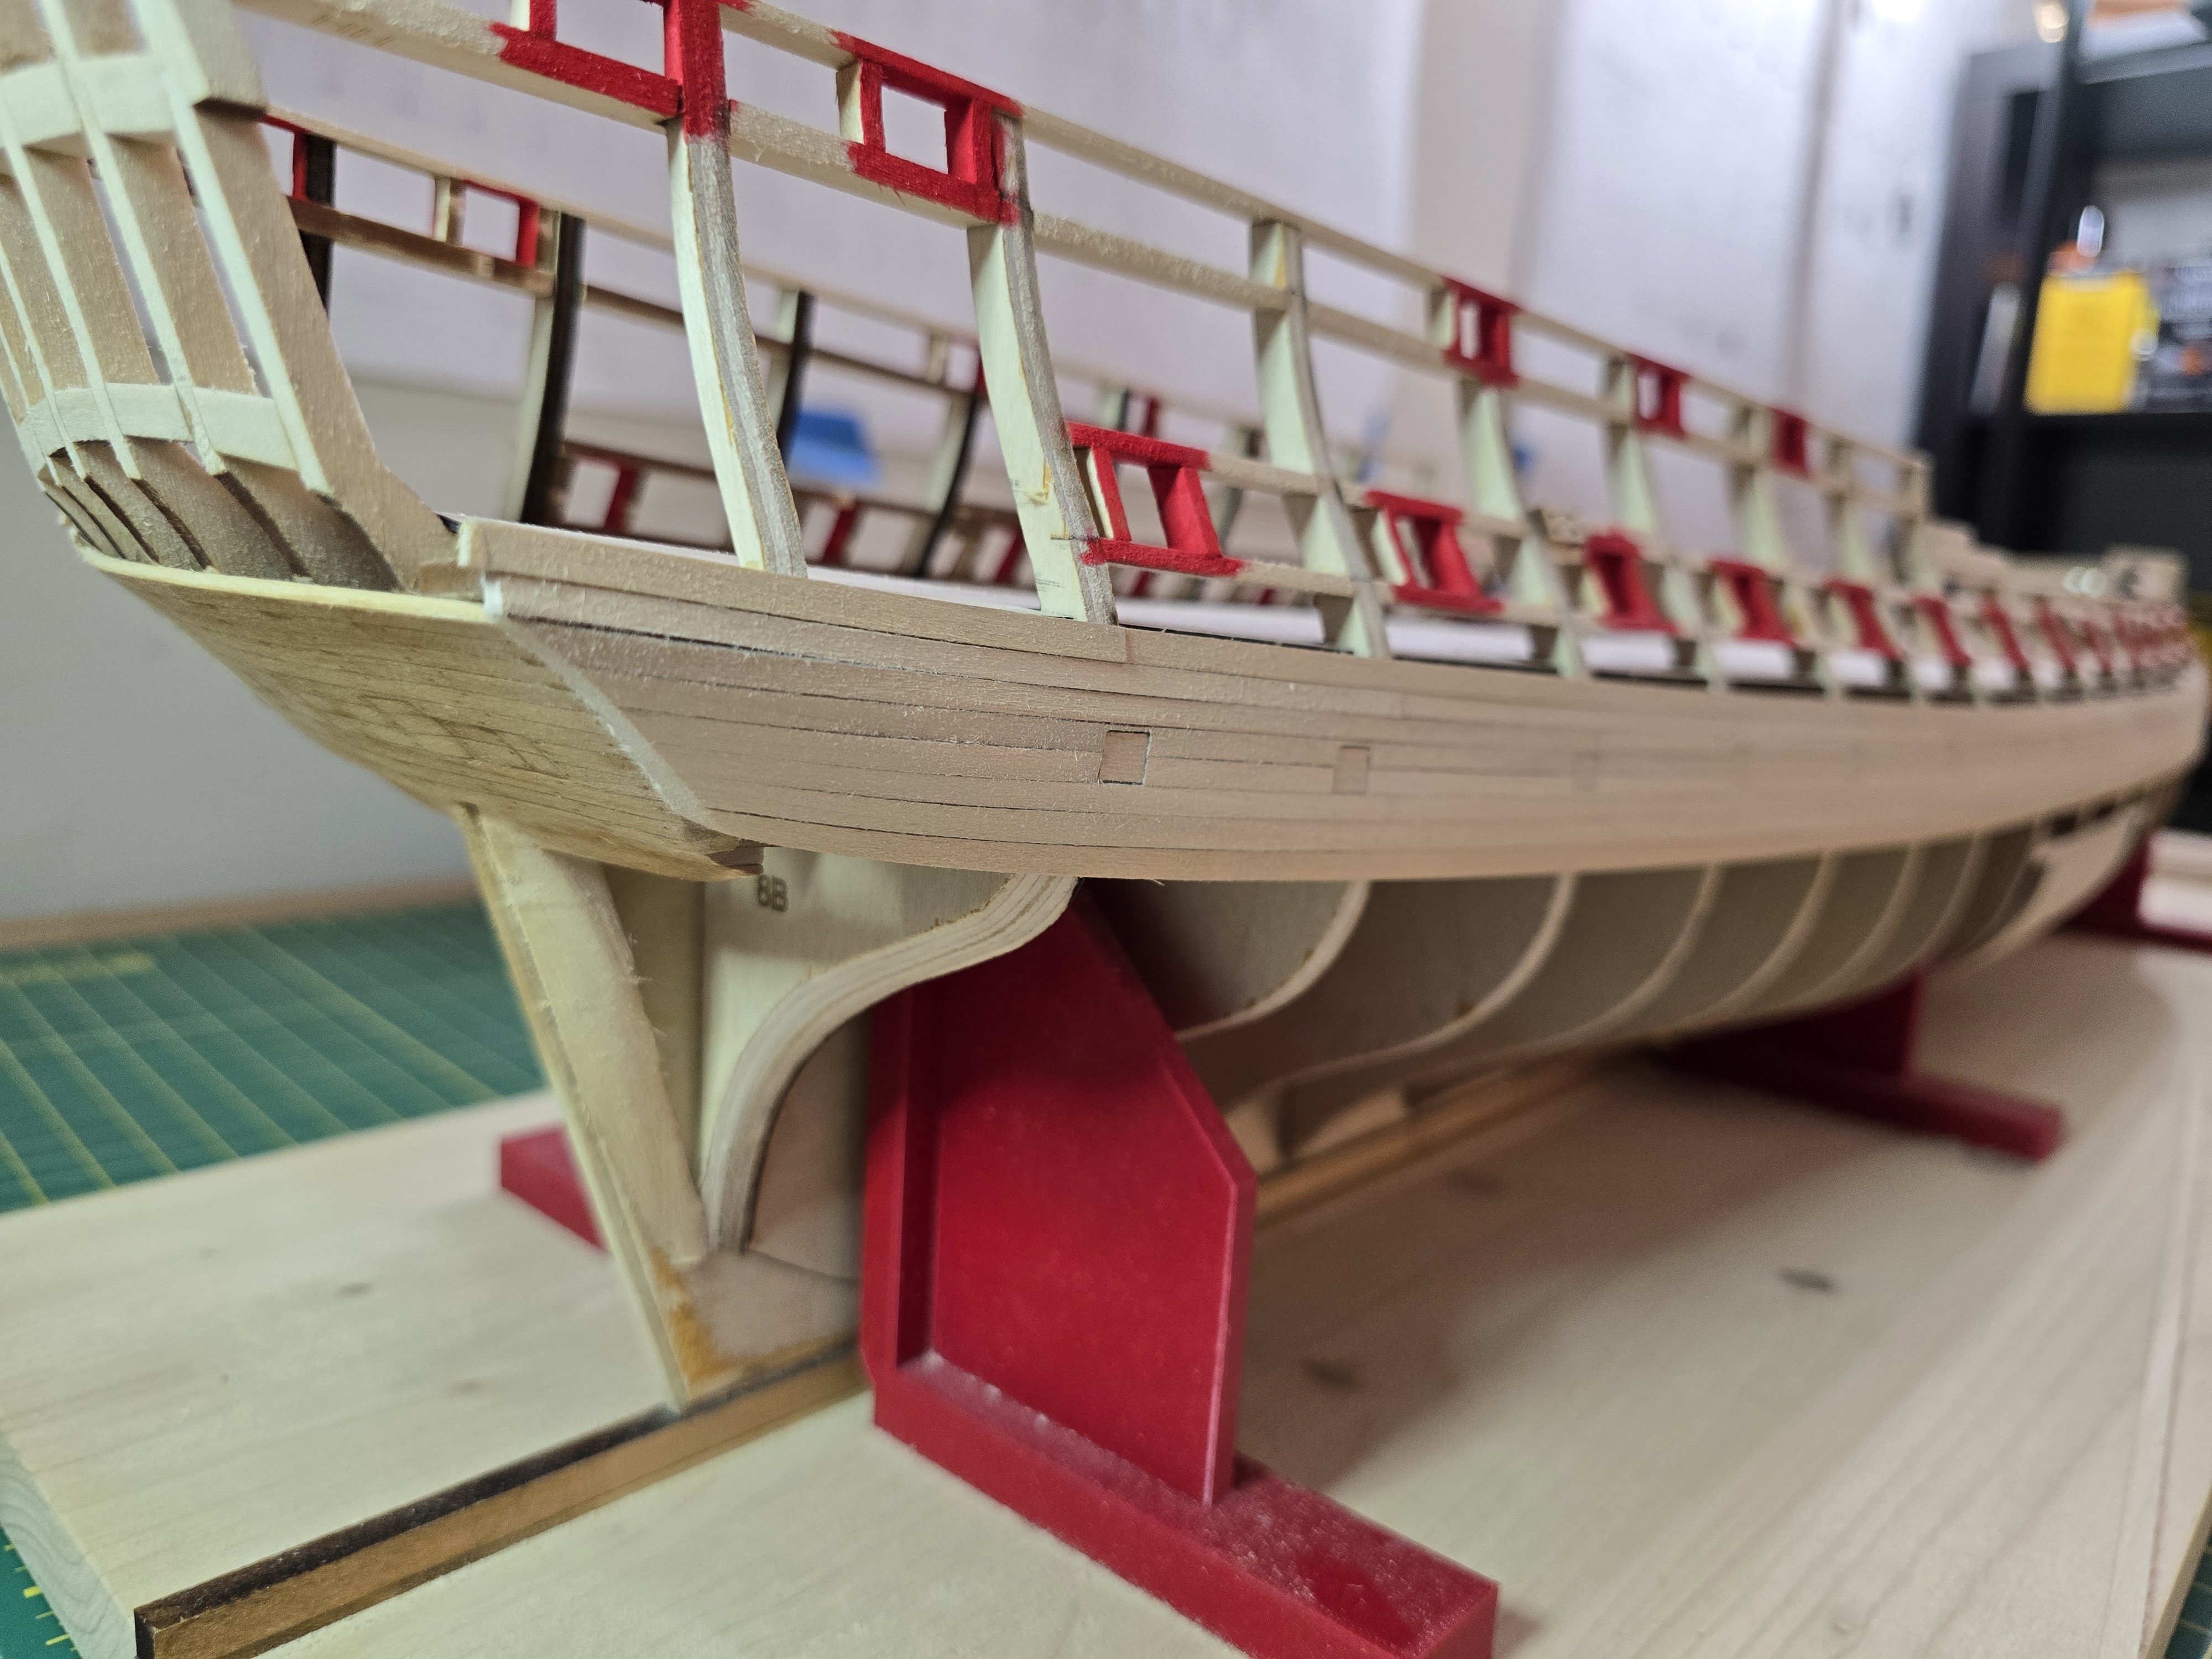
This weekend I was able to paint the gunports as well as lined off the wale markers that were on every bulkhead. Painting took some time, but it sure adds to the model; even at this stage! This next photo, it might be hard to tell, but I have marked each bulkhead to where the top of the wales will be placed. I had a hard time figuring out where the top wale strake should go on the aft counter. Unfortunately, the instructions do not have a good picture of the counter and where the top wale strake should go. I did look at the plans ( Sheet 1) and flipped through the instructions to see if I could find a good picture. On page 69 in the instructions, it shows a picture of the aft completed. I tried to use this as a guide as it shows the wales and it's relative height to where the closed ports are on the counter. I hope I got it correct. I'll include some pictures of where I placed the black strake for reference if it might help anyone. I guess I'll see later if I put it in the right spot! Thanks! Jeff

-
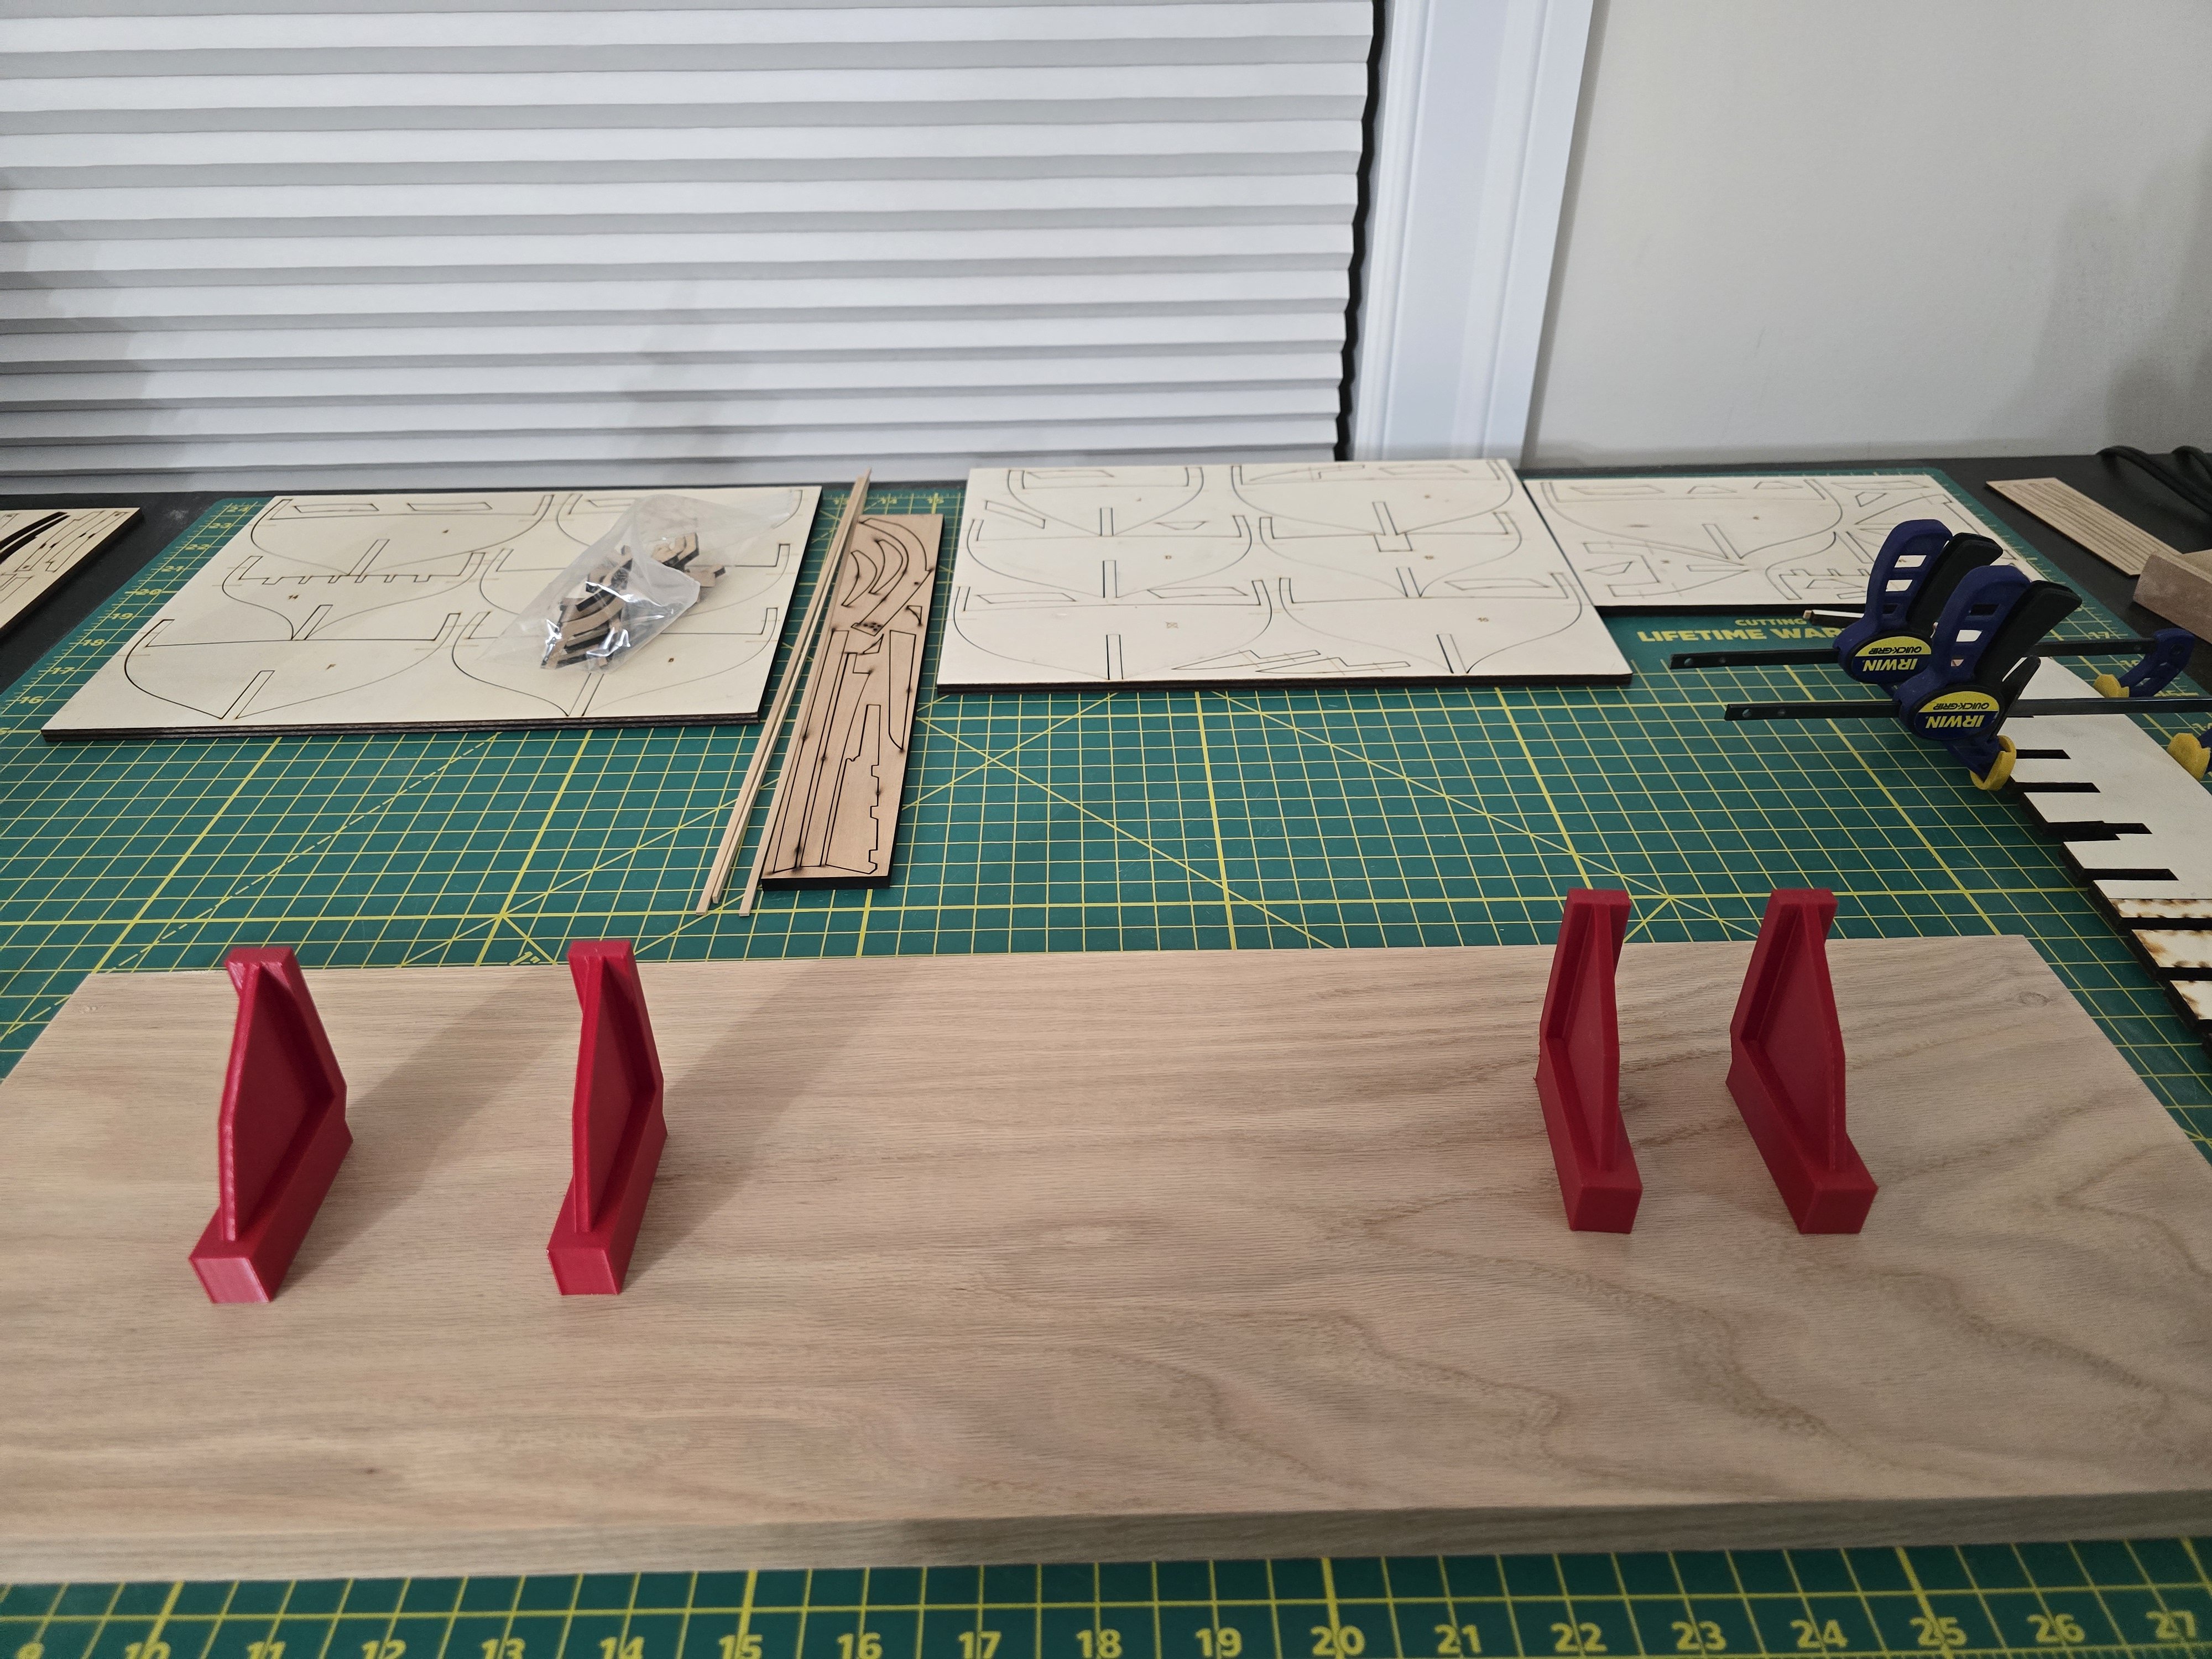
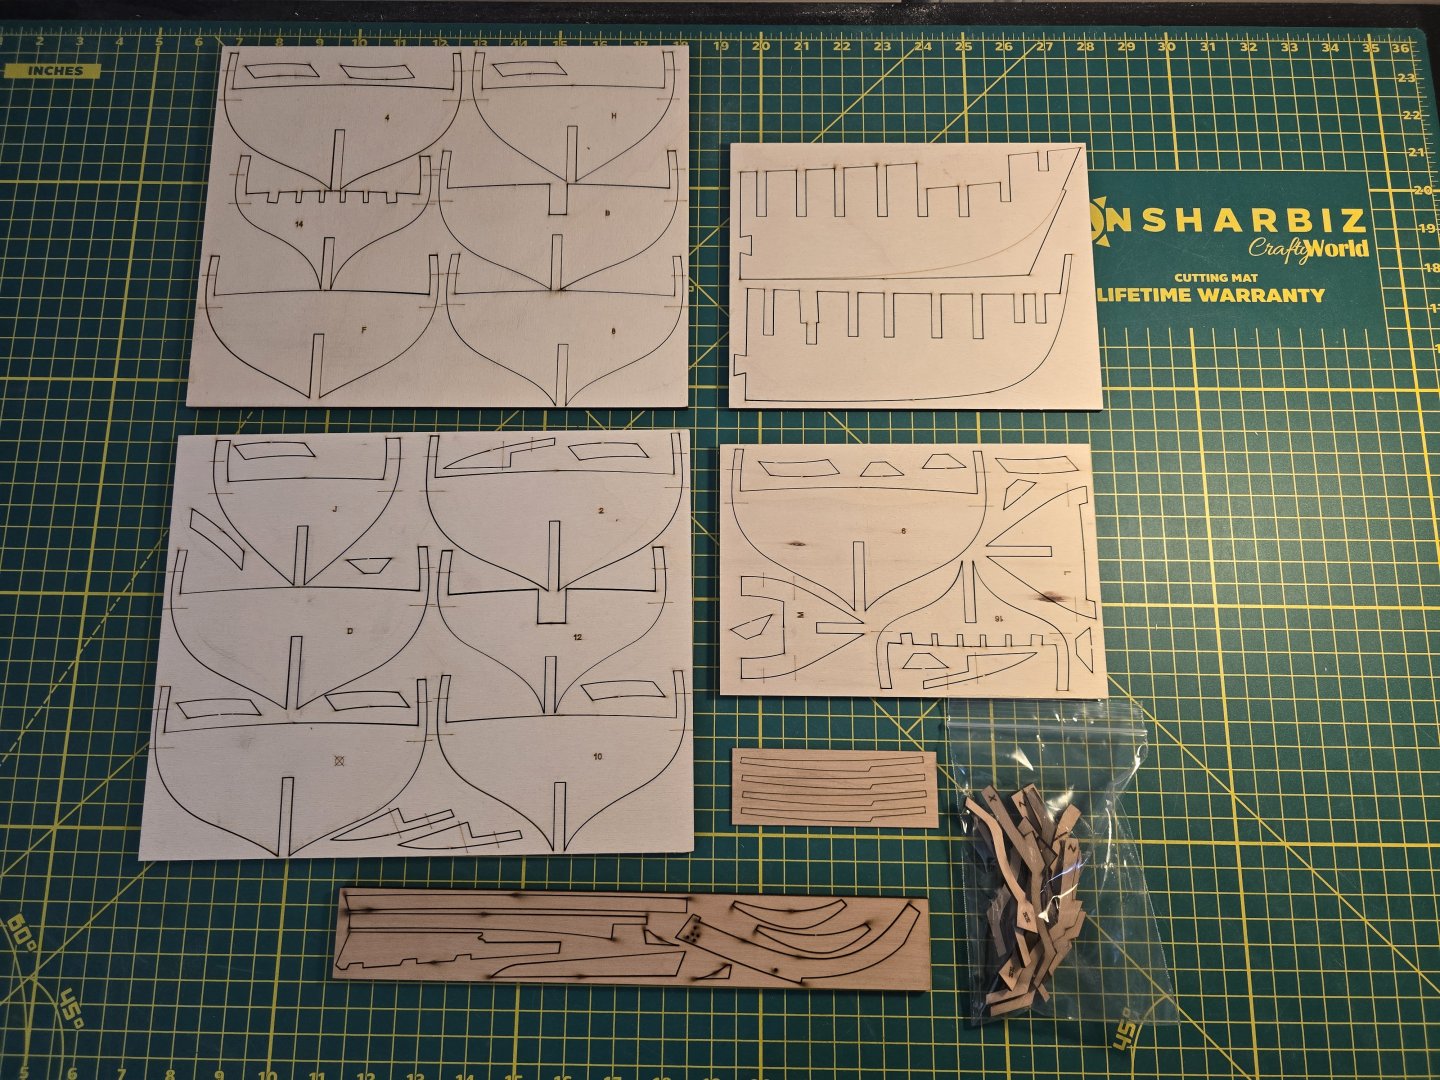
Hello all! This is my first scratch built model. I did purchase Chuck's starter kit but I will be milling all the wood myself from sheets that I ordered from Modeler Saw Mill. The boxwood sheets are fantastic! Here is what I got in the starter kit. The plywood laser sheets were all VERY straight and none of then were warped at all! I couldn't wait so I got the pieces needed to build my building board. I went to the hardwood store and bought a 2 foot long board that was as flat as I could find. I then 3d printed some pieces to hold the False keel in place at 90 degrees. I will be building the build board later. I then glued the 2 false keep pieces together. After that dried the next day, I milled the rabbet strip and bent and glued the bow portion of the rabbet. I'm careful to make the rabbet not very long near the bow so that I can make sure I can glue it properly (centered along the false keel). So far so good! Once this dries, I can add the rest of the rabbet. Thanks for reading! Jeff

-
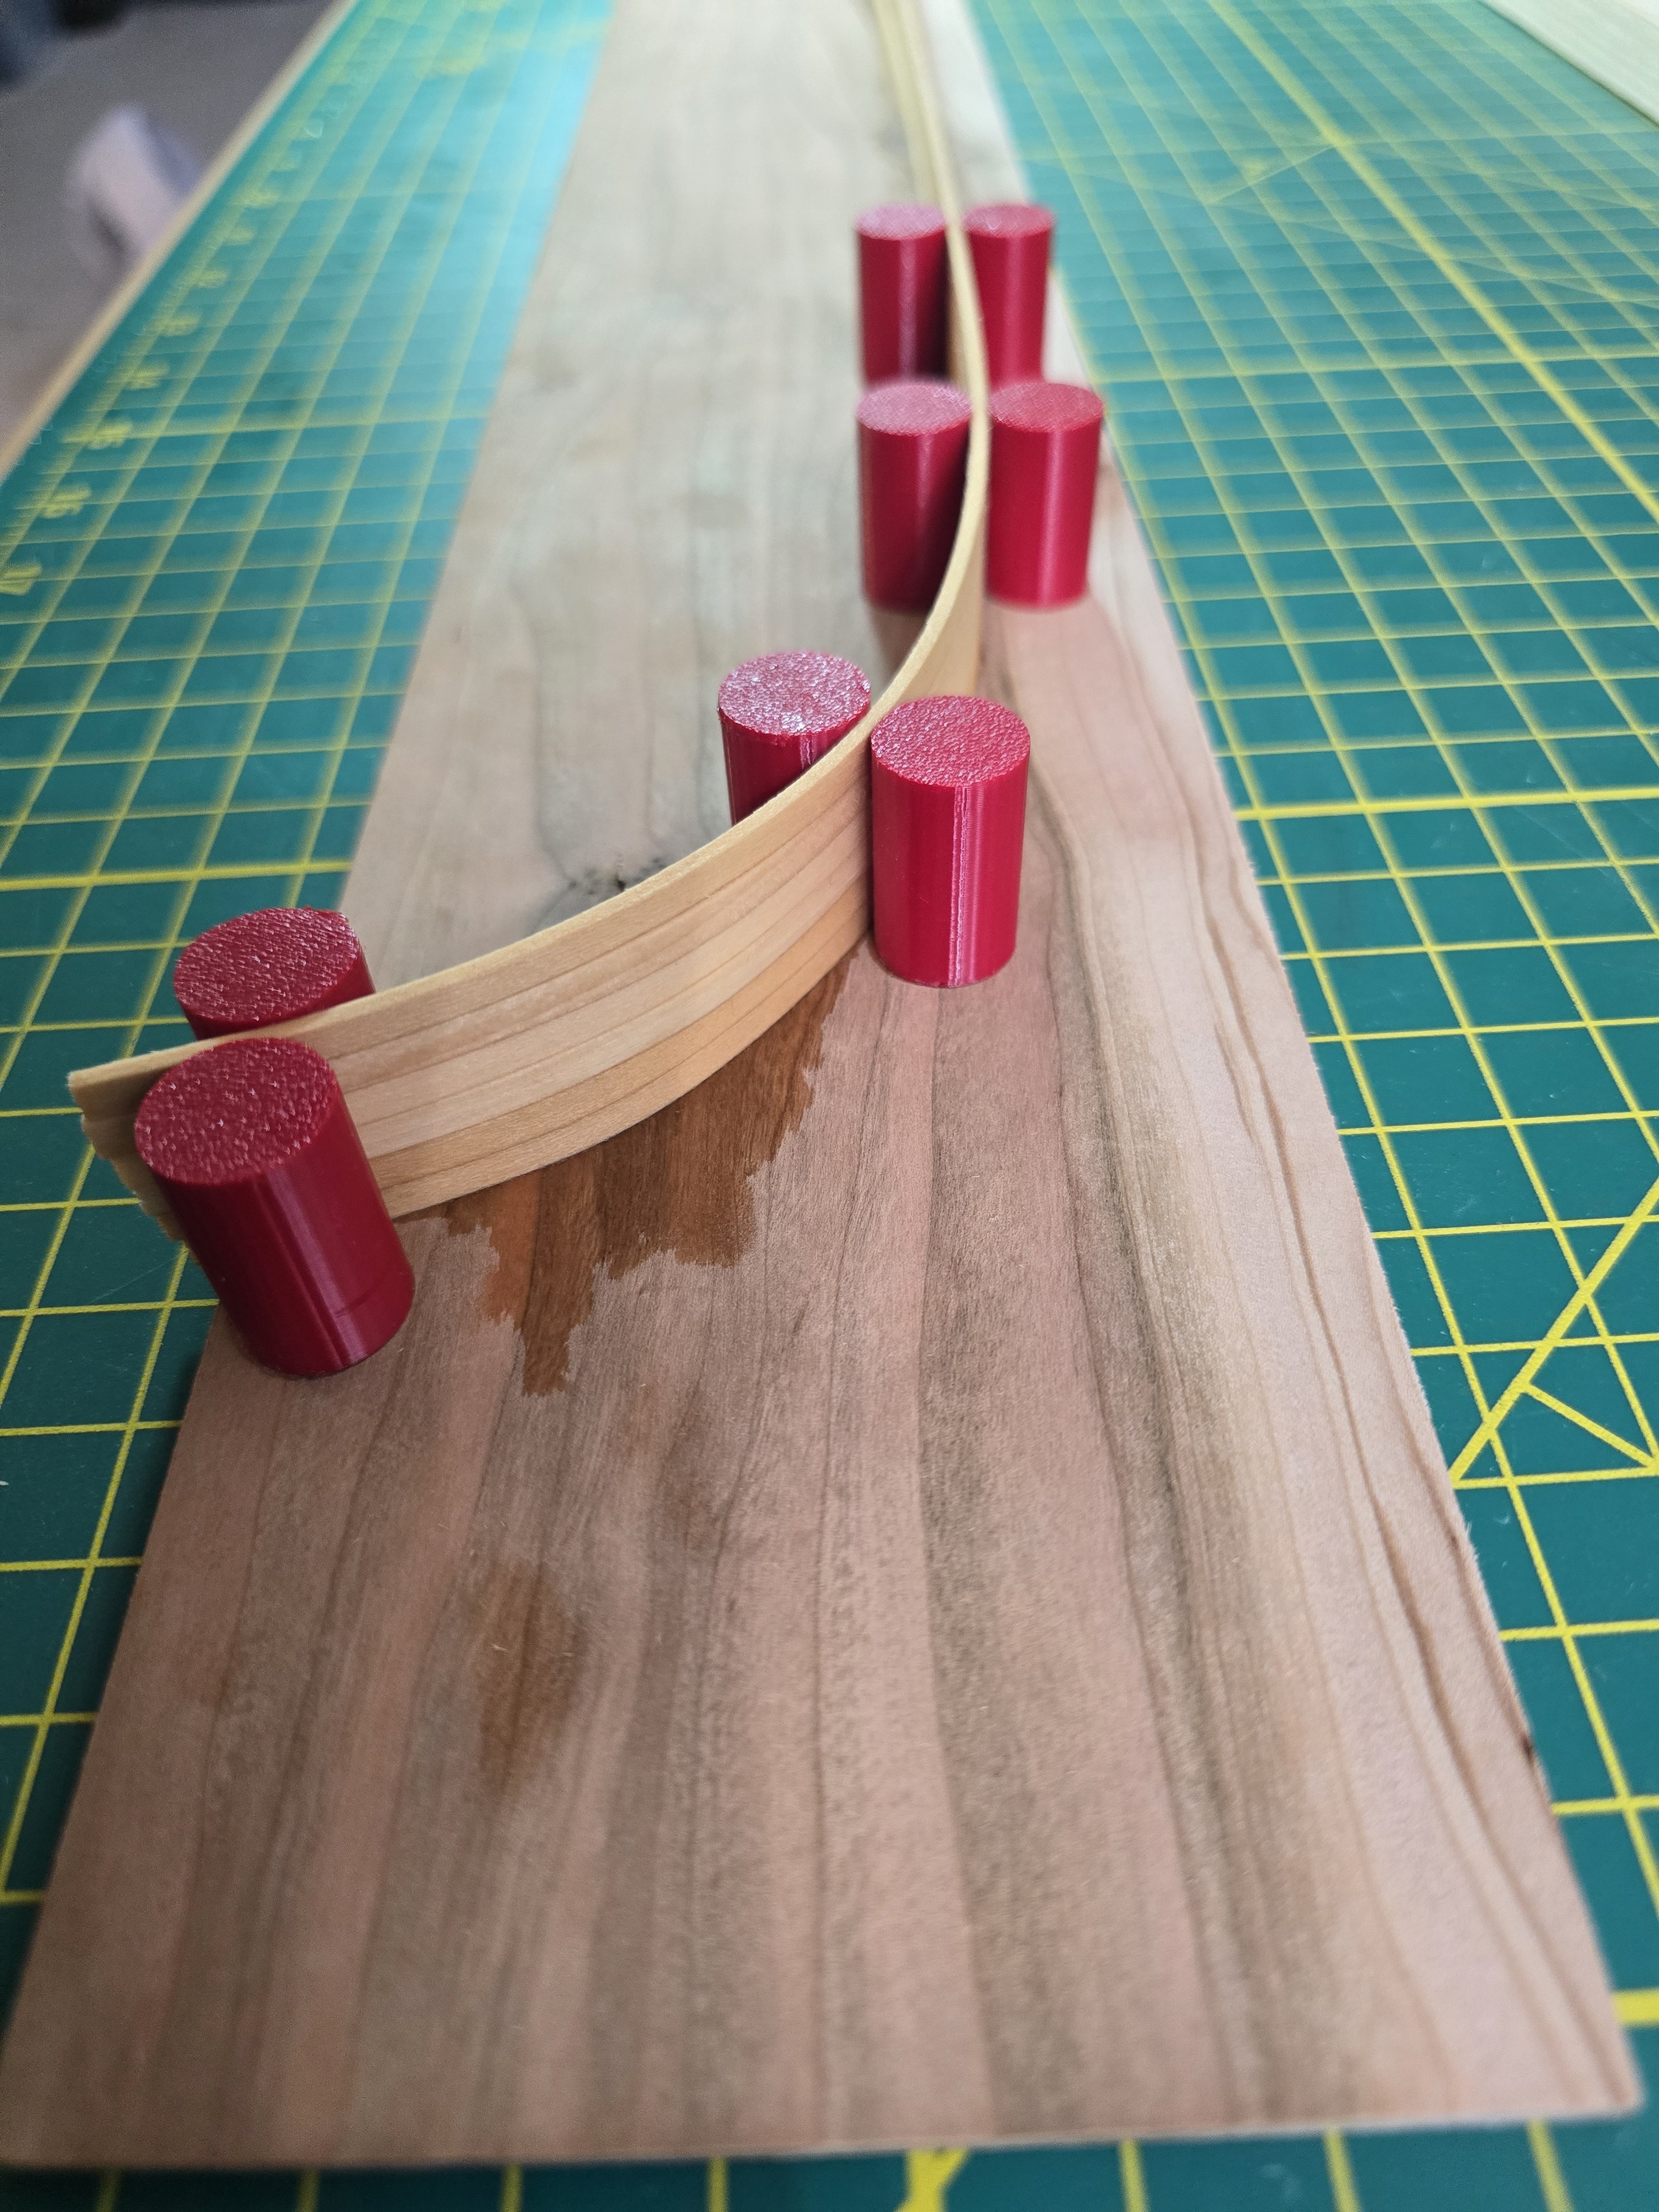
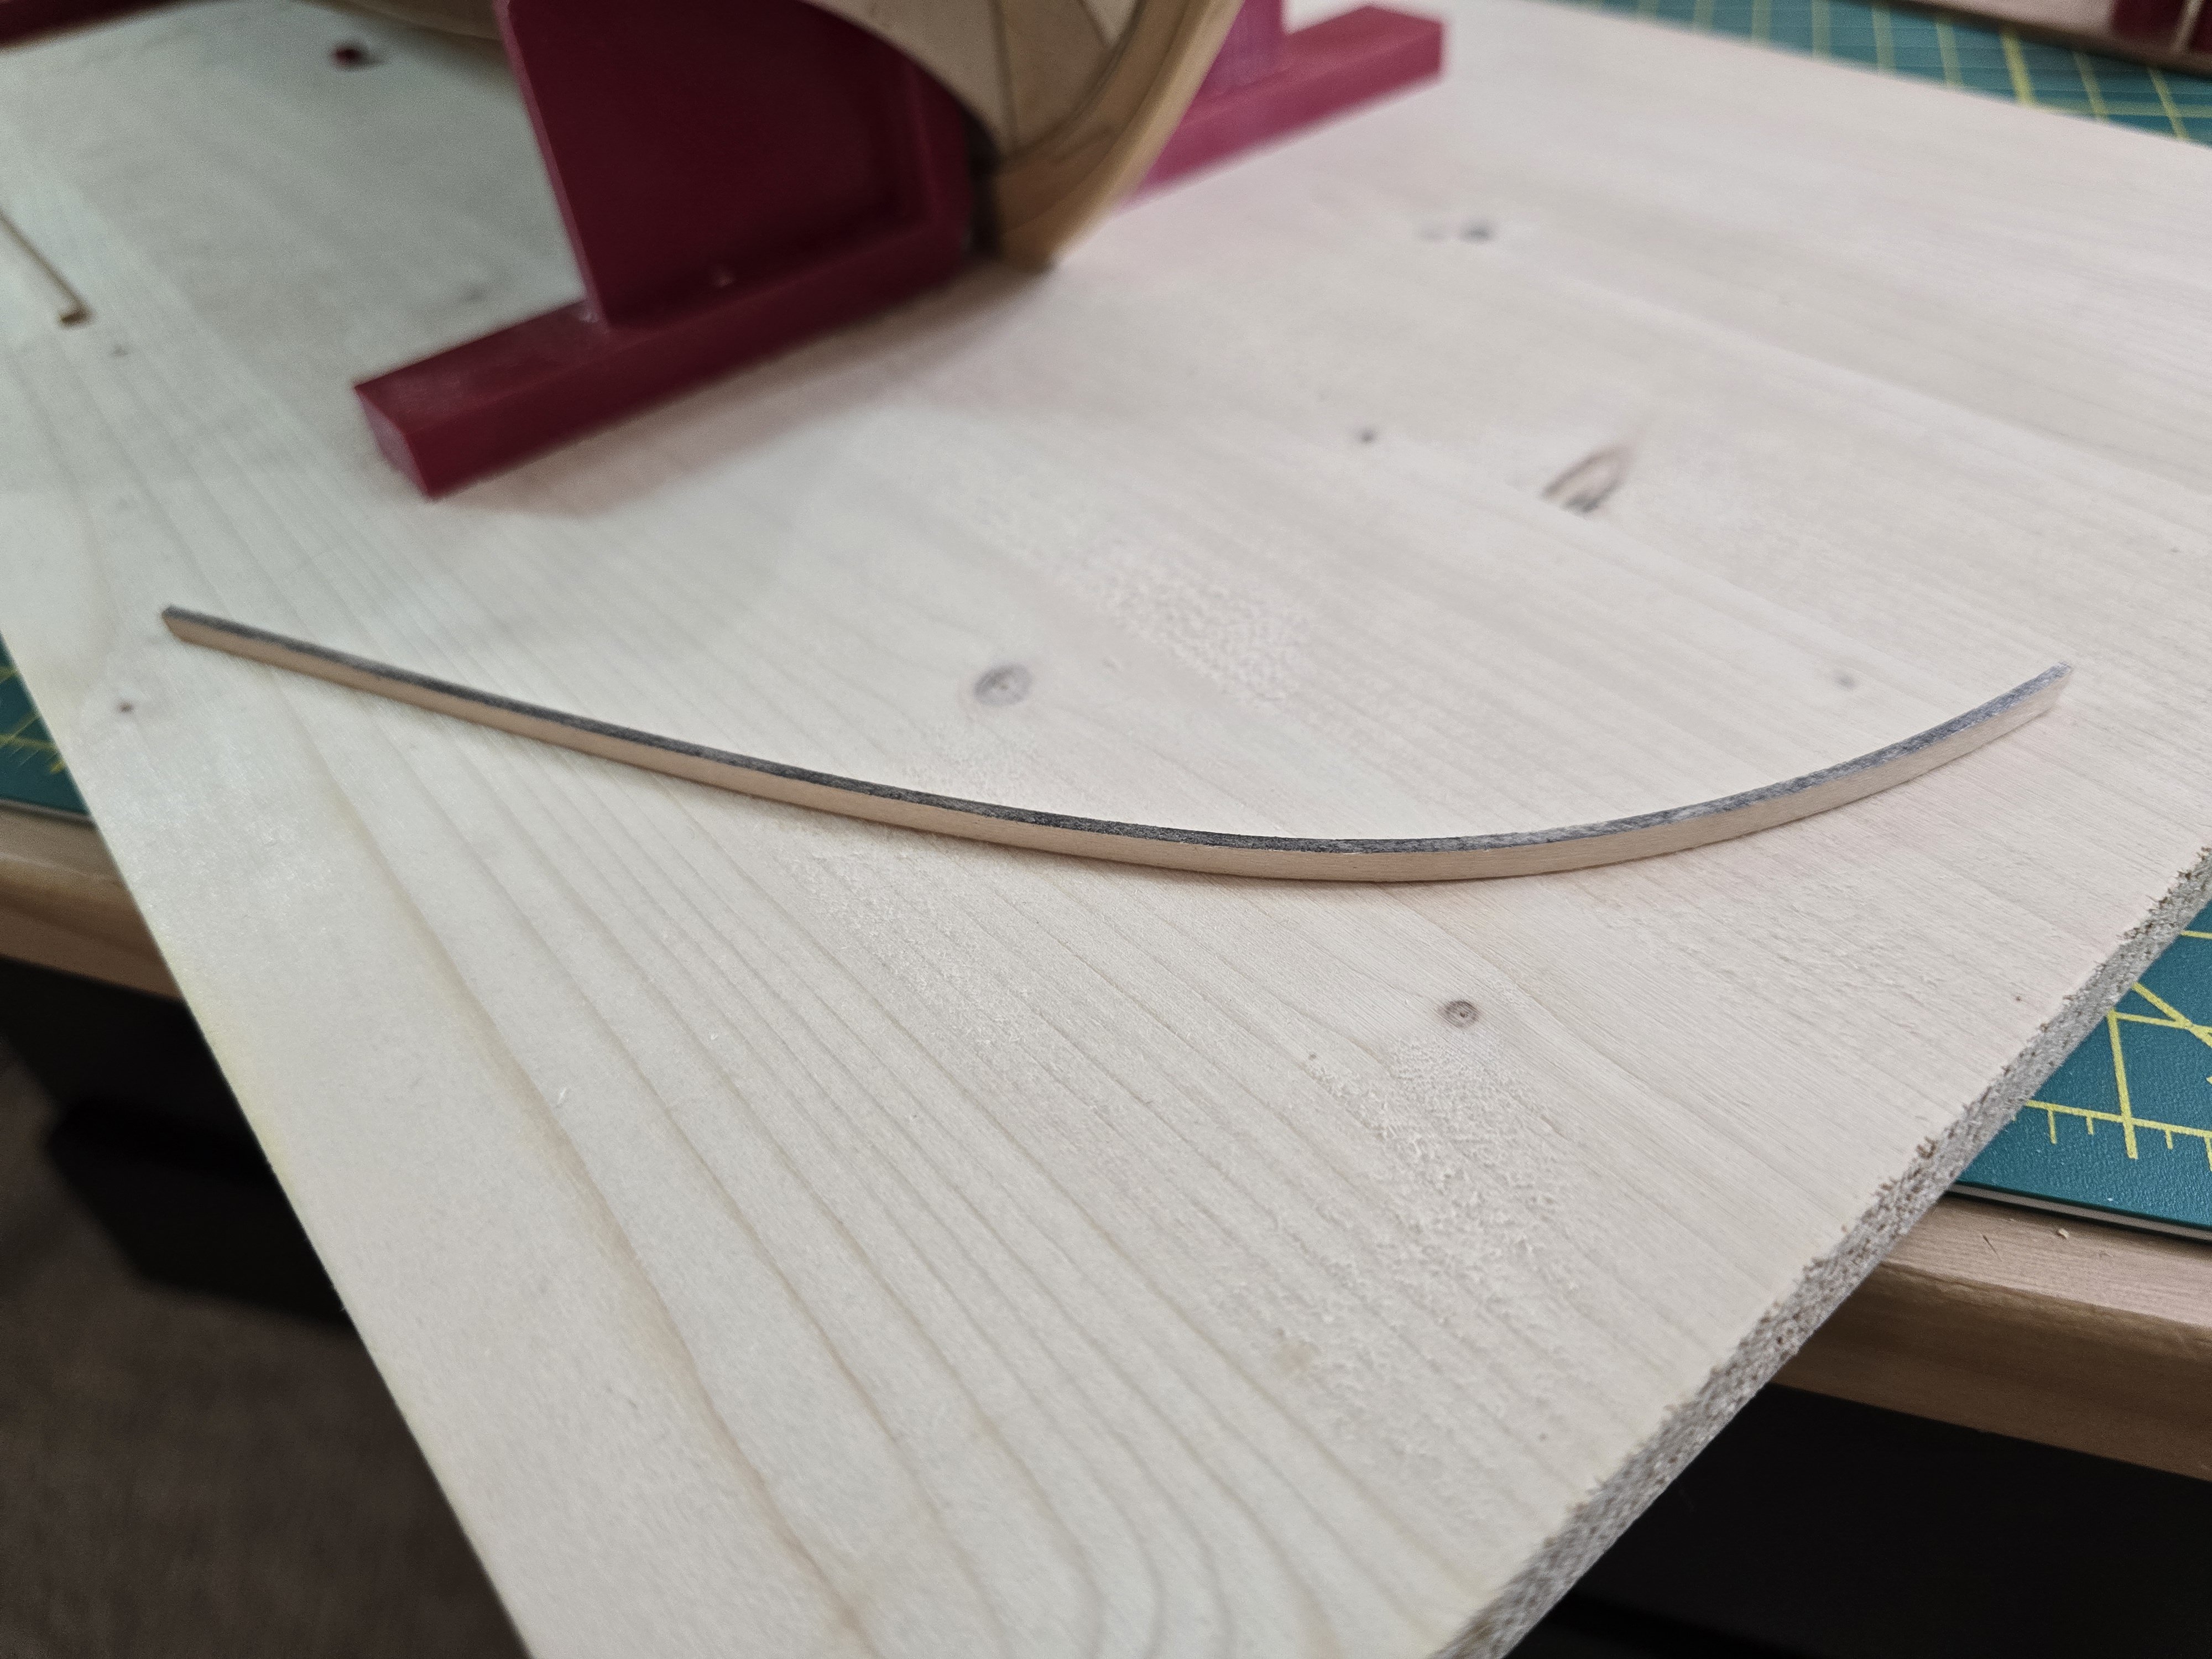
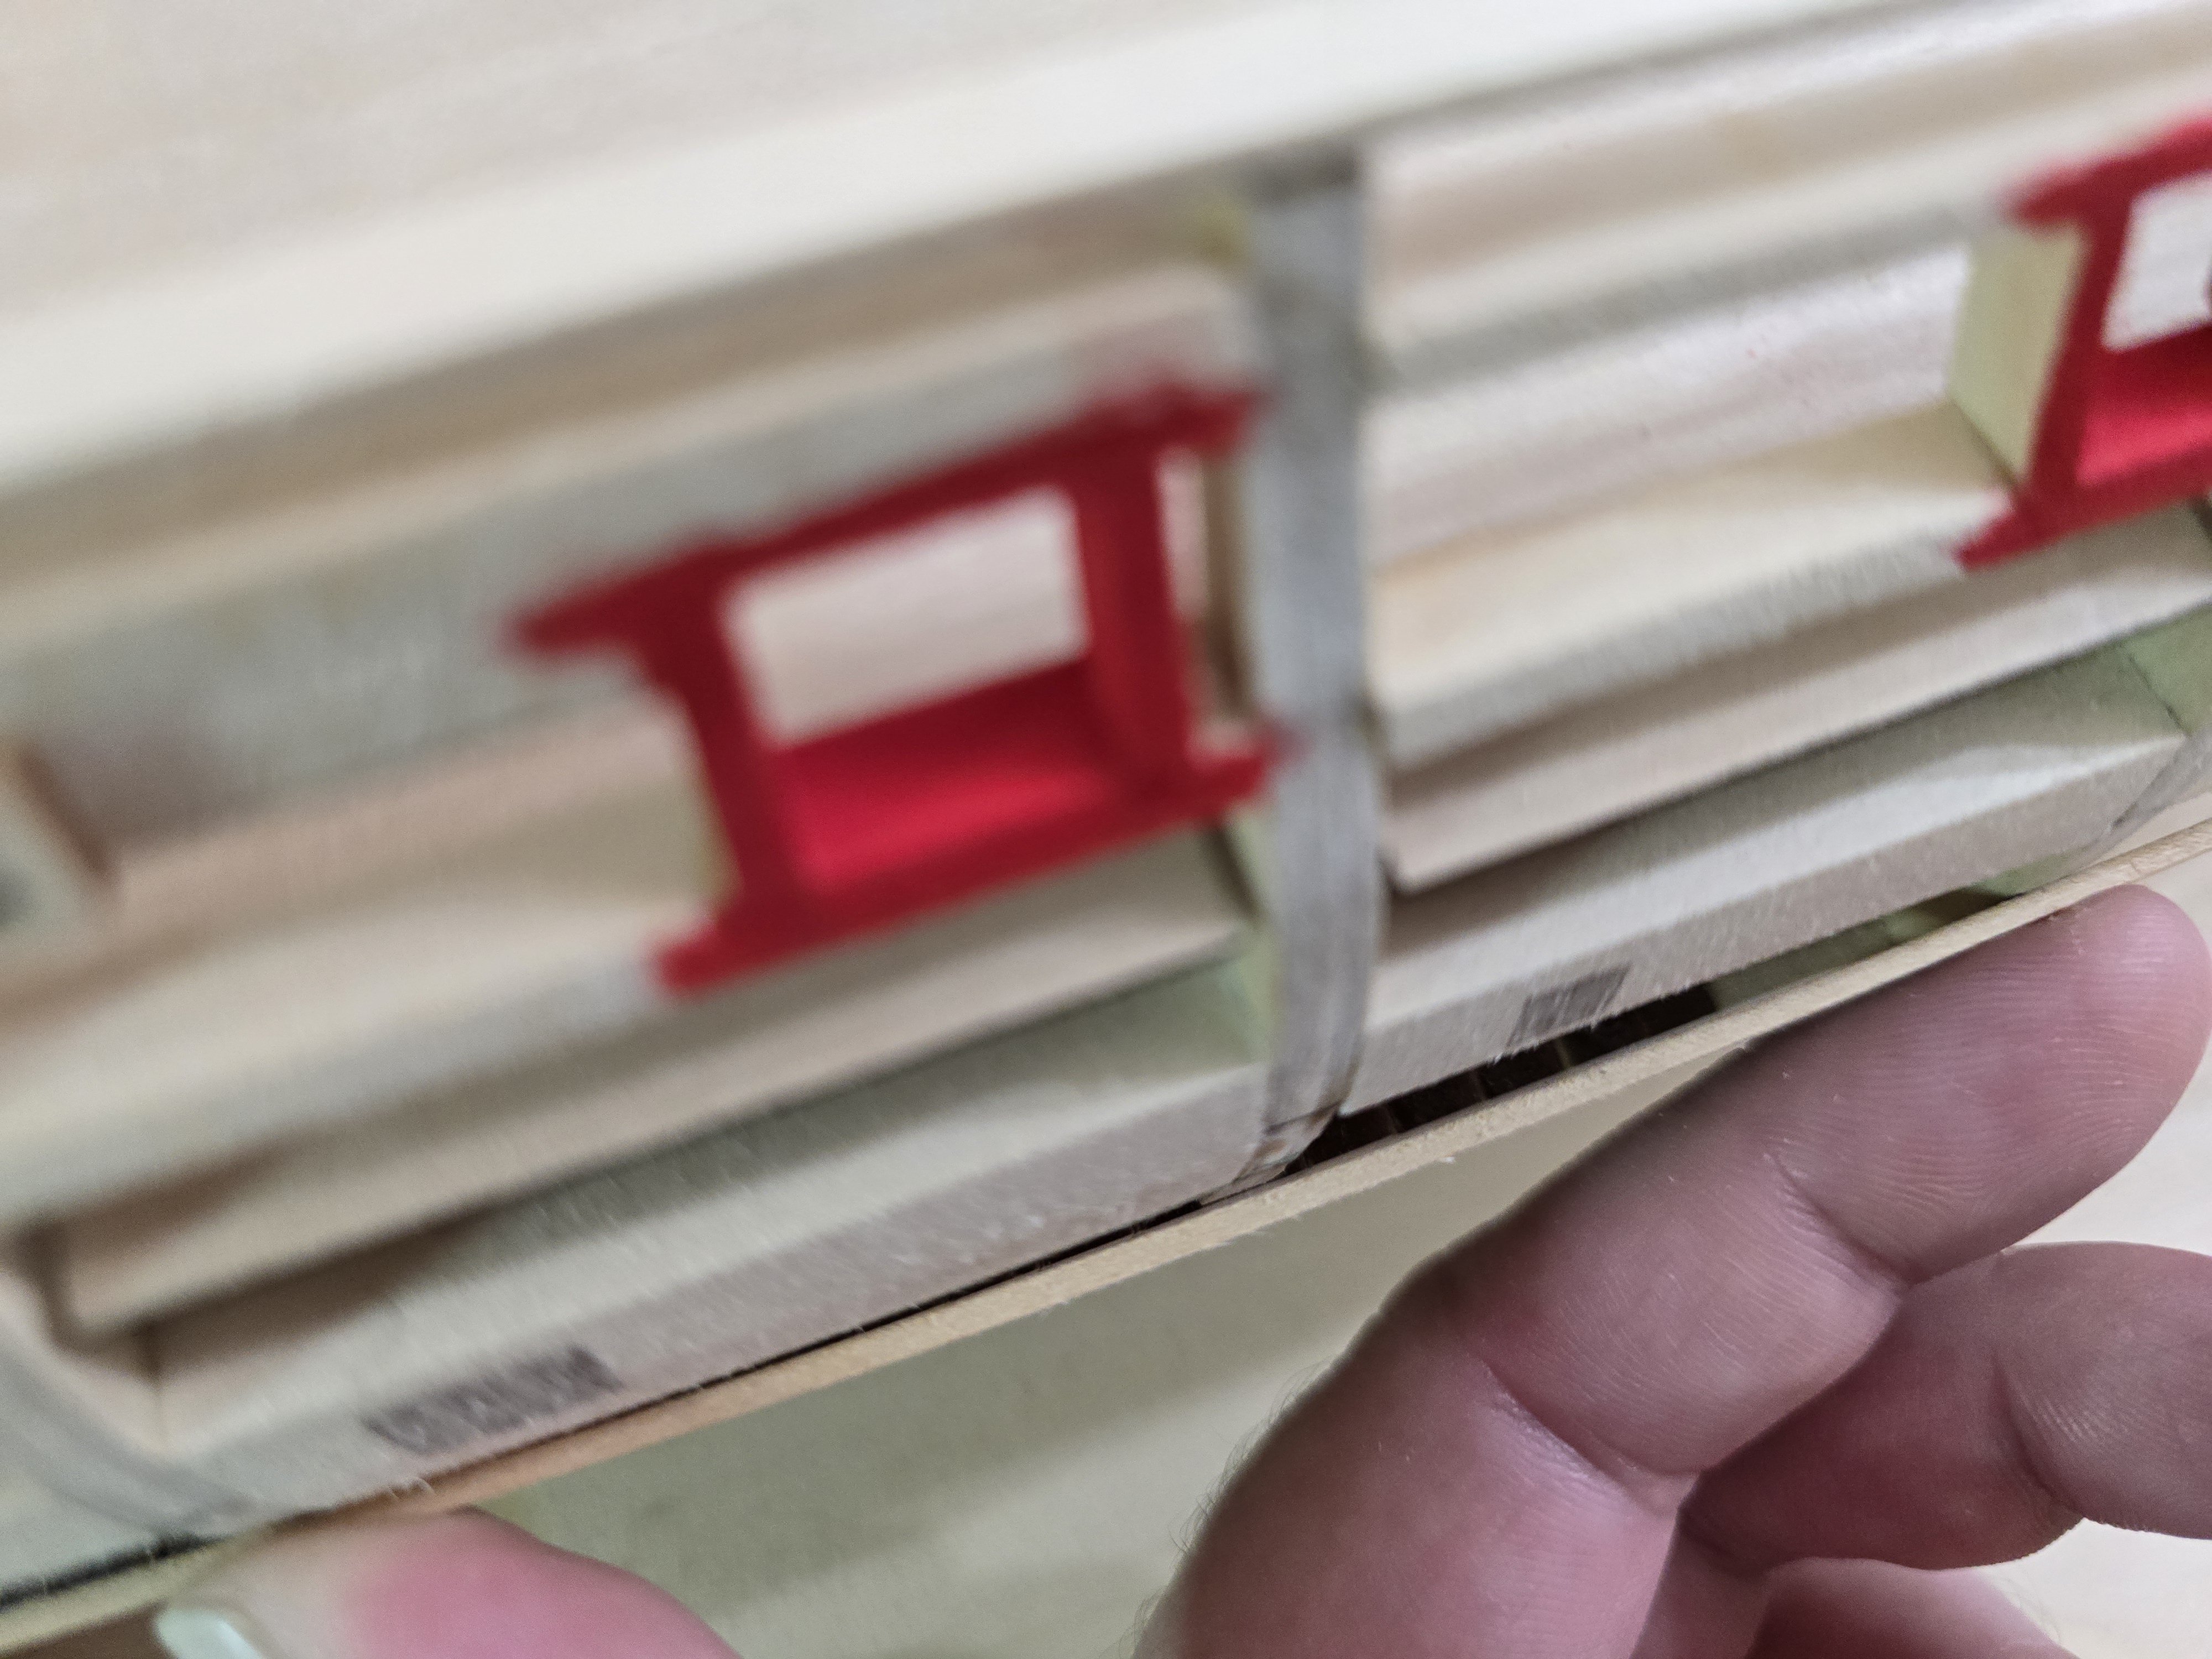
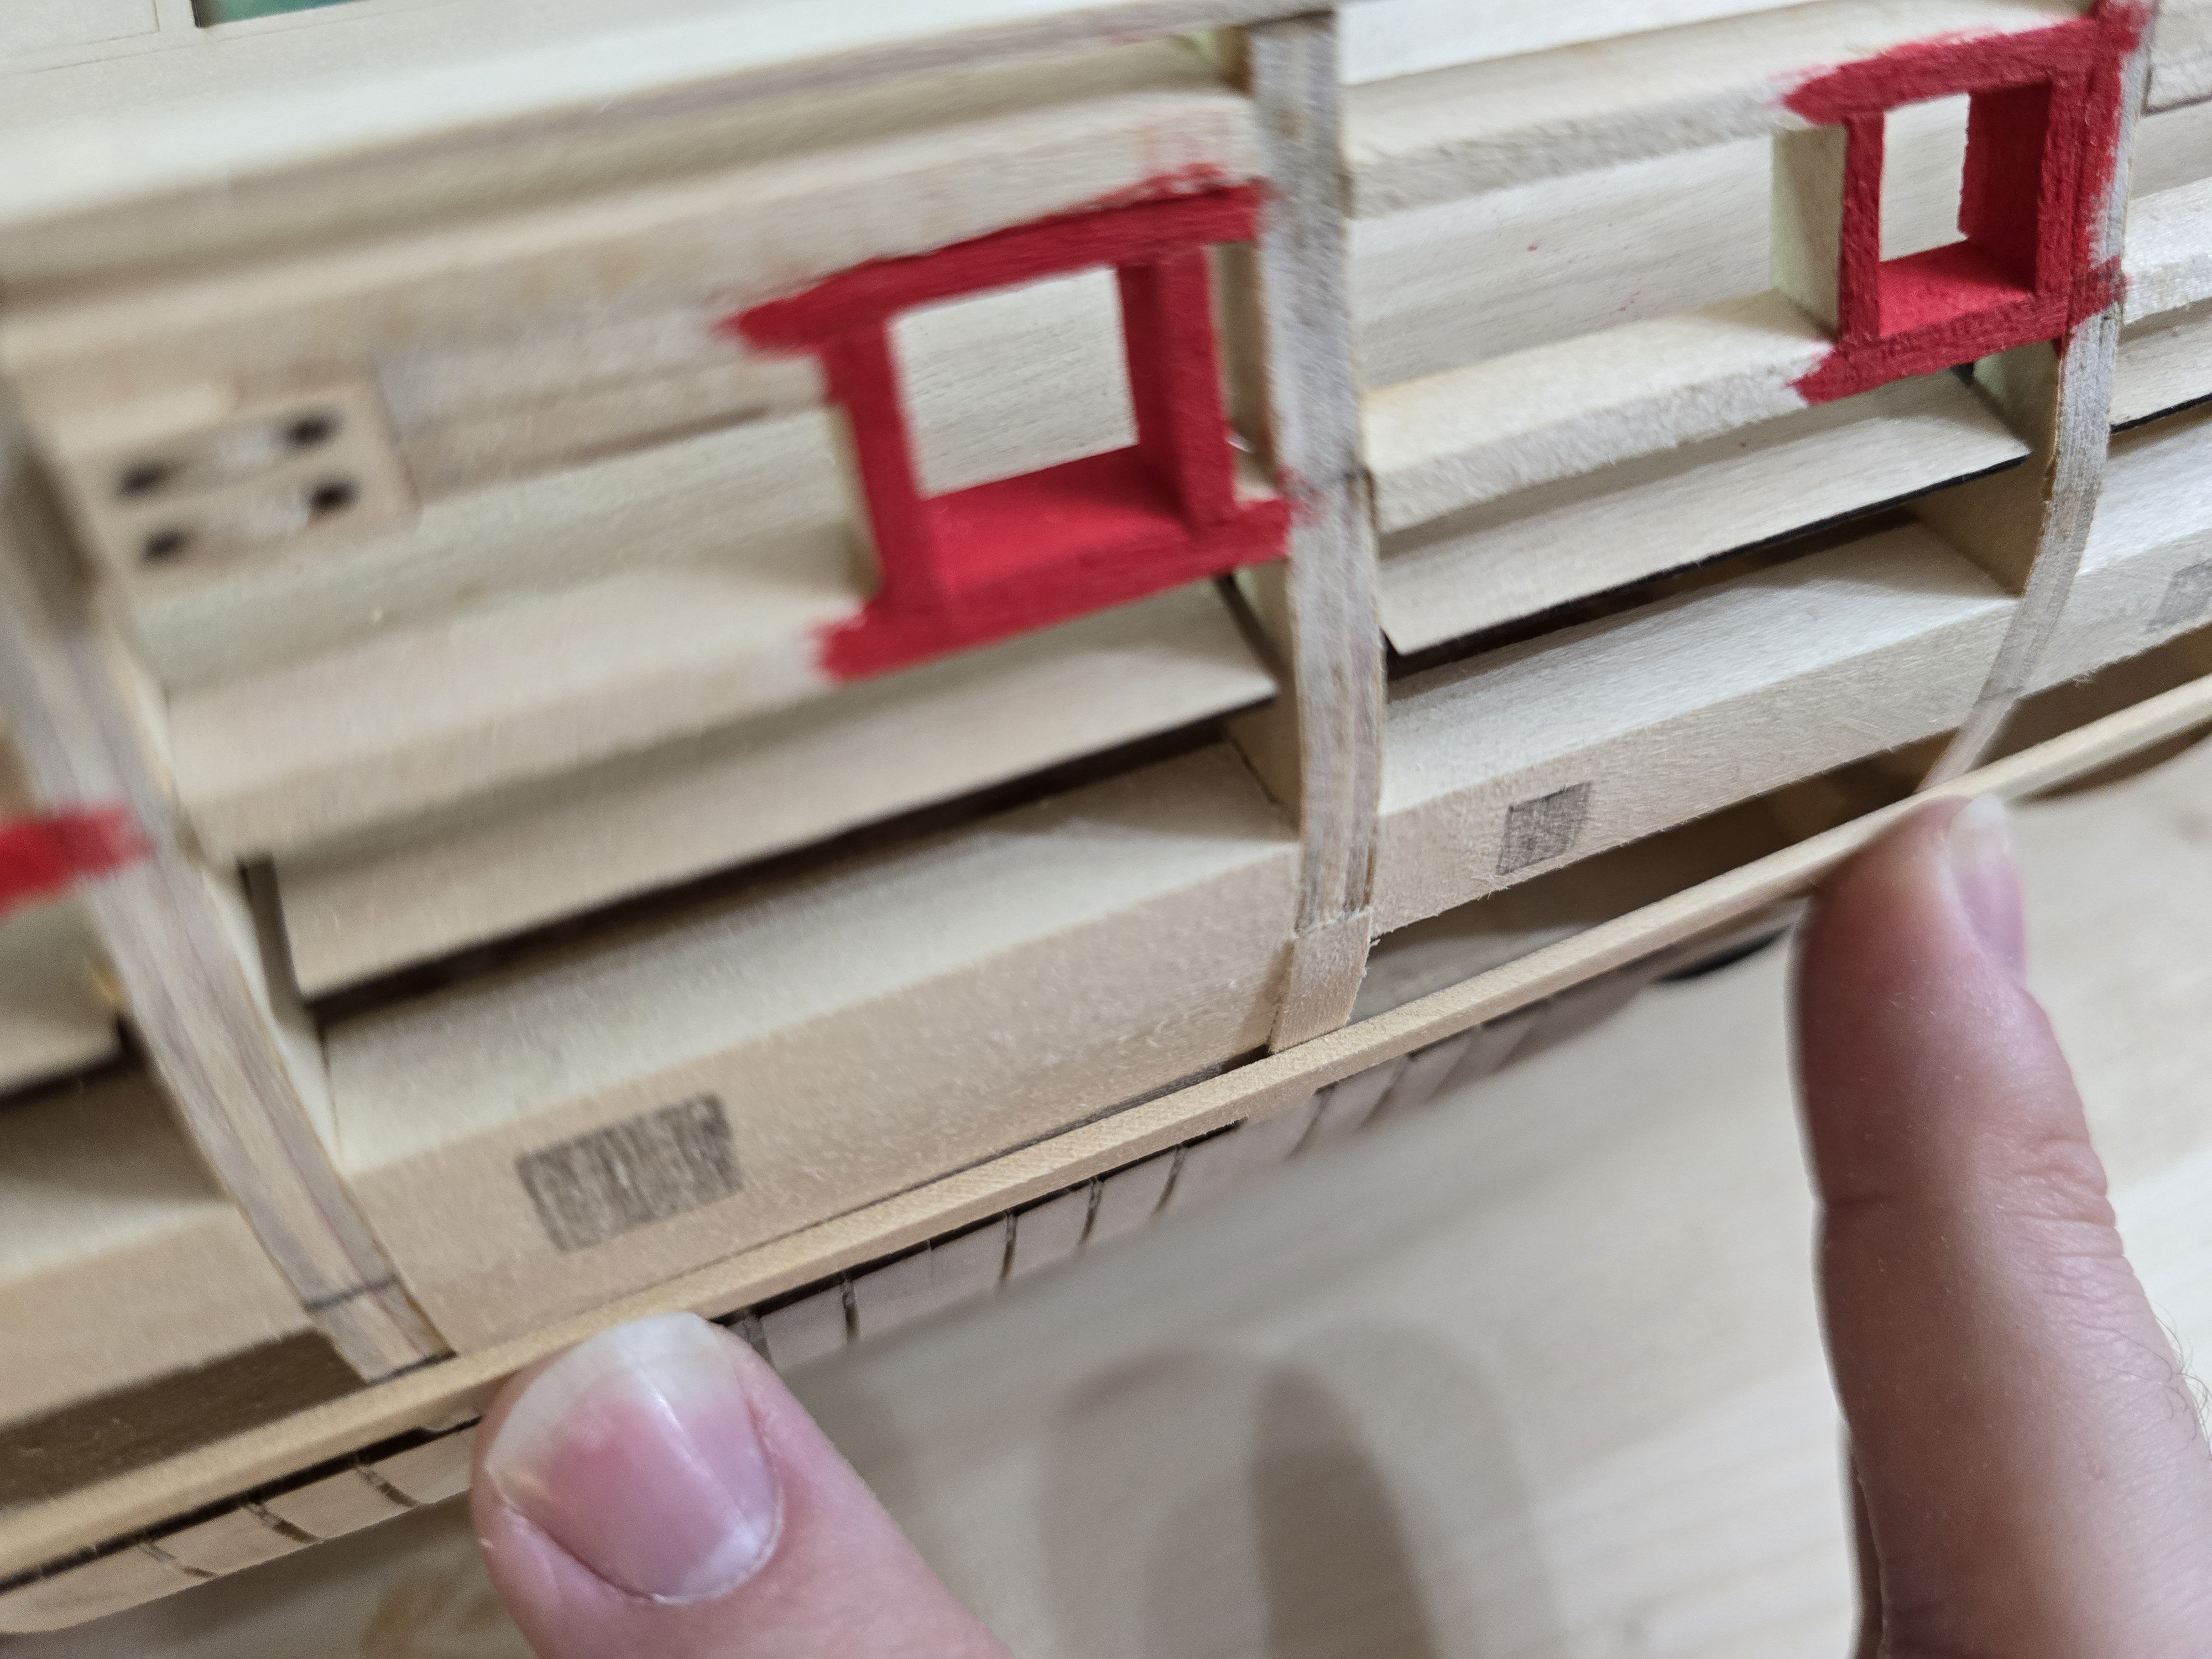
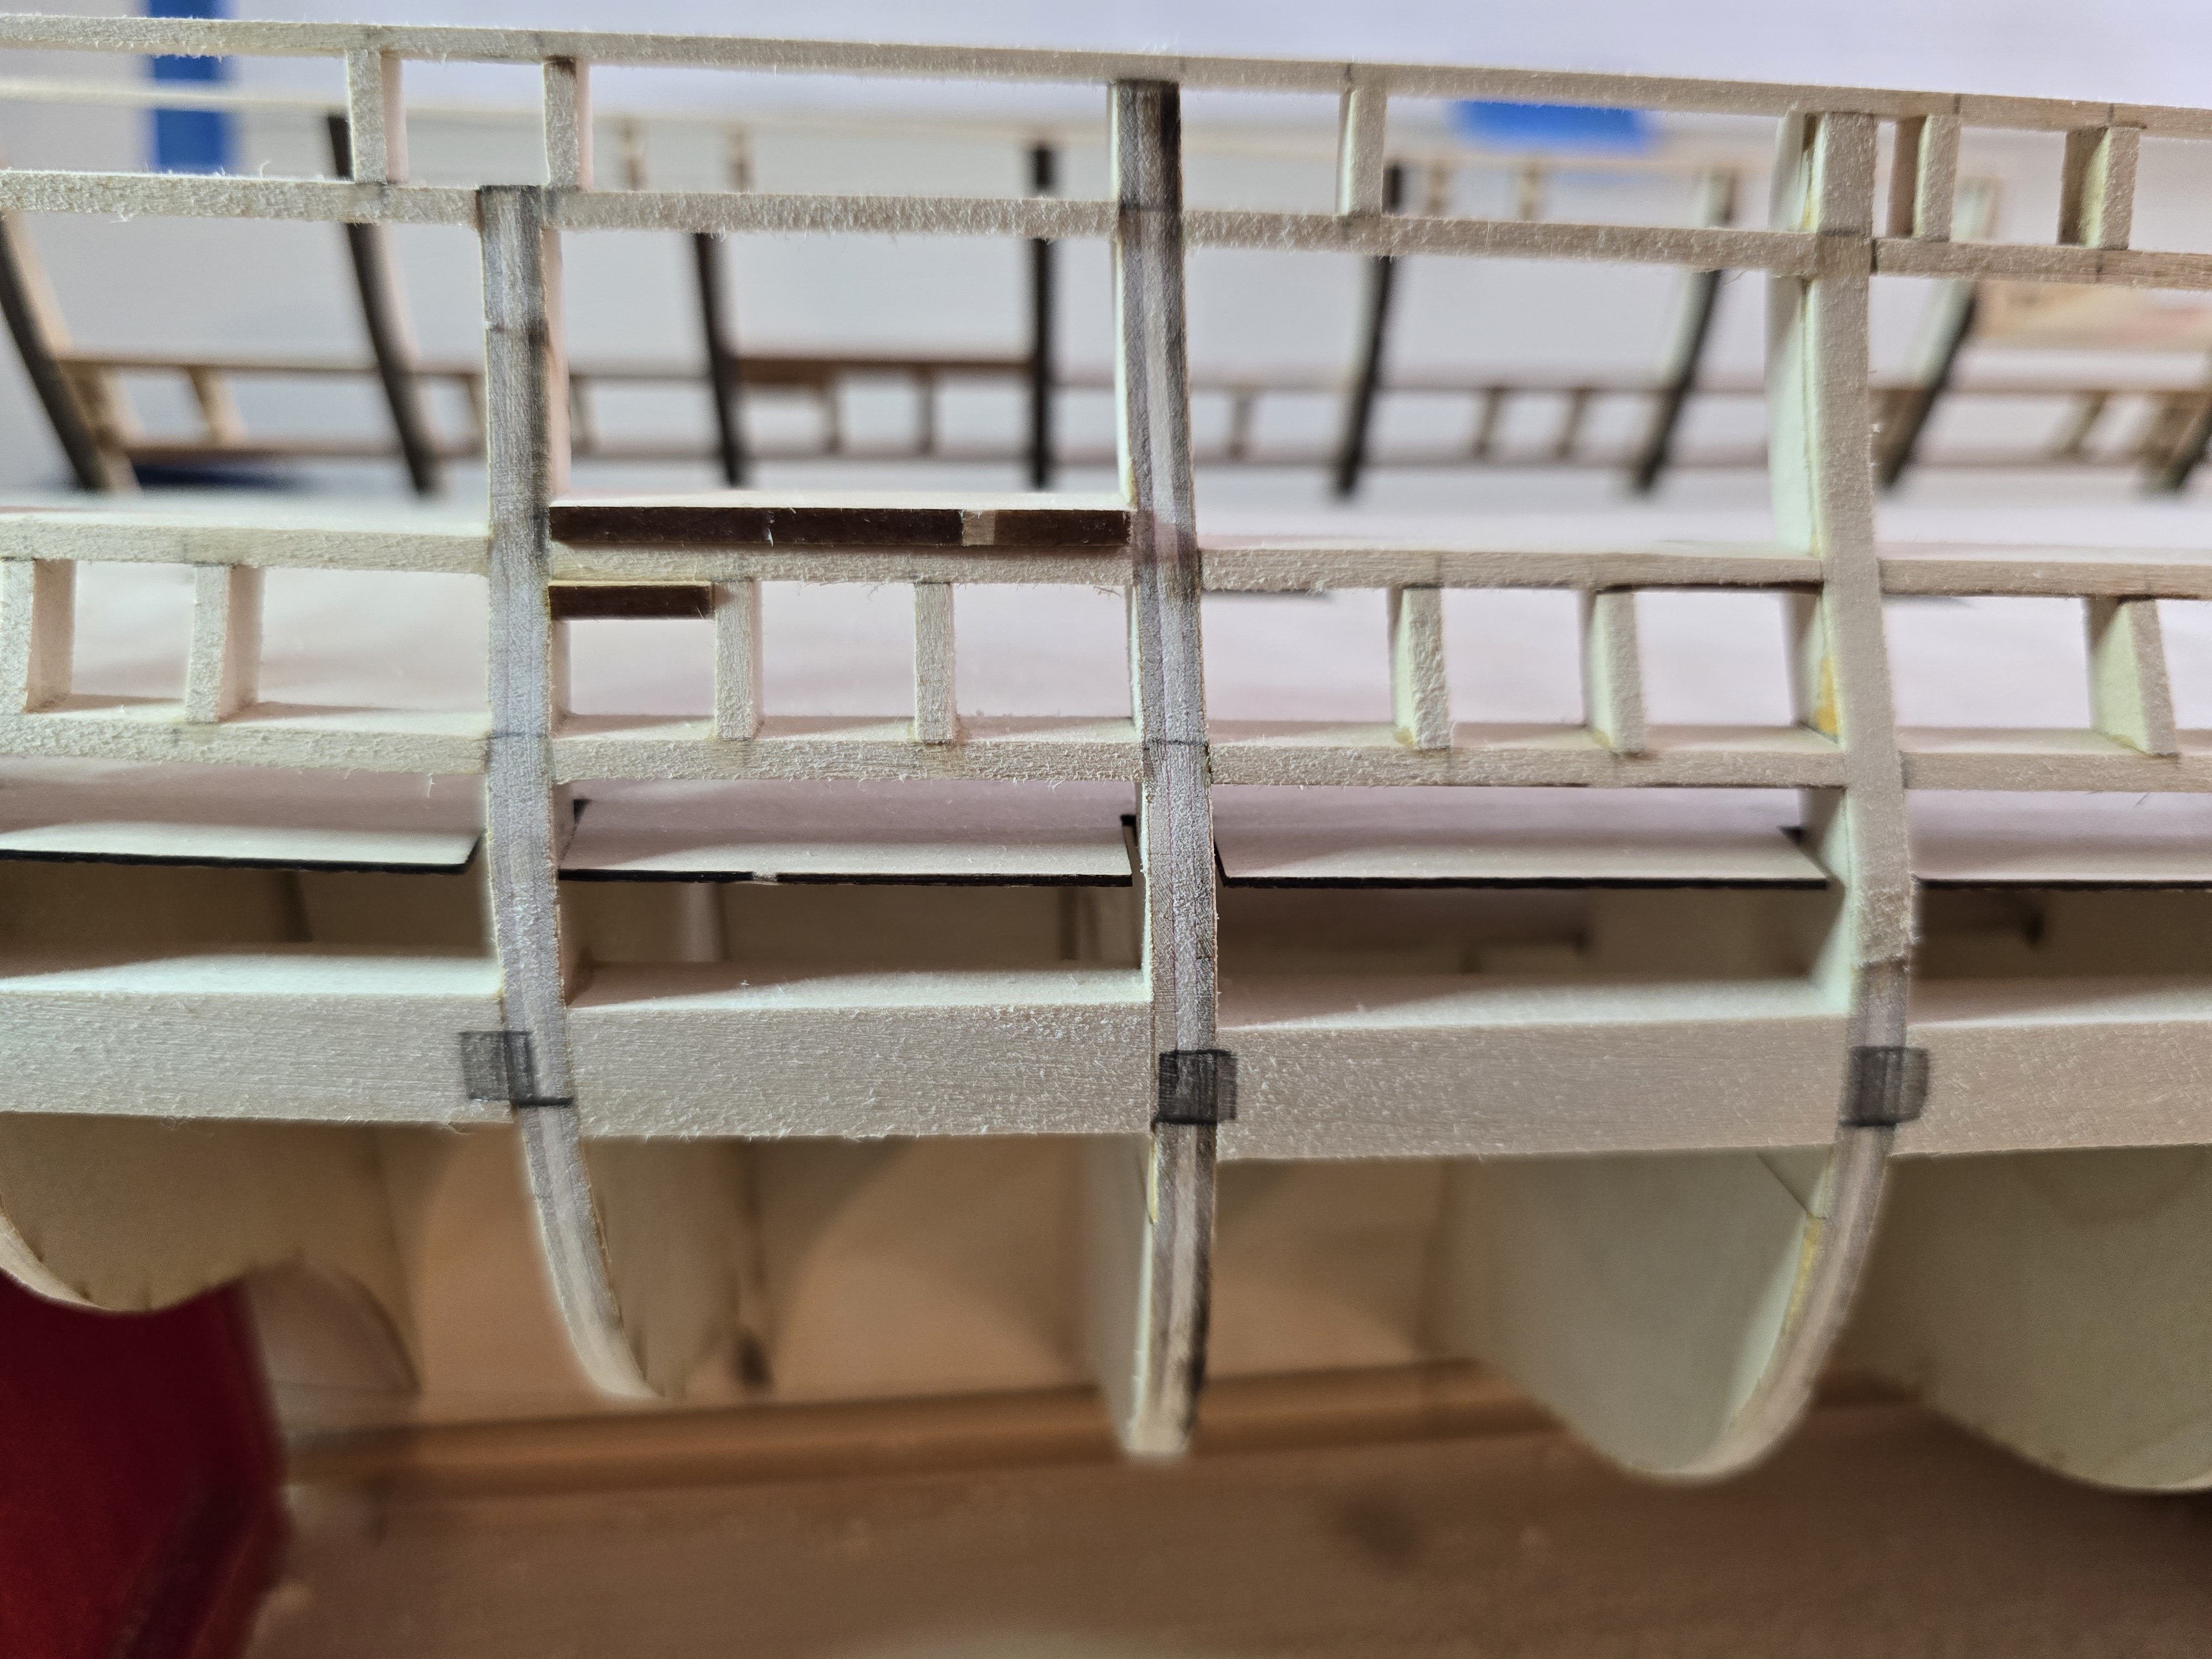
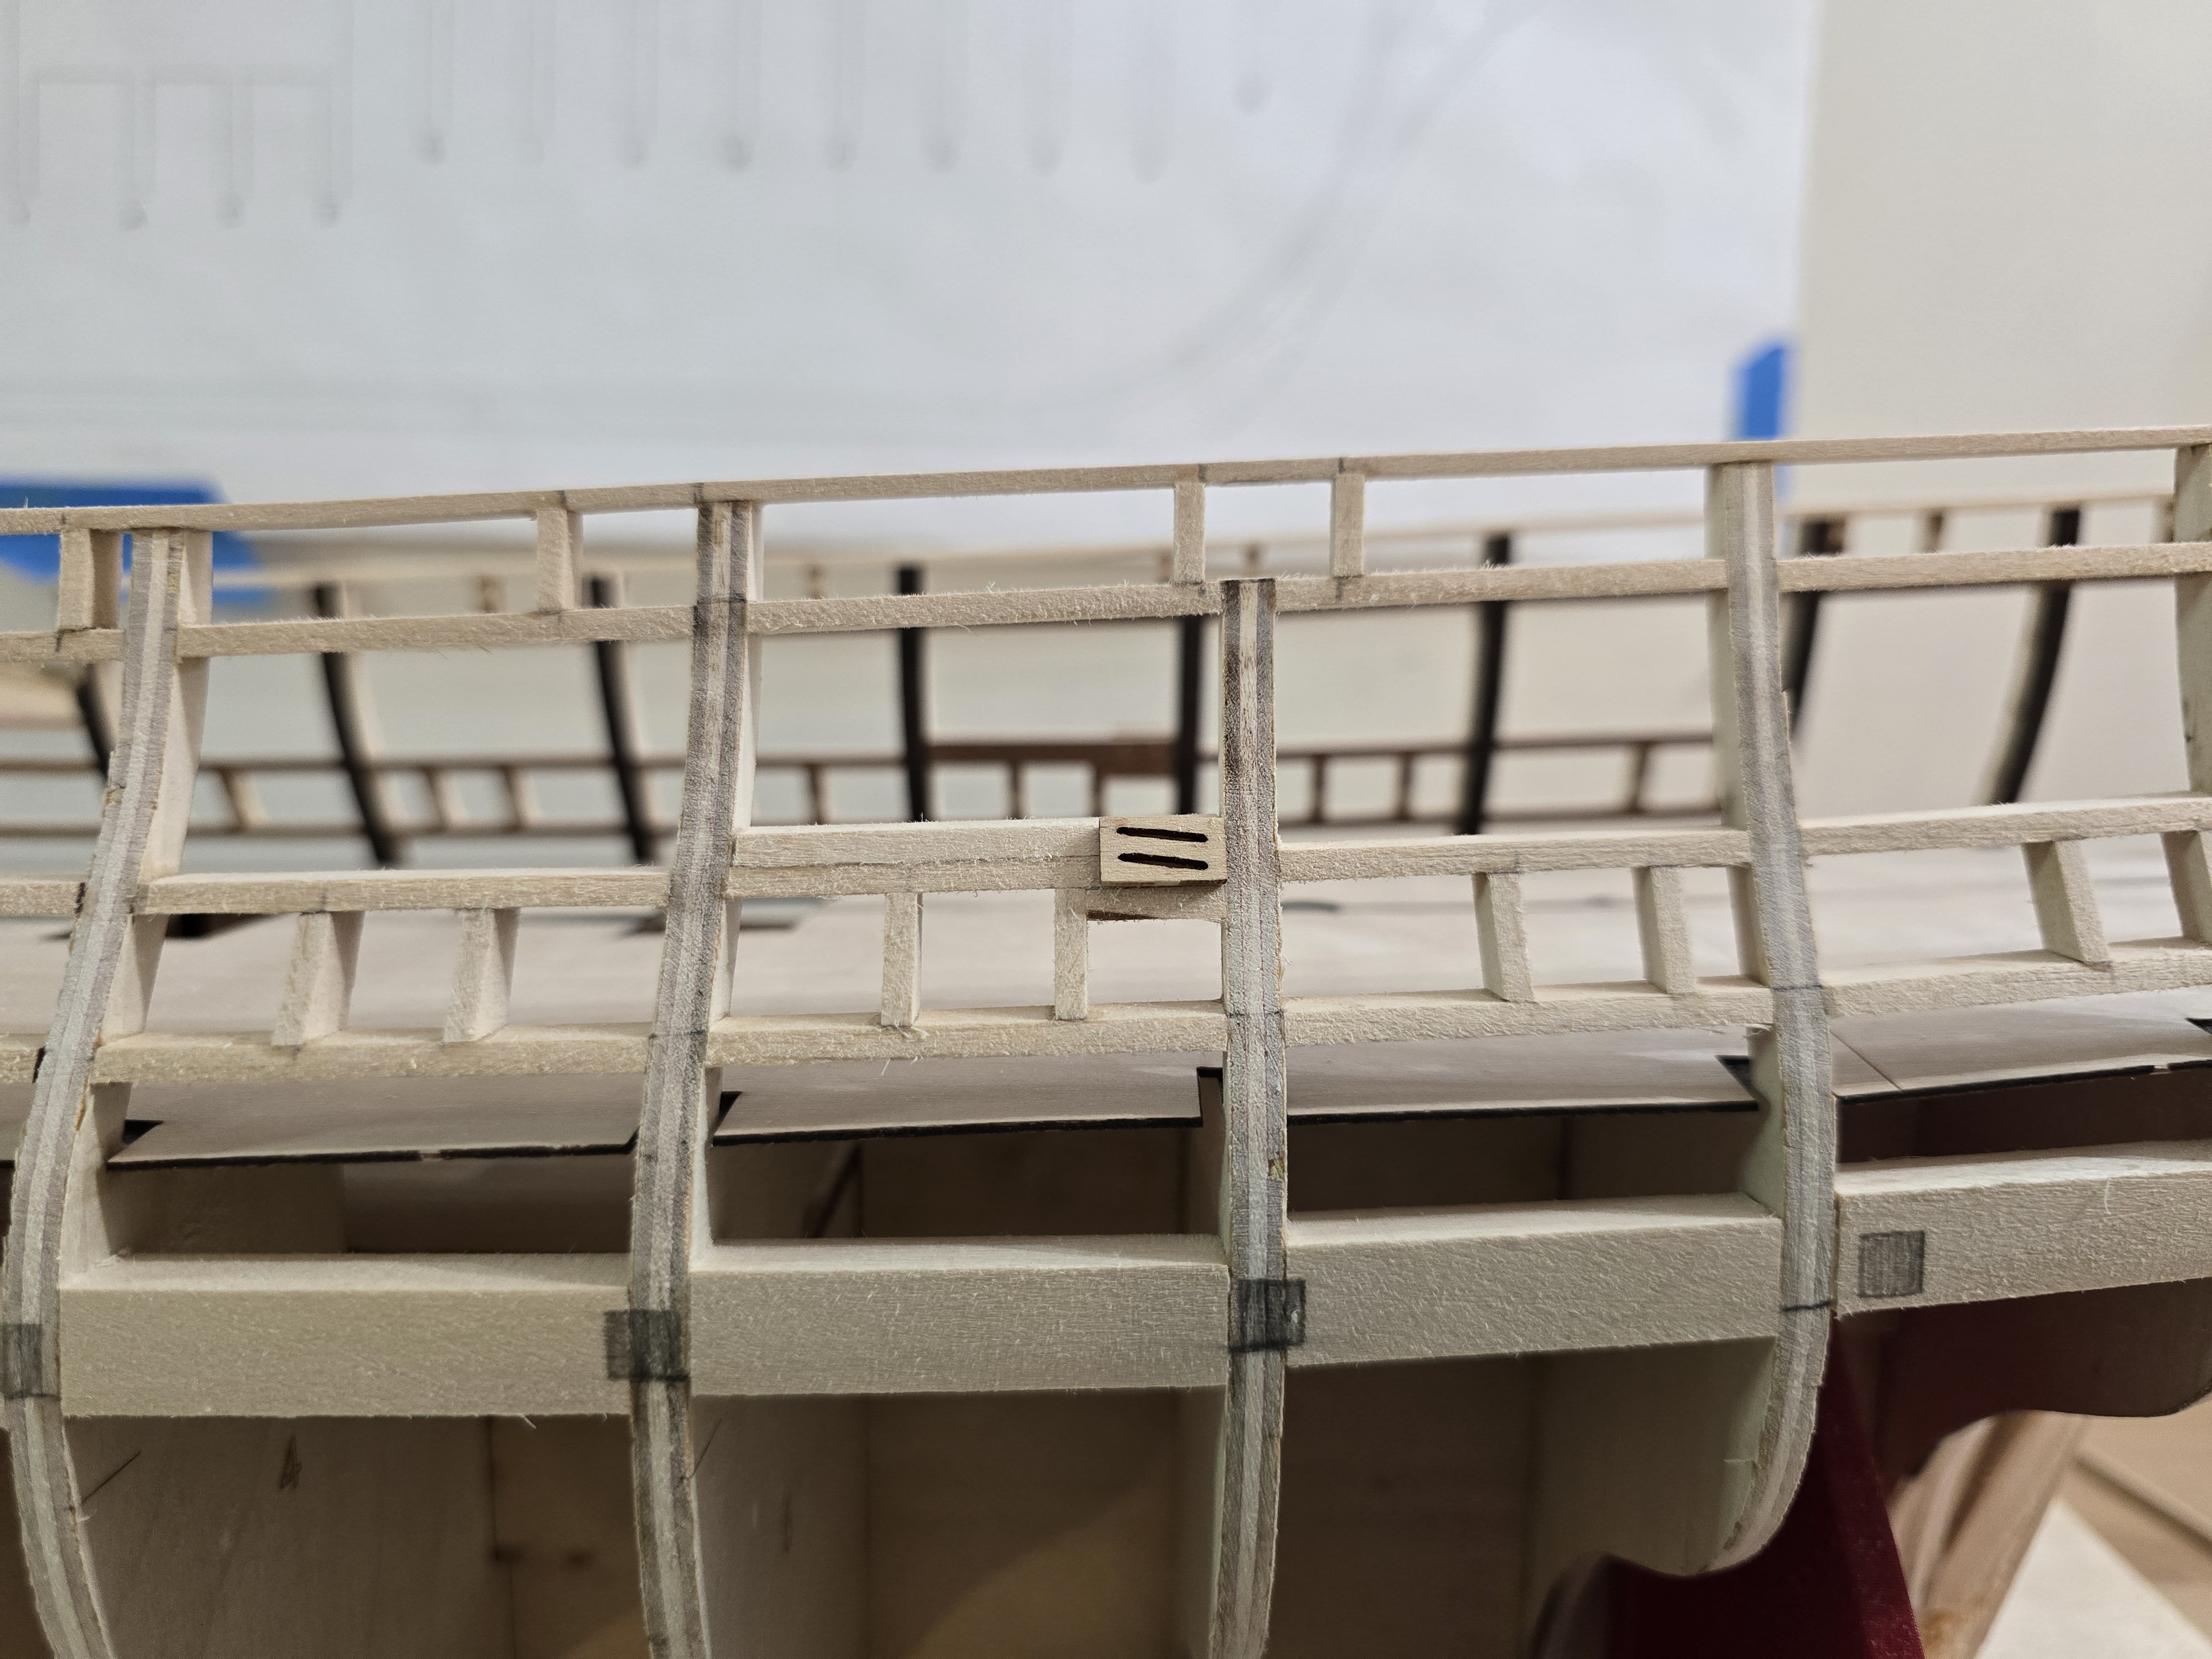
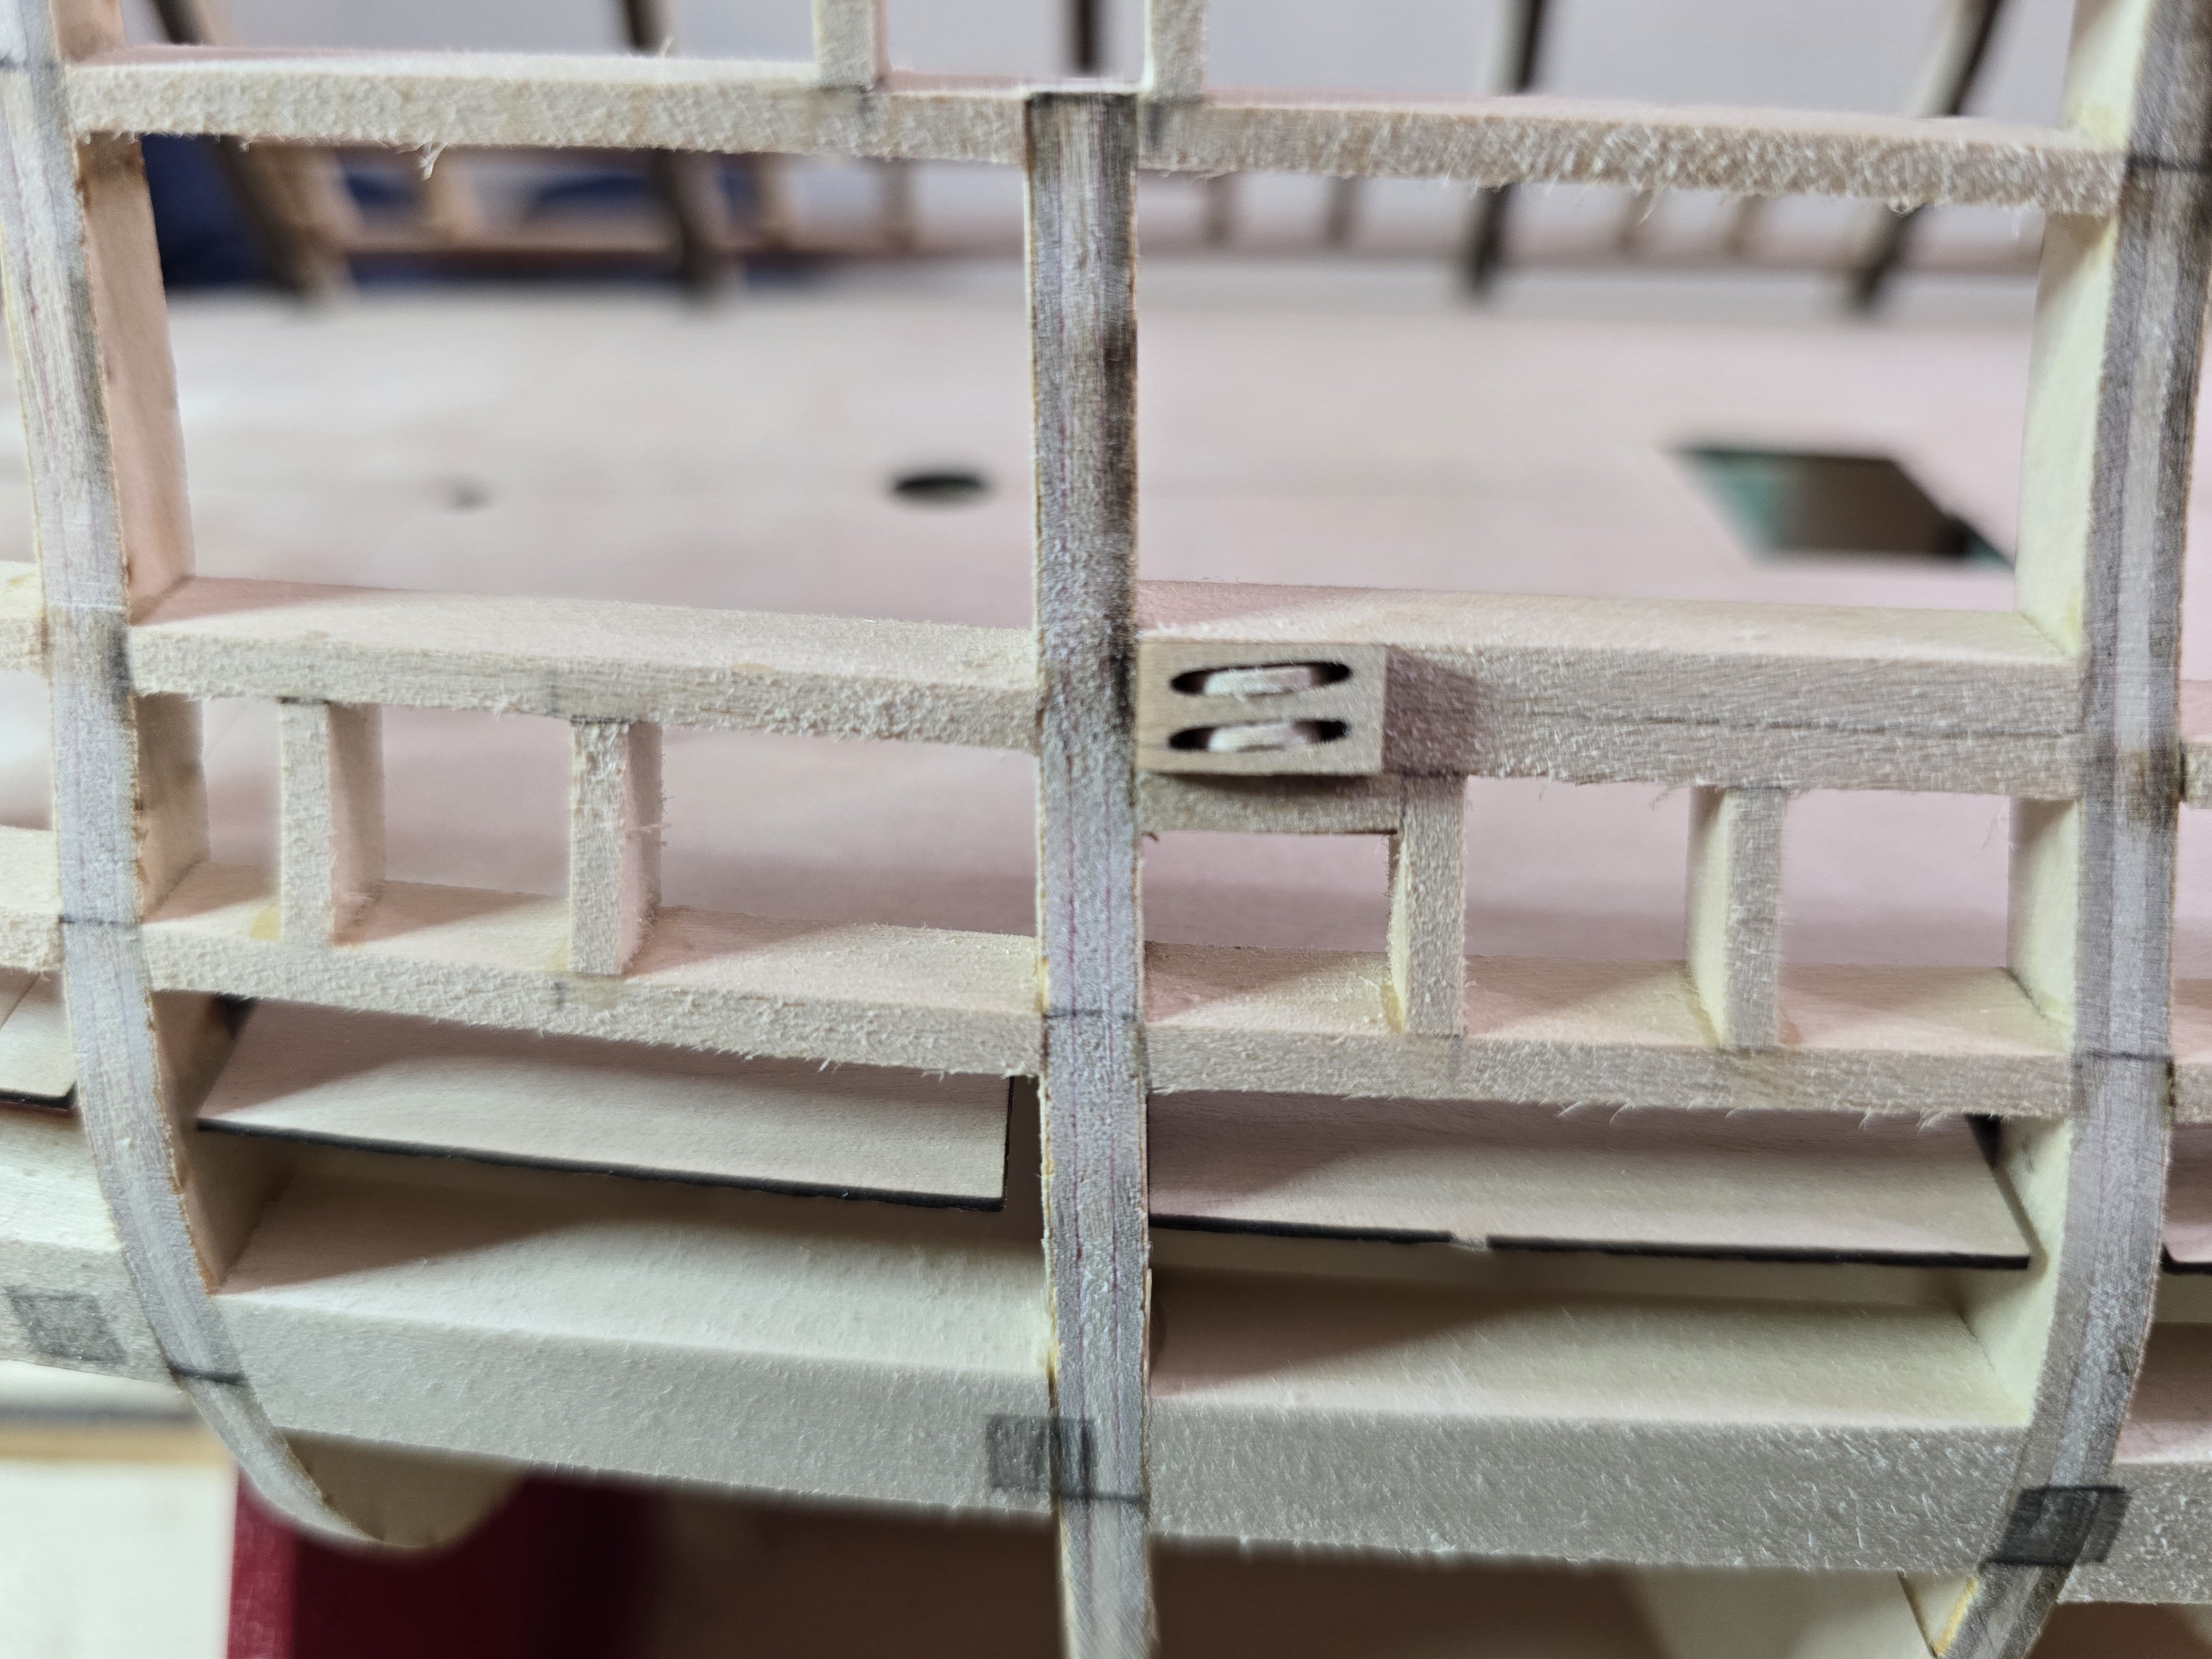
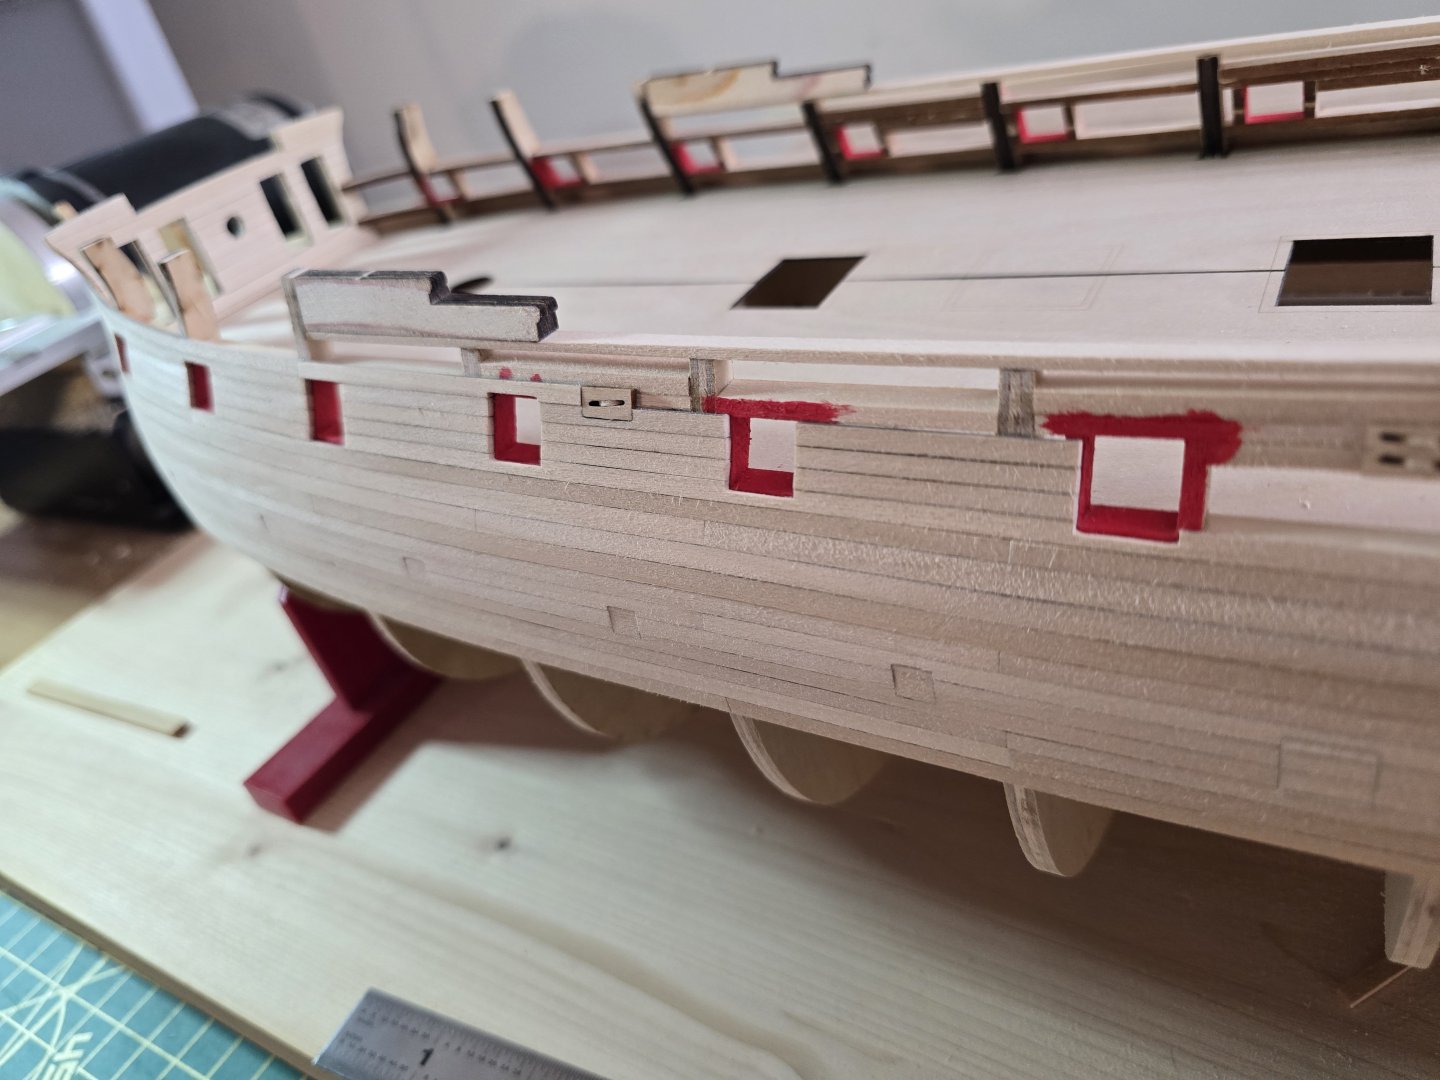
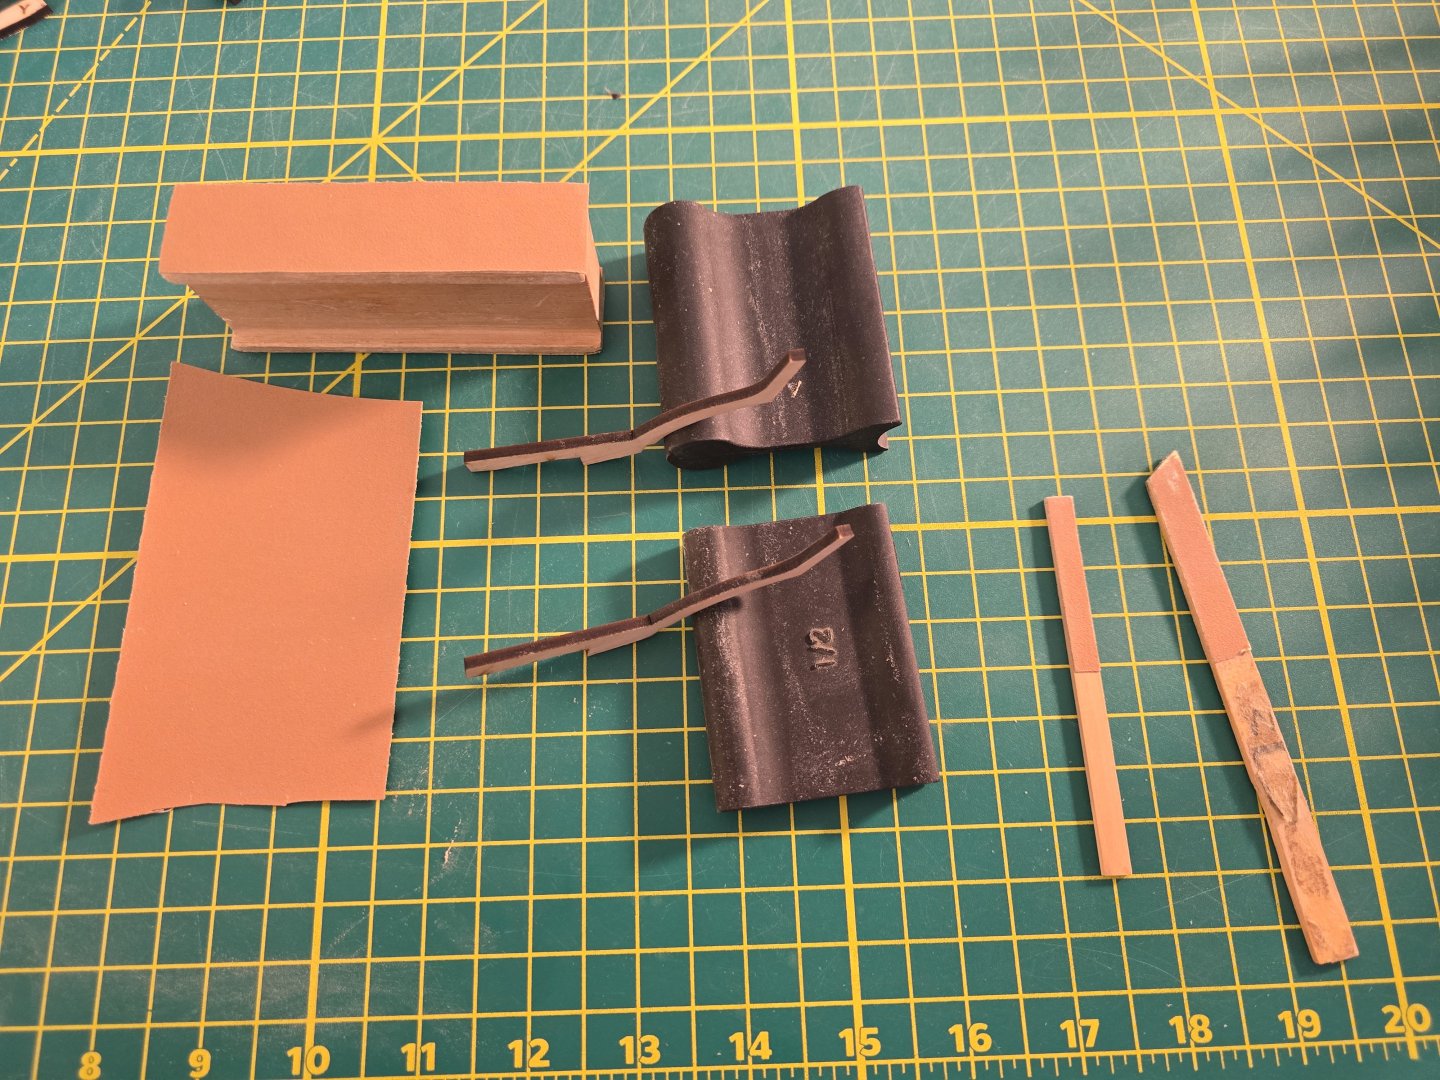
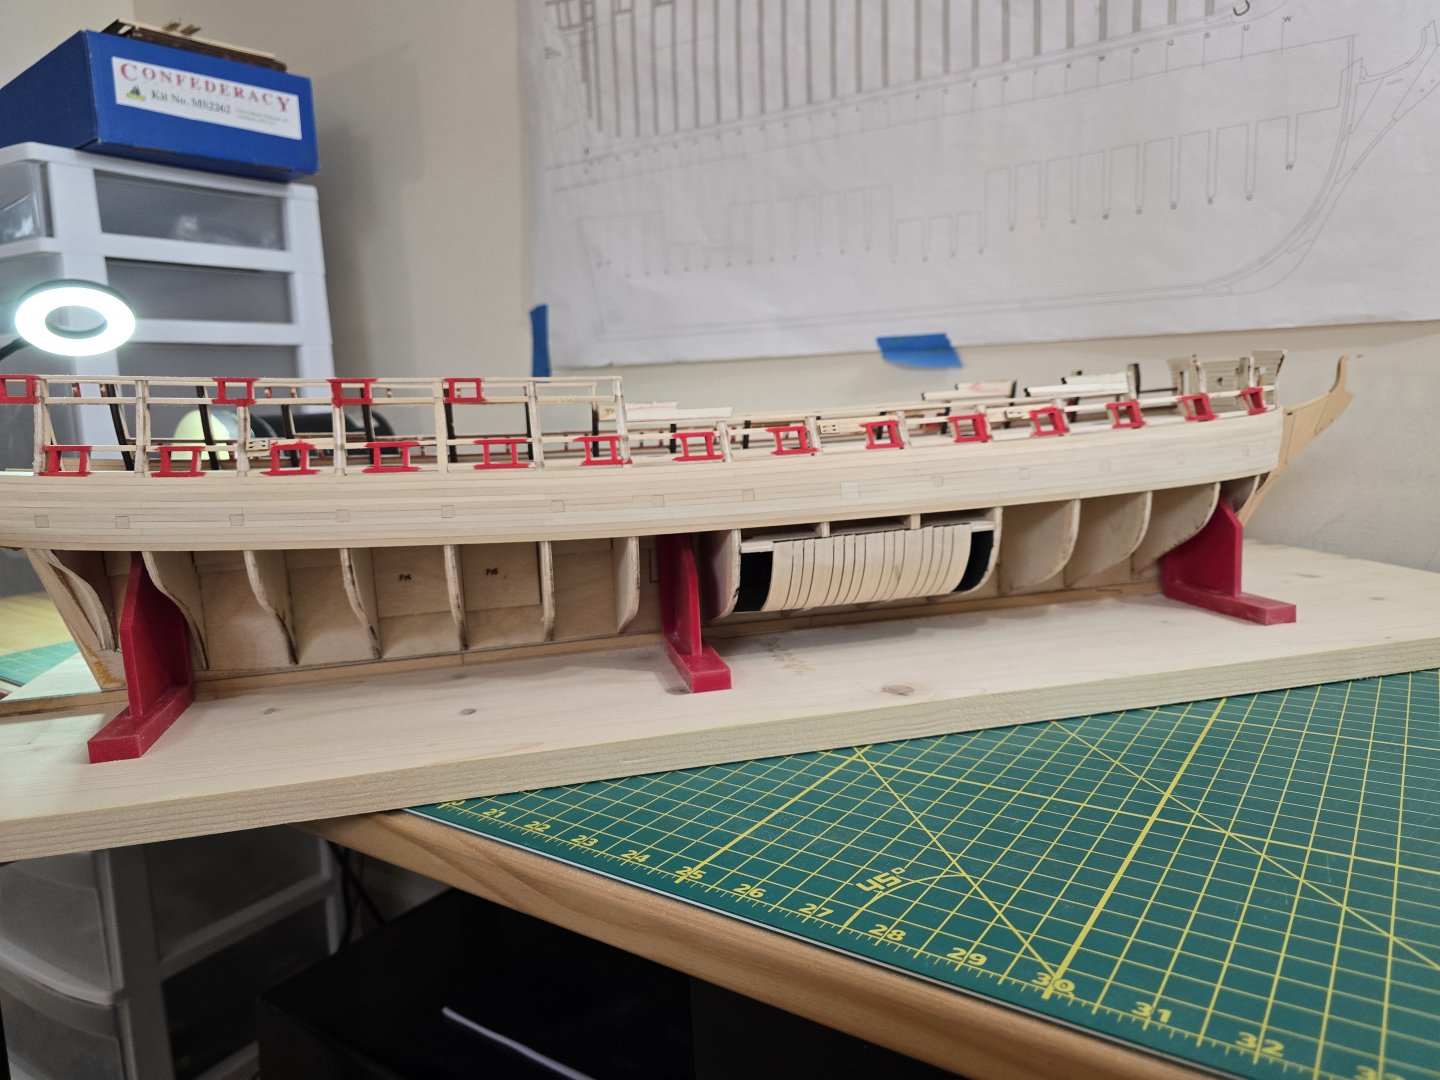
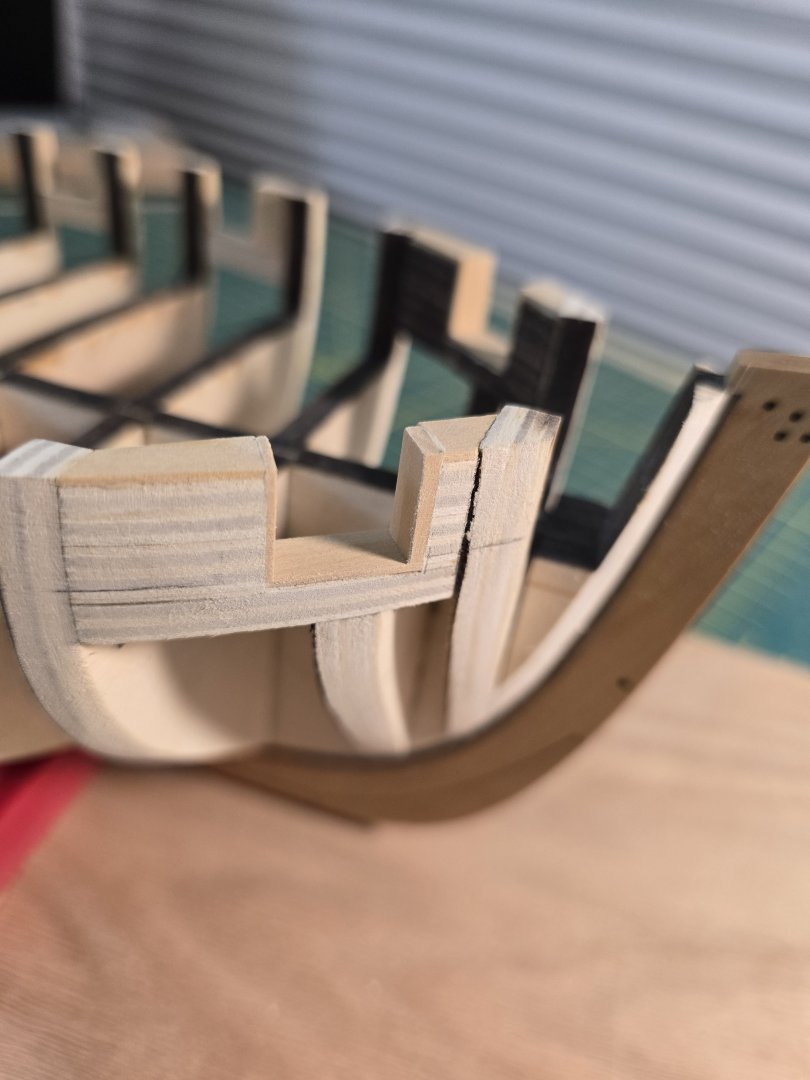
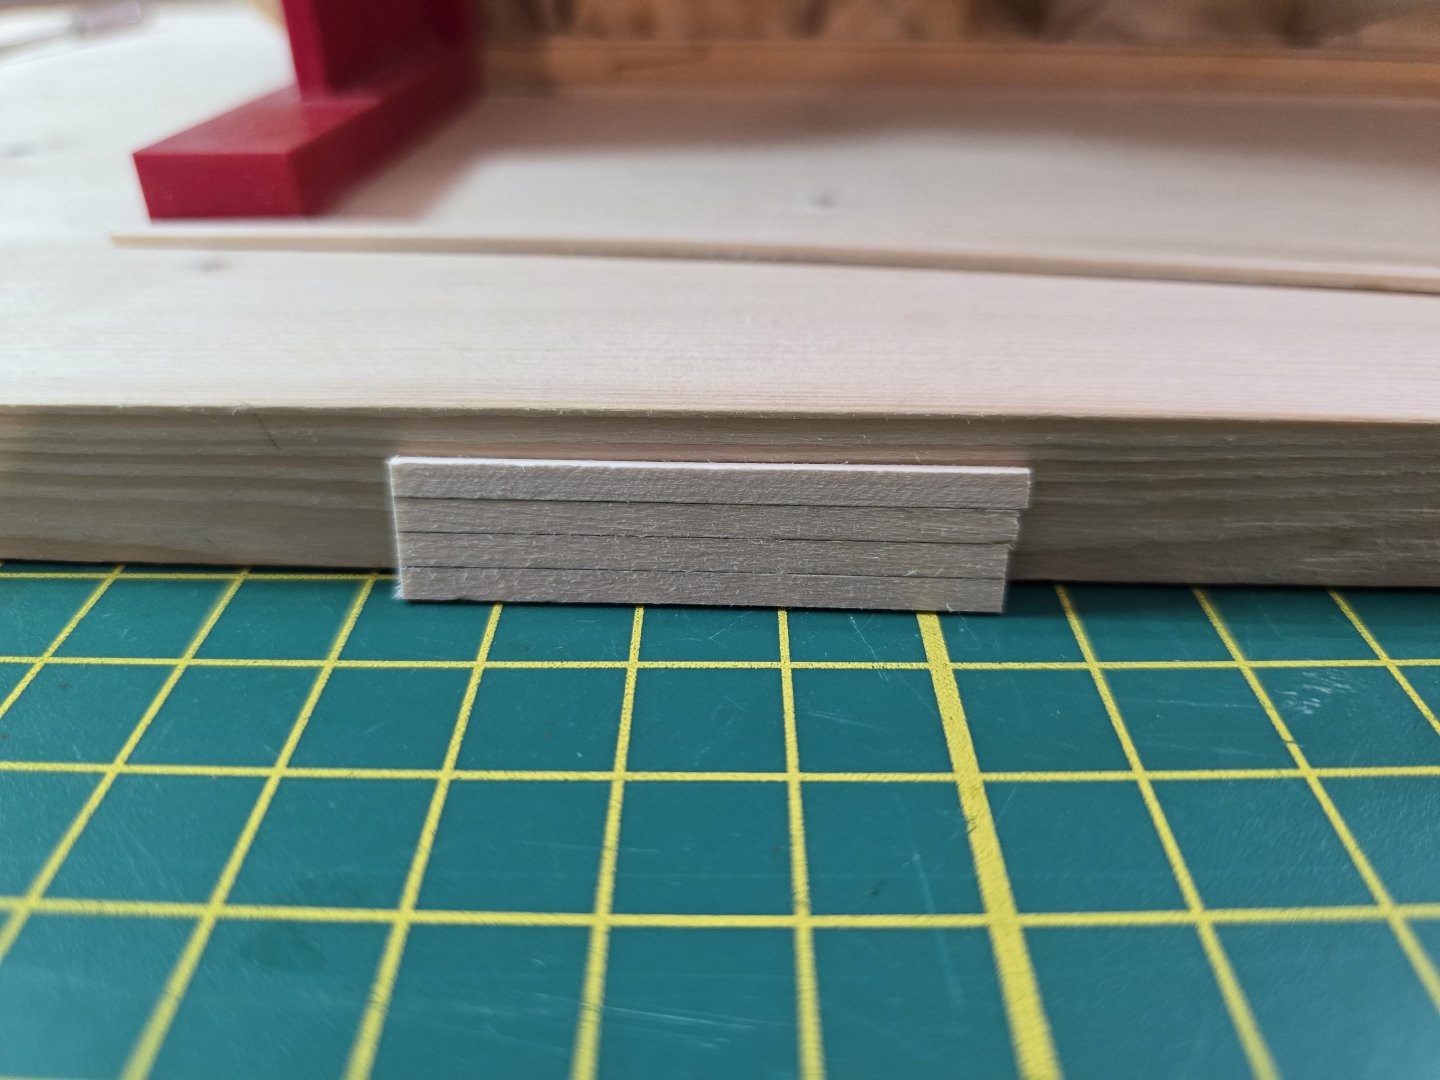
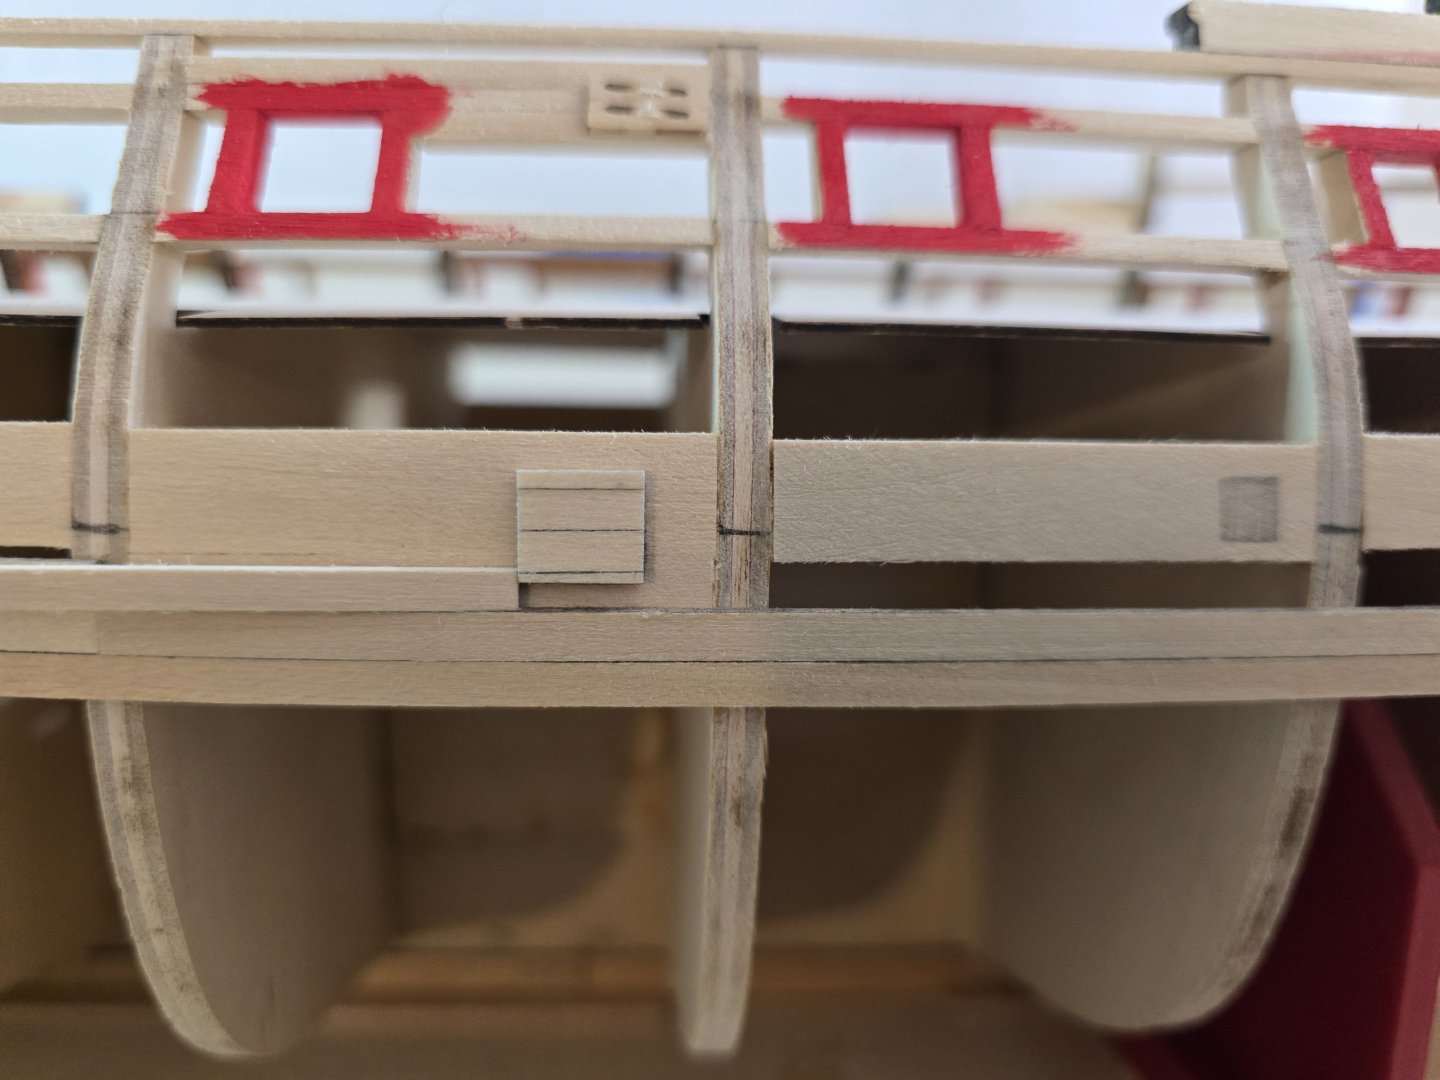
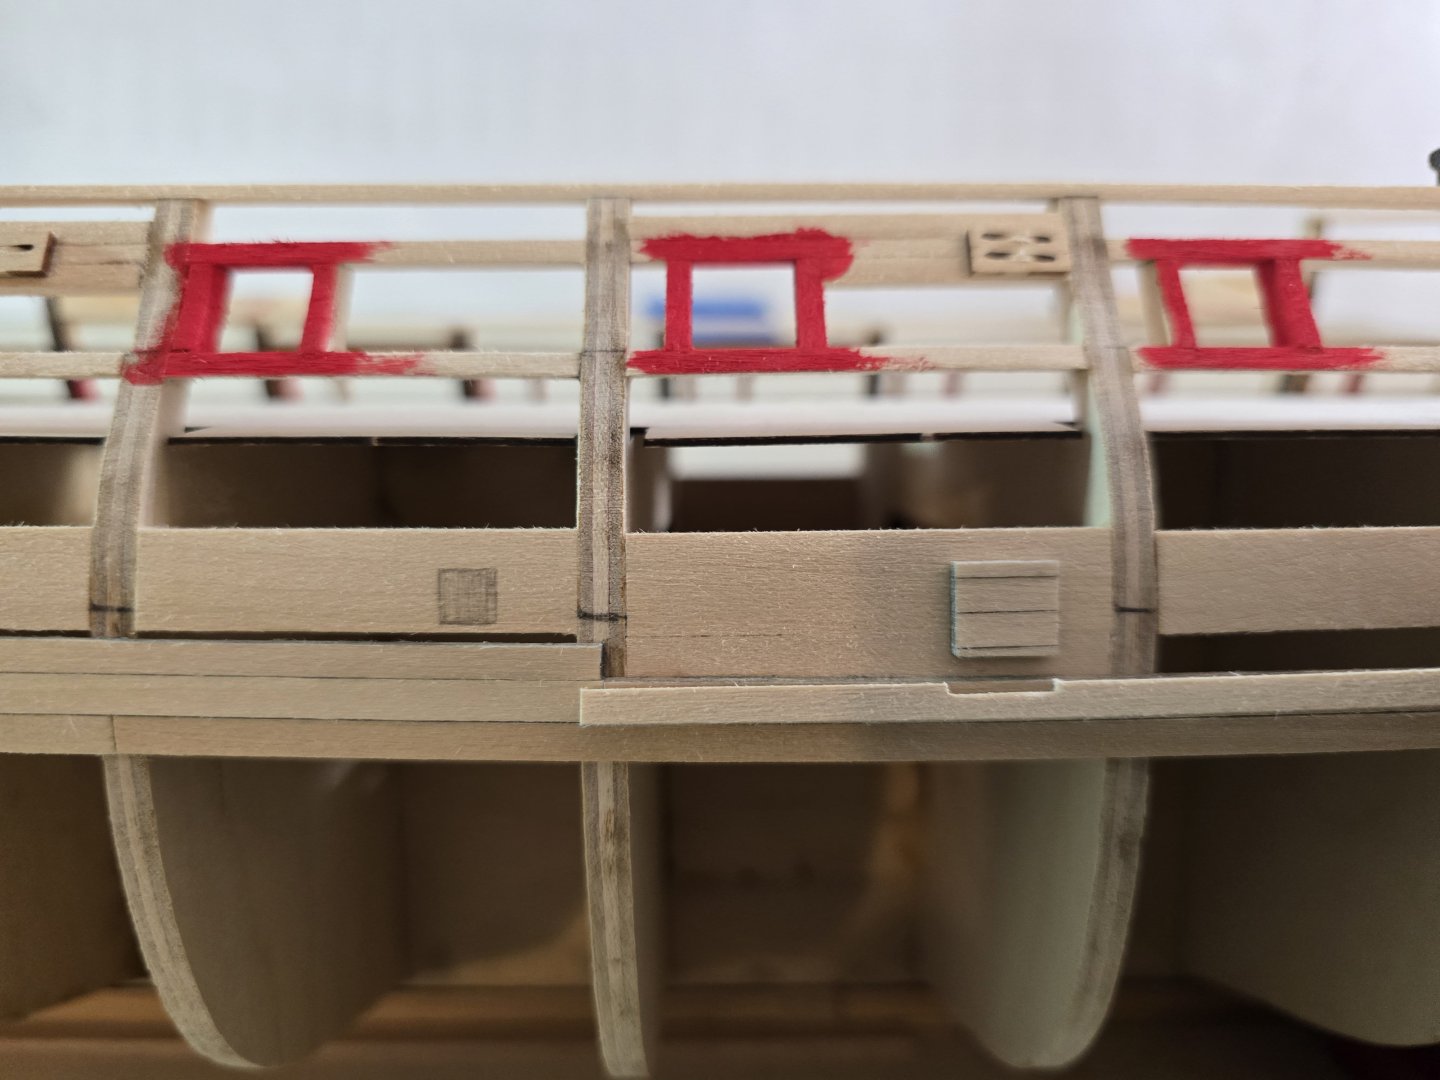
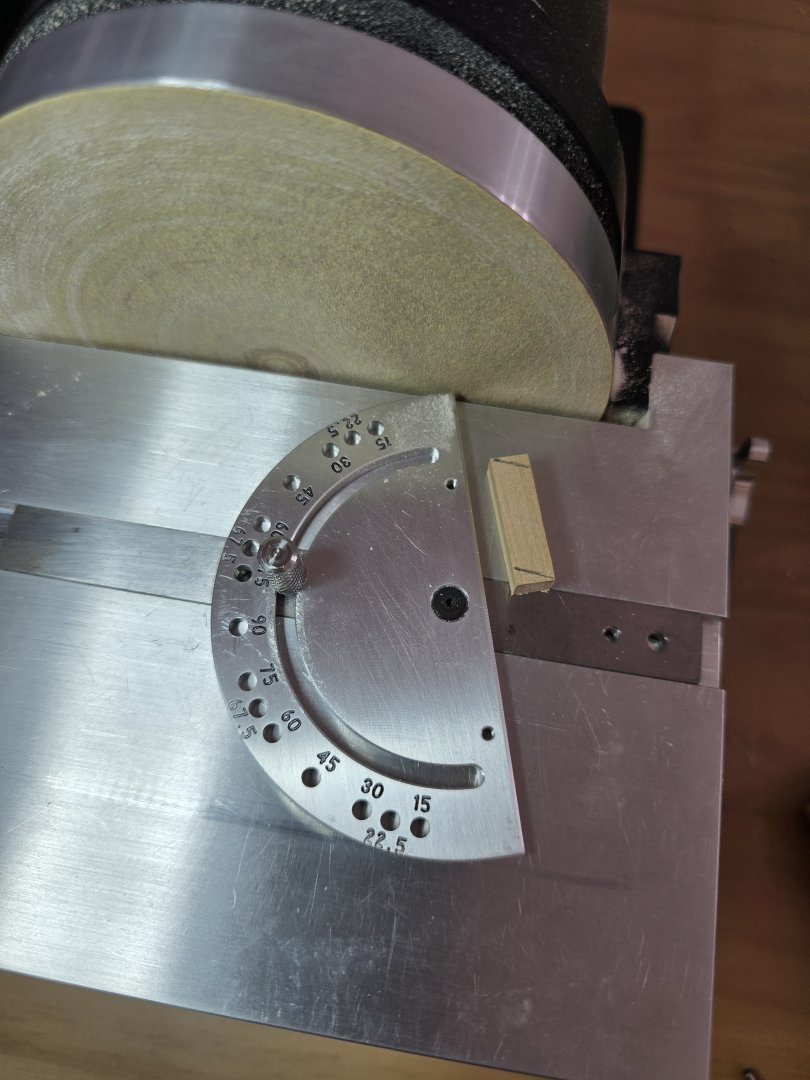
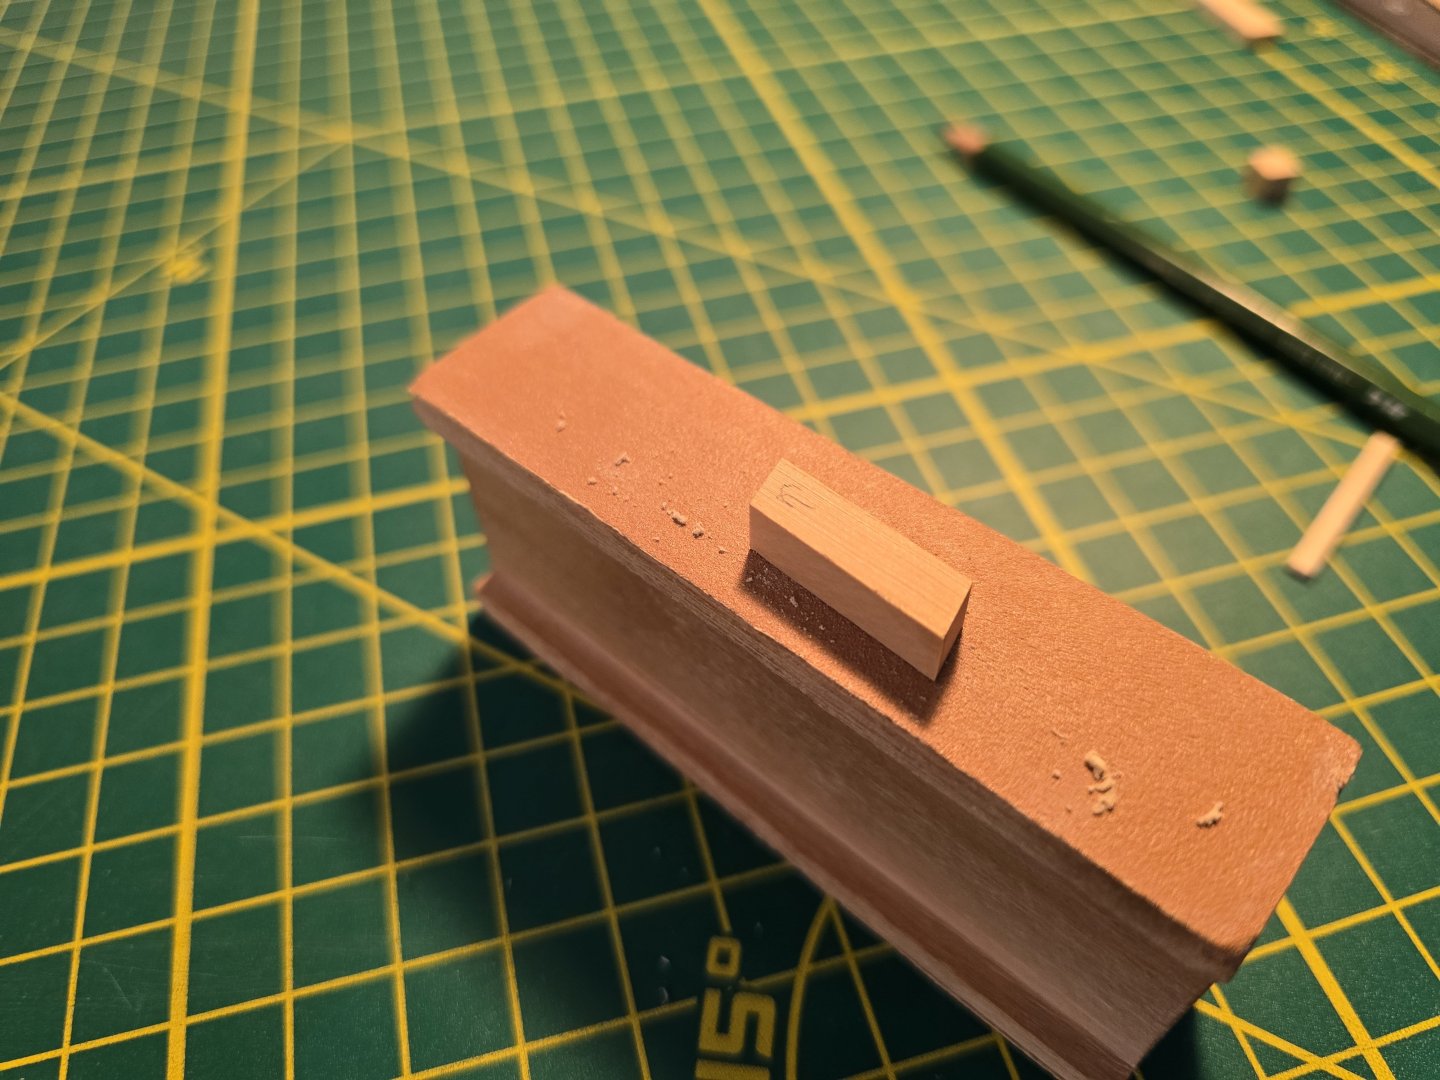
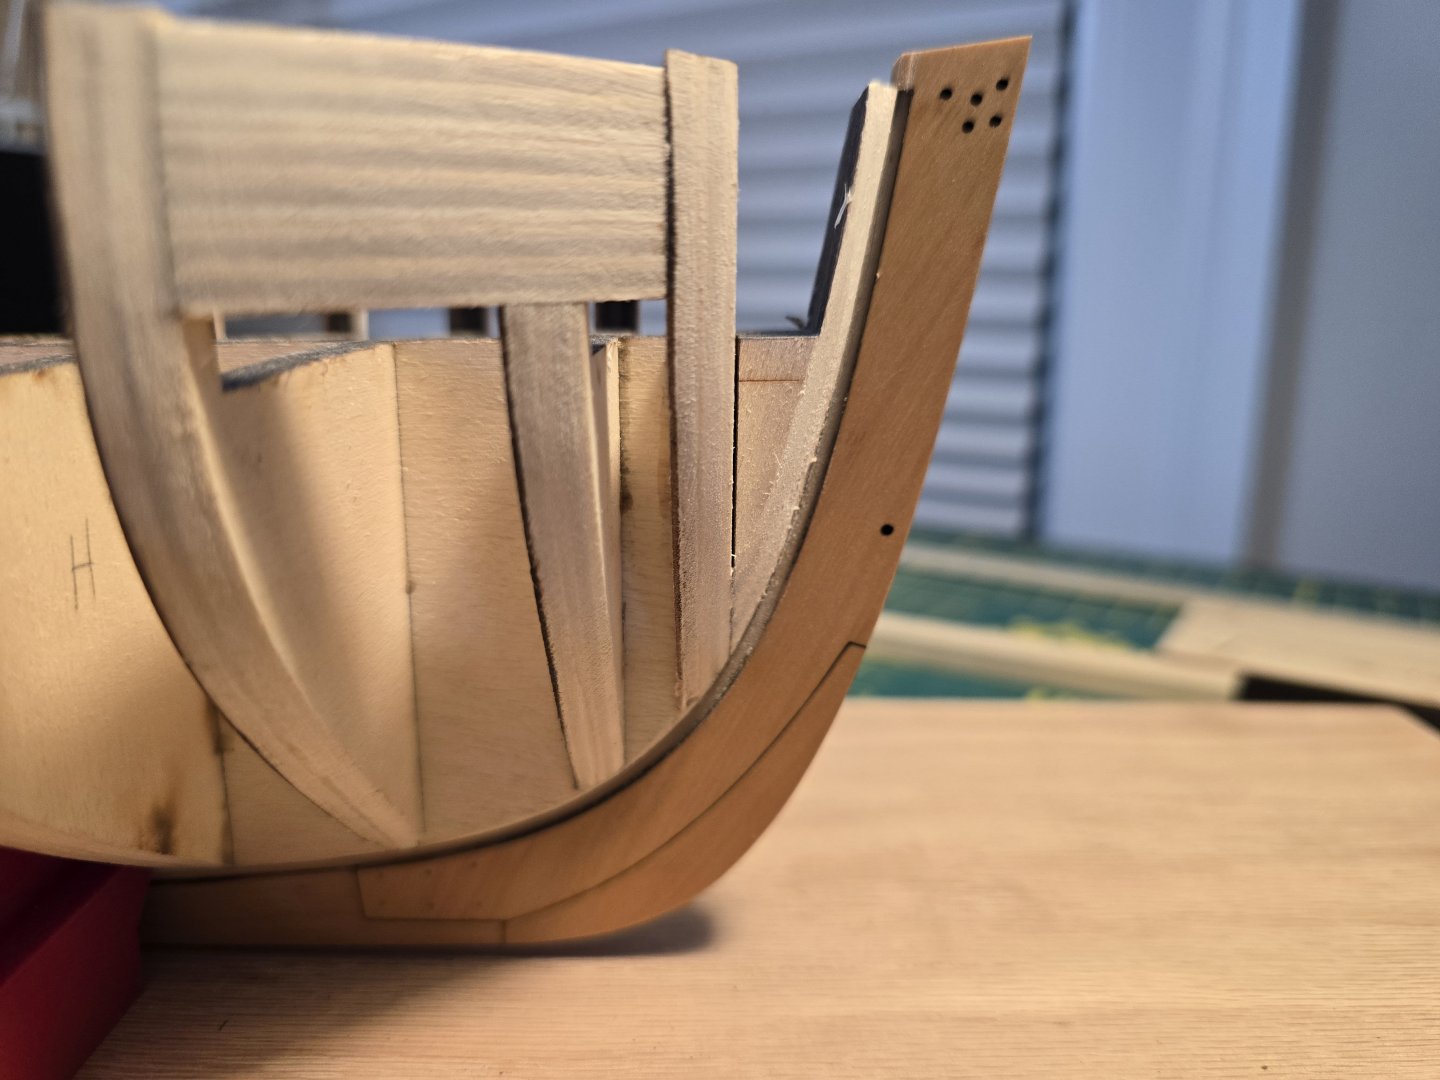
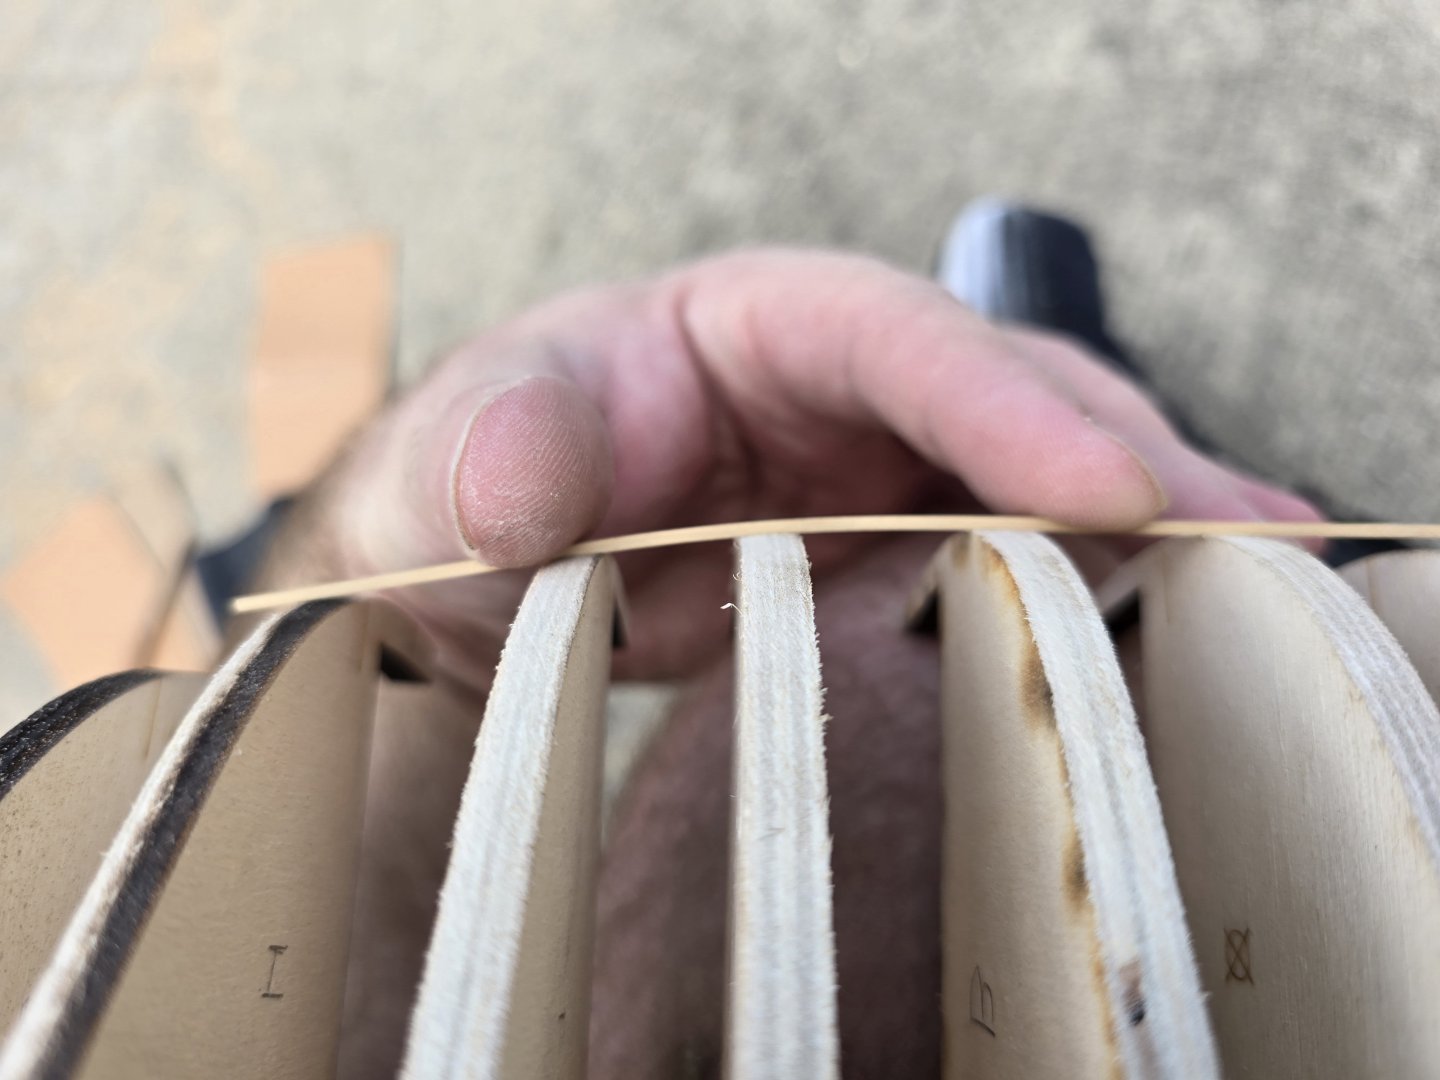
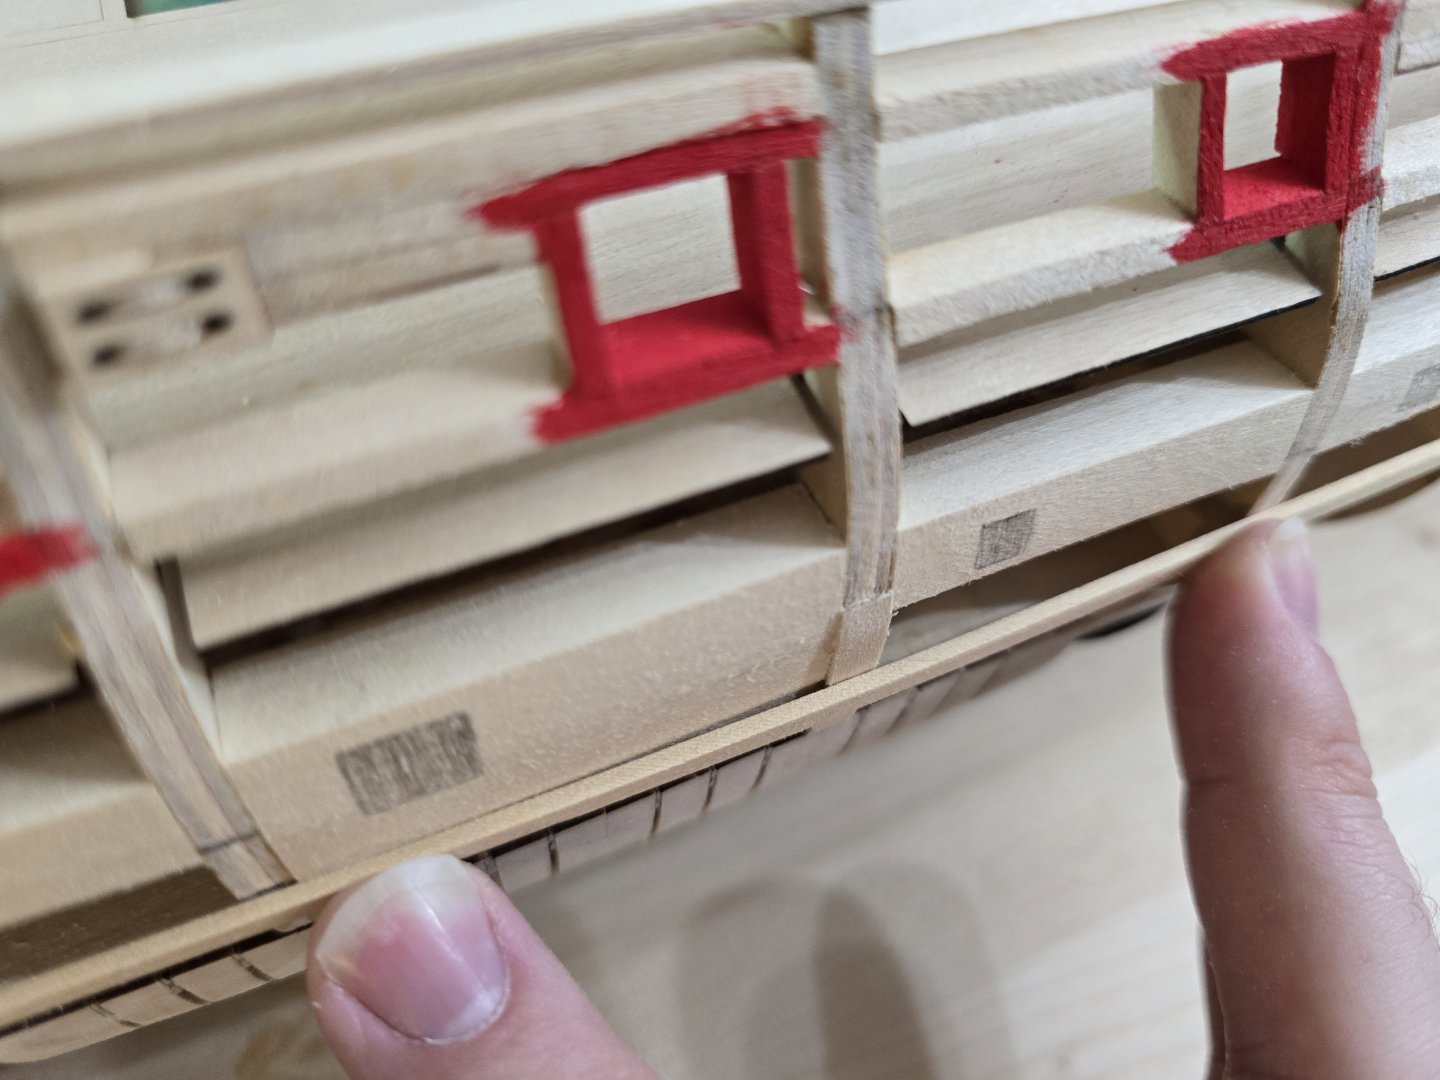
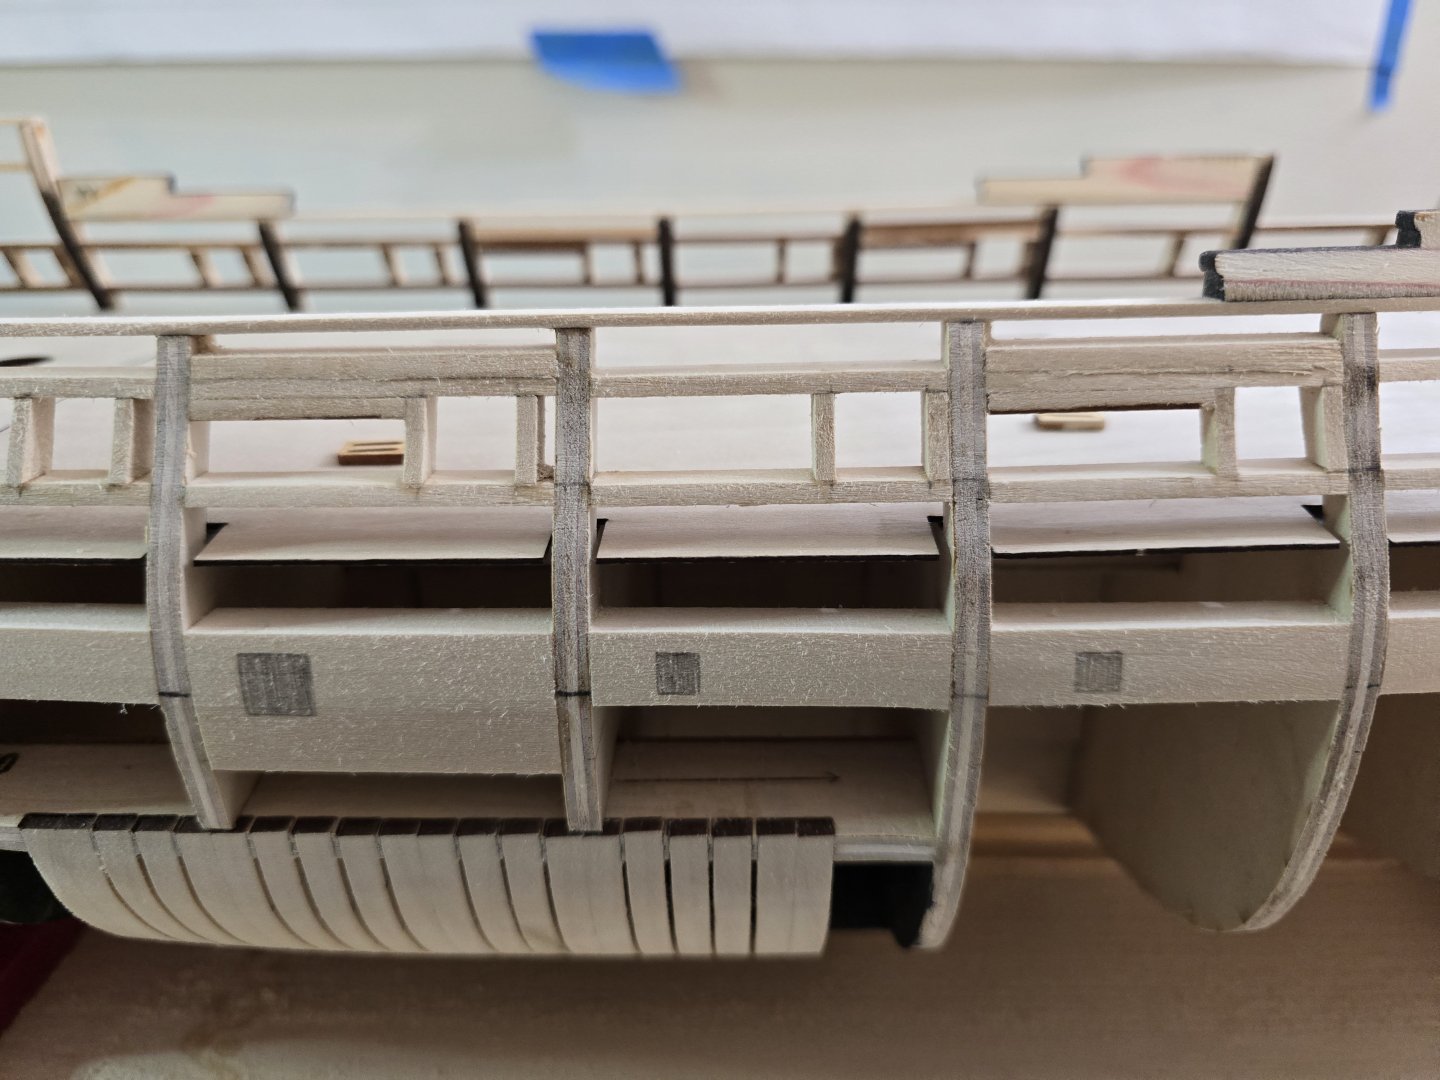
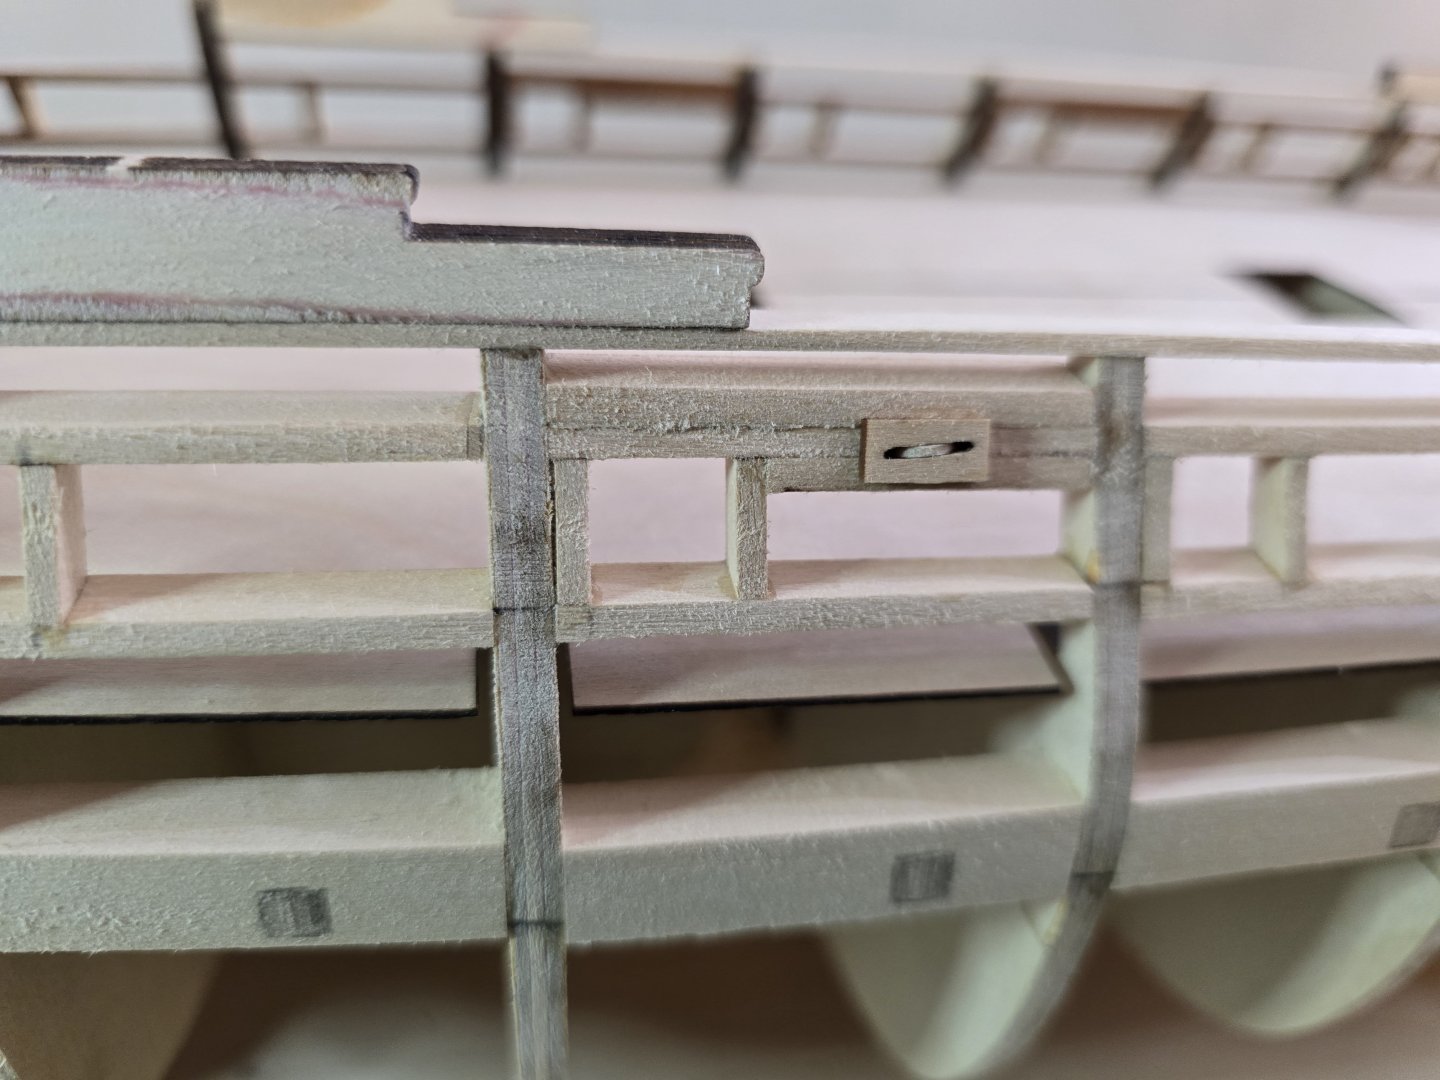
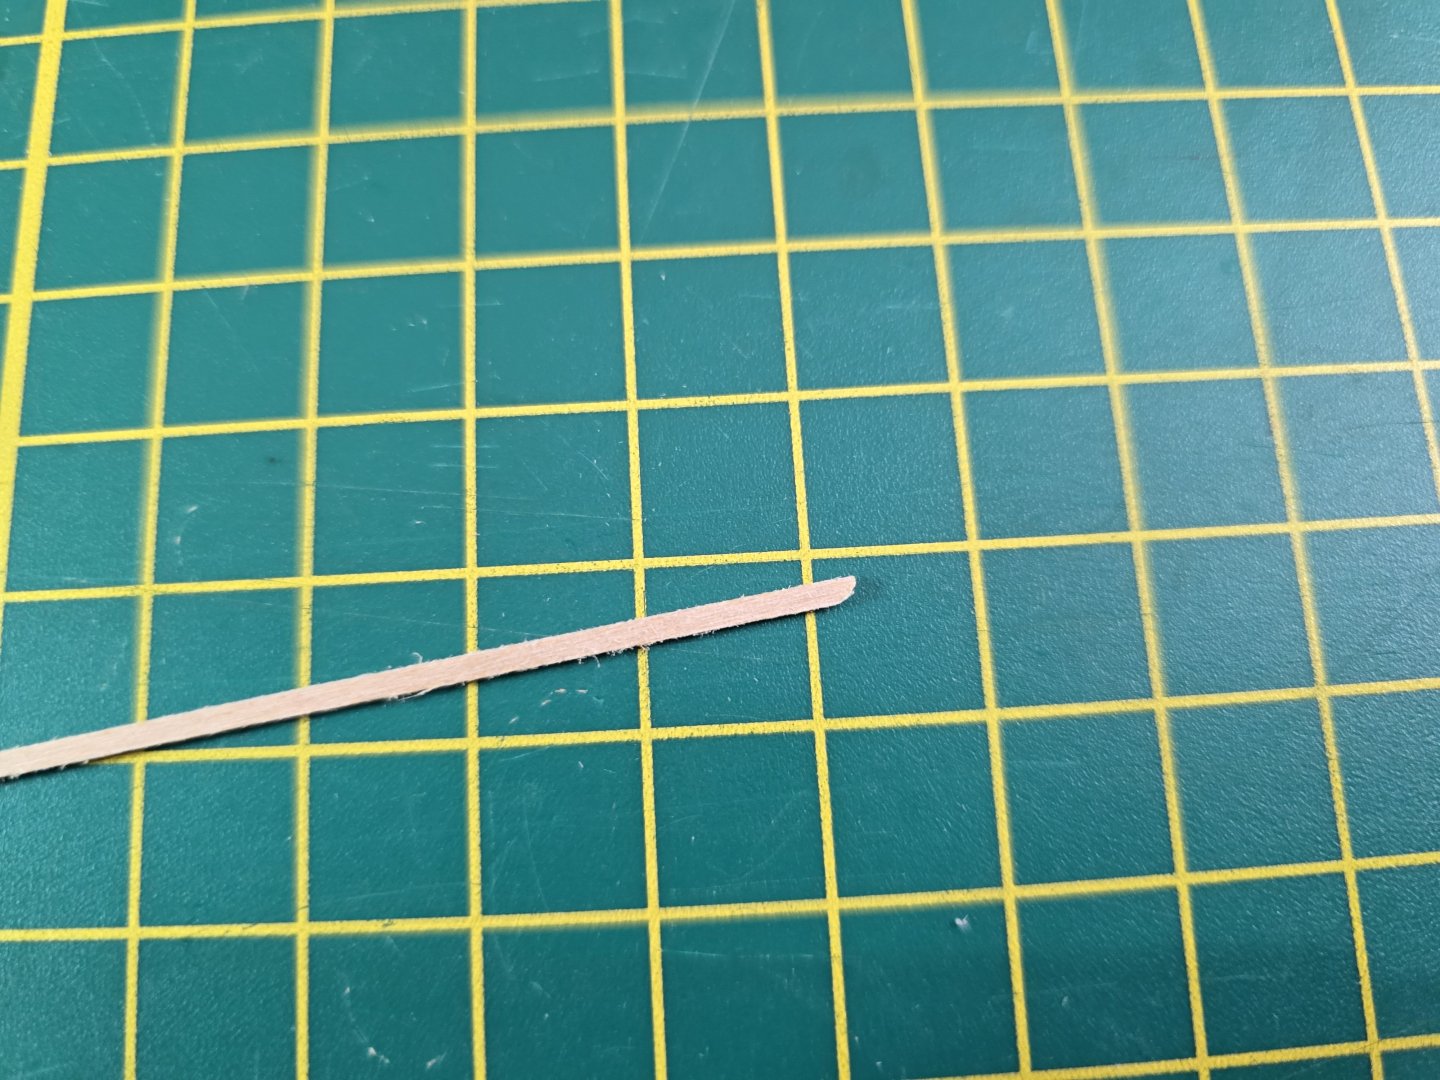
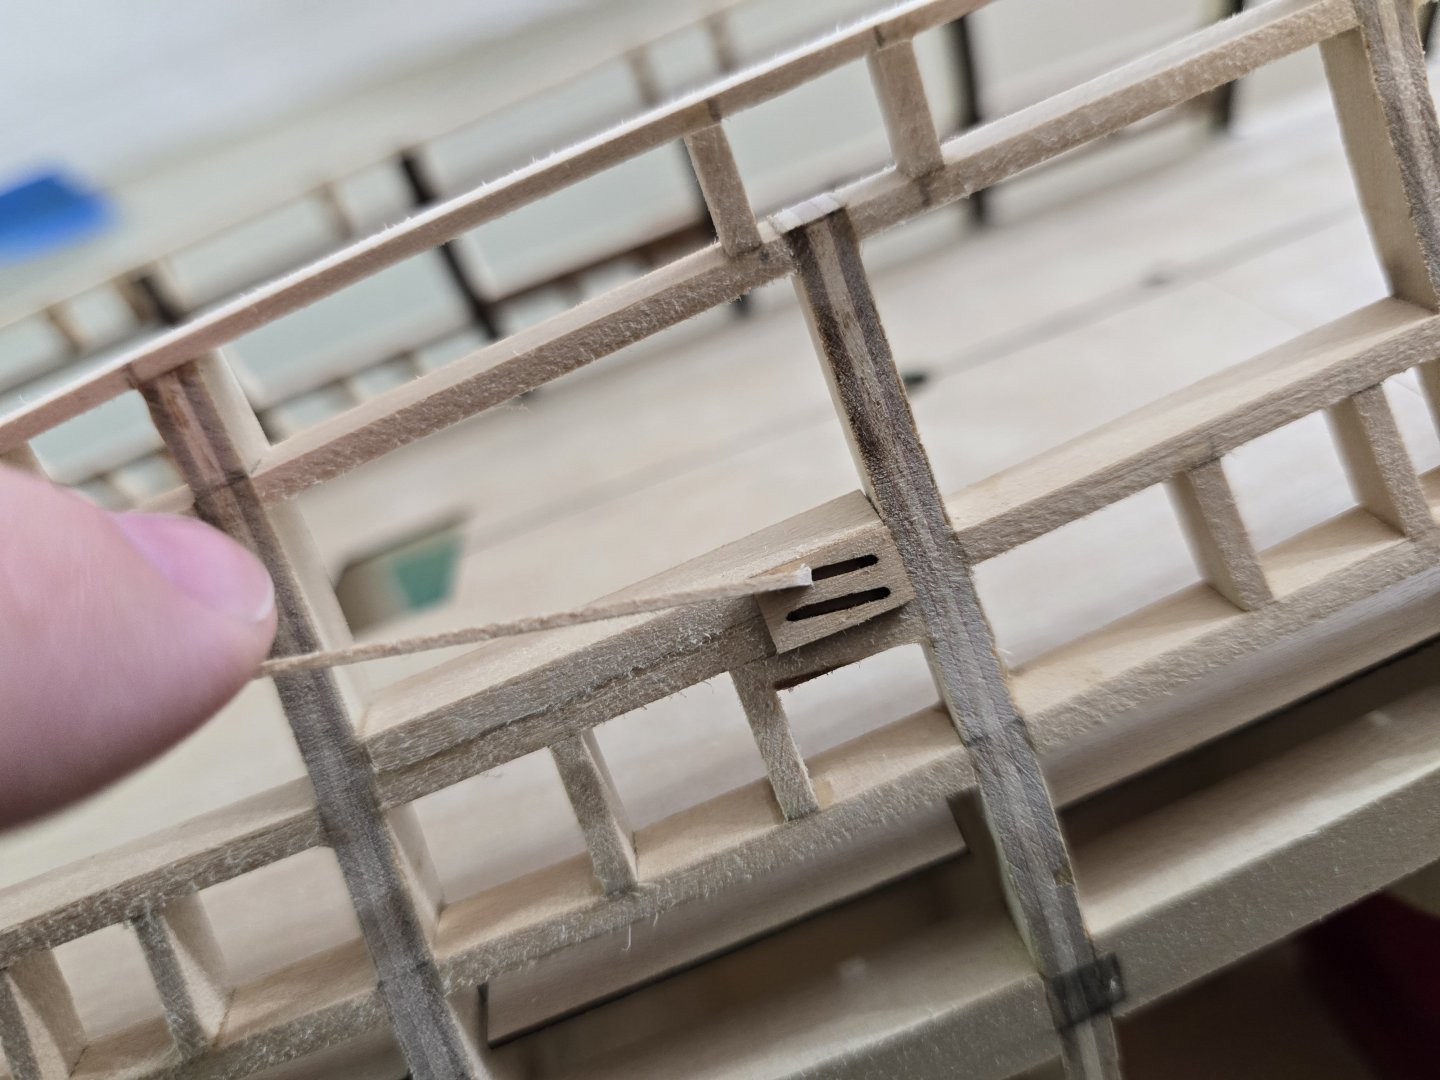
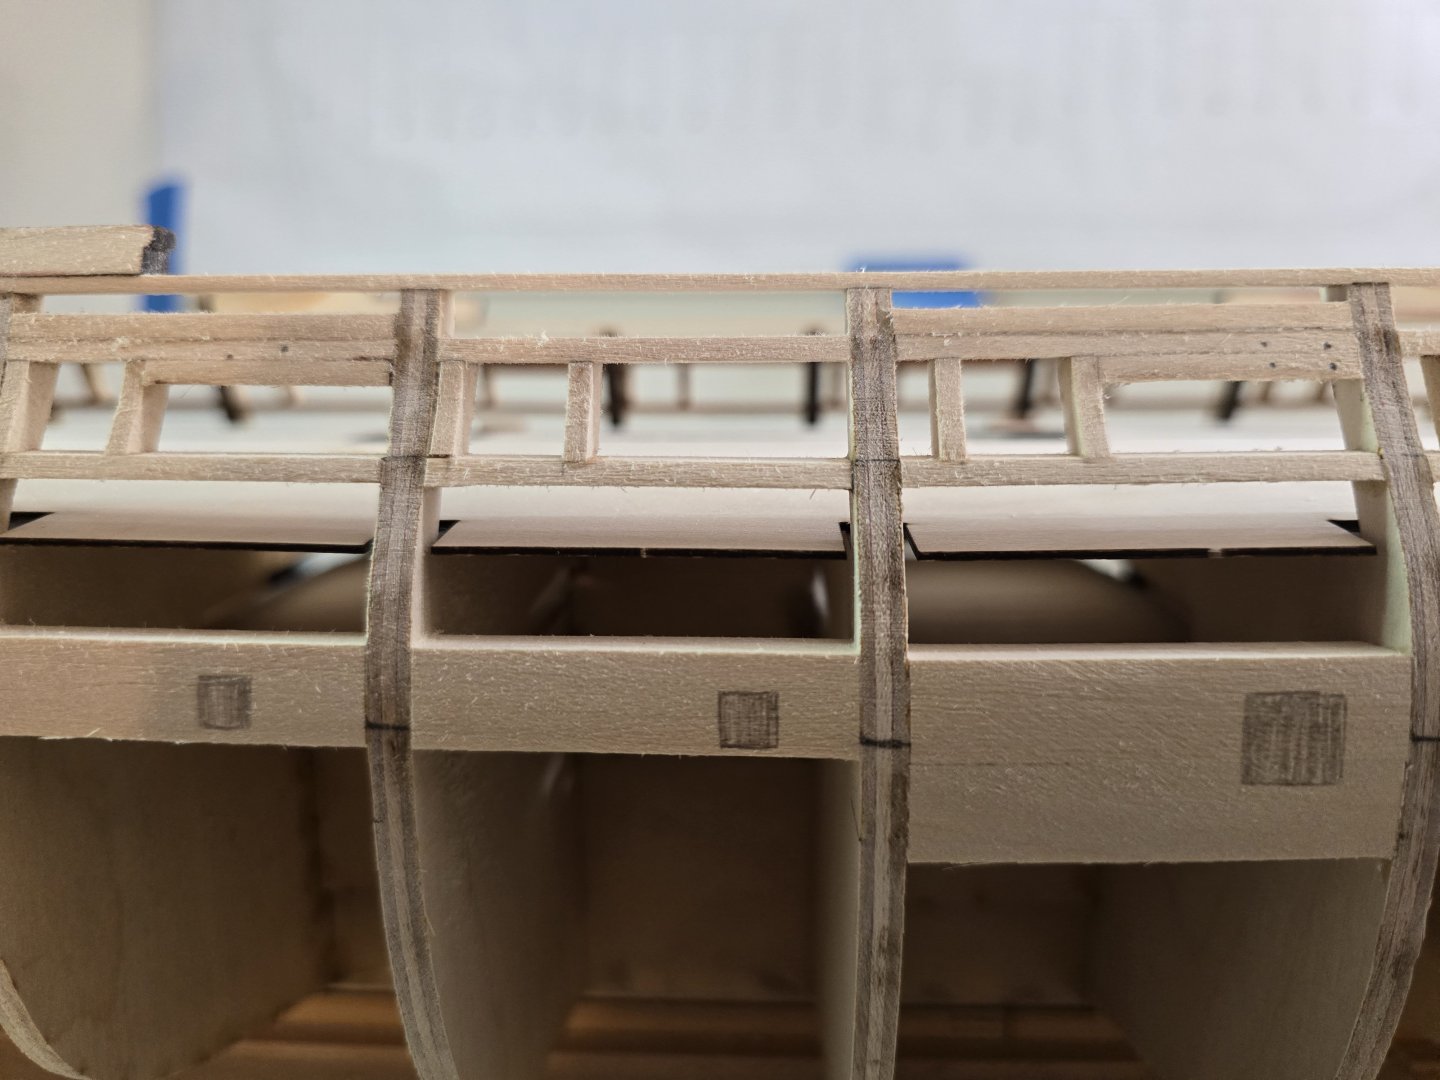
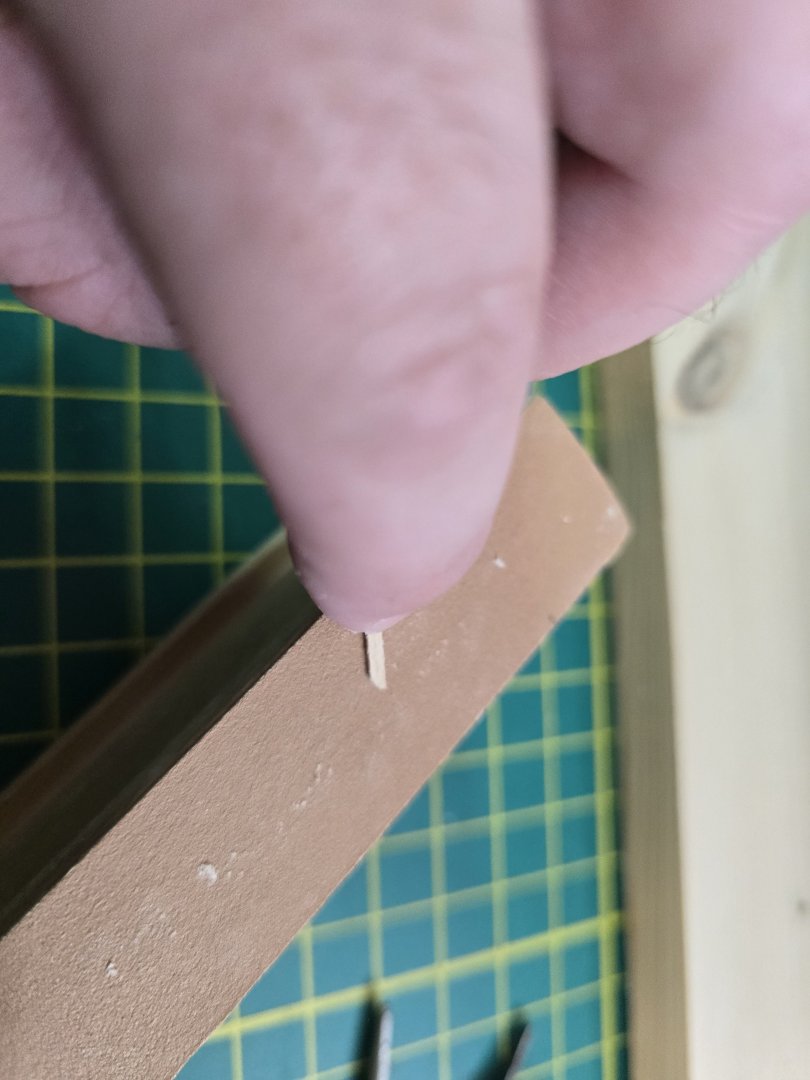
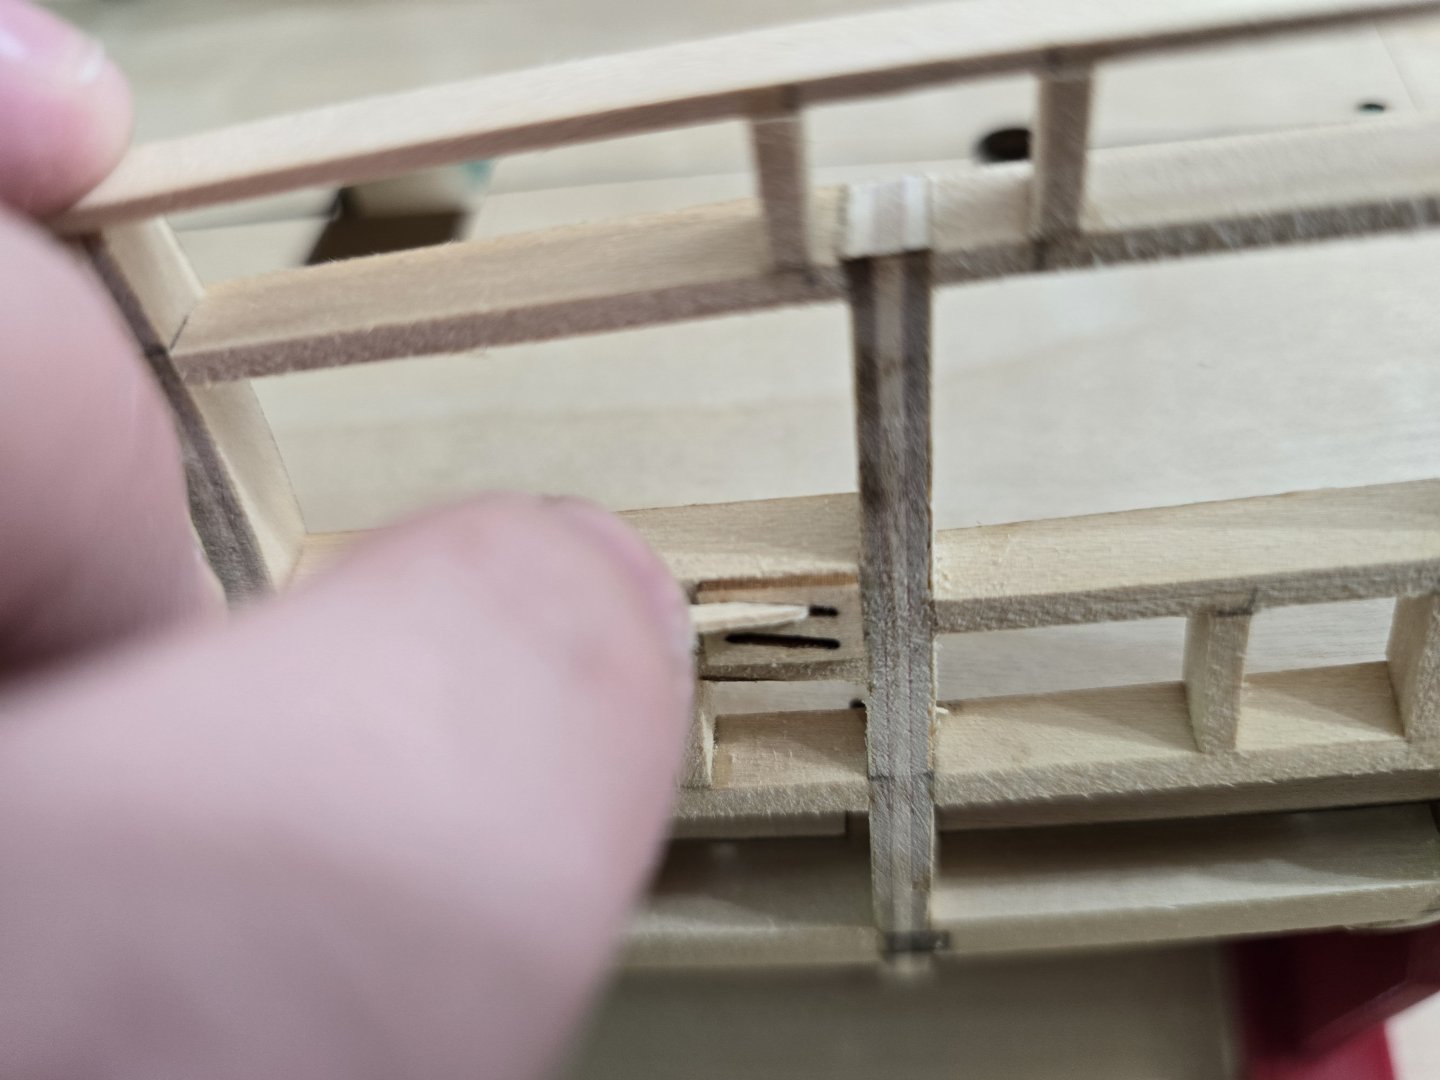
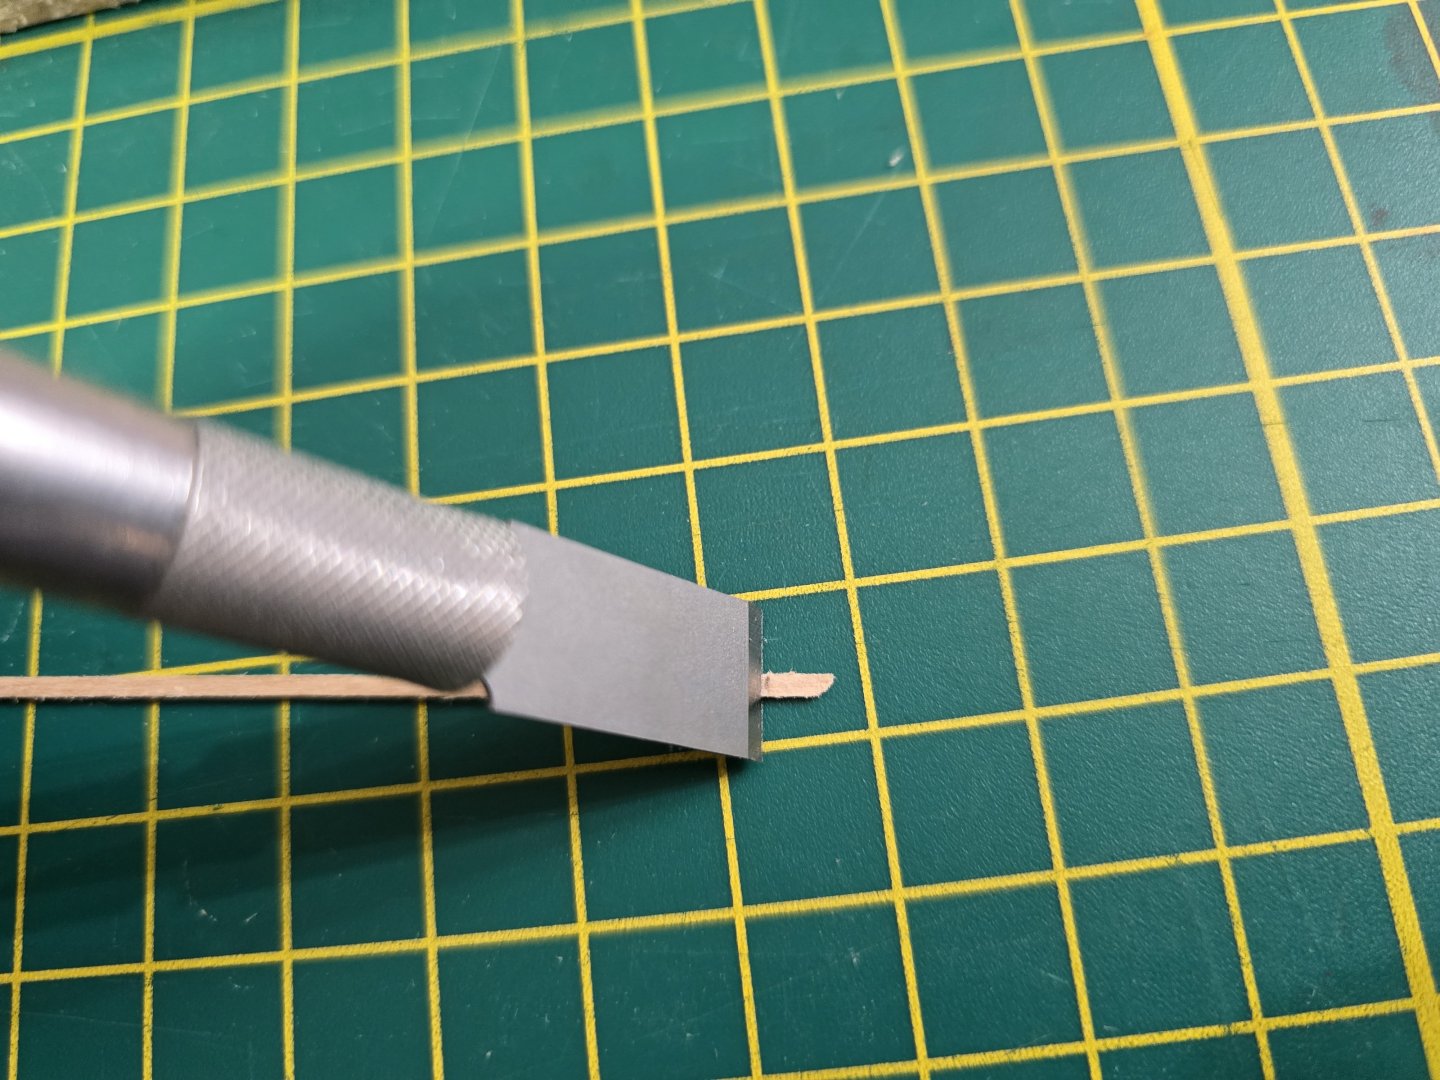
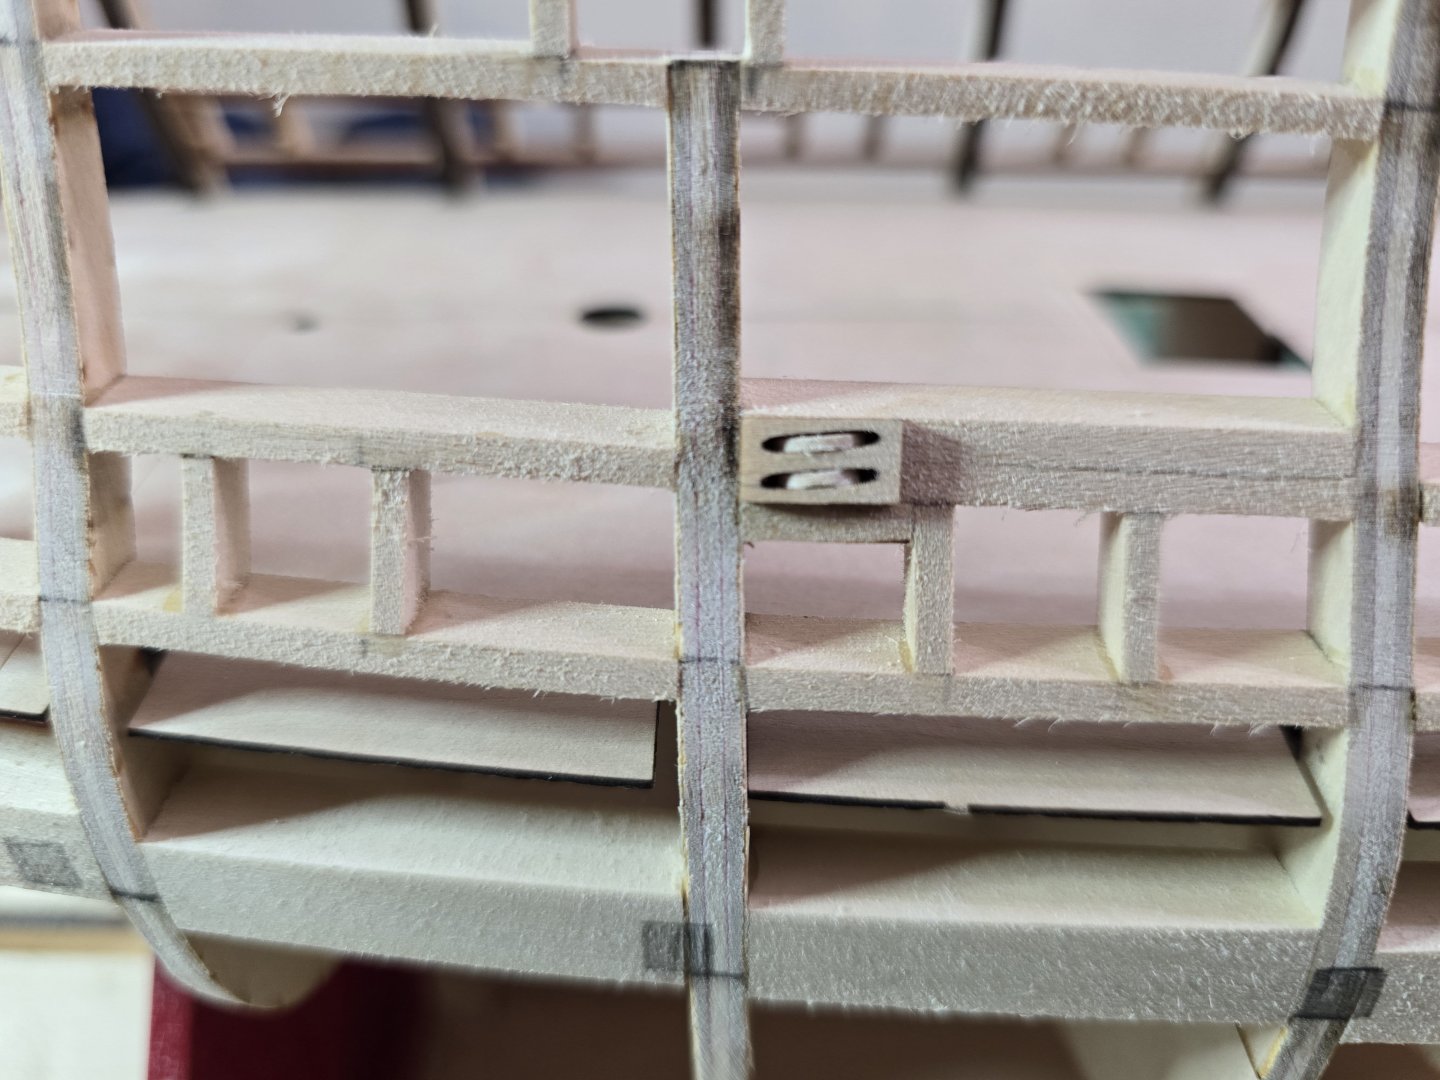
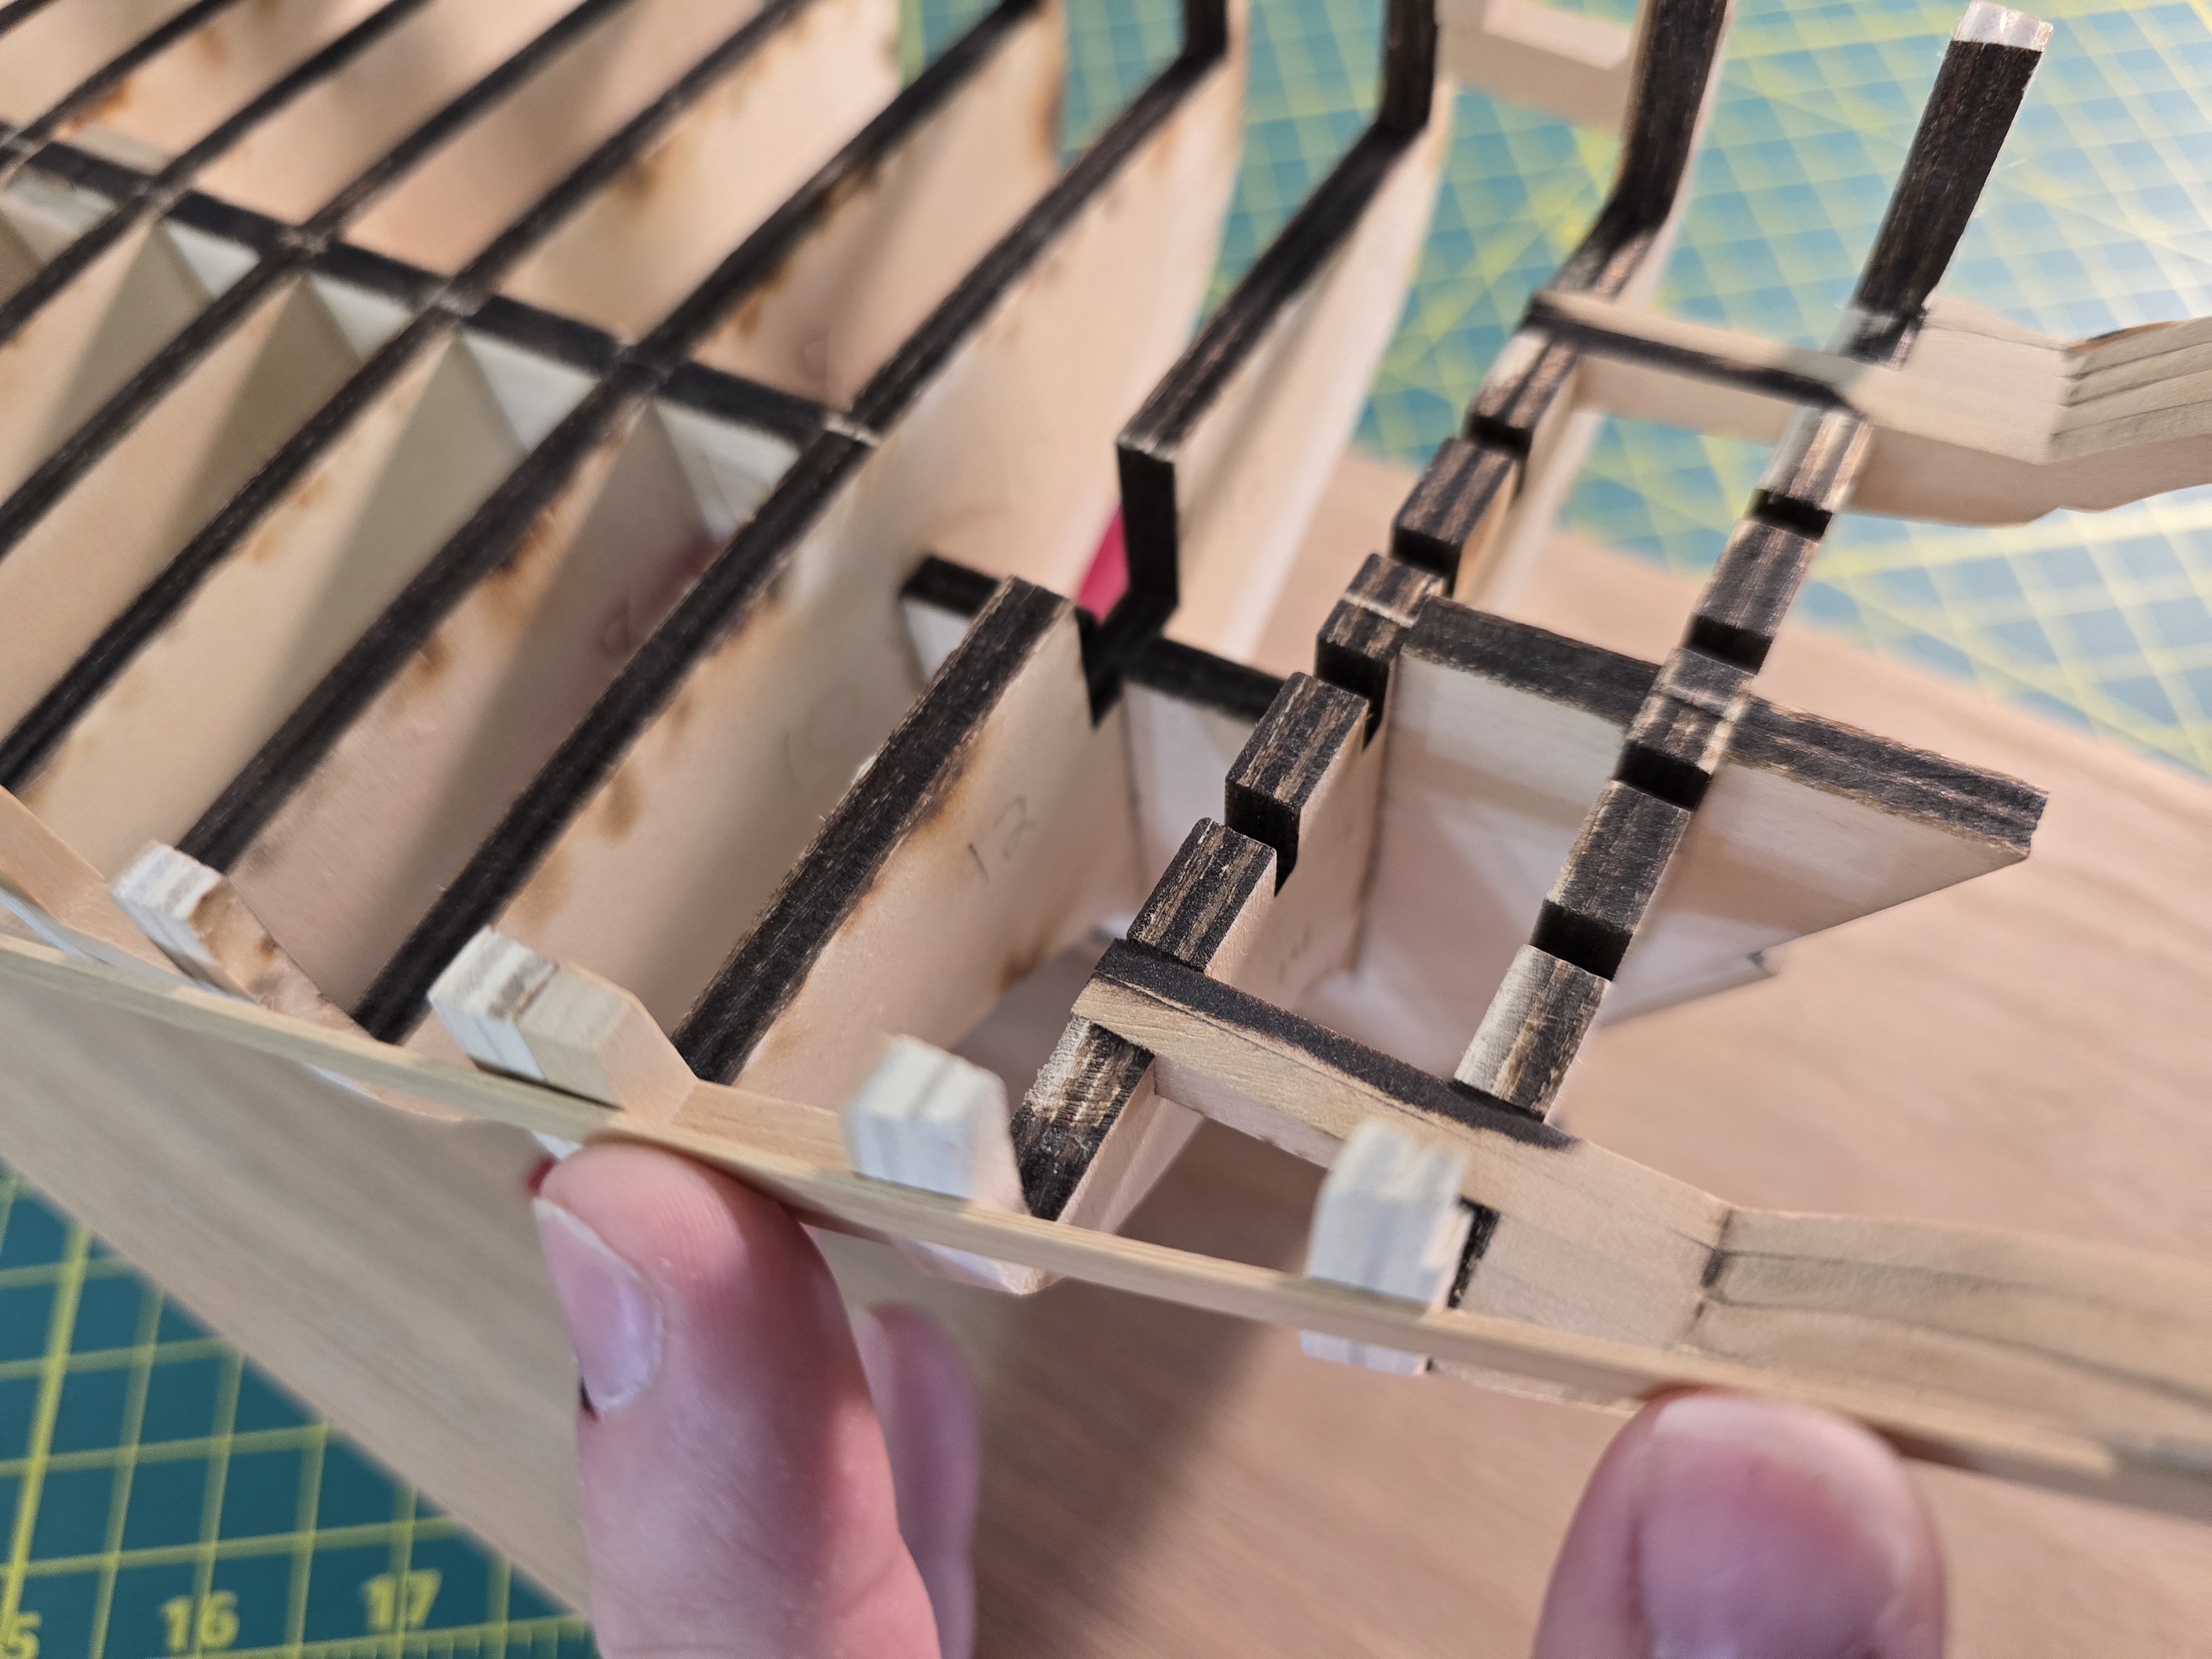
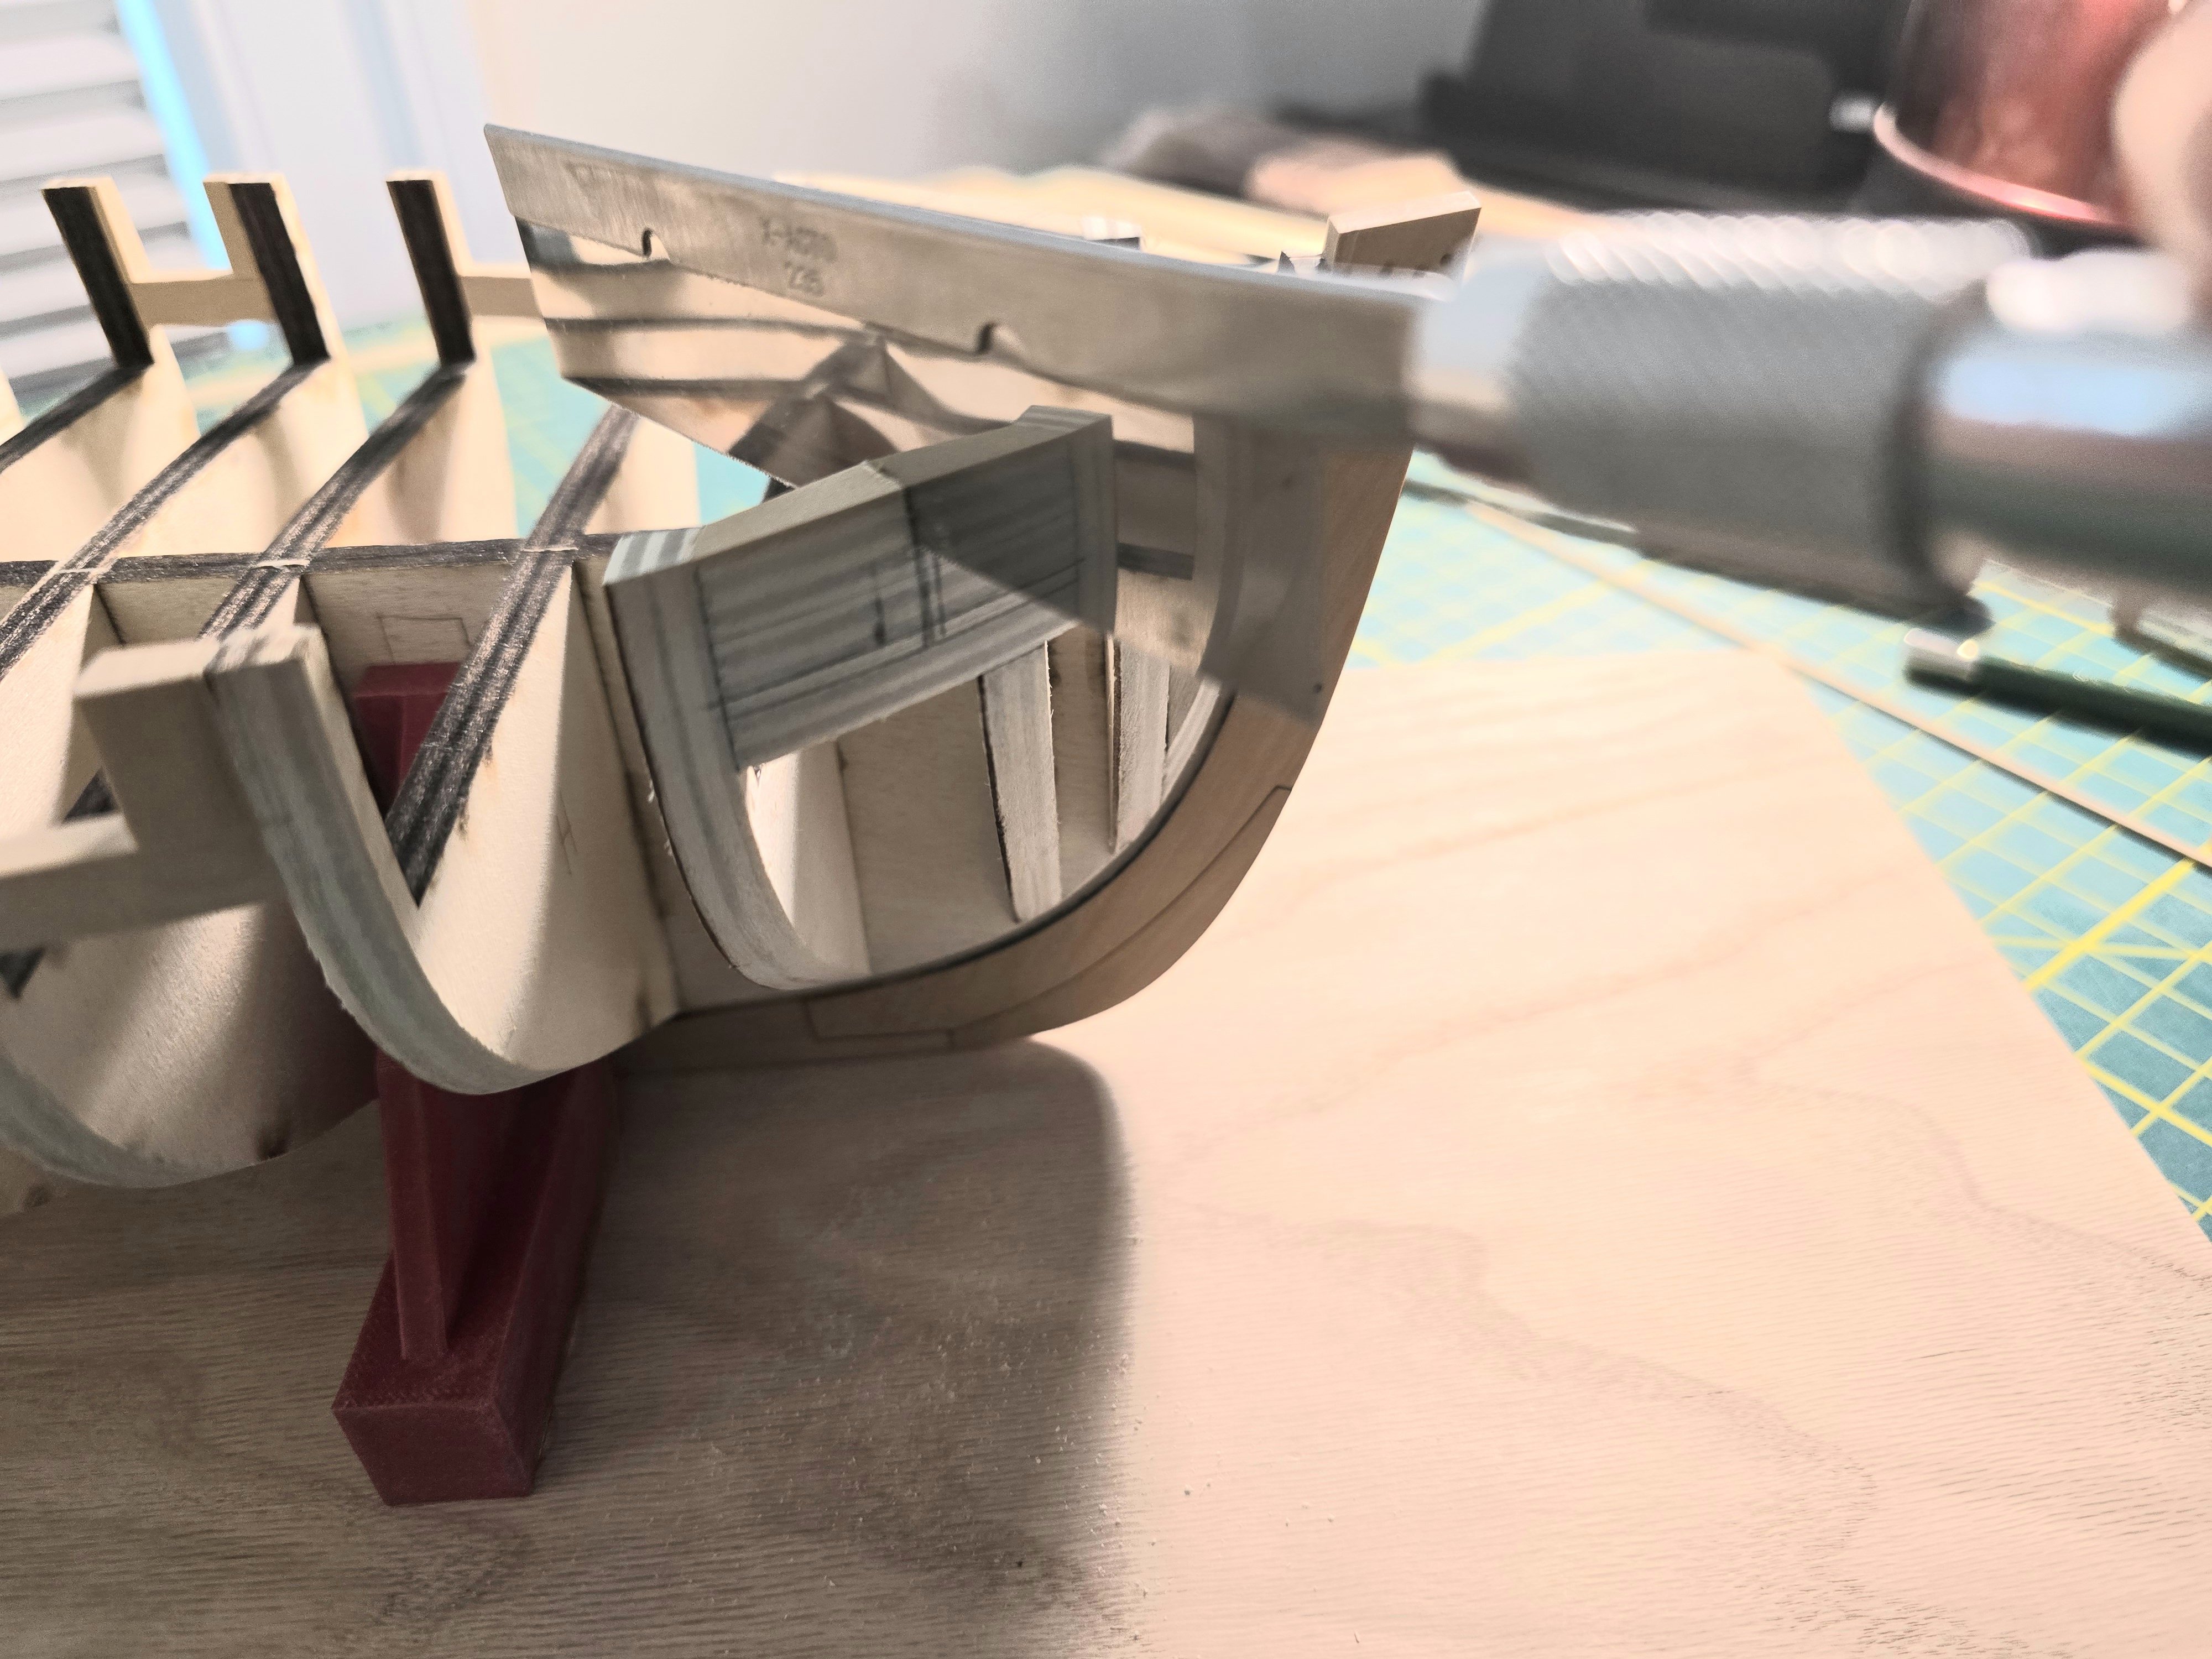
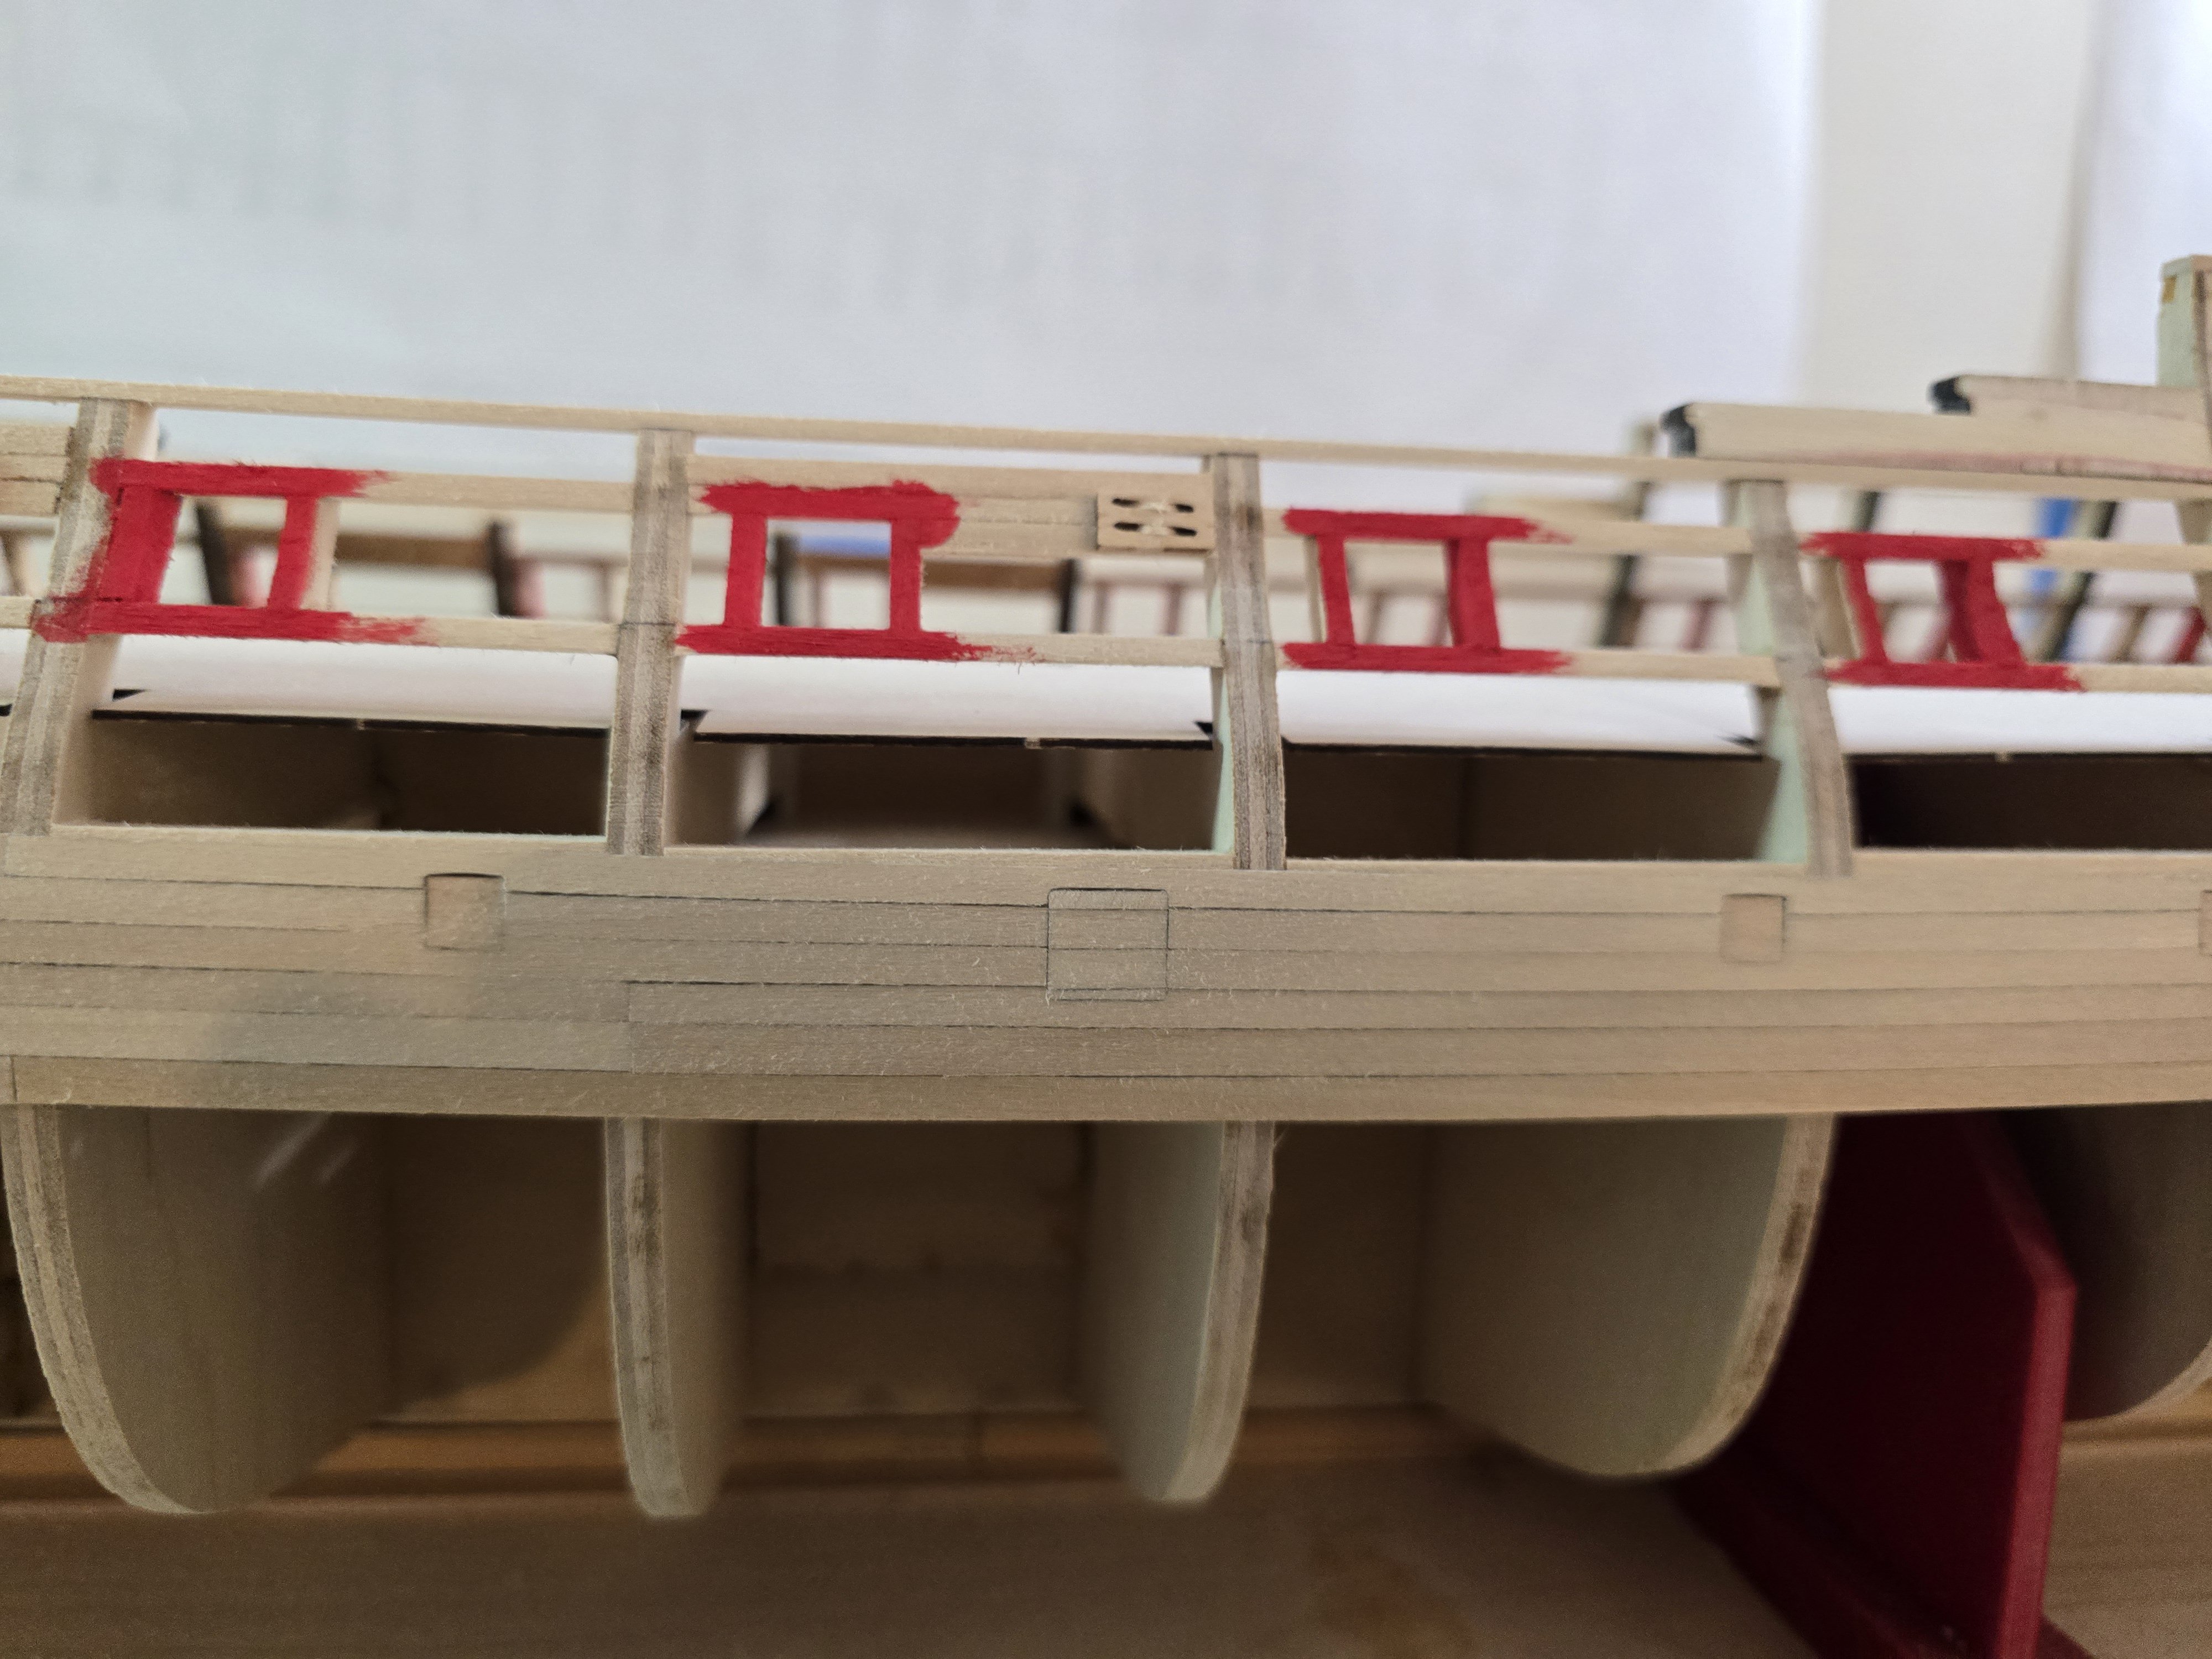
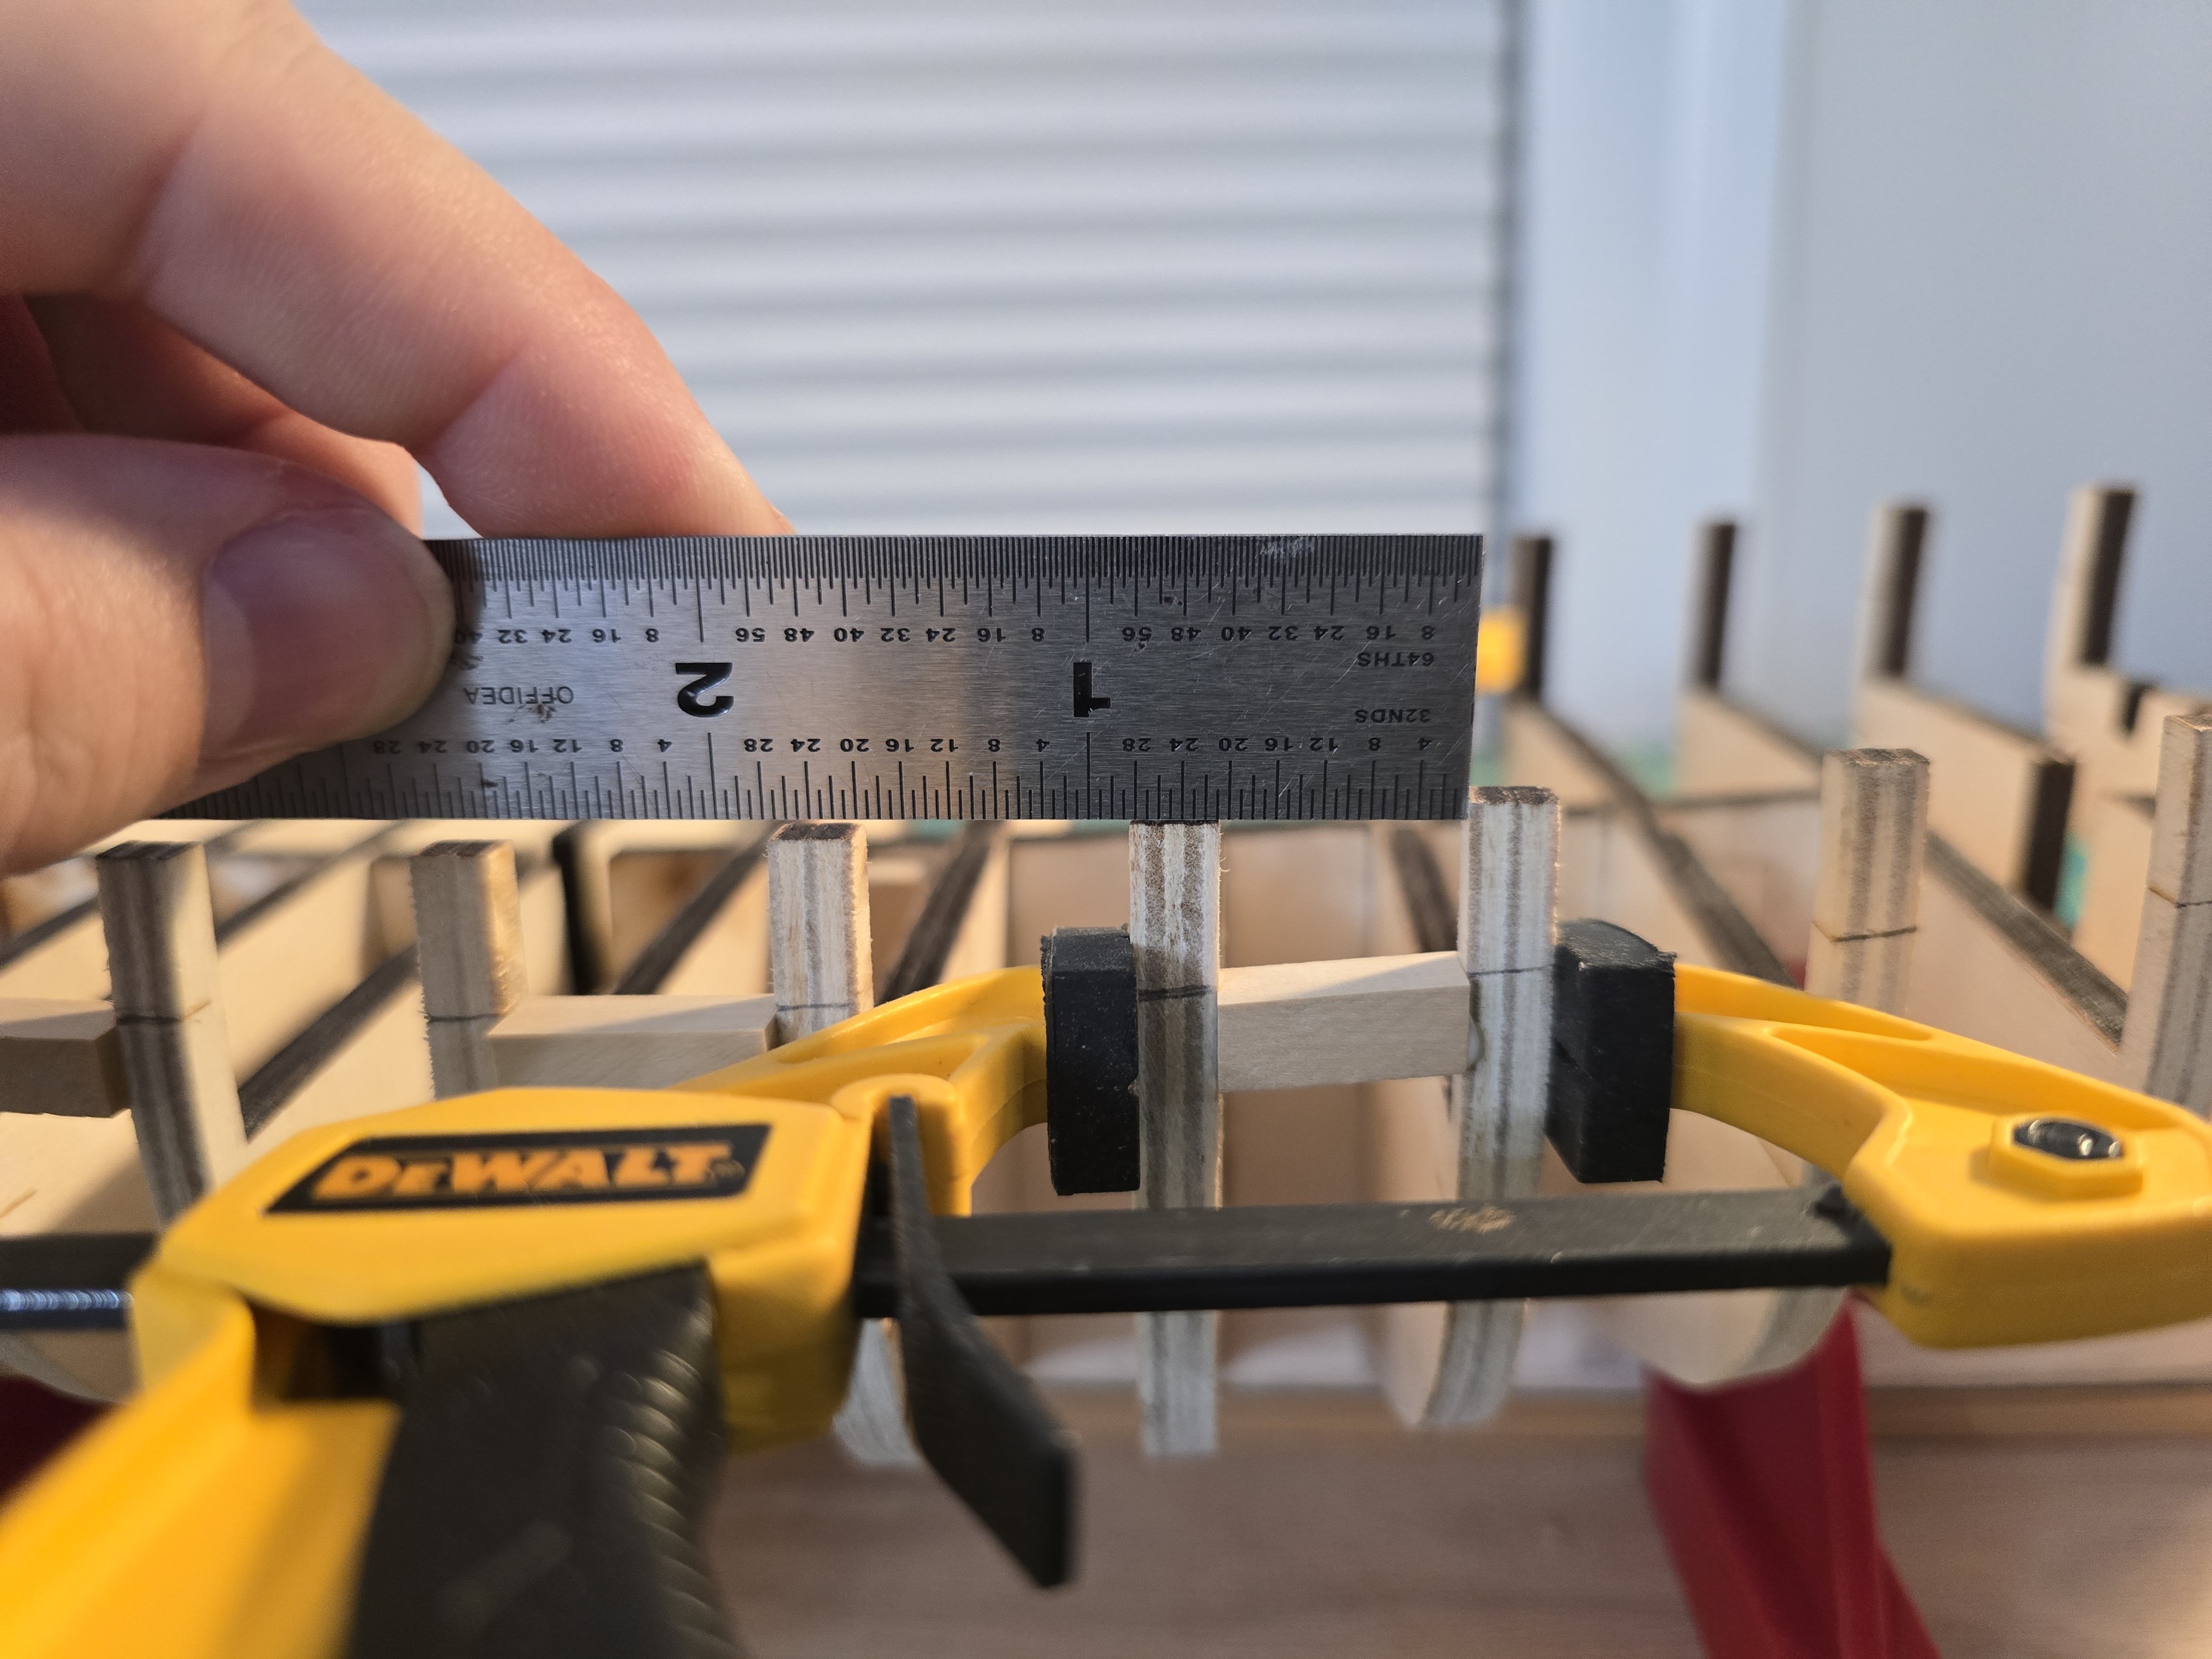
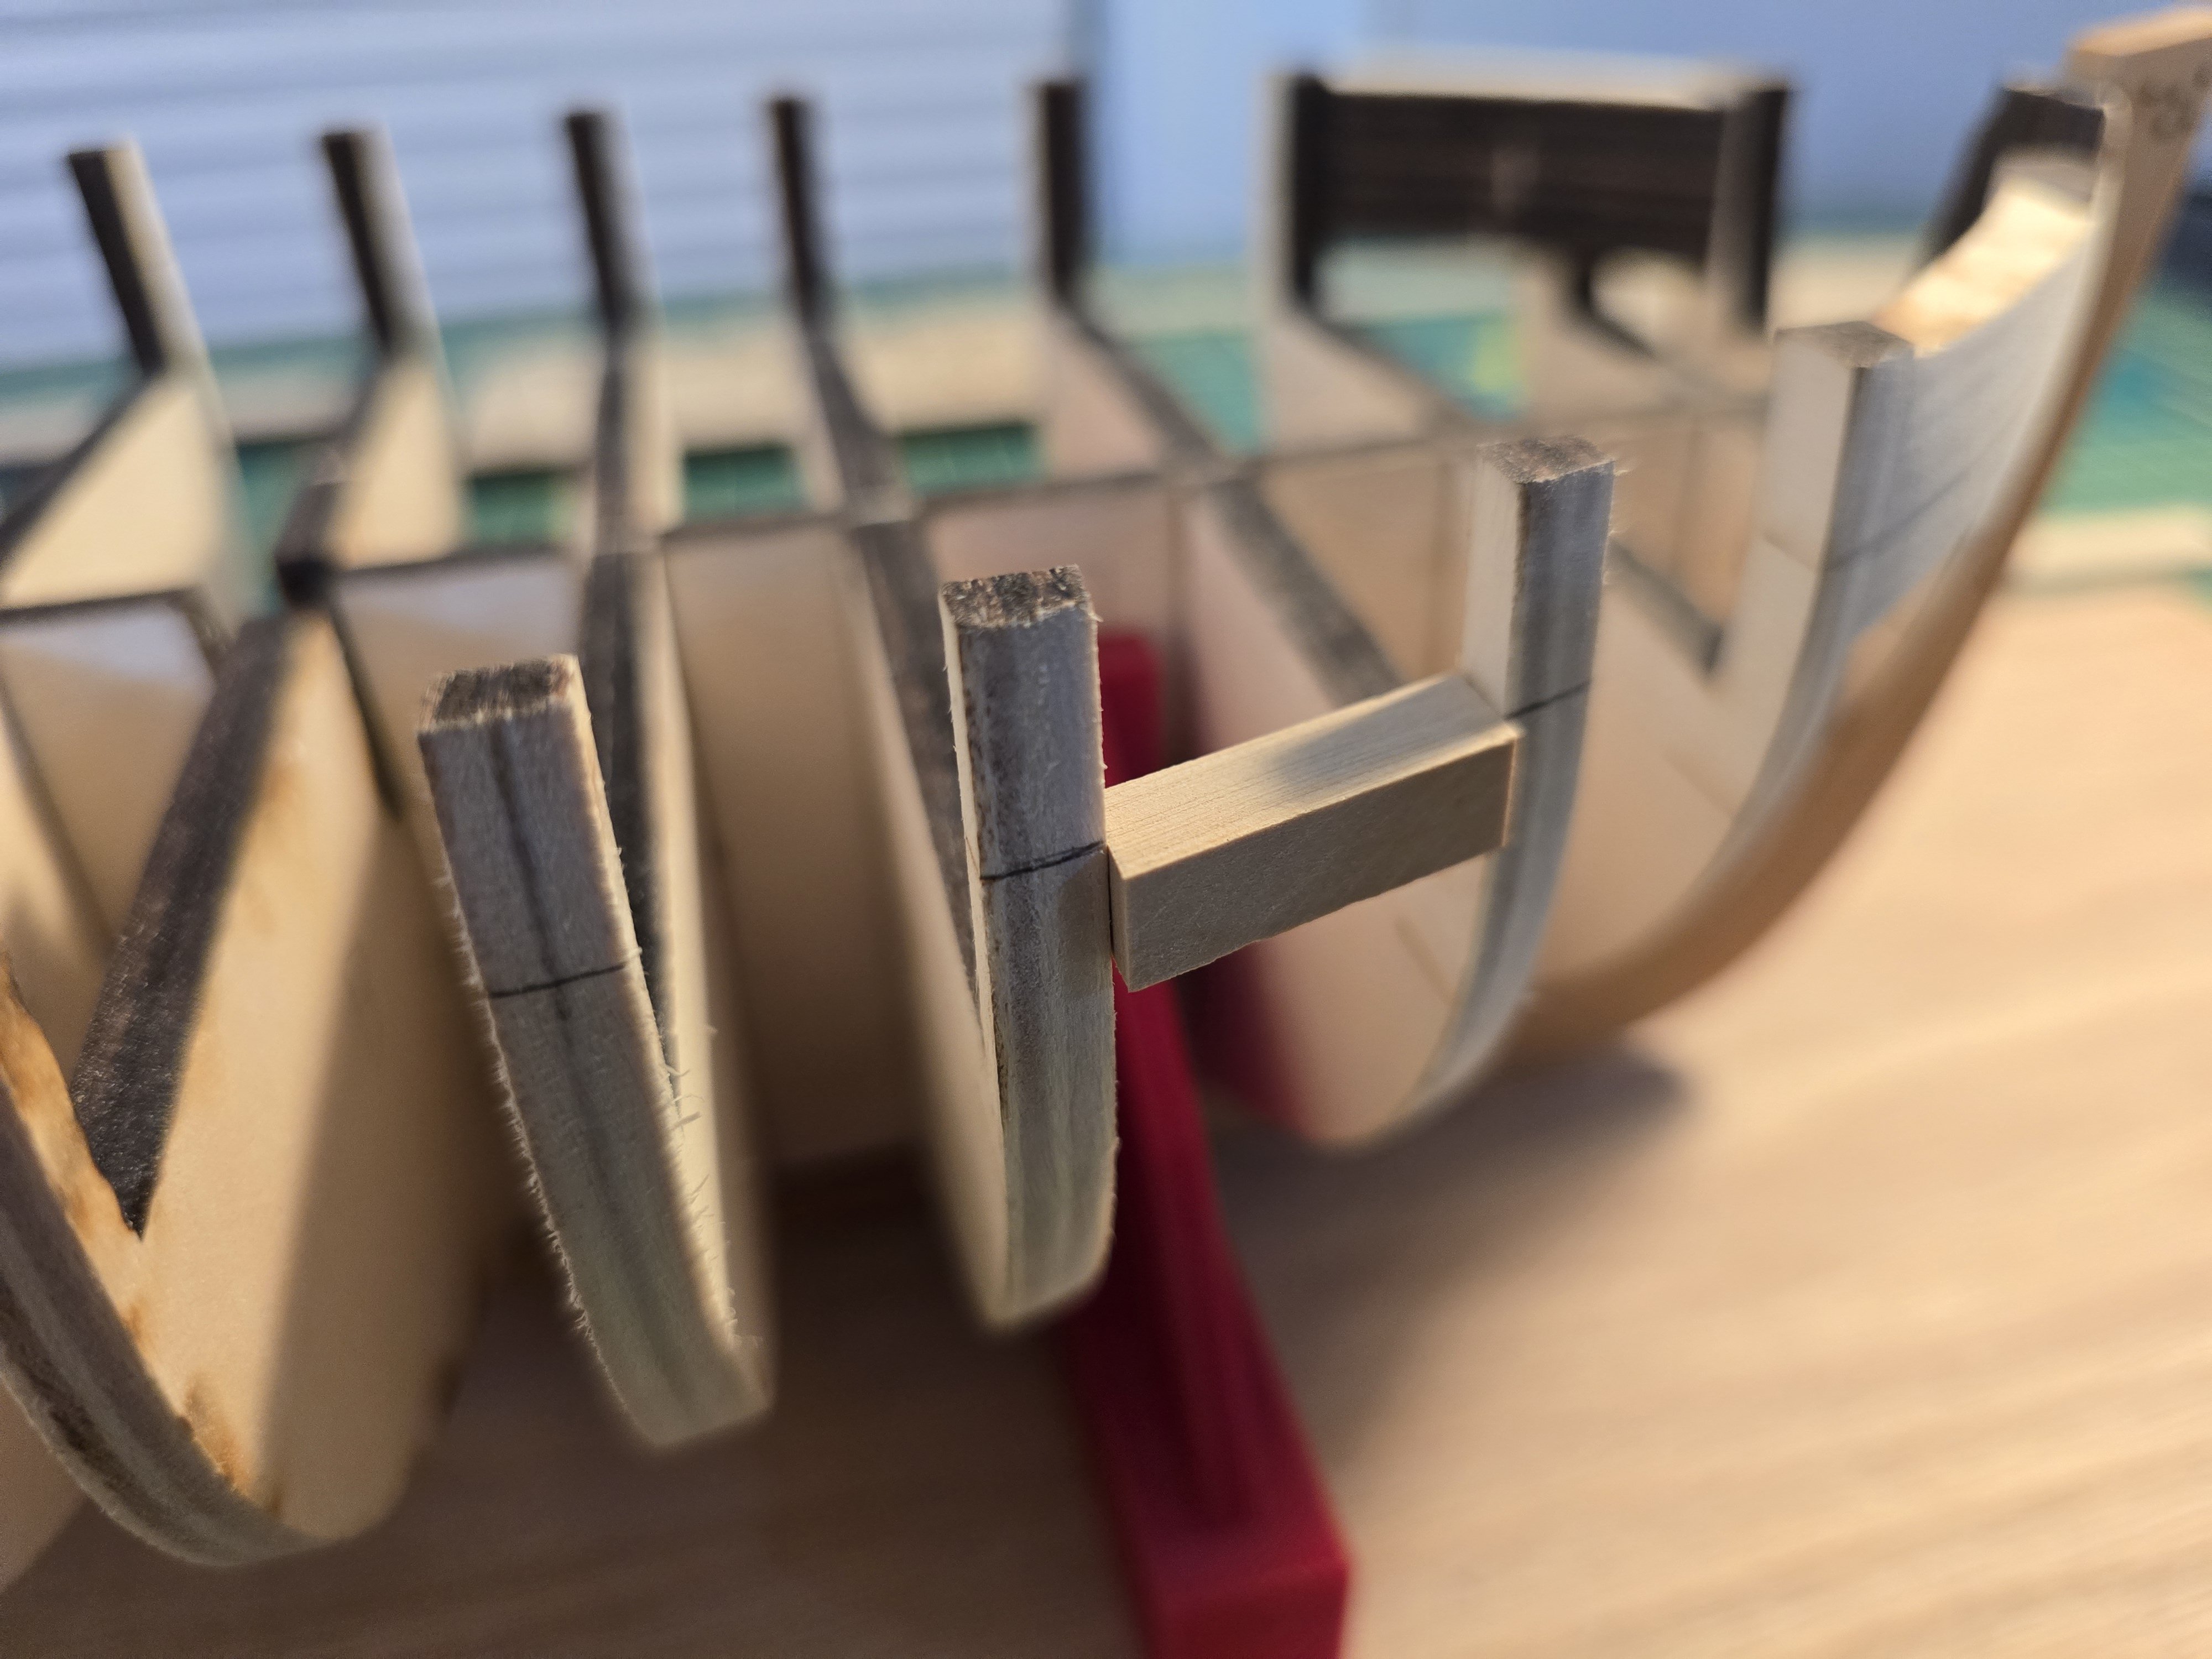
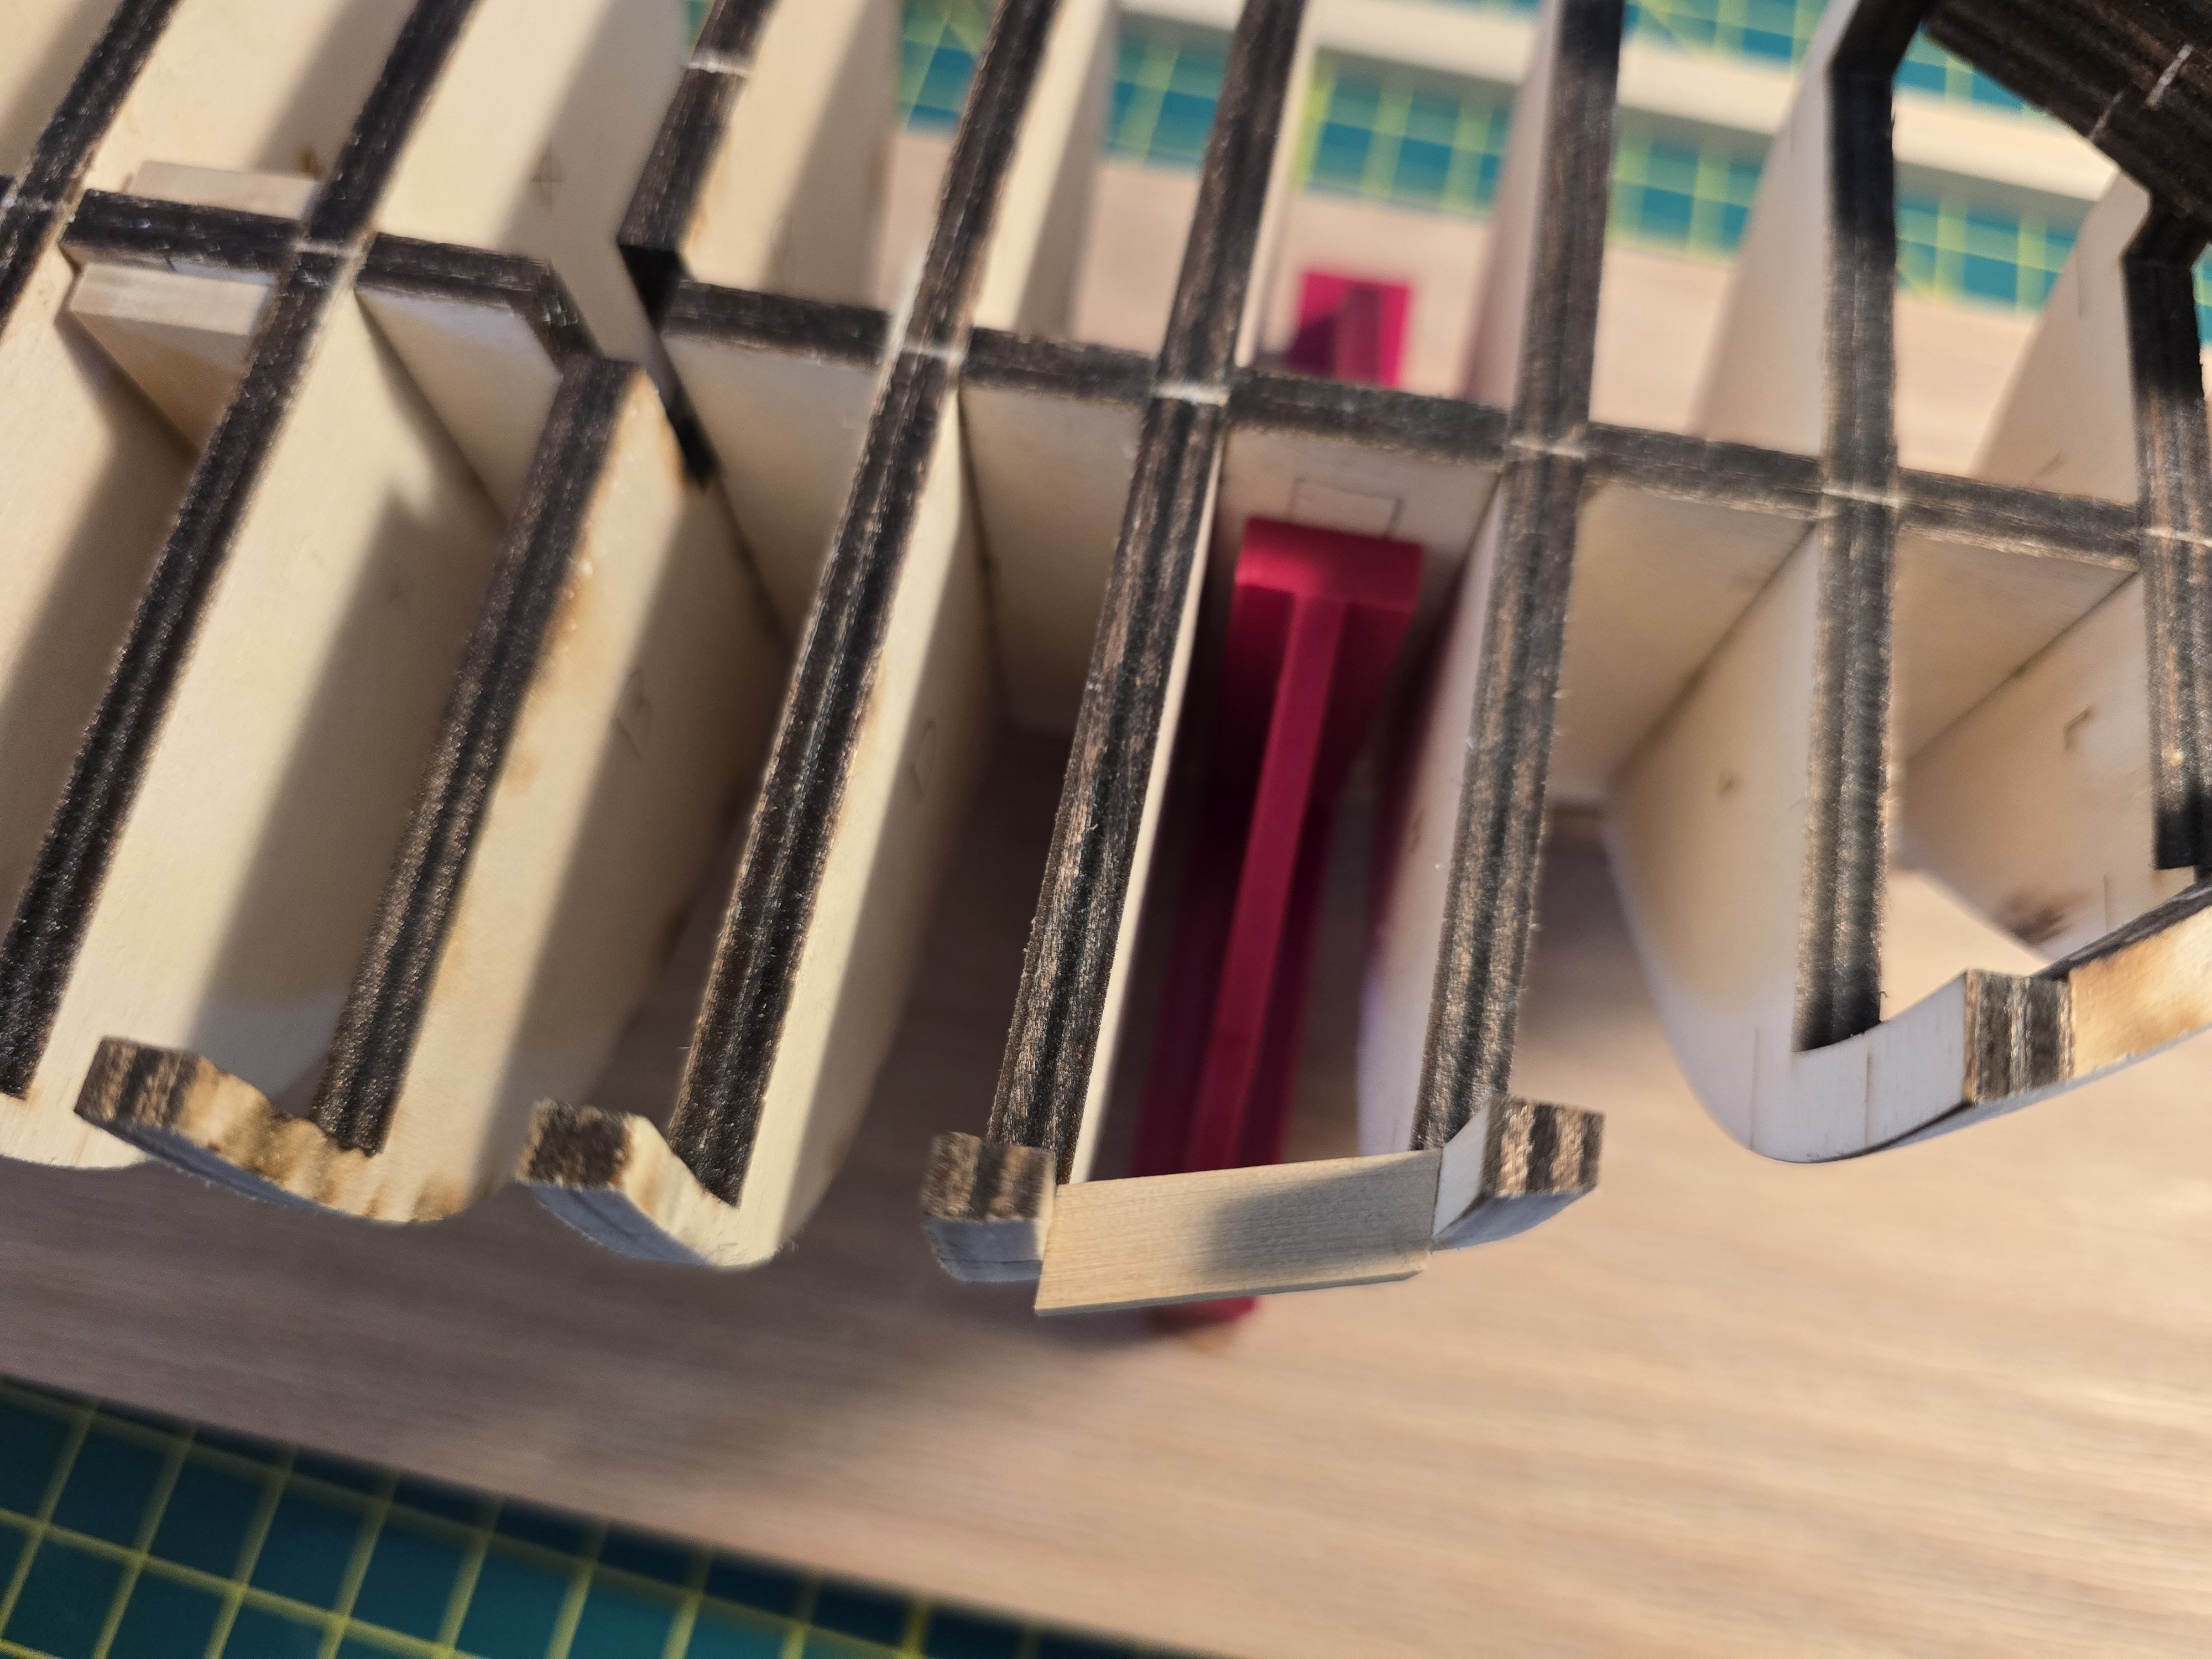
I have fitted and glued the fixed blocks onto the Confederacy. Firstly, I had to add the extra sills/lintels to where each of the fixed blocks would reside. I have to admit, I had to cut out 1 extra piece from the laser cut sheet. Also, seeing a basswood laser cut sheet look like this makes me feel like I am making progress! First, I glued then on proud of the outer edge of the hull so I could sand them level to it later. I then sanded them down to match the hull shape. Then I looked at the plans to make sure I'm placing the correct fixed block to the correct position in the correct orientation. I then marked the positions of where to drill the ends of the fixed blocks where the rigging runs through. I then drilled out the marked spots. Then I lined up the fixed blocks with the drilled holes and glued them into place. The next part was some what challenging for me. You have to make half round circles to simulate the sheaves in the fixed blocks. This was tough because you had to make them with 1/32" x 1/16" strips provided with the kit. These were super small. This is how I made them. First I rouned one end of the strip, then I test fitted the strip into the fixed block. A lot of the time, they didn't quite fit. So, I had to thin down the strip until it fit. I then measured how long each sheave should be and cut them with a hobby knife. There wasn't a need to use a manual miter saw or anything since the strip is so small. Then I sanded the other side down into a curve to simulate the sheave. Lastly, i glued it into the center of the fixed block. That was quite a bit of work to complete all the sheaves. But it does make the fixed blocks look a lot better! And with that, I'm done! Next will be painting the gunports red. Unfortunately, the red paint I currently have is semi-transparent. I'll have to go to the store tomorrow to get some red paint. I'll have to look it up, but not sure why it's red. Did some ships use other colors? Thanks for reading! Jeff


-
I heard that is a great Victory kit. What i can tell you, from looking ahead, is that the Confederacy is a very detailed model. I like the bigger scale better on the Confederacy than a lot of the Victory kits. Right now though, I'm happy that there aren't as many gunports on this model as on the Victory. I have a lot of respect for those that decide to build the Victory! With that said, Chuck Passaro designed kits like this one and all his other kits have very well written instructions and pictures you don't really find in other kits. For my skill level, his detailed instructions are a great help in the building process. The steps can be challenging as his building style is different than other kit manufacturers, but it's satisfying to finish each step. Jeff
-
Thanks for following RossR. Did you have any Victory kit specificity in mind? There are so many to choose from! Jeff
-
@Wawona59 Thank you! To be honest, I've had this kit for years; not ready to build it. I used to take out the instructions and read it over quite a lot because they are so well written with tons of pictures. I finally got enough courage to start it and I'm glad I did! It has been a very fun build so far. Thanks for the encouraging words! Jeff


.jpg.819ff79ae17504c38d7083377bfca12b.jpg)