HOLIDAY DONATION DRIVE - SUPPORT MSW - DO YOUR PART TO KEEP THIS GREAT FORUM GOING! (Only 69 donations so far out of 49,000 members - Can we at least get 100? C'mon guys!)
×

Zarkon
-
Posts
295 -
Joined
-
Last visited
Content Type
Profiles
Forums
Gallery
Events
Everything posted by Zarkon
-
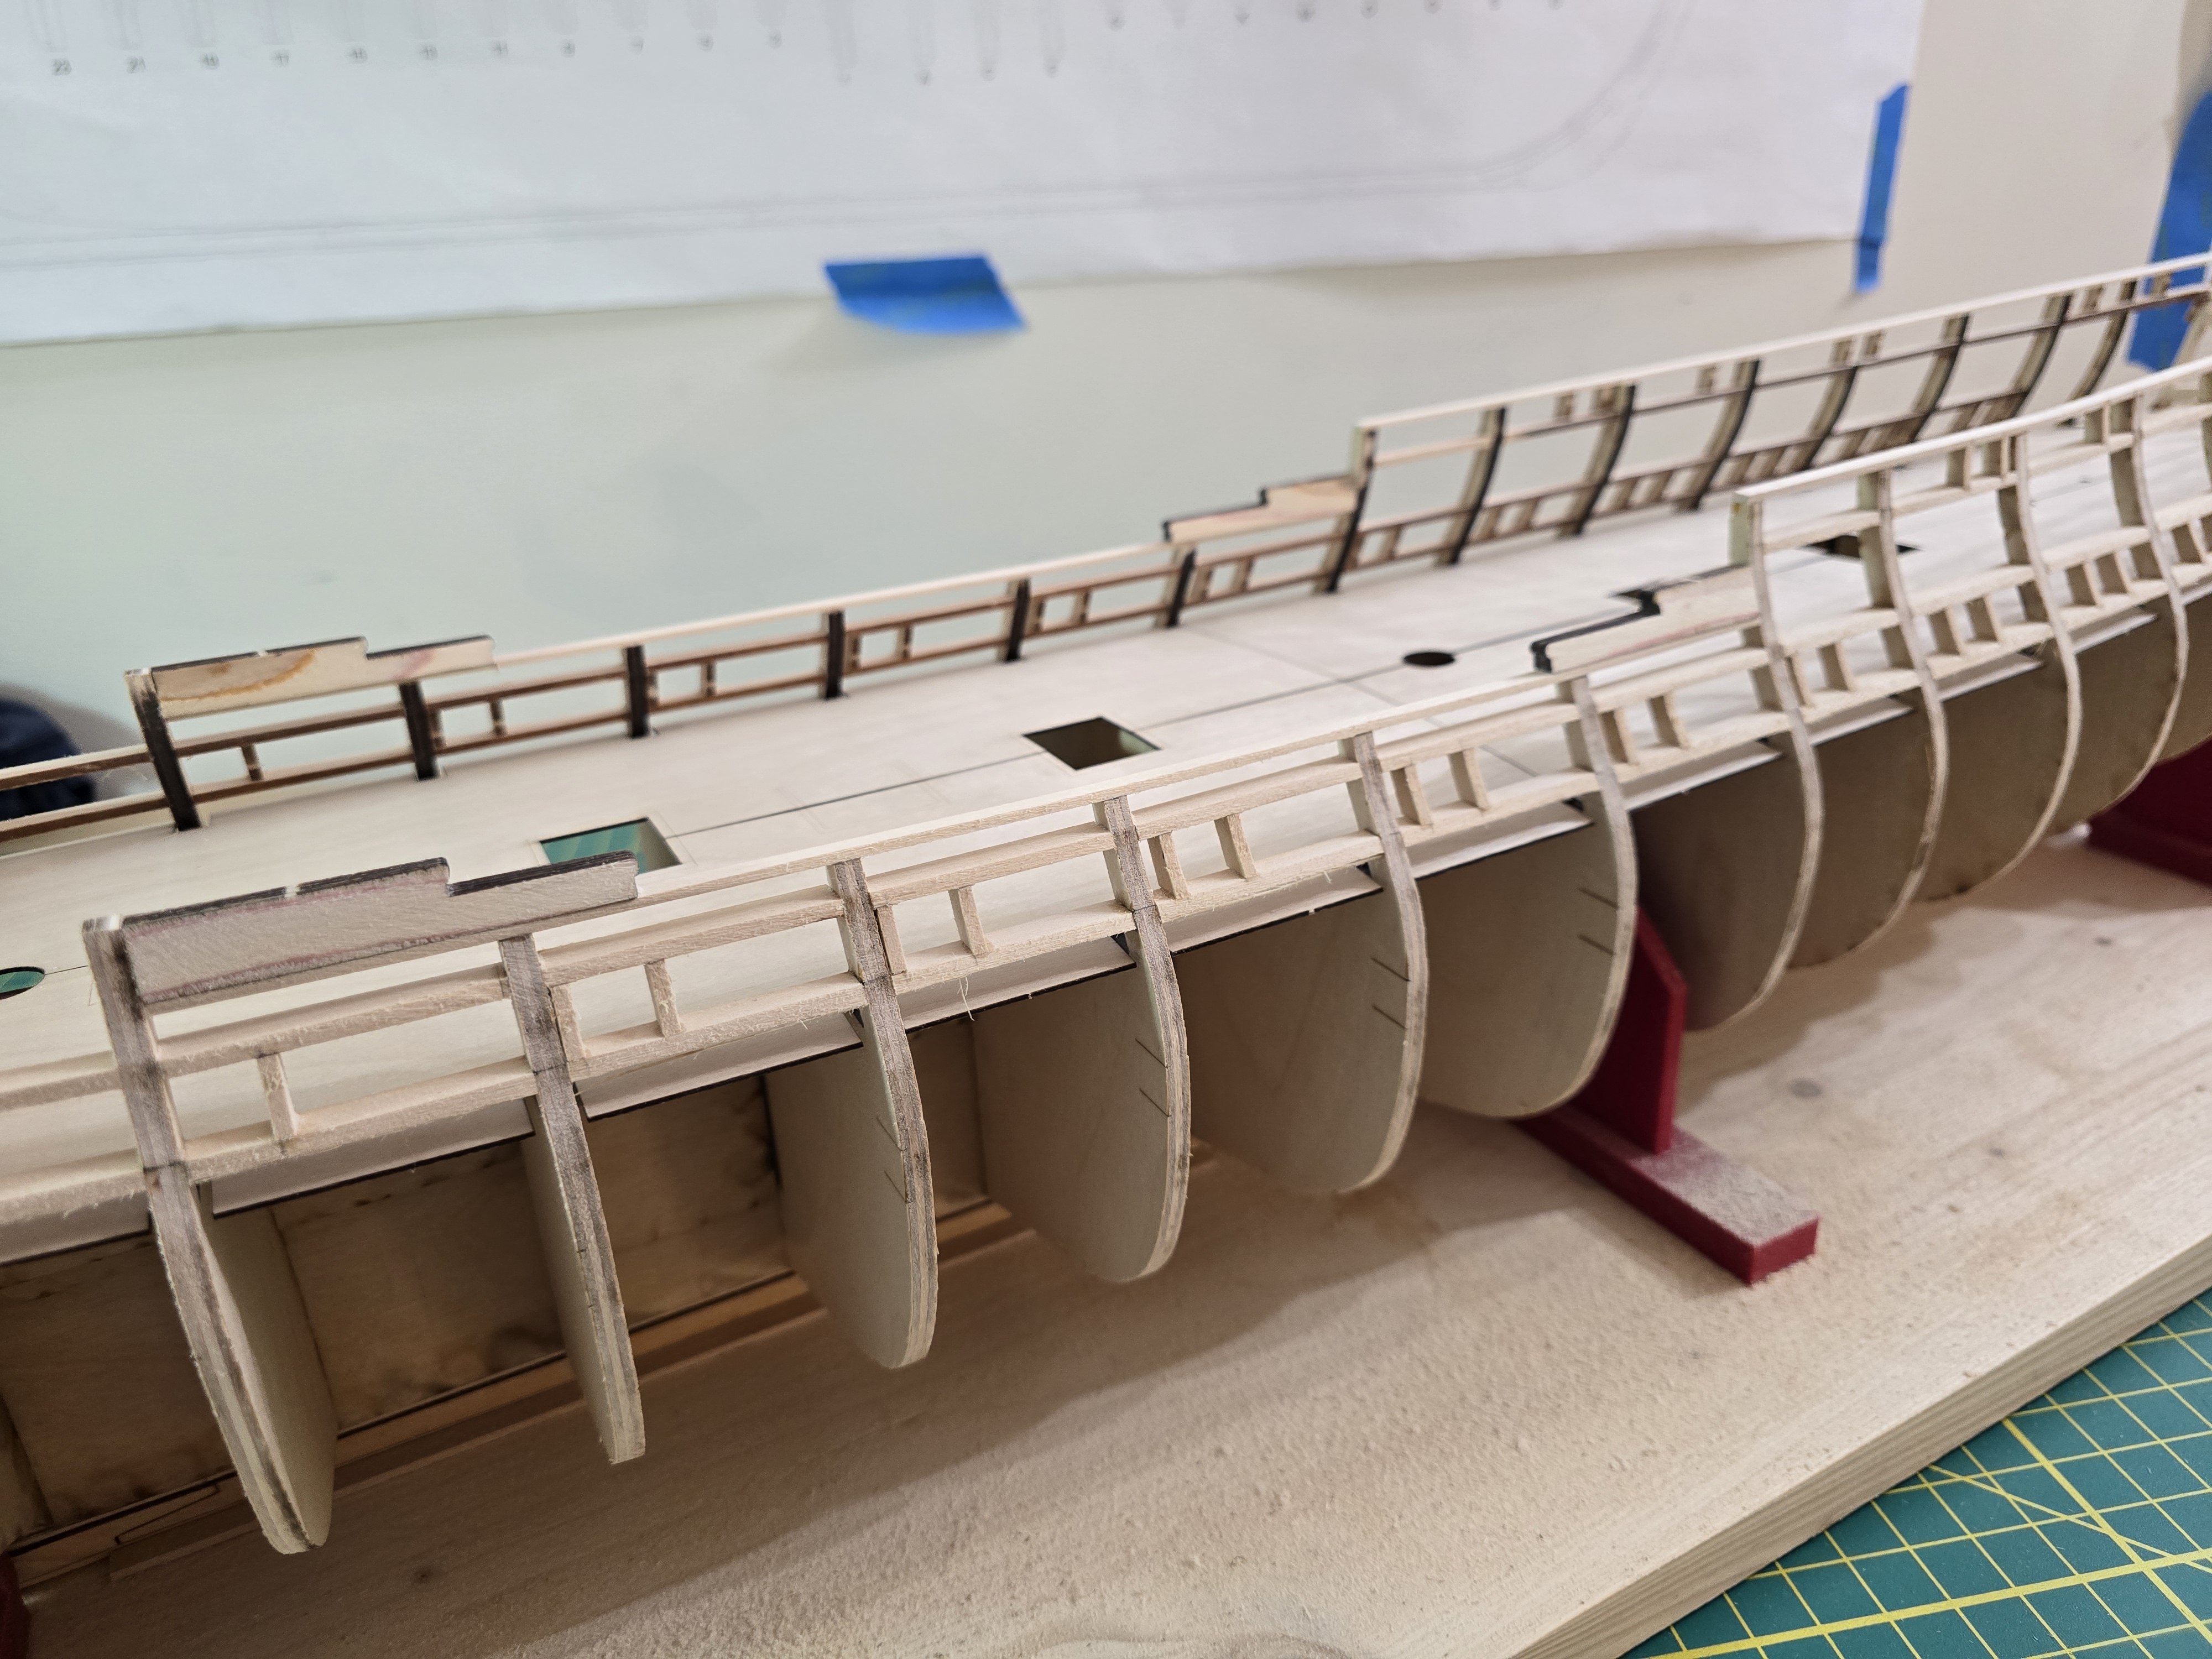
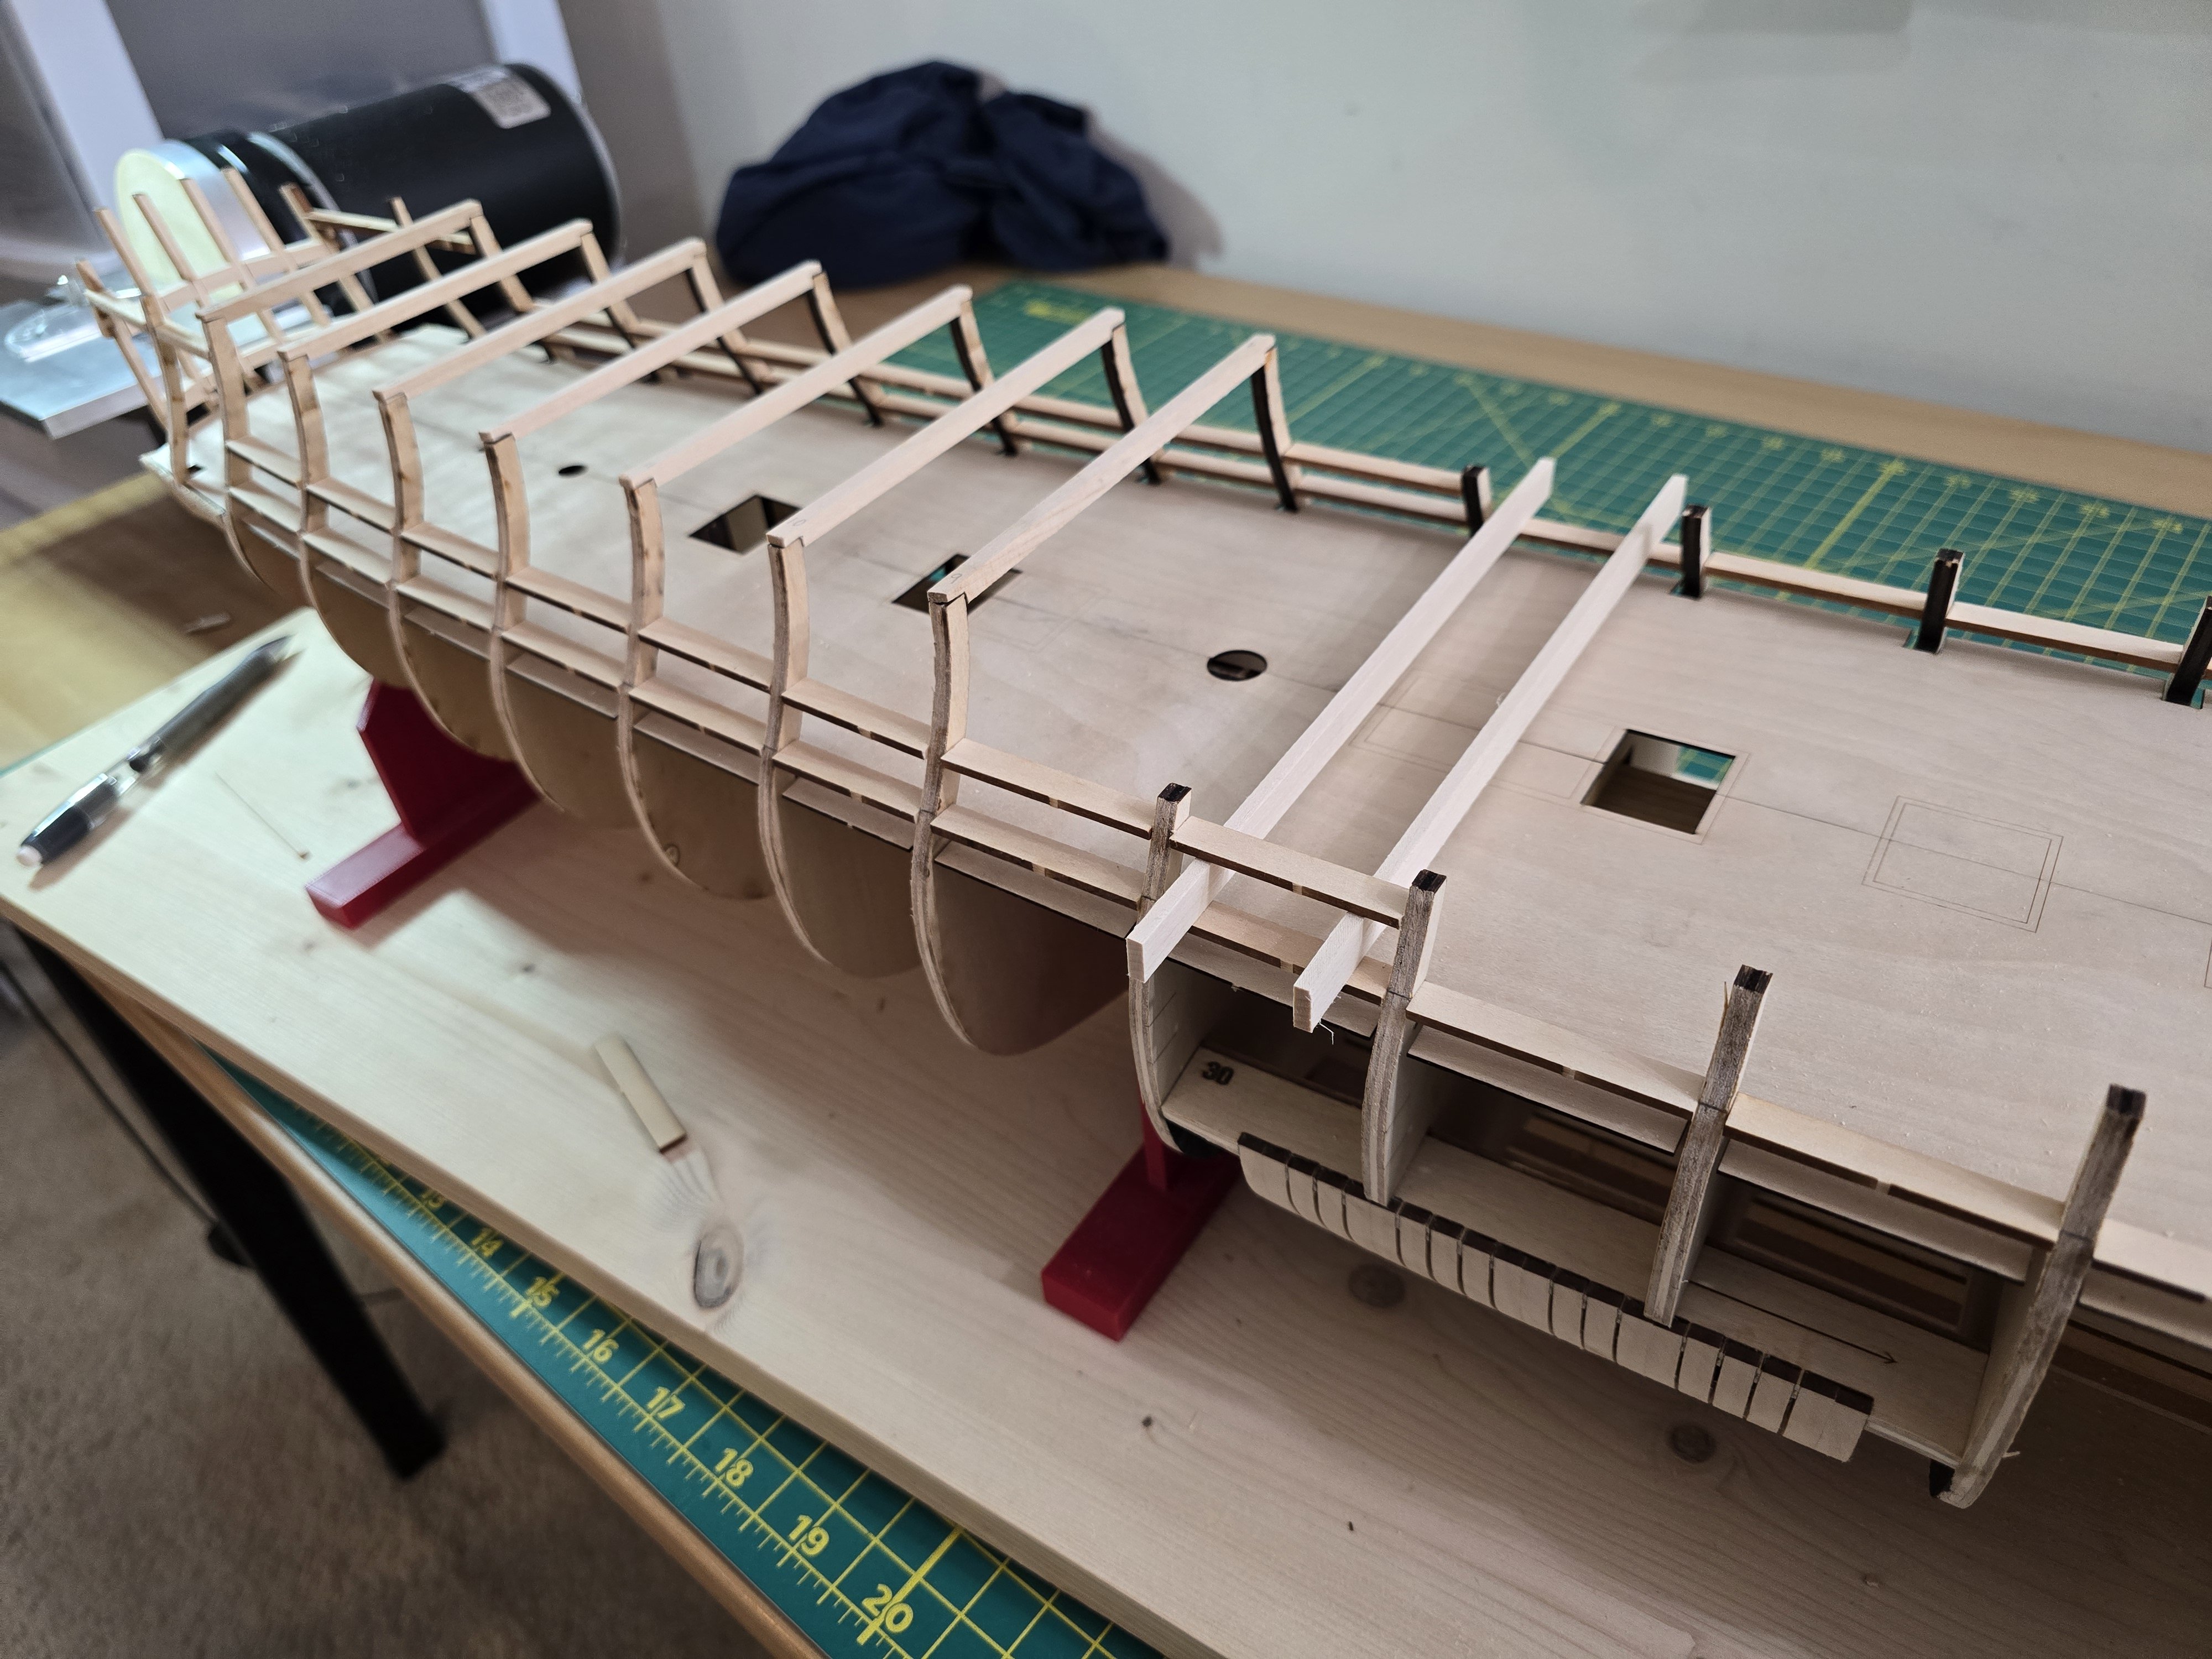
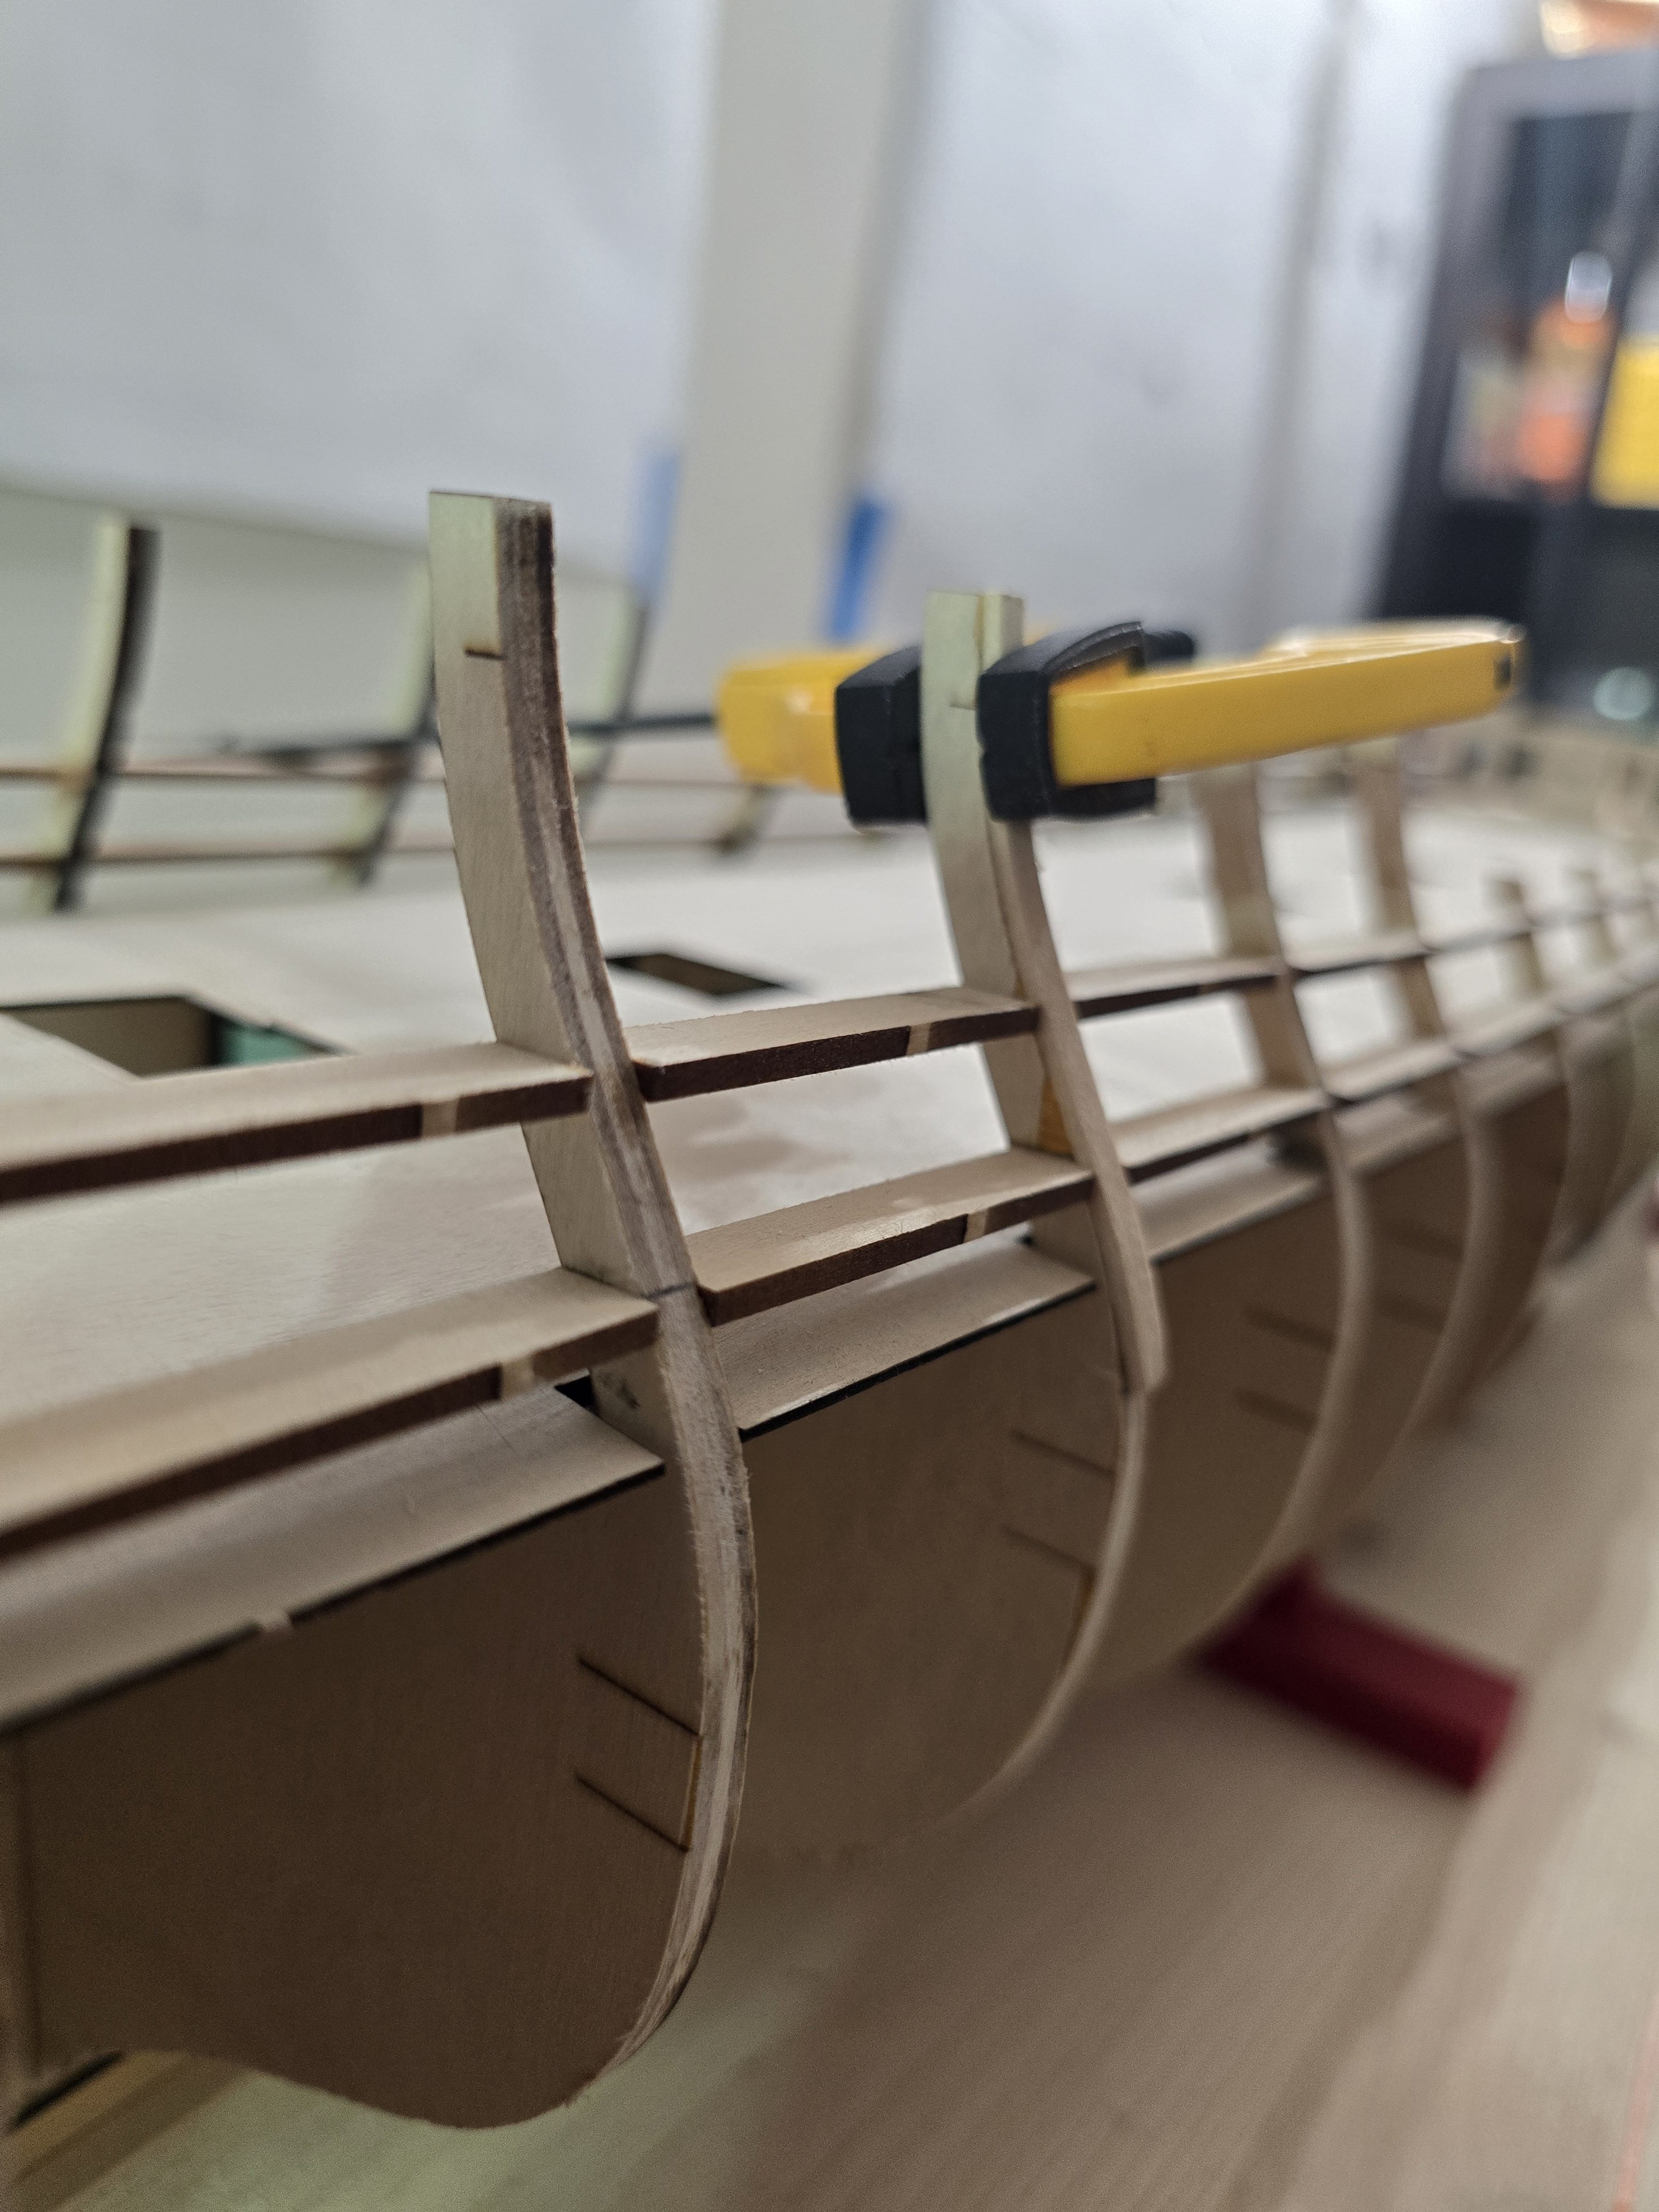
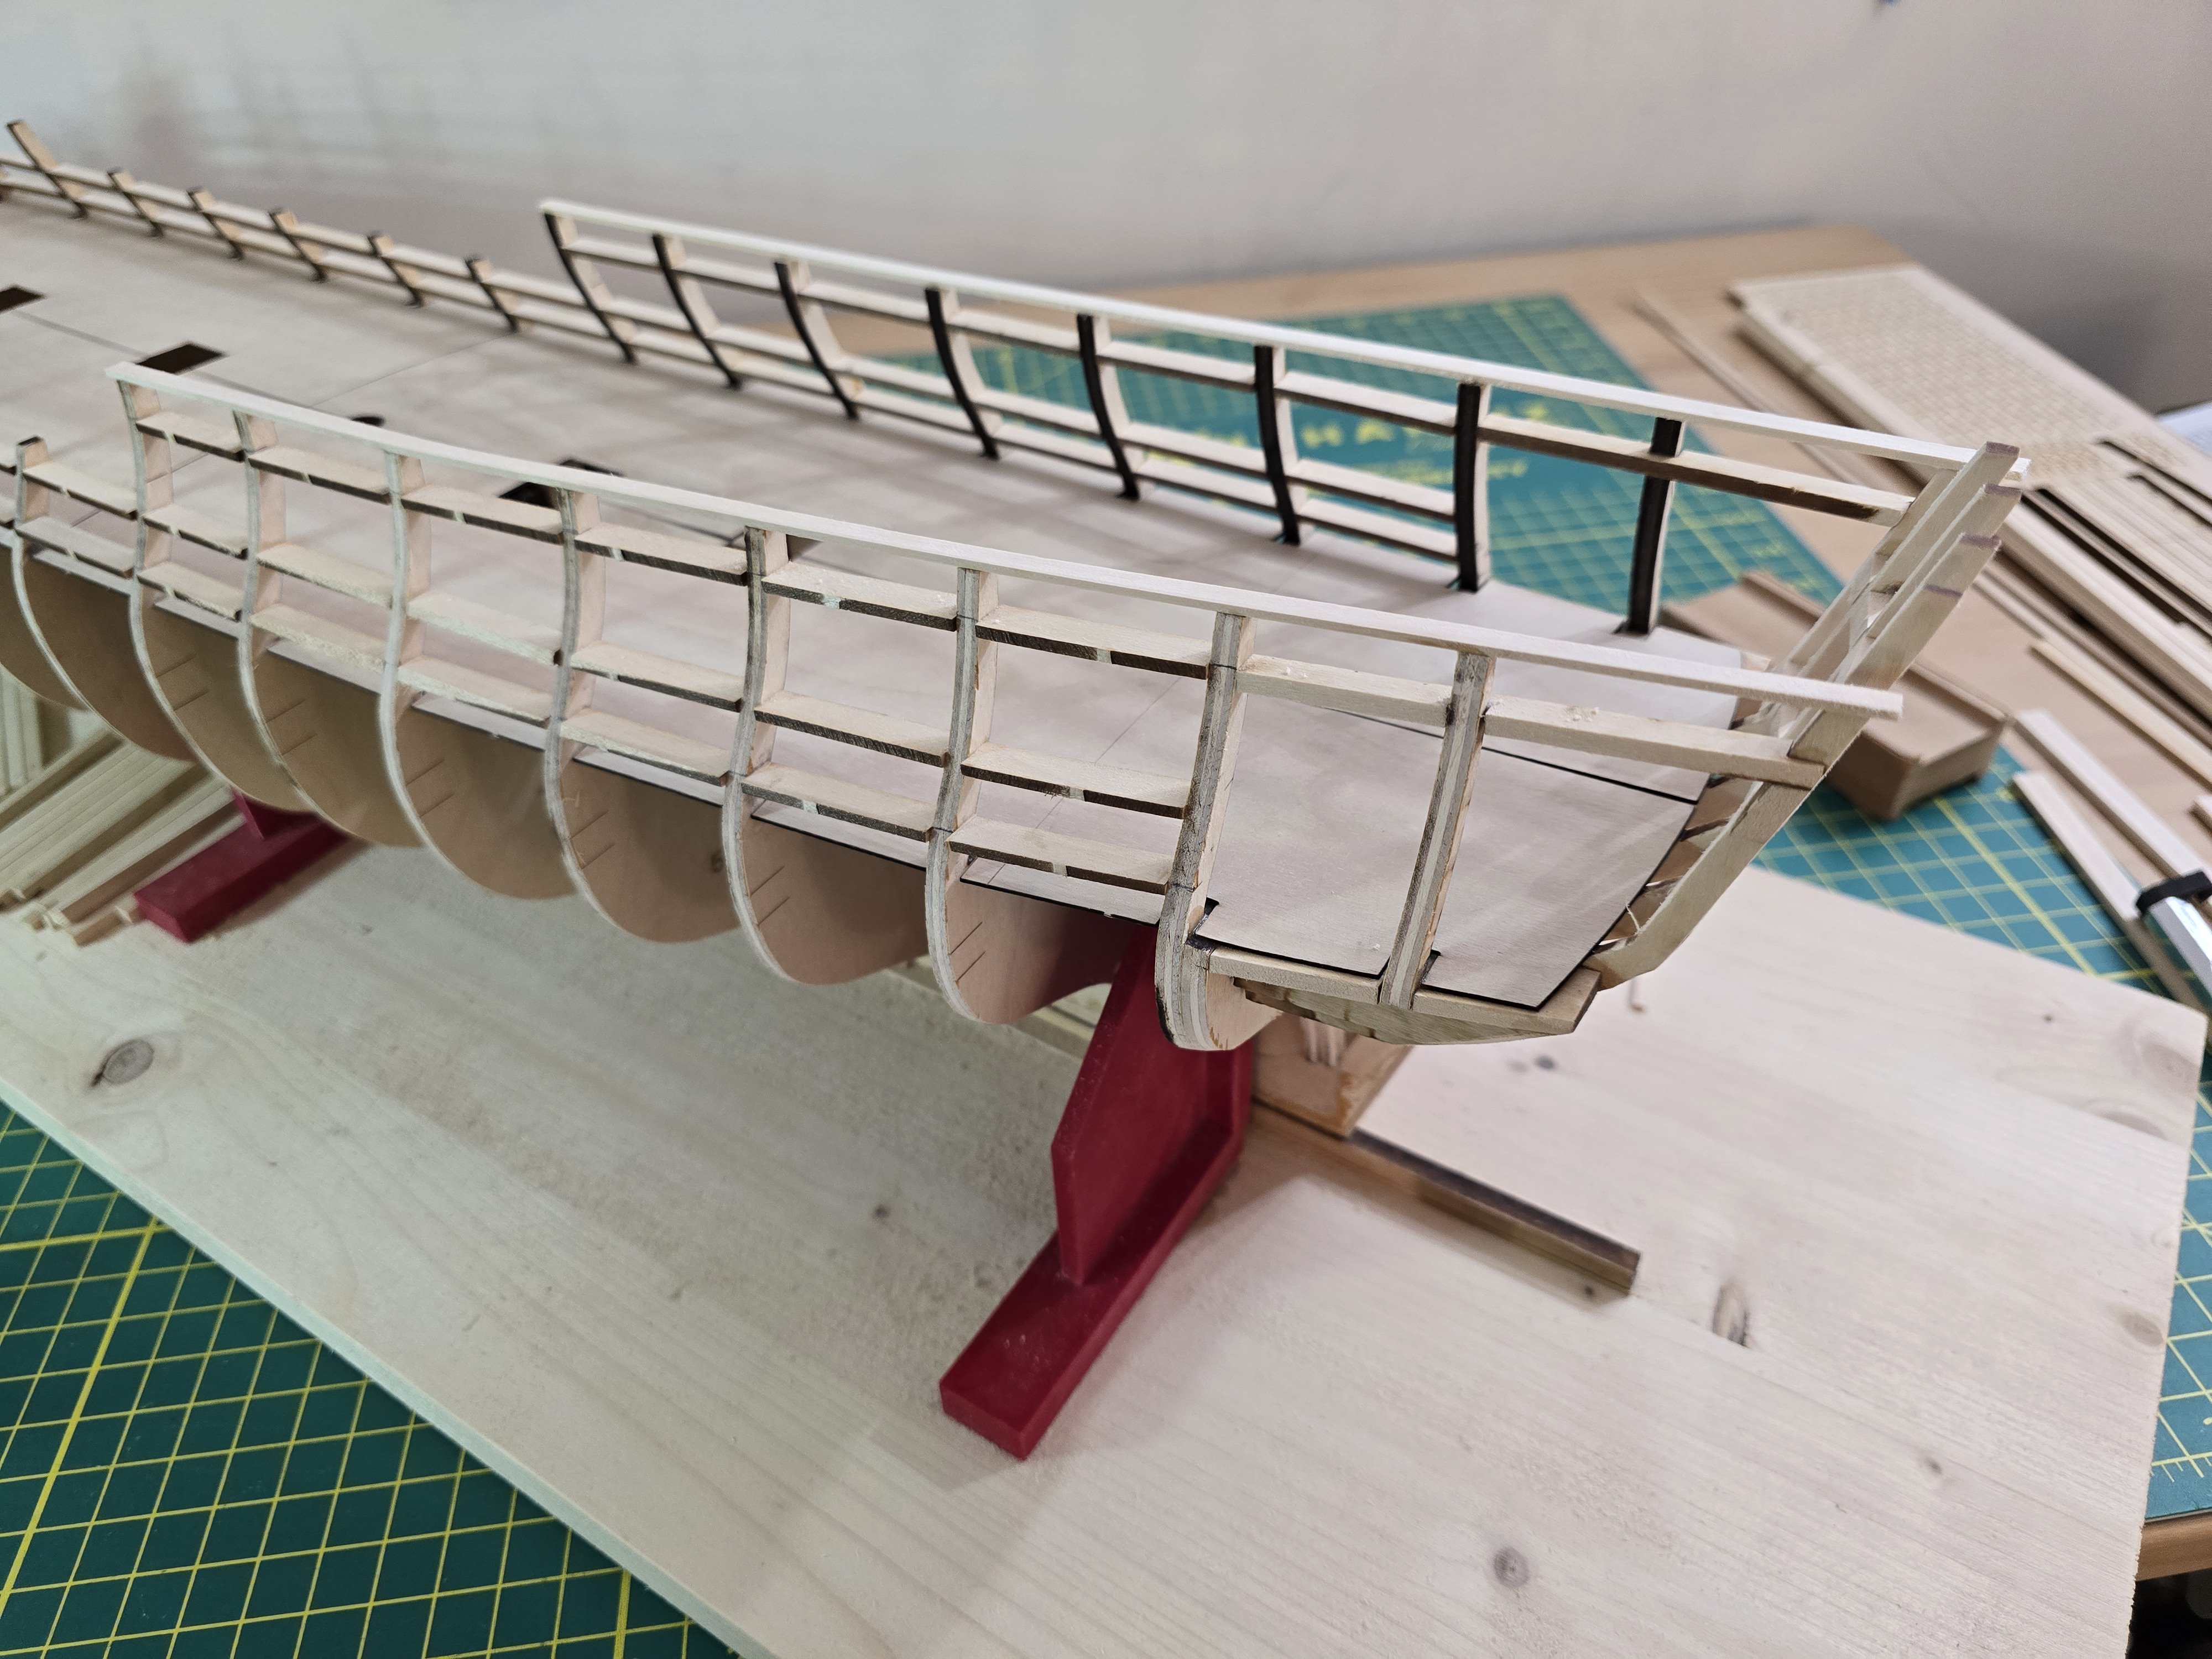
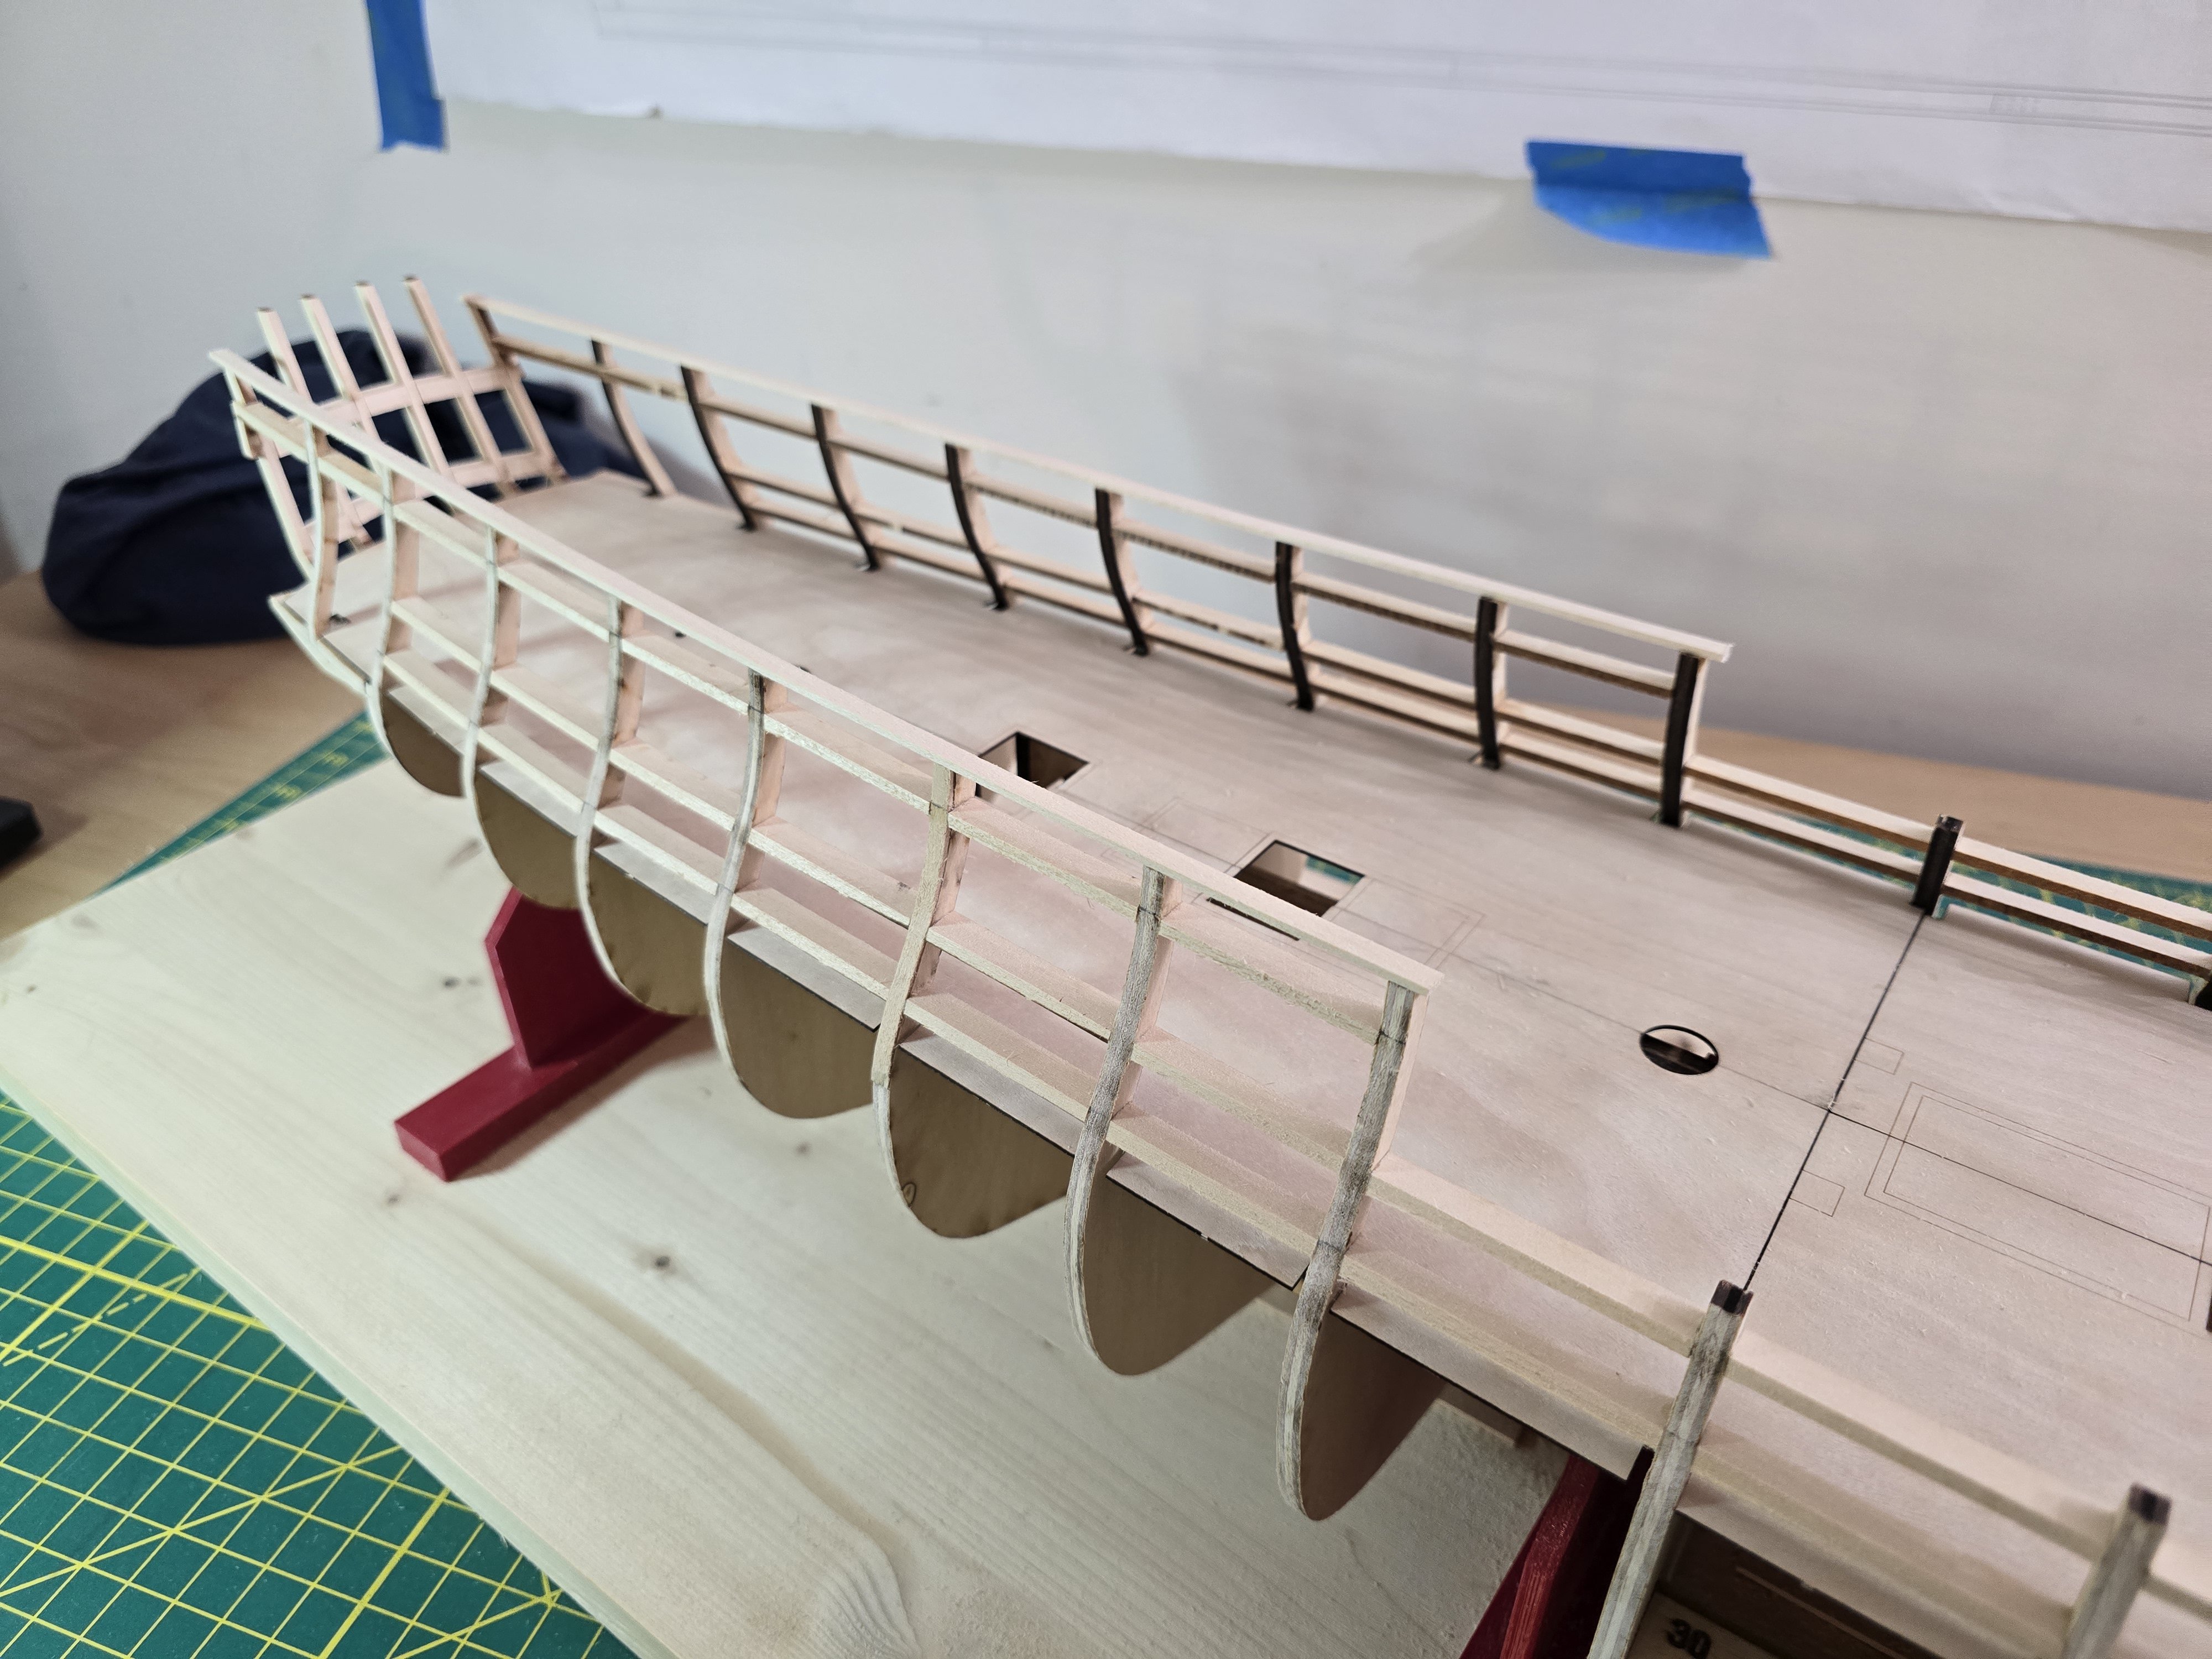
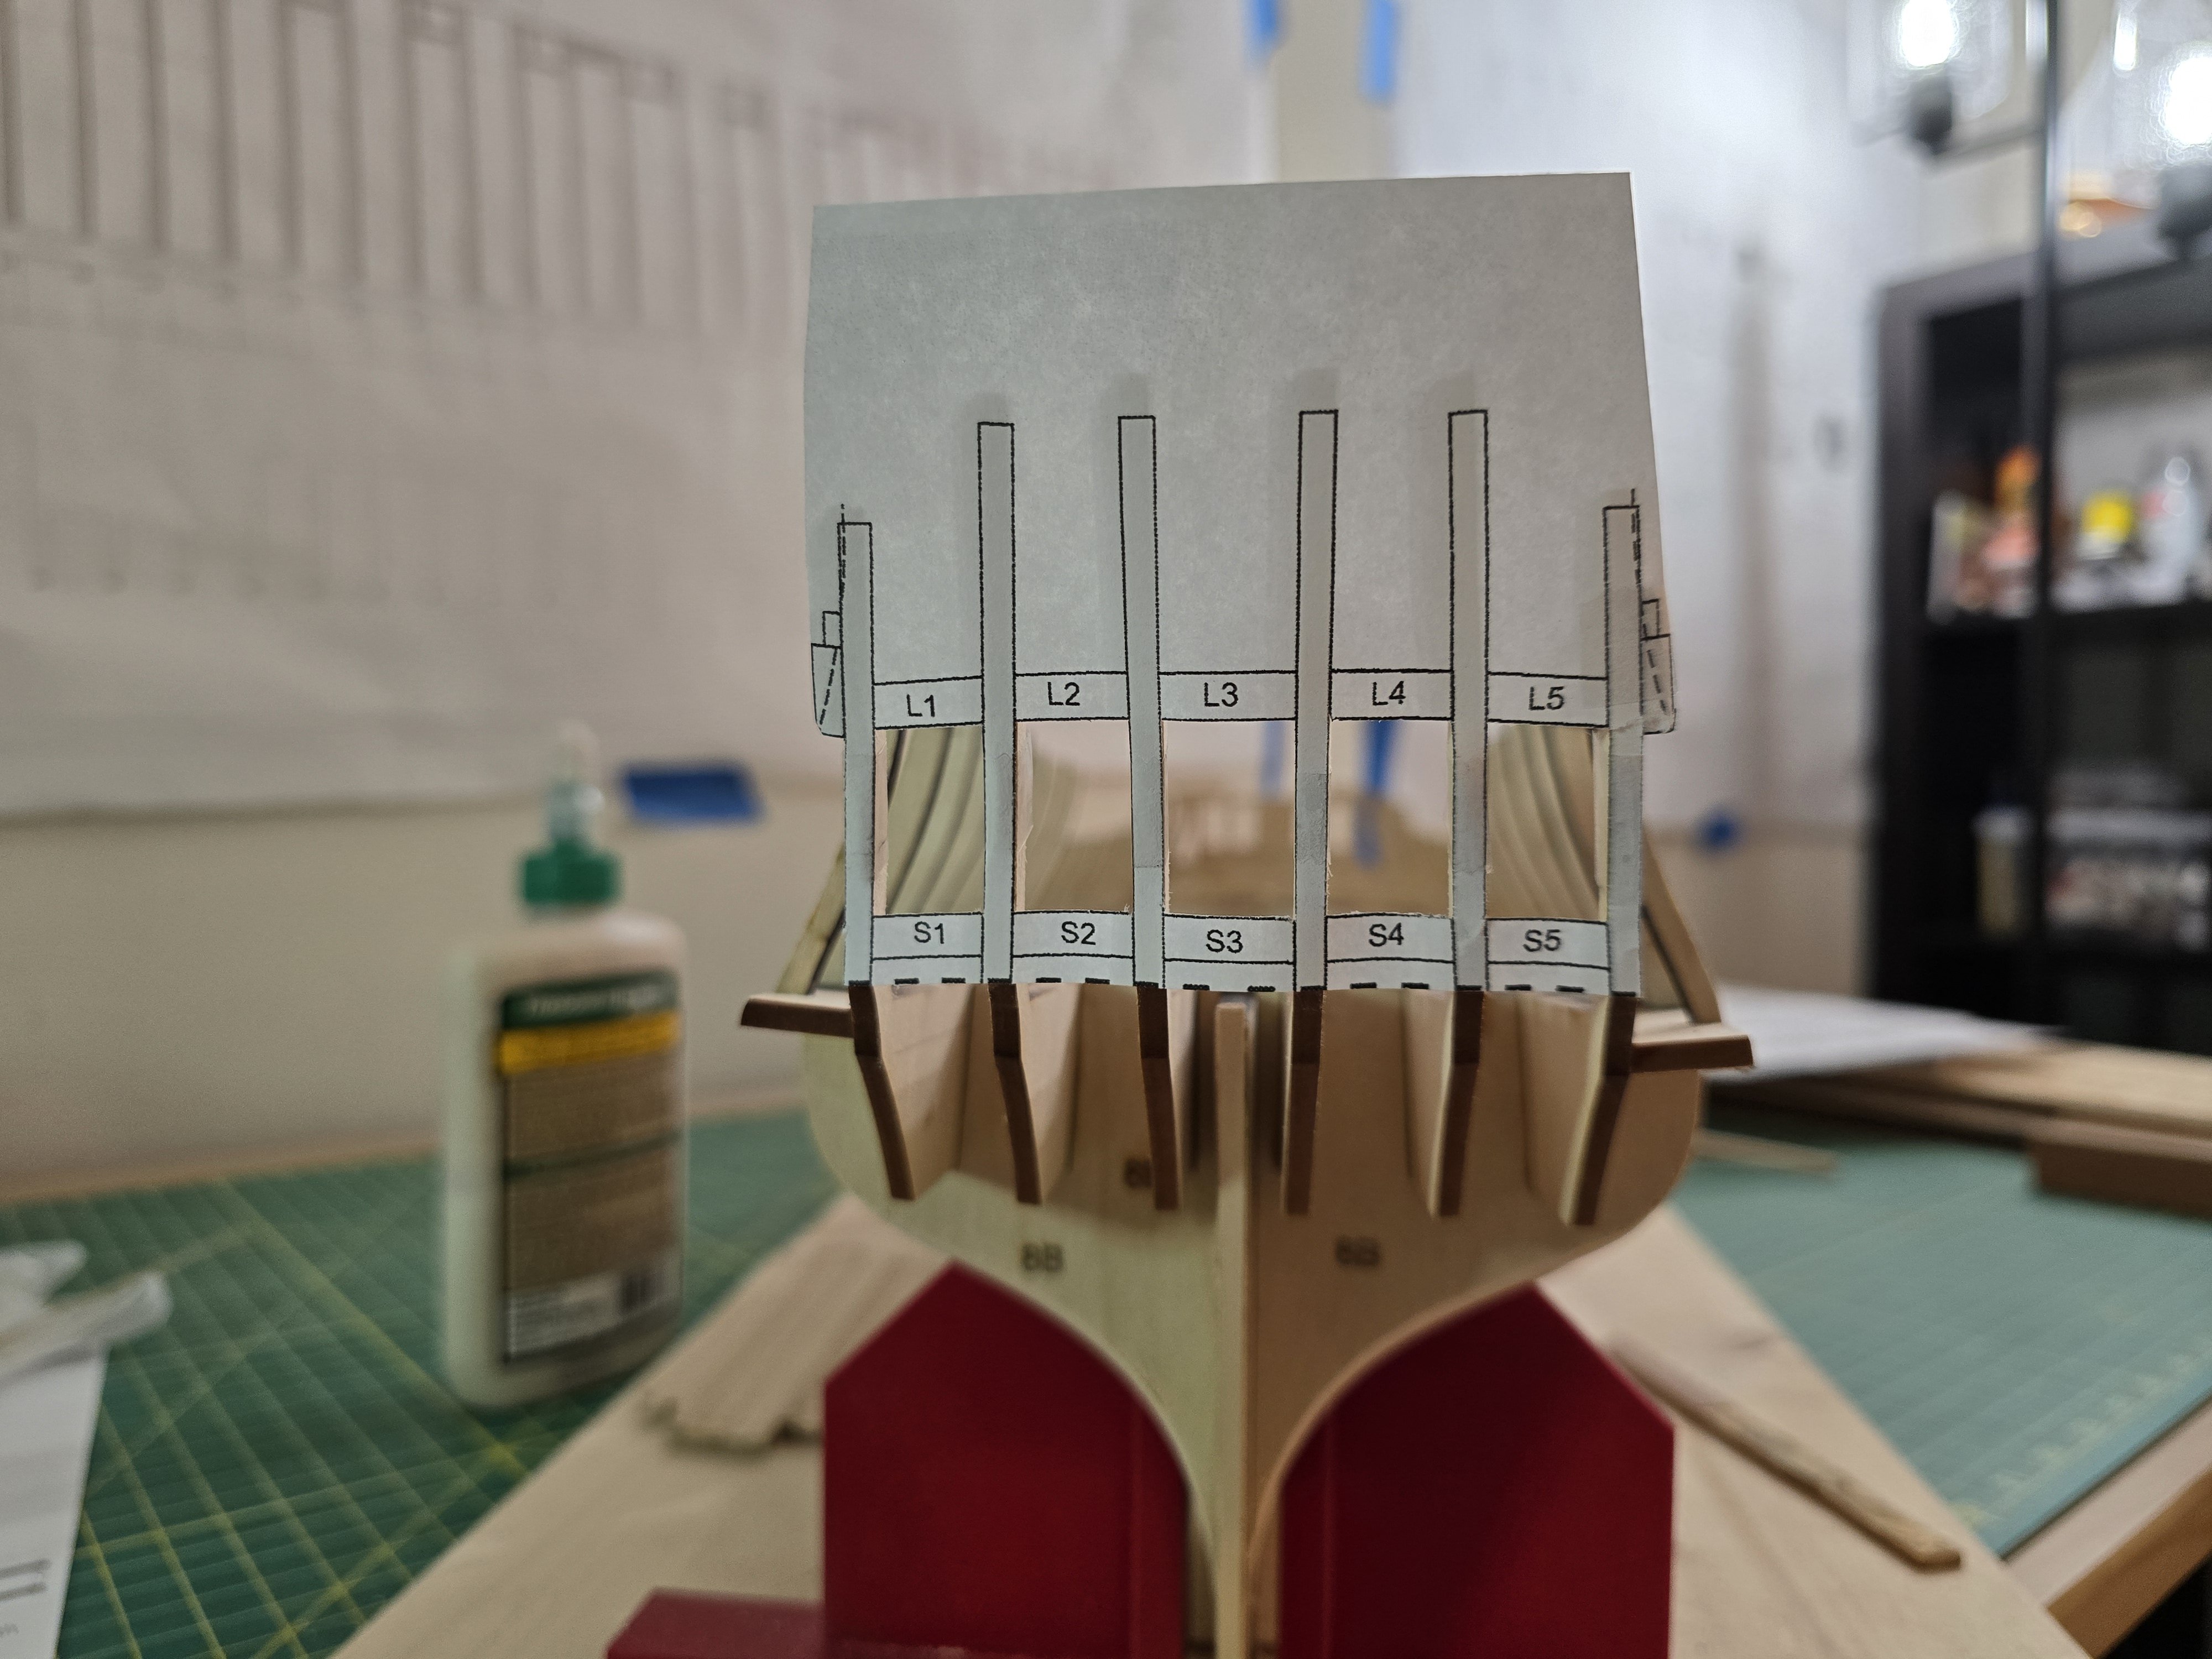
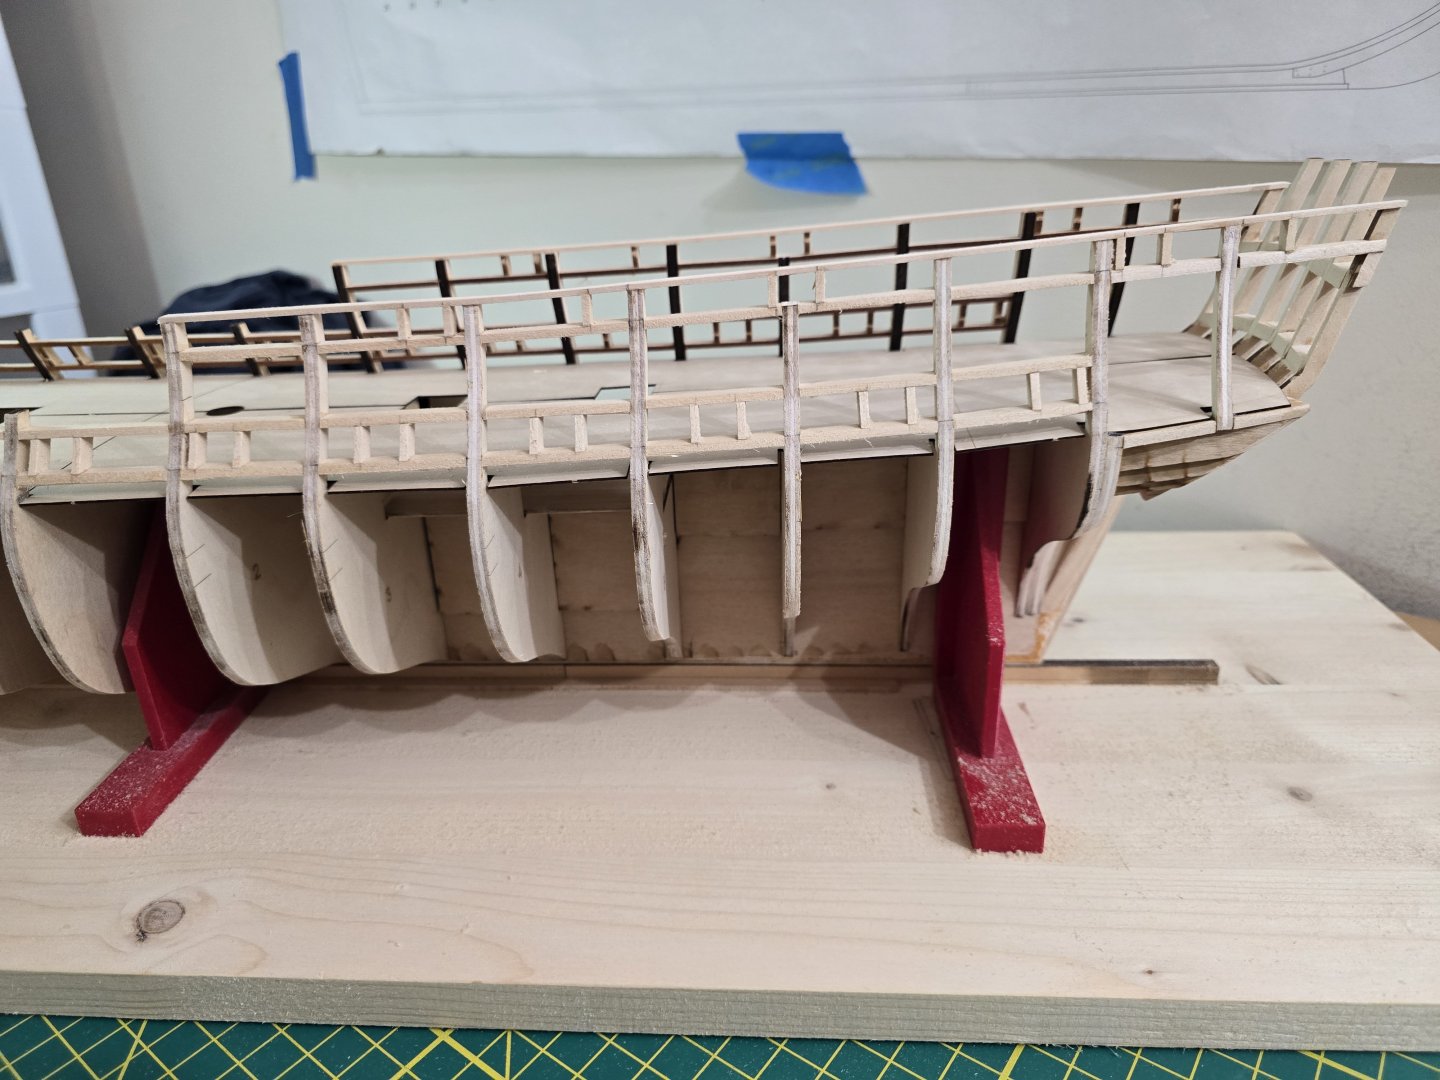
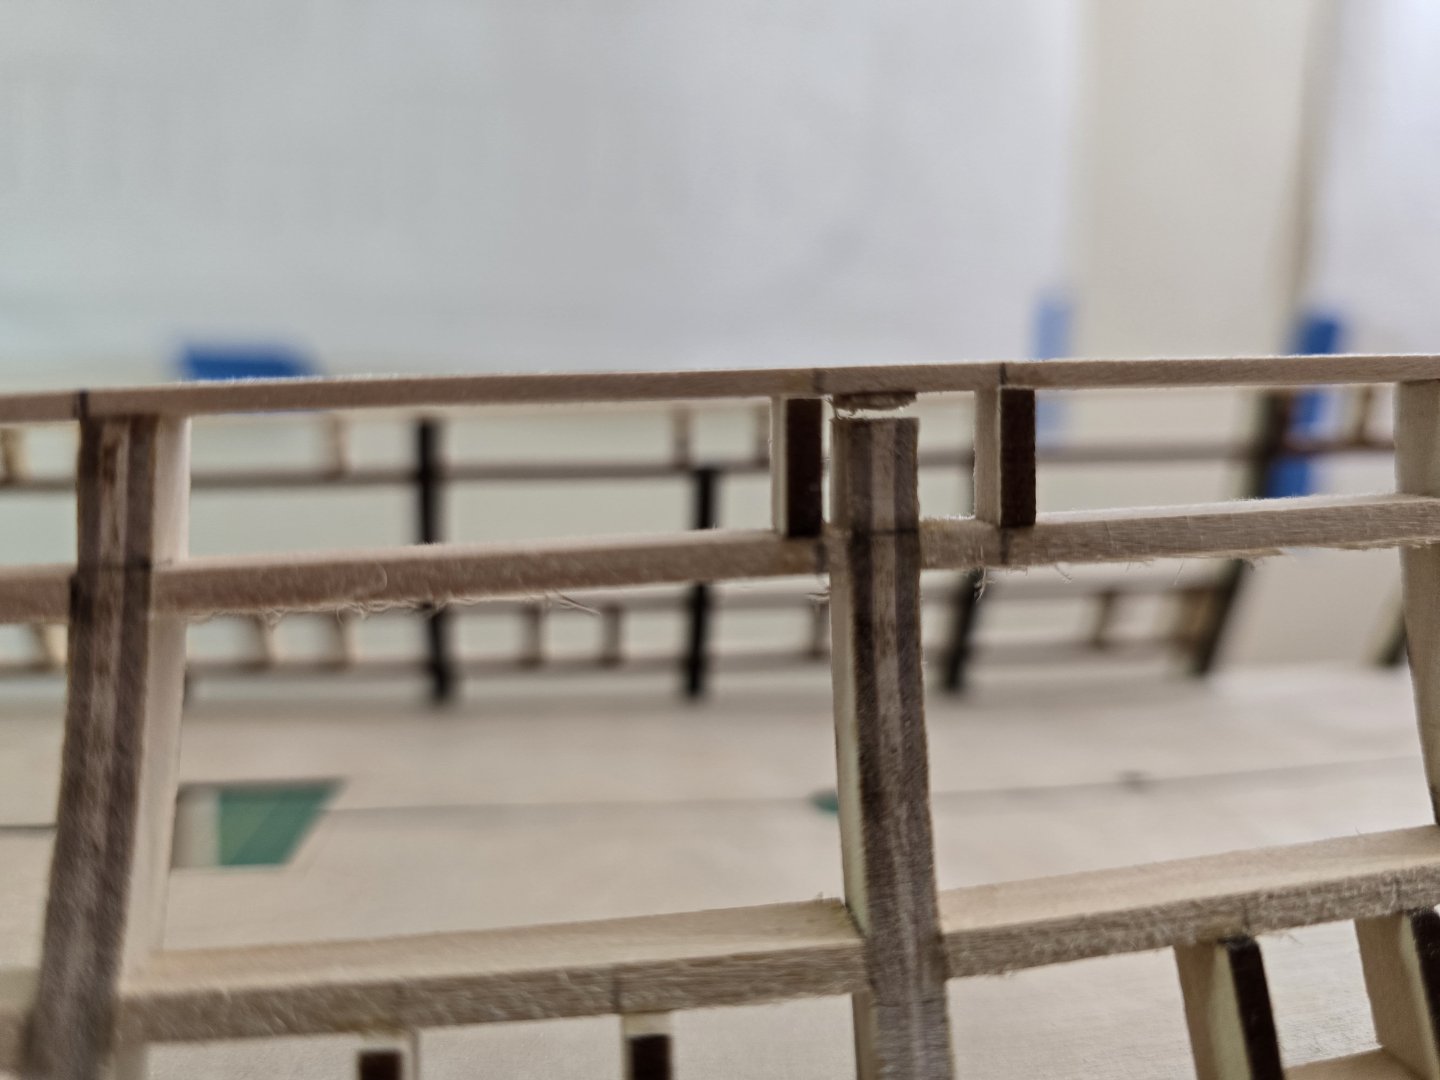
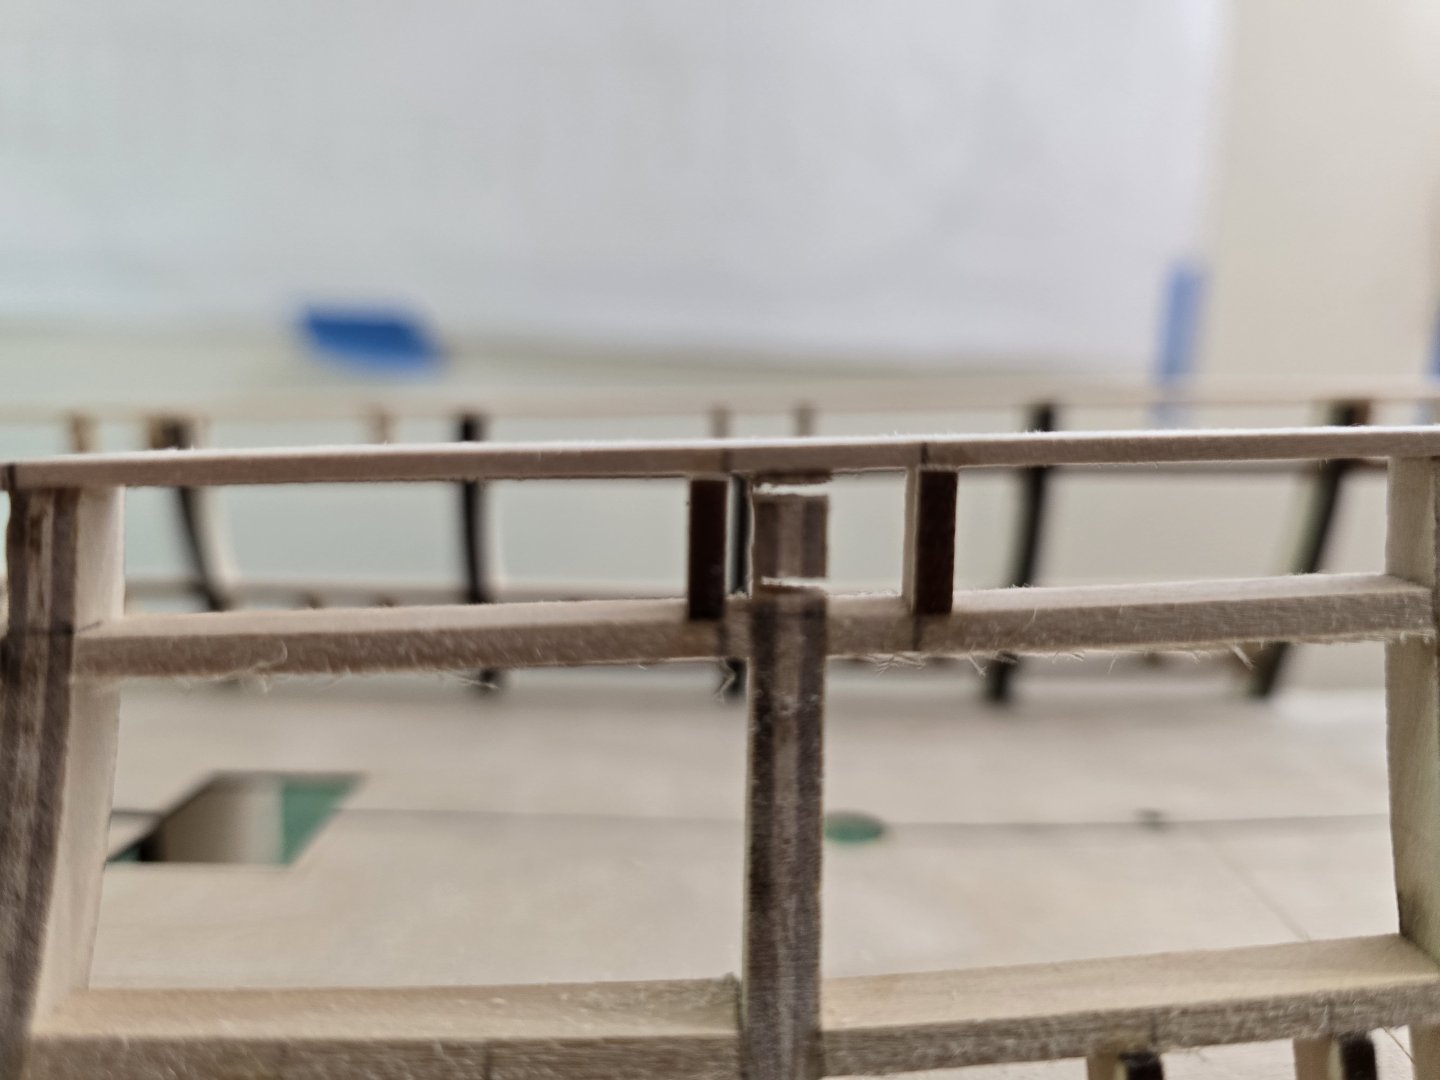
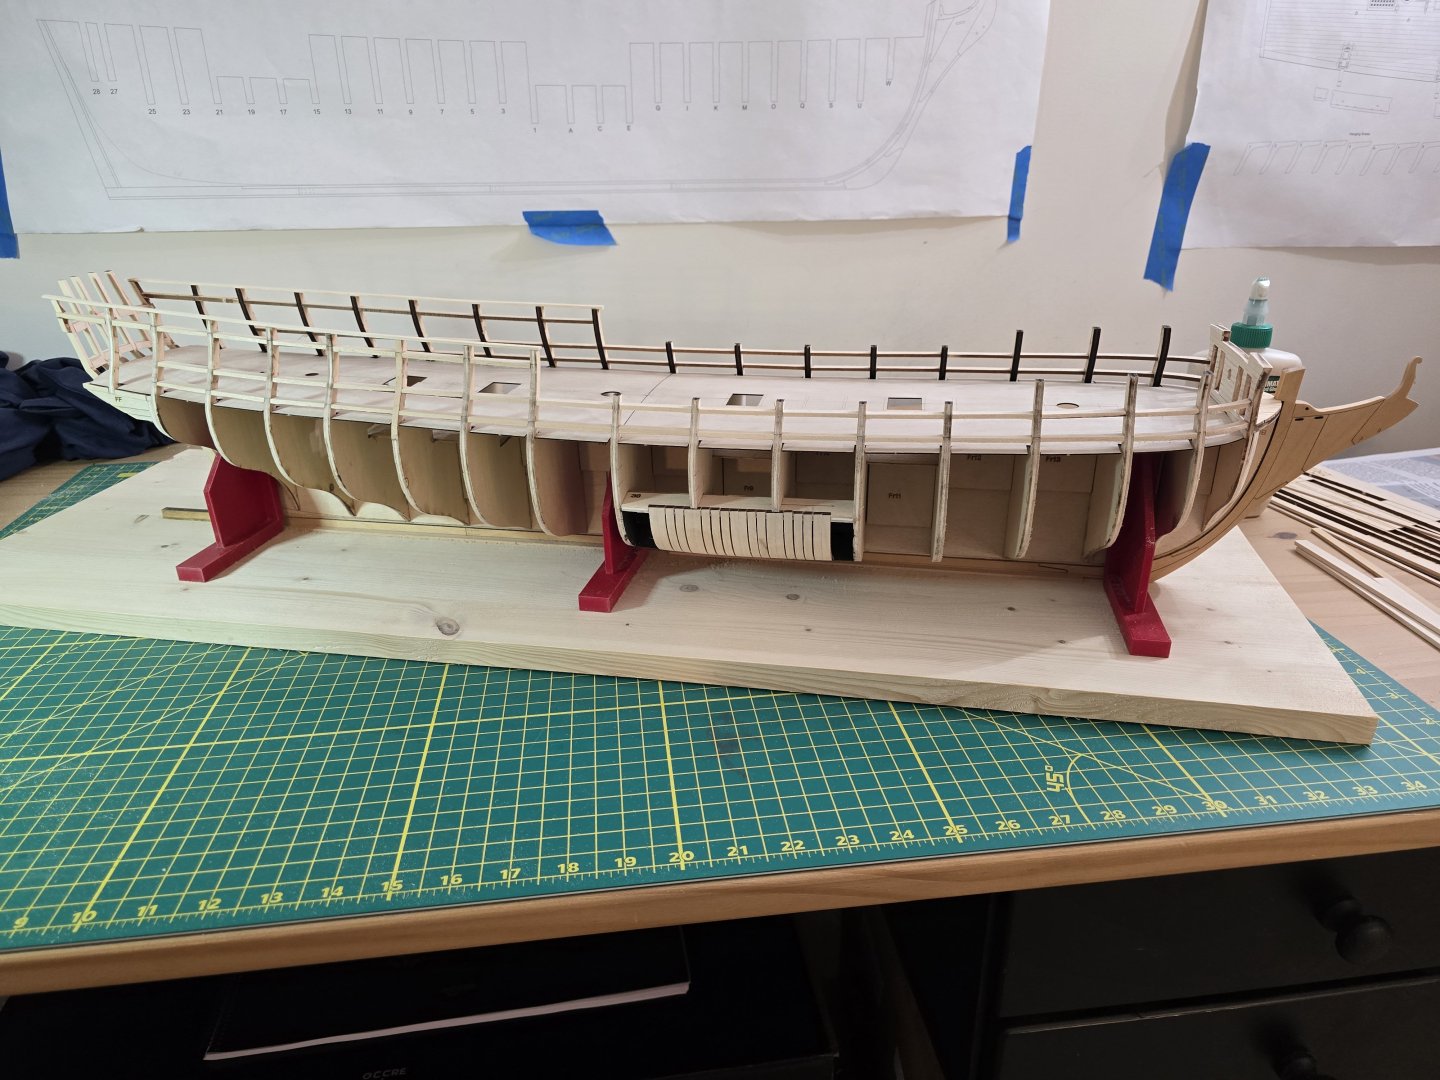
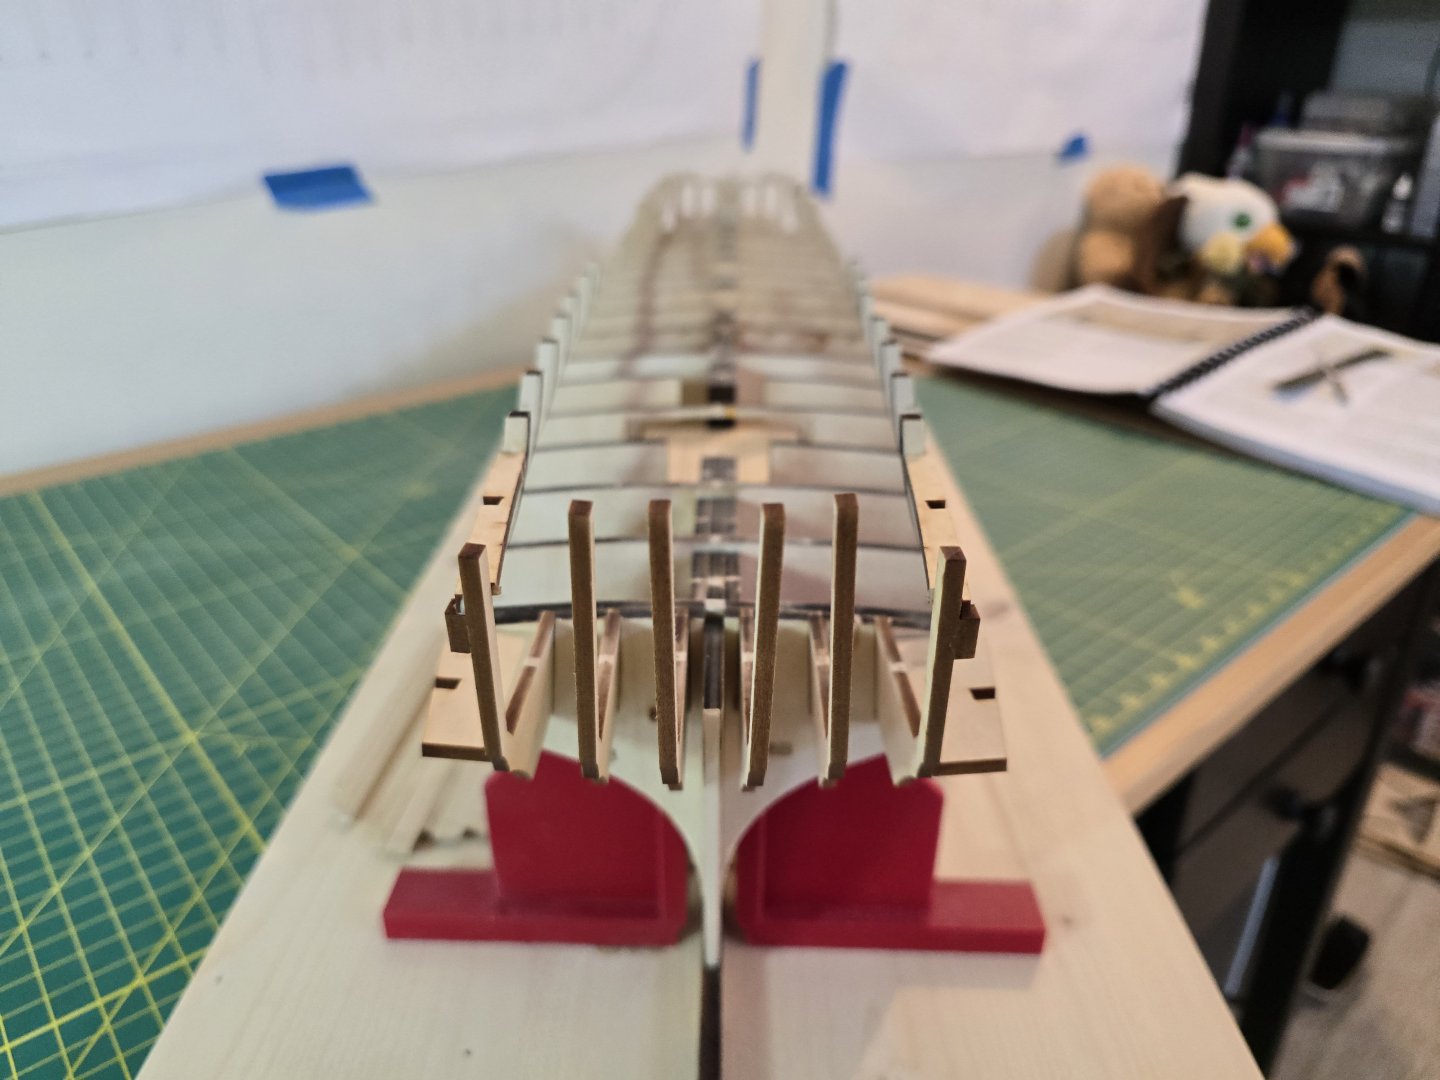
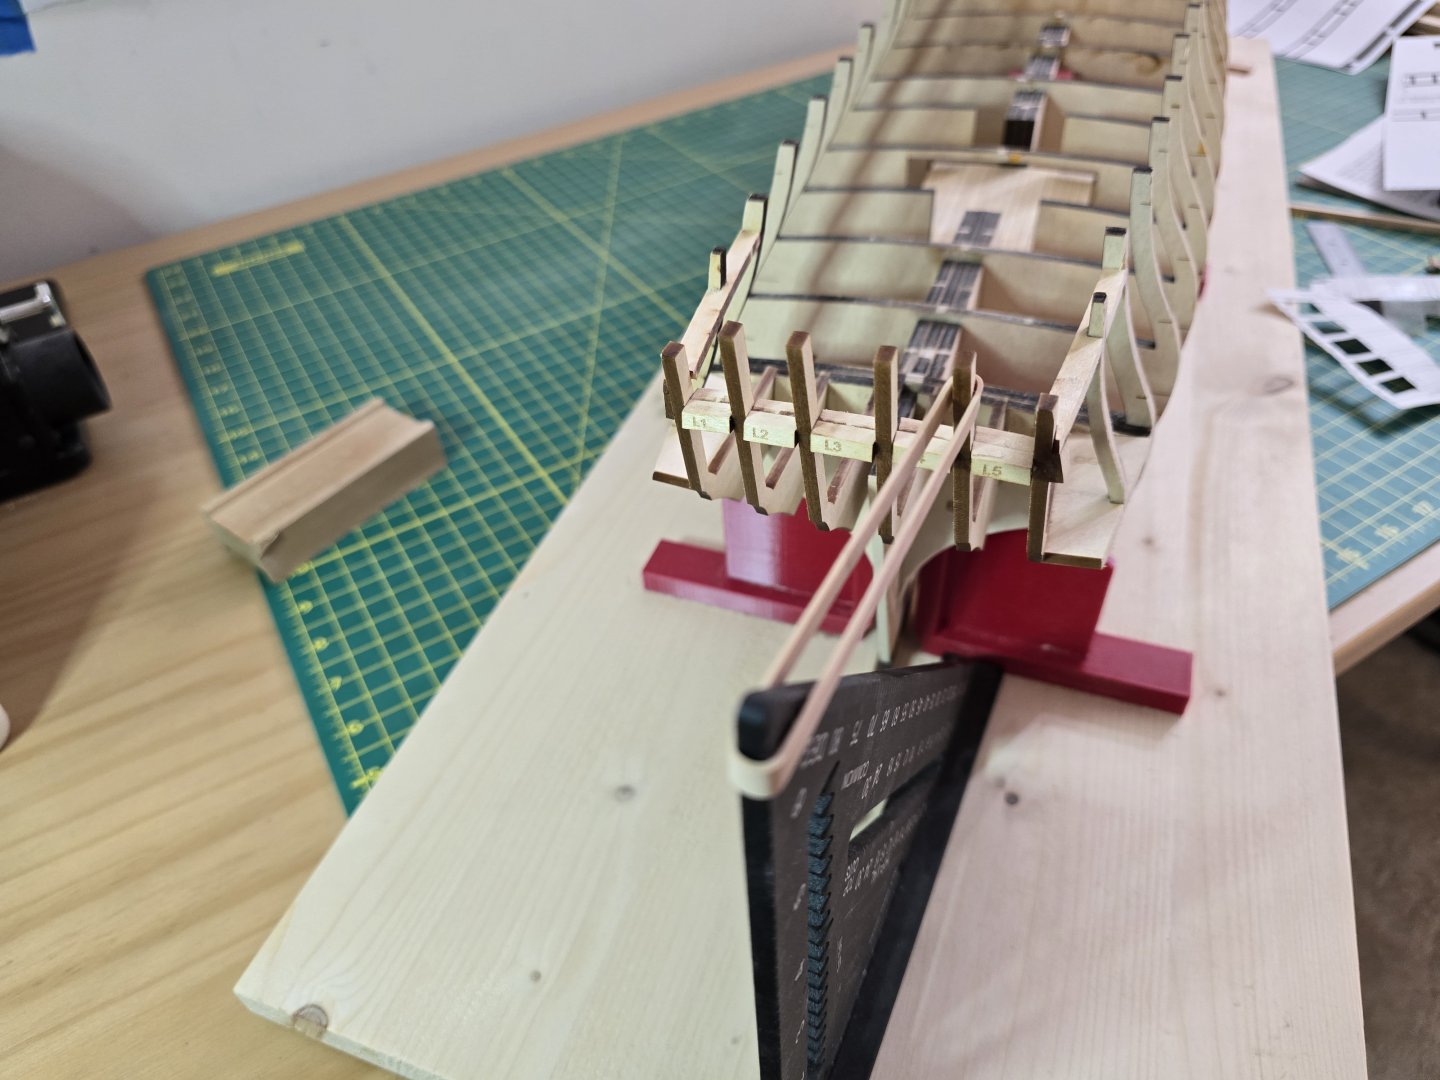
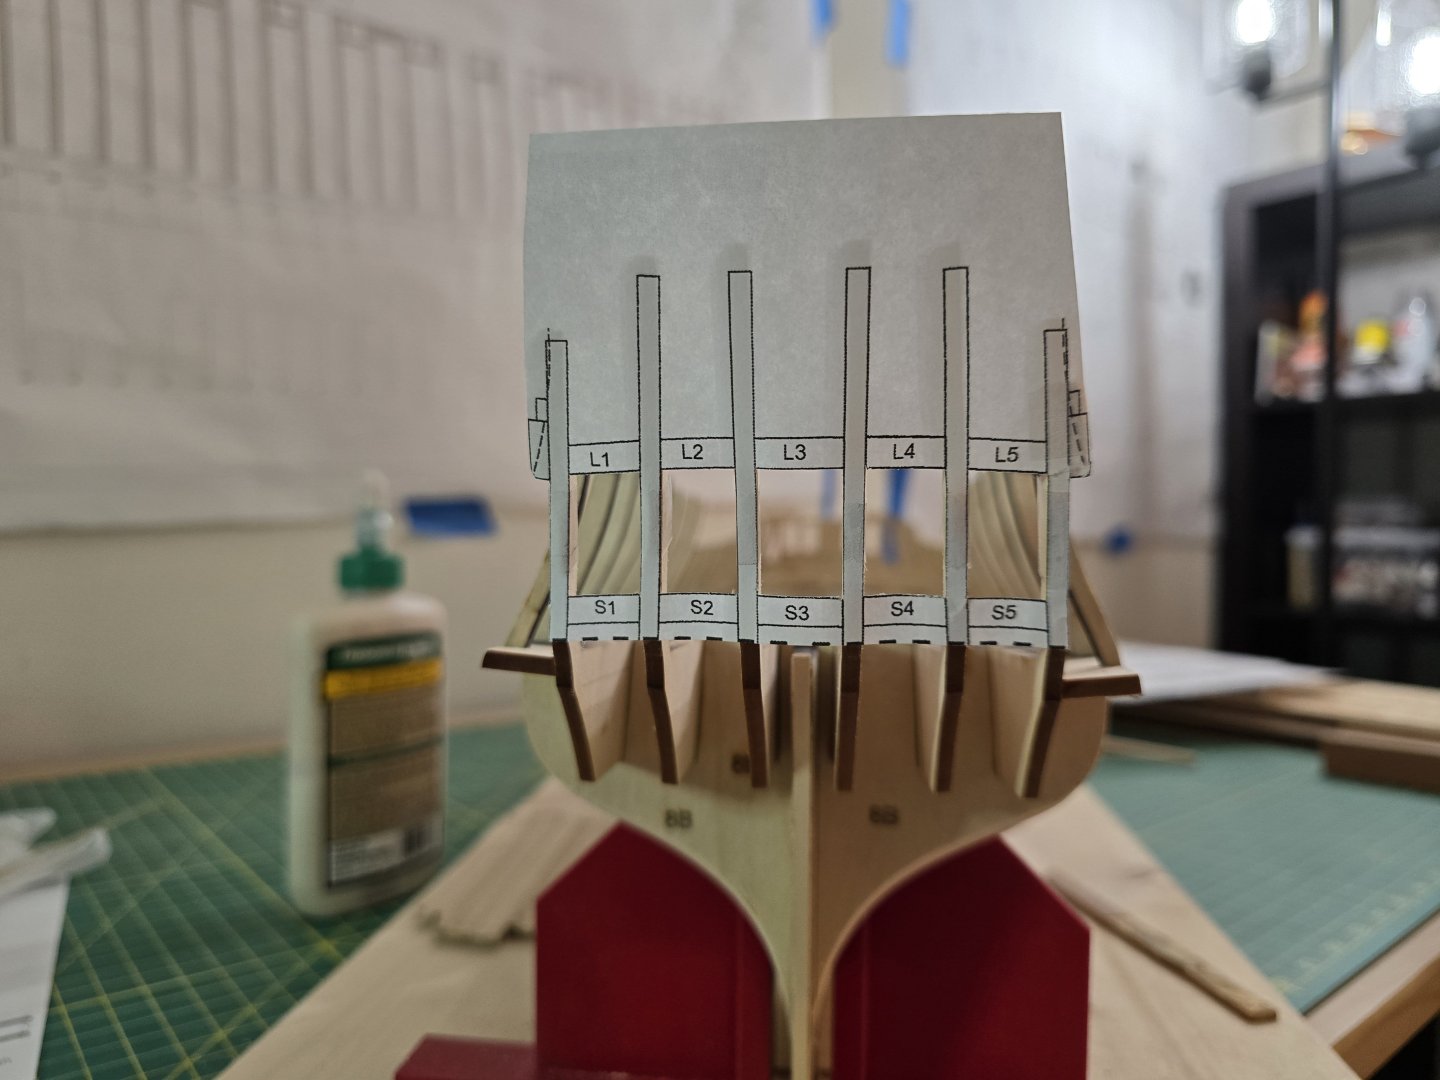
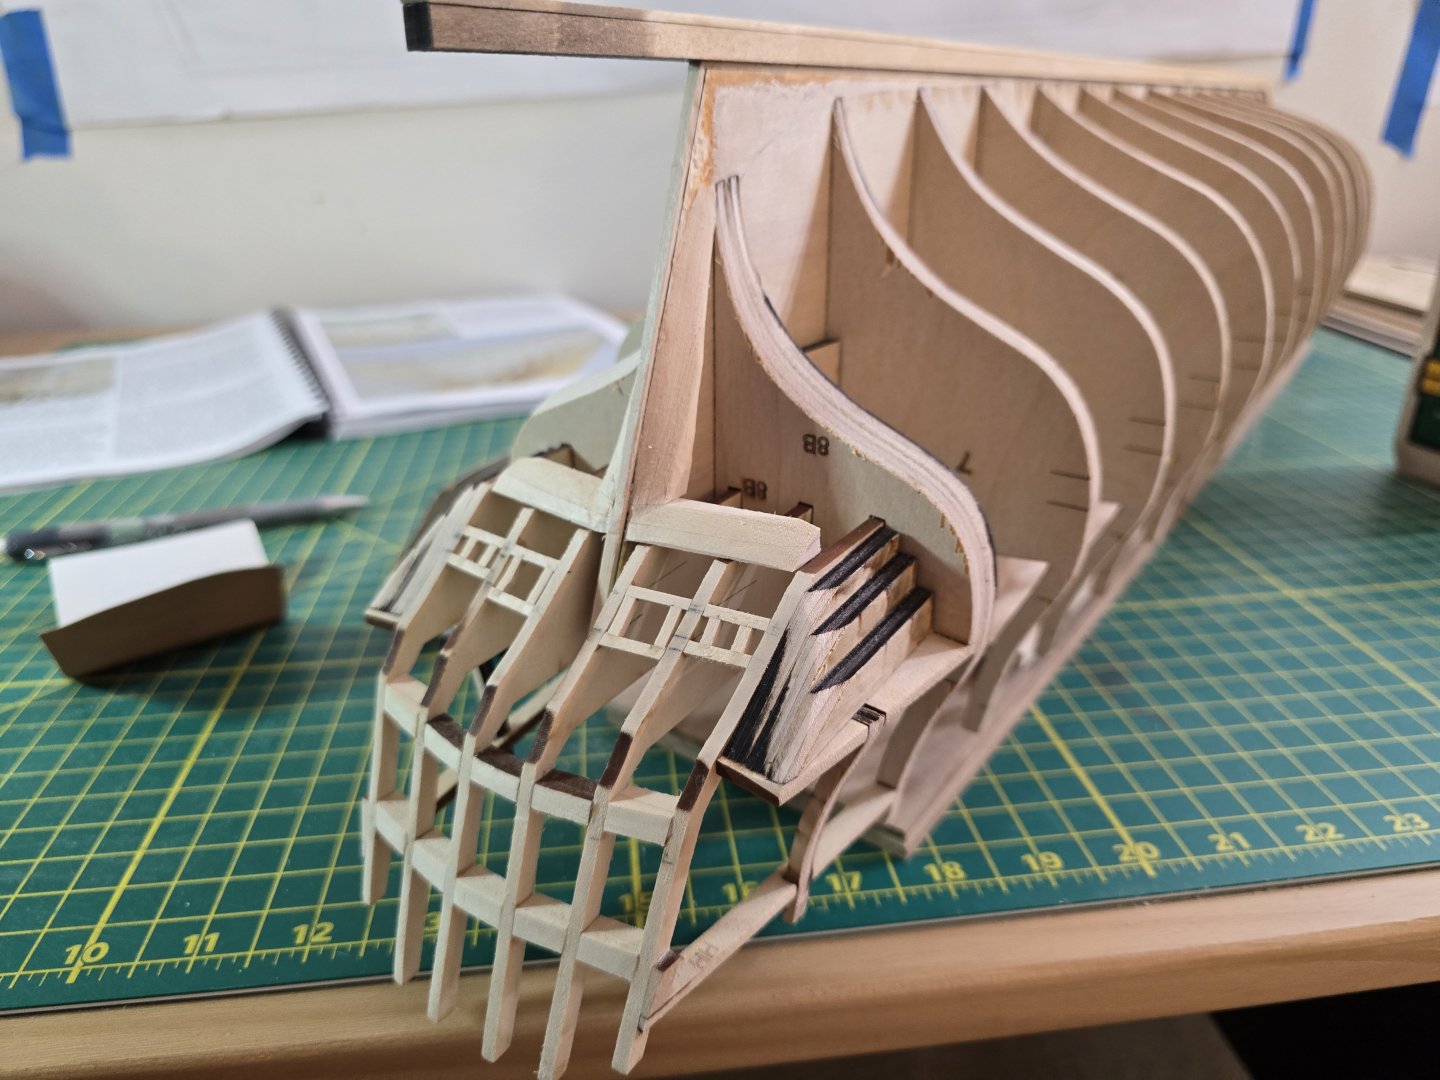
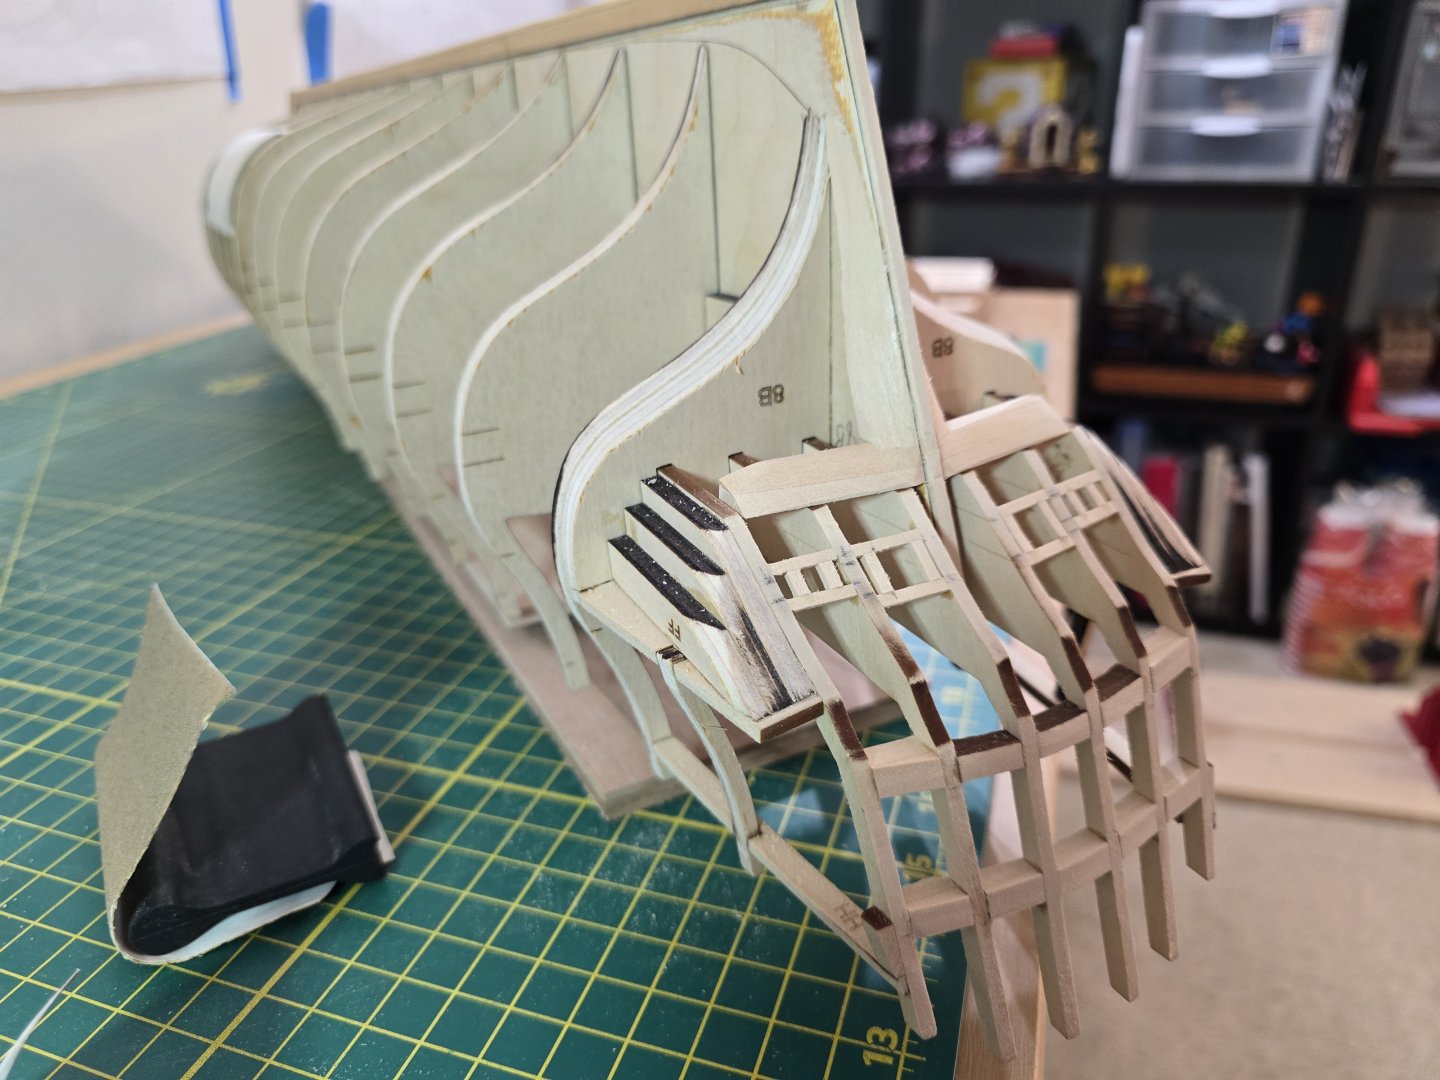
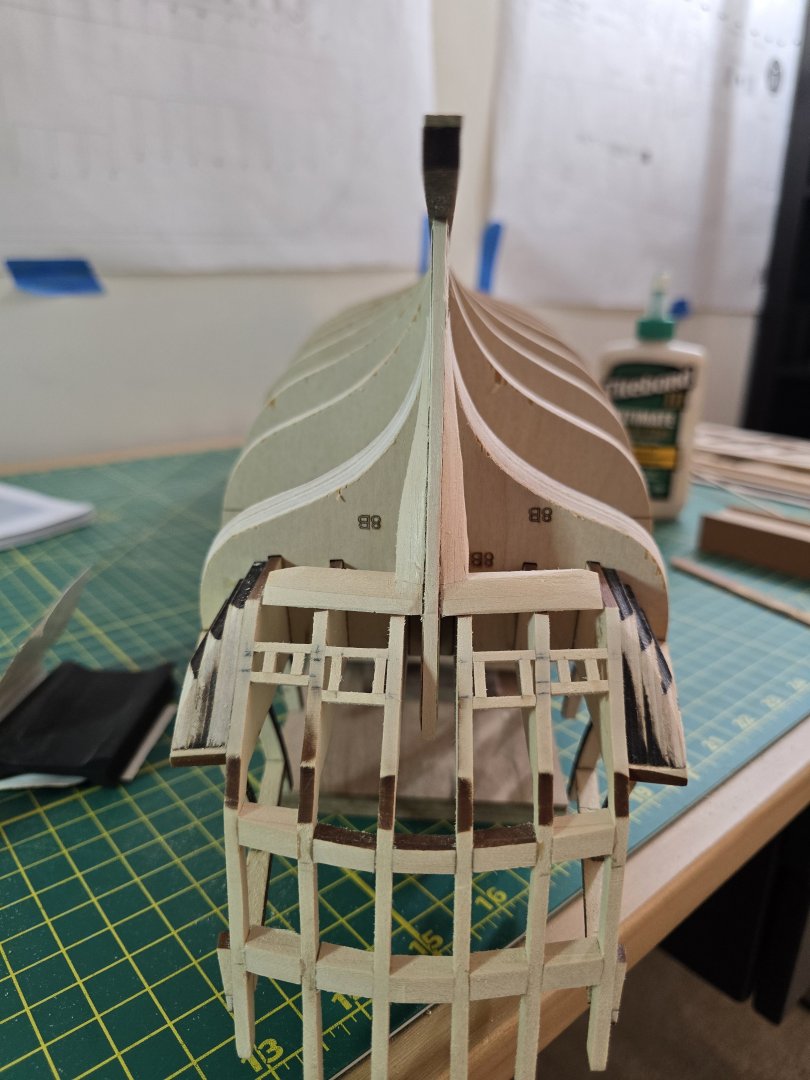
Hello everyone! I have just a small update tonight. I added the sweep port frames to each side of the hull. I first used some small painters tape to find a good run for the sweep ports using the laser etched lines on the bulkheads and marked each bulkhead with a pencil. Then I cut and fit each 3/8 x 3/8 strips onto the hull. The instructions specify using 3/8 x 5/16, but the parts list says to use the supplied 3/8 x 3/8 strips instead. I then sanded them to match the contours of the hull. Before I cut out the sweep port templates and mark the sweep ports onto the sweep frames, I need to check the contour of the hull. I will be checking and adjusting (sanding) the entire hull to get ready for planking. After I check the hull's shape for planking, I will finish marking the sweep ports by cutting out the template and marking all the ports before continuing on. Thanks!! Jeff
-
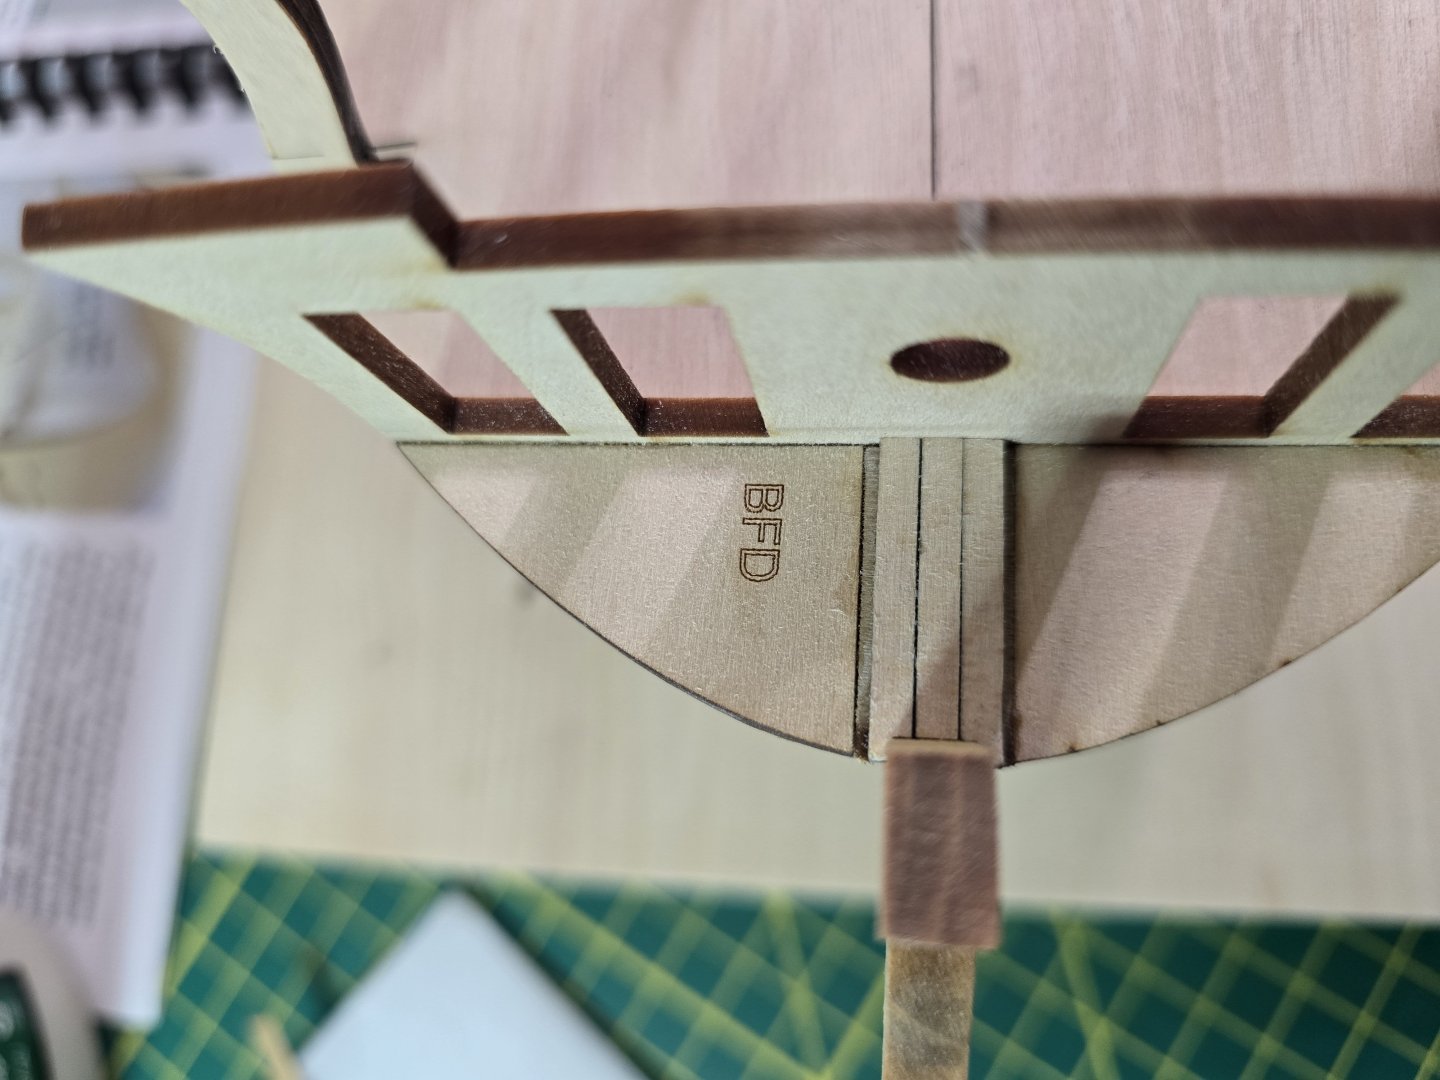
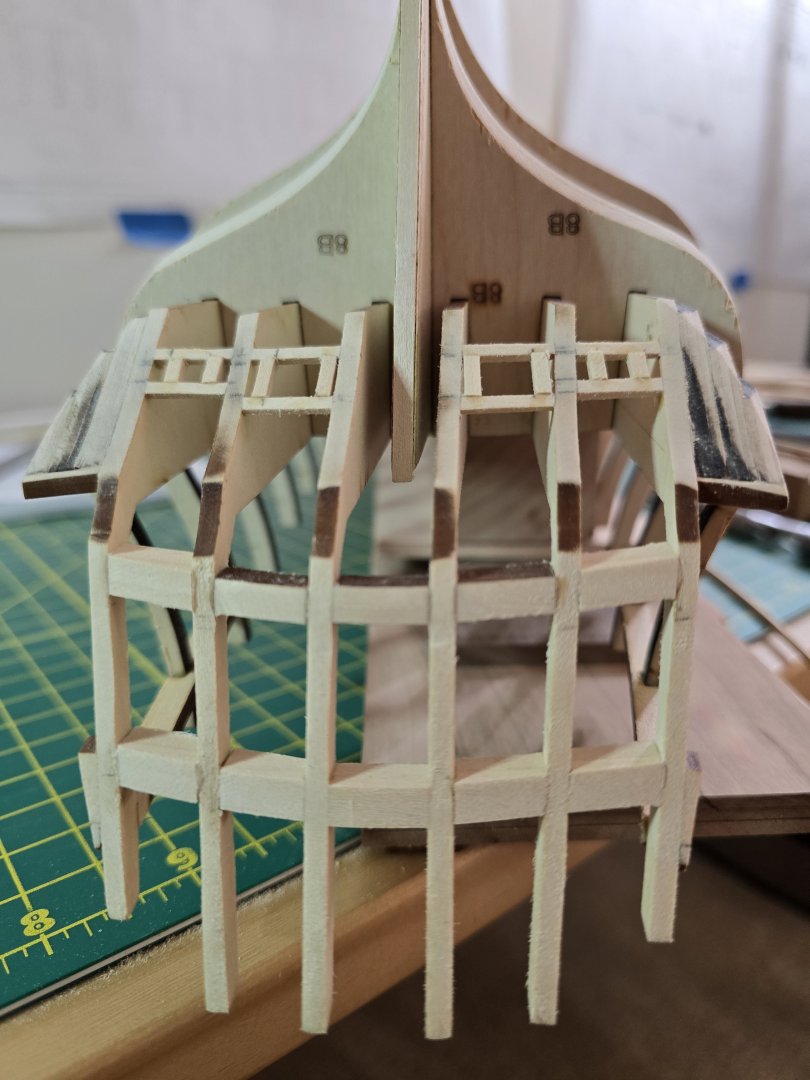
Okay! I finally finished adding the hance pieces and sanded them down. I test fitted some battens to try and make sure there is a smooth transition up the hance pieces. But before I plank over them, I will give them a once over to make sure it will look good when I plank above the wales later in the build. I am a little worried that I sanded a little too much off of them, but I can add some material to them and sand again if I need to re shape them some. Next up is the sweep port framing! Thanks all! Jeff

-
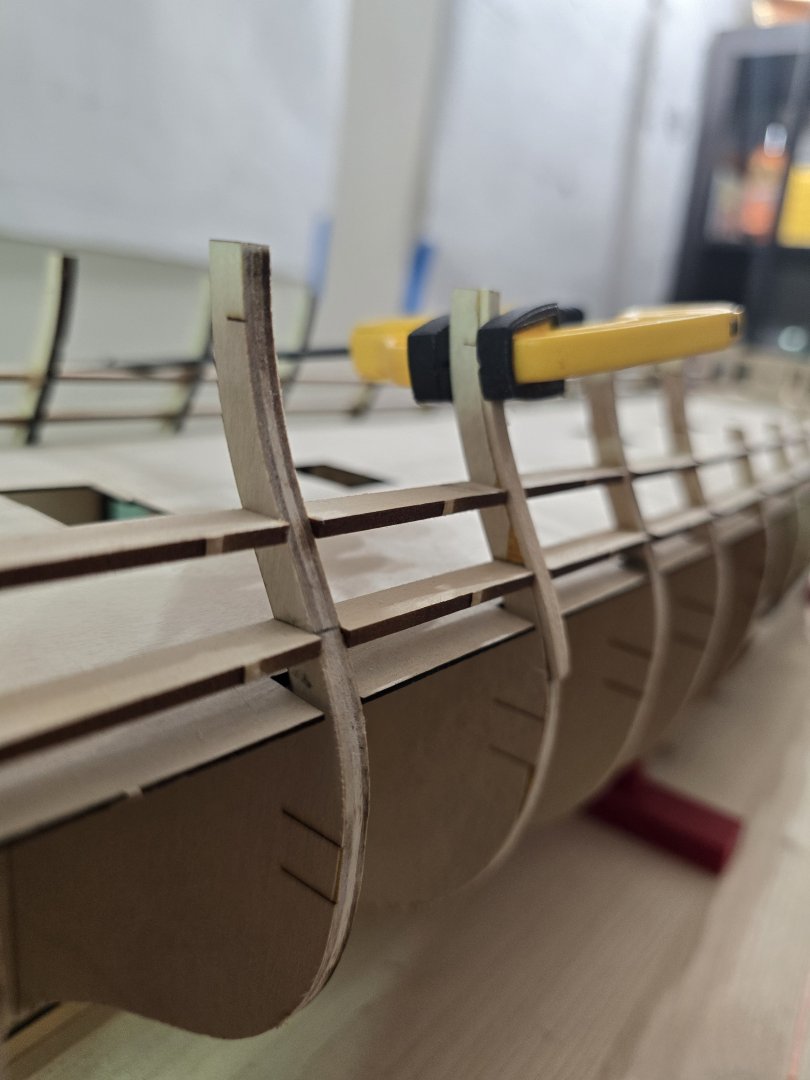
Hello all! I found some time tonight to slowly sand down each of the gunport frames. This step was actually pretty relaxing because the soft basswood formed to the hull very easily. I took my time with it to try and get the correct outboard shape of the surrounding bulkheads. Next I will be adding the hance pieces and then farming the sweep ports. Thanks all! Jeff

-
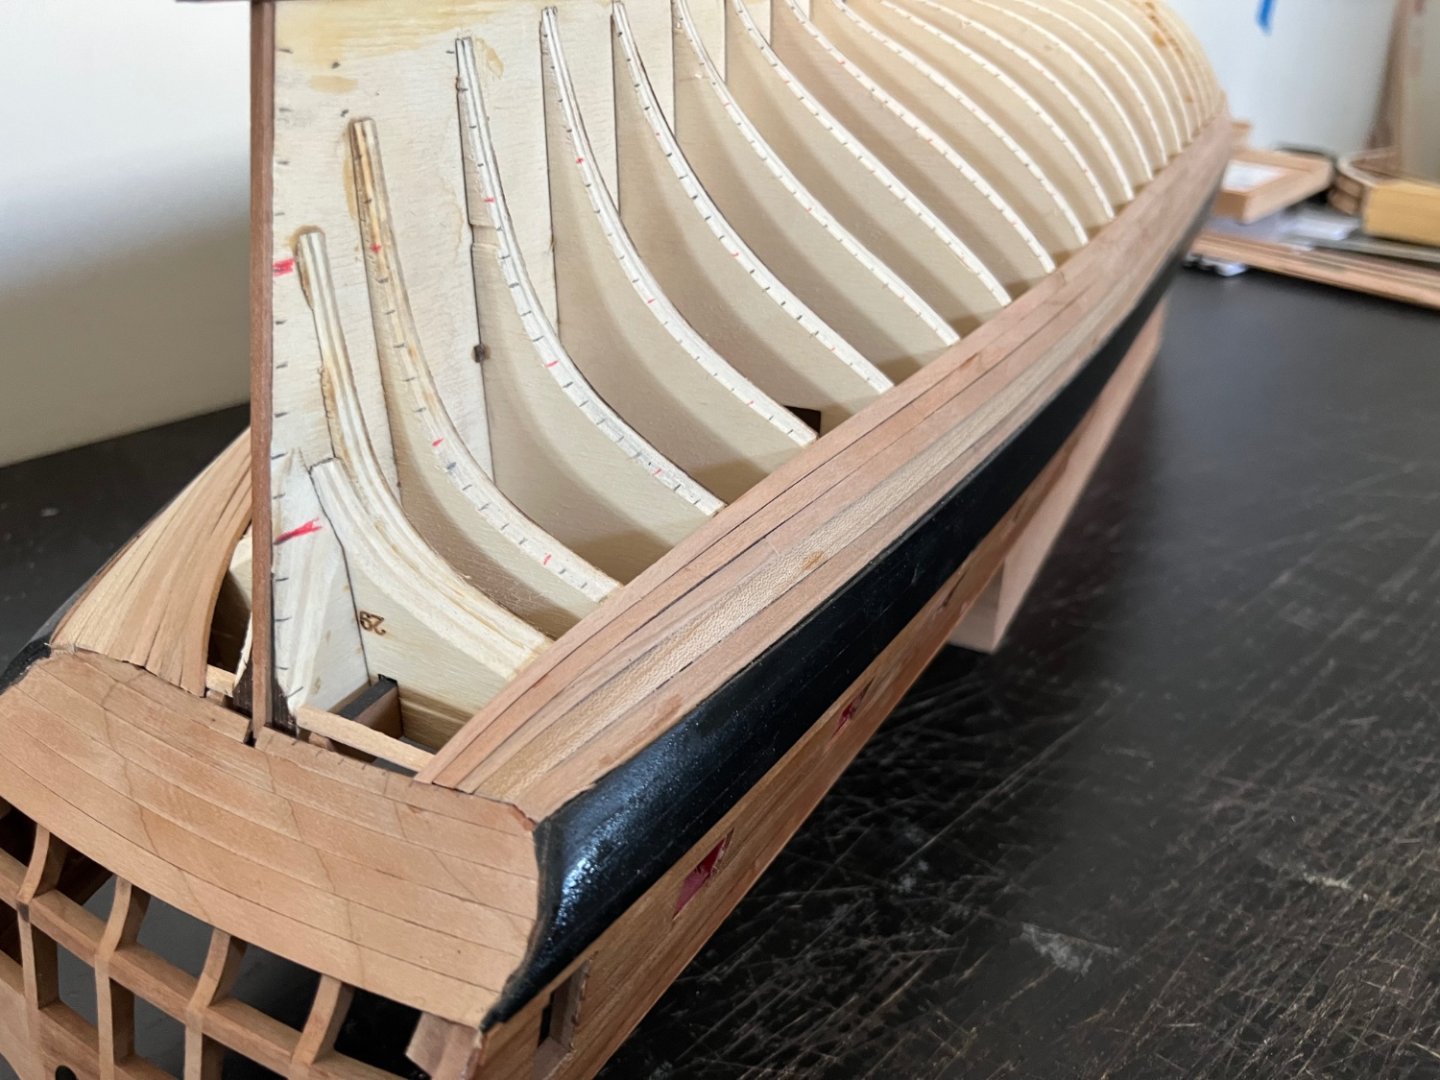
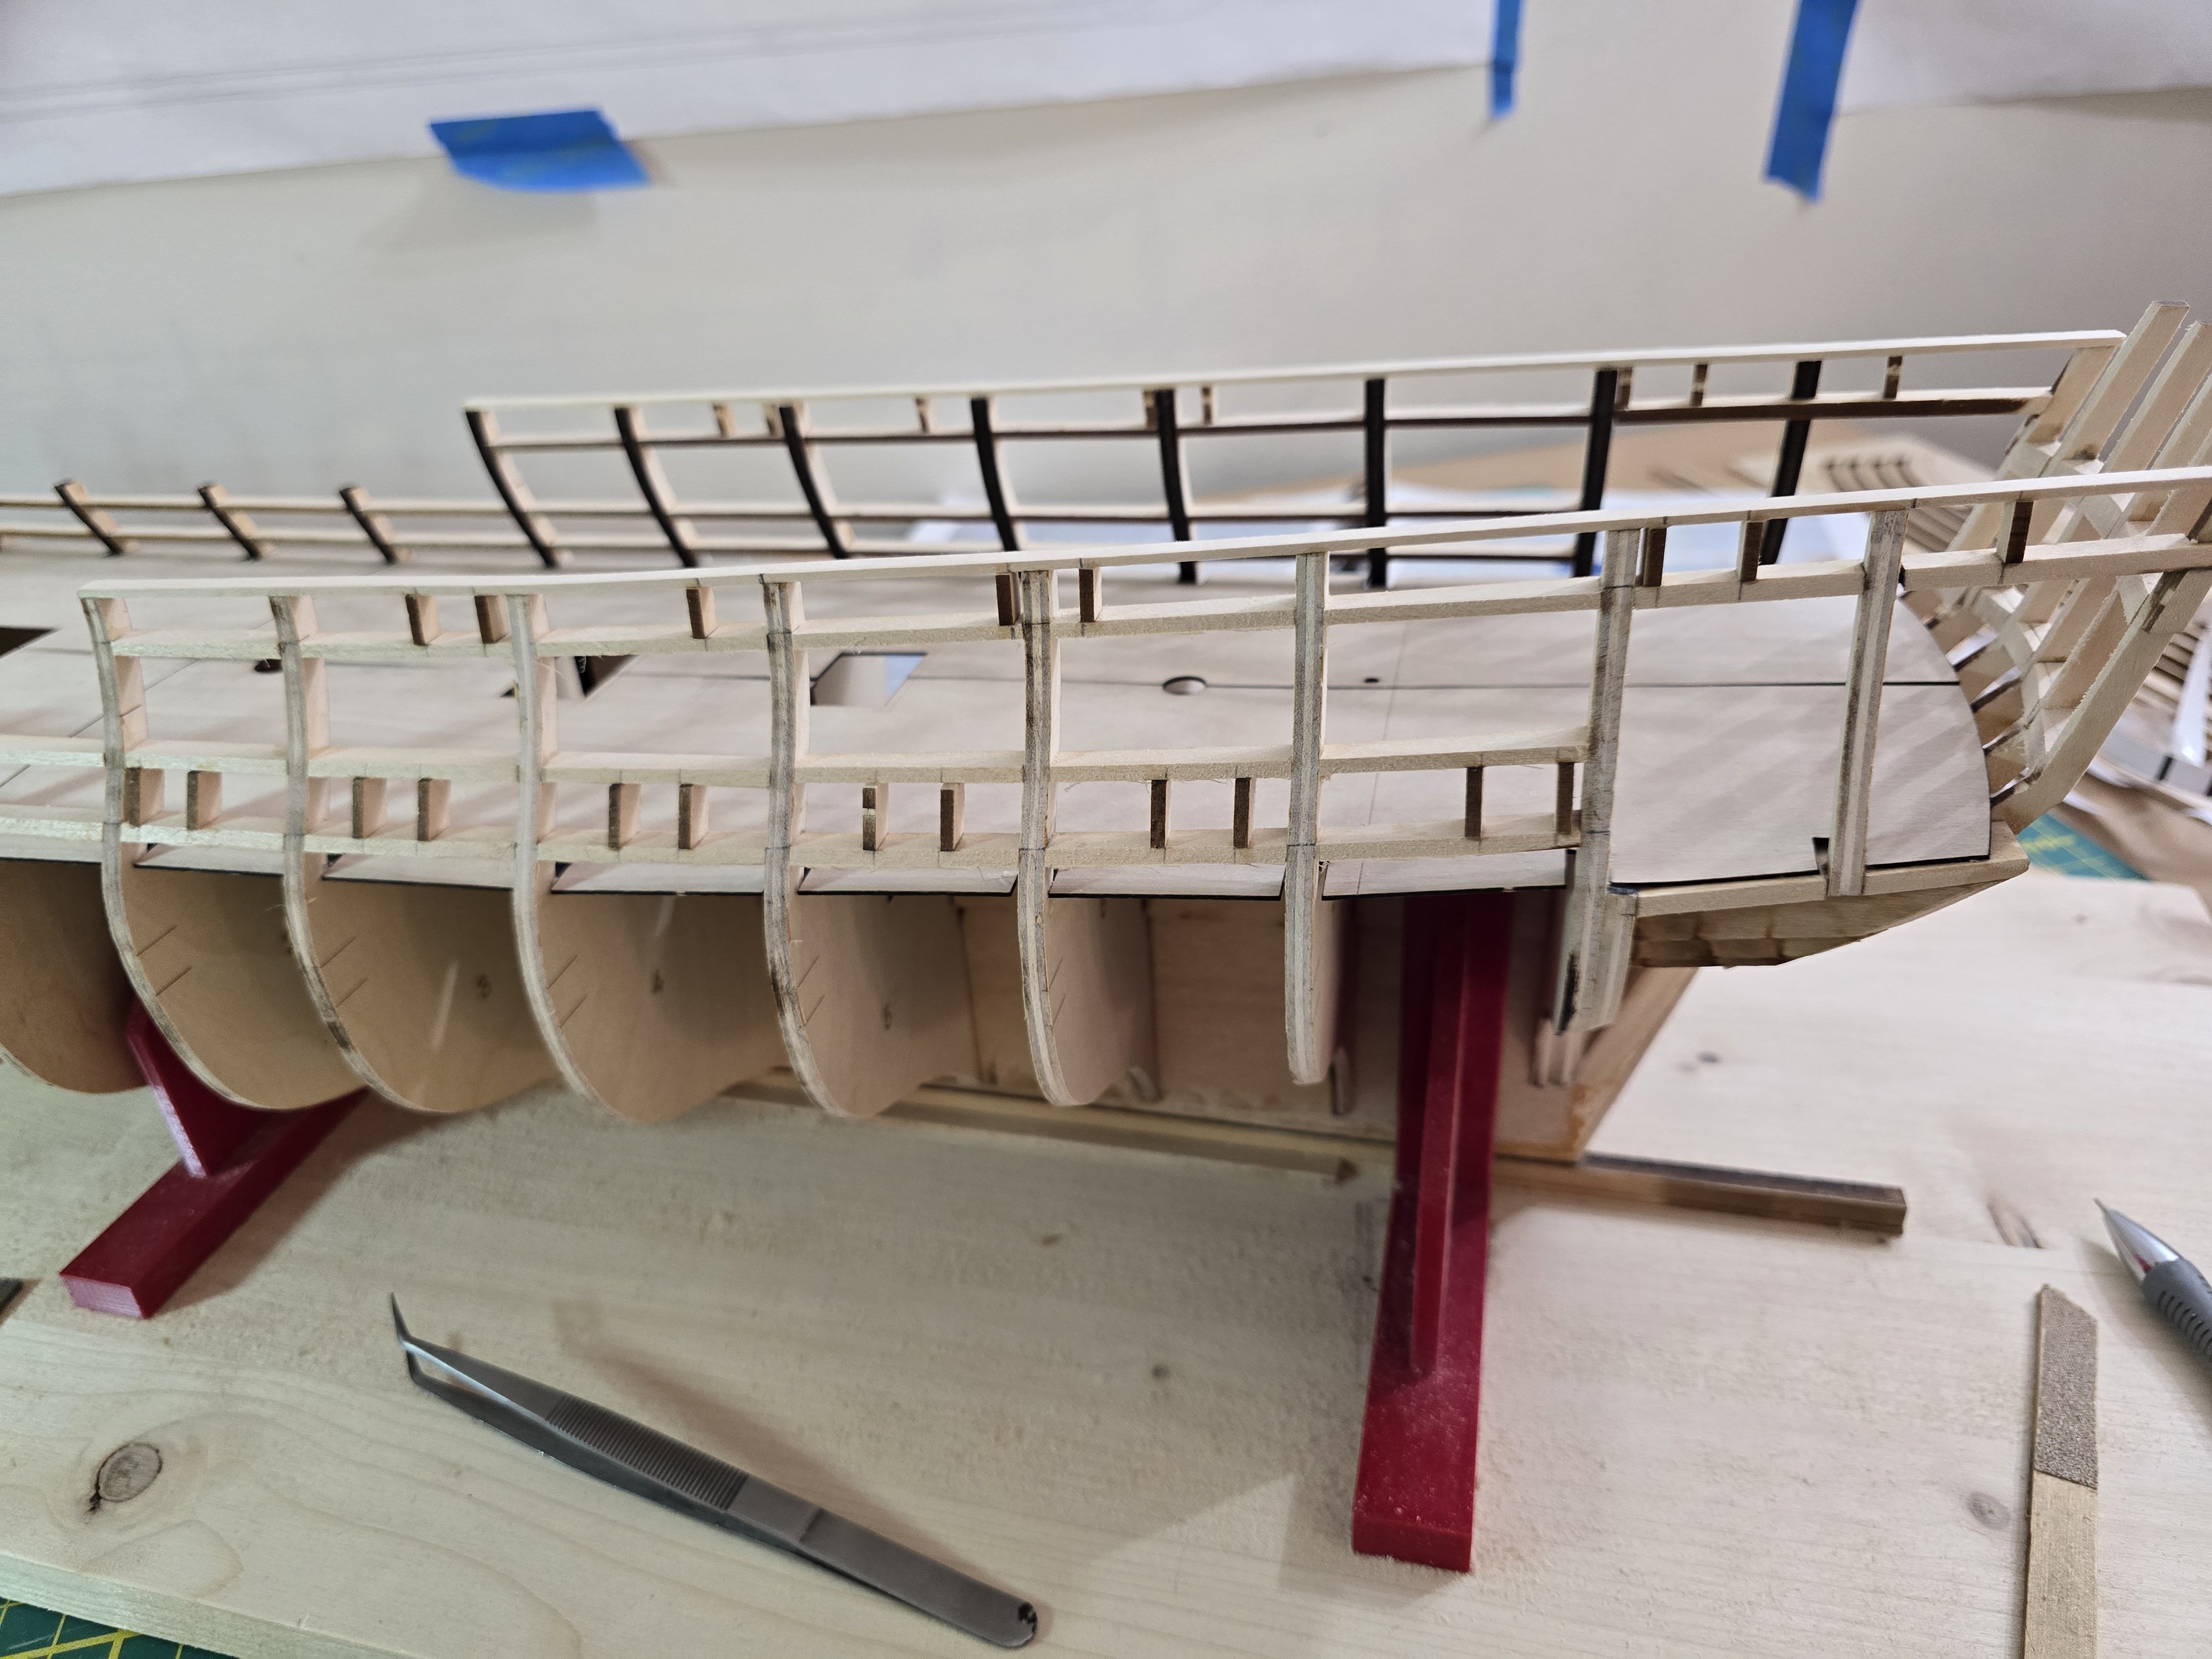
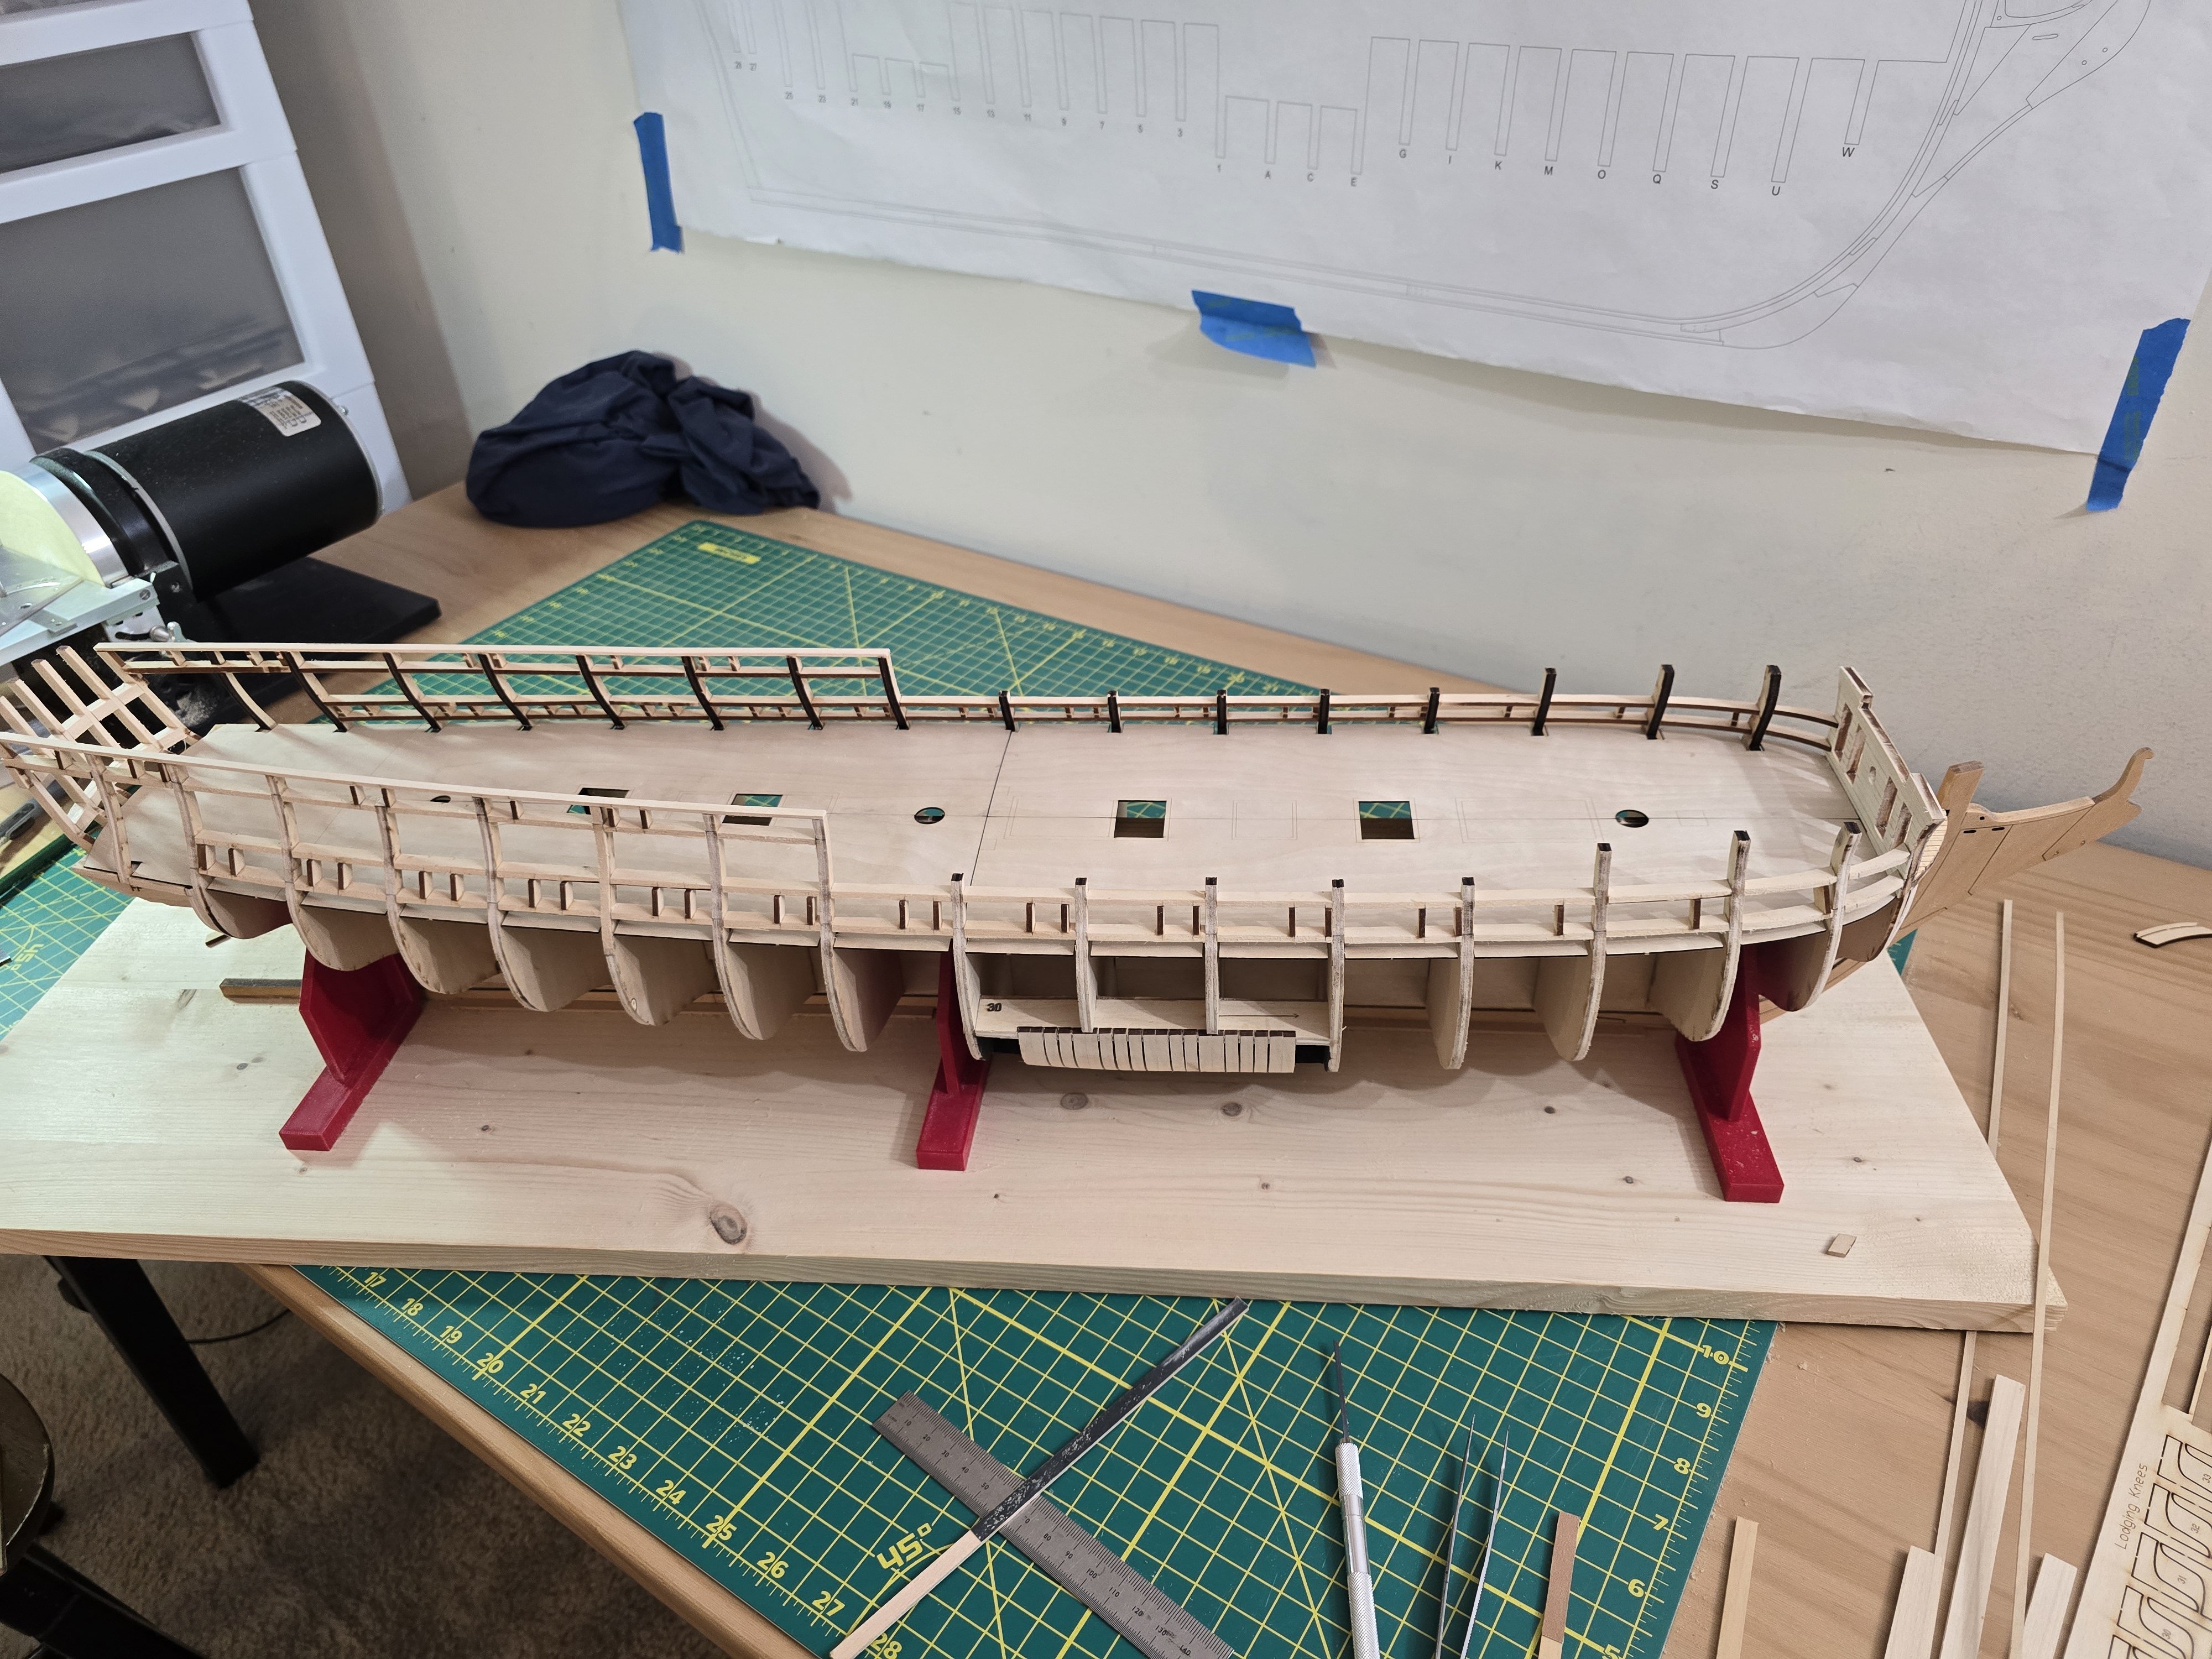
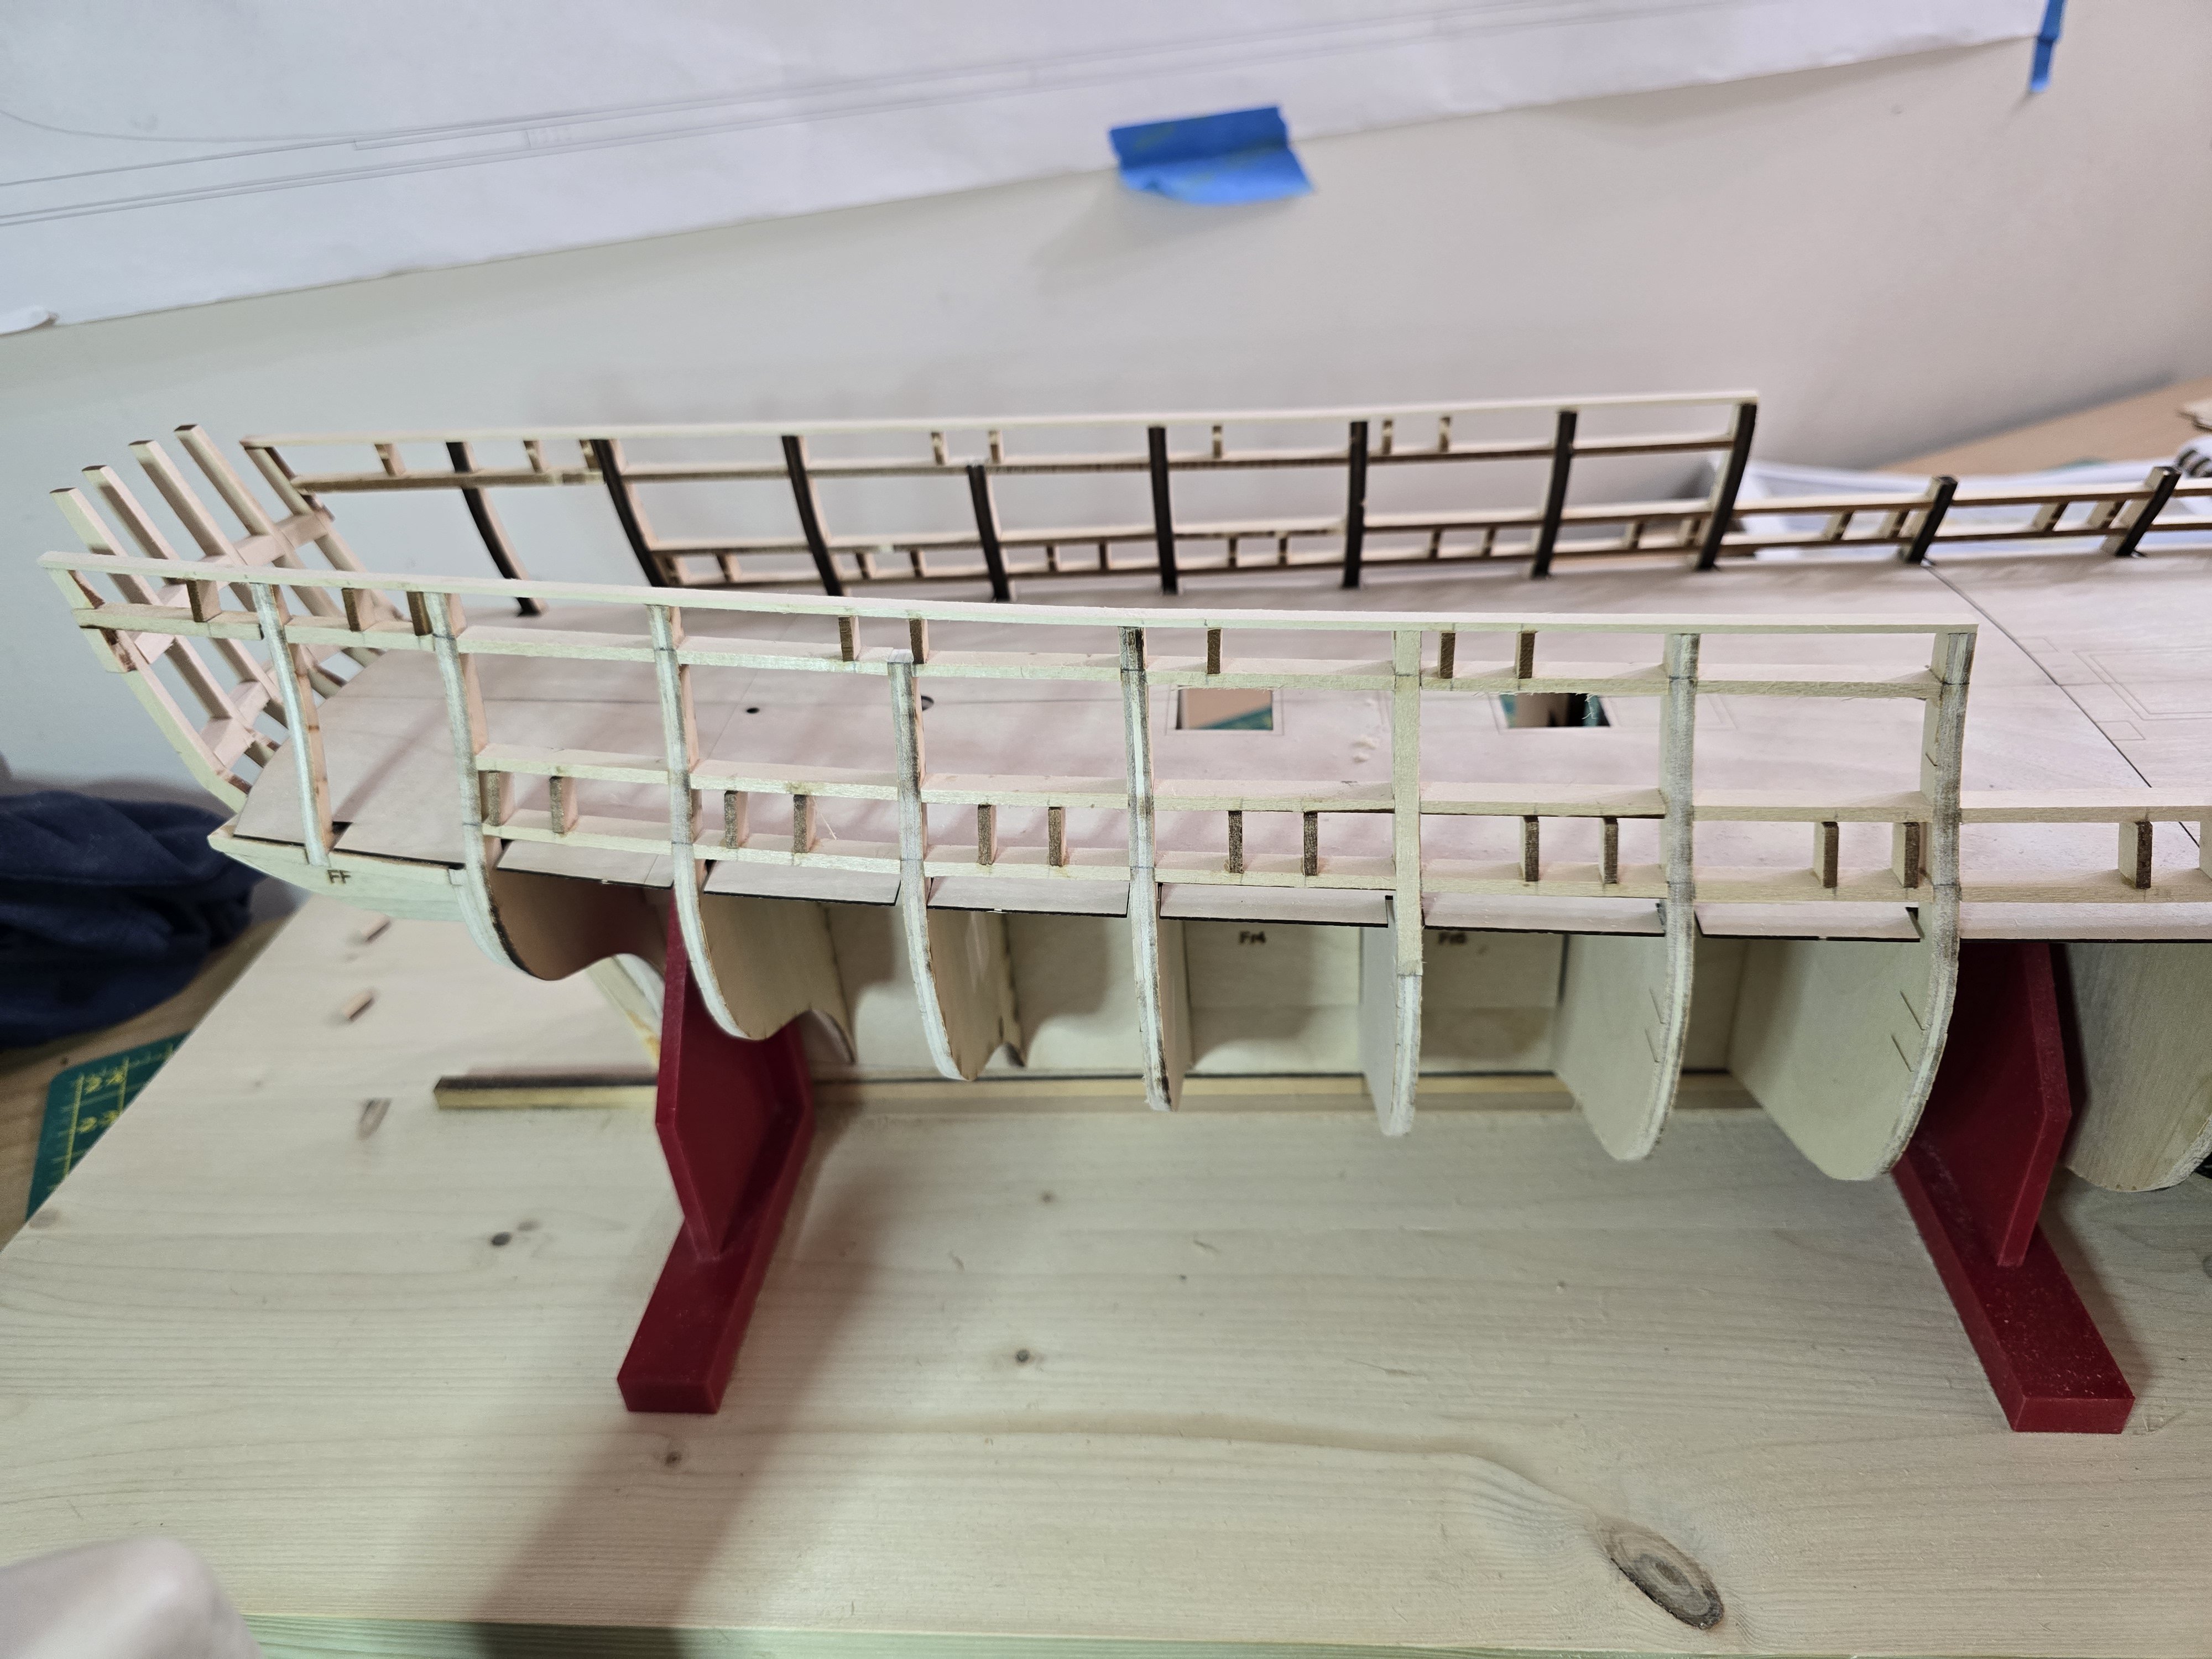
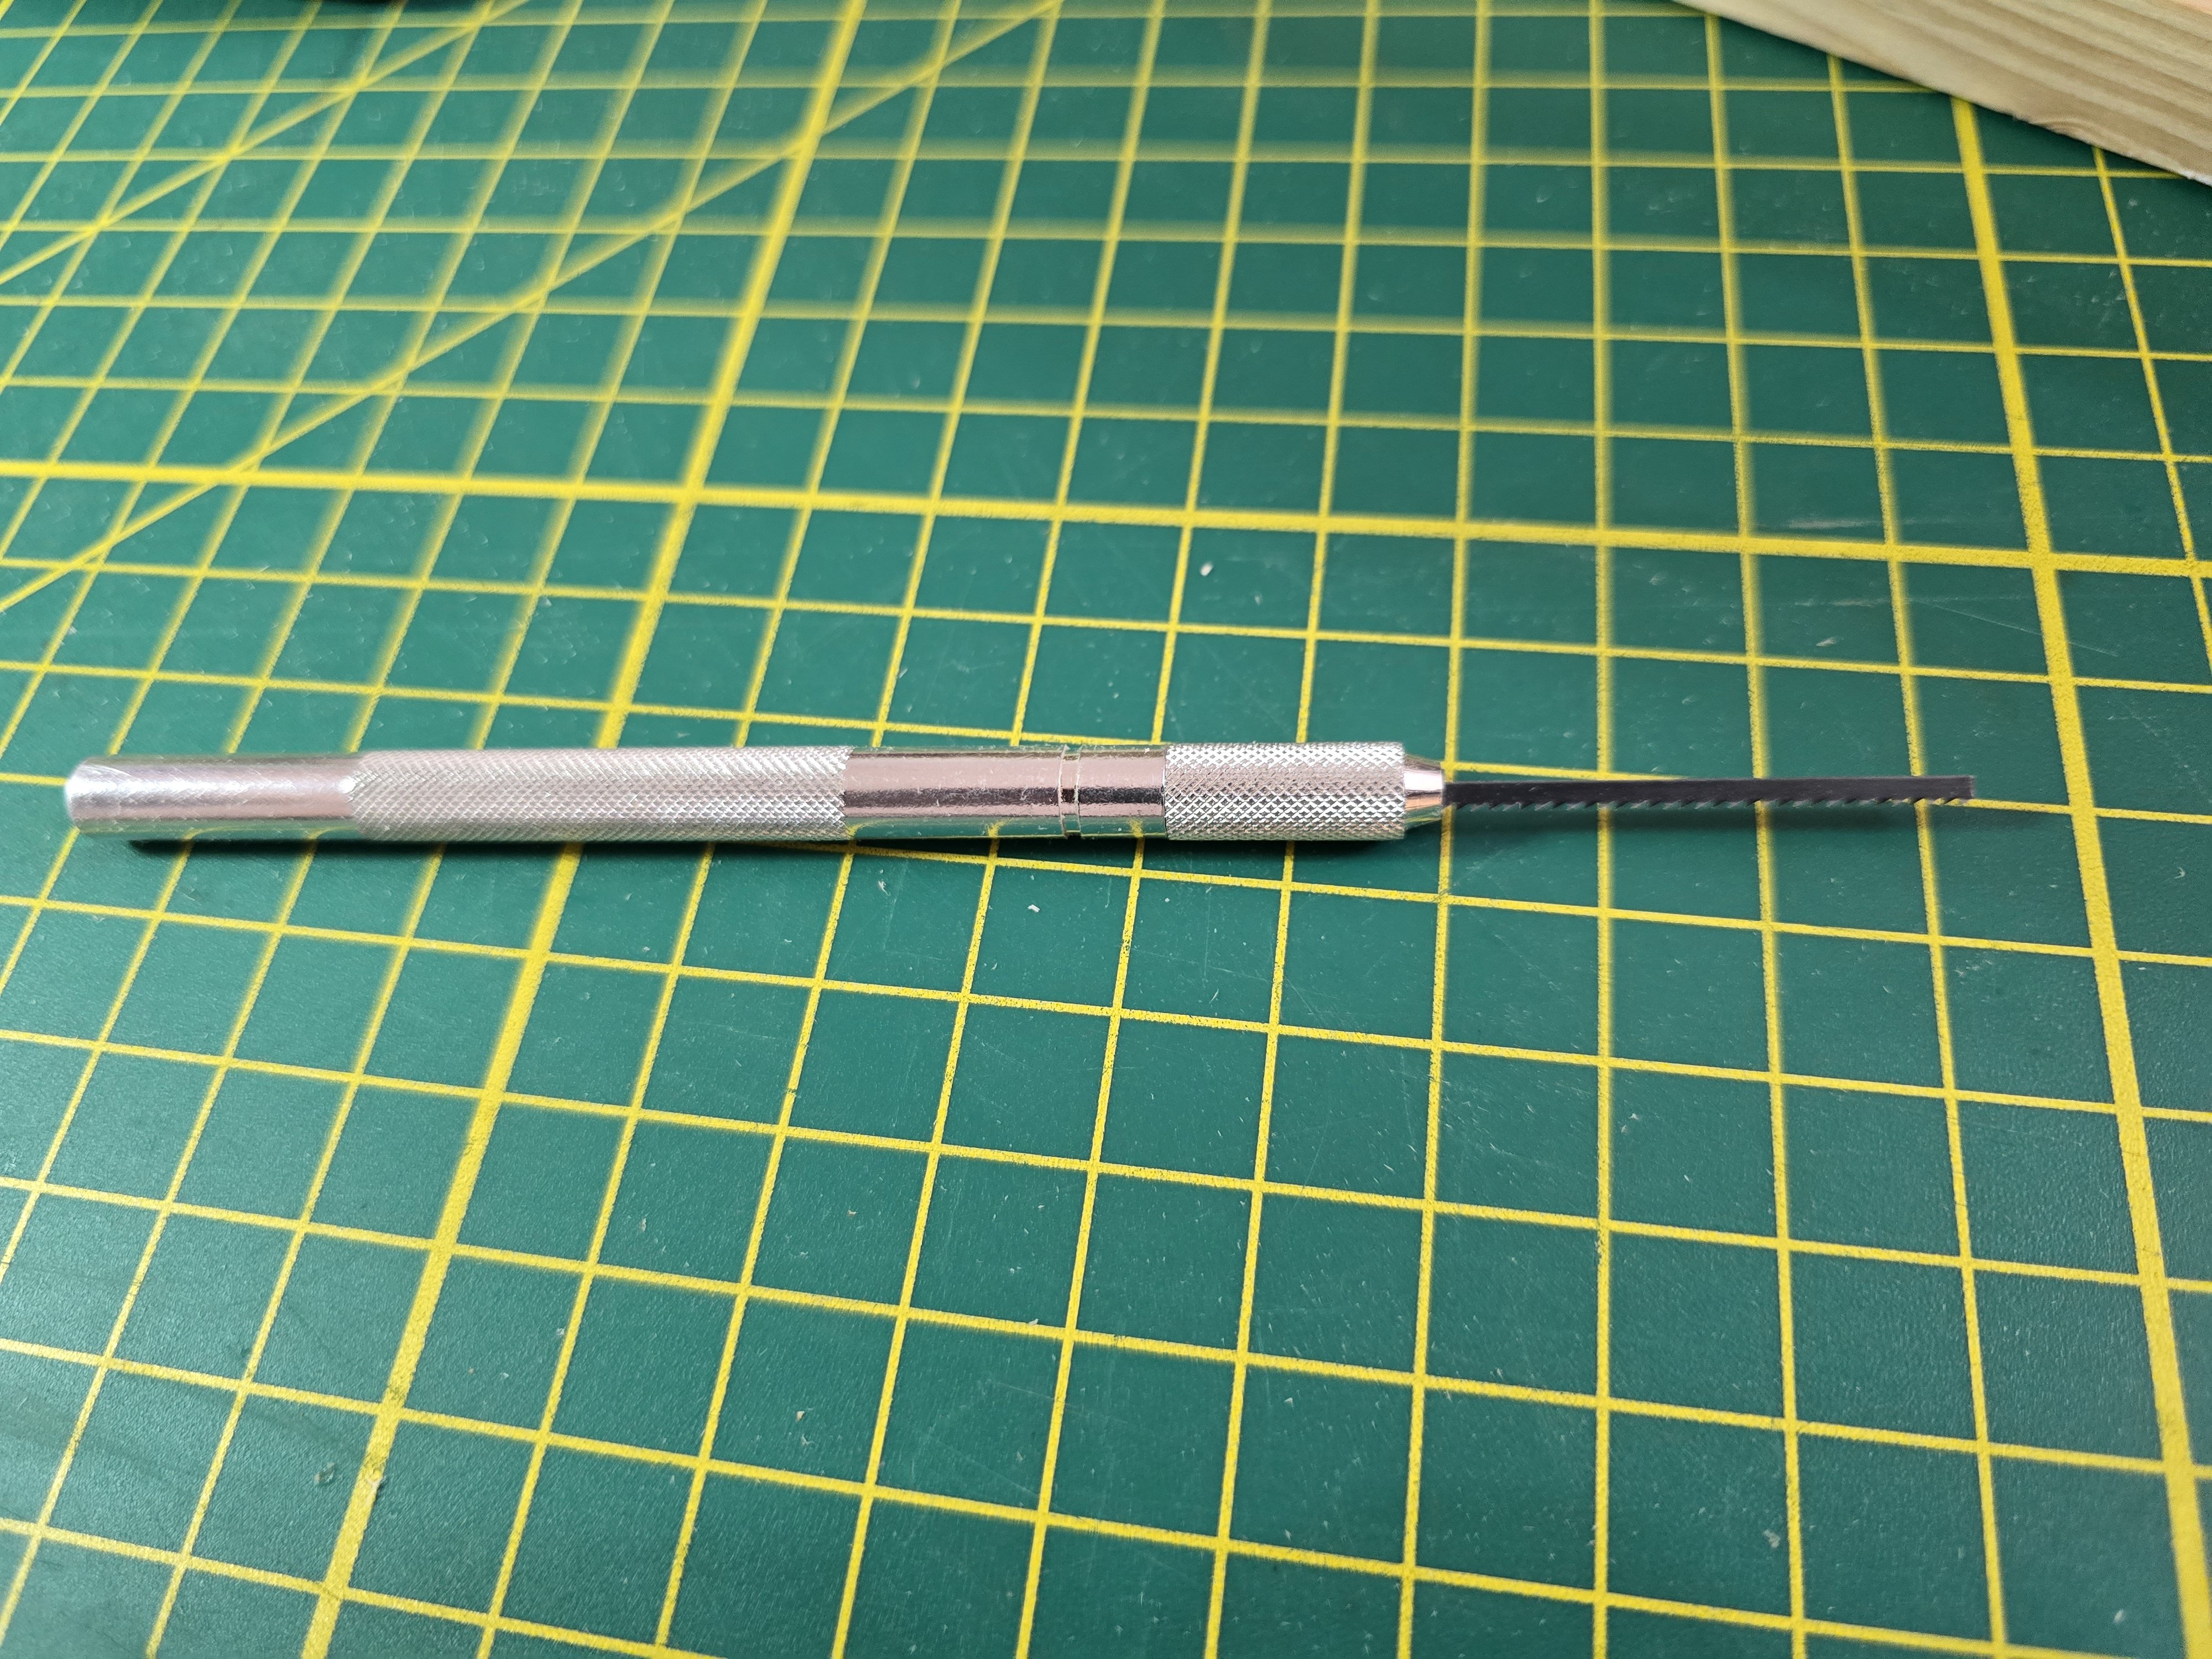
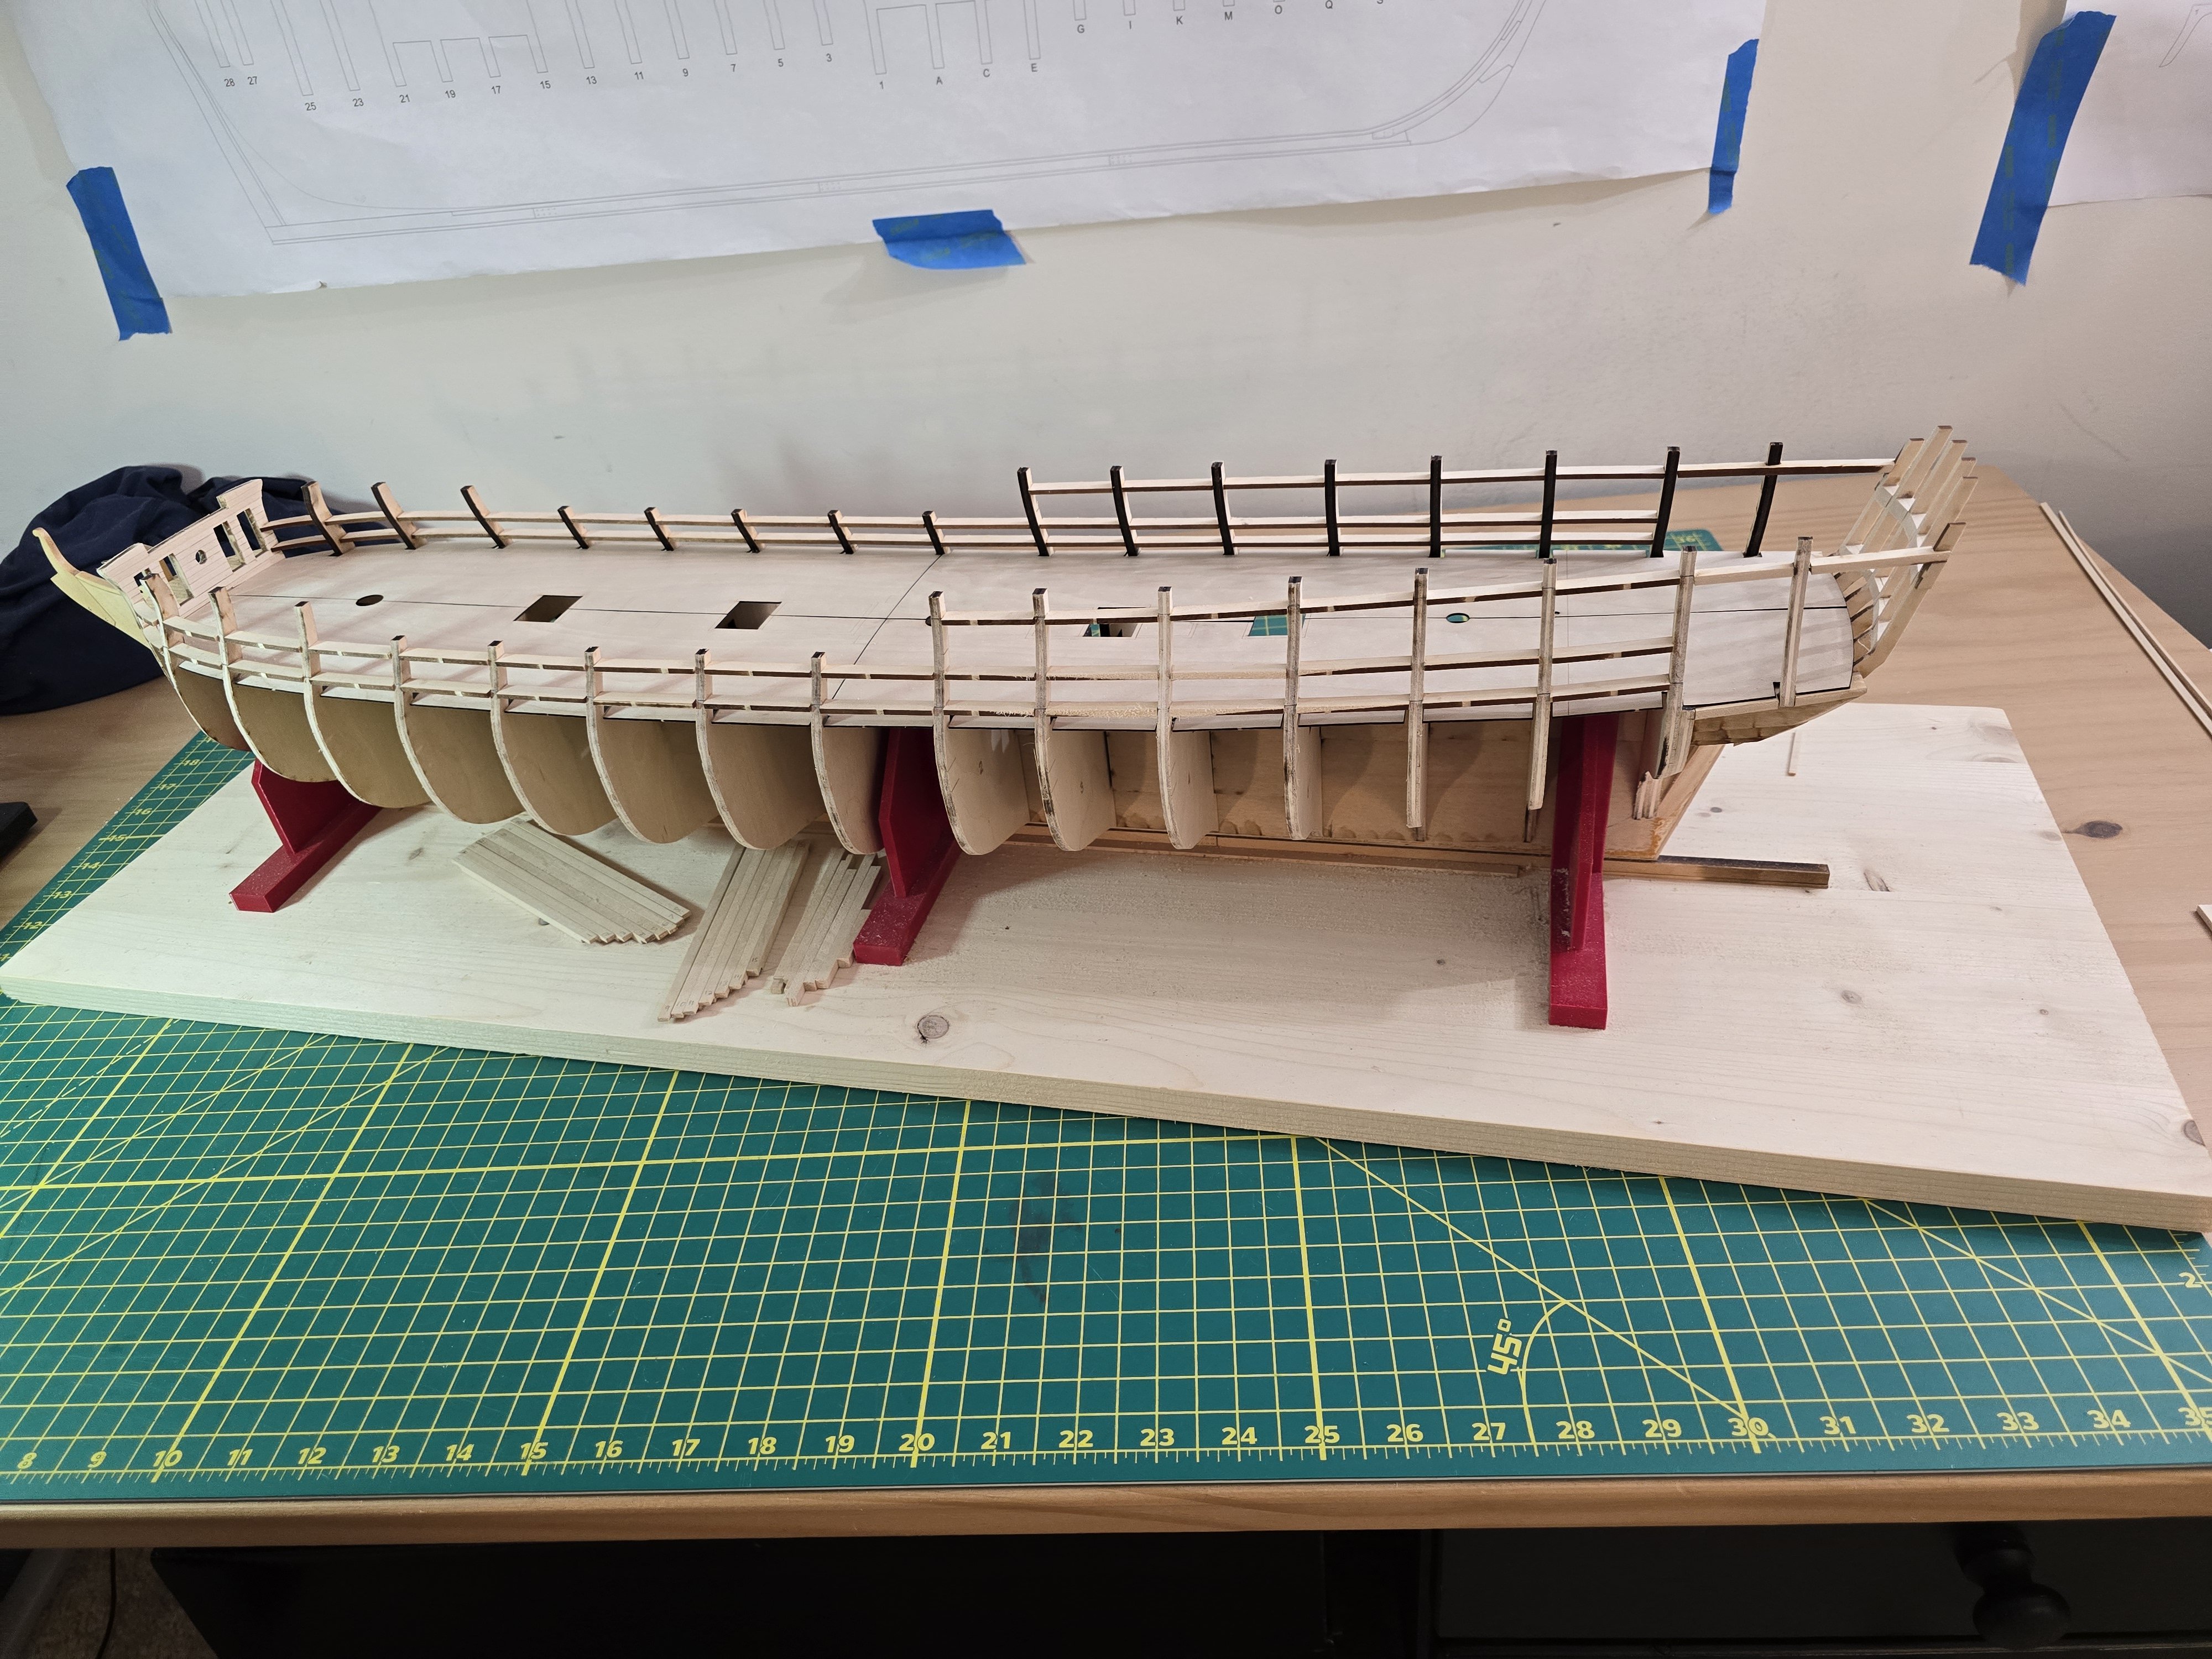
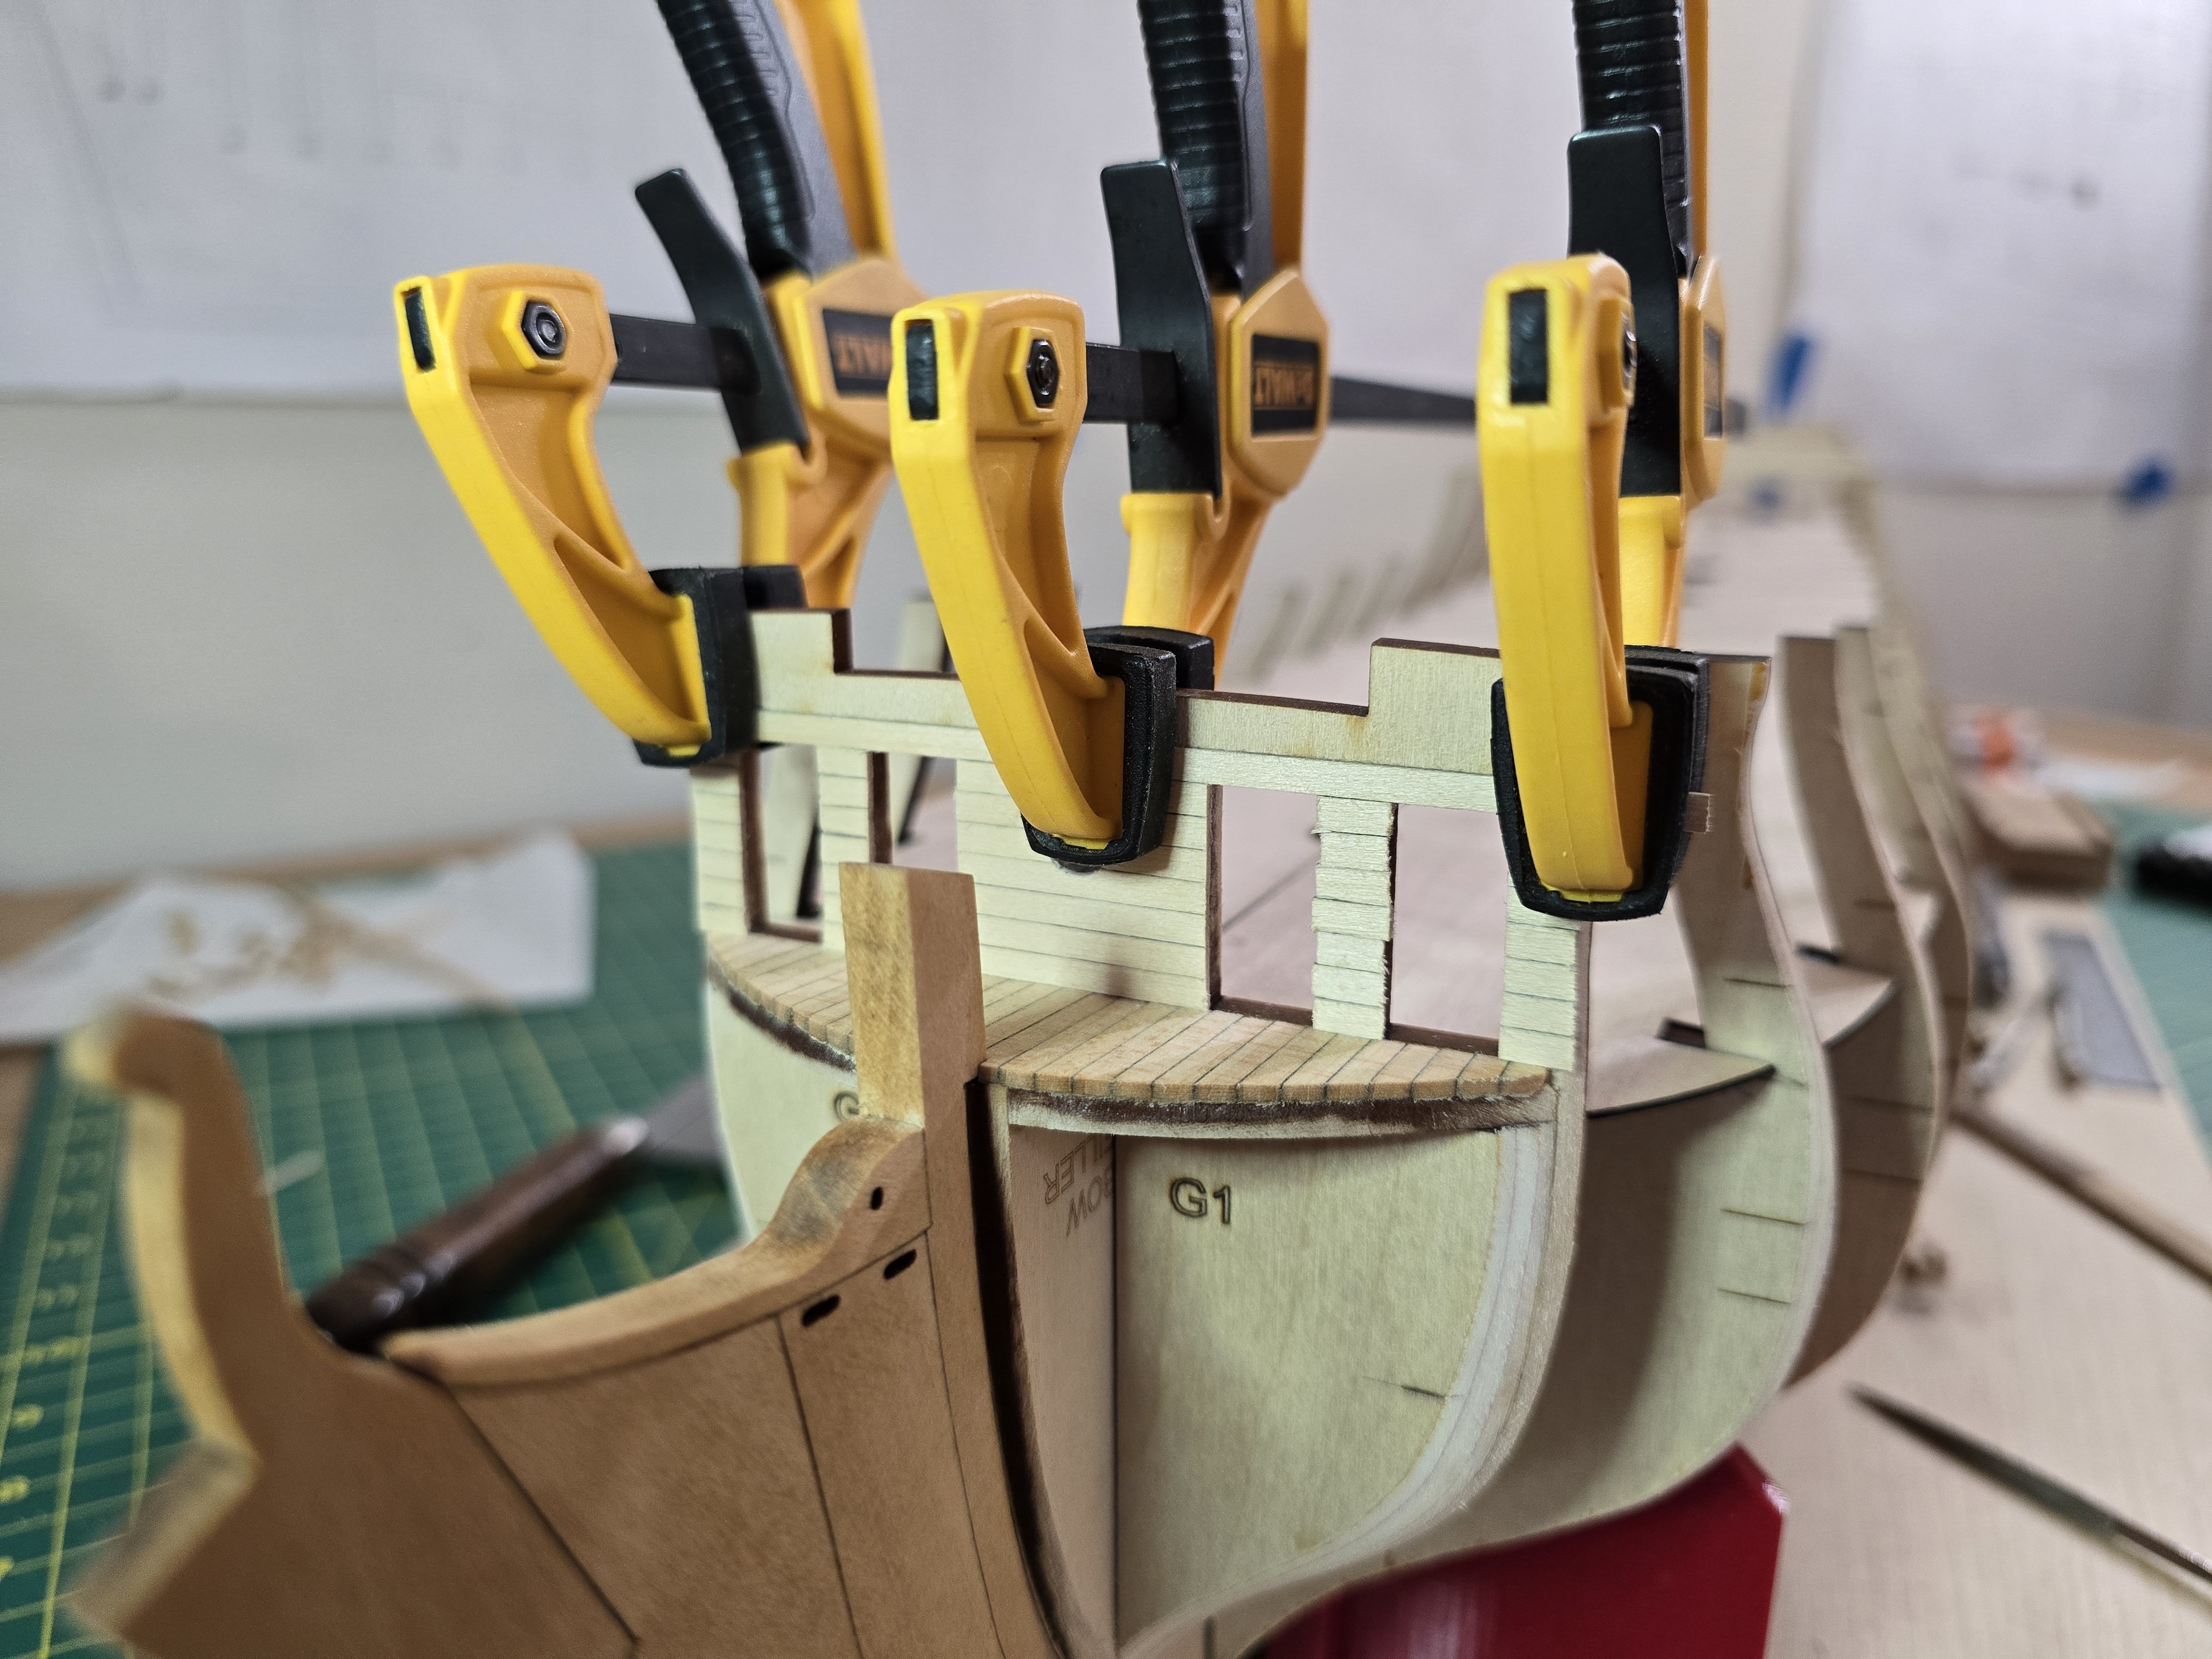
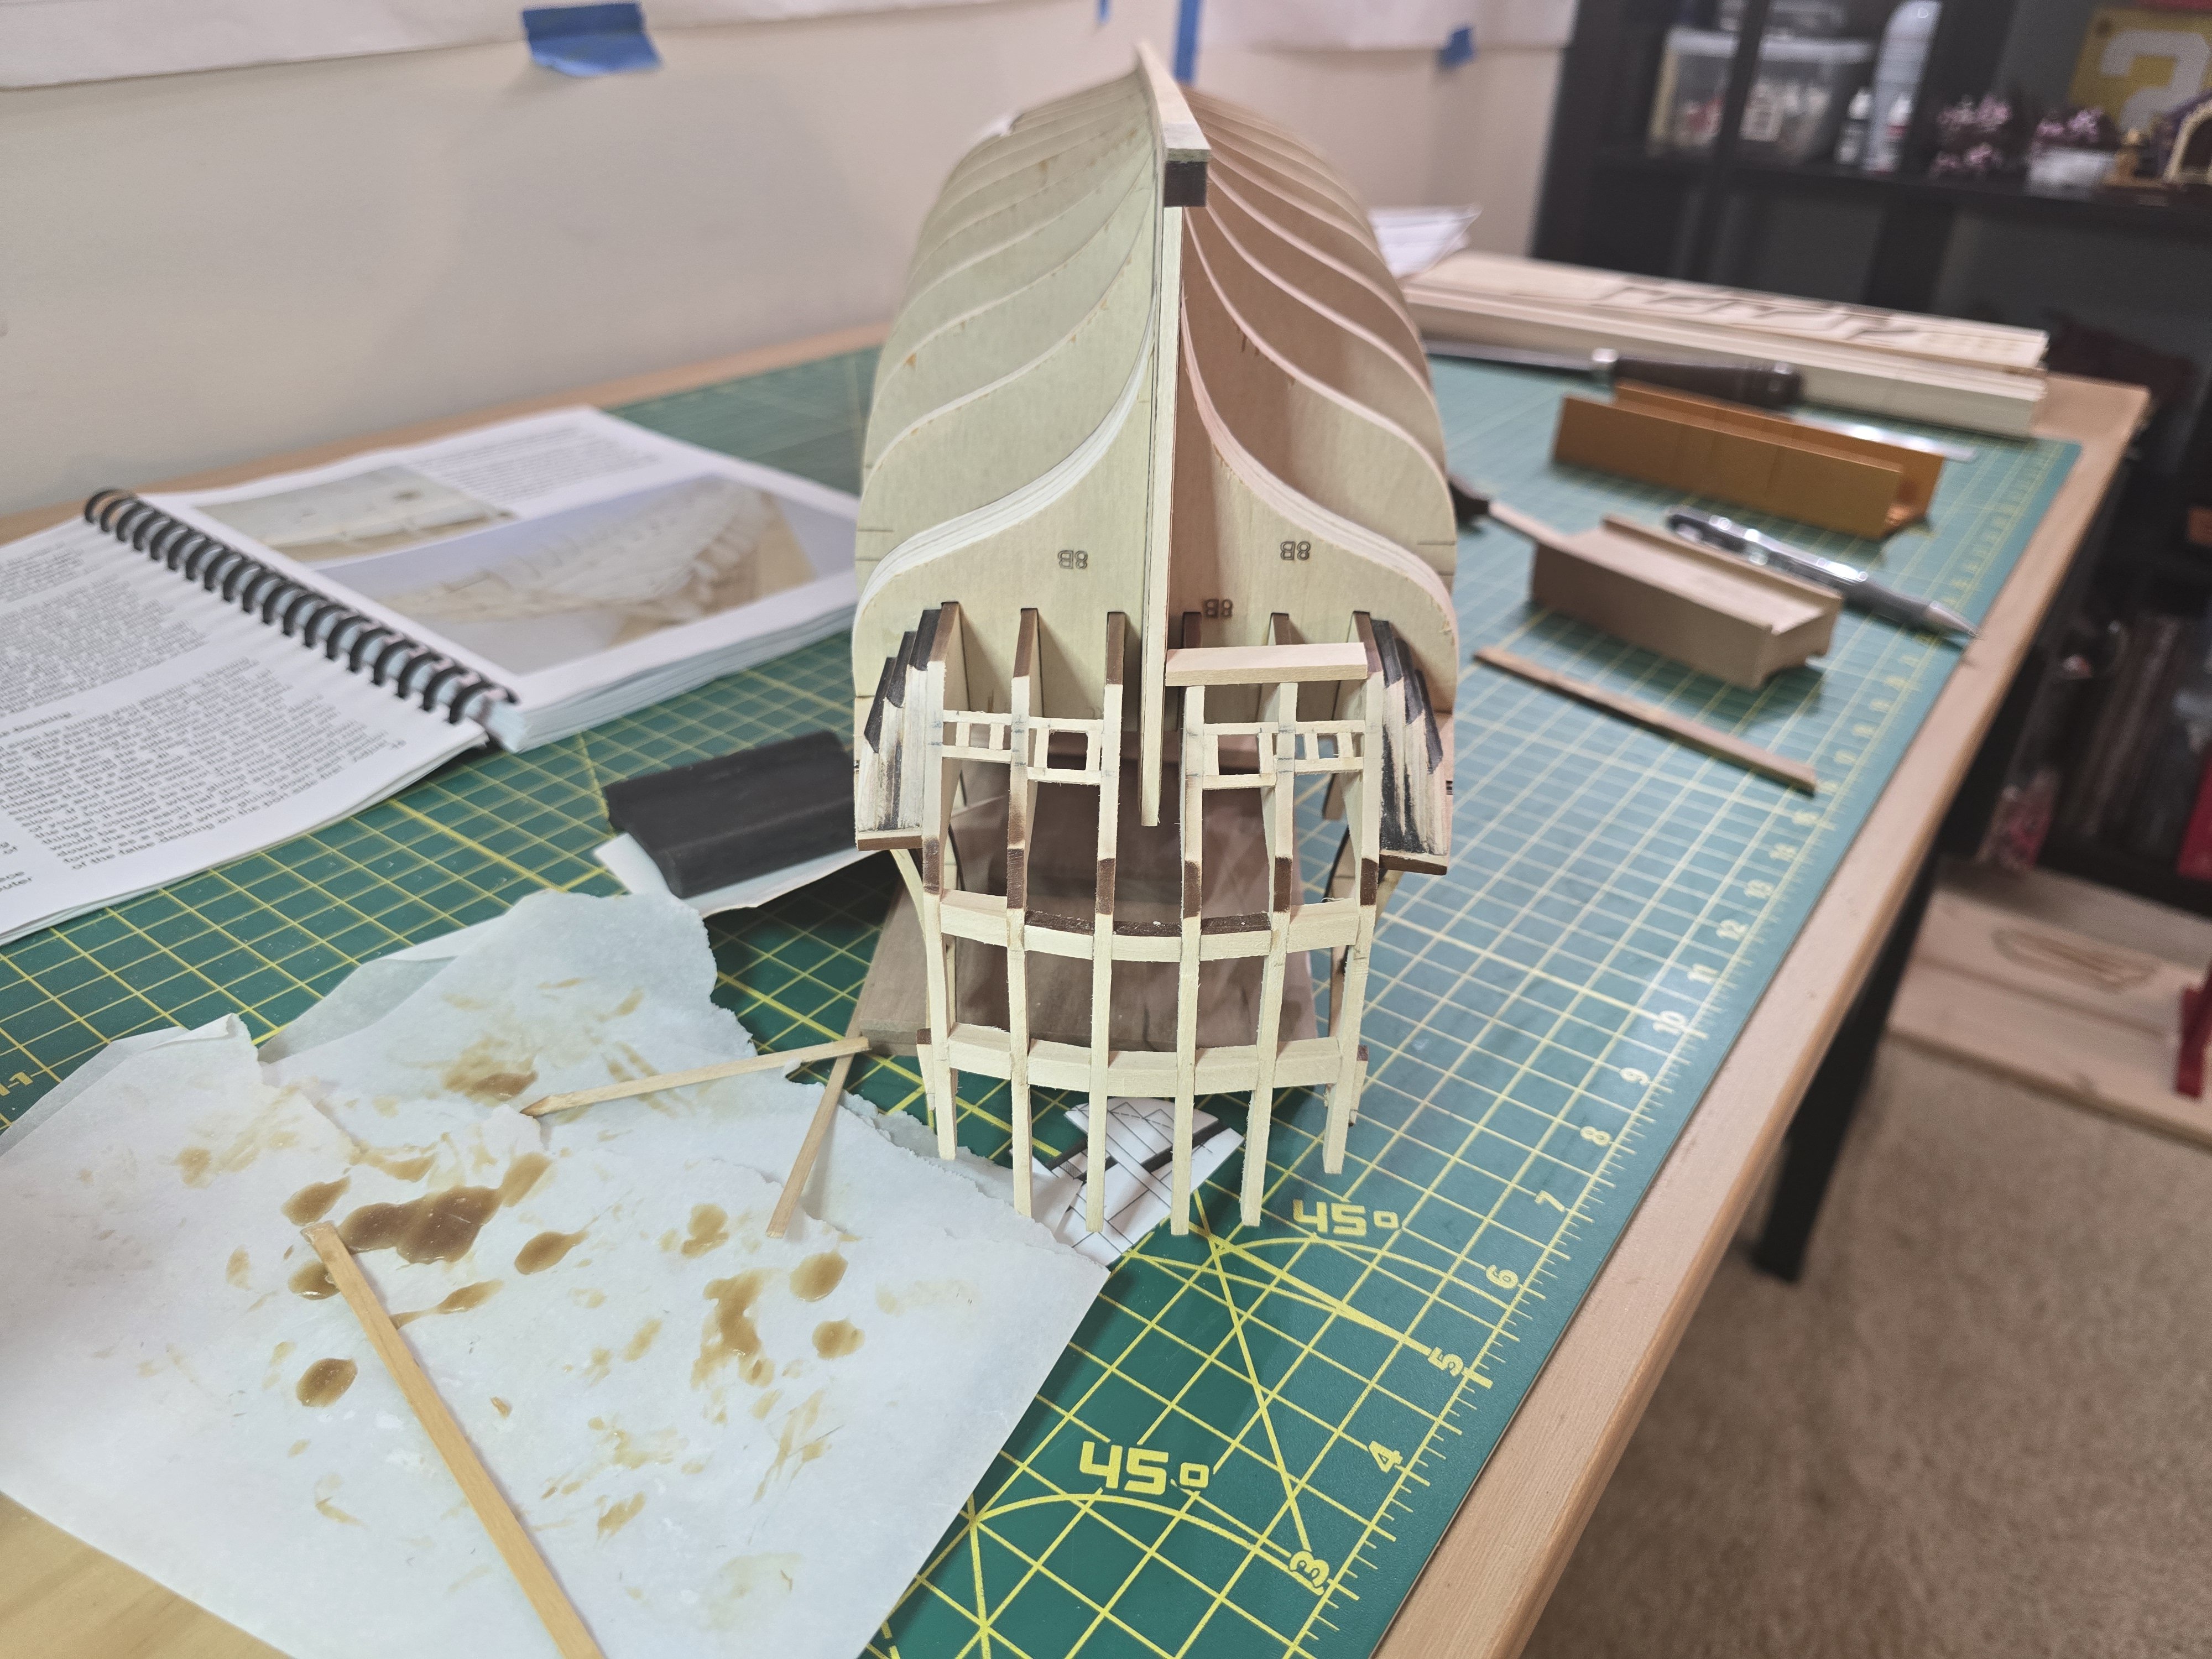
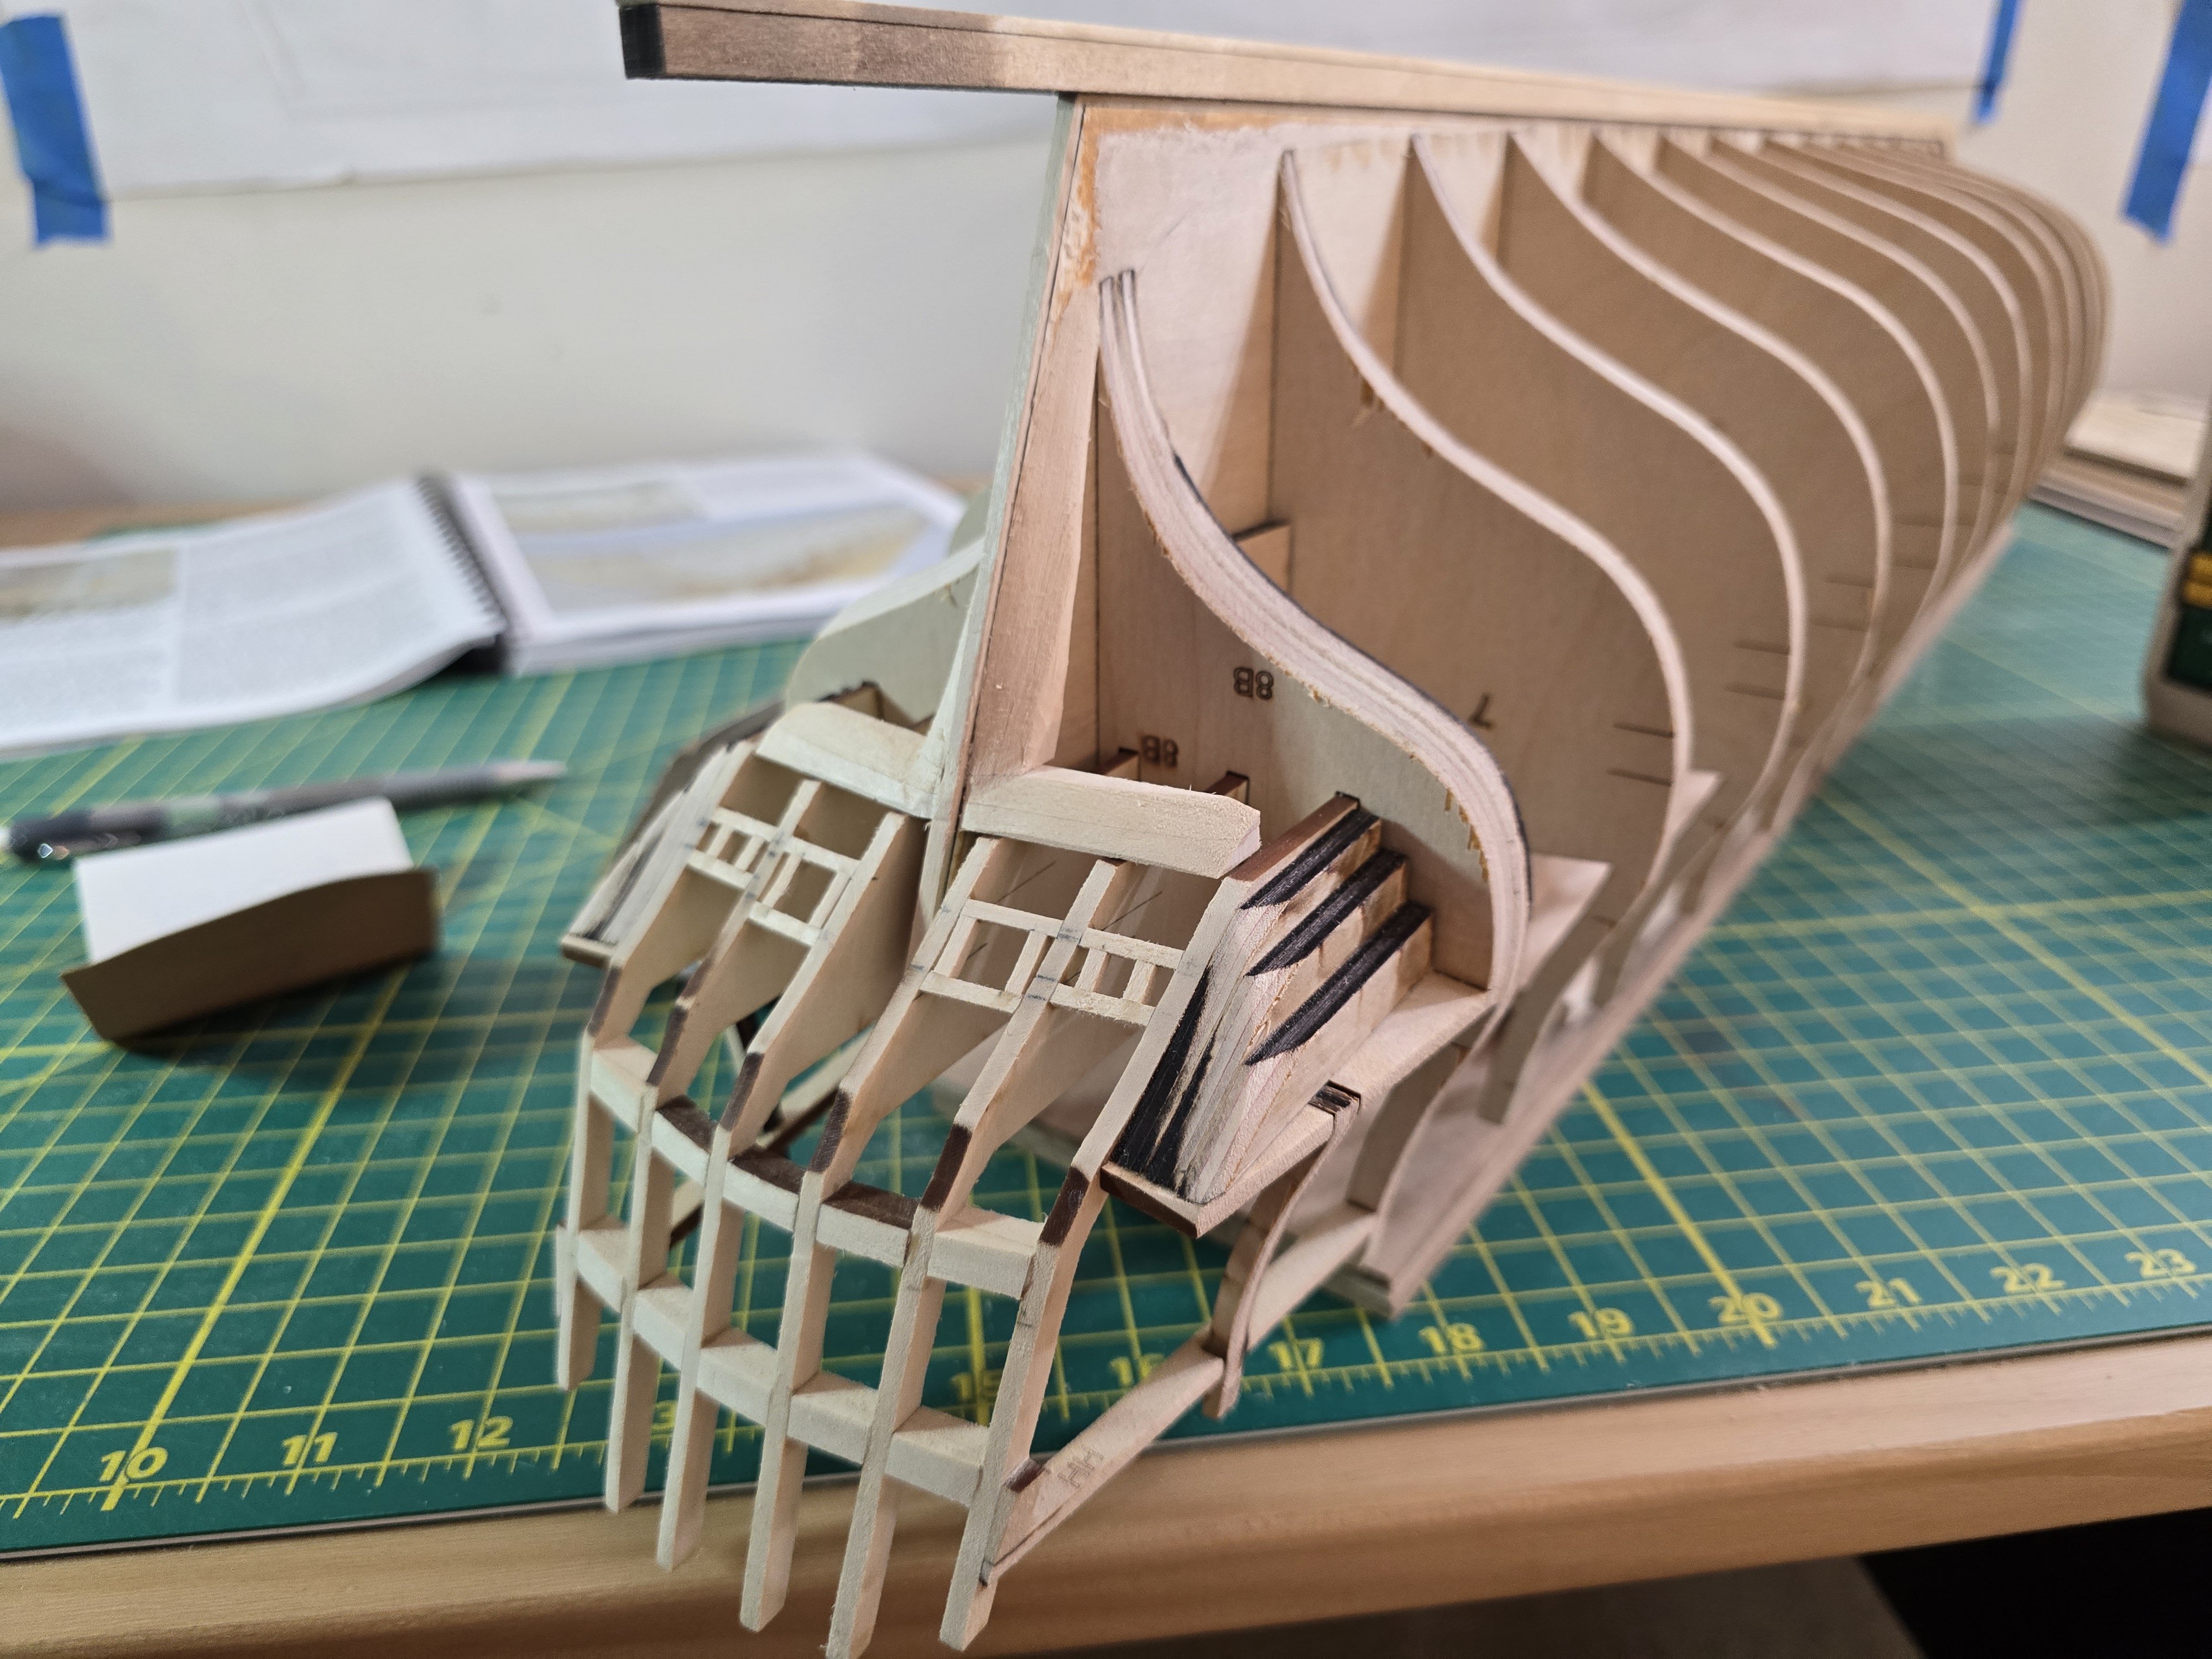
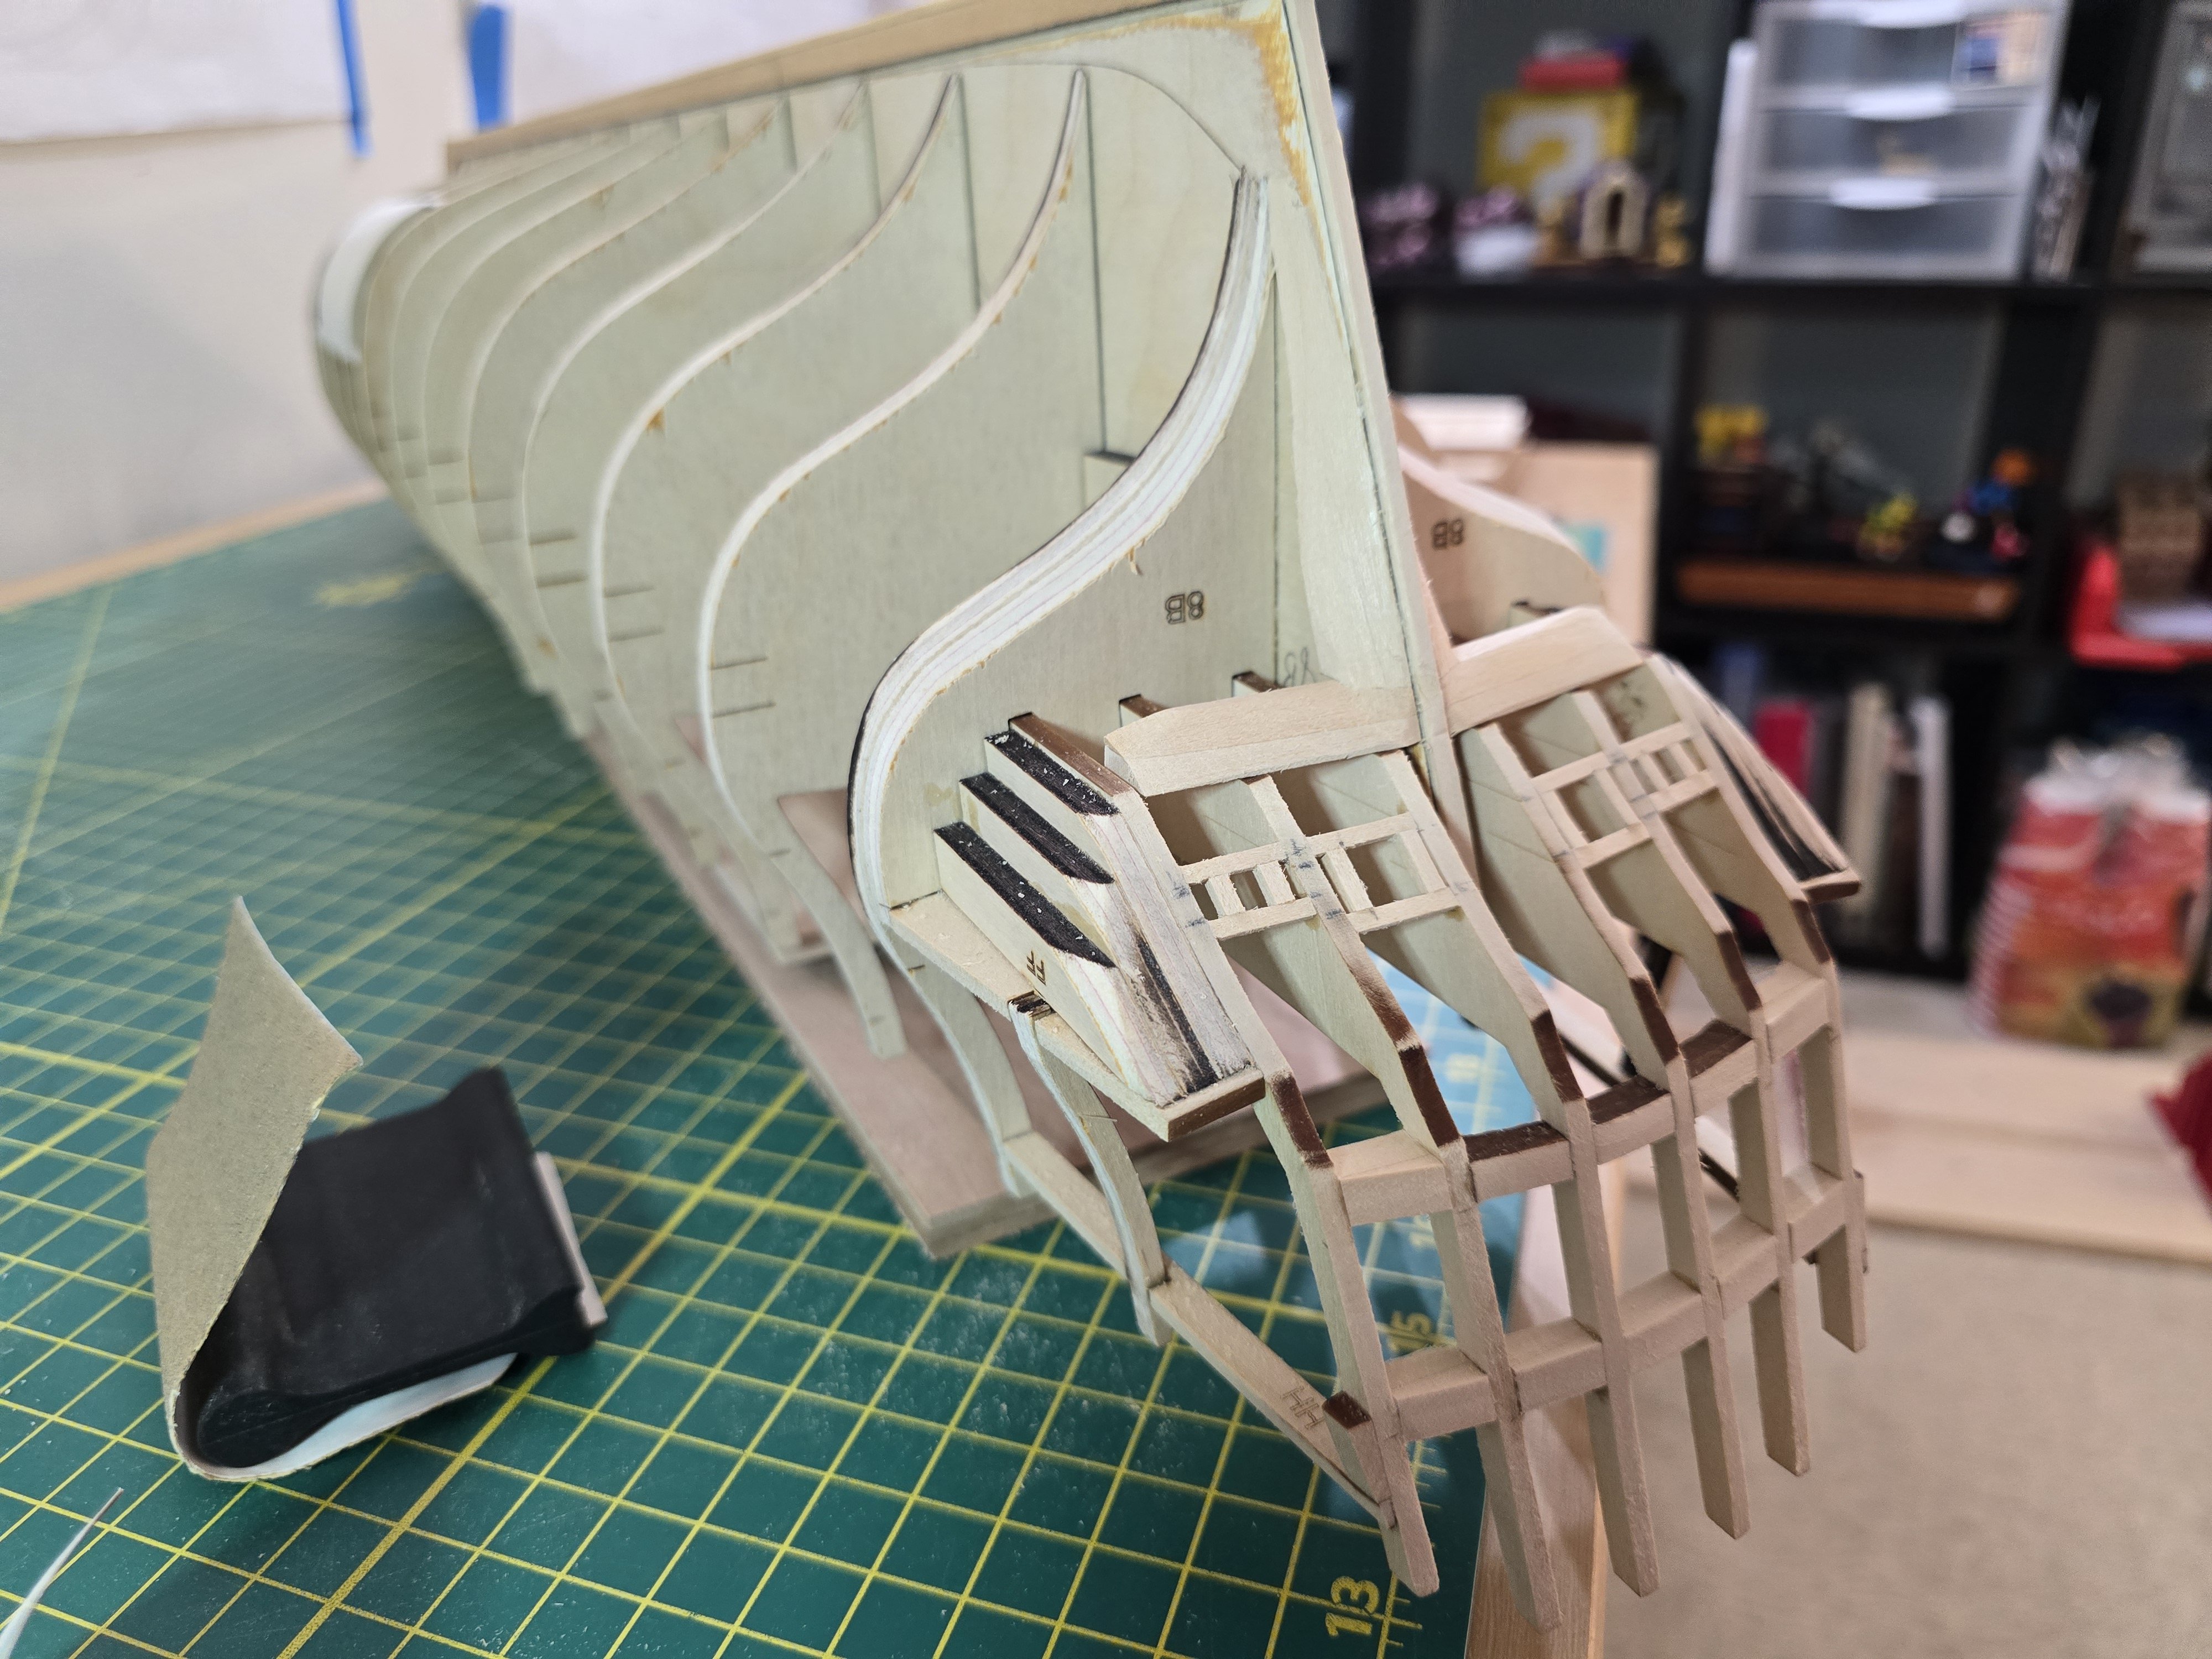
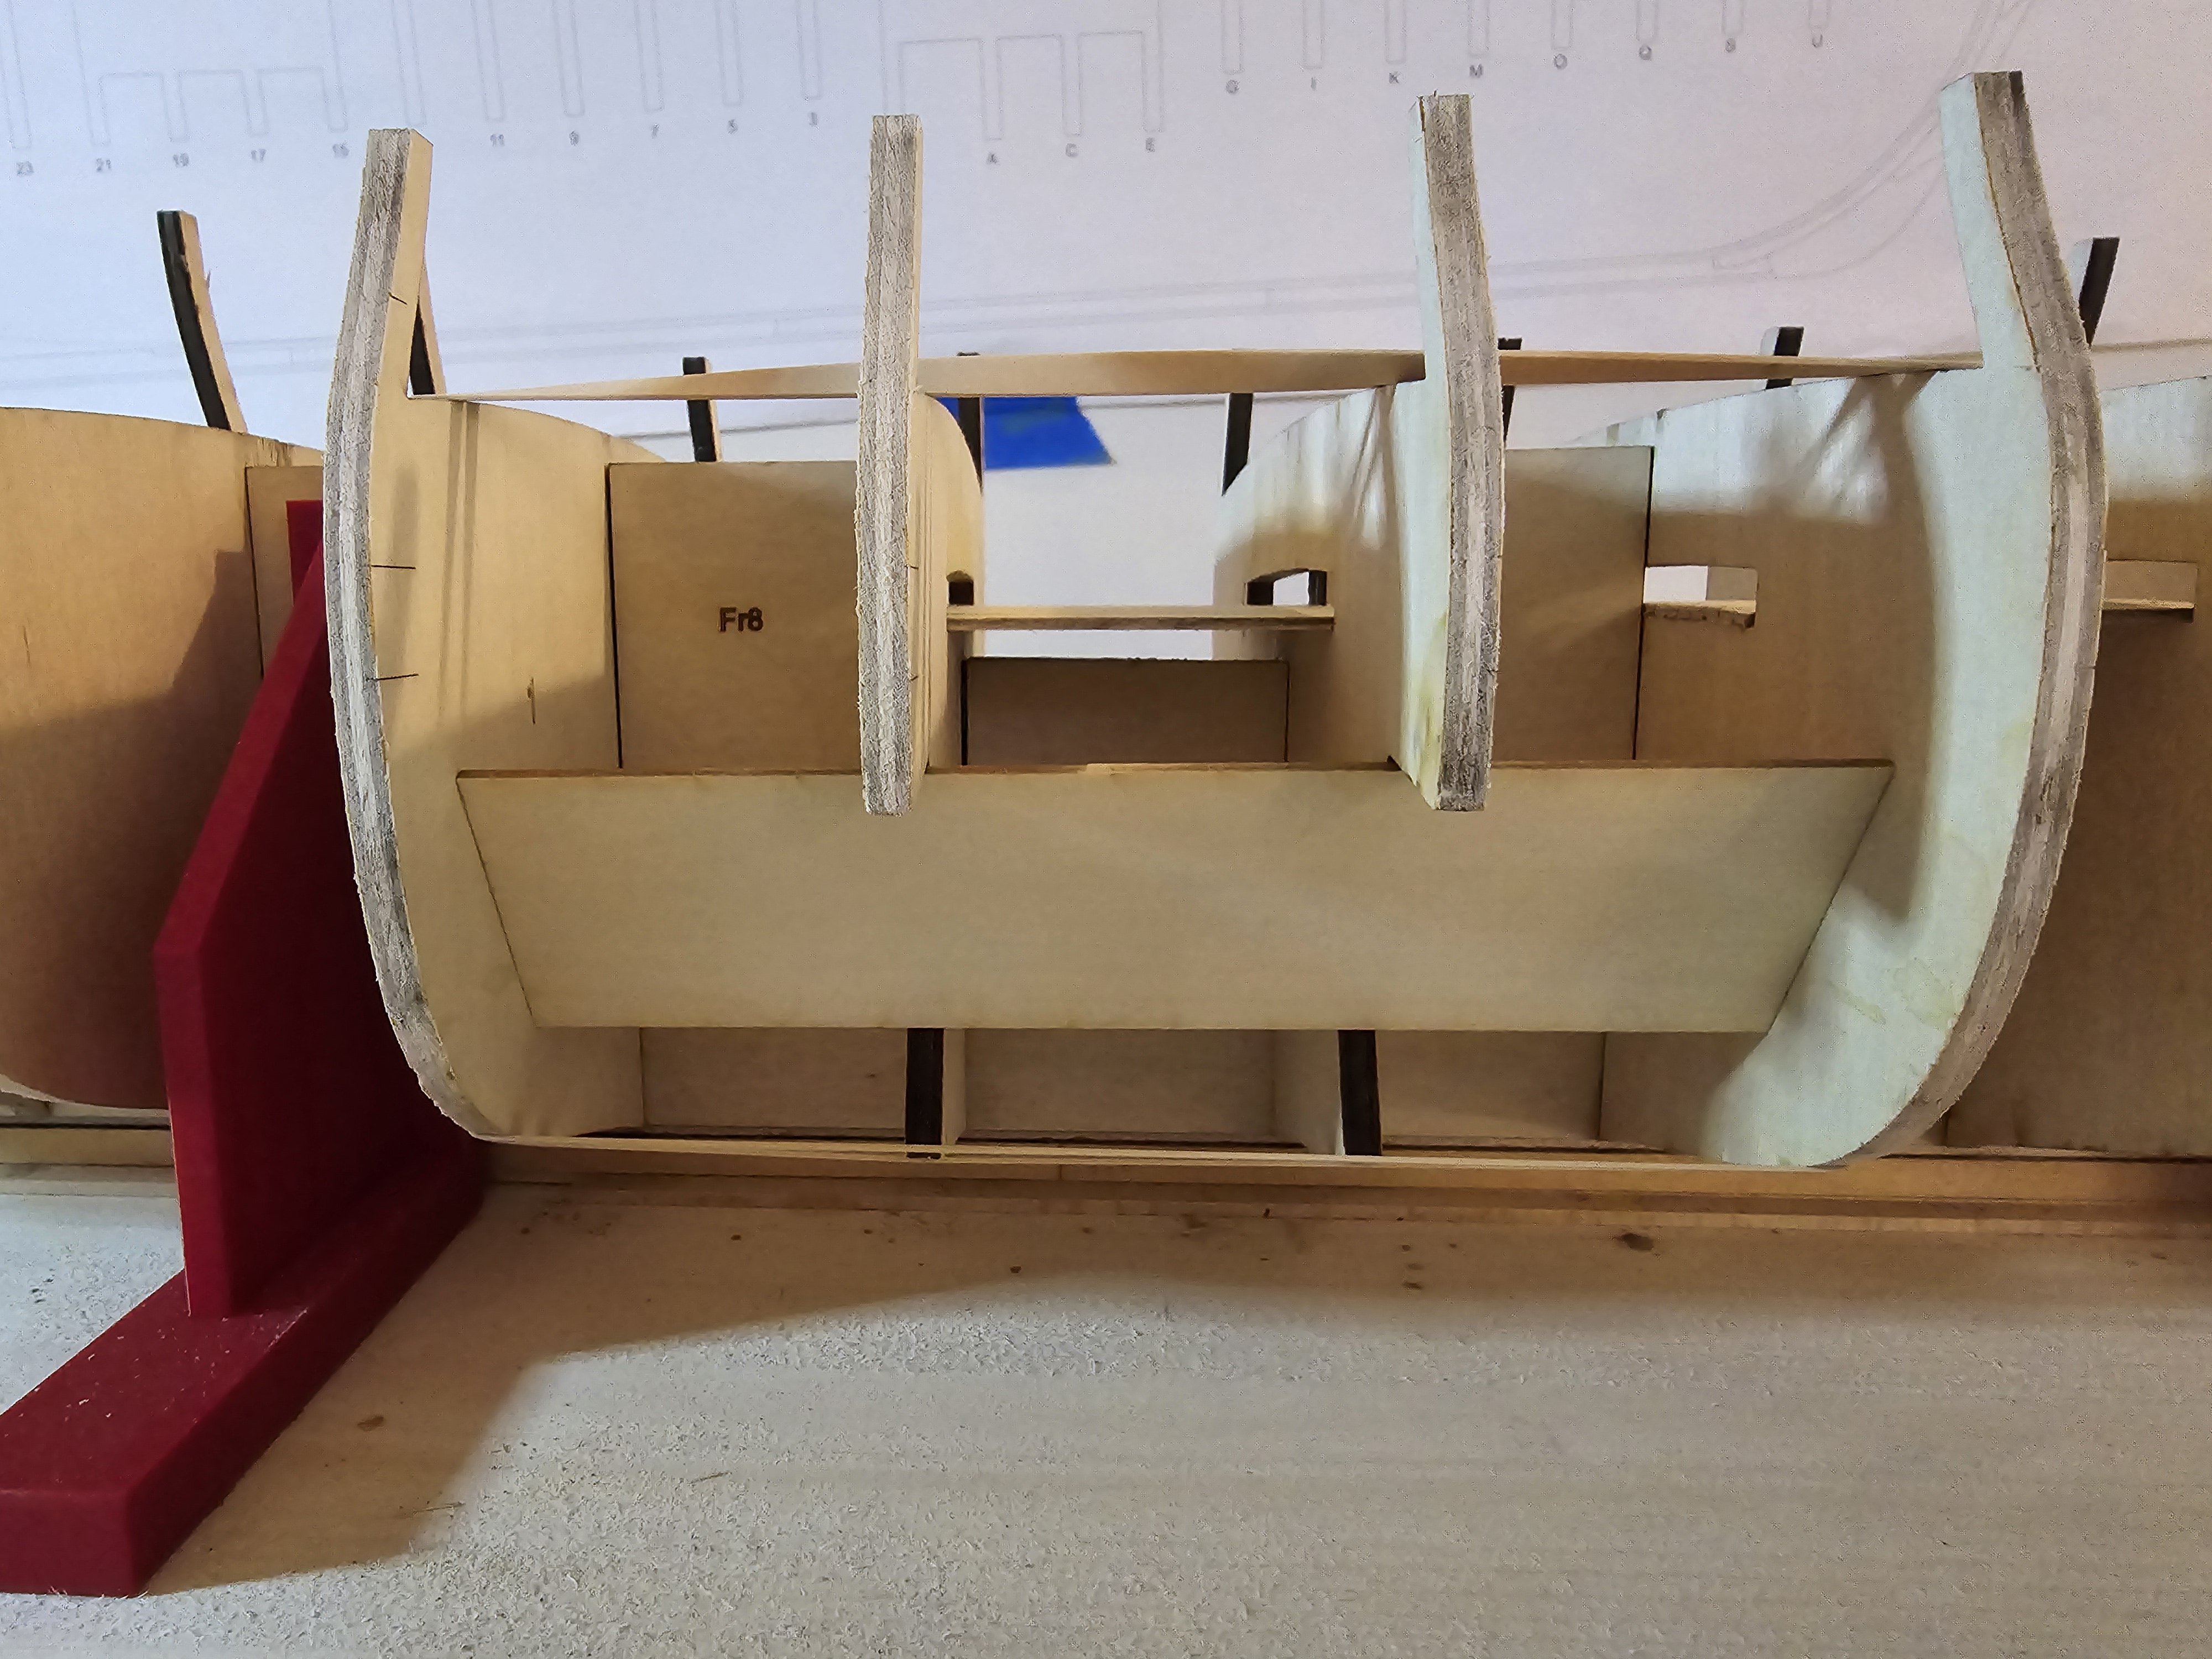
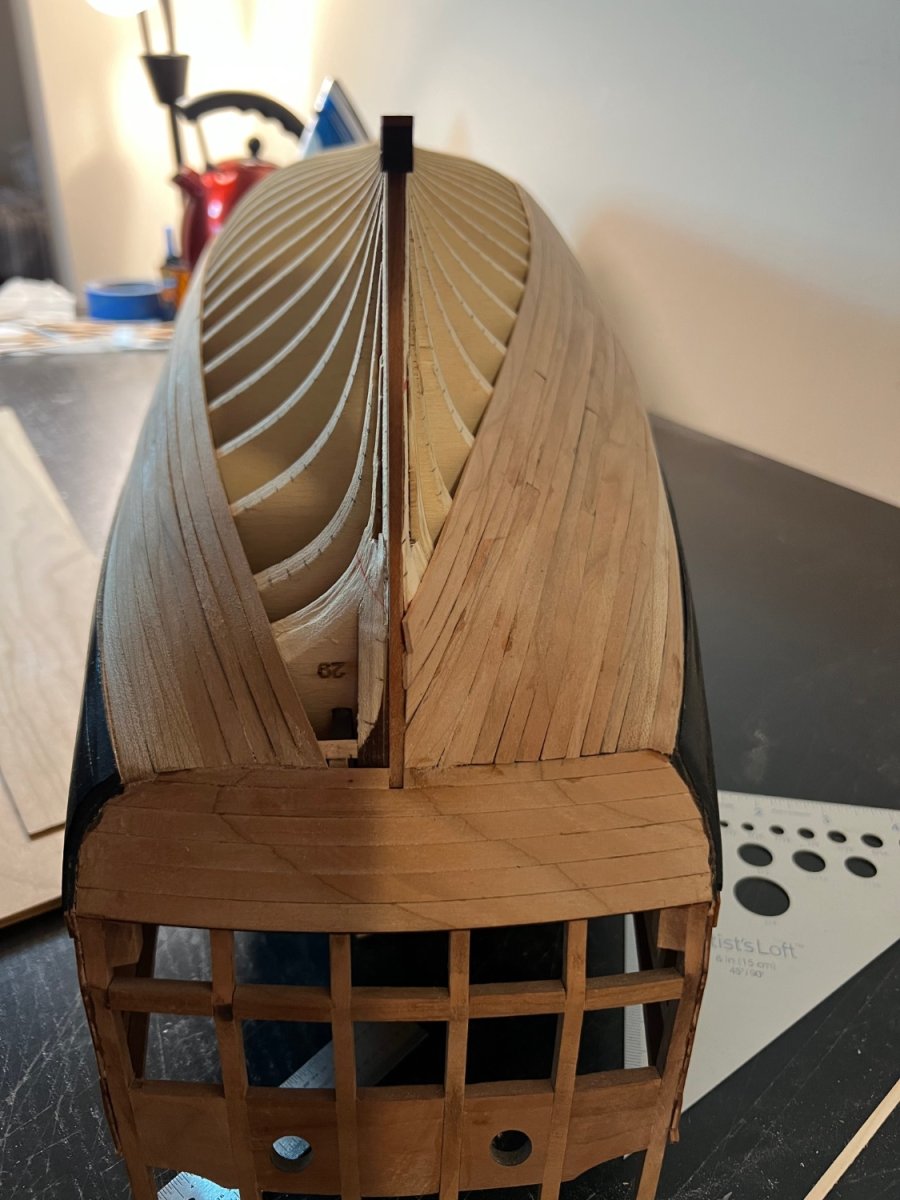
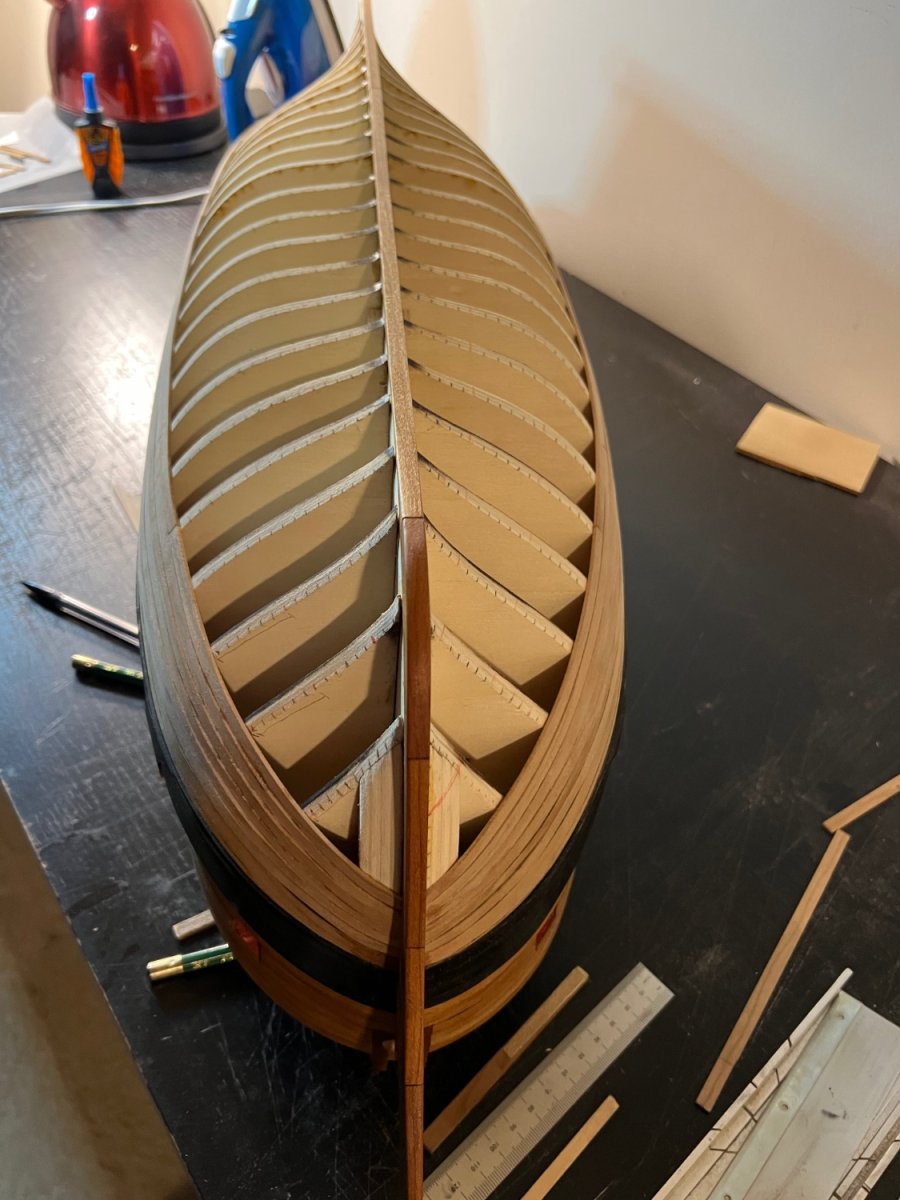
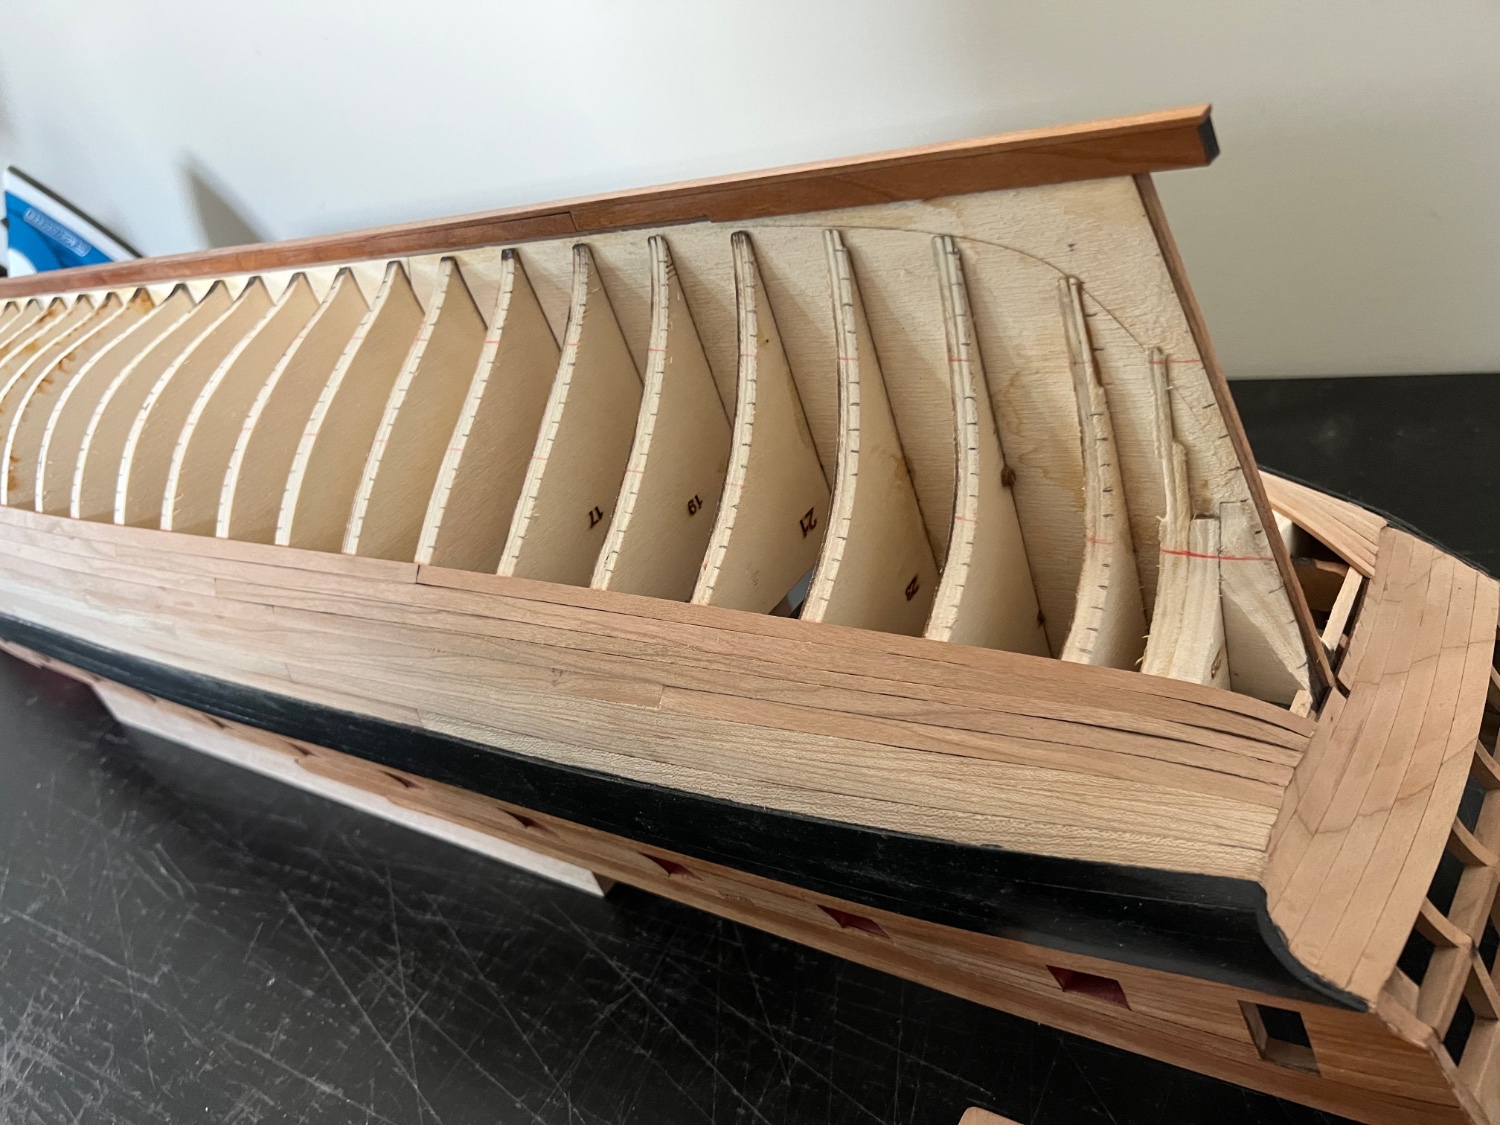
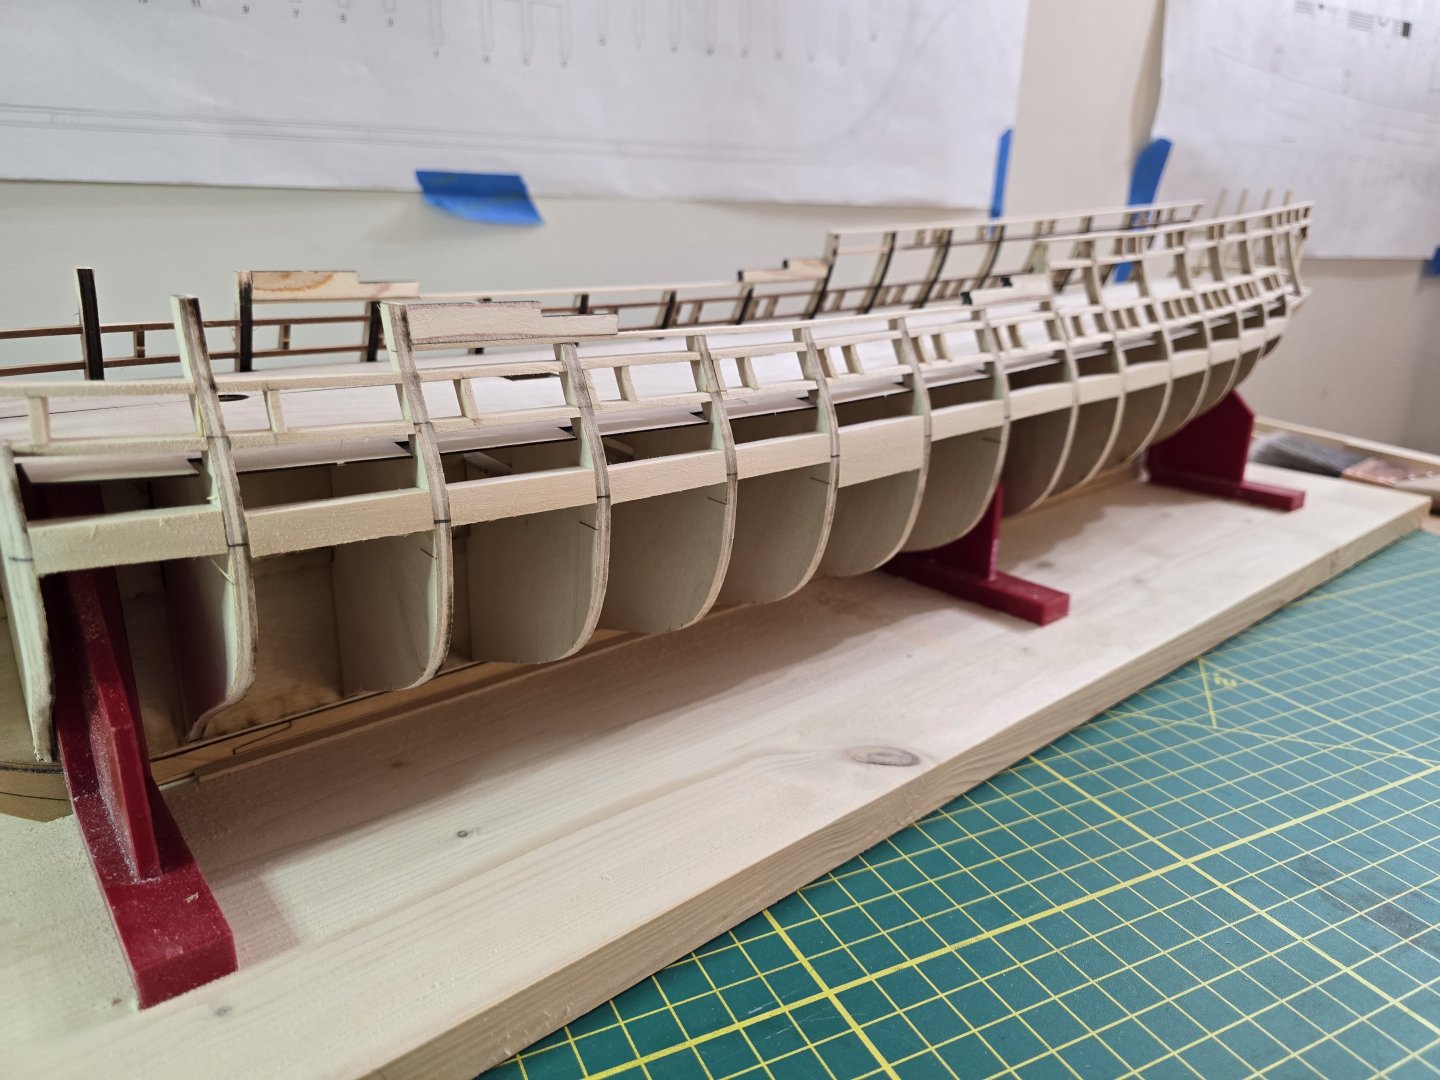
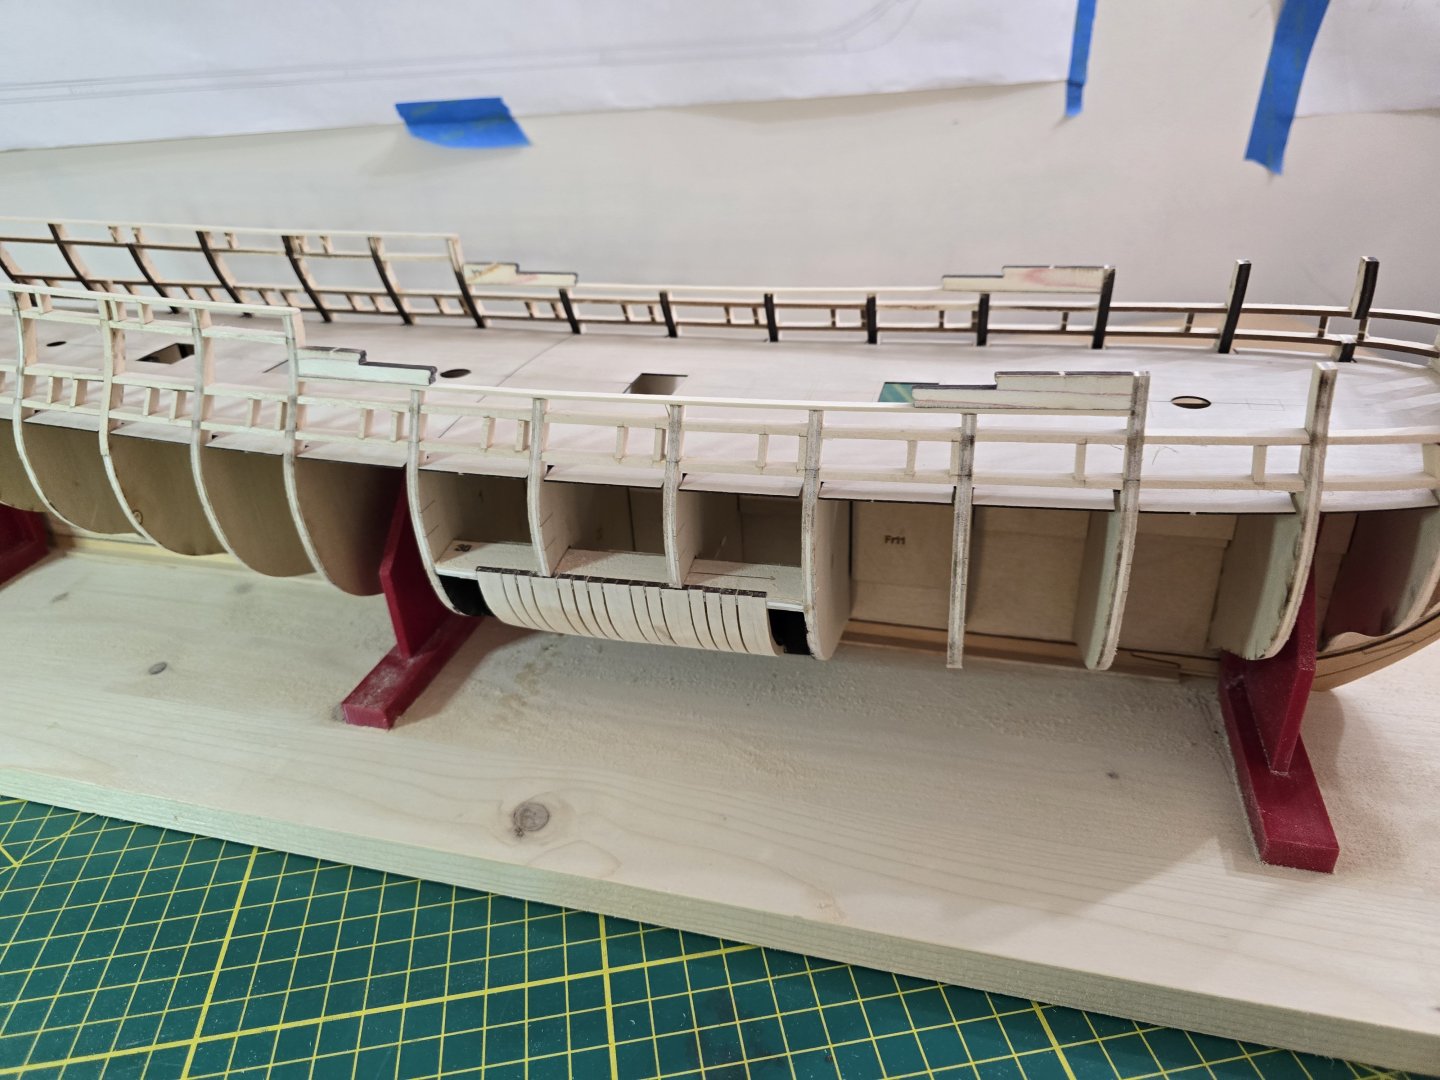
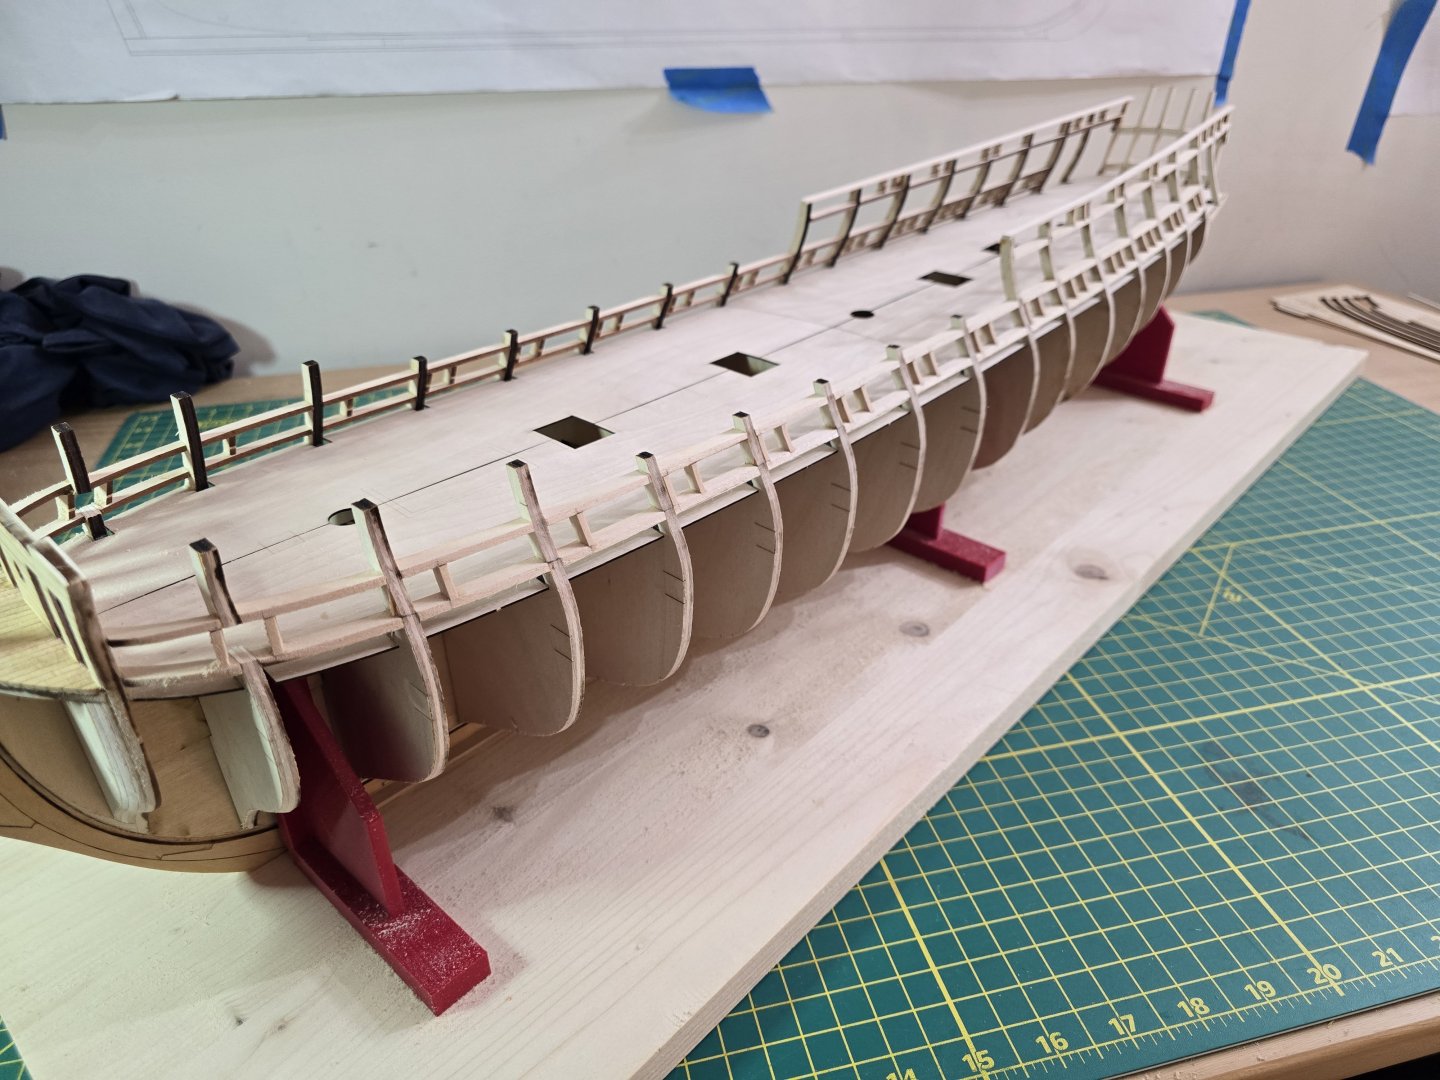
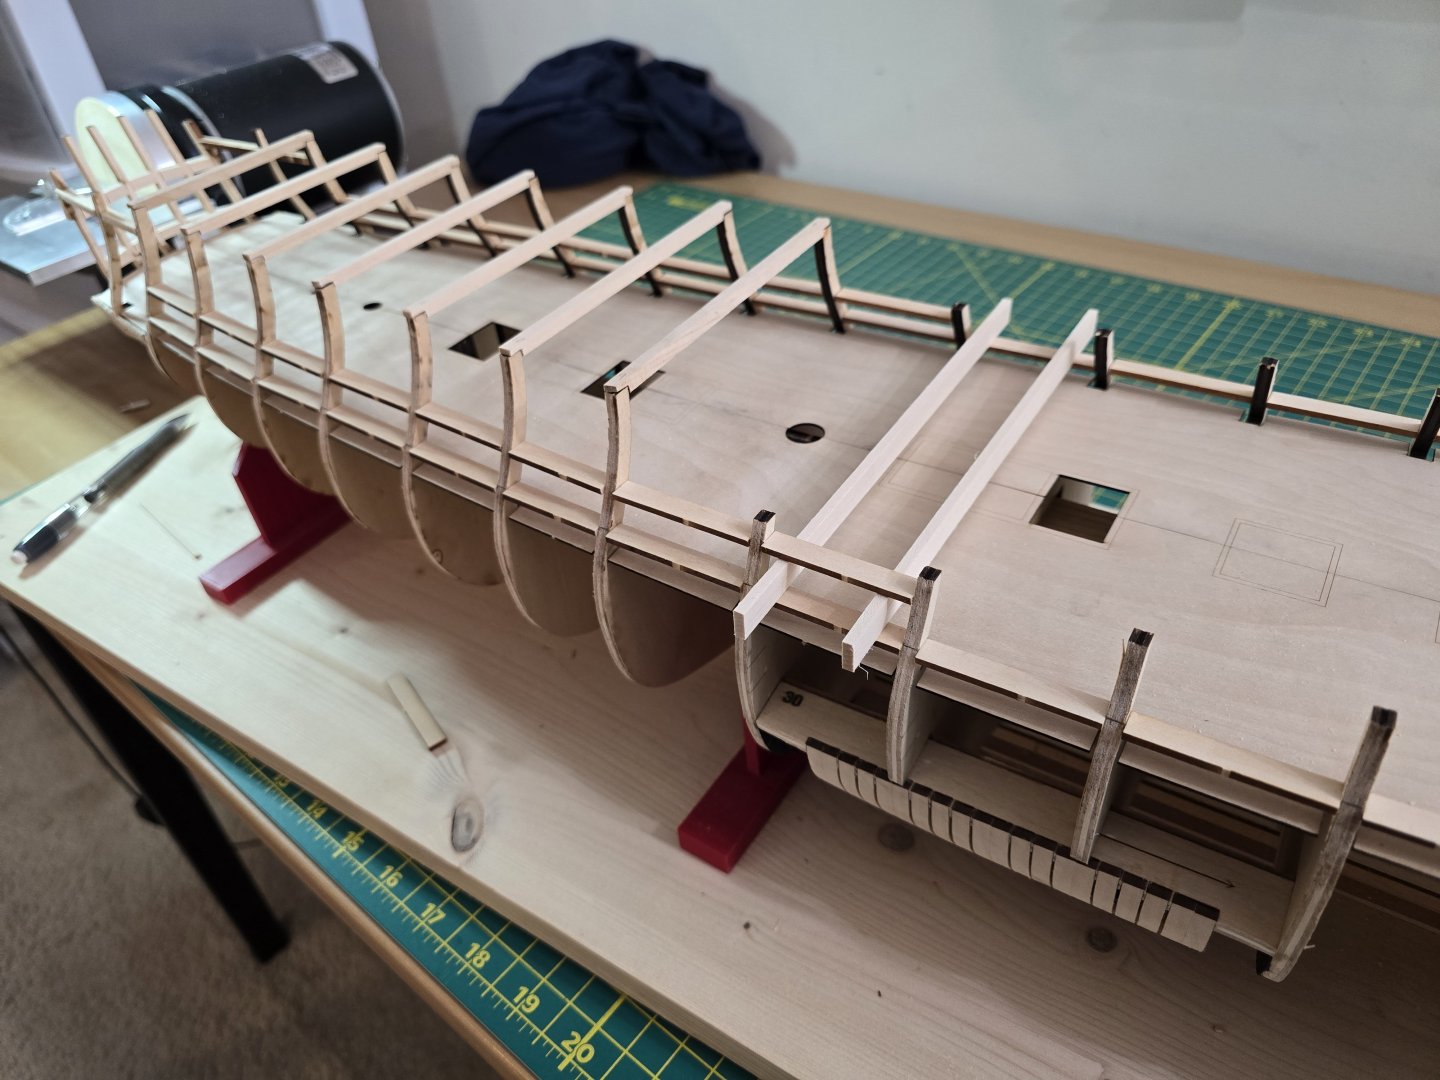
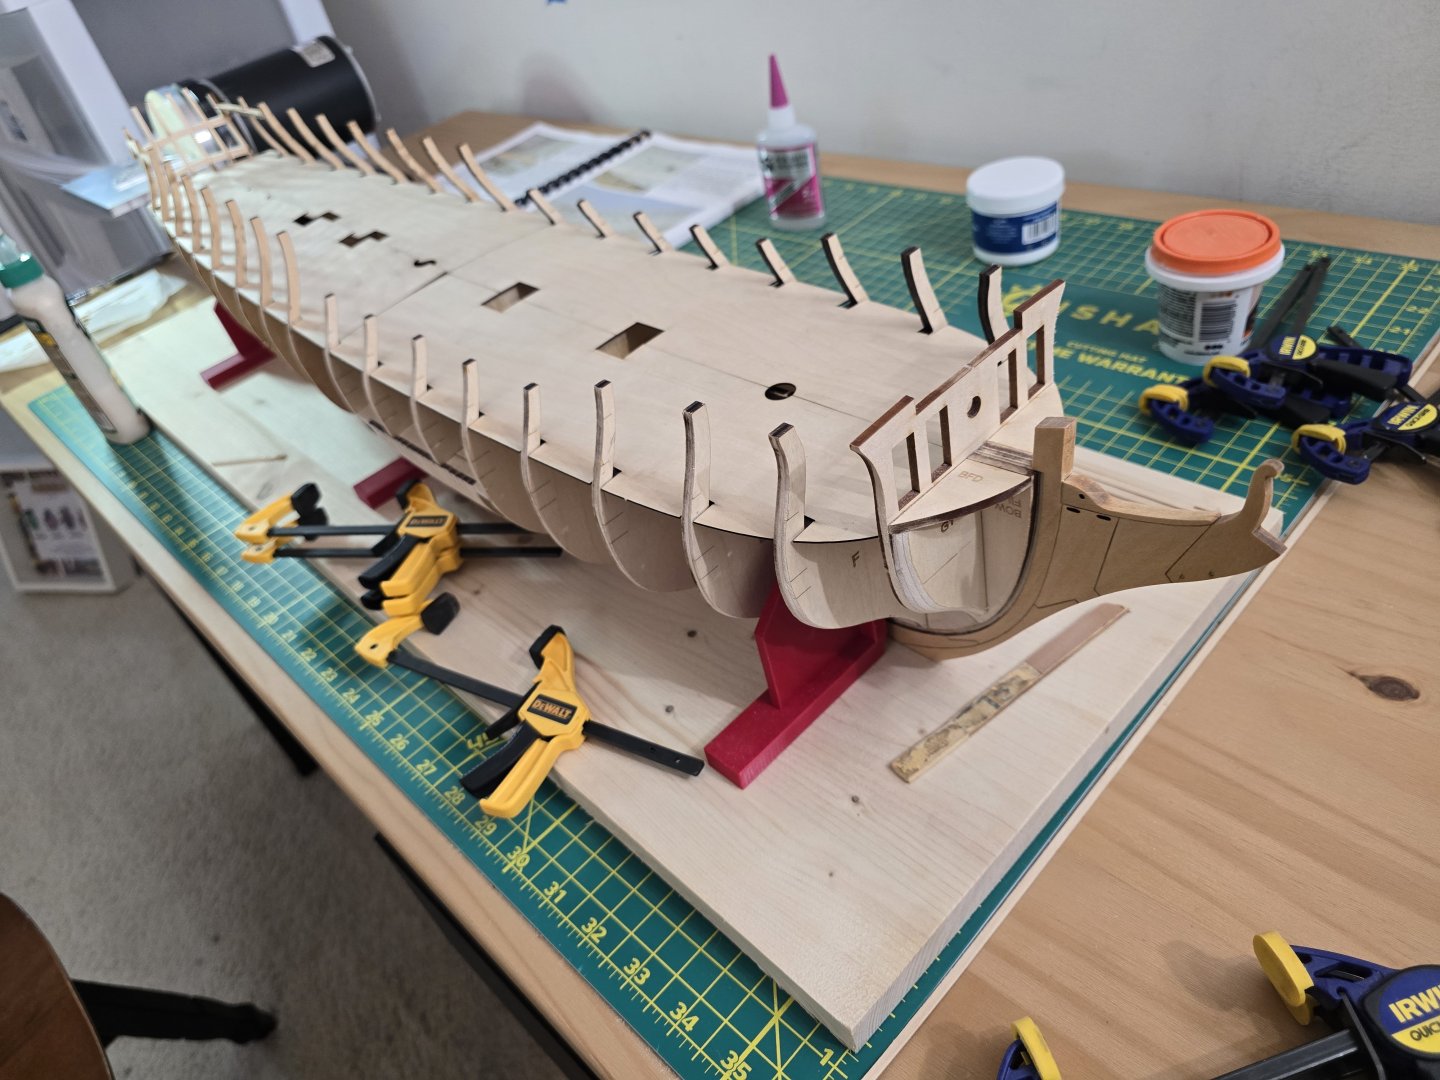
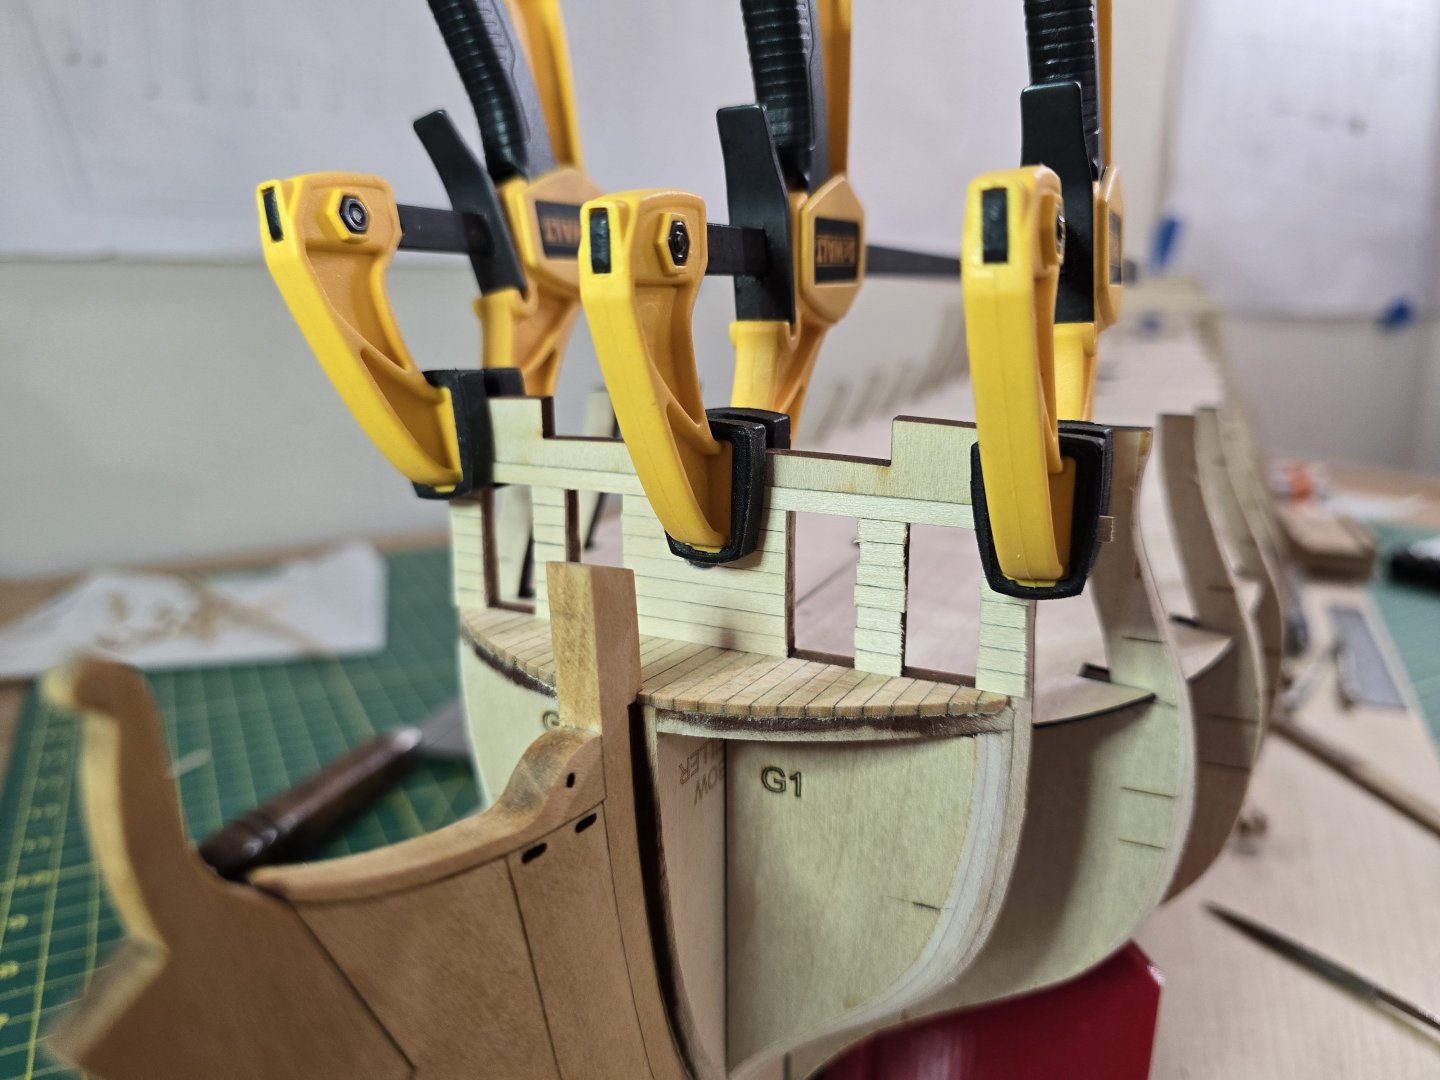
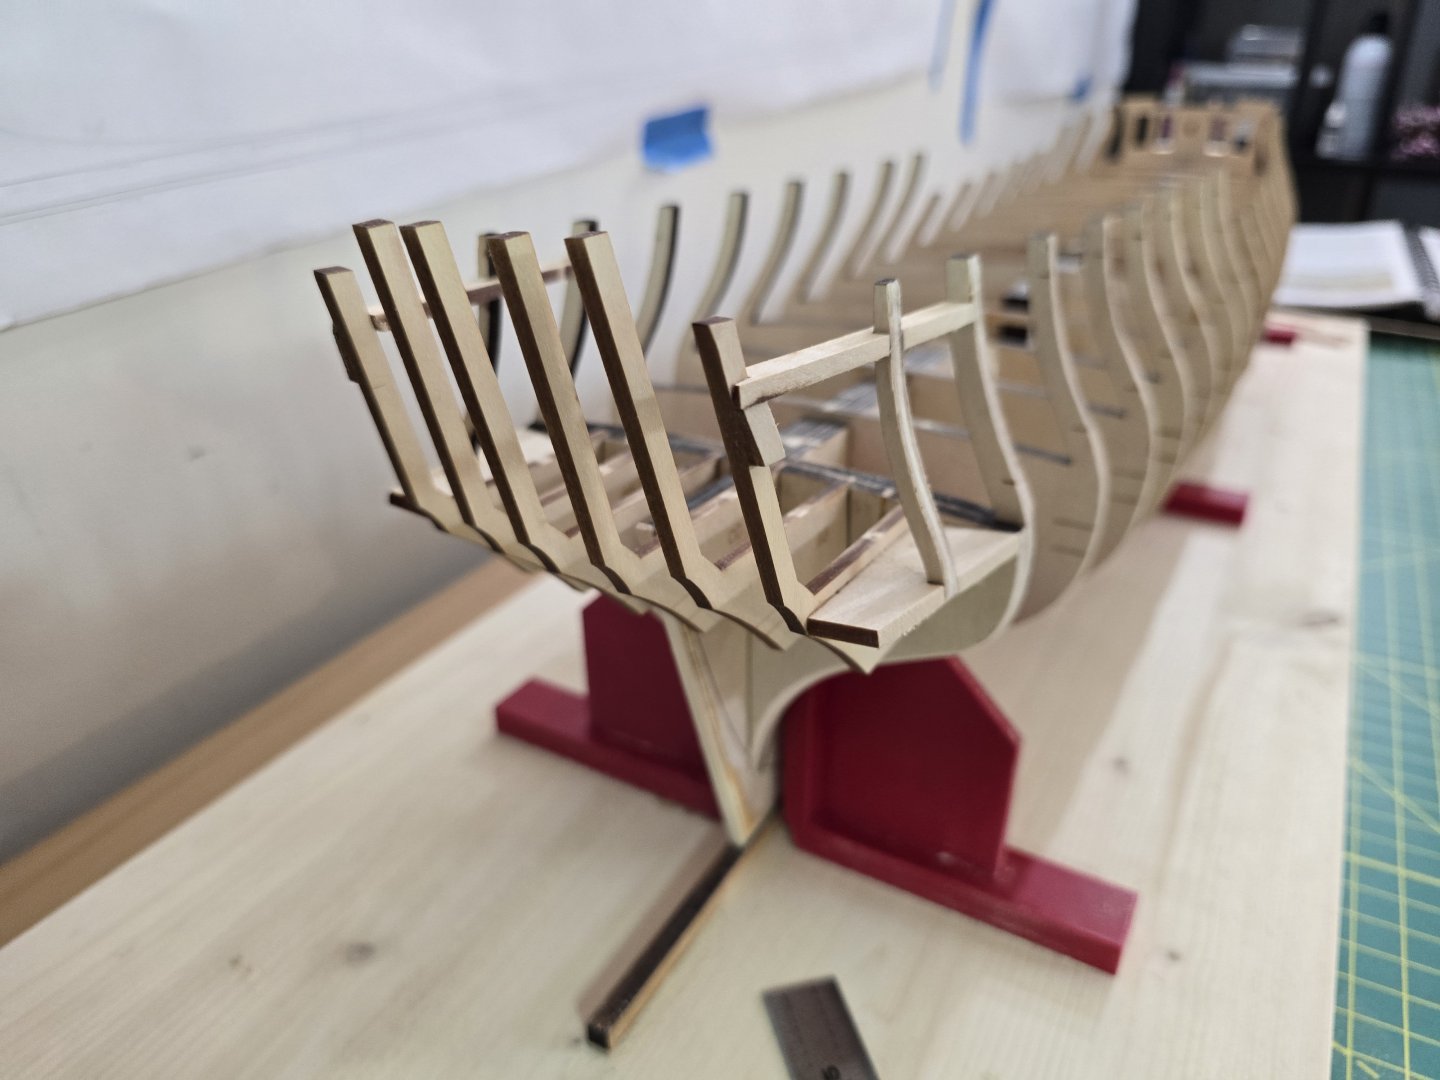
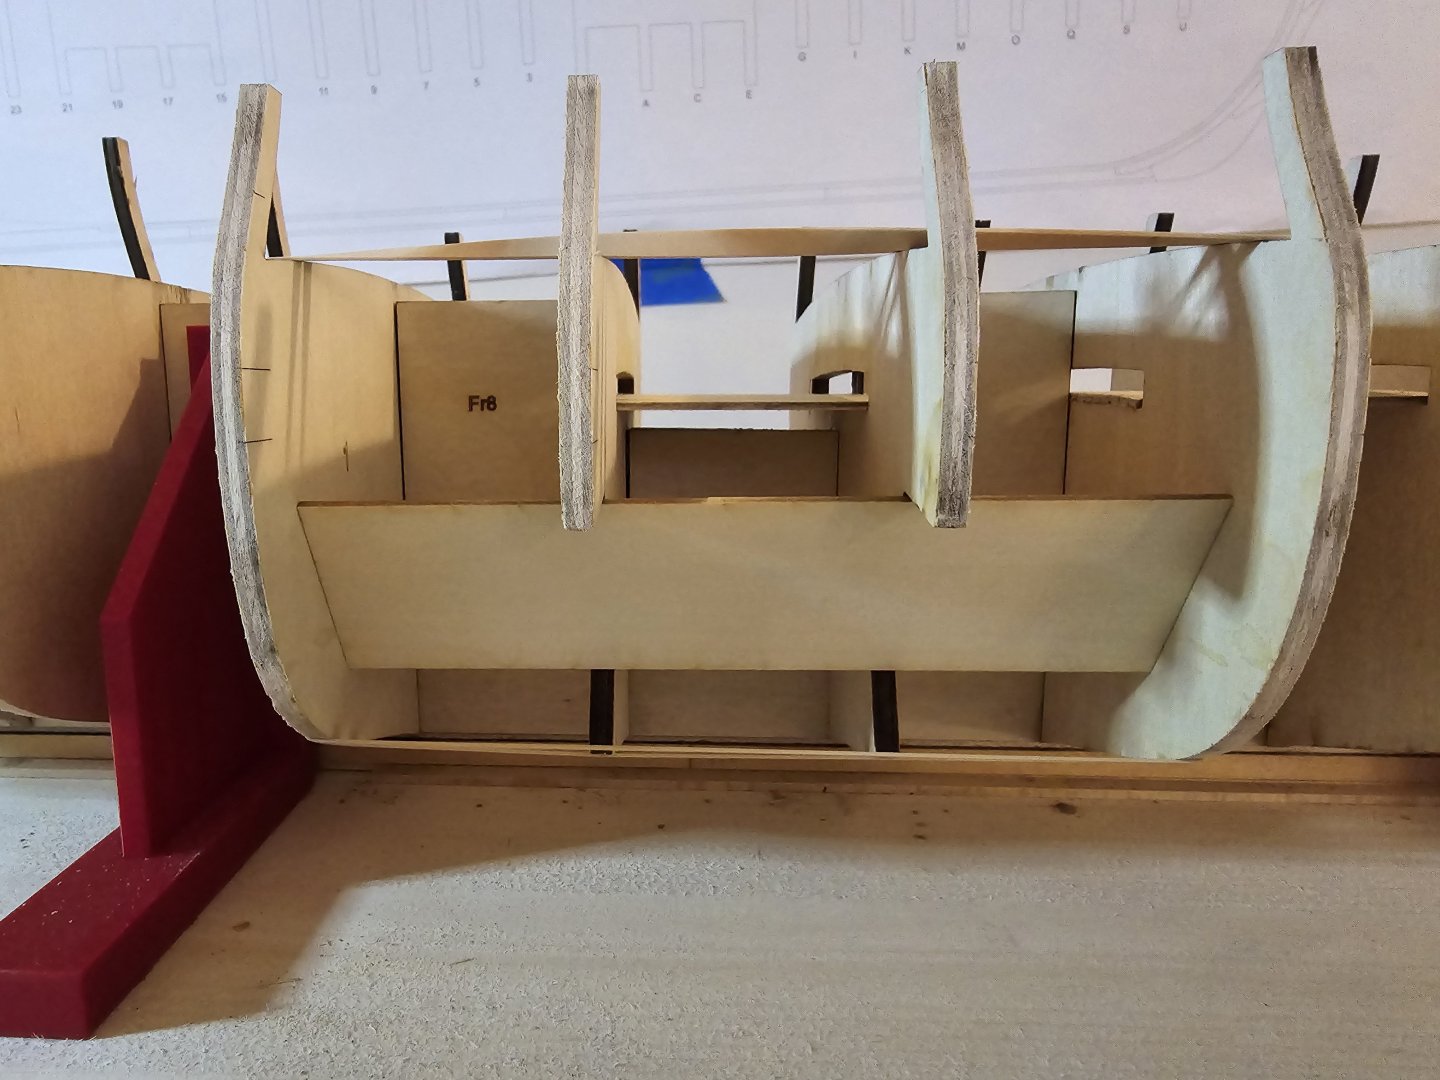
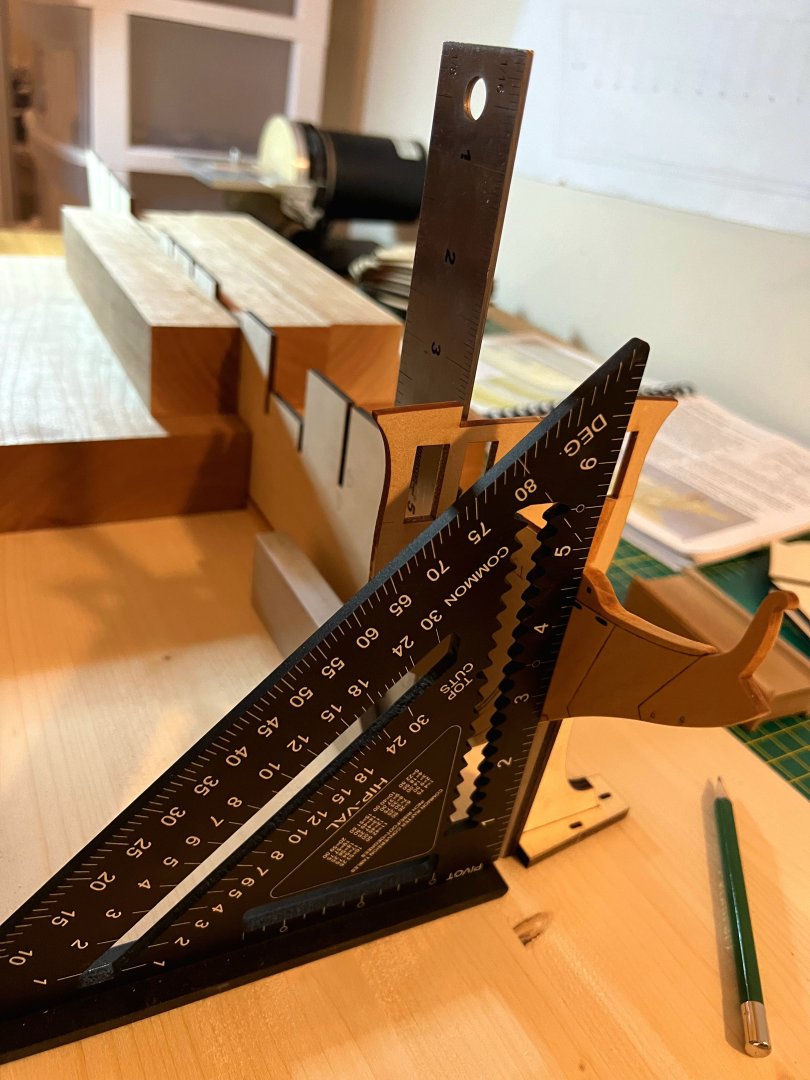
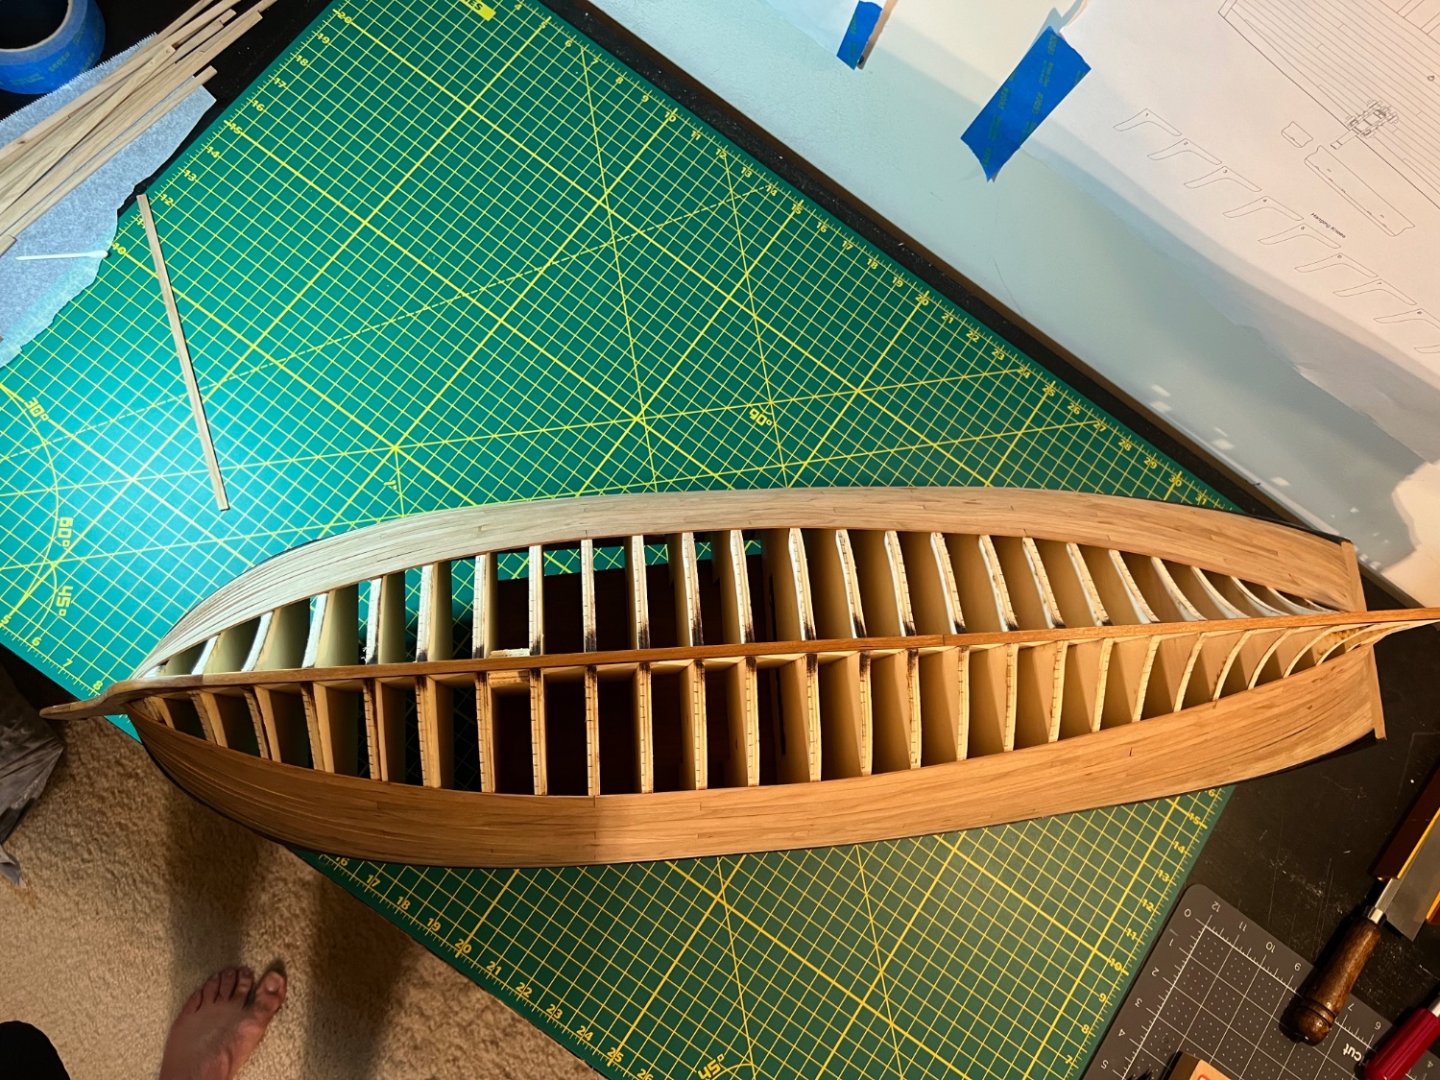
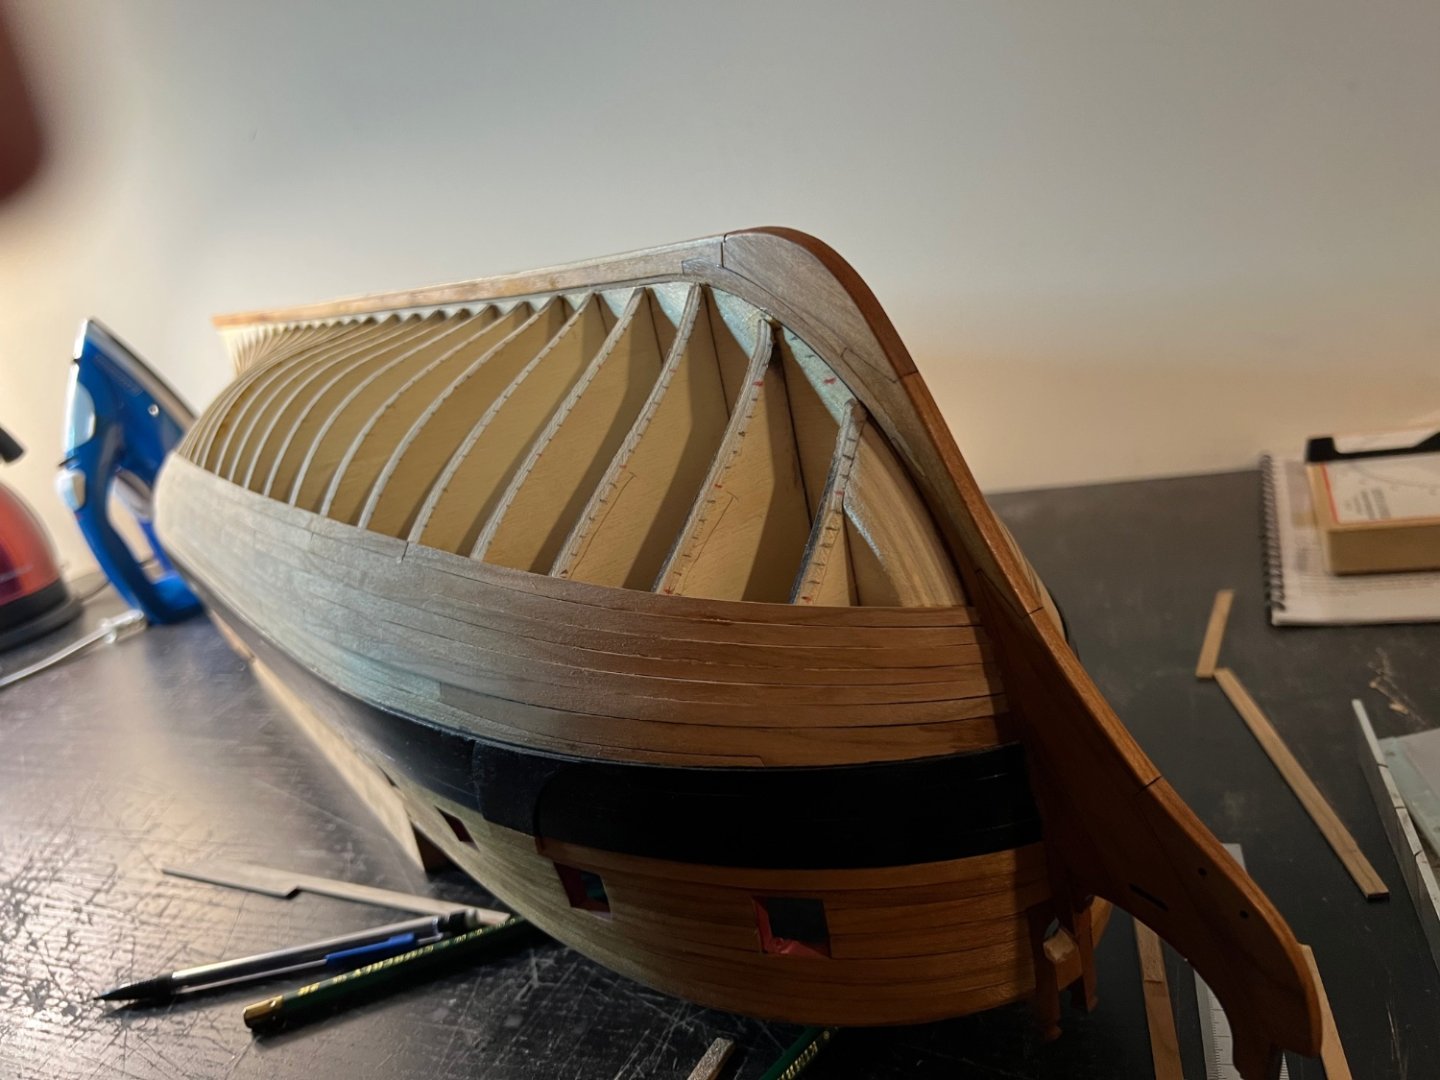
I'm finally caught up go where I currently am in the build. It took a few days, but I have placed all the gun port frames on the model. The front ports were the hardest to put on. Firstly, I placed on all the gun frames; making sure to have each stand proud of the side of the ship. Then, I followed Chuck's instructions on how to move the bulkhead pieces that were in the gun frames. Thete aren't many to remove. Only 2 on both sides were removed. Like the instructions detail, first I cut the top part of the bulkhead with a hobby knife. I removed the blade, and placed in a scroll saw blade that I had cut in half. Then, I cut the bottom part of the bulkhead the same way. I used a lot of care and went slowly to make sure I didn't saw the gunport frames themselves. Its important to note: Do not cut the bulkheads too close to the sill or lintel. This is also described in the instructions. This is to prevent you accidentally sawing into the sills or lintel with the scroll saw blade. After I removed the bulkhead pieces, I created a small sanding stick, and put 150 grit sand paper on it. I have some sand paper with adhesive backing. Super helpful in making sanding sticks. I then carefully sanded the rest of the bulkhead fragments left over from cutting it out. I tried to make sure to have this sills and lintels look flat and even. I have to admit, this part was pretty satisfying! I have cut out all the bulkheads that were inside gun ports. So this is what she fully looms like right now. I need to now sand all the gun port frames down to match the curvature of the hull above the Wales. I'll hopefully start that tomorrow. Thanks all! Jeff


-
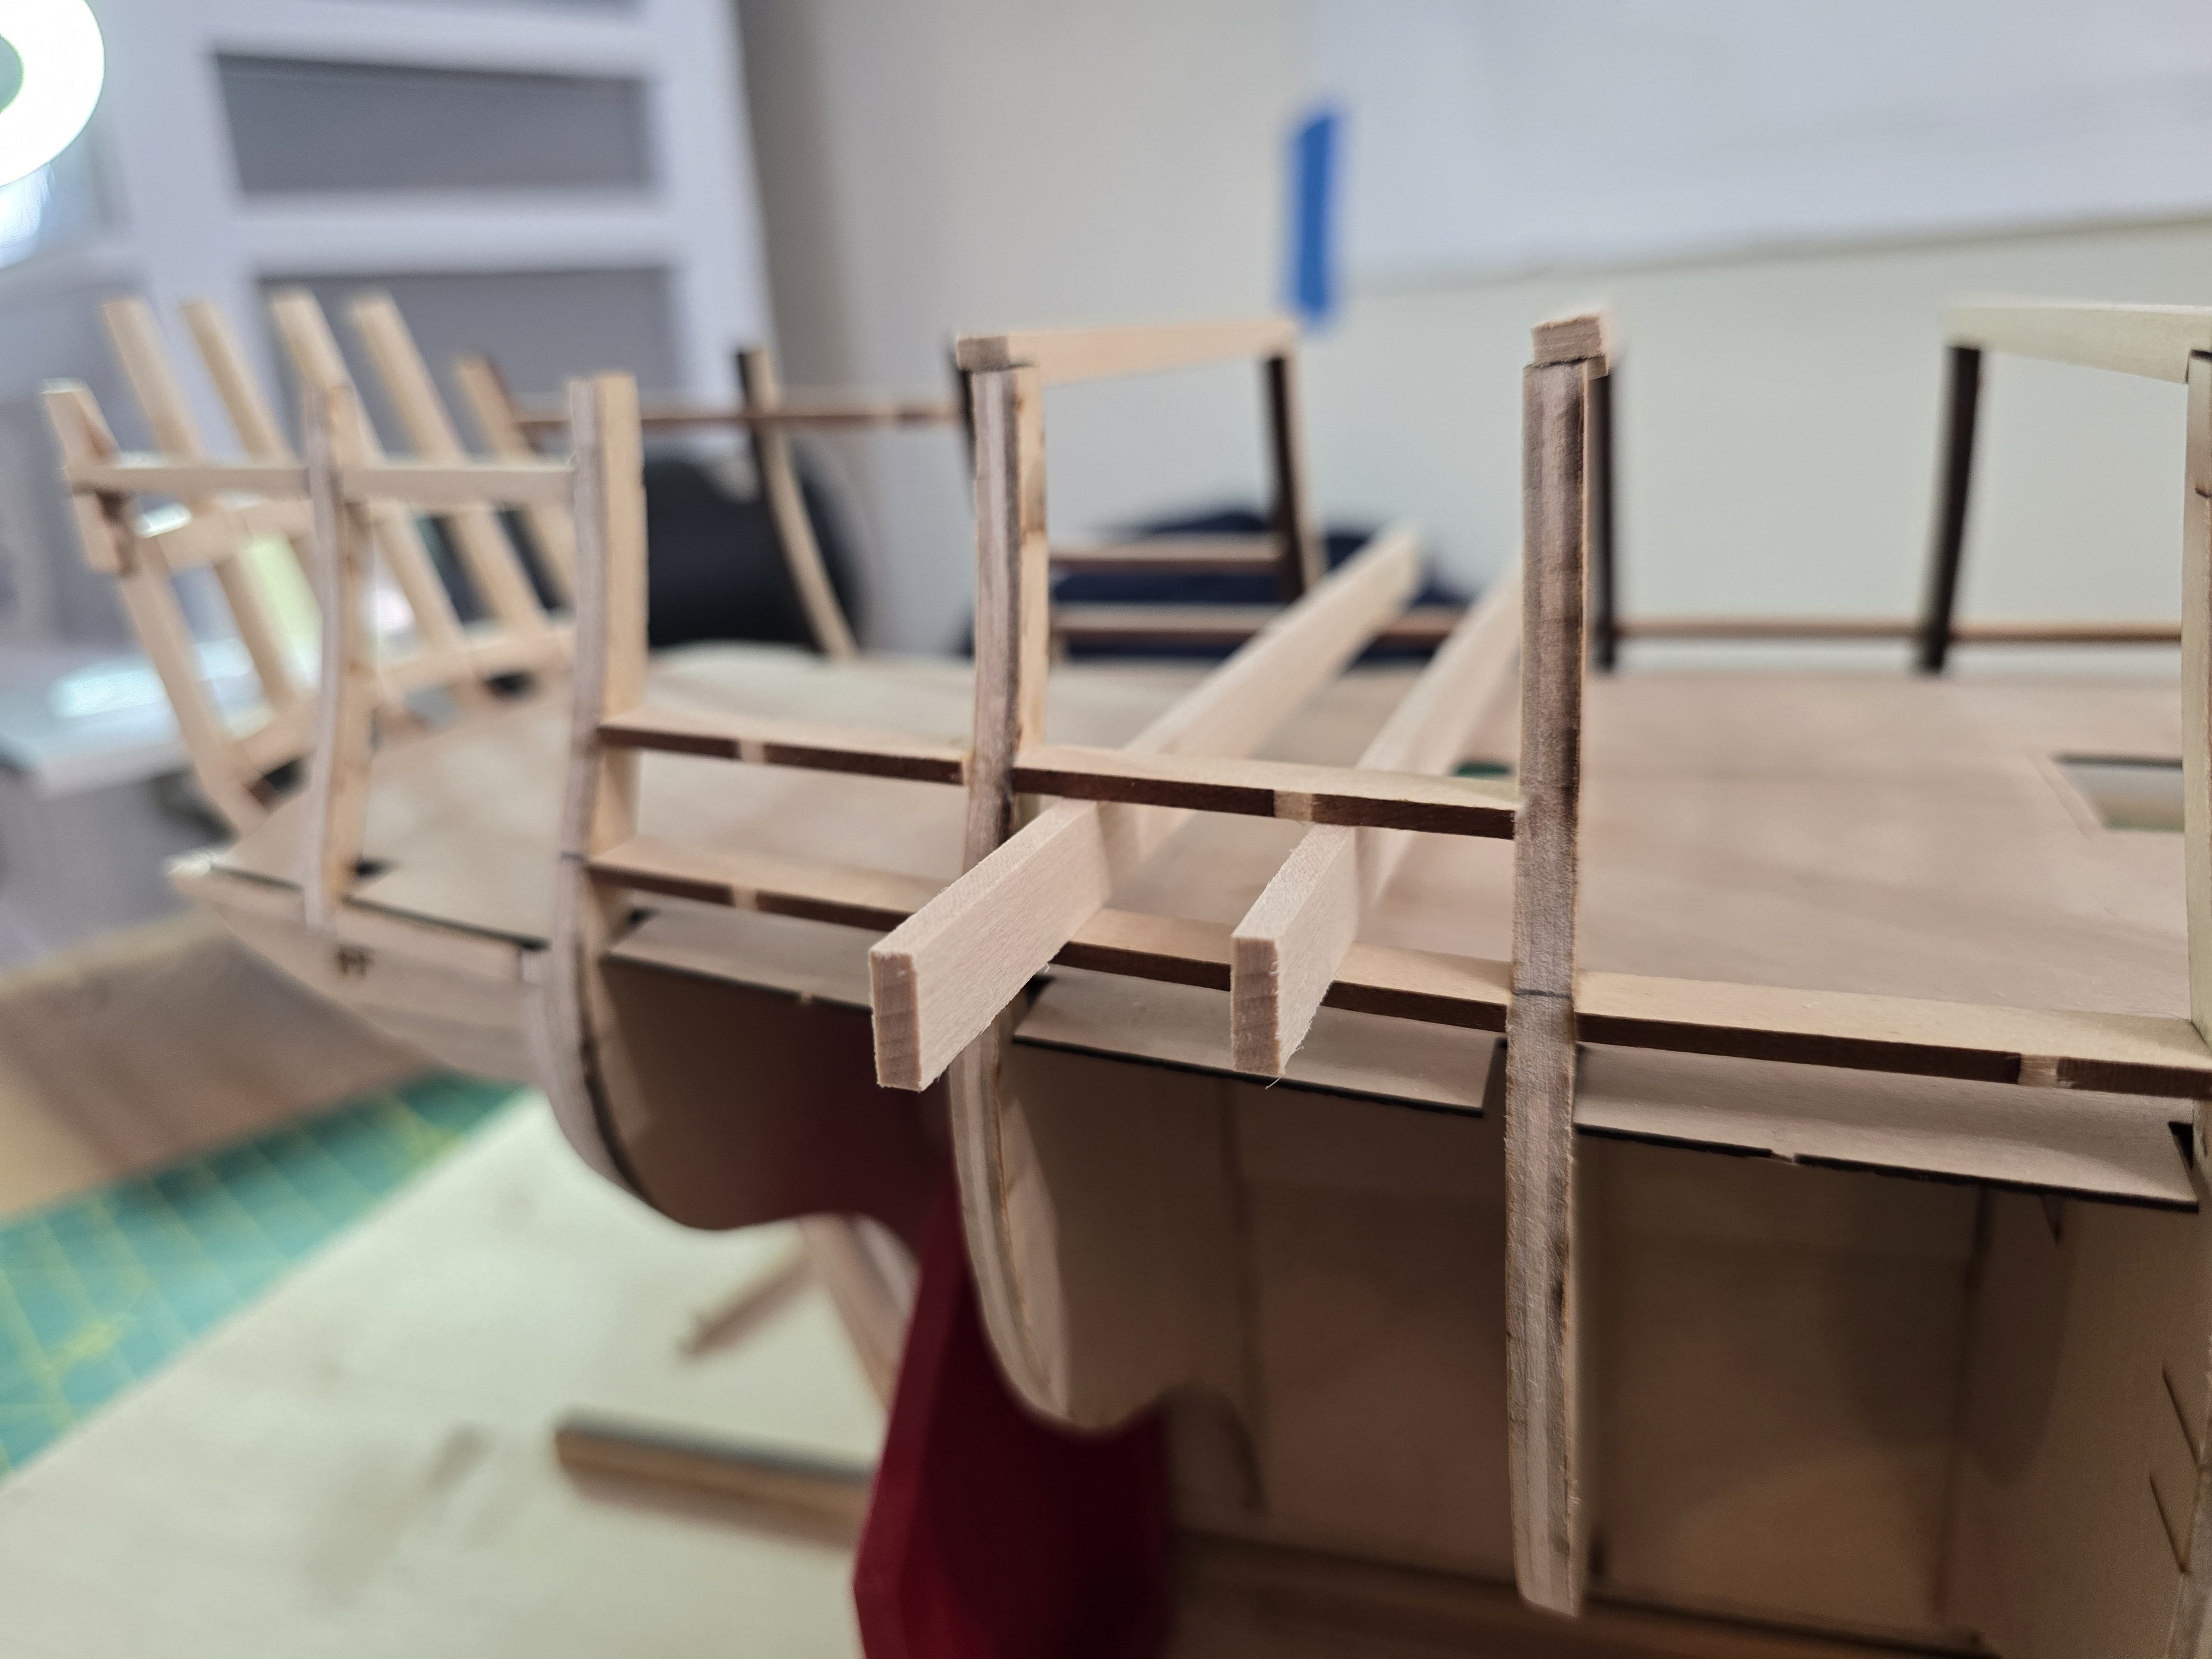
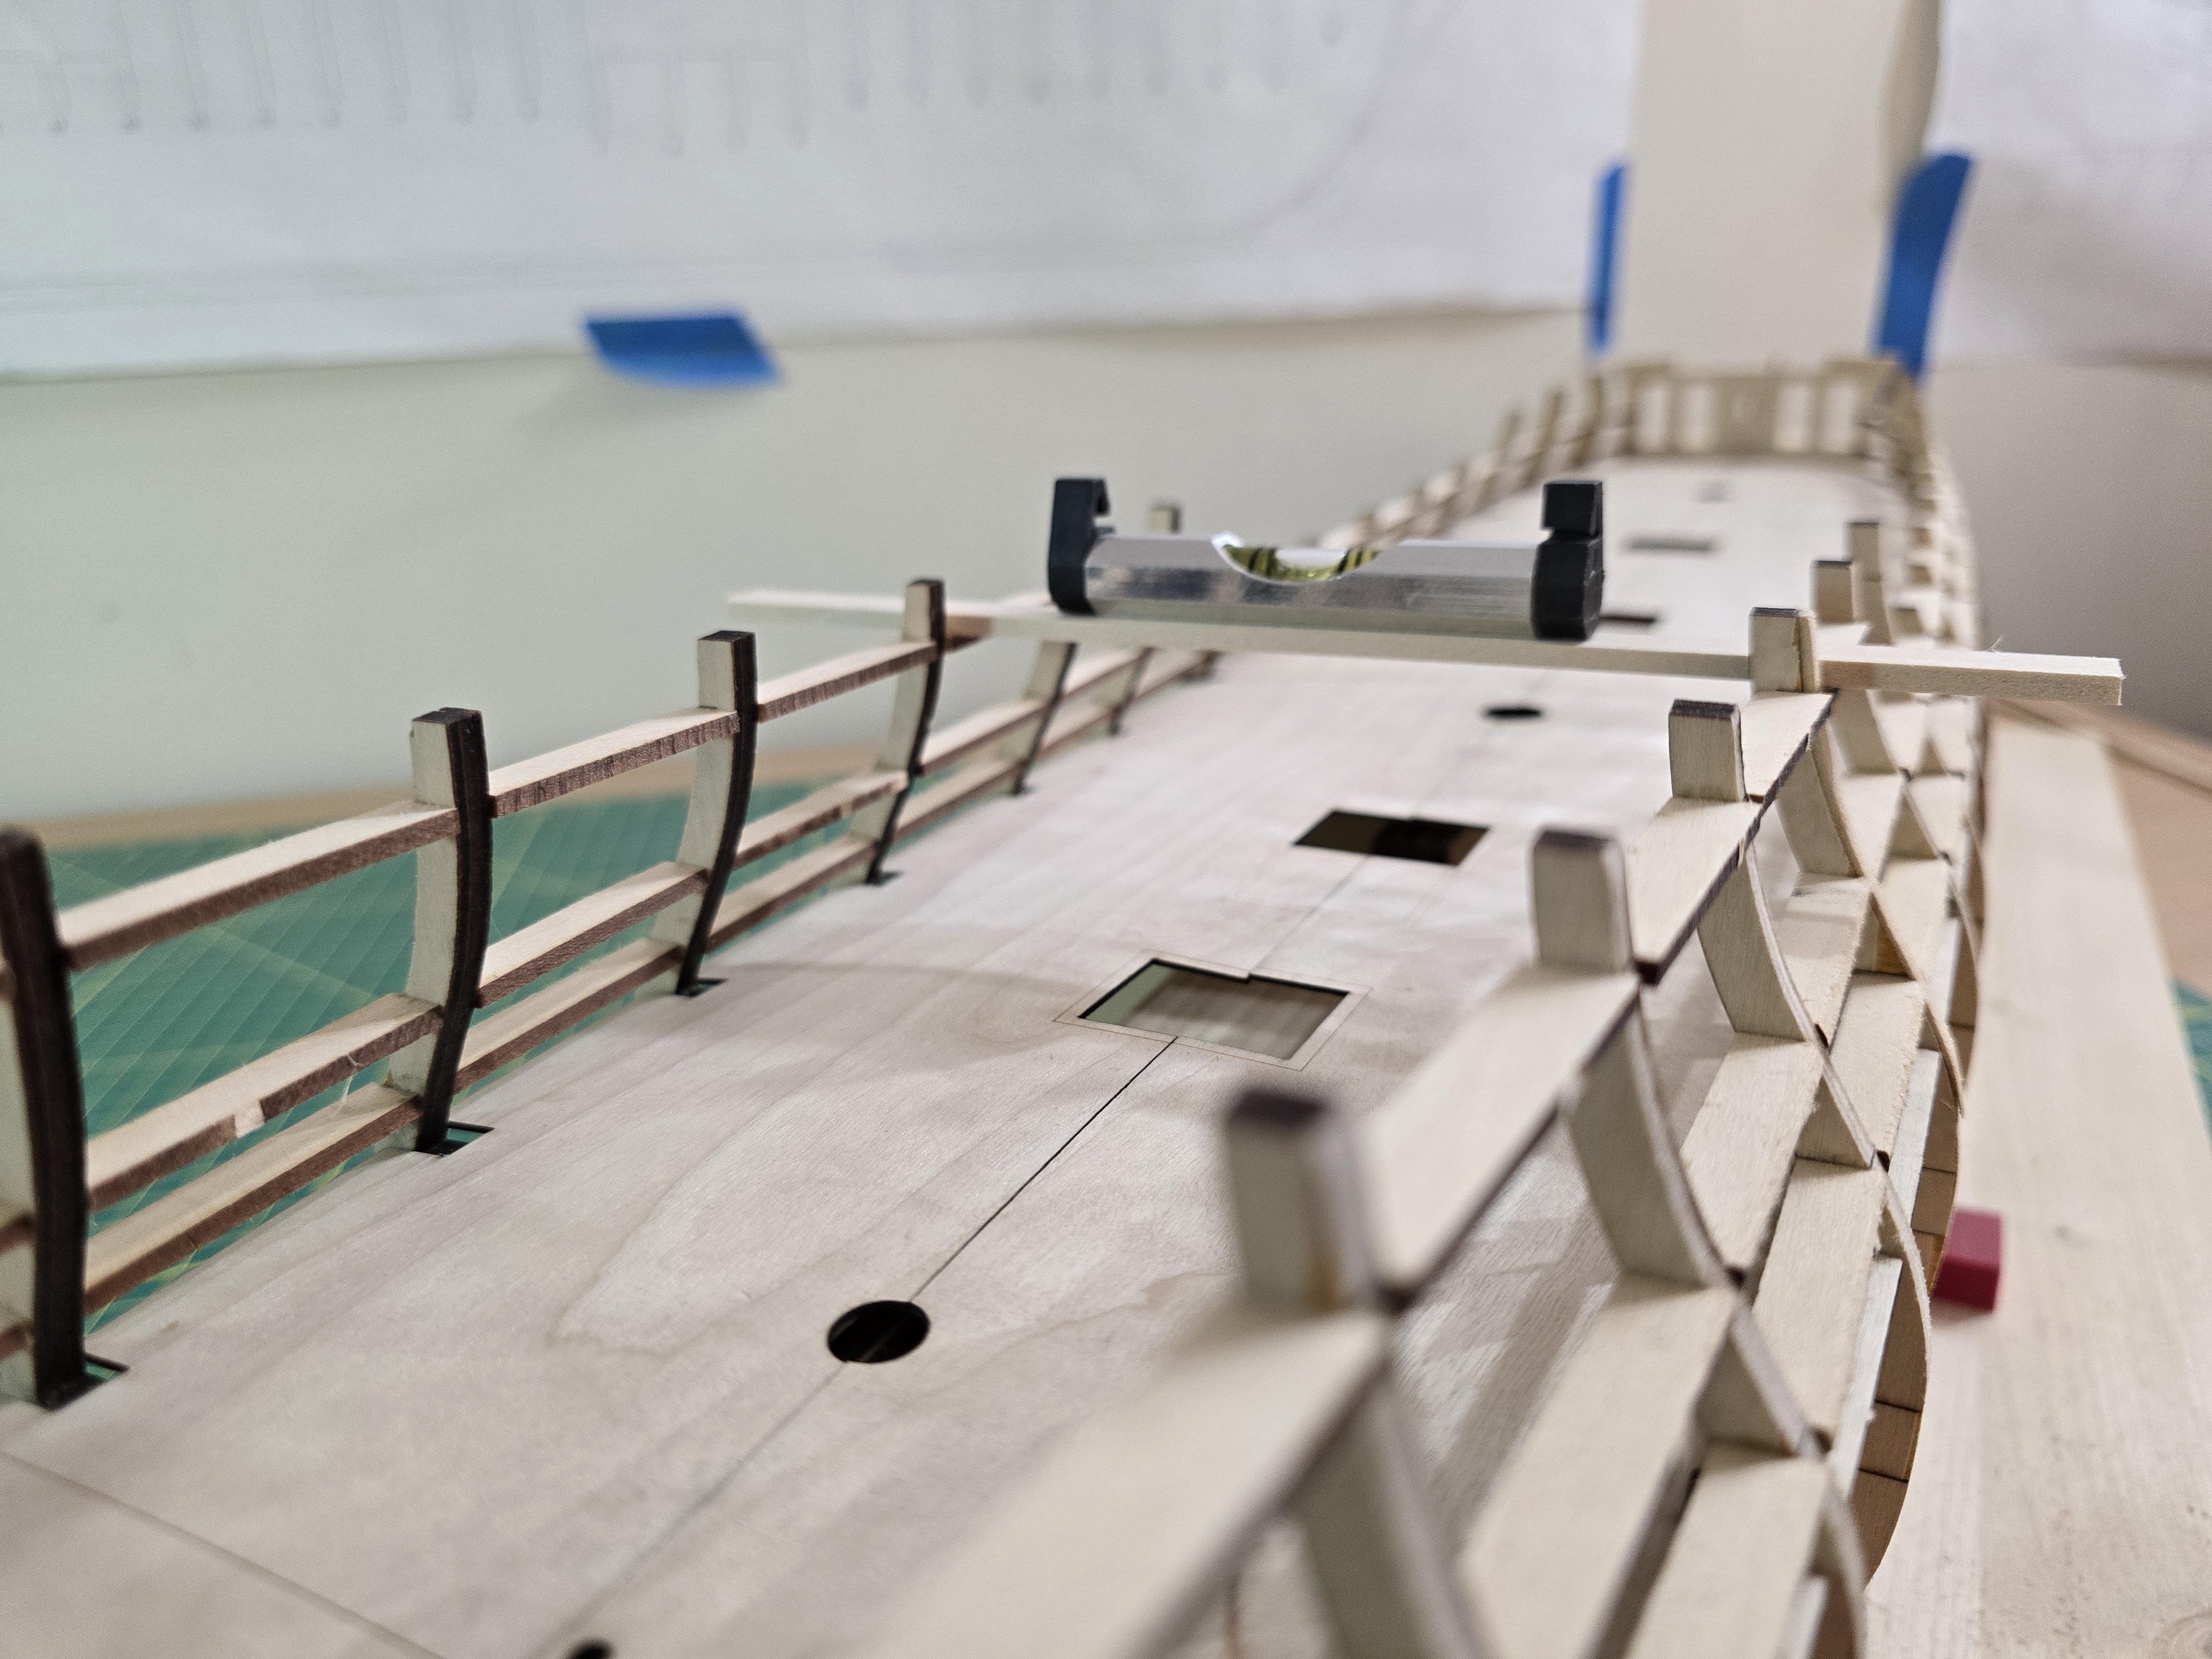
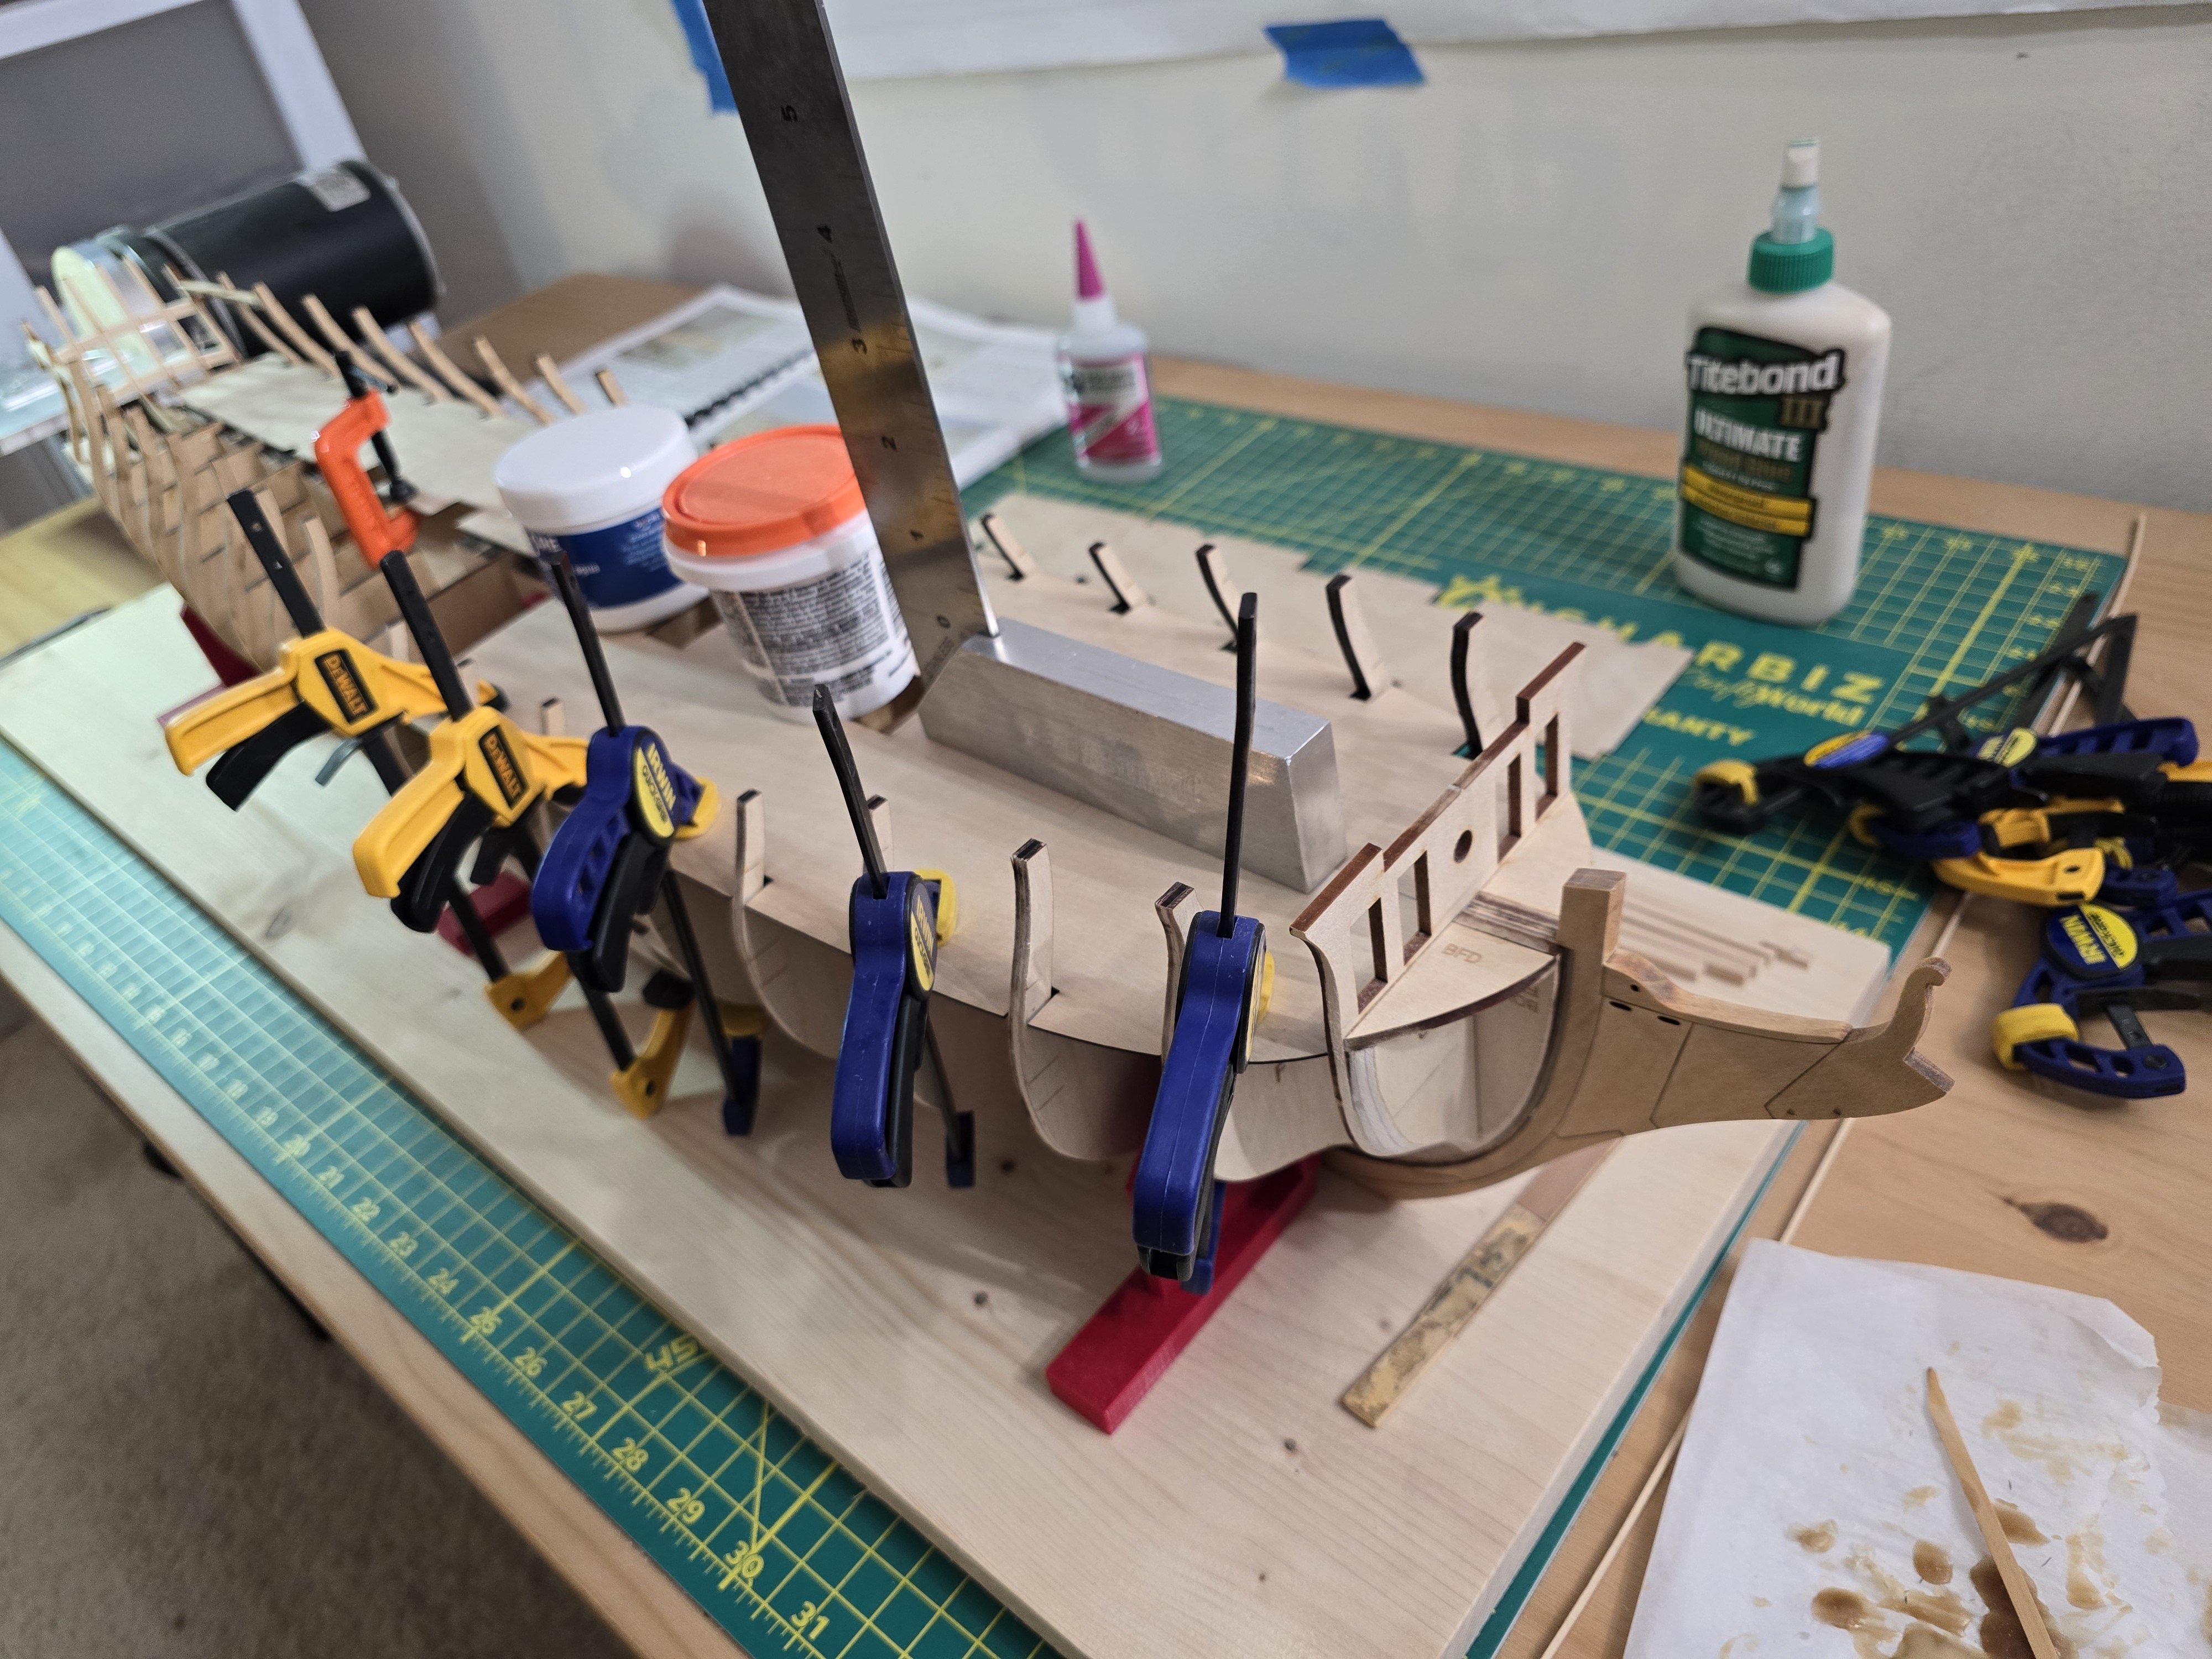
Hey all! I next lined off the hull foe the gunports. I enjoyed trying to get a clean line based upon the supplied gunport lines on each bulkhead. After marking where they should go, I proceeded to fit and glue the sills one at a time on each side. I used a level to try to match both sides to make them even. Once that was complete, I fitted and glued on the lintels. This was easier as I cut the correct height supplied basswood strip into 2 equal length pieces so I could easily fit the lintels to the proper height. This made the process enjoyable and easier than trying to measure out the correct height. While I was adding the sills and lintels, I double checked the bulkheads to make sure there wasn't any dips or bulges. I did find one bulkhead which was bulging too much on one side, but was sinking on the other. So to fix it, I cut and bent to the correct length and shape a strip of bass wood who's width was the same as the bulkhead. I then proceeded to sand it down to the proper width so the planking would lie on it correctly. Here are a few more pictures of this step. After the glue dried, I then sanded all of the sills and lintels to match the bulckheads. This took a few days as it takes a while and creates a lot of dust! Whew that toom a while and I think I still need to make some adjustments to the bridle ports. But this step is mostly complete! Onto marking and gluing in the gunport frames! Thanks for reading! Jeff


-
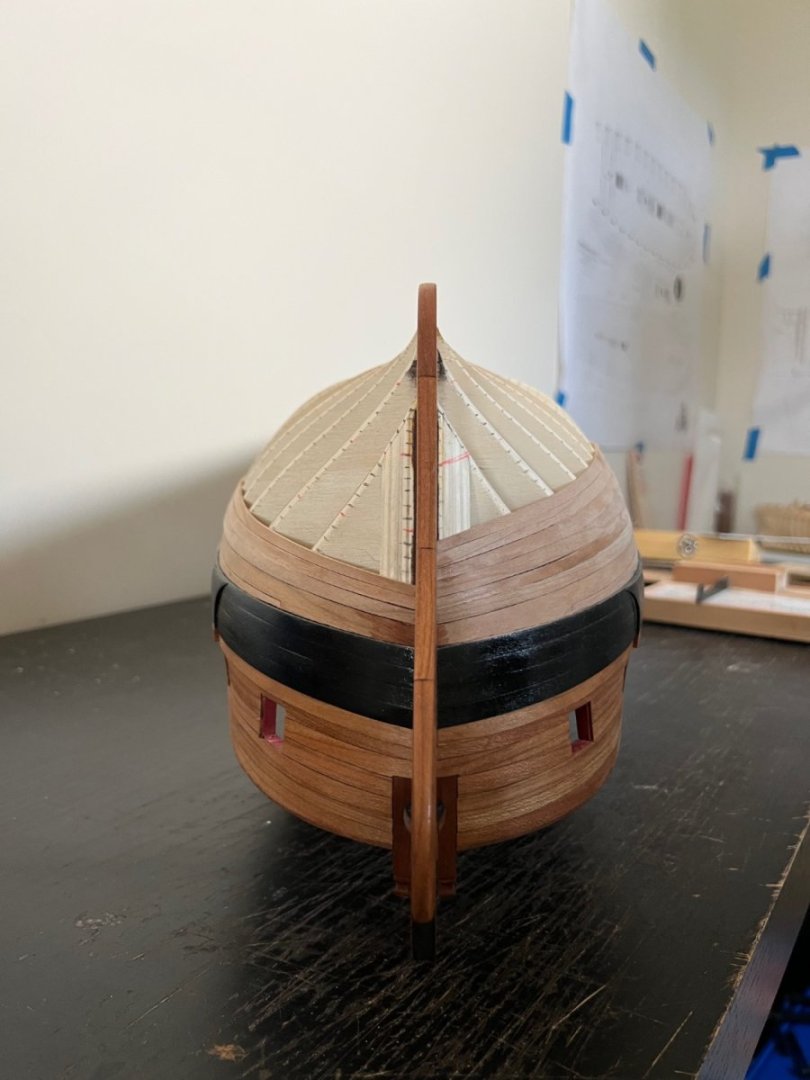
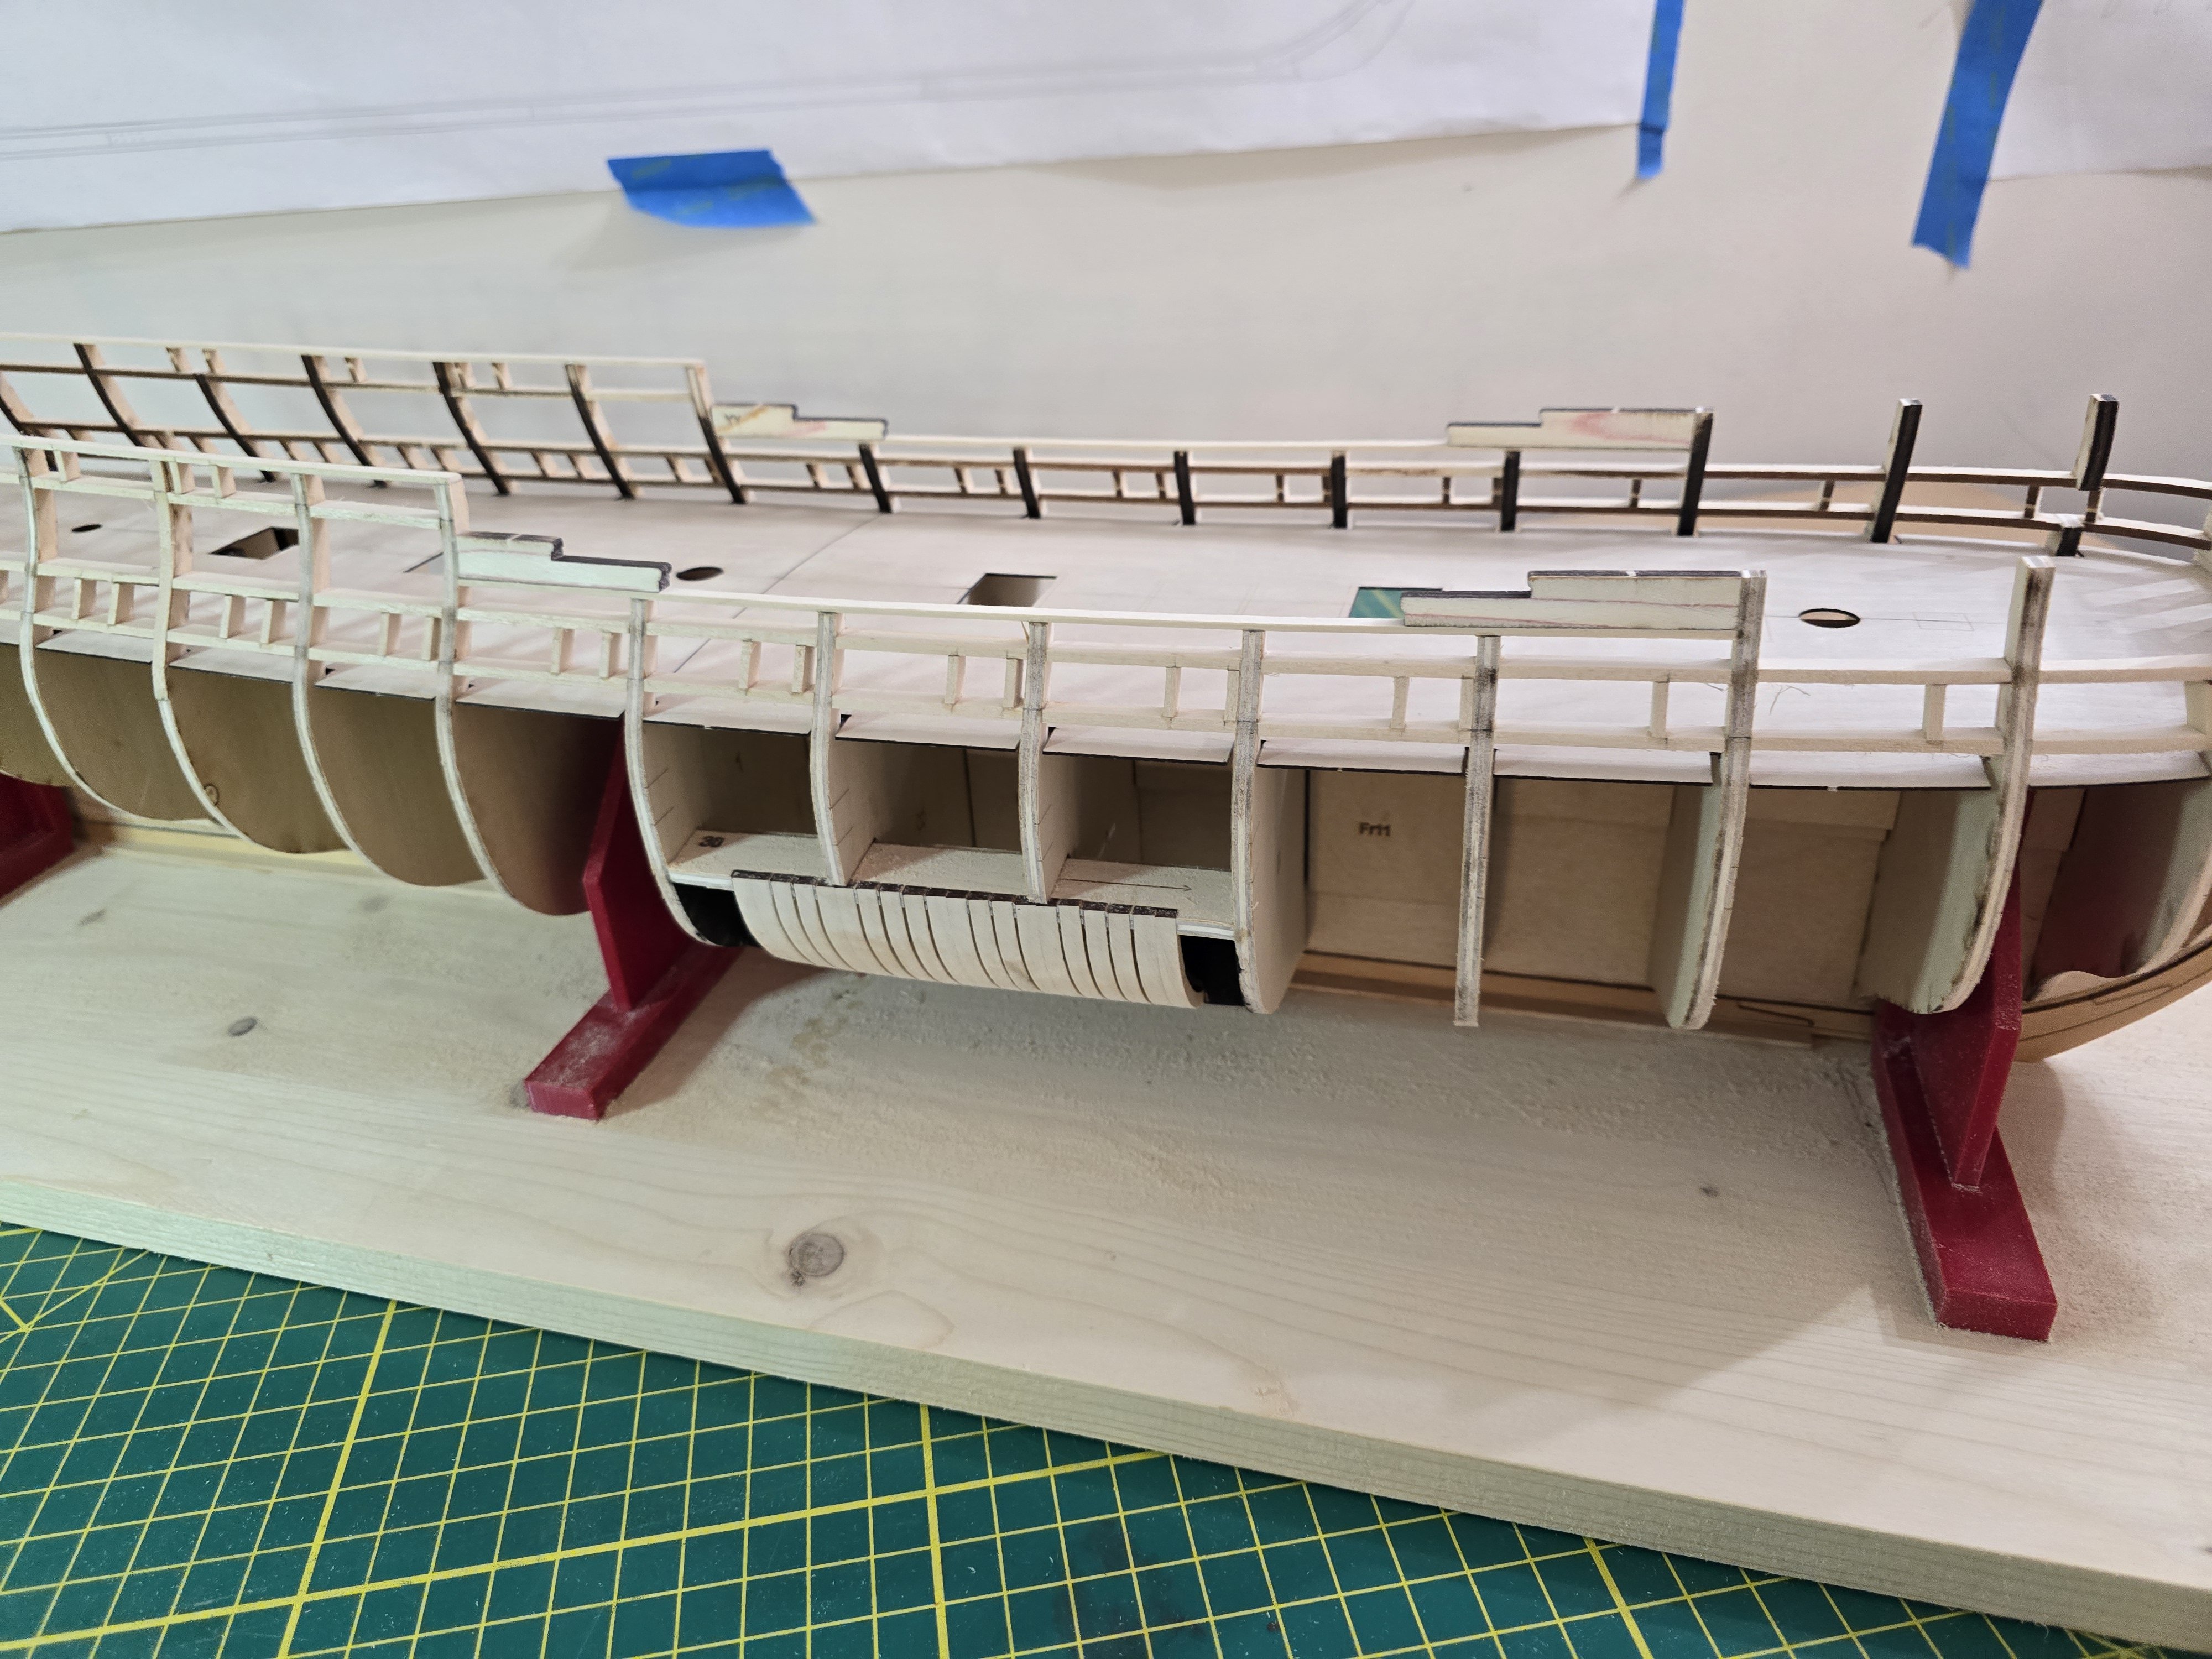
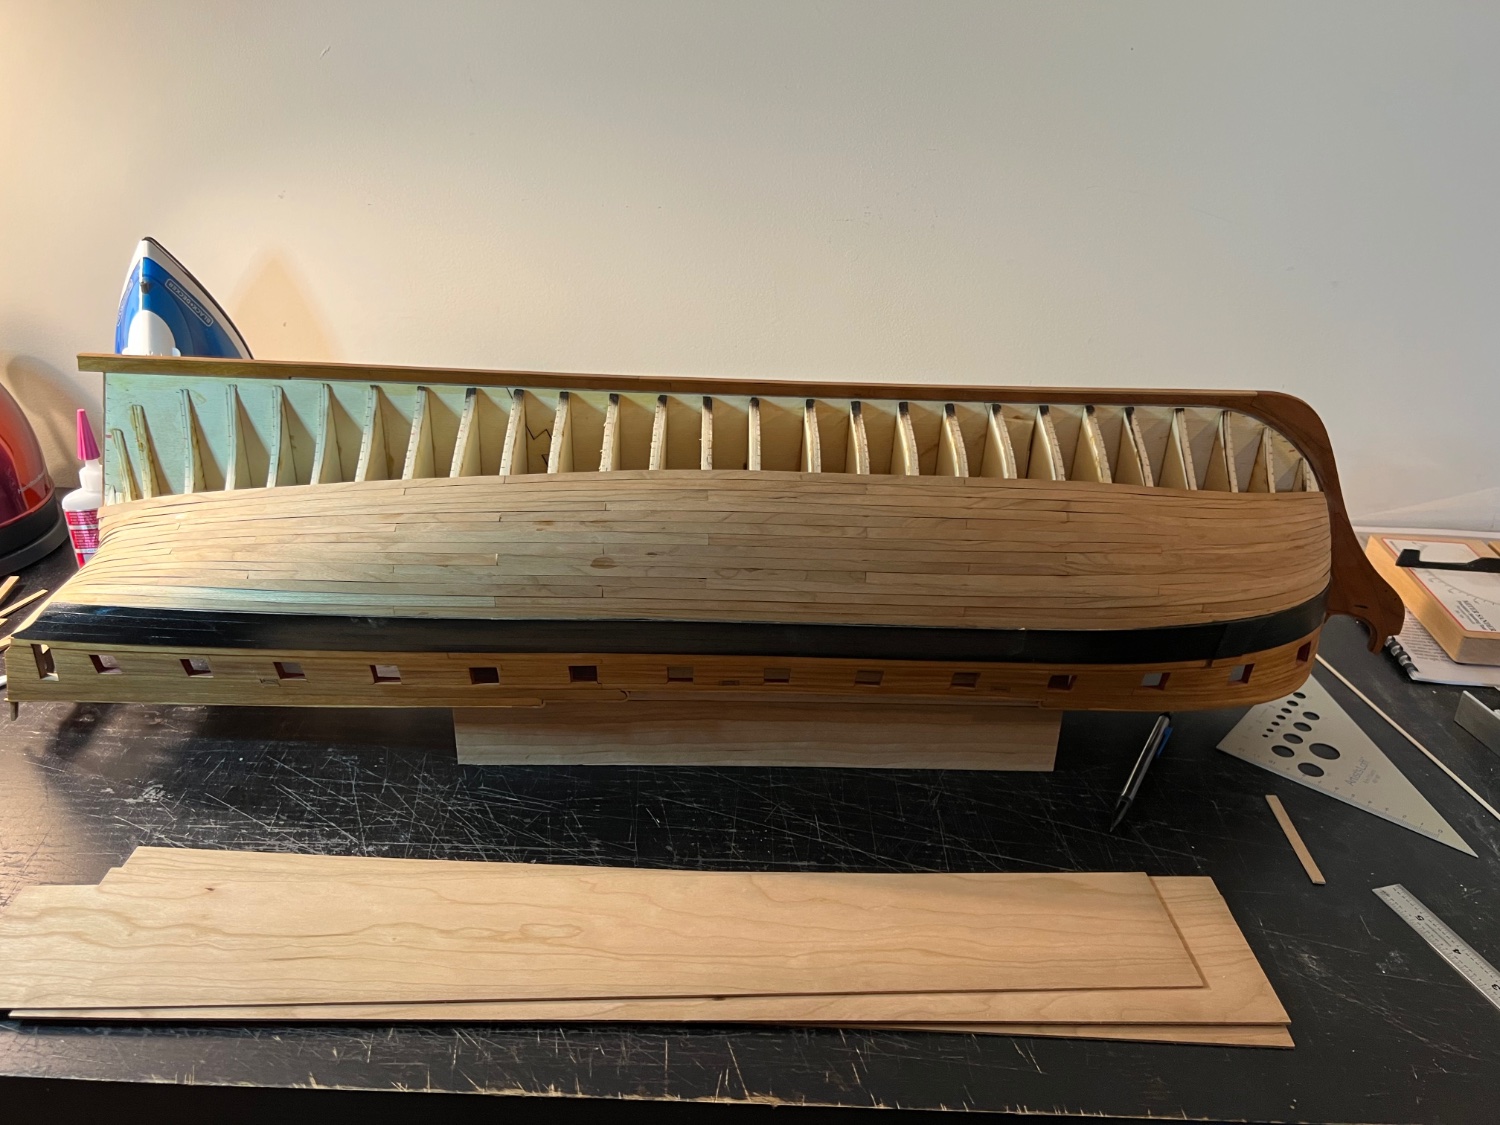
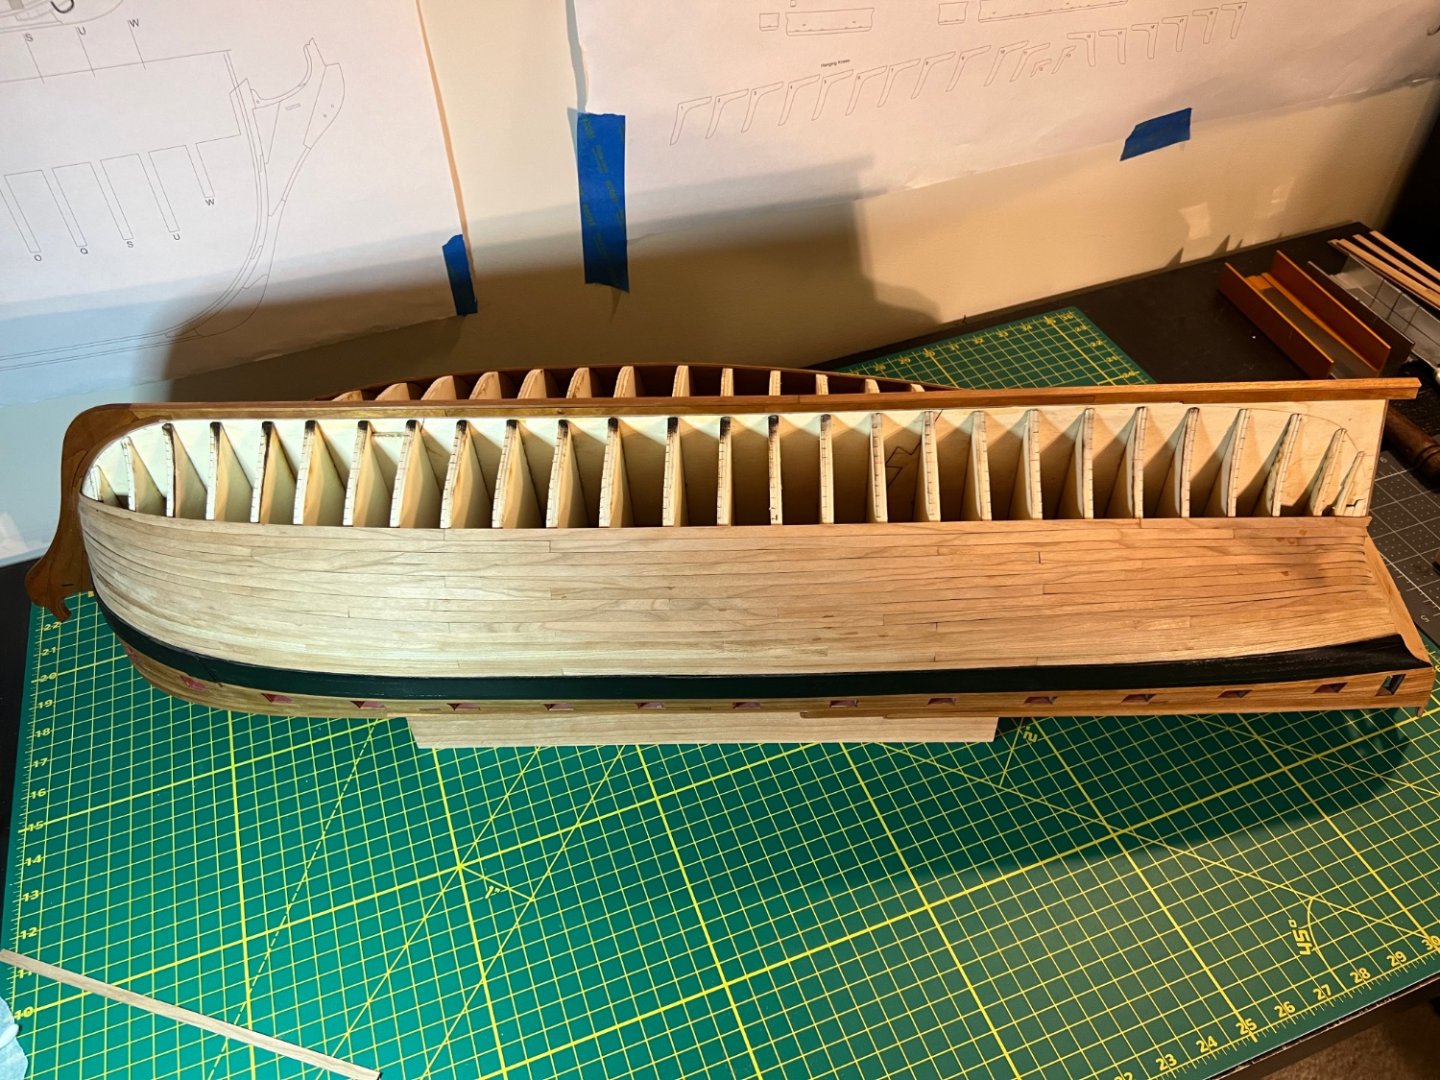
Hey all, Thanks for the likes! Next I added the false deck flooring. This was fun and really helped to stiffen up the bulkhead formers. I test fitted every one of them multiple times: including with the clamps to make sure I could hold it drown correctly while the glue dries. This last pic is when I was test fitting the last piece. I felt it came out pretty well! The next step was to plank the beakhead bulkhead. This step was pretty easy but was fun seeing more deck planking on the model. The last pic, shows me continuing the planking. I did varnish the deck and stained/ varnished the other planking, but I don't quite have pics of that yet 😅 Thanks all! Jeff


-
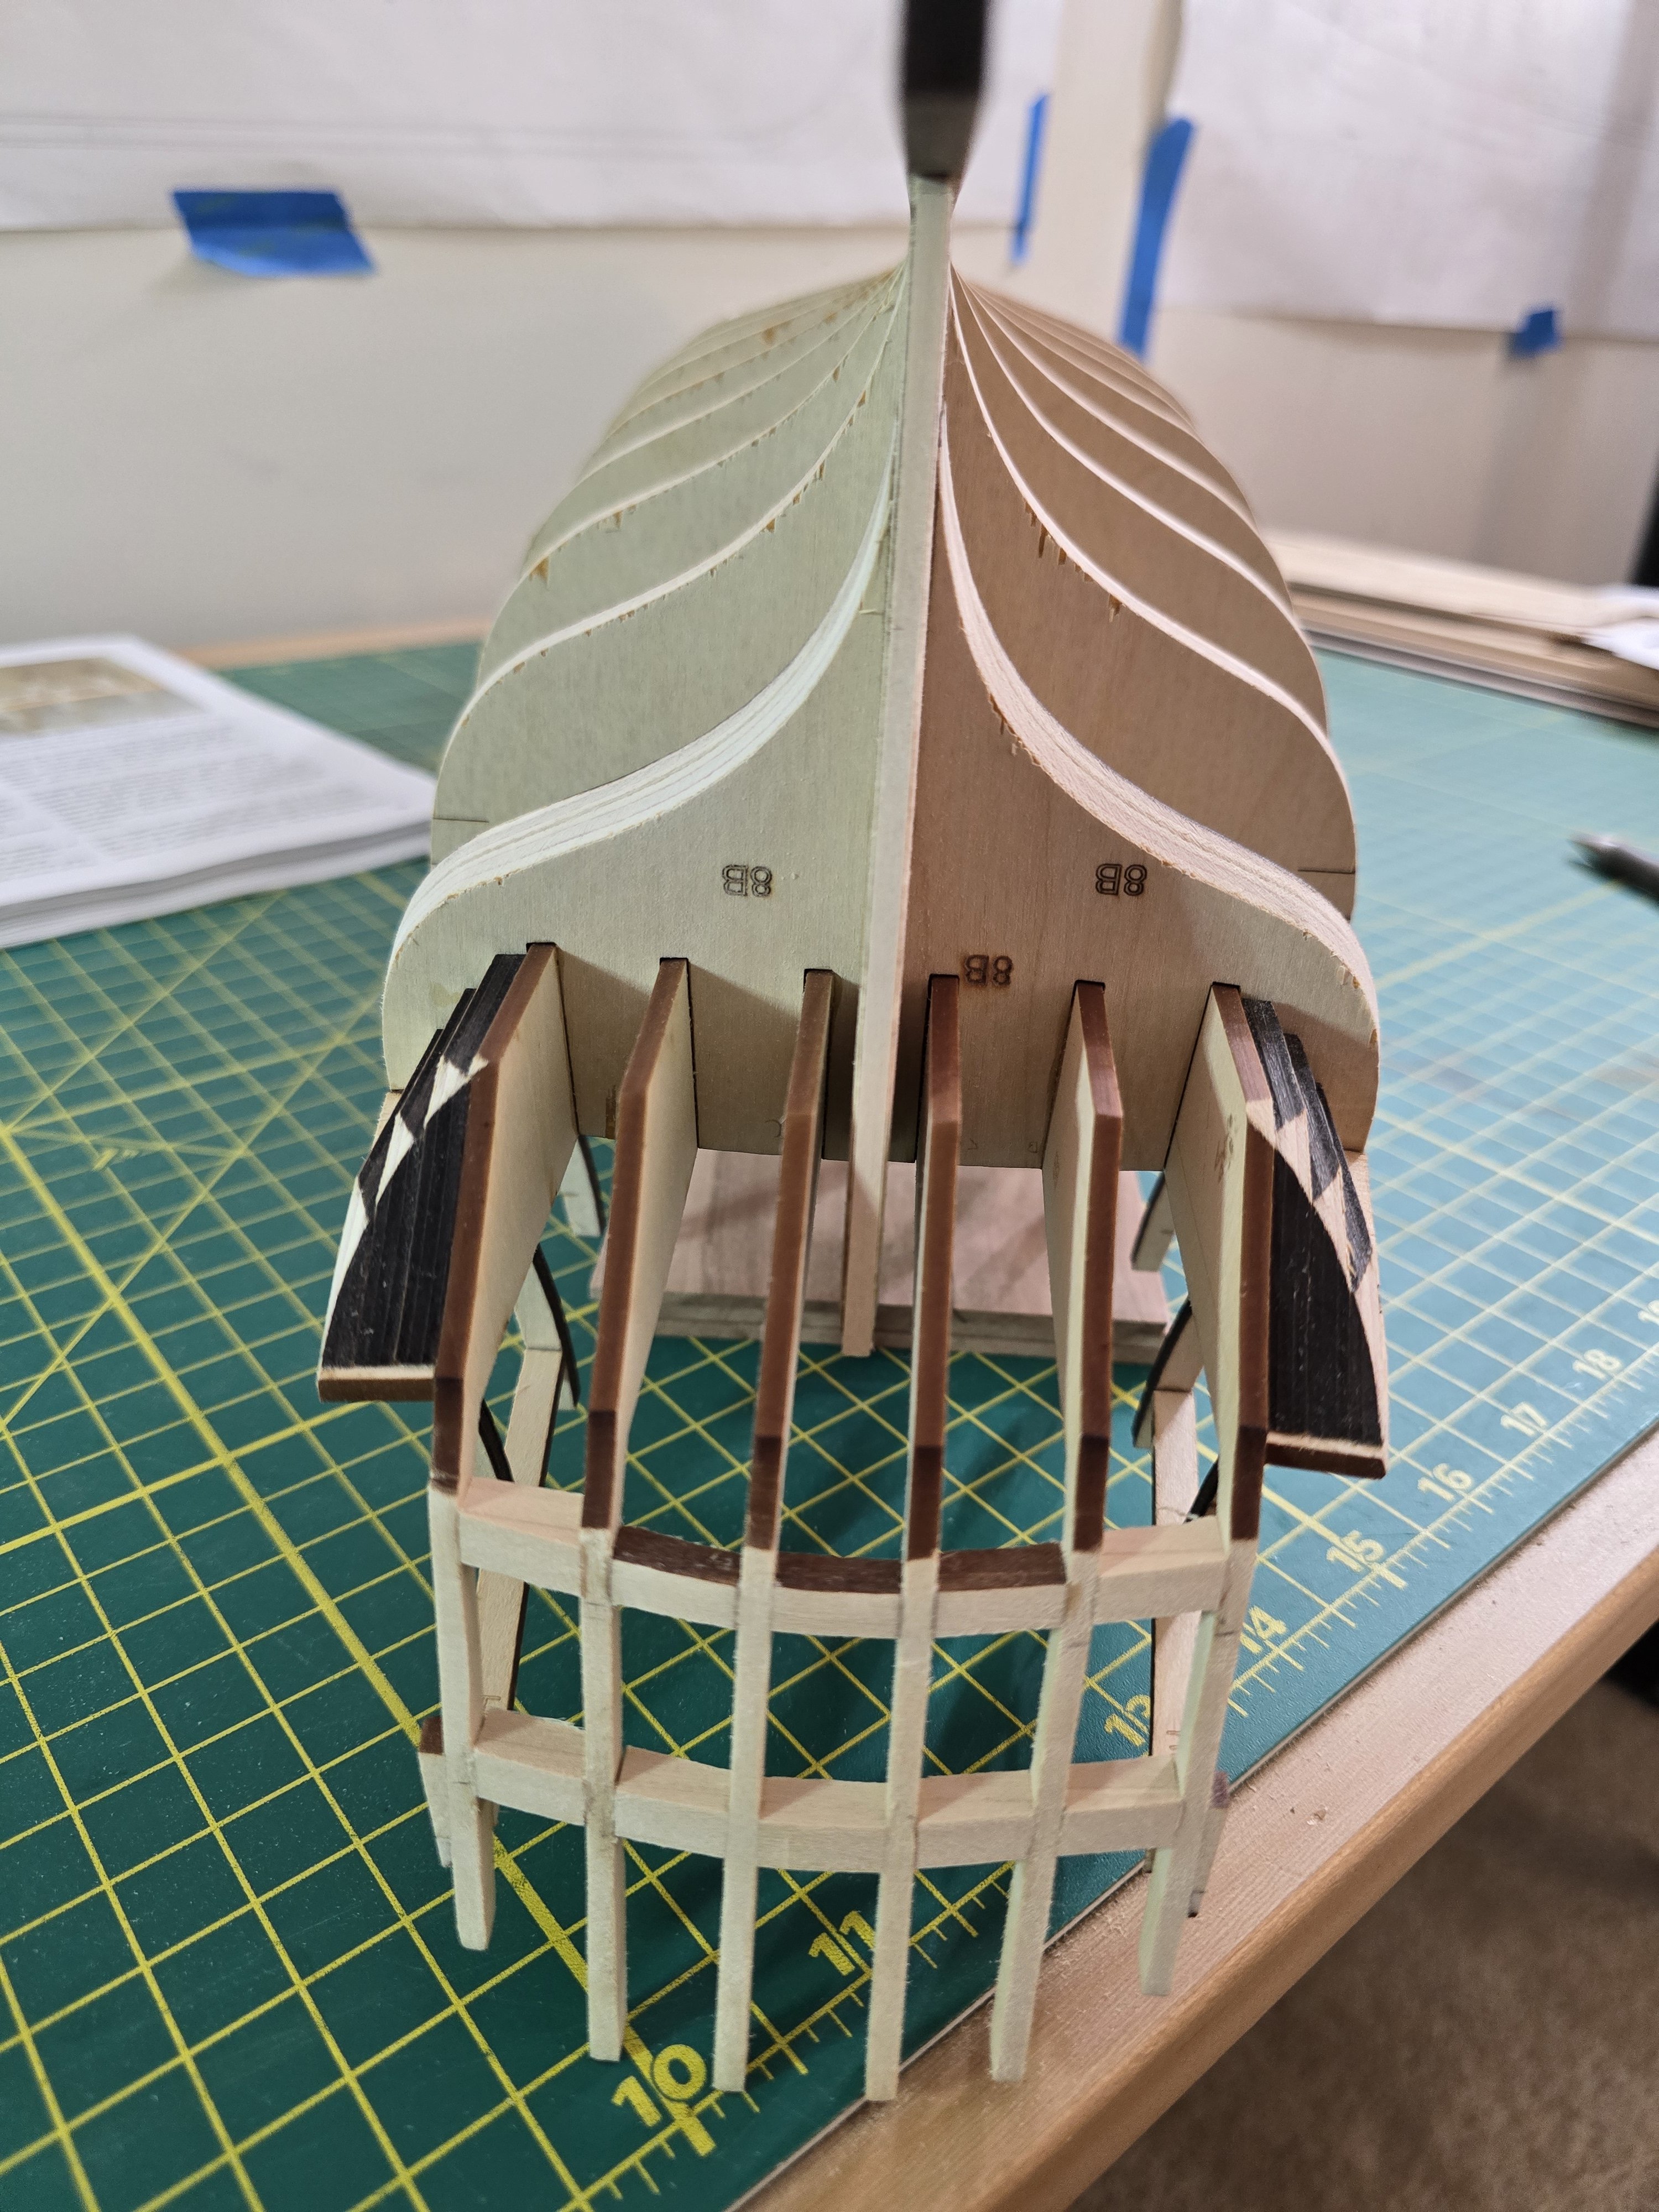
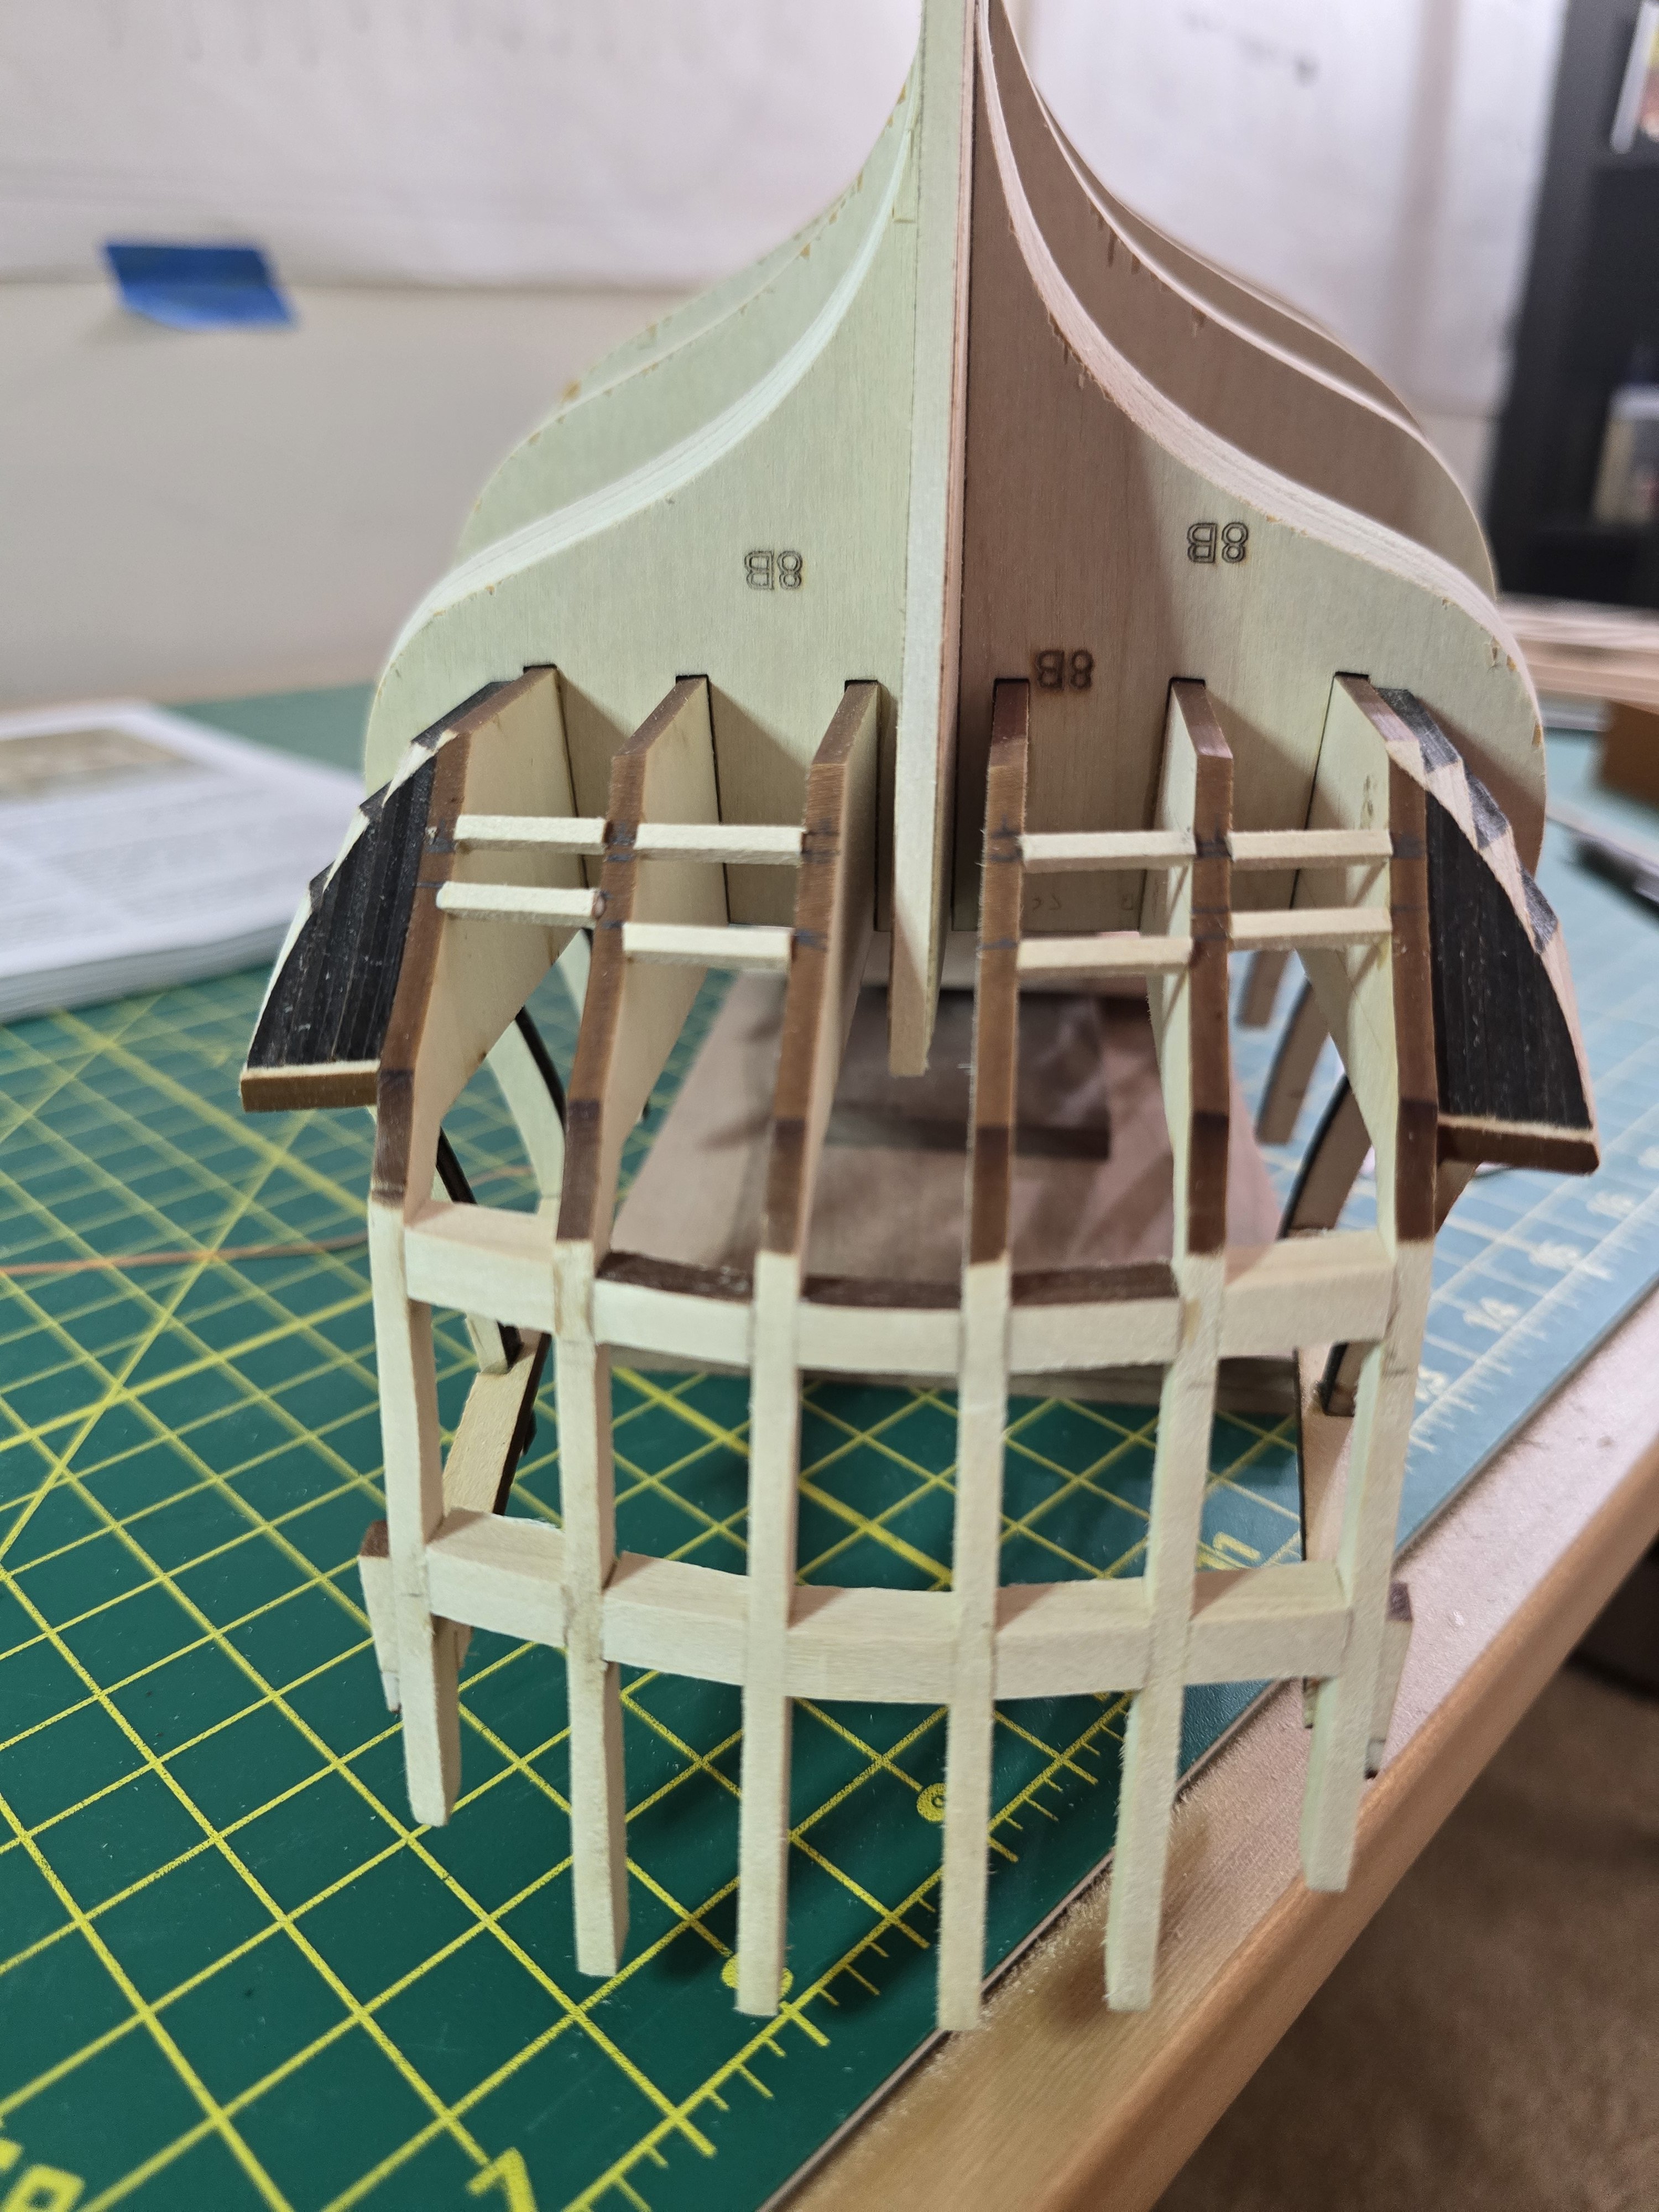
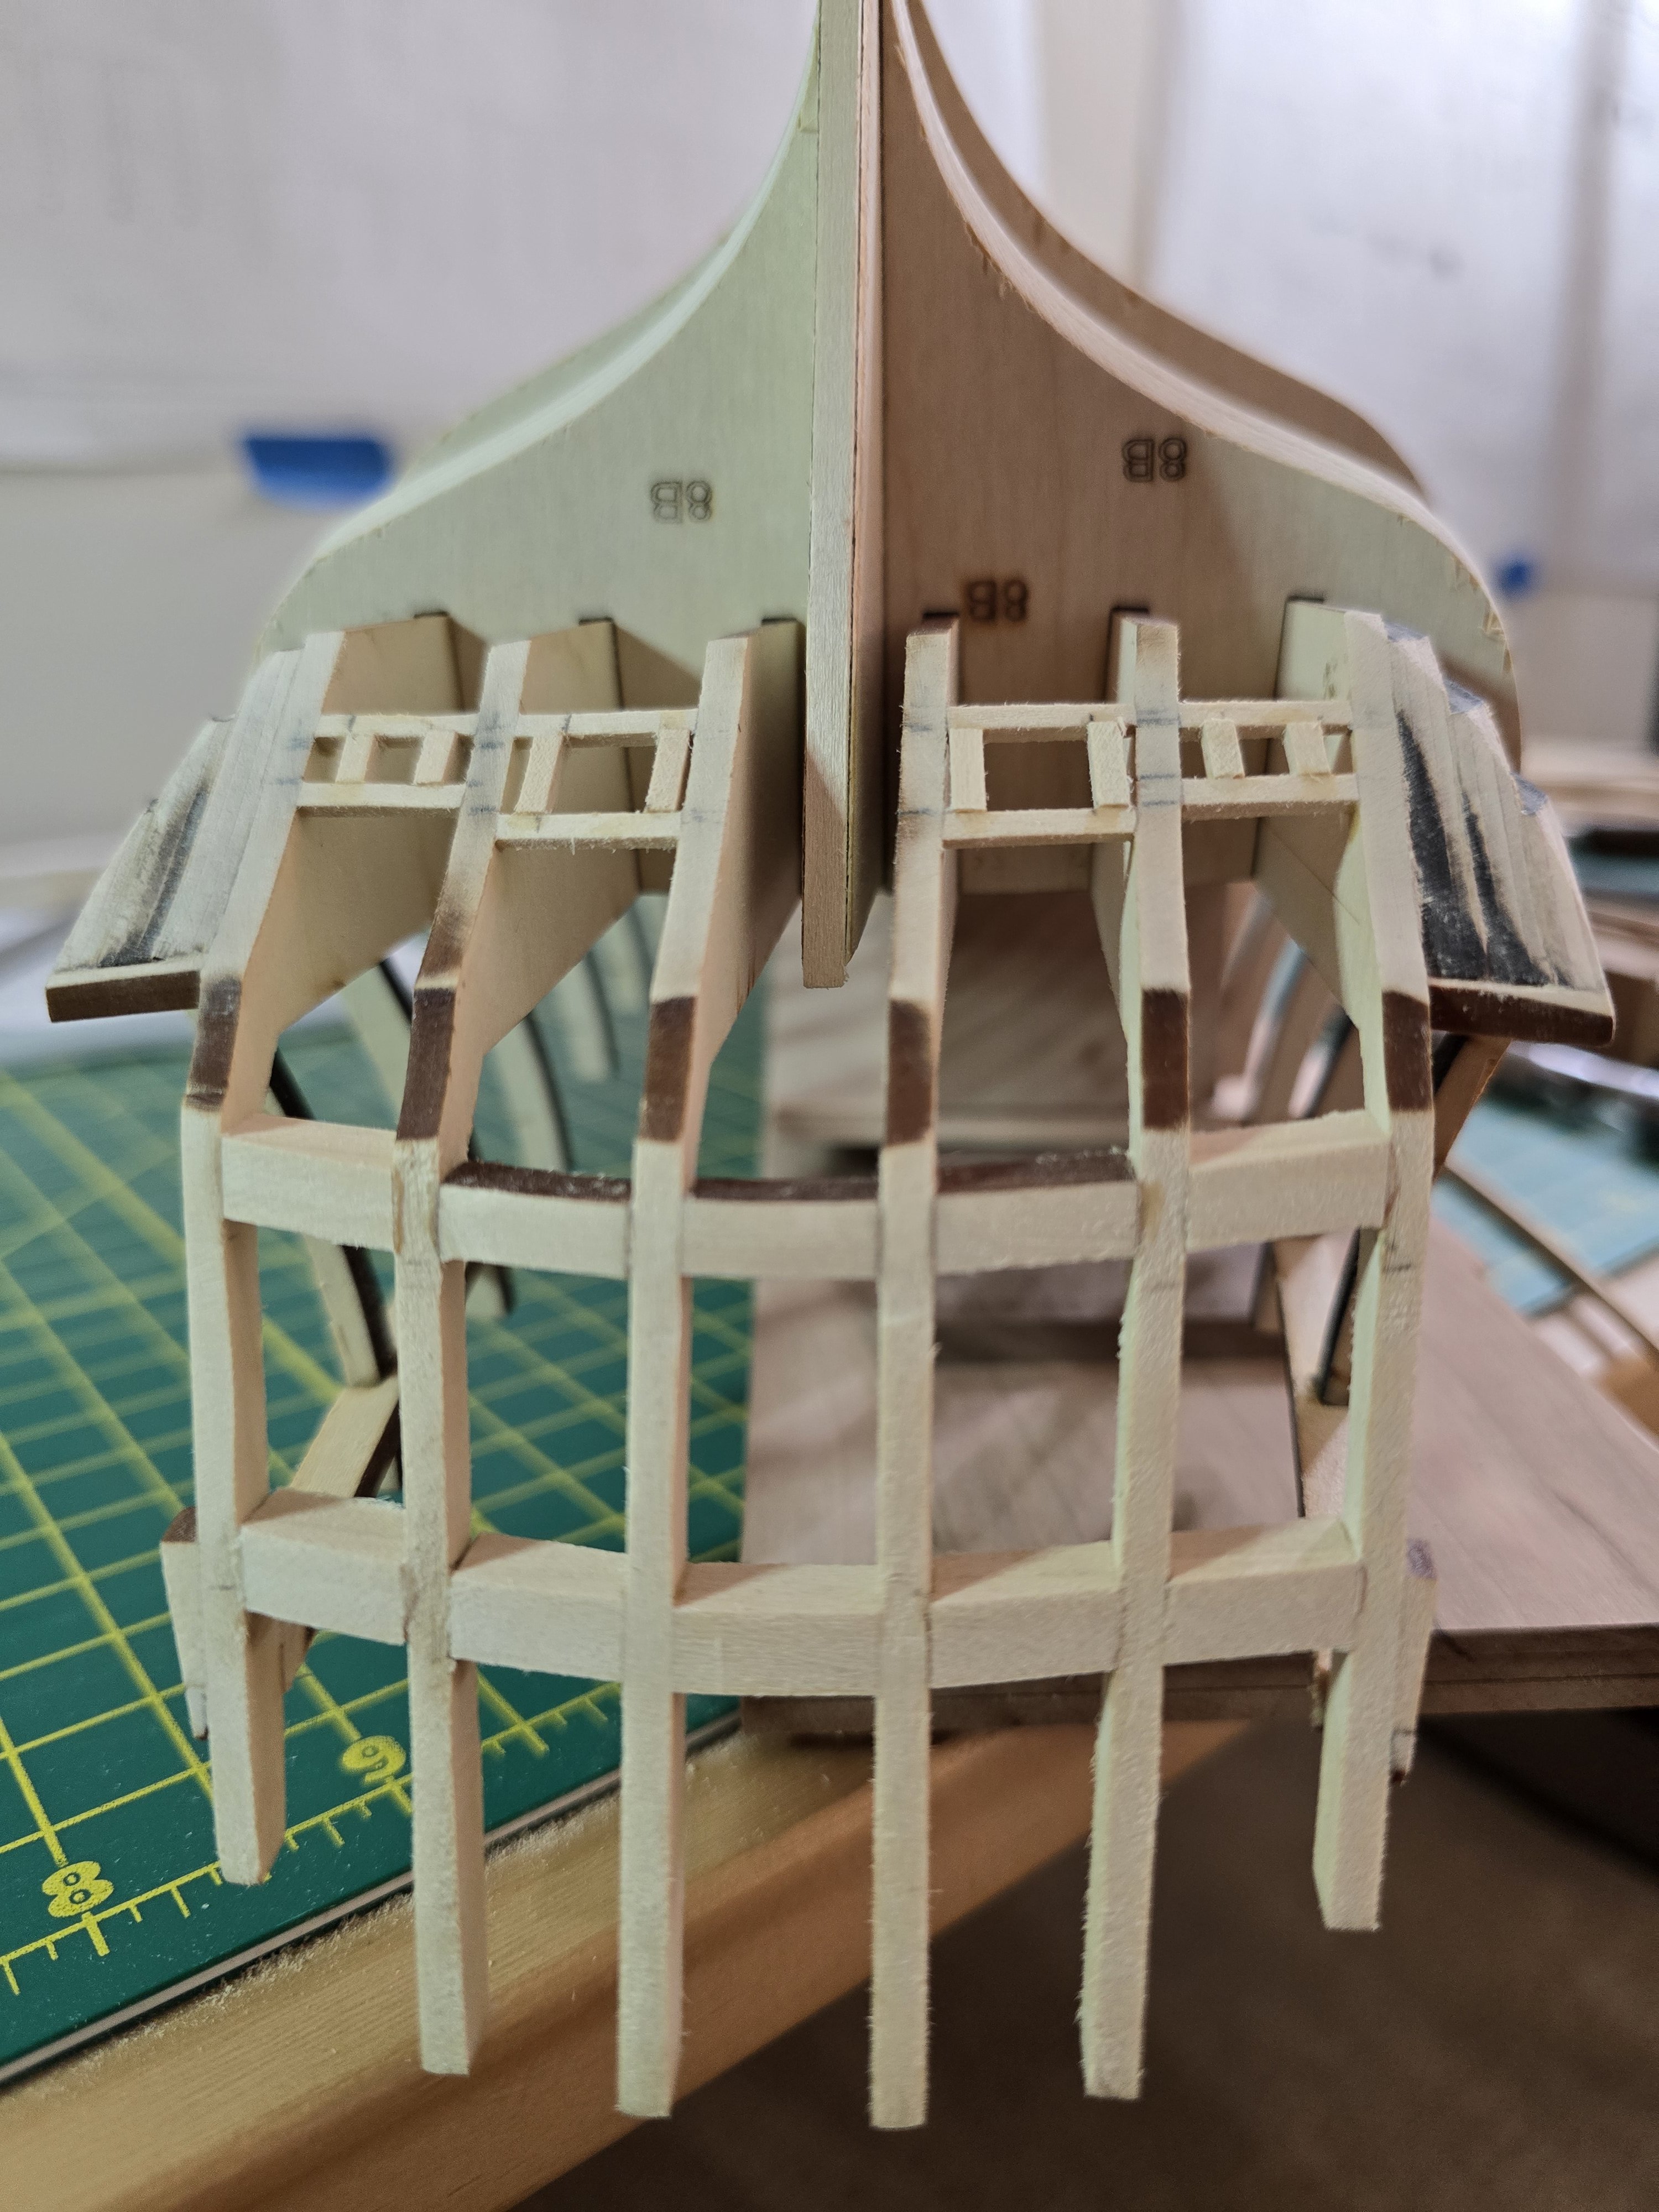
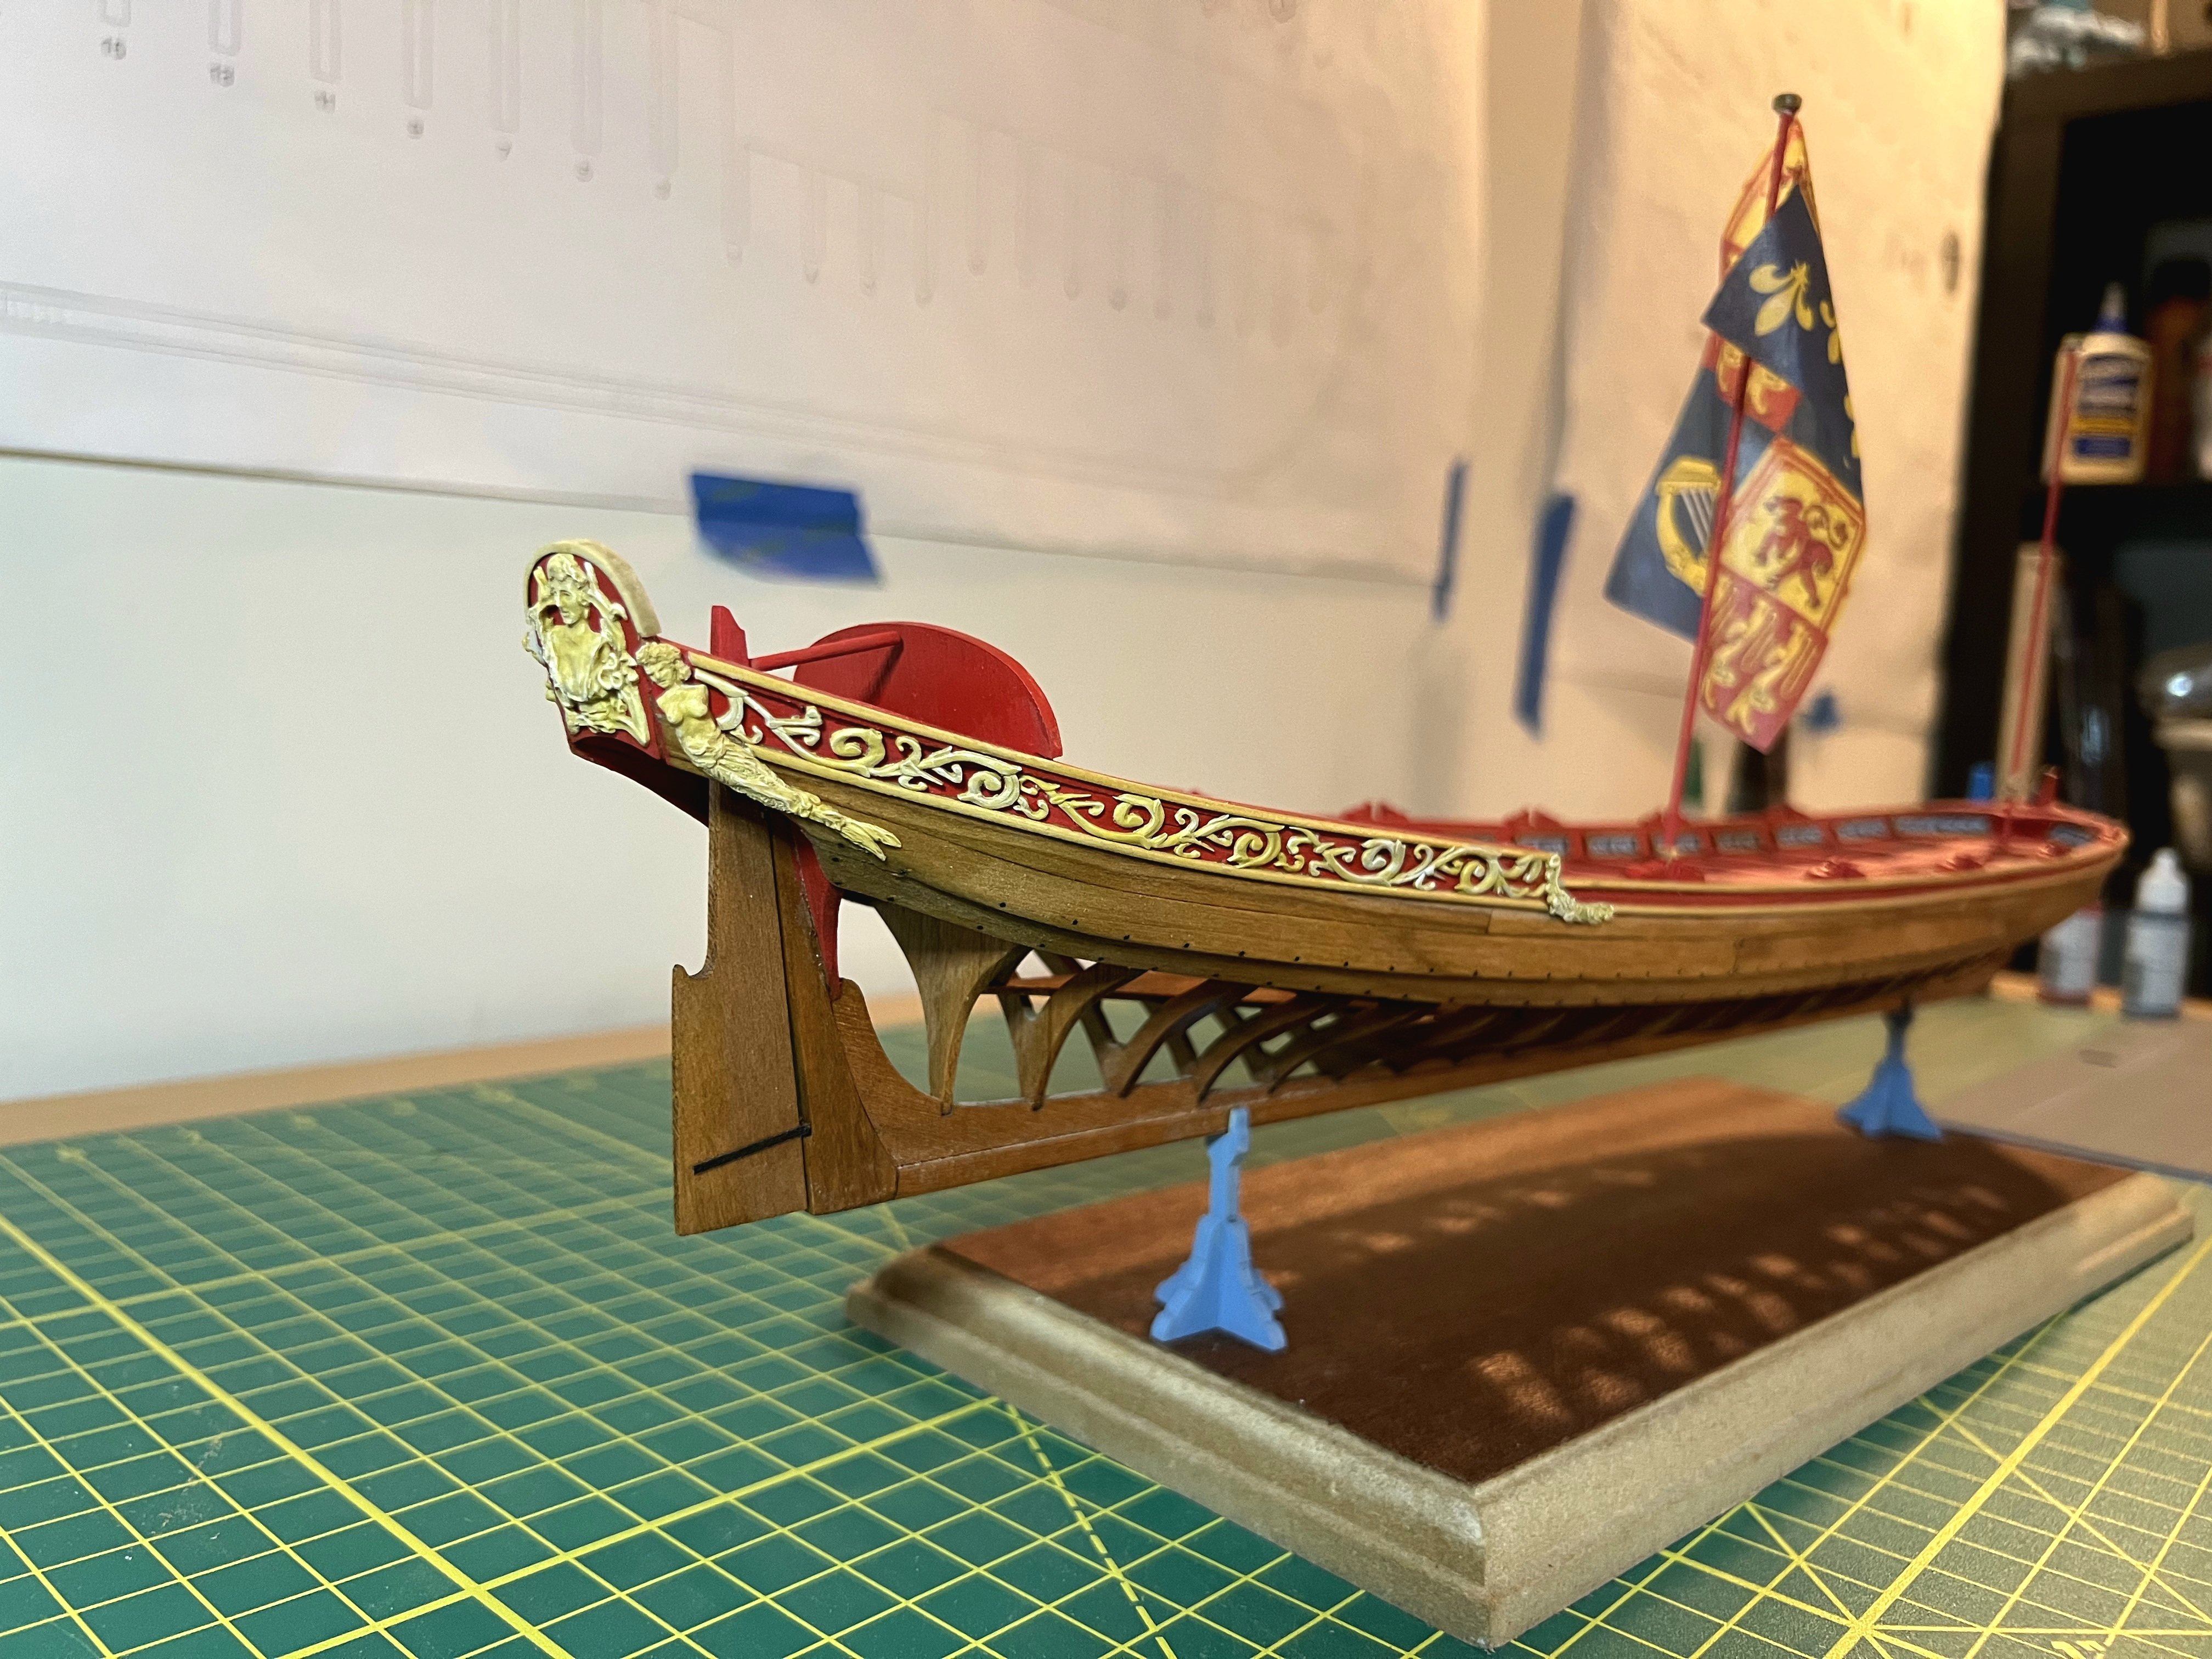
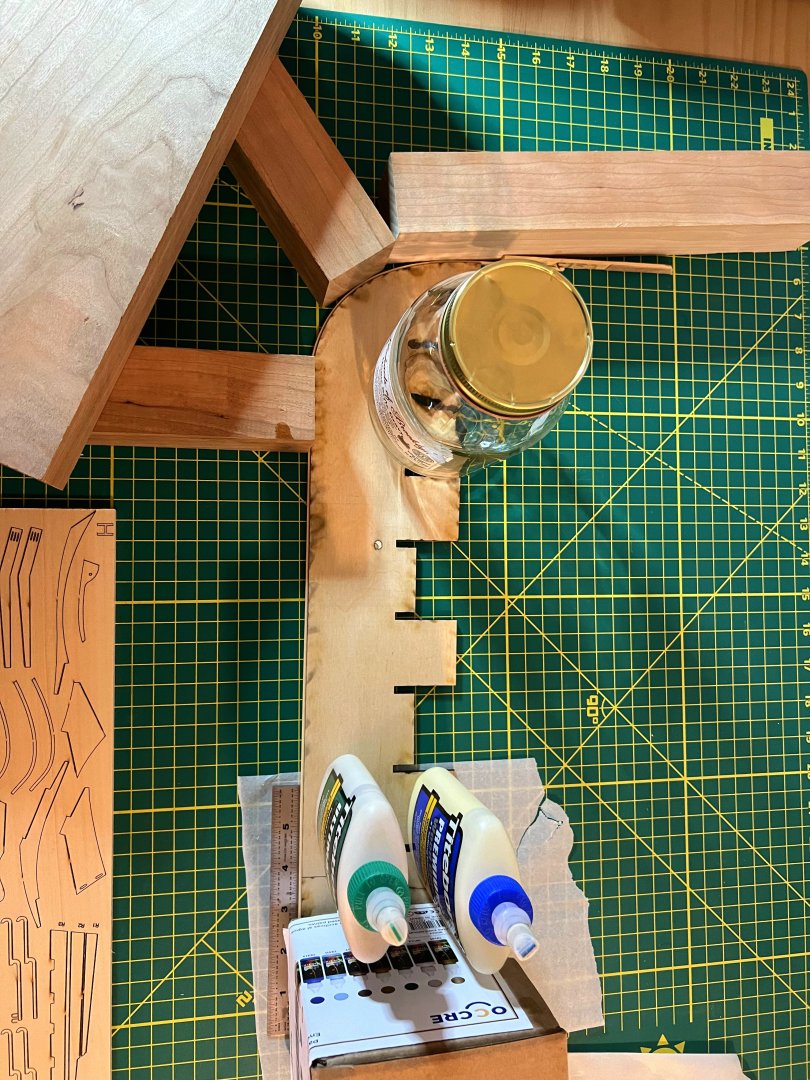
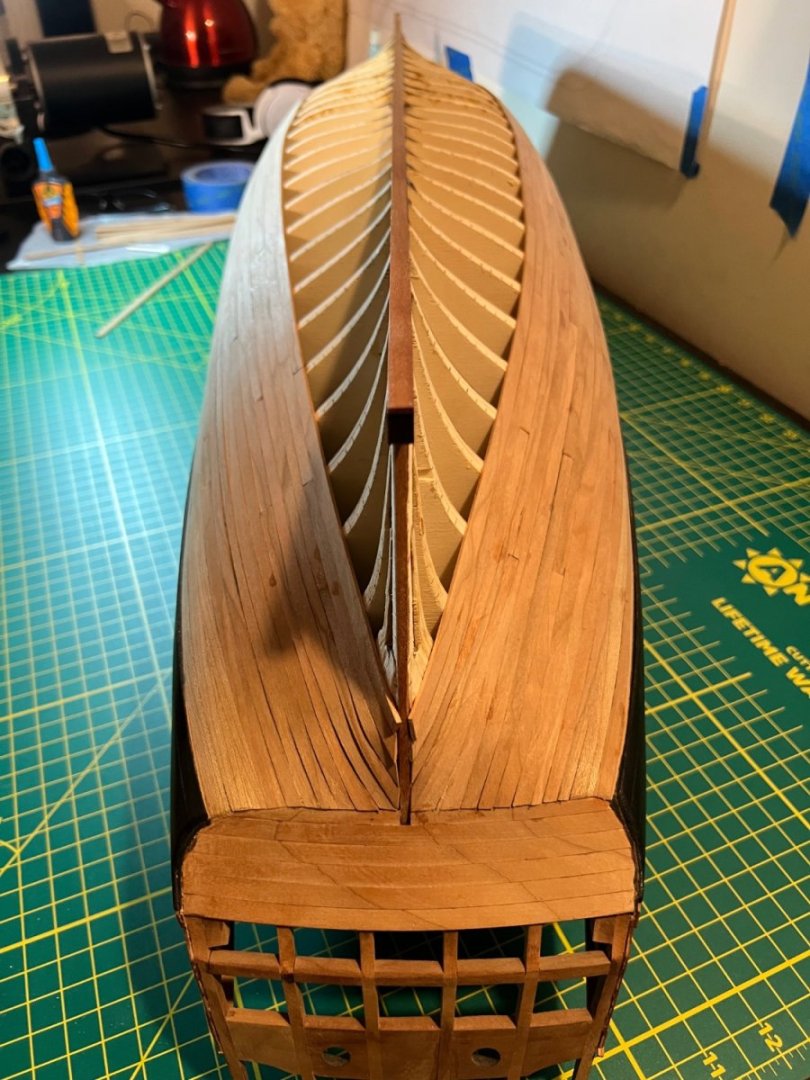
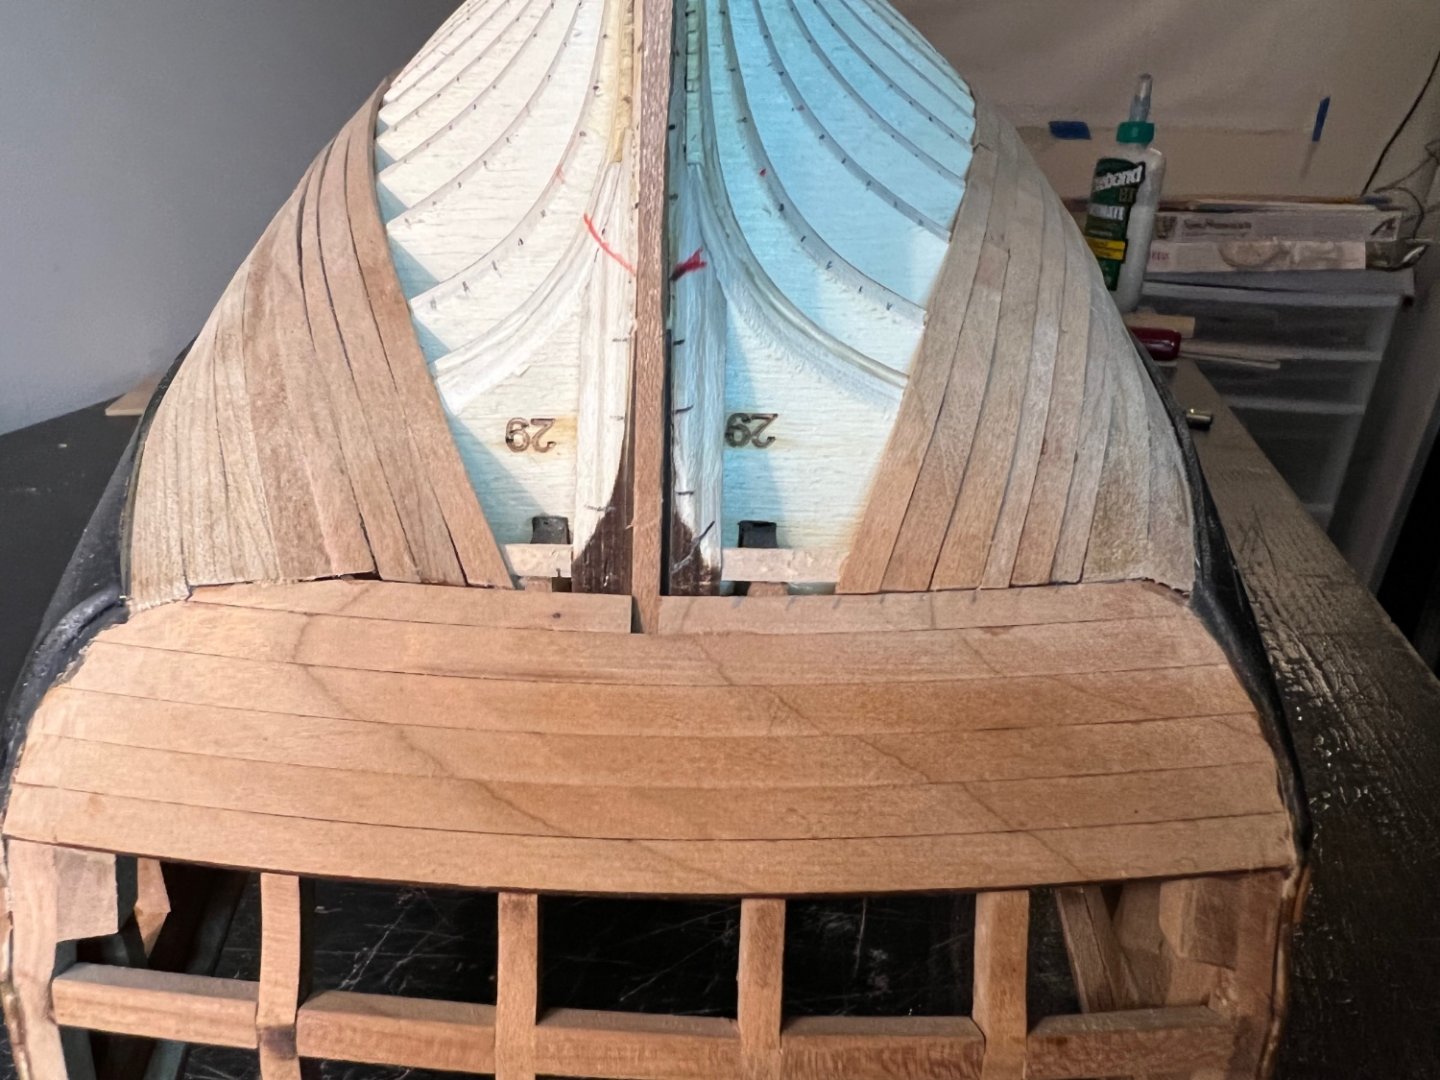
I then added the stern framing. This was fun but challenging. After the glue dried, I started framing the stern windows. This was quite the challenge. I kept getting very close with the sills and lintels provided, but, like normal, I would accidentally sand a few of them slightly too much or at the wrong angle. In those cases, I took a strip the same width and depth as the sills and lintels and made my own based upon the plans provided. Here is me trying to mark the correct placement for them: When gluing the lintels, I realized one of the stern frames wasn't lined up correctly. It needed to be bent a little farther back to line up correctly with the others, so I made this contraption to make sure the stern pieces were all at their correct positions relative to each other. Now below is a pic of the window sills and lintels glued in. Okay, I had to remake quite a bit more sills and lintels than I care to admit, but I hope it looks like it turned out alright. I honestly tried to take my time with this step. This caused me to remove and remake a lot of these pieces as after I glued them in, I wouldn't be happy with their placement. So I would remove most of them and try again. It took me 2-3 attempts to glue them all in. I constantly would check their placement against the plans and also the laser cut stern window pieces. To finish up the stern for now, I added the other ports on the bottom of the stern. This was also challenging and I had to read the instructions many times to figure out where exactly they should go. The following are some pictures of putting them together. To finish up the stern for now, I added the filler pieces described in the instructions and sanded them as best I could to match the shape of the hull at the stern. Those filler pieces were a little challenging to build and sand. It took me a while to try and figure out where they needed to be added and how to shape them. I hope it turned out alright. Thanks for reading! Jeff


-
Hello all! Next, I added the hull framing box and the lower deck planking. Sorry but I don't have pics of the lower level planking. I painted the framing box black then added the frames. I hope this looks alright!

-
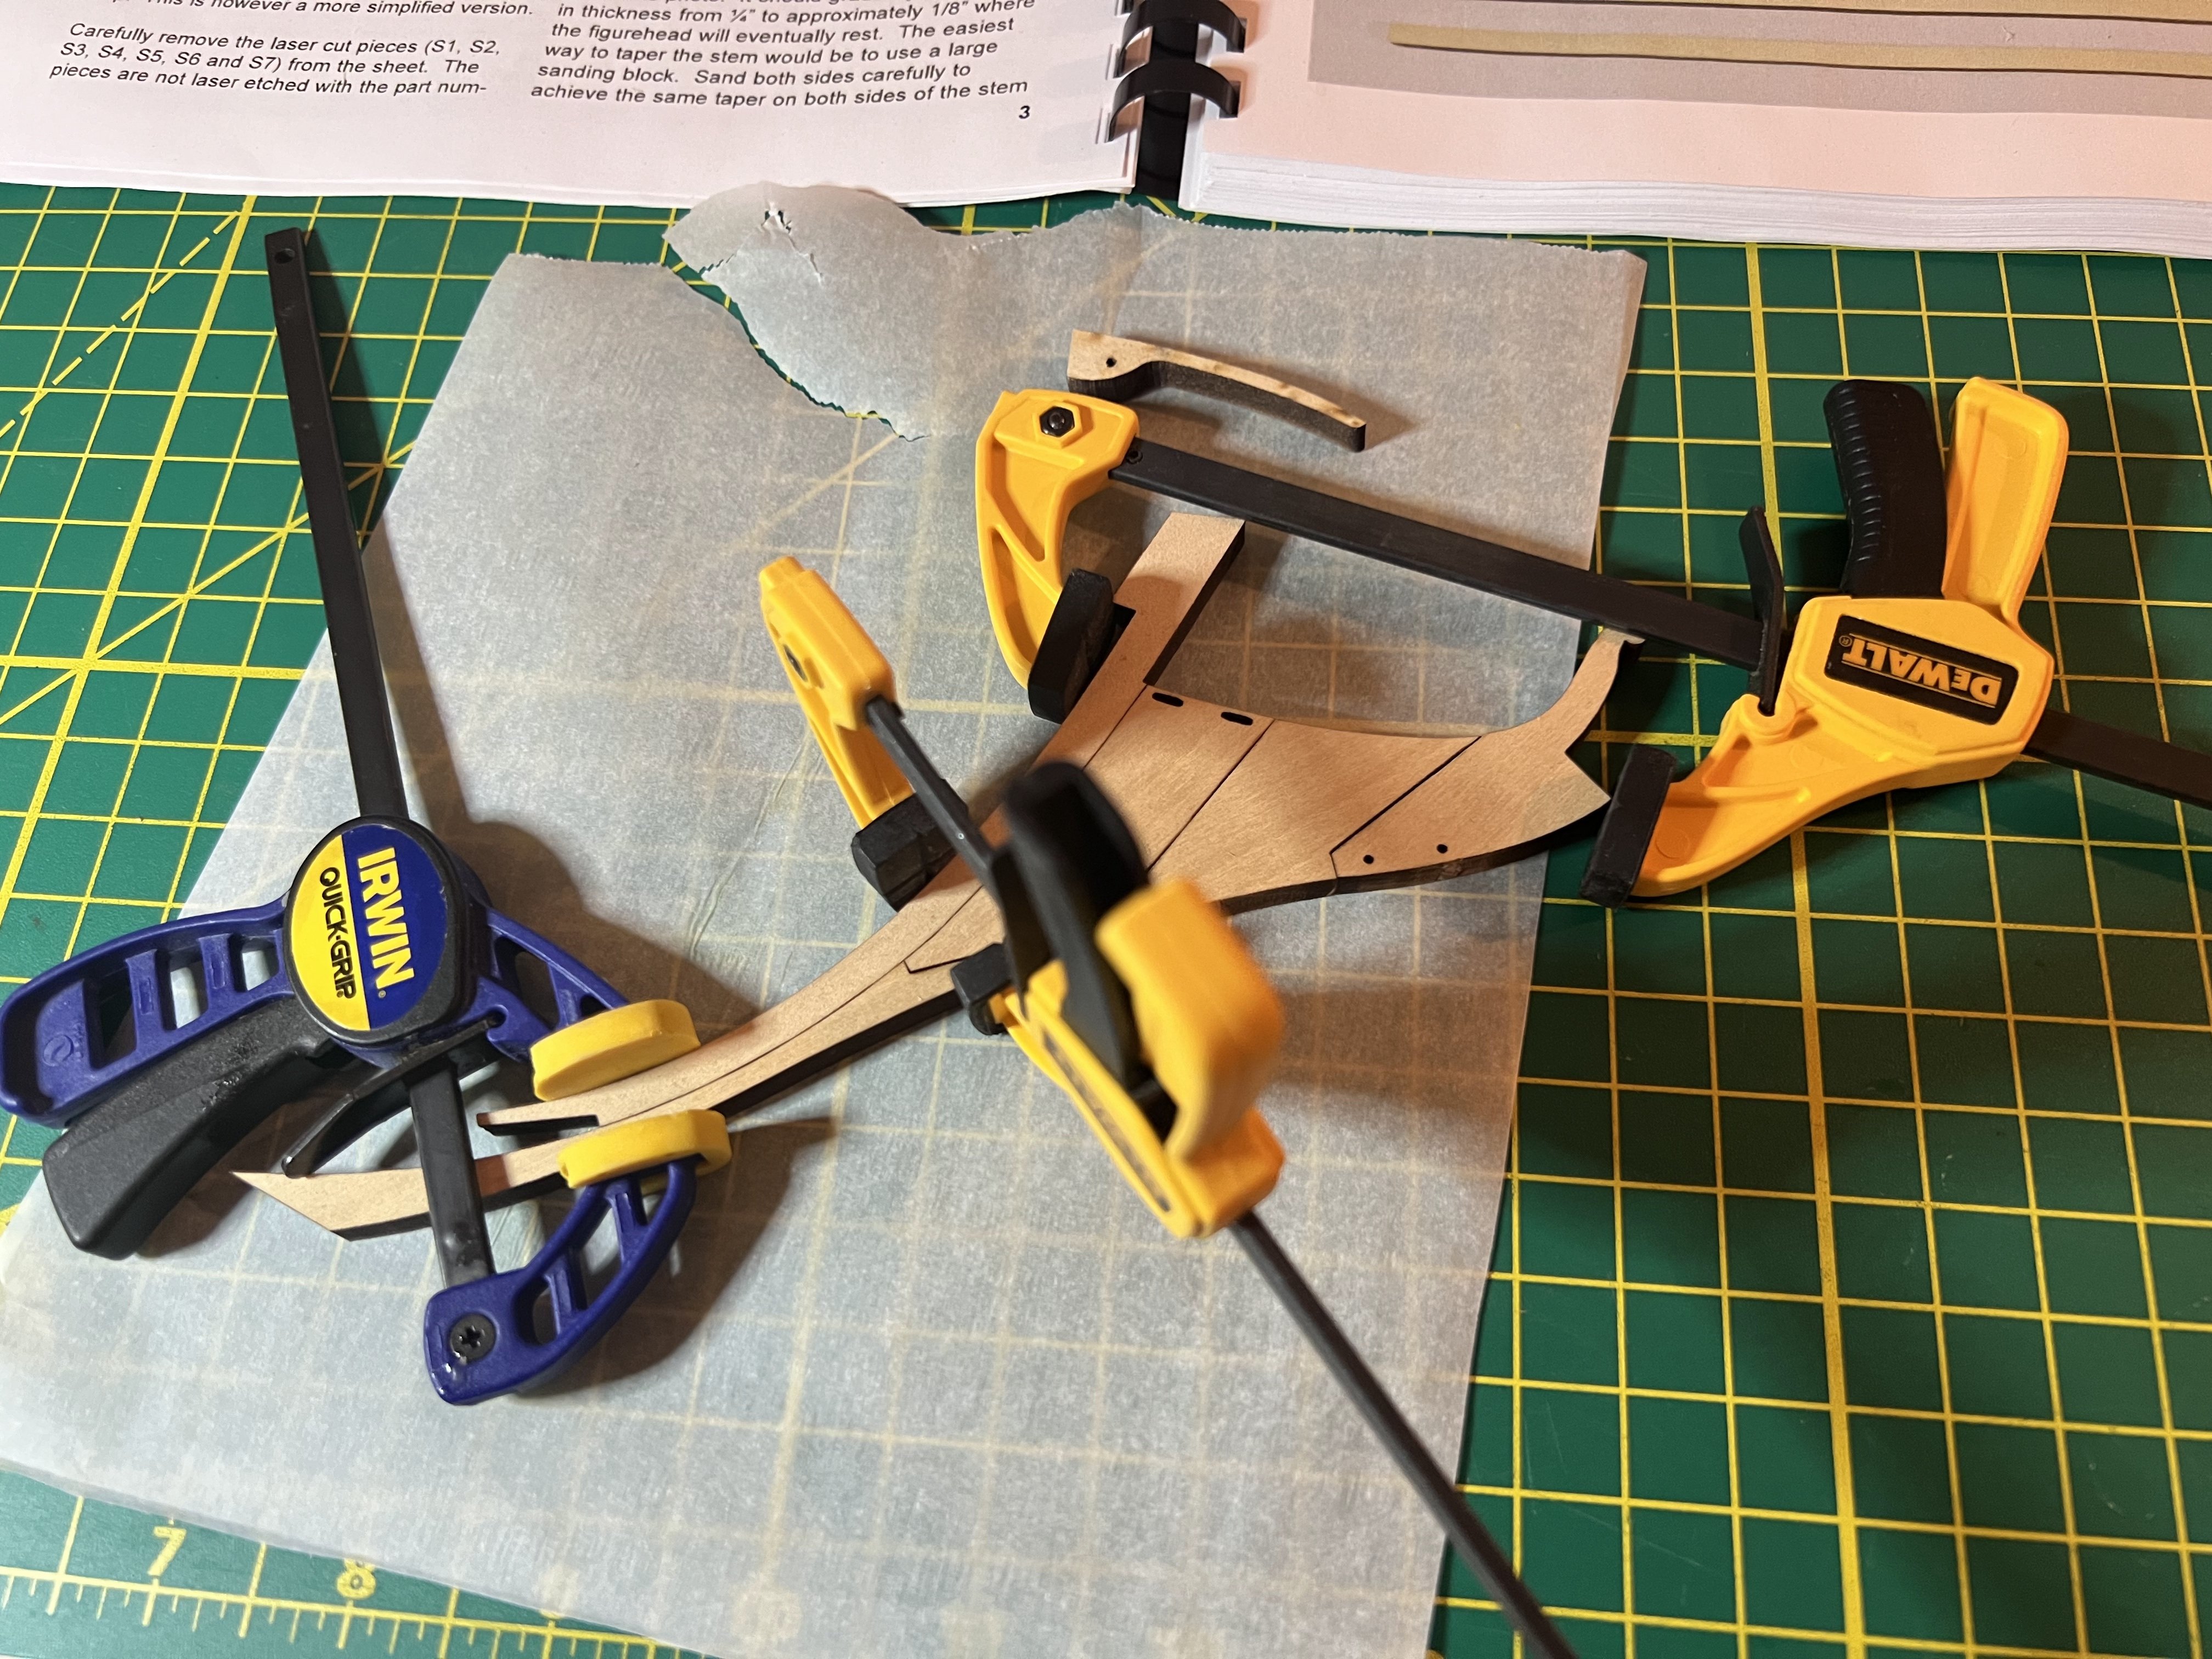
@Ronald-V Thank you very much! I agree with you that this is a beautiful ship. I just hope I can do her justice. @wernerweiss I did taper the stem before gluing it onto the bulkhead former, but you reminded me to test fit the figurehead. I am close, but my stem is about 1mm too thick which honestly isn't too much. Thanks for reminding me to test fit the figurehead. I will narrow the stem in the next few days so it fits properly.
-
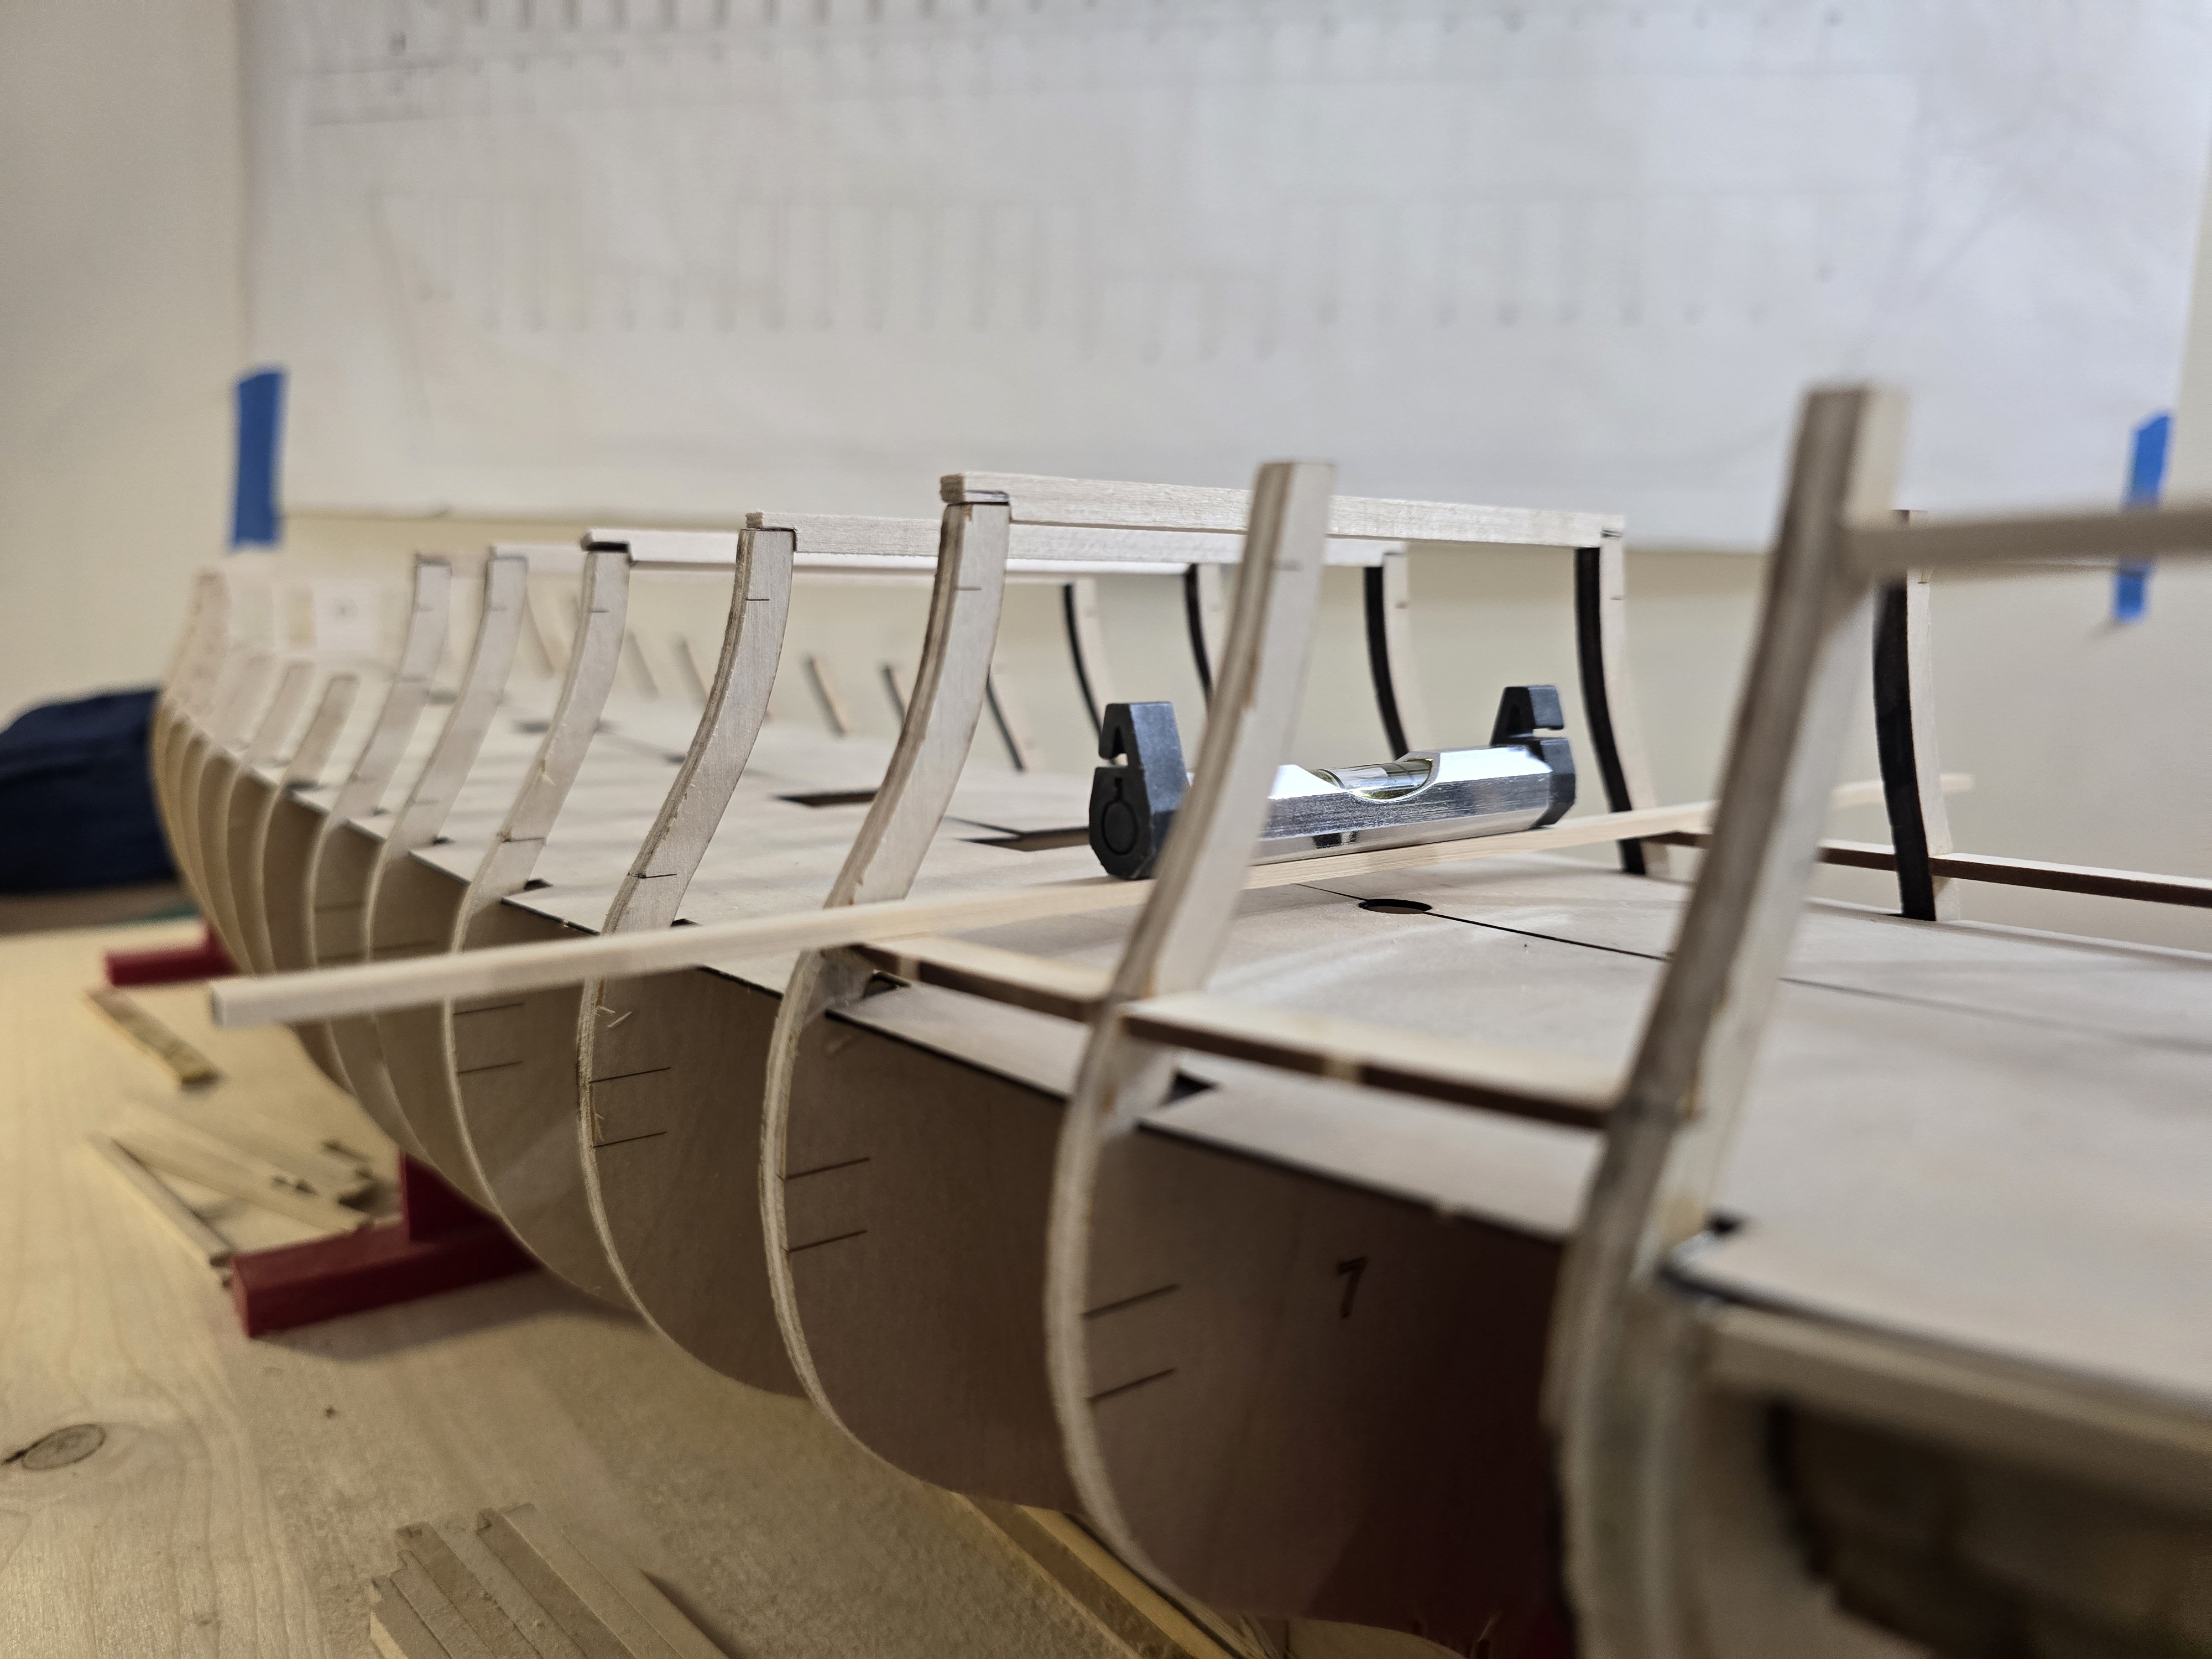
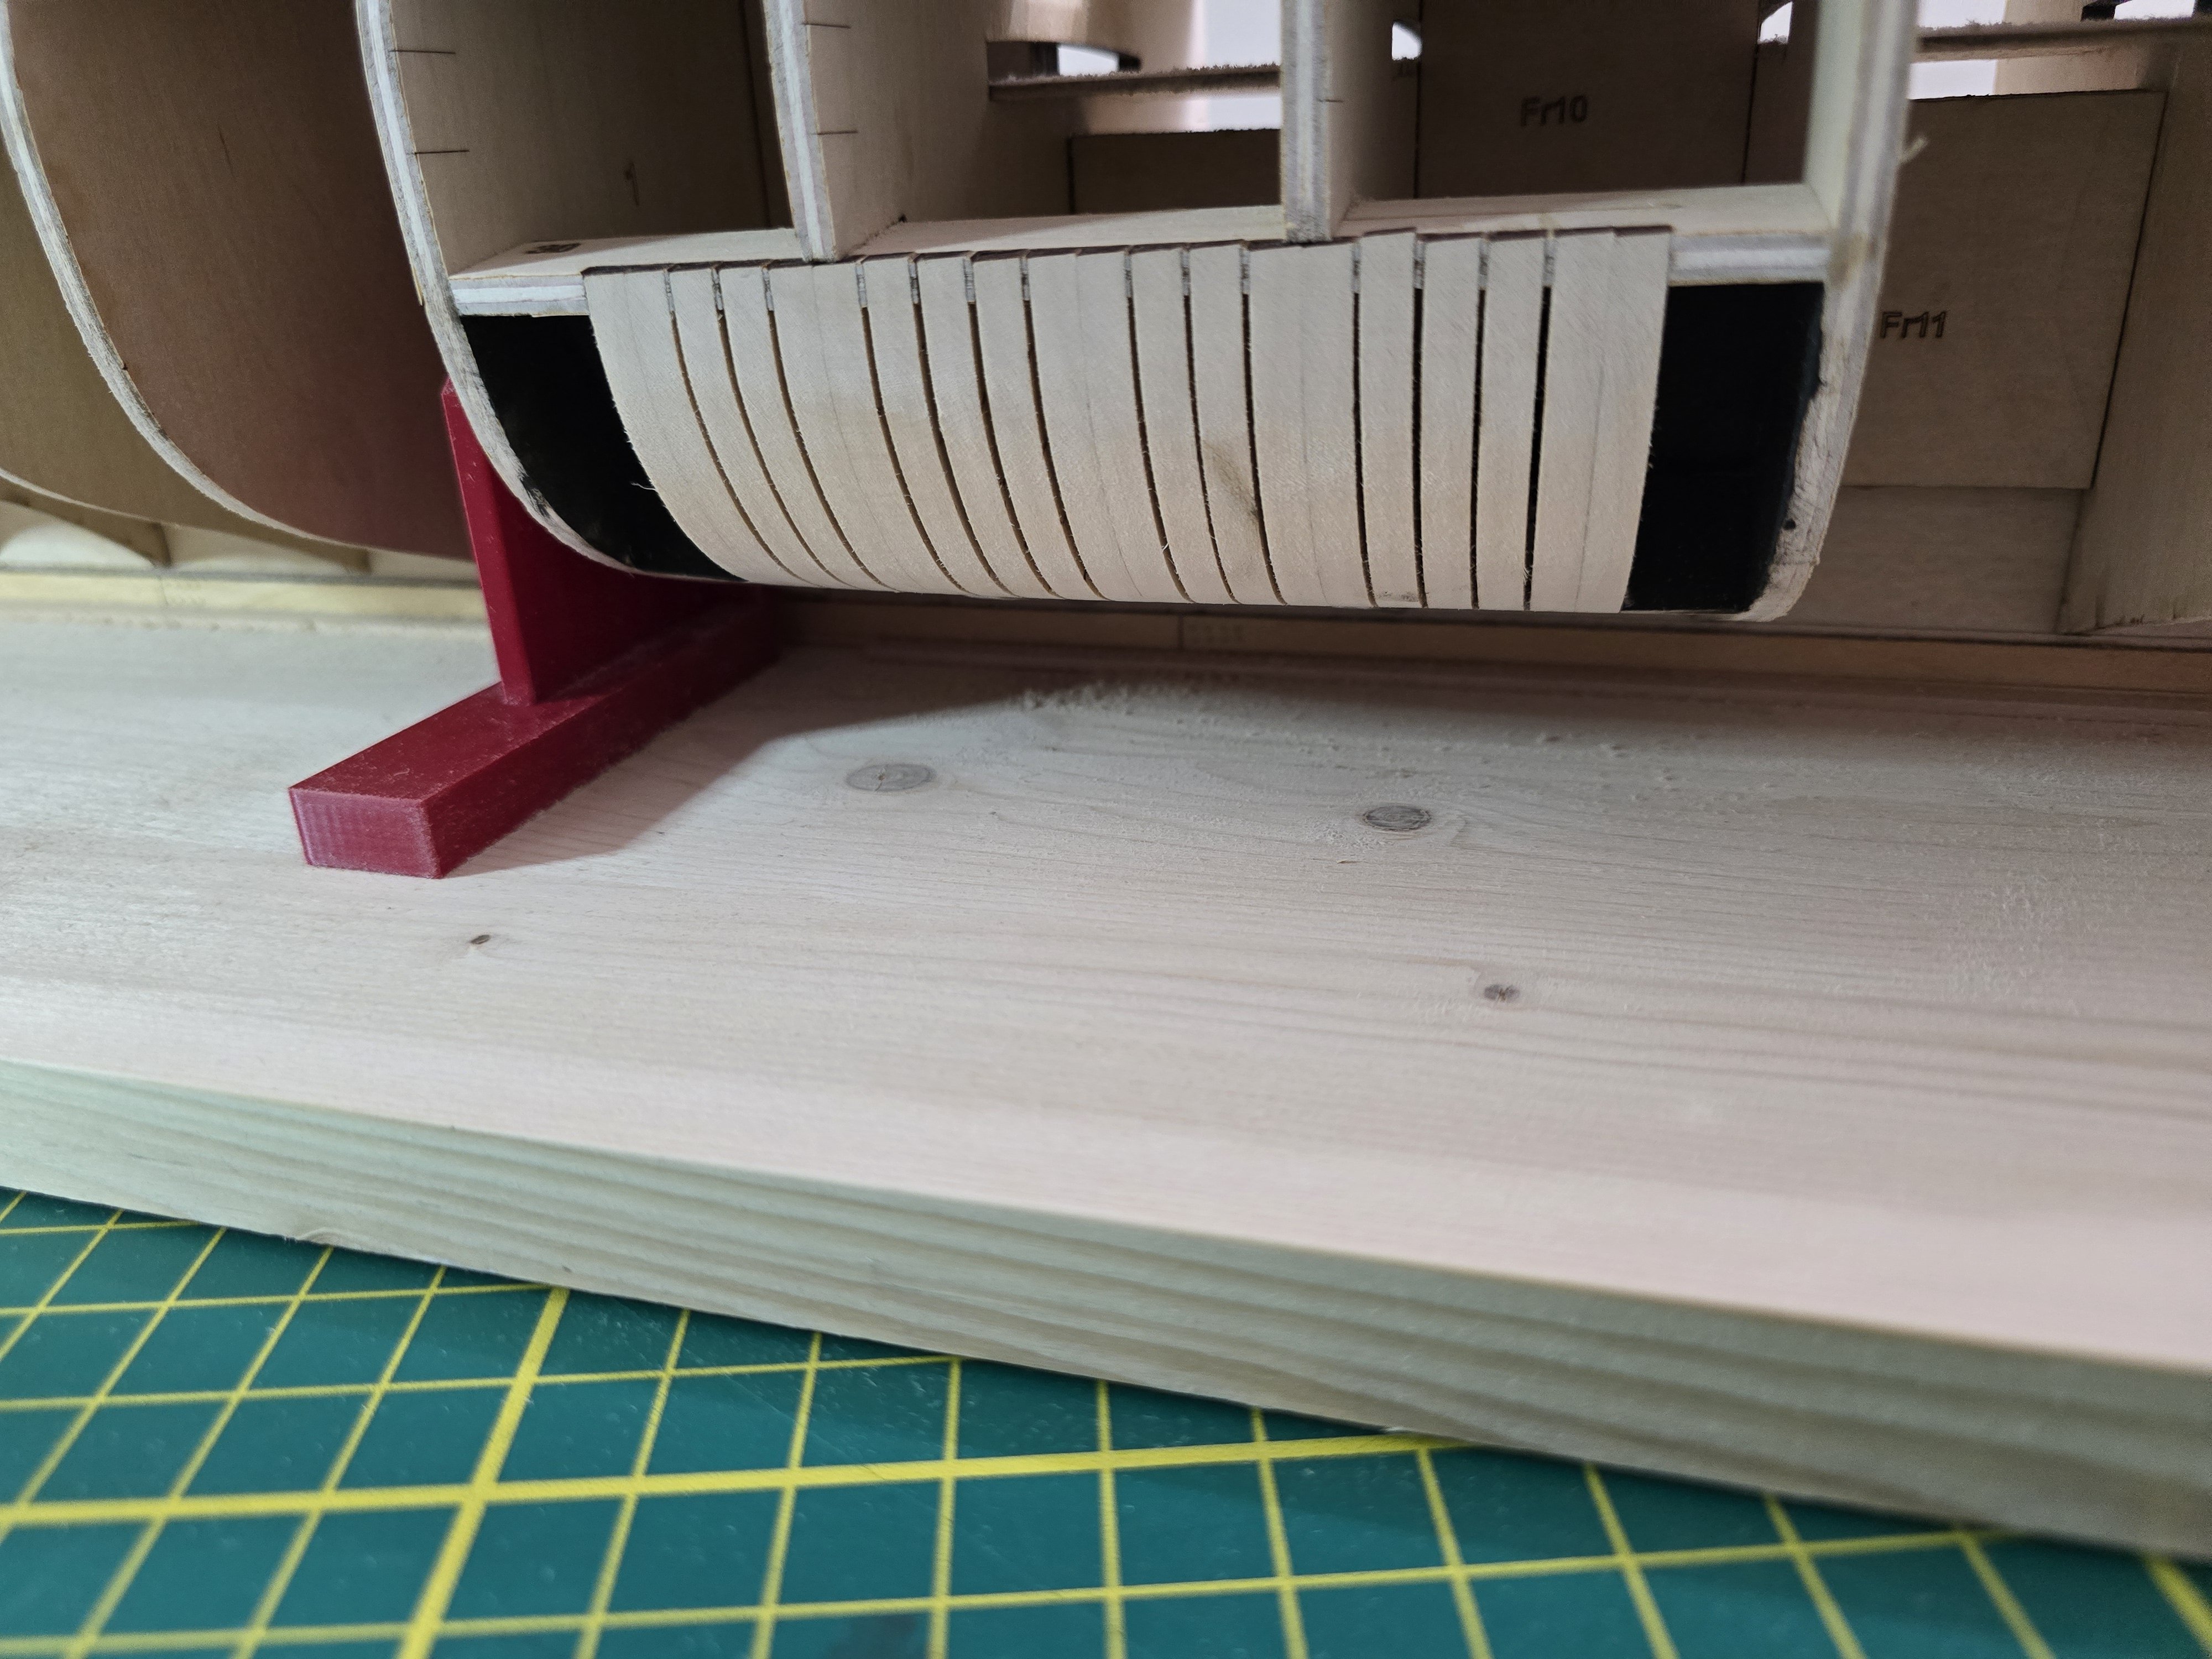
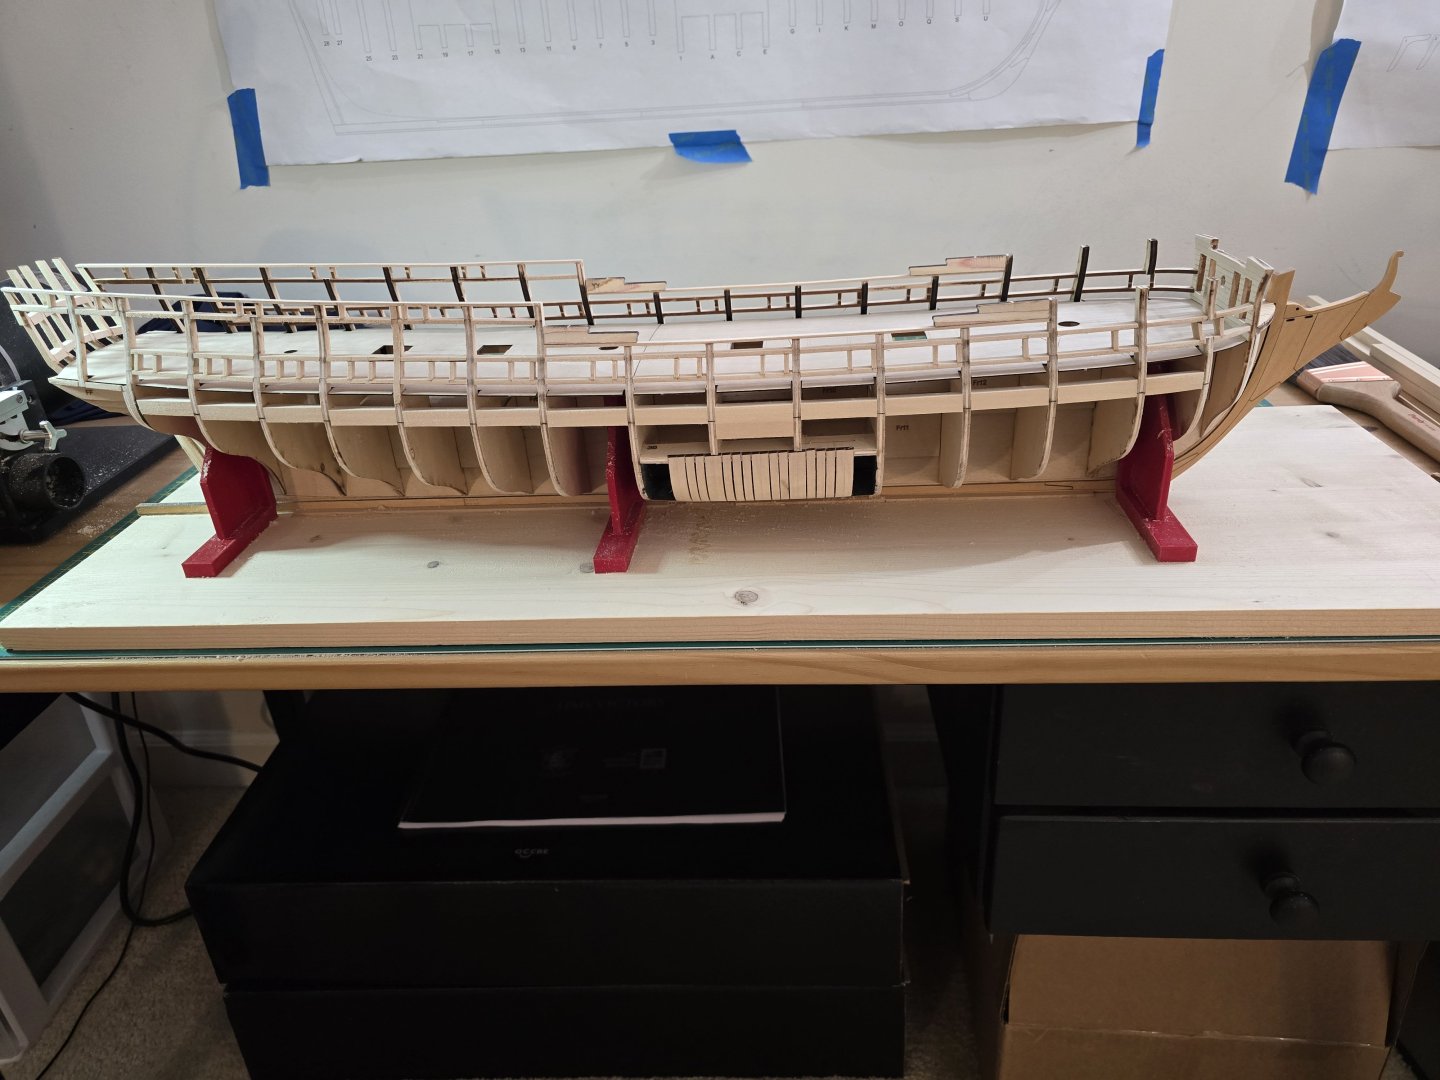
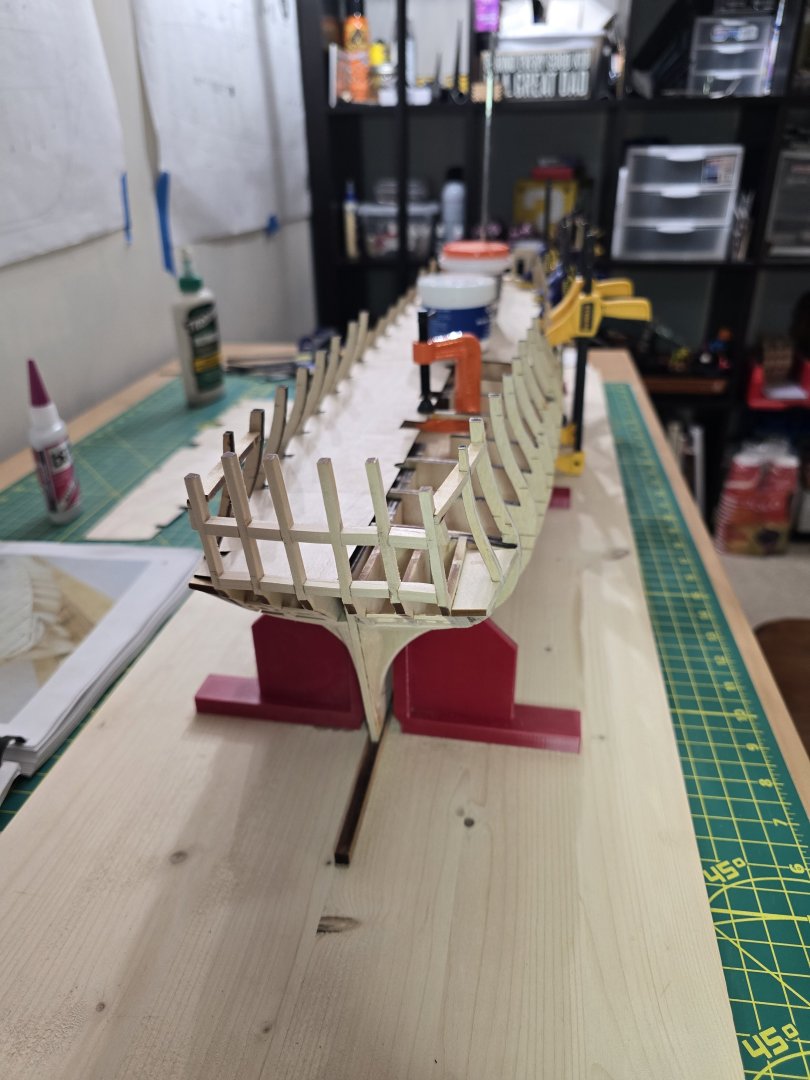
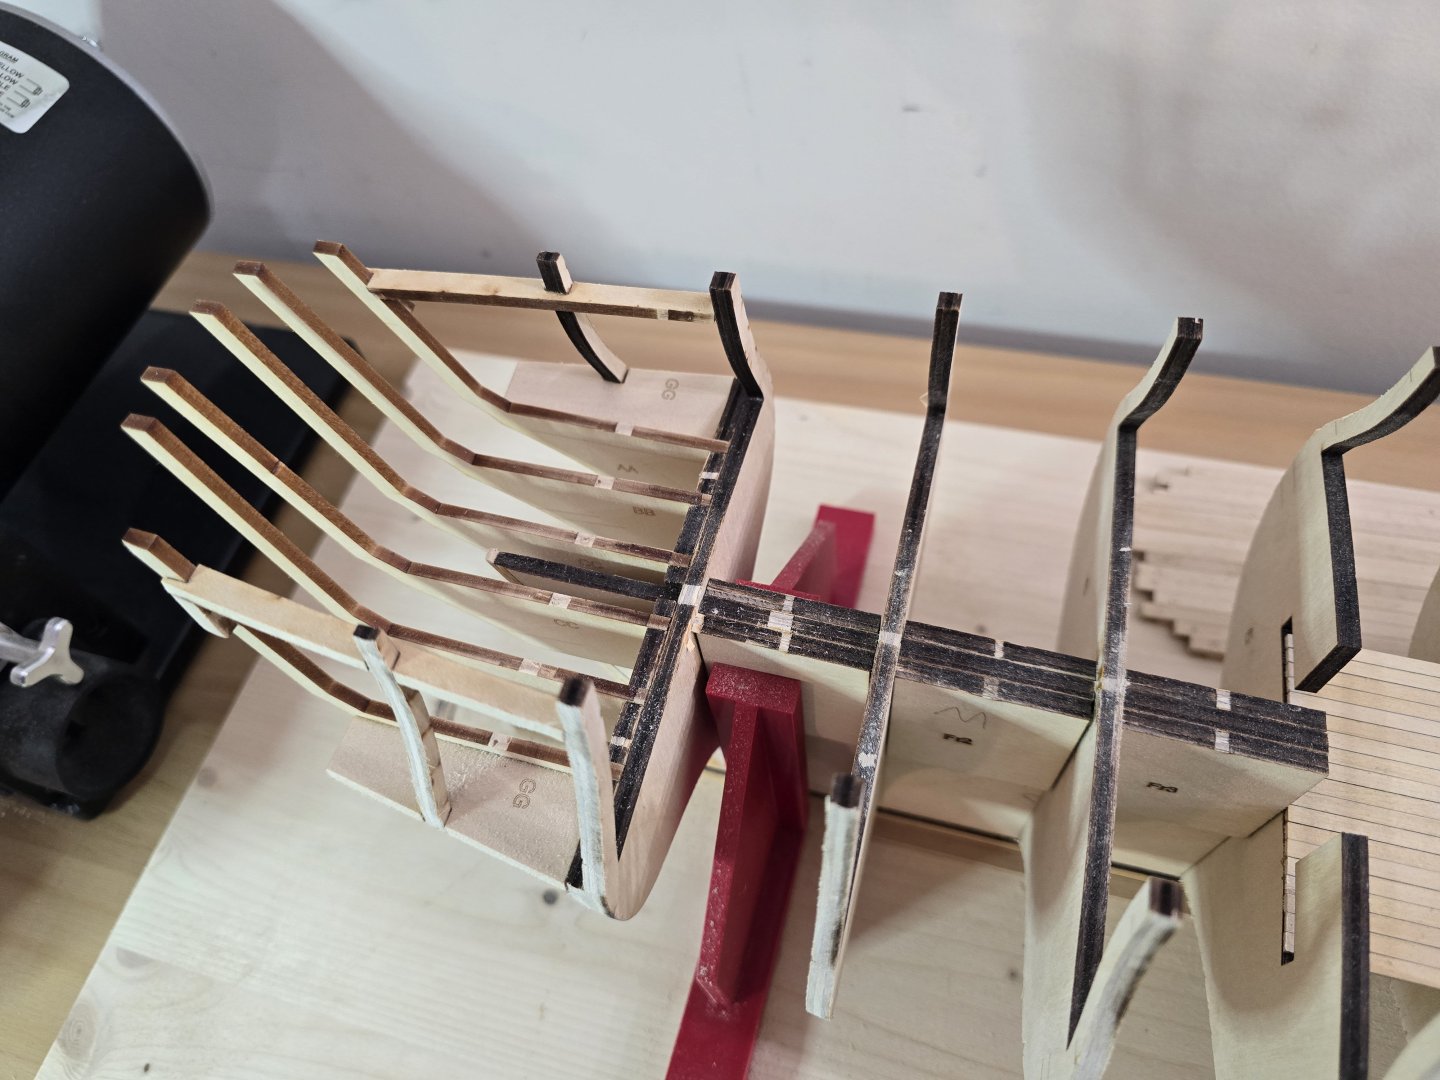
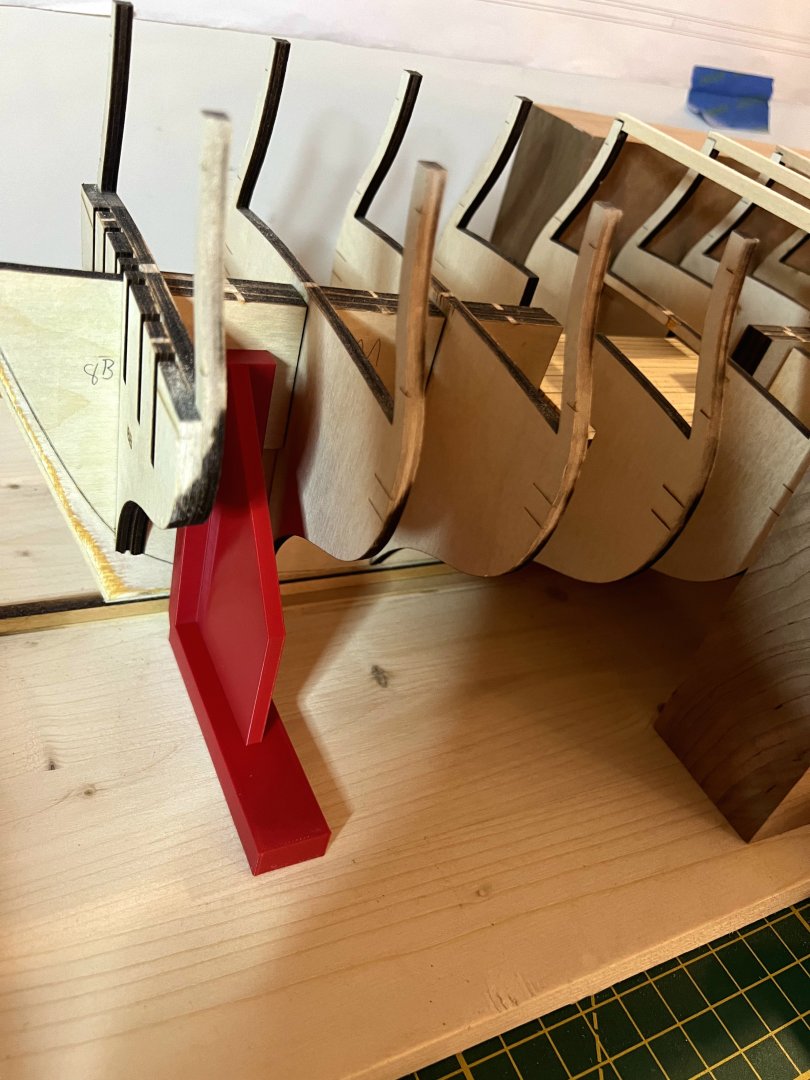
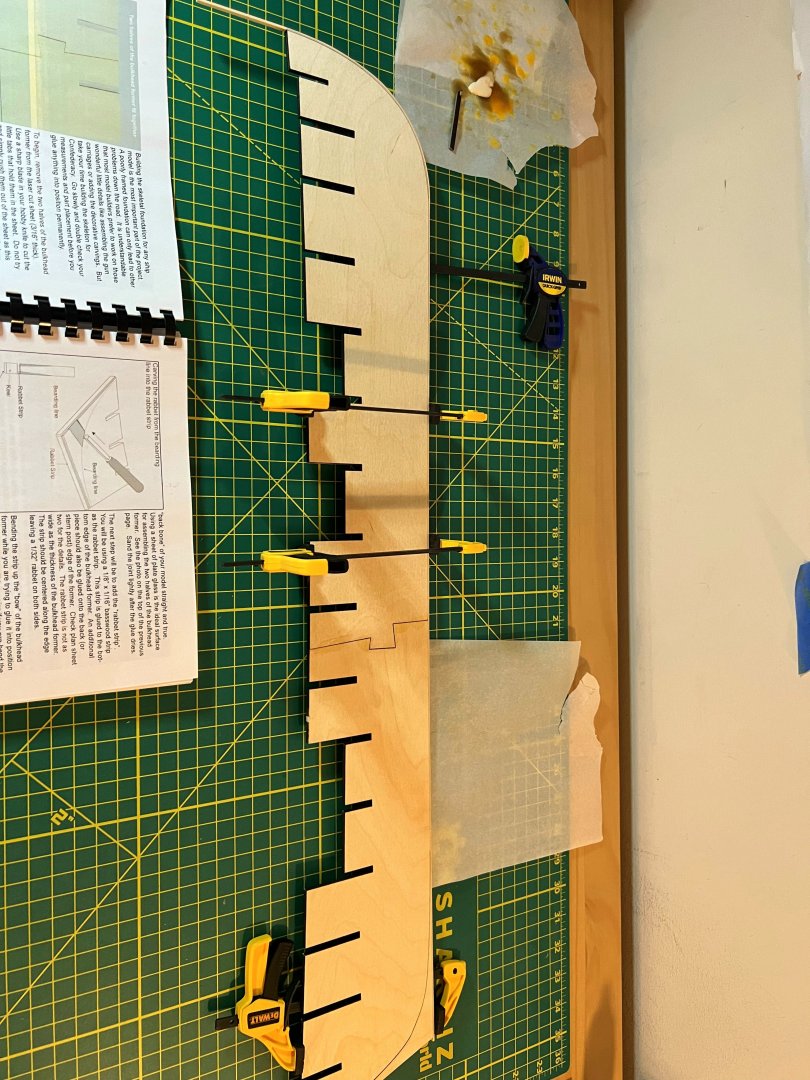
Next up was the bulkheads. Looking back on my pics, I noticed I didn't take such great photos. But oh well! Here they are anyway! I got some squares to help make sure both the bulkhead former and the bulkheads were as straight as I could make them. As you can see, I have a building board, but was currently using blocks of wood to try and make sure the model was straight. This obviously wasn't working too well, so I had an idea! We had just gotten a 3d printer, so I designed and printed out some things to hold the bulkhead former straight while building. I know it's hard to see, but its those red things! Totally blends into the picturs I know... ( just kidding!) You can also tell that I started fairing the hull too at this point. Fairing the hull isn't the easiest nor most fun part of the build, but is very important. I learn most by failing, and even though I didn't totally fail on fairing the Winchelsa, I learned a lot from it. I learned that I did not fair it enough near the stem, so I spent much more time trying to get the shape right there this time. I apologize, but I don't have any pics of that step. That's a lot of posts from me tonight. I am farther along than this, but I'll post more tomorrow. Thanks for reading!! Jeff


-
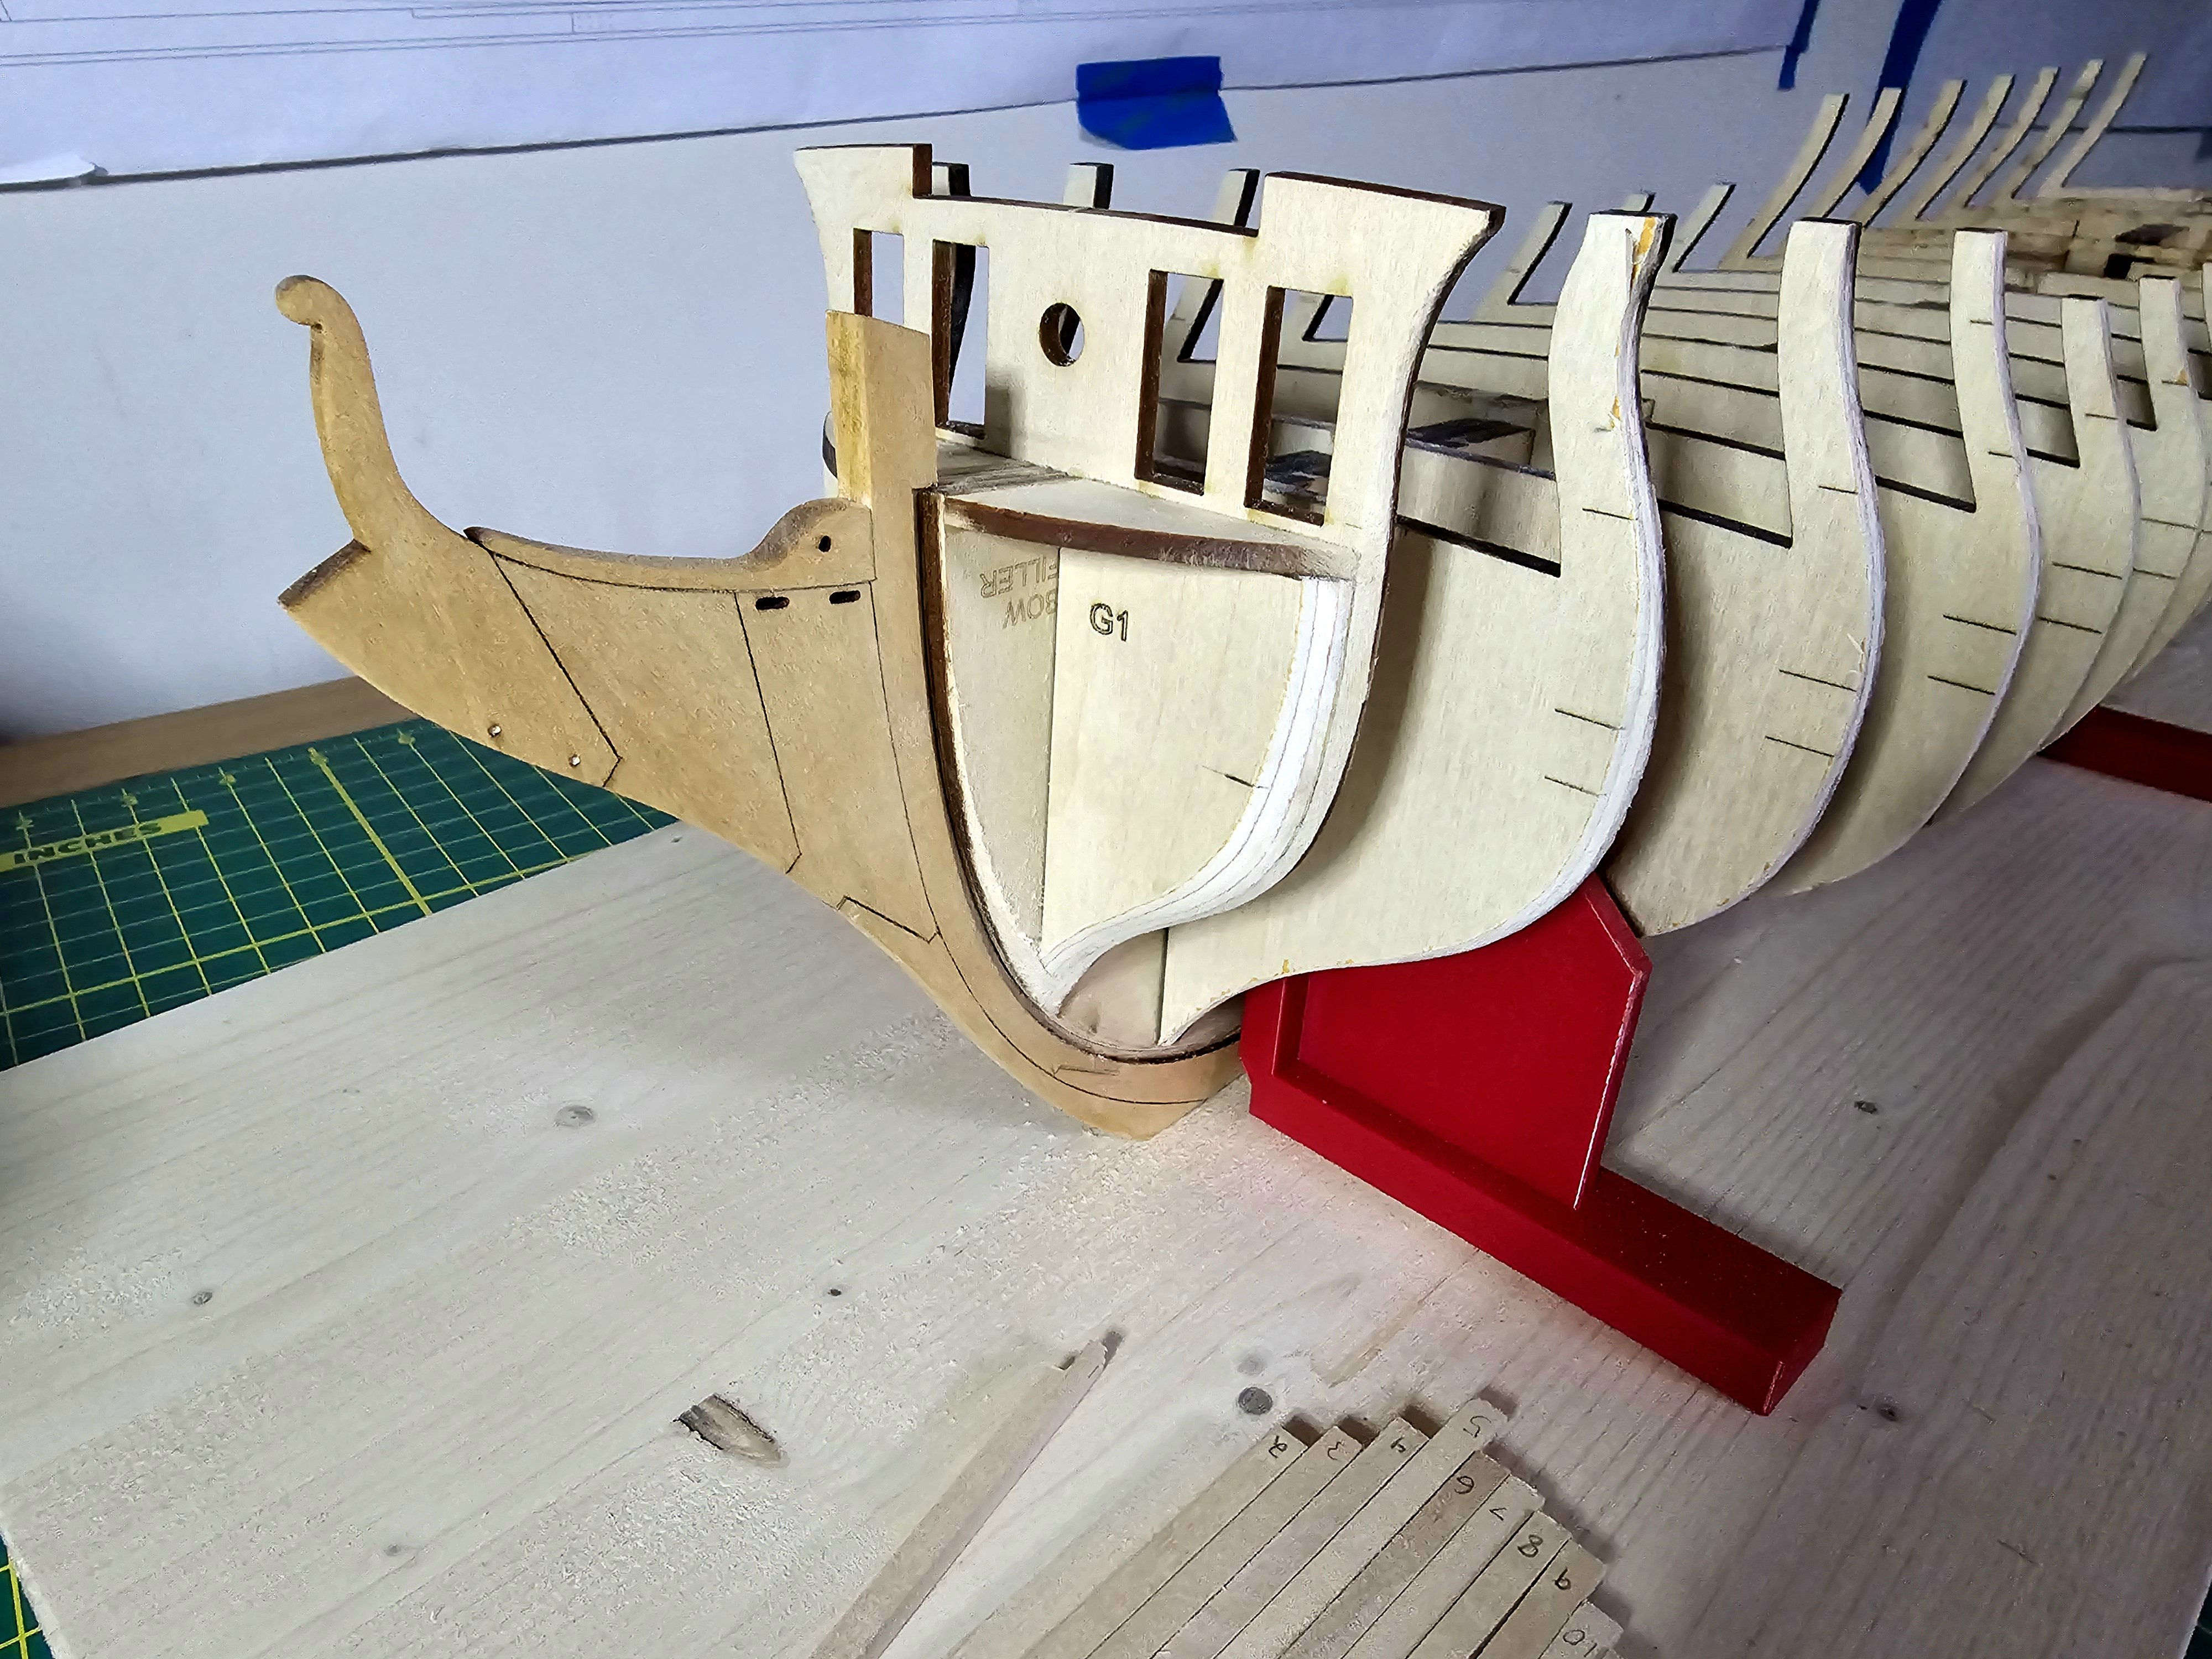
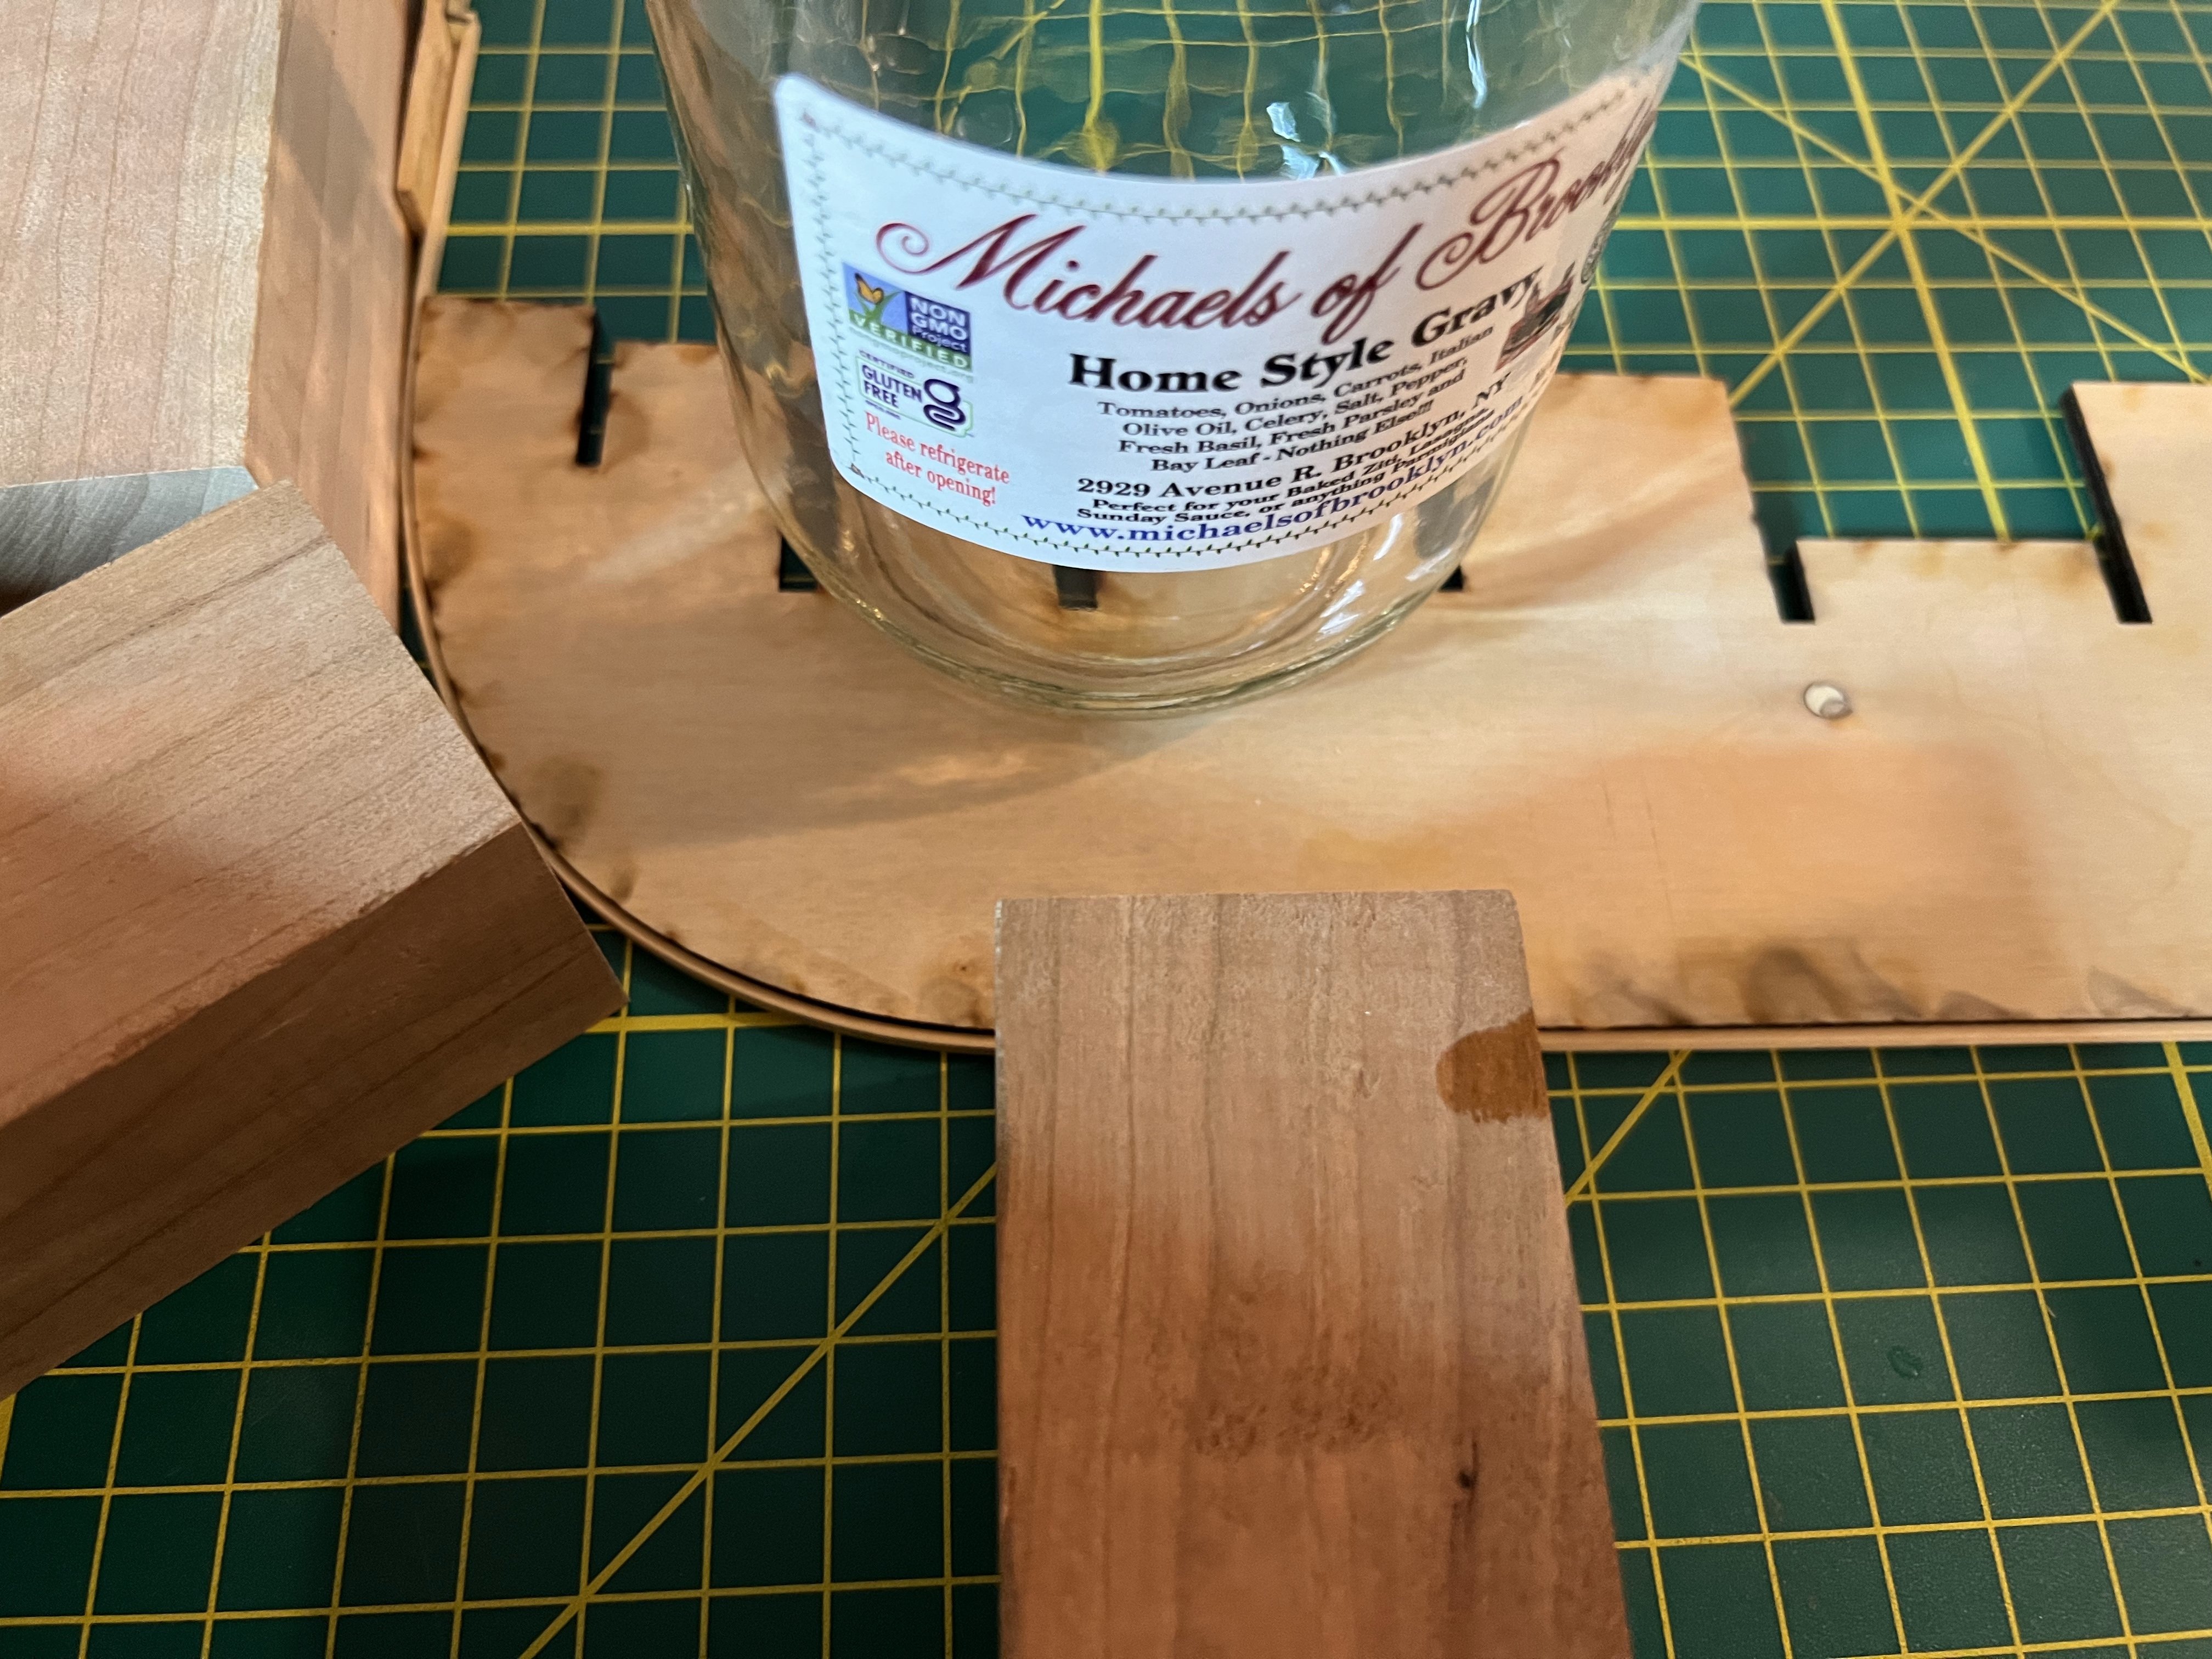
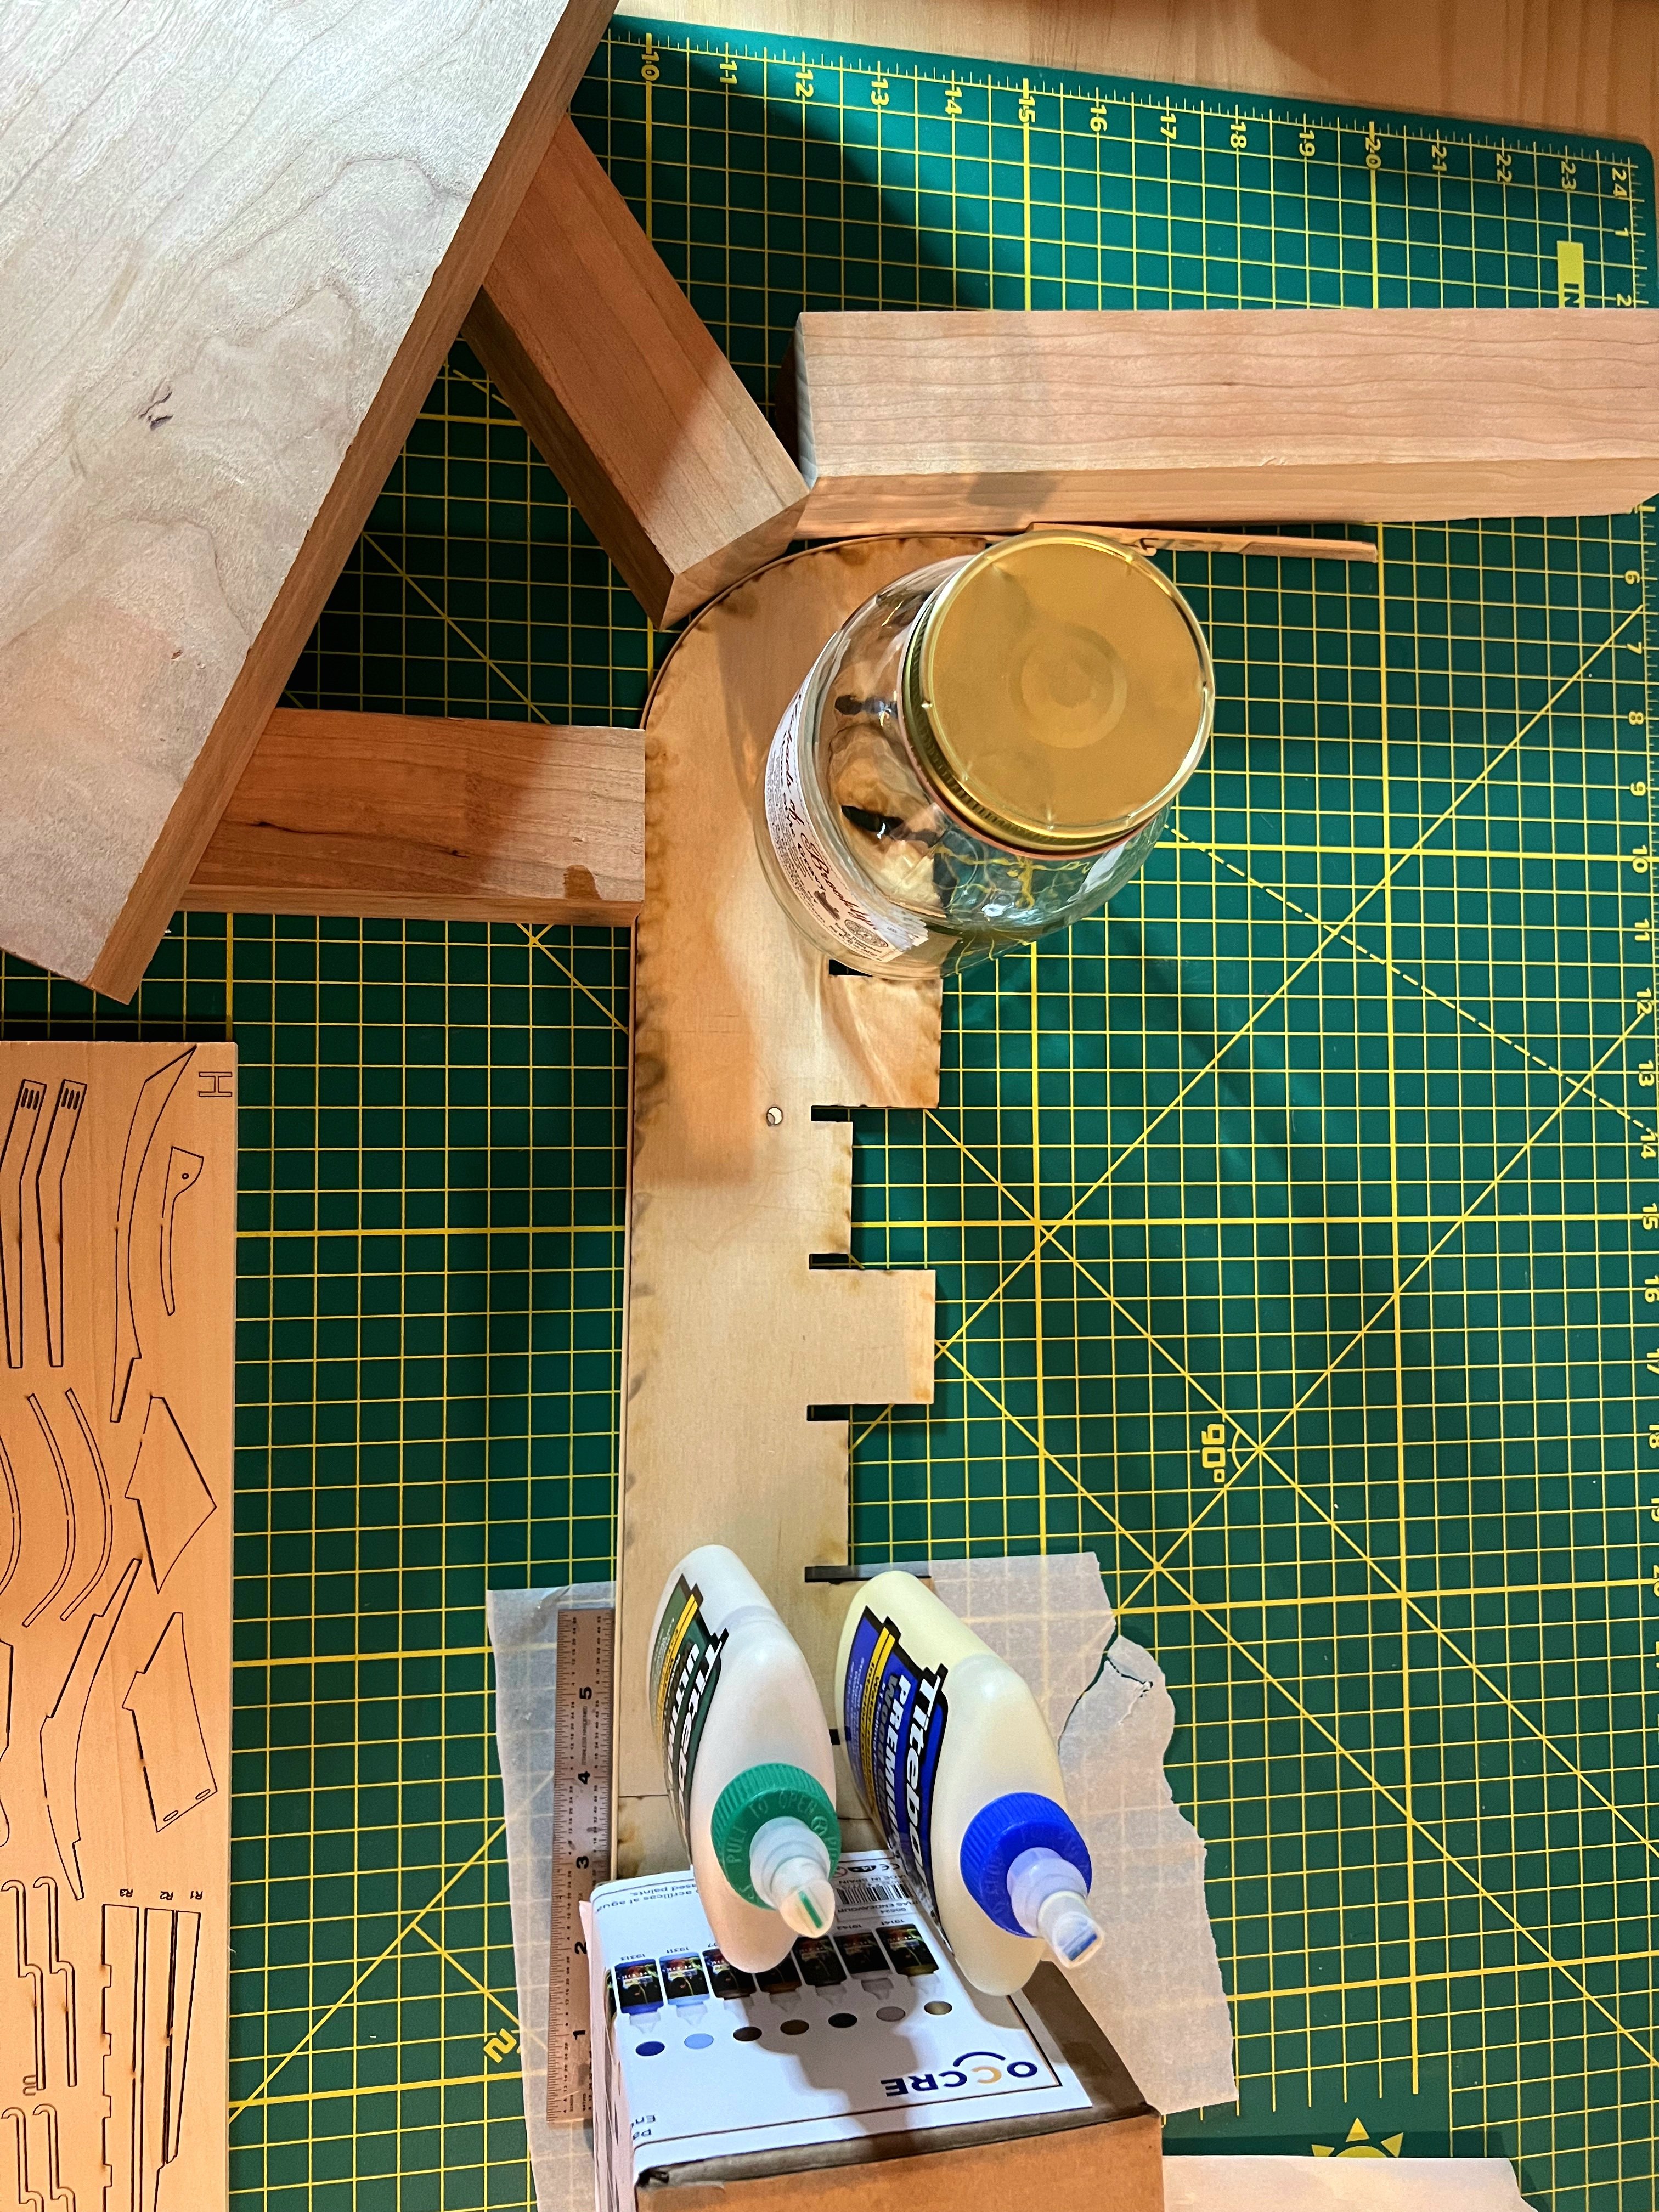
Okay! Finally some Confederacy posts! Woo hoo! I started the build in January but wasn't confident enough to start a build log for it. I feel that I'm confident enough to start posting, so here it goes! I was super impressed with the amount of laser cut parts and just the sheer amount of wood that comes with this kit! The keel pieces were VERY straight with no bending or curving at all. I was surprised since this is such a long ship! I inspected the strips and really liked the quality of the bass wood that was included. Model Shipways did a fantastic job with the wood quality of this kit. I started by gluing the rabbet strip using some wood, and a good old jar of gravy, home style! Trying to center the rabbet was a small challenge. I made it easier for myself by cutting the long strips provided into smaller pieces. This made it much easier to center each piece of the rabbet. I then moved onto tapering the bulkhead former into the rabbet using the bearding line provided. I copied this line to the other side to try and make both sides symmetrical. I then glued the stem assembly together and glued it onto the bulkhead former. Lastly, I added the keel but unfortunately I don't have any pics of me adding it. Next will be adding the bulkheads! Jeff


-
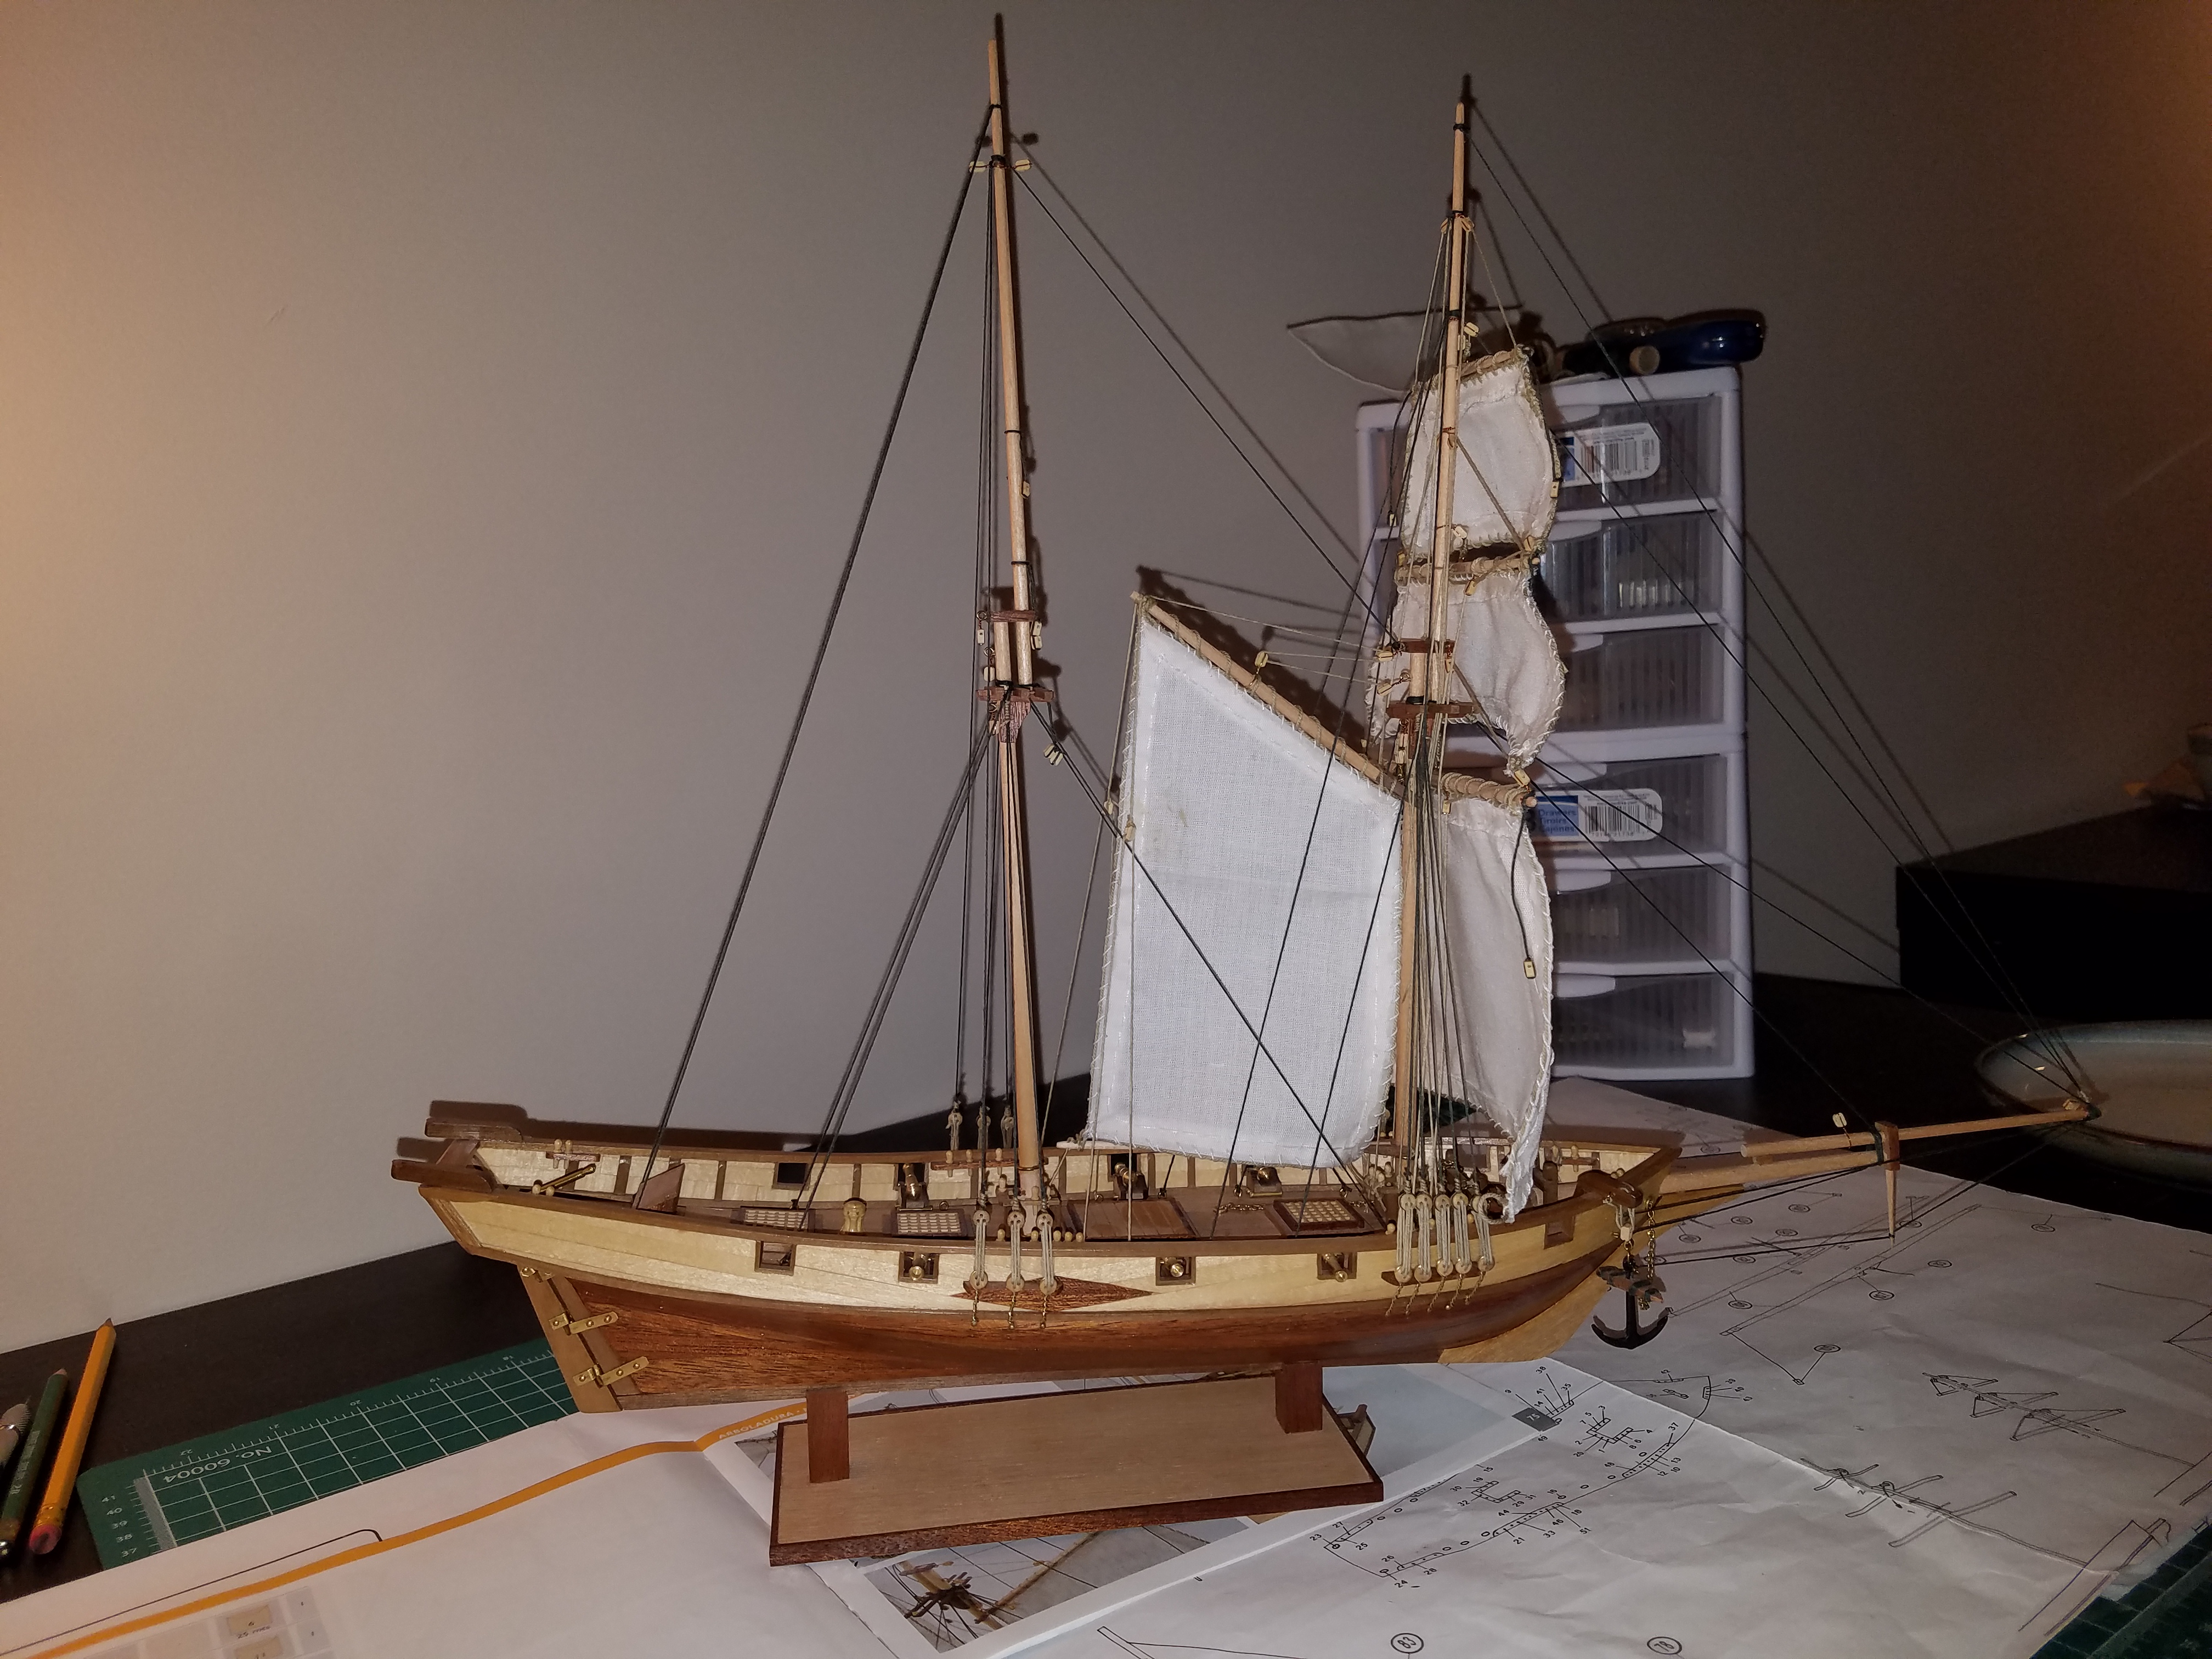
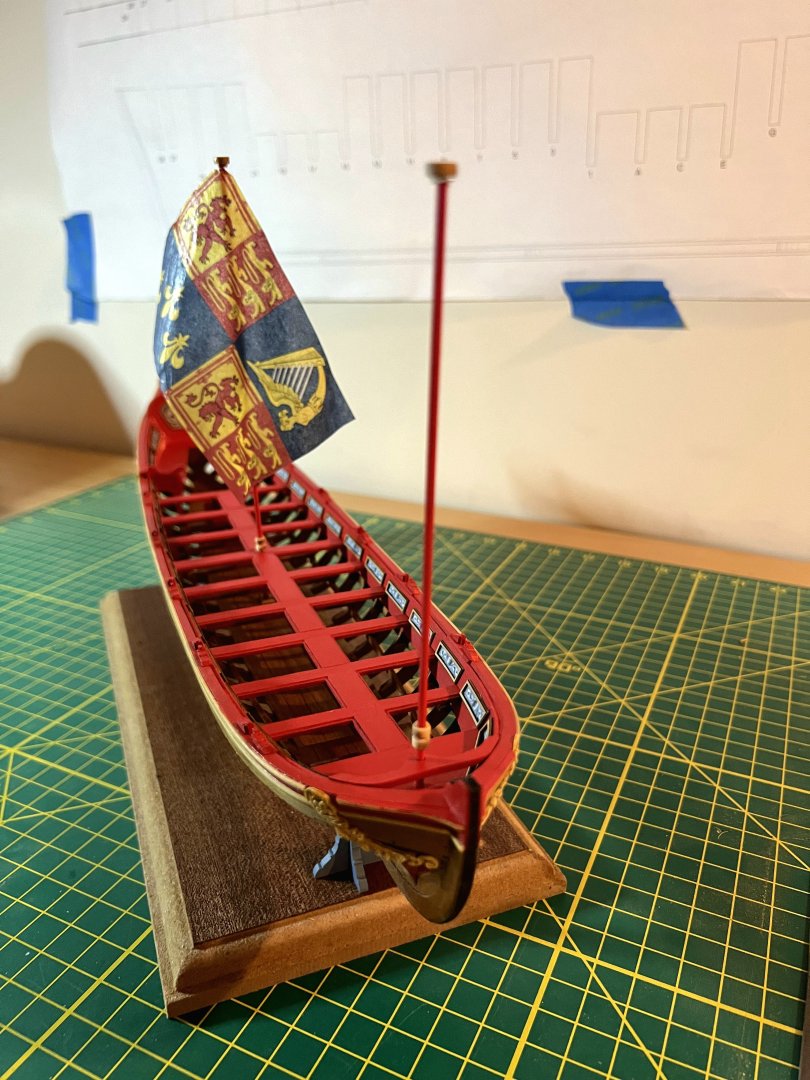
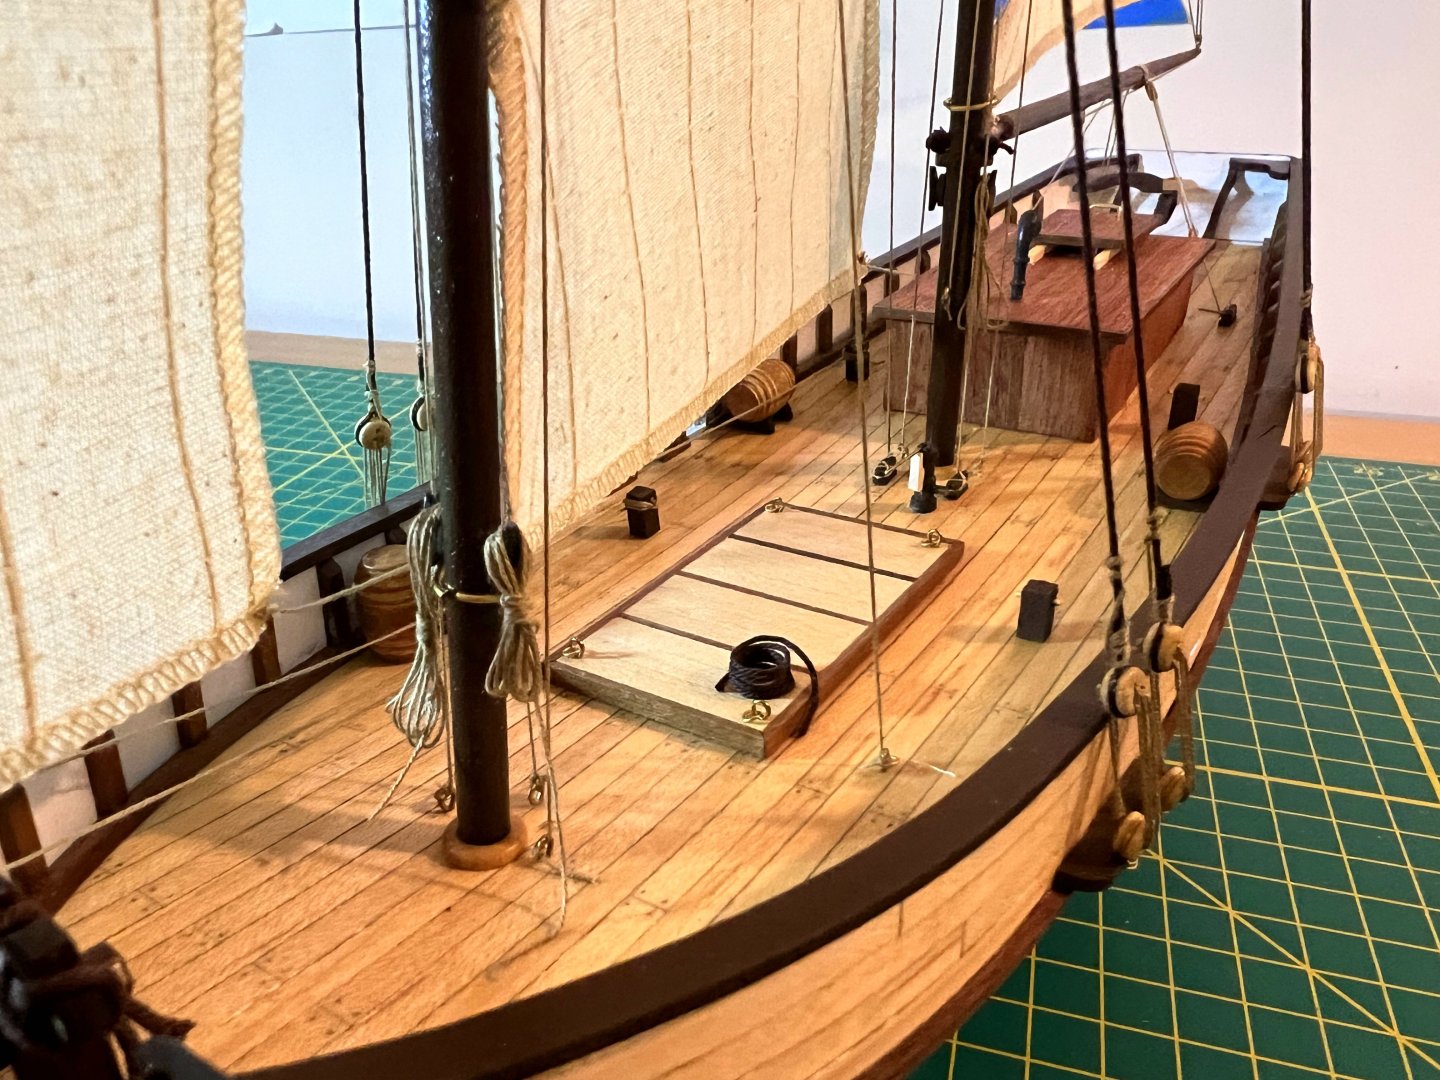
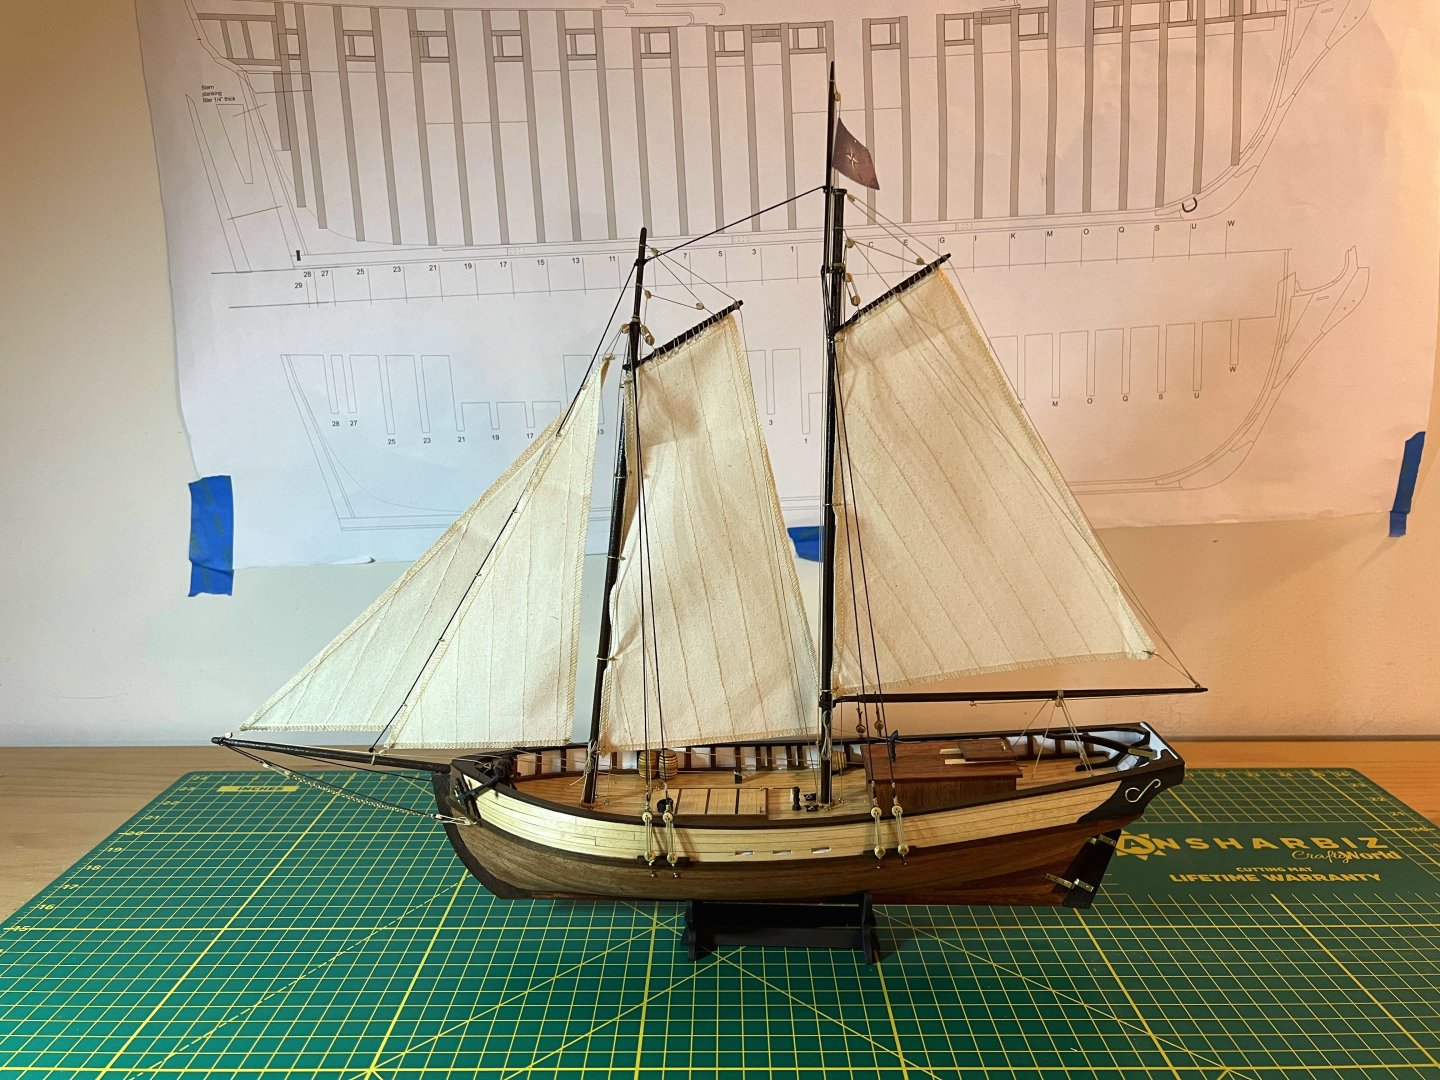
Next up is my Queen Anne build by Syren. ( I swear my next post will be about the Confederacy!!!) Did you notice something missing? The British flag! I was putting it on when my wife came into the room and frightened me. I jolted a little, tearing the flag by accident! Haha! Since then, Chuck was kind enough to give me a replacement flag and I have since placed it on the model. My posts from now on will be of the Confederacy I swear! Jeff


-
Ah hah! I finally figured out why my images weren't showing up correctly! Here are some pics of my Occre Polaris model I built. I did enjoy building it and it helped me get back into ship modeling. Jeff

-
Hello all! It's been way too long since I've worked on a model ship. ANY model ship. The past few years have had a lot of ups and downs; especially for my family's health. With this said, I wanted to get back into ship building. At first, I wanted to get back into my Winchelsa build. I brought it back out, and quickly realized that I really needed to brush up on my skills before I continue the build. So after talking with my wife, I picked up a much smaller kit. The Occre Polaris. I didn't feel confident enough to make a build log for it, but I did have a blast successfully building it. I'll add some pictures later. I then got the confidence to then Syren ship model company's Queen Anne kit. Again, I was too shy and didn't create a build log for her either. This kit was fantastic and really helped to improve my skills. The cherry wood looks fantastic and I had a great time with the build. I finished her as well. I can include pics later too. Afterwards, I felt more confident to start a new ship to build up my skills. I had bought the USF Confederacy a long while back and finally felt confident enough to tackle the project. In my upcoming posts, I will go into detail of what I have already completed. Wish me luck on this build! It's quite an adventure and challenge but I finally feel ready to take it on! Thanks! Jeff (Zarkon)
-
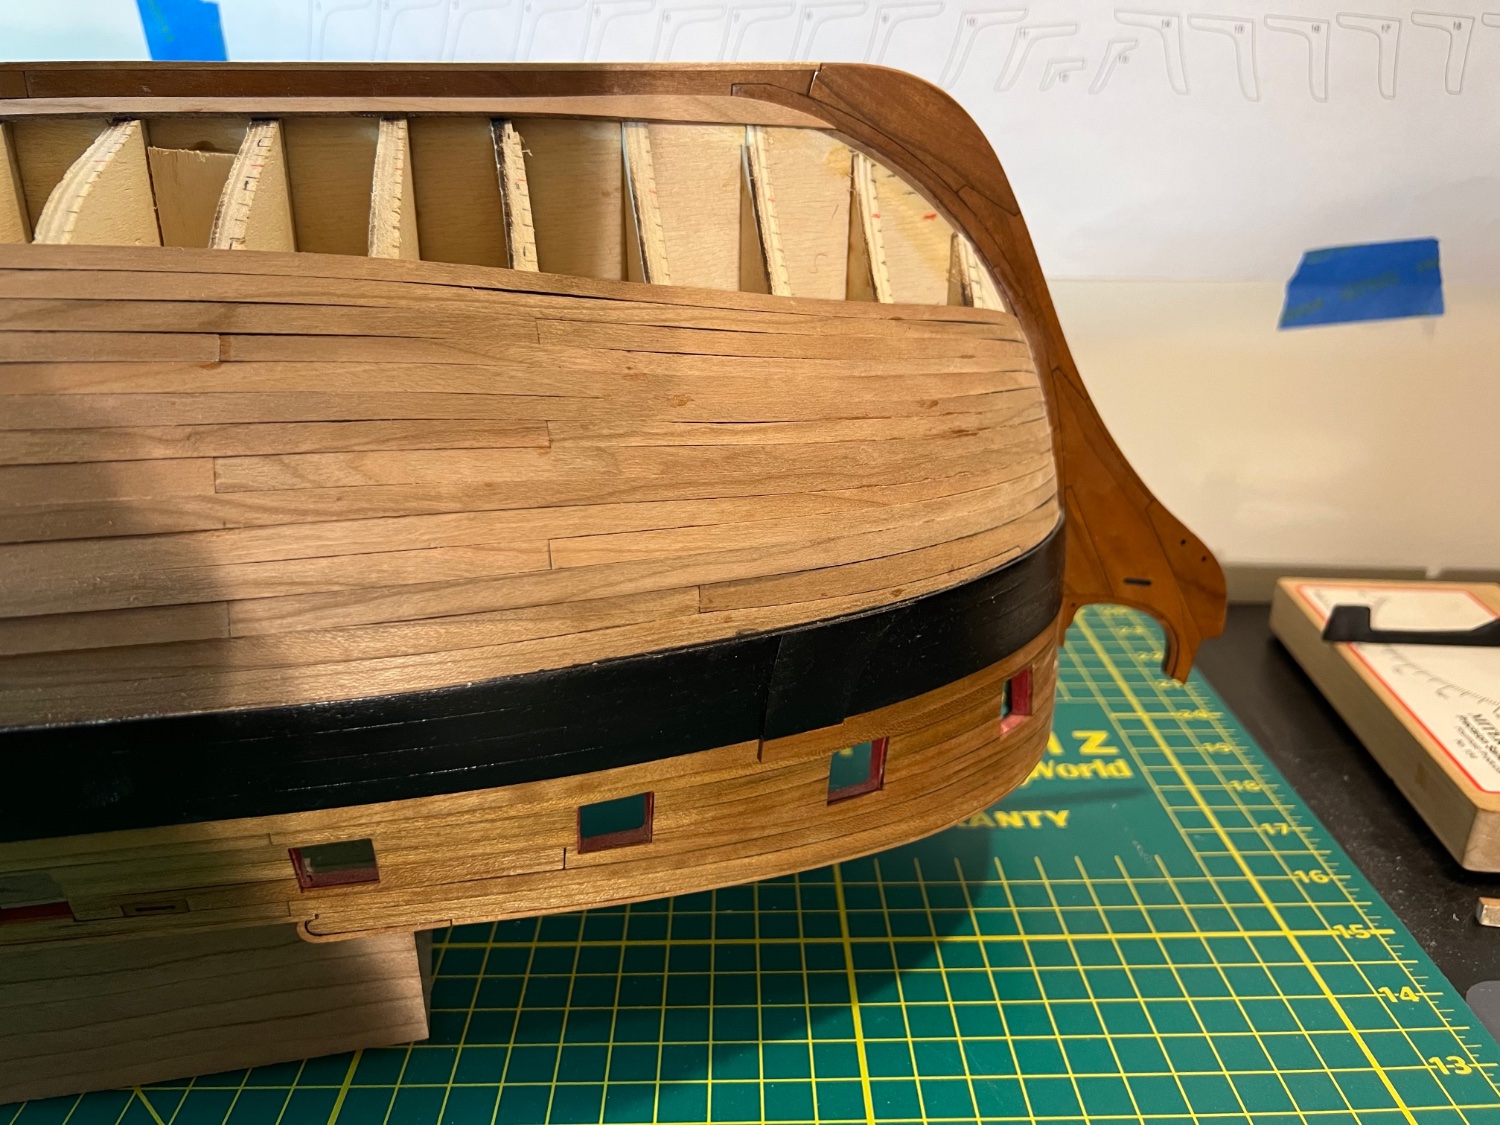
Thank you glbarlow. I am glad the garboard looks about where it’s suppose to be. I tried to not have it inch up the bow like the instructions say not to do. I so feel planking is my way of life right now! Hah! Since it takes me longer, it feels like it’s taking longer than it should. But I’m not in a rush and I am having fun. And yeah! That’s the point isn’t it? At the stern, I do see a lot of room for improvement on my part. I am taking notes and making sure the next time I will be planking, It will be better. It seems I didn’t twist the strips enough (which I should have caught but oh well). And I know the widths of the planks aren’t correct. Lastly, I’m learning I didn’t sand the bow and stern enough but I’m trying to rectify that as I go. After finishing the garboard, I realized I need to cut my strips into slightly different widths, so I finally ordered more sheets of cherry. Enough to finish the hull planking. But for now, I will have to take a small break from the build until the sheets arrive. Thanks!! Jeff
-
Thanks everyone for the likes! I do have a question about the garboard plank since this is my first time doing this… Do I have the plank at the correct position in relation to the scarf joint? I don’t want it to be too forward like the instructions say. I really just want to double check I have this placed correctly before I continue planking. Thanks! Jeff

-
I finally finished with the second set of 6 planks! I wish I could be faster with it, but I know this isn’t a race. Things at home have been rough which takes me away from building. And a lot of the time, I am too tired to work on her at night (which is my only free time). I also reorganized my work space to be more open. It feels great to have things more organized! I don’t feel as cramped which was starting to affect my building. I’m slowly getting better at this, and I know the next set of planks will be better ( but still will take me a while to complete). I look through a lot of the build logs and am very impressed with everyone’s skills in this step which I am still trying to get down. As you can see, there are definitely glue marks all over the hull! I hope I will be able to clean it up with some sanding after I finish planking. It’s been a little confusing to me exactly how much CA glue to use per bulkhead when glueing the strip to them. I seem to tend to overdo it with the glue. Also, the Saturn doesn’t look that great to me. If anyone has some tips for how they bent and placed the strips correctly for the stern, that would be much appreciated. I am also running out of cherry sheets to use for planking, but money is a little tight right now, so that will have to wait. I currently don’t have enough wood to finish this next set of planks which is a little upsetting. But, what can you do? I will have to wait a month or so before ordering more cherry sheets. I will though, update this log with what I am able to do with the remaining wood I do have. I think I got the curve of the planks correct, but if anyone thinks I need to adjust it, or any other tips, please let me know! Thanks everyone! Jeff

-
Thank you Vlad! Your right, it is pretty difficult but I’m still going at it. I am almost done with the second set of 6 planks, but I am reorganizing my workspace and need to get another table! So I am having to put her down for a few days until I can finish reorganizing. But it does feel good to clean the room and setup the space differently. I hope to respond in a few days with some more progress. Jeff
-
David, Wow! What a great build! She is looking fantastic! Jeff
- 310 replies
-
- 2
-

-
- Diana
- Caldercraft
- (and 1 more)
-
Thank you glbarlow! I will continue to make progress! (Silly me I ran out of glue so couldn’t work on her the past few days, but I’m all stocked up now!) Jeff
-
Rusty, Everytime I look at your build log, I am super impressed with your craftsmanship! Great job on your build! It’s looking fantastic! Jeff
- 642 replies
-
- 1
-
-
- winchelsea
- Syren Ship Model Company
- (and 1 more)
-
Thank you Frank! I look at others building this great model and I’m in awe at everyone’s building skills and craftsmanship. I hope I can get as good as the others building this model someday Jeff
-
Hi all! I finally finished planking the next section! I am now half way done with planking on one side! It takes me a while because I have about 30 min to and hour a night I can dedicate to her. It ain’t perfect, and I realized I didn’t edge bend enough on the bow to make the planks sit flatter, but I’m learning. So the next section should be better! I also milled 15 more strips so I can finish the other side’s 6 rows. I do enjoy milling. I don’t know why but I find if fun. Thanks all! Jeff


-
Thanks everyone for the likes!! I finally finished planking the first set of 6! That took over a year to do. Haha! Here’s to the second set not taking that long 🤪 With the first pic, I can really see a difference between the left and right side. The right side is quite a bit better, which gives me hope I am getting better at this. I feel like I accomplished quite a bit with this first row done! I will continue onto the next set of 6 planks and make sure this row is even better than the first! Thanks! Jeff

-
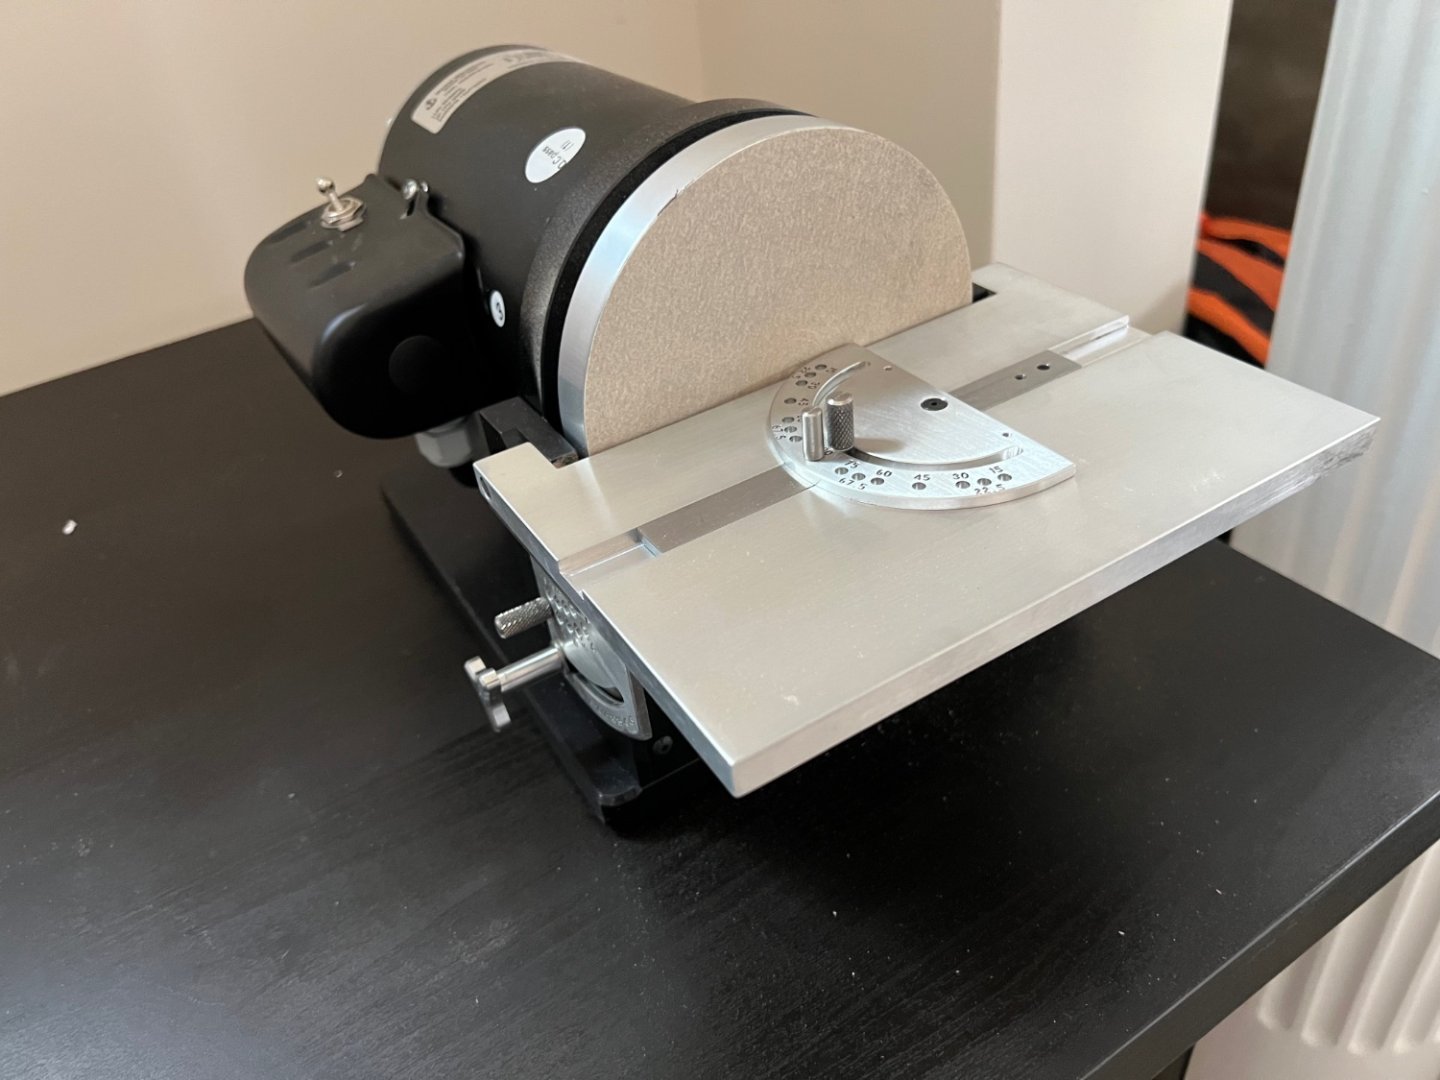
As I said, here are some pics showing my progress. It’s not too much, but I am glad I am able to start building again. I am slowly getting better at it as I progress through the hull. One thing I am noticing, is that I need to sand more on the bow and stern. So before I add more planks, I will need to sand it down a little more. Lastly, as a birthday gift this year, my wife ordered this Byrnes disk sander! It works very well!! Thanks all! I will be posting back soon. Jeff