HOLIDAY DONATION DRIVE - SUPPORT MSW - DO YOUR PART TO KEEP THIS GREAT FORUM GOING! (Only 69 donations so far out of 49,000 members - Can we at least get 100? C'mon guys!)
×

Zarkon
-
Posts
295 -
Joined
-
Last visited
Content Type
Profiles
Forums
Gallery
Events
Everything posted by Zarkon
-
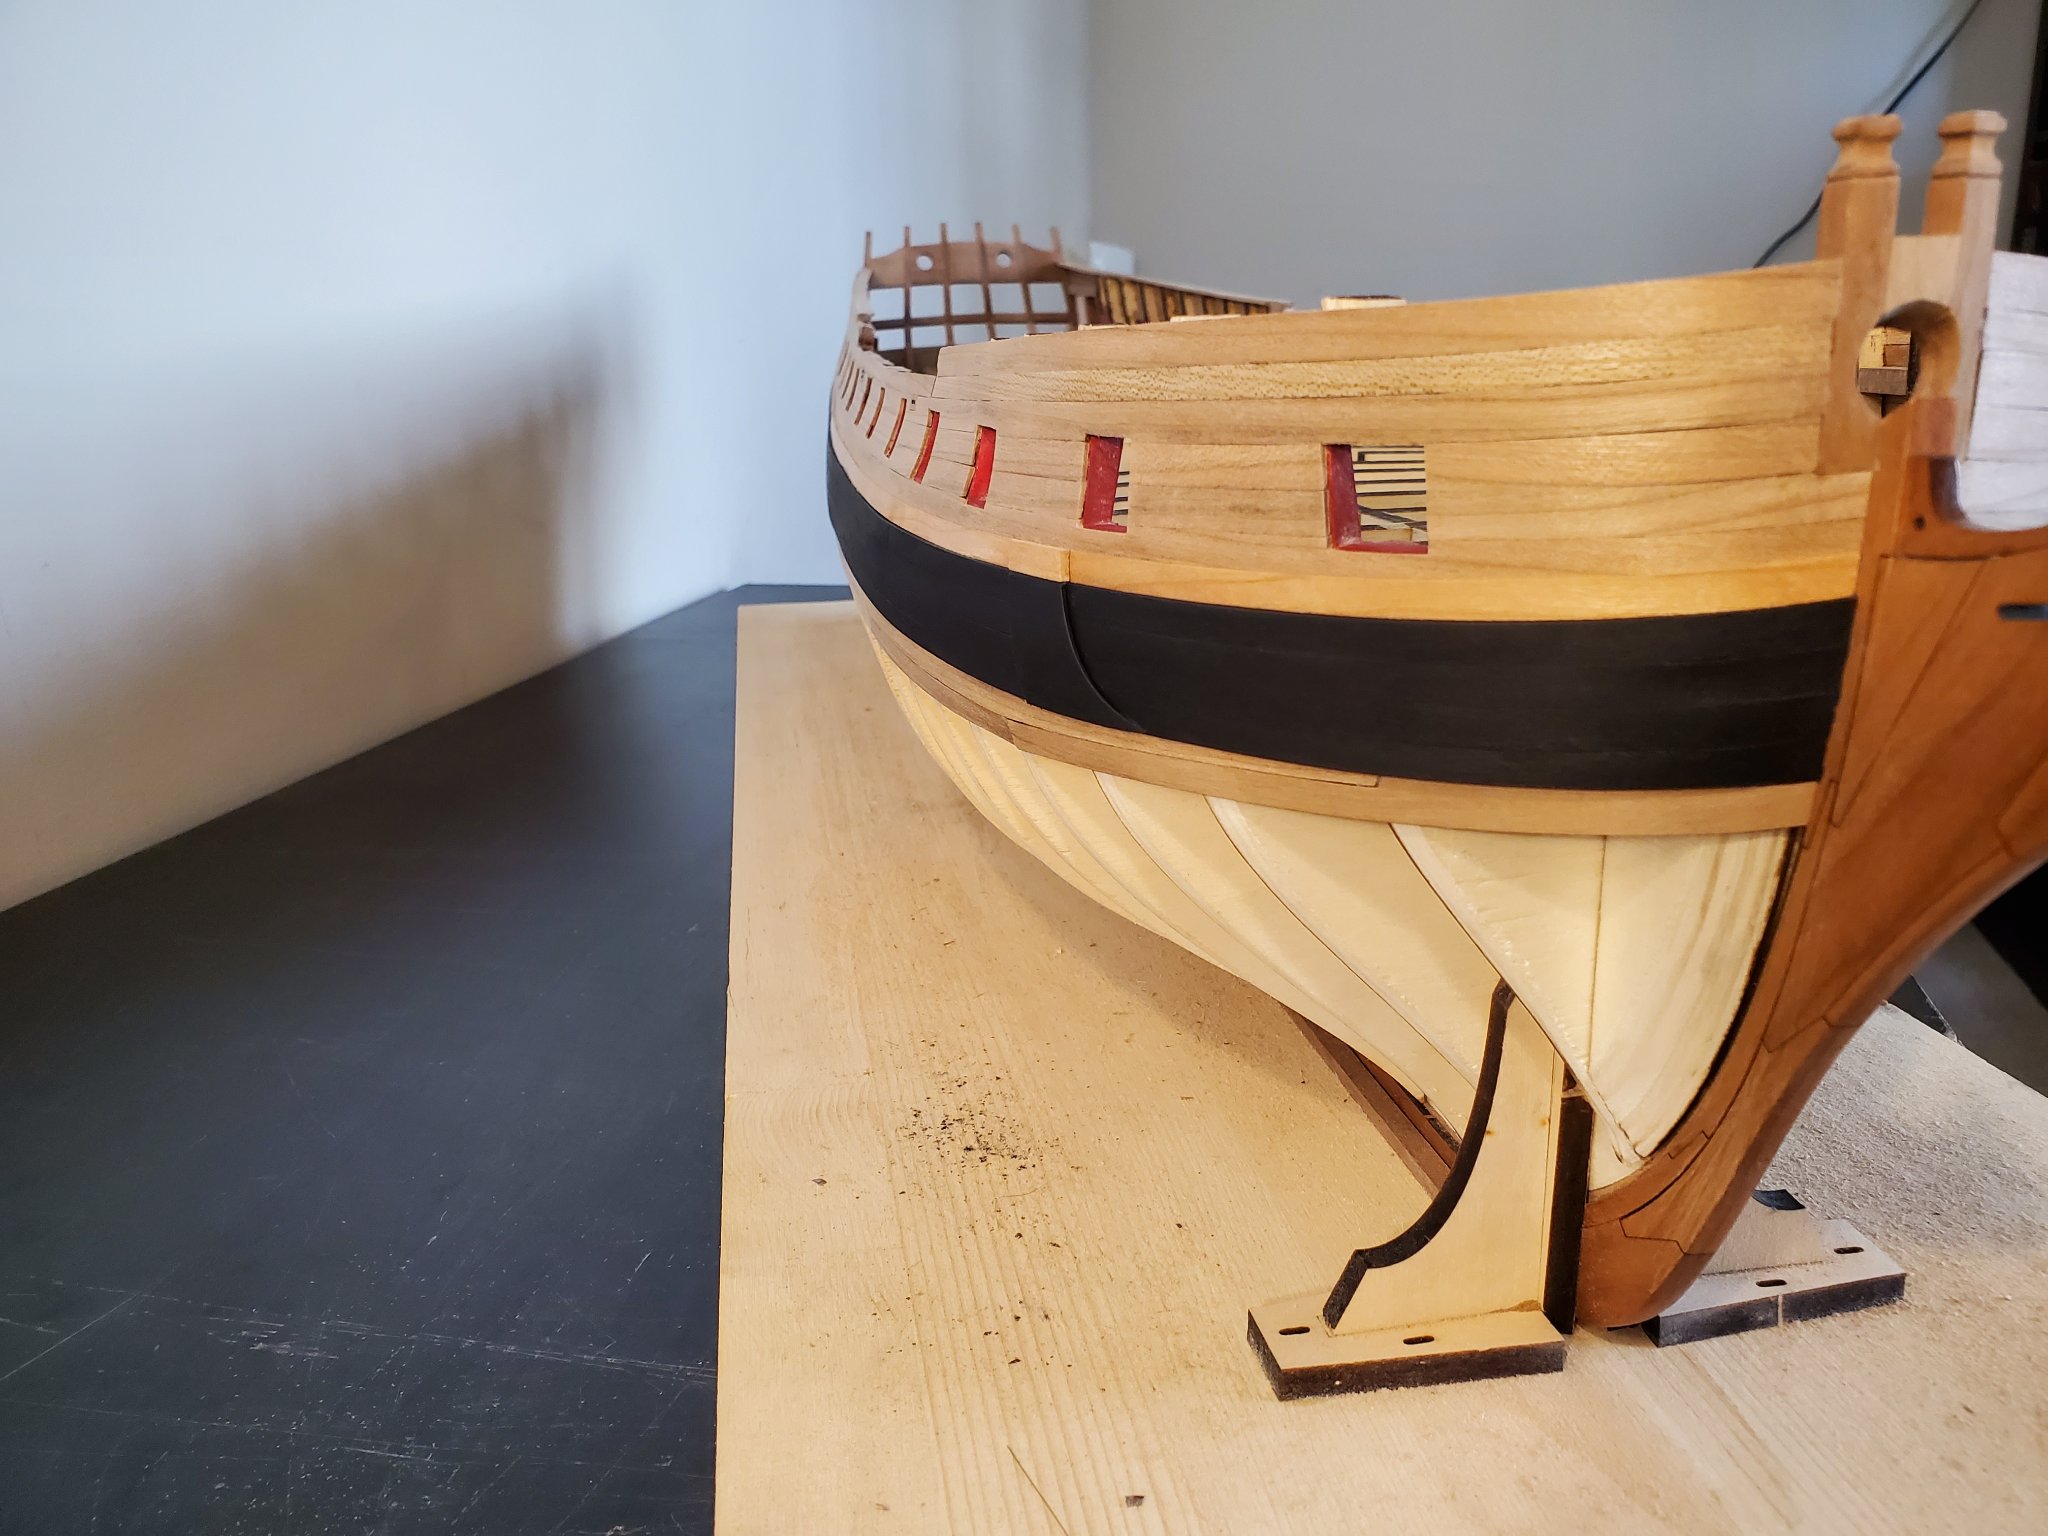
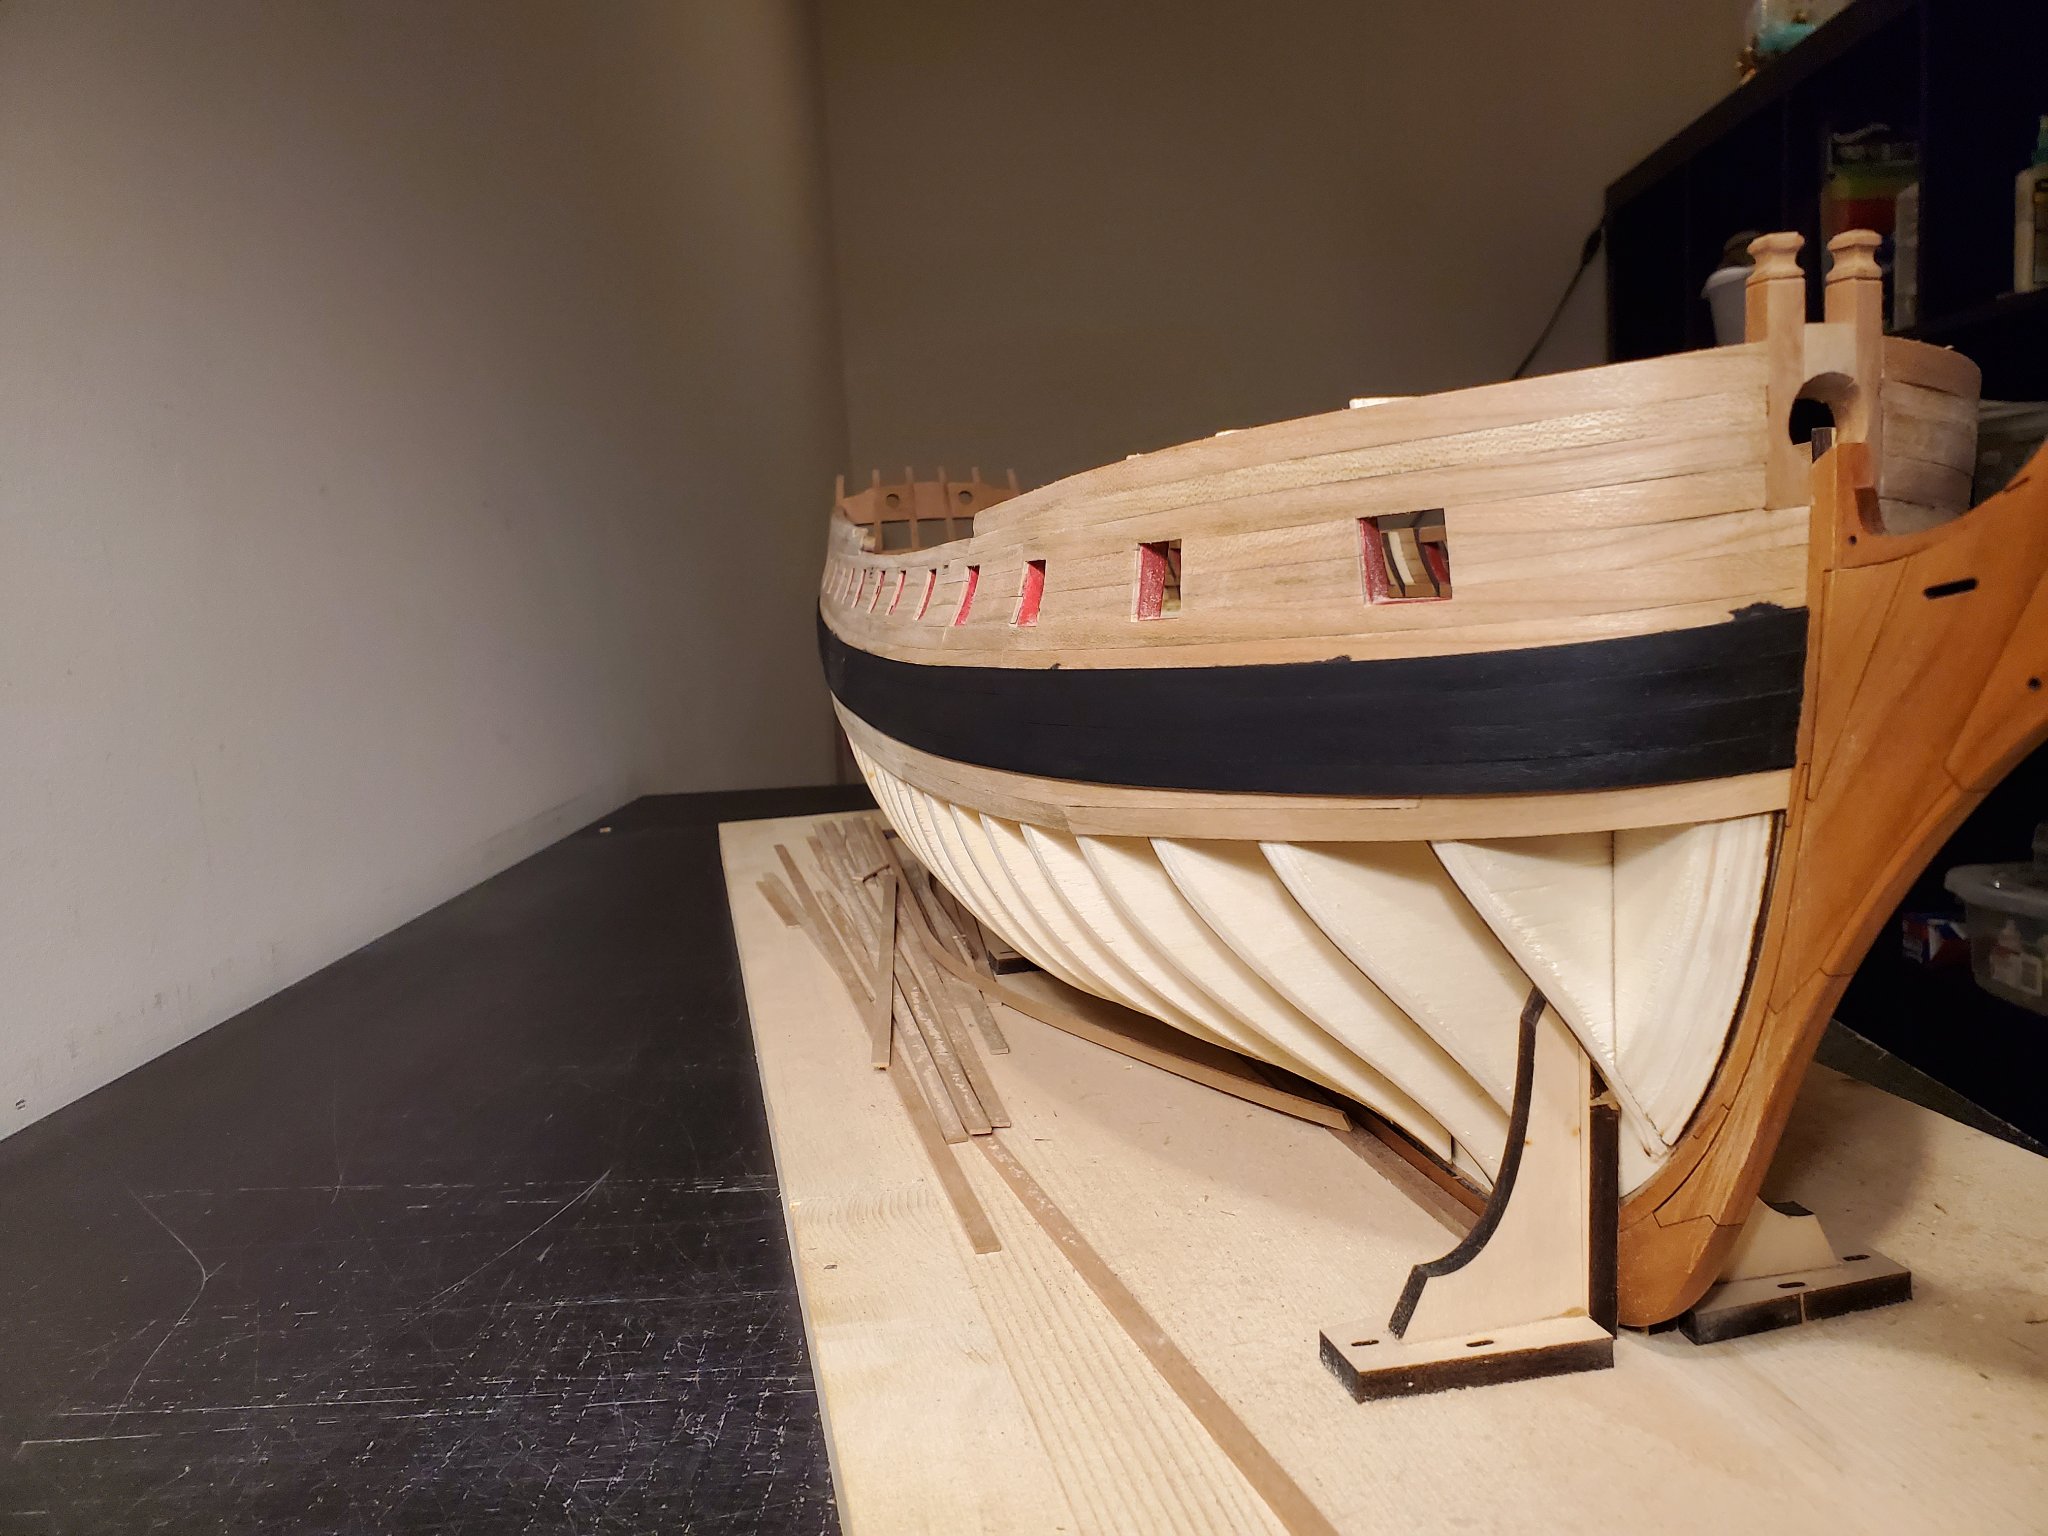
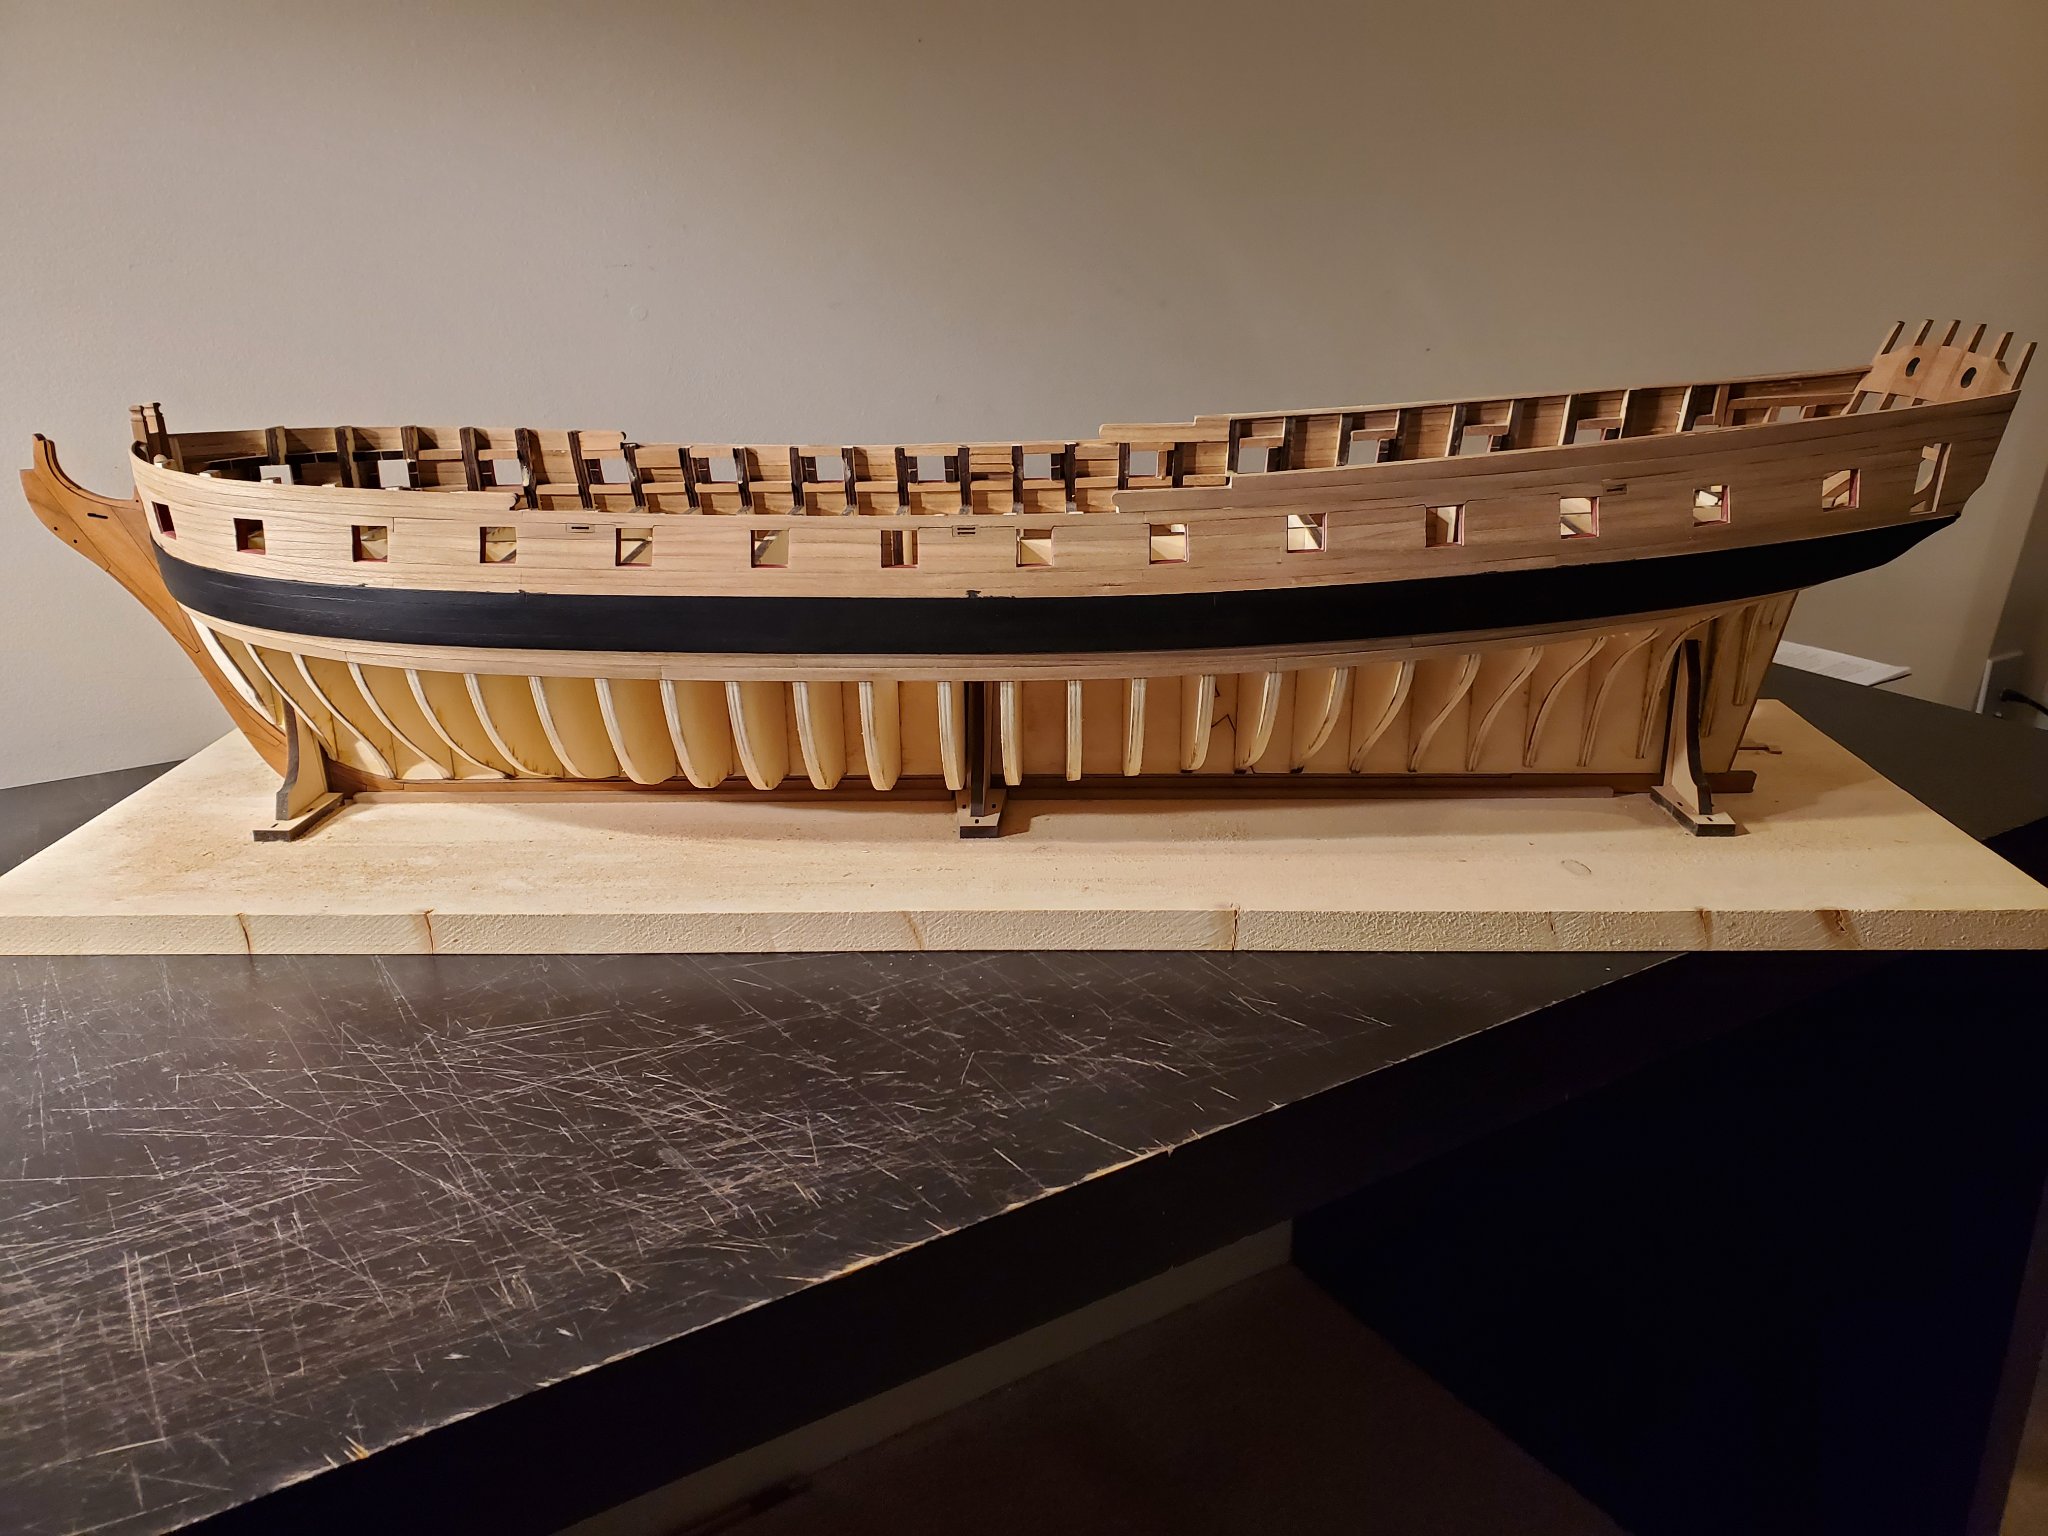
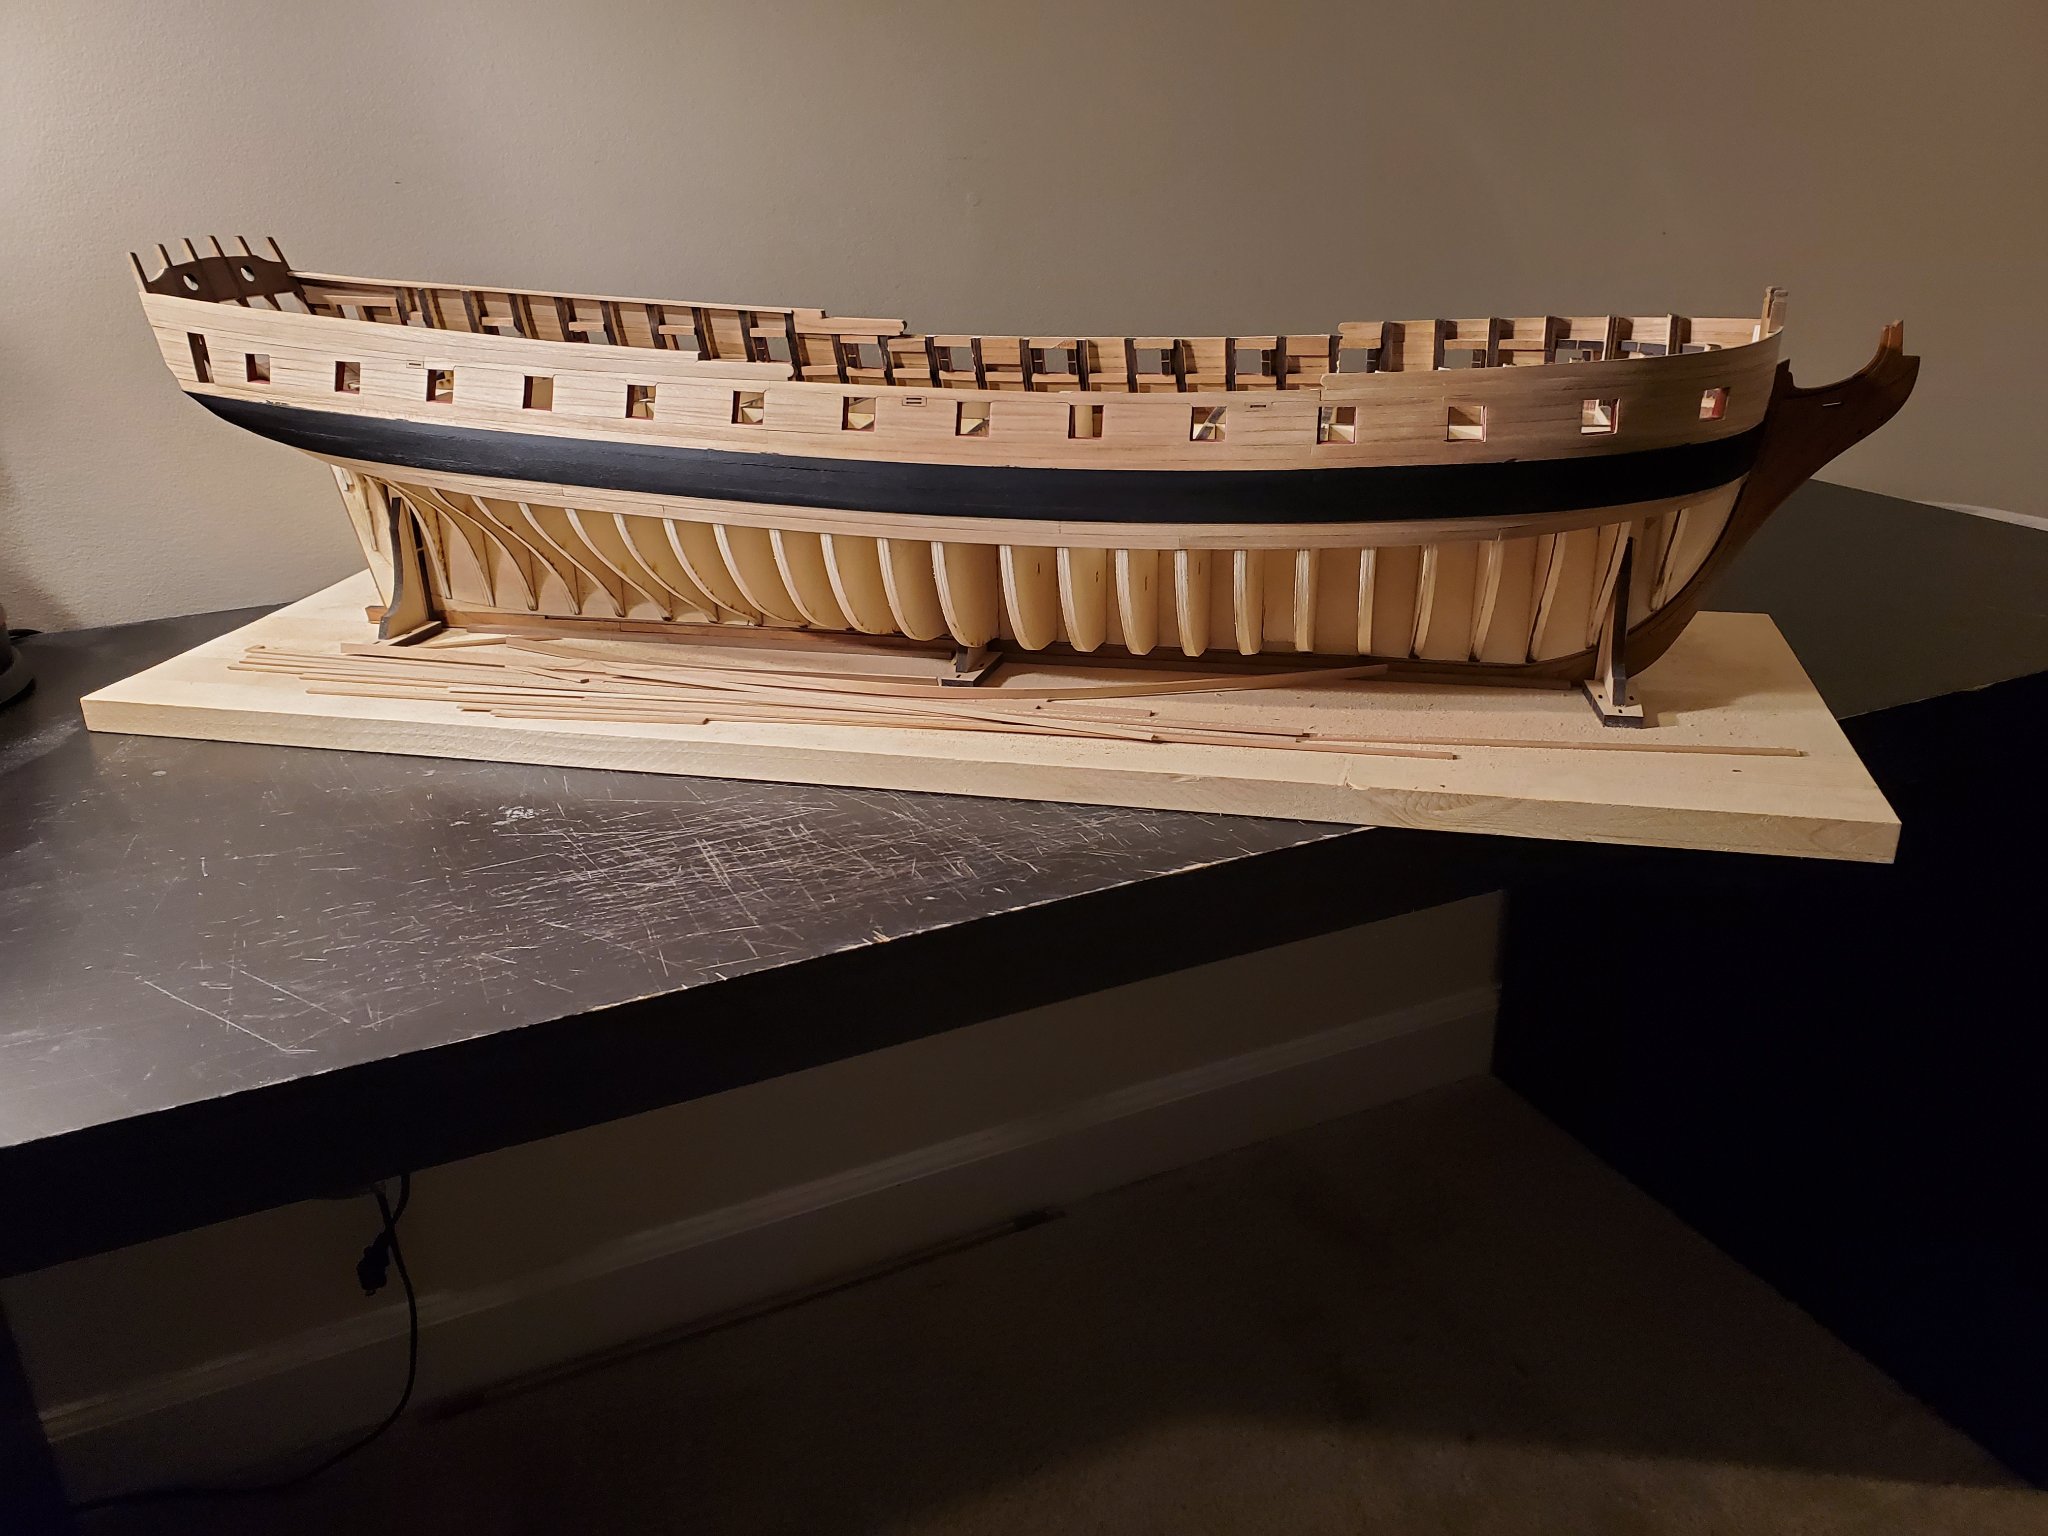
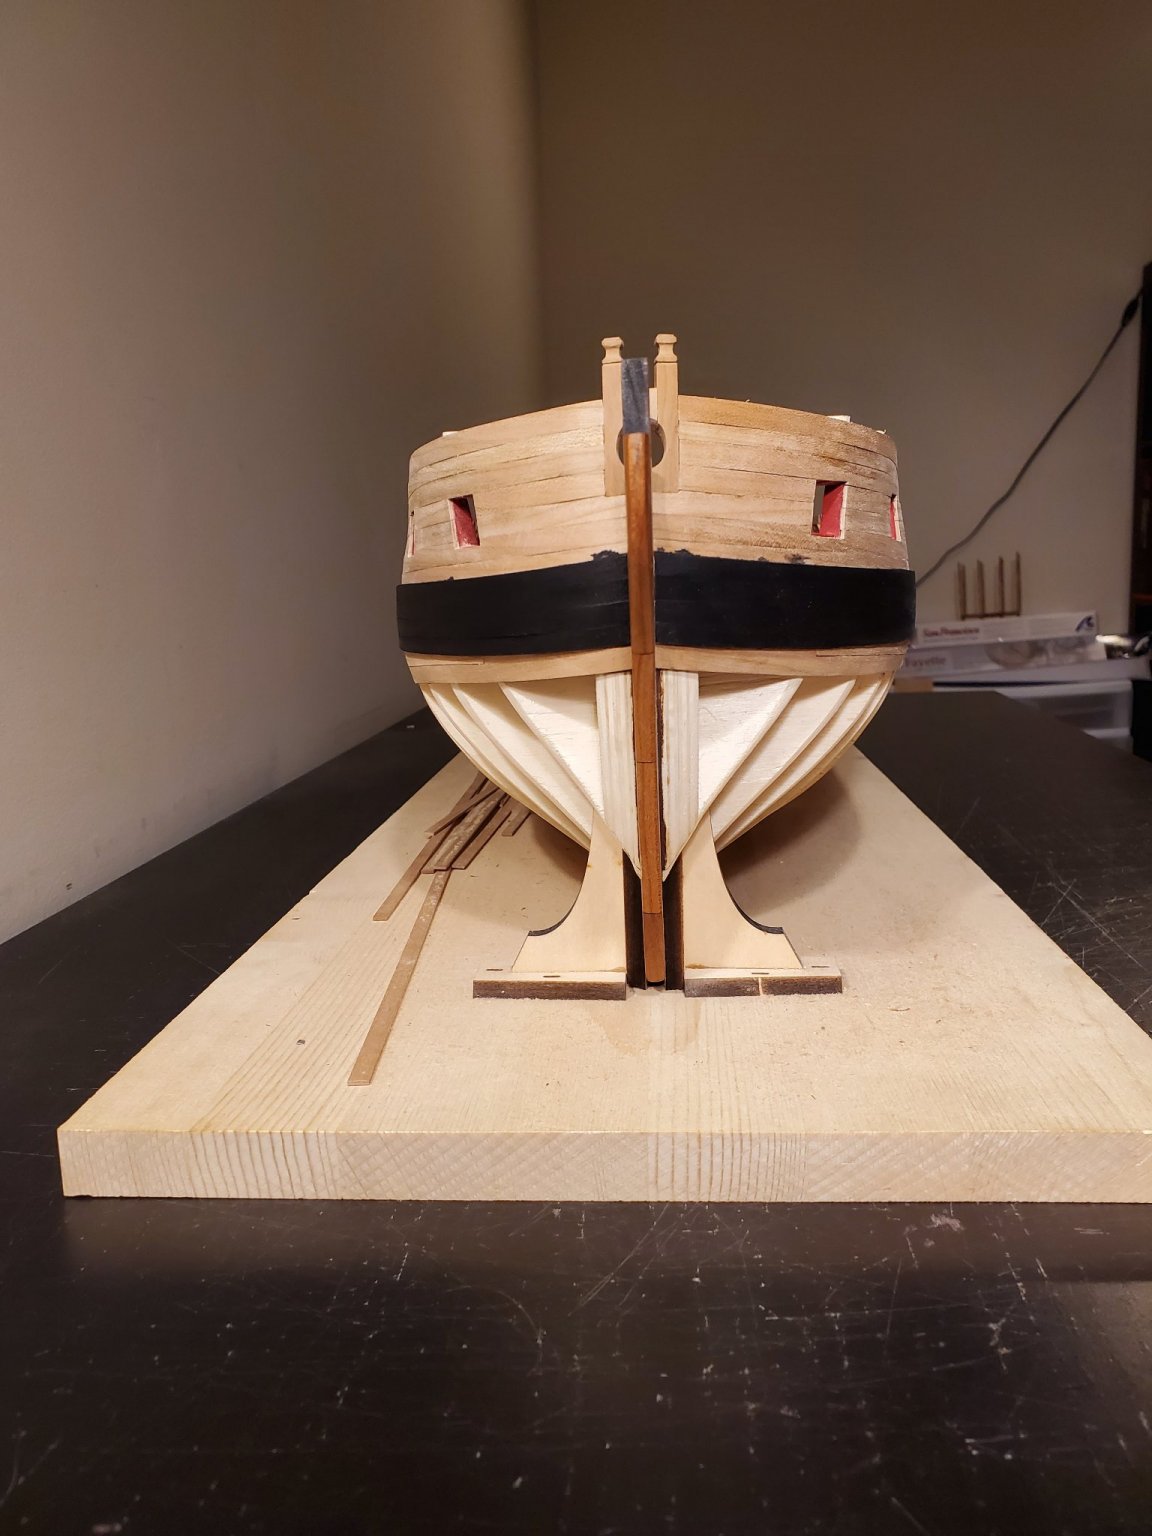
Hi all, Its been a long while since I have been able to work on her. With Covid, work, my son’s health and other unforeseen events, I have had to take a long break. I have had no energy or time to continue…. Until now! I have been able to plank more of the hull recently and I’m getting back into it. Planking the hull is a daunting task for me and sorta scary. I am almost done with the first set of 6 planks on each side. I will be posting a few pics of my progress later today. Chucks instructions on how to edge bend the planks has been a huge help with this planking so far. I can tell I am getting better at it as I continue with each plank, so it’s giving me motivation for me. Thanks all!! Jeff
-
Thanks guys for the feedback. That really did help. I ordered some tracing paper and I will pick it up tomorrow. I have some sheets I can use to cut it out. Would you guys recommend using a scroll saw to cut the base shape? Thanks! Jeff
-
Hey everyone, So I am in need of some advice. I am not sure how to create the fairing cap strip at the bow. The sideways bend needed for a 3/16" x 1/16" strip of wood is proving difficult. Should I try to trace the shape on a 1/16" sheet of cherry, then cut it out? I'm not sure what the best method is for creating a strip with this type of bend at the bow. I have added the all the other fairing caps down to the stern. I just need help with the bow fairing cap since it bends MUCH more than the others. Any help would be great! Thanks! Jeff
-
Thank you Chuck! I am really enjoying this build! Your pics and instructions are a HUGE help for me. I ordered the chapter 4 cherry set, and I was really surprised at how fast it got to my house! I also ordered all the cherry sheets I should need to finish planking the hull. Im excited to line off the hull and start to plank! Well... after fairing inboard of course! Jeff
-
Thanks for the advice! I do have a Dremel so I will look into using that for the initial fairing. I do need to re-read the fairing cap section to make sure I am doing that correctly. I might have some questions before I start tomorrow. Thanks! Jeff
-
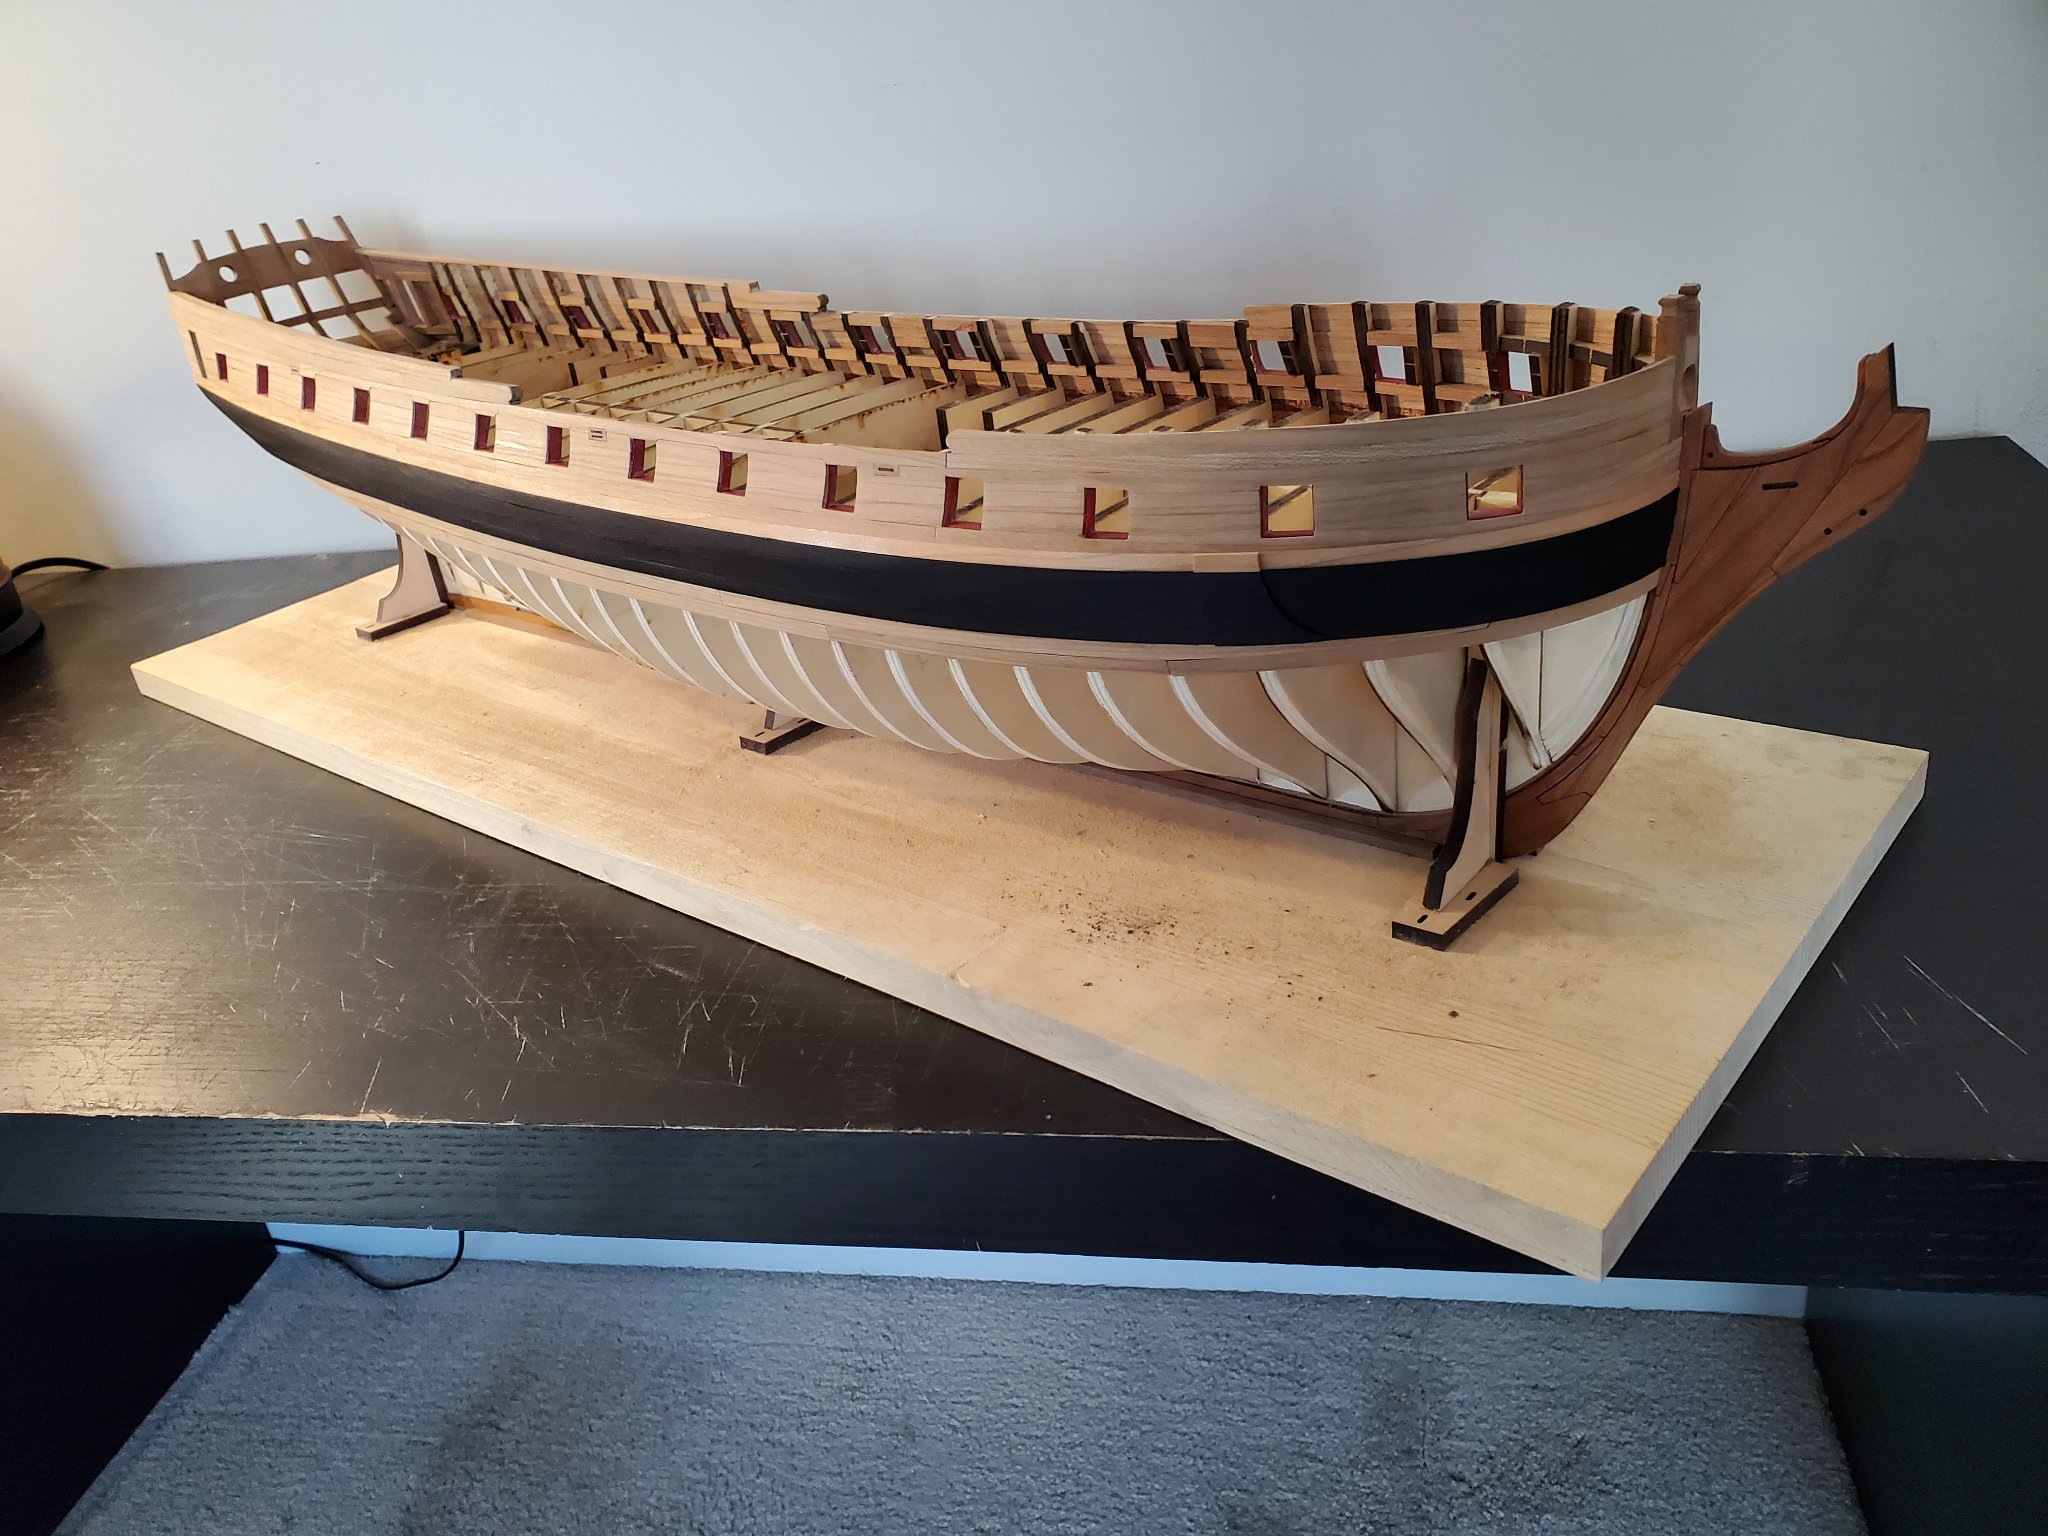
Thanks everyone! I do appreciate the feedback and likes! It helps inspire me to do my best. I have finally finished placing the black strake and the anchor lining. It took longer than I had thought. But again, I am happy with the result! Next up is the step I have been slightly dreading. Fairing inboard. Chuck even says this isn't a fun step. But I know its really important, so of course I will do my best. I am not sure though what would be the best method of fairing. Would it be just making some custom sand blocks and going to town? I'll have to think about it and any suggestions would be helpful I will read over Chuck's excellent instructions a few times before adding the "fairing caps". Here are some pictures of where i am currently. Thanks everyone for reading my log! Jeff


-
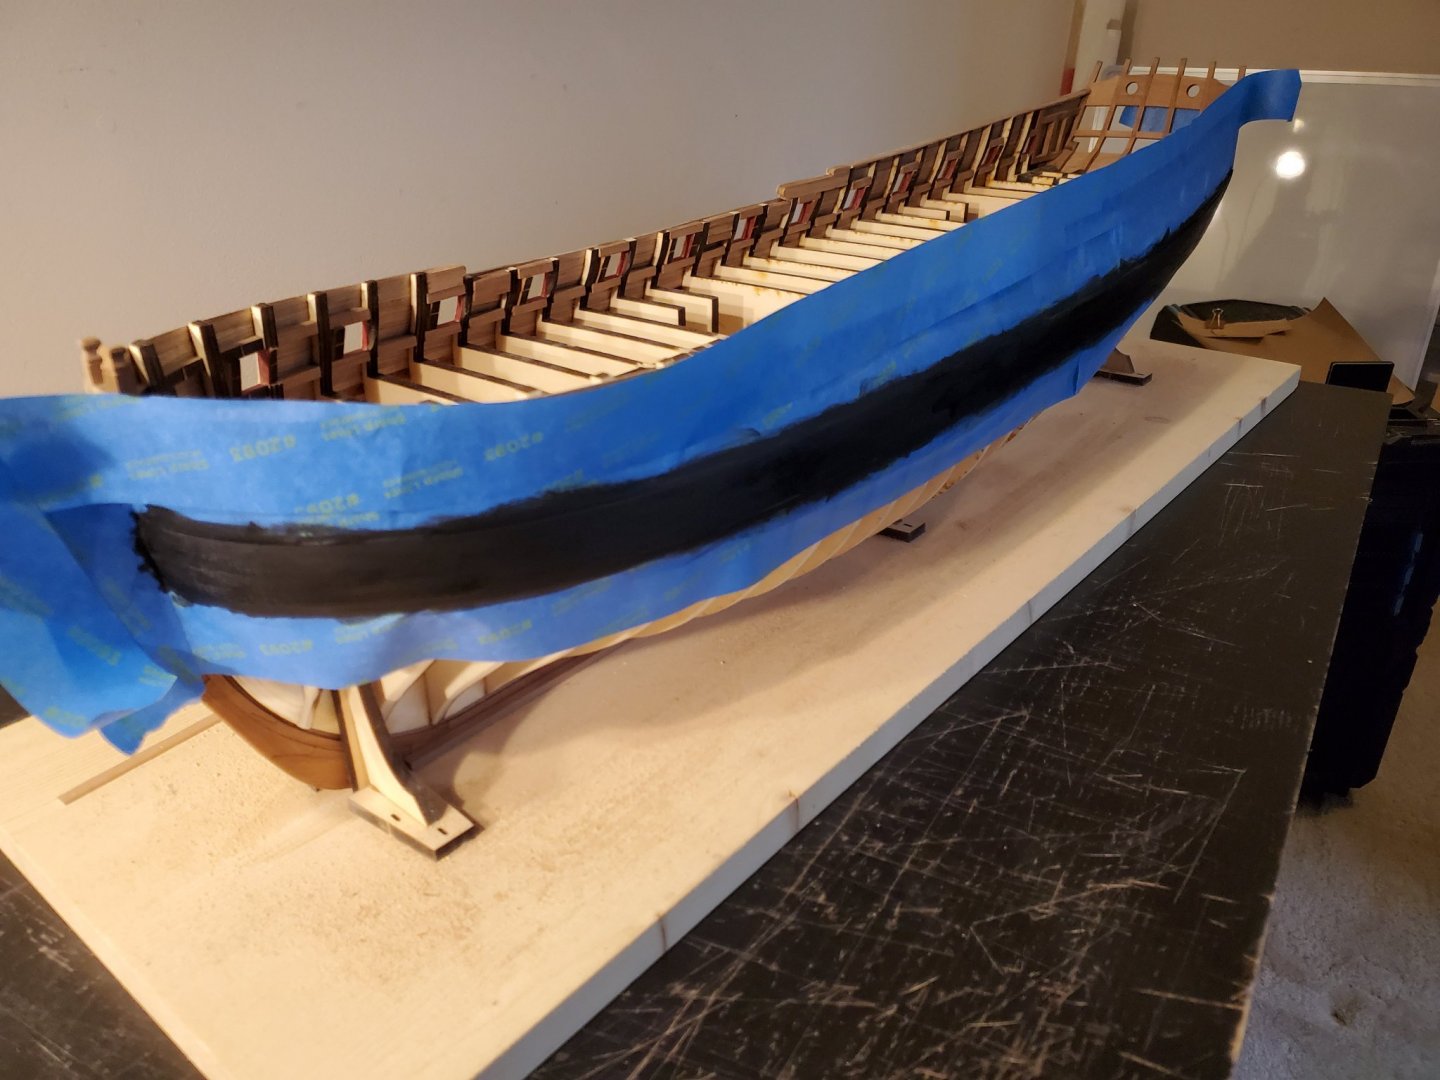
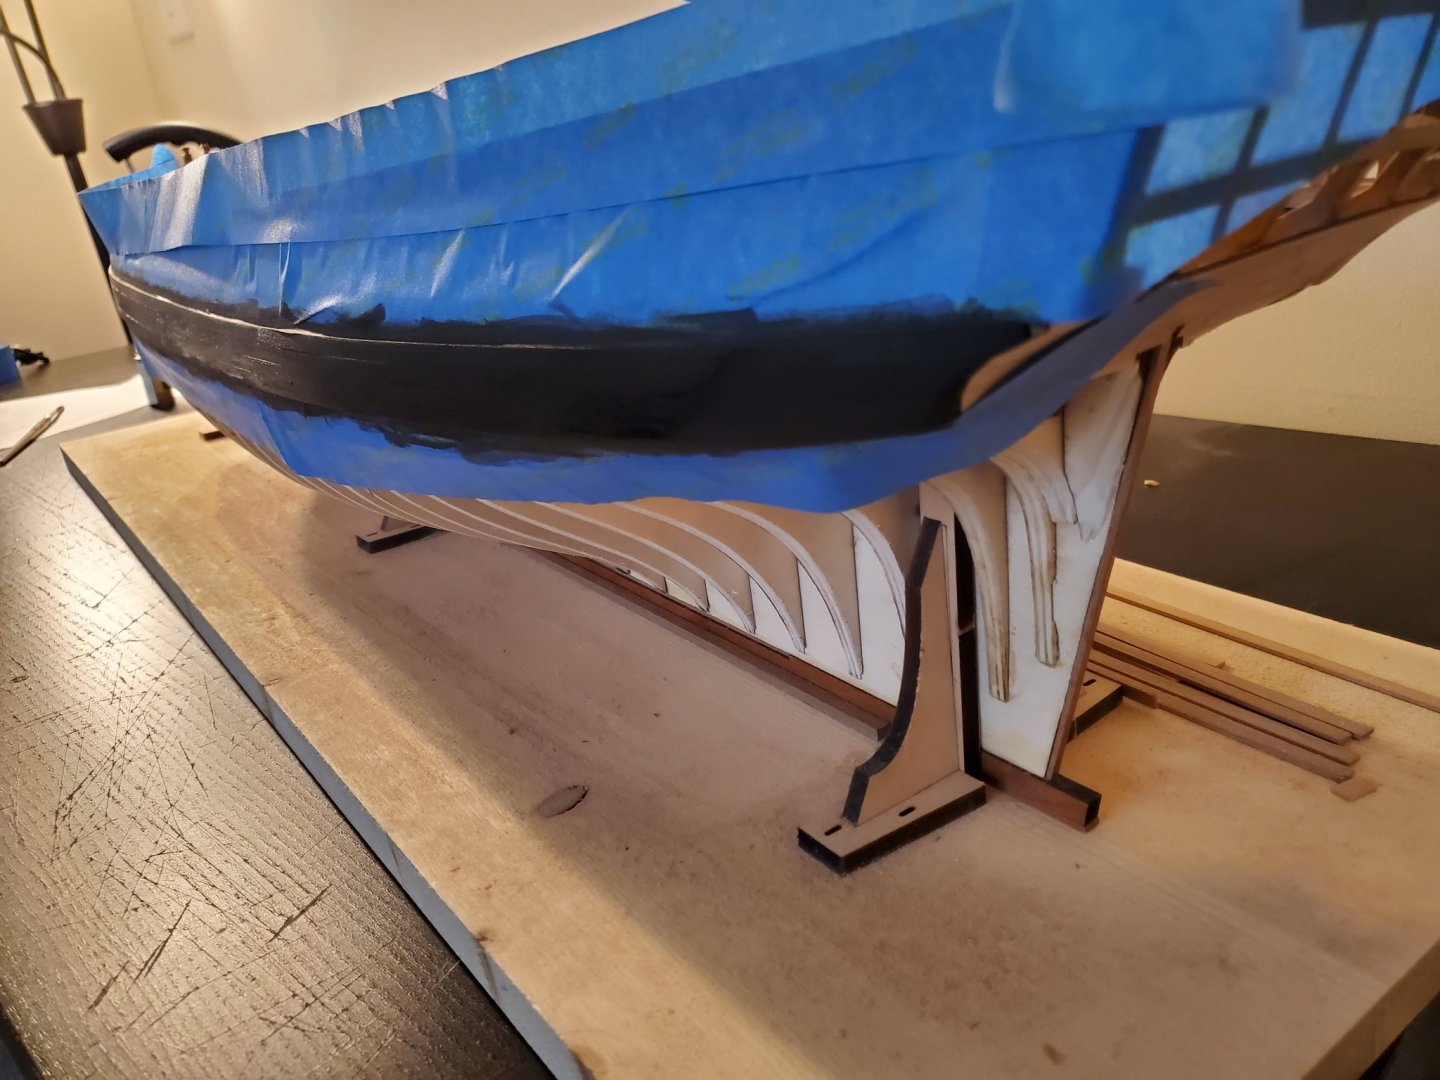
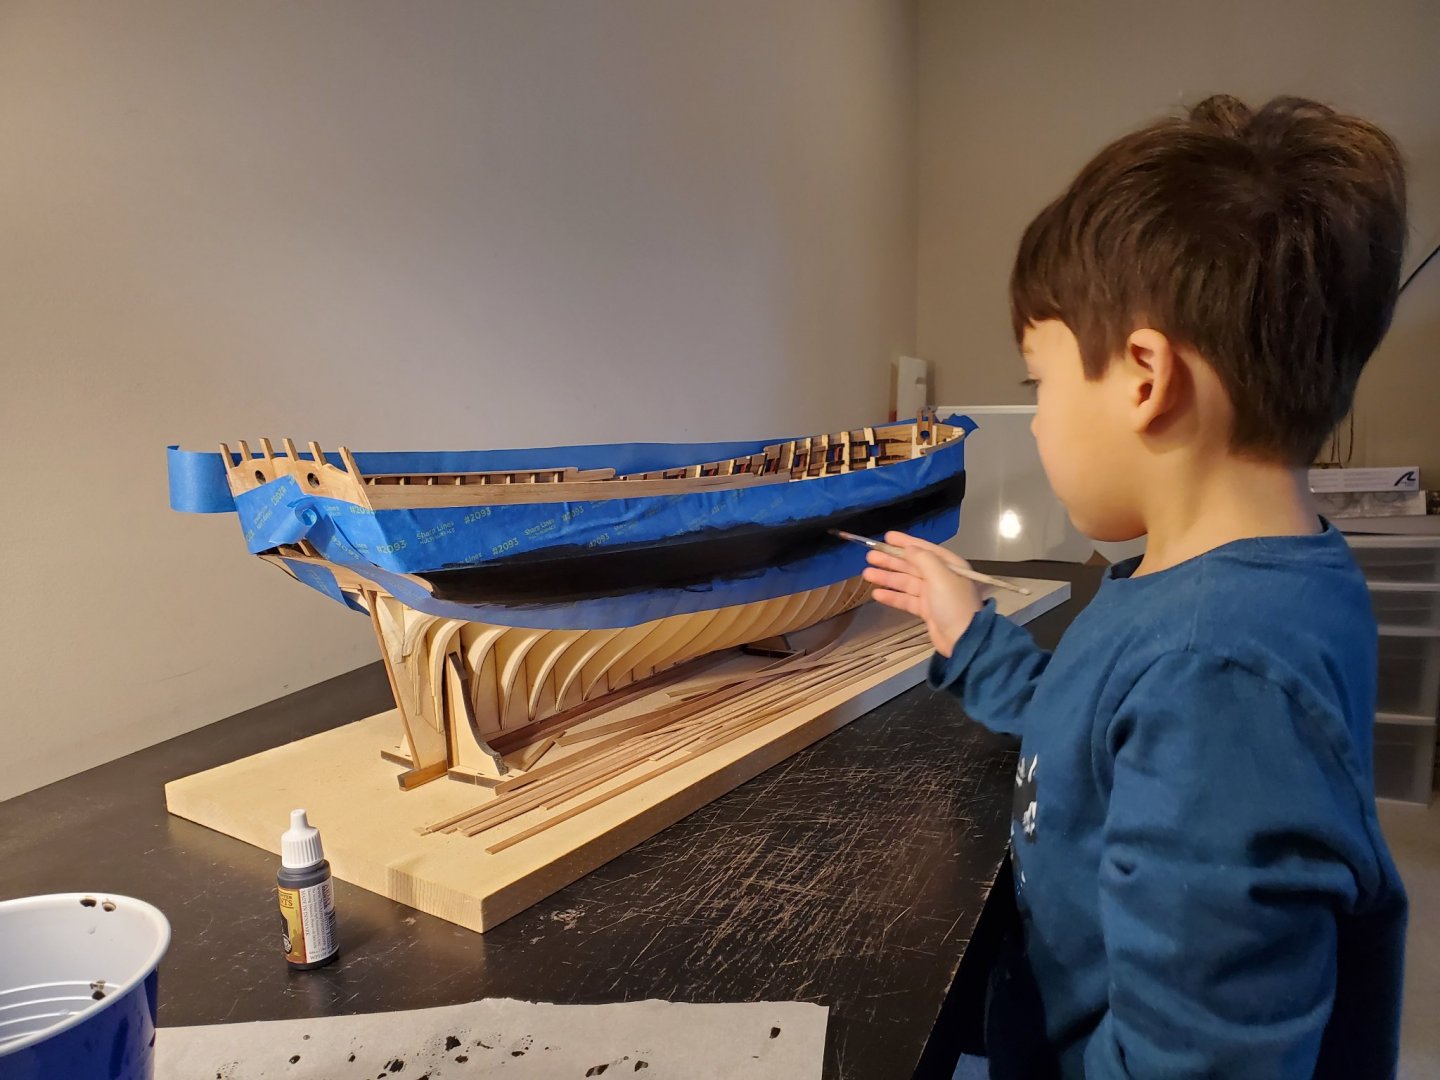
My paint came a day early! I was too excited so I painted the wales with many thin coats today. Even my son helped! He was very proud of himself for helping to paint . He did a great job if I do say so myself! After cleaning it up some, I am really happy with the result! I don't care as much about the top because the black strake will cover the little spill over. I need to make the black strake strips so that will be done this week. I do need to clean up a few places here and there, but its mostly completed! Thanks everyone for the nice comments and likes! Jeff


-
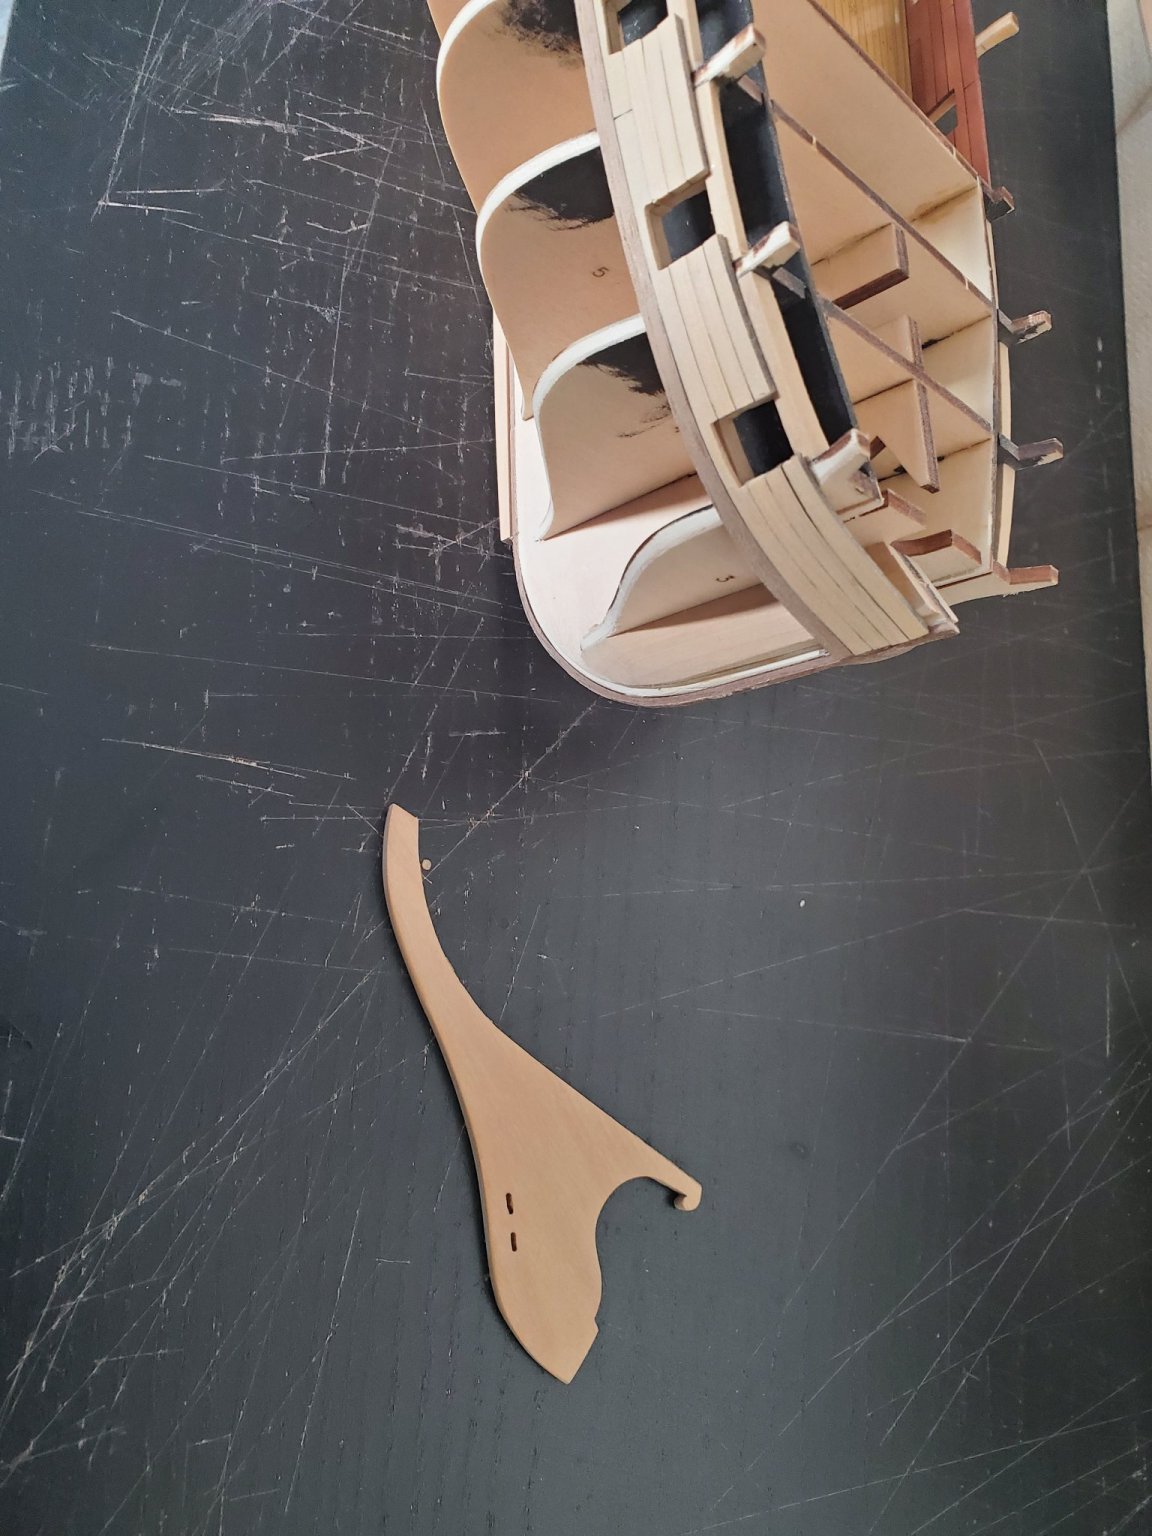
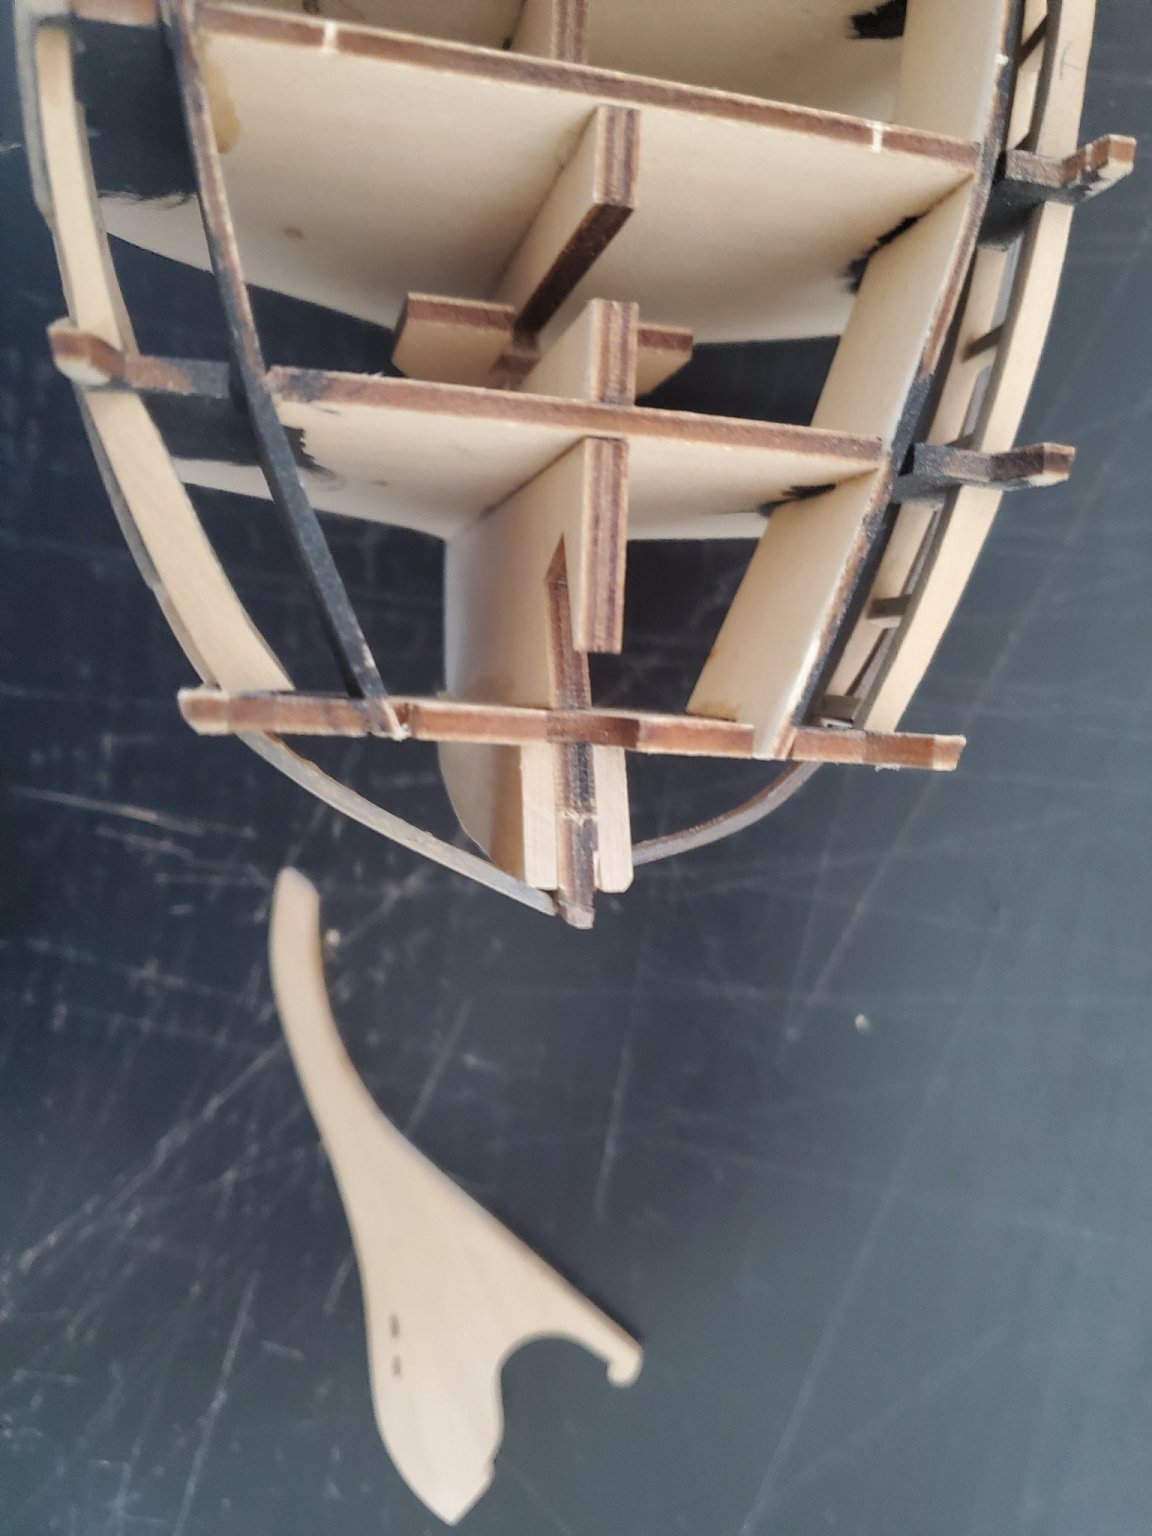
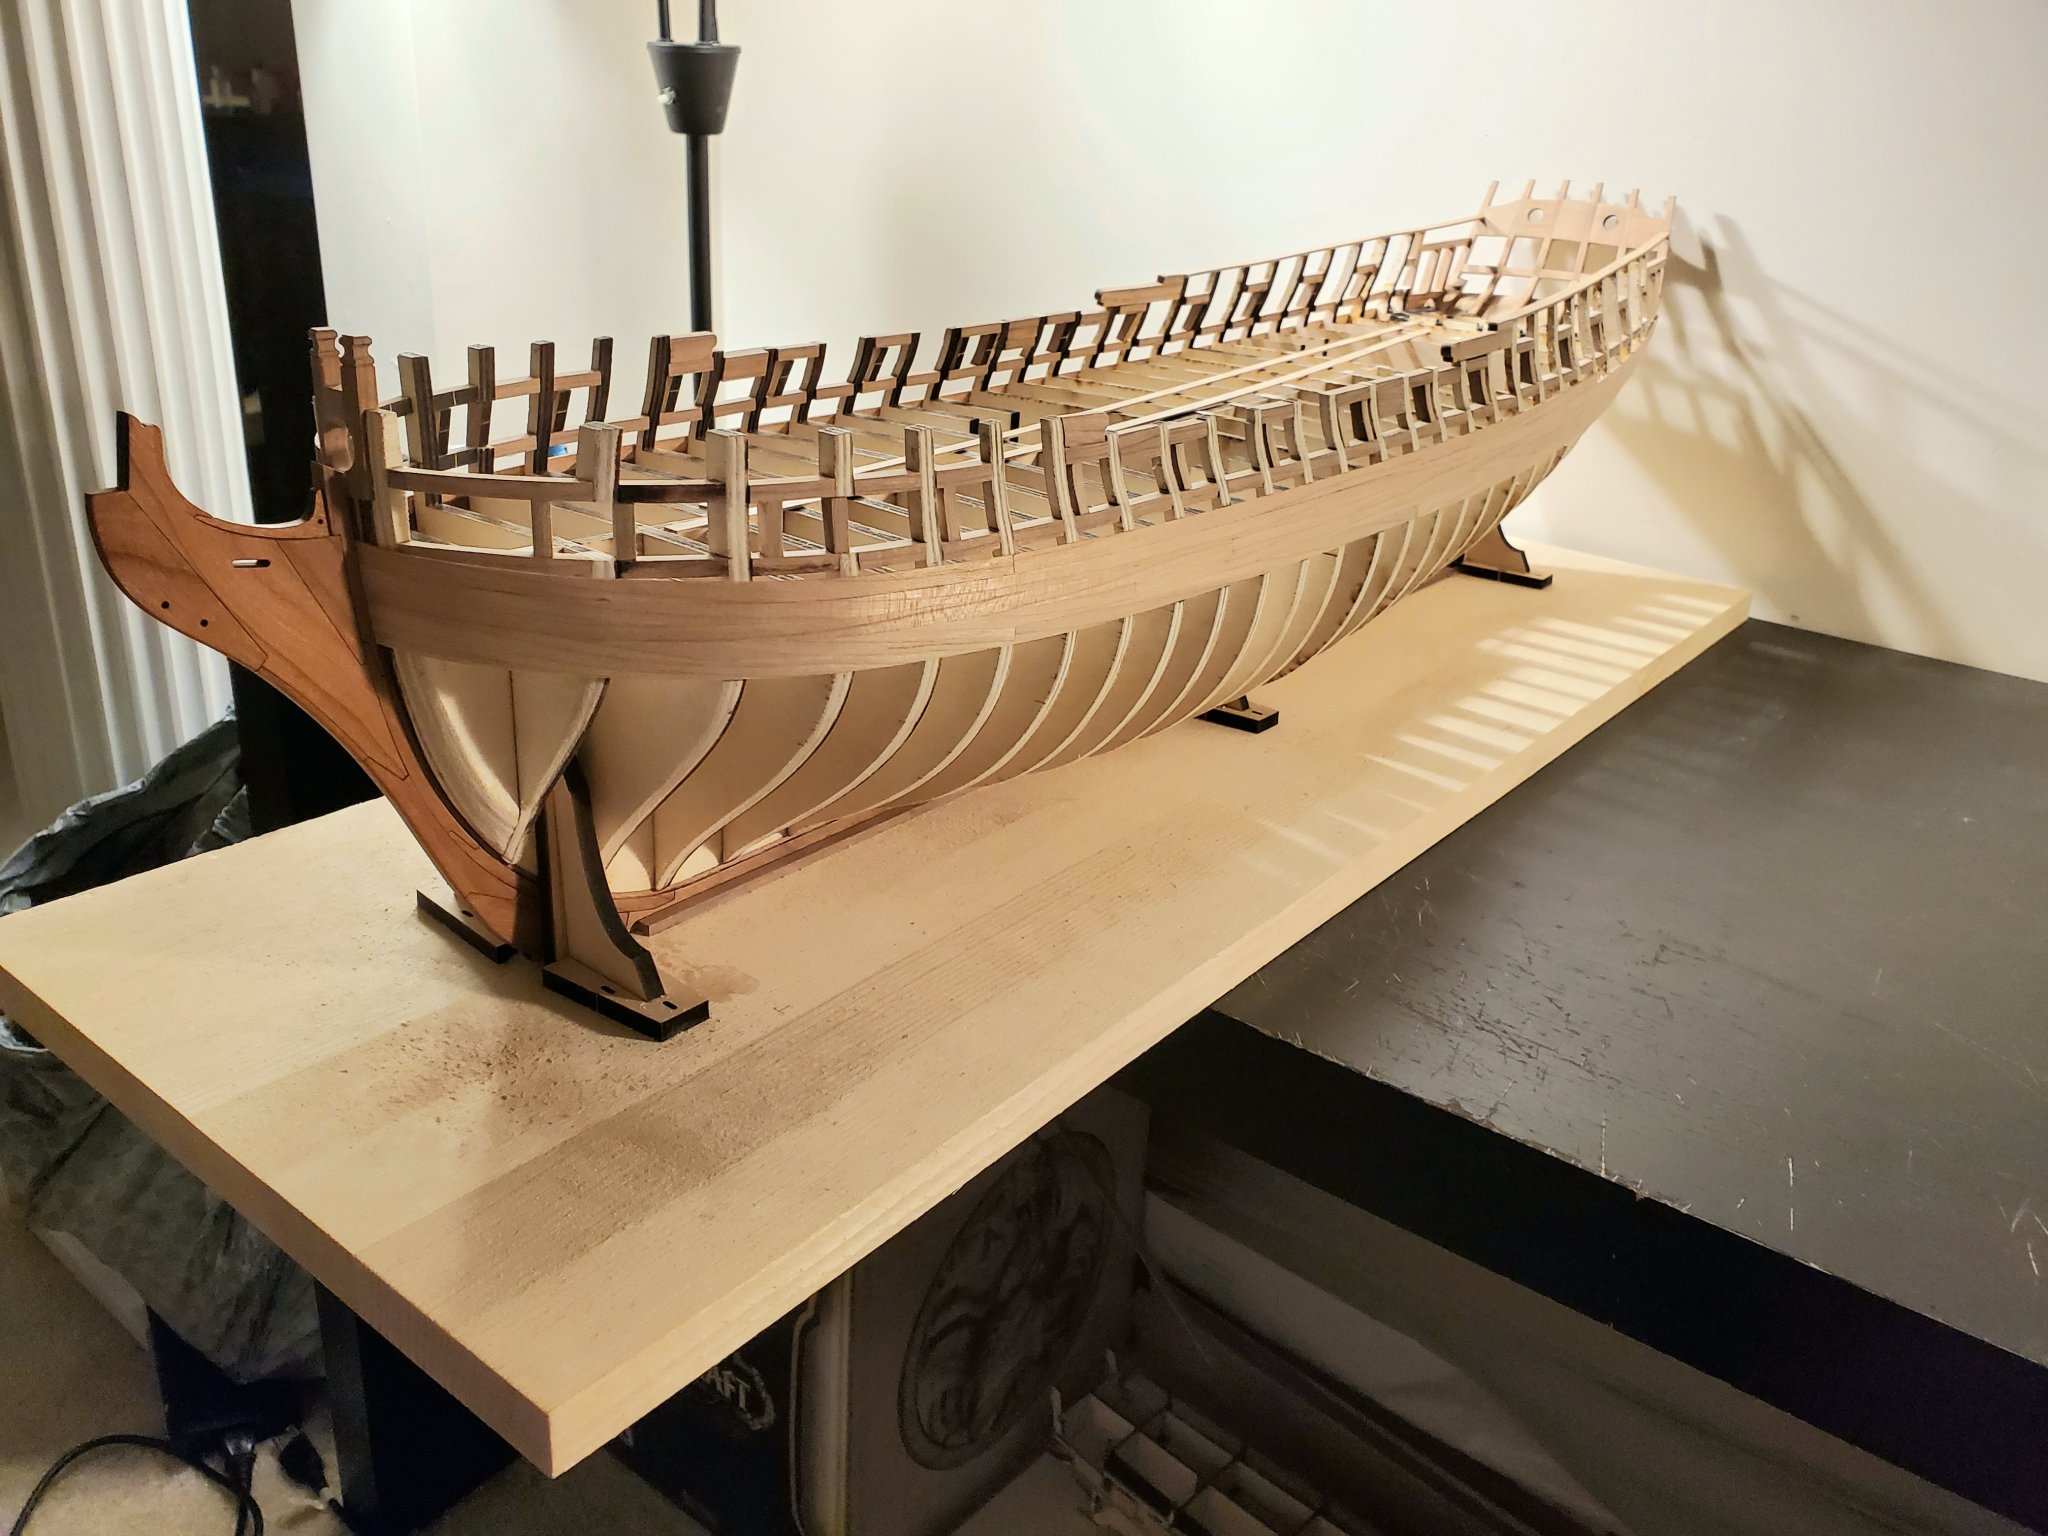
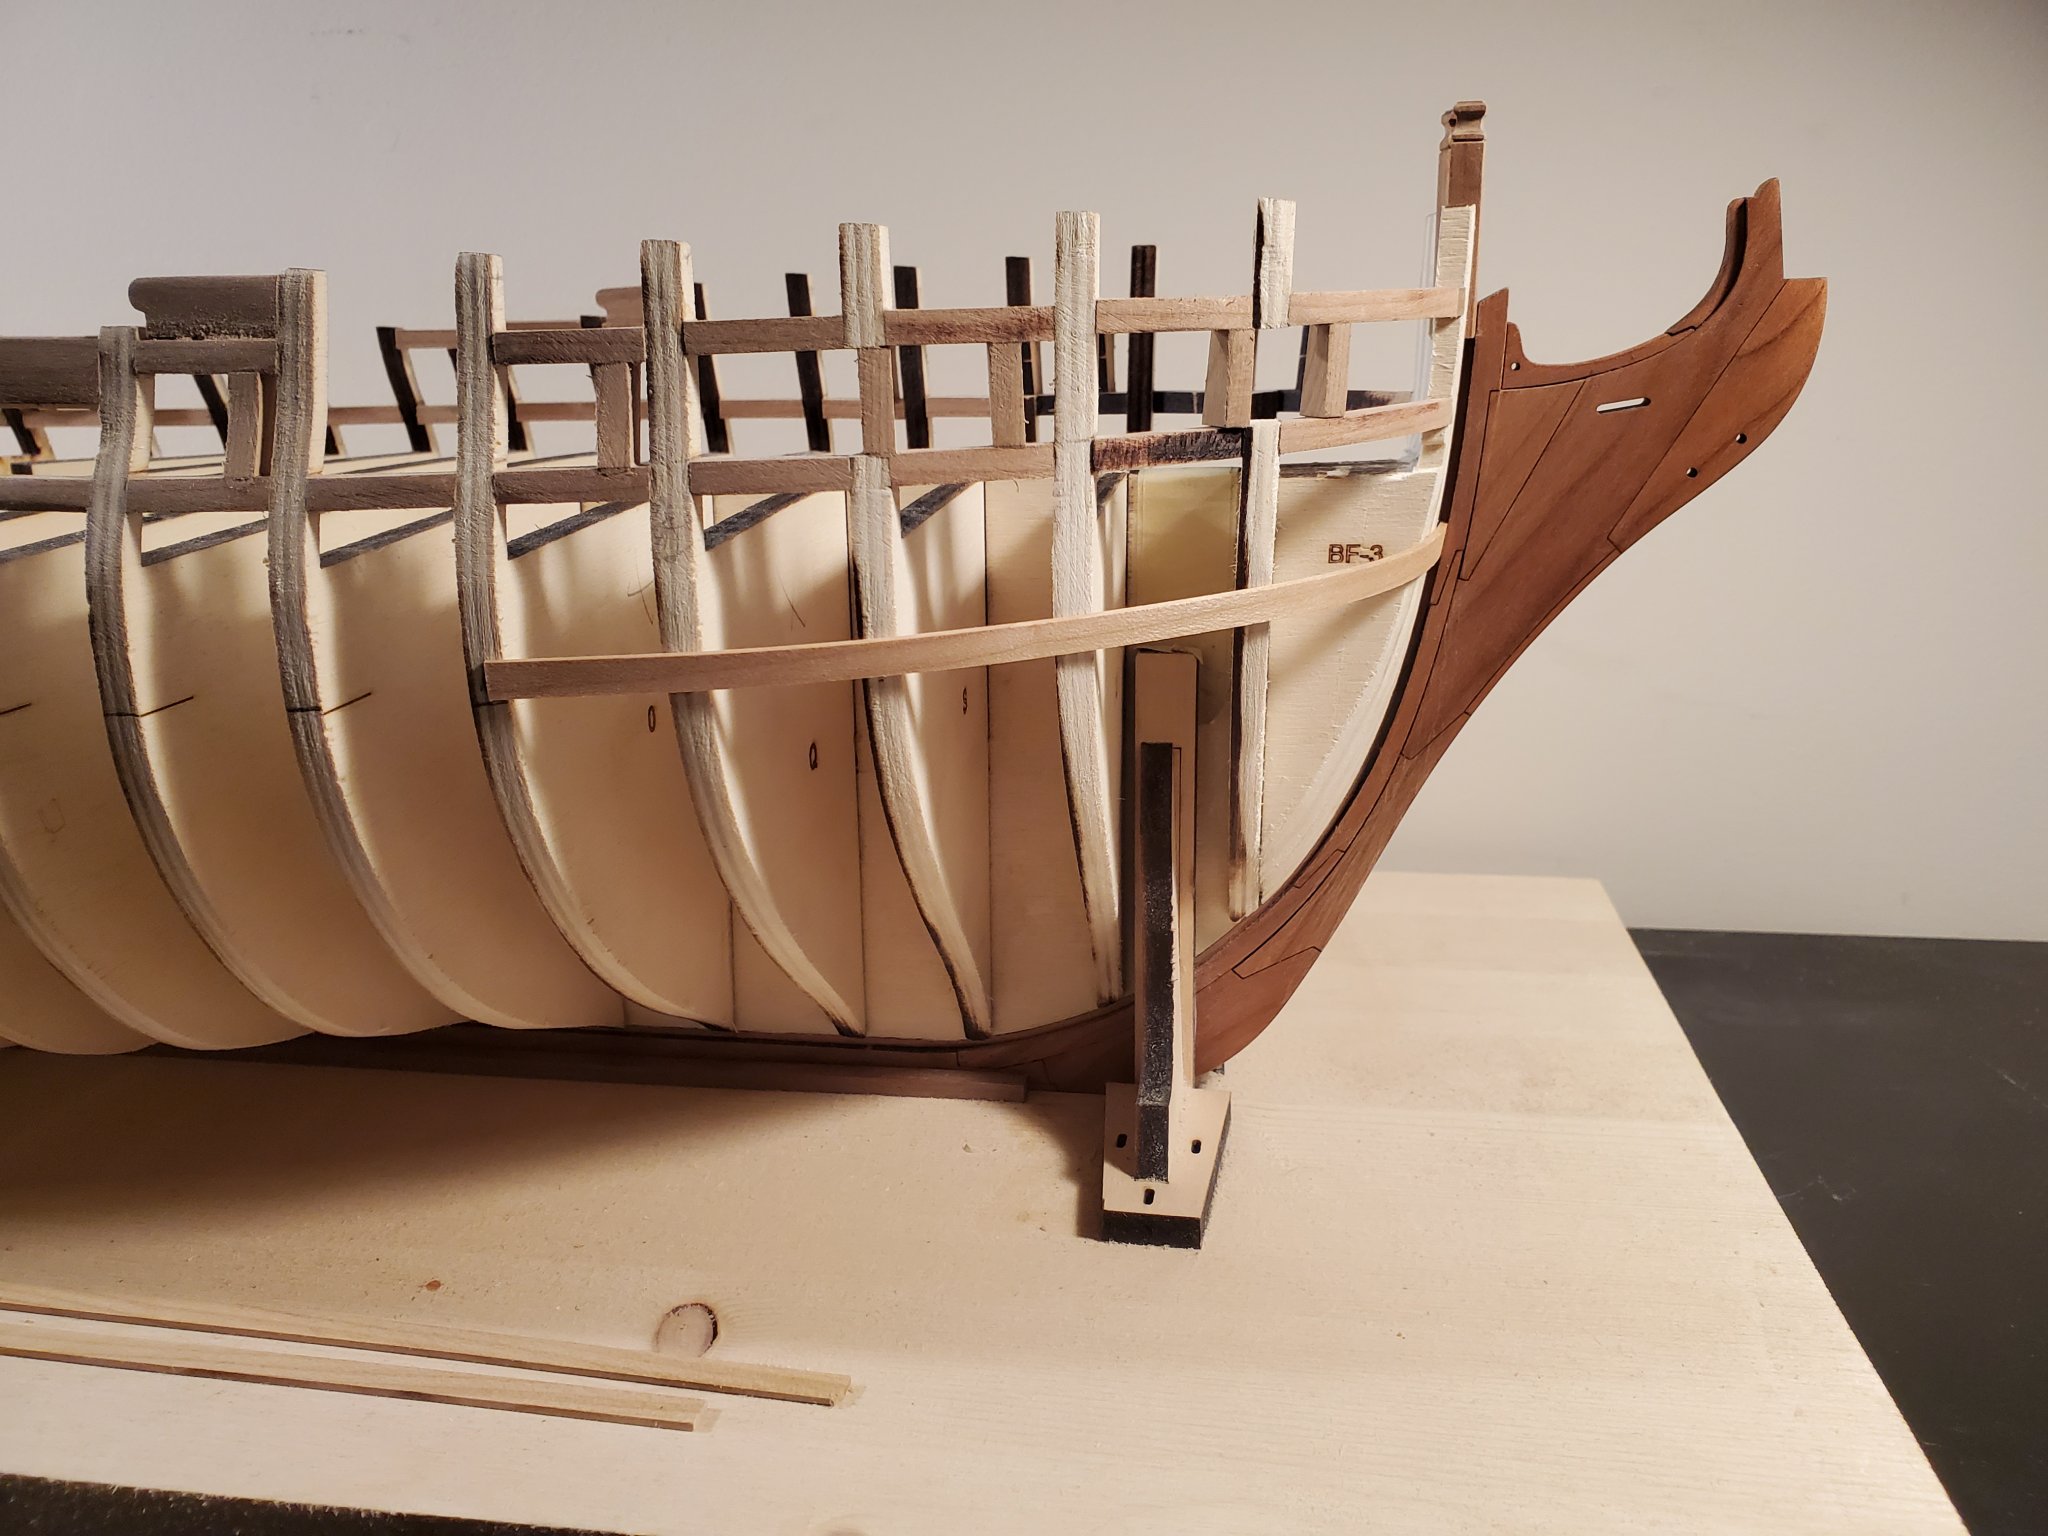
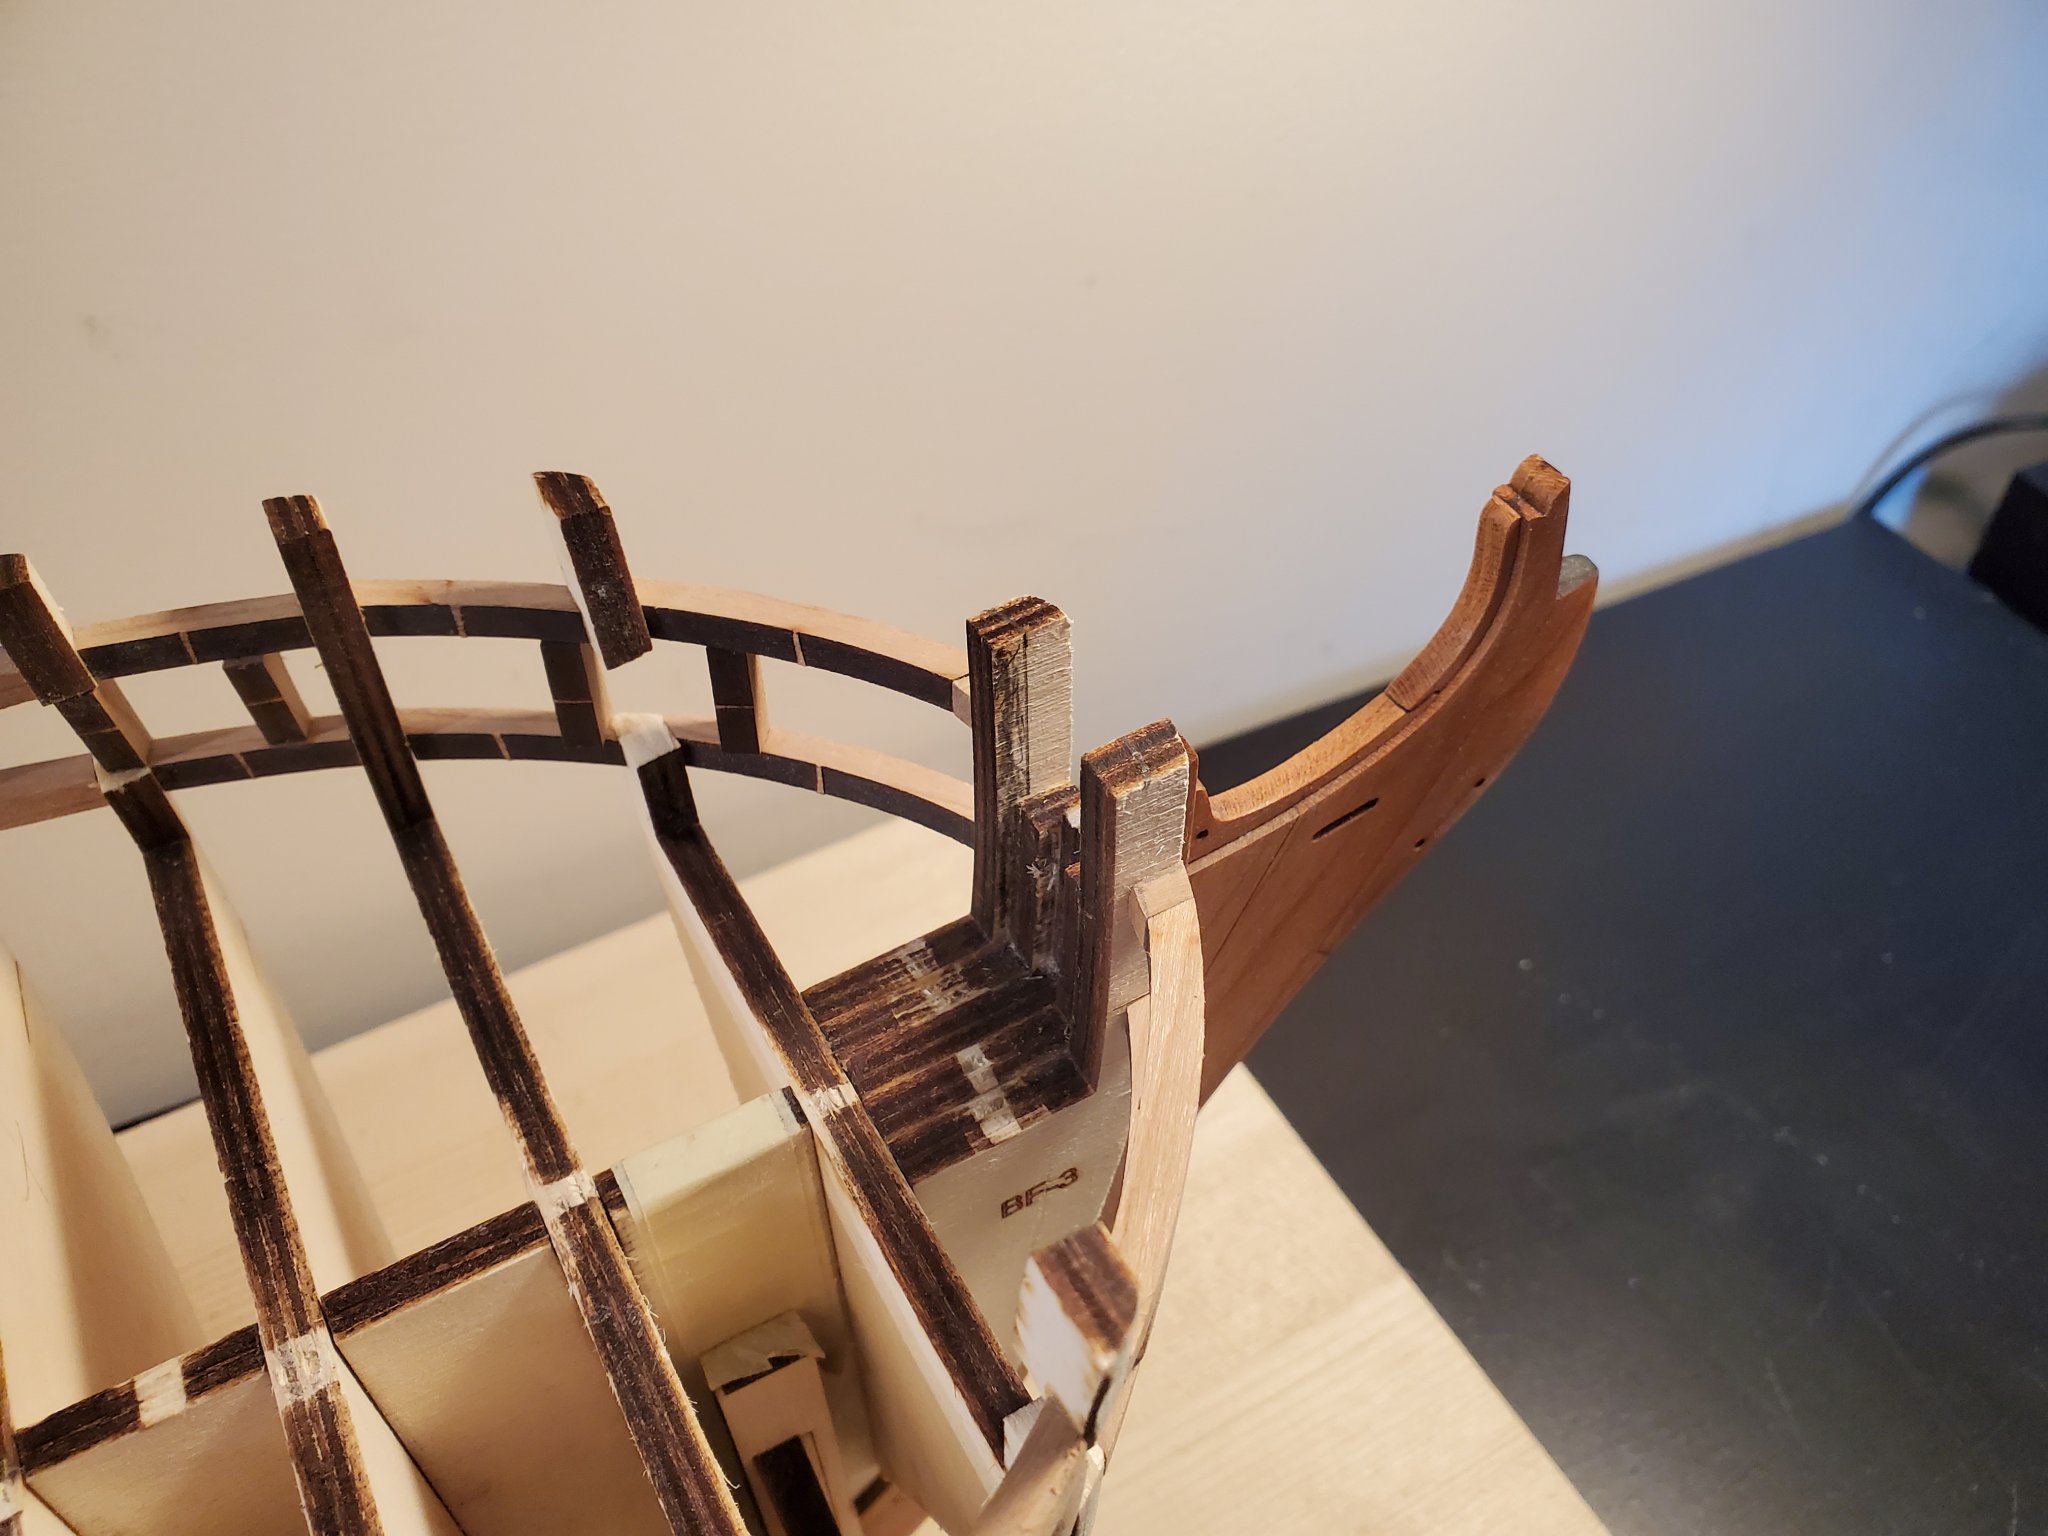
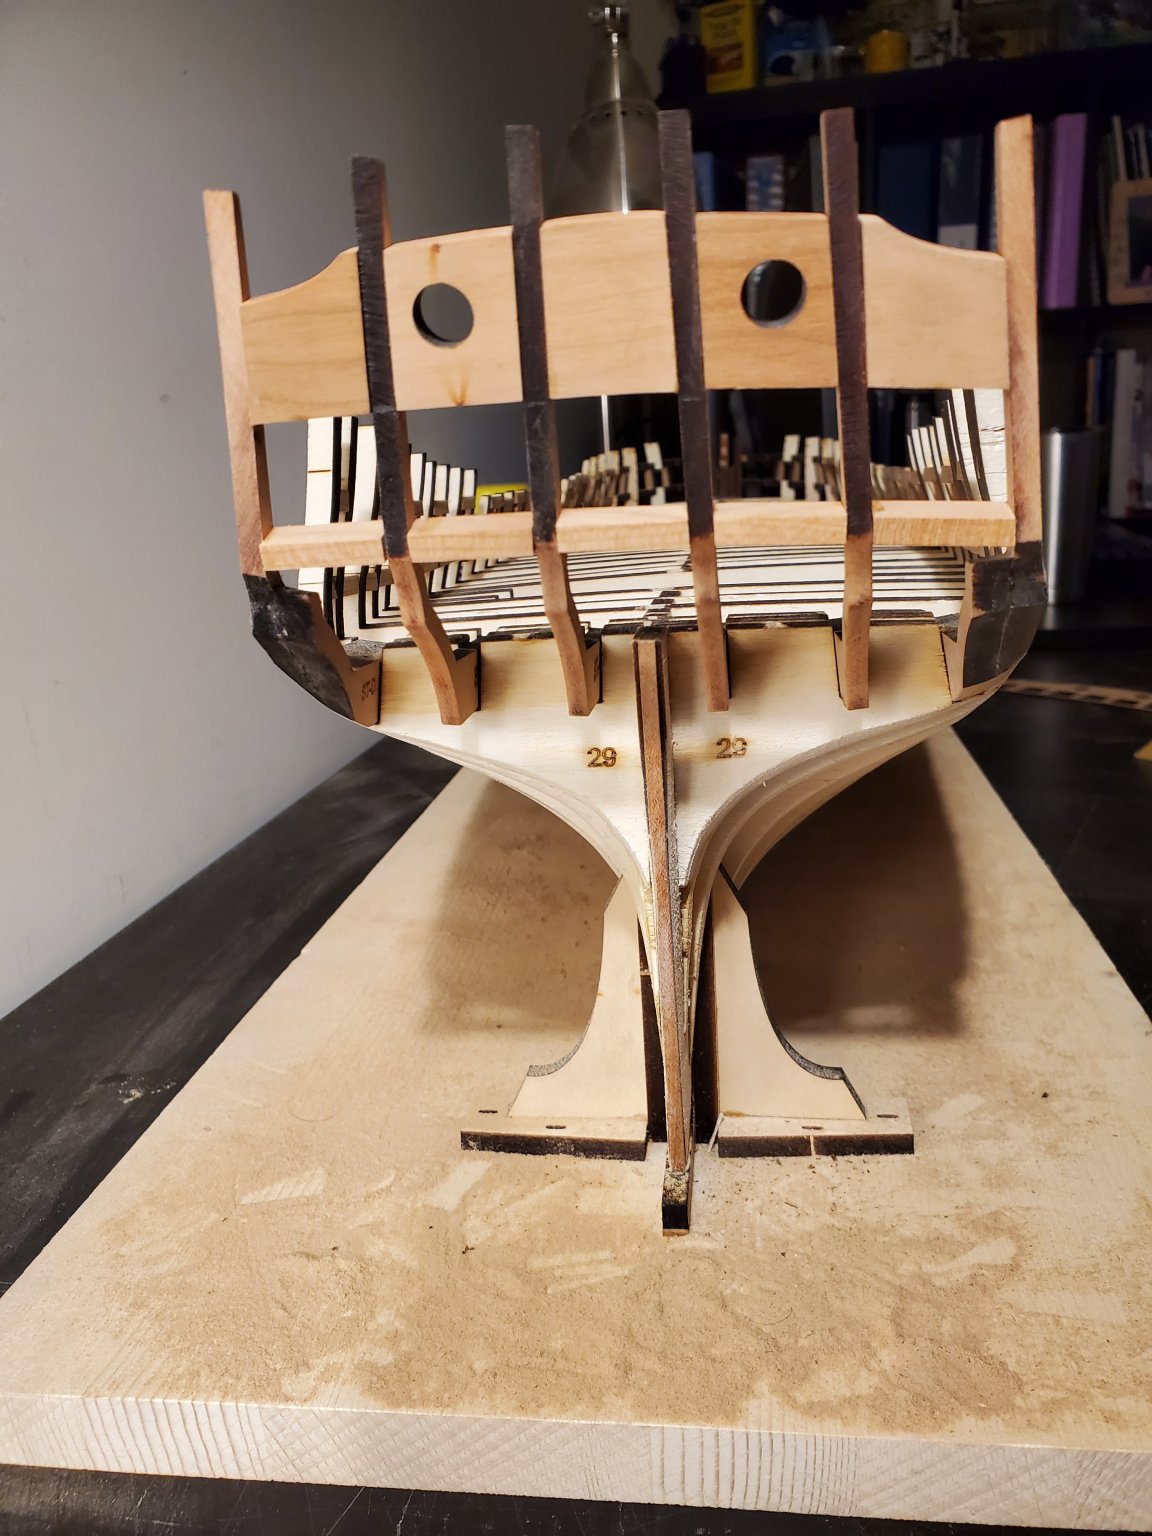
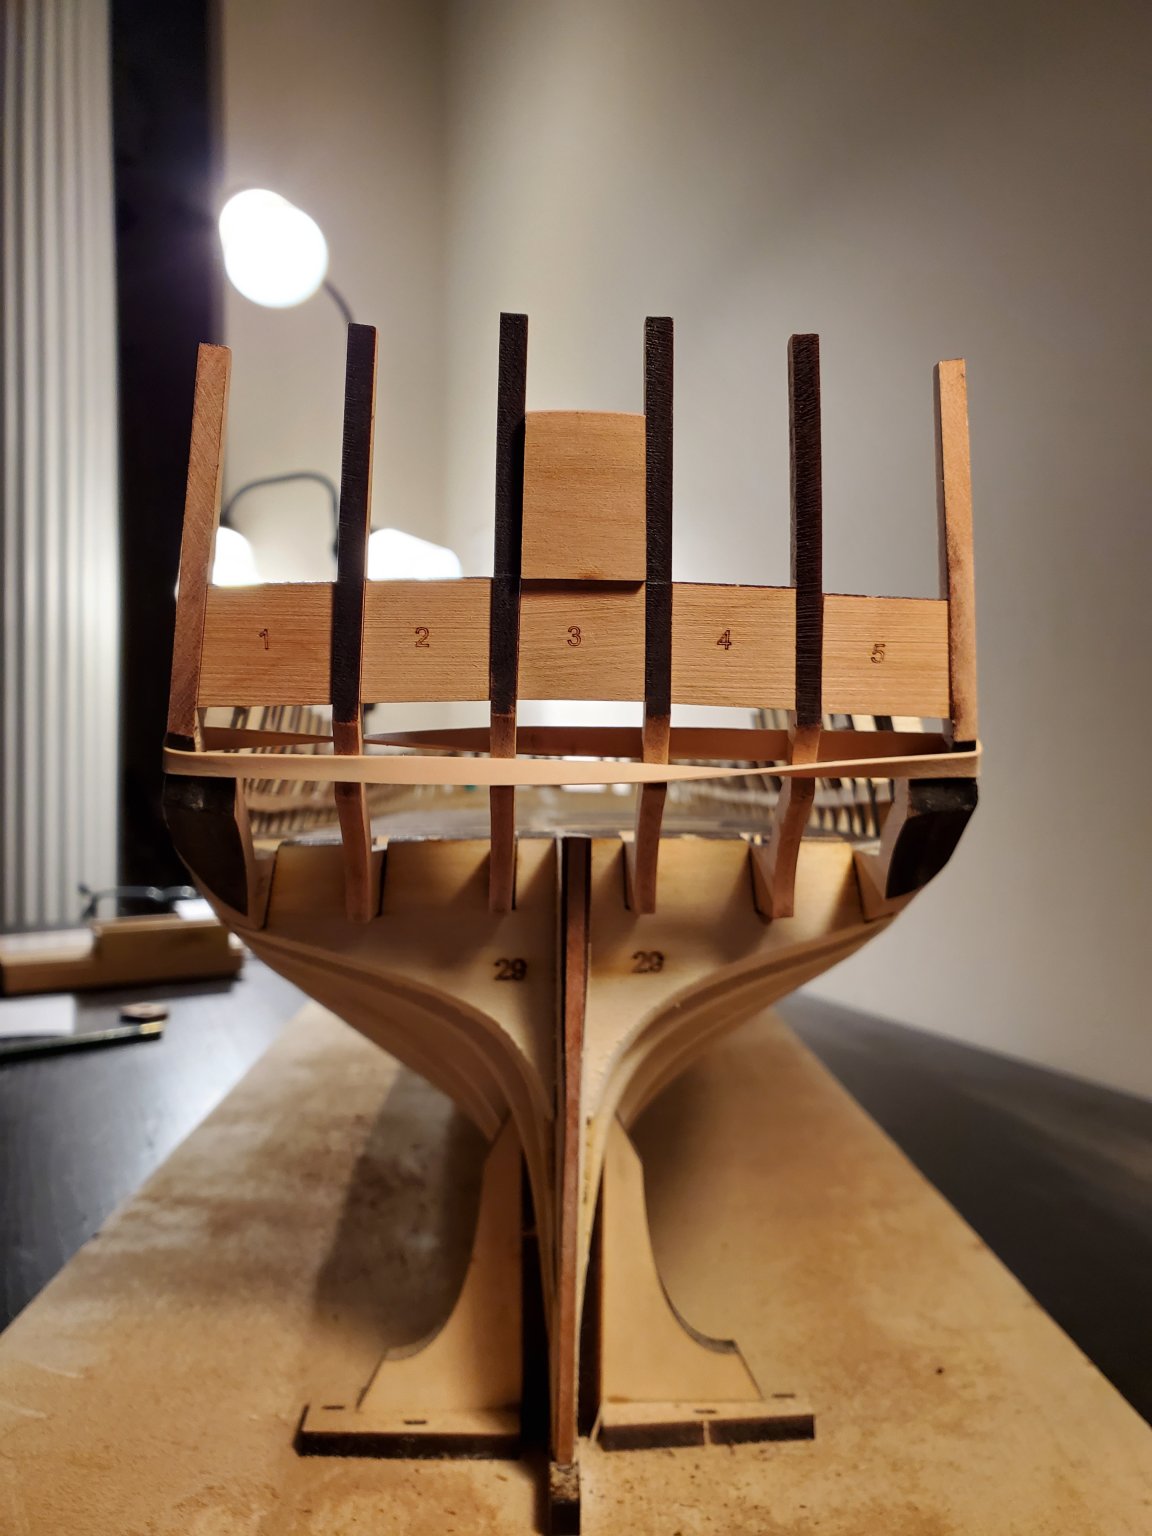
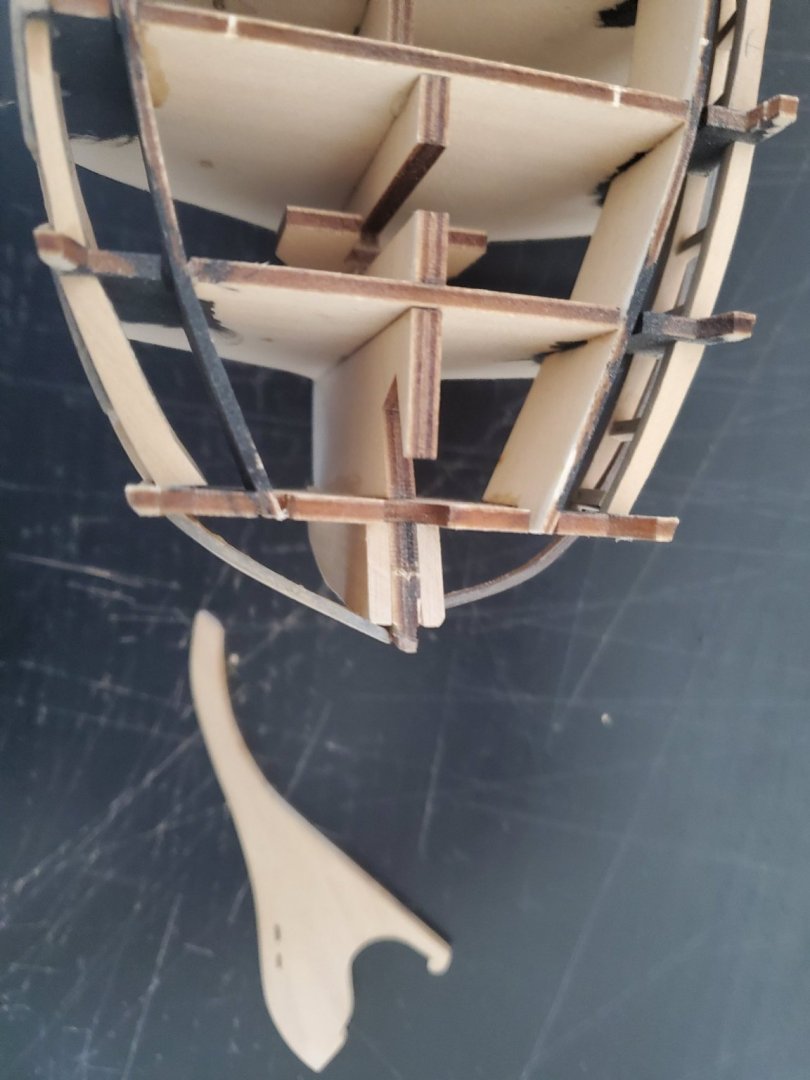
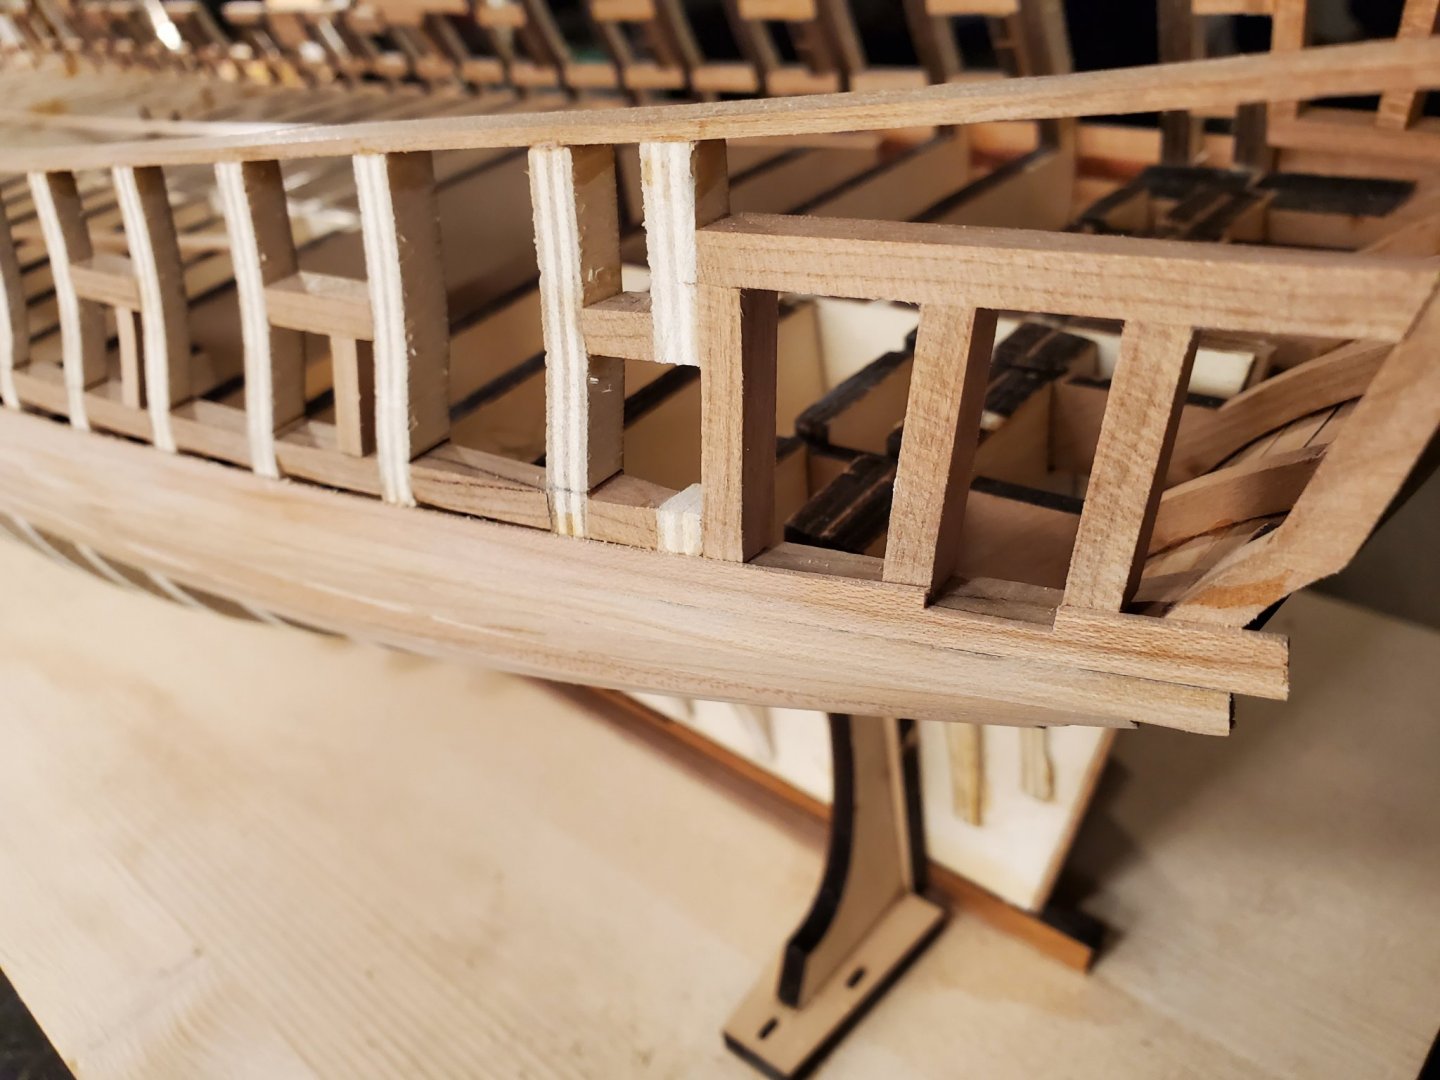
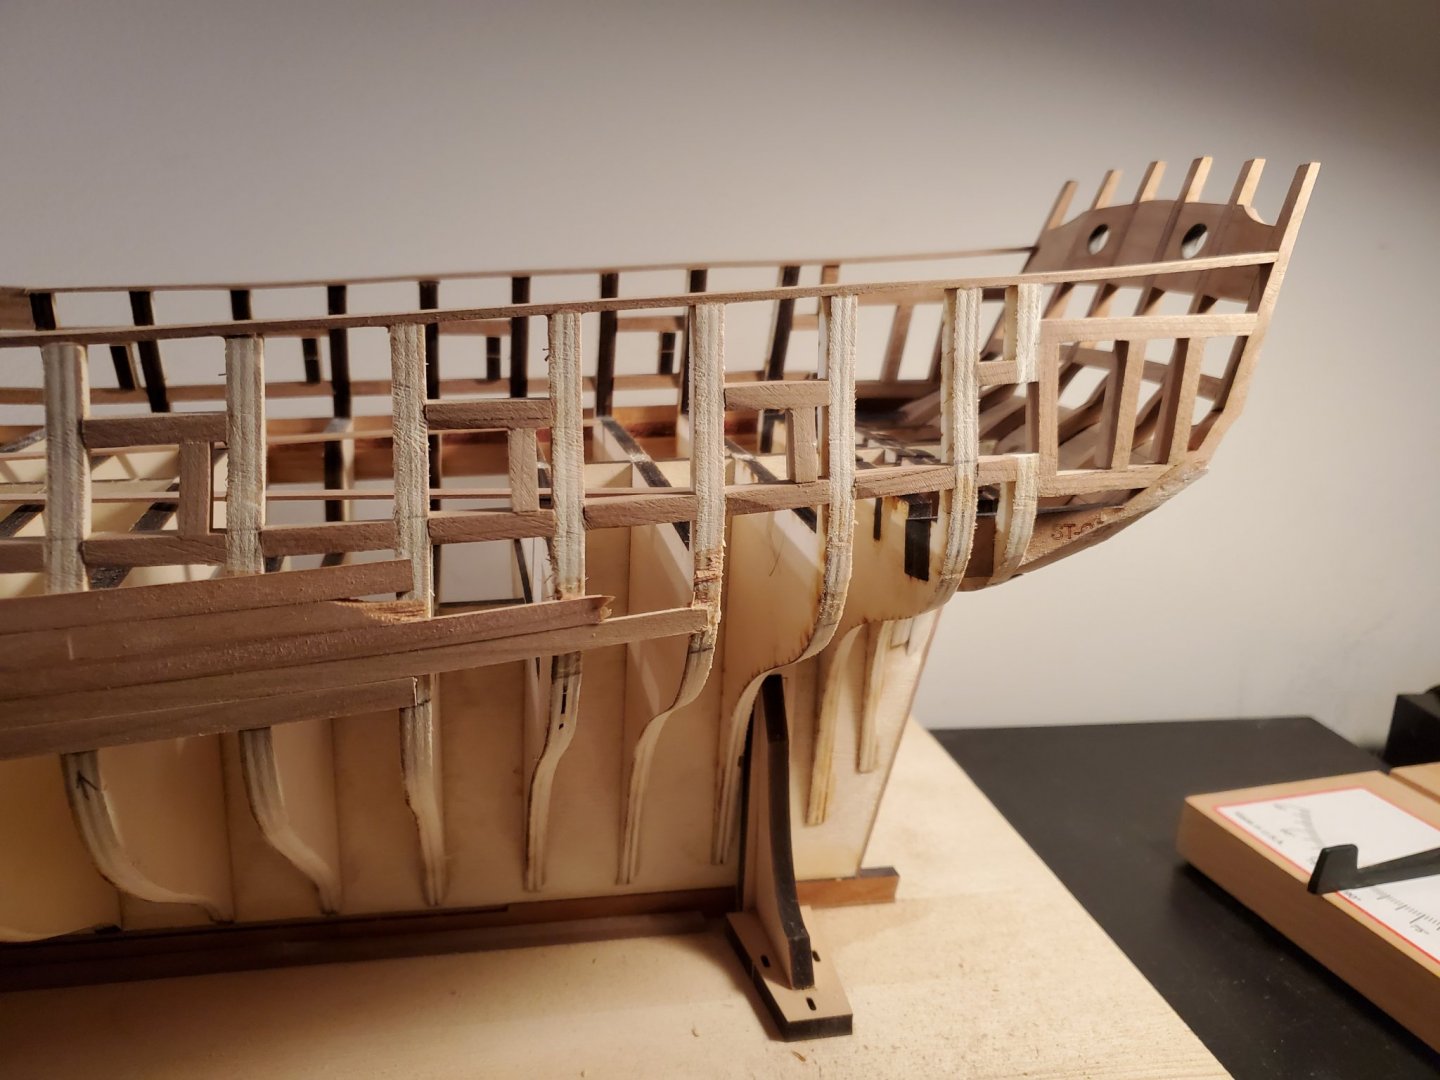
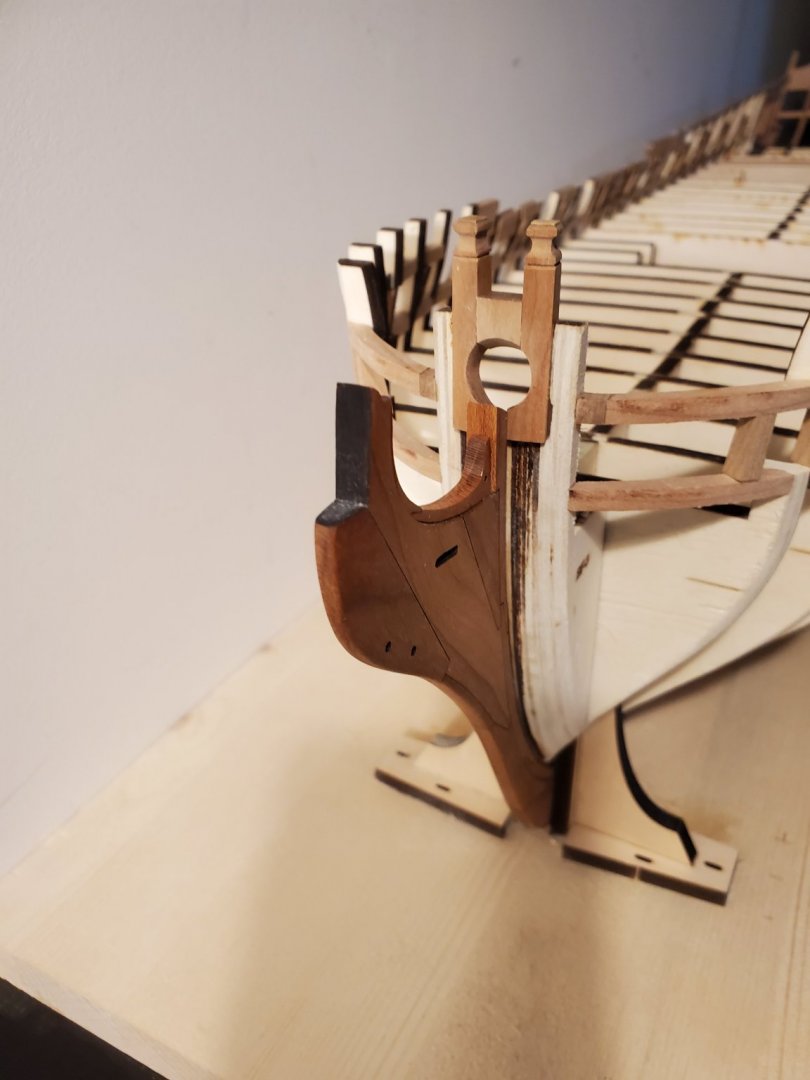
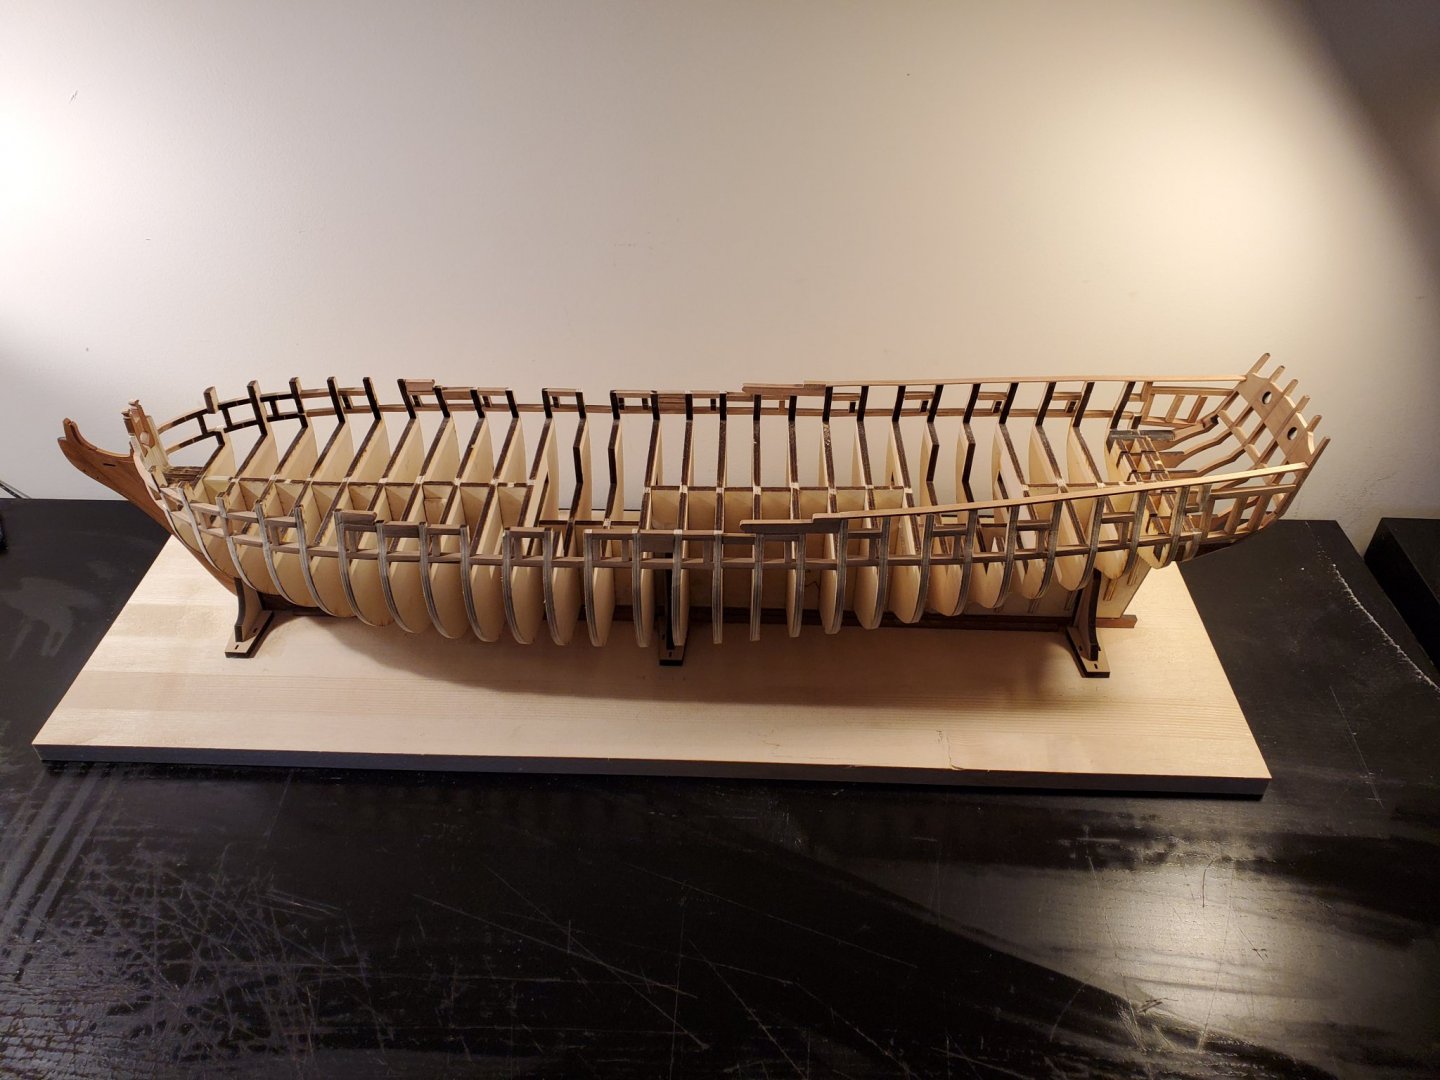
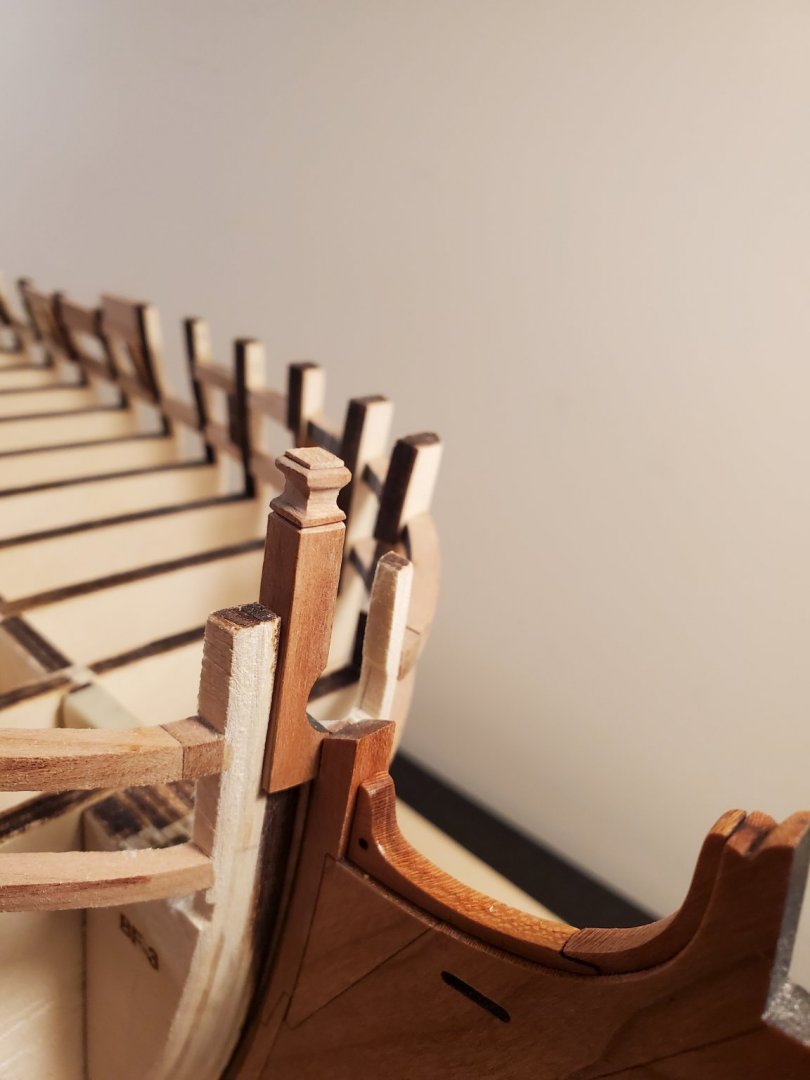
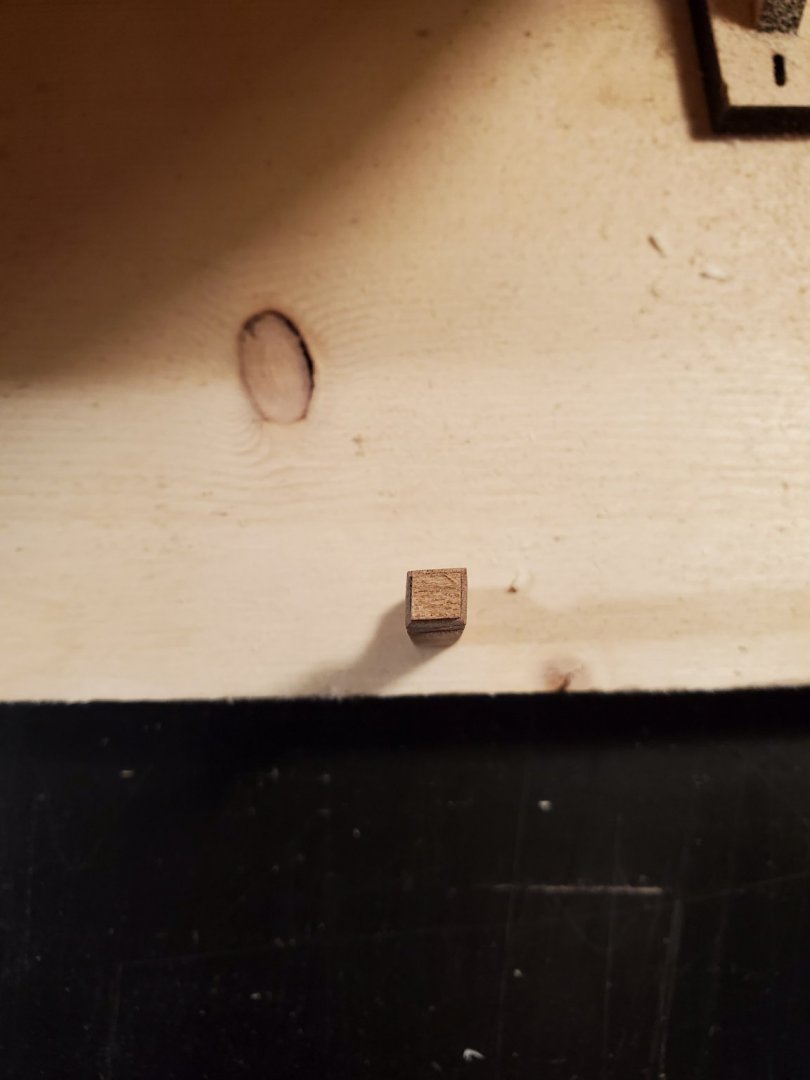
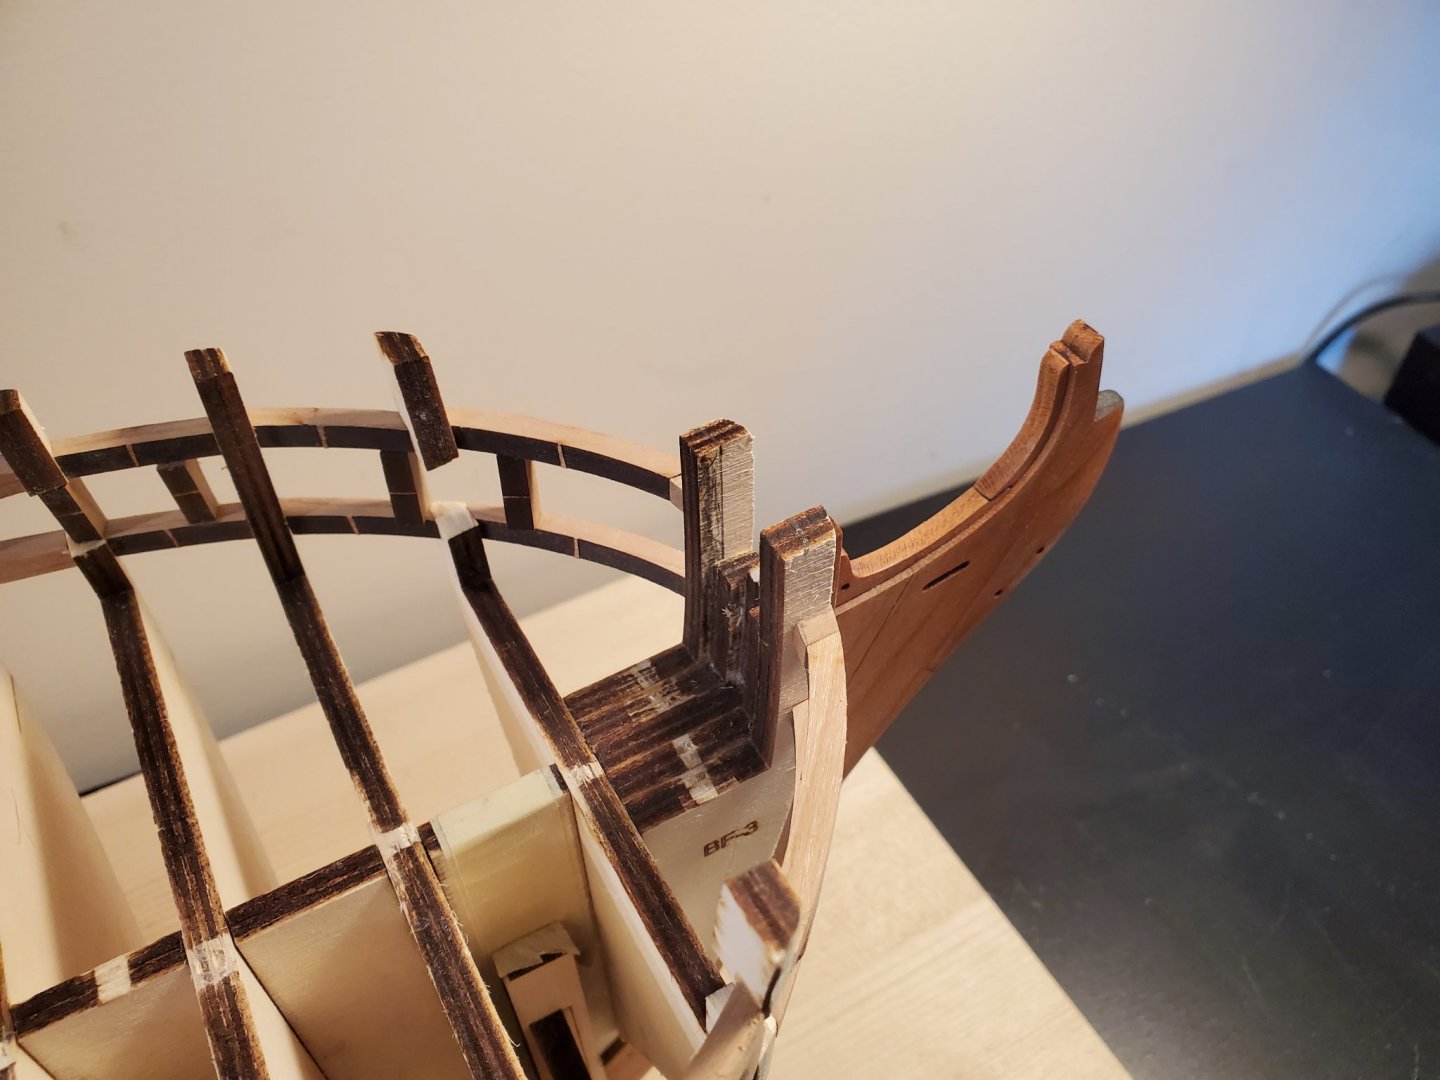
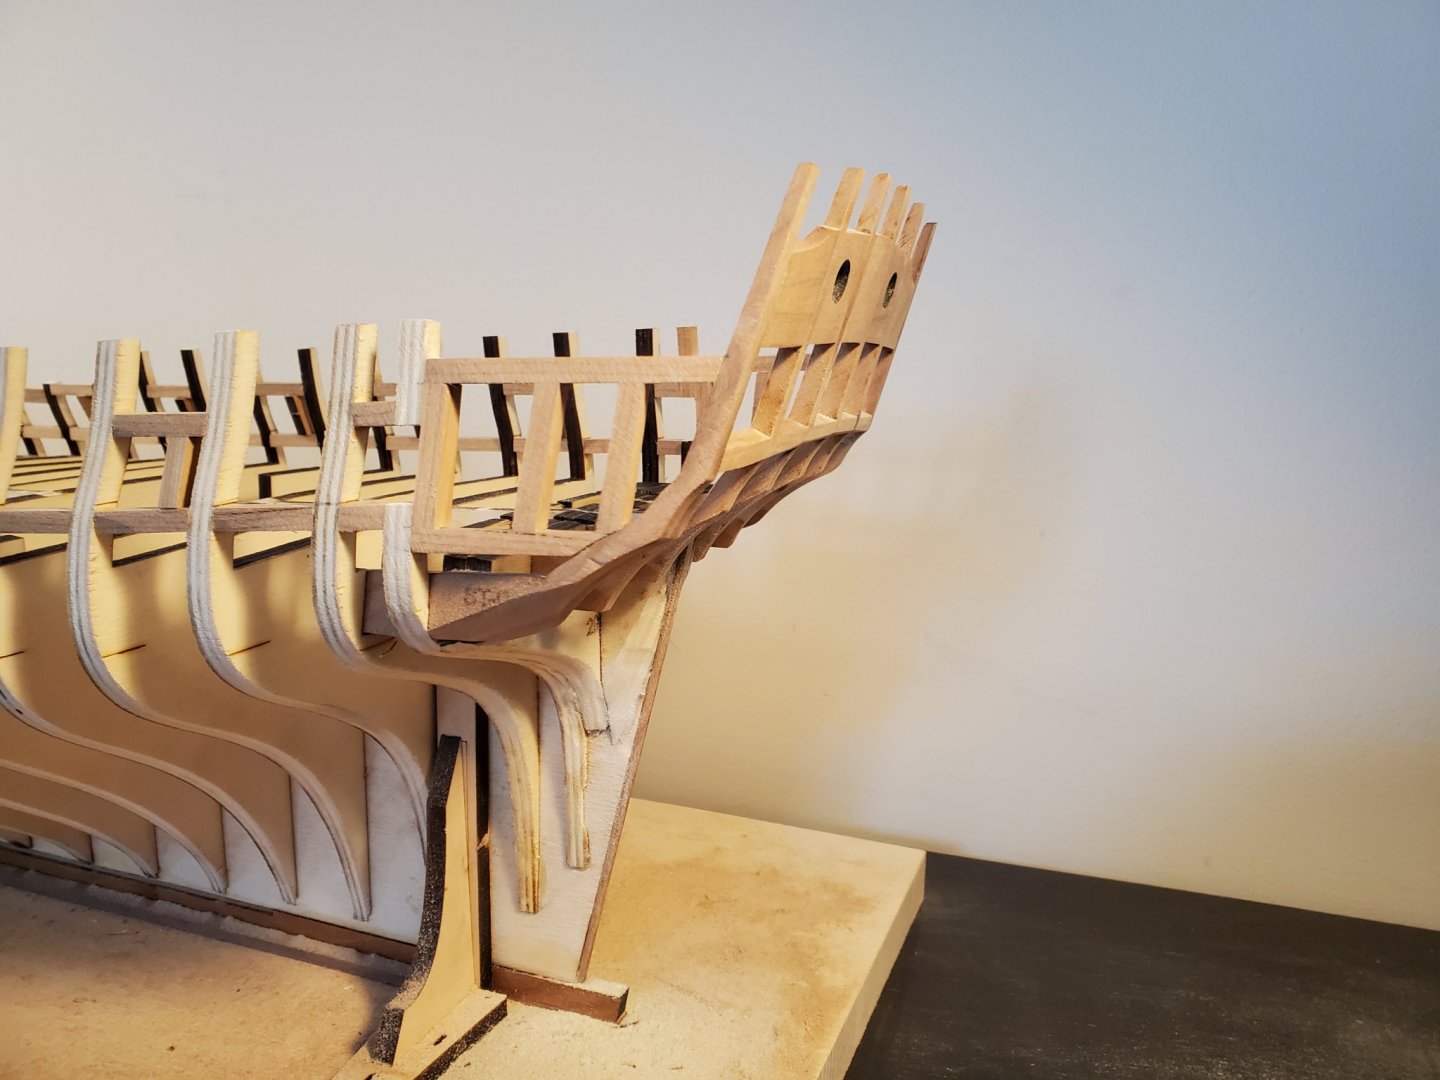
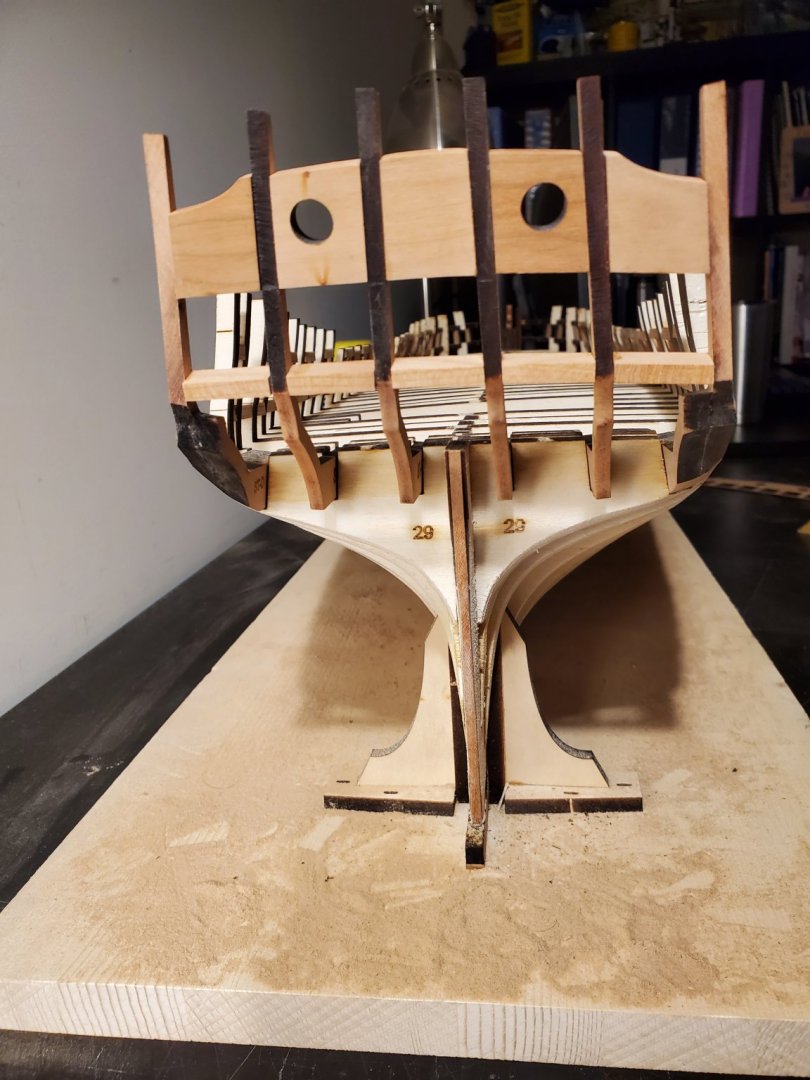
Yes I am! I had to stop because of family matters as well as other issues. I swear I posted more on this forum, but I can't seem to find it. Anyway What has happened since my last post was, I wasn't happy with my first attempt at this model. I had since gotten another kit and also a book on Hermione. I started to notice there were many discrepancies between the kit and the book plans. (I will post more on that later). So, what I decided to do, was to plank the hull with boxwood and walnut. I also made the stem from boxwood too. Unfortunately, in the past 2 months, I was rearranging my room when the stem broke by accident. Here is a pic... Oops! Also, the building board was damaged too. I will be needing to build another building board. I was sad the stem broke because I wad really happy with how it turned out. But.. this was a blessing in disguise because I realized I needed to make it out of walnut instead anyway. I will also need to make a few new walnut pieces as well. Also, inspecting the model, I am not happy with how the hull planks bent towards the stem piece as shown below. I will be ripping out some strips and remaking it. Good thing is there aren't many strips to replace. To do these repairs, I had to order more walnut sheets. So, I will be waiting until the sheets arrive before I can continue. Thanks!!! Jeff

-
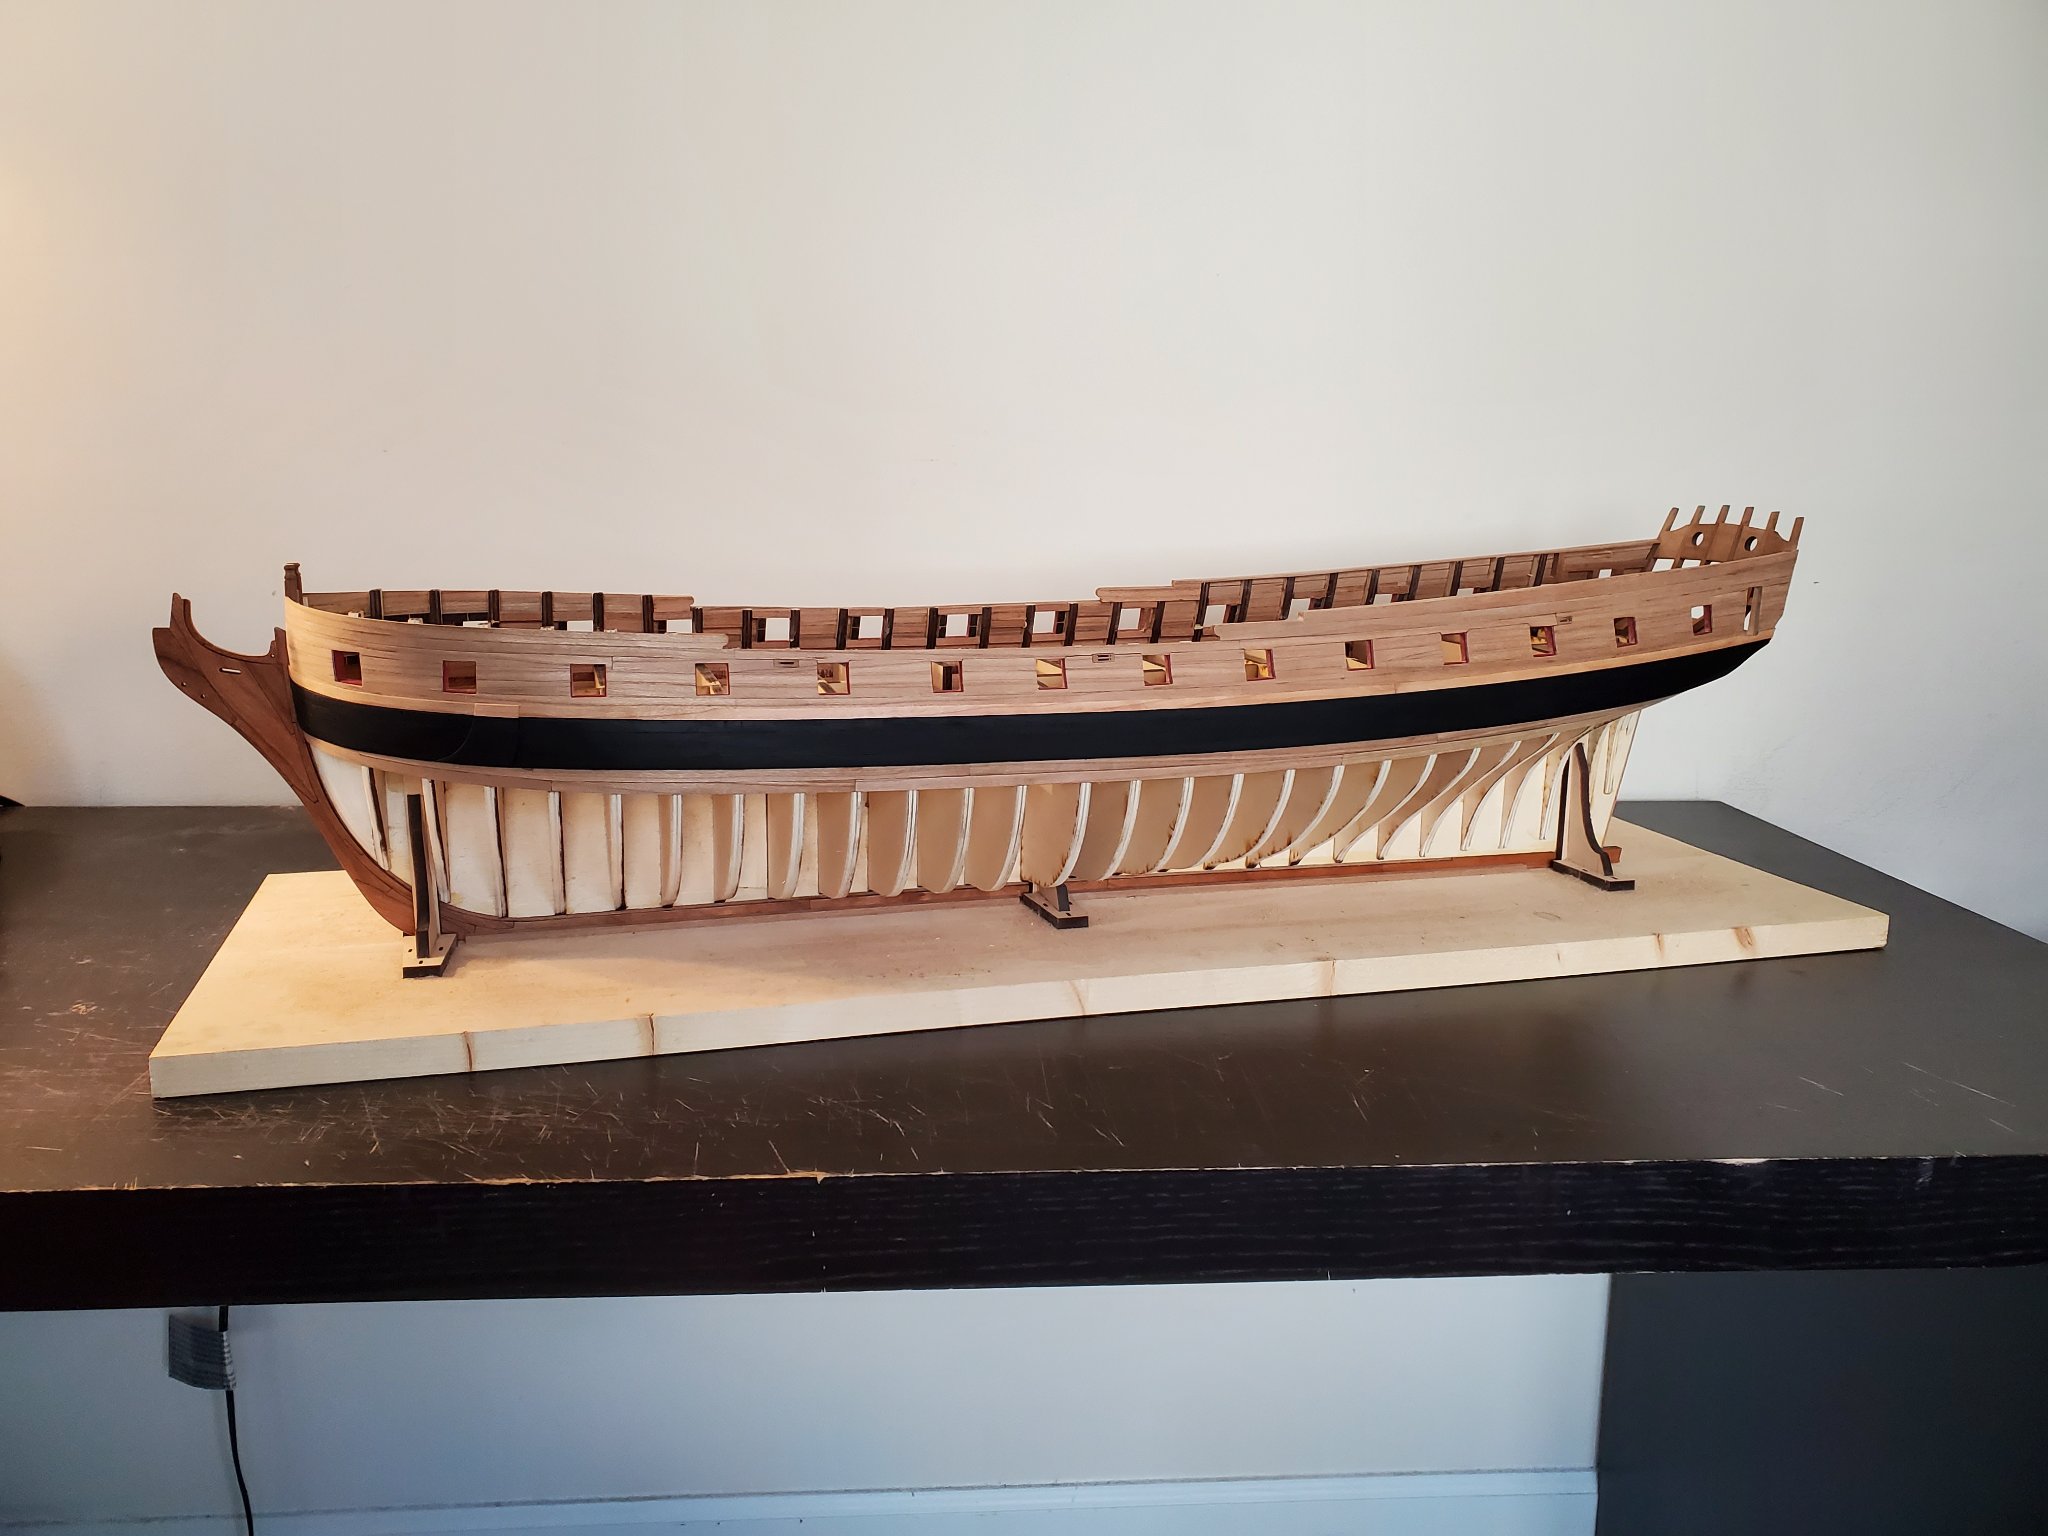
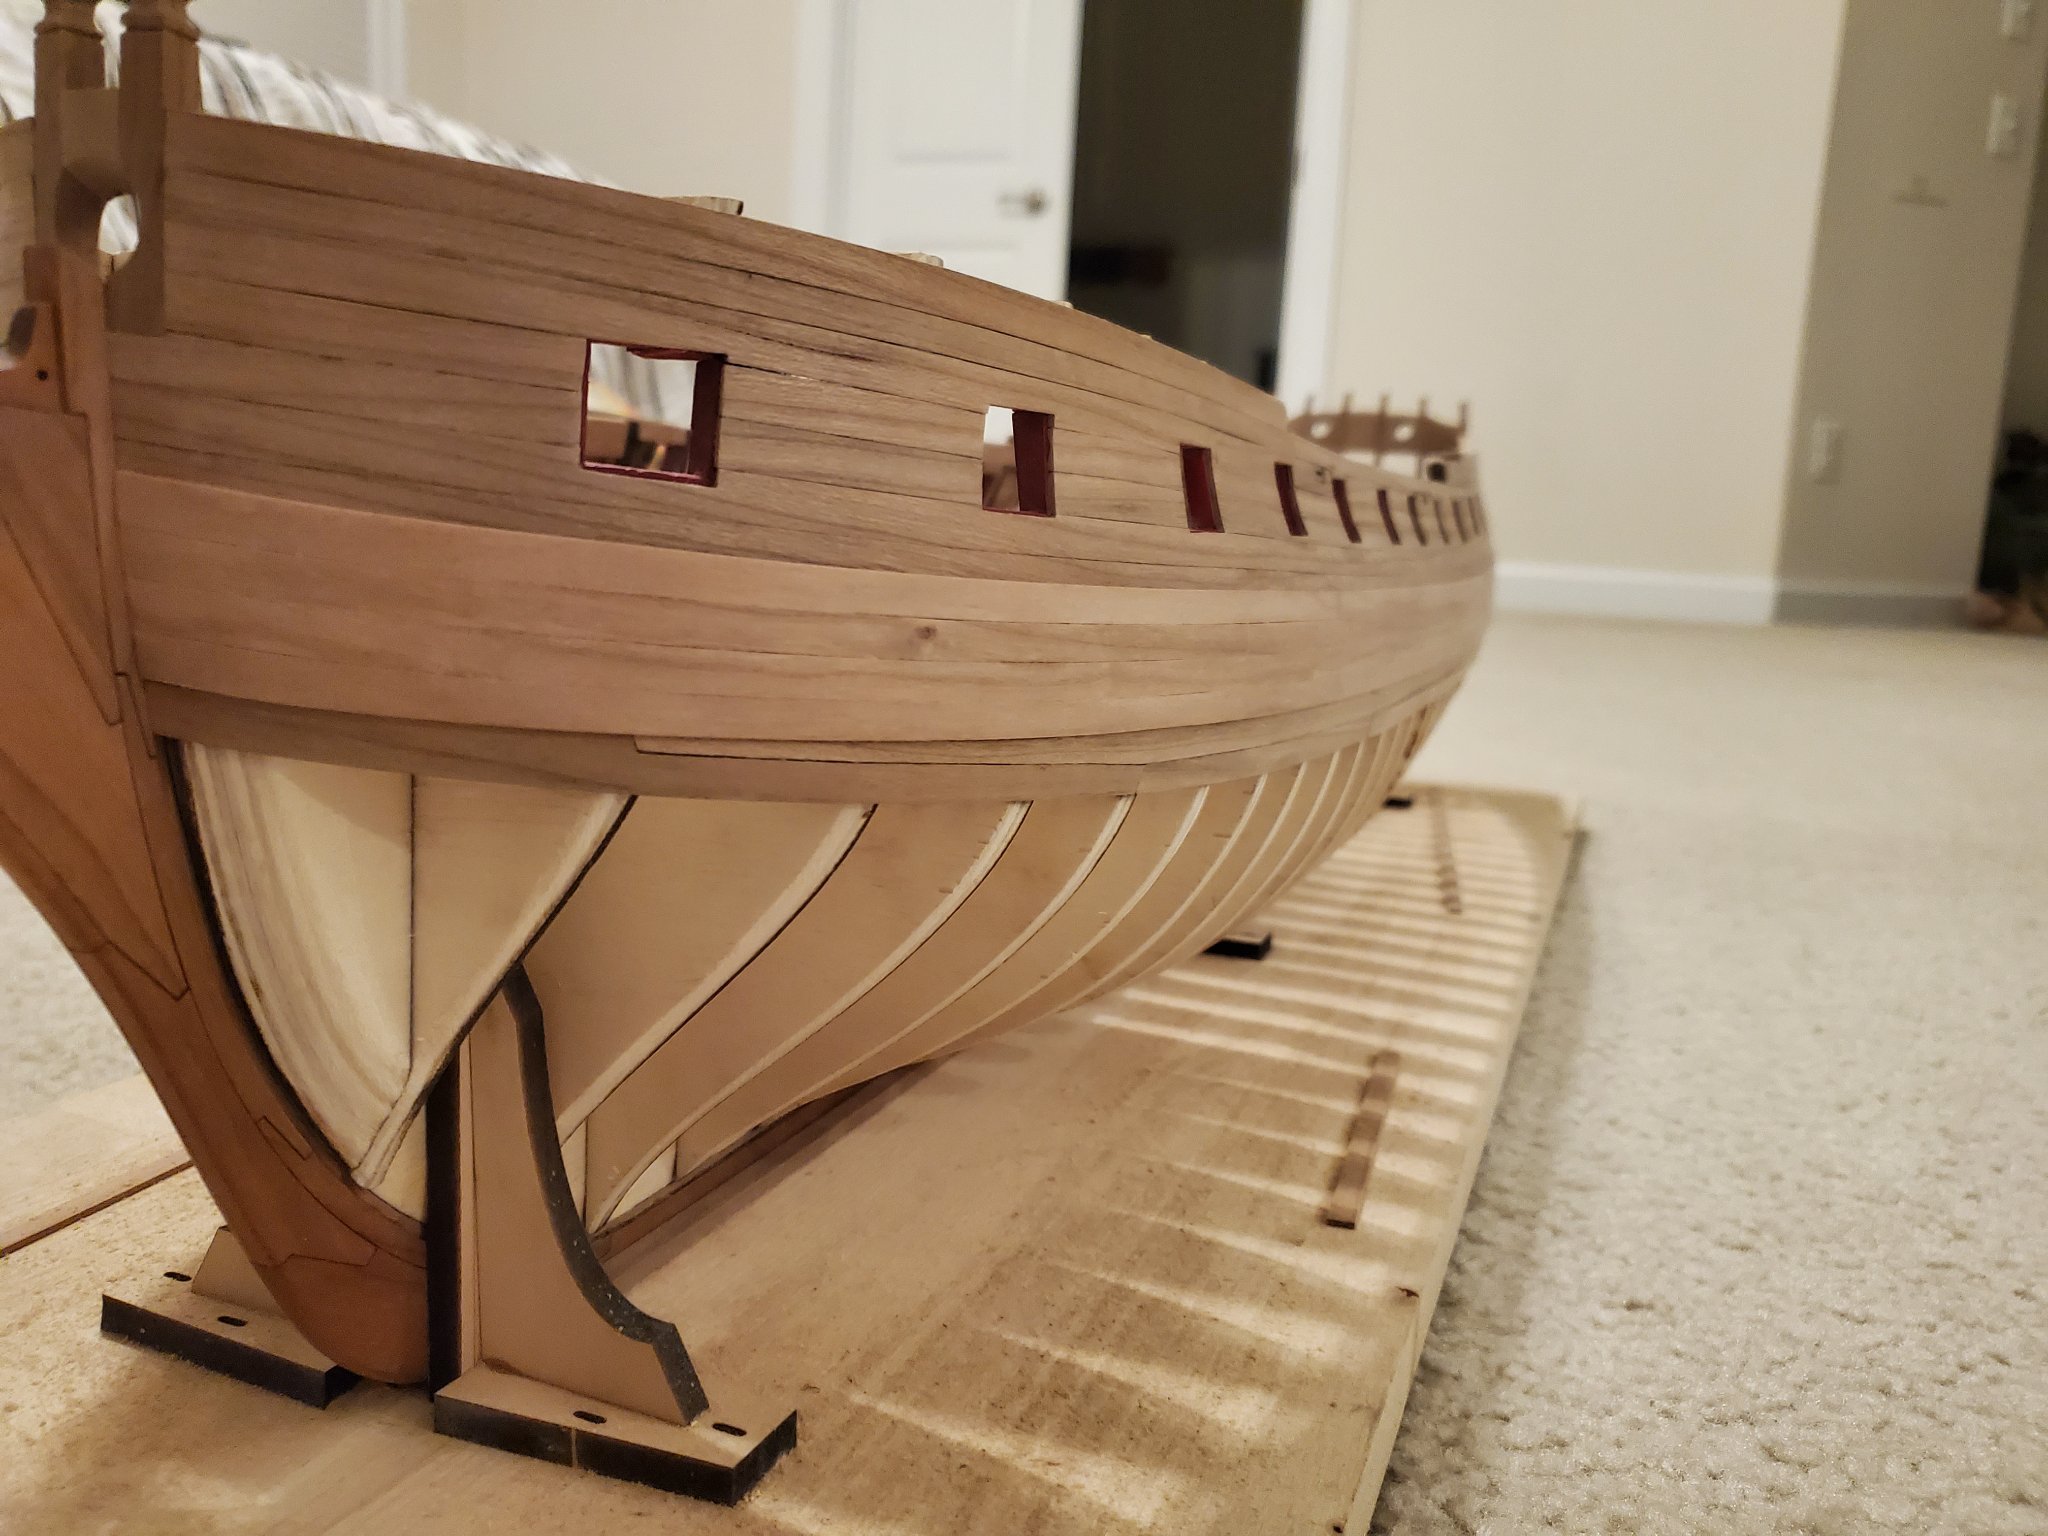
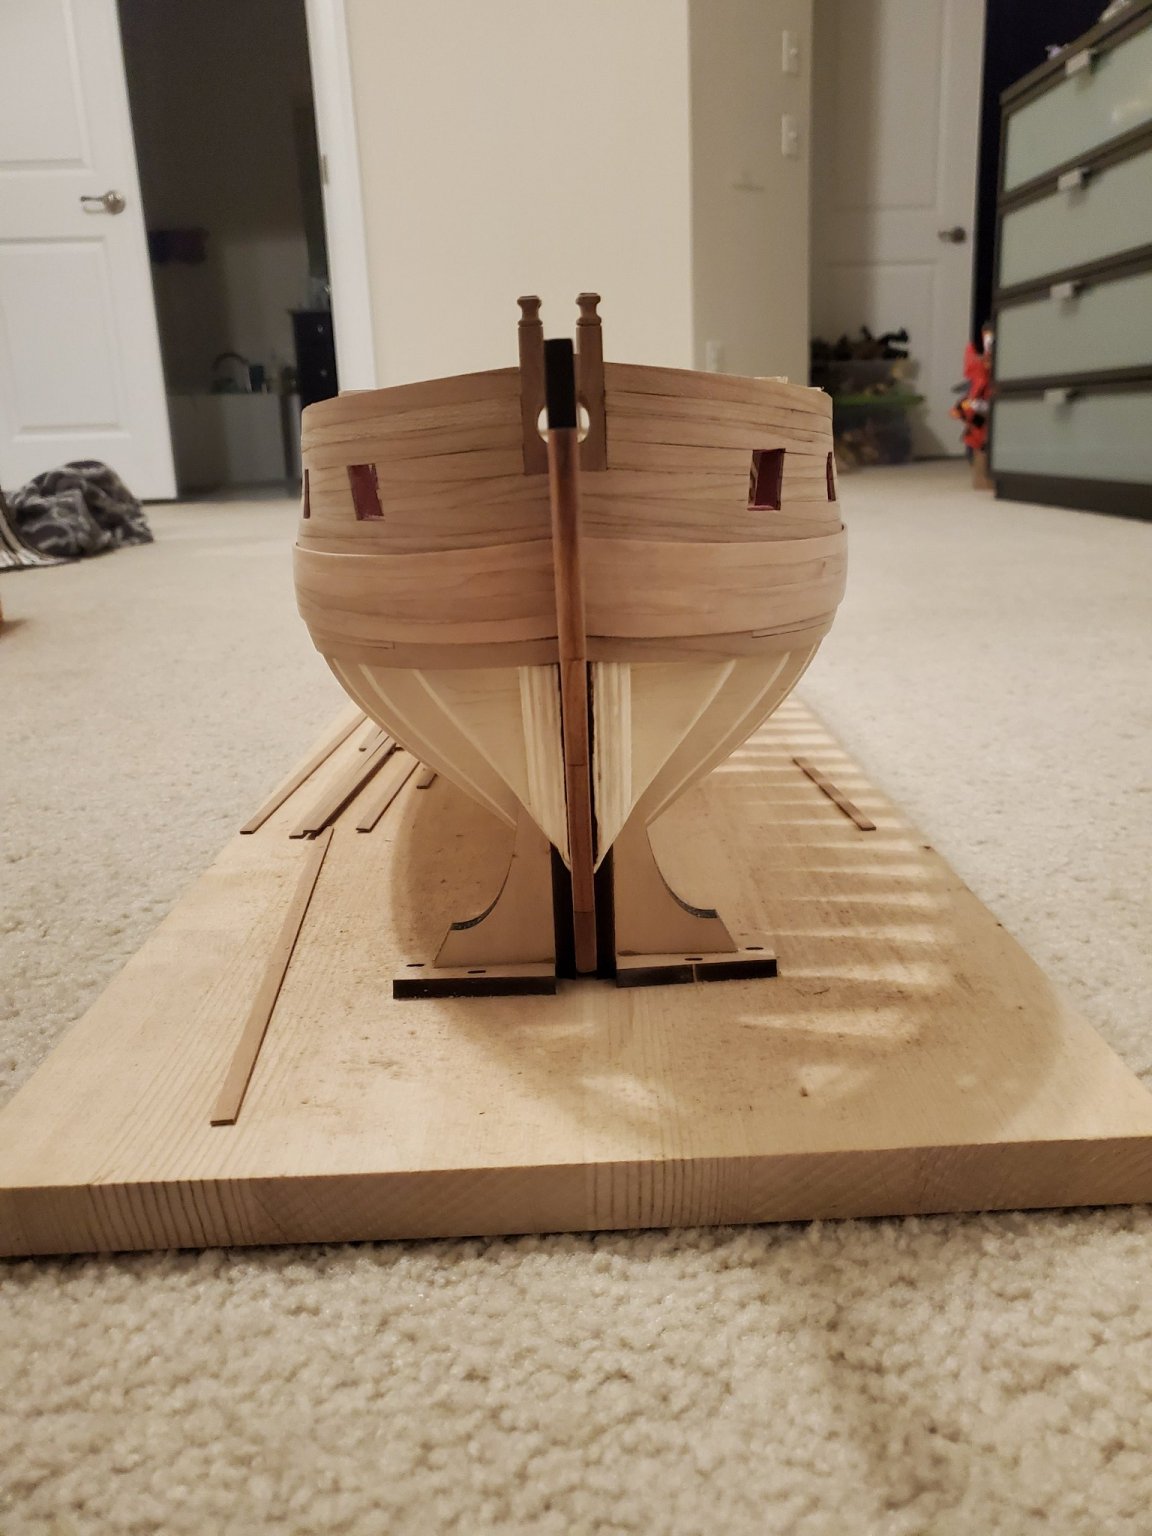
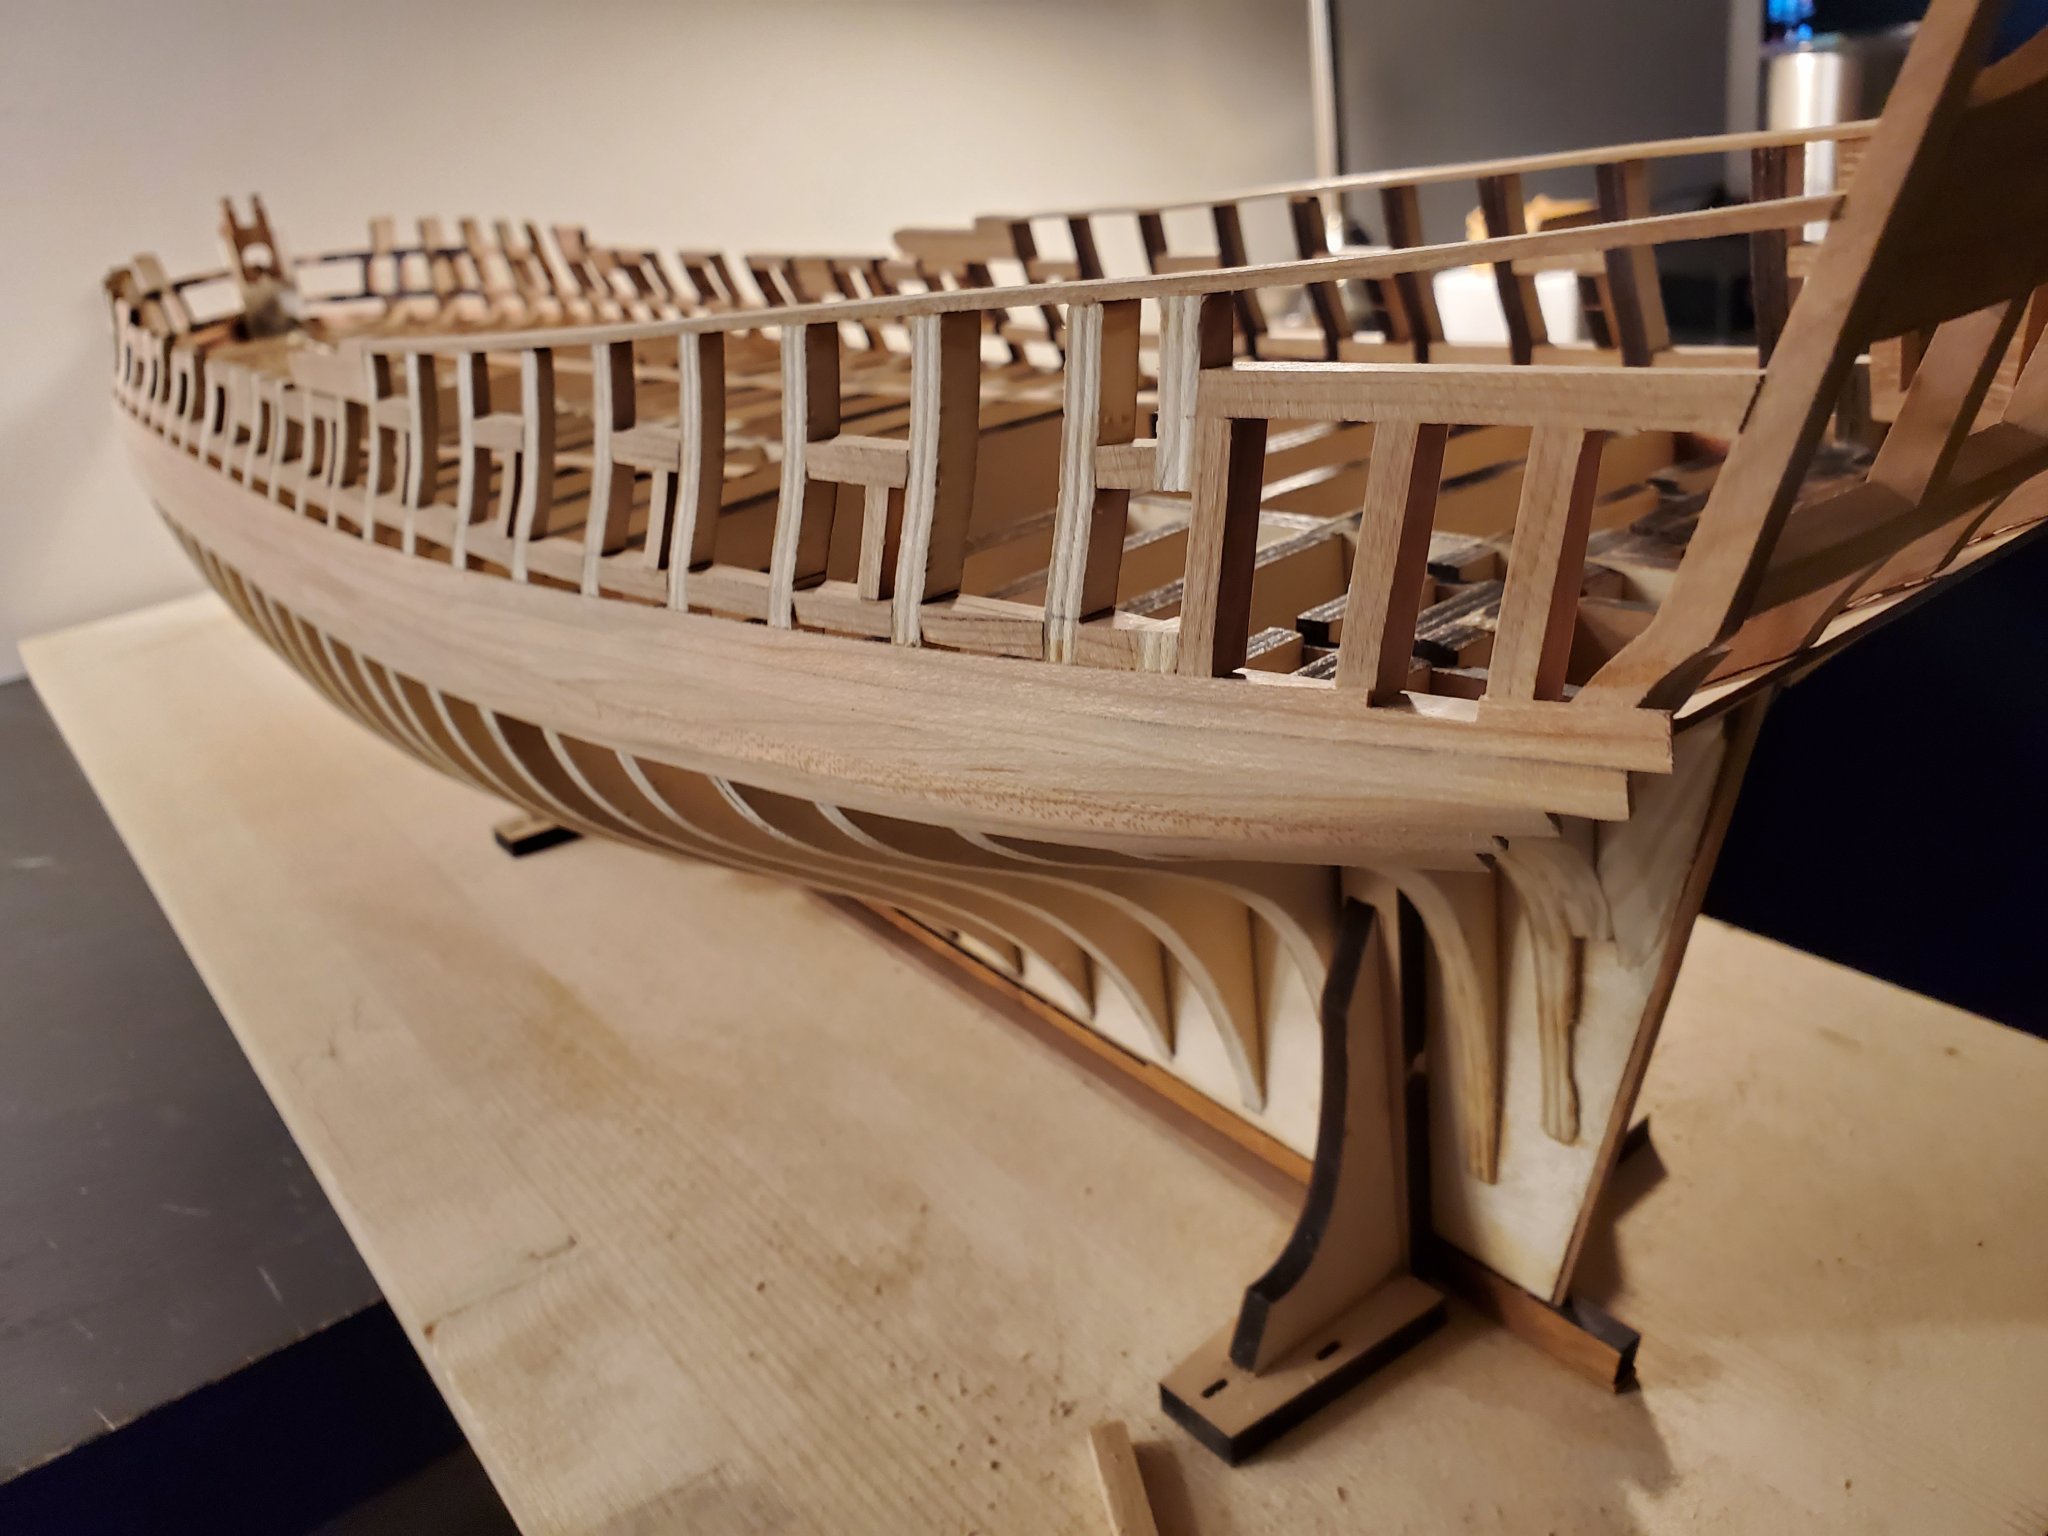
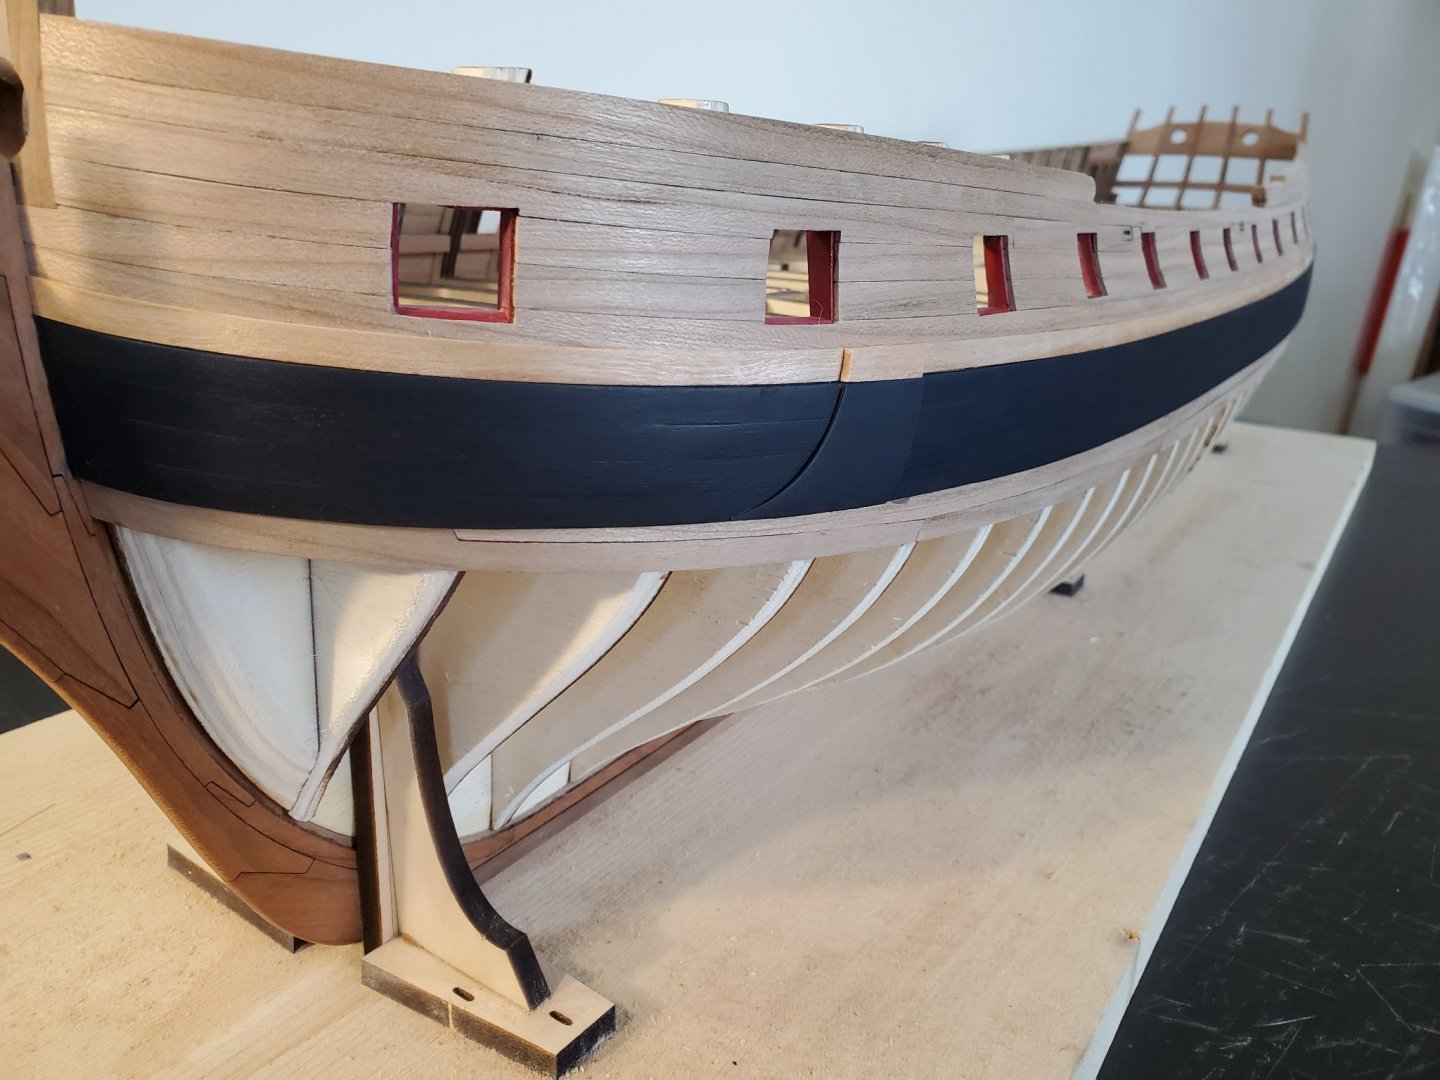
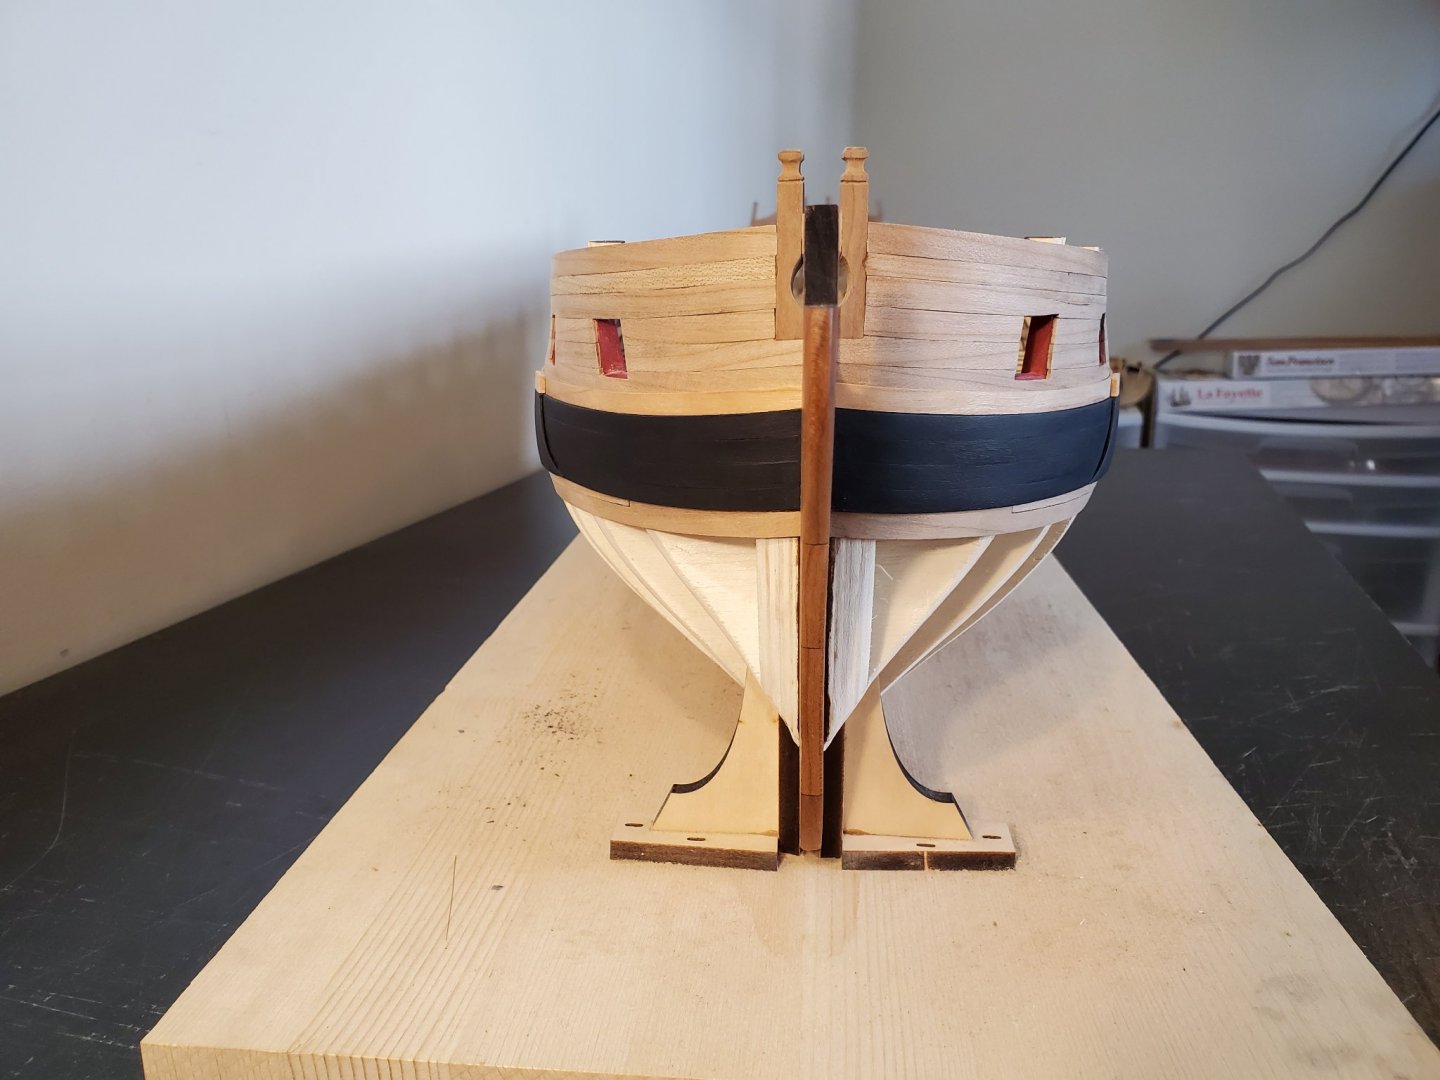
HAPPY NEW YEAR EVERYONE! Hey all! It sure has been a while! I finally was able to find time for the build and have completed adding the wales (minus the black strake) to the model! I tried to make the wales even on both sides. I am pretty happy with the result. To make the wales, I copied where I placed the first layer of planks. The sides fitted pretty well, but the trickiest part for me, was the bending at the stern. I did the best I could. I am happy with the result. Is it perfect? Nope! Haha! But it seems, I always learn from doing each step of this model. Here are some other pics: I did my best to thin the wales down at the stem to simulate the wales fitting into the rabbet. I am now waiting on some black paint to start painting the wales. I want to start now, but the paint won't arrive until Monday. I can't wait to see what it looks like painted! I will be painting the wales this coming week, so my next update shouldn't be far off. Thanks everyone! Jeff


-
Rustyj, Your build is coming along beautifully! Keep up the great work!
- 642 replies
-
- 1
-

-
- winchelsea
- Syren Ship Model Company
- (and 1 more)
-
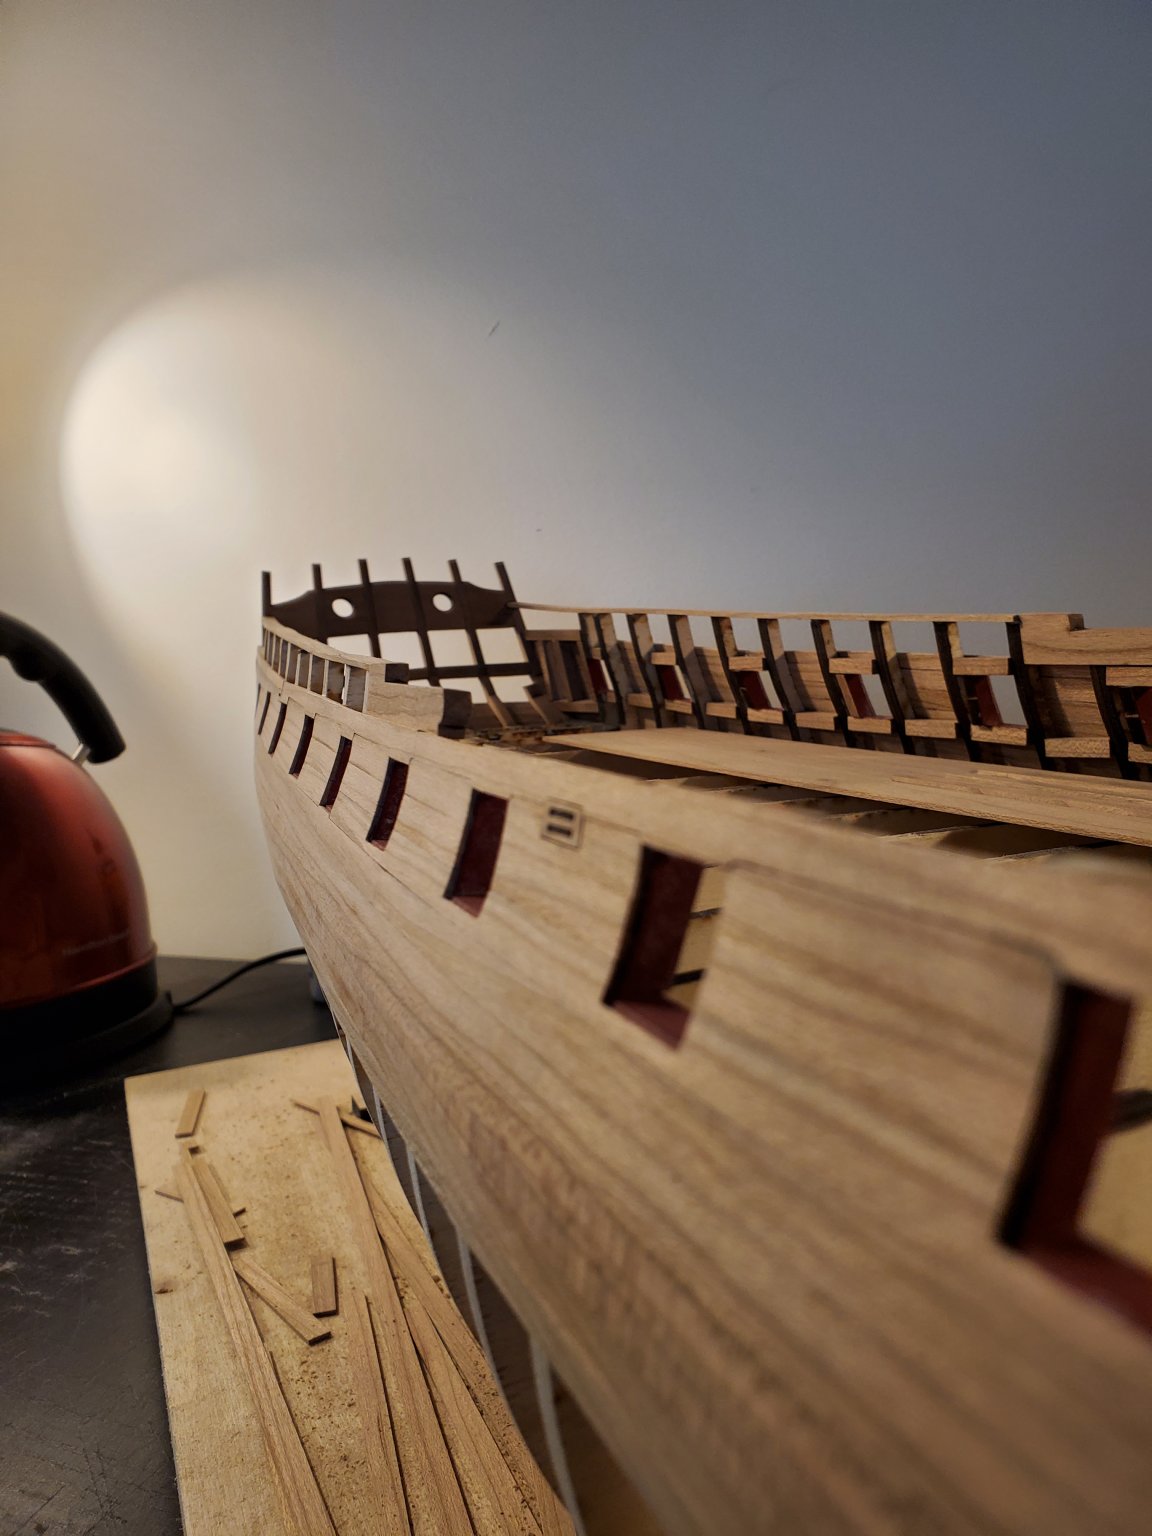
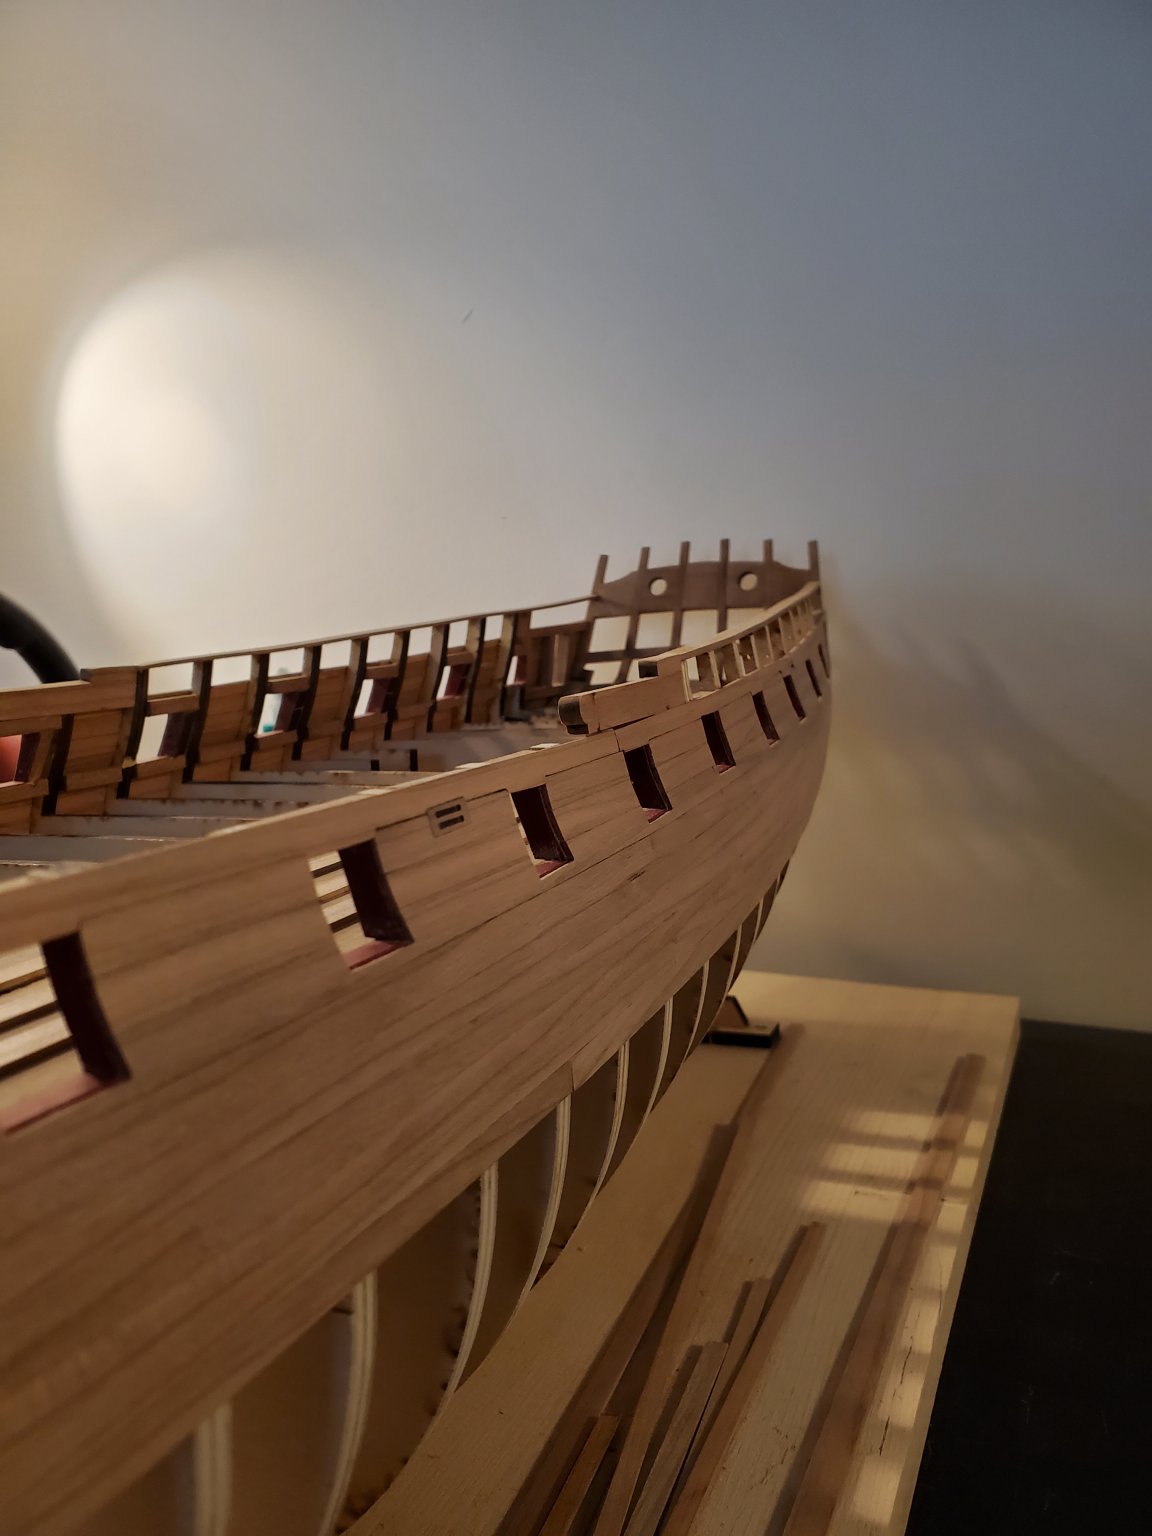
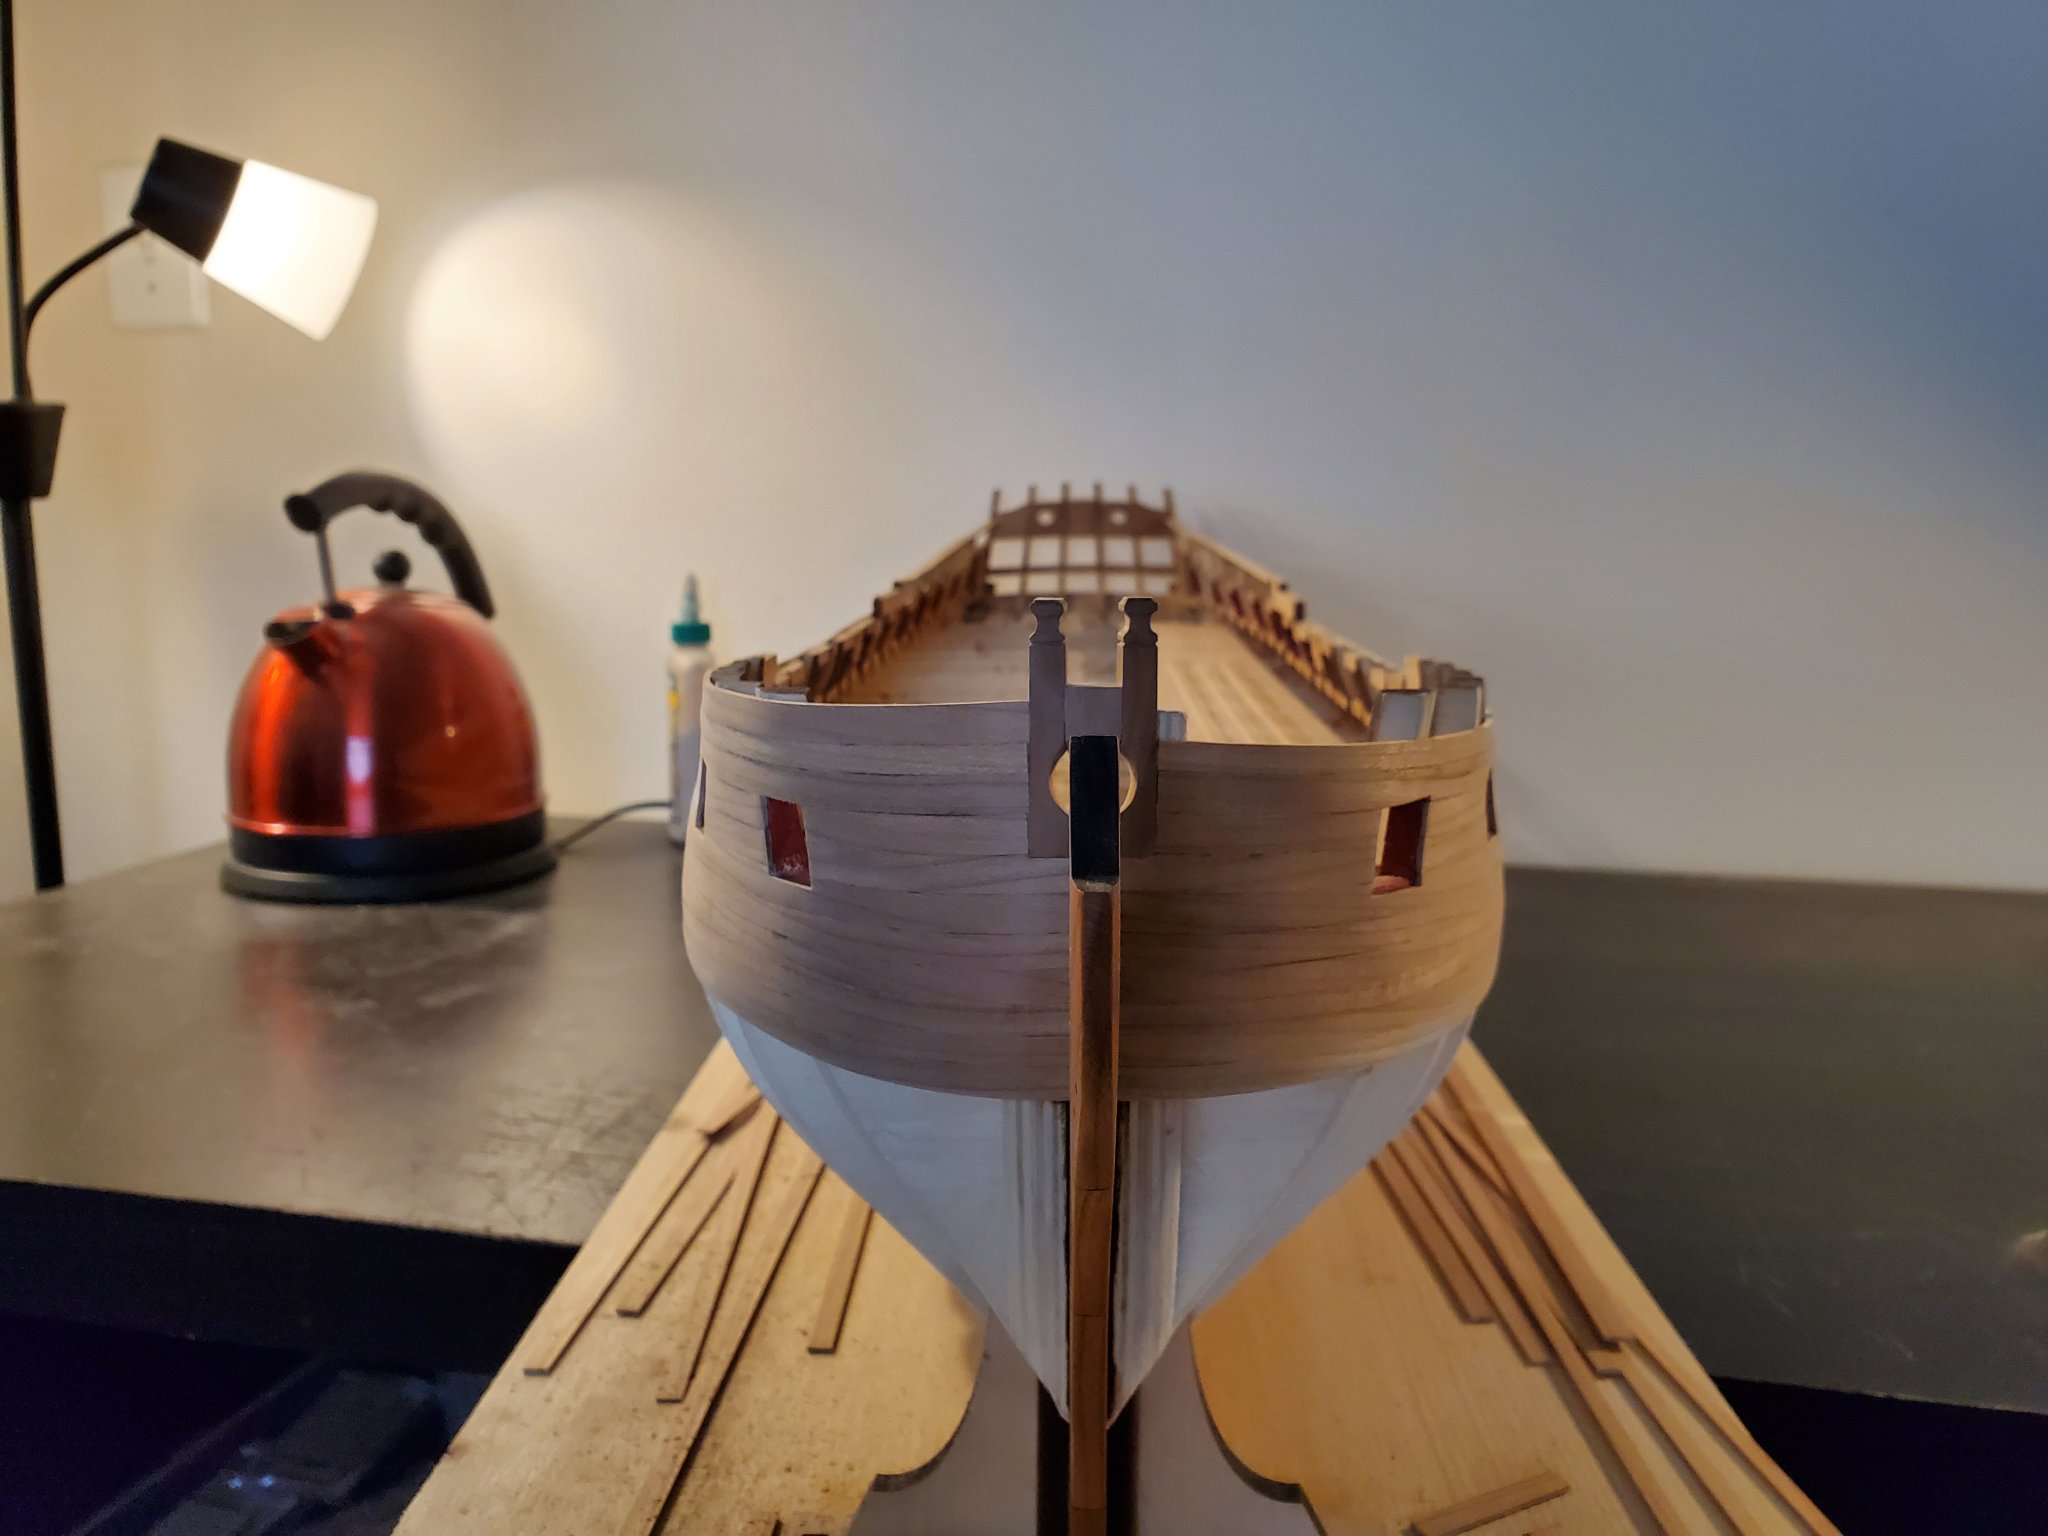
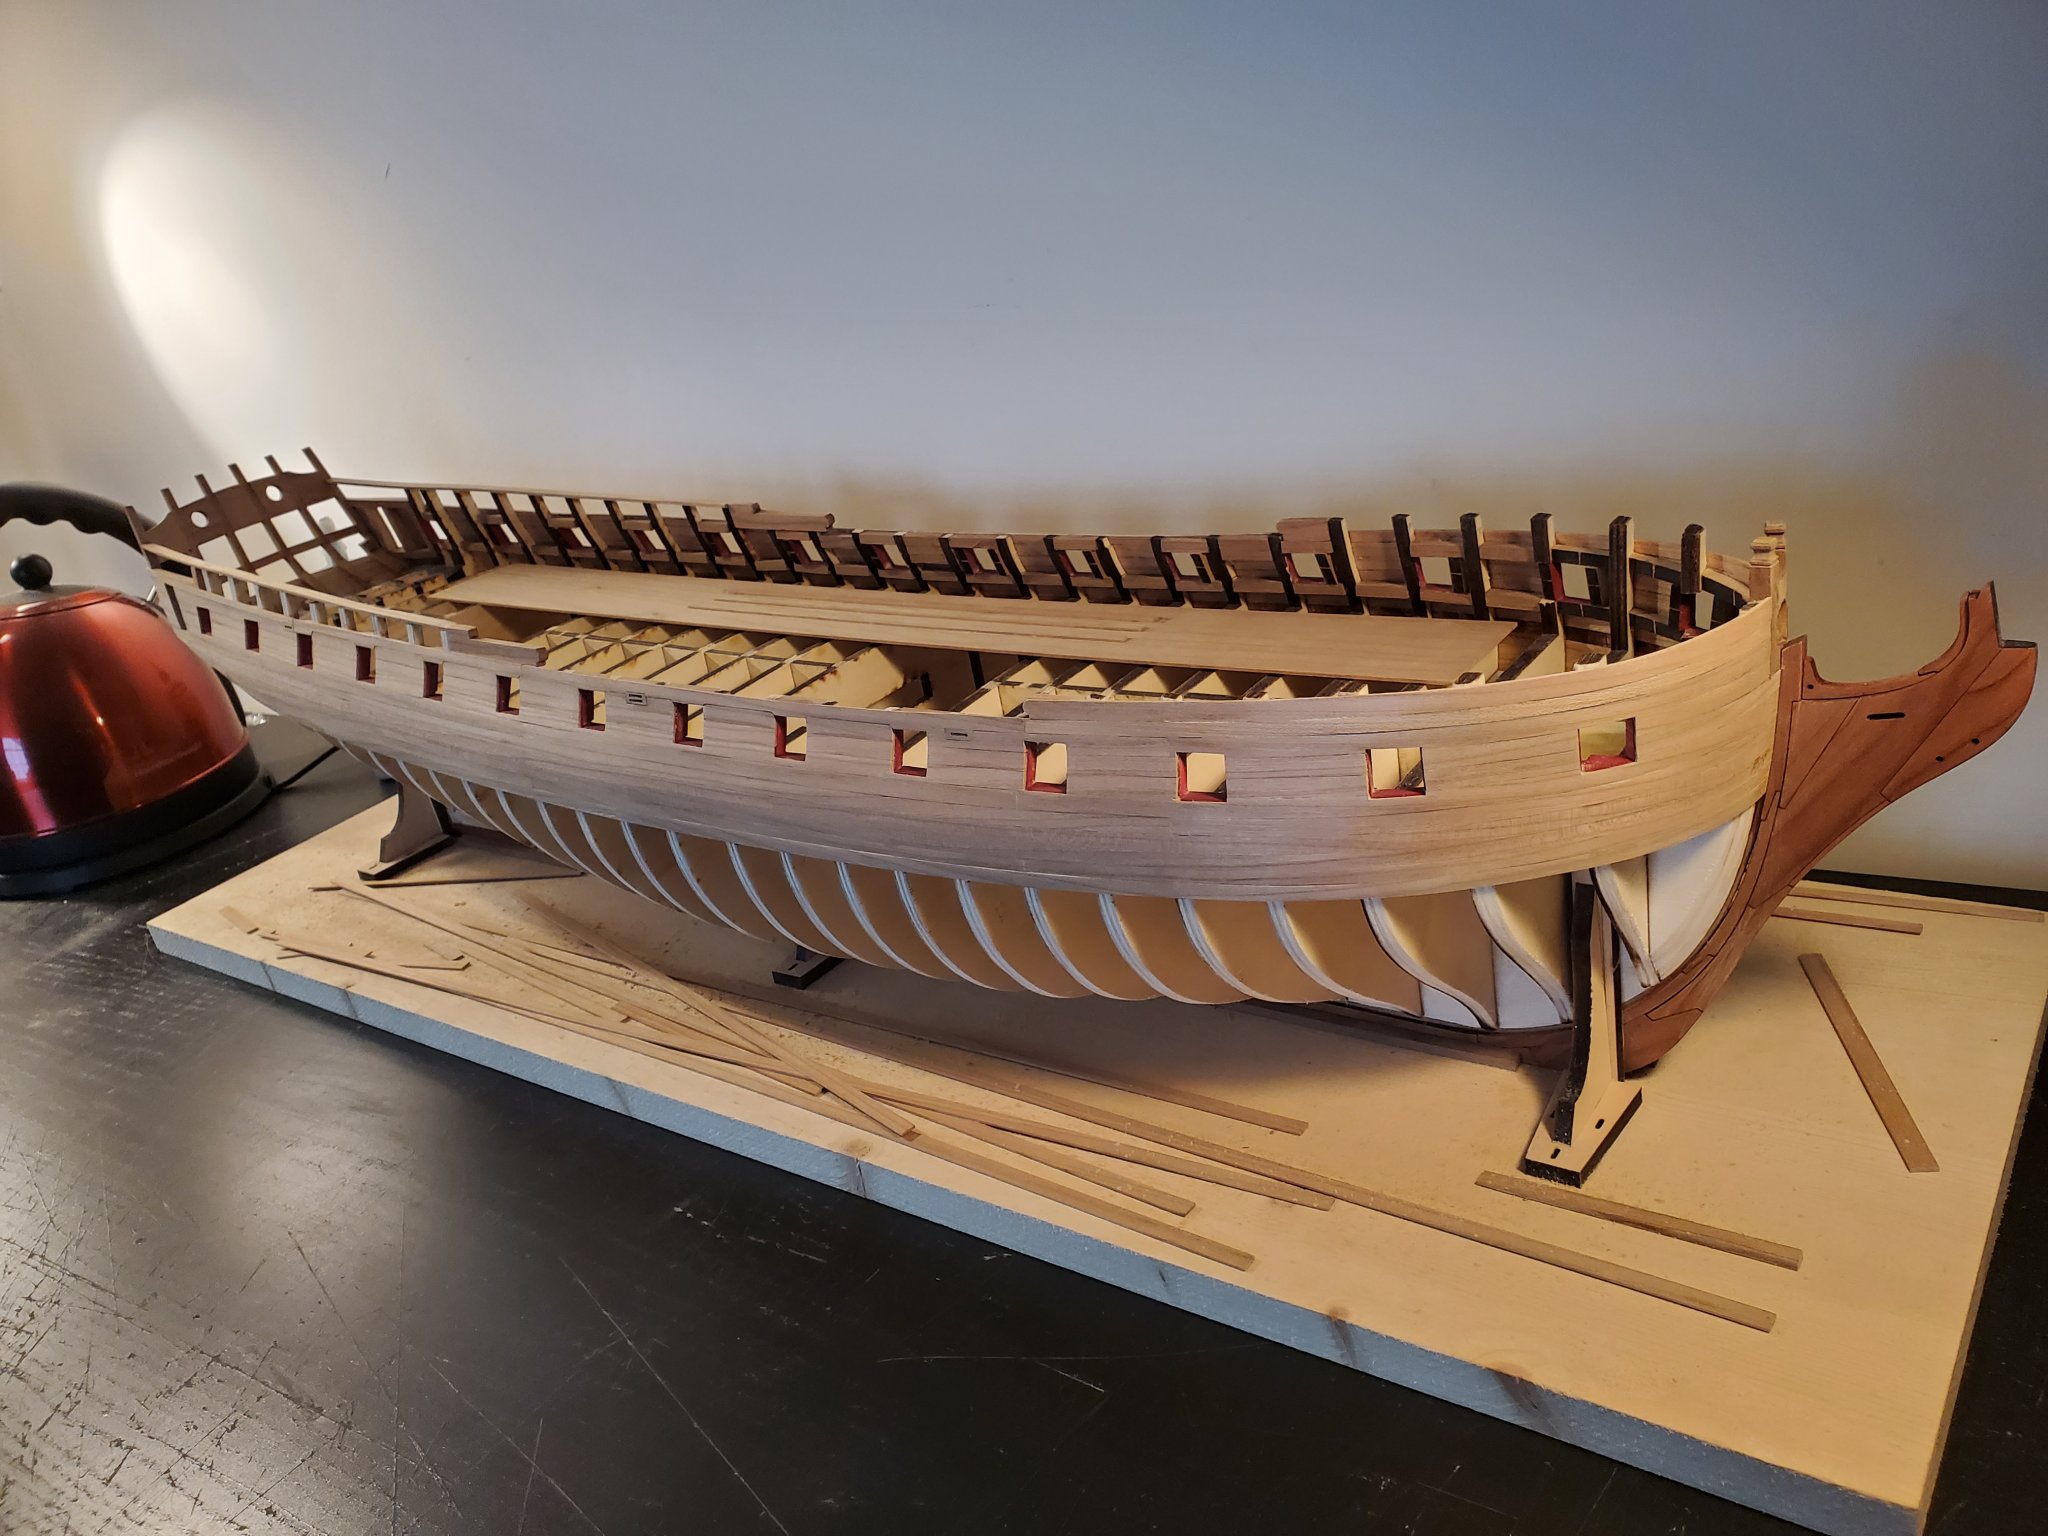
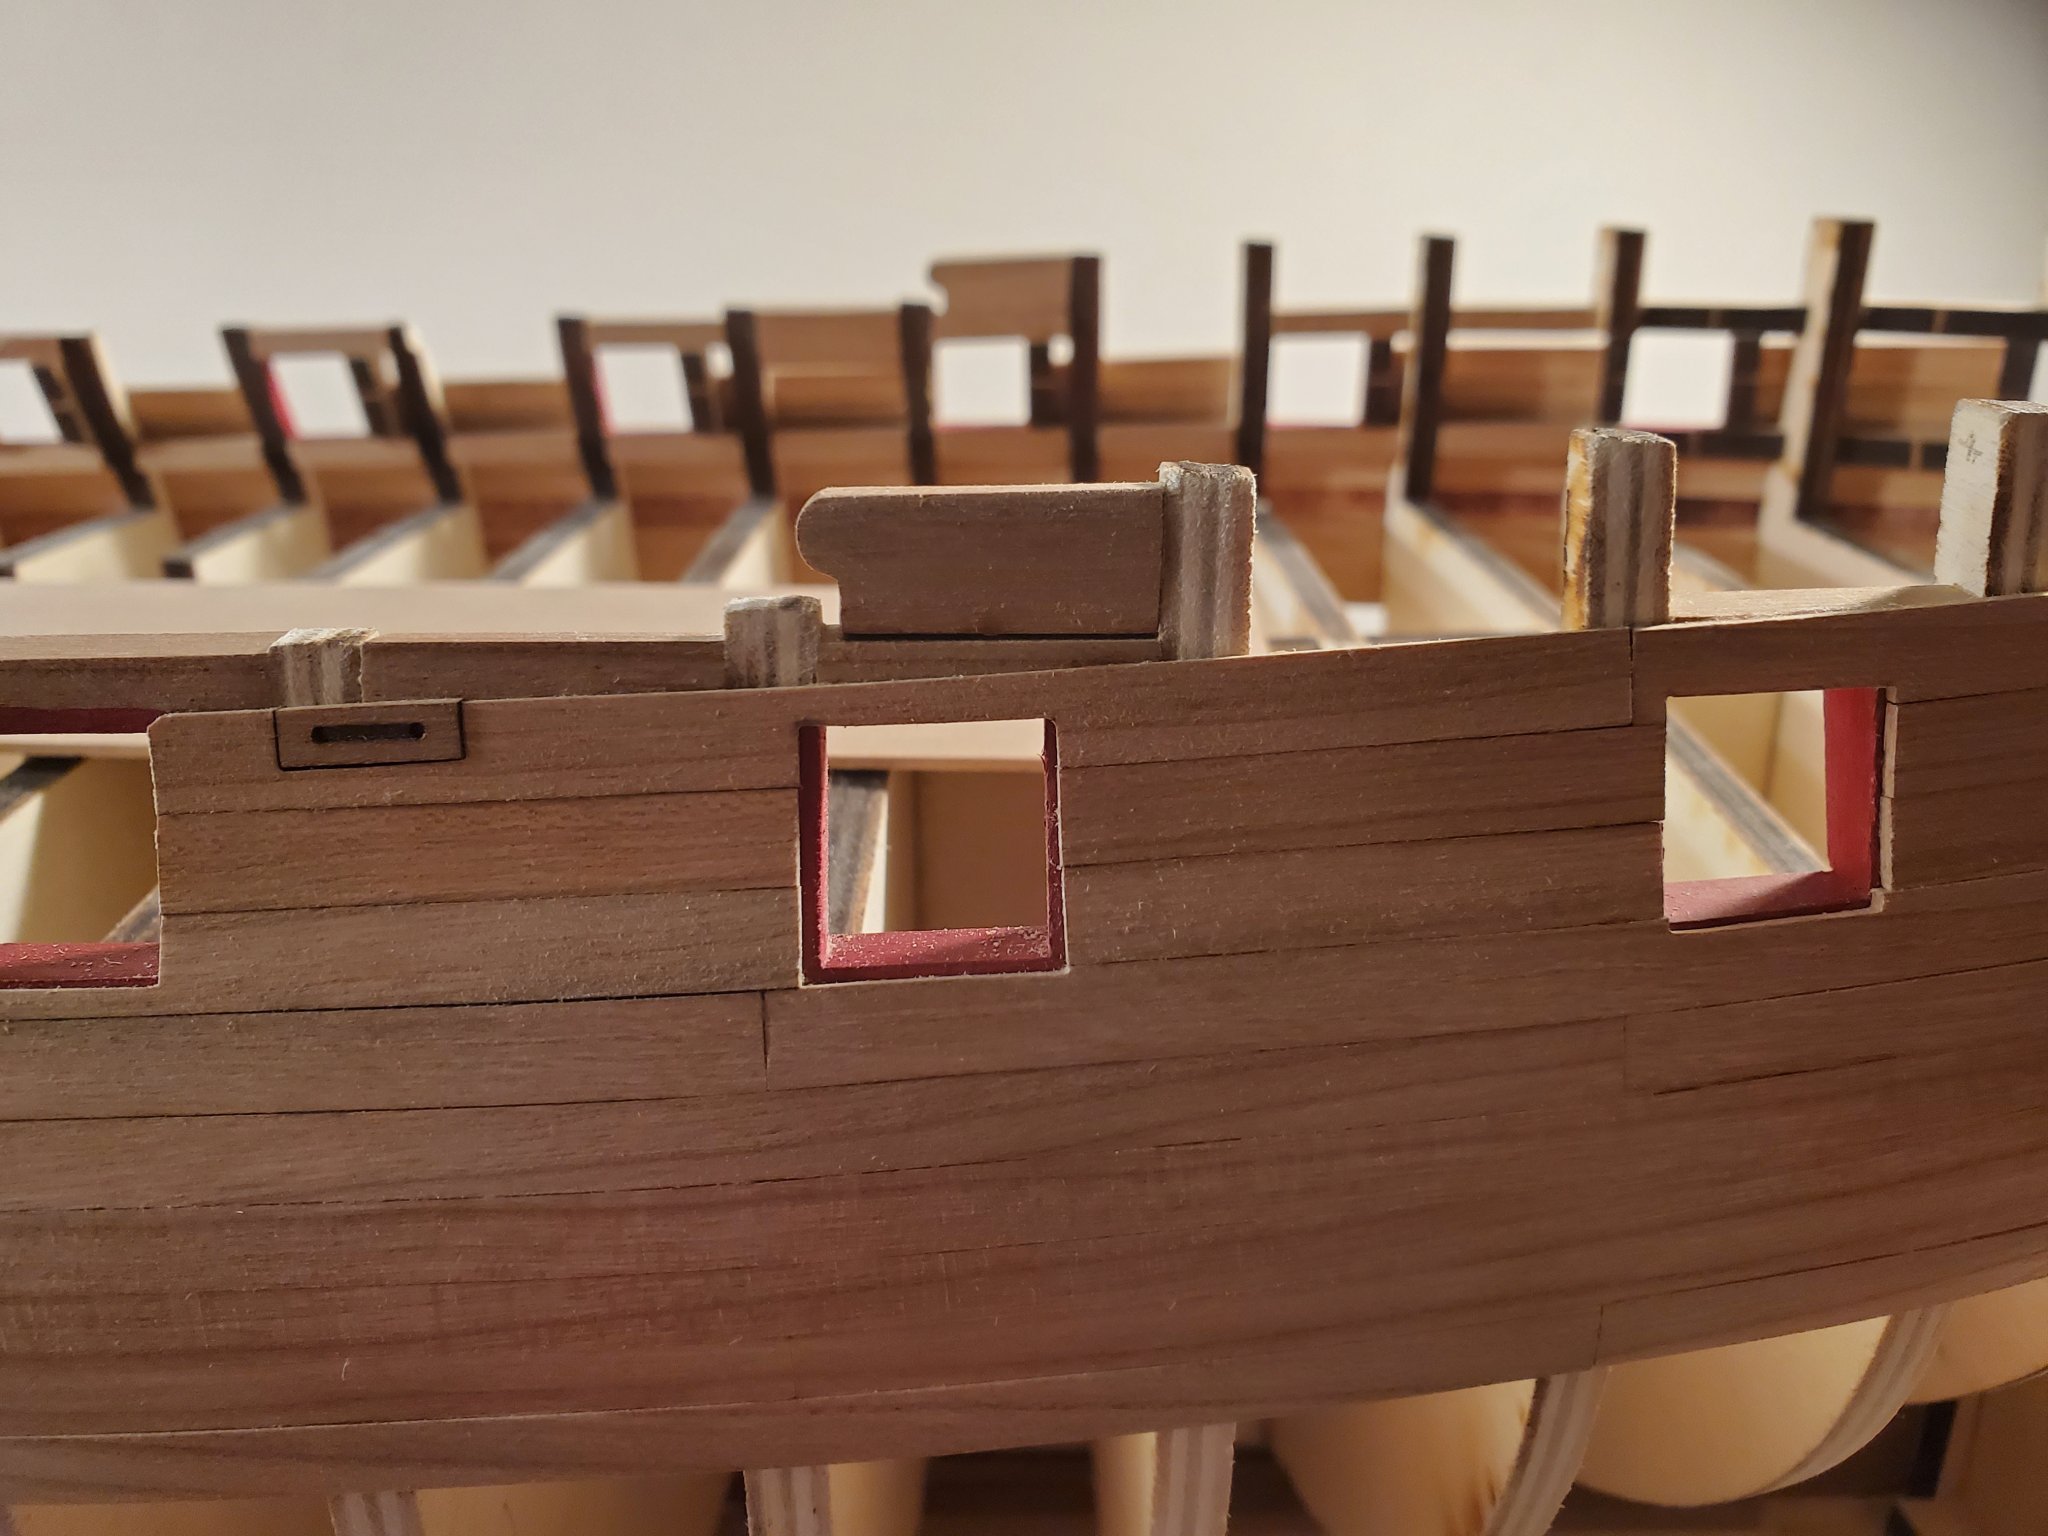
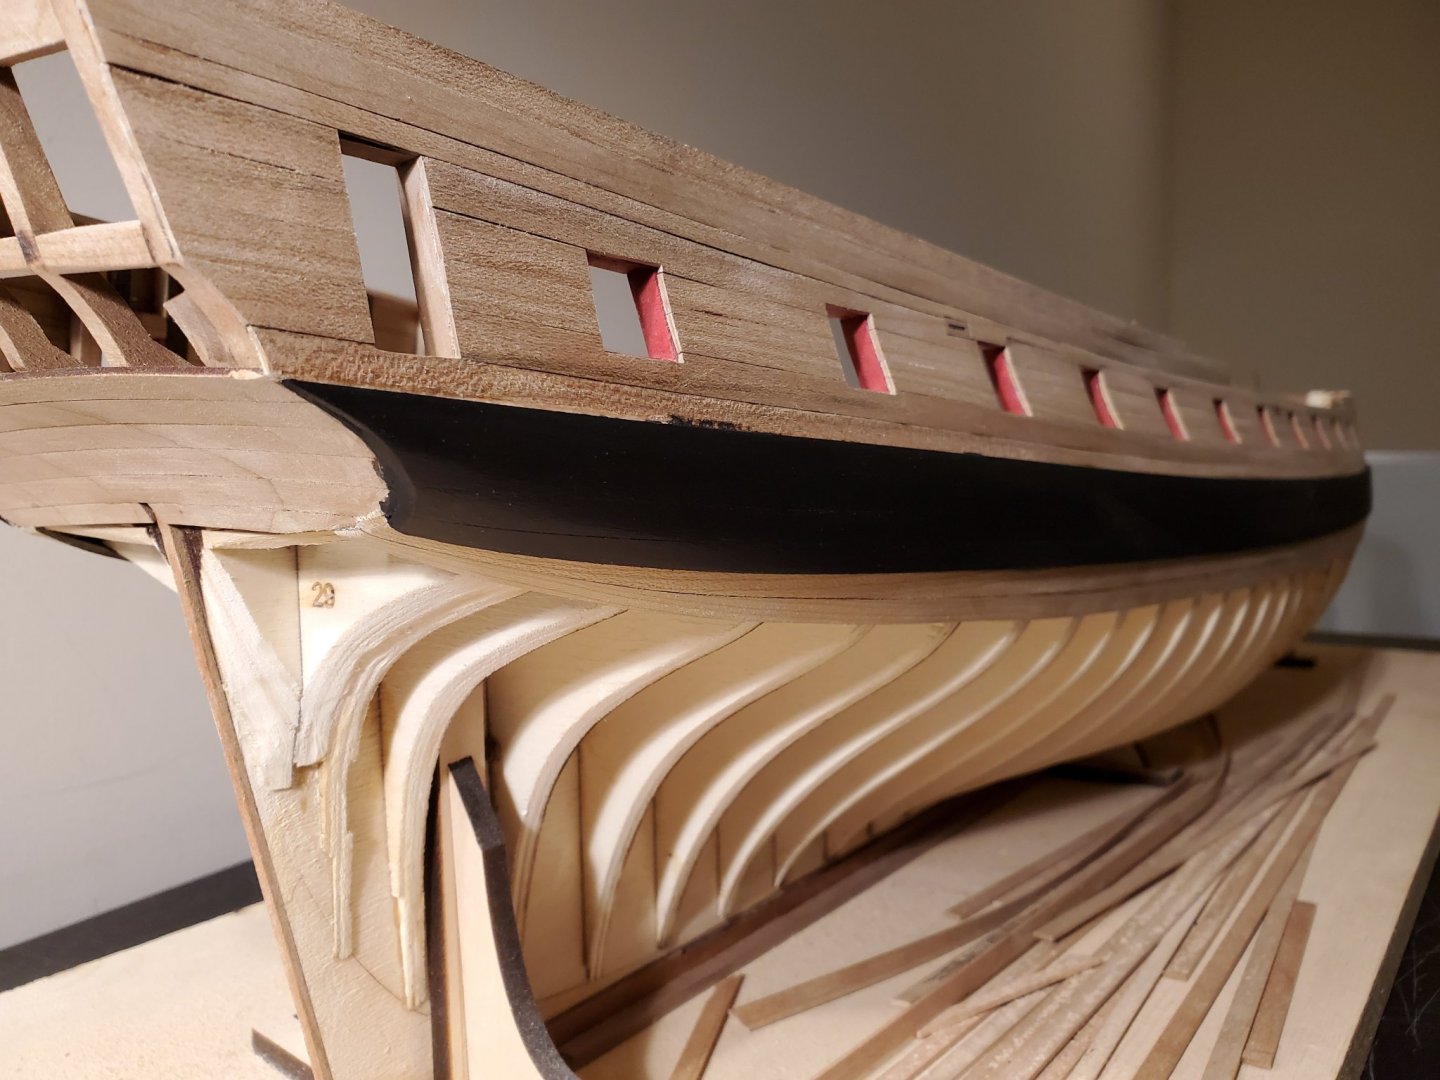
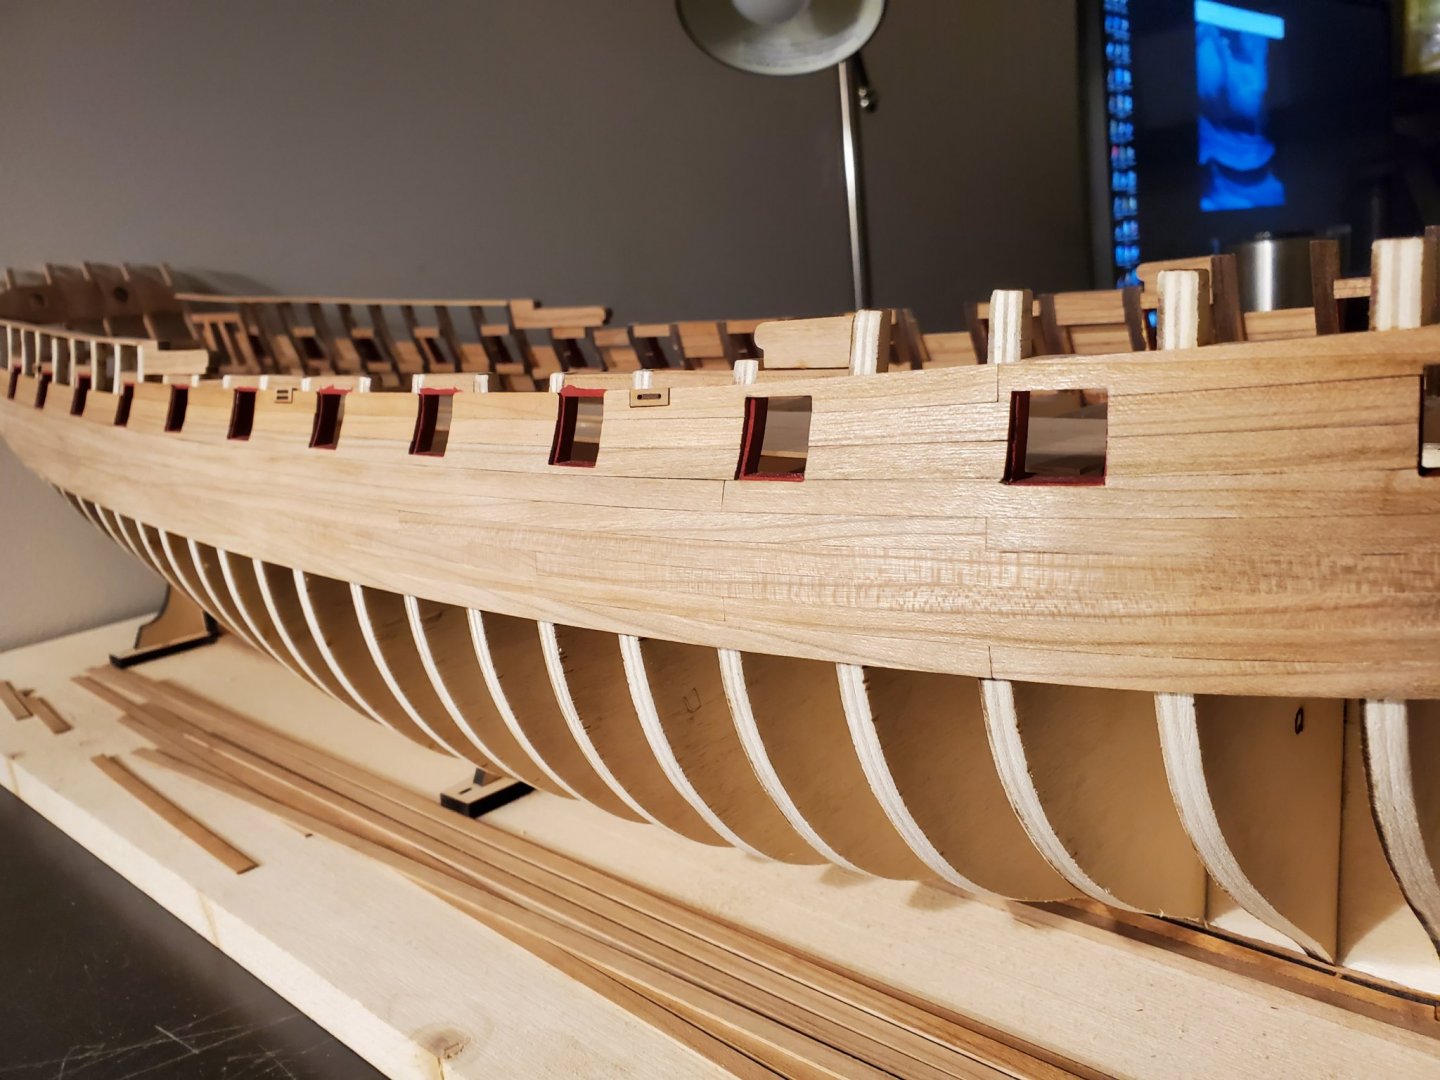
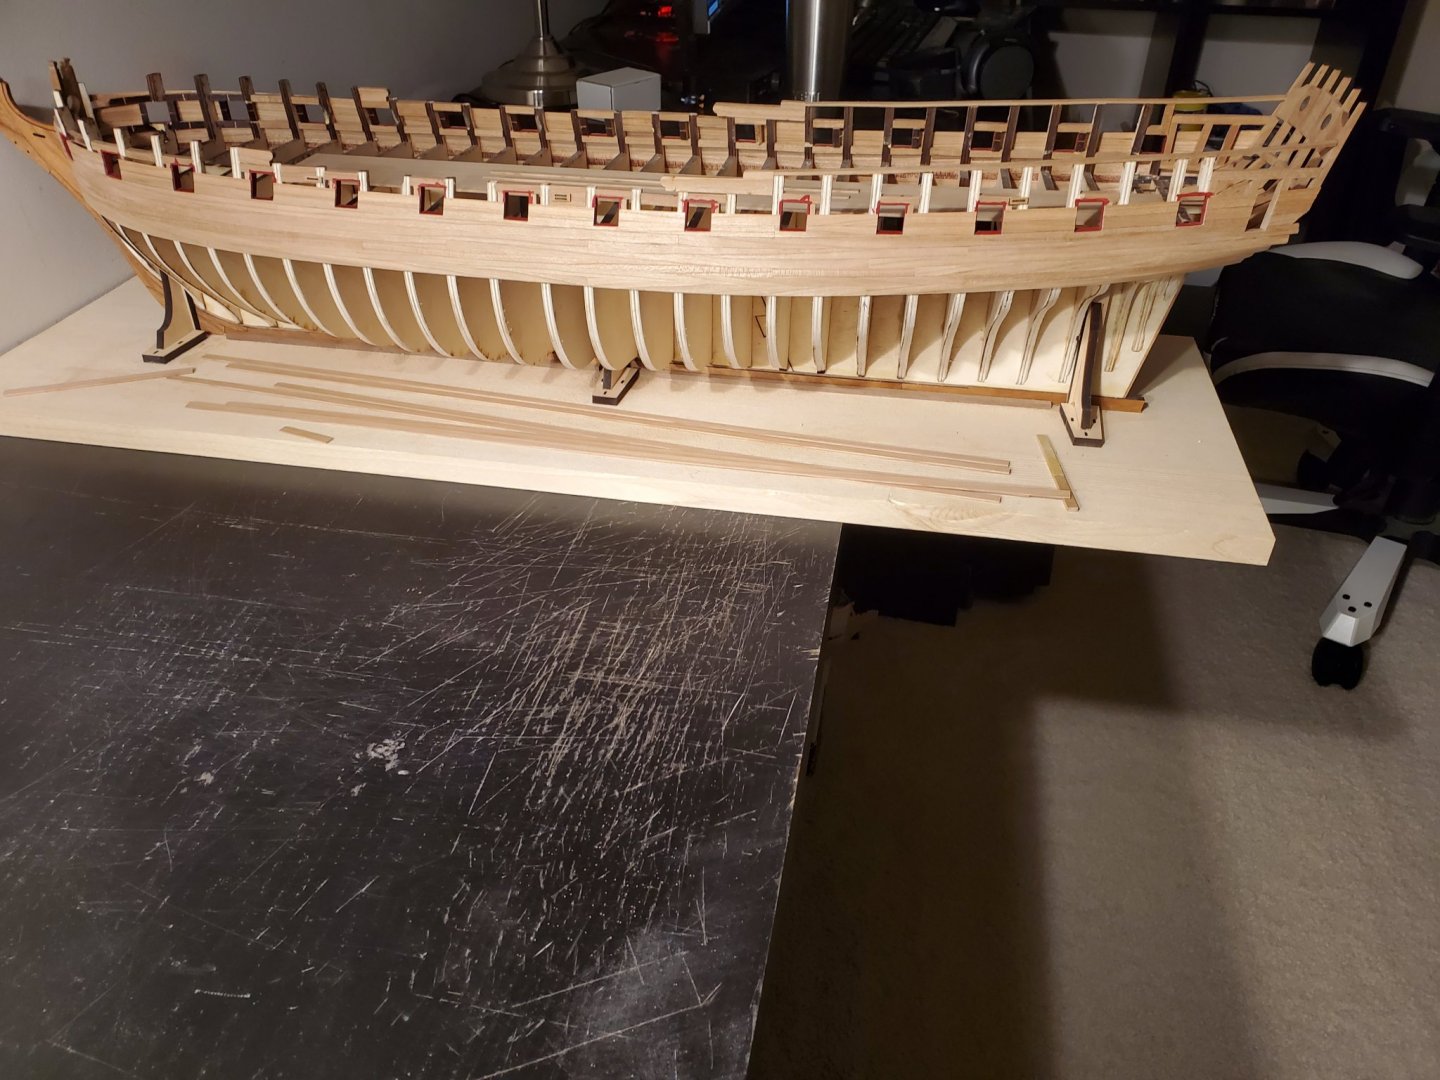
Hey all, Thanks everyone for the likes! I have been moving up the gun ports. I had thought I finished them until I tried to plank the strake above the gun port. I noticed the top gun port planks don't line up at all with the curve of the planking. I have some pictures below. Its the top second planks you see. I'm not sure the best way of fixing this. Would it be to take the strake off and make a new one? Or to try to sand down the top of the strake to try to re create the line of the planking? Any suggestions would be helpful. Also, here is an overall pick of my planking so far. Thanks!! Jeff


-
Wow! Your build is looking fantastic! Jeff
- 642 replies
-
- 1
-
-
- winchelsea
- Syren Ship Model Company
- (and 1 more)
-
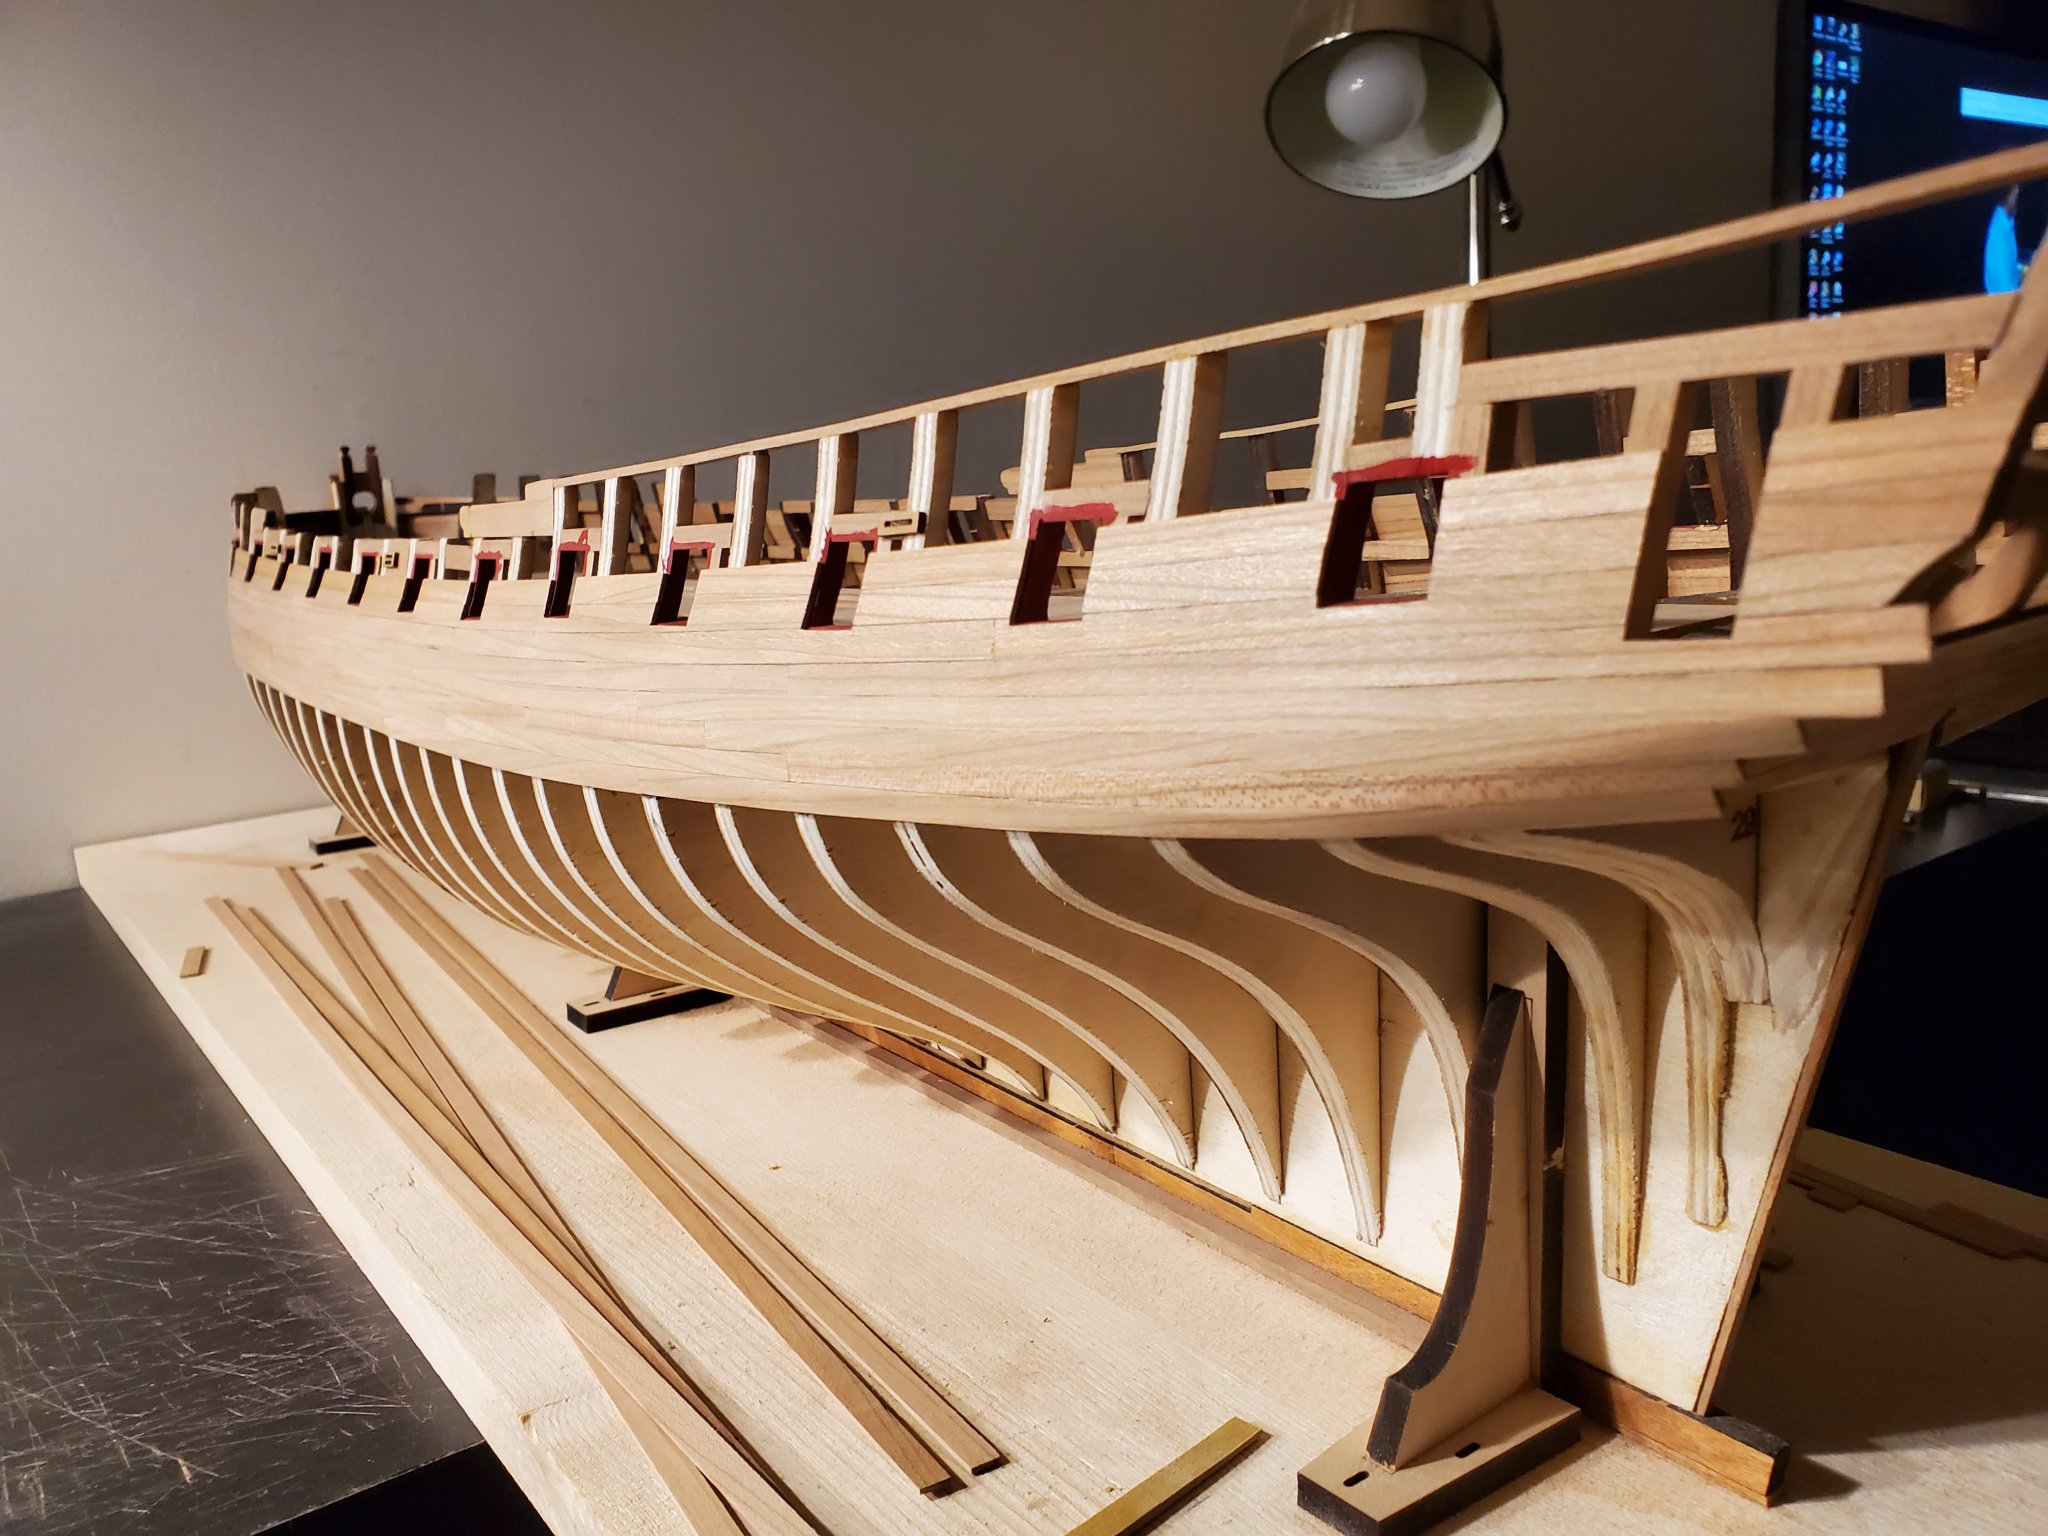
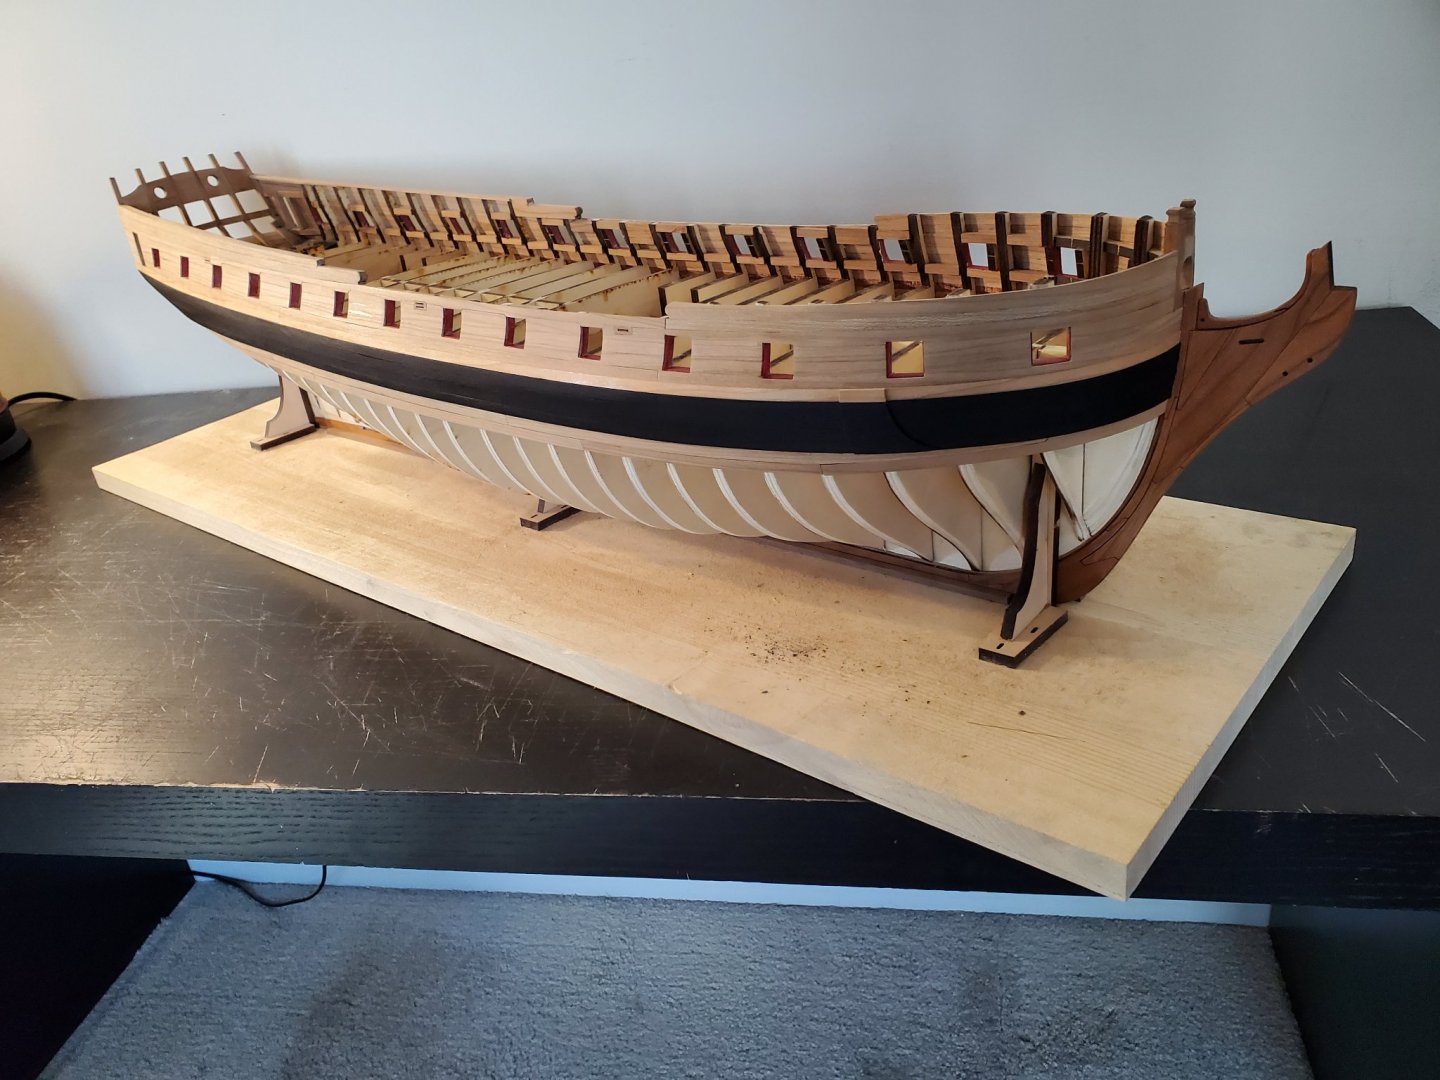
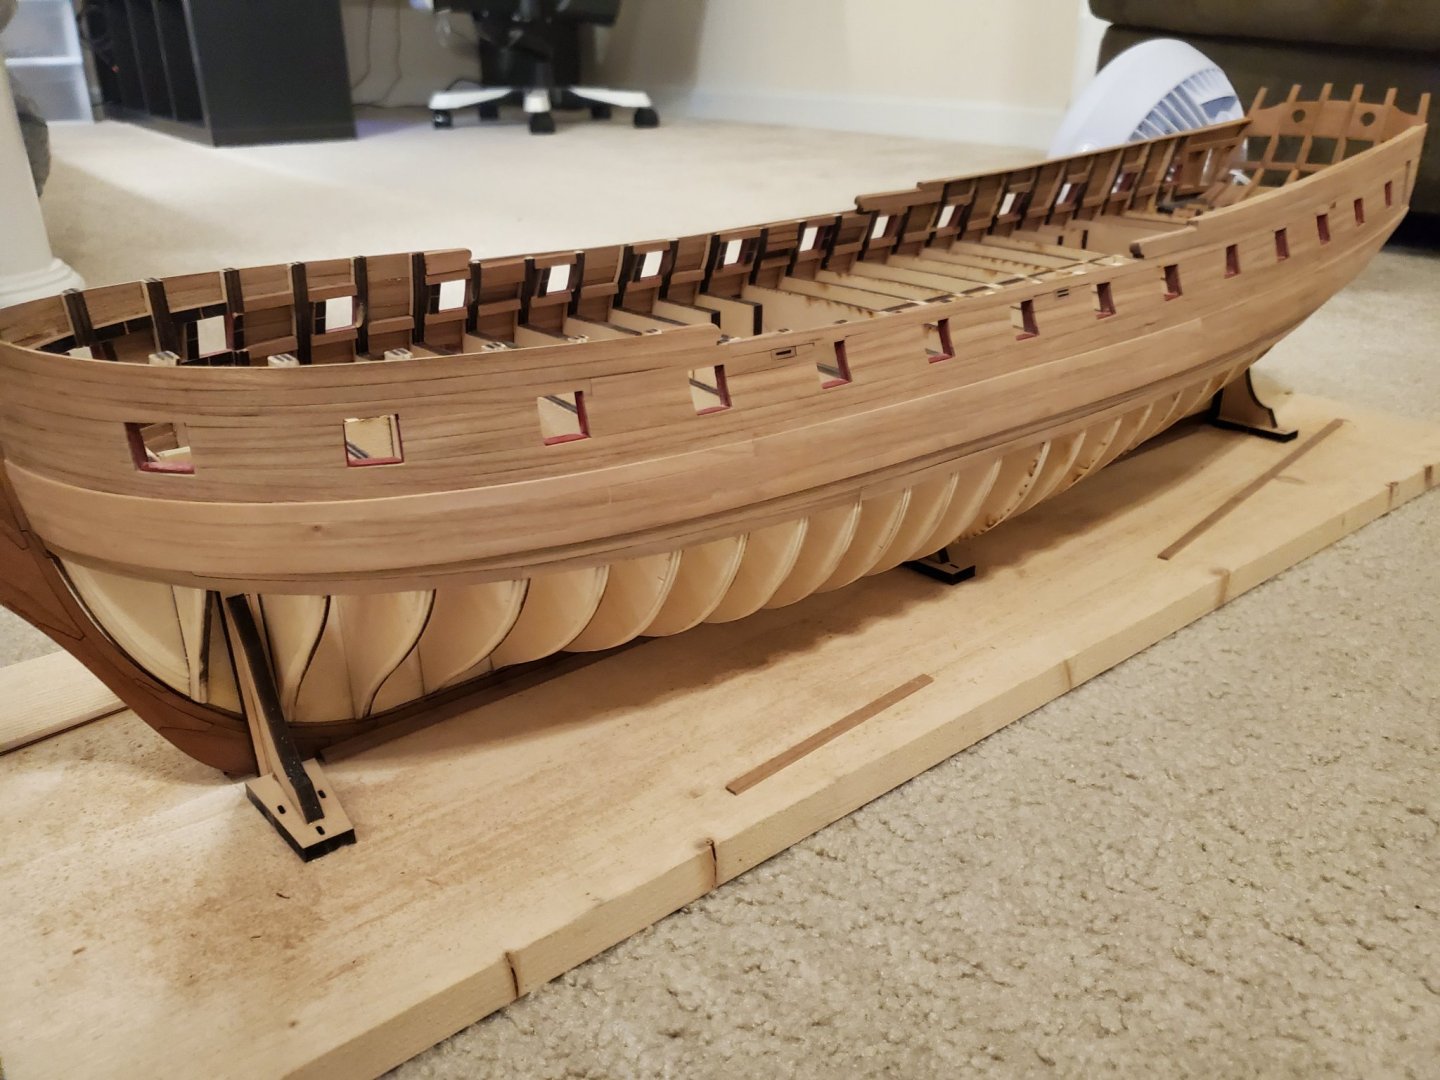
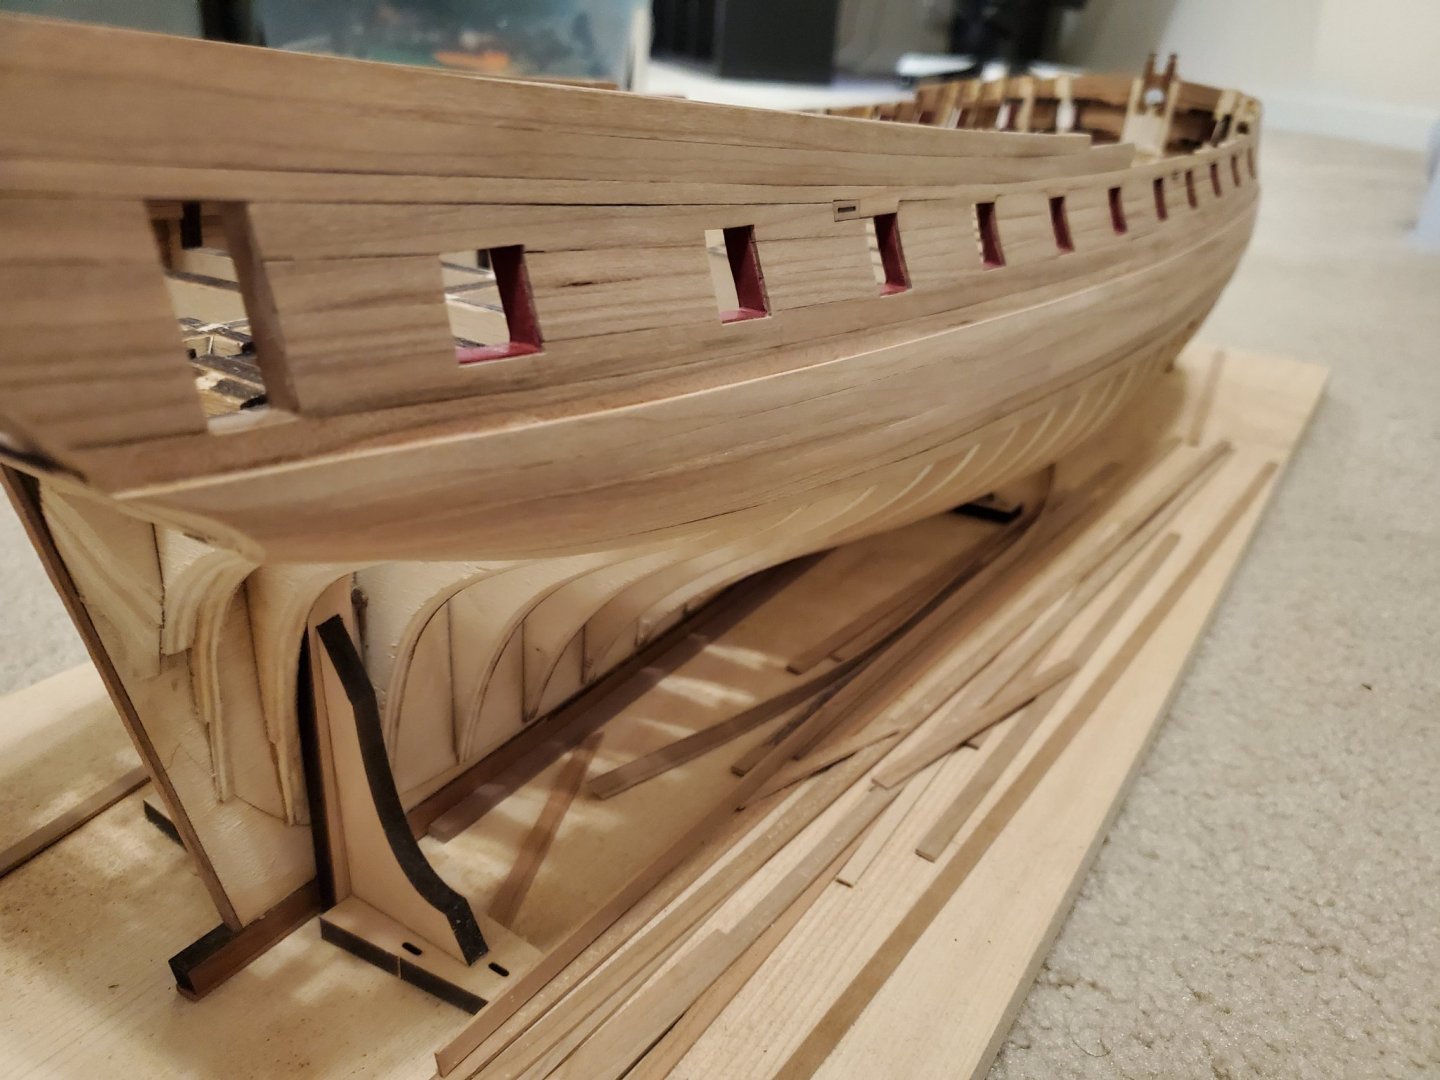
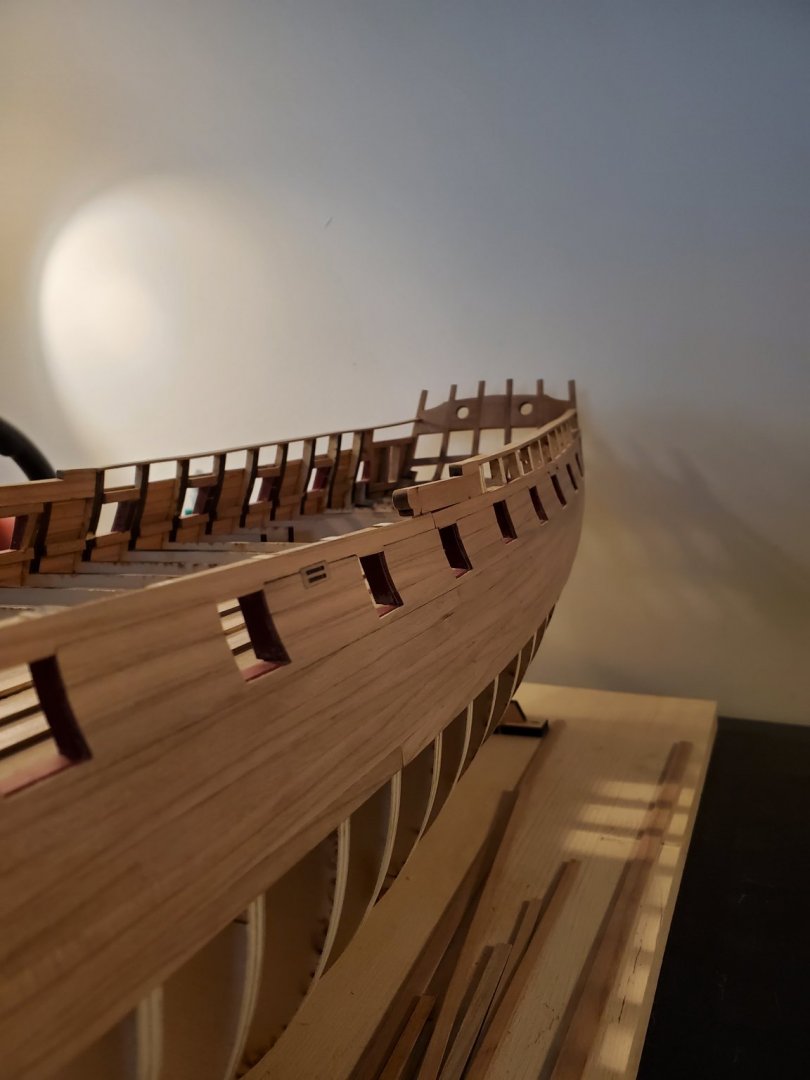
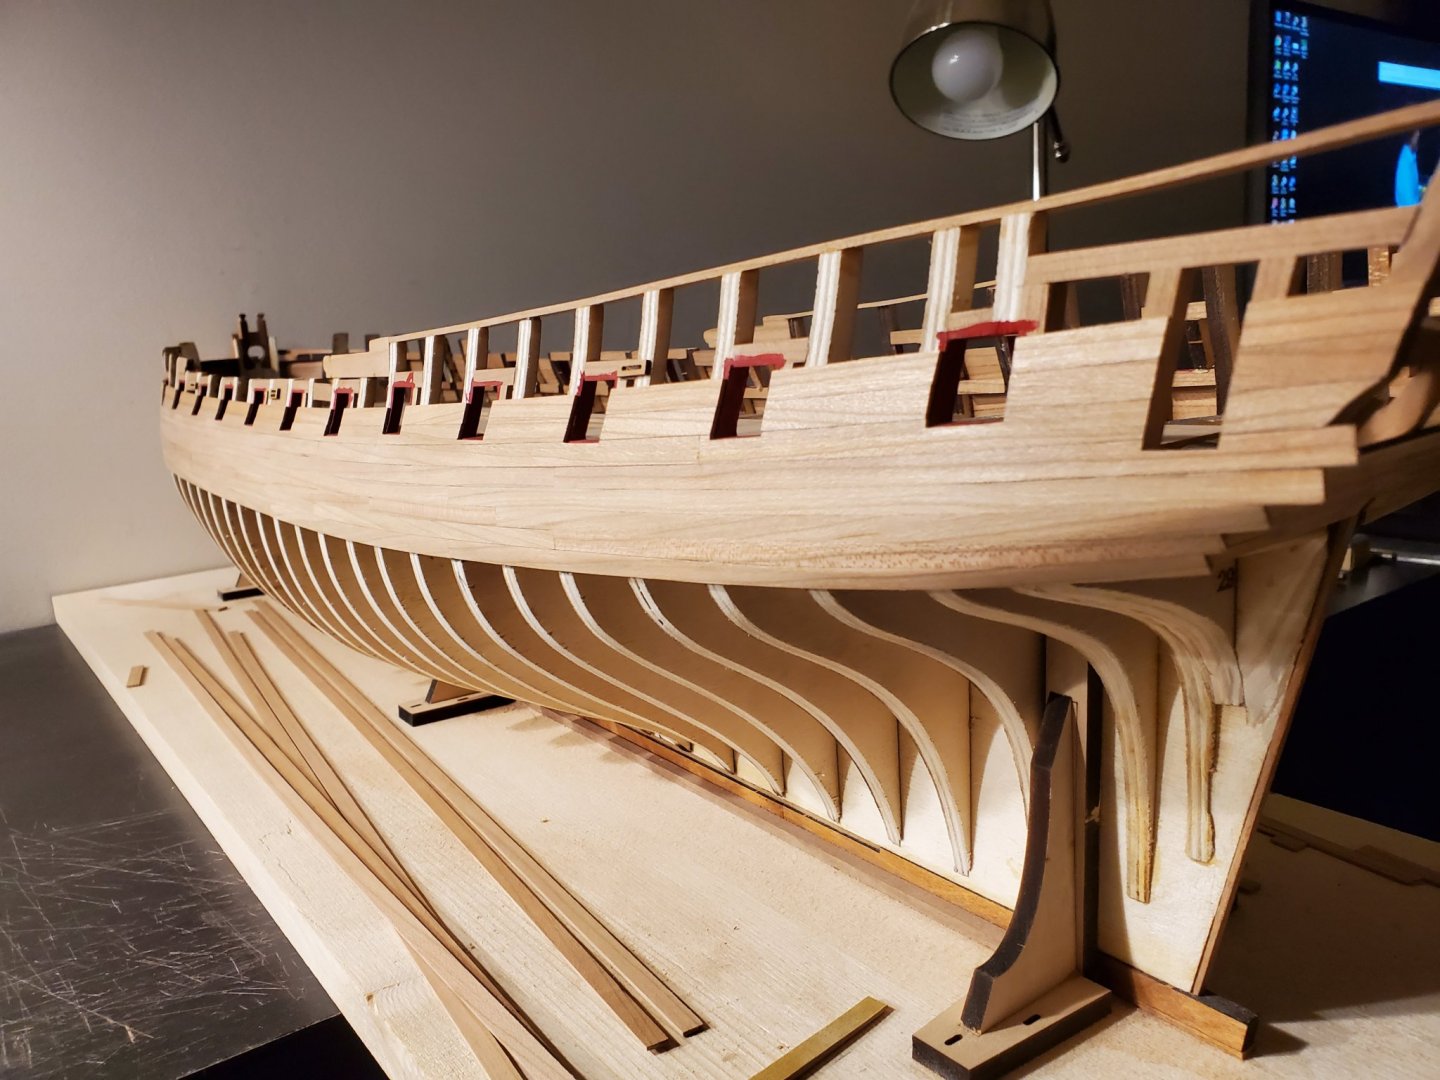
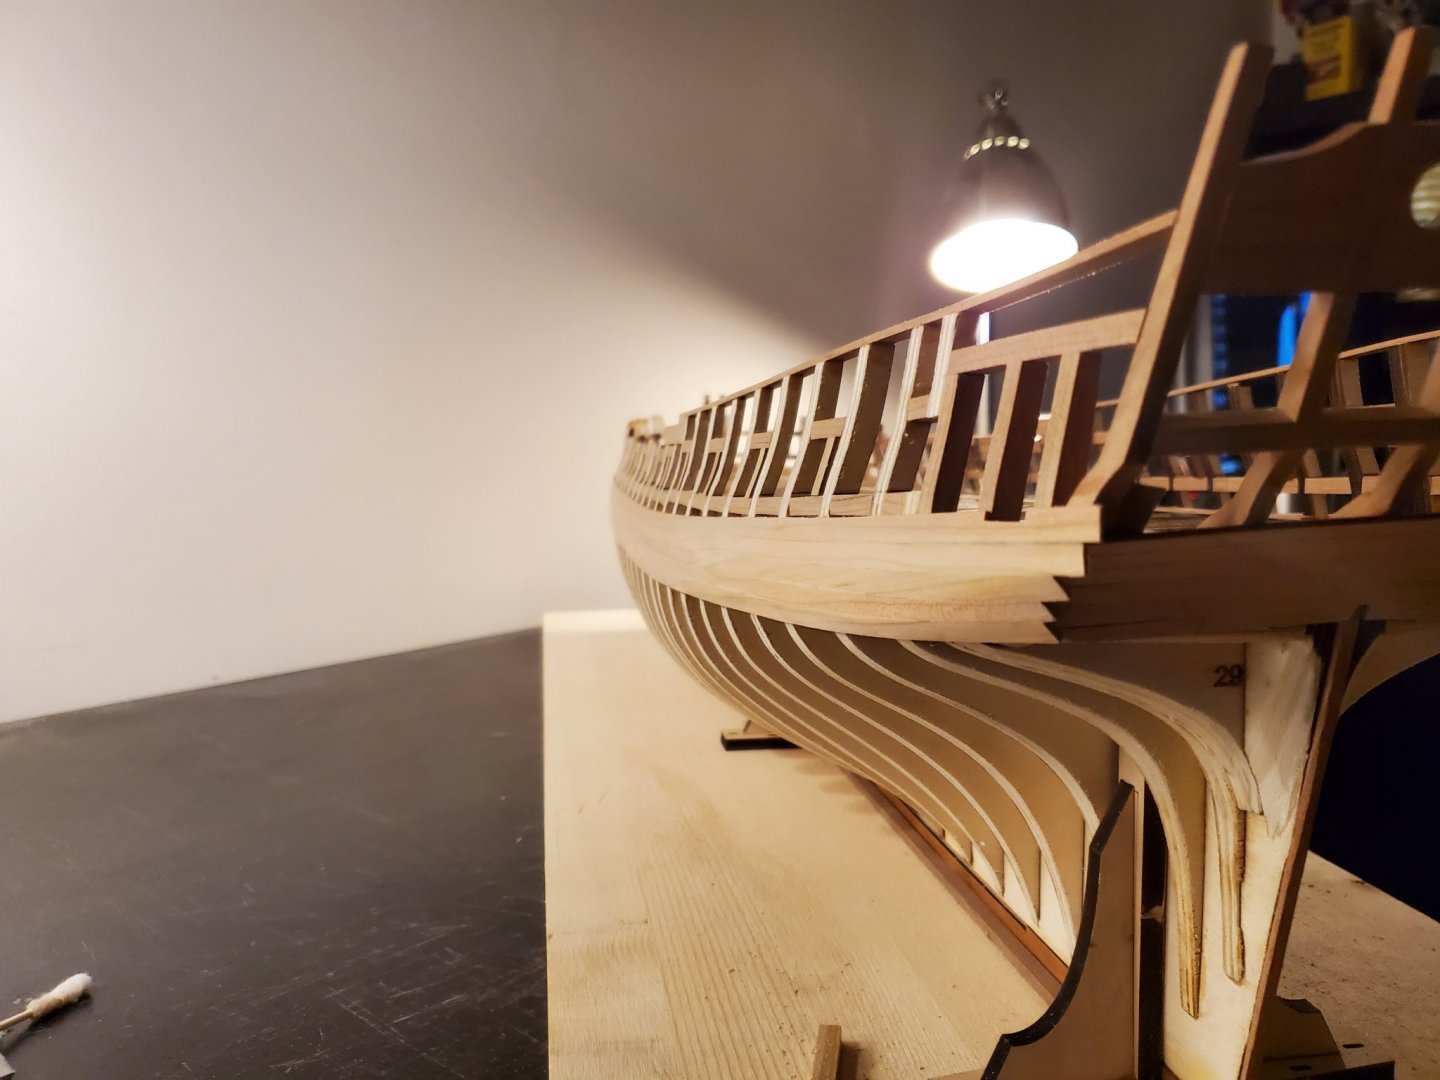
Hey all! I have been slowly planking my way up from the wales. I still don't get as much time as I would like to work on it, but I'm still managing to get some progress done. Be it as little as 1 piece a day. Anyway, I hope this looks good. I am still working up the bulkheads, but thought it was time to give an update. The planking around the fixed blocks was quite daughnting for me. It took me a few attempts, but I am satisfied with the results. I'm on the last row of 1/4" wide planks before the 3/16". After I finish planking up the wales, I will sand it to even out some of the rough spots, then add the 2 rows of planks below the wales. Thanks all! Jeff

-
I was able replace the strips I removed. I had to remove a little more than the last pictures I posted to fix how the bottom wale streak flows down to the stern. I think it turned out better than I thought! Compared to the other side, it is off by 1mm. It was off by almost 7/32". So I feel that's much better. The sheer going down the hull to the stern looks a lot better to me as well . Thanks! Jeff

-
Good idea. I fitted the other side's black streak for reference and I'm making the adjustments now. The position and sheer will be much more correct. Having this correct is more important than getting the tightest seems for this layer since these wale planks will be planked over and painted anyway. Thanks! Jeff
-
Thanks everyone for the likes! That makes a lot of sense Chuck. I will order some 1/16" sheets later this week. I noticed the sheer is too steep on the port side stern. Way too steep. And this would cause issues down the road. The starboard side is good. I then realized I didn't follow my guide lines correctly on the port side. So I decided to remove the wale planks that were too steep. I was able to clean it up quite a bit. I know the butt ends aren't correct, but this is the first planking of the wales, so it will be covered up anyway. I was able to keep my black strake intact so lucky me! I didn't have to replace that! I'm not upset because I need to make sure the sheer is correct before continuing. It would be horrible to realize this later after planking up the the hull. I will start to replace those strips tomorrow! Thanks! Jeff

-
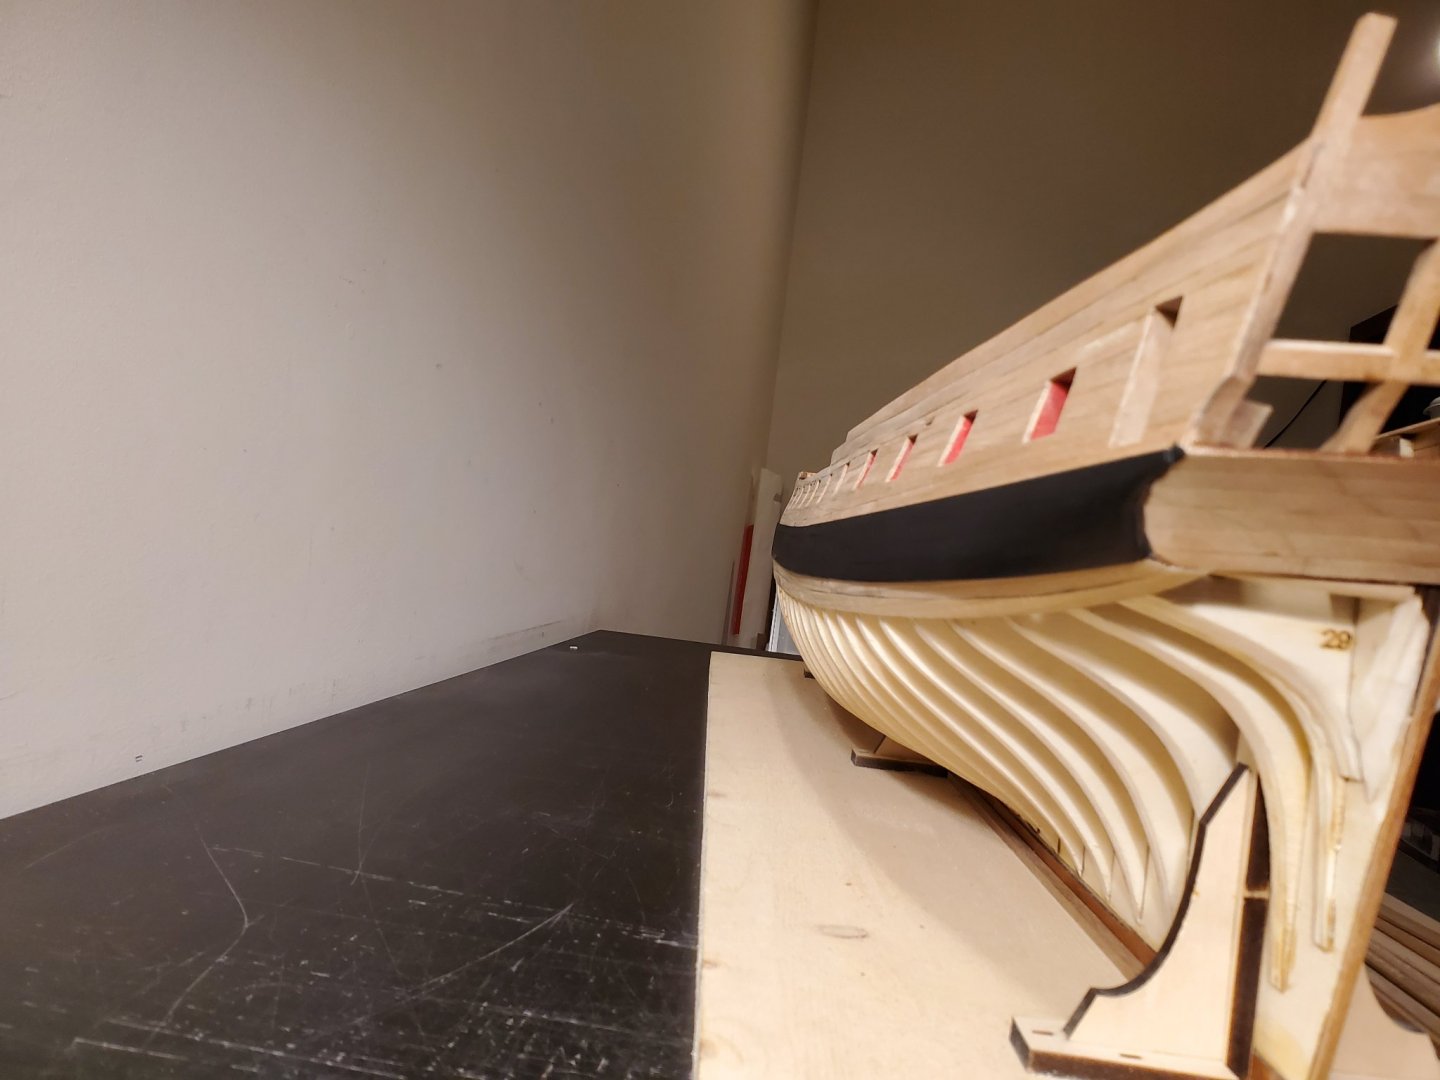
Thanks everyone for the likes! Its been a little while, but I have been busy on the ship. I am starting to get used to using the table saw as both a saw and a planer. The first few times trying to get usable 7/32" strips yielded 4-5 strips since I have to plane the 1/4" sheets down first. But slowly as I was getting more comfortable; this week, I was able to produce 15 strips at one time! That really made me feel I'm starting to get used to the table saw. I have enough 7/32" strips to finish the first layer of the wales and black strakes. I am currently working on the black strake. Sorry for the bad lighting. I need to get more light in my room. Making the 1/4" strikes will be MUCH easier because I won't have to plane them before making the strips. So I am excited about that. Thanks!!! Jeff

-
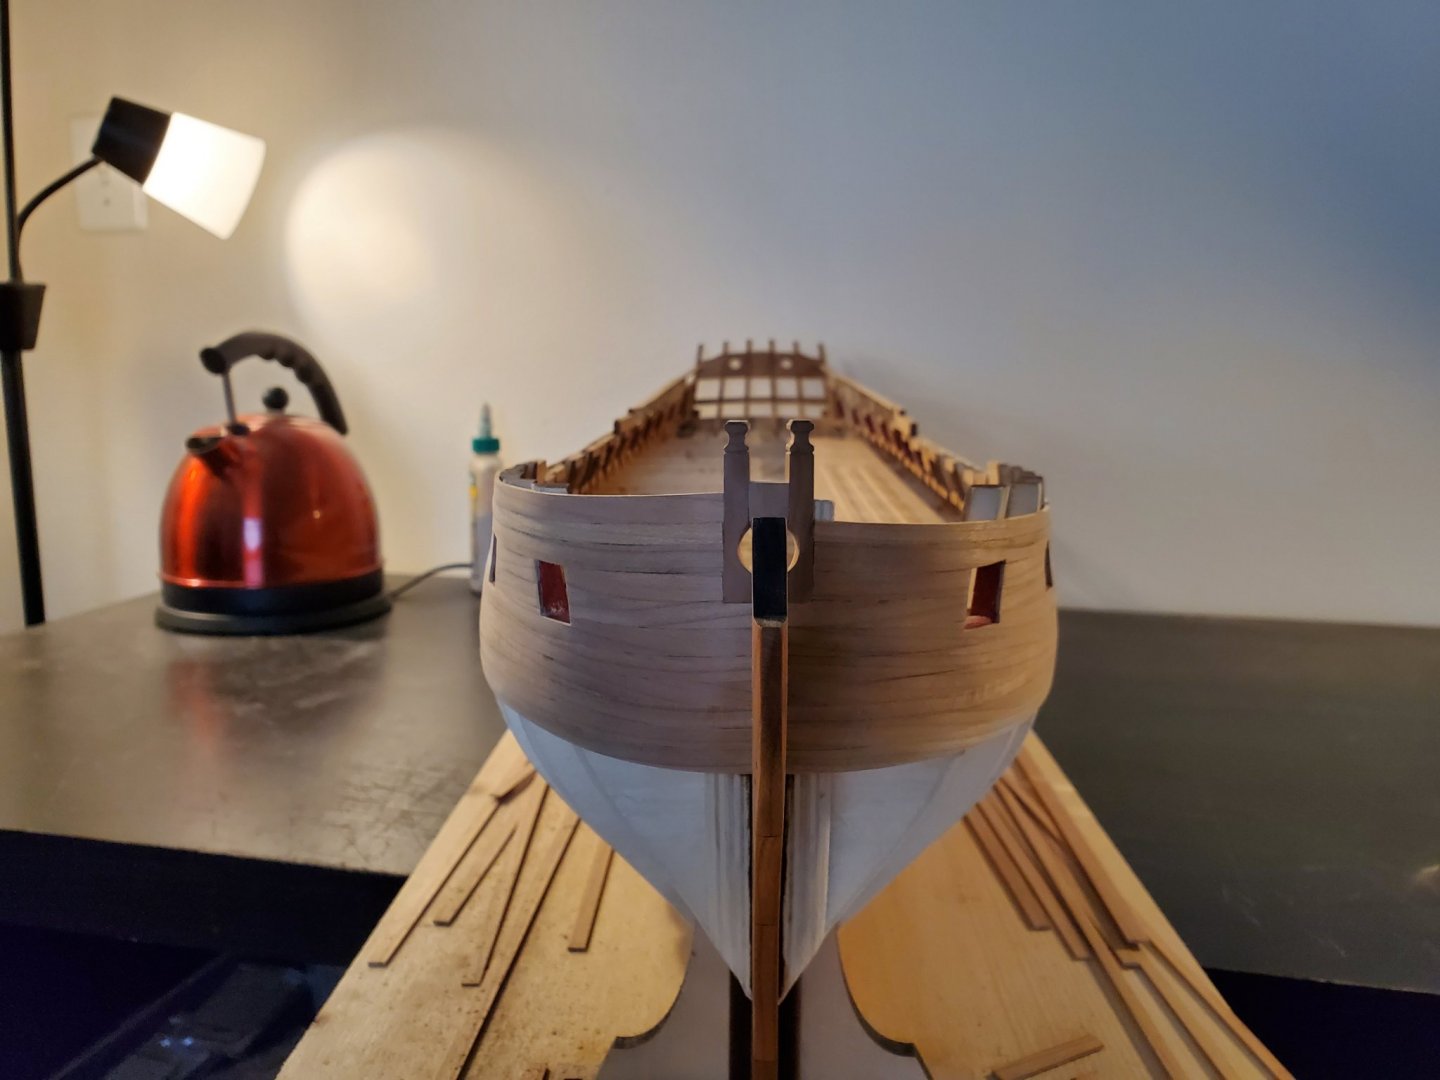
Thanks everyone for the likes and tips! I started getting used to my new table saw. Since I have not used a table saw before, it has taken me about 3 weeks, and very helpful tips and advice from G, Ben, and Chuck. Like Ben said, I had to reduce the height of the sheets by a small amount. I had to create some jigs to support the sheet as it goes through the saw. Making the first strips was tough for me. I have about 10 or so unusable strips. But I learned more and more as I went on. I had chipped, burnt, too wide, not wide enough.. you name it! Advice from G, Ben, and Chuck really helped. But, being safe, after 3 weeks of trial and error, I finally was able to make the first 3 usable strips!!!! I would have made more, but I didn't have enough time. I know it might sound like a small thing, but it is a big deal for me! So, a few days later, I placed the the first part of the first plank on the hull. I really didn't understand what the 'S' shape of the plank meant at the bow until I placed this first plank on. I then finally saw it. Here is a small 2 pics of it. I hope it looks alright! I am proud of it because I made that strip, and I realized how much work went into getting this far. Its really hard to see the S curve at the bow, but I know its there cause I had to bend it! Thanks everyone for your help and support! I hope to plank more this week. Jeff

-
Thanks G!! I am going to re read your advice as I start to make the strips! I have planked the lower counter and added the support strip to help with the lower planking. I still need to do a little sanding on it. I received my wood sheets! They look very nice but there is one problem. I asked for them to make some 7/32" but they are all 1/4" or slightly thicker. It wouldn't be a problem if I had a planer, but I do not. So I am not quite sure of what to do. I also need to take a little break from the ship. Only because my wife and I need to decide where to put the table saw. I also will need to get a sturdy table and a small shop vac to connect to the table saw. This might take a few weeks or longer to do since we will need to clean some rooms out in our basement and need to save up for the table and shop vac. Thanks everyone foe the likes! Jeff

-
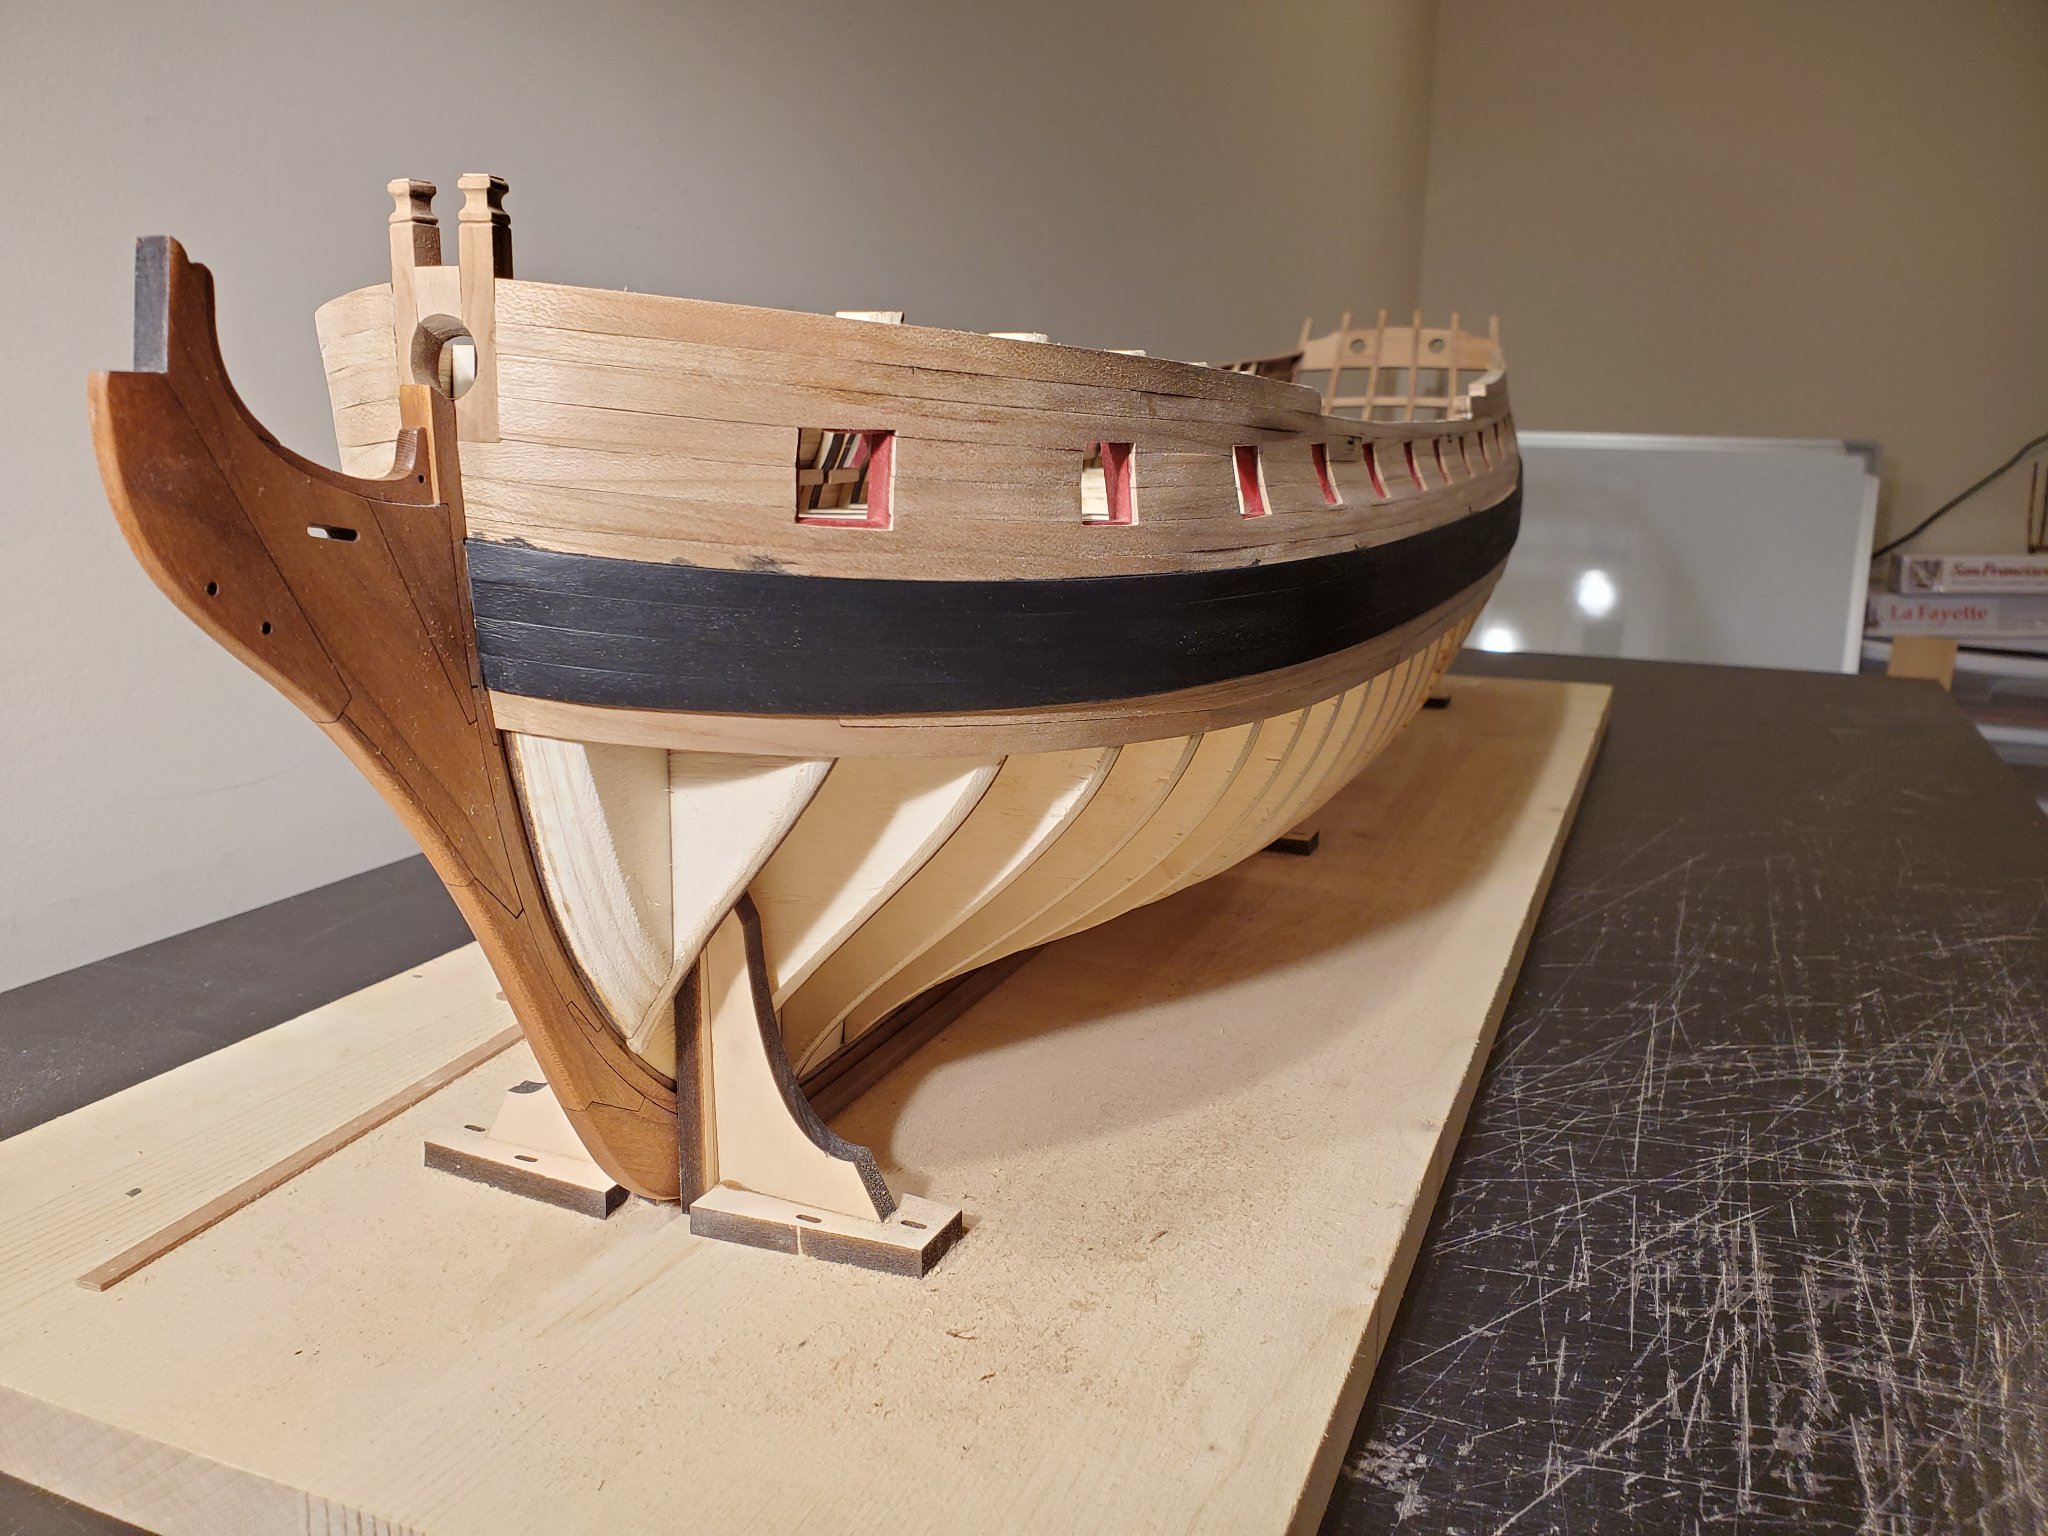
Thanks G for the advice! Also, thanks to everyone for your likes! I was able to complete the other bollard timber and the spacer between. Making the bollard timbers was actually one of the most fun parts of the build so far! Other than some small adjustments, I have finished chapter one! Wow what a journey. I have learned quite a lot from this chapter. It has taken me 5 months to get this far. I have really enjoyed the build so far and will continue that enthusiasm into Chapter 2. Sorry for the bad lighting. I do not have too much room! My cherry wood sheets were shipped a few days ago. So hopefully I will receive them this week and start making the strips needed for the hull planking. It will be my first time doing this. So I will be nervous and excited at the same time haha! I'm actually going to read through chapter 2 a few times before starting! Thanks everyone! Jeff
-
Thanks everyone for the likes! I ordered some sheets with the correct width so I hope to receive them soon. Small update. Been working on sanding down the stem and bulwarks near the bow to thin it down to allow the bollard timbers to fit correctly. Here is a pic of my first attempt of making a bollard timber. The top piece, the 1/64" strip, needs to be sanded down but I will do that tomorrow. I also beveled the outer and inner sides. Its a little hard to capture in a picture but I tried to match the curve that the planks will follow. I will try to start working on the matching pair tomorrow. Thanks! Jeff
-
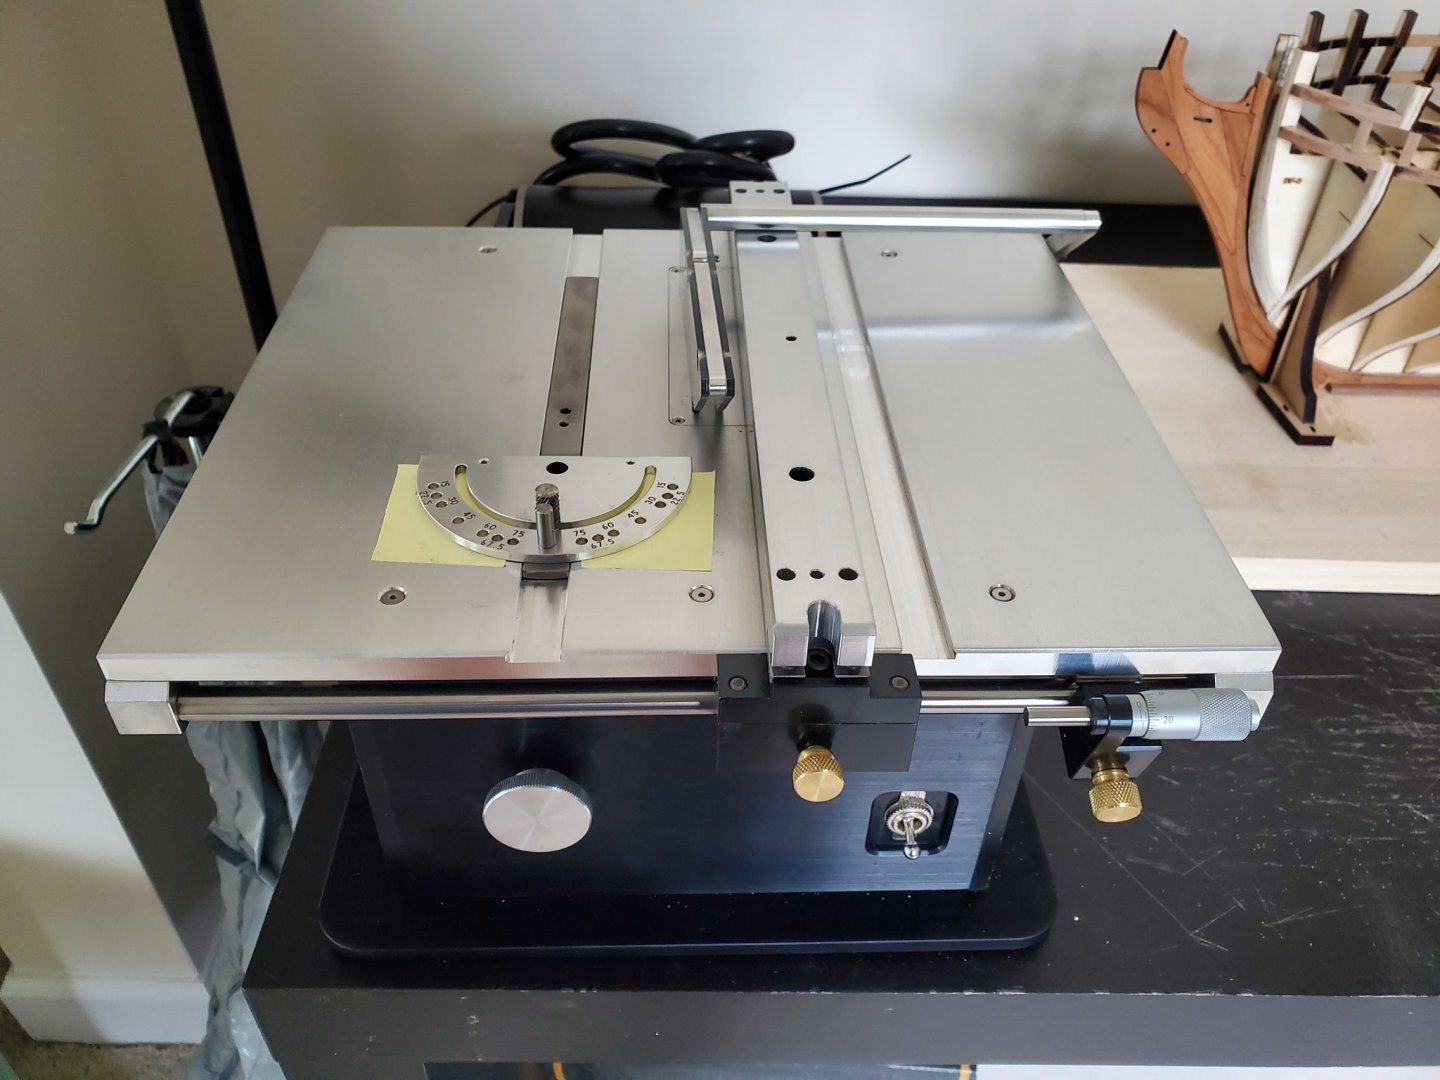
Thanks everyone for the likes!! Haha! It will take me quite a while to catch up to you Chuck! I have finished adding the strips of wood above the quarter deck along with the hance and forward hance pieces. Now onto the bollard timbers! It says to reduce the stem and bulwarks inboard so they are all 5/32". I marked what needed to be removed. Is this correct? I just shaded the inboard sections that need to be removed to thin it down to 5/32". What is the best way to do this? Put some adhesive sandpaper on some scratch wood strips and sand down manually? I'm going to read and re-read how to make the bollard timbers before starting that. Lastly, I received my new Byrnes table saw! I definitely won't be keeping it up here. I will move it somewhere else when I start using it. Correct me if I'm wrong, but to mill the wood I nead, I should get some wood sheets slightly thicker than what I need the strips to be. Then use a plainer to make the sheet the correct height. Then rip the strips from that? I will need to also get a plainer then!


-
Thanks Chuck! I am happy with the result! I finished the quarter gallery framing and sanded the outside smooth with the hull. I did have an uh-oh moment because one of the tops of bulckhead 28 was cracked near the gun port frame. I was actually not surprised because the top of frame 28 was super warped. So when I tried to cut off the part of bulkhead 28, this happened. I was actually glad it did that because that meant I could straighten up that part of the bulkhead using an extra bit of stop included with the chapter 1 package like so Not only is it straighter, but it released a lot of tension between the top of the bulkhead 28 and the small top of the gun port sill. (The top of the bulkhead was warped in 2 dimensions) This is a pic with that side completed And the other side When placing those frame pieces,l made sure that they laid down on the frames without pushing on them. It was mentioned to be careful not to change the stern frame angle. The last things to do for chapter 1 are to add the strip pieces to the tops of the quarter gallery framing, adding the hance pieces, and the bollard timbers! I am excited that I am close to completing chapter one! My new table saw for milling the strips for chapter 2 arrives tomorrow and so I am super excited about that! Thanks all! Jeff


-
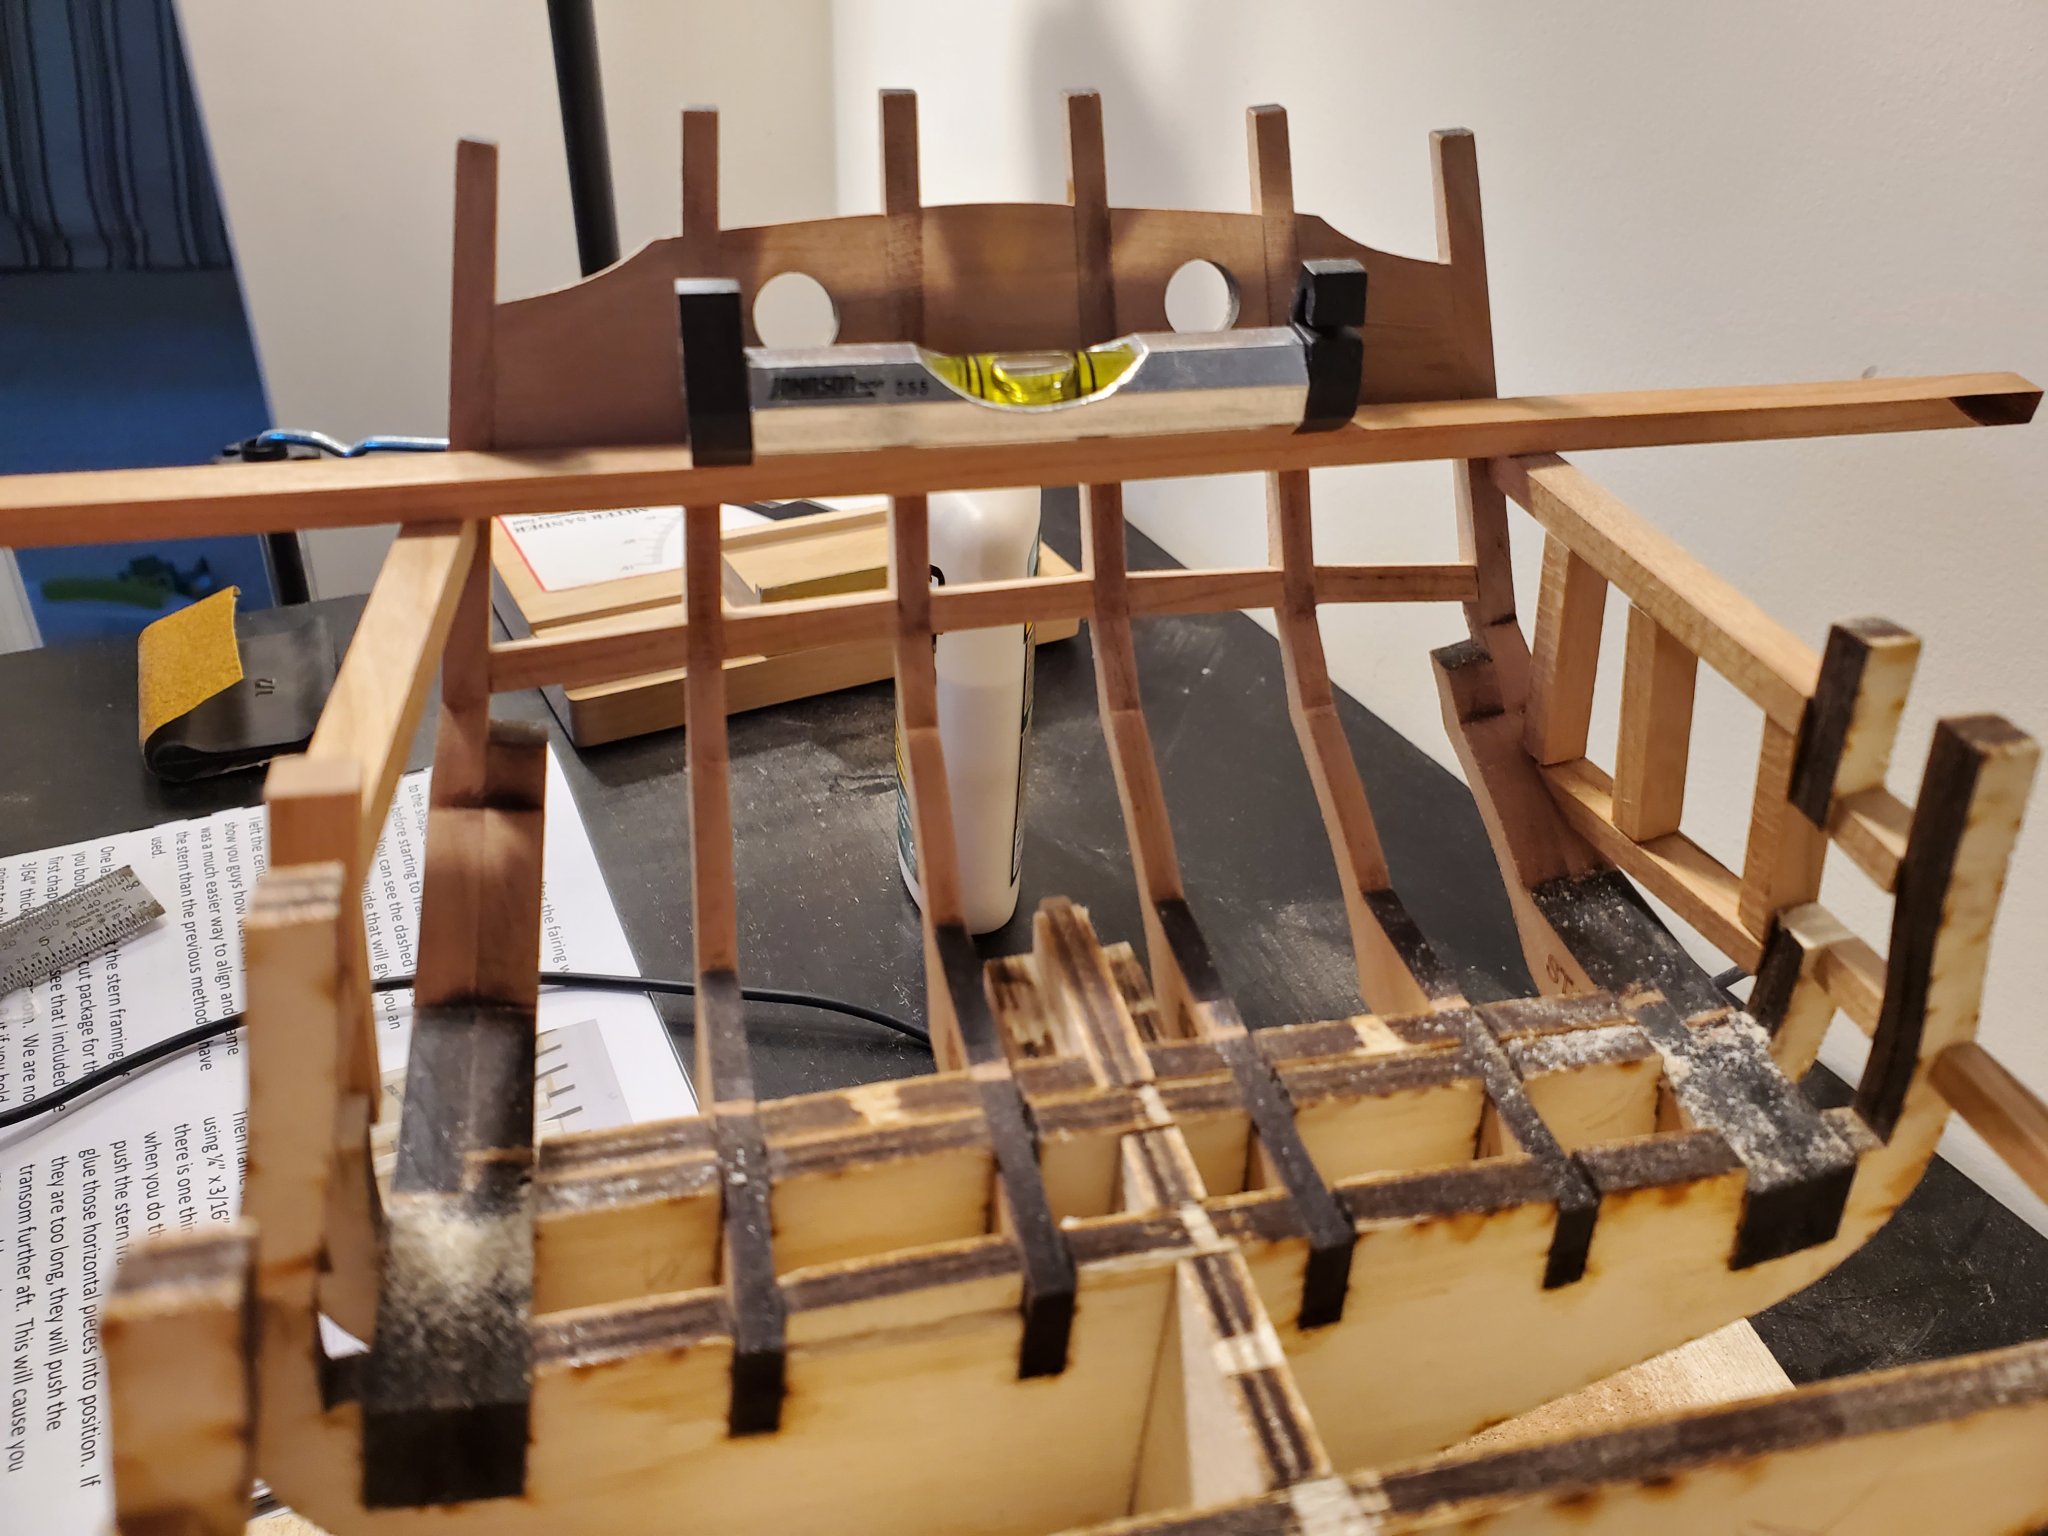
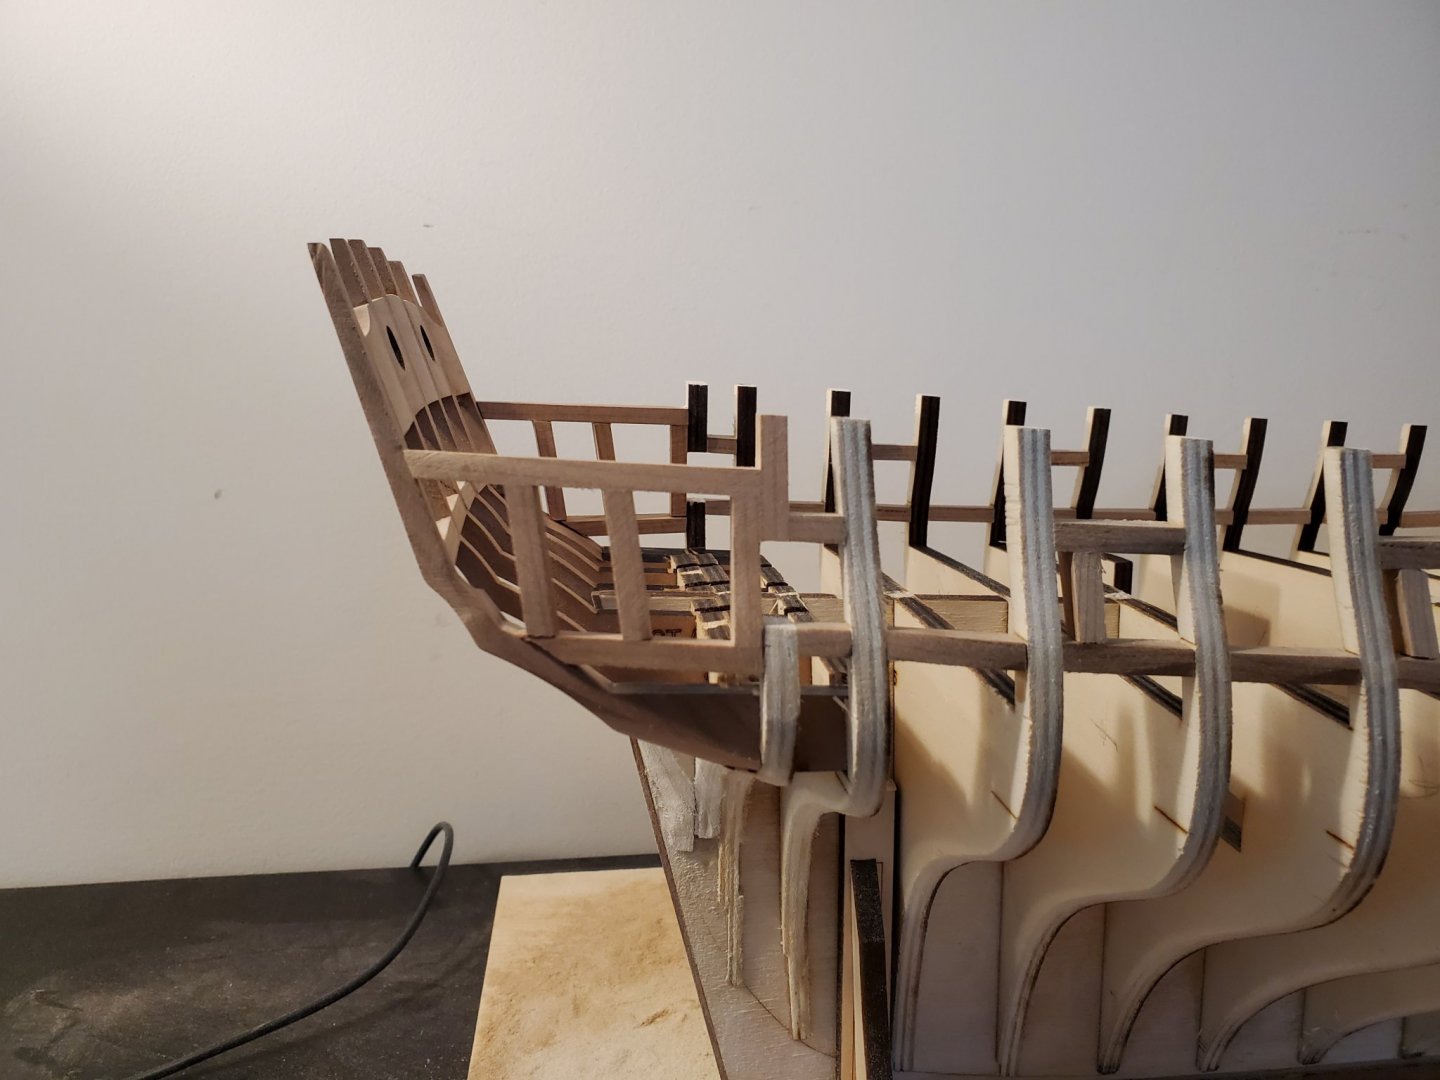
Thanks Ben! I will definitely be using this for the rest of the build! Thank you for sharing! Thanks again to Chuck for mailing me one set of stern frames. That was a life saver! I got them in position and here is how it looks: I will be doing some tweeking. But I think this placement is better than what it was before. I still need to finish gluing and sanding down the stern, but that will be saved for later this week. If anyone has comments on their layout, please feel free to let me know! Thanks everyone! Jeff
-
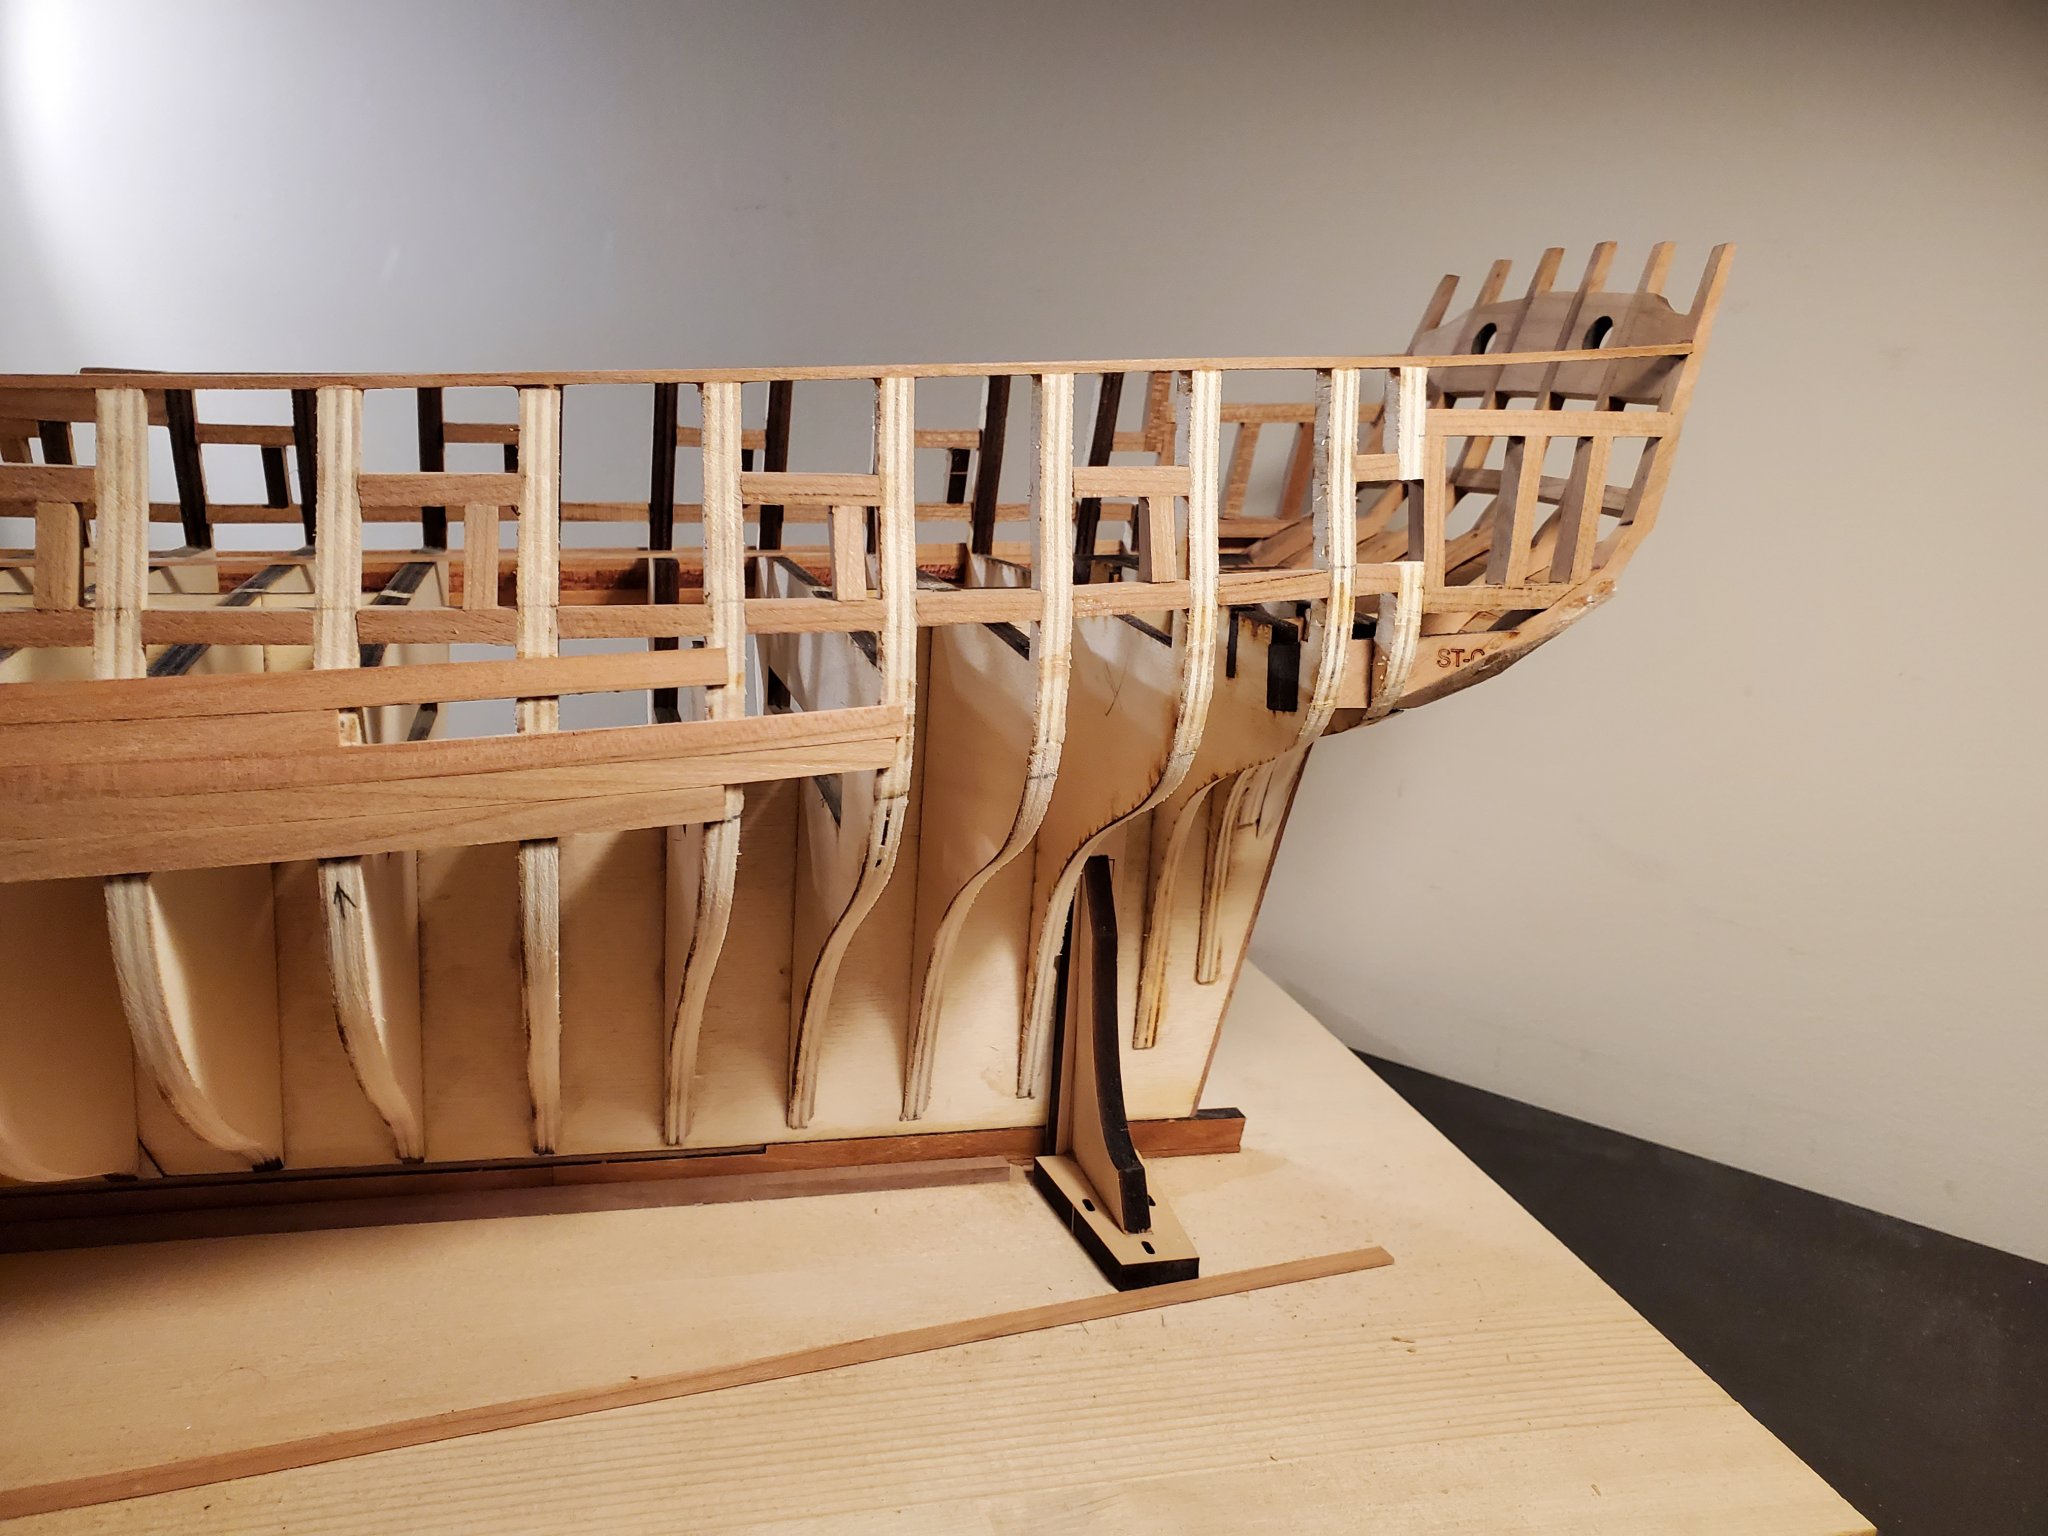
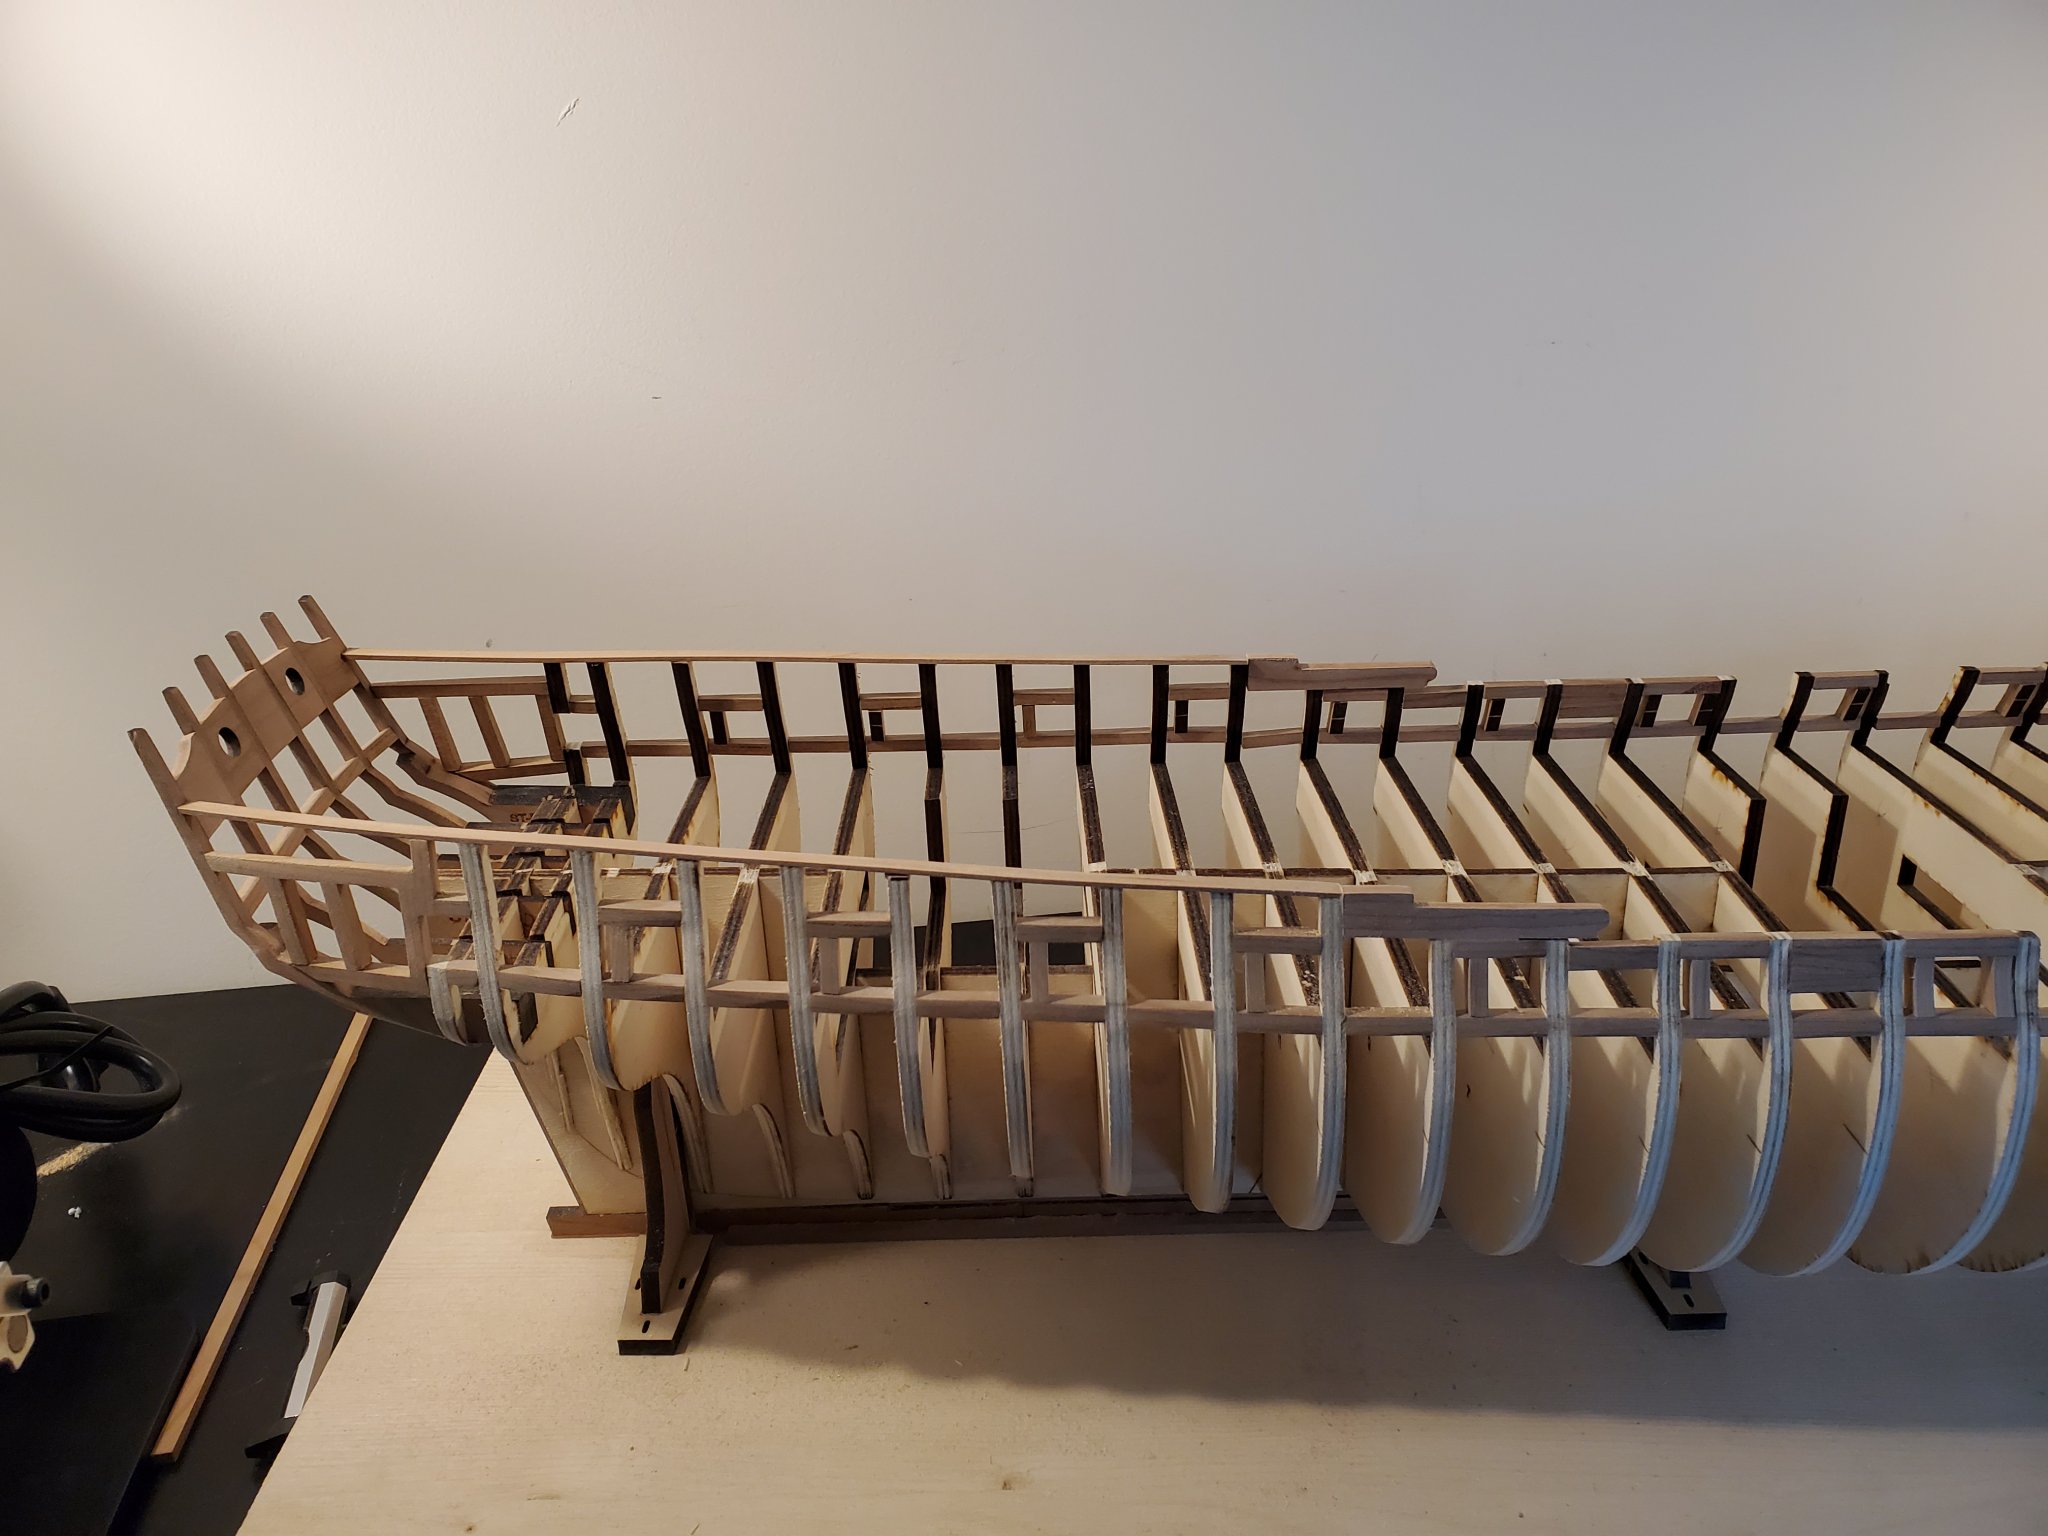
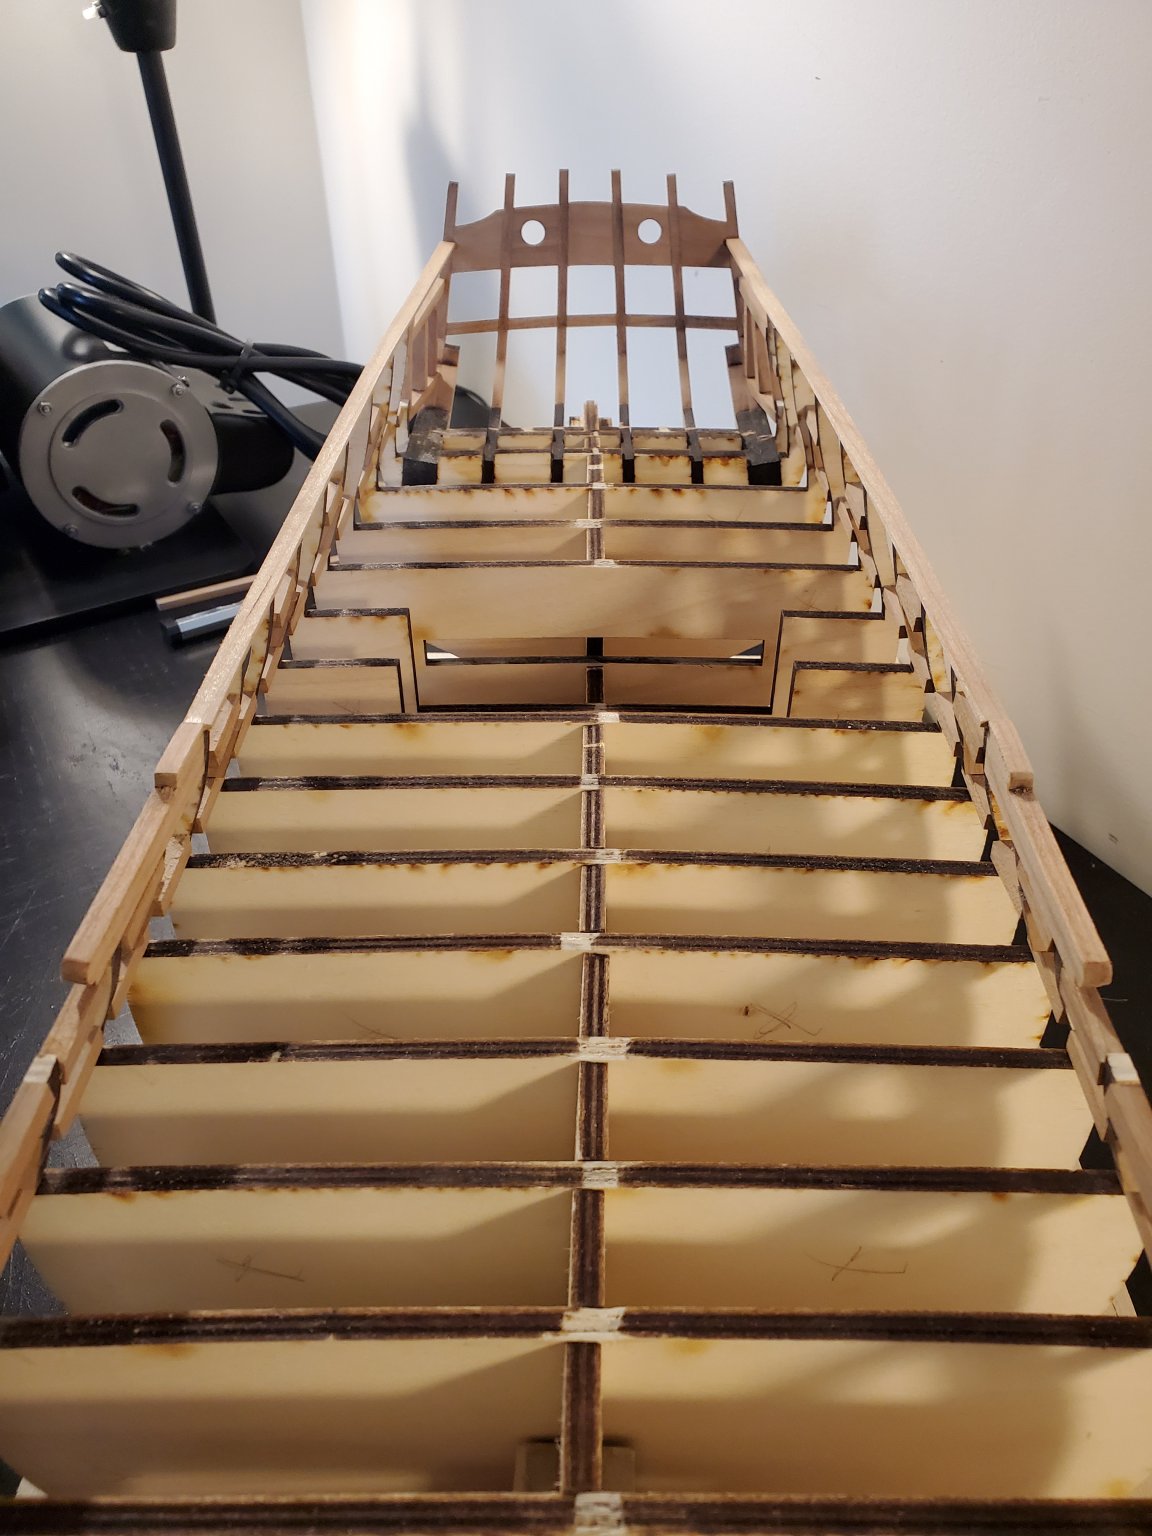
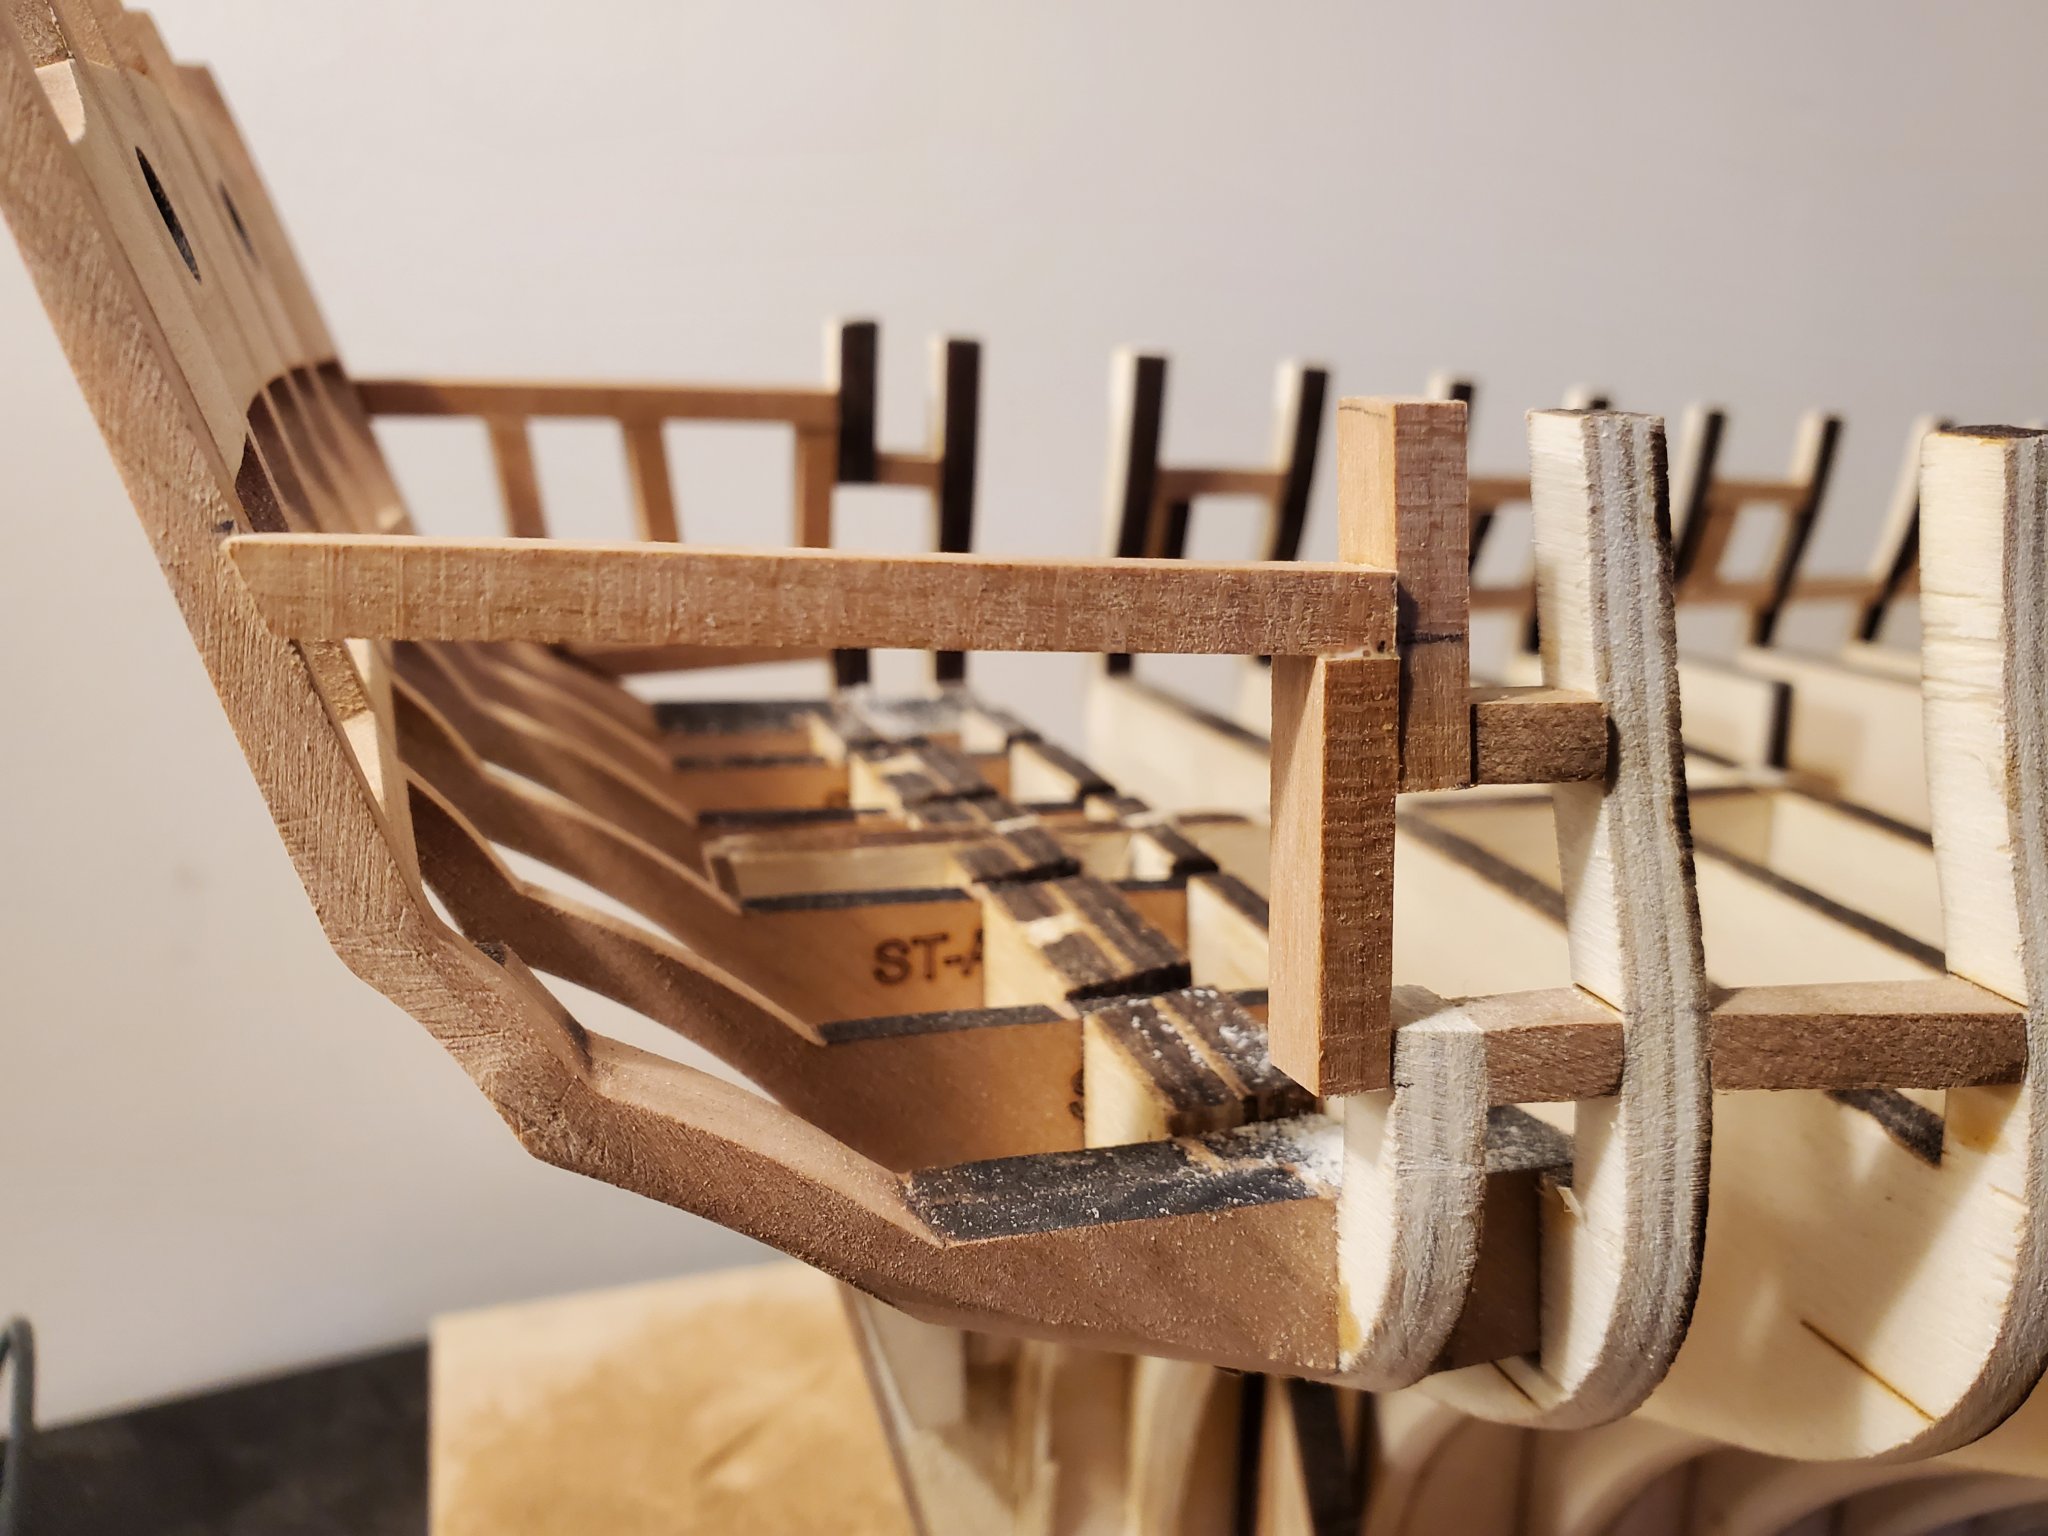
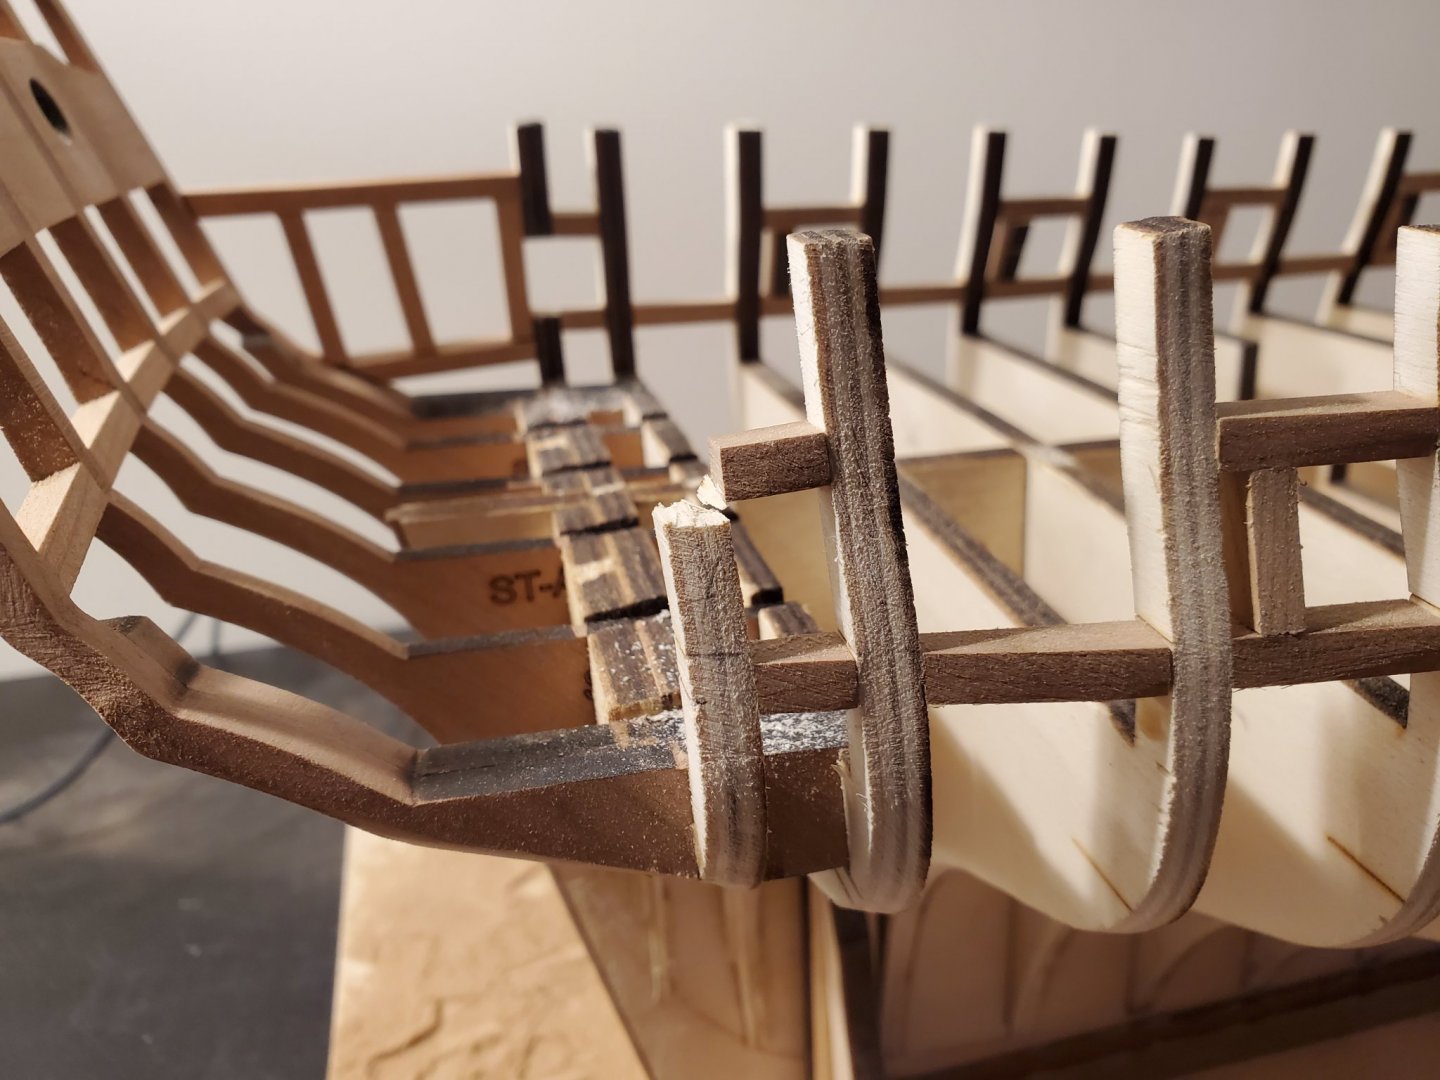
So I had to remove the stern frames ST-A and ST-B since all four of them were unusable after removing the window sill pieces. Luckily, the outer stern pieces look alright. So I haven't removed them for now. Removing these frame pieces was much easier than I thought. I took some rubbing alcohol and applied it using a straw to the joins to help disolve the glue. I then waited and was able to pry them off with Hobbie knife without widening the slots. I have to give a huge thank you to Chuck, who was able to send me a replacement set of laser cut stern frames! This was very generous of him and recieving them honestly made my week a lot better! I was able to glue on the new replacement stern frames and will be taking my sweet time making sure I place the sills in the correct spots. Here is a pic of where I am now. I will not be gluing anything until I am happy with the position of all the top window sill pieces. If anything seems off, please let me know so I can correct it! Jeff