HOLIDAY DONATION DRIVE - SUPPORT MSW - DO YOUR PART TO KEEP THIS GREAT FORUM GOING! (Only 69 donations so far out of 49,000 members - Can we at least get 100? C'mon guys!)
×

Zarkon
-
Posts
295 -
Joined
-
Last visited
Content Type
Profiles
Forums
Gallery
Events
Everything posted by Zarkon
-
This will be a very fun build! I'll pull up a seat! I hope there is room in the front row..
-
Hmm.. I can't edit out that last pic. It keeps putting it back in. Oh well!
-
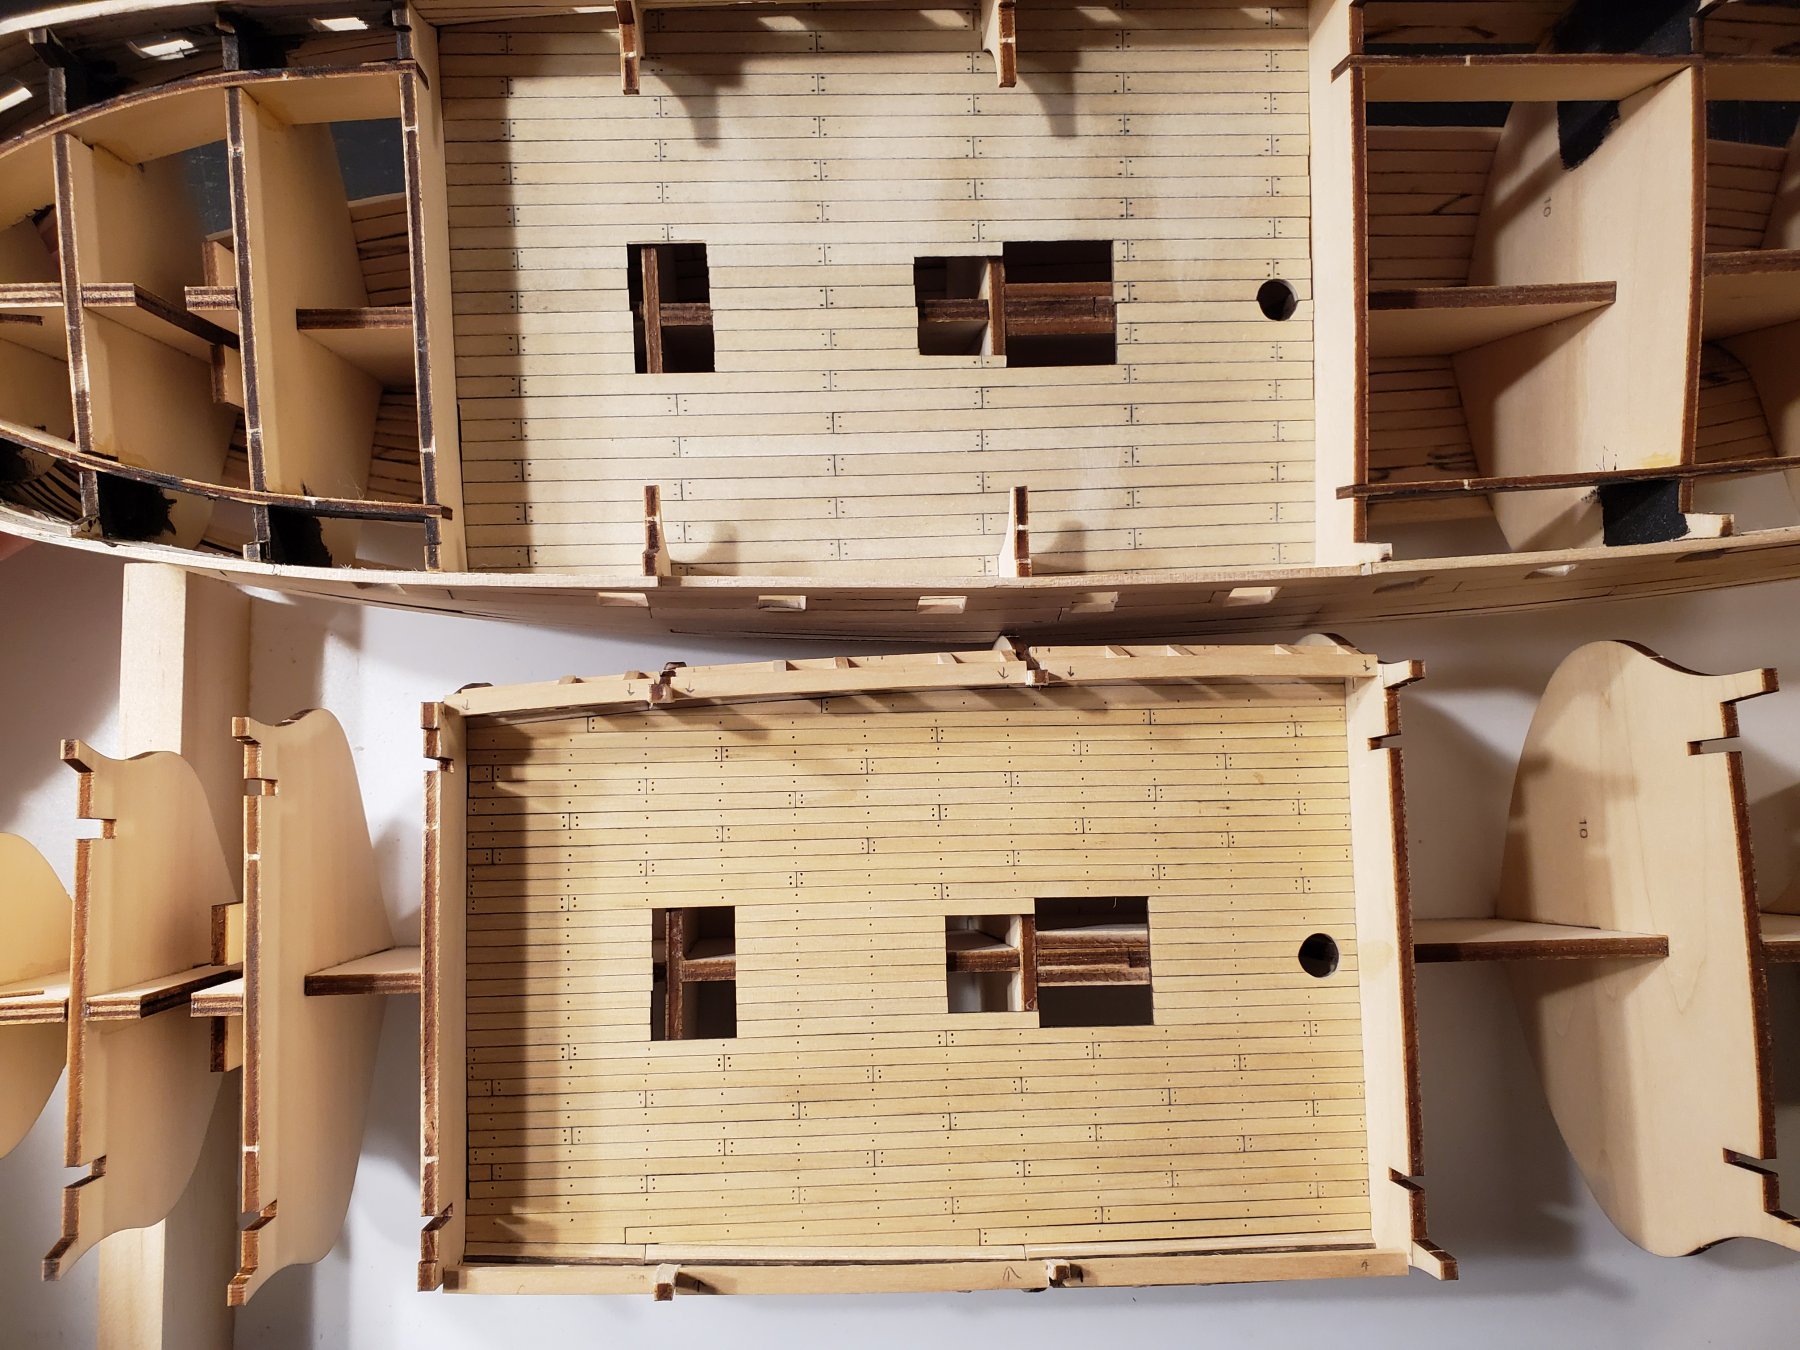
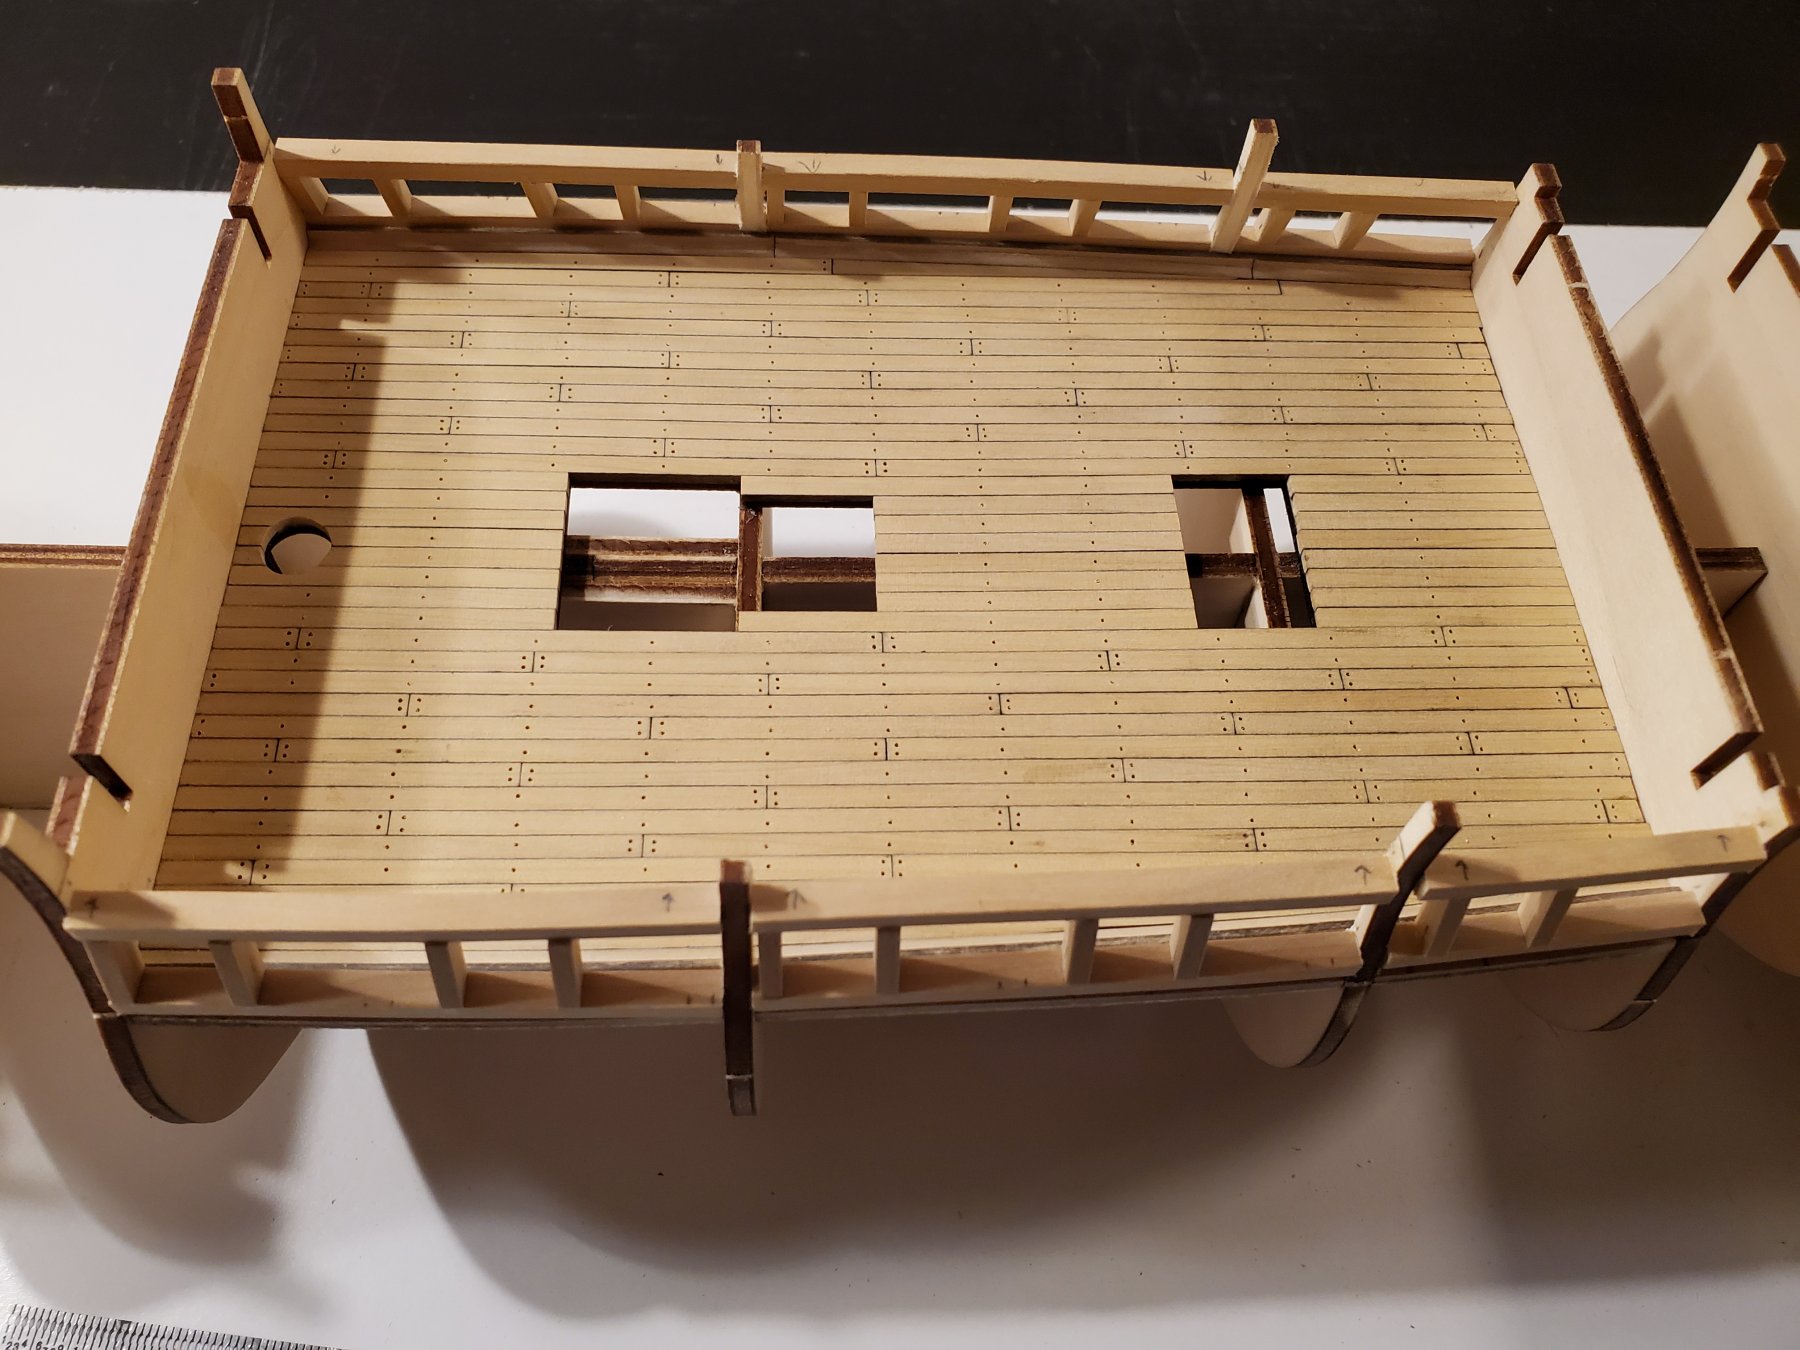
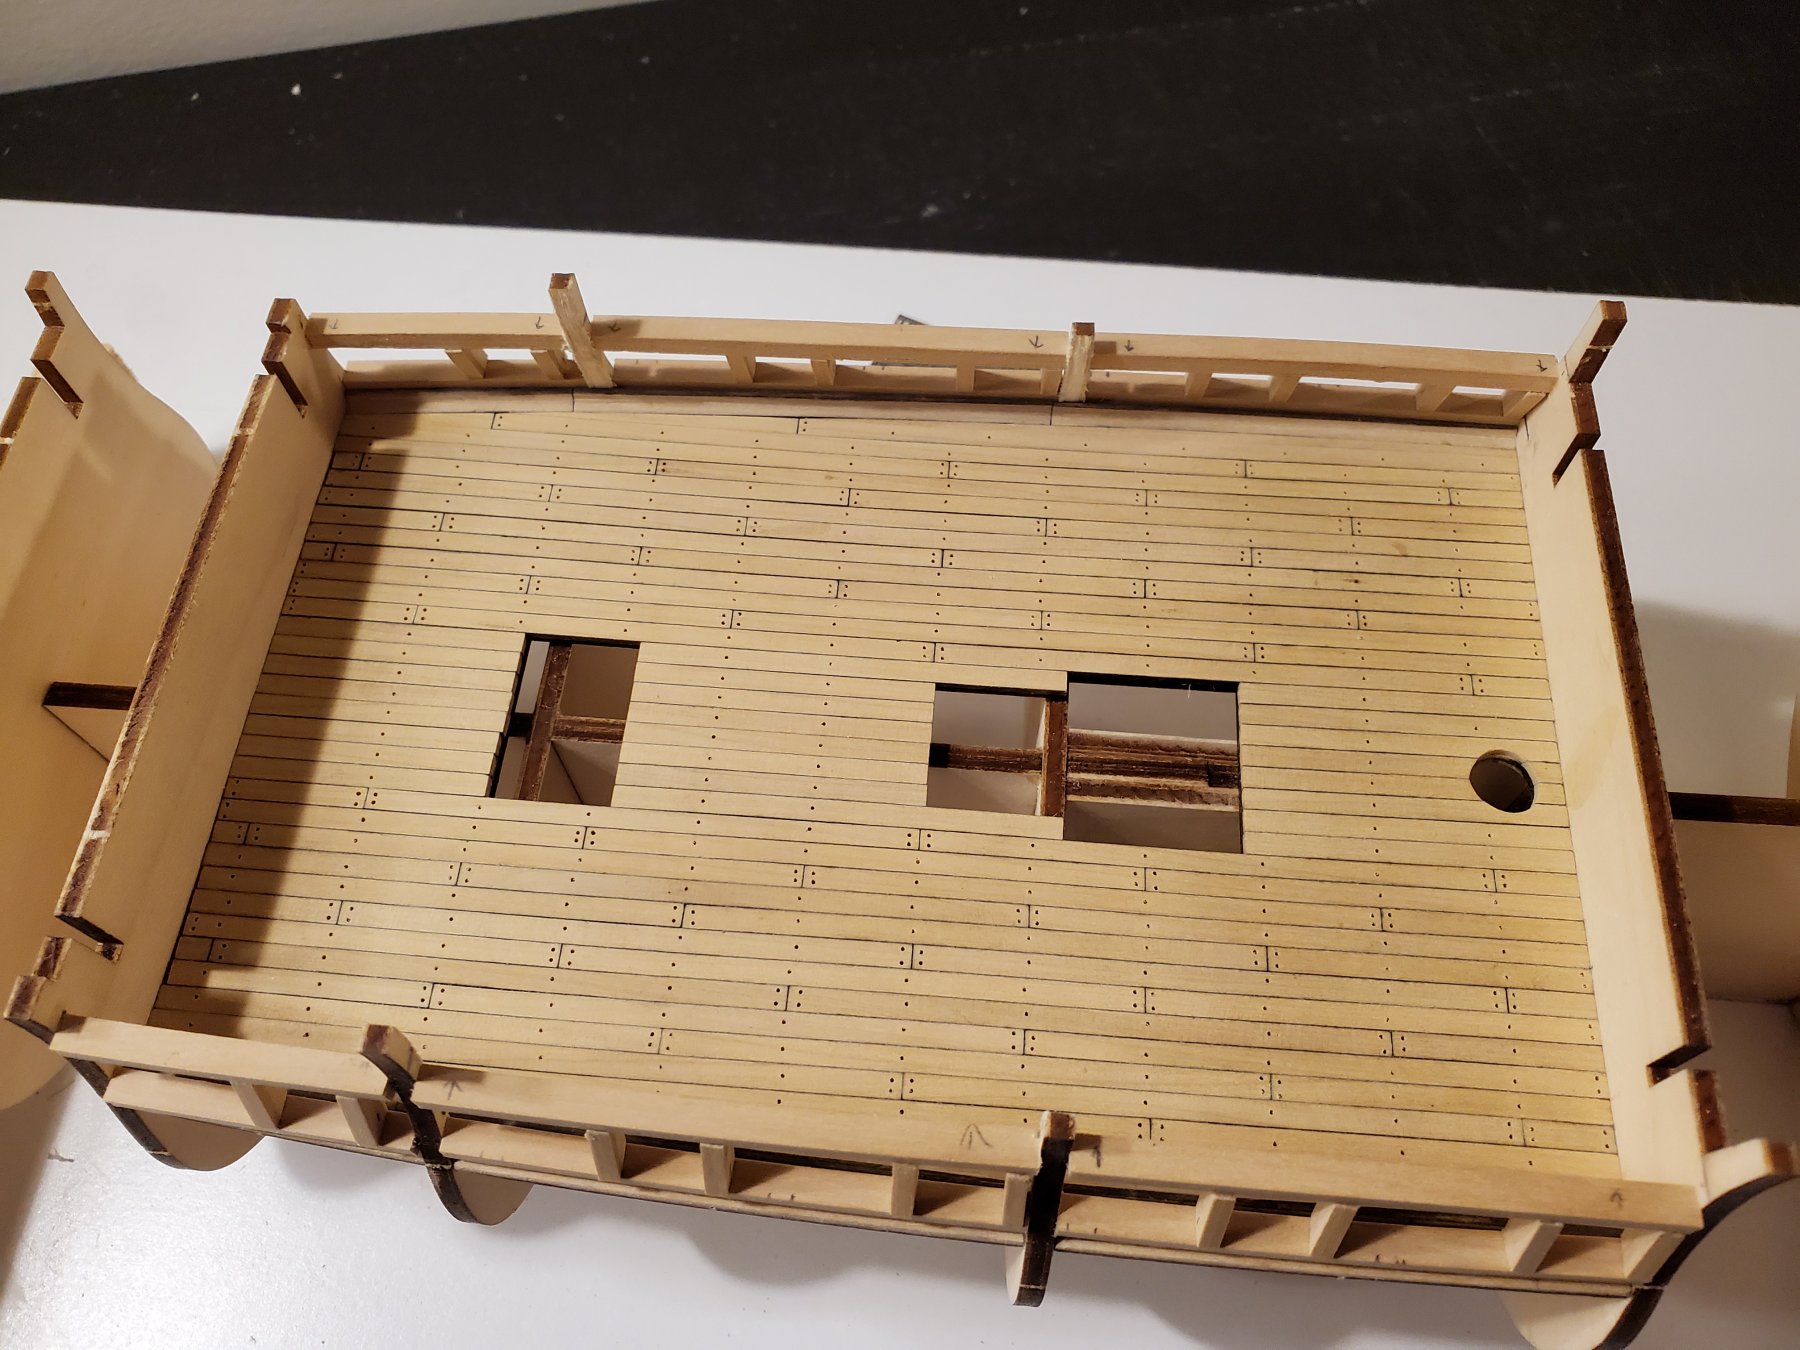
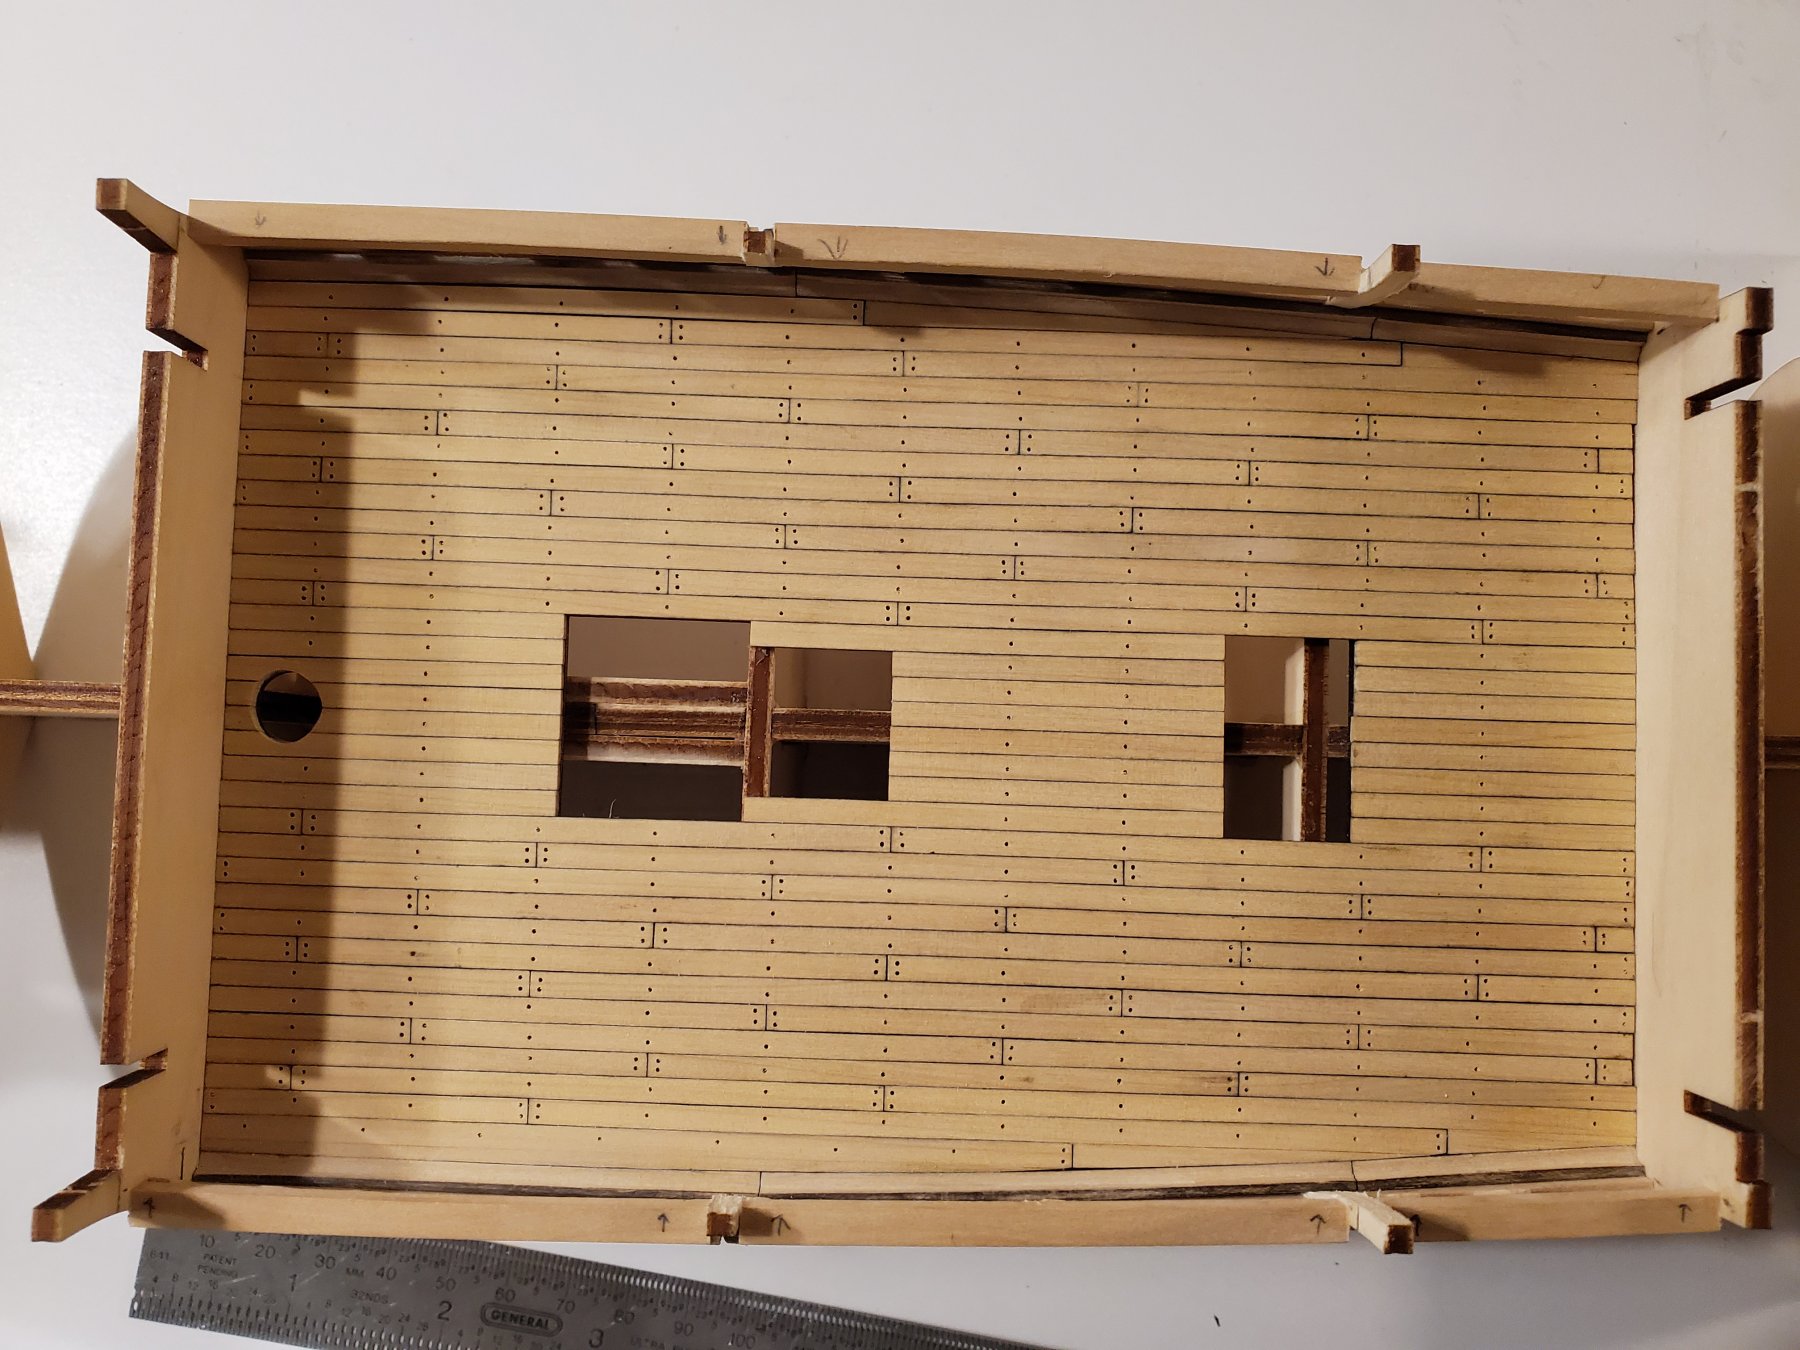
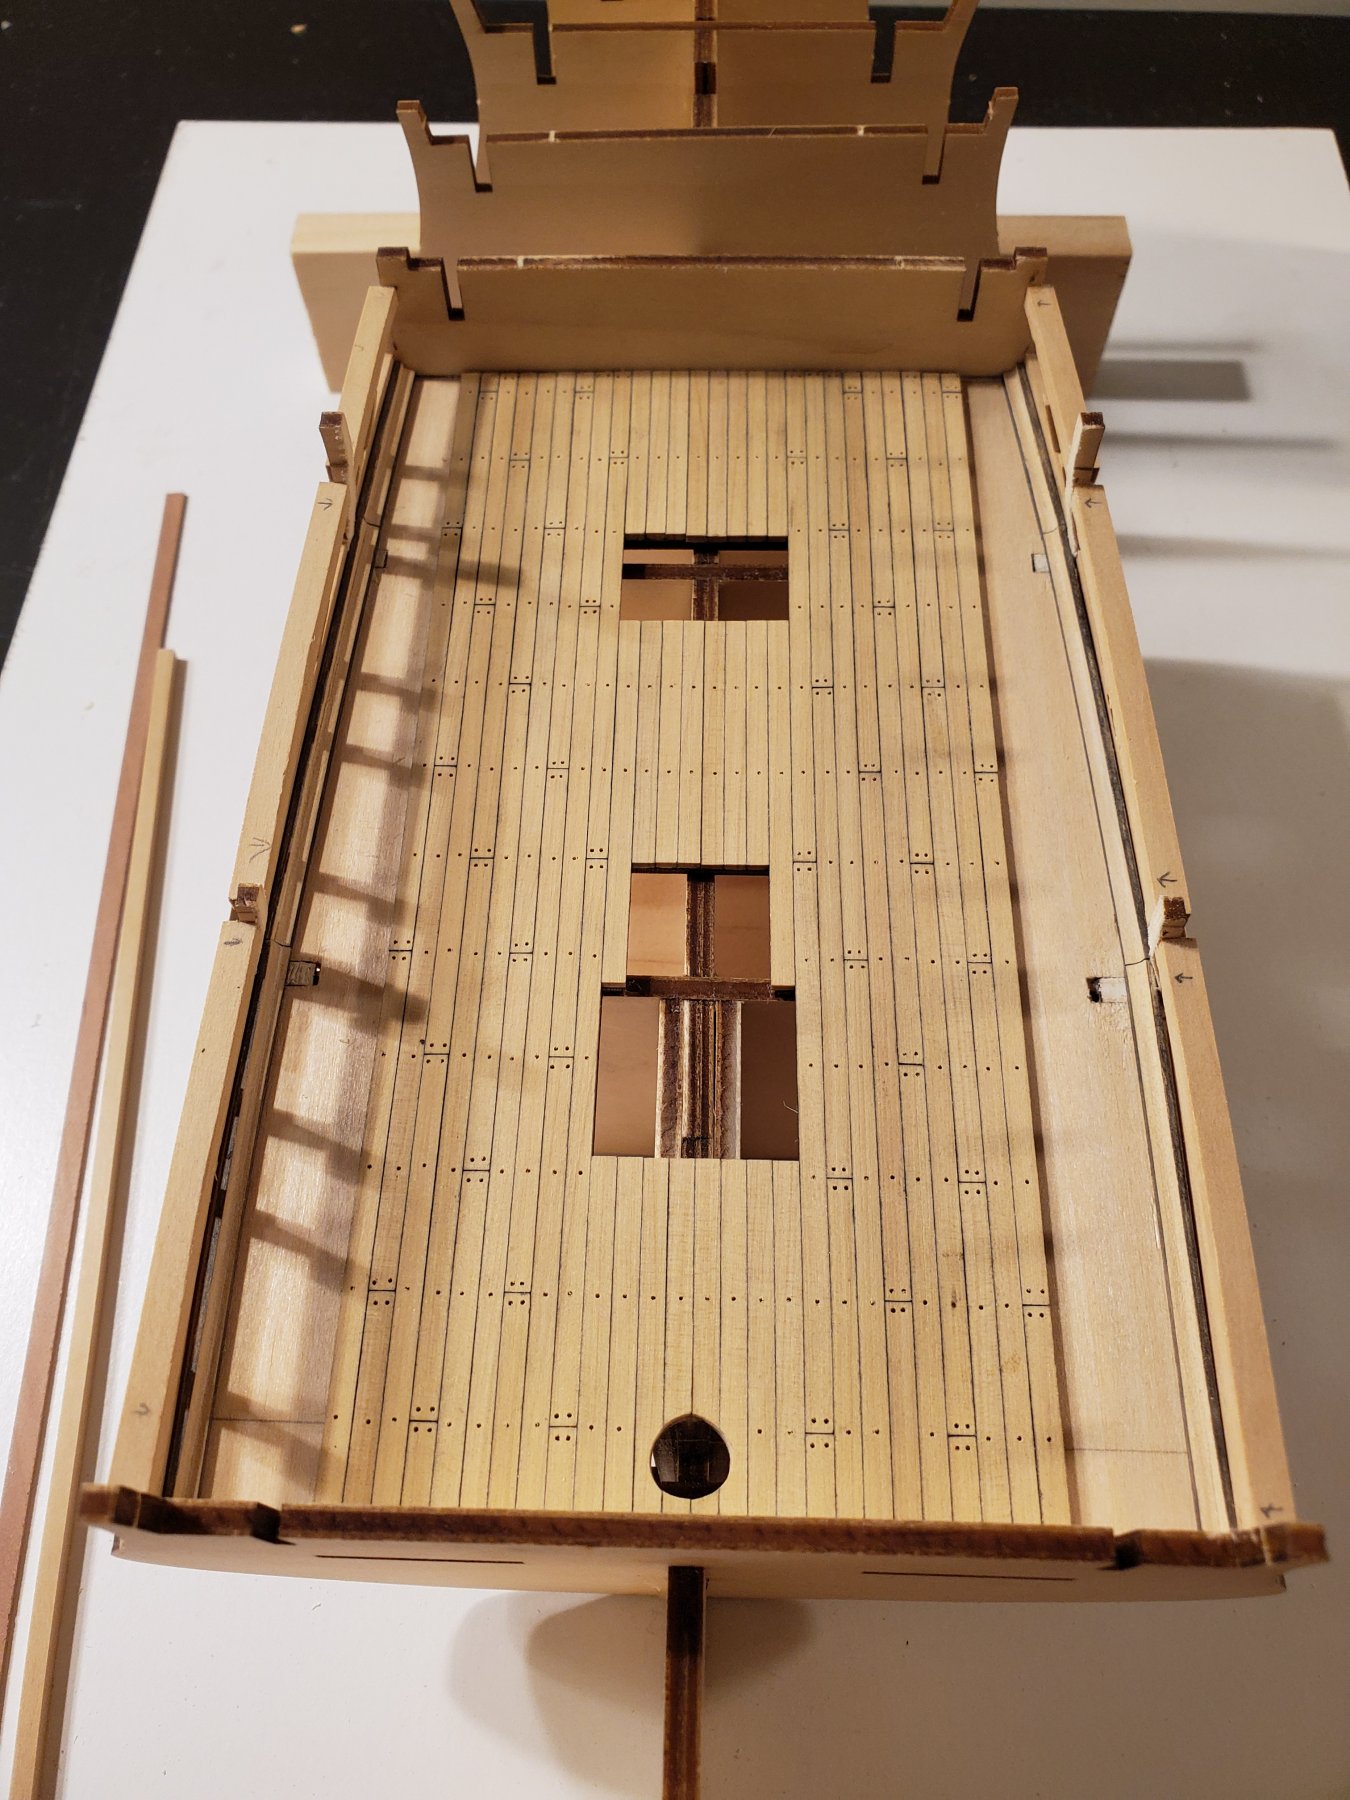
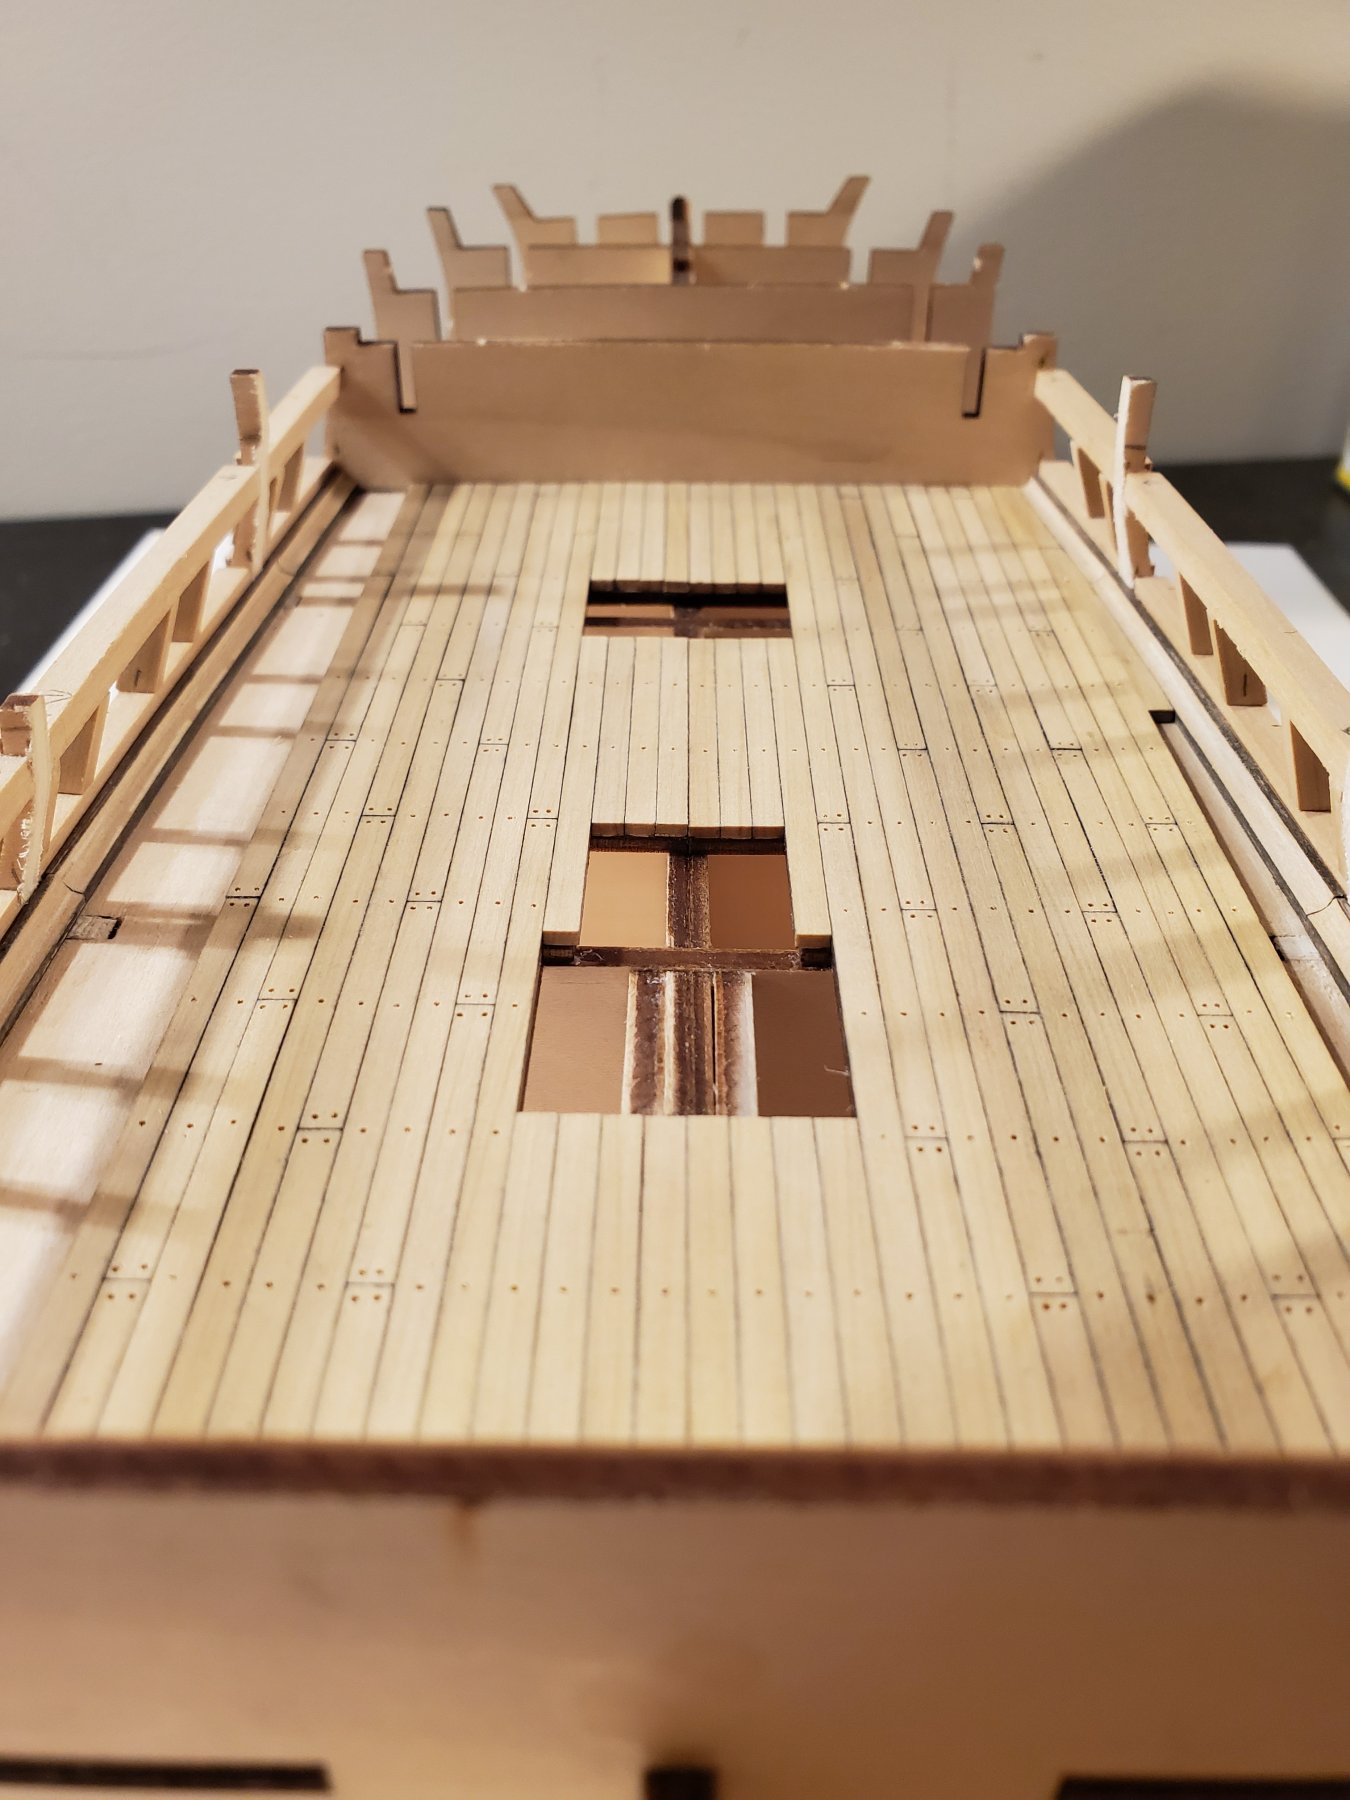
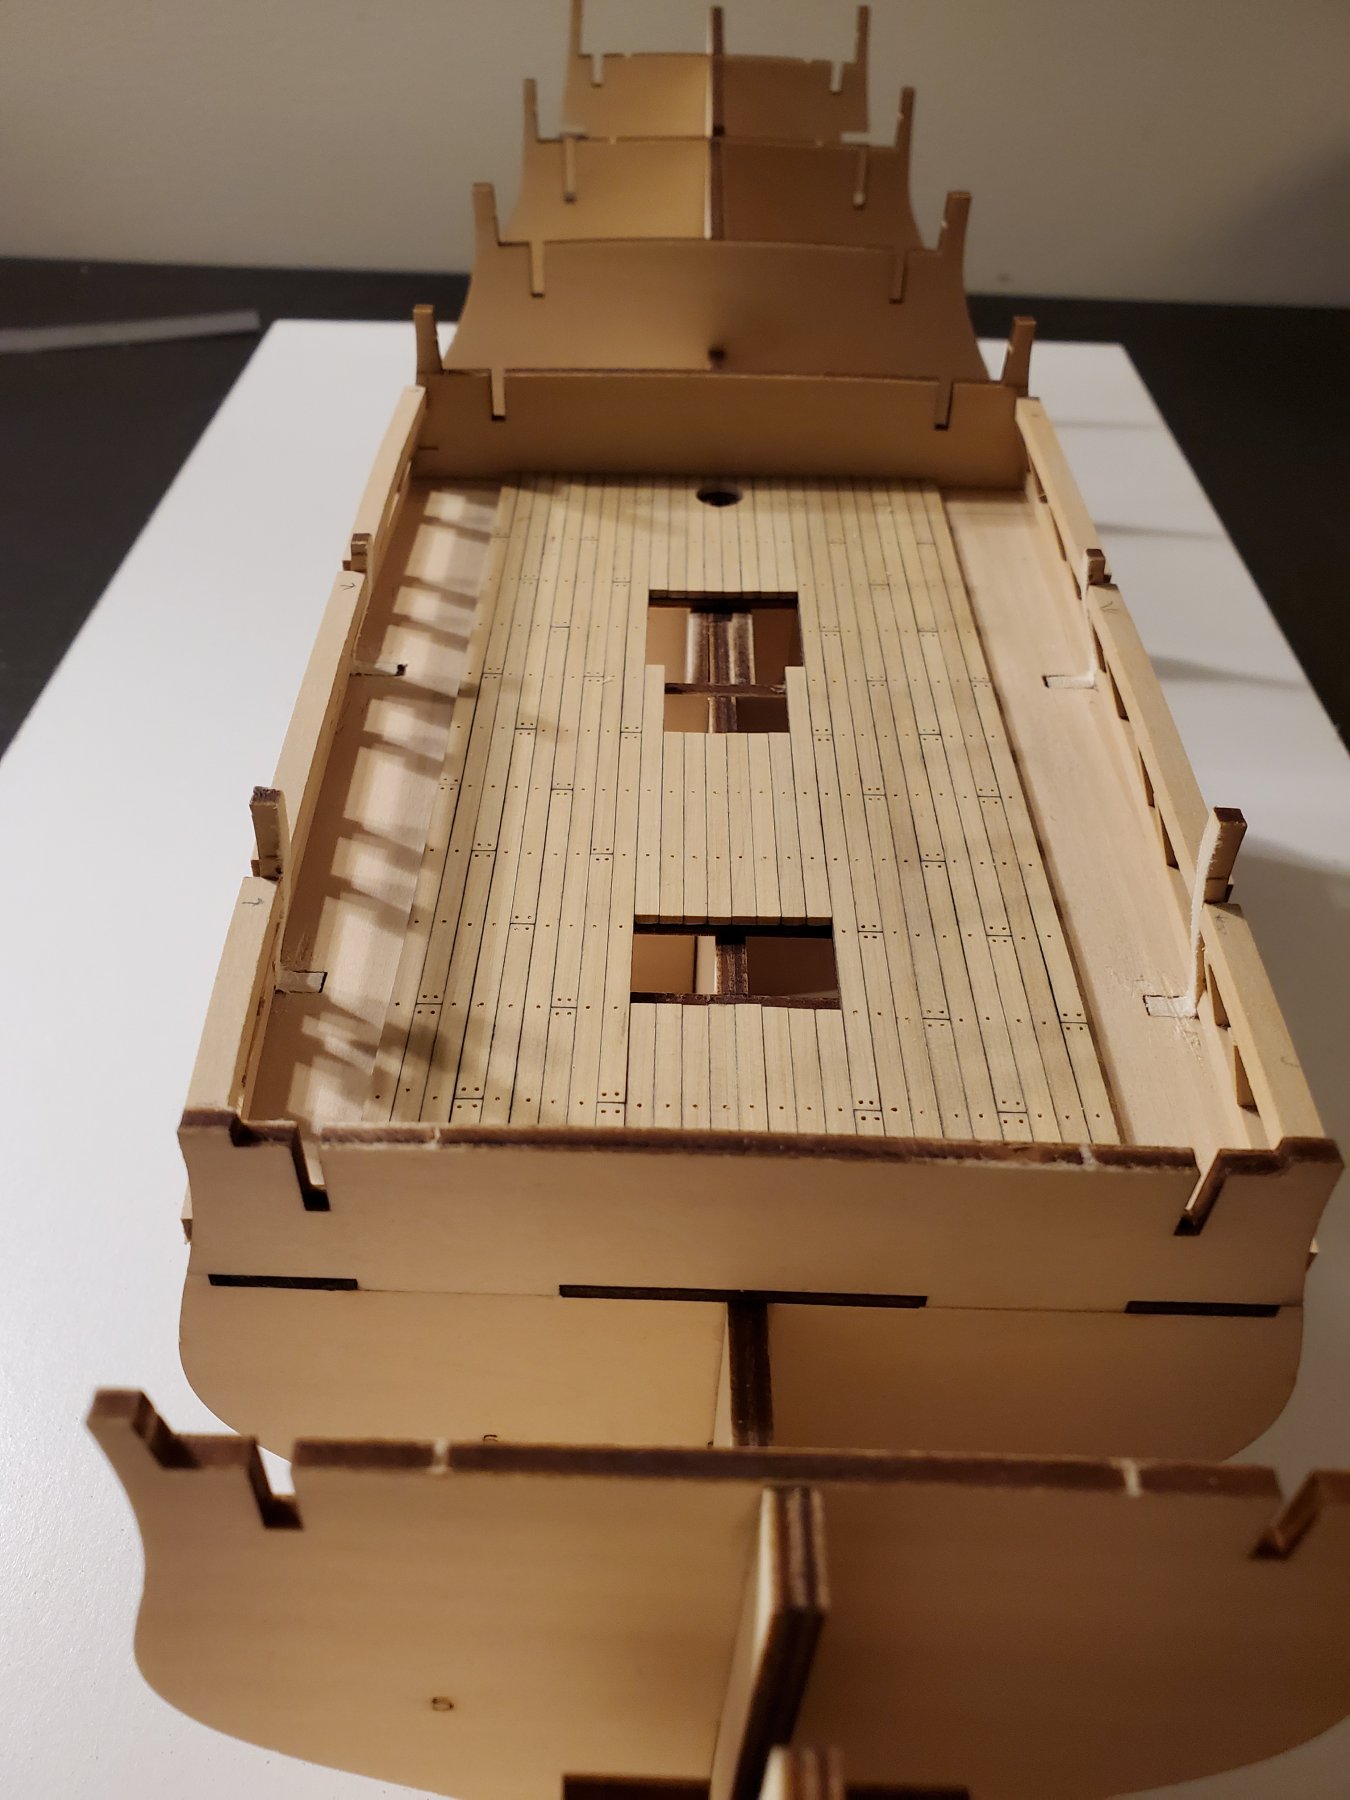
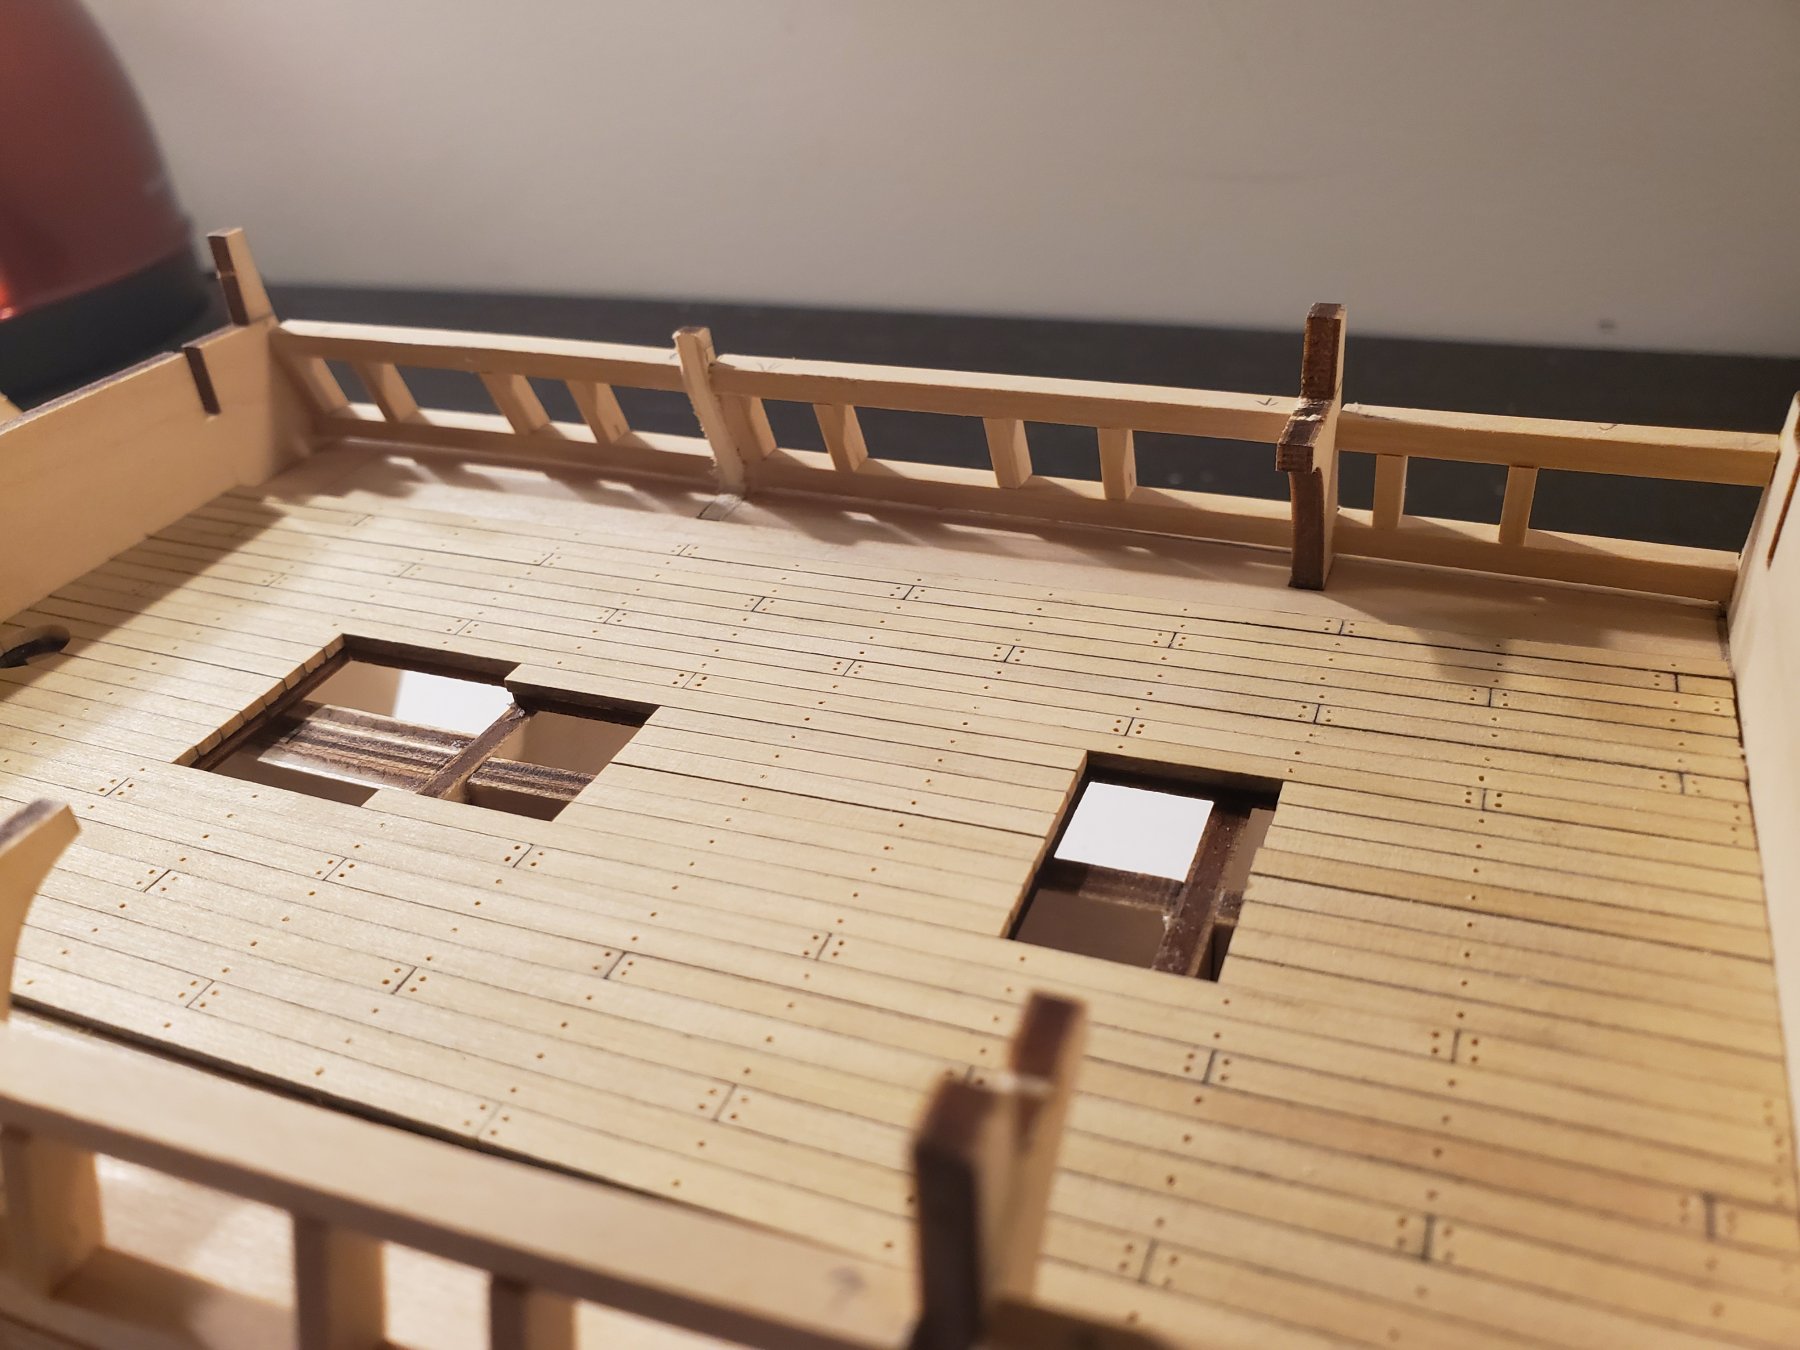
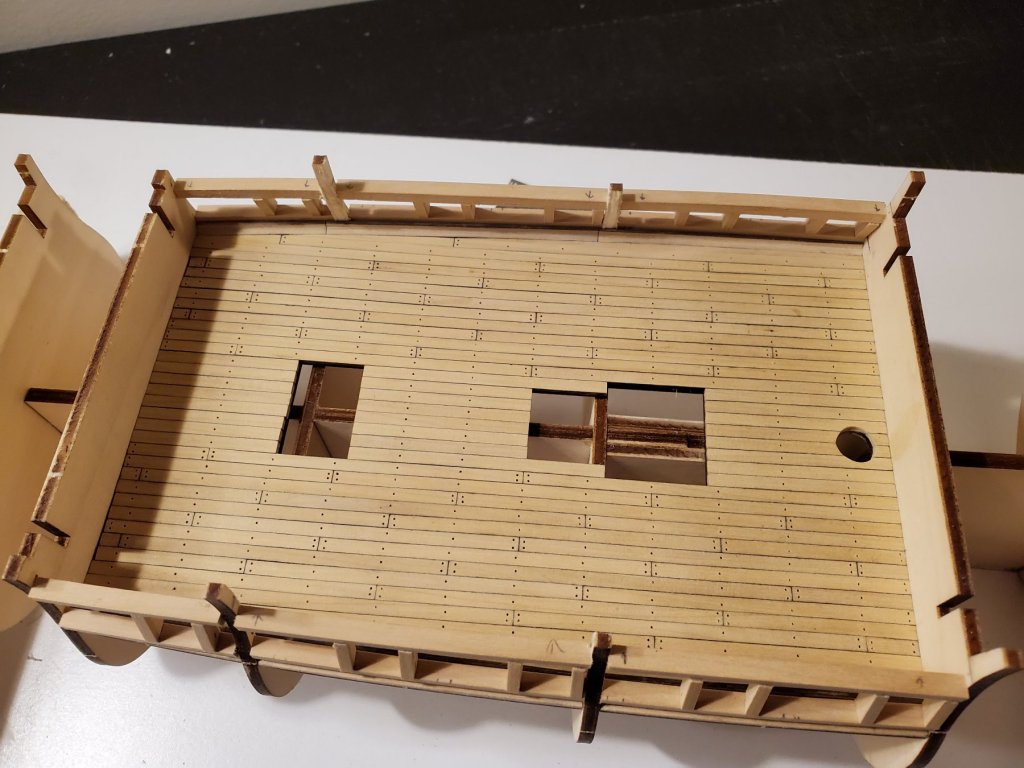
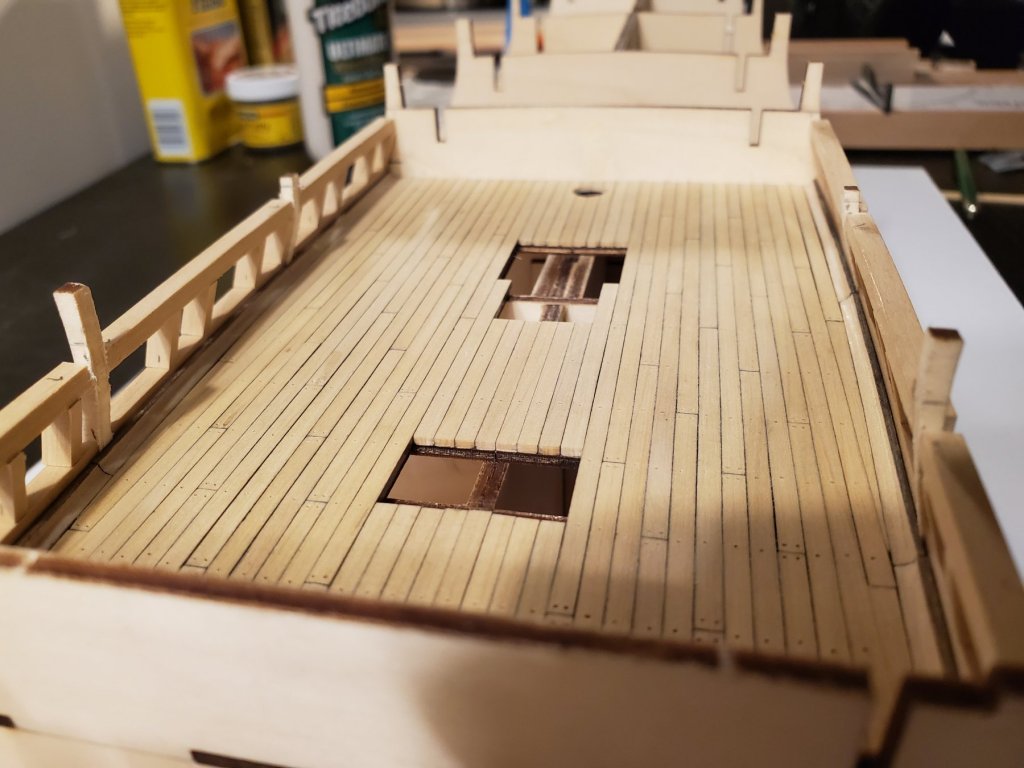
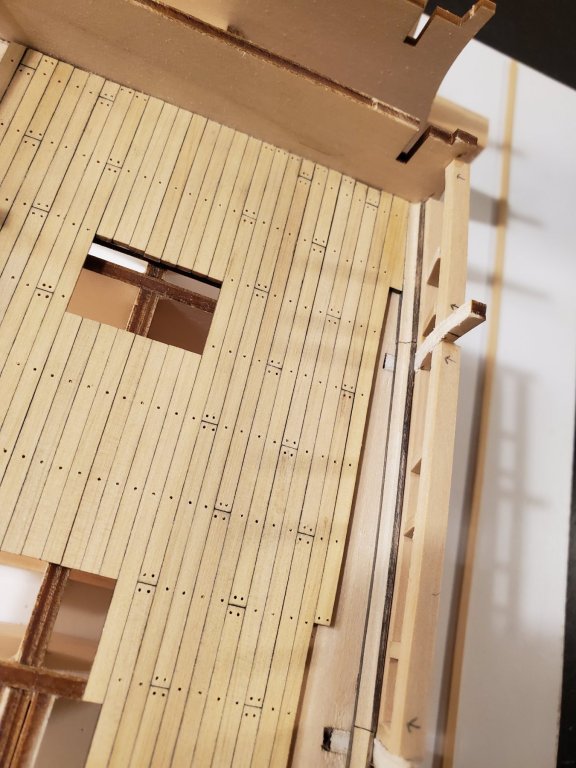
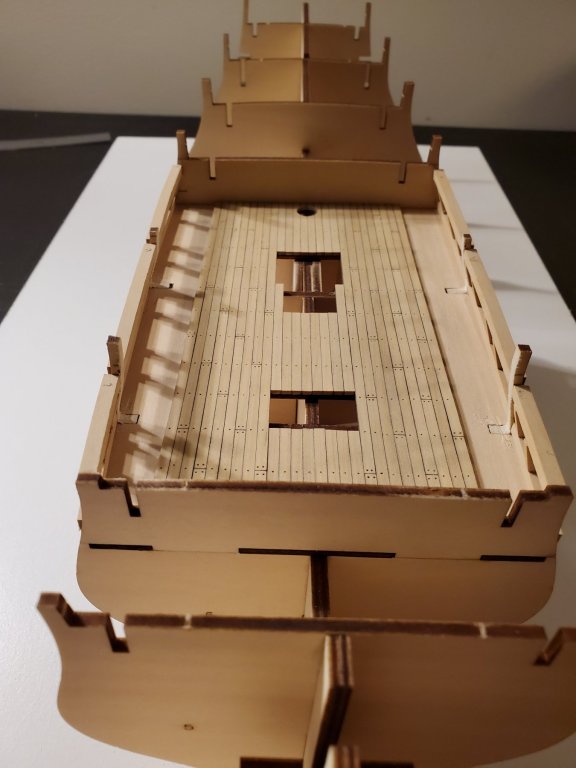
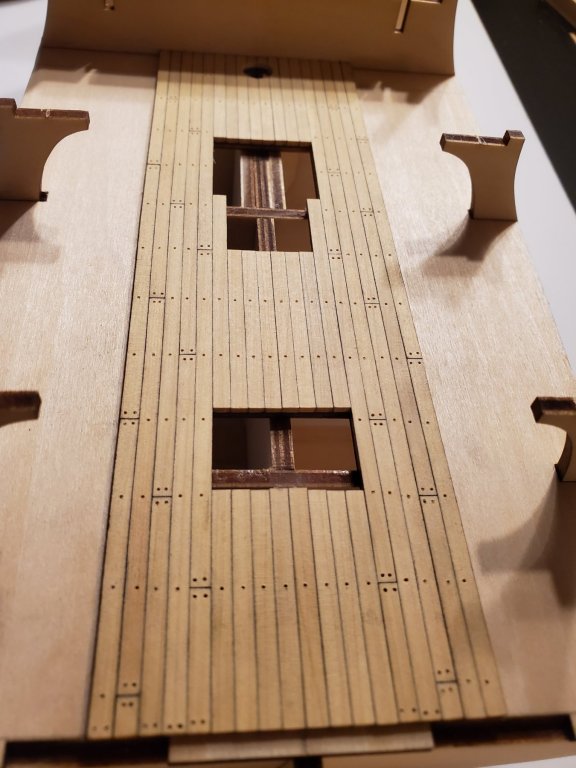
I finally finished placing the planks on the second deck!!!! Whew!!! That took quite a while but I am happy with it. The following are pictures of the second deck without the treenials and without any sanding yet. The last pic compares my first attempt of the second deck with what I just finished. You might have to zoom in on the comparison photo to really see the difference. I personally like my current builder's second deck better! Thanks! Jeff


-
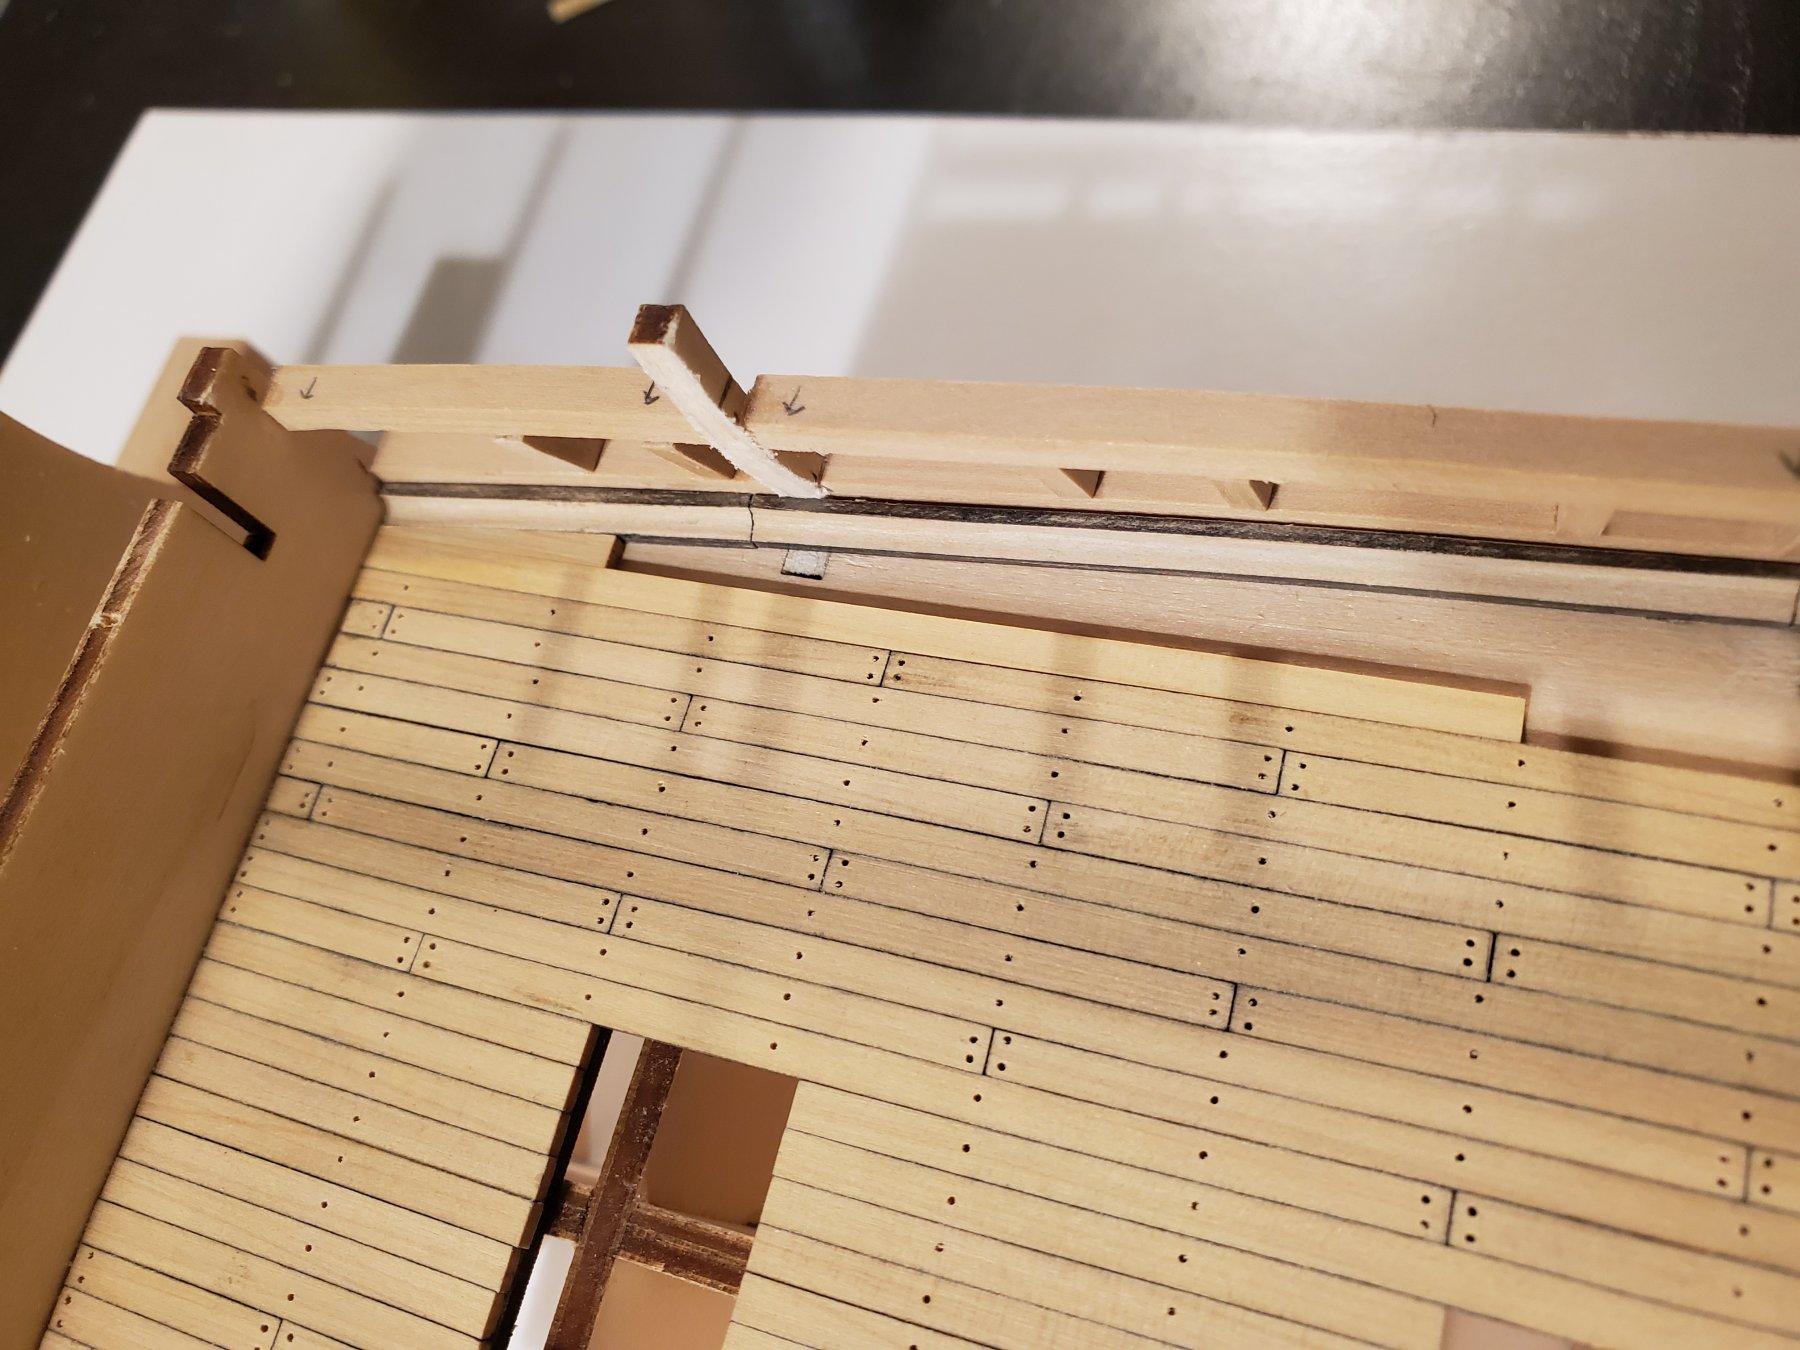
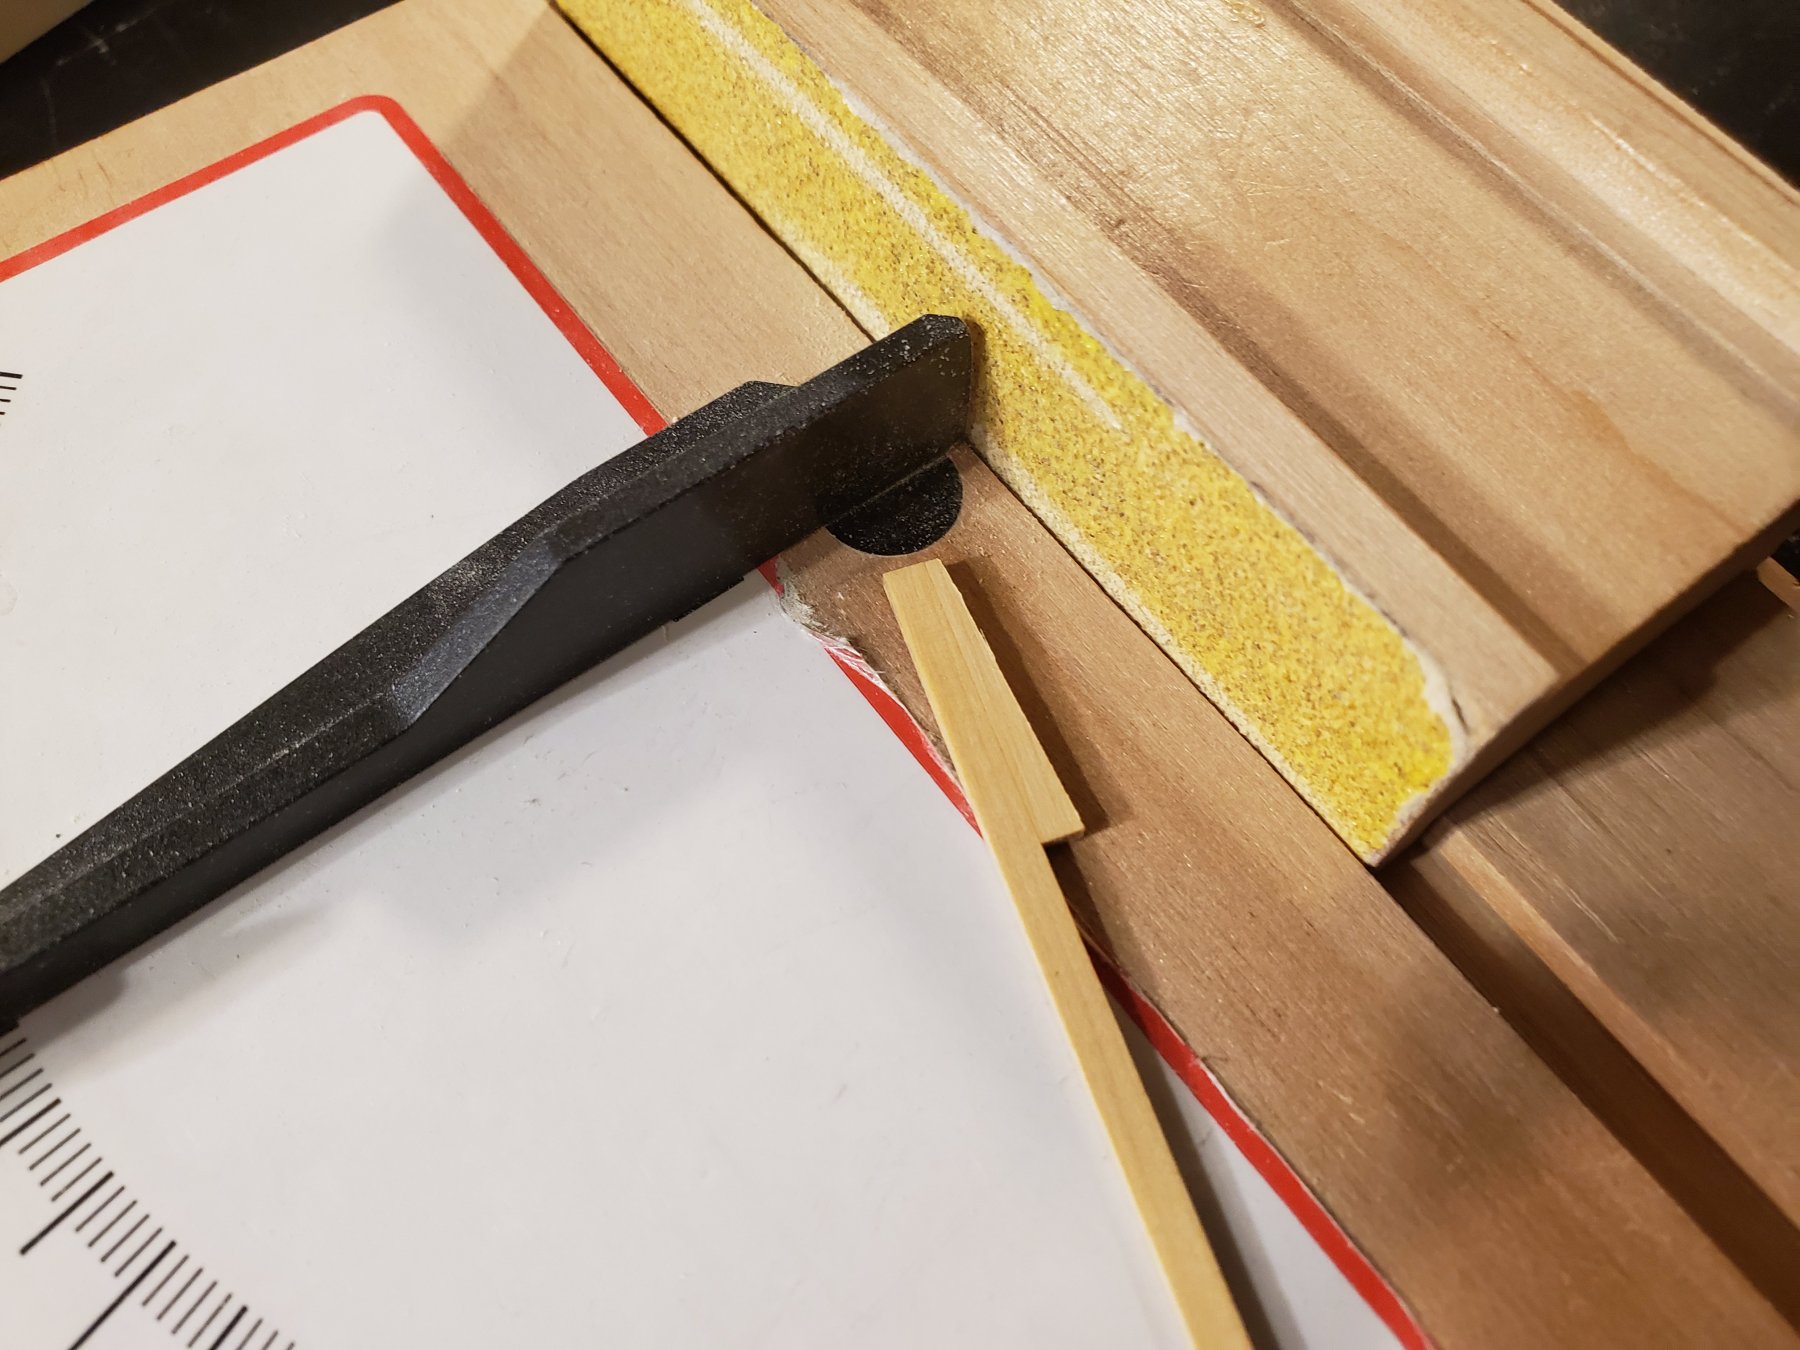
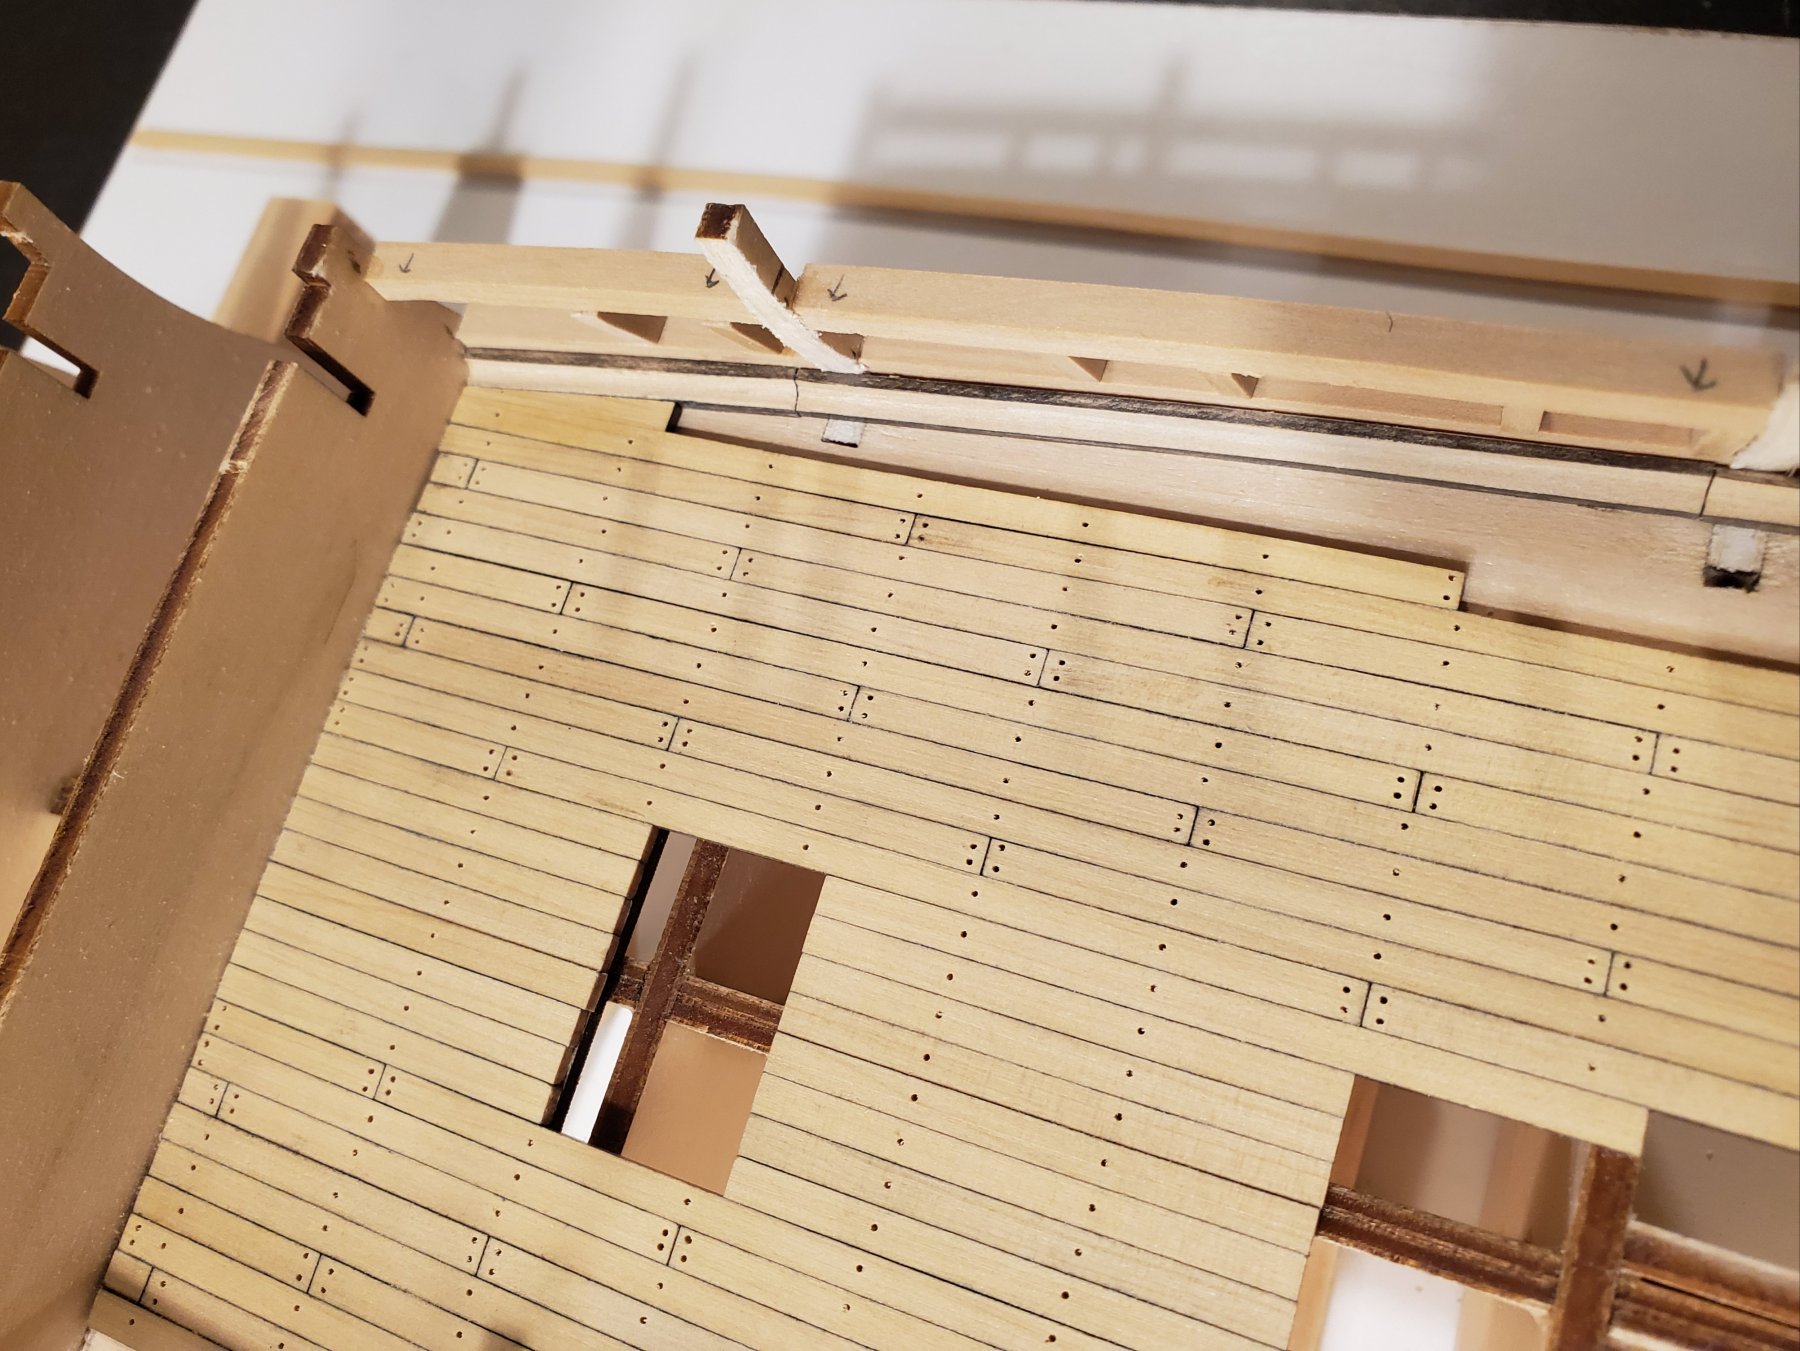
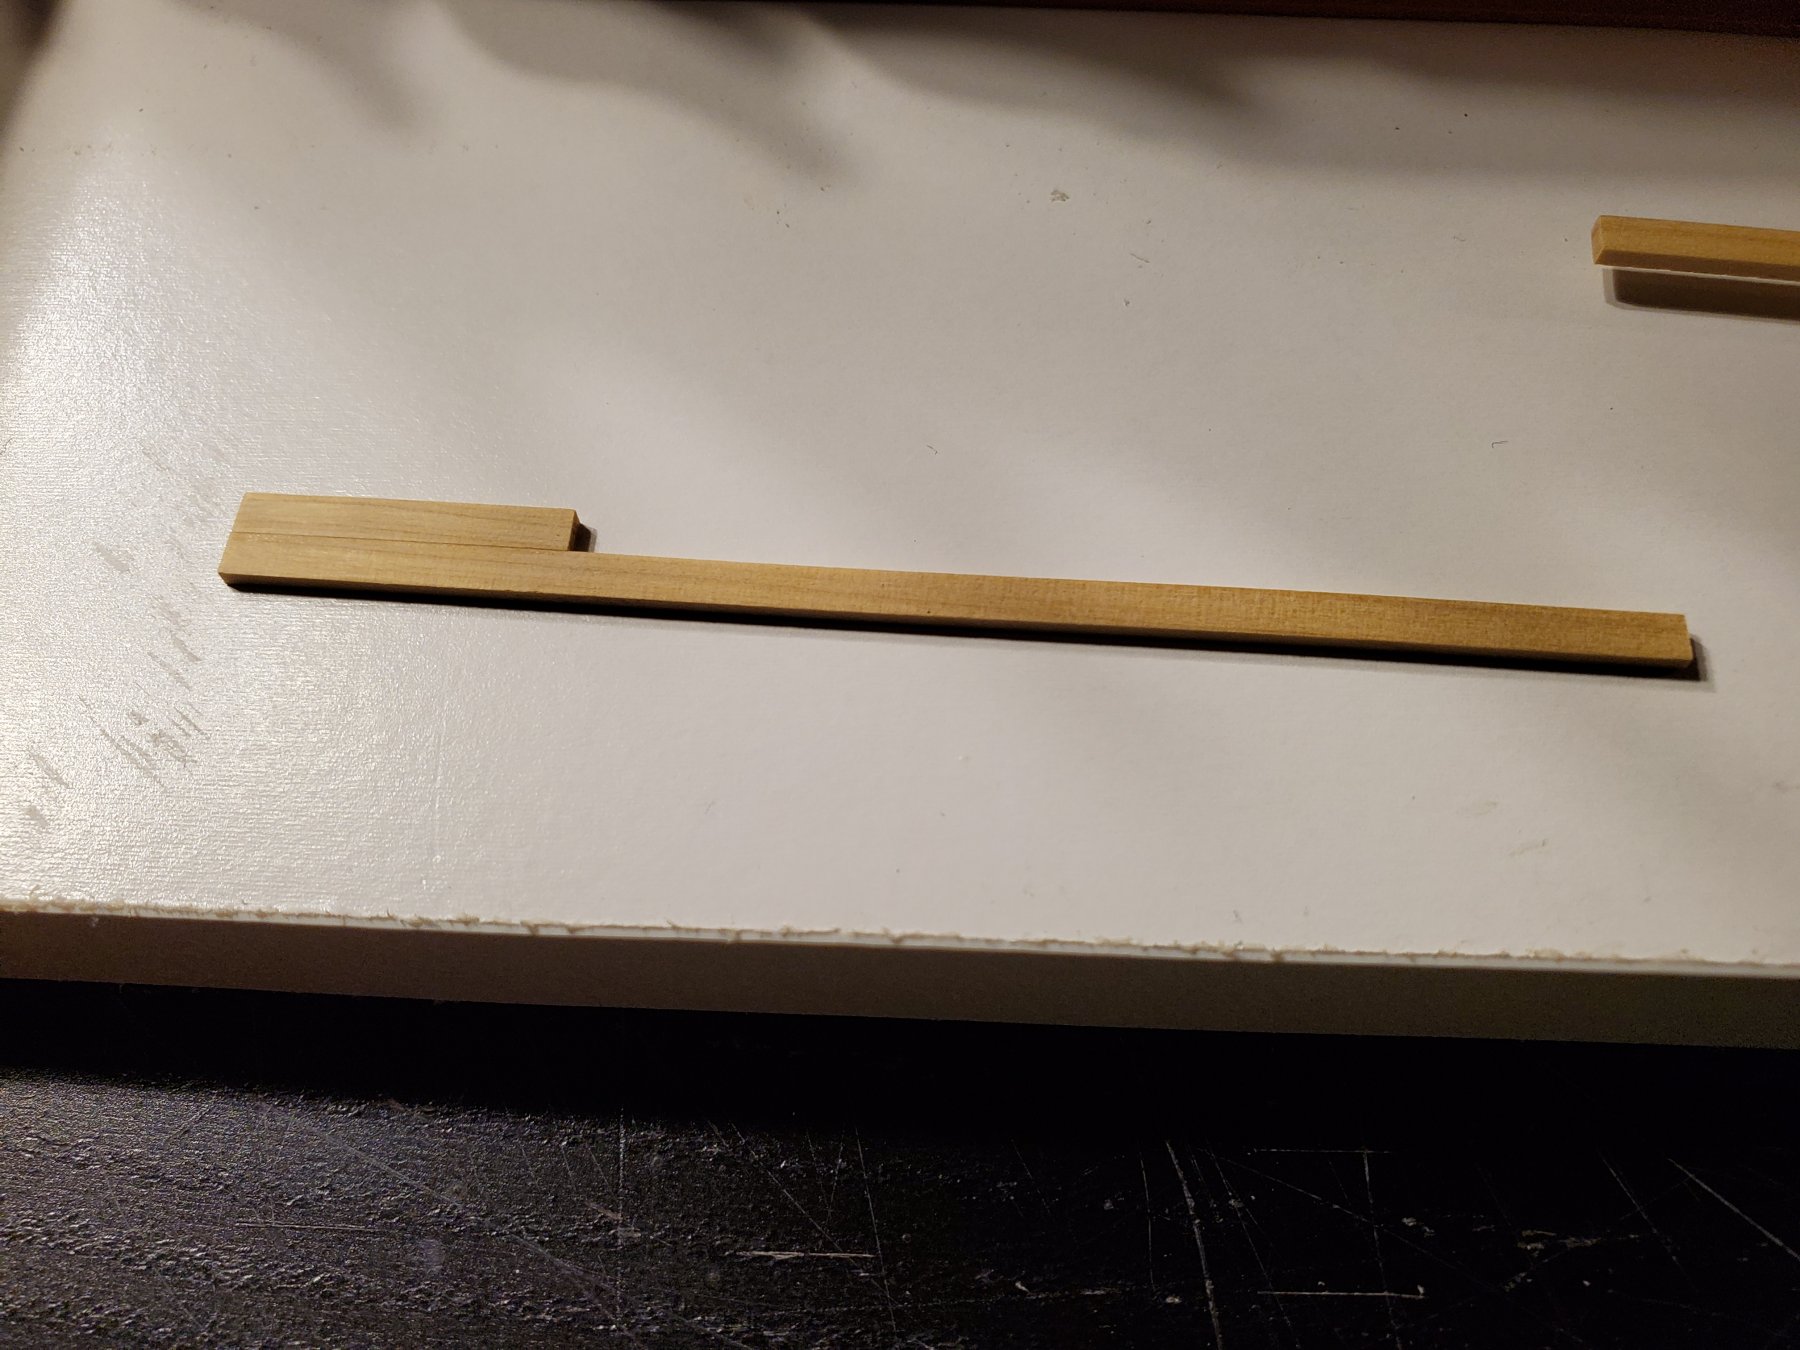
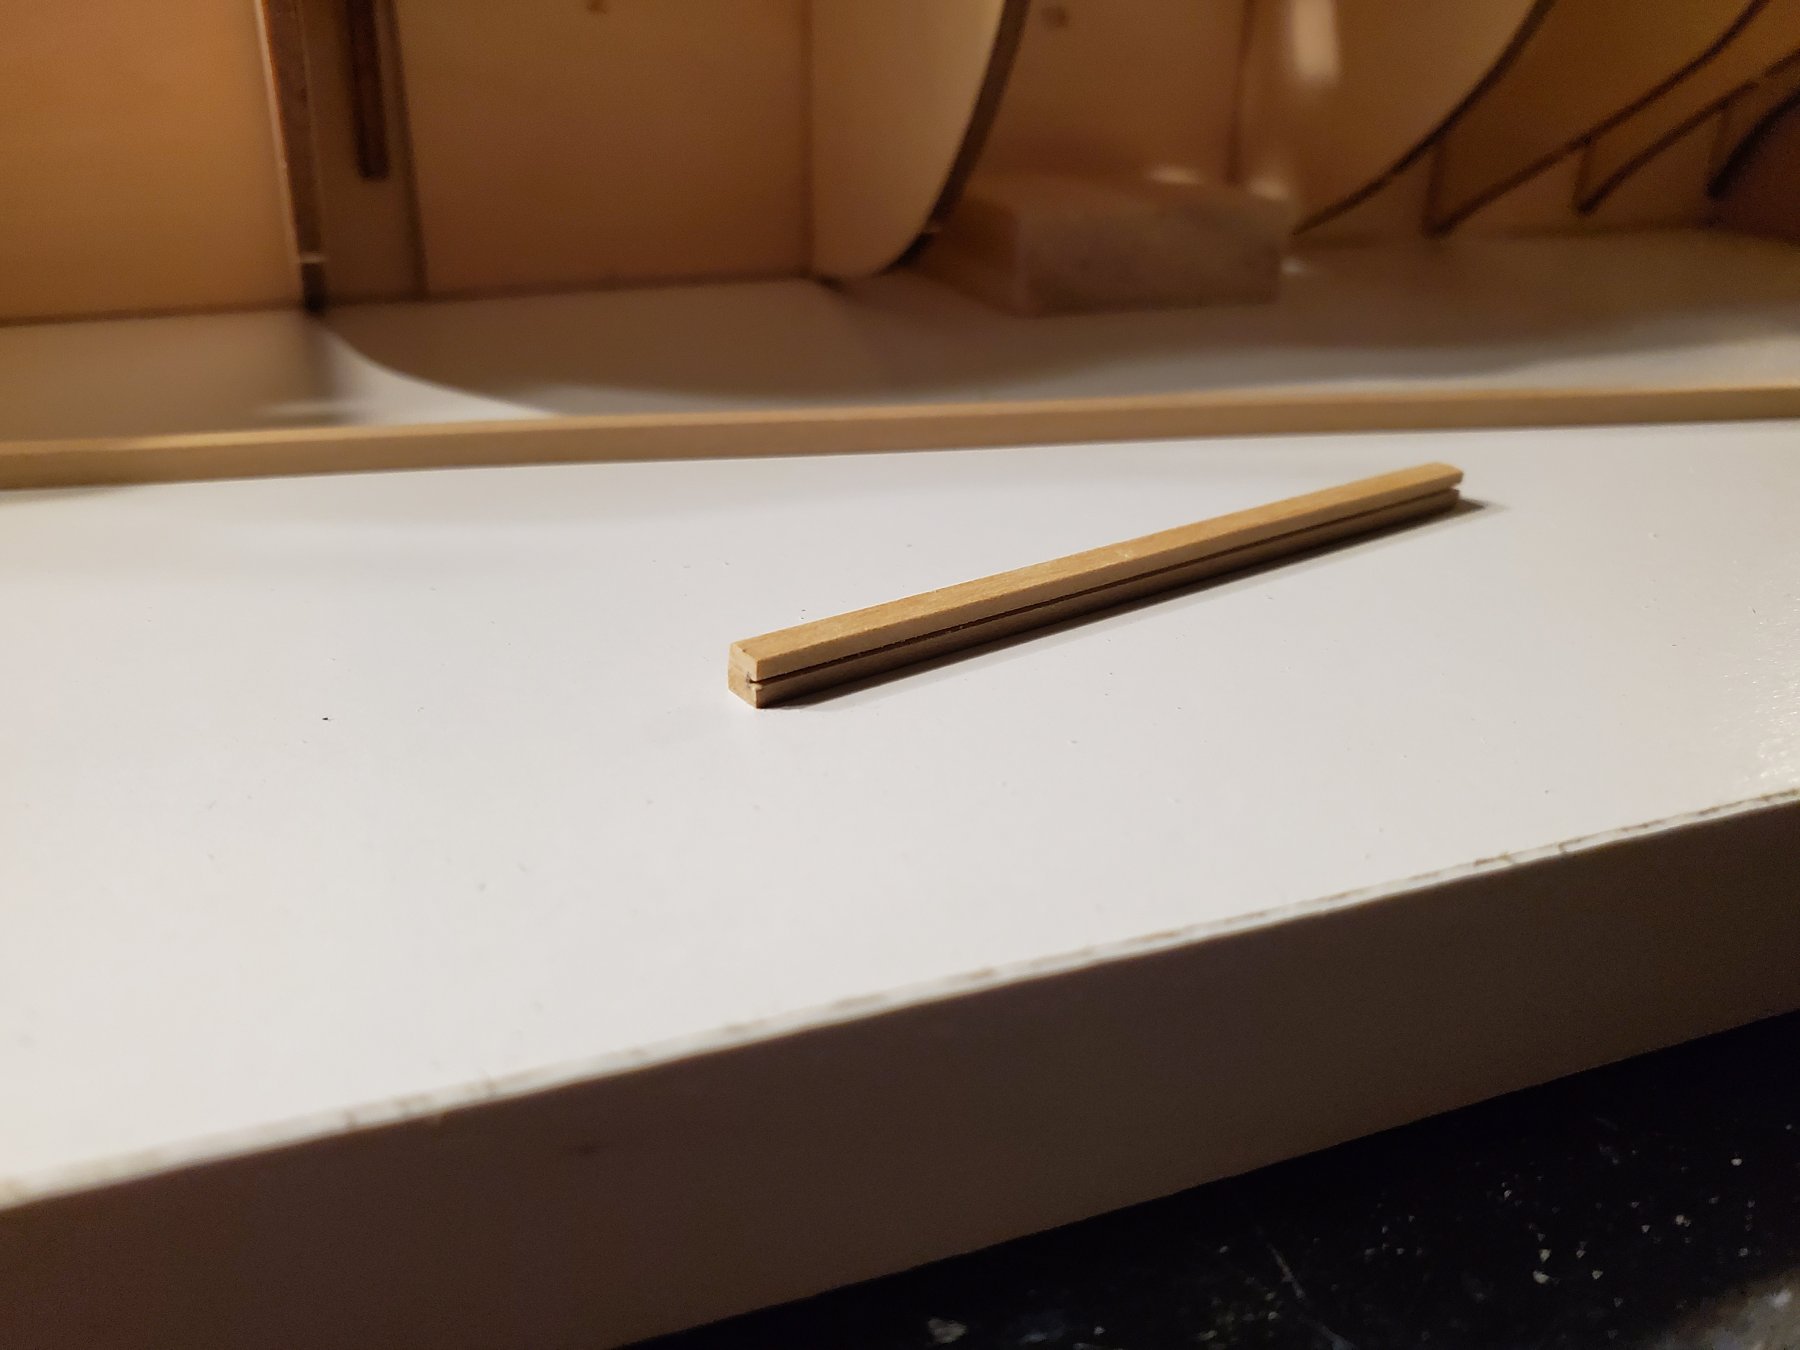
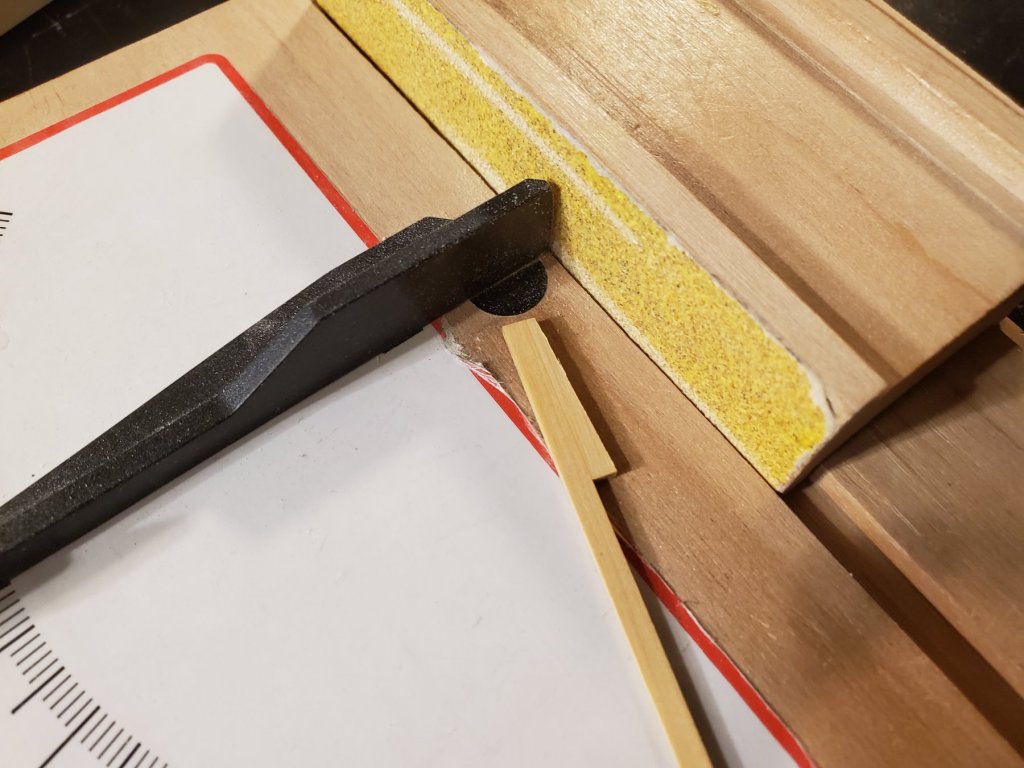
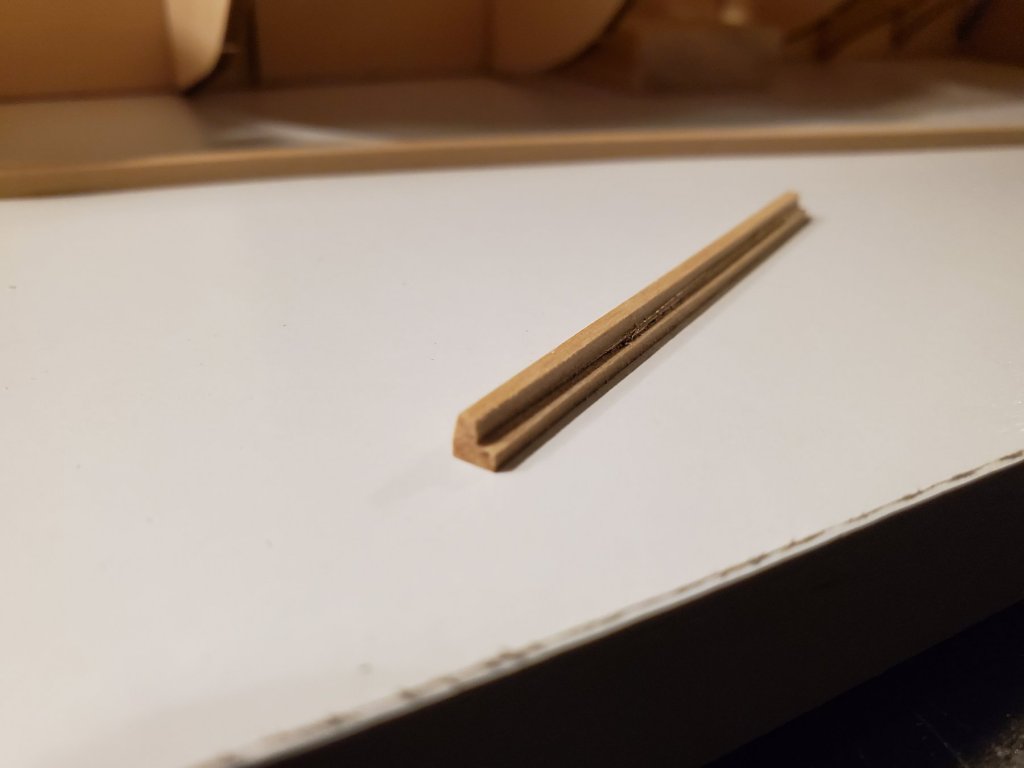
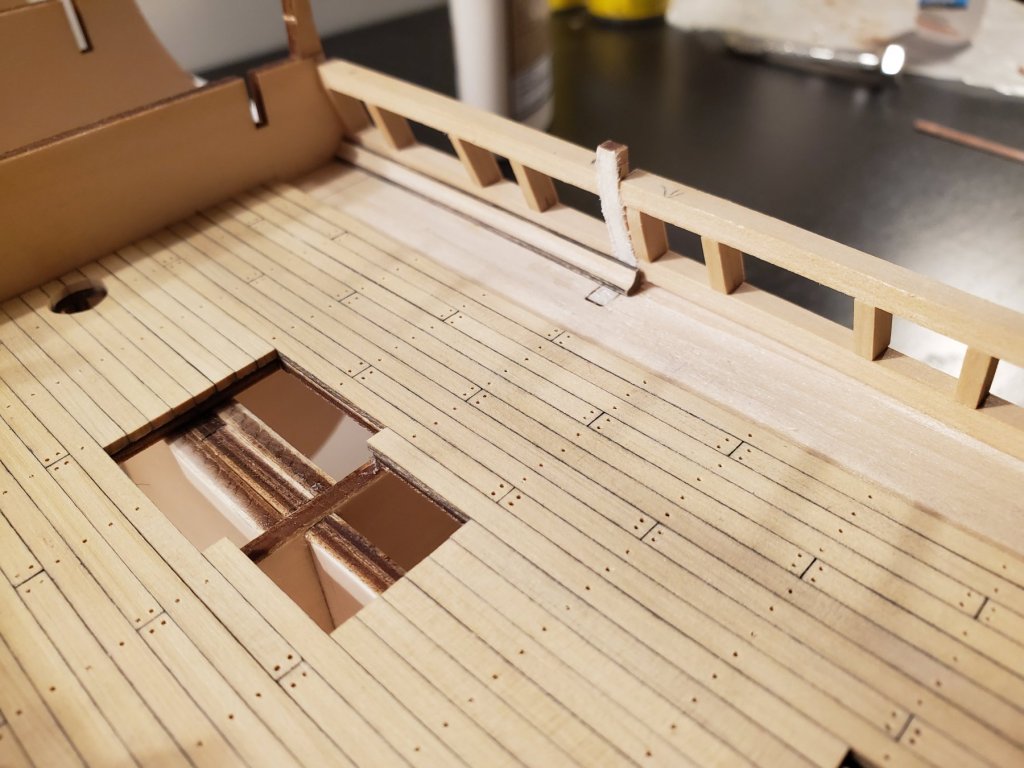
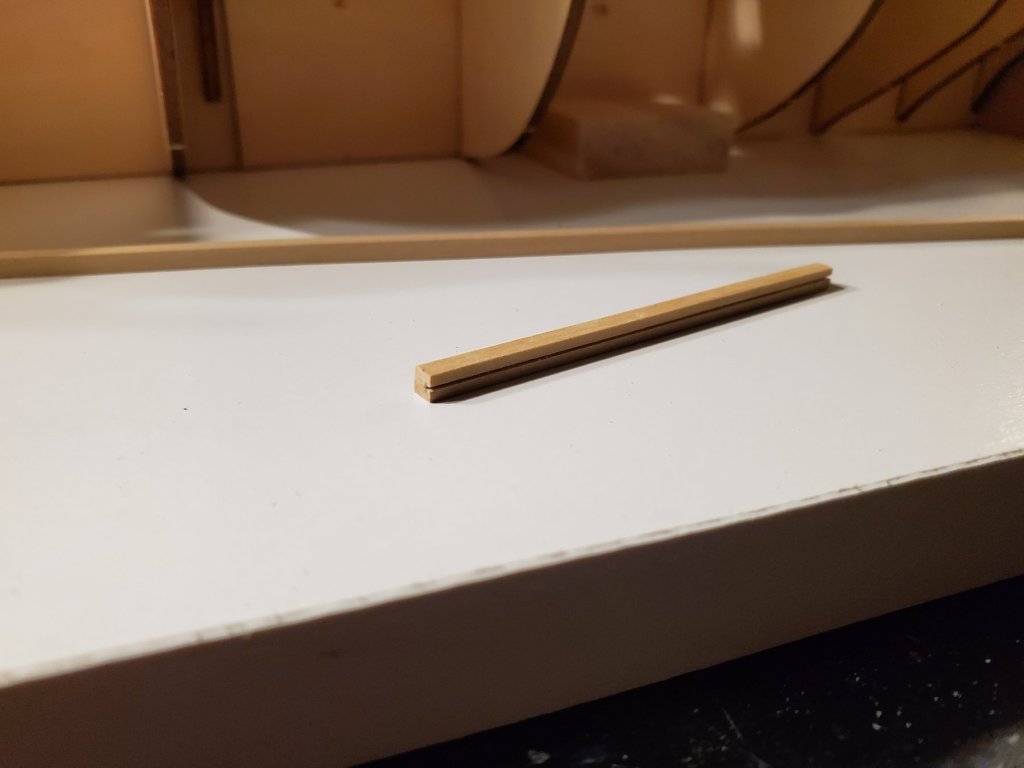
Thank you Messis! And thank everyone for the likes! I finished the waterways: I now need to finally finish planking the second deck. To do this, I realized after looking at the plans and how much space I have left to plank, I will need planks that are appropriately 4.5mm wide near the waterways. The boxwood strips I have are 3mm wide. The issue I had was, I don't have anyway to mill my own planks, and Syren Ship Model Company currently is out of boxwood strips. So it took me yesterday to come up with a solution that should have taken me 1 minute to realize. Just glue 2 strips together and sand off the access. Haha!! So here was my attempt to create my first plank ends that end at the waterways: I was surprised I was able to get the edge that touched the waterway correct. So I drilled the nail holes, and glued it in place. I then made the next row. I knew this row would be harder than the first: I hope you can see it, but those 2 rows ended up much better than I thought! I feel that I accomplished something that really in Isnt very easy (well, for me anyway!). So I am pretty happy with it! It got me wondering what it will look like when the guns are in place! I'm tired so I will finish up this side tomorrow and start on the other. Thanks! Jeff


-
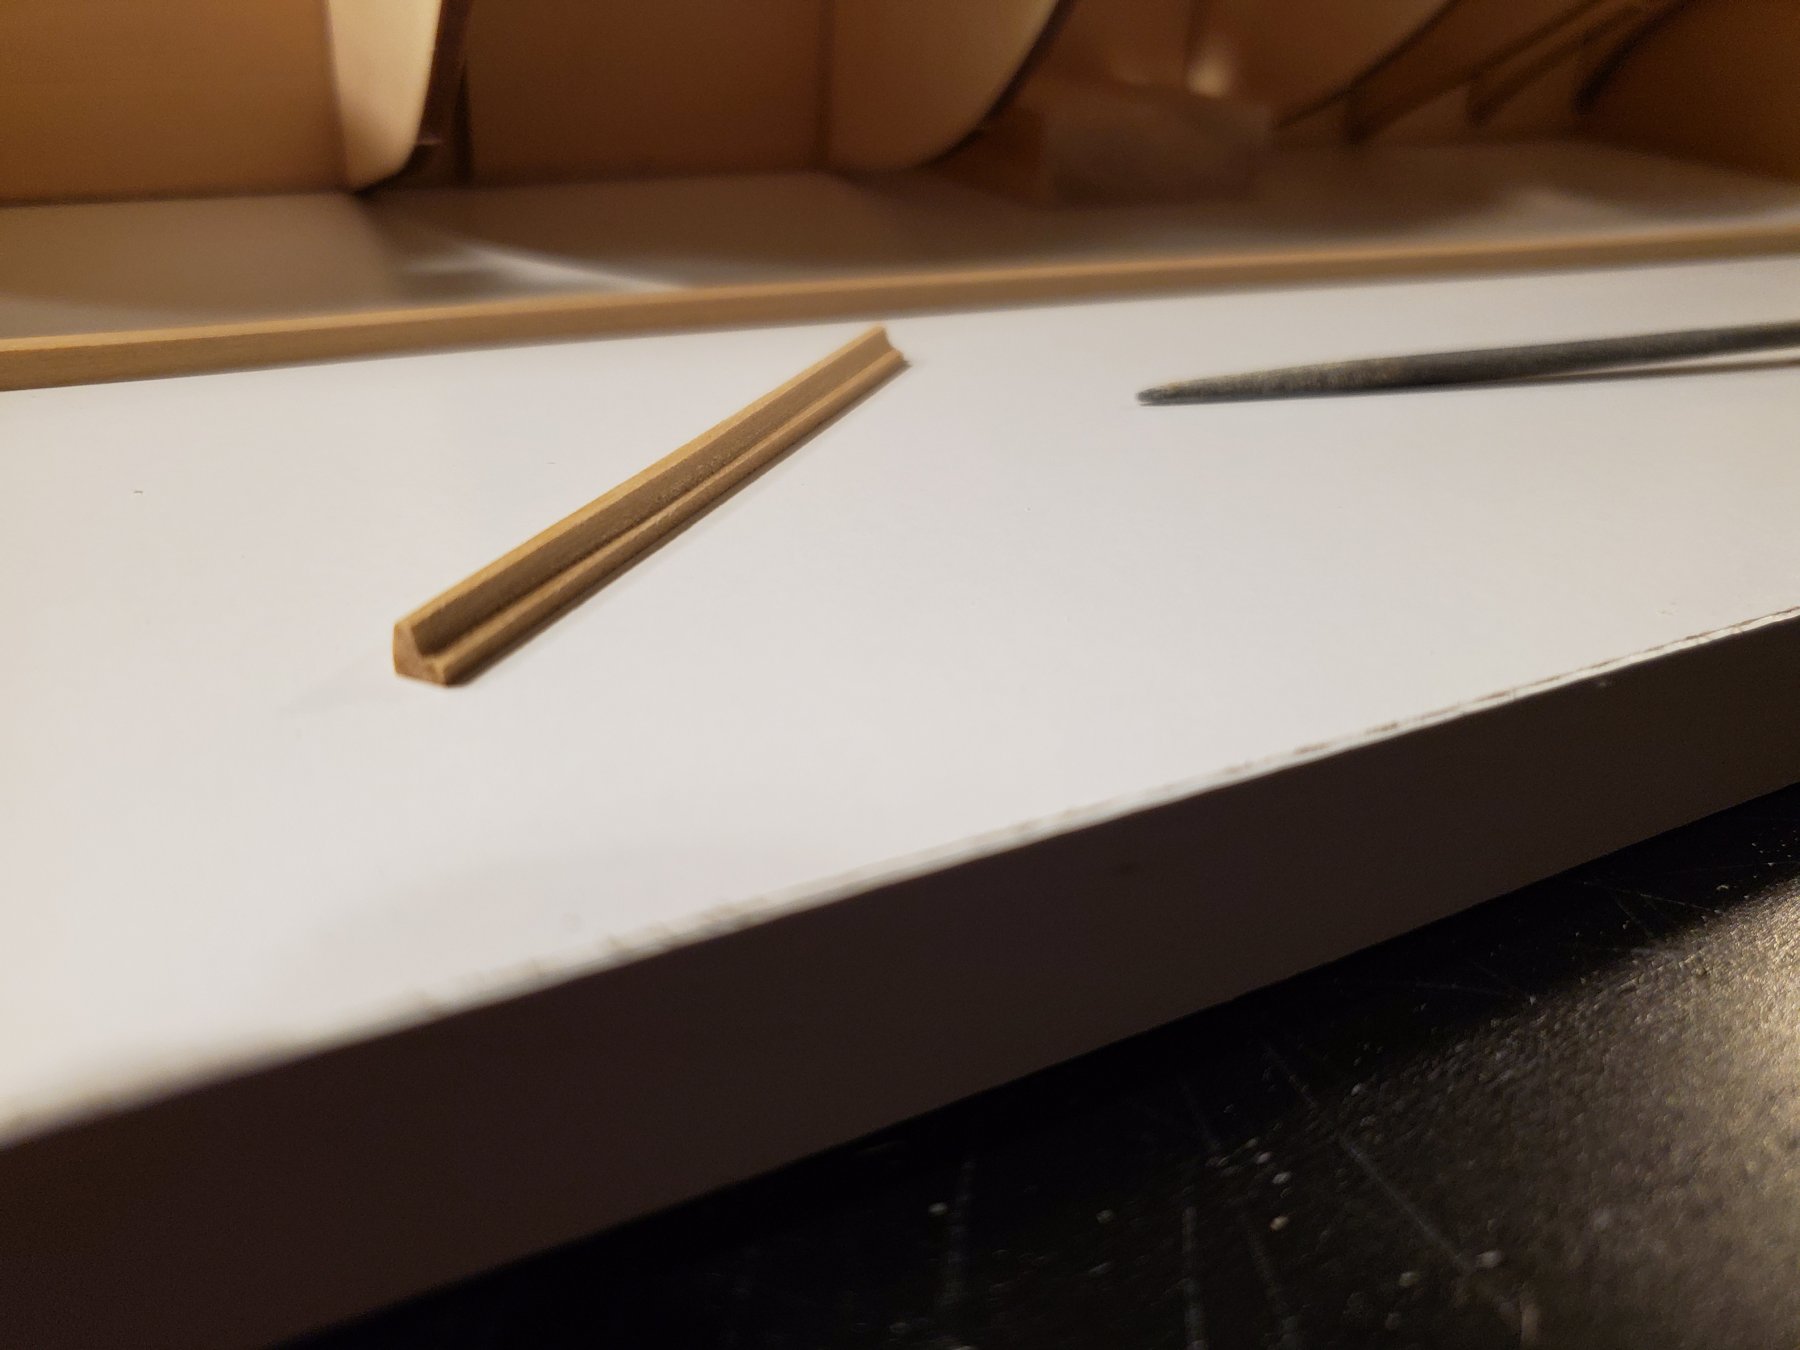
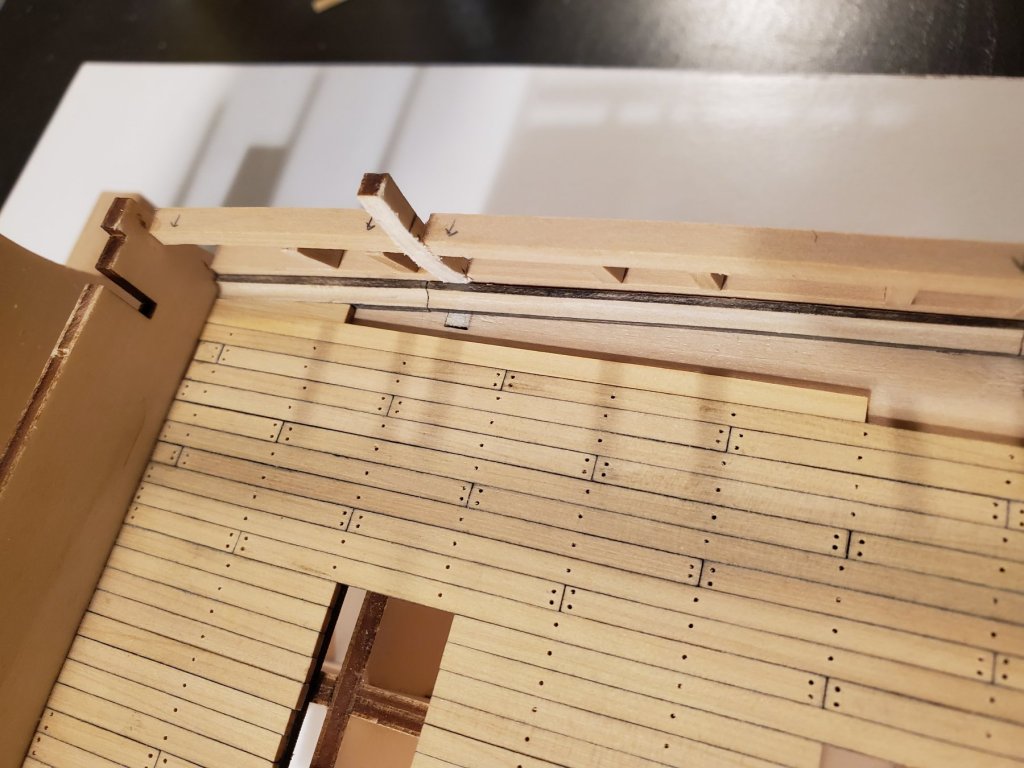
Thanks for the likes! I finished cutting the frame tops The gunport supports kept the frame tops from breaking. That was my worst fear. I then started on the waterways on this deck. Luckily, I had 3mm x 3mm boxwood to which to form the waterways. It took me a while to figure out how to cut and sand them to the correct shape. Below is how I performed it with pictures. I made sure that the bottoms of the waterways was the same height as the deck planks. Now I have 1 more side to do. But that will have to wait till tomorrow! Thanks! Jeff

-
What a wonderful build!! She looks excellent! I can't wait to see your next build!!! Jeff
- 593 replies
-
- 2
-

-
- royal william
- euromodels
- (and 1 more)
-
Great work!!! Your Hemeione is turning out brilliantly! Jeff
-
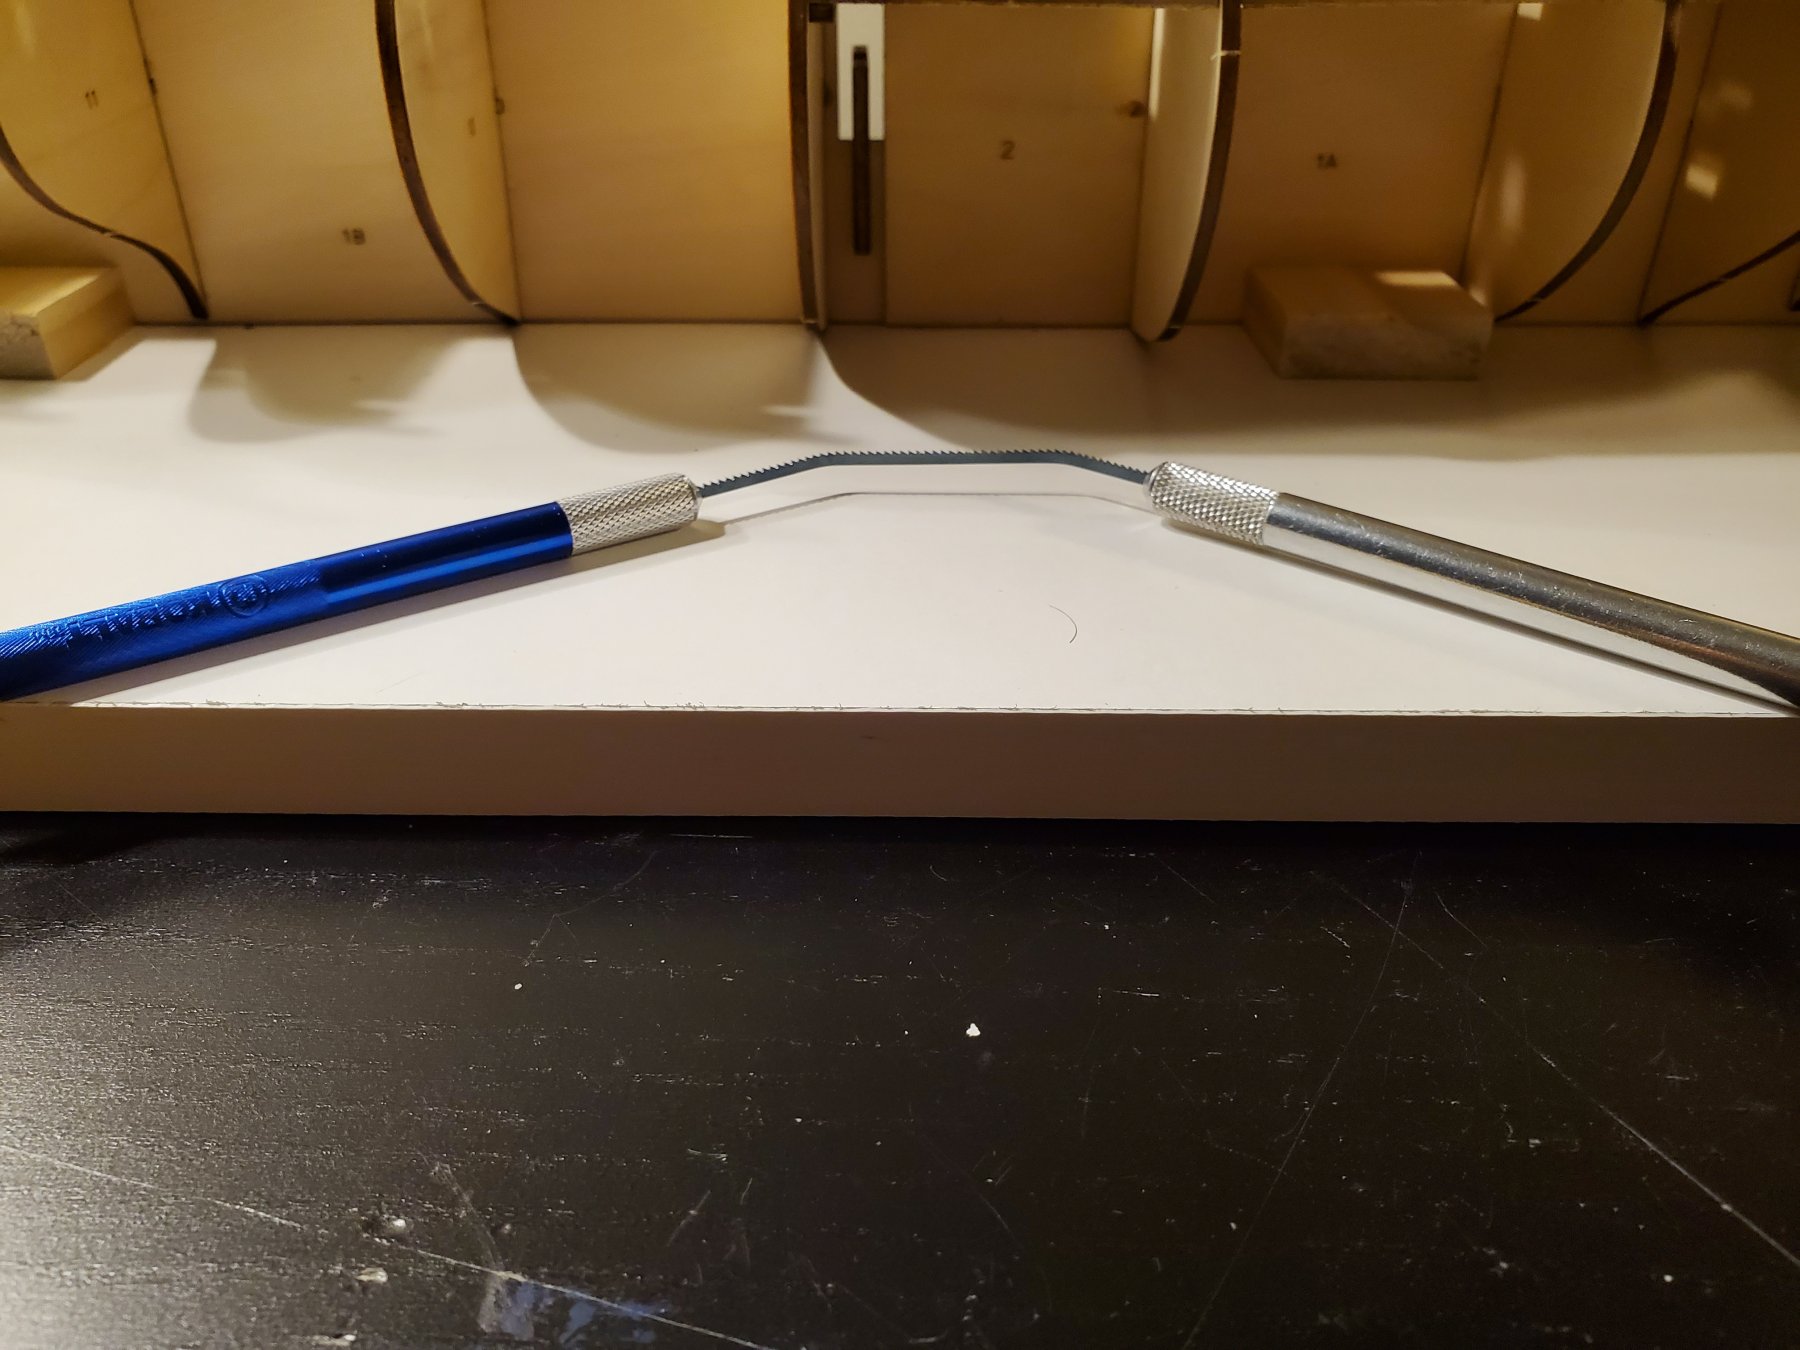
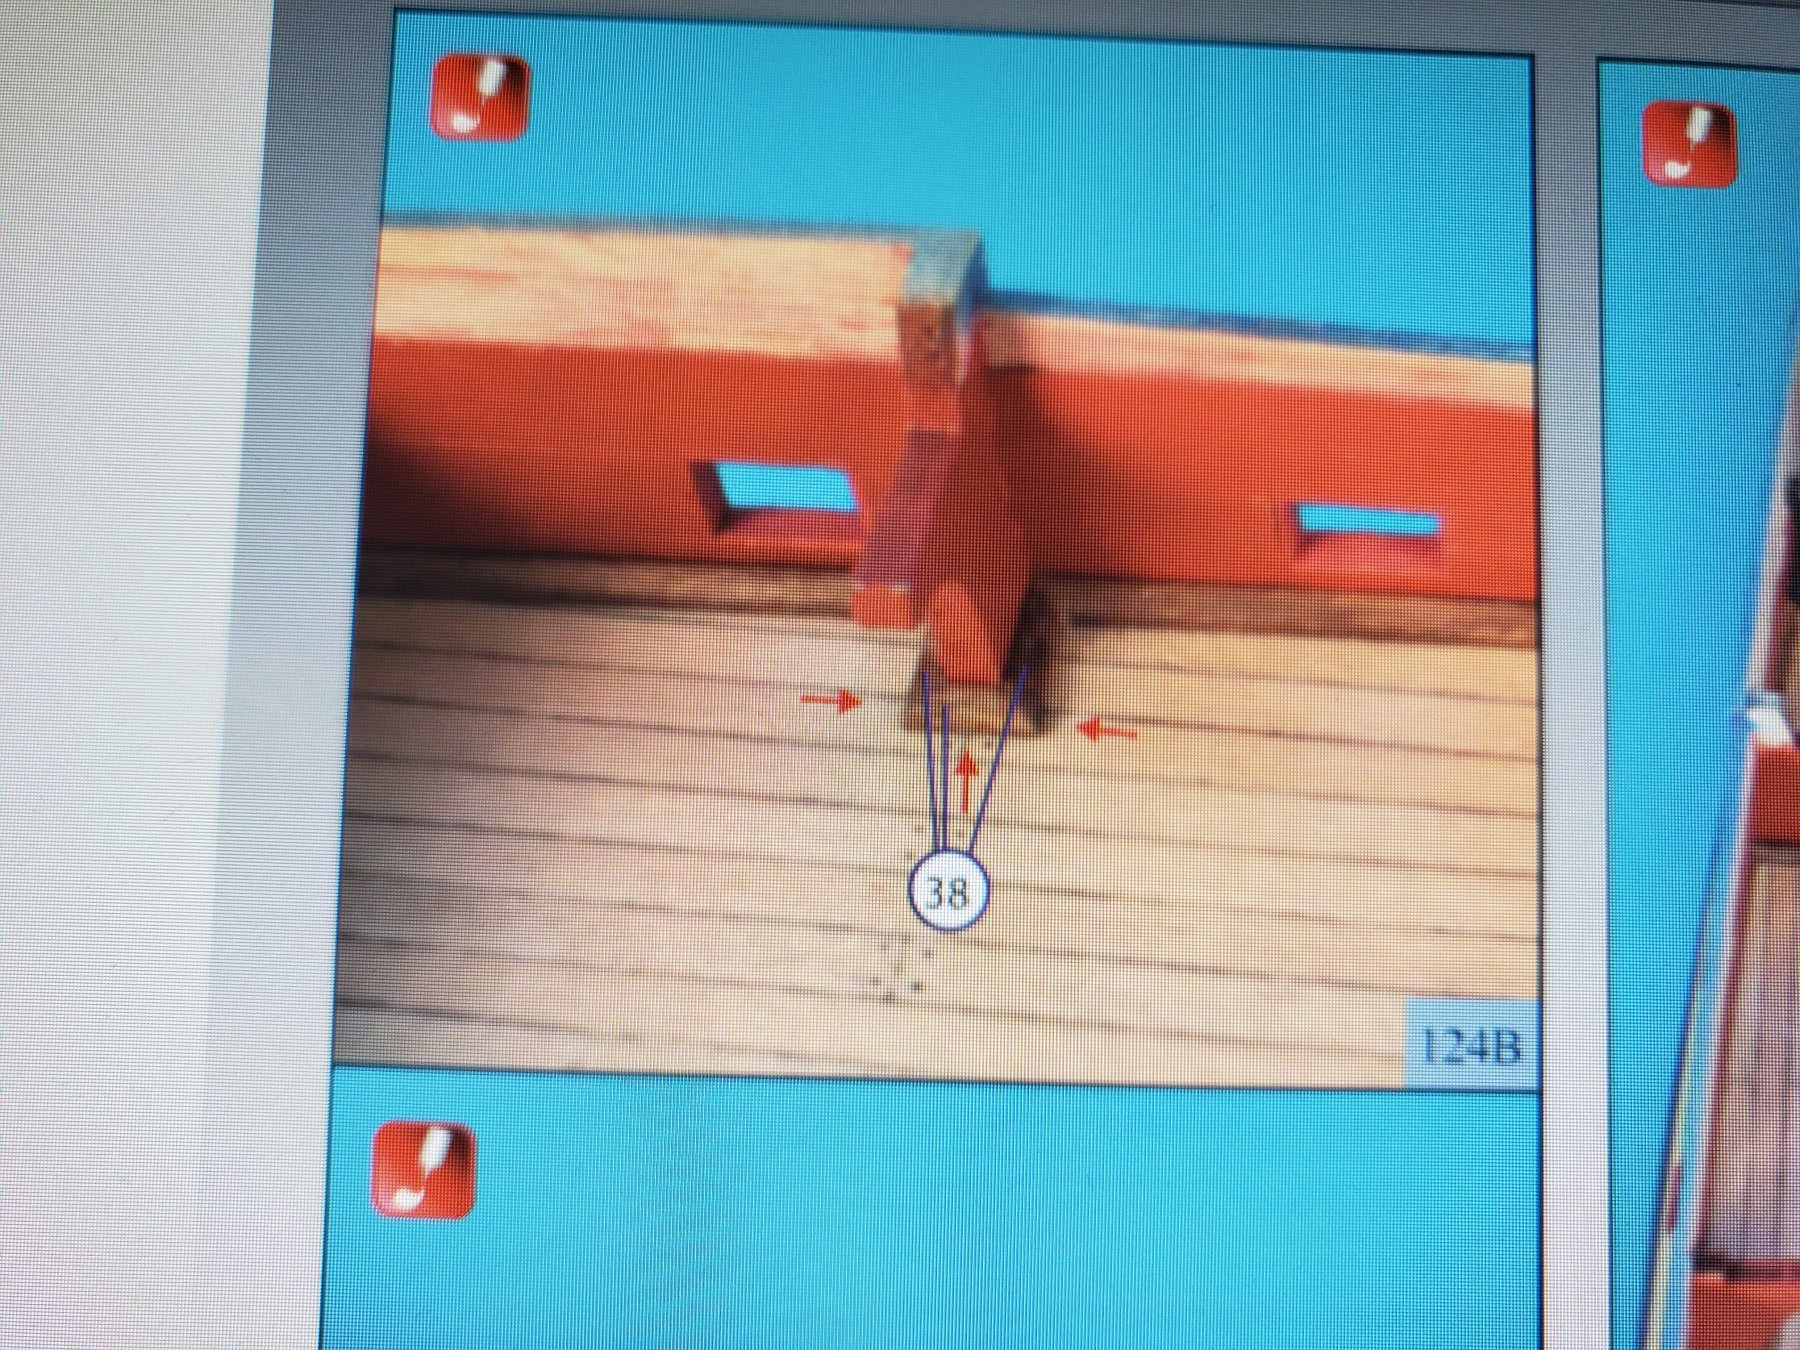
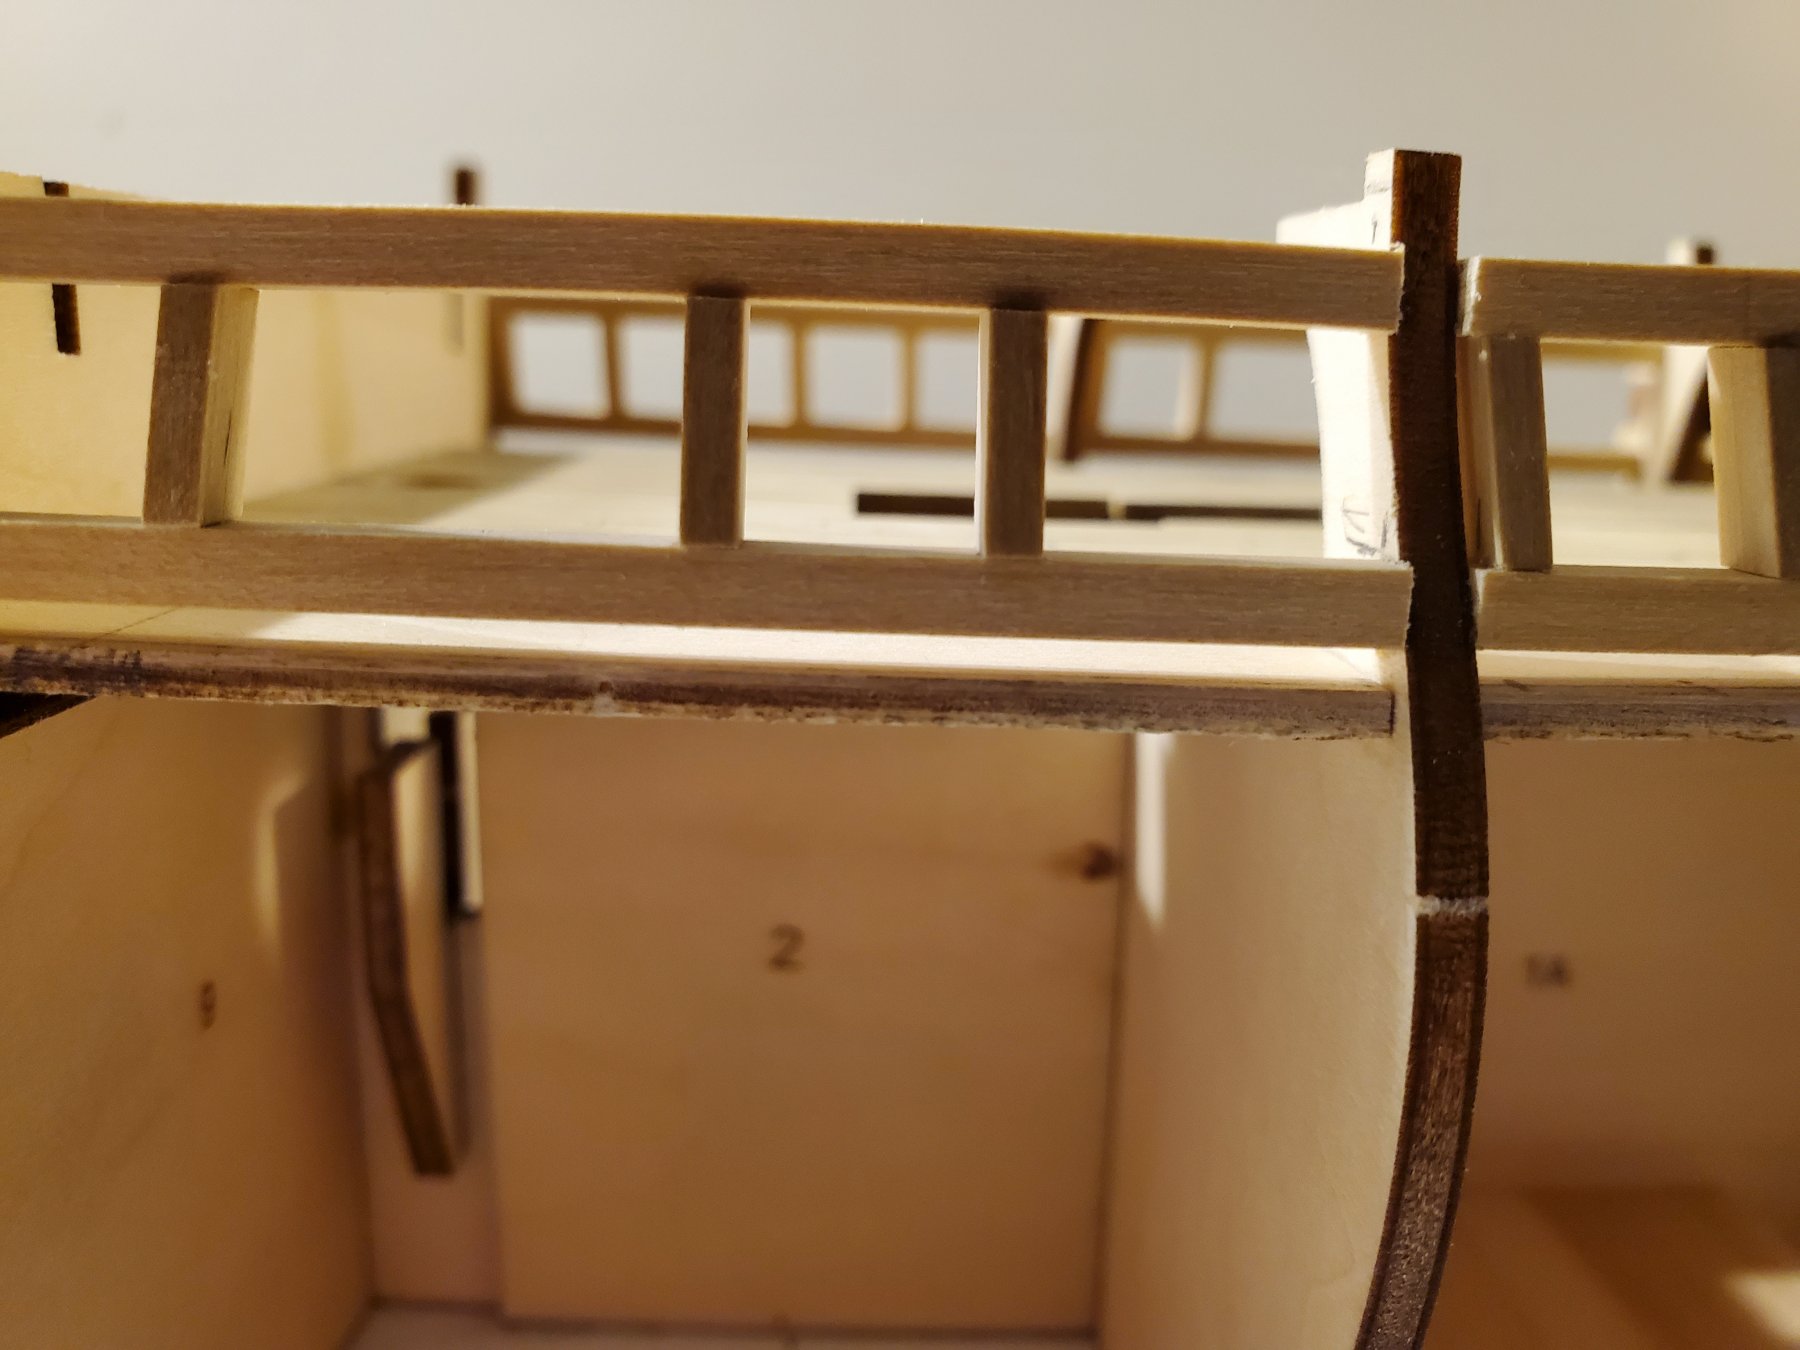
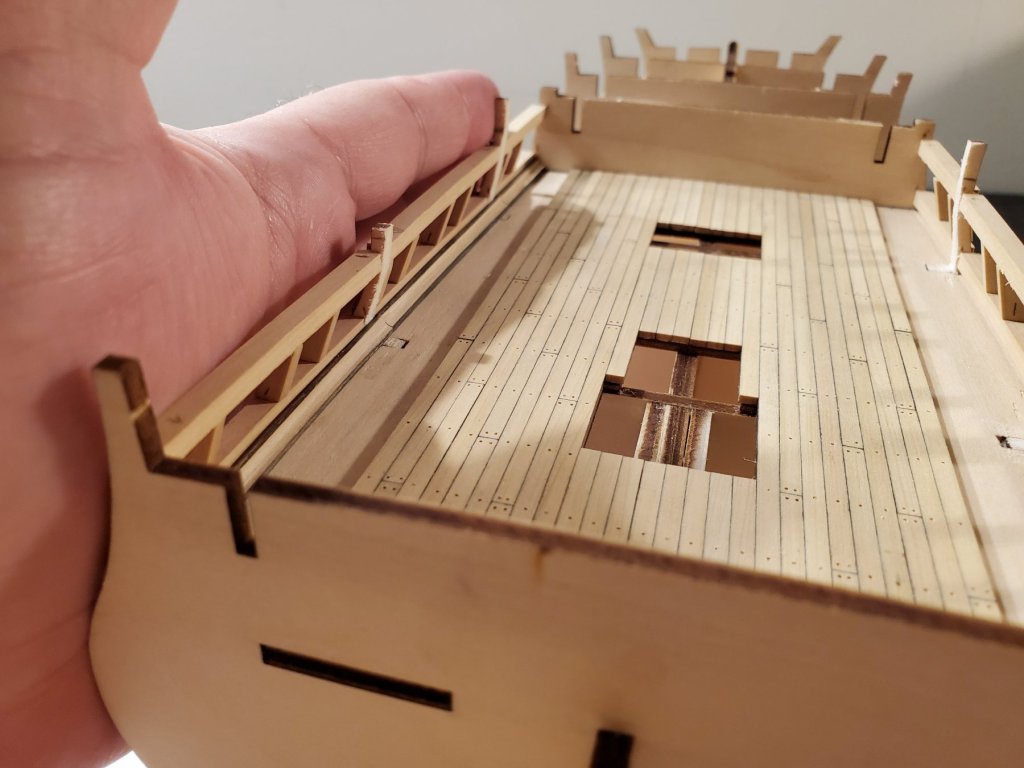
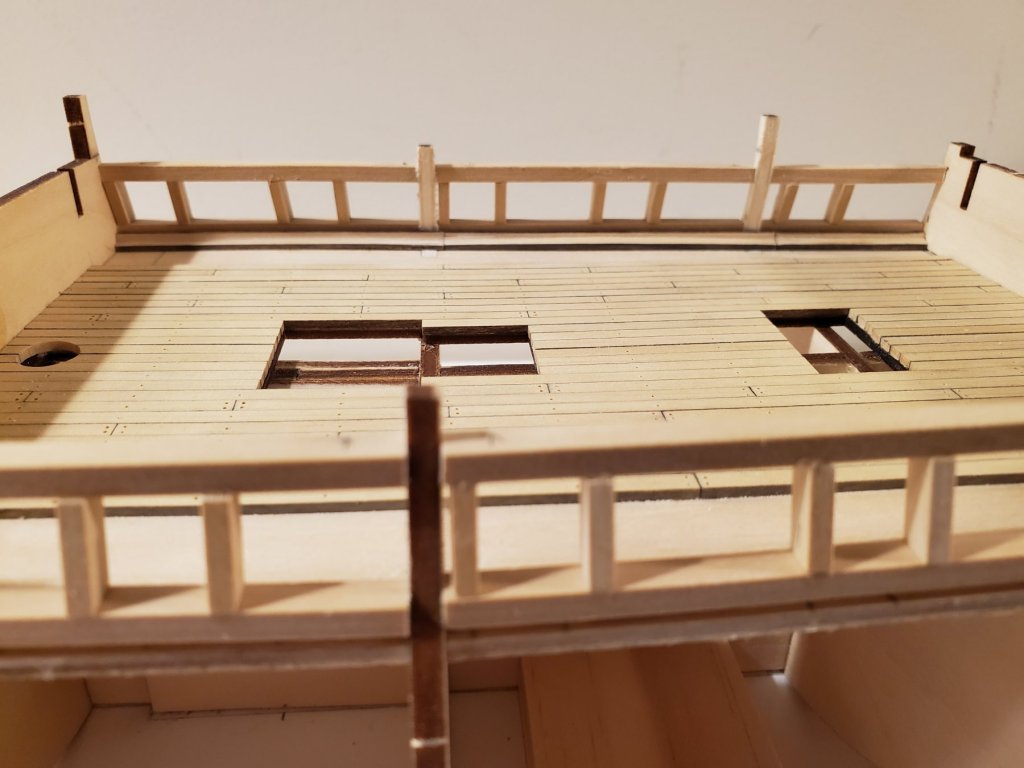
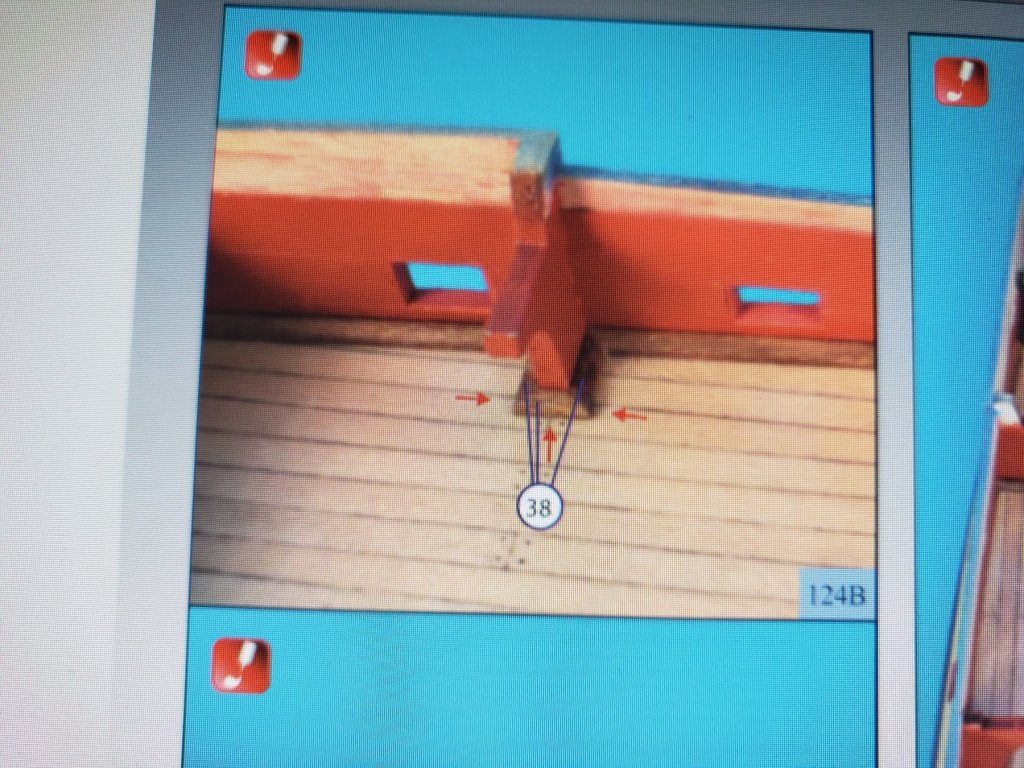
I finished putting in the gunports on the exposed second deck: Took a while , but I am pleased with it! There has been something that has urked me since I started to plank this deck. The frames 7 and 8 protrude into the middle deck WAY too much compared to the plans. Farther into the instructions, it shows to paint it, then put molding around all of it: This didn't look very good to me nor was it any sort of accurate to the the ship. So the reason I didn't plank the deck all the way yet, was so I could ( if I decided to) cut them too the shape of the actual frame of the ship. This way, I could plank the inside of the deck much more actually. I pondered over if I wanted to do this or not because this would be a big modificationfor me, but finally decided to do it. I know that the upper deck uses these frames to rest on, so I made sure to take the measurements before sawing away. I had to figure out how to cut the bottom evenly and accurately without messing up the already set deck planks, and the deck frame to which the deck planks sit on. I then noticed on this site how Chuck cut a small scroll saw blade to cut out some frames on the Confederacy. It then gave me the idea to go a little farther with it. I used this to cut the horizontal portion of the frame that is ontop of the deck. It kinda looks like something from a horror movie, but it worked! I wish the teeth were smaller, but it worked! I then filled/ sand it down. I had to place the gun ports first to strengthen the frames before I could do any cutting. The frame that is left after cutting is about 2mm wide which is about accurate to the actual frame width shown on the plans. Somehow, I didn't damage deck planks, nor gun port segments! 1 down. 3 more to go!! Jeff


-
You are of course, correct! Altering anything from the kit's design will affect things down the road. I thought of that when I decided to make the alterations to the gun port locations. I look at this as more of a fun challenge than a problem. After placing the gun ports for this middle deck, I will analyze the build to see what other modifications I will need to do. I will then create an custom parts by hand to replace any prefab parts (when the time comes), using the actual plans from the book as a guide. Jeff
-
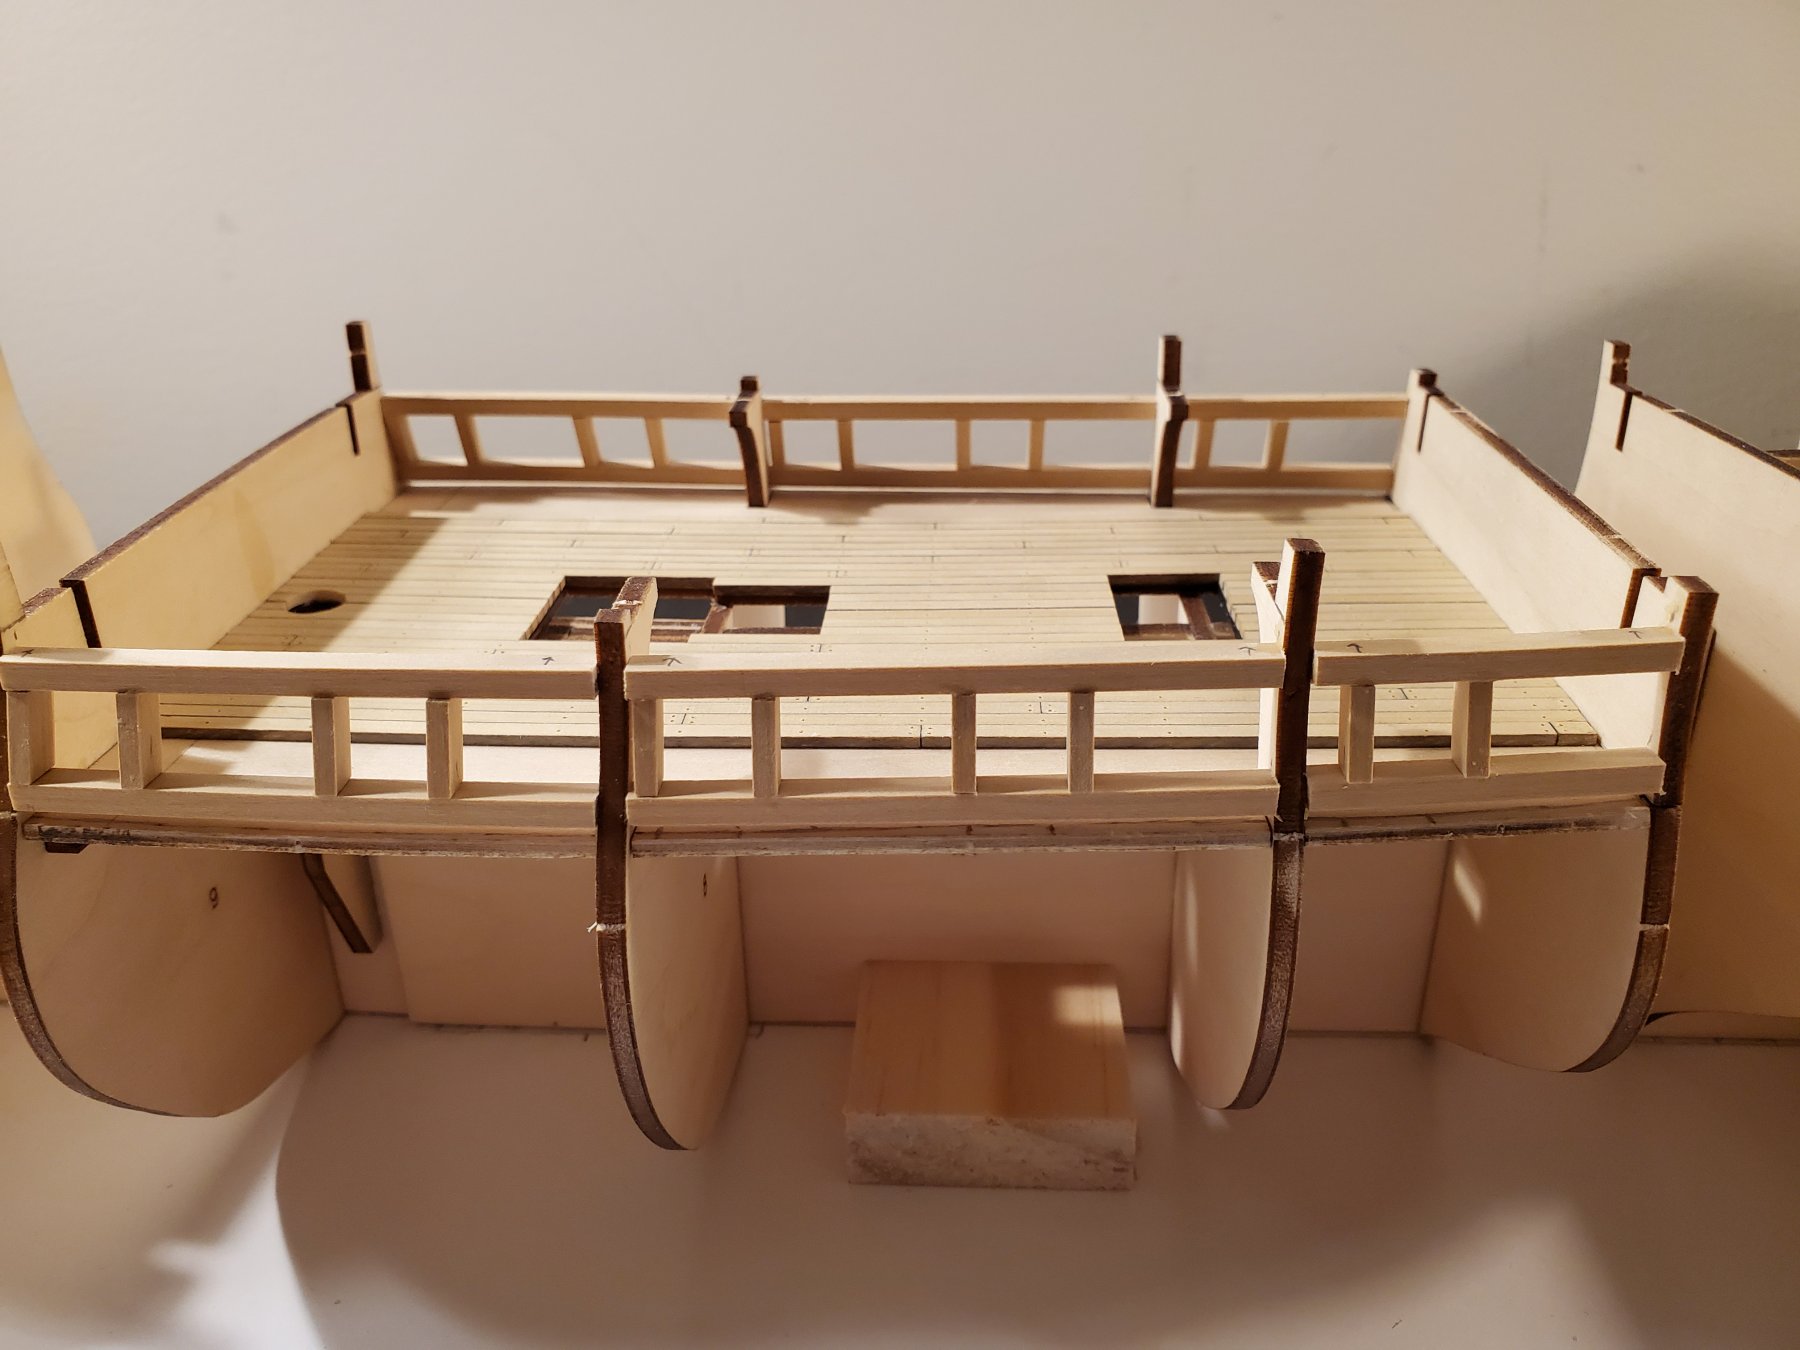
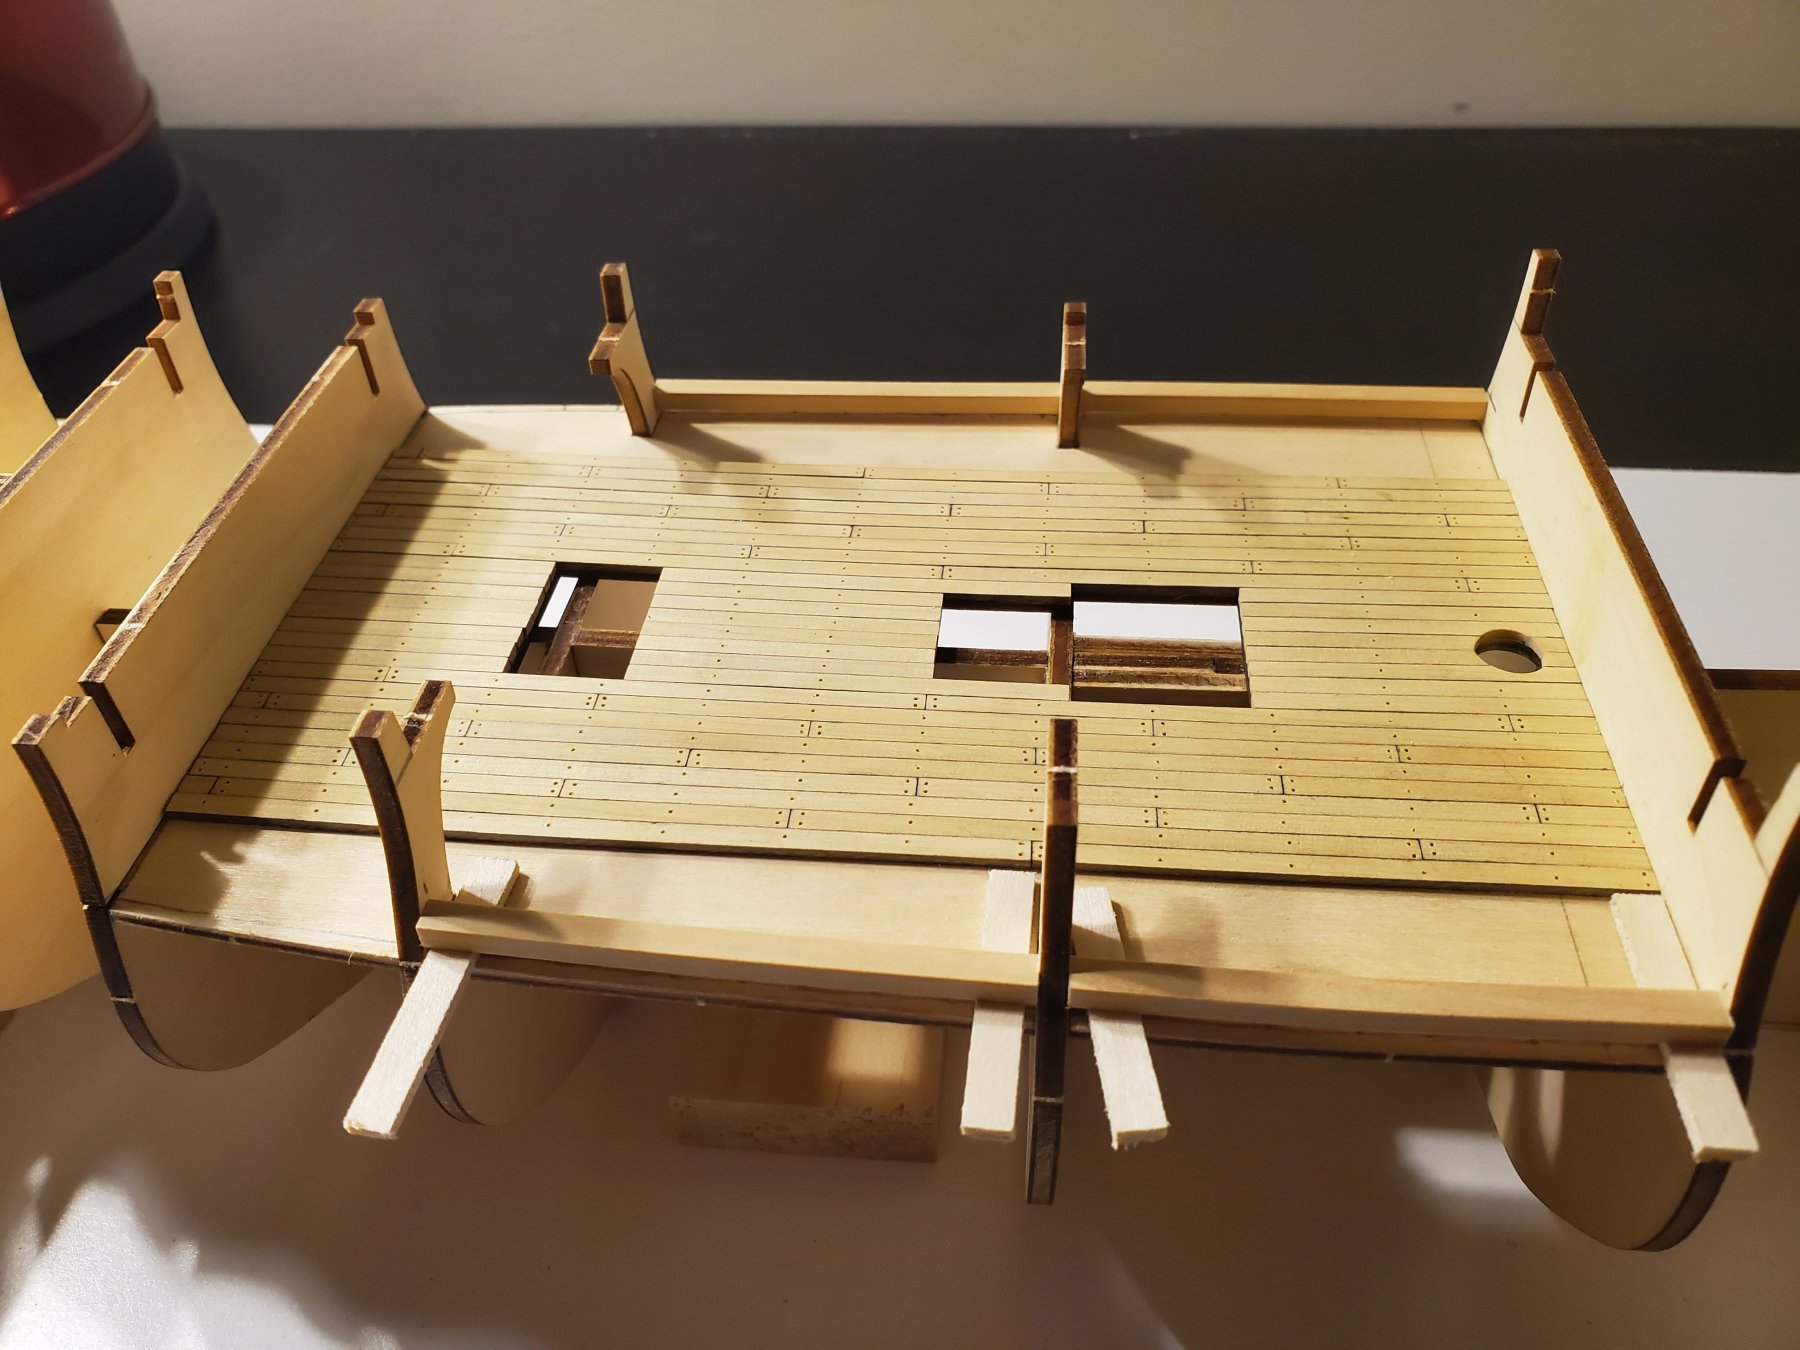
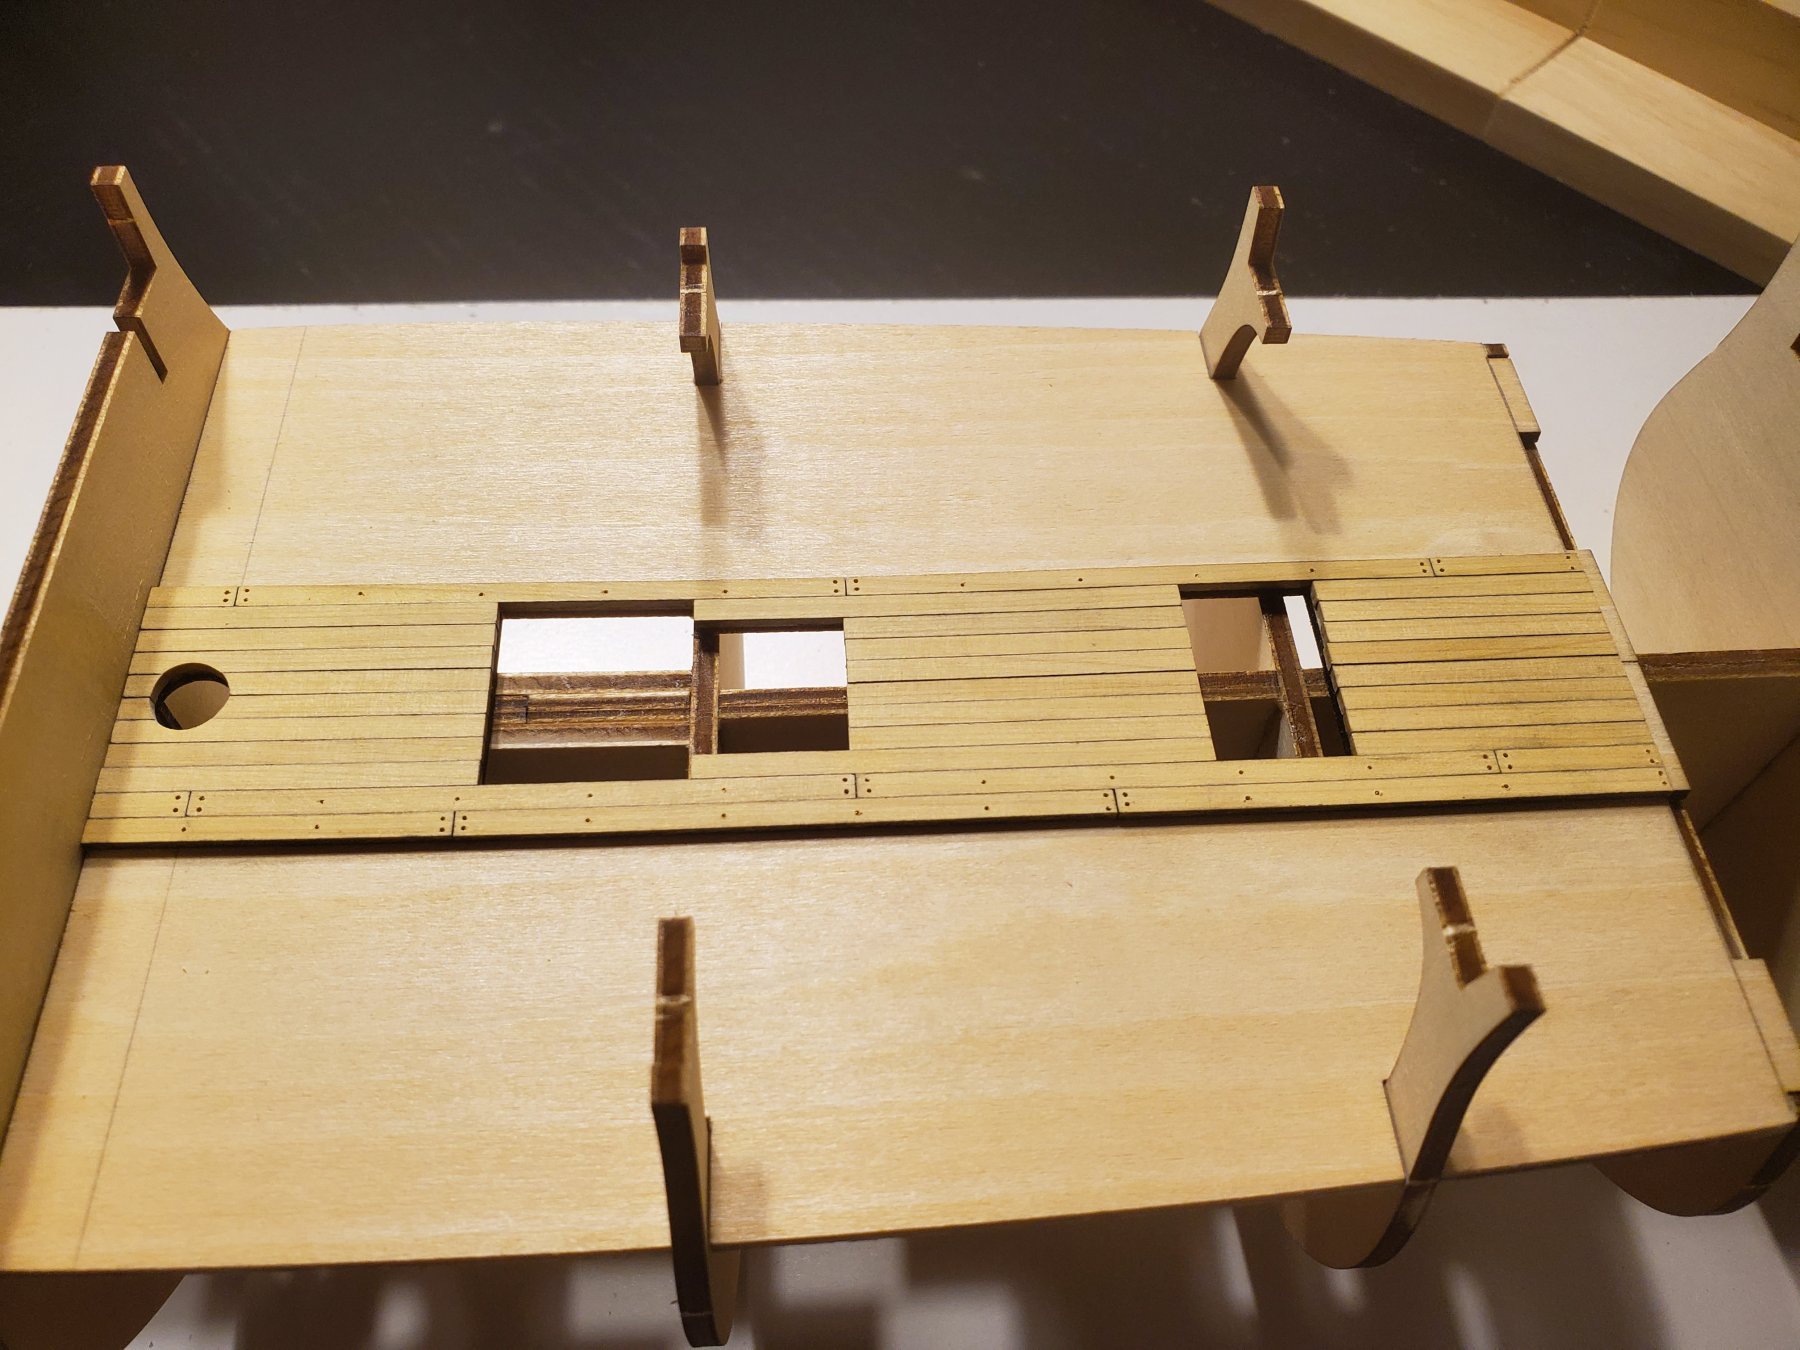
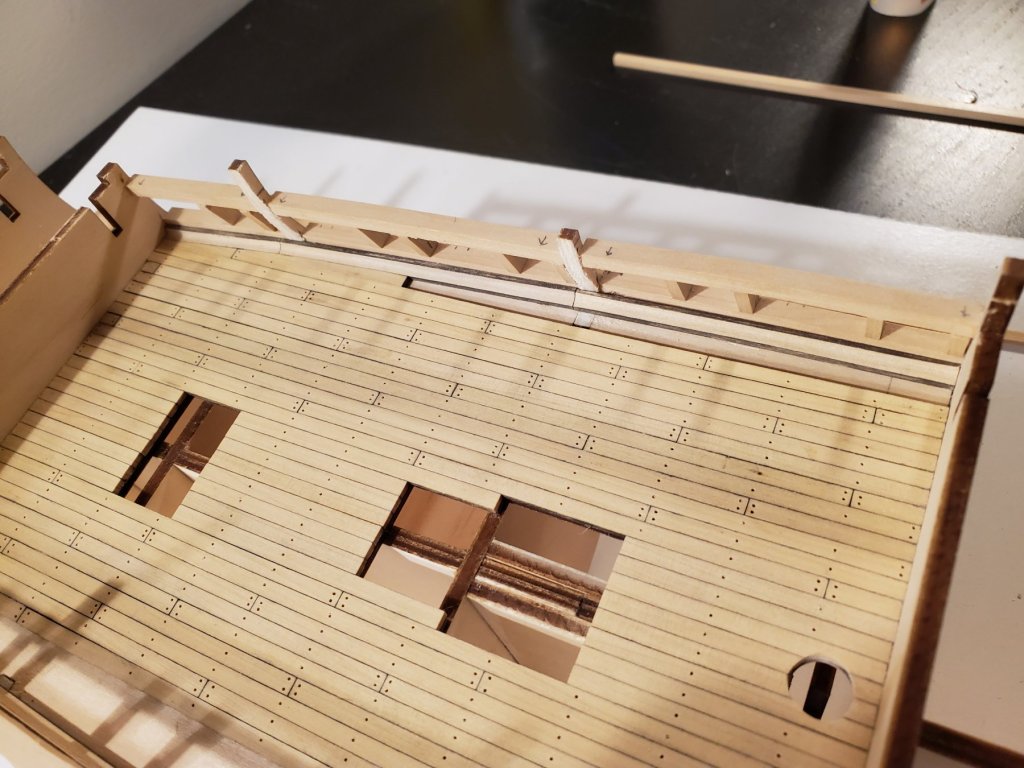
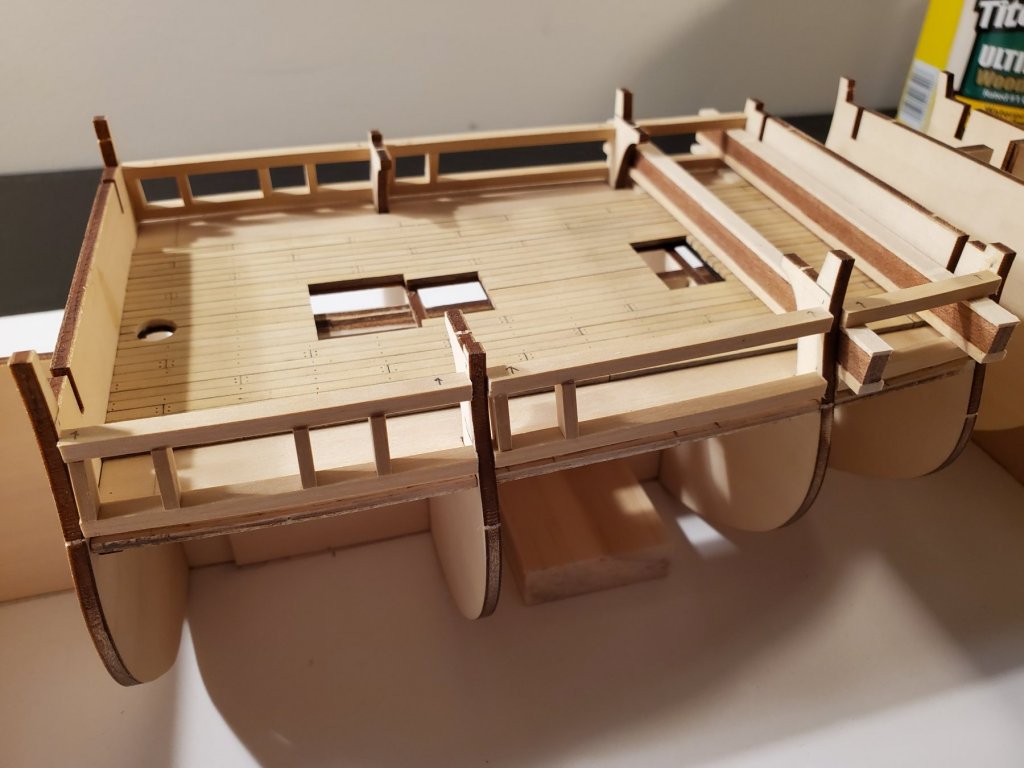
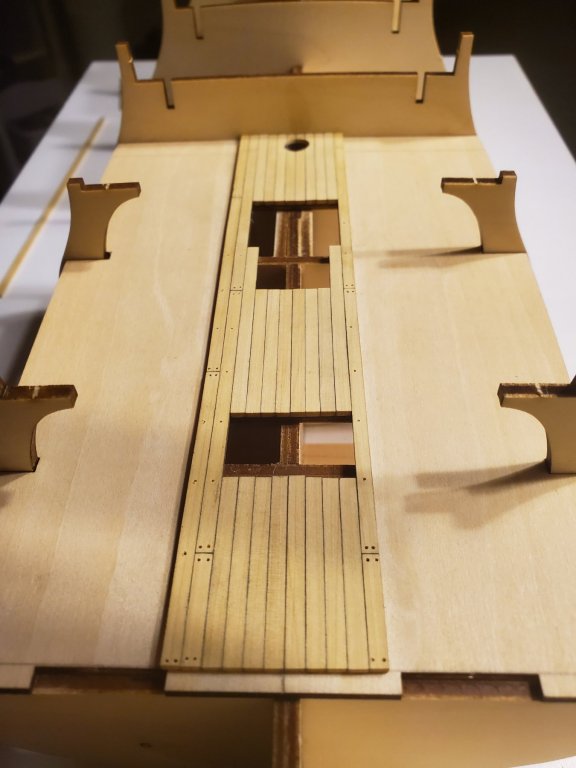
@Dutchman Yes! It's a very thorough book. Many plans and explanations!! It already pointed out to me that the gun placement wasn't quite correct for the kit. Thank you everyone for the comments and likes!!! Slow but steady progress. My son has been quite the huge handful this past week, so my wife and I have been pretty tired by the end of the day. But, nonetheless, I have made some progress. I stopped planking the second deck so I could make the gunports for that deck. This has taken me almost a week to do because I wasn't sure which way I wanted to do it. But, here are some pictures of my results so far. I was pretty proud of myself because If you notice in some of the pics, you see 2 I-beams I made myself from extra wood that corresponds to the correct height of the gunports. I used these 2 I-Beams to make sure the cross beams were at the correct separation. Plus I think they look kinda cool! Haha!! I set my goal to complete 3 gunports a night. So far, I am on target with 6 ports done in 2 nights. So after the gun ports are completed, I am thinking of removing a part of the frame tops for the second deck because they stick out way too far into the middle deck which, according to the plans, isnt accurate at all. When I refer to "the plans", I am actually referring to the plans I bought online. NOT the "plans" included with the kit. The kit plans are just pictures of the finished model, which is quite a bummer, but I am very happy with the plans I bought, so I will going by those instead. Thanks for reading!! Jeff


-
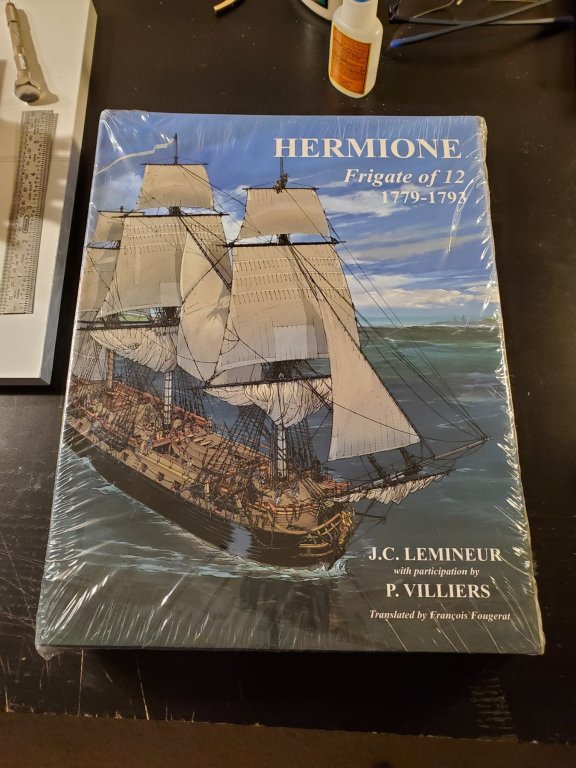
I finally had some time to work on her tonight! Got more of the deck planking done. After looking through quite a few build logs, I really liked how Chuck made his gun ports on the Cheerful. So I decided to try and make them like he did. I cut out the gun port placement paper guide and placed them on her. The paper of course, didn't match the frames as well as I would have liked. And that got me thinking if the gun ports were correctly placed, so I scowered the internet for some plans. I came across this: It was pretty expensive, (about as much as the kit), but my wife got it for me for Father's Day. I won't place pics of the plans here cause of copywrite, but WOW! Very detailed! It comes with the history if the Hermione, as well as 1:48 plans. After looking at the plans and comparing the gun ports to the kit, it seems the gun ports are s little off on the kit. I also glued on the top of frame 6 as well as some boxwood denoting the bottom of the gun ports. After the gun ports are done, I will continue to plank the deck. Thanks for the likes!! Jeff

-
Slow progress because not much time to spare, but I'm able to find time everyday. It takes me approximately 30 min per deck row, so I am able to plank 2 rows per day. I also have been drilling the nail holes too. I haven't finished drilling the holes near the middle of the deck because I want to make the hatches and things to see where they will be placed. I haven't done any sanding/ scraping yet. When I am done, i will compare the first model's attempt with this one. Thanks fur the likes!! Jeff

-
Very nice job planking the decks! It looks great! It looks like those decks were laser etched with where the planks would go. It would have been nice if they eched where the tops of the bulkheads would be. I totally would have done exactly the same thing and planked the entire deck. Glad you figured it out! Your build looks great! Jeff
- 26 replies
-
- 3
-
-
- mantua
- royal caroline
- (and 1 more)
-
Hello all!! Thanks for the likes! Just a small update. Slow but steady, I am still planking the second deck. I think it's turning out pretty well for me! I'm taking my time with each piece. Each piece is taking me about 5 to 10 min from cutting to gluing. I haven't finished with drilling the nail holes. I wanted to get a few of the full length rows done before drilling the middle section. I will be filing the holes with dark colored filler. I have not done any sanding yet, and I won't until it's all placed. I am going to use the 4 butt shift system for the plank nails. Thanks! Jeff

-
I am not sure yet if I will copper or not. I have to say, I really like how yours is looking with the copper! Jeff
-
I am not sure yet if I will copper or not. I have to say, I really like how yours is looking with the copper! Jeff
-
Very nice work! Your copper plates look excellent! Jeff
-
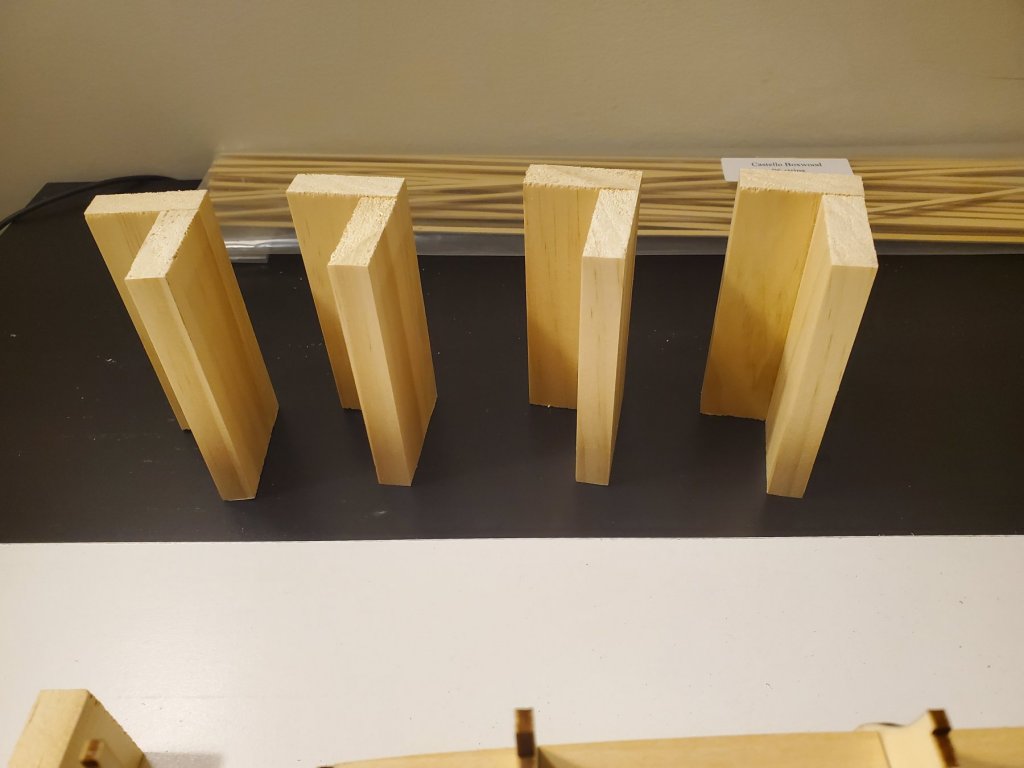
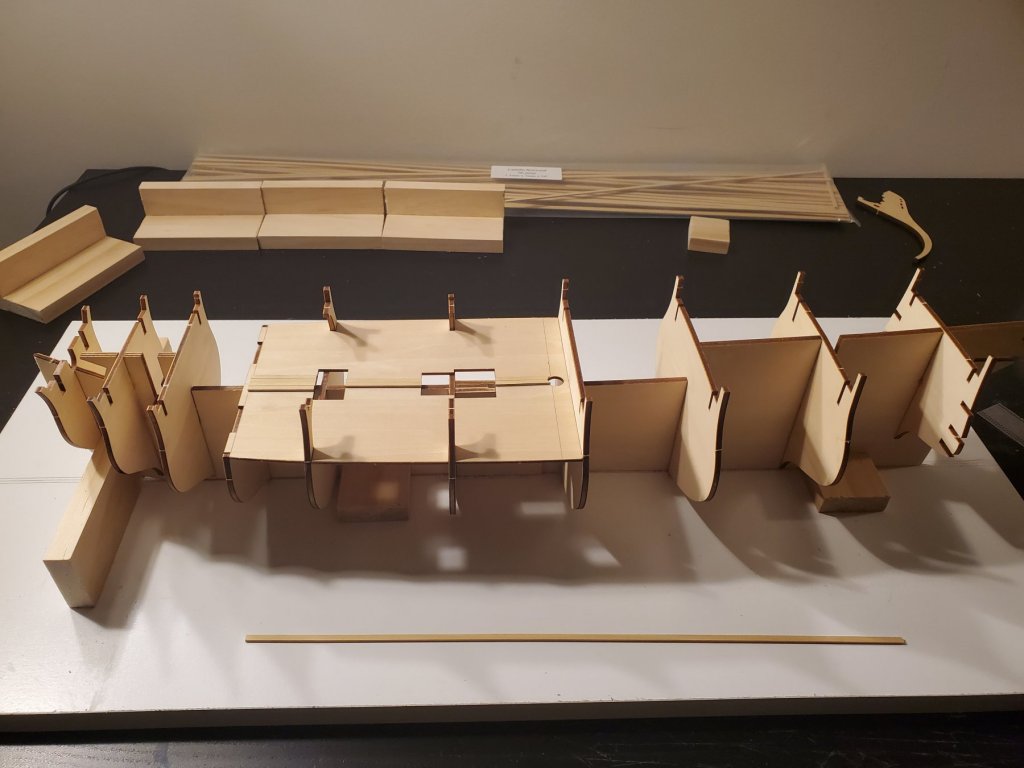
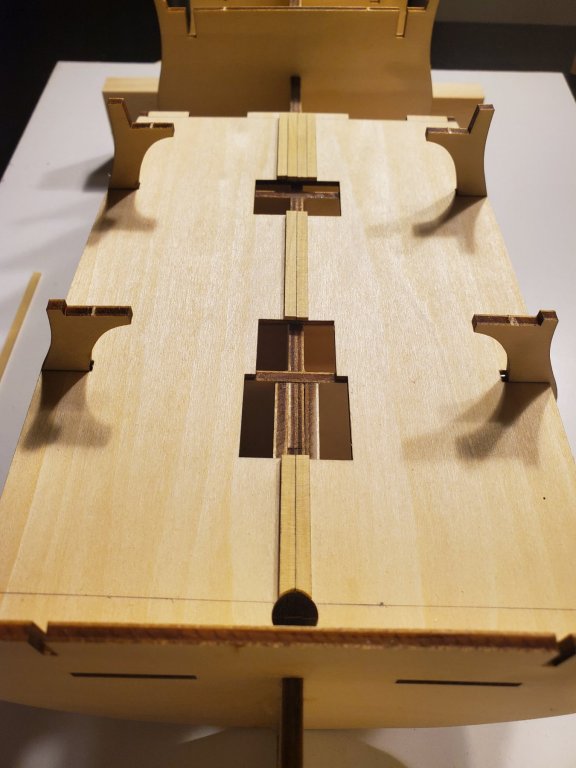
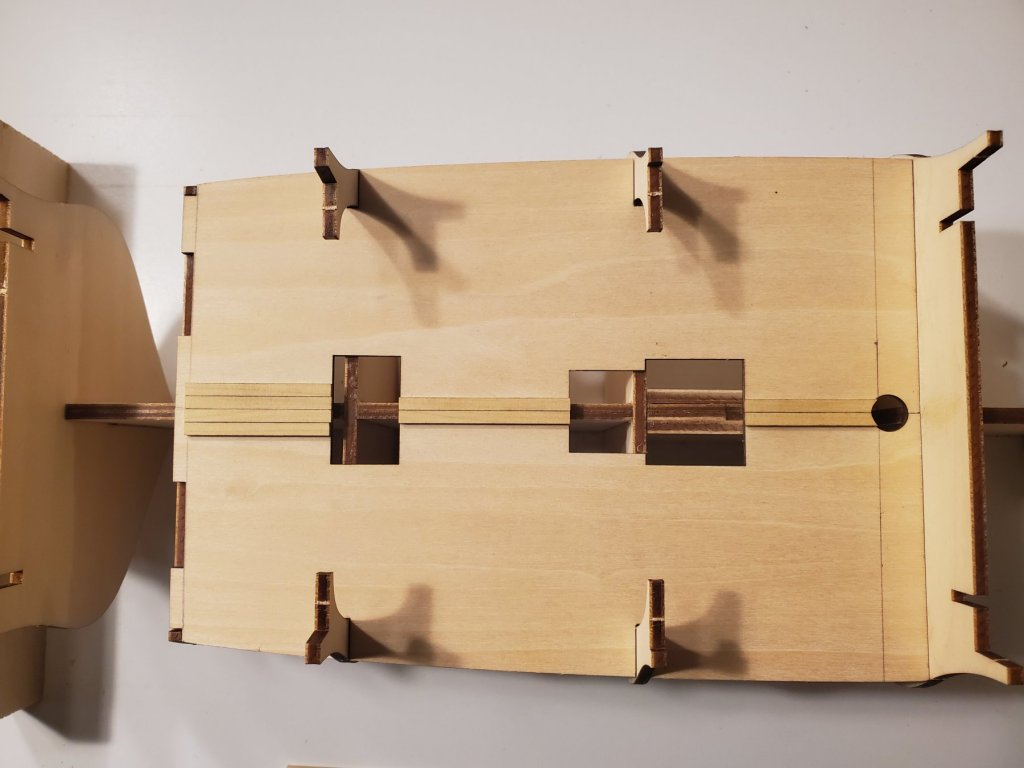
So I have been making slow but steady progress. I have glued the frames and the inserts for the masts. I have to say, making and using this building board is very helpful! I made some squares using some spare wood: These actually did help a lot to make sure the frames were square against the false keel. I also fitted and glued the second deck ply pieces too. I then started to plank the deck with boxwood instead of the supplied deck planning wood. I know the wood is thicker, but I will adjust the gun ports add needed. I actually have more time tomorrow to plank the deck, so I hope to give am update tomorrow. Thanks! Jeff
-
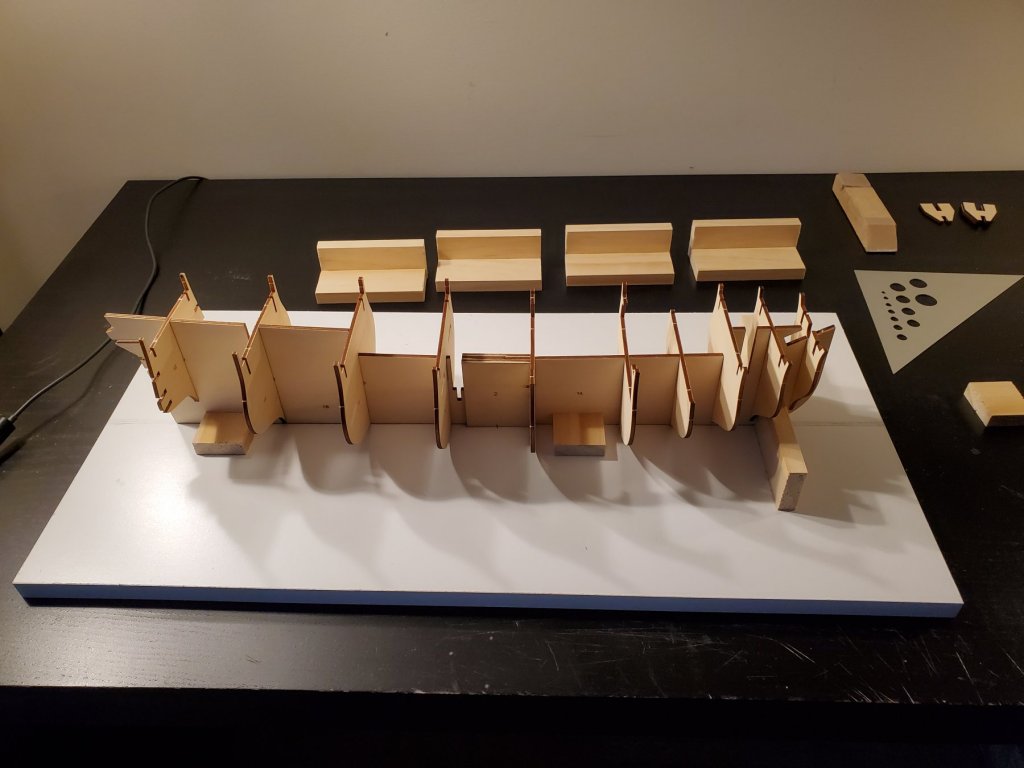
Dry fit the false keel with the frames. Nothing is glued yet. Jeff
-
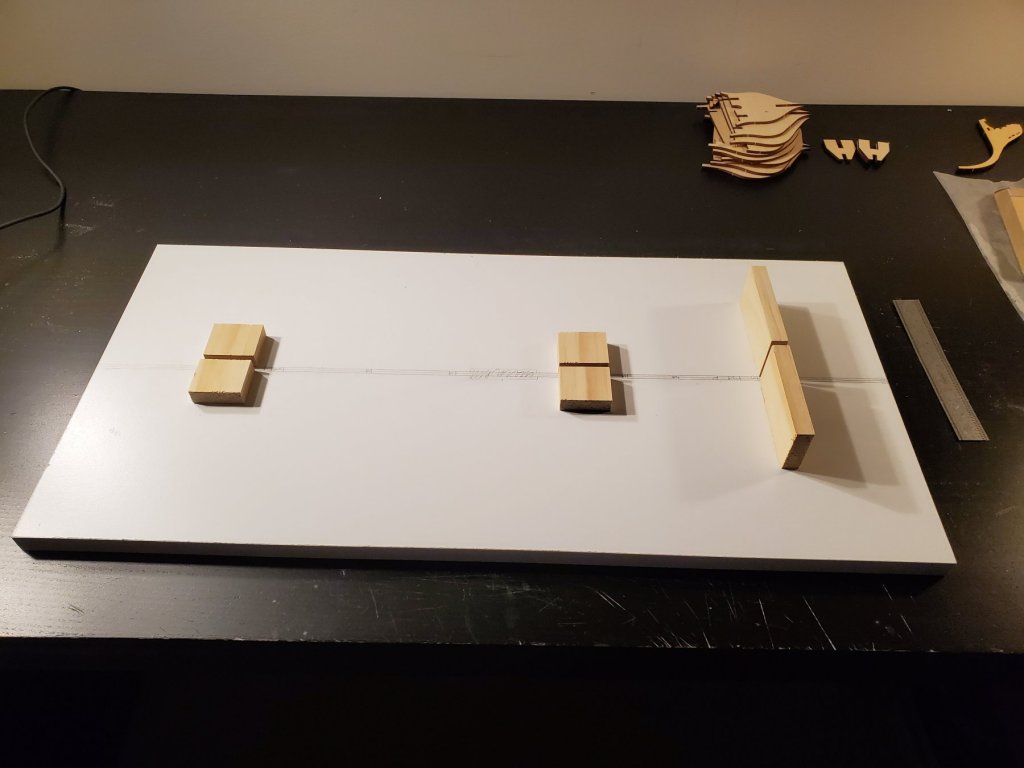
So, I decided to try my hand at making a building board for the ship to help make sure I can place the frames correctly and square. Super simple, but just has 1 job. The false keel isn't quite as straight as I would like, but I think this will help some while i place the frames, second deck, and the other supports. I like how the kit splits the false keel into 2 pieces instead of one. This helps to have a better chance of getting a straight false keel. I also made some squares to square off the frames when placing/gluing them. Once the glue dries on the boarding build supports, I'll take a pic of the false keel on it. Thanks! Jeff
-
Thunder, You are exactly right! The bulkheads are few and far between. It did make it difficult to plank. There were MANY more bulkheads with the longboat I made which made it easier to plank. Also, I did NOT make a rabbet. That would have made it much easier to plank. I recently just read some of Chuck's posts, and he mentioned that kits like this are near impossible to plank unless you make your own rabbet. With my redo, I will be making a rabbet. I need help to decide either to make one on the false keel itself, or glue on a rabbet strip to the false keel like on other model shipways kits. If I do the latter, I will have to make a new stem or modify it to fit. I haven't decided which I will do yet. I agree with you that if it were double planked, I could just finish what I had, sand it down, then plank a nice finishing layer. But, this isnt the case. I am honestly not beating myself up about my first attempt. I am just learning from it and doing it again, but better! I decided I don't want to paint it, and instead use natural wood. So, I will be replacing the basswood hull planks with boxwood, and maybe walnut. If you guys have some good ideas on what wood would be great for hull planking, let me know! Thanks! Jeff
-
Thank you everyone for your thoughts and prayers about my son's condition. It truly warms my heart to know that everyone on this forum has been so generous and kind. My son is doing a LOT better, but is still on steroids so we have a VERY active 4 year old! Haha! Within the last month, I have completed a much smaller ship. The Model Shipways 18th Century Longboat. Very small kit! I enjoyed the build and the instructions, but I wasn't to much of a fan for painting. I painted it, but it made me realize I like natural wood color more than painting. Now I comeback to Hermione. I took a few days to see where I left off. 1) The aftercastle (part 34) was chipped and slightly broken. That is fixable. 2) The second deck planks were over sanded and some deep scratches on it from me using too low of grit of sandpaper. That came with inexperience. Also, there were a few places on the deck planks themselves that didn't fully cover the deck. 3) The hull planking. I feel I did a pretty good job starting the planking. But as I went up from the keel of the ship ... a) I noticed that I rushed it. Planks aren't sitting straight on the hull. b) The planks that meet the stem do not sit properly against it. To truly fix it, would require removing the planks and trying again. c) There are some planks that didn't bend all the way, so they stick up off the ship, the ends not glued to anything. Again, would have to remove these planks too. d) My wife came by while I was writing this, and said, "Can I be honest? This isn't your best wood working you have done". And I had to be honest with myself and I did agree with her. e) I also, somehow overused the wood planks that came with the kit and I don't have enough to finish the hull planking. So no matter what I decide to do, I will have to order more wood. What Bob Ross the painter used to say is true, "You do not make mistakes, you make happy accidents." And we learn from our accidents. In this case, it's true. After reviewing the current state of the build, it made me realize where I didn't bevel the planks enough, where I over beveled, and how I didn't follow the curvature of the hull very well. How I didn't take enough time bending and fitting the planks. etc etc etc. I think this is a great example of a beginner's oopies to which to learn from. Am I giving up? NO WAY! If anything, it makes me want to do it better. The only way to do that, is to scrap the planking and start over. I would like to re-do the deck planking too because the strips are thin (no issue with that), BUT I sanded them WAY too much. Getting the scratches out might thin the deck planks too much, so I would have to replace those deck planks. I wouldn't be happy with myself if I felt I didn't do the best job I could on the ship. I realized that yes, this ship is painted, but I would actually like to do a non-painted version.. I really like the natural wood look over the painted. I know this is super subjective, but if the finished ship is going up in my house, I would like it to look the way I want. I had some discussions with my wife about this ship and how I want to proceed (removing the planking and starting over, etc). After some talking to her about what I want to do with the ship, she and I agreed that it would be of my best interest to start over. But this time, slower and more carefully. This isn't a decision that I take lightly. I feel that I really goofed up, but in a good way. I am keeping what I already have done to compare it to what I want it to be. I see this as more of a good opportunity to help me understand how to properly plank a hull on a bigger ship model. I will be posting updated pics as I begin. Again, I am excited to buckle down and do the best I can on this ship!!! Thanks for everyone's support! Jeff
-
Thank you all for your support! Russ, your ship looks great to me!! You use styraphome to hold the ship up while you work? Neat idea! You are right. It's easy to buy kitsch more than build them. This is why I asked you guys for your opinion. Tha is for your input and I am excited to continue the build again. I will be updating my build log soon with my assessment. Thank you for your input Mark. It just solidifies that I need to continue on with the Hermione. Thanks! Jeff
-
Thanks everyone for your thoughts! The Medway longboat is really a great looking kit, and I will consider it for my next build! After some thought, I think you guys are right. I will continue with the Hermione kit next. It will be a challenge because I did make a few snafus on the hull planking. I will bring it out and make a fair assessment of what needs to be done to continue with the build. Thanks for all your help!! Jeff