HOLIDAY DONATION DRIVE - SUPPORT MSW - DO YOUR PART TO KEEP THIS GREAT FORUM GOING! (Only 24 donations so far out of 49,000 members - C'mon guys!)
×
Tom E
-
Posts
469 -
Joined
-
Last visited
Content Type
Profiles
Forums
Gallery
Events
Everything posted by Tom E
-
 Thanks for the kind words Jim! Mike, I was wondering about the hooks at Syren. Was wondering about the size. They work well on the Niagara? No blackening chemicals for me. I've always painted. Maybe in the future when I gain some more experience. Tom E
 -
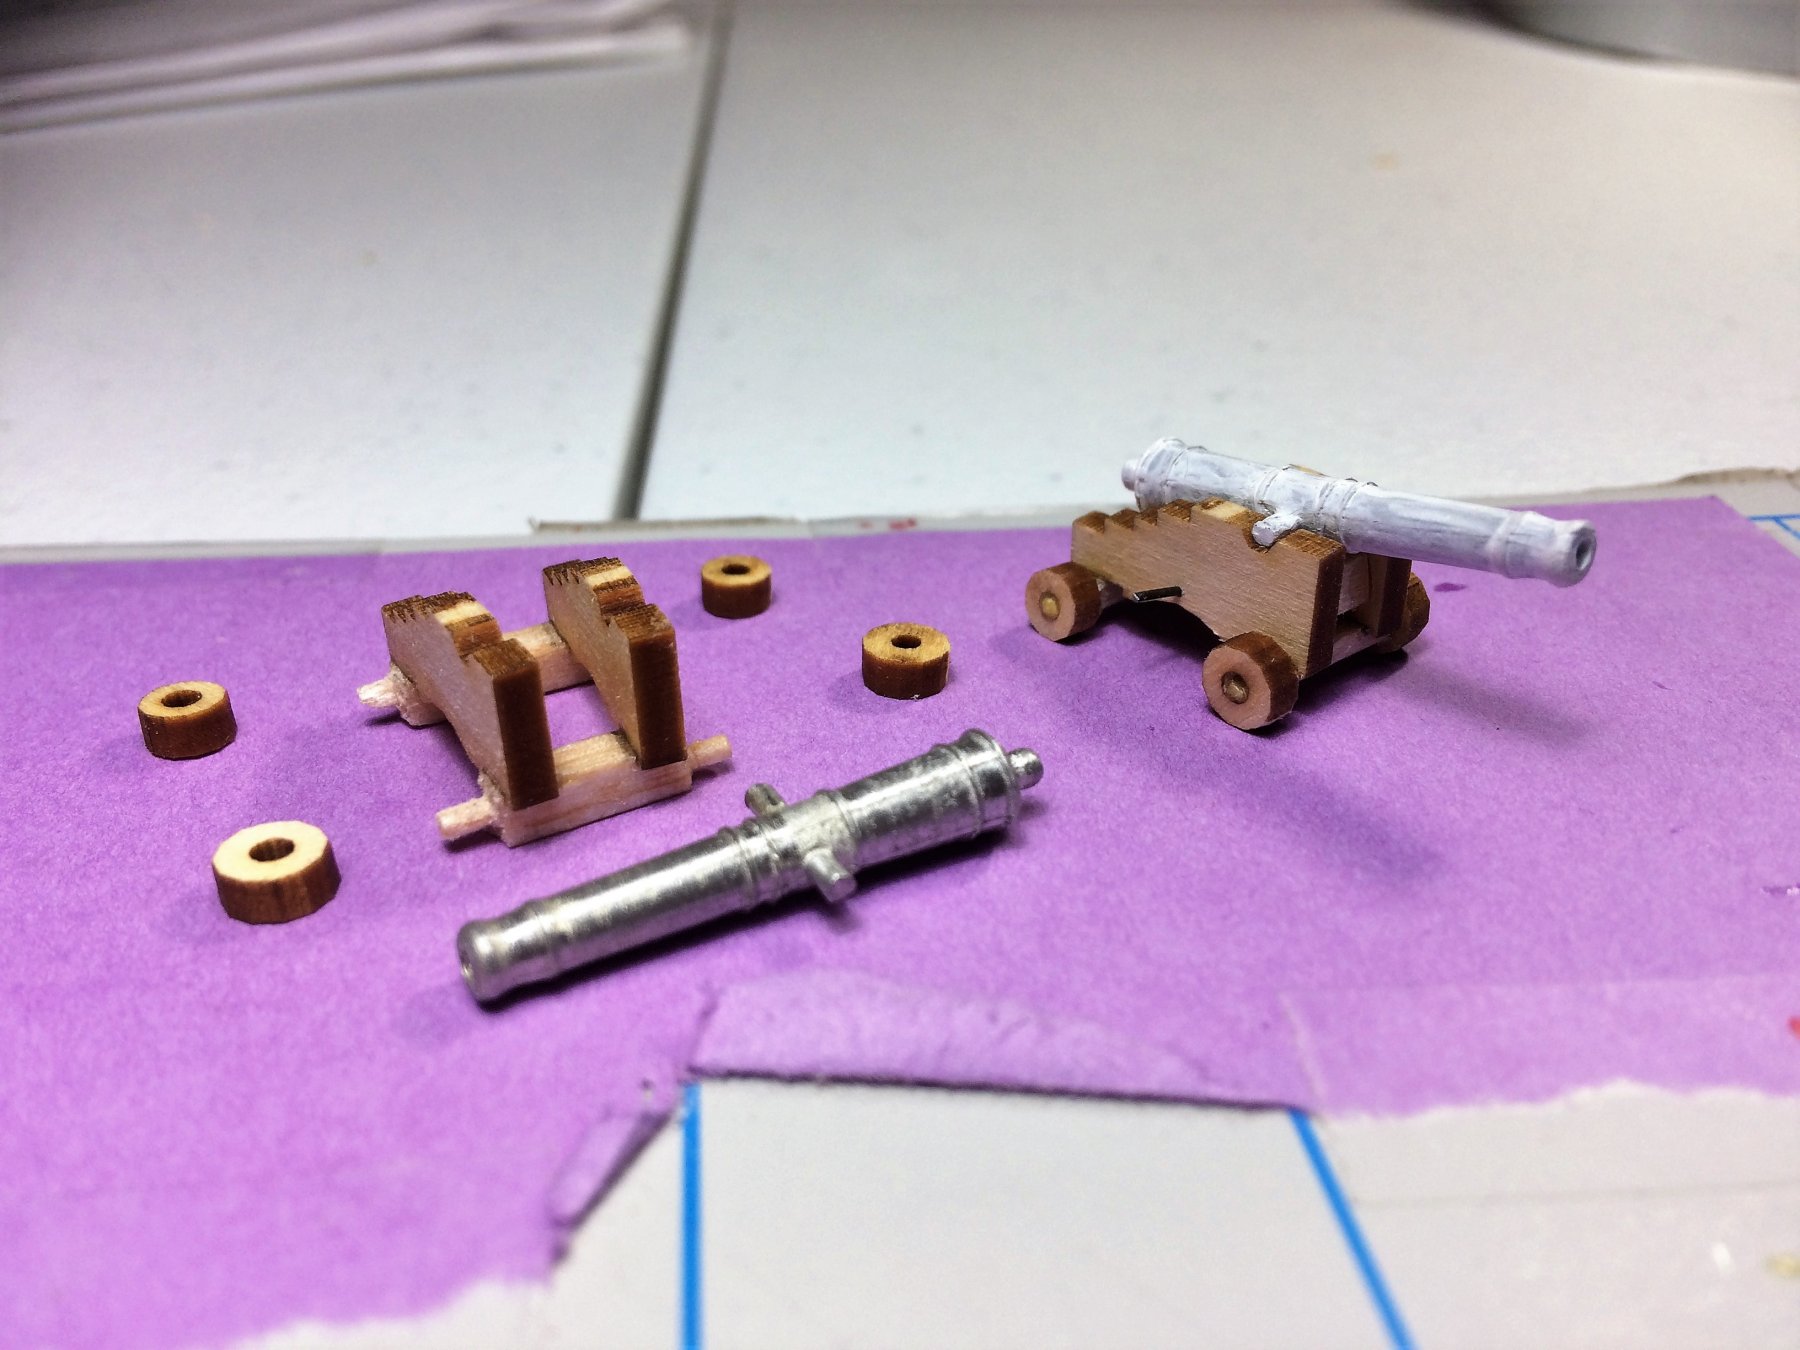
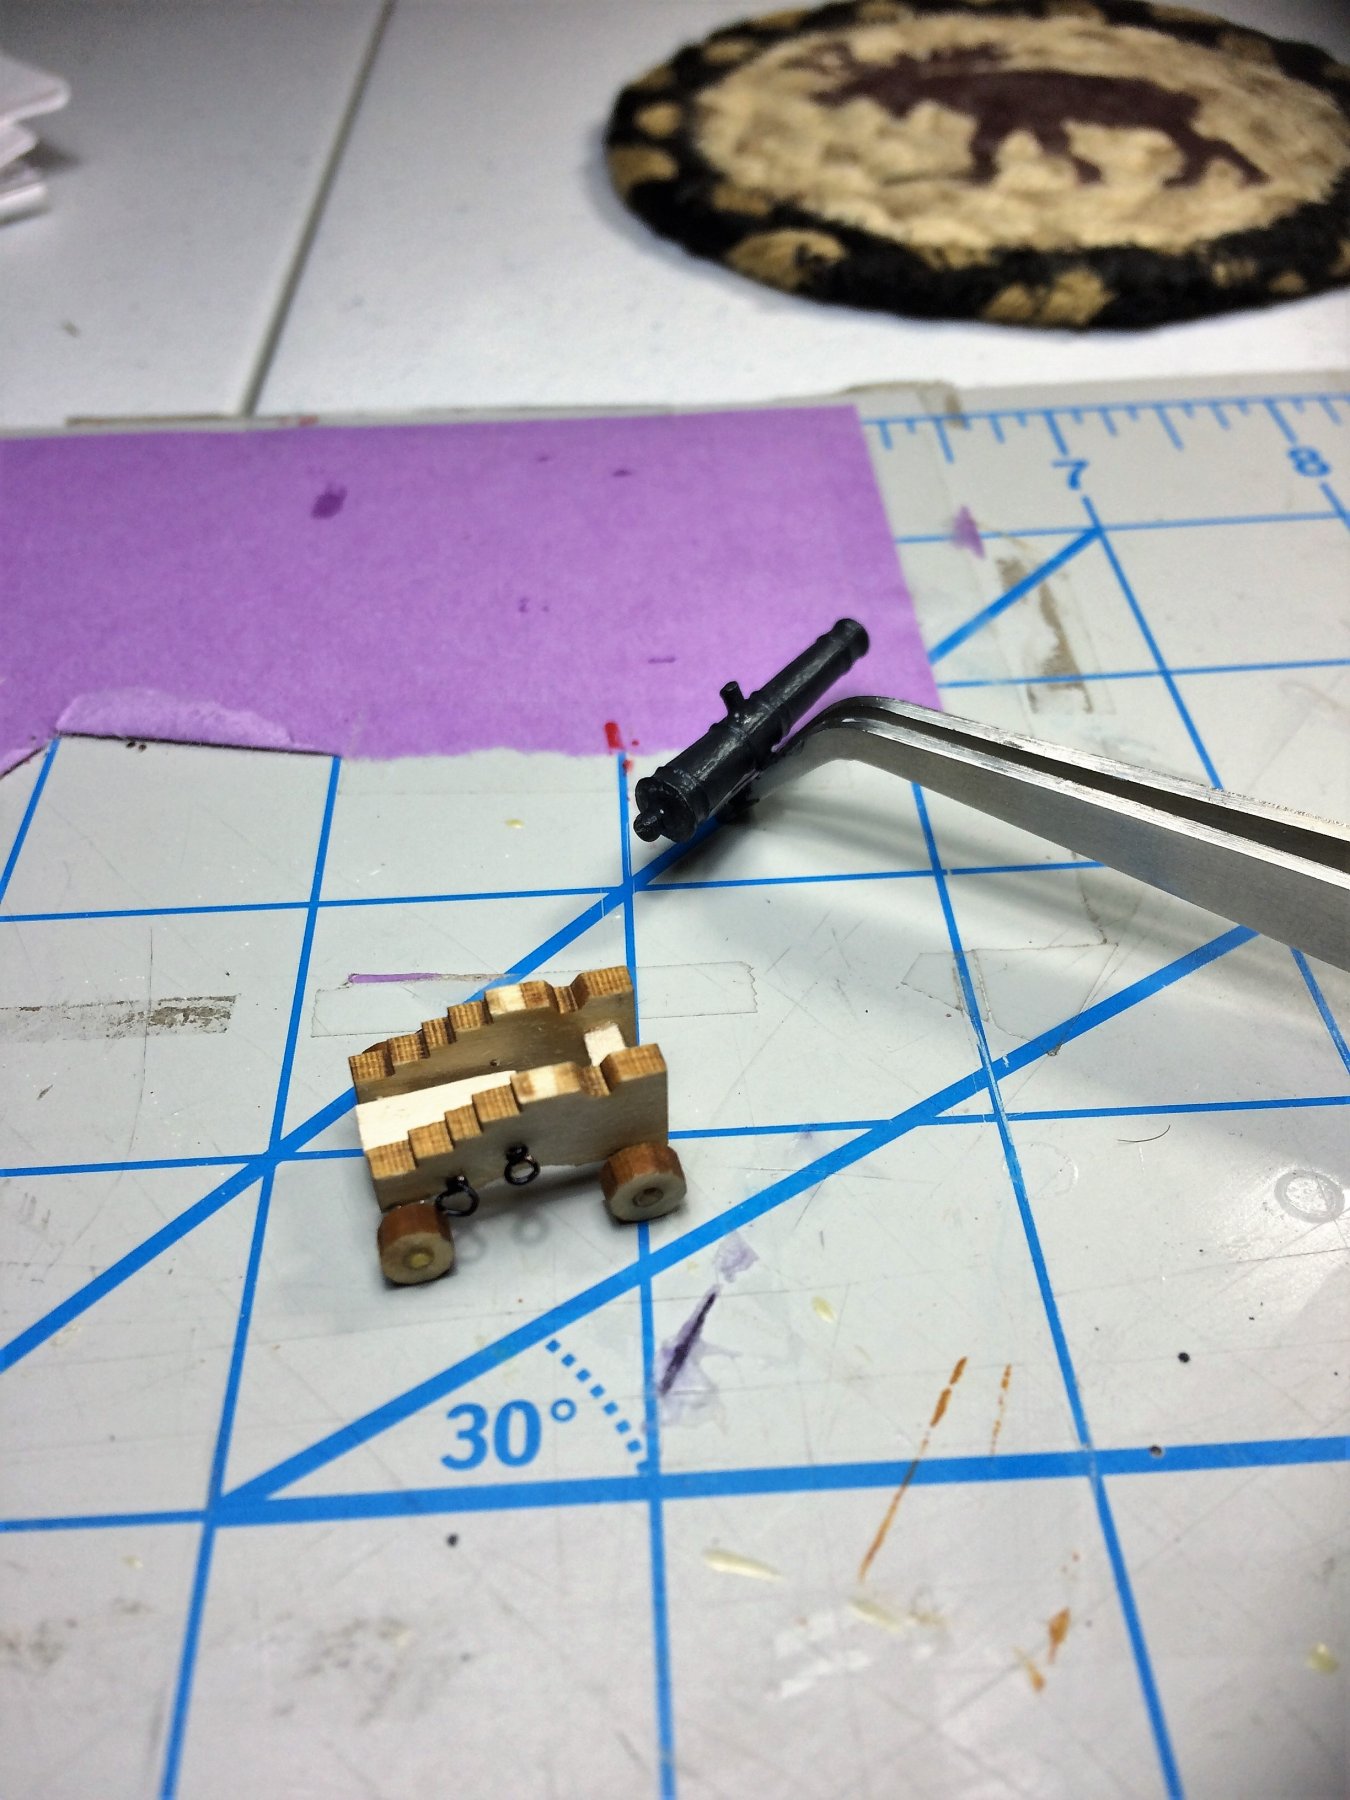
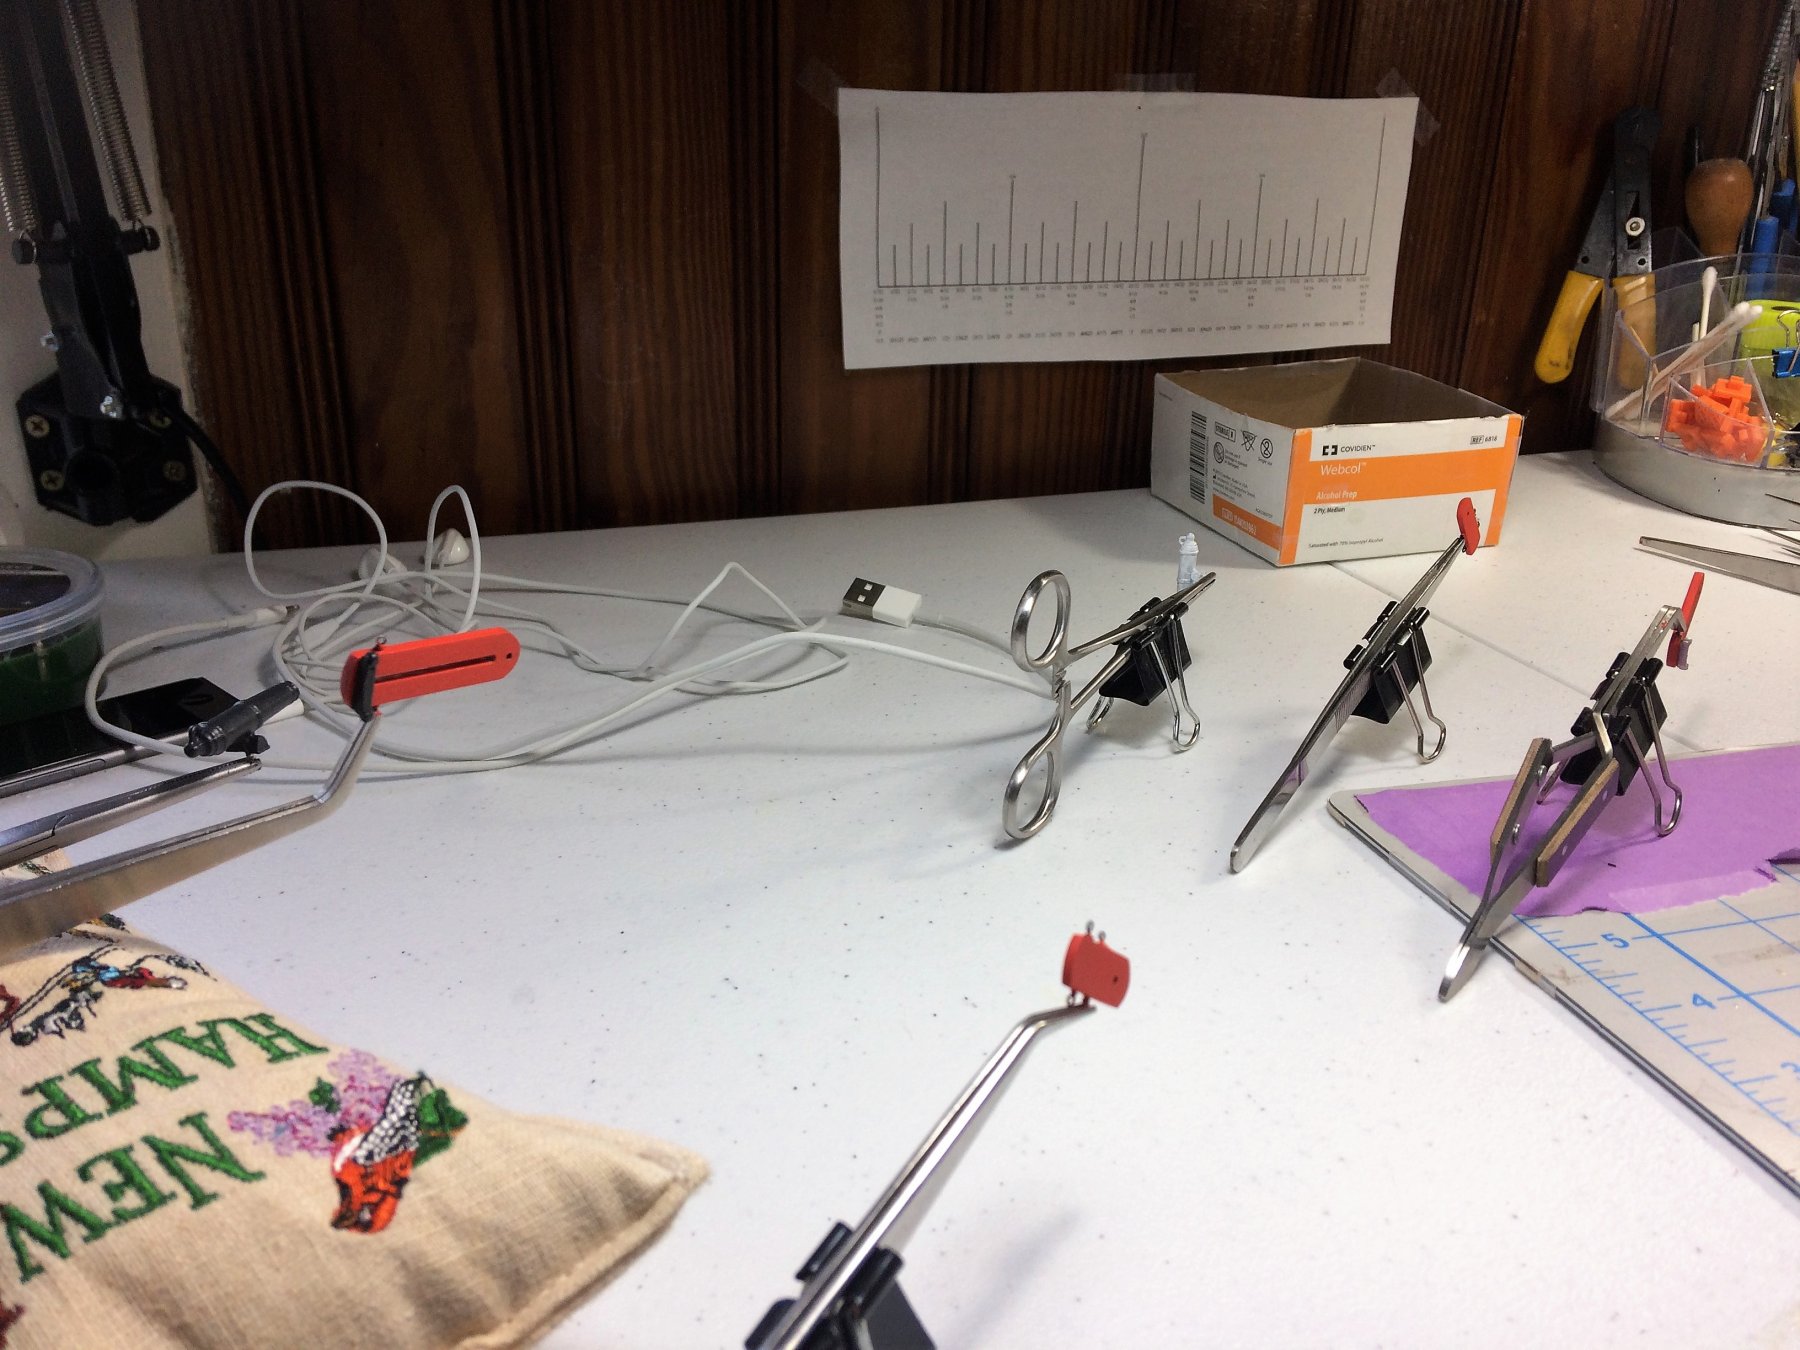
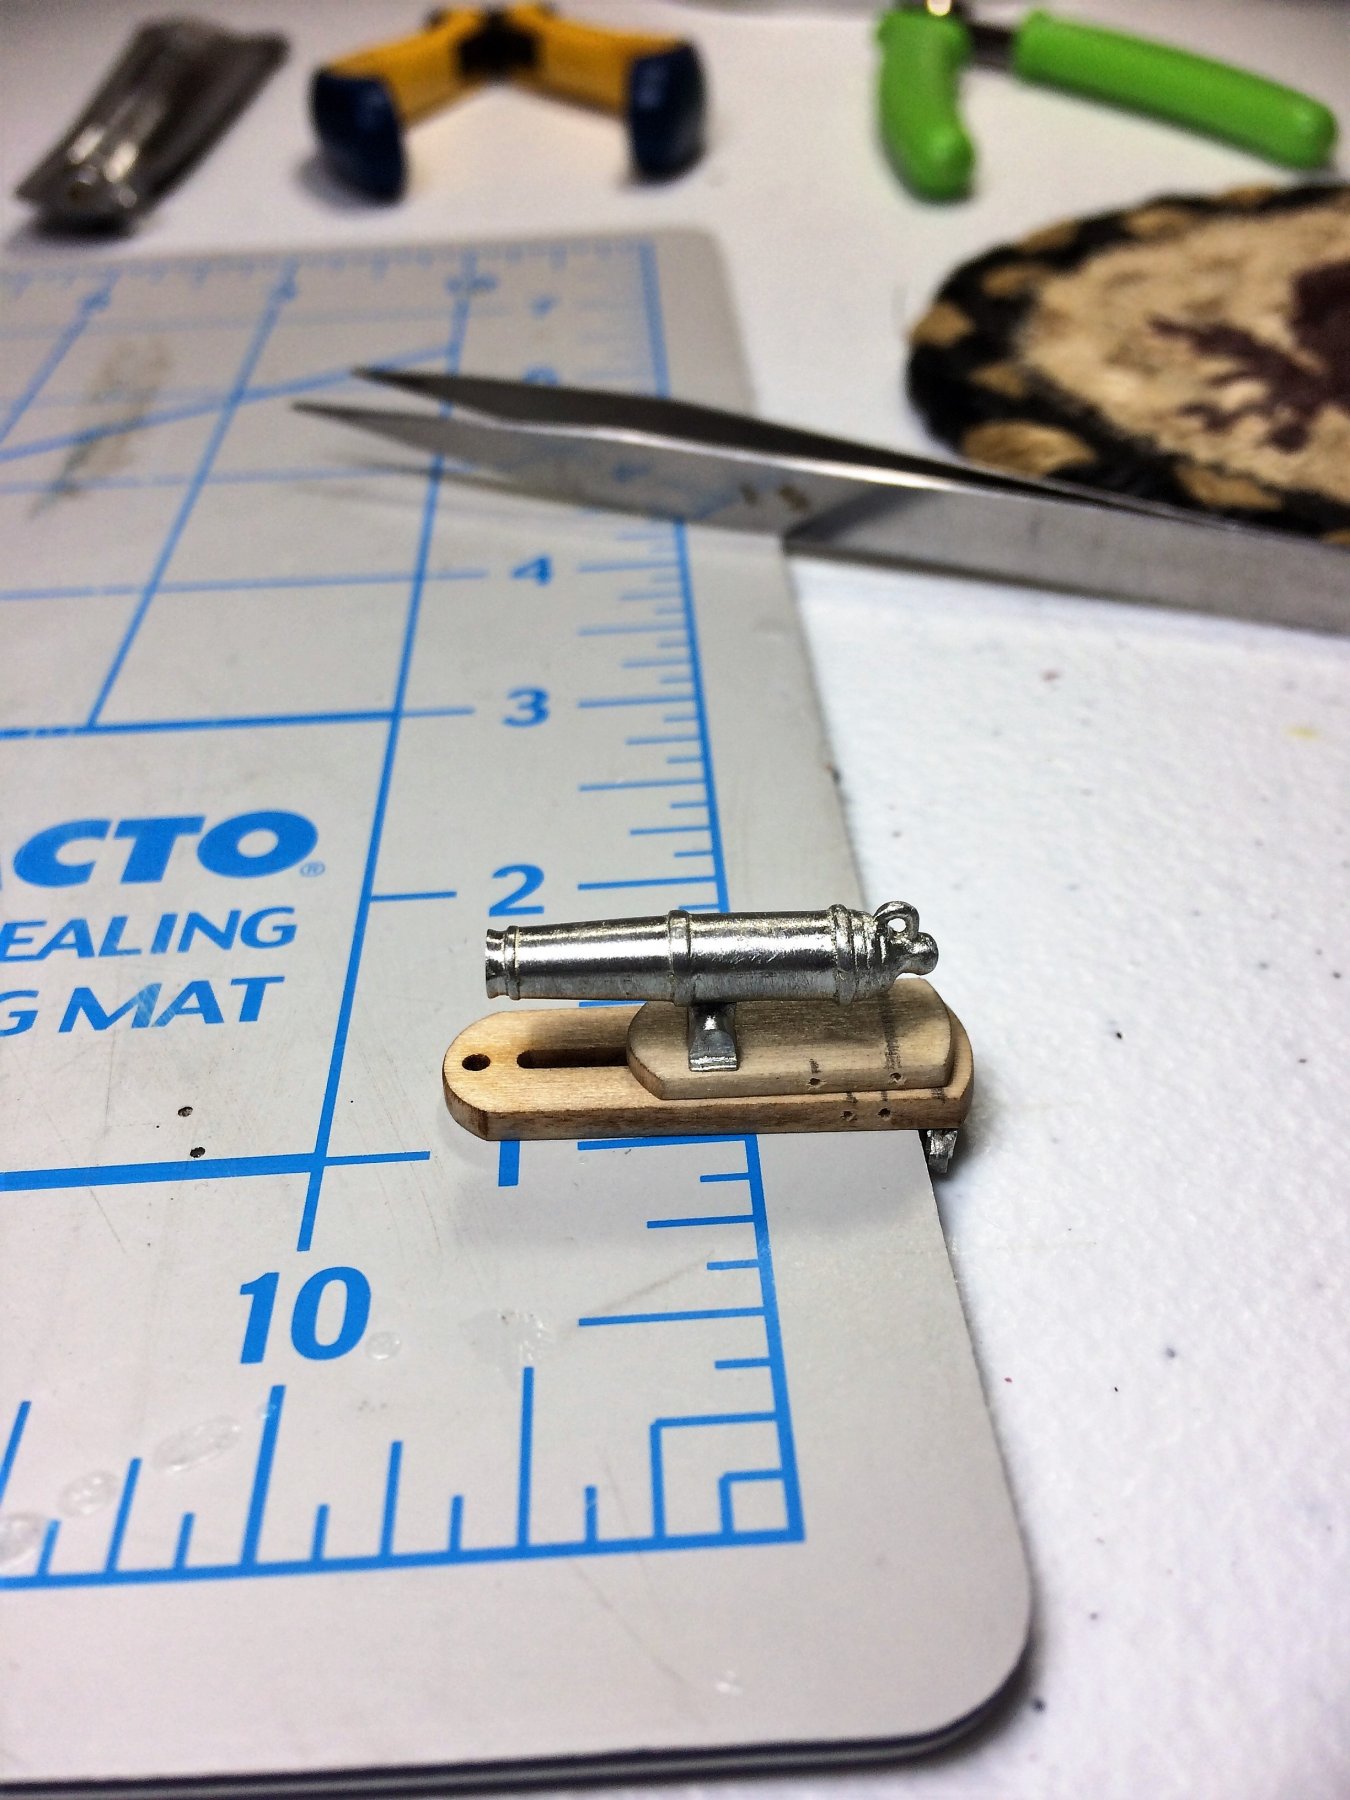
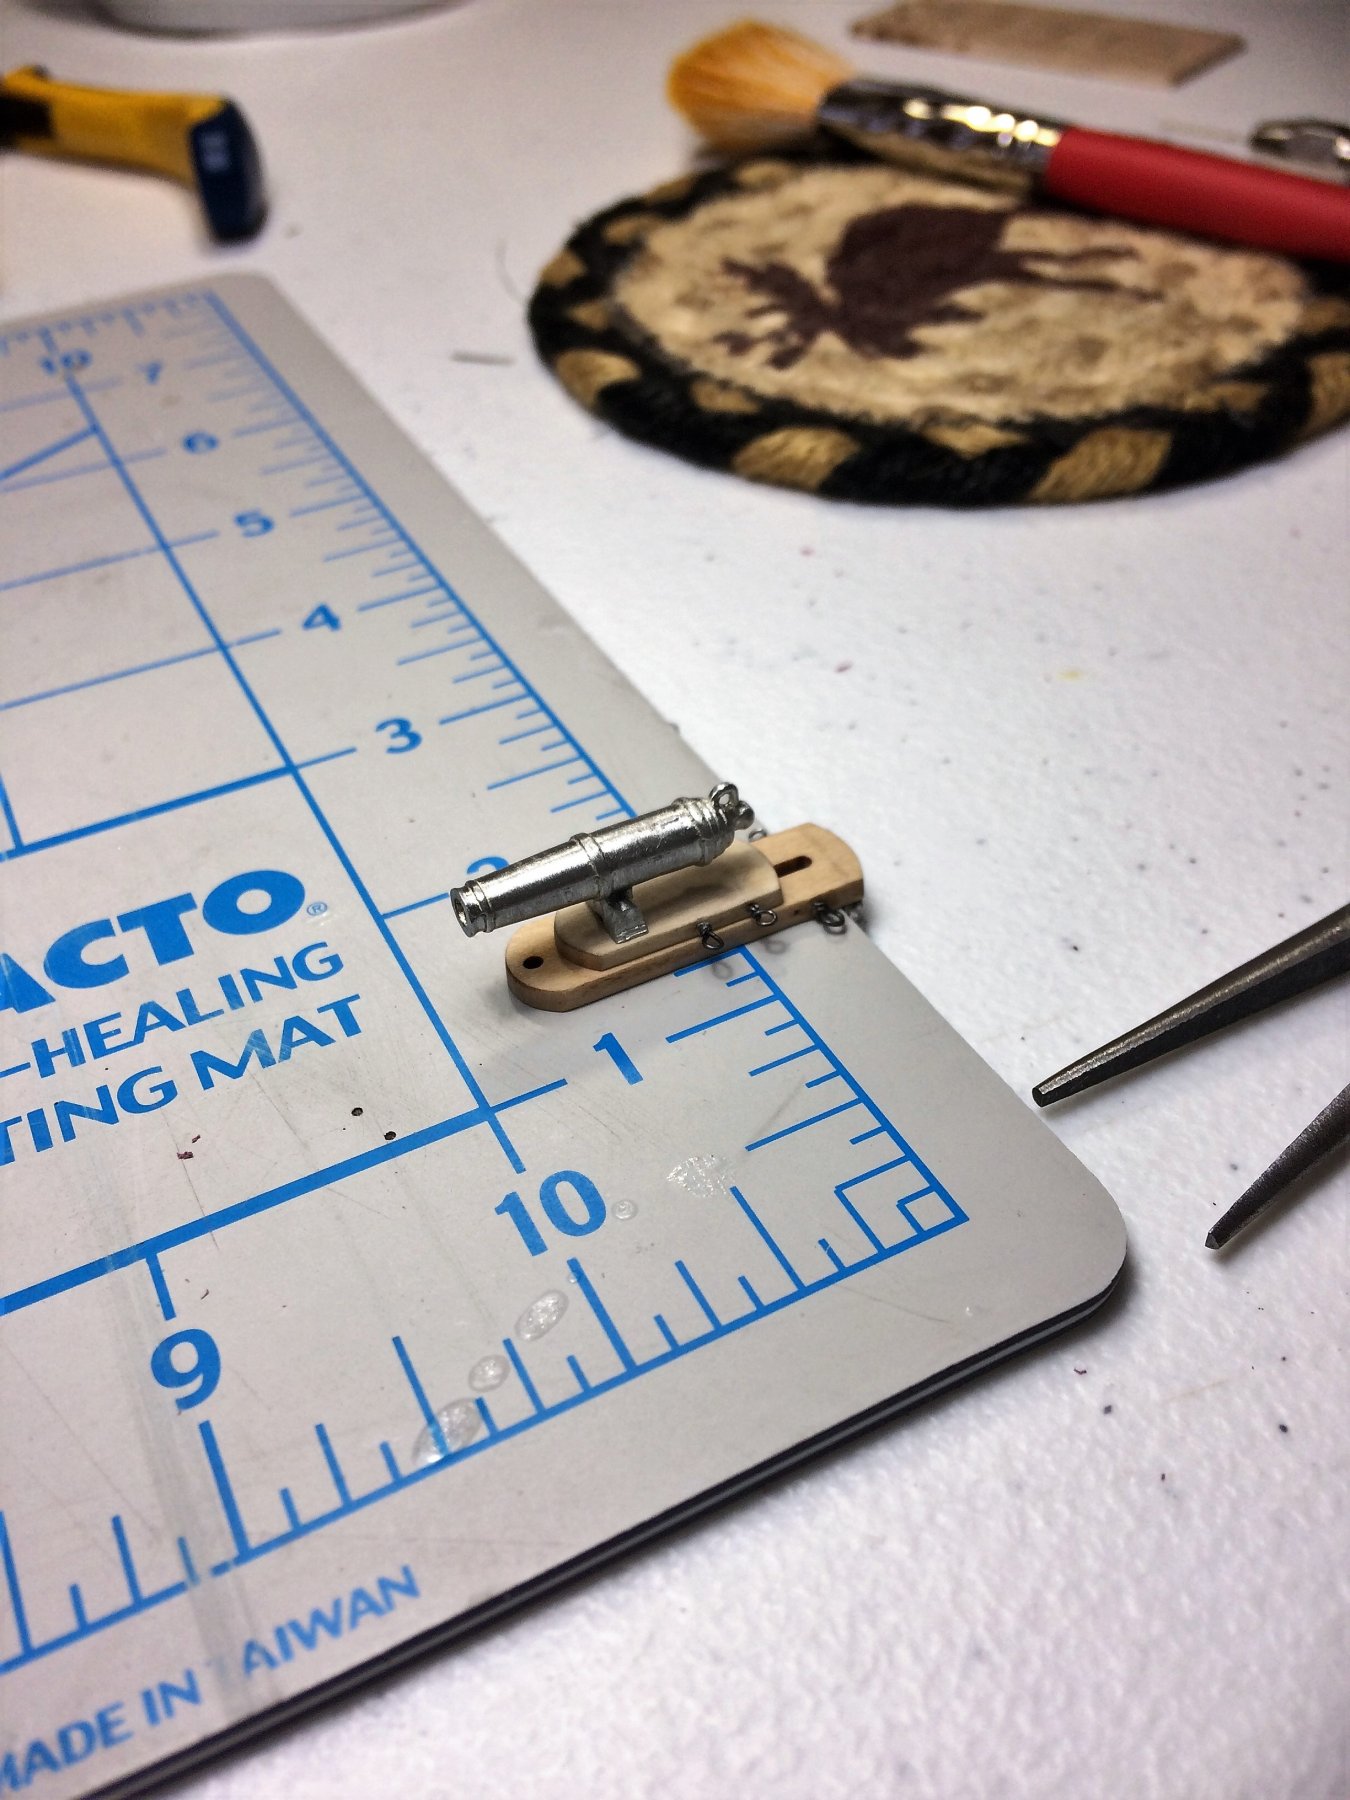
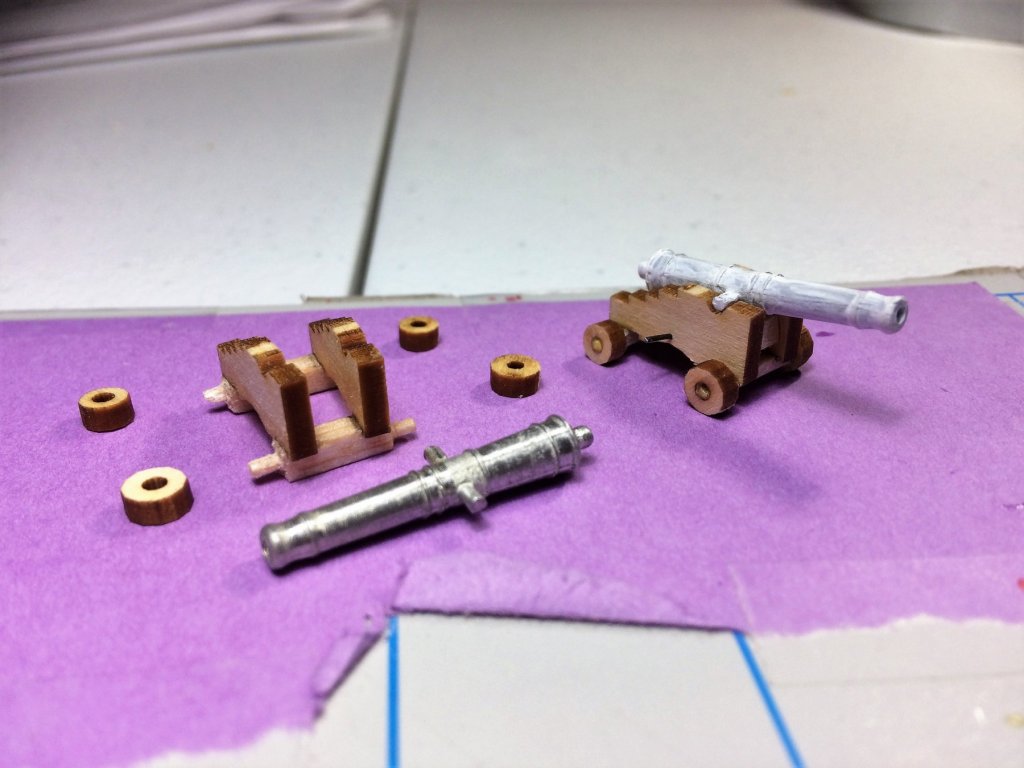
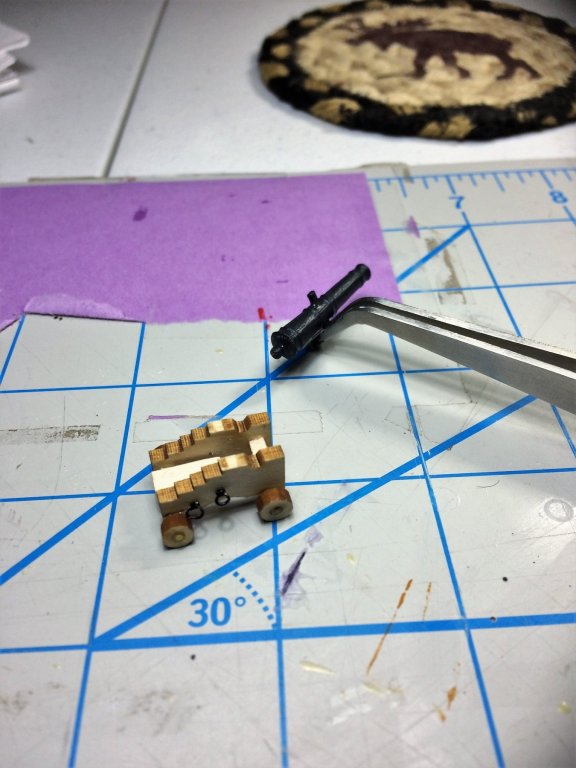
Evening, Hope all is quiet in everyone's Shipyard tonight. Work got in the way a lot this week. Healthcare......it never stops! A lot of chores were done as well in preparation for next weeks Super Bowl! Go Pats!!!!!! Some was done in the Shipyard. I seem to be staying away from the superstructure. I'm doing prelim measurements and test fittings for the Counter area and the transition area from the deck up the transom. Also wrapping my mind around the fashion pieces. I have really been studying John Flemings (Texxn5) build log. He goes into some depth in this area, its been a great help. So I do what I think a lot of us do.......side projects! Mine are the guns right now. The Masts have also been made a priority, but are purely in the reading/measuring/research stage right now. I do really like the look of these cannon. I had partially built one already. so I started the other. One could dry while I worked on the other. Busy hands, busy brain They clean up easily. They are a white metal.....Britannia?....Pewter? A little bit of assembly line here, there is only 2 total guns anyways. 1 cannon gets primed, 1 gets the first coat of Gunmetal/Iron black. 1 carriage gets the iron rod thru it, the other, the flat piece of wood resting on the axels and the iron rod. Eyebolts next. I'm still perfecting my technique! Admittedly, there not the best looking things and are probably out of scale, but I'll get better. There's plenty of them on the carronades so I should be an expert by the time I'm done with them all. Everything gets a coat of primer. I mean everything. From cannon, to masts, to bulwarks. When in doubt, I prime it. No matter what! Below is the current state of affairs. Looks like a model shop after an earthquake hit! The place needs a tidying up. I'll have guests next weekend for a Super Bowl party. Good food, good beer/spirits/entertainment and a HD TV near by for the big game! Tom E


-
Its such an easy mistake. There is such a small difference between the inner and outer timbers its almost imperceptible. I sat and looked at those timbers for a full day before making the decision as to which ones were inner or outer. I measured, re-measured and measured again and I was still unsure. Eventually just jumped in and made a decision. I think got it wrong as well. I had to remove my quarter stanchion supports and sand everything down because I had a huge upward slope. Tom E
-
Mike, Think I'll get some masking tape! I have some, but I've been wondering if painters tape will work, or should I invest in something like Tamiya's masking tape? I do like the different sizes that Tamiya has. As for the paint, I will try and blend something with what I have. Anything that's saves me some cash is worth looking into. As for the spars, I'll be using what's supplied in the kit. I was wondering when I should start playing with that. Tom E
-
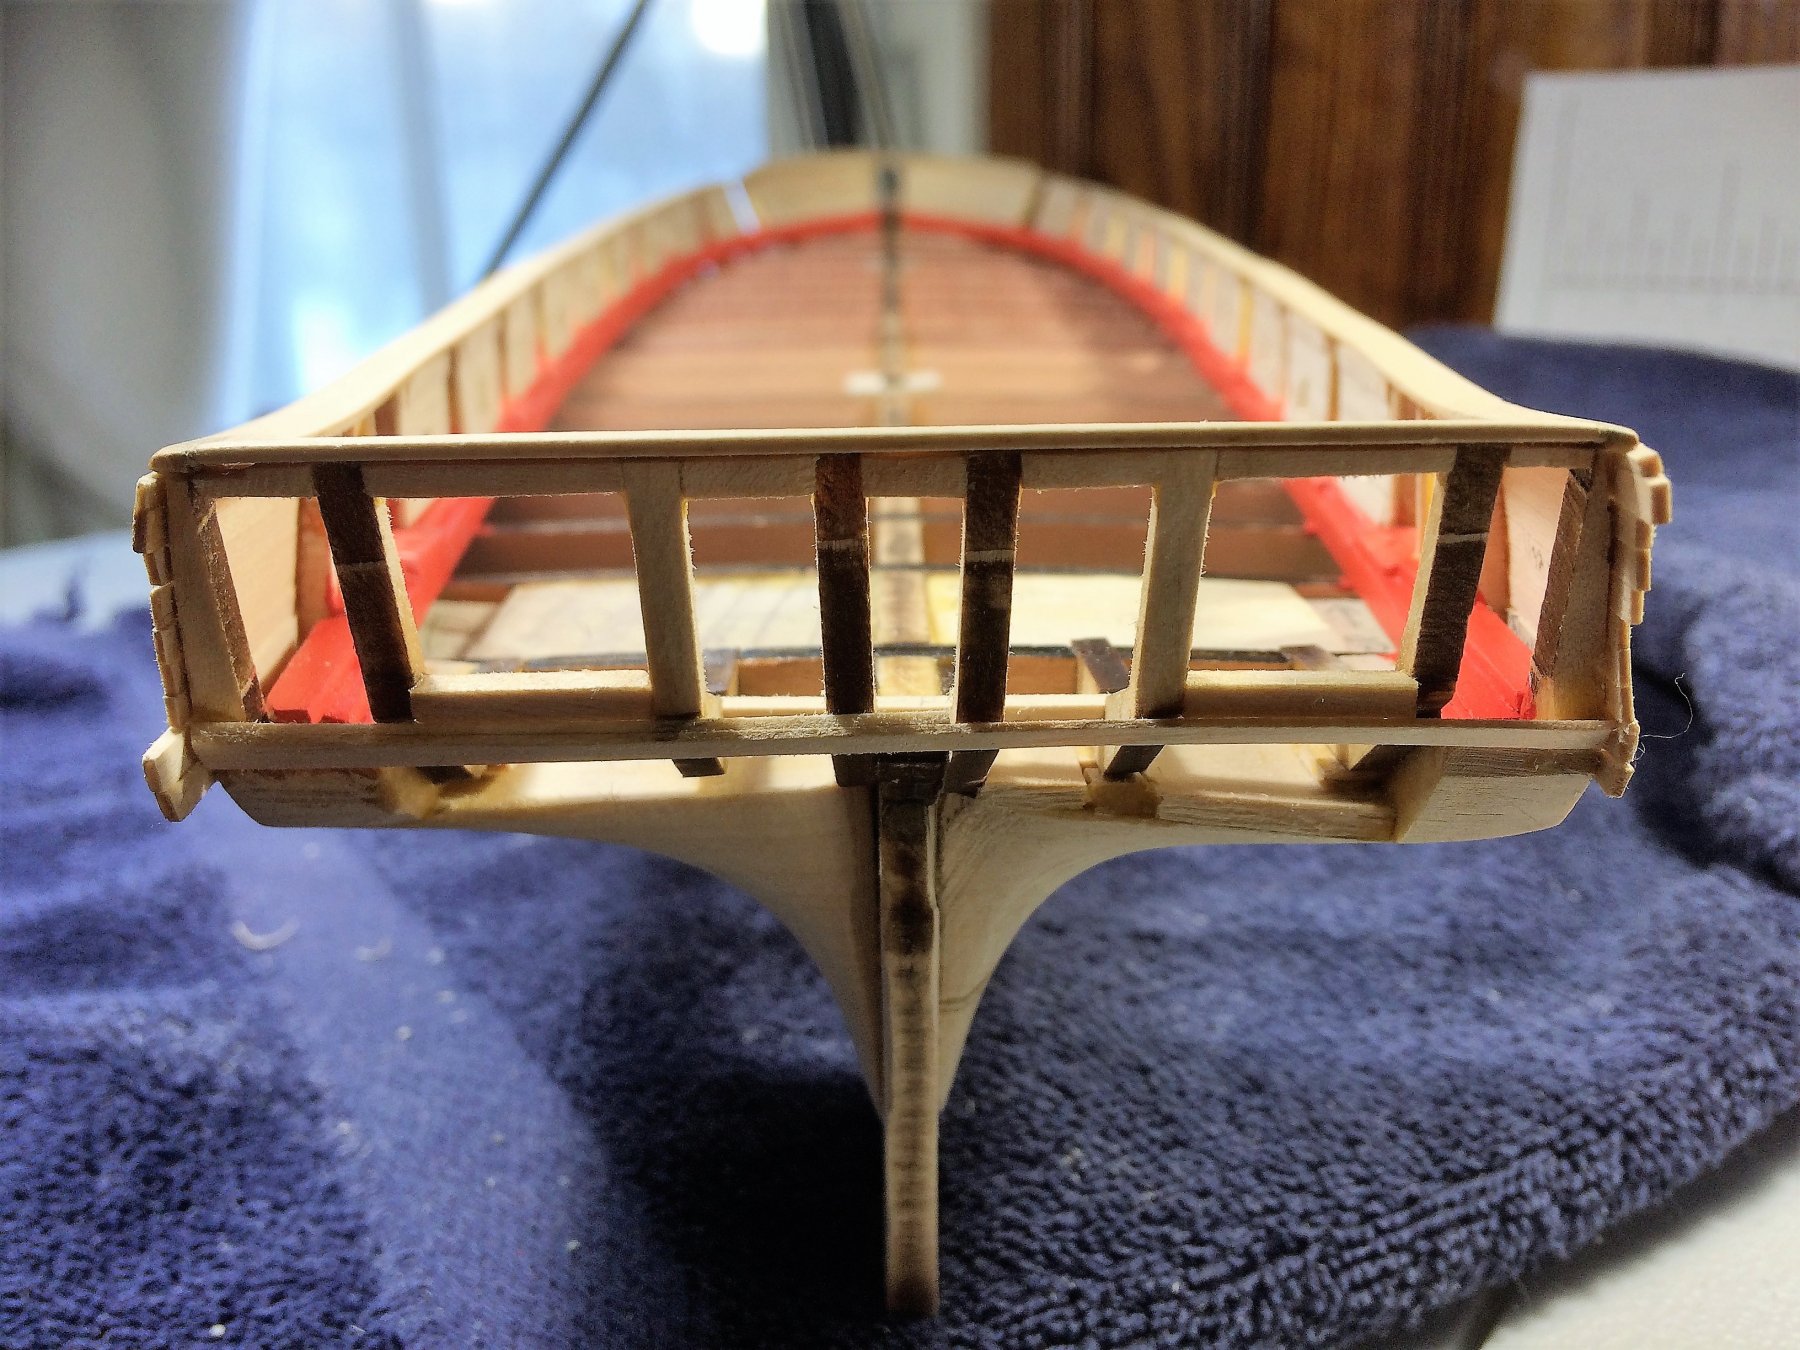
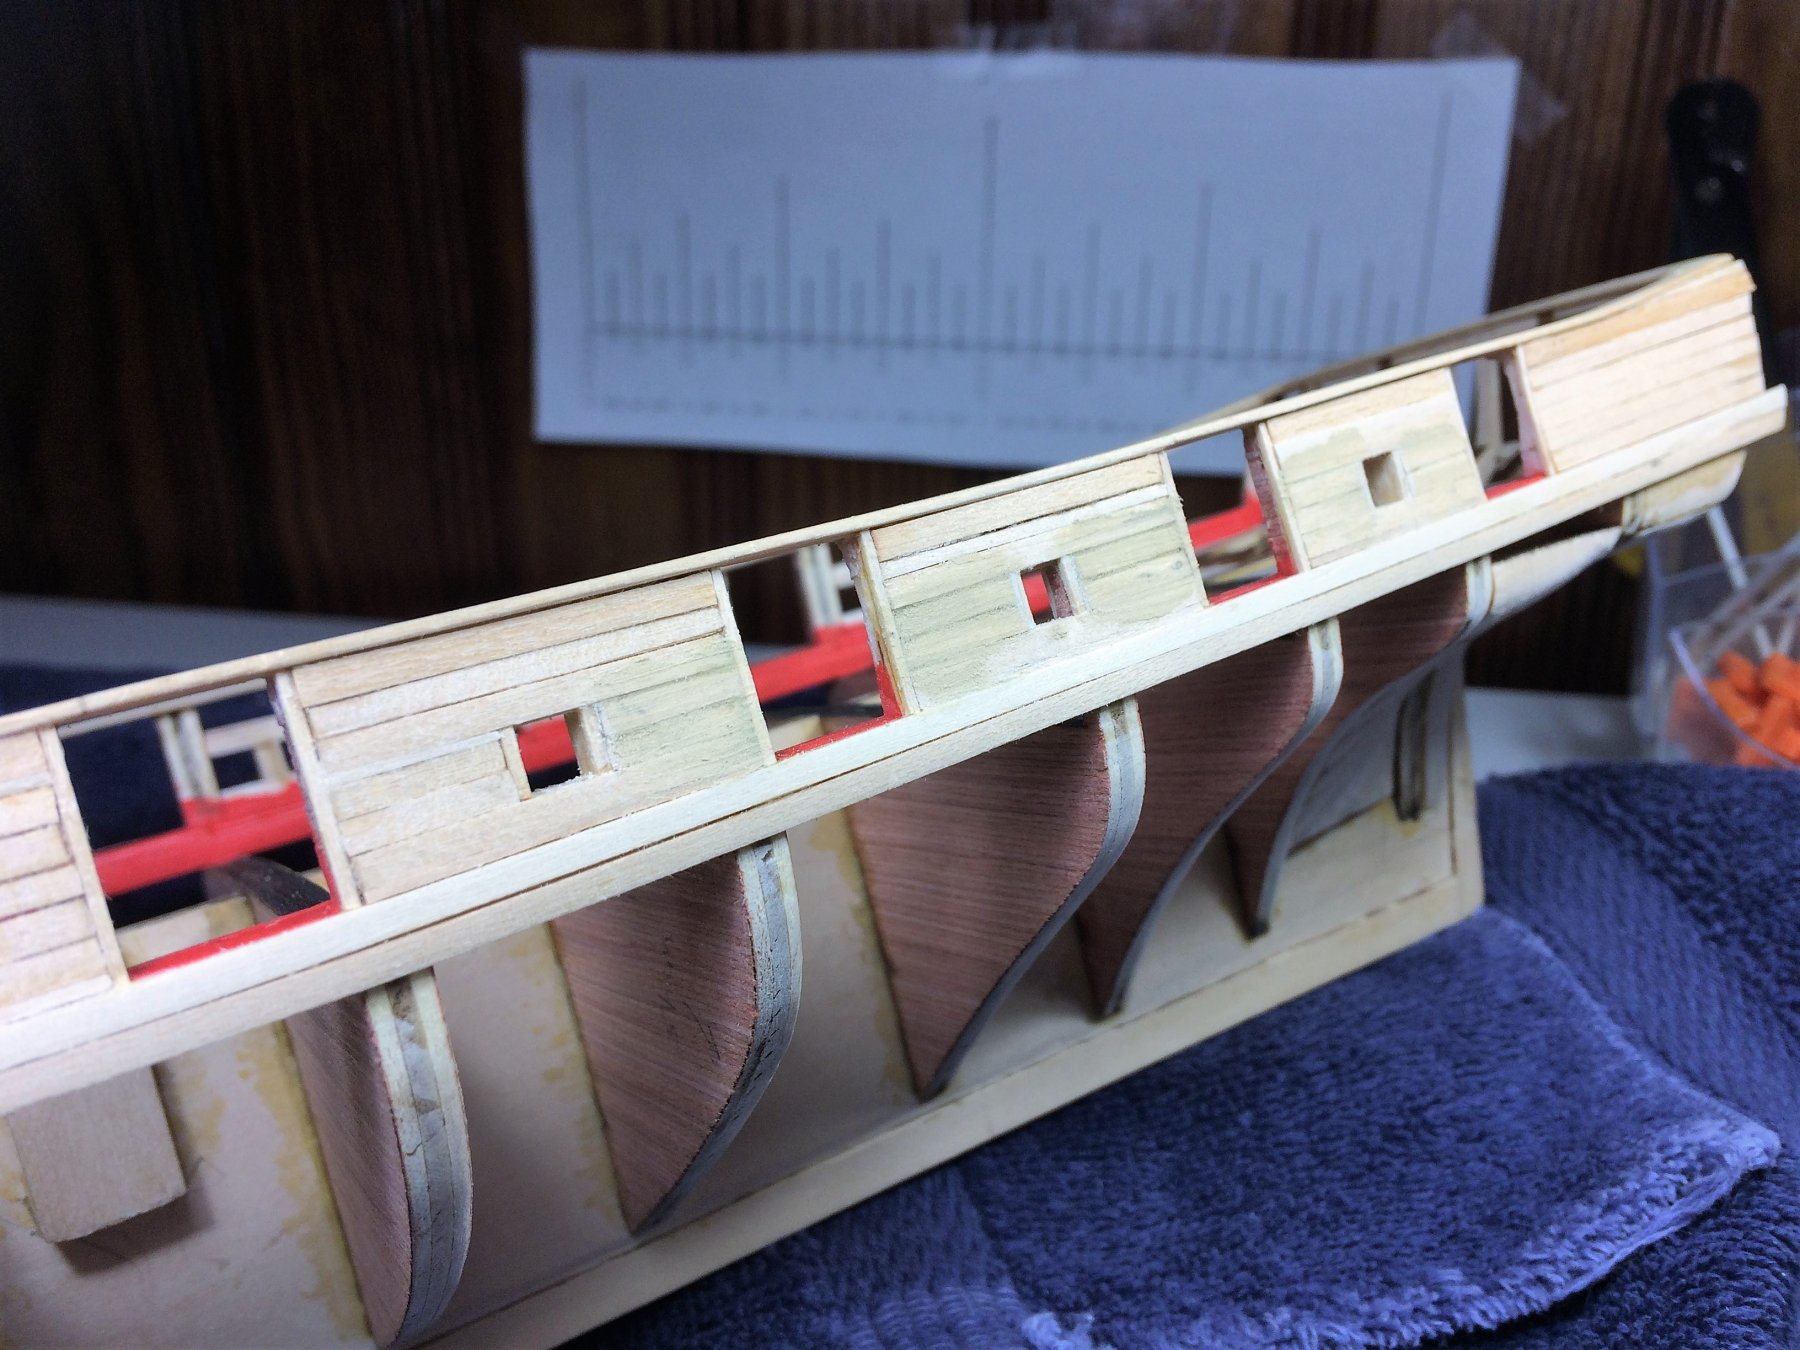
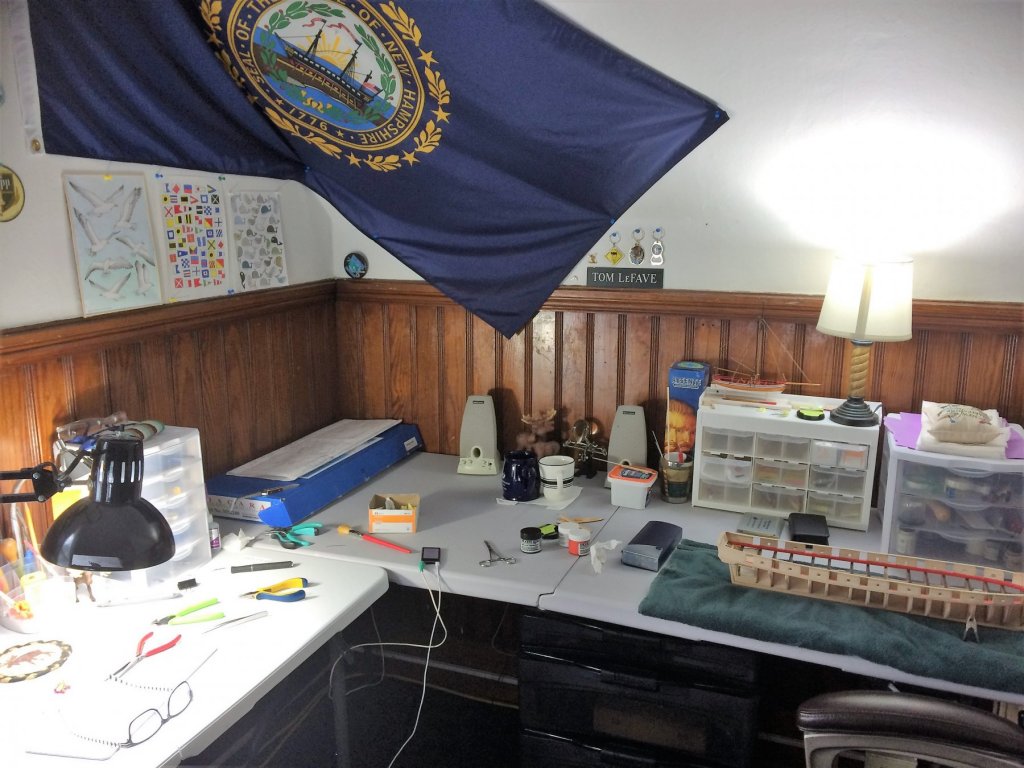
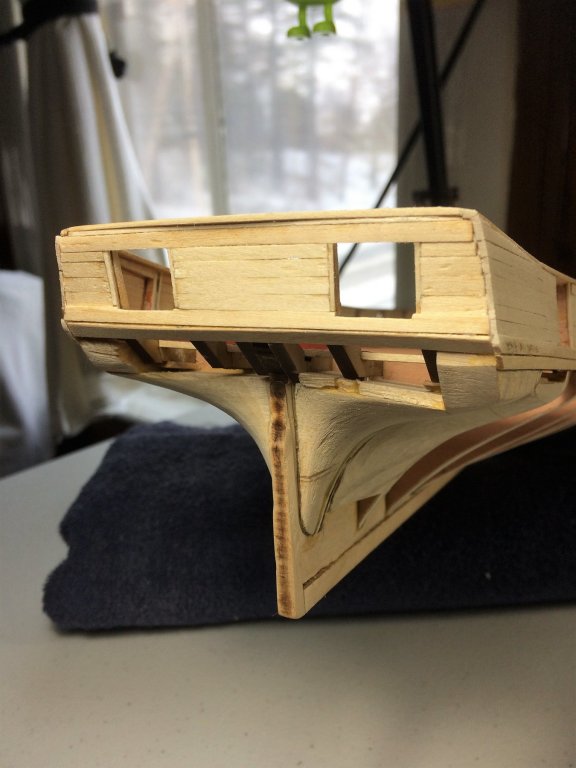
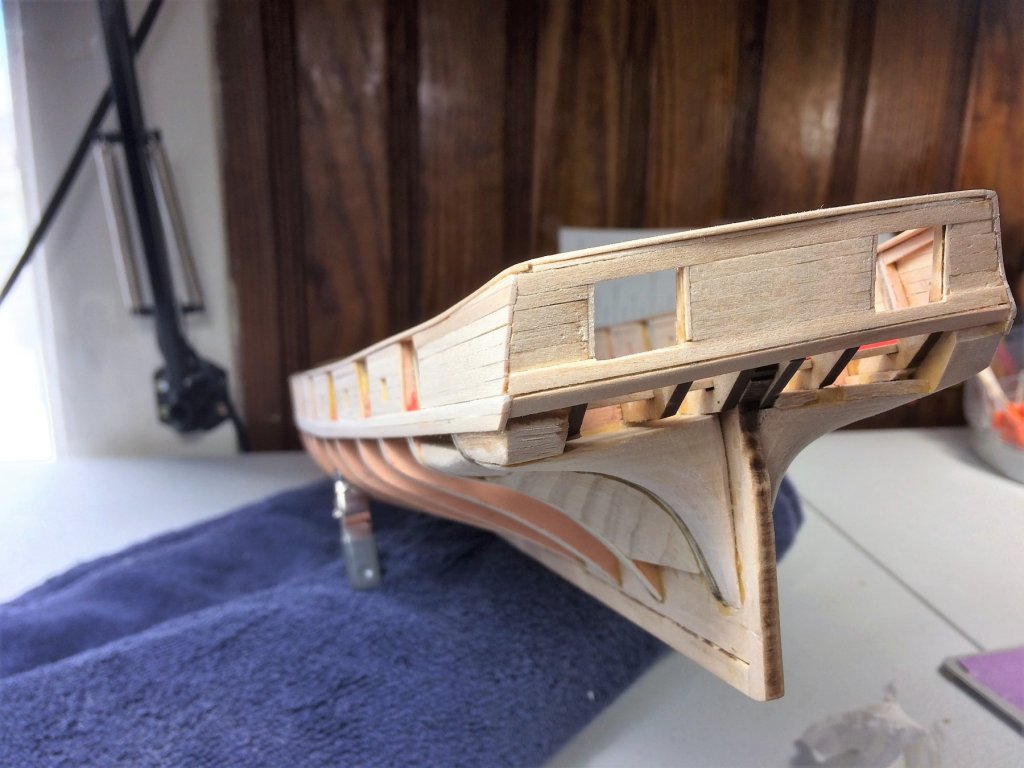
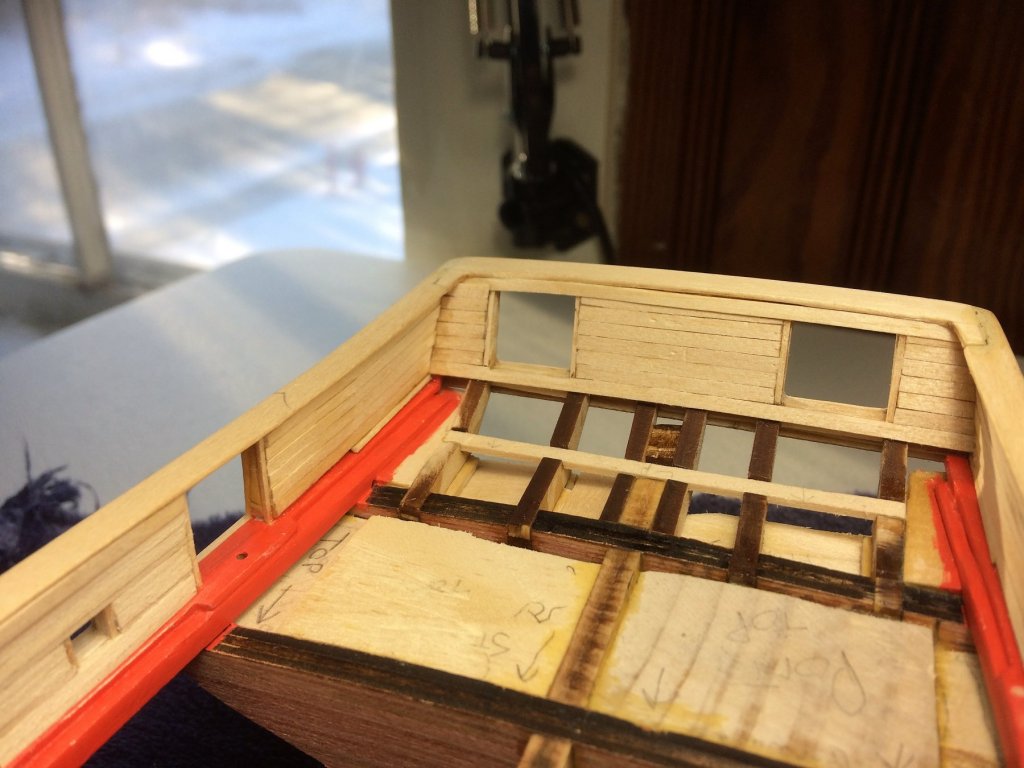
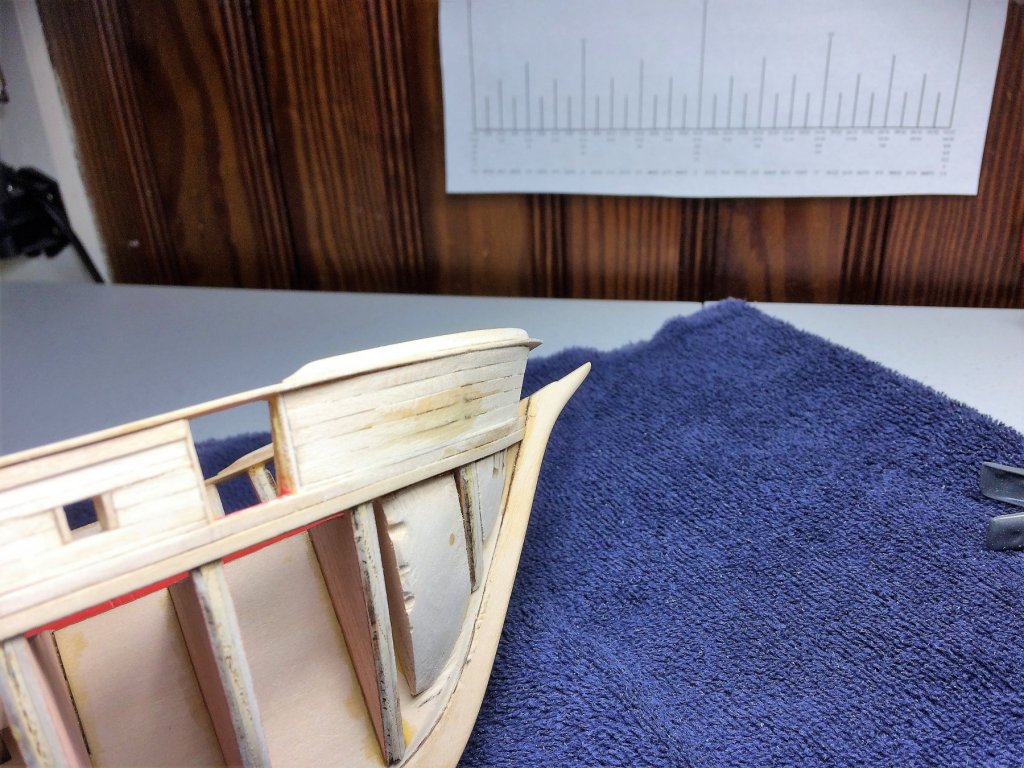
Evening, I have been in the Shipyard all day long! All of my chores were done yesterday, or finished very early today. Laundry was put away, dishes were done, showered, appetizers were in the oven for the Patriots game. Ate, built, and was merry all day! The Pats won!!!!!! Super Bowl bound!! Anywho...... Time for an update. With all this time in shop, I did get some things done. Time to plank the stern. Just as all the other bulwarks. Used 1/32 square strip around the gunports. Some stringers at the very top and bottom with smaller widths in between. I didn't get the angle of the gunports as seen in the plans. There mostly symmetrical......mostly. I can live with it. A little rough. Sandpaper to the rescue. The edges are kind of rough. The Fashion Piece should cover a lot of this. With things filling in, I can get an idea what my Counter area is looking like. Inside the stern was the same. Stringers at the top and bottom, with smaller width in between. I didn't go any lower towards the deck as this. There's a transition area that has different widths. I'm studying this area on the plans now. The rudder comes up thru this area. Bow to Stern. Stern to bow. She is filling in nicely. As for the "paint" question. Sheeesh! I never thought I would get this far! I have been using the ME paint set thru out the build, will continue to. But, that yellow they include is way too much. In research I have found some possibly better substitutes. At Woodcraft, they sell an "Old Fashioned Milk Paint" in either Marigold yellow or Mustard. I'm leaning towards the Marigold. I will also use a black and green paint for the body of the ship. Its sold as a powder, add water and it makes a pint. I've never used this before, it intrigues me. Looks like its used for antique furniture and the like. This will be all hand painted, no airbrush. Want one, never used one, but not in the budget right now. Go Pats! Tom E

-
Hi Ronkamin, Welcome to MSW! The Niagara is a beautiful ship. The complexities are challenging yet not overwhelming. Your off to a great start. I wish I had seen the timberheads being built off model. That's a great idea, I would have done the same. There are some great resources here. I have to recommend the Niagara build logs of @xken and @mikiek. Especially when it comes to the main rail. Admittedly, I still got the main rail wrong! Both of these logs have helped this rookie many times. Tom E
-
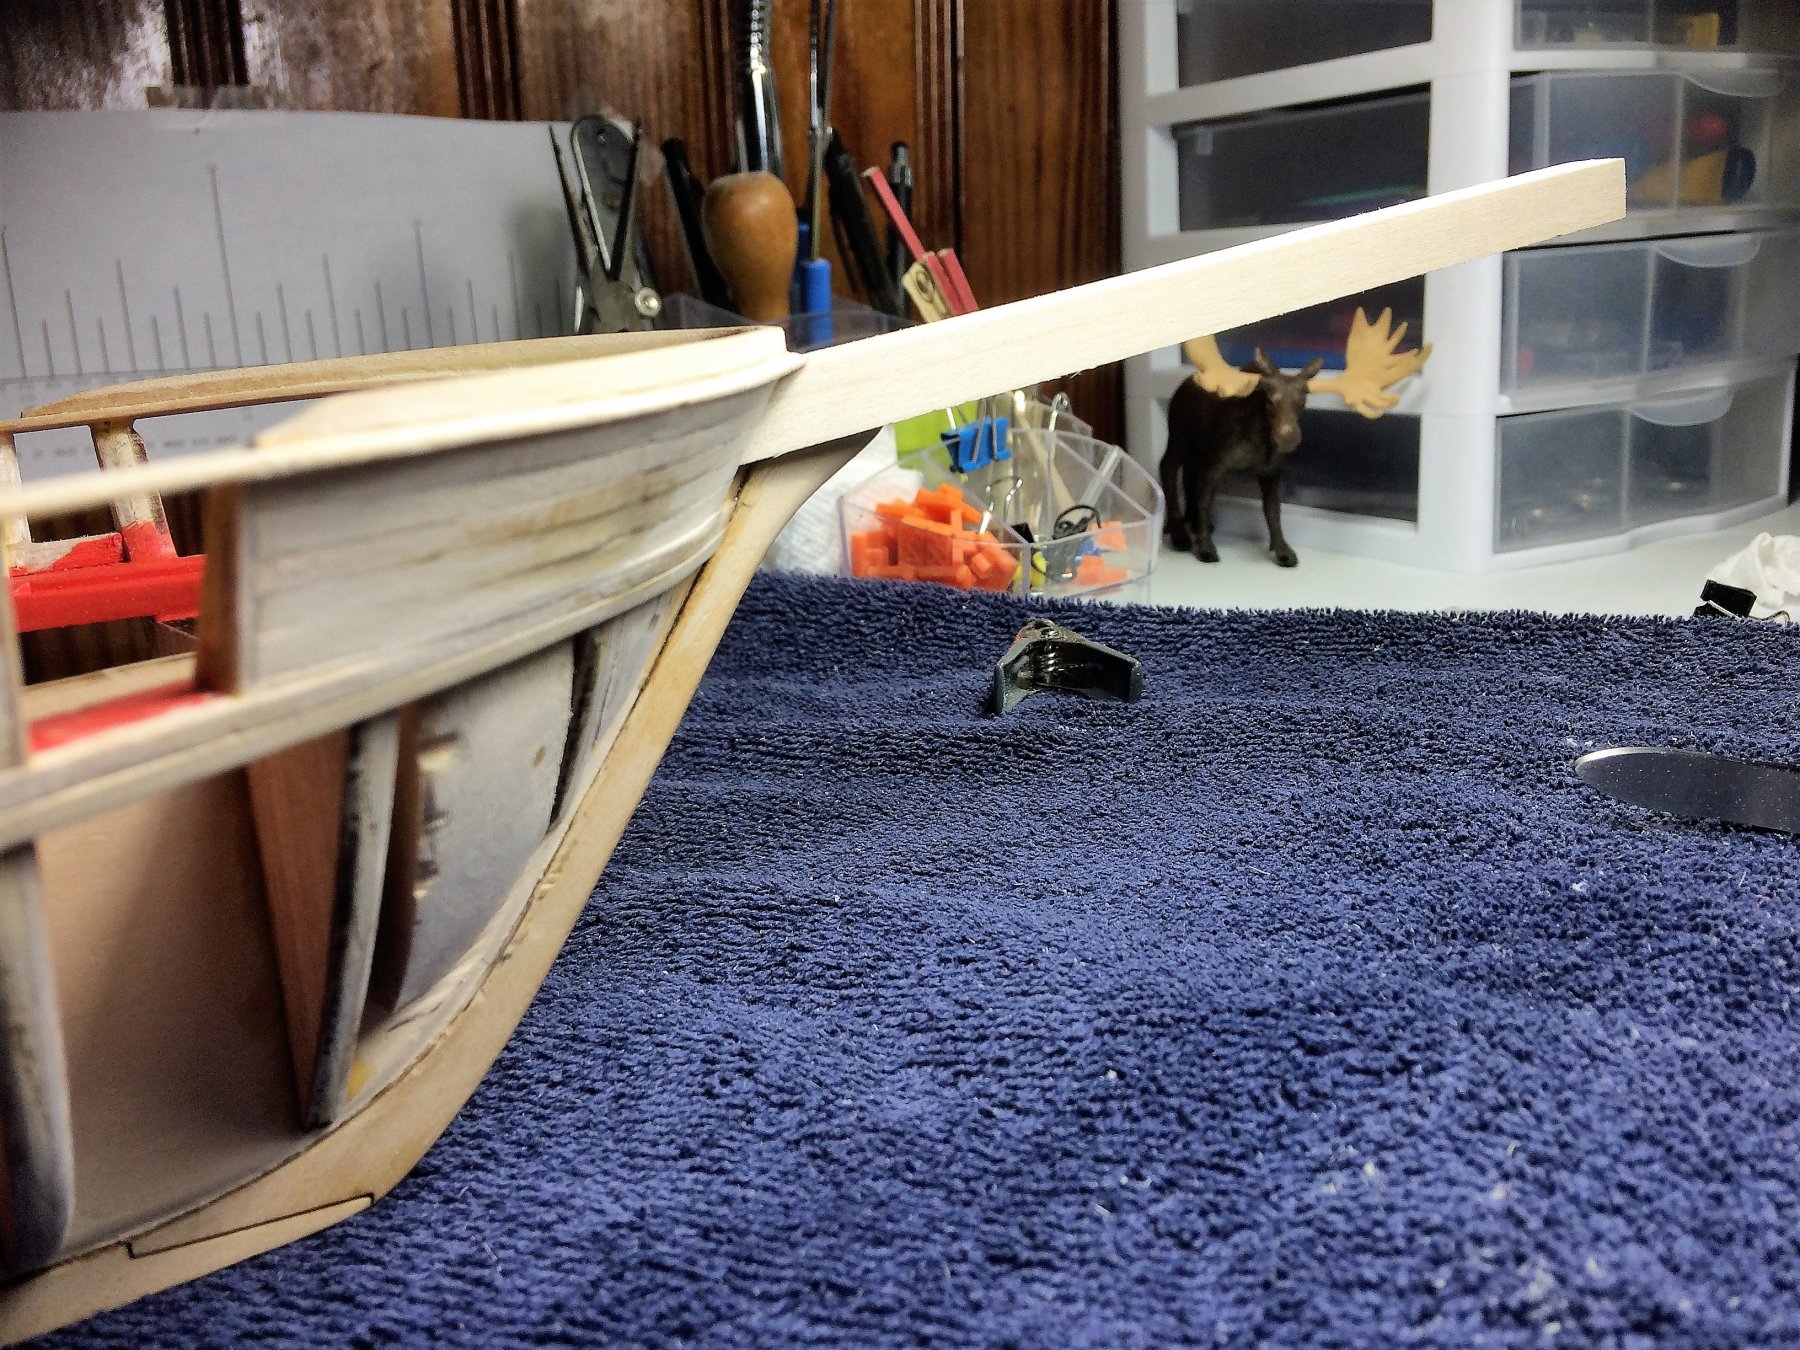
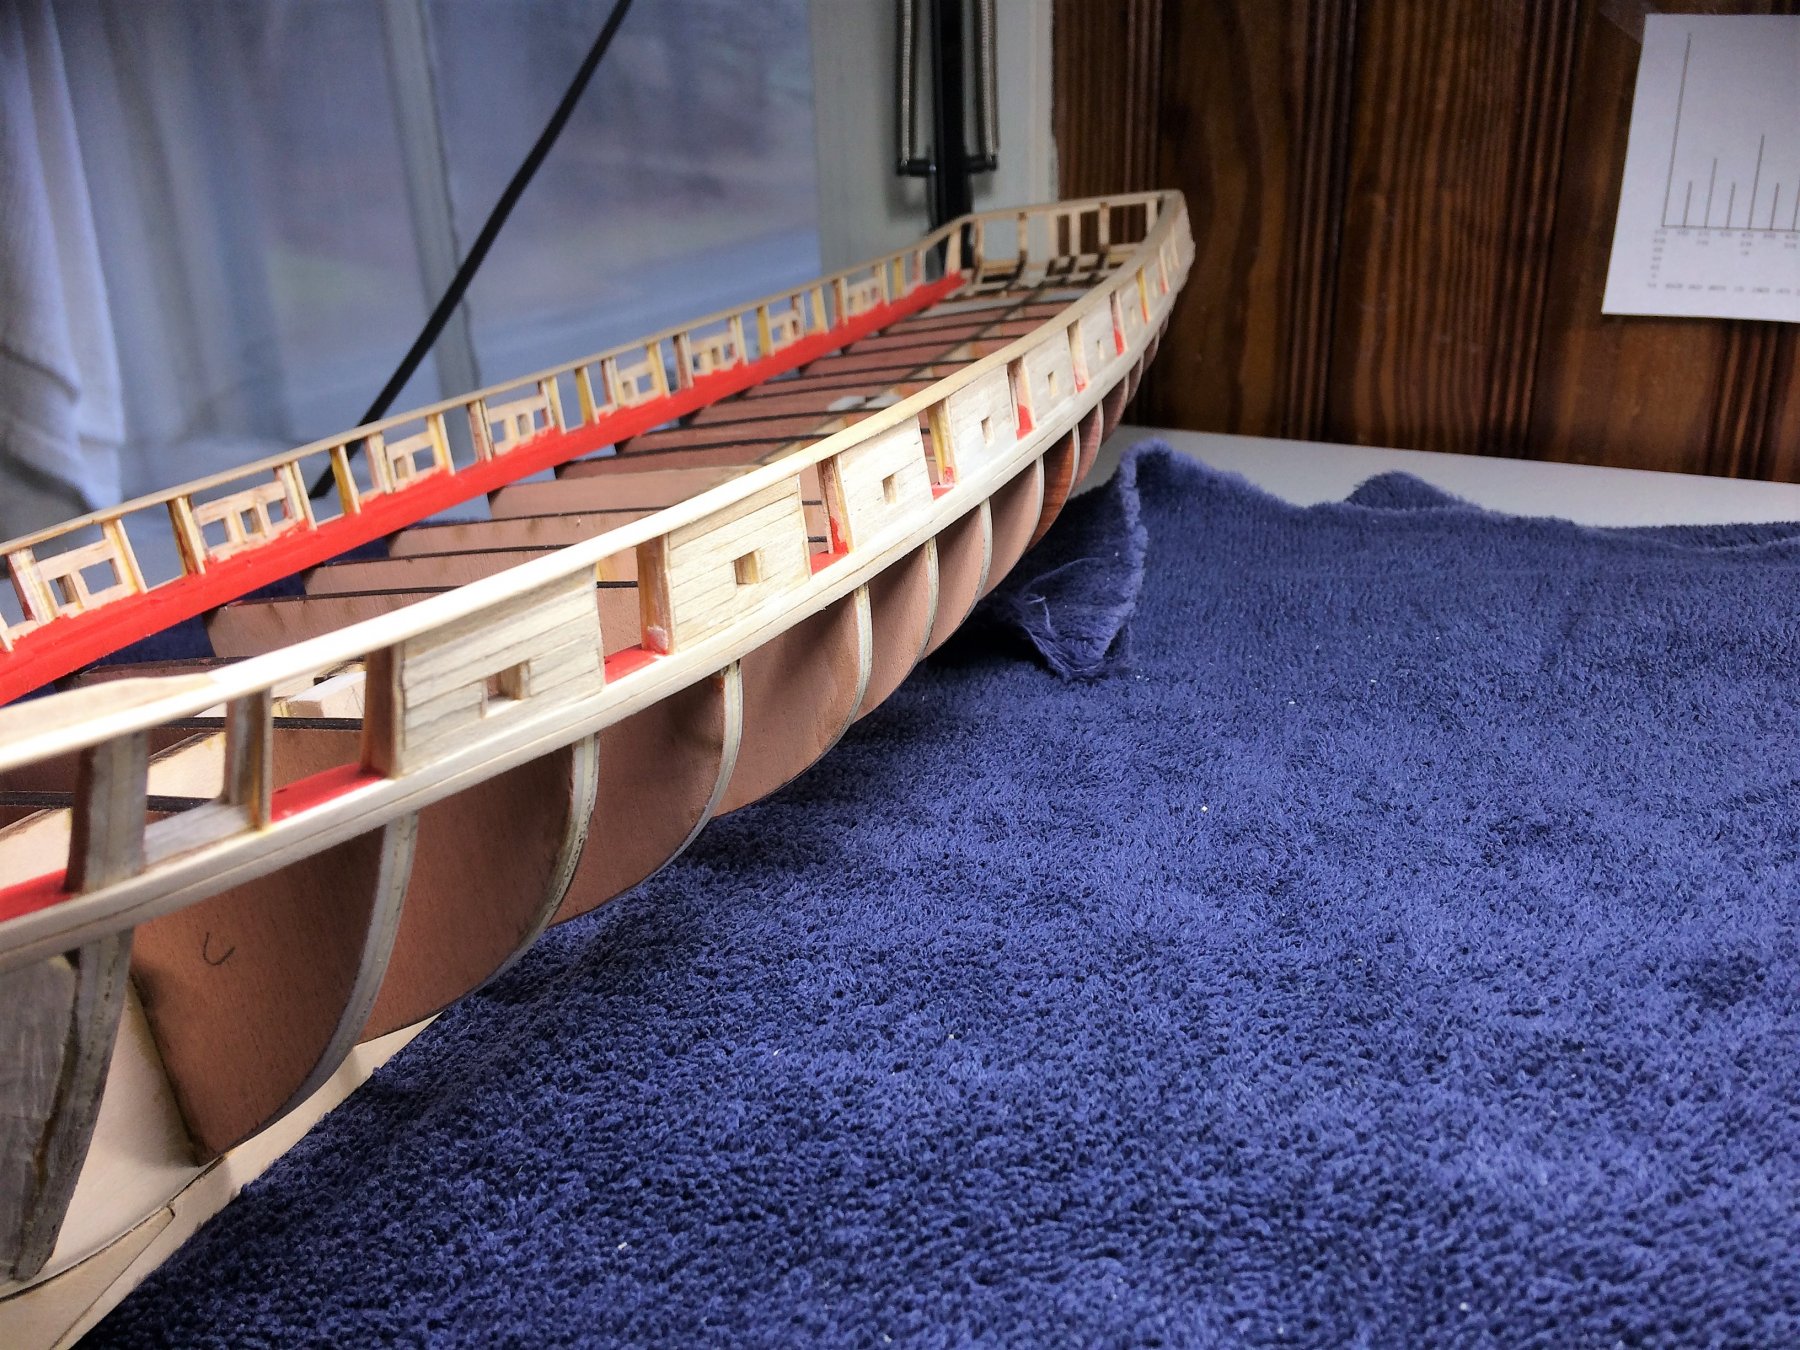
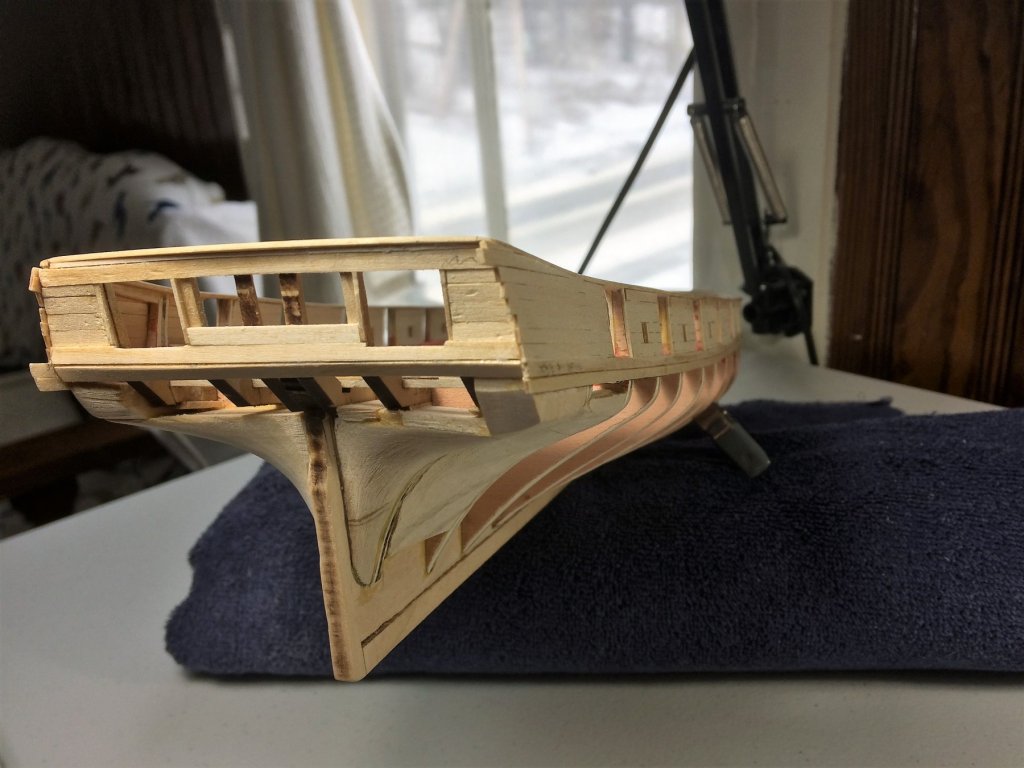
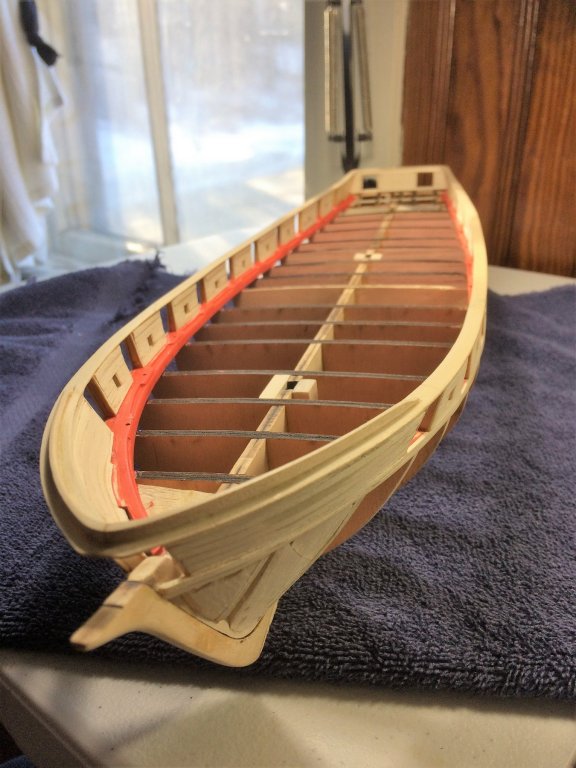
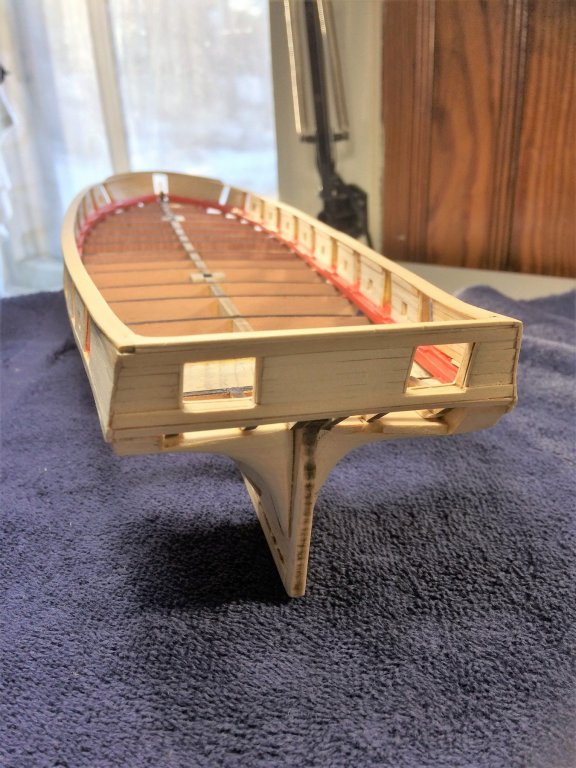
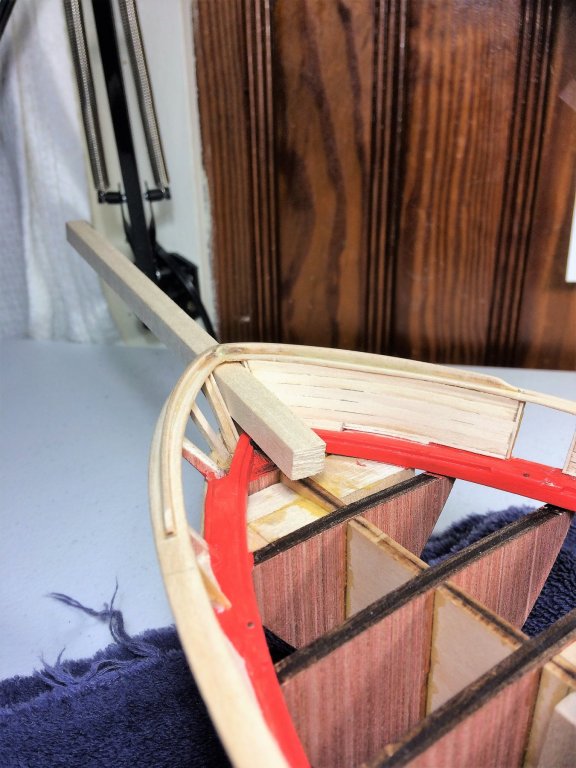
Evening, Hope everyone is well. A little update tonight. I planked the Bow. Harder in my head than to actually do it. Didn't have to soak and bend anything. Just like you said Mike, the CA held everything fine. Gaps will get some filler. I hadn't checked the Bowsprit in a while. Fits nicely. Just as I had with all of the other bulwarks mid ship. I used 1/32 square strips to frame the area to be planked. My "edging" at the plank ends could be better! Hopefully some sanding will knock some of that down. With some sanding and filler the waviness should even out. This is her in all her glory so far. She's starting to "fill in". Tom E


-
The Lion would make a great display if built under full or partial sail. Maybe make it an "intro" kit to first time sail builders. Tom E
-
Really looking great! I'm still just impressed by the quality of that wood. It looks like quality product, well, at least it does to this rookie! Tom E
-
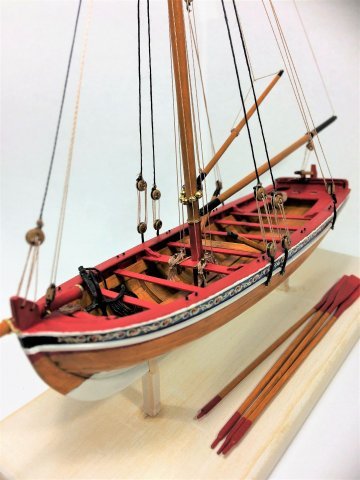
Taking a shine to the Chebacco fishing boat. Being a New Englander my entire life, and spent plenty of time at the shore line. Love history, study it. I've never come across this type of ship. Did they go by another name, a nick name? There quite a bit going on about that deck. I like that. Tom E
-
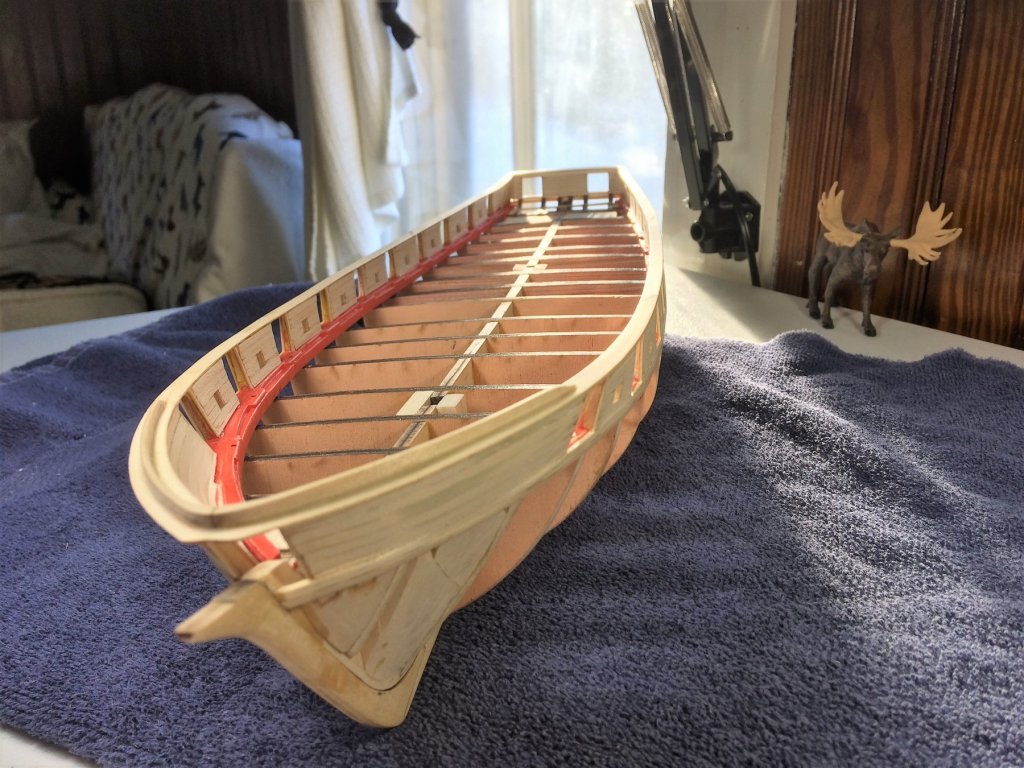
Looking good Derek! It looks like a "spider web" of wood. Will this cross section have a mast? Tom E
-
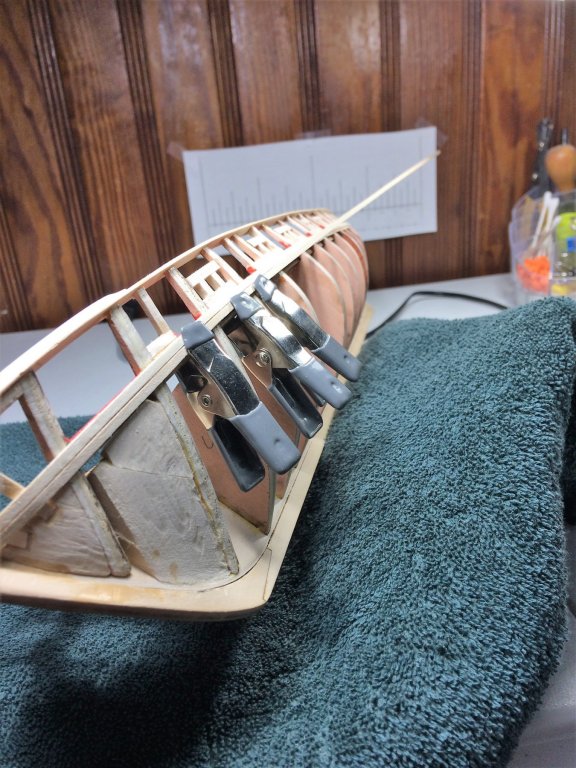
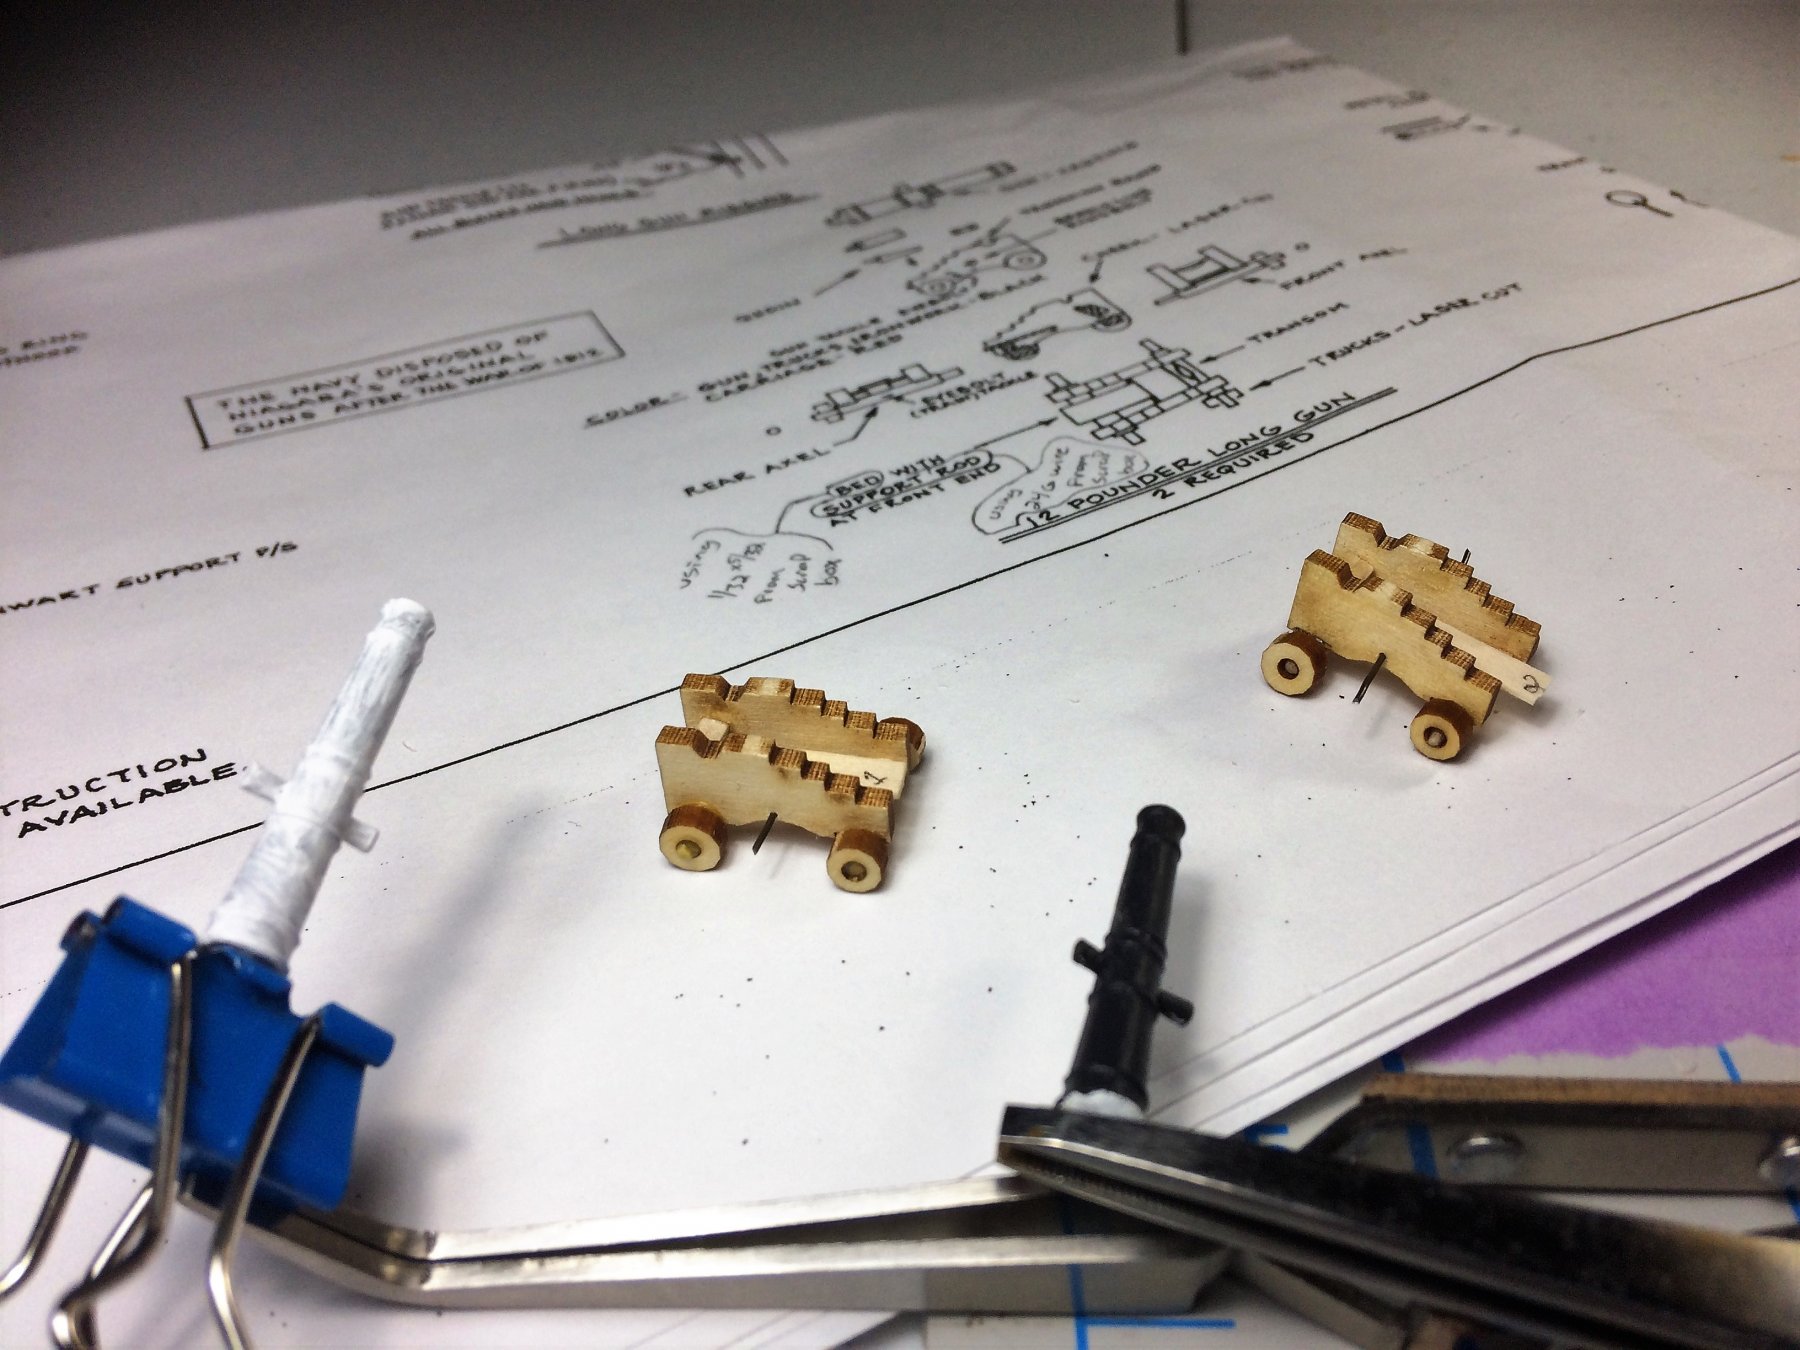
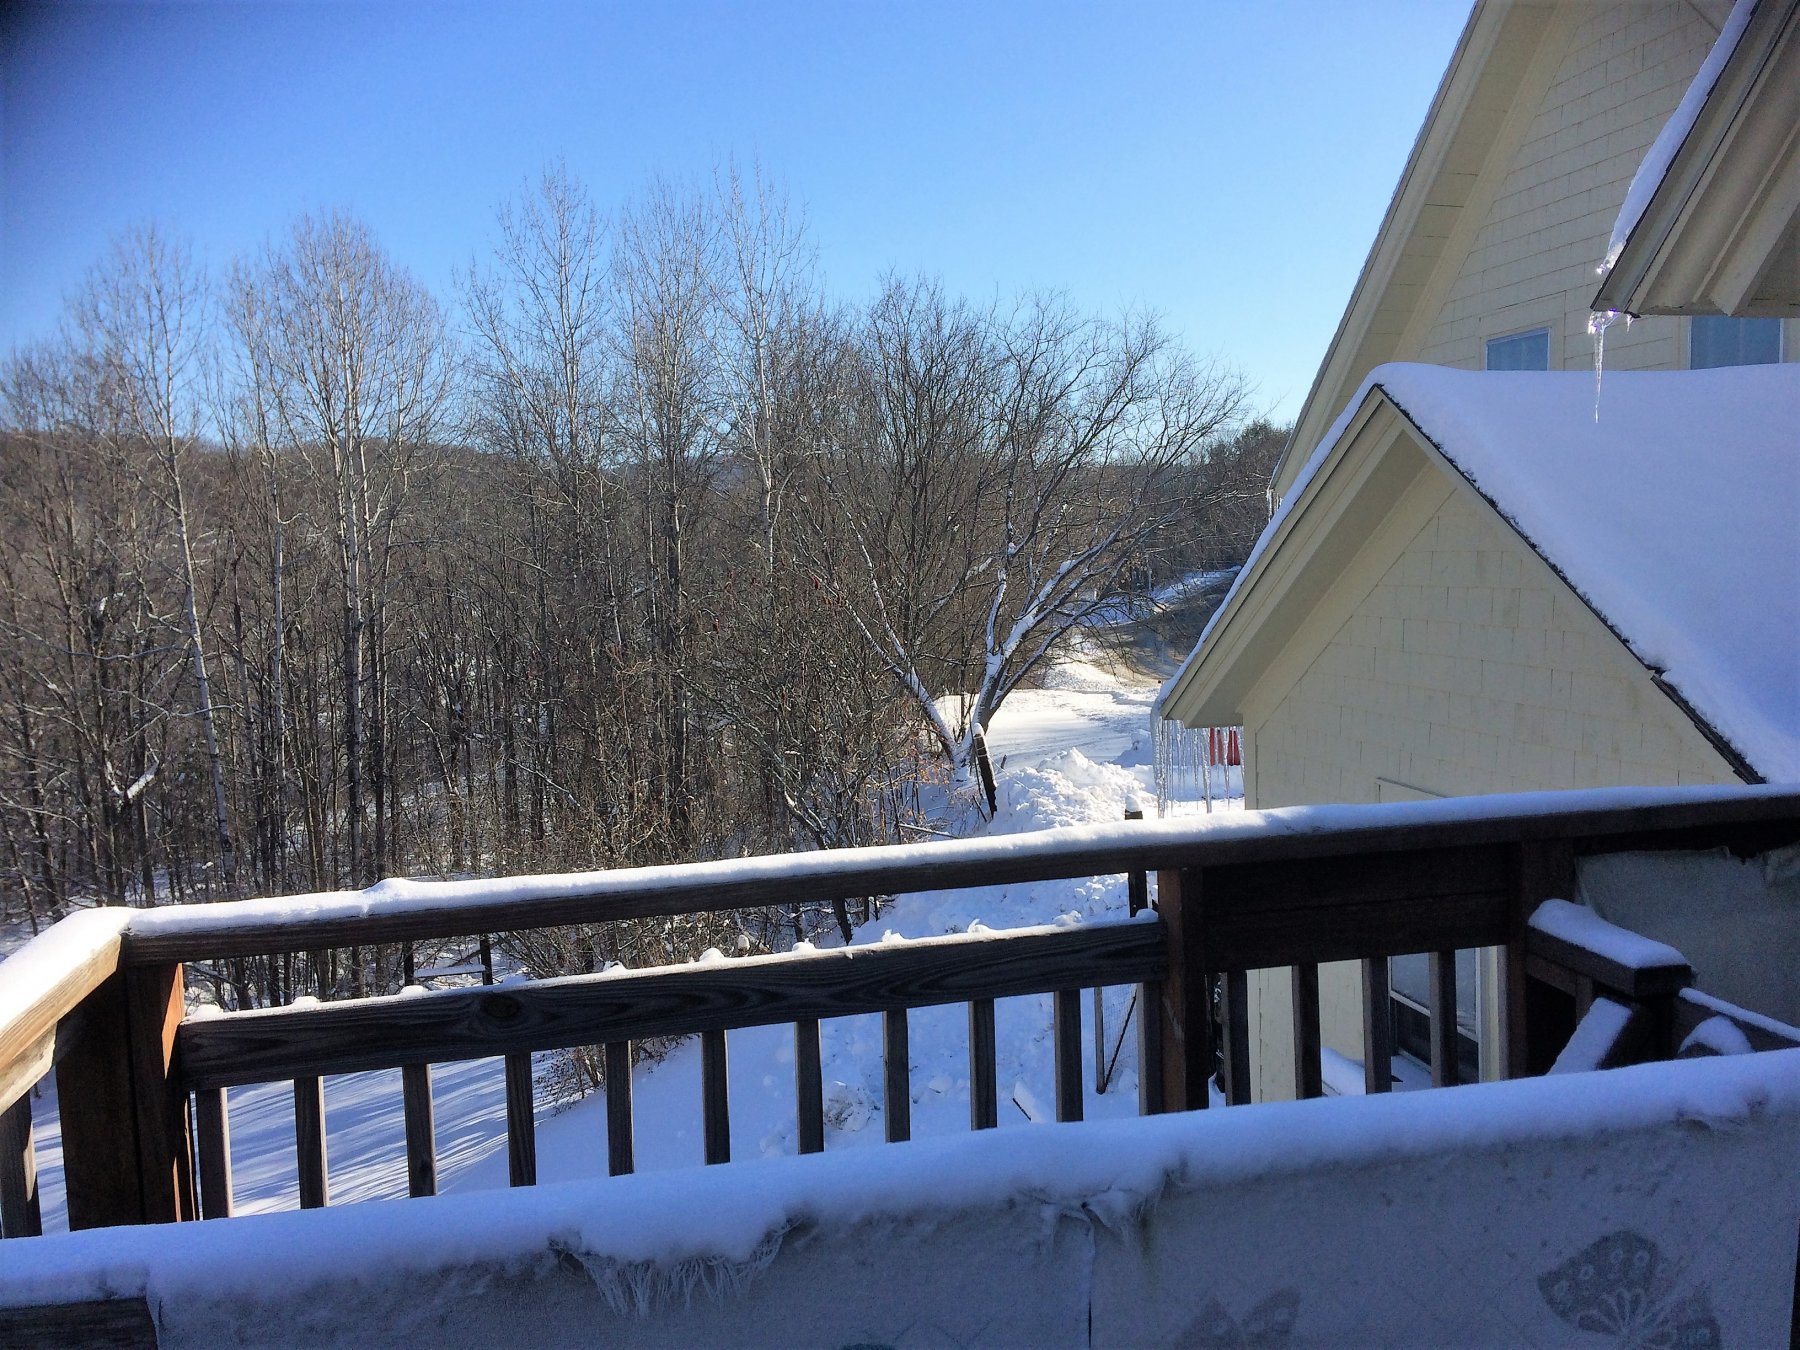
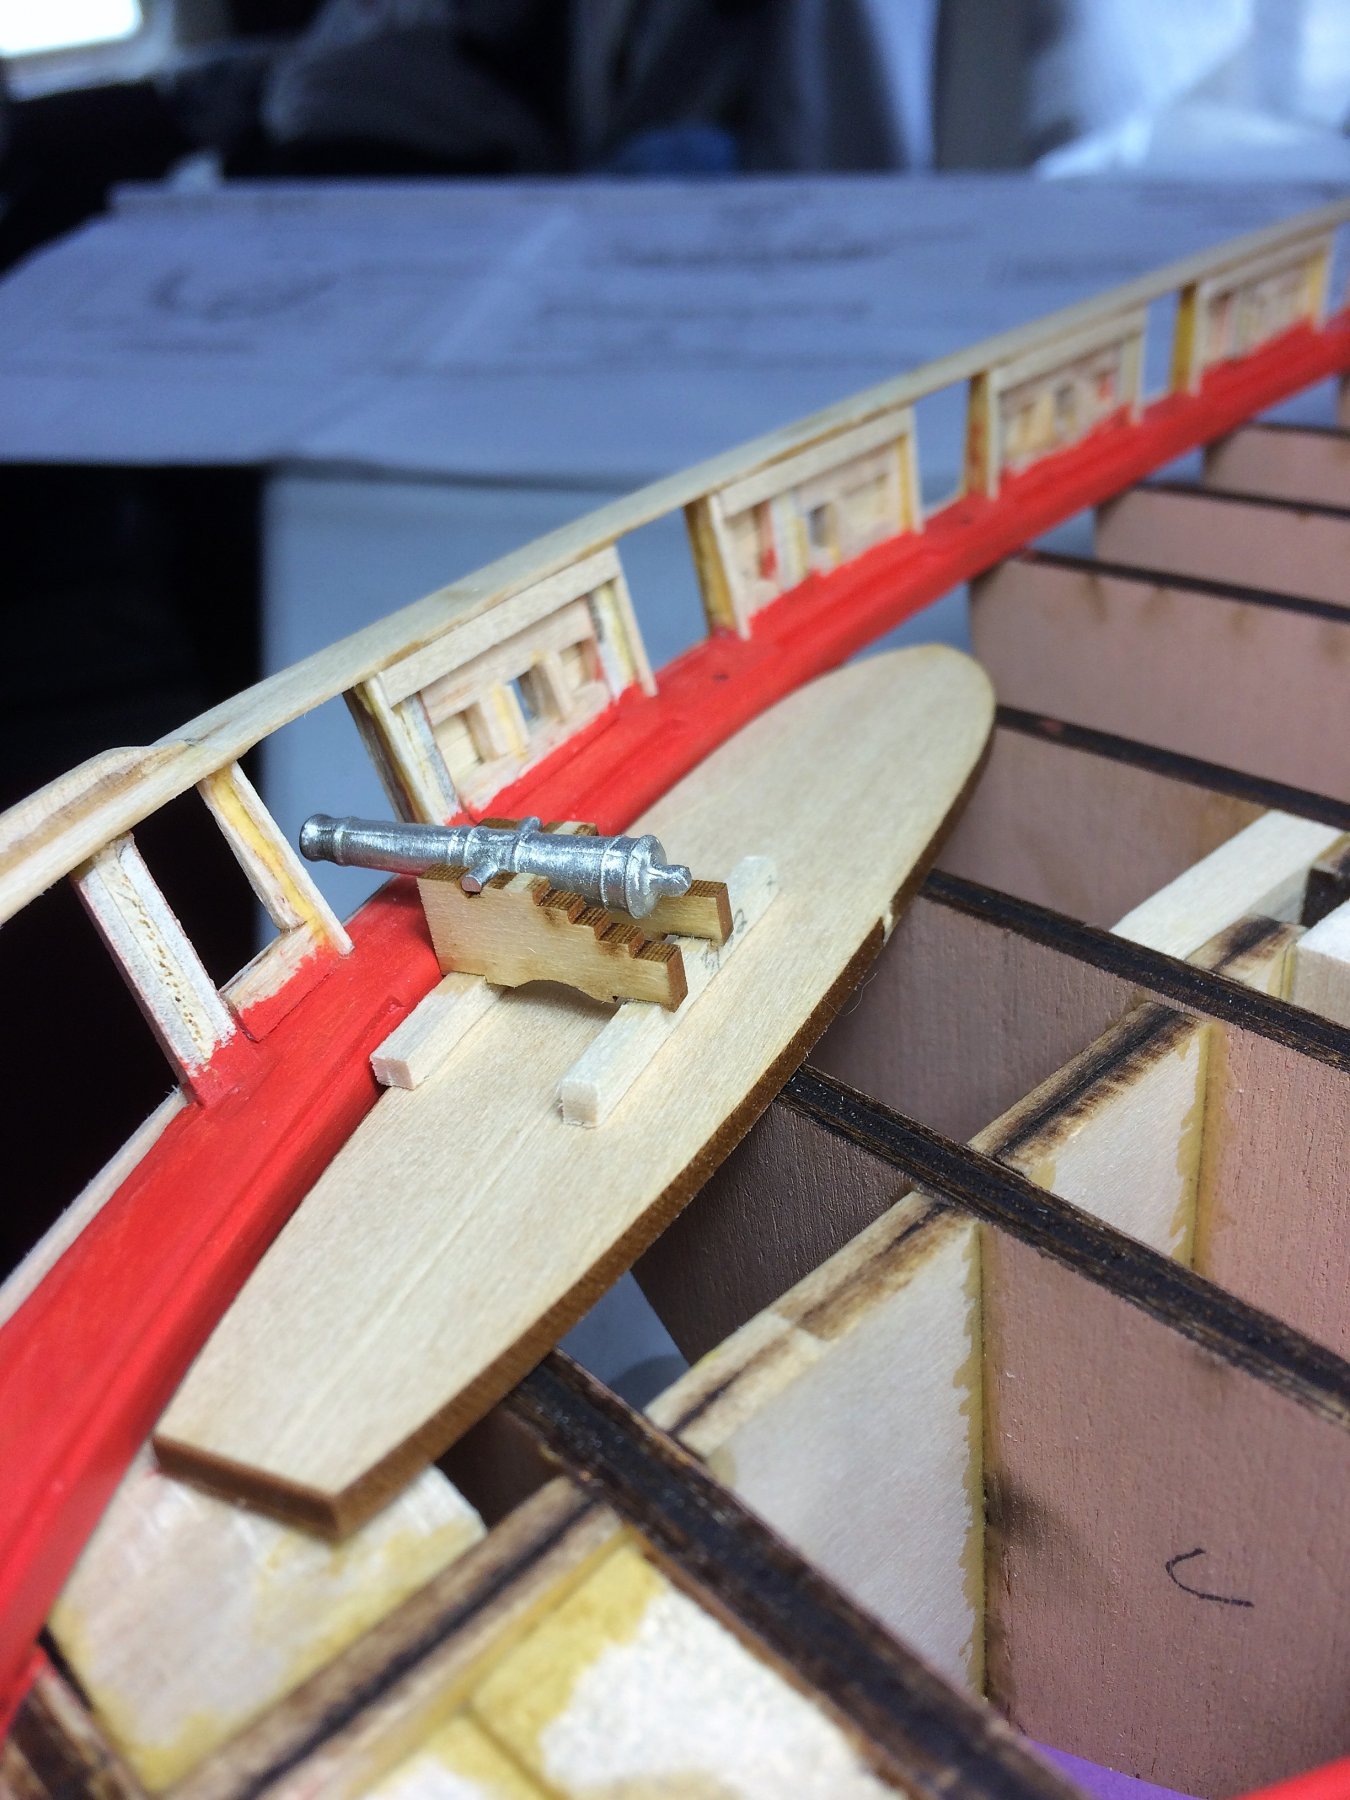
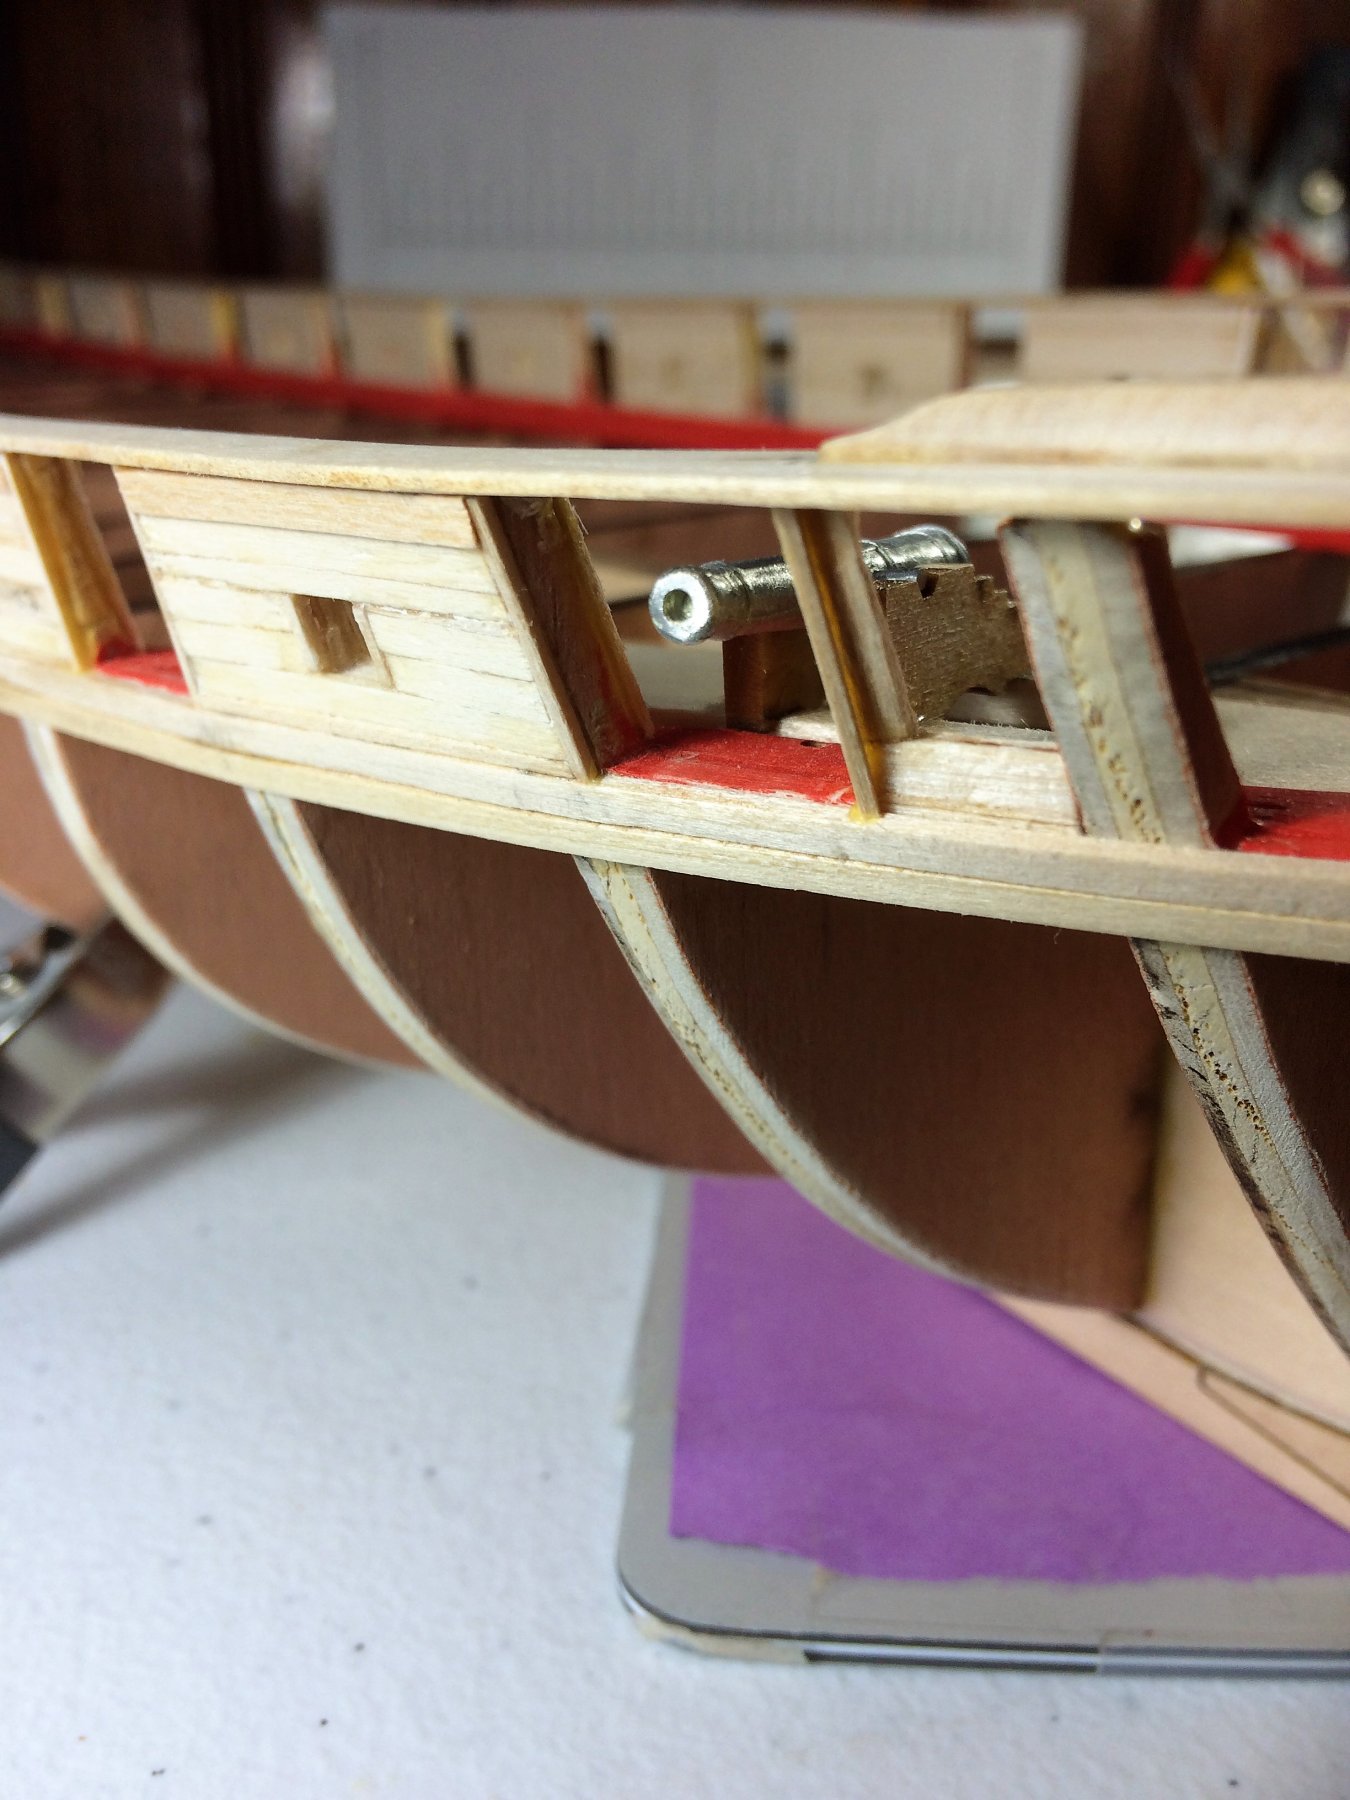
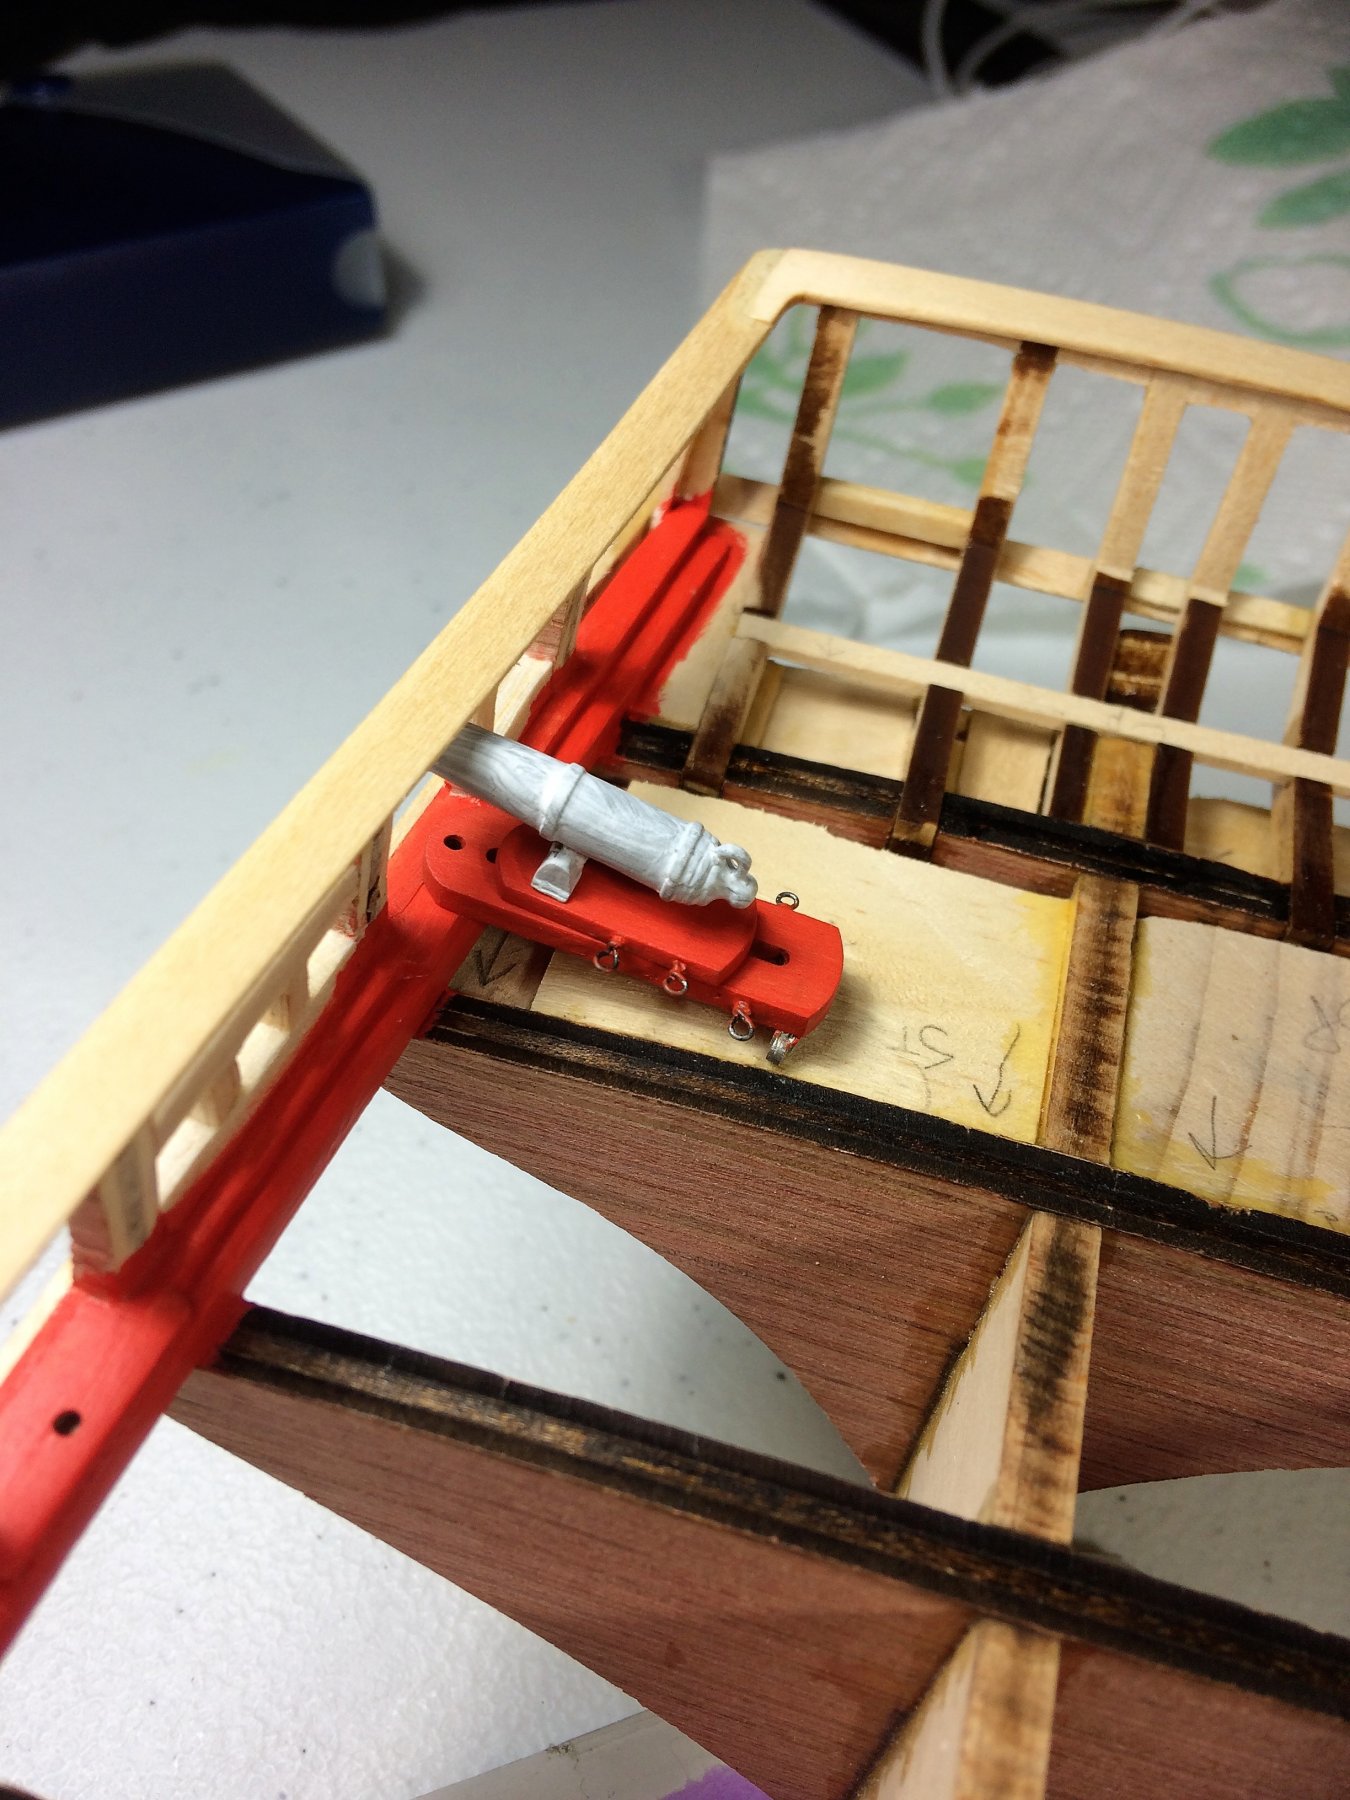
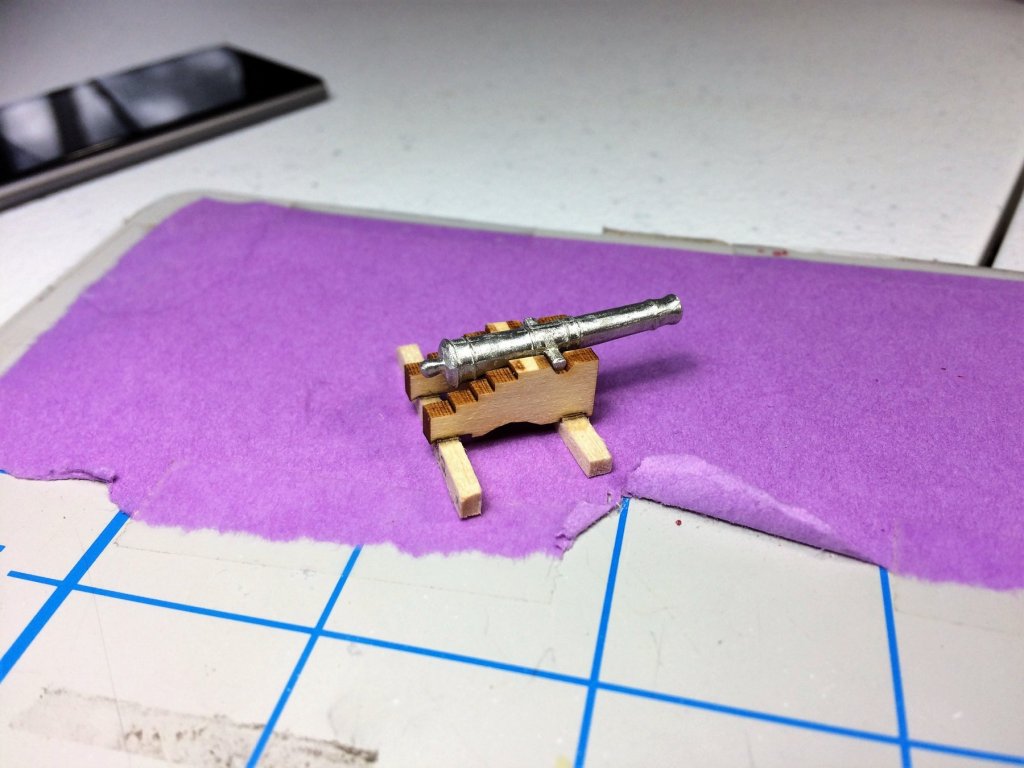
Evening, Time for a short "weather report" and a build update. I had to share the below 3 pics from New Years Day. It was about -25 degrees with a wind chill around -35. It was an advanced cold! I live in Western Central New Hampshire, about 2 minutes from Vermont. I've seen some cold in my time, but dang! That was ridiculous! As brutal as it was, it sure was pretty. These are from my back deck. Anywho.... Time for a build update. I finally finished planking both inner and outer bulwarks. Leaving the very front of the bow and the stern for last. Before I start planking the bow, thought I would try my hand at a cannon. I have built a few of the carronades already. Just needed to clear the brain with something other than planking. I used the laser cut carriages, some scrap strips will be used for the axels. I'll hone these down to fit the laser cut wheels....trucks? The cannon cleaned up easy enough. This will eventually get primed then painted. Using some "pseudo" decking and did a dry fit. They seem to fit the gunports. I'm hoping the wheels add a little lift. Stay warm, Tom E


-
Thanks Mike, Concerning that slope you mentioned. I've actually dealt with that before. What I do is I hold an appropriate sized piece of sandpaper flat to the deck in the area will it be installed. Give that piece of furniture a few slides along the sandpaper. Takes the shape/slope of the deck perfectly every time. If I remember correctly, I saw that trick in the book "Ship Modeling Simplified" by Frank Mastini. Tom E
-
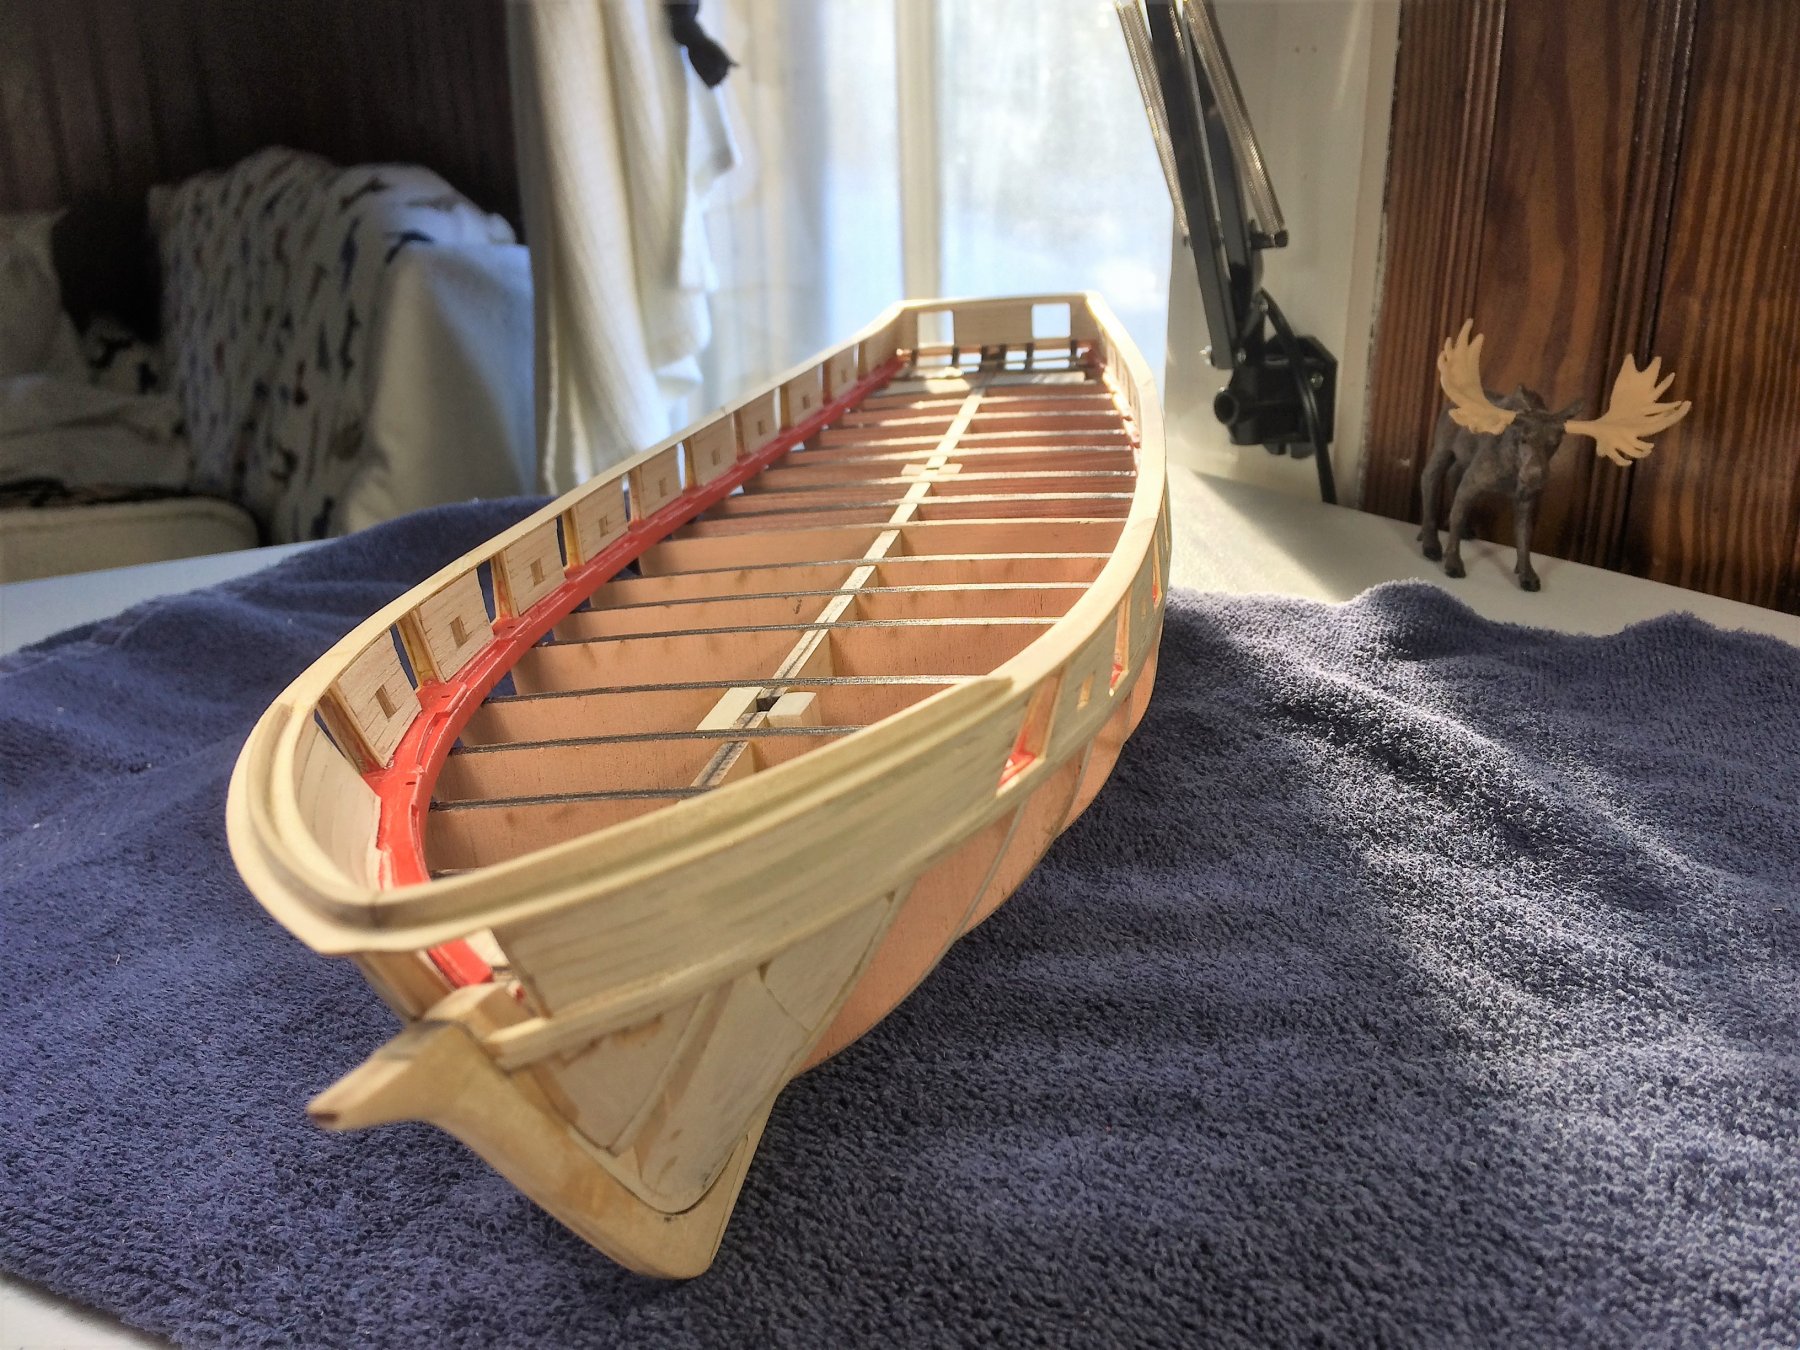
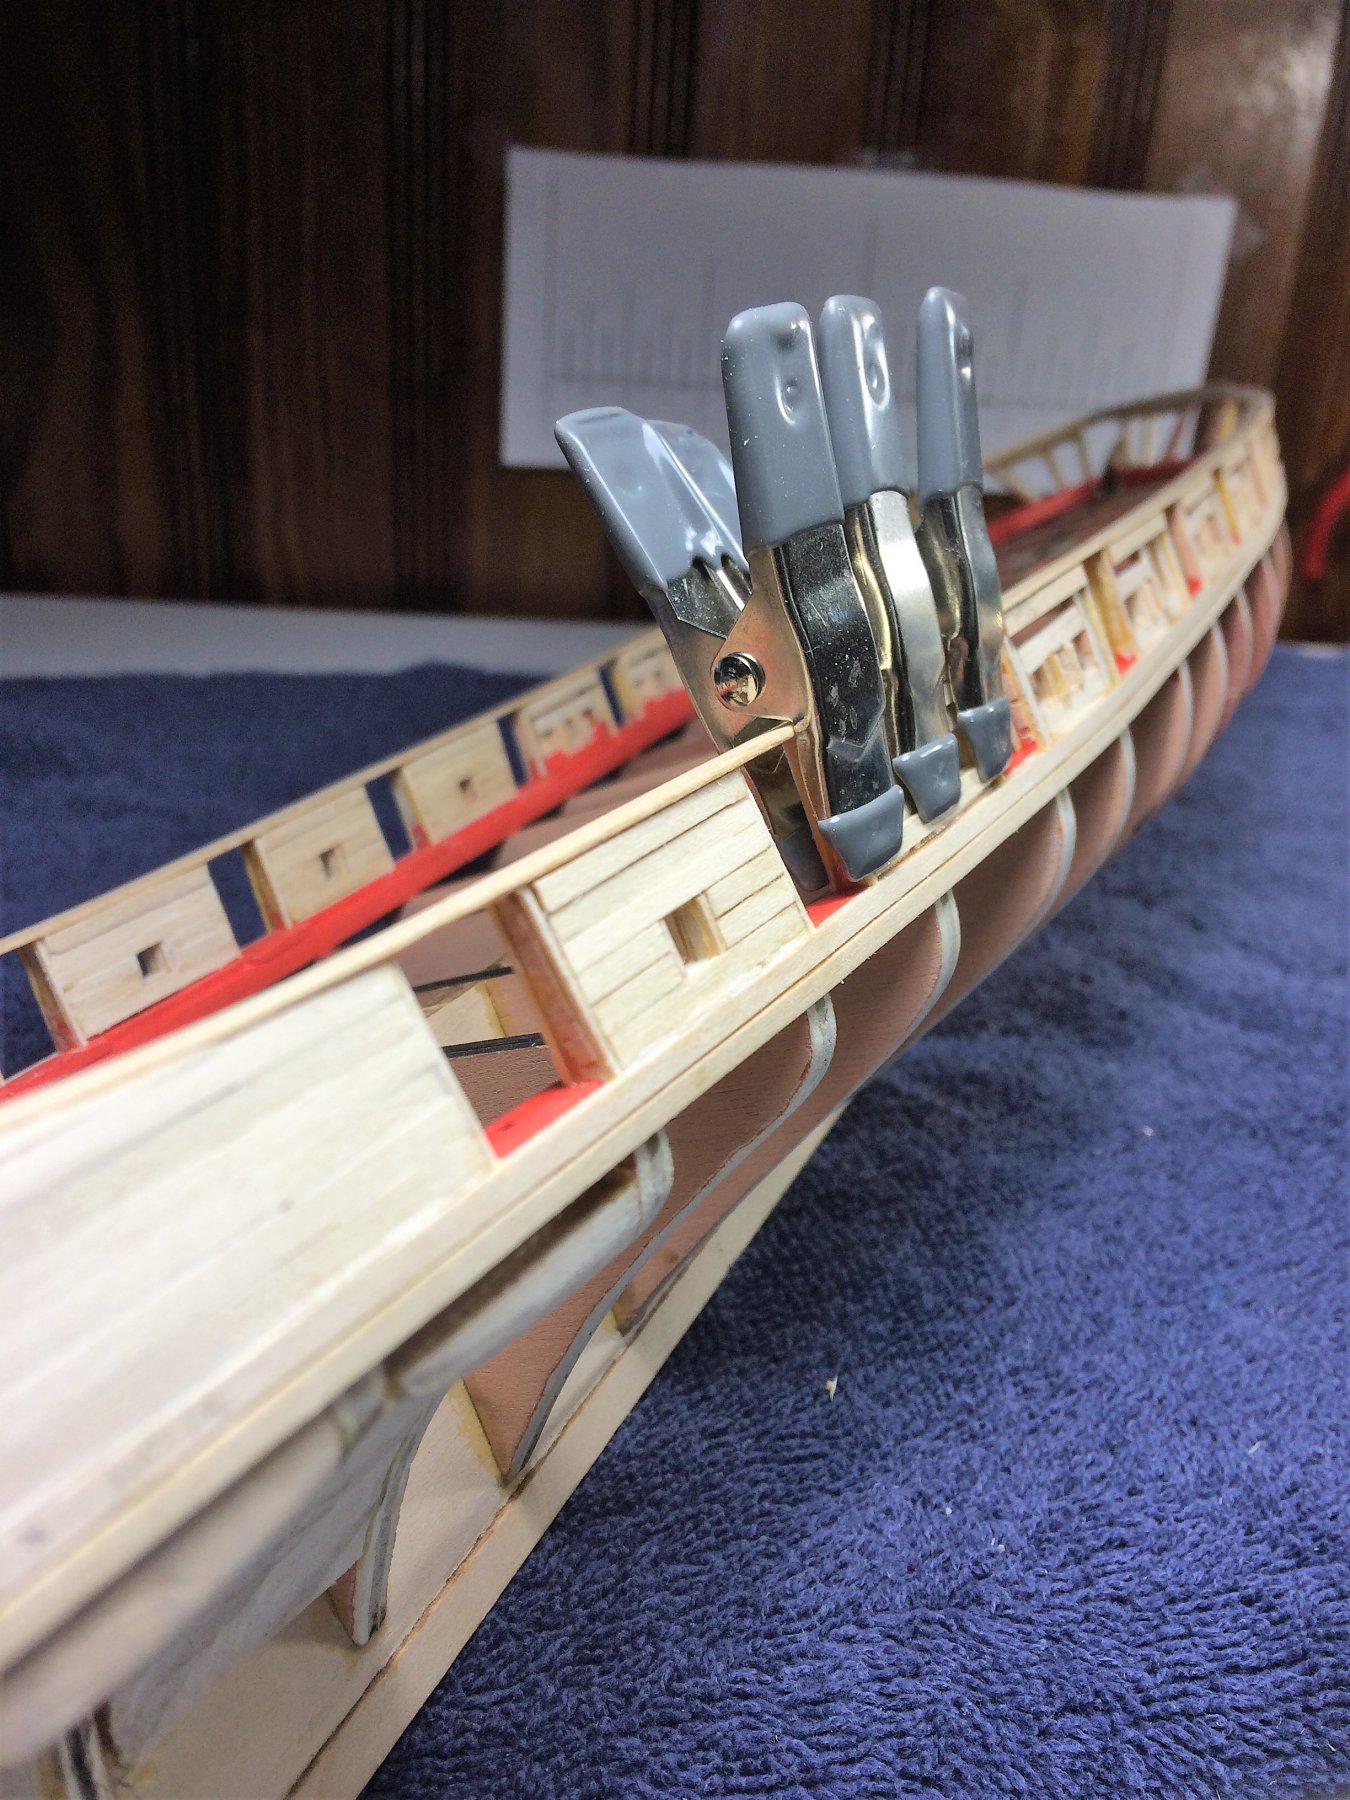
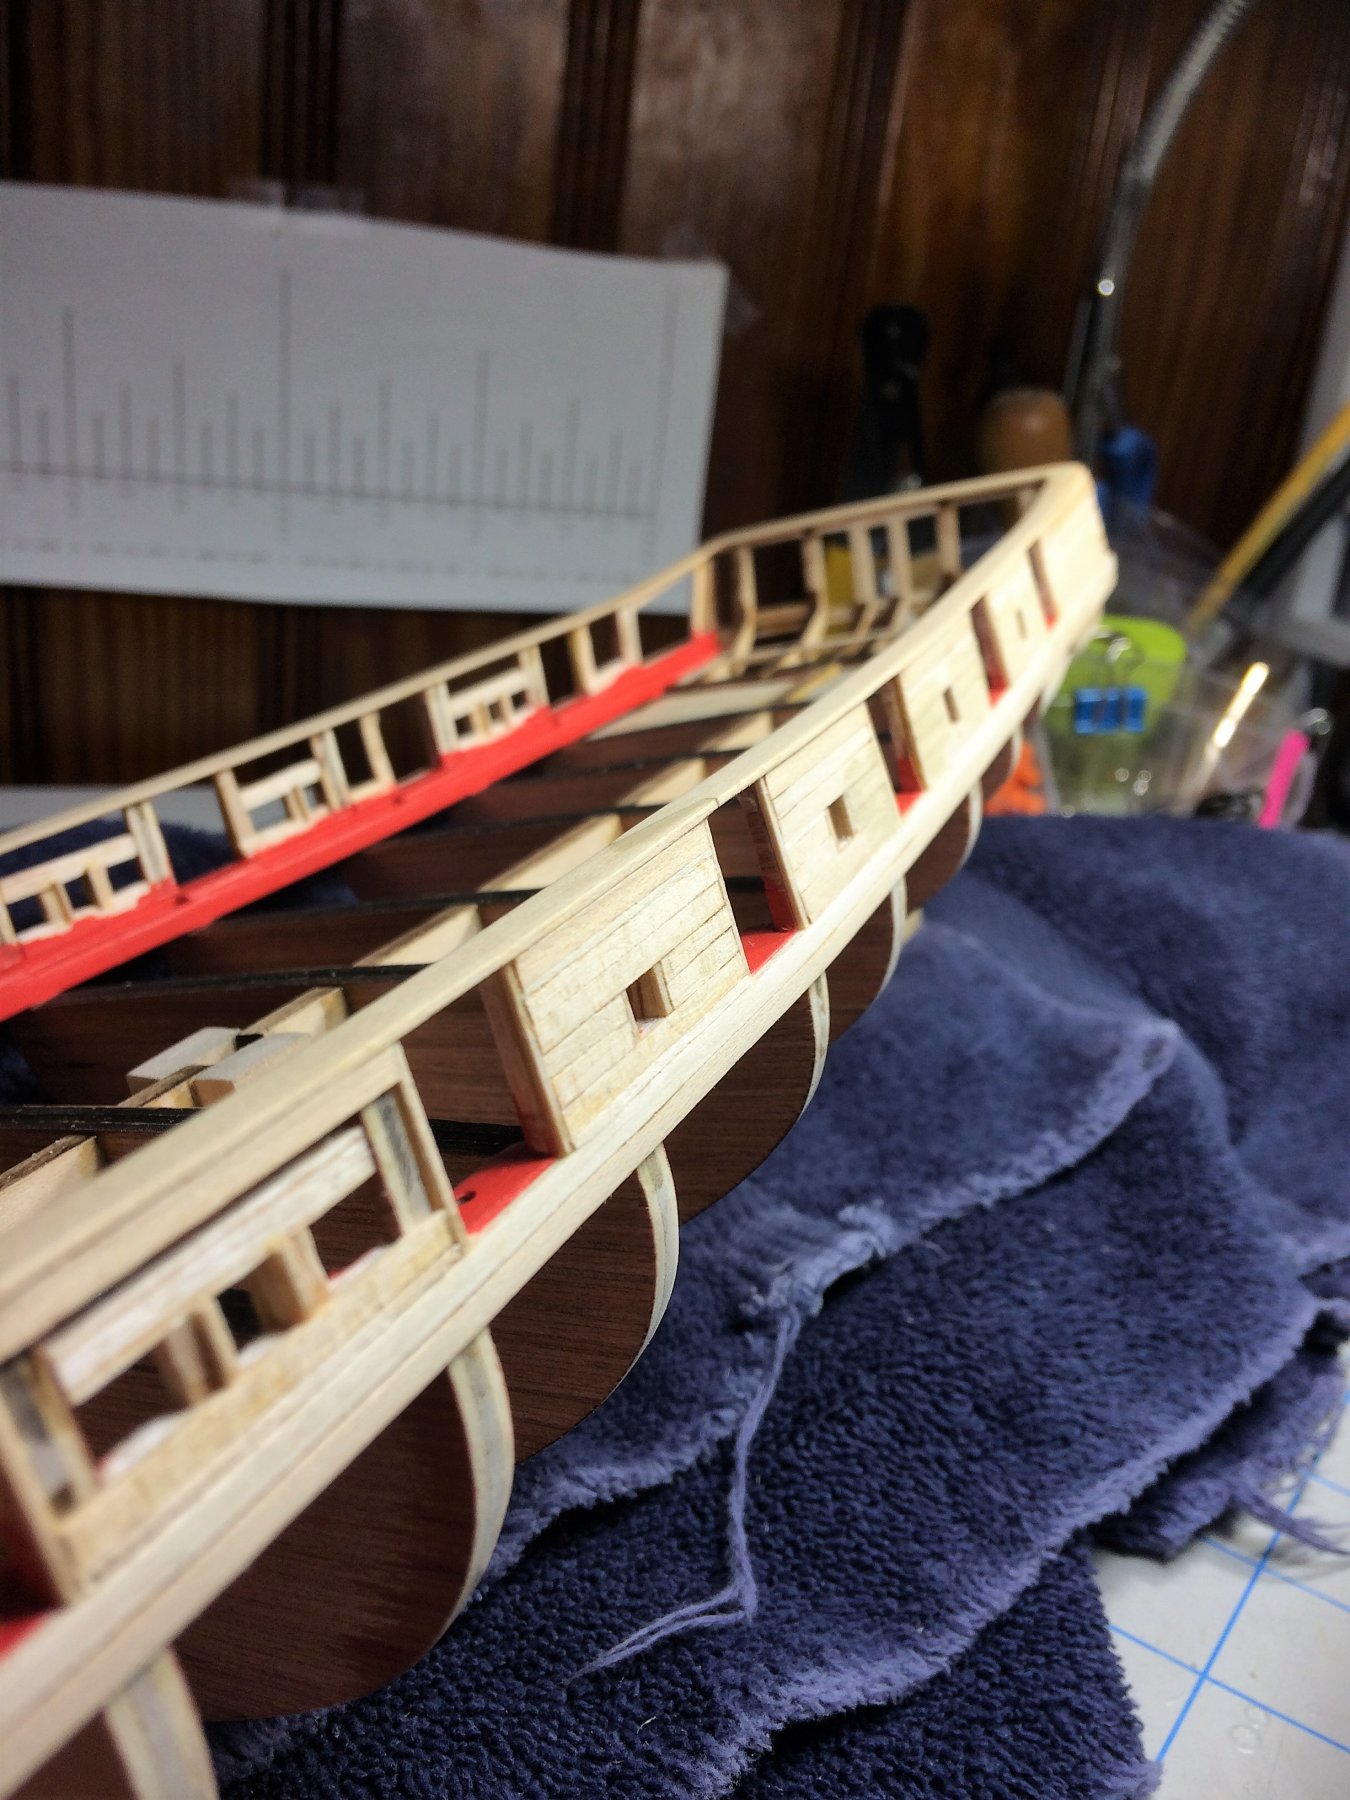
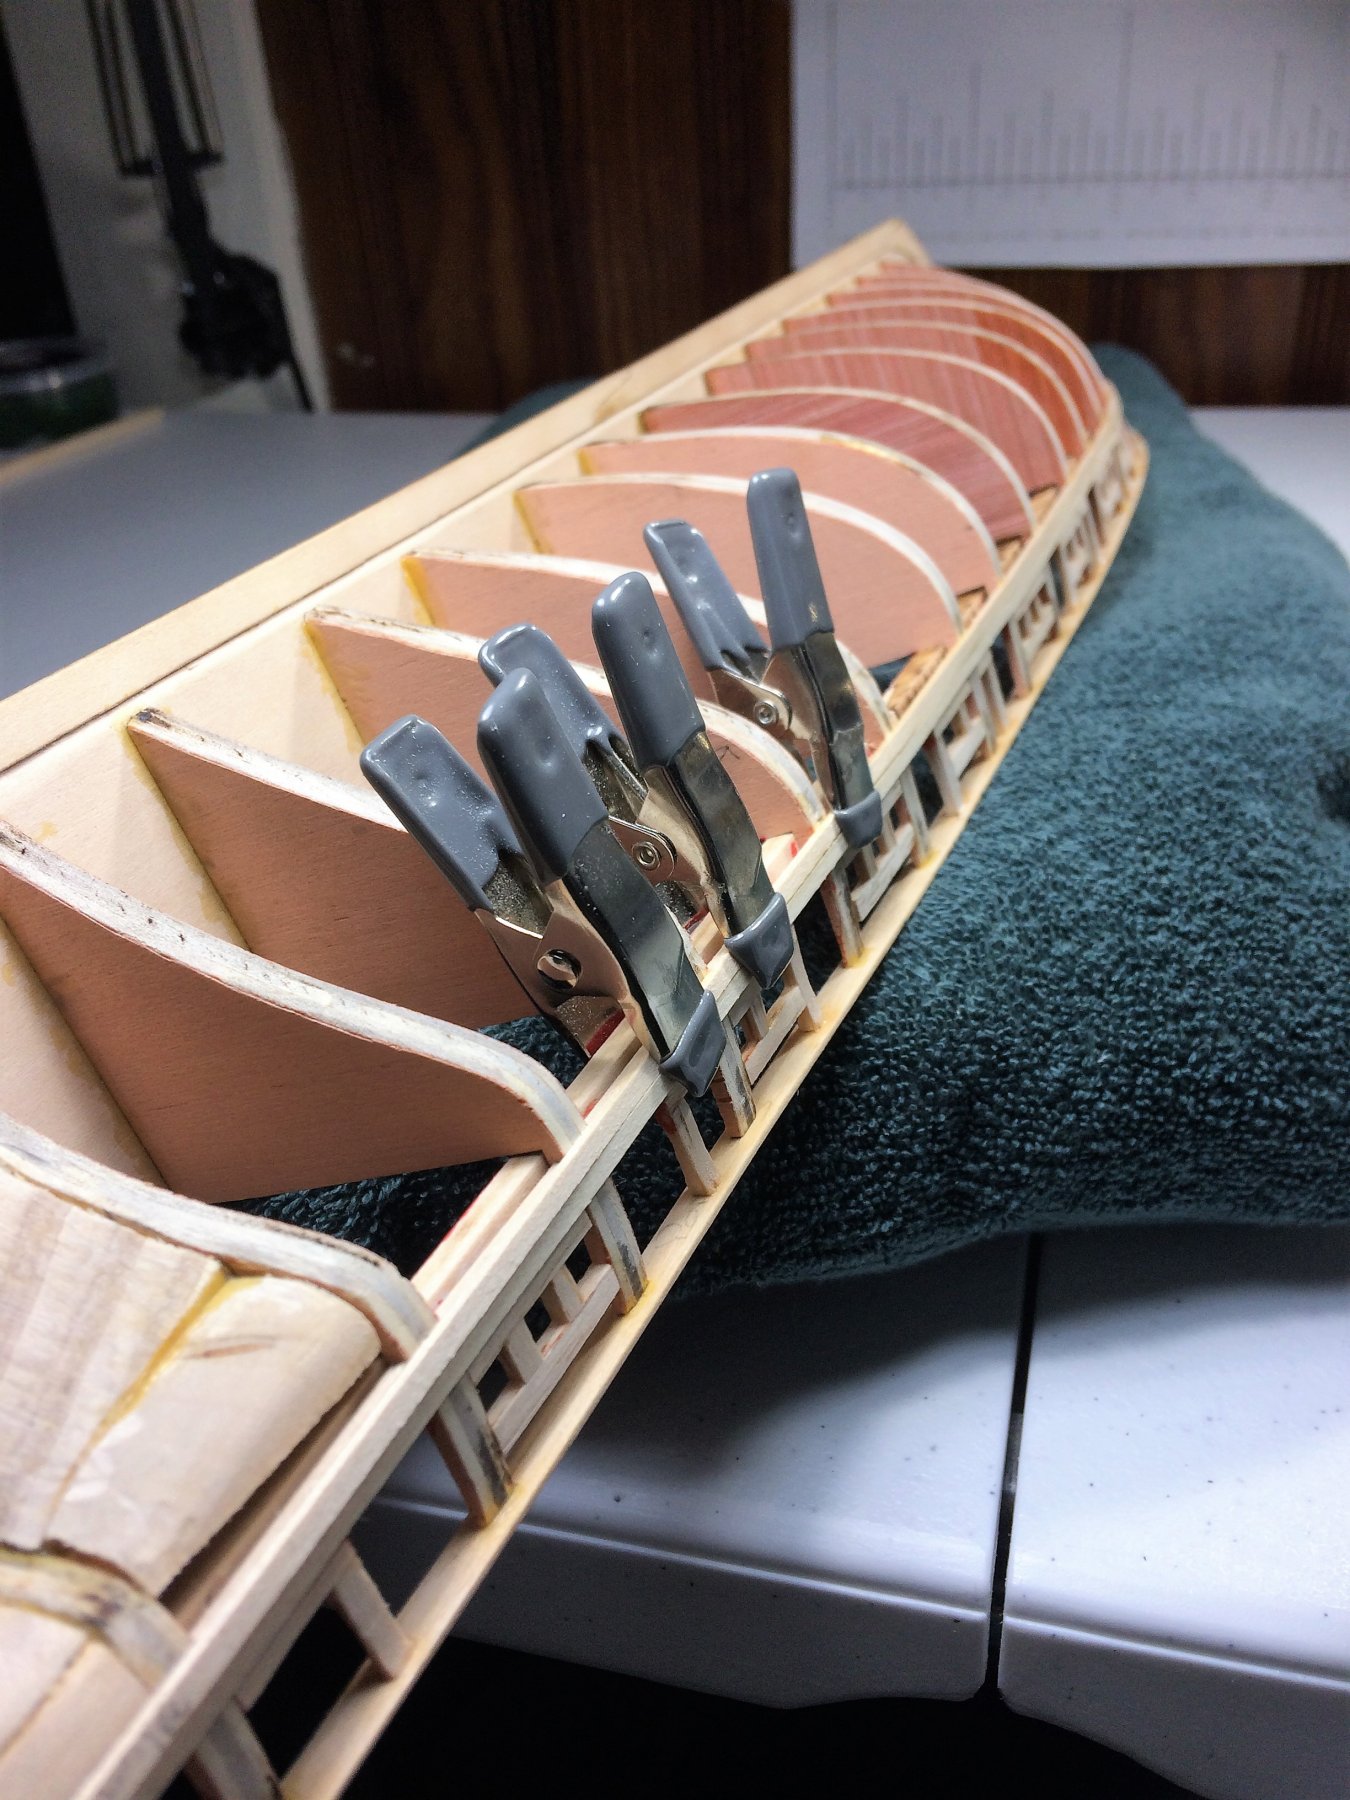
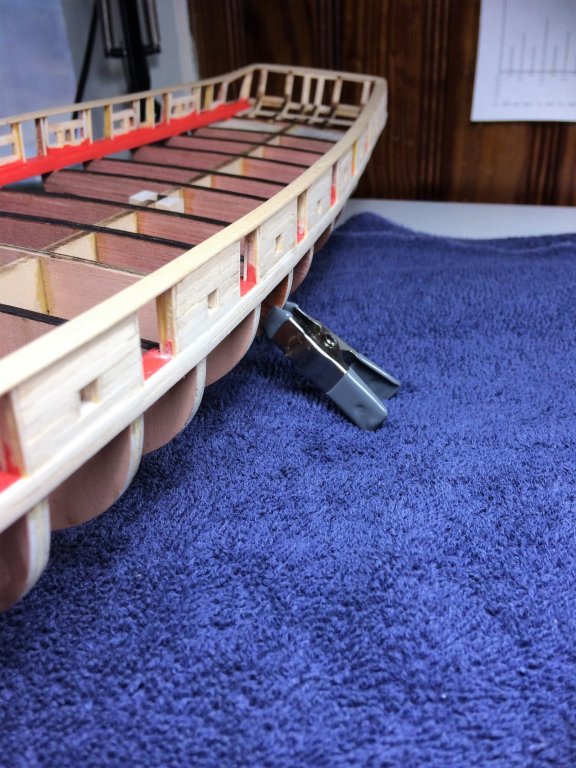
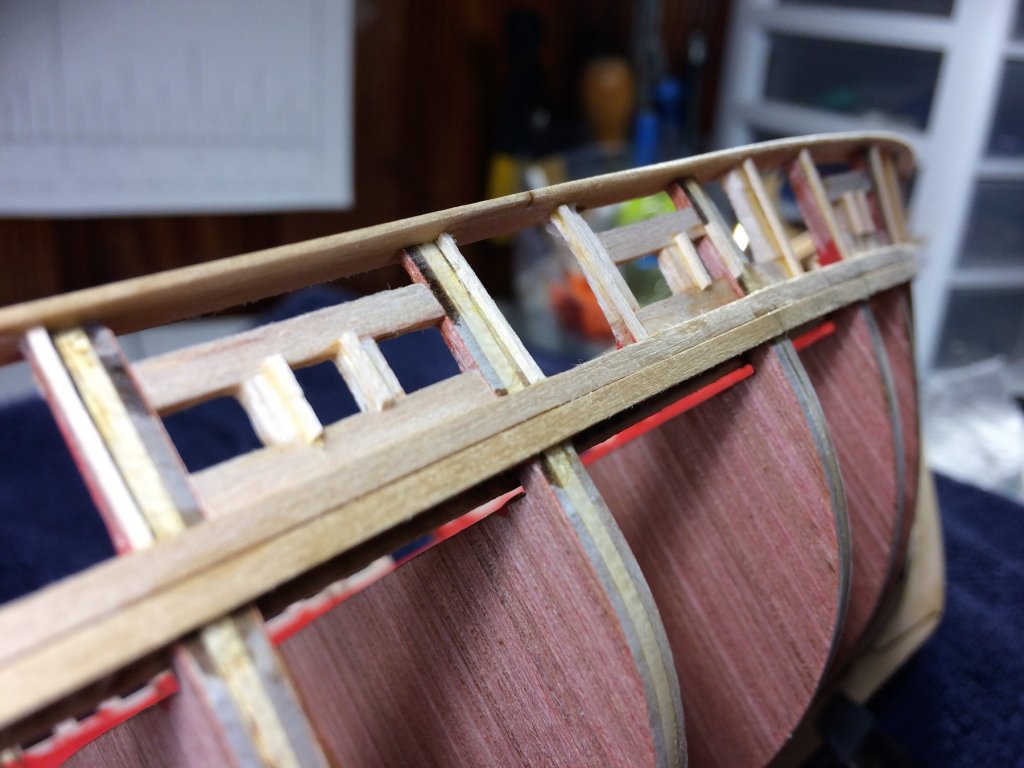
Mike, I appreciate all of the helpful words, Thank you! You have basically given me direction about going forward. I thought about things I haven't even considered yet. Some things I can easily answer. Example, the deck furniture will most likely just go on top of the decking. With my limited experience, I feel that will give this learner a better chance at a respectable looking deck. I do think I wont lay the deck down until I plank the hull. Like you said, just being able to hold the hull by the ribs tells me to do the deck later, I know exactly what you mean. In the manual it mentions that if you do this approach, reduce the height of the furniture. That I shall. Plus, with the deck in, and while doing the hull planking, I can see the deck taking a lot of dings that will really show when stained. Other things, I'll address as I approach that part of the build. As for the build, I think its time for an update! With the holidays winding down, I can finally get a few hours in the shipyard. Still just methodically planking the gunports. While planking the outside, I started laying a 1/16 thick stringer just under the deck on the inside. All planks under these will be 3/64 wide down do the waterways. These will get a good sanding and should have a better "flow" in relation to the curve of the ship. Love these little clips. Instant kick stand! Below is my first "ceiled" bulwark. Hope that's the correct term!? With some sanding, and repetition, they should look better. Each piece is cut one at a time. No two are alike. Measure, cut, shape/sand, glue in place, repeat. Got 4 bulwarks planked. Its slow, but I'm getting there. She's coming together. Happy New Years MSW! Tom E


-
I'm usually pretty good about cleaning up extra glue or the stuff that squeezes out......usually. I'm far from perfect. I have a paper towel near by at all times for the CA and with the wood glue I just use my finger to wipe it off, then I sand after it dries. I can not stand glue stains! Hate the little buggers. As a kid doing plastic kits, I would scrap a project because of glue stains. It severely takes away from any project with gobs of dried glue everywhere. As for the hull, no stain. I'm going to paint her in the standard Niagara colors. But I will be staining the deck. Which would be the next best step after planking the gunports? Head on to planking the hull or do the deck first? Tom E
-
Mike, Thru out the entire build I've been using both wood glue and CA. The planks have been glued in almost entirely with CA. If CA does the trick, that saves me the whole step of soaking and bending. I'll try it this weekend. Sounds like I was over thinking it. Tom E
-
I'm sold on the purple filler. I'll definitely pick some up. Sounds like something Home Depot might have, or good ol' Amazon. As towards how to paint the bulwarks...sheesh, I haven't even given it one thought at all. To be honest, never thought I would get that far. Since I re-started modeling, I've been a "by hand" painter my entire time. Really want to upgrade that to an airbrush. Been doing some research and I know I want a Dual Action. As towards compressors I am oblivious, still researching those. Paasche (spelling?) seems to be a common name. I've been watching a Bismarck build (SeymoreButts) and his paint work is fascinating. Sounds like he will only use an airbrush, nothing else, and his work backs that up. Great results. I figure I'll invest in one when I get my tax return. Tom E
-
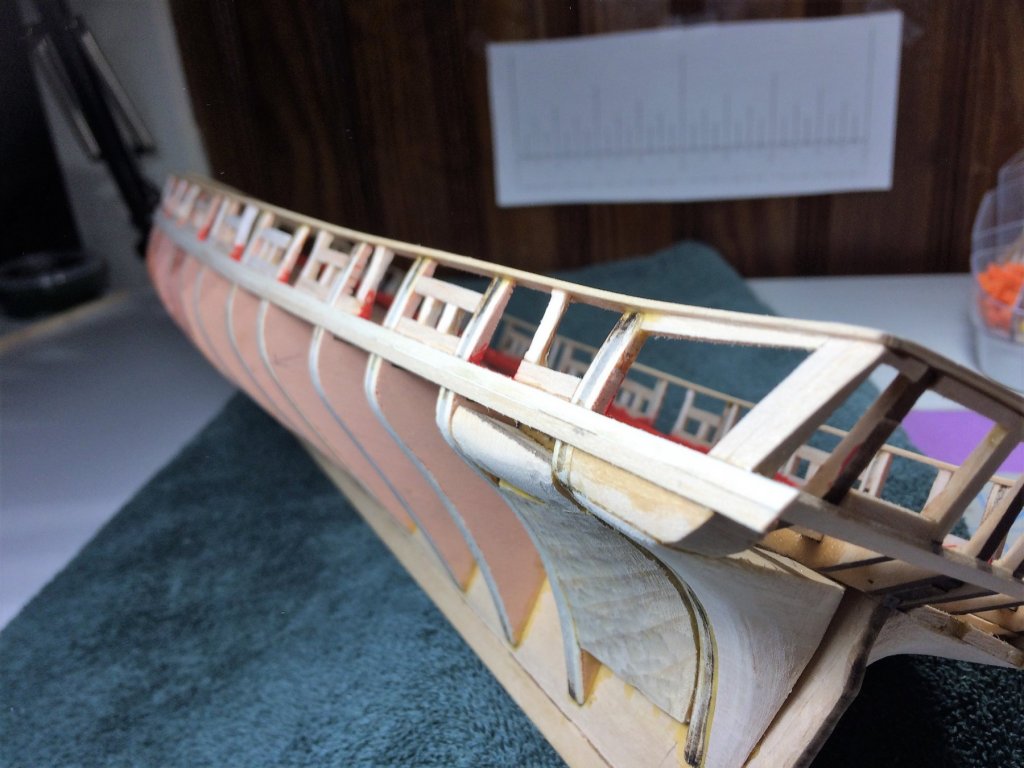
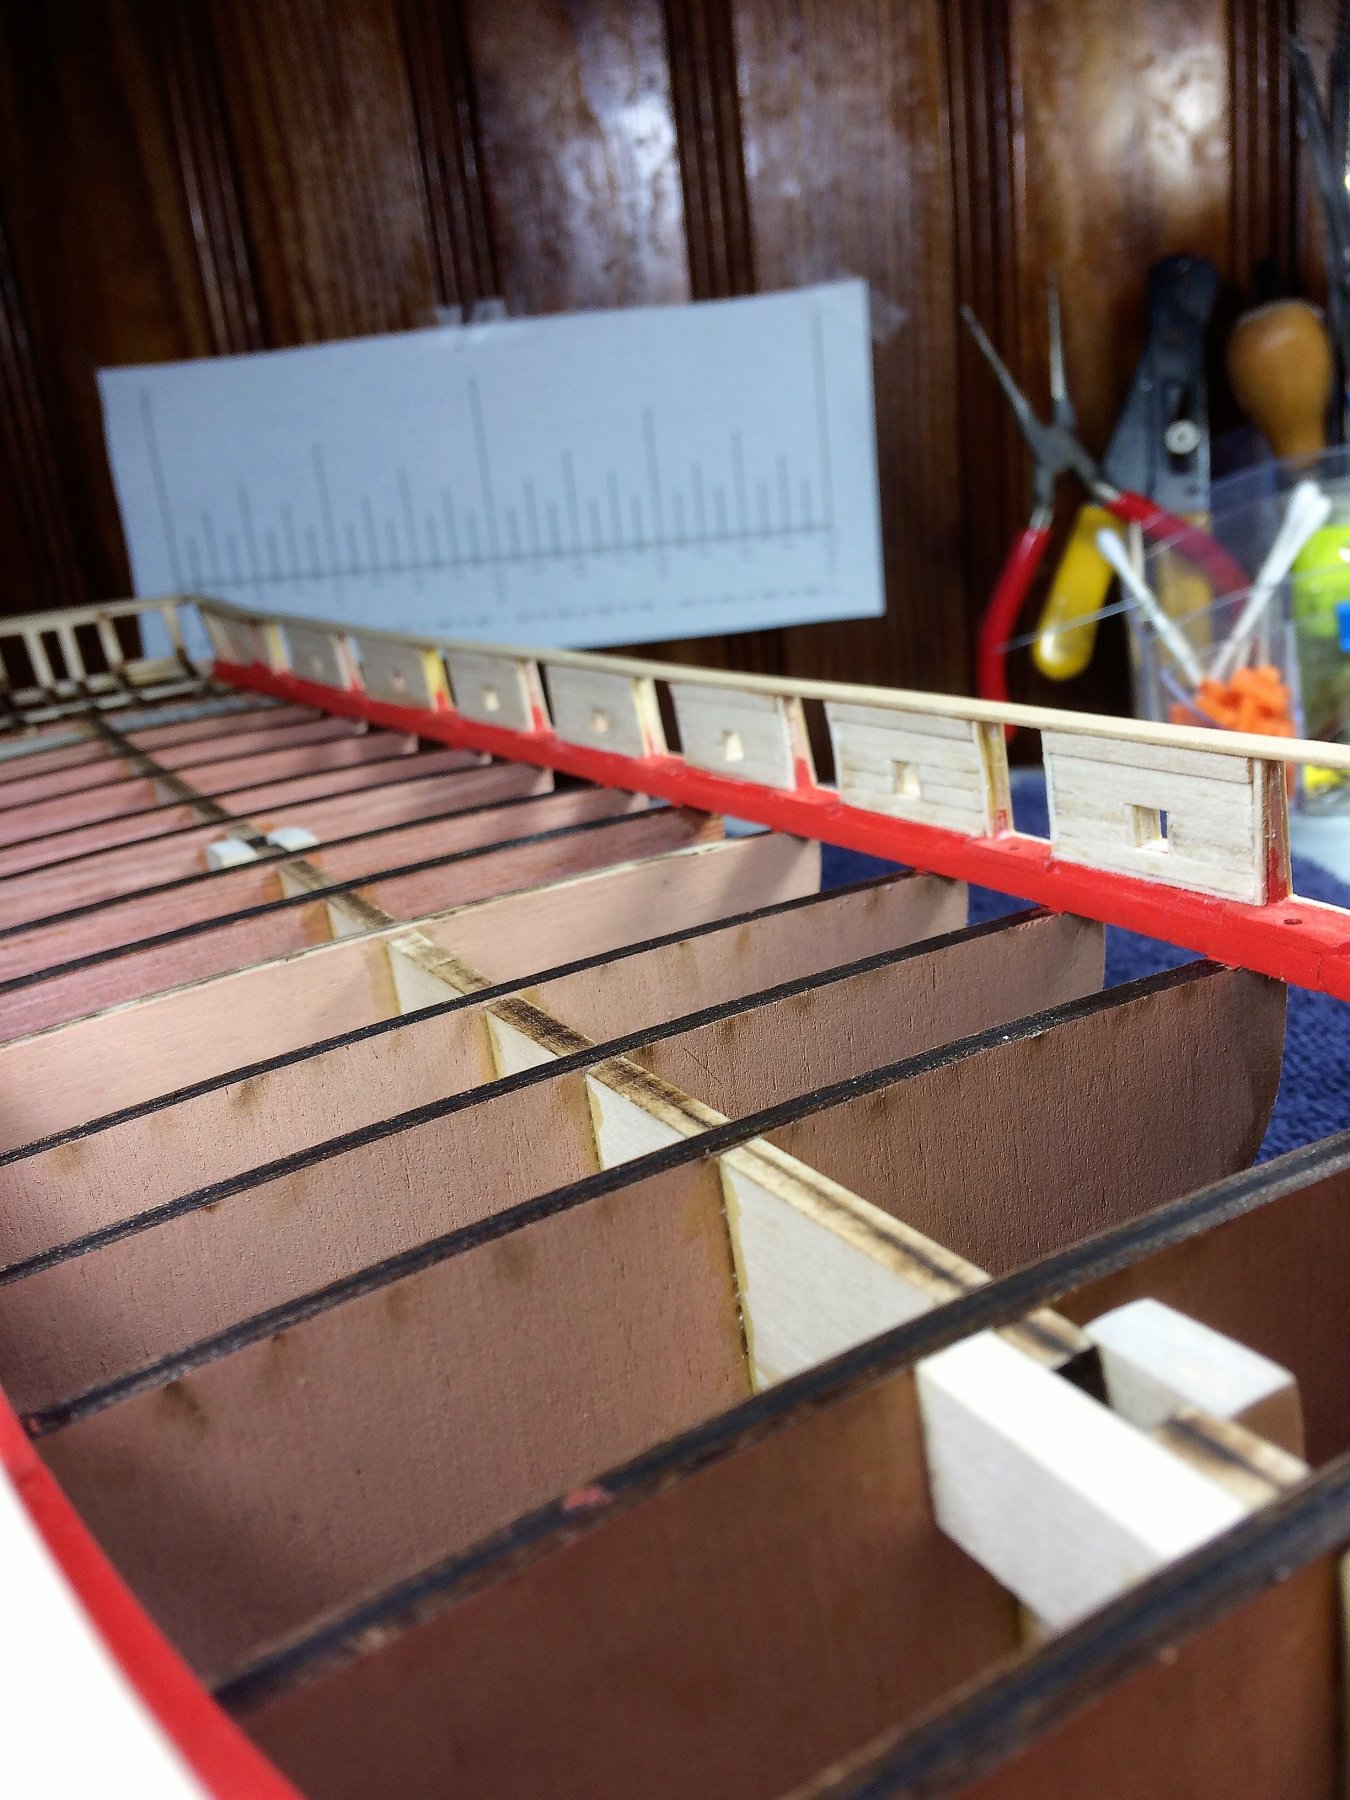
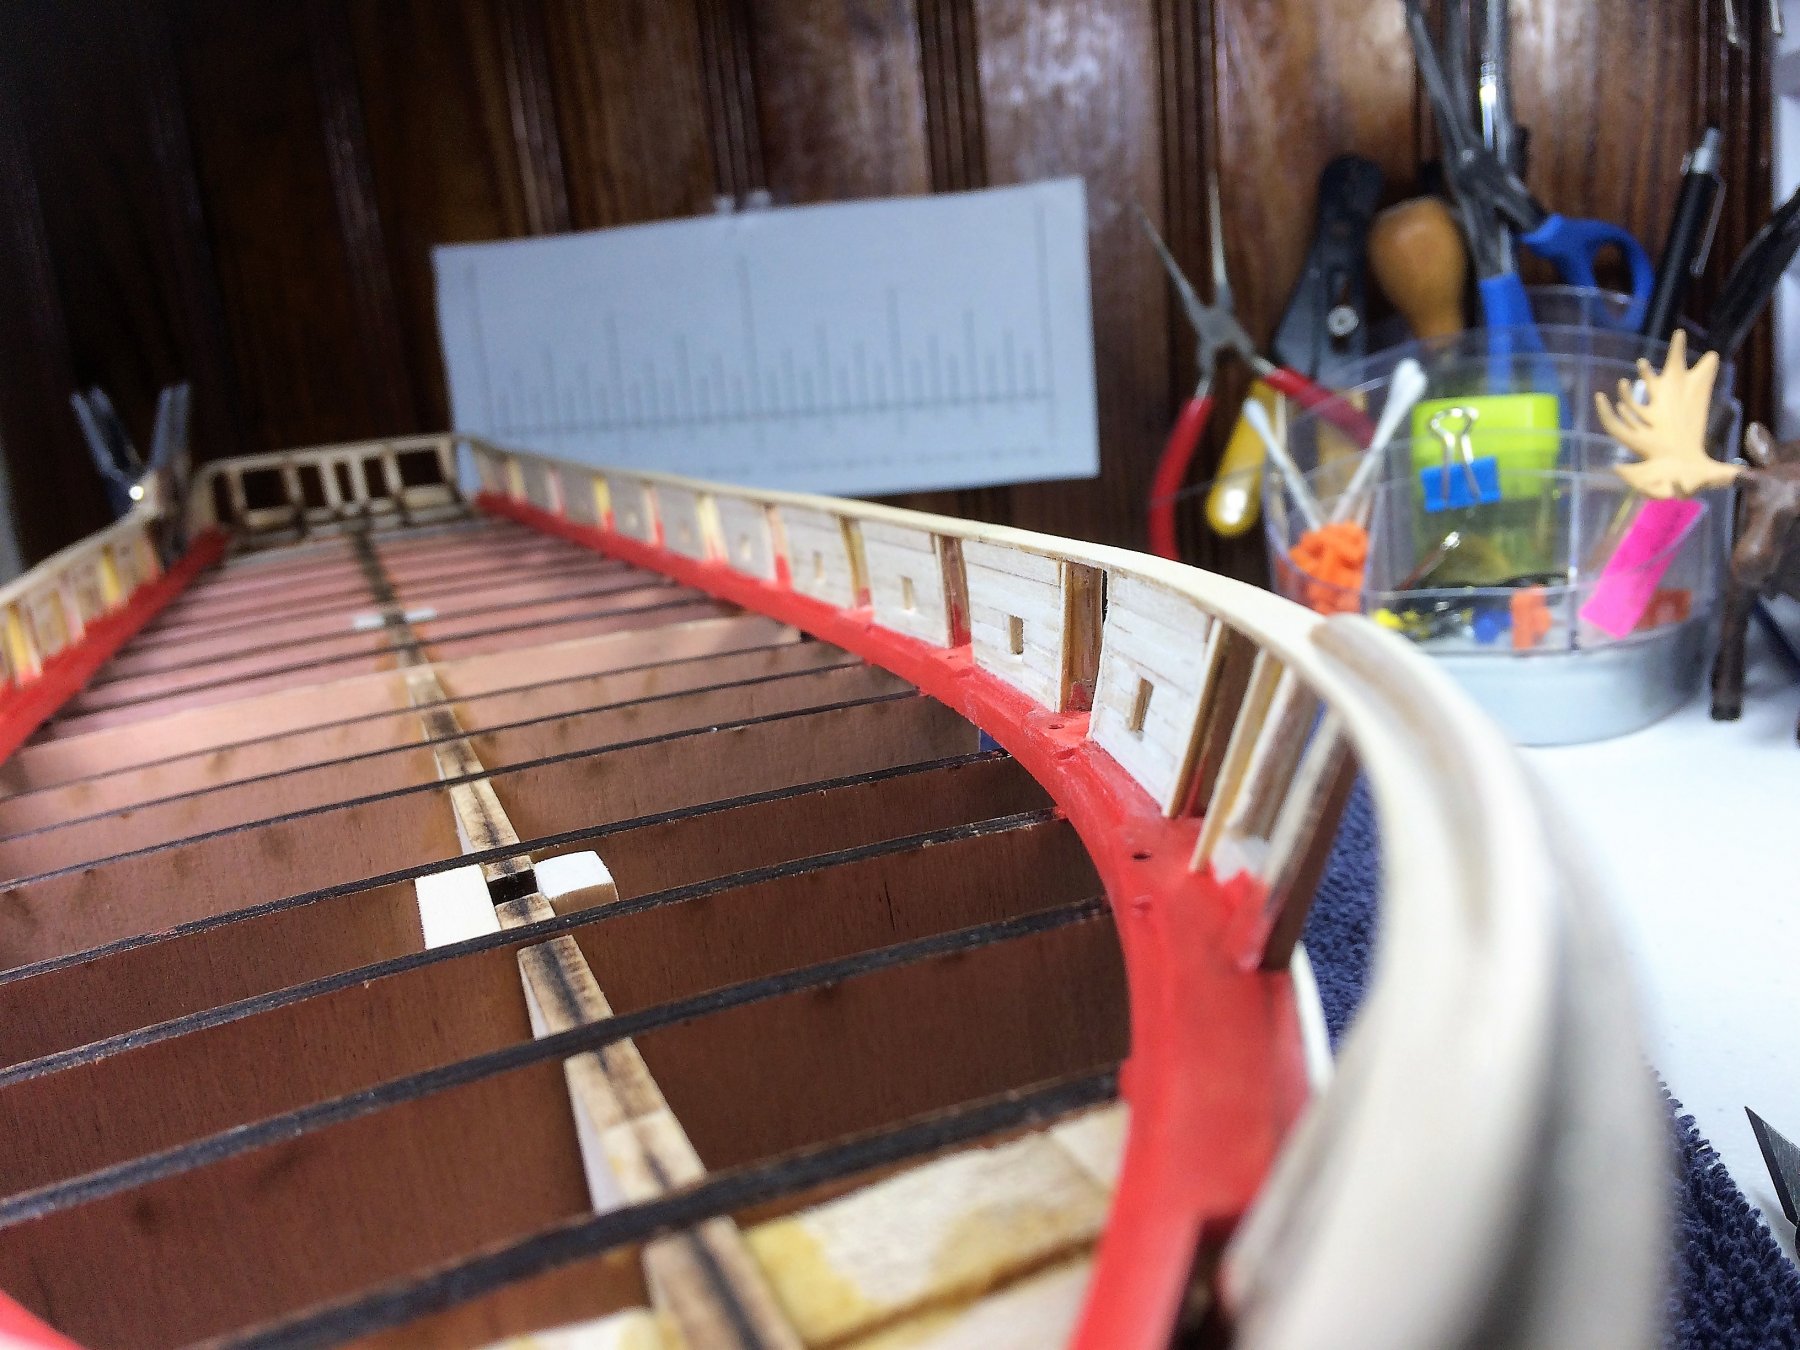
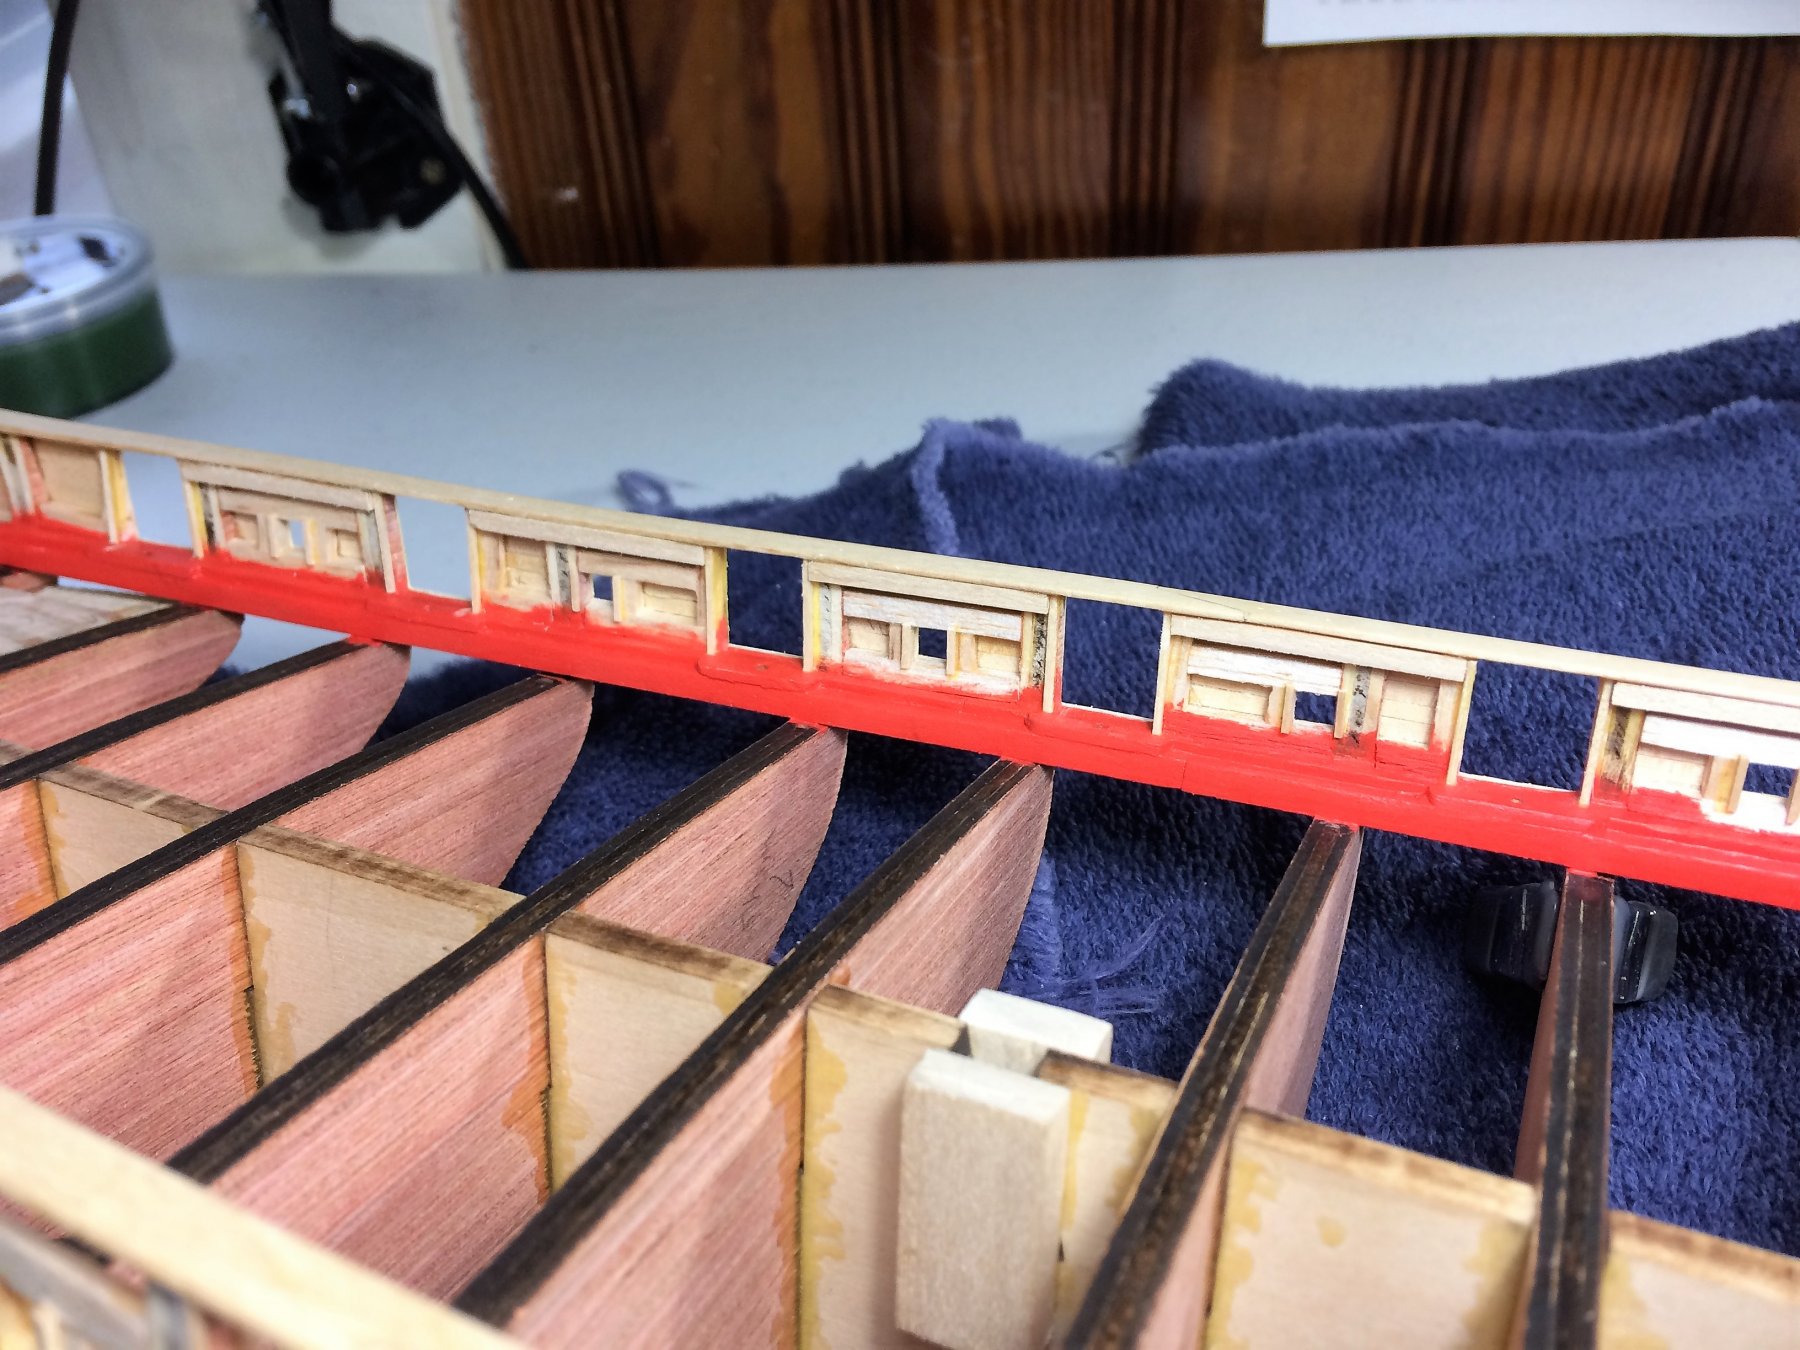
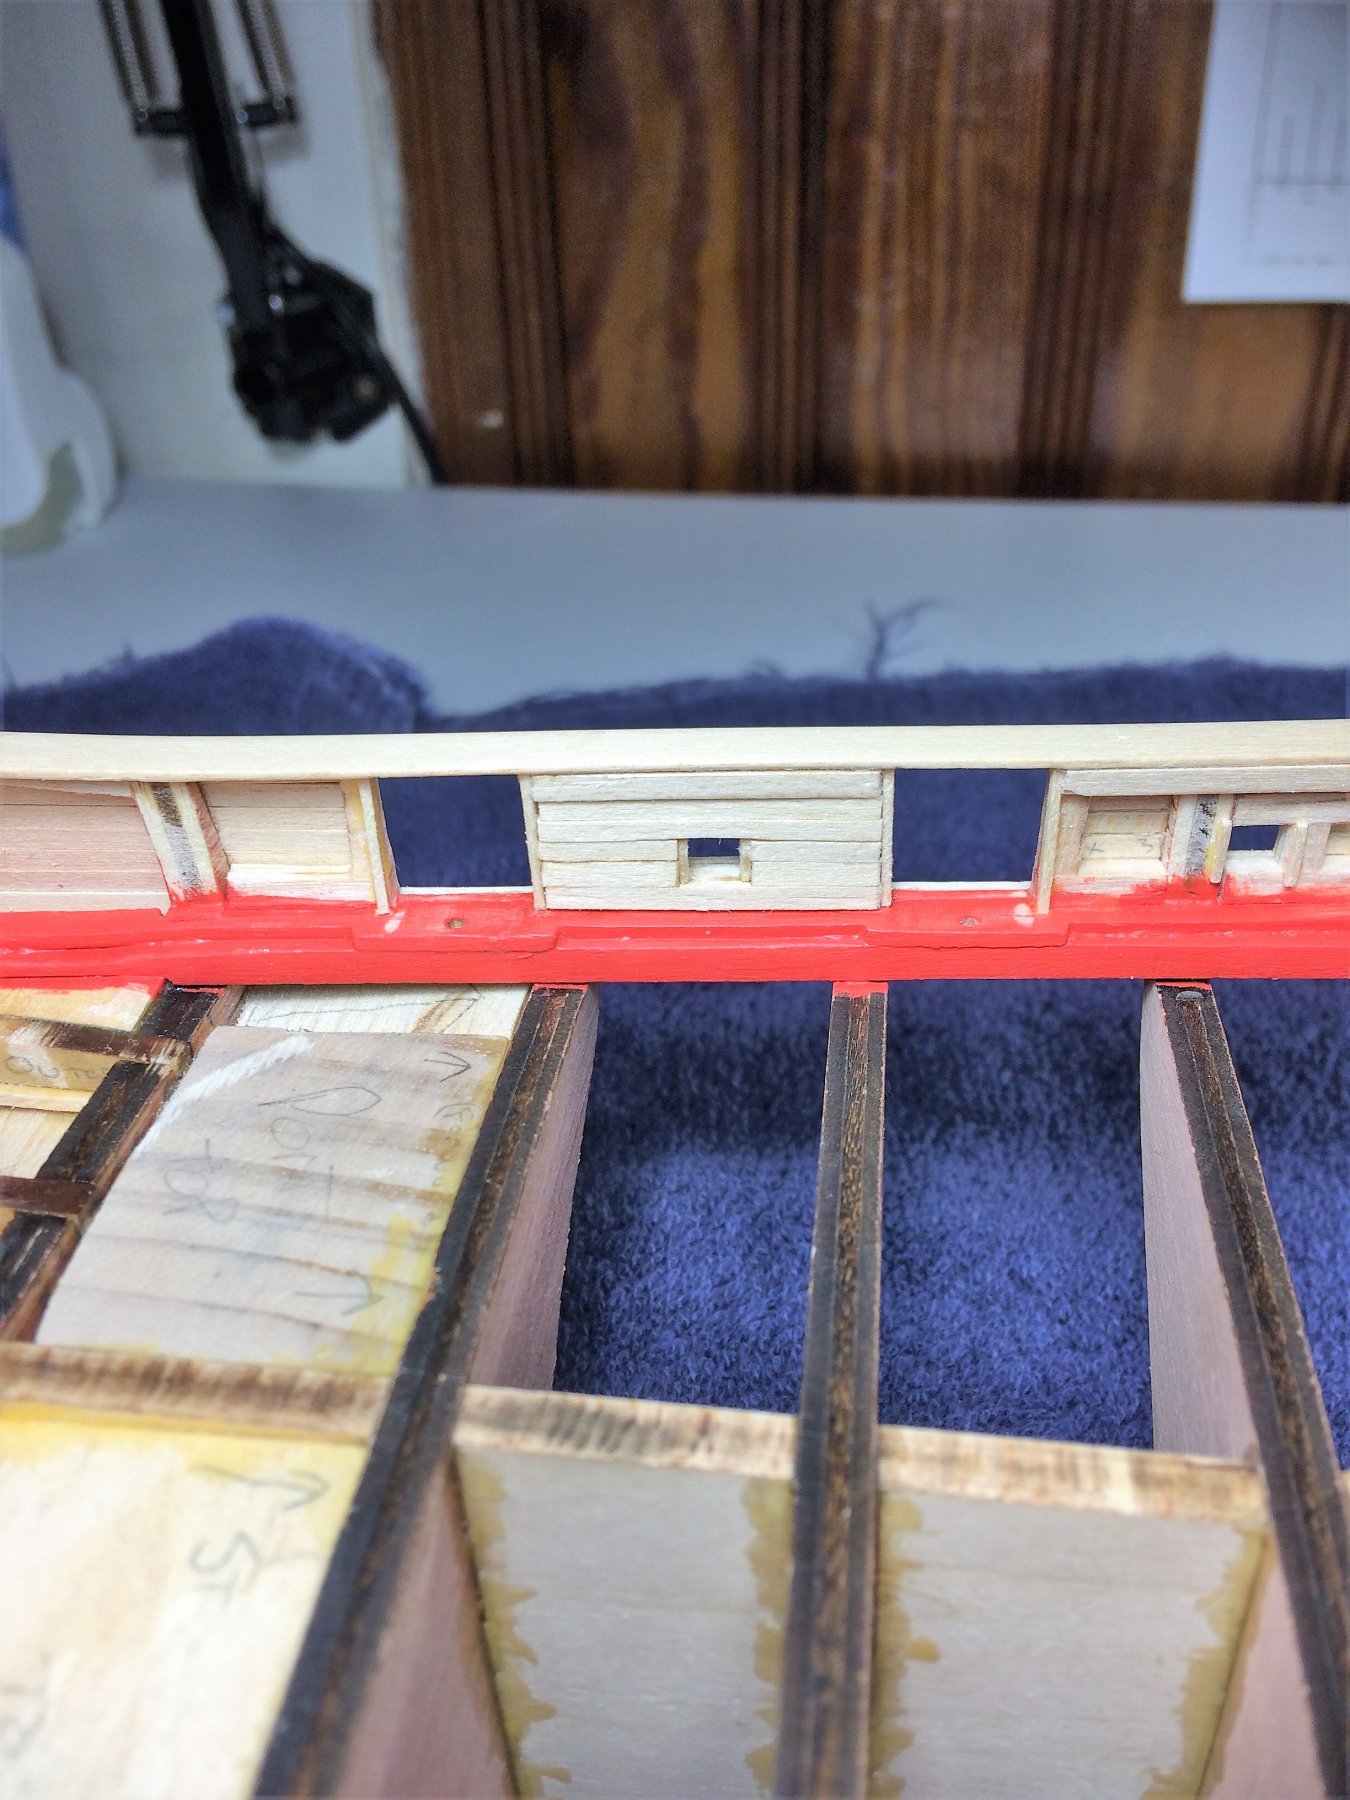
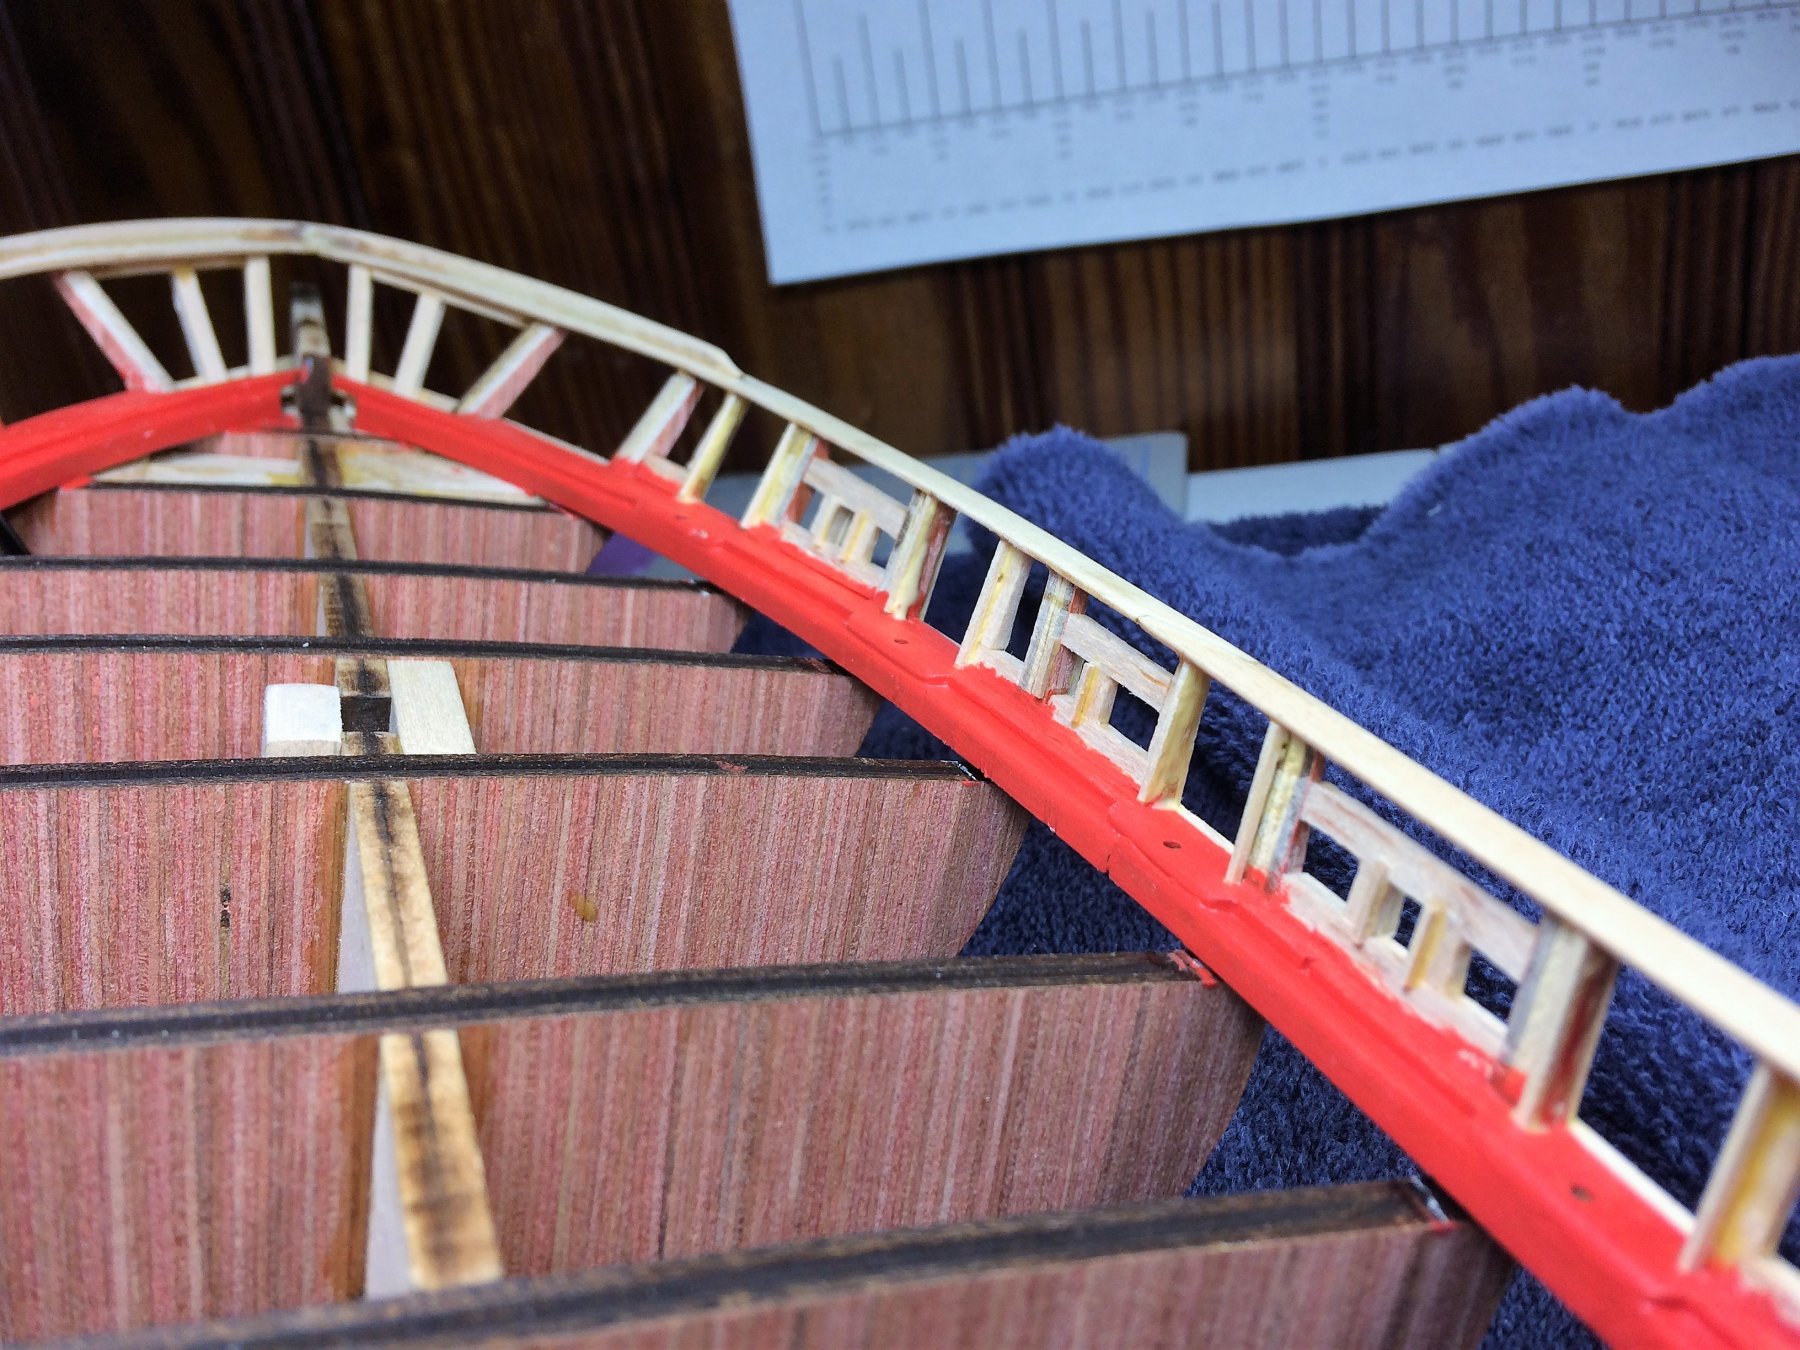
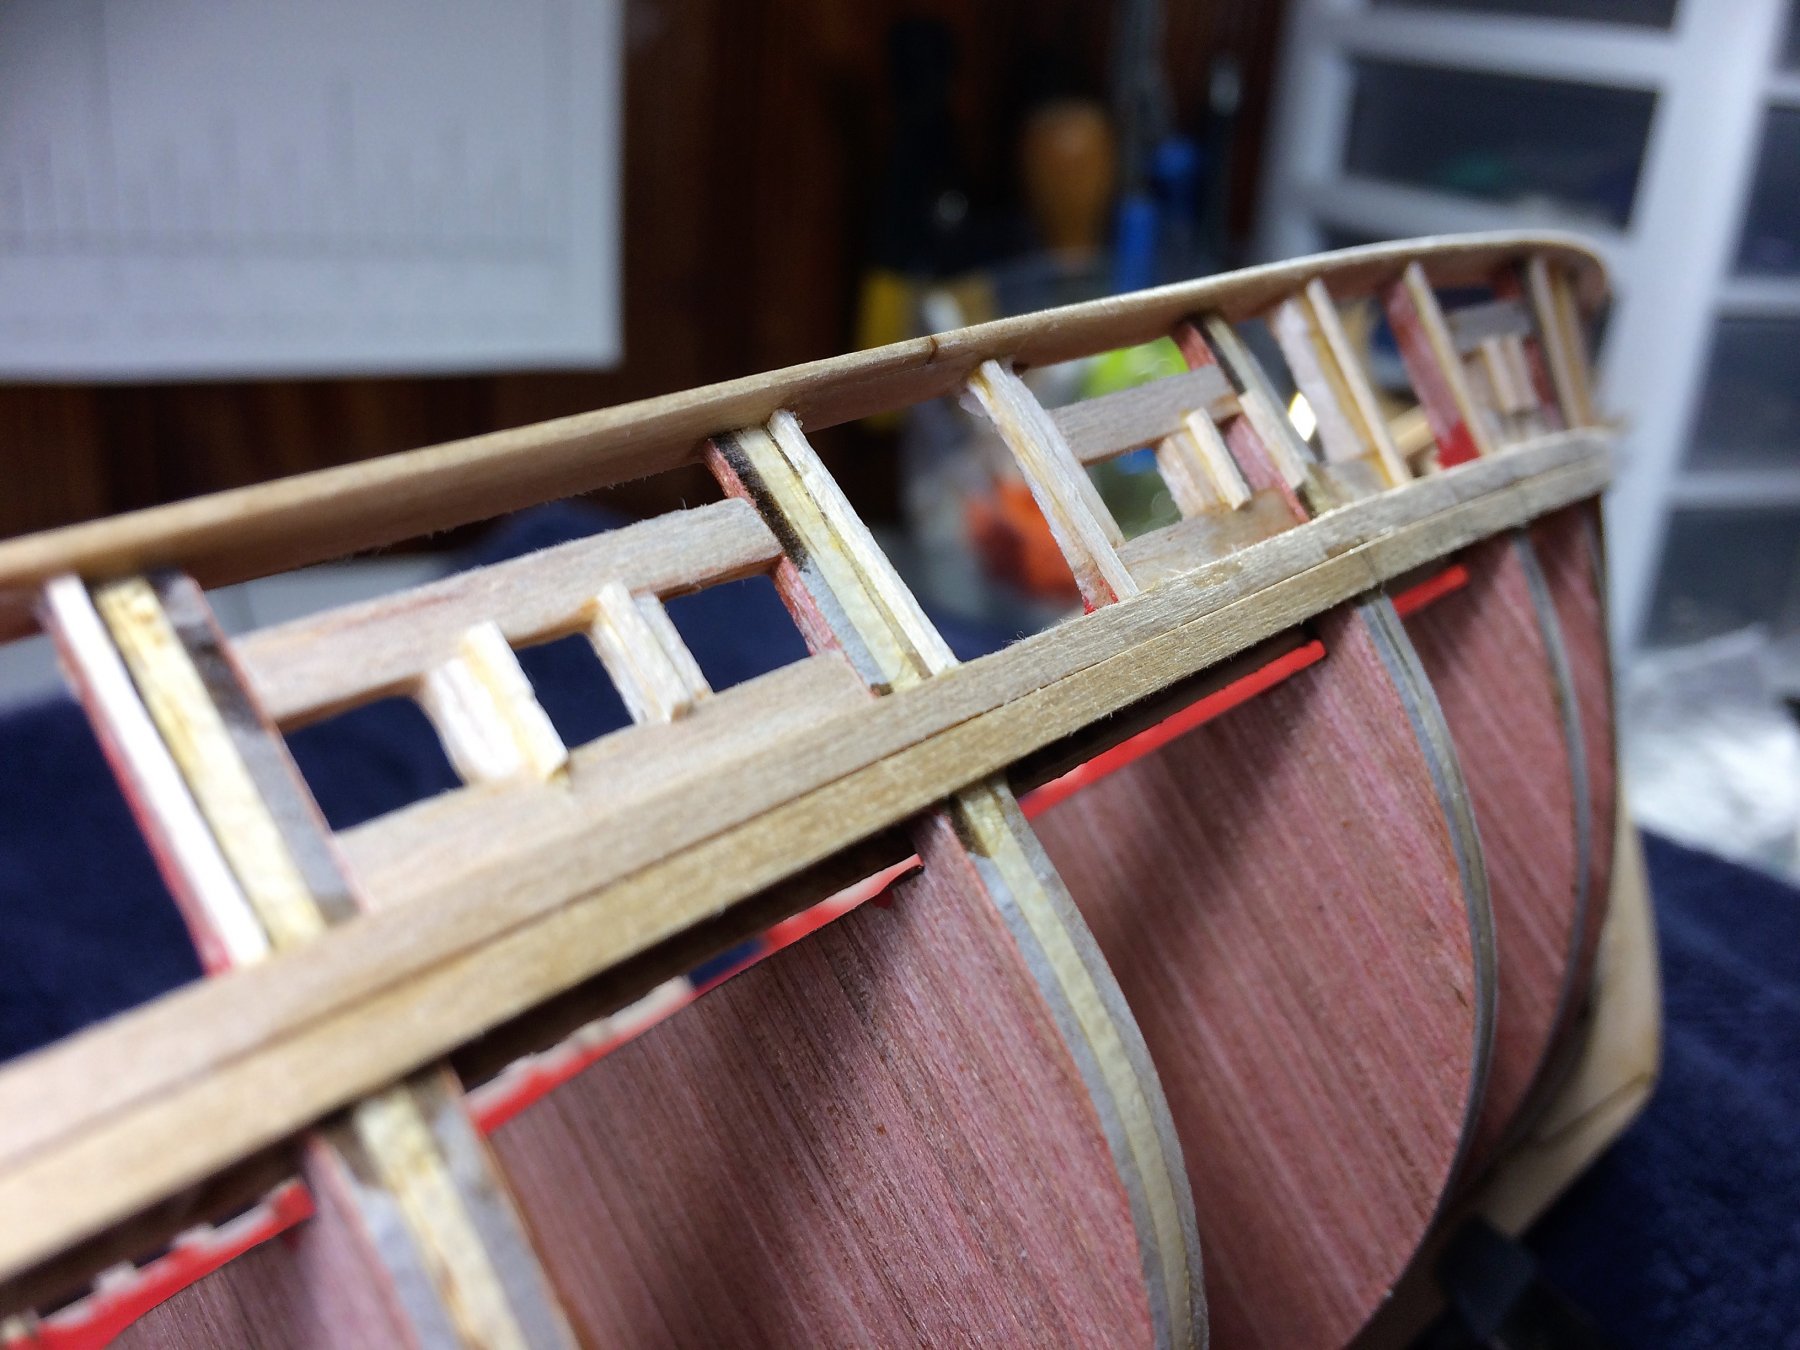
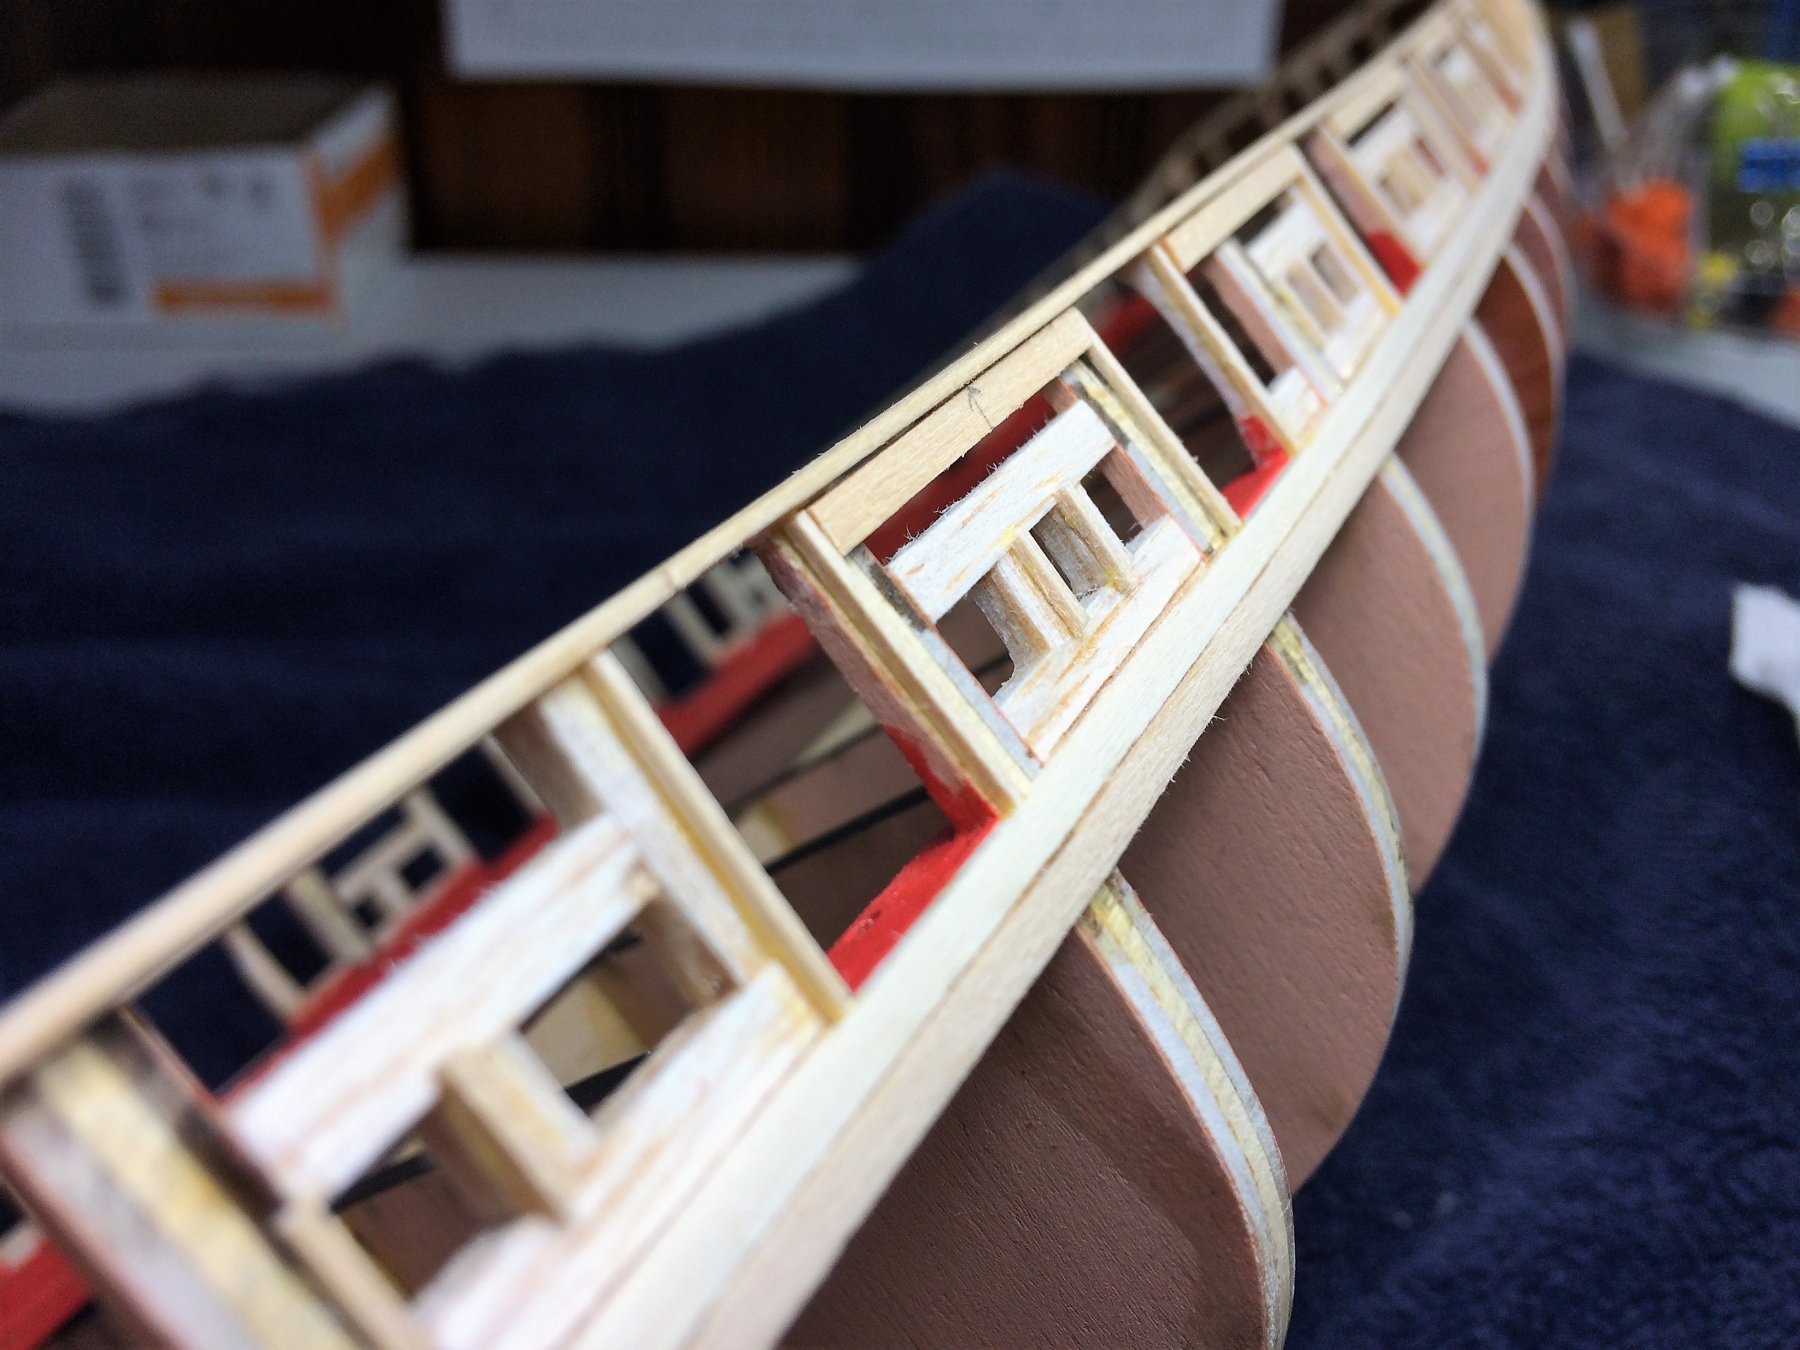
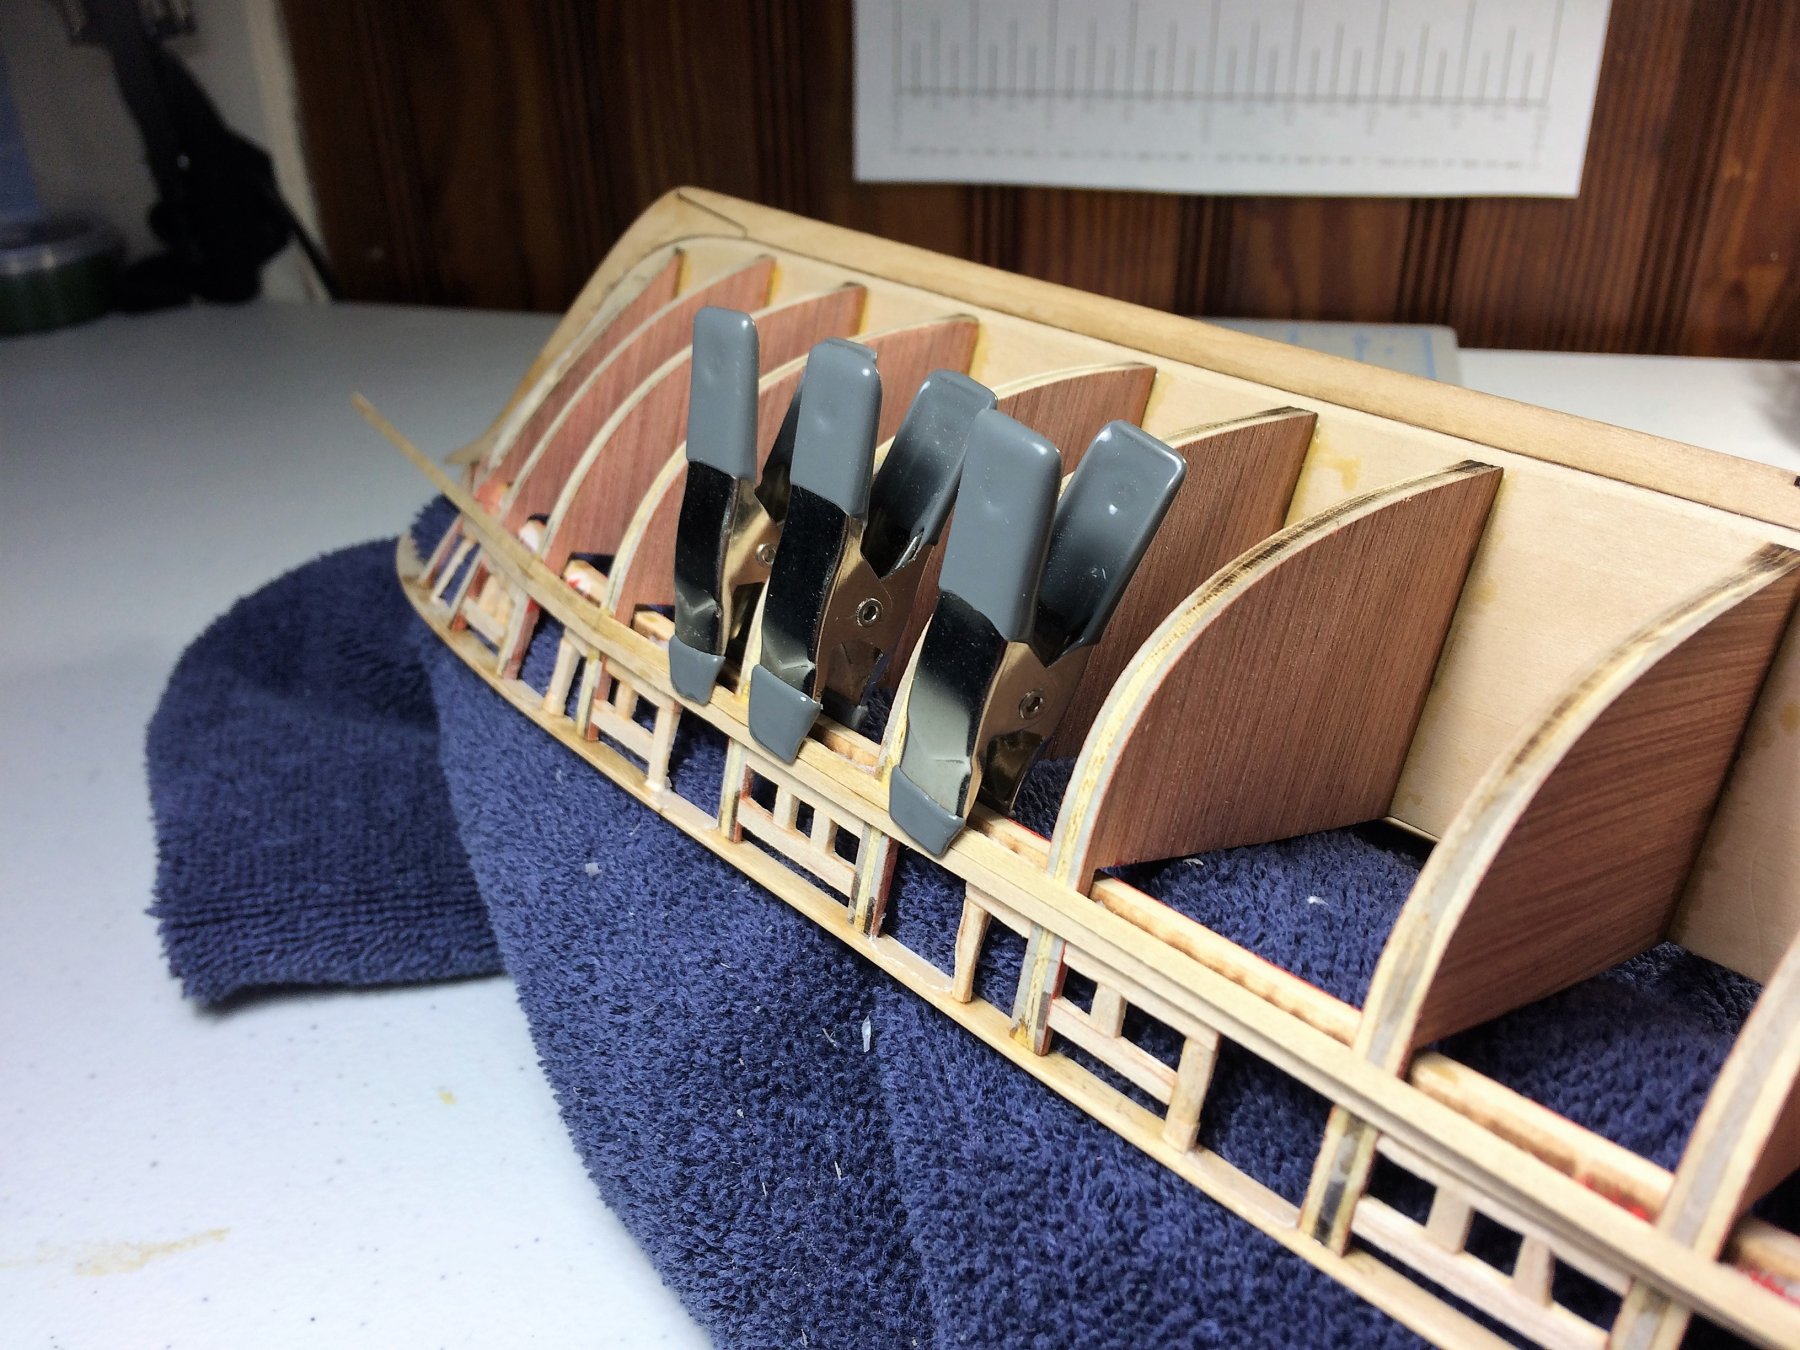
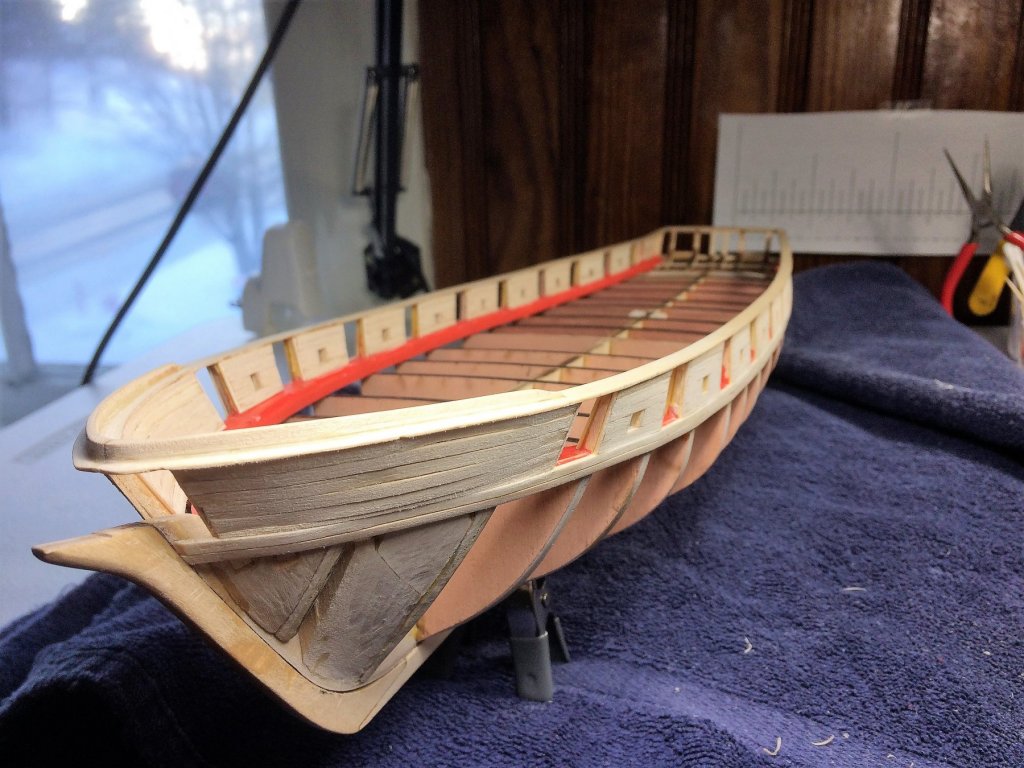
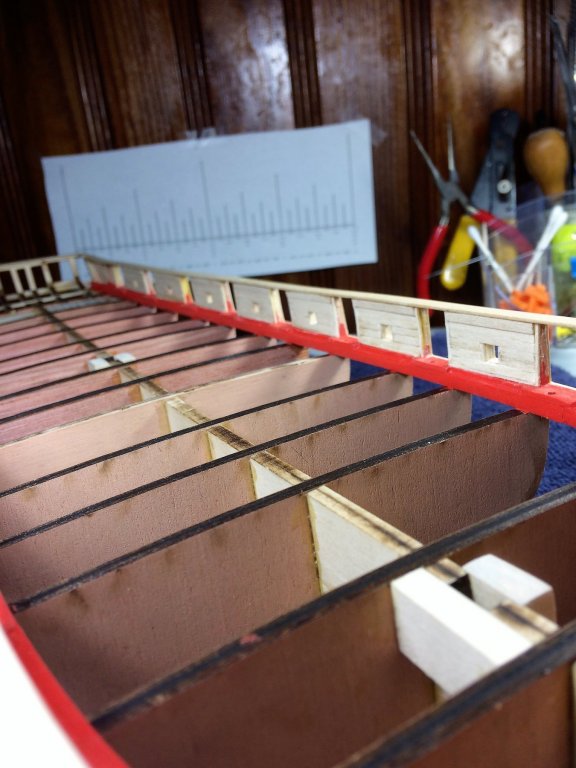
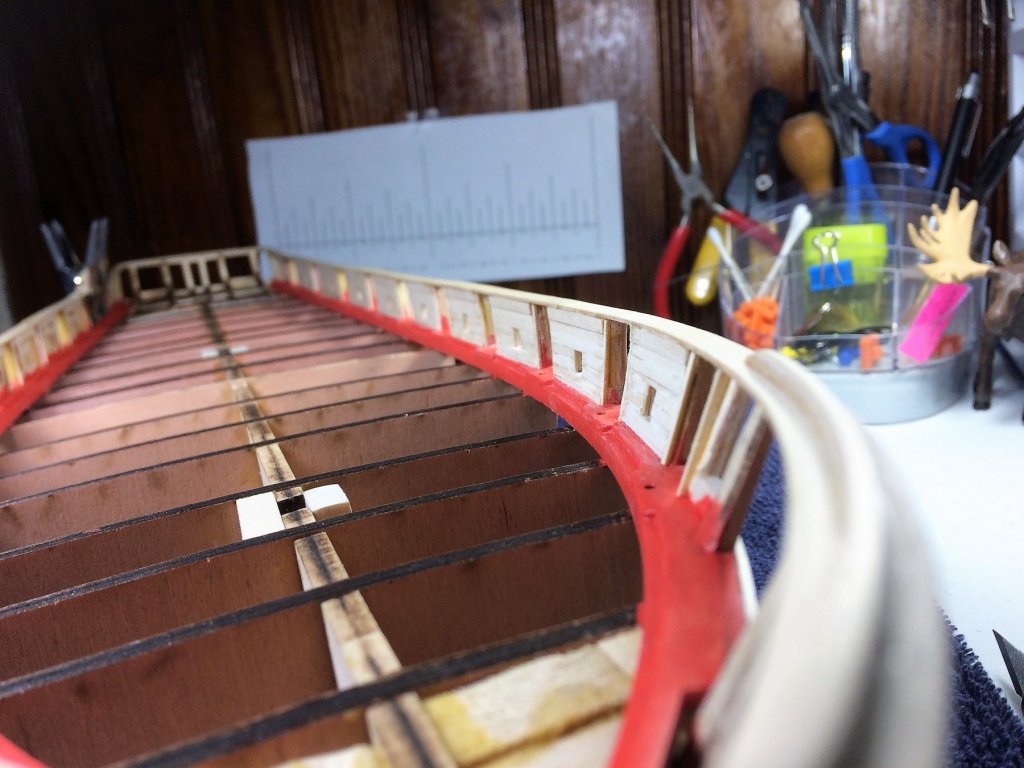
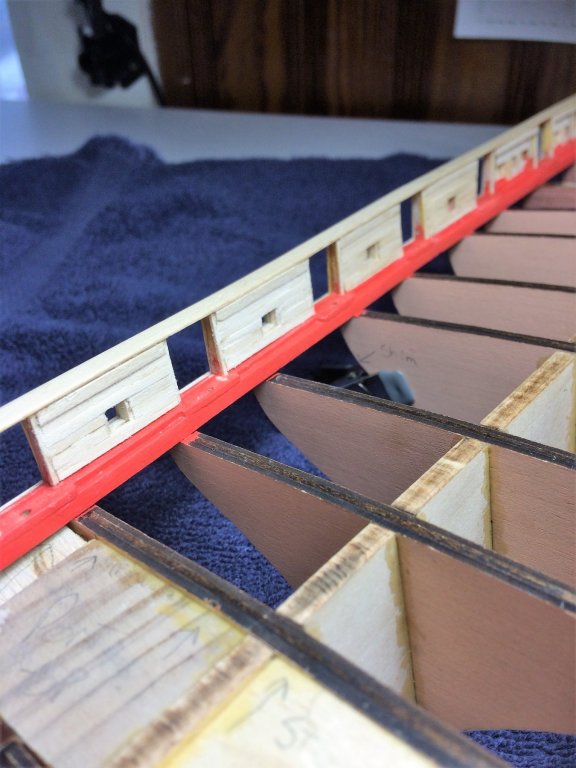
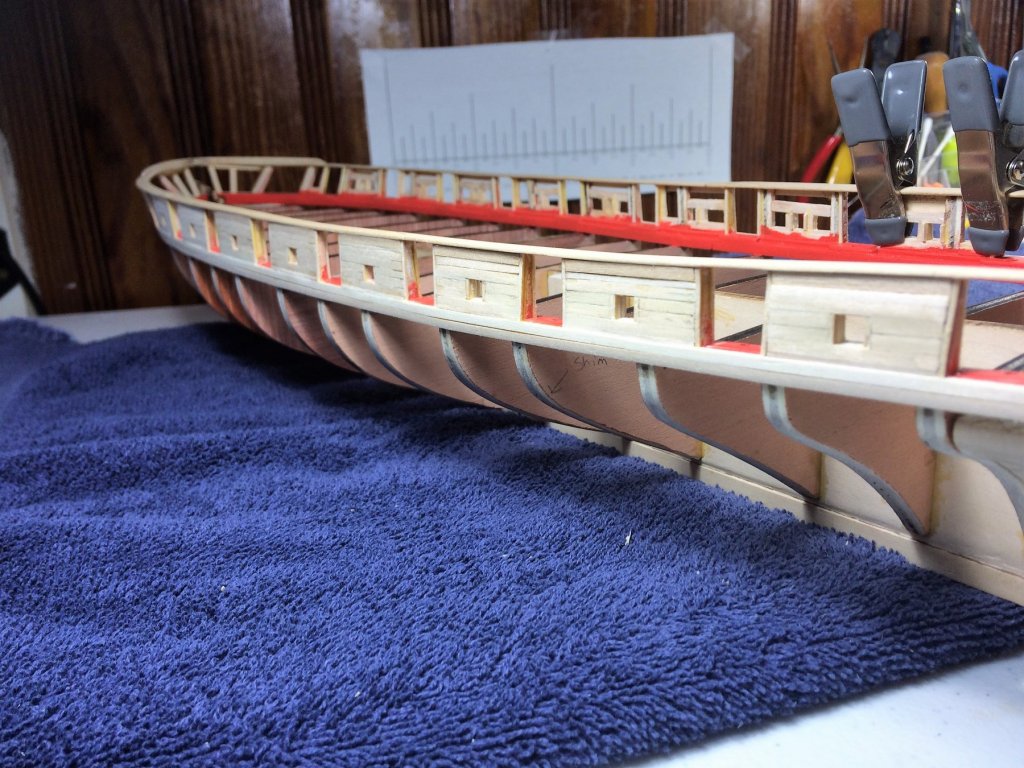
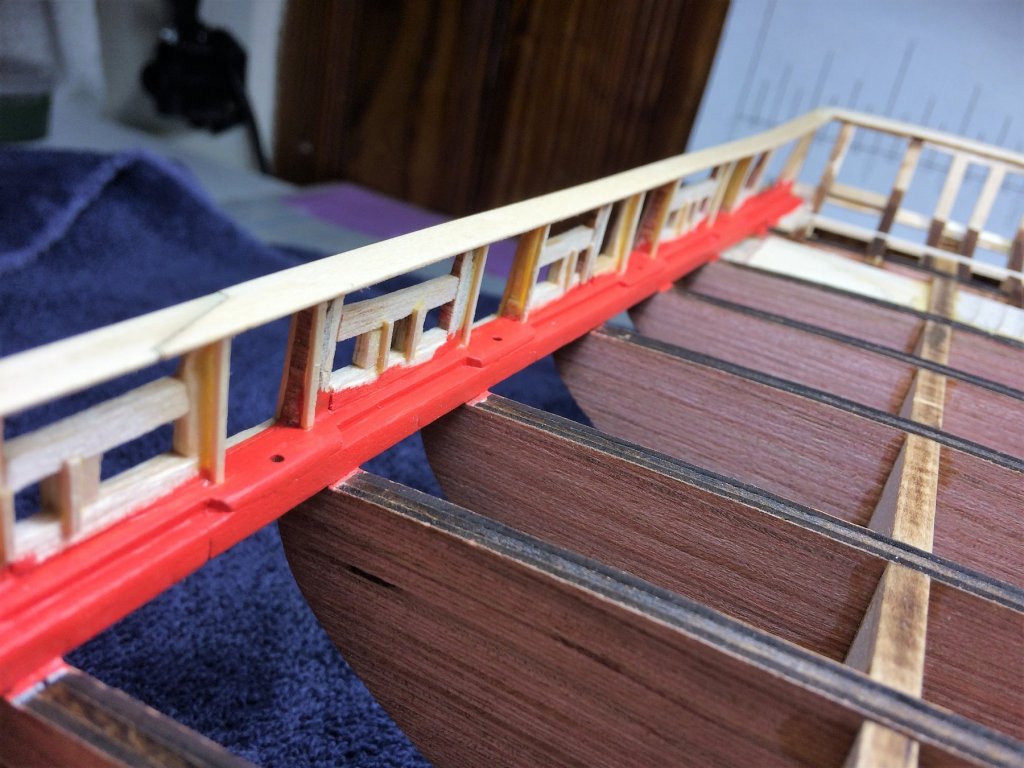
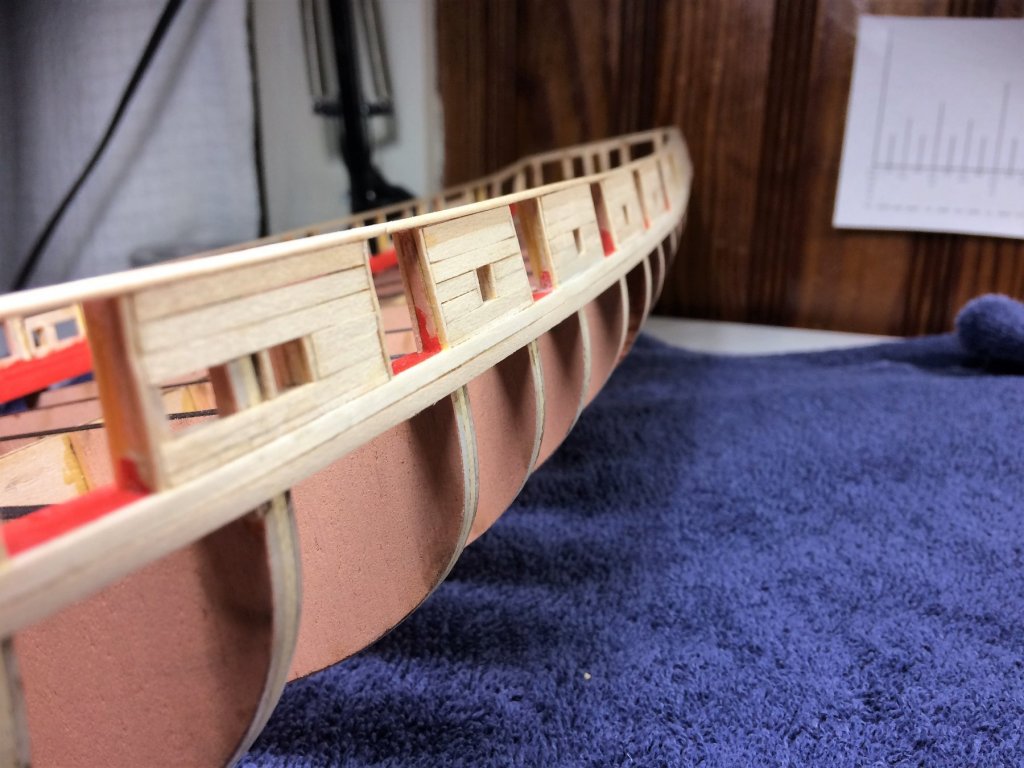
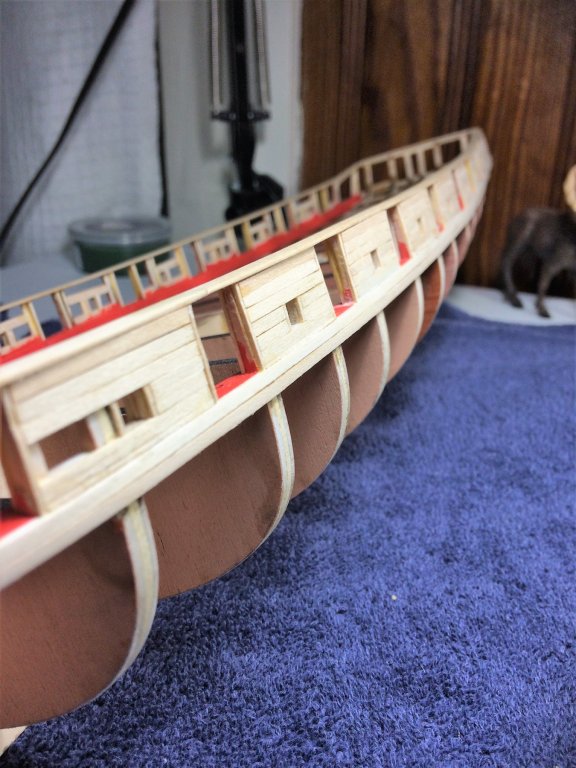
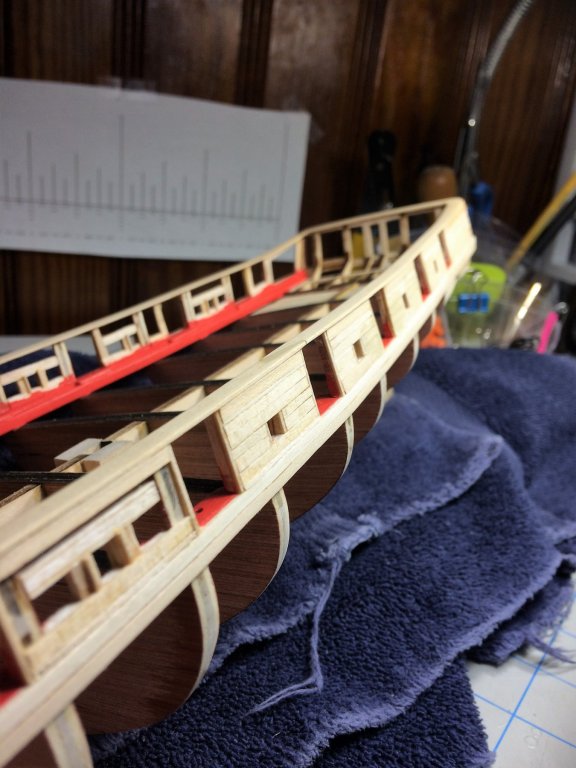
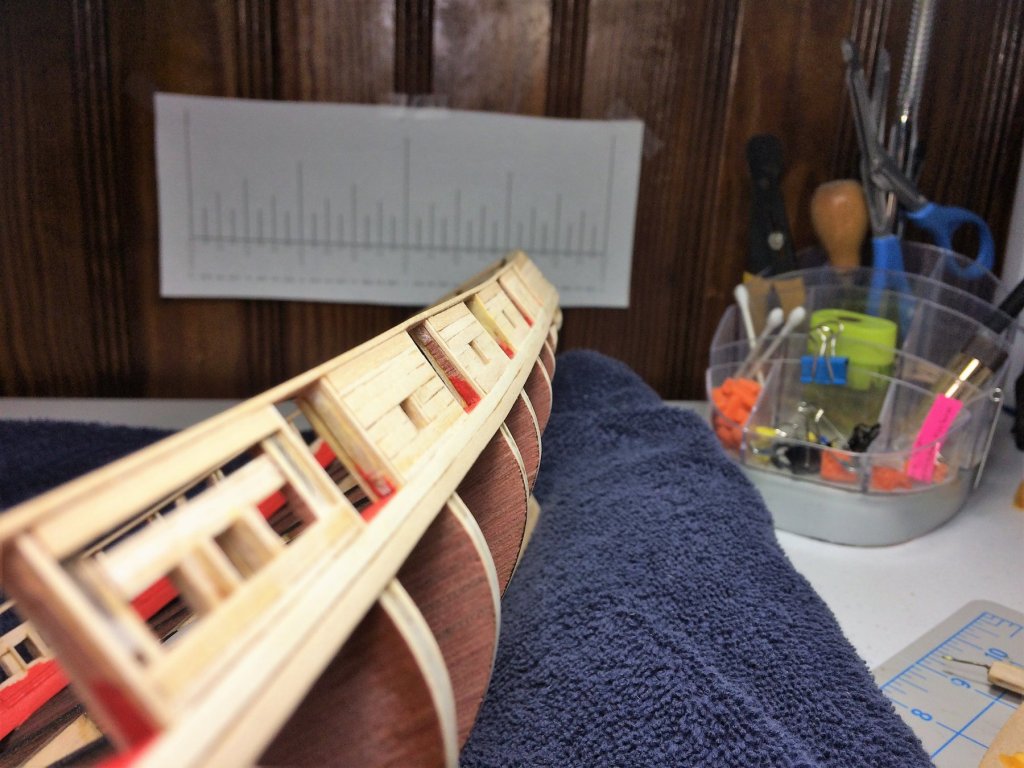
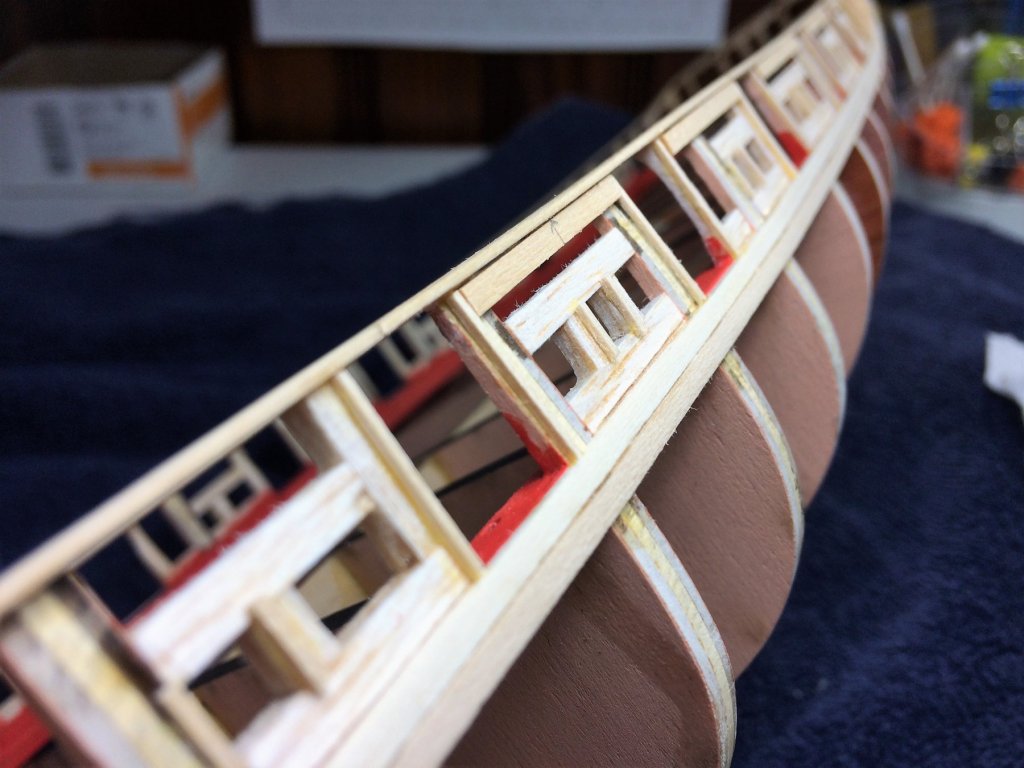
Evening, Merry Christmas and Happy New Years to all my fellow modelers! Hope Santa was good to everybody! We were delivered one official white Christmas here in western New Hampshire. About 6-8 inches fell last night, on top of the 10 inches we got last Friday into Saturday. Very picturesque! Although for some reason I took no pics!!!!! I have not seen a significant snowfall on Christmas Day in a long time. Then I shoveled for 2 hours and it lost its luster. With the holidays in full swing, not much has gone on in the Shipyard. What has been done is small things I can easily put down and come back to. Below, I finished the inboard 1/32 square strips around the sweeps and gunports. One by one. They were all different sizes. If there were any gaps between it and the timberhead, I filled with wood glue. It gets painted in the end. The below shot shows the outboard planking from behind. I got a sense that the ship is starting to close up. Not a skeleton anymore......might just be me......my goblins. I continued on planking the outboard port side. Piece by piece. After a while a pattern formed. The planks went in well with just the smallest gap on the very bottom of most segments. With some spare 1/32 square strips and some slight sanding they slid in for the most part. I've limited the use of wood fillers, but I know I'll need it later. Mike, I've been looking into the Purple filler you mentioned. I never heard of this stuff, its unique. It starts as purple then changes color when dried. How does paint do with it? Below, the port side is essentially finished. I'm holding off on the very front section of the bow. Those planks will need some bending to fit. Looks like they might need a slight edge bend as well. All will get a good sanding. Happy Holidays! Tom E


-
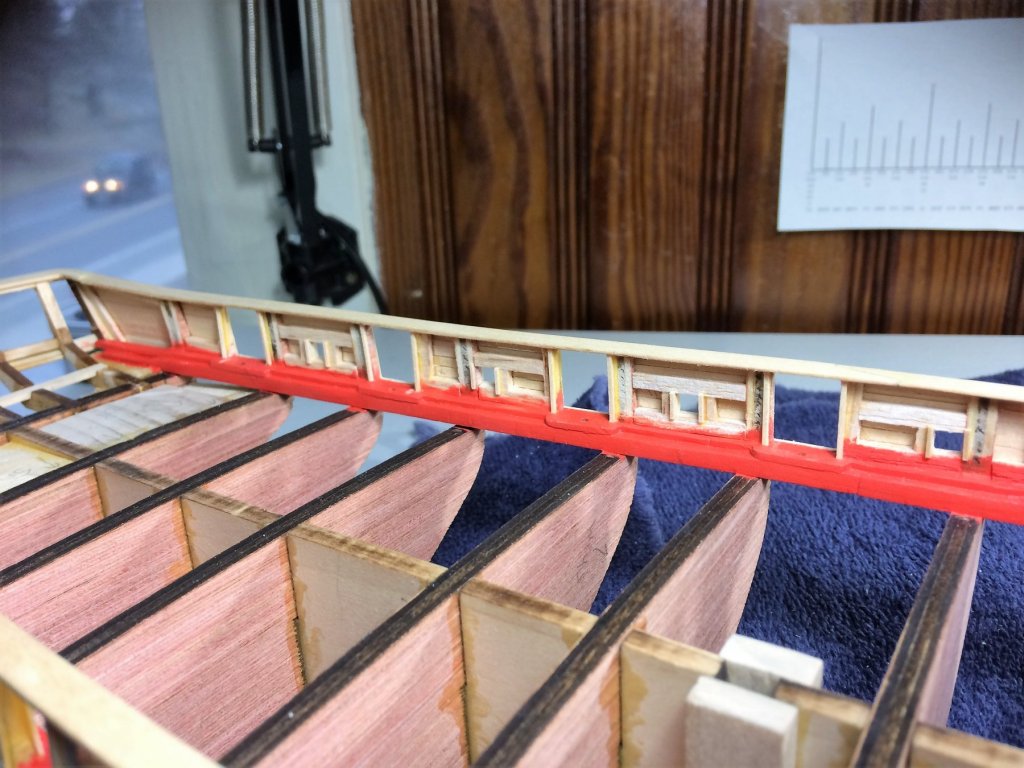
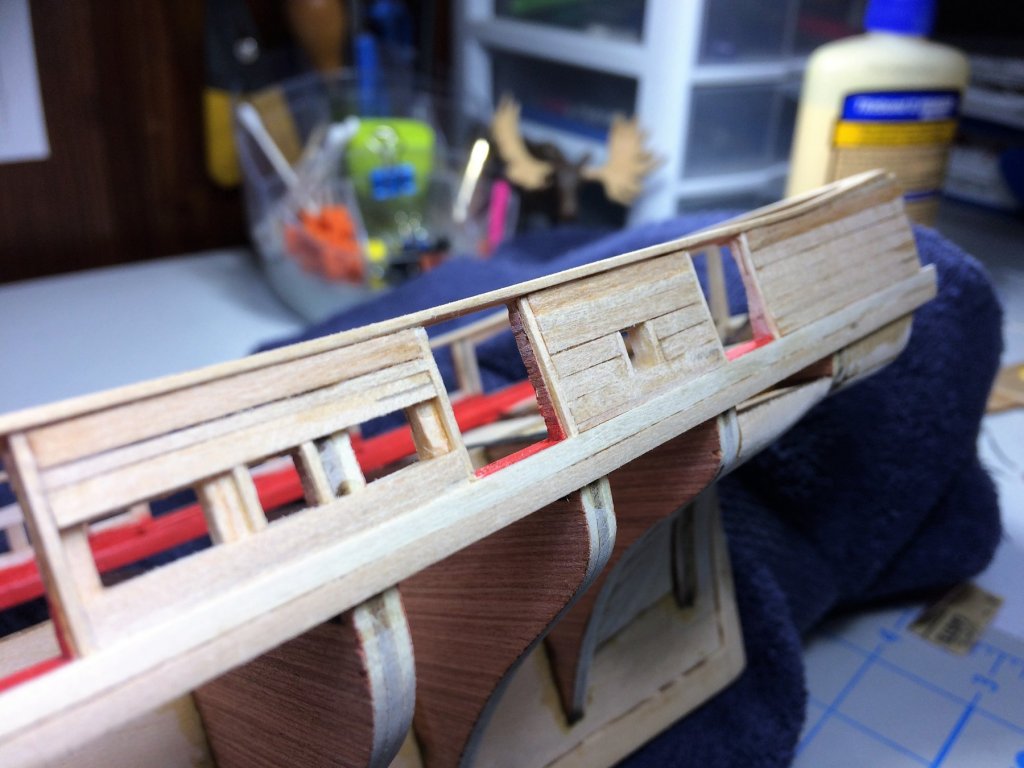
Evening.... Hope all is well with everyone and your Holidays are coming on nicely. Derek, Mike......appreciate the comments, thanks! Also appreciate all the "likes"......thank you MSW! We had our first good snowfall!!!!! About 12 inches fell last Tuesday. I'm one of those nut balls that loves winter. There's something about a good storm, or blizzard for that fact, that just gets me going!!!!!! I even like shoveling. A few hot adult beverages help! I was born in the Northeast and I'll probably die in the Northeast. I NEED 4 seasons. Is there any Ice Fishing at all in Florida? And no, not fishing for the ice in your drinks! Answer me "yes" and I'll move there when I retire. Anywho........ I have been in the shipyard, but not the quickest pace. I started planking the outboard gunports. Simple enough. But, with the rail where it is, it does send some things into recovery mode. The very top plank under the rail is a 3/64 "stringer" that will line the very top of each gunport. This matches the two 3/64 strips that line the bottom of every gunport. Every plank in-between is 1/32. The below are the first I've ever done. Ehhhhh........I got a lot to learn! With both outboard and inboard needing planks, I'll have ample opportune! Having never done anything like this before, I decided to just keep it to 4 or 5 segments so I can learn a little bit. They were rough to say the least. It should clean up with wood filler and sanding. I had so many different sized gaps. I didn't know if wood filler or shaped planks would work best. In the end, I have adopted a "shaped" plank instead of filler mentality. Just looks better. Although, I still use both methods when needed, I lean towards using planks instead of filler. Wood filler puts this "opaque-ness" over the wood I do not like. Will this screw with the paint job later on? My sweep and gunport areas line up well. Some wonky-ness to the flow, but not bad for my first big ship. On the pic below, 2nd sweep from the stern. There is a tiny little gap just under the top plank. I have hit that thing twice with filler and it keeps opening up. I wonder If I have old filler? The other areas seem to be holding up. Merry Christmas! Tom E


-
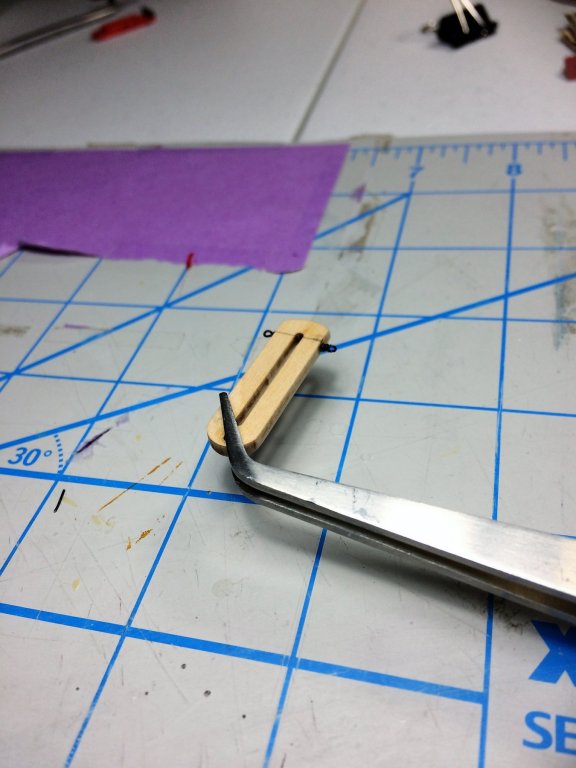
Evening, Hope all is well with everyone. Quiet Friday night after a great dinner at a local seafood restaurant called Weathervanes. Folks from New England might know who they are. There's only about 6 of these left, and only in Maine, New Hampshire, and possibly Massachusetts. I'm lucky, there's one 20 minutes from me. As a kid and as an adult. it's still a treat to go! Great fish, lobster, and some of the best onion rings I know of, and I am not a skinny man! I like food. Quite possibly to stuffed to build, so with a hot cup of tea on the couch, this log needs an update. I kept building some carronades. They seem pretty much straight forward. I'm only going to build about 2 at a time, as it's a side project as I plank the gunports. Another reason to only build 2 at a time. I only have so many things to hold the bits and pieces. There's 13 individual pieces to 1 carronade. Times 16 carronades, that's 208 pieces, sanded, formed, bent, painted, then eventually glued in place. And that's if my math is correct! I feel like I'm not counting something. Slow and steady will win this race. I try to focus on each individual piece. Even slowly, it eventually gets done. I cleaned up the cannons with some sandpaper and gave them a good wash and dry. The Admiral called it the "ole fluff and buff"!!!! We both near passed out from laughing! Just one of those things where the timing was perfect but ya had to be there. I primed the cannons with the primer from the Niagara paint kit from ME. Looks like a good base. These will dry for a while before they get some color. When I did work over this past work week, it was mostly cutting 1/32 square strips to frame the gunports and sweeps. The sweep strips were somewhat easy. Those I could pre measure a few then glue. Following advice, I'm still measuring pretty much each one individually. The gunport frames were one at a time. No two were exactly alike. I kinda liked it. It gave me better control of my wood stock with less waste. Once those where installed, I experimented with a 3/64 stringer underneath the main rail. Under this one strip will be all 1/32 strips down to the two battens I installed earlier. Mike, I've seen you use a Proportional Divider for planks. After reading your build again, the light finally turned on in my head as to how valuable they are. They look like they could be used from just under the rail all the way to the keel......top to bottom! Especially when planking with those twists. I'm in the process of getting one from Micro-Mark. I think it will look good after a good sanding. I'm adding this last photo purely for poops and giggles. I was starting to fill in the frames around the sweeps and gunports, as you can see in the background, looked to my right and saw that I had every single type of glue I own out and ready. Probably all were used by this time as well! So I cleaned them up and lined them up for a "family" photo. Wonder If I can use this as a Christmas card this year!?!?!?!?!?! My Brother-in-Law would get it! He's a builder. Even the Admiral just pointed out the fact, as I'm wring this, that I even got the moose in the picture as well. I wasn't even trying to get him in the pic, never saw him! Frickin thing moves!!!!! I originally took the pic to show what I use for building and see what others use. Are there better brands? I've had nothing but great results with all of the below products. The only thing I'm missing is the white wood glue. That's for the next Home Depot trip. Tom E


-
Rinse and repeat....... Ya'll got that right!!!! I've started planking the gunports, I'll put an official update later......but.......it's one piece at a time. Mark the plank for length, cut just a smidge longer, sand it into its final shape, then glue in place. I've repeated that process so many times I've lost count. And that's just framing the outer port side of gunports! Mike, I was thinking just like you. Get an assembly line thing going. Looks like every plank will be hand fit. The only assembly line I can get going is hand form a few planks, like 4 or 5, then glue those in place. But, its still piece by piece. Tom E
-
I really like the color/hue the wood has. I don't know if its the camera, but it almost looks pink. What type is it, and, will you stain it?
-
Thanks Derek, No luck on the lotto, its off to work for me on Monday. Appreciate the kind words and the likes! Tom E
-
Mike, I was thinking of cut planks instead of whole. In my mind it seems easier and with the shorter sticks, less breakage. Tom E
-
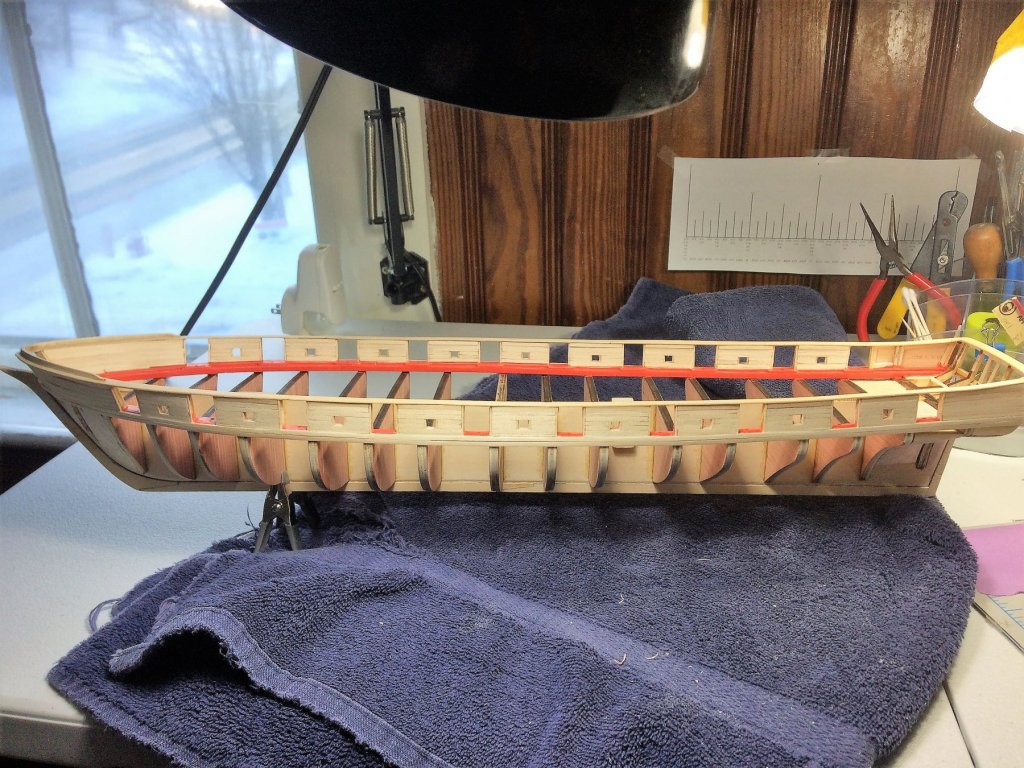
Evening, Time for an update. Admittedly, not much done this past week. Work.........hmmmph!!!!!!!! I have 2 dollars on Powerball tonight. That's $177,000,000.00! Even after taxes, that's still plenty to retire on and build to my hearts content. Of course I'd be building from a beautiful house on the Maine coast line in the summer and the mountains of Vermont in the winter!!!!!! Continued to add the second 3/64 batten, both sides. Wont head any more south than this. I plan on concentrating on the gunport and sweeps opening and plank them first. I don't feel like I'm totally done fairing the bottom half. I will use the tick strips to lay out the bands for planking. Mike, thanks for the heads up on those plank twists! Dang! That's gonna take some soaking! Especially where it meets the transom area. Don't think, in my limited experience, I have ever bent something like that. I should but some extra planks now!!!!! I do love these mini-clamps. Very handy. If I remember correctly, Home Depot for about $0.30. Good grip too! Sometimes too strong and will jump off! Finished battens from the stern. Finished battens from the bow. They align well at the very front of the bow, under the bowsprit. Surprisingly I don't have a pic from that angle. As stated in a previous post, I started building some carronade. One to check for clearance at the deck/main rail area, also.......because its fun! There carronades, this ship will have some teeth! With some sanding and shaping the carronades perk up well. The base and sled are laser cut, easy enough. A few, of I'm sure to be hundreds!, metal eyebolts made from 28 gauge wire. Easy enough to make with a few twists. I'll put a layer of primer over all before adding there final colors. Tom E