MORE HANDBOOKS ARE ON THEIR WAY! We will let you know when they get here.
×
Tom E
-
Posts
469 -
Joined
-
Last visited
Content Type
Profiles
Forums
Gallery
Events
Everything posted by Tom E
-
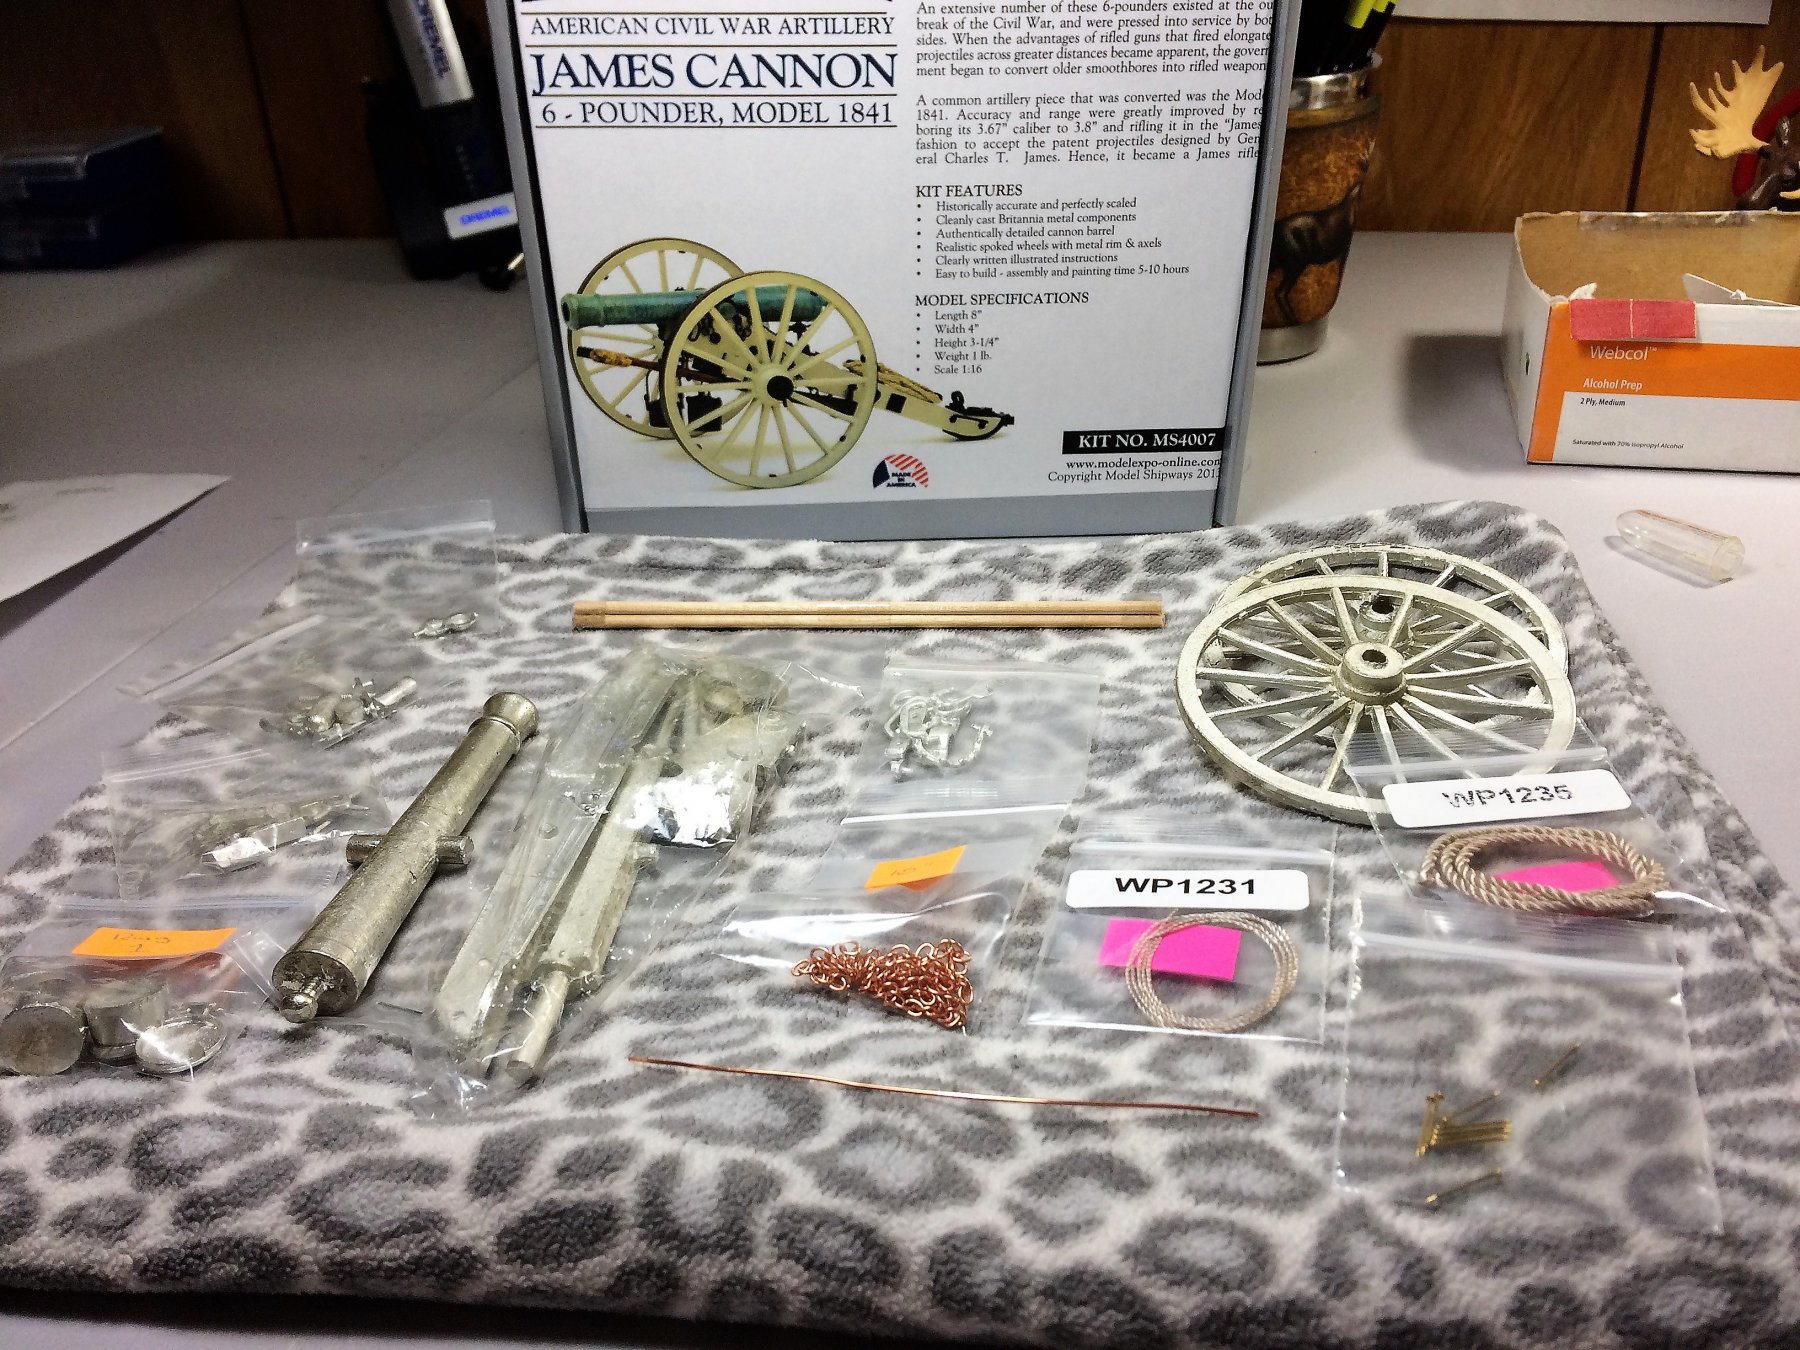
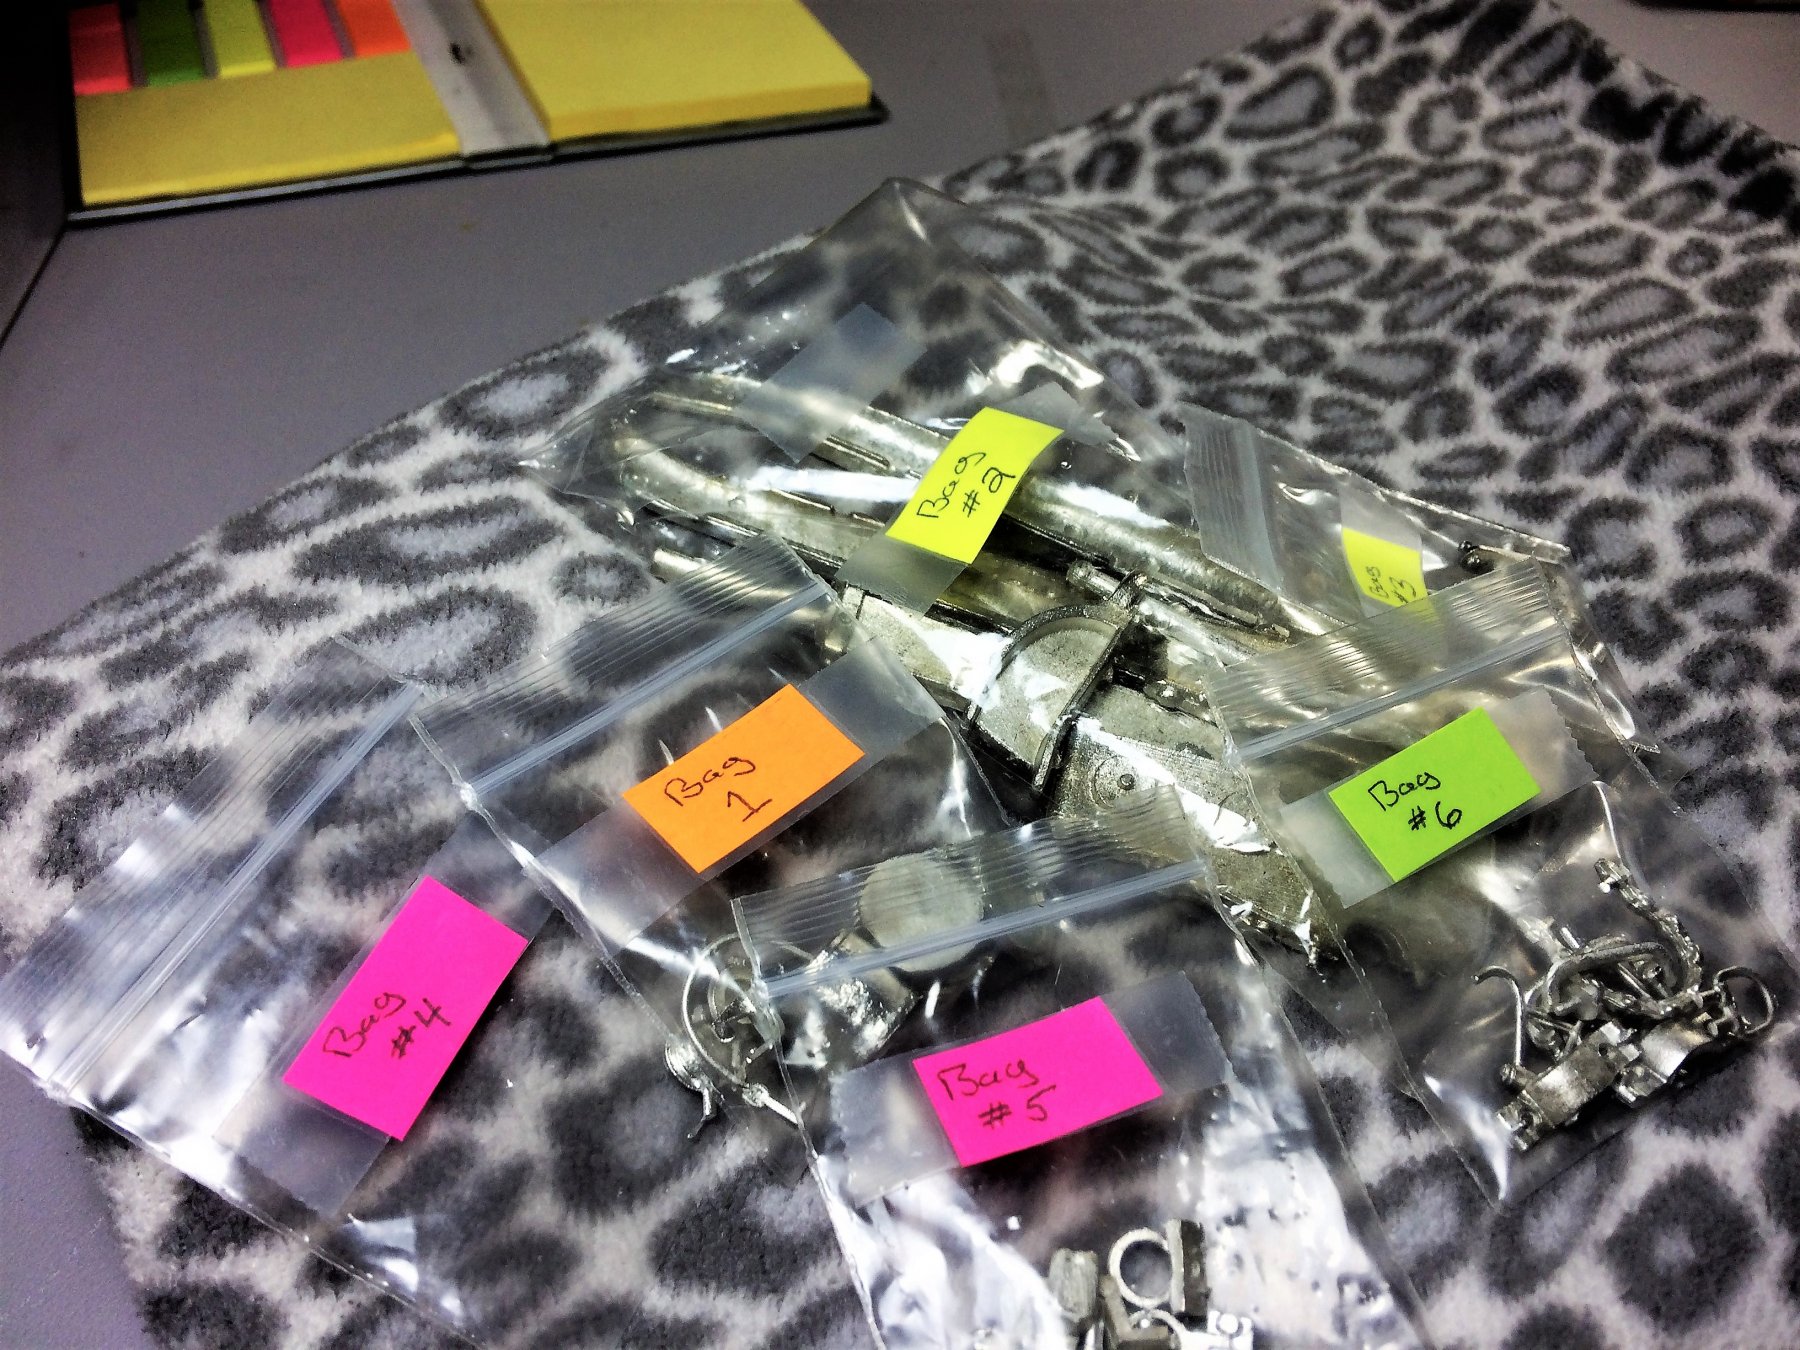
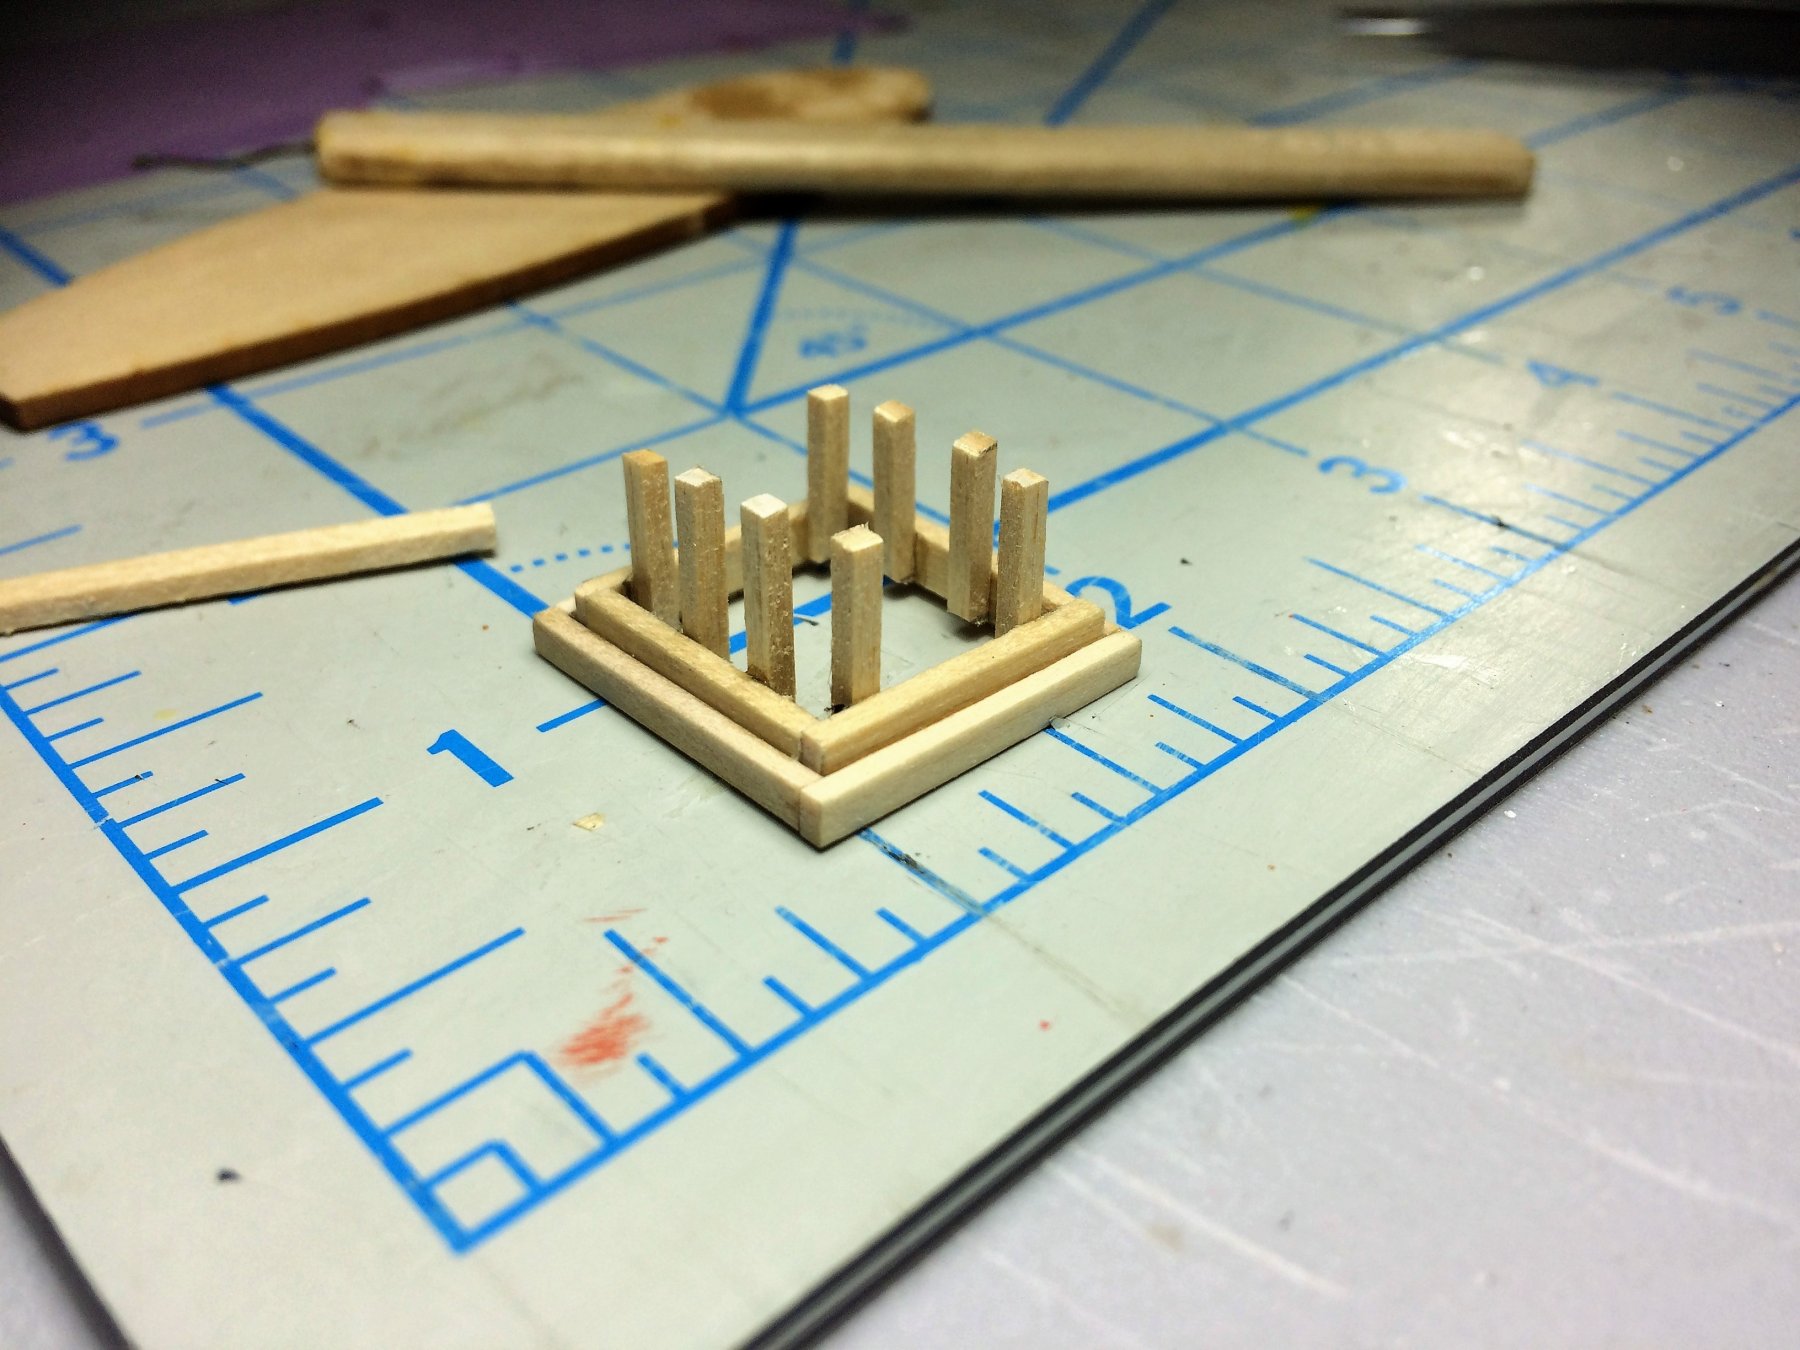
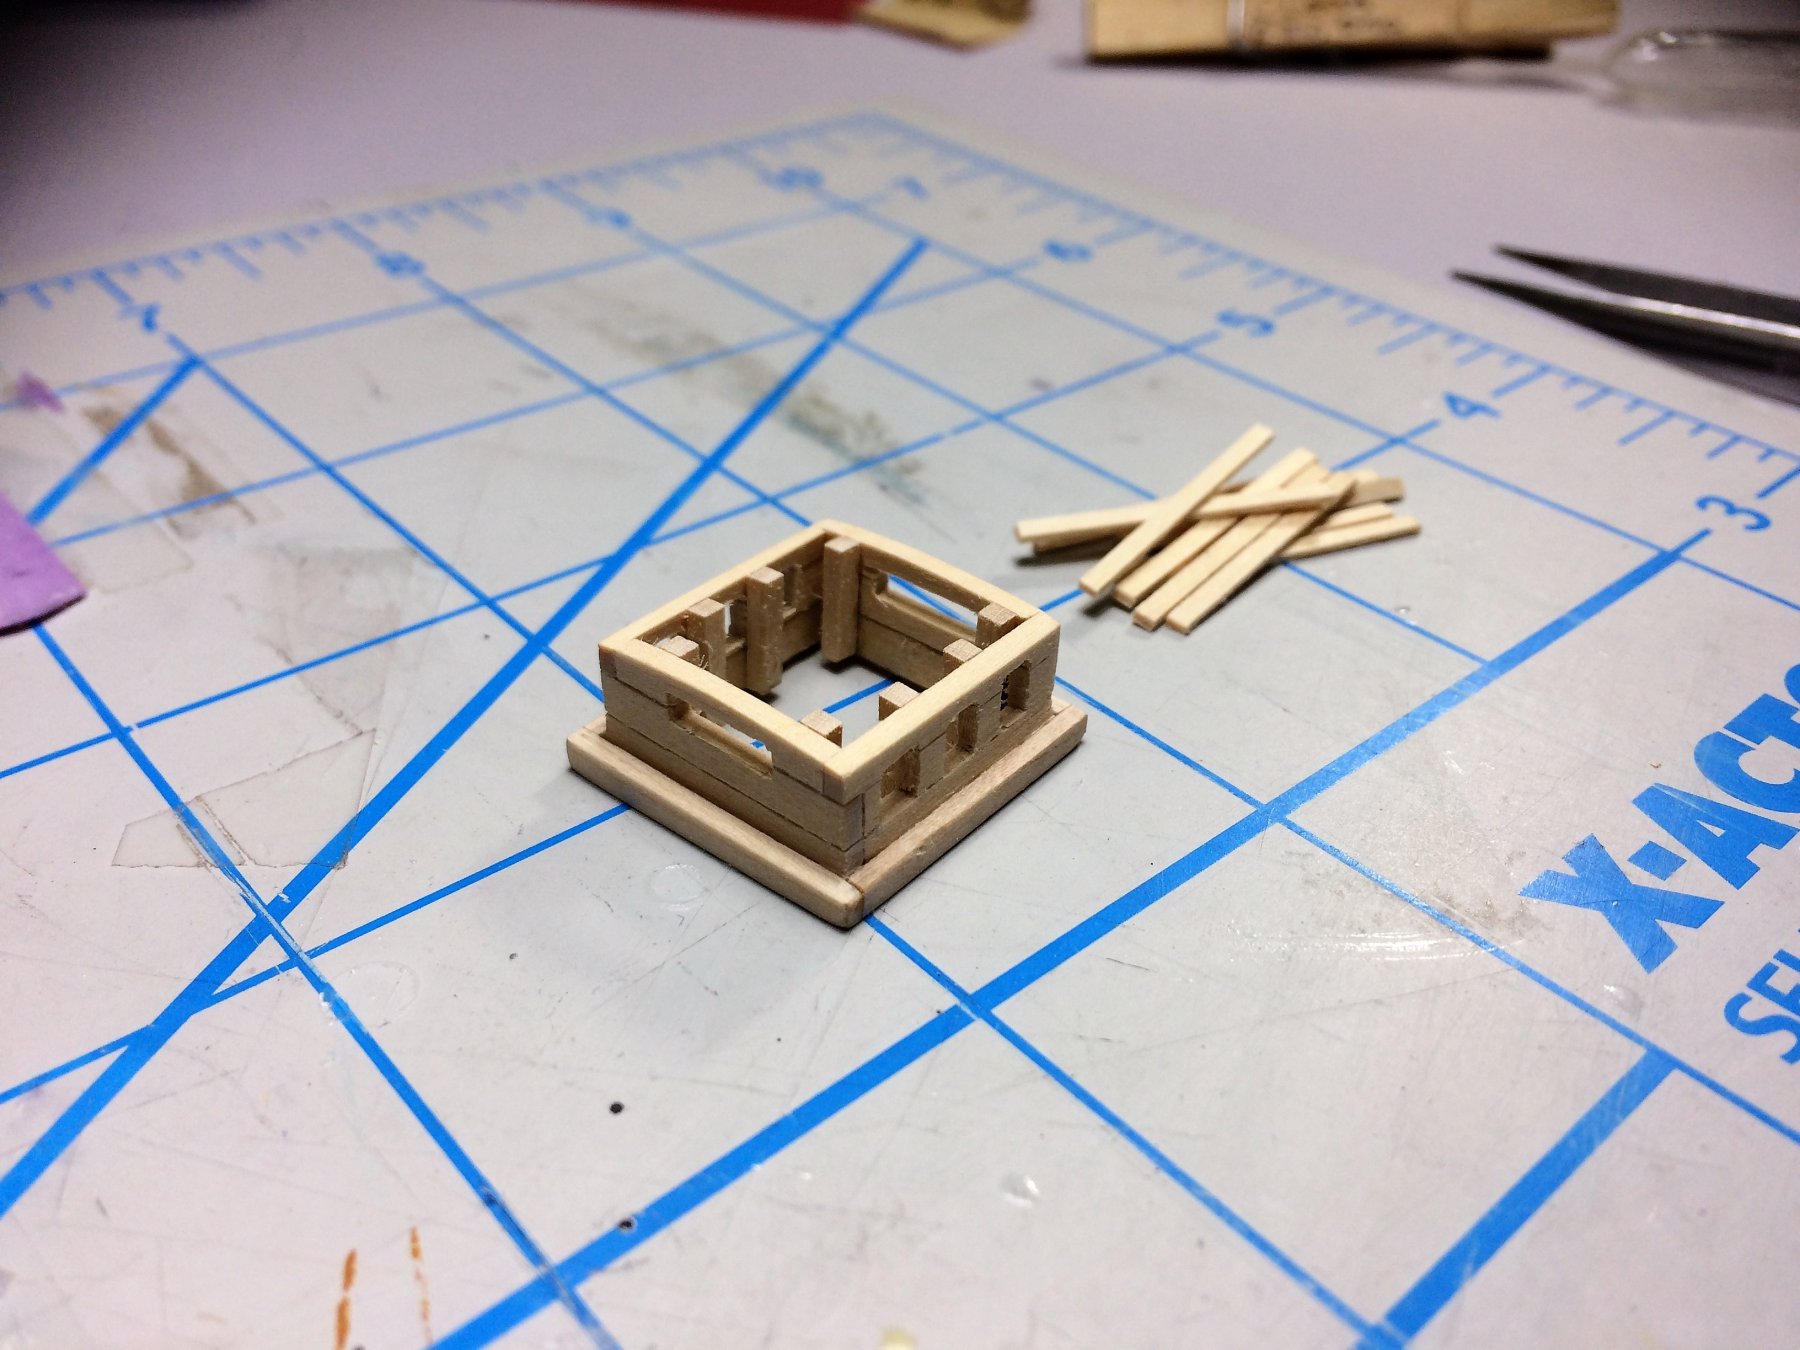
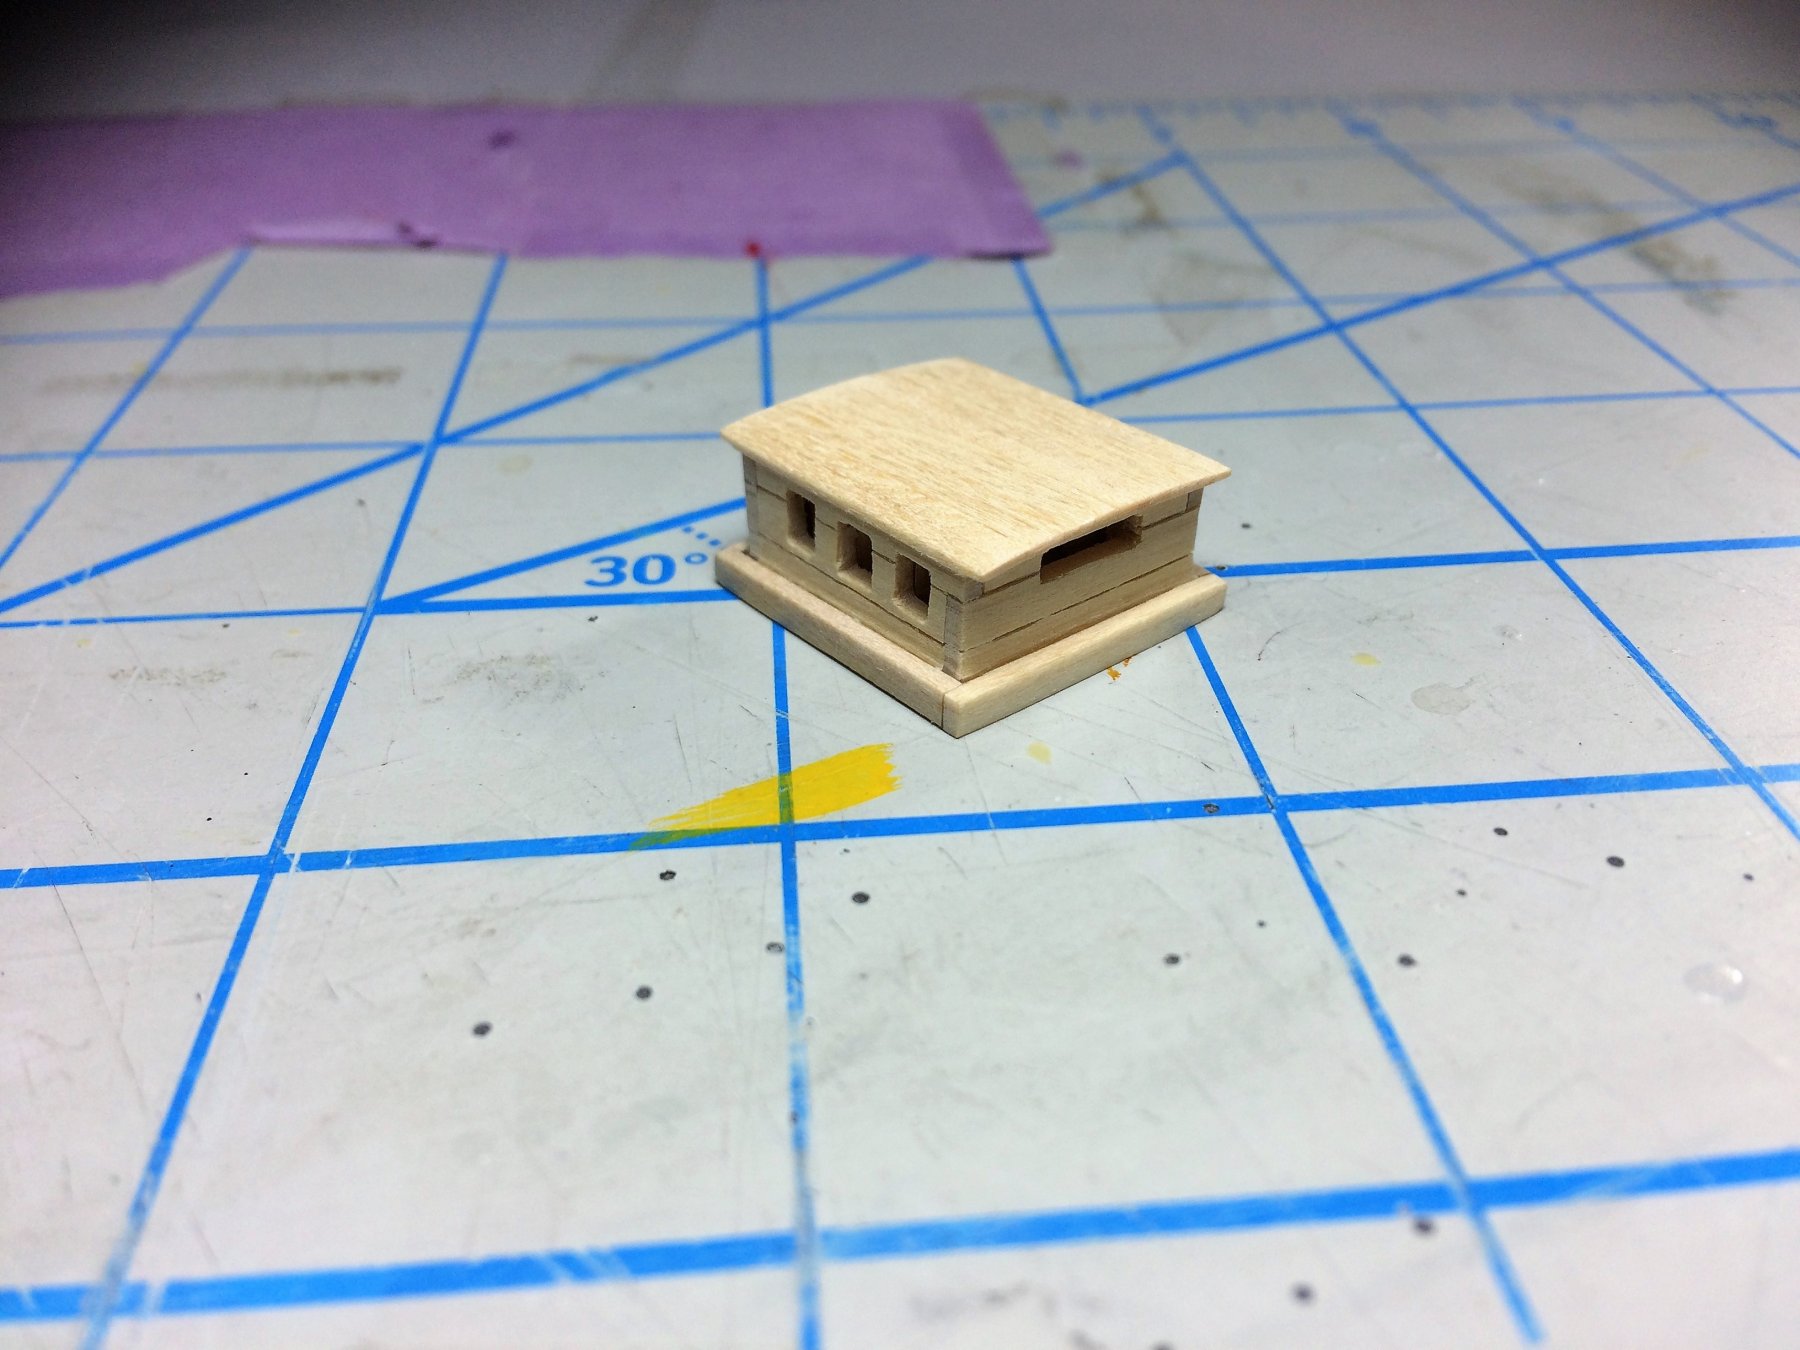
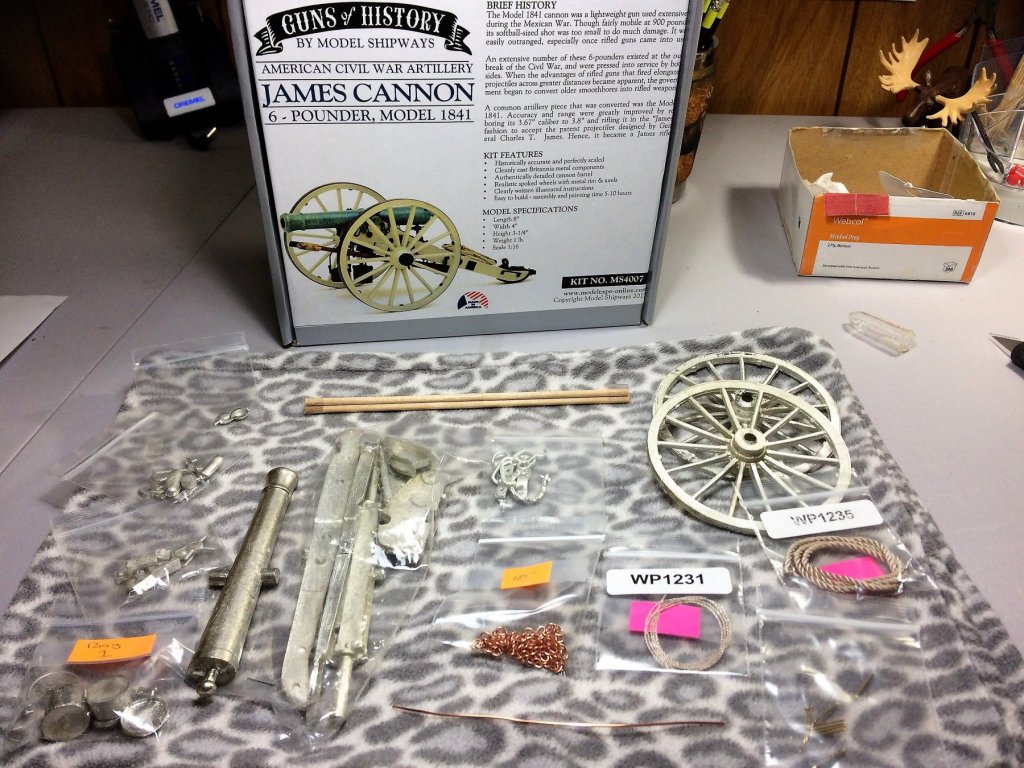
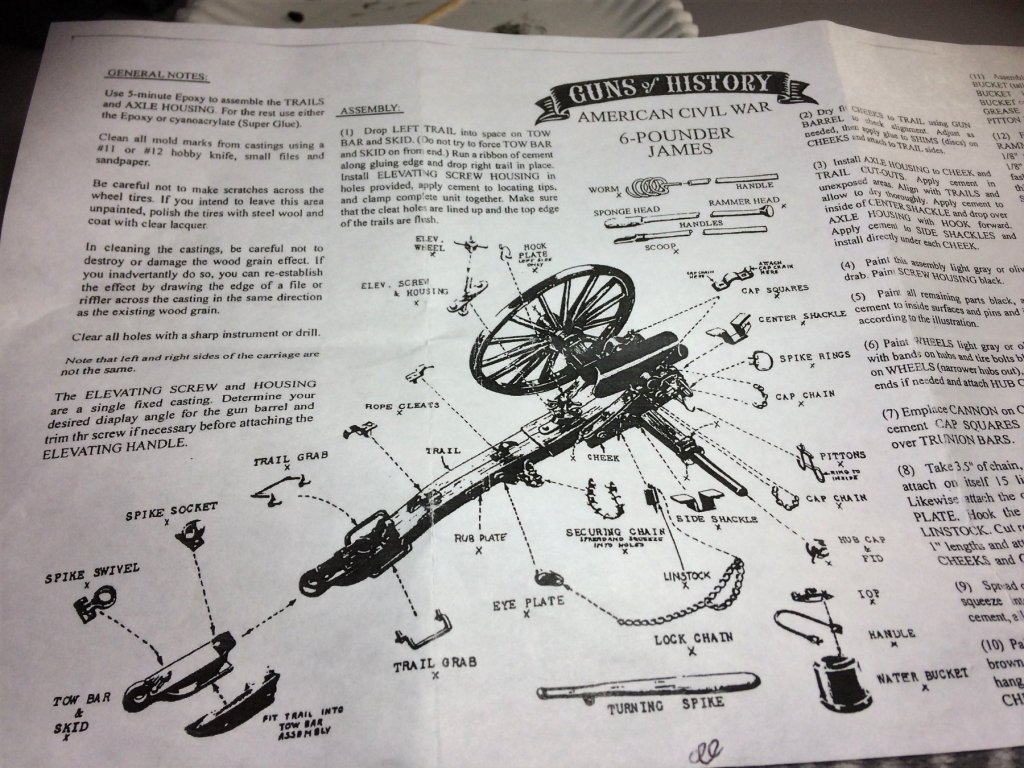
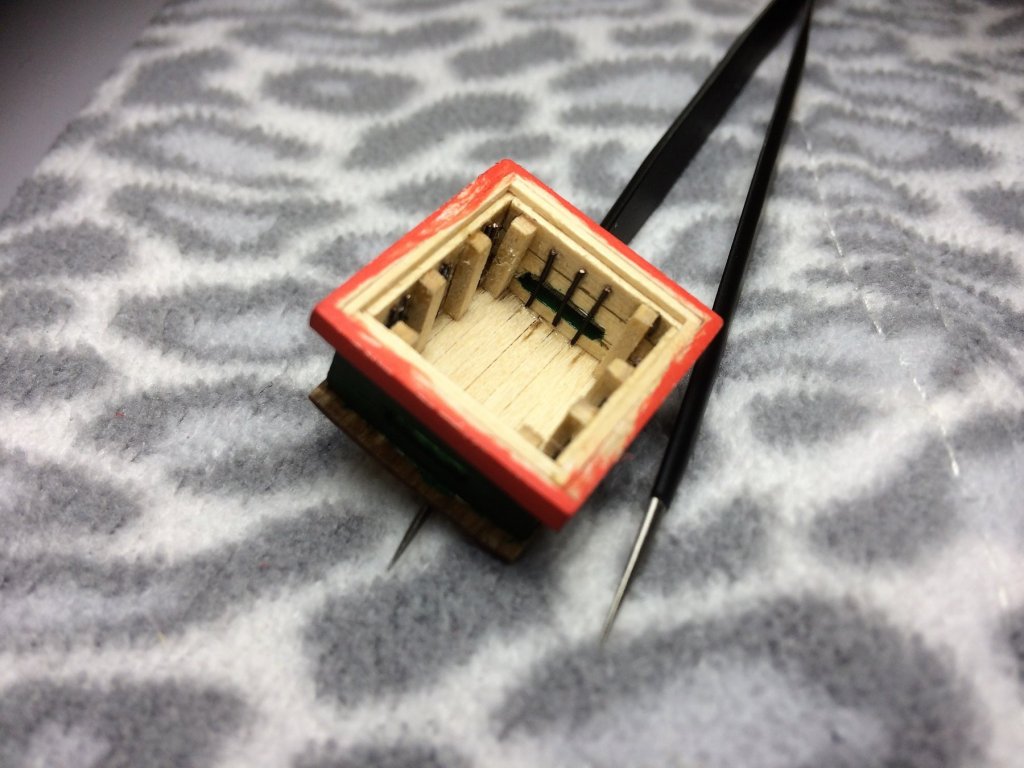
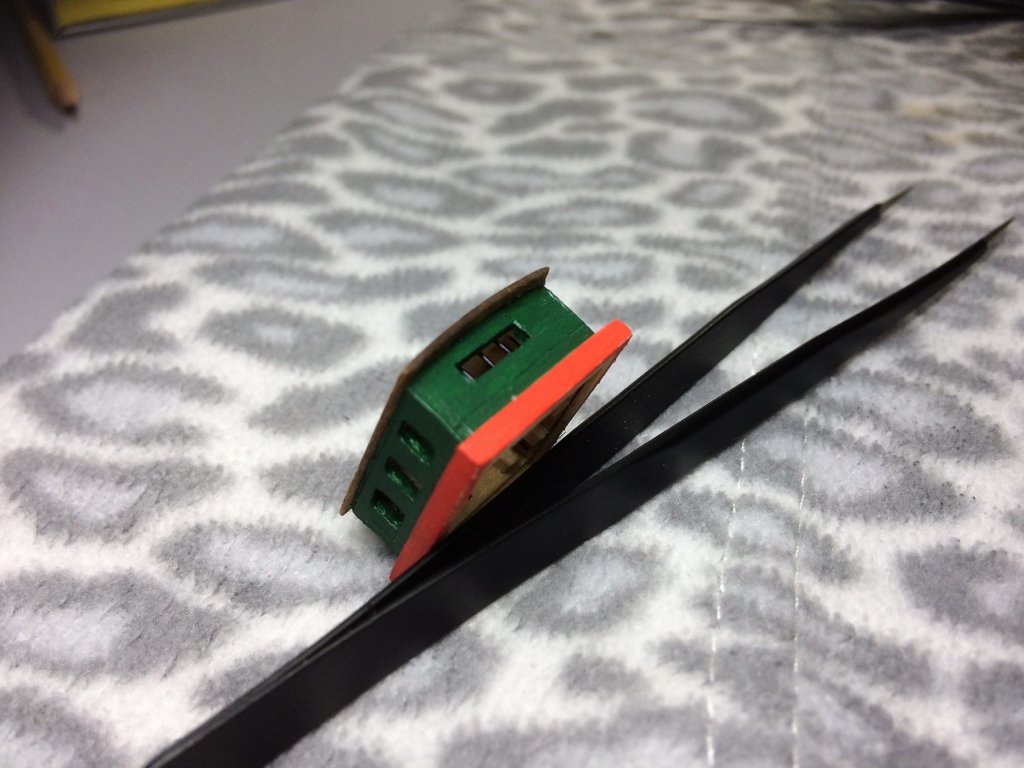
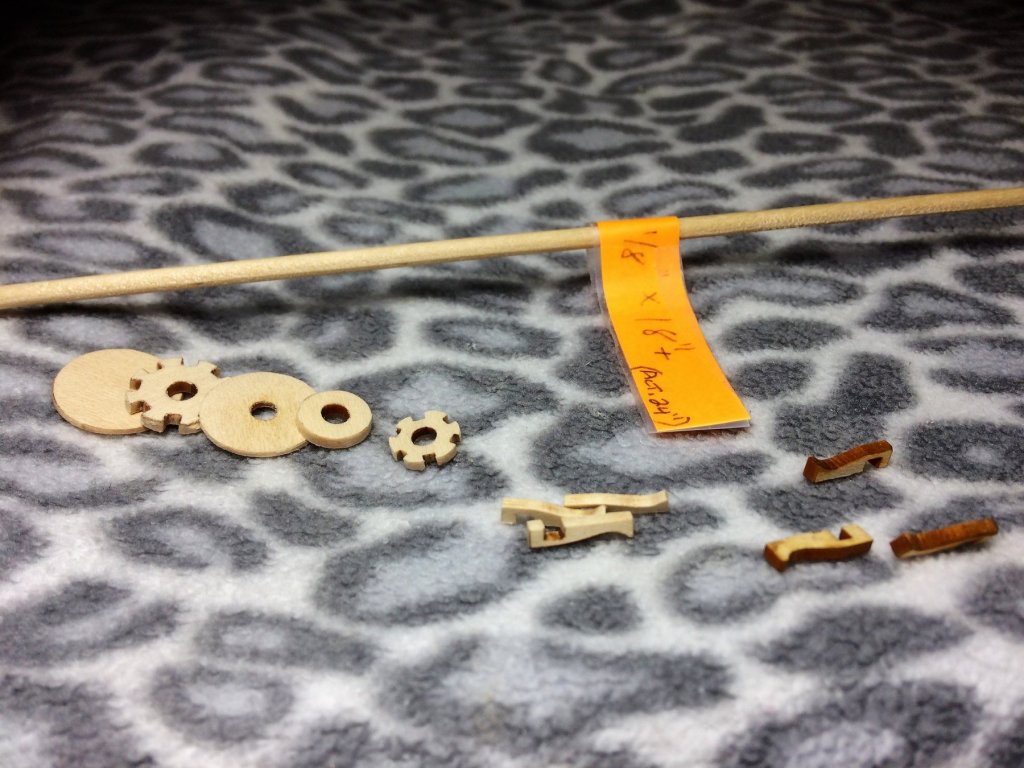
 Evening, Thought I would throw my hat into the "Non-Ship Categorized Build" section. This looks like fun! As much as I love ship modelling, I do dabble in other things. WW1 aircraft are a passion. I have the ME Curtiss Jenny in my stash, which may be started sooner than later! This is my first cannon. The obligatory box shots. Well packed kit of a few pounds. Cast parts that you would expect. They will need some clean up. All rope will be replaced with Syren rope. The chain I'll blacken with Birchwood/Casey. The way the parts list is organized, one can label the packages with ease. The one thing, The instructions are fine, read them and you'll do well. But it looks like its been photo copied a million times and the diagram has faded. Its workable and shouldn't pose a problem. Tom E

-
Phantom Henry J Gasser by jct - FINISHED - 1/24 scale - PLASTIC
Tom E replied to jct's topic in Non-ship/categorised builds
That engine is insane J! Well done! I swear, I can smell gas right now...….smells like victory! Tom E -
Thanks Sea Hoss, Niagara is a great kit. It has it's drawbacks, but , most kits do. Yet, it's manageable. Being my first large build, it's made me learn things, yet it's forgiving. I've noticed, and other Niagara builds have as well, they give you a lot of extra wood, more than usual. That helps. I have the MS Constitution in my stash, the odd thing, I chose Niagara first. I though it would be quicker! I've been watching your Picket boat. That's a nice ship, great build. Tom E
-
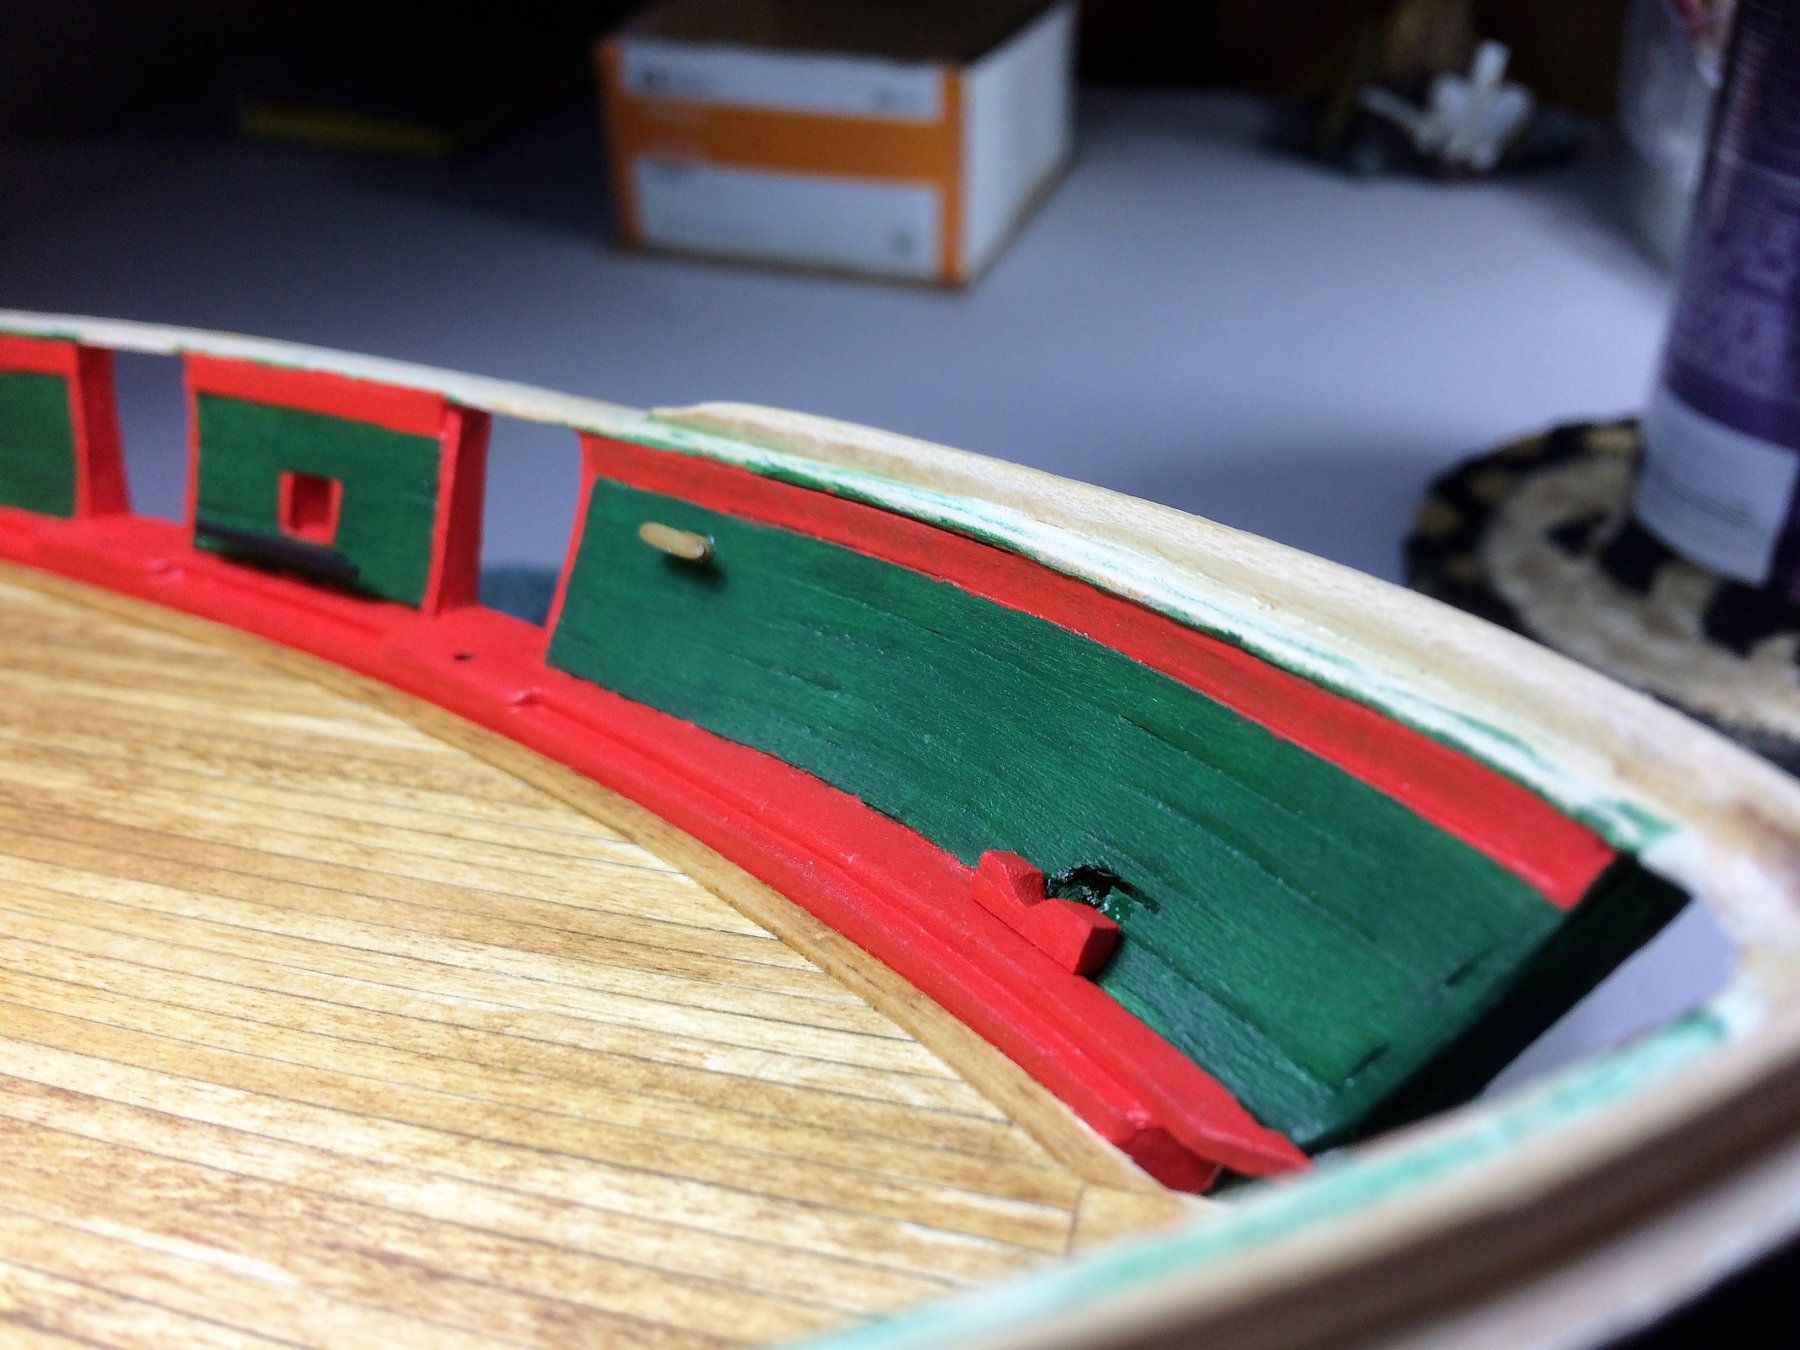
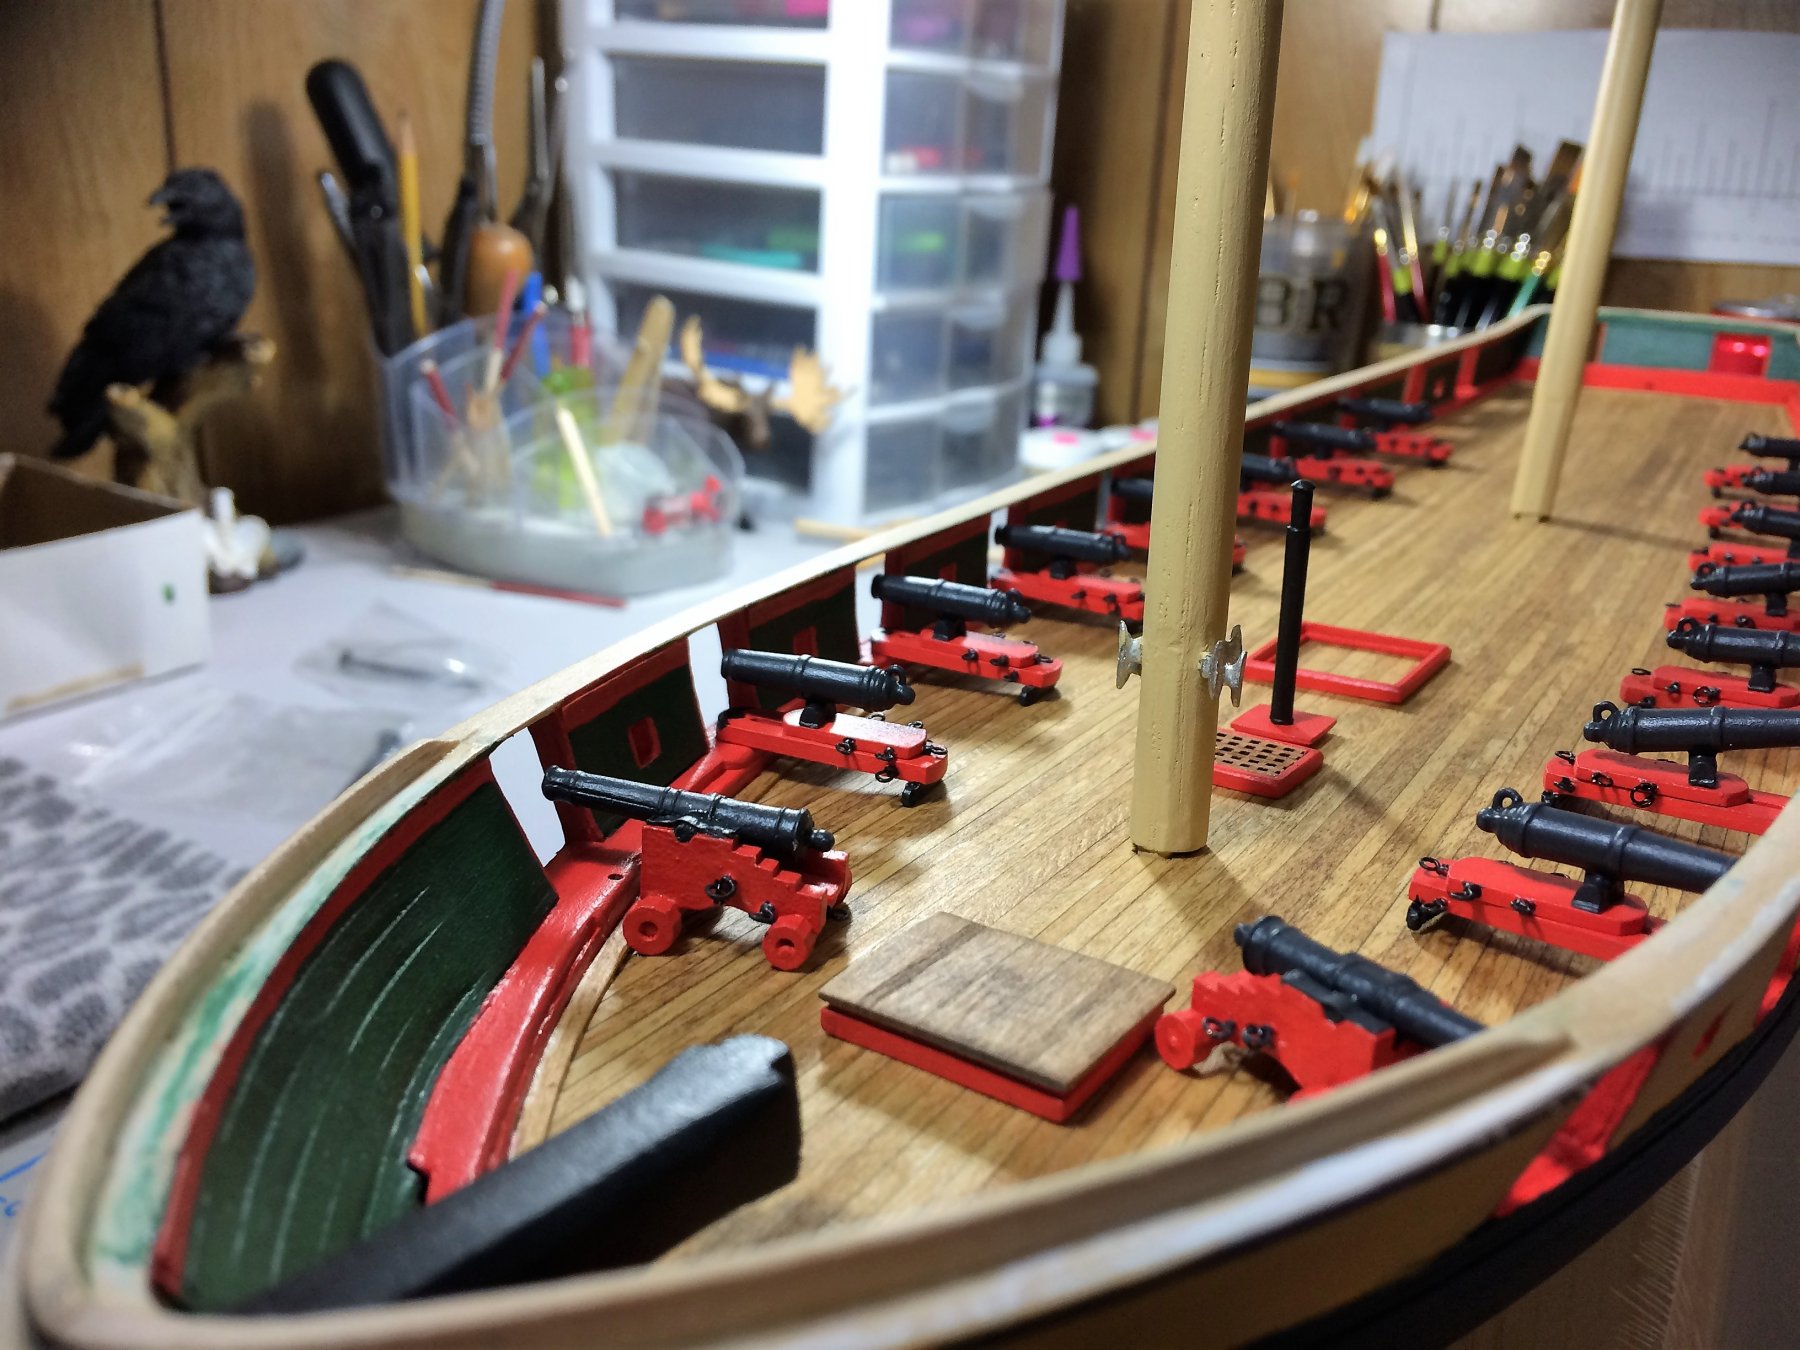
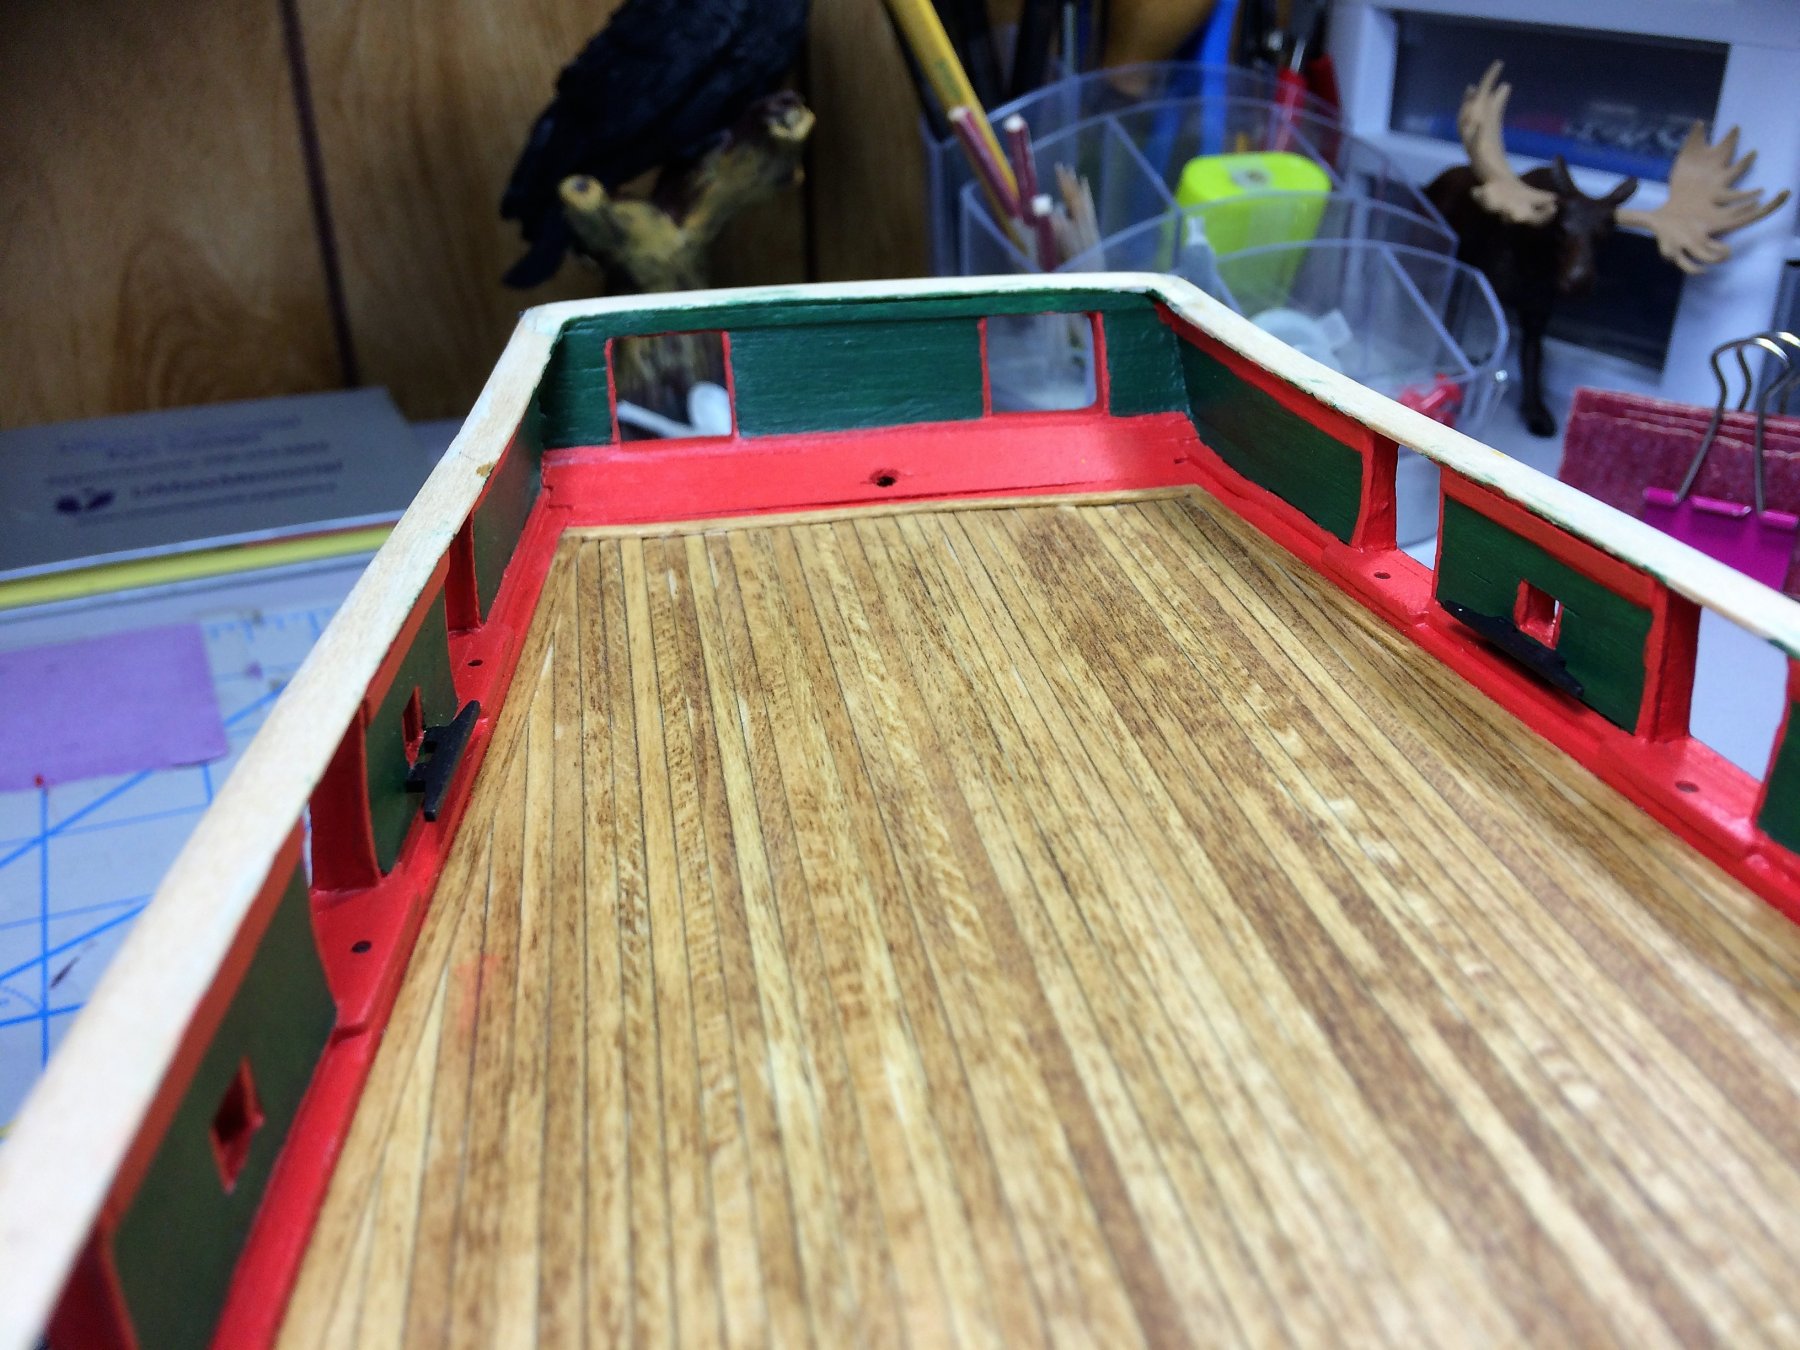
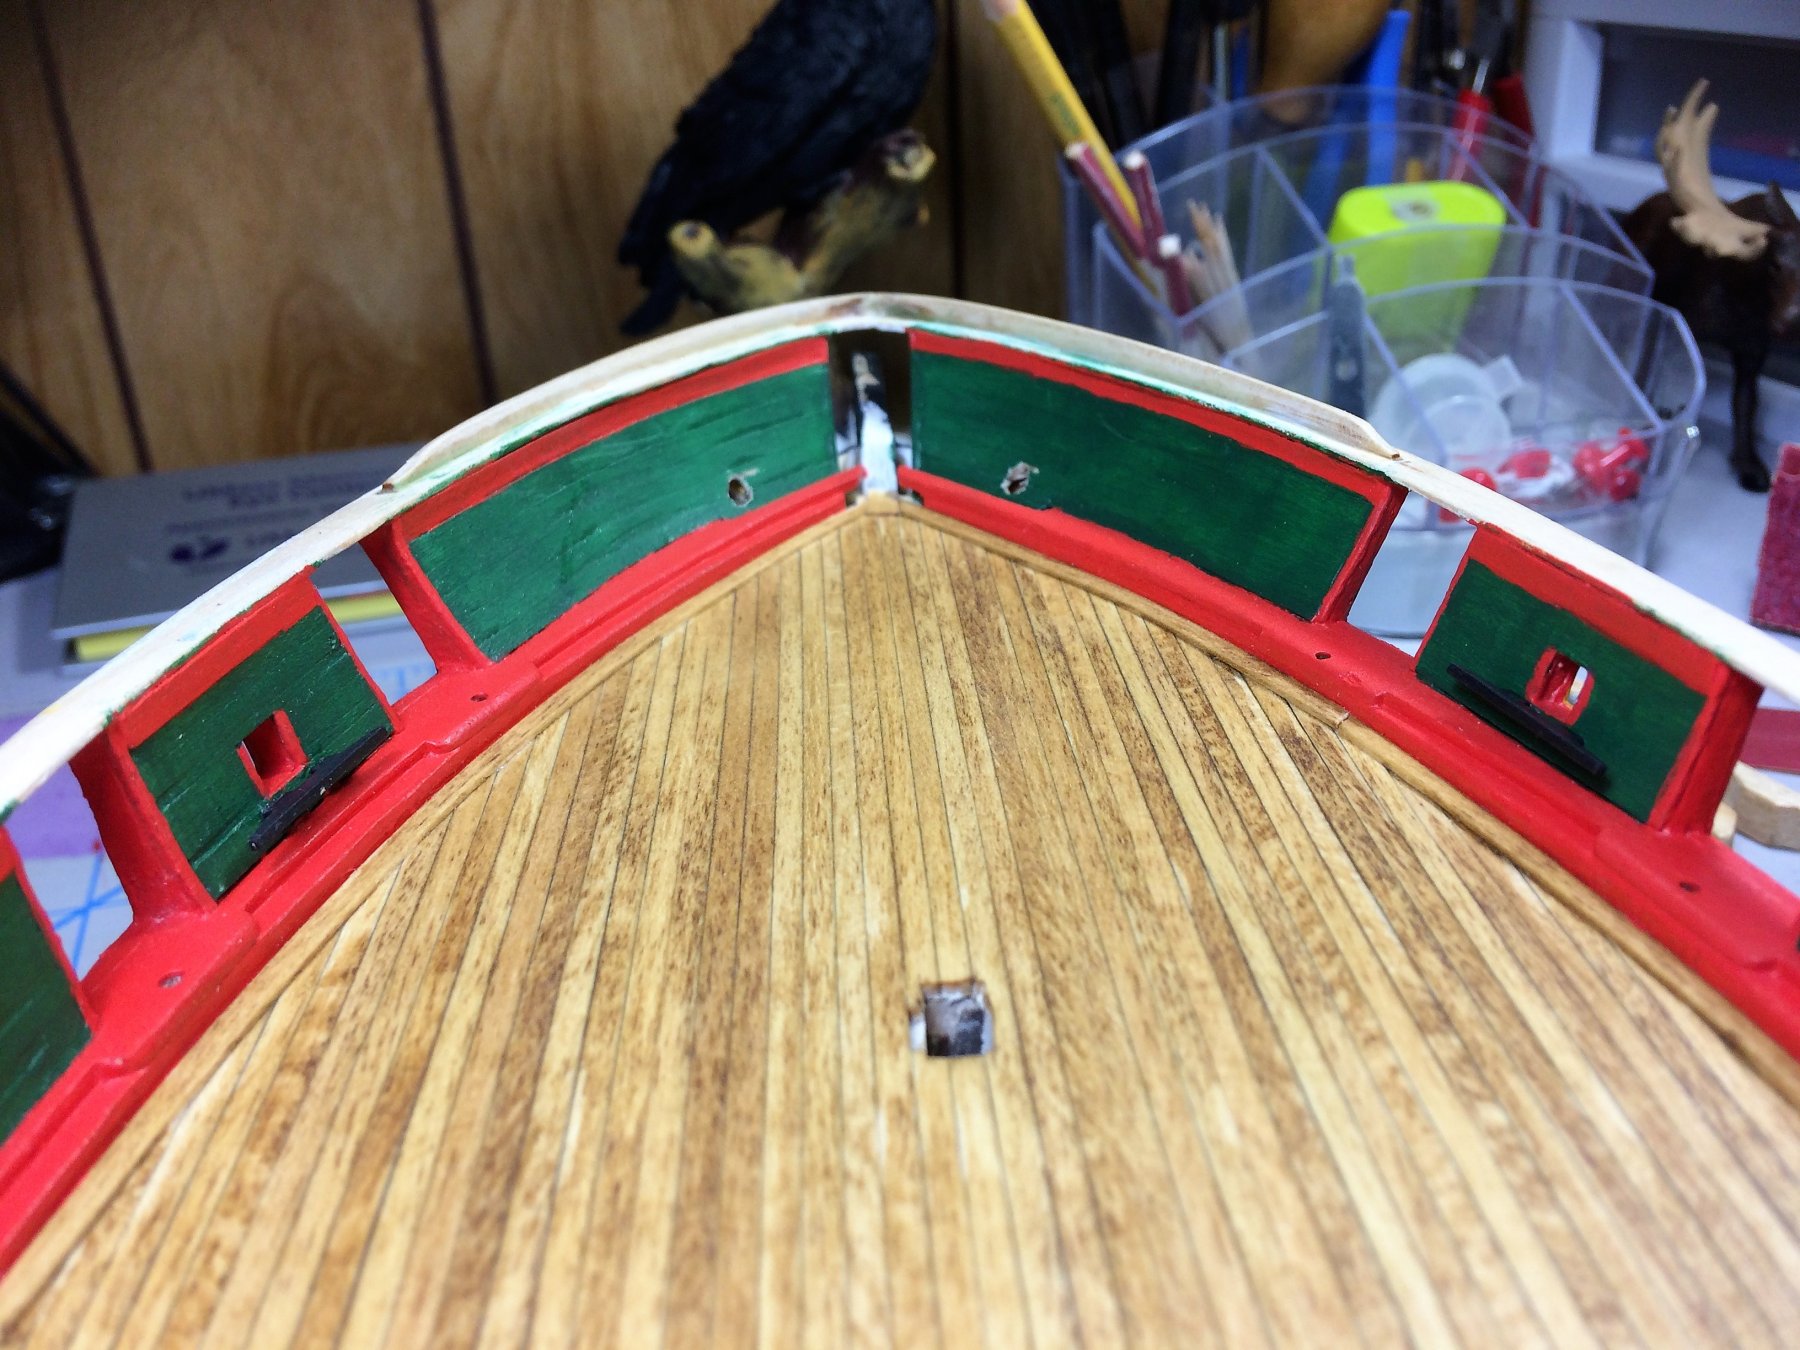
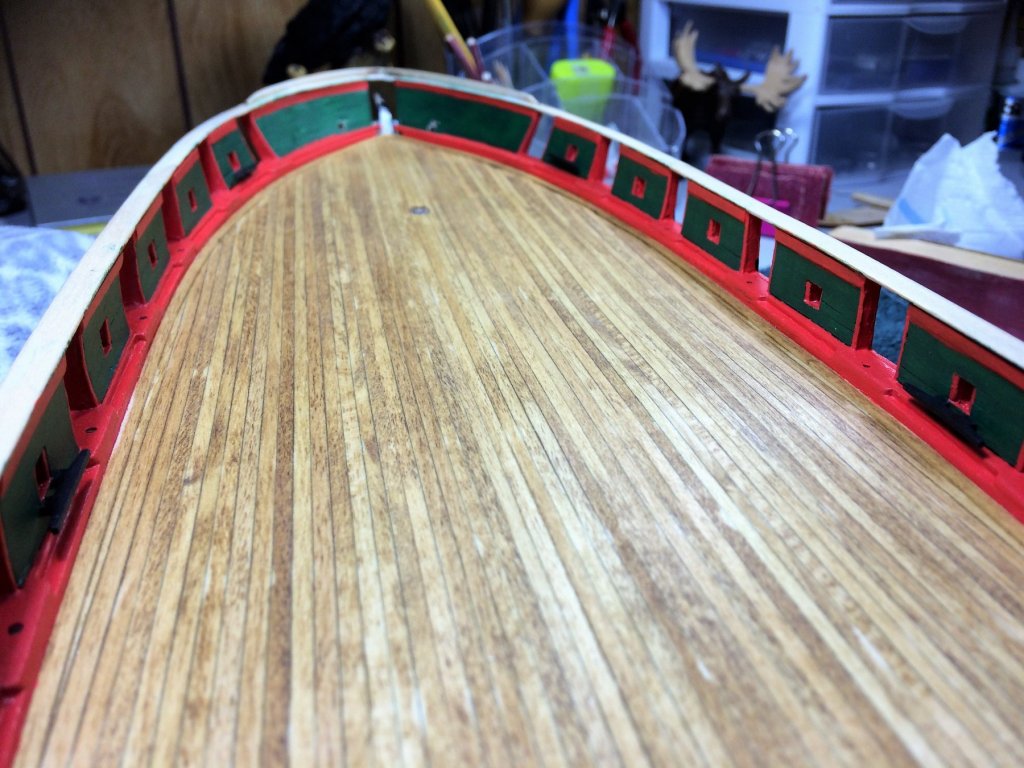
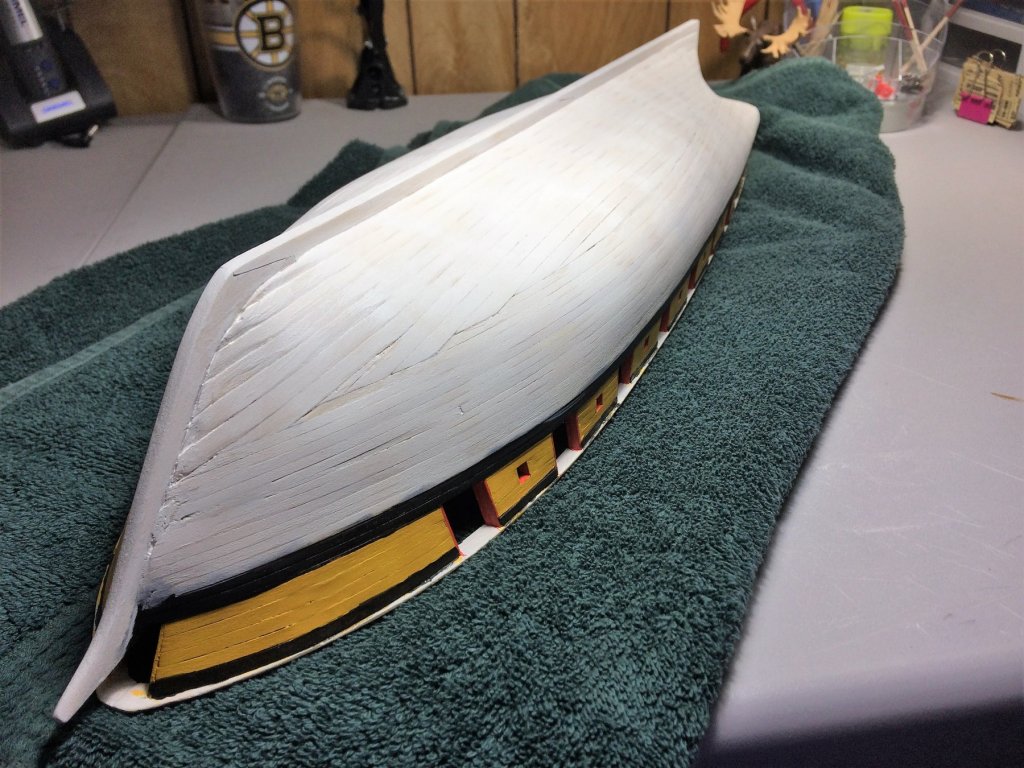
Evening, Very quiet weekend here in New Hampshire. It's been awesome!! Cleaned the house, went to the market....all done early on Saturday. Sunday has been a lazy Sunday! I've lived off the left over donuts from this morning all day long....it's been great! There has been some work done in the Shipyard. I installed the first of many Cleats on the Bulwarks. Just one, mostly as a walk thru for the rest of them. Using an old Model Master Wood paint for the color. I really need to focus more on outfitting the deck. The deck furniture is almost done. With the Saloon Skylight officially done, the Capstan off getting its paint, time to start the Companionway. Never built anything like this before! I decided to keep it simple as towards reinforcements on the inside. This thing has an opening in it, I have to account for that. Most of my reinforcements goes up and under the roof. You can see it just under the roof below. That's where my opening ends. Now I need to think a bit on the sliding contraption on top. At this scale that's seems difficult. I'll figure it out. Had to include the below pic. Sometimes you cant beat the view from the Shipyard. Beautiful late winters morning, really starting to feel the angle of the sun. Feels great! Spring does eventually come! Stay warm, Tom E


-
Andrew, That's a good crisp edge on the paint. Easy clean up. That hull red your using, Is that from the paint set offered by Bluejacket? It looks nice against the white. I'm about to paint the boot strap on my Niagara. I've heard of one trick for the tape. Some place the tape on the pants there wearing, sticky side down, right before putting it on the hull. It seems to help with tearing off the paint underneath. Must take off just a bit of the adhesive. I have no idea if it works, I've never done it, but, I'll give it a whirl when its time! Tom E
- 106 replies
-
- 1
-

-
- bowdoin
- BlueJacket Shipcrafters
- (and 1 more)
-
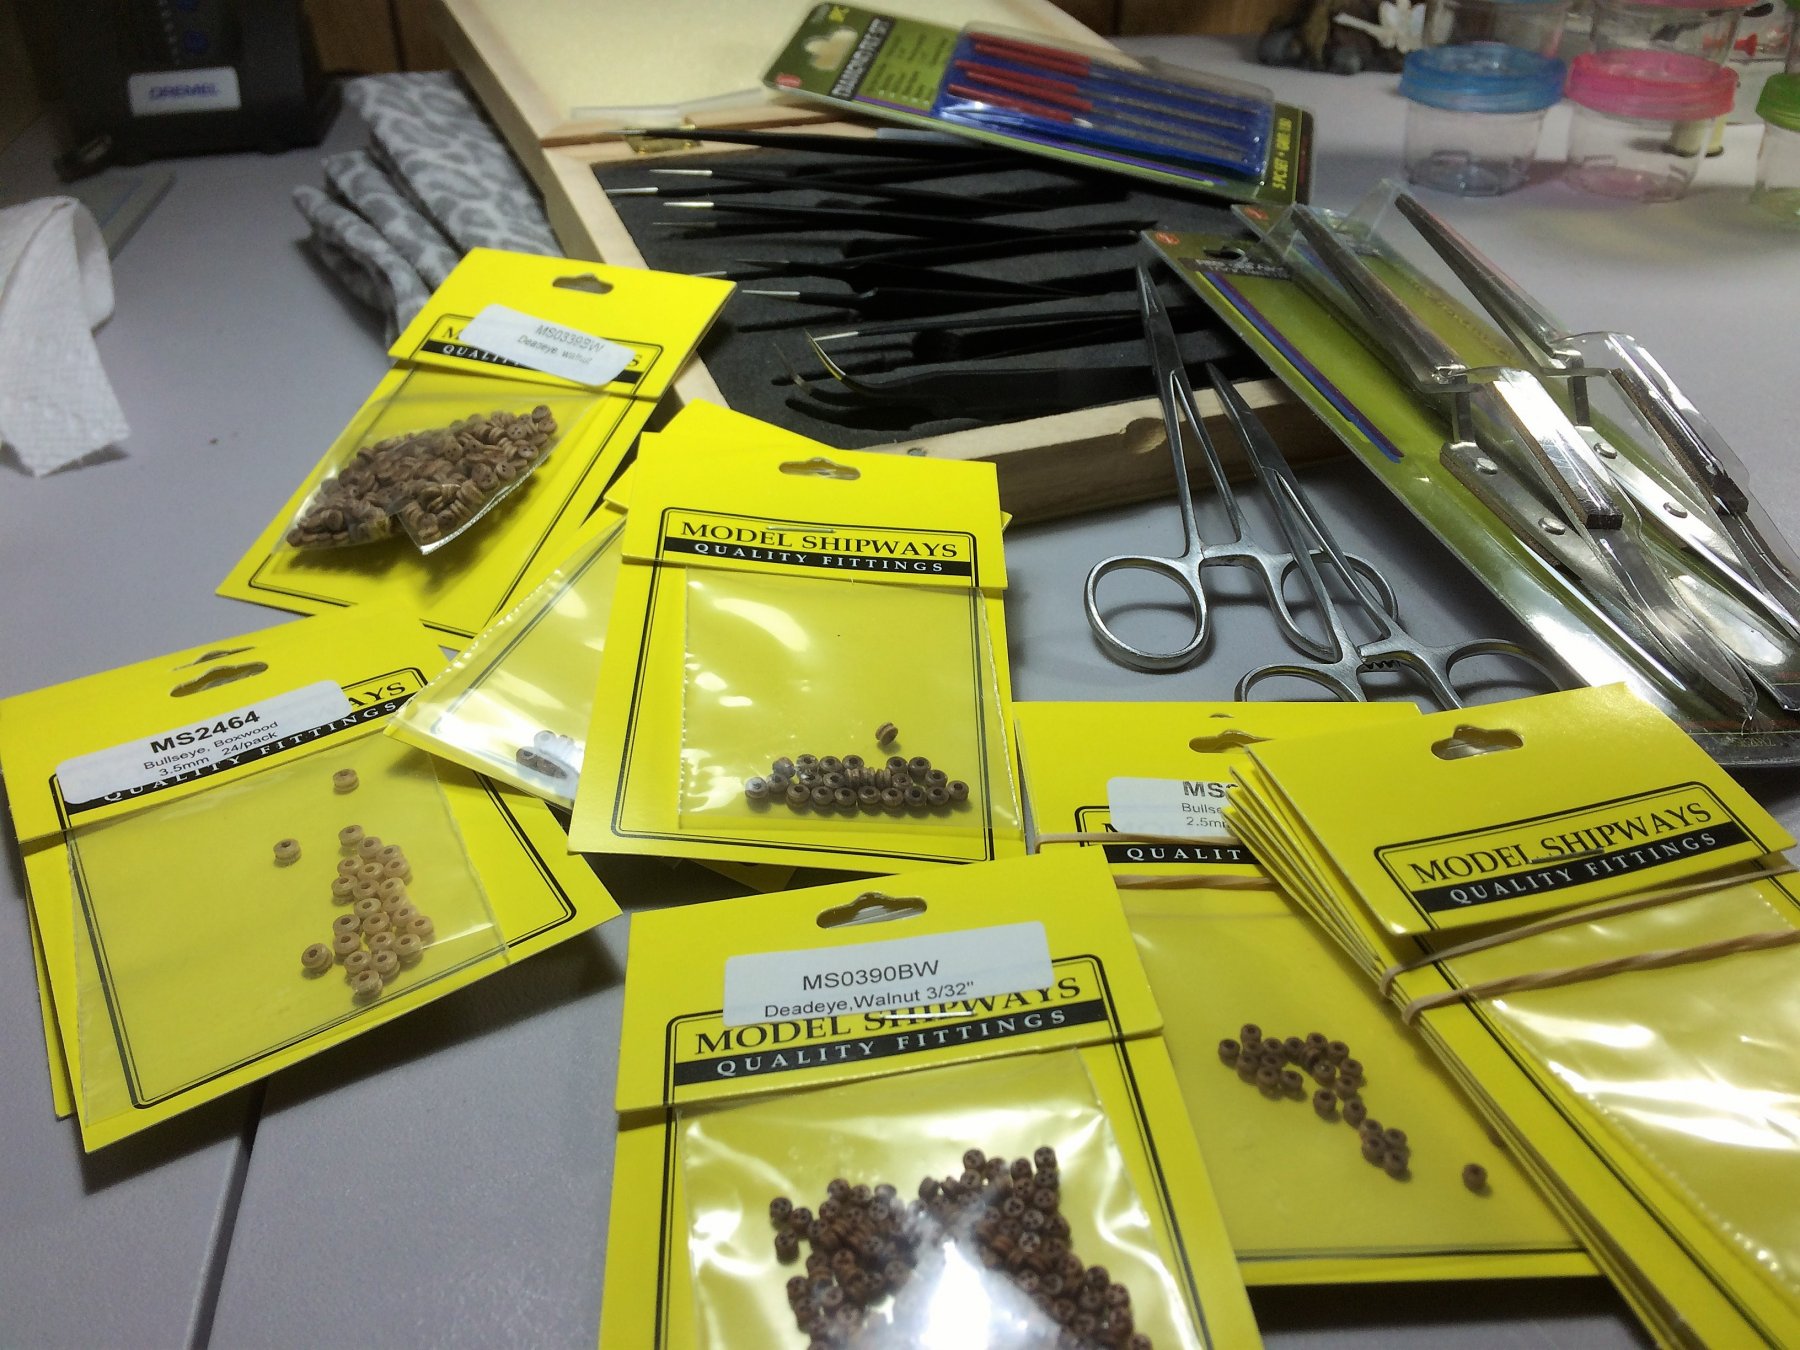
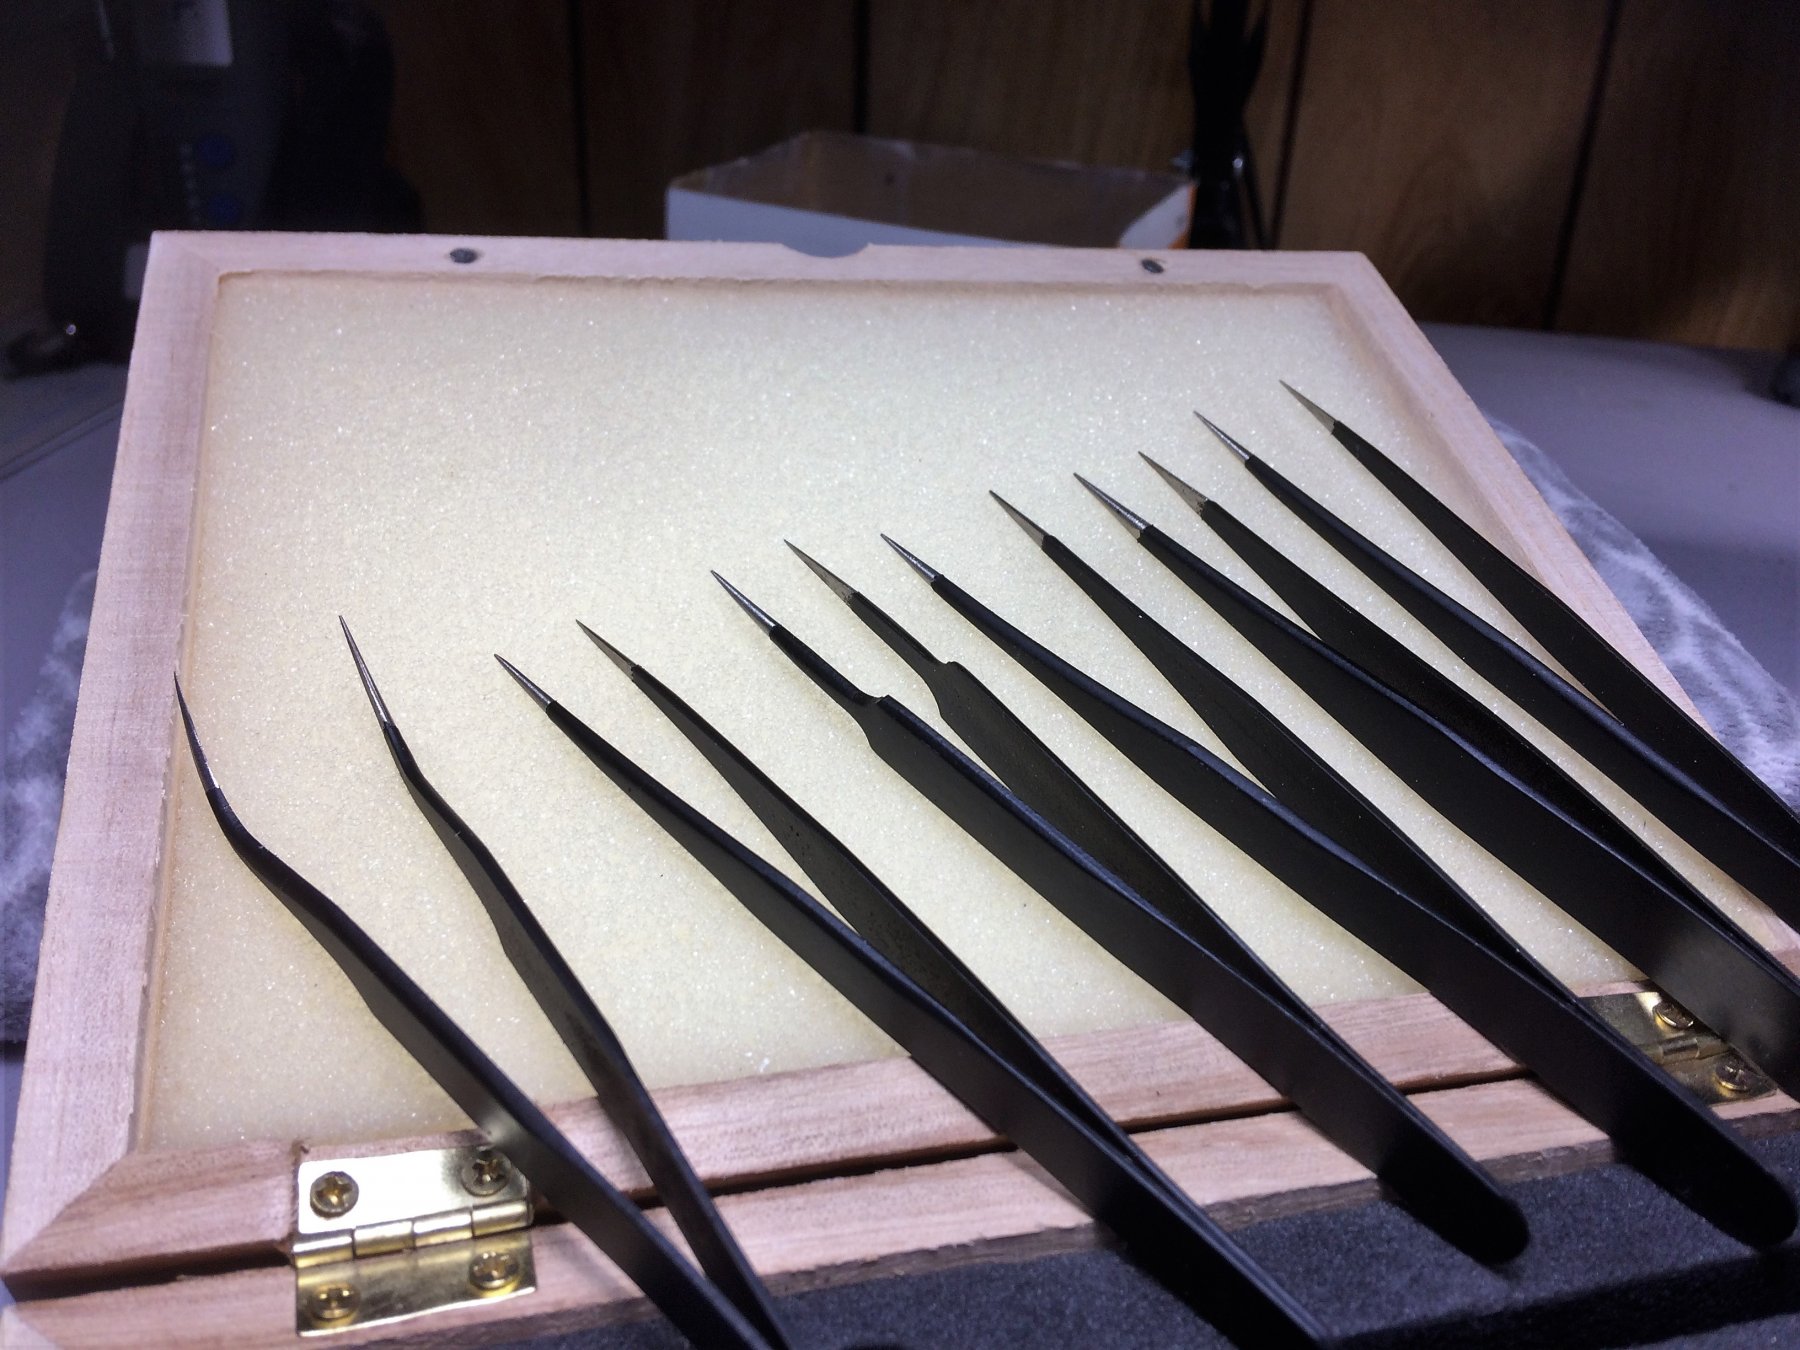
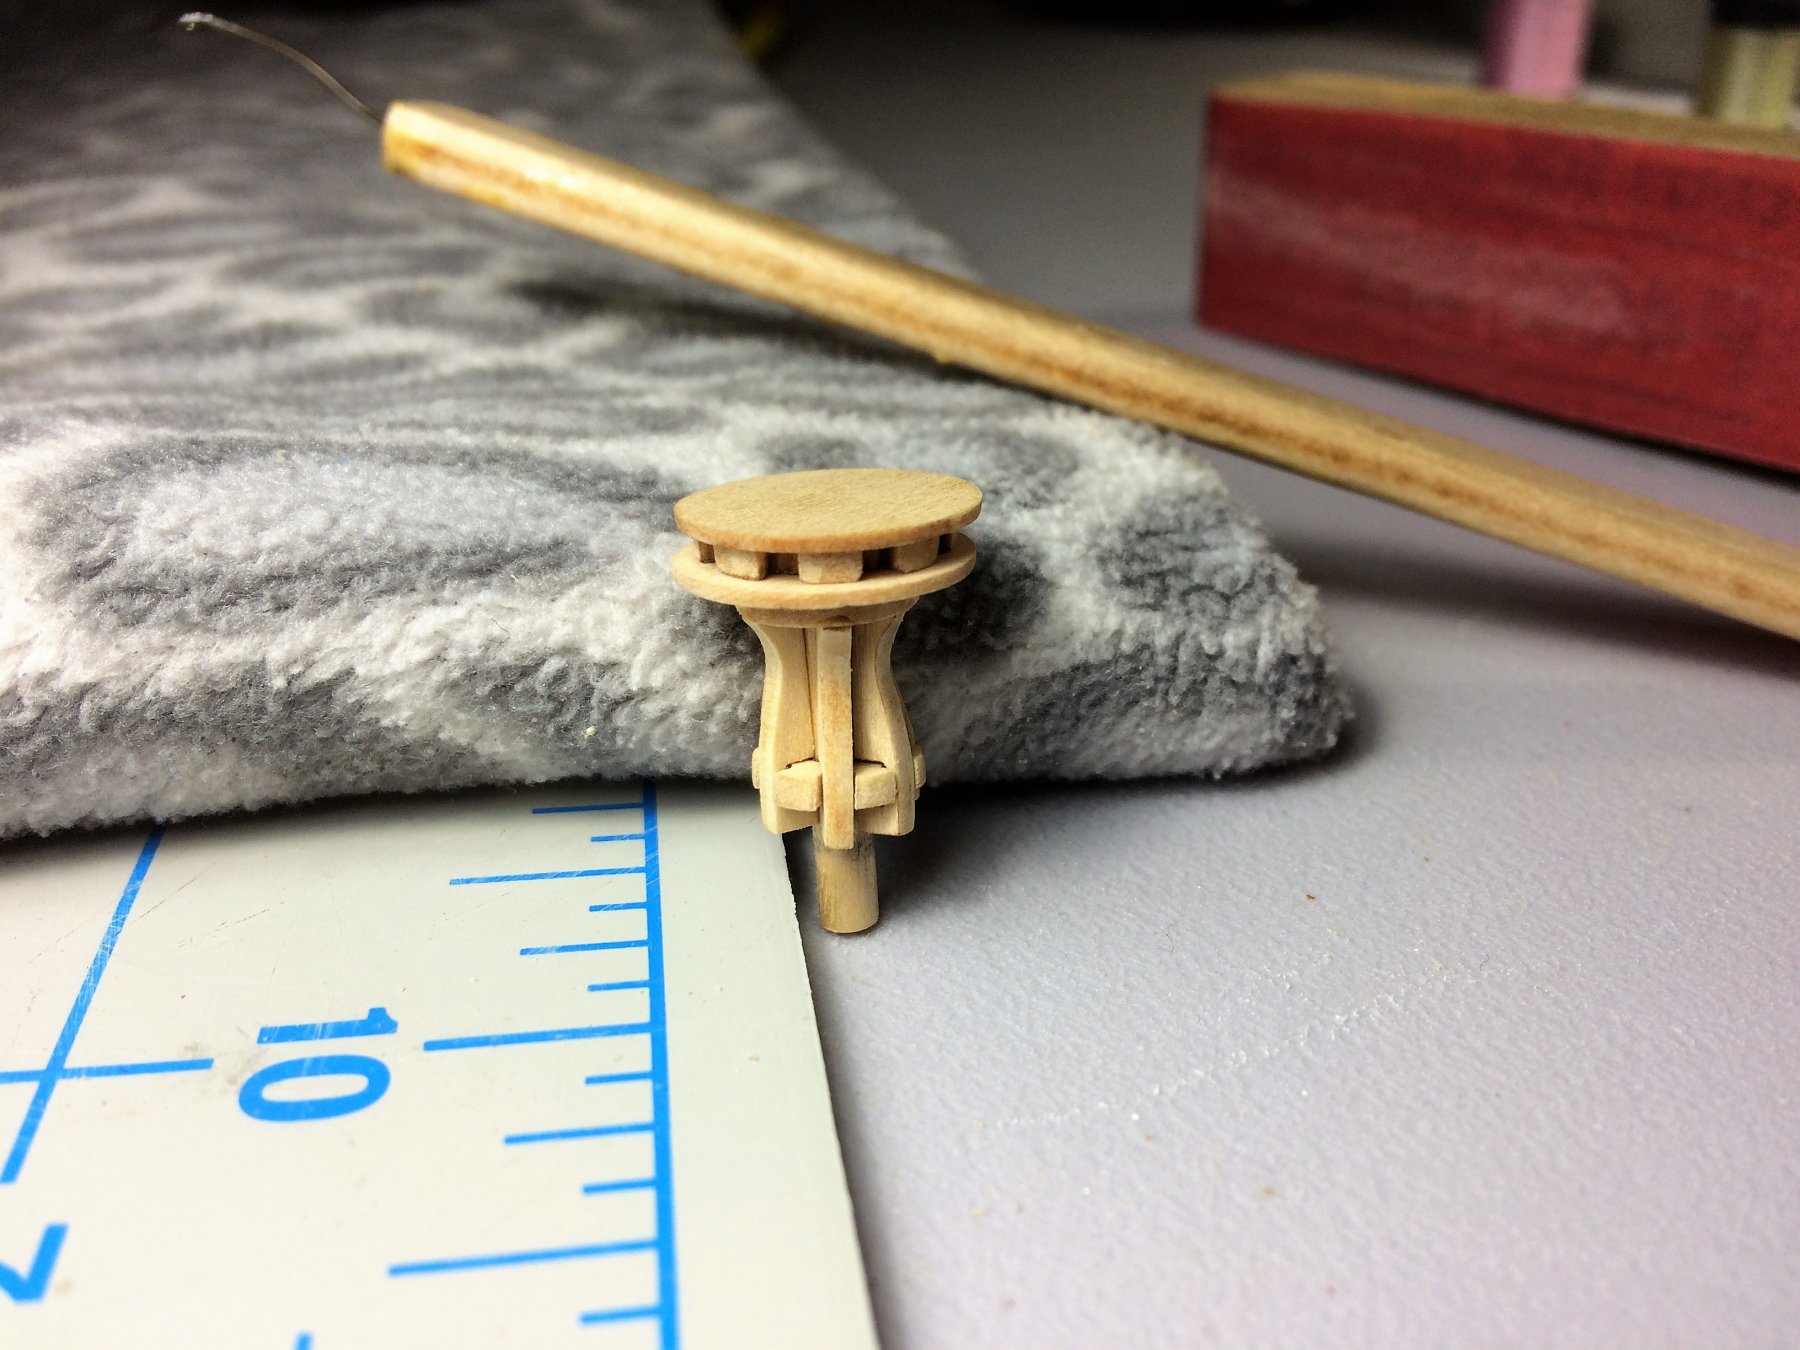
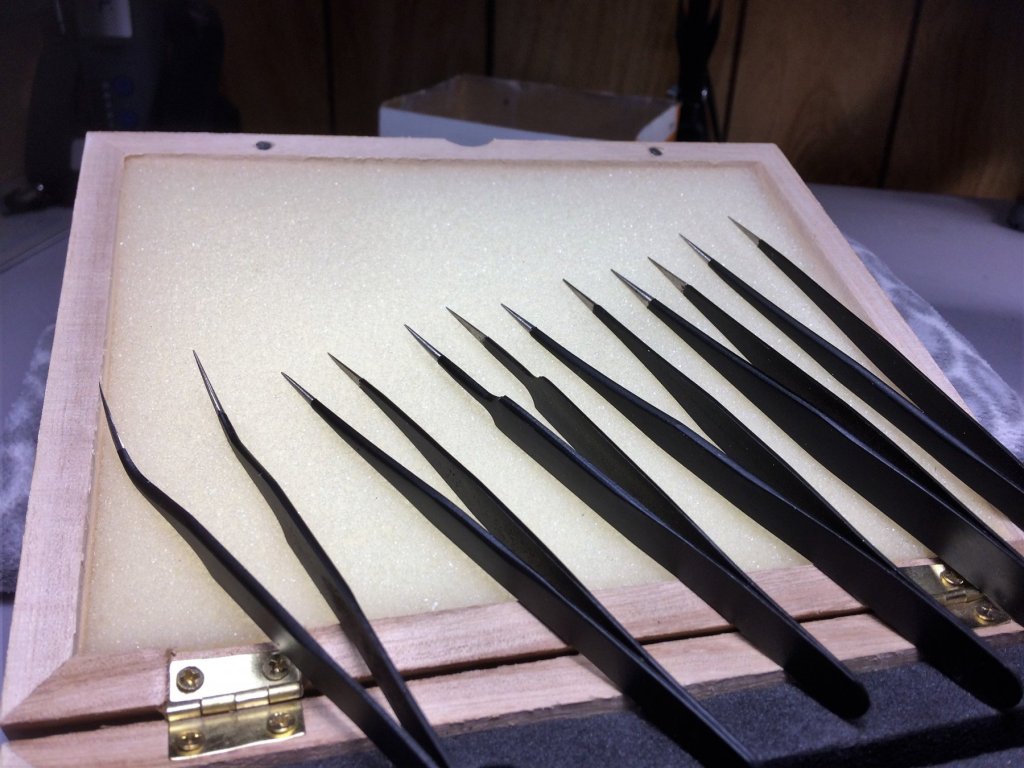
Evening, Hope everyone is well. Small update tonight. I finished the Salon Skylight. As I mentioned before, I'd like to stay away from the Buff paint. I'm going forward with a darker color scheme. I stained the roof an "Early American" from MinWax. The same stain as the Forecastle hatch. Just like the Forecastle Hatch, just a tick darker than the deck. Glued 28 gauge wire to the inside for the bars. I think it came out ok. On a side note, I took advantage of a sale at Model Expo. I originally was going to just buy some Bullseyes for Niagara. That didn't happen! I took full advantage of the recent "scratch" sale. In the end tho, I saved $40. I wanted to point out these tweezers I bought. There "non-magnetized Black Oxidized" tweezers. Not sure if all that means much to a wood medium, but I found these to be quite nice. They have a good weight in the hand, but not too heavy, and there fine points are superb. That's just this mans opinion. Stay warm, Tom E

-
Green Elephant funny car by jct - FINISHED - 1/24 - PLASTIC
Tom E replied to jct's topic in Non-ship/categorised builds
Great build J! Those are handsome. That Vega is blowing my mind! I'm really liking the "non-ship" build section. Some great models being built as is evident by your build. The first car I owned was a Vega! Its the only car I knew of that the fuel pump was inside the gas tank! Took an entire day to drop the tank. At 17, you think you can fix anything....what a mess! Tom E -
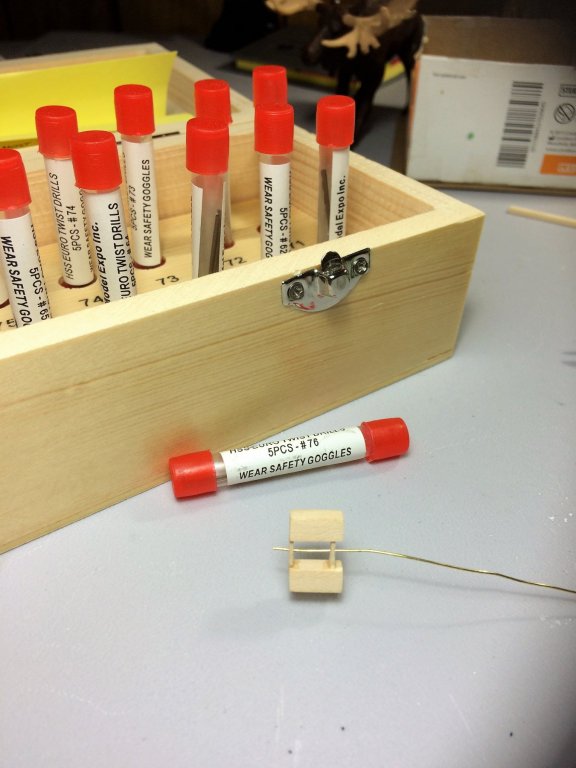
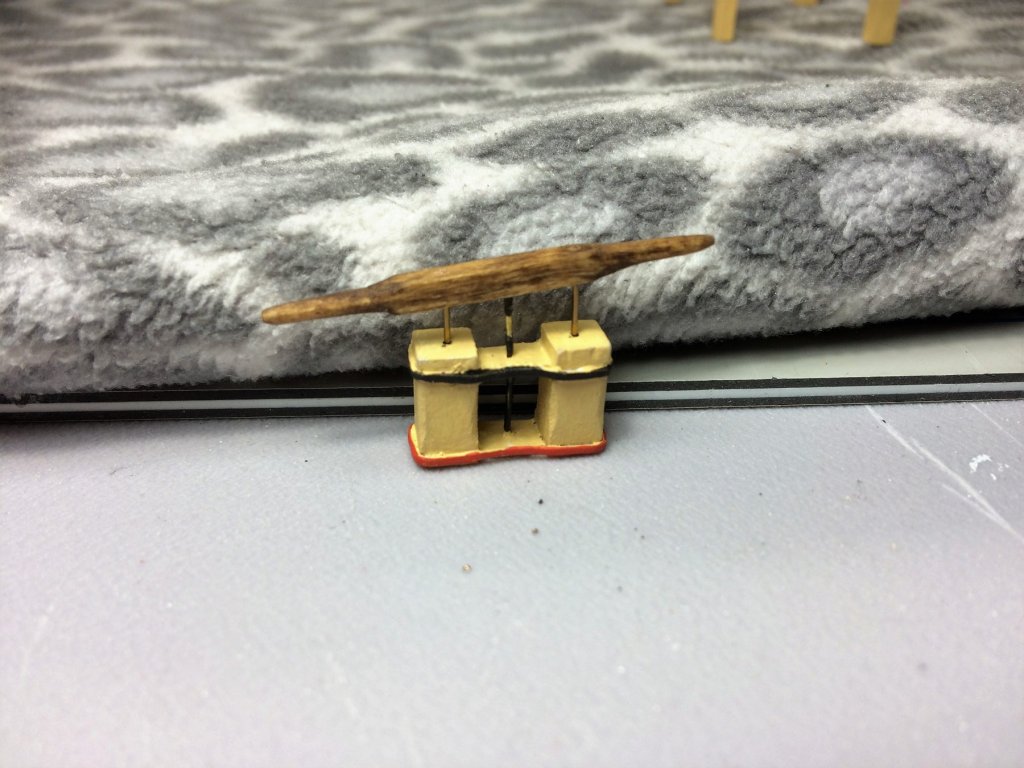
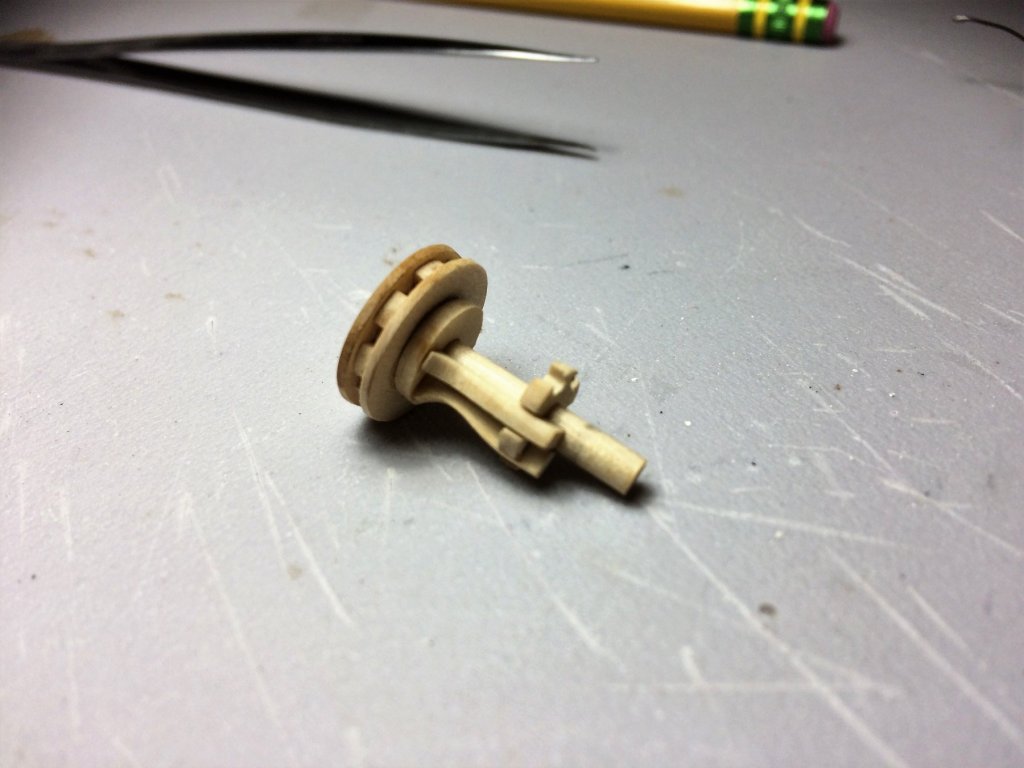
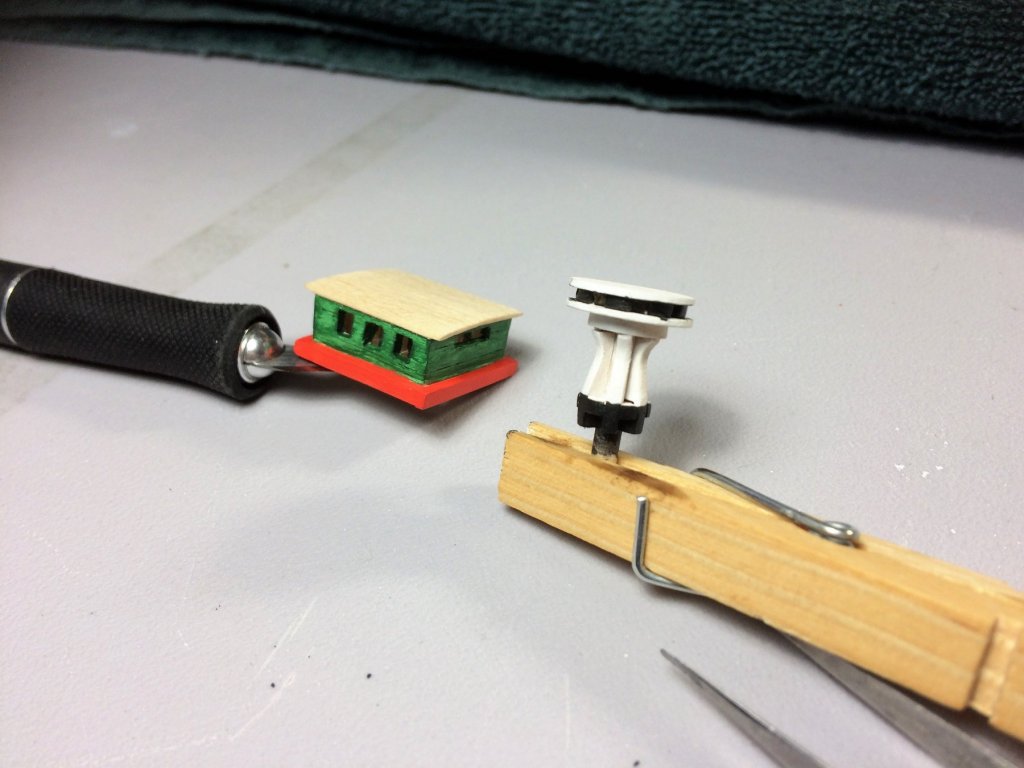
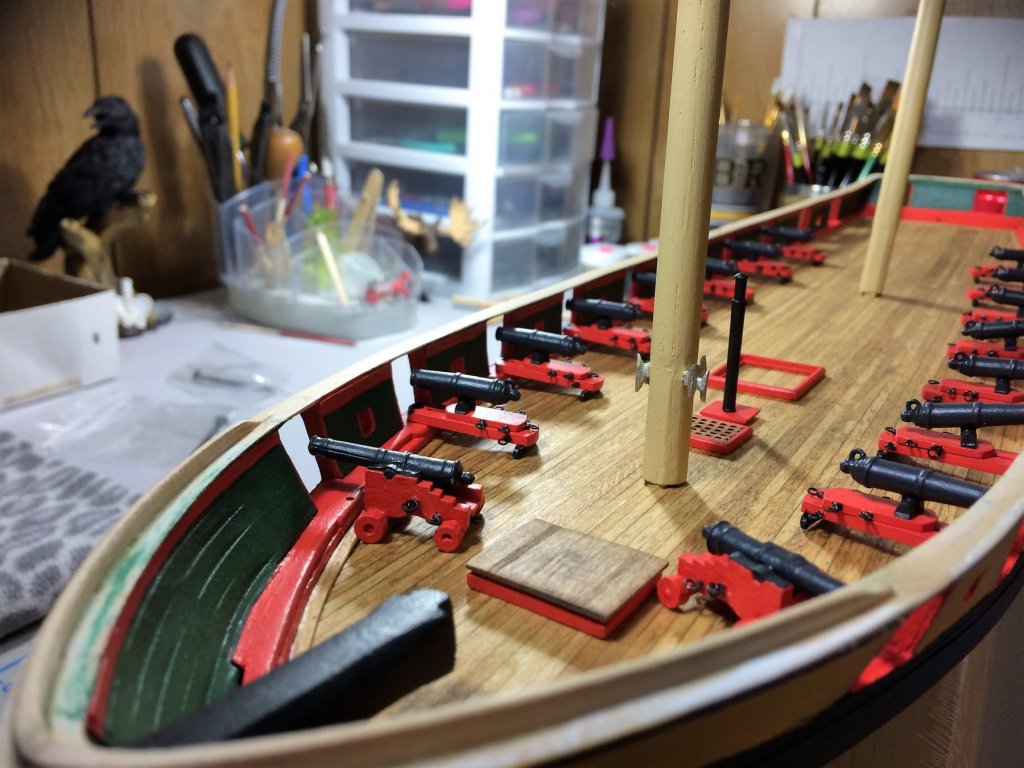
Evening, Took a few days off from work. Been enjoying a lot of time building. As long as the coffee holds out, I'm a happy man! All the chores are done, and to the Shipyard I went! I'm only going to show 1 pic of the Bilge pump. It's pretty sad. I'm tempted to re-build it. I can live with it.....for now. It should get "lost" in the busy Main deck. I think it's the Buff color that gets me the most, I may change that. Bulwark green maybe? Hmmmmmm….. I started to bring together the parts for the Capstan. A little sanding and all fits well. That was pretty easy. I figure painting this little thing will be harder than building it. The Capstan, as well as the Saloon Skylight, went to paint. Trying to shy away from the Buff paint. The Saloon Skylight will have a stained roof, Bulwark green sides, and red Coaming. The Capstan will be Black, Green, Red, with some Brass. The roof will be stained the same color as the Forecastle Hatch roof for continuity. Below is only after 1 coat of Green, I usually do at least 3, or more, coats. Tom E

-
That deck really is nice! I'm always impressed with Bluejacket kits. What color stain might you use? Making great progress! Tom E
-
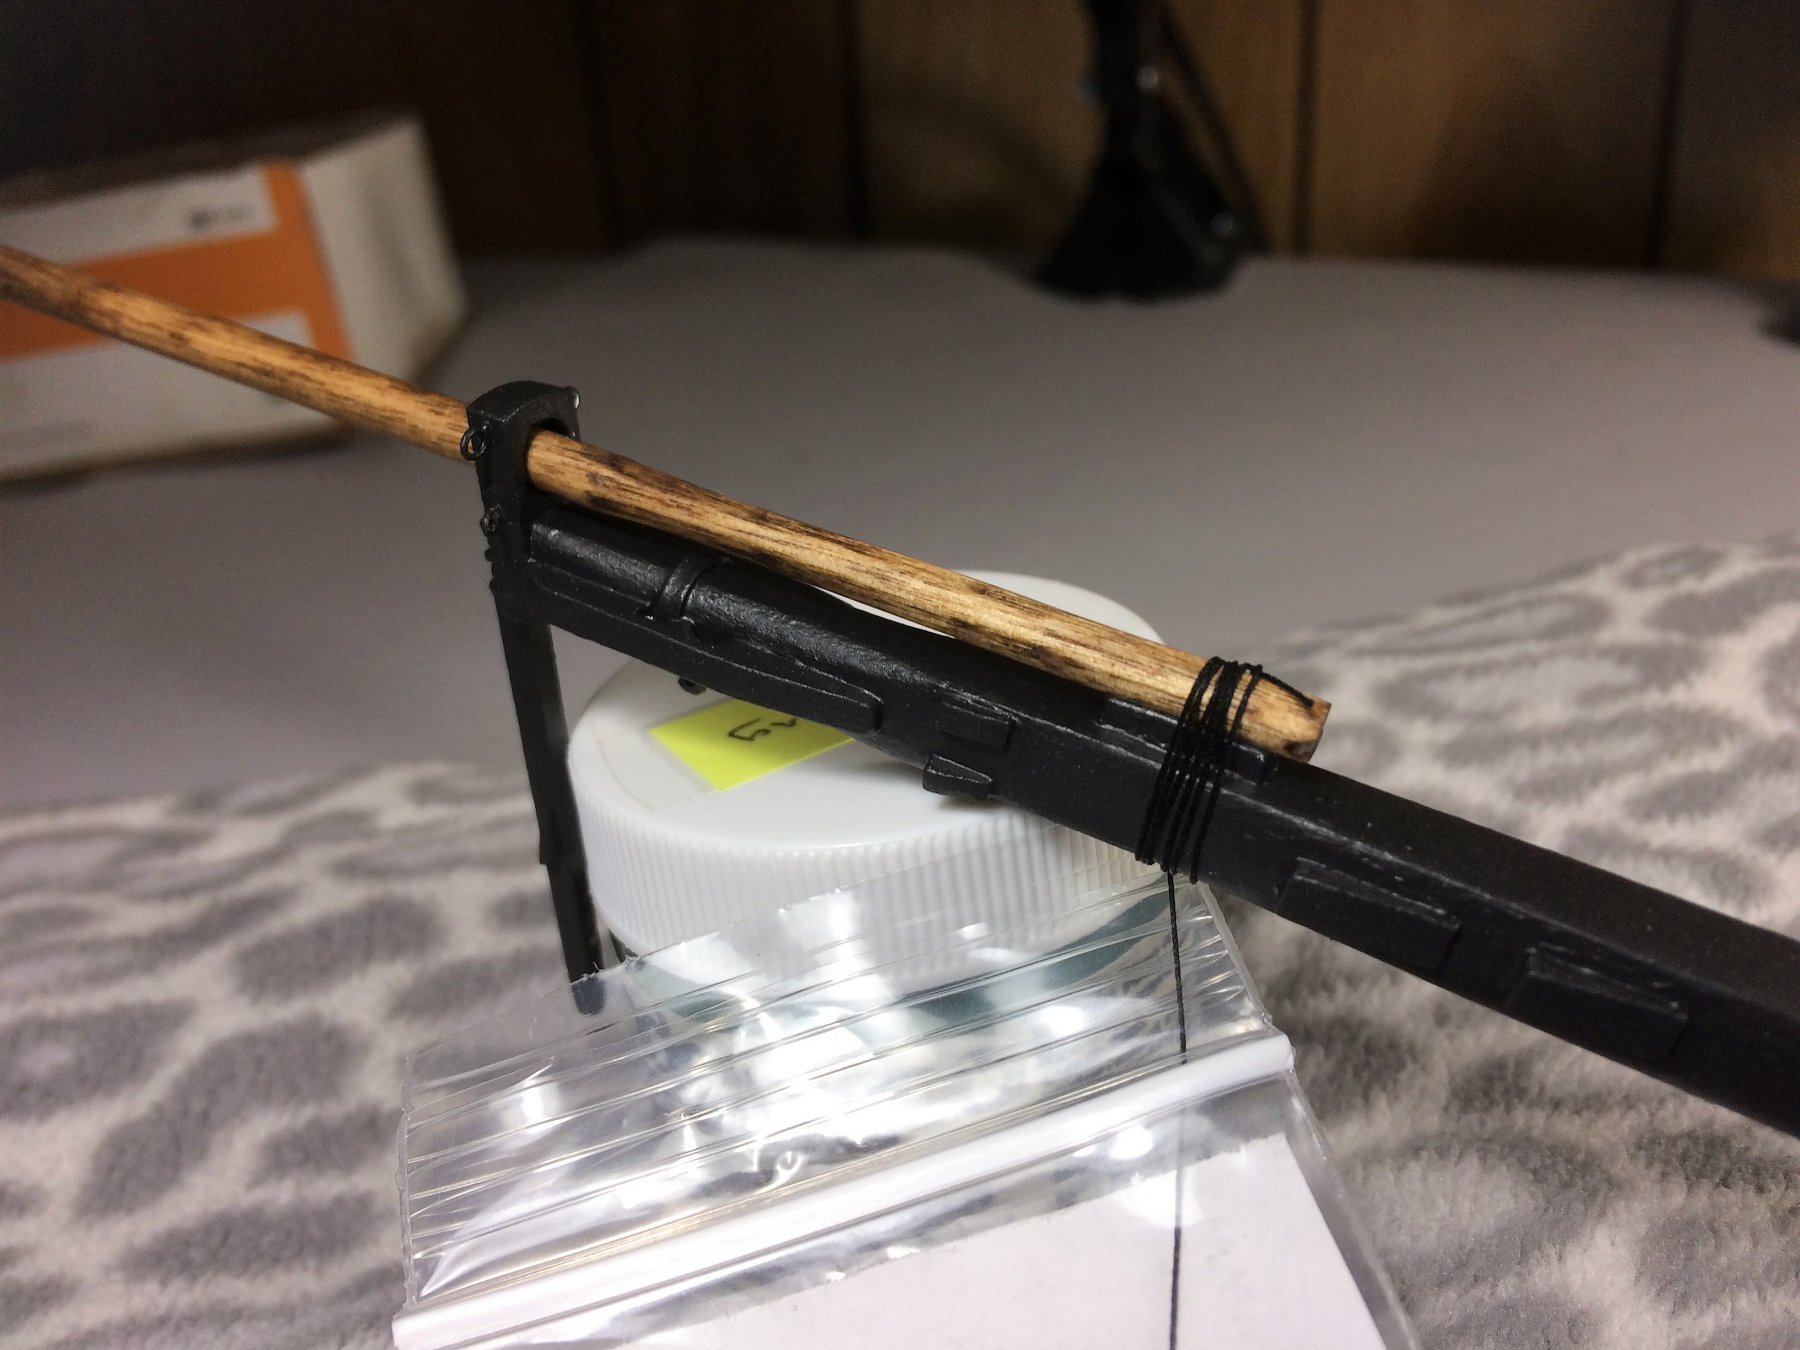
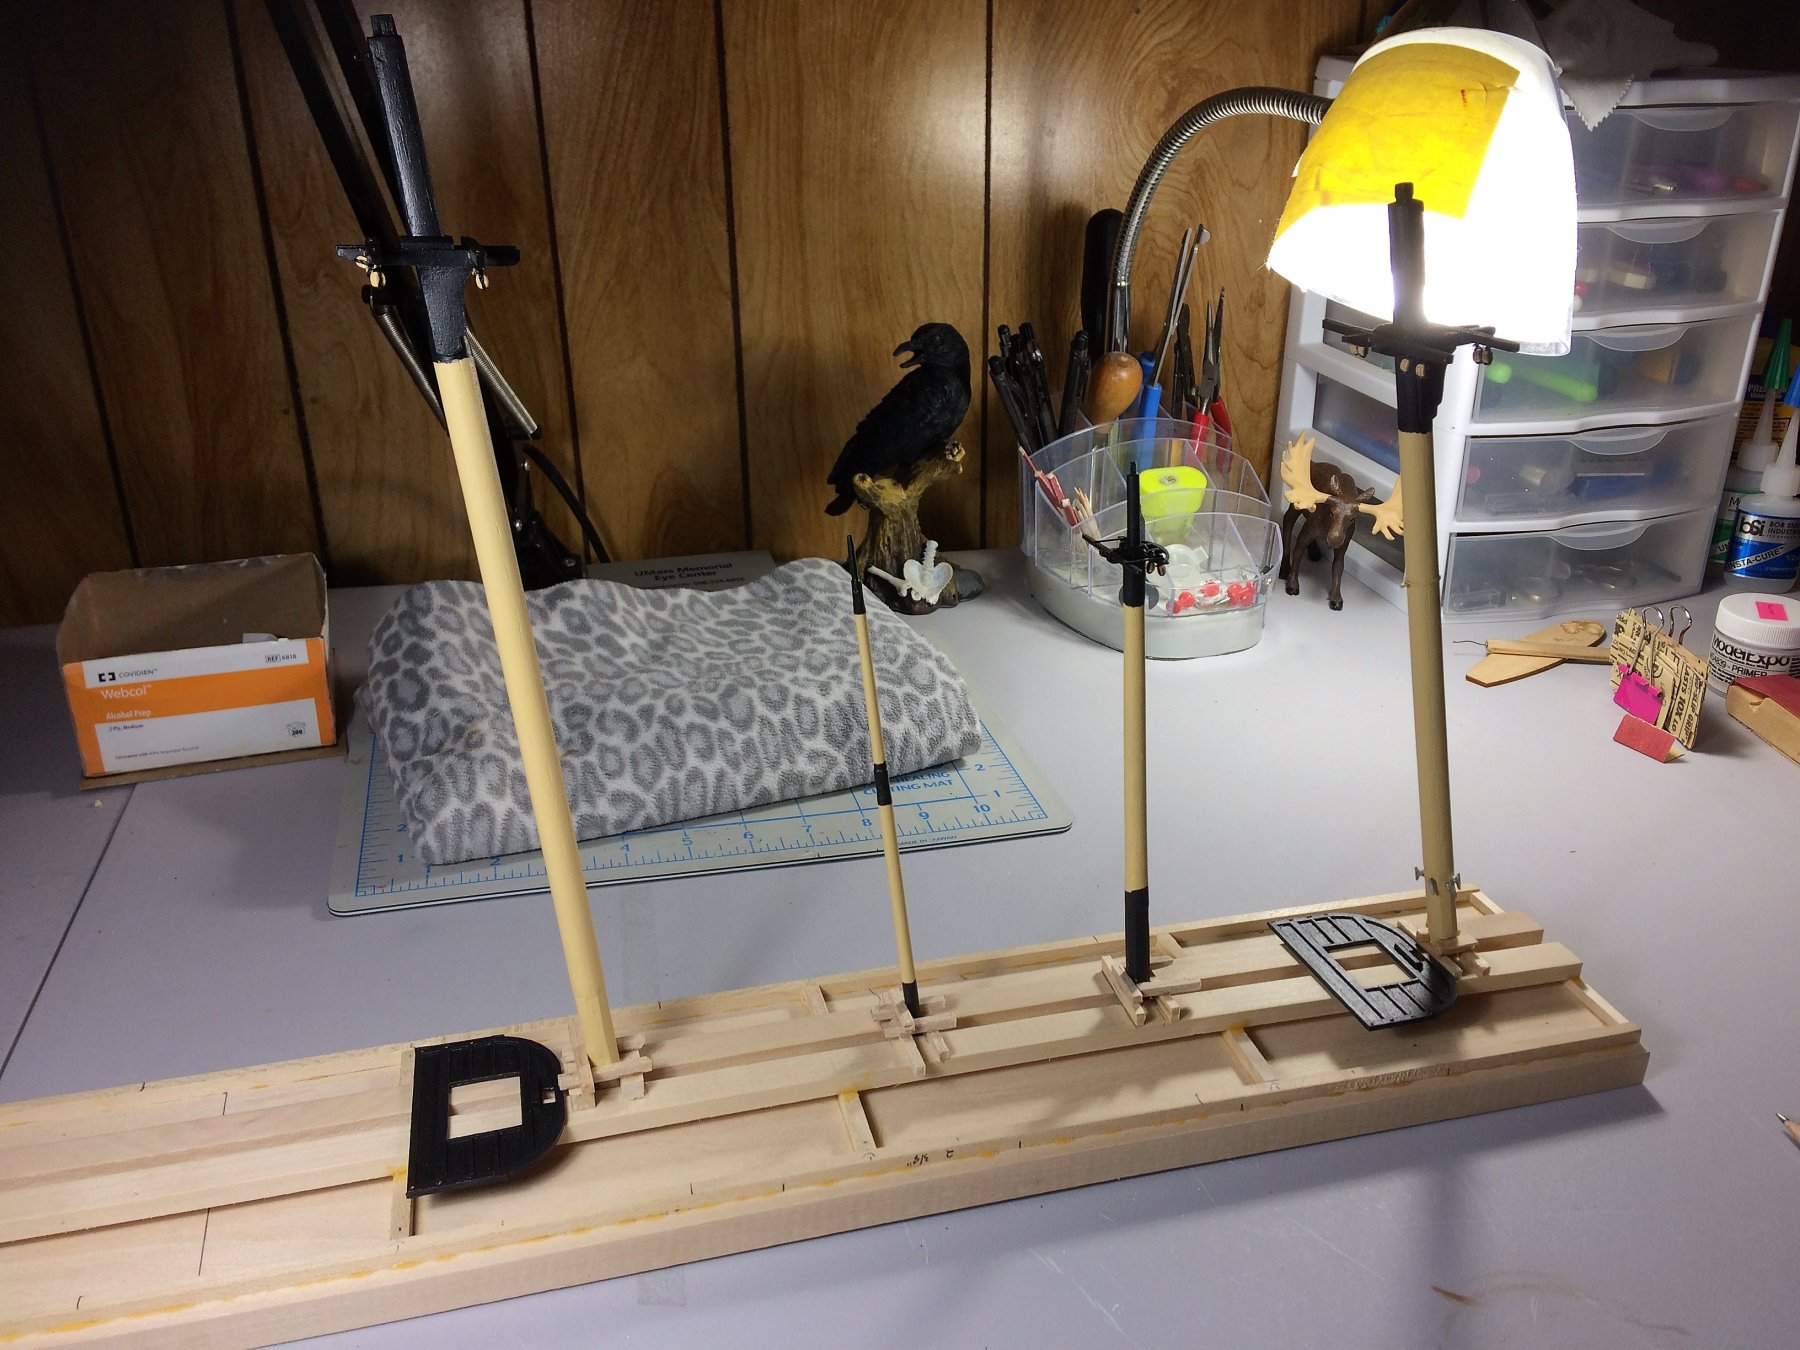
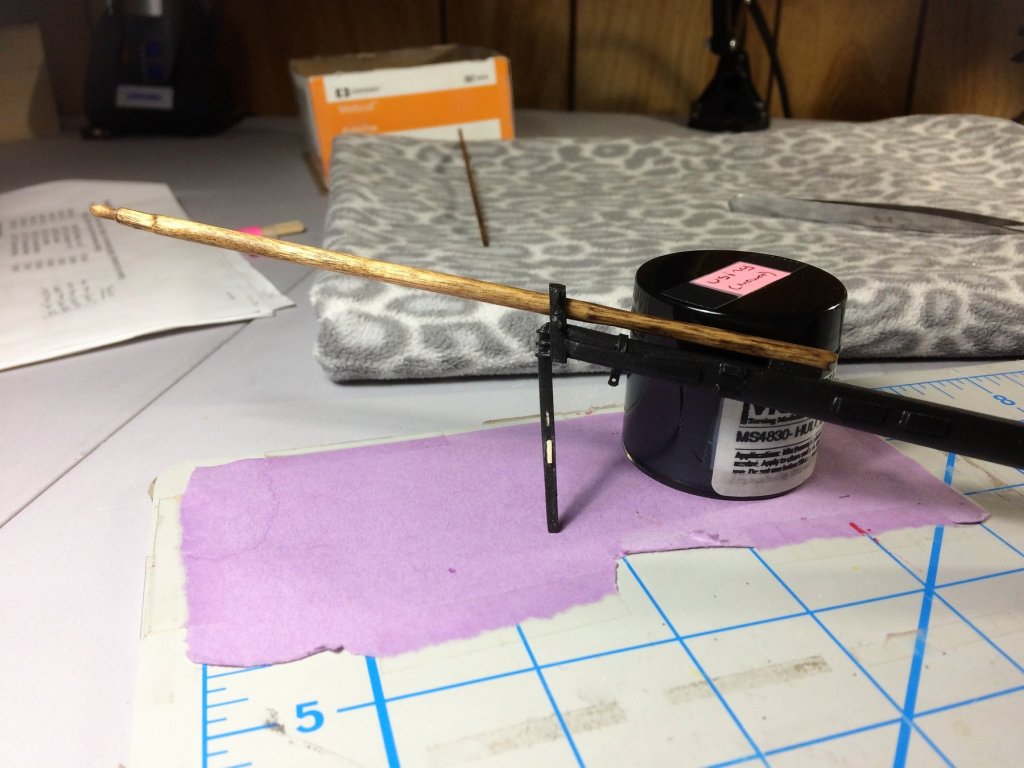
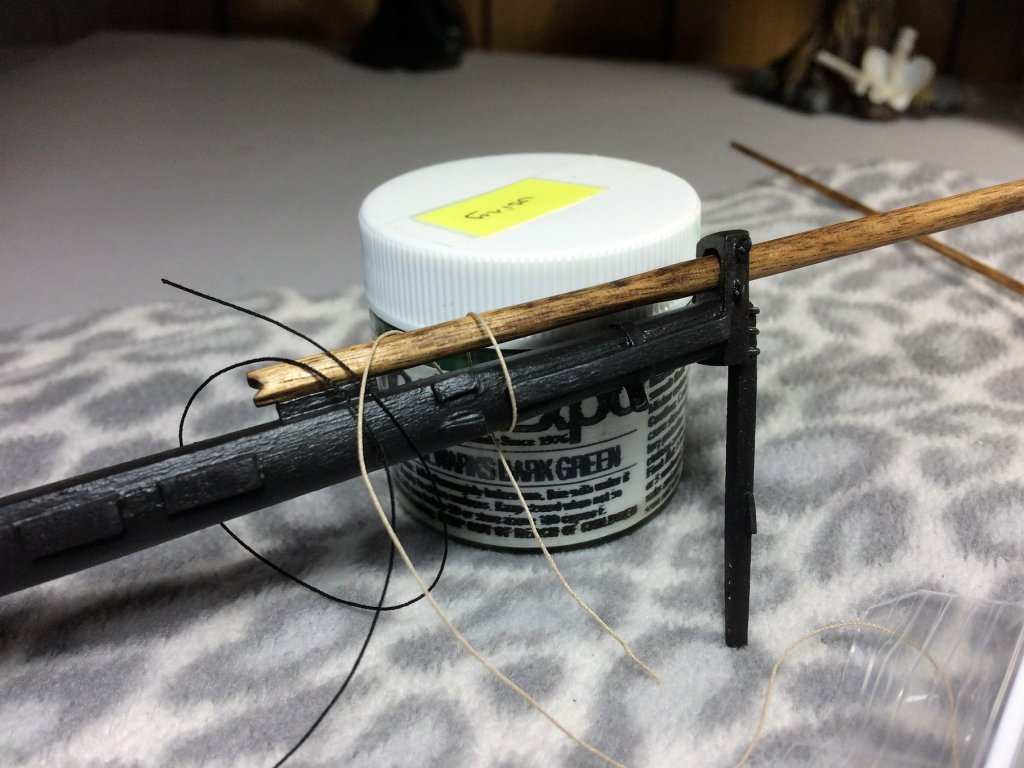
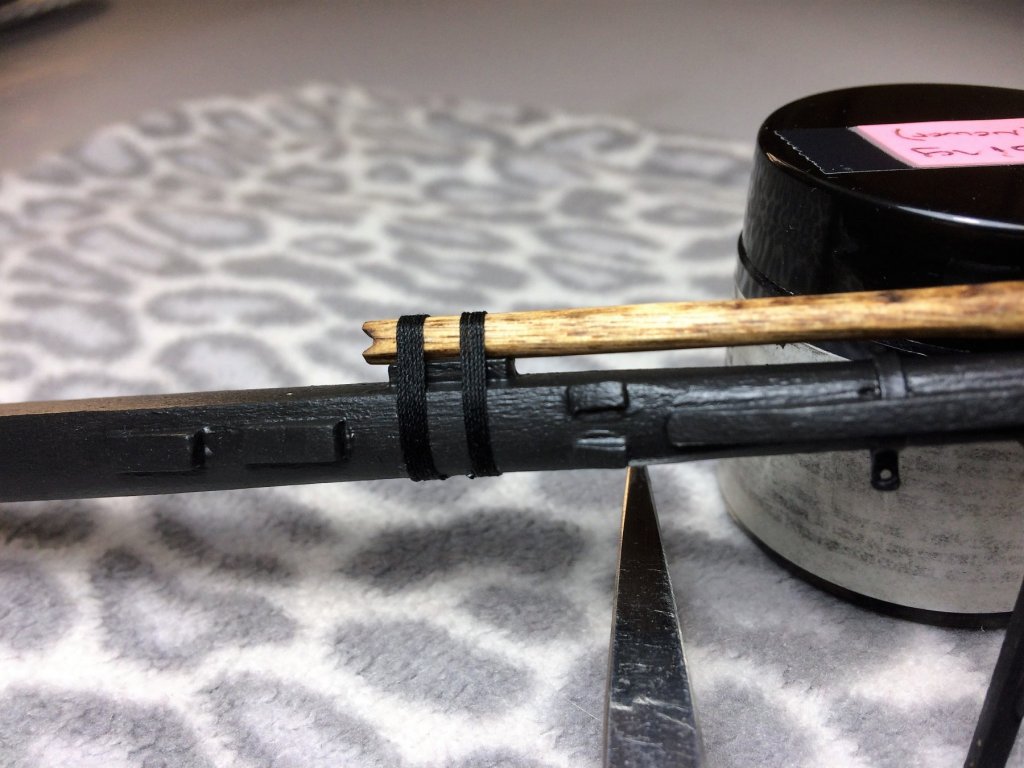
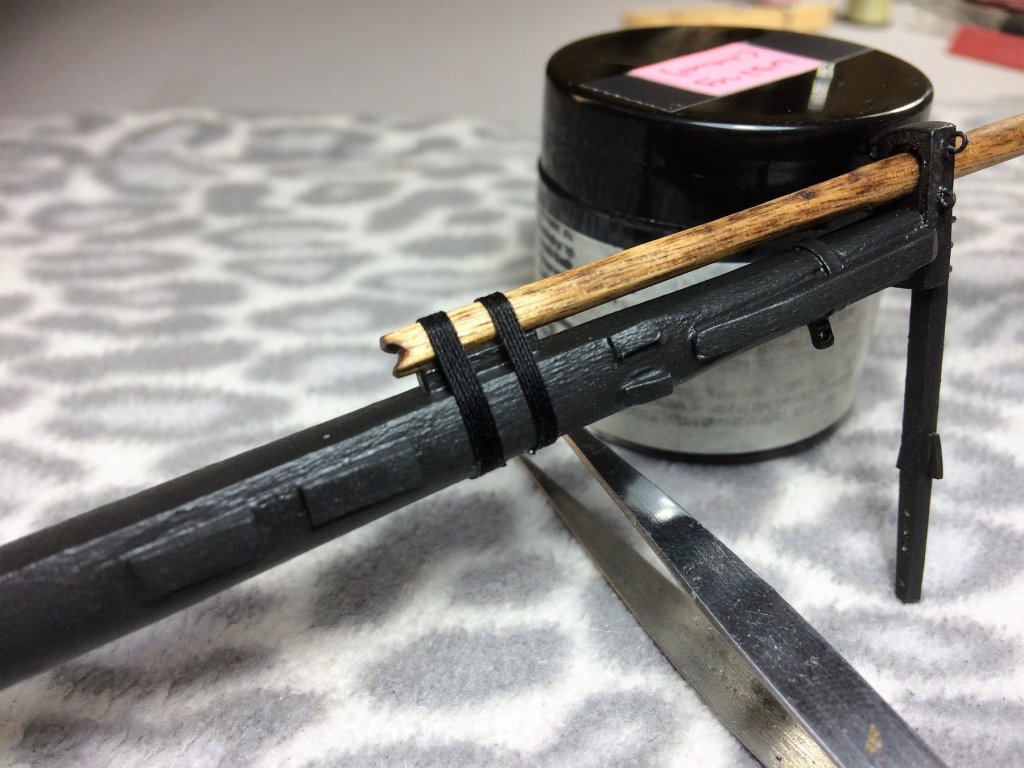
Evening, Hope everyone is well. Very limited time in the Shipyard lately. But, some small items were done. I've really been making a push to finish the Bowsprit. I noticed I missed installing a few chocks on the Dolphin Striker. While the chocks were drying, I played with idea of tan rope for the lashings on the Bowsprit. Went against the tan rope. The below pic is a test wrap. I did the same with the tan, but for some reason never took a pic!🤨 It didn't work with the stain of the Jib boom and the black of the Bowsprit. The below 2pics are the finished product. I'm happy with it. According to the plans, the back lashings are wider then the front. The rope is glued underneath where no one should see it. Then wrapped like a fishing rod guide. I'm hoping to get the hearts for the Fore and Preventer Stays started this weekend. It dawned on me..... Besides stropping blocks, this is the first use of rope/rigging on my ship! It looks so cool!! Little milestone in this builders head. There's a few miles more of rope to be strung! Thanks for watching! Tom E

-
Gary, Hope everything has resolved. But, In the section "the Captains Quarter", Its the section right above the kit and scratch member build log sections. There's a section about how to use the site. There are some folks over there having the same issue. The Admin's have been looking into it. Tom E
- 367 replies
-
- 1
-
-
- model shipways
- niagara
- (and 1 more)
-
I saw how you did that to the furniture, I really liked it. Seriously thought about changing the furniture to reflect that. It made sense. But, In the end, given my limited experience, I decided to just follow the plans I have in front of me. I may adjust the overall sizes of things in that area, but nothing severe. Tom E
-
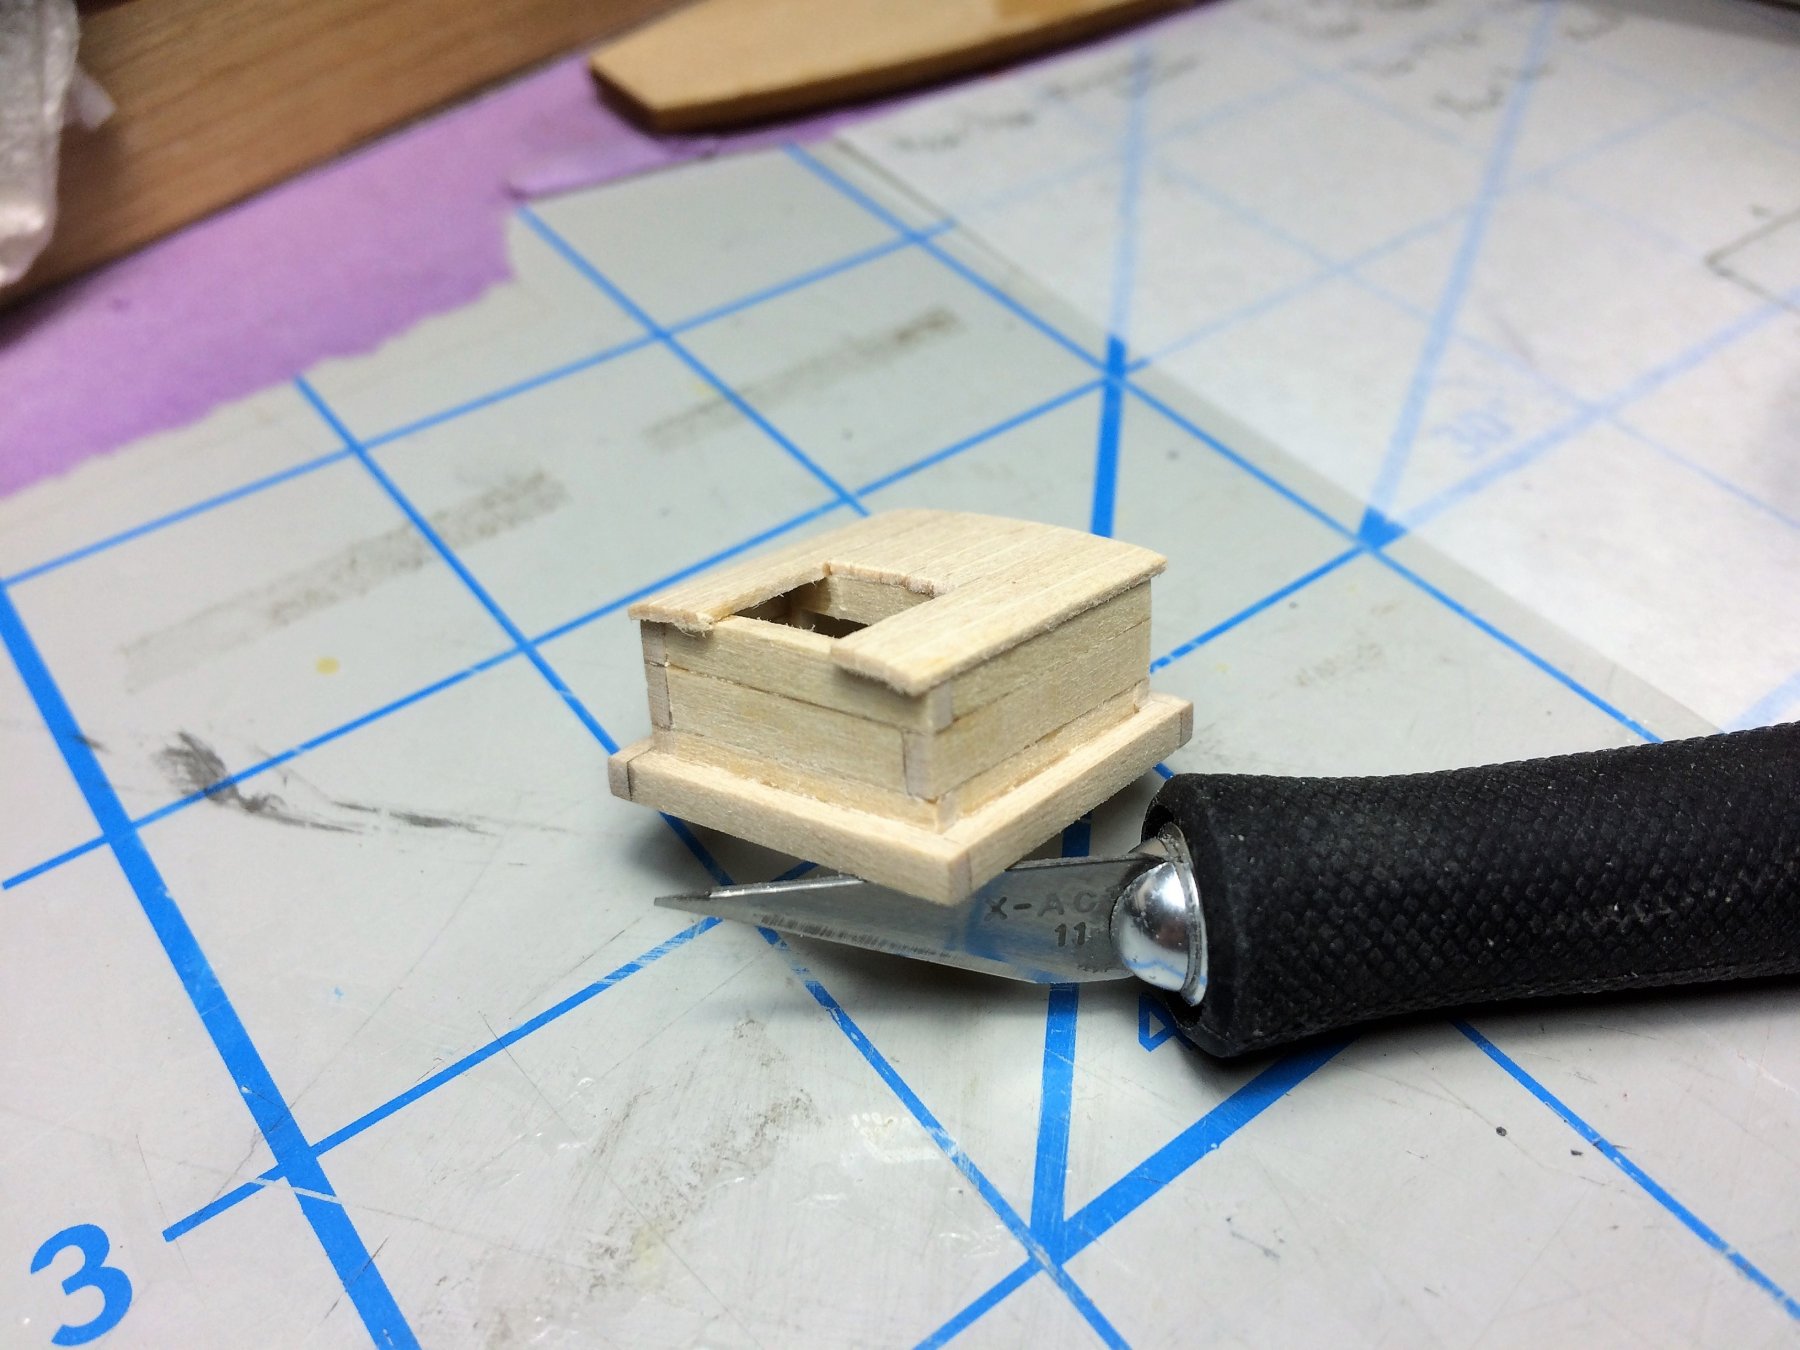
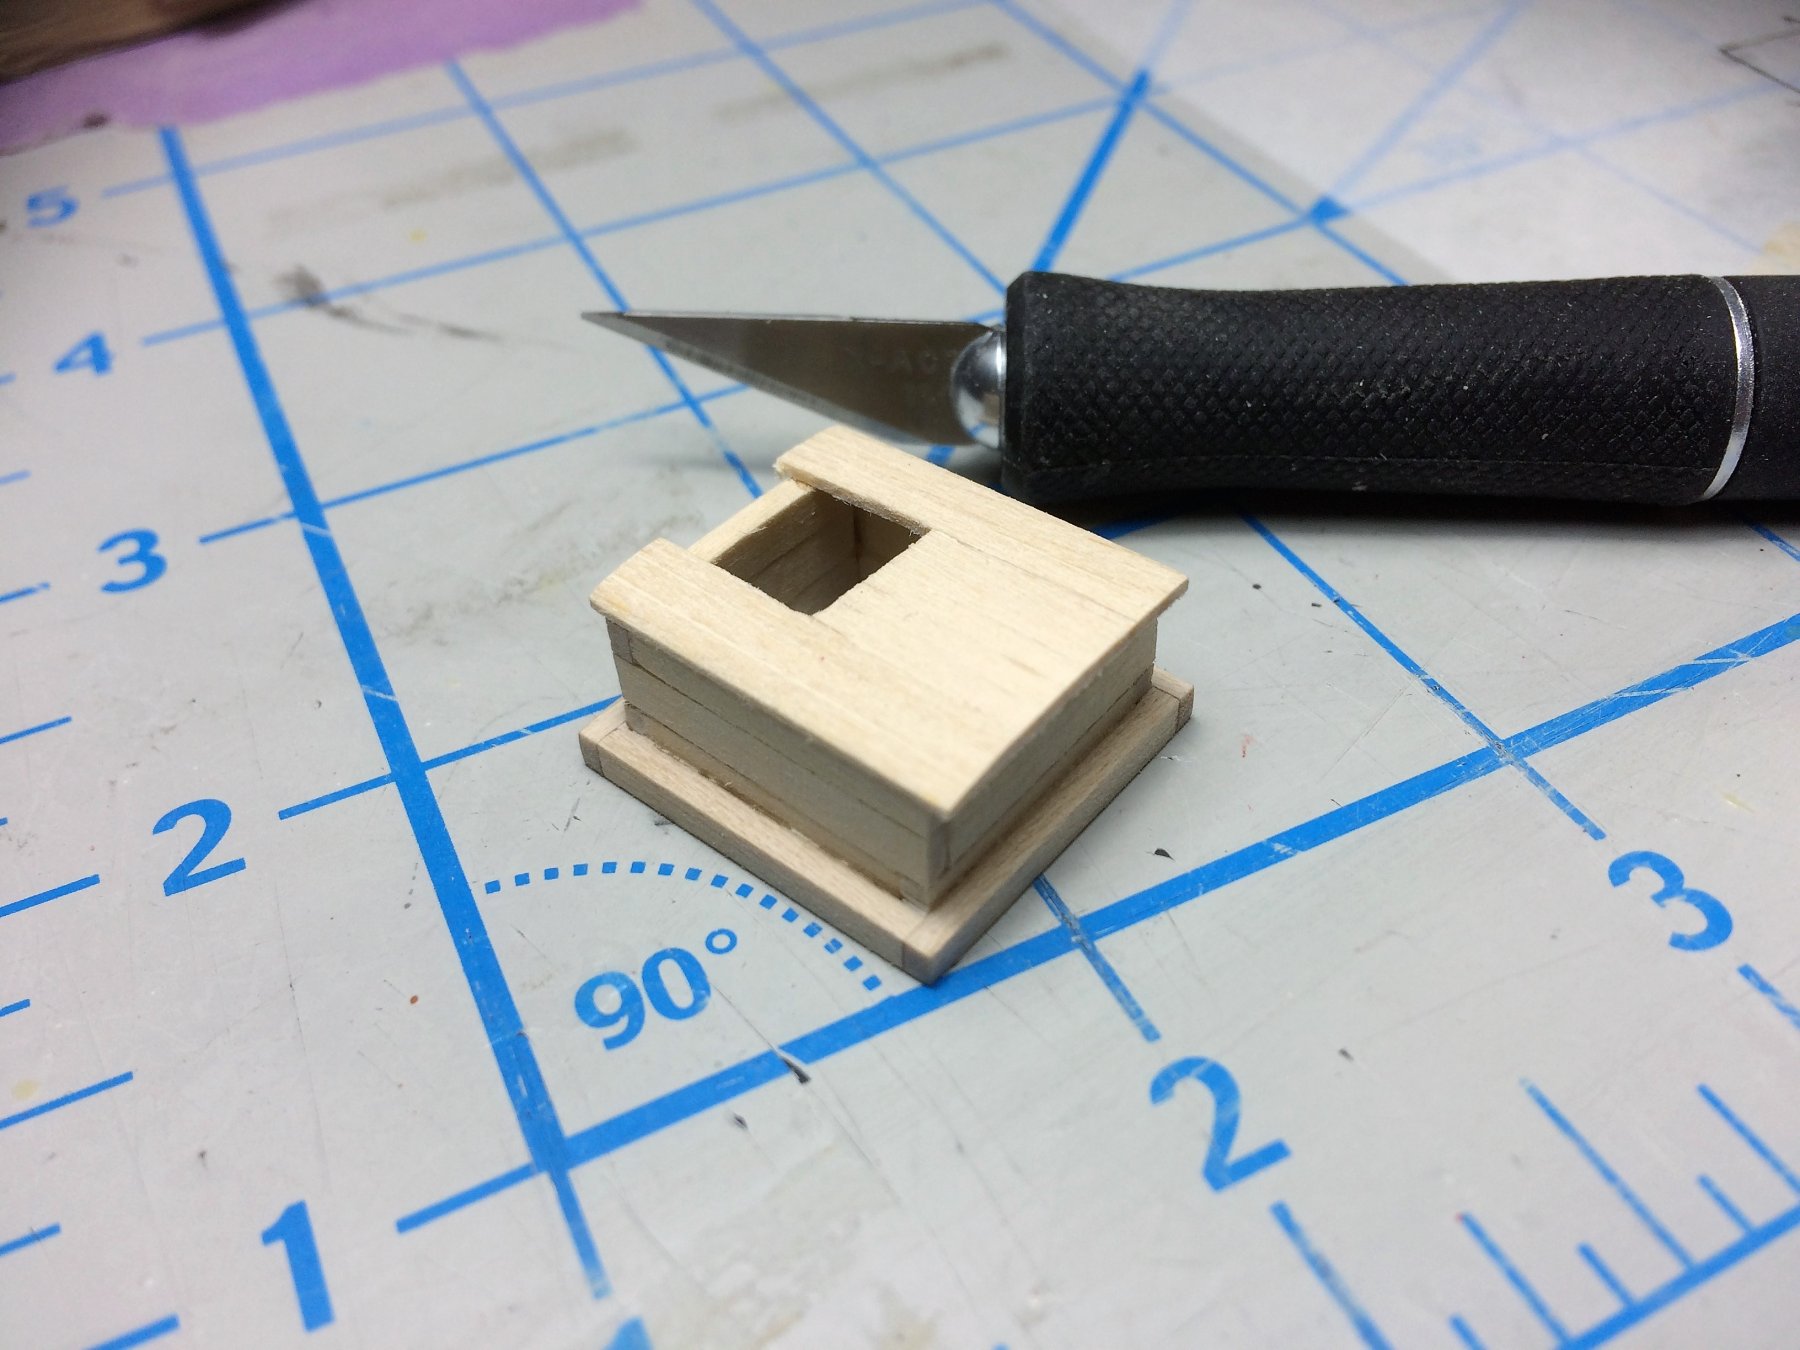
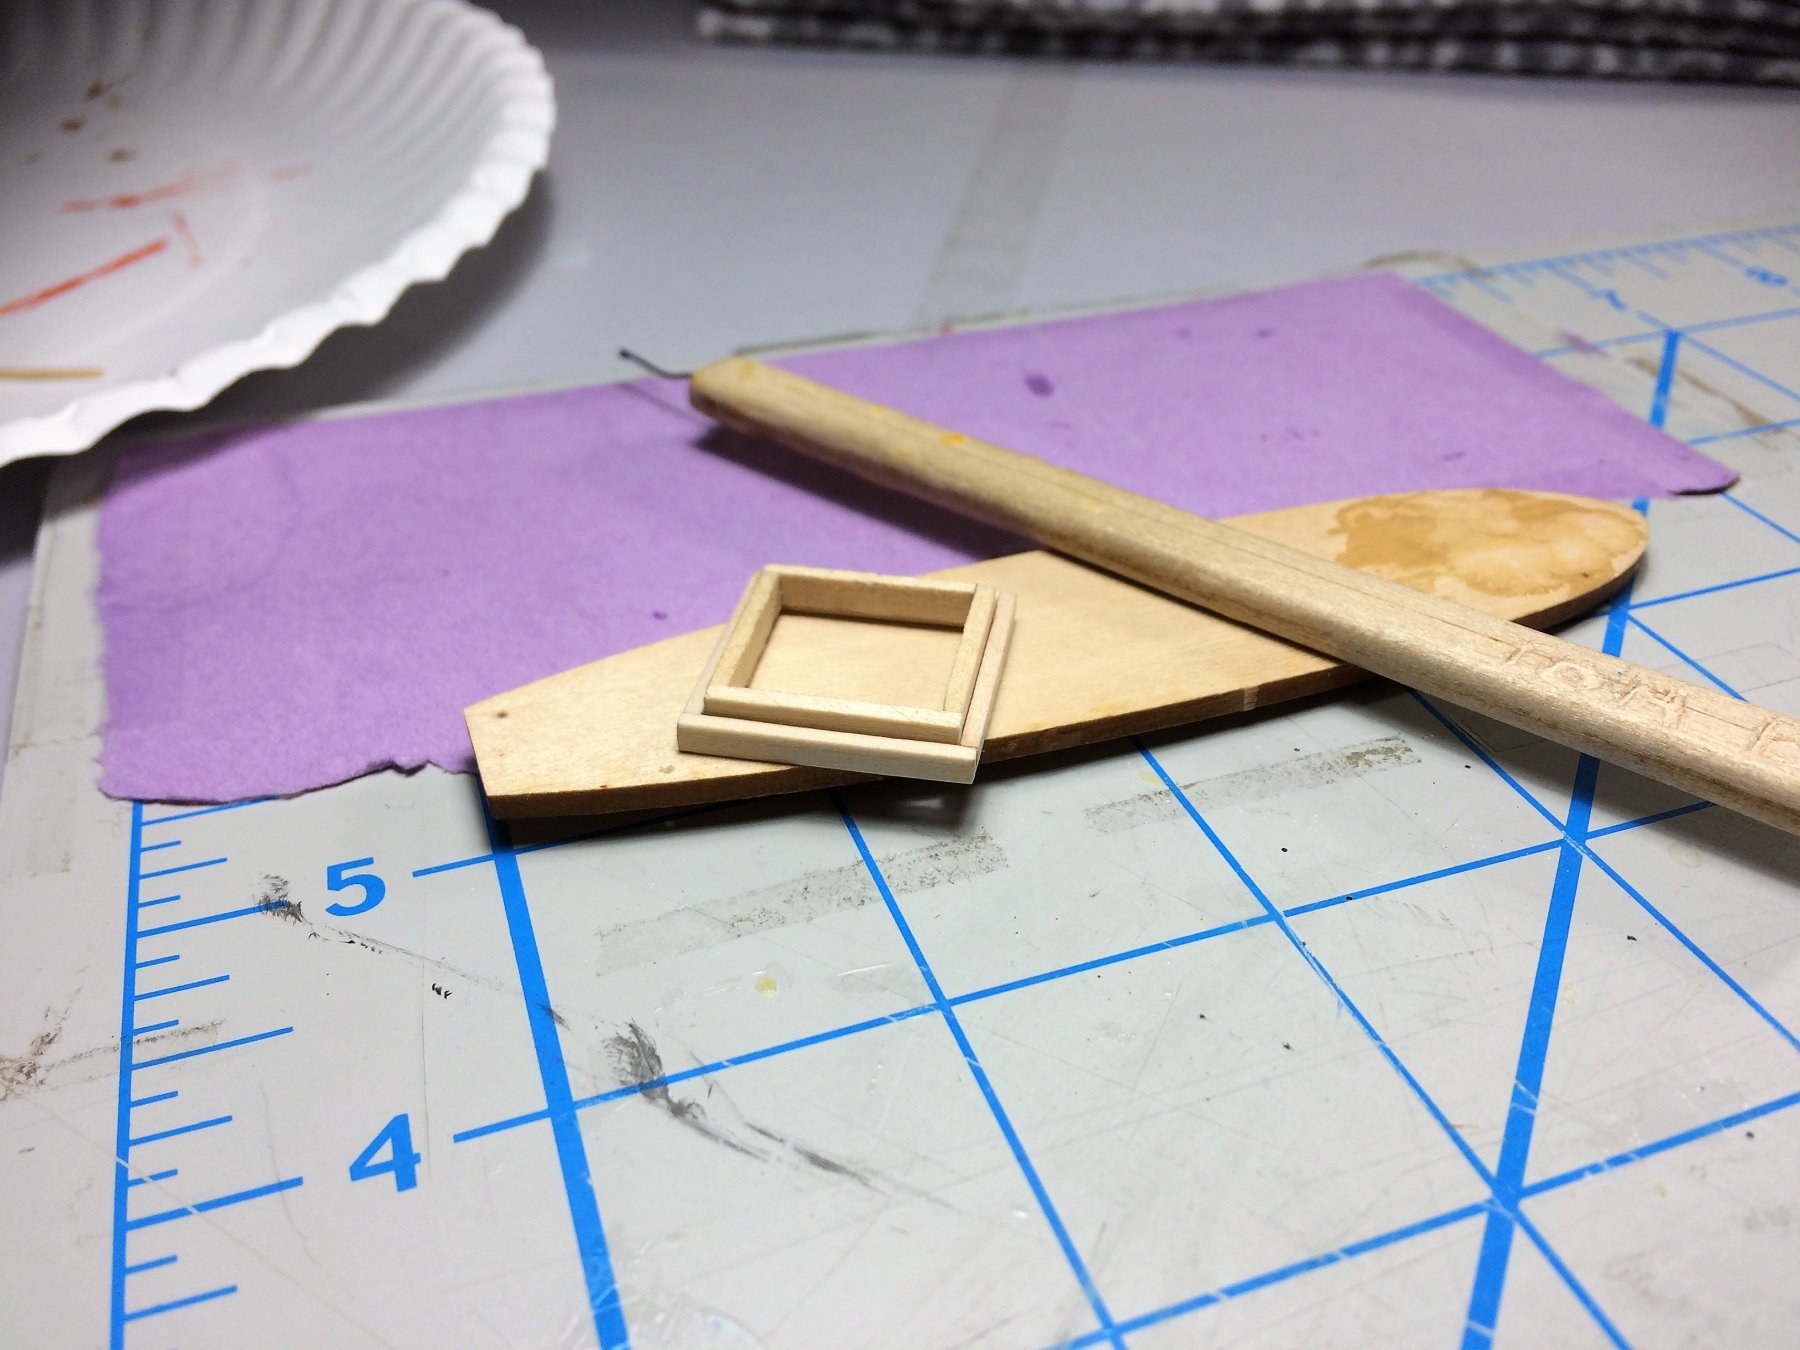
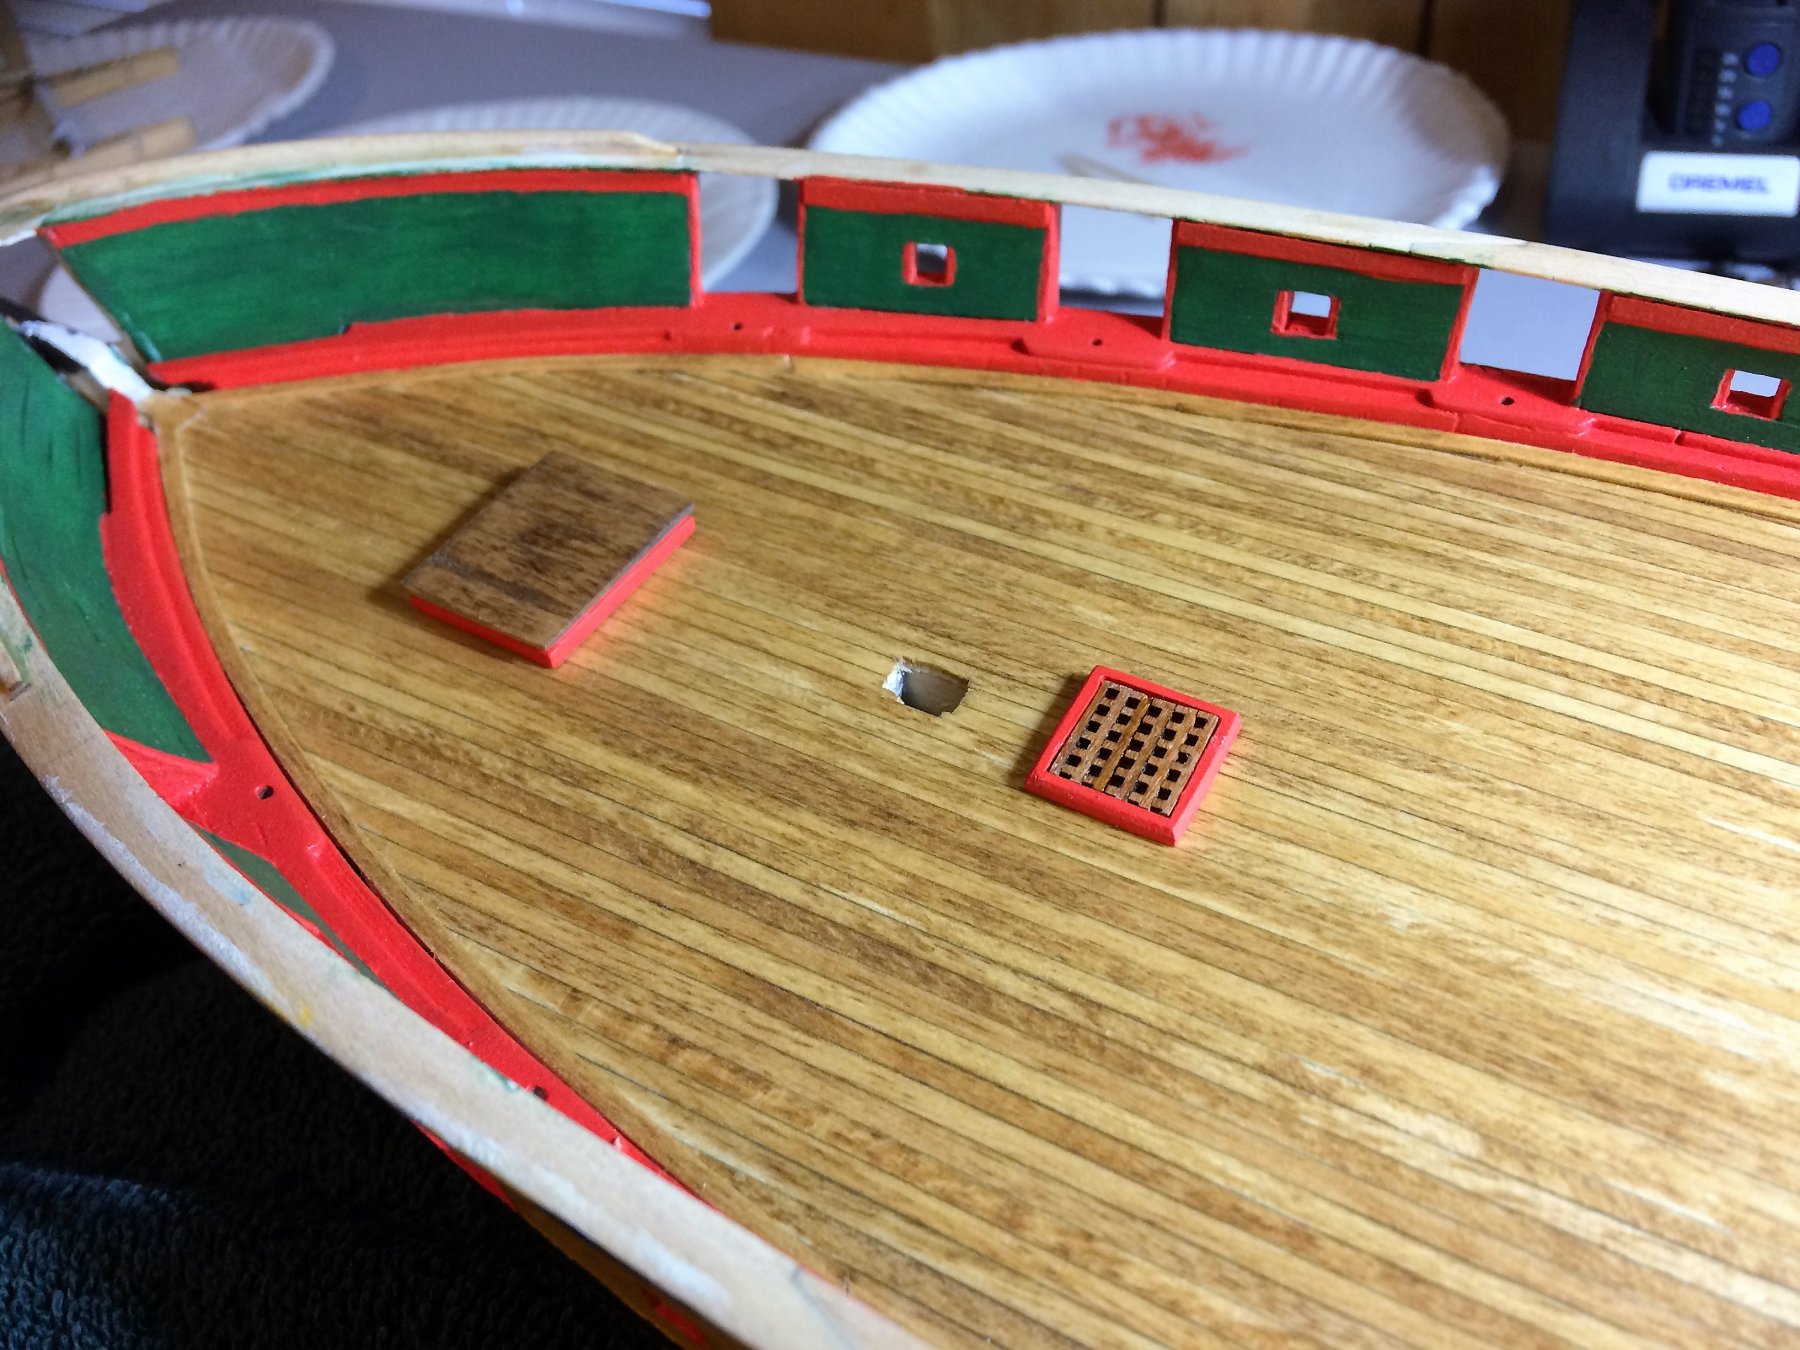
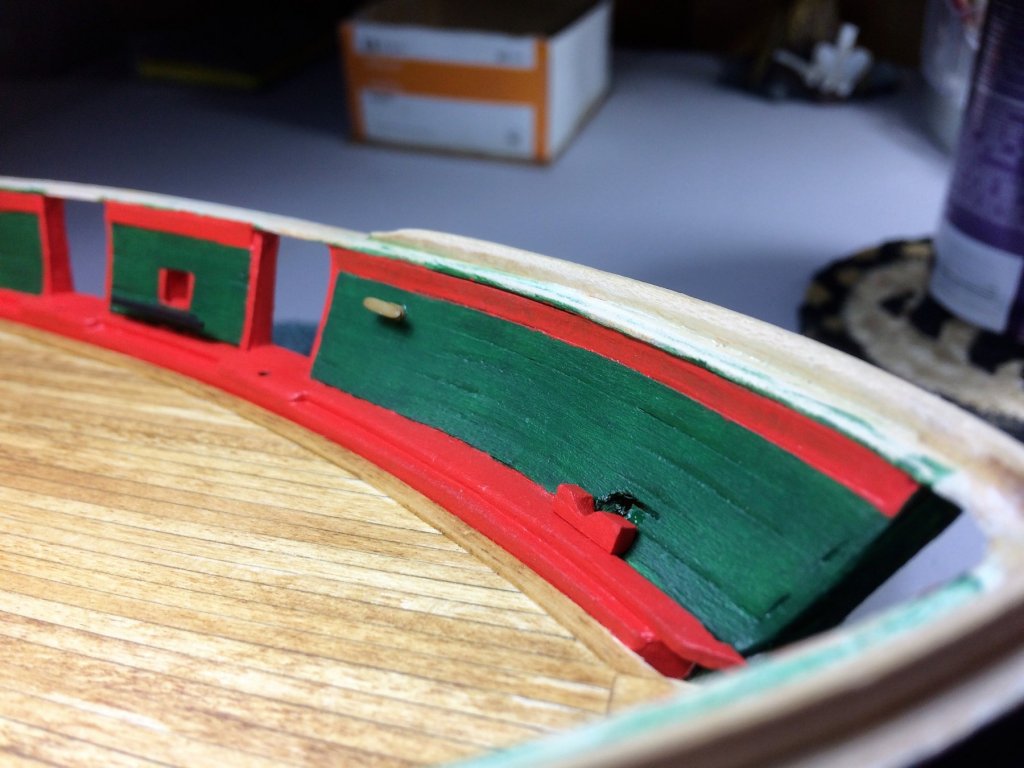
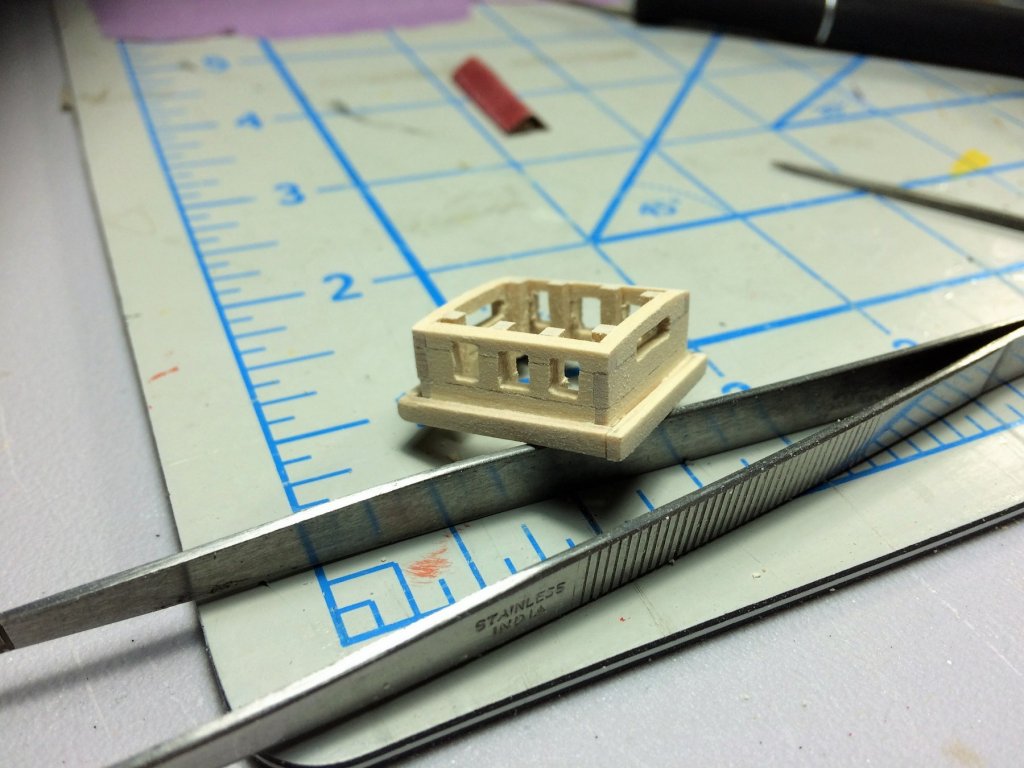
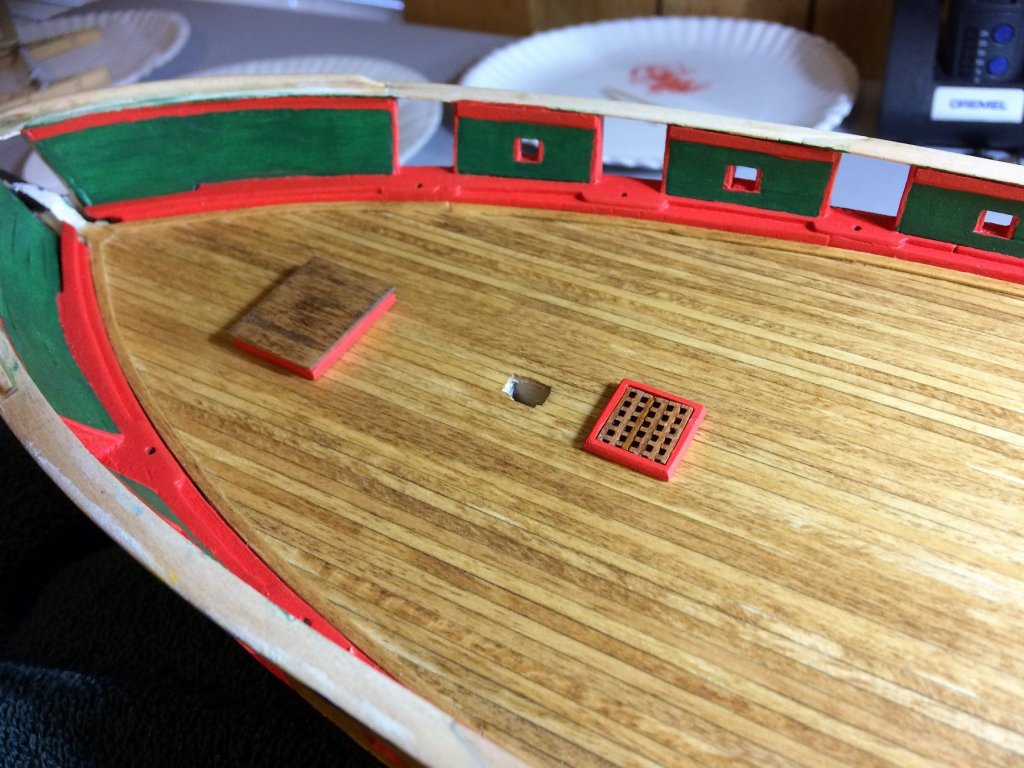
Evening, Hope everyone is having a great night in the Shipyard. Chores were done early, everybody fed and watered, Celtics on the TV. Niagara continues. Mike, Appreciate the kind words on the deck. Only one coat of pre-stain and Golden Oak needed. I deliberately left it bright. Some of the deck Furniture has a darker stain to them which off sets it nicely, I think. I'm trying to keep the deck furniture a bit darker, down playing the Buff paint when possible. Below I started building the Saloon Skylight. Coamings are getting easier to make. I placed these "frames" strategically. The windows correspond to the gaps in between the "frames". Worked pretty well. I need to work on my window carving ability! I sanded a gradual curve to the roof. Came out pretty good. Sanded up well. Once this is painted I'll add the metal bars to the windows. I was thinking of painting the Coaming Red, the body Buff, but the roof I may use my dark stain. The same as my Fore hatch. Again, trying to minimize the Buff paint. Stay warm, Tom E


-
Wow! She's beautiful Jim. Well done, Tom E
-
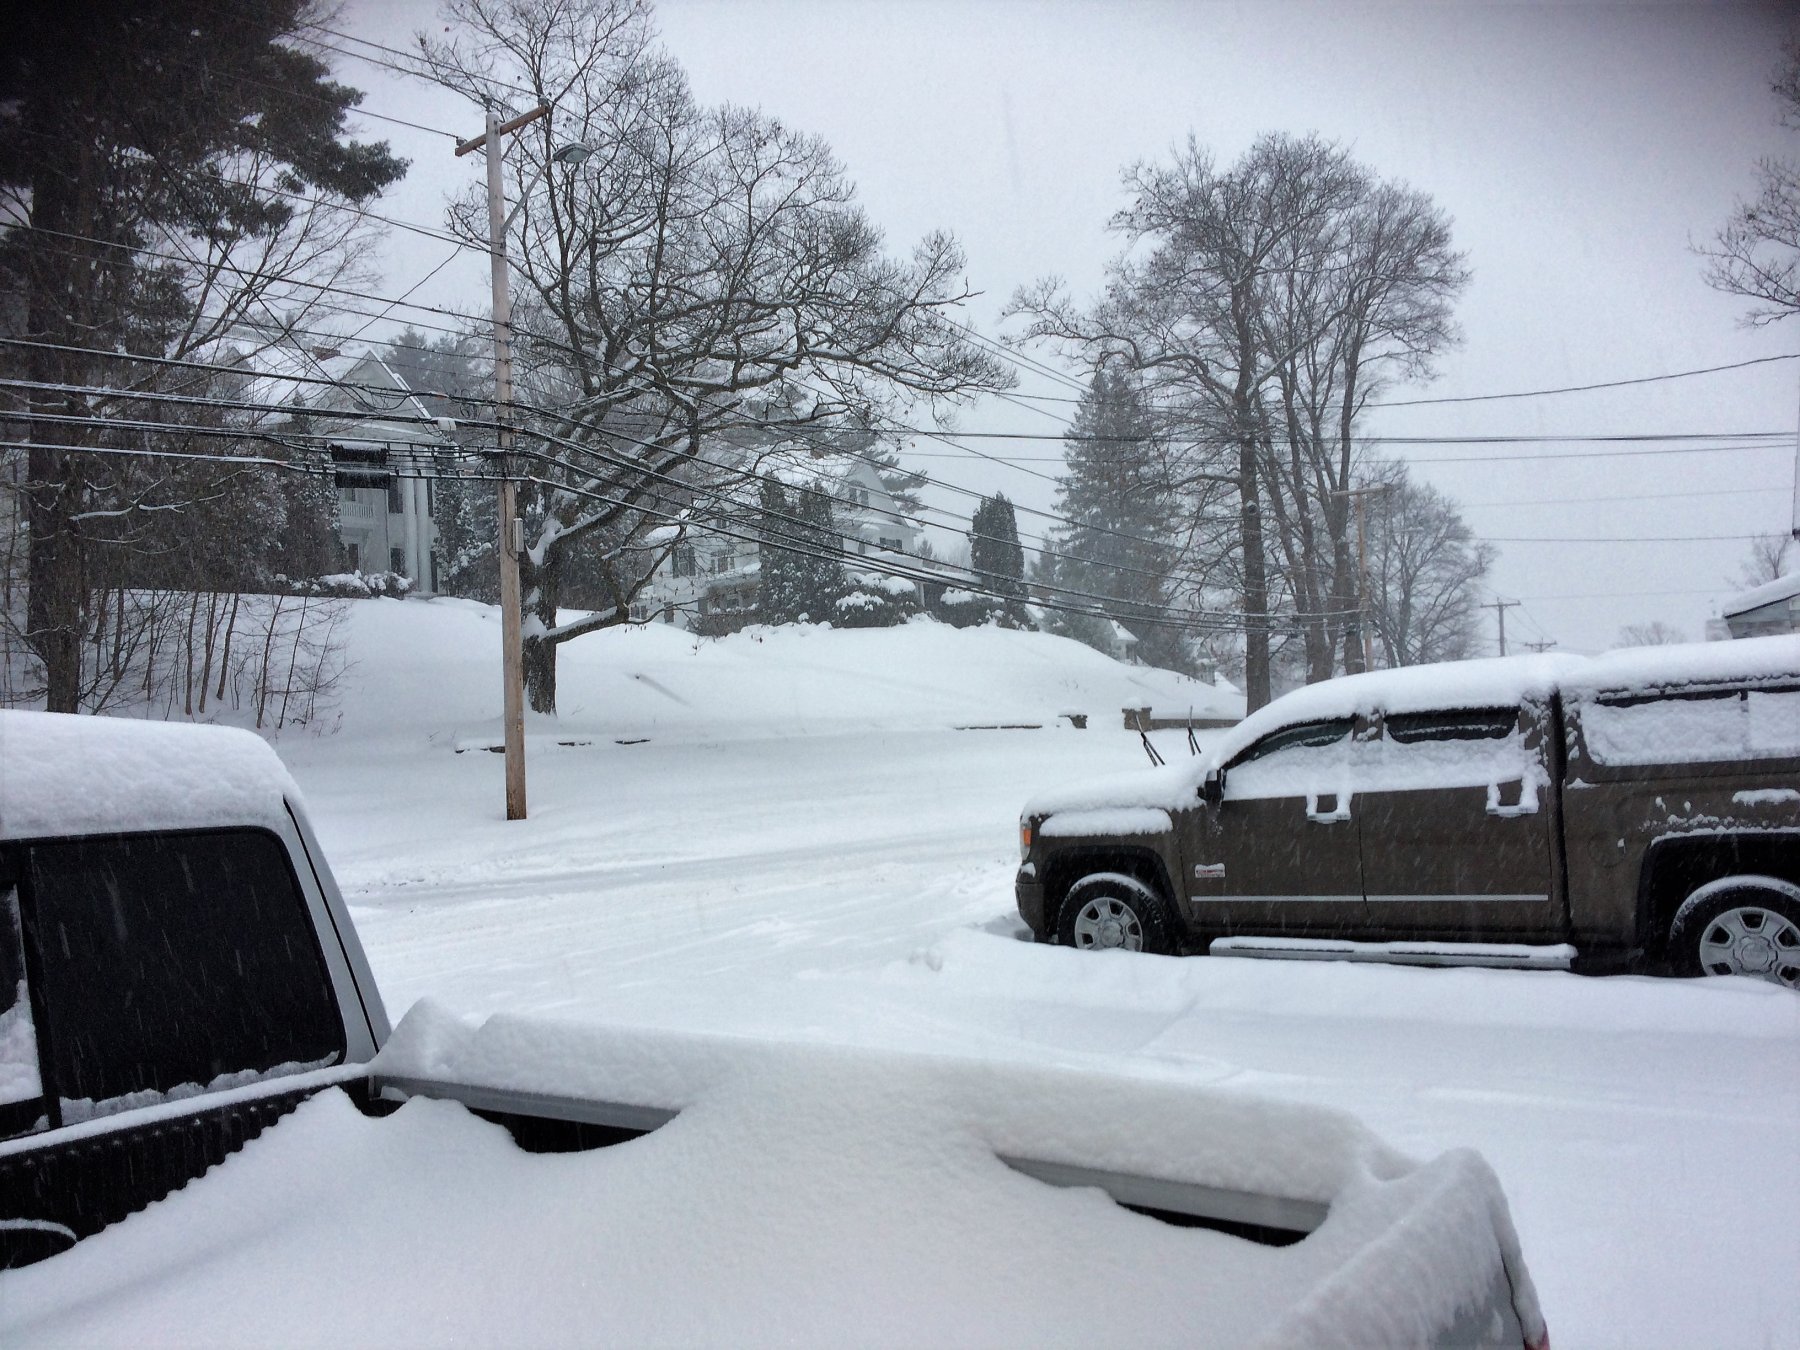
In the end it wasn't as bad as they said it would be. Saturday night they were calling for 18-24" with a swath of 30" thru central VT and NH. I'd say we received about 12-14". That's nothing for this vicinity. Tom E

- 367 replies
-
- 2
-
-
- model shipways
- niagara
- (and 1 more)
-
Gary, The pin for the course yard is a great idea. I haven't given the yards much thought so far, but that seems logical. I may steal that one! Tom E
-
Mike, I really like that idea. It makes sense and in my head looks good. What I may do is drill some holes in the deck right below where they would be on the hatch. The below pic is a good example of that area. I'm not in front of the plans right now for a better look, but should work. Just have to make sure I don't foul up the Bowsprit area and it's needs. Would it be wise to wait until the Bowsprit is fully installed before drilling? Thanks, Tom E
-
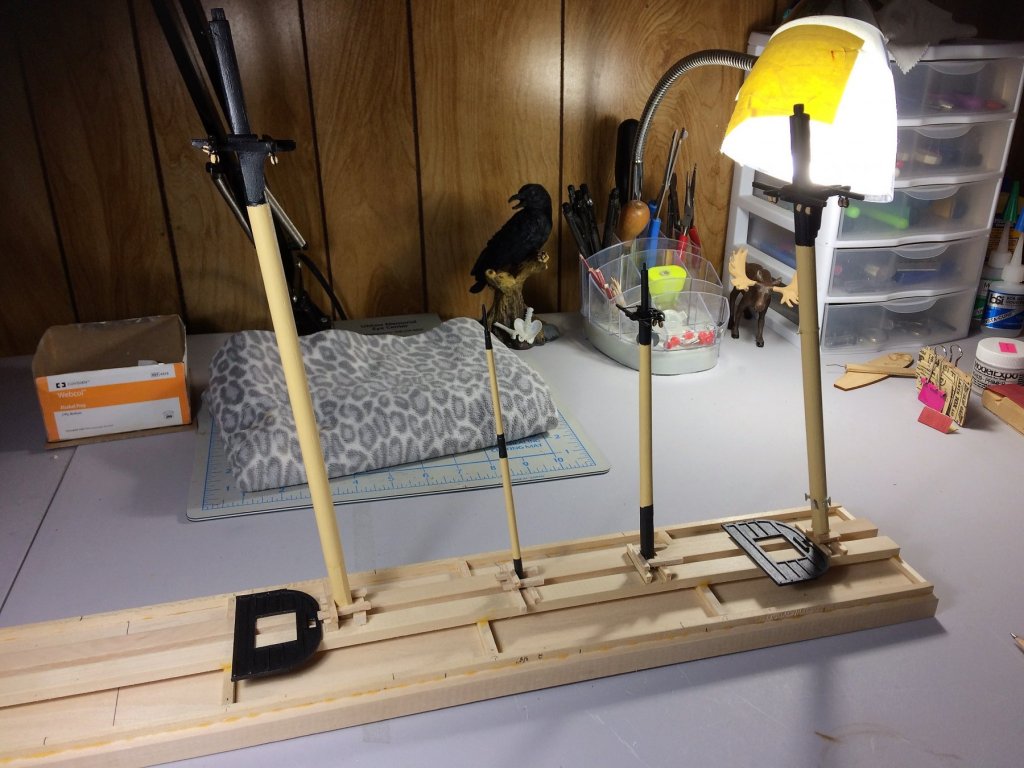
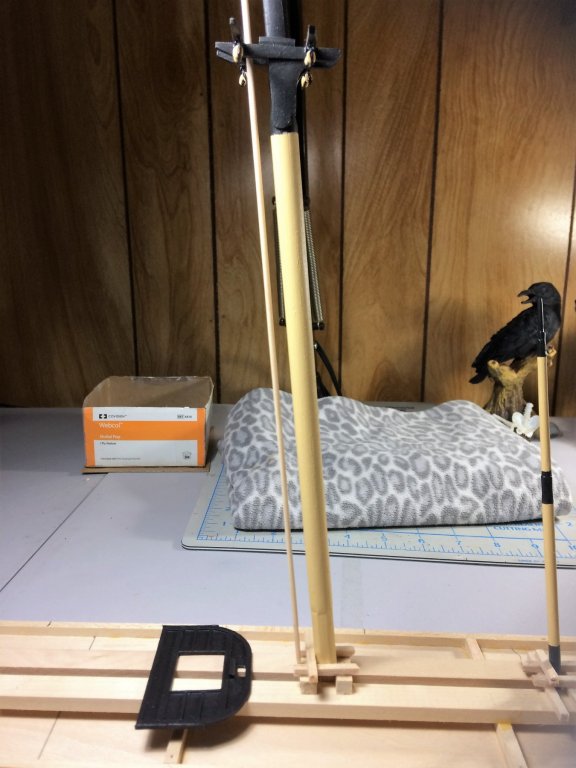
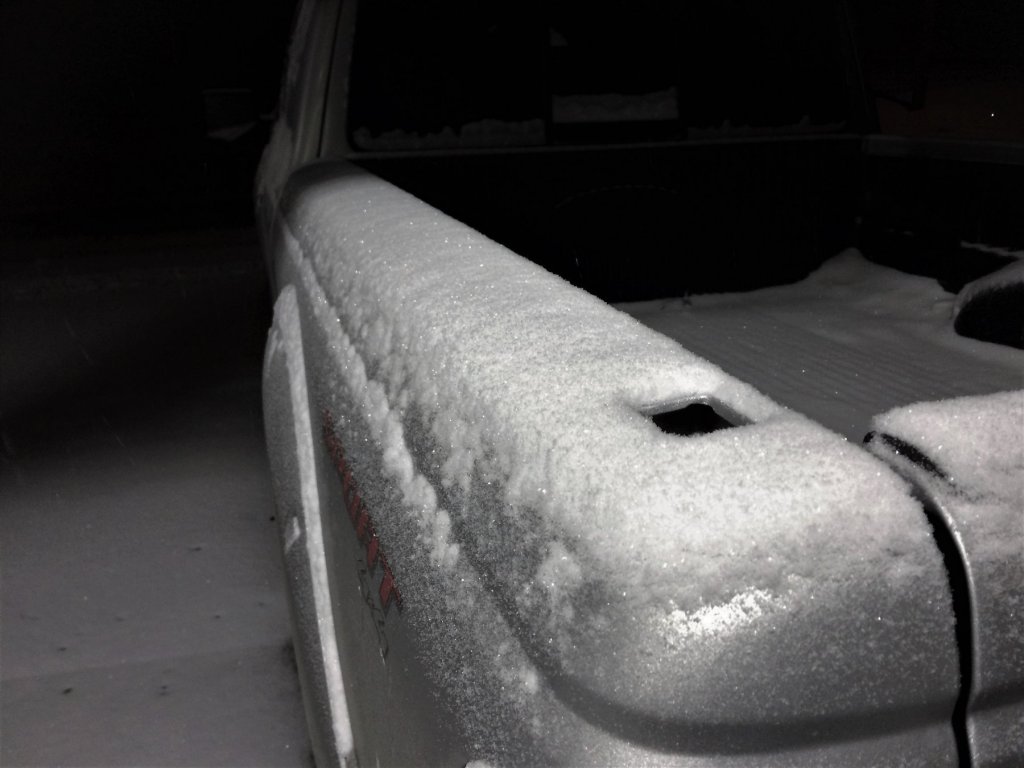
Evening, Since there's a snowstorm outside, its all inside sports this weekend! Sure enough, that means the Shipyard for this guy! There forecasting 18-24 inches of snow with a swath of 30 inches right thru my area. I love a good snowstorm.....as long as the power stays on for the Patriots game! Go Pats! The drinks are cold and the Shipyard is toasty. I have got some things done. The Mooring chocks are in. Longer process to paint them than install. They will get some touch up paint before I call them done. The mast board is getting filled. I take no credit for this thing, I've seen others use it and its awesome. Should help with the rigging things off ship. Helps with shaping the Spanker mast. I included the below pic to show Hawse pipes that were drilled out. Like the hole for the Tiller, no power tools. I used a 1/8 drill bit with my fingers. Slowly and deliberately. I had some wood breakage, but nothing some sanding and paint wont hide. Drilling these things was like drilling into my own arm. Intentionally drilling into something that took hours to make! With every crack of the wood....ouch! Had to include the below pic. The snow is like a thousand diamonds in the light. Its better in person! Tom E


-
Hi Phil, I had the same splintered wood on my hull. Especially when it started to bend towards the bow of the ship. With some sanding and wood filler later on, it should smooth out. Just be careful not to sand the wood too thin. I didn't fair my bulkheads enough. It was a learning moment. The below pic shows after a good sanding. A coat of primer showed where I needed wood filler. I also do the same with my planks. I soak them in hot water for about 15-30 minutes. It may be overkill, but It works for me. Tom E
-
Gary, When I made my Forecastle hatch, I chose the alternative version with a solid roof, no grating. Being my first ever try at a piece of ships furniture, guess I bailed out and went with the easy version! Is it acceptable to place the same kind of corner cut outs in the solid covering? Seems like an easy fix in my mind. Simple round cuts with some blackened brass tube inside. Roll a lip on the top side of the brass tube. Tom E
-
Gary, I agree with you about the Burton pendants. I probably leave them out as well. This is my first wooden build, the rigging is confusing enough. That's one less thing to worry about. Mike, Long time no see, glad to have you back! Gary is right, of the 2 ways to lay the grating, I went with that one. I tried both. Felt more confident with that method. I haven't upgraded to Syren grating on this build, but definitely my next. Haven't even bought them yet. I like that idea about the holes in the grating....that I will do. Is it the Main hatch that has the cut outs? Thanks, Tom E
-
Great build Andrew, Bowdoin is my next project. I cant wait to build her, but I tend to just have one project going at a time. The rudder looks spot on! Tom E
- 106 replies
-
- 1
-
-
- bowdoin
- BlueJacket Shipcrafters
- (and 1 more)
-
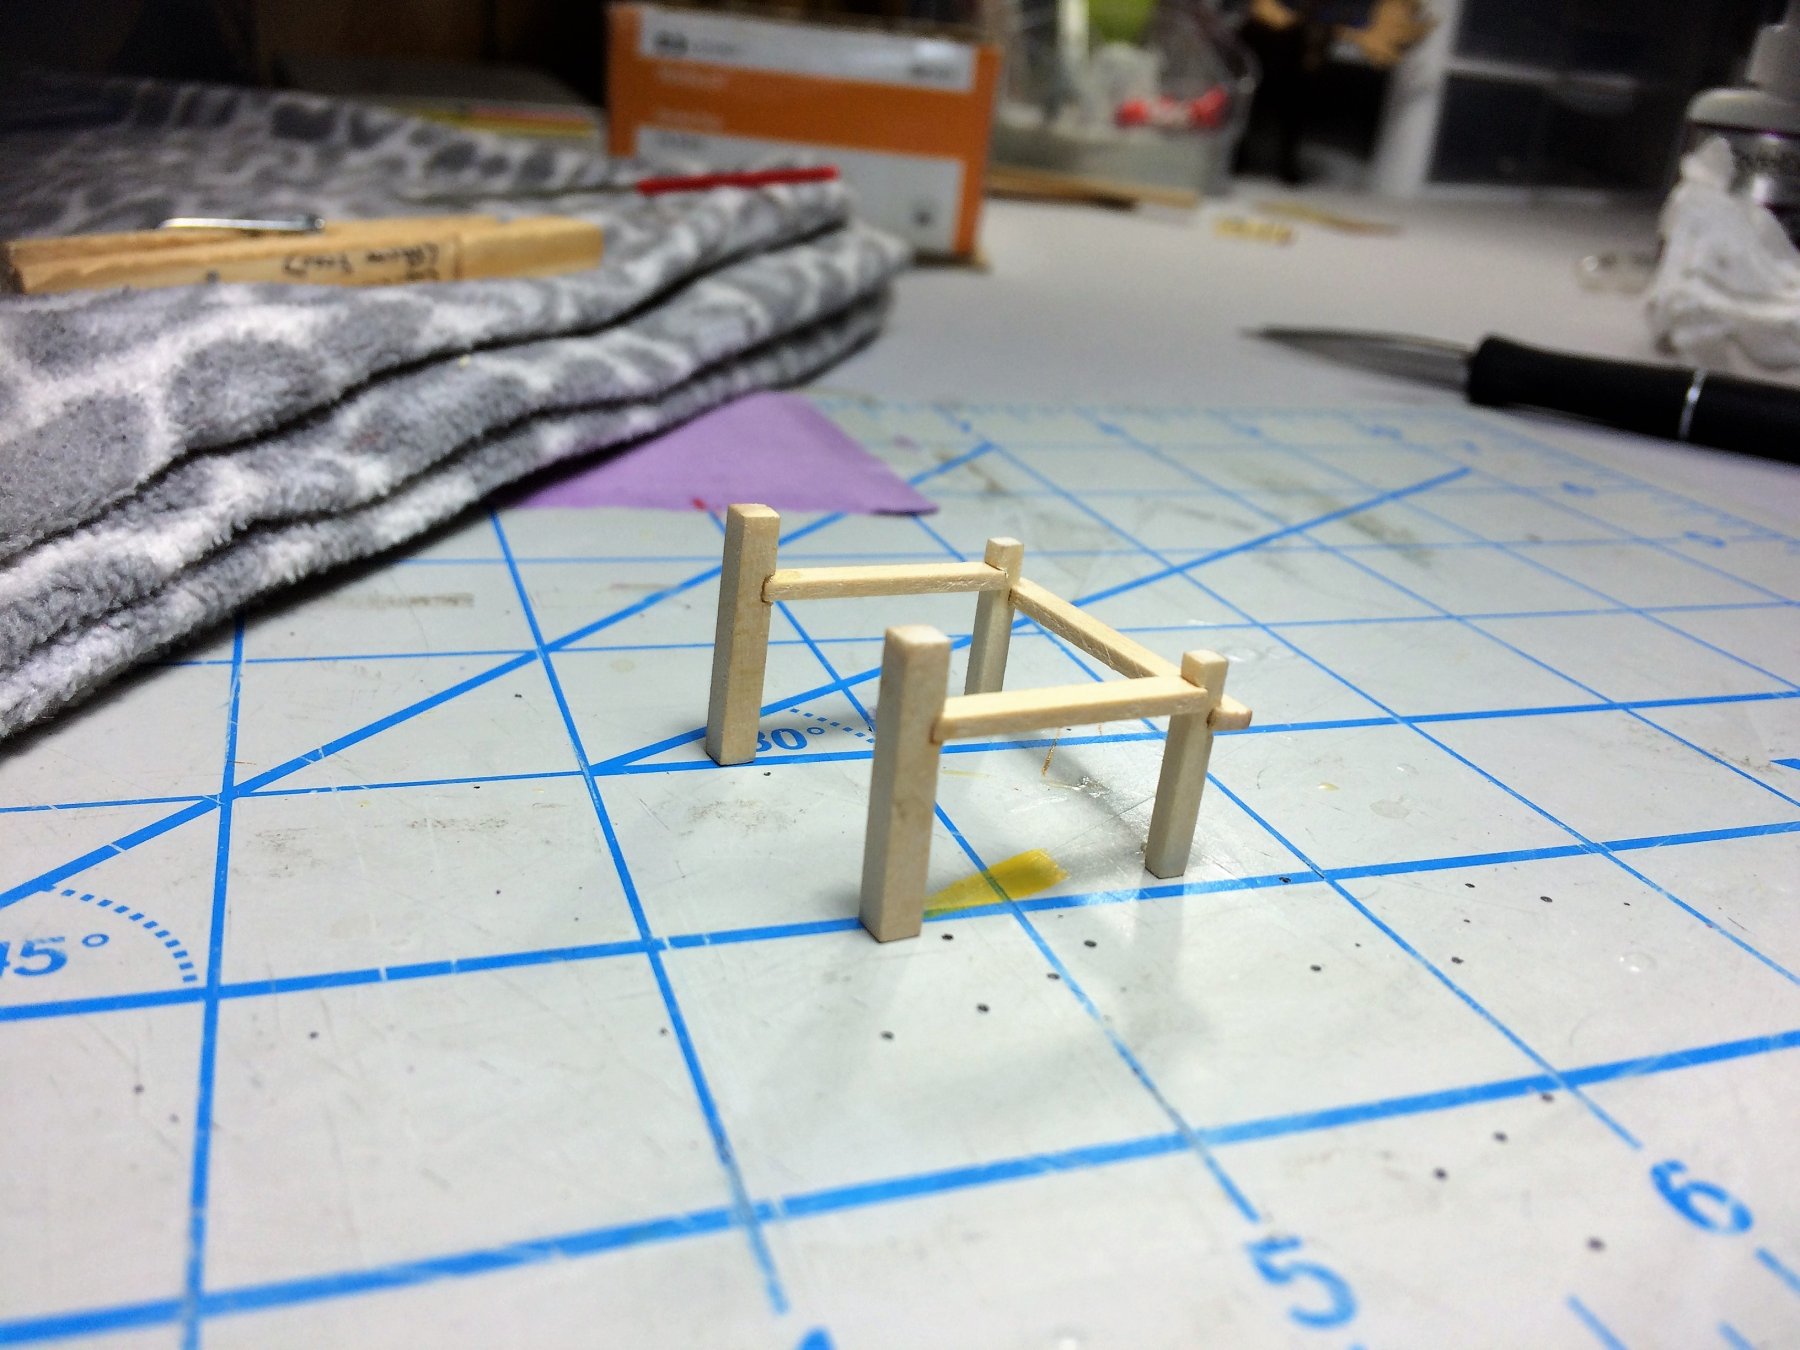
Evening, Busy Saturday, but all was done. Pretty cold in the Northeast tonight, below zero temps! The Shipyard is toasty warm with playoff football on...….go Pats! The only thing cold in the Shipyard tonight is the beer! Building continues. The Mooring Cleats are painted and ready to place. Hope to have pics of these installed soon. Started to bring together the pieces for the Aft Fife rail. Lots of notching and solid joints. I would say the toughest thing about Fife rails is just keeping alignment. Don't want a side bar hooking to far out or inward. Admittedly, the below Fife rail is the second attempt. The first one, well.....it was pretty sad. A good laugh and learn moment! Should serve its purpose well! For some odd reason I never started to stain the Bowsprits jibs after I made them. With things coming together onboard, they need there stain. I used an "Early American" stain, its dark which is what I want. Below is only one coat with no sanding just yet. I'm thinking 2-3 coats with sanding in between. I've also started to shape the Spanker Mast. Stay warm, Tom E


-
Christos, I cant take any credit for the blocks. These are aftermarket blocks from Syren Ship Model Co. Quality product. I've replaced all kit supplied blocks with these. I'll also be replacing all the kit supplied rope with rope from Syren. Tom E
-
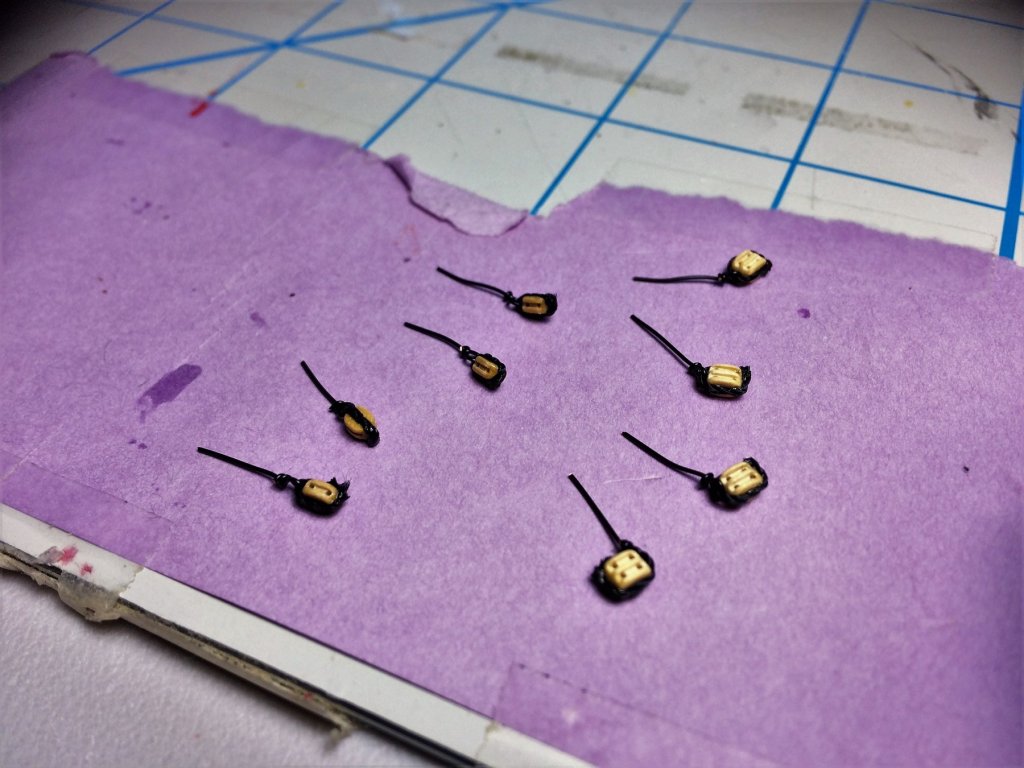
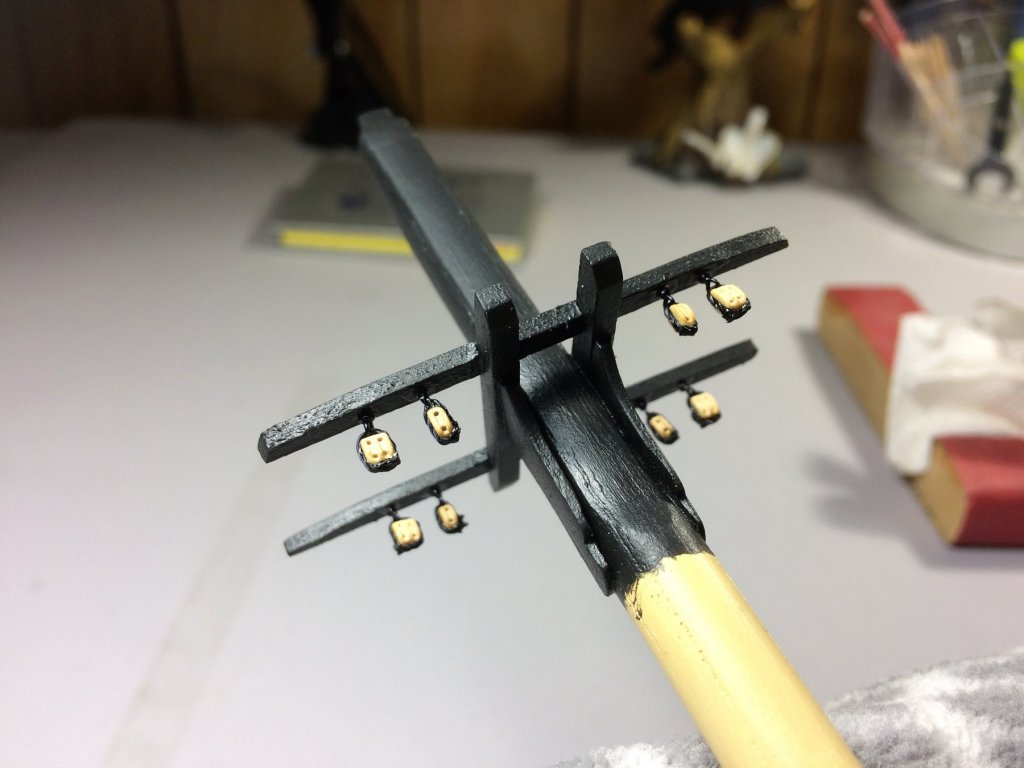
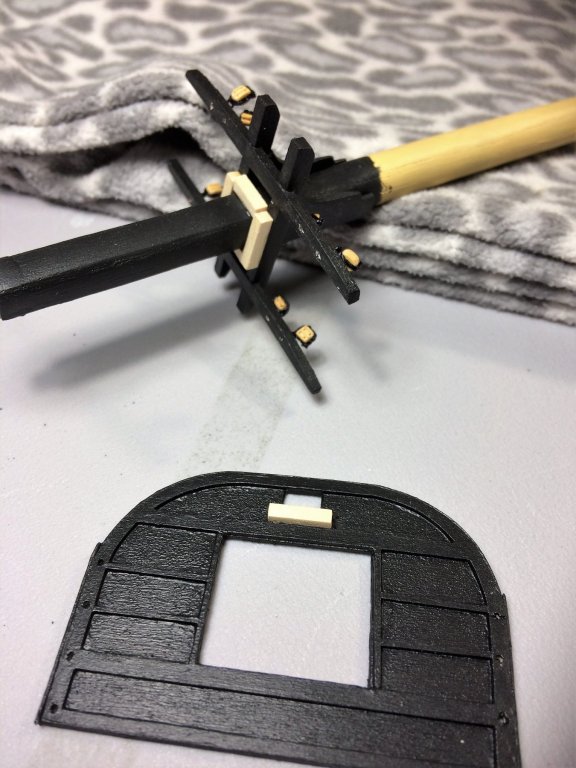
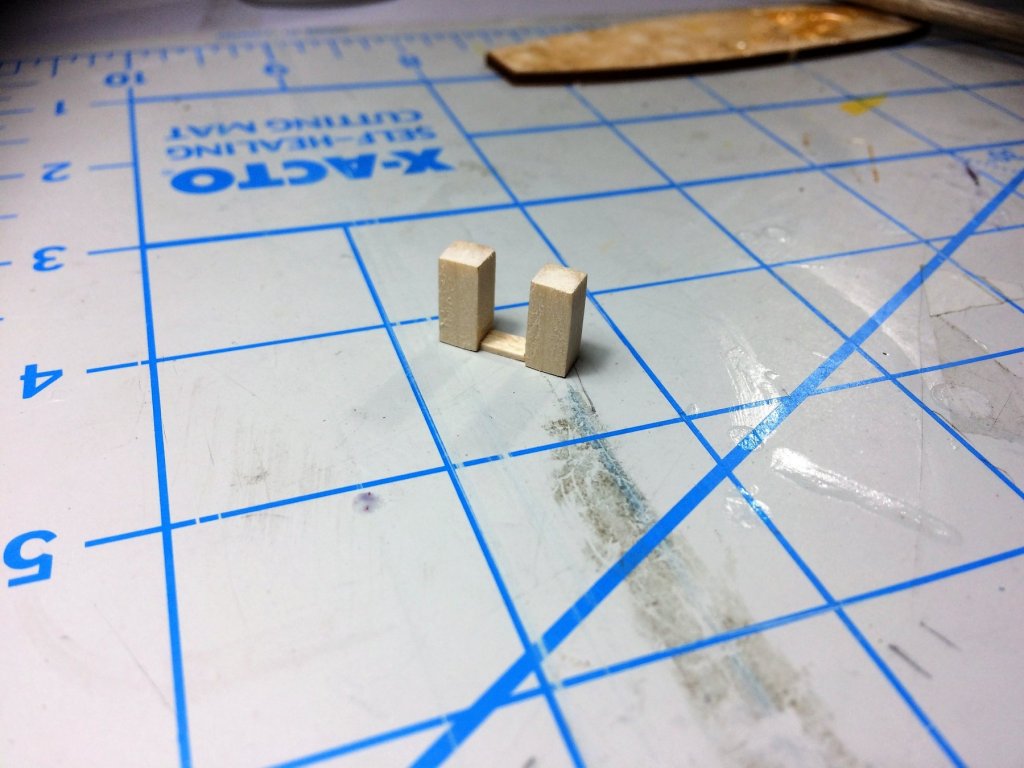
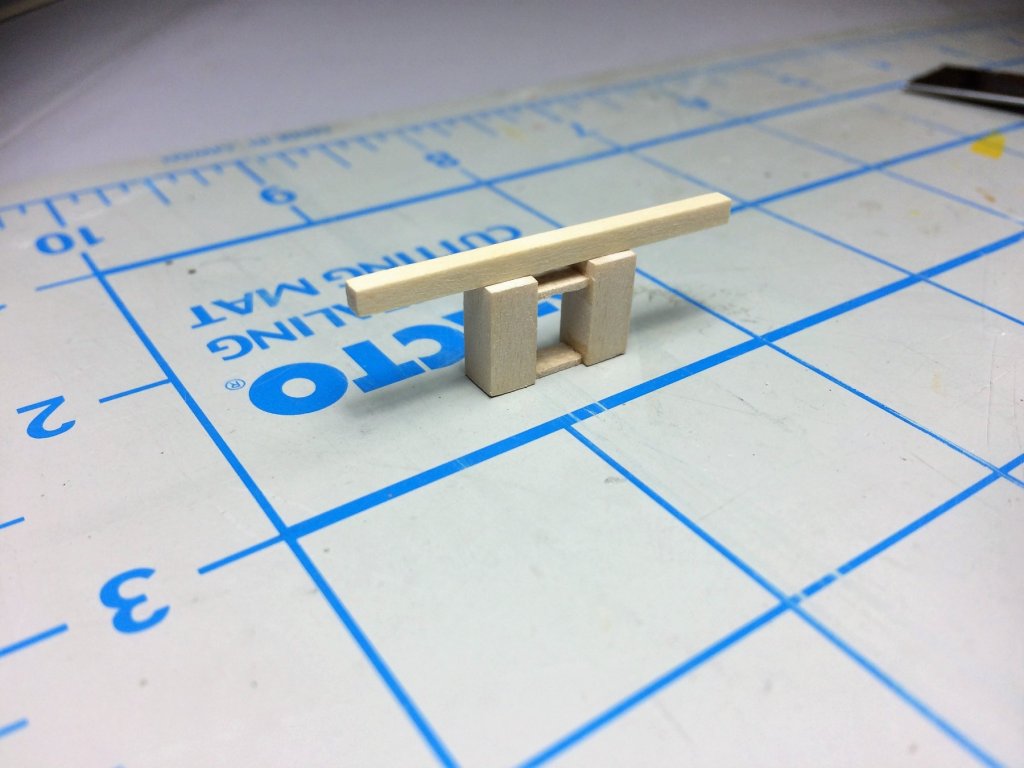
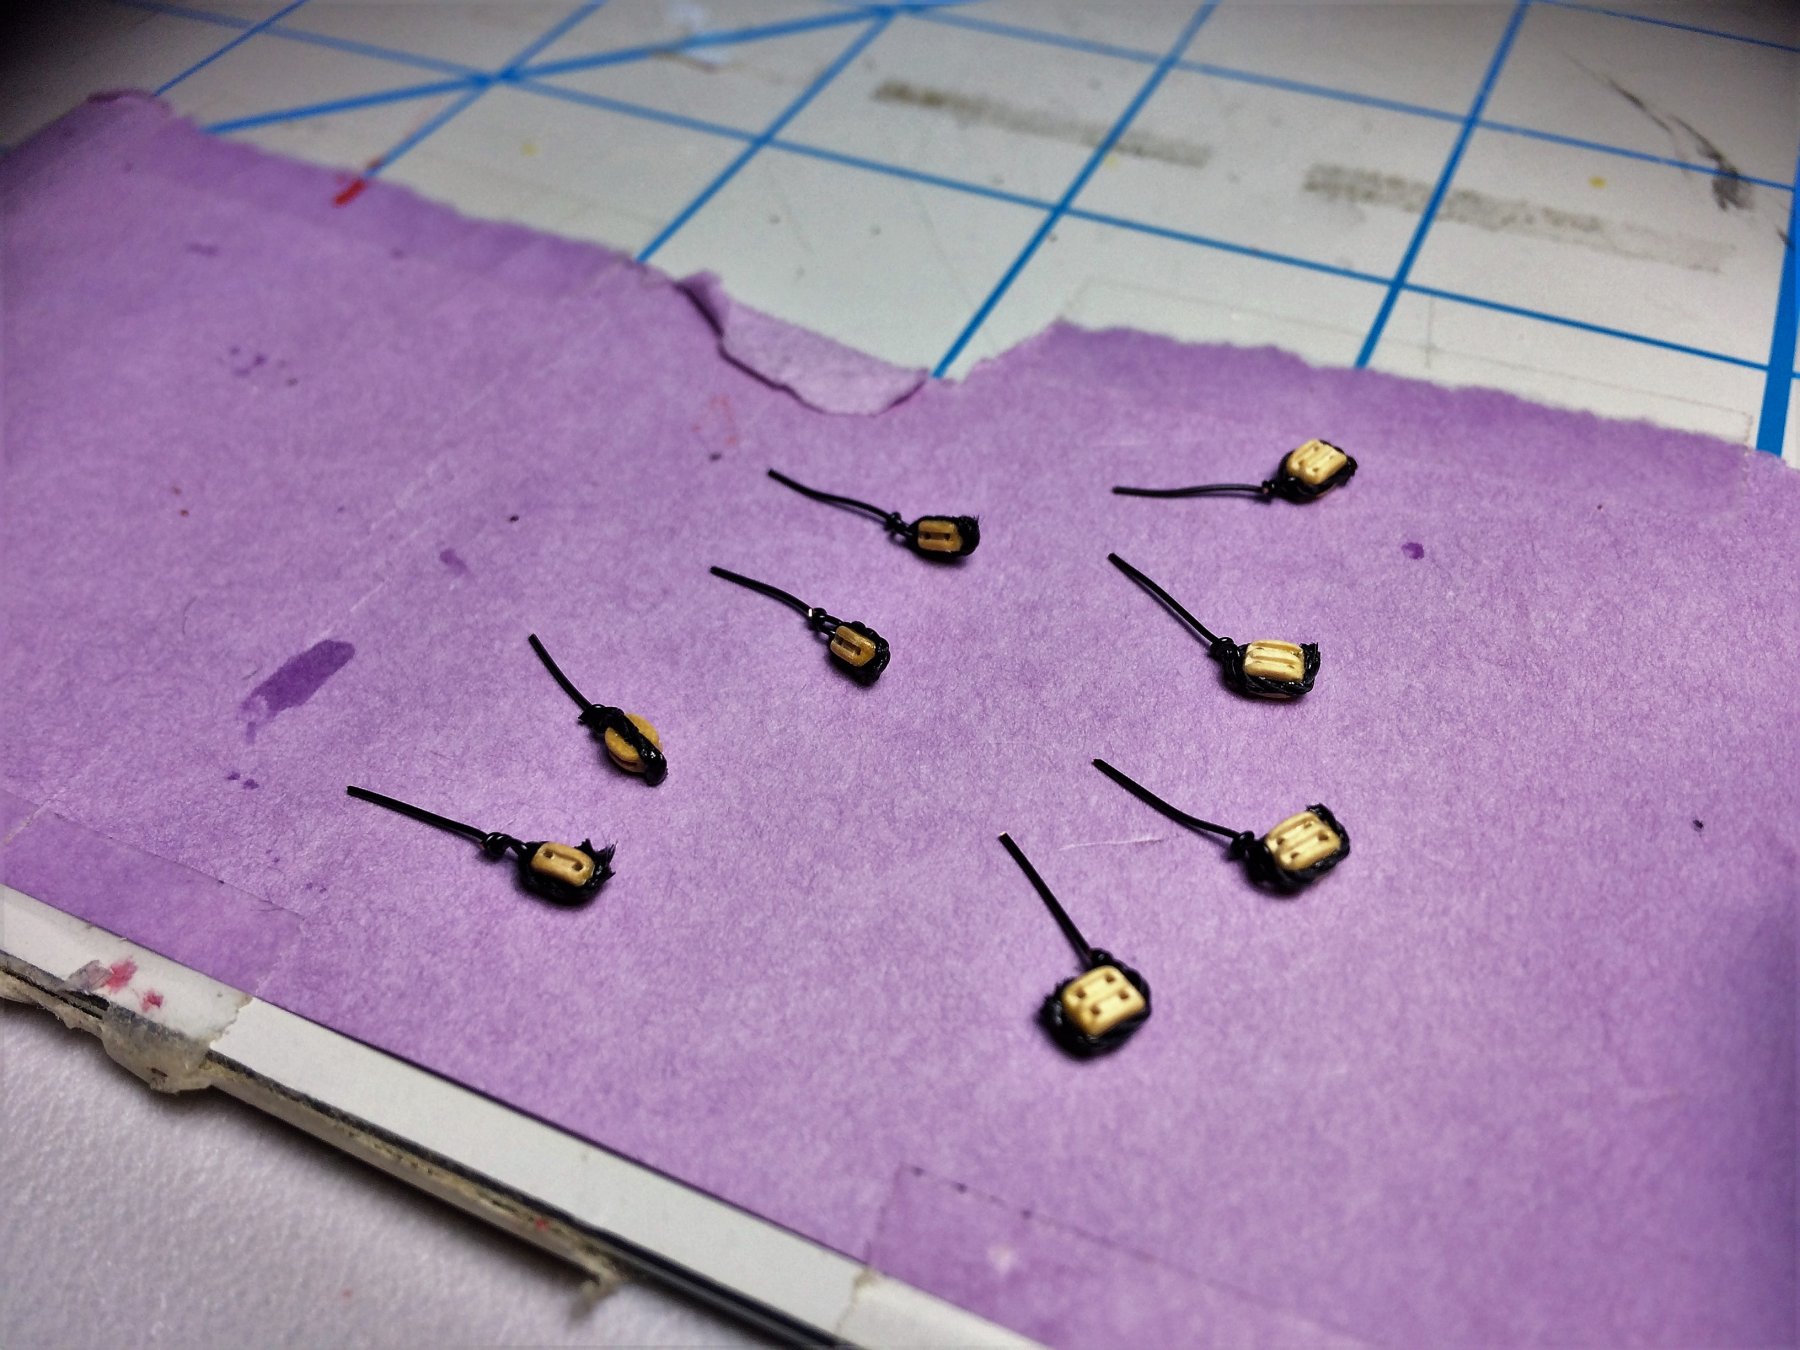
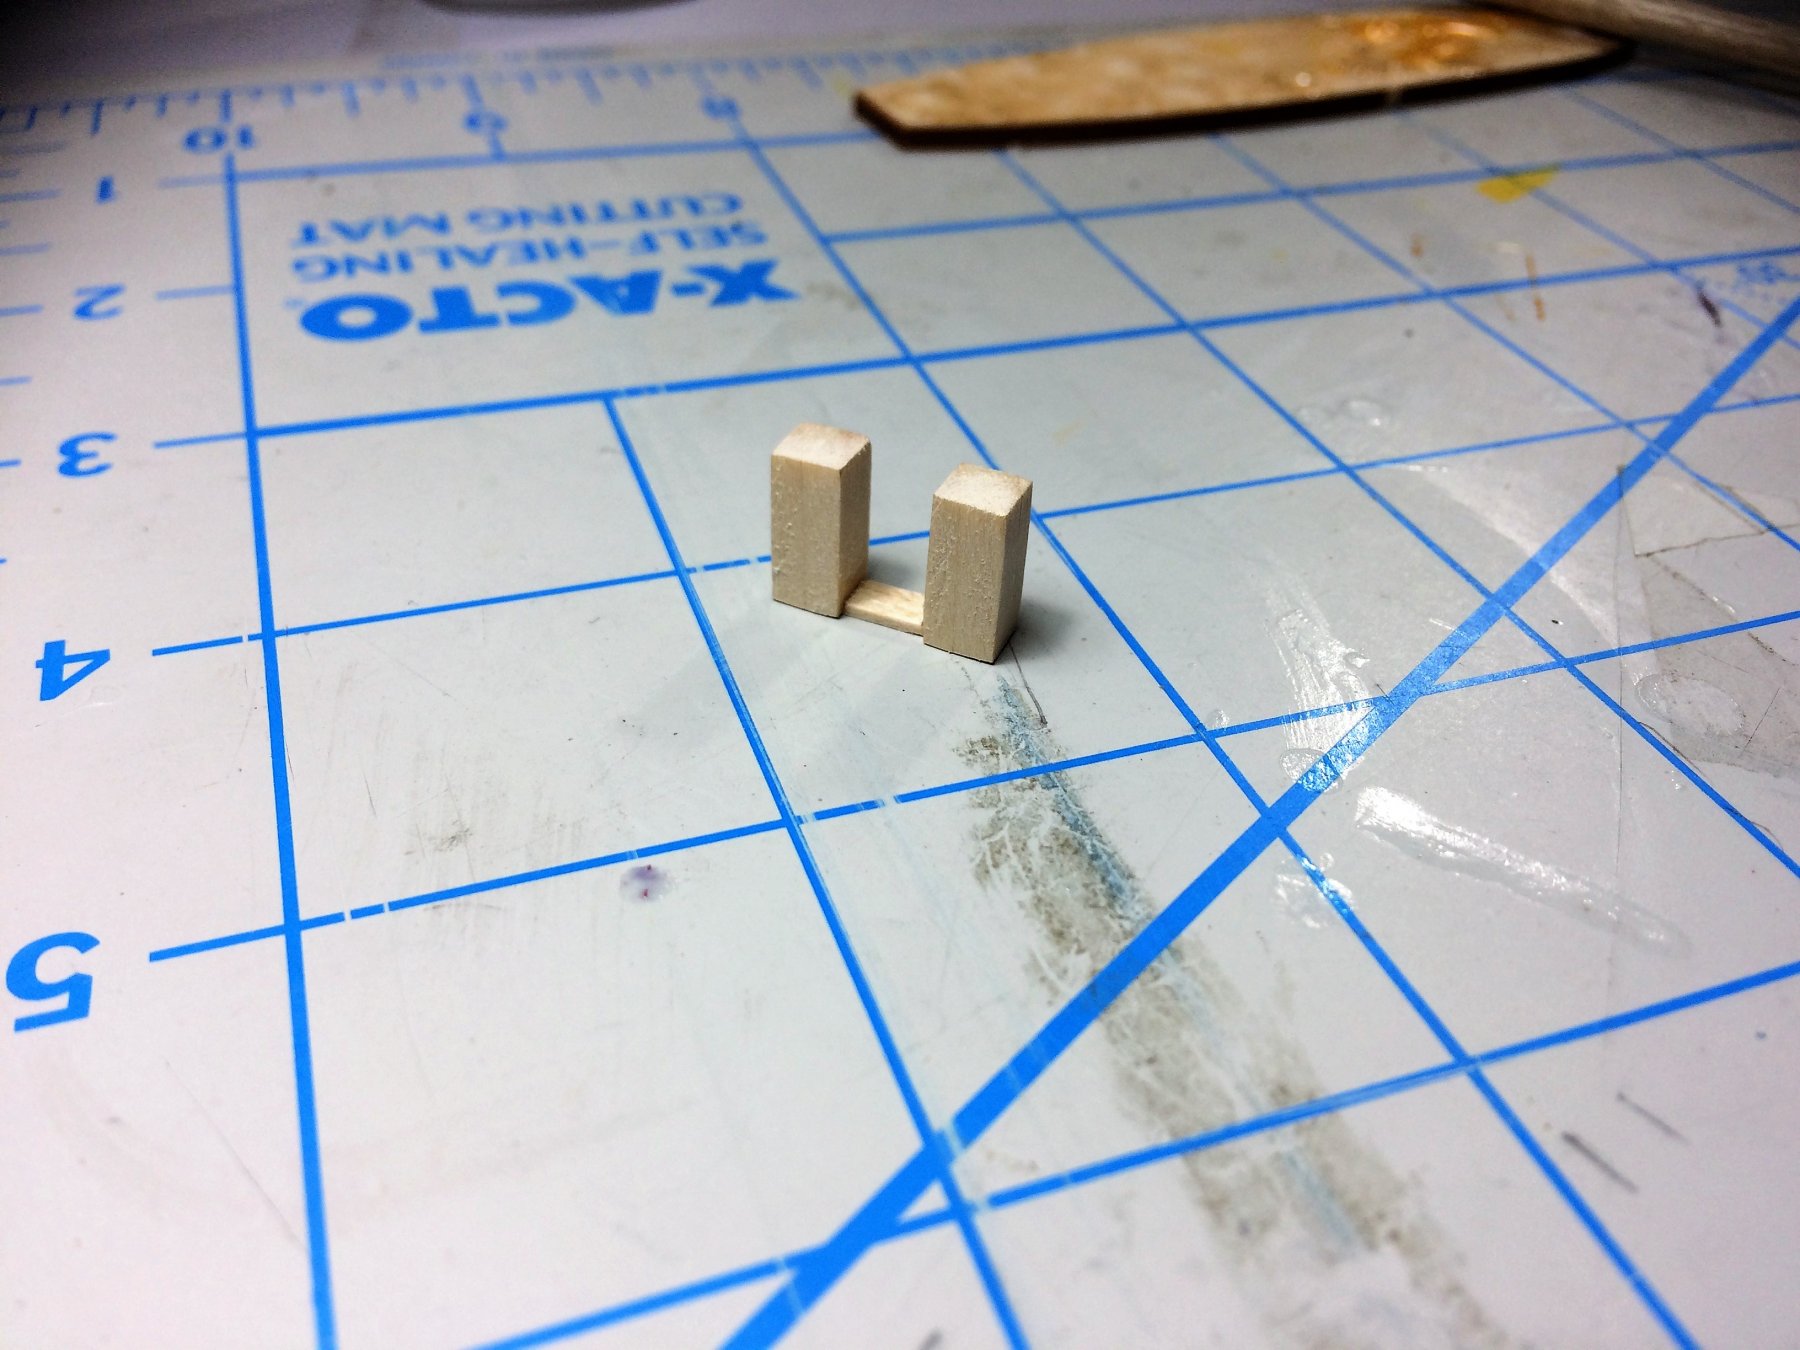
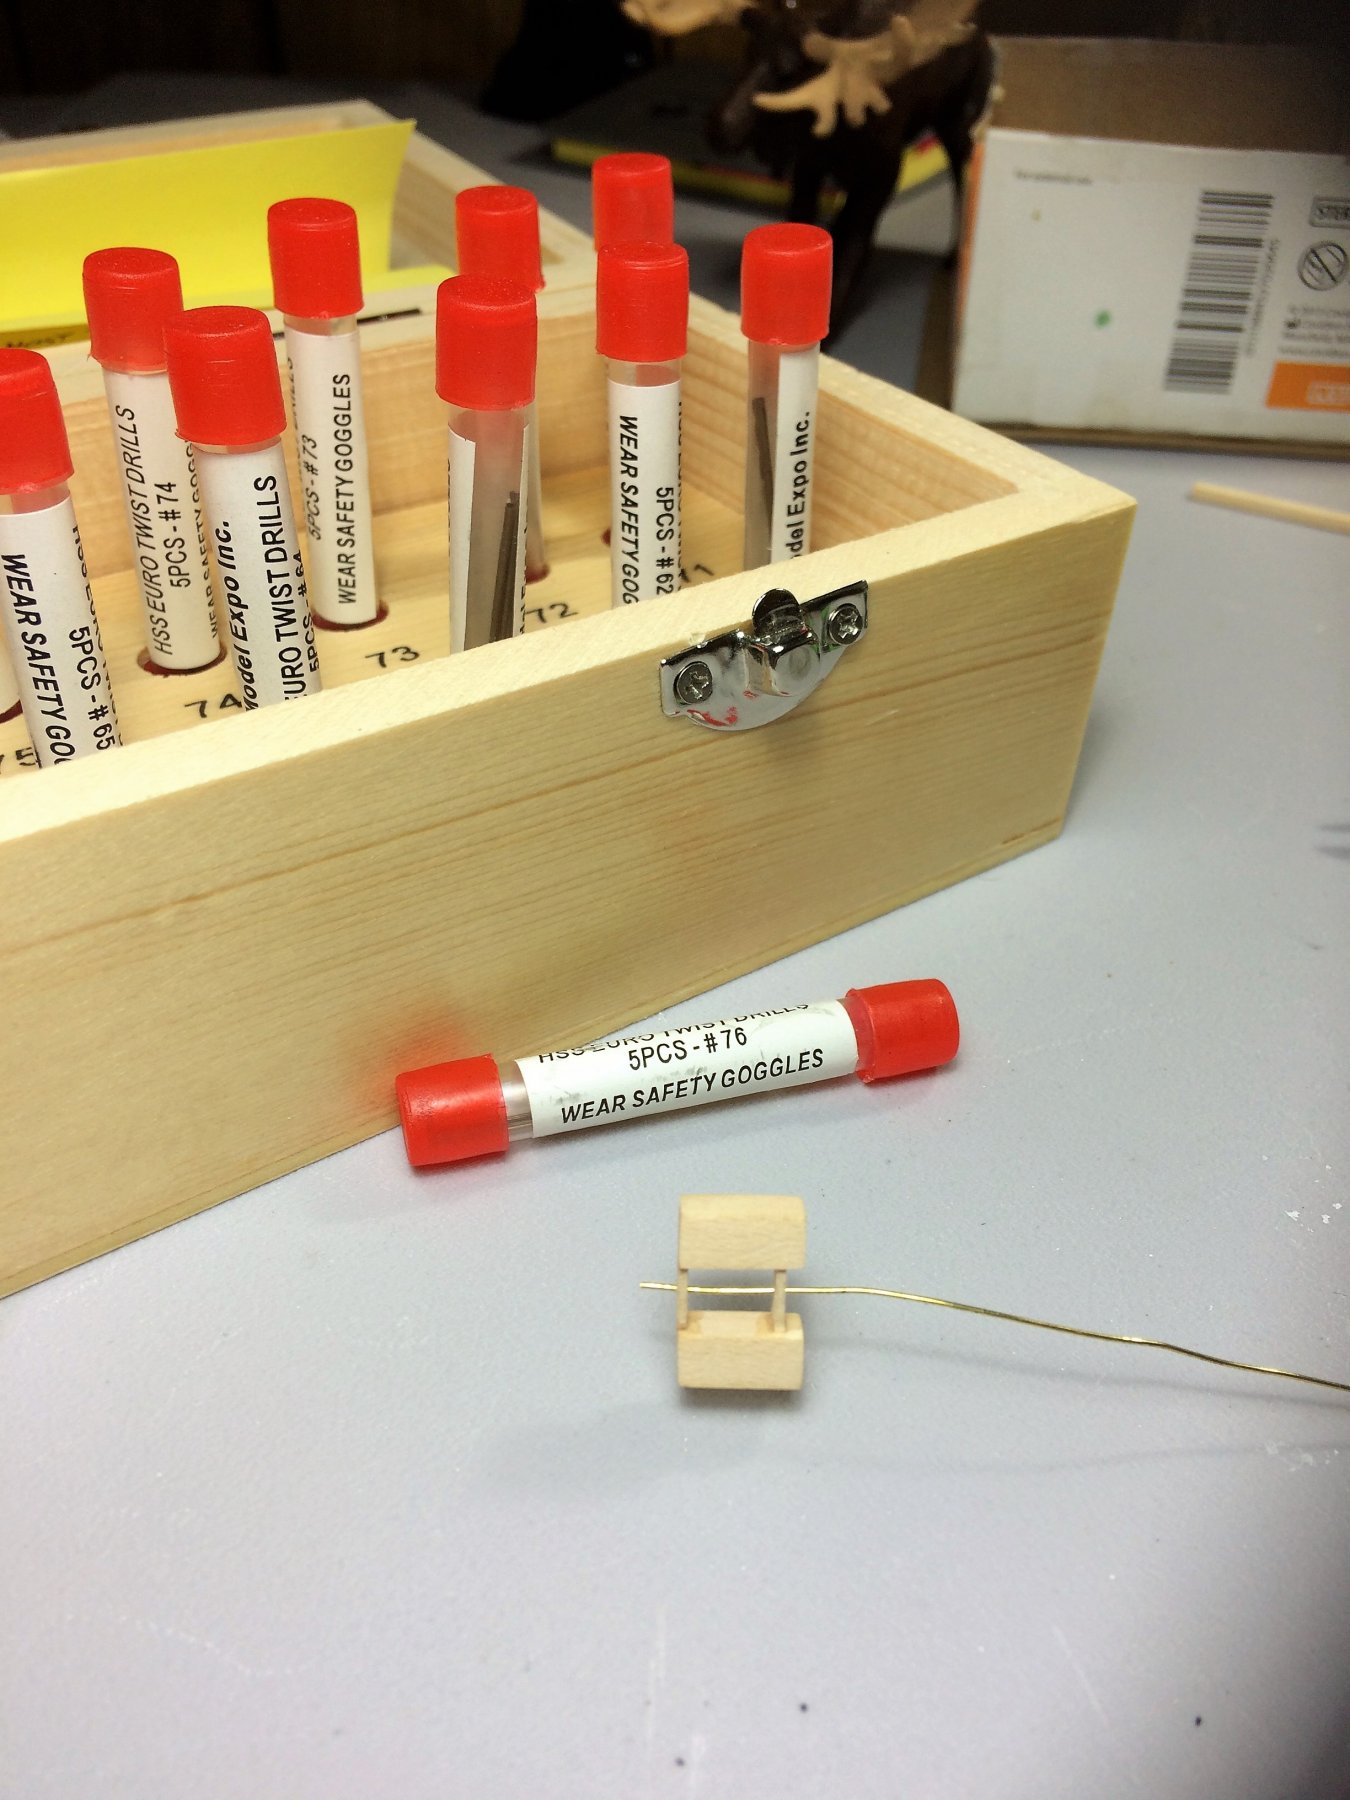
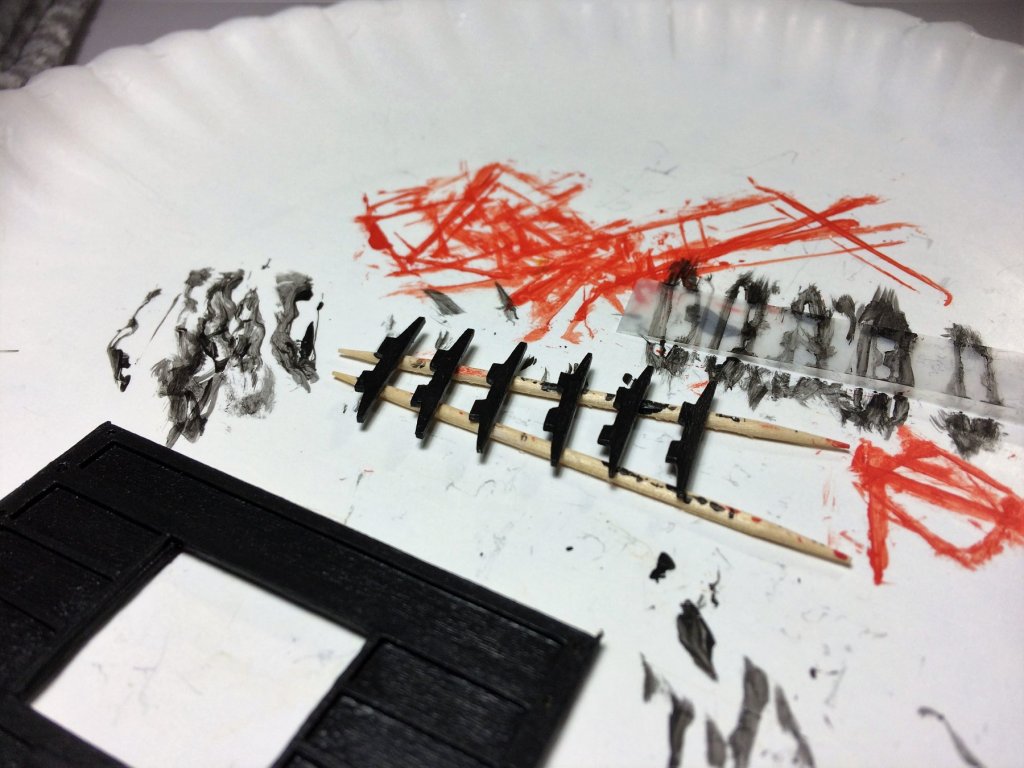
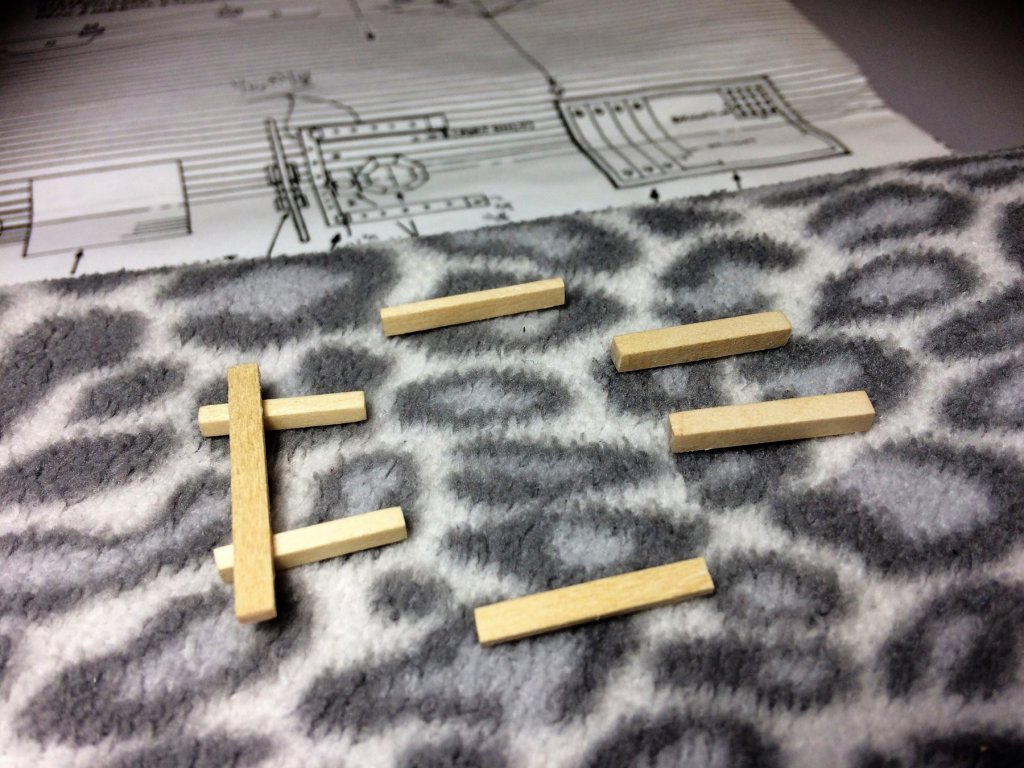
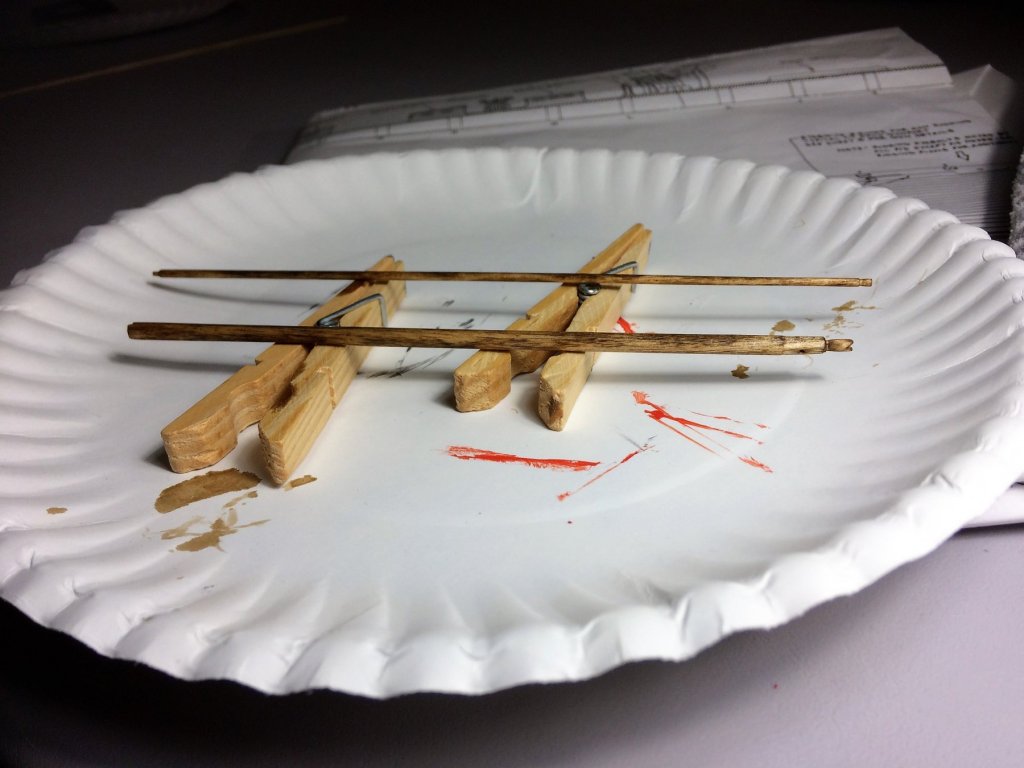
Evening, Taking a break from the Shipyard to watch some playoff football. Fresh order of nachos dripping with cheese and goodies in the oven! Figure I would update the build. A few things done, some still ongoing. I finished stropping the blocks for the Main mast crosstrees. Not my best, but I'm getting better. They were installed easy enough. Per the plans, the inboard row are singles. In my rush to hang the blocks.....I forgot to install the Chocks and Blocks. These are glued in, then cut to shape and sanded. There probably half the size they are in the pic when done. This means most of the black area will get another coat of black. I've started the Bilge pump. The handle will get shaped/sanded then a dark stain, I don't want to paint it. The bottom part will be painted per the plans. Some brass strip will wrap around at the top and bottom. Using a #76 drill, made the hole for the iron in the middle. Using some of the thick stock wire from the kit. As toward where the Iron meets the handle, I'm undecided. I might just have the Iron enter into the wooden handle itself, or, try and solder something like I've seen on other builds. Never done it and I don't want to burn the house down! Tom E