Tom E
-
Posts
467 -
Joined
-
Last visited
2 Followers


About Tom E

- Birthday 11/16/1971
Recent Profile Visitors
3,134 profile views


-
 ferretmary1 reacted to a post in a topic:
Are you an NRG Member???
ferretmary1 reacted to a post in a topic:
Are you an NRG Member???
-
catopower reacted to a post in a topic:
Are you an NRG Member???
-
chris watton reacted to a post in a topic:
Are you an NRG Member???
-
glbarlow reacted to a post in a topic:
Are you an NRG Member???
-
CDR_Ret reacted to a post in a topic:
Are you an NRG Member???
-
Keith Black reacted to a post in a topic:
Are you an NRG Member???
-
Nirvana reacted to a post in a topic:
Are you an NRG Member???
-
mtaylor reacted to a post in a topic:
Are you an NRG Member???
-
BLACK VIKING reacted to a post in a topic:
Are you an NRG Member???
-

Are you an NRG Member???
Tom E replied to Chuck's topic in How to use the MSW forum - **NO MODELING CONTENT**
Just renewed last week. If I remember correctly, it will be seven years now. I'll be honest, I feel a little bit of pride being an NRG member. I can't begin to express what this website and organization has given me. Chatted with people from all over the globe. Tips and techniques I would have never thought of. Not much of today's modern life can afford me that. Seems everywhere online is filled with dishonesty. This is my happy place. Good honest people. Tom L.- 70 replies
-
- 15
-
-
Tom E reacted to a post in a topic:
US Brig Niagara by Tom E - Model Shipways - 1:64 Scale
-
Tom E reacted to a post in a topic:
US Brig Niagara by Tom E - Model Shipways - 1:64 Scale
-
Tom E reacted to a post in a topic:
Prince de Neufchatel by Coyote_6 – Constructo – 1/58 scale - American privateer
-
Tom E reacted to a post in a topic:
Prince de Neufchatel by Coyote_6 – Constructo – 1/58 scale - American privateer
-
Tom E reacted to a post in a topic:
US Brig Niagara by Abelson - Model Shipways - 3/16" scale
-
Tom E reacted to a post in a topic:
Cat Esther by GrandpaPhil - 1/64 - CARD
-
Tom E reacted to a post in a topic:
Maverick's F-14A Tomcat by SigEp Ziggy - Revell - 1/48
-
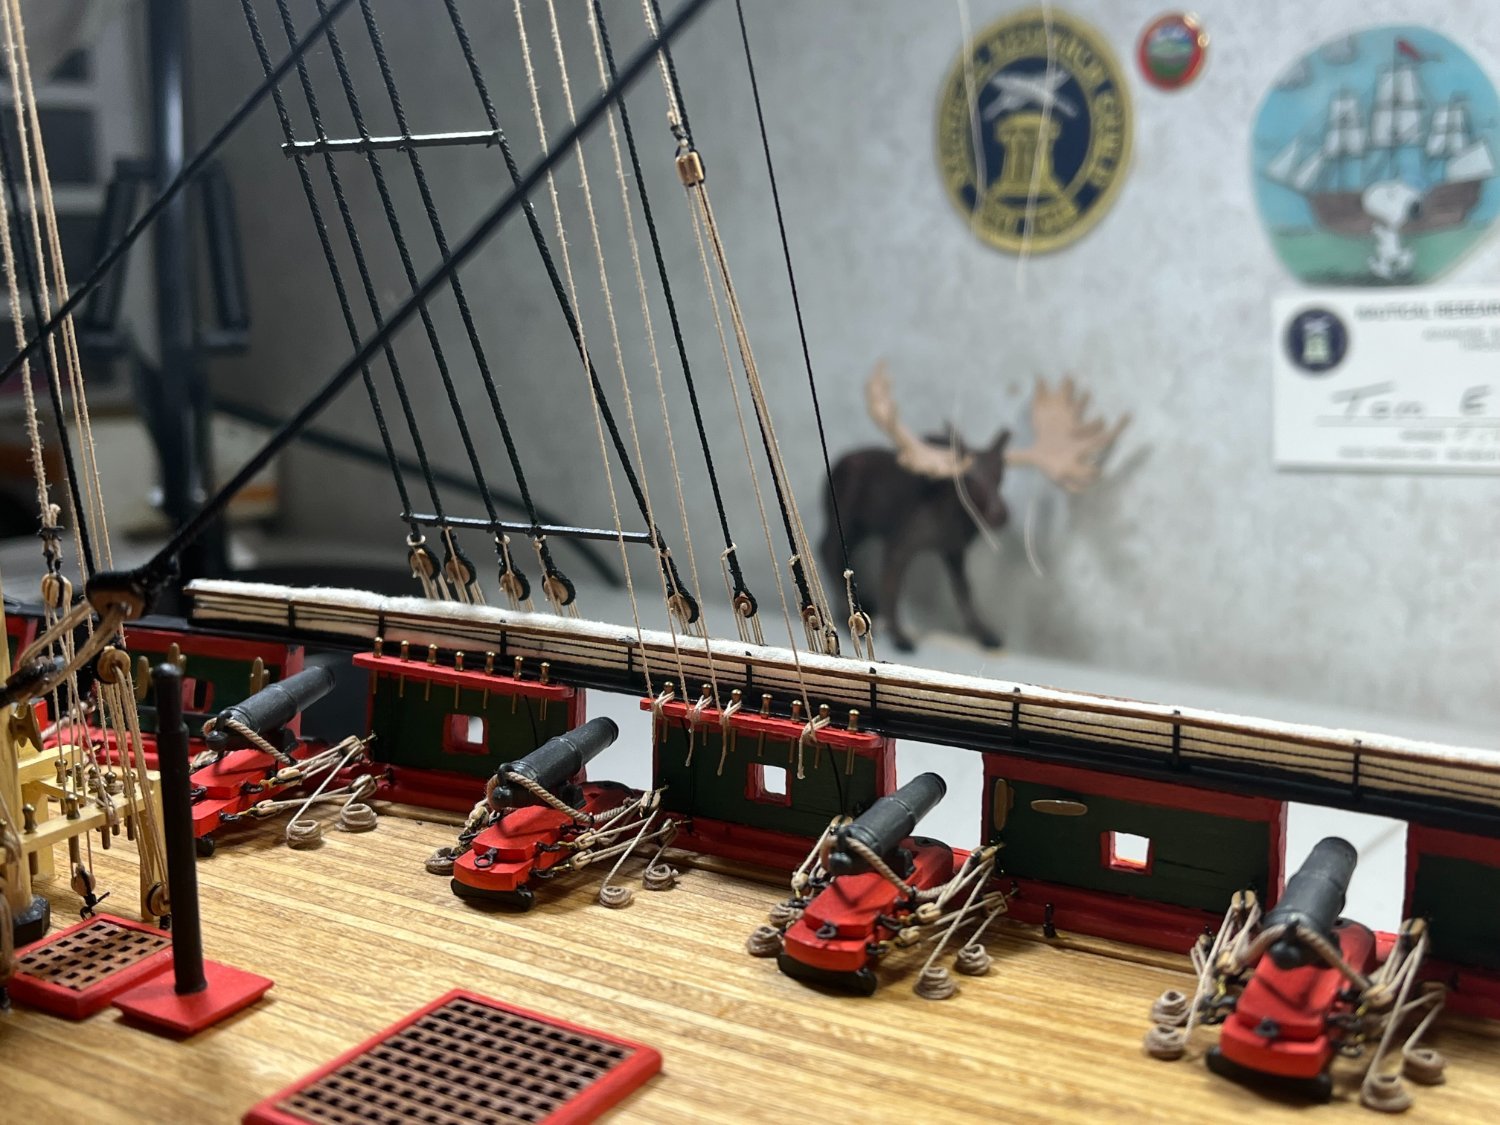
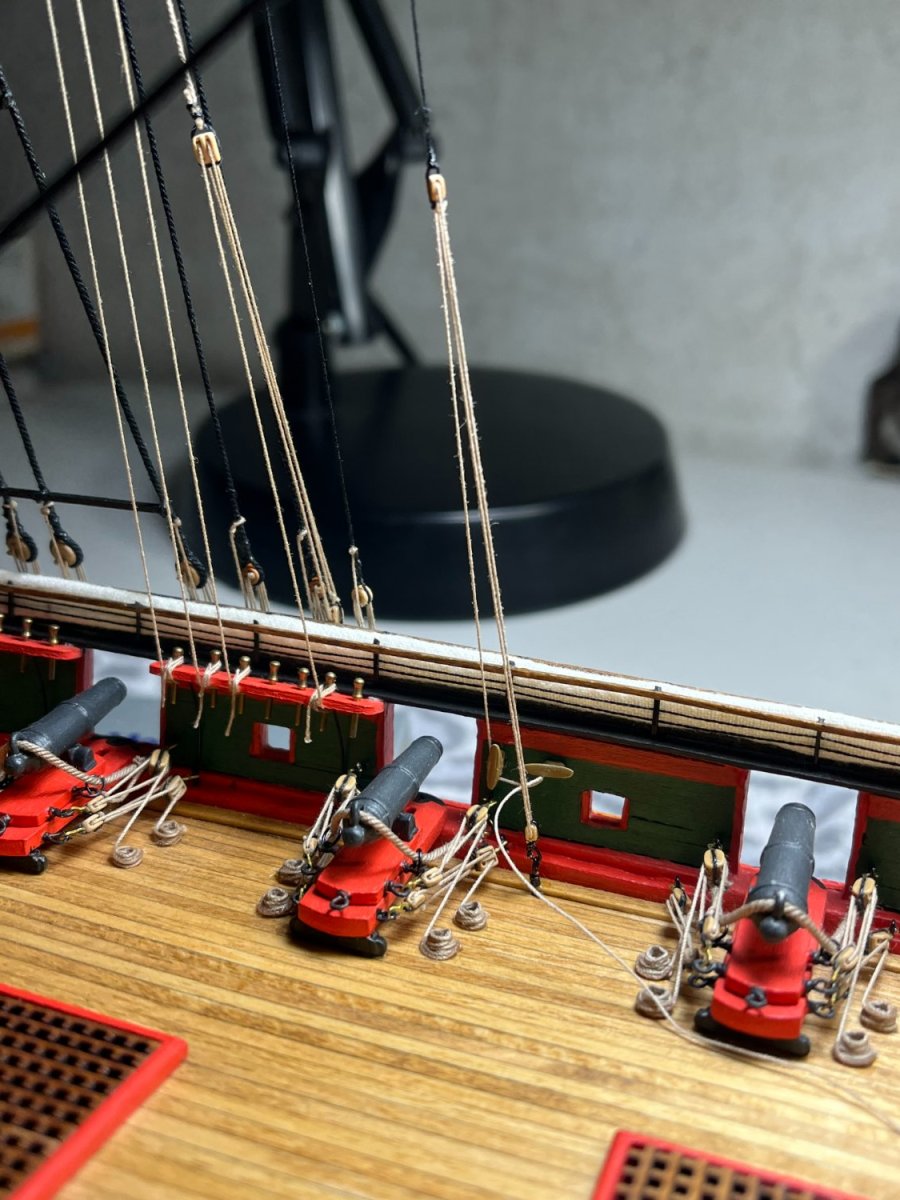
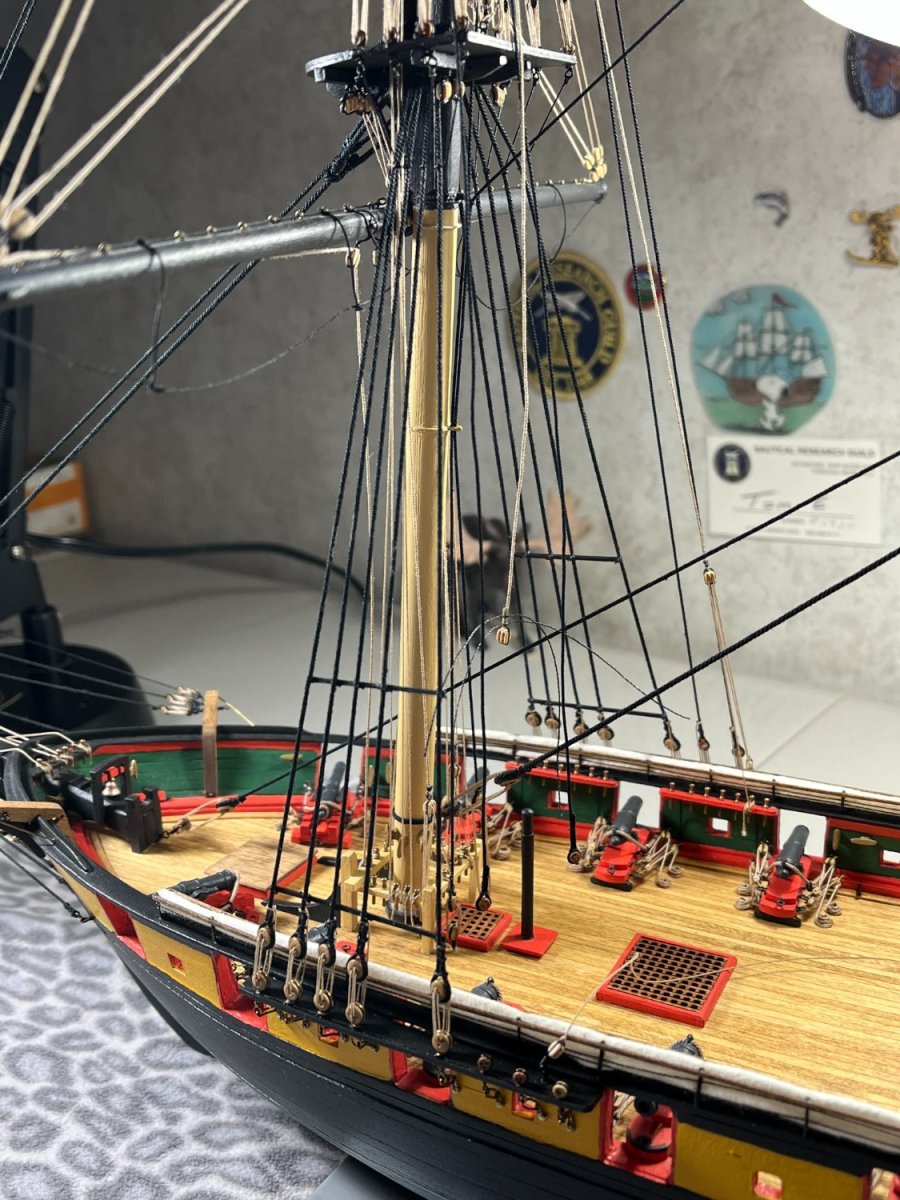
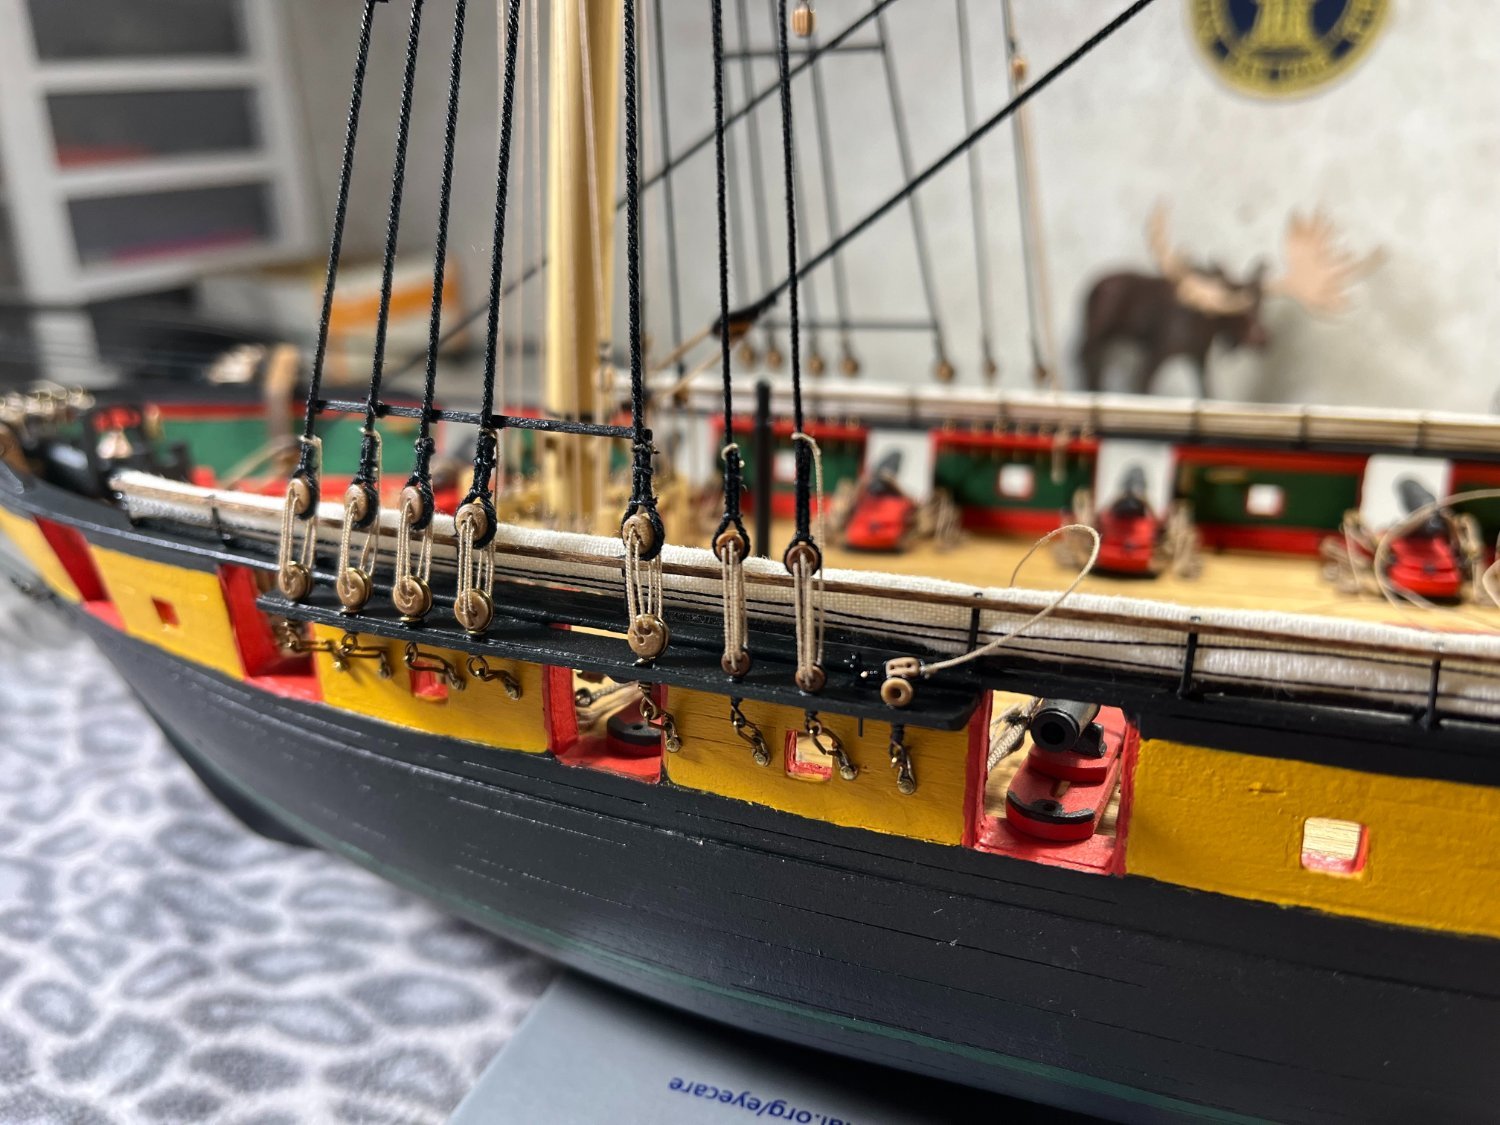
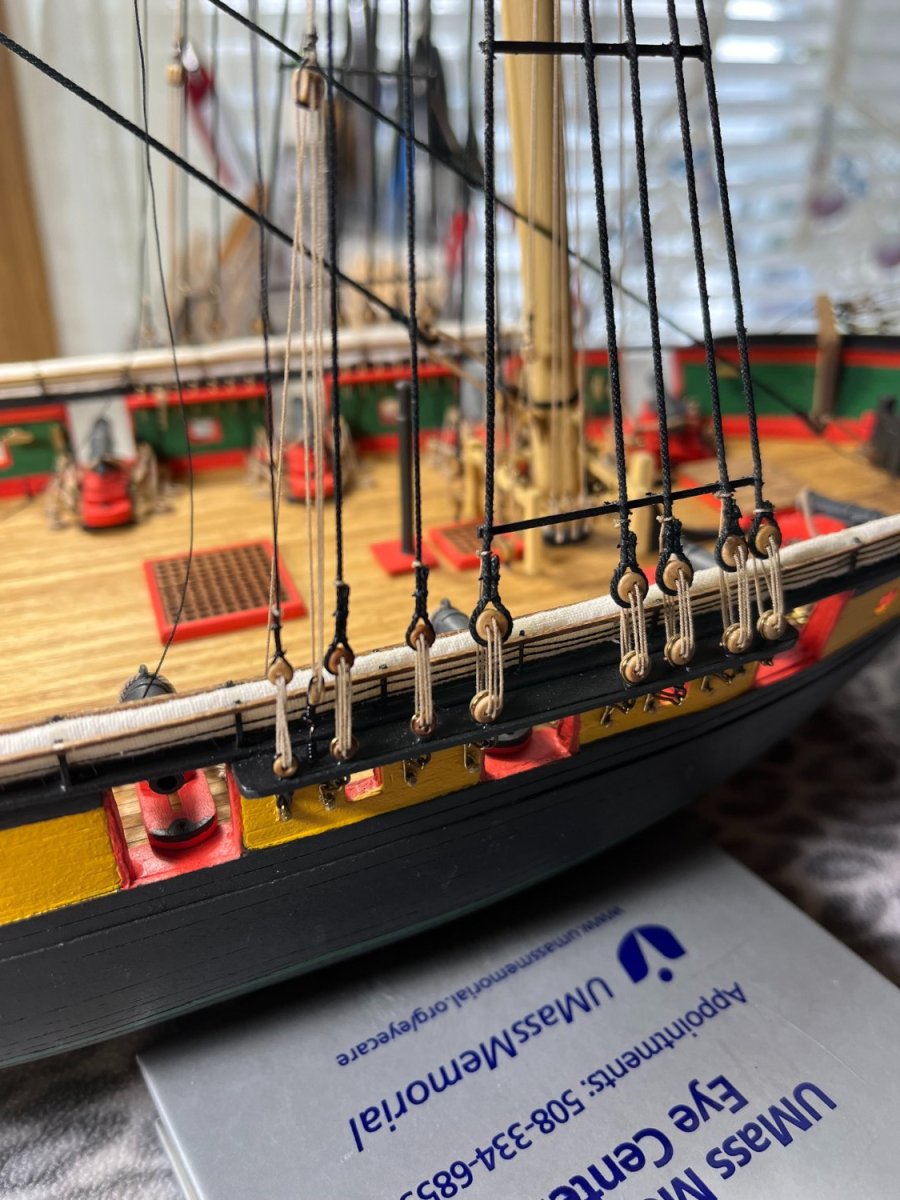
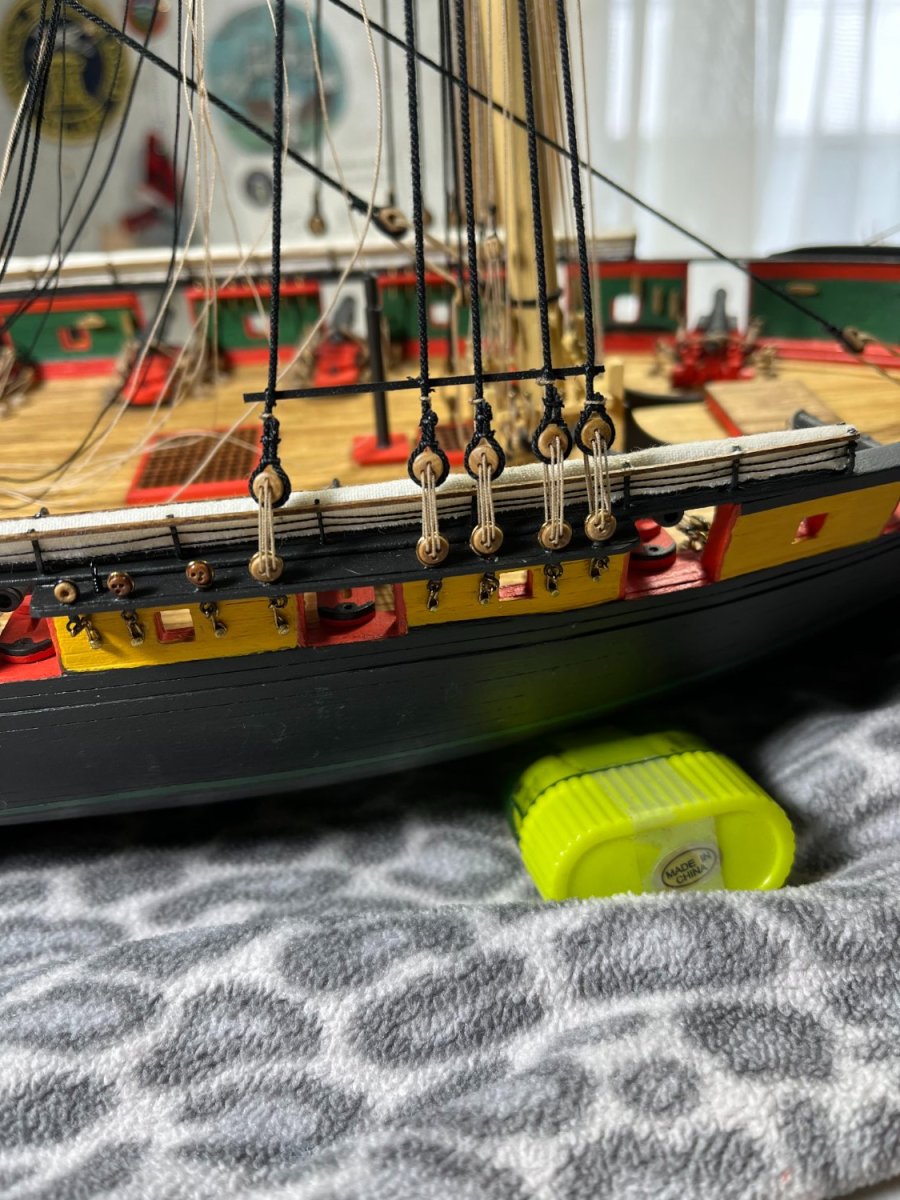
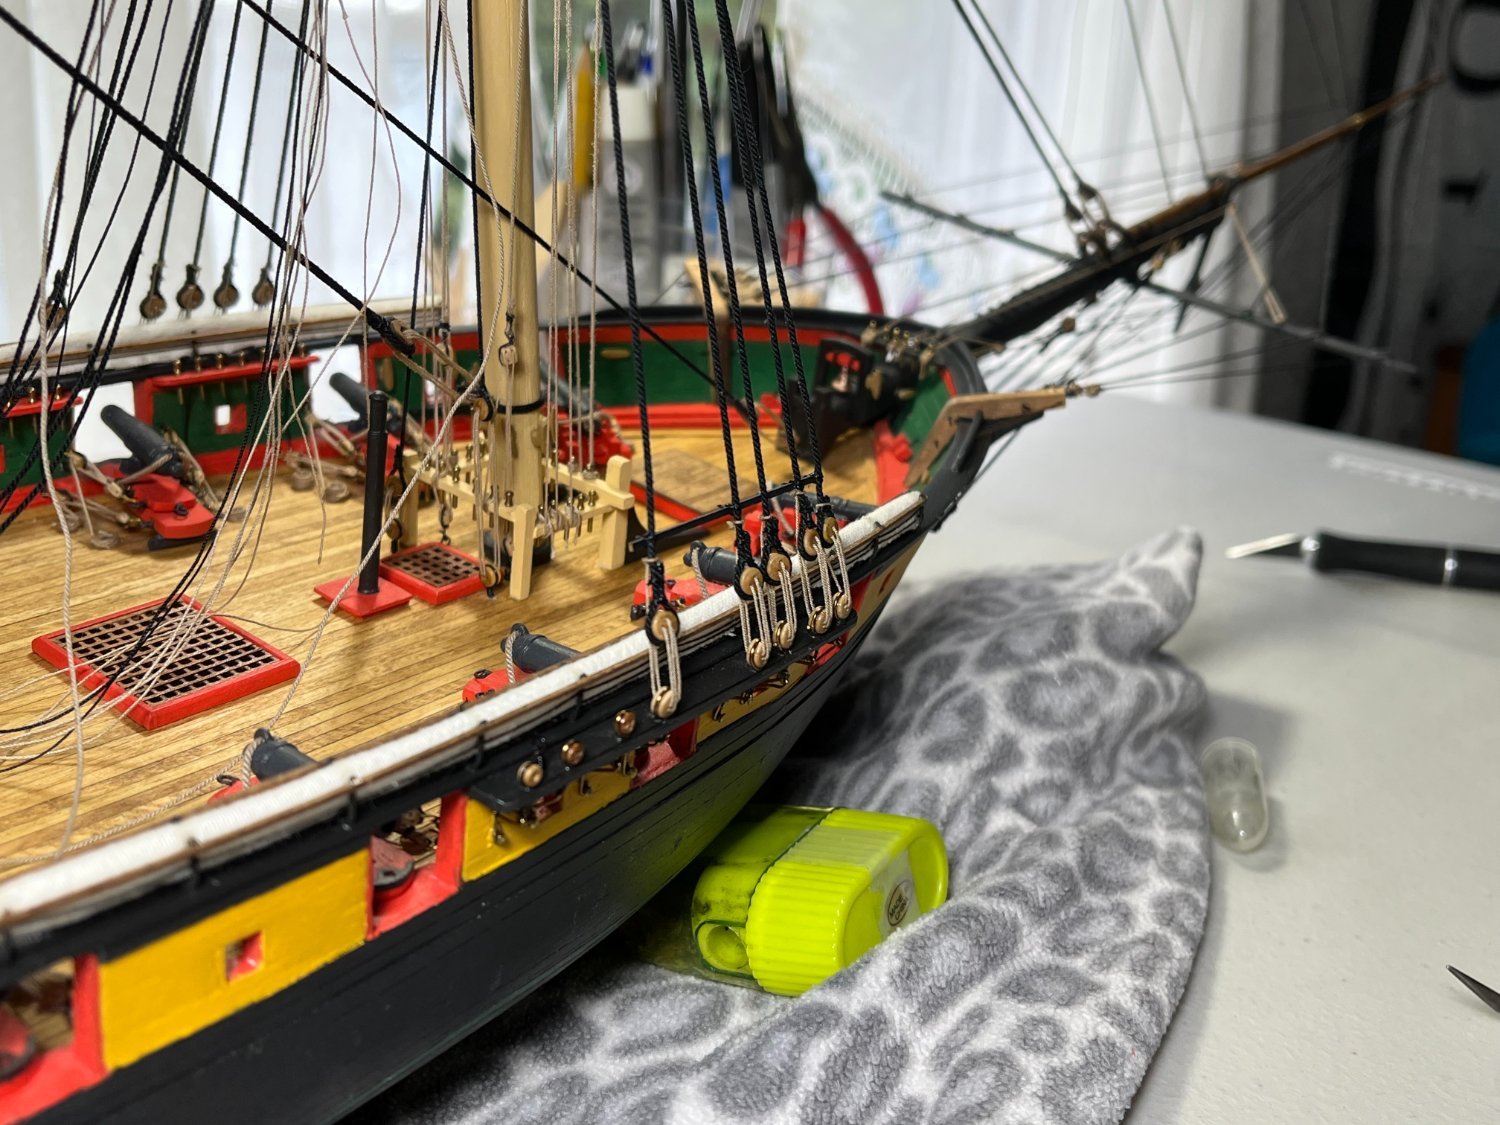
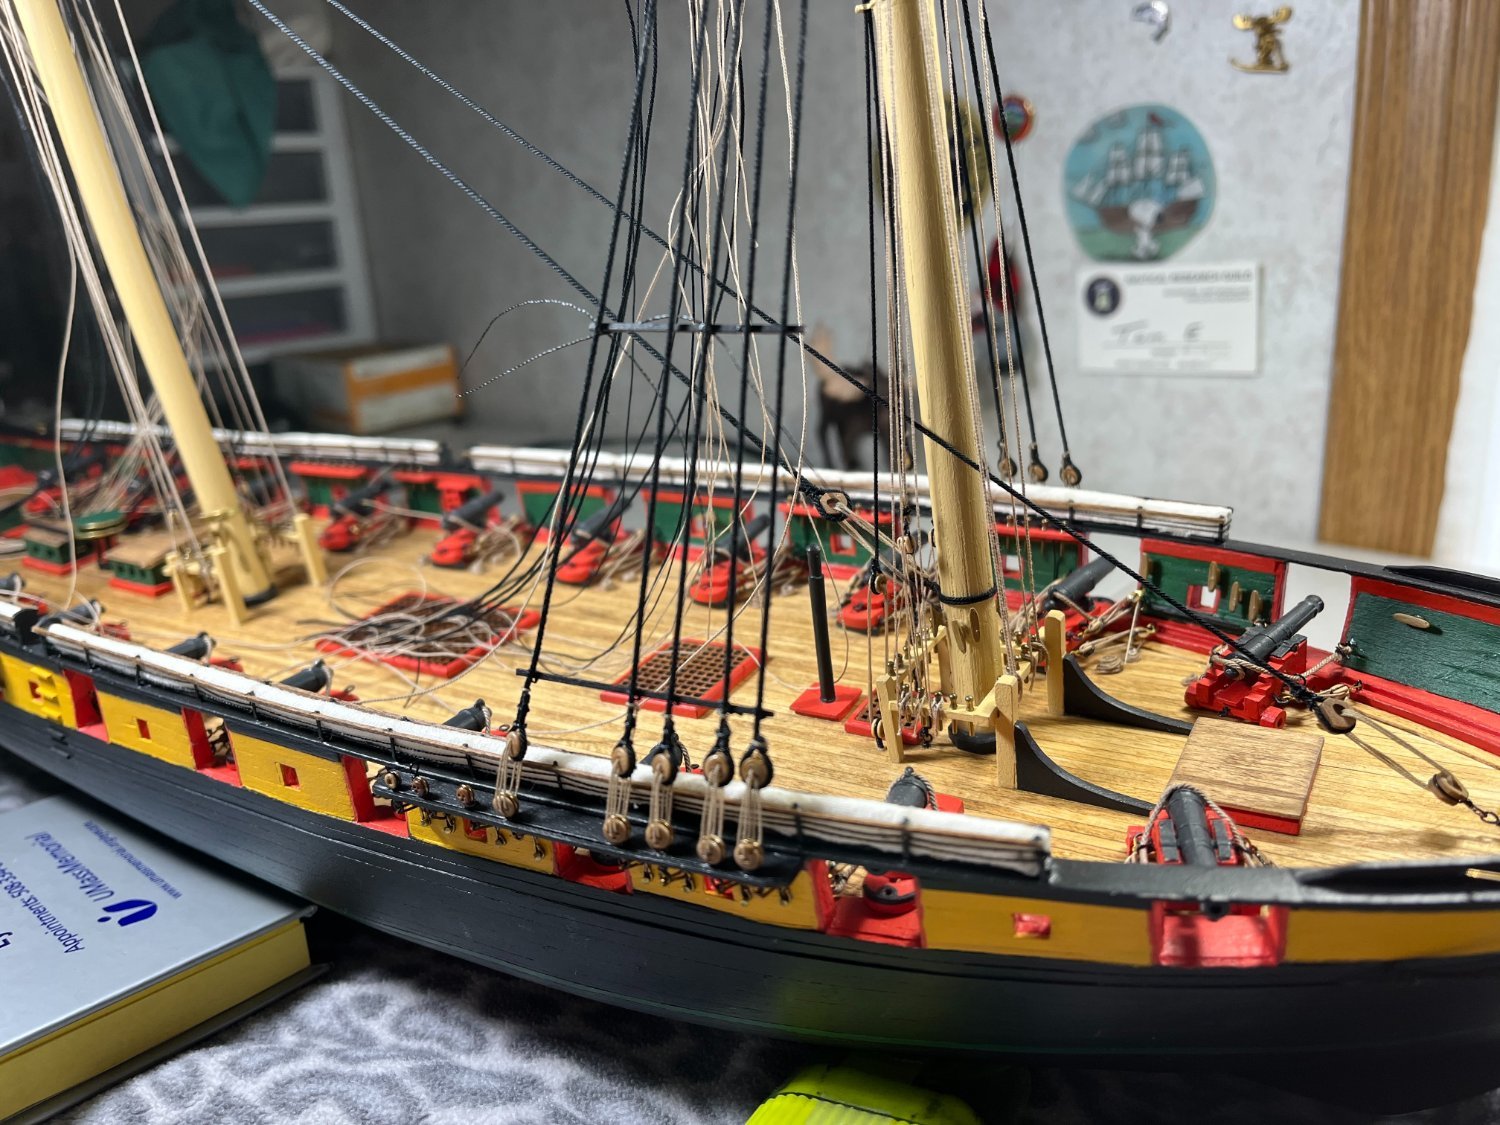
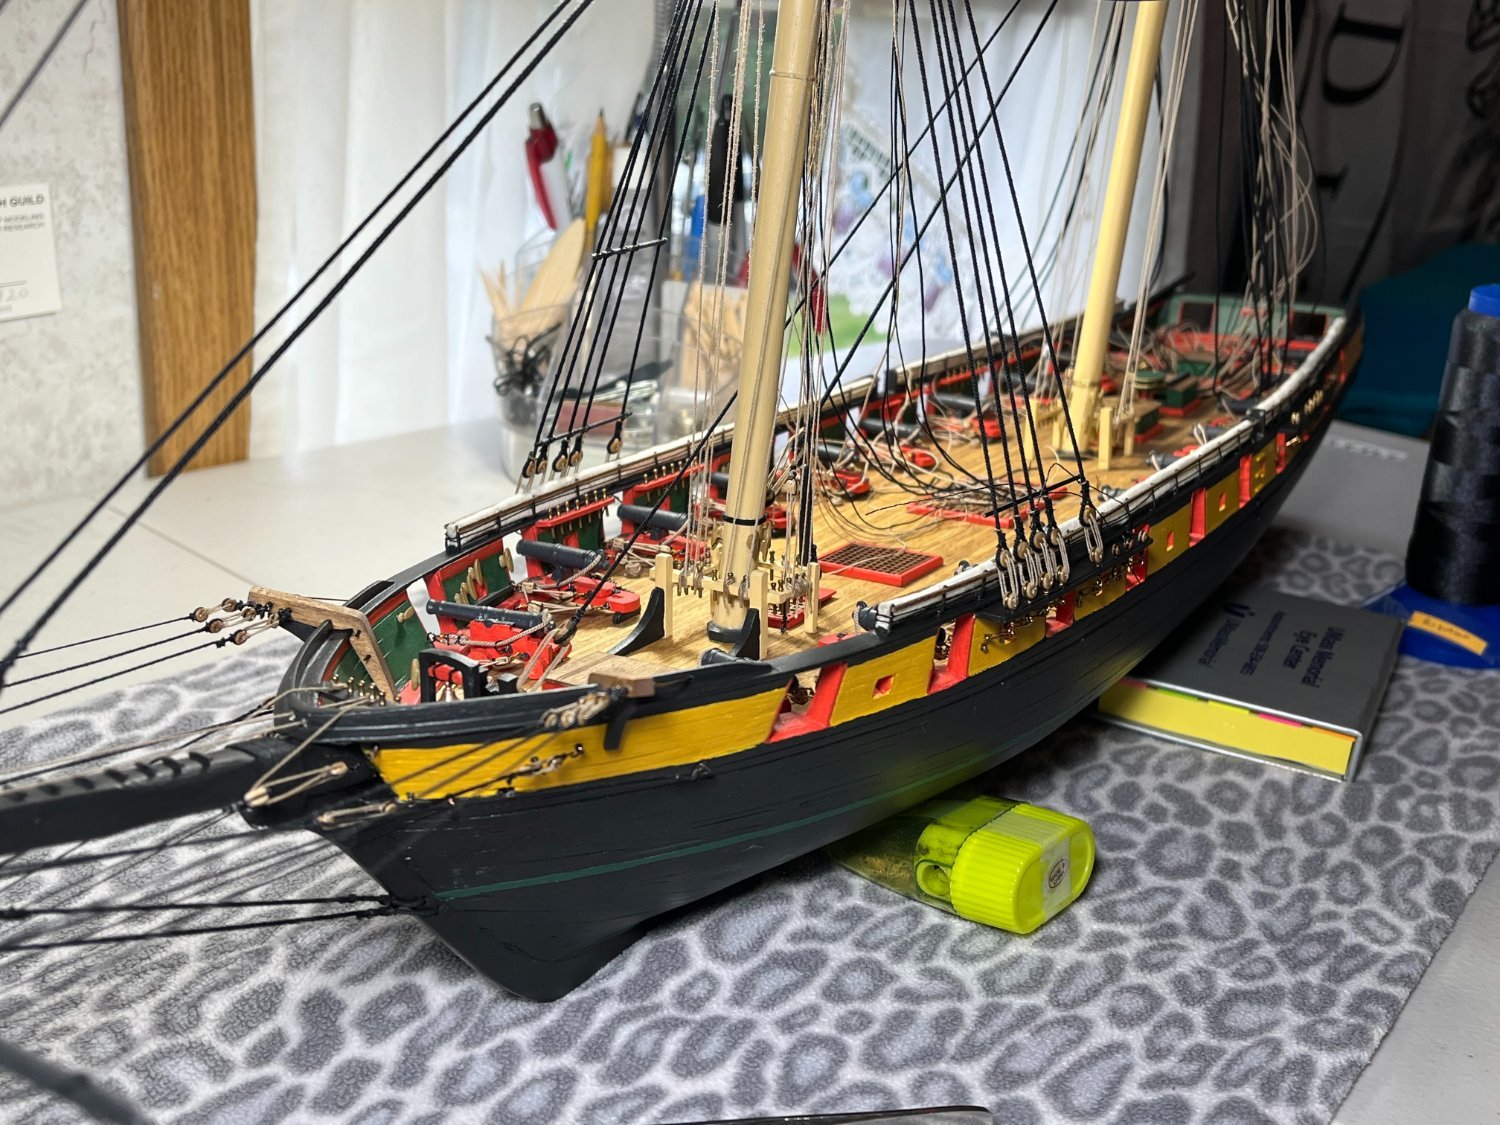
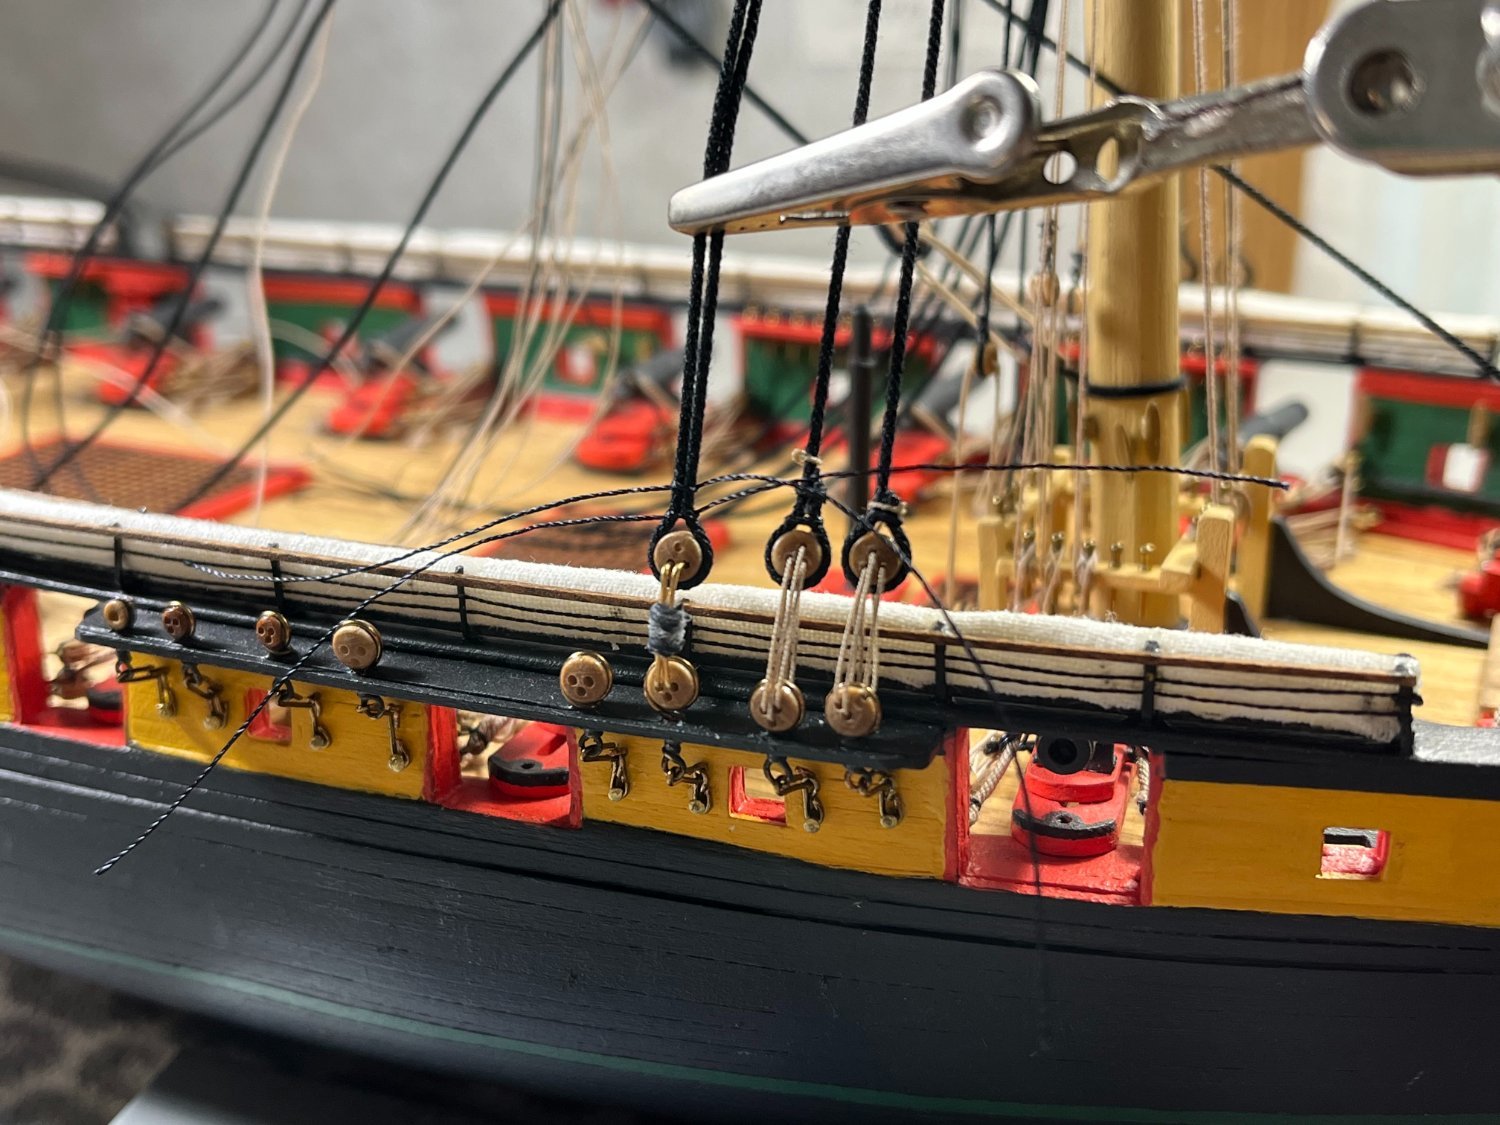
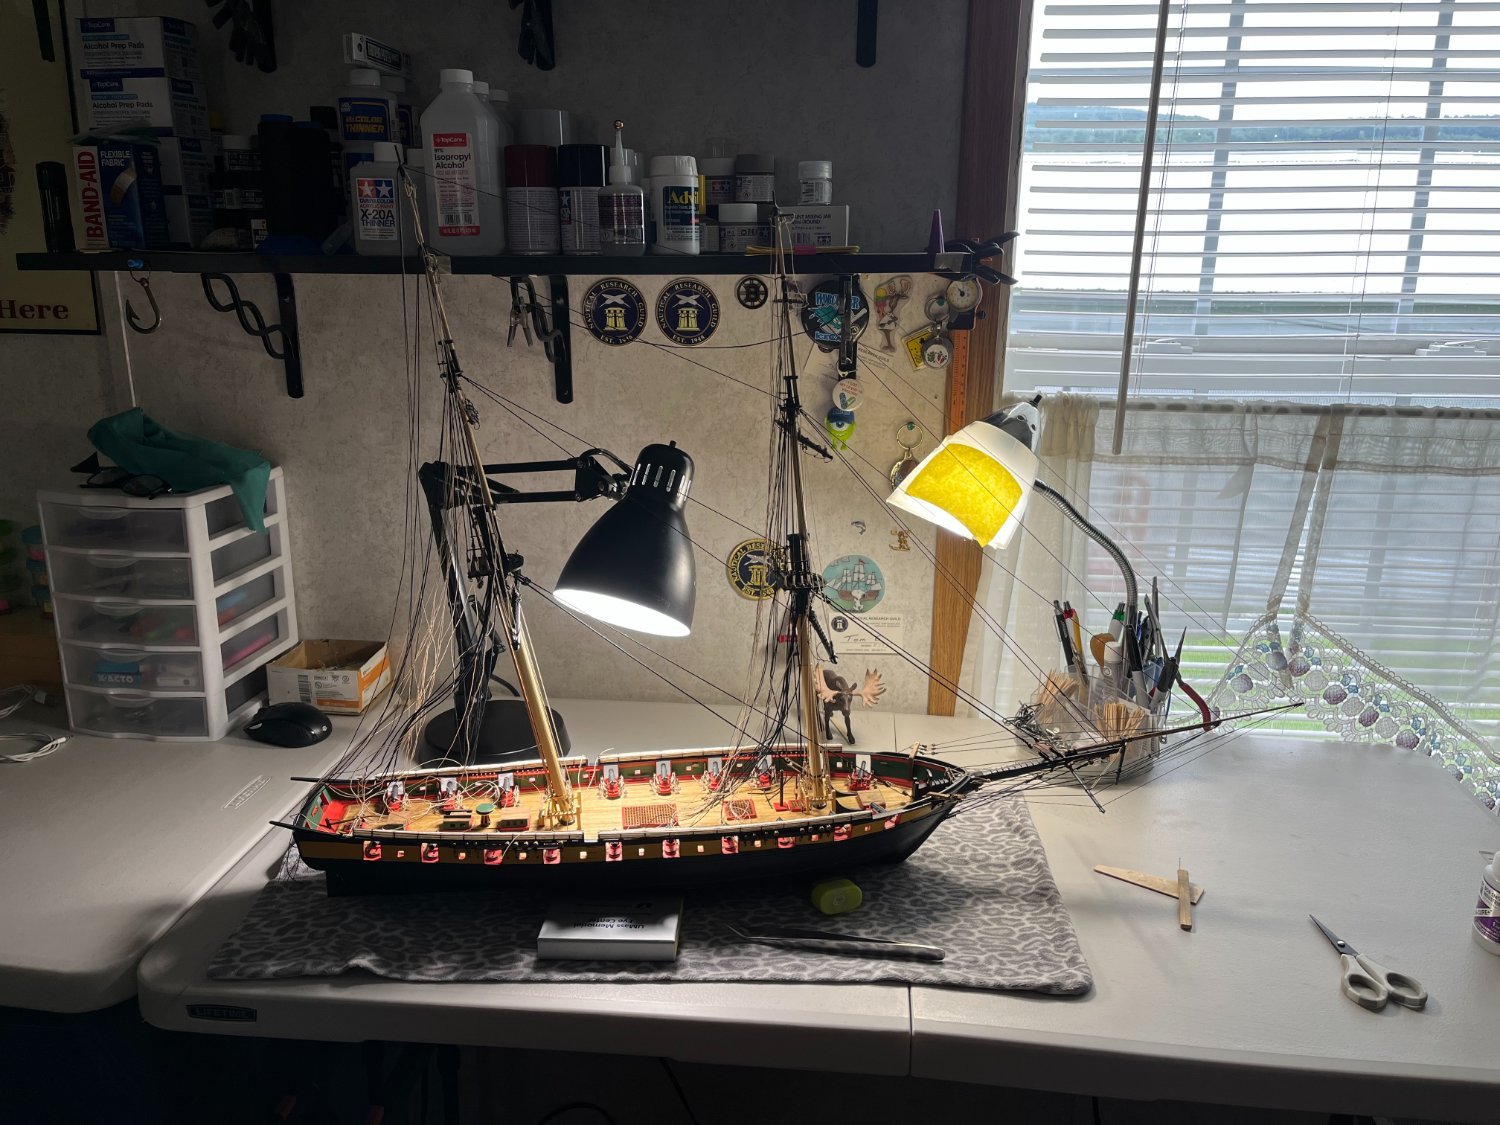
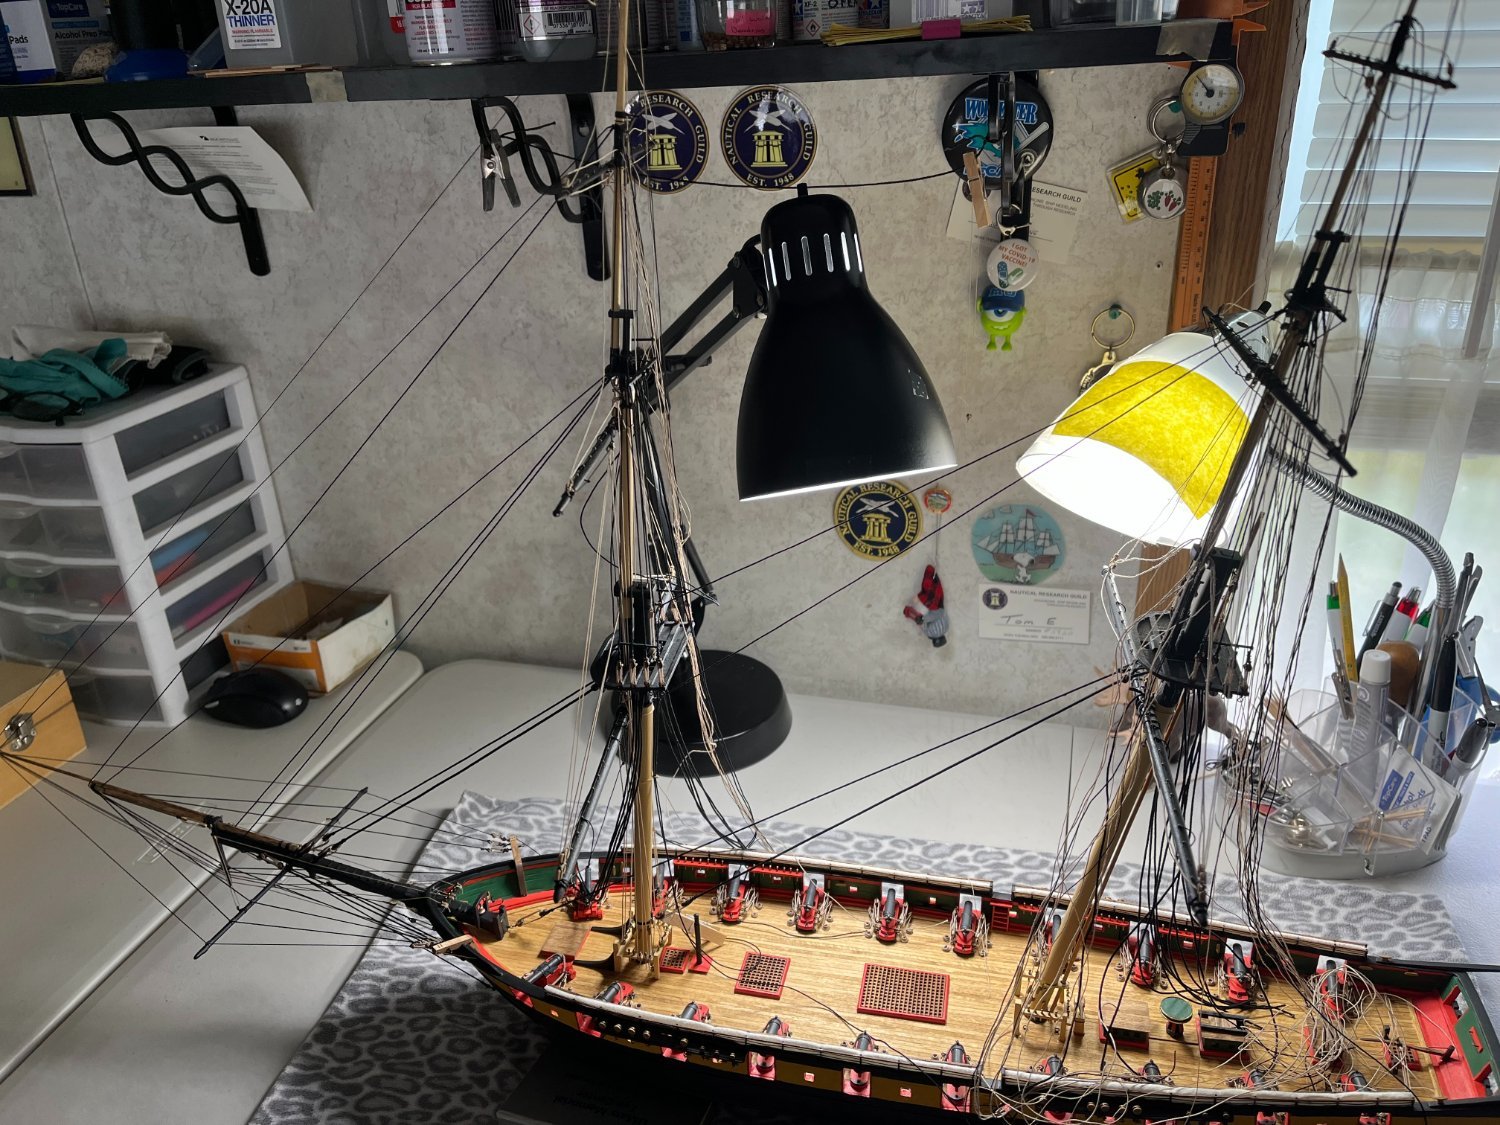
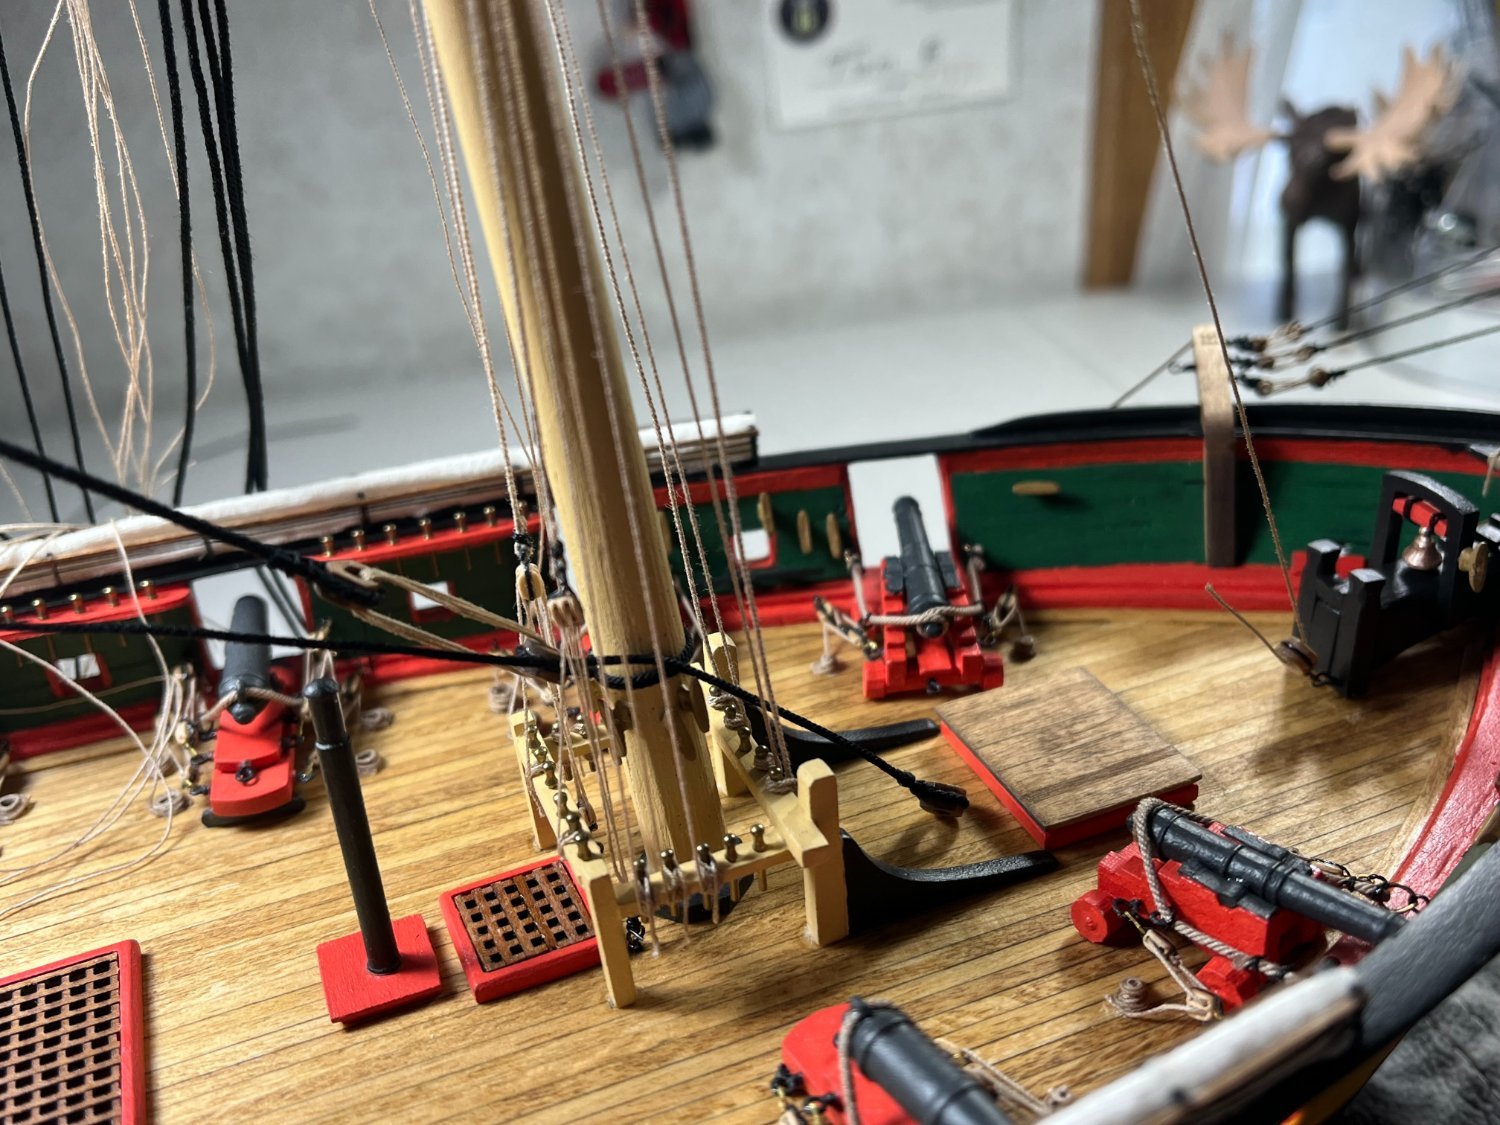
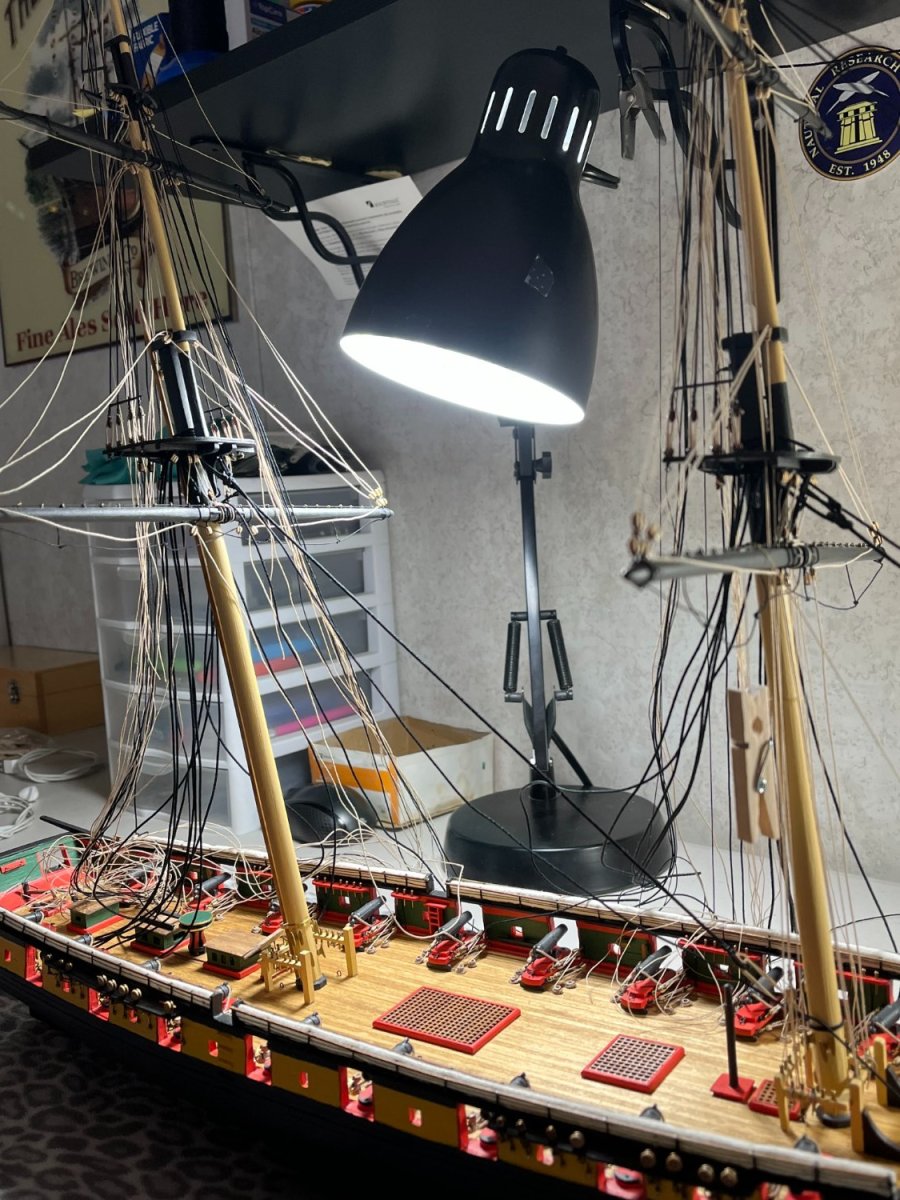
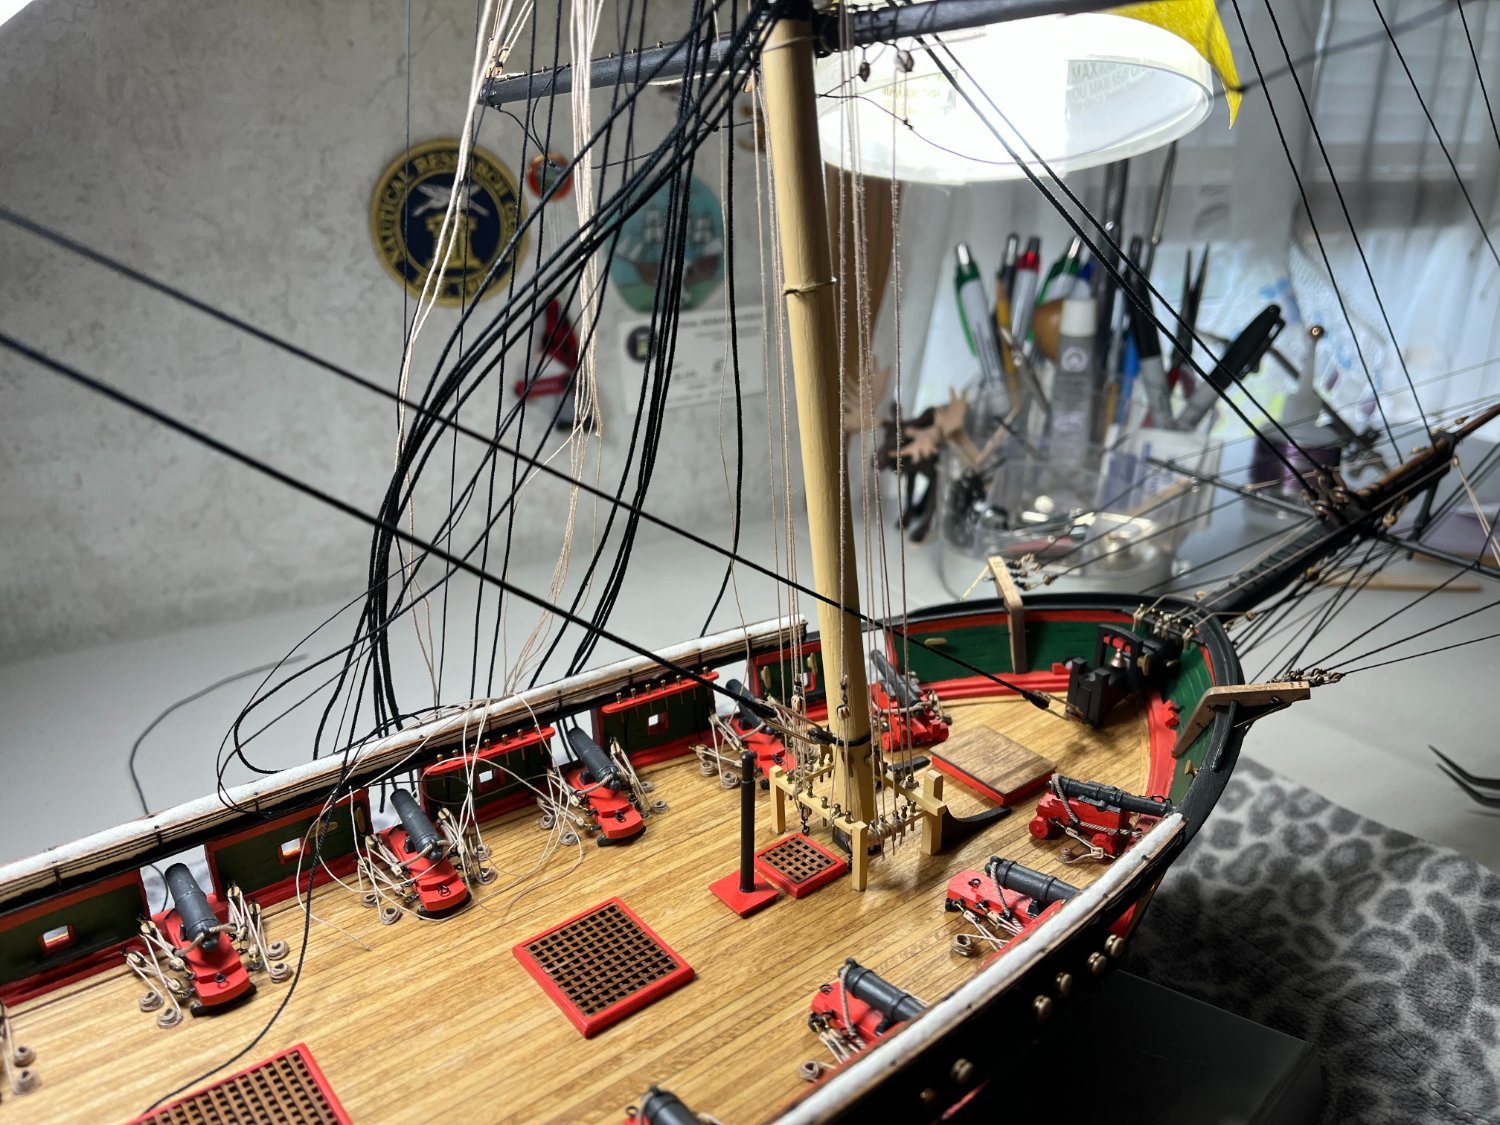
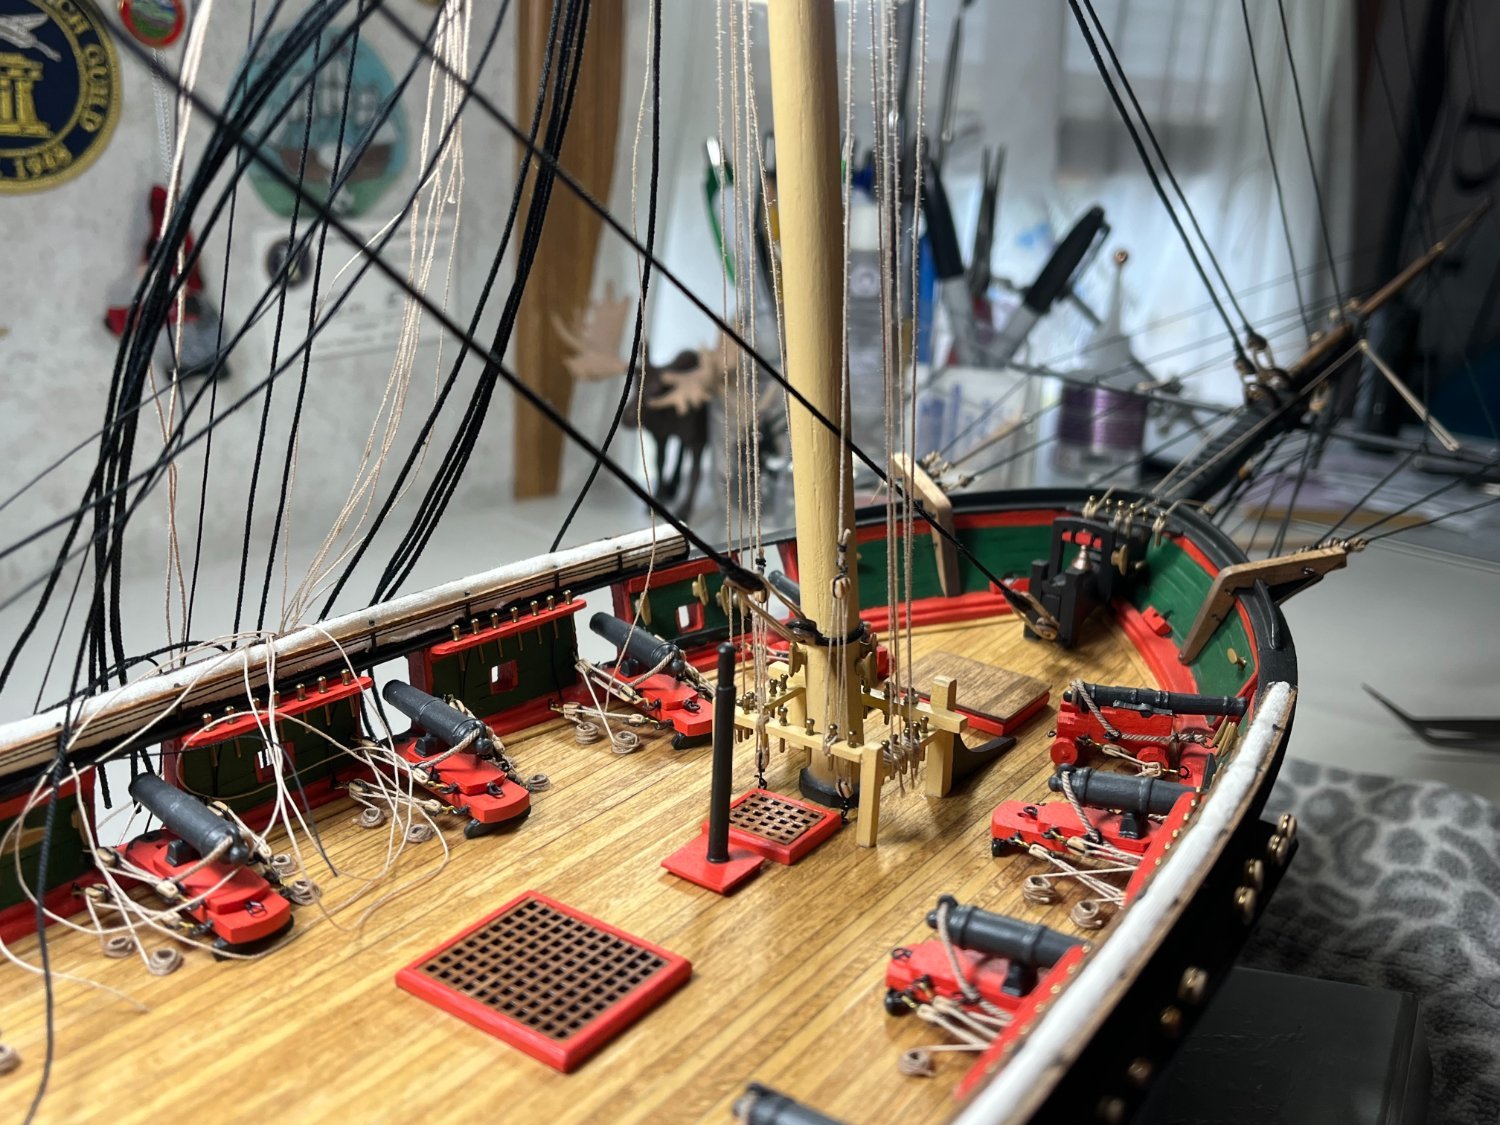
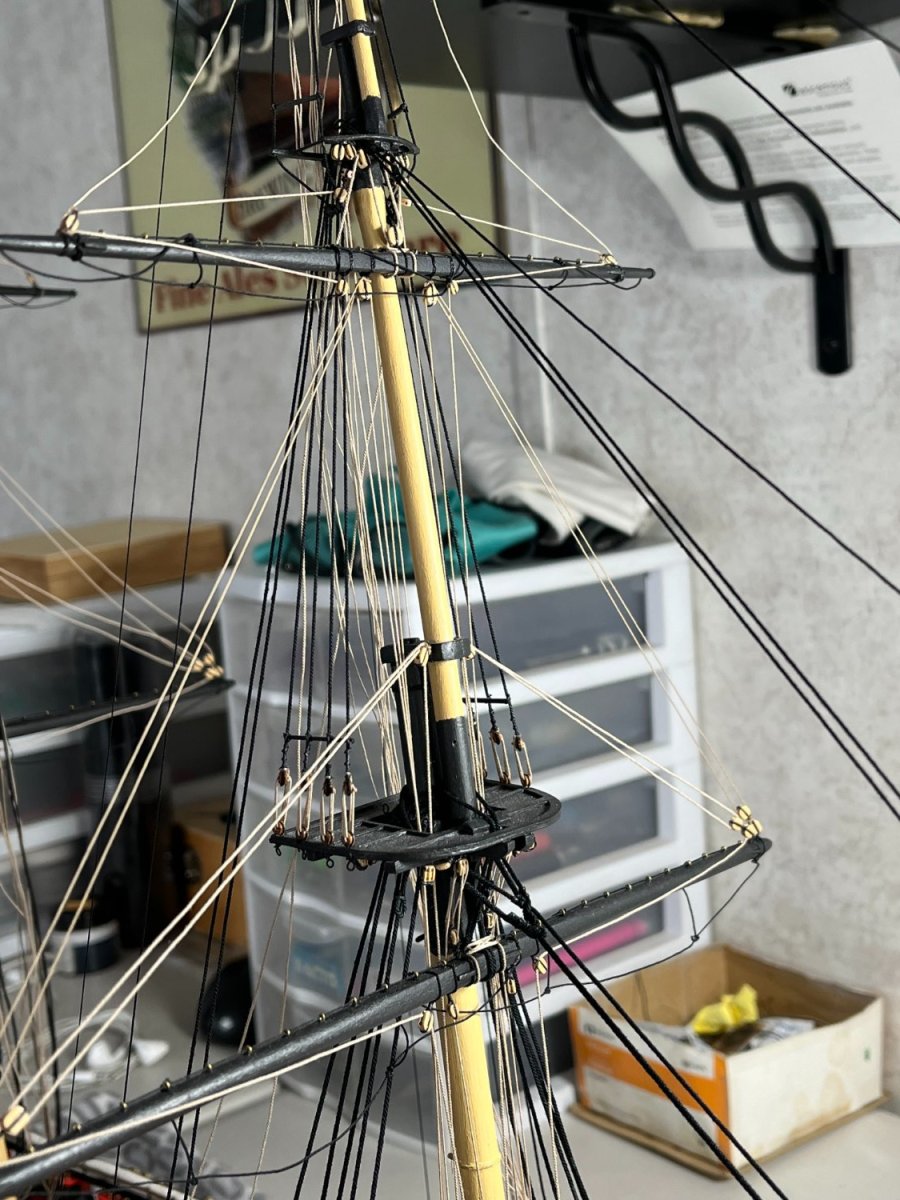
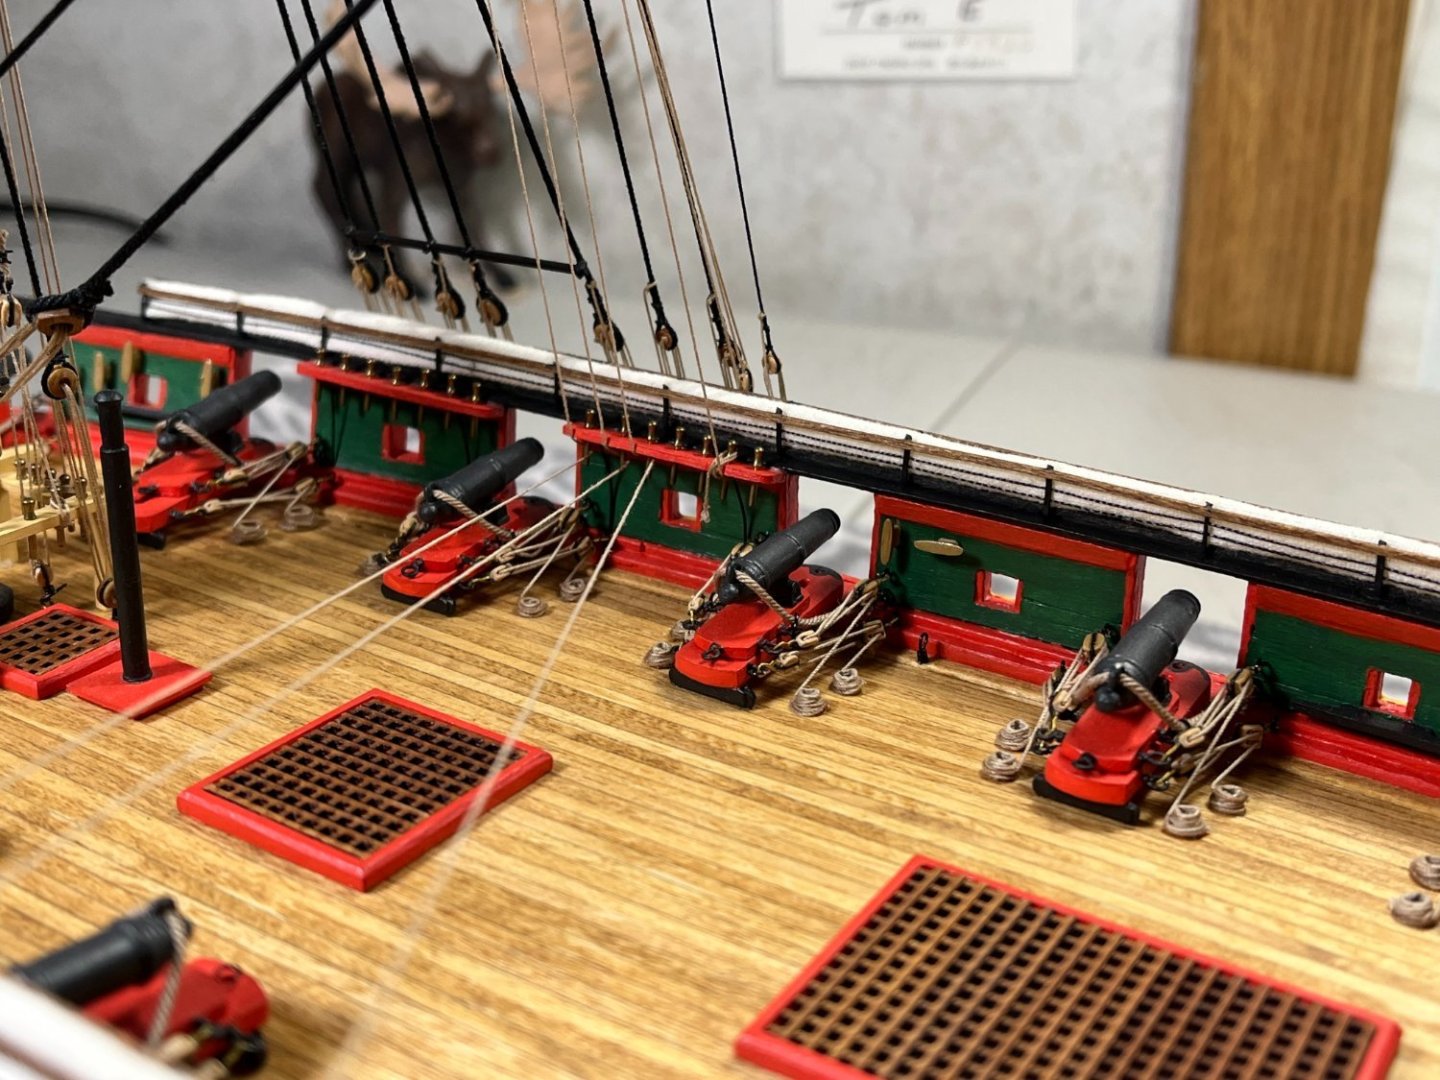
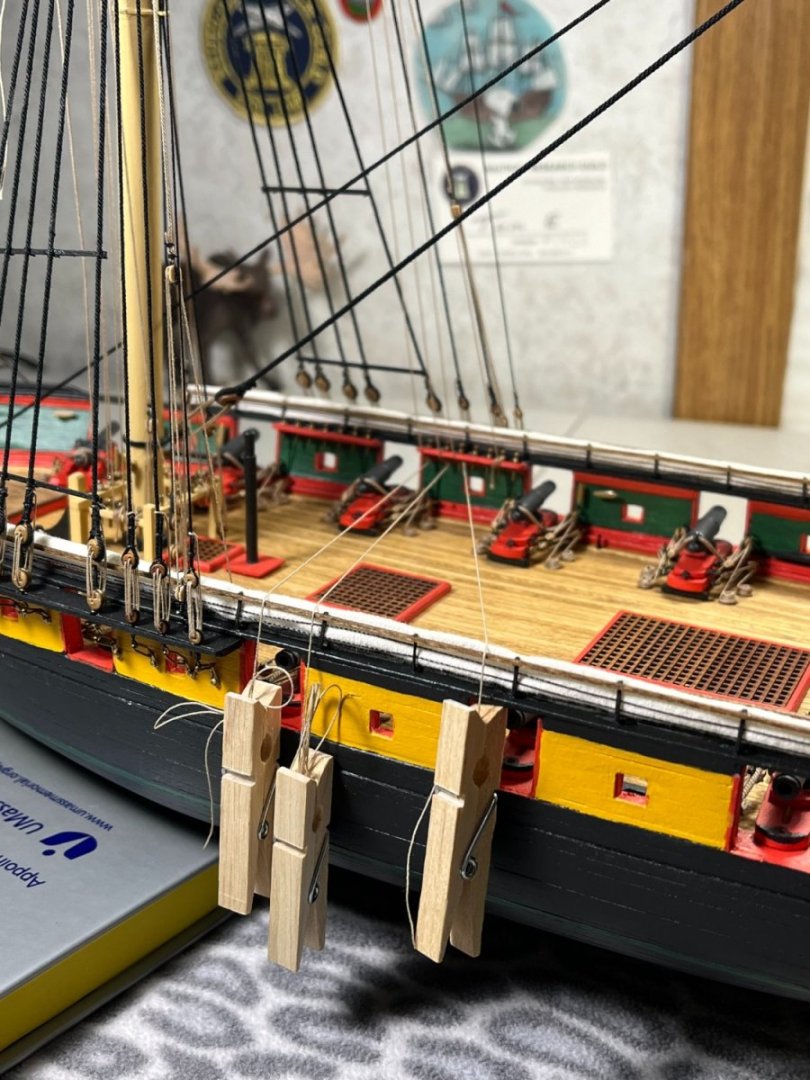
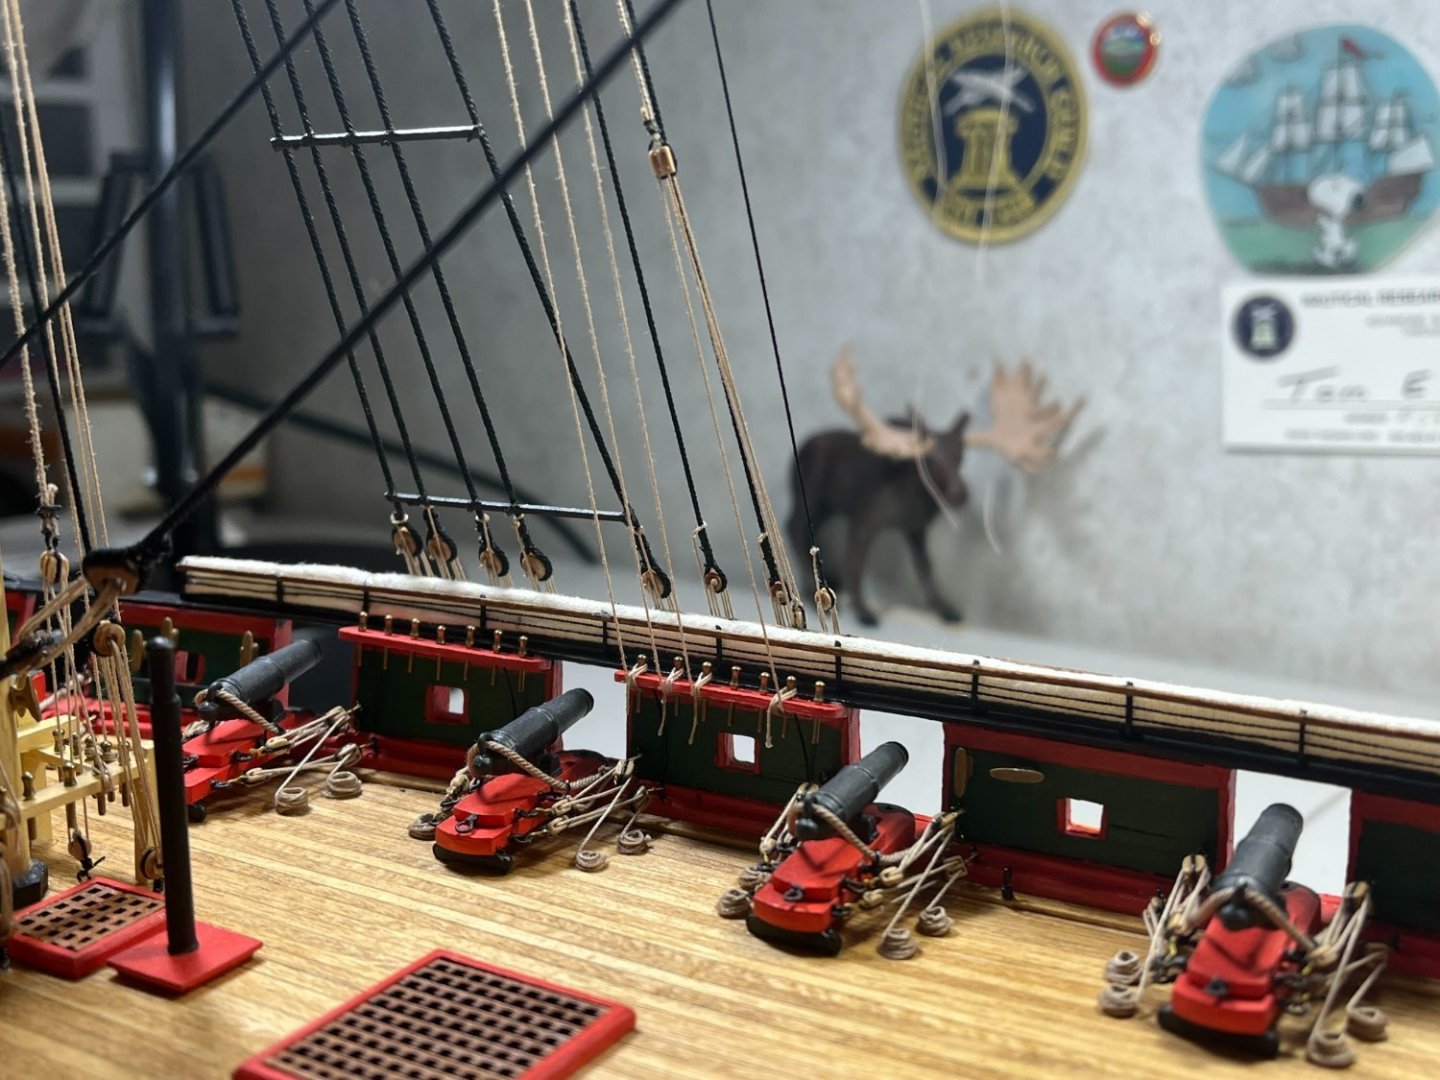
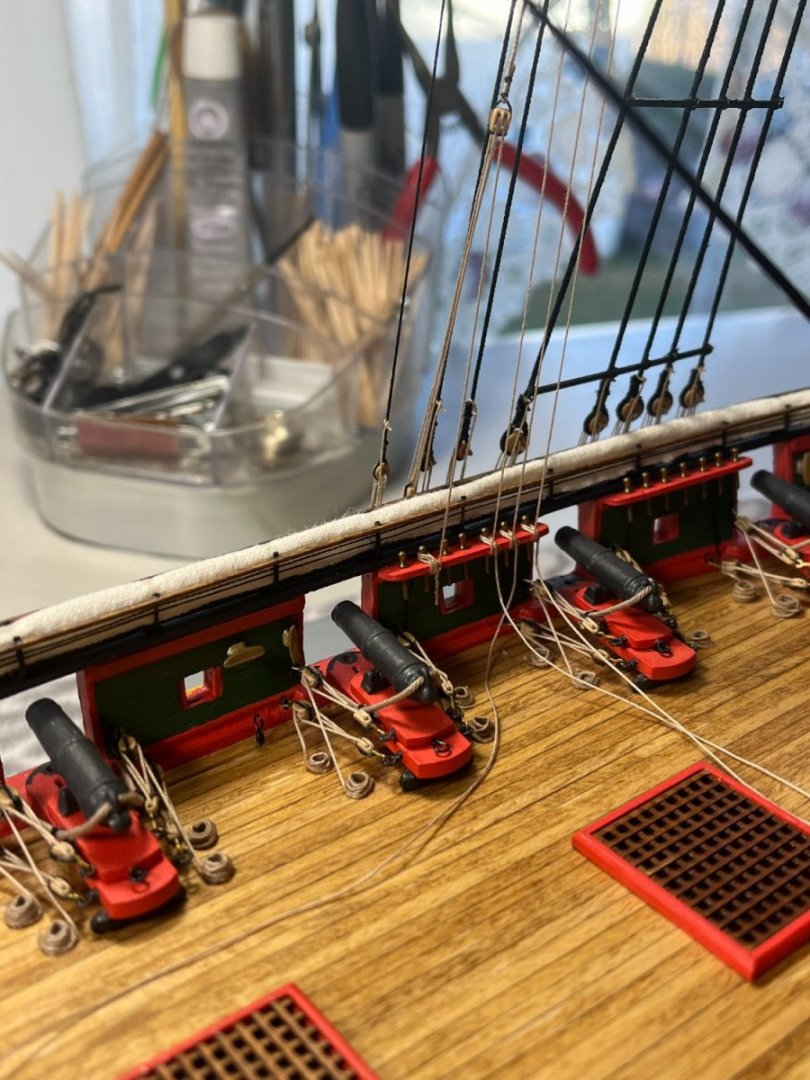
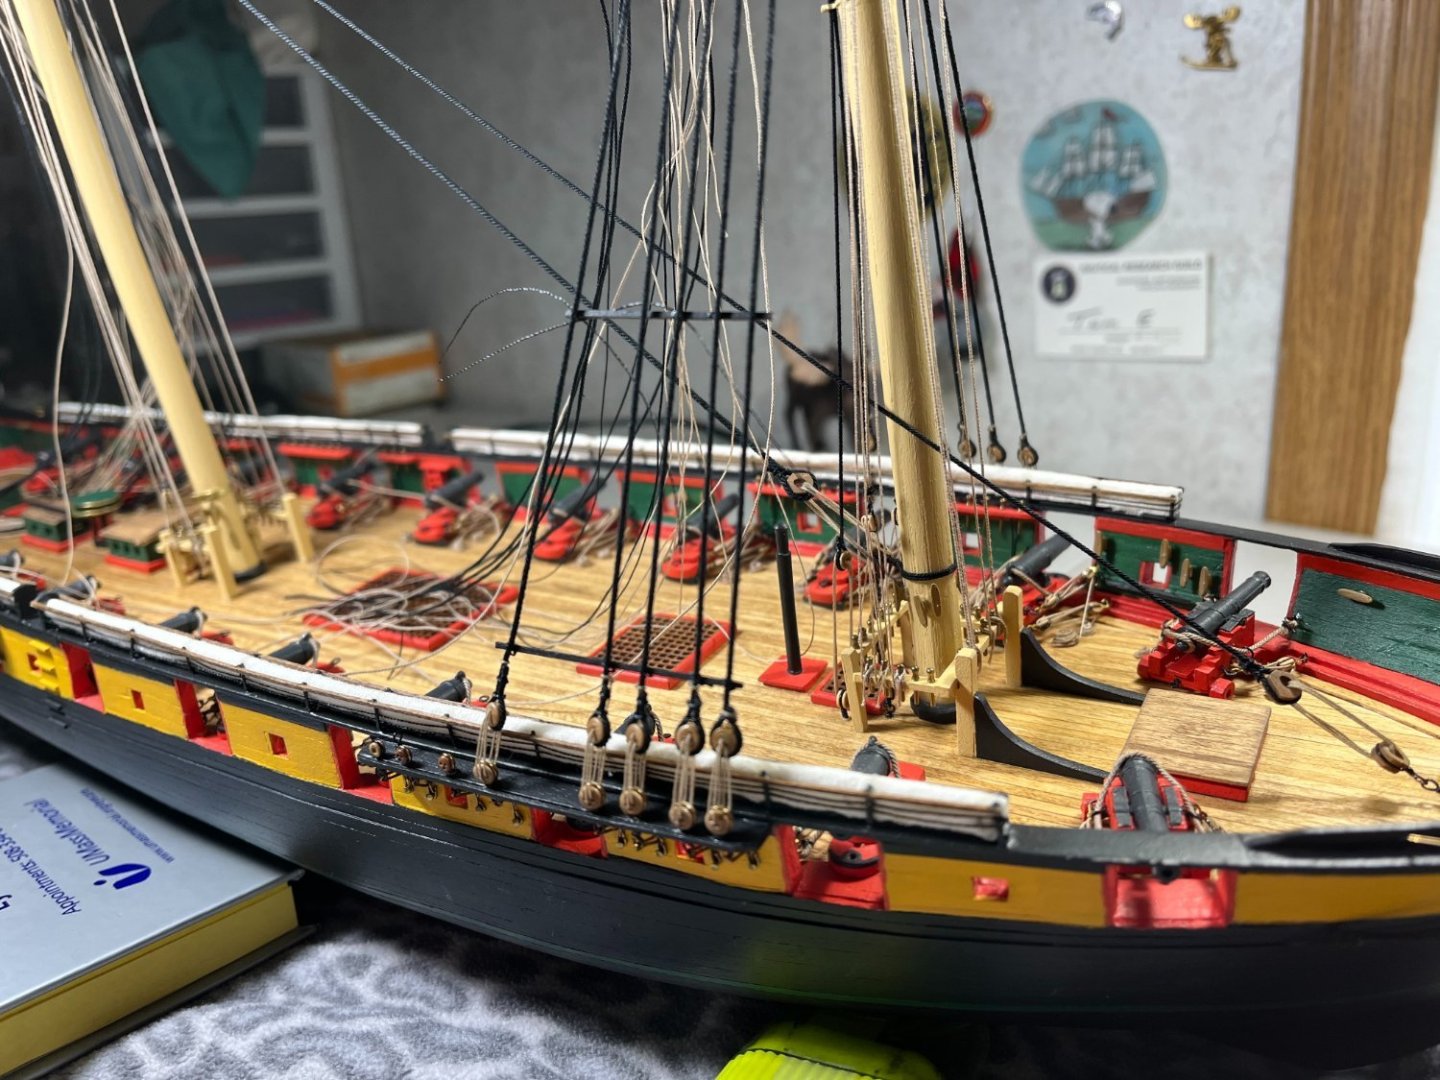
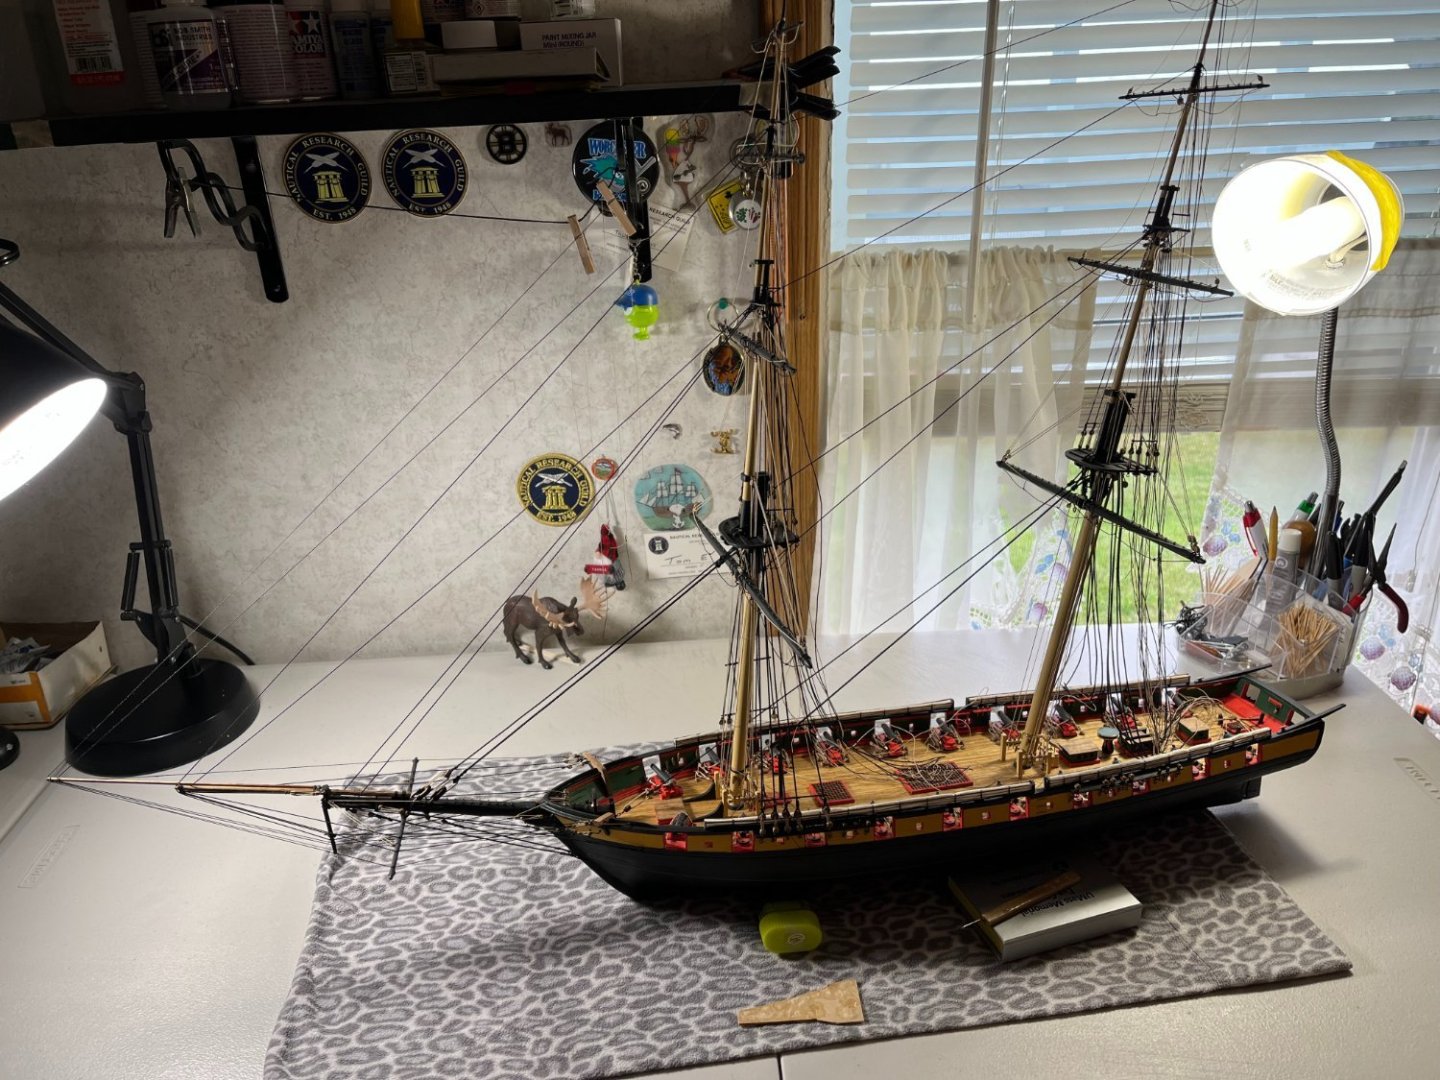
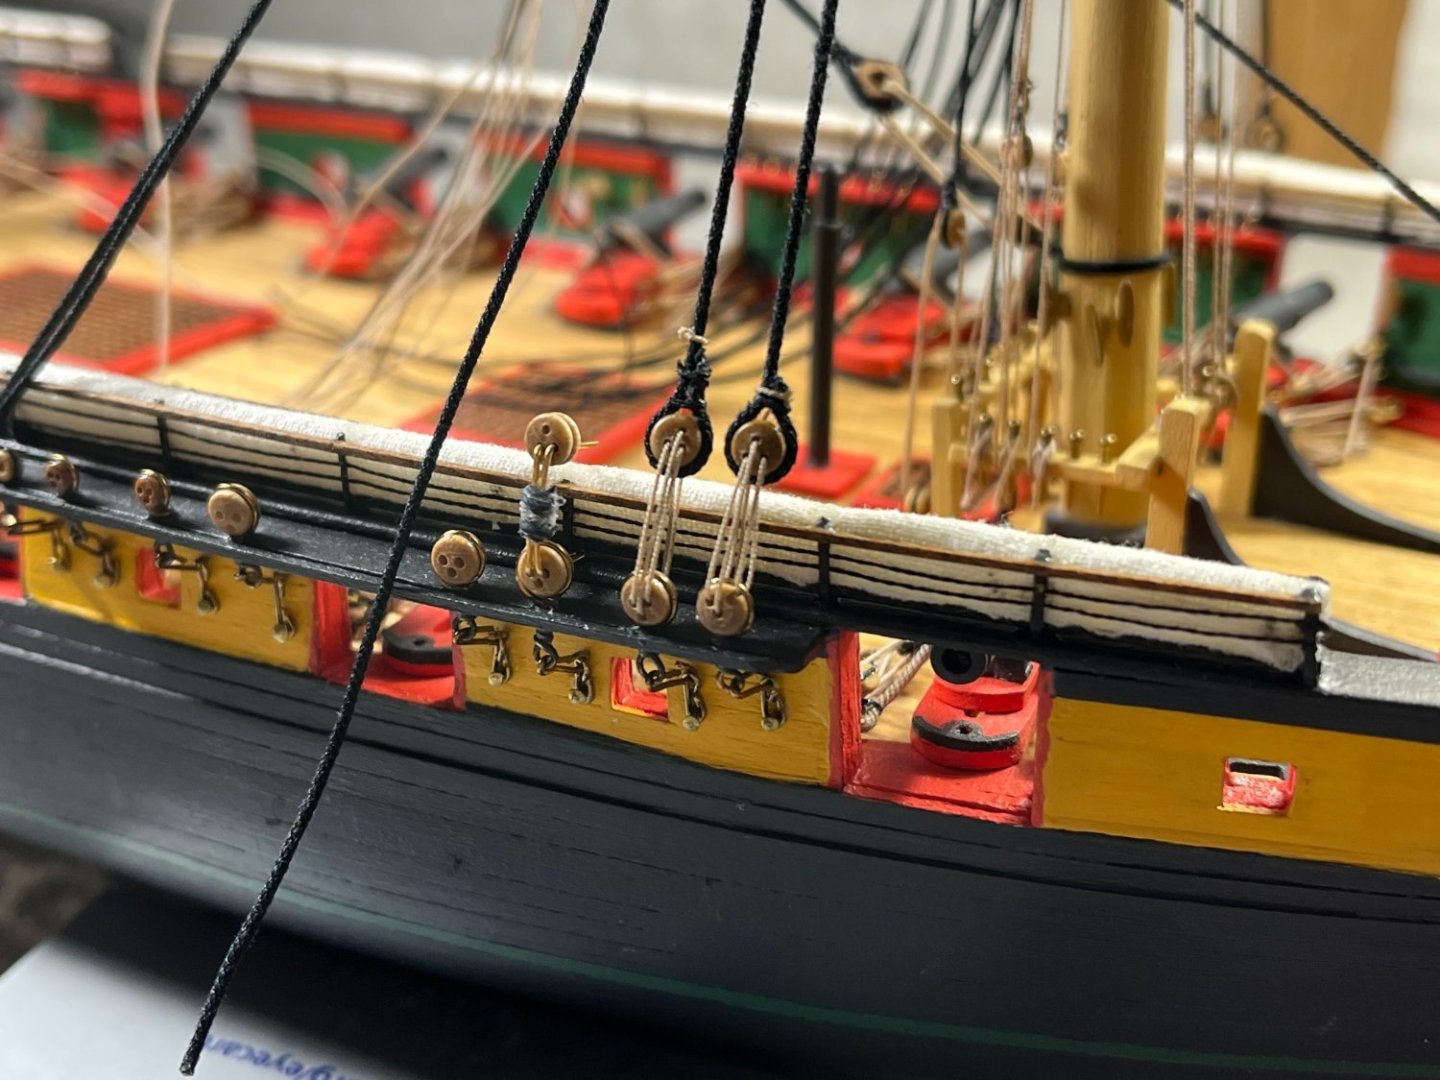
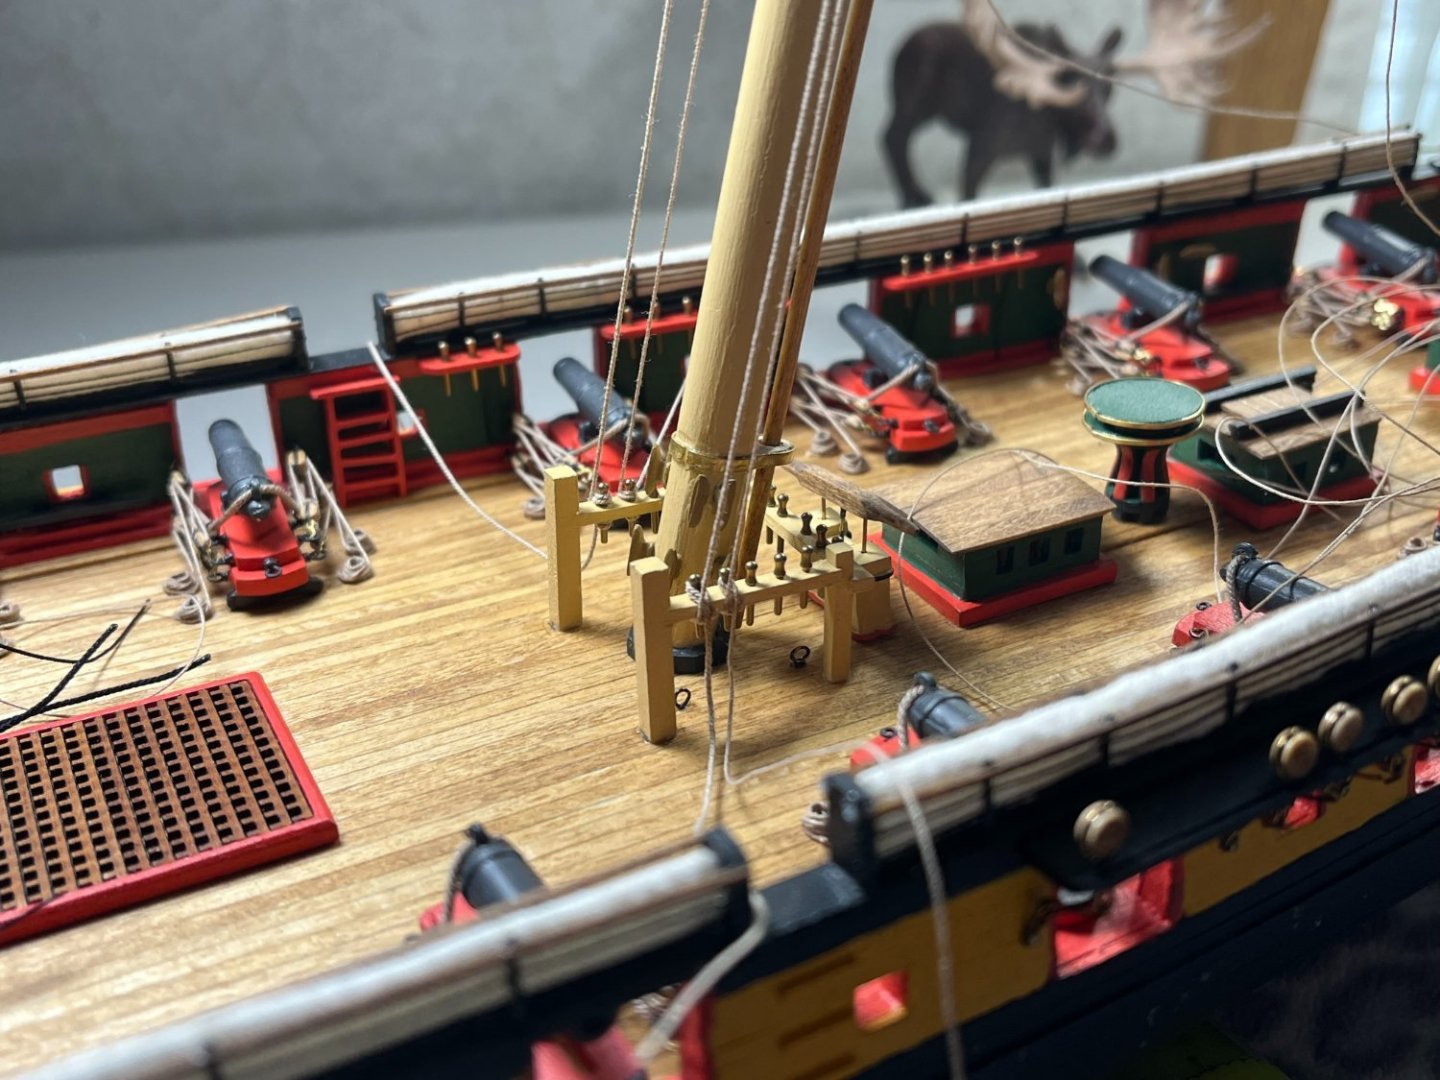
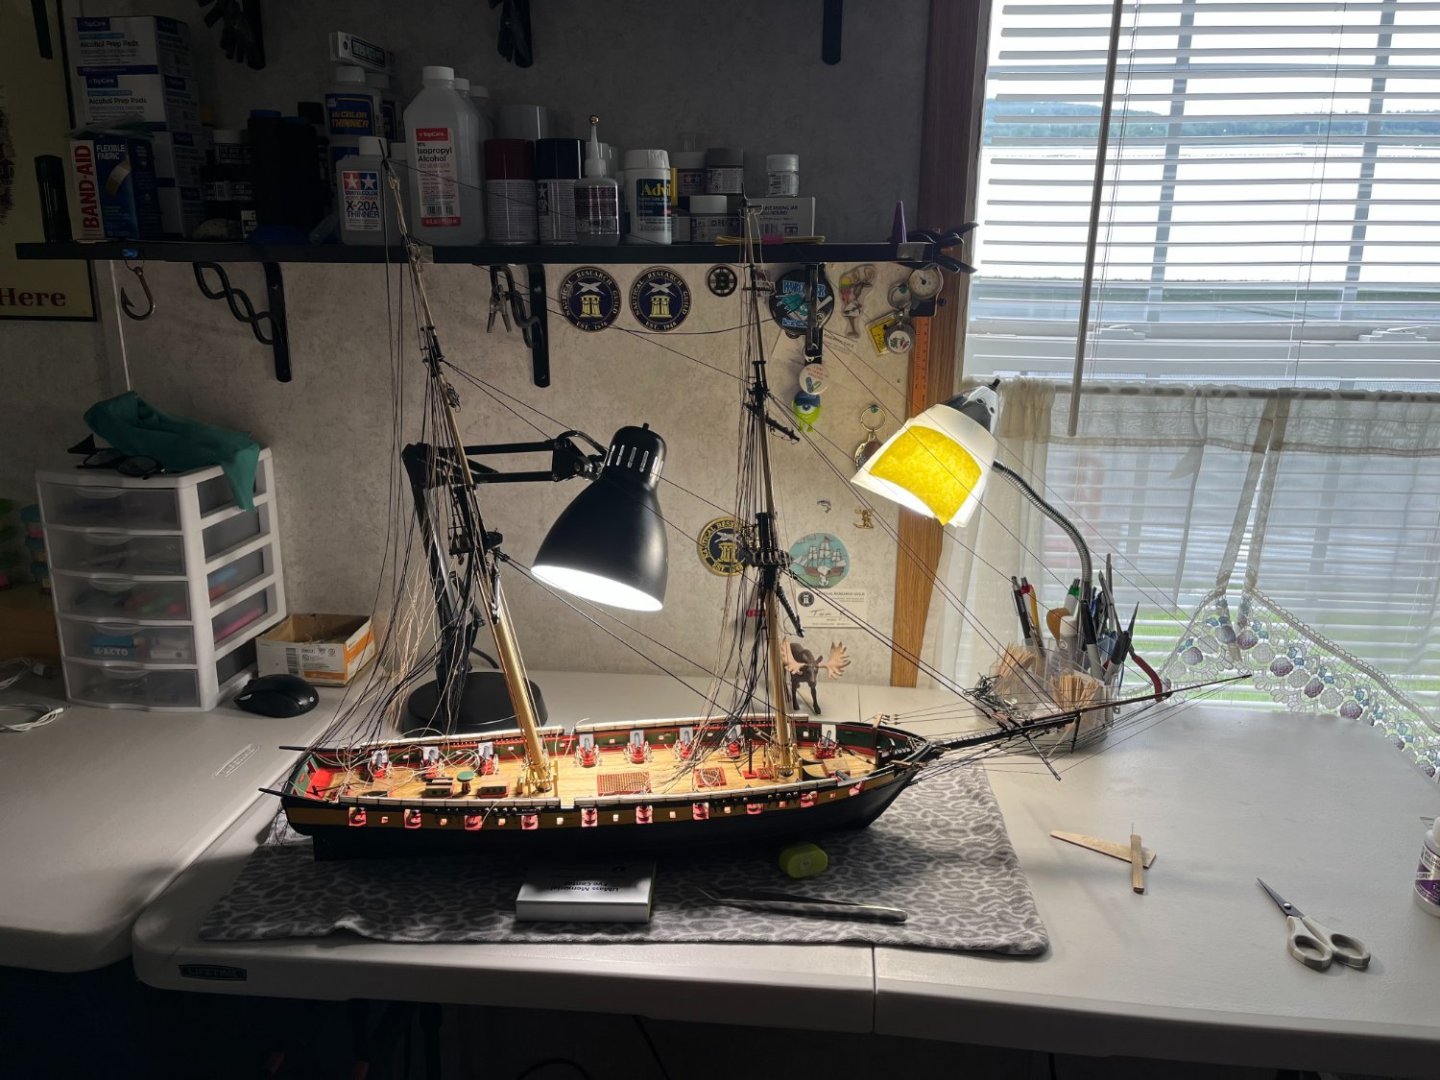
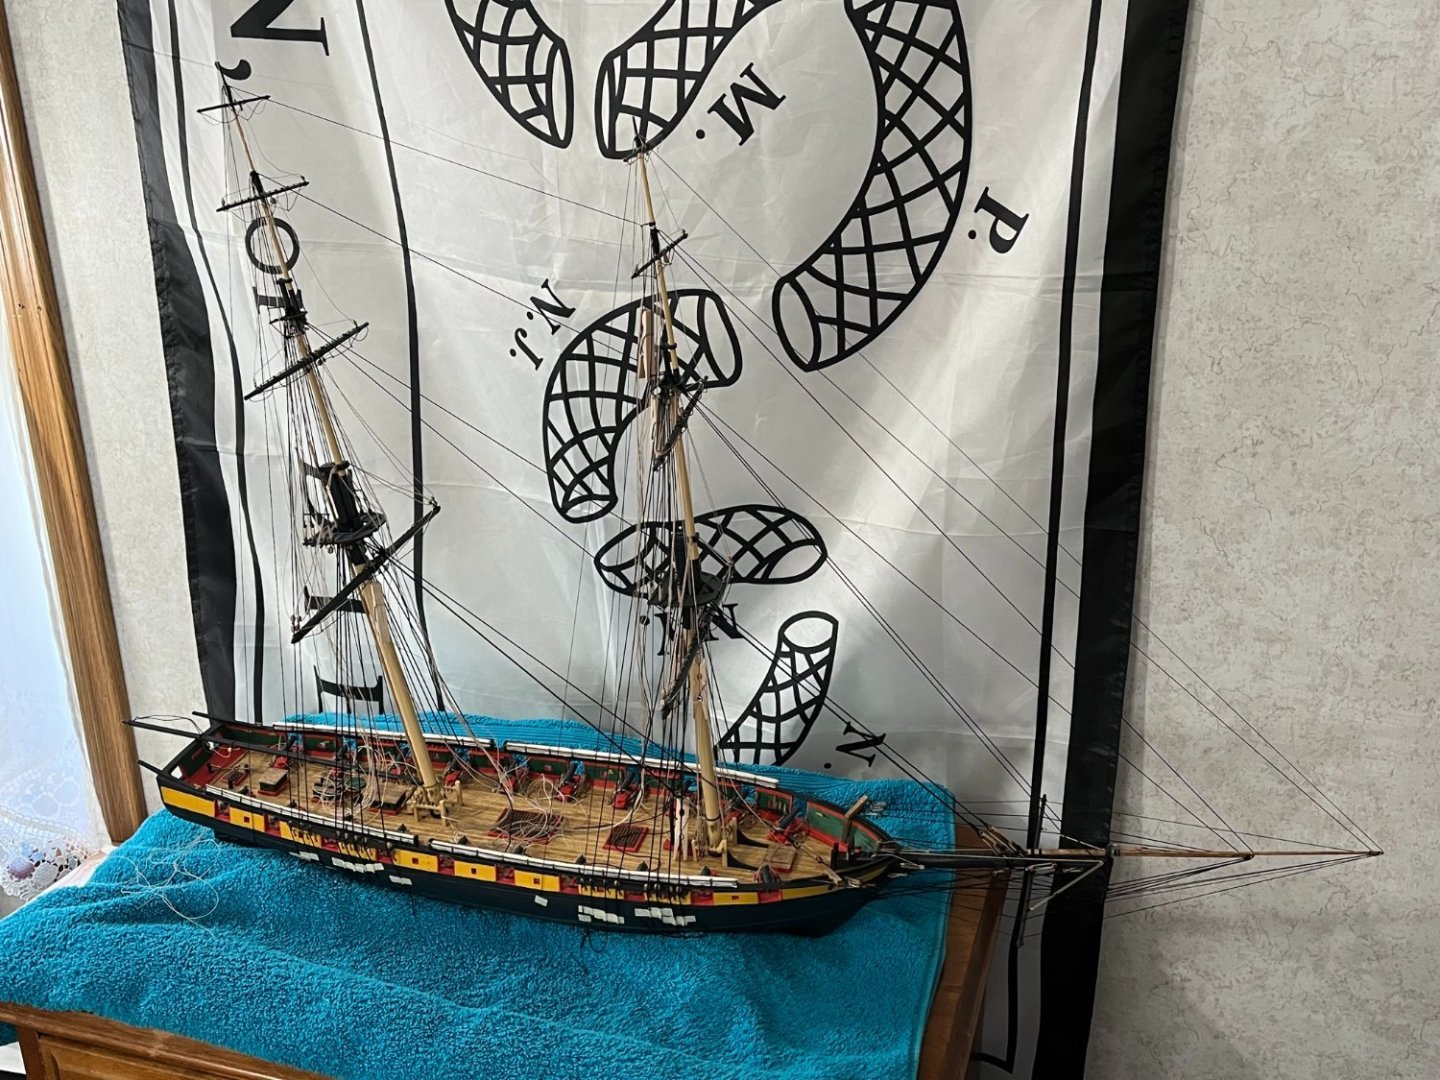
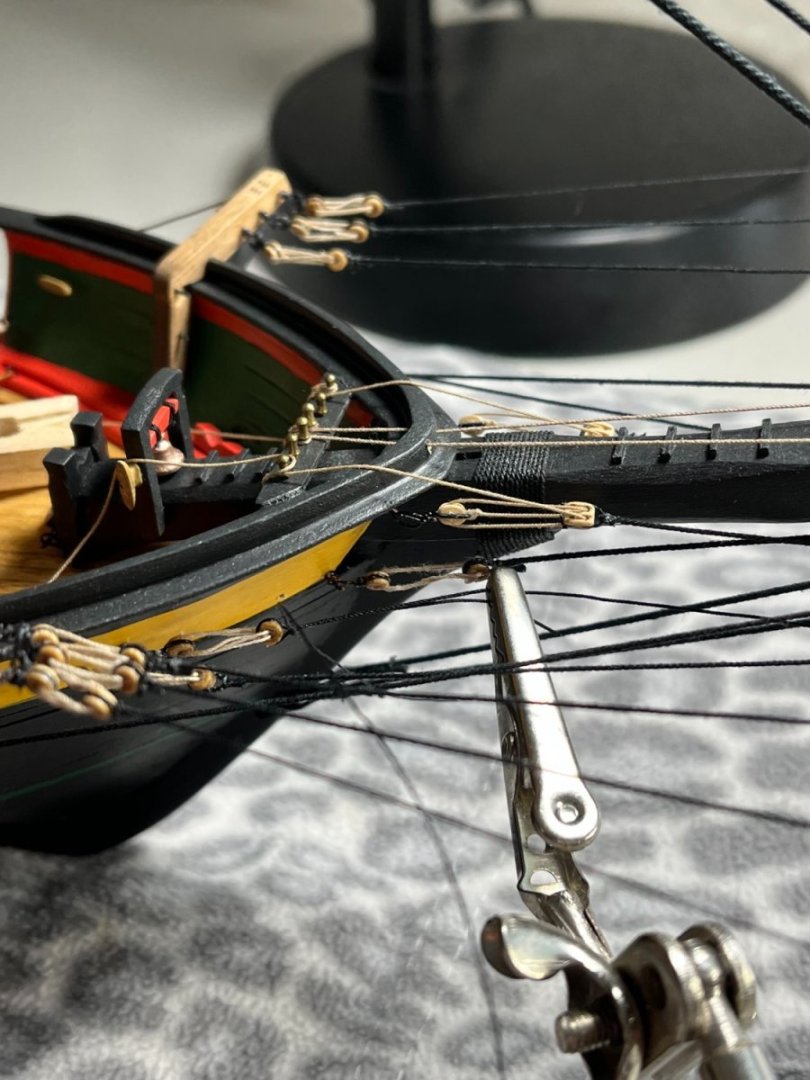
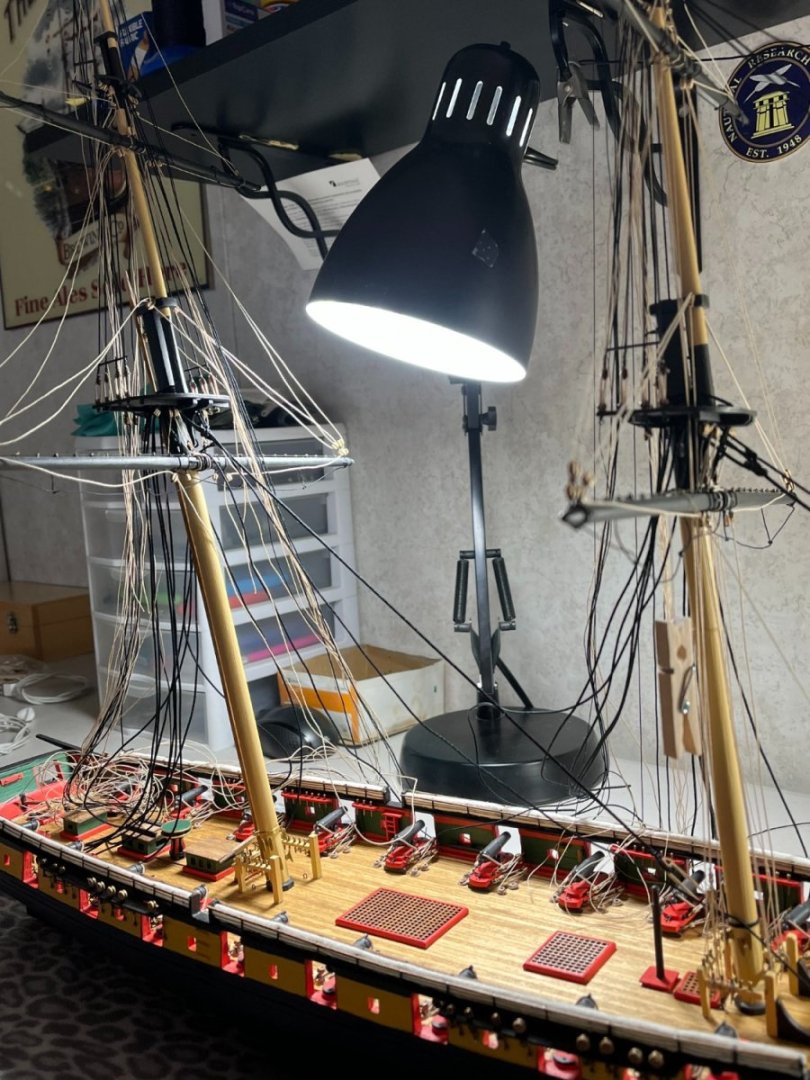
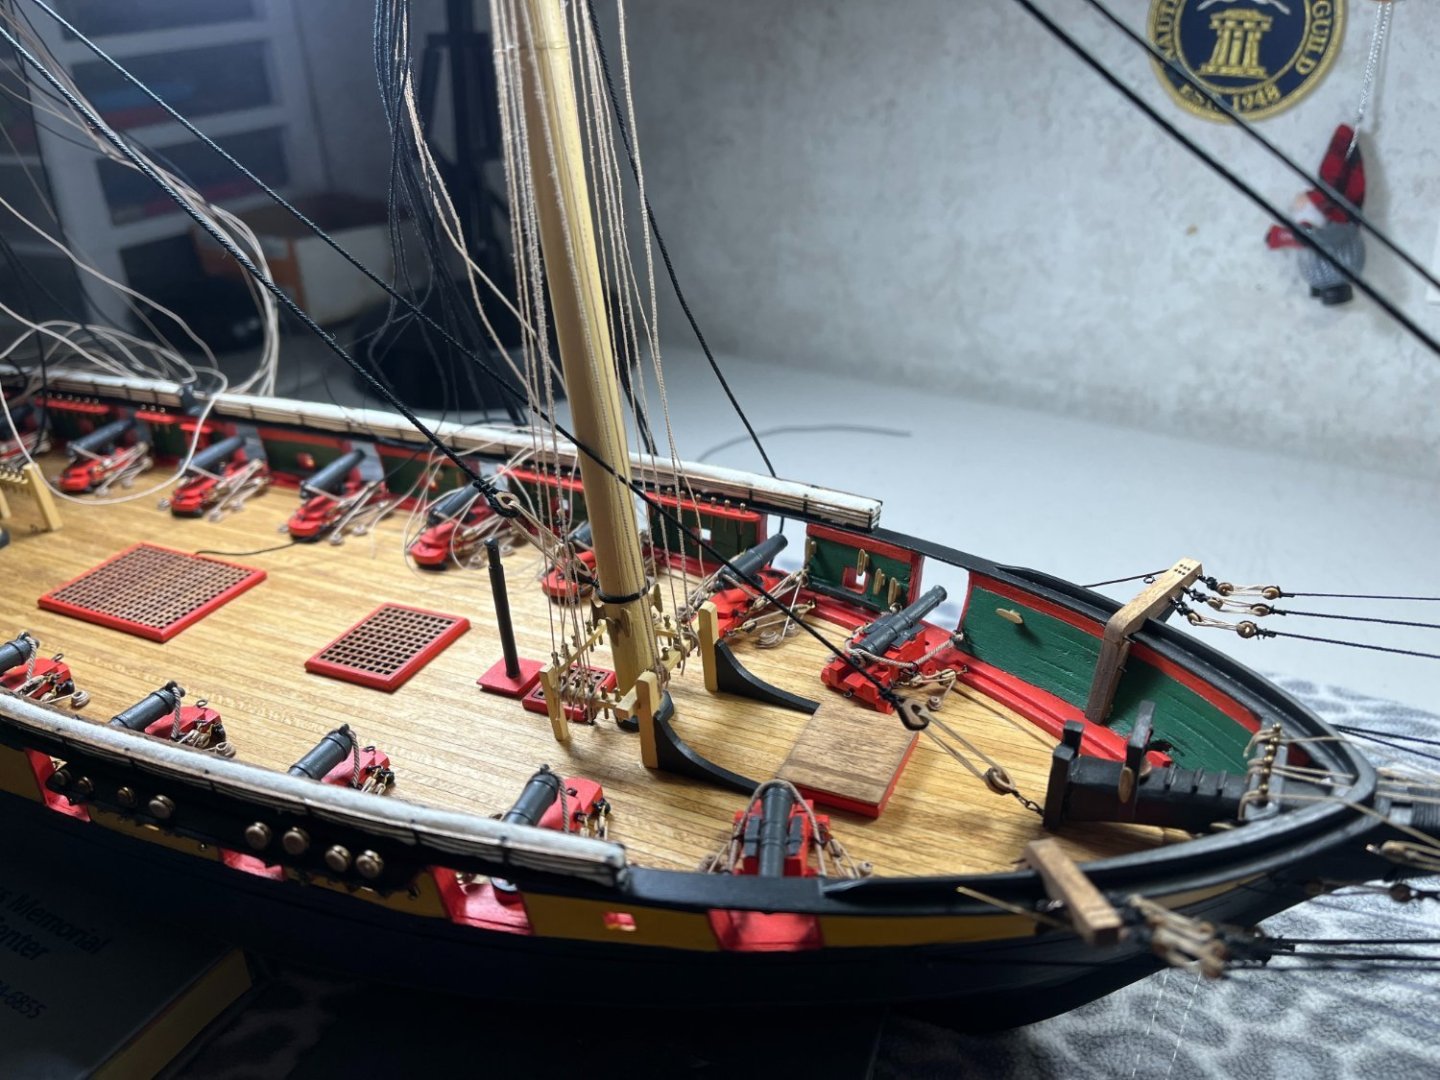
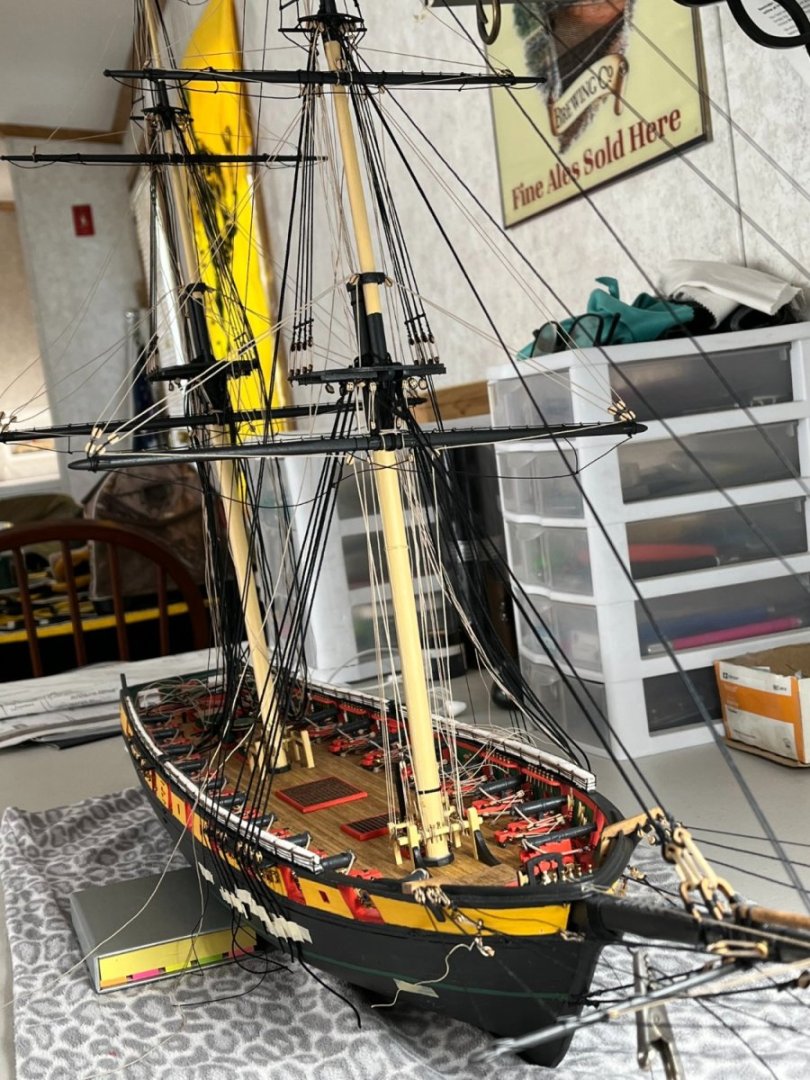
Evening, Hope everyone is well. Weekend is in view. Absolutely no commitments, no work, no responsibilities this weekend. Just have to get thru Friday. I see some quality ship building. We'll see what ultimately happens, ya know....life happens. Any who, Let's start off right with an update. Rigging continues. With all the shrouds in on the fore mast, I wanted to tie off some lifts, sheets and clew lines running from the yards. All along I wanted the black standing rigging in first, then install what limited running rigging I plan on installing. I wasn't quite sure if the rope should go over or under at the pin rail. Tried for a pleasing look. Coils will be added later. I seem to prefer wood clips while rigging. Heavy enough, yet light enough that if I hook it with a shirt sleeve, the whole boat doesn't go flying. All along I've been following the plans as towards rigging. Some of the below lines I did adjust on the pin rail so as not to foul with any other lines further up the mast. Seemed logical. Both sides of course. With all of that in place, the royal backstays were installed. There's some fuzz on my ropes. Admittedly, this ship does not have a case yet so it does get dusty. It really isn't as bad as it looks. Both sides of course. Minus some braces and ratlines, the foremast rigging will be done. Be good, Tom E


-
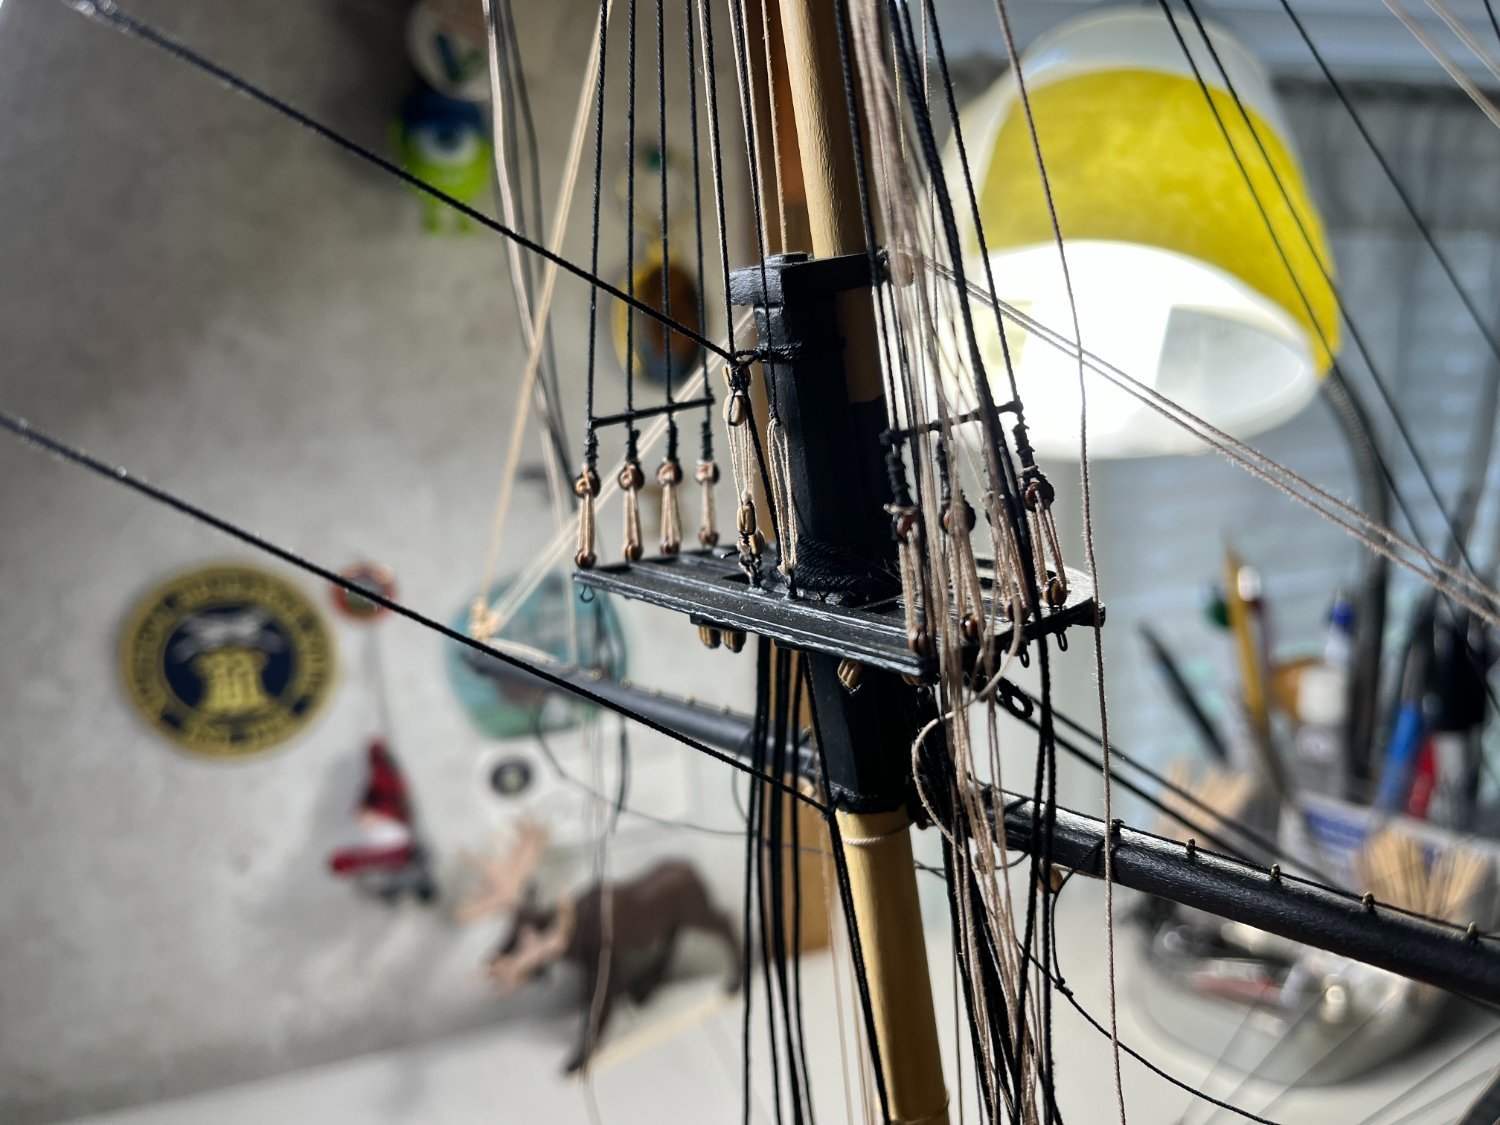
Evening, Hope everyone is well and warm. It's been a cold snowy and icy week of work. Too exhausted to build, but I think an update will suffice. With the fore lower shrouds in place and the sheer poles installed. I wanted to get the Tye and Halliard for the topsail yard rigged in before moving onto the rest of the shrouds. My thinking, it will be easier to do first, before setting in the topmast and topgallant stays. In the end it was all fiddly but was more difficult in my head. The set up will be fully installed on the pin rail with a rope coil done later. What you do to one side, you do to the other. Ship building at its simplest. With things falling into place, I could move onto the topmast backstays. Just worked my way down that side of the ship. I would alternate when installing shrouds. Set two on one side, then the other. I never favored one side, finished it, then do the other side. Tried to be as symmetrical as I could. The topgallant backstays could then be set in. Once both sides where completed, it put a fair amount of tension into the rigging running to the bowsprit. This was by design. The royal backstay will be installed next. Be good, Tom E


-
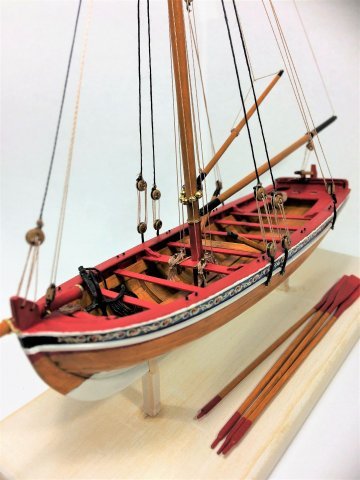
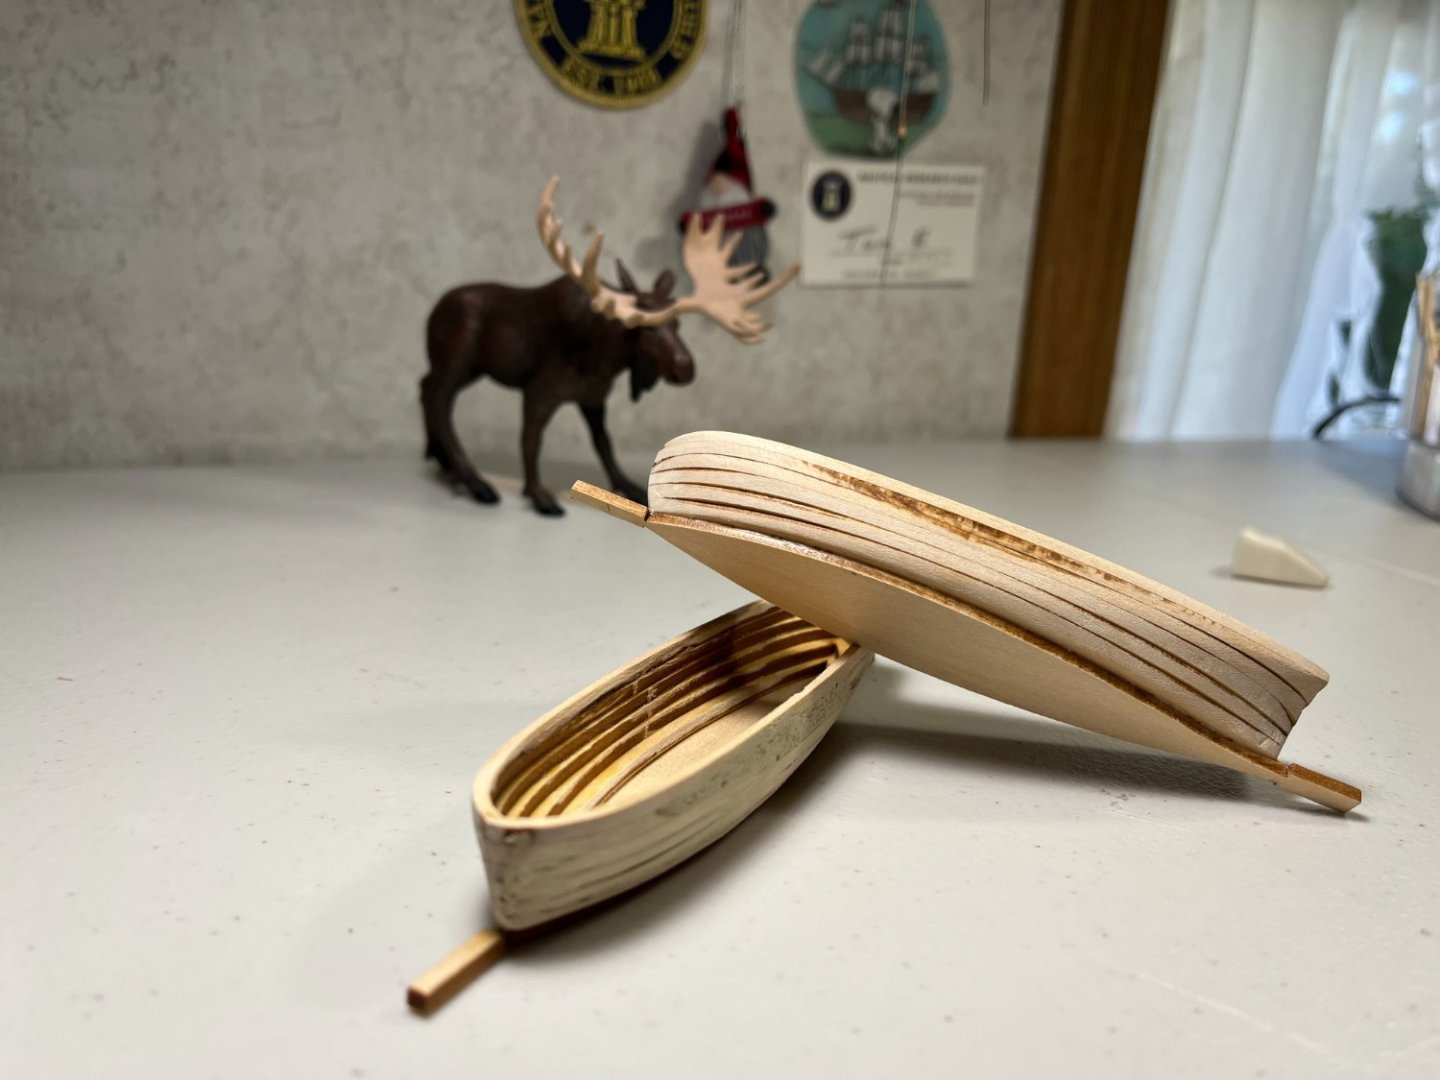
Evening, Cold snowy New Hampshire night. A good 5-6 inches has fallen since lunchtime. Needless to say, the ride home was slow and long. But, home safe, chicken parm is in the oven. Niagara needs a small update. For some reason I re-visited the Cutter and yawl. I need to start cracking on these things. I originally built the cutters when I started this kit, well now it's time to incorporate them. These will make an appearance later on. With the foremast main shrouds installed. I wanted to get the sheer poles going. My alignment on the deadeyes in the shrouds has some wobble, but not too bad. I would say I've done worse or better but can't. This is the first time I've gotten this far with a ship. Working my way up the shrouds. Both sides will be done. Learn on one side, then repeat. Below is the current state of affairs. Stay warm, Tom E


-
Happy Holidays!!! Hope everyone is well. Stuck at work right now. I have no doctors working today, my OSHA training is done, and I really want to be in the shipyard right now. I have to stay until at least noon because I have to monitor the triage line. One good thing, the coffee is free at work. Anyone have a good excuse to get me outta here?!?!?!?!? Tom E
-
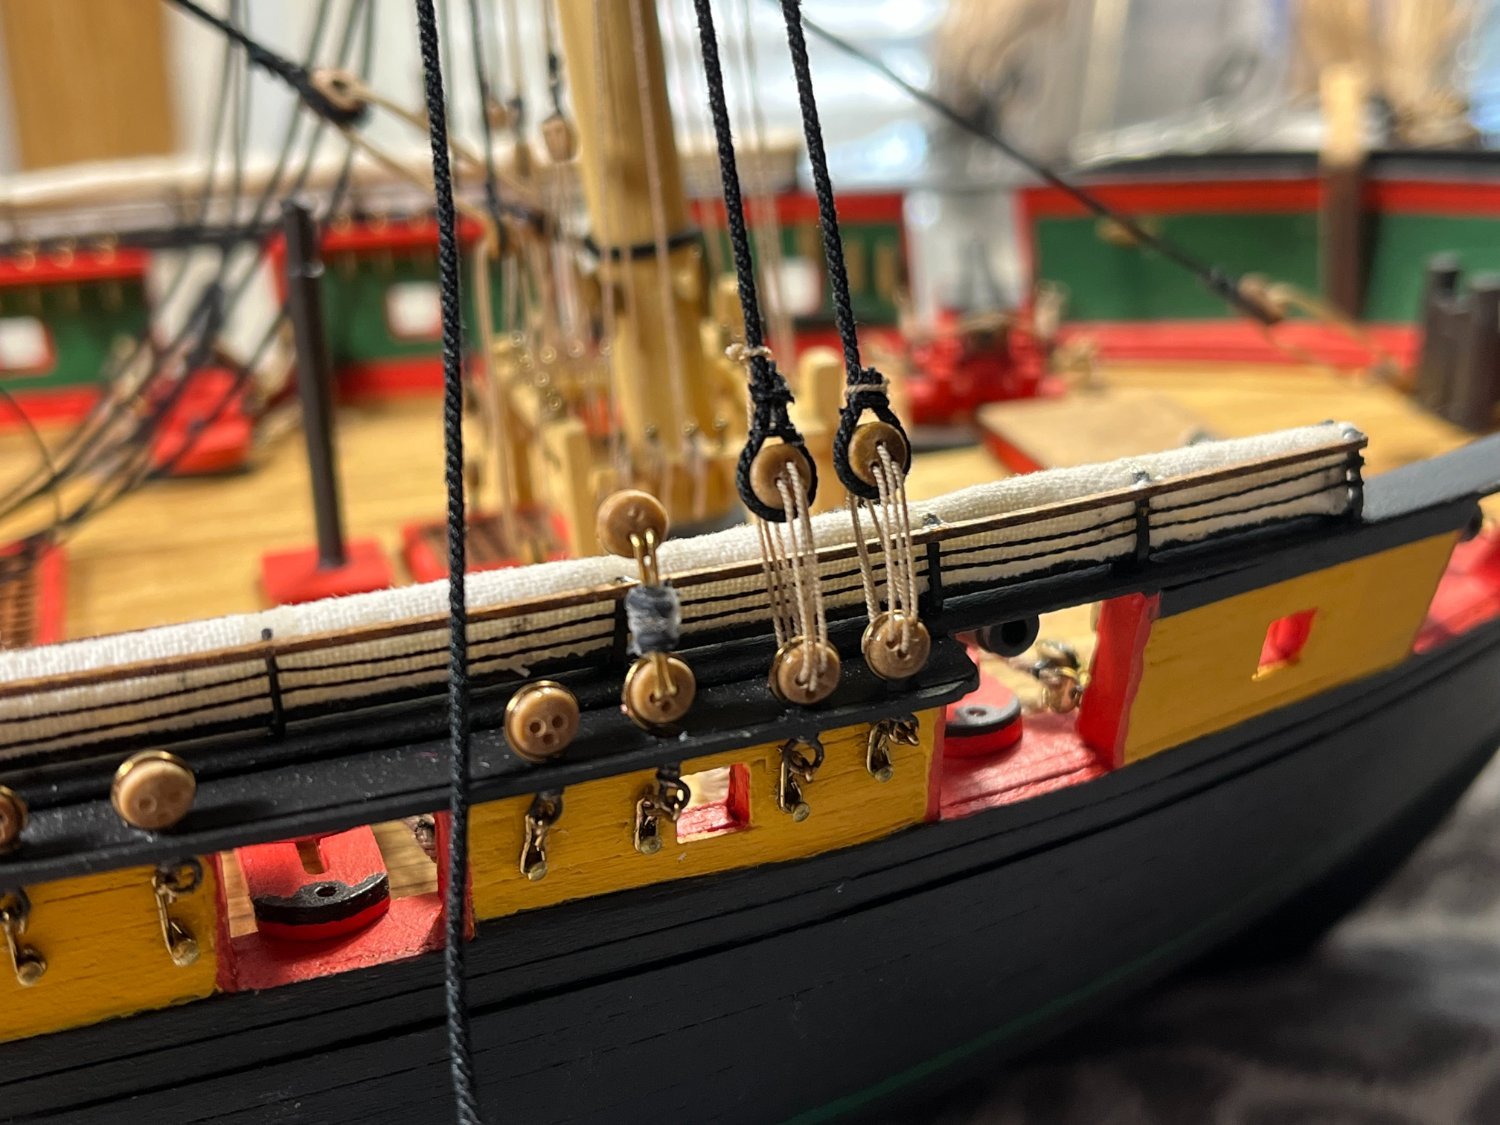
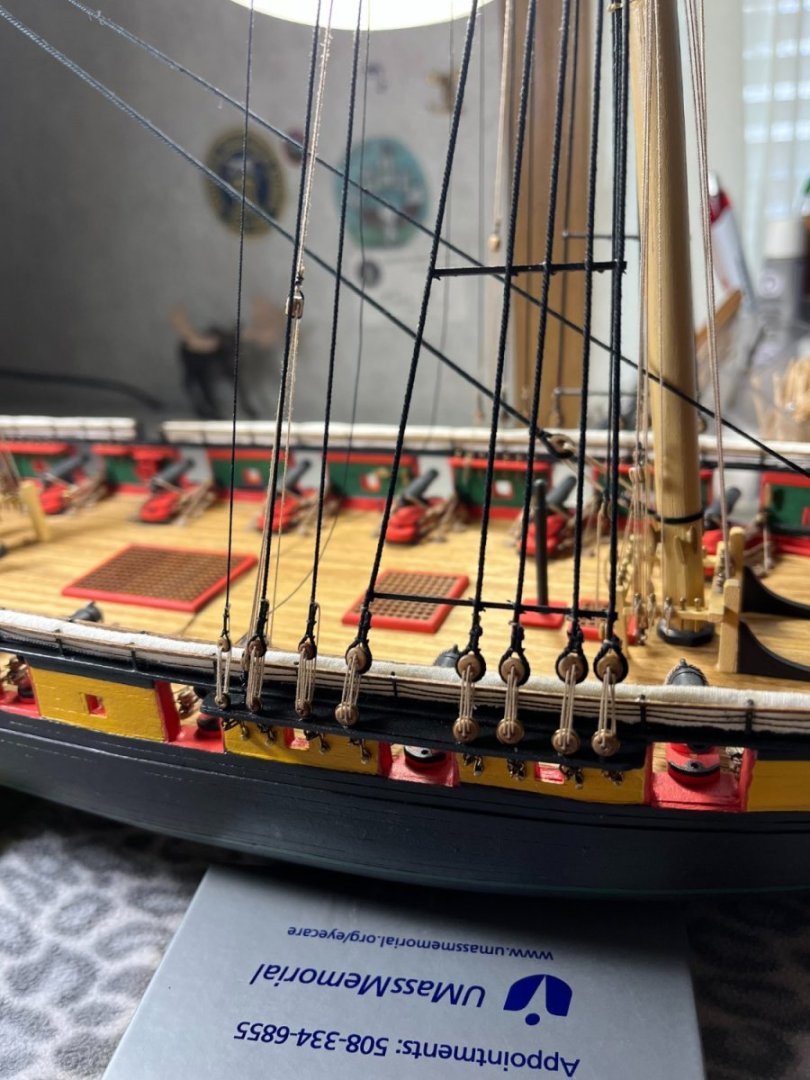
Evening, Hope everyone is well. Niagara continues. With little projects getting done off ship. I decided to start rigging the lower shrouds. It's time. No ratting just yet though as these go in. I want to see where the halyards and lift lines end up beforehand. Just to see what it will look like. I think we all have our own way of setting deadeyes. Set first with my little wire gauge. I call it my "bug". Pinch with a third set of hands and tension said shroud. These are kit supplied deadeyes. Tie off with two knots. Set in the lanyards. These are tied off above the deadeye. Learning moments abound!!!! Rinse and repeat. Constantly checking tension thru out the entire model as one shroud is set in. Every little pull of any line will have a reaction somewhere else in the rigging. Thats the battle!!! As the shrouds get set in, a lot of loose/extra lengths of rope is being eliminated. The model is large enough where there is a fair amount of open space to operate as I fill in other rigging. I don't know how many times I've whacked a yard or something else backing out of the model as I set something. It's a miracle this ship is still standing! Be good, Tom E


-
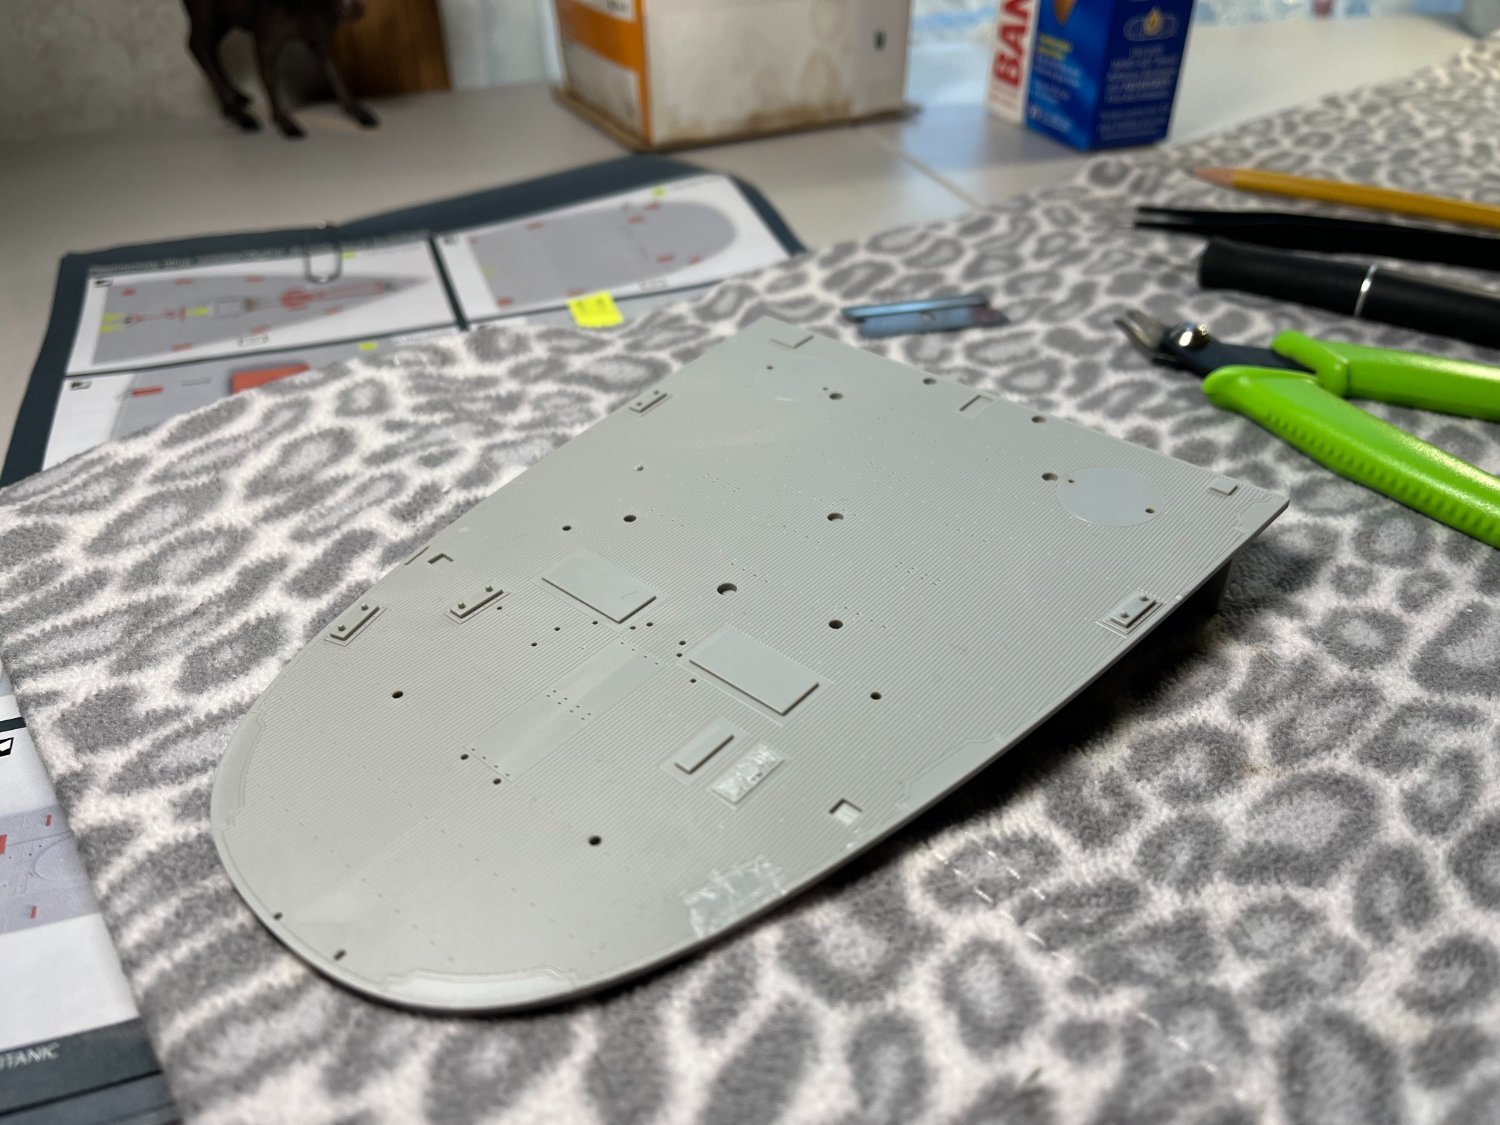
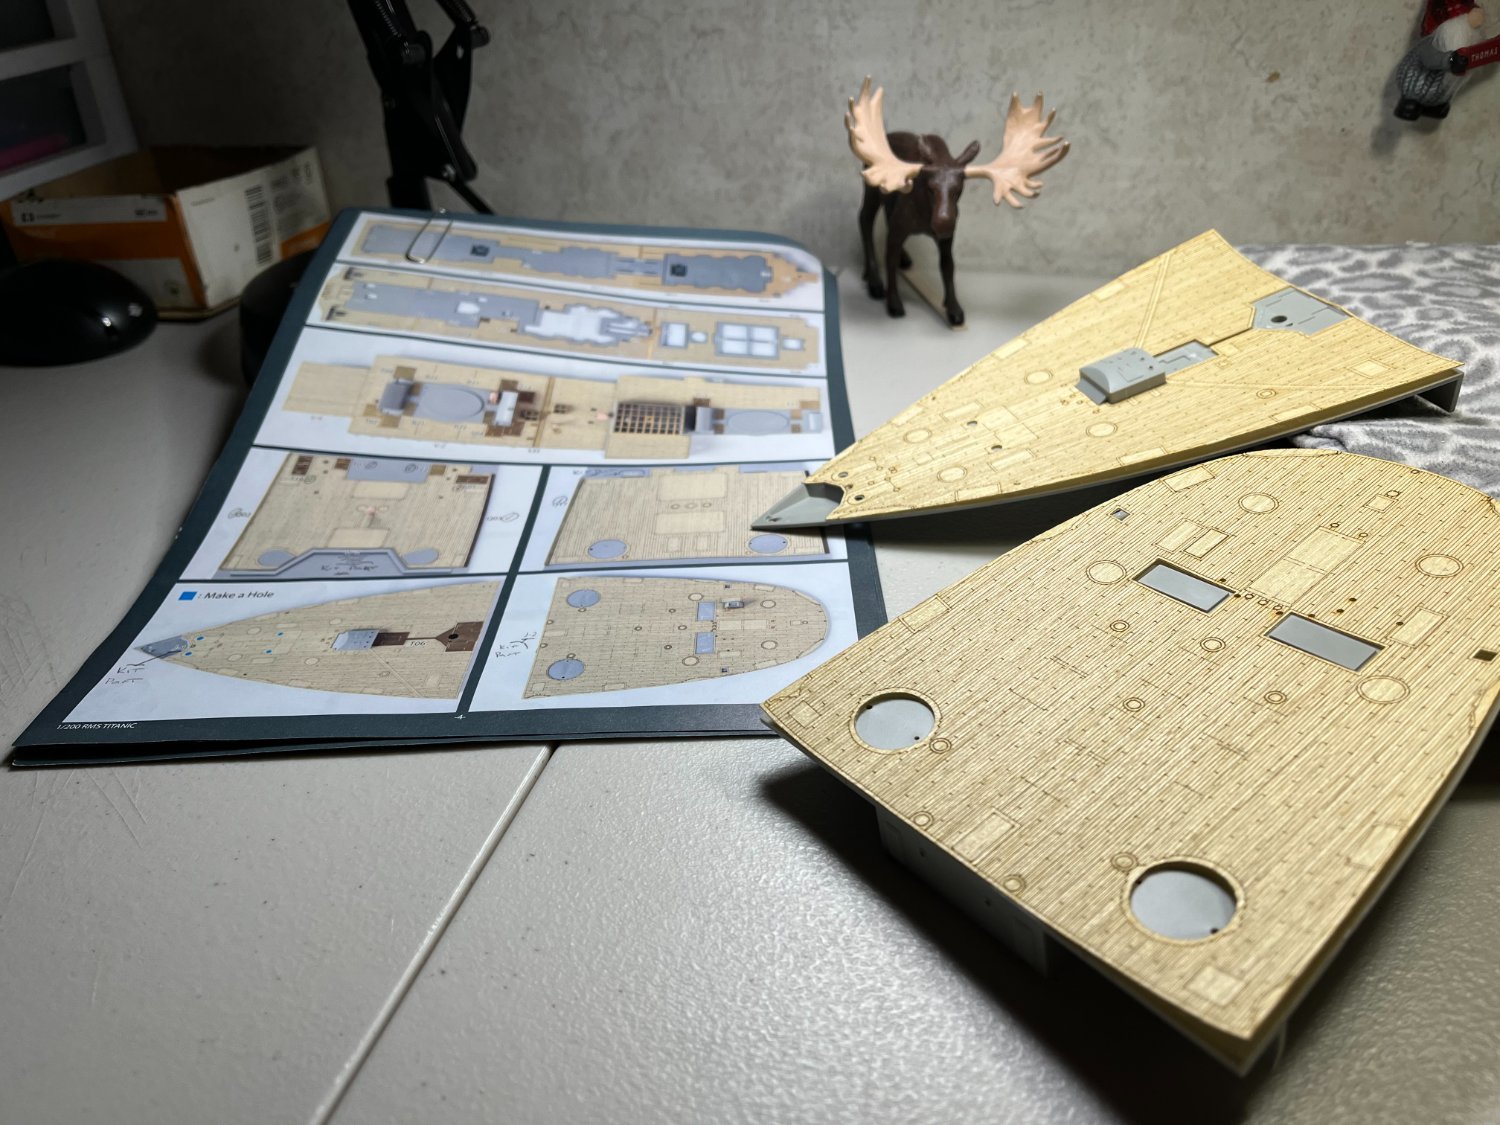
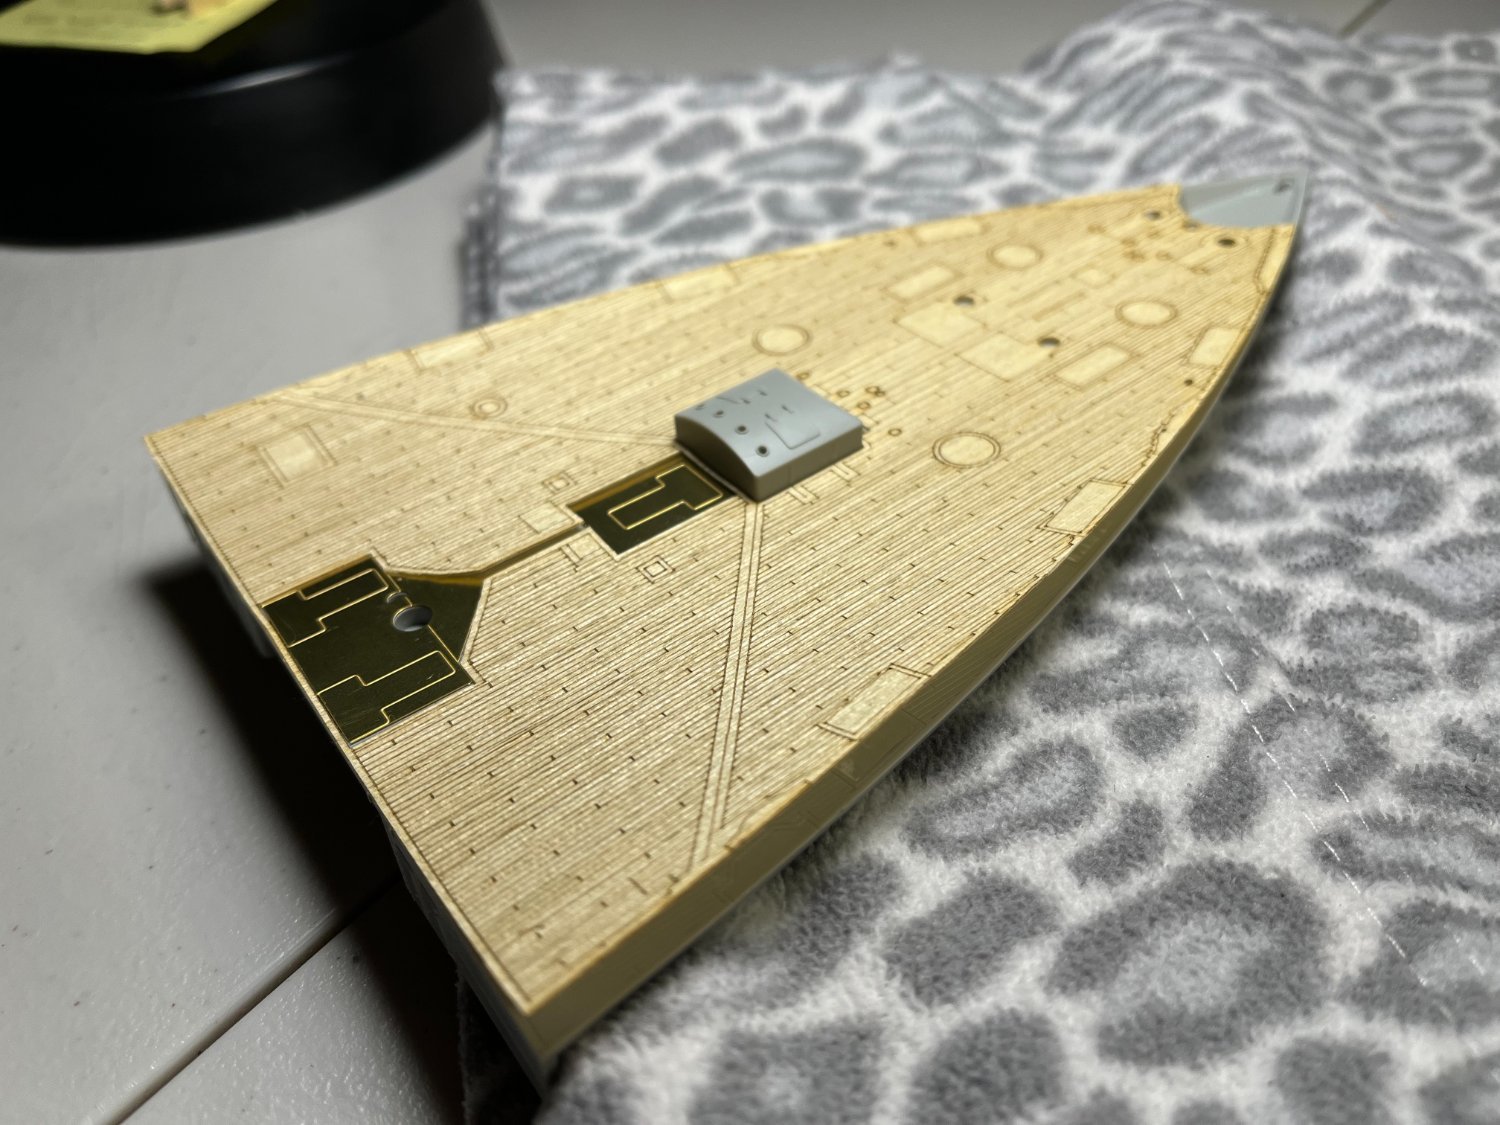
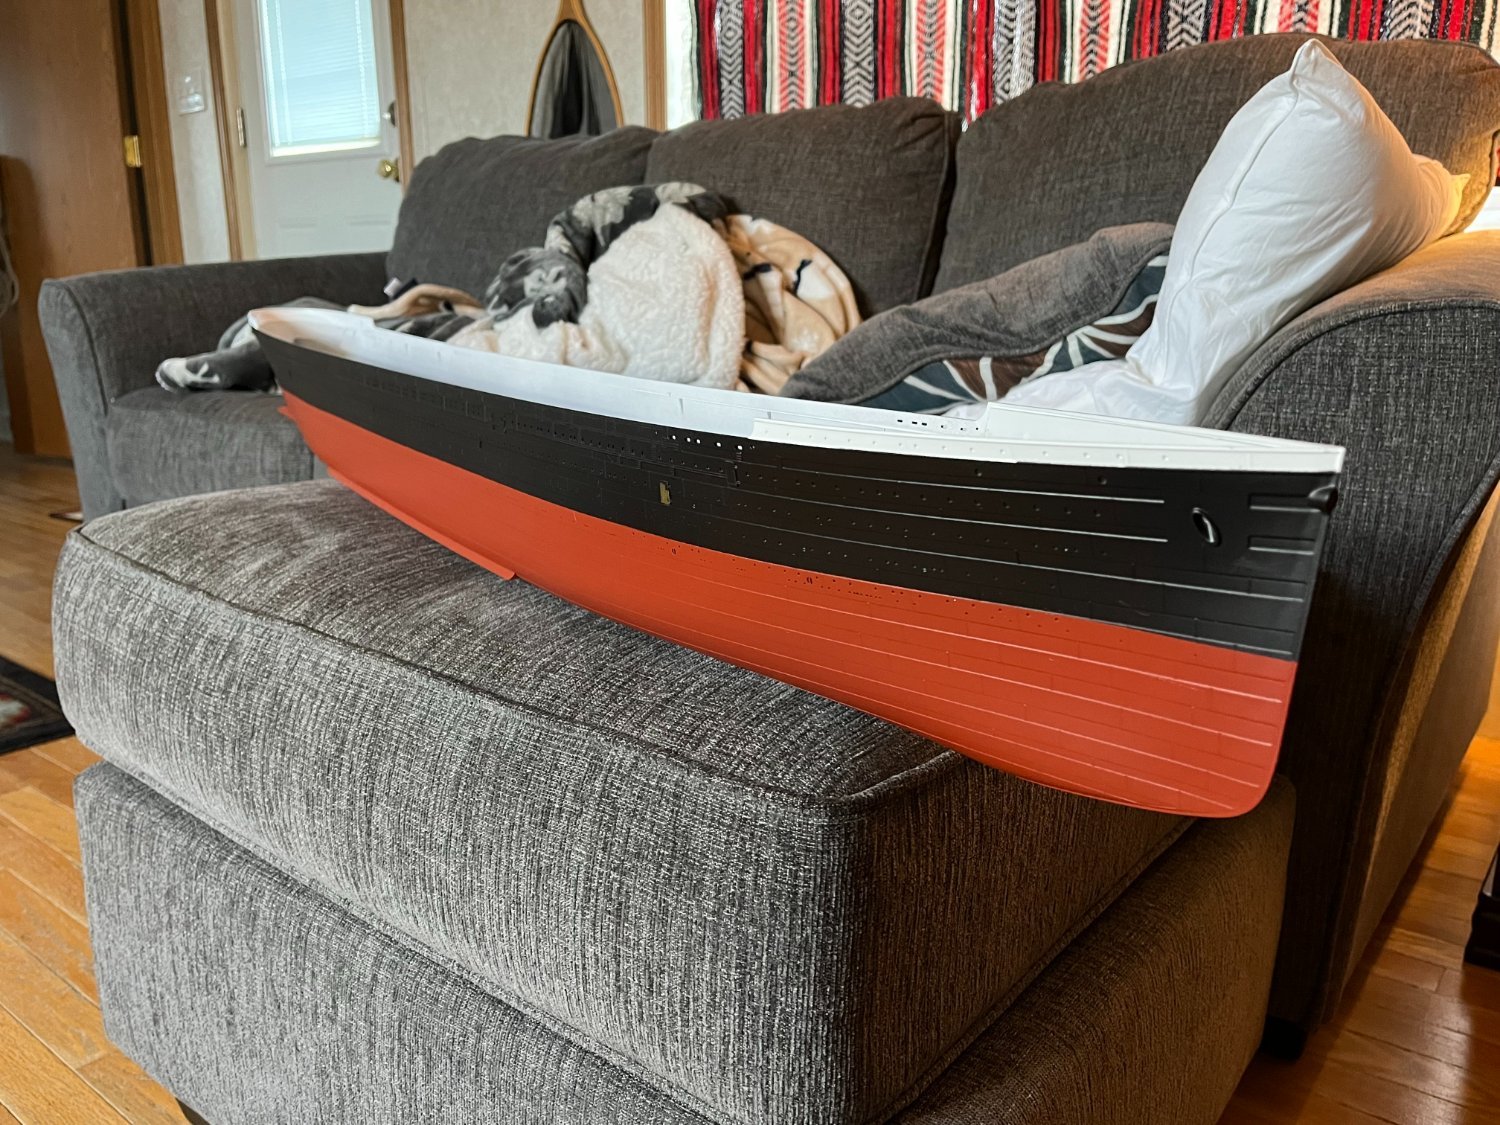
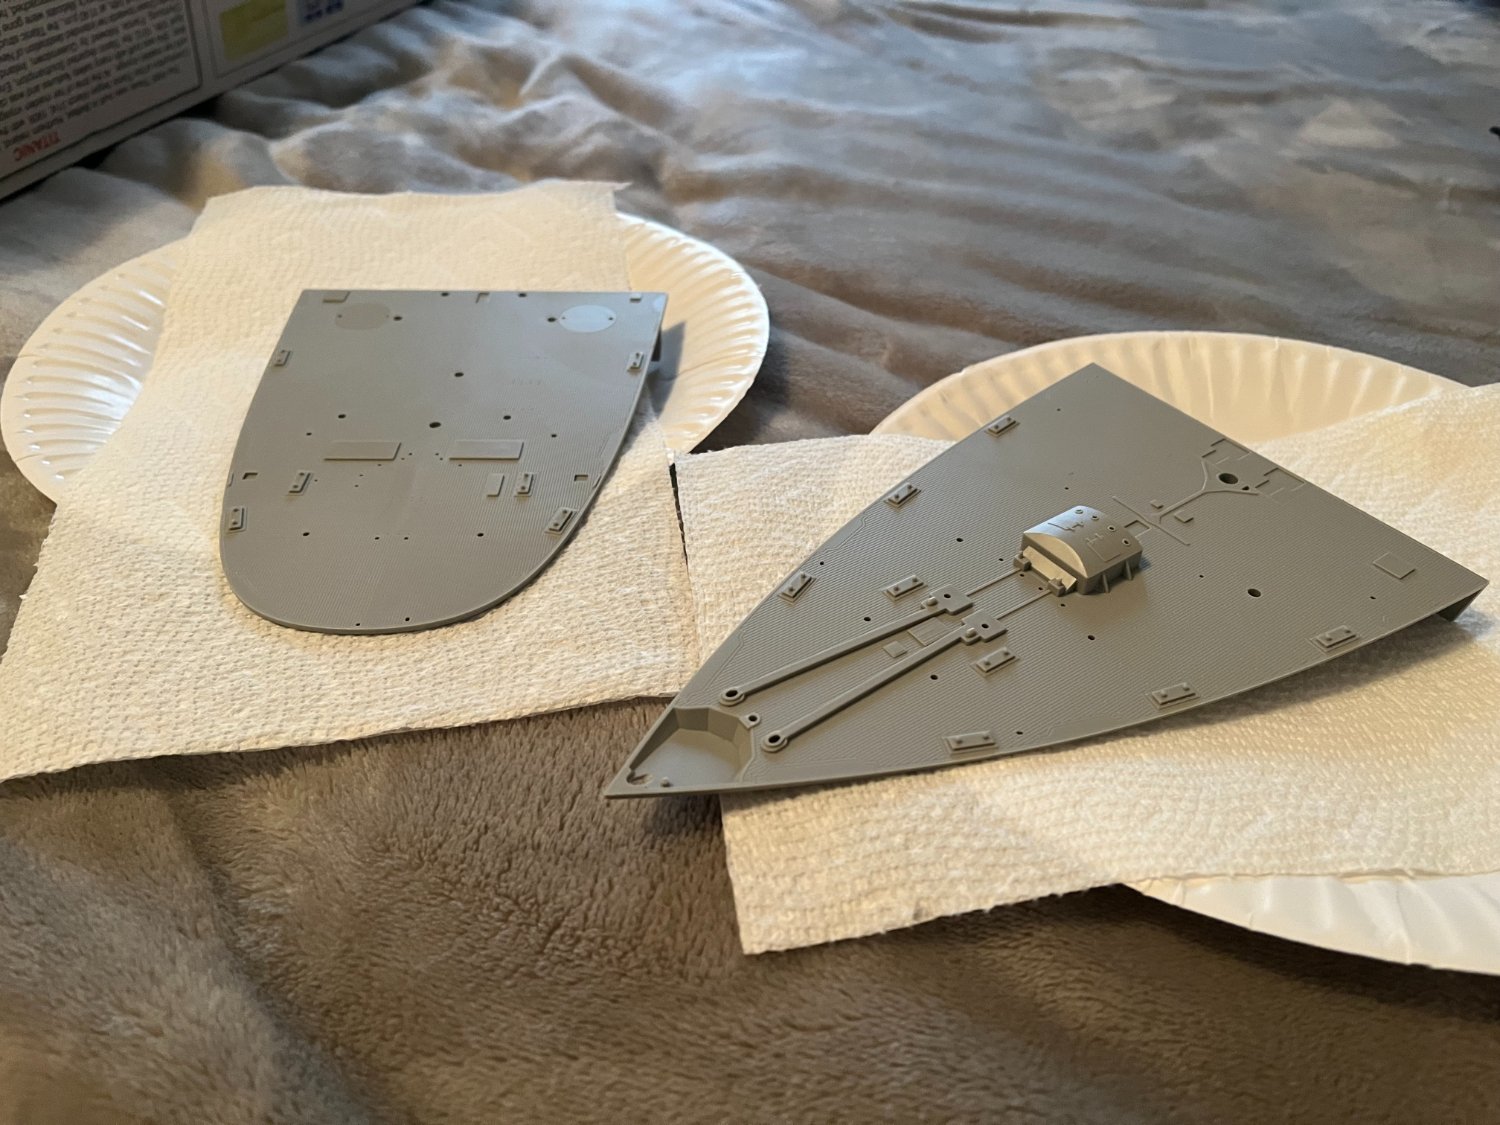
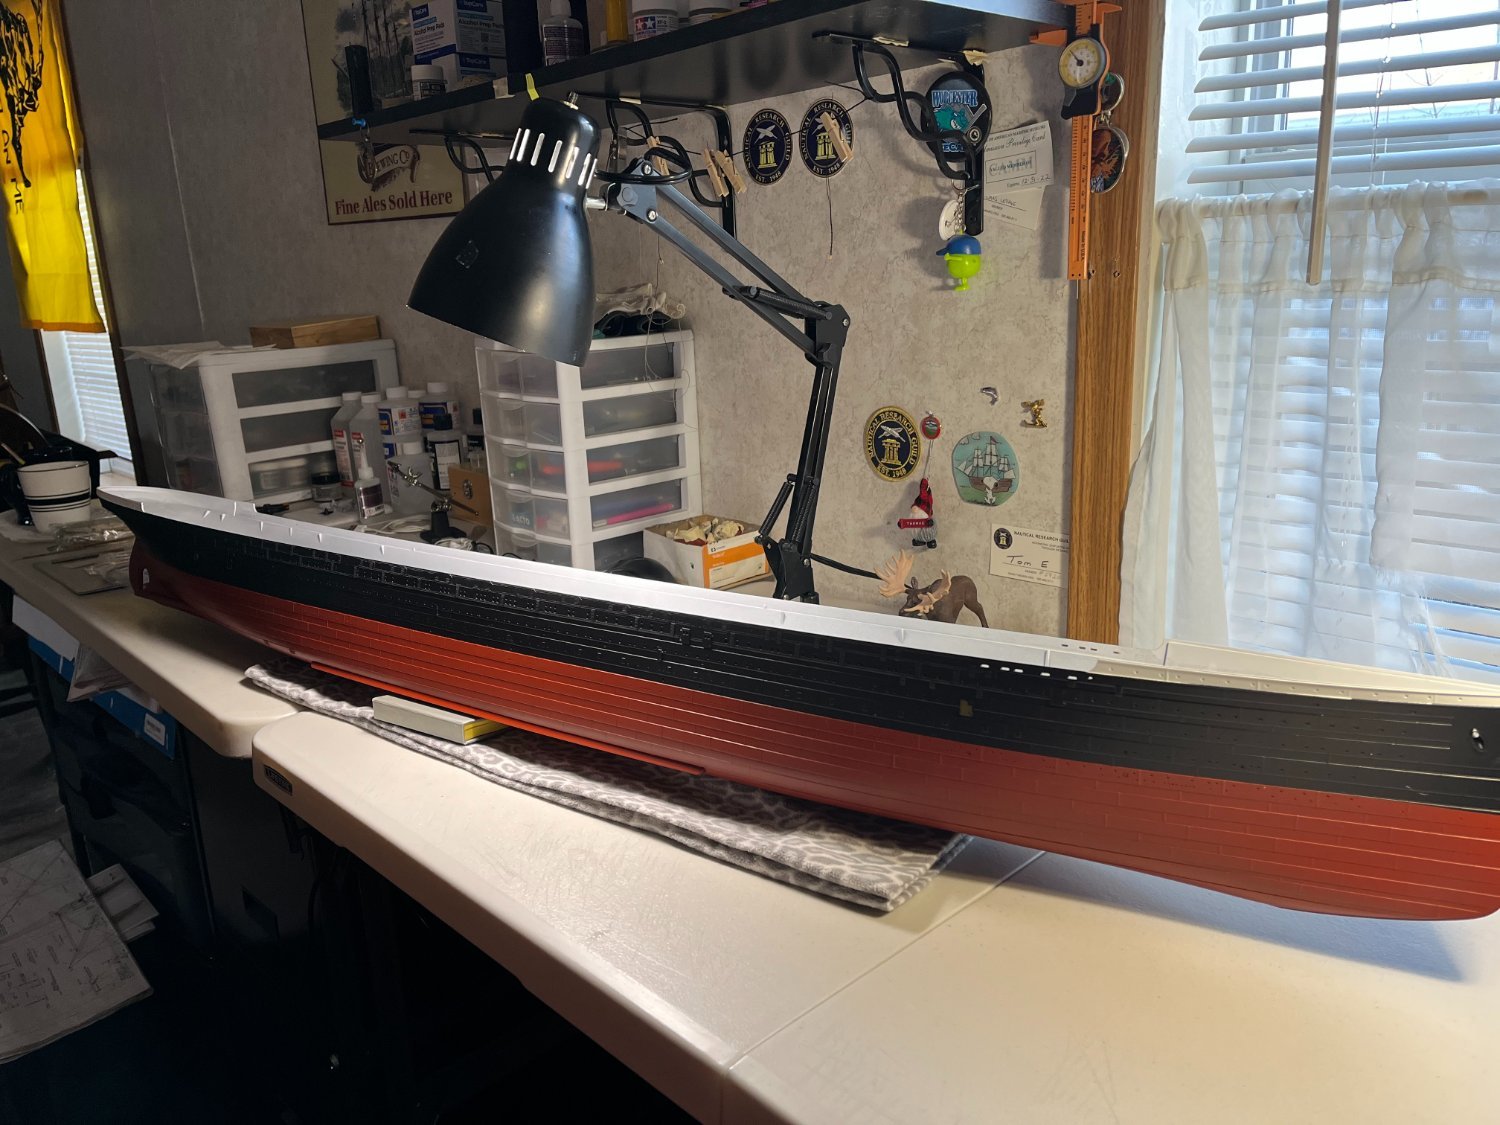
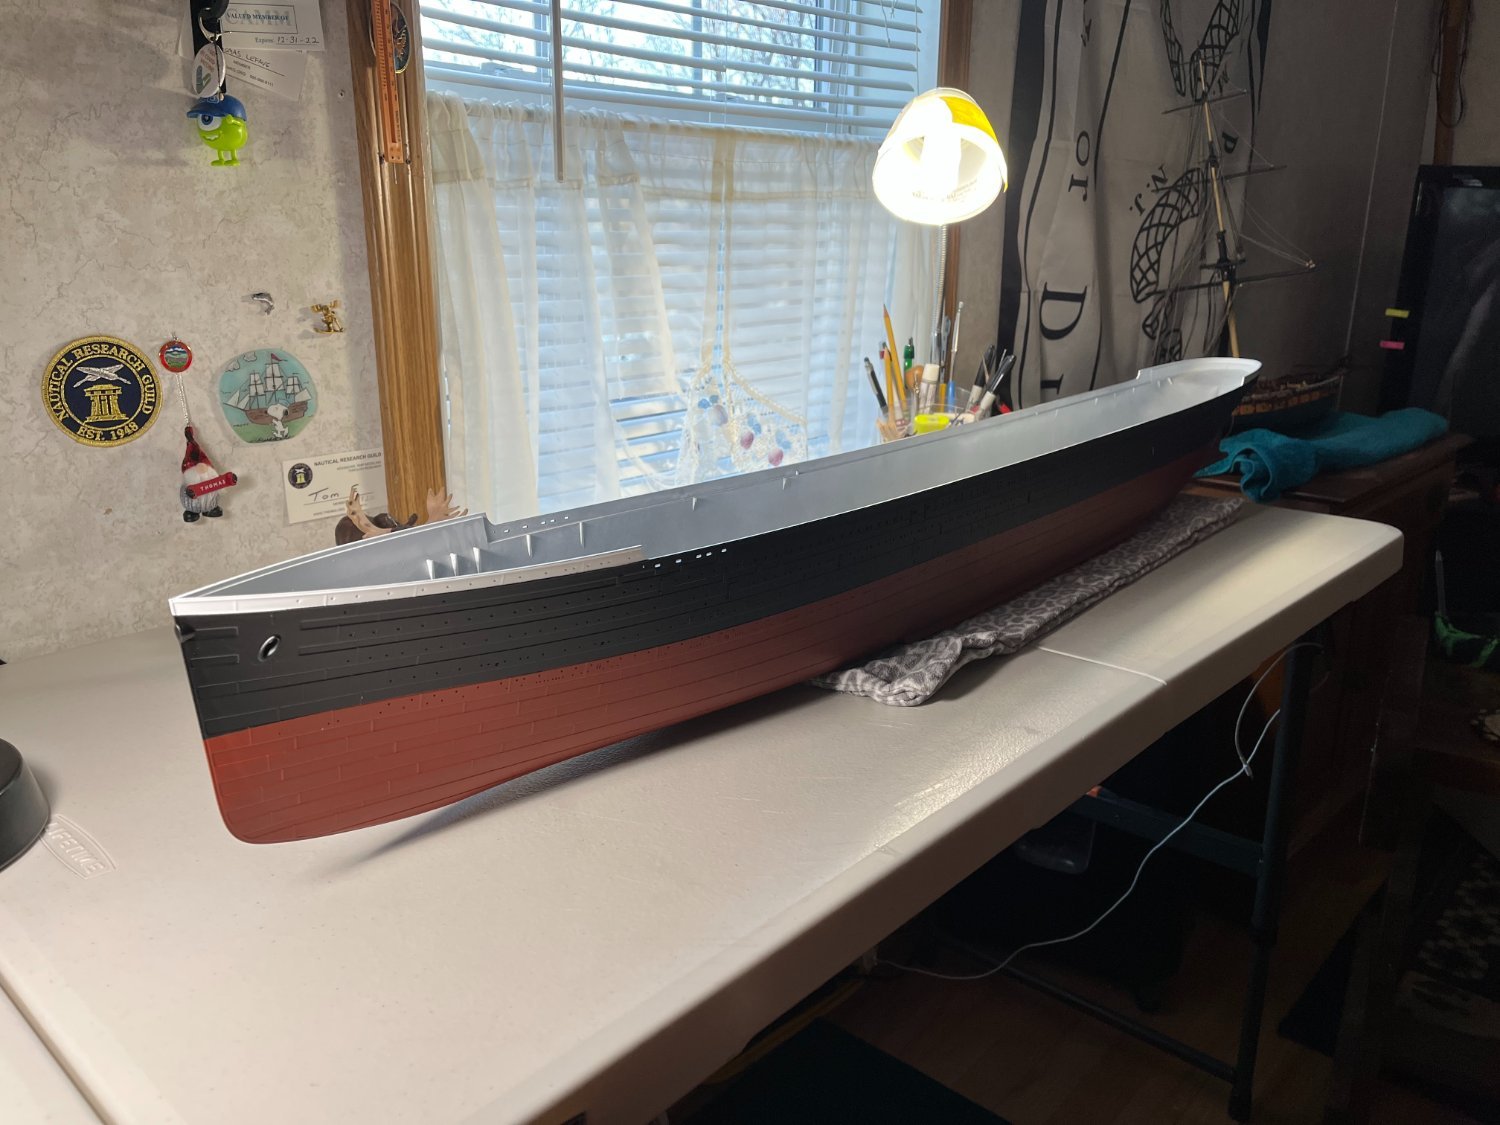
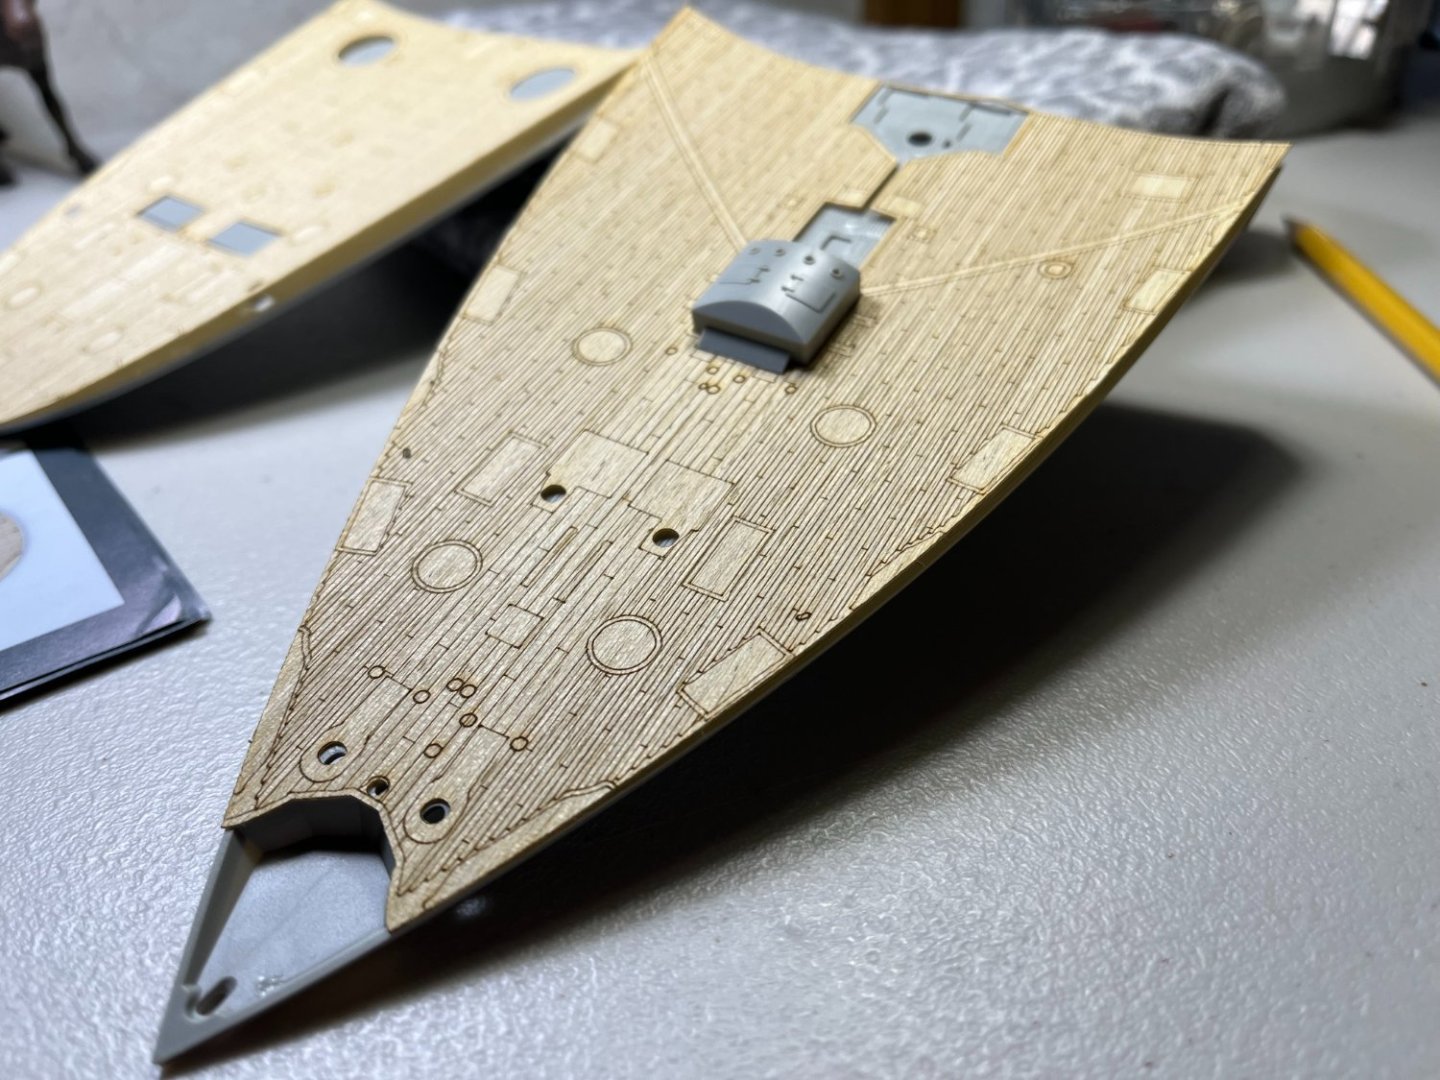
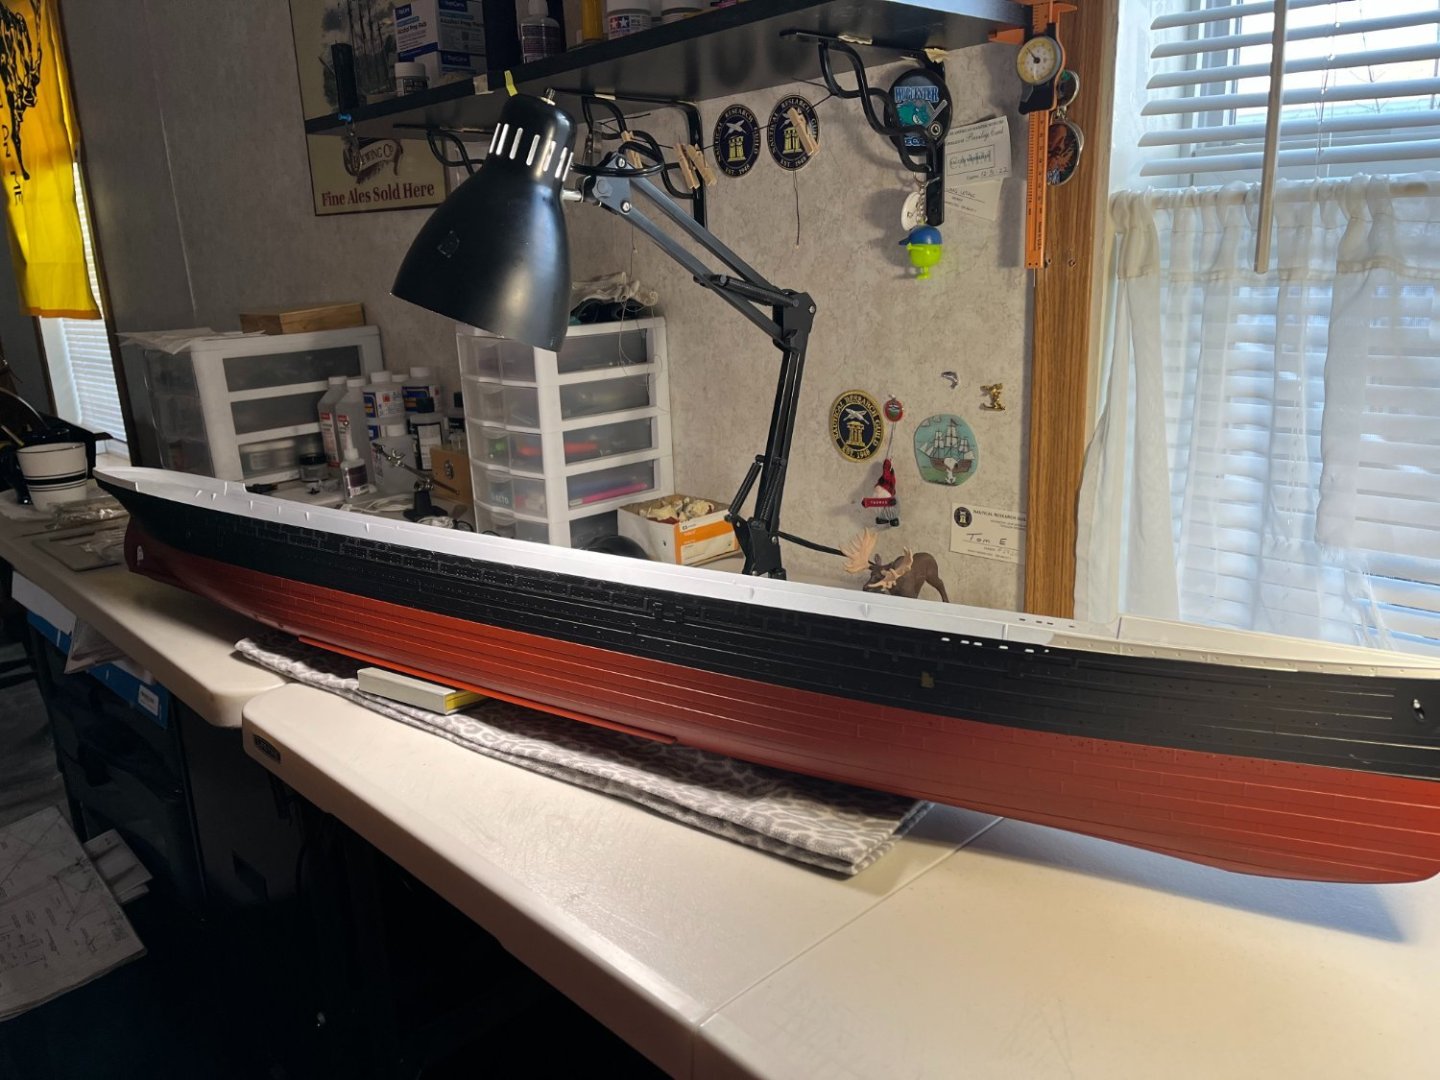
Morning, Titanic sorely needs an update! Sorry Admittedly, and as explained before, this is kind of my "secondary" build right now. I am so tantalizingly close to finishing my Niagara build. Whenever I try to work on something else, I feel guilty about "ignoring" Niagara. Modeling goblins Anywho, some work has been done. With the hull pretty much done. Decks need some attention. First, carve up the decks to fit the wooden deck upgrades. Tentatively went about removing items per the MK1 instructions. Kind of my first large subject where I'm removing material to fit upgrades. In the end, I think I did ok. No serious injuries to model or fingers. The deck fits really well. Before I can attach the wooden deck there are PE pieces all over to attach. Once these pieces are in, the entire deck structure will be painted white. The deck will cover most and any "peek thru" will be white. First time working with wooden decks. It really does enhance things. Well worth the investment, so far. Once the base structure of the deck is in place, deck furniture would be next. Slow and steady tortoise Tom E


-
Hi Tim, Appreciate the kind words, thank you. The Ultra rope is from Syren Ship Models. They are one of the sponsors listed on the side of the MSW main page. One of the moderators, Chuck Passaro is the owner. He makes aftermarket rope, blocks and other goodies. My entire model has his rope and blocks. In my opinion, a fine upgrade from some of the kit supplied stuff. Tom E
-
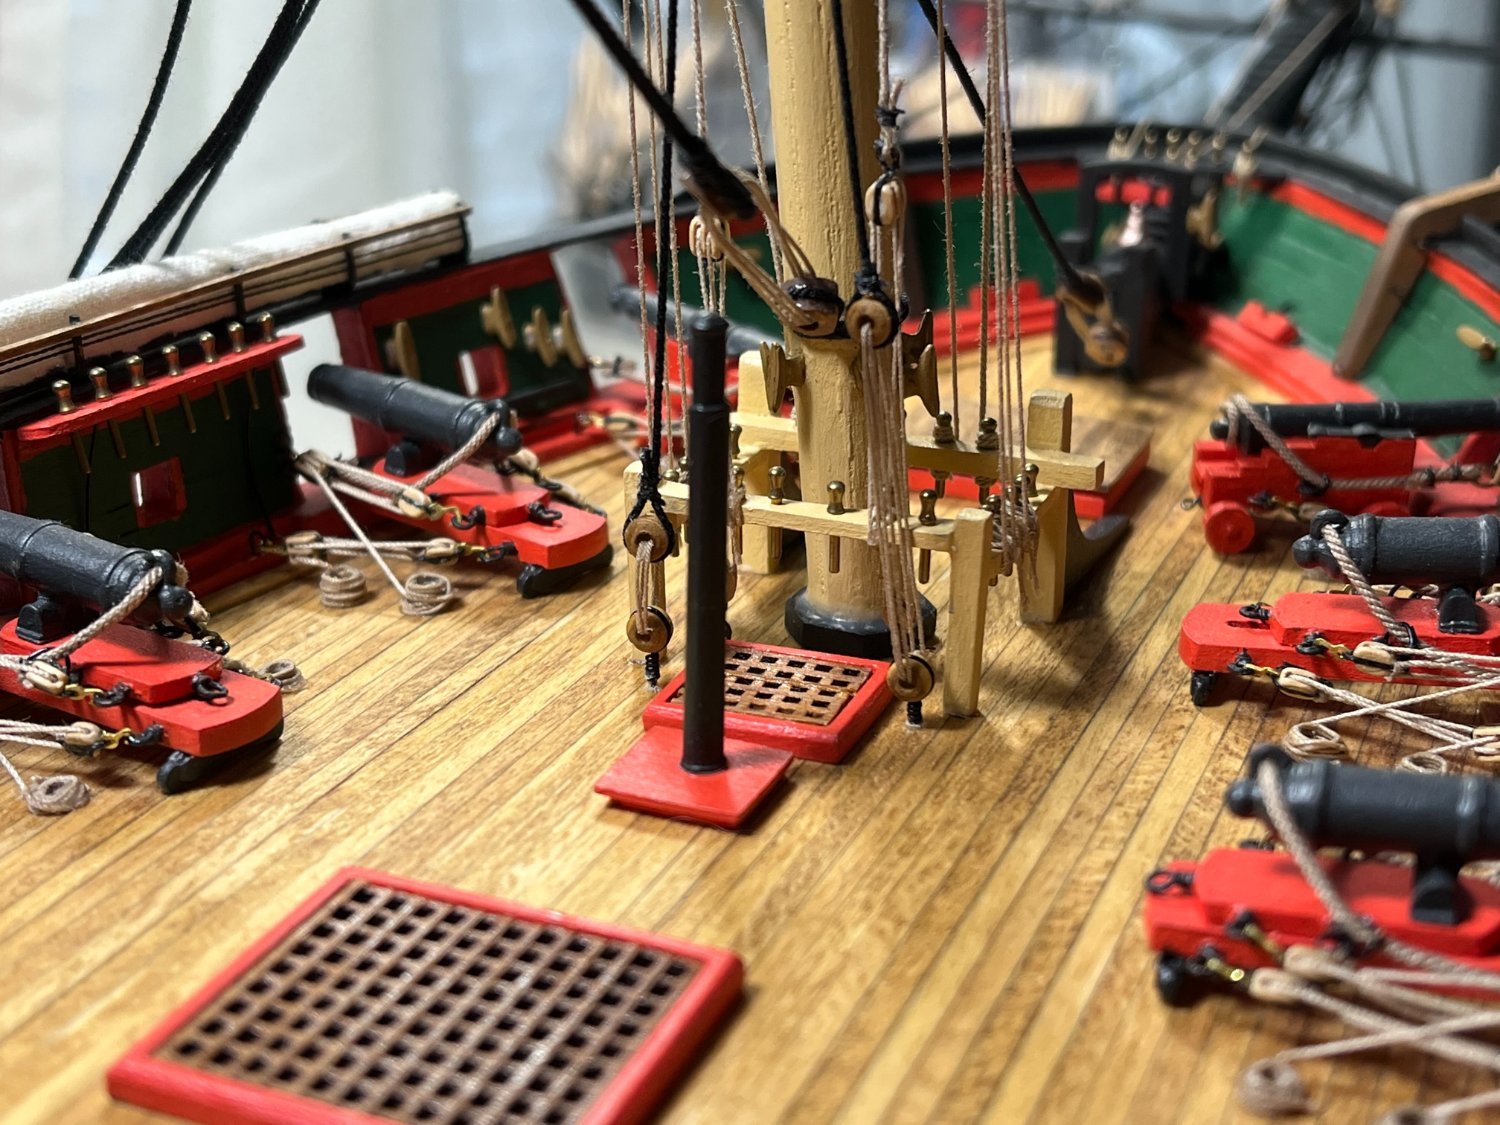
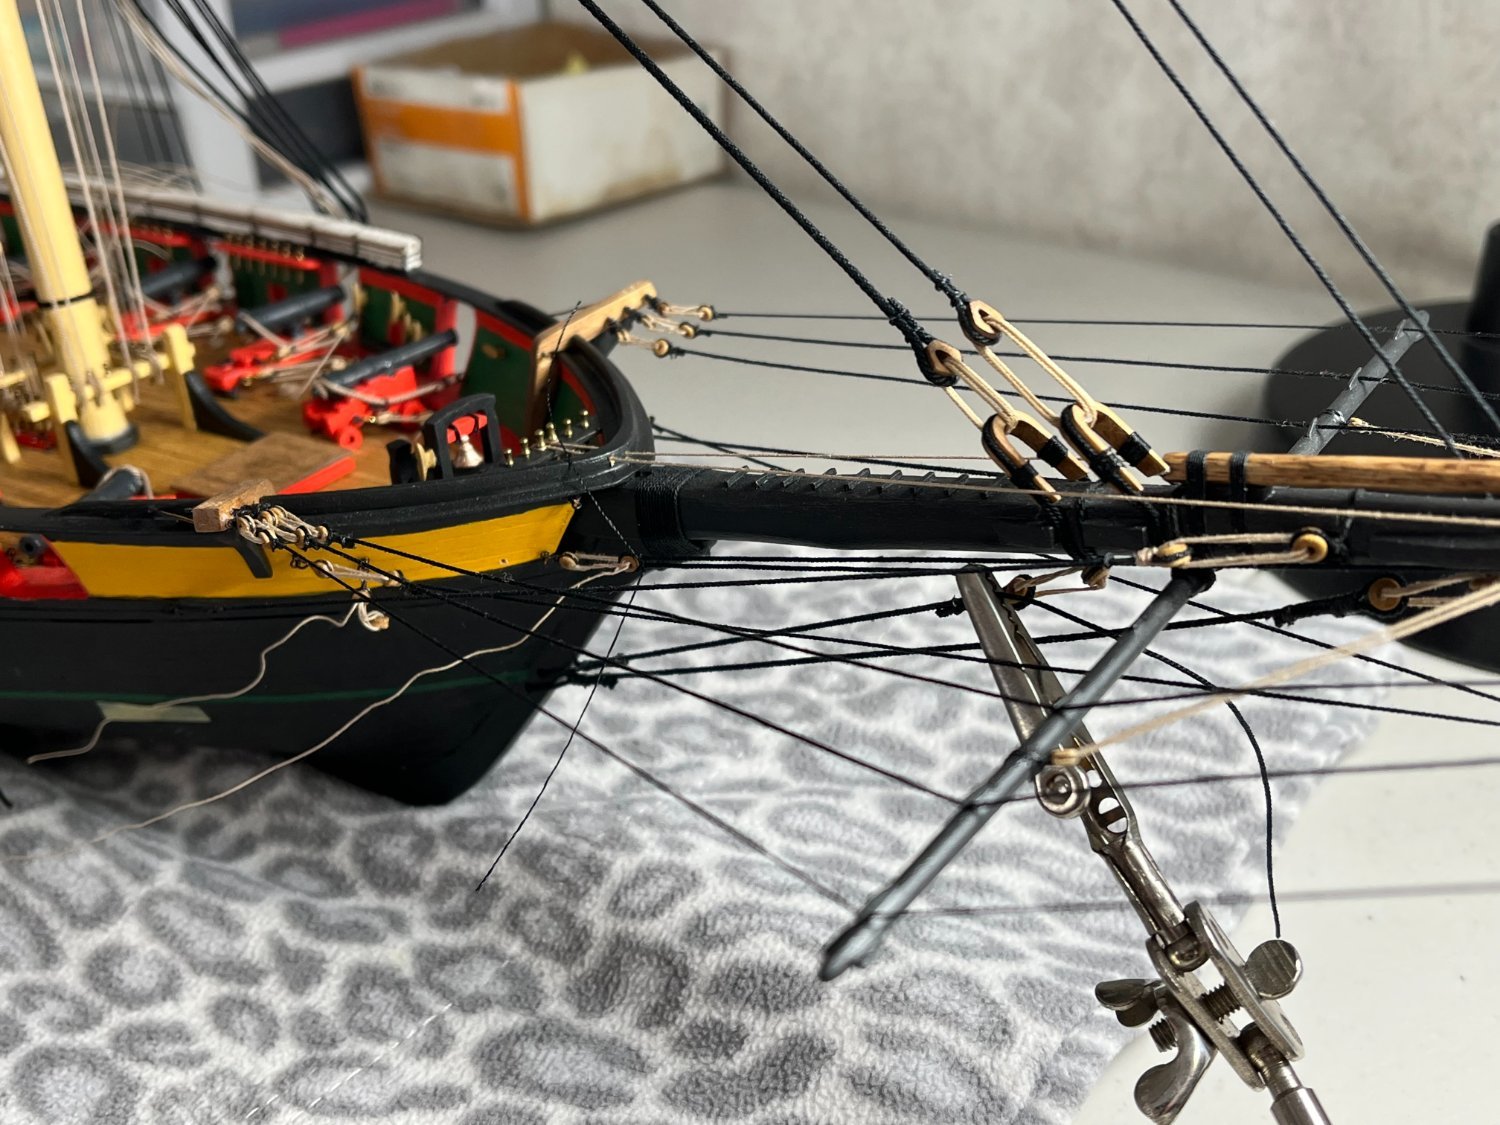
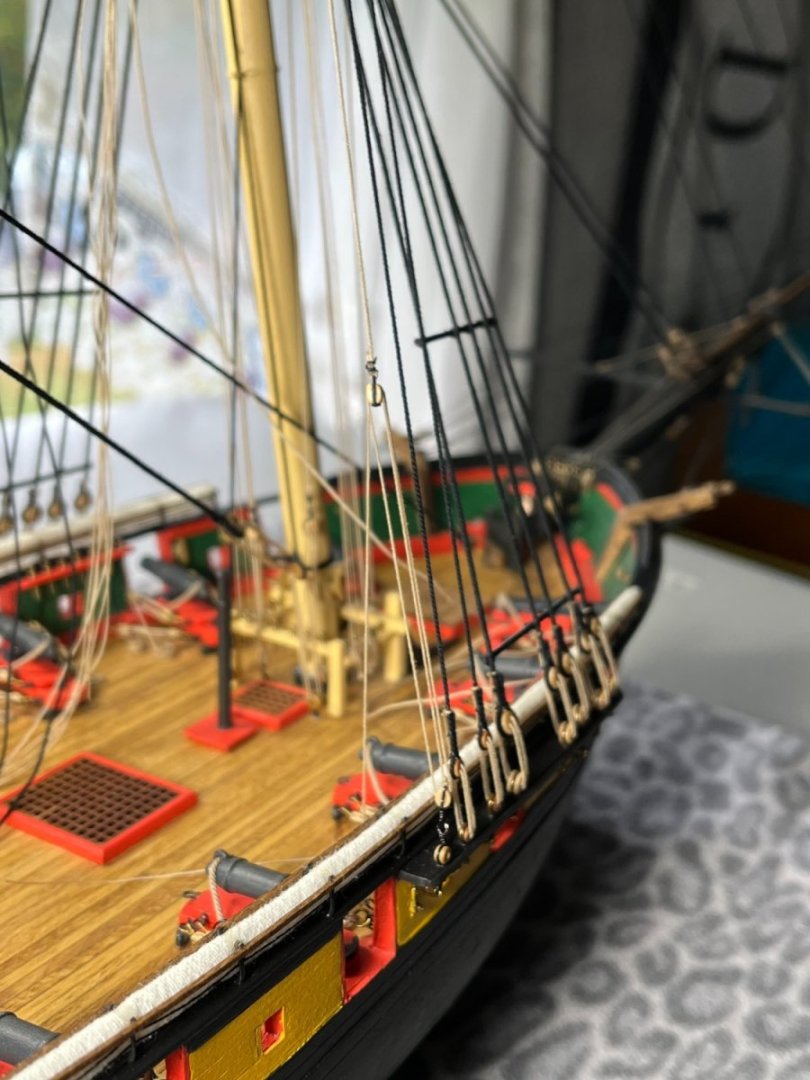
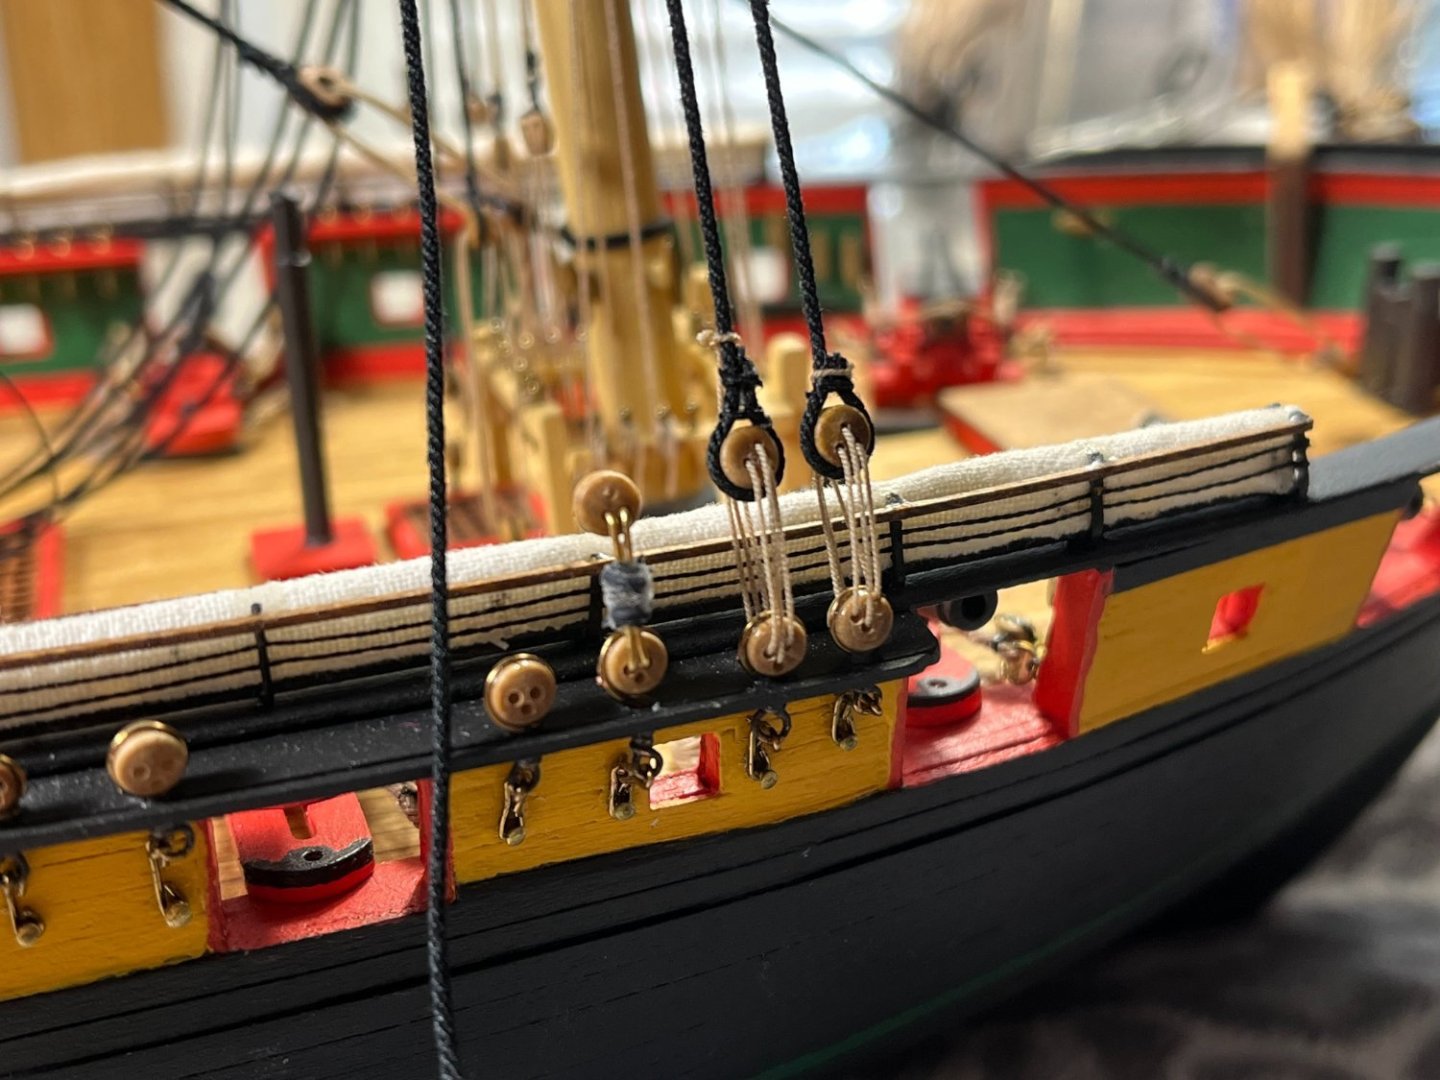
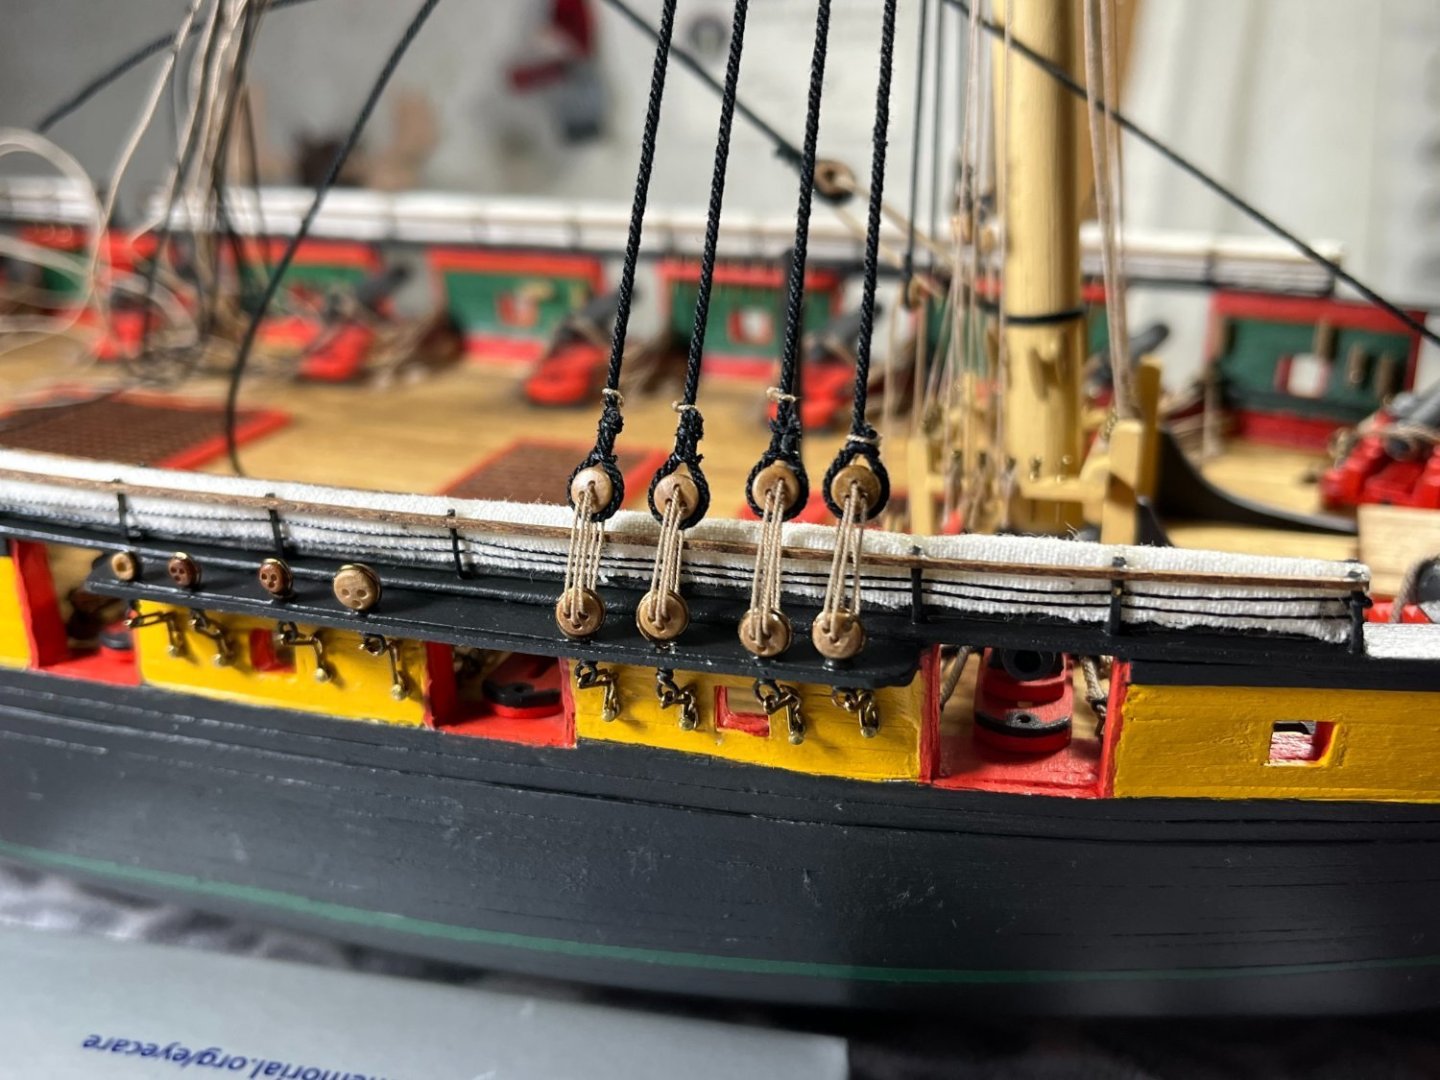
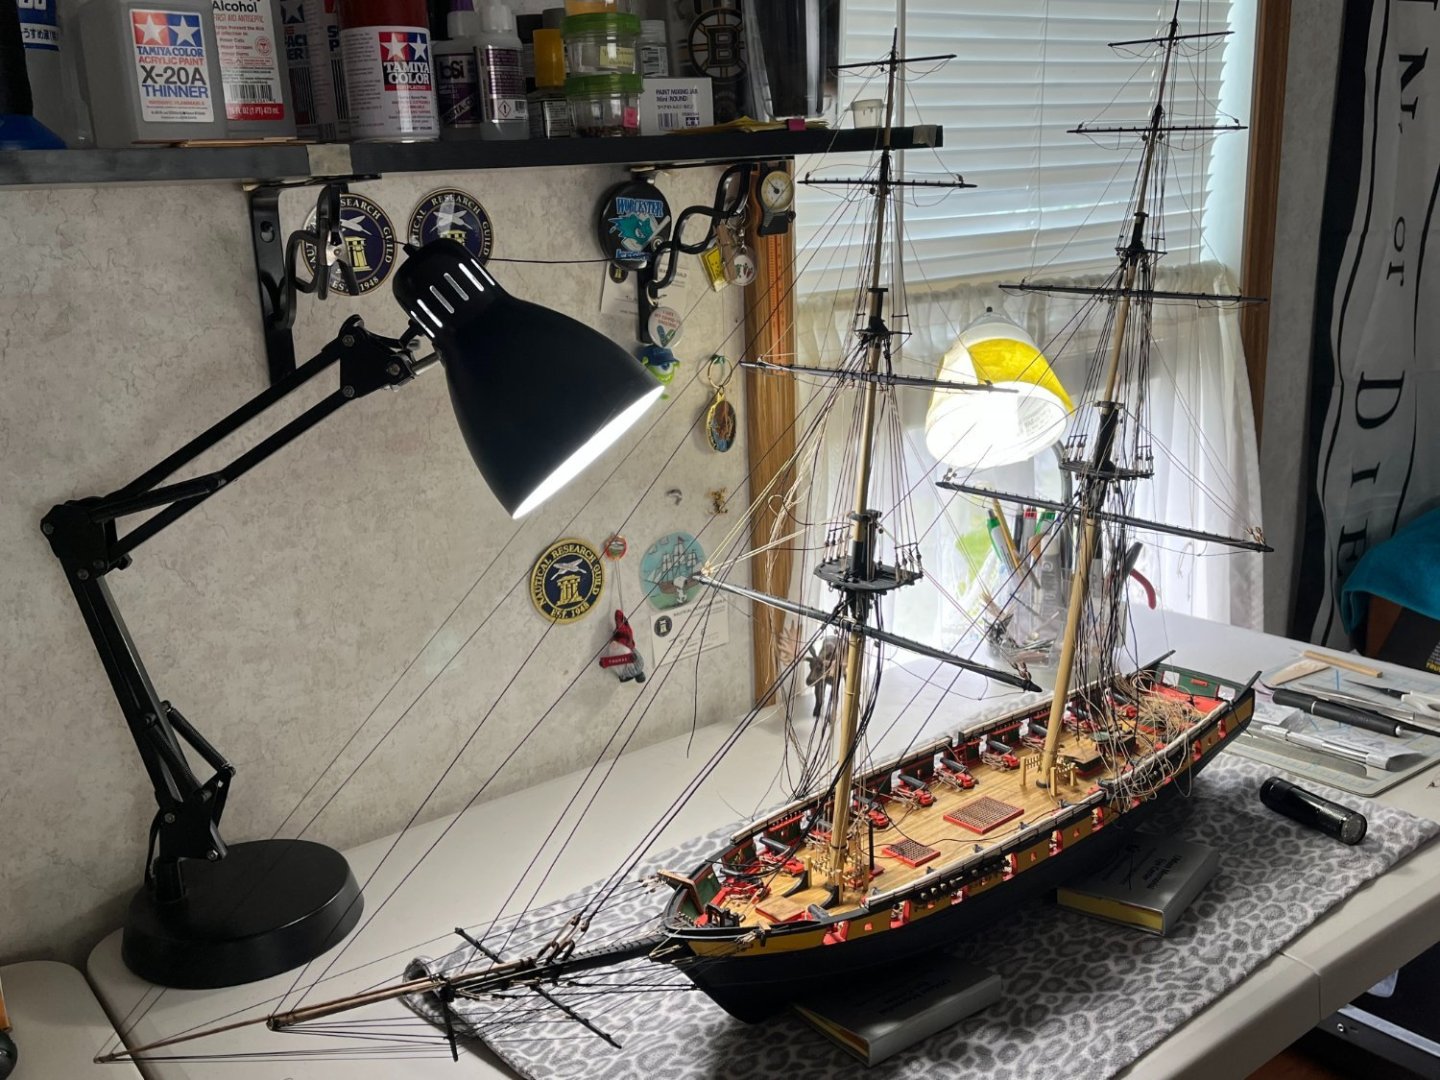
Evening, Thank you, Steven and BD! Thanks, MSW for all the likes as well, I see you folks watching!!! Hope everyone is well. Another Monday done. Niagara continues. With the Bowsprit done, time to move on to the stays running from the main mast to the foremast. As seen before the main and its preventer stay are attached. Moving upwards has the Topmast stay and Its preventer stay installed. Per the plans, these attach to bullseyes in the deck near the fife rail. The plans show to eyebolts near the fife rail for the fore main mast course yard, but no mention of eyebolts for the stays. Looking for an acceptable "fix", I attached them to either side on the outside of the fife rail. I probably missed somewhere in the plans that mention these, oh well, senior moment, I guess. While some areas are drying, I've started to attach the fore lift and sheet ropes. Most of these are static lines and once attached they should be done. Not going overboard here. The one's I can attach are, holding off on others until later. I've got fuzzy ropes! Alot of these ropes have been pre-installed on the mast for a while. Feels good to actually attach some and see how it looks. The below photo may look like there's some twist but that's the angle. Rope coils will be added later. The topgallant and royal stays will be next. We're getting there. Be good, Tom E


-
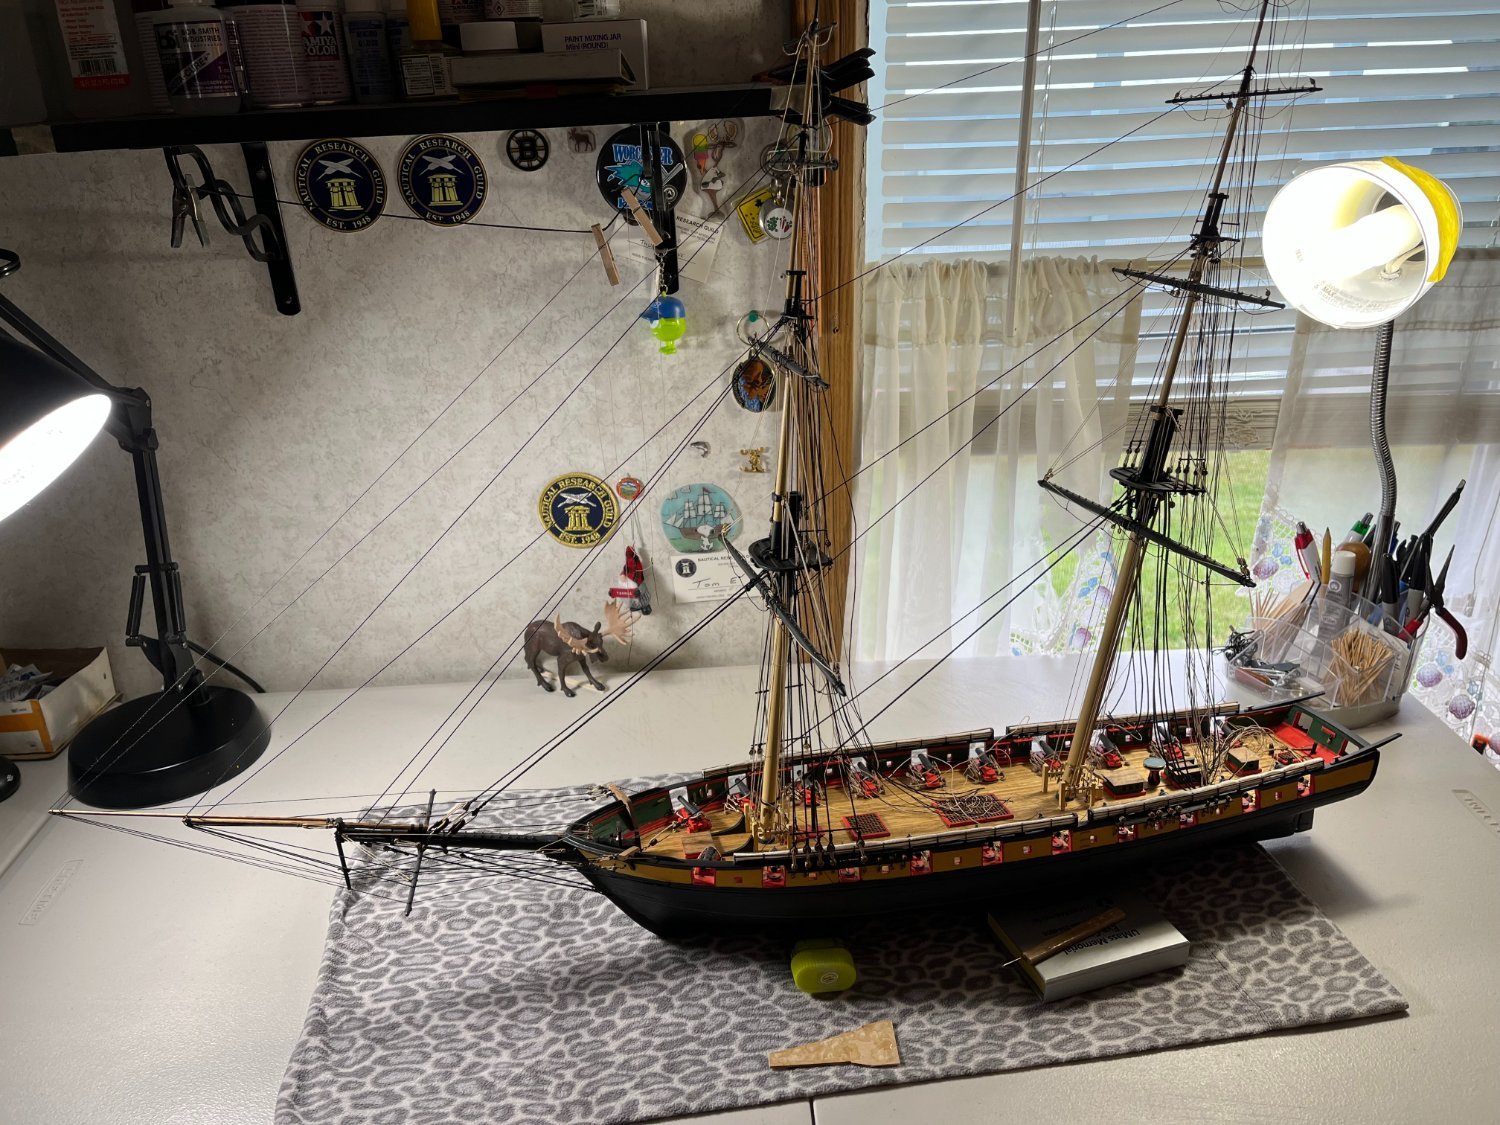
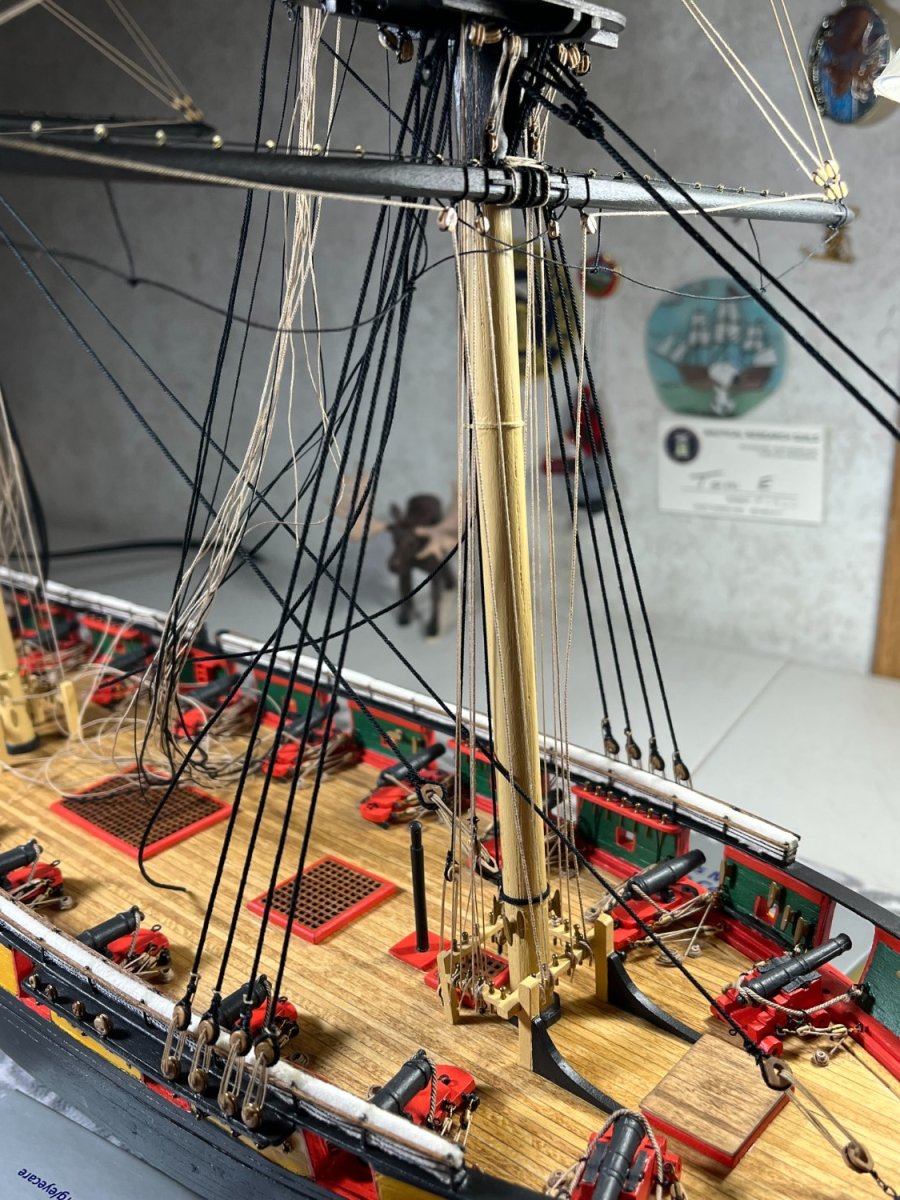
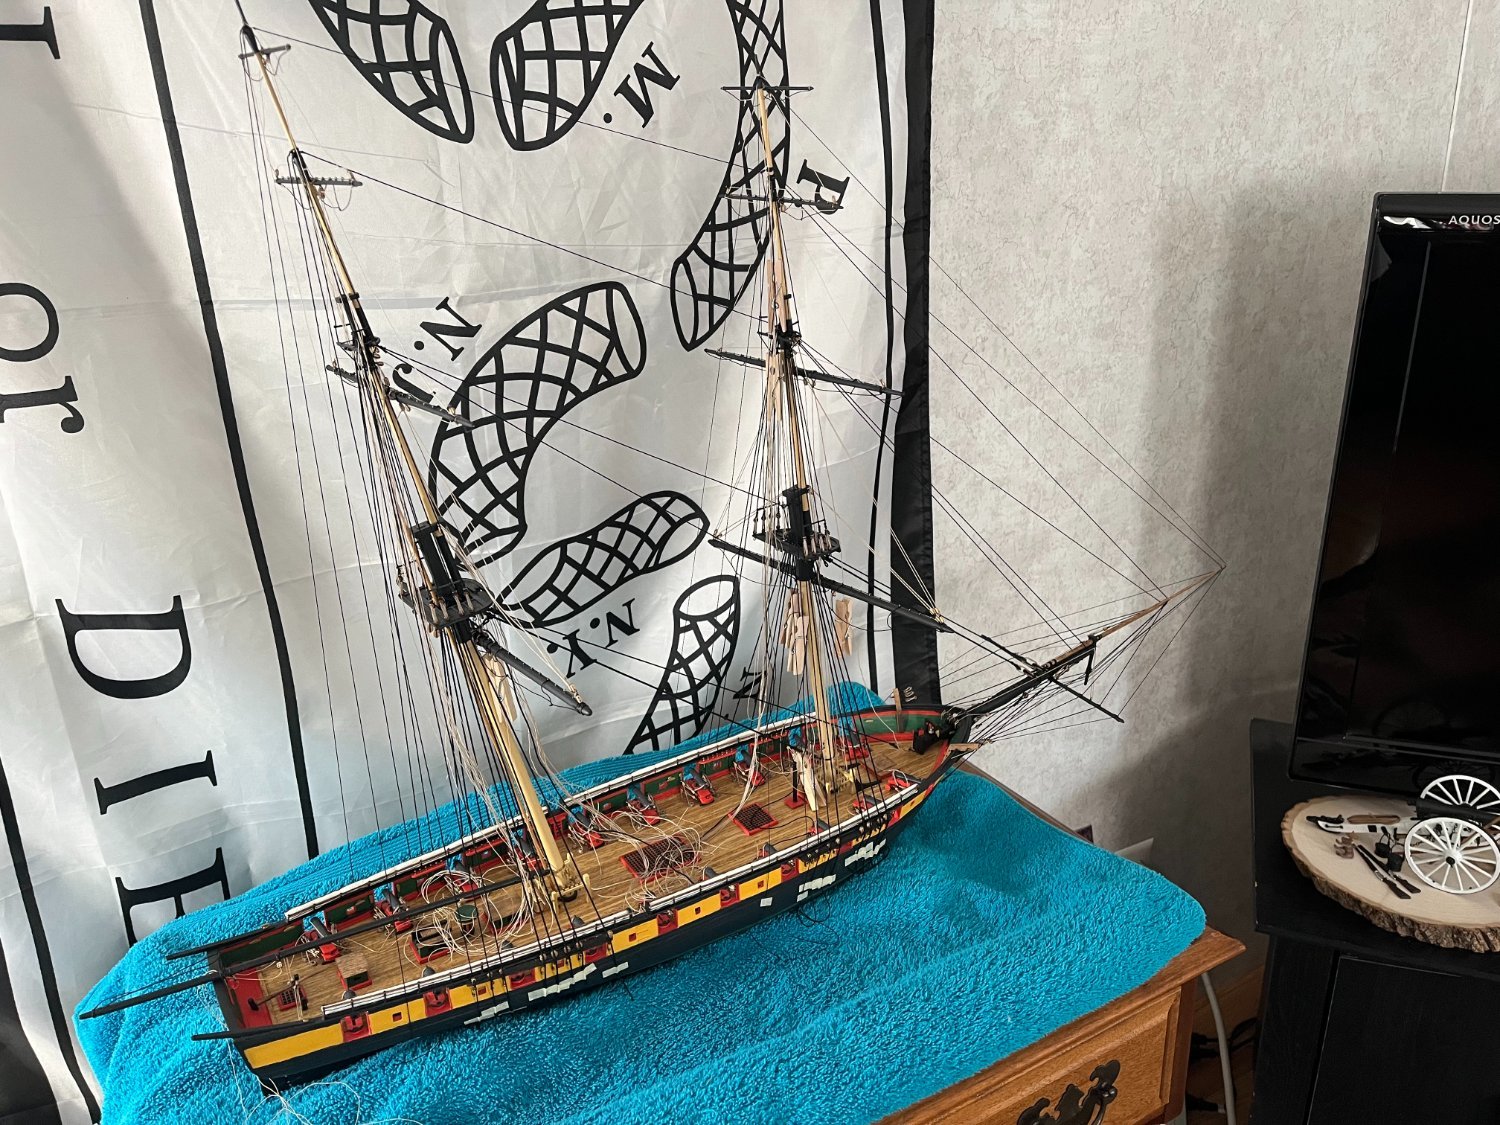
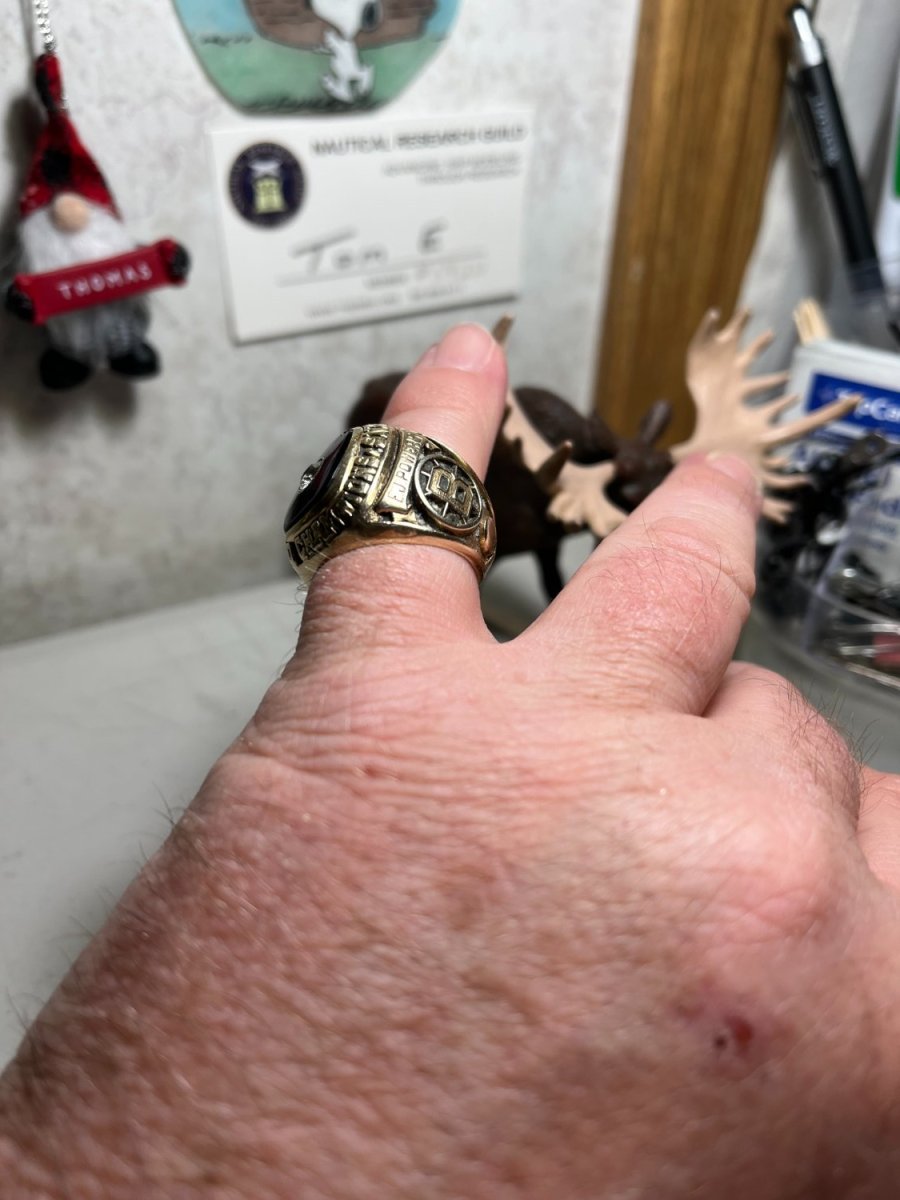
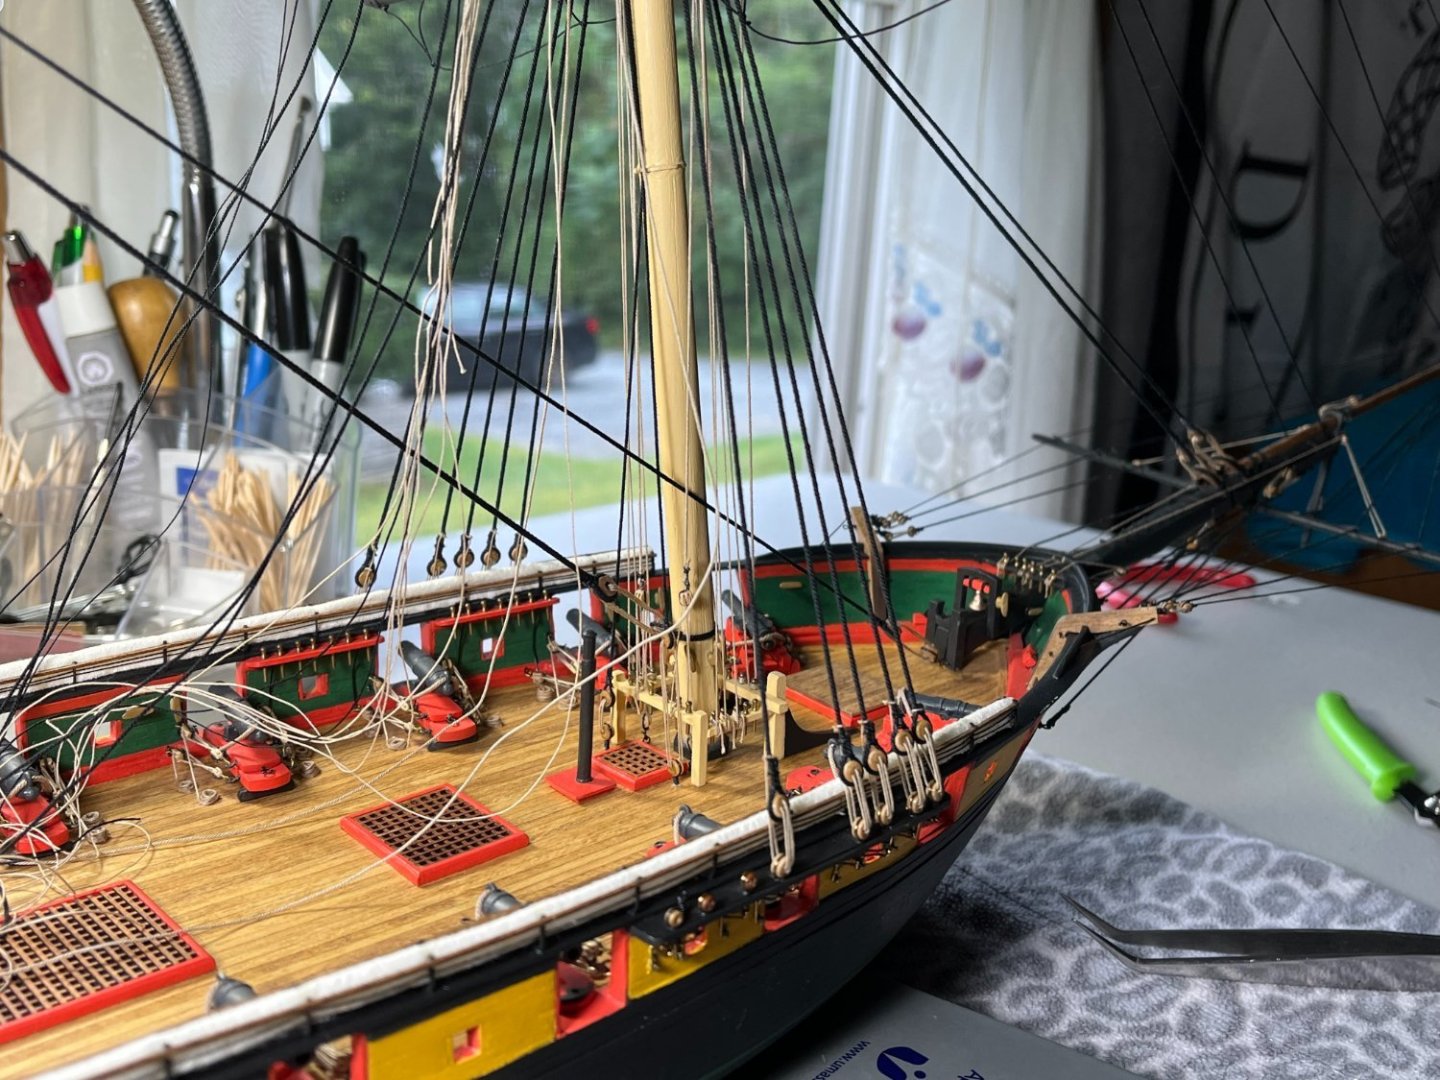
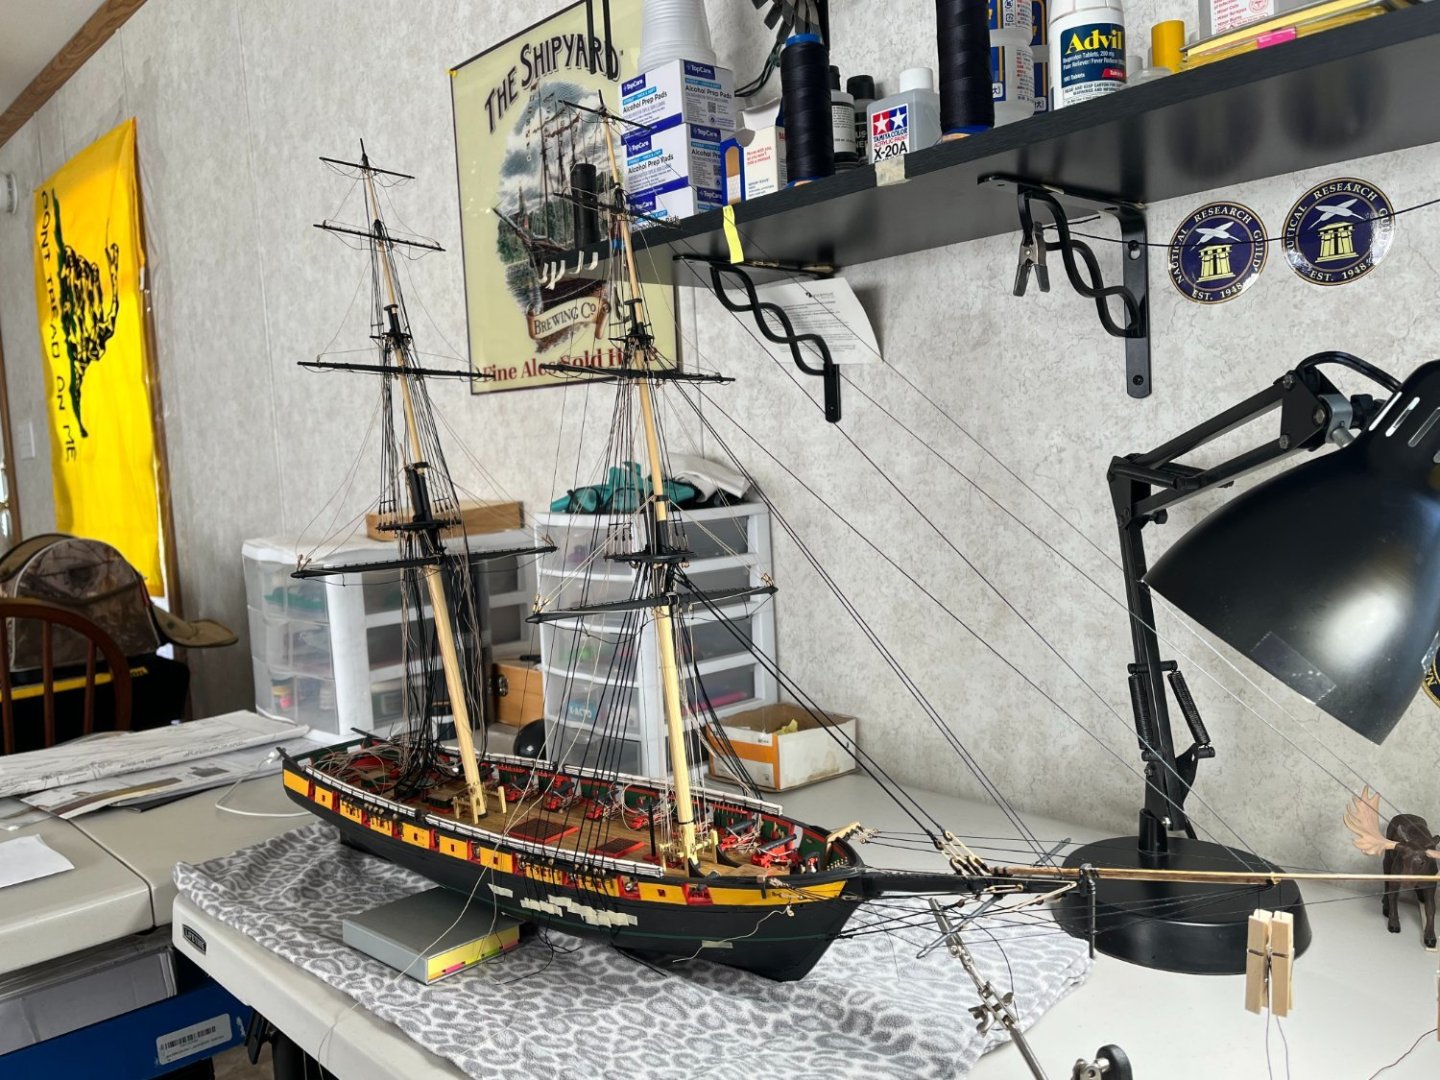
Morning, Hope everyone is well. Beautiful cool fall morning. It's just begging for a good old-fashioned hearty breakfast. The breakfast that sends you back to bed for a nap. Coffee and tea. Egg, potato and green pepper omelet's, bacon, sausage. You can't do these types of breakfast too often. I would get a stern finger shaking from my primary care doctor as my cholesterol shoots off the scale! Anywho, With the main and Its preventer stay in place, I will work upwards but still just rigging items that are on the centerline of the ship. The topmast stay and Its spring stay are next. Only working on the center line rigging as it seems logical. The lower shrouds can still be moved out of the way. Easier to work with an open field of view than around in place rigging. While working on one set of stays on inherently starts to tinker with the next set. I've noticed a firmness forming in other ropes already in place. But a pleasant firmness. Everything so far, including the bowsprit rigging, has a pleasant tension to it. Not too hard, not too lax. It is a balancing act when tensioning off ropes. Constantly checking other ropes to see how they react while I apply pressure to whatever rope I'm working on. Feel like I'm missing something. Or is the usual for me, I'm over thinking it. Below is her all dressed up for company coming over. Show her off a bit!! The spanker boom makes a rare appearance. Below is a little show and tell. The wrinkled old hand is mine. But, with a genuine Stanley Cup winning ring from 1970 with the Boston Bruins hockey team. A friend of mine, her grandfather, ran the old Boston Garden from the 1950's thru the 80's. Back then, he would have been considered the GM. They knew all the old Bruins and Celtic players. Pictures of them with Bill Russell, Bobby Orr, Larry Bird, Reggie Lemelin. The ring is no bigger than my high school ring. The rings these days look silly, gawdy. Thats as close as I get to 15 minutes of fame, and I'm cool with that!!!!! Go Bruins!!!! Tom E


-
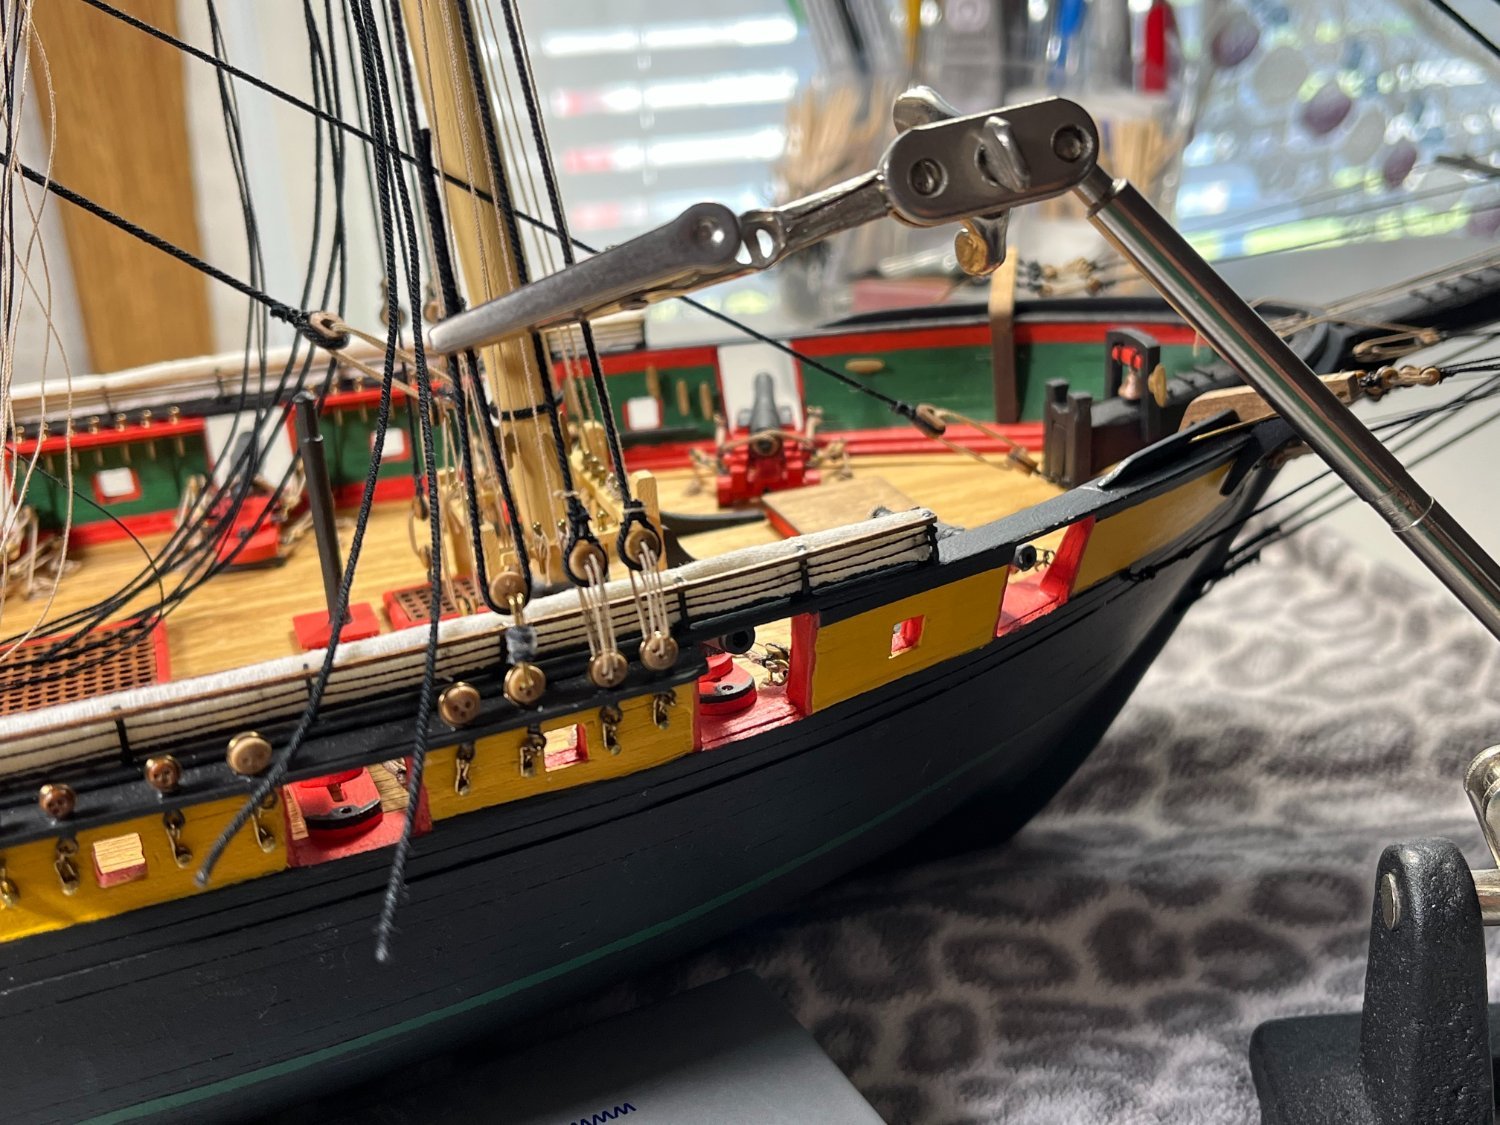
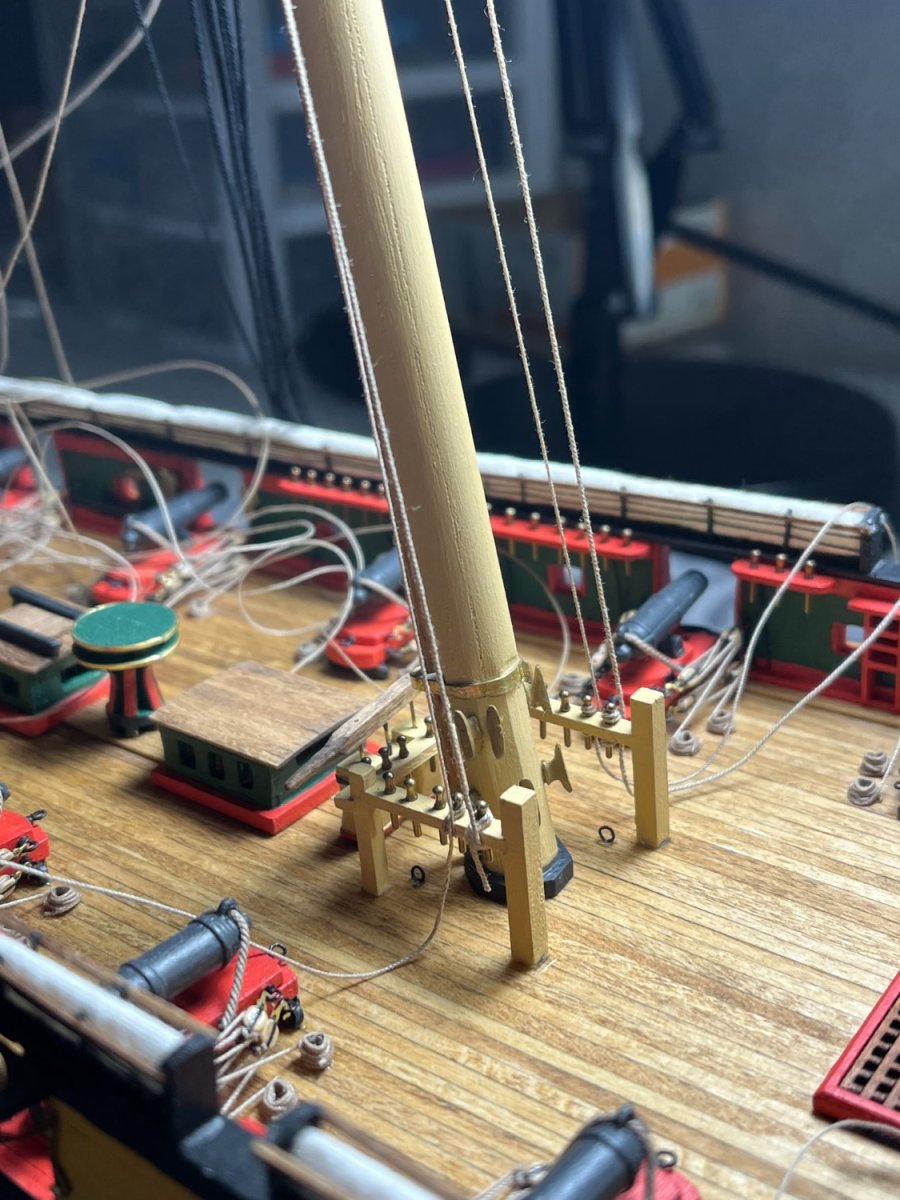
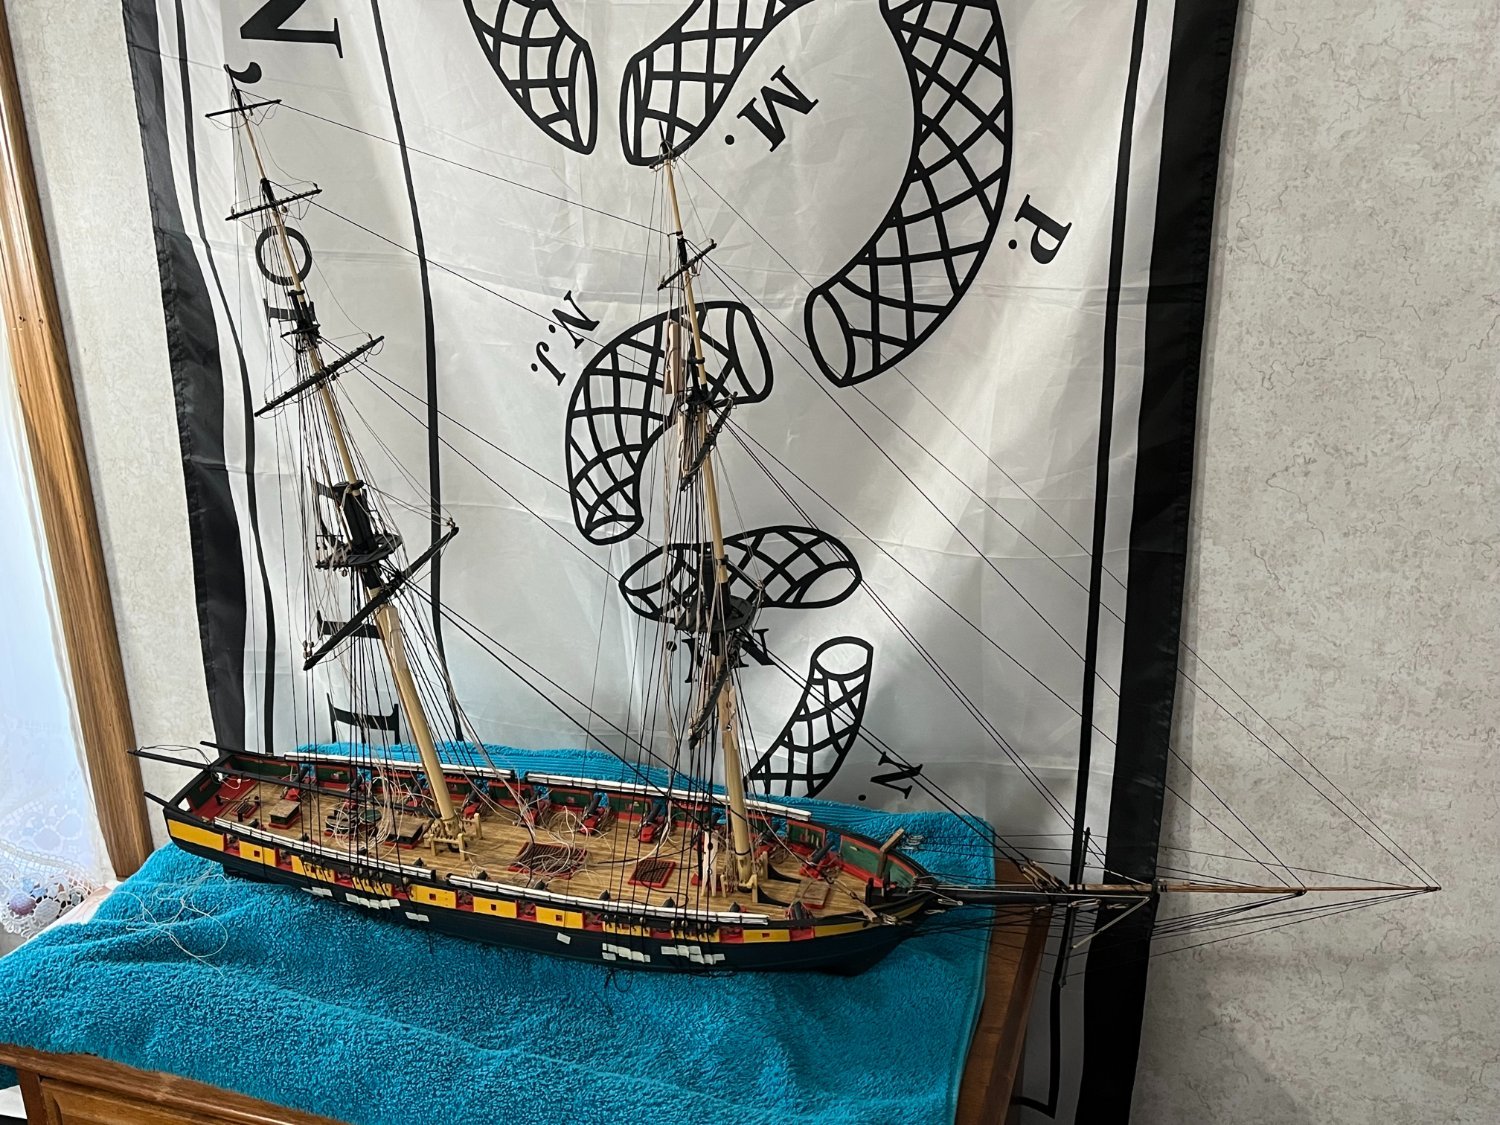
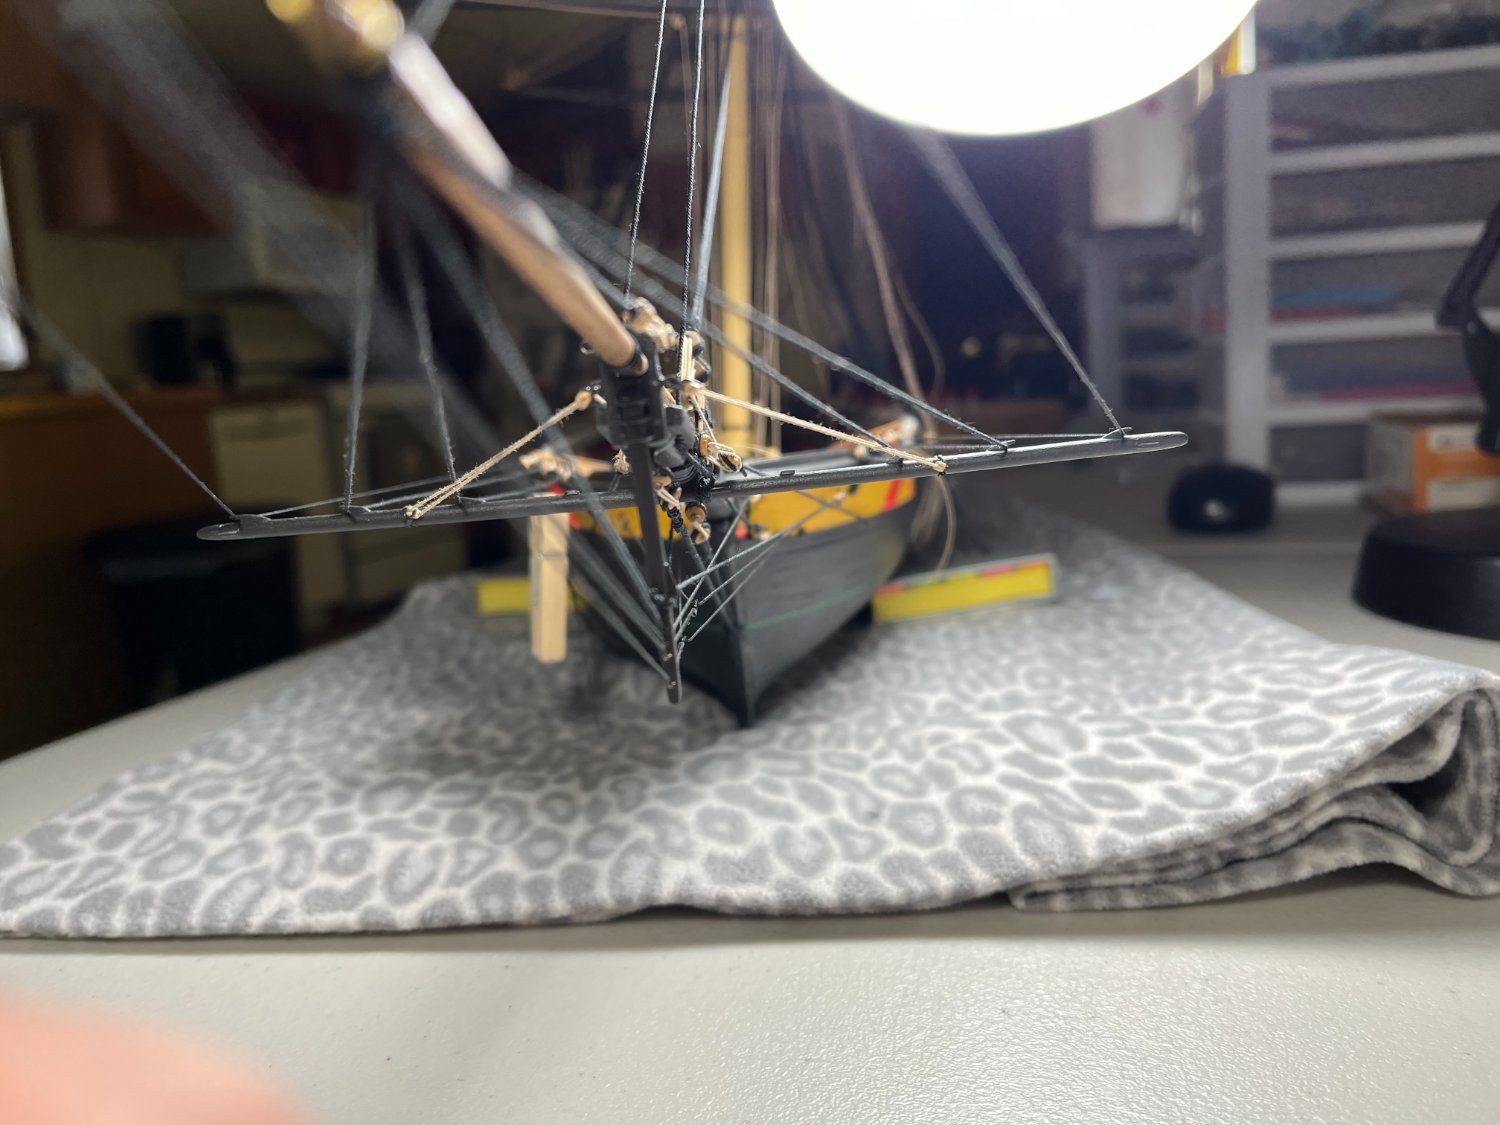
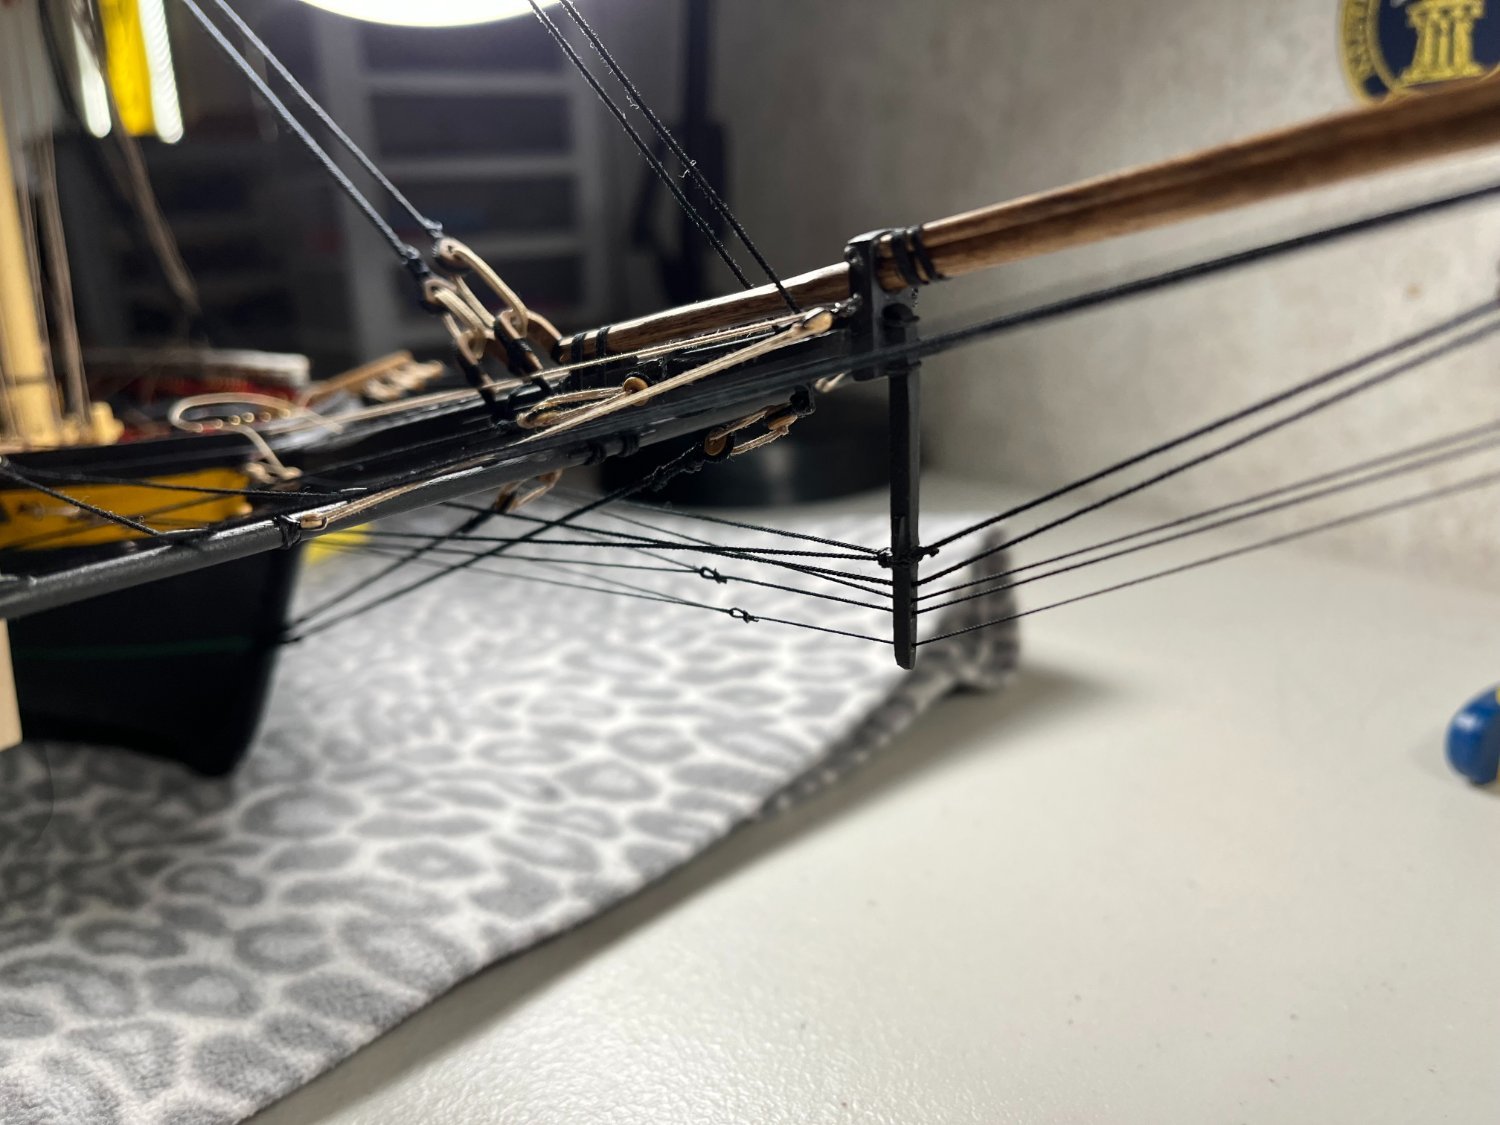
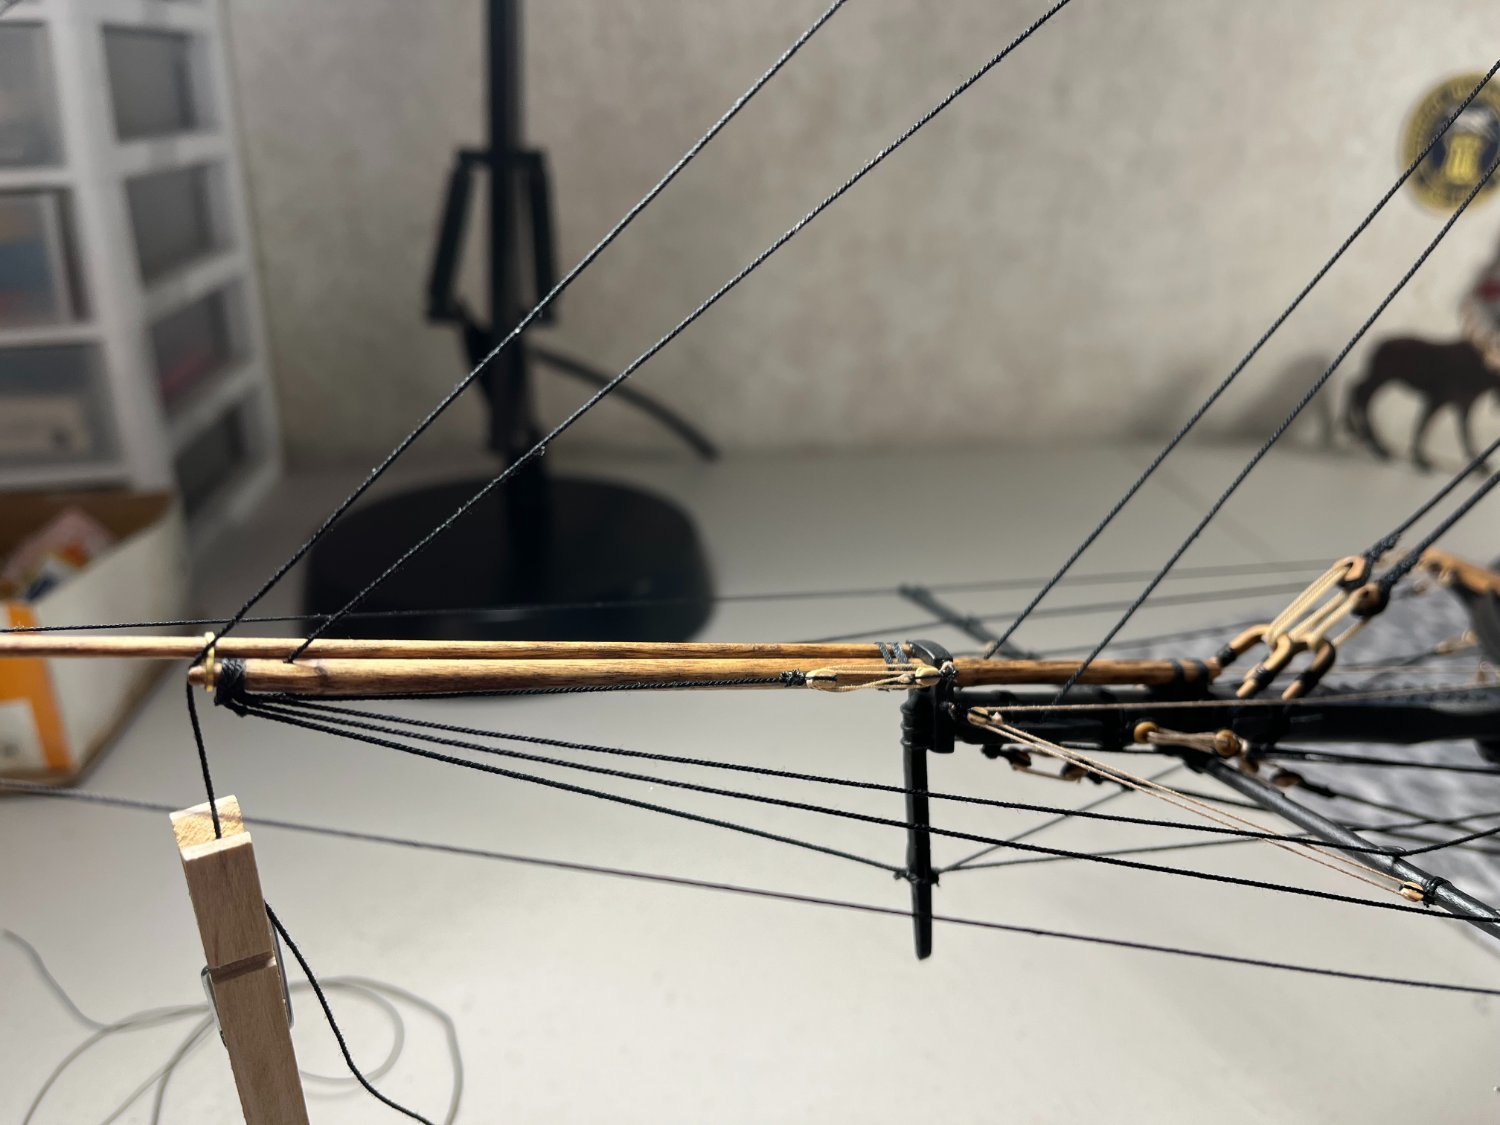
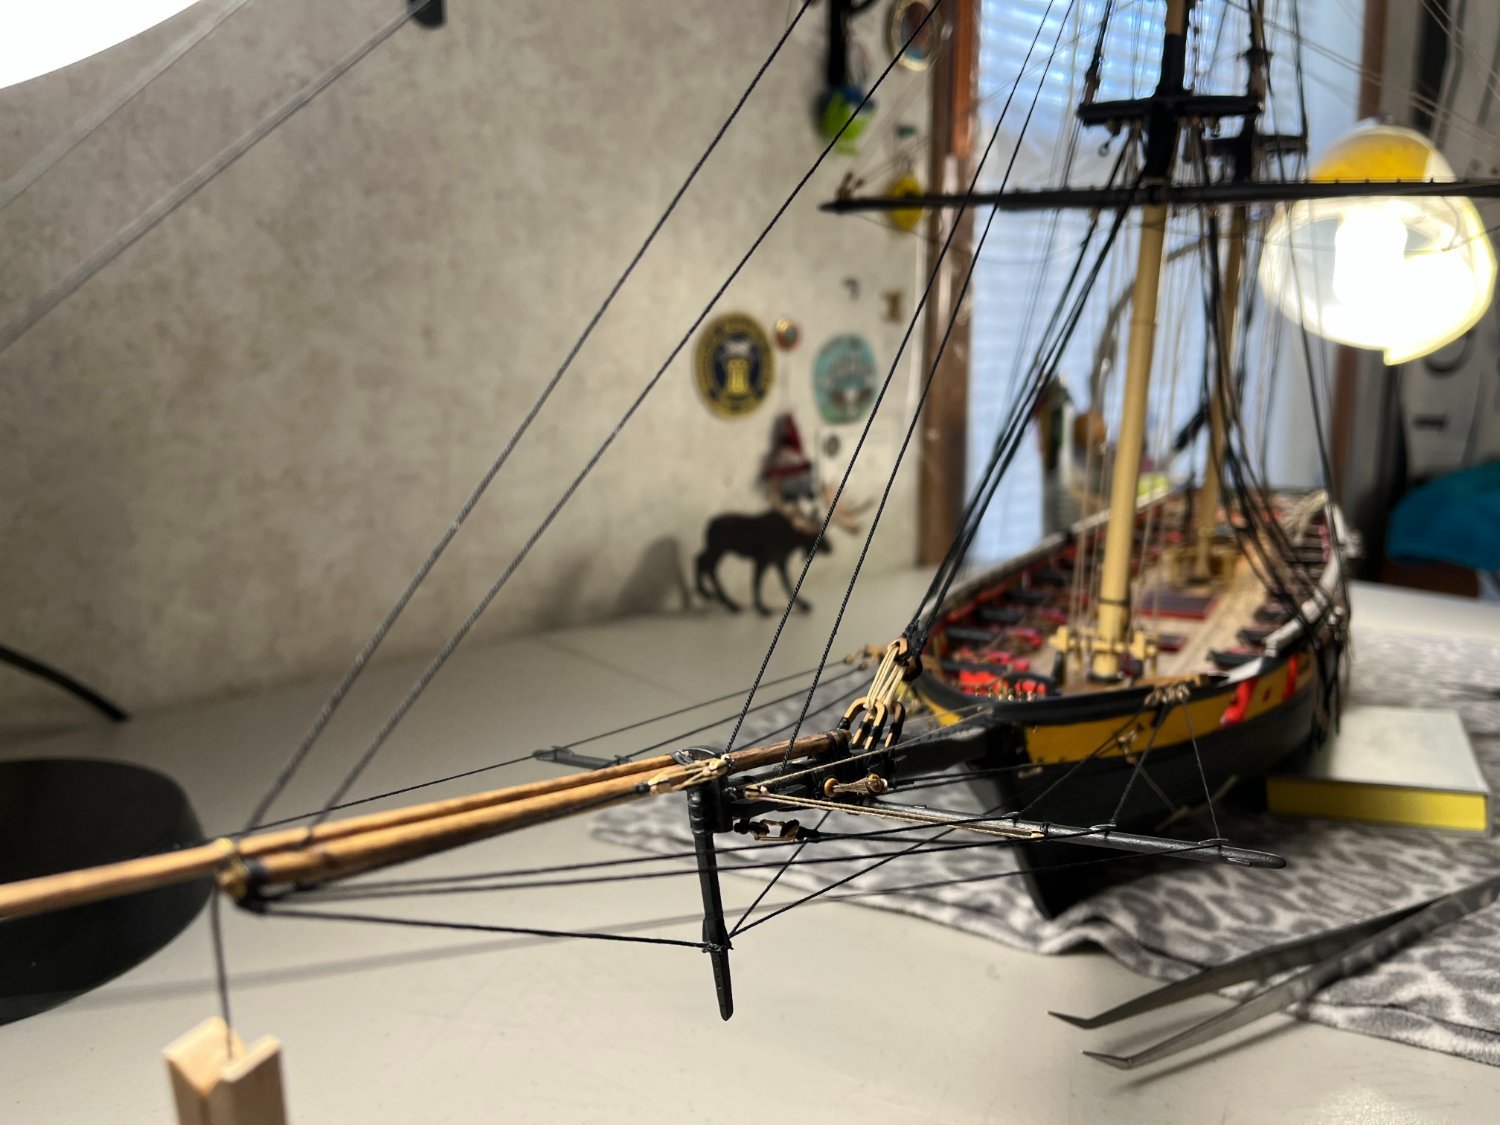
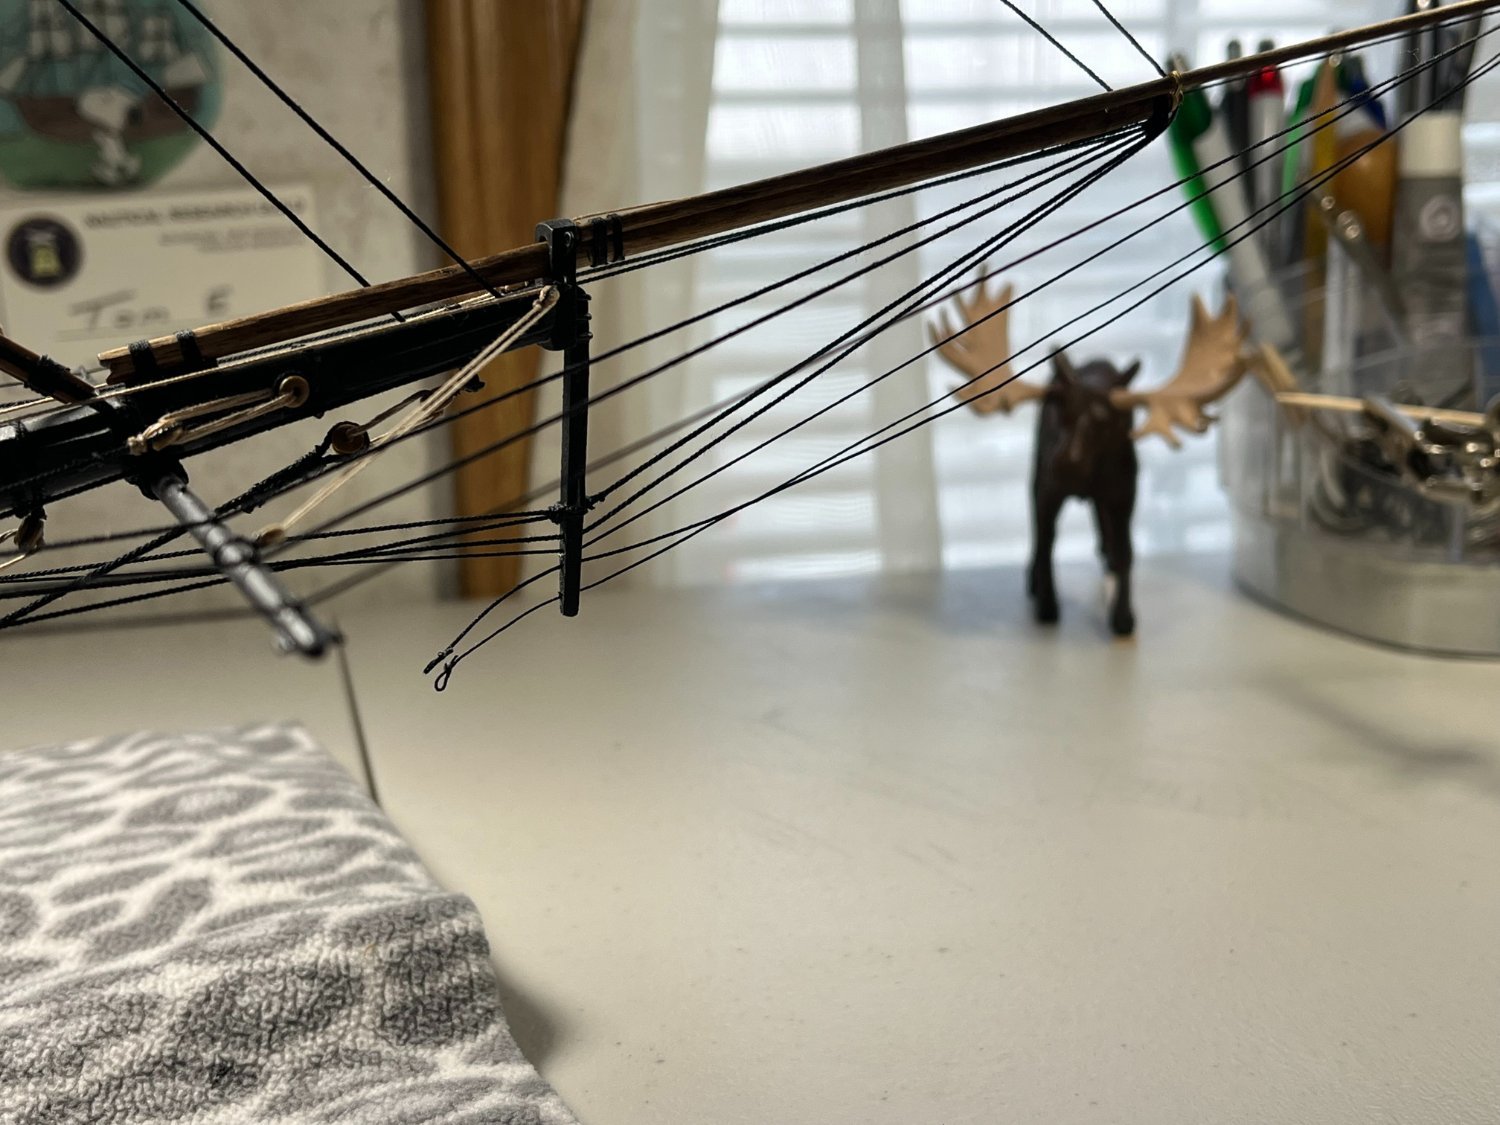
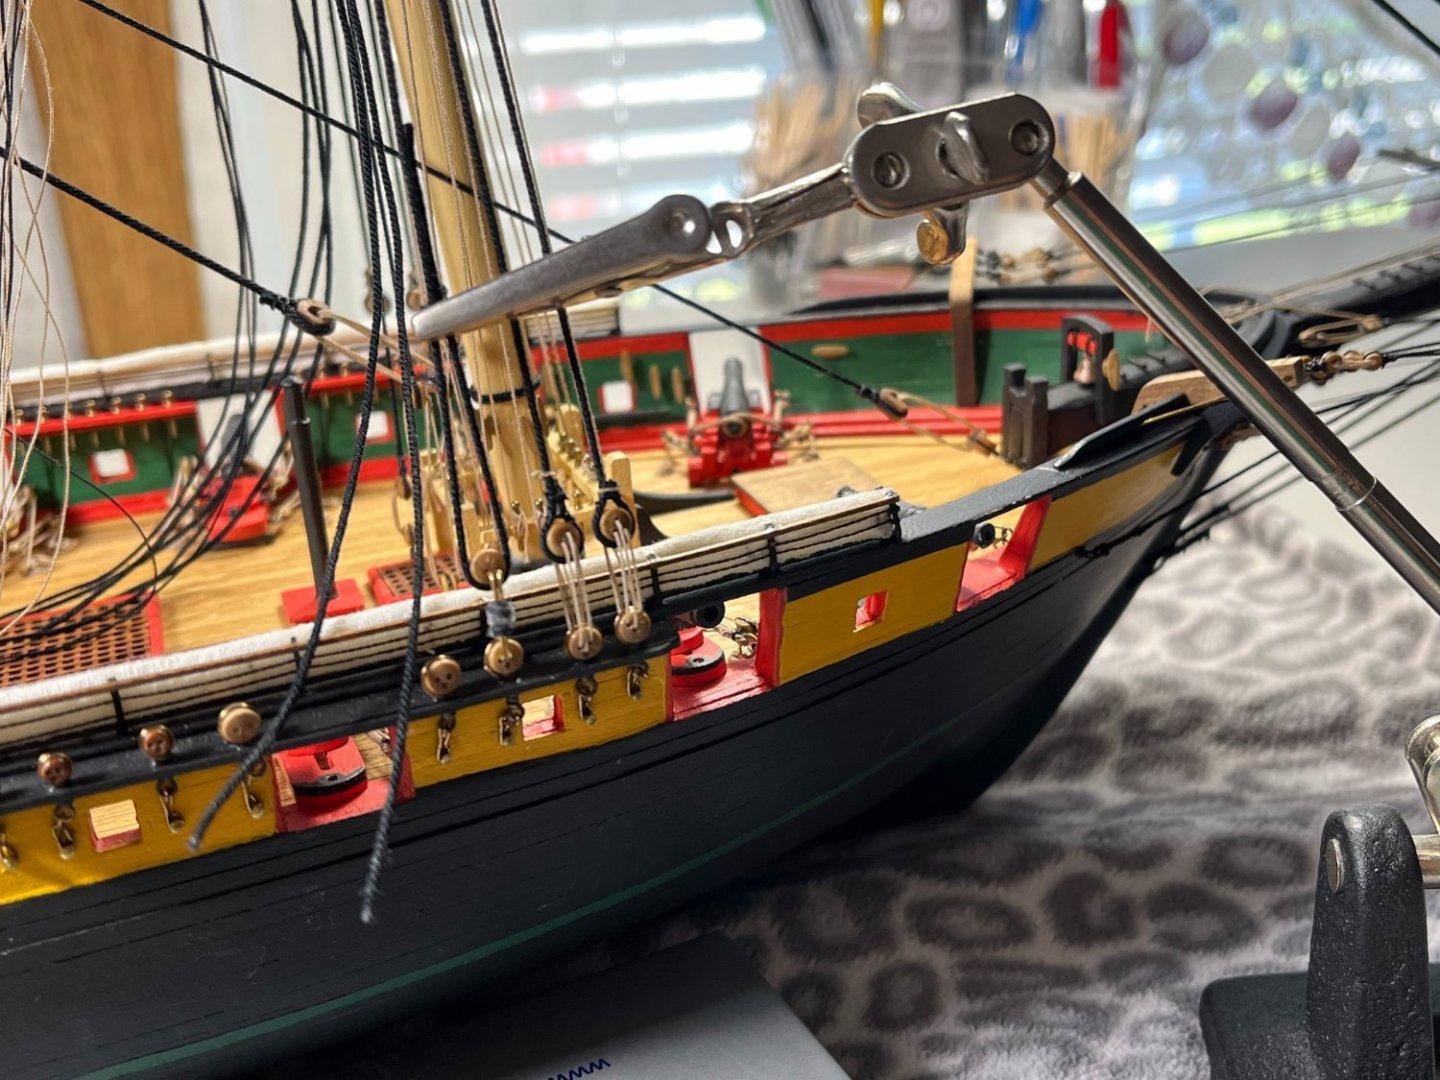
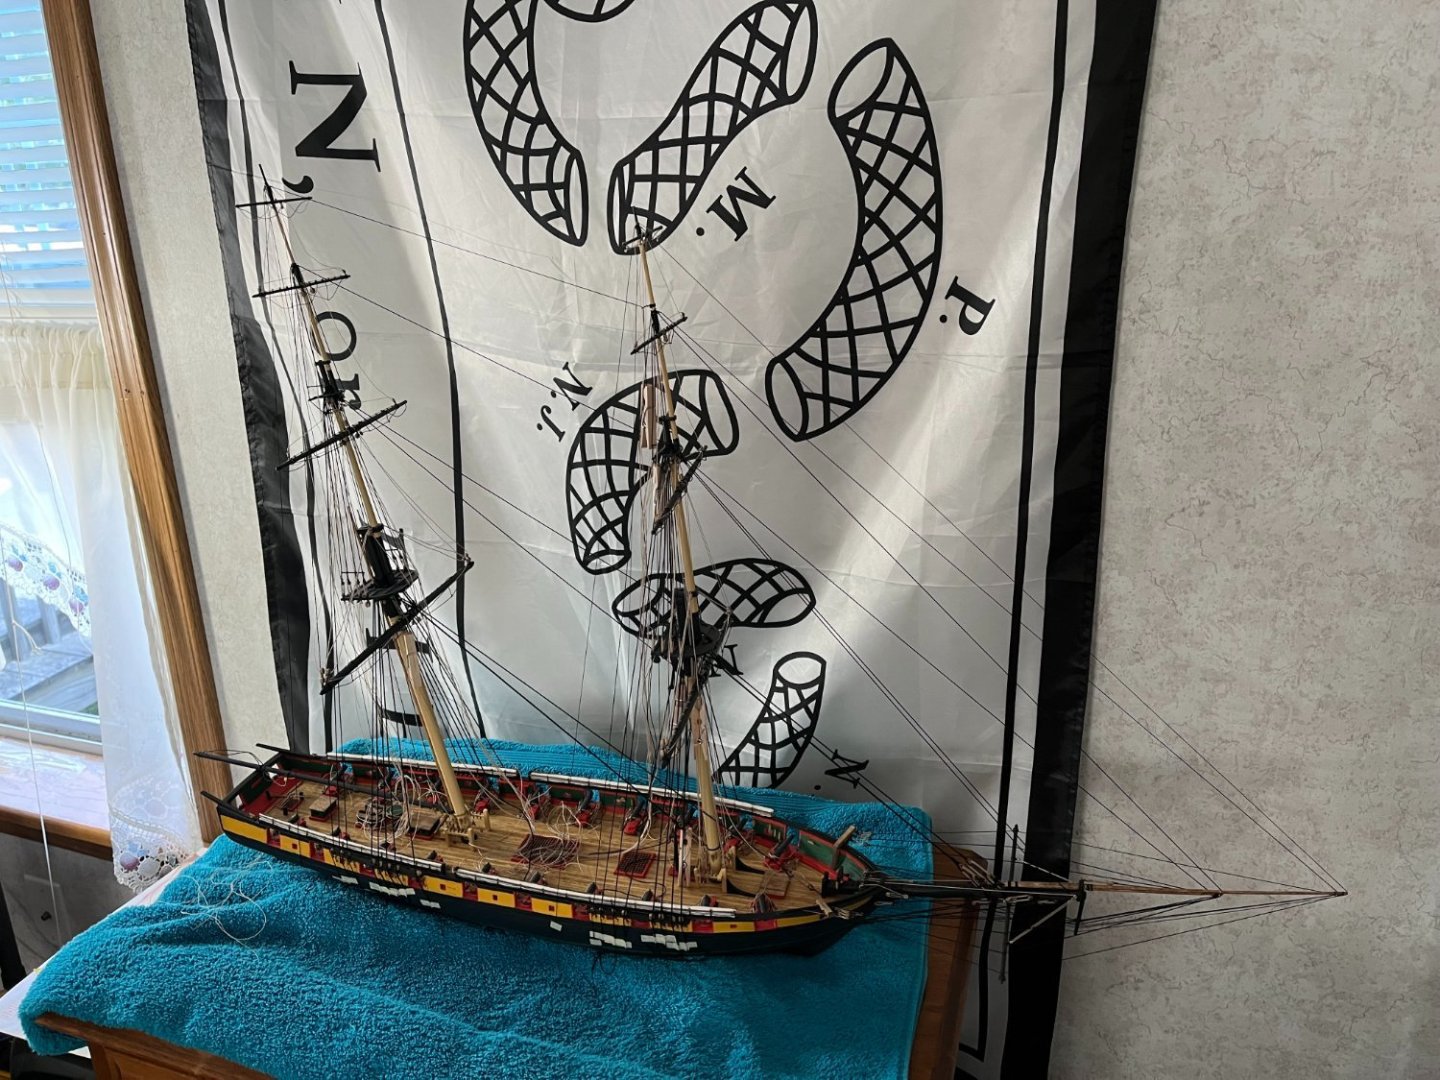
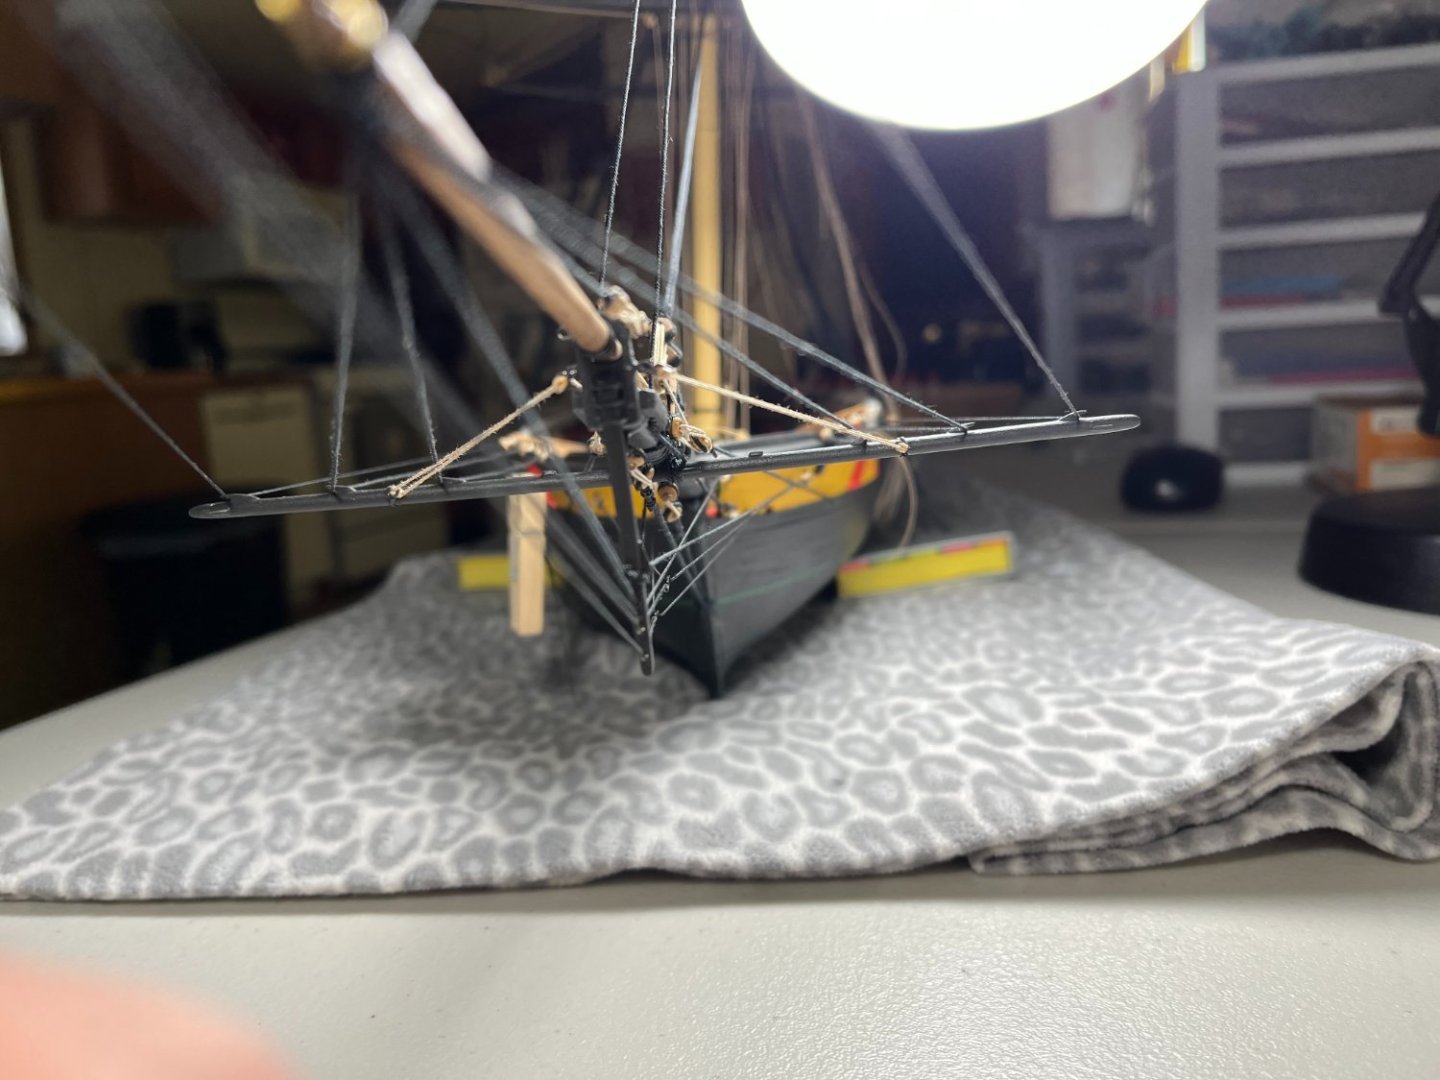
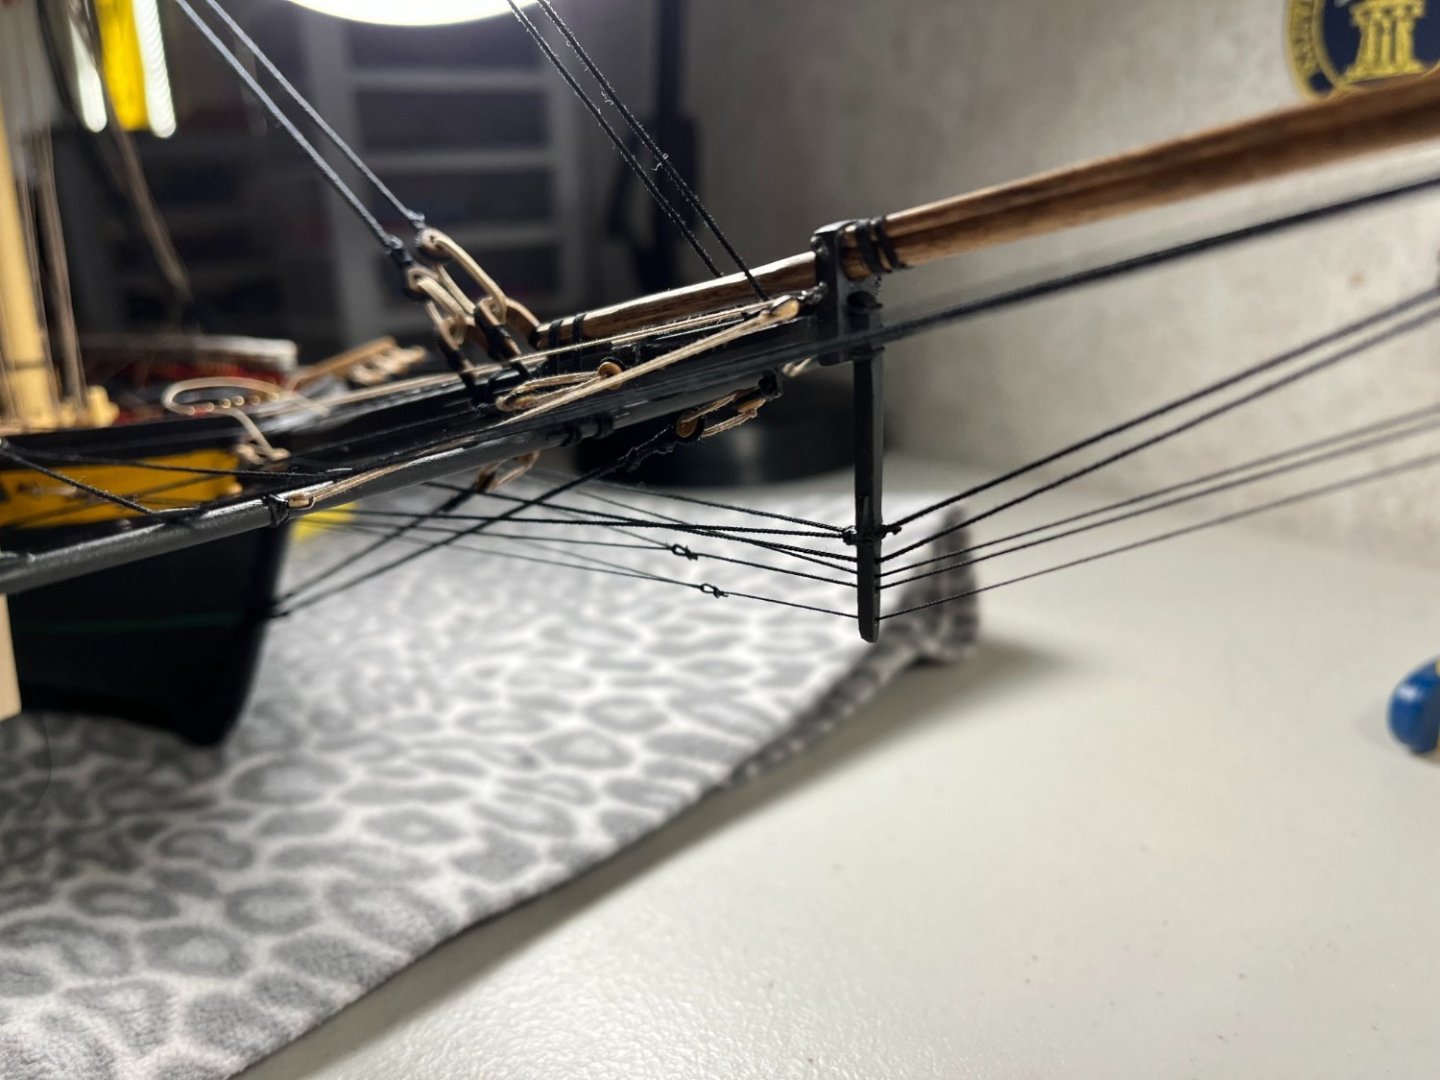
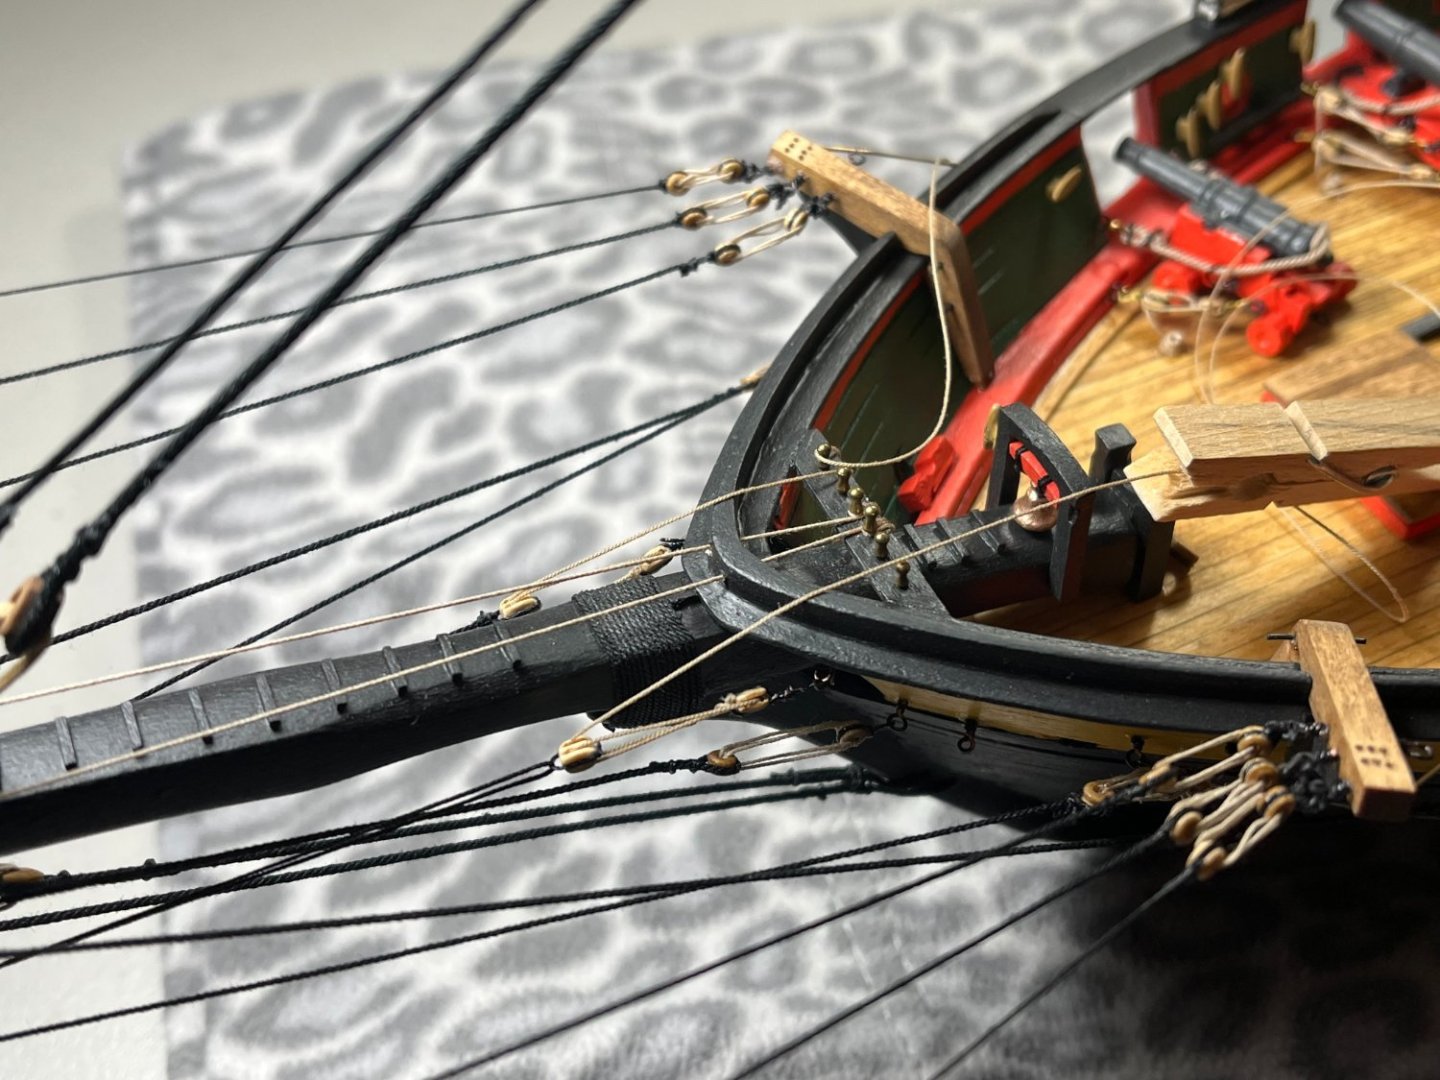
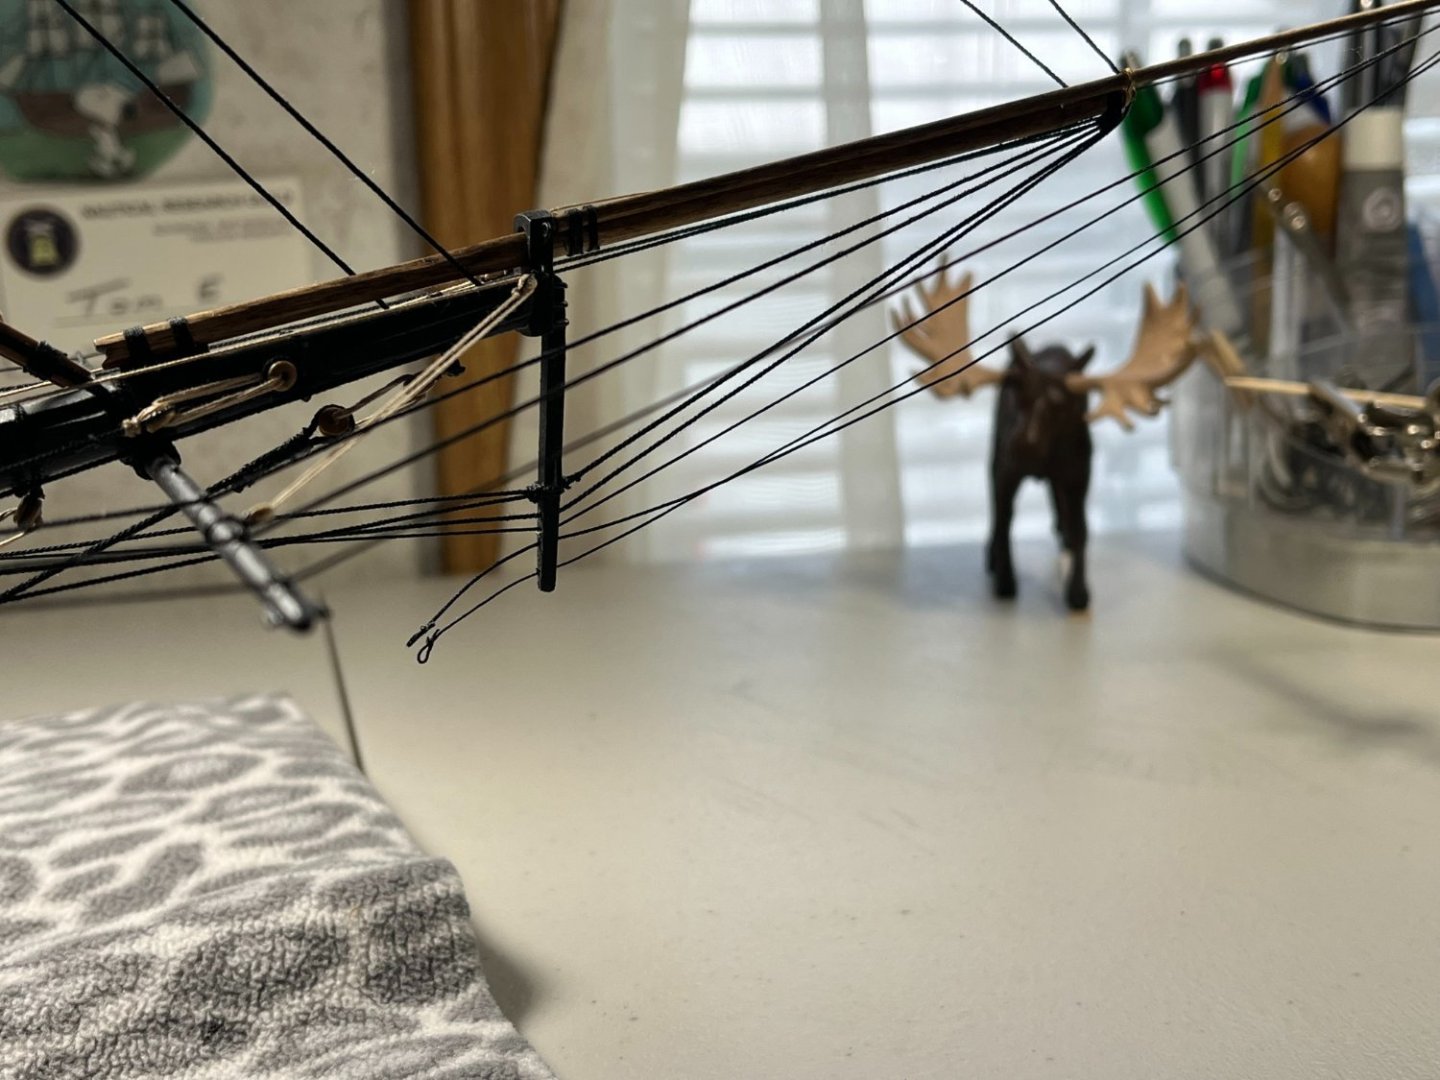
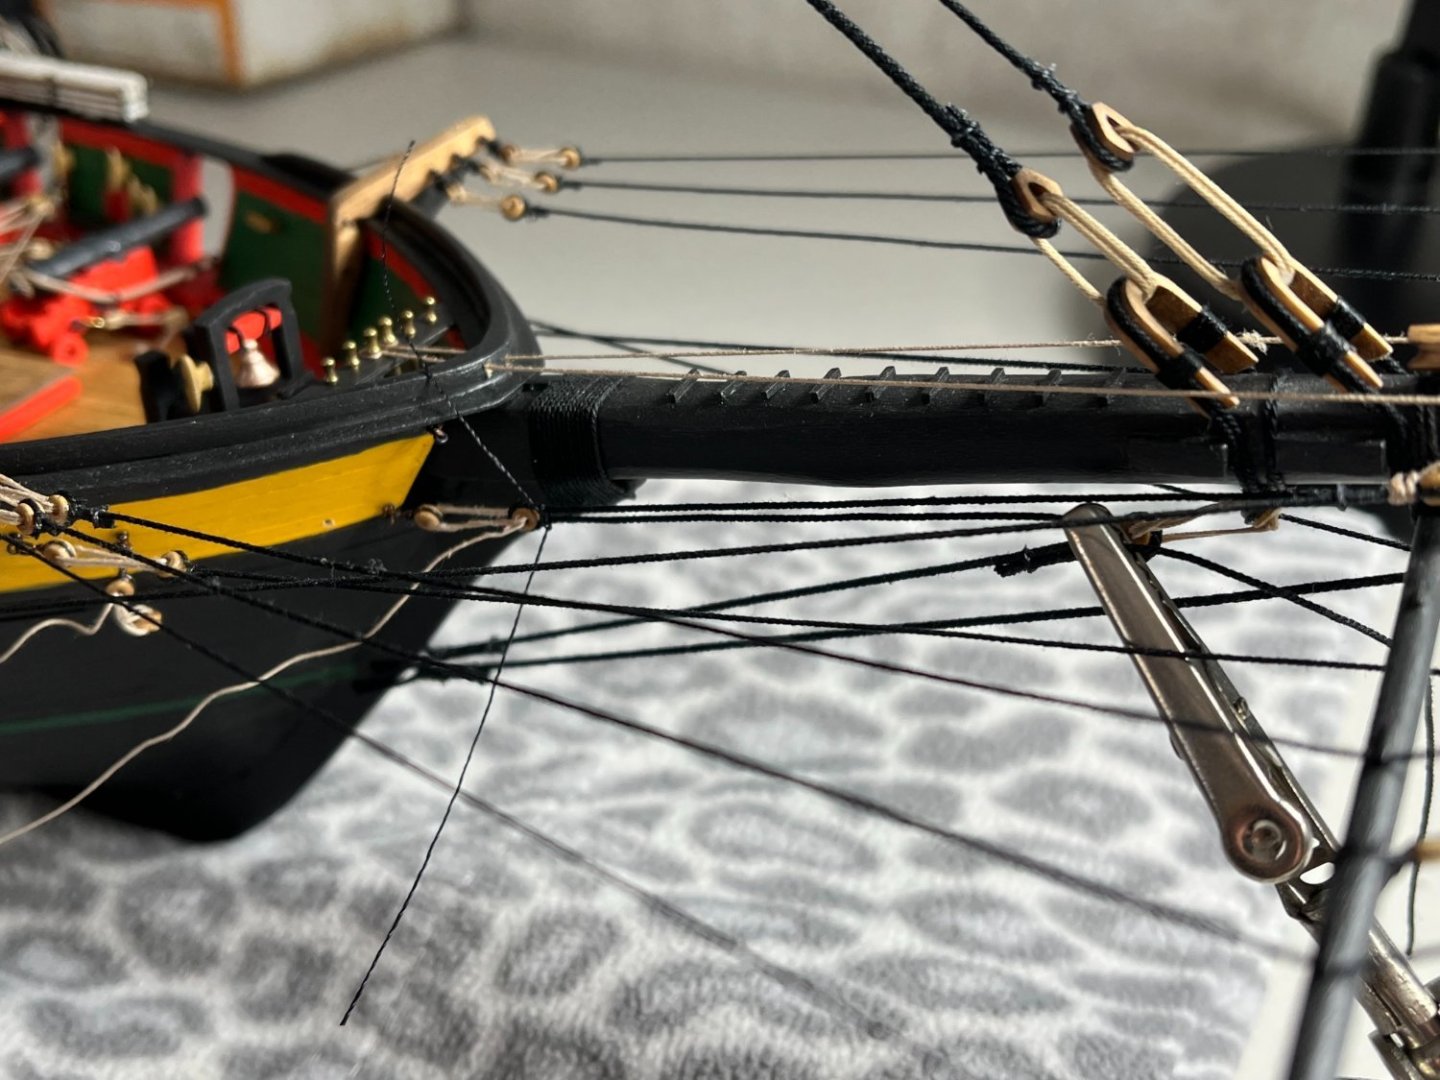
Evening, Hope everyone is well. Absolutely beautiful early fall evening in New Hampshire. Warm cup of something, radio buzzing in the background, ship building happening. Update needed. Continuing with the forward stays leading from the Fore mast thru the Bowsprit to the hull. Minus braces and footropes, this will mostly wrap up what I have planned for the Bowsprit. By no means done, just it will return at a later stage. The Flying jib stay, and Royal stay are the most fragile. Once you get them mounted, they do steady up nicely. Not the best pic of the bow, but my lines look "appropriate" for the shape of the ship itself. No ropes are too close to the others and looks "square" with the hull mountings. The eyelets are out of scale. I know i know Still learning!!!! With the Bowsprit essentially in place. I going to follow down the center line of the ship as towards what to rig next. Main and Its preventer stay are next. Rigging forces in the bowsprit are already pulling the fore mast gently forward. Rigging the main and Its preventer stay are a bit of a balancing act as it's now going to start pulling back on said bowsprit rigging. A gentle touch here attaching in anticipation of more forces pulling when lower shrouds and the like are installed as well. Anticipatory forces, if that's a term. A small cleat will eventually be attached to the fore mast gently tightening the preventer stay. I'll form one out of scrap wood. As many bullseyes as possible were pre-installed. Using a "third set of hands", the stays were tensioned off to an appropriate length with the bullseyes. Nothing too fancy. Bullseyes wrapped and stropped at two points and trimmed. Be good, Tom E


-
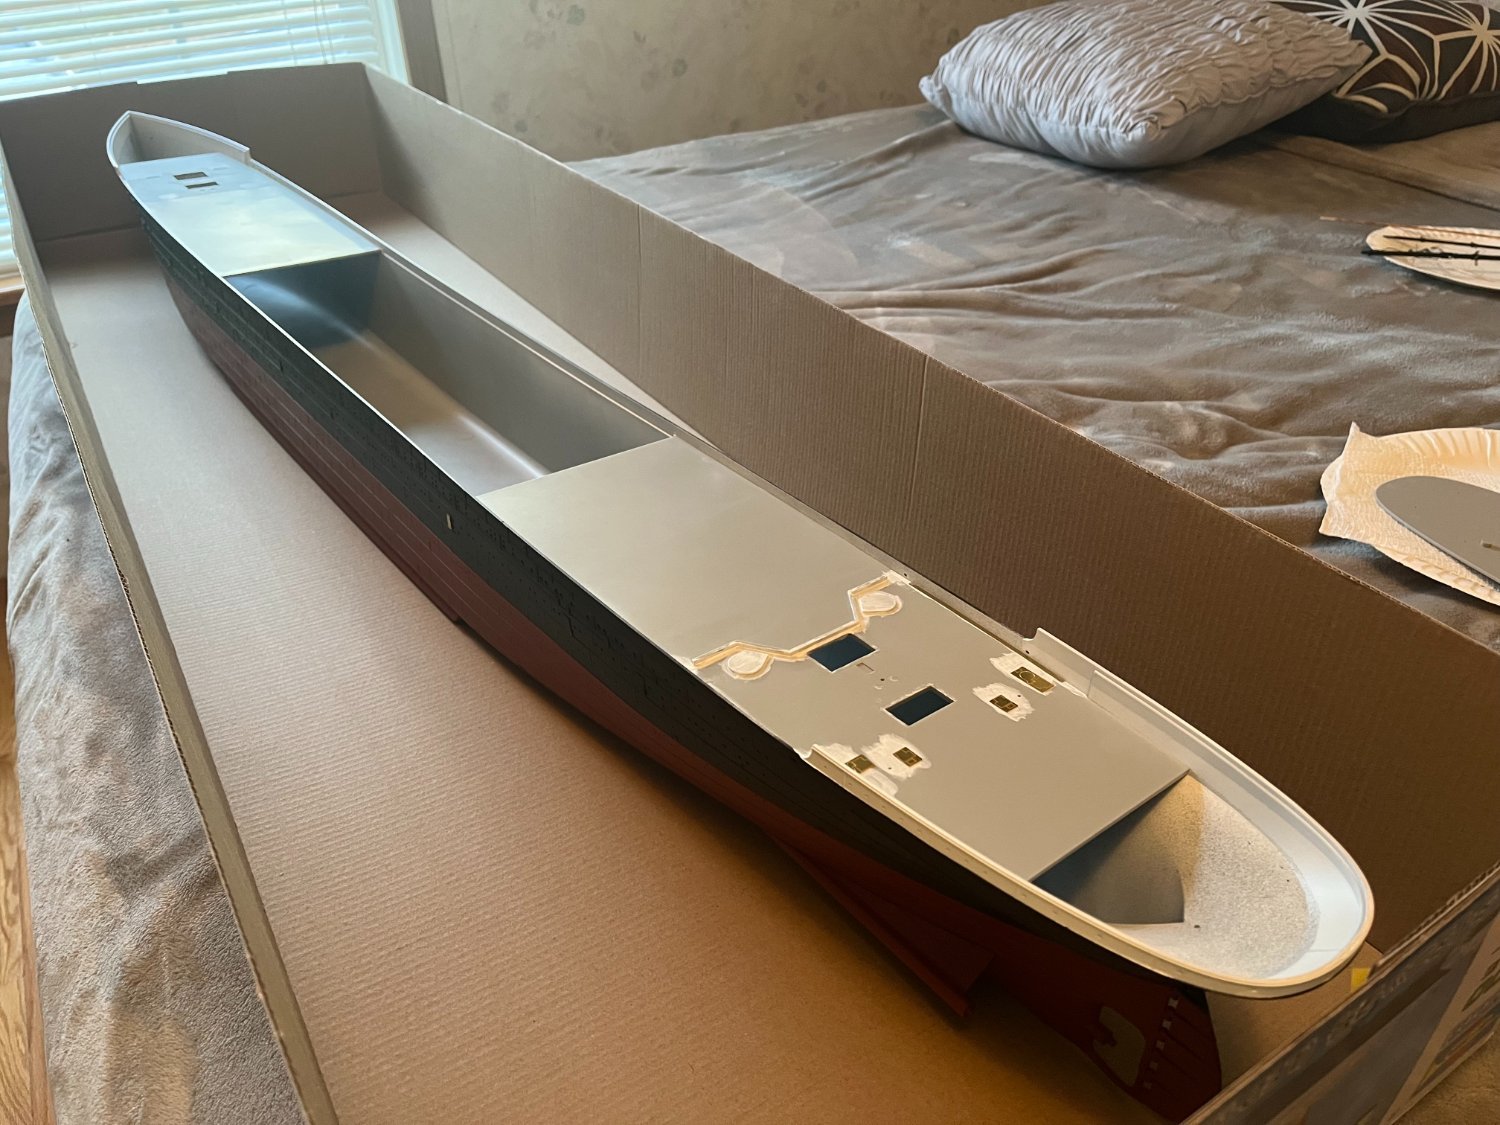
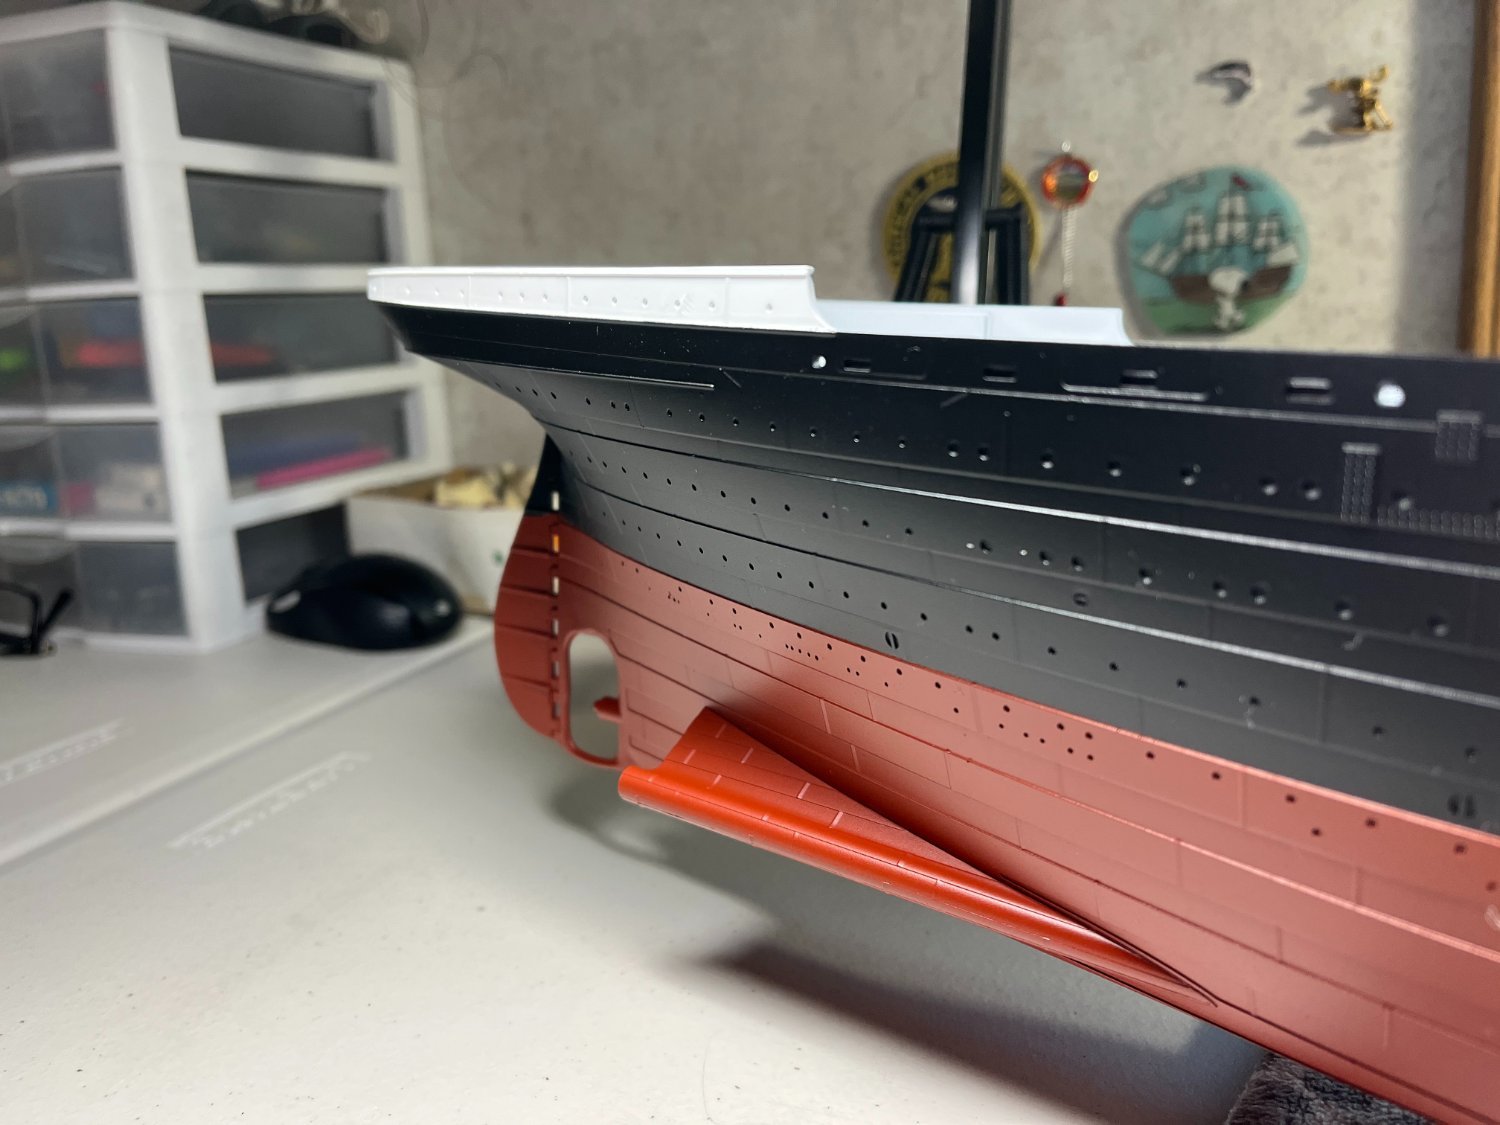
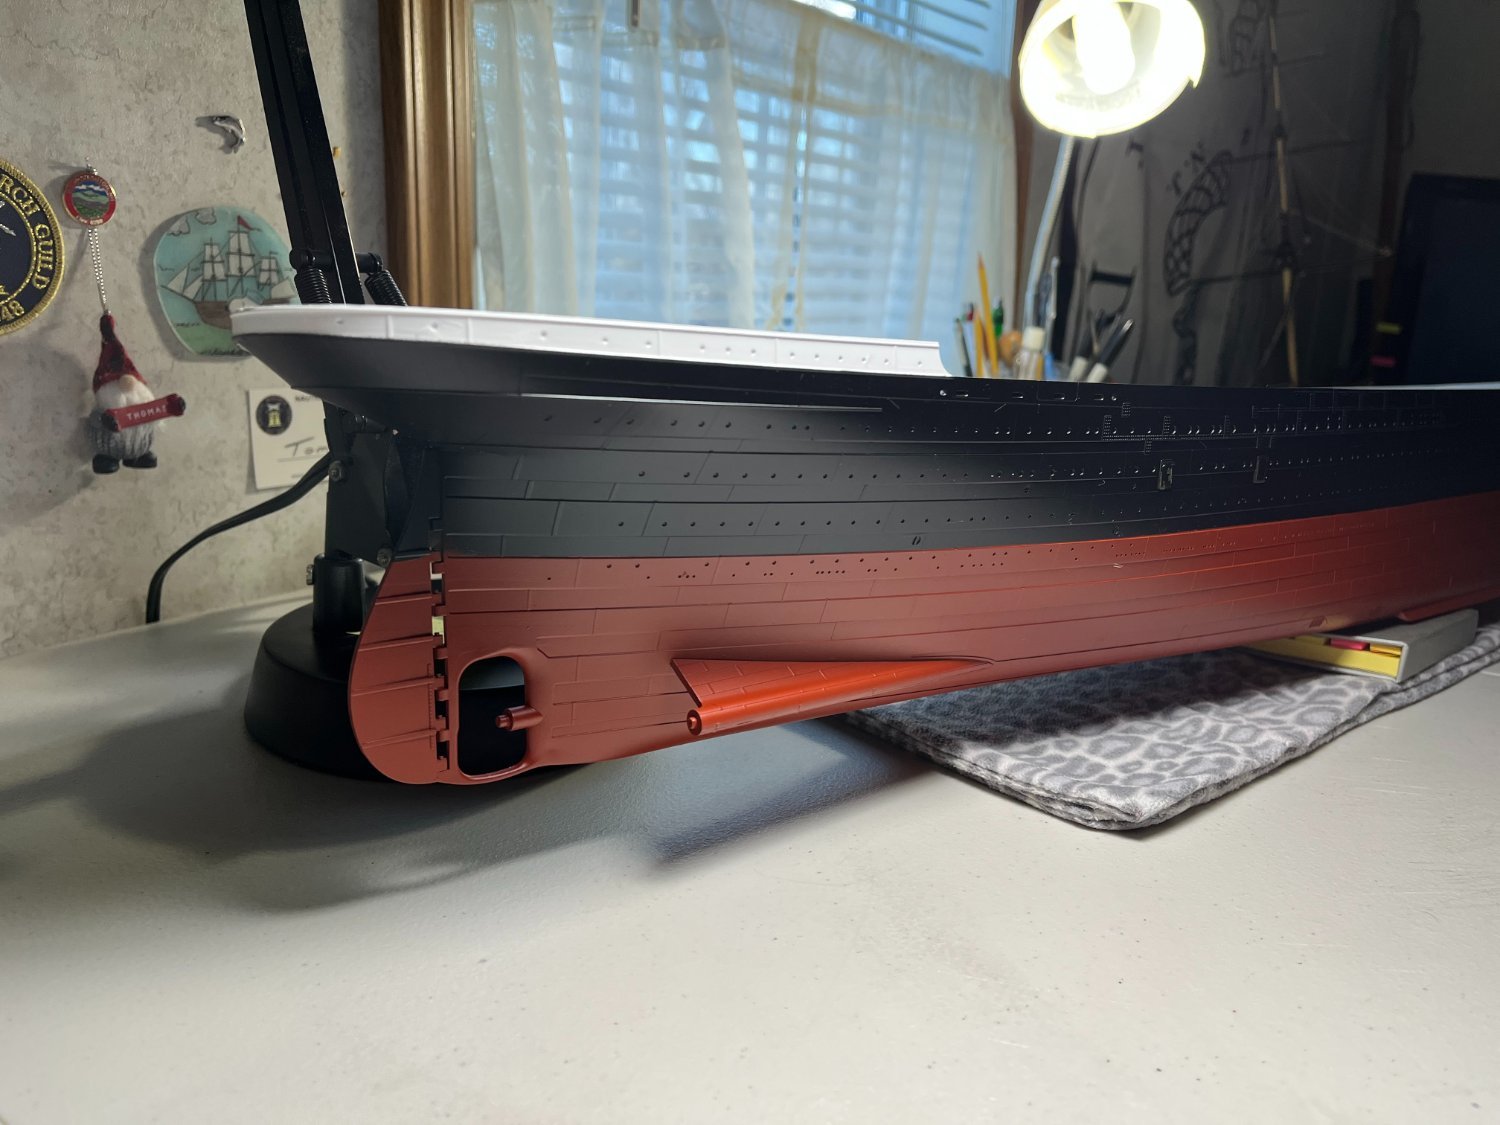
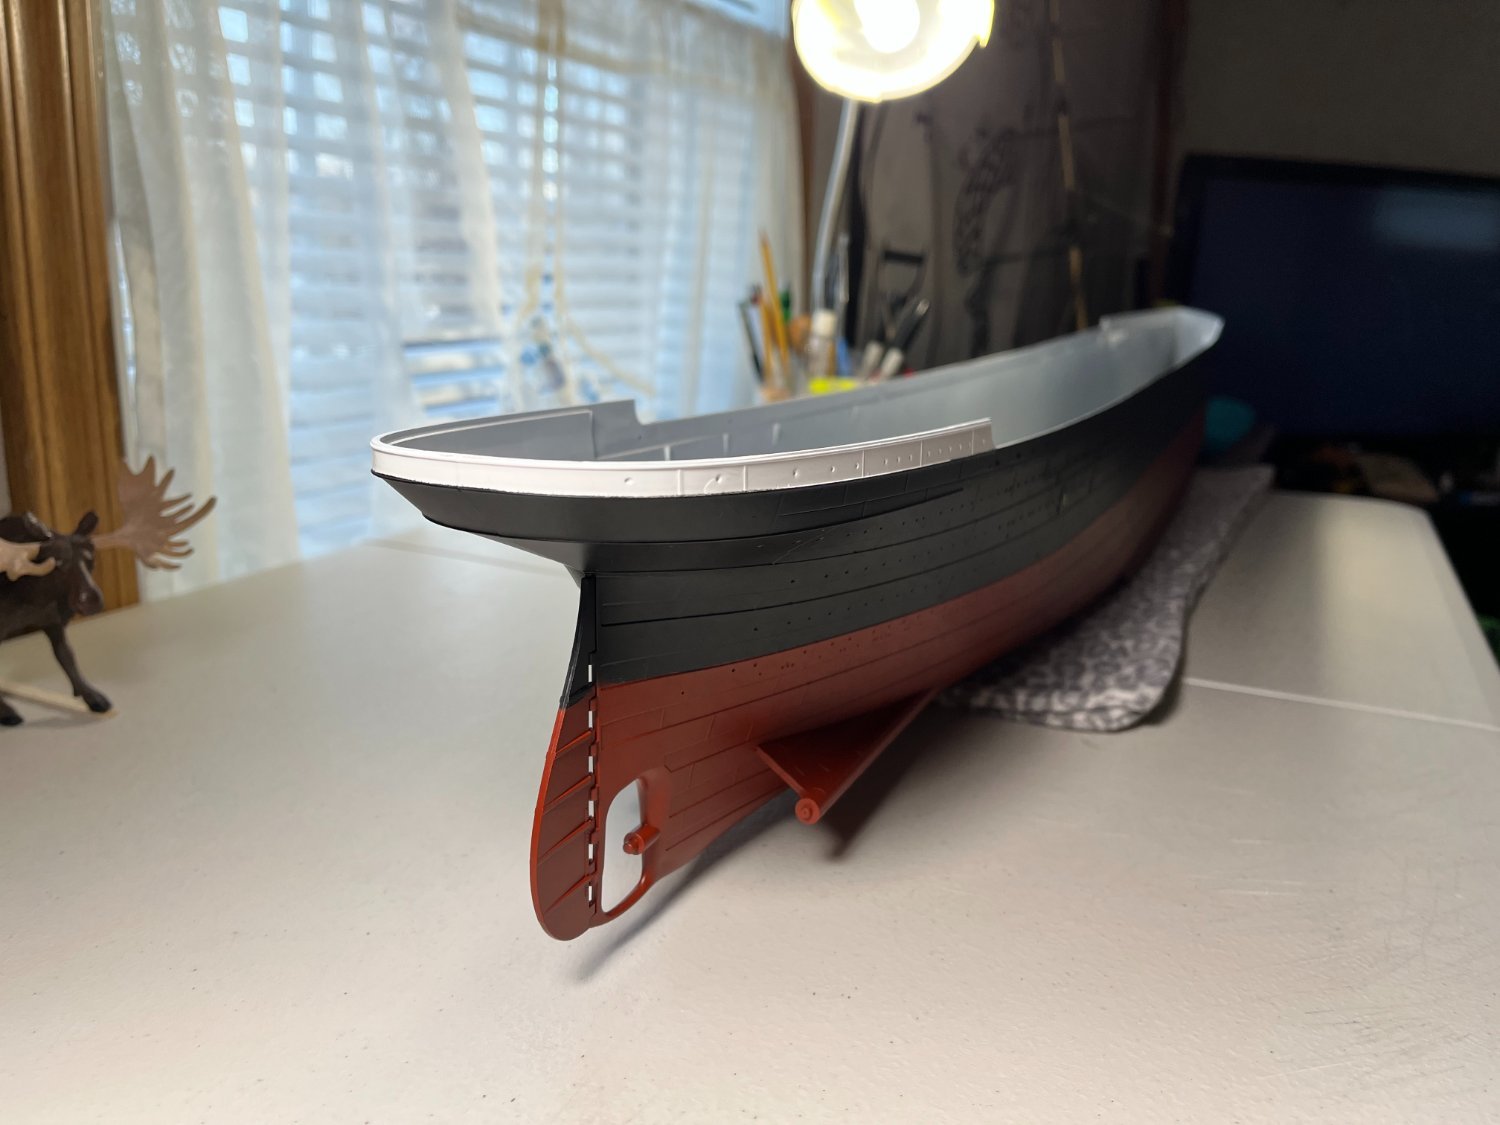
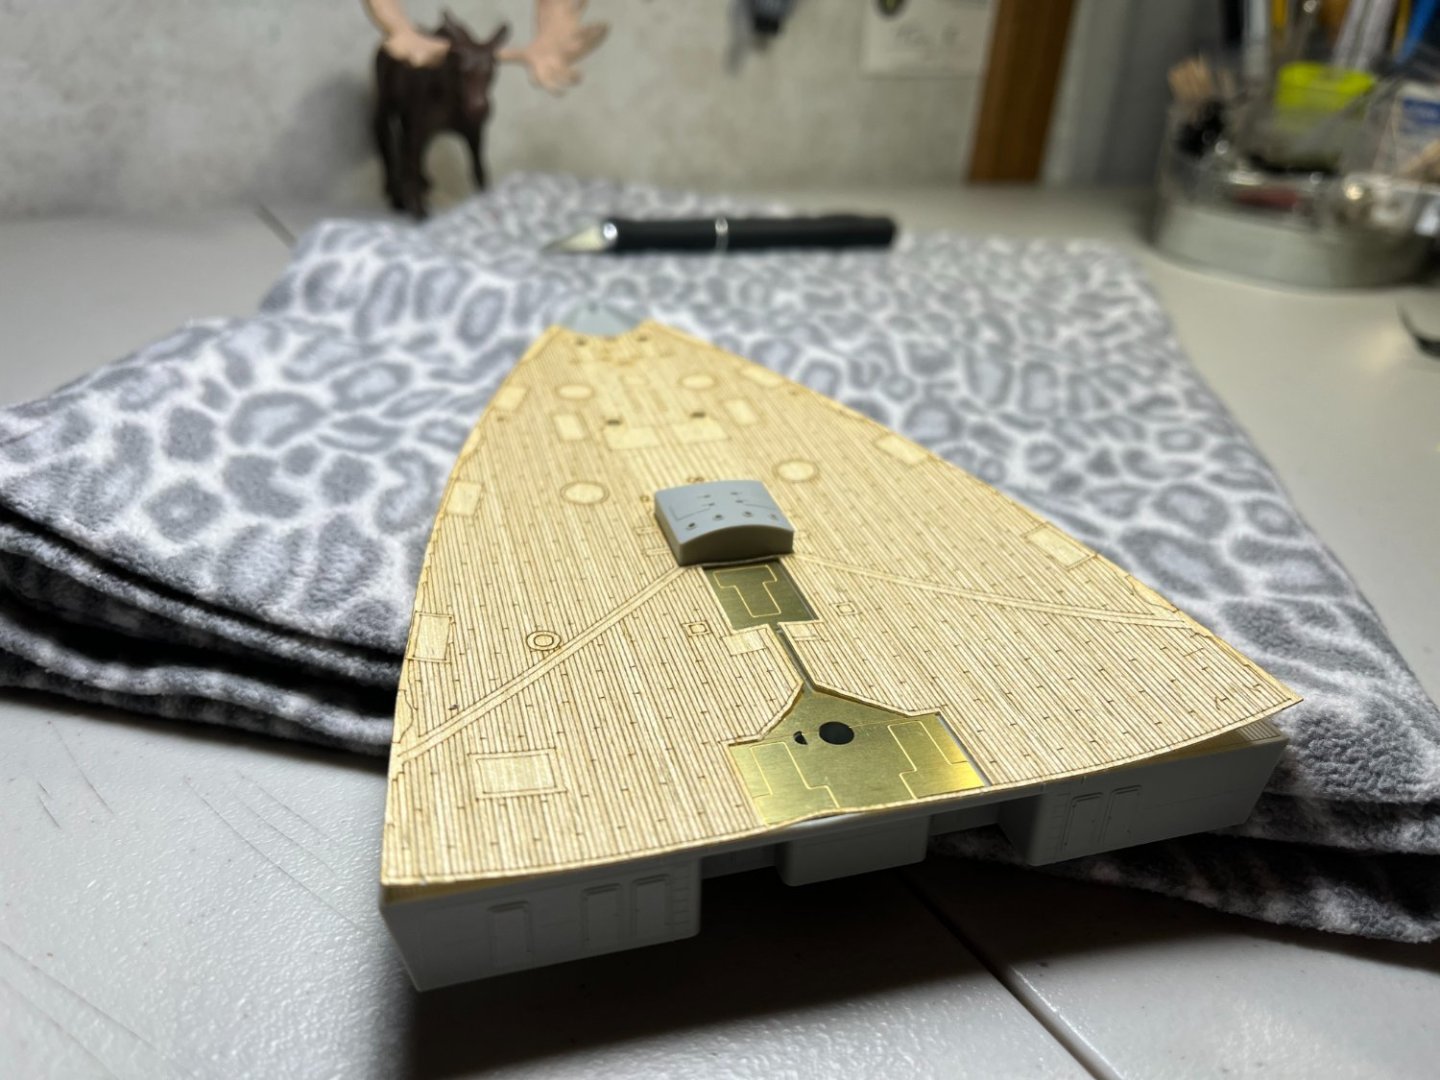
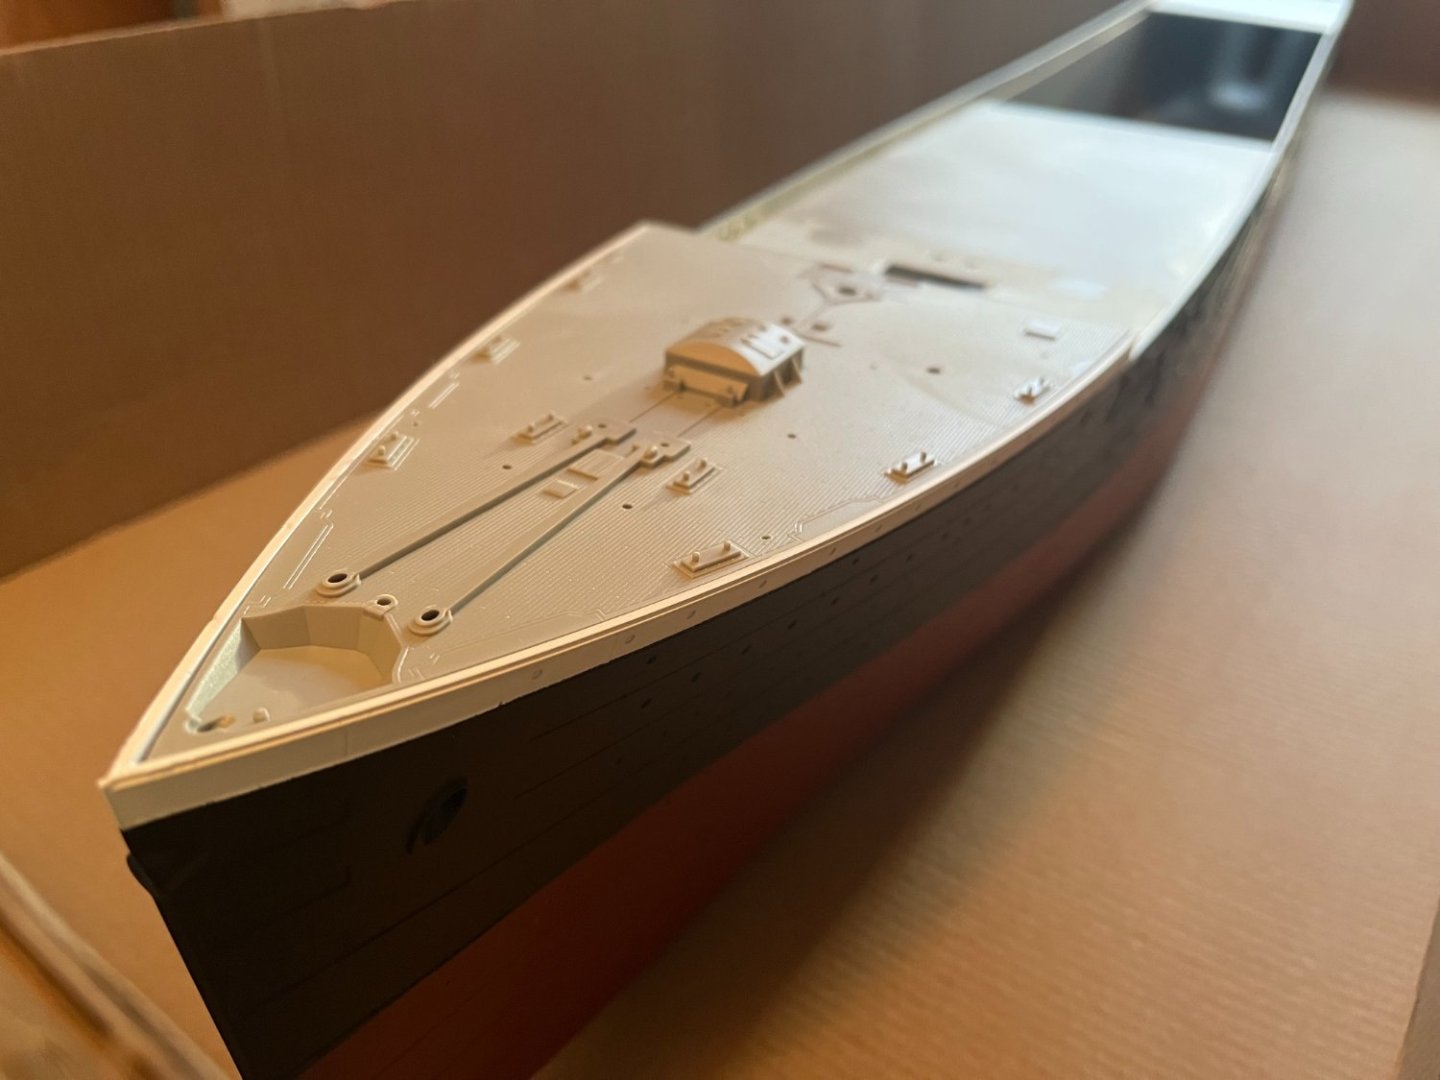
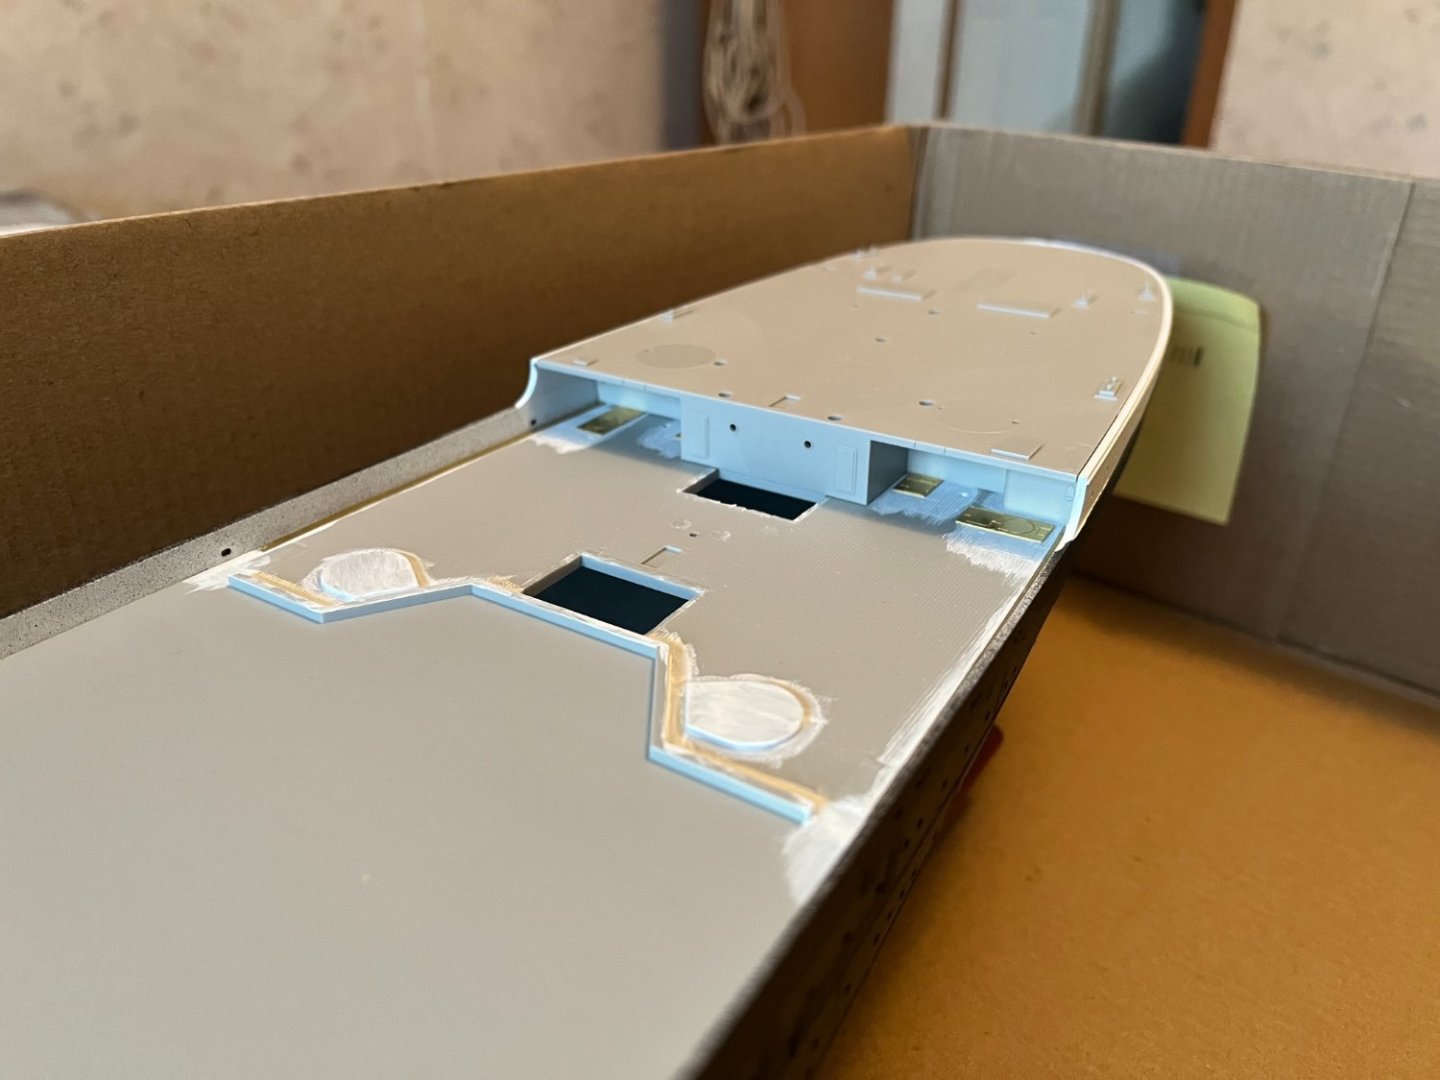
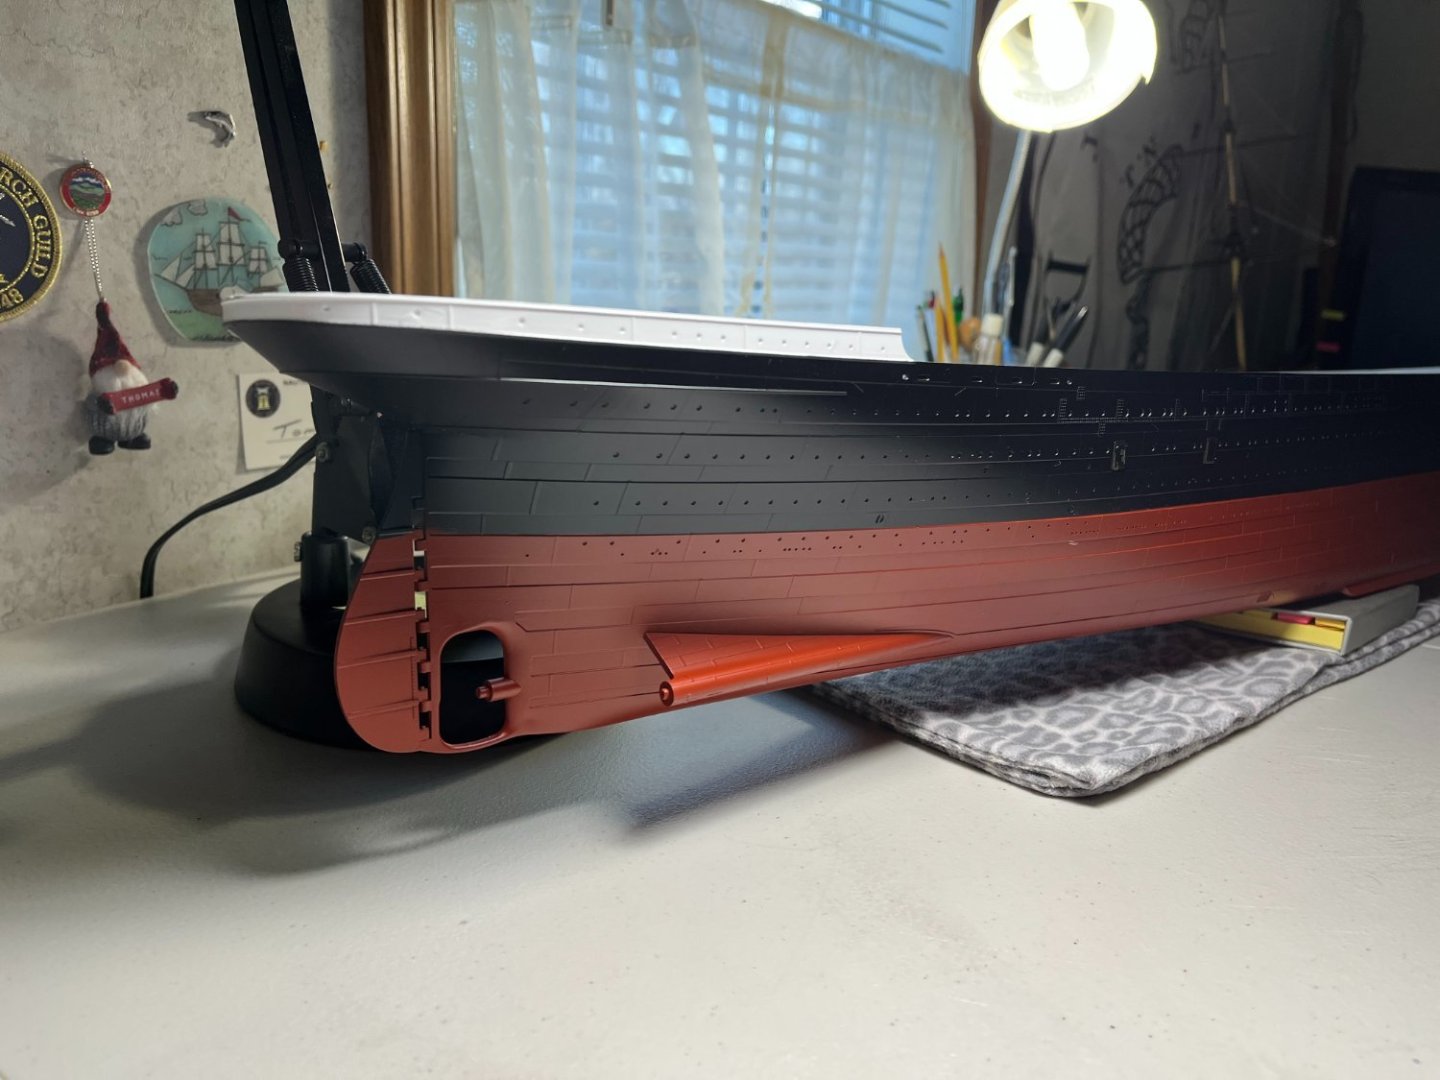
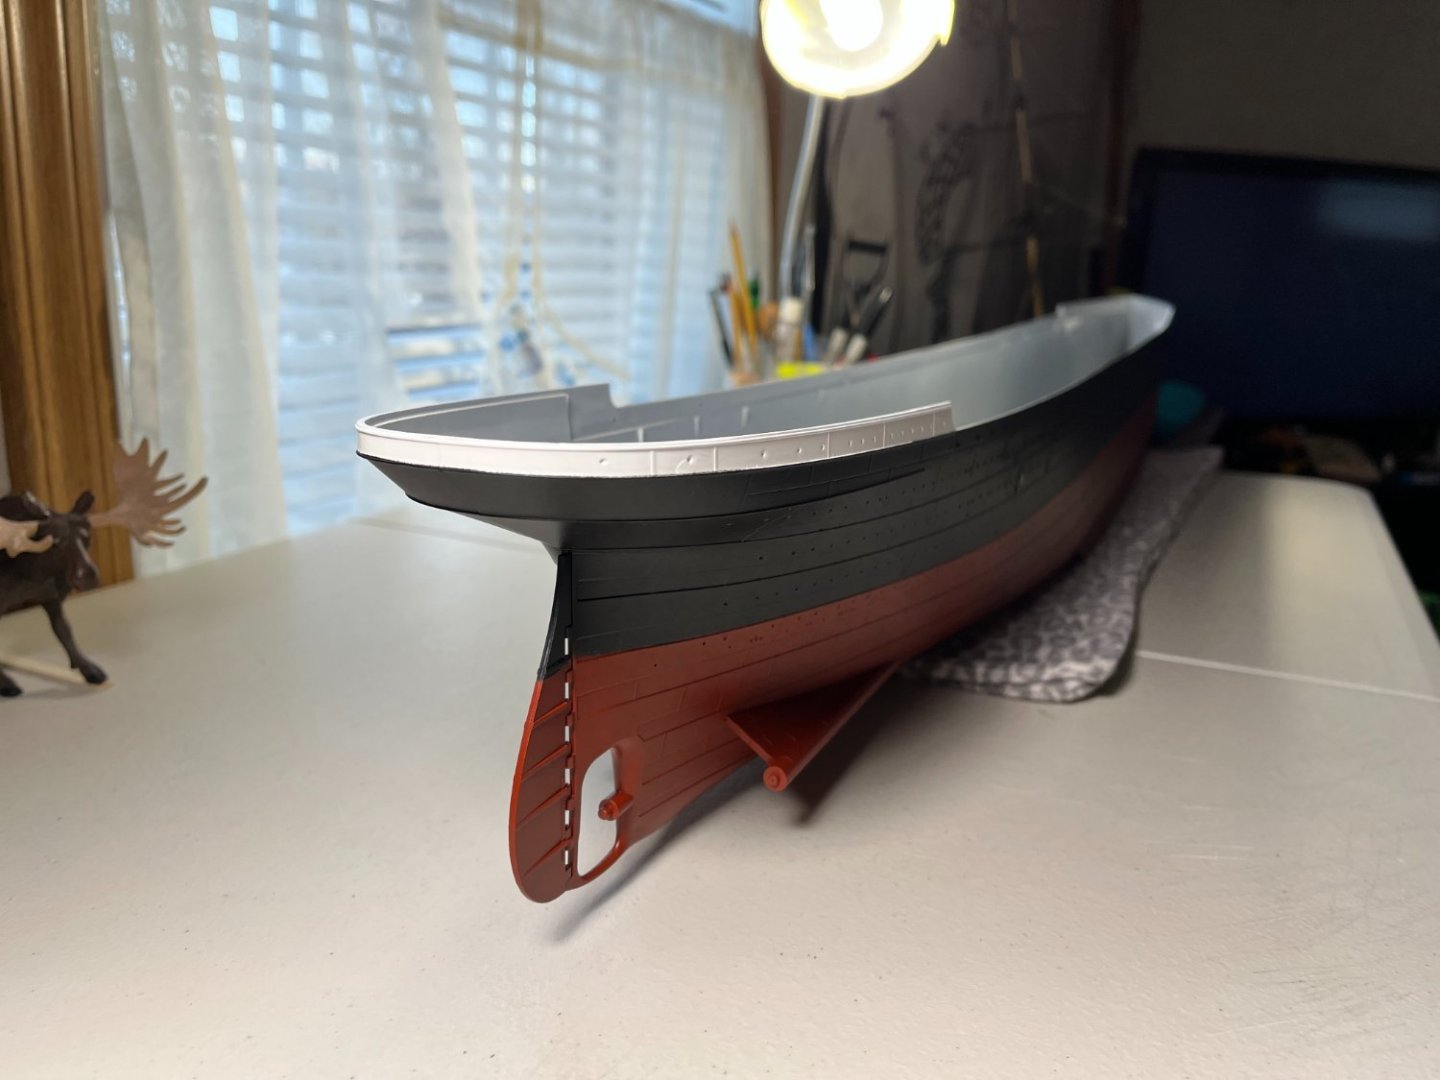
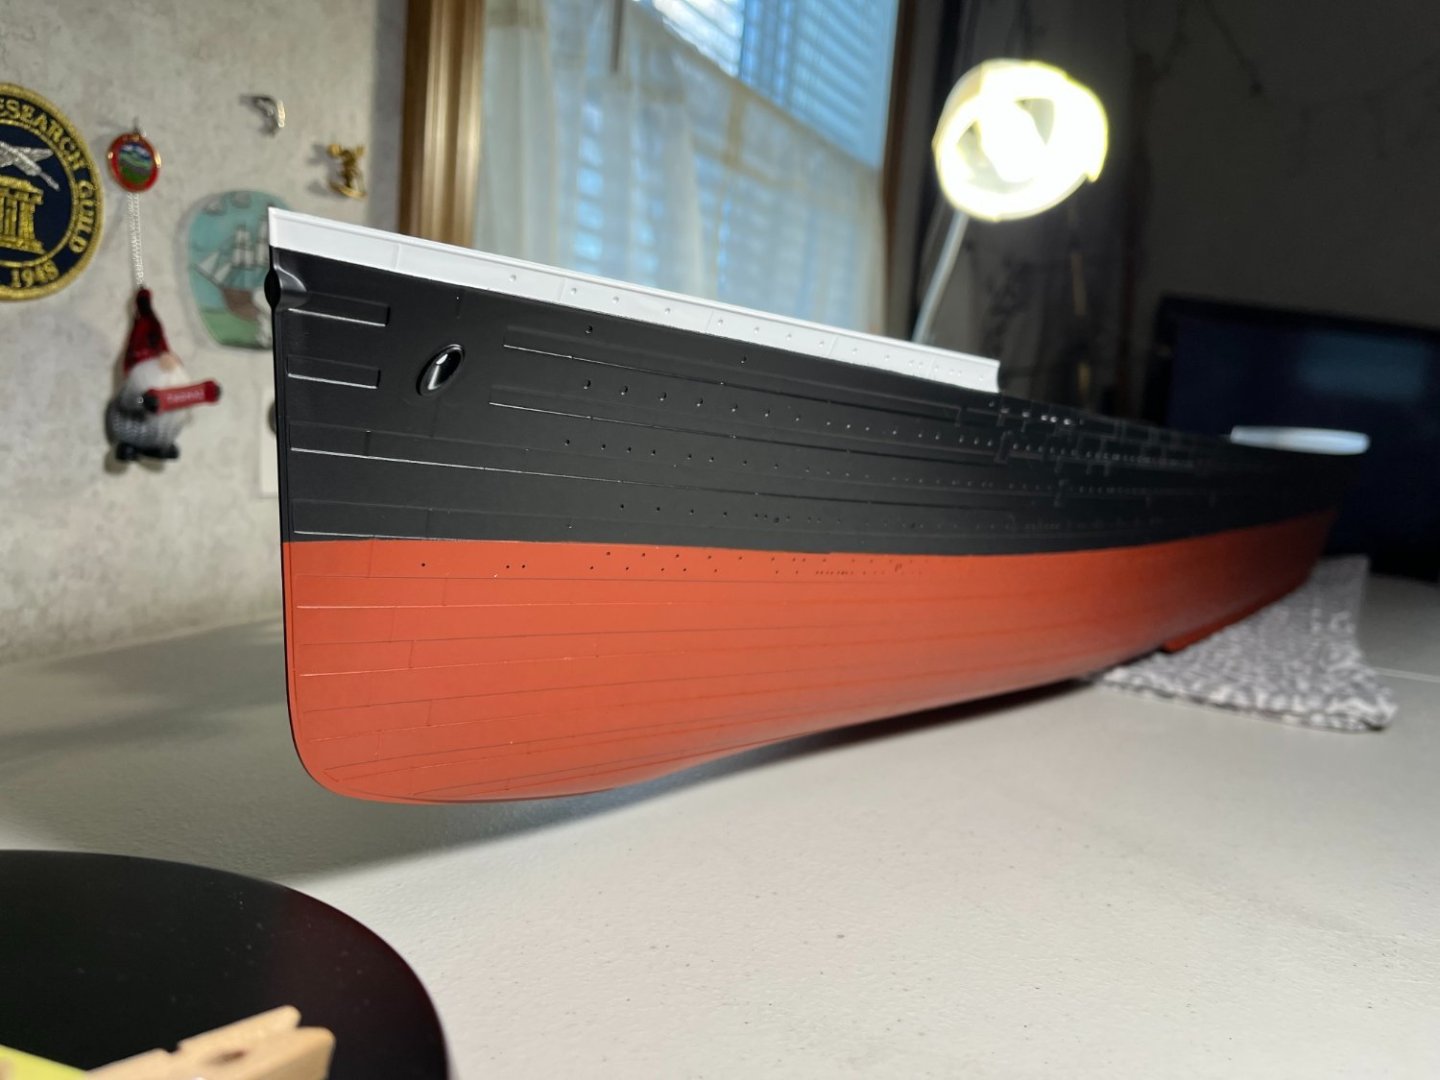
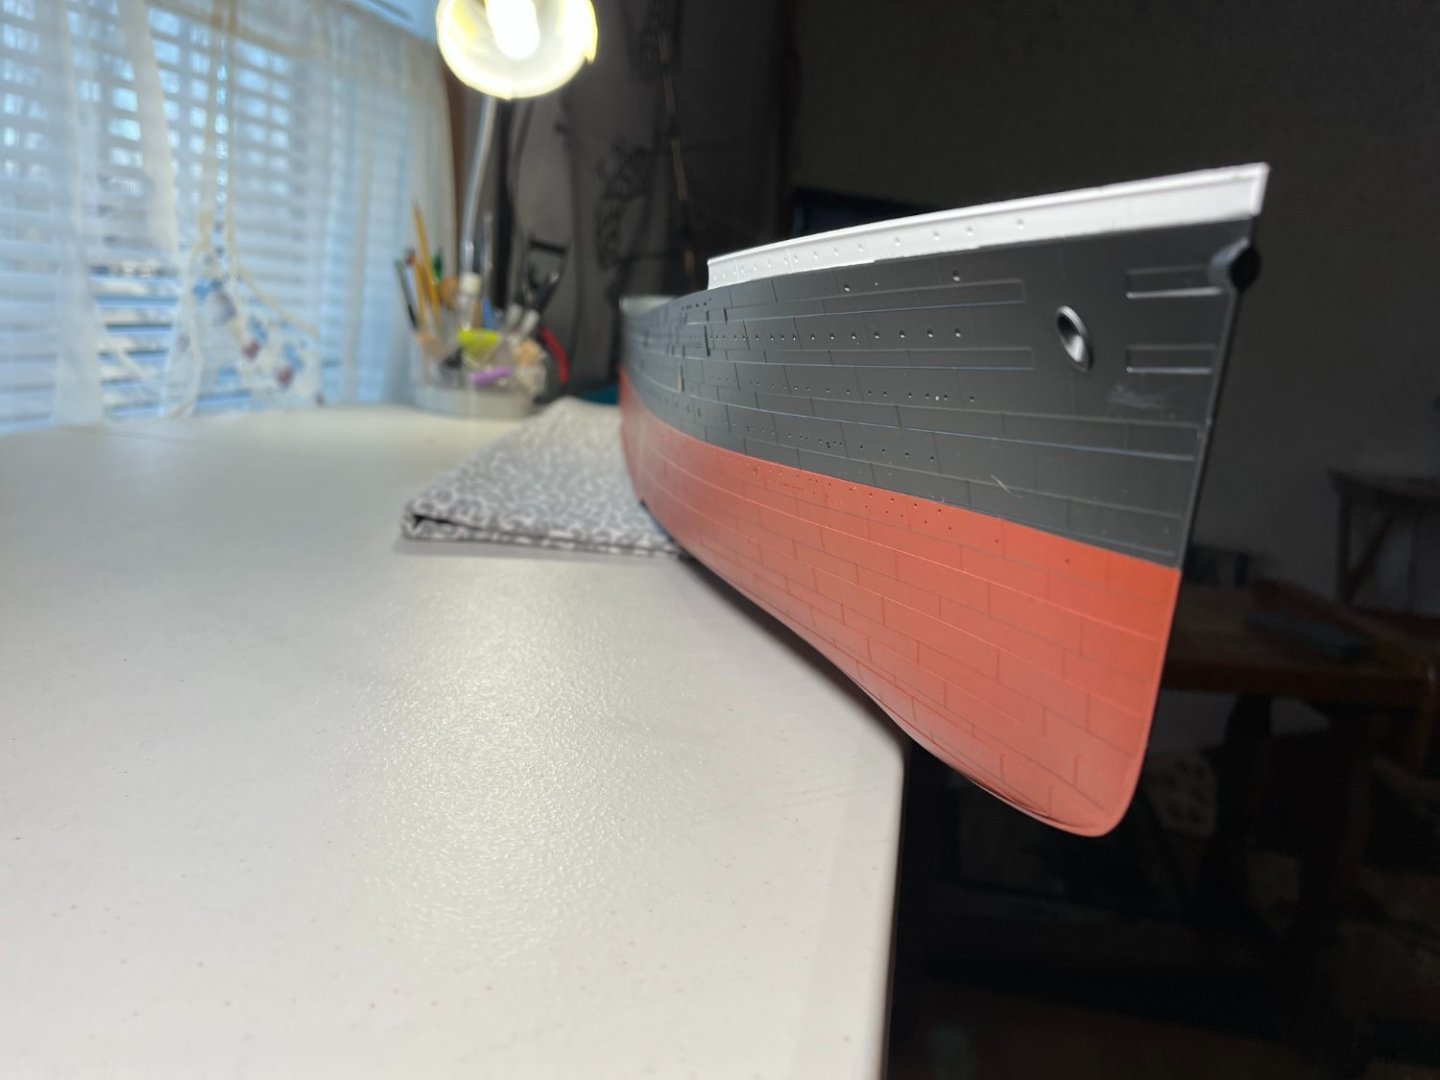
Evening, Titanic sorely needs an update. Life sure does happen sometimes!!! The hull is pretty much done. Just need to touch up the paint that came off some PE pieces. Masking tape was the culprit. Really just following the build order from the kit instructions. The decks will need some scraping to work the wooden decks into place. Checking the alignment of everything so far. All looks good, I think. But that's thru my amateur eyes, I'm sure others would see more. The fit at the bow looks good. All decks have PE. The trouble is finding it in the instructions supplied. I figured out that there is no order in the PE instructions. You find the area you're working on. I then tick off each piece number that's been done on the instructions with a pencil. Plus, its most likely that there are several views of the area your working on, but there spread out over the entirety of the instructions. No rhyme no reason. Once you get it figured out, things work a bit better. The white patches are just primer. I laid those down in areas where I think there might be some peak thru from the plastic underneath. Rather keep it a white color than plastic grey. My goblins Be good, Tom E


-
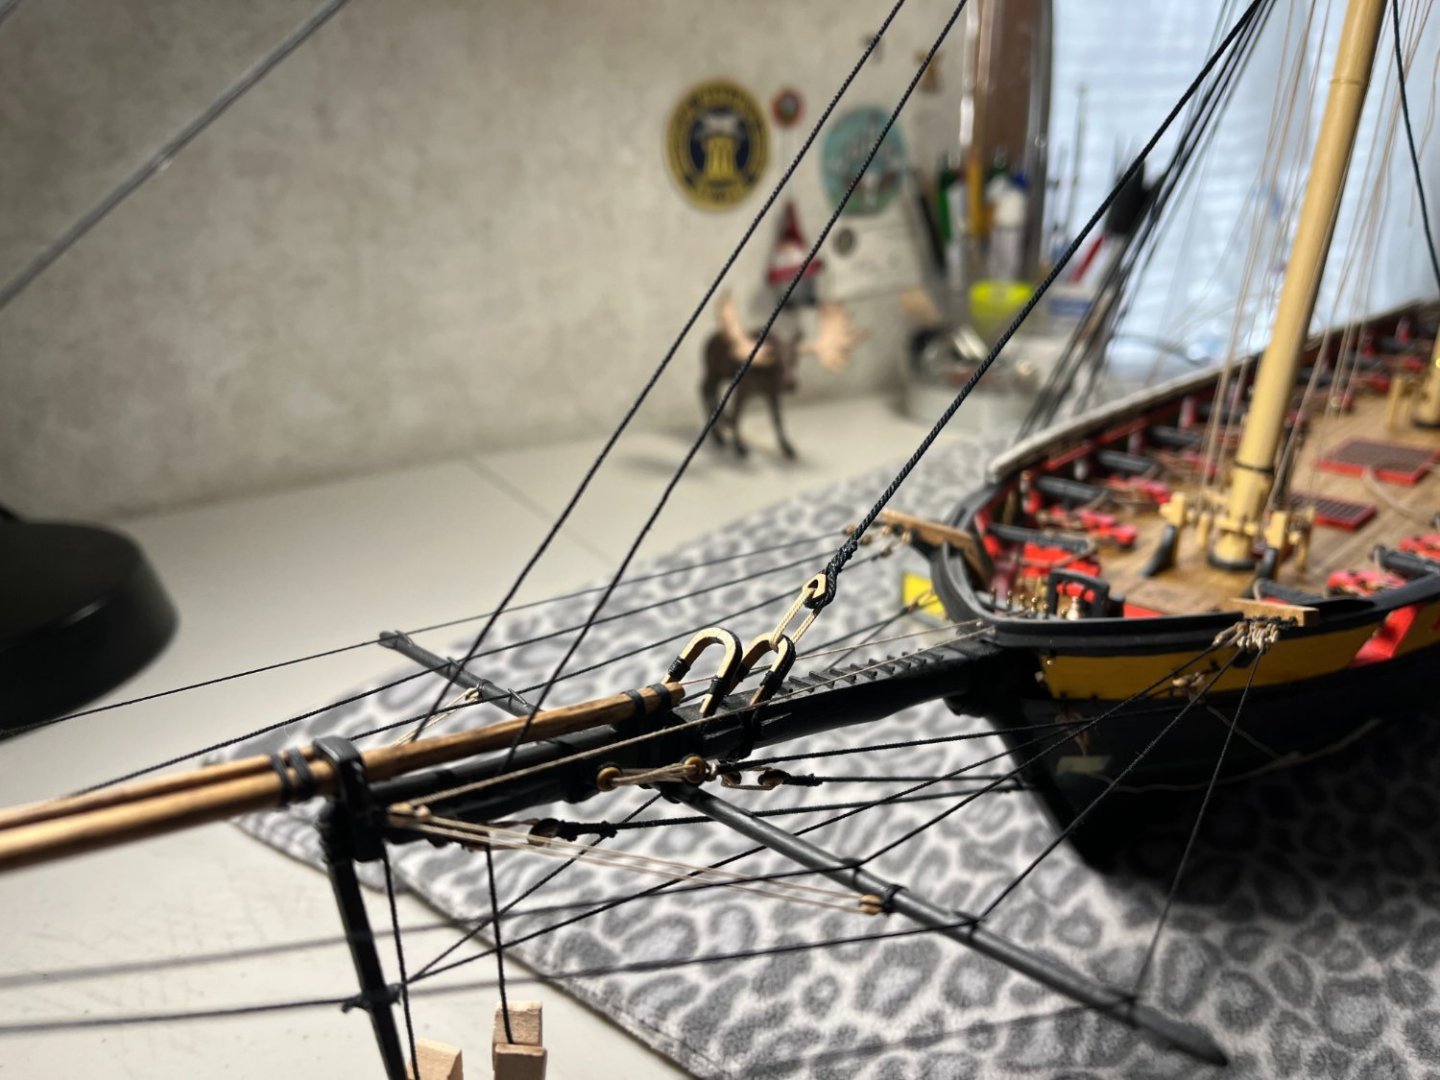
Evening, Been a while. Has been one heck of a summer, but not in a good way. Back in July I caught covid. This will be my third bout of covid. I work in medicine and am probably exposed more than the normal civilian. It is what it is, I accept it, doesn't bother me. I wouldn't do what I do if I was scared of bugs!!!! Plus, I'm fully vaxed for covid plus all the old guy boosters. But this last episode really sent me for a loop. Kinda shook me to the core a bit. Not in the hospital bad, but sure close!!! But it's time to move past this. Modeling keeps me centered, but admittedly, not much has been done. Anywho.... Back to Niagara. Rigging of the foremast stays thru the Bowsprit continues. Slow and steady. Working my way from bottom of the Foremast to top. It's amazing how this ship is starting to look. Never thought I would get this far! All rope at this stage is from Syren. It's the jungle gym of rigging that goes from the foremast thru to the Bowsprit seems where one can lose control. Constantly checking which line goes thru which hole to which bullseye and lanyard. Constantly.... The Royal and Flying Jib stays are the most delicate. These cap off over the Bowsprit and end with a loop after the dolphin striker. Be good, Tom E


-
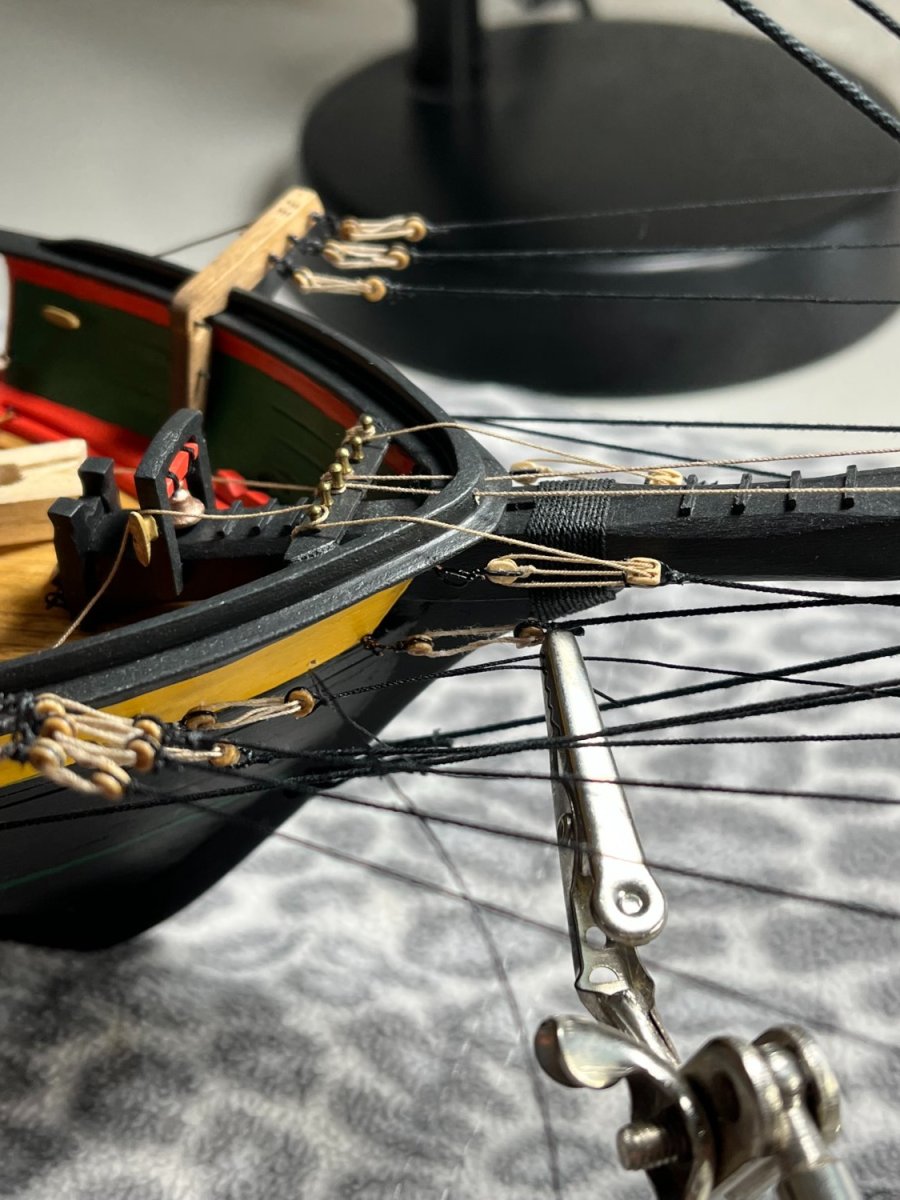
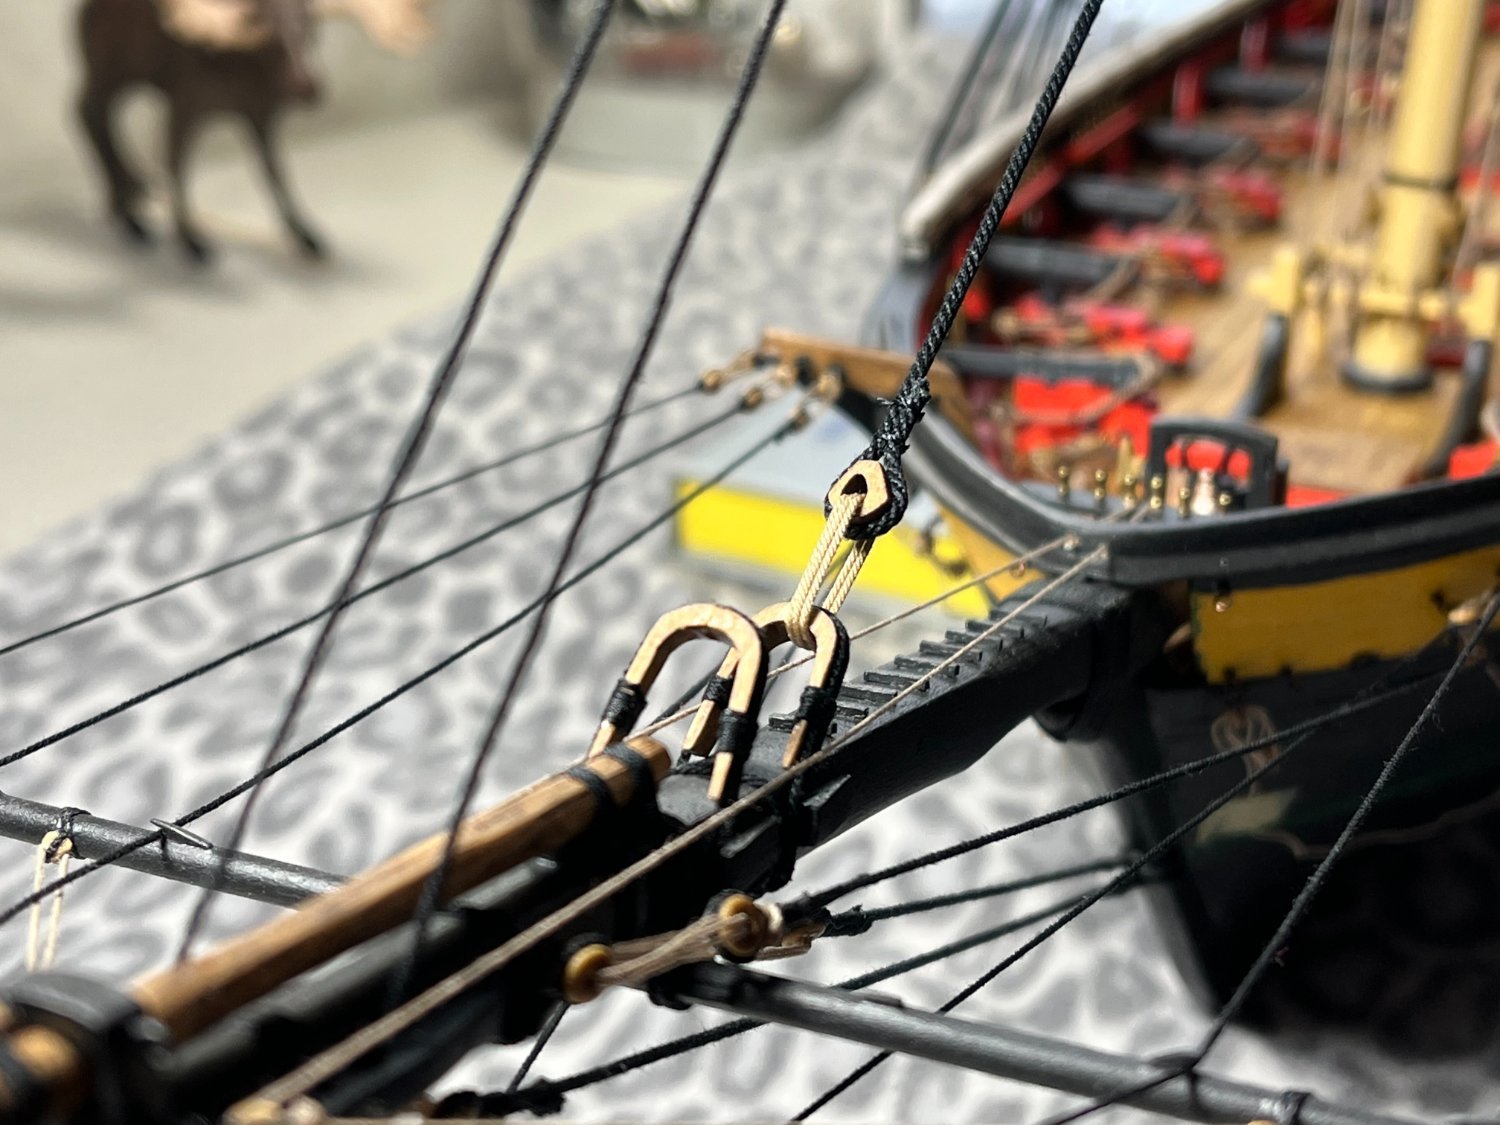
Afternoon, Hope everyone is well. Going to be stuck at home for the 4th of July. A Doctor I work with made a trip to Italy last week, came home with the "sniffles" per him. The "sniffles" turned out to be covid. As of today, the office is now down 2 doctors and 1 tech (Me!). Irony is, I just started to relax using a mask at work this week. I was hesitant and other people did there thing, but I just kept wearing them. Sheesh! Any who, Niagara needs an update. With my "inside out" mentality approach to the rigging. I decided to get the Bowsprit rigged in. After this I'll work backwards and do the stays off the Main mast. Starting with the Fore and Preventer stay. Nothin fancy. Rinse and repeat. I've been keeping an eye on how all the other rigging reacts when I apply pressure to the rope I'm working on. Trying to maintain a proper balance to everything. Topmast and Inner jib stay are being worked in as well. The alligator clips are holding the Topmast stay as it goes thru the starboard side bee on the Bowsprit, per the plans. I'm trying to control myself in tightening things up too much. I imagine when I set in the stays off the main mast it should, in principle, tighten up the stays off the fore mast. My goblins!! Here she stands in all her glory. Wash your hands! Tom E


-
Evening, Dinner is in the oven. Whole chickens on sale at the market. A deli style dry rub for the chicken, garlic roasted potatoes as a side. Titanic needs an update. How'd I do? Some of the flat PE pieces on the hull lost some paint from the tape job. Easily touched up. I was worried about the white areas and bleed thru. Not too bad. Kinda wonky where the red meets the black. The inner white areas of the hull that meet the deck pieces will get a touch up with the airbrush. There's PE that goes on those inside areas if memory serves me. She's starting to take shape. Be good, Tom E


- 40 replies
-
- 10
-
-