HOLIDAY DONATION DRIVE - SUPPORT MSW - DO YOUR PART TO KEEP THIS GREAT FORUM GOING! (Only 24 donations so far out of 49,000 members - C'mon guys!)
×
Tom E
-
Posts
469 -
Joined
-
Last visited
Content Type
Profiles
Forums
Gallery
Events
Everything posted by Tom E
-
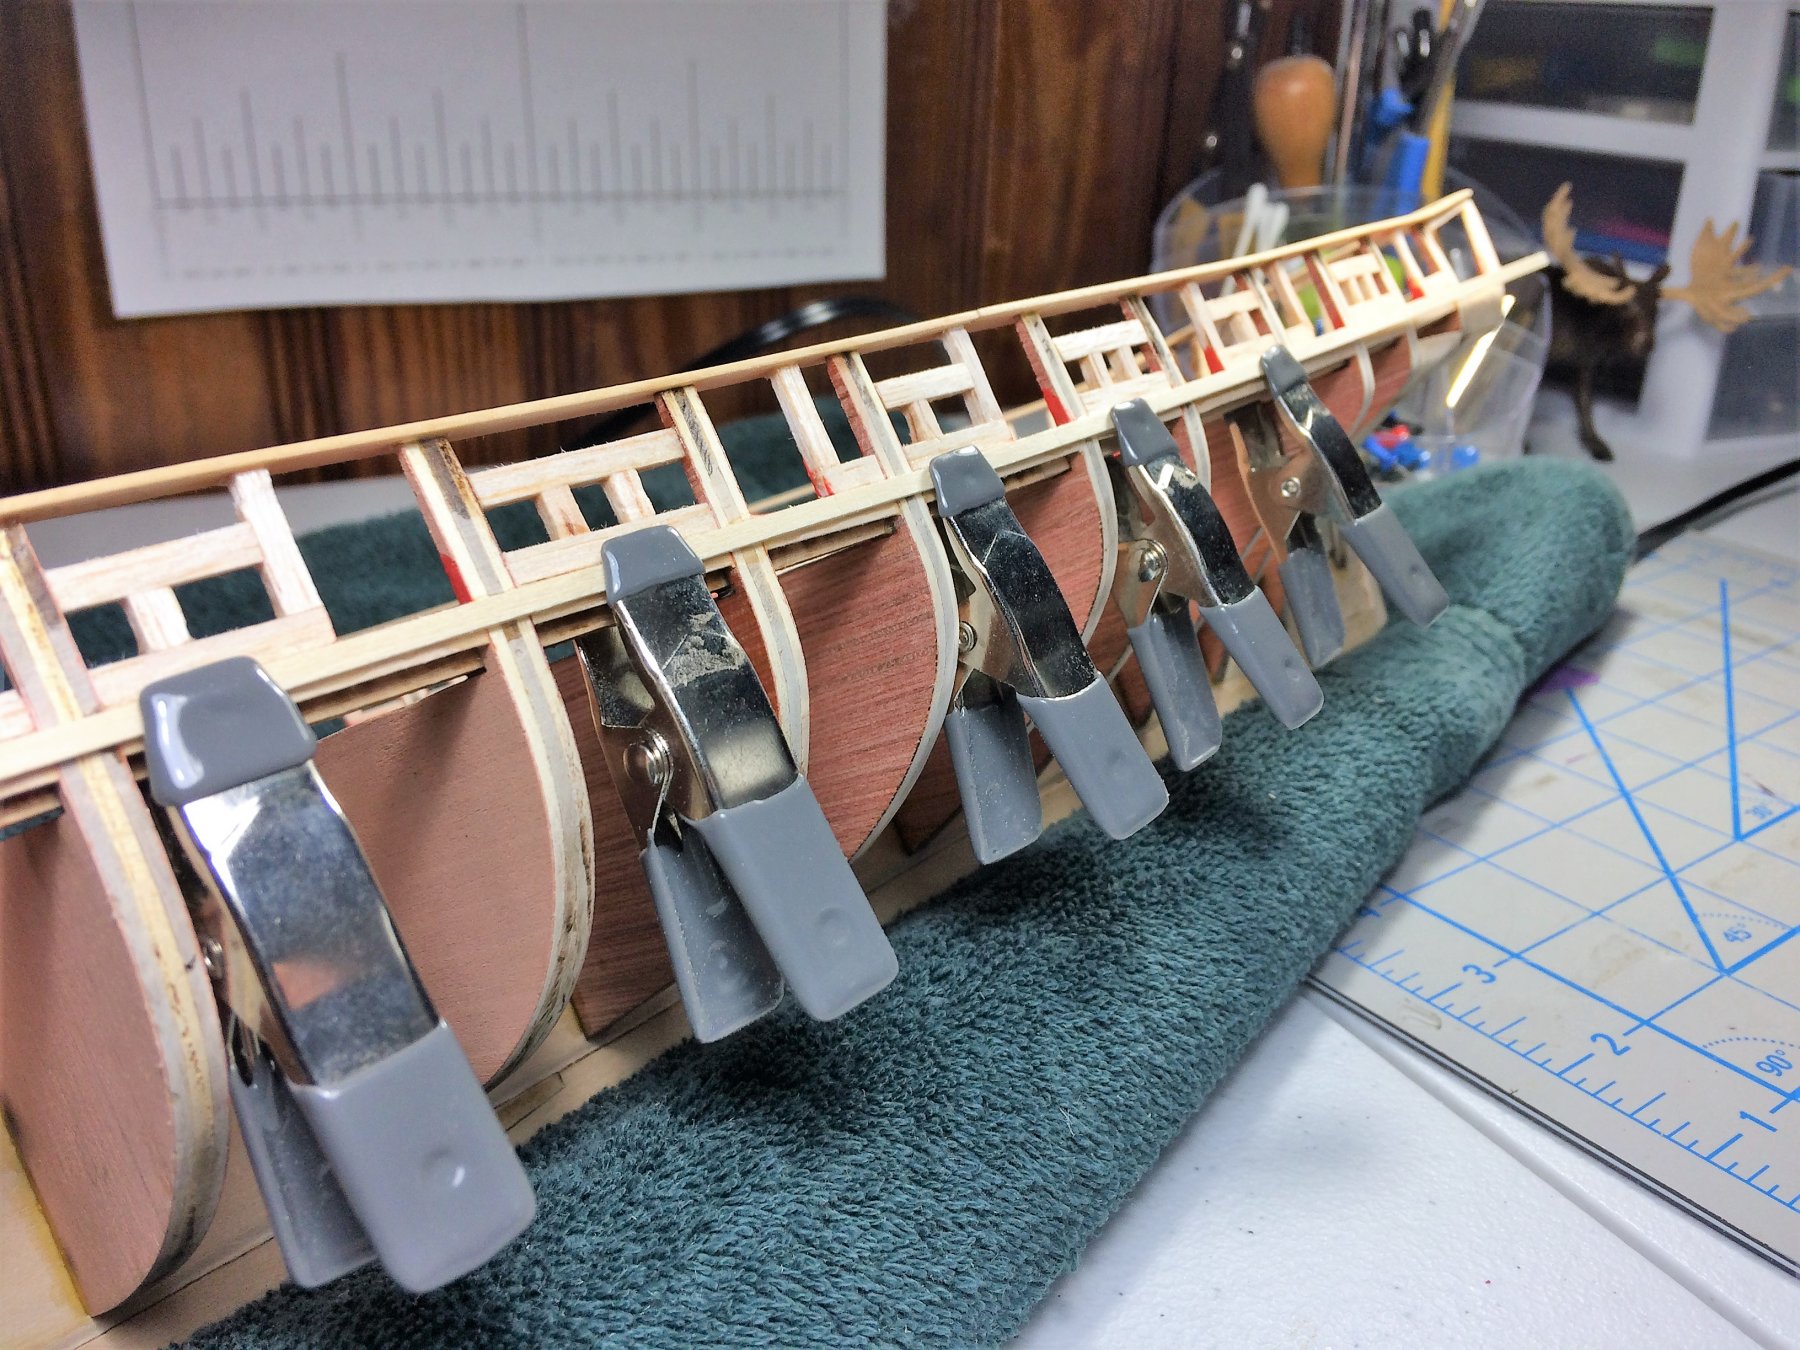
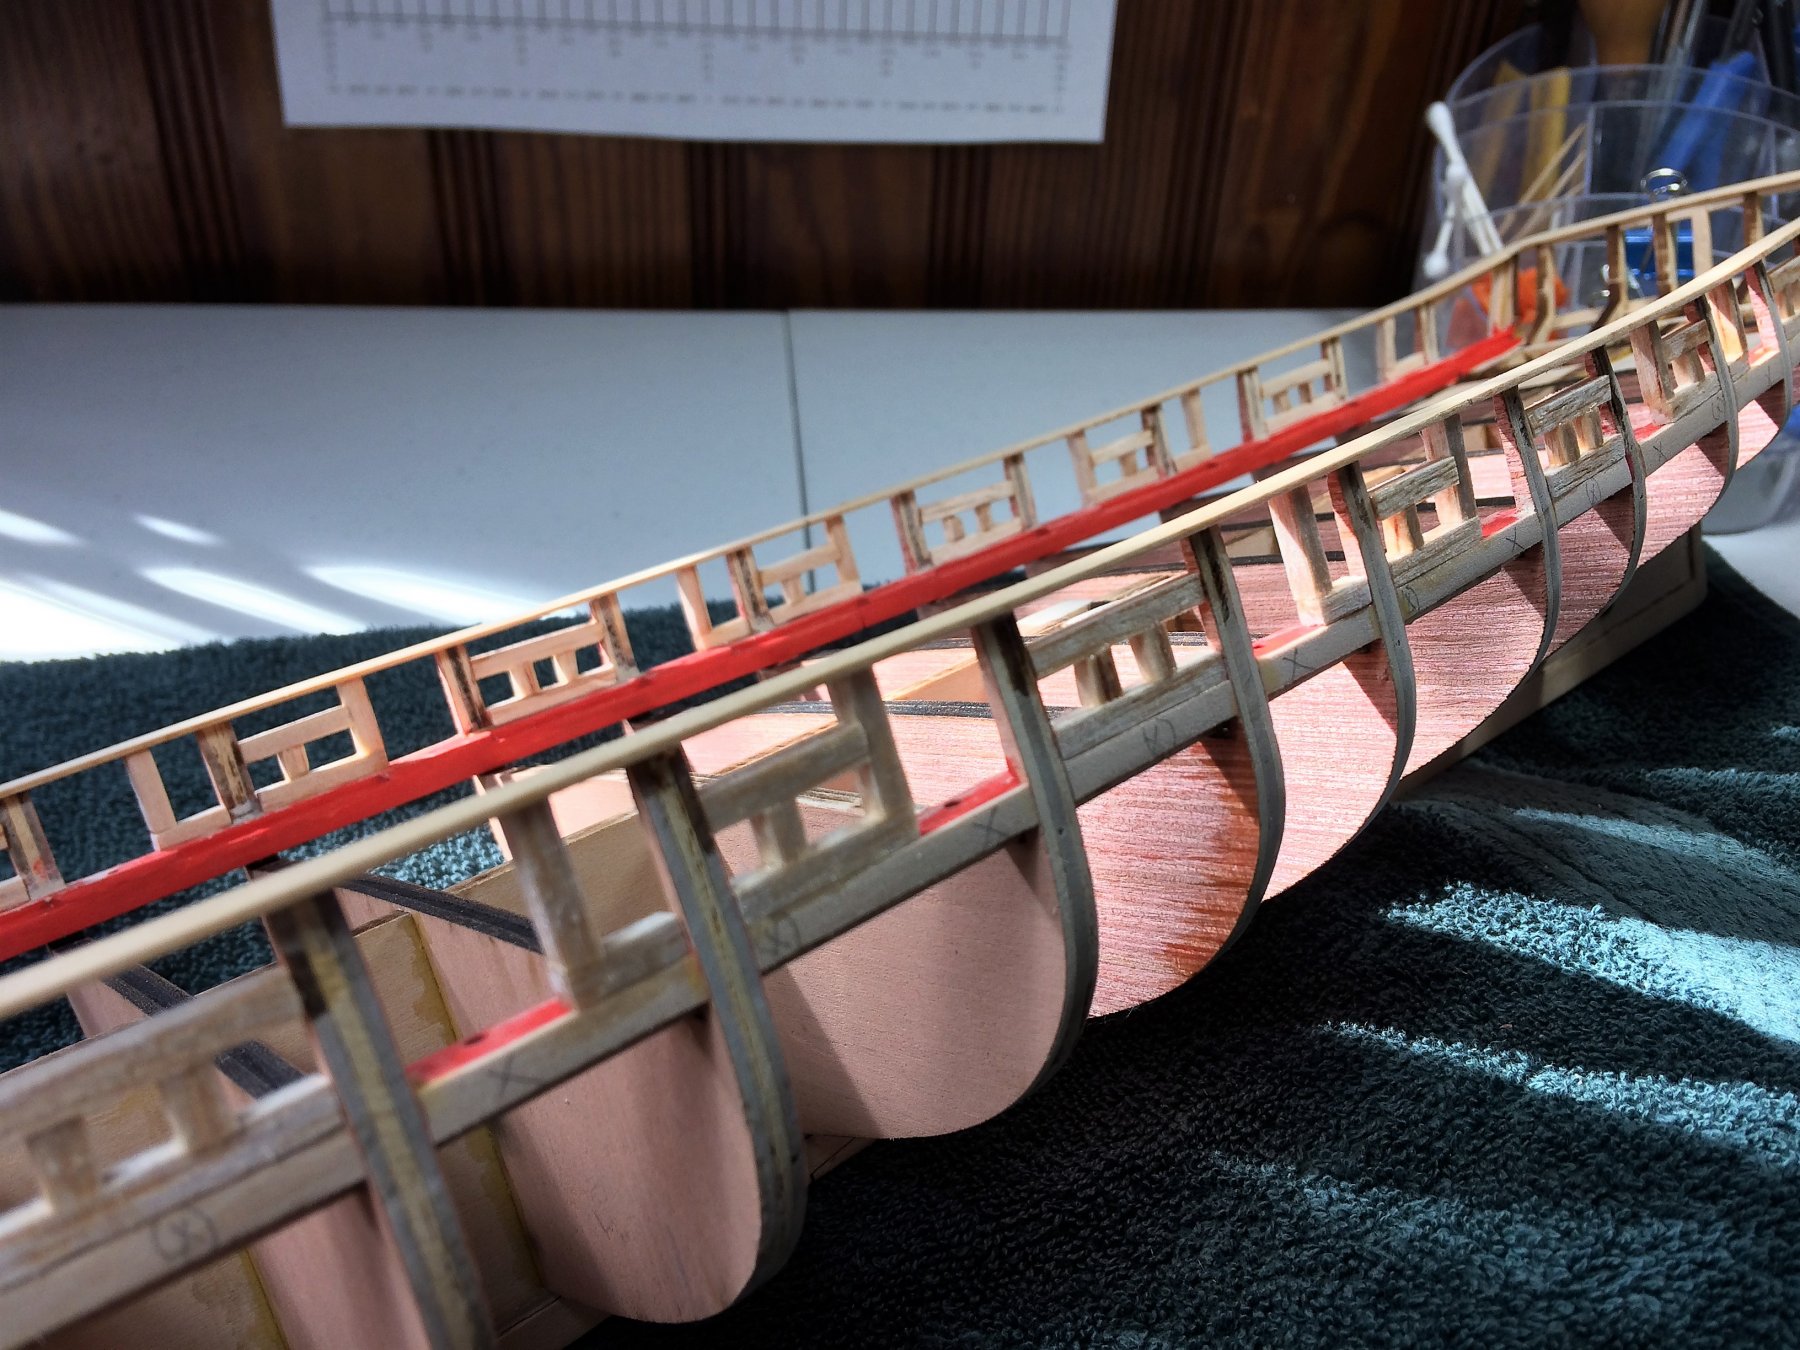
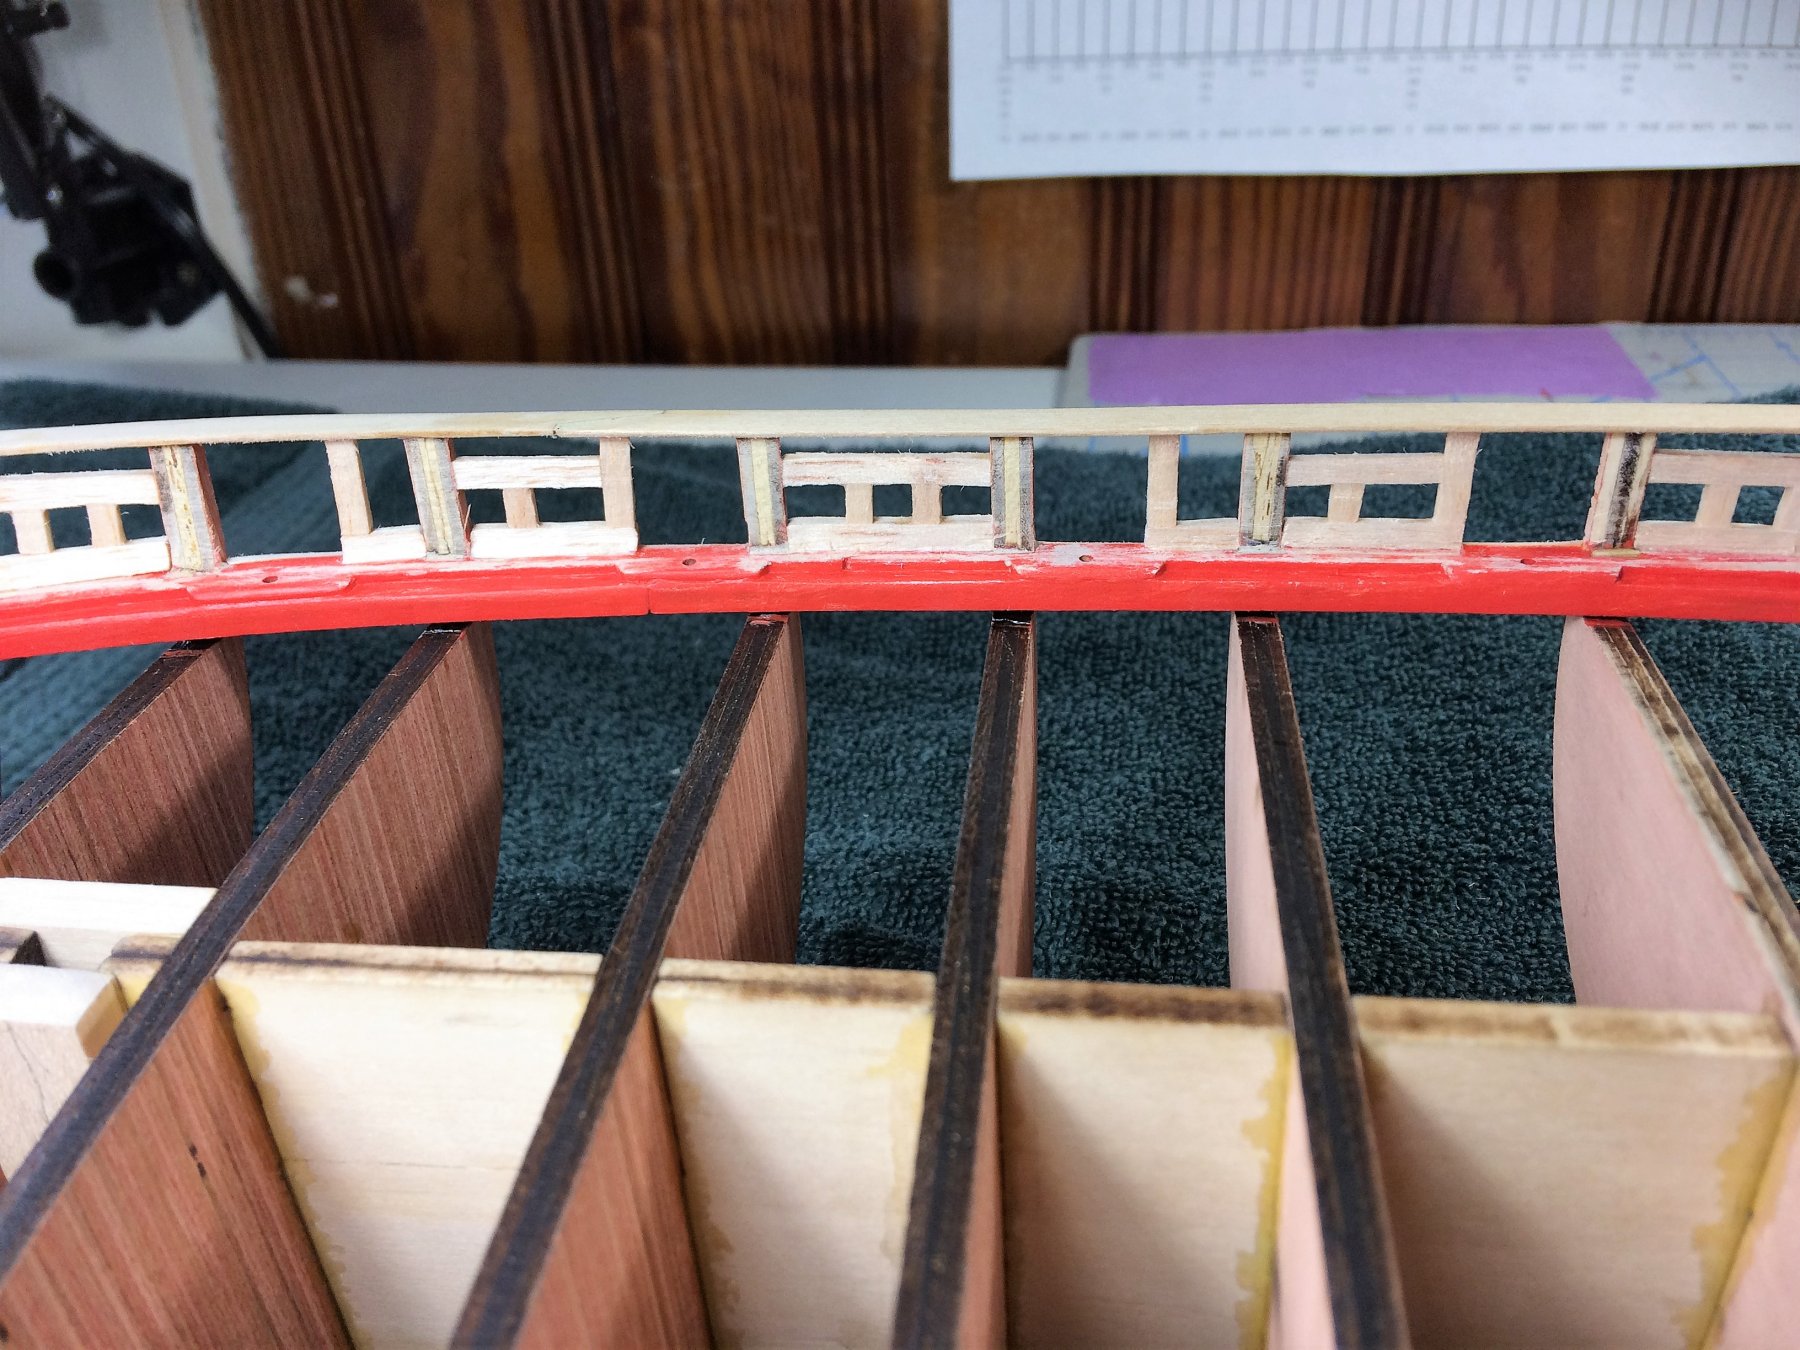
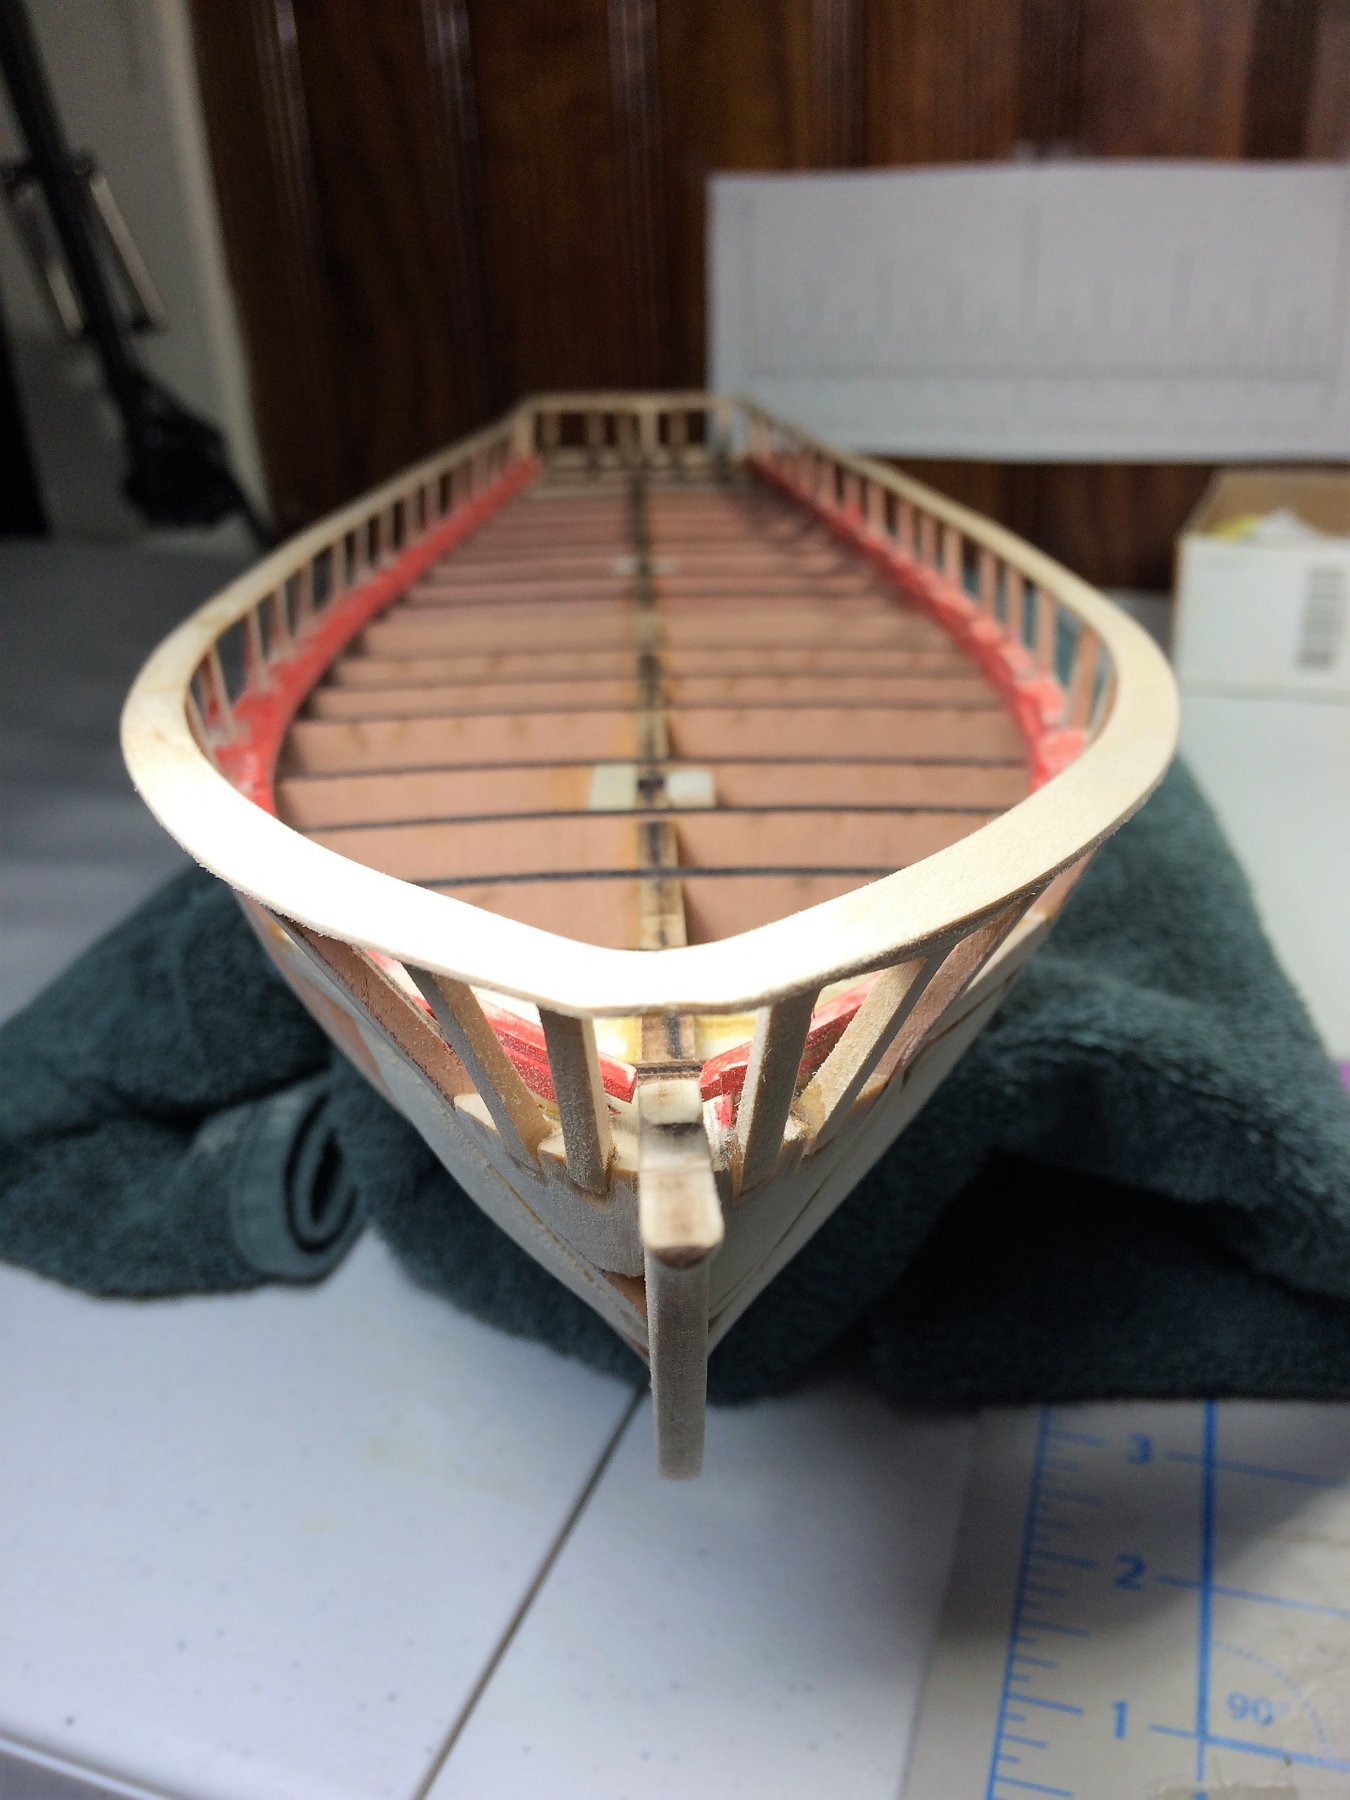
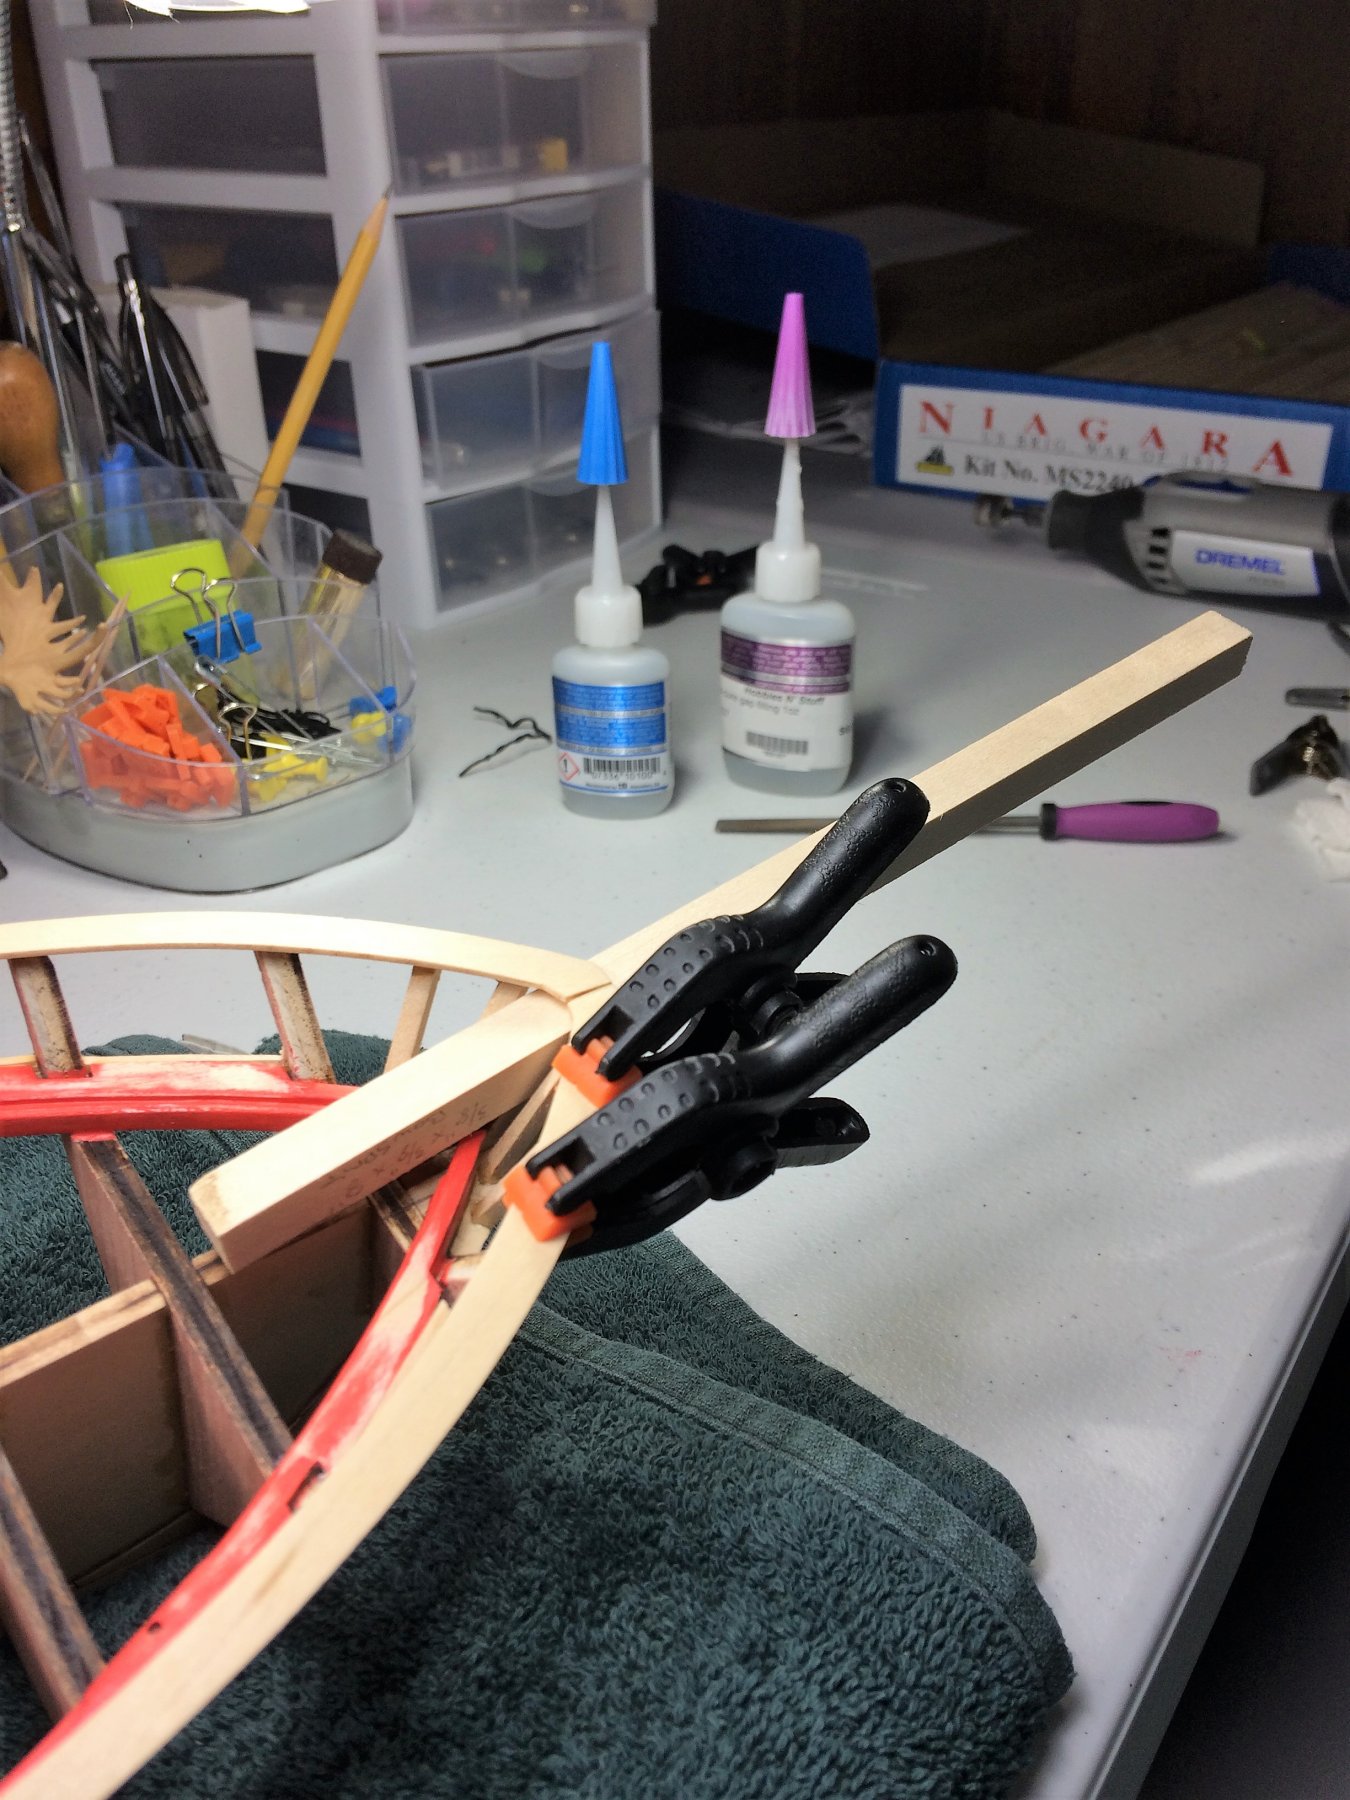
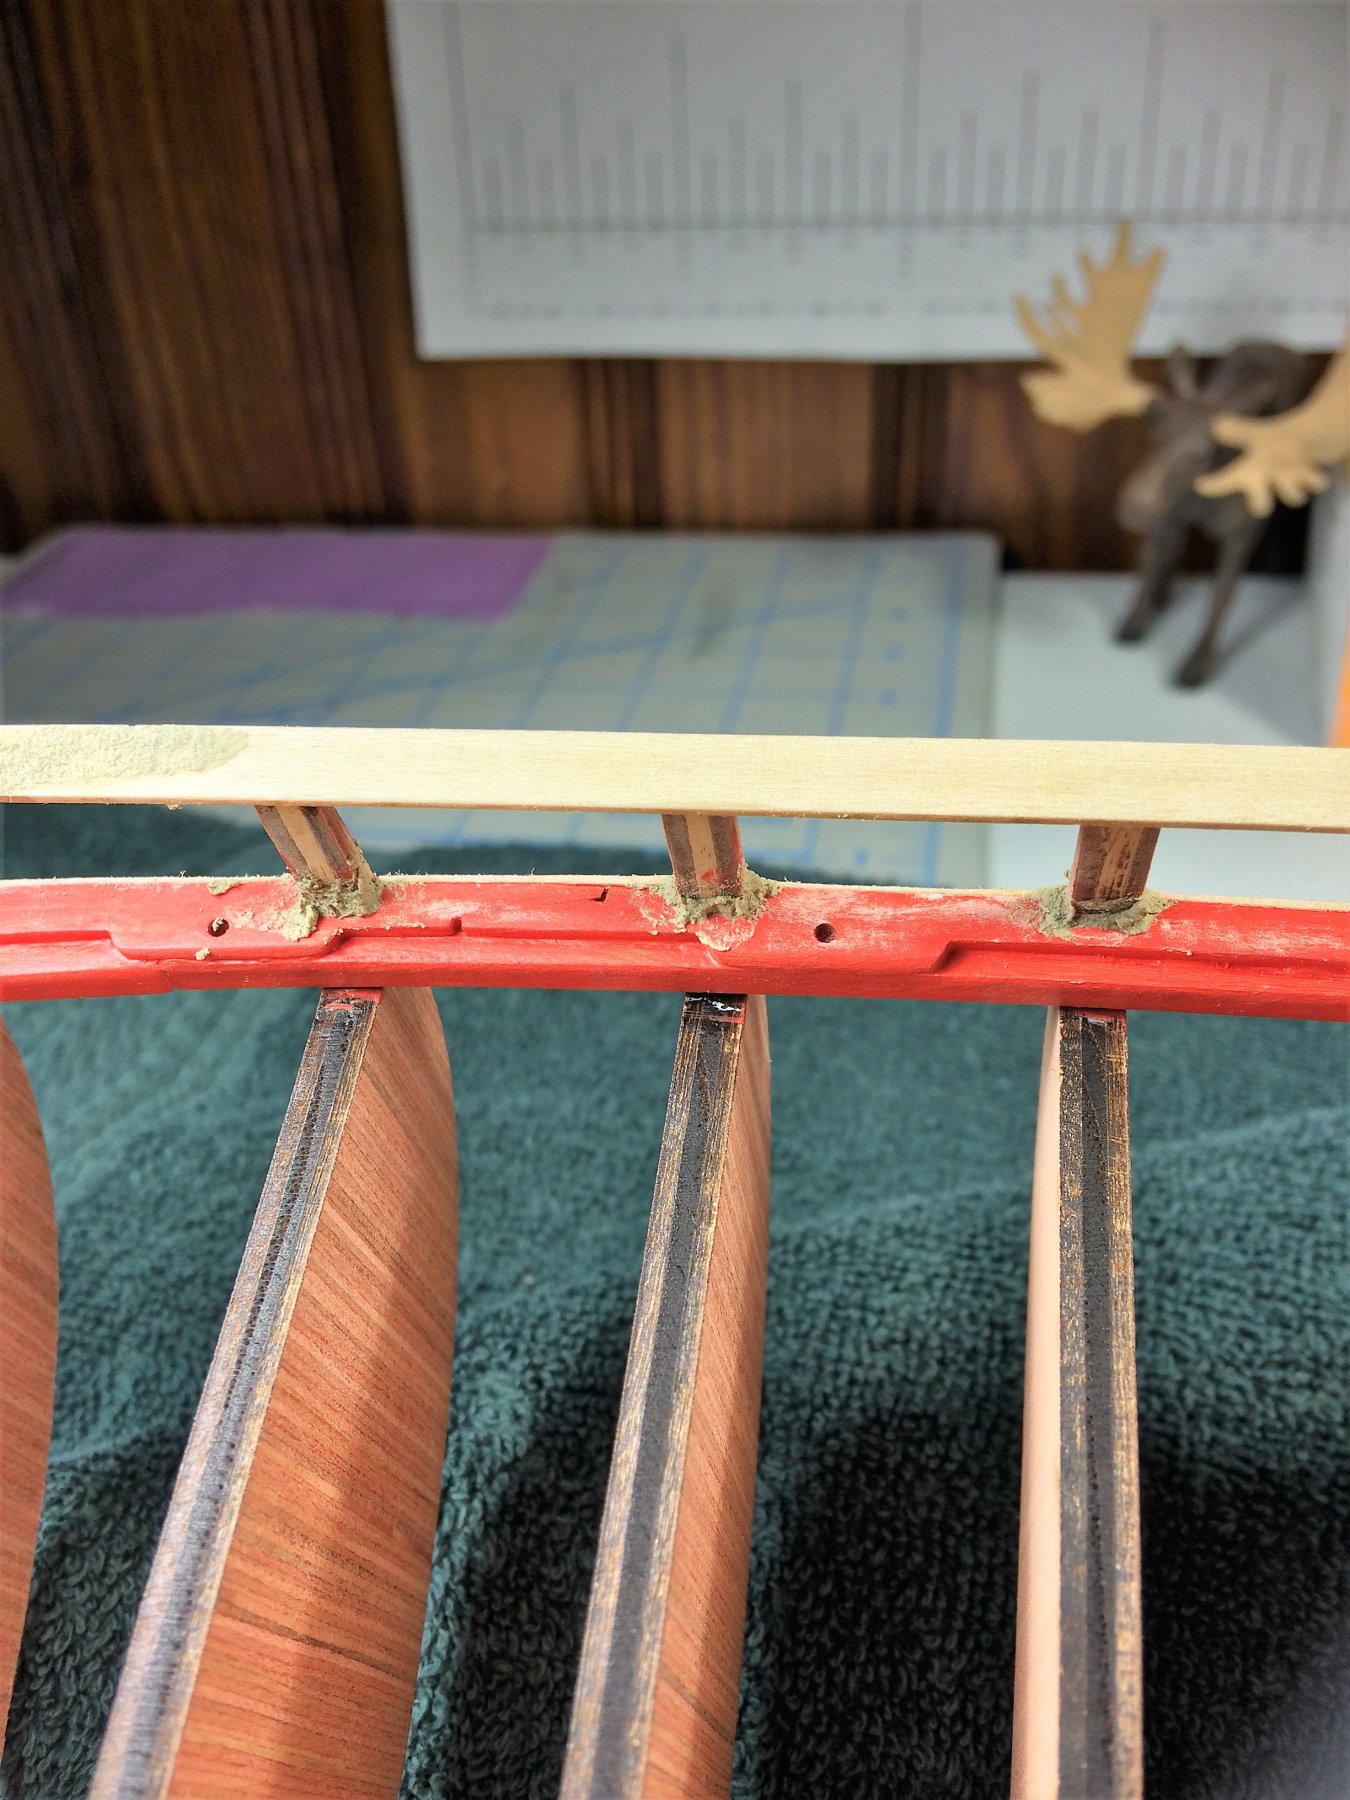
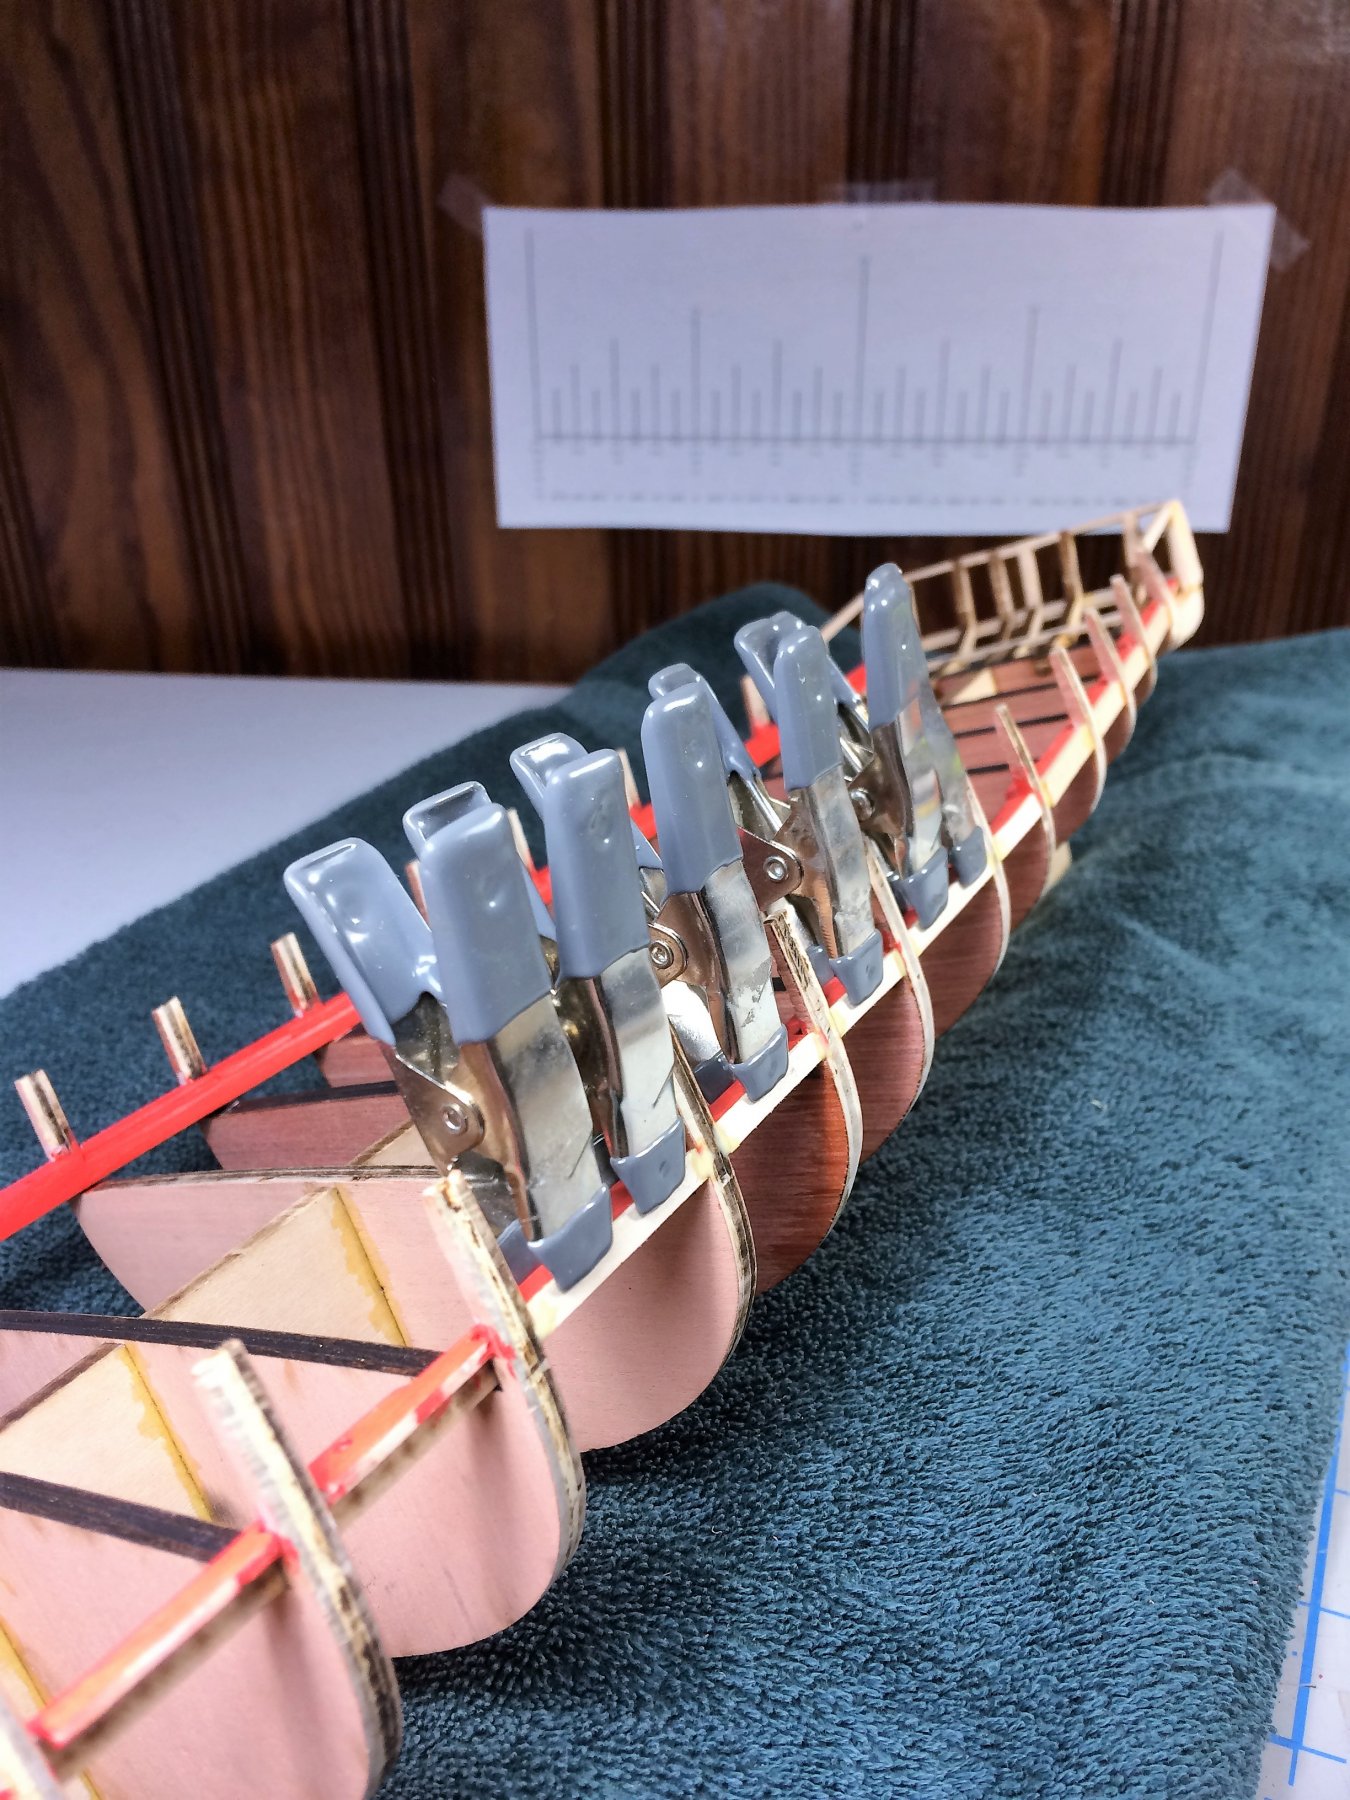
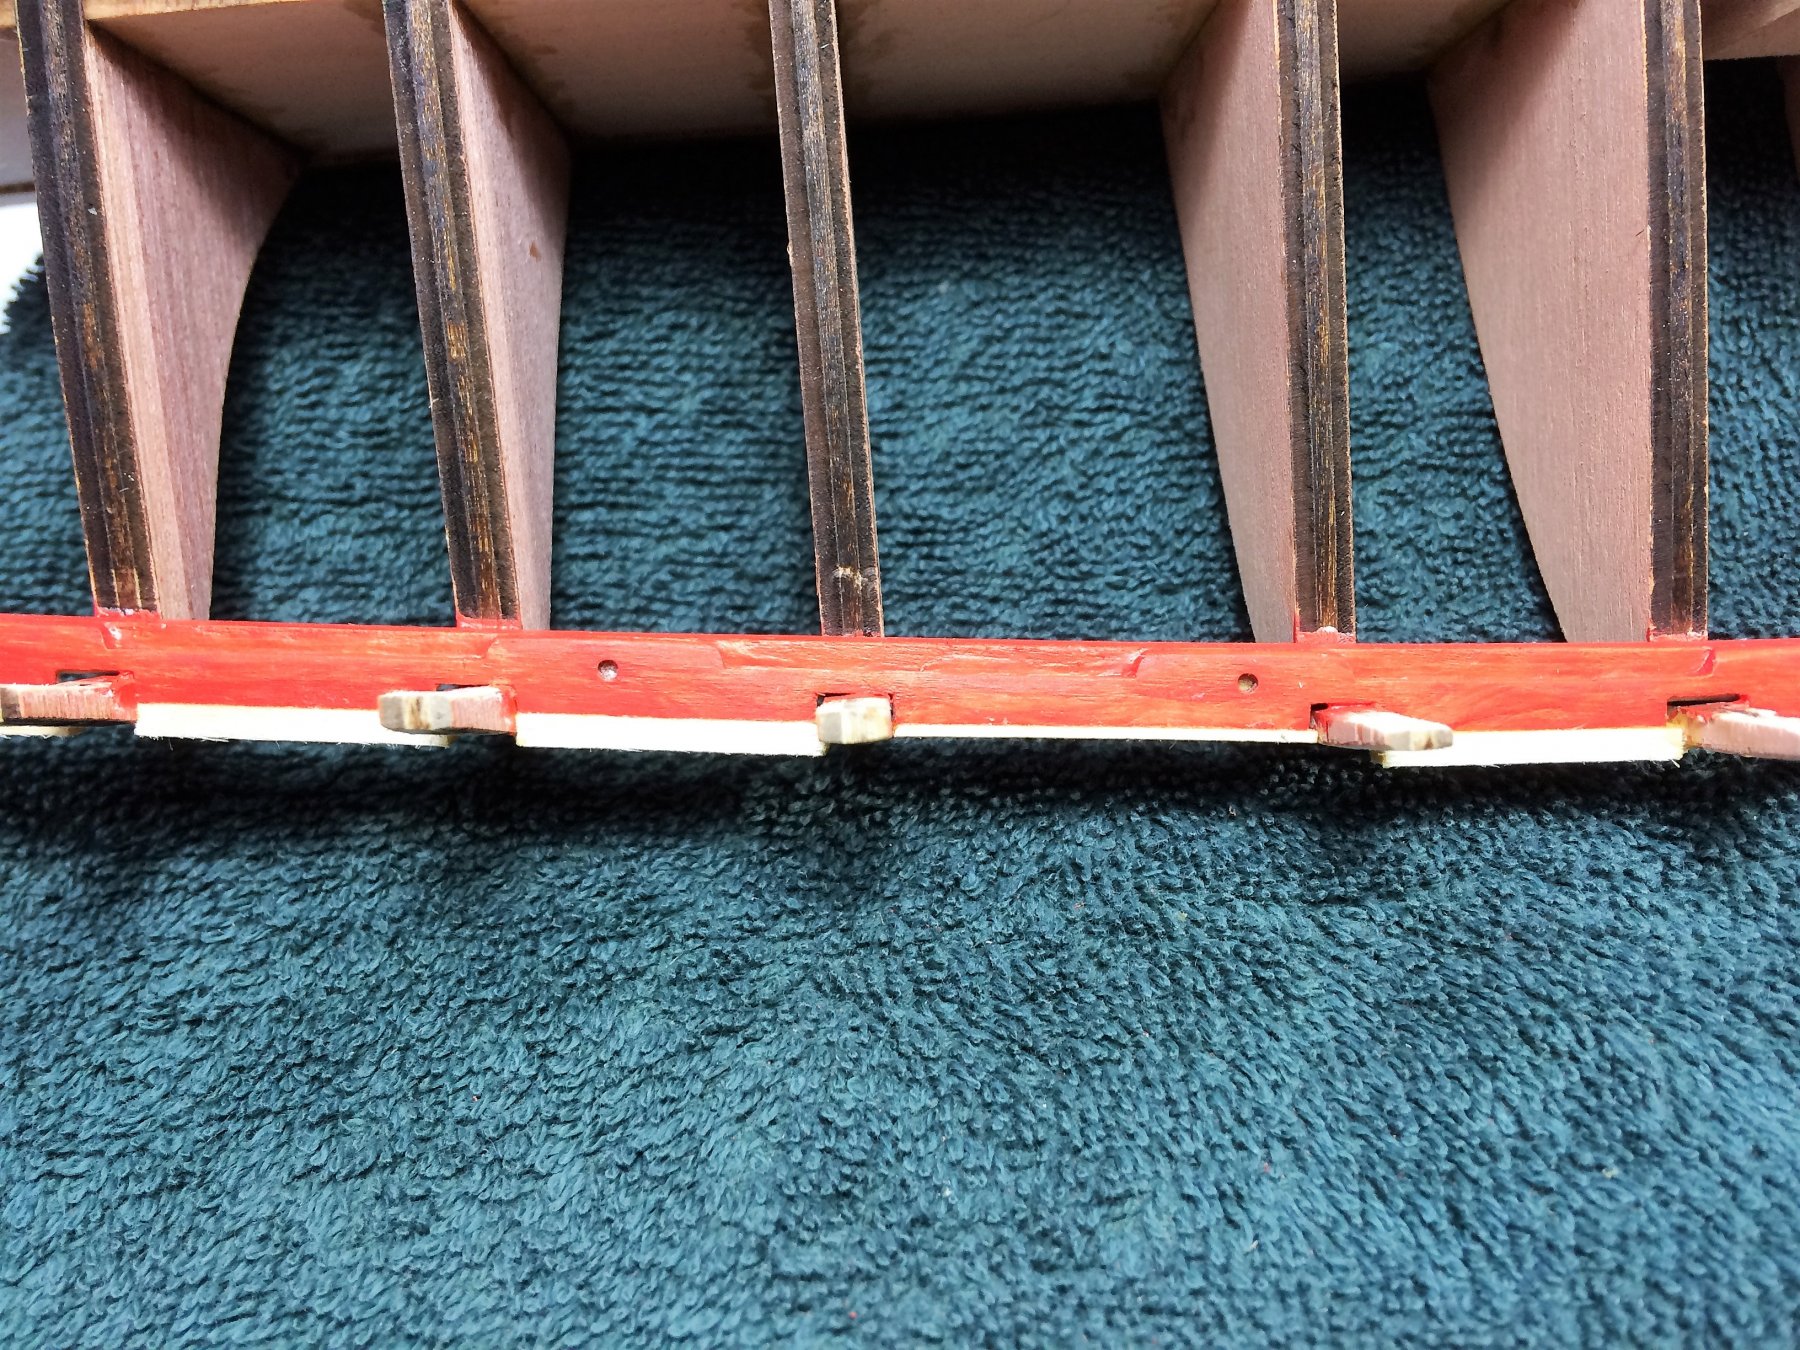
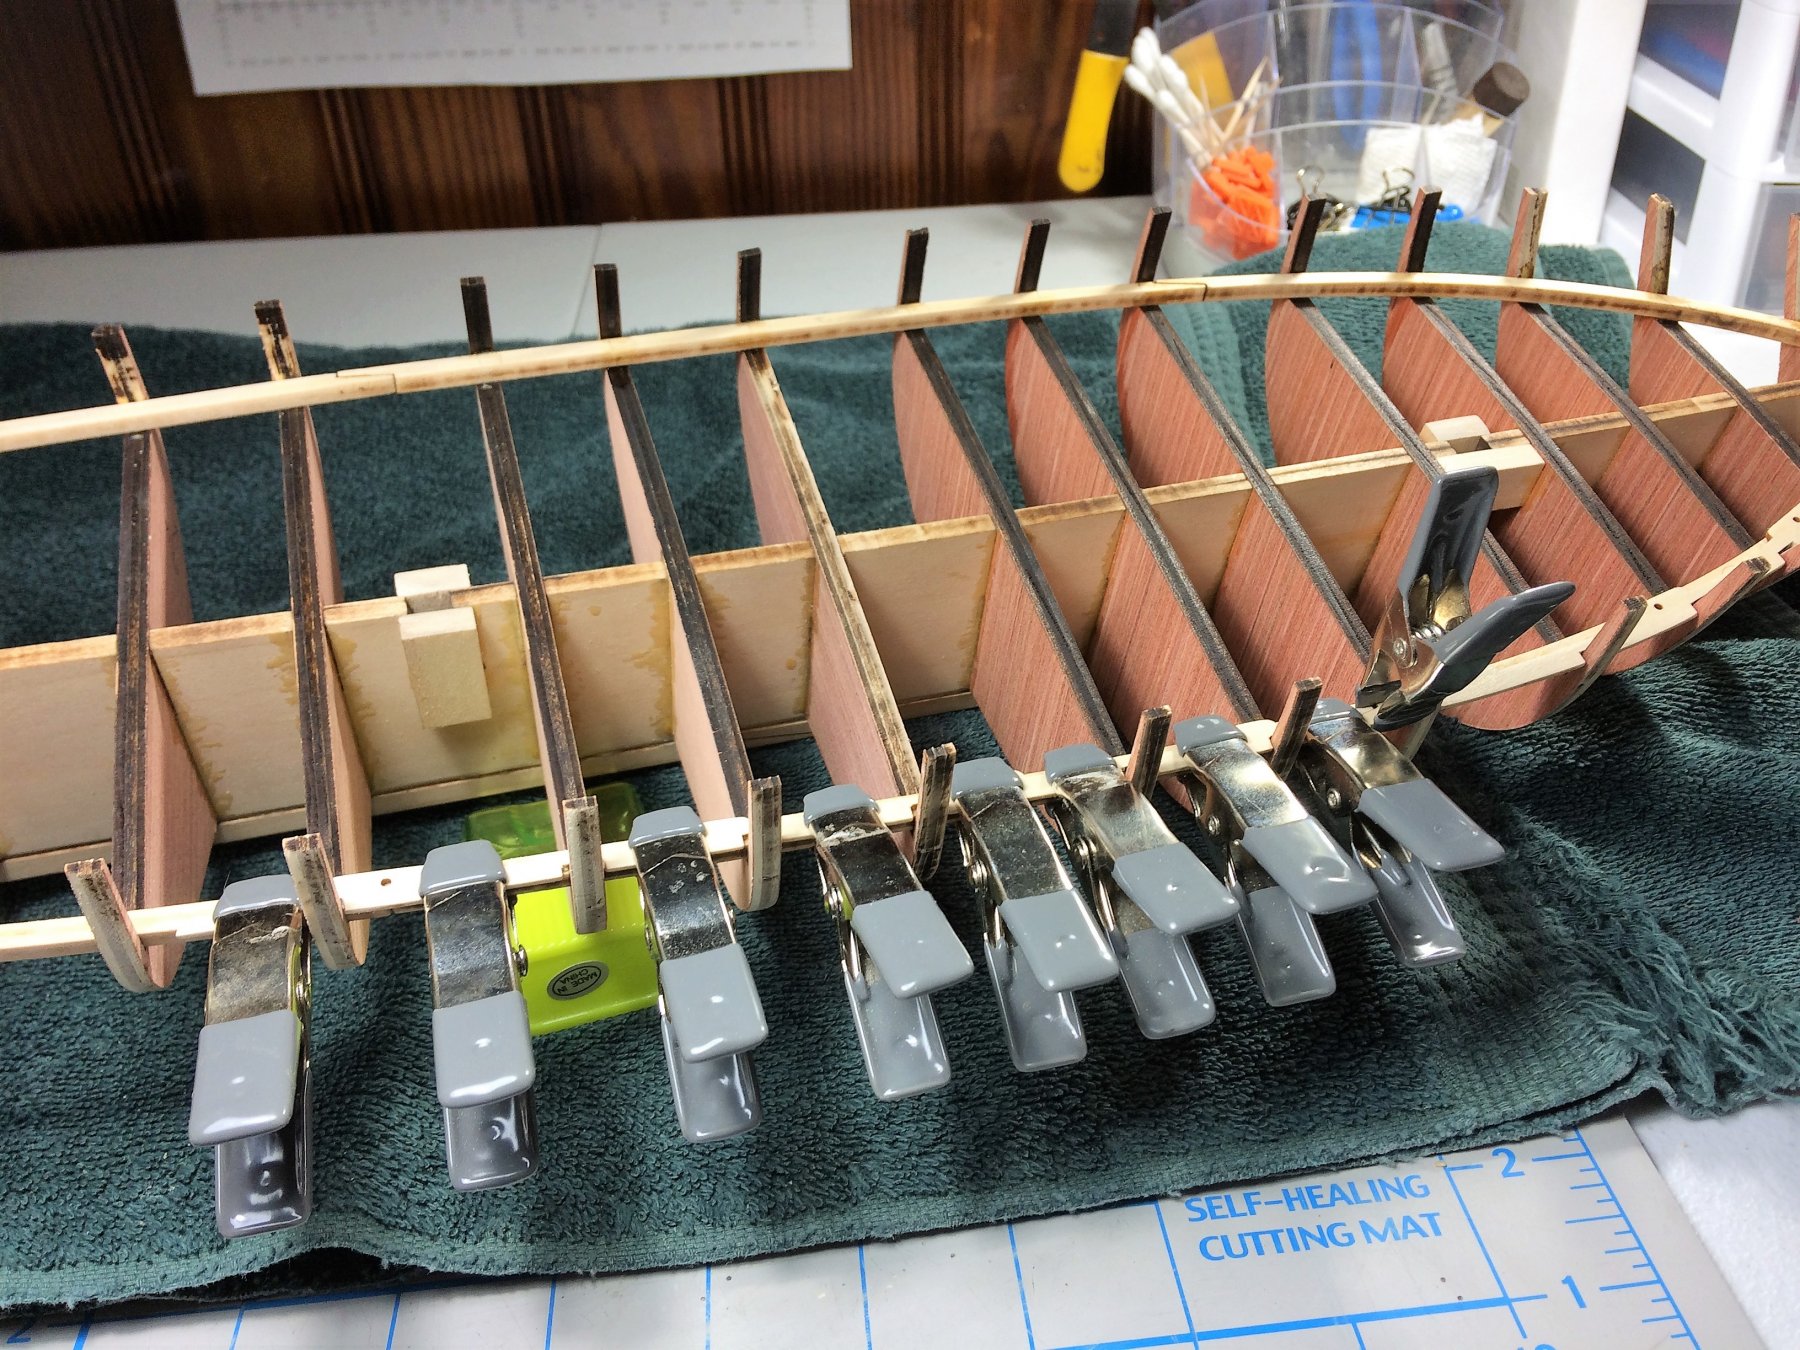
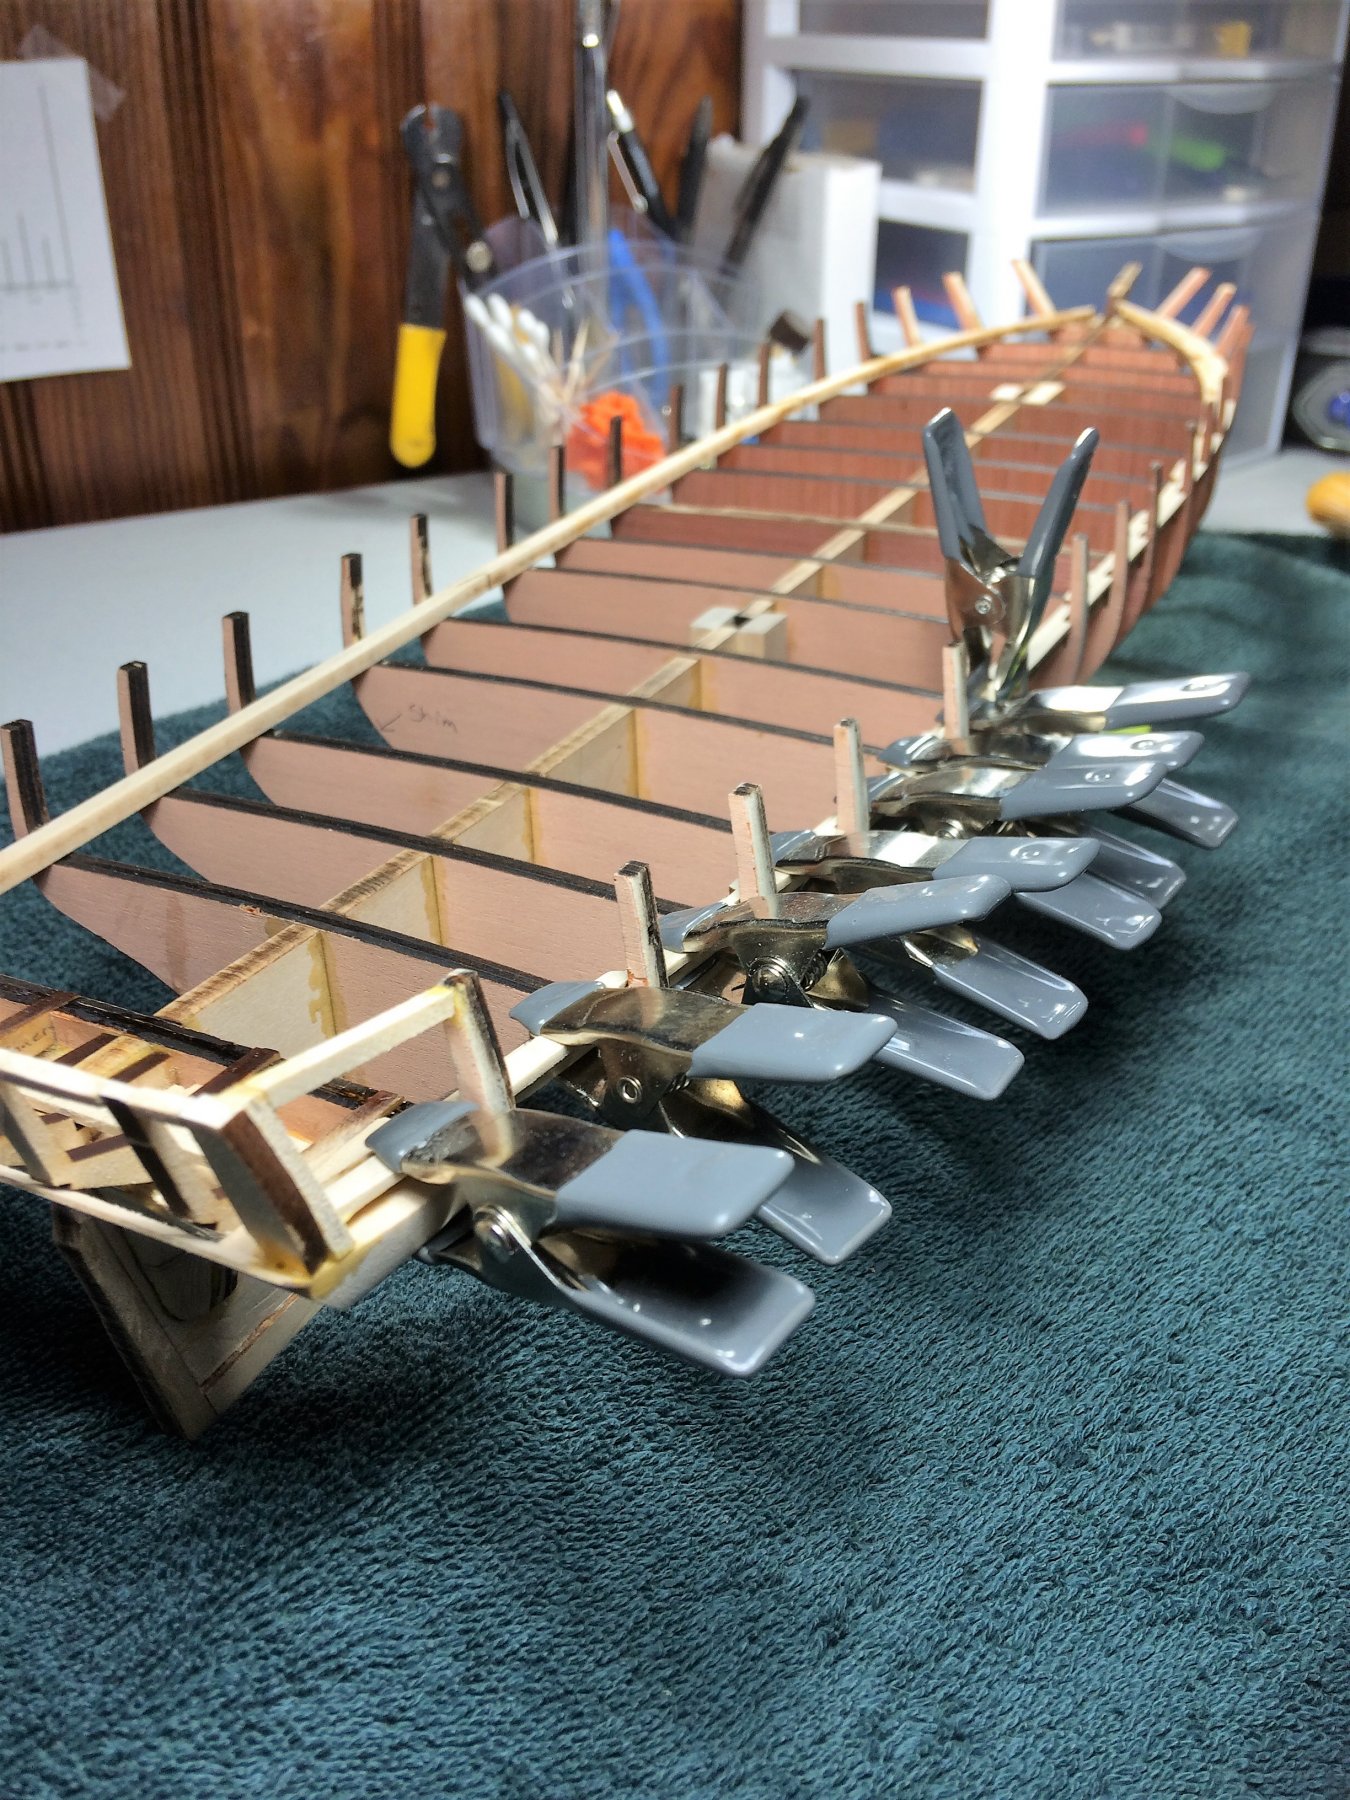
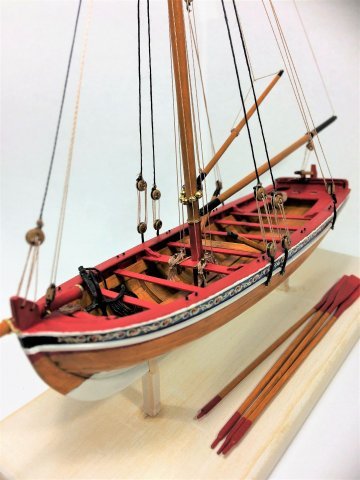
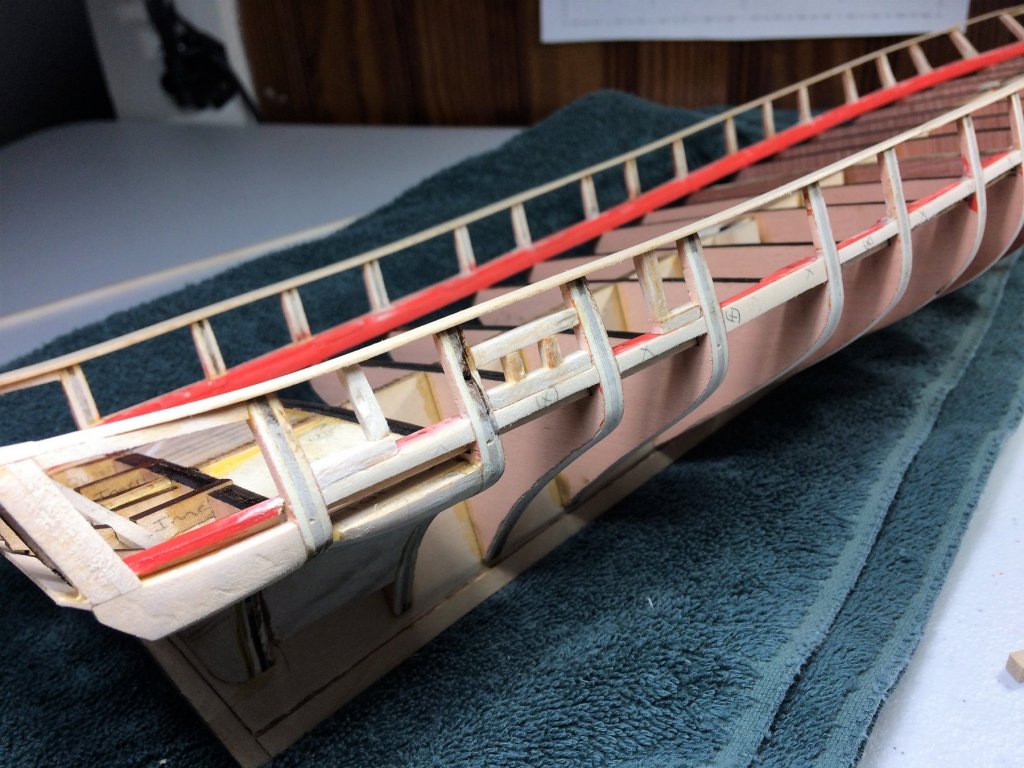
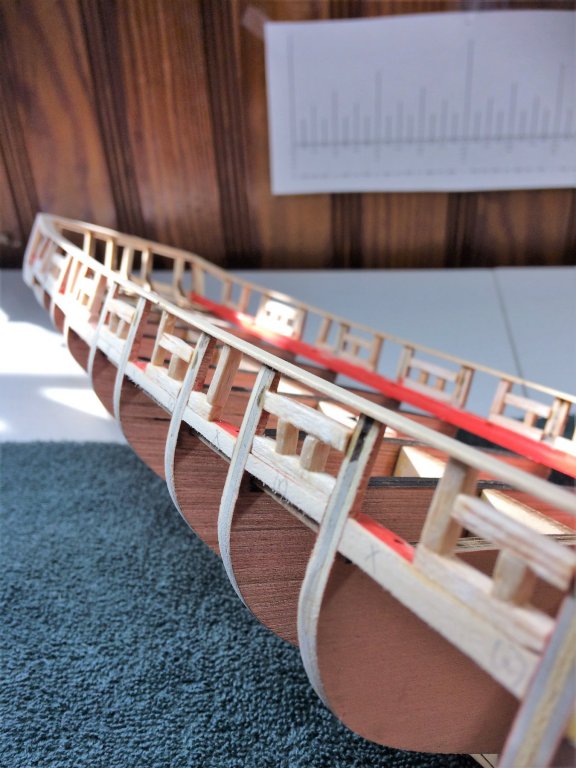
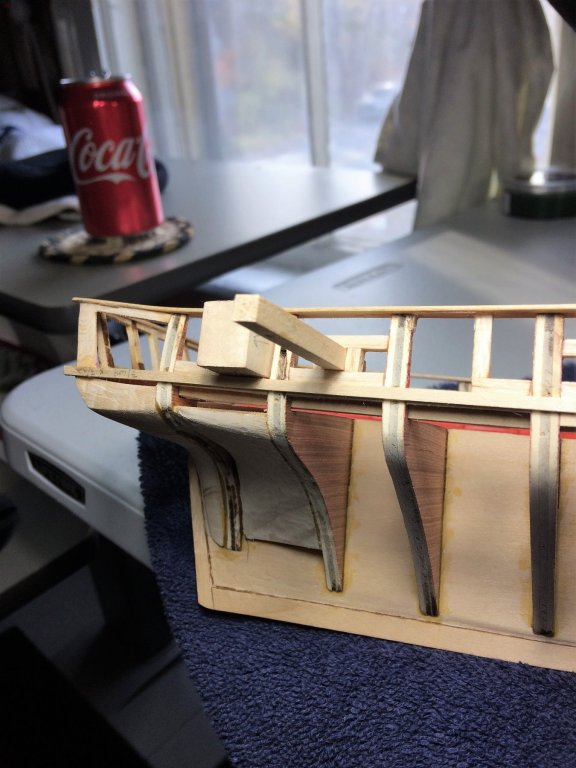
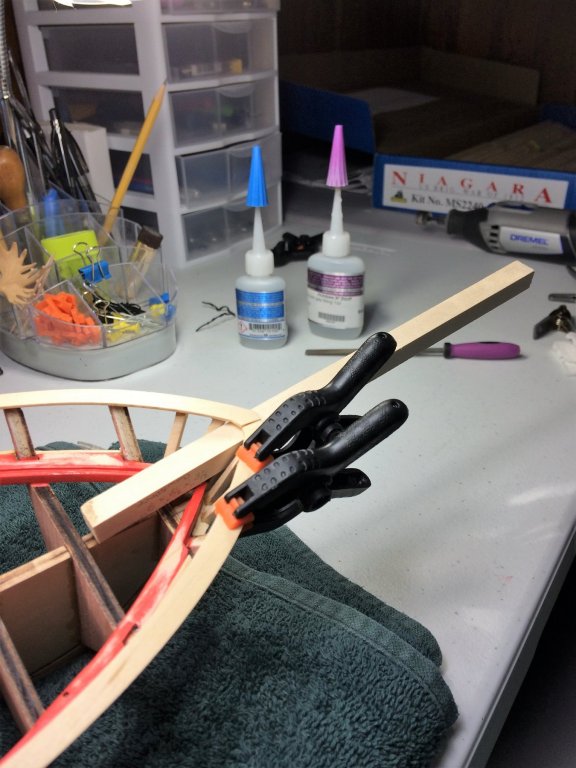
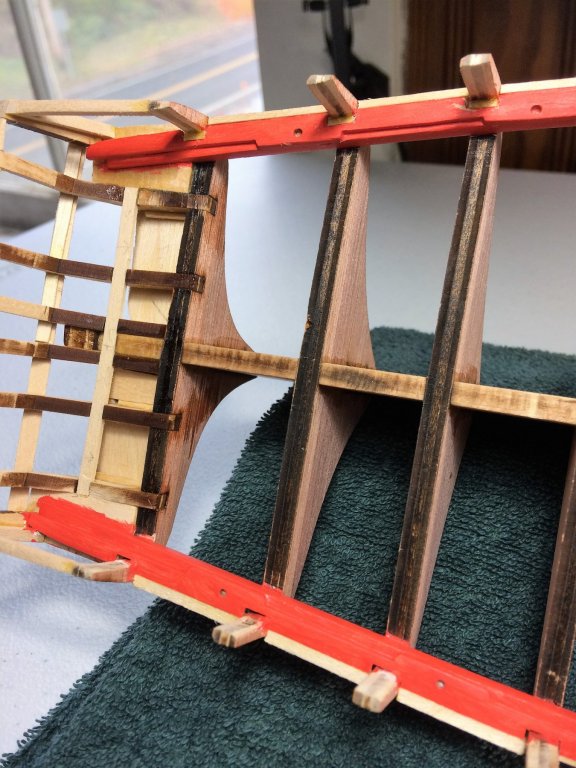
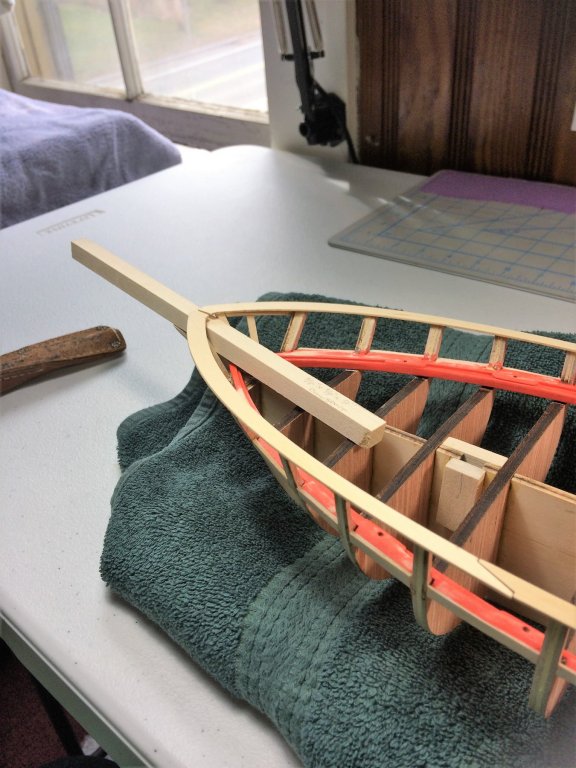
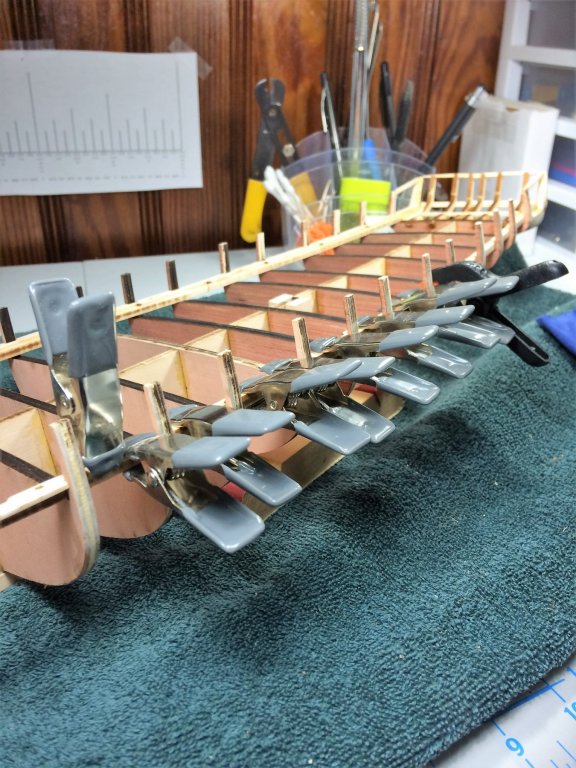
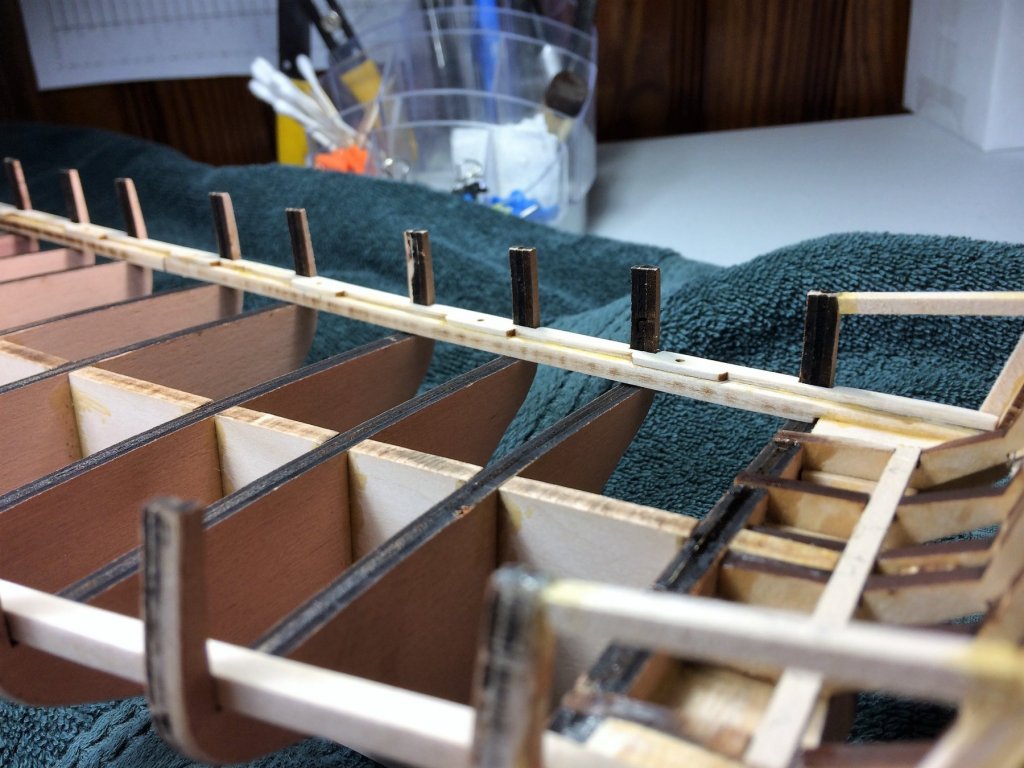
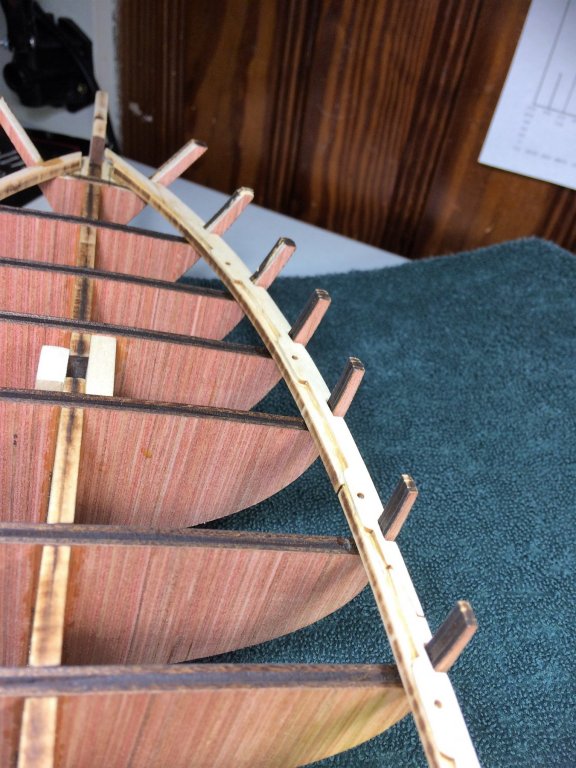
 Well, its official......the holidays are here!!!! Dear Santa, All I want for Christmas this year is Bluejackets kit Bowdoin. I've been real good this year.......mostly! Something about a huge Thanksgiving dinner. Sure, you take a nap......I wake up, have another piece of pie and head to the Shipyard with a large glass of a good beer...icy cold! Actually, there were several cold ones! At one point, the Admiral checked in on me as she hadn't heard from me in a while. She hadn't heard from anyone! Anywho...... Since my rail is in and staying, I installed the chock rail. It was easy enough. With some shaping will look better. I hesitated drilling any holes in the front for rigging as there seems to be no set amount, none that I can find. In the plans, in build logs, in the finished albums, I've seen anywhere between 4 to 6 holes. I next installed the first of two 3/64 x 3/32 planks running the entire length of the ship. This was flush with the gunport openings the entire length. This went in fairly easy. With some coaxing and really strong glue.....it sits well. Then it dawned on me, I officially have the very first plank attached to my frame!!!!! Huzzah! I left enough of a tail at the end so when its time to do the stern, I've got extra to play with. These originally were longer. But the old sweatshirt around the boat and the sleeve grabbing the strip had me shorten them before any major mishaps! Tom E
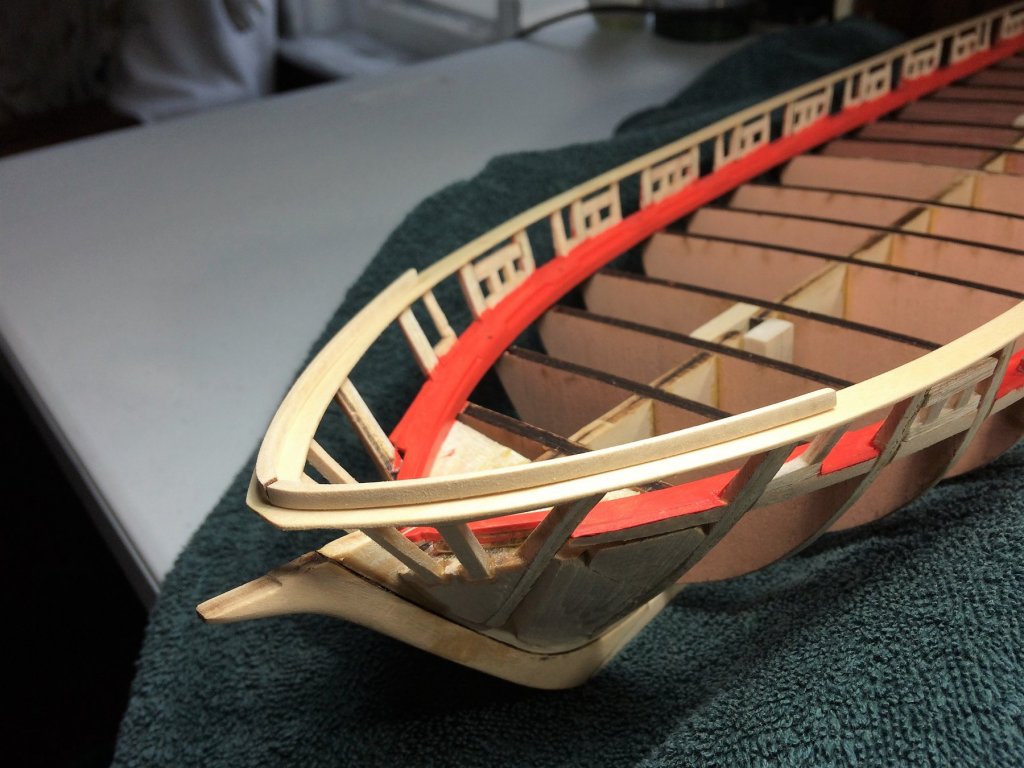


-
Beautiful build, Beautiful dedication. Well done Mike I hope you and your family enjoy the ship for years to come. Tom E
- 843 replies
-
- 2
-

-
- niagara
- model shipways
- (and 2 more)
-
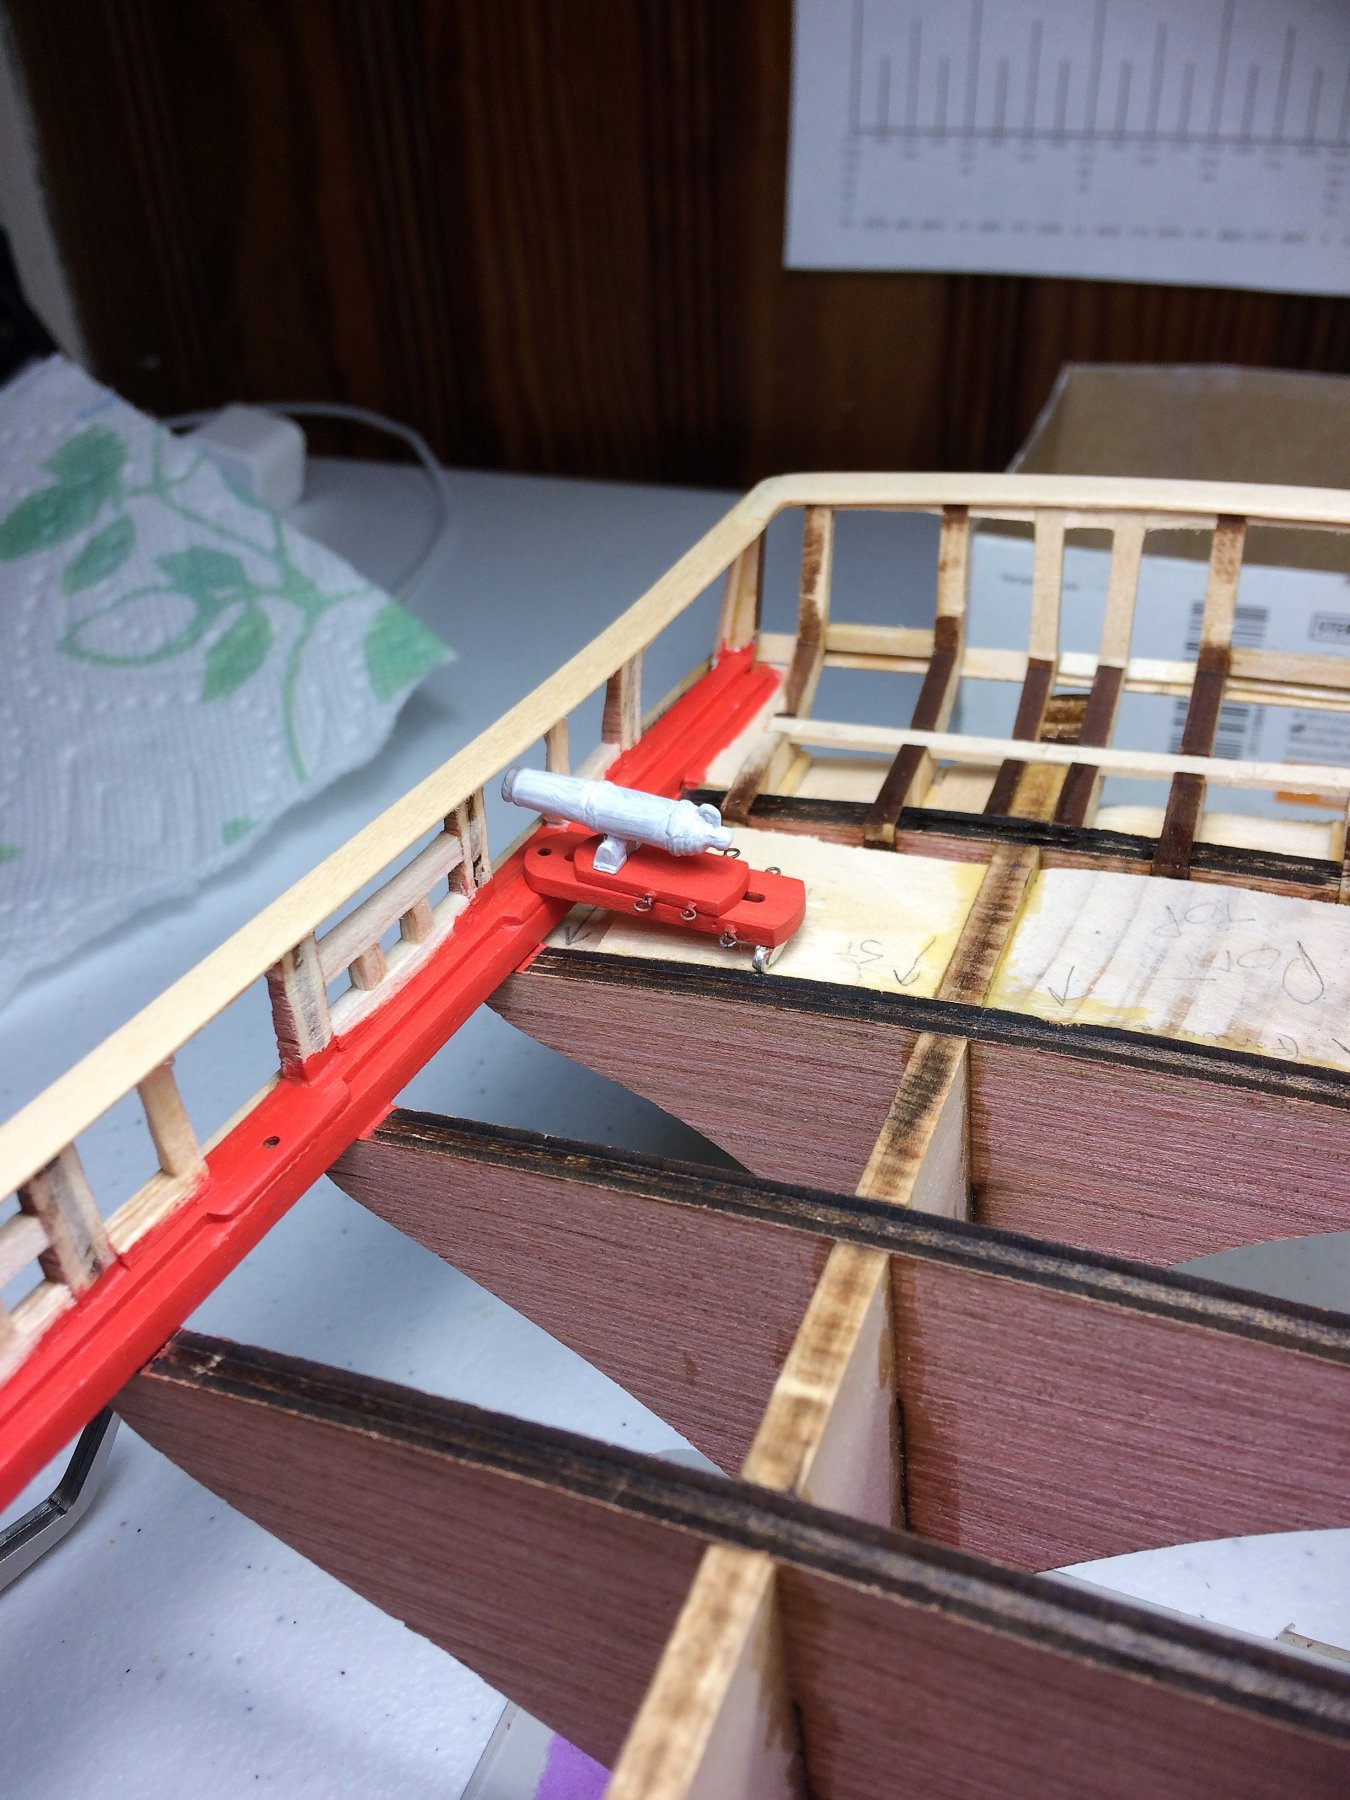
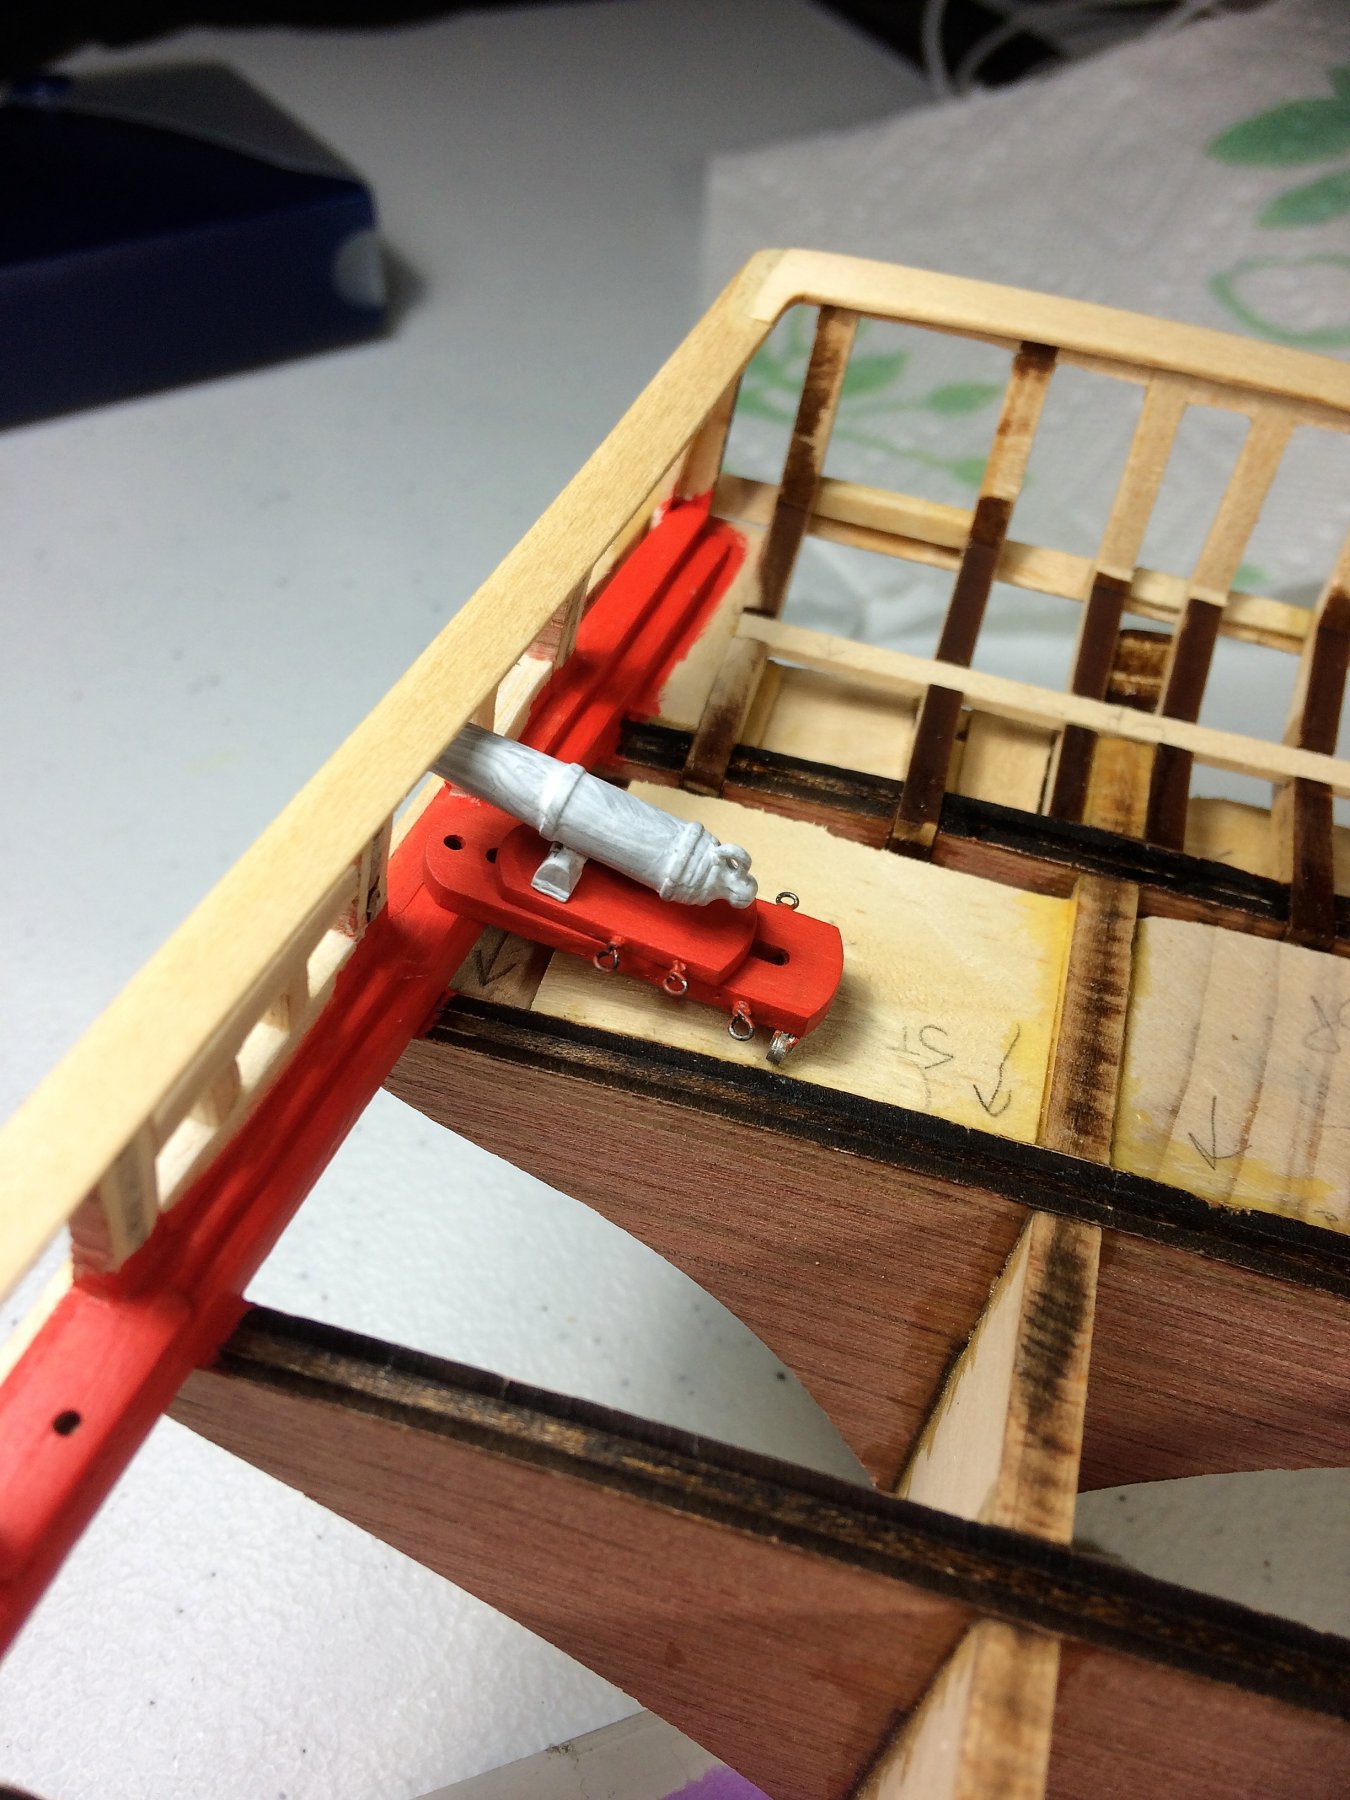
Mike, I did build 2 carronades and they seem to fit well. Once the decking is installed it should help with the pitch, but they do fit. Maybe not historically correct, and would probably blow the rail off when fired! The carronade are not fully assembled, just primed and pieces on top of each other. I wont glue the slide board to the carronade base until ready for final placement. In the end, I want the barrels hanging outboard a bit...I think. I'll know when I see it. Deck planking should raise the backend of the carriage up. I'll still have the stringer, per the plans, under the rail. It just wont cross the gunport opening. I'll piece that in, with the rest of the planking section by section. Tom E


-
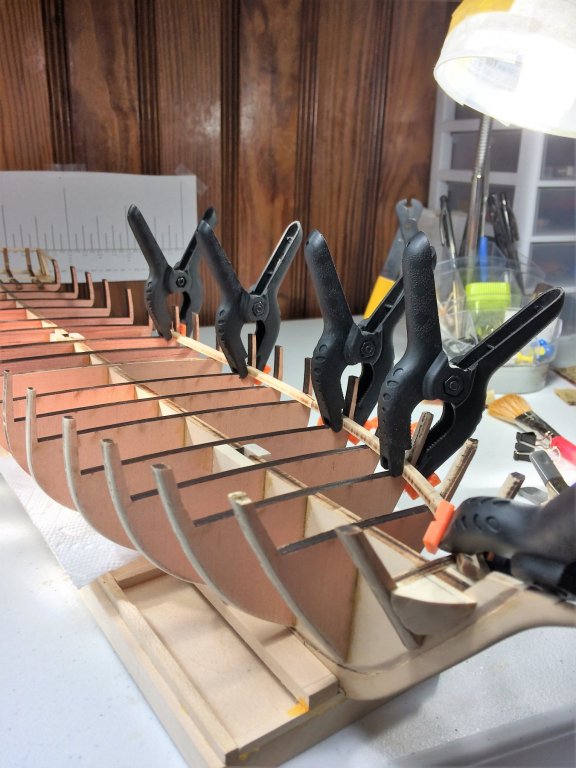
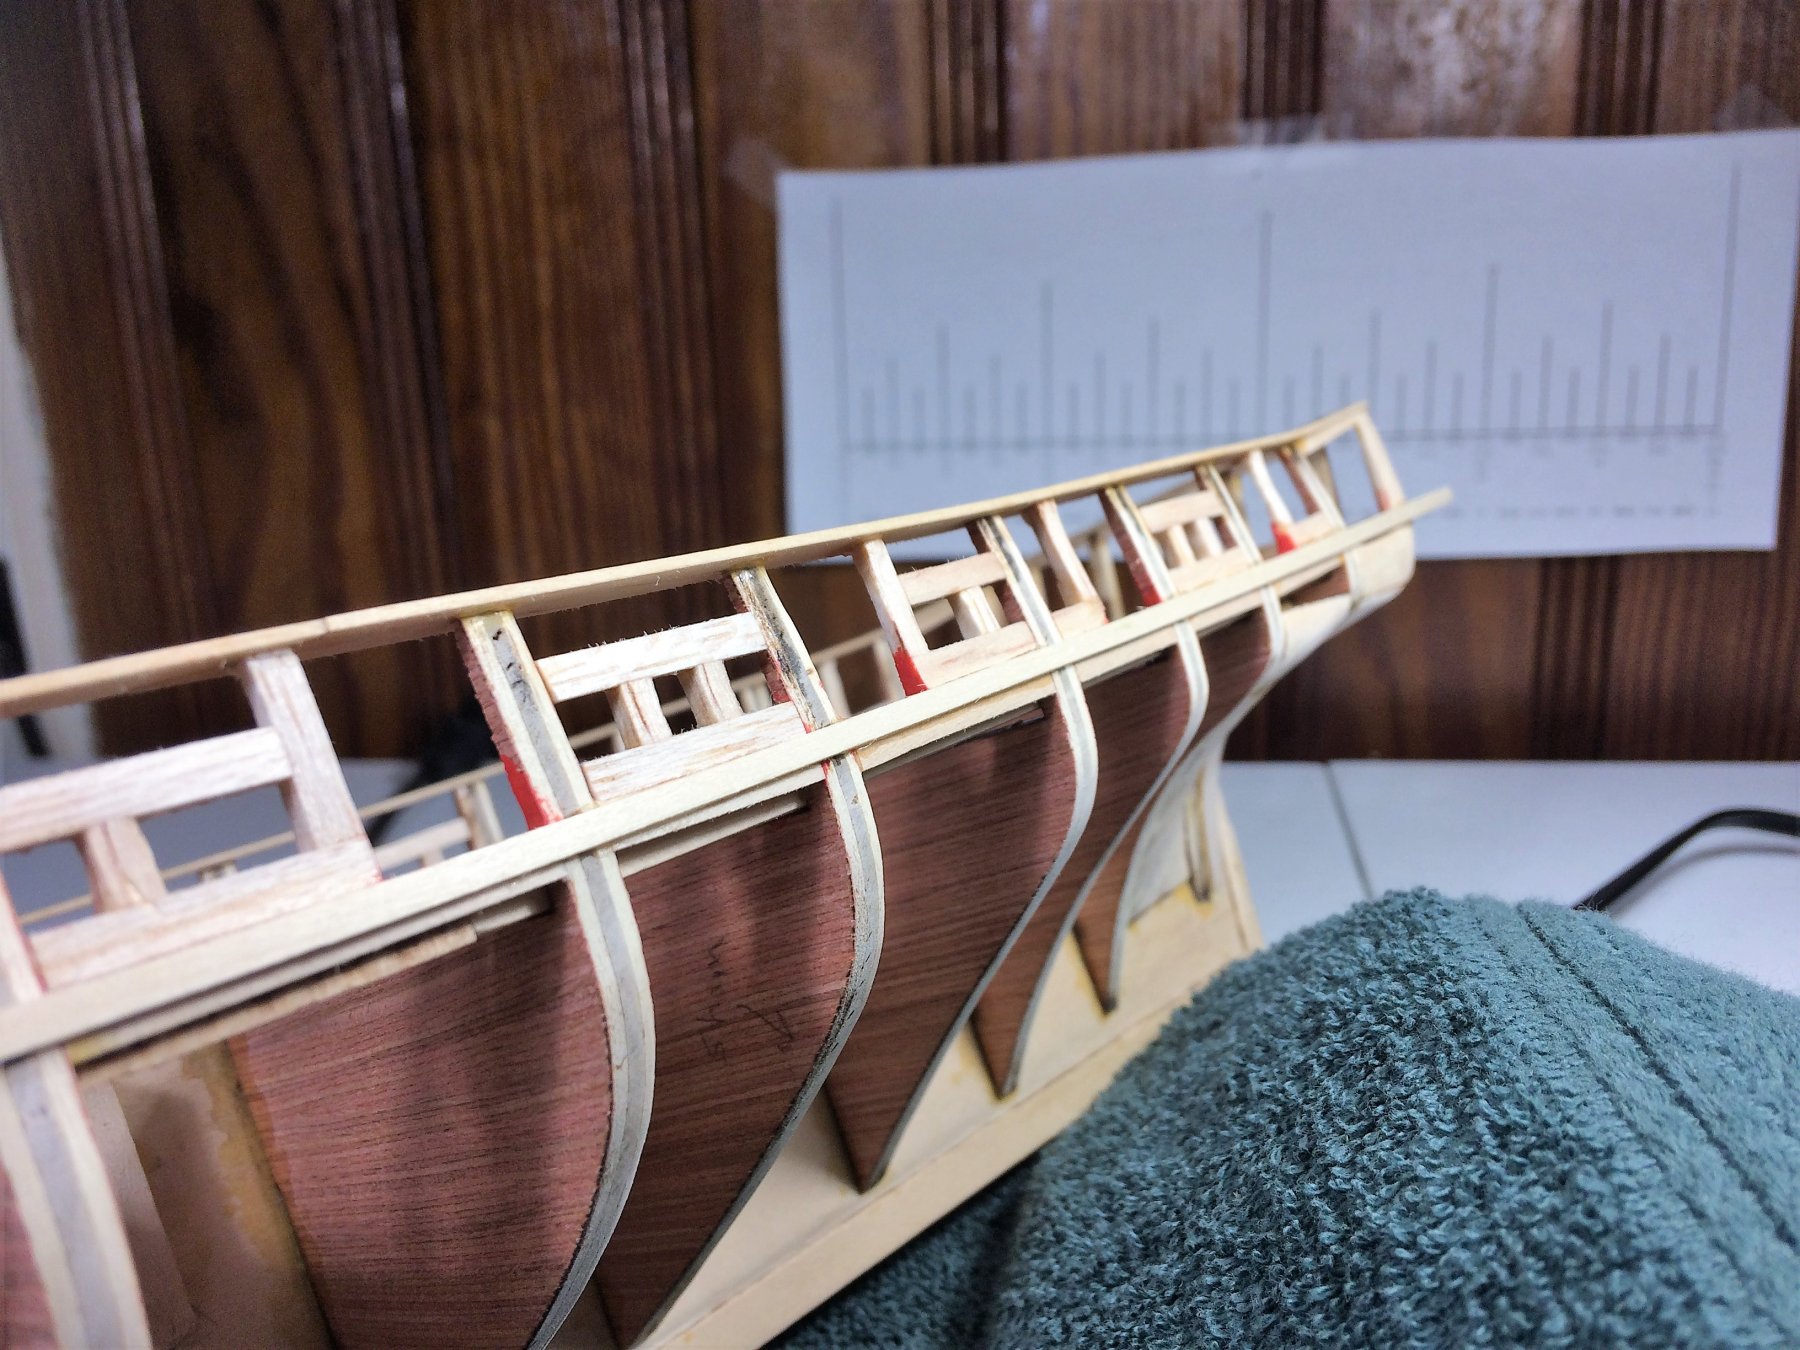
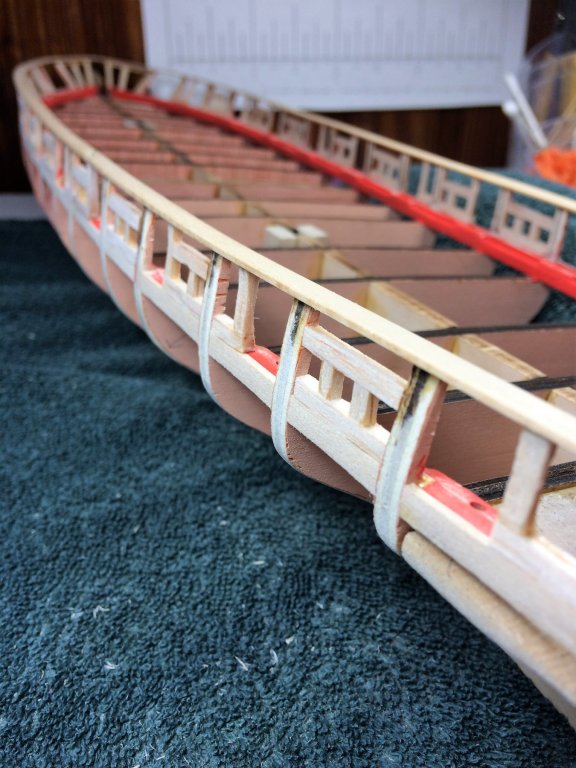
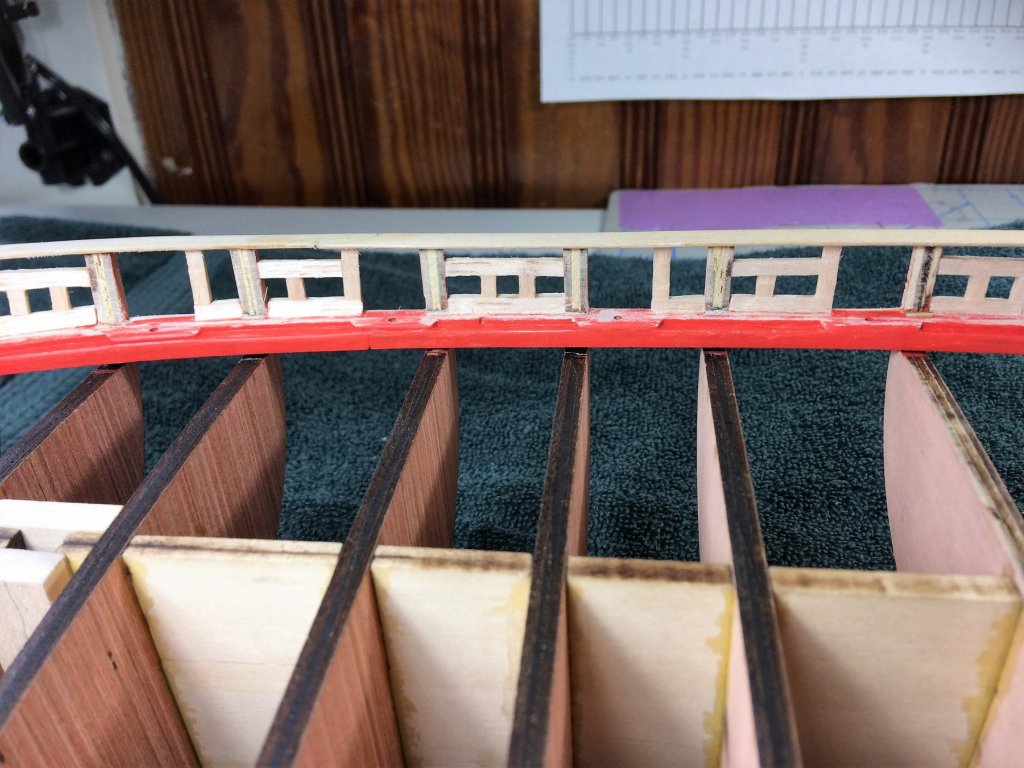
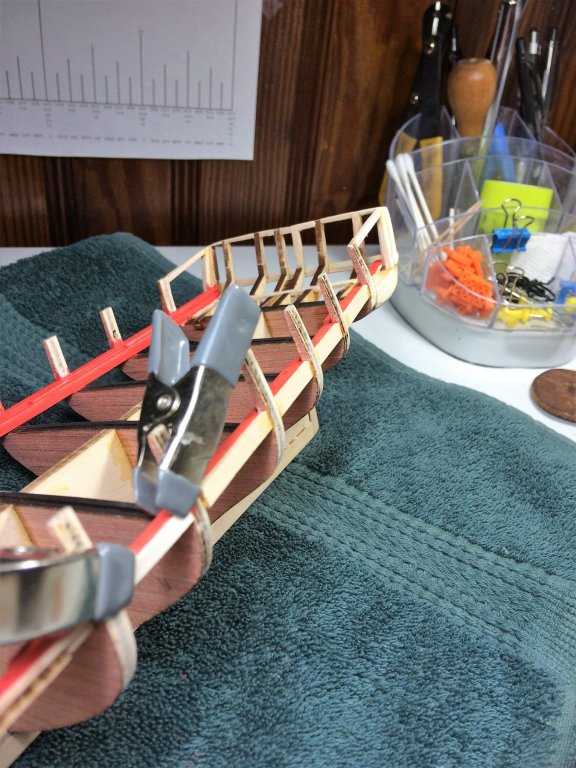
Evening, Thought I would share an update prior to the holiday travels. Heading to Massachusetts for dinner with the parents and one of my 2 sisters. The good thing, my brother in law is a modeler. So we'll basically talk "shop" all thru dinner. In dealing with the main rail and all that jazz.......I'm moving on. It is what it is and I'm throwing my hands up on it, but NOT on this build. I'll adjust to my best ability. With that said. I started putting the gun ports framing in. Pretty simple. They should sand up nice. I let these sit for a few days before sanding. They sanded up nice and flush in between the timberheads. I've seen this jig in other builds. Its simplicity is staggering. Measured out the area of the gunport from the plans and made some blocks the same size. Easy peasy! Happy Thanksgiving everybody! Be safe! Tom E


-
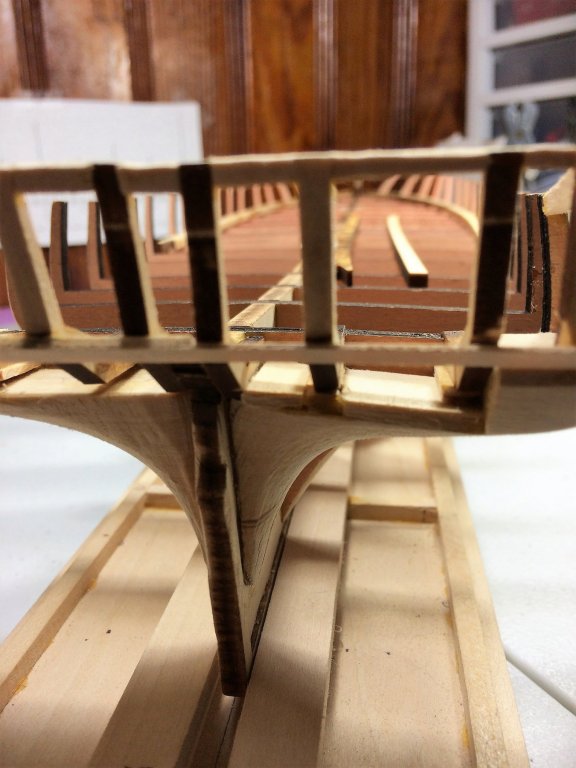
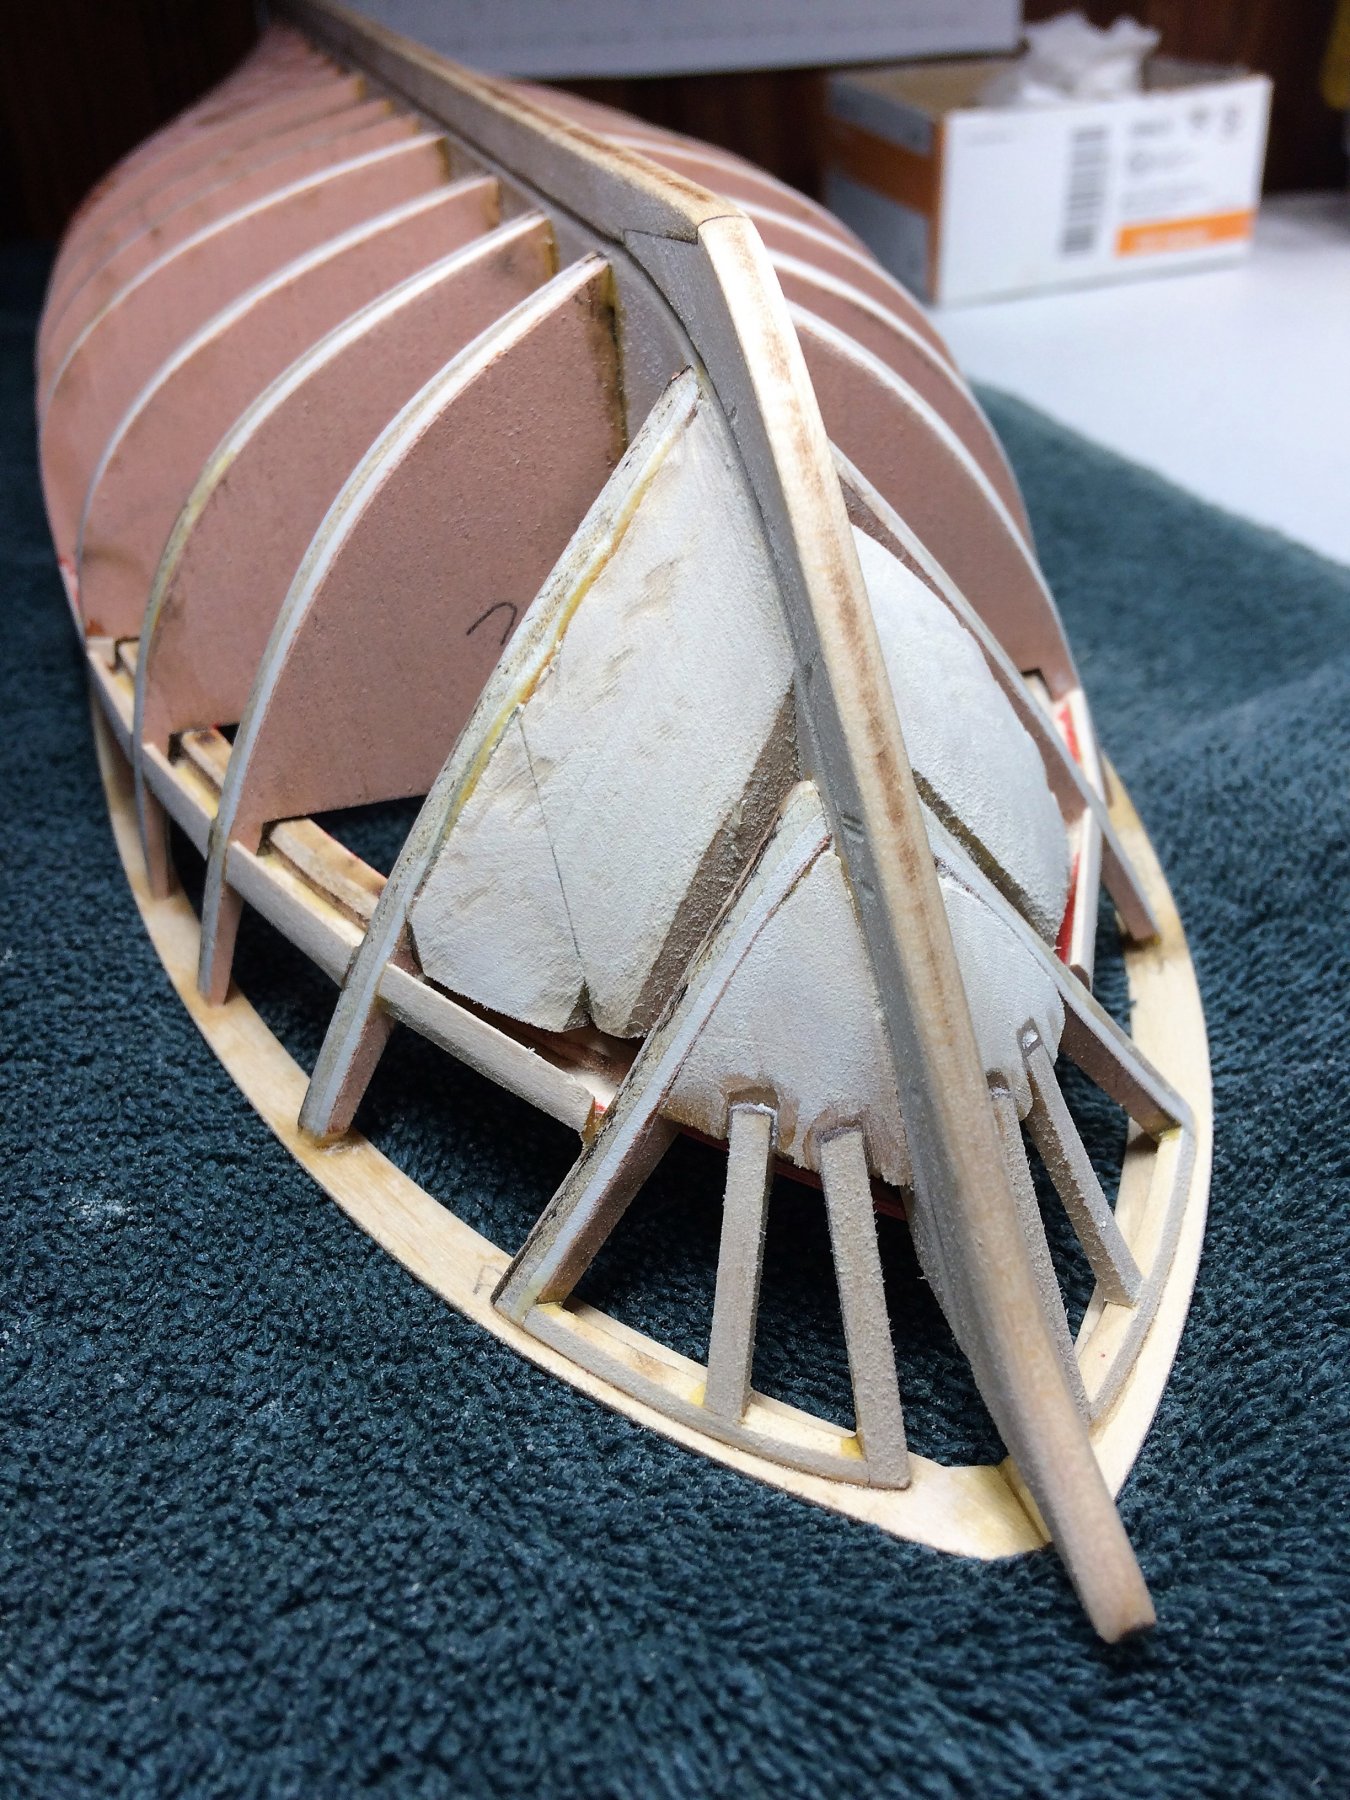
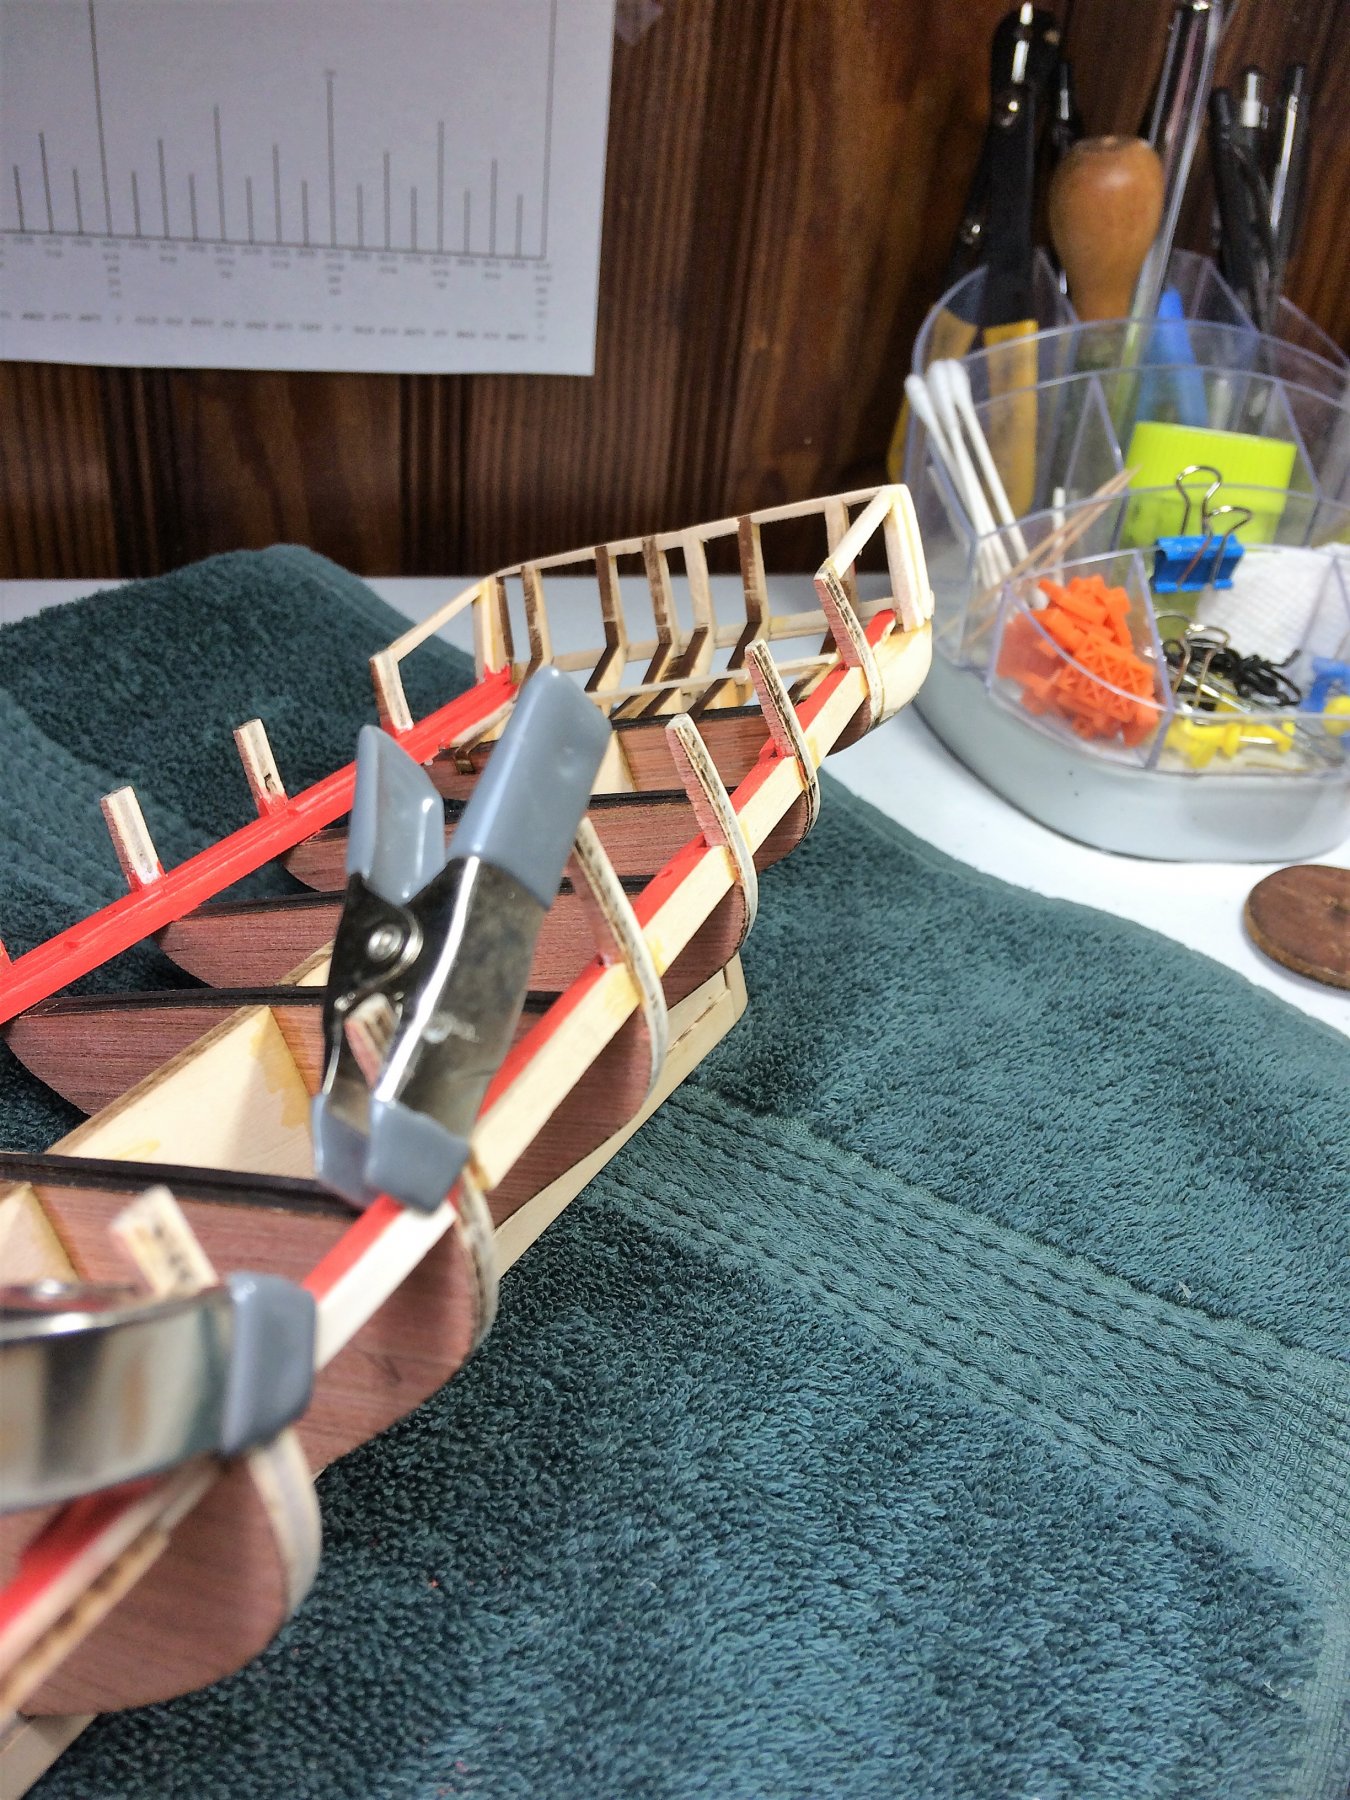
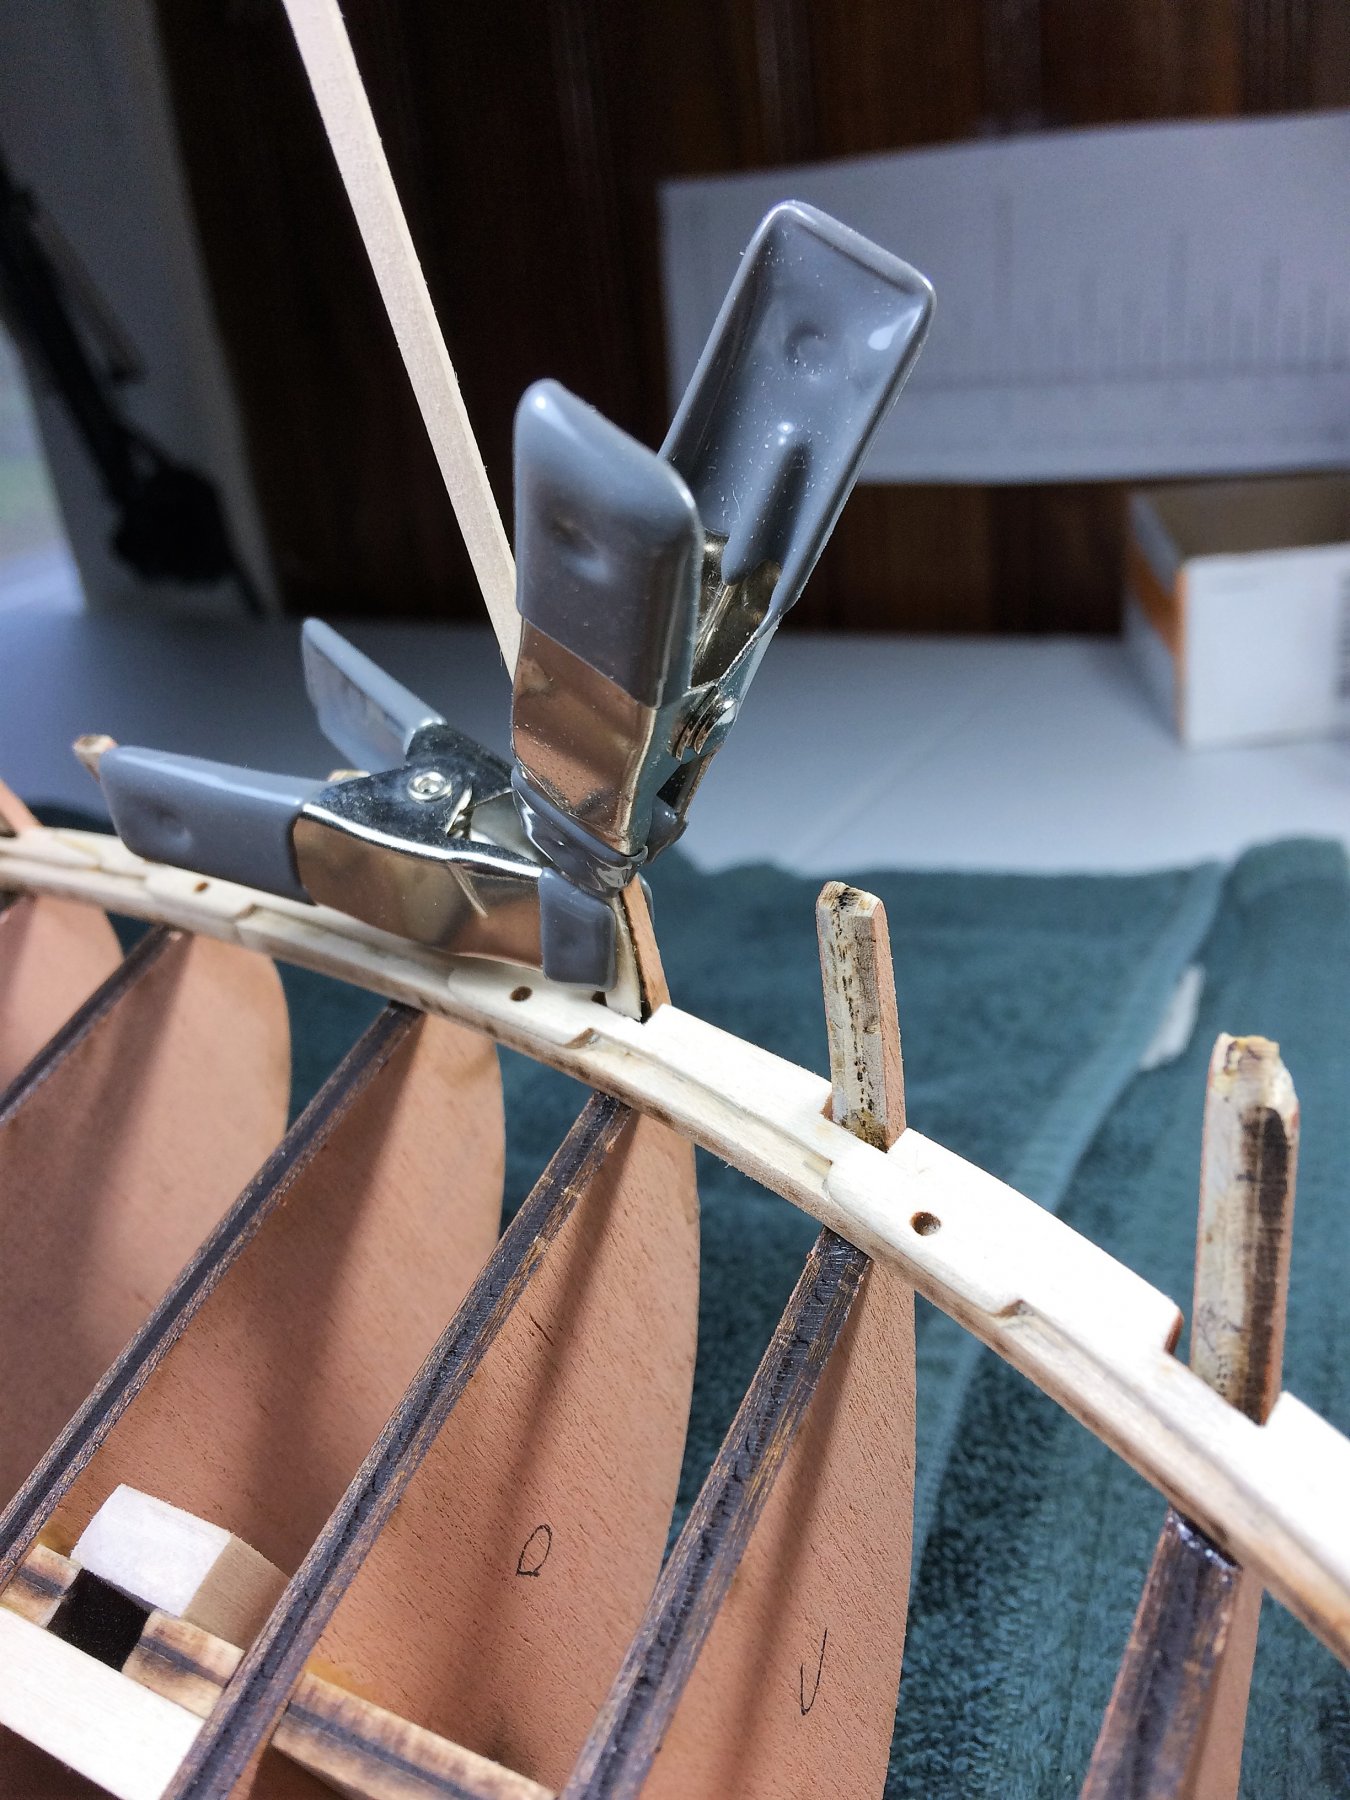
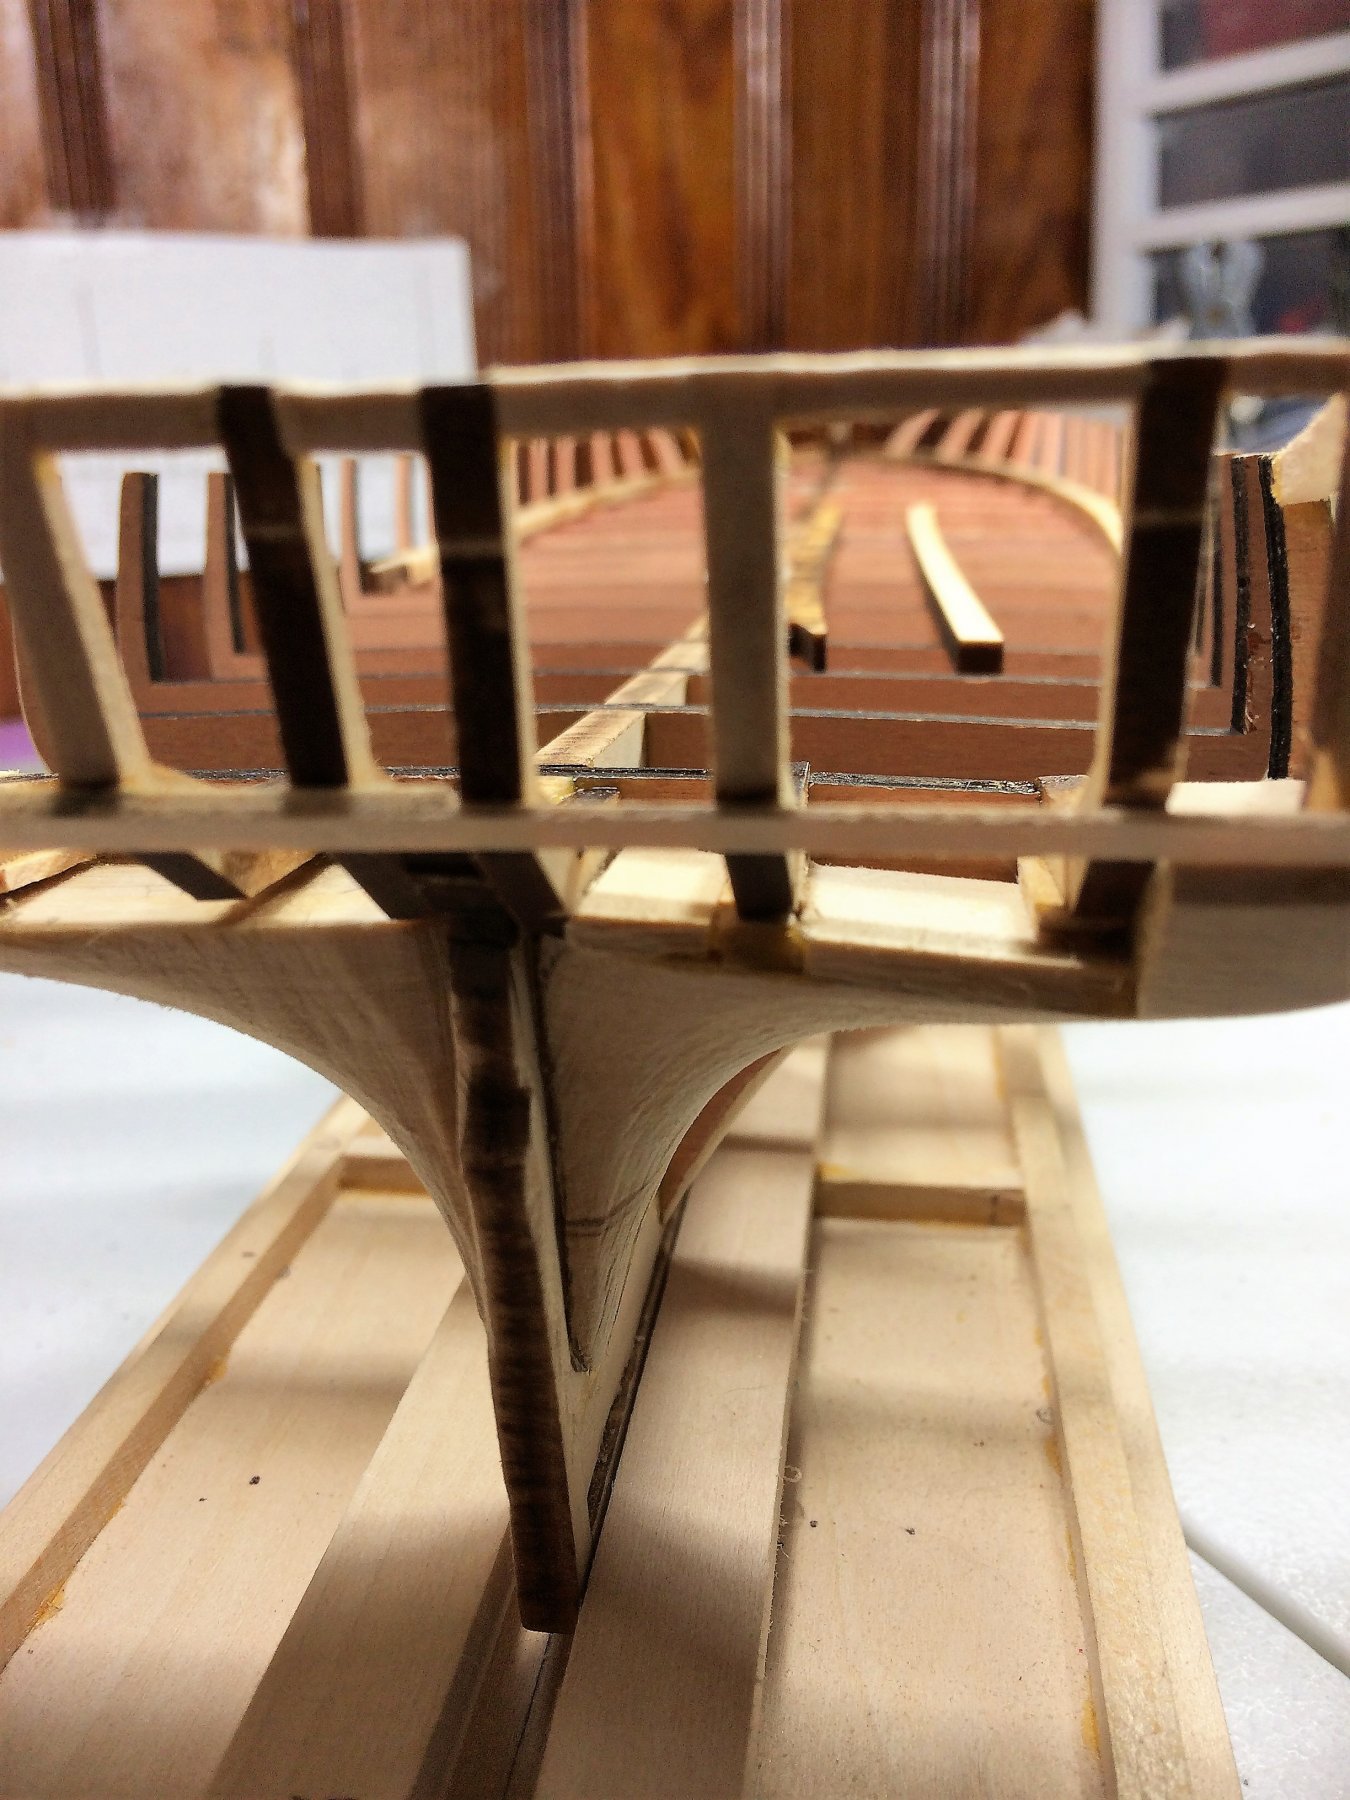
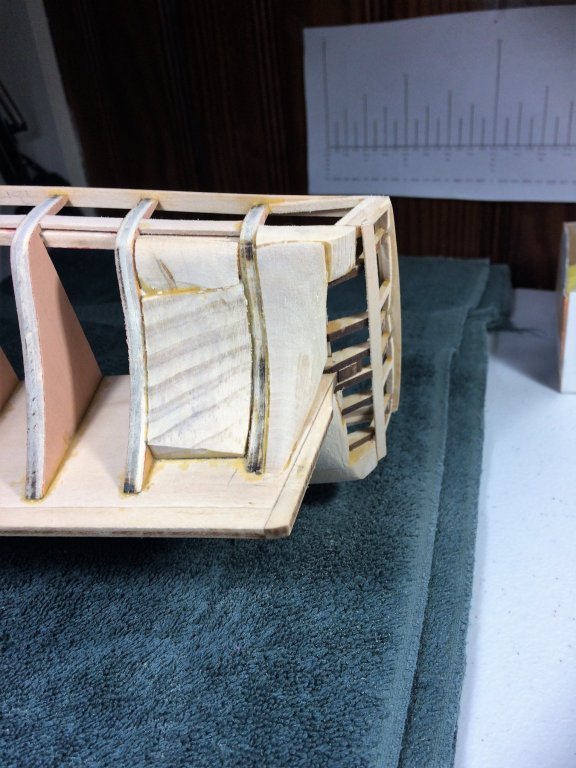
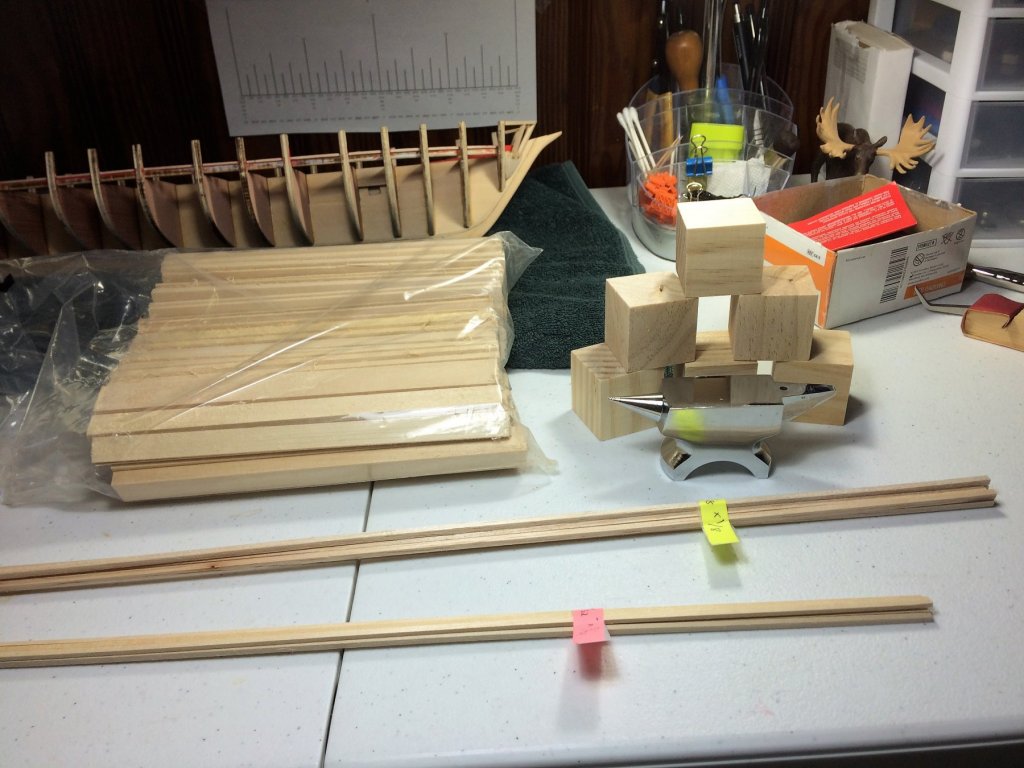
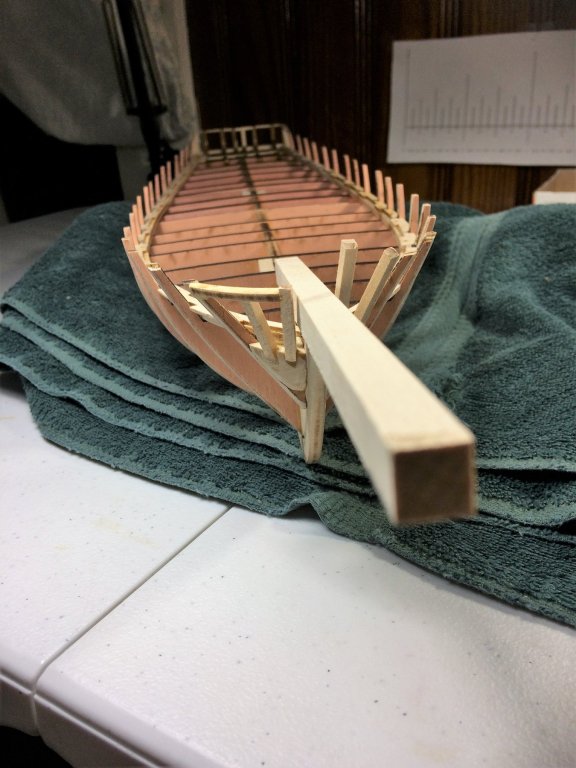
Evening, Hope all is well in everyone's shipyard tonight. Quiet, and cold, night here in central New Hampshire on a Saturday. Good movie on, hot cup of tea, and heading to the Shipyard! Moving on from the main rail as it vexes me right now! Installed extra fillers at the bow and stern. The fillers looked "pieced" in. Went to Michaels to buy some balsa wood blocks I had seen previous. Lo and behold, they were gone! There must be another modeler in town, those were pretty sweet blocks/slabs of balsa wood! I knew I should have nabbed em when I had the chance! In my frustration, at myself, walked thru the "wood/carving" area and found little blocks, I think there used to make building blocks for kids. I little shaping and they fit. In the end, they are covered over anyways. As you can see below, there's still some fairing to do to the fillers. A bit uneven! With these now installed, and checking fairing with the batten strip, you get a real feel at how well these things are going to give an extra grip while planking. Already convinced on extra fillers and will use on any future builds where they can be used. I'm still in awe at my keel. She is staying straight during this entire process. And that's with me pulling and screwing with the main rail, and several strong solvents to loosen glue, she stays straight. Tom E


-
Mike, I used CA. I tried the acetone trick and everything else I could come up with to loosen the glue, but no luck. It did loosen some, but removing was causing more damage. Timberheads where starting to crack and loosen. I thought about just ripping off and replacing with a new rail thru Model Expo, but I just cant bring myself to that. I've dug my own grave, Just have to adjust going forward. I know there's a stringer just under the rail, where the square strip would be, I'll adjust its size down a bit. I did build a carronade, and with the smaller stringer I'm thinking about, the gunport openings looks ok. My scale may be off, but the average person may not realize it. Tom E
-
My kit does mention a stand, but none was included.
- 843 replies
-
- 3
-
-
- niagara
- model shipways
- (and 2 more)
-
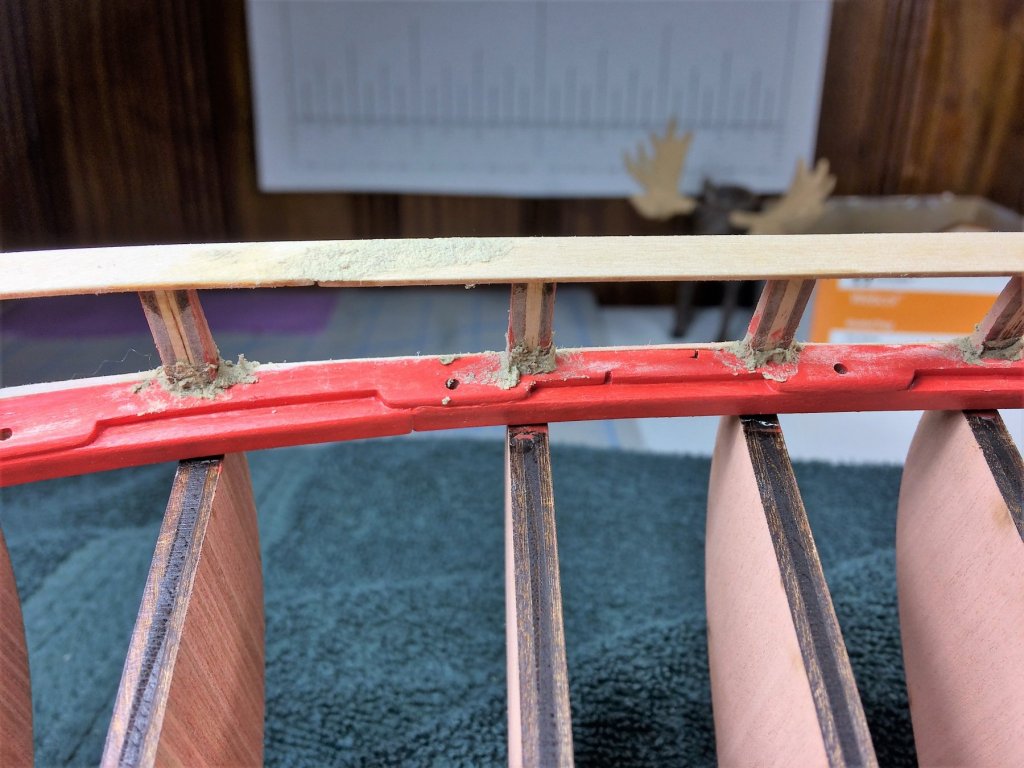
Evening, Been a while for an update, and admittedly I screwed up. There comes a point in almost every build where you realize you did something that cant be undone.....well, not easily. I couldn't fix it as admittedly my build log is about 6 weeks behind the actual build......it my way of motivation.....it just me....my goblins. In my last post it was brought to my attention that the correct way for the main rail was to use a square strip on top of the bulkheads, then the main rail on top. I missed this. I found it on Xkens Niagara build, but, I was unaware of this build prior. Some reason, I never came across it. Thought I did good searches. To all Niagara builders in the future, use the square strip on top, then the main rail on top of that. Oh well, learning moment. With all of this in mind, I need to press on. Its crossroads like these that cause folks to "mothball" a build and move on to something else. I will not do this! I have some fixes in my mind. The main rail fits on the timberheads quite well. Some humps, but I should be able to sand these down. With the rail in place, it was time to sand and fill some gaps. Its about 20 degrees tonight in New Hampshire, without the wind chill. Hot cup of tea will be on order all night!!! Tom E


-
All I see are the toothbrush pics, and boxes that show where a pic/jpg should be but no pic.
-
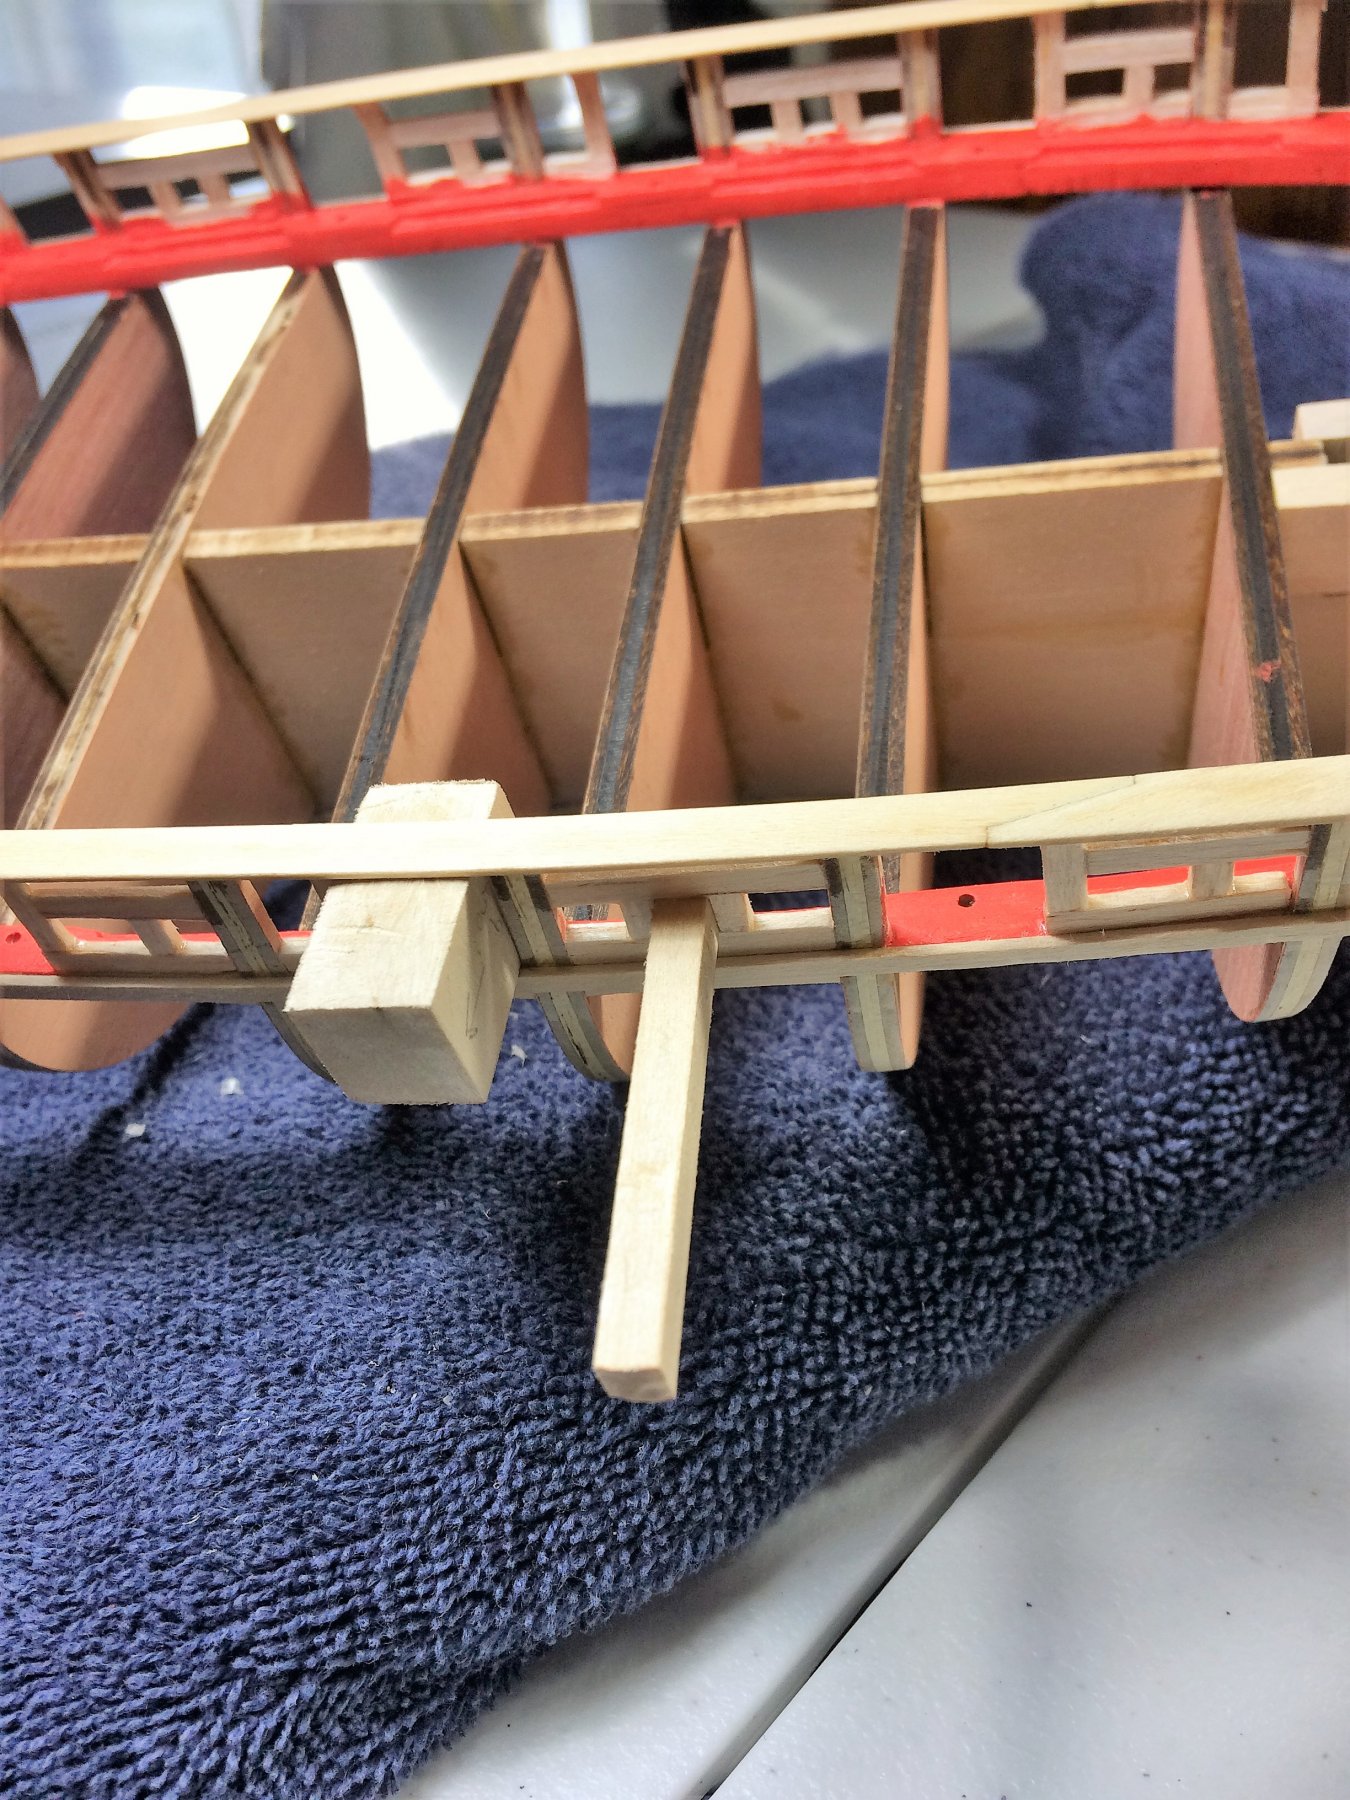
Absolutely bloody brilliant! Does the neck of it stand up to the downward pressure applied while sanding? Tom E
-
Mike, That's a fine idea. I think I will build a few carronades to see how they align/look. It would be easier to adjust those pin holes now than later. Sounds like a perfect weekend project. Tom E
-
Mike, I had the kit for just shy of a year. It was stored under the bed. I didn't do anything special to her for storage. So in the end she did sit thru a cold, dry winter and a hot, moist summer before building. Do you think it was the wait that did this? I figured it was the cut from the factory. Tom E
-
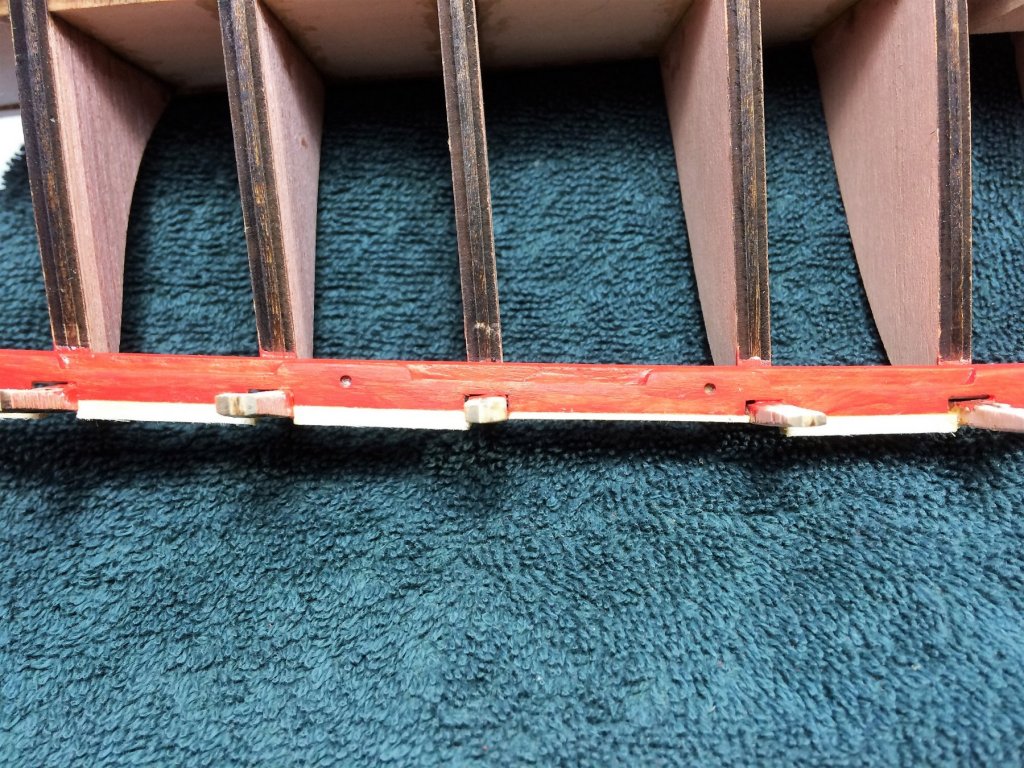
Evening, Thanks John! While I wrestle with the main rail question, the build presses on. With the infamous gap between the planksheer and the outer edge of bulkheads appearing, time to fill it. Just using scrap strips, used various sizes according to the gap that needed to be filled. These will be sanded down flush with the bulkheads. They all needed it. From bow to stern. They look unsightly, but will sand up just fine. Harder to do in my head than in reality. The stern needed the most work. These below are essentially sanded flush, but still in progress. I think they look good. If you look at the port planksheer where it meets the timberheads, I started to put wooden plugs to fill the gaps. These will be sanded and covered with wood filler as well later on. After painting, hopefully they will look some what close to seamless.....hopefully! Still fiddling with the main rail. I test fit, test fit again, then re test fit. Sooner or later I'm just gonna have to dive in and lay down what I have planned. Tom E

-
Hmmmmmmm, Seems I need to do a bit more research. In my head I think I have the ports figured out, I must be missing something. That will be tonight's homework after work. Thanks for the heads up. Tom E
-
Hi Mike, Thanks for the tips! I hear ya about the painting, wasn't even thinking about the glue under paint. Over the weekend, with the work I did, most of the paint was sanded off. Is it best to paint after all is planked and ceiled? As for the main rail, I have held off for now as the timberheads on the bulkheads need more work/fairing before installing. Think I'll build what I can of the gunports/sweeps before installing the main rail to allow access for sanding/shaping. It looks like the main rail is used to help "frame" the gunports and I'll have to make the leap and install sooner than later. Tom E
-
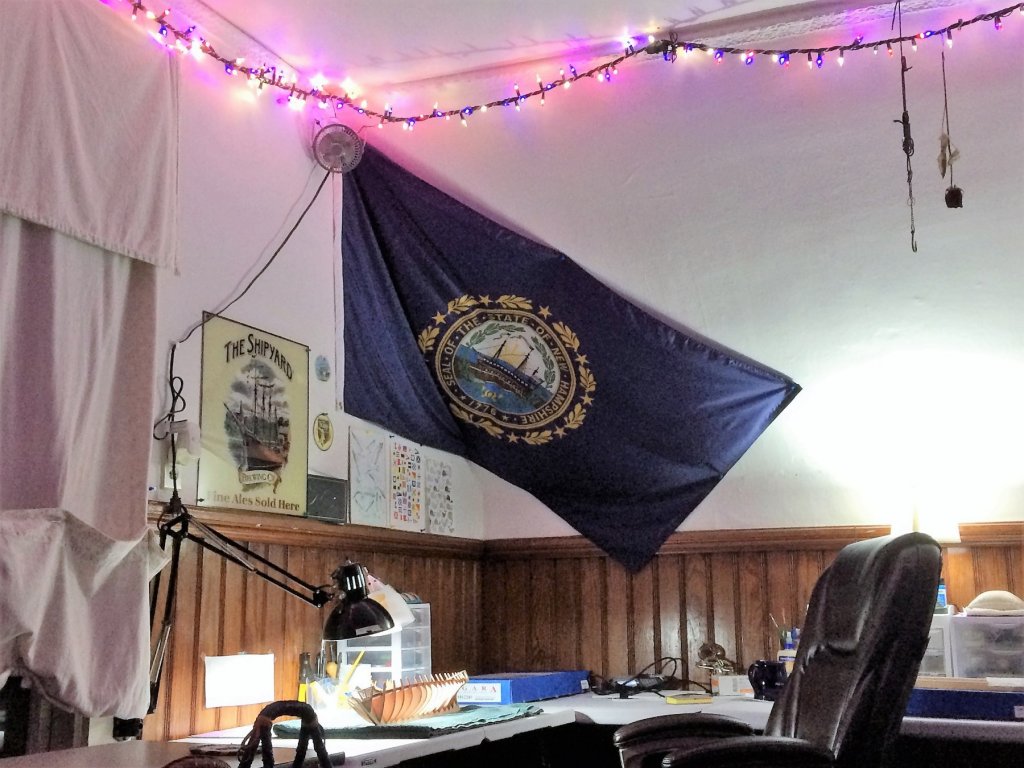
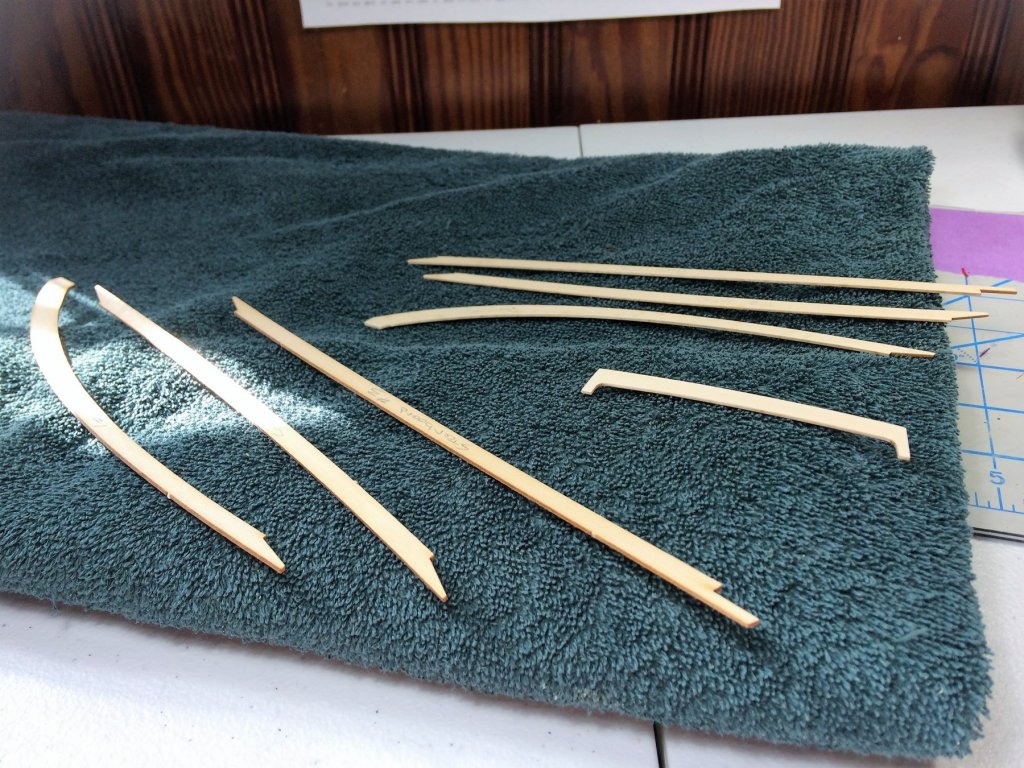
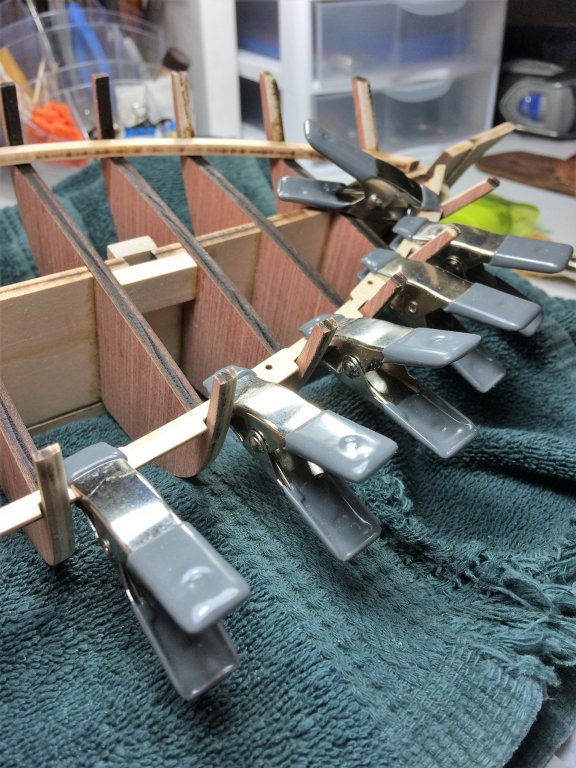
Evening all, Kind of a slow week, but by design. I wont say I've hit a road block, but a mere speed bump over which way to go. When I have to decide a certain path over another, I go into a research mode.....eg, internet, other builds, and the like. So instead of actually building I get to cleaning and re-organizing the Shipyard. New Christmas lights for this years tree.......and the shipyard I also tend to shop. A trip to Michaels for some spare bass wood, and some blocks for extra bow and stern fillers. The path I have been thinking about is how to handle the Main Rail. In some other build's I've seen the main rail omitted until further in the build and use a square strip in its stead. This is a large cross road in a ships build. Being a newbie to all this and not looking to "bash" anything just yet, I'm going to stick with what comes in the kit. Then I can move onto the gunports. I took all of the pieces and did a rough draft and I feel more confident in using the supplied rails. Honestly, they look pretty good. There flat, no warps, and they align very well with the top of the bulkhead extensions. I've seen builds where there wasn't enough length at the end, as is the case with these. But nothing severe enough to change direction. Some wood filler and sanding will do the trick. And they give me a good gauge of the overall curve/flow of the ship. Tom E

-
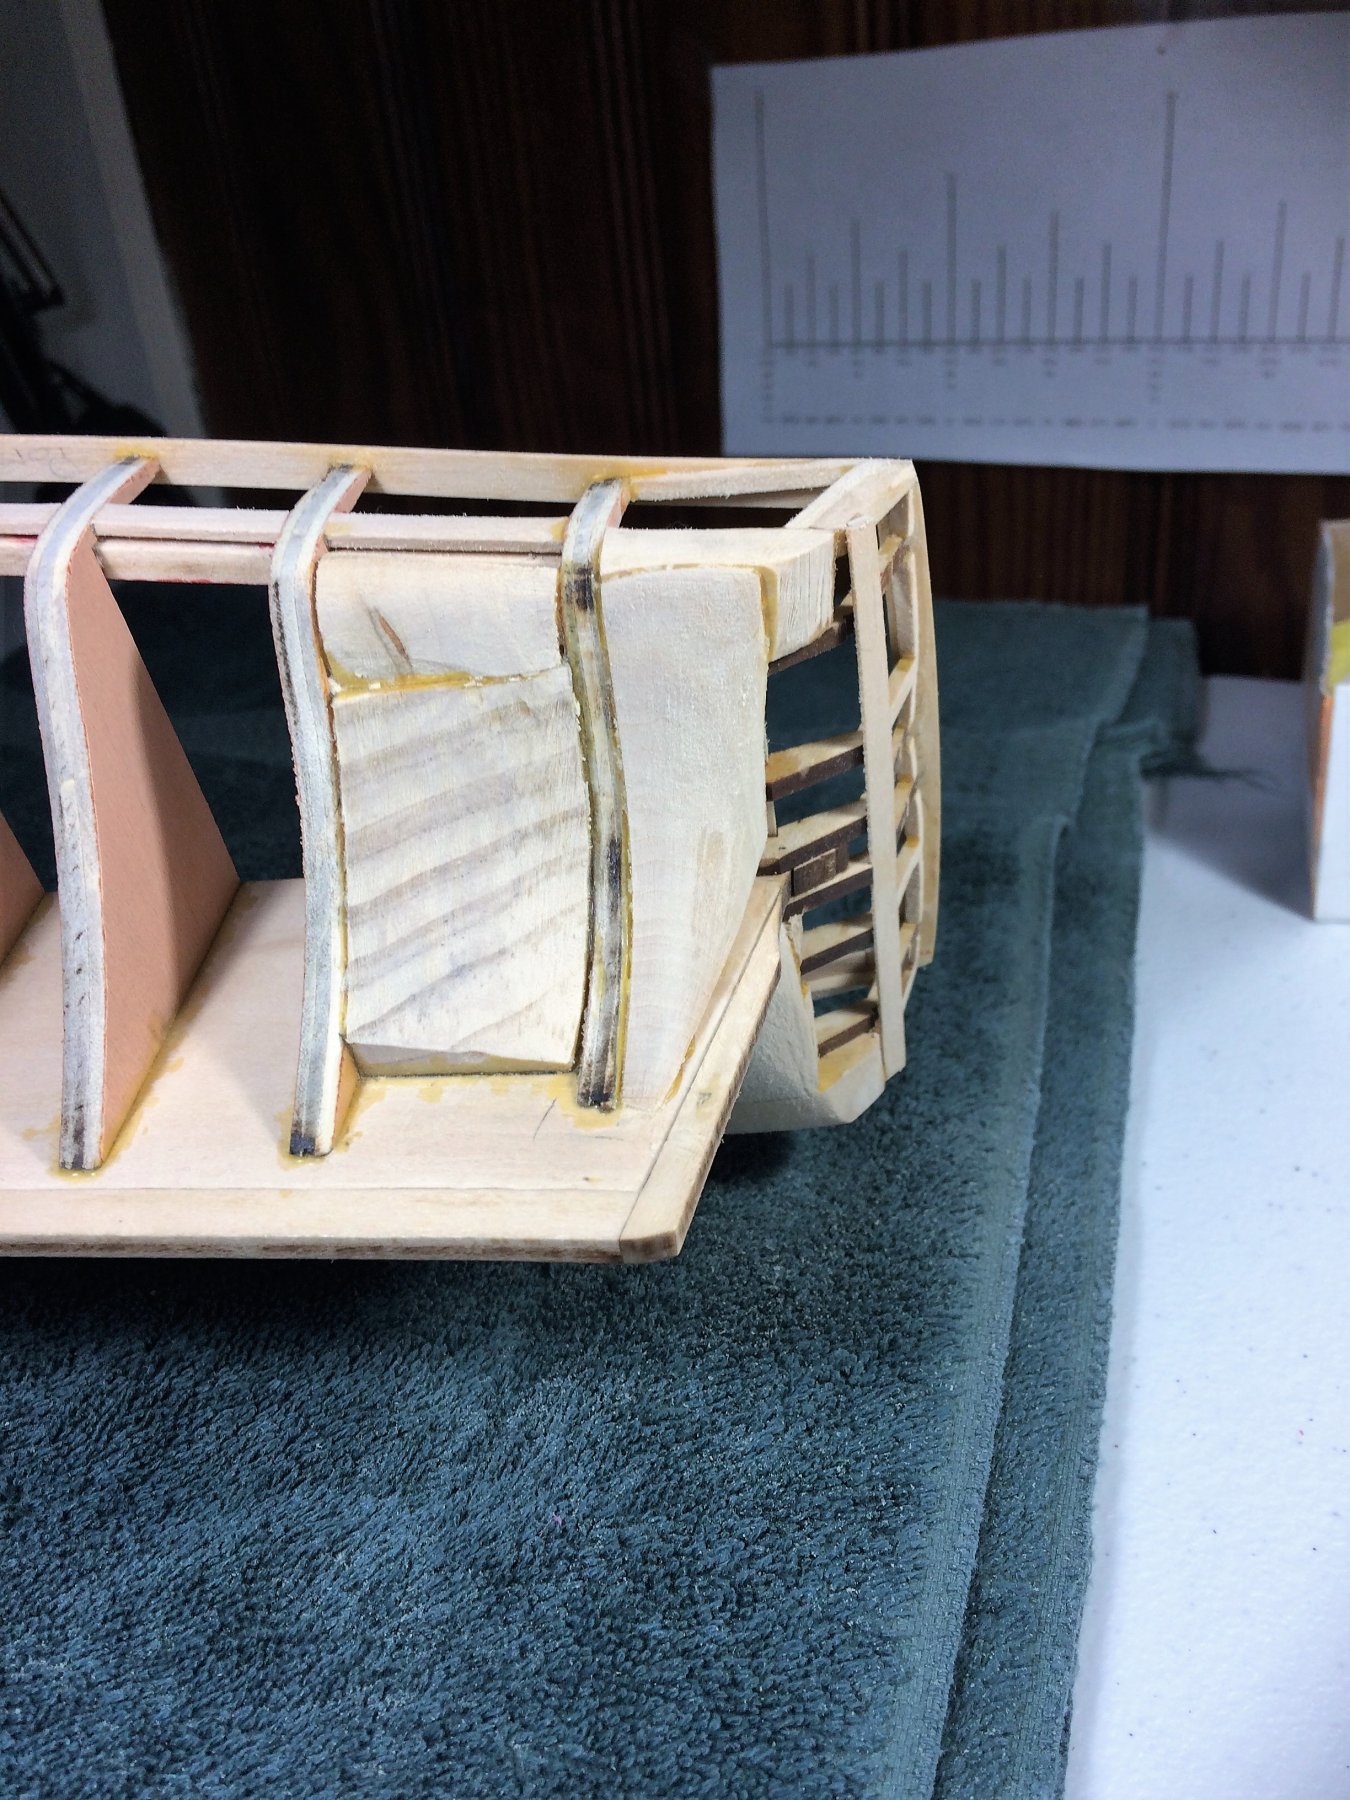
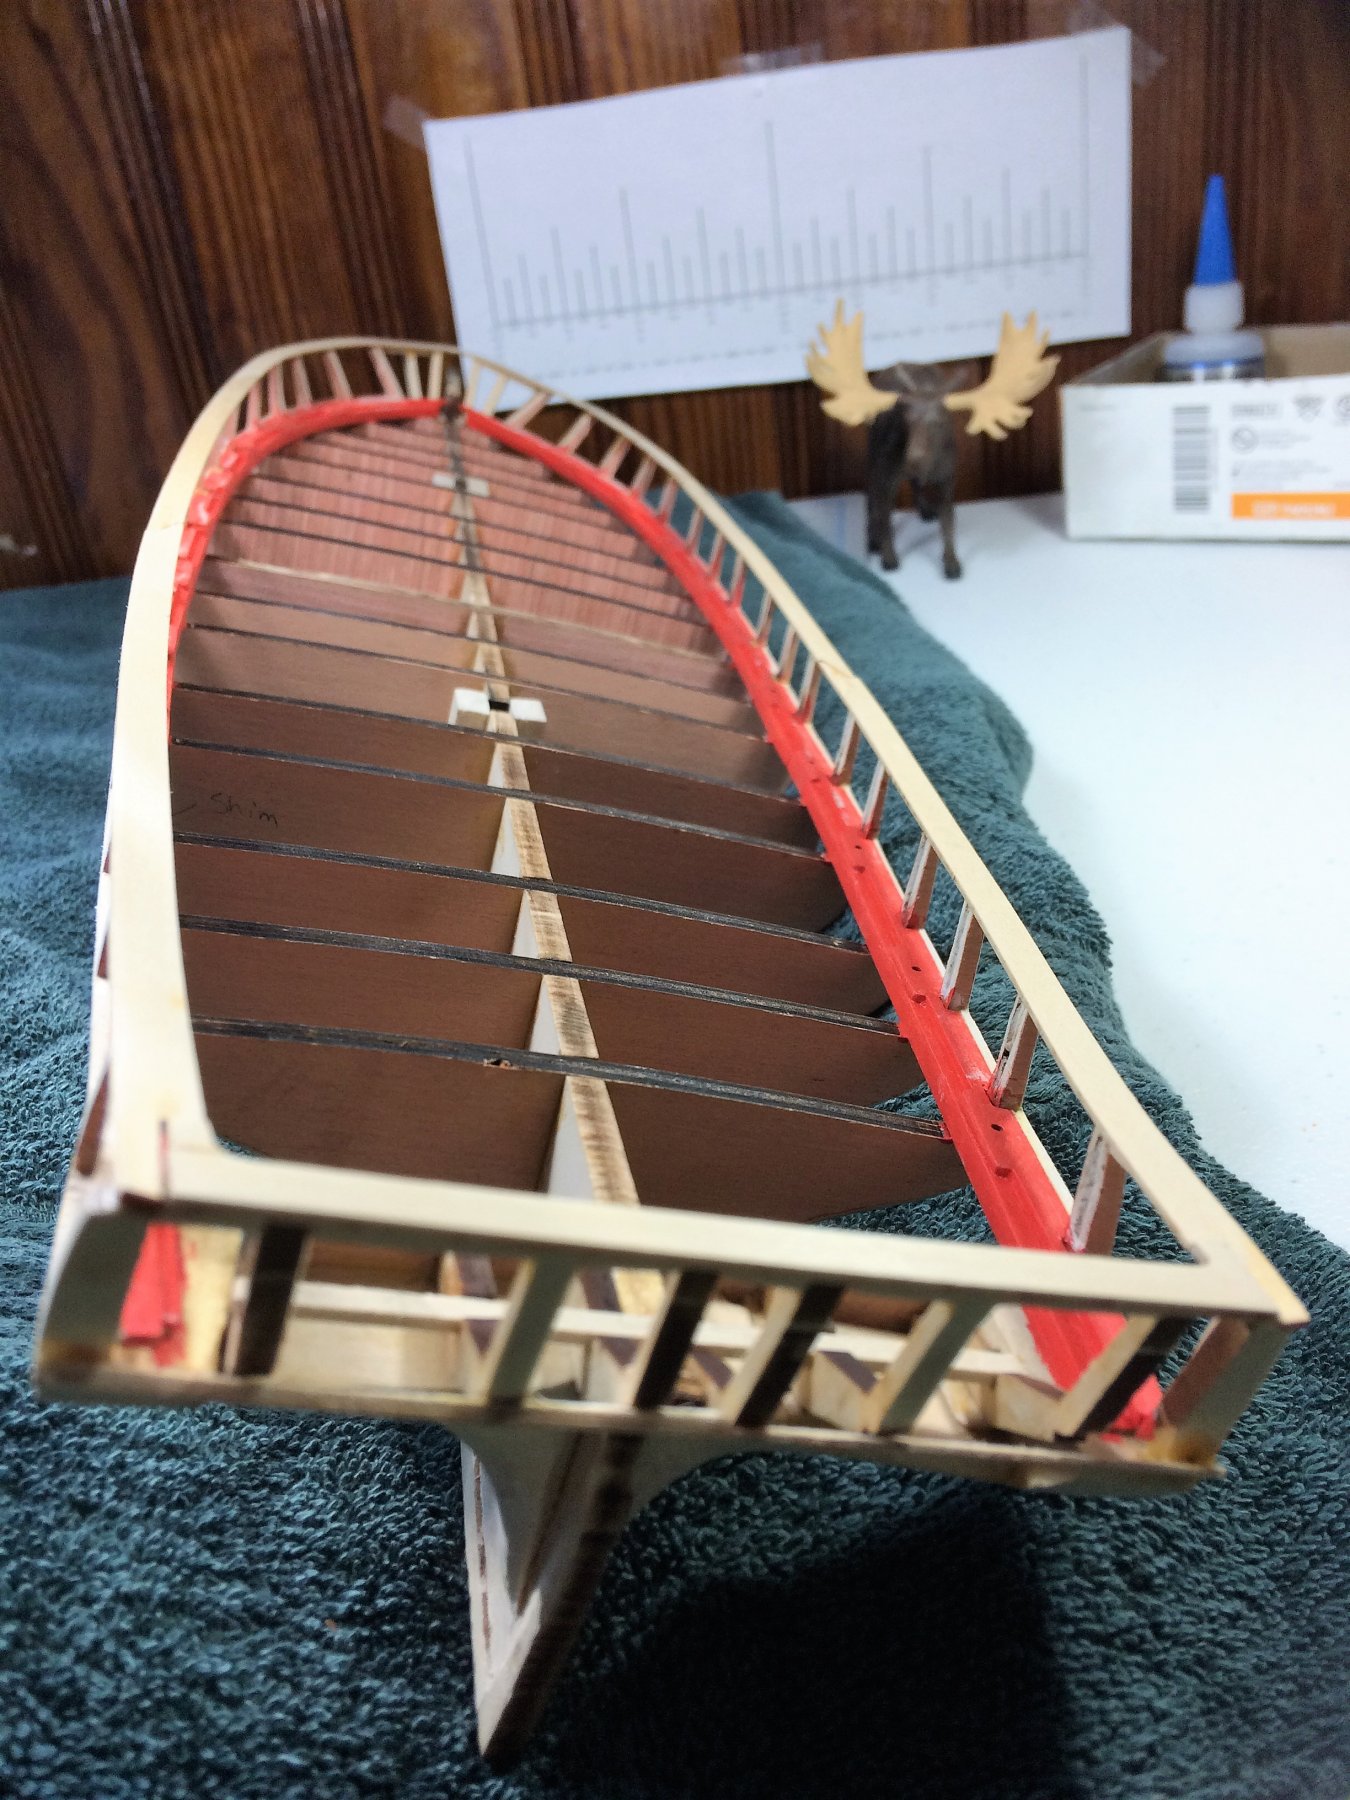
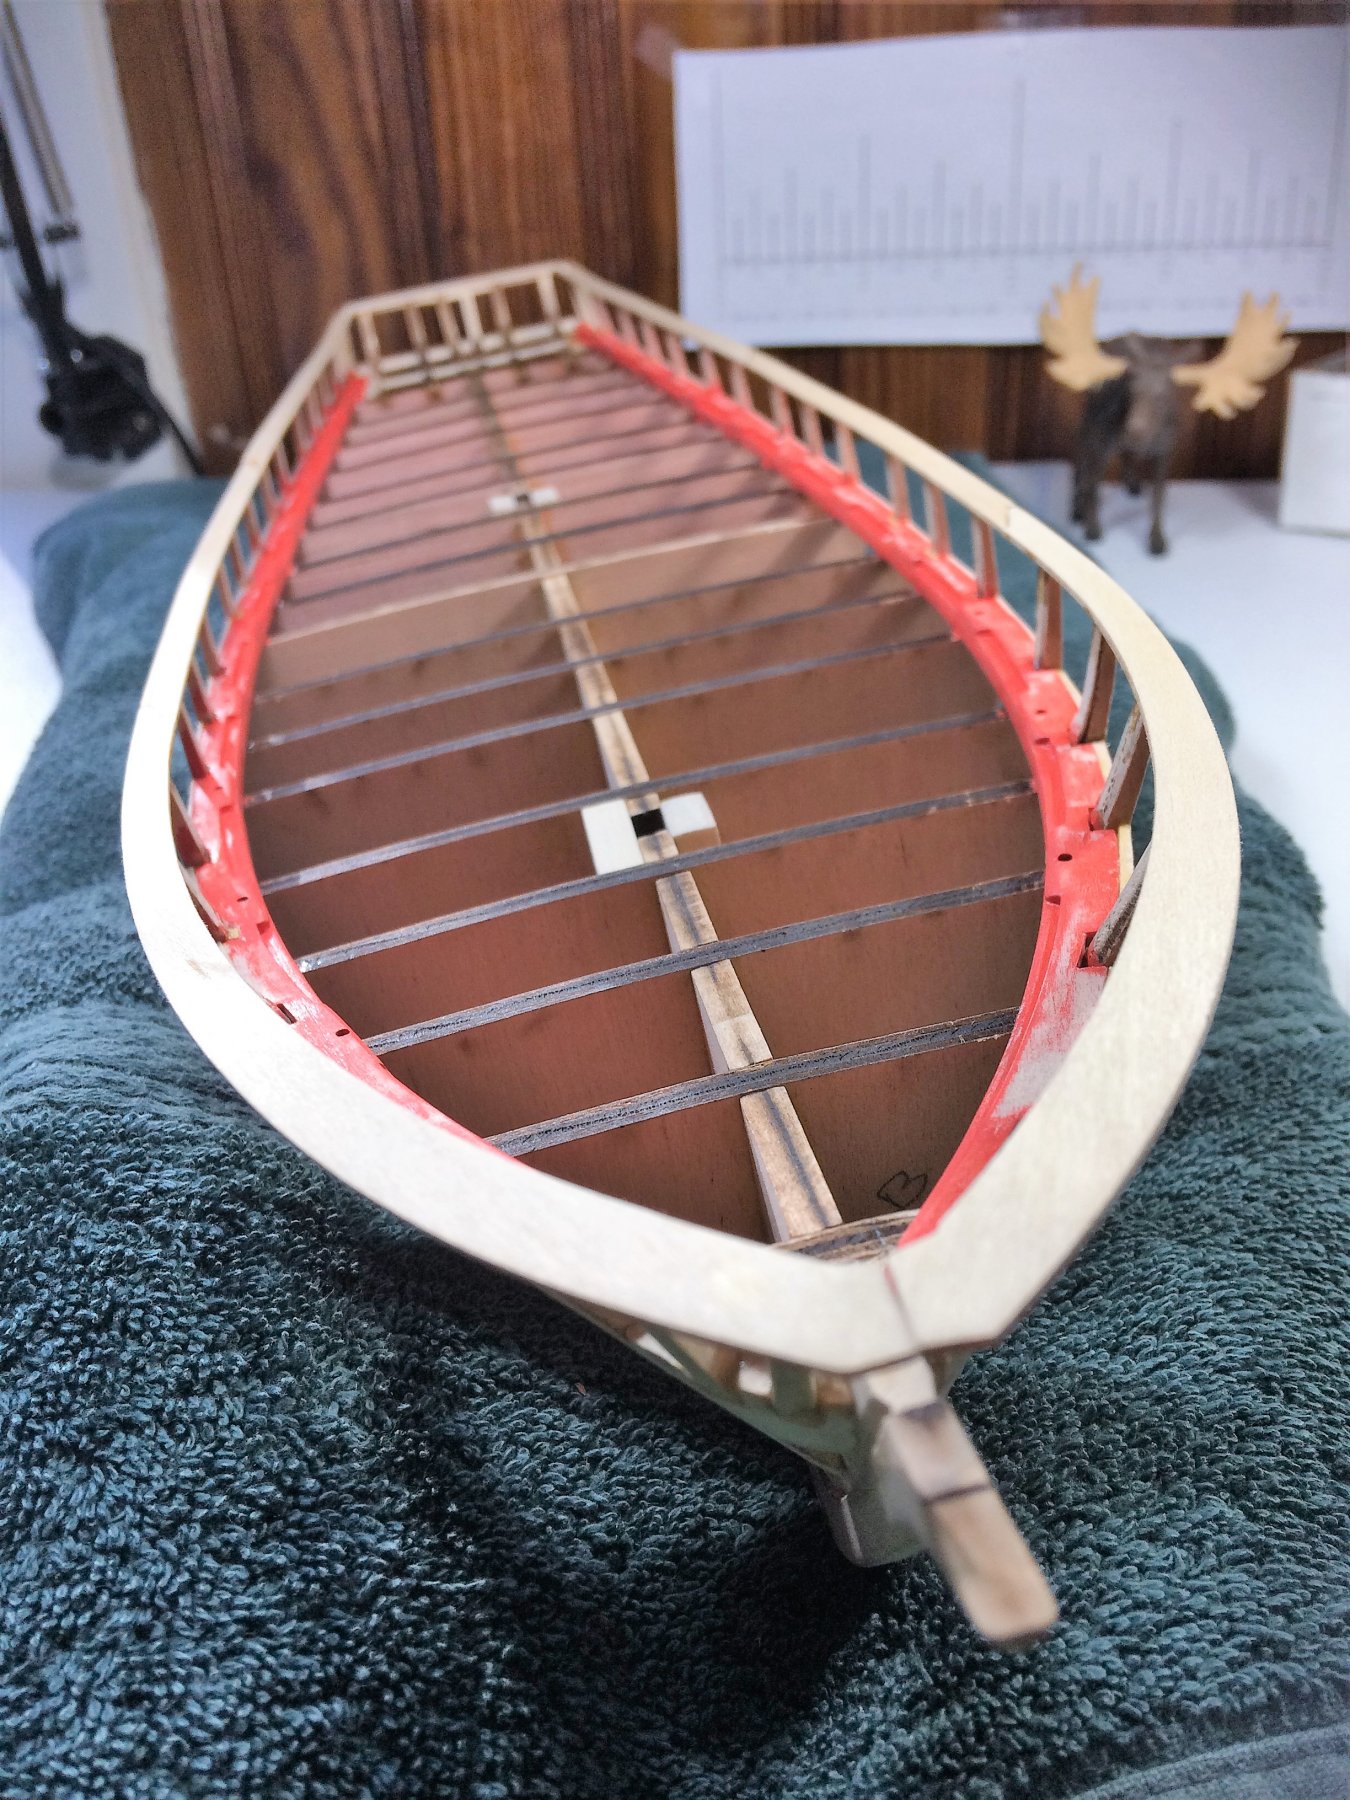
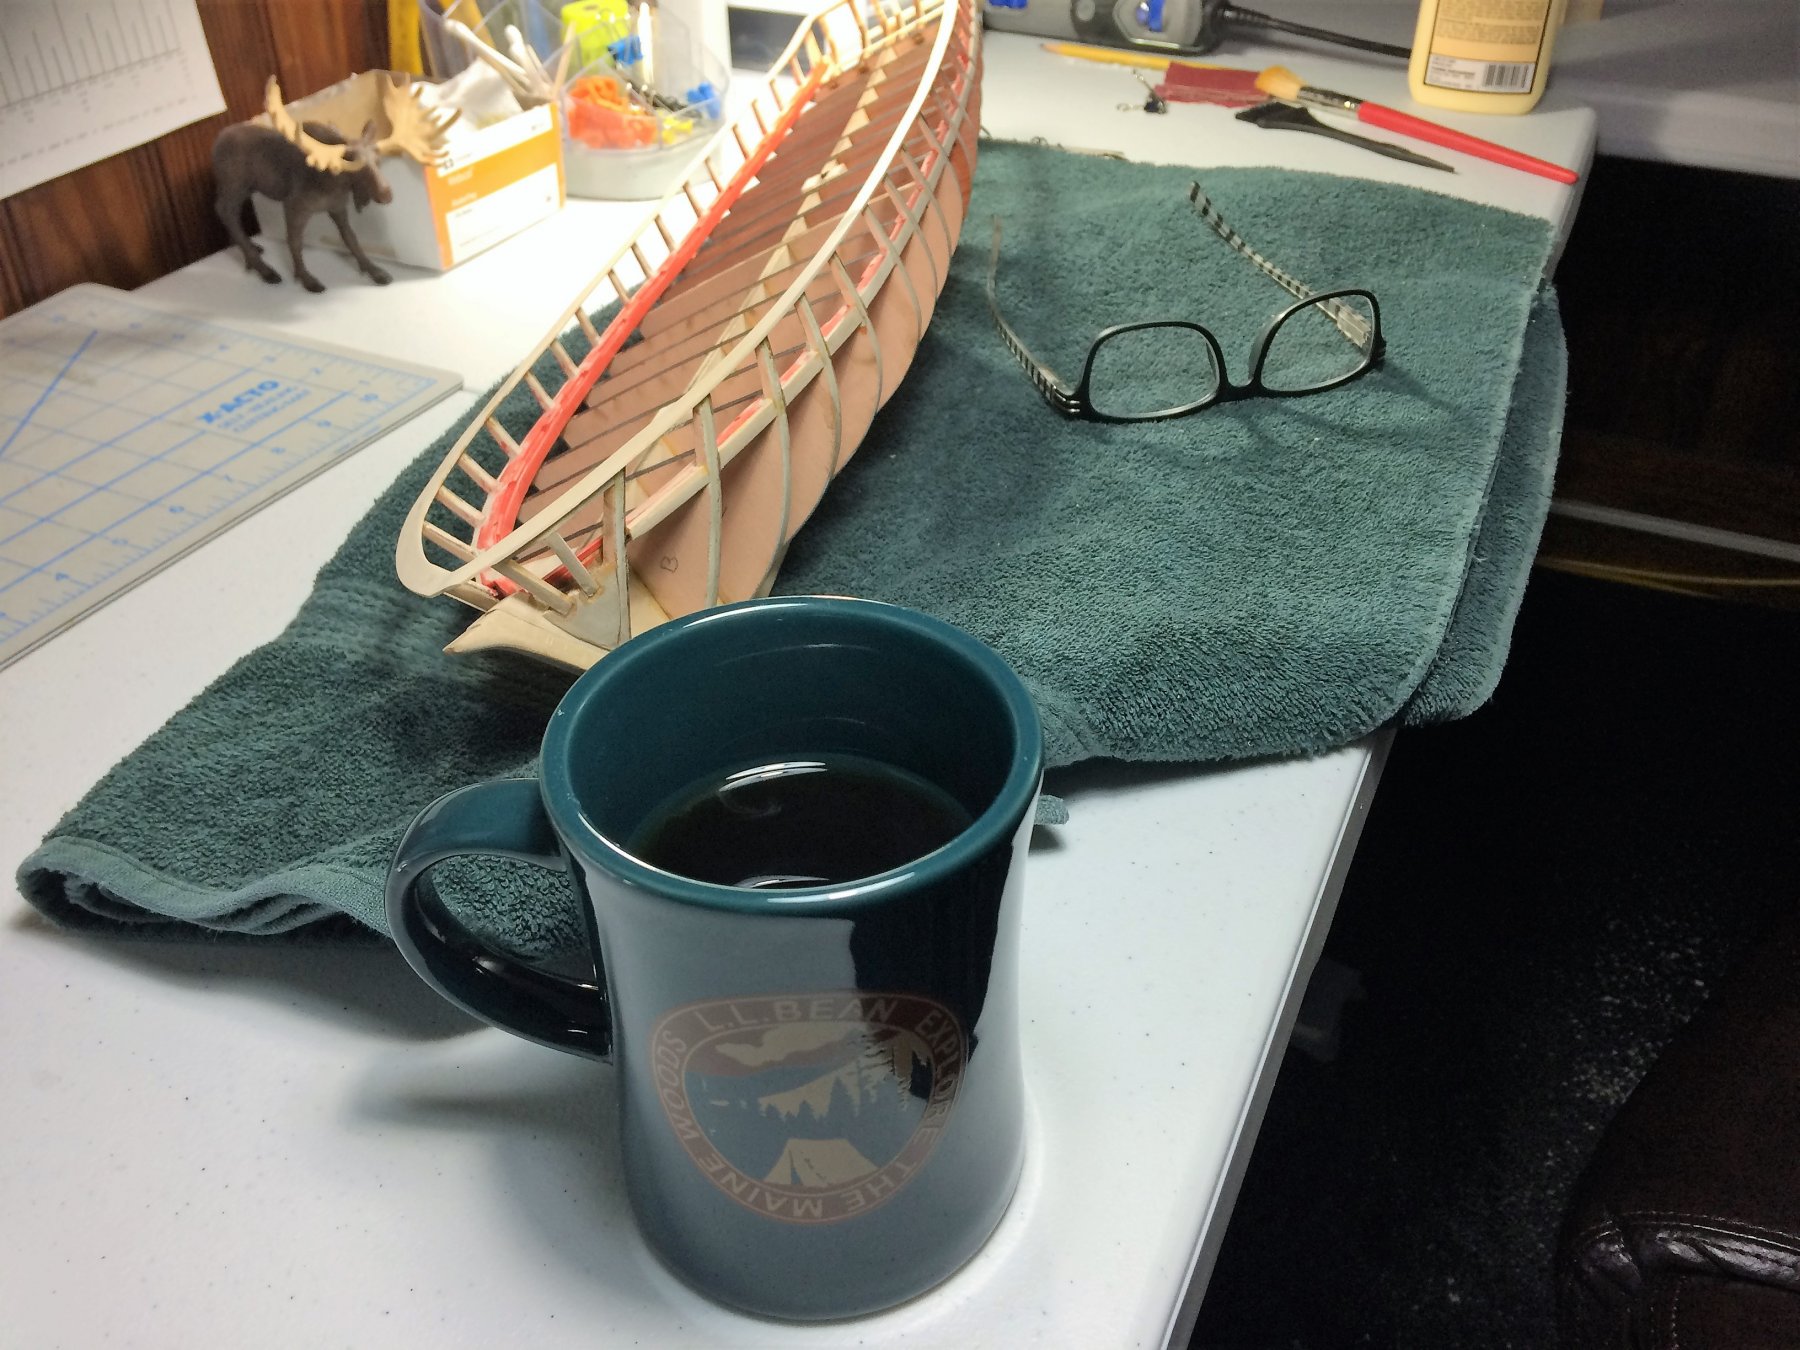
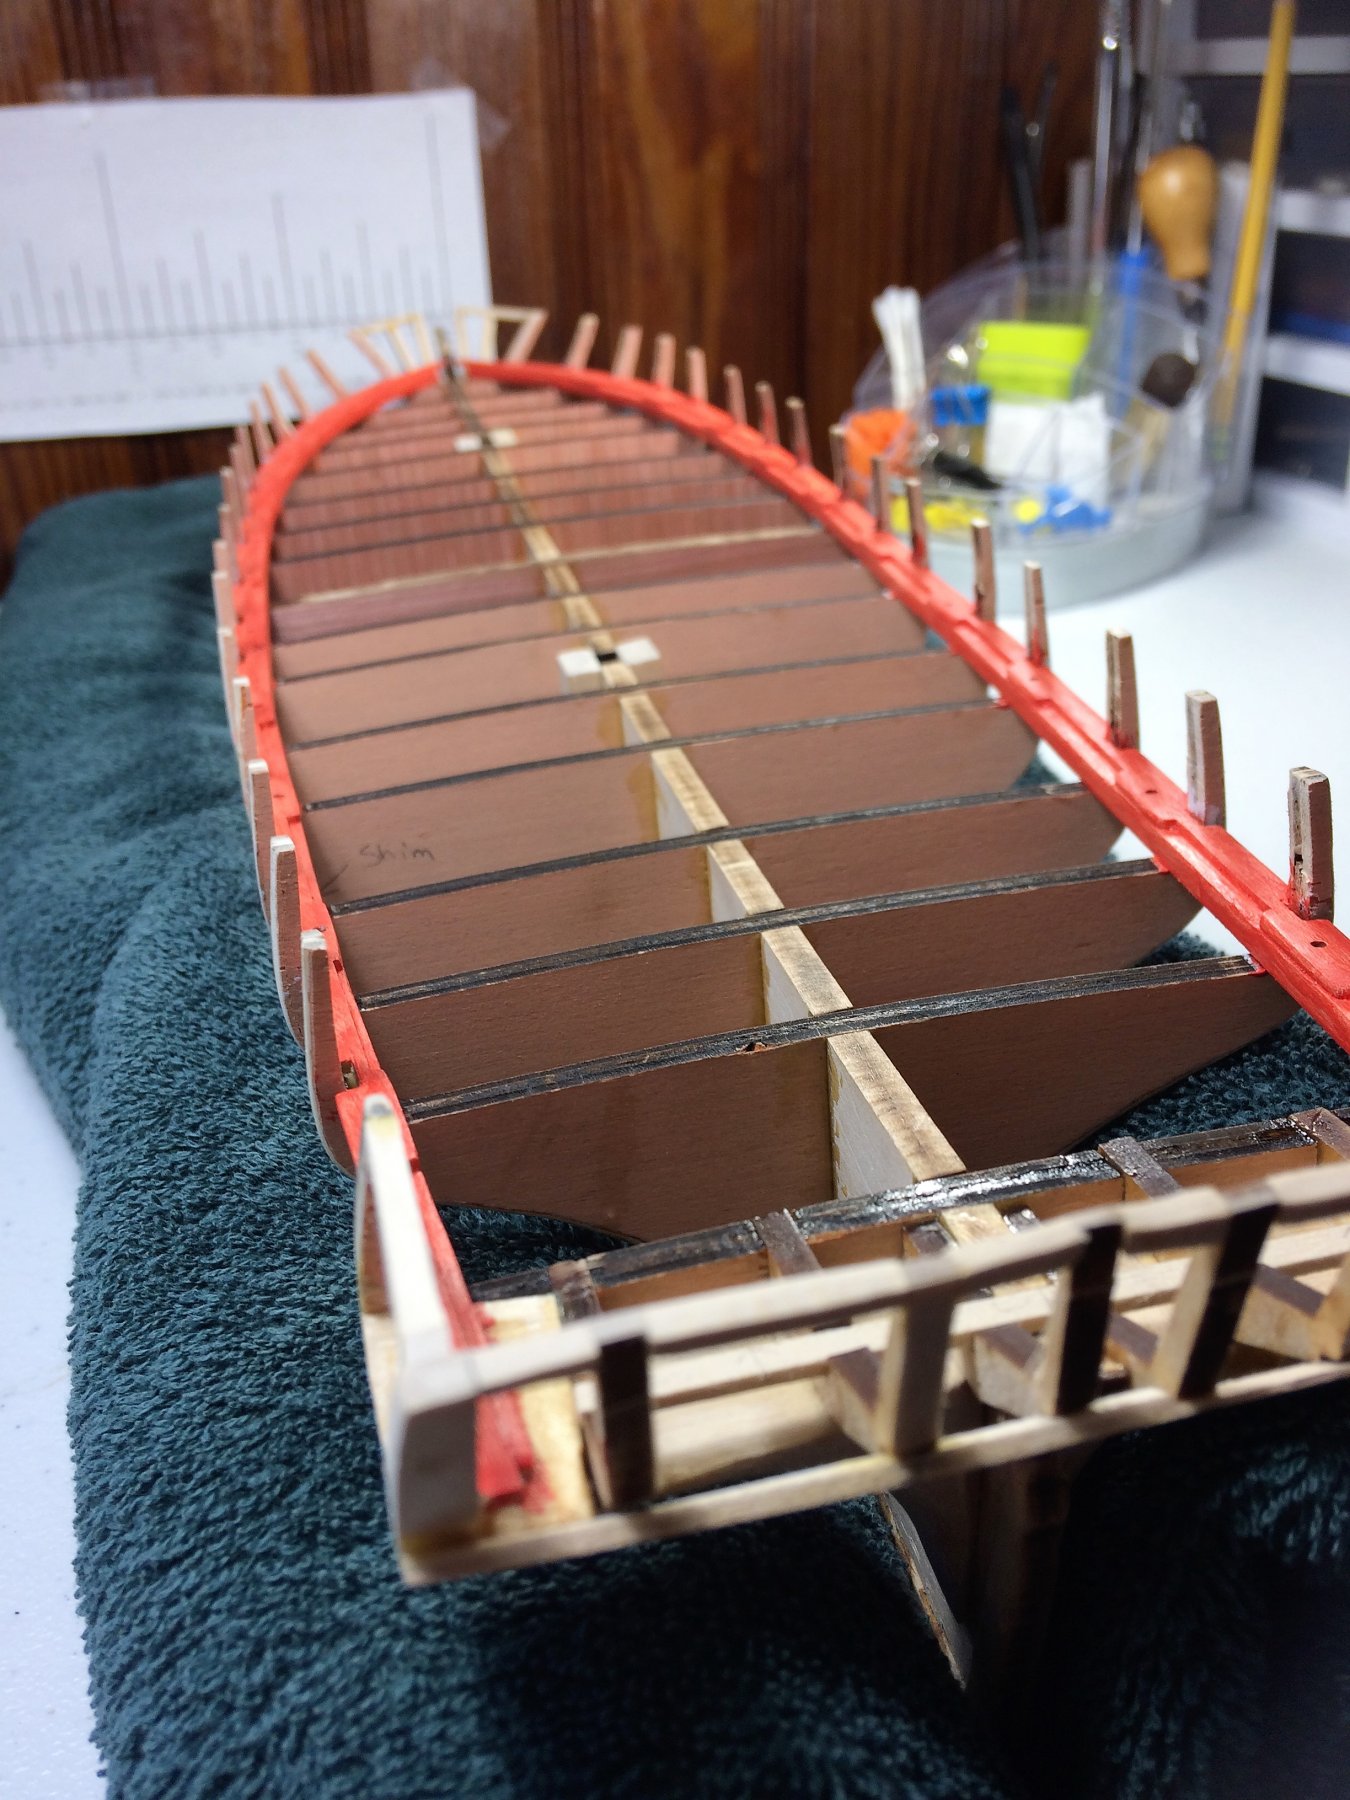
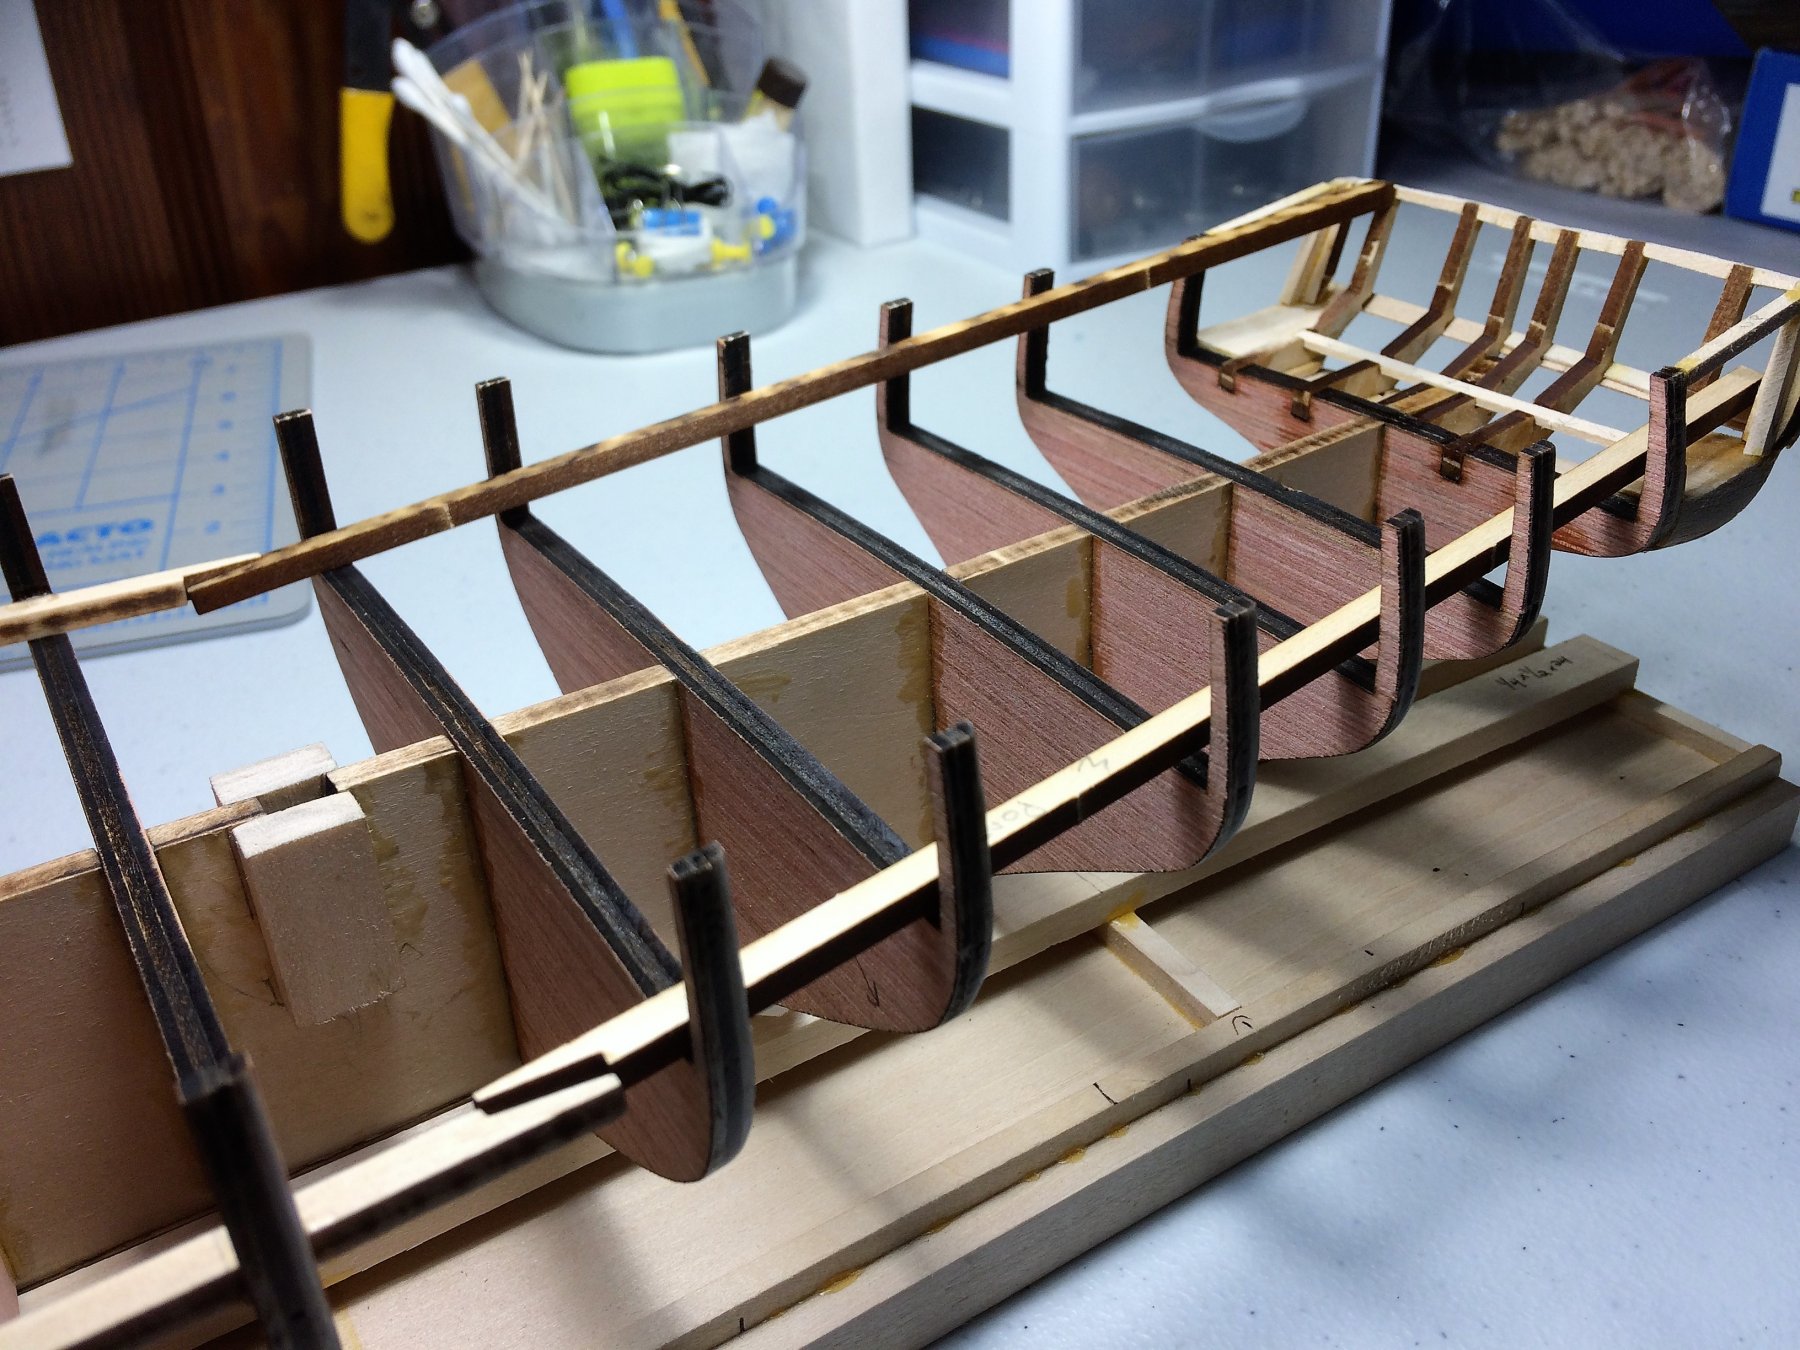
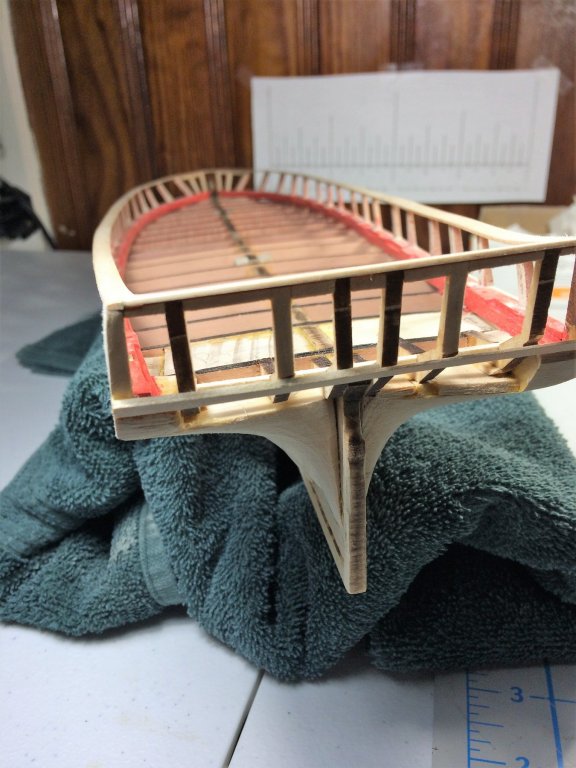
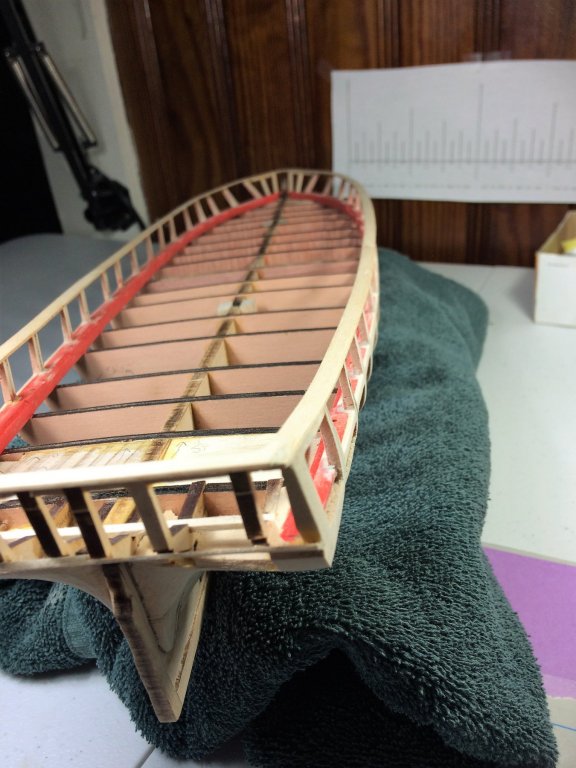
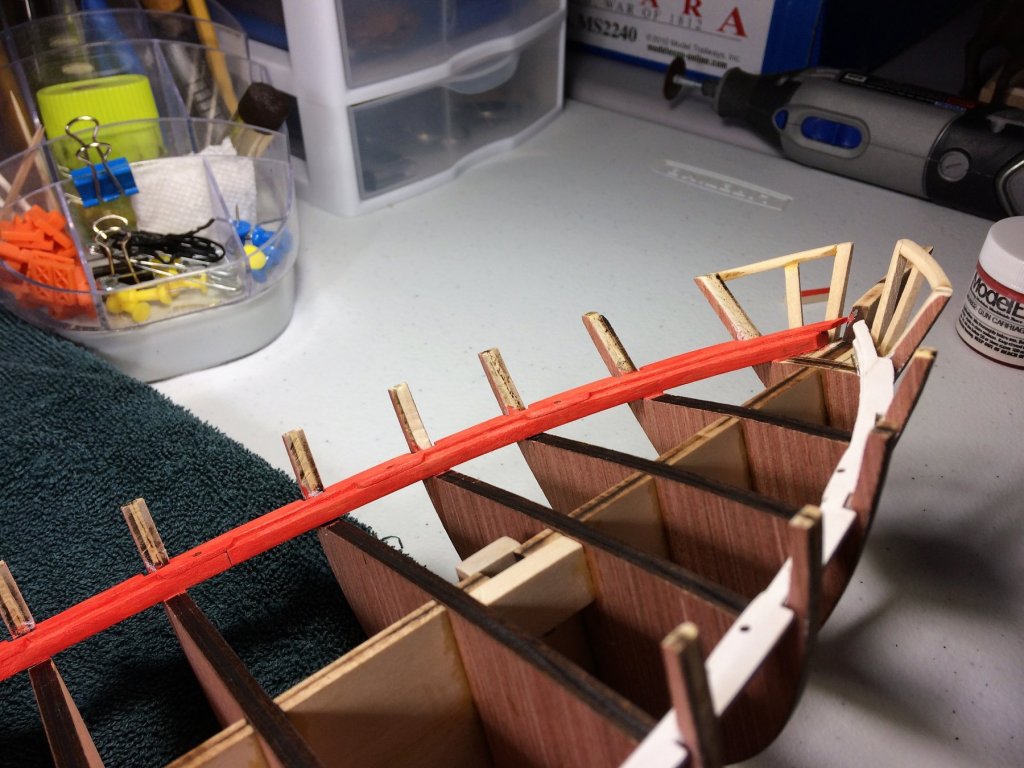
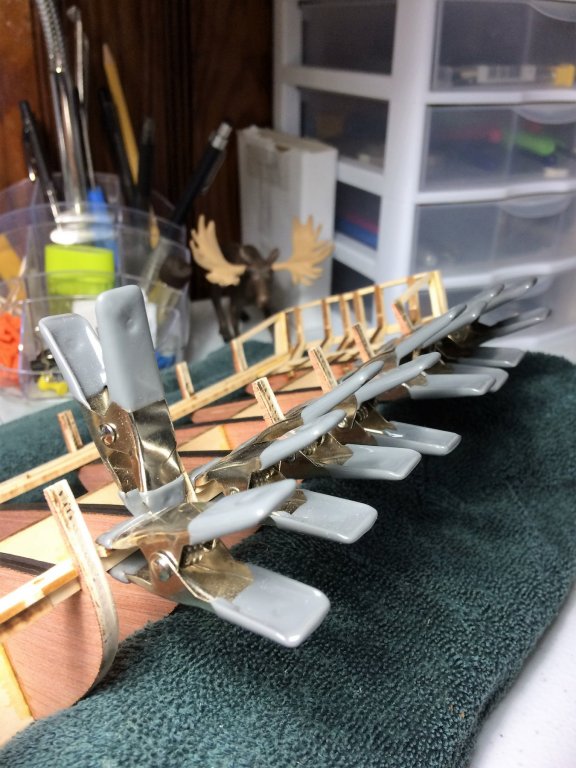
Evening, Thought I would share an update. Did some little things over the course of the work week. I figure since the overall skeleton of the hull is up I would start the fairing. The way I fair is slow and deliberate and will take me a few weeks. The fairing wont "officially" wrap up until the planking is done and sanded into its final shape. So far, I've only found one shim needed for the inside of the bulkheads. While fairing the hull, I was sick of looking at this brown shell of a ship and decided it needed a little color. Don't know why, could be out of order in a ships build, but the goblins in my head told me to go ahead and get a layer or primer on the planksheer/waterway. Then proceeded to put the first coat of bulwarks/gun carriage red down. Yes, I'm using the Model Expo paint set. I realize that almost most of this will be sanded down, covered with wood filler and the like. Since most painting is done in several coats, might as well start now. Areas may form where access will get tougher and tougher as the ship fills in. Seeing some color down is a milestone in the build in my book. Feels good, feels like progress!!!! Tom E


-
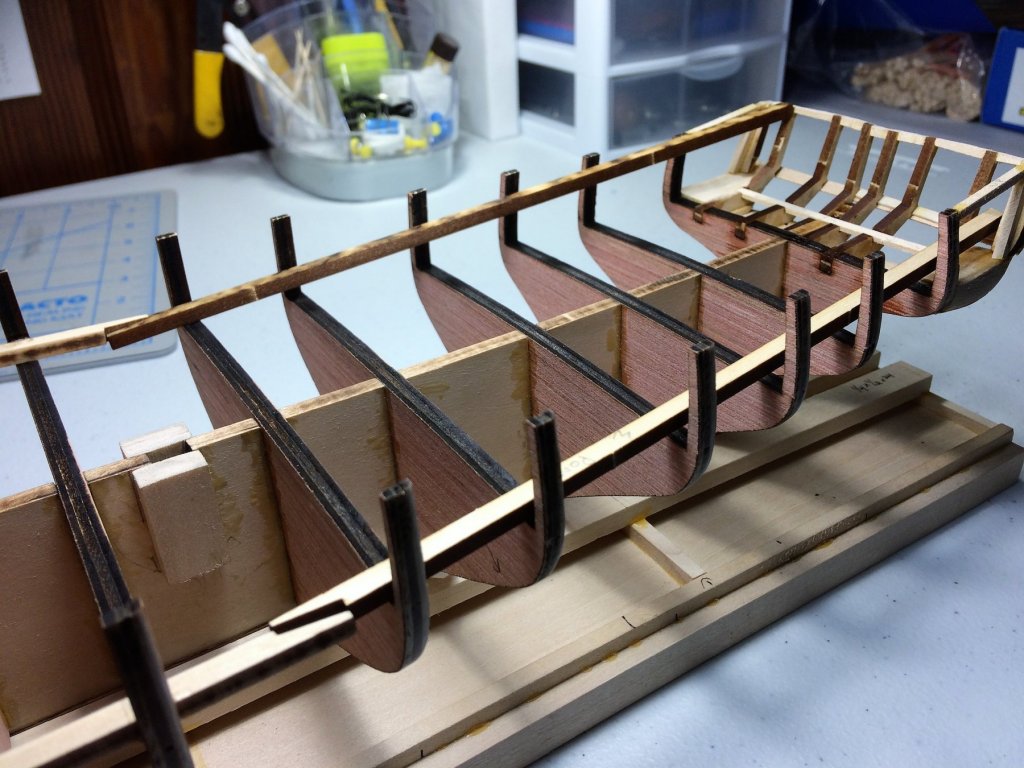
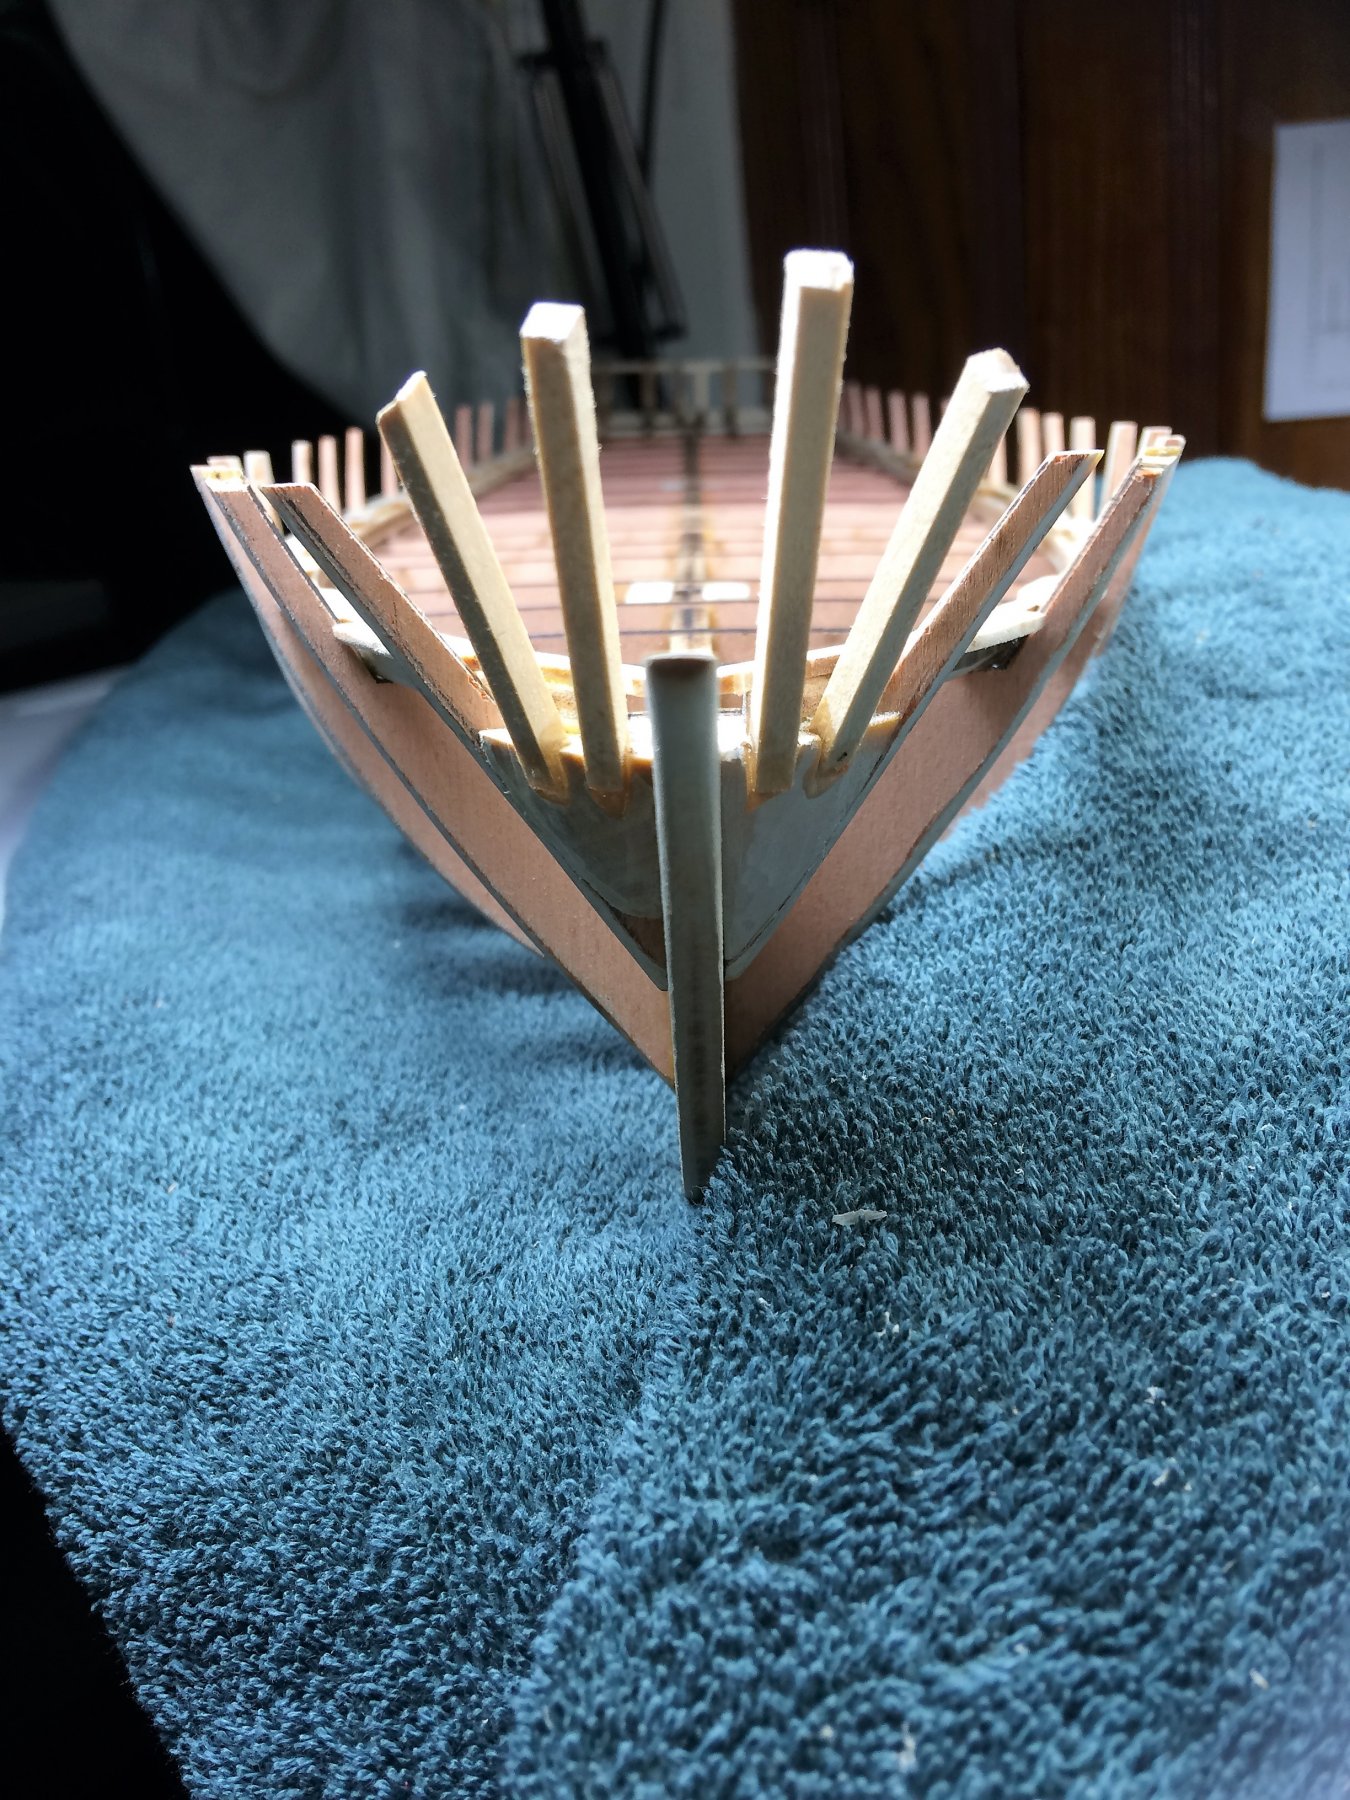
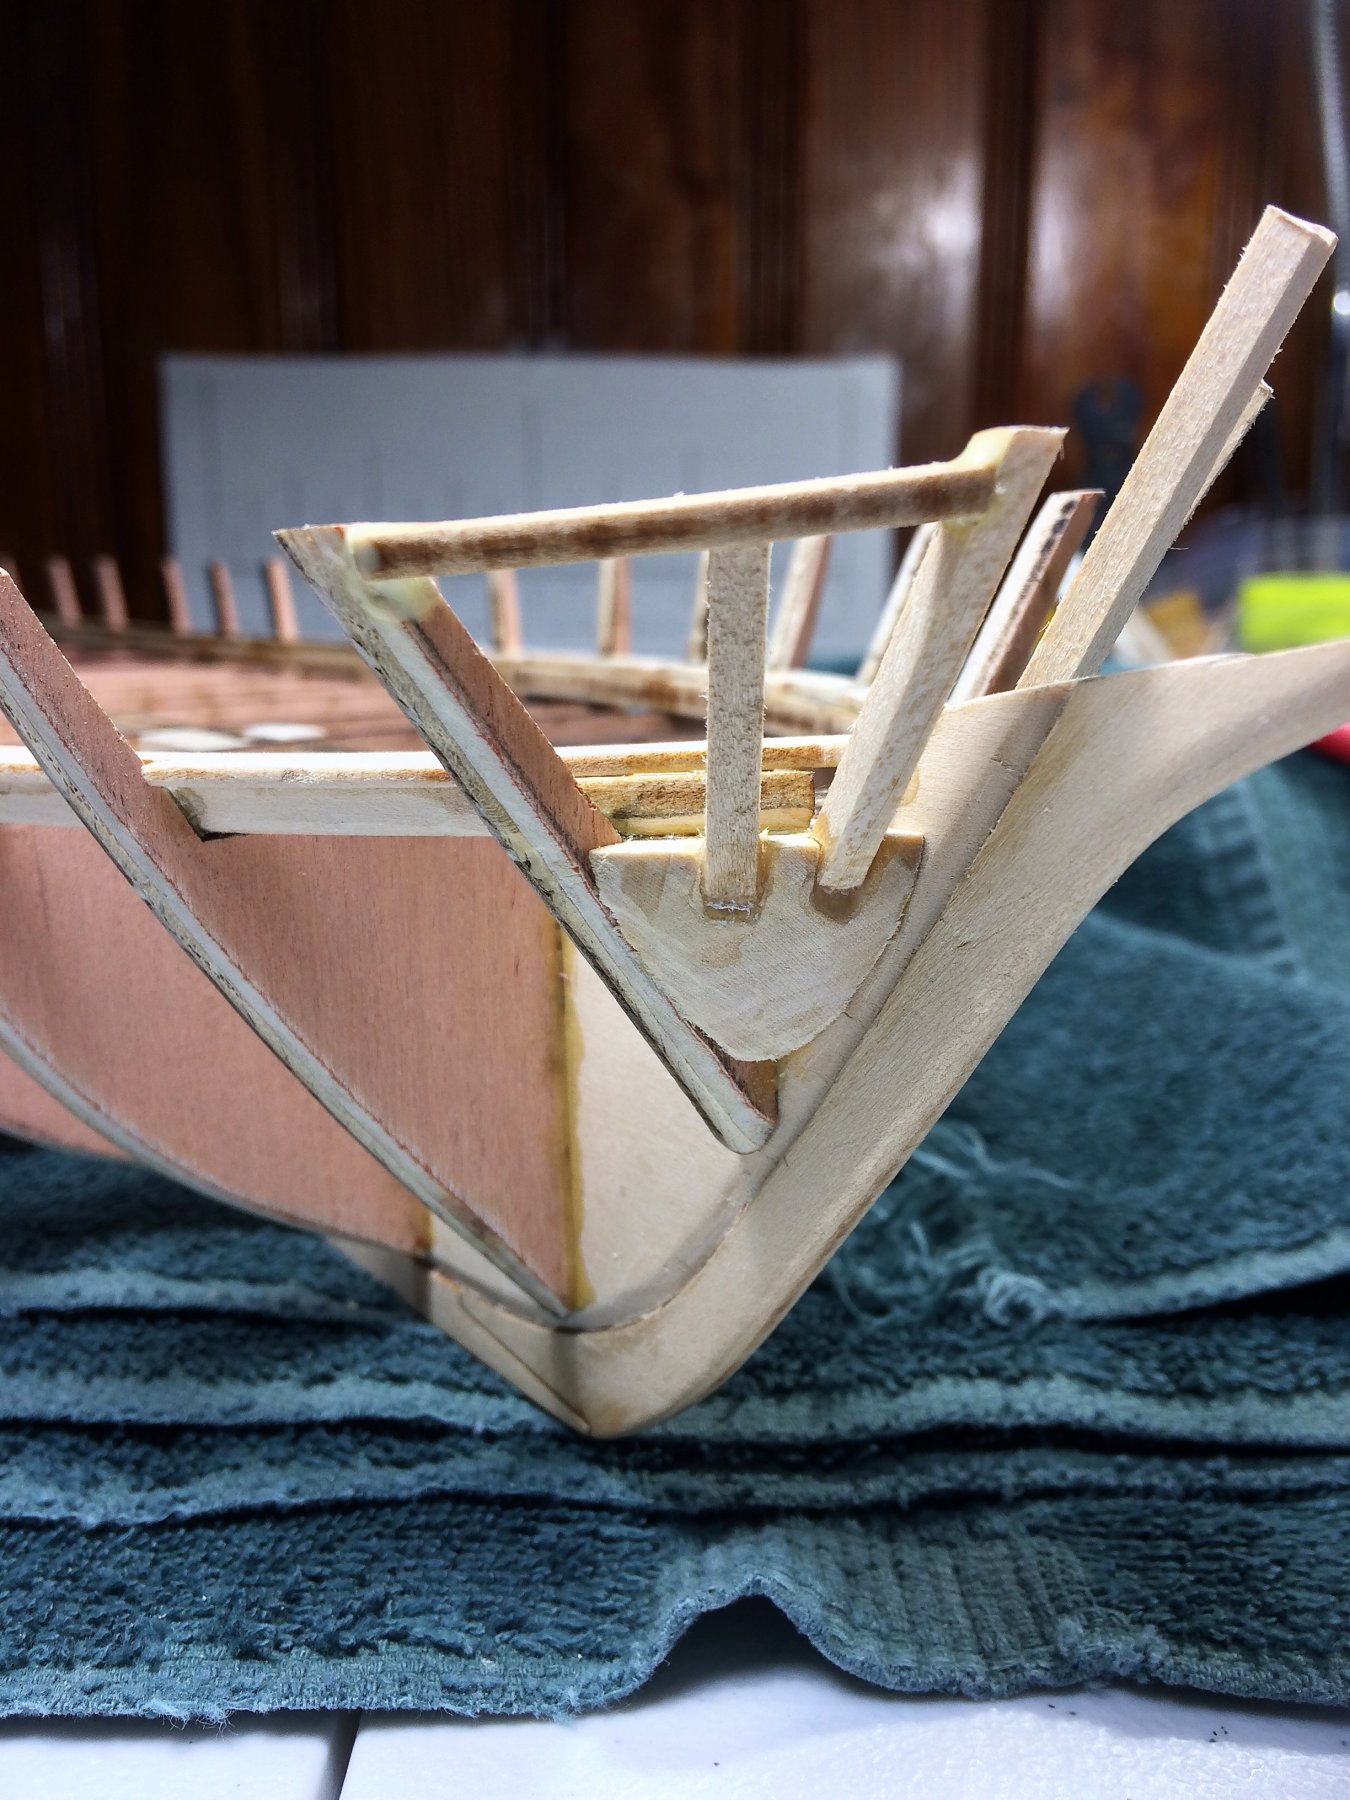
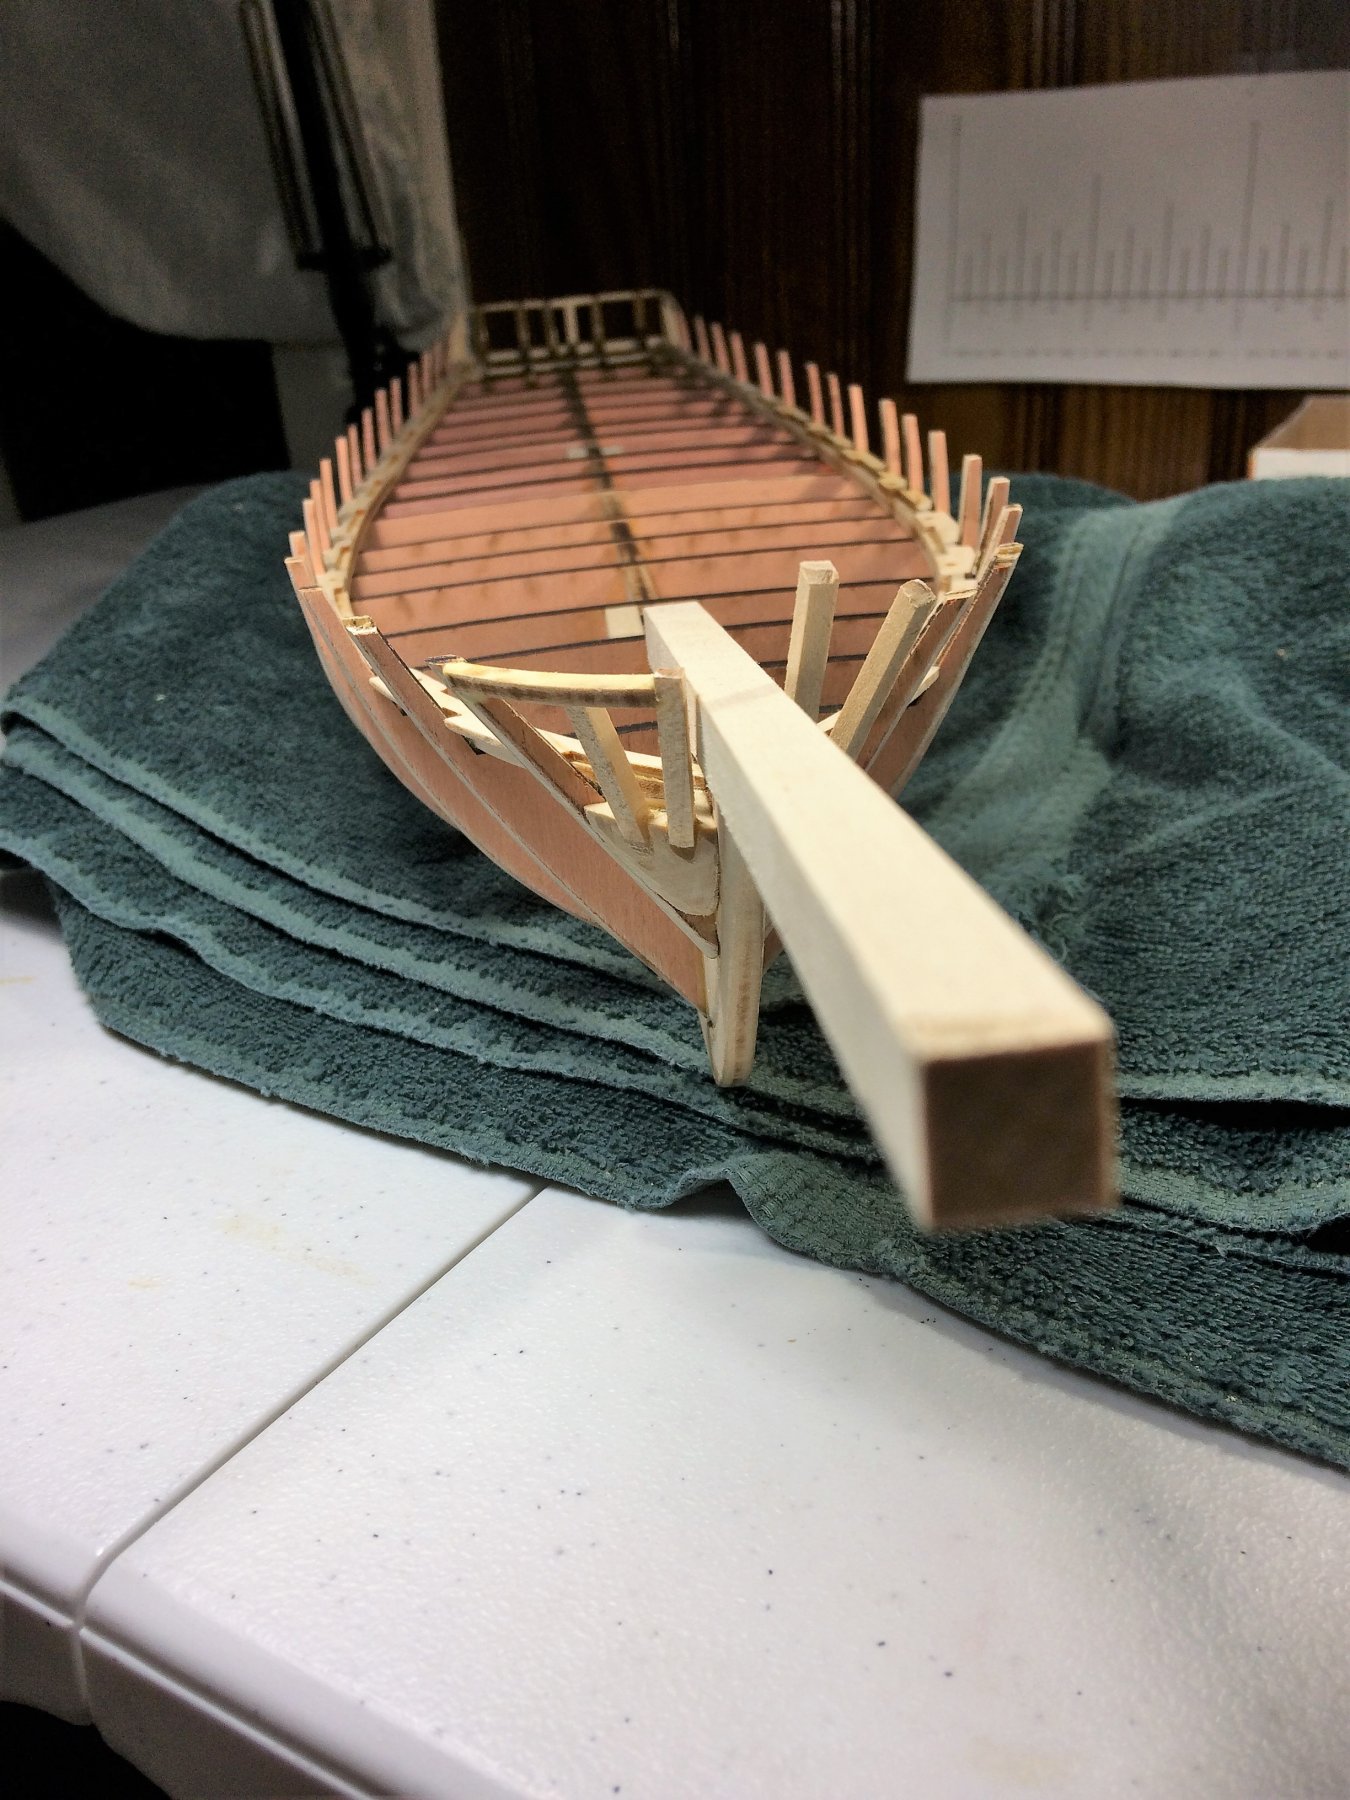
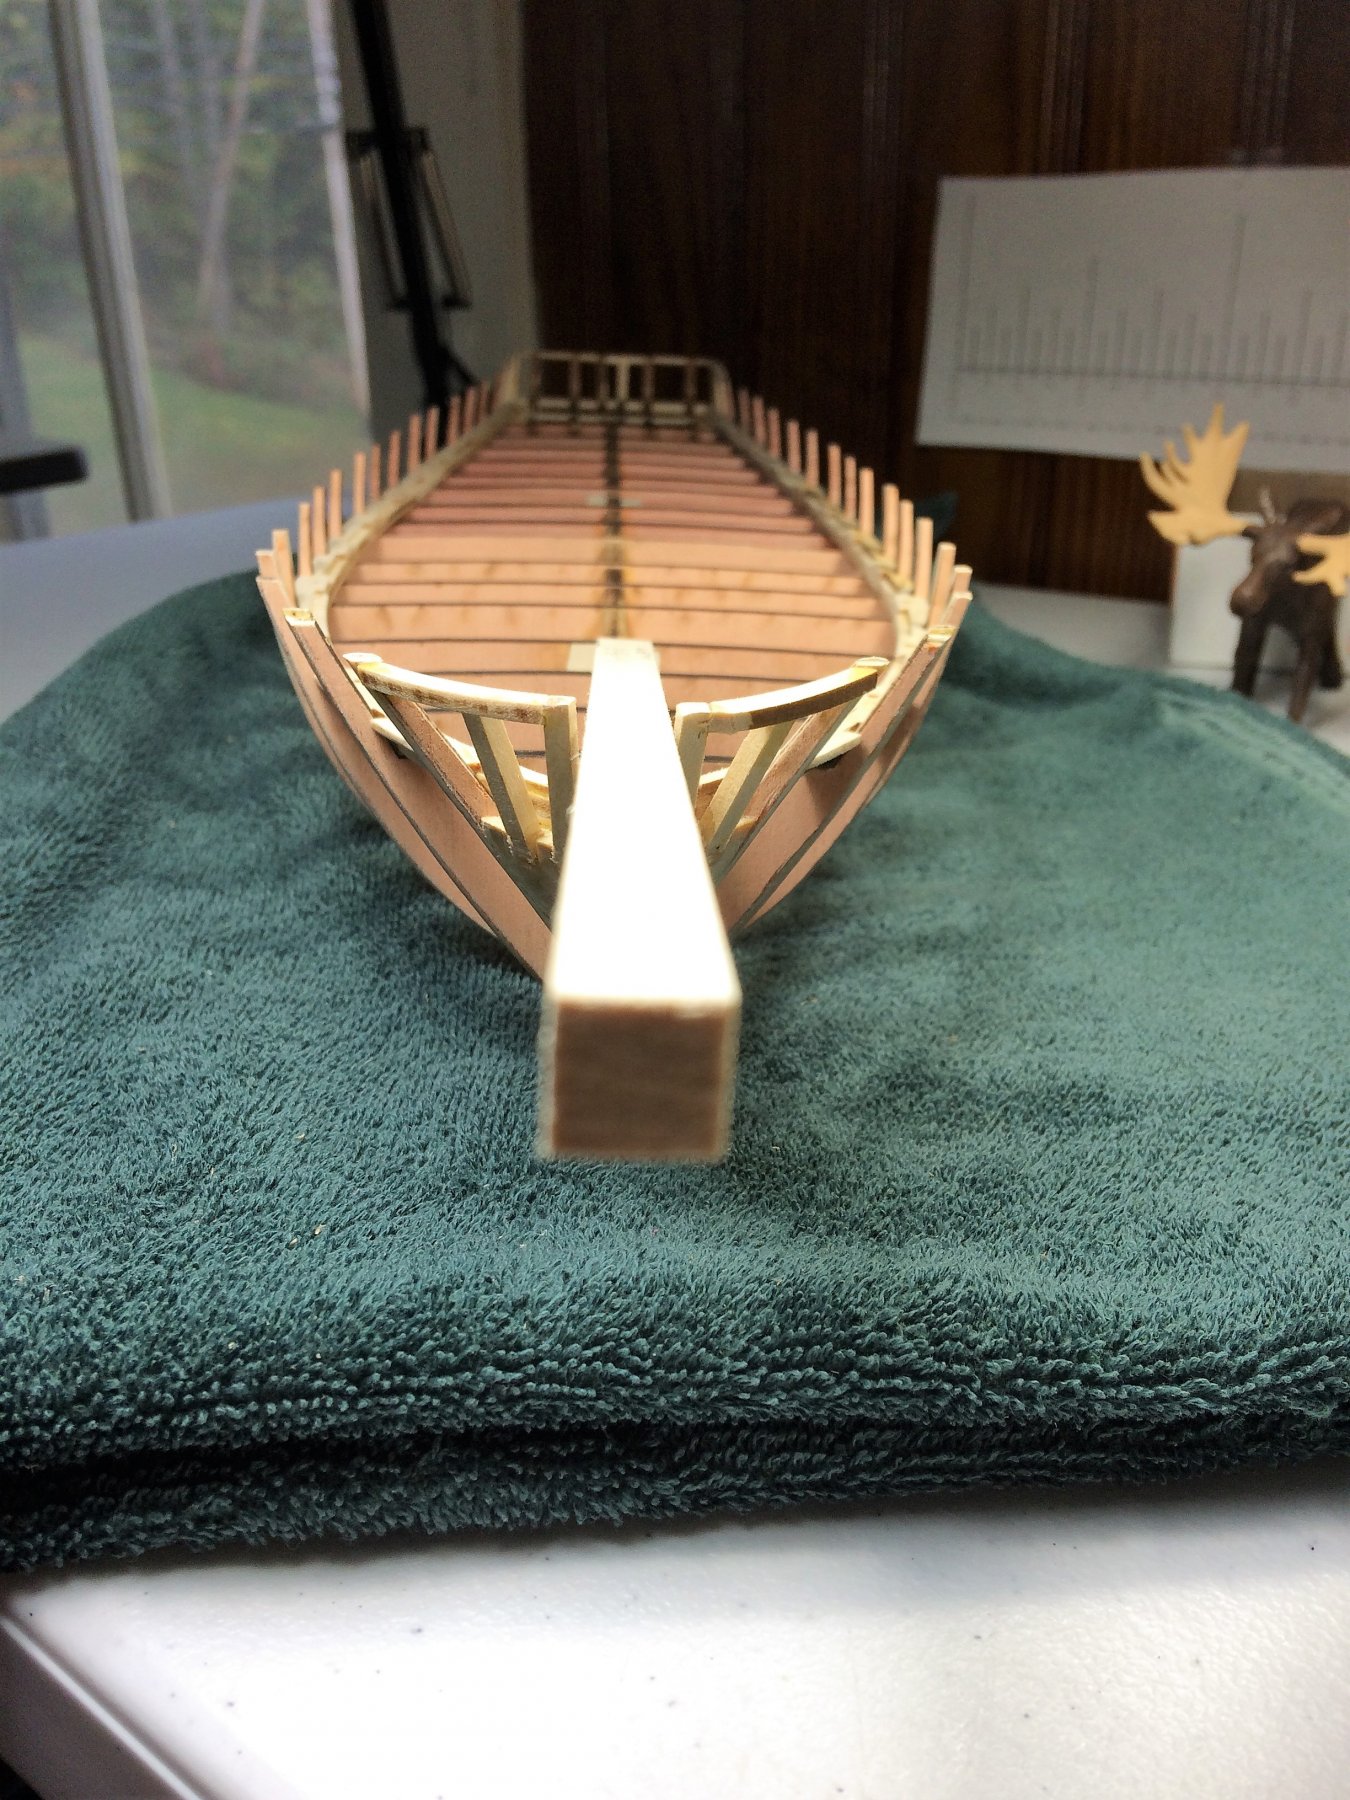
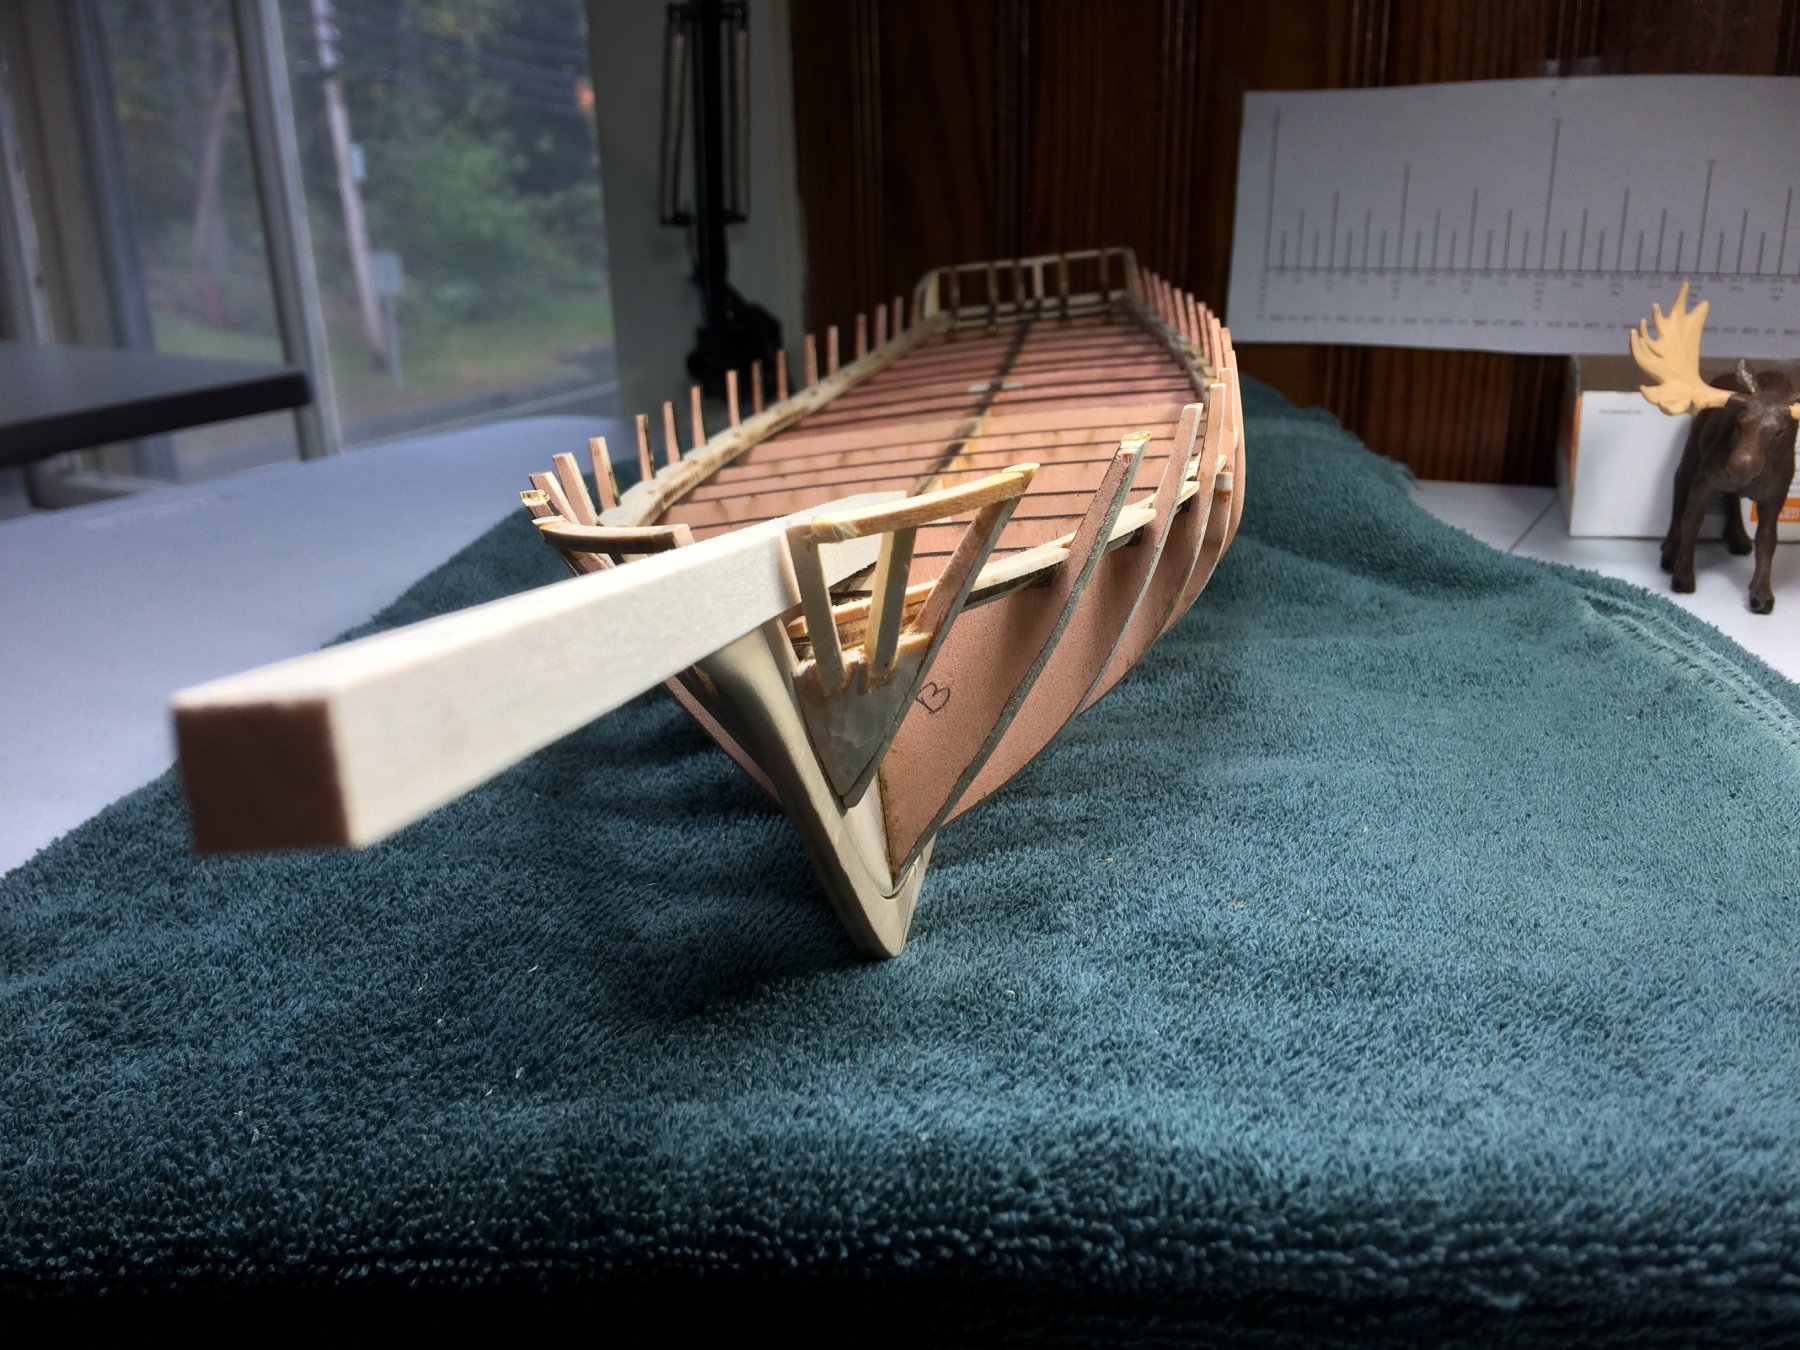
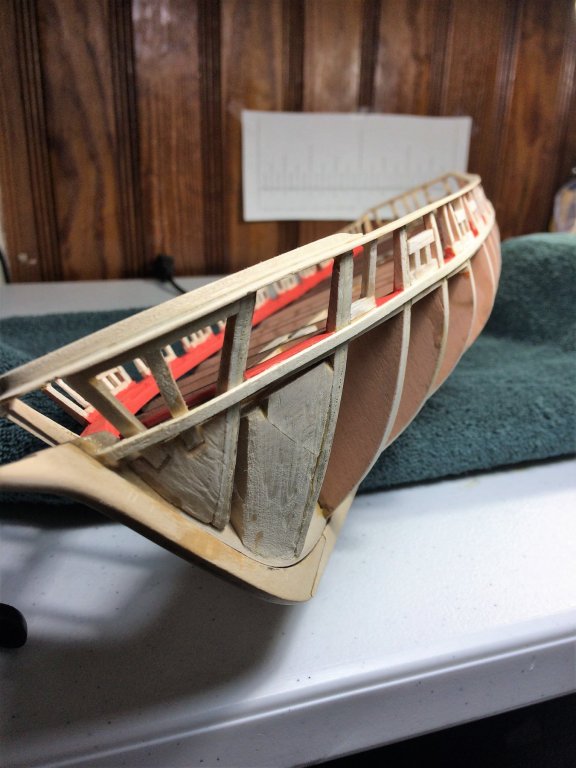
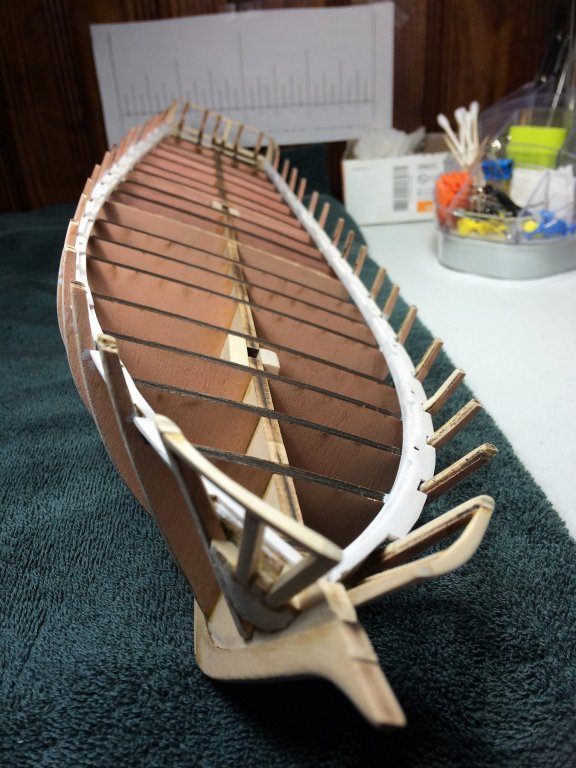
Grrrrrrr!!!!!! This ship has teeth! Almost looks appropriate for Halloween! I installed the front timbers. As you can see, I made them a lot longer than needed and then trimmed. I think they came out pretty well. Admittedly, used ALOT of glue on these things. I anchored these things very well to the bow fillers. These will get a better profile as I continue to fair the bulwarks. I did like the pre cut fillers for the front timberheads. It gave me a gauge for the overall curve of the bow. the alignment of the timberheads where based off of these and the overall shape of the ship. With what will be the bowsprit, this is starting to look like a ship!! You start to get a better sense of the size of this ship. Every time I see it, I'm still astounded at how straight my keel came out. Tom E


-
Those sails look good! The black stitching really pops out. That clear coat, was it old? Hope it doesn't eat thru the threads. Tom E
-
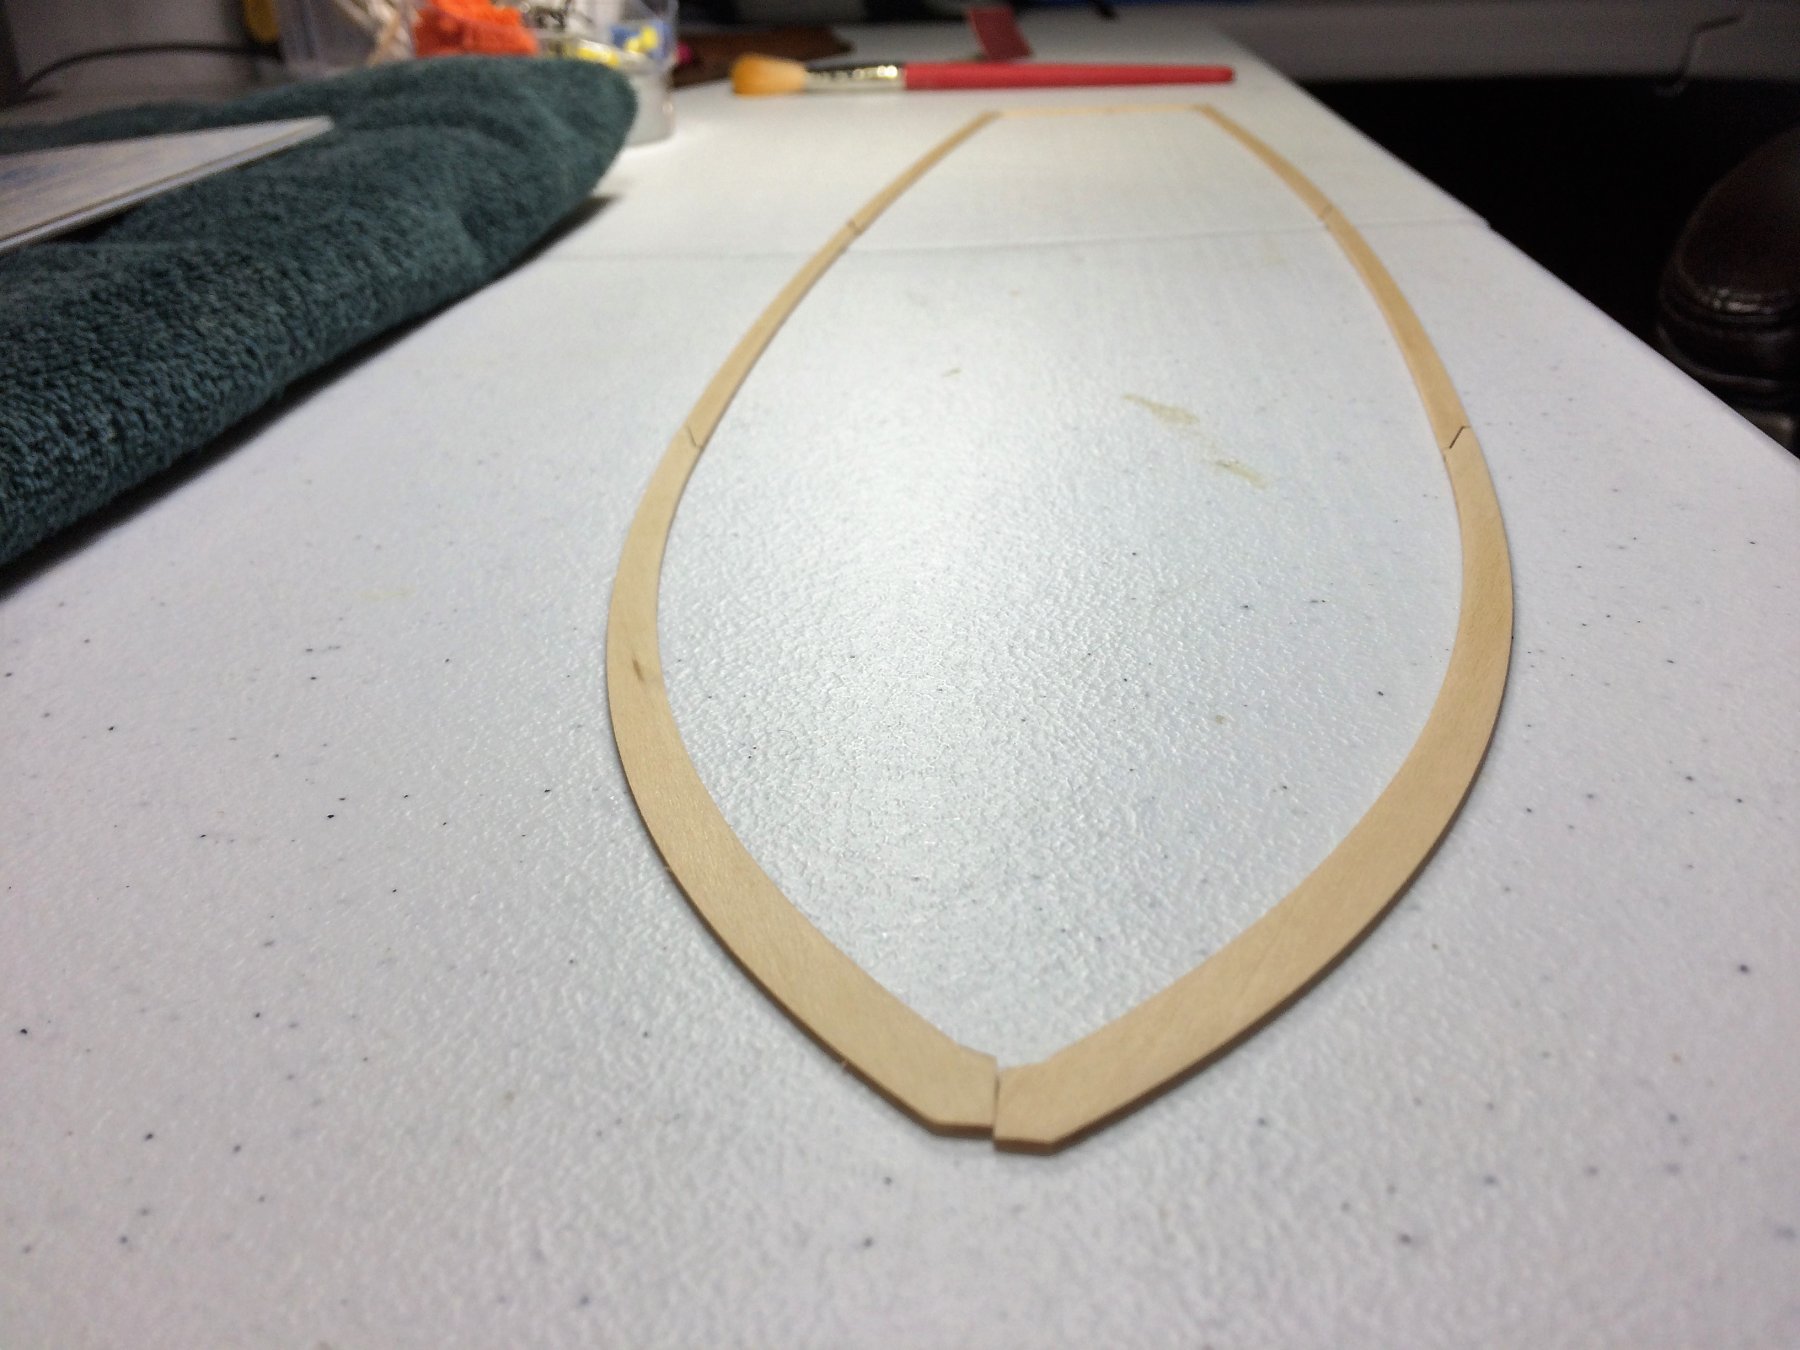
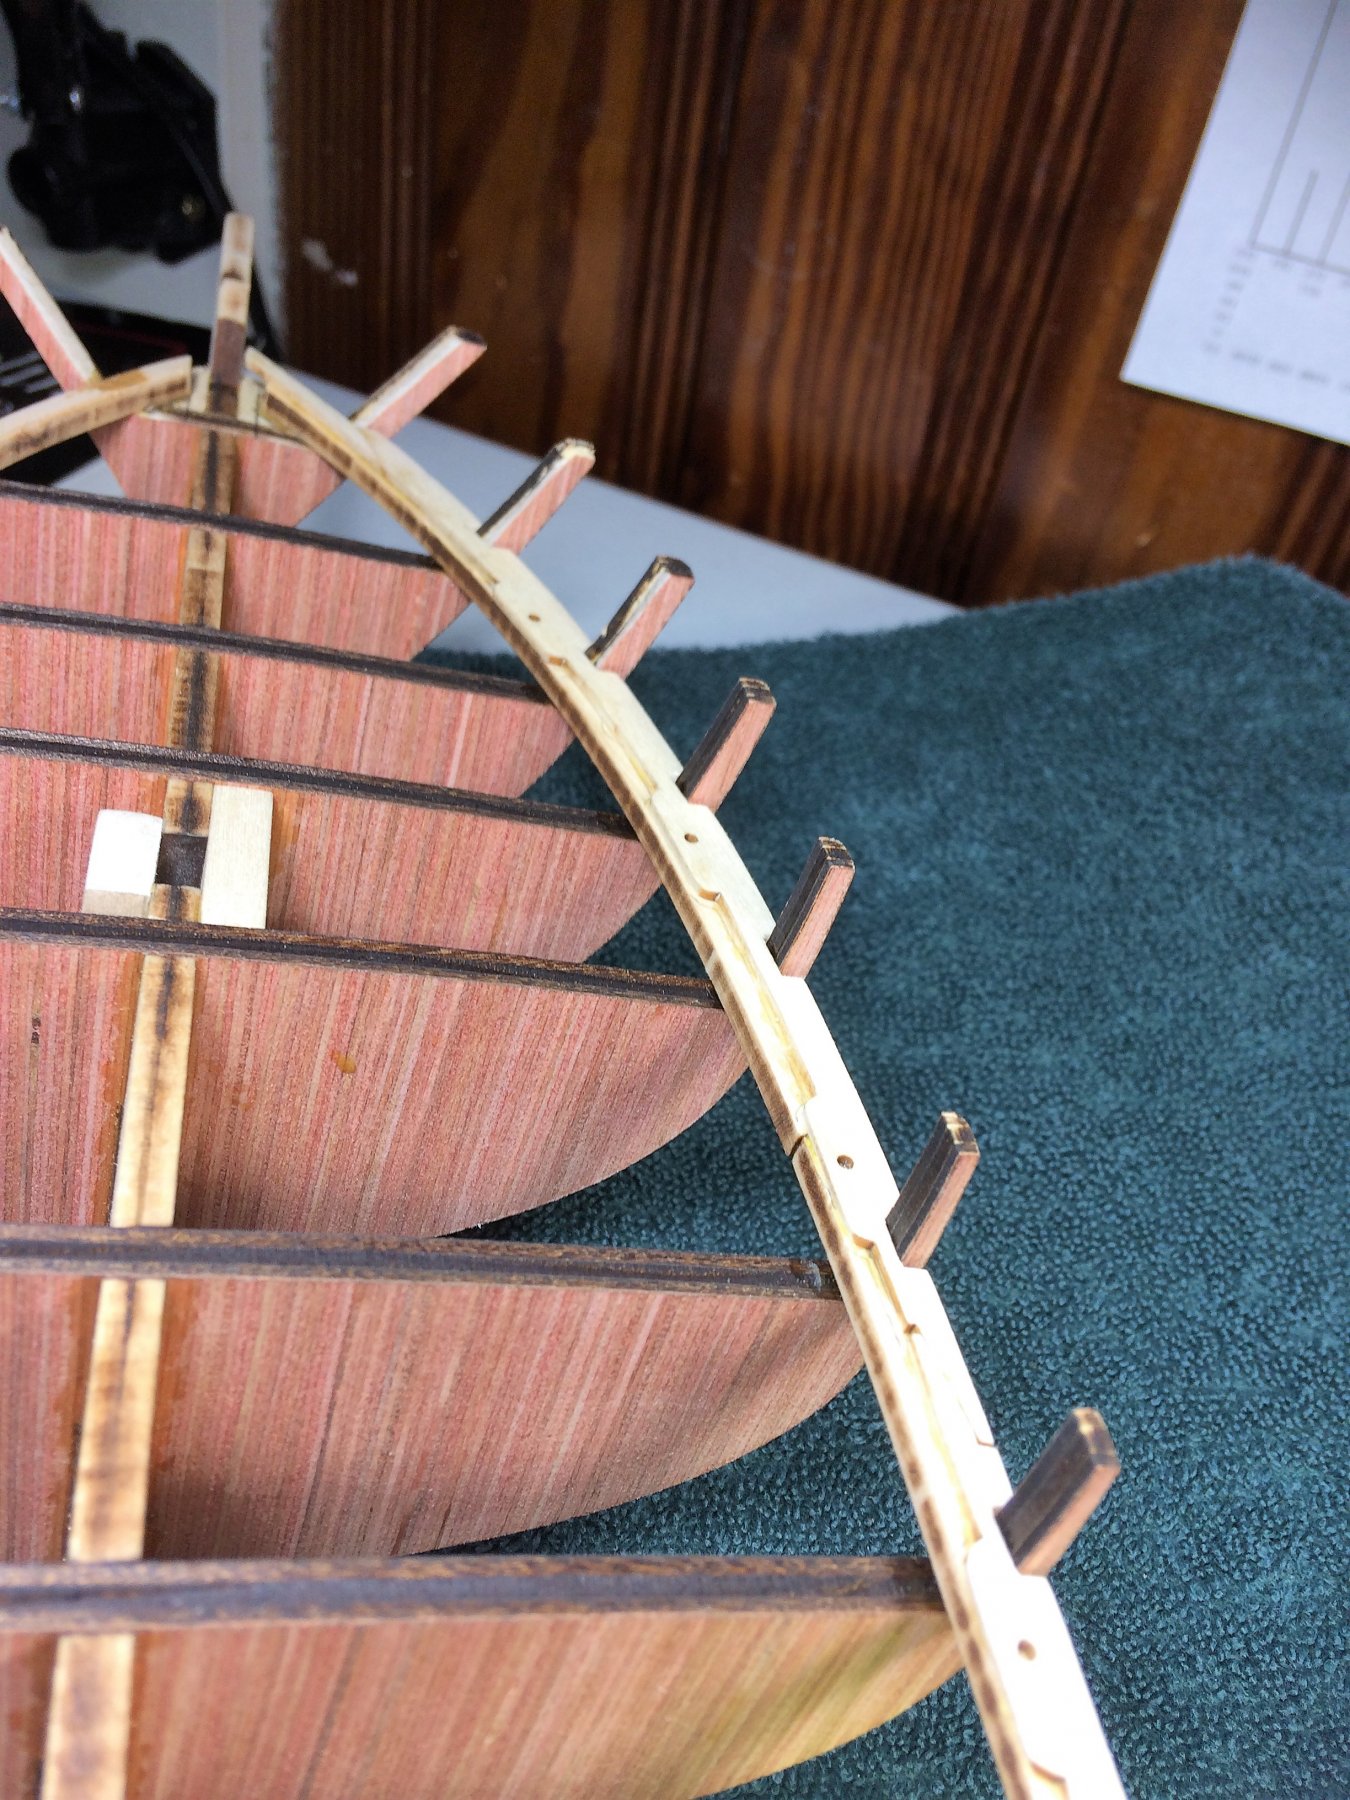
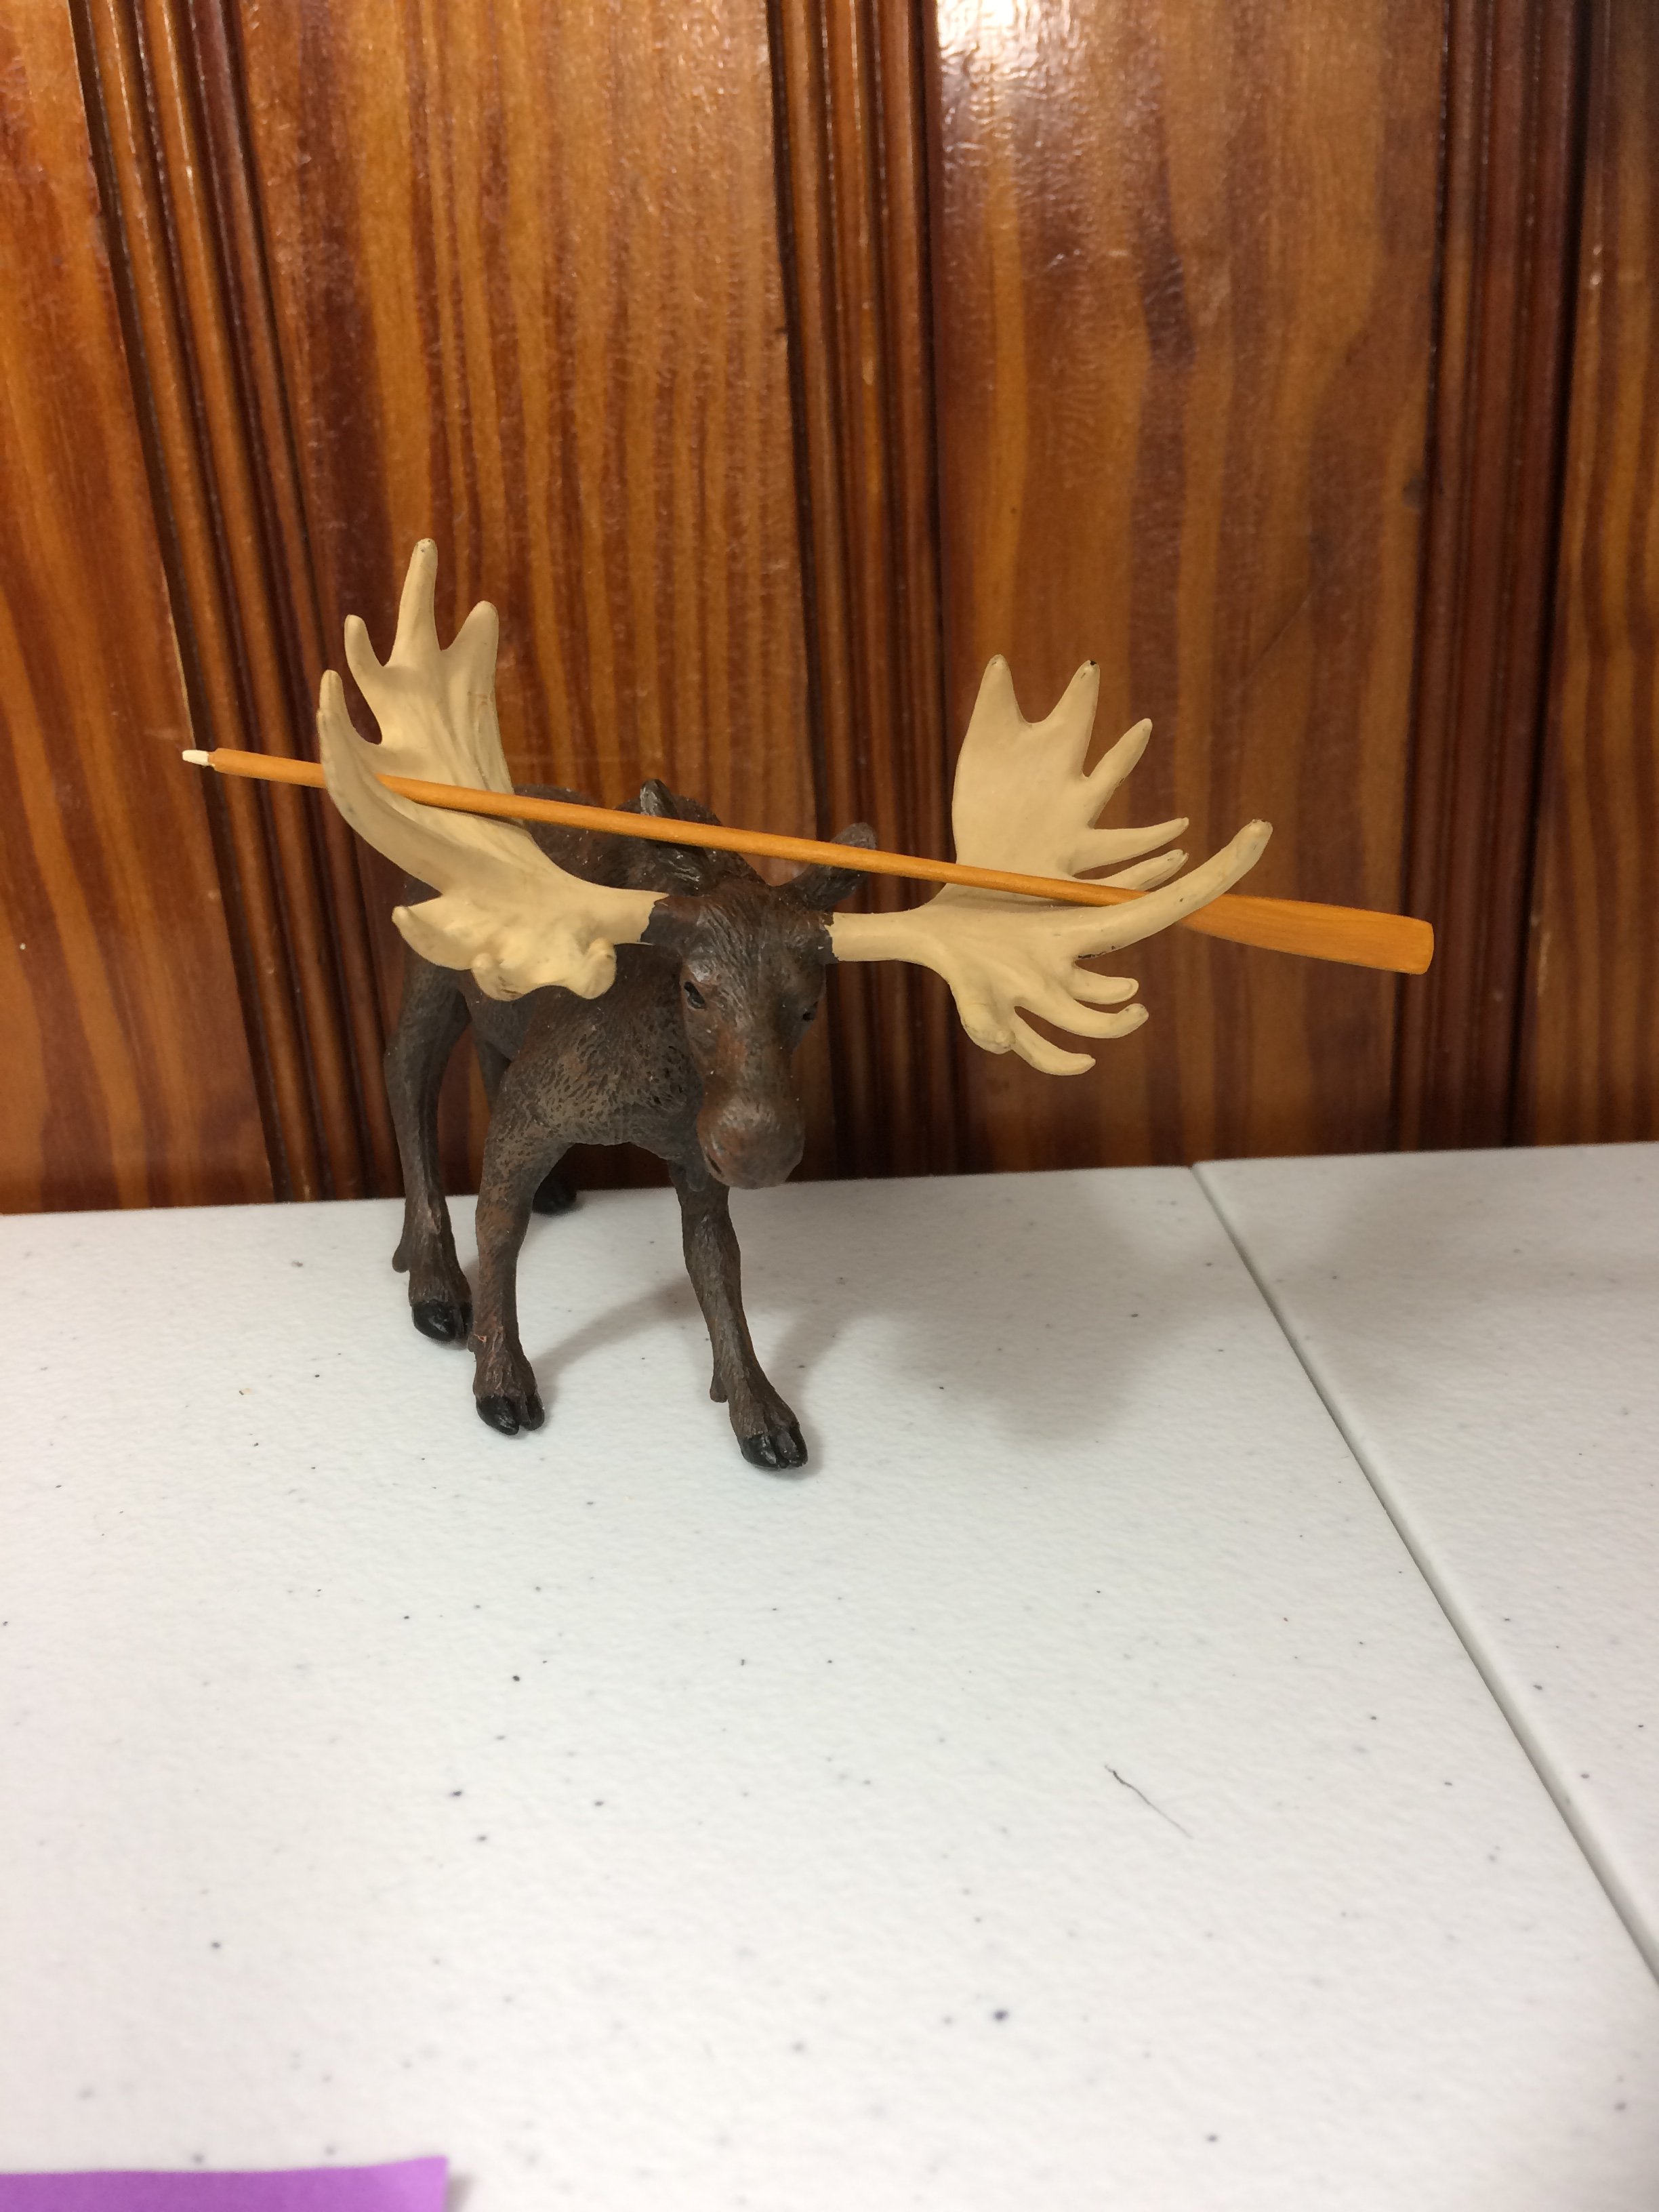
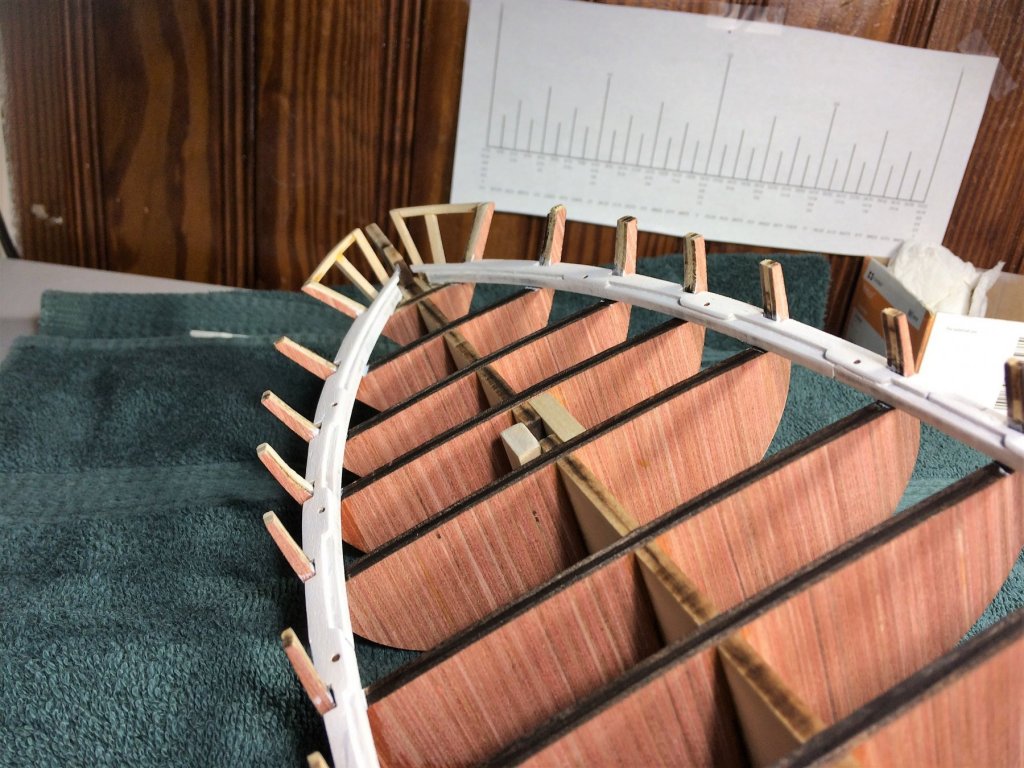
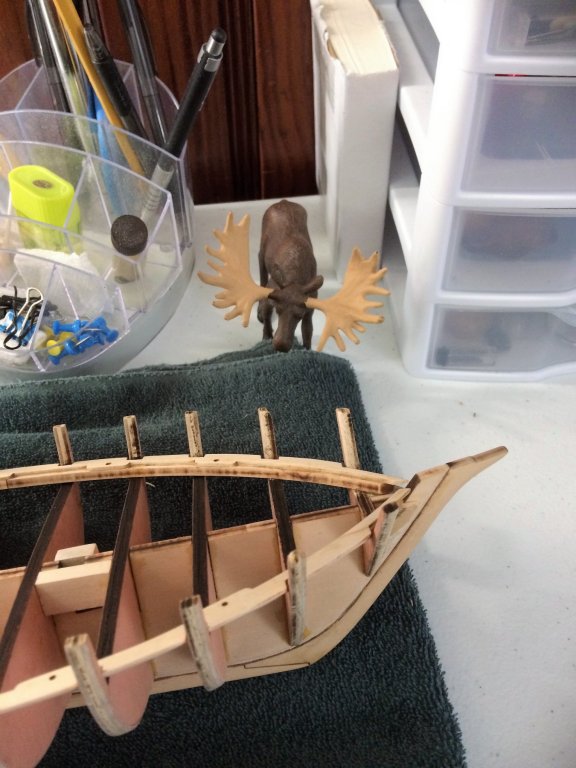
Evening, An afternoon in the Shipyard, because the chores are done early, a fresh hot cup of tea, and playoff baseball on the TV. Could it get any better?!?!?!?!?!?!? Well, I suppose if the Red Sox had won, then yes it would be better. But as we say...."There's always next year! Time for a Niagara update. Finished the port side planksheer. Plenty of length, adjusted at the stern and fit nicely. Alignment is good. Plenty to work with here. Time to start sanding, and filling the gaps at the bulkheads. Similar to the waterways, the planksheer needed some adjustment at the stern, and they fit easily. All gun port holes align well as compared to the plans. The Yard Boss, Gordon, likes the look of these. Just looks at me and says "start sanding". He's a hard drivin moose! Keeps a tight Shipyard. Tom E

-
Thanks for the kind words Darrell! I'll be installing the extra bow and stern filler blocks soon. I think I'm getting tomorrow off from work, and should be a good day to get that done. Tom E
-
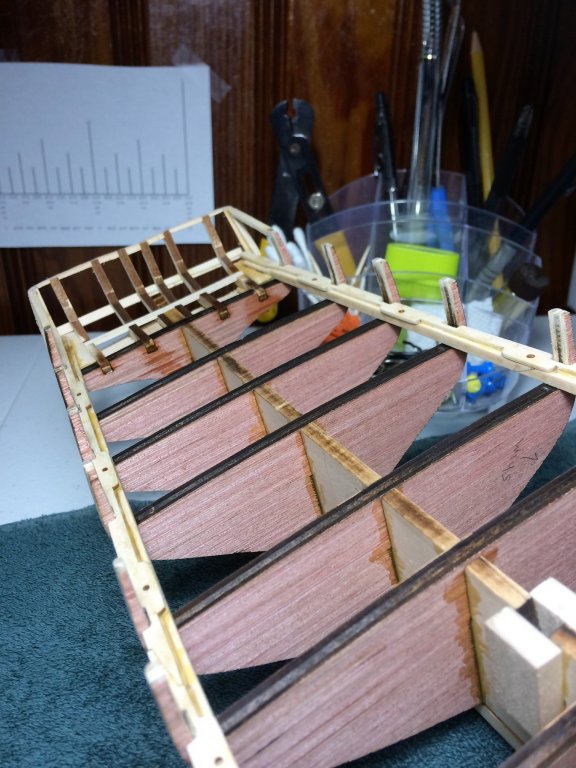
Evening, Made a bit of progress. Finished the waterway, then a good overall sanding. Moved onto the planksheer. I liked the cut of these pieces, they easily came out and clean up easily. I decided, unlike the waterway, to install these one piece at a time, feeding off the lay of the previous piece. Started on the starboard side. The end of the planksheer was worked over a bit and fit nicely. A nice smooth run with well aligned gun port areas. Fill have to fill some open areas around the bulkhead frames. Let this set up for a bit. I'll tackle the port side sometime this week. That "work" thing we have to do keeps getting in the way of my build!?!?!? The infamous gap has appeared between the edge of my planksheer and the edge of the bulkhead frames. Not much, but enough to add to the "to do" list. I have plenty of scrap to fill these in. They all need it. Tom E


-
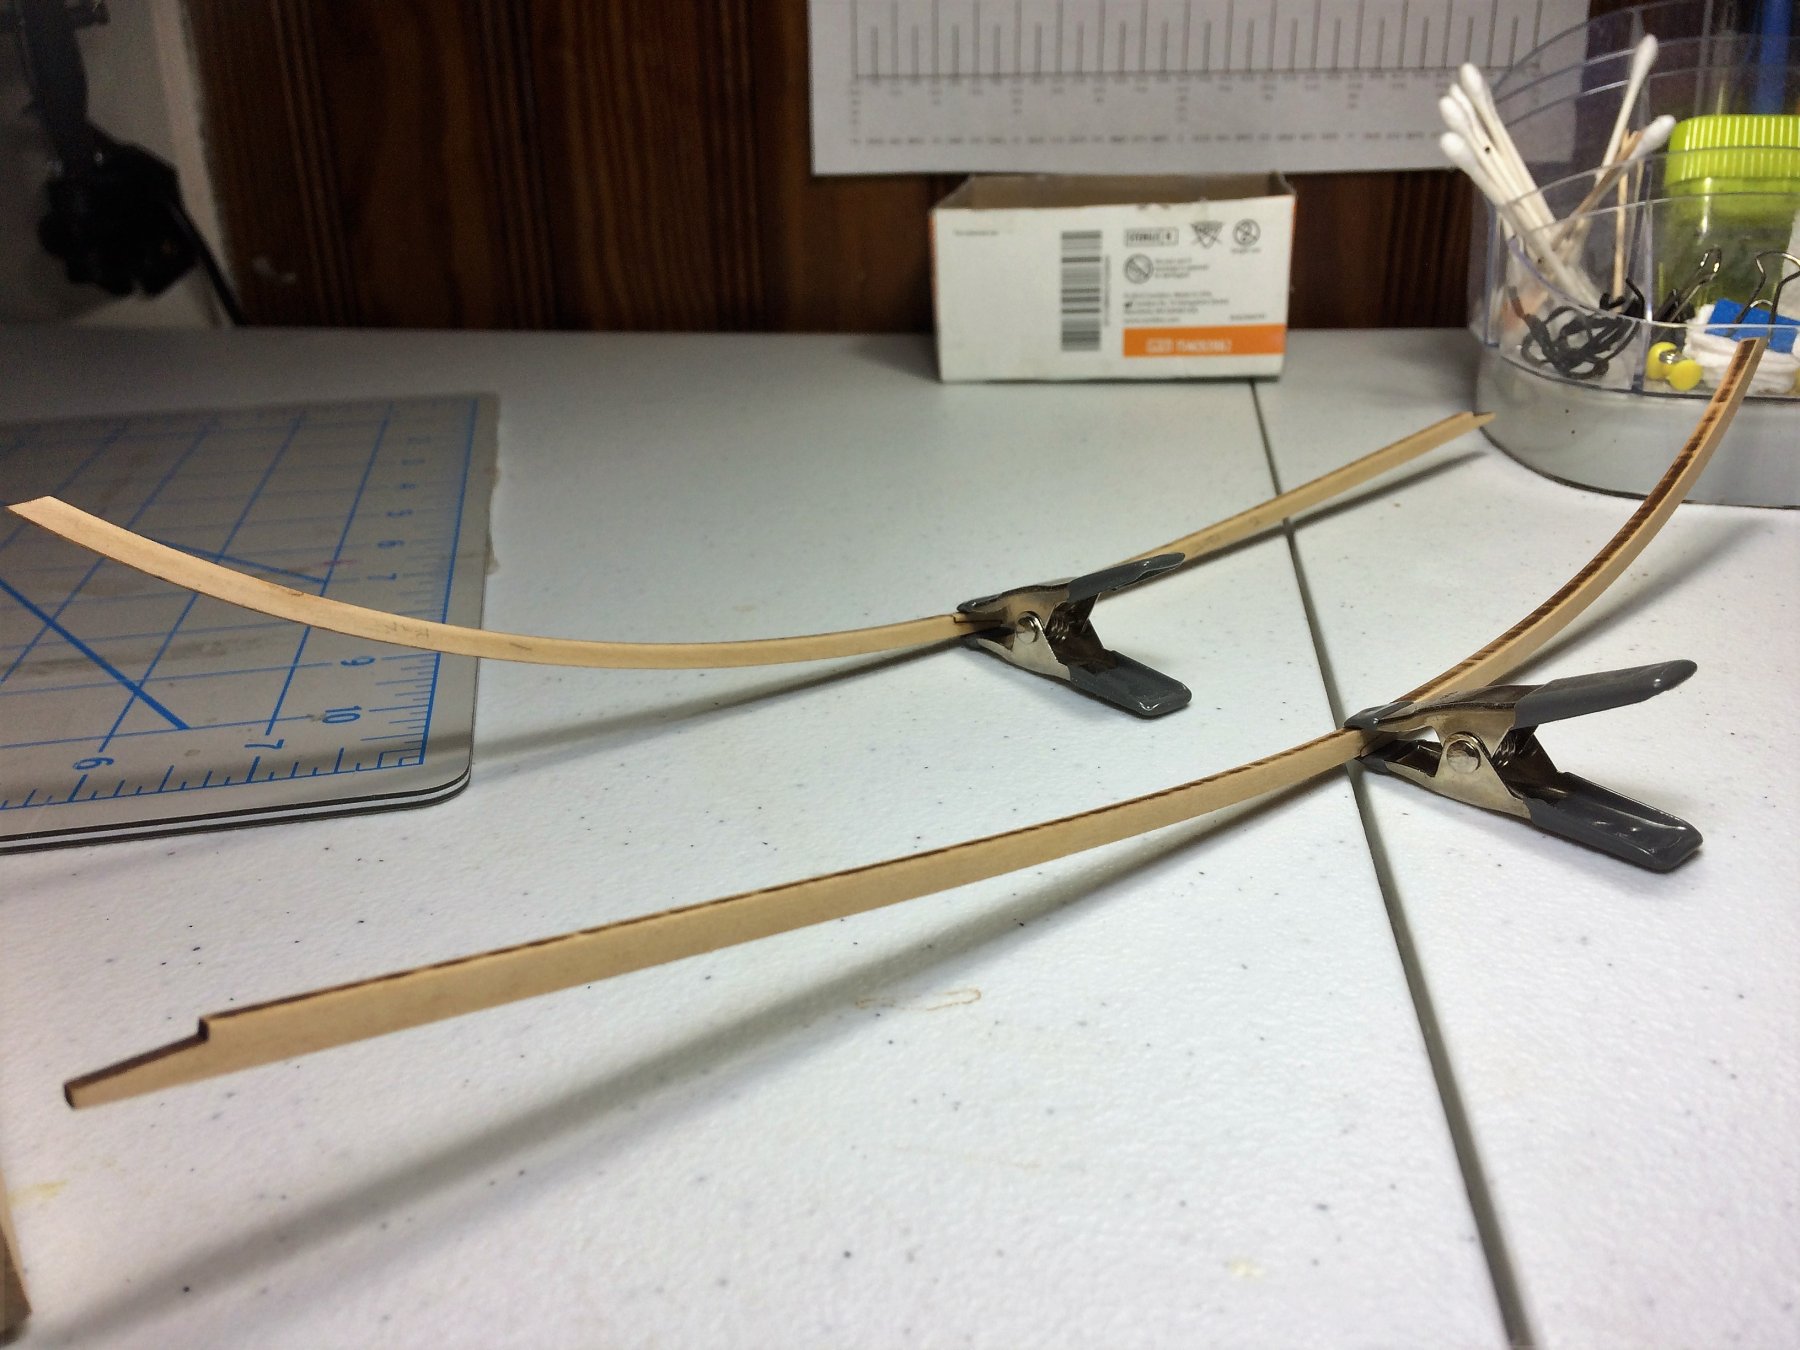
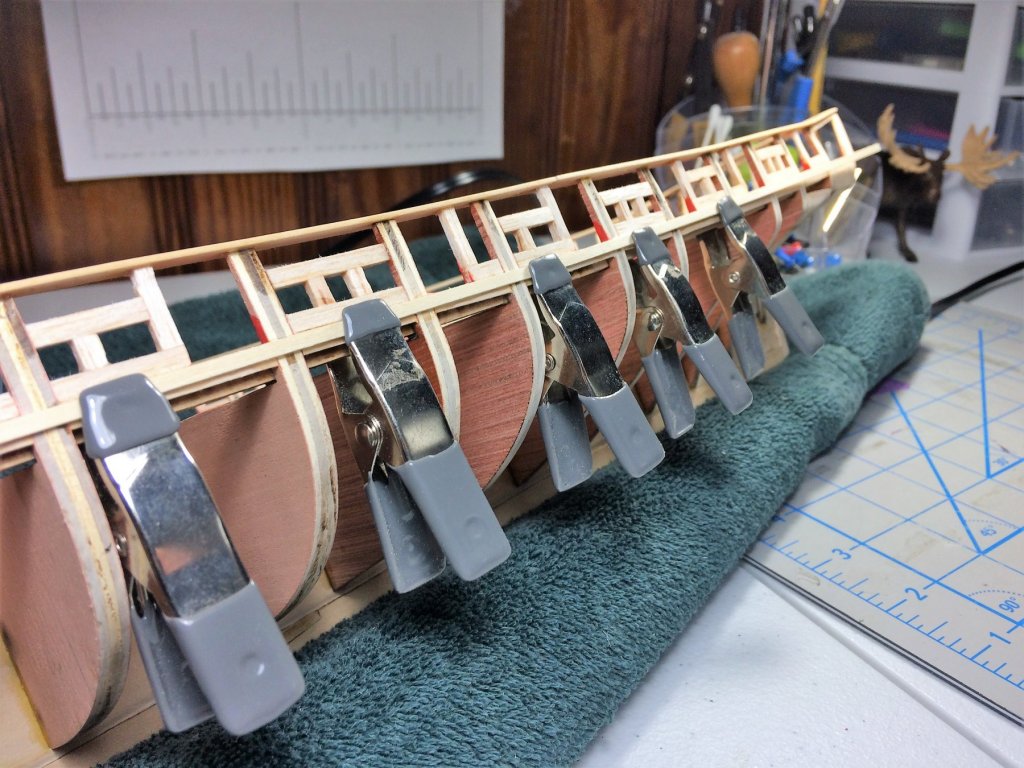
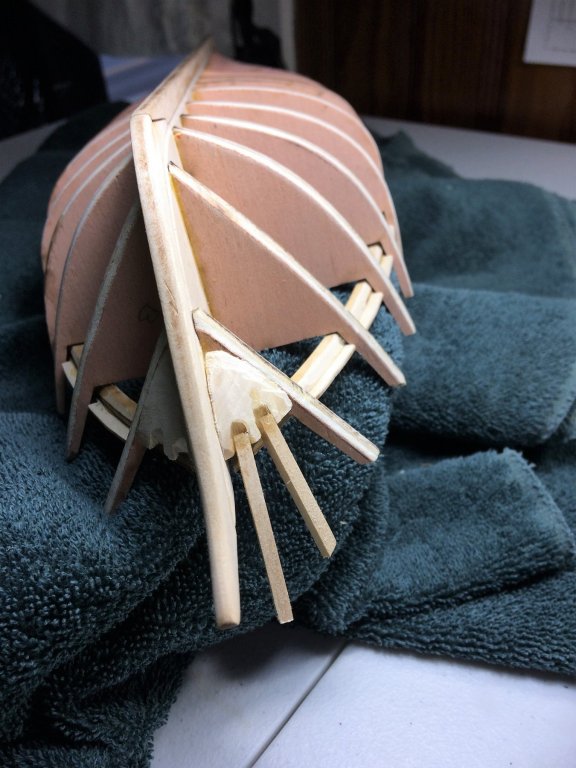
Morning, With the stern "in progress", thought I would start the waterways. I ended up gluing the first two forward sections together, formed, and glued them in. From the aft section I adjusted the length needed to complete the waterway into the stern. I've heard stories of the waterways not being long enough. Had plenty of length to play with, not a problem. It was harder to do in my head than the actual operation. Installed the waterways. Kept the bowsprit in mind for final placement. The supplied waterways were plenty long enough. Simple adjustments at the very end, and they slid right in. Seems an easy part of the ship. That make me feel uneasy!!!!!!!! Wonder what I've forgotten, overlooked, or missed?!?!?! What ever it is, It'll pop up somewhere down the line! Tom E