


wool132
-
Posts
117 -
Joined
-
Last visited
Content Type
Profiles
Forums
Gallery
Events
Everything posted by wool132
-
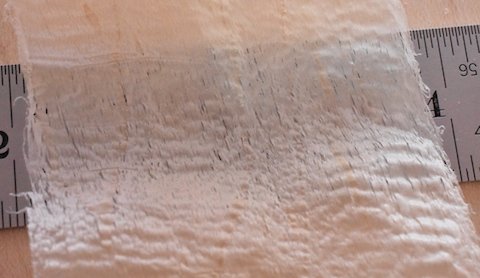
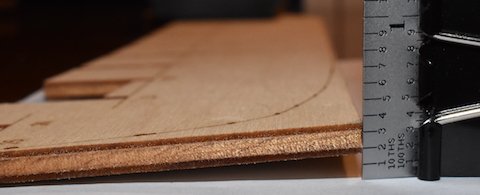
 I heeded Antony's advice and found that one of the corners was down by 0.014". I managed to reduce that so now there is no place (longitudinally, laterally, or diagonally) between the Veritas 24" steel straightedge and the face surface that'll accept a 0.003" feeler guage. There is a 5" long by 2" wide section at one end that's still off by 0.002": I think I'll declare victory and move on. Jonathan
-
Totally agree! I was thinking of buying another kit and doing just that. Kinda expensive though...
-
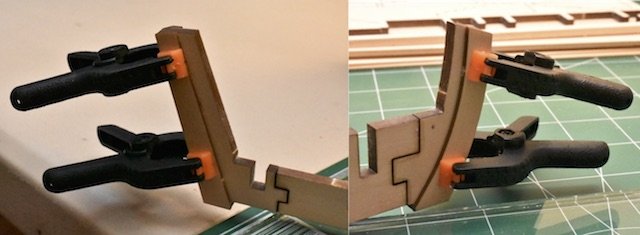
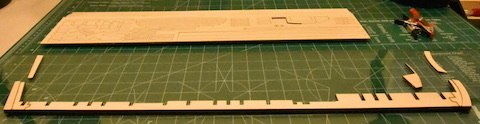
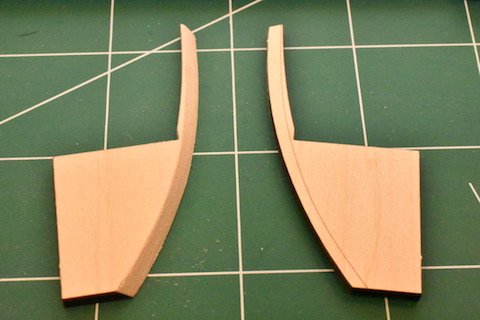
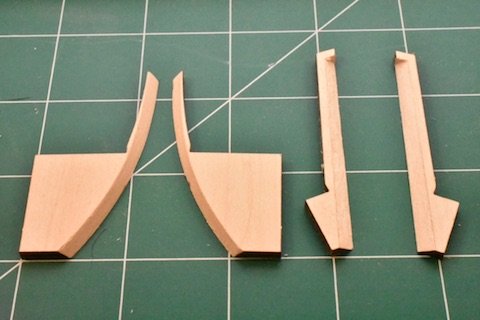
This looks like a great kit for a first build, so instead of just a narrative, I'm going to try and create a sort of revised instruction manual (instead of kit bashing, manual bashing?) for other beginners to perhaps follow if they wish. Hopefully I'll get done with the build (gulp!) and the blog will be a worthwhile effort. To that end, I plopped the contents of the instruction manual PDF file (available from ModelExpo Online) into Pages and sifted out the historical notes and extra explanatory material to get just the basic build steps. I'll use that to start my amended, abbreviated, annotated, and mostly-photo-documented version of the manual. The steps are numbered to make it easier for y'all to make comments if you want (as in "Yo! Woolly!! You blew Step 22. You should have said the shearstrake ...", or "Steps 61-71 should be done before Step 47."). I can then edit the steps based on your improvement suggestions and use the Reason for Edit feature to help keep track of step versions. There seem to be around 200 individual tasks, so this could take a while... Building the Gunboat Philadelphia by Bob Crane (as told to wool132) Building the Hull Step 1: (This is from the Syren user manual; seems like a good idea for the Philadelphia too): "Before removing any of the parts from the basswood sheets for the bulkheads and keel parts, sand both sides of each sheet smooth with some 320 grit sandpaper to remove the laser char." Note to self: be careful not to erase the laser marks that are on many of the parts (e.g., bulkheads). Step 2: Glue together the keel, stem, and stern post using parts 17, 18, and 19 (these are all found on sheet PA-5) using a pane of glass as a flat reference surface (see Detail 2-1 for Steps 2-6). Step 3: Glue a pair of part 26 to the Stern Post and two part 18Bs to the Stem (they are on sheet PA-8). Step 4: Carve and sand them to shape according to Detail 2-1. Step 5: Carve and sand the bevels on parts 18A and 25 (PA-7). Step 6: Glue to the keel assembly (there is a small gap between parts 18A and 18B at the stem and parts 25 and 26 at the stern). Jonathan
-
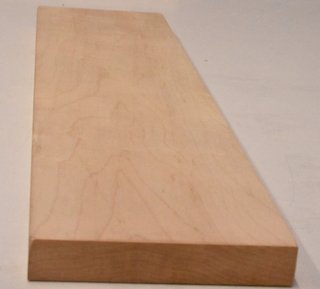
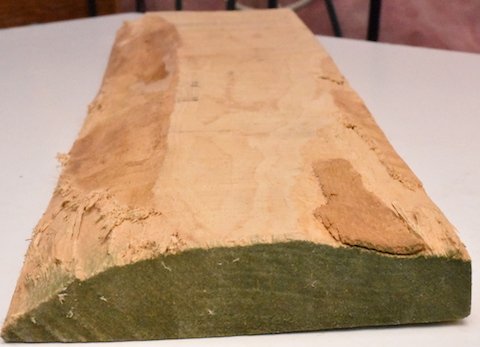
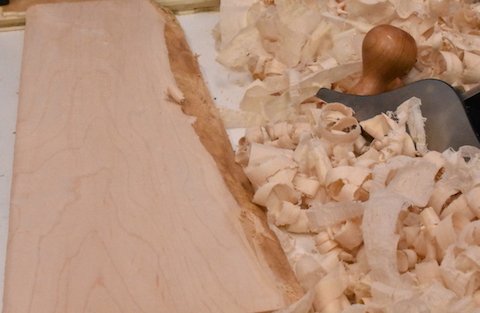
I rummaged around the shop in the garage and found a scrap piece of hard maple to use as a building stand: After a bit of work with some hand planes it started to take shape: The rough edge on the right was cut off with a rip saw and everything planed square. A smoothing plane set for a fine cut provided the final finish: The end product is shown below. I'll screw in a couple of poplar wood strips to hold the keel then finish it with Watco Danish Oil. Jonathan
-
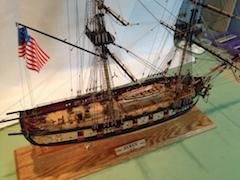
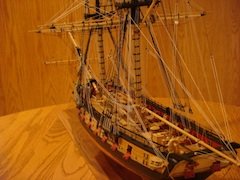
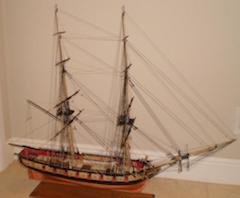
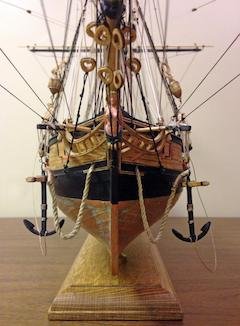
I've begun this build as a companion to the Syren build log I started earlier. I had planned to co-construct the Pinnace or the English Longboat but apparently these models are rather challenging (in the words of mikiek (December 8😞 "You know, I remember thinking about this kit right before I bought it. Looking at it online, I figured it would be a cinch to knockout. A small footprint. No rigging. A cheap price. How hard could it be? "WRONG!") So I put those two boats aside and looked for something larger for my inexperienced fingers and found the Gunboat Philadelphia. I knew I was on the right track when the kit arrived: the Pinnace box easily fits inside this one. Time now to review this forum's currently available build logs for this kit: Elijah (in progress), Brucealanevans (finished) , MarkCC (on sabbatical), Chuck Seiler (as of 2015), and Steve. Y (finished). Jonathan

-
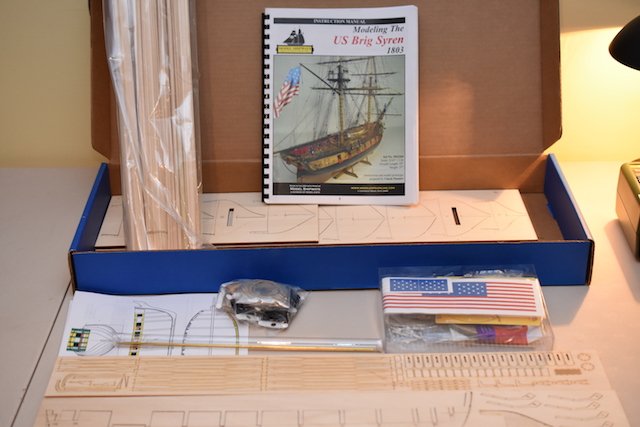
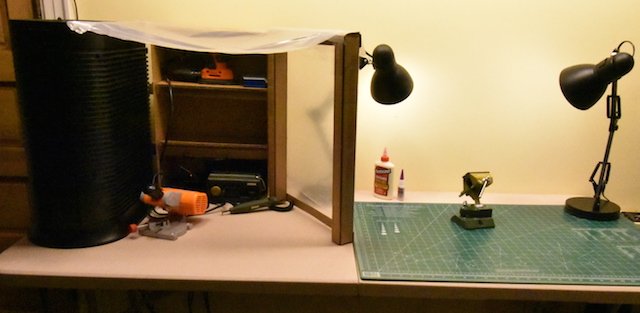
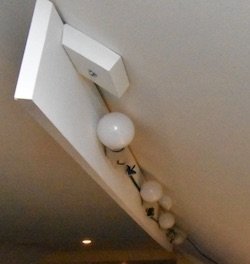
Merry Christmas and Happy Holidays! The kit arrived safe and sound a couple of weeks ago with no sign of the notorious pink punk plywood: The keel is slightly warped but should be manageable: Most of the month has been spent setting up an infrastructure. There's now a six foot long portable table in our attic set aside for modeling: There's a general work area on the right side and the left has a makeshift dust hood. The dust is filtered out by a whole-room air cleaner that used to be on the floor. To help guide the dusty air into the cleaner are some shelves made of cardboard along the back and plastic sheeting on the top and right hand side. The cardboard frame that supports the plastic is taped to the shelves so it can swing out of the way of the right side work area if needed. I've also started to invest in some of the recommended tools of the trade. On the left you can see a genuine, certified, bona-fide Nirvanna chop saw (Nirvanna, July 19) from Amazon. There's also a pen sander (Charley54, Jan 19), with power supply, a Mouse Detail sander, a vise (Blue Ensign, 18-May), and a cutting mat. The lighting consists of Hue dimmable bulbs that can be controlled from my intra-planetary communication device. There are two lamps for detail work and a set of four lights attached to the sloped ceiling for general lighting: These four bulbs produce between 0 and 3,000 lumens depending on what's needed (3,000 lumens is a lot of photons: the picture of the workbench above was taken without a flash). Jonathan
-
It really is Jonathan. Honest! Jonathan (It would have been funny if I had signed this Fred!)
-
Thanks for all the Hello's from around the world! I'm looking forward to a lot of fun and satisfaction but also understand that there will be some catastrophes (e.g., David Rice, 02-Aug) along the way. I've been browsing the forums while awaiting my order's arrival so although I have yet to create any sawdust, I've learned an awful lot from all the posts. Jonathan P.S. Rumor has it that my order has left Model Shipways and is currently in Opa Locka, FL. Won't be long now!
-
Despite your efforts to convince us otherwise, I think your model looks great! Jonathan
- 242 replies
-
- 2
-

-
- syren
- model shipways
- (and 1 more)
-
Thanks for the posts, guys! Meanwhile, while I wait for the order to arrive, I'm daydreamin' ... _SalD_: Augie: Rafine: RVChima: Jonathan
-
After considerable contemplation, I've decided on the US Brig Syren as my first build. I was thinking of getting my feet wet with the smaller English Longboat and English Pinnace kits. Then I found the Tigersteve and Blue Ensign build logs showing their fine work, especially the planking. Yikes! I got to thinking about that skill: I need something I can practice on so that it won't matter when I screw things up. Ah ha! The copper sheathed Syren! I can mangle the planks to my hearts content, slap on a coat of wood filler, sand it down, and no one will know the difference. Once I get good at it, I can order some hard maple (like Tigersteve did for the English Pinnace: see 30-Apr for the order list, 29-Sep for the results) and tackle the Longboat and Pinnace, where the planking is much more visible. "Wait!", you say. Statistics show that 90% of first time builders who tackle a Big Boat give up early and the other 50% don't finish either. "Au contraire", I respond, I'll go ahead and purchase all three kits. Some time after Chapter 5 - Hull Planking, when I hit the doldrums and get dejected with the thought of never ever getting done (copper plate number one thousand thirty two, one thousand thirty three, ...), I can amuse myself by puttering around on these two more manageable craft. Plus word gets back that the Syren's User Manual is terrific (with color pictures no less!). Now, having said all that, where did I put that order form ... Jonathan
-
Hello, y'all! I'm retired now and I figured model ship building would be a great hobby. After poking around some, I joined this community earlier this week and have been exploring the site's layout, content, and software features (as in, for example, "Oh crap! How do I delete that post?"). I look forward to learning a lot, developing new skills, and then having something to show for it! (versus, say, General Relativity: "Yippee! I finally understand his theory!!" "That's nice dear. Does this mean you'll be warping some space soon?"). And hopefully I'll be able to give something back to MSW that's worthwhile, too.