wool132
-
Posts
117 -
Joined
-
Last visited
Content Type
Profiles
Forums
Gallery
Events
Everything posted by wool132
-
 Great job and congratulations on another build! I second Dan's thanks for the detailed log. I've learned a lot from your posts - thanks! Jonathan
 -
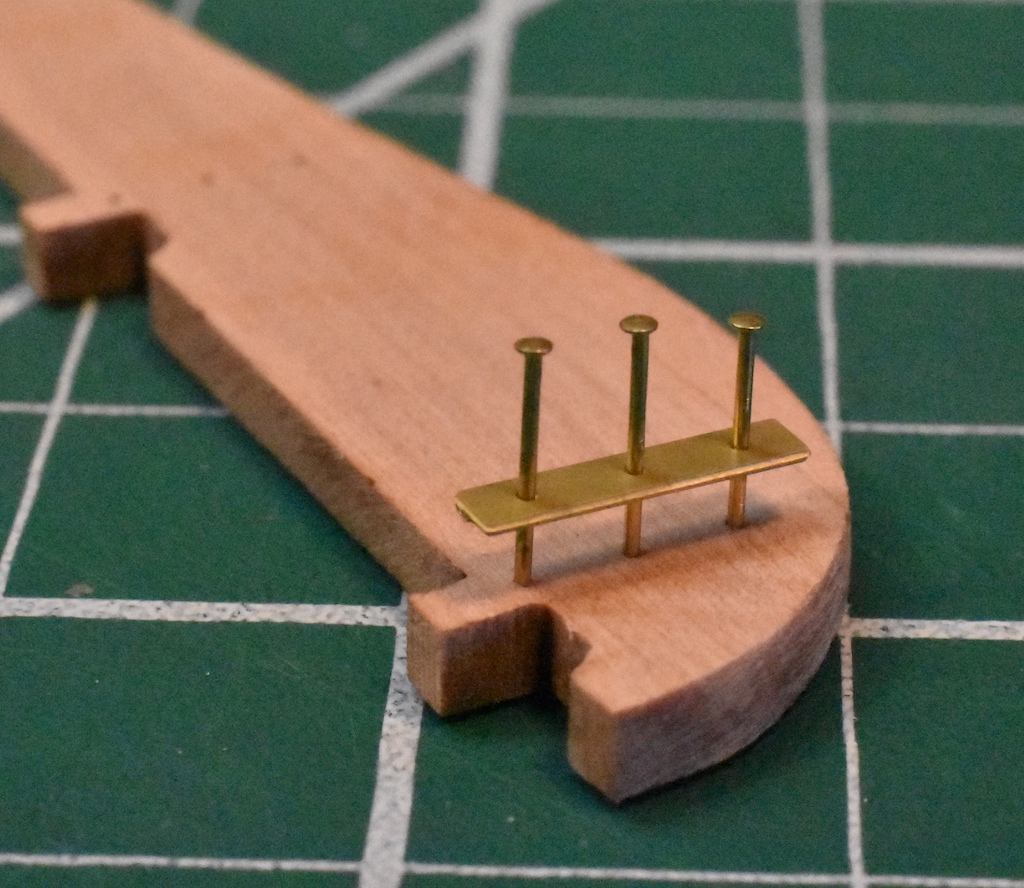
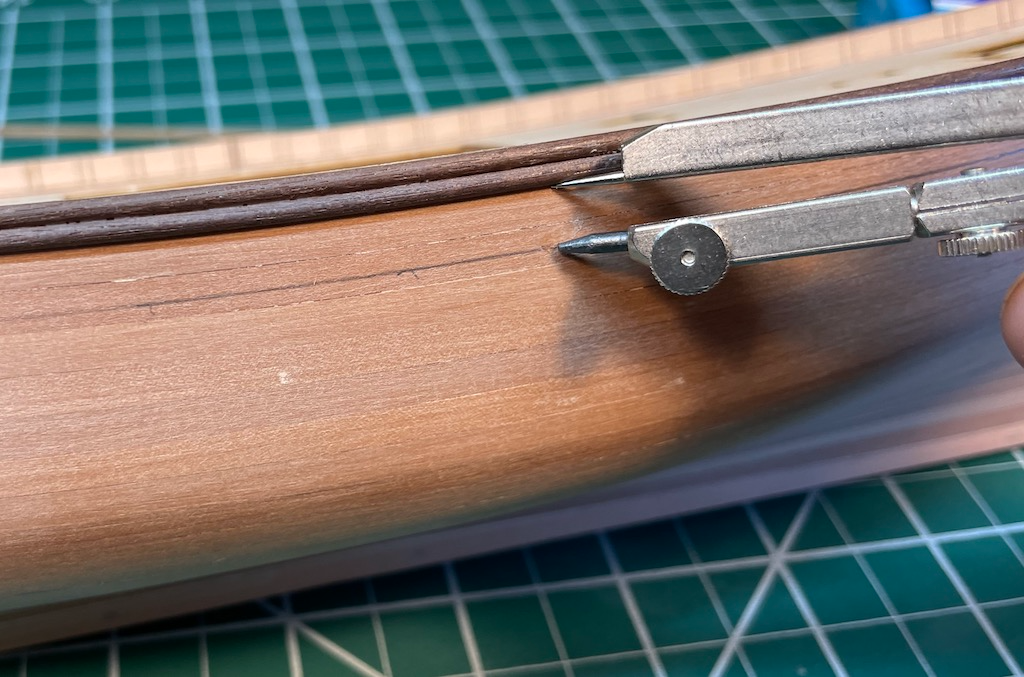
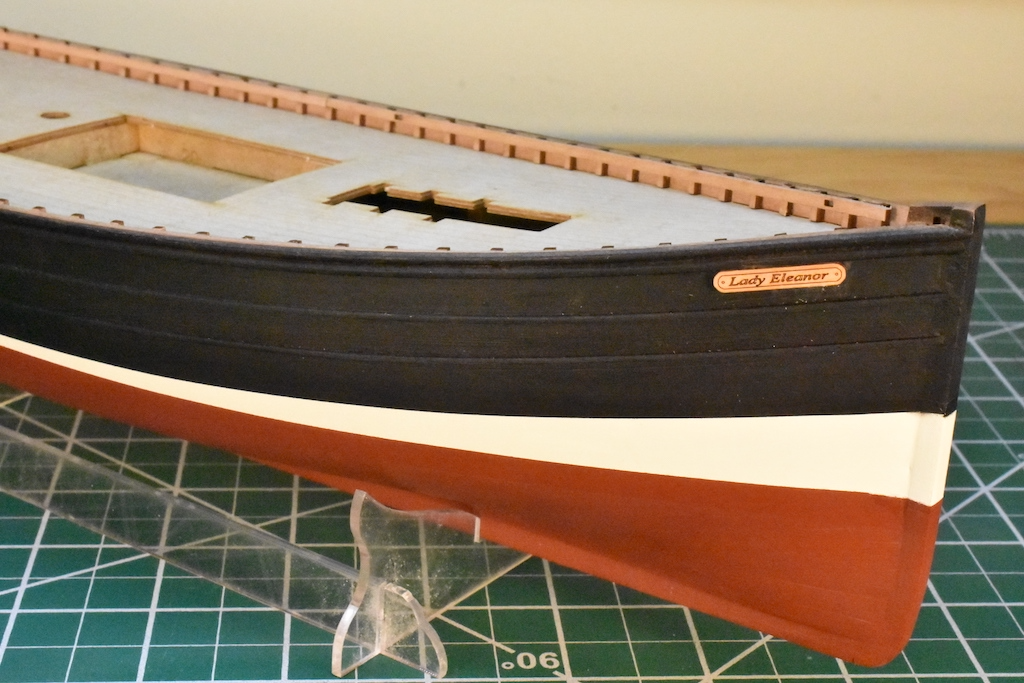
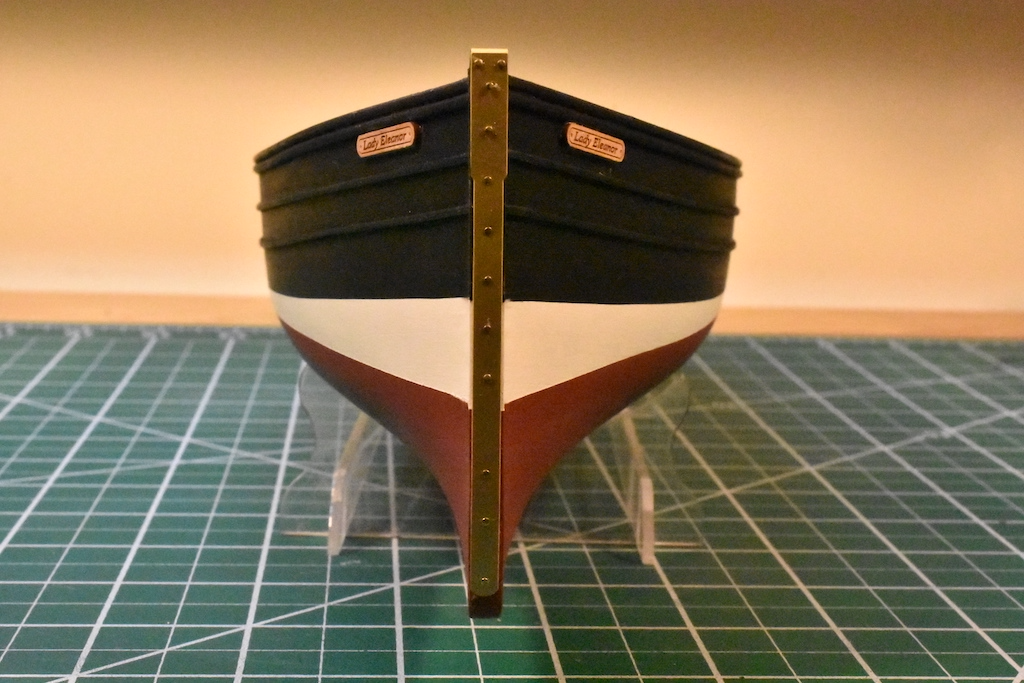
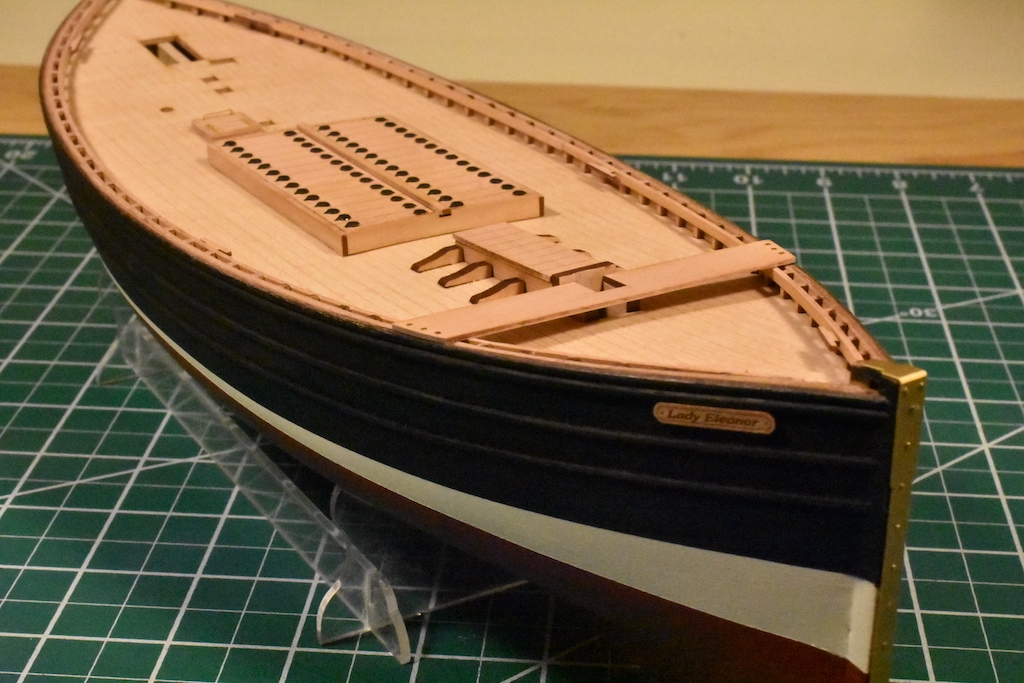
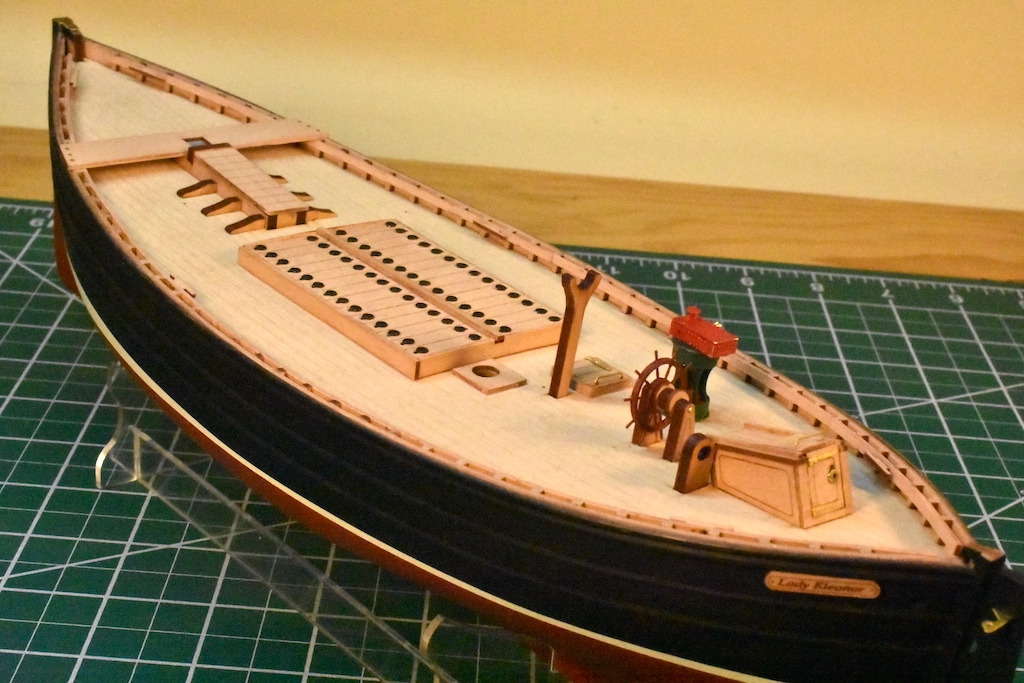
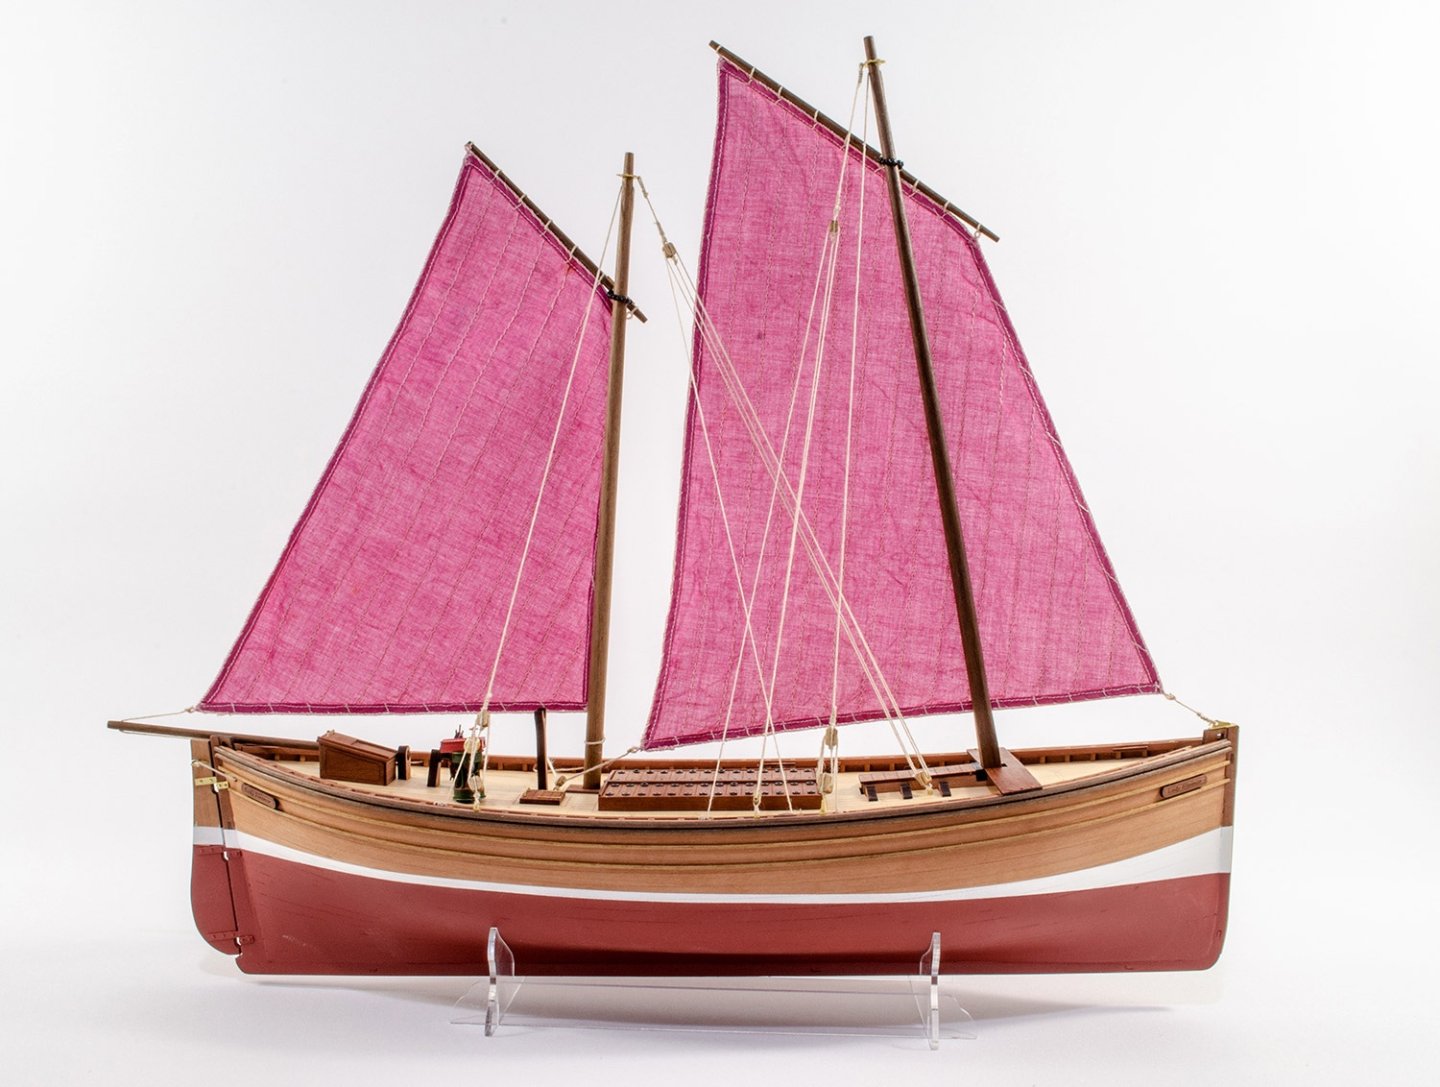
Progress has continued over the past two months. Having finished up the second planking, I turned my attention to the rudder. I drove the nails part way in so that the brass hinge was able to stand clear of the wood. This allowed for accurate alignment of the piece after getting some SuperGlue in place on the bottom of the hinge piece. For the rails, I glued the top two in place and then used a compass to mark the location of the first of the two lower rails. Below is the hull fully painted with name plates installed. I was originally aiming for the varnished wood treatment when applying the second planking but screwed up filling the gaps so the color would have been horribly uneven. Fortunately black was apparently commonly used above the white boot top when painting the full-sized ships. I sprayed Badger Stynylrez Black Primer on the top, hand-painted ModelExpo Warm White on the boot (with plenty of sanding with fine grit paper), and sprayed Badger Red Oxide on the bottom. The fish hatch, seat, foremast opening, and deck hatch thankfully presented no problems. The rest of the deck hardware was installed so we're now ready to start on the masts and rigging. Yippee! Painting the Steam Winch by hand didn't work out very well. It sort of looks okay from a distance but up close, well, not so much. In a fit of remorse over my poor workmanship, I ordered the Zulu - Lady Isabella kit so I can take another crack at getting it right. For that model I'll be sure to prime the metal properly and use a spray gun. For the Fifie, I used ModelExpo Bulwarks Dark Green and Bright Red Trim, neither of which spray very well at all, hence the attempt with the brush. Speaking of paints, the green and the red had been sitting around quite a while and needed to be stirred up. I used a magnetic mixer that I purchased a year ago from Amazon. It works great - highly recommended! I also use it in the wood shop when mixing up my own varnish. Jonathan

- 15 replies
-
- 5
-

-
- Lady Eleanor
- Vanguard Models
- (and 2 more)
-
Dang - what a forum! Instant feedback from the prototype builder hisself!! Jonathan
- 106 replies
-
- 3
-
-
- Erycina
- Plymouth Trawler
- (and 3 more)
-
The wood for the false stem isn't mentioned anywhere. I used the smallest square or strip basswood that would still fill the gap I had. No marks for the seat risers on my kit either. I figure these omissions are an intentional part of our training for the more advanced kits we'll be tackling in the future 🙂. Nice work - keep it up! Jonathan
-
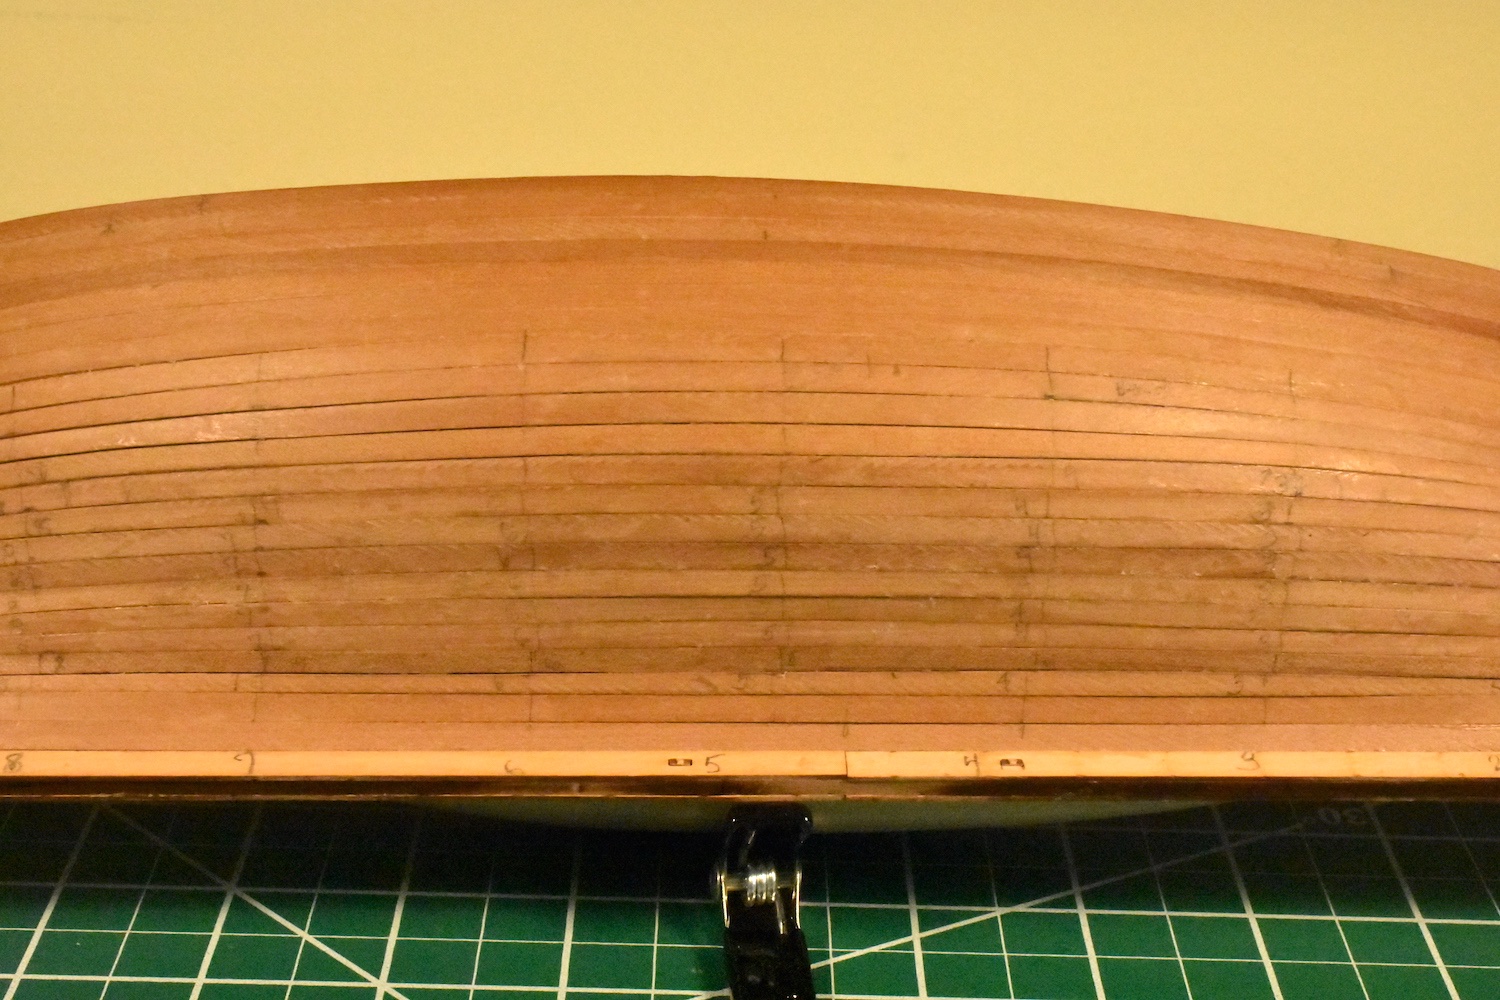
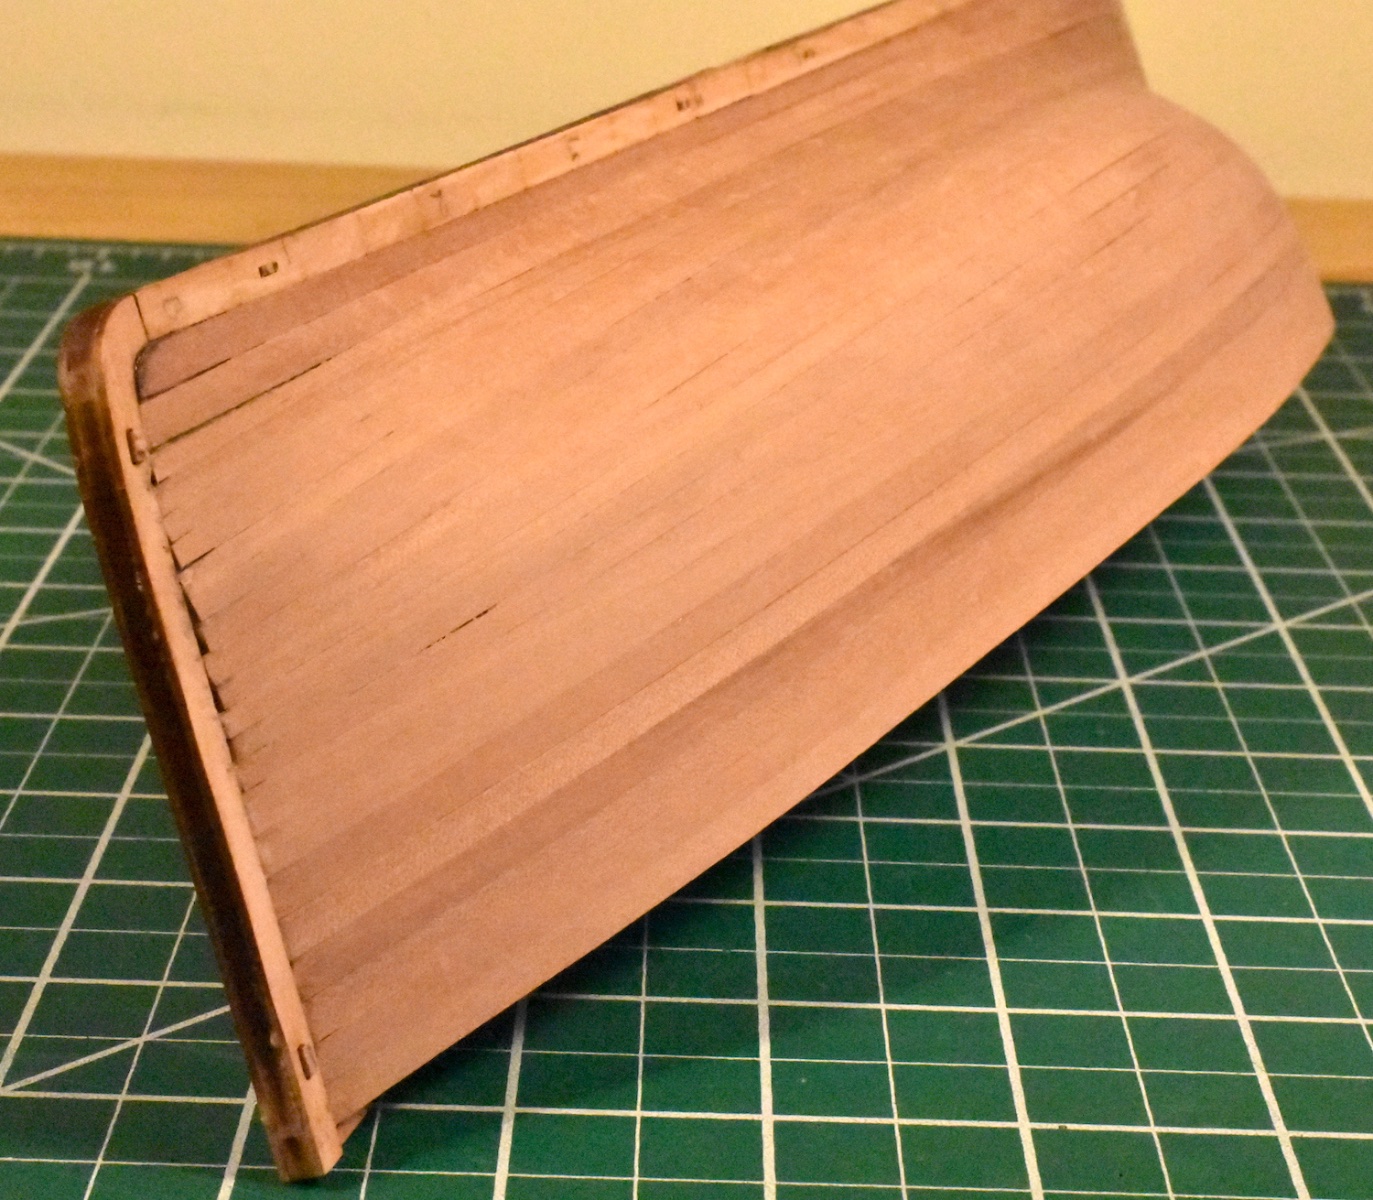
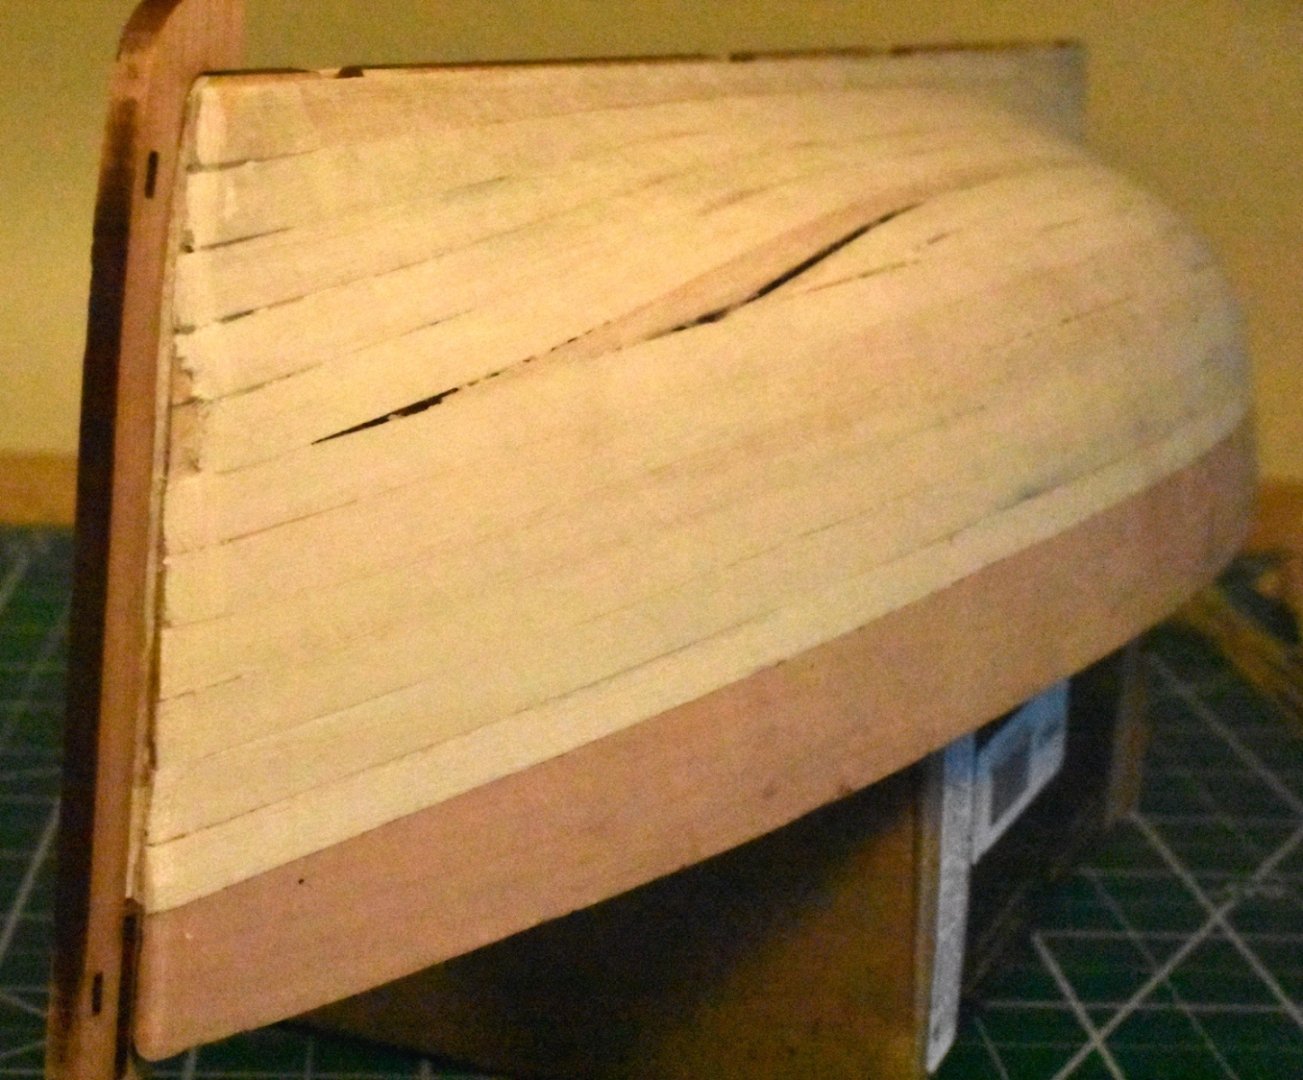
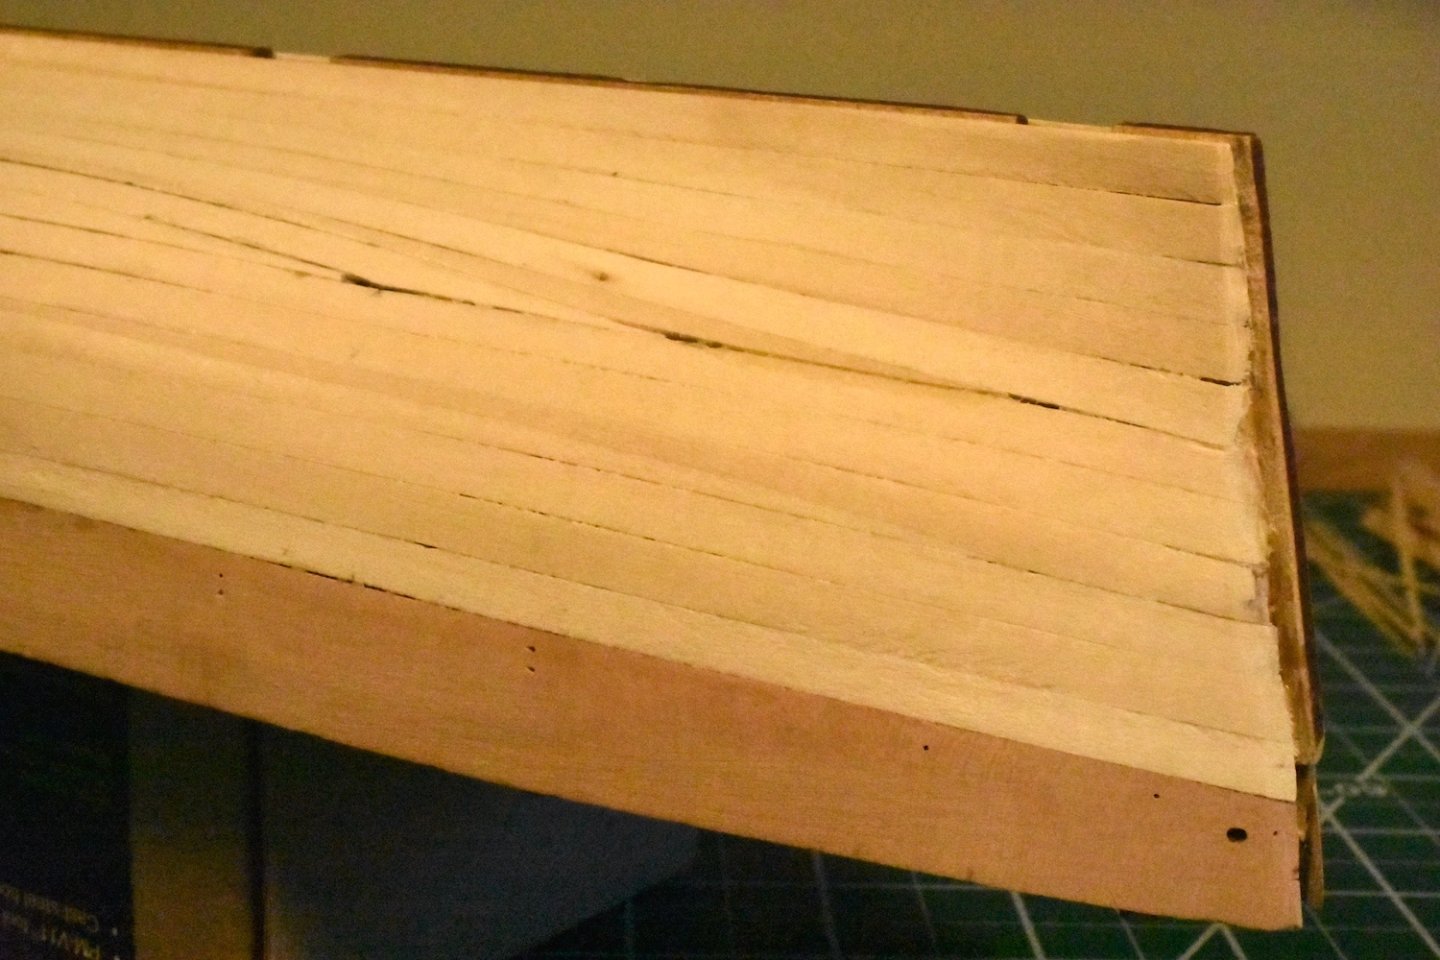
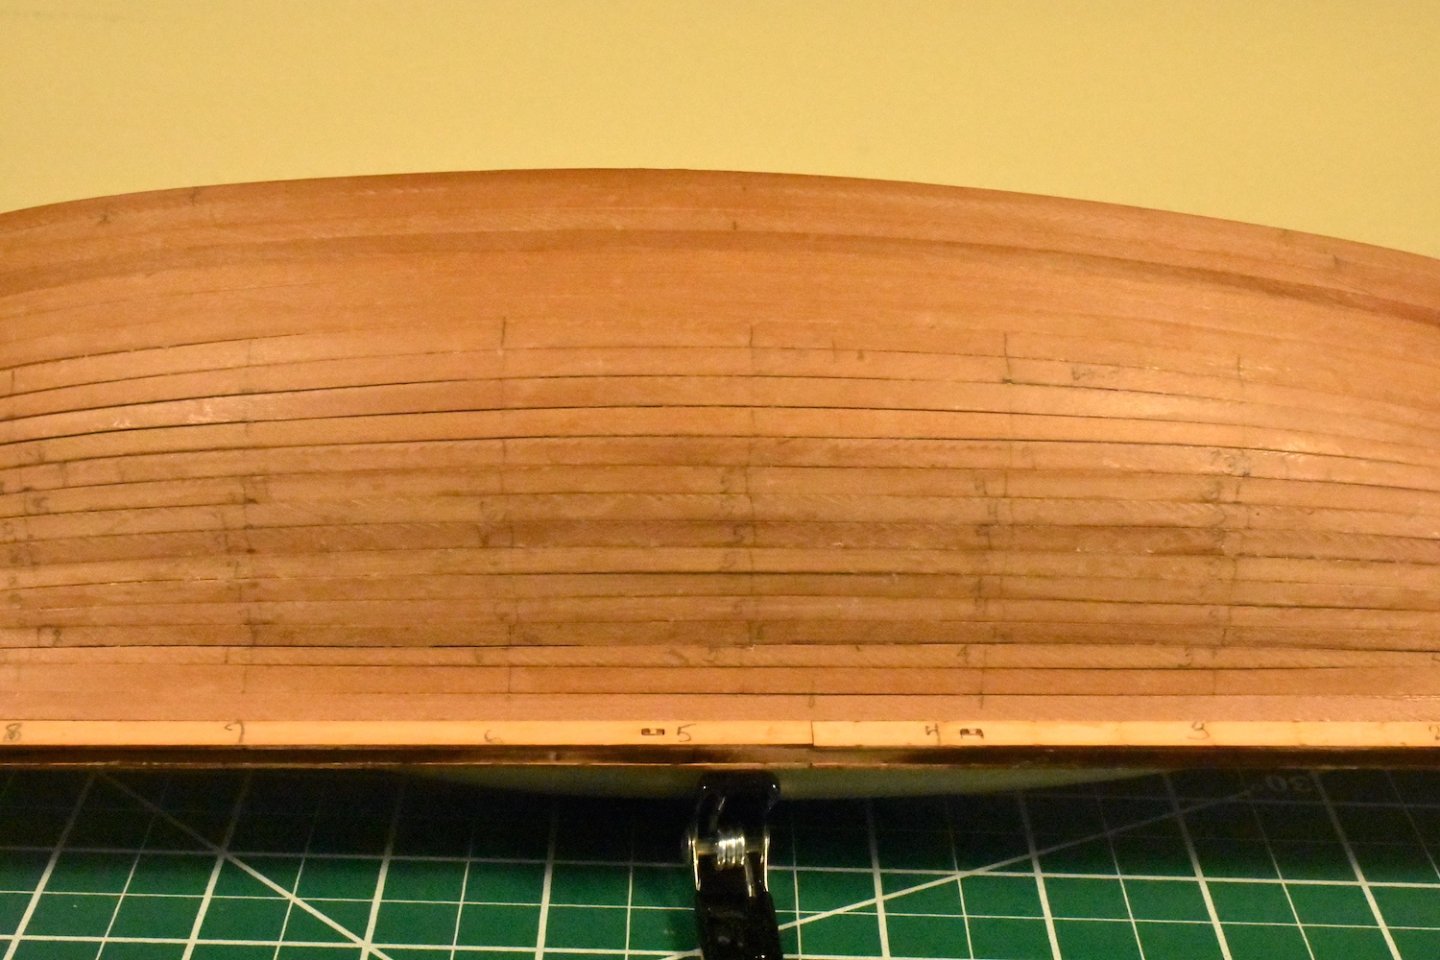
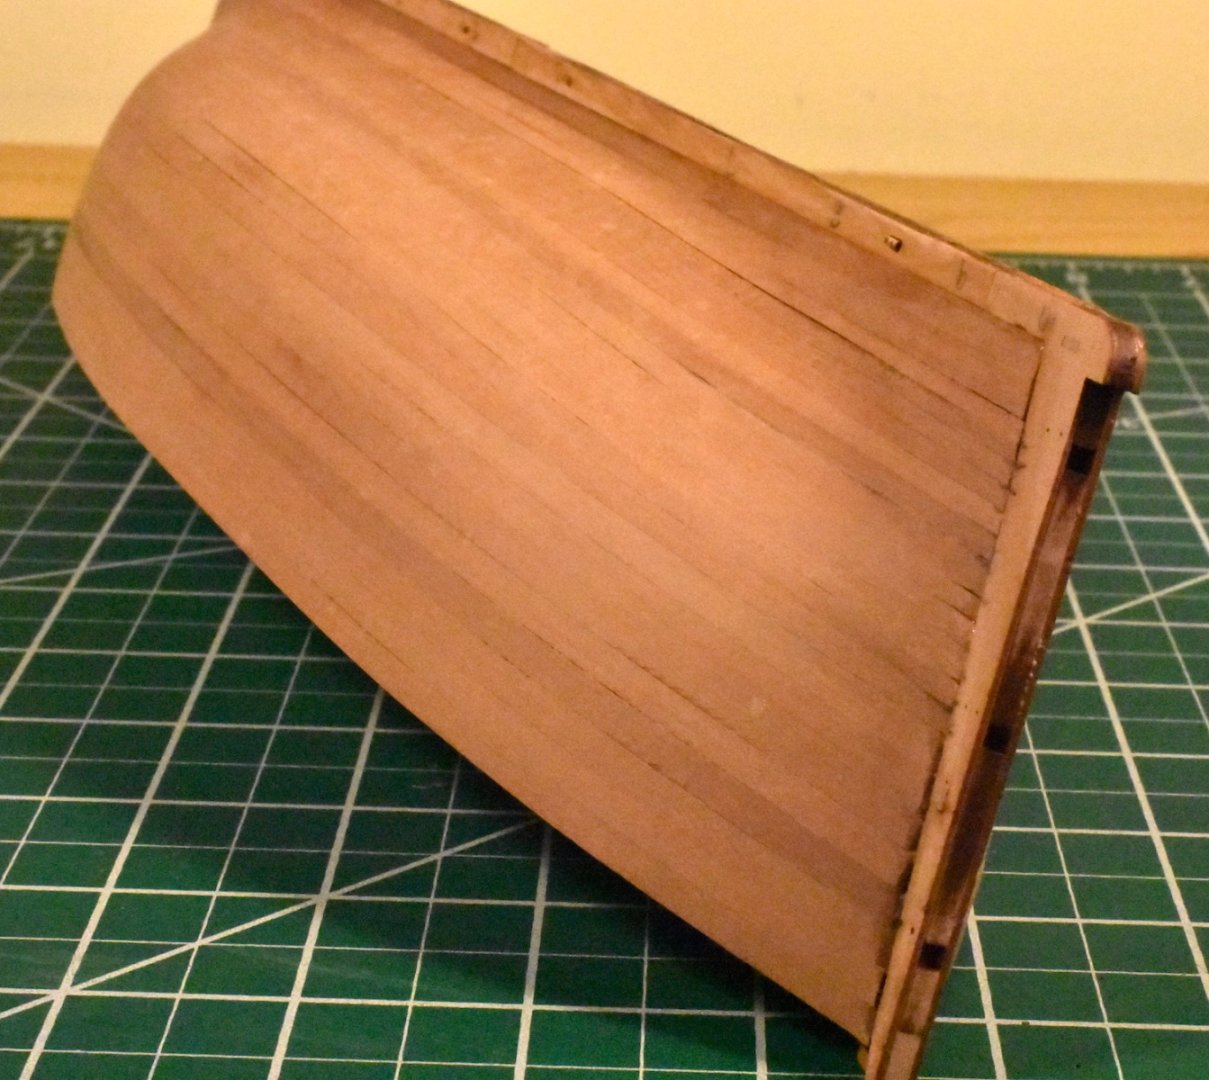
After the doing the fairing thing I started the first planking beneath the bulwarks using six full width planks. After the garboard plank I worked my way up, again using full width planks until the last few funky ones. As you can see from the pictures below, I didn't worry all that much about gaps. The starboard bow ... and stern: The port side planking looks about the same. Fortunately the second planking covered the anomalies. I laid down seven full width pear planks to get below the waterline. I installed two full width planks at the bottom then switched to tapered planks, working from the top down. I used the tick strip trick* (go ahead, say that fast 🙂) so these had consistent (mostly) widths except for the last one (third from the bottom). The sanded starboard side now looks like this at the stem ... ... and this at the stern. After sanding I was pleased with the planking above the waterline. There's one board a little darker than the others; I'm hoping the varnish will even things out. There are some gaps between the planks below the waterline but they will disappear after I slap on some paint. Next up is the port side. I'm shooting for zero defects from top to bottom in preparation for planking the unpainted Alaskan Cedar (gasp) Cheerful, if and/or when I start that build. Jonathan *It's actually not a trick at all. It's a technique but I couldn't pass up the opportunity!

- 15 replies
-
- 6
-
-
- Lady Eleanor
- Vanguard Models
- (and 2 more)
-
Très droll, très droll. 🙂 Great looking model! Jonathan
- 43 replies
-
- 2
-
-
- Mayflower
- Model Shipways
- (and 1 more)
-
Here's a link to an article by Bob Flexner on Wiping (a.k.a. Wipe-on) Varnish that takes the mystery out of it. This guy really knows his stuff and his articles bluntly cut through all of the marketing piffle. I strongly recommend Understanding Wood Finishing, available in paperback, hardcover, and Kindle (for the bookshelf impaired) from Amazon. Jonathan (P.S.: your model is lookin' good!)
-
Thank you Chris. I'm glad you like it. Thank you Paul for your kind words. Thank you Andrew for the kind words (gee - a hand clap too!). Thank you Ryland. I'm glad it's done! Thank you Dan. And thanks for your thorough color, er colour tests! Thank you Aero. Thanks Craig! Lessee, ratlines eh? Thank you Kev. Thank you for the kind words Andy.
-
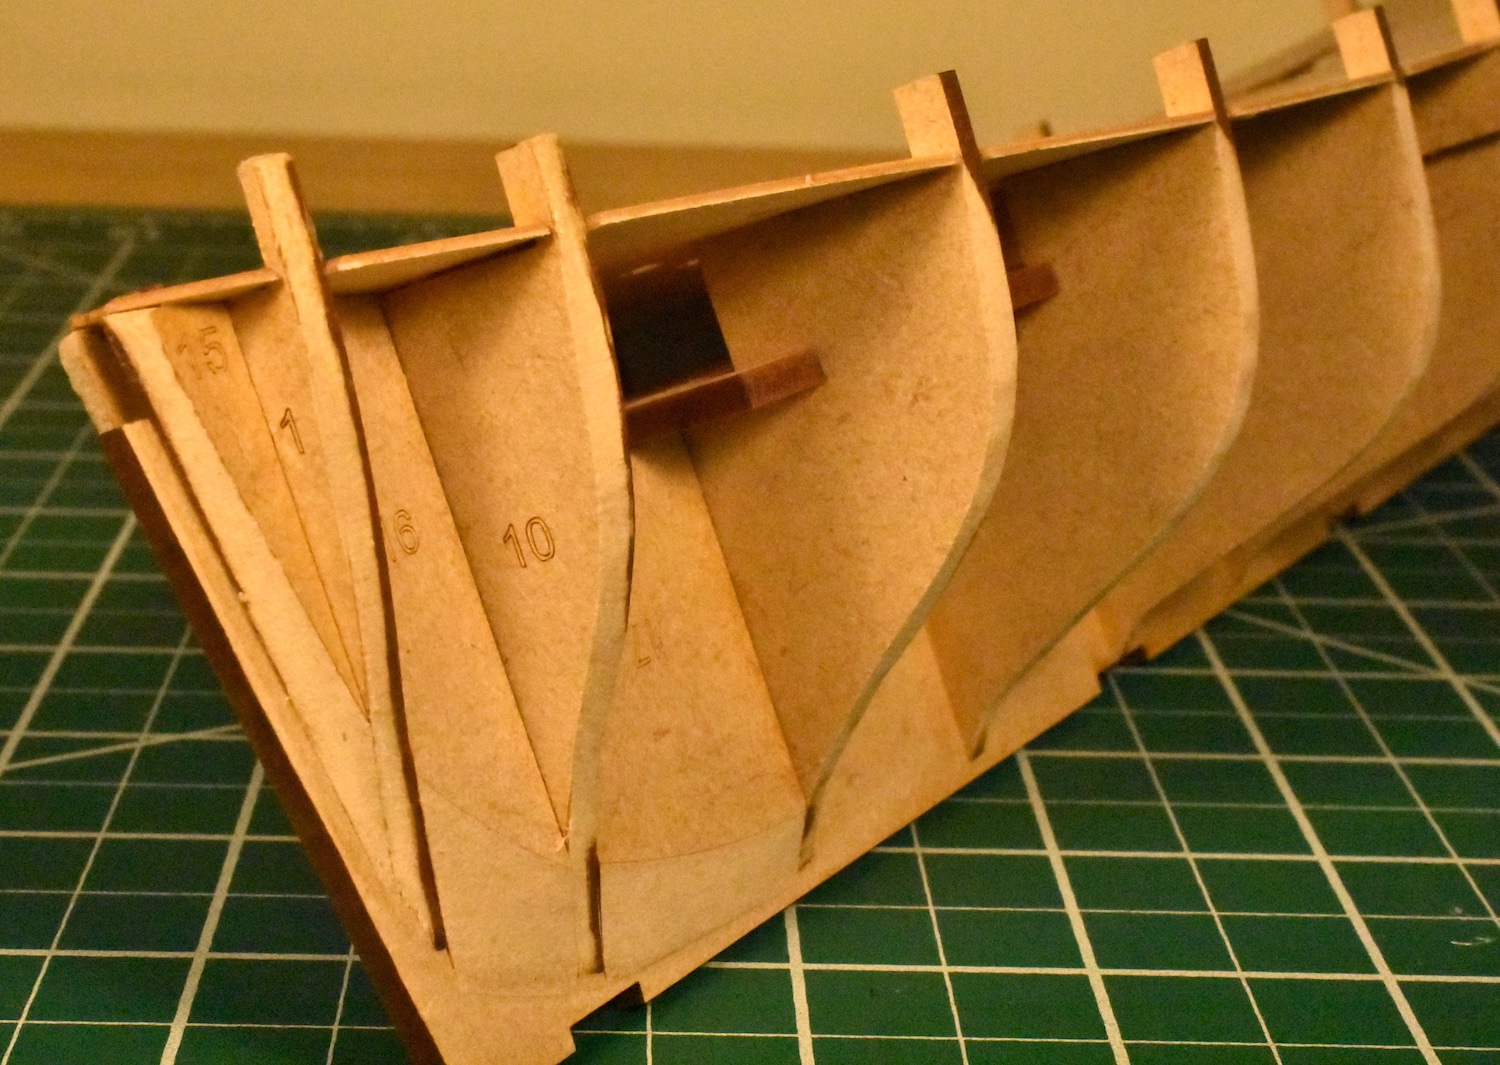
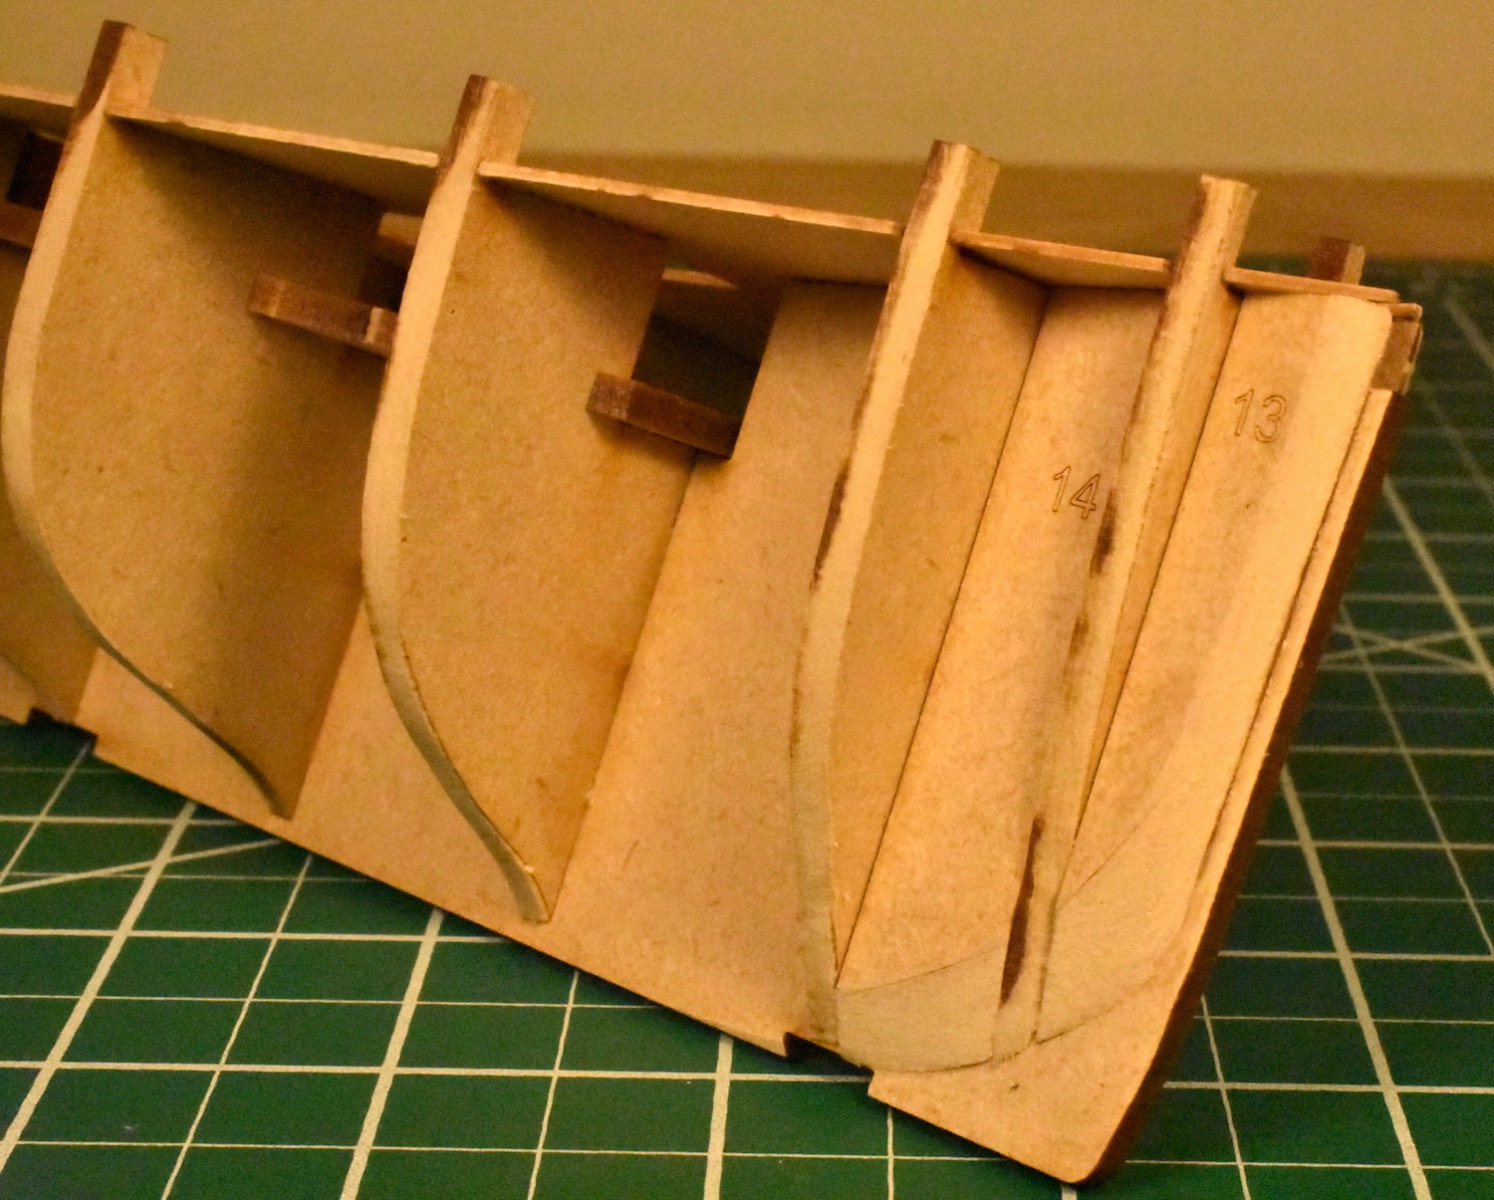
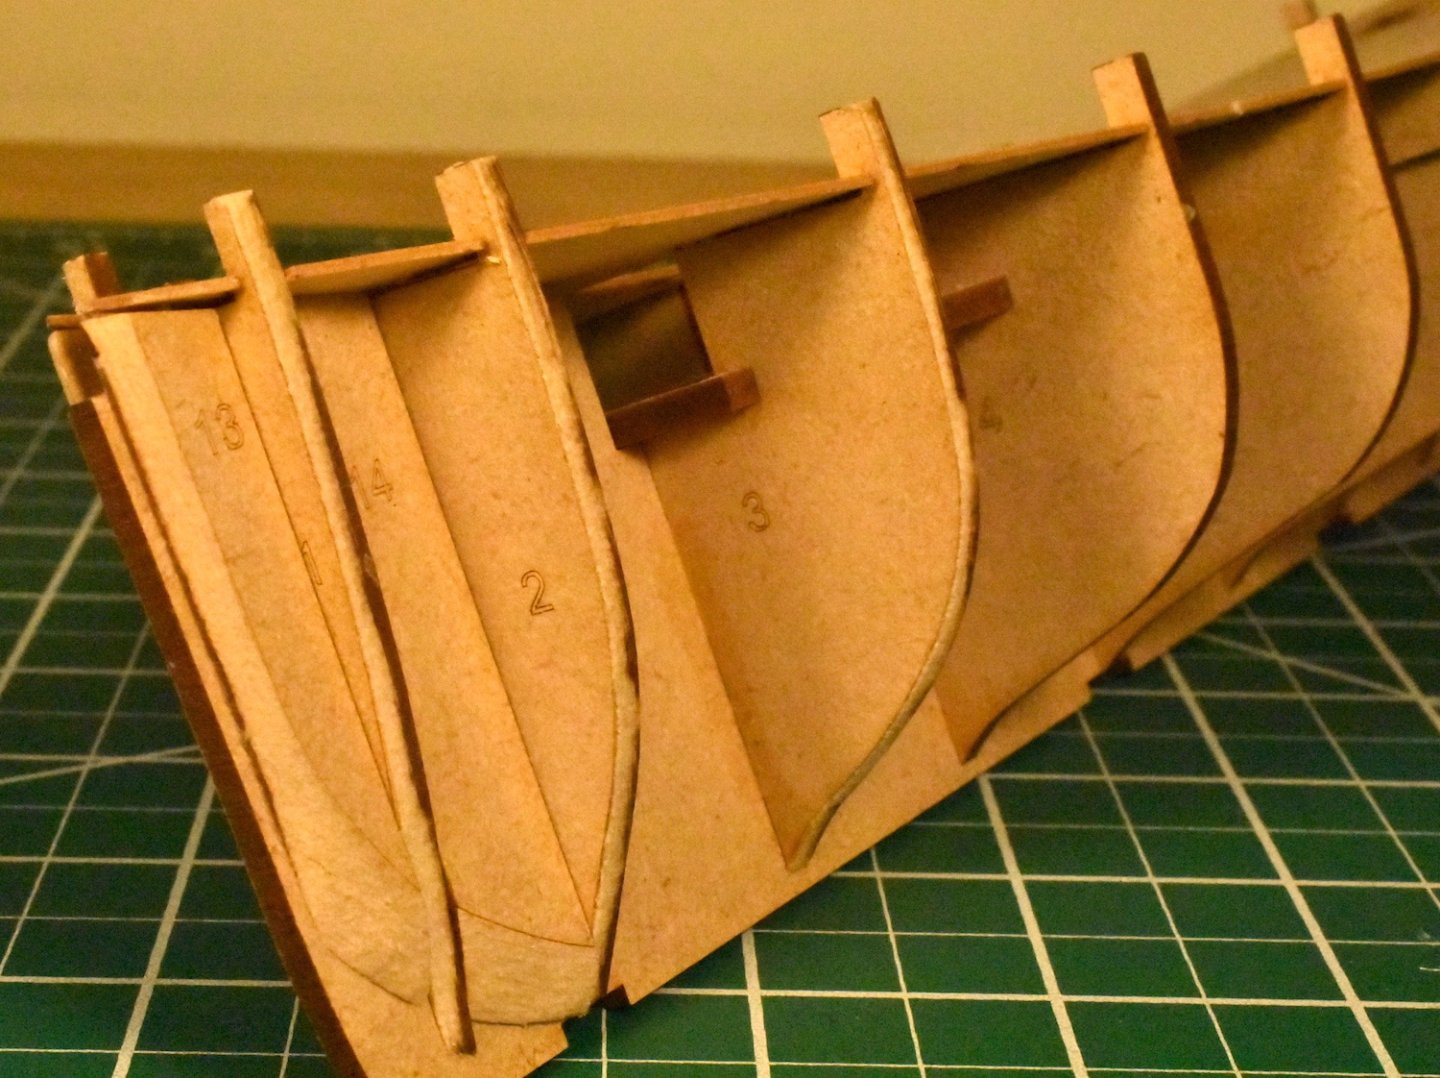
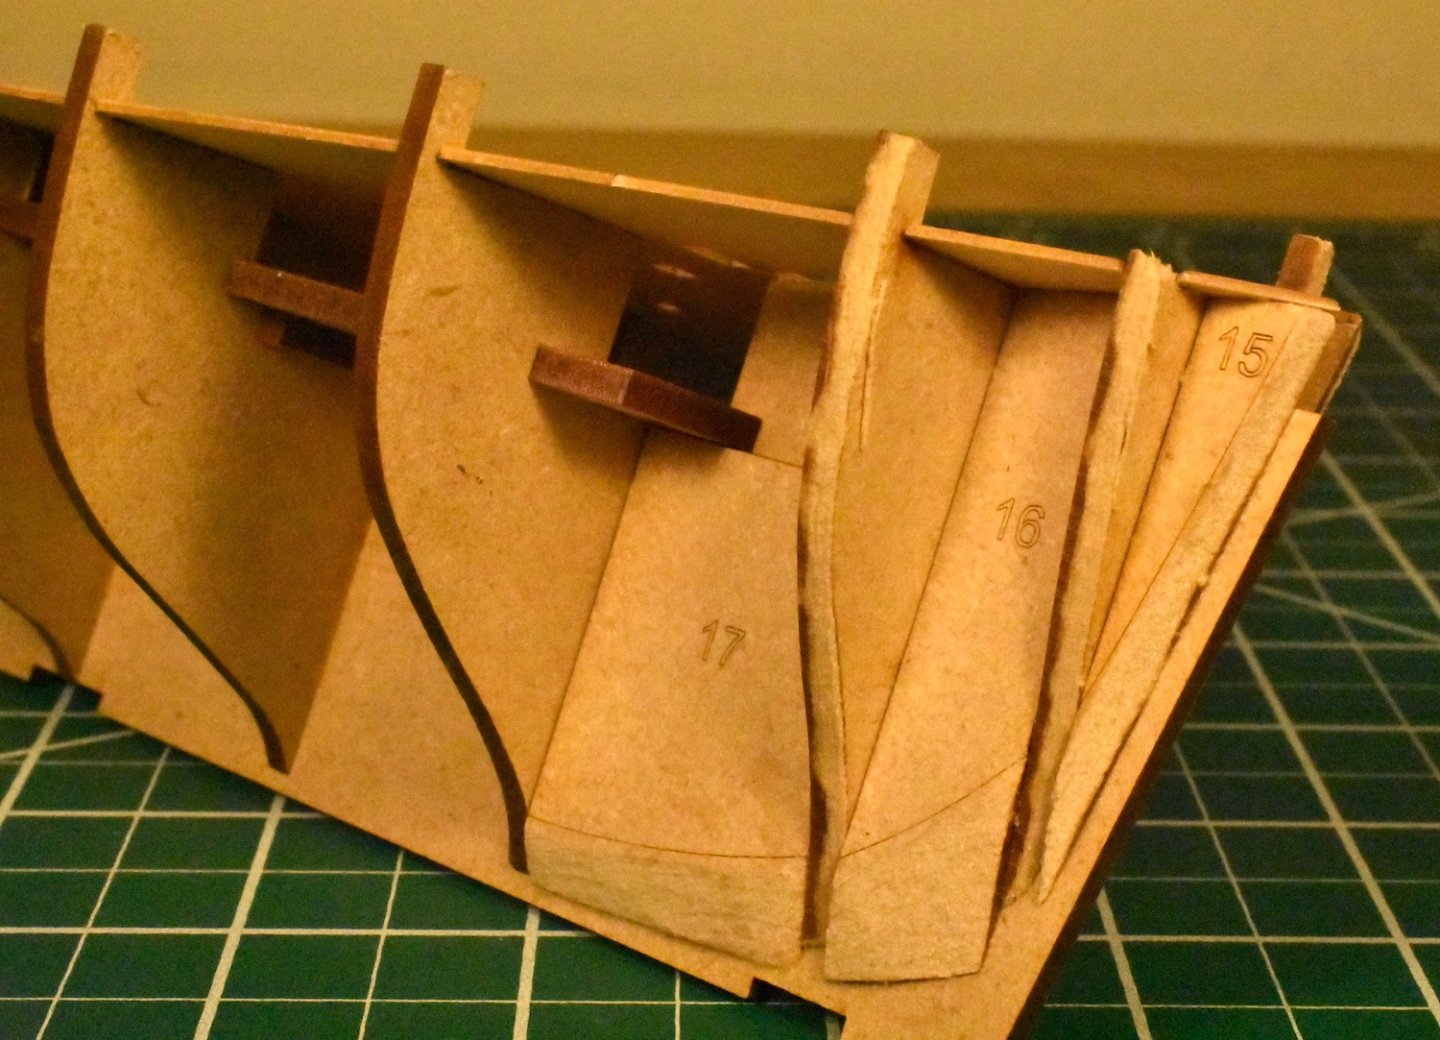
After a suitable break for celebration and respite, we're back at it again. I was toying with the idea of building the HMS Sphinx for the amusement of one @Craigie65 but elected to construct the HMS Fifie instead. Oddly enough, this model has no ratlines . (Vanguard Models photo). So far I've assembled the hull and faired the port side (fore and aft views below) using a Dremel for the basic shaping of the bulkheads off the model followed by a coarse Flory sanding stick after they were glued in place. The starboard side is next. I left a fair bit of MDF on the fore and aft bulkheads for removal to ensure an even foundation for the first layer of planks. Nothing untoward happened during hull construction though my heart was a goin' pitty-pat as I warped the deck to snap it in place. That plywood sure bends a lot! Jonathan


- 15 replies
-
- 9
-
-
- Lady Eleanor
- Vanguard Models
- (and 2 more)
-
I had the same question. Here's some info. Jonathan
- 25 replies
-
- 1
-
-
- Lowell Grand Banks Dory
- Model Shipways
- (and 2 more)
-
Good Lord, what's he up to now? 🙂 Jonathan
-
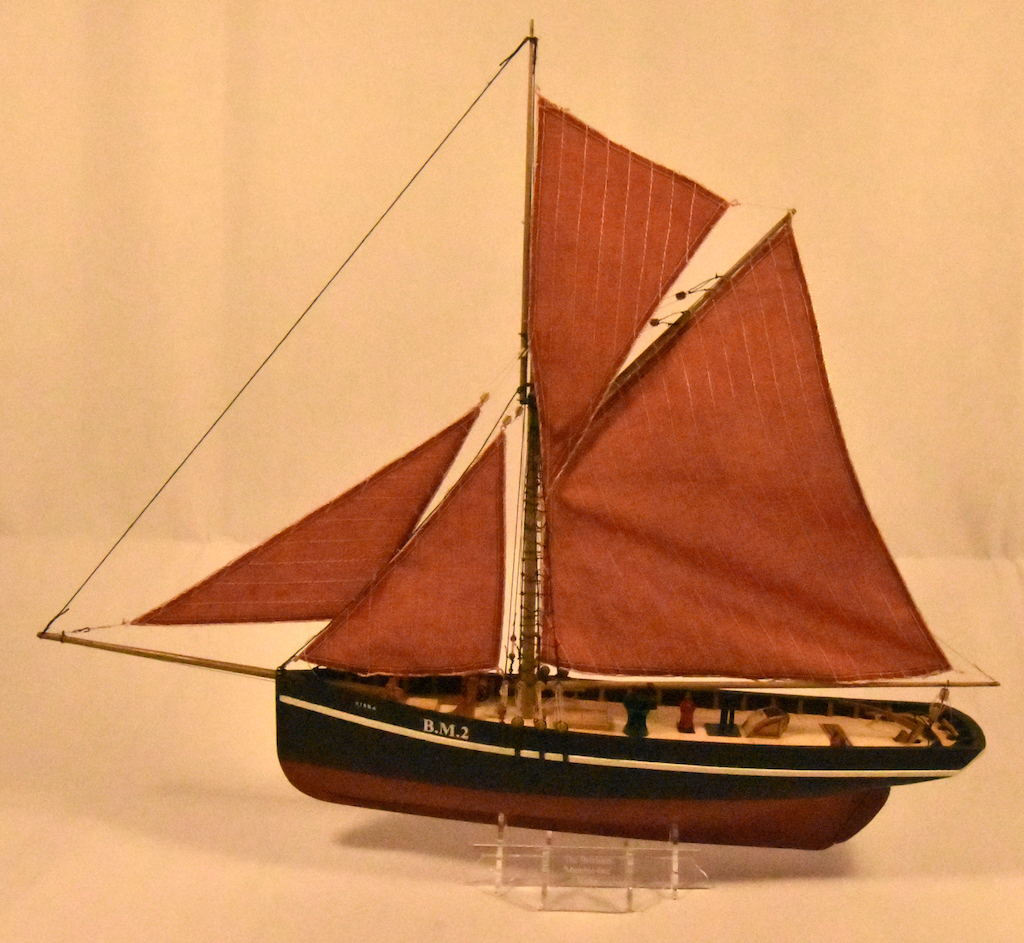
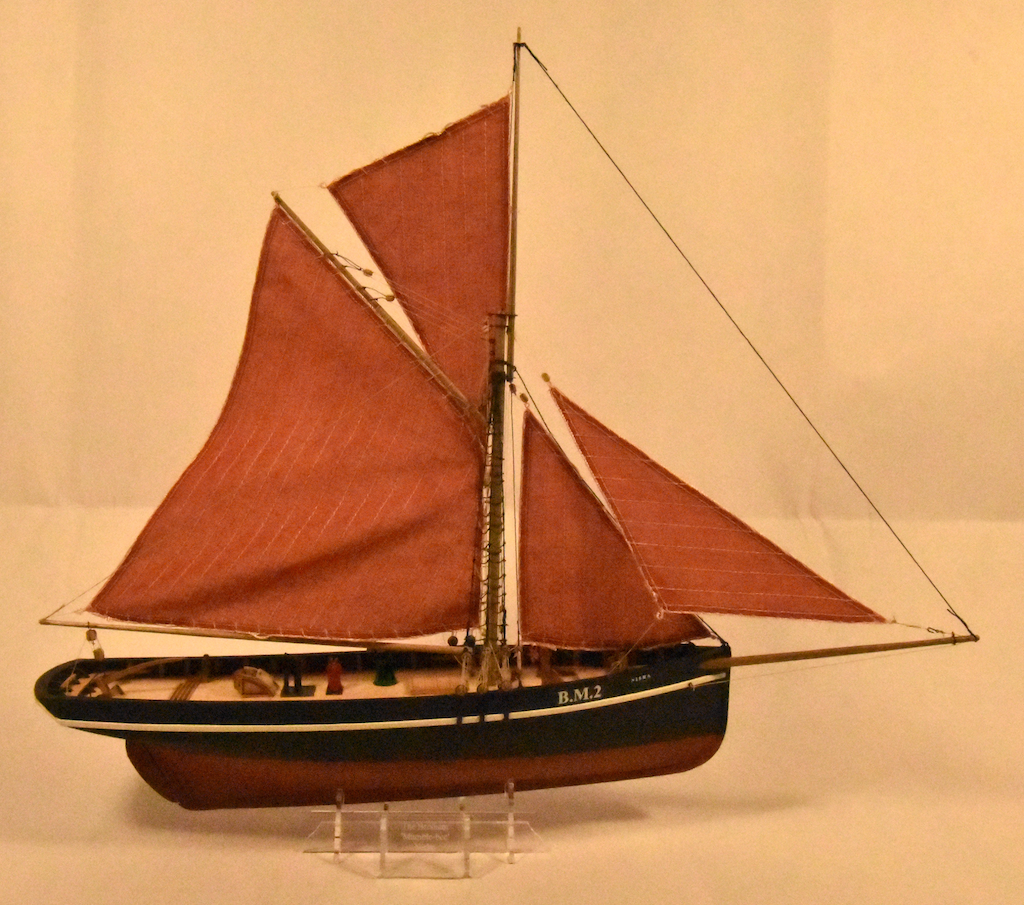
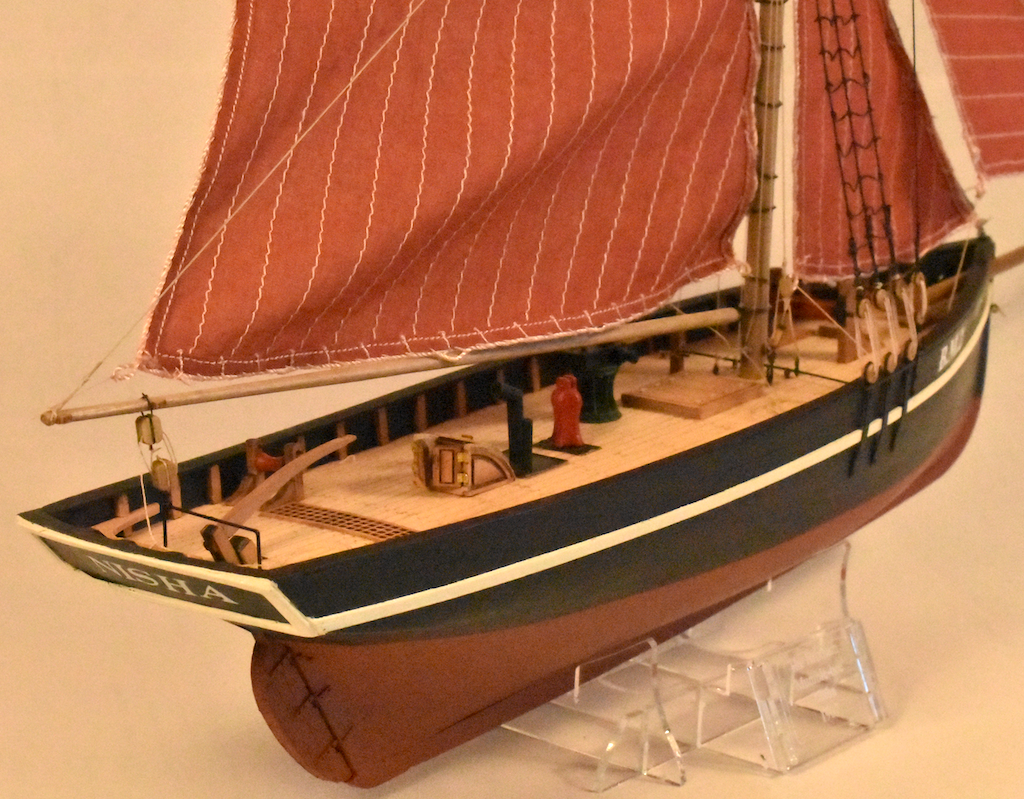
This model is finished. Craigie65 was right - the rigging didn't take all that long to finish up (though I had my doubts 🙂). I found that I had to get the main sail and the top sail in place before I could do any final adjustments with the length of sheets, halyards, etc. The major problem was the bottom ring on the mast which was glued in too low so there is not enough clearance for the boom over the steam winch. I recalculated the distance between the bottom ring and the top of the main mast and what should have been 5.47" (after measuring the distance on the plans and multiplying by the requisite 7/6 to account for the printing error) was actually 5.65" on my model. Had I measured/calculated correctly in the first place then there would have been no clearance issue. Piffle. If you're interested, the total time spent on the model was nearly 190 hours: 30 for planning, updating the build log, and research, 20 hours each for hull construction, first planking, second planking, and for building the rudder and painting the model. All the deck paraphernalia, decals, etc, took 50 hours and the rigging 30 (10 of that was spent in Ratline Purgatory). Thanks y'all for your support, advice, interest, and good cheer. I hope that these updates have kept up my end of the blog bargain. Jonathan
- 38 replies
-
- 9
-
-
- Nisha
- Vanguard Models
- (and 1 more)
-
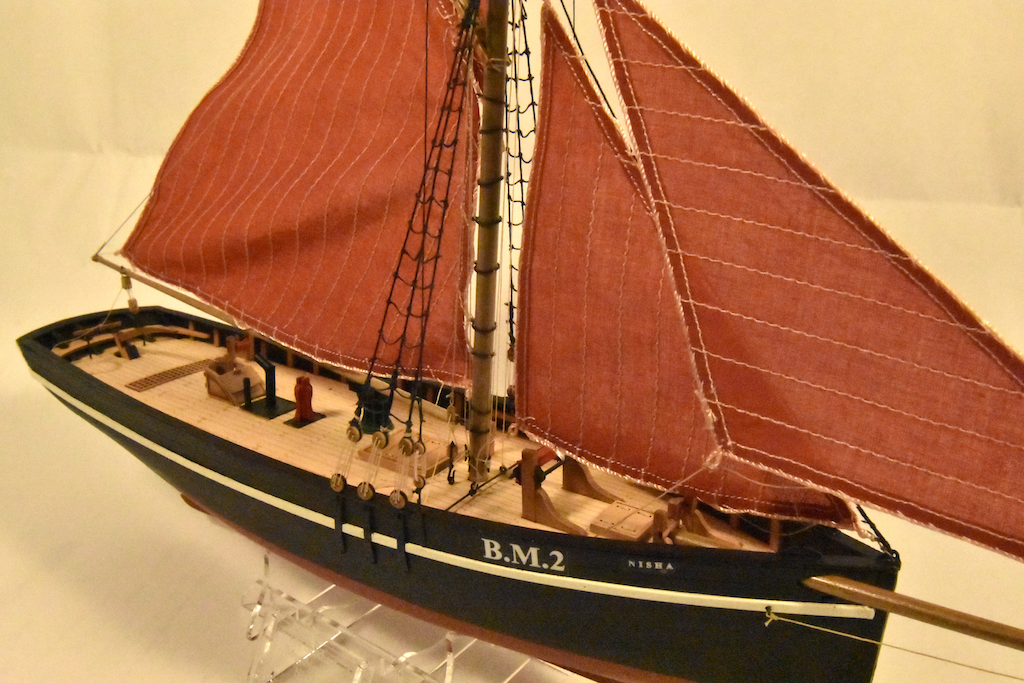
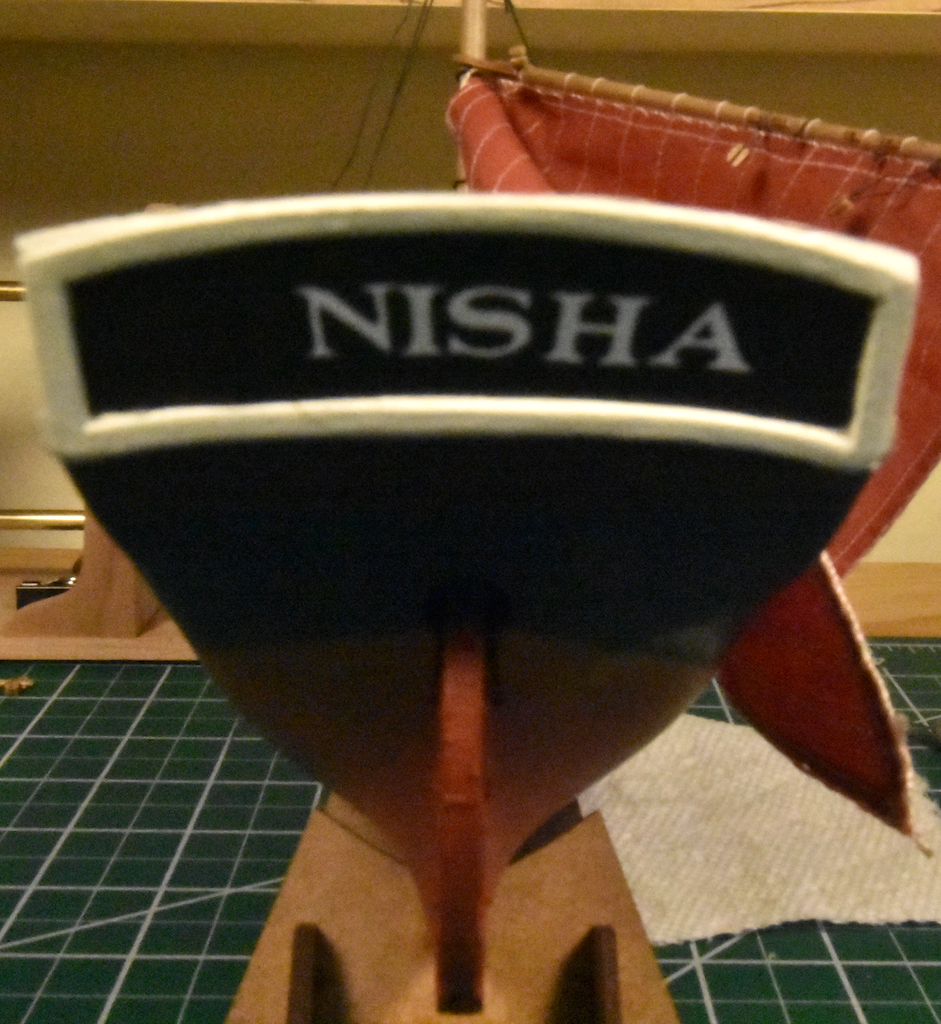
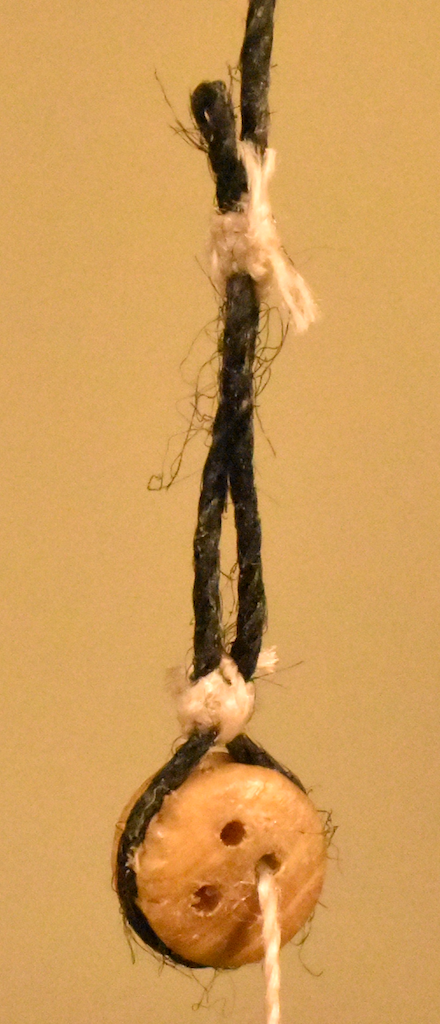
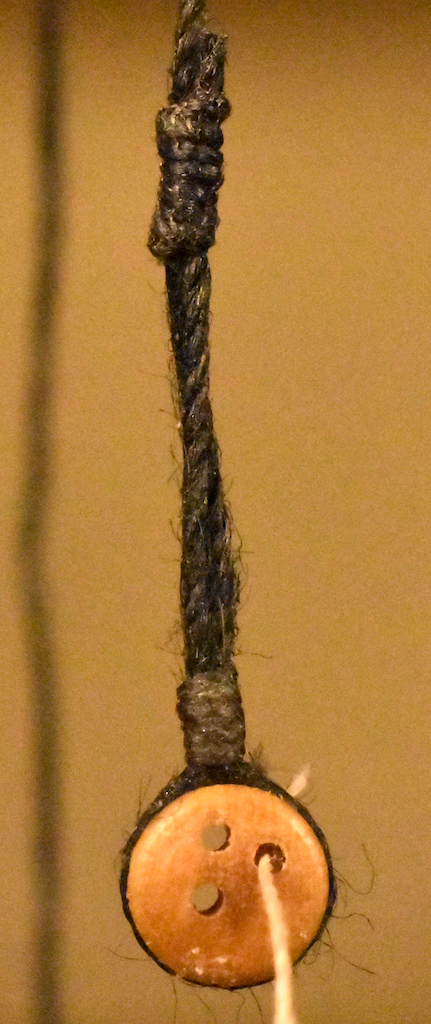
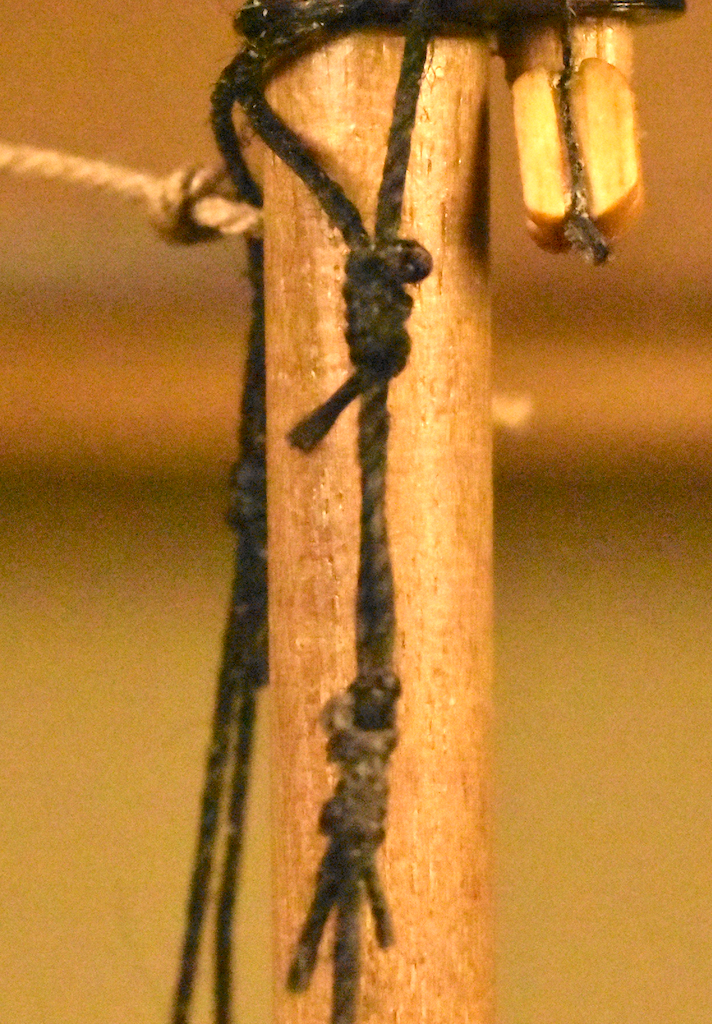
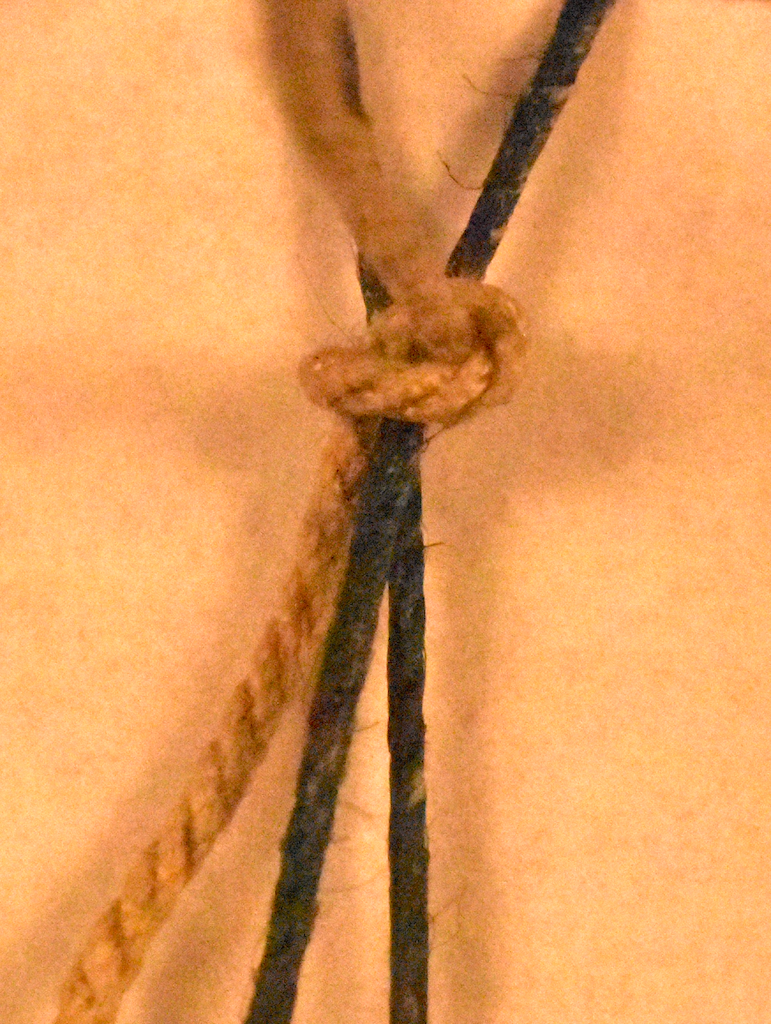
After celebrating The Launch of the Bounty Launch, I returned to the Nisha after a six week interlude in the build. The first thing to do was to use dry-transfer lettering to replace the botched-up stern decal. I didn't center it quite right ... but it's not really noticeable if you view it from the right angle 🙂. (Note: Funny how that works. I started out with the intent of constructing a model that would make Malcom Darch proud but by now I'm thinking that if it looks any where near half-way decent then that's great.) So now I've started on the rigging. First up are the main shrouds. I used the Thanasis tool to apply the seizing for the deadeyes off the model. On the first one, I tried using the DelF method to more accurately reflect how it was done in practice. Here's how it turned out after a lot of finicky and tedious work with the beige thread: As you can see, the results were not that good. I used plain old seizing on the second one. Although it was not as authentic it certainly looked better than the first so I've elected to continue with the easy way for the rest (see Note above). After threading and fastening the lanyards, I ran the top of the shroud around the mast and wrapped the line around the shroud six or seven times for the seizing. I found that it was rather difficult to slide them up towards the mast to tighten up the shroud so I've started to use only four turns. It was also difficult to manage all the threads involved so I've started to hold the top of the shroud together with a large piece of thread (to make it easier to untie the knot when the upper seizing is finished). One problem with using the Thanasis tool is that it can't be used for lines that are looped around the mast. For that, I had to revert to use the toolless method. This was hard to do because it was on the model in a rather tight space and because I had not done any using this method having relied on the tool for all prior seizings. Now, after the third one, I'm starting to get the hang of it. After the first bottom seizing at the top of the mast I elected the easy way out and started using a succession of knots tied to the left and the right of the line as described in DelF's HMS Speedy build (left/right was easier than top/bottom). Meanwhile, the ratlines are looming in the background (cue the cellos playing two short notes 🦈). Jonathan

- 38 replies
-
- 7
-
-
- Nisha
- Vanguard Models
- (and 1 more)
-
Wow! What a shop!! Jonathan
-
Belay Pins
wool132 replied to shipman's topic in Discussion for a Ship's Deck Furniture, Guns, boats and other Fittings
After reading up on the Bollard/Capstan Equation from my college physics course of yore, I'd have to agree with Bob. It doesn't take many turns to create a large hold-force. With Bob's Belay Pin technique, it looks like there are the equivalent of about two turns (one on bottom and another on the sides/top) so the simple half-hitch knot can restrain maybe 200x to 2,000x more force than it normally would. And I had fun reading all the posts. Learned a lot about Robins, too. 🙂 Jonathan -
I had the same wandering problem trying to cut tapered planks. Sanding works but if there's a lot of wood to remove it can be slow and tedious. To speed things up, I started using a Proxxon vise and a Veritas miniature block plane to get near the line, then sanding and testing as Paul Le Wol recommends to get a descent fit. You can use the block plane on single planks; they don't have to be ganged together. Just don't push down too hard (i.e., apply a miniature force on the miniature plane 🙂). Jonathan
-
I referred to my annotated copy of the build instructions and found "What do I use?". Humph. I built this model twice. I just measured the stem on the first one and it's a length of 3/64" x 1/8" basswood strip. For the second go-around I was able to use 1/16" square basswood. Jonathan
-
Wow - several great ideas in one post! Thanks! 😄 Jonathan
- 43 replies
-
- 3
-
-

-
- Mayflower
- Model Shipways
- (and 1 more)
-
Congratulations - job well done on the model and the documentation!!! Be sure to take time and celebrate! 🎉 Jonathan
-
Bit of a snag. I remember building a Revell USS Missouri when I was but a wee lad of five way back in nineteen hundred aught 54. I don't recall having problems with the decals (though I do remember a few of the 5" guns annoyingly sticking to my fingers because of the globs of glue). Nor do I recall problems with the decals on the B-29 Superfortress I built around the same time. But when I went to apply the Nisha decal in the stern, I screwed it up when I decided it would be a Good Thing to rub the decal One Last Time to get it really nice and flat. So I ordered some dry transfer lettering. Meanwhile, I resumed work on my Bounty Launch model. Today I got to the part where I need to make the sails. Me: "I need to sew some sails for my ship model, so I was wondering if you could show me how to work your sewing machine, at your convenience." The at your convenience was a nice touch, I thought. Admiral: The Look. So I ordered a super-basic sewing machine from Amazon for $38 that a) might work and b) last long enough to put some stitches into some cotton fabric. The lettering can't arrive soon enough. Jonathan
- 38 replies
-
- 3
-

-
-
- Nisha
- Vanguard Models
- (and 1 more)
-
Geez - this on top of a case of Covid? You're a brave man. Jonathan
- 562 replies
-
- 3
-
-
-
- vanguard models
- alert
- (and 2 more)
-
Can’t help much with your first three questions but for the custom decal I’m intrigued by this post by Dr PR. I’m thinking of using his technique instead of plastering on the kit supplied decals. Jonathan
-
What's a good kit for learning rigging?
wool132 replied to Mark m's topic in Masting, rigging and sails
You might take a look at either the Nisha or the Erycina kits, both from Vanguard Models. Expensive? Yup. High quality? Very. Worth it? Oh yeah! The details on assembling the rigging in the instruction manuals are a tad sparse but you can make up for that by looking at the Bluenose build by Ed Ku20 starting here, the HMS Speedy build log by DelF starting here, and Dr PR’s topic on Topsail schooner sail plans and rigging here on MSW. Jonathan