wool132
-
Posts
117 -
Joined
-
Last visited
Content Type
Profiles
Forums
Gallery
Events
Everything posted by wool132
-
 Thanks for the warning! I’ll get there eventually (it’s in the stash) - Jonathan
- 436 replies
-
- 1
-

-
- Syren
- Model Shipways
- (and 1 more)
-
Another thank you for sharing all of your discoveries and mistakes during this build! They have been quite helpful especially the mistakes and recoveries 🙂. They give me a heads-up on pitfalls dead ahead not only on the Sherbourne but other (Vanguard) models as well. Jonathan
- 177 replies
-
- 2
-
-
- Sherbourne
- vanguard models
- (and 3 more)
-
The bulkheads having been installed, I turned my attention to the bulwark patterns. I soaked them in very hot water for the recommended 30 minutes before bending them in place. In the meantime I installed the brass straps on the rudder. I used two pins to align the strap and to hold it above the wood so I could get in a dab of super glue gel. I lowered the strap and held it in place for a few seconds to let the glue set. I installed the wet bulwark patterns on the hull and used rubber bands to keep everything in place. The next morning I discovered that they had deformed where the rubber bands where affixed. I ironed out the waves as best I could and forged ahead. I measured, cut, and bent the sheer strake using an iron and a bending jig, per Chuck. For the bending form, I marked a piece of waste pear wood from the kit using a french curve and cut it with a knife. This wood is the same width as the planks. This makes heating and bending the planks easier than a thicker piece of scrap that would get in the way of the edge of the iron. This is the bent plank ready to be put into position. I put dabs of wood glue (not super glue - it doesn't smell bad) on the bulkheads and along the edge of the bulwarks using a syringe. Because the plank is pre-bent I only needed to apply finger pressure for about 20 seconds. This was enough time for the glue to set and form a bond strong enough to hold the piece in place after I let go. The photo below shows six bent, twisted, bowed and installed full width planks. Next week I'll start by marking out the plank widths on the bulkheads (again, per Chuck) for the remaining strakes so that everything fits. Included in the photo are the tools I use: 1 - A syringe (Amazon) partly filled with Titebond Original wood glue. The modeling clay on the tip keeps the glue from drying out and clogging the narrow tube. 2 - A miniature plane (Lee Valley) for reducing the plank width to size according to the tick marks on the bulkheads (when I get to that point). 3 - The bag of Chris pins (and pusher) for getting the cranky planks in place (there's a Modelcraft pin pusher with an adjustable depth stop on Amazon that might be handier). 4 - A Tamiya modeler's knife with a padded handle for comfort (as opposed to the bare metal grip of a standard X-acto knife). Jonathan


- 8 replies
-
- 3
-
-
- Vanguard Models
- Lady Isabella
- (and 1 more)
-
After a brief hiatus Zulu's back in town1. 🙂 I removed all of the pieces that compose the hull from the 3mm MDF sheets using an Xacto X-4 square blade and gentle taps with a small hammer. I find this is easier than trying to use an X-11 or X-13 blade. I used a Dremel grinder to sand away the bulk of the material on the fore and aft bulkheads and formers, per James H. A dry fit of these parts showed that the fore and aft bulkheads need a little hand sanding (as expected). The journey continues... Jonathan 1: Apologies to Dubin and Warren (cf. Wikipedia).


- 8 replies
-
- 5
-
-
- Vanguard Models
- Lady Isabella
- (and 1 more)
-
Very nice job - congratulations!! Jonathan
-
Wow! Took you less time to complete a fine Lady Eleanor model than it took me to unwrap the box and examine the contents! Great job! Jonathan
- 38 replies
-
- 2
-
-

-
- Lady Eleanor
- Vanguard Models
- (and 1 more)
-
I found a video from five years ago by a guy who had no luck trying to tune his Buck. The good news is that there were a couple of comments from folks who were able to get it to work well: Beavis Christ: "Try flipping the blade so that the bevel is facing down. I set mine up that way, and it works wonderfully. When setting it up, I put it on a piece of glass, or any totally flat surface, and put a piece of paper just under the front of the block, let the blade drop down and sit flat against the glass, and tighten the screw." Robbie Vigil: "(Put) Sand paper between the blade and holder and put the bevel down and it's good to go." Another suggested trying a replacement blade (about $10 bucks) from Lee Valley. I use this miniature block plane ($45) from Lee Valley to taper my planks. No tuning required. Highly recommended. Jonathan
-
You're off to a great start! Jonathan
- 40 replies
-
- 2
-
-
- Lowell Grand Banks Dory
- Model Shipways
- (and 1 more)
-
Congratulations on finishing your build and it looks mighty fine! Jonathan
- 34 replies
-
- 1
-
-
- Grand Banks Dory
- Model Shipways
- (and 1 more)
-
What's the math subject? Manifolds? 🙂 Jonathan
-
I recently bought some Gorilla Gel super glue to use instead of wood glue when I start my Zulu planking. Hmm... Jonathan
- 62 replies
-
- 1
-
-
- Saucy Jack
- vanguard models
- (and 3 more)
-
It's been a while since I finished my two builds of this dory but as I recall the ModelExpo Hull Yellow Ochre was noticeably tacky for a fairly long time. It eventually dried out, so forge on! I just finished my Fifie build and used hand-brushed ModelExpo Warm White, Bright Red Trim, and Bulwarks Dark Green. The Dark Green was kind of tacky (not as bad as the Ochre) but I was able to sand down the Warm White on the hull with only a day or so of drying time. On that model I also sprayed on Badger acrylic paints for the primer, the red oxide lower hull, and the black upper hull with the brushed warm white in between those two. Jonathan
- 34 replies
-
- 1
-
-
- Grand Banks Dory
- Model Shipways
- (and 1 more)
-
Thank you! I've started the Zulu kit so I've been referring to your build log rather frequently as I get started. You did a nice job on your build! 🙂 Jonathan
-
HM Cutter Cheerful 1806 by JpR62 - 1:48 scale
wool132 replied to JpR62's topic in - Build logs for subjects built 1801 - 1850
Full recoveries are good! Now, your next challenge is to stay recovered! 🙂 Apt name for the model, too. Jonathan -
That brings up an interesting point. I remember reading somewhere that the writer Guy de Maupassant ate lunch every day in the Eiffel Tower restaurant. A waiter said that he must really like the tower and the de Maupassant said "No, It's the only place I can eat lunch and not see the damn thing!". If you're inside the suit, you're just running along as usual (maybe a little warmer) and you can't see it but to those outside it is a memorable event. 🙂 I'll stop going off topic now. Jonathan
-
I used to store blog references using browser bookmarks. I wound up with a long list of bookmarks and had no idea what they were for without clicking on them to find out. Quite tedious. Putting a link in the spreadsheet next to the build step(s) provides a context for the bookmark and I can add clarifying text in the link's verbiage if I want. If you wish to link to a specific reply rather than the whole page of entries, right click on the "Posted at ..." in the black bar at the top of the targeted entry and choose Copy Link and paste that into the sheet. As for most of the pictures, I use the iOS Screenshot utility to capture an image from the screen to the clipboard. I paste that into a blank spreadsheet cell, adjust the row height so the image is visible, and add a link if desired. Jonathan
- 8 replies
-
- 1
-
-
- Vanguard Models
- Lady Isabella
- (and 1 more)
-
I'm thinking that the first planking surface is a great testing ground for surfacing since it will be covered up by the second planking. As for Penguins, I've nabbed the wrong Glenn - sorry! ("Glenn Shelton followed in a penguin costume..." in an article on the Dalby Parkrun in The Scarborough News, circa 2017) Jonathan
-
Thanks for your informative post before being off with your grandsons! I'll be sure to give this a go when I get there on the Zulu. Neither my Fifie nor my Nisha planking was as smooth as what you've got. By the way, you wouldn't happen to know anything about a penguin suit, would you? Have a good time! Jonathan
-
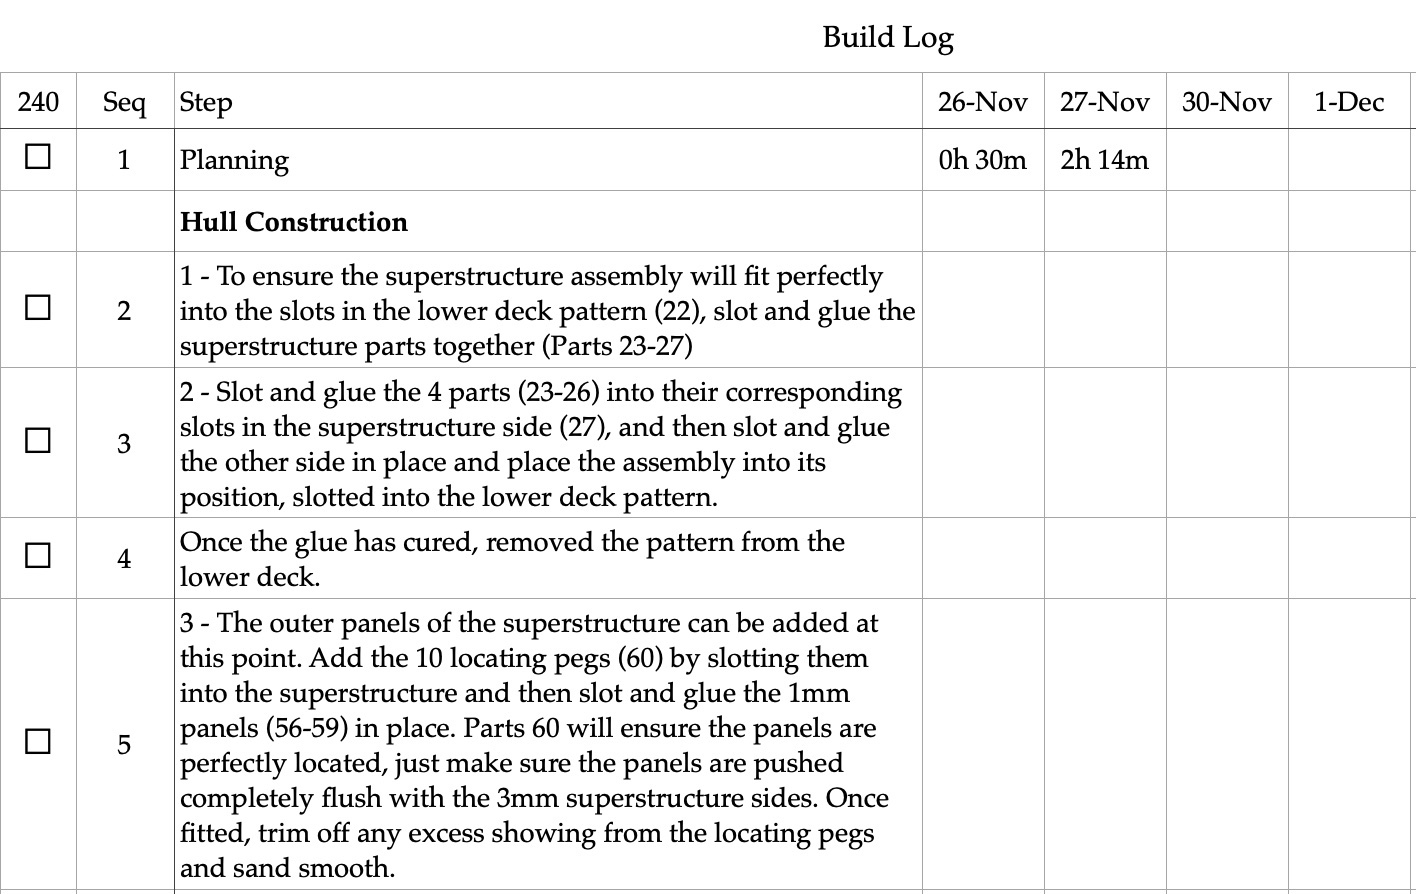
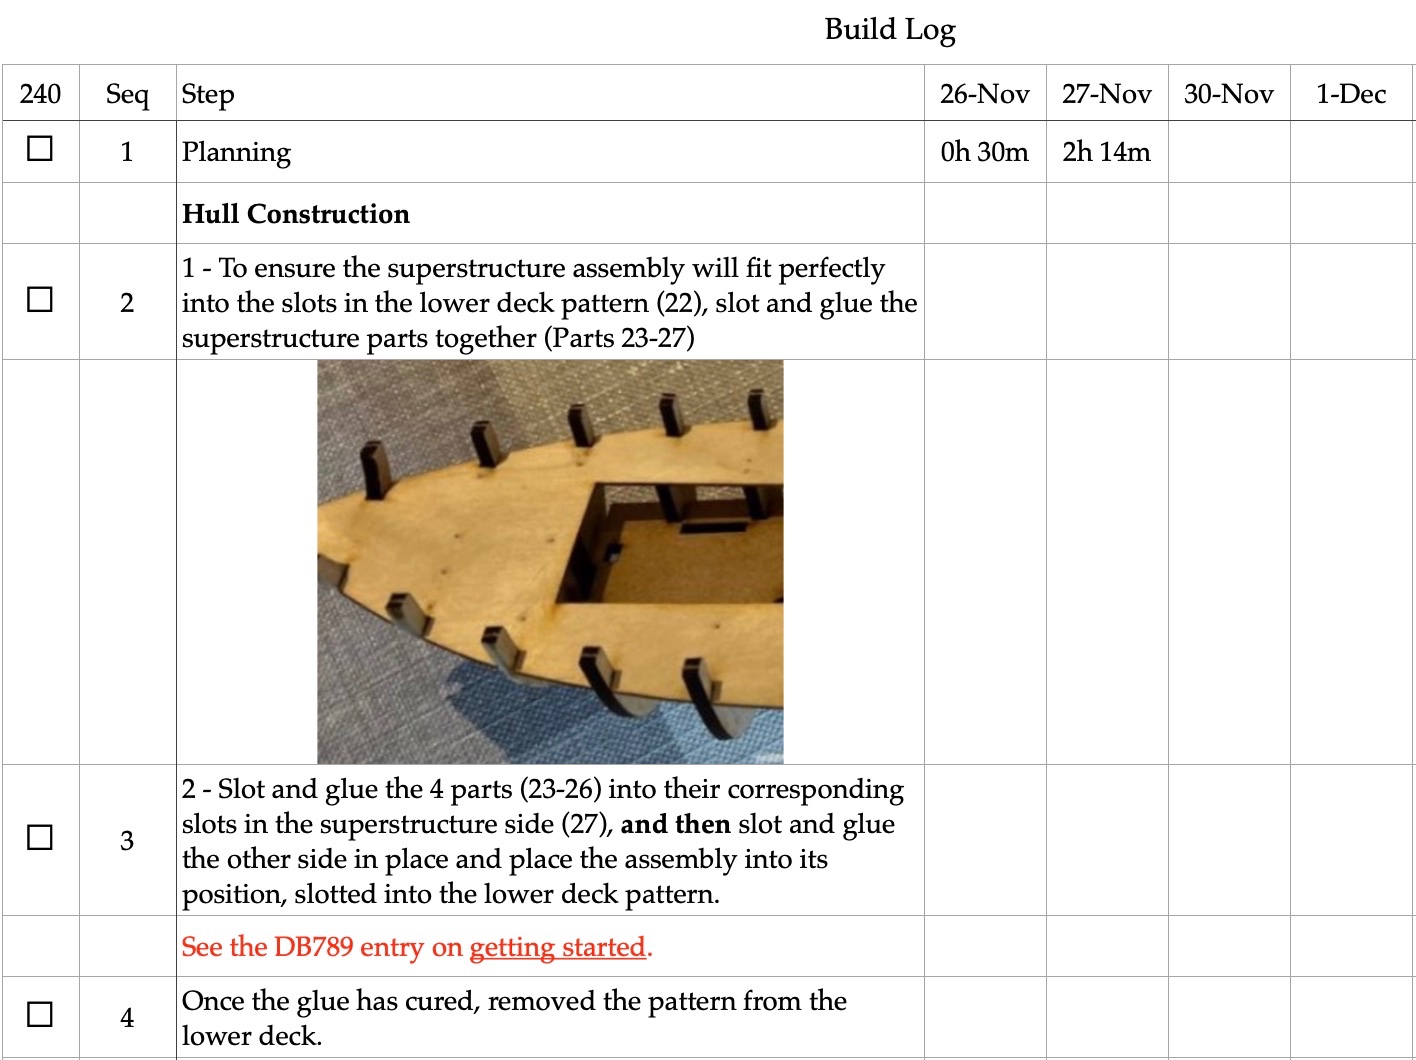
A word about preparation. In order to better keep track of where I am during a model build, I create a spreadsheet with all the build steps from the manual. I imagine that for a lot of you this is all ho-hum, nothing new but I include it here in case you're new to the hobby or you haven't thought much about some of the advantages of using a spreadsheet in a build. To do this, I select everything from the first step to the last in the PDF instruction file (pictures and all) and paste the clipboard contents into a blank spreadsheet. I use iOS Numbers and just the text gets put into the sheet. (Windows and Excel may do the same thing.) I then add two columns in front of the one for the steps. One is a checkbox that toggles between not done and done. The other is a sequence number for the rows with actual content and not headings (in this case Hull Construction). Columns are added after the steps to record the time spend on each step for the days when I work on the model. I inserted a formula in the top left cell to count the number of unchecked checkboxes in the first column. In this case, there are 240 steps left to complete the model. With any luck, that number will go down as I slave away at the workbench. 🙂 The rows with headings are inserted at various points in the file to give a general idea of what's being worked on. These are usually provided in the Vanguard instructions, though sometimes I add them if I feel they're missing. Once the sheet has been created, I can reorder the steps if I wish, highlight key steps, insert links to other builder's blog entries or insert pictures of their work or techniques, add comments (like what NOT to do or things to avoid), add rows to create sub-tasks for a complex step, etc, etc. A sample is shown below: Jonathan
- 8 replies
-
- 4
-
-

-
- Vanguard Models
- Lady Isabella
- (and 1 more)
-
Thank you very much! The two of them do look rather good together. Jonathan
-
Thank you, Paul. High praise indeed coming from a builder of your caliber. Jonathan
- 15 replies
-
- 1
-
-
- Lady Eleanor
- Vanguard Models
- (and 2 more)
-
Wood glue will adhere to acrylic, sort of. For much, much better results, apply to bare wood. It's worth the extra effort. Jonathan
- 34 replies
-
- 1
-
-
- Grand Banks Dory
- Model Shipways
- (and 1 more)
-
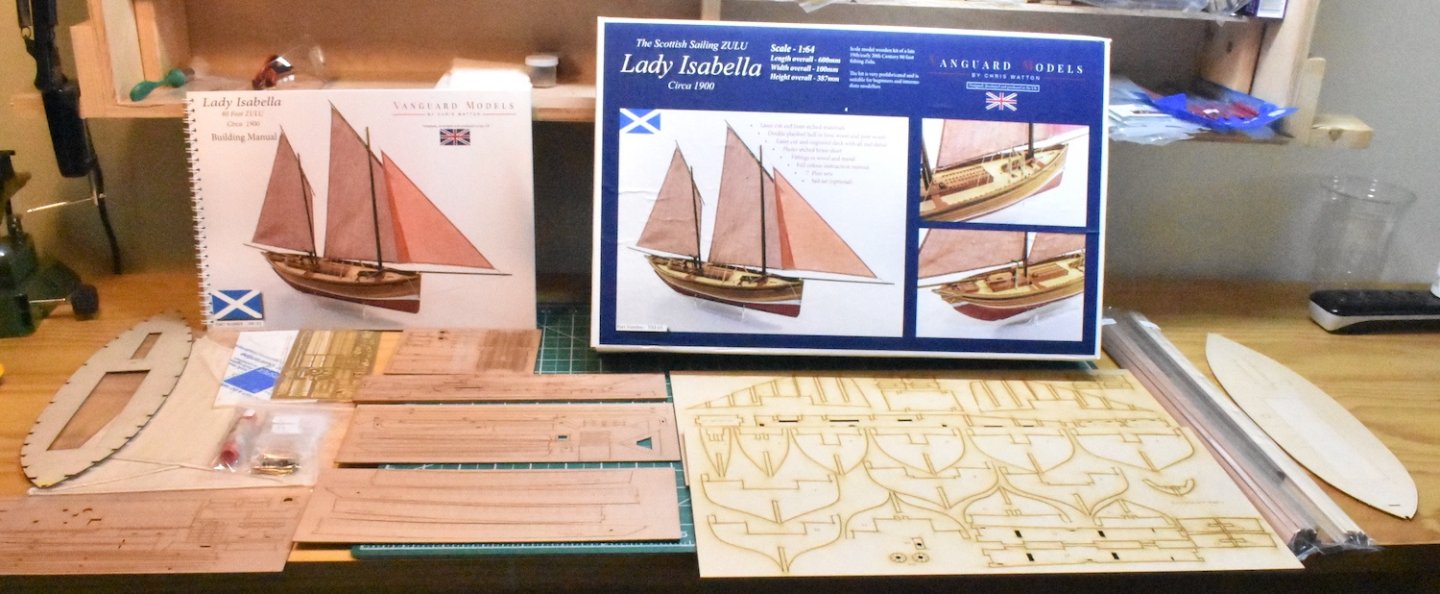
It looks like I'm hooked on the fishers from Vanguard Models. This one is the Lady Isabella. It's rated as a kit good for Novices like the Fifie (just completed) and the Ranger (waiting in the wings). I am certainly a Novice so this kit should be right up my alley. After those two we'll move up to the Amateur kits and tackle the Erycina and the HMS Alert (also waiting in the wings). Here are the parts for the kit, arrayed on my workbench, awaiting two lbs of wood glue and three bottles of aspirin 🙂. Jonathan
- 8 replies
-
- 8
-
-
- Vanguard Models
- Lady Isabella
- (and 1 more)
-
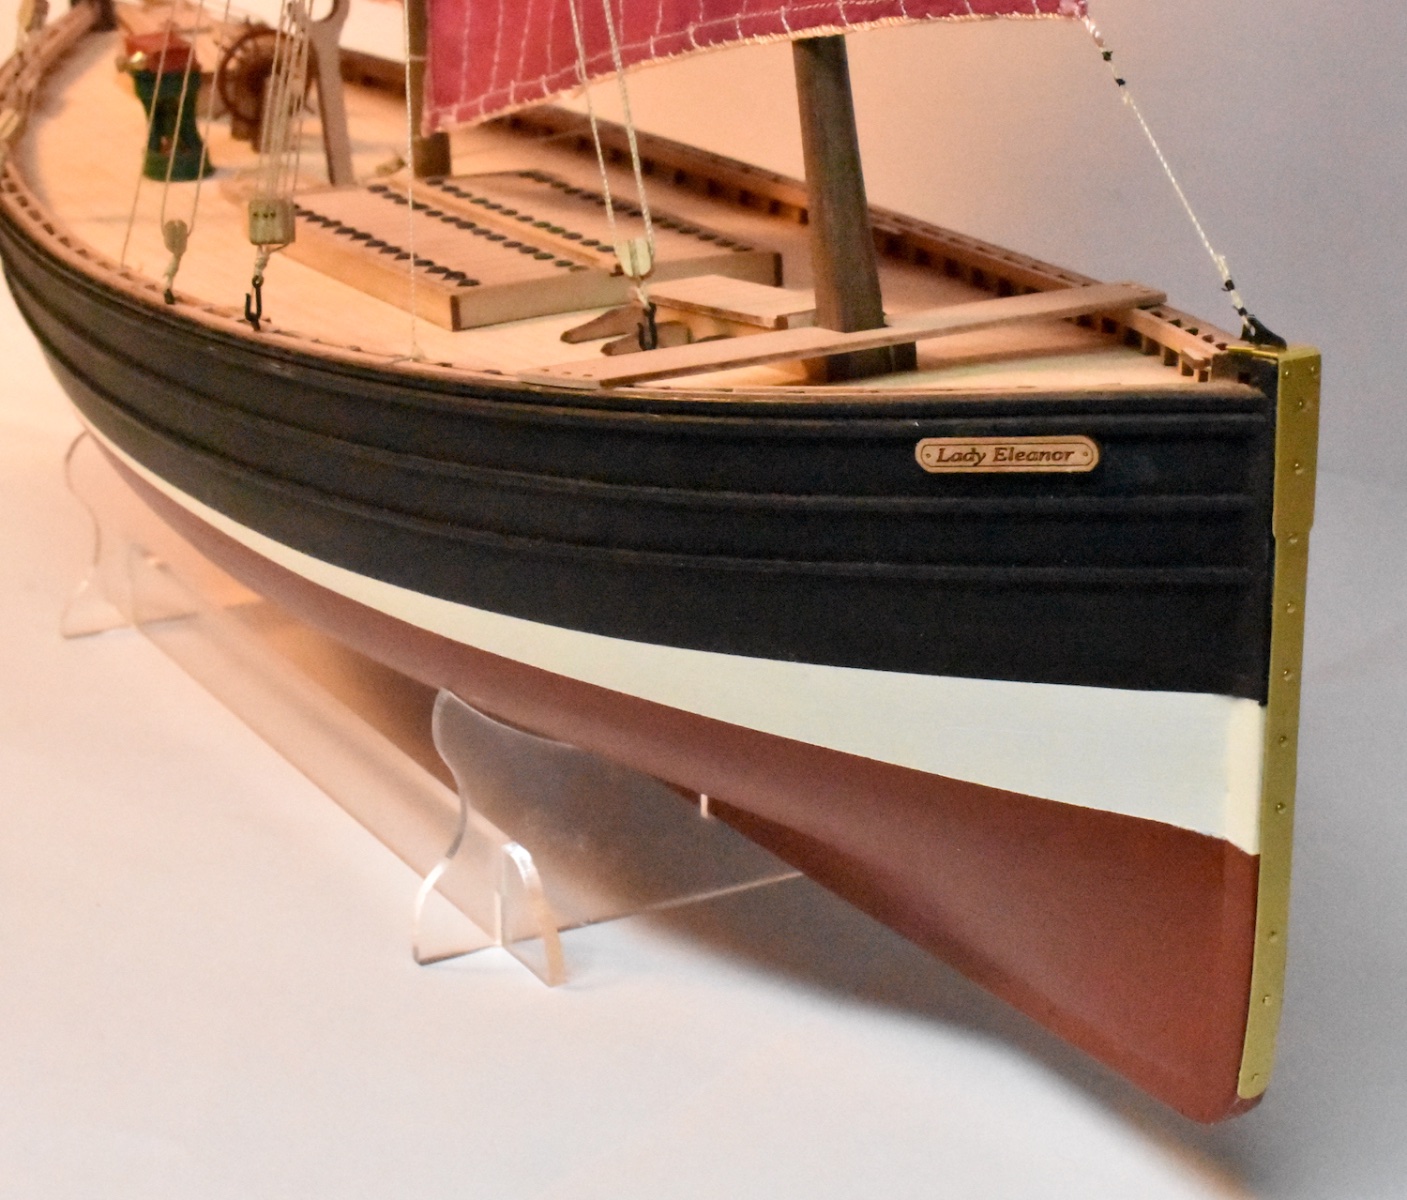
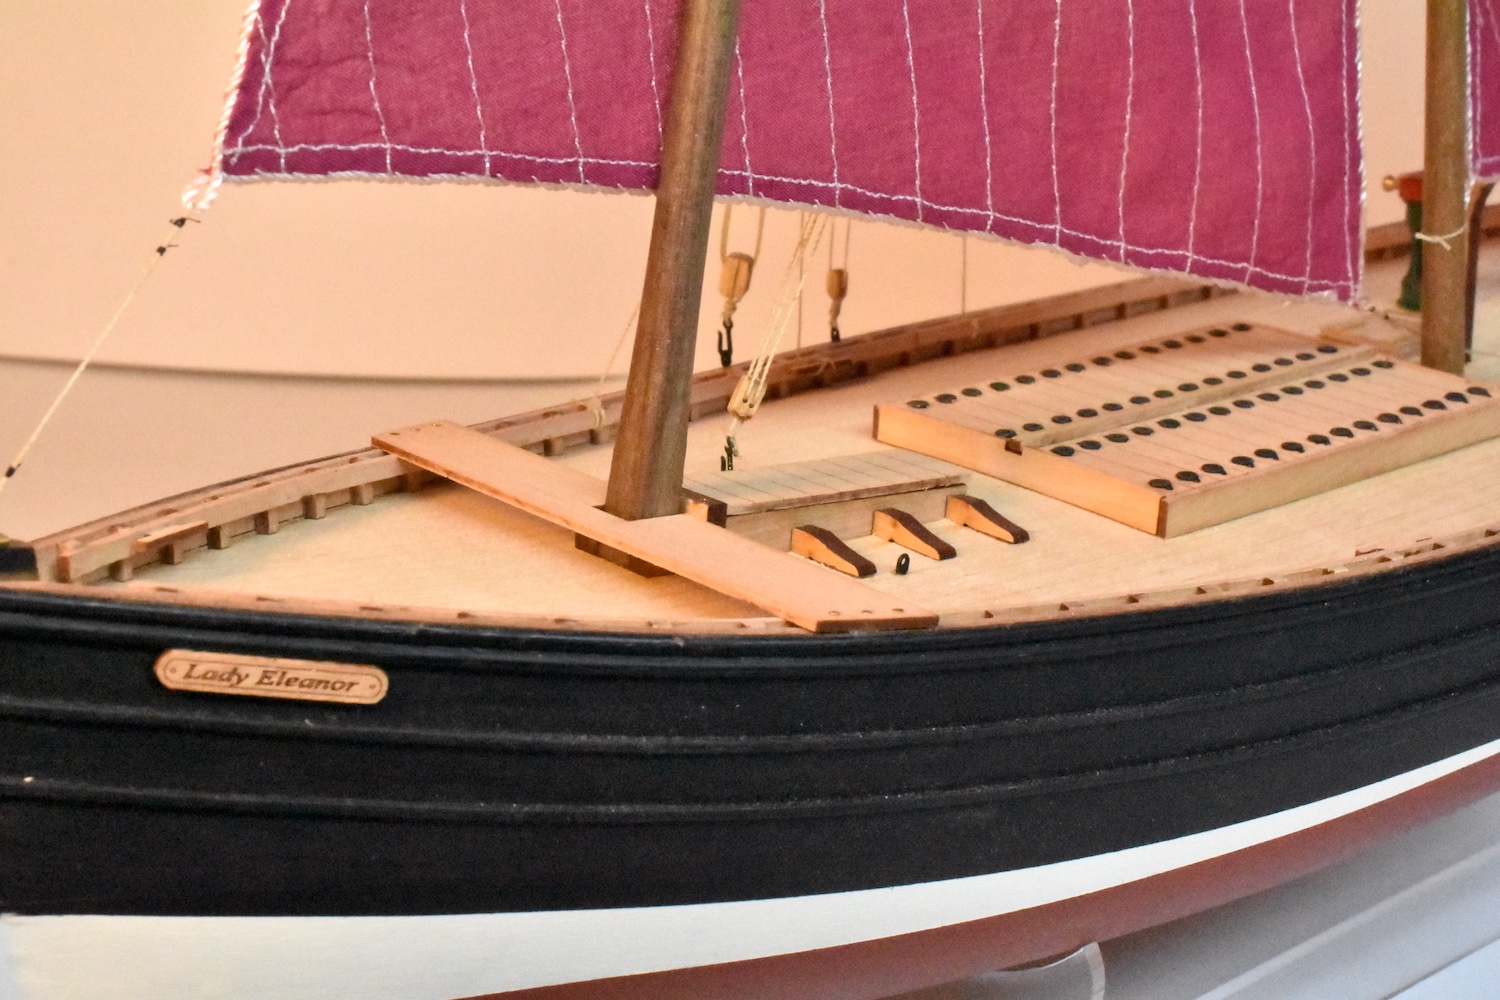
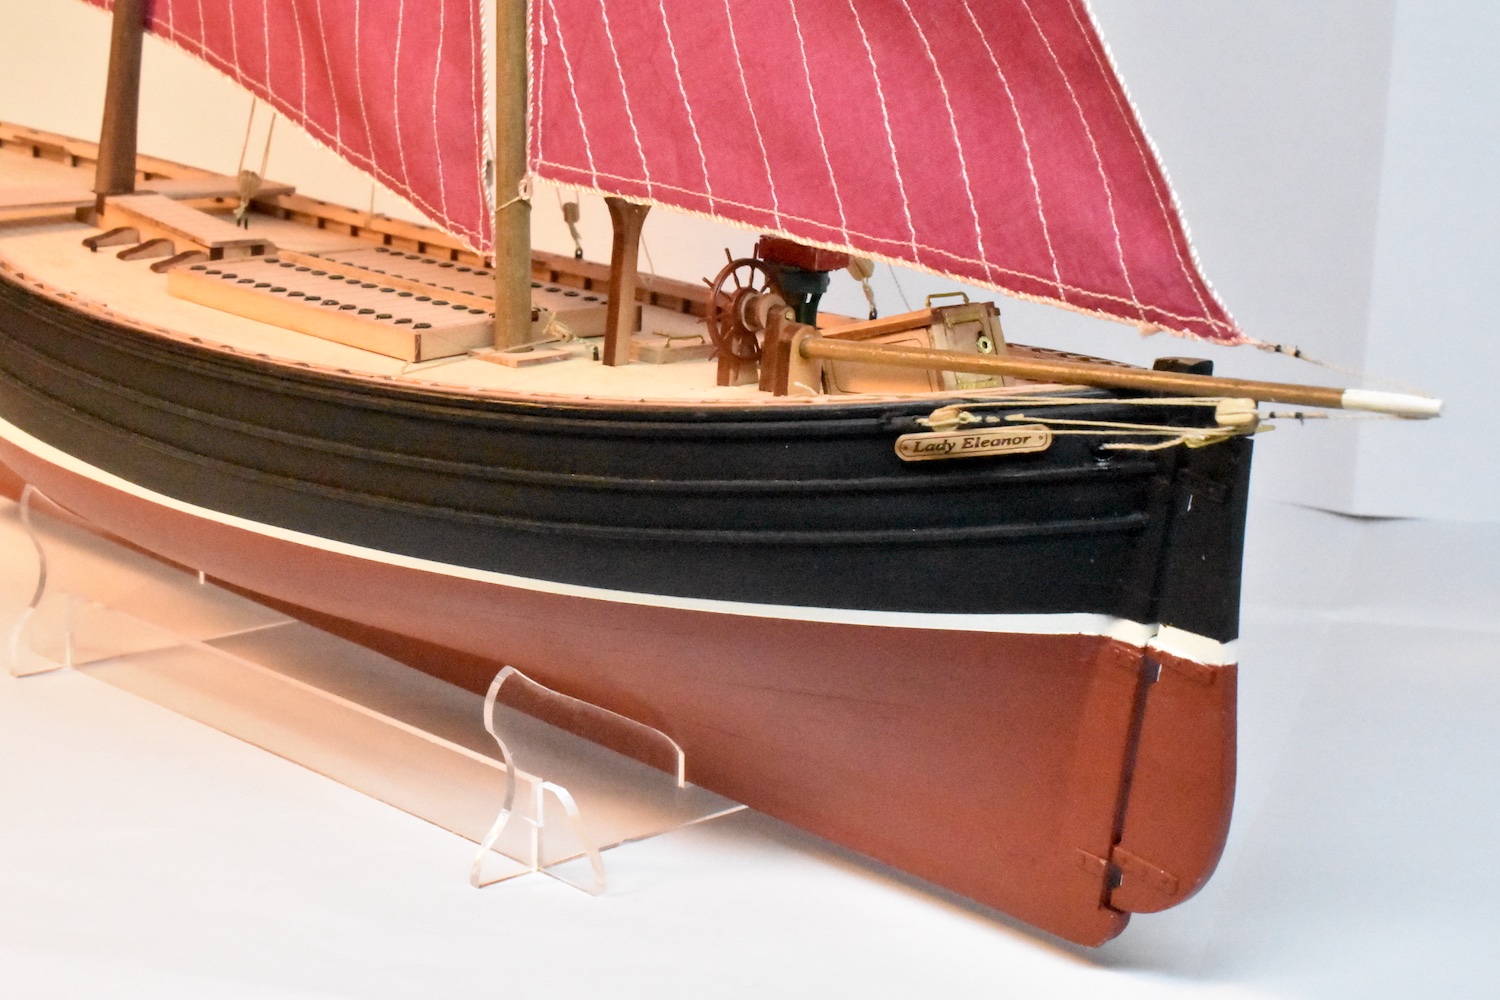
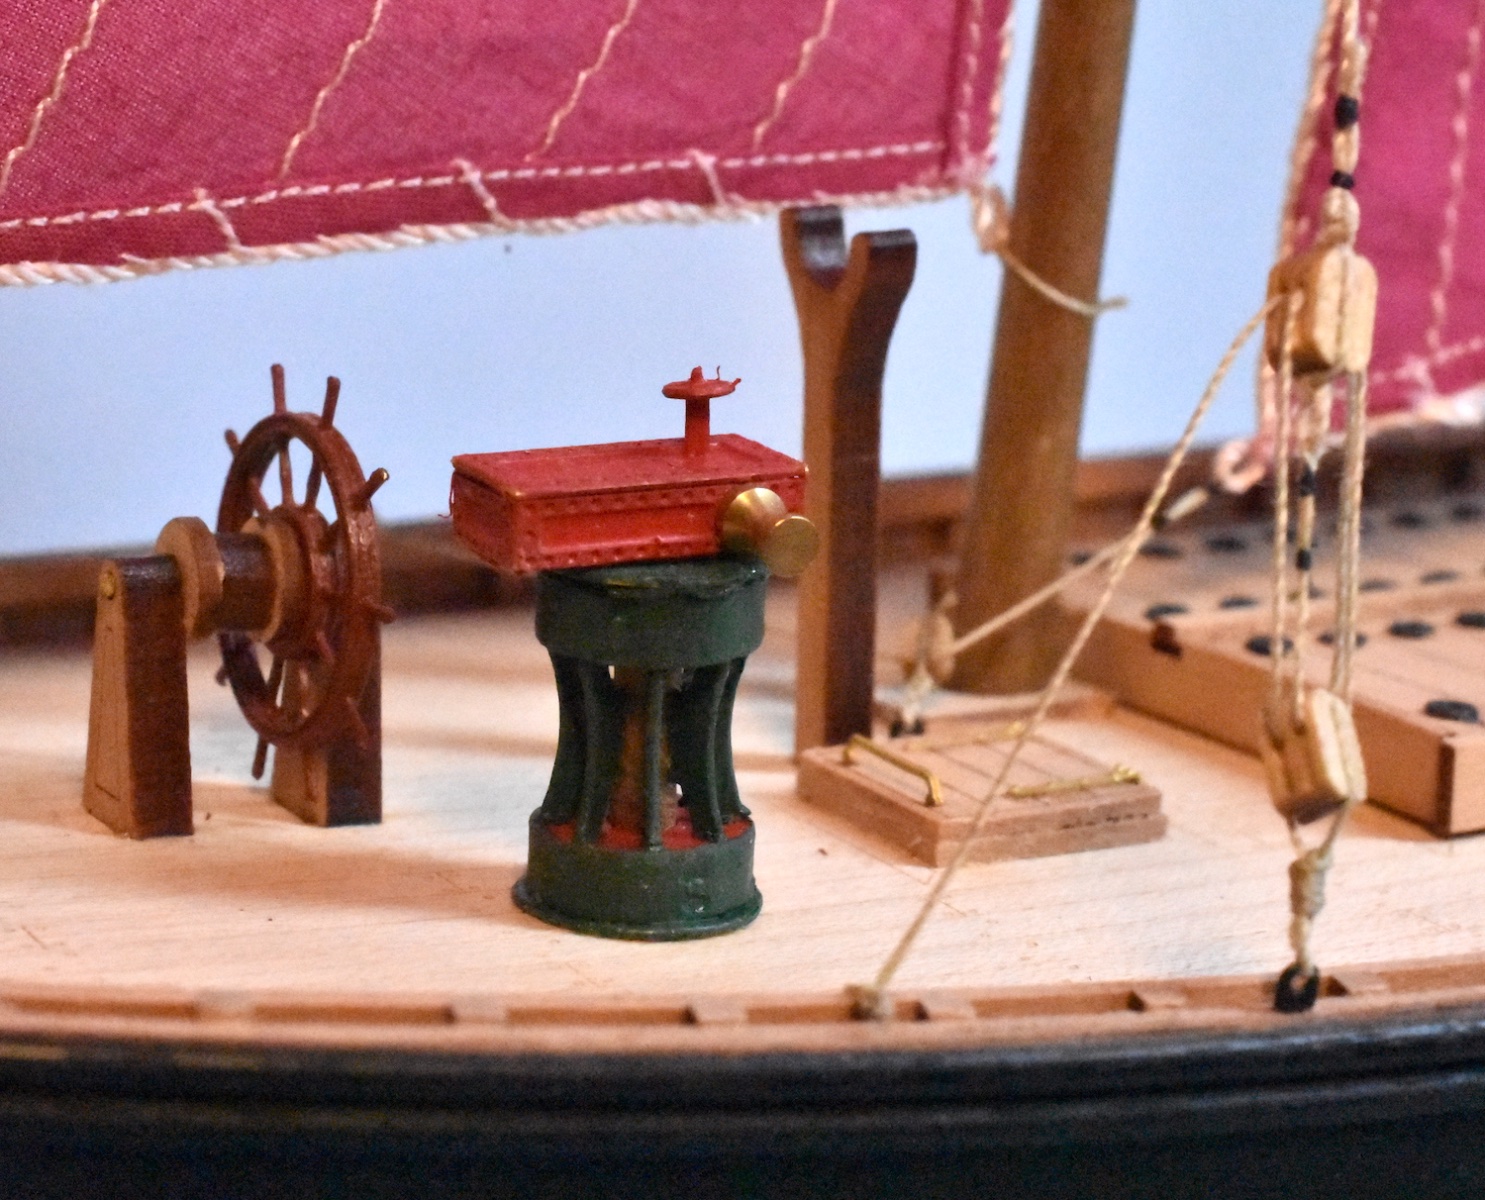
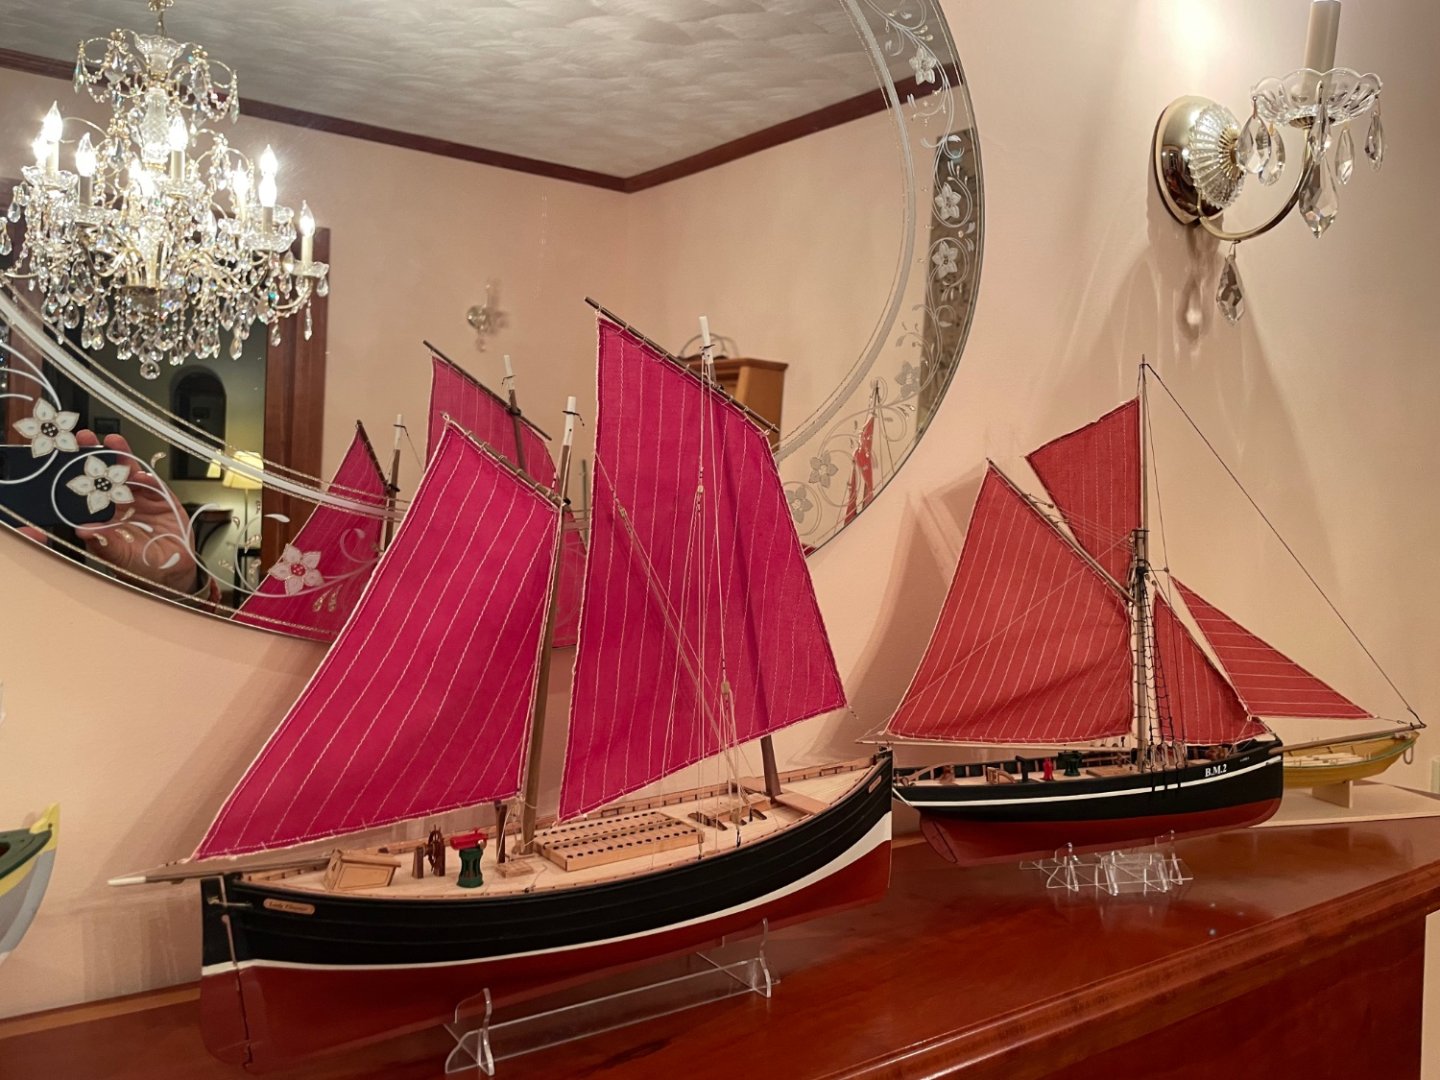
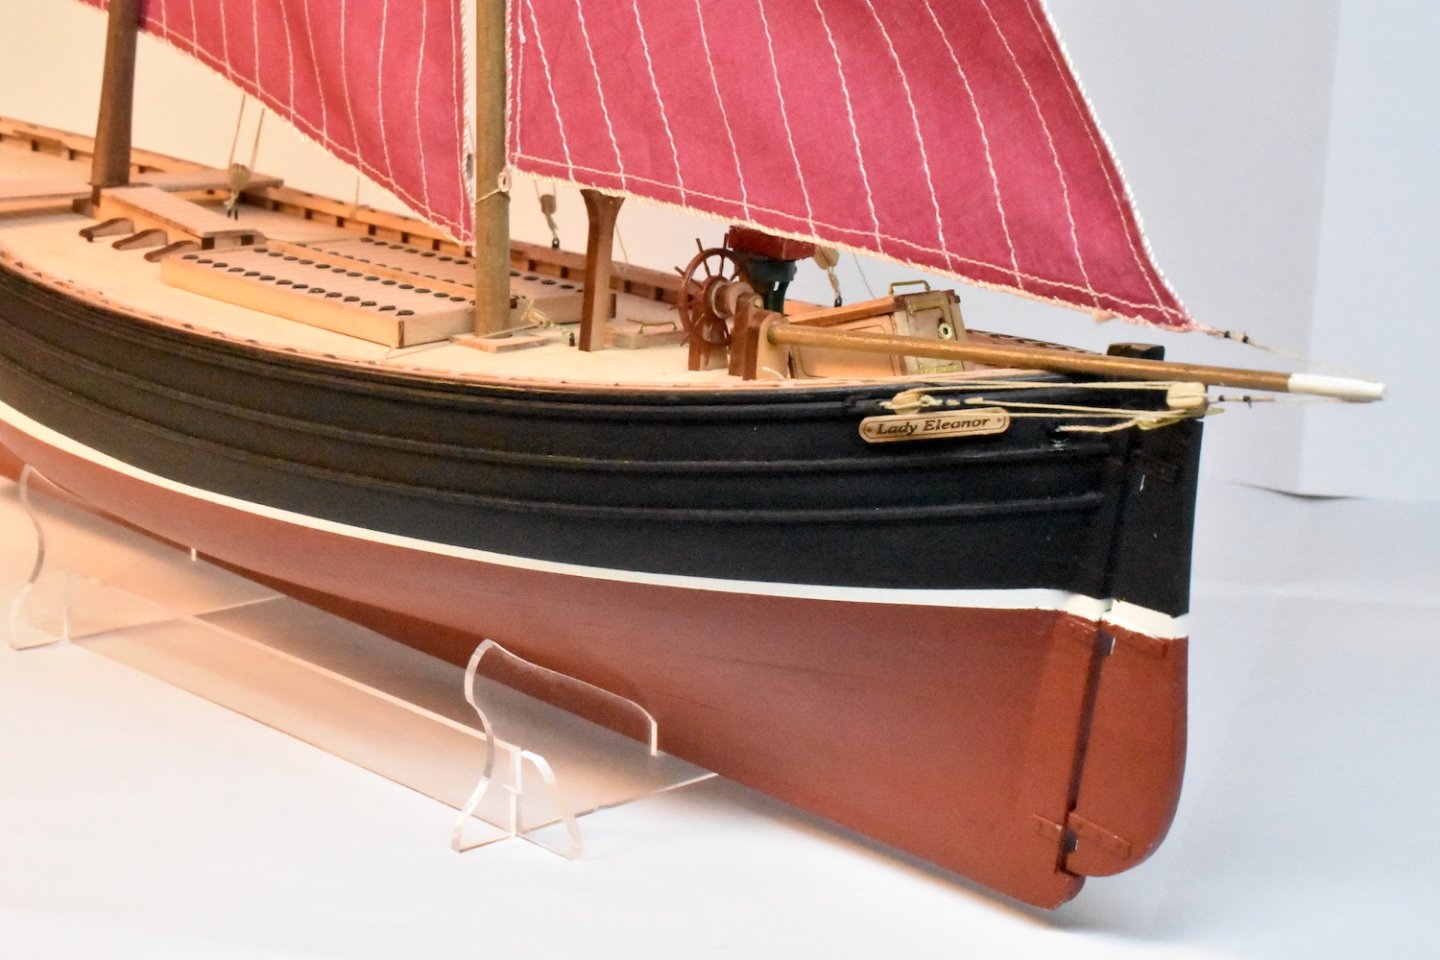
The Lady Eleanor is finished and is now with her Vanguard sibling (Nisha) on the dining room mantle. The total build time for the model was around 150 hours, with planking (first and second) consuming around 40% of that time. The rigging took about 18 hours but it seemed more like 180 (even without any ratlines)! Thanks to Paul Le Wol, Ryland Craze, DB789, glennard2523, ccoyle, Craigie65, Prowler901, chris watton, Rik Thistle, RockinBudgie, Retired guy, andyrew, and longshanks for the Likes and a shout out to Cragie65 and glennard2523 for their Comments. Chris Watton has done an outstanding job in designing, developing, and producing this whole series of fisher models and James H's (Jim Hatch's) prototype builds have been both informative and inspiring. As a result, I'm finding it hard to work on my stash of ModelExpo boxes and keep buying more Vanguard Model kits instead. Some pictures for the record: Now it's on to Zulu - Lady Isabella! Jonathan


- 15 replies
-
- 12
-
-
- Lady Eleanor
- Vanguard Models
- (and 2 more)
-
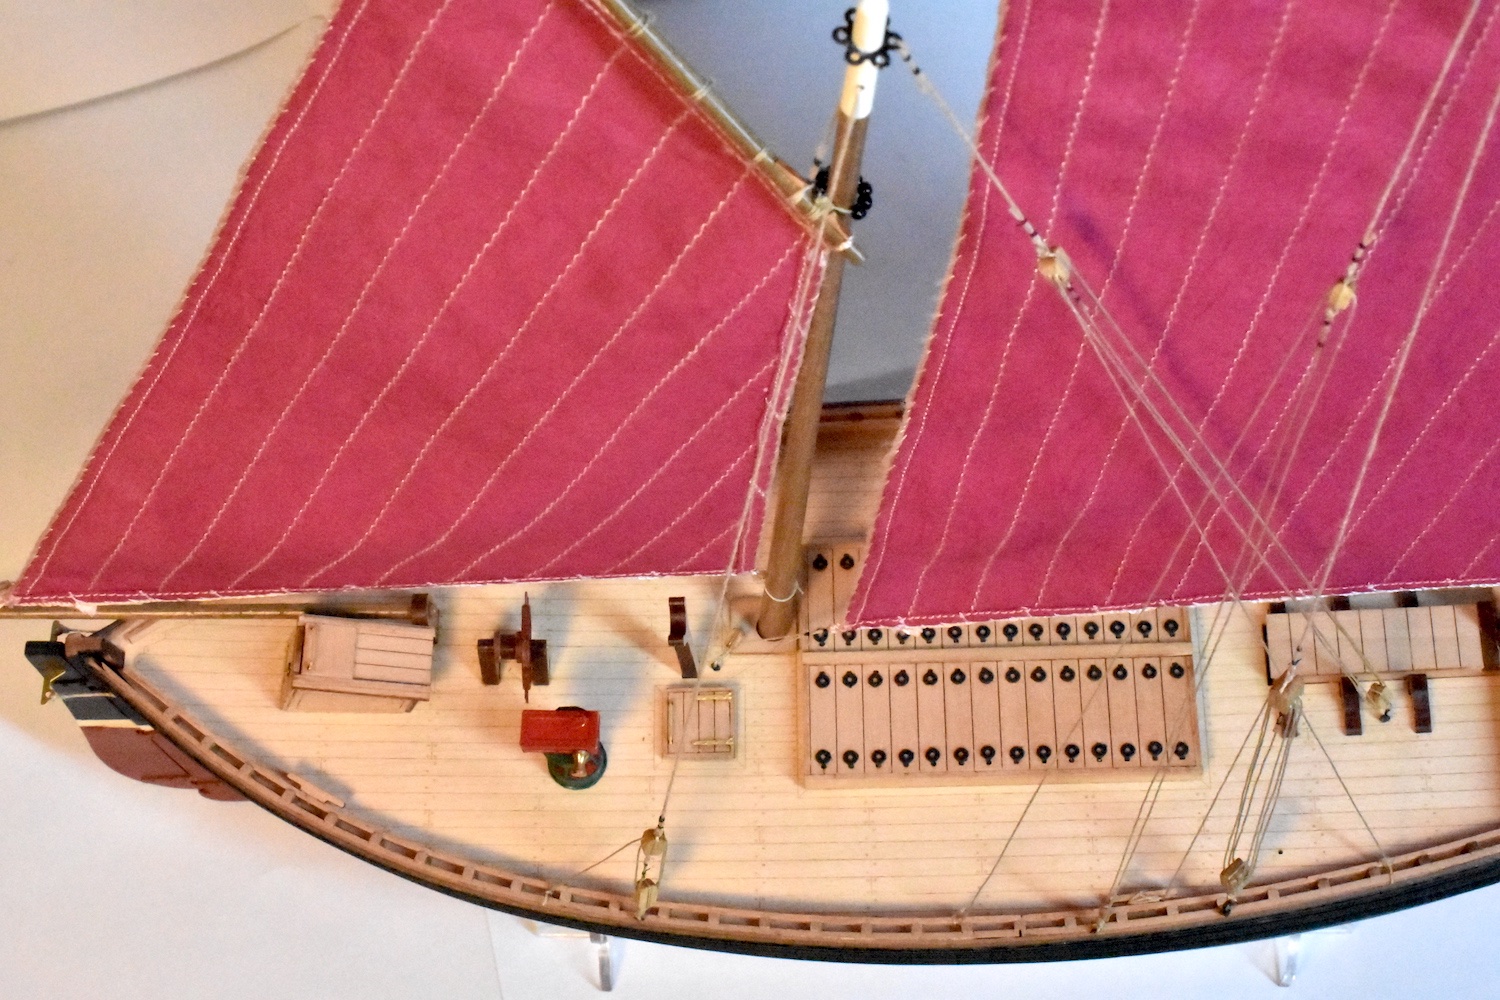
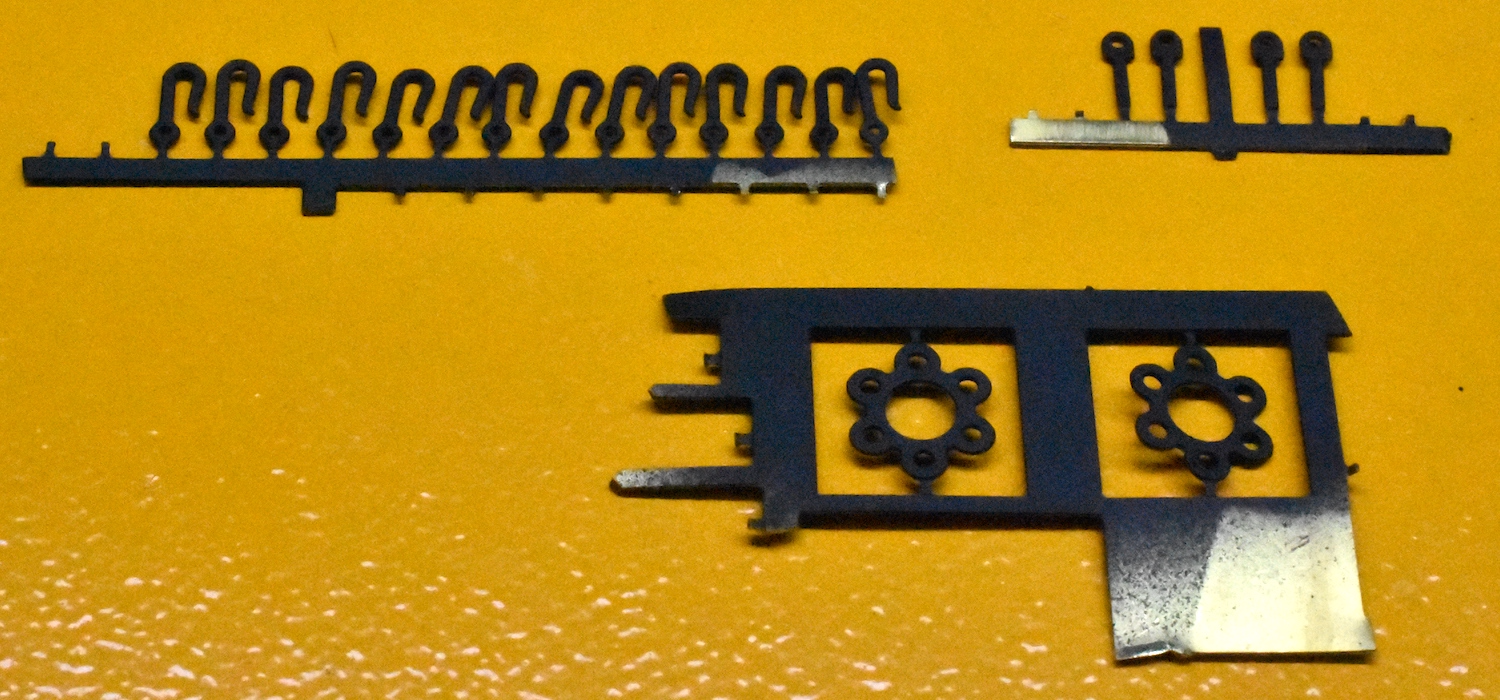
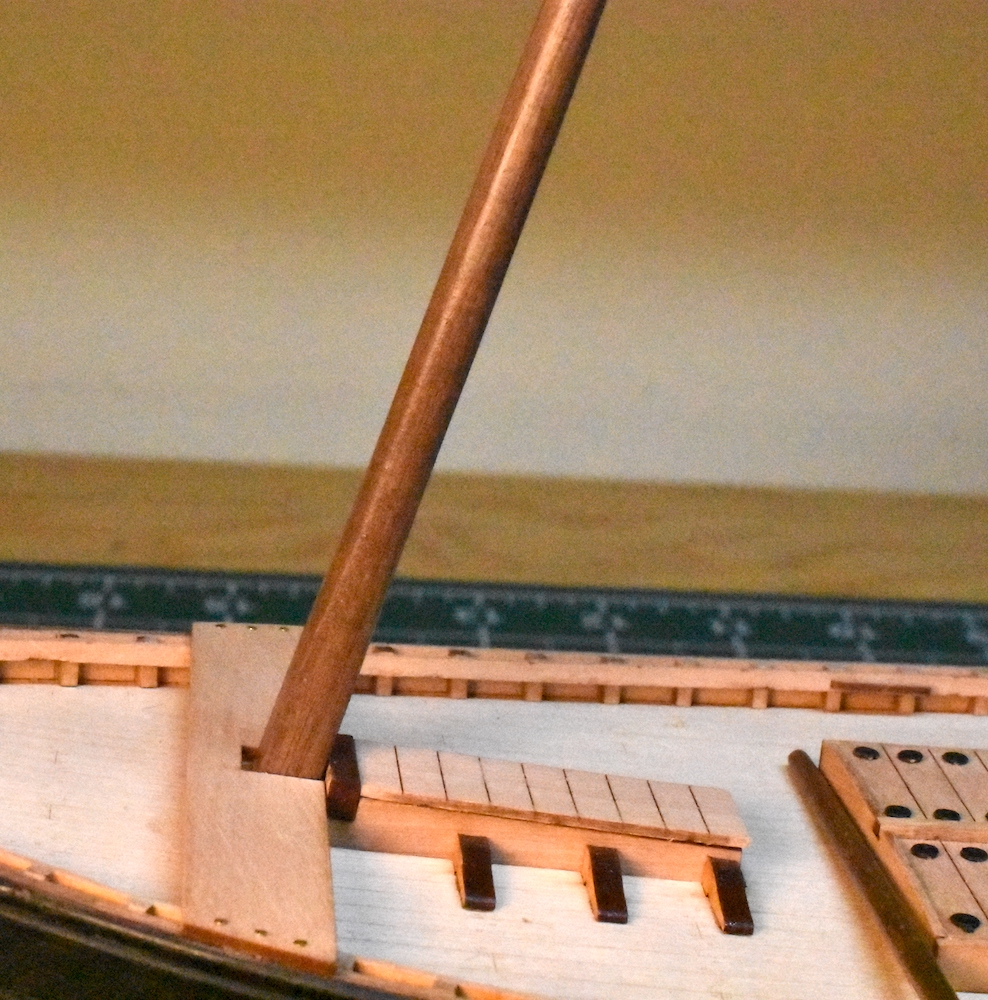
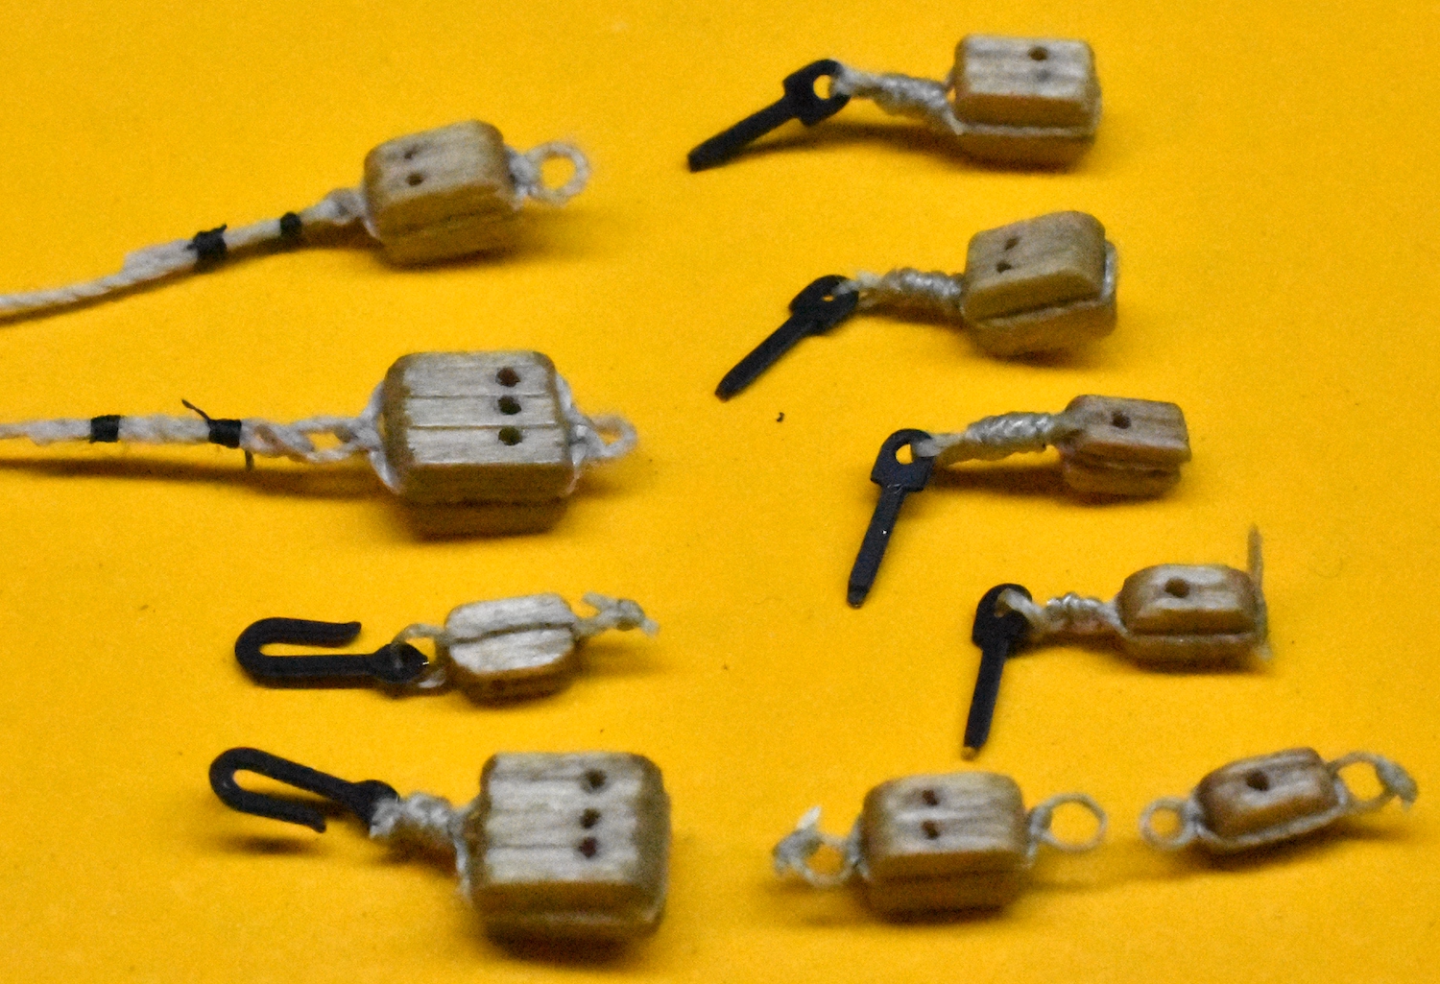
Construction continues. I turned the masts and yards on my wood lathe and ground down the excess wood using a variety of sandpaper grits ranging from 80 to 400 (or P80 to P800 using the FEPA standard). I then brushed on a layer of clear matte water-based polyurethane varnish. To get started on the rigging, I prepared the eyebolts and the hooks while they were still attached to the PE sheet. I sanded the sheet using 400 grit sandpaper then soaked the pieces in vinegar for an hour or so. Being careful not to touch them with my fingers, I painted them using black Stynylrez primer. They looked fine after a couple of coats so I didn't bother spraying on a finish coat of black paint. The parts still looked good after being manhandled while being attached to the various blocks, so I'll stick with this revised procedure (my original one was to spray on a coat of black paint and hope for the best: not very complicated and not very good). I think several of the blocks should have been rotated 180° around the z-axis so that the offset holes for the rigging lines would always be closest to the hook/eyebolt/seizing. The black seizing was done with 18/0 Semperfli Classic Waxed Thread. I probably should have used more of that and less of the .25mm thread supplied with the kit. Now I have to figure out where these things go on the ship. I'll be dyeing the sails soon so hopefully it won't be long before this one is done! Jonathan


- 15 replies
-
- 3
-
-
- Lady Eleanor
- Vanguard Models
- (and 2 more)