
MORE HANDBOOKS ARE ON THEIR WAY! We will let you know when they get here.
×

canoe21
-
Posts
4,355 -
Joined
-
Last visited
Reputation Activity
-

 canoe21 reacted to michael mott in Skipjack by michael mott - 1/8th scale - SMALL - 19 foot open launch
Floss/Skipjack Part 1
History
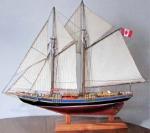
Floss was one of a pair of Launches that were built in 1909 by Herbert Minett and was powered by a single cylinder Ferro engine, her sister named Skipjack pictured here had a two cylinder Buffalo engine.
These launches were built for Andrew Mellon the Pittsburgh Millionaire.
Model
I am still tracking down information about Floss, and I have a few leads. I am going to build this model the same way as the full size boats of this type were often built.
Moulds were suspended from the ceiling in some cases and others were built upside down. The Stem Keel and Stern timbers were set up and the moulds positioned. In either case to build a model using either of these methods I will need to support the moulds and backbone to fix ribbands for setting the bent frames before planking.
After the ribbands are fixed to the Stem, moulds and stern the bent frames will be fitted to the keel and then temporarily attached to the ribbands with pins. Once all the frames are set the sheer clamps and bilge stringers and floors will be added.
After the basic shell is assembled then the planking will commence.
In order to accomplish all this I needed to build a building board with some specific features.
Using odds and ends of materials I had laying around the shop I came up with an acceptable solution.
The base is 36inches by 10inches by 1 7/32 inches thick it was cut from and old office desk top.
The white square tubes are 3/4 inch railing bars left over from a project a couple of years ago.
The blue anodized aluminum tubes are also 3/4 inch diameter left over from another project.
The white plastic components were machined from some offcuts picked up at a commercial plastic supplier.
The aluminum rails are a low cost bar clamp that was cut in half and the clamp mechanisms removed.
The dome nuts are 5/16 and are threaded onto a length of 5/16 ready rod that causes the clamps to lock on the rails.
The cross rails are a sections of some 3/4 inch U channel that was slit down the middle in the table saw. The cross rails are clamped with some cherry blocks and 4x40 allen head cap screws.
These lines are still being reviewed and updated as I get new information, When I am satisfied that they are as good as I can get then the build will actually start.
Floss lines.pdf
Until then I am getting on with some tests regarding bent frames and testing my ideas about the construction method, and finishing the elements of the building board.
Because of scale and look at the large scale of 1:8 the frames will need to be made of something different than oak it is just too coarse. these frames are 1 1/4 scale inches square Fir the wood was boiled for 15 minutes in water. The actual frames will likely be somewhere around 1 1/4 by 3/4 with the inside edges rounded off before bending. I am also testing without heating and just soaking overnight.
This will probably be a while in the making and I am in no rush I have lots of work doing the testing and research. it is a great diversion and a break from the intense work on the Pilot Cutter. Plus I needed something to fill in my spare time;>)
Michael
-
canoe21 reacted to Jack12477 in Willie L Bennett by Jack12477 - FINISHED - Model Shipways - 1:32 Scale - skipjack
Small update: Sometimes progress is measured in millimeters
Finally added the rudder assembly and foreward capstan/winch. Still trying to learn to solder - so far getting an "F" in the class.
-
canoe21 reacted to mtaylor in Willie L Bennett by Jack12477 - FINISHED - Model Shipways - 1:32 Scale - skipjack
Looks good, Jack. I've never thought about wire rope before.
-
canoe21 reacted to Jack12477 in Willie L Bennett by Jack12477 - FINISHED - Model Shipways - 1:32 Scale - skipjack
Well, the summer hiatus is over, cooler weather has moved in (low of 45 F overnight last night) and it's back to the shipyard.
I've been debating with myself over how to fabricate the railing(s) around the side and stern section. Didn't like the wire that came with the kit so I got some jewelry wire and experimented with that. I like the braided jewelry wire better than the solid because it more closely resembles wire rope, or cable. I also picked up some jewelry crimp tubes is varies sizes and colors ranging from 1mm, 2mm, 3mm, to 4mm and silver, gold, brass, and bronze. The braided wire is less than 1mm in diameter and folded back on itself it should be around 2 mm + or - in diameter. In practice only the 4mm crimp tube would fit over the folded back rope, so I used that, choosing the darker bronze color for both the rope and crimp tube.
Pictures follow:
First the wire rope and tubes
The end results
Now to do more practicing with the soldering iron before tackling the other deck structures. So far the practice sessions haven't been going so well.
-
canoe21 reacted to Jack12477 in Willie L Bennett by Jack12477 - FINISHED - Model Shipways - 1:32 Scale - skipjack
Thanks, Ken.
More work on the railings - now have the entire railing done.
After marking and drilling the holes for the nails in both the railing and the ship's sheer. I insert the nails in the holes first, then place a 1/16" x 1/32" tube over each nail, then place a tiny drop of thin CA where the nail protrudes thru the tube. This keeps the tube from slipping off and winding up on the floor as I turn the rail over to align it with the pre-drilled holes.
Then using a tweezer to align the nails with the hold, and using finger pressure I press them into the holes. To completely seat them into the deck I use a small hobby hammer (smaller and lighter than a standard tack hammer) to drive the nails all the way into the wood. Then another drop of thin CA to lock them in place.
Then finished rails
-
canoe21 reacted to Jack12477 in Willie L Bennett by Jack12477 - FINISHED - Model Shipways - 1:32 Scale - skipjack
Another small update ( summer gets in the way of progress )
Got the forward railings installed on both sides. Used the 1/16" x 3/32" brass tubes I had cut earlier, drilled holes in the rails at 1/2" intervals, pushed the bras nails (which are magnetic by the way ) thru the rails, inserted the tubes over the nails, then pre-drilled holes into the sheer and with a little persuasion from my hobby hammer drove the nails home. After that I gave each nail a drop of thin CA using a cut-off sewing needle eye as the applicator. Of course the rails were pre-painted green to match the wales and cabin roofs. Also installed the pulley to raise and lower the "dagger board" in the keel.
Photos follow:
Nails and stanchion tubes for the rails:
Rails installed
Pulley for raising/lowering "dagger board" (aka center board - my Sailfish sailing lingo is coming out)
-
canoe21 reacted to Jack12477 in Willie L Bennett by Jack12477 - FINISHED - Model Shipways - 1:32 Scale - skipjack
It's been a few weeks, but progress has been slow. Working on cutting the tiny 1/16" diameter x 3/32" long brass tubes for the cap rail posts. Had to dig around in the ole toy box till I found a suitable jig to use to cut repetitive lengths of pipe. 24 pieces cut so far, about a dozen more to go. The jewelers saw was the only saw small enough to fit in the slot and tough enough to cut the brass tubing.
-
canoe21 reacted to Jack12477 in Willie L Bennett by Jack12477 - FINISHED - Model Shipways - 1:32 Scale - skipjack
Time for a small update:
Finally got the small pusher boat completed. Ran into some problems keeping the side aligned even with the aid of the frame templates. The instructions were really vague and frustrating on what size lumber to use - had to do a lot of "translating" from the plans and to find the right pieces. Mostly I eye-balled it and used what "looked correct". Results are shown below in the photos.
-
canoe21 reacted to mtaylor in Willie L Bennett by Jack12477 - FINISHED - Model Shipways - 1:32 Scale - skipjack
It's probably better in some ways that you only got one stick. Could you imagine if you said "29" and they shipped 29 bundles?
Yeah.. summer is here and the yard is demanding attention.
There's a pusher boat?????
-
canoe21 reacted to Jack12477 in Willie L Bennett by Jack12477 - FINISHED - Model Shipways - 1:32 Scale - skipjack
Well, I checked out Lowes and Home Depot and neither of their local stores carry basswood. Re-checked Michaels yesterday and they have nothing smaller than 1/8 x 1/8 and that was out-of-stock.
The resupply from ModelExpo finally arrived. ME delivered the package to the US Postal Service (USPS) on May 9th, it was logged into the USPS tracking system on May 10th in Opa Locka Florida with a projected delivery date to me of May 13th. When it hadn't arrived by the following Monday I filled a inquiry with the USPS - who could not find it anywhere - it was still in Opa Locka according to their records. Then it suddenly appeared at my door on May 19th after arriving that same morning at my local post office with no explanation for the delay.
The box:
The resupply contents - yes ONE stick of each size.
Boy was I surprised when I opened that box! Until I rechecked the parts list. I had read the parts lists as "part-number - 1/16 x 3/32 x 22 - - 29" as one bundle of 29 pieces when the part-number was really for 1 piece so I got one piece not one bundle of 29 pieces.
I guess I can chock that up to "Jack's brain was on the train to Spain" when I contacted ModelExpo.
No problem. The build has been side-tracked by Spring/Summer yard work and assorted other life things. I did start building the pusher boat - will post updates as I get further along with that.
In the meantime we attended our youngest daughter's university commencement where she received her Doctorate in Education (EdD) degree; we now have two "Doctors" in the family, our oldest daughter has her Doctorate in Epidemiology (PhD) and next up will be our oldest grandchild's High School graduation. So the shipyard will be somewhat quiet for a while.
Stay tuned !
-
canoe21 reacted to Jack12477 in Willie L Bennett by Jack12477 - FINISHED - Model Shipways - 1:32 Scale - skipjack
Joe, Lawrence thanks for stopping by and your comments. And all those who clicked the LIKE button.
Joe: I have both Lowes and Home Depot close by but have never seen hobby sized lumber of any type in either of them. No ACE Hardwares near me.
Another small update: Wheel house and ship's wheel completed.
-
canoe21 reacted to mtaylor in Licorne 1755 by mtaylor - 3/16" scale - French Frigate - from Hahn plans - Version 2.0 - TERMINATED
Thanks again for the likes and comments.
This truly is a work in progress. The situation is slowly resolving itself...
Today's update is somewhat tiny... waterways. The first picture shows the mill setup with the ball cutter. I pass each waterway piece through the jig and each time take off more material. Picture 2 shows the profile on a test piece that I'm aiming for. I'll need to profile the side against the hull during installation to get a good fit.
-
canoe21 reacted to mtaylor in Licorne 1755 by mtaylor - 3/16" scale - French Frigate - from Hahn plans - Version 2.0 - TERMINATED
Thanks for the "likes" and commentary...
Making progress. The beams are in for the lower deck. There's probably another couple that I'll need to put in once I figure out the shape at the bow and stern. The bow, not so much, but the stern looks different on the drawing than it does looking into the hull. i think it's not at deck level... just has me scratching my head as I know the beams are all at the right height.
Anyway, I'm checking fore and main mast locations and then I'll be dropping a bit of string down the centerline to double check and pin down where I'll need the mizzen mast step, the three hatches, and the bowsprit step. I'm also plotting out the walls and cabins but won't get to far into that until the deck is planked. Which... I'm hoping to get started on this week as soon as I can get the planks cut. The actual next step with the waterways. The wood has been selected (cherry) and the appropriate sized pieces selected.
Here's pictures. Feel free to point out any stupidity or errors on my part.
-
canoe21 reacted to mtaylor in Licorne 1755 by mtaylor - 3/16" scale - French Frigate - from Hahn plans - Version 2.0 - TERMINATED
Thanks for the likes, the comments, and just looking in....
Not a big update, but deck furniture (except for the mizzen mast step and the oven) are mostly done. The main mast partner is coming out as I'm not happy looking at the picture. Other than this partner, the oven and the mizzen step, everything else I salvaged from Version 1 for this build hit the scrapbox. The main mast partner should be following.
-
canoe21 reacted to shipmodel in Licorne 1755 by mtaylor - 3/16" scale - French Frigate - from Hahn plans - Version 2.0 - TERMINATED
Hi Mark -
Checking in again and love what I am seeing. Those deck beams are very nicely done, and you should be justifiably proud of them.
As for decking, you have to be careful about the differences between British and French practice. Since the French were strategically blockaded by the British for most of this period, their ship designs favored speed over carrying capacity. With lighter hulls and scantlings they could make more knots, but the ships 'worked' much more than their British counterpart of similar size. To counteract this they strengthened the decks with longitudinal stiffeners called binding strakes that were thicker and set into the deck beams, much the way the stringers stiffened the fuselage in those balsa wood planes we all built as kids.
Here are several contemporary cross sections of French ships. Note that the outer binding strakes are set into the deck beams but do not rise above the deck surface. However, the ones toward the center rise above the rest of the deck level. In fact, the entire center section of the deck is raised. Frequently these binding strakes are shown on models as being contrasting color from the rest of the deck. Whether this was true on actual ships, I do not know.
Further, as seen in the models, the gratings are set flush with this raised section of deck and do not have the coamings that are such a feature of British ships.
Didn't mean to make extra work for you, but hope it helps.
Be well
Dan
-
canoe21 reacted to Jerry in BLUENOSE By Jerry - Model Shipways - Scale 1:64
Hello Everyone...
This morning I have been working on the preparation of the shroud lines..I usually seize these lines at the point where they make contact when wrapped around the mast. Therefore as I begin the rigging of the Bluenose I thought I would include some pictures of my method of seizing these lines. Some modelers will seize the two lines together as they bend around the mast as a method of binding them to the mast. I prefer seizing them, as the real ships did, to prevent chafing where they make contact with the mast and then securing them to the mast with two or three square knots. Here is an idea of the sequence:
The shroud line is prepared in the seizing machine with a clip locating the center of the shroud line.
The seizing thread is half-hitched to the shroud line and a dab of CA cement is applied.
After the seizing process is completed the thread is tied and glued to the shroud line
The excess thread is snipped away
The shroud lines are placed around the main mast waiting to be tied in place.
I have also installed all of the deadeyes in place on the channels. The chainplates will be added once the shrouds are fully rigged.
I wish everyone a great day
Jerry
-
canoe21 reacted to Jerry in BLUENOSE By Jerry - Model Shipways - Scale 1:64
Hello Everybody,
Since the shipyard is going to be closed for several days or weeks next week I've been working overtime to get the masts. booms and gaffs finished. I'm happy to say that other than the varnish coats they're going to get, these pieces are done. I'll get the finish work completed by the end of the week so that when the shipyard opens again we can go right to work on the rigging. So here are a couple of more pictures showing the completed work. I wish everyone a happy evening.
Best,
Jerry
-
canoe21 reacted to Jerry in BLUENOSE By Jerry - Model Shipways - Scale 1:64
Hello Elijah..
Many thanks for visiting my log.
The "rope" is actually a wire loop which will be used to rig the throat halyard later in the process. In the meantime, here is a picture of the Fore gaff and Fore boom.
Have a great day,
Jerry
-
canoe21 reacted to Elijah in BLUENOSE By Jerry - Model Shipways - Scale 1:64
Nice job! What is that rope on the boom for?
-
canoe21 reacted to Jerry in BLUENOSE By Jerry - Model Shipways - Scale 1:64
Hi Everybody..
Today was an interesting day since some of the work required a lot of patience because of the dealing with very small diameters. I finished the main and fore masts so I started and finished the bowsprit and the fore gaff. I intend to put a coat of satin varnish on the raw wood of the Masts, gaffs and booms to preserve their natural look. The bowsprit is mounted in the hull and has been coated. Dealing with drilling at the 1/8" end of the fore gaff had me in fits for awhile but I calmed down and did the deed. So here are a few more pictures and it's off to a bottle of beer.
Have a happy evening everyone..
Jerry
-
canoe21 reacted to Jerry in BLUENOSE By Jerry - Model Shipways - Scale 1:64
Hi Mike..
Thank you for your nice words about the dory. I'm having my daily fit today as I try and figure out how to make the bottom of the masts square so that they fit into the rectangular holes in the deck. (Time passes........) Okay I cut the masts a little smaller than they're supposed to be so that if necessary I can rotate them if they are not perfectly square when raised into the deck. Nobody will get to see the ugly job since they'll be below the deck anyway. I hope you had a nice weekend and that you have a good week ahead.
Best,
Jerry
-
canoe21 reacted to Jerry in BLUENOSE By Jerry - Model Shipways - Scale 1:64
Good morning, Dave and many thanks for your visit and kind words. The seizing machine that I use makes the process very easy.
Hope you have a great weekend.
Best,
Jerry
P.S. I used to live in Issaquah and miss the Northwestern weather sometimes.
-
canoe21 reacted to genericDave in BLUENOSE By Jerry - Model Shipways - Scale 1:64
Jerry, looking good! Thanks for posting the details on those lines! I bought a similar machine from Domanoff in anticipation of rigging my Bluenose, so it is really helpful to see how you're putting it to use in such detail. (I skipped over those kinds of details on my first build.) Your log is giving me another great build to refer to!
-
canoe21 reacted to Jerry in BLUENOSE By Jerry - Model Shipways - Scale 1:64
Good morning everyone:
I'm back in business!! It just didn't feel right to begin a build and not share my progress with the many friends my admiral and I have made since becoming a member of NRG's Model Ship World. I'm just plain happy that I feel well enough to work on another model and after some persuasion from a couple of fellow modelers I have decided to share my ups and downs on this site once again. I must admit, the "downs" are going to be mentioned first:
This model from Model Shipways has been a challenge right from the beginning. I had no trouble combining the three keel sections into one but boy did I run into trouble carving the the bearding line. A bearding line, believe it or not, is a new phenomenon for me. I suppose I should have cut one in the keel of all the other models I have built but I'm making a confession here... I never did one before. But since this ship model is designed for a single planking (something I'm not sure I'll stick with) I decided to do what is expected and carve a bearding line and rabbet. This keel is basswood, about 3/16 of an inch thick and the instructions call for a 1/16 bevel on each side of the keel for the bearding line. So, yep, you guessed it, I ended up with a new piece of keel from the bearding line down. Even though I was warned, I scored the initial cut too deep. But all is not lost as I was able to reattach the severed piece and hopefully, as the hull progresses, it will get stronger. So that's where I am at this time. I intend to remove the bulkheads from their respective billets today and glue them to the keel shortly thereafter.
The ugliness of my bearing and rabbet sculpture can be seen on the attached pictures.
I wish you all a good day,
Jerry
-
canoe21 reacted to Jerry in BLUENOSE By Jerry - Model Shipways - Scale 1:64
Hi Lawrence.
Many thanks for the advice which I'm happy to have. I believe that the top mast is not that far off and can be straightened when tying the rigging. It's just a little bit off...
Thanks again and regards to you know who..
Best,
Jerry