-
Posts
178 -
Joined
-
Last visited
Content Type
Profiles
Forums
Gallery
Events
Everything posted by Johnnyreg
-
Thanks OC for the good words and to John & Lee for following, welcome aboard. Thanks SpyGlass for coming up with the goods again. I ordered some Beadalon Black Artistic Wire because I’m up for cheating too if it saves time. I’ve also ordered the following to play around with so I can hopefully master the ironmongery side of things: Bare Brass Wire (0.4 & 0.5mm) from wires.co.uk here Birchwood Casey Brass Black from Amazon UK here Black Enamelled Brass Wire (0.5mm) from wires.co.uk here Artistic Black Enamelled Brass Wire (0.4 & 0.5mm) from SJ Jewellery Supplies here Thanks to SpyGlass and all who commented on my “Black Wire” post here
- 110 replies
-
Black wire for eye bolts/rings
Johnnyreg replied to Johnnyreg's topic in Metal Work, Soldering and Metal Fittings
Thank you all for your great info and links and based on what you have given me I have ordered the following items to play about with: Bare Brass Wire (0.4 & 0.5mm) from wires.co.uk here Birchwood Casey Brass Black from Amazon UK here Black Enamelled Brass Wire (0.5mm) from wires.co.uk here Artistic Black Enamelled Brass Wire (0.4 & 0.5mm) from SJ Jewellery Supplies here The Liver of Sulfur seems like good stuff, based on your comments and The Jax Pewter Black I couldn’t source from the UK so will see how the Birchwood Casey stuff works out first. -

Black wire for eye bolts/rings
Johnnyreg replied to Johnnyreg's topic in Metal Work, Soldering and Metal Fittings
Lots of info here thanks to all. I have found a bare copper wire source here in the UK at https://www.wires.co.uk/acatalog/cu_bare.html#aBC0500_2d125 so it looks as though this is what I need and some Liver of Sulfur. Was hoping for a ready made black solution. Note to self - don’t be lazy. is there one solution that blackens both brass & copper well or is it horses for courses? -

Black wire for eye bolts/rings
Johnnyreg replied to Johnnyreg's topic in Metal Work, Soldering and Metal Fittings
Thanks Alexey. Blackening is another skill I need to get into for the brass guns but I was hoping to get black copper wire as copper is easier to twist I think. I specifically want to make them like shown here -
I have a question on black wire which I’ve posted here as I thought that here wasn’t the right place.
- 110 replies
-
Hi. I’m building a Swan class HMS Fly and I'm starting to think about stocking up with various sizes of black wire to make eye bolts using the twisting method, where do you guys get your black wire from, preferably in the uk for me, and what diameters do you use for 1:64? I’m trying to get diameters from the FFM books and 1” & 1.25” keep cropping up which equates to 0.4mm & 0.5mm @ 1:64
-
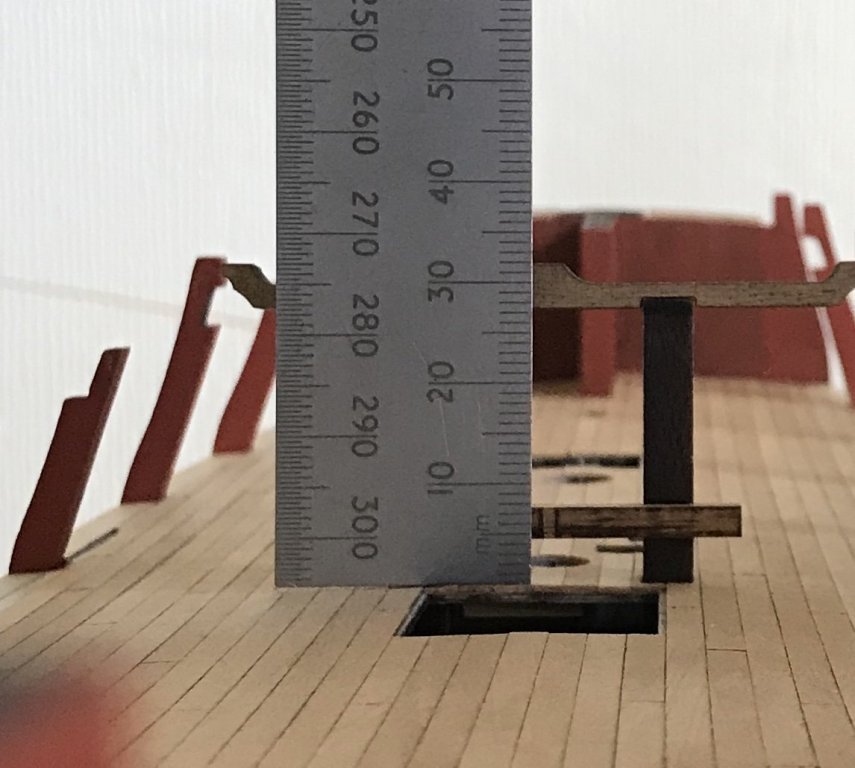
Thanks SpyGlass. Looking at BE’s pics it looks like the top spar needs to be level with the Fore deck so I will definitely revisit when I get this deck fitted
- 110 replies
-
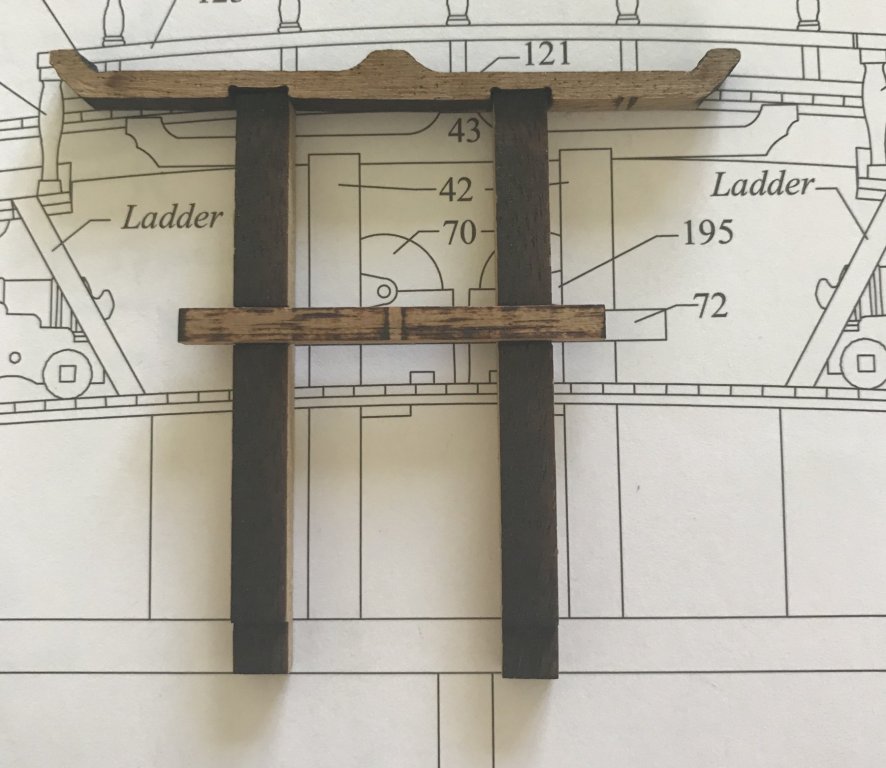
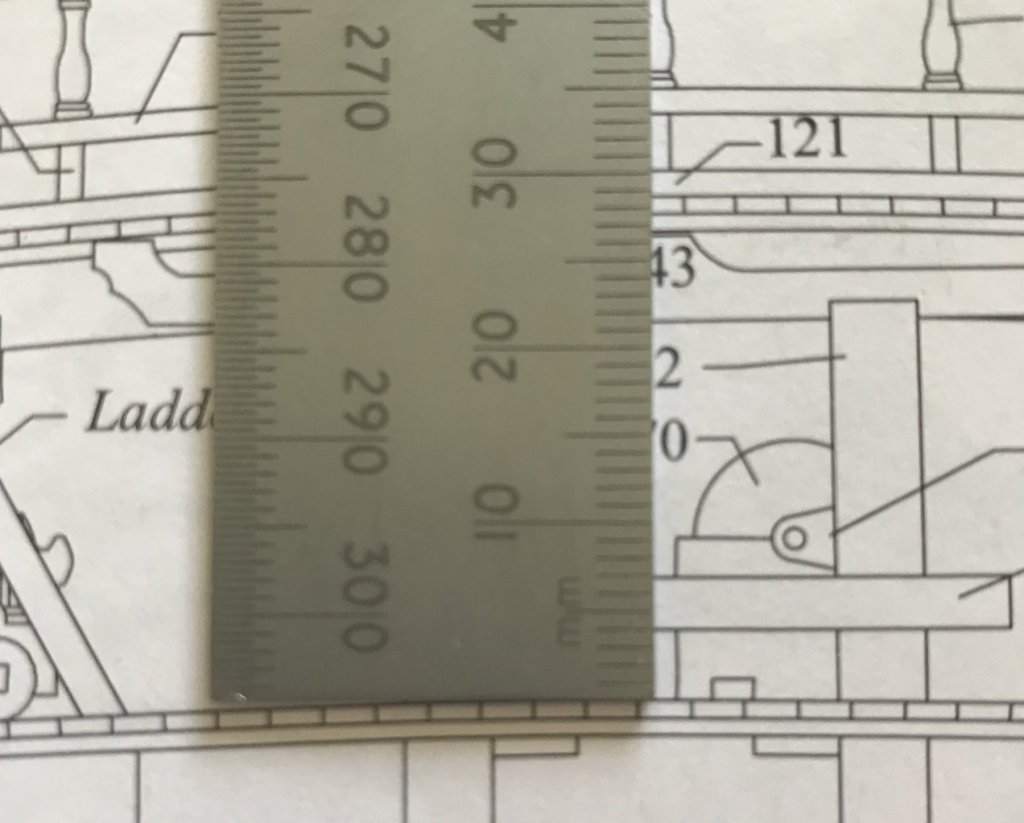
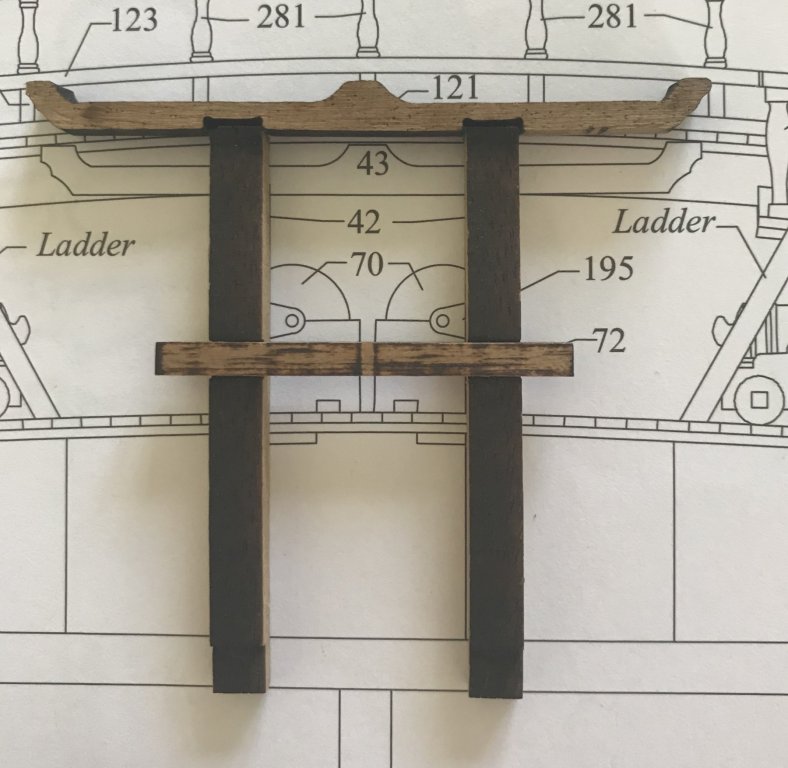
I’ve checked with both the assembly and part drawings and it appears to be between 4 & 5mm to high but the lower cross piece height appears to be ok. Not sure at this time what it needs to be related to height wise so will leave out until I know. Thanks for the warning.
- 110 replies
-
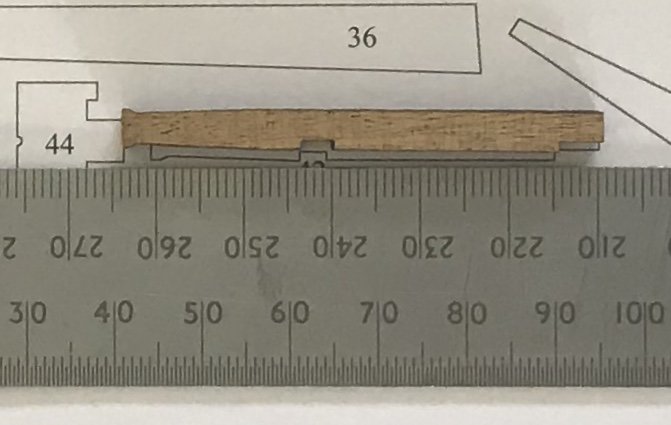
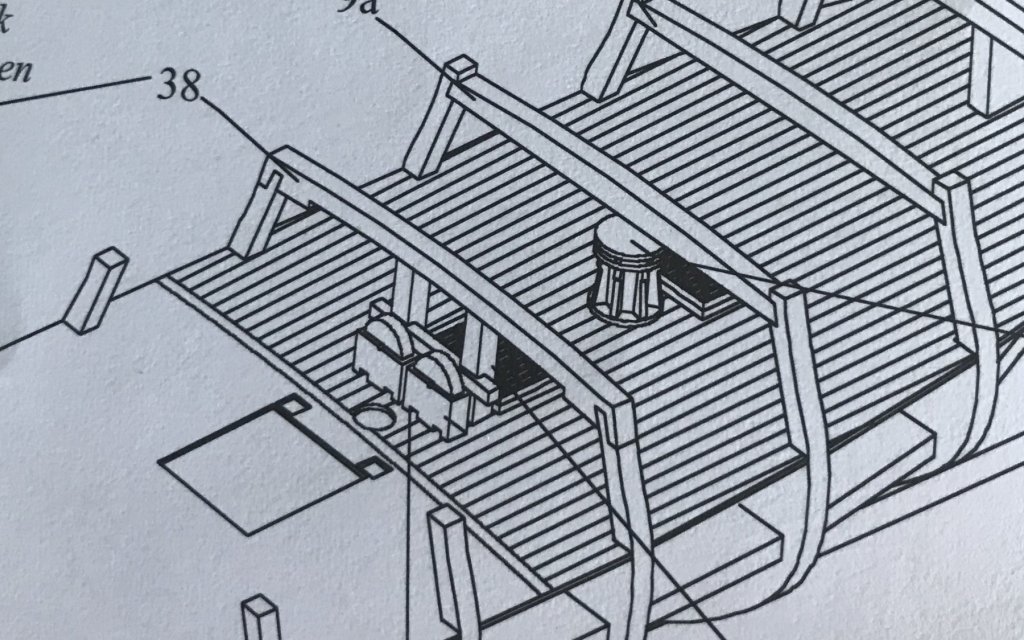
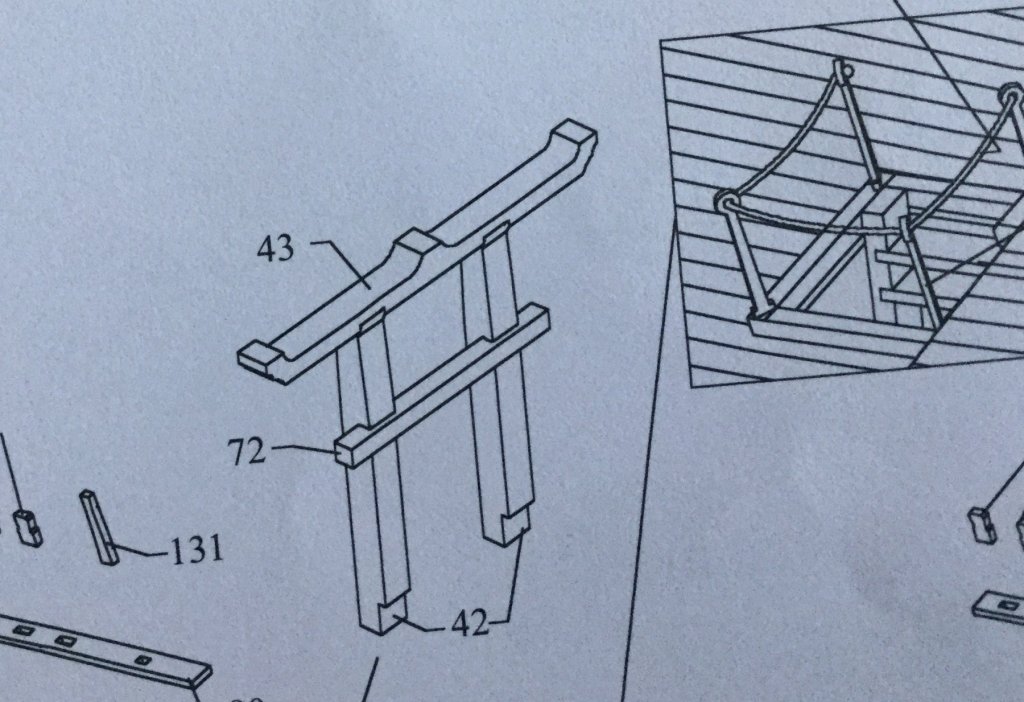
Thanks SpyGlass for clarifying which part is vulnerable and the warning about the bits problem, I will check with the drawings hopefully tomorrow. Yes I’ve noticed part 38 has to be slid on horizontally not vertically because of the tongue & groove angle.
- 110 replies
-
Thanks Paul, Denis, SpyGlass & Al for your kind words and thanks also to all who hit the like button Thanks Al (alde) & Jobbie for following and welcome aboard. Paul - thanks for clarifying the shipwrights rules for sizing. I’ve just ordered some 6mm boxwood from Original Marquetry here in the UK for when I come to do the two upper decks so that should be better than the 4.5mm I’ve just used and should give a more realistic looking edge joint. The 16 Syren/Chuck guns and carriages were £71 plus £19 import vat and handling fee so there not cheap. I just hope I end up using them Denis - according to the FFM books the centre king plank is thicker on the gun deck but the extra thickness is recessed into the underlying beam and is level on the top. If I said I had done it that way would you believe me? Typically, after searching for ages on information about the edge planking and timelines for usage, I have just spent 10 minutes and found a lively discussion here Also check here on page 9 of this pdf http://modelshipworldforum.com/resources/Confed/Chapter10.pdf SpyGlass - thanks for the warning about part 38 or did you mean part 43. Either way I will be careful.
- 110 replies
-
A lot of progress made (for me anyway)… First of all I’ve changed my mind regarding the coamings and hatches. I was going to plank around them but with it being my first attempt at proper planking I thought I would have enough to worry about so went for the simpler option of planking underneath them. As this was going to be my approach I needed to shape the underside of the coamings and hatches to match the curvature of the finished deck so used this good method I’ve seen others use here. After I had rounded the fore hatch for the ladder-way, I added some thin sections to give the hatch some illusion of depth (picture later) Now comes the part I’ve really been really looking forward to, decking the Gun Deck. I’m using 3.4mm boxwood and pencil caulking as mentioned earlier. The maximum plank length will be 90mm. I drew this plan a while ago and as you can see I’m intend using a three butt shift pattern, except down the centre where the planks are short enough anyway. I plan to have a waterway strip, which is not shown on my plan, but this will be a flat affair and not sloping as shown in the FFM books. I also want to have a go at some fancy plank joints around the acute curves. I’m not sure what these are called specifically but I think they are hooded planks but I’ve seen other terms used such as, nibbling and joggling but here is a picture of what I will actually be attempting. I wish I could find a single resource on the different types of edge planking used and the timelines when they were typically used, does anyone know of such a resource? I’ll go with the term “hooded planks” until someone corrects me. The only problem I have with these joints is my boxwood stock consists of 3.4, 4.5, and 8mm (limited) but I’ll have a go using the 4.5mm for the Hooded planks. I think really it should be about 1.5 times wider than the standard width so 5mm would have been better. If it doesn’t look right it will be hidden anyway so no big deal. First plank down is along the full length of the deck to make sure those either side will be lined up correctly. I started the shift pattern once clear of the smaller coamings. Note the ladder-way hatch lining and the visible decking below. All furniture dry fitted to check they covered up my plank edges Fiddlesticks (**&&&***!!!) Just when I thought things were going well. That’s the second time I’ve knocked this one off so it’s stopping off for now Here is the decking done as far as I can for now. With deck furniture, dry fitted I really enjoyed the decking but I was glad to finish, if that makes sense. The Chuck guns and carriages have now arrived which didn’t take as long as I thought they would (11 days not 20 as I was told). I had to pay VAT and a customs charge as expected. The laser cut parts look really clean and a lot better than the Amati upgrade ones. I will build one of these up to do my comparisons with the Fly supplied and Upgrade ones and check the gun heights for the gun ports. Hope to have another update soon.
- 110 replies
-
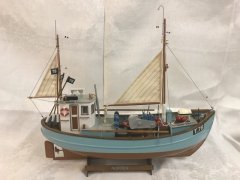
Just found the picture with the net full of fish, it’s the Progress on your Nordkap 476 post here. Do you think they painted every grain silver? The Hull Model Boat site look interesting. I’ve bookmarked it and I will definitely check it out again when I get my “fishing boat” head back on again.
- 378 replies
-
- t78 norden
- billing boats
-
(and 1 more)
Tagged with:
-
Looking great Denis. Love the detail your putting in, especially the fish idea. I was thinking about what you could use if you wanted more and remember one of your builds, or a photo you showed, that had a bulging net full of fish, what were they made of?
- 378 replies
-
- t78 norden
- billing boats
-
(and 1 more)
Tagged with:
-
Thanks Denis, SpyGlass and all who have hit the like button. Just to set the record straight, and before you think I’m a selfish old b***** , I will take the Admiral on a proper holiday later in the year . Don’t get me wrong Denis, I enjoyed the testing I did very much and I learnt hell of a lot from it but I need to make progress now with my build. Especially now the weather is getting warmer and the growing and walking season is nearing. We need to get out and get some colour in our cheeks as I’m looking a bit peaky. I will try to spend at least one day a week on it though to keep the interest going.
- 110 replies
-
Yes they do SpyGlass and you’re so lucky but I need to see in the flesh too. Also the Admiral needs a blooming holiday so I am gonna God damn make sure she gets one
- 110 replies
-
Thanks Denis. I liked the thread method for neatness too, especially the 0.4mm one but it's too big, the same as you thought that the 0.5 mahogany you tried was. I see what you mean about your home made grating on your United States project, hats off for even attempting that but you pulled it off. I noticed you haven't put them on yet is that further down the line? I think I have got plank testing fatigue now. It's a shame that in my pre-modelling days I went on the 40% replica of the Bark Endeavour in Whitby and never noticed the decking/caulking, why would you. The good news is that the full size replica is coming back to Whitby permanently, some time this year, so I intend to visit it often and take more notice this time, and lots of photos. It's only about one and a half hours away. A few weeks ago, I told the Admiral that I'm taking her on holiday soon and she asked, "that's nice, what have you in mind" I said, "how do you fancy Portsmouth" she said "are there some ships there by any chance" . Anyway it might be happening so I will get a good look at the Victory and visit the NMM too . Again lots of photos will be taken. I may create a new thread with the pictures.
- 110 replies
-
Hi Paul Thanks for looking in. Yes I thought custom charges were coming my way but hey ho. I’ve seen the Chuck ones on Doug’s (Dfell) build and others and they look good. The Chuck guns looks a bit small but I’m hoping the RB guns, at 32mm might fit the chuck carriages. I’m sure between the 3 sets I’ll find a good combination.
- 110 replies
-
Thanks SpyGlass. I thought my technique might be wrong. Oh well I managed it in the end. I like to do it the hard way Thank you for the curve sanding warning, I will be careful.
- 110 replies
-
Hi Doug Thanks for looking in. I'm following your fantastic looking build and refer to it often. Hope mine is half as good as yours. I never thought about the quarter deck steps coming down so will definitely check that out so thanks for that.
- 110 replies
-
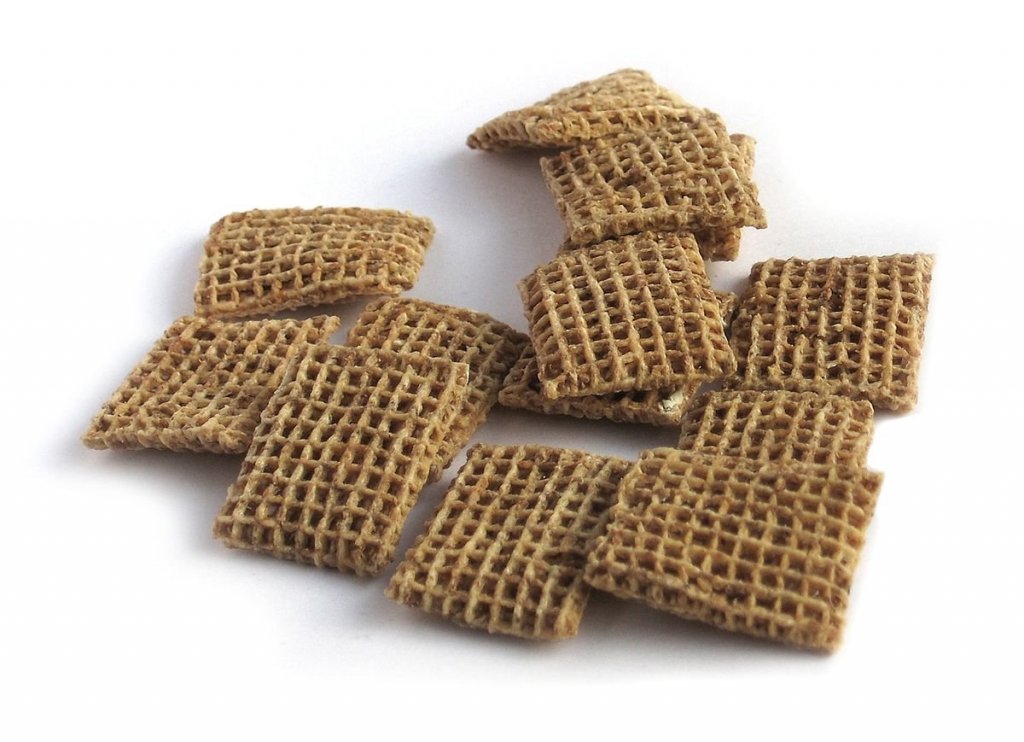
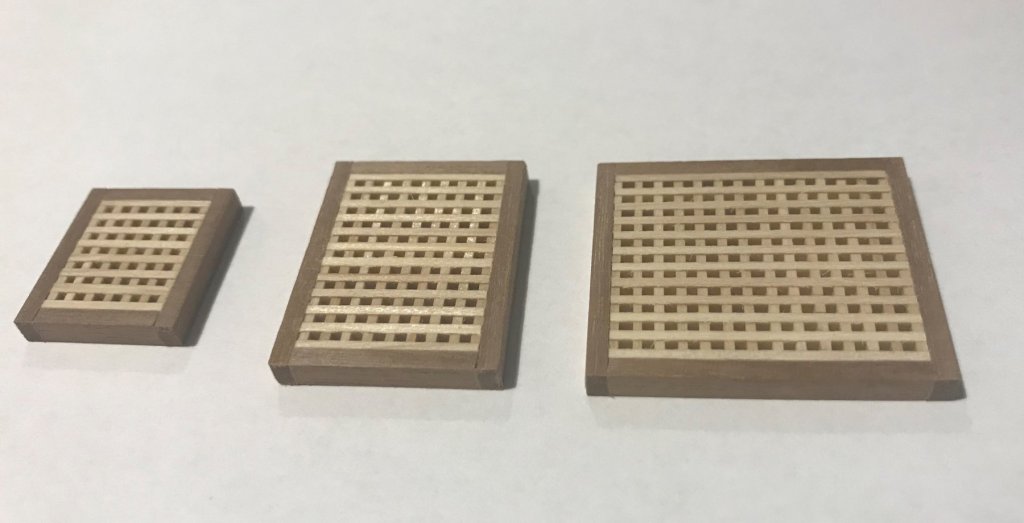
Here are the pictures I promised plus some more progress. The other planking/caulking tests I said I was going to try. I’ve now got my Testors Dullcote and I used it for finishing these samples and I like the finish very much. The caulking looks quite good but I’ve discounted them for this build because I want keep it simple for my current skill level so therefore I’m going do the decking as follows (final decision): Material - 3.4 x 0.6mm Boxwood Caulking - 2B pencil both sides of join Finish - Scrape Sealing - 1 coat of 70/30% Polyurethane/White Spirit, 2 coats Testors Dullcote On a whim I made the lower capstan partner which will go on top of the decking strips. I consulted the FFM books and took the measurements and re-scaled for 1:64 I glued the 3 strips together and carefully drilled, cut and filed it to shape. As I previously explained I shied off the gun port strips for now and will concentrate on the gun deck and the furniture and canons that go on it Firstly I painted all the space below the gun deck black, just in case someone tries to look down the hatches. I dry fitted the gun deck one last time to get my clamping methods sorted. Note the centre line gaps fore and aft. I thought the springiness of the wooden strips would help to give the deck a natural curve, especially across the centre line, where some have experienced a ridge forming. To eliminate the gaps fore and aft I first PVA glued between the deck and just bulkhead #8 for now. After this had set I super glued the fore and aft centre lines using these weird looking clamps I found I also went down the centre with diluted PVA, applied with a brush. After the centre line of the deck was fixed, I relaxed the outer clamps and injected PVA between the deck and the other bulkheads, where I could, and re-clamped. I then brushed round all the joints with diluted PVA just to make sure. The next day, just to make doubly sure, I went round all the joints again with a bead of PVA. I then remembered the good advice to strengthen the weak unsupported areas of the deck so I just added some short bits of wood across the centre line with big blobs of glue to fill the curvature, as I didn’t want to clamp them and flatten out the natural curves of the deck. The deck is now so strong I feel I could jump up and down on it, better not test this out though I next went about making the coamings and gratings, which I’ve never done before, and thought this should be pretty straight forward (remember that thought). I measured the kit drawings which differed from the measurements in the FFM book but then remembered the FFM book doesn’t cover the Fly specifically but is generic to the “Sloop” type of ship, if I’m correct, so this could explain the difference. I then checked several Fly logs and counted the holes on their pictures but there was no consistency between the logs I checked. In the end I went for the sizes on hmsfly.com here which ties up with the kit drawing sizes, near enough. They are: Fore Deck Grating .. .. 4 x 2 squares Gun Deck Main Hatch (Large) 11 x 13 squares Gun Deck Hatch (Medium) .. 11 x 8 squares Gun Deck Hatch (Small) .. 7 x 6 squares Poop Deck Two Small Gratings 3 x 3 squares Poop Deck 3 Grating Hatch .. 9 x 4 squares per grating First off, I assembled all the grating strips which was just enough for 4 blocks of 15 x 15. I then brushed on diluted polyurethane varnish to glue together The Admiral thought they were Shreddies . Maybe if mine don’t turn out too well… just maybe I could… What do you think? When my "Shreddies" were dry I thought I could simply cut the sizes I needed with a razor saw. I haven’t got a photo of what happened next but just try to imagine a big pile of match sticks . The varnish wasn’t as strong as I thought, or maybe my technique was wrong. I re-assembled the “matchsticks” and glued the underneath side of all 4 blocks with brushed on diluted PVA. These pictures show how I eventually managed to make them. I taped both sides to give the blocks more strength while cutting T = Topside, arrows are Fore and Aft, Number are grating size in mm Both the strips and the gaps are 1mm each which give a pitch of 2mm When cutting I found it important to cut from the solid side of the strips and not the teeth side. When you get halfway through the teeth just fall away anyway, if that makes sense. I also made these clamps to gently hold the structure solid and then used very slow gentle backward cuts All edges were sanded with the tape still on top and bottom for insurance. Here they are finished ready for gluing the coaming and head ledges on. With coamings and head ledges. I intend to curve slightly to match the deck curvature after the decking is competed. I now have the sizes to plank the decking with the intention of butting up to them. I need to think about the guns and carriages now so assembled one of the kit supplied ones (2 seconds) and also one of the Fly upgrade ones (a lot longer) I made up a little jig for gluing the upgrade ones as the joints are very loose and I wanted to get the side tapers symmetrical. I drilled 0.6mm holes for the mini dowels and the yellow sheet on the board is the backing paper that sticky labels come on, which is resistant to the PVA glue I’m using. Parts assembled with tiny blobs of glue so as not to glue them to the jig I also painted the outside joints around the delicate truck axles with diluted PVA The axles very gently rounded and trucks dry fitted. These are tiny fiddly things to build but will be easier to drill than the supplied cast ones. I’m still waiting for the 32mm RB cannons to arrive. I’ve also recently ordered some cannons and carriages from Syren, which they say could take 20 days to arrive in the UK and then they will probably be held until I’ve paid VAT on them. When they arrive I will have 3 sets of carriages and guns to choose from. Next I think I will press ahead on the gun deck planking… I’ve just re-read my build log and I hope I am not going into too much detail, please let me know if I am. I know a lot of this is bread and butter stuff to a lot of you but it’s a journey of discovery for me and hopefully will help others who are at a similar skill and experience level to me.
- 110 replies
-
Thanks Denis for sharing your way of doing it. Look forward to trying the laquer, when it arrives. I think I've decided on the pencil caulking for this one. I've not ruled out the shimming or archive pen for future builds but I didn't like the bleed I got on the boxwood I'm using. Maybe other woods will be better, but that's for another day. You're probably right about the gun strips but I haven't seen anyone planking them instead. You probably would I know it
- 110 replies
-
Lots of good detail there Denis. I think you got the gill net winch spot on. All that research is definitely paying off.
- 378 replies
-
- t78 norden
- billing boats
-
(and 1 more)
Tagged with:
-
Thanks Denis for the good words I was thinking about the gaps filling with varnish too and for it to look good they would have to be all full of varnish or all not full of varnish. I have shown the sample with just one thin coat which looks good but I think another coat would be required. Never used lacquer and only limited experience with varnish. I have some brush on Testors Dullcote on order so will try it. I may as well as I've tried everything else Do you brush or spray? Ive done a few more caulking tests but discounted them but will show photos next time anyway. A bit more progress. I've glued the gun deck on and made the Capstan partner. i was intending to form the Gun strips but realised I needed the gun deck in place and at least one gun carriage built to check for position in the gun ports. I've also ordered and waiting for some RB 32mm barrels from Cornwall Boats which is closer to scale than the kit ones. I've got a choice between the kit or upgrade carriages so will make up one of each. I've decided that when it comes to doing the Gun strips (bit scared), I will make some cardboard ones first to get a feel for it and maybe get some reference measurements to apply to the real ones. The other reason I'm doing this is because, although I've read all the great advice on here about getting them on in the right position and in the right shape, I just need a bit of confidence first Photos coming soon
- 110 replies
-
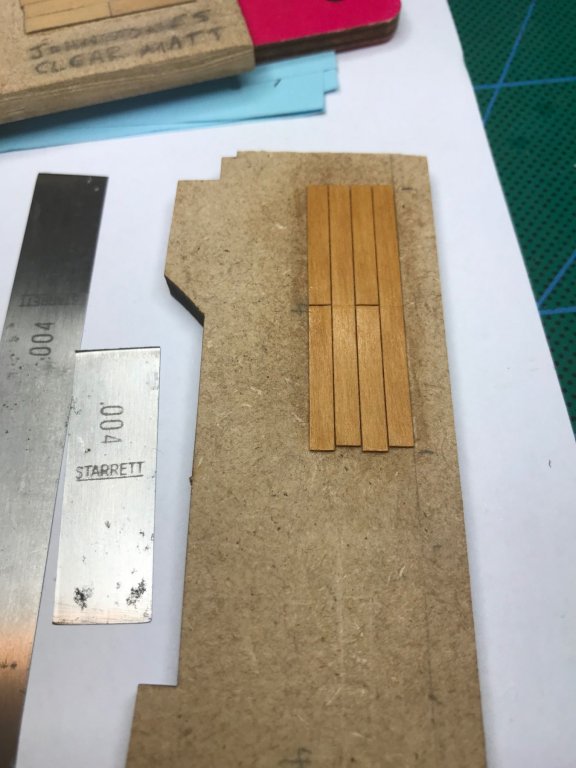
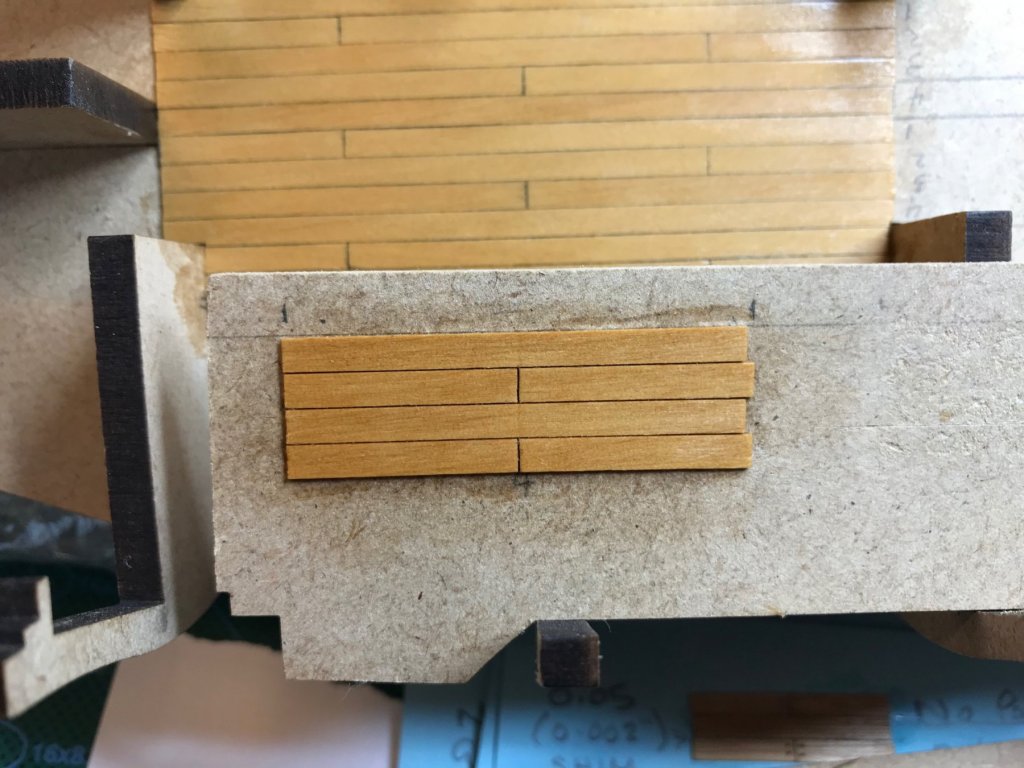
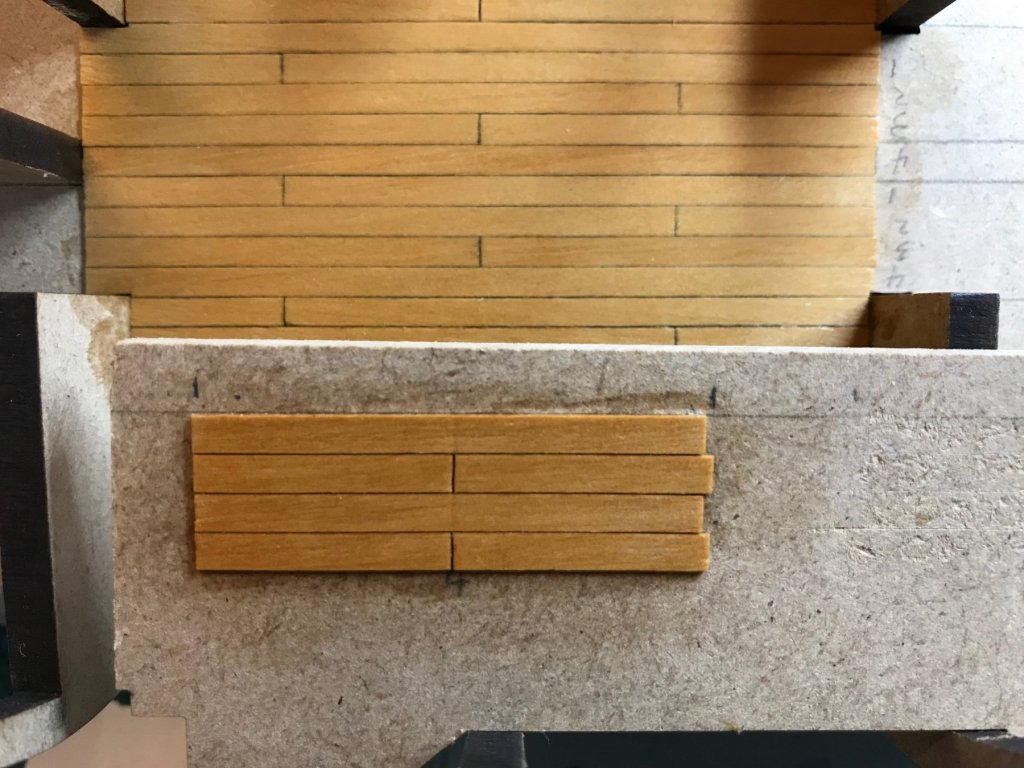
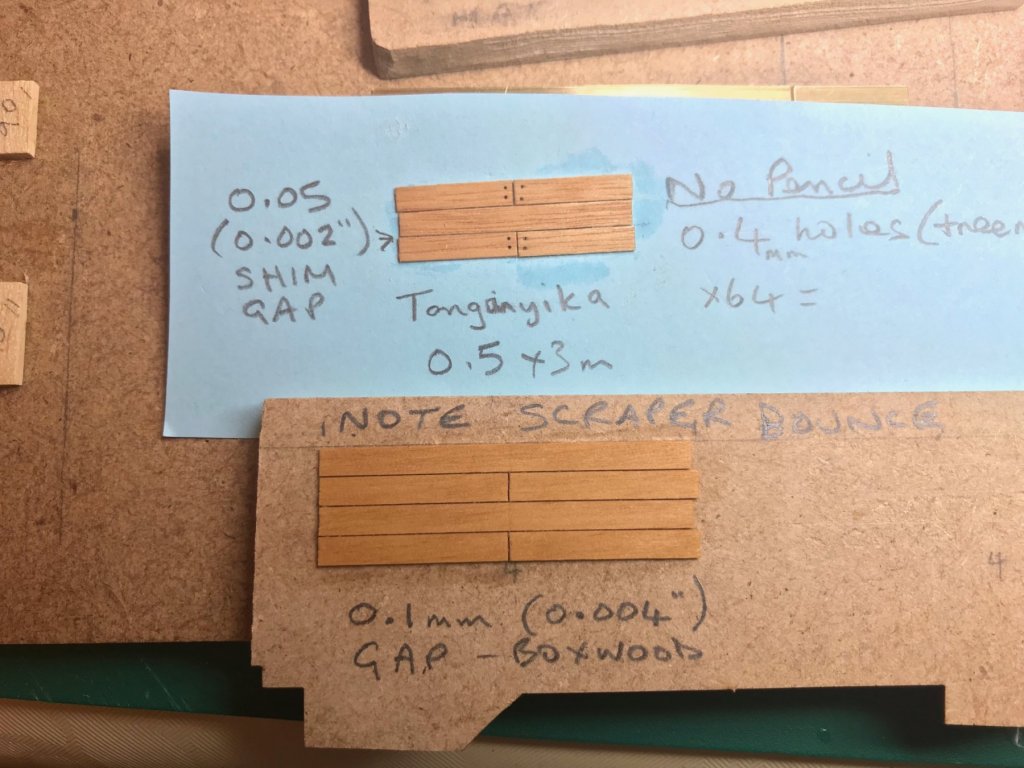
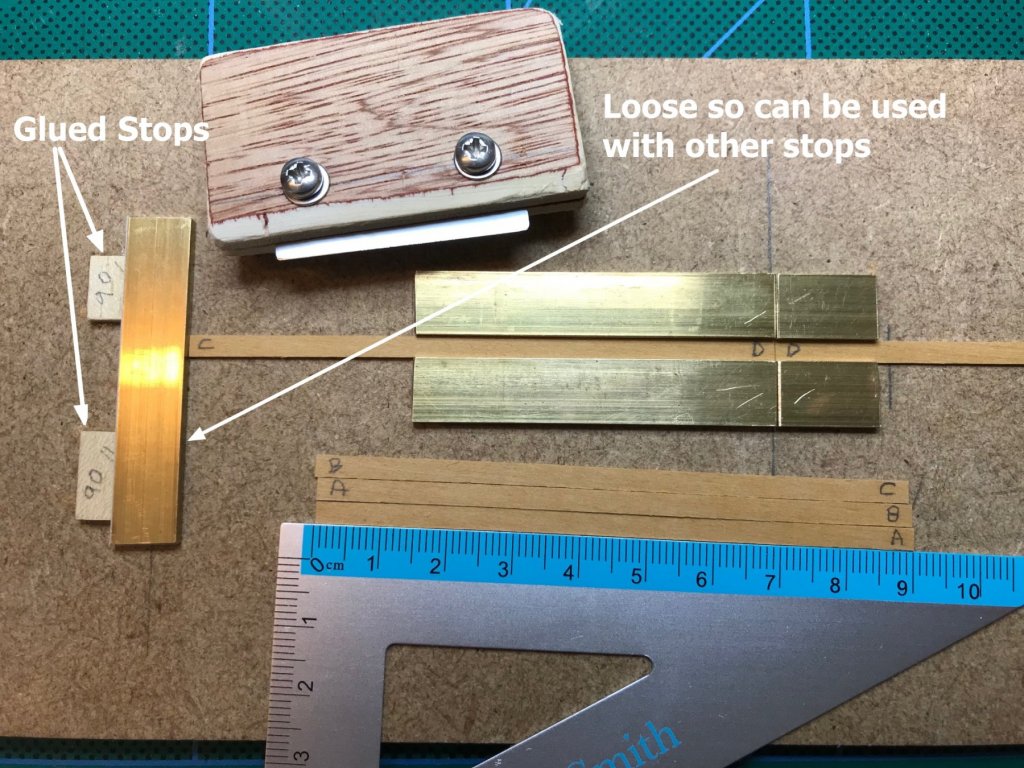
Yet more playing around with planking following SpyGlass’s curveball Just for comparison here is a better picture of a previous test I did way back on my planking quest. I’ve since decided on boxwood but the 0.05mm gap with no pencil beat all other methods I tried back then but I dismissed it because it meant extra work for a moderate improvement. Anyway, following on from SpyGlass’s last post, I tried the boxwood I going to use but this time with the bigger gap of 0.1mm (0.004”) gap, that SpyGlass uses, and here is the result. …and Compared to my lower deck area (sorry couldn’t get them both in focus) I must admit it looks really good (method, not skill) and I don’t think I could improve on this for neatness and it was fairly easy to do. I have plenty of shim as I used to use it a lot in my toolmaking days. I may go this route but I have one more thing to try… <tease> but I’ll tell you what it is after I’ve done it </tease> I’ve been busy on other stuff too. My previous plank cutting jig was made out of wood and was always intended to be temporary so I’ve made a proper one out of 2mm brass bar The cutting slit is square, this time , and should not wear. I made the main guides on the tight side which has the added benefit of demurring the strip edges which I think shows here I can now see why others here like boxwood it’s lovely to work with. I have to say, this site and you lot are “brilliant”. Thanks to all that have taken the time to comment and help me along my way, and thanks for all the likes too. I'm sure BE's planking is nice and fancy but I think you might mean LandLubber Mike's Peggy here which follows the FFM book pattern. Not sure what wood he used off hand. It is beautiful though.
- 110 replies
About us
Modelshipworld - Advancing Ship Modeling through Research
SSL Secured
Your security is important for us so this Website is SSL-Secured
NRG Mailing Address
Nautical Research Guild
237 South Lincoln Street
Westmont IL, 60559-1917
Model Ship World ® and the MSW logo are Registered Trademarks, and belong to the Nautical Research Guild (United States Patent and Trademark Office: No. 6,929,264 & No. 6,929,274, registered Dec. 20, 2022)
Helpful Links
About the NRG
If you enjoy building ship models that are historically accurate as well as beautiful, then The Nautical Research Guild (NRG) is just right for you.
The Guild is a non-profit educational organization whose mission is to “Advance Ship Modeling Through Research”. We provide support to our members in their efforts to raise the quality of their model ships.
The Nautical Research Guild has published our world-renowned quarterly magazine, The Nautical Research Journal, since 1955. The pages of the Journal are full of articles by accomplished ship modelers who show you how they create those exquisite details on their models, and by maritime historians who show you the correct details to build. The Journal is available in both print and digital editions. Go to the NRG web site (www.thenrg.org) to download a complimentary digital copy of the Journal. The NRG also publishes plan sets, books and compilations of back issues of the Journal and the former Ships in Scale and Model Ship Builder magazines.


.thumb.jpg.5a06bbe60fd305cda6165a2c188cb669.jpg)
.thumb.jpg.25b7b8f6838fb45184dd389b832ec064.jpg)
