hamilton
-
Posts
1,933 -
Joined
-
Last visited
Content Type
Profiles
Forums
Gallery
Events
Everything posted by hamilton
-
 Definitely one to follow! I'm tempted to start my Bellona now so I can have someone to build with! But I don't think I have the skills yet to match the beauty of this ship....I'll be following this with great interest! hamilton
 -
Hi Dave: Though my name's hamilton, I've never been to Hamilton - I was born in Montreal, grew up in Fredericton, New Brunswick and have lived for the last 17 years (minus 4 between Montreal and Seoul) in Vancouver. As for Lees, thanks for the references! I just got an email saying that the expected delivery date is April 27!! How will I wait? Anyway, maybe I'll do some yard work for the next month to pass the time..... hamilton
-
Thanks a lot Jay - the funny thing is I was looking for this thread last week when I was finishing off a build and wanting some suggestions for rope coils! It'll definitely come in handy on the next one. hamilton
-
Hi John: Good to know re, shroud cleats. And thanks for the tip on Lees - I just ordered my copy! Almost ready now.... hamilton
-
Yes John and Dave - very helpful - though with all this extra rigging I'm fast running out of potential places to put all the lines! I haven't been able to find Lees book at a local library and I'm afraid I'm unwilling to pay over $100 for it, which is the minimum I've been able to find.....if anyone has a copy I'll pay to have it shipped here and I'll ship it back to you nice and neat! I'm very good with books! Another question - would a ship of this size/rate/era have had shroud cleats on either the lower or topmast shrouds? Or both? Or none? I know, I know - I should be waiting for all my literature to arrive, but the answers here have been so good and so fast! I can't help it!! hamilton
-
Hi Jackson: Short answer - yes, you cut it from 2mm x 4mm walnut (though if you have a softer wood of the same dimensions lying around, like lime or basswood, I'd use that - no sense using nice walnut for a structural feature that will go completely unseen. Now having said that, there are A LOT of problems that I can foresee in installing this seemingly simple piece - this is part of the overall poor instructions/plans that Corel has included with this kit. So even though it seems straightforward I would approach it with some caution. Let me explain. The beam supports the aft end of the quarterdeck (piece 20) and is shown in the instruction booklet as having a distinct curve (or camber). But since there is no scale drawing of the transom or stern section of the model, there is no telling exactly what this camber is from the plans....it seems that Corel expected us to guess! The solution is actually in part 19, the metal part included for the cabin bulkhead, which supports the forward end of the quarterdeck and the curve of whose top should match that of the beam (18). The top of this part has a very slight camber, which (if you're going to use this part as opposed to scratch building it) should be traced onto a slightly thicker piece of 4mm wide wood - 3mm or 4mm x 4mm would work for this. Trace the camber of part 19 onto the wood strip, cut it to length (using the bulkhead 13 as your reference) and shape just the one side of it. Then cut the opposite edge of the wood flat so that it measures 2mm x 4mm at both ends. It is not necessary to cut the curve into the bottom, since this part is only included to support the quarterdeck and will not be seen. And in not cutting the curve it will be easier to place on the model. I would also do a bit of dry fitting of all these pieces (your shaped part 18, part 19 and the quarterdeck, part 20) first, to determine that the notches in bulkhead 13, where you lay (18), are even in height with one another and with the cabin bulkhead (which fits between the bulkhead extensions of bulkhead 12). If you find that your quarterdeck is sloping either aft or forward, you'll have to modify the notches in bulkhead 13 where you fit the beam - either sanding them down or shimming them up so that the quarterdeck is nice and even fore and aft. Anyway, sorry for such a long response to a short question! I hope this is helpful. This seems like it's going to be a really nice model when it's done, though given the generally poor quality of the plans it may be more or less frustrating to get there. Though some here might think me foolish for doing so, I've basically begun (and now almost finished) completely re-jigging Corel's numbering system and elaborating a detailed parts list, rigging table and belaying plan. I would be happy to share these with you at any time you begin to get a sense of the inadequacy of Corel's instructions/plans. Using my modified tables involves going through Corel's plans/instructions and making changes to the numbers they include. I'm no artist so there is no graphical dimension to what I've done (except some very crude plan & profile drawings to show belaying points), and it might not make sense to others! But for me it was a good way to identify a number of omissions, inconsistencies and errors in Corel's documentation. My current version of these modified tables (though almost done) is probably going to be heavily modified again once I get Goodwin's Anatomy of the Ship HMS Blandford (a ship nearly identical to Greyhound) from Amazon, which should be shortly....anyway if you PM me an email address I can send these to you once they're complete....don't know if you'll find them useful but...I'm happy to share and to answer any questions too. Do you have a build log going here? You should start one if not! hamilton
-
Well I've almost completed making the rigging table for Greyhound but I was getting so frustrated with the often random way that Corel has numbered parts and particularly the fact that the plans do not indicate or distinguish between things like belaying pins, timberheads, cleats and so on, that I've decided to generate what I think is a sensible parts list put together in the progressive order of the build. The parts list will essentially allow me to develop a much more detailed view of the build but will ultimately require me to modify the plans and instruction booklet so that I don't get too confused during those times when I have to use them as a reference....Of course it will also mean that I have to completely revise my rigging plan, since the numbering system I used to identify lines, blocks and belaying points was derived from the kit.... Anyway, today I put quite a bit of time into the new parts list as well as into the rigging table. Tomorrow I'll complete the parts list, modify the plans, and begin revising the rigging table/belaying plan.... This could be a complete waste of time, as well, since one the literature starts arriving I may have to revise everything again! Once everything gets finalised I will post the rigging table, parts list and belaying plans here for anyone thinking of making this kit in the future hamilton
-
Excellent - clearly and simply put and well illustrated! I feel better already. Thanks BE! and all on this thread for your help and encouragement hamilton
-
Thanks BE - I was suspicious of the presence of so many pins on a ship of this vintage - the having some helps to figure out the rigging/belaying. I've made a couple of plan sheets of my own (very crude) to replicate the layout of the belaying points as shown by Corel. I've also begun to make a rigging table based on the Corel plans. Having begun this latter, I now see the need to go through the entire kit and re-number everything after the basic hull construction....a bit of a headache, but Corel were not very dilligent or complete on the masting and rigging and so I'll need to re-number, modify the existing plans and then make new clean plans and a final rigging table of my own based on the sources at my disposal. I've located a copy of Anderson's book at the University of BC library, to which I'll pay a visit soon....Anyway, lots of work to do. It's actually a heck of a lot more interesting to have to do all this work first before launching into the build itself. I feel like I'm building up a kind of "intimacy" with the ship that I missed on other builds.... I may actually build this one as the Blandford, though the scale is a bit off from Goodwin (1:100 as opposed to 1:96) - could anyone give a complete math idiot (me) a quick tip on scale conversion? Maybe I'll post this topic in another thread..... hamilton
-
Yet another question regarding the 20-gun ship of 1720 (though if I had more patience I could just wait for the AOS Blandford to arrive... Were such ships rigged with stay sails? I'm putting together my rigging/belaying plan and rigging tables and was not sure - there is no indication (surprise!) in the Corel instructions/plans...but if anyone knows....Thanks! hamilton
-
Thanks for the quick response druxey! I thought so. The Corel Greyound has pin racks on the bitts, on a ring on the mizzen mast, and along the quarterdeck rail (which seems especially weird to me)...once the AOS Blandford arrives I'll be able to get what hopefully is a more accurate sense of things...alright, I should get back to marking papers here....goodnight all and thanks for the help! hamilton
-
Whoa! Jerome, I think I missed your post by seconds (I was typing mine) - what ship is that in the photo you posted? I'll take a look for Lees book as well, though if it's out of print that usually means $$$$ for any used copy....anyways, thanks for the pointer....always in the market for more books hamilton
-
Good suggestions all. Druxey - thanks for the advice, but I have a lot of experience doing historical research. My PhD is in history of technology, so I'm used to dissecting old books on specialised subjects, and I'm not afraid to learn some new terminology. I'll give Anderson a go. Working from home today, so I spent my lunch hour starting to map out the Greyhound rigging. Started by taking a tracing of the deck plan and both outboard and inboard profiles and marking the various belaying points - timberheads, bitts, cleats and (perhaps anachronistically) belaying pins....On that topic - my understanding is that belaying pins were not typical on ships of this era, but maybe I'm wrong....I had assumed that the timber heads would do the majority of the work for belaying.....can anyone clarify? Anyways...thanks a lot all! Very helpful responses here and so fast!! hamilton
-
Thanks Chuck - a bit of prodding tells me that the Blandford was ordered at the same time as Greyhound....hard to say how similar they might have been but hopefully this will give some indication - I have the AOS Bellona and it's a very useful resource. Just ordered the Blandford from ebay anyhow...Thanks again hamilton
-
Hi there: I'm now at the outset of building Corel's Greyhound - a kit whose box looks great but whose plans leave a lot to be desired - especially when it comes to rigging - there is no rigging plan for this kit, so I have to develop one myself.... The lines themselves are not too difficult to identify - the real issue is belaying the lines. Some are obvious - the shrouds, stays and backstays. But elsewhere things get murky, e.g. 1. The rigging of the bowsprit/jibboom - the instructions show a single bobstay and bowsprit shrouds but nothing on the jibboom...can this be right? What lines would have appeared on the jibboom on an early 18th century 20-gun frigate? 2. The spritsail yard - most lines are represented in some way, but there is no illustration of the jeers...I'm assuming that there would have been spritsail yard jeers below the bowsprit - one on the yard, one on the bowsprit cap. But would deadeyes or blocks have been used? 3. The general belaying of running rigging - it will likely be simply a matter of working out what seems logical and workable on the model...but any guidance that you guys can provide or resources you can suggest on belaying the running lines on a ship of this size (20-gun 6th rate frigate) of this era (early 18th c.) would of of great assistance! I am considering using the belaying plans on my HMS Bellona as a starting point, though obviously it is a very different vessel from several decades later....but at present I'm kind of flying blind and need some kind of reference.....I've also bookmarked Steel's "Art of Rigging", which will be helpful for planning the rigging, though not for belaying the lines... Anyway, thanks in advance for any help on this! I will be sure and share the plan that I develop - both for criticism, commentary and (hopefully) to help those who come to this kit in the future.... hamilton
-
Thanks Augie! I'm hoping it will - I'll be sure to publish it here for the benefit of anyone seeking to build this kit in the future.... hamilton
-
Thanks BE - this is very helpful hamilton
-
Hi there: I've been looking to buy the Caldercraft Supply from Cornwall Model Boats and noticed that on the pages that advertises the Supply, under "Customers who bought this item also bought"...it lists "HMS Supply Brass photo-etch set".... Does this mean that the photo etched parts do not come with the kit? It seems strange that they would sell just this one item separately from the kit, so maybe I'm just misreading - I was hoping to figure this out before taking the leap....Thanks in advance hamilton
-
Hi there: I've spent a bit of time this past weekend getting deeper into the Greyhound and I have to say the deeper I go the more I realise exactly how vague and unsatisfactory the plans and illustrated instructions are....there is no plan sheet for the rigging - this is all covered in a set of very disappointing drawings which often indicate little about how the lines are to be belayed and breed a lot of confusion....I began today to make my belaying plan - perhaps not essential to do before launching into the build, but why not? I need a break from actual building, but since I can't seem to keep away from the kits, I might as well do something. In beginning my plan I've already noticed several omissions and errors in the plans/instructions....more to come I suppose....anyway, my past experience of Corel is being soundly defeated on this one....I think someone warned me that this one would be frustrating....anyways....we'll begin in earnest next week.....
-
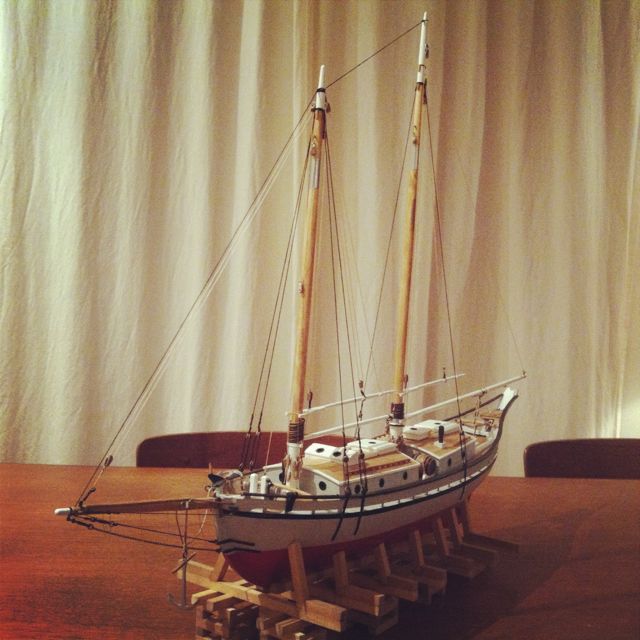
Thanks for the compliments, Alistair! And good to see you back on MSW. I'm guessing you were on a bit of a summer vacation down there? Nothing but the wind and rain up here.... Yes, I'm actually very proud of this one. I took my time a bit more than with some of the previous builds and I think it shows. In the "old days" (two years ago) I probably would have tried to rush through this in a couple of months - doubling my time was definitely a good idea and on the next build (Corel's Greyhound) I will take considerably longer, considering that the plans and illustrated instructions are dismal! It's a fully rigged frigate, but Corel did not even include a belaying plan! Lots of work to do just to get ready.... Anyway. Here's one last shot of the finished Glad Tidings before I move on....thanks all for following and for the feedback! hamilton

- 19 replies
-
- 4
-

-
- glad tidings
- model shipways
- (and 1 more)
-
Looking great Jim! Though it's a while back in the log now, I have to say I love what you did with the dories. Nice detail! hamilton
-
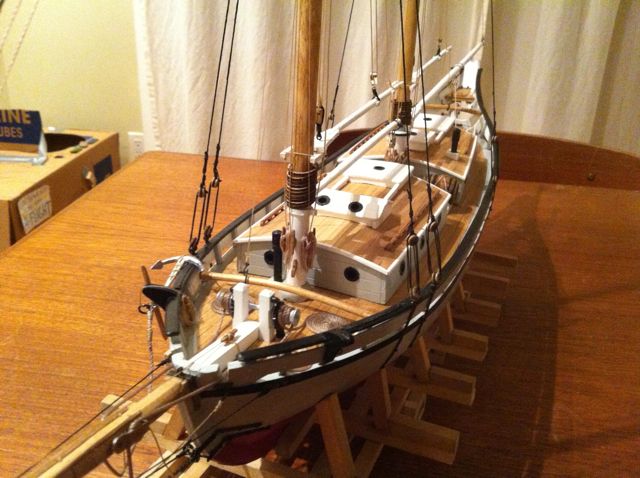
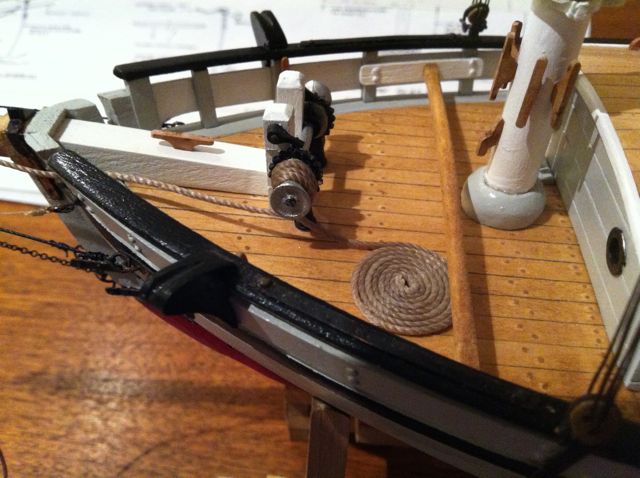
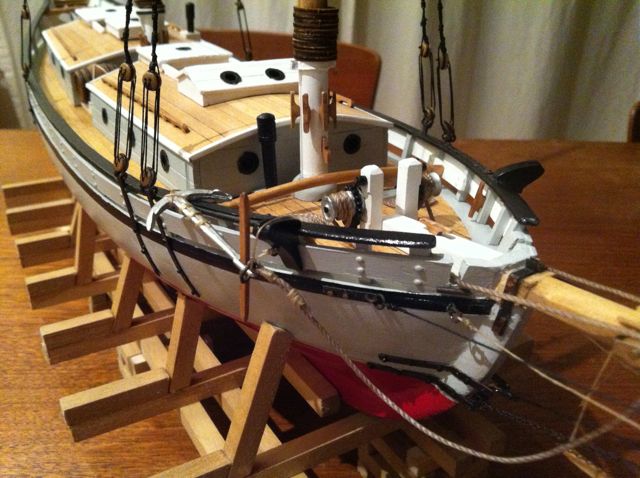
Well I'm nearly finished the Glad Tidings, though the photos below do not represent the progress to date. I've fabricated the fore and main boom and completed the running rigging on the main boom as well as completing the anchors and anchor rigging (which you can see in the photos below). I still have to complete the running rigging on the fore boom, and make & rig the fore and main gaffs - which will take a few days. I'm pulled away from the workbench for the next few days so the build will likely be completed middle of next week. All in all this has been a very enjoyable kit to put together. I love the large scale on this beautiful little working boat and as I think I said before, I wish there were more kits of this type available. This is one kit I would actually consider building again, though if I did I would modify the bulkheads under the cabins and include some interior detailing and leave the hatches off/skylight open and possible rig it with sails....anyway, it's one of those kits that I see on sale on ME every once in a while so who knows....maybe in a decade or so I'll return to it again.... Anyway, next time will be my last post on this log I think....here are some photos in the meanwhile hamilton
- 19 replies
-
- 4
-
-
- glad tidings
- model shipways
- (and 1 more)
-
Thanks for the comments Mark and Augie - I never realised that plans could be affected by changes in humidity! Unfortunately, I live in the Pacific Northwest where humidity is the rule of the day! Right now it's mild and rainy. Last week it was cold and rainy. And in a month or so it will be warm and rainy before becoming cold and rainy again in June! Then the sun will come out for a couple of days and my plans will return to scale! Can't wait! In any case I'll check the scale on the plans to see what's what...I've also heard that the scale can be put off incrementally through the printing process.... It shouldn't be a problem to muddle through even if the plans are a little off. I've long since learned that you often have to deal with the ship in hand rather than the ship on paper.....Bye for now hamilton
-
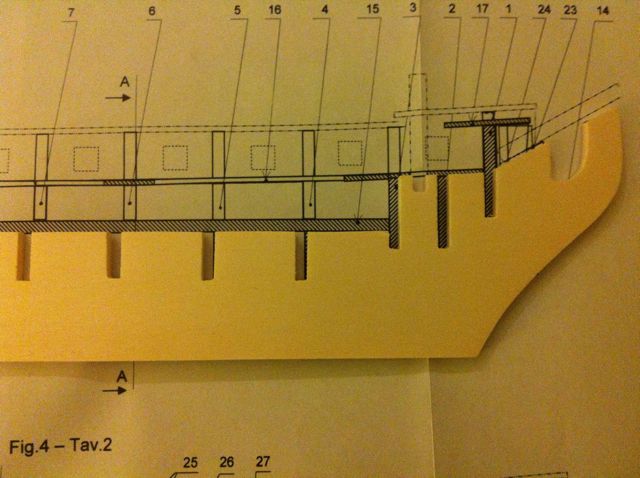
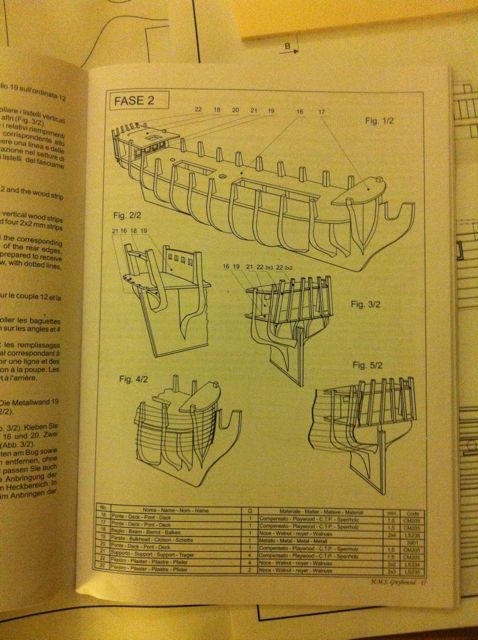
A much more troubling thing is that there is no clear belaying plan included here - very disturbing on a fully-rigged ship (indeed the first ship rig I've ever attempted!) Belaying points are all numbered together (so timberheads, e.g., are all numbered "64") with no reference to the run of the lines. When the time comes, I will have to create a detailed belaying plan of my own - no doubt at this point I will be turning to this forum for some advice on how to prepare it accurately! I'm also a little worried about the stern framing - on which there is precious little detail. The measurements of the outboard vertical frames can be taken off the profile plan, but there is no plan drawing of the stern framing itself, only a general drawing in the instruction booklet... The gunport framing presents a similar issue.... I do plan on trashing some of the metal parts provided and scratch building them - the cabin bulkhead, the capstan, the head rails, possibly the ship's boat, etc. In any case, this should be a fun - though potentially frustrating - kit to build. If all goes well it will produce a nice little model. Any and all advice, guidance and commentary is, as always, more than welcome! More in a week or so once I dive in.... hamilton

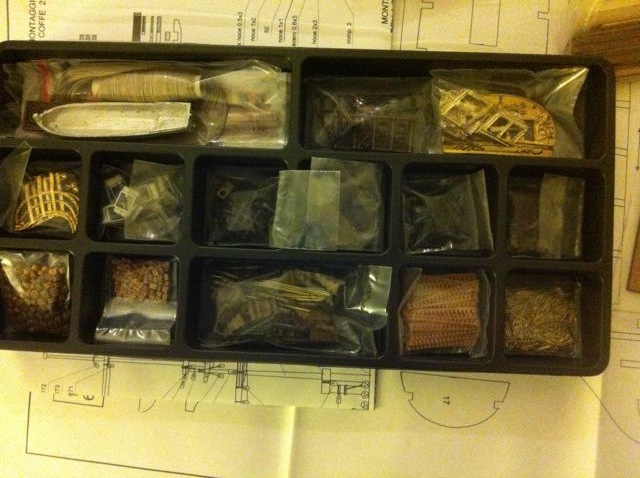
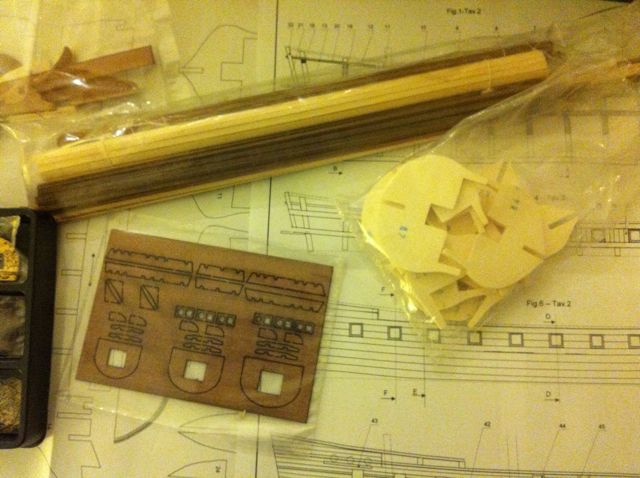
-
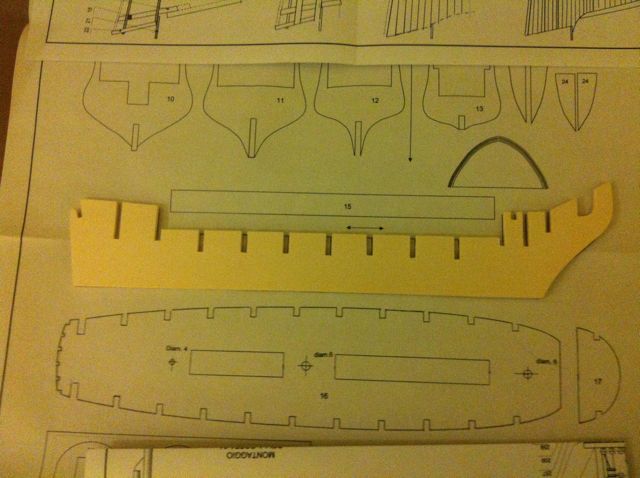
I've built several Corel kits and I've enjoyed them all. And when I first opened the box about a year ago I was not disappointed. The wood and parts supplied with the kit are of very high quality and they even include some yellow coloured strips for the outboard bulwarks. I got a little more concerned when this evening I took a look at the plans and the instruction booklet, and began testing some of the CNC parts against the plans... While Corel's instructions have always been a little off, the plans they provide have always been excellent. Not so here, I think. Four sheets of plans are provided with very general information. These are complemented by a more extensive illustrated instruction book, which is alright at showing basic construction steps. However, when I tested the centre keel against the sheet showing the ship's profile, I was shocked to find how far off it was...Thankfully the kit-supplied part did match the plan containing the CNC templates...however, now I wonder how trustworthy the plans will be for taking measurements during the ship's construction. I'm sure this won't be too much trouble....