hamilton
-
Posts
1,933 -
Joined
-
Last visited
Content Type
Profiles
Forums
Gallery
Events
Everything posted by hamilton
-
 Hi there: I'm currently working on Corel's HMS Greyhound, which I'm building as HMS Blandford, following the basic external configuration, fittings & rig outlined in Goodwin's Anatomy of the Ship Blandford. On this build, the hull will be painted below the waterline and finished with Golden Oak stain (apart from the wales, which are black) above the waterline. Second planking began with the double wales and filling strake, then above the wales and now the lower hull. The waterline runs immediately below the wales at mid-ships, but there are sections of "exposed" planking at both bow and stern, where the planks rise above the waterline. I want to finish these areas with a clean line, obviously, but I'm not sure which of the following methods will reduce the chance of bleeding (or whether it matters at all): 1. Mask the waterline (below) and stain the portions of planking at bow and stern and then re-mask and paint the lower hull 2. Mast at the waterline (above) and paint the lower hull, then remask and stain the exposed portions... Maybe this doesn't matter at all and I'm overthinking....Any help at all will be much appreciated! Thanks in advance! hamilton
 -
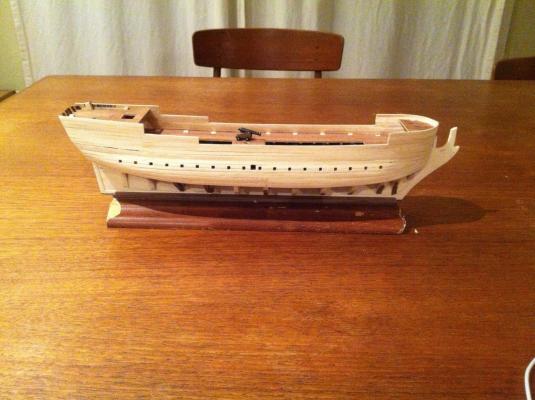
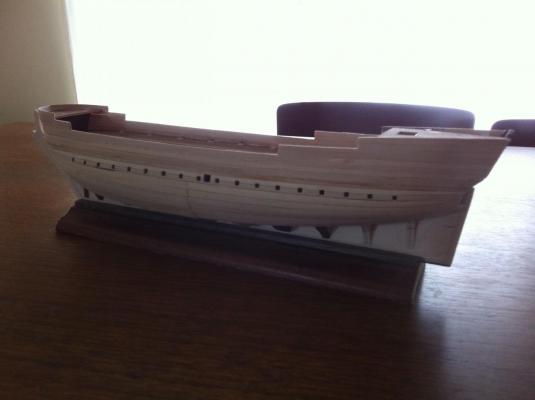
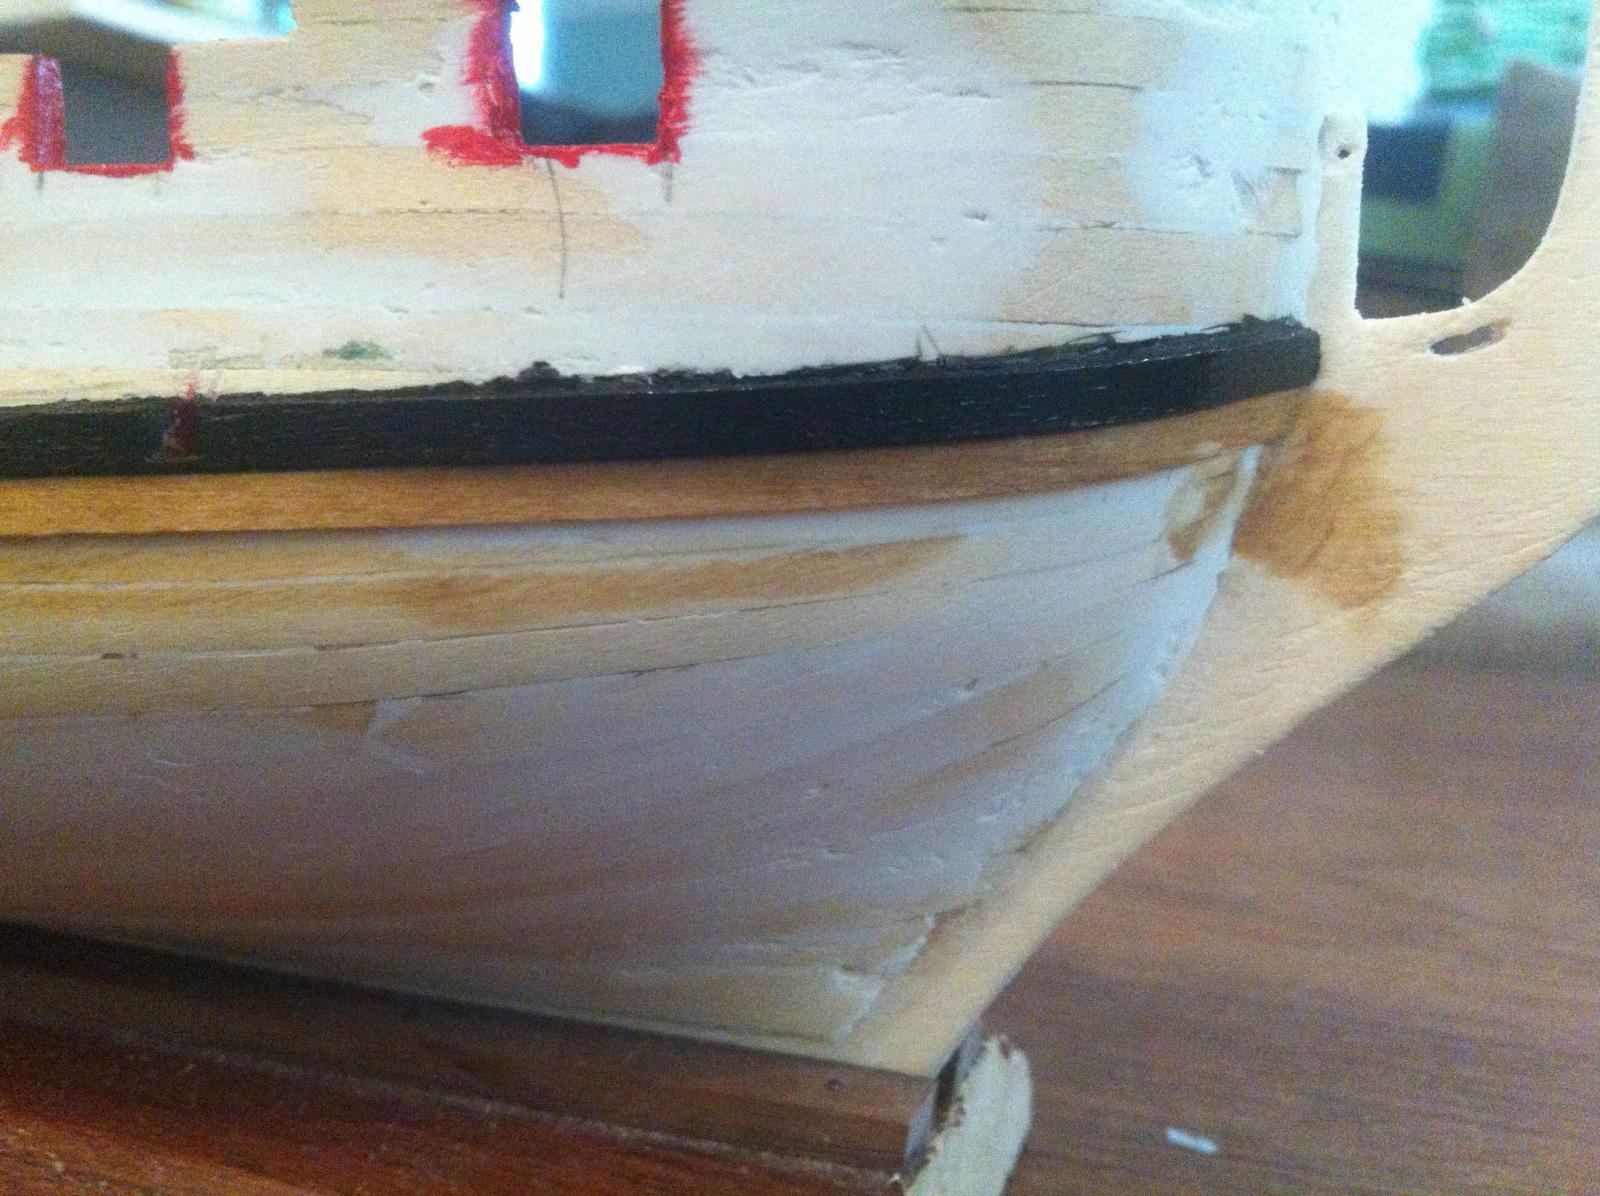
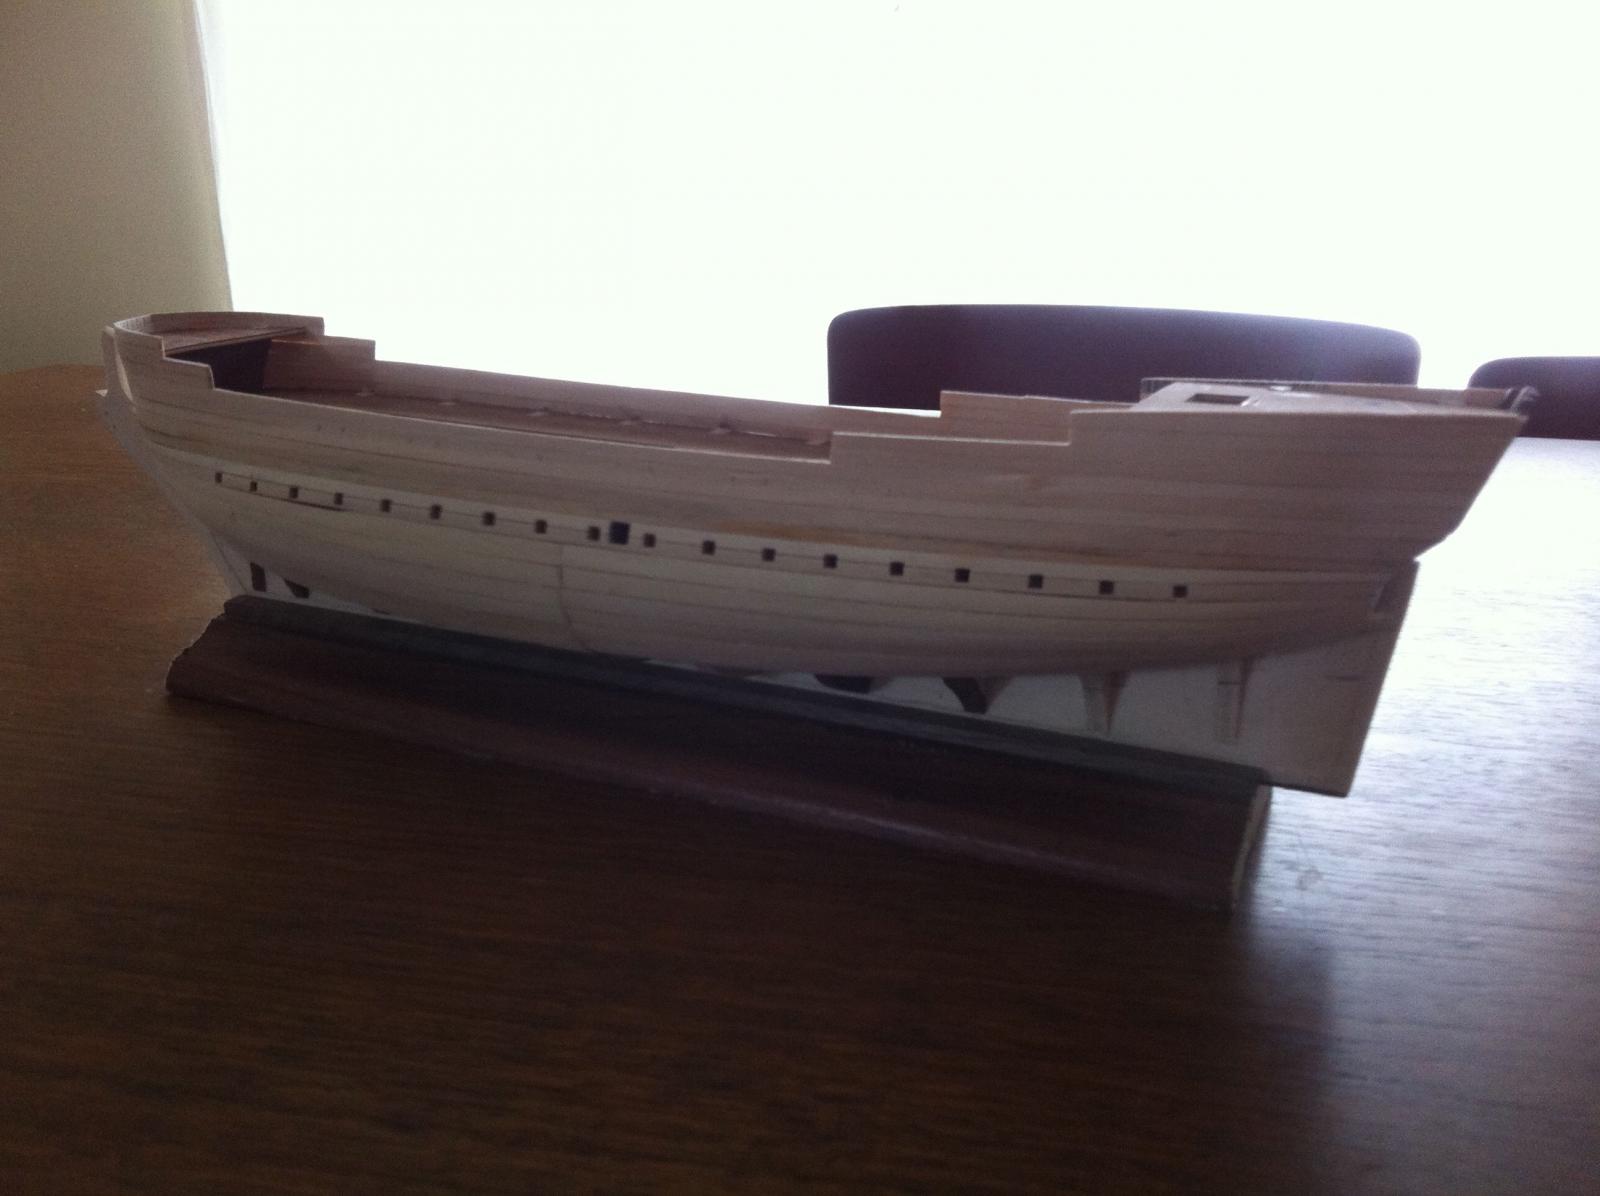
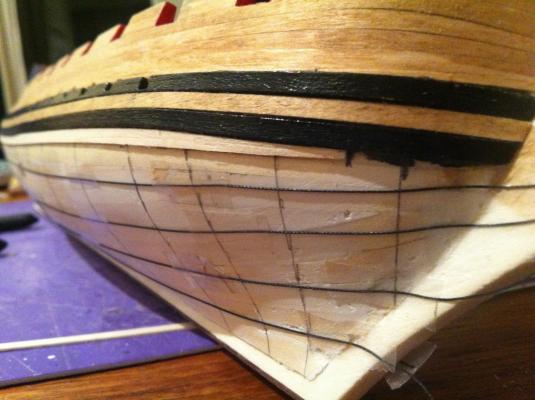
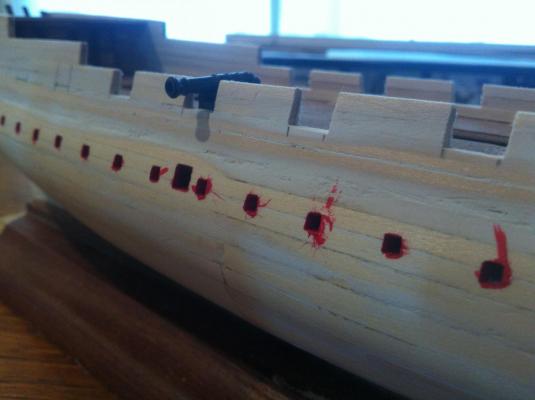
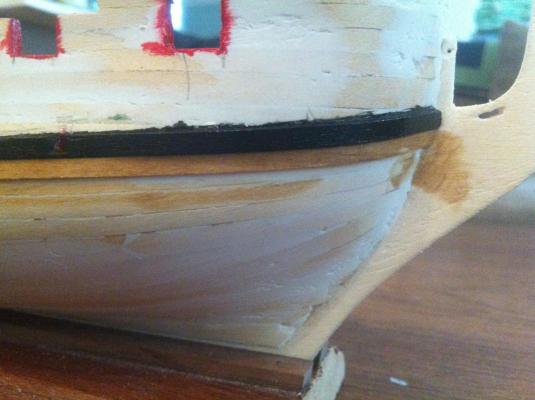
Alright, then - I thought I'd just give a brief update on the (rather slim) progress on the second planking. I spent a quiet afternoon yesterday touching up the paint on the gunport linings, sweep ports and wales. Not a lot done. Today I lined off the lower hull and managed to get "Band A" on the starboard side planked - using 1mm x 3mm lime. Eventually, this will be painted white below the waterline and stained at bow & stern where the planking rises above the waterline. Band "A" required 2 dropped planks - not the most sightly, nor perhaps strictly speaking correct. But so far so good. Here are a couple of shots to whet the appetite. I will probably hold off on further updates until the lower planking is completed and finished up...Until then.... hamilton

-
Thanks Mark - for the compliment and the links! hamilton
-
Of course you're right!! I had forgotten....It's been a year - long enough for me to bury that particular trauma quite deep - thanks for dredging it up again!! And thanks for the kind words. hamilton
-
I guess it's one of those expressions that never entirely caught on in the colonies (at least not here in the frigid north - or at least not in my day). Didn't I read it in a Rudyard Kipling novel? It means go slow and carefully and achieve your ends....not my strong suit I'm afraid! hamilton
-
Beautiful work! hamilton
-
Beautiful work! The scratched gun port lids are a great addition - I'm amazed at the detail you were able to add here. hamilton
-
PS - your kevels are a marked improvement over the metal ones supplied with the kit! hamilton
-
Ferit: Please - I'm blushing!! If there is any "incompetence" in your build, you've done an expert's work at covering it up! All I can see is nice, clean and well-detailed craftsmanship! hamilton
-
Hi Richard Wonderful work - I love the detail you've added - it really brings the model to life! hamilton
-
Very nice work on a really beautiful ship! I feel like your pics sell this kit much more than the promo shots I've seen from Corel! hamilton
-
Beautiful planking! hamilton
-
Thank you Ferit - this is high praise coming from a master such as yourself! If my results are even half as clean as what you've done with the Berlin, I will be more than satisfied! hamilton
-
Good to hear from you Harlequin! We should arrange a side-by-side photo-log of our two builds once mine's done - it would be interesting to see how they stand up - we'll have to make up a list of perspectives so we can each replicate similar shots for comparison - not a quality comparison, clearly, since I cannot hope to match your beautiful work on the Greyhound! hamilton
-
Thanks BE - again, I wish I had both the time and the patience to follow through on your earlier suggestion! But I will live with these results. I was trying to picture her with the lower hull planked and the channels & chainplates on - this will soften some of that high contrast - as will the rails and mouldings once they're on....next time I'll wait a bit longer to read all the responses before moving on! hamilton
-
Nice work Harlequin - I still can't believe you're already into the planking! Very gratifying to watch this build take shape. hamilton
-
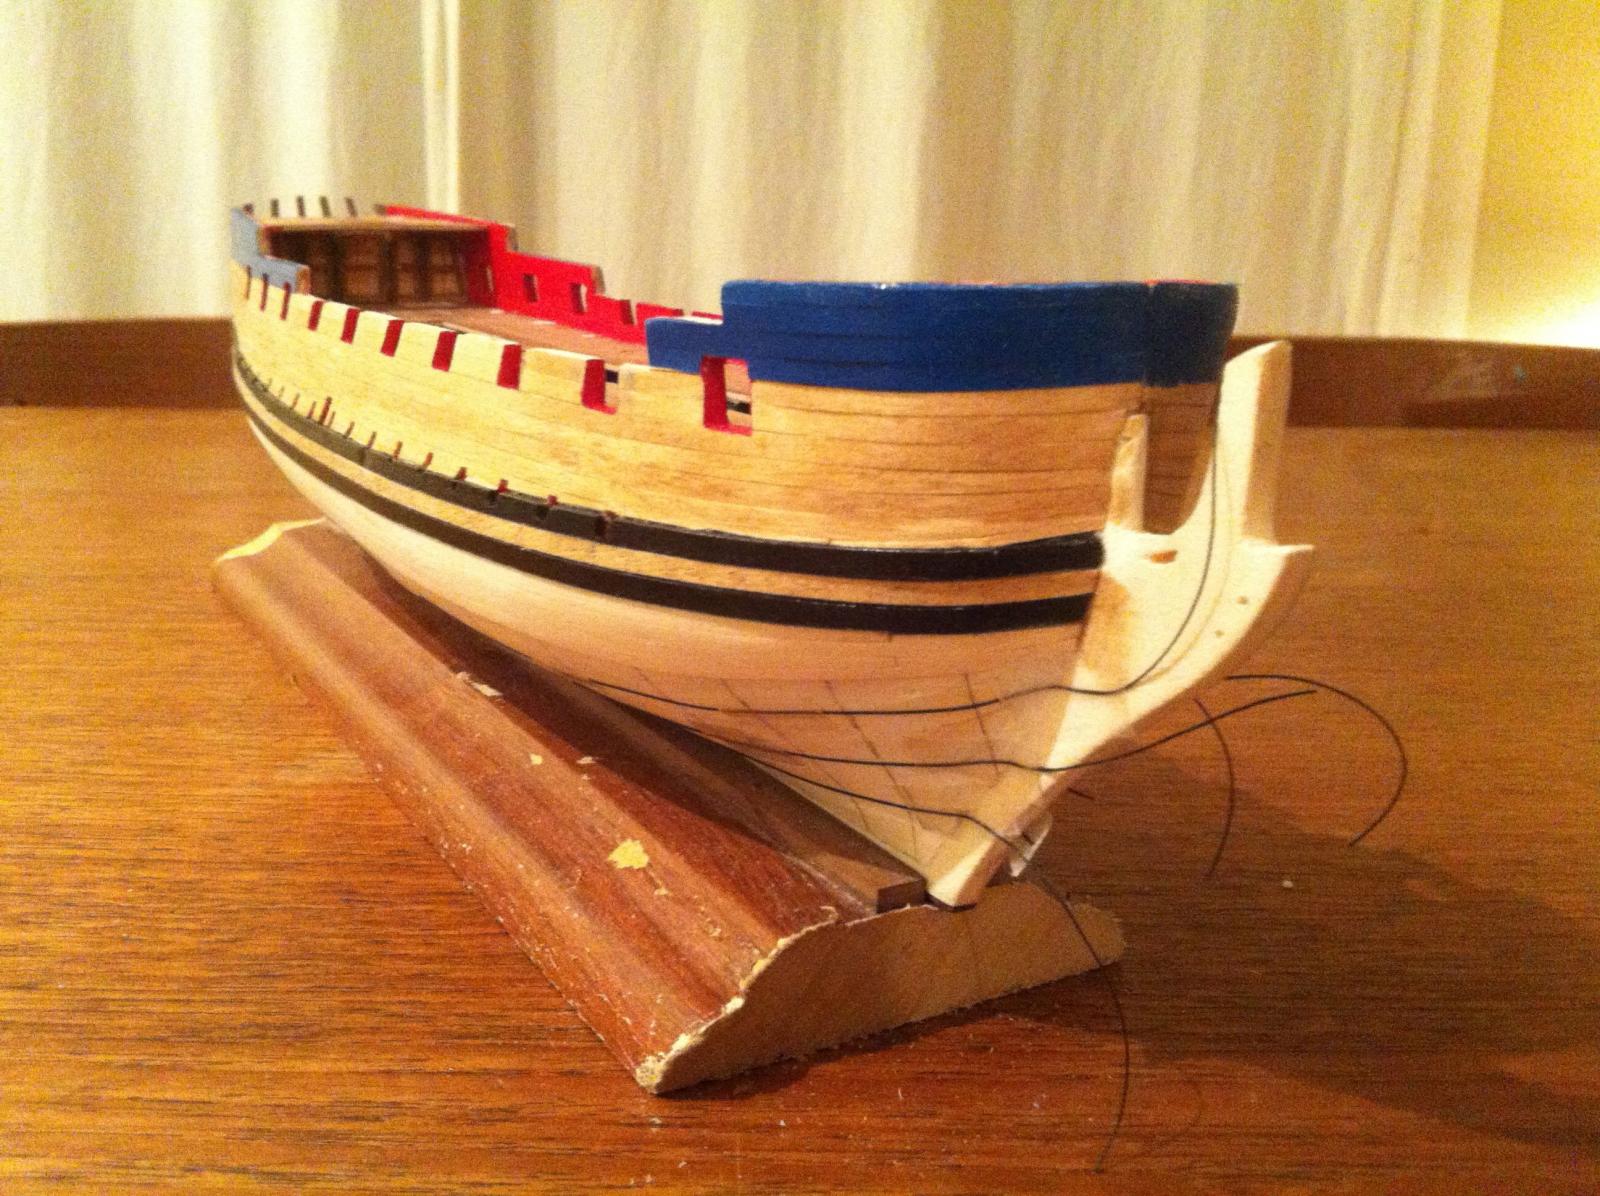
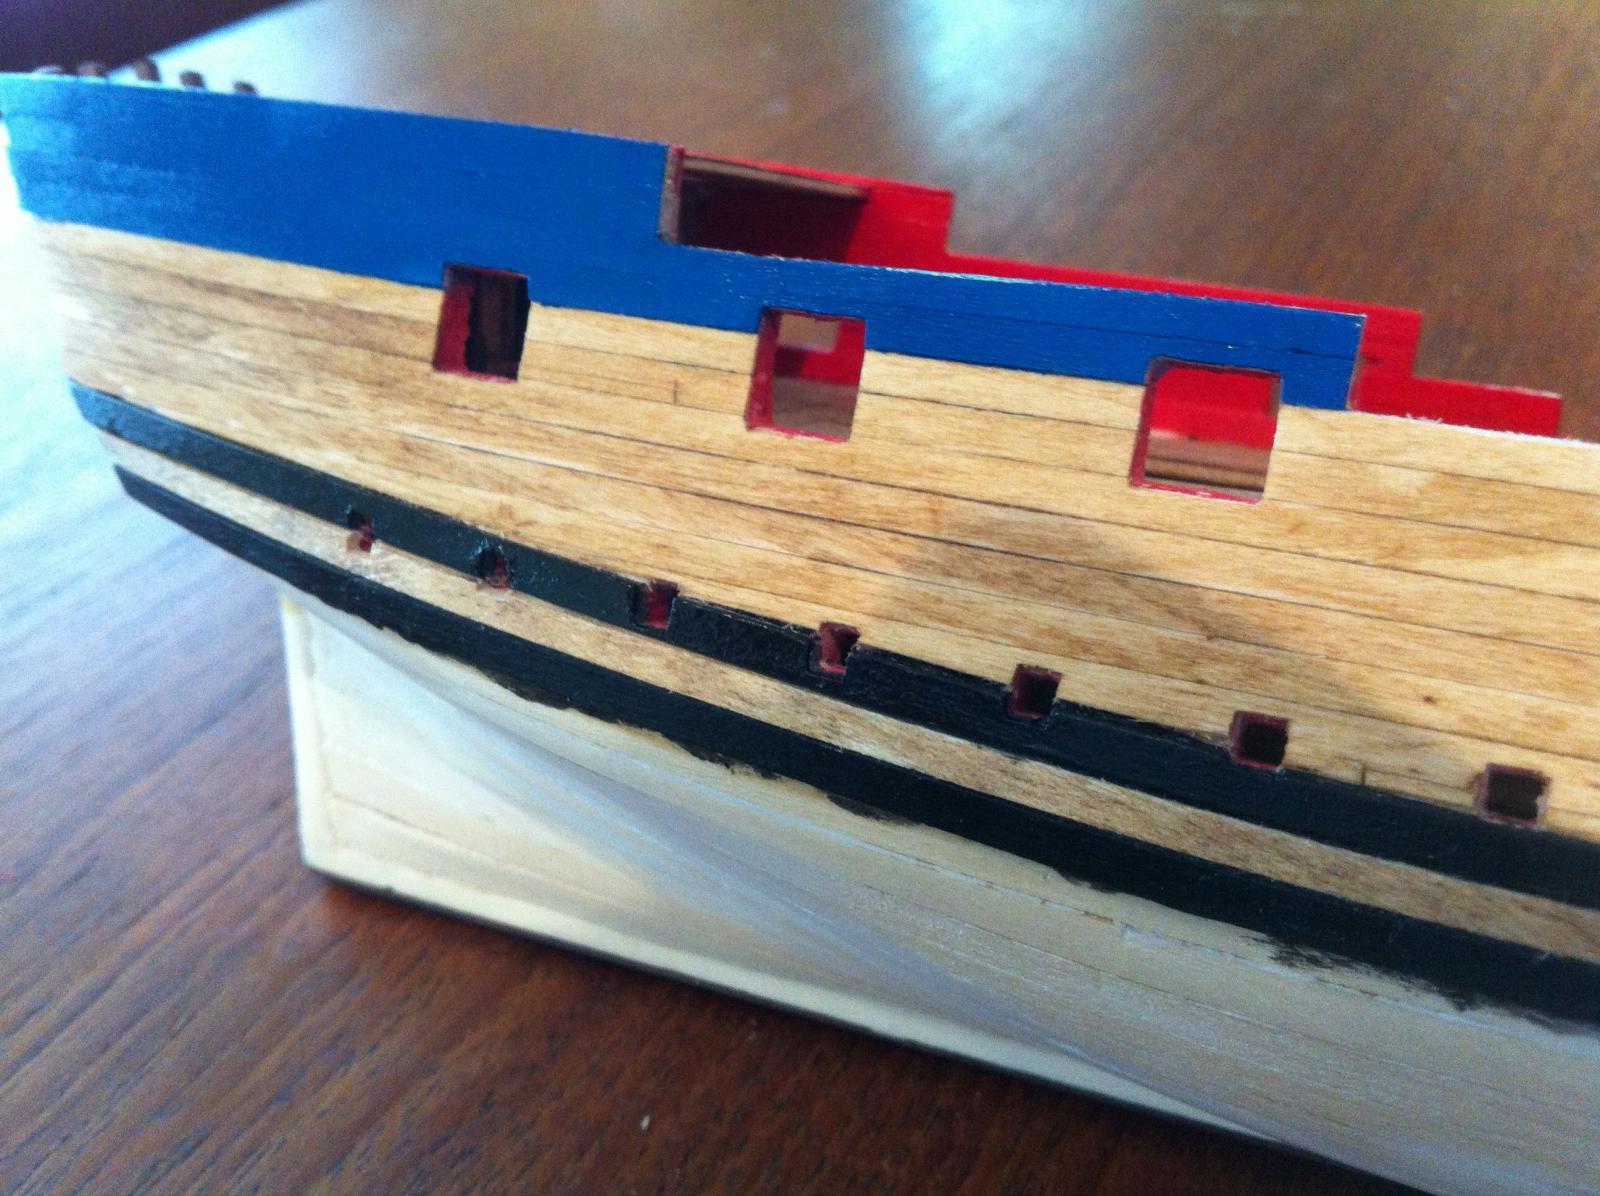
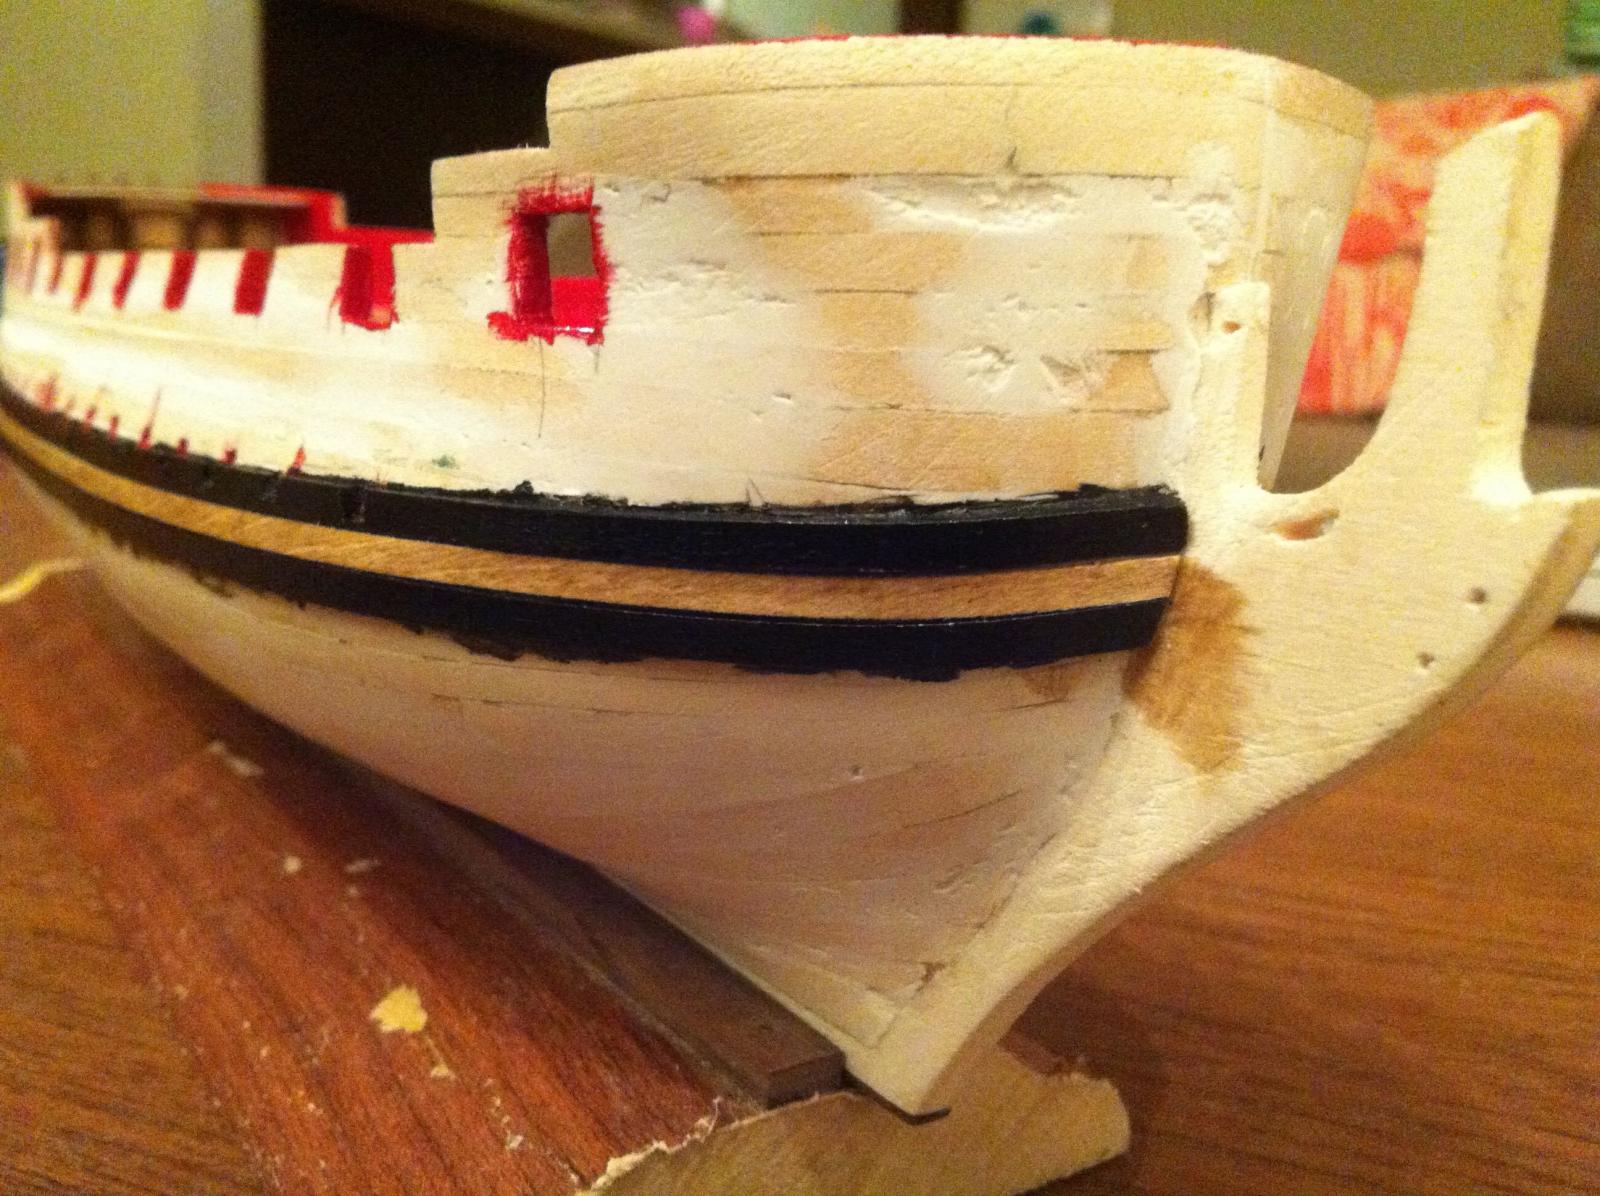
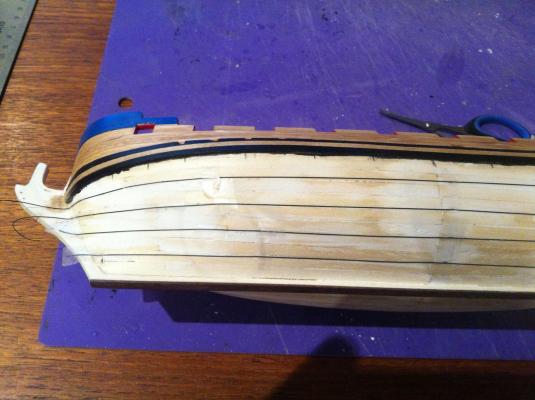
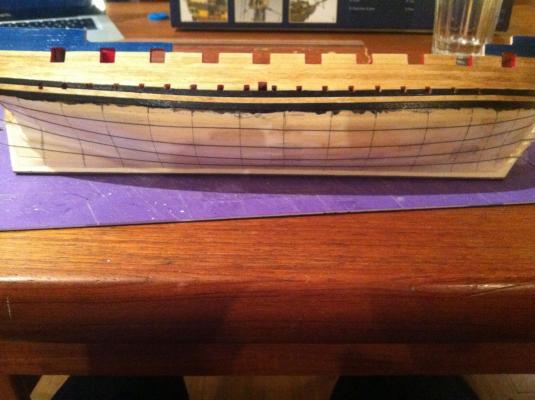
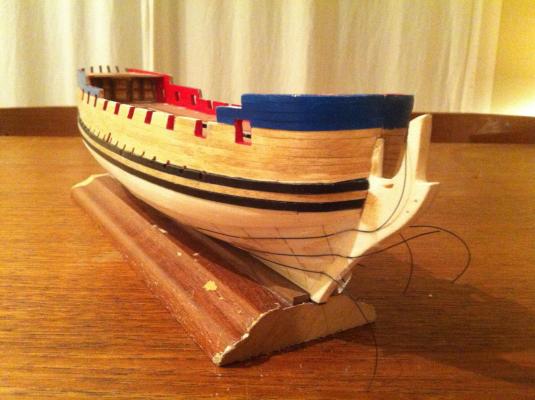
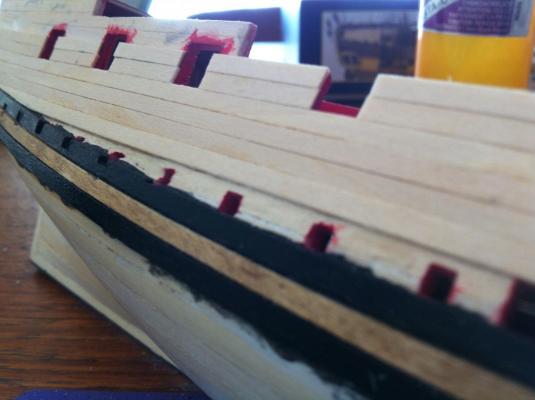
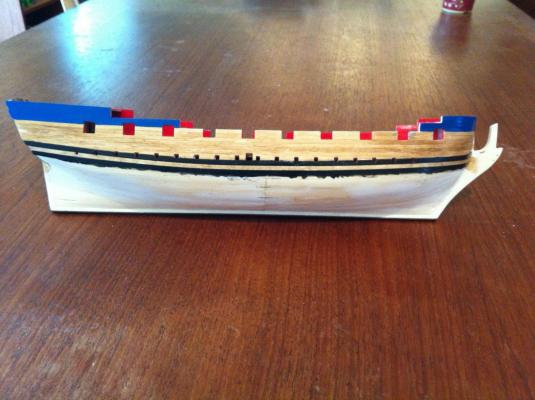
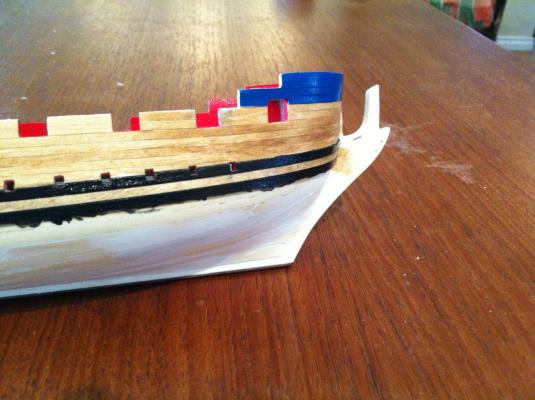
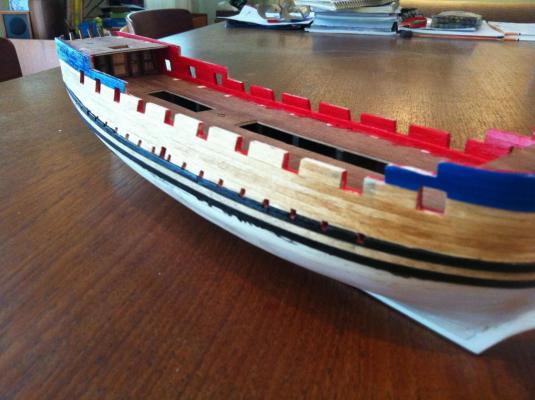
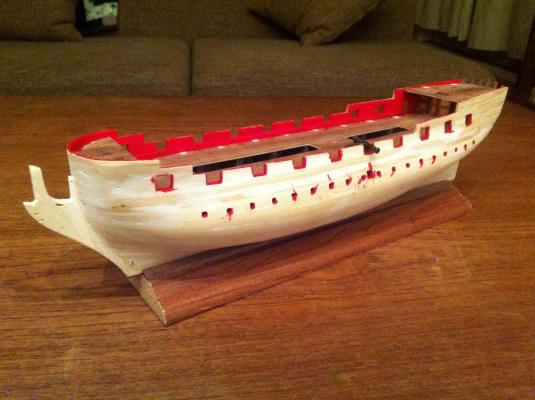
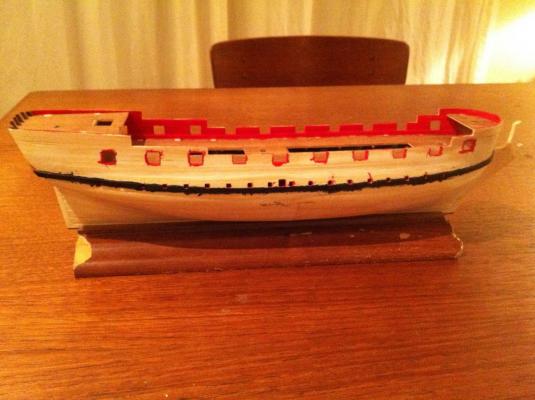
Hello Augie, J and BE Thanks for your words of encouragement and advice! BE - I just read your response now after spending the day re-doing my bulwark planking (see photos below). In retrospect, this solution makes sense....I had a feeling very early on that I may have been positioning the sweep ports too low....but I didn't listen to myself then, as I should have.... I could certainly have stripped the wales and re-positioned them - and probably this would have been the best solution - either re-positioning and cutting the the sweep ports or omitting this detail....I had considered this, but went for what was "easiest" rather than what may have been "best". I installed a plank along the bottom edge of the gun ports to establish the run of the strakes and then planked up and down from there, spiling the last two planks to fit along the wales-as-fitted.....others may disagree, but I can live with the results.... Anyway, thanks all once again! Here are some photos of the results (I've only completed the starboard side....). I re-planked, up to the top of the gun ports in the waist and then down to the wales. I then stained this section of bulwark planking with Golden Oak. After it had dried, I touched up along the wales and then planked the remaining upper section of the bulwarks, masked it off and painted it blue at quarterdeck and forecastle. These blue sections will be further segmented with 1mm x 1mm extensions from the rails (later).... Anyway - enjoy! hamilton The patchy look of the paint at stern in the last photo is a function of the glare of sunlight - it doesn't really look that bad!

-
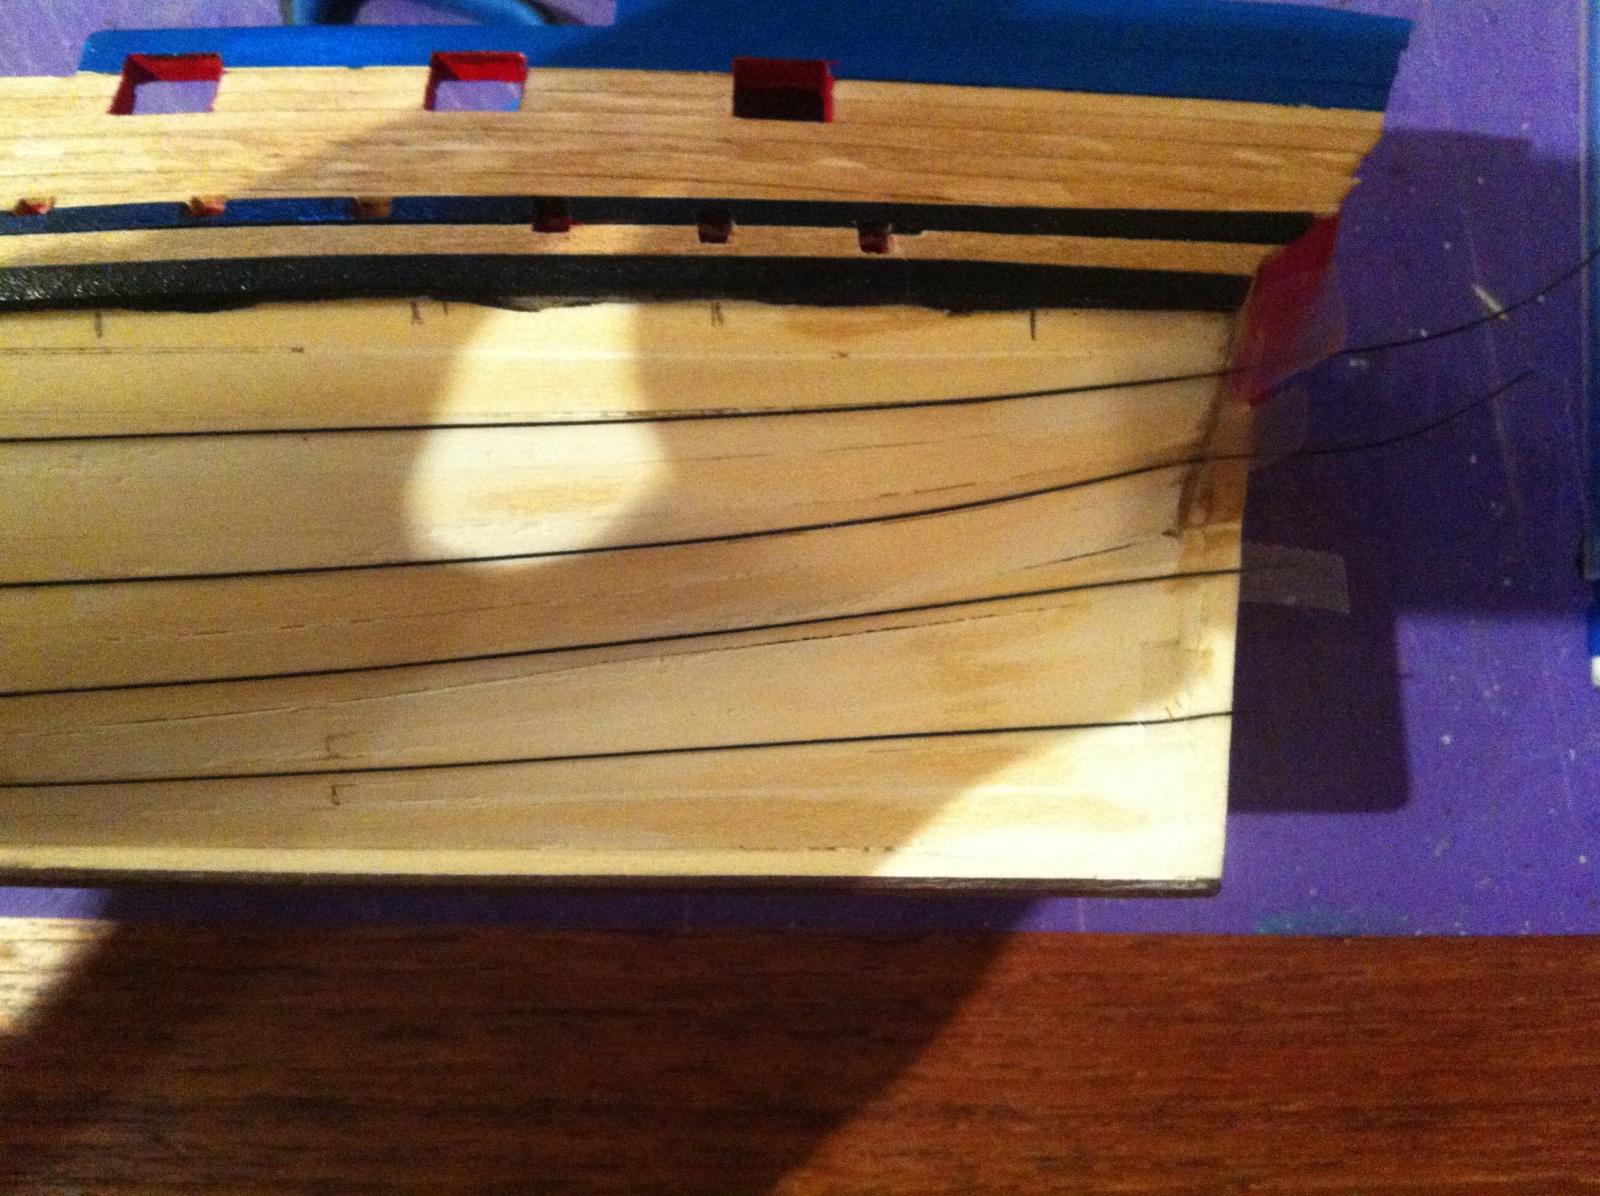
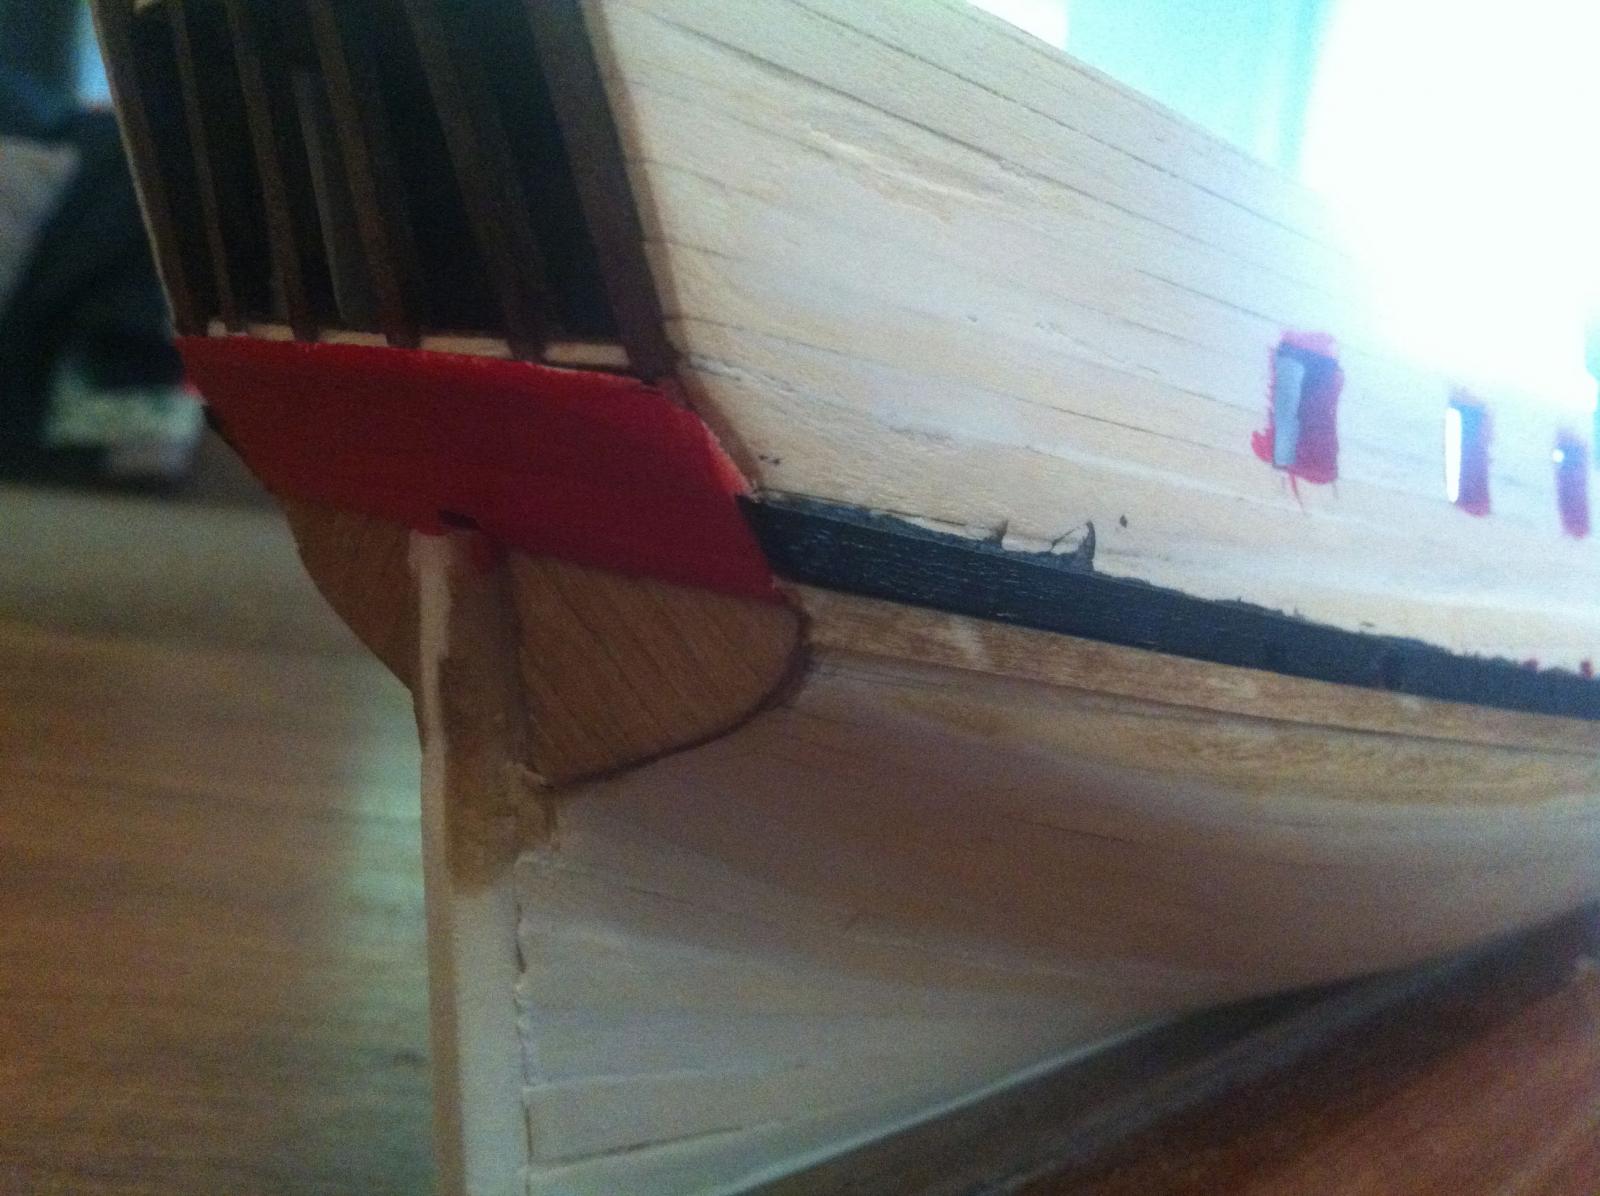
Hello.... Did you ever have one of those days when you probably should never have sat down at the workbench? I had one tonight! I'd been looking forward all day to starting in on the bulwark planking, though as I mentioned in my last update I thought I might have difficulties here - that is an understatement!! I completed the wales last night and as I mentioned previously, I'd tried to keep a distinctive sweep to the run of the wales without edge bending them beyond recognition. When I was laying on the wales I noticed an error that I'm not sure how I could have avoided making.....The sweep ports are about 3-5 mm too low.....Thus, the wales are too low. The upper wale should meet the same point as the top of the counter at the stern - to make it rest even half way up the counter (and thus not have the wales bending under it) I had to put quite a sweep into it - and thus into the wales overall. This sweep doesn't look too exaggerated in the photos, and it isn't really. But you can see that it puts the run of the wales off from the lower edge of the gunports (they should be not exactly parallel, but very close, judging by Goodwin's book). This would not have been an issue if the sweeps were a little bit higher up the hull....As it is, however, they are not, and it is impossible for me to correct them at this point. So having the sweeps too low means having the wales to low and having them make a much more dramatic run then they otherwise would (or should). But this also means that the bulwark planking will be especially tricky, and it certainly proved to be so today when I came to it after putting our son to bed.... I thought of three possibilities for attacking the job: 1. Just lay the bulwark strakes along the same trajectory as the wales - however, this would have resulted in some bizarre edge bending and would have looked very weird. 2. Start by laying the strake that runs immediately below the gun ports, so as to define the run of the strakes according to the gentle curve of the bottom edges of the ports. Then plank downwards and spile the last couple of strakes to conform to the sweep of the wales - this is what I SHOULD have done, though not, as it turns out, what I did....though I will be doing this tomorrow 3. Spile a short plank to fit against the upper wales and then just fill upwards like filling a bowl with water. This is what I did tonight, with grievous results. After I had laid 4 strakes (and finally got out of the well created by the wales) things looked good at the bow, but at the stern I noticed that the planks were actually tending downward and not sweeping upward as they should be....This was the result of a cumulative error in my spiling of the planks at stern which led to a miscalculation of the length of these lower strakes at that point.....fortunately I just did the starboard side.... So, long and short? Seeing how horrible it looked, I ripped the planks off (leaving the starboard side rather scarred) and will smooth it out and start again tomorrow.....Here are a few photos - a couple of the completed double wales (which I'm very happy with) and a couple of the scarred outboard bulwarks.... Tired and morose hamiton


-
Thanks Augie. I used a very soft old t-shirt to lightly wipe it on. Hopefully the bulwarks will look as nice when they're done....but that is the matter of my next post.... hamilton
-
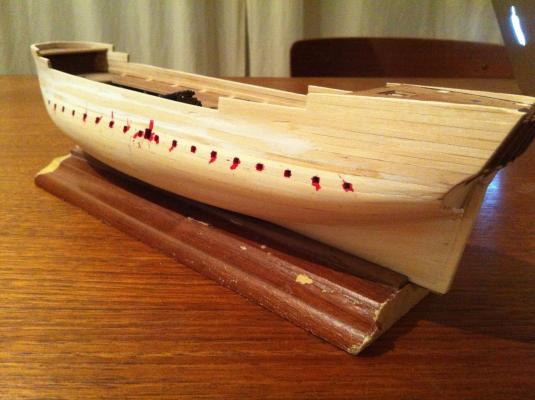
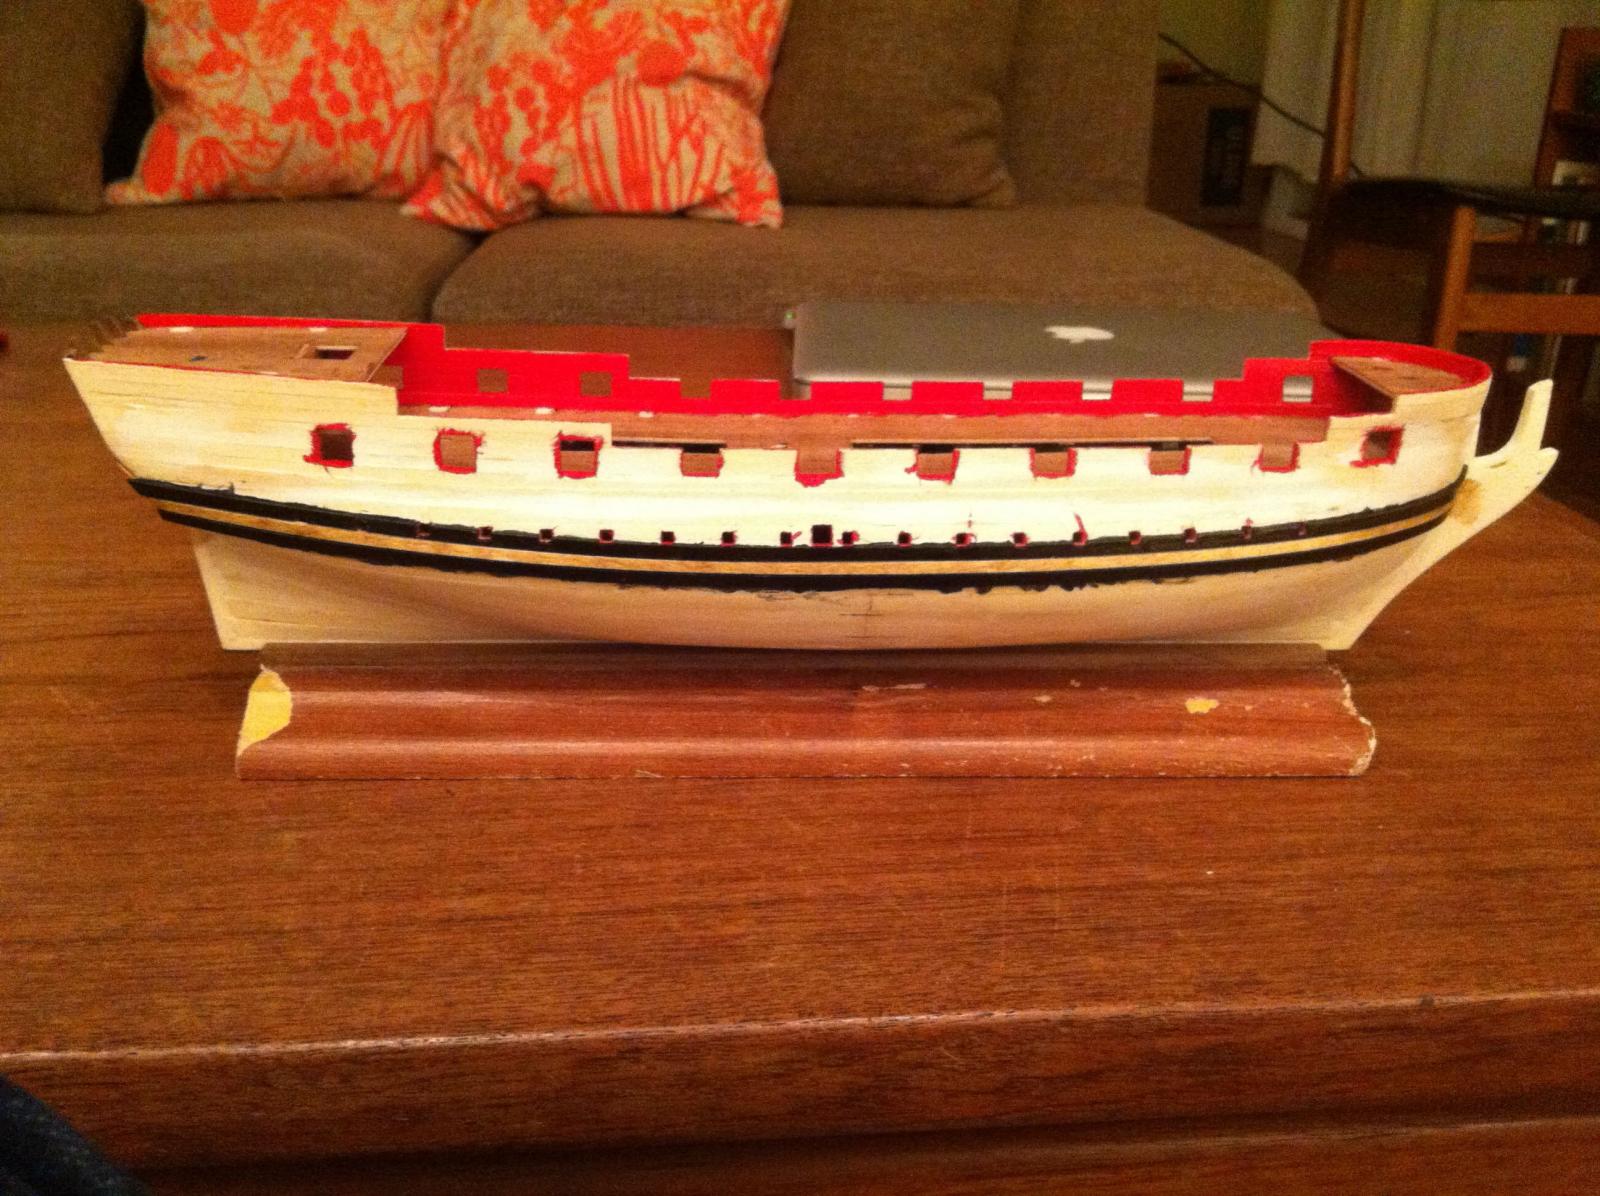
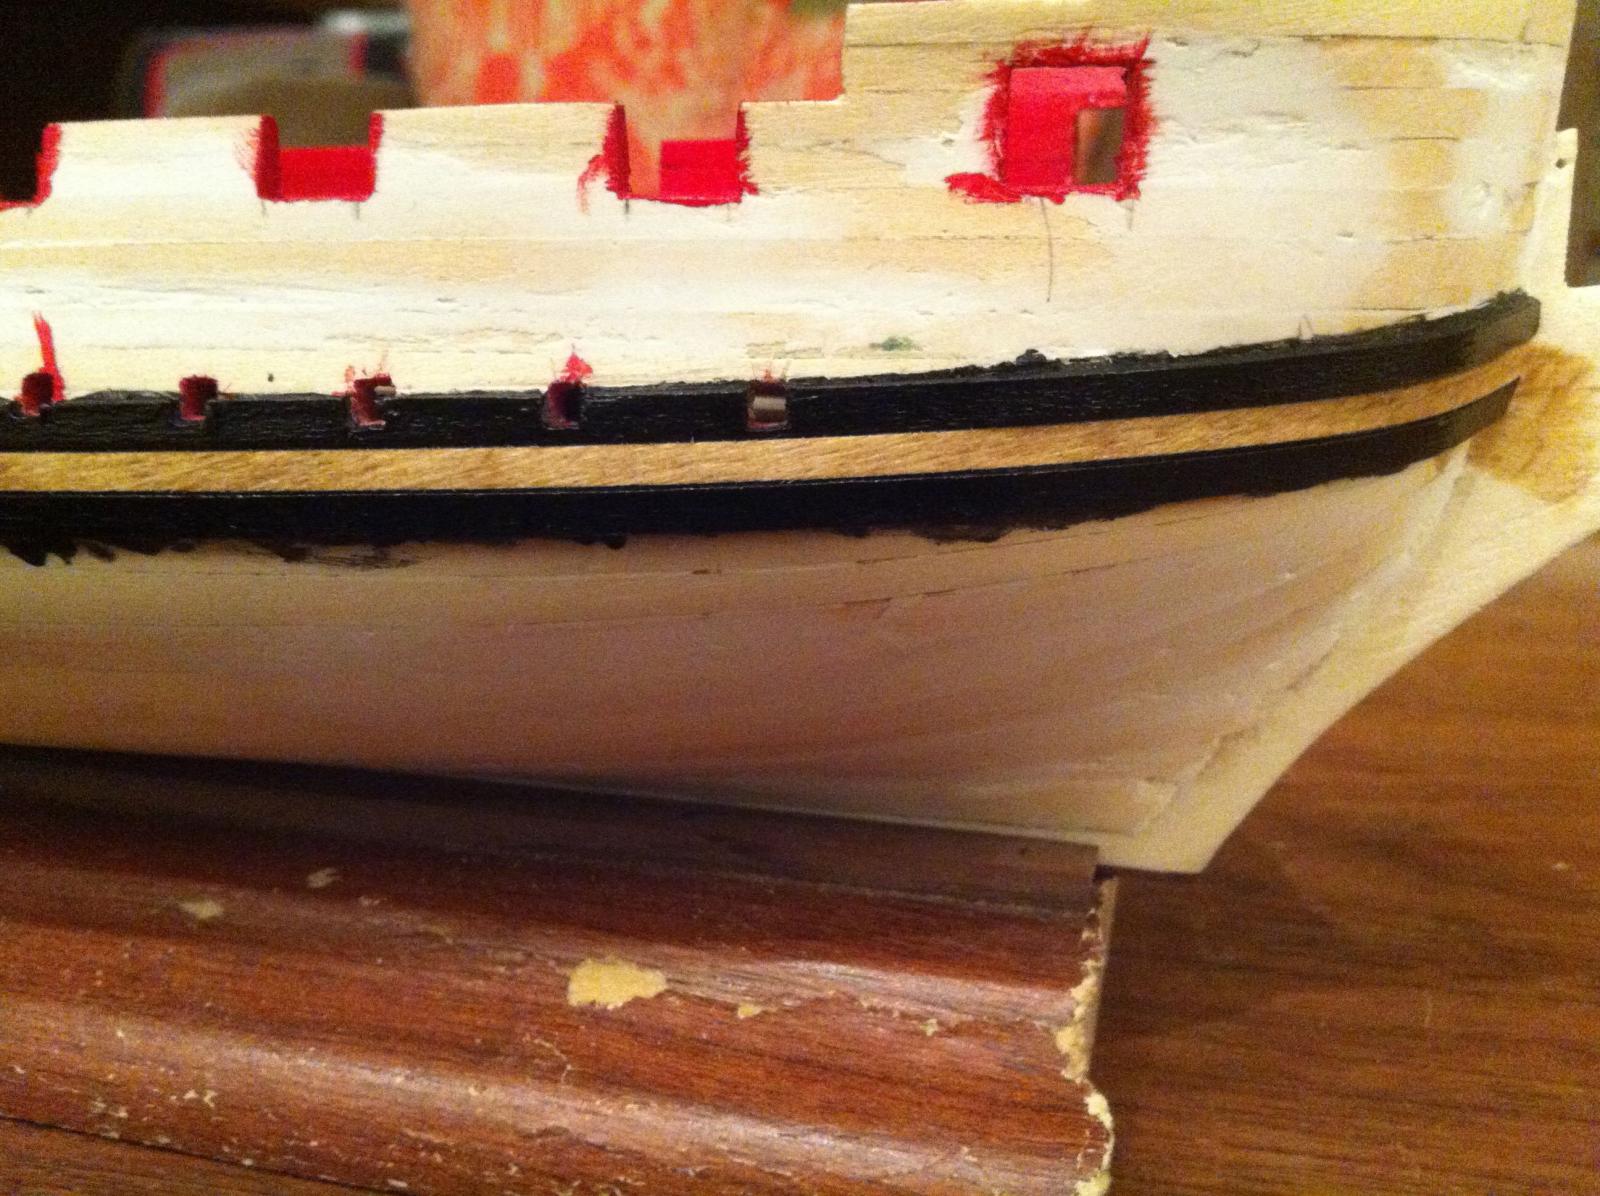
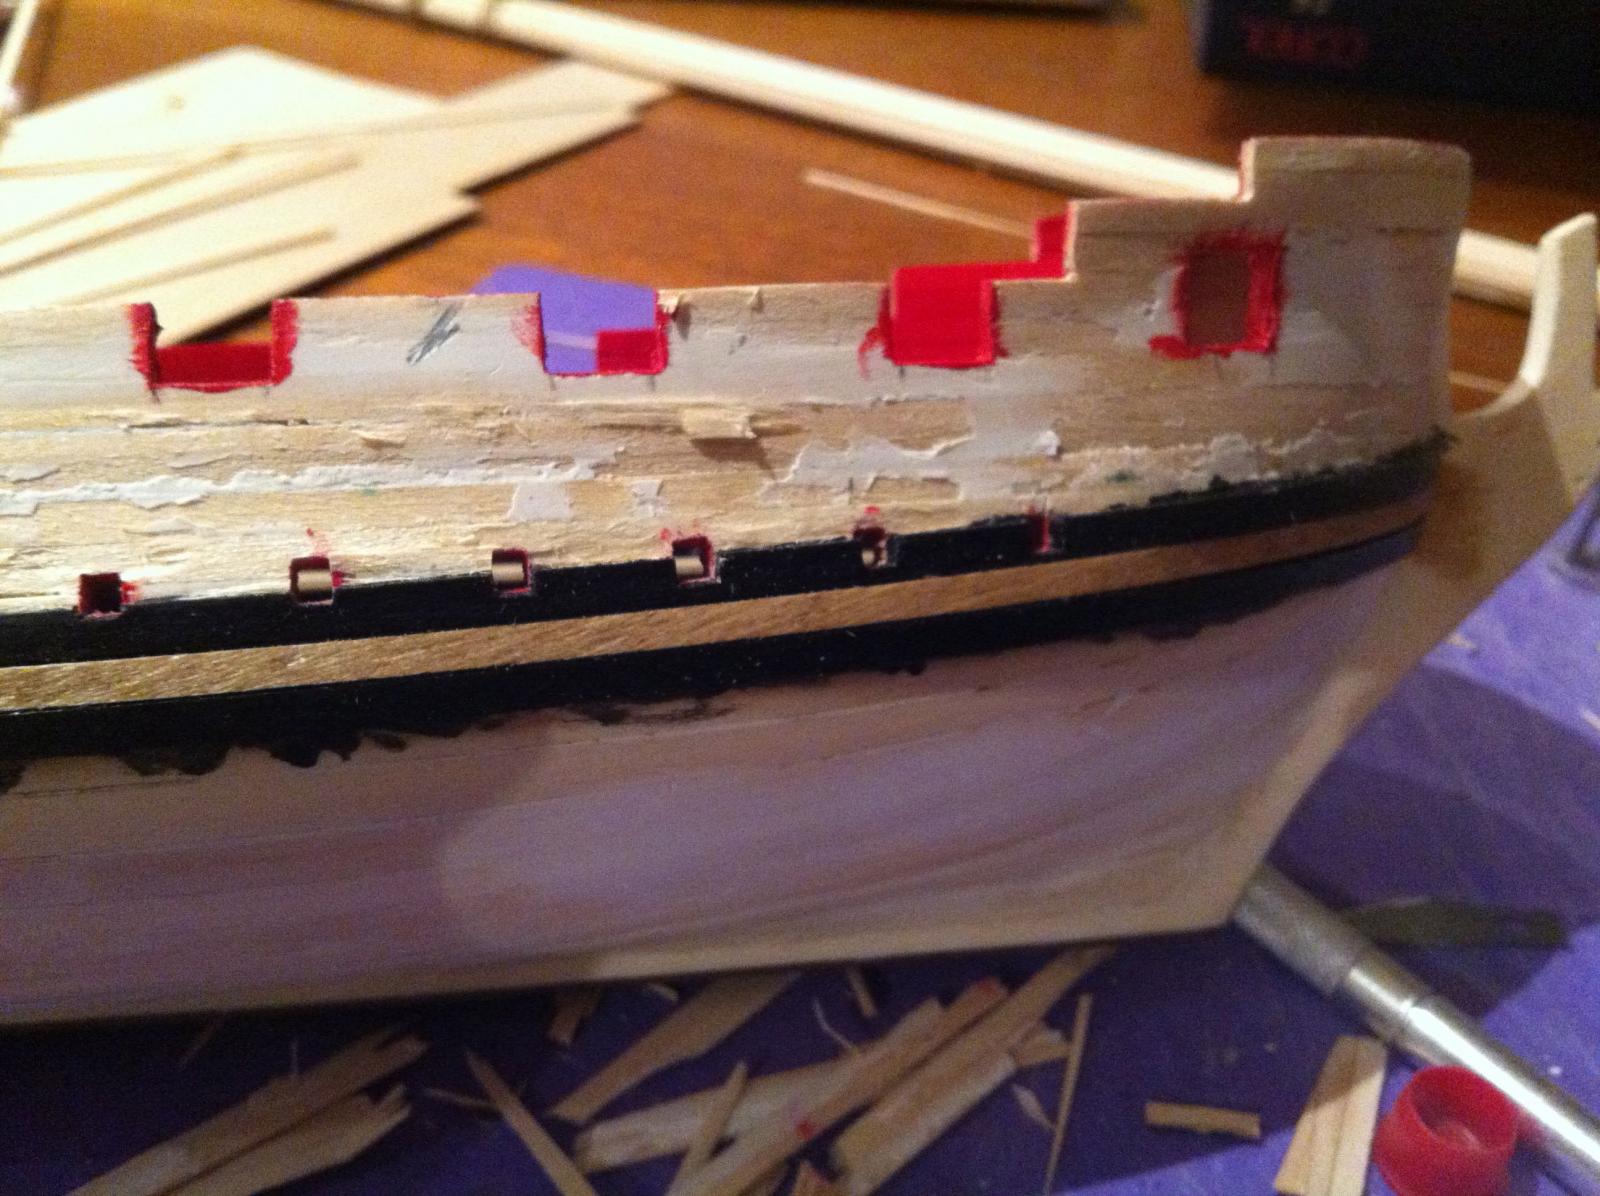
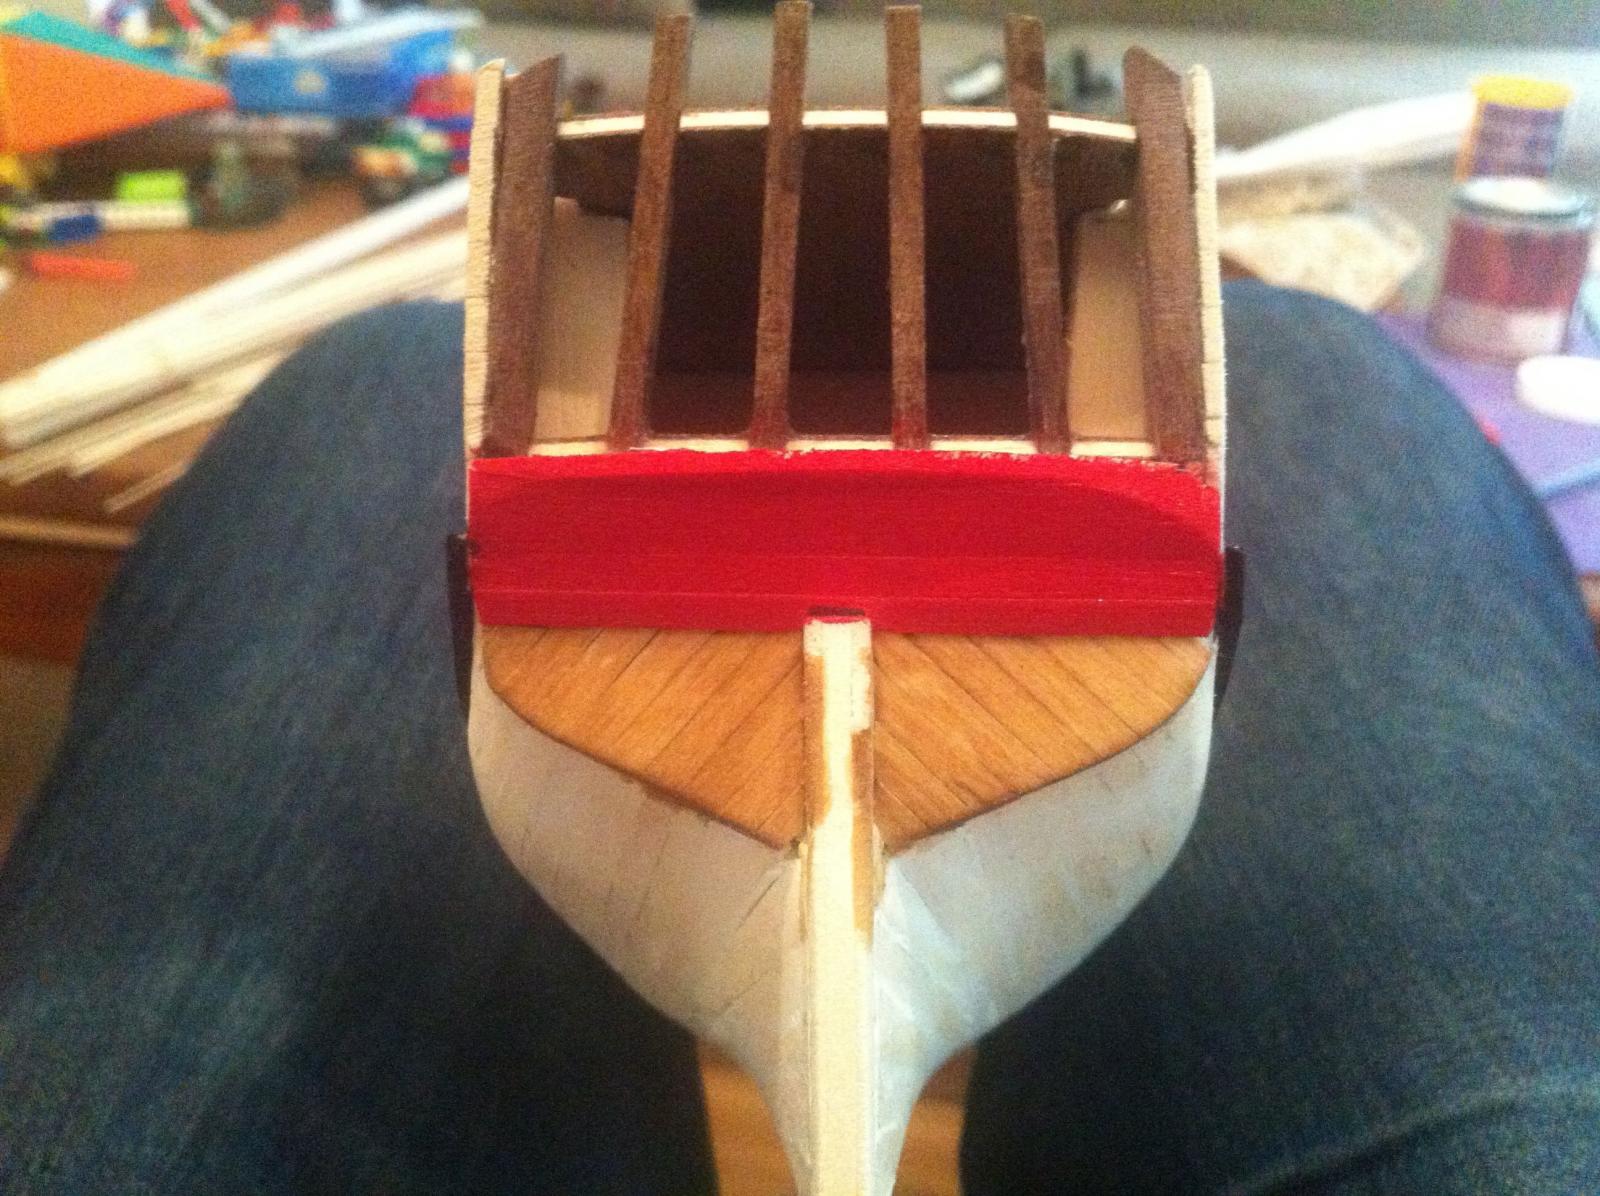
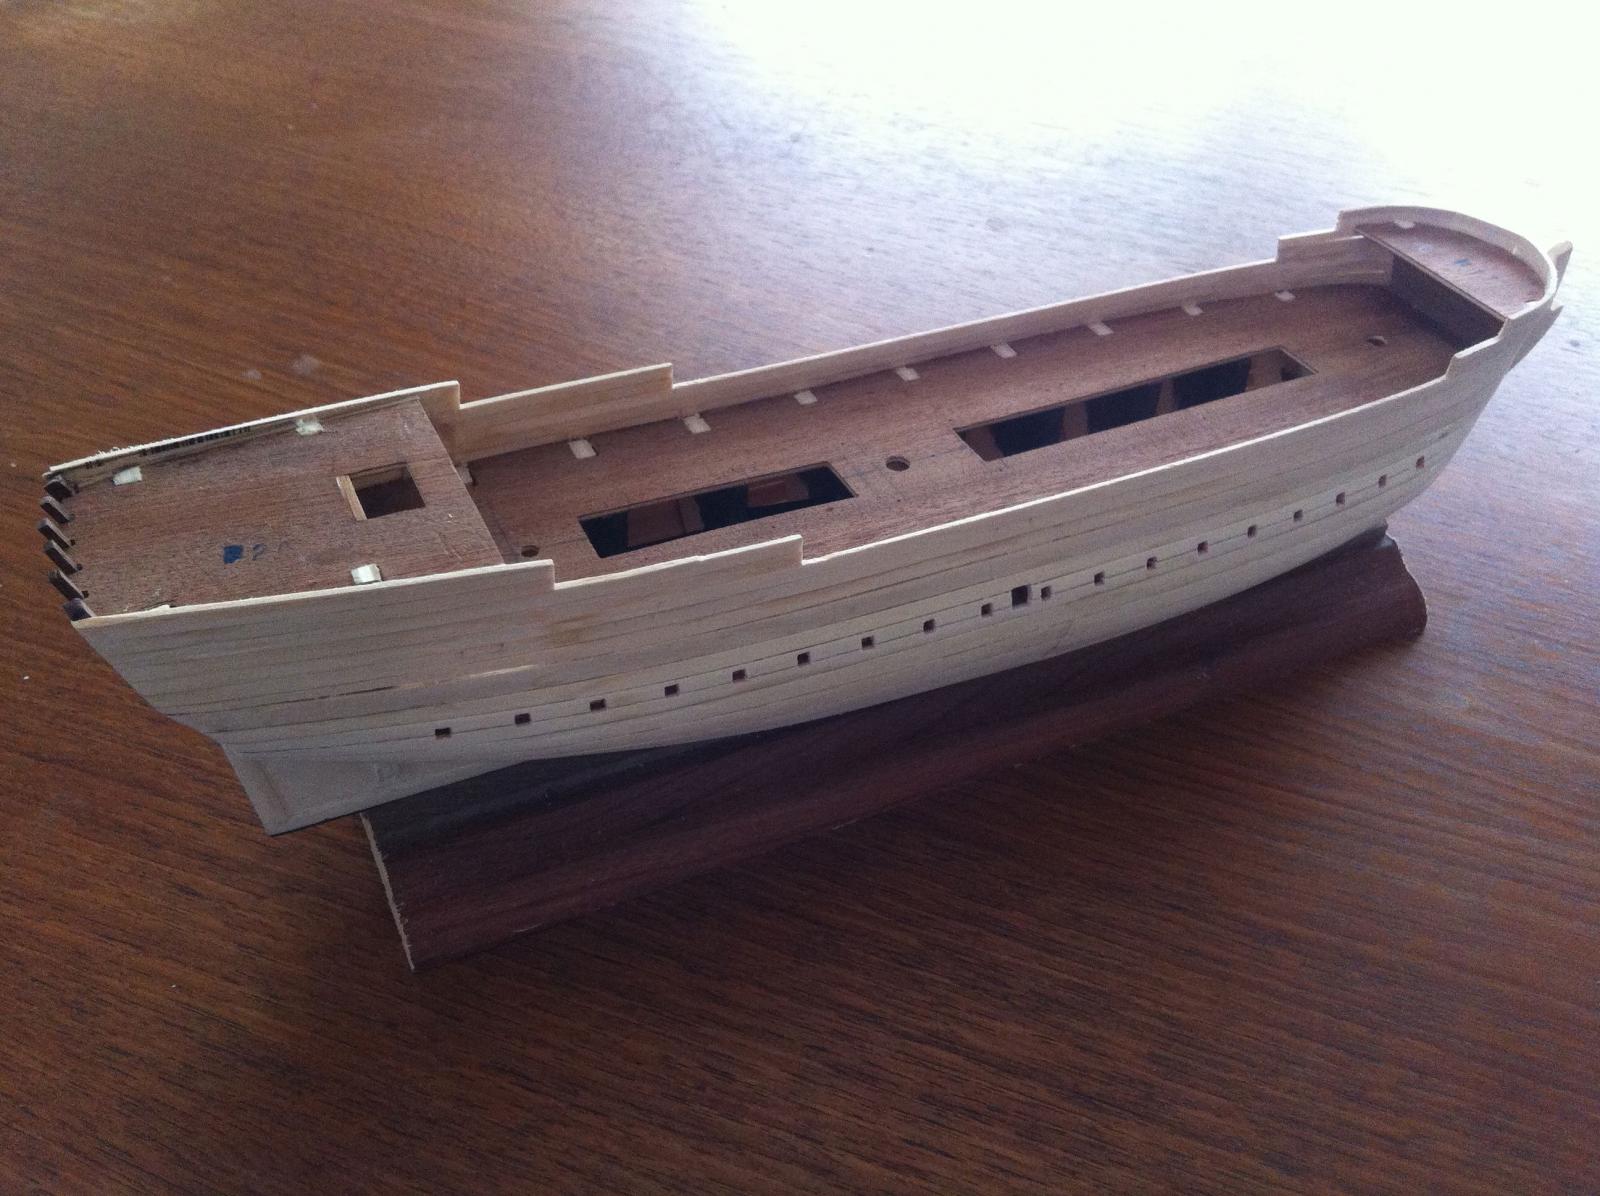
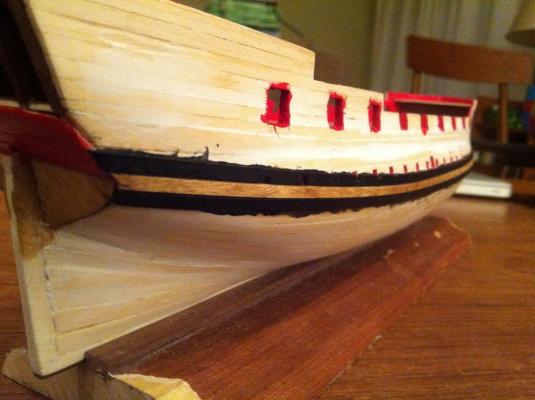
Alright everyone - Happy Victoria Day to my commonwealth buddies! Or Happy May 2-4 for my fellow Canucks. Hope you're enjoying the long weekend. In other news, a bit of an update on Greyhound, which I will now stop calling Greyhound and start calling "Blandford", since it's starting to come together as such.... Here's the latest laundry list: 1. Cut out gunports - using a template I made a while back that derived from the plans. The gunports in the waist were sawed out with an x-acto saw, while the other full square gun ports were cut out using the tried and true micro-drill/x-acto blade/needle file method. 2. Inboard bulwark finishing - in Cadmium Red medium (I use Golden acrylic artist paints, which are very nice to work with). Finished off with a coat of polyurethane. 3. Installed the upper wale - Goodwin's book shows the Blandford with a really distinctive double wale. I'm using 3mm x 1.5mm line for these wales with 1mm x 3mm lime for the filling strake. The upper wale was very difficult for two reasons - first because just locating its placement was tough. Goodwin shows its top edge flush against the sweep ports/ballast ports at mid-ships and then crossing the line of these ports at both bow (slightly) and stern (where it crosses entirely and where a few of the aftmost sweep ports are in line with the filling strake....I could not really get this effect without really edge bending the wale - so I avoided doing this and went with what looked good and followed as close as possible to the natural run of the planking...though I think I may get in trouble with the second planking above the wales..... 4. Installed the counter planking - and finished it also in cadmium red medium - very straightforward. 5. Installed the stern planking on the exposed aft side of bulkhead 13 - used a diagonal pattern as shown in Goodwin's book...this was (like the filling strake) stained using Minwax Golden Oak. 6. Installed the filling strake - see notes above. That's it. I'll be laying on the lower wales tonight and then on to the outboard bulwark planking.....Bye for now hamilton


-
Looking great Augie - the boat, I mean. Like other commentators, I would love to see an overall picture - but maybe you're saving it for a big reveal at the end..... hamilton
- 1,668 replies
-
- 1
-

-
- syren
- model shipways
- (and 1 more)
-
Beautiful work, as always, Ron - and such dedication to detail! Wonderful hamilton
-
Wow Ferit! Your work is really top-notch - and this log is a really joy to follow. I had taken the Berlin off my list of potential builds, but I may not add it back being so inspired by your craftsmanship here! Can't wait to see the rigging hamilton
-
Thanks everyone for the comments! She's definitely coming along now. I started cutting out the gun ports last night and they're adding a lot, as well - I'll be finishing them this evening and painting the inboard bulwarks which should bring a bit more life into her. Another update probably in a few days..... hamilton
-
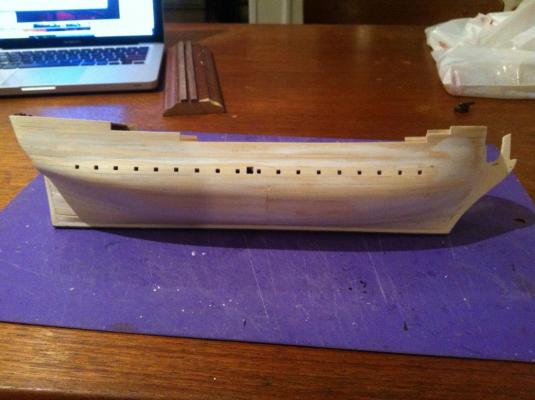
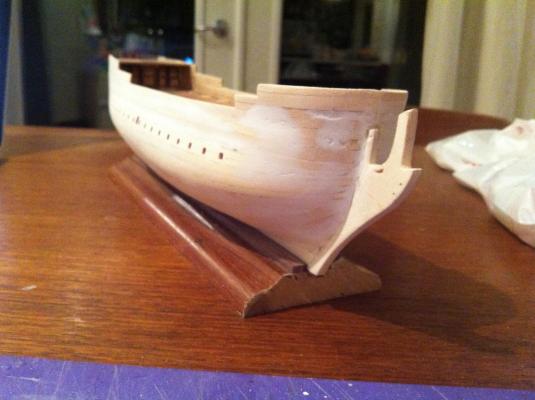
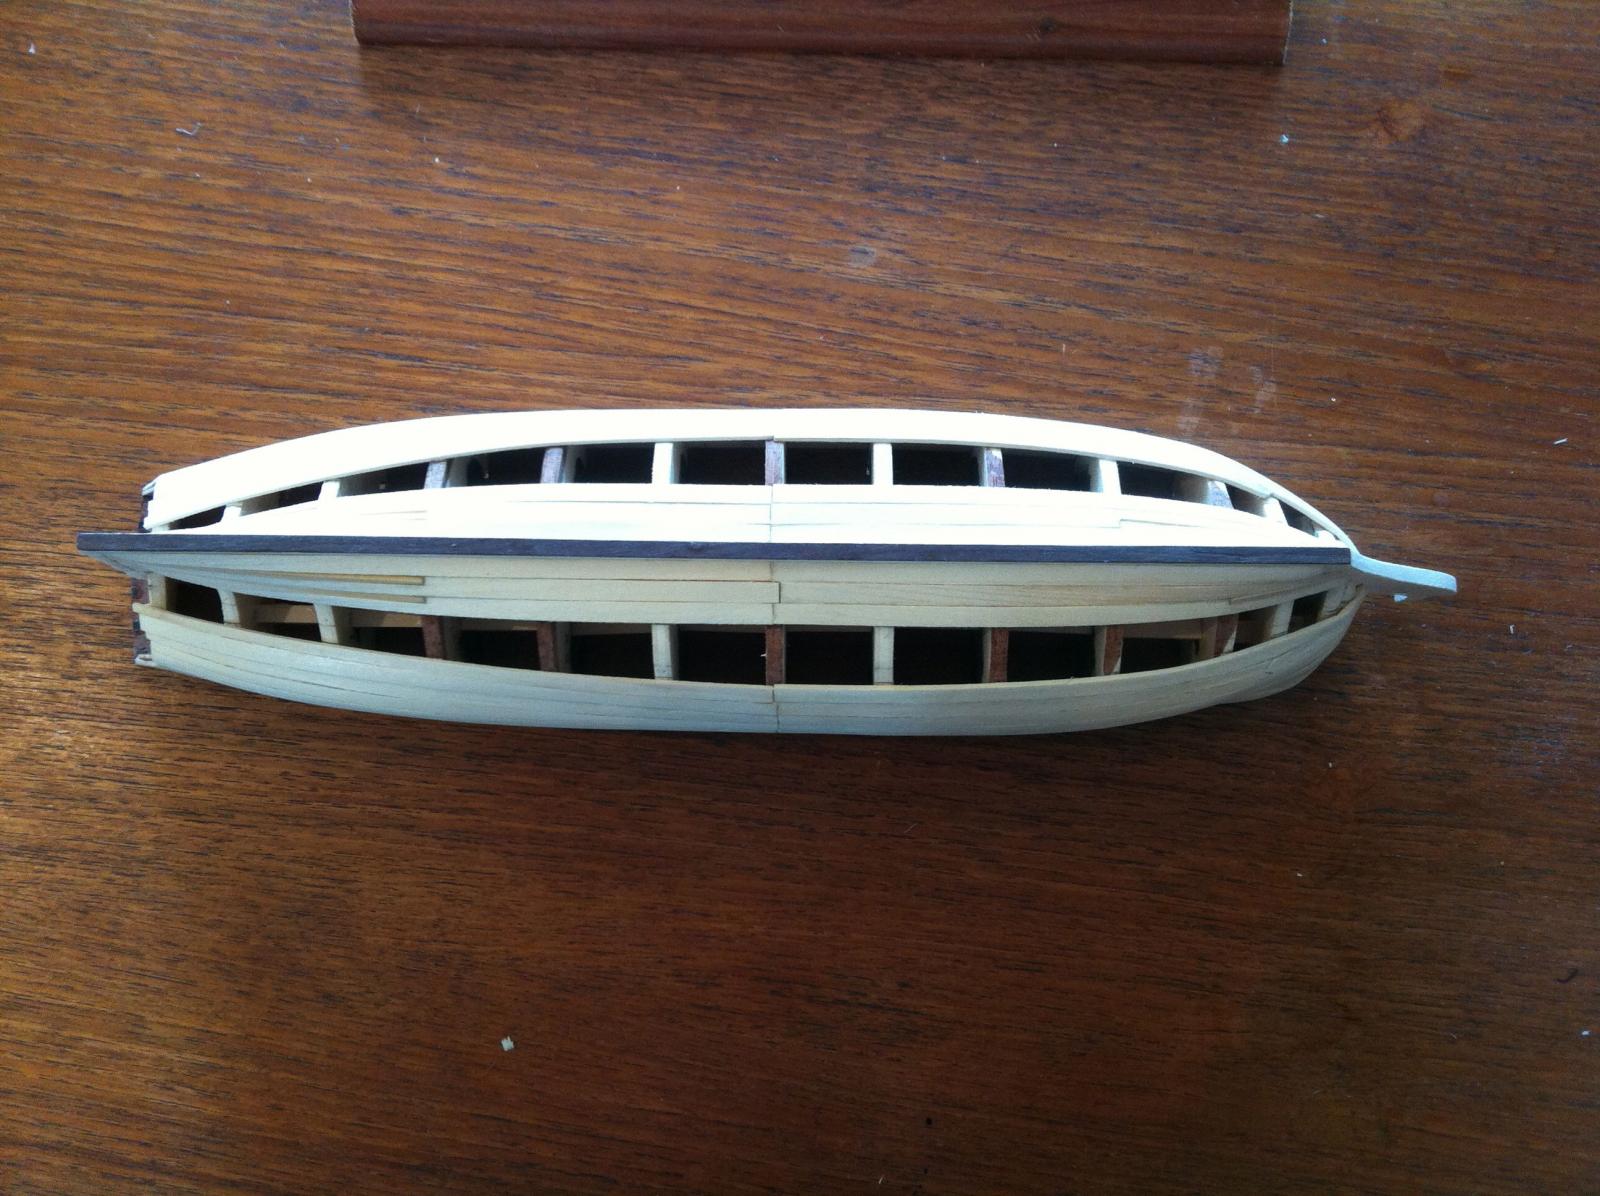
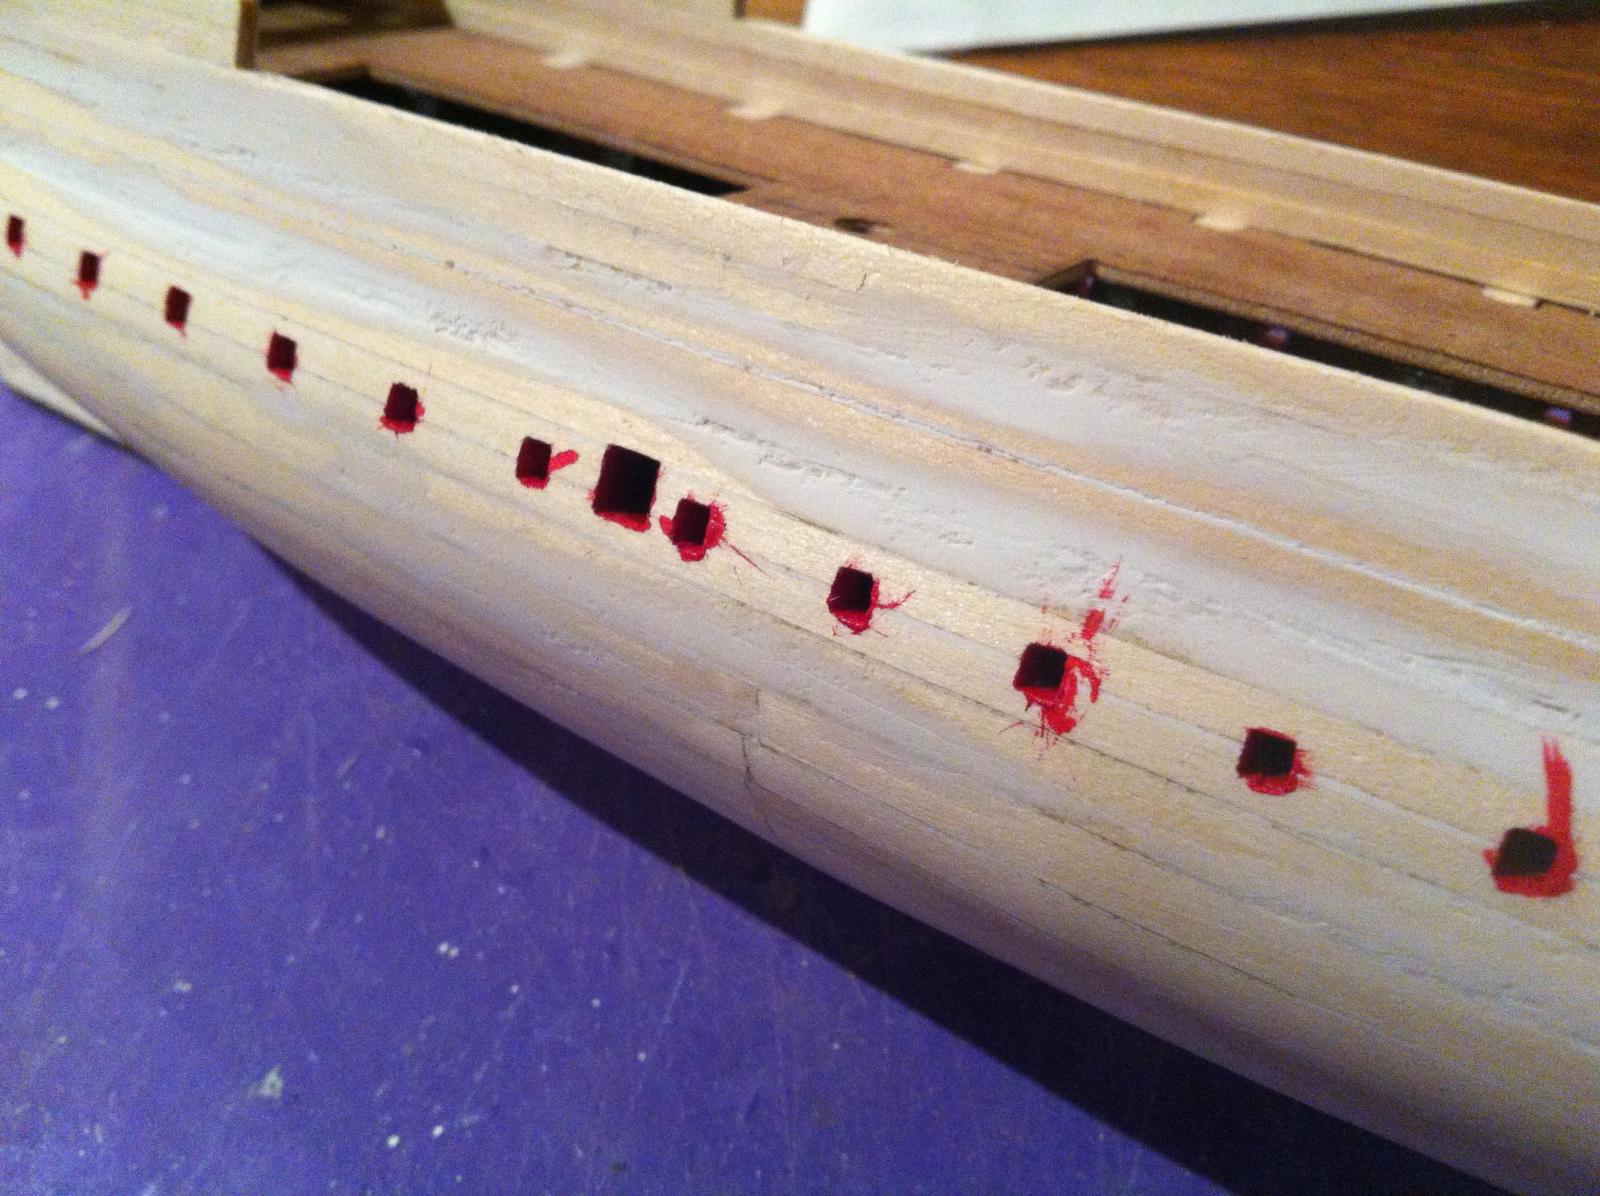
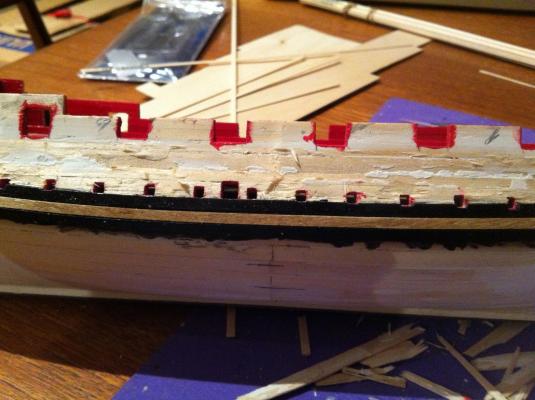
Hello all: The first planking is now finished, and she is shaping up, I think - or maybe I should say "I'm feeling a little more pleased about her". Since my last post, here's a couple of things that have happened.... 1. I was studying the Goodwin's AOS Blandford and noticed that I had forgotten to cut a little "step" in the f'csl bulwarks.....this I did - see below. 2. finished planking the 5 bands I had lined off on the hull 3. applied liberal amounts of acrylic modelling paste to the hull and then sanded it quite vigorously on my front porch as the sun went down. 4. filed out ballast and sweep ports 5. I decided to lay a spirketing plank of 1.5mm x 3mm, and then plank the rest of the inboard bulwarks with 3mm x 1mm lime - I'm going to finish them in red once I cut the gunports and line them 6. finished the sweep and ballast port frames in red (again, and I'll have to do so a couple of times more I think.... Anyway, things are proceeding now, and the next couple of weeks will show a real transformation....I'm starting to have fun with this build - it only took 6 weeks!! Here are the photos - enjoy! hamilton