
Peter Y.
-
Posts
71 -
Joined
-
Last visited
Content Type
Profiles
Forums
Gallery
Events
Everything posted by Peter Y.
-
Why is this in the build logs?
-
 As described in my initial post: I've just lost interest in this particular ship/kit. I'm definitely looking to sell it.
 -
As the title suggests - I have a Caldercraft/JoTiKa HMAV Bounty kit for sale. I've only just recently began my model building adventure. While researching a kit to start with I've narrowed it down to two that interested me the most: The HM Schooner Pickle and HMAV Bounty (both by Caldercraft/JoTiKa). I couldn't make up my mind so I ended up ordering both. After some further thinking I've decided that the Bounty is out of my skill range and started the Pickle project - the log for this can be followed on this very site. If I ever finish my initial project I'll probably move on to another Trafalgar vessel rather than build the Bounty, so I've decided to sell it. The kit is practicaly new. The box has been opened to check the contents, take photos, etc. Everything looks fine and is in pristine condition, including the box (it was originally sealed with transparent tape that was cut without damaging the cardboard), so this is still viable as a gift. I'm located in the UK, East Riding of Yorkshire - international shipping is an option as is picking it up personally. You can find this kit for anything between £230 - £290 + shipping here. I bought it for £240 and am willing to let it go for £200 with the buyer covering shiping costs. I'm not really into exchanging money in any other than through a bank transfer or cash. My personal details, including phone number are available via PM. Any questions: Ask away. The photos can be found below:


-
1:64 Copper plating
Peter Y. replied to Peter Y.'s topic in Building, Framing, Planking and plating a ships hull and deck
Thanks everyone for all your answers and opinions - very helpful stuff! At this point I'm pretty sure that I'll go with the 1:64 Amati plates. I don't think that I'm ready to try the tape - it's only my first build. Many of you said that the Caldercraft nails are just plain too big. Although I appreciate that the Amati ones are also not 100% to scale they seem way better than the kit-provided versions, the nail pattern itself is also more realistic and adapted for overlaps - which should also look better since the plates are thinner (0.1 mm vs. 0.15 mm).- 14 replies
-
- 5
-

-
- pickle
- caldercraft
- (and 1 more)
-
Hi All, I'm currently building my first ship (Caldercraft HM Schooner Pickle) and have a question about copper plating. The instructions suggest that the 18x5.5(x0.15) [mm] plates should be aligned like this (with edges sitting against each other): I find this peculiar and was considering doing this (sides lying on top of neighbouring plate): But this makes the plates look a bit narrow. Could I ask for your opinions on this? I was also wondering about the rivet pattern - is it a technically accurate representation? Should I have a look at different plates? I can see that Cornwall Moedl Boats has a bunch of other ones: - Option I (these are the ones that I have) - Option II - Option III - Option IV However the photos aren't all that helpfull. Can anyone post a picture of these and/or provide me with some advice?


- 14 replies
-
- 2
-
-
- pickle
- caldercraft
- (and 1 more)
-
Ooooh, now that you’ve said it I’m starting to have a real dilemma. Ironically, the copper plating is one of the features that made me buy this particular kit and now I’m seriously considering not doing it...
-
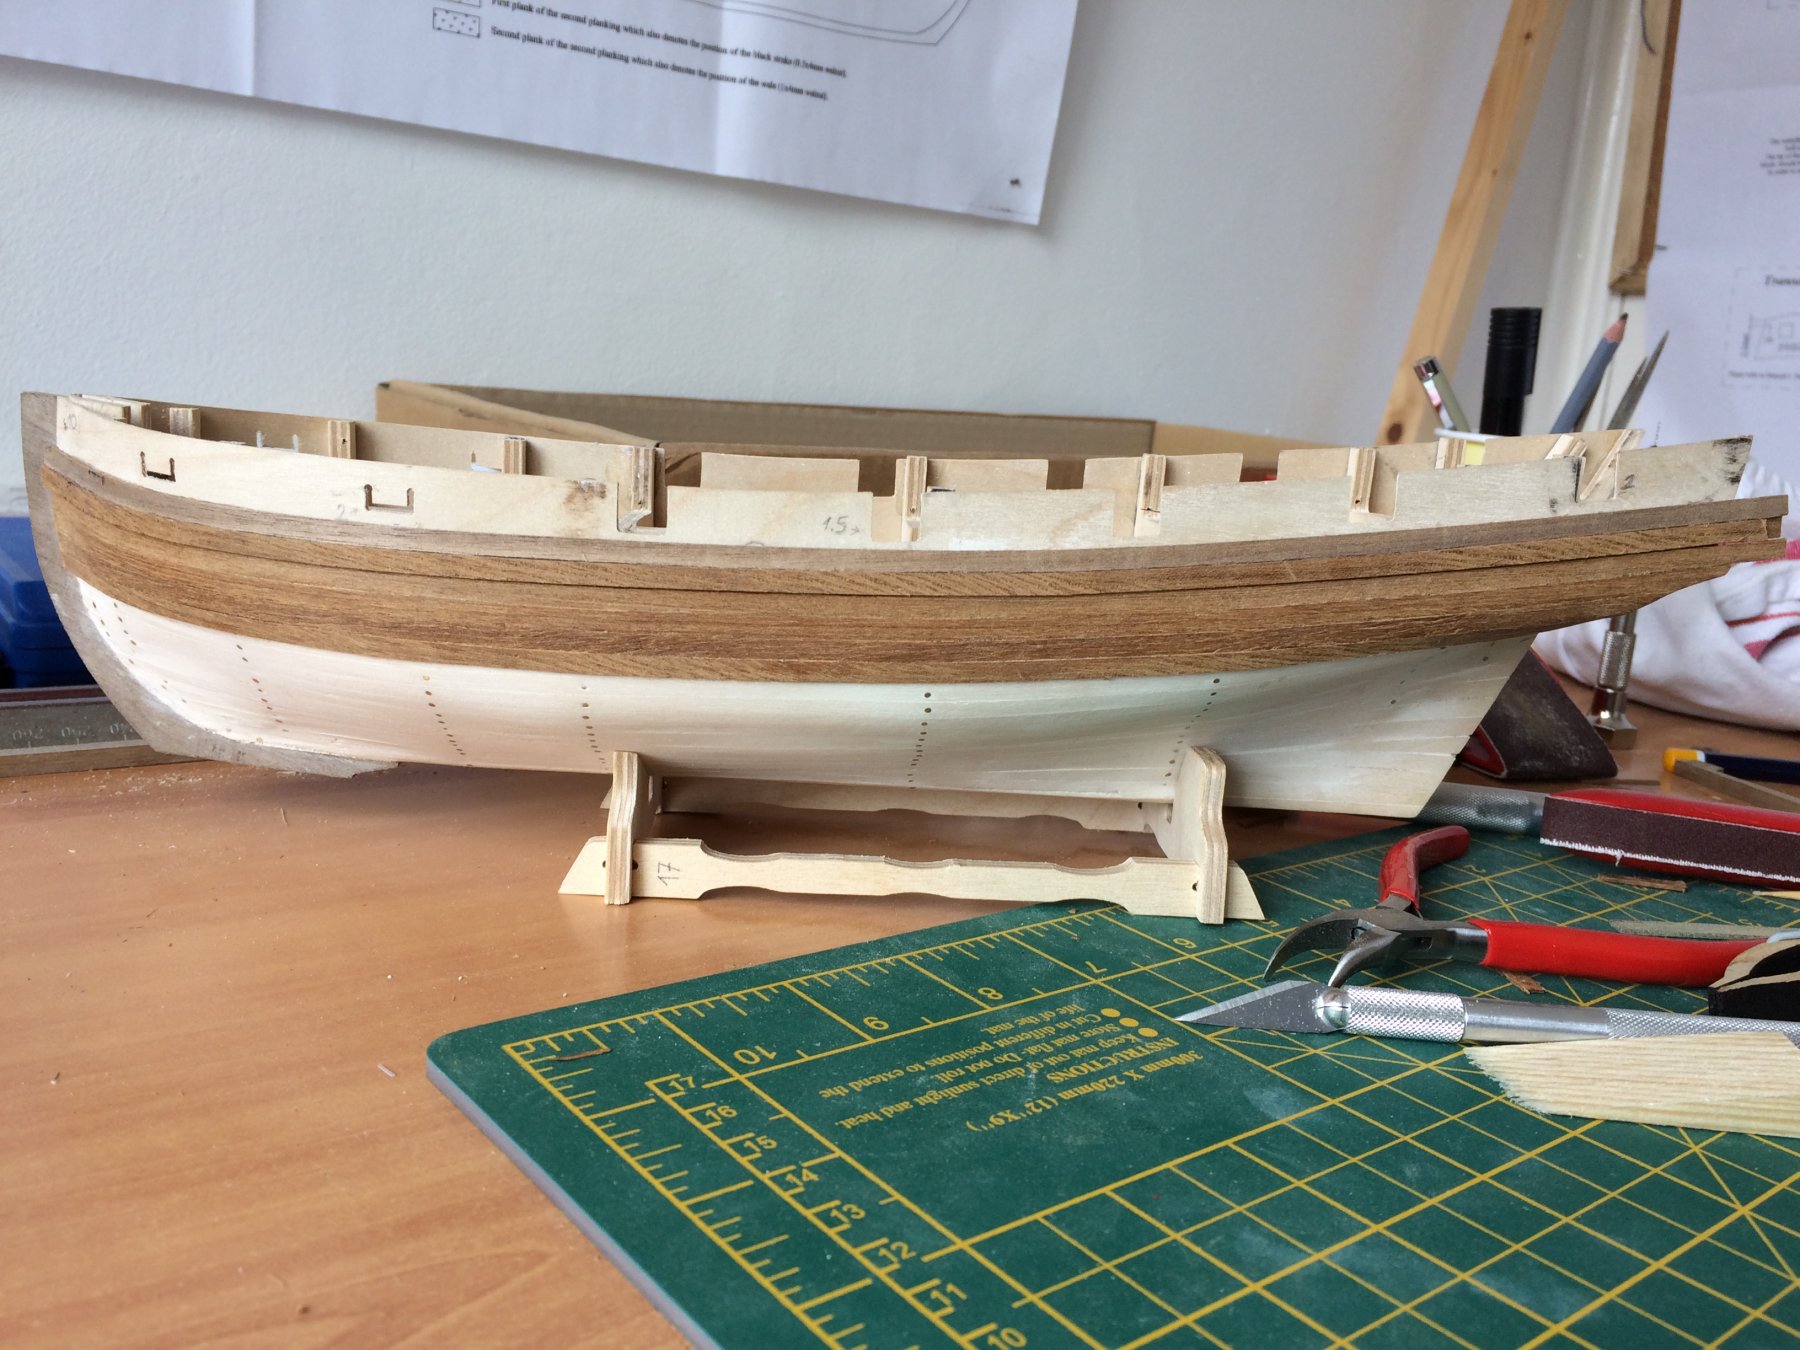
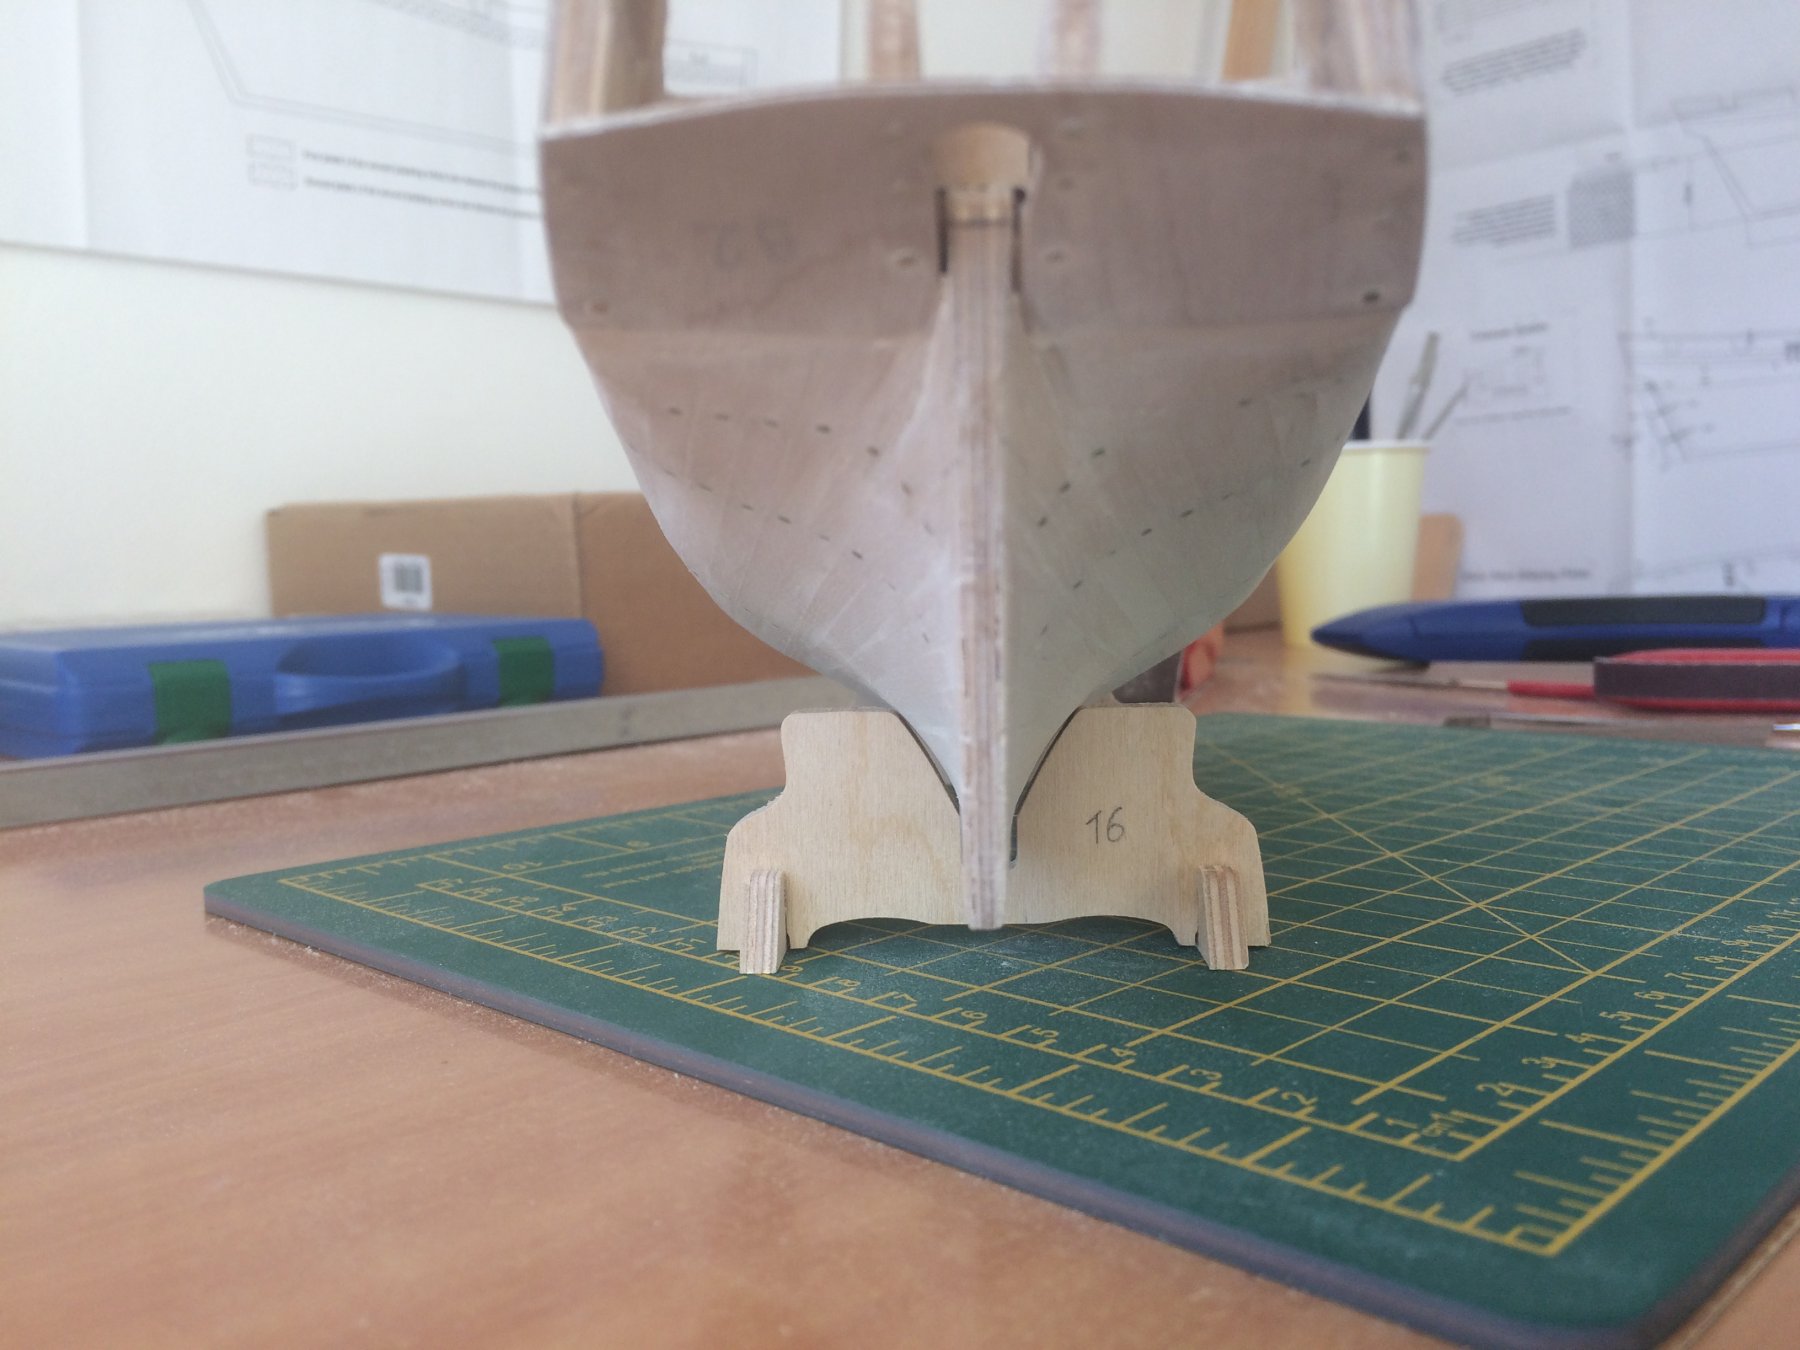
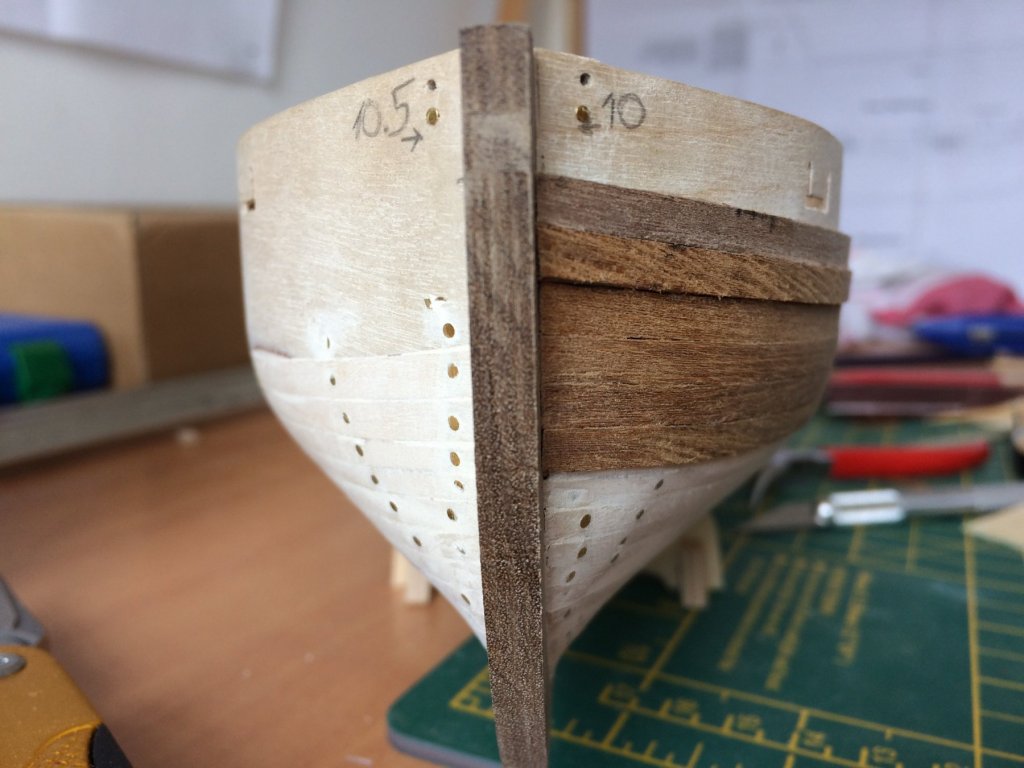
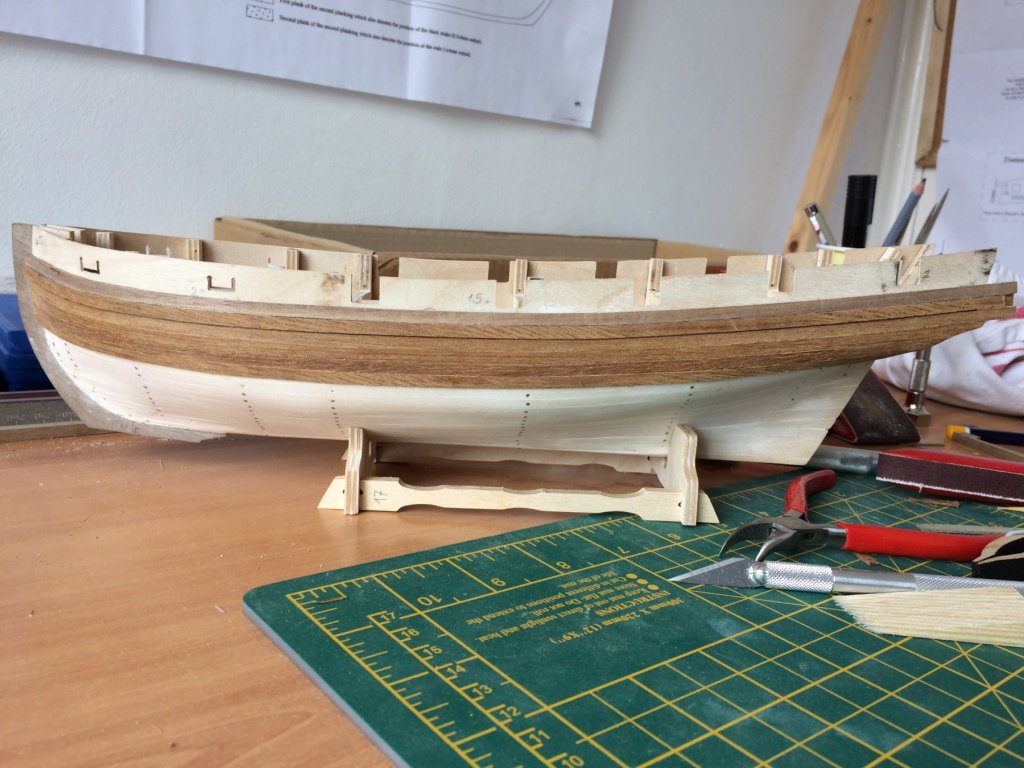
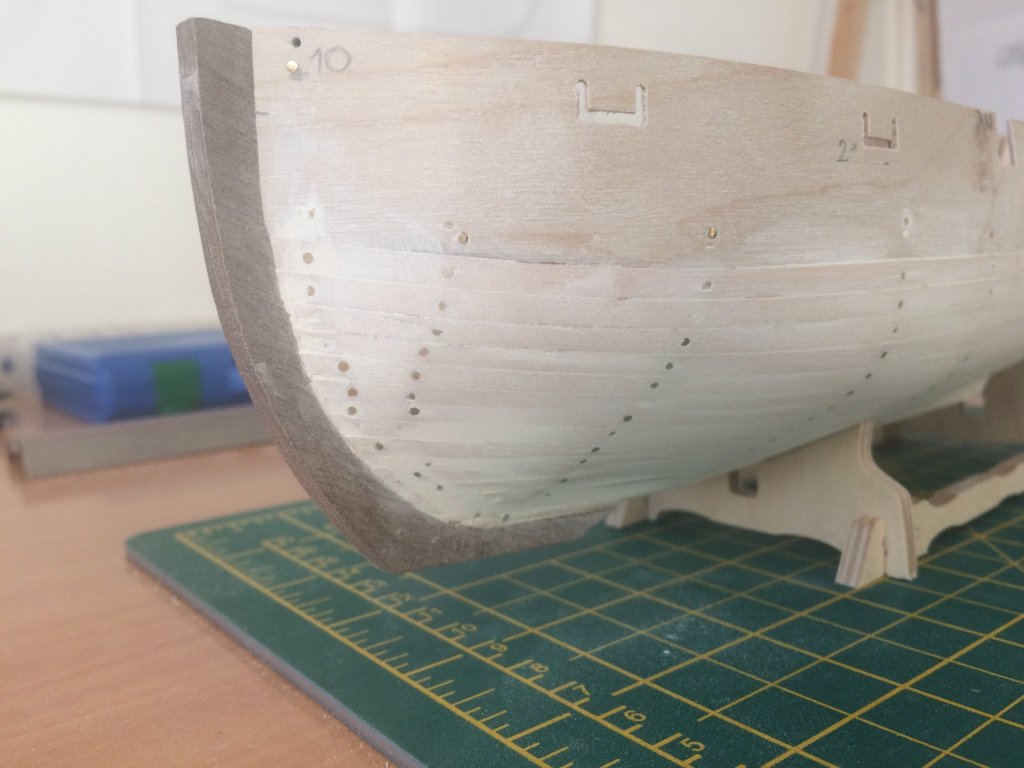
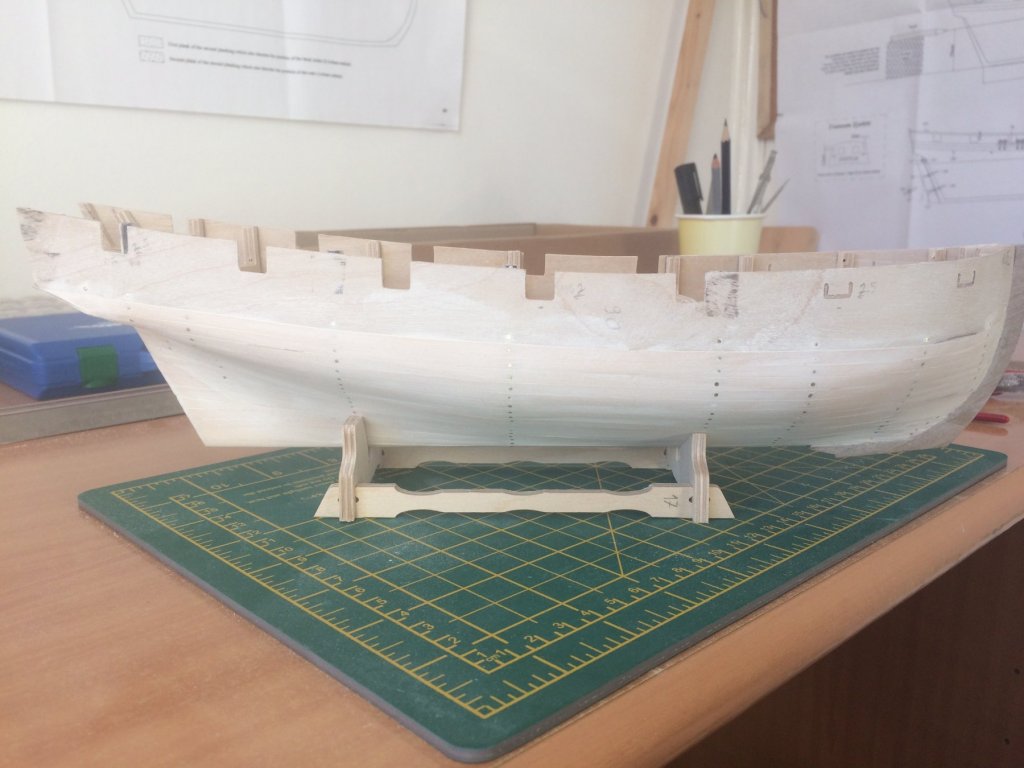
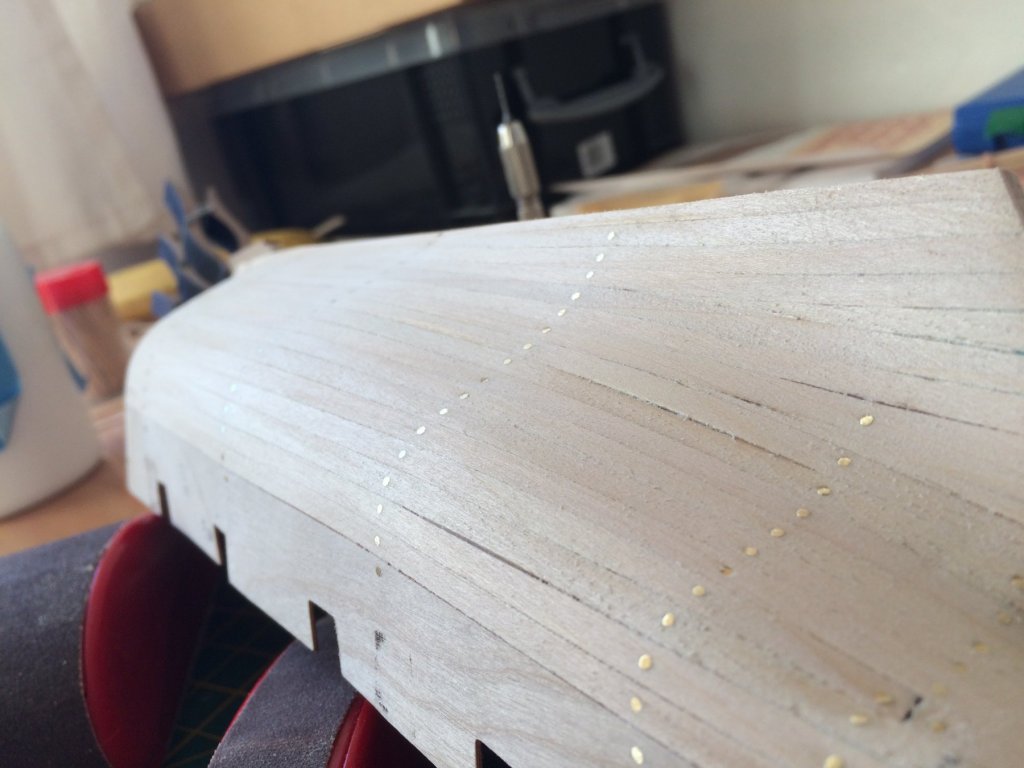
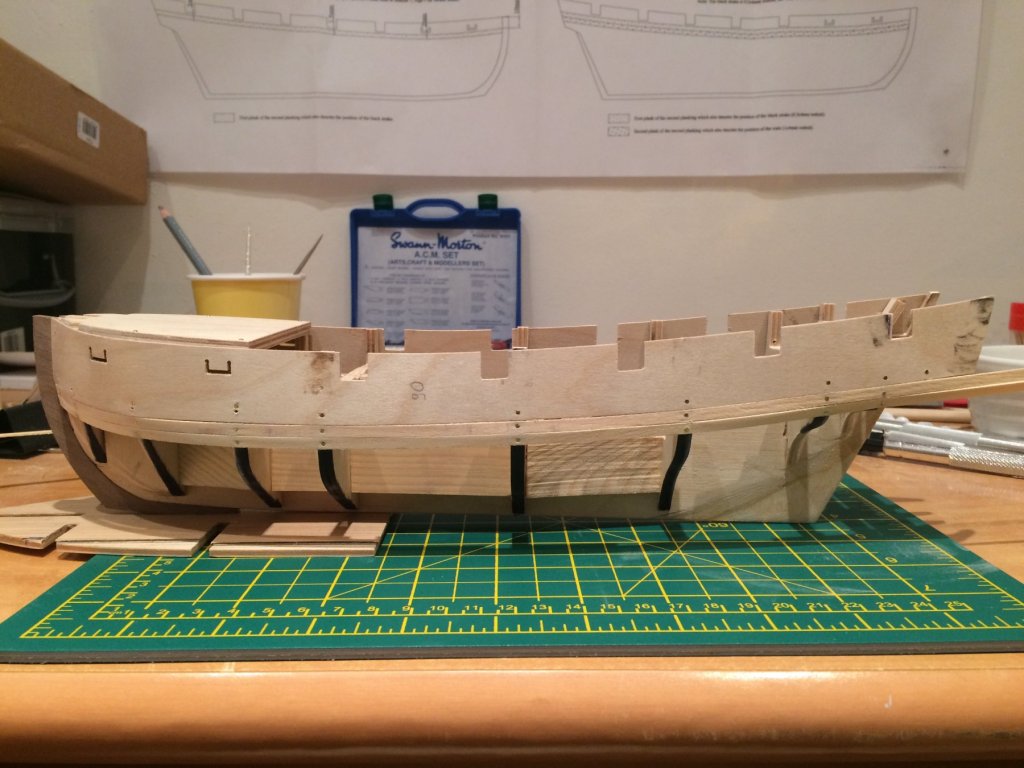
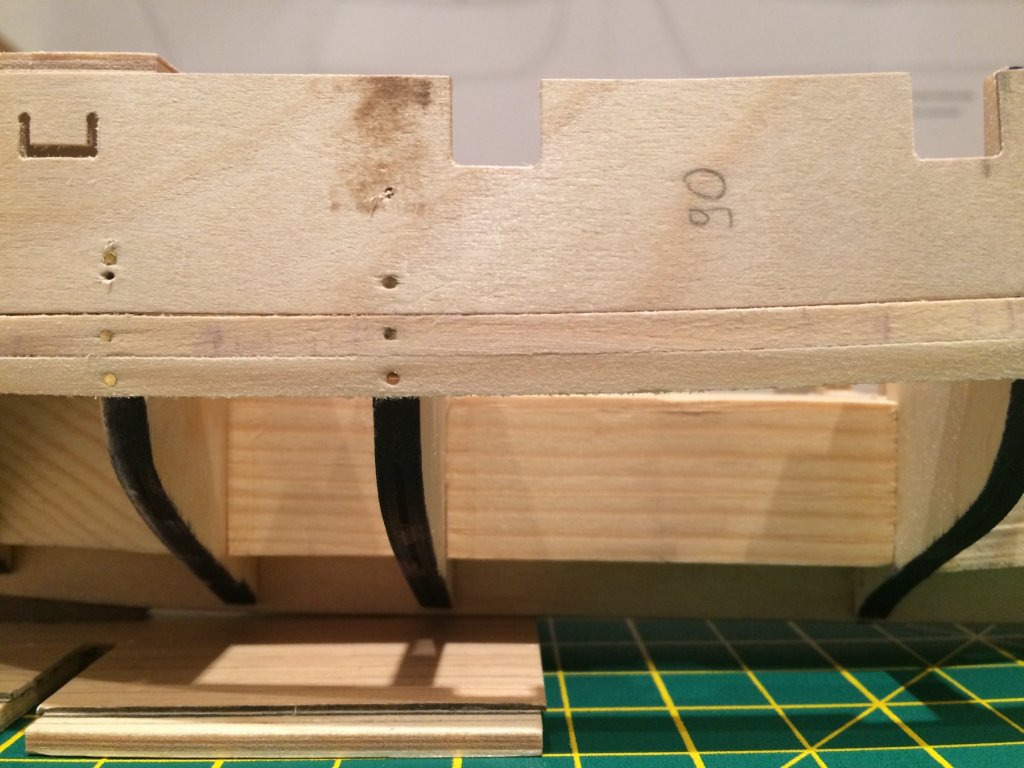
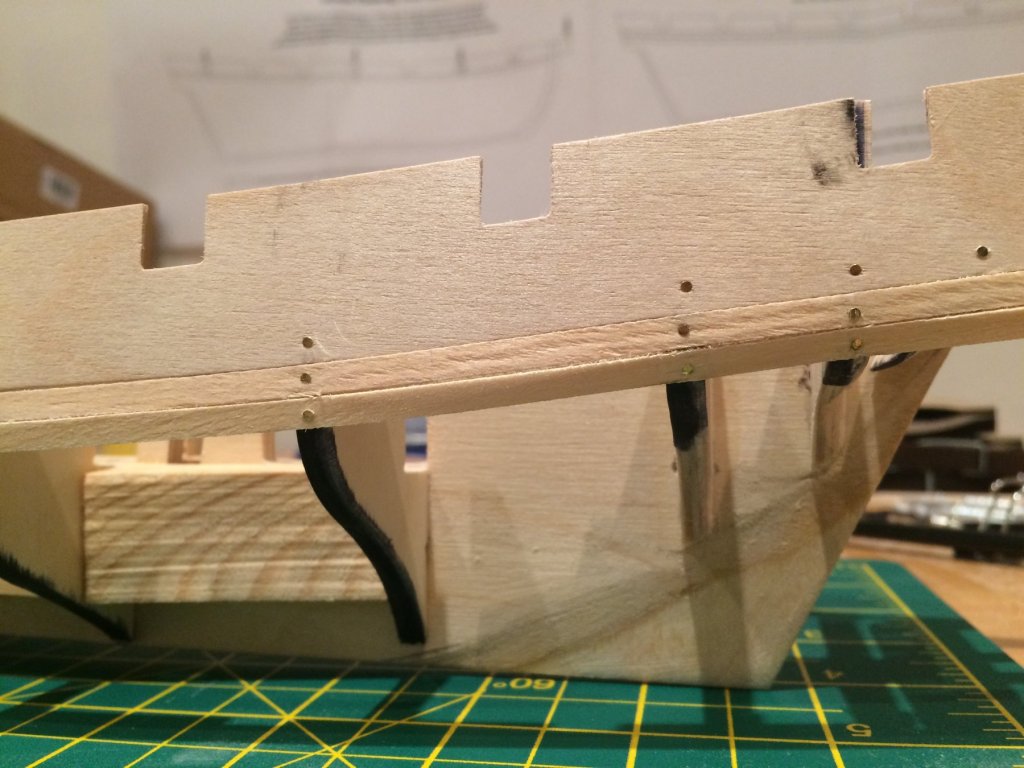
Some further progress pics below. 2nd planking on the port side has been finished (no filler used at the moment). Meanwhile the starboard got its black strake, wale and 4 further planks beneath it. AS previously mentioned some sanding on the stern will be required to enable it to sit flush with the sternpost. I'm pretty happy with the quality of the work so far. Bit of a shame that 80% of it will be covered by copper plates ;-)

- 37 replies
-
- 6
-
-
- pickle
- caldercraft
- (and 1 more)
-
Such a cool kit! Looking forward to how it turns out. It might be just my impression, but it think you need some extra lighting in that workshop ;-) Good luck!
-
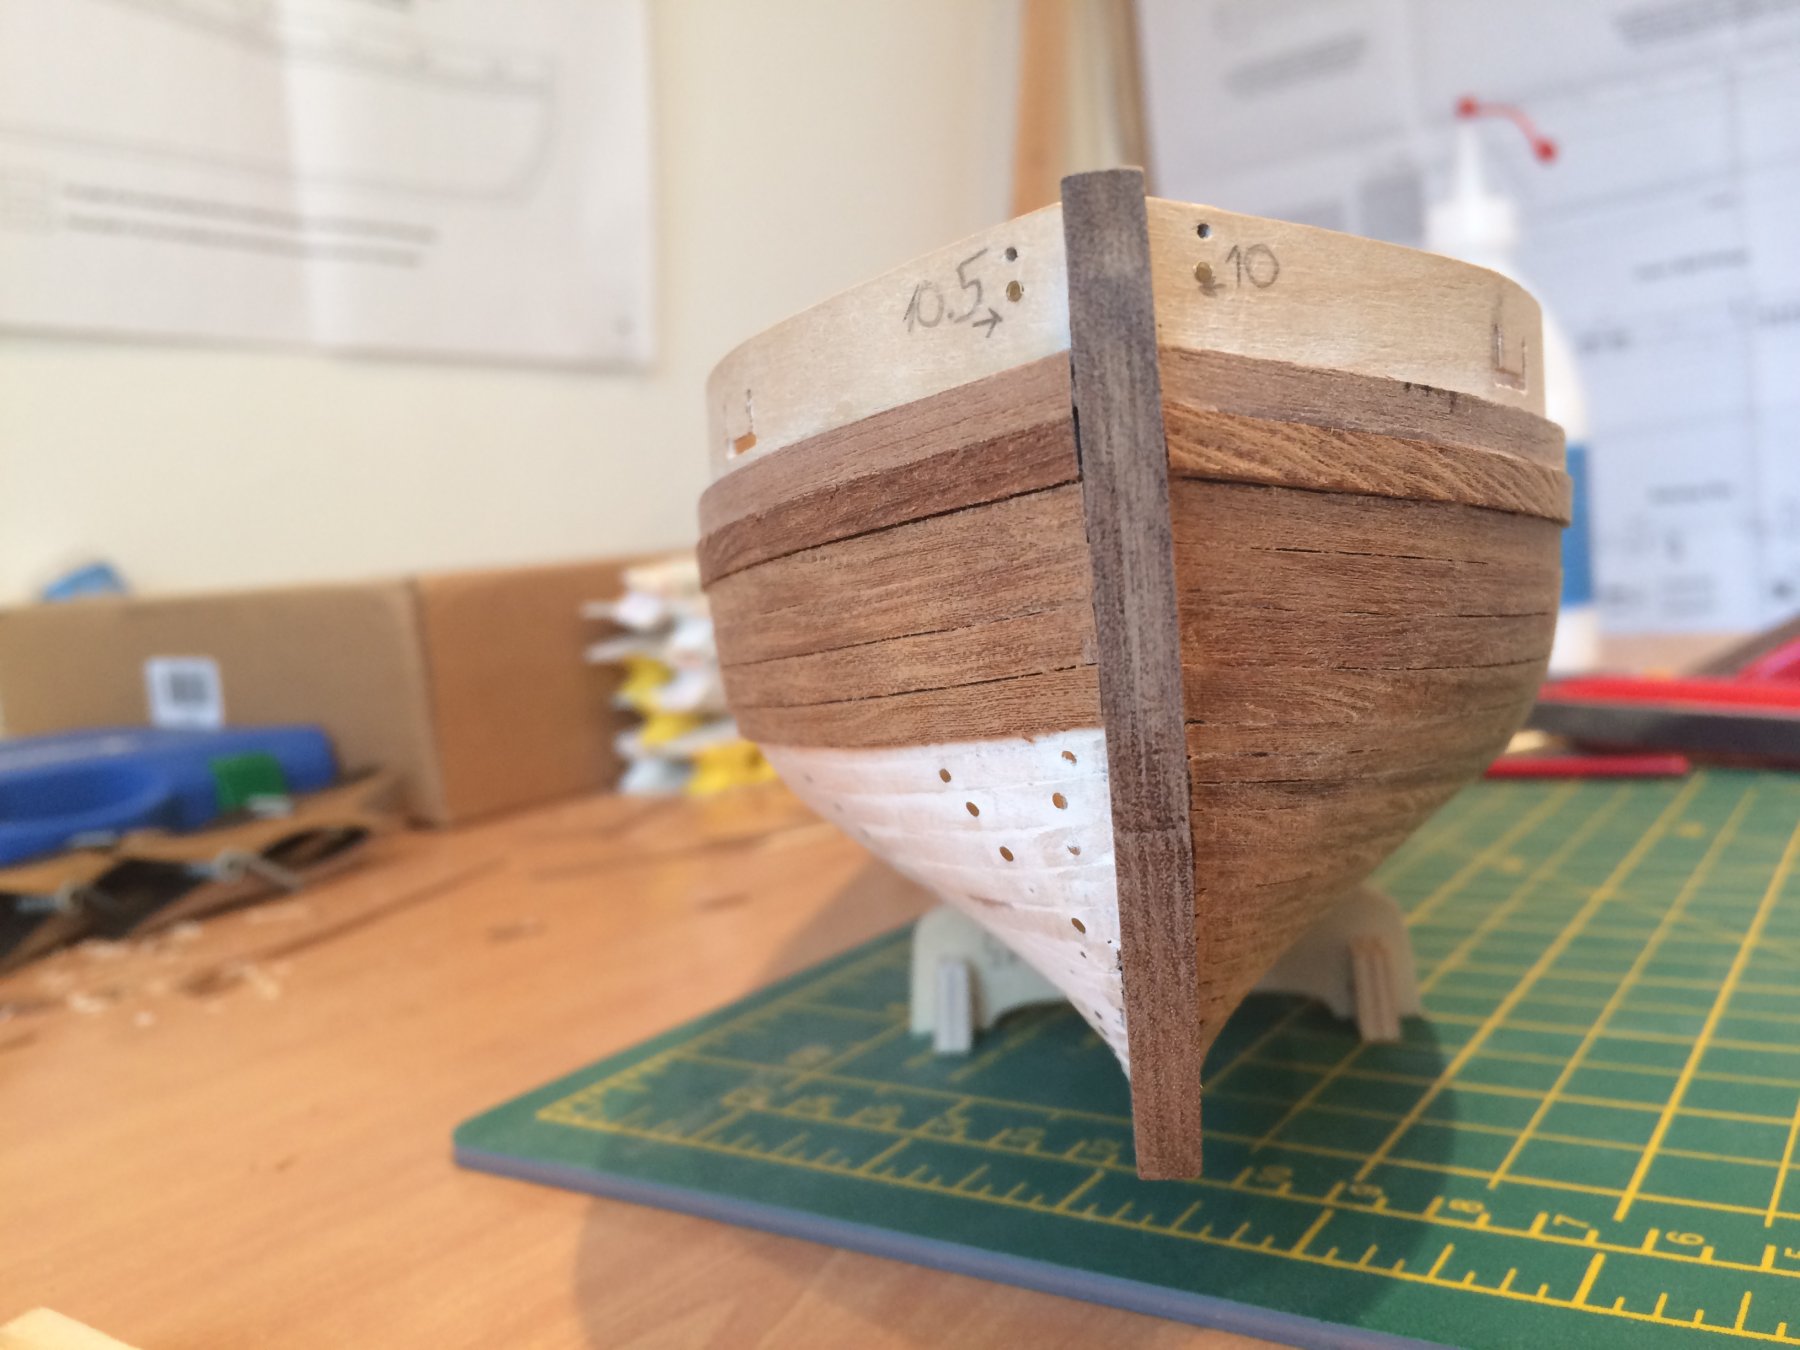
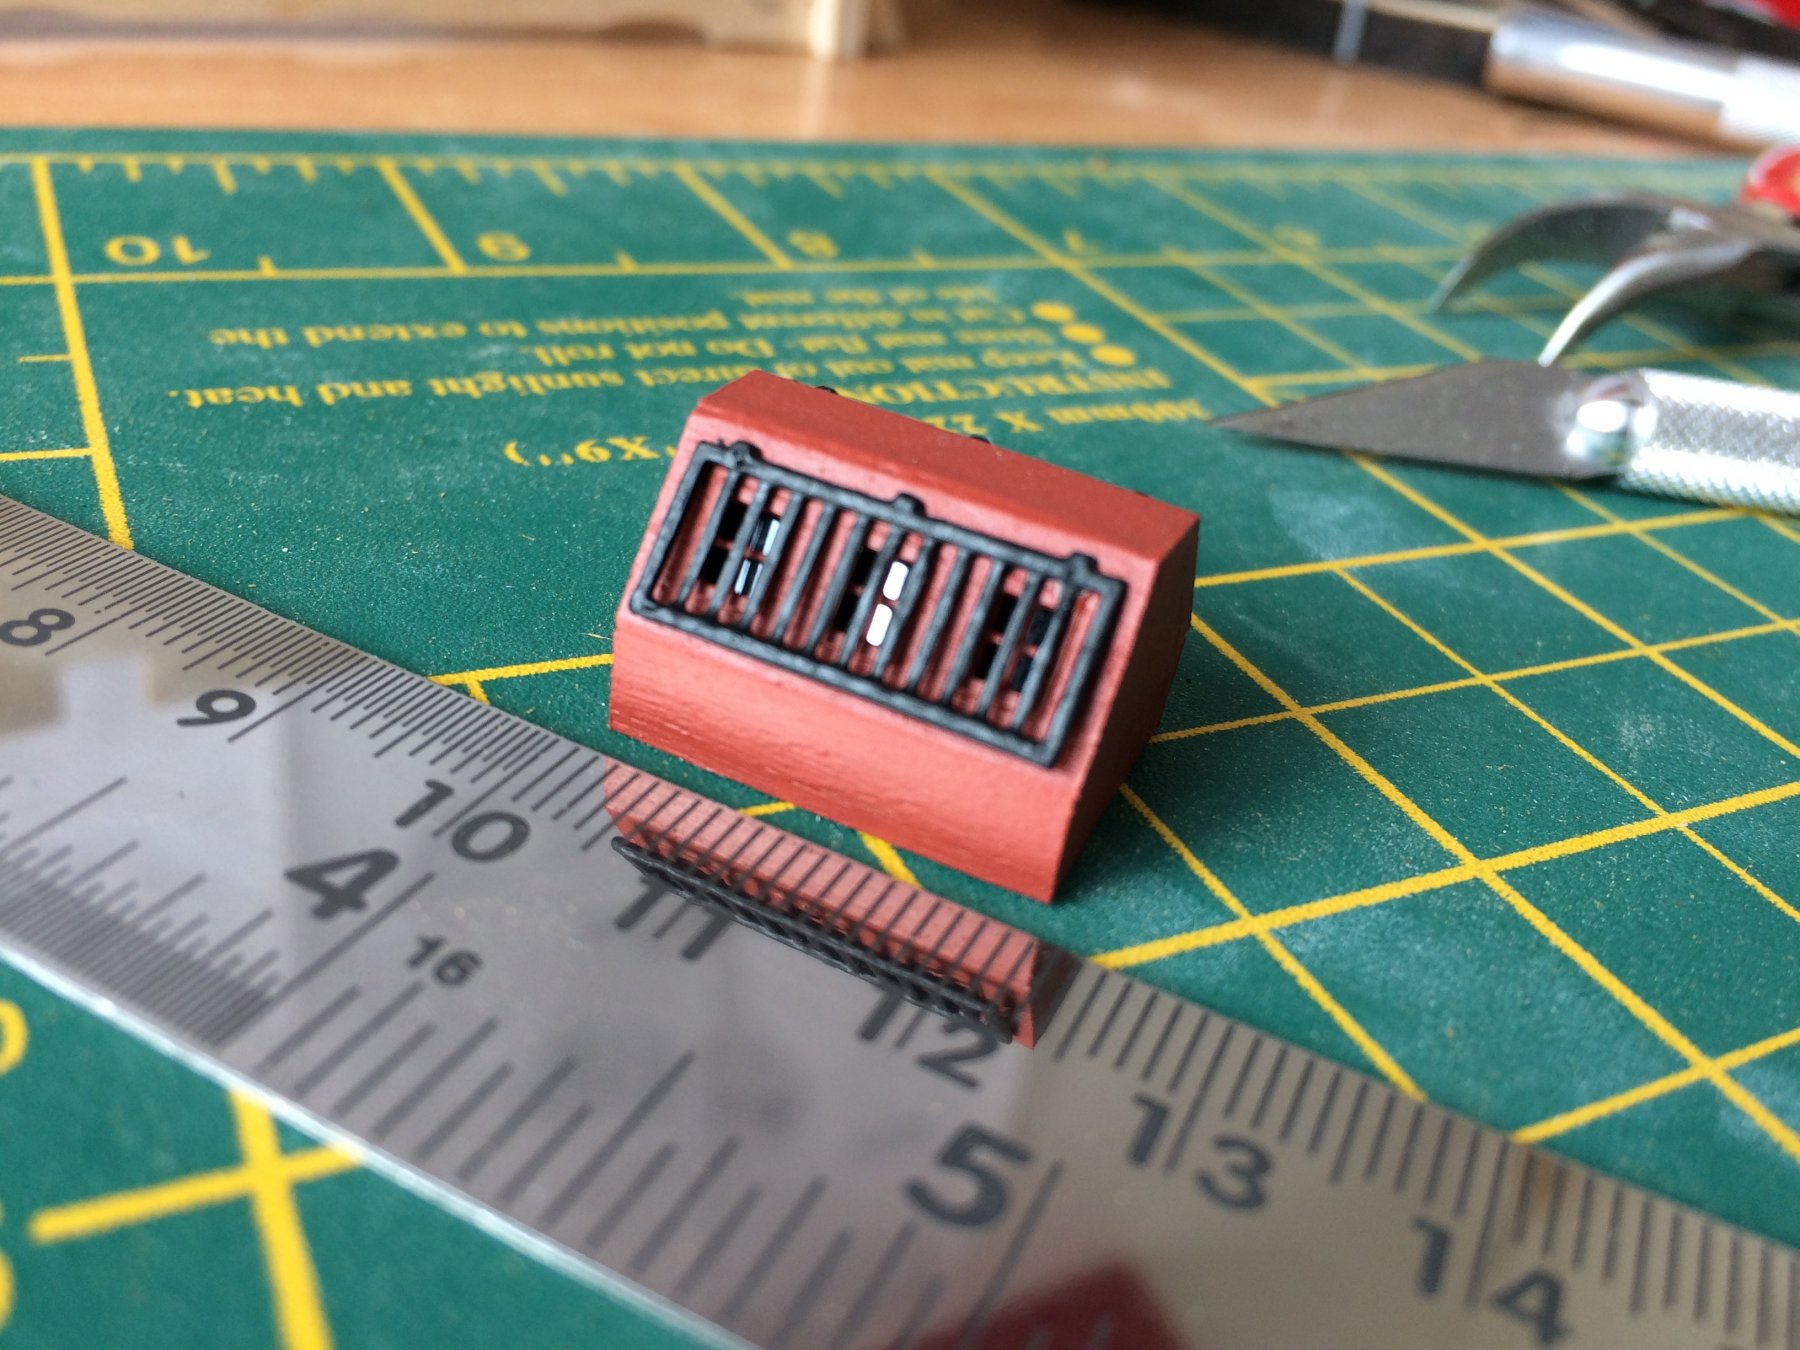
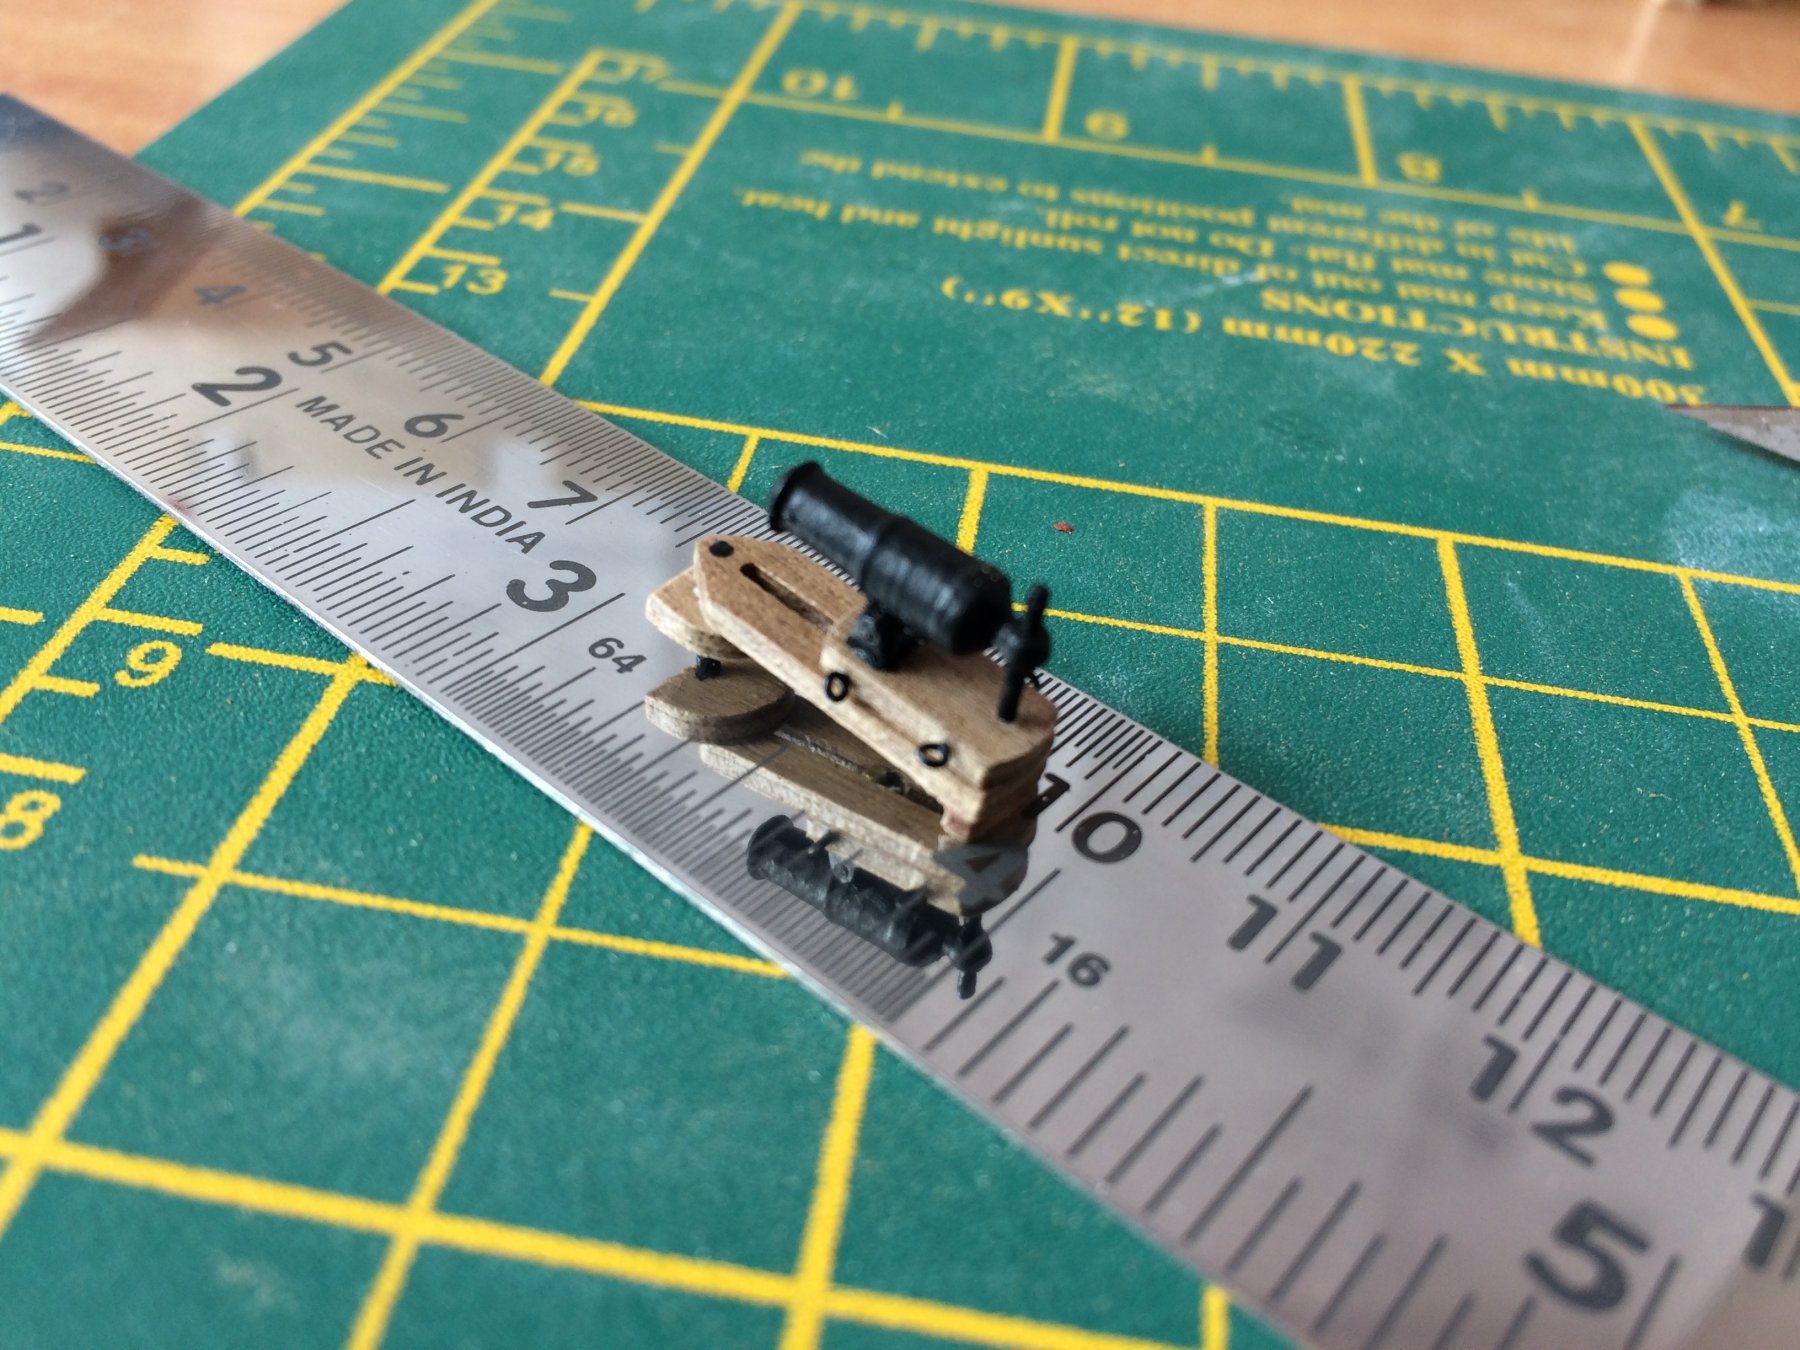
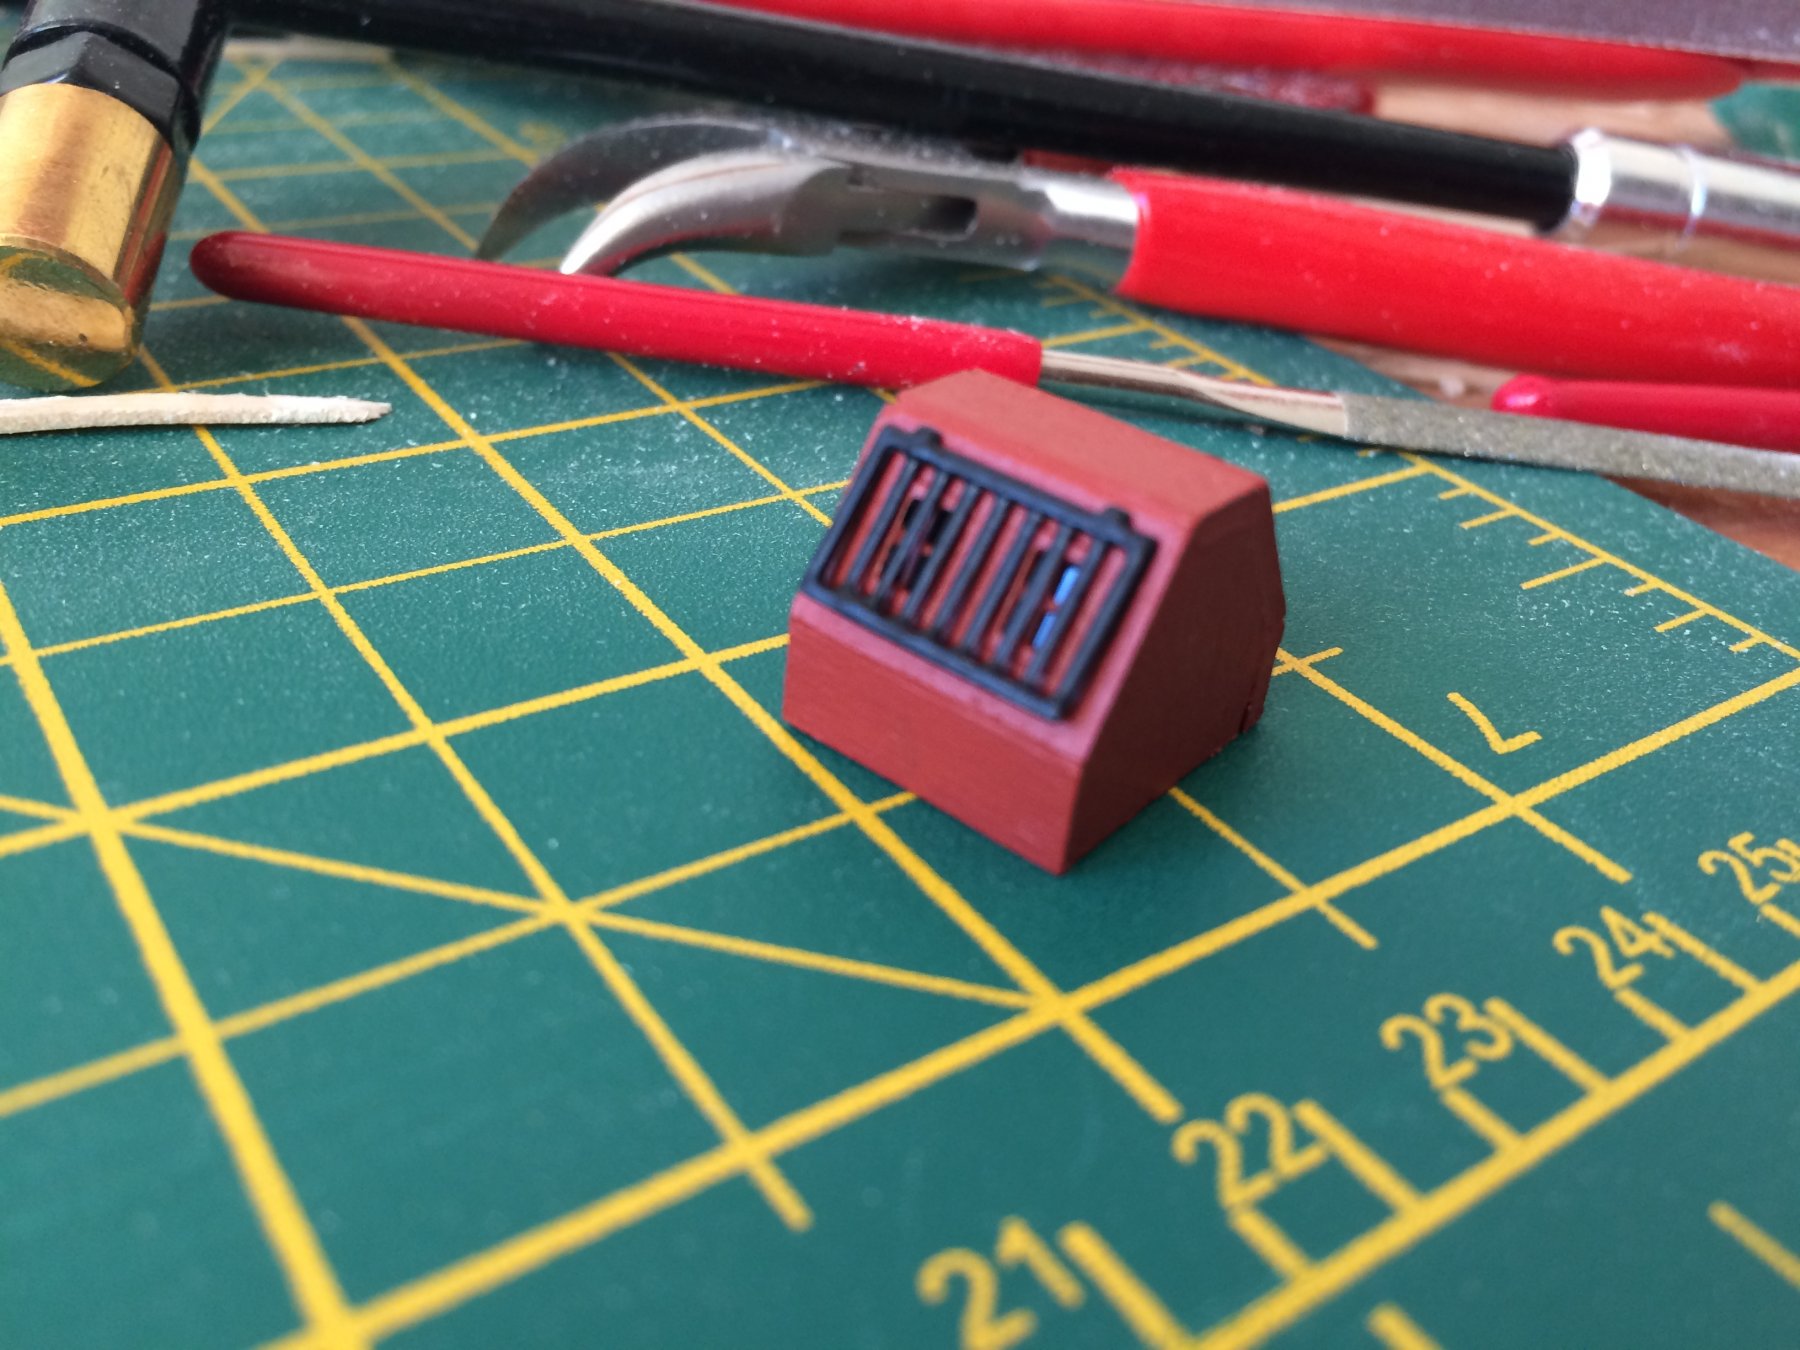
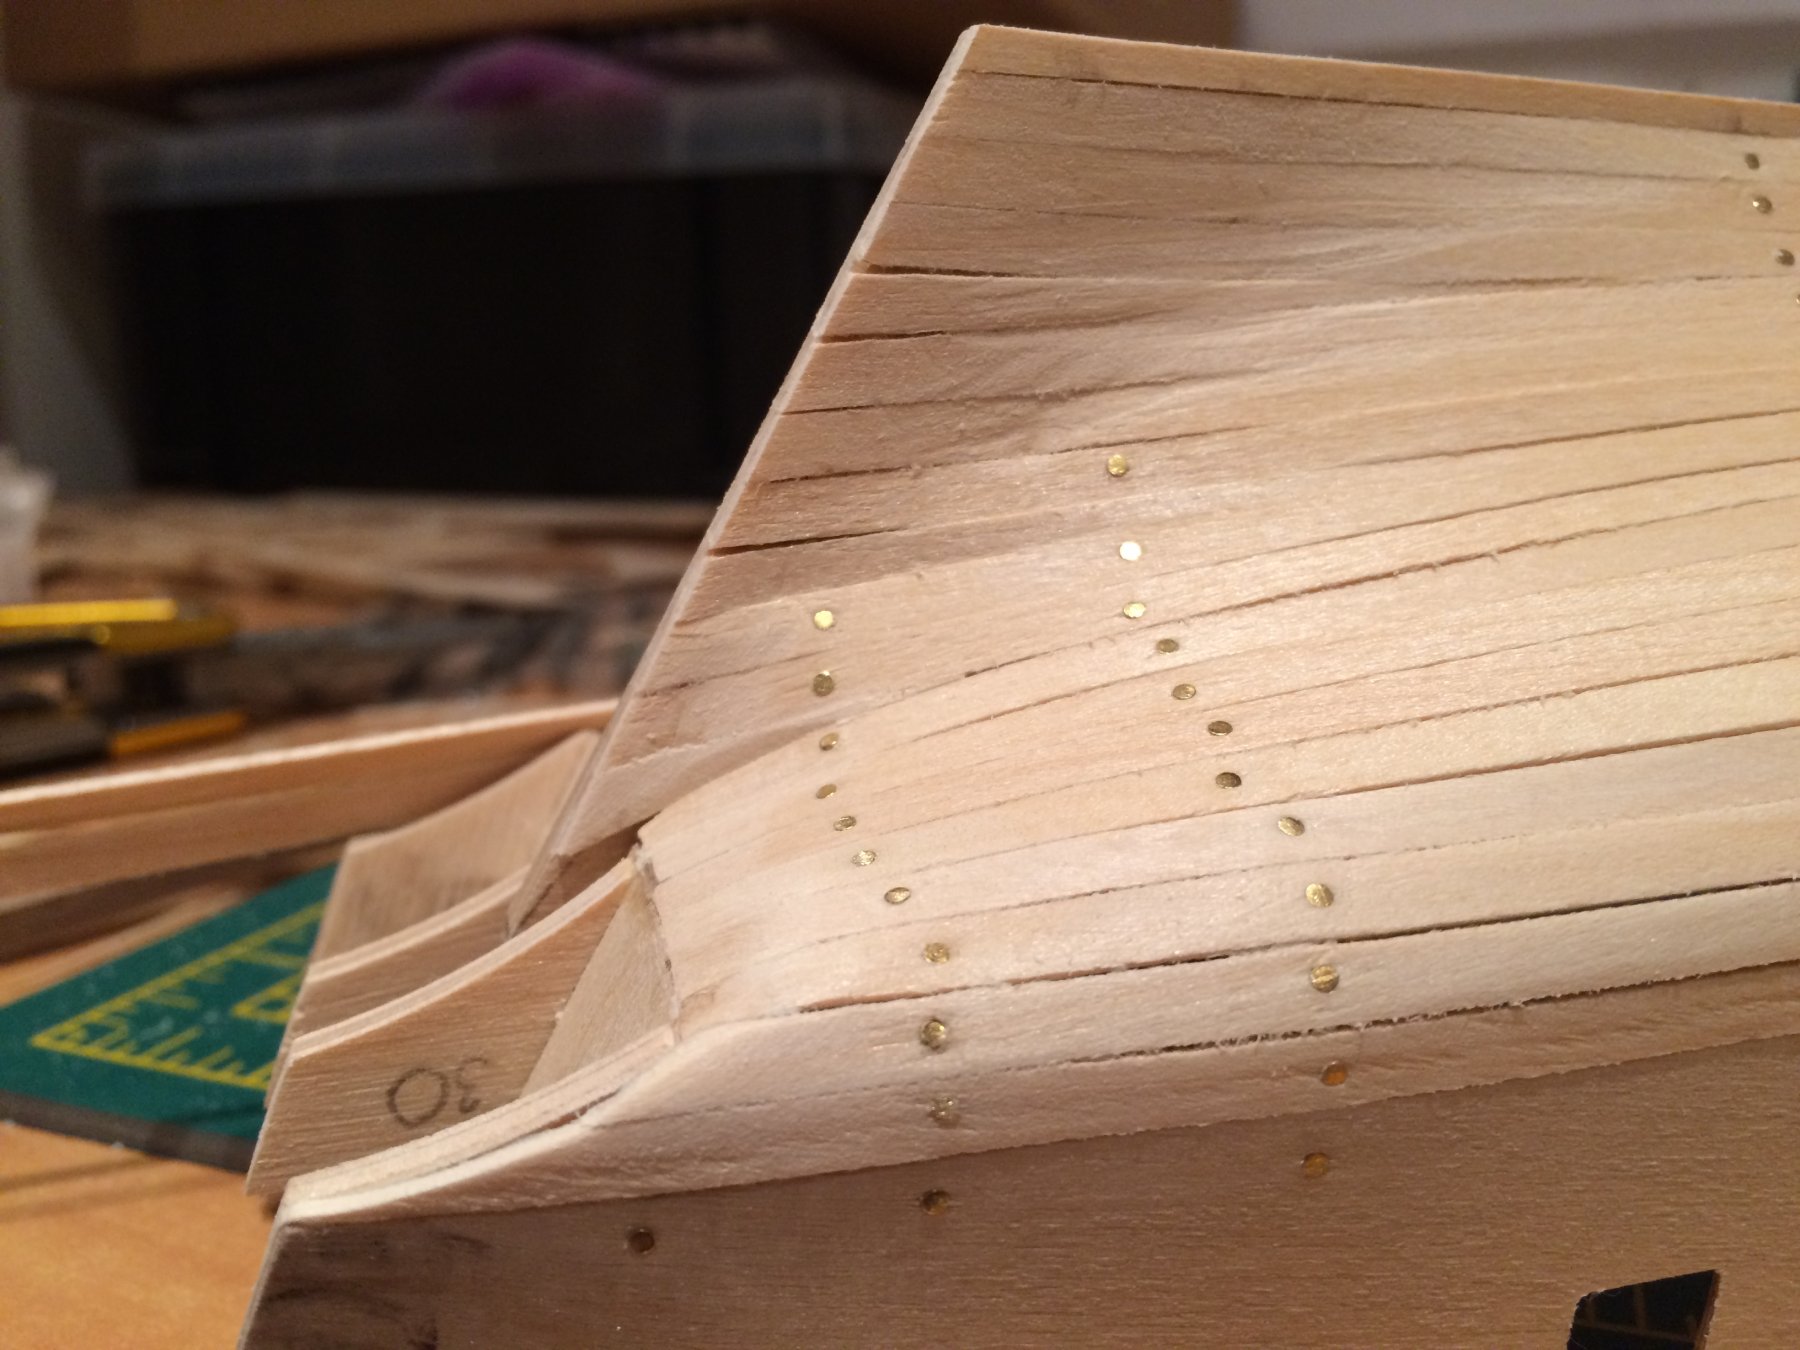
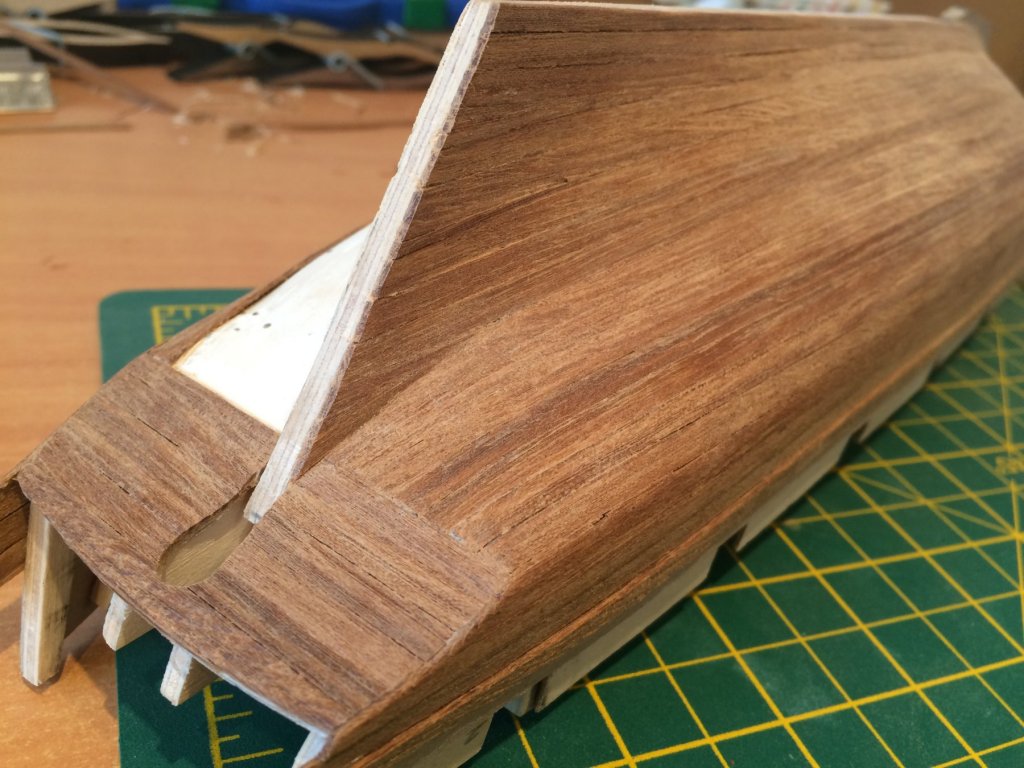
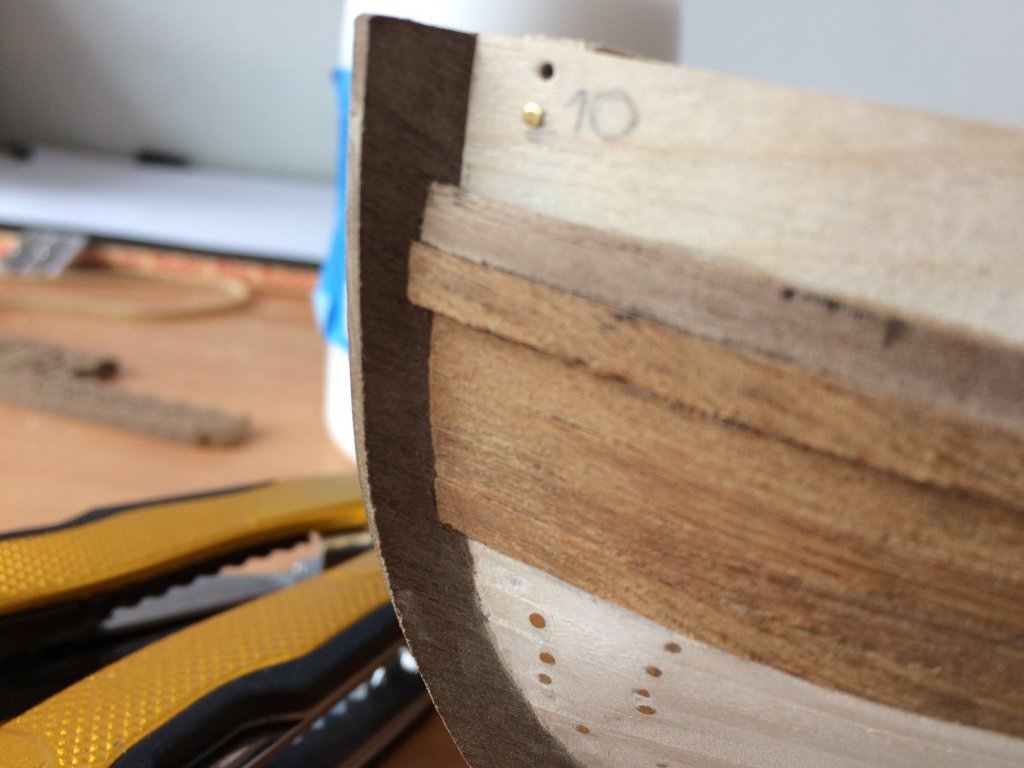
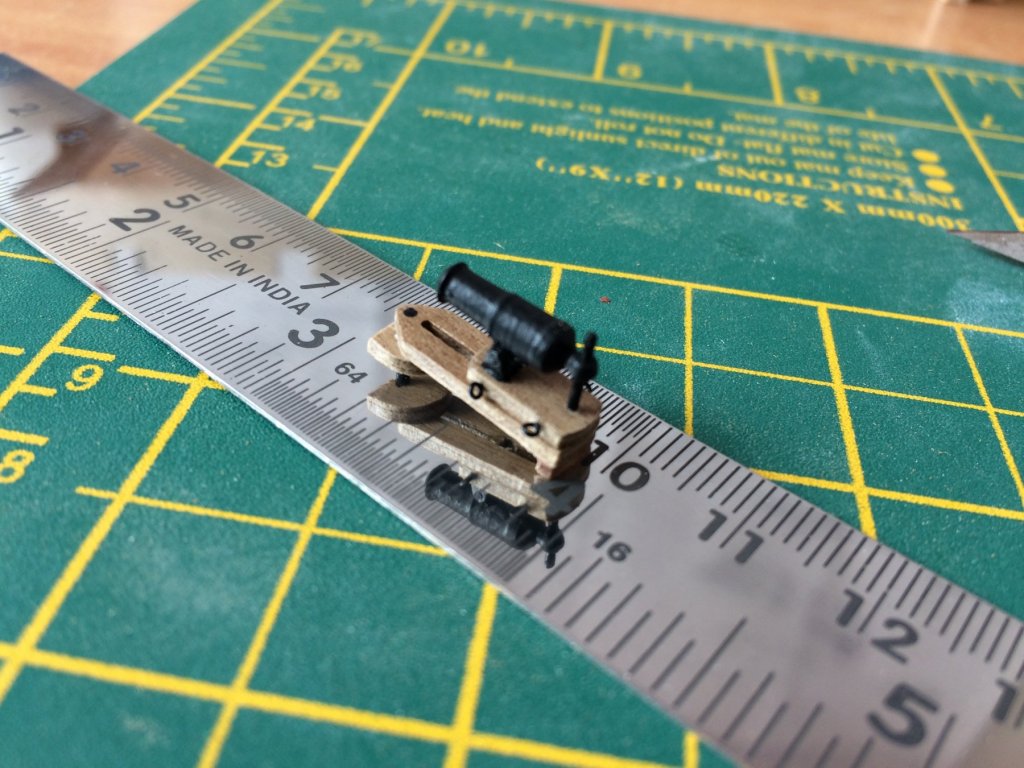
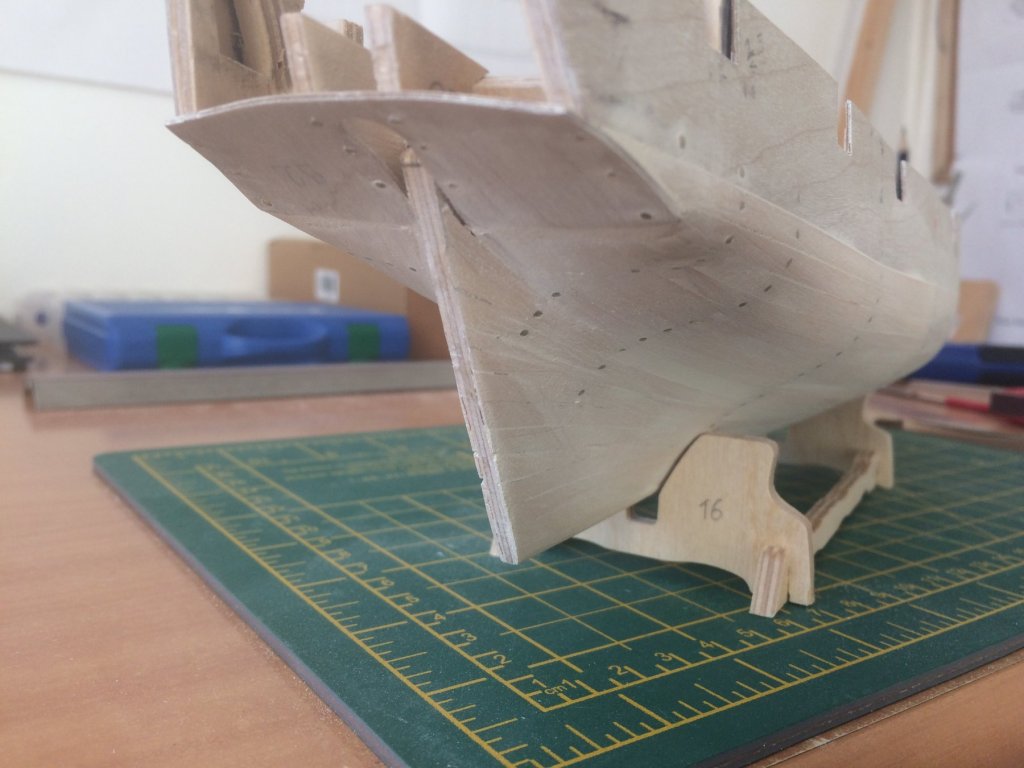
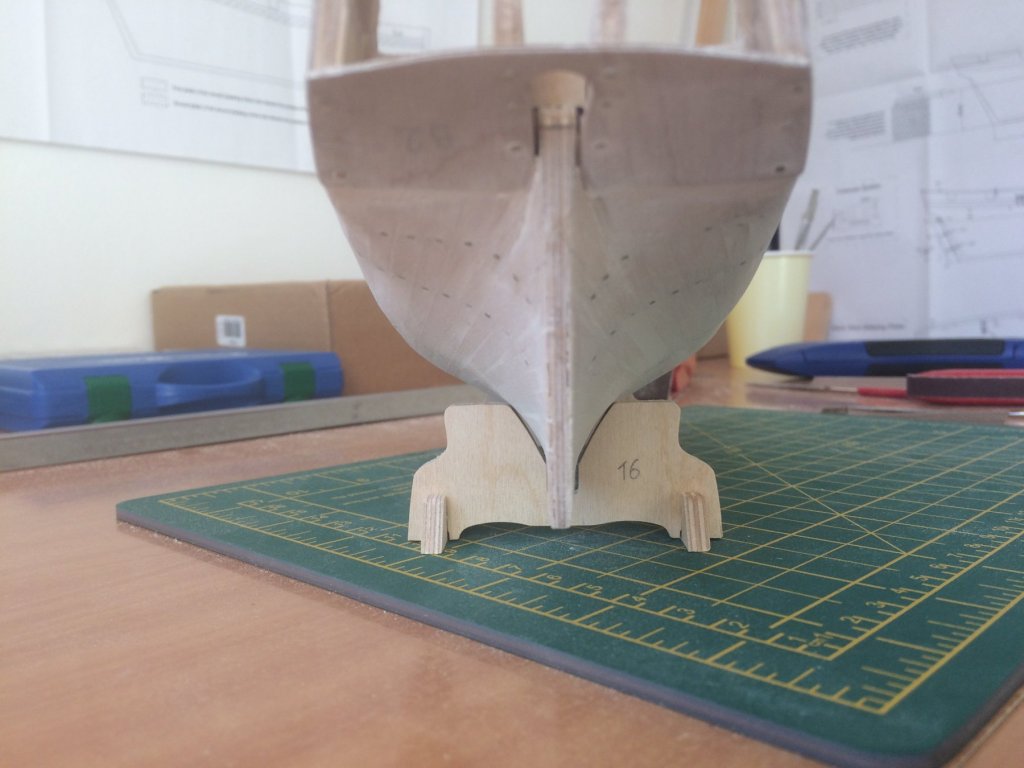
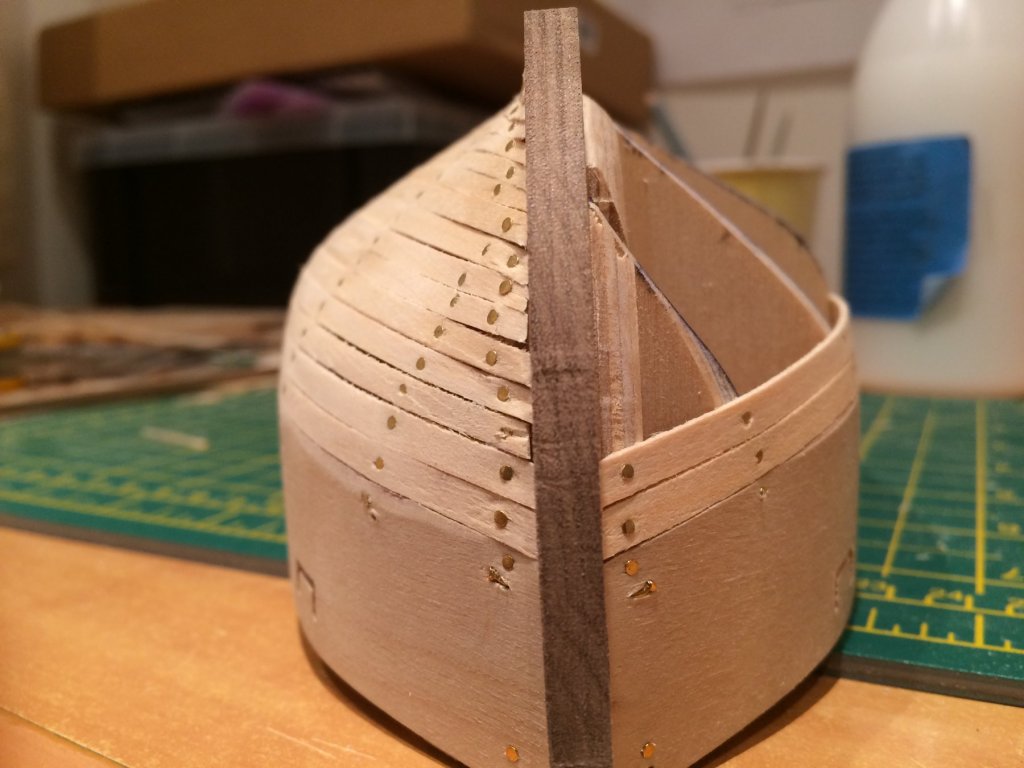
Hi Mike. Thank you for your kind words and sharing that great advice. I realize that what I did here is suboptimal (to say at least) and will definitely do it differently on my future builds (if there are any). That tool is quite pricey though! I'll take this opportunity to share some further progress photos. Stern counter has been planked, the black strake, wale and further 4 planks beneith it have been laid on the port side. These are all the planks that will be visible on the bow as the rest will be covered by copper plates. This was a particularly tricky spot: While waiting for the glue to dry I've once again tended to some deck equipment, namely: The second skylight: And one of the carronades: I'll now proceed with laying the same planks on the starboard.


- 37 replies
-
- 5
-
-
- pickle
- caldercraft
- (and 1 more)
-
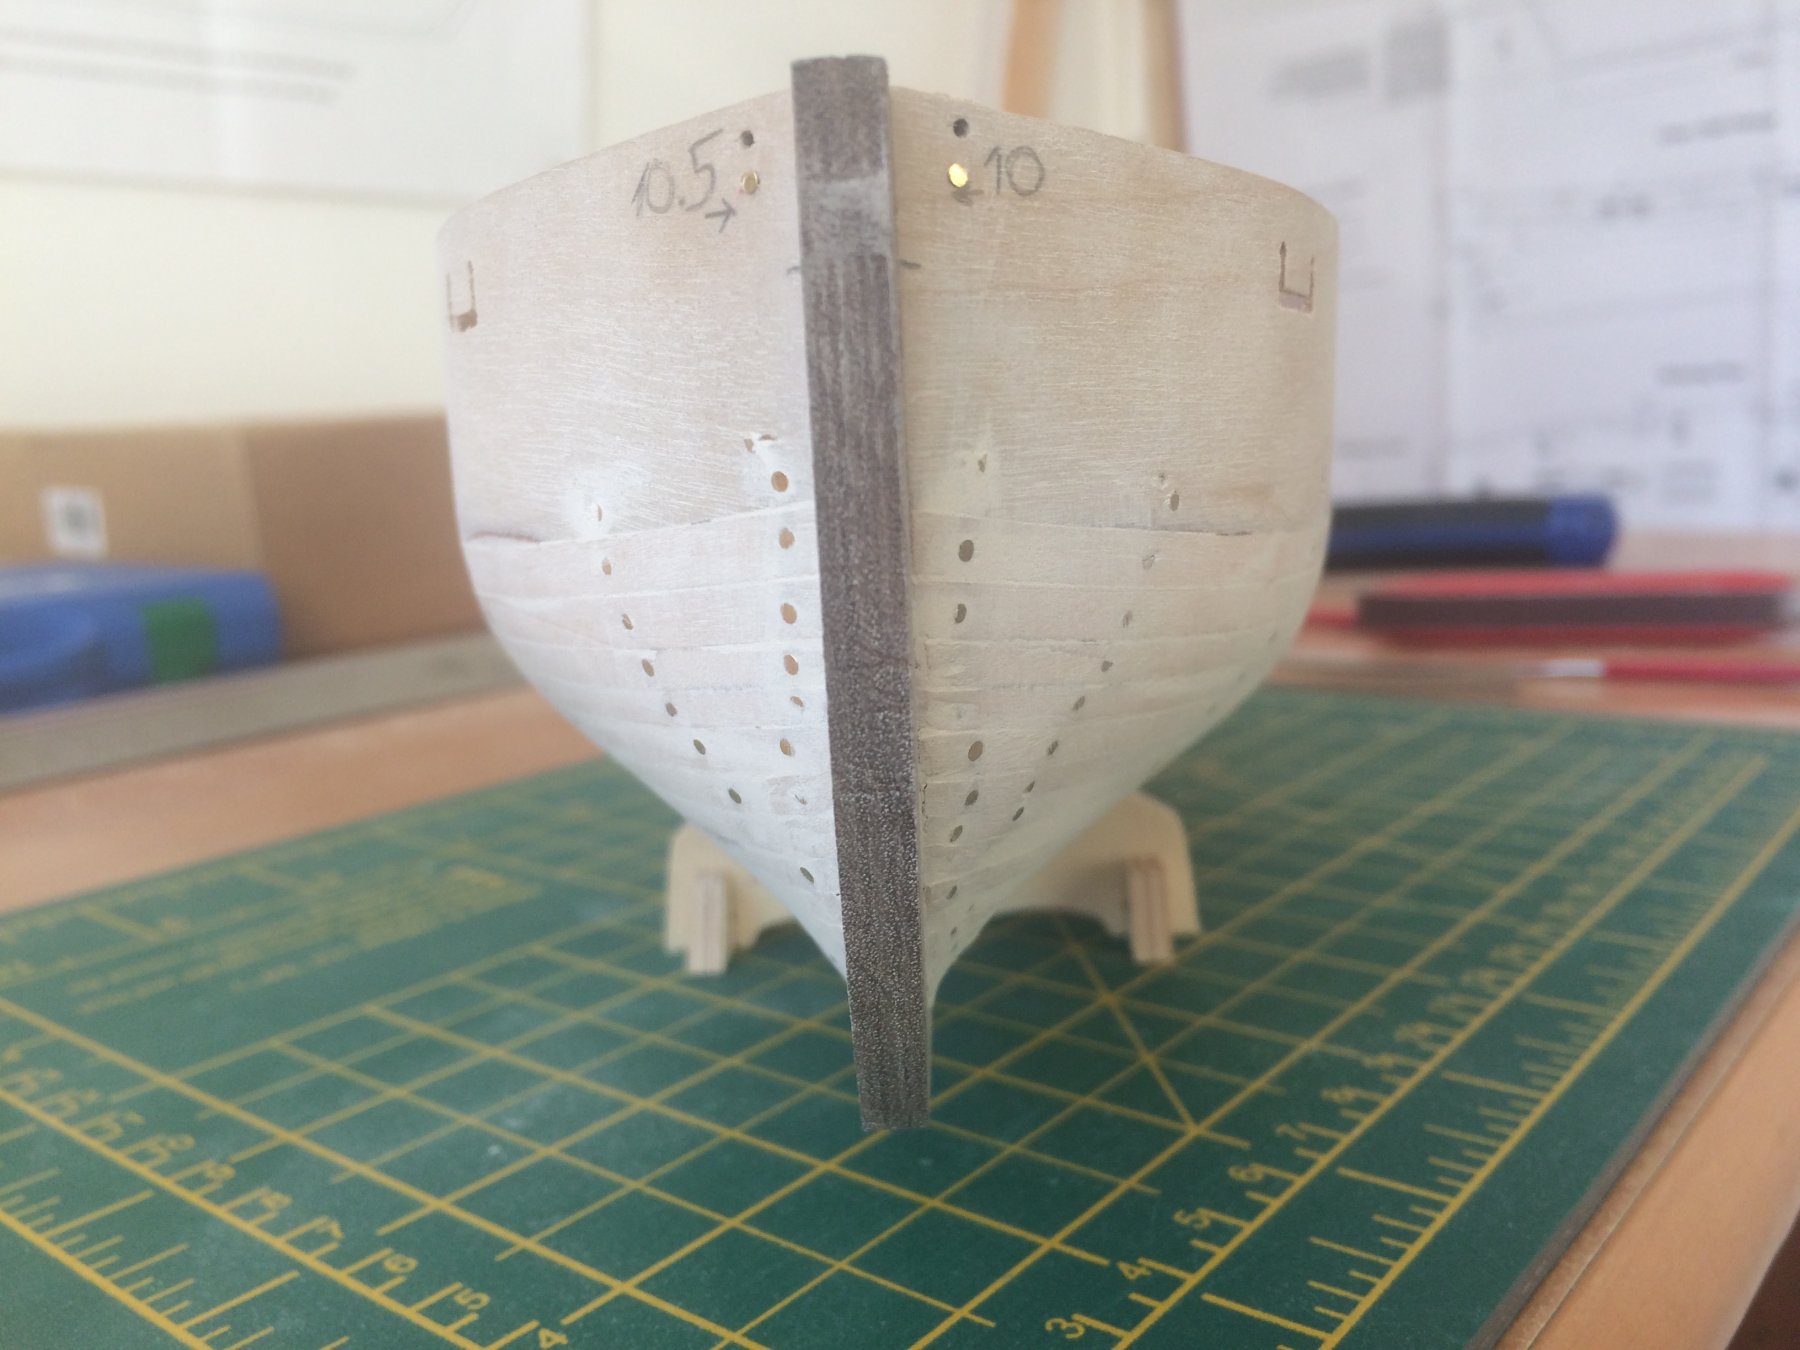
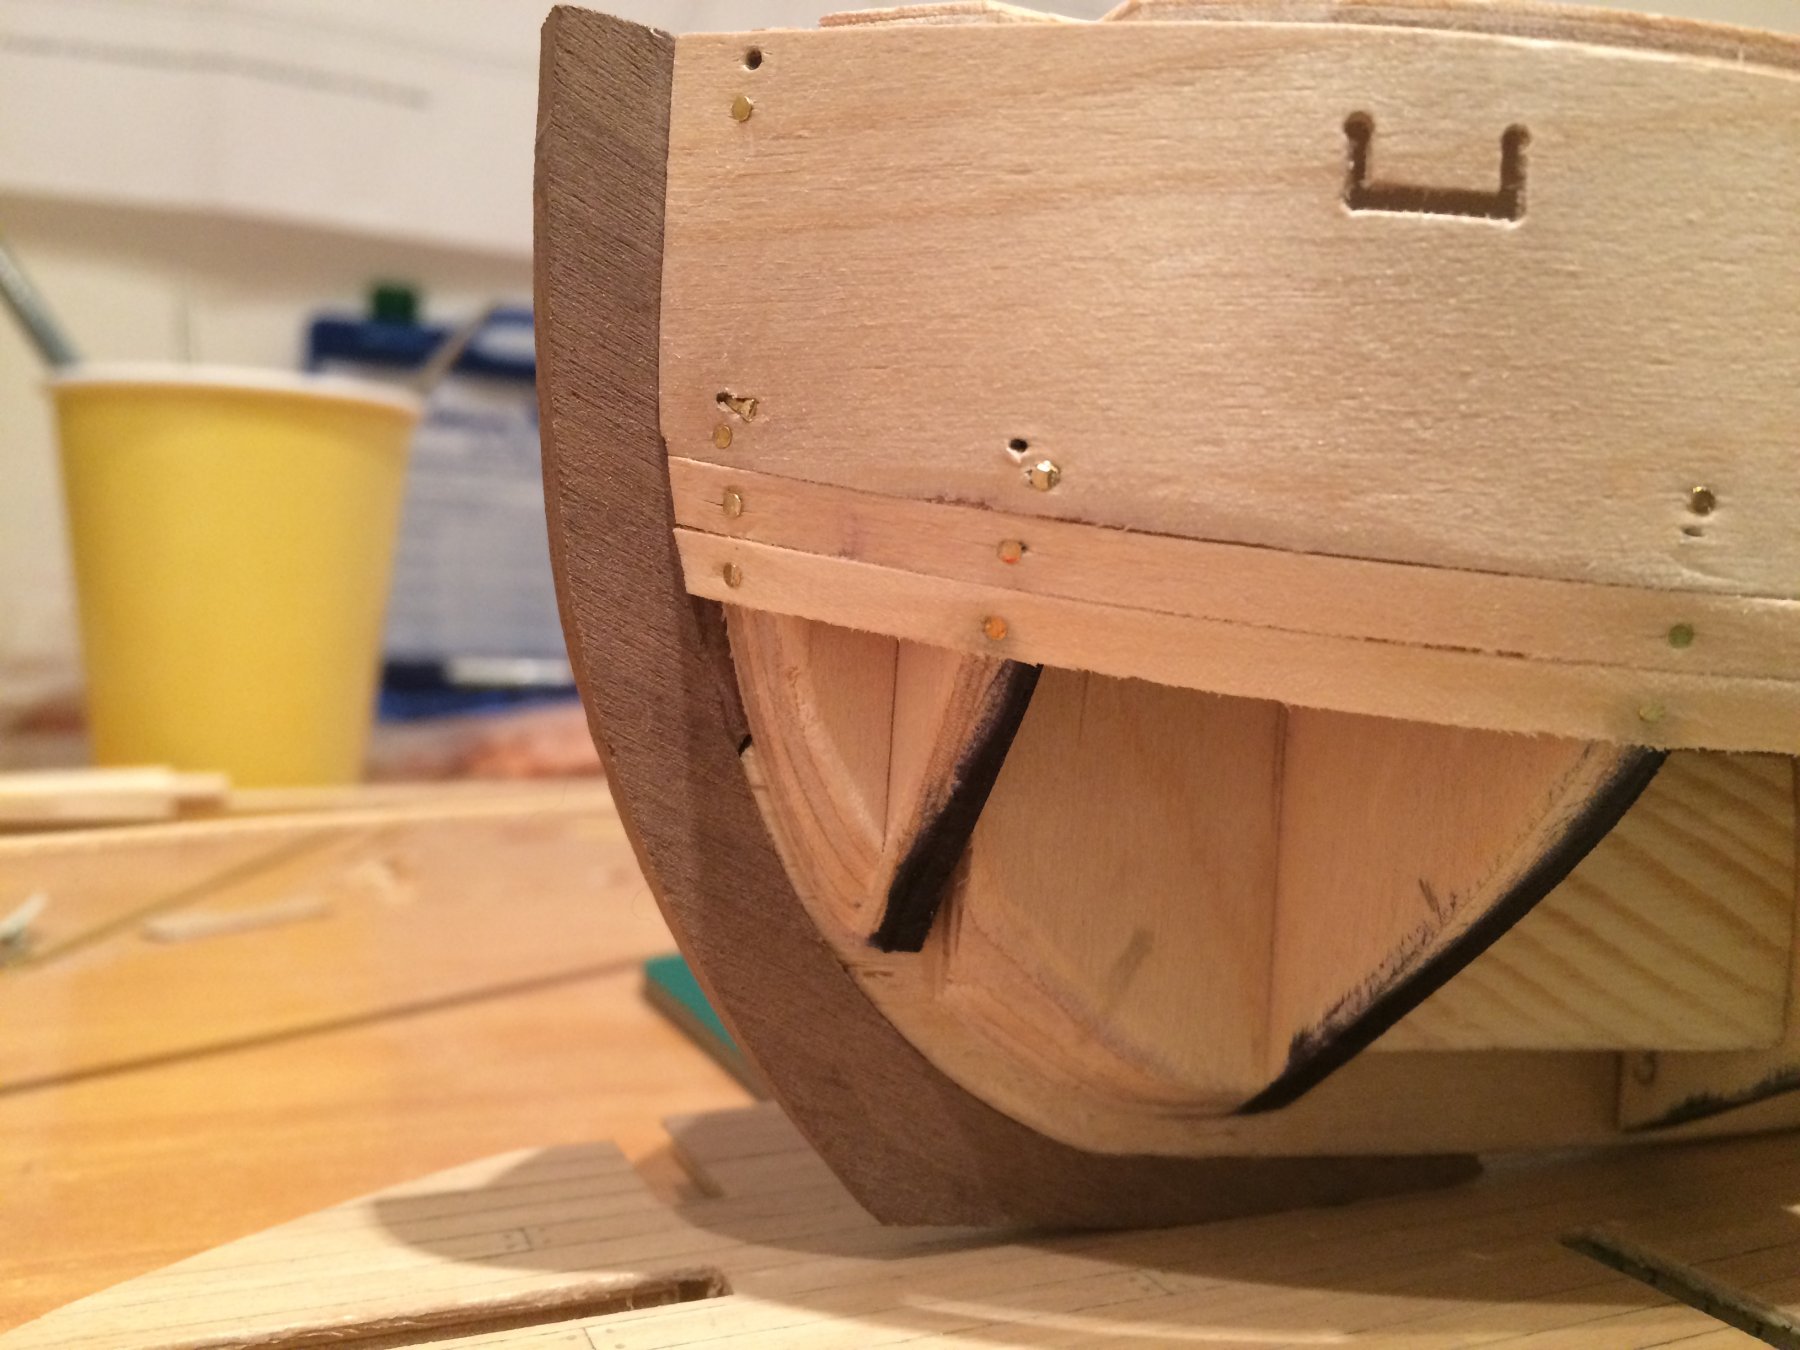
Ah, tell me about it! I feel exactly the same! All those build logs with perfect ships, well-equipped workshops, etc. It's like seeing the top of a mountain that you want to climb from a valley beneath. But 'A journey of a thousand miles begins with a single step', so just slowly and steady plow ahead. It's great to hear that you appreciate this log - It was kind of hard for me to find entries by beginners as well. It's really encouraging to hear that from an experienced builder. Thank you! You are absolutely right about the stern. I did a dry-fit of the sternpost after taking the photos and it was indeed too wide. I've sanded it down a bit further. At present the stern is 3.2 mm wide at the bottom and 4.0 mm wide at the top, so although the second planking will still require some sanding it's not nearly as bad as it was (planks are 1.0 mm thick, sternpost is 5.0 mm wide). The reason for this was my poor execution of the bearding line. In regards to the stem my plan is to try and bevel the edges of the second planking so that it'll sit flush with its side. Same with the keel. I've recently equipped myself with some 'diamond' needle files which makes sanding down the pins a lot easier :-)
-
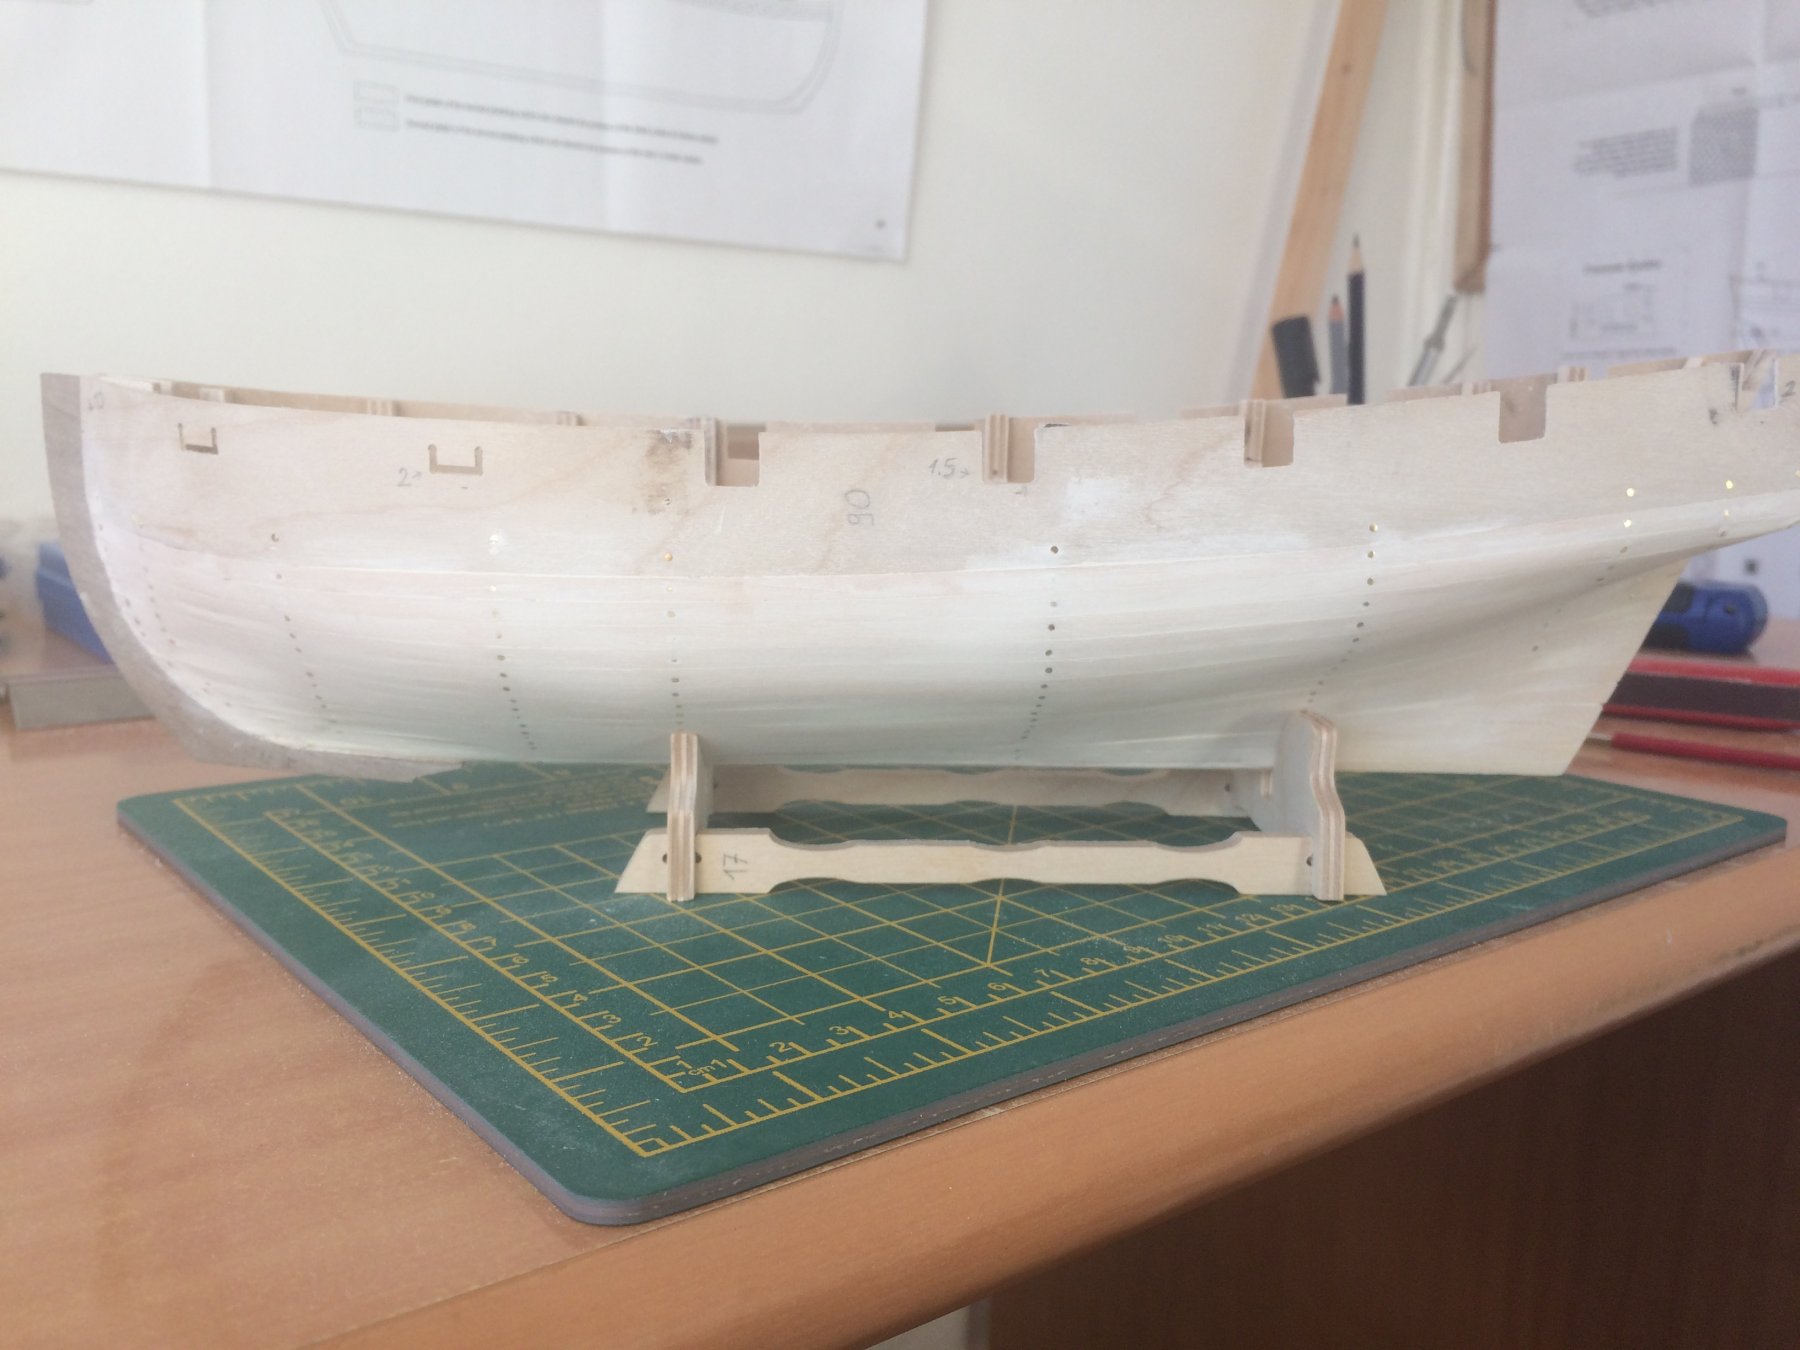
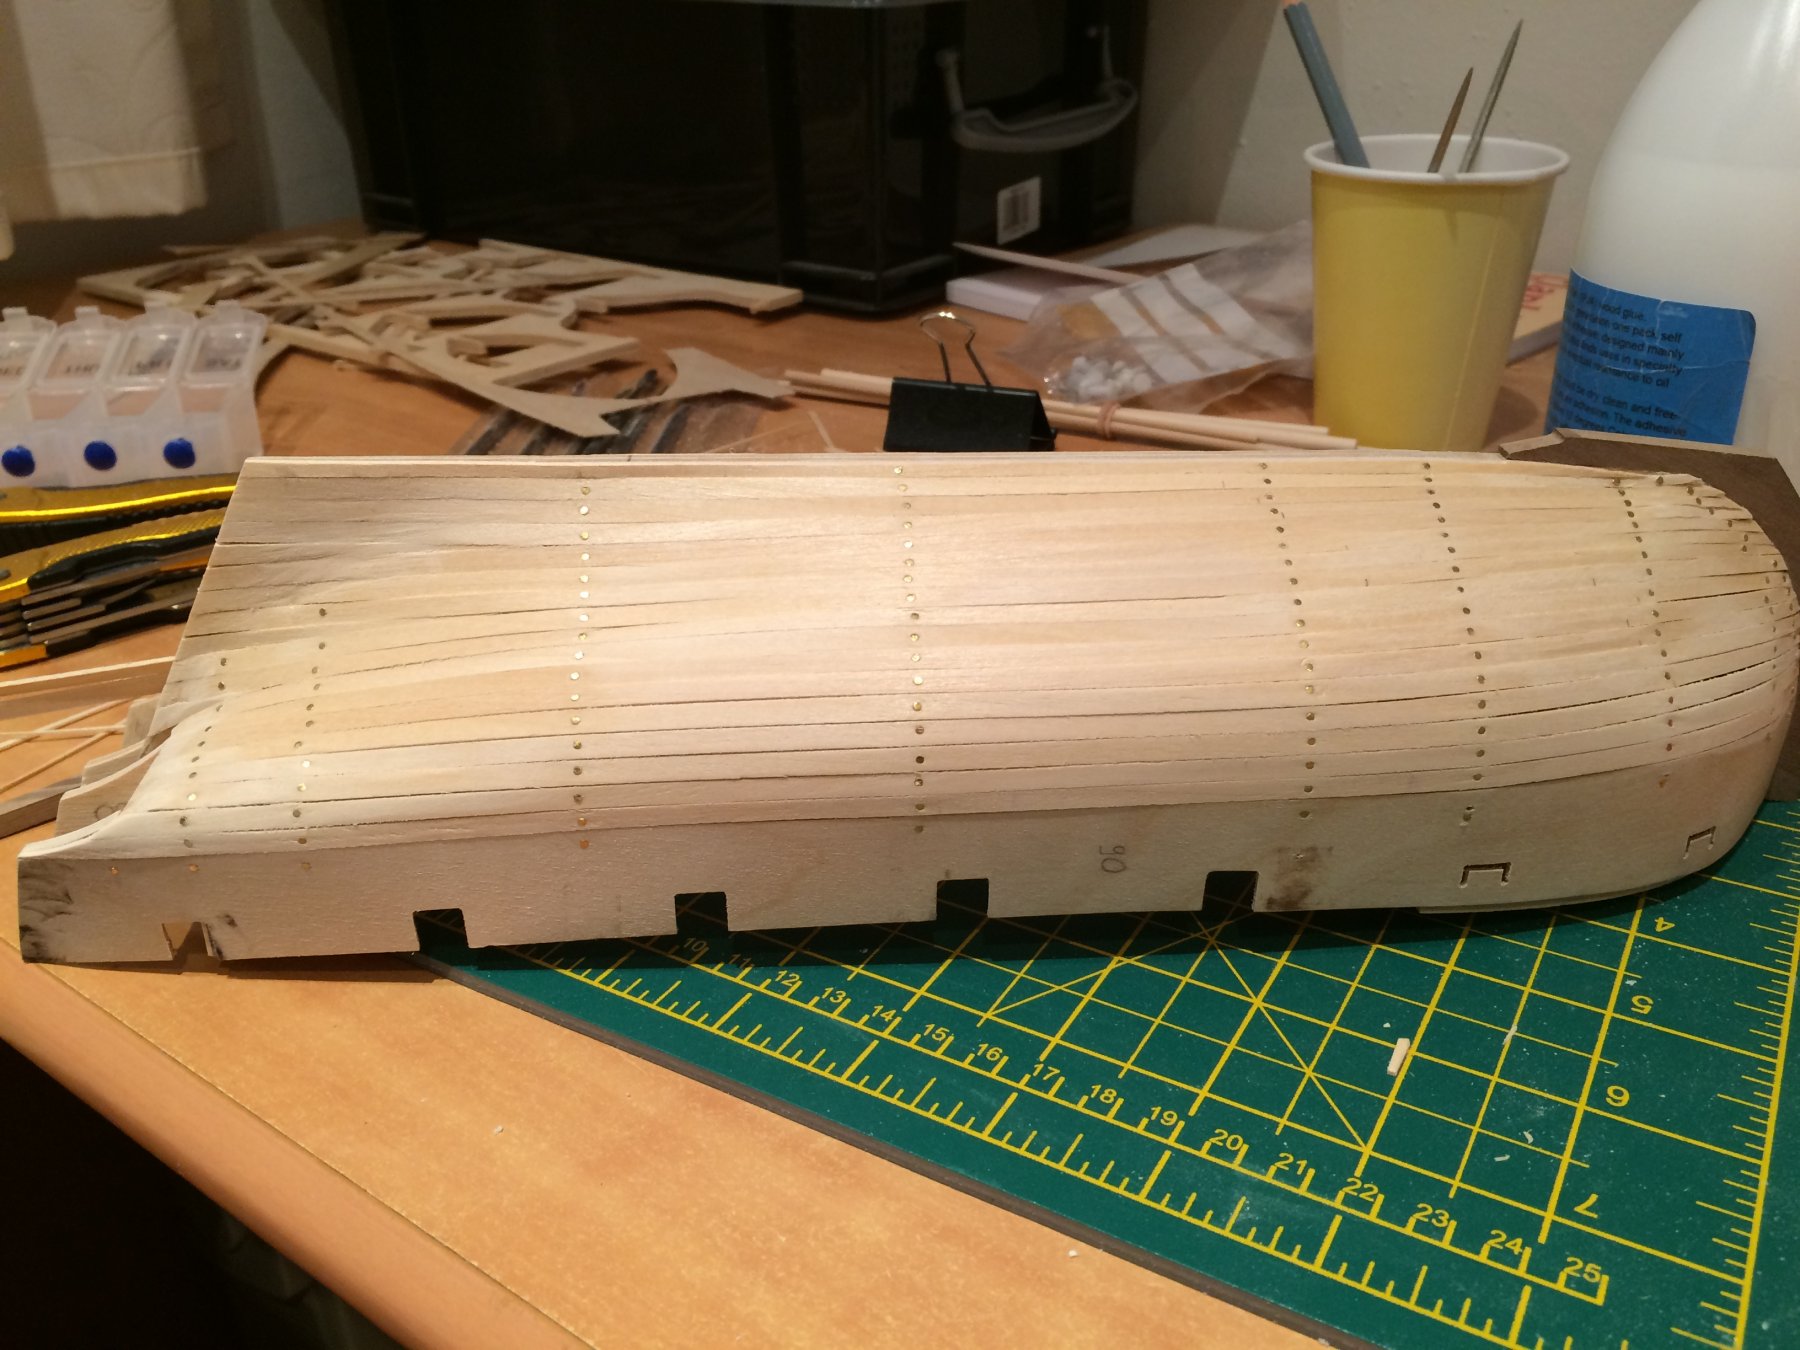
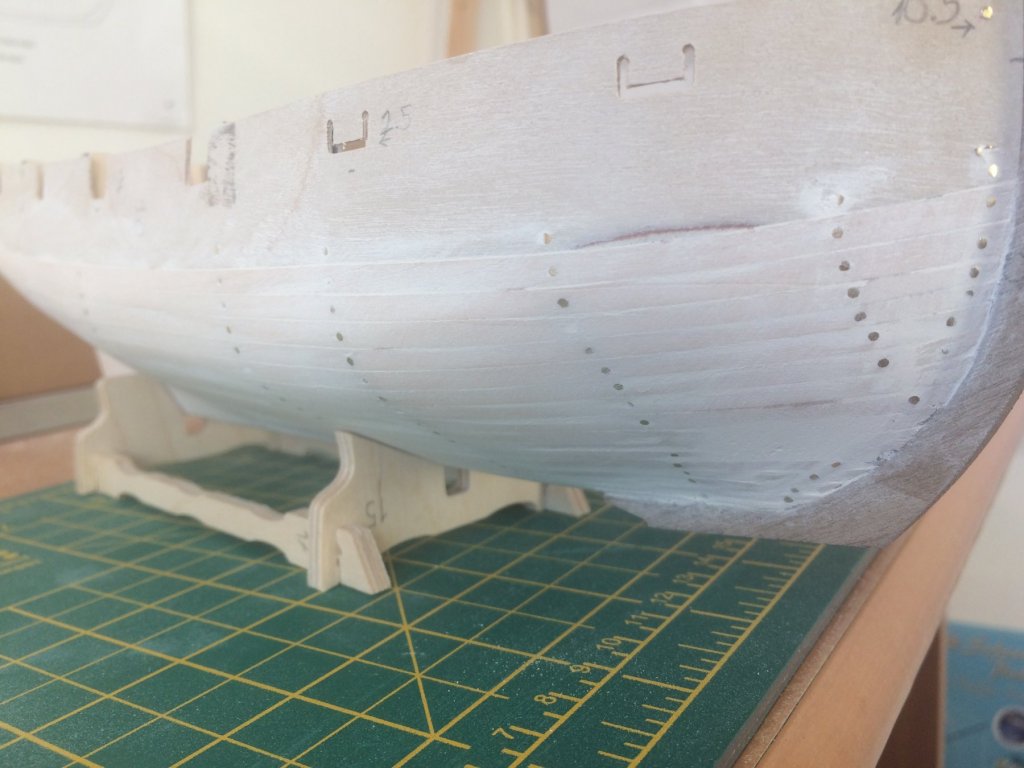
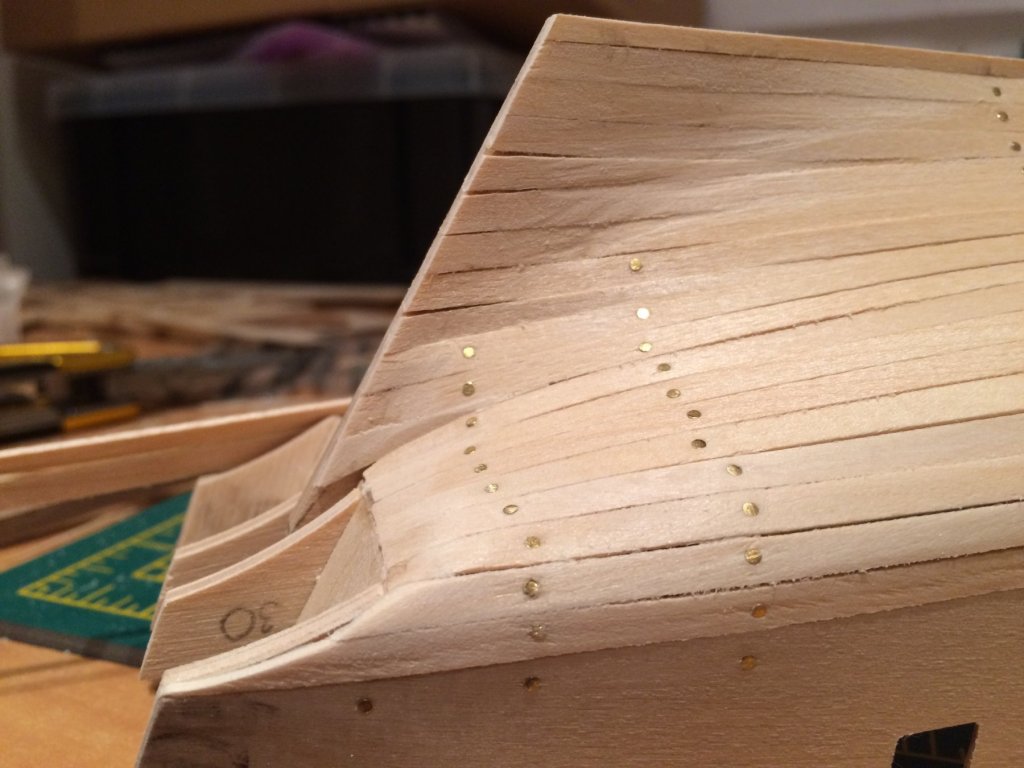
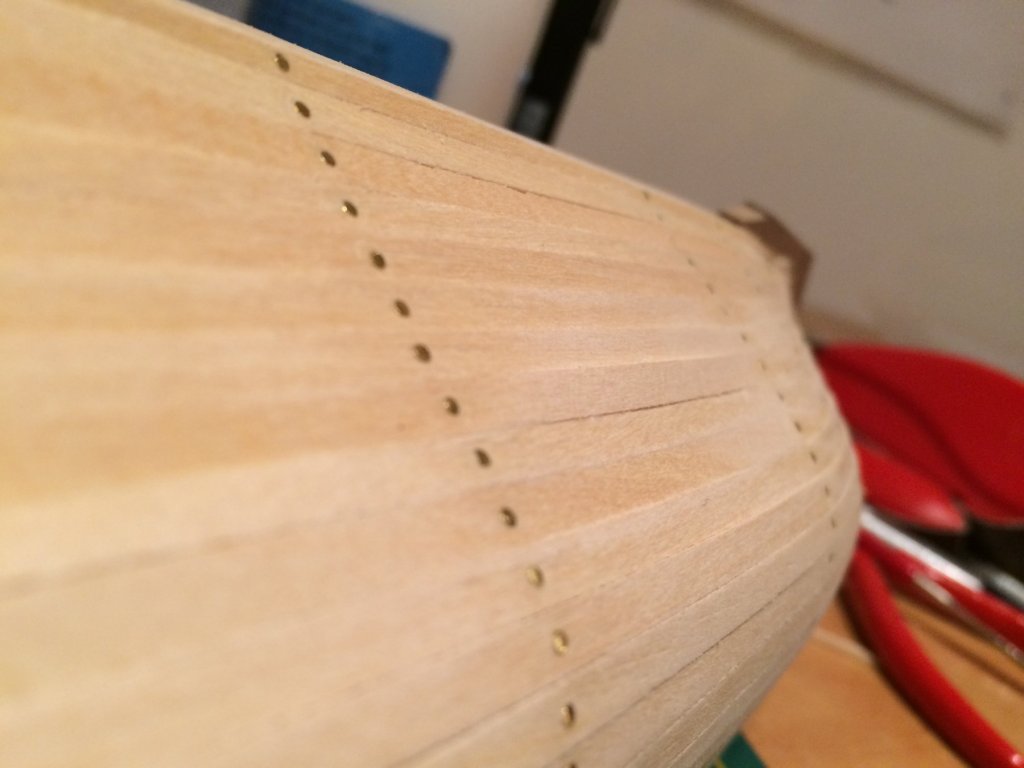
Yay! First planking finally completed :-) Quite a lot of filler was necessary, but in the end I'm happy with how it looks. The bow that was previously awful is now OK (I think). Starboard gunport pattern will require some small adjustments as it's 0.5 mm higher then it should be at the bow. Any and all comments welcome - I consider your feedback very valuable.


- 37 replies
-
- 4
-
-
- pickle
- caldercraft
- (and 1 more)
-
Thanks for your reply Joe. Yes I was thinking about using CA glue as well. I do have different varieties at hand (thin, medium and thick 'Admiralty Superglues'). I will most definitely do a sample, but was just wondering whether anyone had any experiences in this area. Your example sounds encouraging - sounds like I won't have to compromise the smoothness of the hull after all! That's a huge relief :-)
-
I've recently completed the initial planking of my first model and proceeded to use a wood filler to smoothen the surface. The planking was quite uneven so after sanding the filler down I can see several areas that are effectively still covered with it. Sanding them down any more would leave the hull covered with nasty depressions. I'm concerned that the 2nd and final layer of planking might have difficulties with sticking to these (filler-covered) areas. Am I right? Is there something I can do to address the issue? The filler in question ('Super Filler' supplied by Cornwall Model Boats): The glue ('Admiralty Water Resistant PVA Wood Glue' supplied by Cornwall Model Boats): The wood itself is 1x4 [mm] walnut that looks quite dry (Caldercraft HM Pickle kit).
-
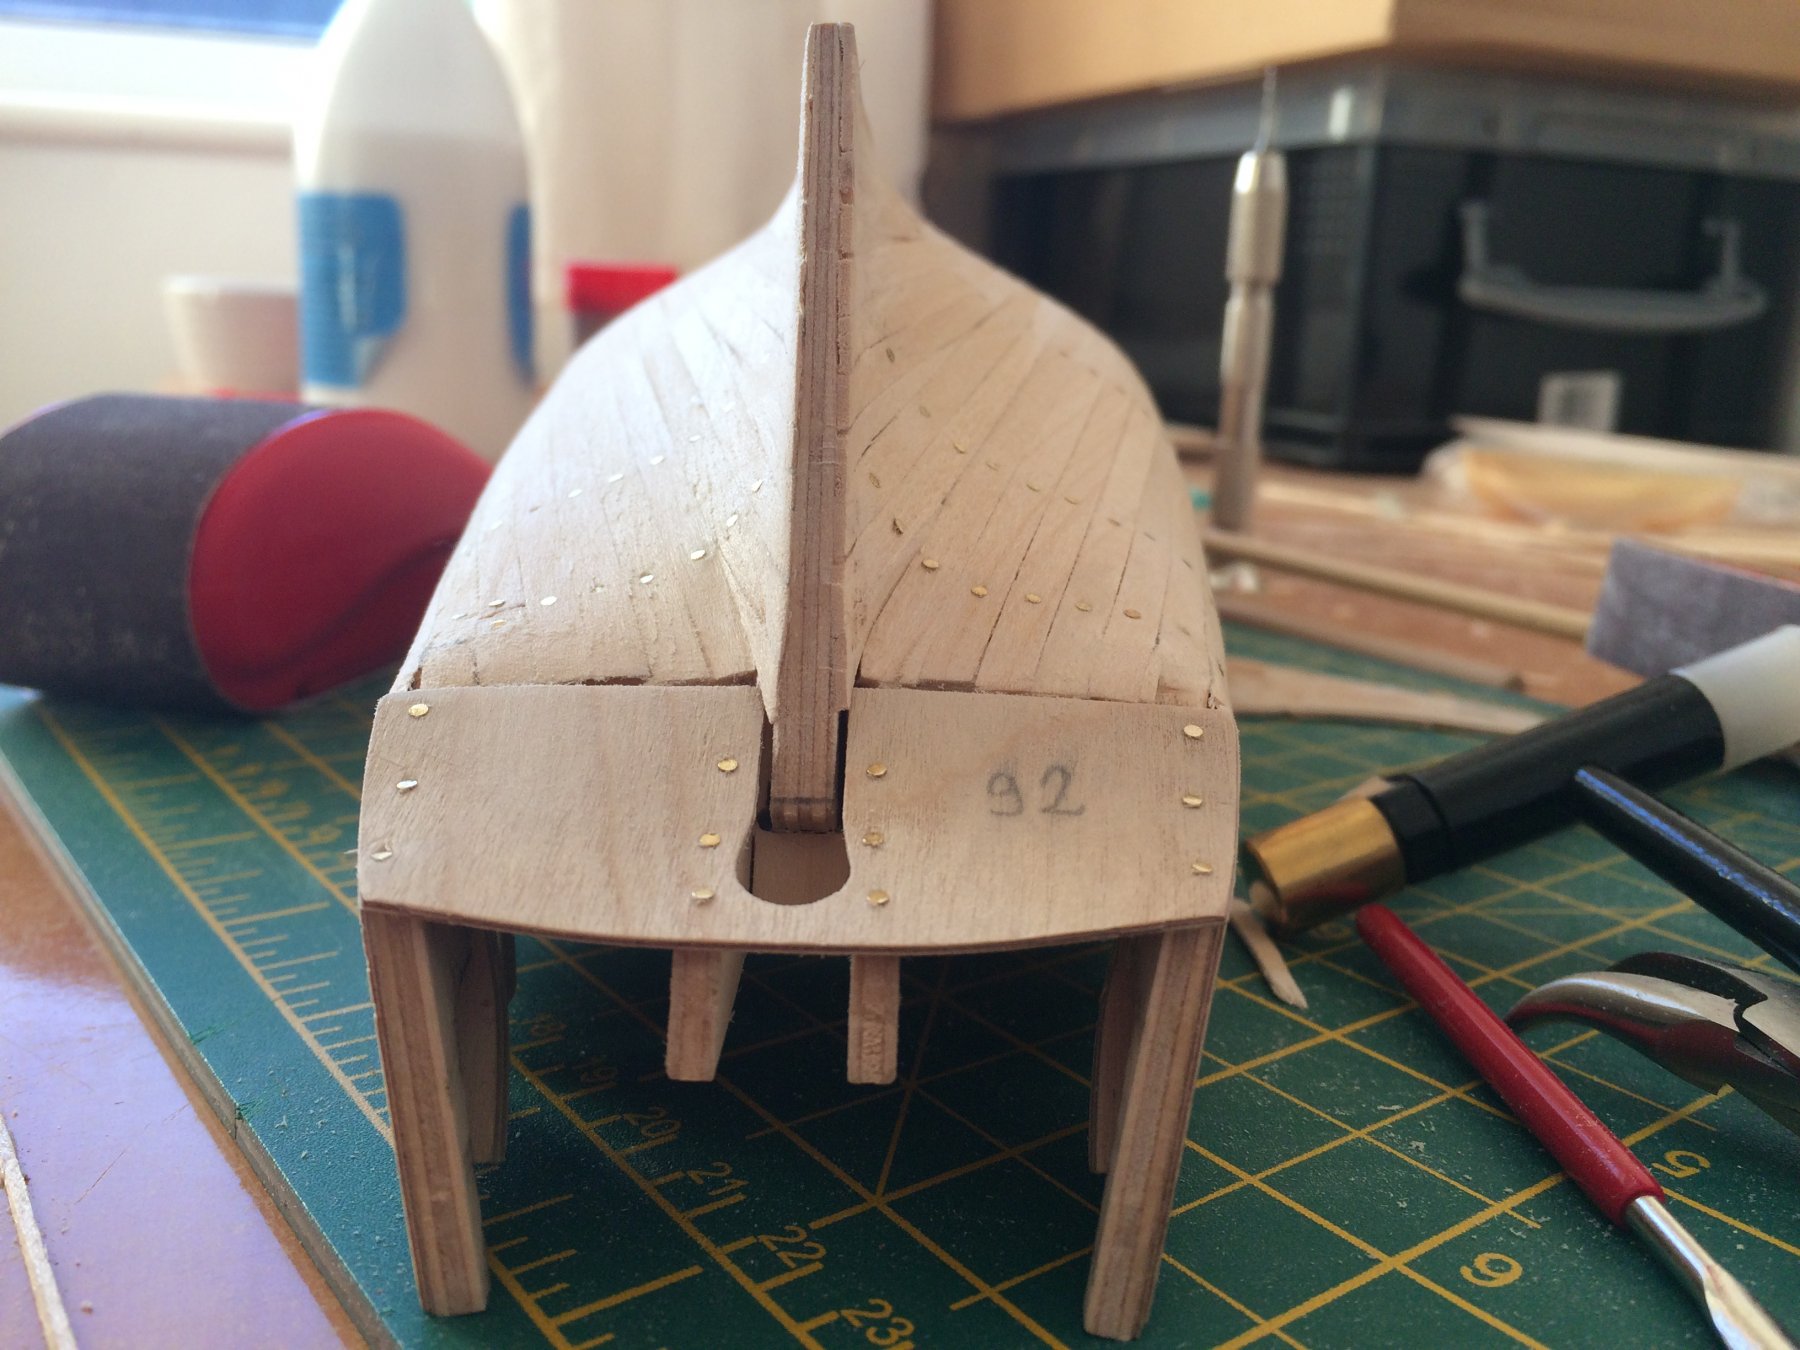
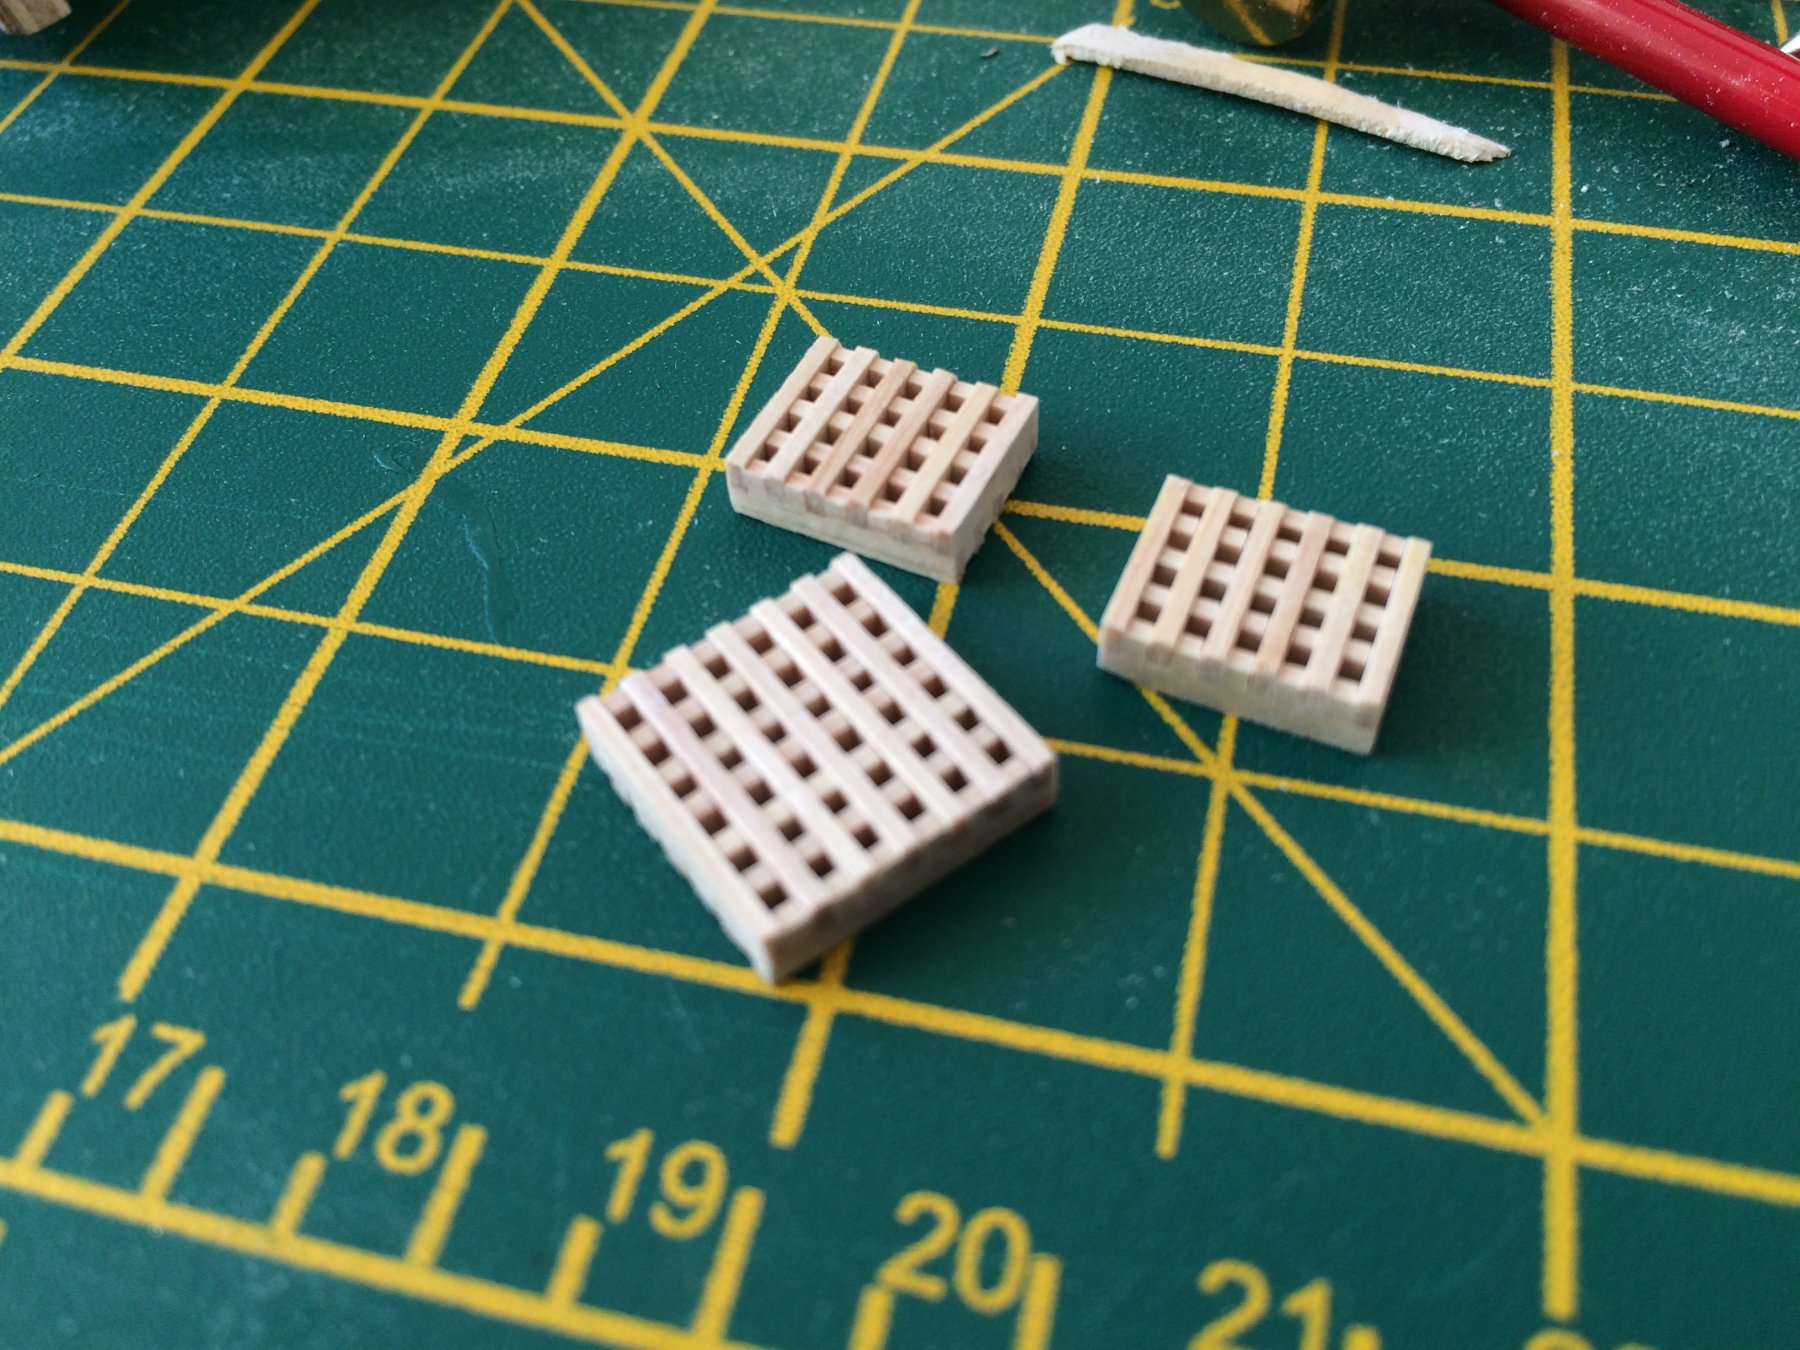
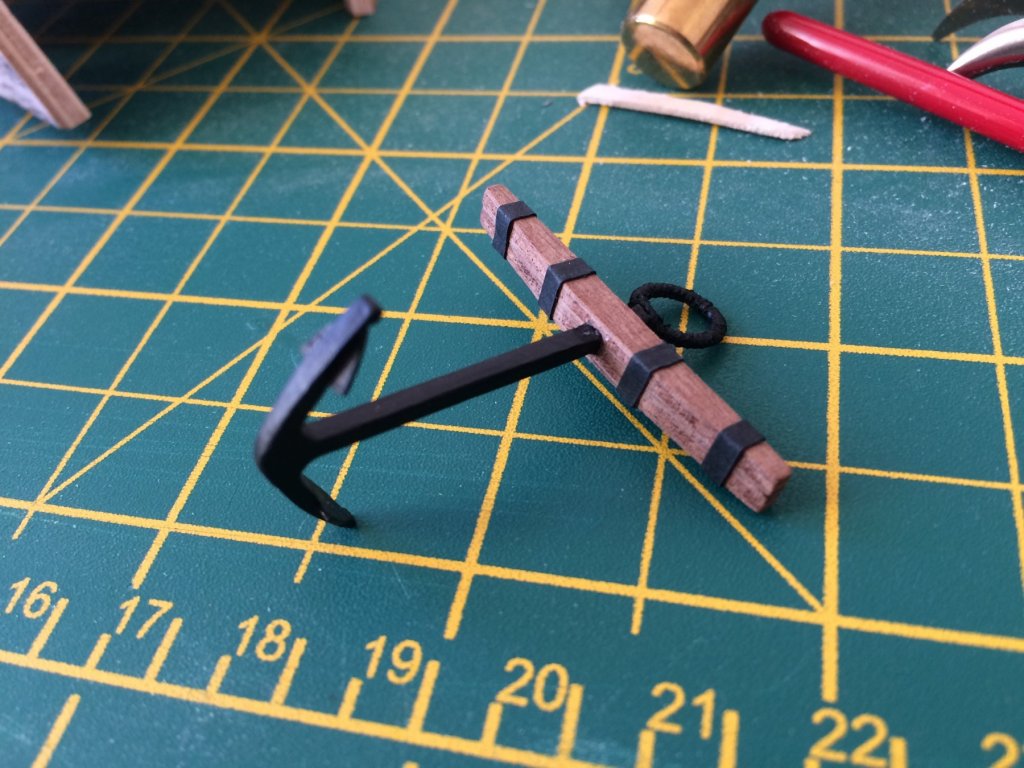
Progress is steady. First planking is completed and glued from the inside. Starboard side has been sanded down, but no filler was used yet. Stern counter is now in place. I have attempted to remove the pins, but was unable to do so and as a result am using much more sand paper ;-) While waiting for the glue to dry I've entertained myself with putting together some bits and bobs, namely: The anchor: Gratings: Skylight: Remainder of this week will be spent on sanding down the port side, followed by filling the whole planking and another sanding session. Hopefully after that I'll be in a position to post some satysfying pictures of a smooth hull (fingers crossed).


- 37 replies
-
- 2
-
-
- pickle
- caldercraft
- (and 1 more)
-
As someone who just started building his first kit my fear was that using power tools will make it easier to mess things up. I do have a Dremel with various accessories at hand (bought it a couple of years ago) but decided not to take advantage of it when constructing the ship. I'm now a couple of weeks in and think it was the right choice. There were numerous situations when my inexperienced fingers slipped or I took a bad measurement and if I was using a Dremel instead of a pin vice things would get ugly. Same goes with sanding down - using sand paper and files makes it a lot harder to take off too much material at one go. The way I see it is that I need to get a lot better at the hobby before using a power tool. Doing it prematurely is just inviting disaster to happen.
-
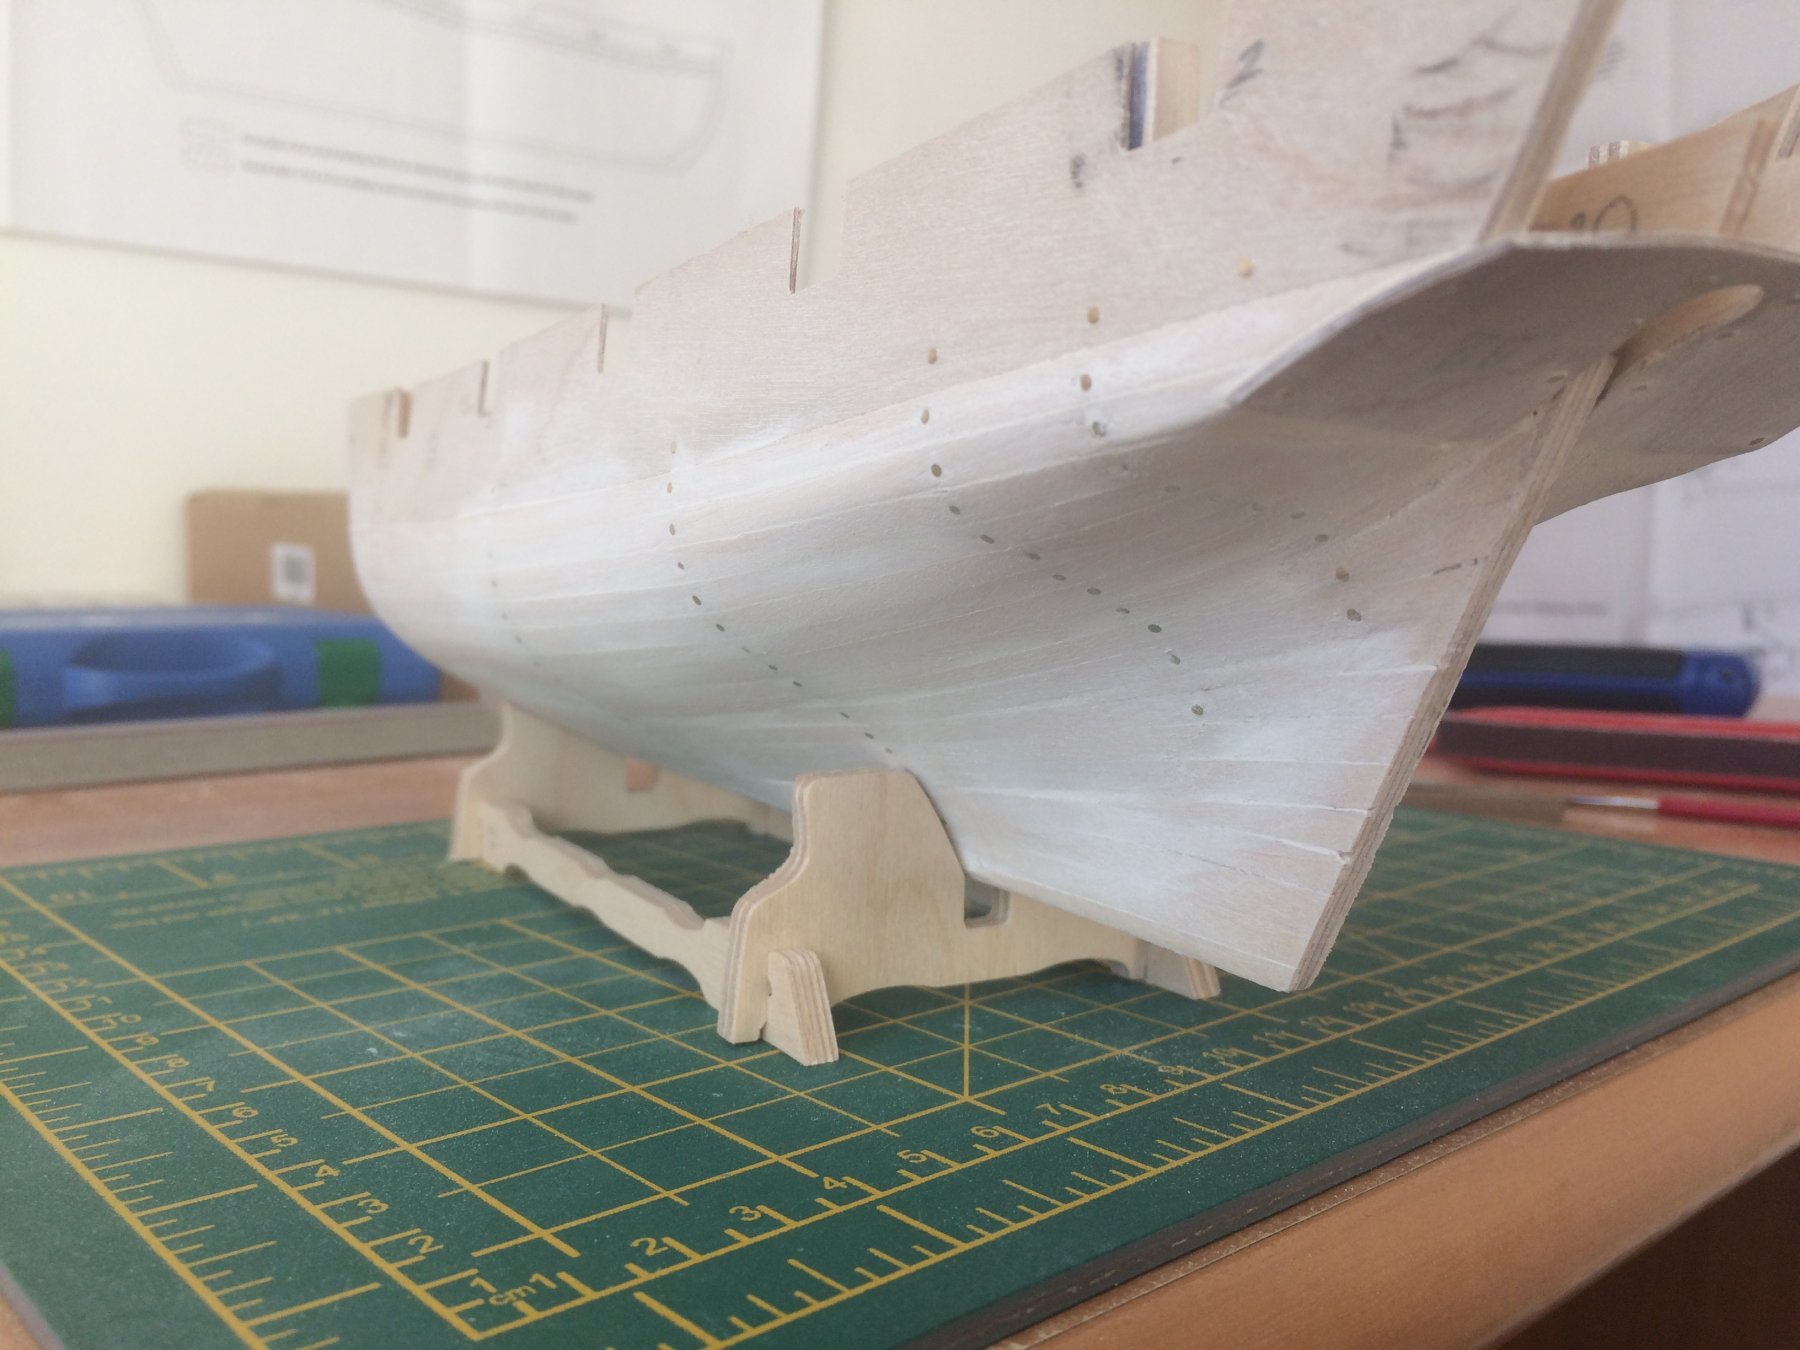
We had some great weather so I didn't have a whole lot of time to work on the build. The port side is now completely planked. I was originally really worried about the stern, but am pretty happy with how it came out. Middle bit looks great. The bow is quite sloppy though and will require a lot of adjustments. Looking at it now I regret not placing the filler blocks between bulkheads which would make things a lot easier. Yes. I will definitely attempt to remove them after gluing from the inside.

- 37 replies
-
- 3
-
-
- pickle
- caldercraft
- (and 1 more)
-
That did cross my mind, but I haven't decided yet. To be honest, looking at it now most of the smoothing will have to be done in-between the bulkheads where there are no pins.
-
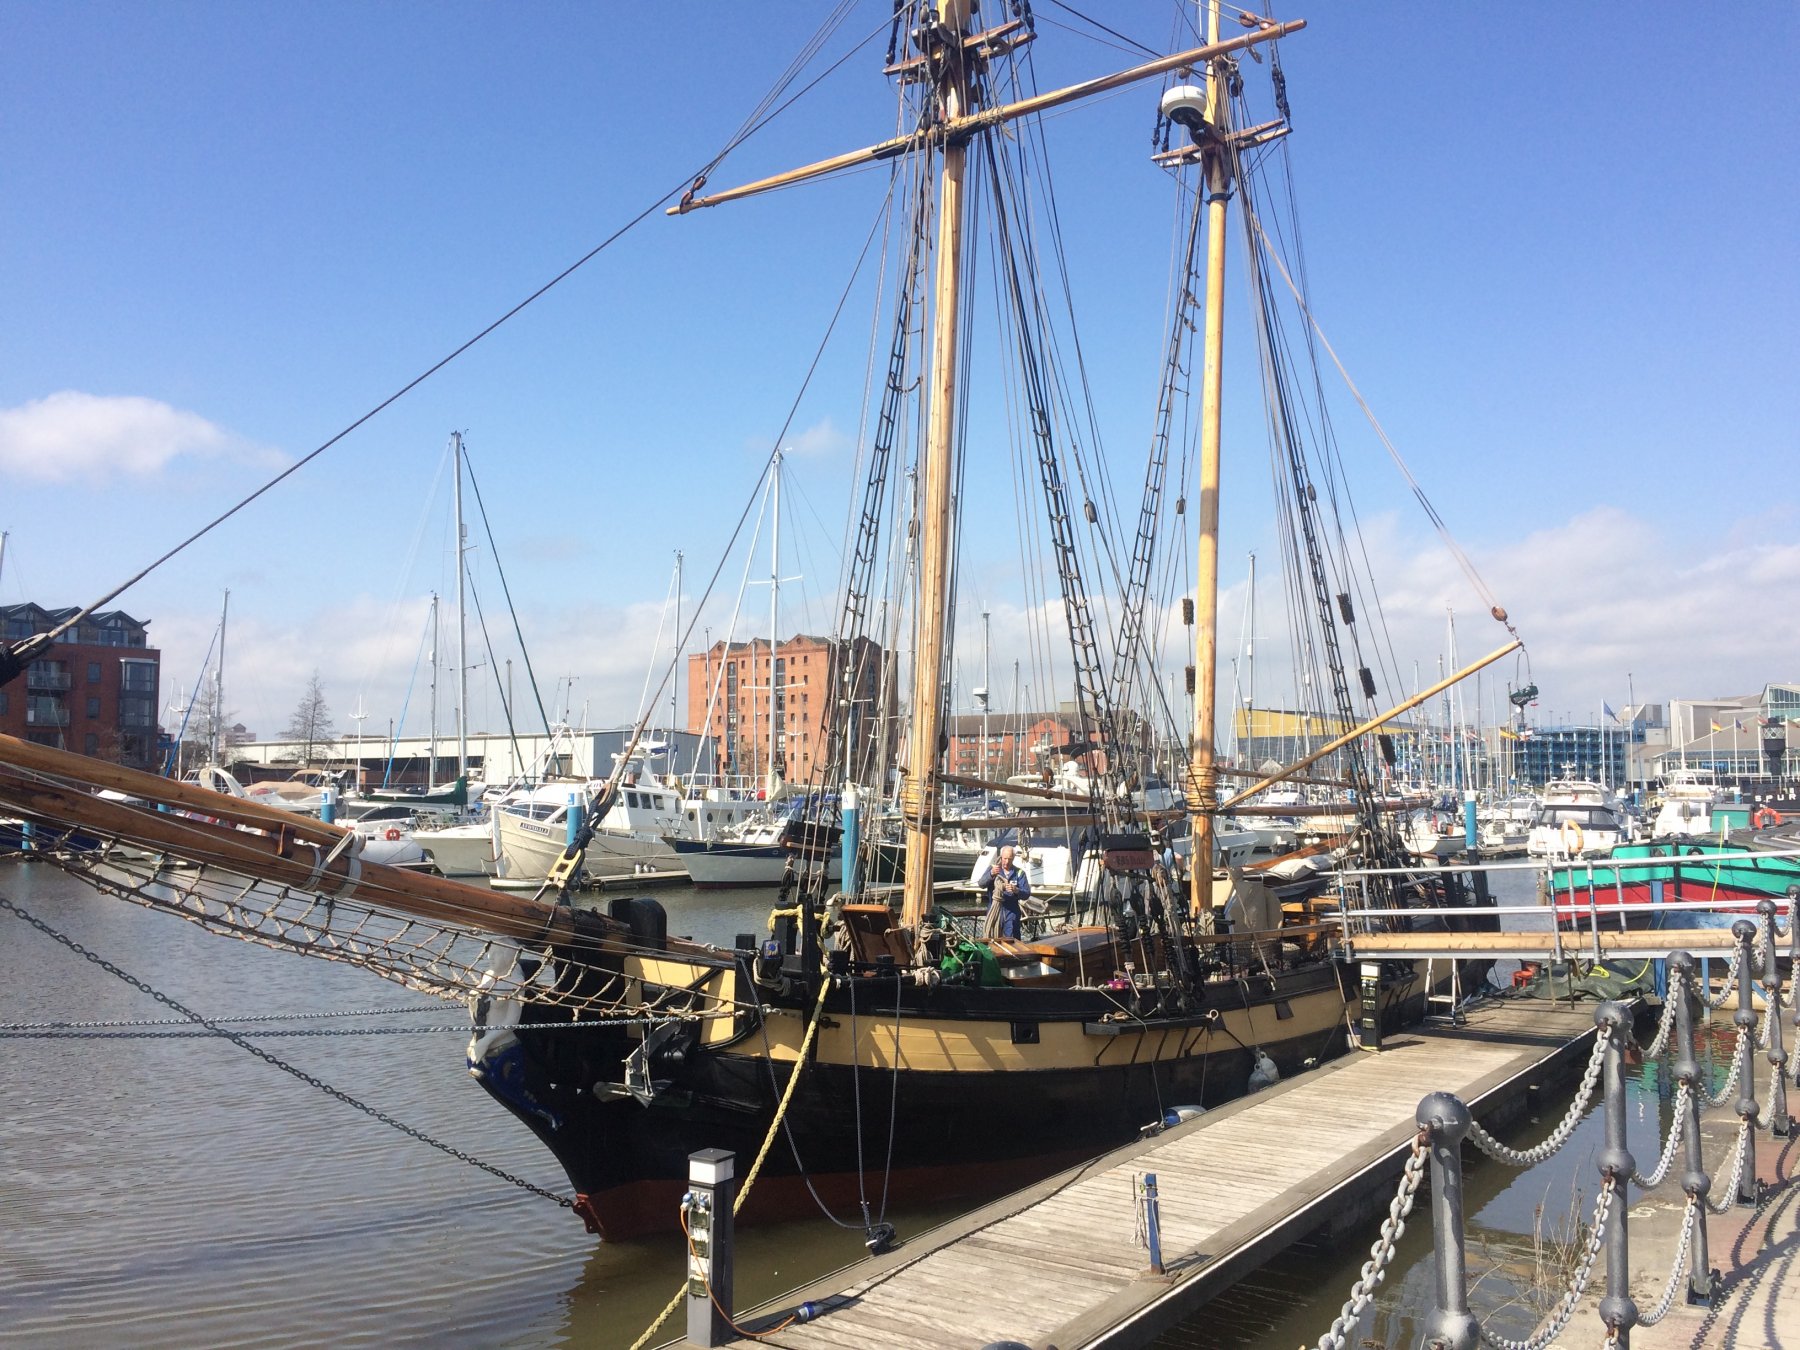
Thanks, Joe. In this case it wasn't so bad as they're quite thin (makes them easier to shape). I'm currently working on the rest of the planking and would like to finish that before Tuesday, in the meantime I can post a picture of the Pickle replica docked near to where I work: I'm also planning on visiting the NMRN in Hartlepool this weekend to look for further inspiration/motivation ;-)

- 37 replies
-
- 1
-
-
- pickle
- caldercraft
- (and 1 more)
-
This ship is older than me... And taller... And more handsome. I'm out of words.
-
Well... There's progress. I've glued the last bulkhead and stern extensions and did all the shaping/beveling in preparation for the planking. The gunport patterns are also in place - I did a lot of unnecessary holes in the process but in the end they came out nicely (I think). I also did the first two planks on the port side (bending was done with a steamy iron): All comments welcome - would be great to know if I'm at least heading in the right direction ;-)

- 37 replies
-
- 4
-
-
- pickle
- caldercraft
- (and 1 more)
-
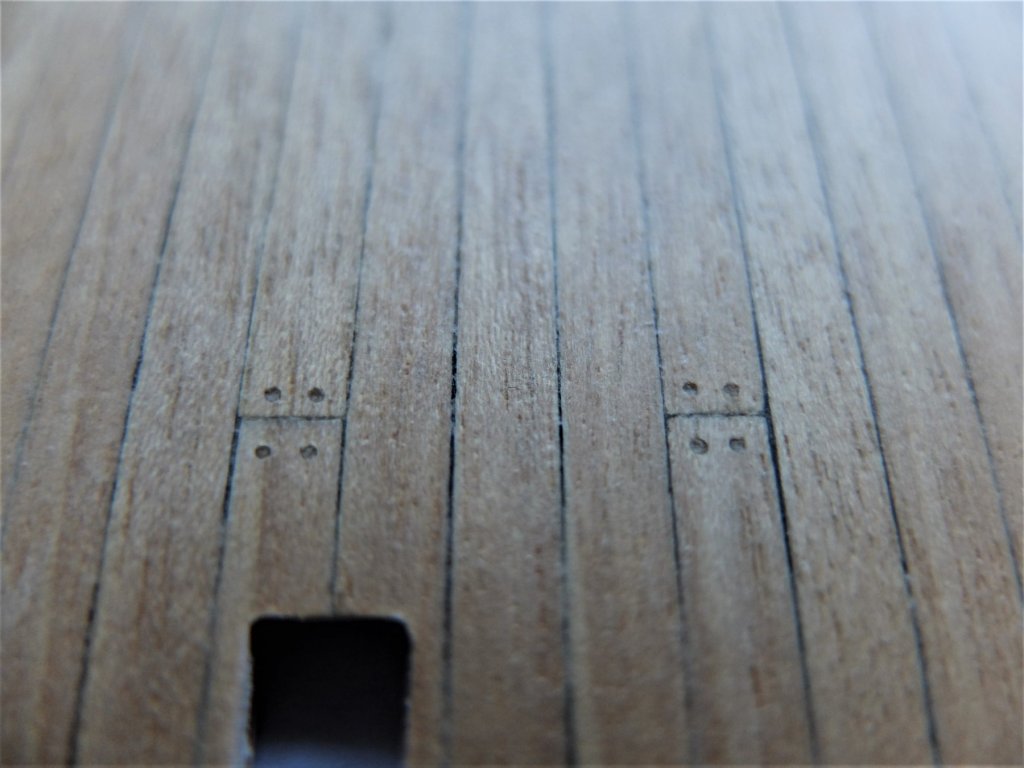
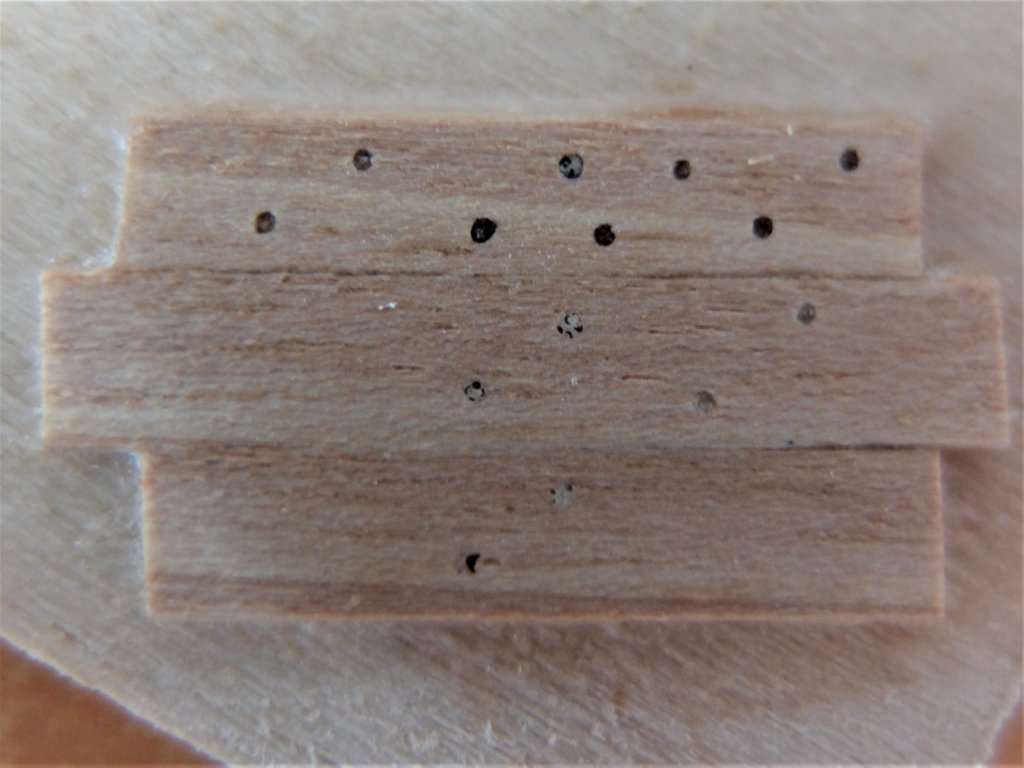
Thanks for the great tips. I'll make a list, so I don't forget any of them ;-) As you rightly noticed, I'm still getting my head around the jargon, so do excuse my unprofessional terminology ;-) Yes, I knew there will be an awful lot of sanding/shaping to do and am a bit worried about getting all the angles and bevels right, but not as nearly worried as I am about hull planking, copper plating, painting, rope making or rigging (come to think of it that's quite a long list of things that I'm concerned about!). As for the progress: I've finished the false (lower) deck planking yesterday and am quite happy with the result. This part of the ship will only be visible through the various (small) holes in the main (gun) deck, so you might say it was unnecessary but the goal here was to get some practice and learn on mistakes. I've tested out quite a lot of different caulking and treenailing techniques with varying results and in the end decided to go with something subtle, as seen below: The caulking is graphite (2B pencil gently applied to the sides of each plank) and the treenails are birch toothpicks that have been stained in earl grey tea for 6 hours and dried. Size of the treenails is about 0.55 [mm] or 1/7 of the width of the plank. The plan now is to fit the 9th bulkhead along with the stern extensions and then do all the shaping over the weekend. After that I'll bend and fit the gunport patterns and do a lot of reading on hull planking before making the next step.
- 37 replies
-
- 4
-
-
- pickle
- caldercraft
- (and 1 more)
-
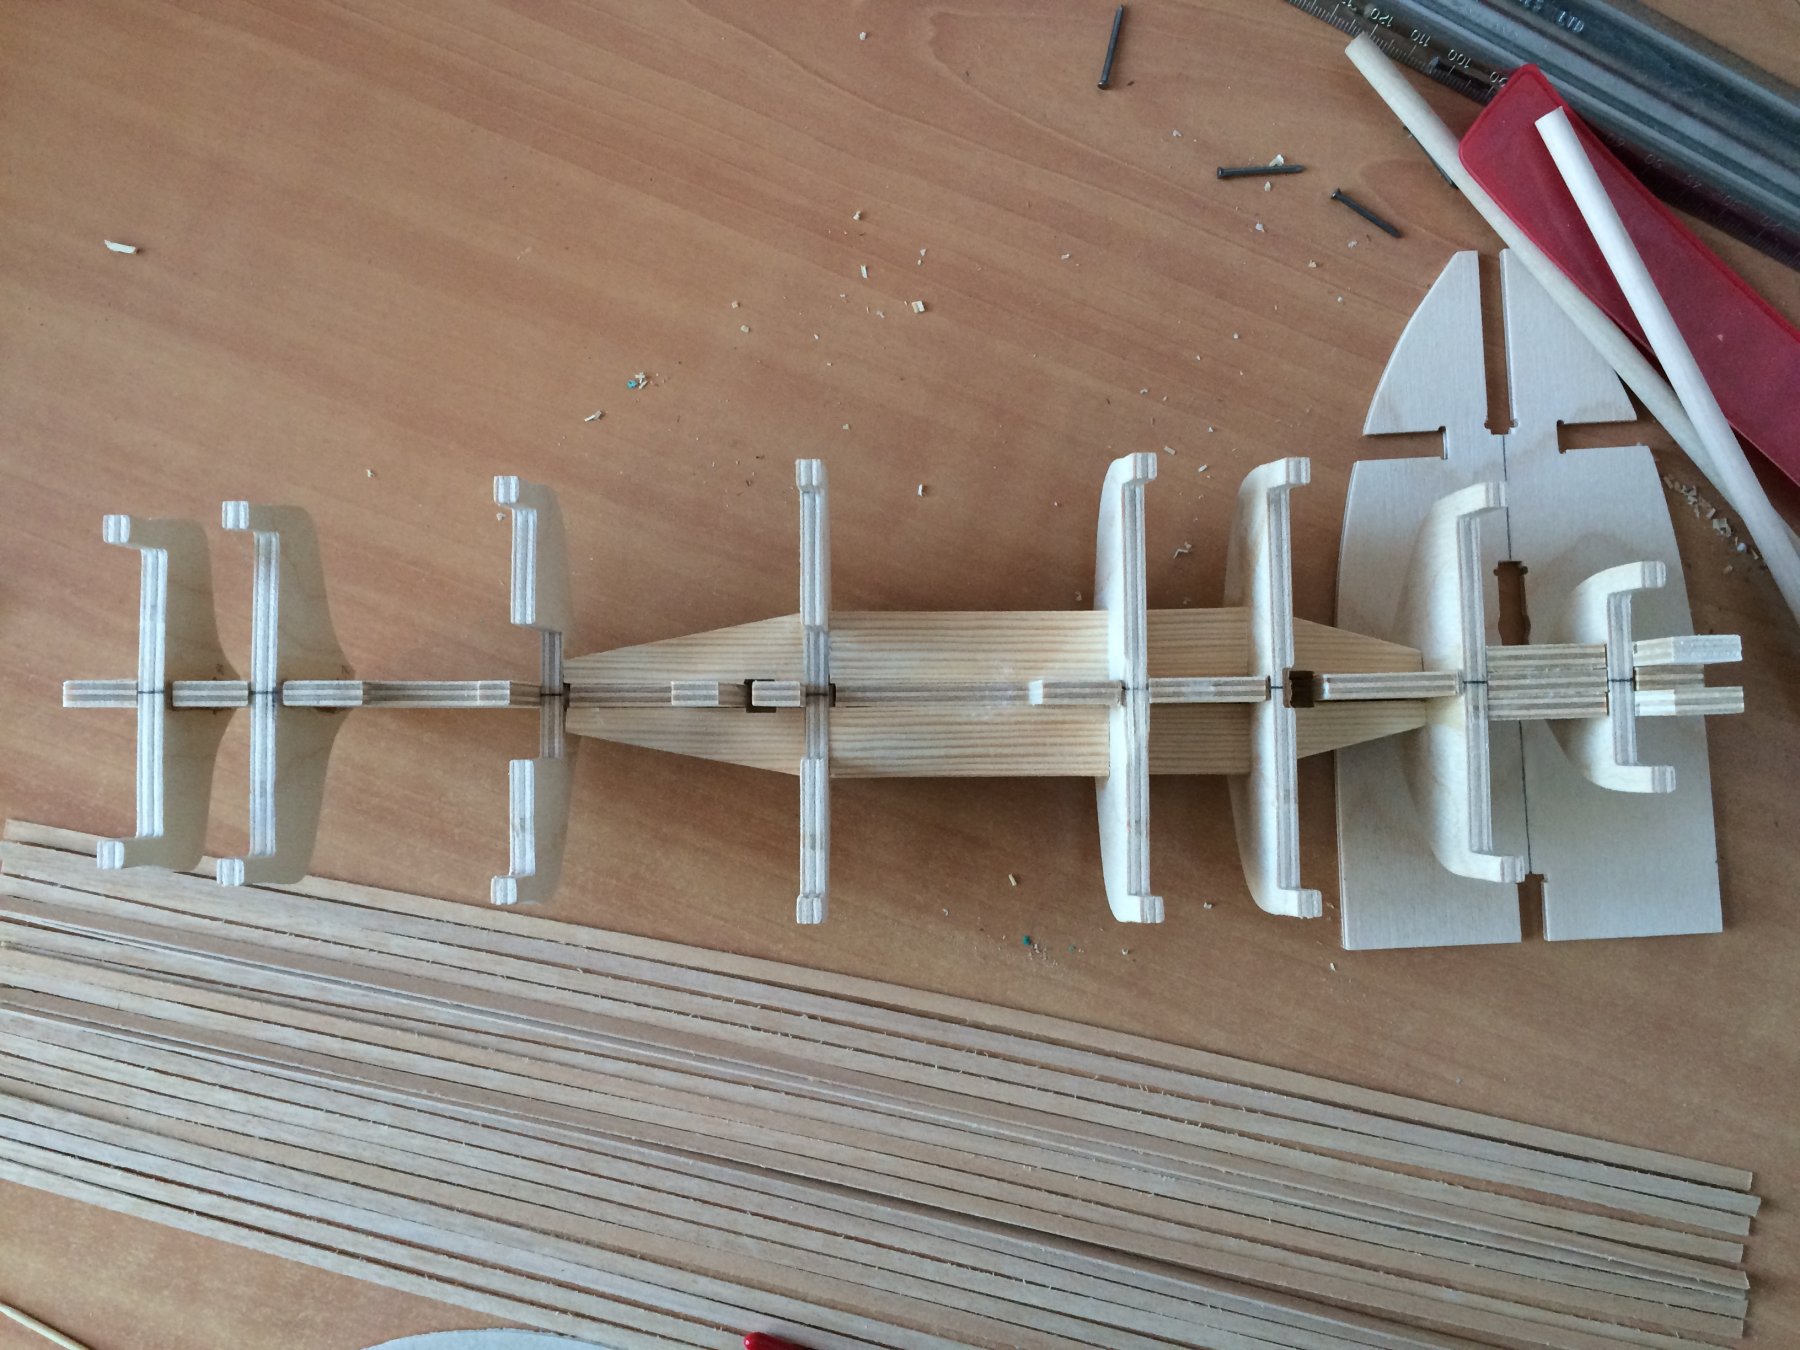
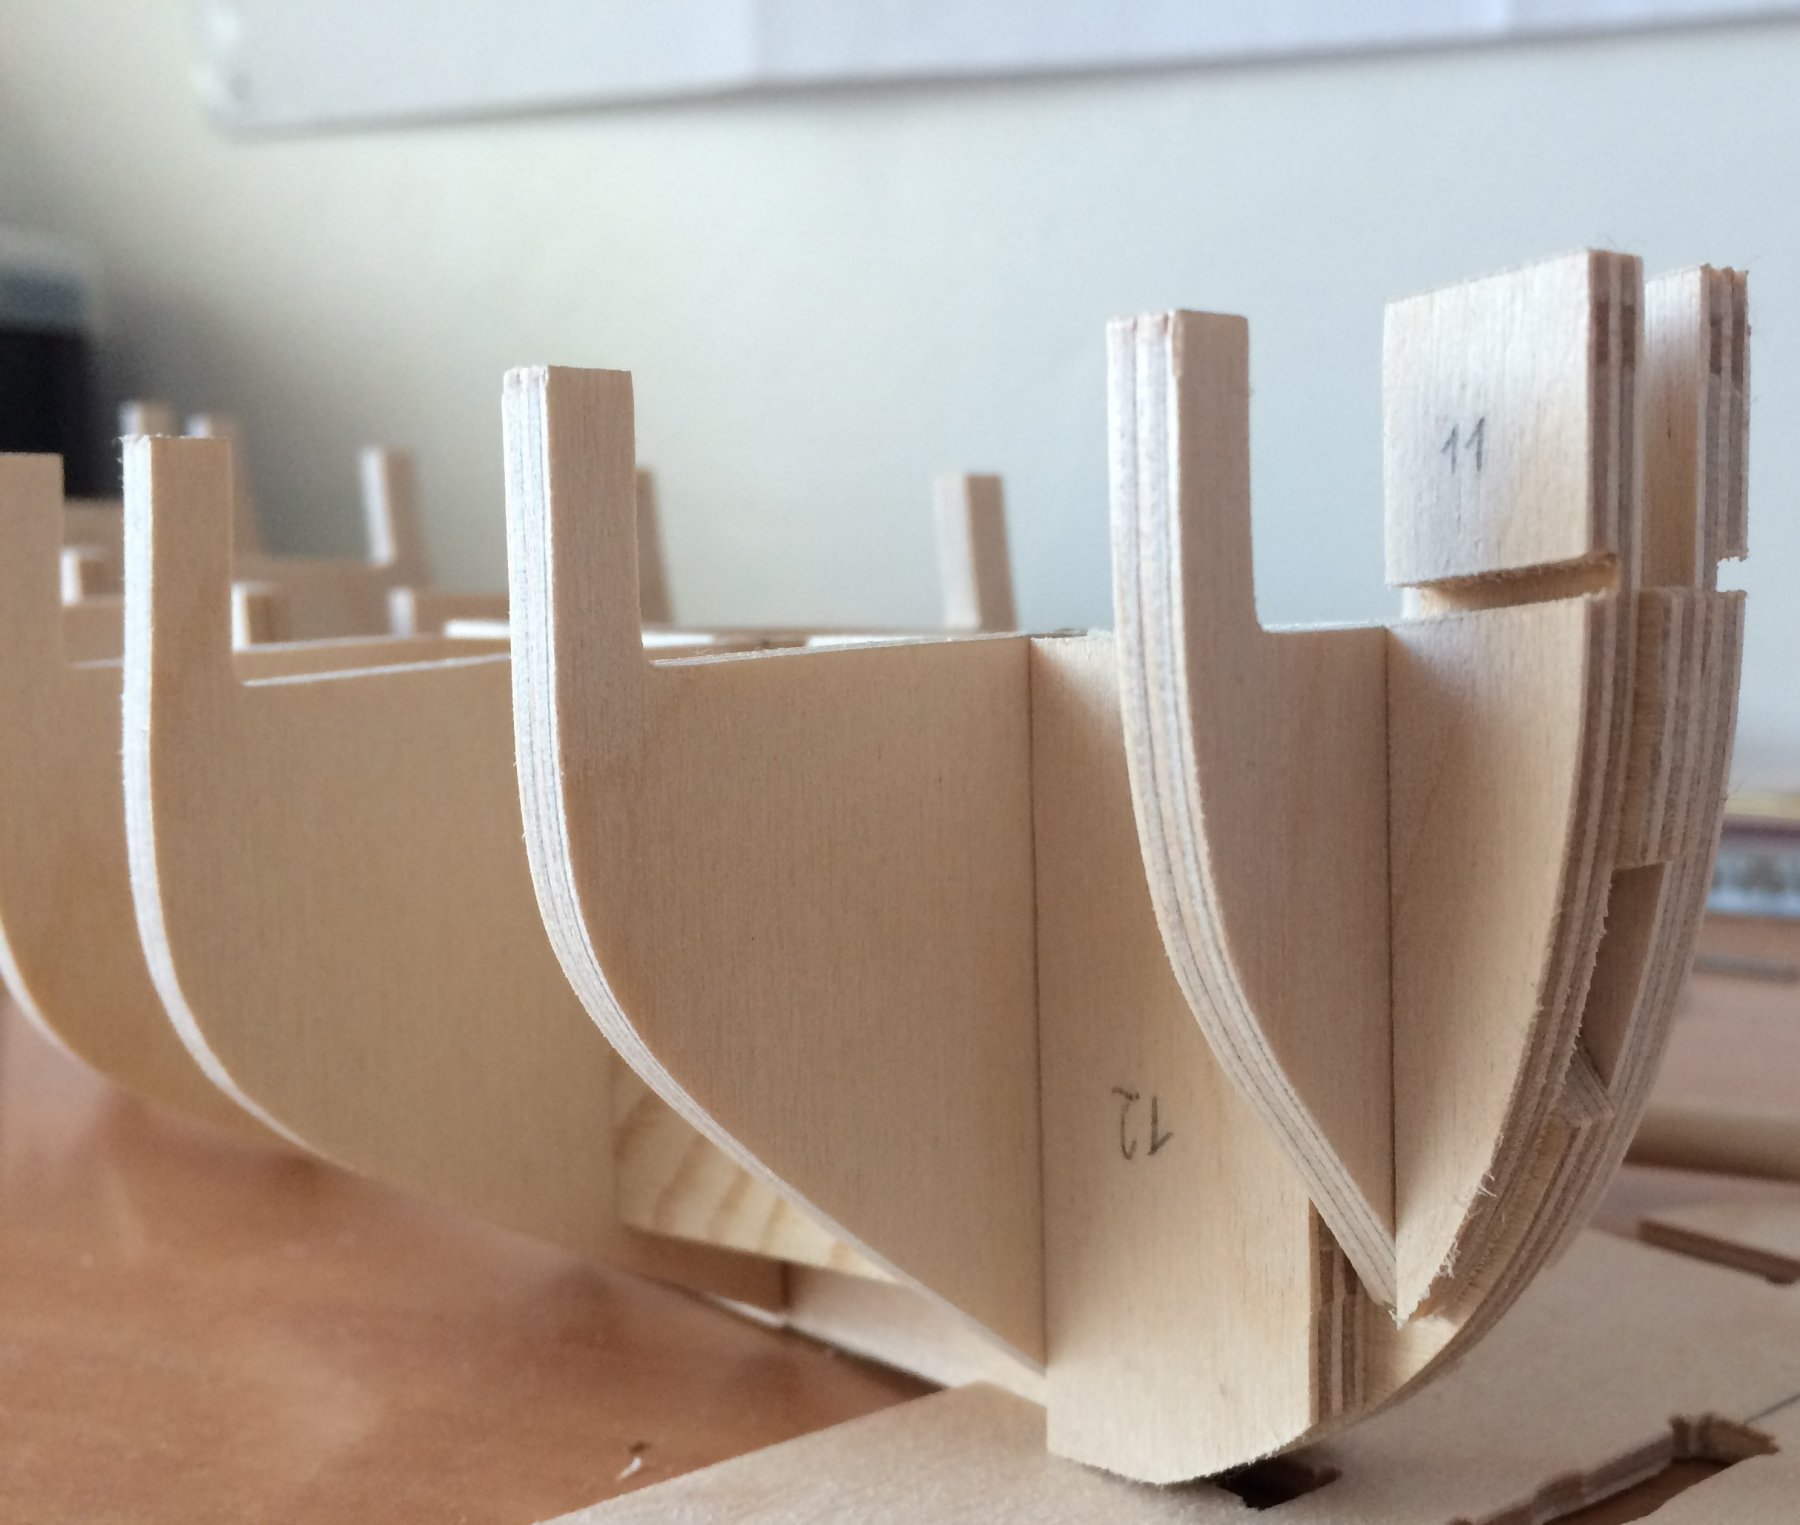
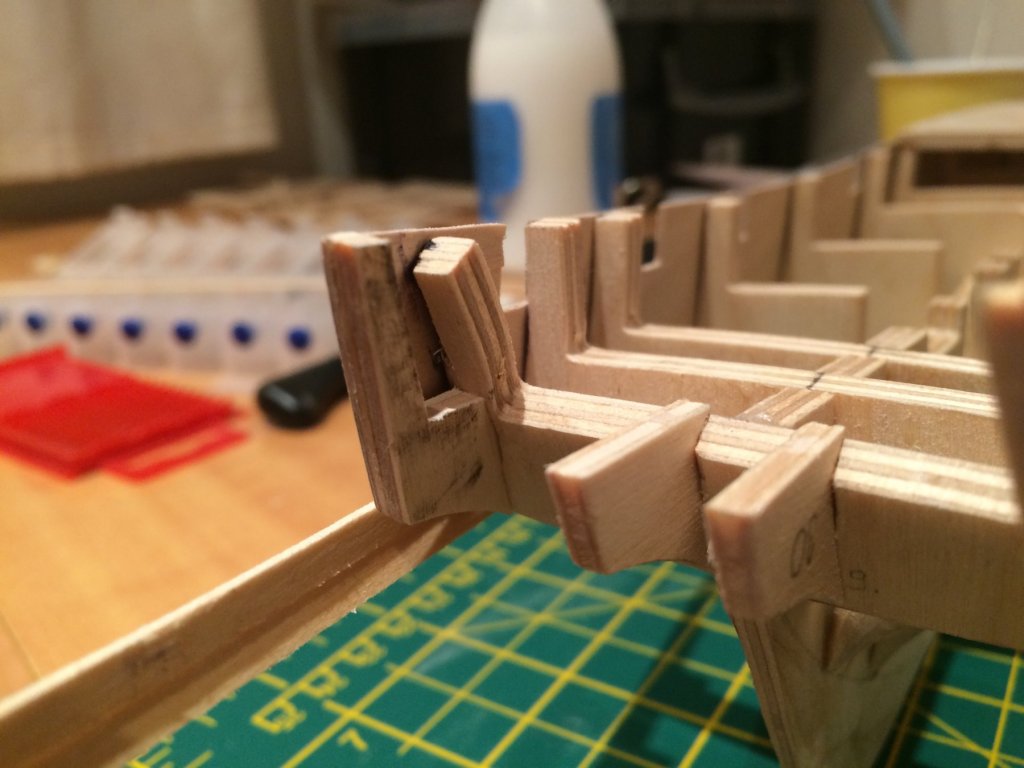
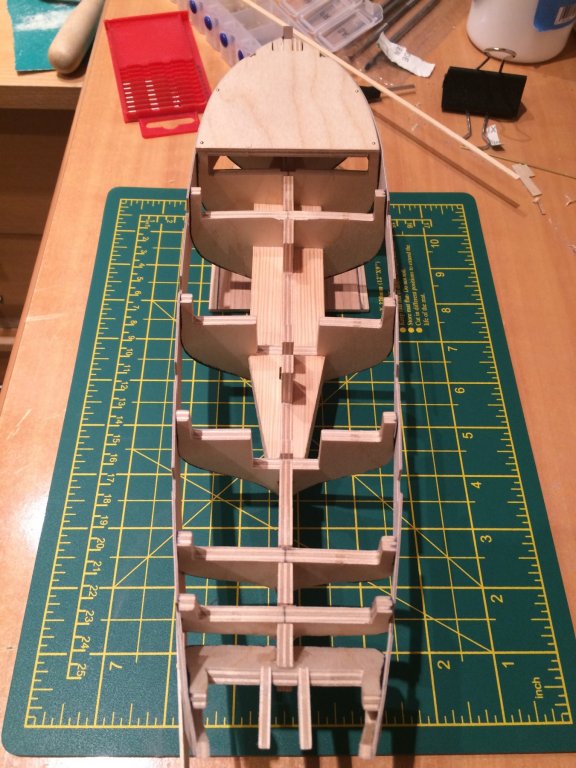
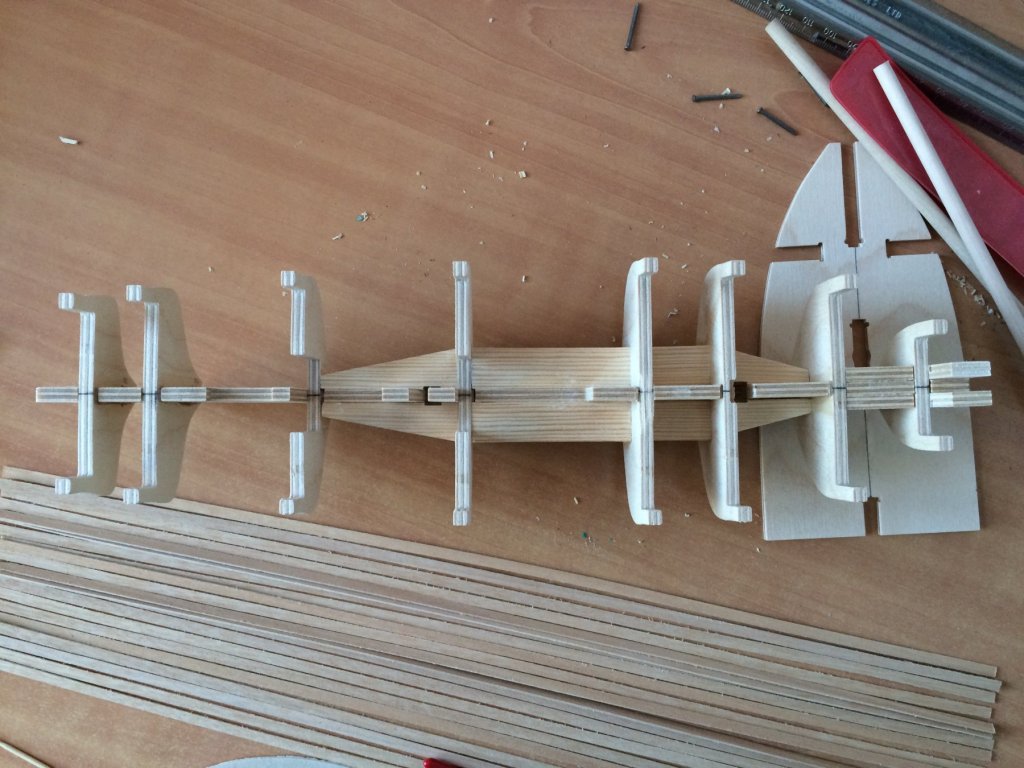
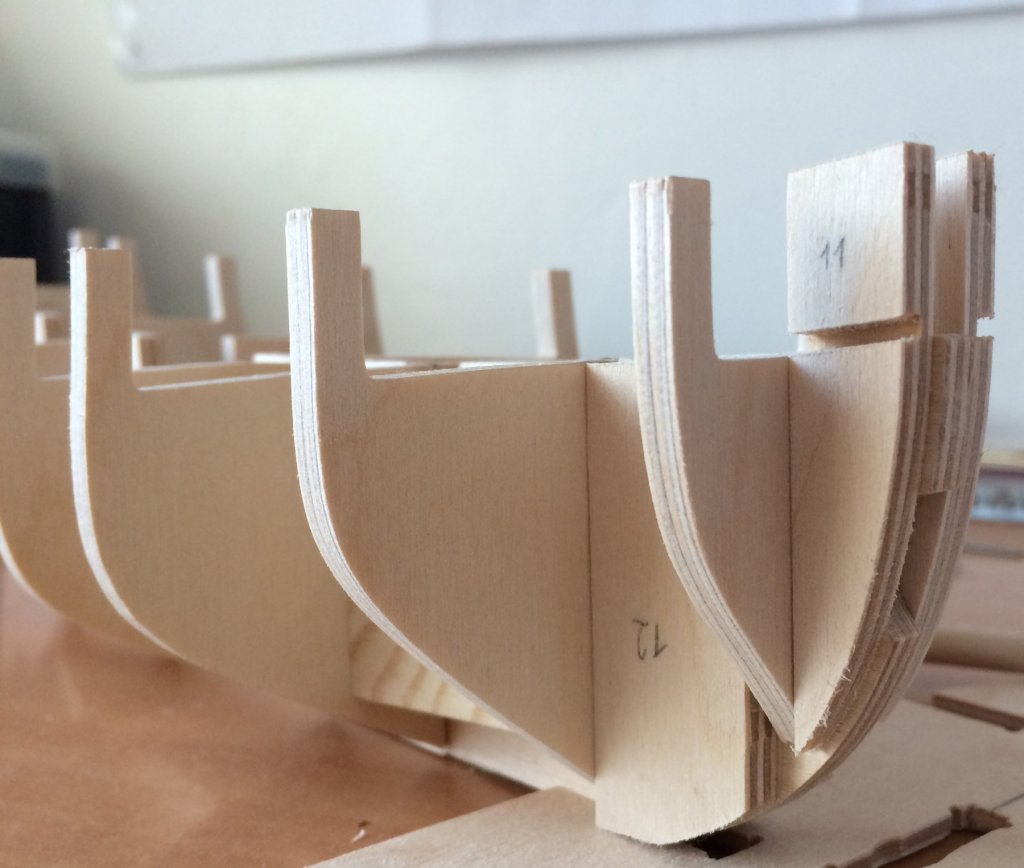
Hello All and welcome to my build log! To make things clear - I'm a genuine beginner that only recently became interested in this wonderful hobby. I've never attempted anything similar or even worked with wood before. If you're just like me then this thread might serve as a great example of what can you expect from your first build. I'll do my best to cover not only my successes but also the failures. To kick things off I should probably show you the contents of the box, but then again there are already 12 other Pickle build logs on this forum and numerous other reviews available online. I'm also (obviously) not an expert and won't pretend that I'm capable of judging the quality or historic accuracy of the kit, so I've allowed myself to skip this bit. I will however tell you in a nutshell what made me go with this particular kit for my first build. This was mainly due to: - Caldercraft being a highly respected manufacturer, often acclaimed for high quality of materials. - The fact that the instructions are available online, so I could have a look of what's to come and reassure myself that I can do it. - Many other build logs available on the forum. - I'll be honest with you - the copper plating stole my heart. You can see where I'm currently at with the actual build below - I've glued bulkheads 1-8 in place (made sure that the angles are right with Lego parts). The keel was a bit bendy, so I've added some reinforcements between bulkheads 2/3, 3/4, 4/5 and 5/6. Good idea (I think) but poor execution means that there is still a slight bend, but it's not nearly as big as before. I've glued the plank termination patterns in place (11 and upside down 12 on the photo below) and am currently wondering: Should I add filler blocks here? I've seen some people do it and others not really and am a bit confused. I also had a go at the bearding line and trimming bulkheads 7 and 8, so that they fit it. Not sure if this was done correctly - I did this according to the instructions, but I've seen that quite a lot of people left the bulkheads alone and adjusted the bearding line instead. That's it for now. All comments welcome.

- 37 replies
-
- 6
-
-
- pickle
- caldercraft
- (and 1 more)
-
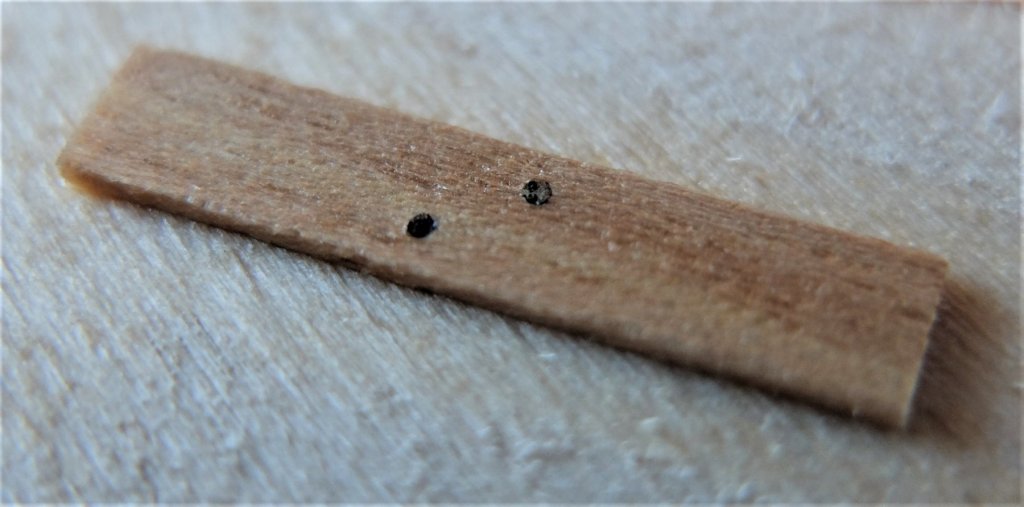
Thanks everyone for your great advice and good examples - much appreciated. I had a couple of more goes using different stains on the toothpicks. The results can be seen below. I think that the most realistic attempt is the one on the right of the middle plank - subtle, but still visible.
-
I'm in a bit of a pickle (pun not intended). I had a go at treenailing and I'm not entirely happy with how it looks. The plank is Tanganyika. I used the Admiralty walnut wood stain on birch toothpicks and the end result seems way too dark. Using no stain results in them being lighter than the plank. I don't really have any other wood stains at hand and was thinking about dipping them in some strong tea (no milk ;-P).
-
Thank you for your reply Chris - it was super helpful. I agree that testing it out is the way to go, but I wanted to narrow down the number of options first. Knowing now what this technique is called (treenailing) I've managed to find a few very informative threads here on the forum. Looks like I was just about right with the 0.4 [mm] diameter. I know what I want to do now (graphite caulking and birch toothpick treenails) and will give it a go on a piece of scrap. If it proves to challenging I'll settle for something easier.
- 6 replies
-
- 2
-
-
- deck planking
- caldercraft
- (and 1 more)