
Archie
-
Posts
26 -
Joined
-
Last visited
Recent Profile Visitors
833 profile views


-
 GrandpaPhil reacted to a post in a topic:
USCG Eagle by Archie - Constructo - Scale 1:185 - first build - Modified - Steam Barque Whaler
GrandpaPhil reacted to a post in a topic:
USCG Eagle by Archie - Constructo - Scale 1:185 - first build - Modified - Steam Barque Whaler
-
GrandpaPhil reacted to a post in a topic:
USCG Eagle by Archie - Constructo - Scale 1:185 - first build - Modified - Steam Barque Whaler
-
Archie reacted to a post in a topic:
Nordsee Krabbenkutter 1900 by popeye the sailor - FINISHED - Authentic Models - 1:48
-
Archie reacted to a post in a topic:
Nordsee Krabbenkutter 1900 by popeye the sailor - FINISHED - Authentic Models - 1:48
-
Tom E reacted to a post in a topic:
USCG Eagle by Archie - Constructo - Scale 1:185 - first build - Modified - Steam Barque Whaler
-
Archie reacted to a post in a topic:
USCG Eagle by Archie - Constructo - Scale 1:185 - first build - Modified - Steam Barque Whaler
-
popeye the sailor reacted to a post in a topic:
USCG Eagle by Archie - Constructo - Scale 1:185 - first build - Modified - Steam Barque Whaler
-
popeye the sailor reacted to a post in a topic:
USCG Eagle by Archie - Constructo - Scale 1:185 - first build - Modified - Steam Barque Whaler
-
popeye the sailor reacted to a post in a topic:
USCG Eagle by Archie - Constructo - Scale 1:185 - first build - Modified - Steam Barque Whaler
-
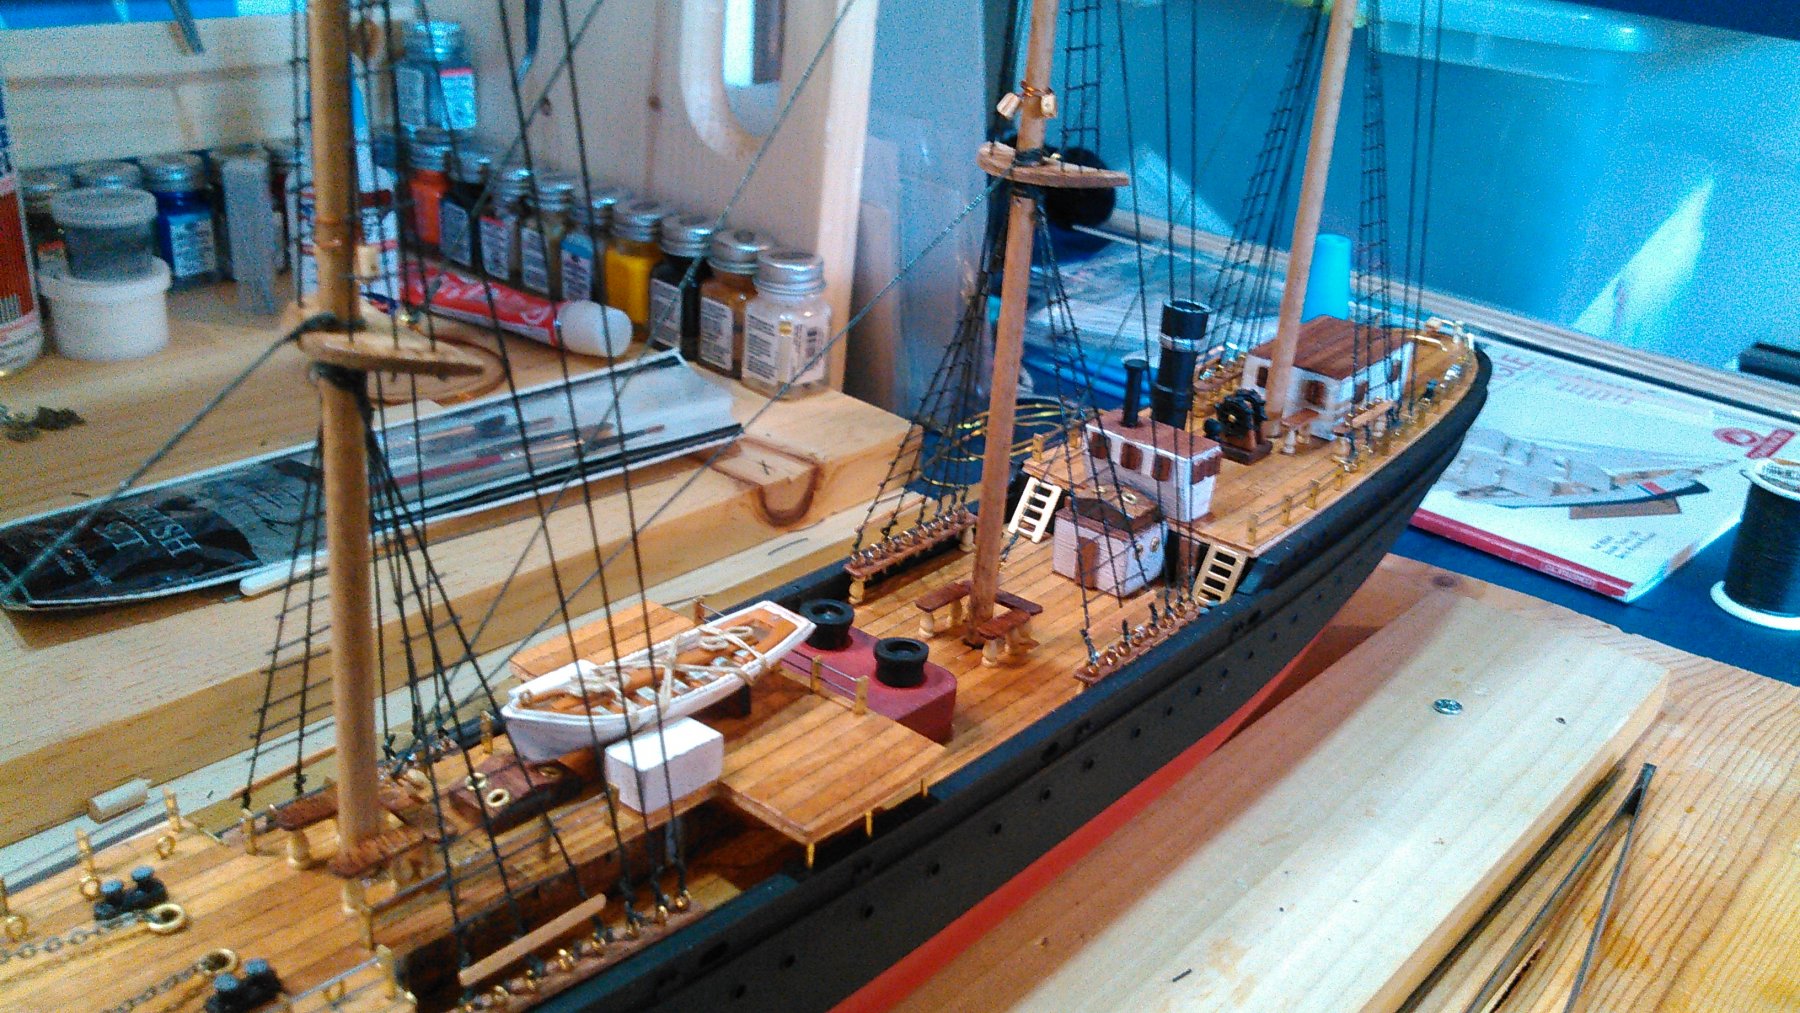
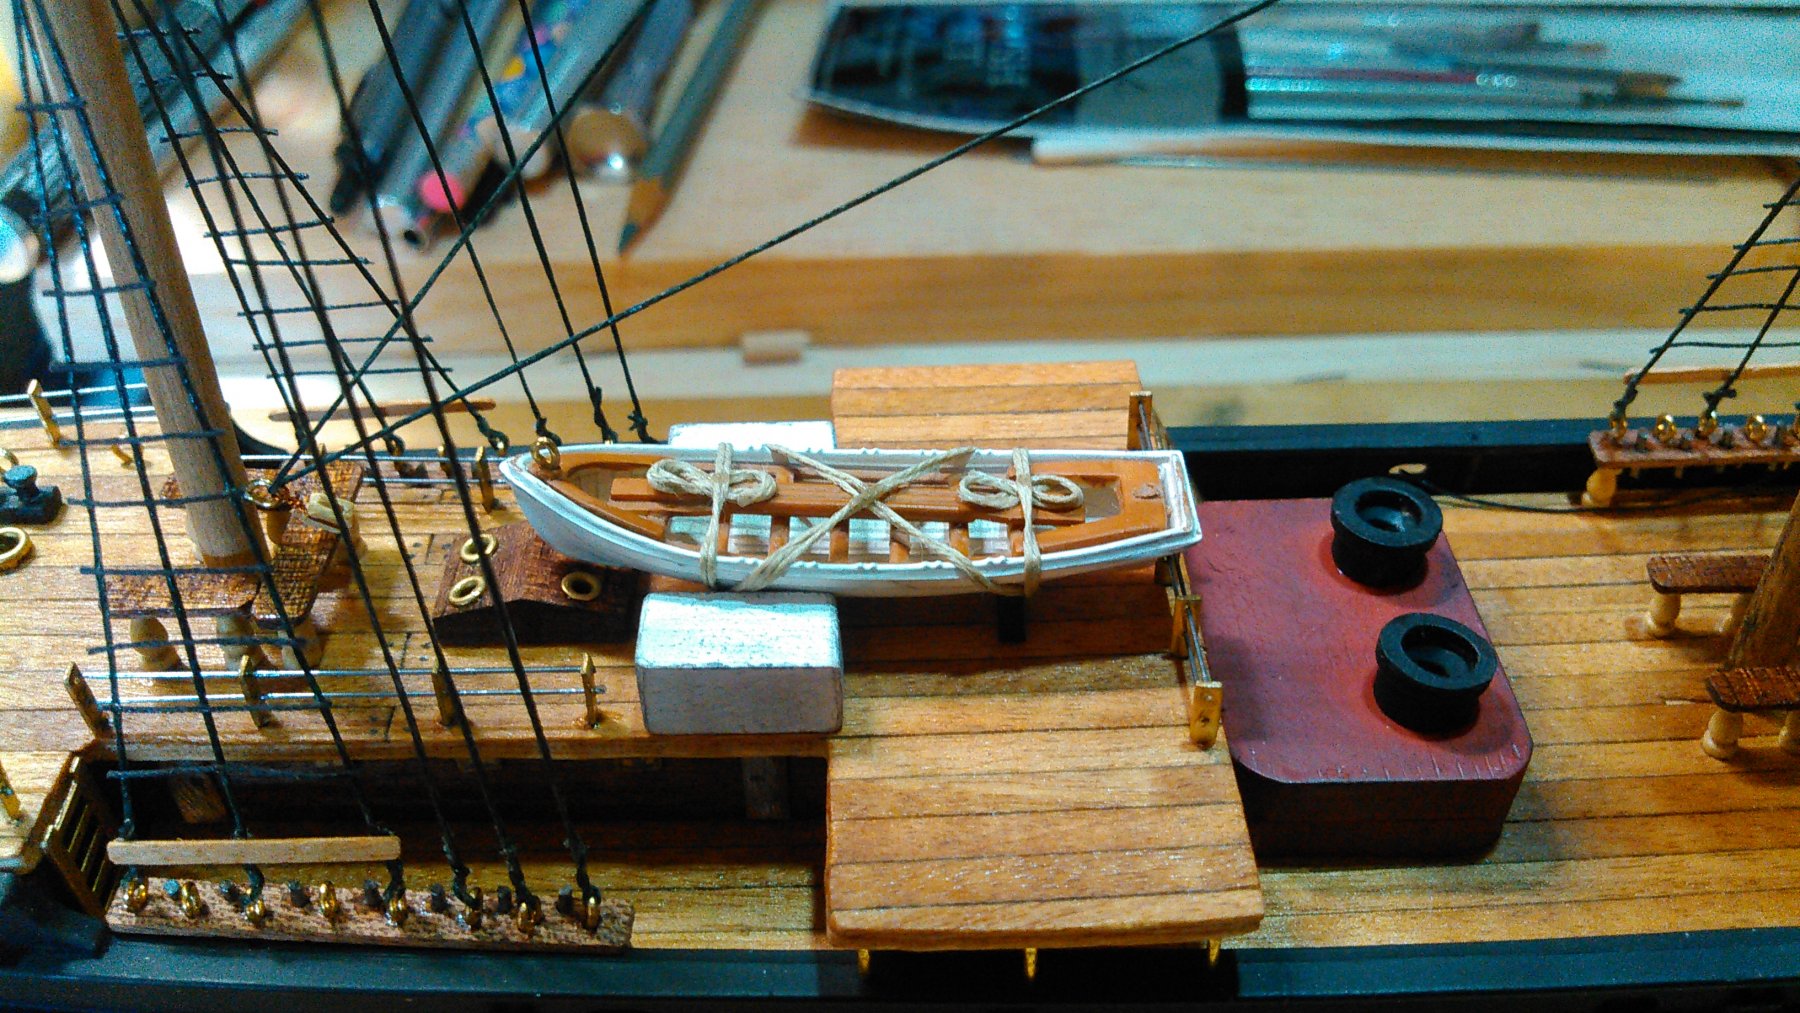
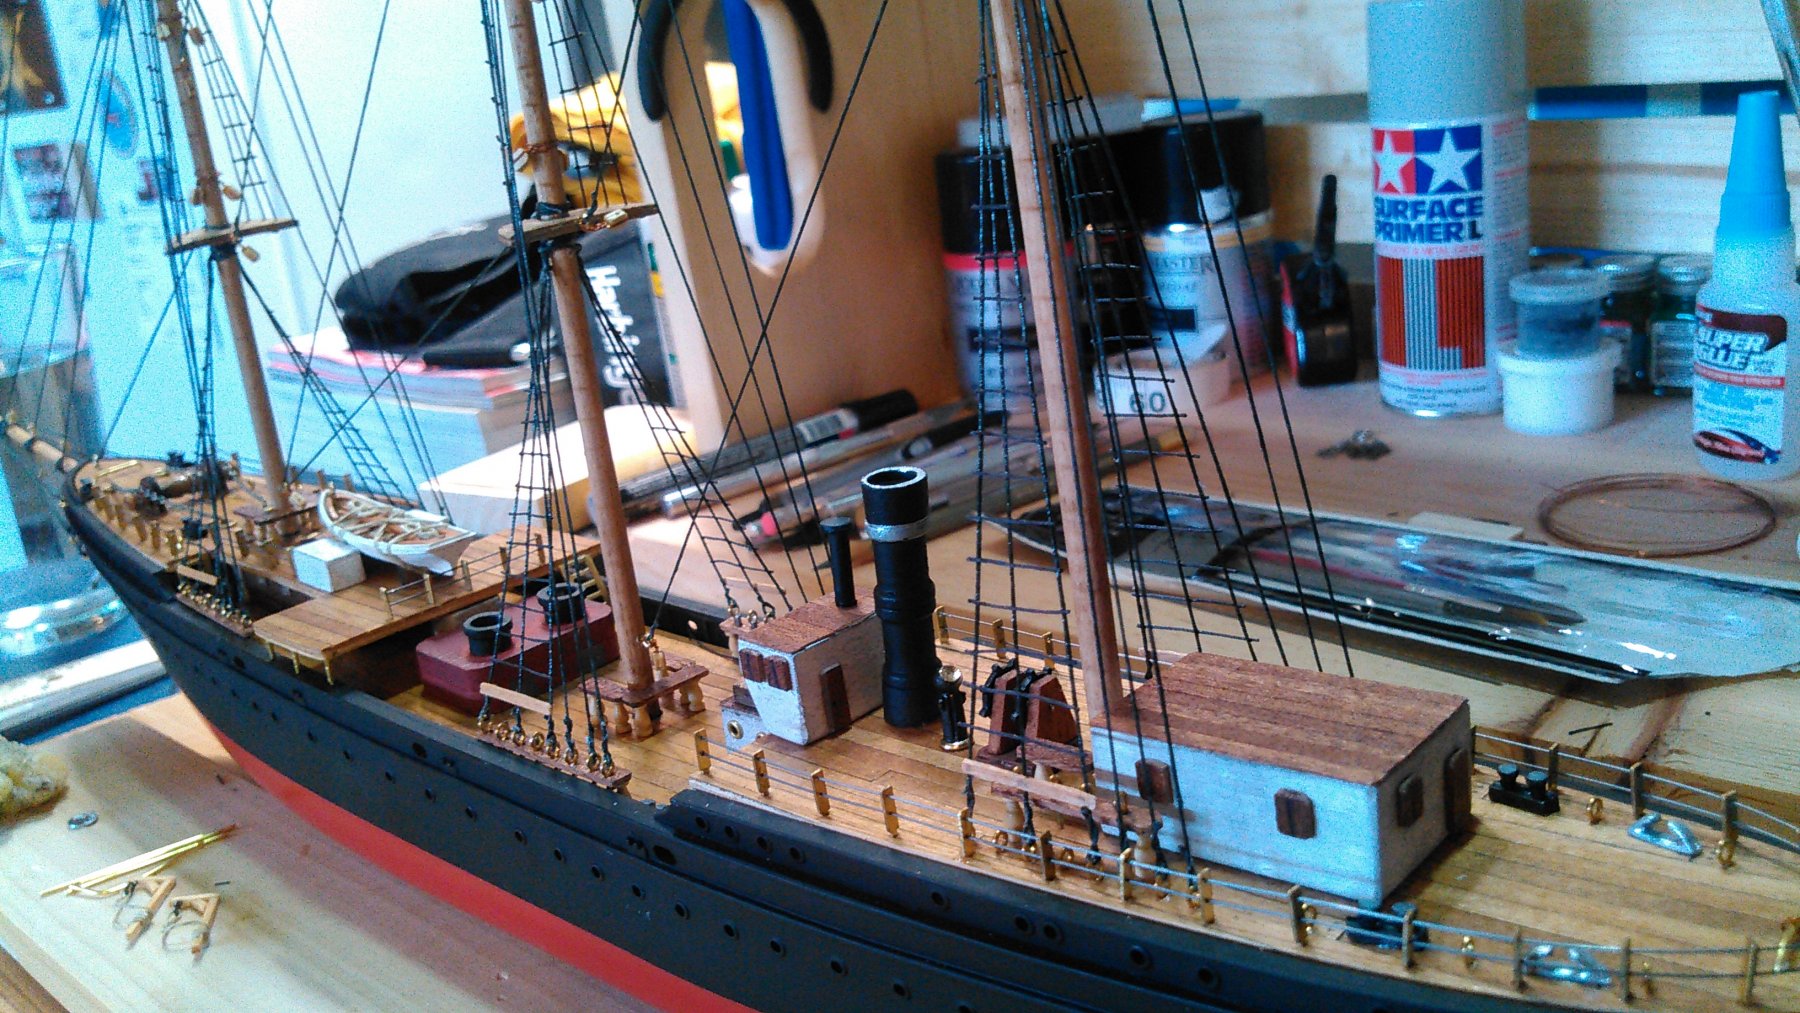
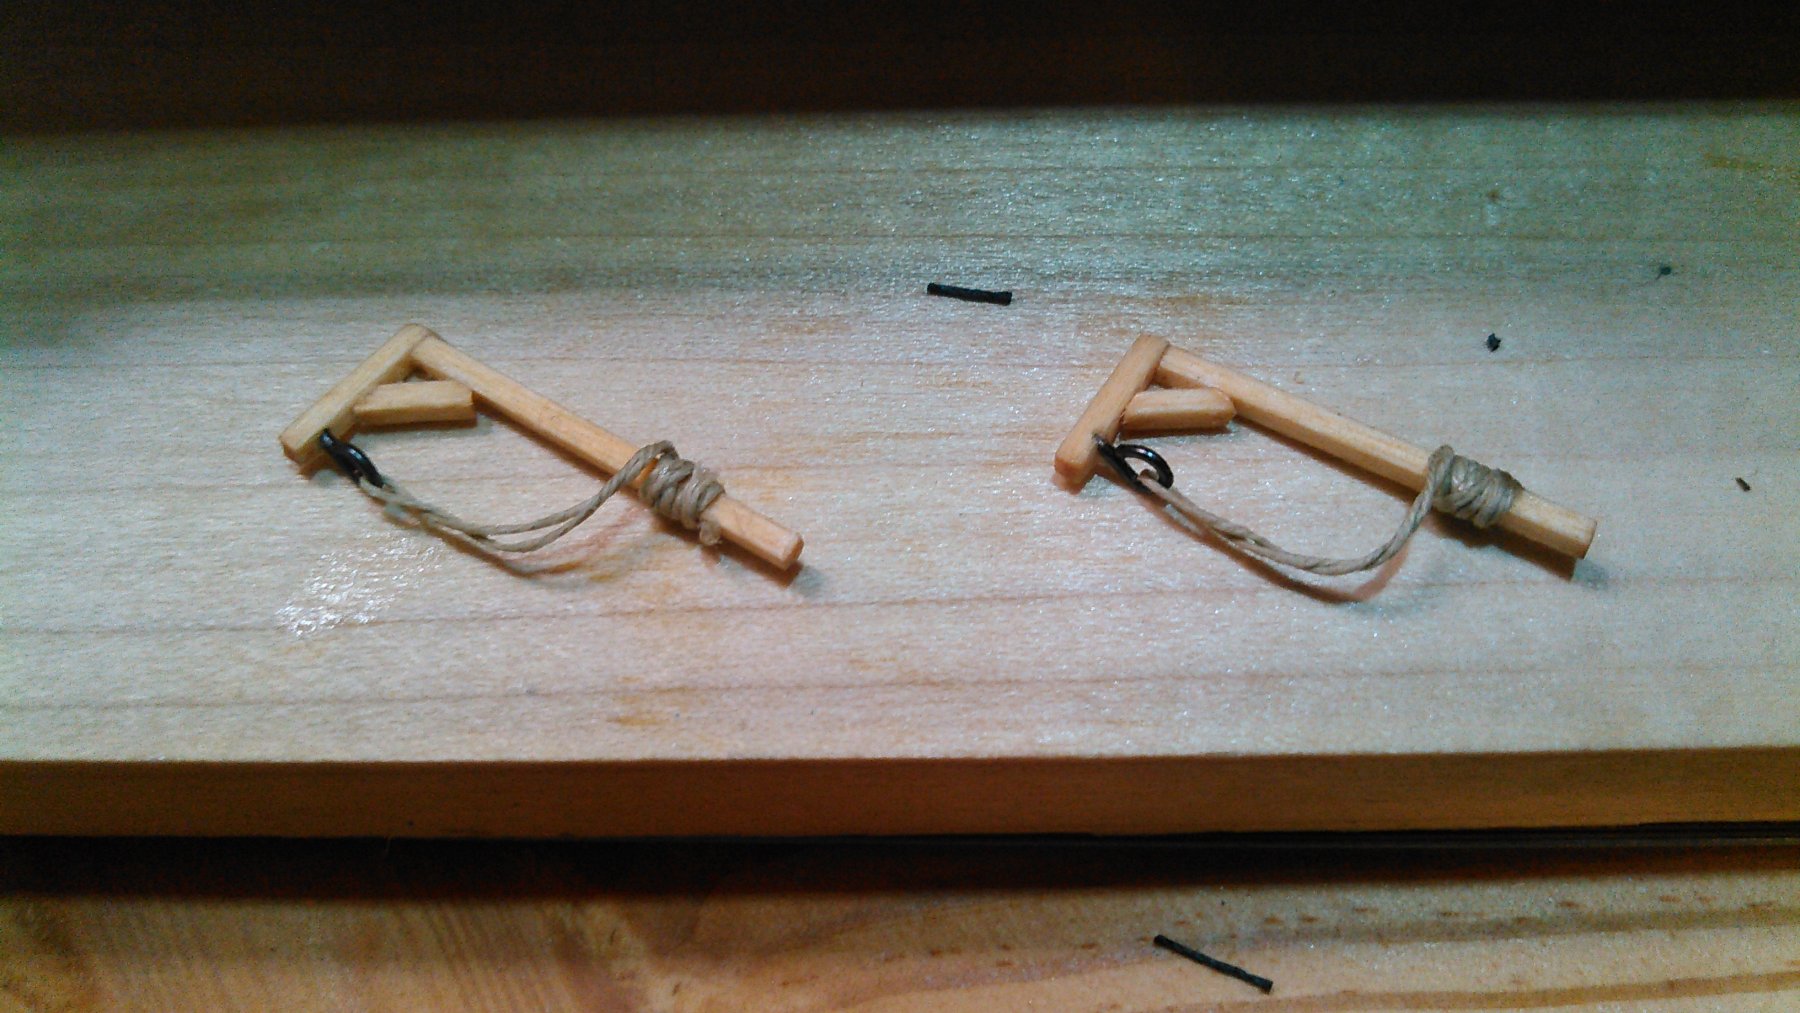
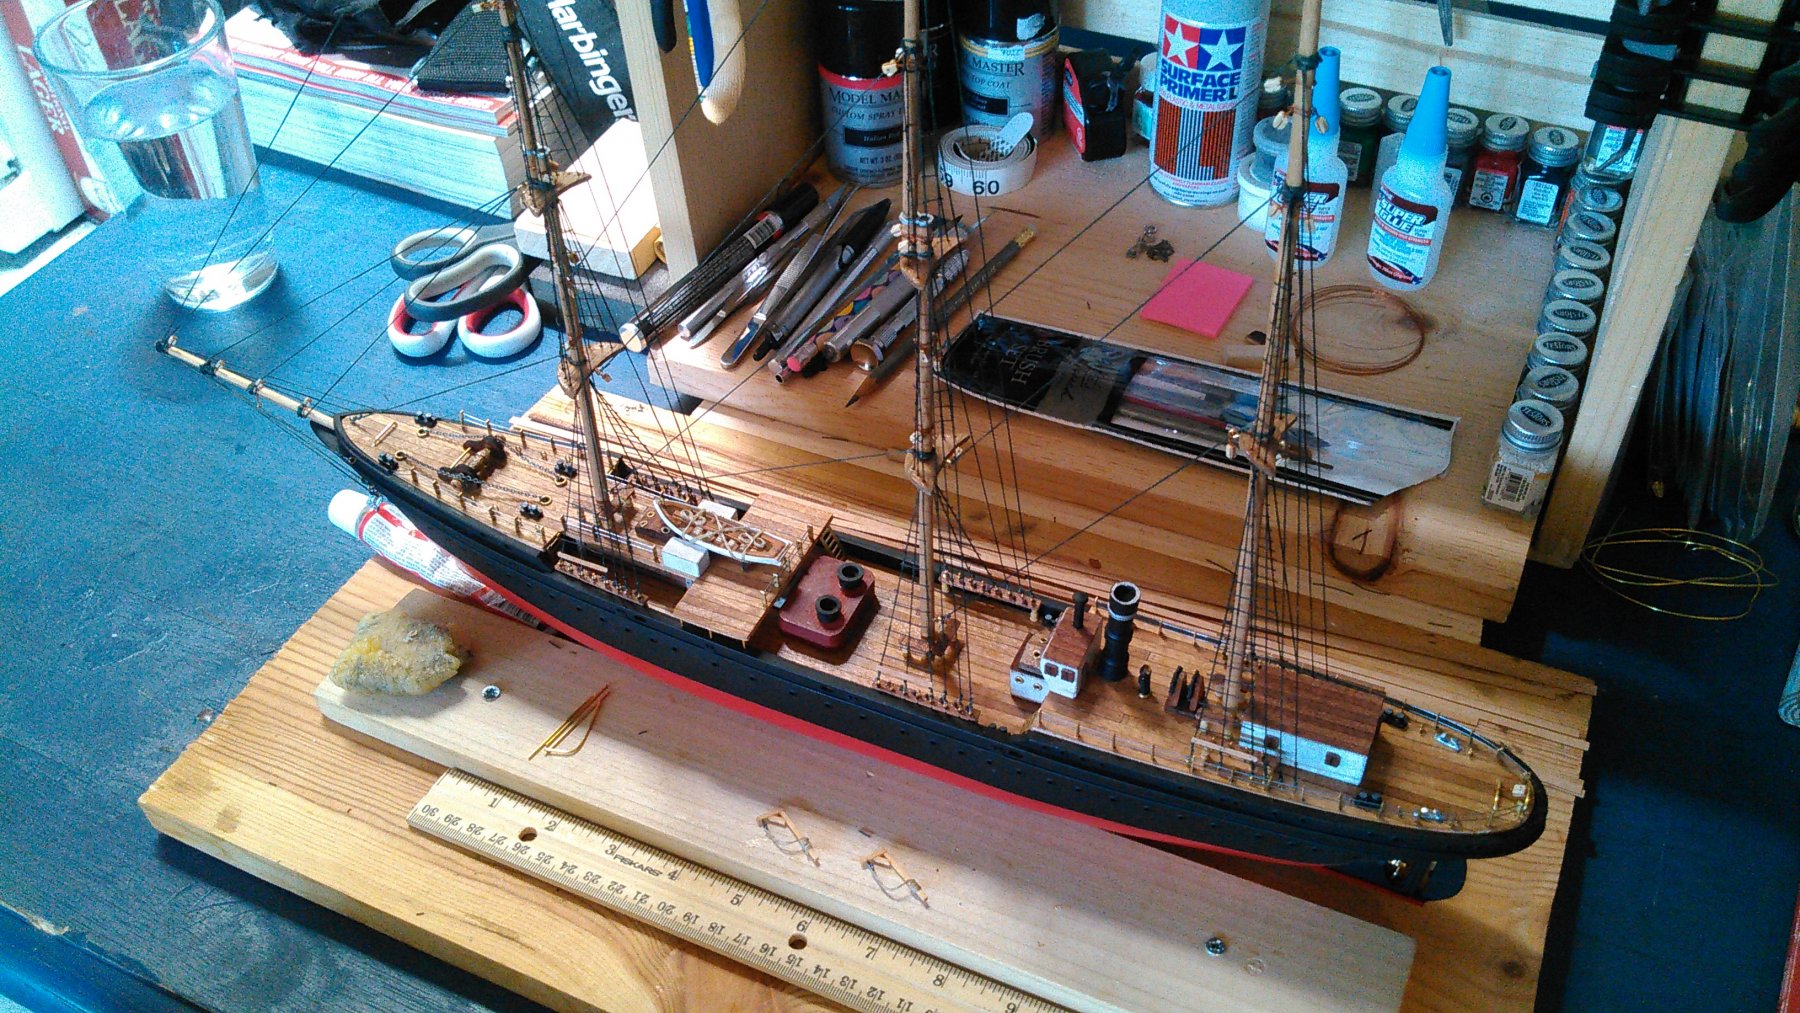
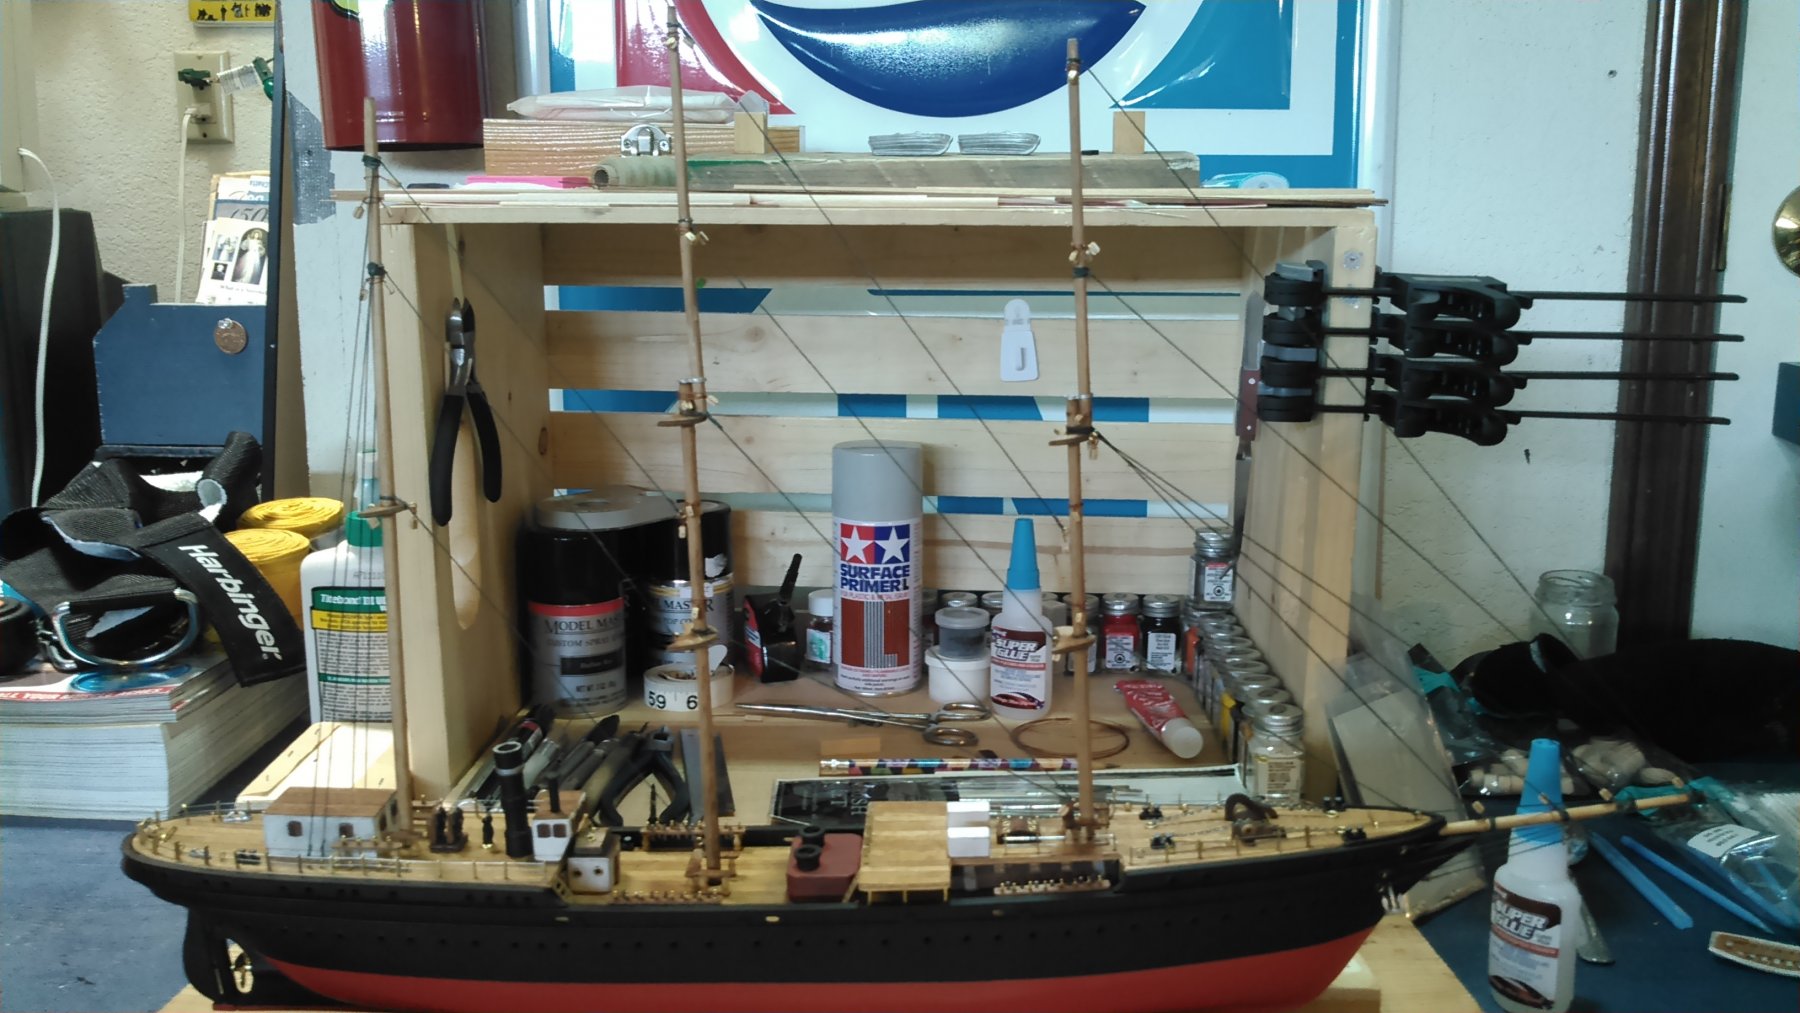
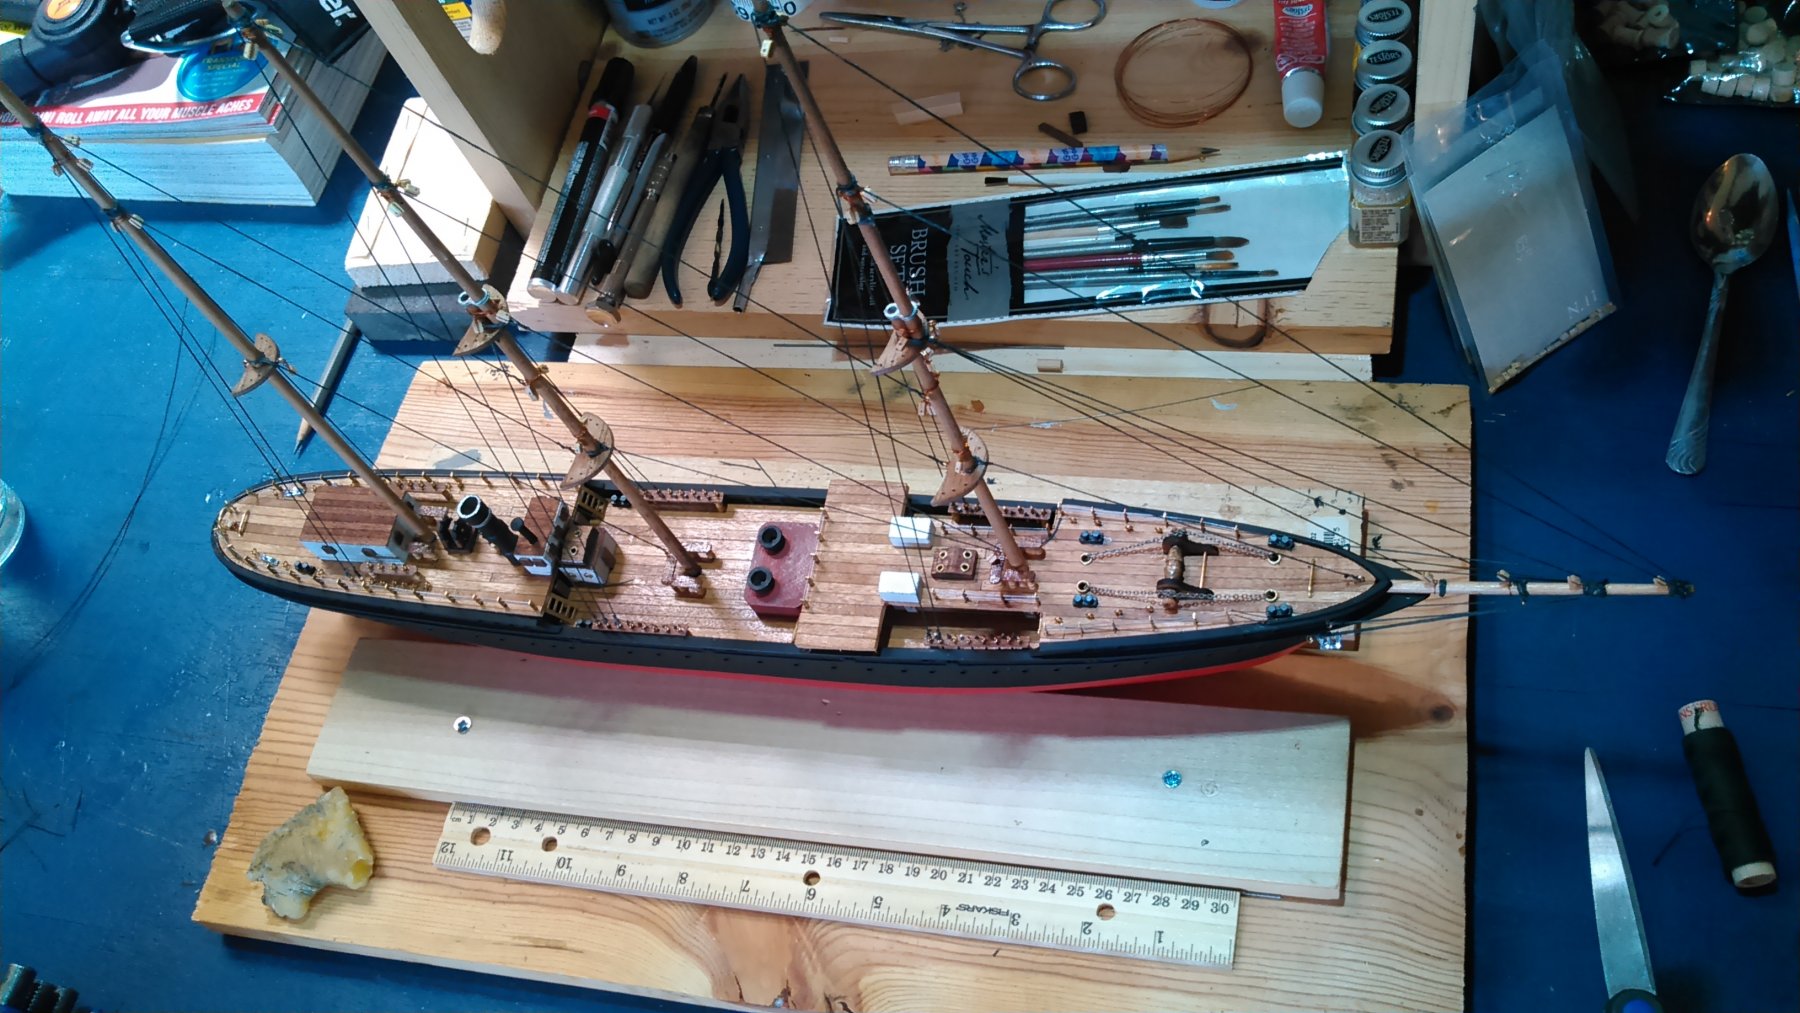
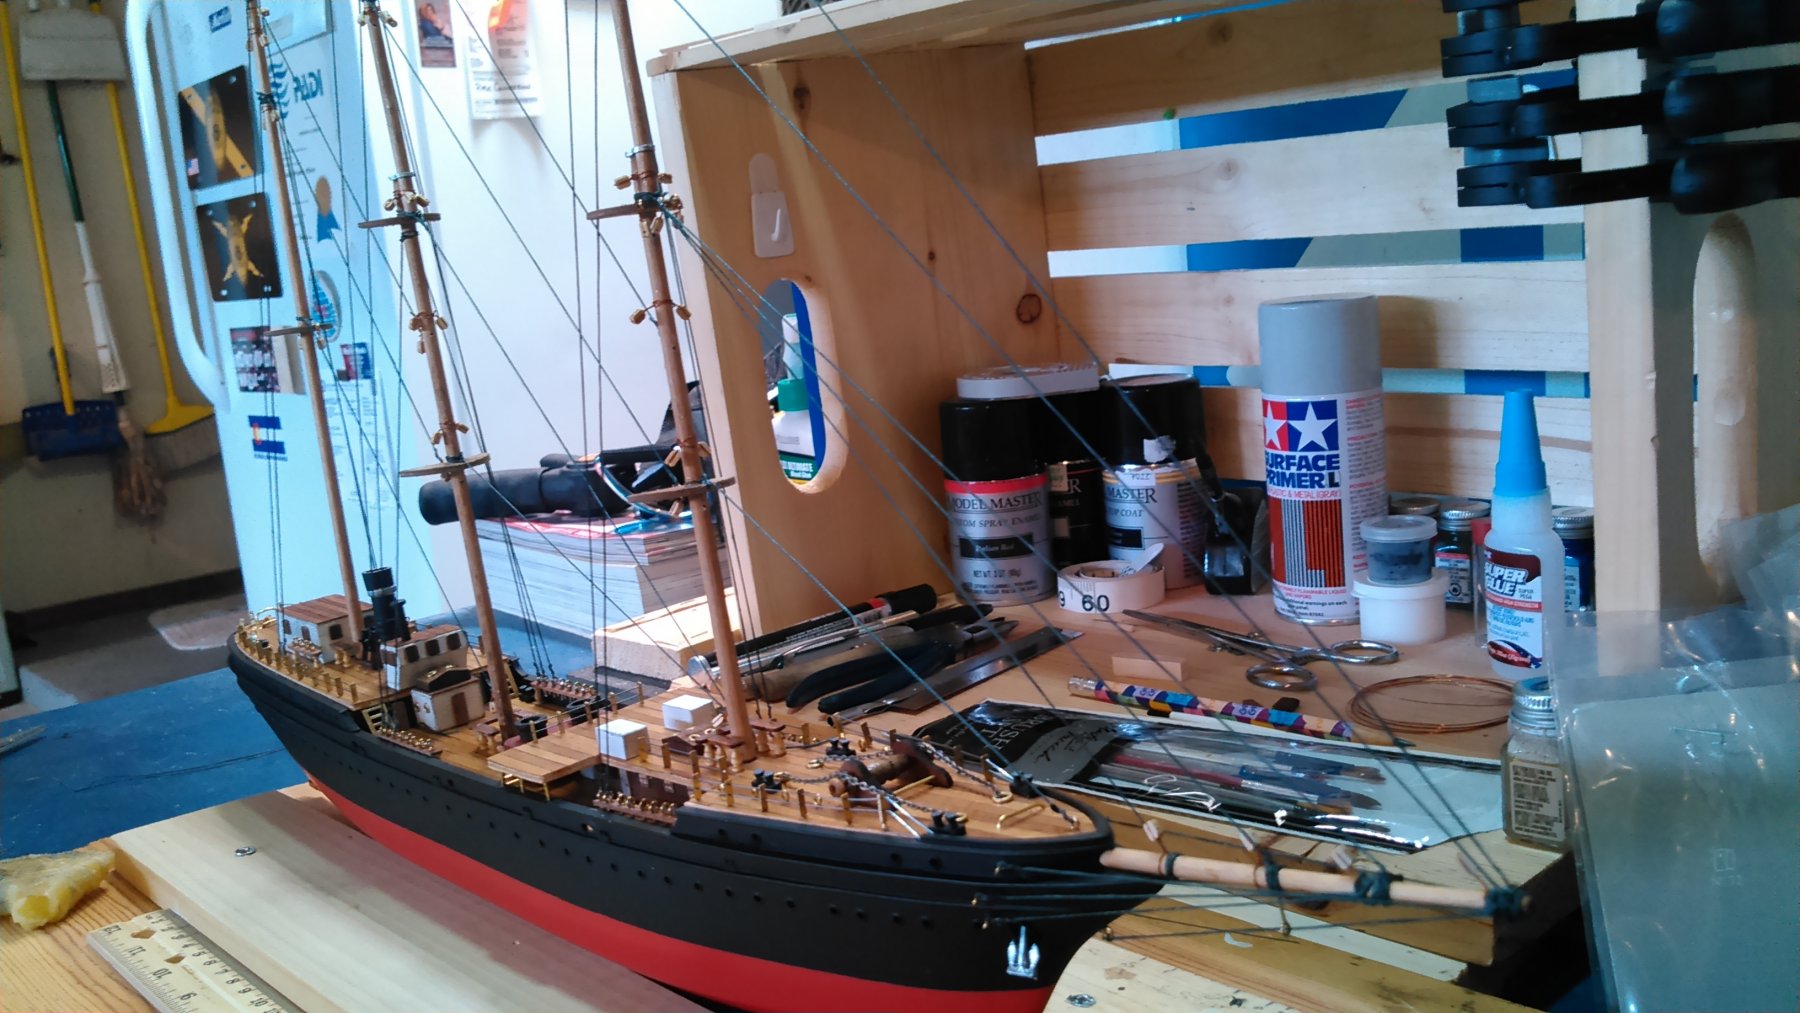
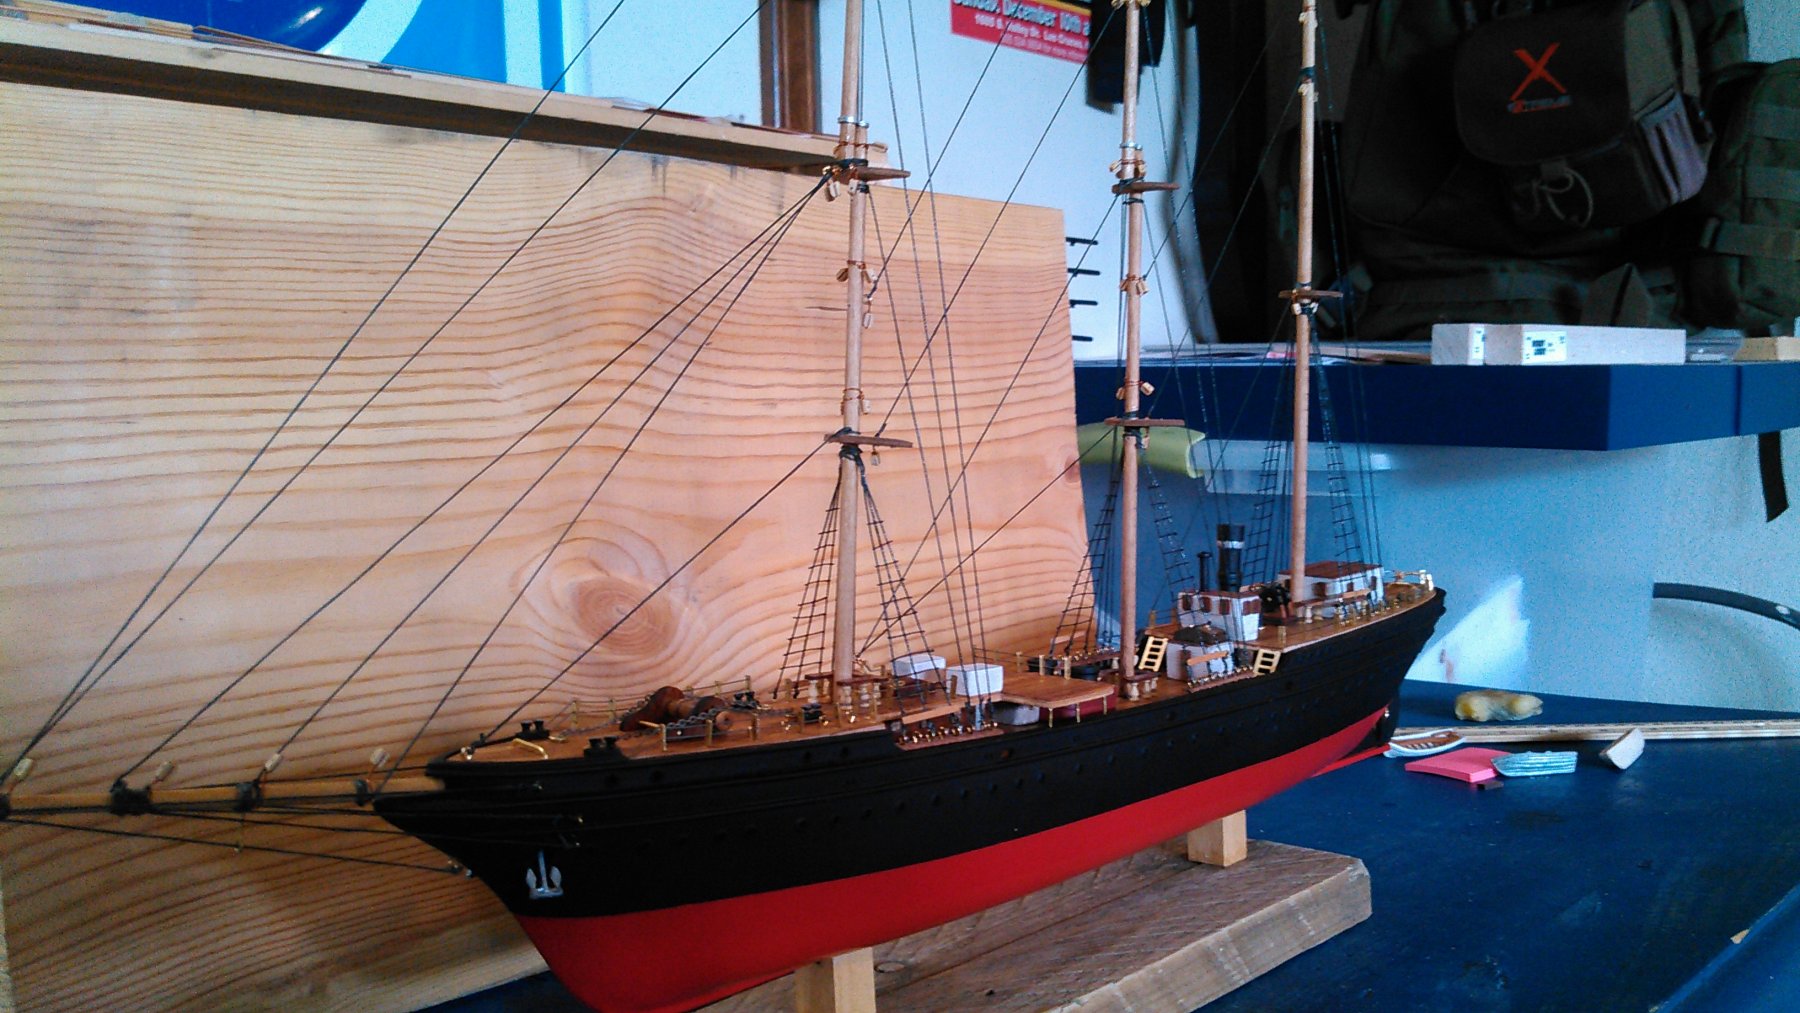
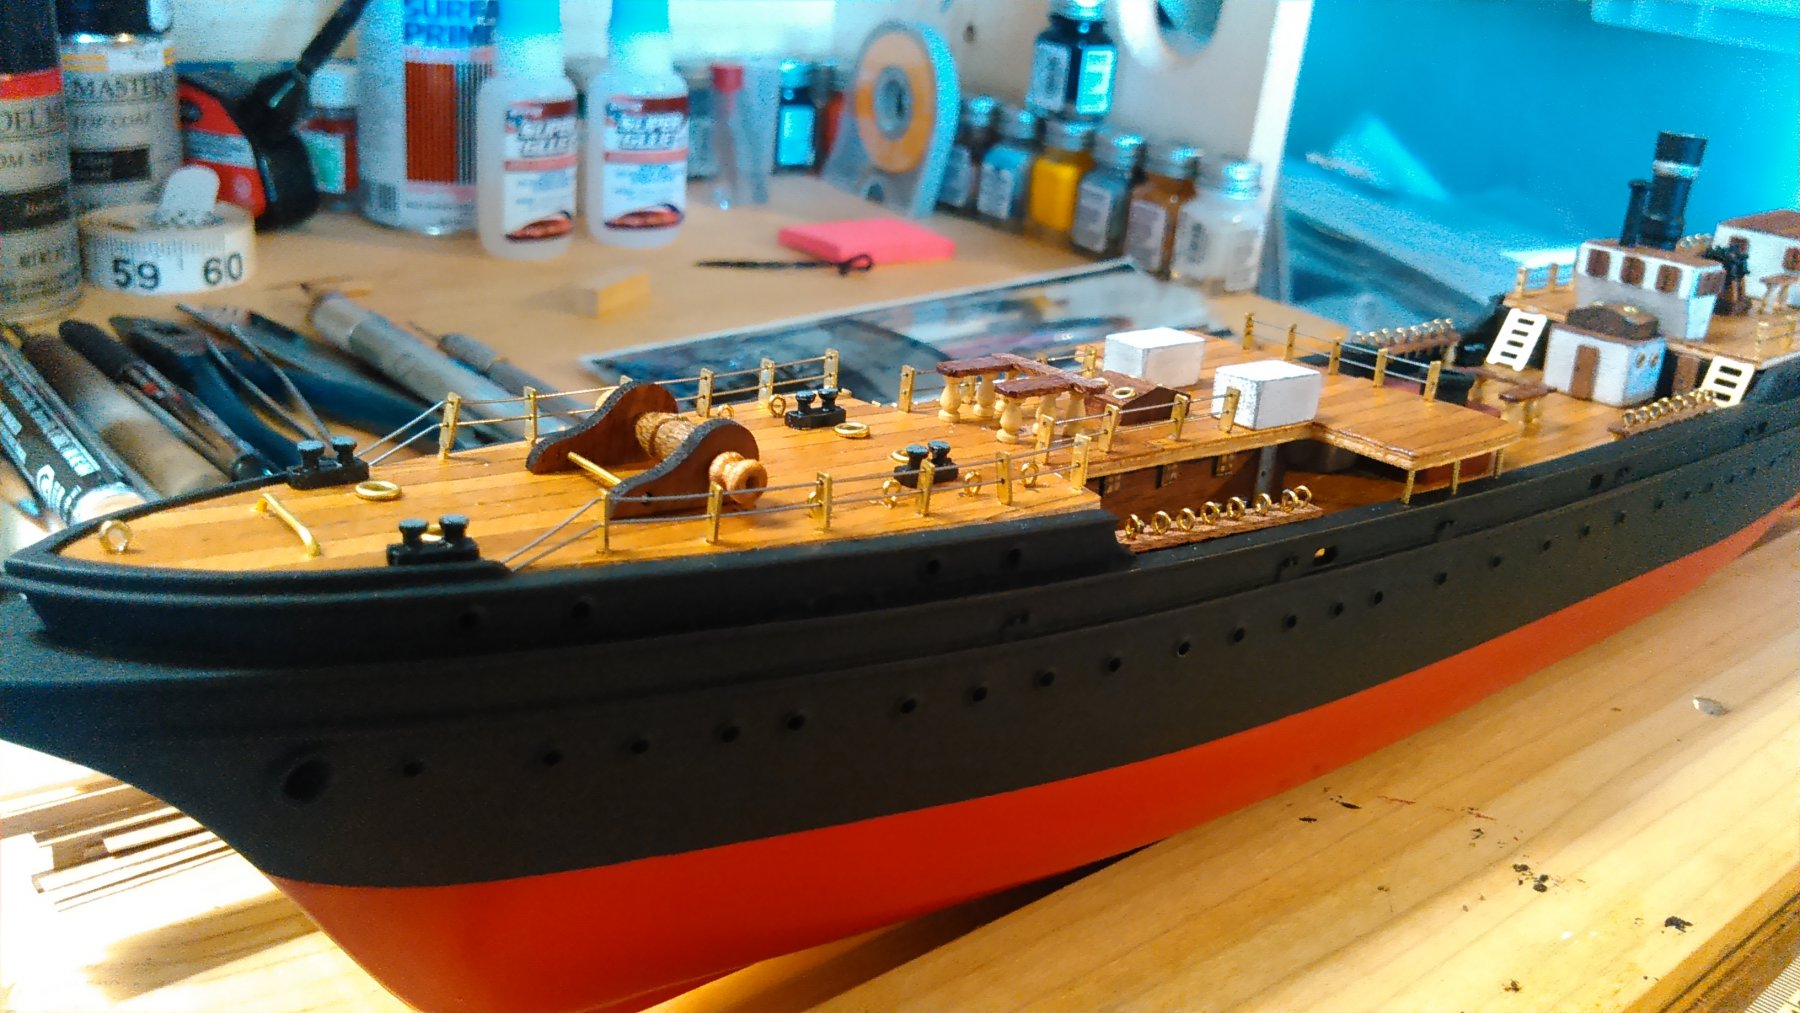
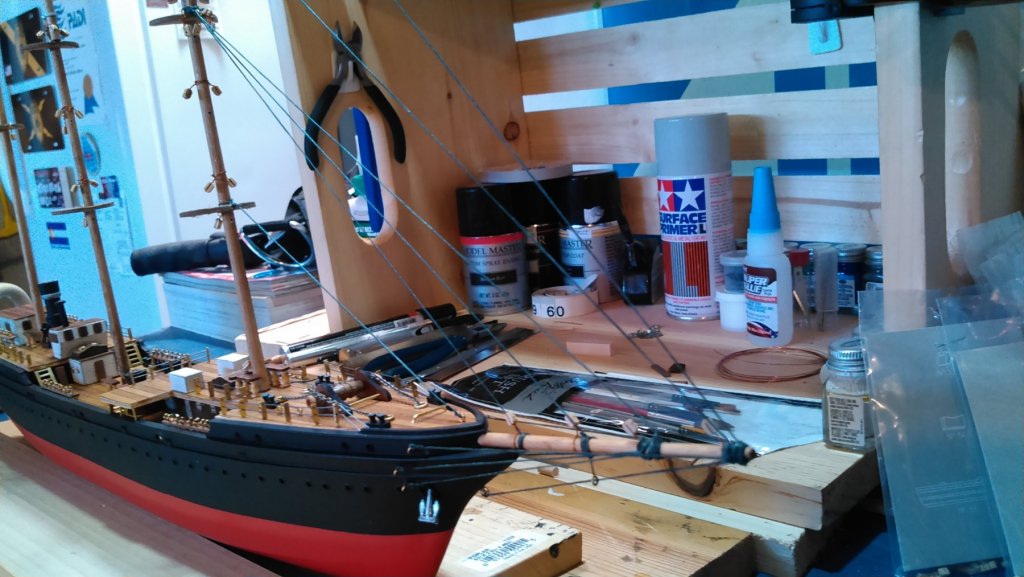
 I've been busy with life and dogs and yard care and bluegrass guitar and watching the builds come to life on the site... but have been picking away a bit at a time on the whaler. I've finished the standing rigging. This was time consuming, and I have much room for improvement. But it is done, and now I know what I'm in for on the next one.... I added a spare & lashed whale boat to the foredeck, and scratch built my first two davits. I will have one set each on the starboard and port sides of the flying fo'c'sle just aft of the lashed spare - which will mean relocation of one of the ladders - as well as one set on the starboard side of the aft quarterdeck. The port side aft will be taken up with a lifeboat/launch, unless I can fit it on top of the deckhouse aft, which is where I had envisioned it. But that will have to wait until the spanker booms are up to see if there is sufficient clearance. So, next up will be finishing the remaining two davit sets, and then I'll get started on the spars and running rigging. I've decided to furl sails so that will be another learning curve.... Until next time. Cheers.
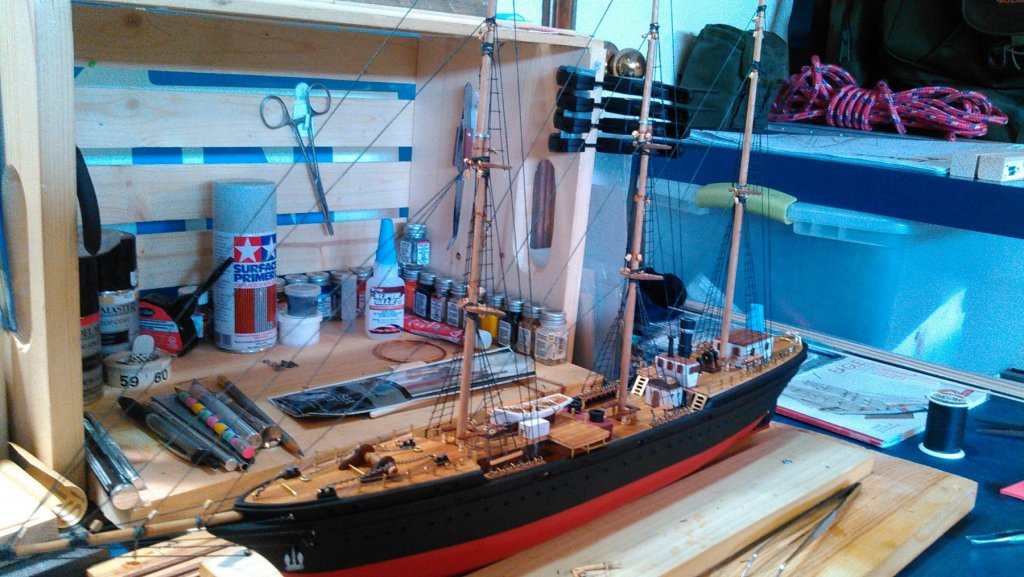


- 37 replies
-
- 3
-
-
- eagle
- constructo
- (and 1 more)
-
Archie reacted to a post in a topic:
USCG Eagle by Archie - Constructo - Scale 1:185 - first build - Modified - Steam Barque Whaler
-
By the way, if someone could explain to me why it is that a bunch of photos that I uploaded but did not manually insert into my narrative keep showing up at the end of my posts, that would be swell. Because I can't seem to delete them no matter what.... Cheers. Archie
- 37 replies
-
- 1
-
-
- eagle
- constructo
- (and 1 more)
-
Archie reacted to a post in a topic:
Enterprise 1799 by mikiek - FINISHED - Constructo - 1:51
-
mtaylor reacted to a post in a topic:
USCG Eagle by Archie - Constructo - Scale 1:185 - first build - Modified - Steam Barque Whaler
-
Tom E reacted to a post in a topic:
USCG Eagle by Archie - Constructo - Scale 1:185 - first build - Modified - Steam Barque Whaler
-
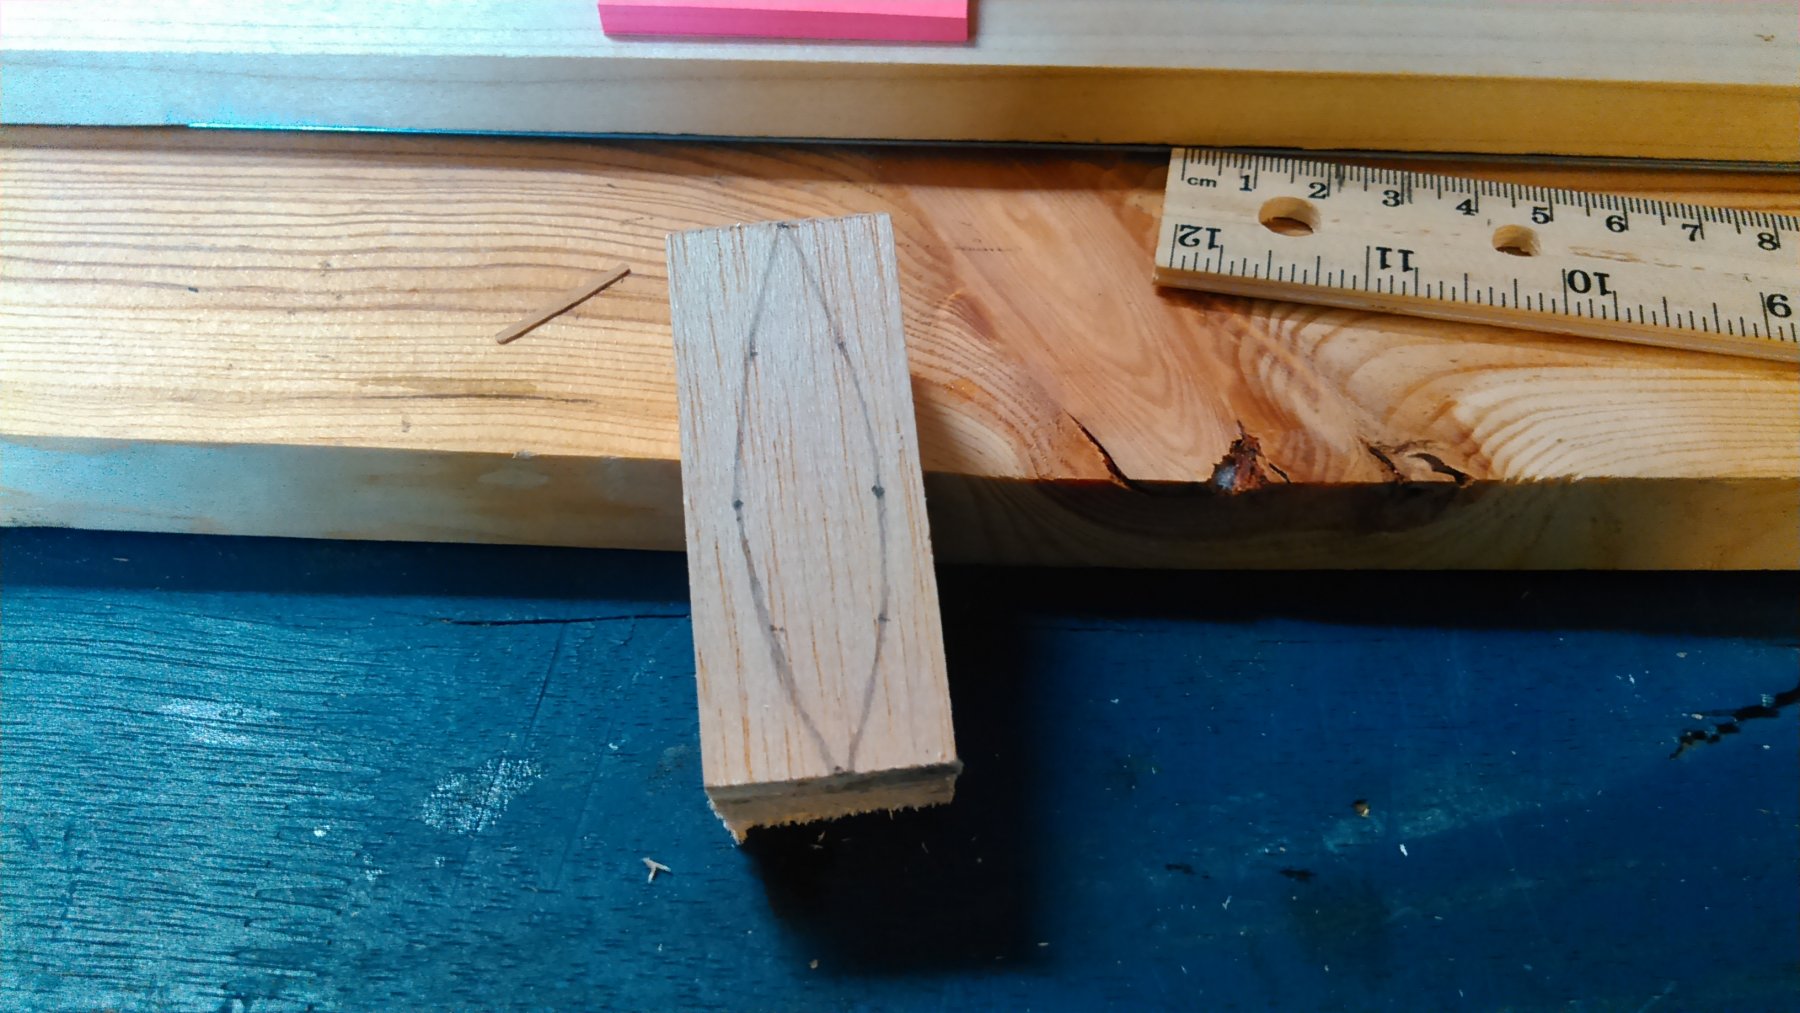
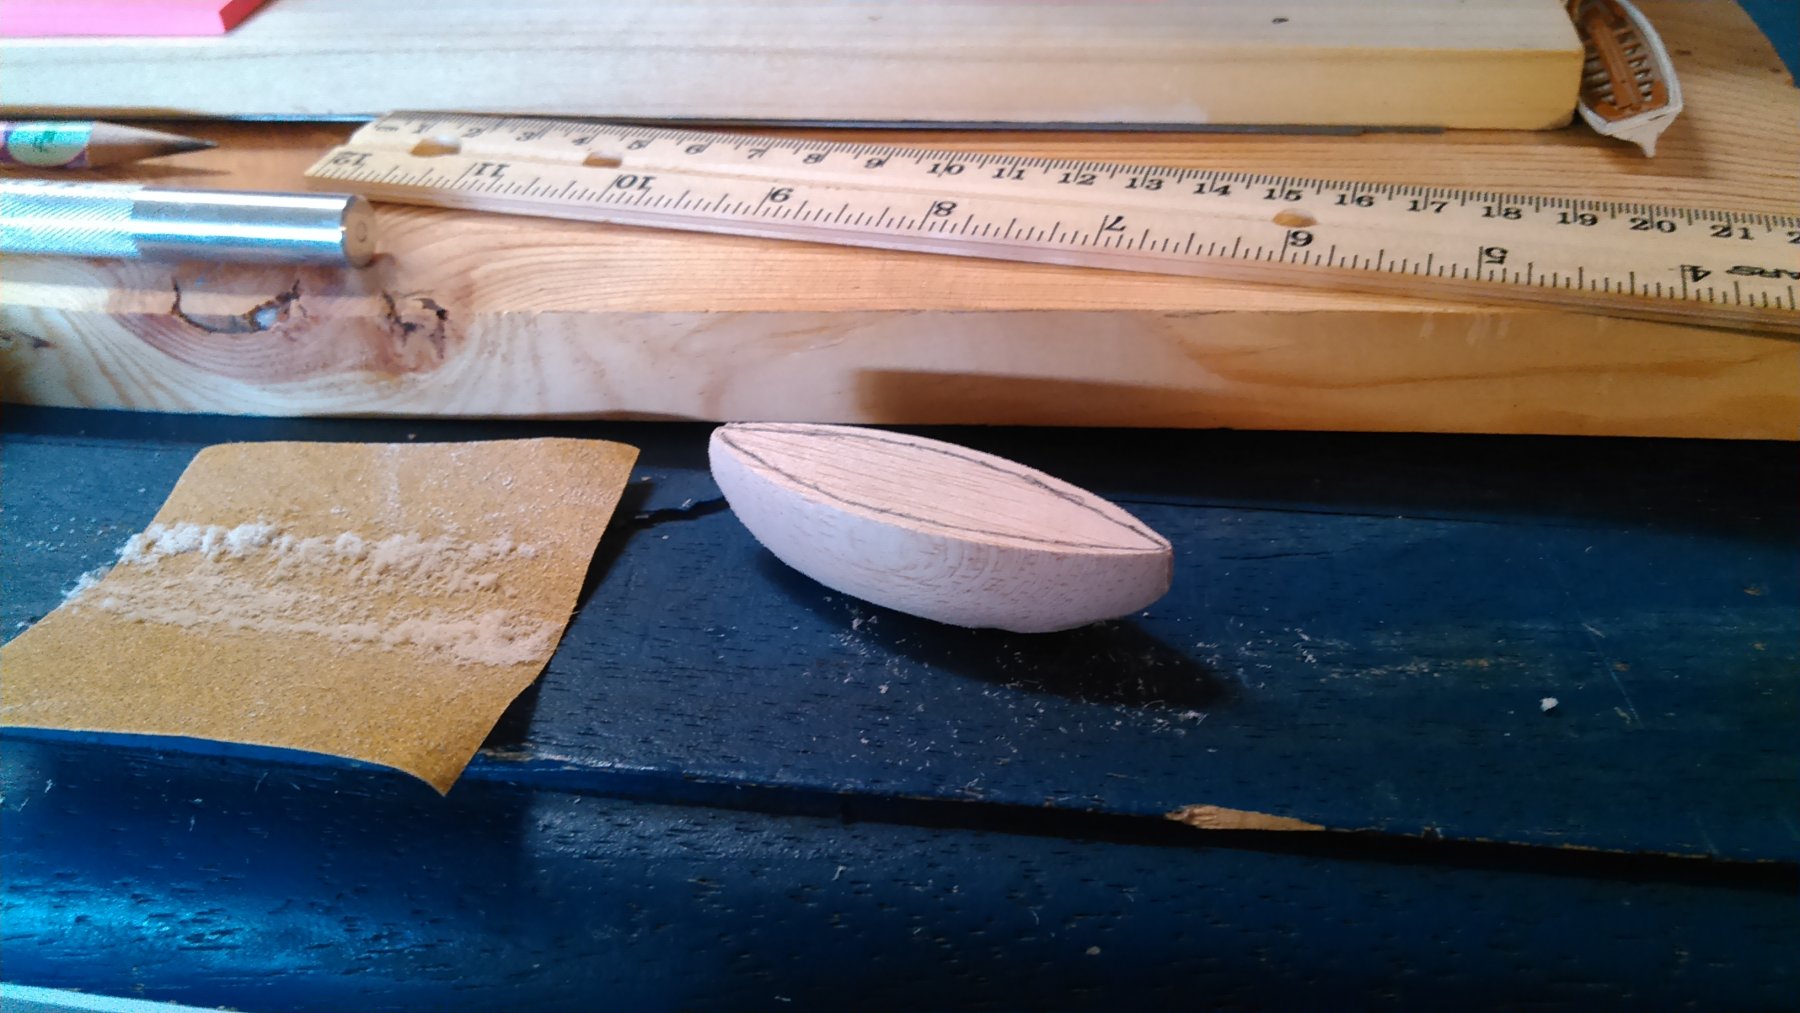
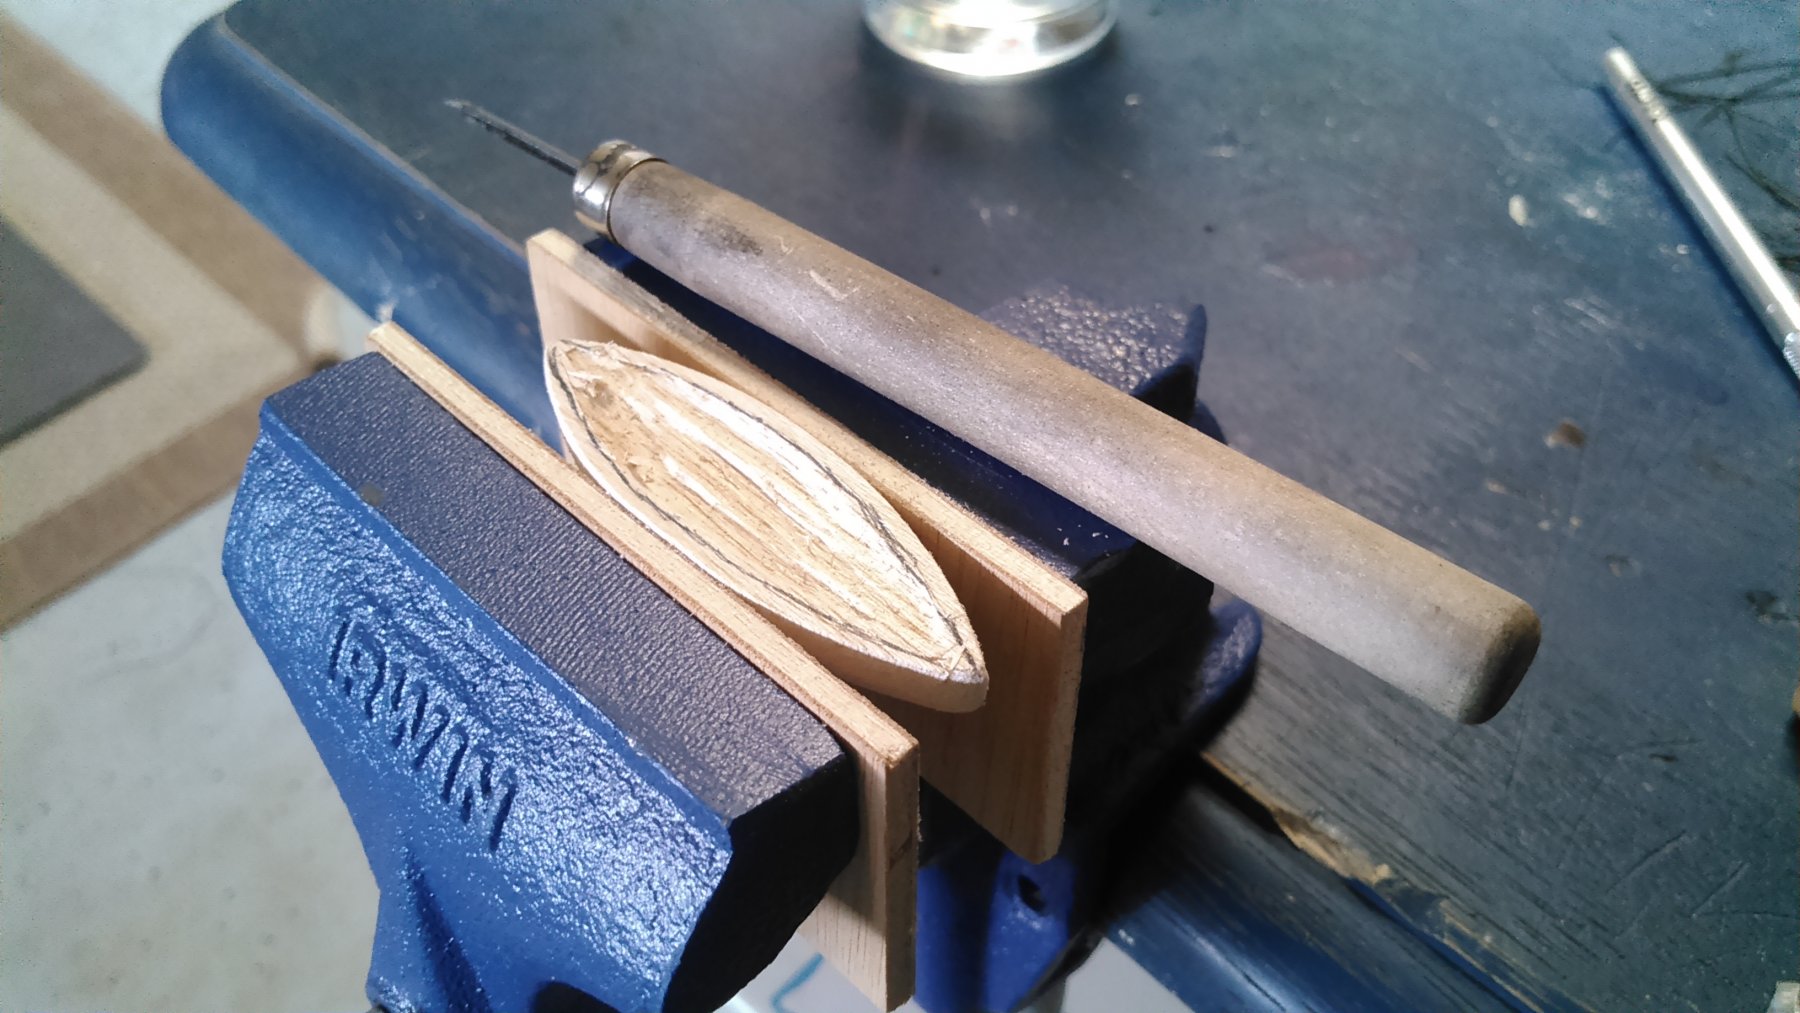
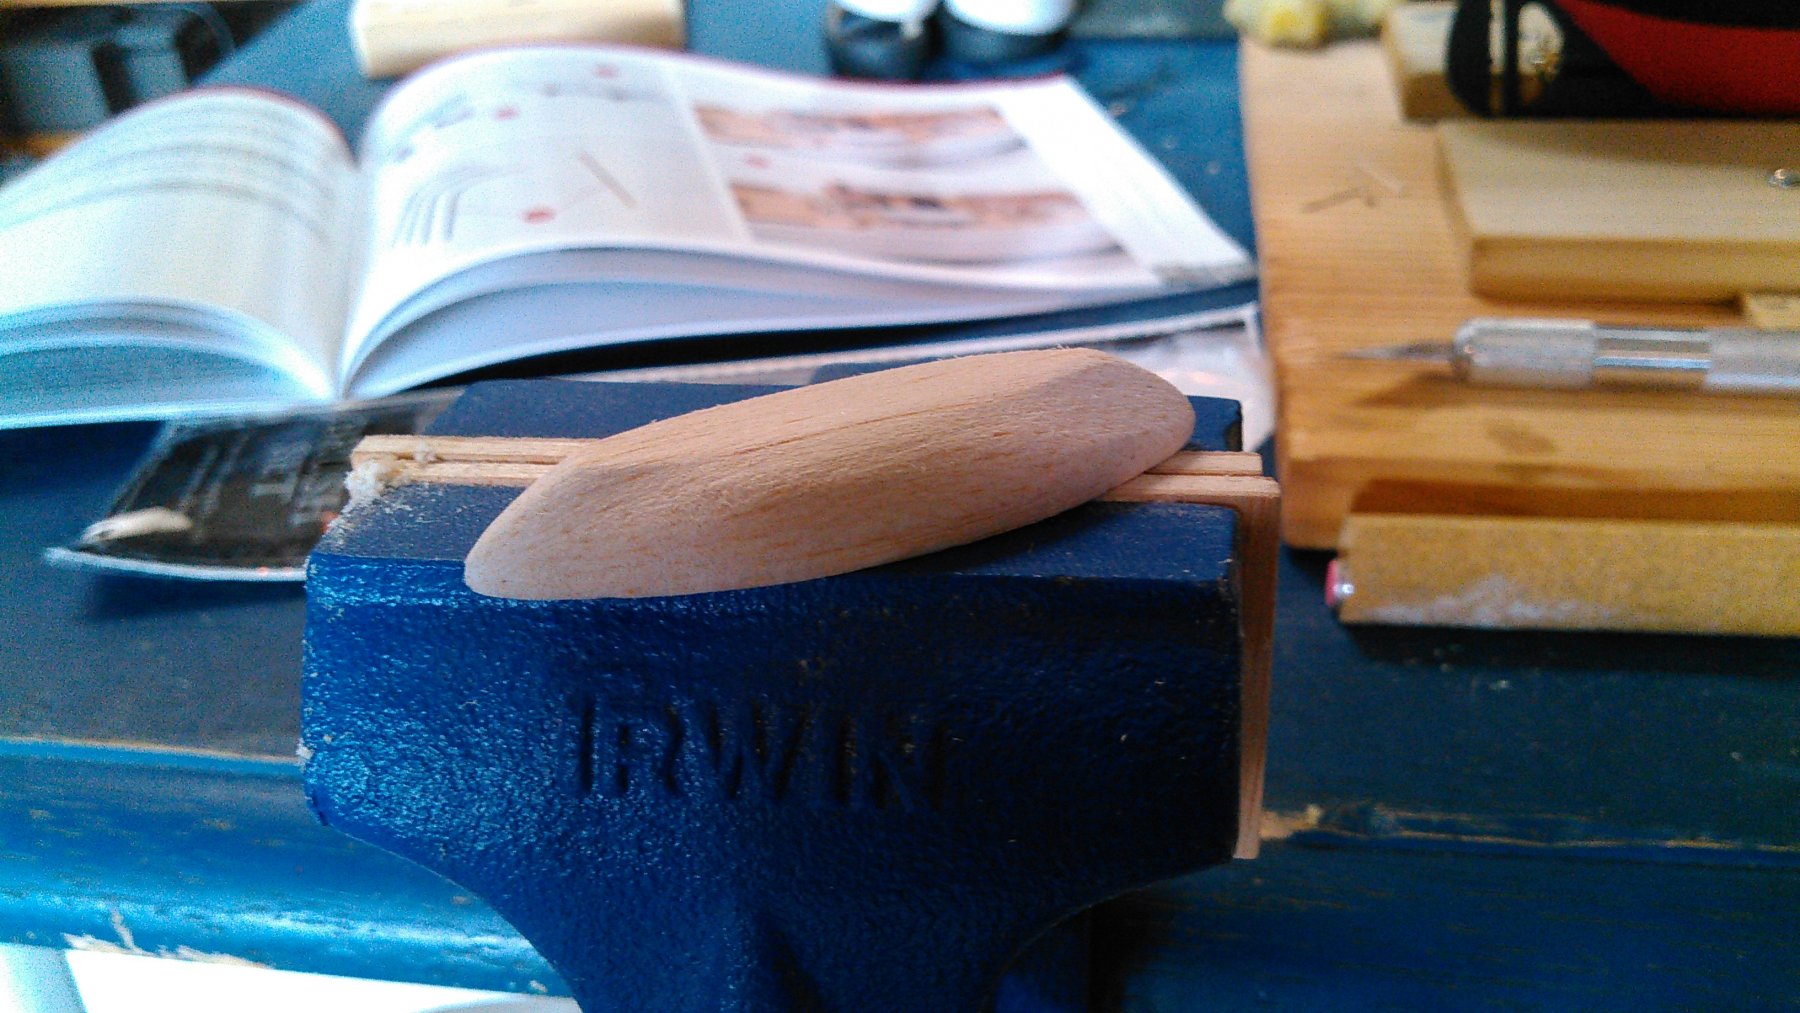
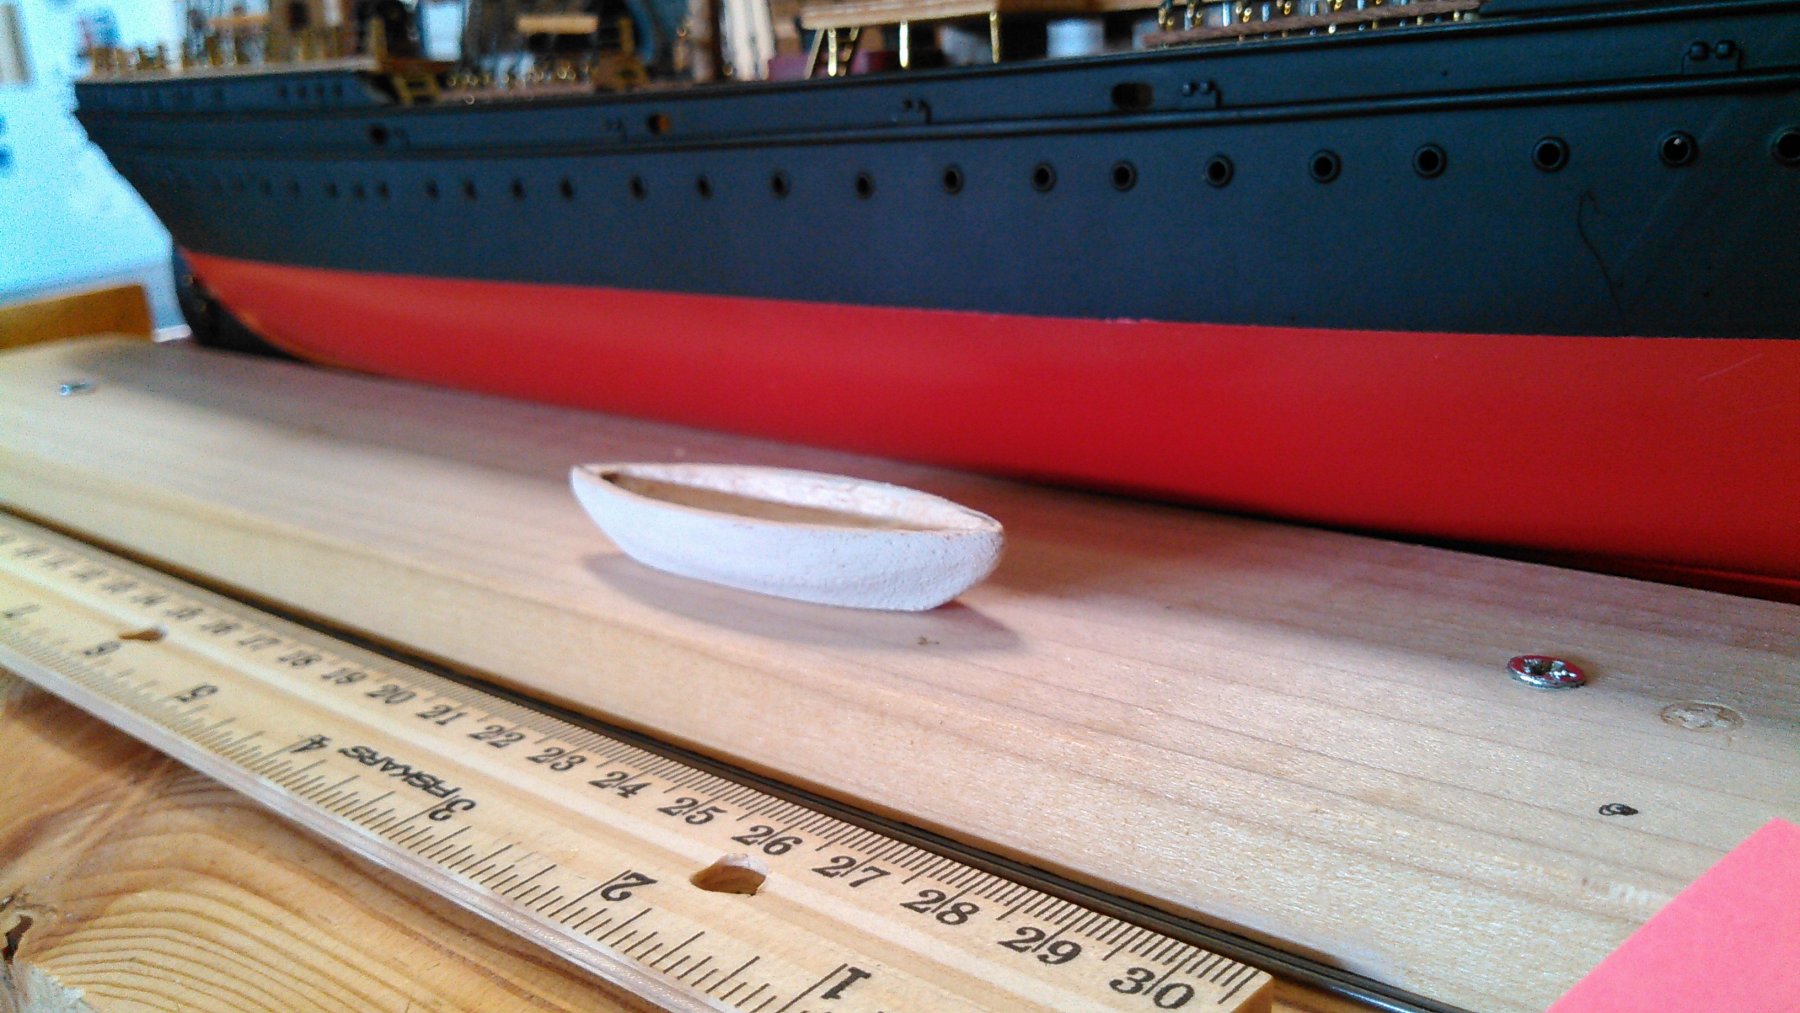
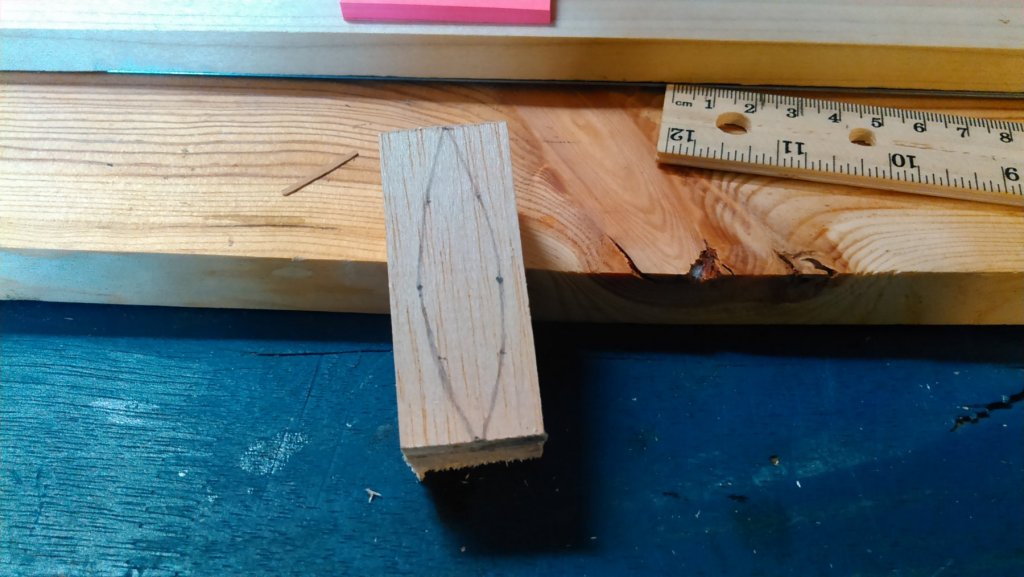
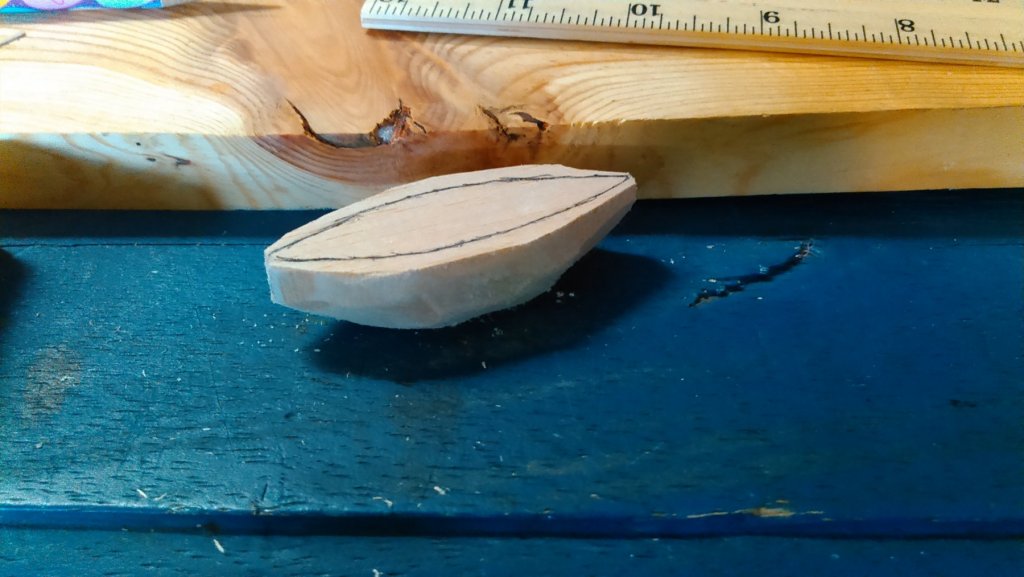
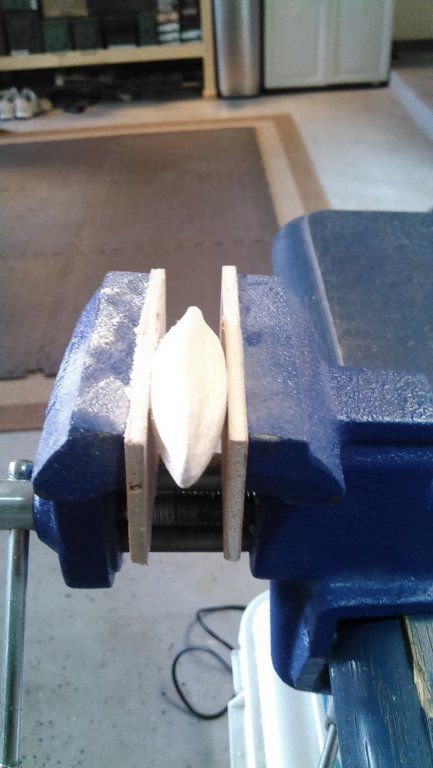
Well it's been a while since I posted.... I've been taking my time and chipping away at the standing rigging, learning as I go. So for the past few days, I've been running standing rigging and beginning the shrouds and ratlines.... This is a first for me, and it is very slow going, especially considering I will have eight sets of them by the time I'm done, before starting the running rig. Then I'd take a break..... a little G&T.... Once the standard rigging and backstays were set, I began on the shrouds and ratlines..... (and am still working on them). At times I would stop and start thinking about whaleboat scratch building. I started this one out of some Hobby Lobby balsa, and after sanding, routing and sanding, and routing and sanding and shaping, I have a little more work to do on it. According to the scale, these are 30 feet stem to stern and a beam of 7 feet.... I'll post more once I have some more detail, paint and appointments put into it. Then I'll decide whether to make more of them, or try something else... Like I said, lots of work to do on it, but we'll see how it turns out.... Until next time. Cheers.


- 37 replies
-
- 4
-
-
- eagle
- constructo
- (and 1 more)
-
Archie reacted to a post in a topic:
18th Century Long Boat by roach101761 - Model Shipways
-
Archie reacted to a post in a topic:
USCG Eagle by Archie - Constructo - Scale 1:185 - first build - Modified - Steam Barque Whaler
-
popeye the sailor reacted to a post in a topic:
USCG Eagle by Archie - Constructo - Scale 1:185 - first build - Modified - Steam Barque Whaler
-
steamschooner reacted to a post in a topic:
USCG Eagle by Archie - Constructo - Scale 1:185 - first build - Modified - Steam Barque Whaler
-
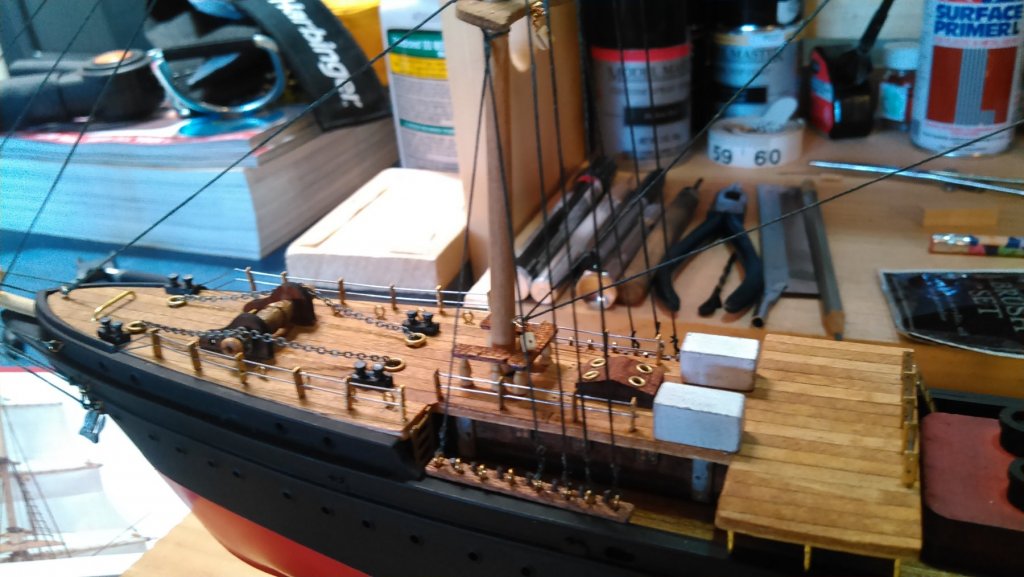
Hey Popeye. Yes, I will try that with the anchor chains.... Didn't think of it, and the plans had them out on the drums so I never gave it a second thought. But yes I think that will look much better. Love the way it looks on your Cutty. That is very nice! And yes the rigging plans are the same on the Eagle - they separated the standing and running rigging. Standing first, and then running, from what I can see. In fact, the clipper plans are very similar to this barque - including the halyards and clews.... I think the only big difference I can see is backstays. Not much to speak of on this barque. Thanks for the compliment! Archie
- 37 replies
-
- 2
-
-
- eagle
- constructo
- (and 1 more)
-
Archie reacted to a post in a topic:
USCG Eagle by Archie - Constructo - Scale 1:185 - first build - Modified - Steam Barque Whaler
-
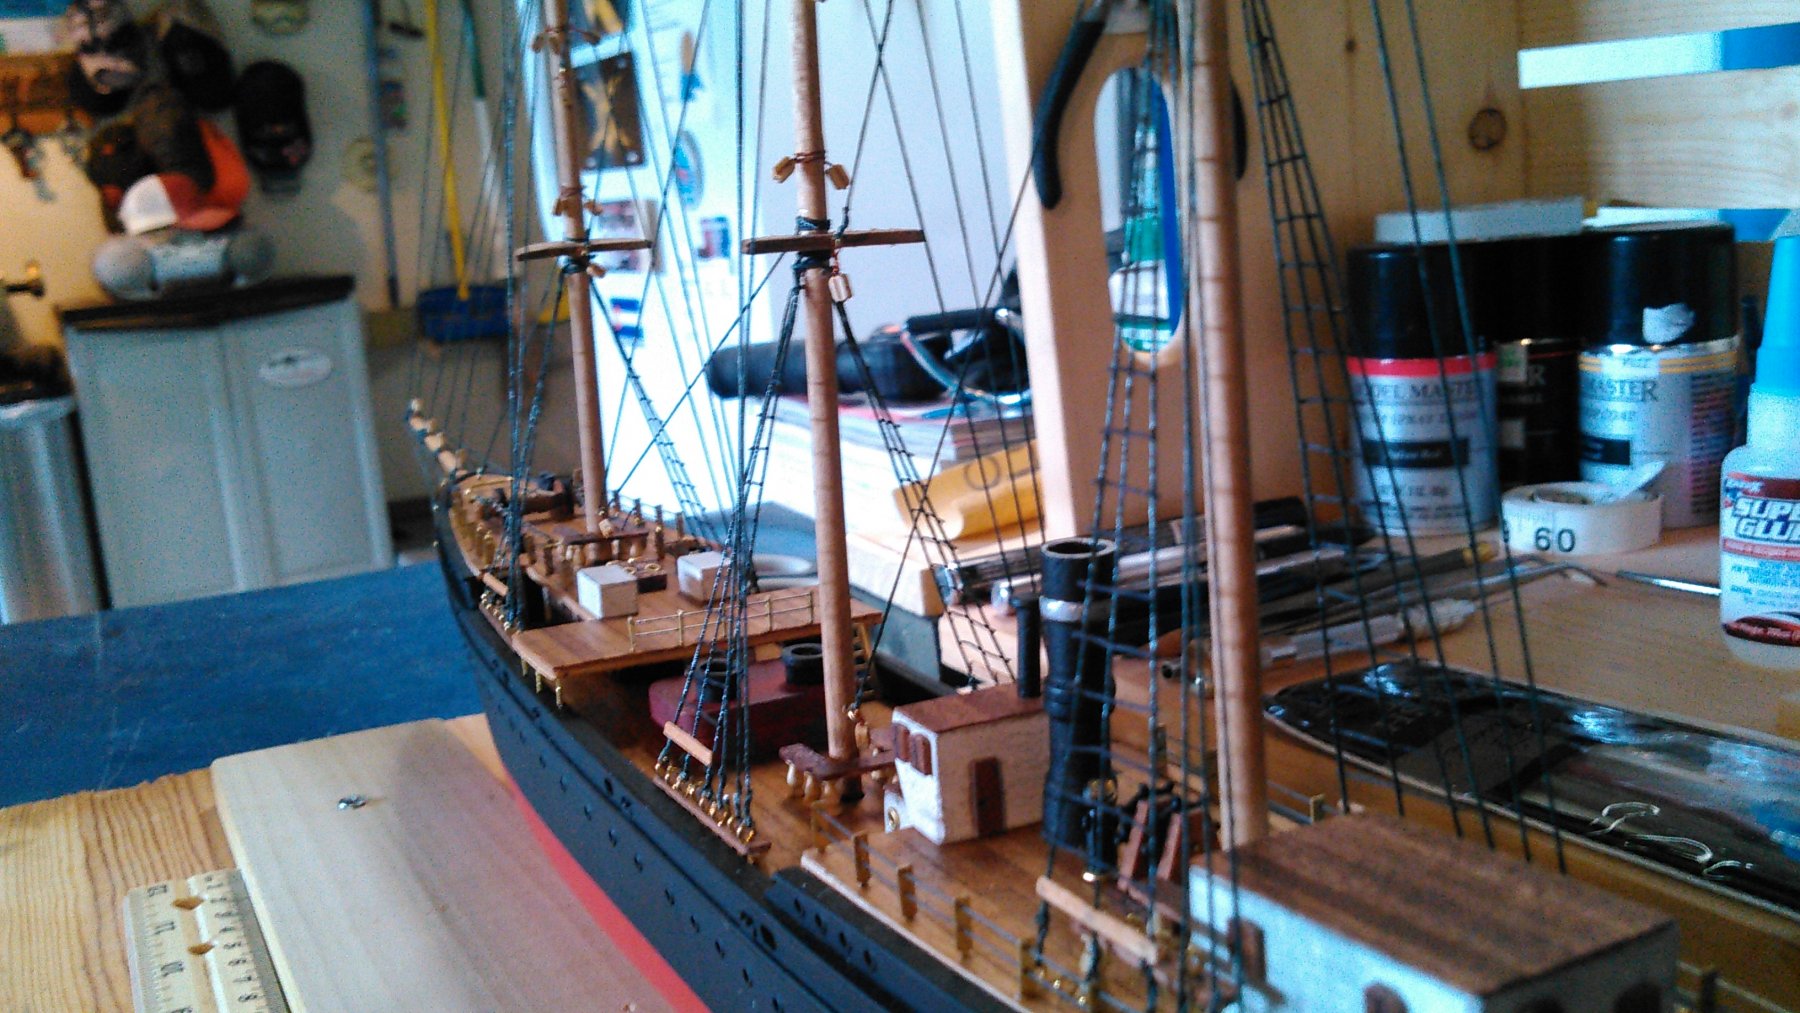
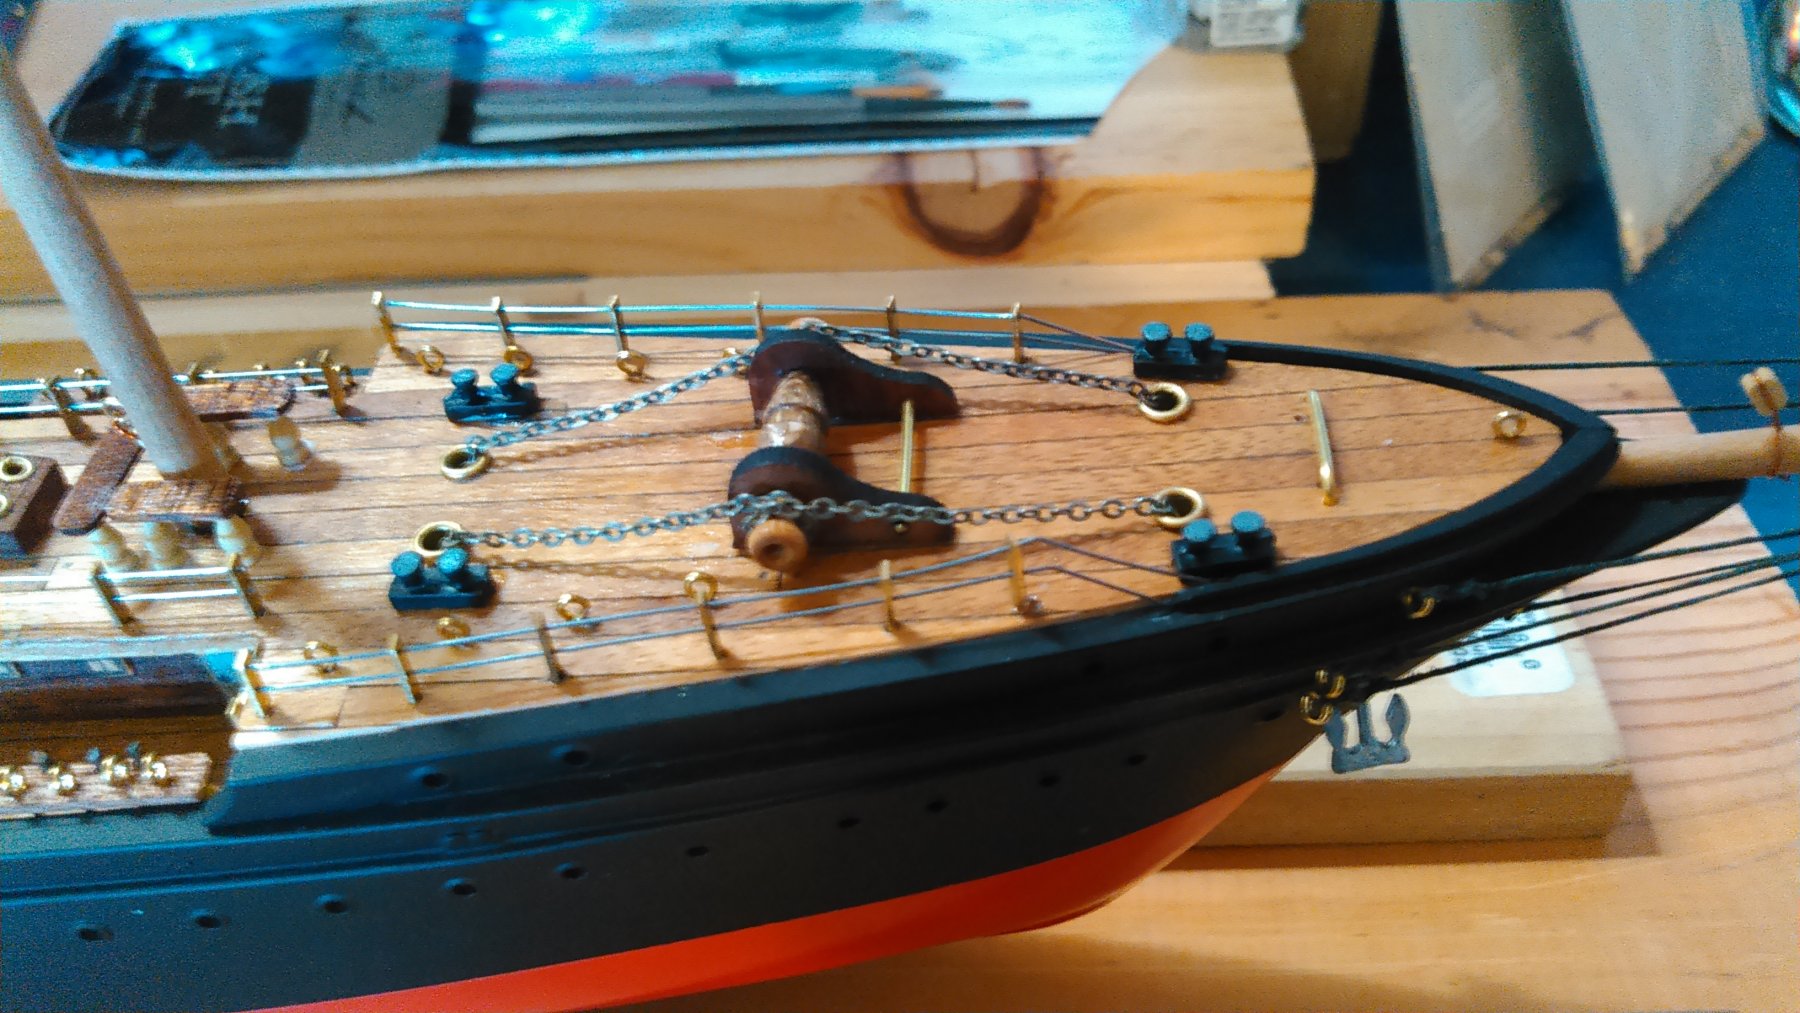
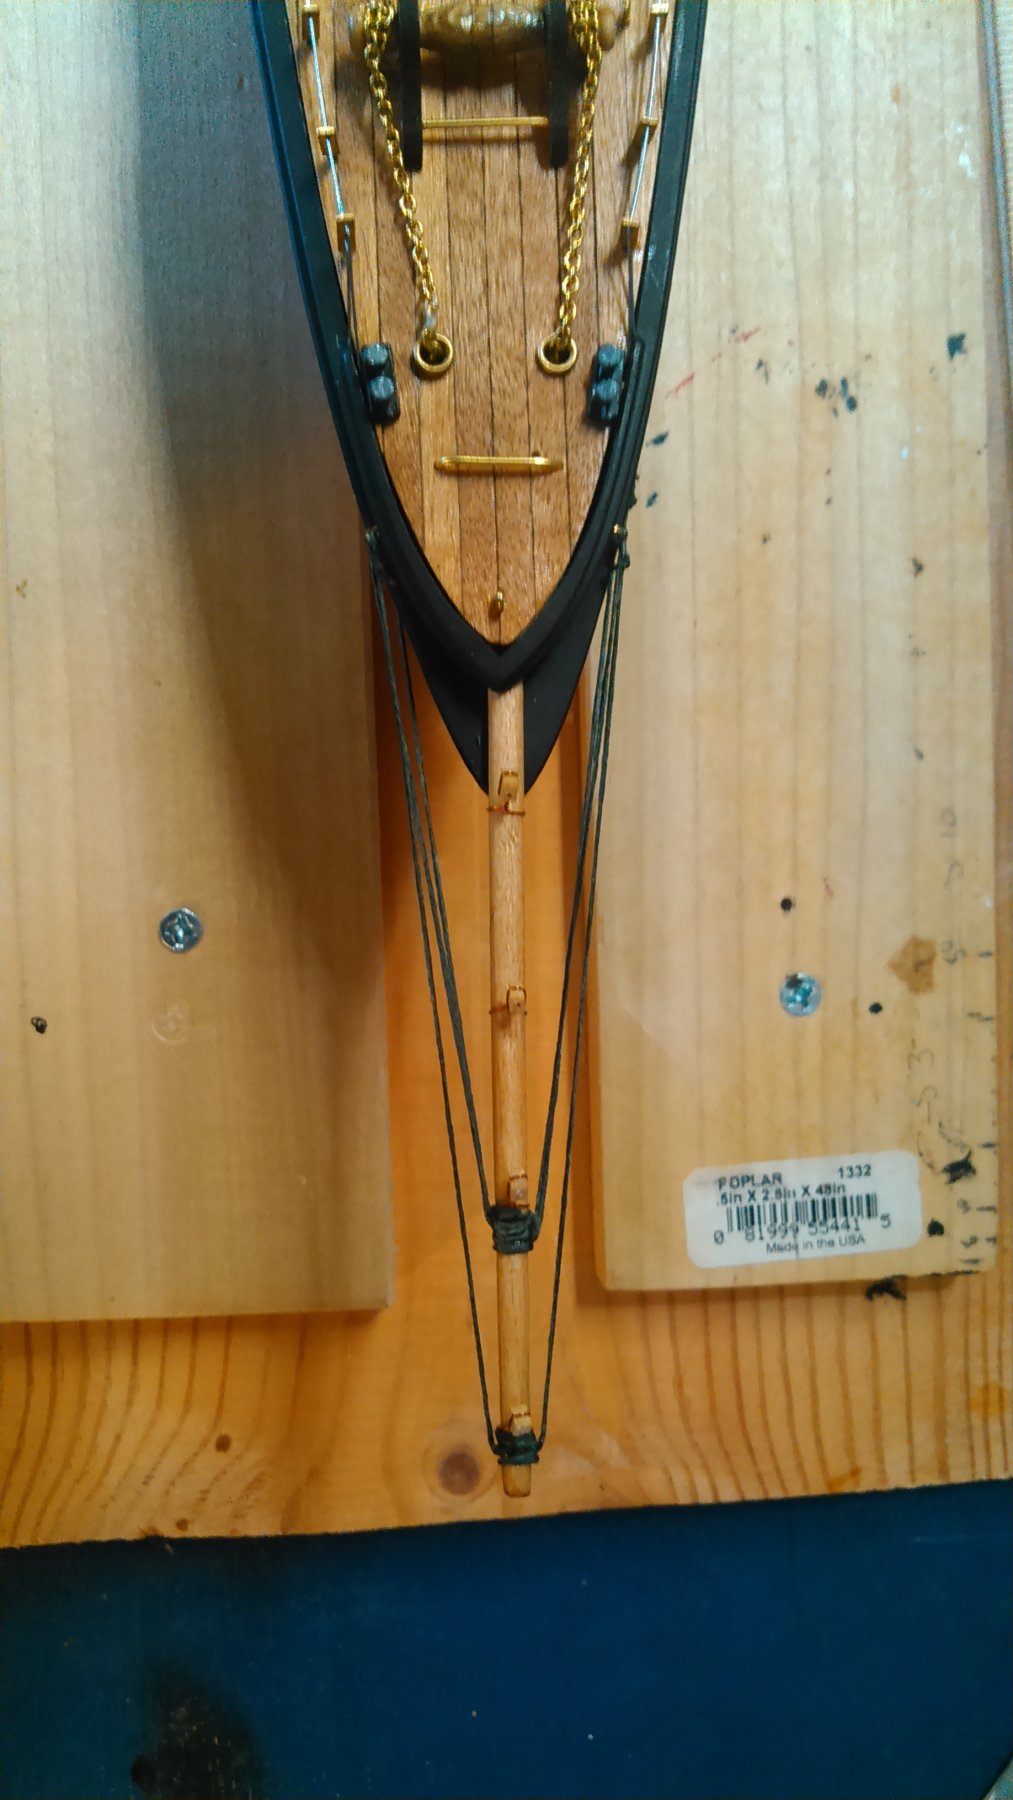
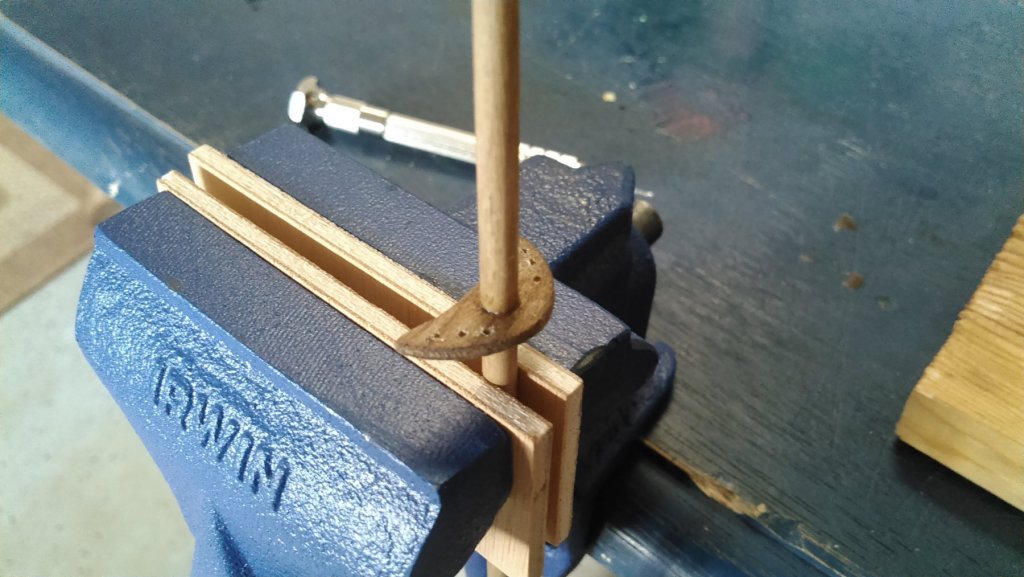
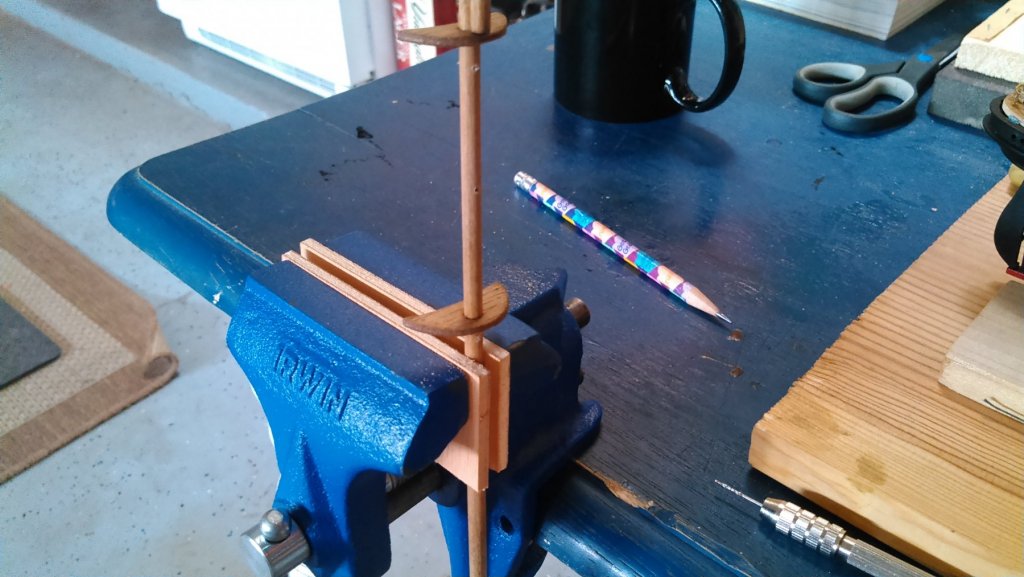
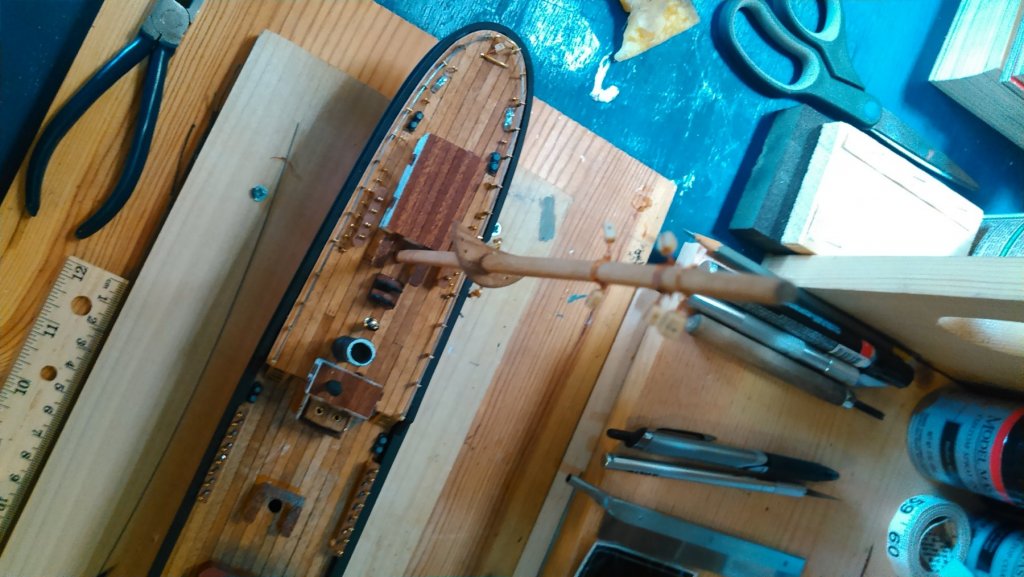
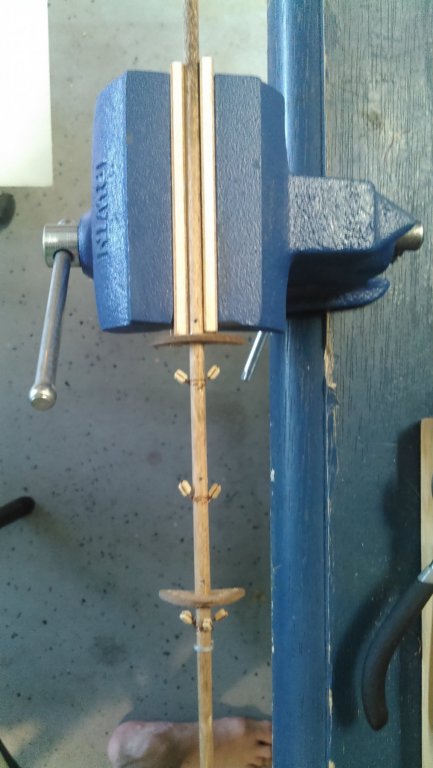
Over the last couple days I took my time reviewing rigging plans and got my masts and tops drilled, blocked and permanently set. This is another first for me, and it is immediately apparent that not paying attention to rigging plans down the road can get you pretty jammed up pretty fast.... To do this, I used the scale plans for measurements and gear placement, and the manual for photo orientation.... I'm very pleased with the appearance of the masts. In the bottom photo you can see I added a little bit of trywork smoke stain to the fore side of the mainmast below the first top. (The mast is upside down in the vice) While doing this, I noticed how little I liked the kit-provided anchor chains, and so I took some old chain that I had, soaked it in Plumb Brown (a gunmetal reagent), and then replaced the bright, shiny chain from the kit, trying to keep the "working ship" motif in mind.... Once all these things were done and dried, I began the standing rigging at the bow. Another first... What I found tricky was keeping tension on all of the lines. The first line I ran was the bottommost on the foremast, and I immediately noticed that the tension on each would lessen as I went up. So, I removed it, started at the foremast top and worked my way down the mast. I ran my lines through beeswax, and used light touches of CA glue to hold lines while I lashed and took up tension. I'm still learning how to do this, and frankly when I look at the plans and photos my hands sweat looking at the amount of rigging in front of me. But I'm taking it one line at a time, and watching it slowly come together.... Until next time.... Archie

- 37 replies
-
- 4
-
-
- eagle
- constructo
- (and 1 more)
-
Archie reacted to a post in a topic:
USS Confederacy 1778 by CRI-CRI - FINISHED - Model Shipways - scale 1/64
-
Thanks Popeye. I appreciate that. I'm going cross-eyed trying to figure this rigging out. Lol.... Archie
- 37 replies
-
- 2
-
-
- eagle
- constructo
- (and 1 more)
-
Archie reacted to a post in a topic:
USCG Eagle by Archie - Constructo - Scale 1:185 - first build - Modified - Steam Barque Whaler
-
Hello Christian. I very much enjoy following your build. You do excellent work! My choice would be the second photo in the post above. It is an interesting design, and the more muted colors seem to work well. Regards, Archie
-
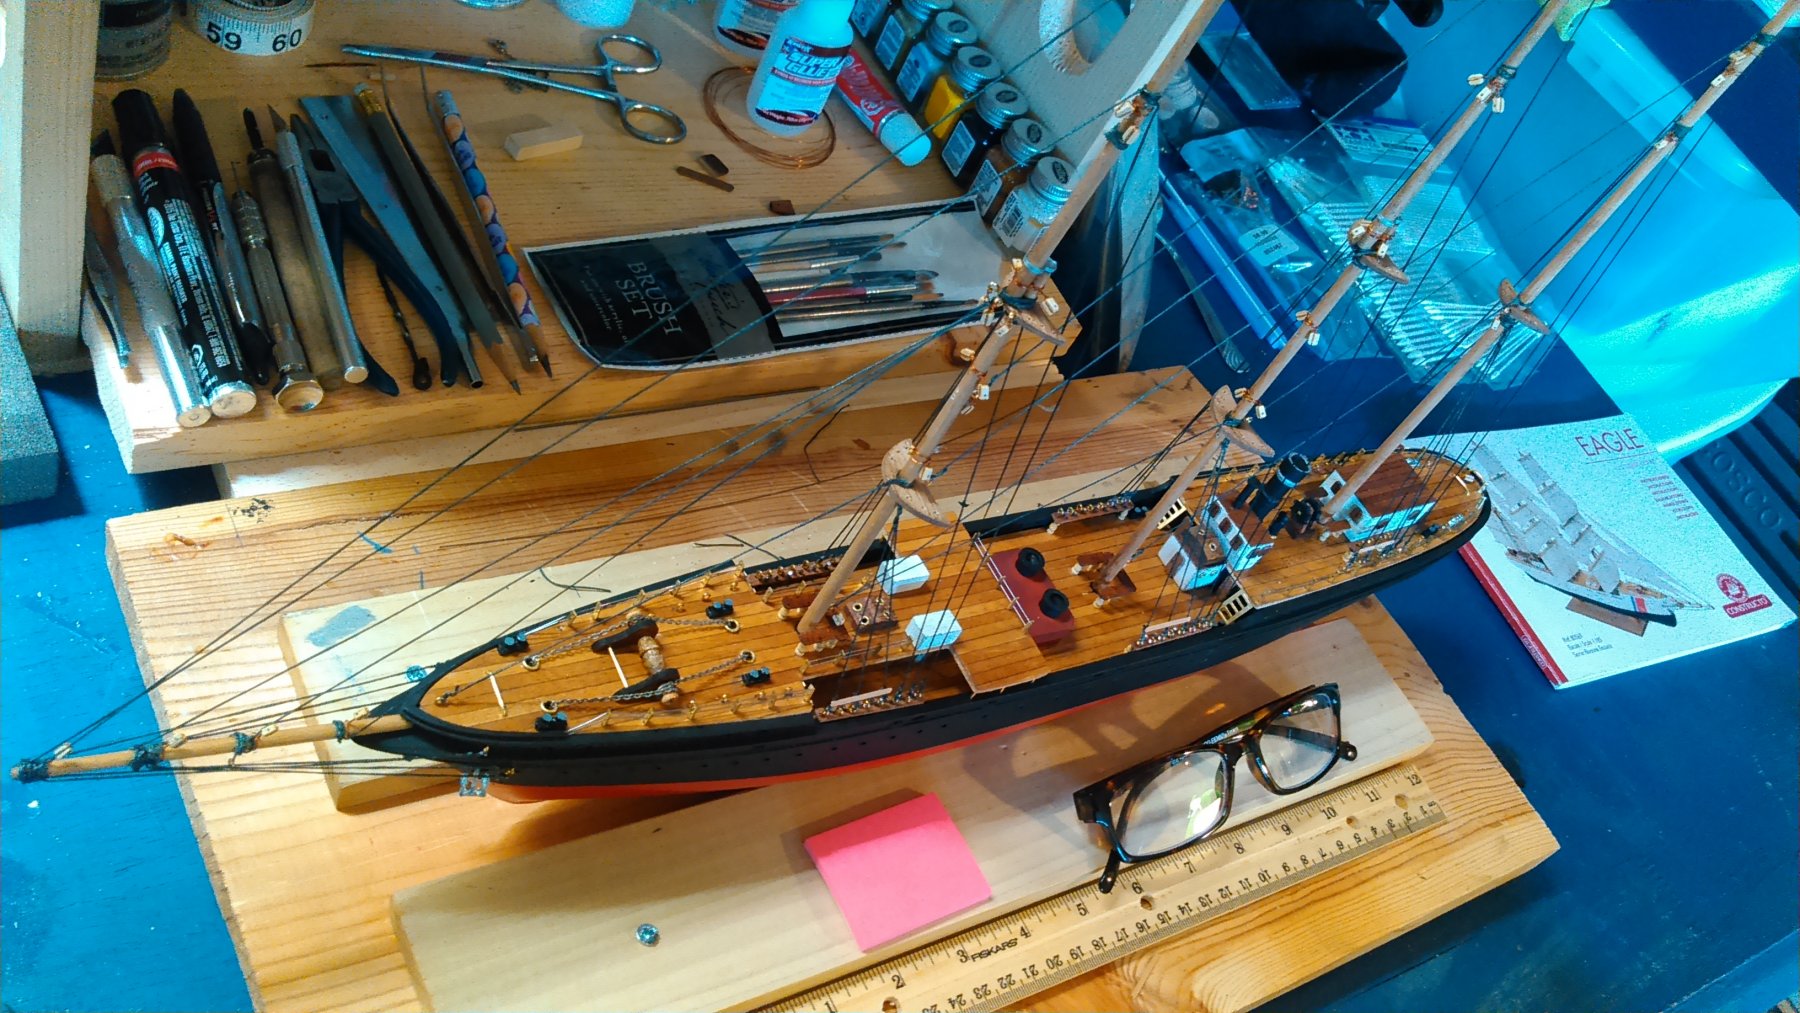
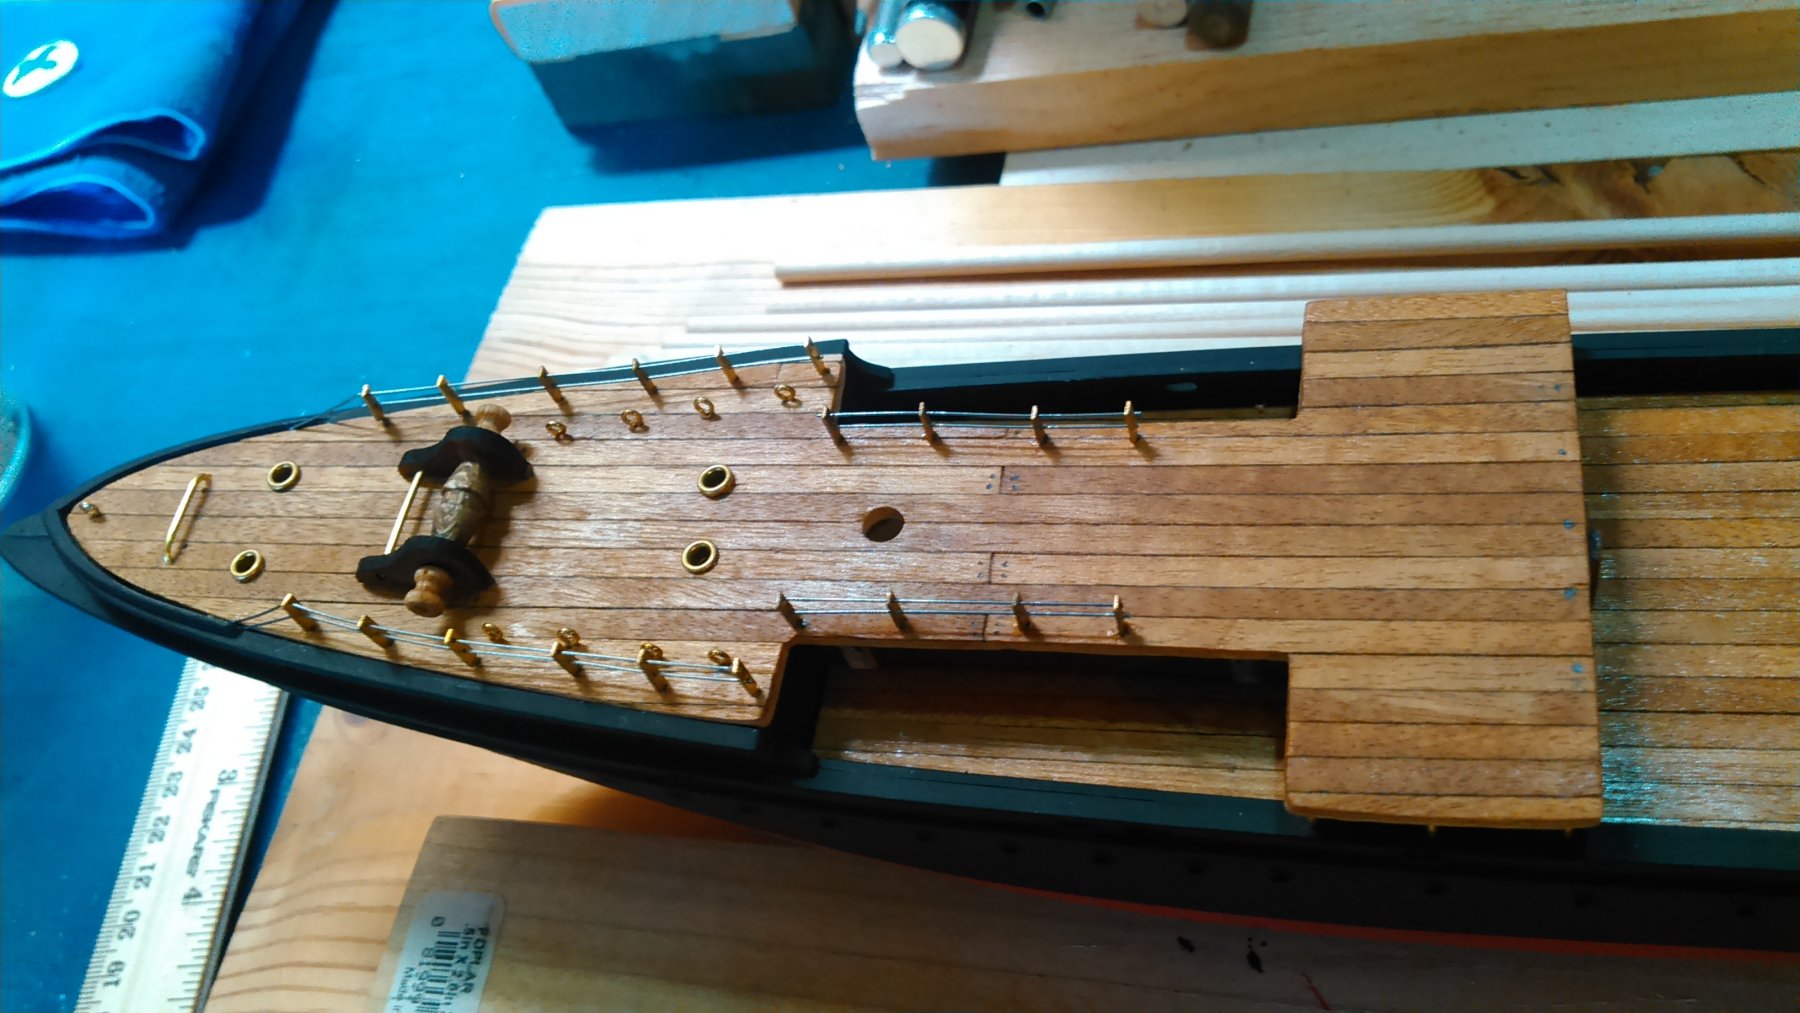
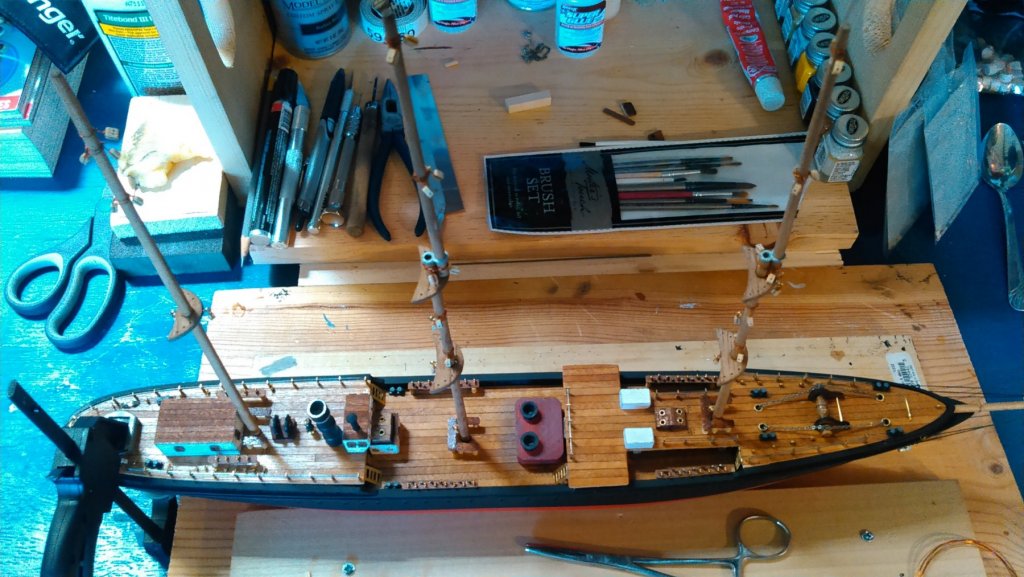
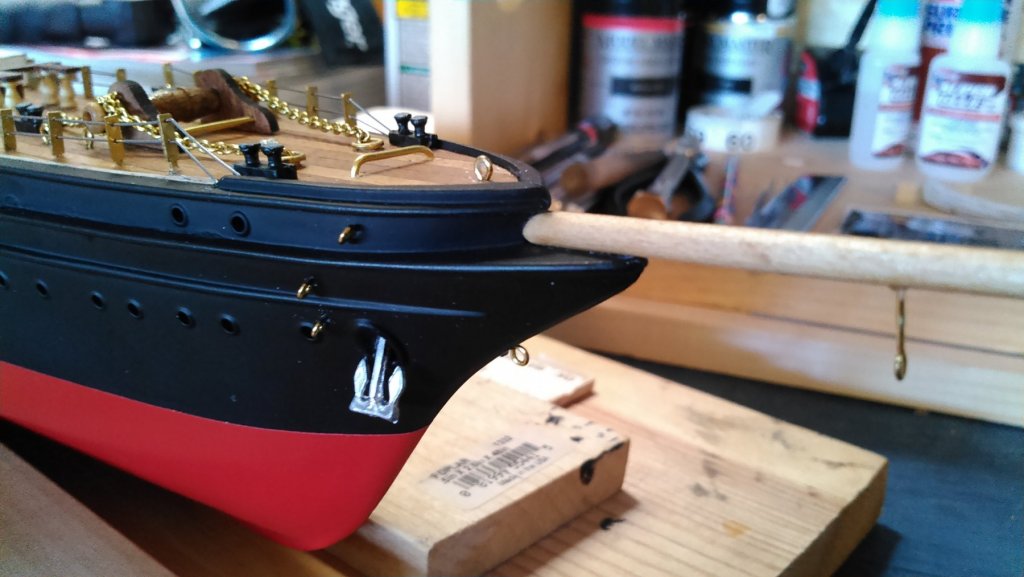
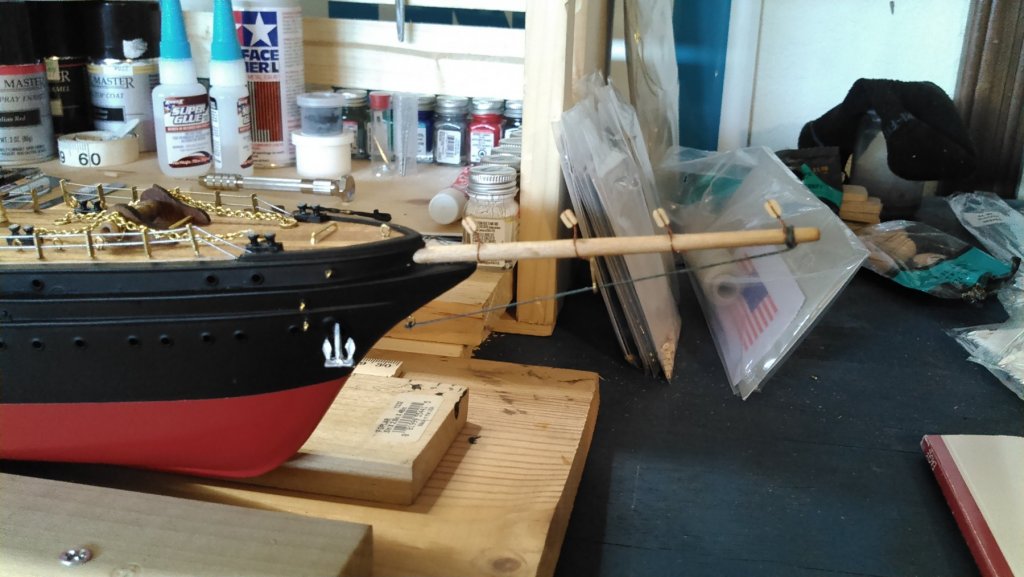
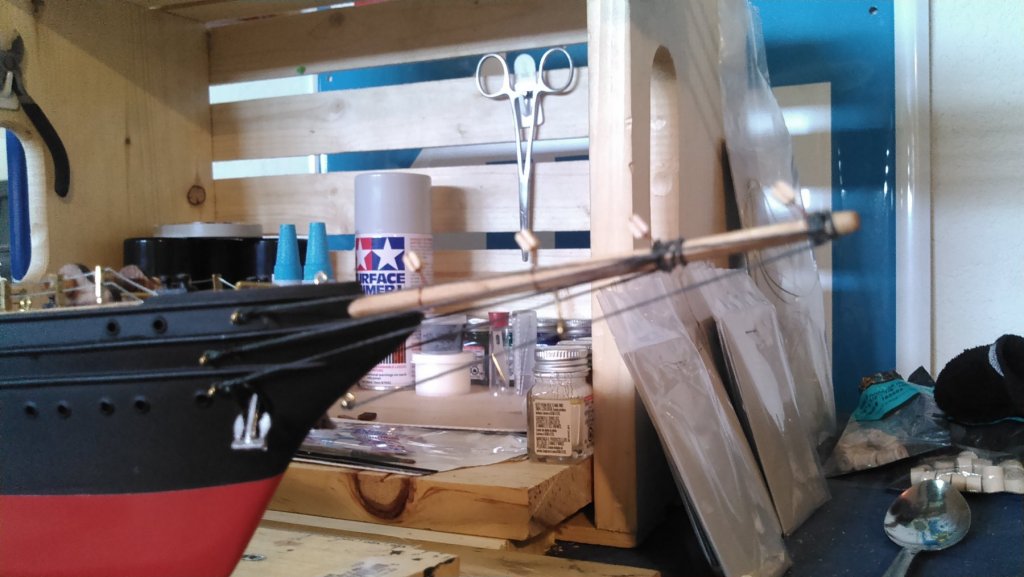
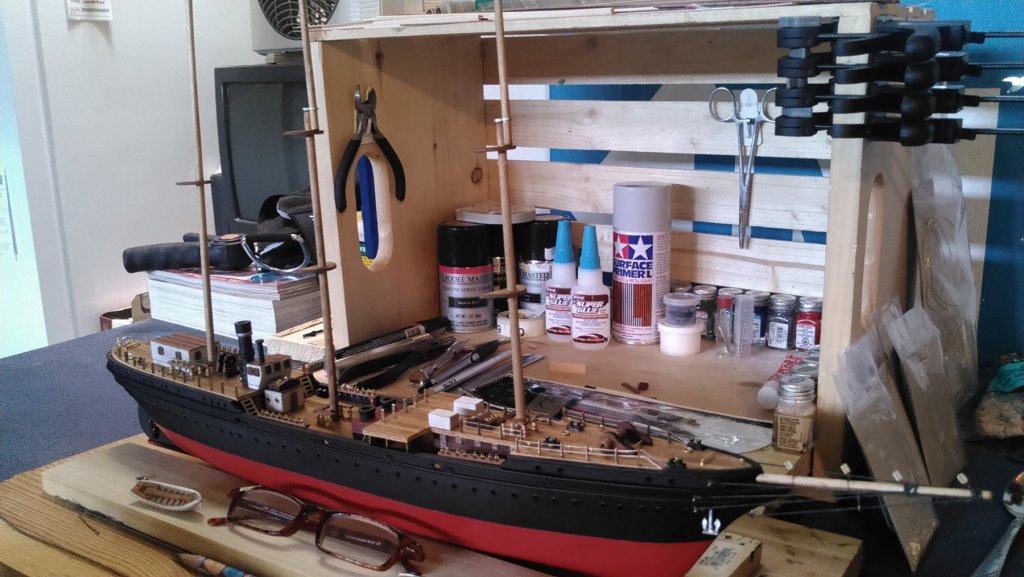
Well I couldn't help myself and did a little work today..... I've been studying the standing rigging plans, and looking forward a bit to running rigging as well, trying to decide if I'll be able to add my davits and whaleboats (once they're done) afterwards. It looks like that will be possible, so I will be working on the rigging while I'm getting my scratch stuff together for the whaleboats.... More on that later. So today's task was pretty straightforward. Get the masts and bowsprit ready. This consisted mainly of comparing measurements from the instruction booklet with the scale plan sheet, cutting, sanding for taper, and staining. I chose an American Walnut stain, applied lightly with some thinner added, to mimic worn white pine. I stepped the masts and added the tops, then drilled them per the plans for some of the standing rigging and running rigging blocks. So the first rigging I tacked on this ship was the bowsprit. After a nice taper and flattened aft, and adding the martingale, I glued it to the bow and let it dry. Then I added the bowsprit blocks. As everything dried, I drilled the hull per the plans, added eyebolts, and then ran my rigging lines. I ran the line through beeswax, and used small drops of glue to help secure them and the lashing.... Once the bowsprit was done, I put the masts in place (not permanently), in order to help make sense of the rigging plans and start planning on adding my blocks and eyebolts for it. Plus it was nice to see things starting to come together.... Until next time... Cheers.

- 37 replies
-
- 3
-
-
- eagle
- constructo
- (and 1 more)
-
I thank ya sir. Though I am disappointed about the lack of deadeyes, I think, considering that this model is built around the eyebolts, that I will stick with it. However, on the next one, there will be deadeyes galore I suspect. I may not post for a few days, as I am studying standing and running rigging, and trying to gird my less-than-talented self for the drilling and placing of mast blocks, of which there are a generous helping, as well as the running rigging, of which there is more than I care to consider, and whether I will be sticking with furled sails (which was the original plan), and, of course, coming up with scratch plans for whaleboats.... So. I will see you soon and appreciate the support more than you know. Until next time.
- 37 replies
-
- 2
-
-
- eagle
- constructo
- (and 1 more)
-
Thanks Popeye! I appreciate the compliment. It's a ton of detail work, and as a rookie I am learning to take my time, but I really enjoy it. Including the research, which is eye opening and I really enjoy it. The more challenging it is, the more I look forward to a step up in builds..... Actually, this model didn't come with deadeyes, which was a surprise to me. I was actually kind of looking forward to working with them, having seen them on so many builds... All that came with this kit were the eyebolts (and belay pins, which I cut out of music wire) in the pinrails and they are all I have to tie the shrouds and the rigging to.... The instructions don't call for any deadeyes at all. I'm thinking as a beginner's kit, they cut some difficulty corners where they could. Archie
- 37 replies
-
- 2
-
-
- eagle
- constructo
- (and 1 more)
-
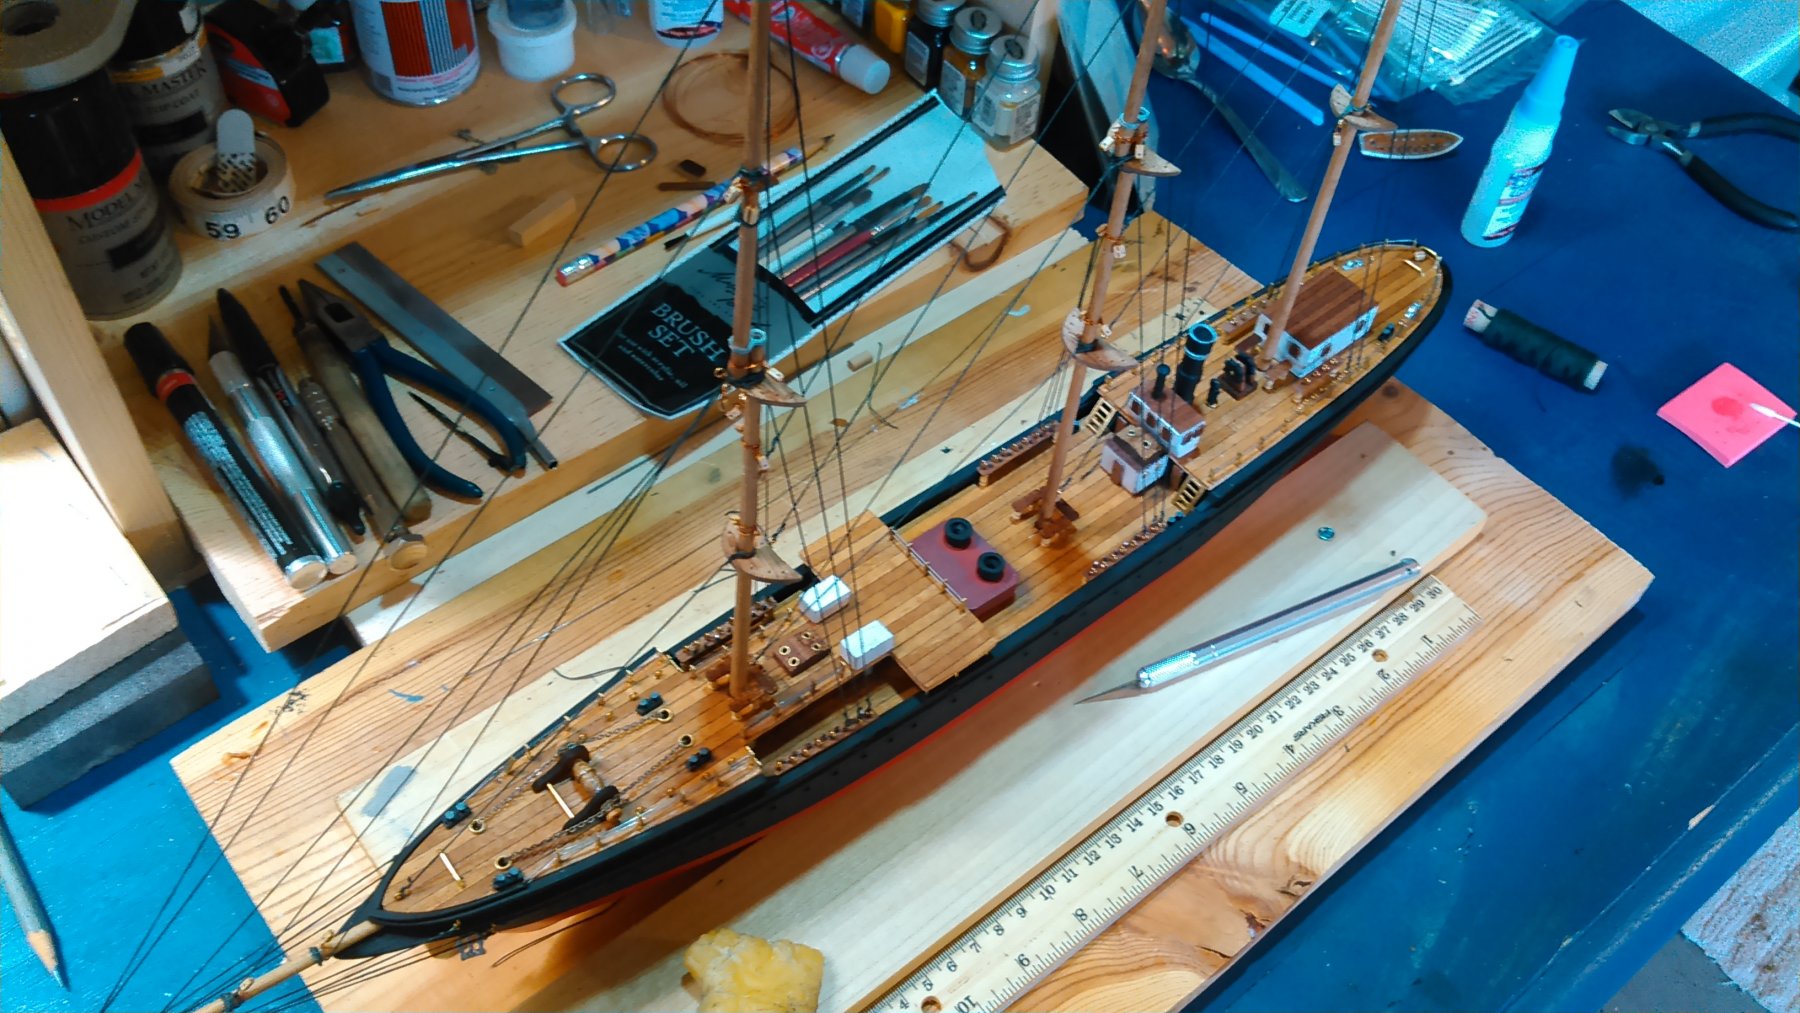
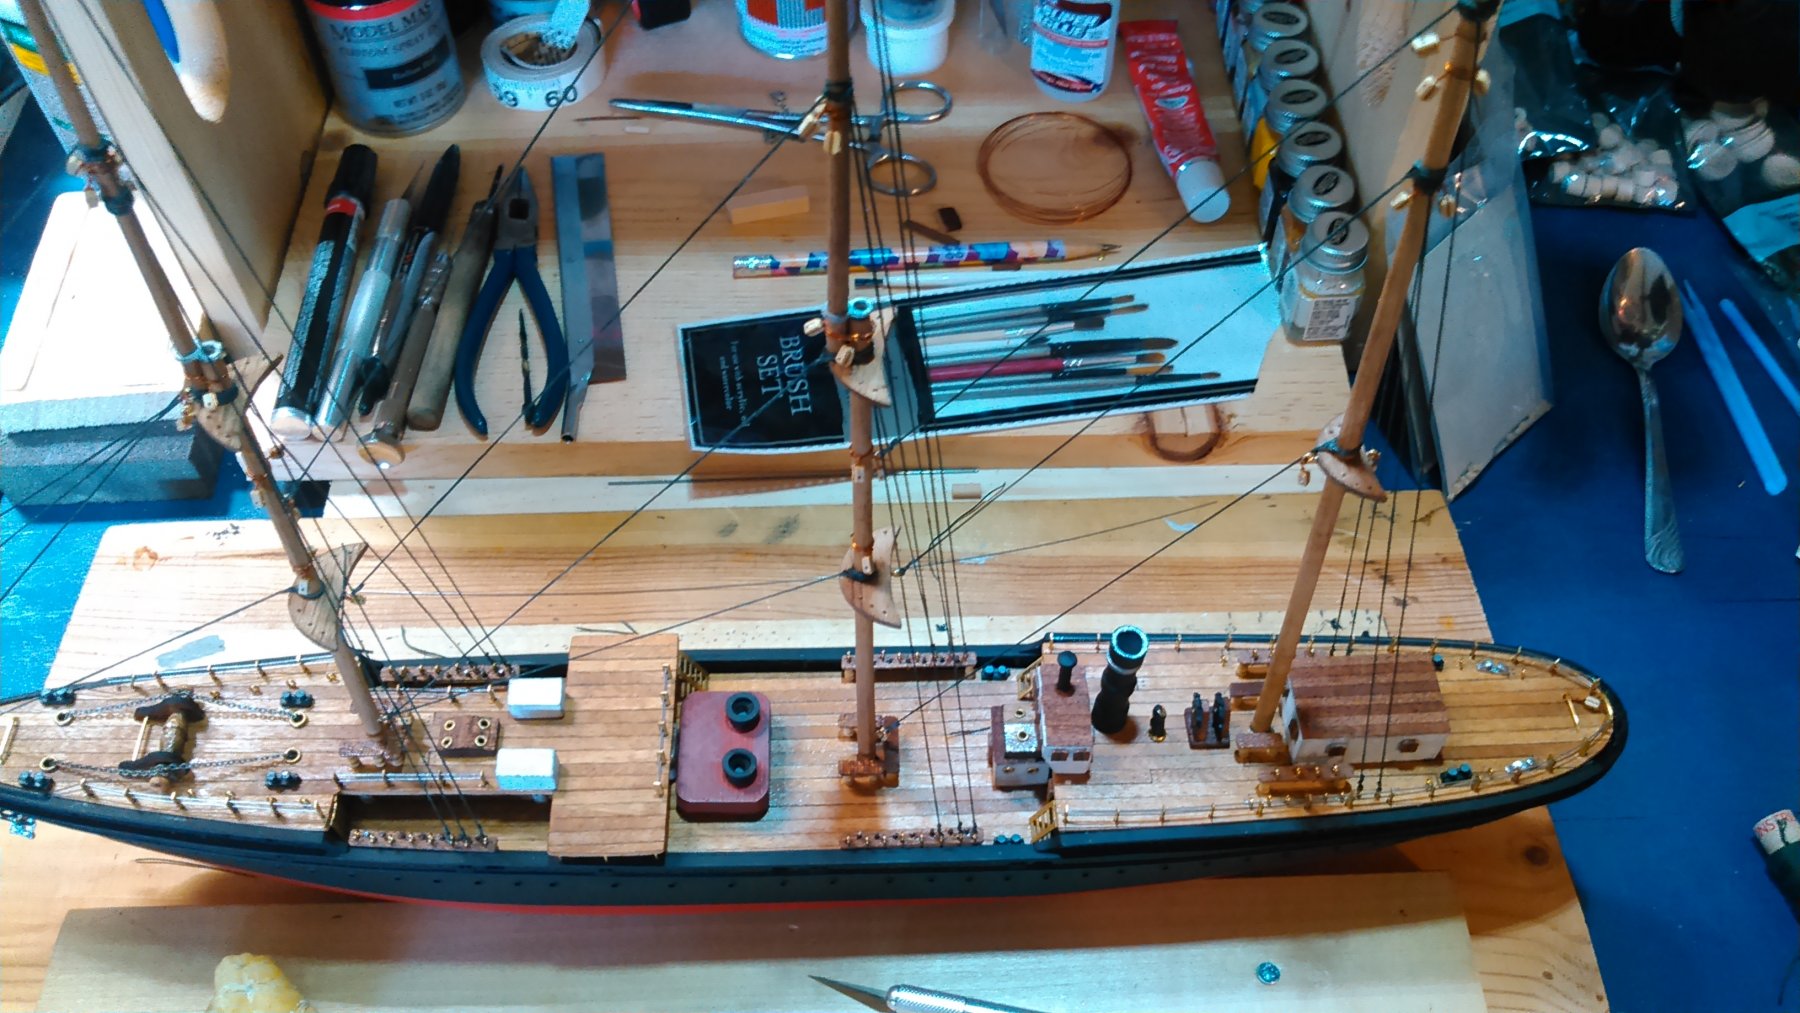
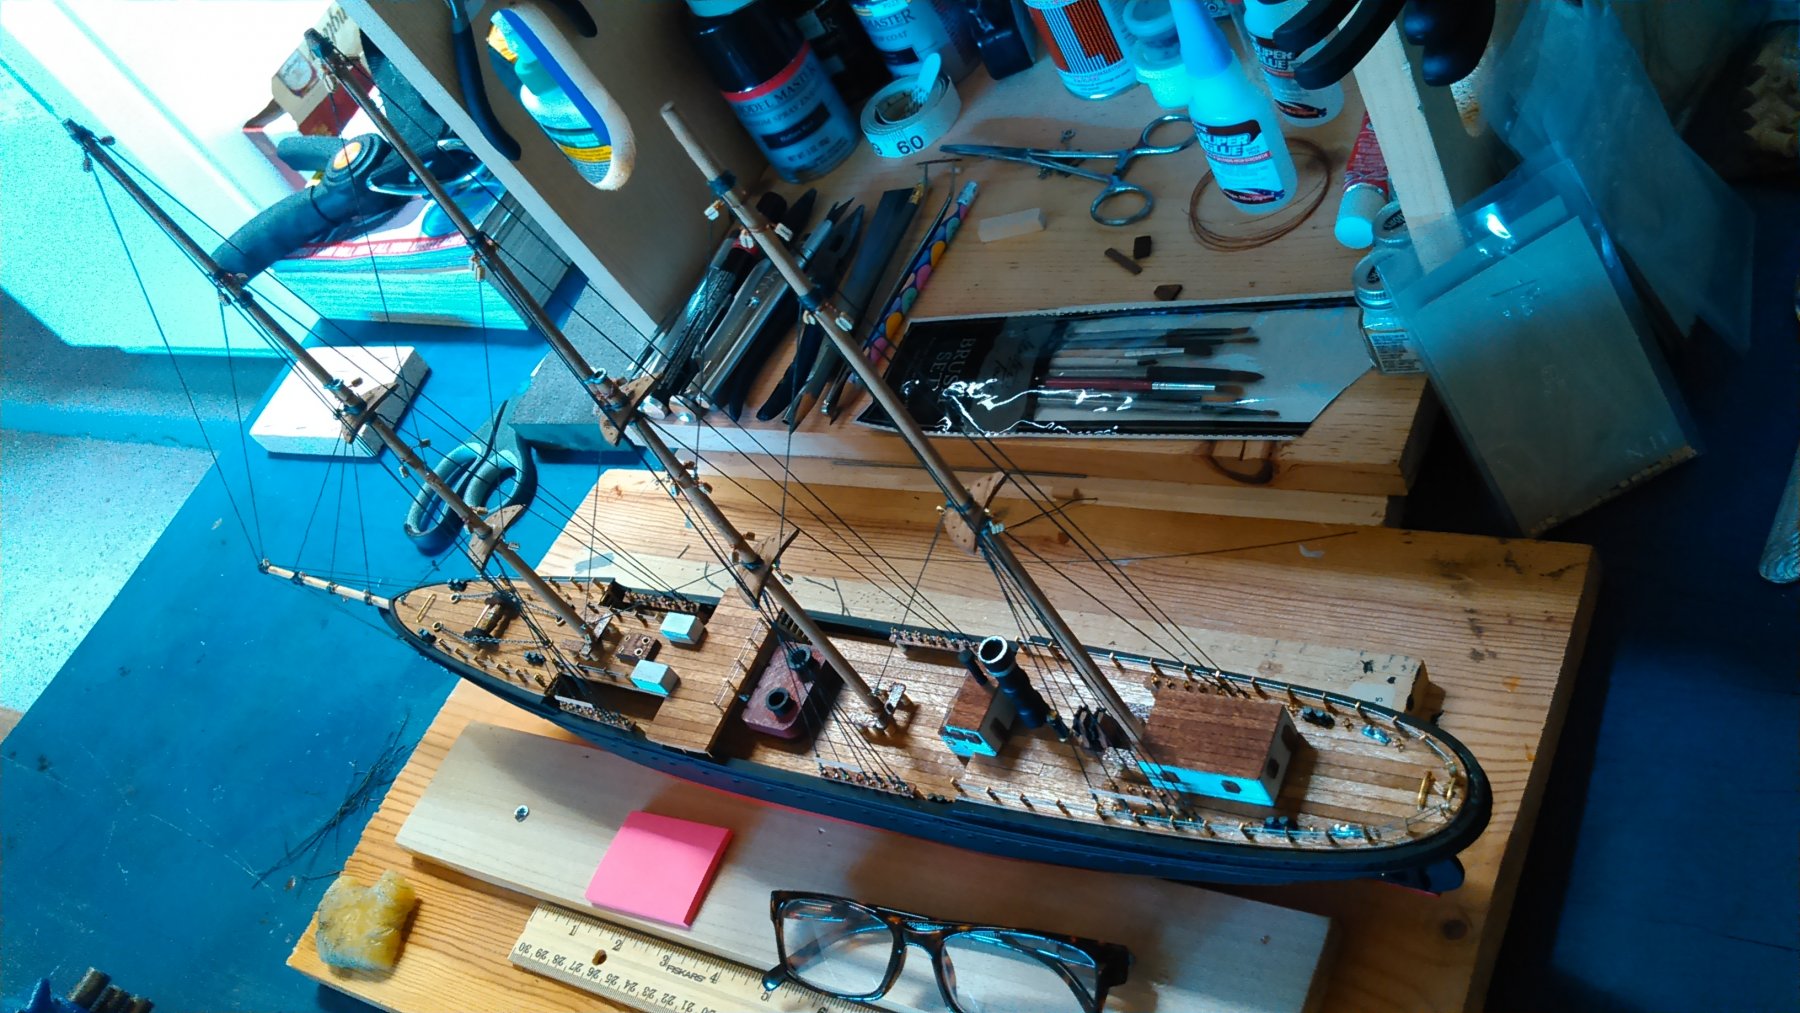
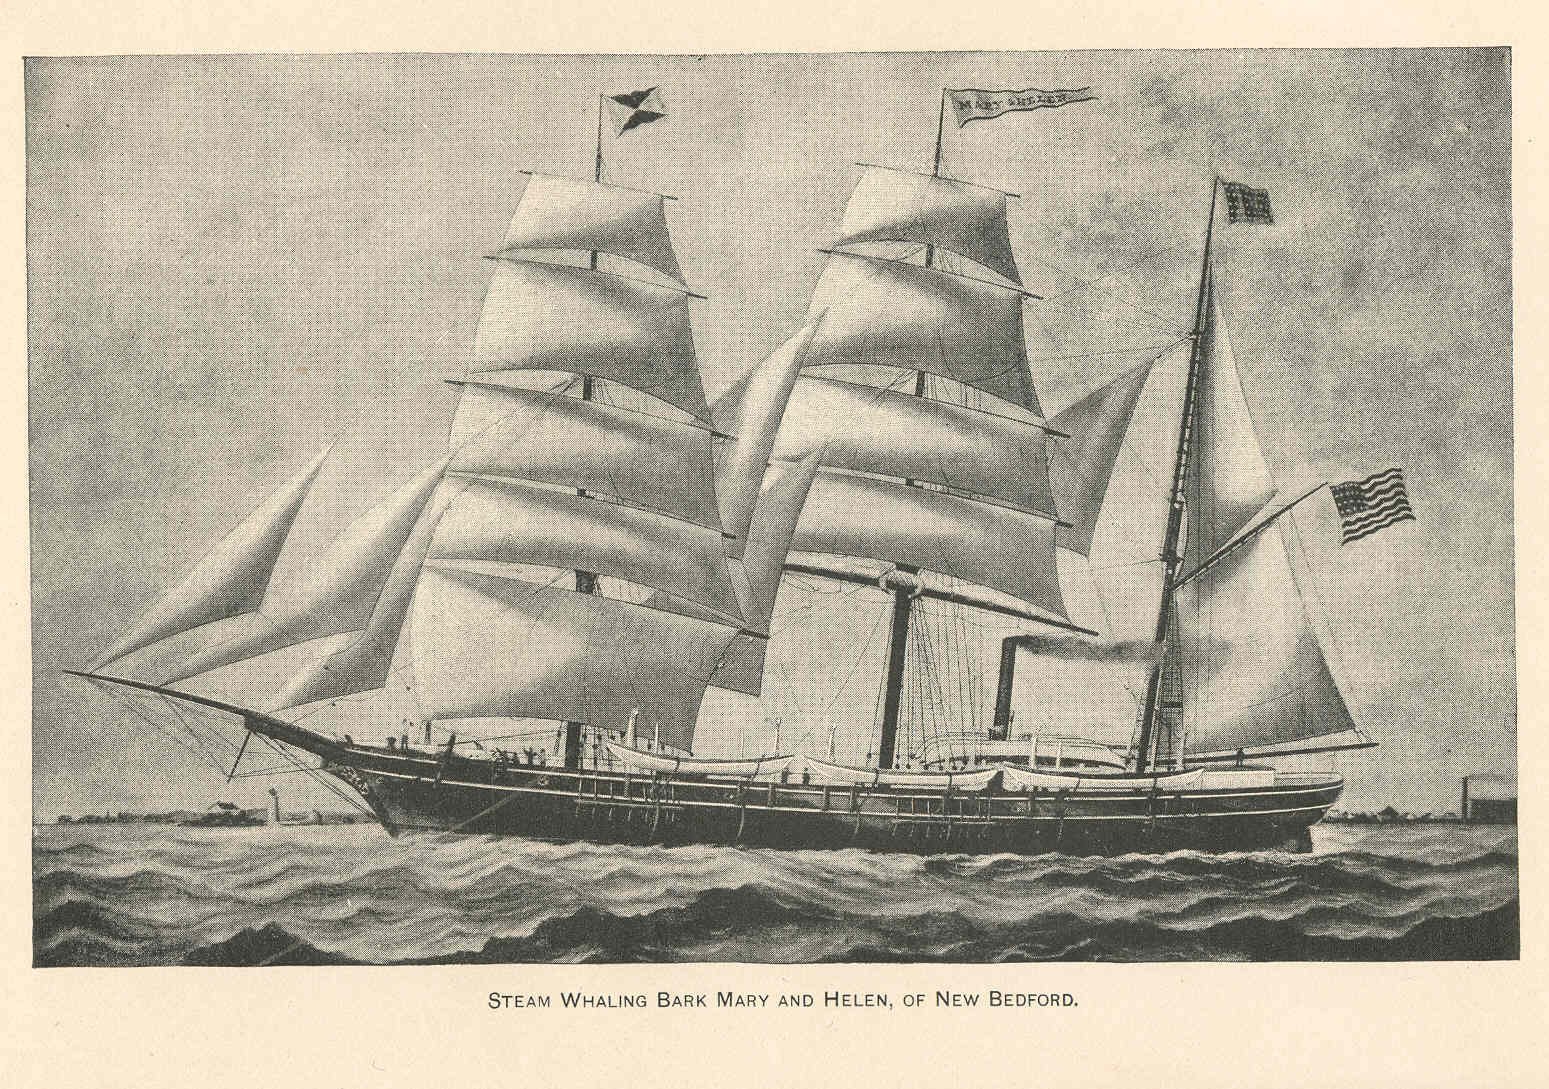
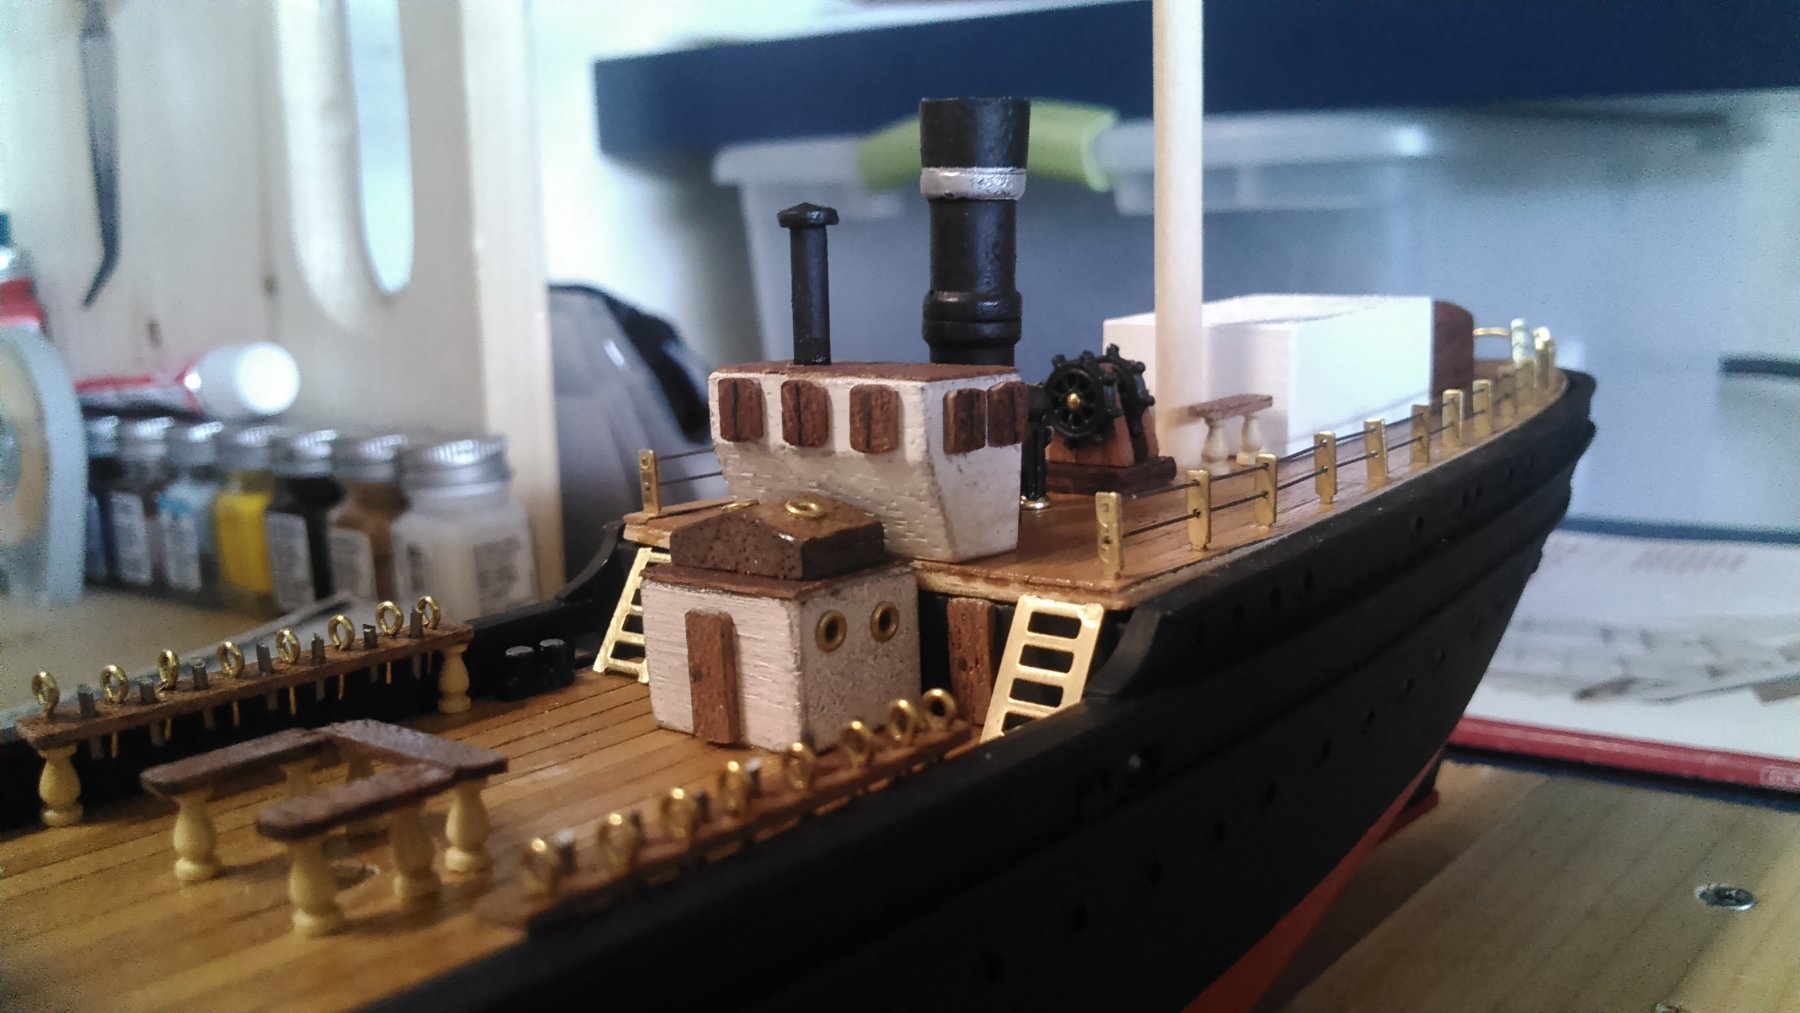
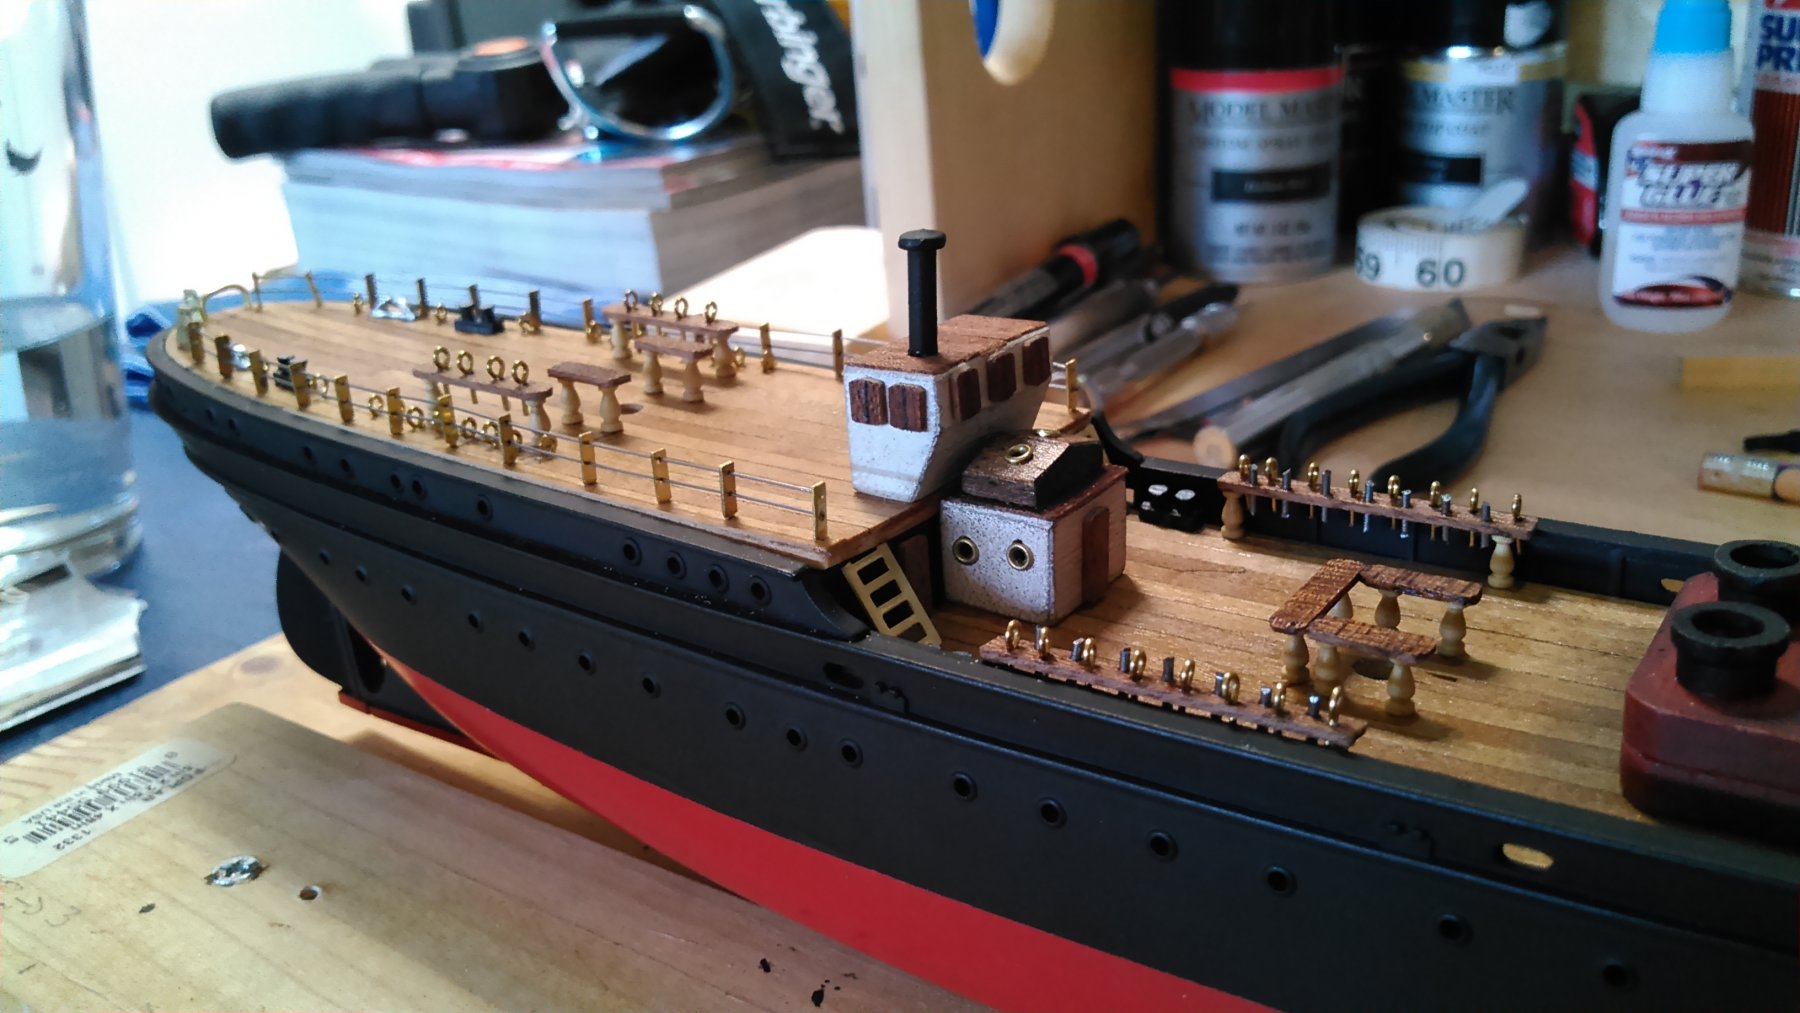
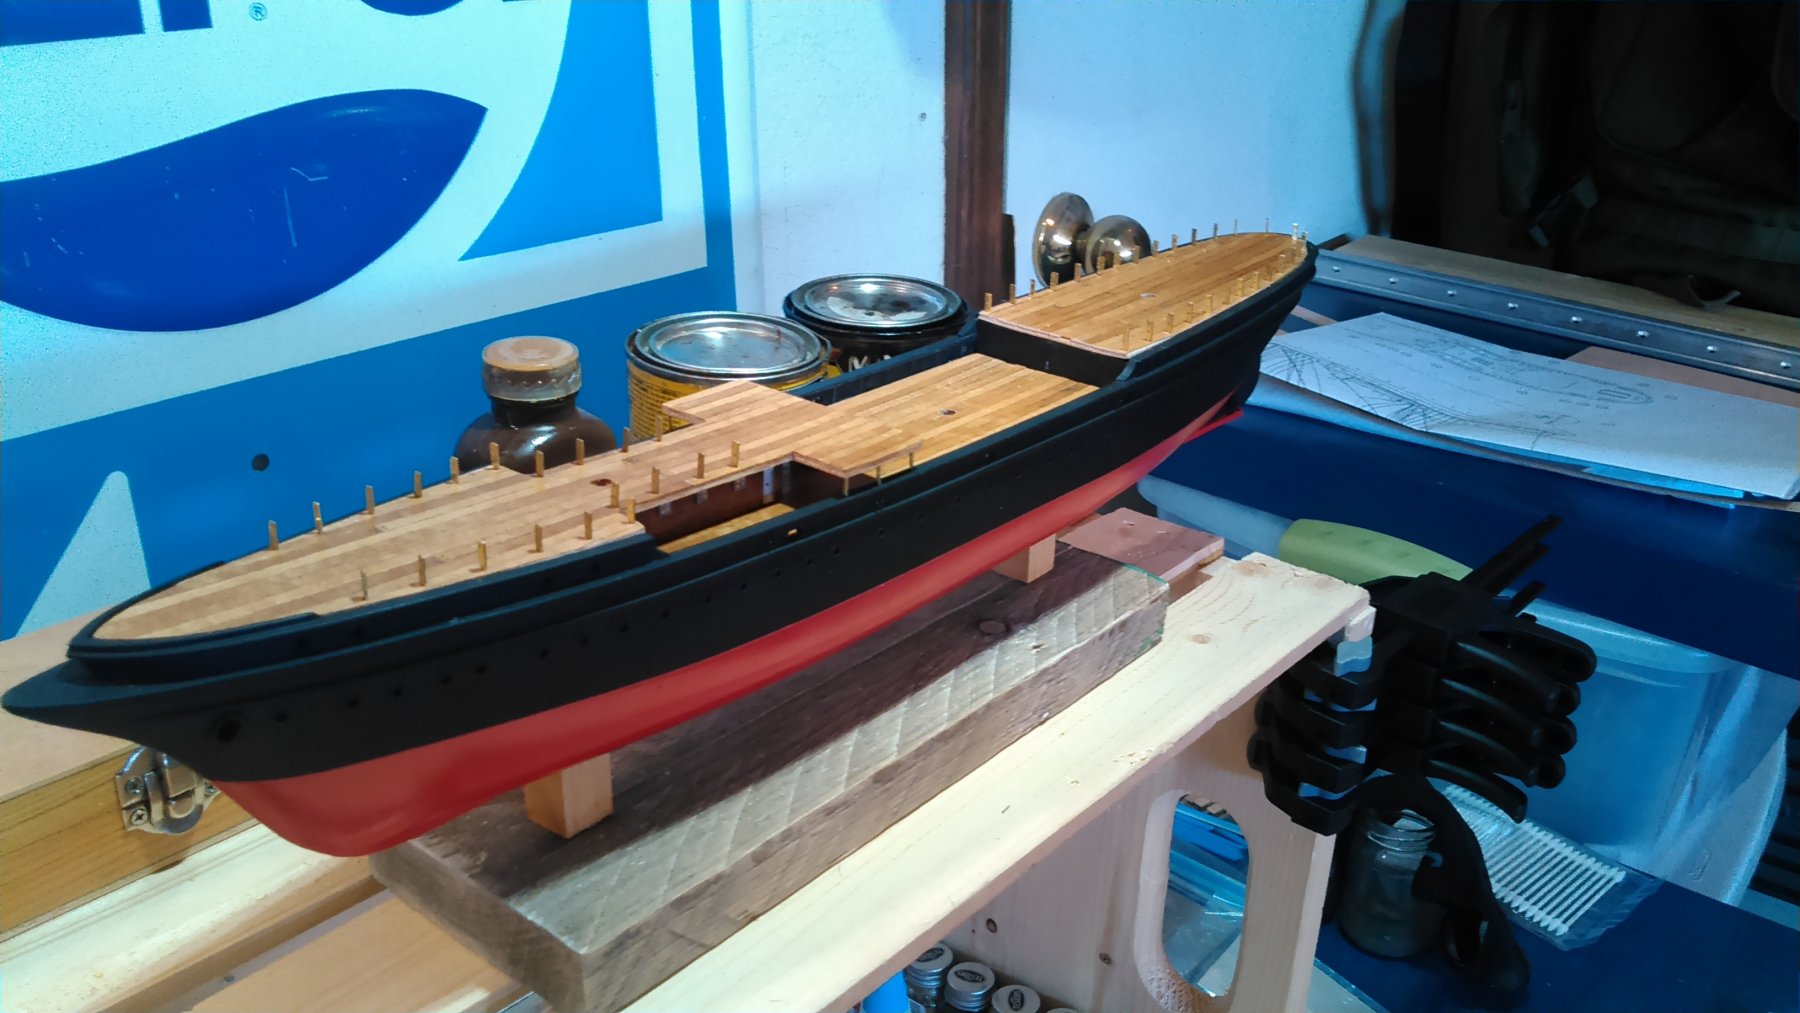
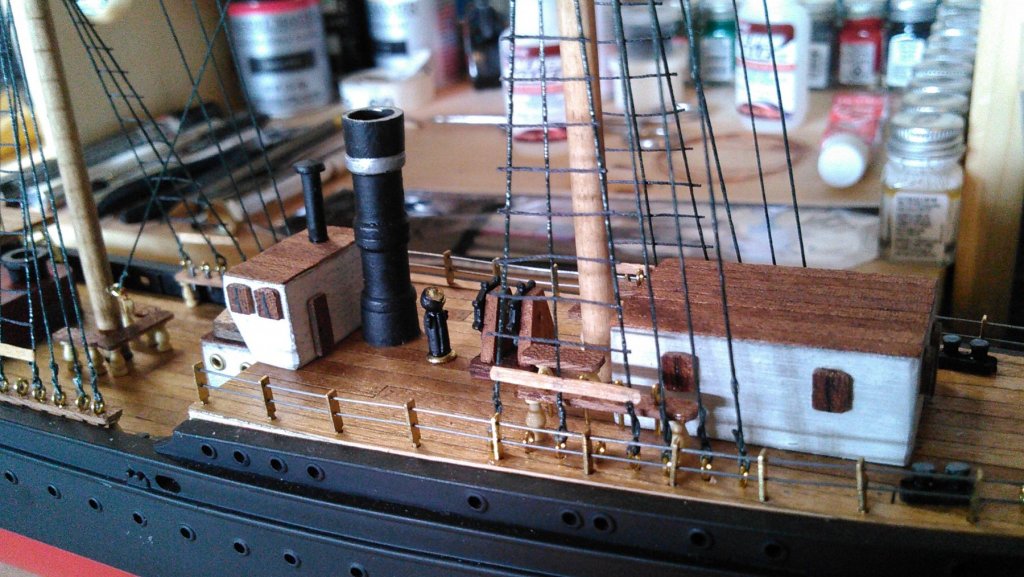
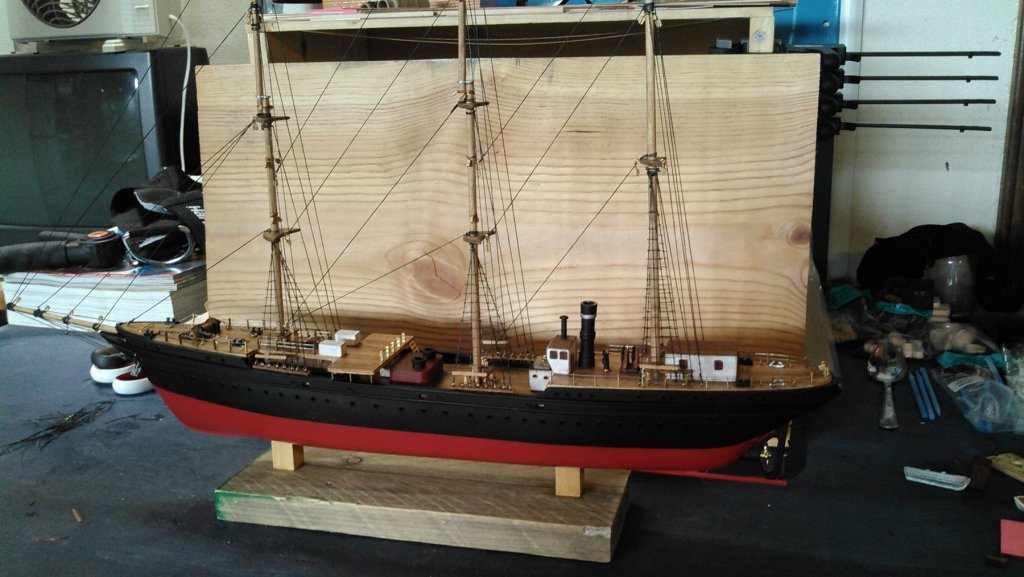
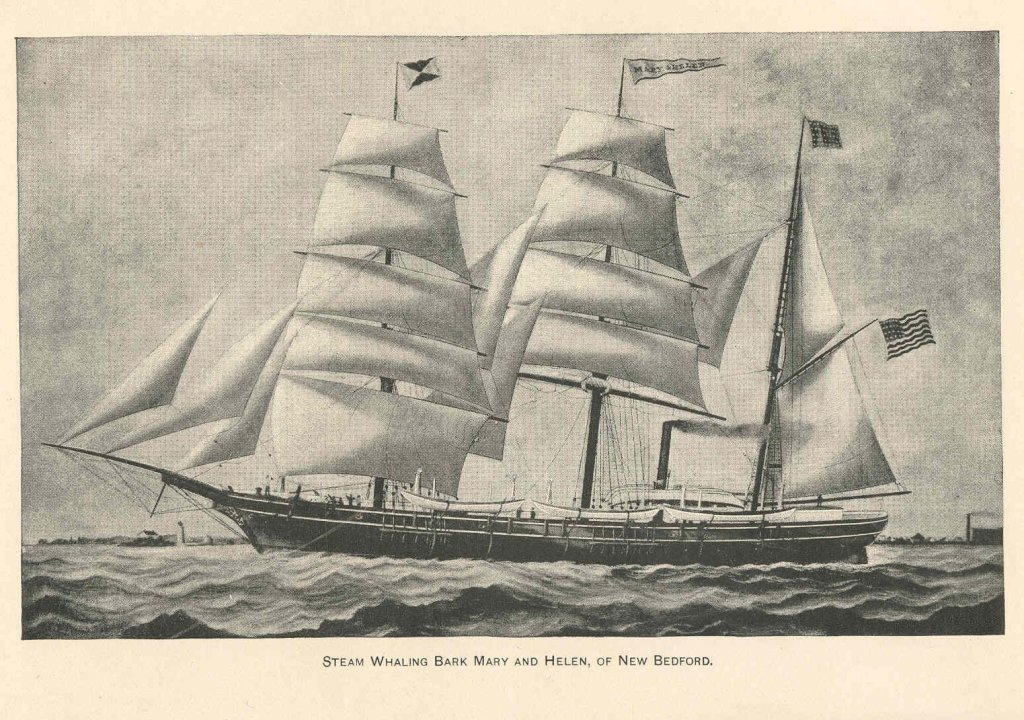
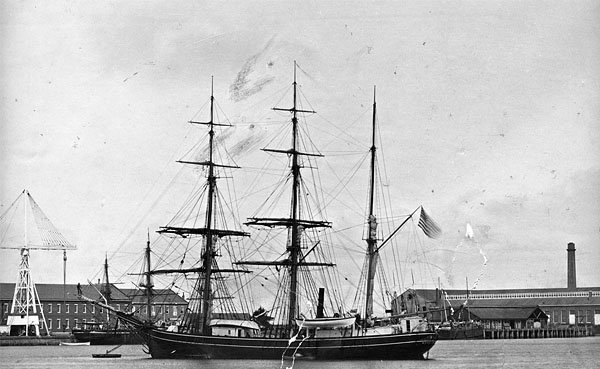
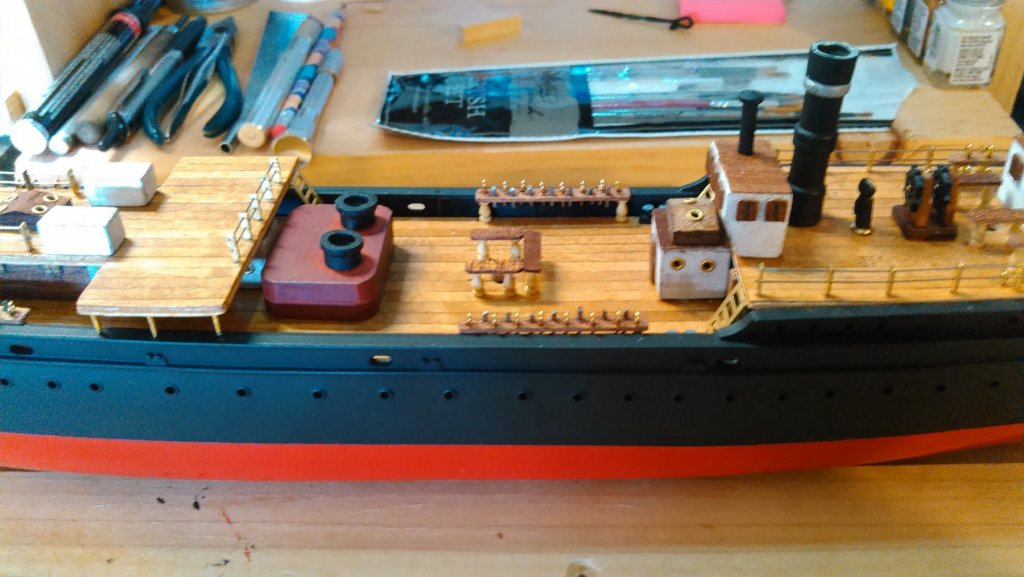
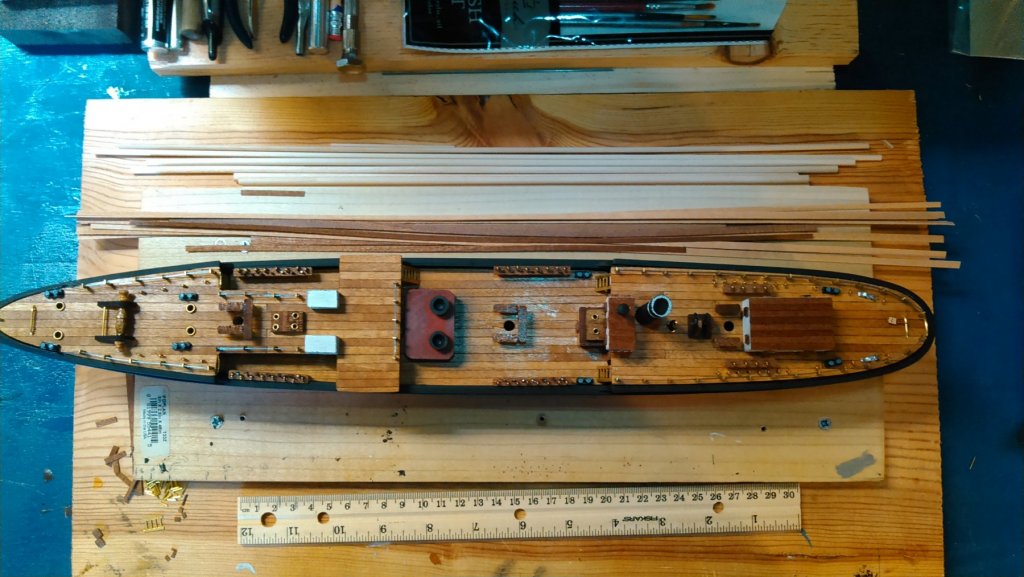
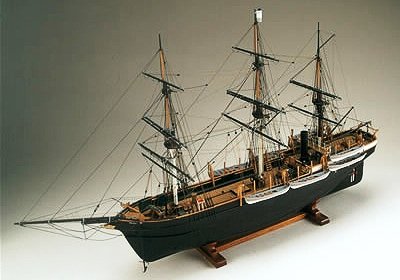
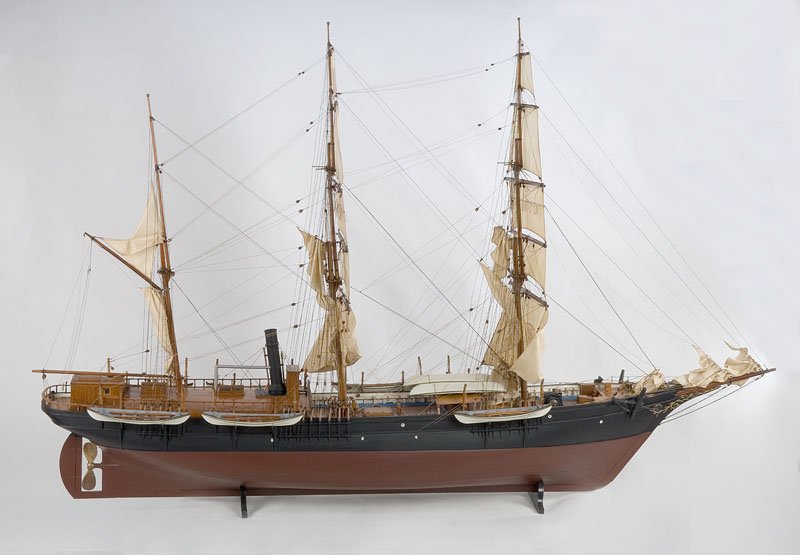
So I spent a couple days doing yardwork, and also doing some research in the evenings on the deck configuration. The only image of the Mary and Helen/USS Rodgers that I could find and verify as not just internet trash was this image of the Mary and Helen which shows a stack placement that appears to be on the aft quarterdeck.... There are two images of the USS Rodgers, which shows it maintained the same basic configuration, after acquisition by the US Navy. I also found an interesting photo of a model of a Pacific steam whaler, the Orca, circa 1894, which shows the same basic engine/stack configuration: As does the layout of the Eclipse, circa 1867: And as she actually appeared: There will be some obvious differences in scale and deck layout and whaleboat positioning, but I am pressing ahead in the spirit of a steam barque whaler, though not an exact duplication of a particular vessel. With that in mind, I spent the last two days on deckwork. I completed the fo'c'sle and central deck pinrails, the central deckhouse with skylight, and the ladders and bitts (shown below with other aft deck appointments sitting unglued while I figured out my deck plan). I then moved onto the aft quarterdeck. I completed the pilothouse with its stove funnel, got the mizzen pinrails in place, as well as the bitts and rope/cable guides and the deck eyebolts. Once this was done, it was commitment time..... My decision was to complete the aft deckhouse and place it directly aft of the mizzen, per the plans. Once this was done, I referred to the rigging plans and made some measurements and adjustments until I could place the ship's wheel, the binnacle and the stack aft of the pilothouse and as amidships as possible so as to avoid interfering with supports and rigging. Once all of this was placed, I could place the aft spanker rack and (my first ever!) block (I hope I got that right - both the name and the block, lol). I also decided to forego the aftermost wheel, as there would be no need for it on a barque whaler... I got kinda into this as I went along and neglected to take regular photos. But here is what I have so far. Next up will be boats and then...… rigging. Until next time.
.jpg.ef21dc77fa96502eba3cae5f42314493.jpg)


.jpg.c504240aeee45a5185258467c57fd4e4.jpg)
- 37 replies
-
- 3
-
-
- eagle
- constructo
- (and 1 more)
-
If any of you vets with much more knowledge than me have suggestions about placement of the stack, tryworks, etc. by all means chime in. All the abbreviated plans I've seen of steam sails have the stack located within 1/3 ships length of the screw, and generally amidships, but I'm open to suggestions or direction. Cheers.
- 37 replies
-
- 1
-
-
- eagle
- constructo
- (and 1 more)
-
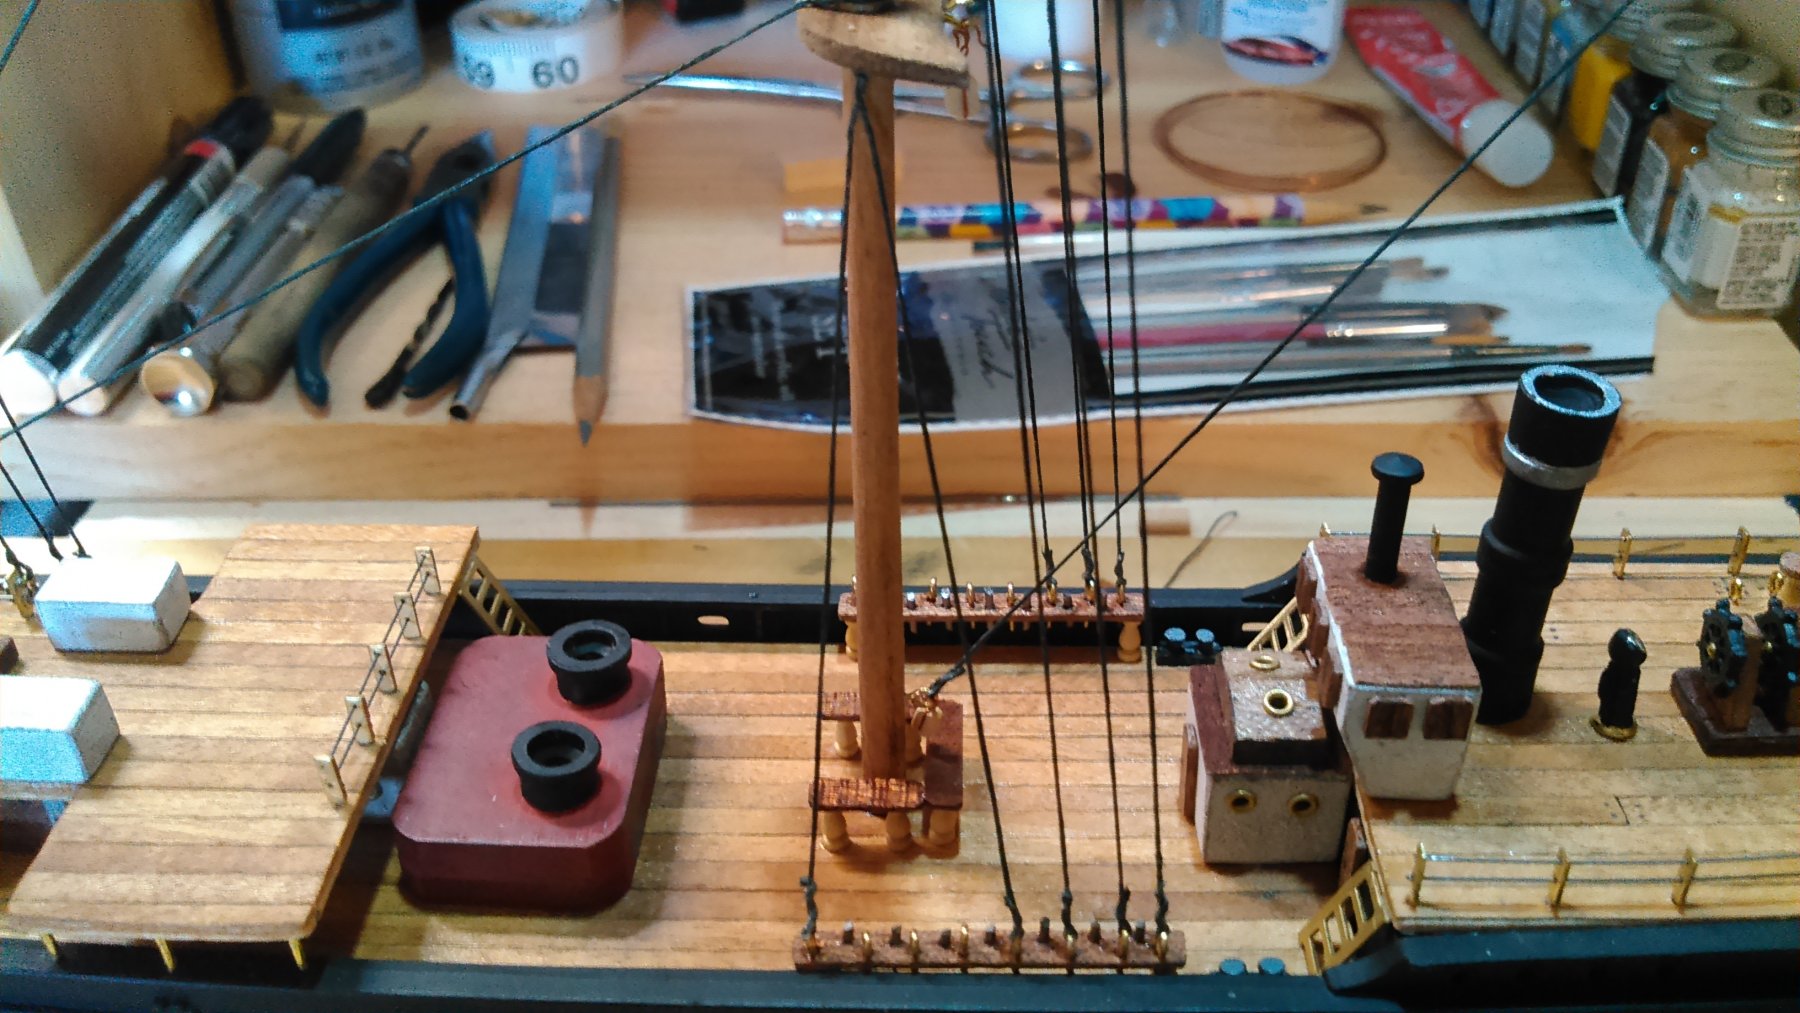
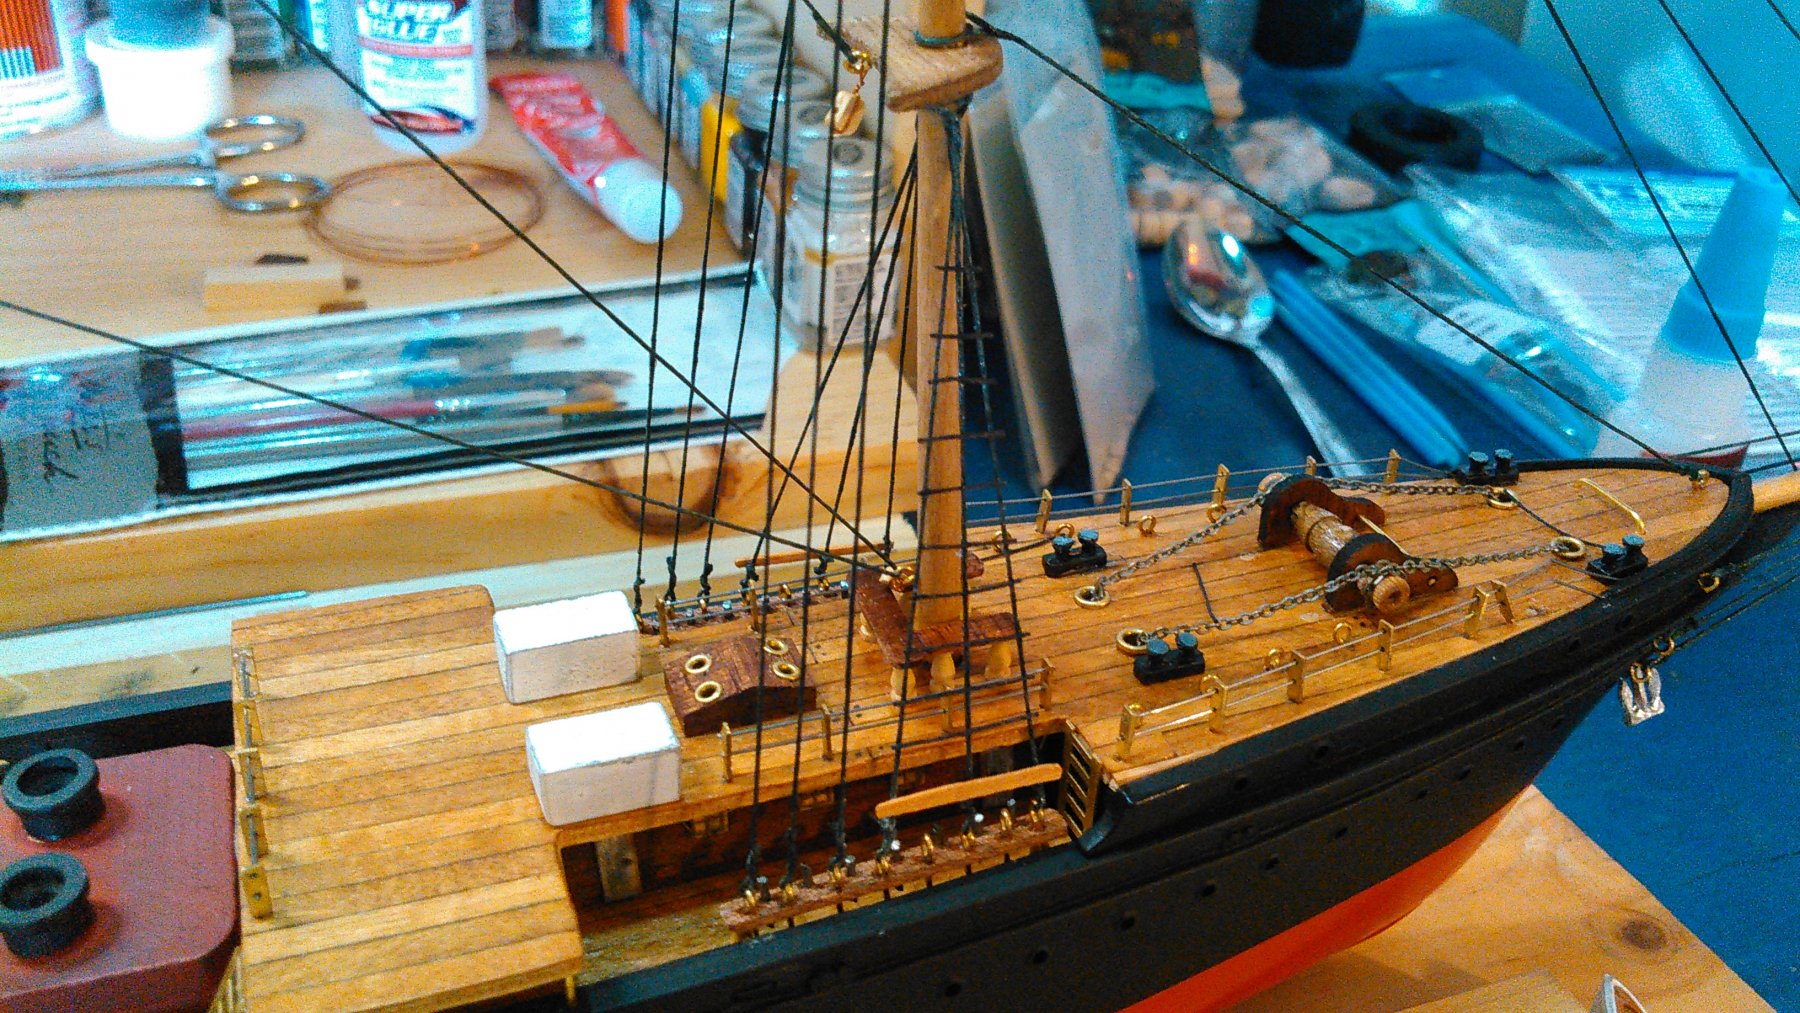
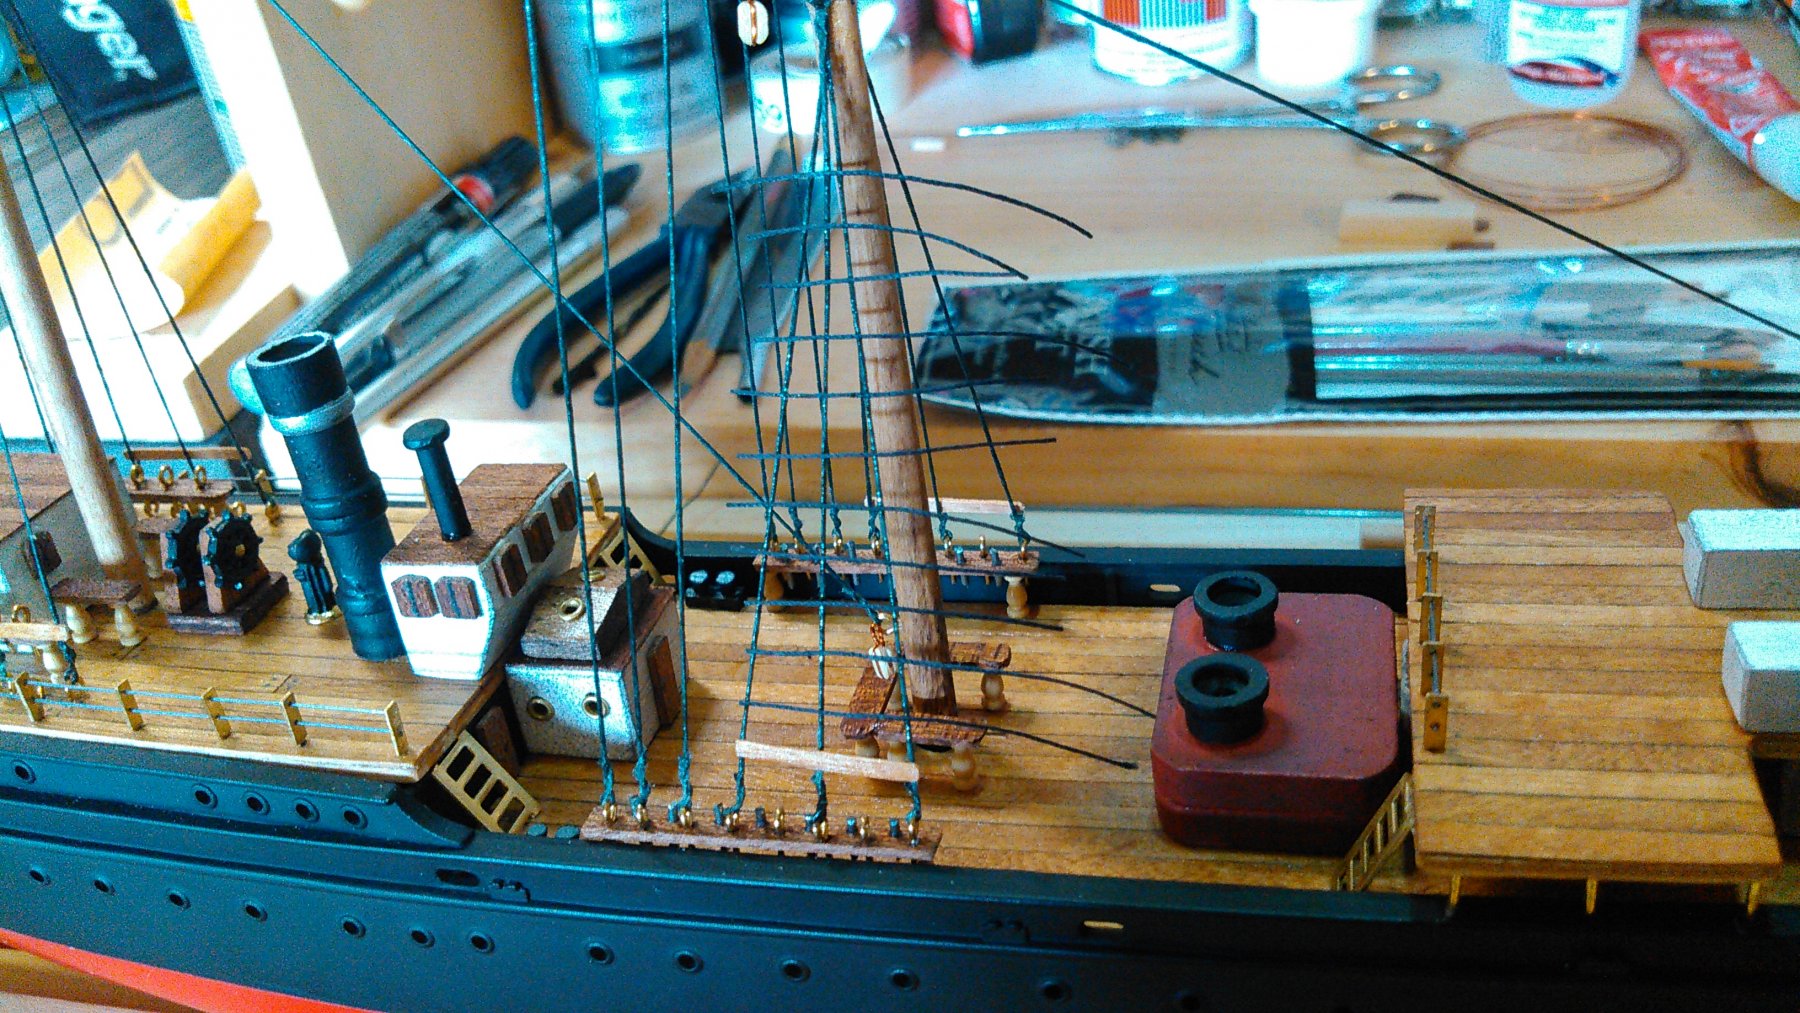
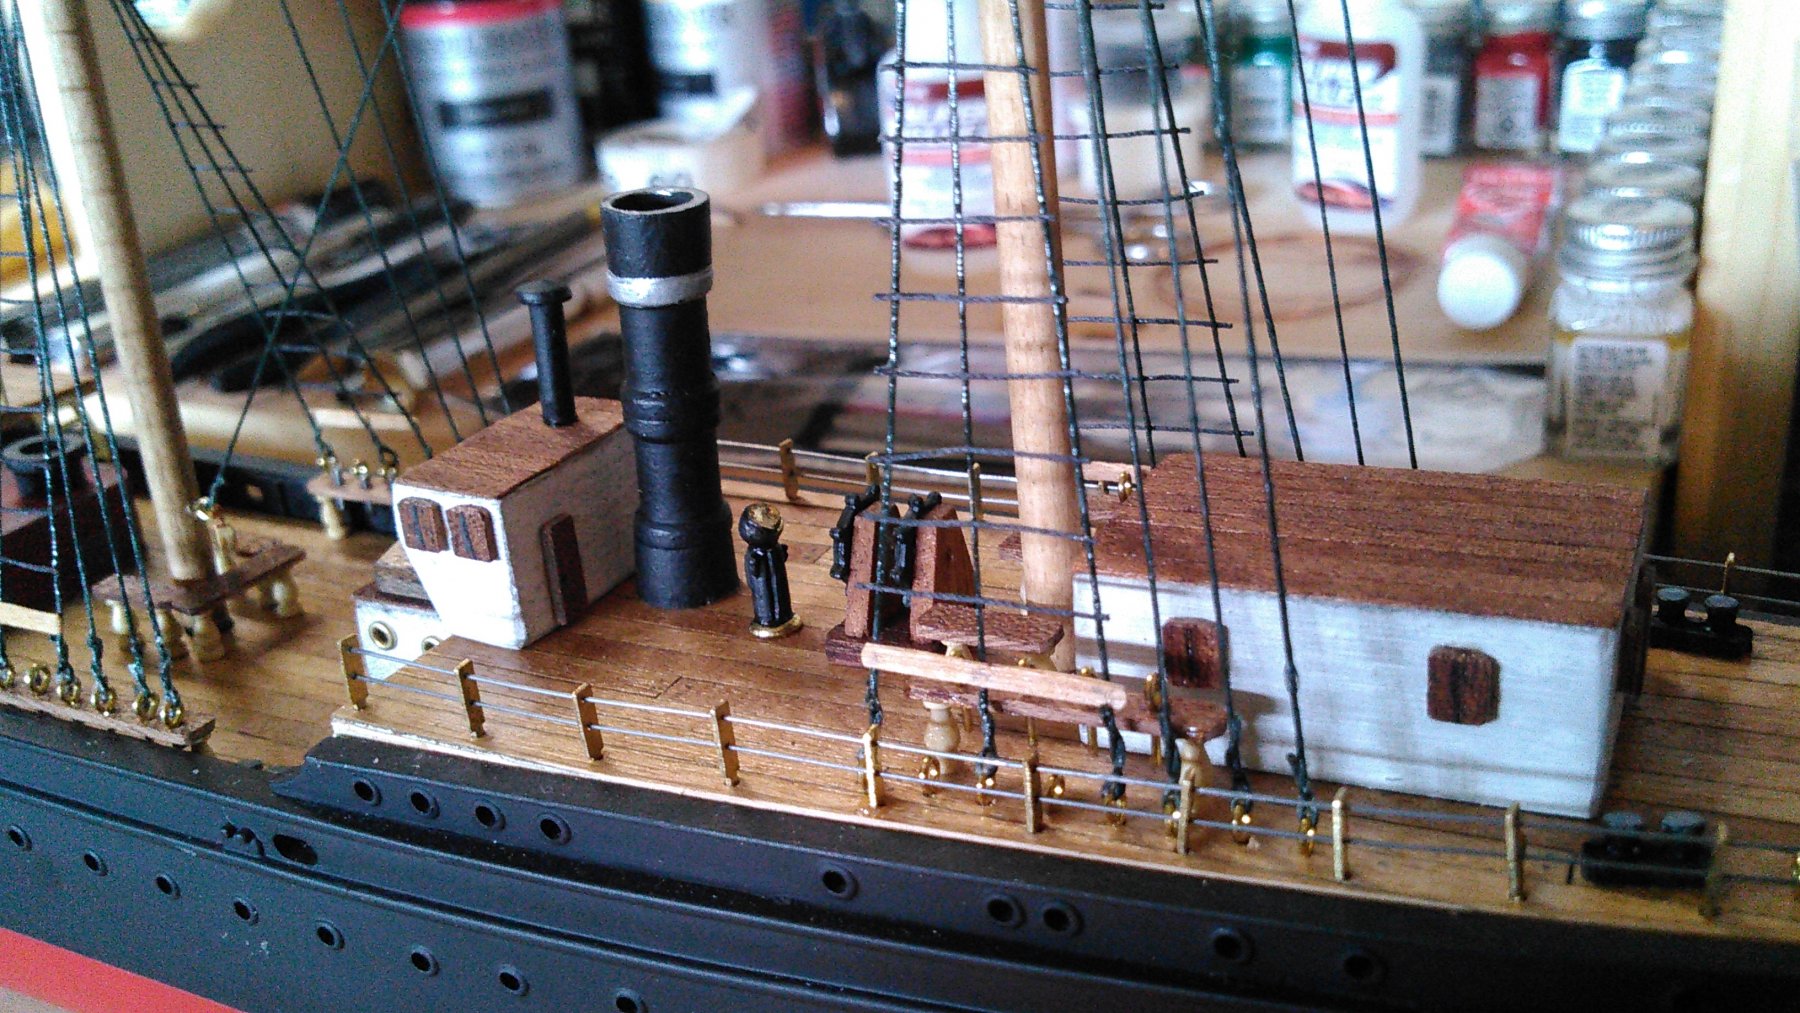
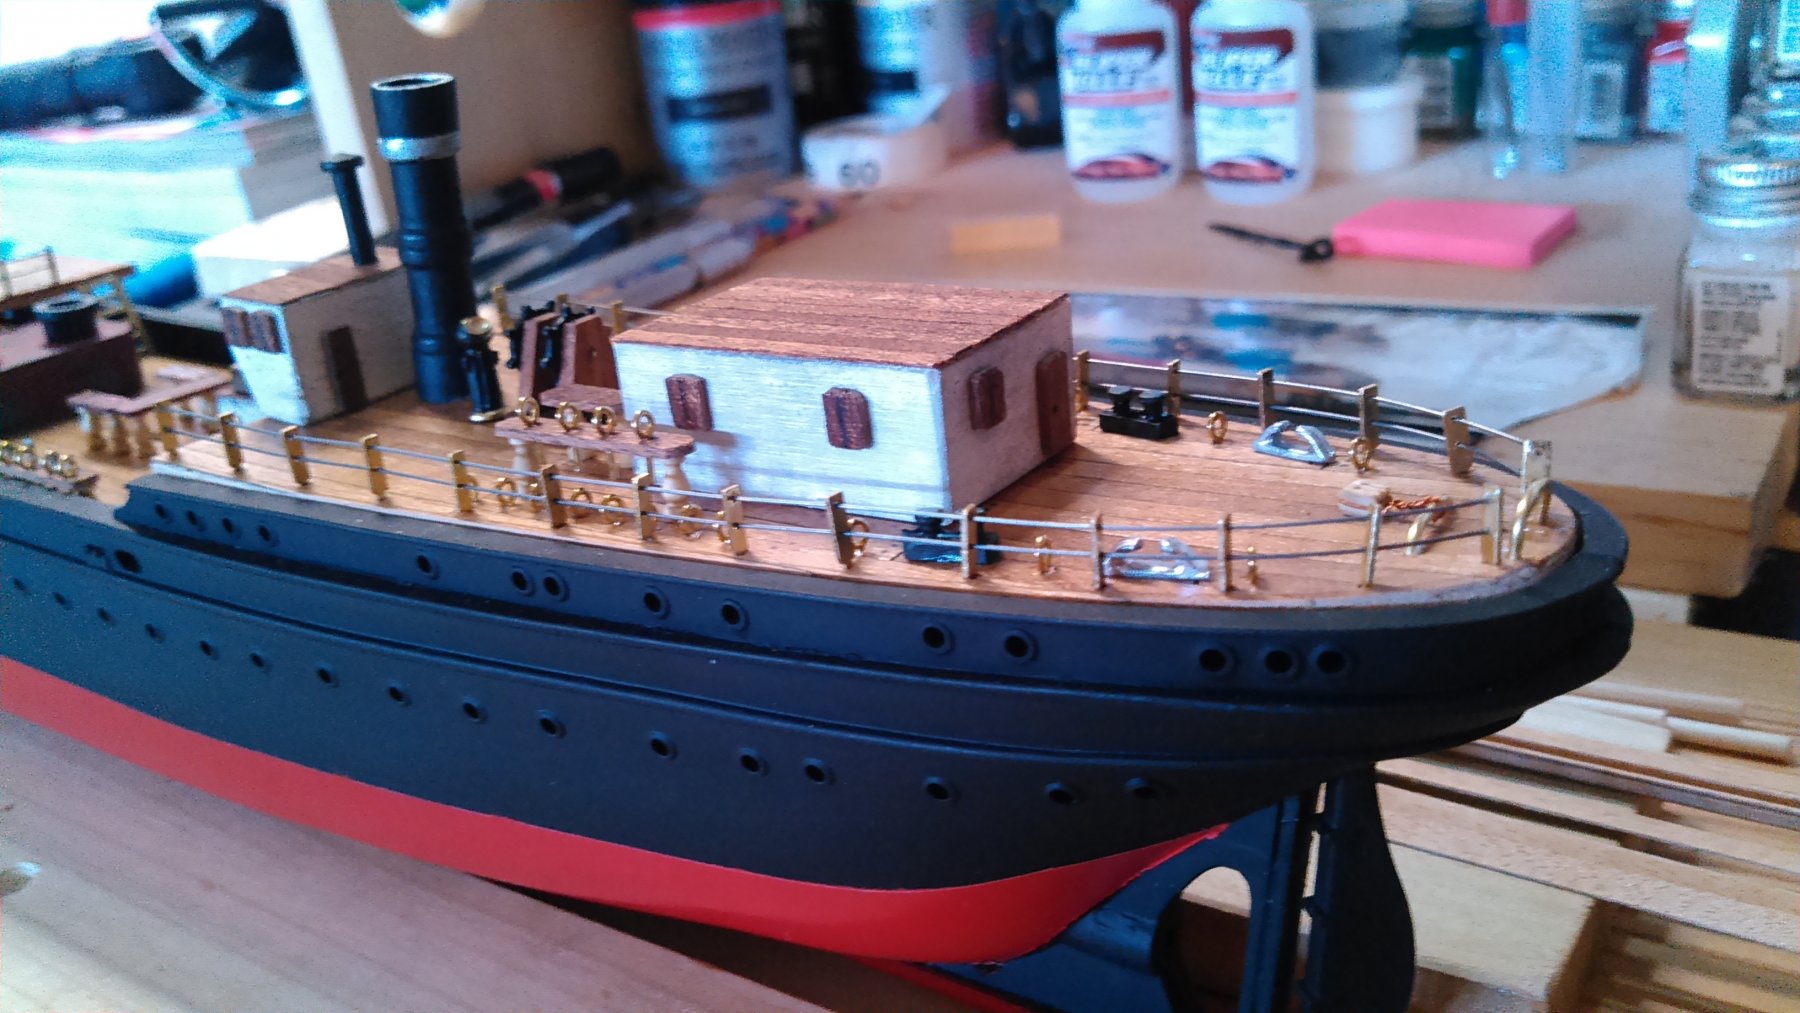
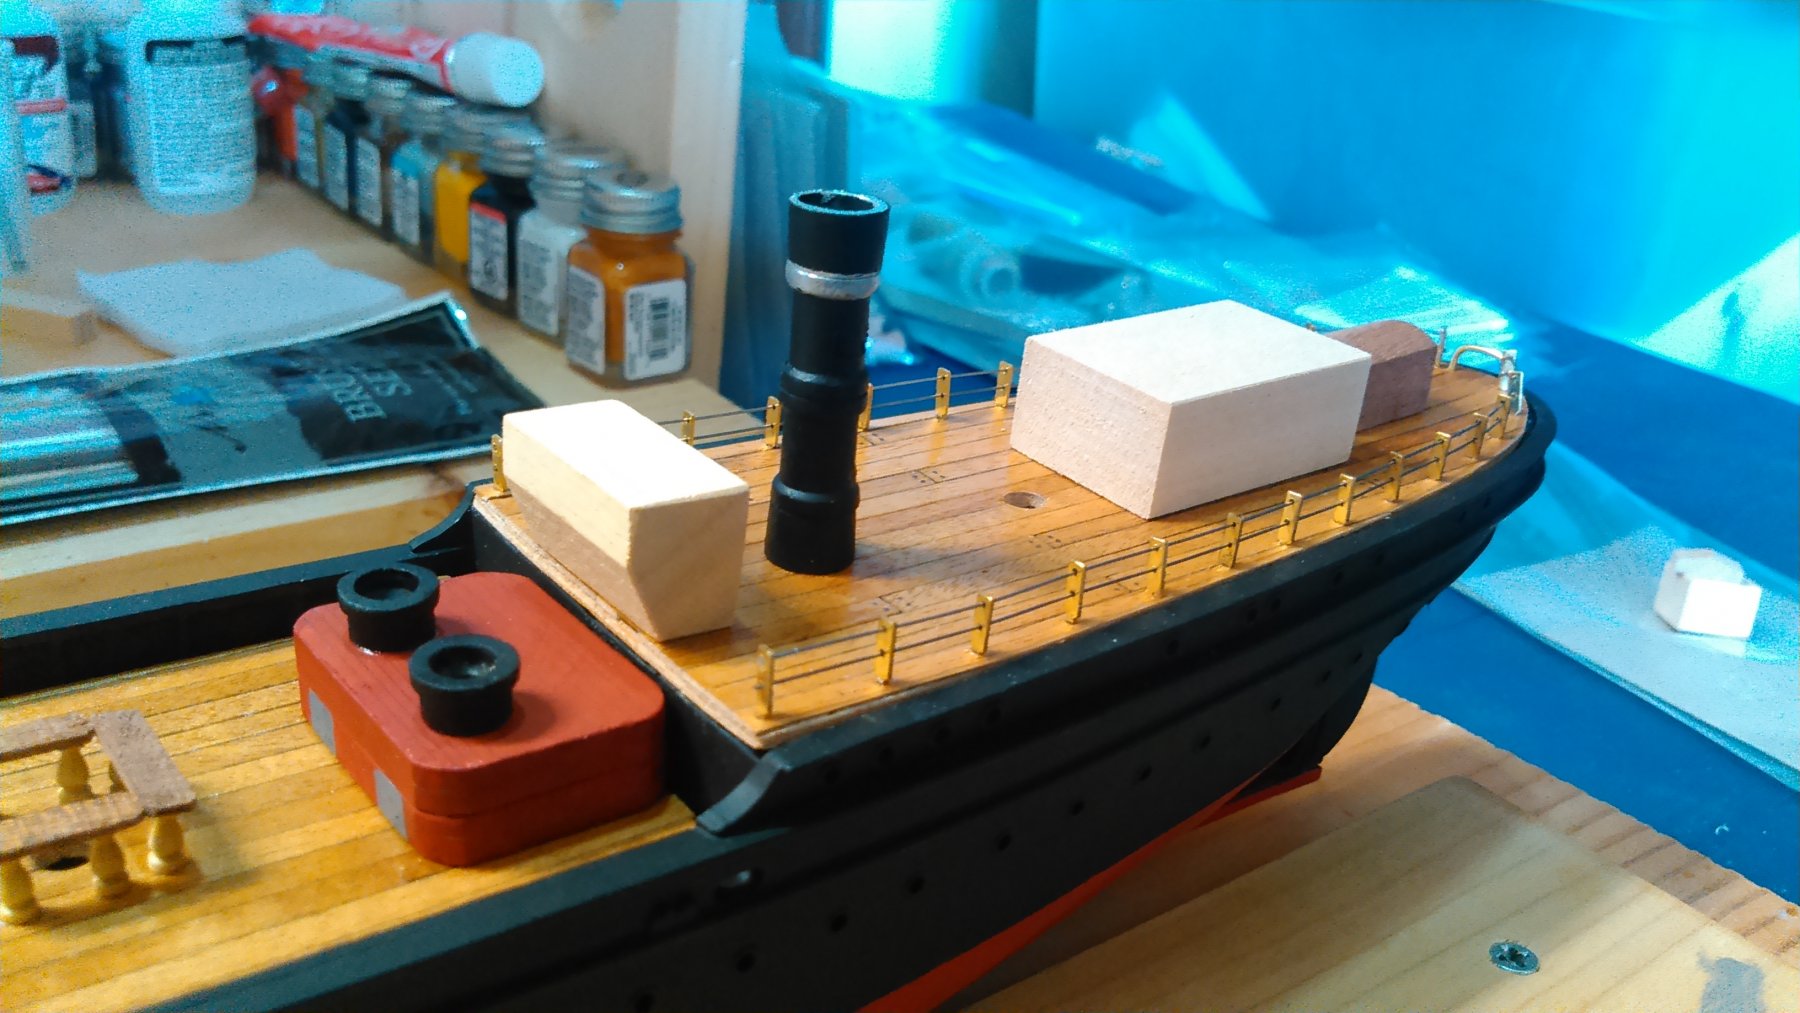
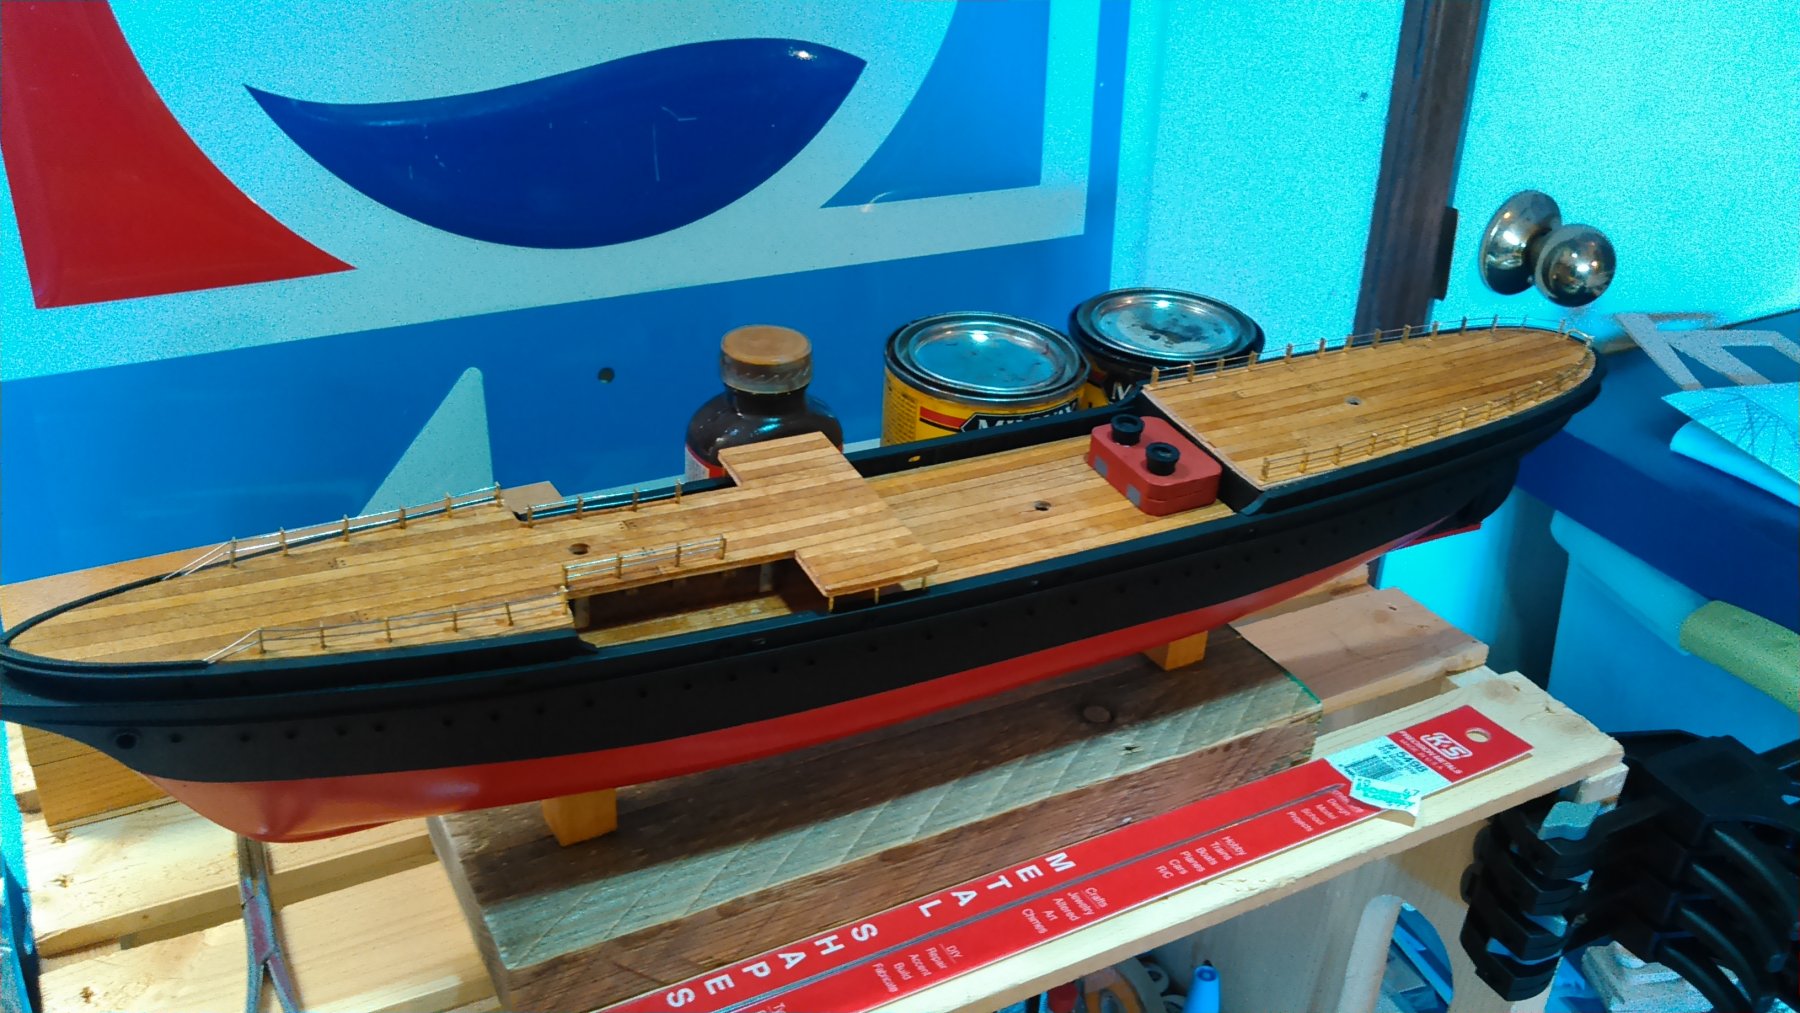
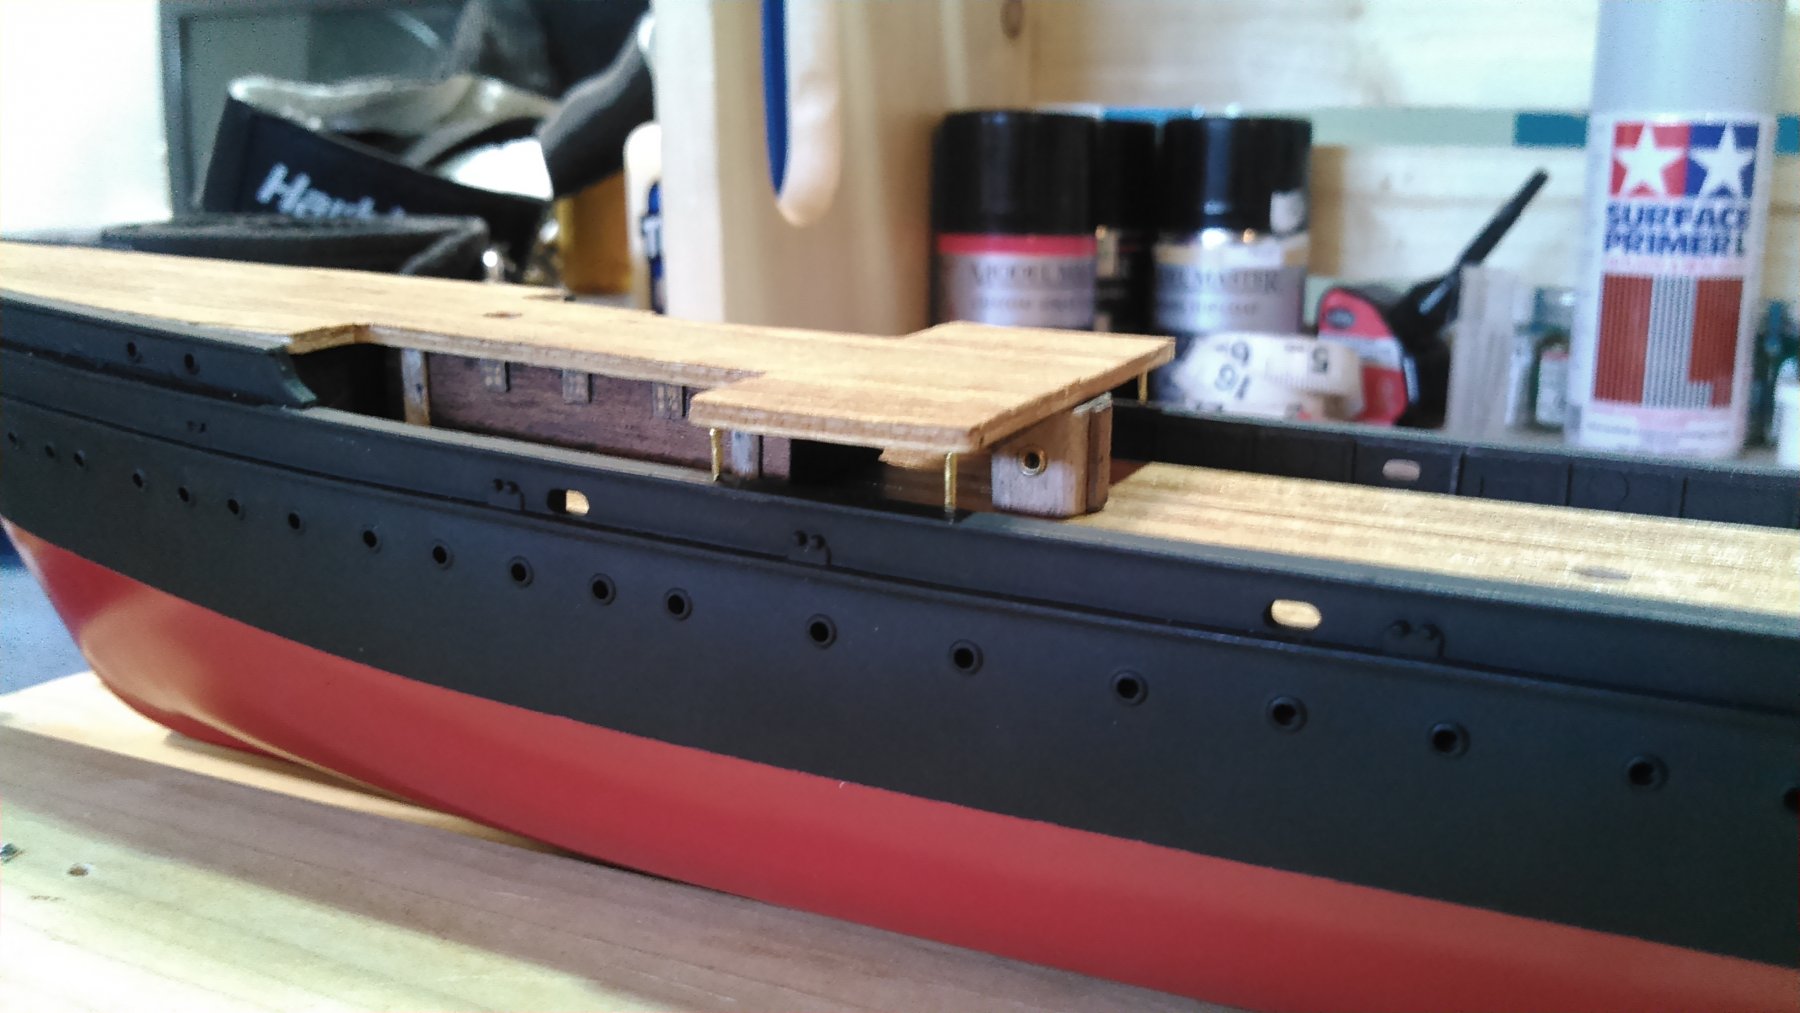
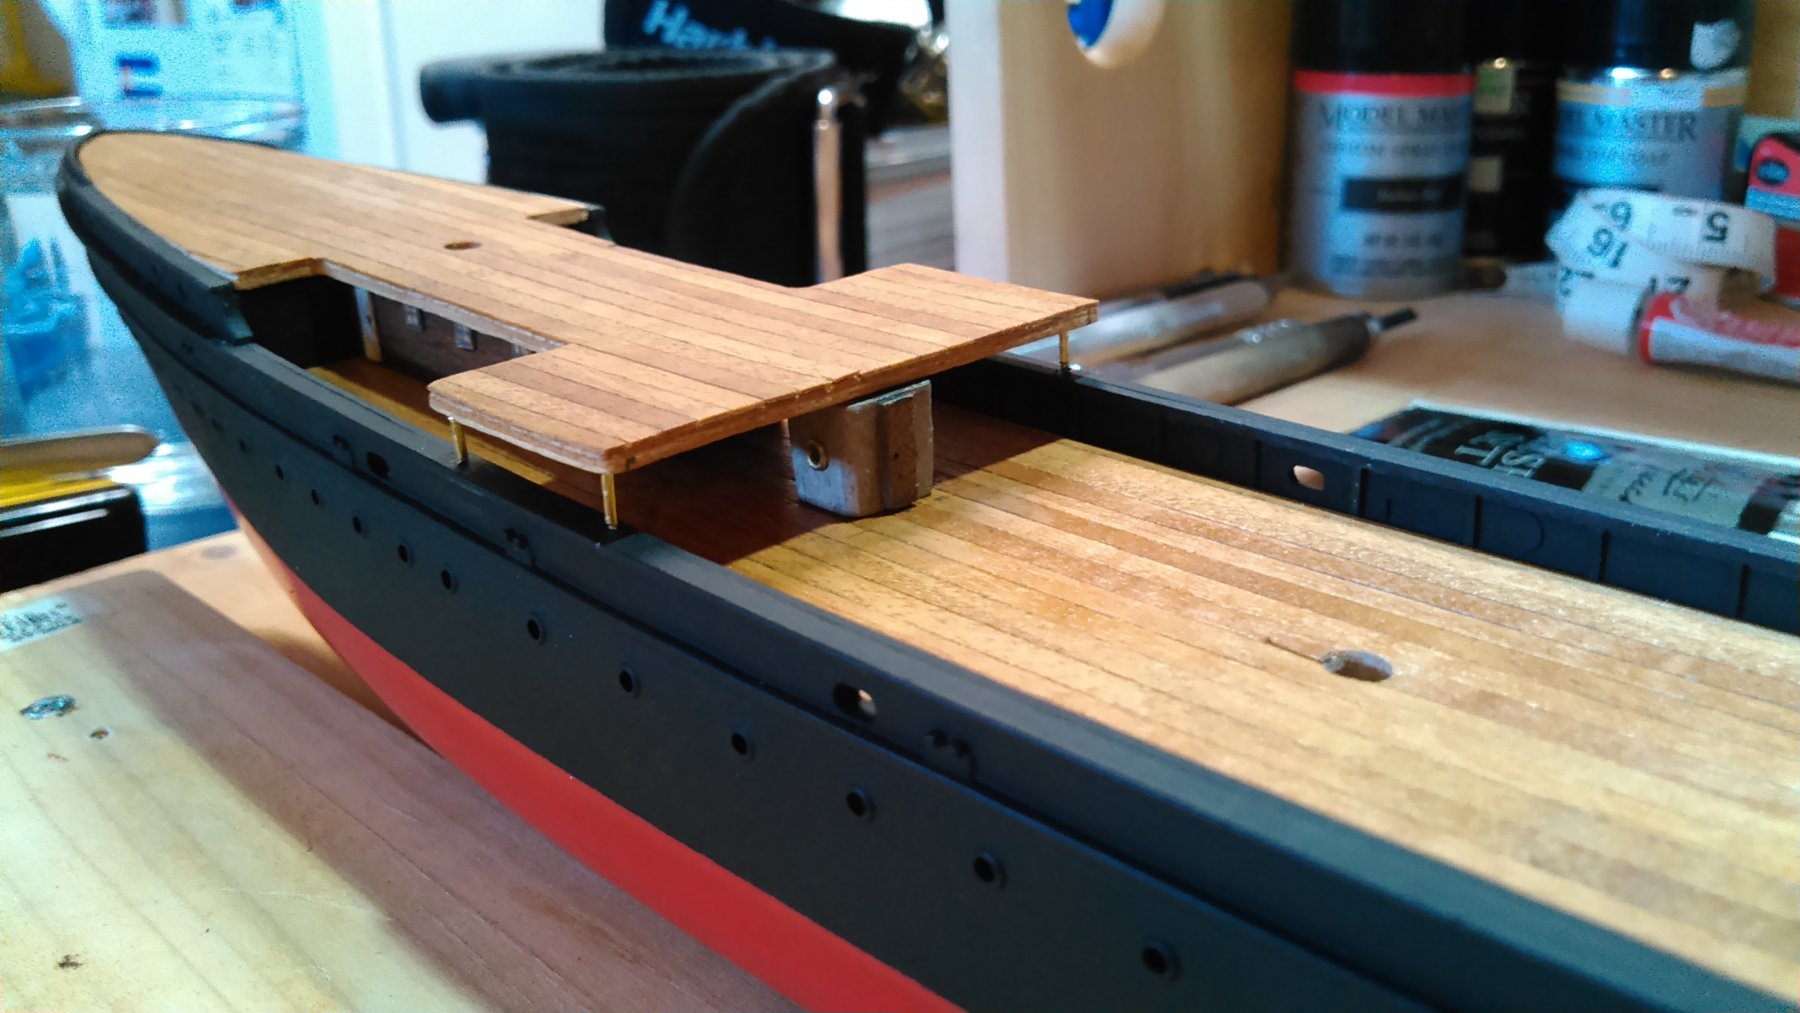
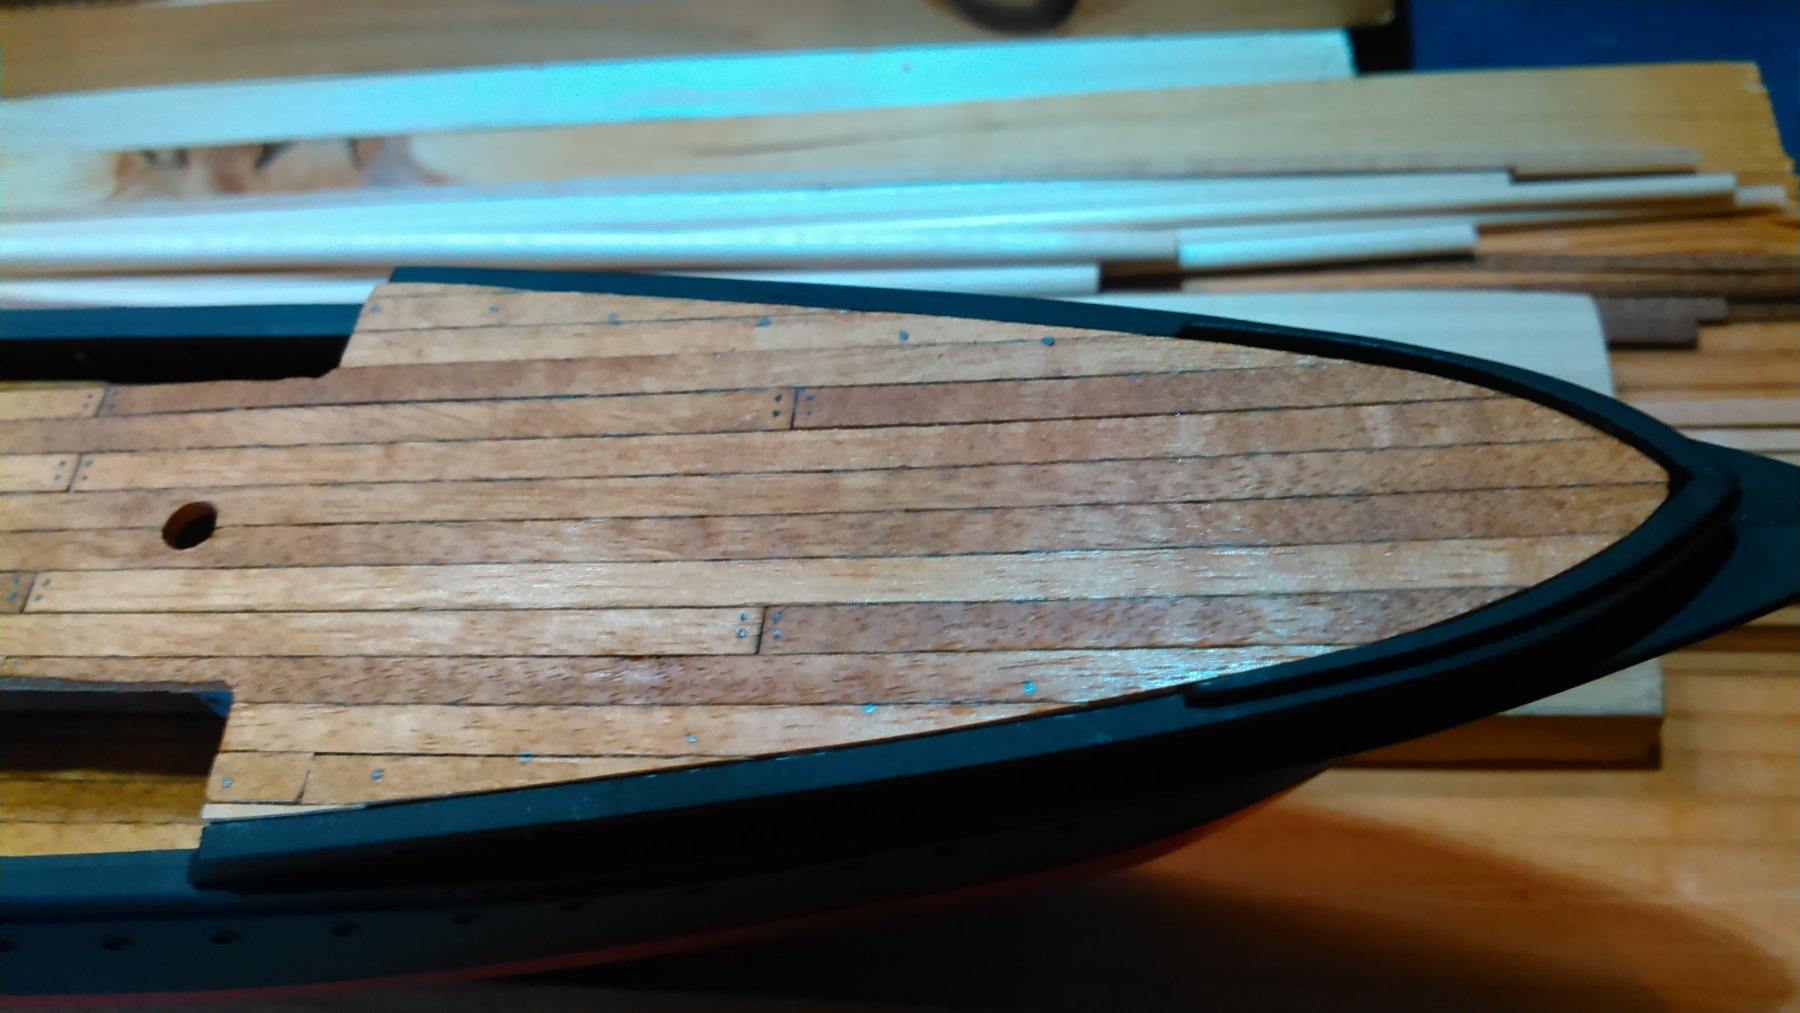
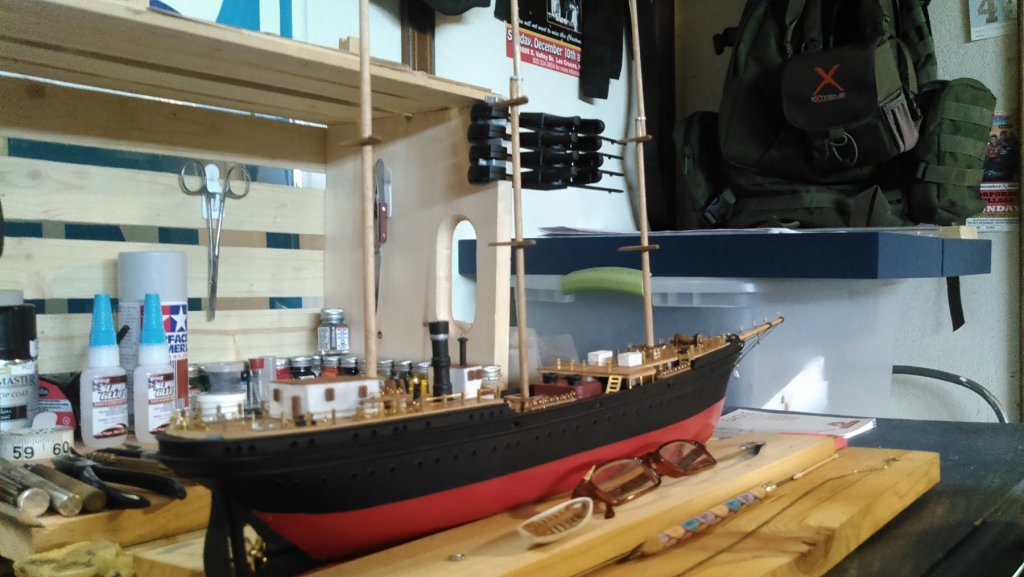
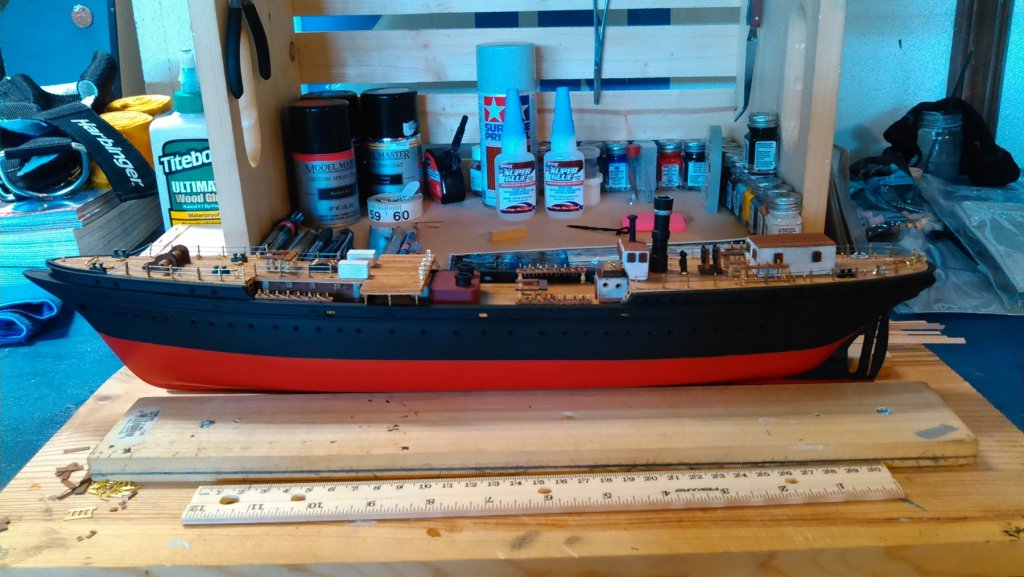
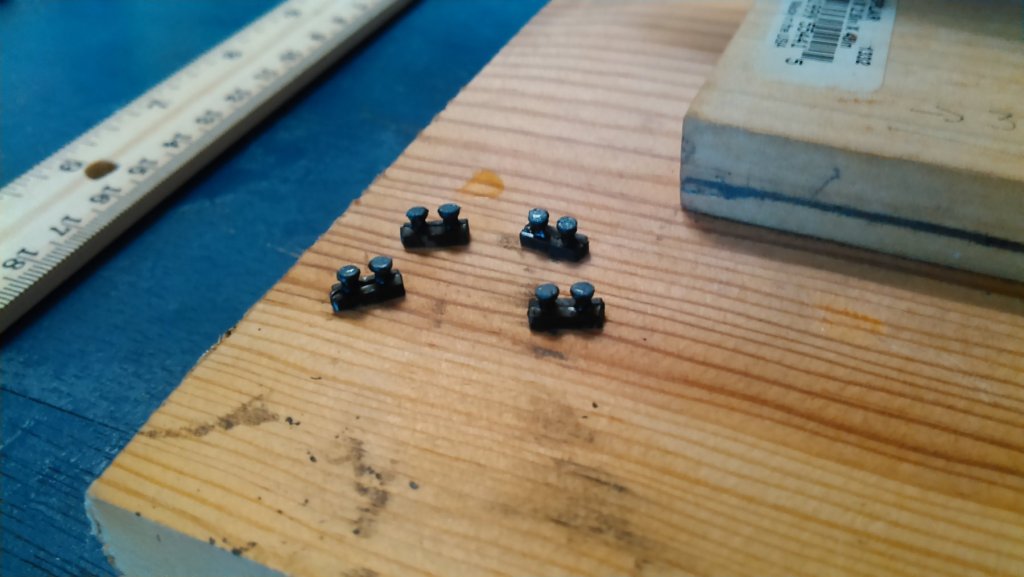
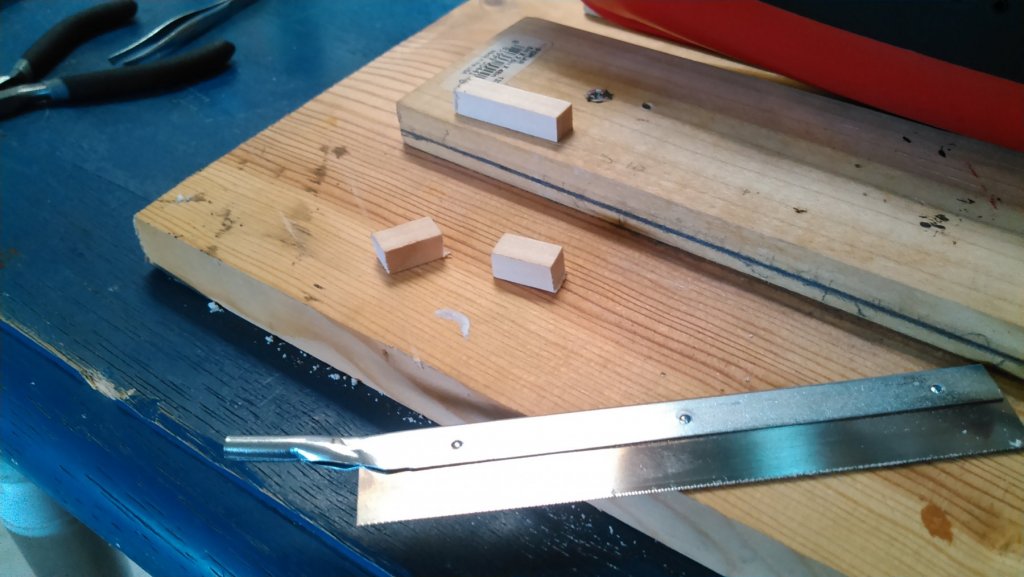
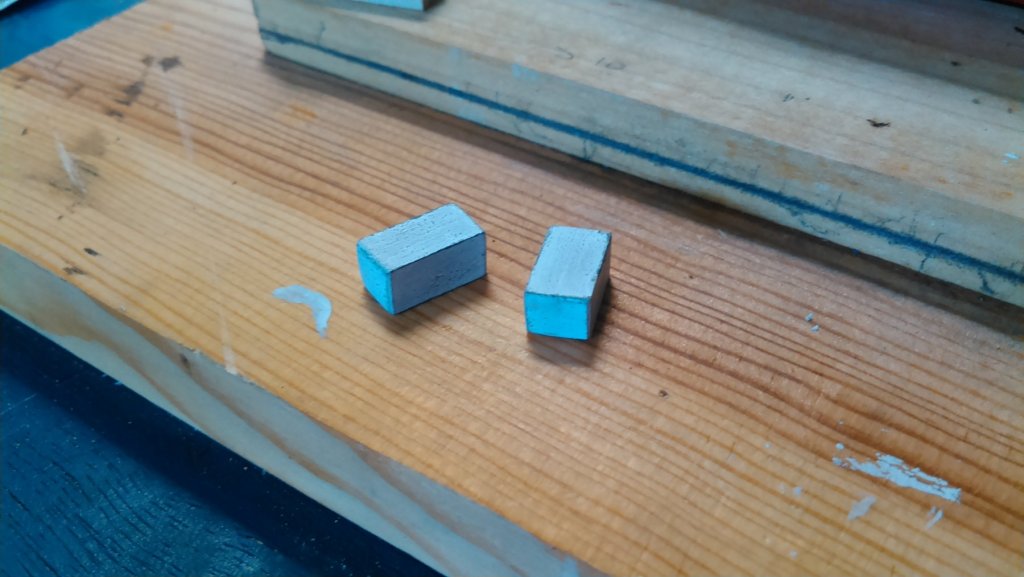
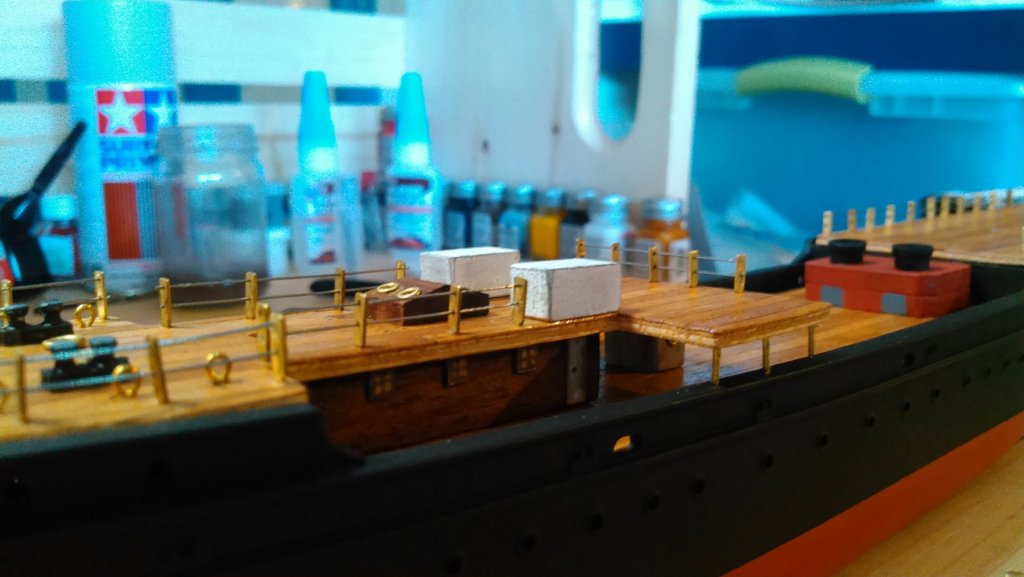
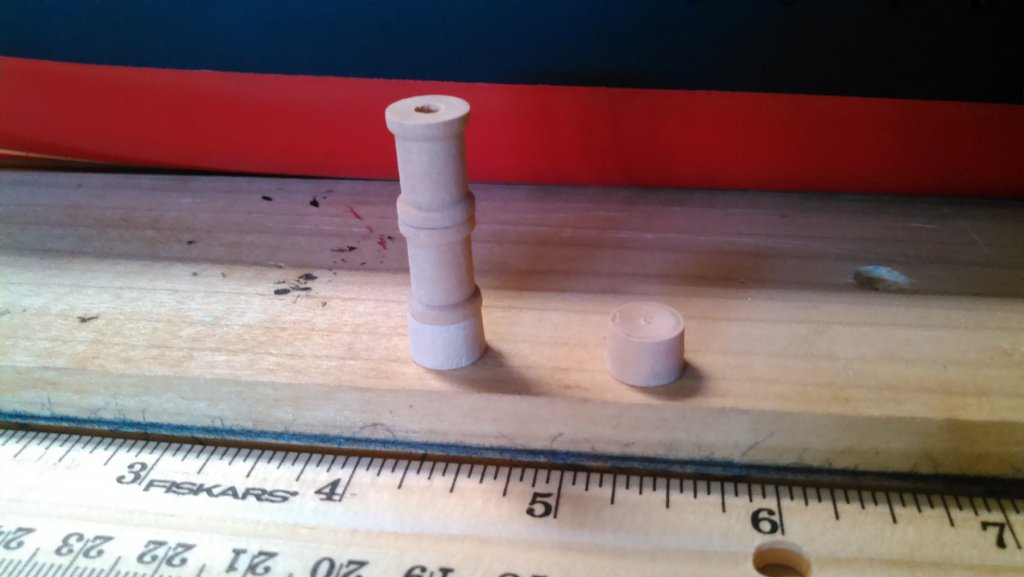
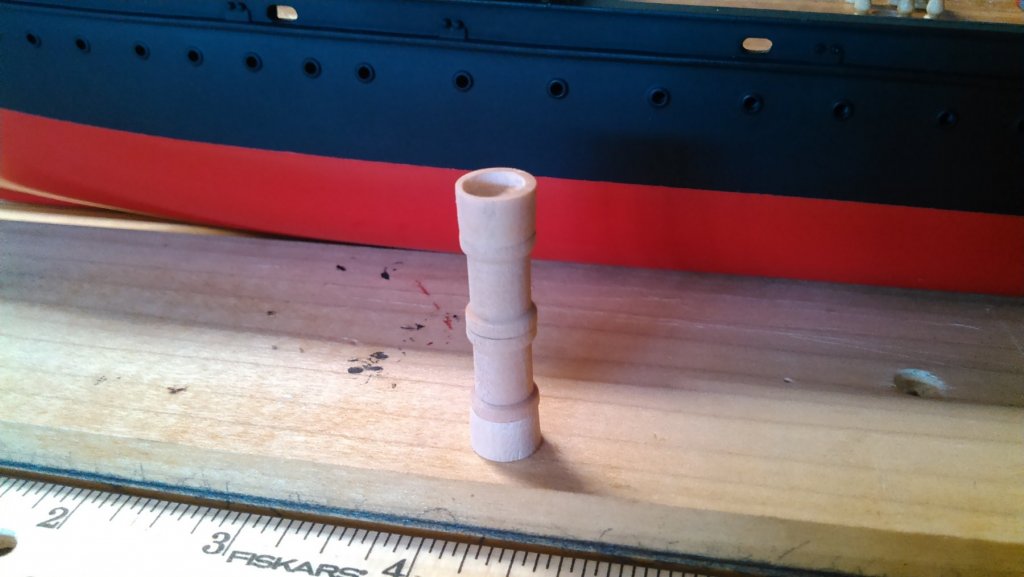
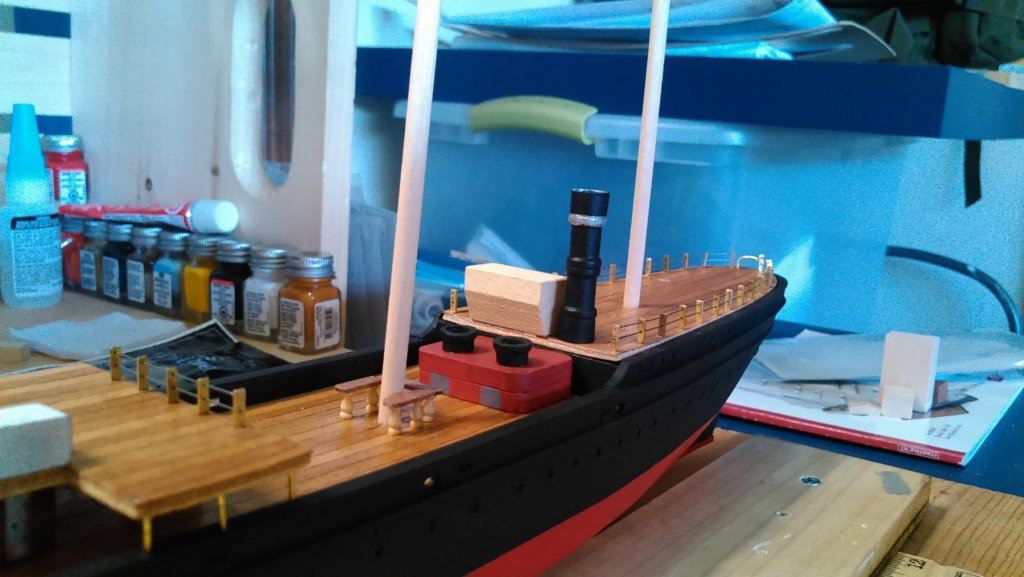
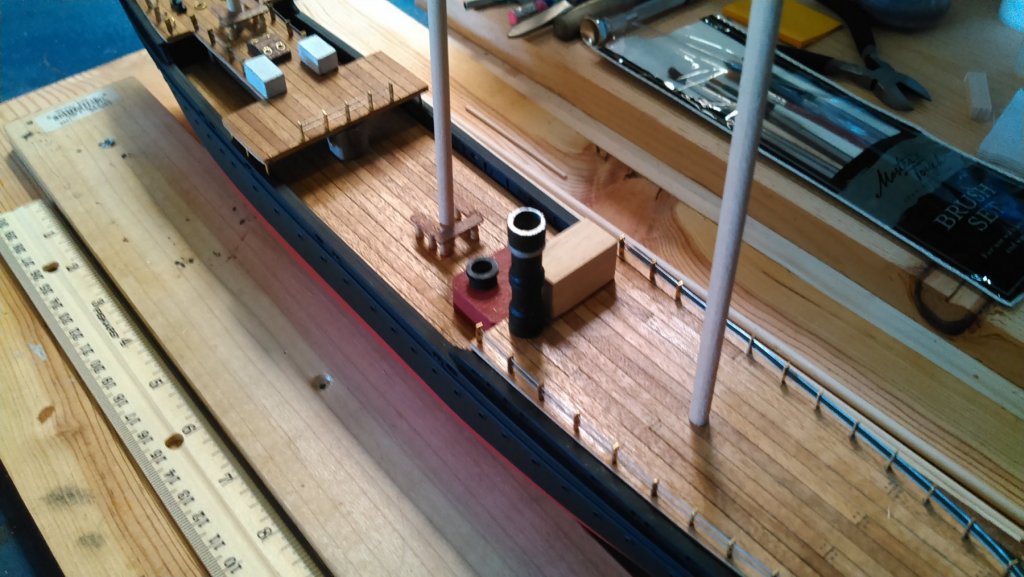
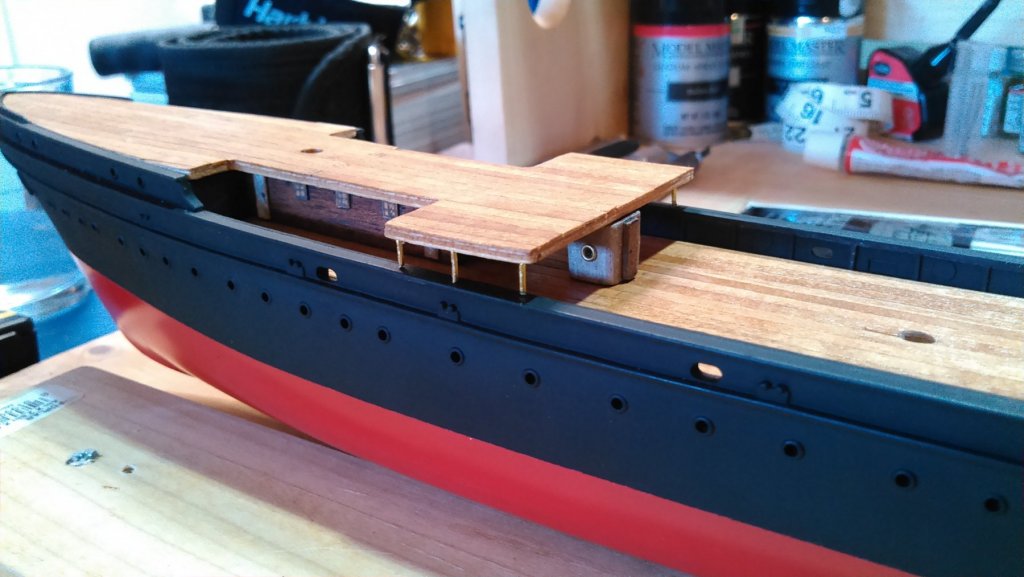
This morning was some deck appointments, as well as some experimenting for the modification.... Firstly, I sanded, stained and built the windlass per instructions (other than the stain, which I varied and mixed in order to continue with the "worn but clean" motif). As it dried, I prepared the four (4) fore double bitts. The sprues on the castings were pretty gnarly, so it took some sanding and a good paint to make them presentable. Once the windlass and bitts were in place, I sanded, stained and drilled the skylight over the deckhouse, and added portholes to it, as well as adding the aft foredeck's stanchions and railings. Once those were in, I cut a 15 mil block in half, sanded the two halves, painted them white and then rubbed them with my fingers with a thin film of pencil lead to age them a bit - especially around the edges - and placed them on the mid-foredeck as housings. Once all this was done, and after eyeing my little spools and small furniture plugs from Hobby Lobby, I had an inspiration for a smokestack for this steam barque... After a little gluing, sanding and drilling..... Then painting.... Now I just have to figure out how best (and most accurately) to move around and/or modify my quarterdeck appointments (placed unfinished here just to give you an idea of how things should be arranged) in order to fit it in there. I'd like to have it amidships of the fore end of the quarterdeck, right behind the pilot house, but I also need to fit in a binnacle and wheel somehow.... I also placed it to the larboard of the pilothouse, which is interesting and certainly would make all the other placements straightforward, but I have no research that would support such a placement. My only other option may be to move the tryworks forward on the central deck, just underneath the aftmost part of the foredeck, facing aft. Then I could place the stack on the central deck (basically where the tryworks is in the above photo), and keep the quarterdeck plans as instructed.... Choices, choices..... So to end the day I built my mainmast and foremast pinracks and put them in place. You can see the mainmast pinrack above, and both of them in the photo below. Then called it a day. Next up will be side pinracks and ladders, and more bitts, and then we'll start on the aft deck and see what we come up with. Until next time. Cheers.


- 37 replies
-
- 3
-
-
- eagle
- constructo
- (and 1 more)
-
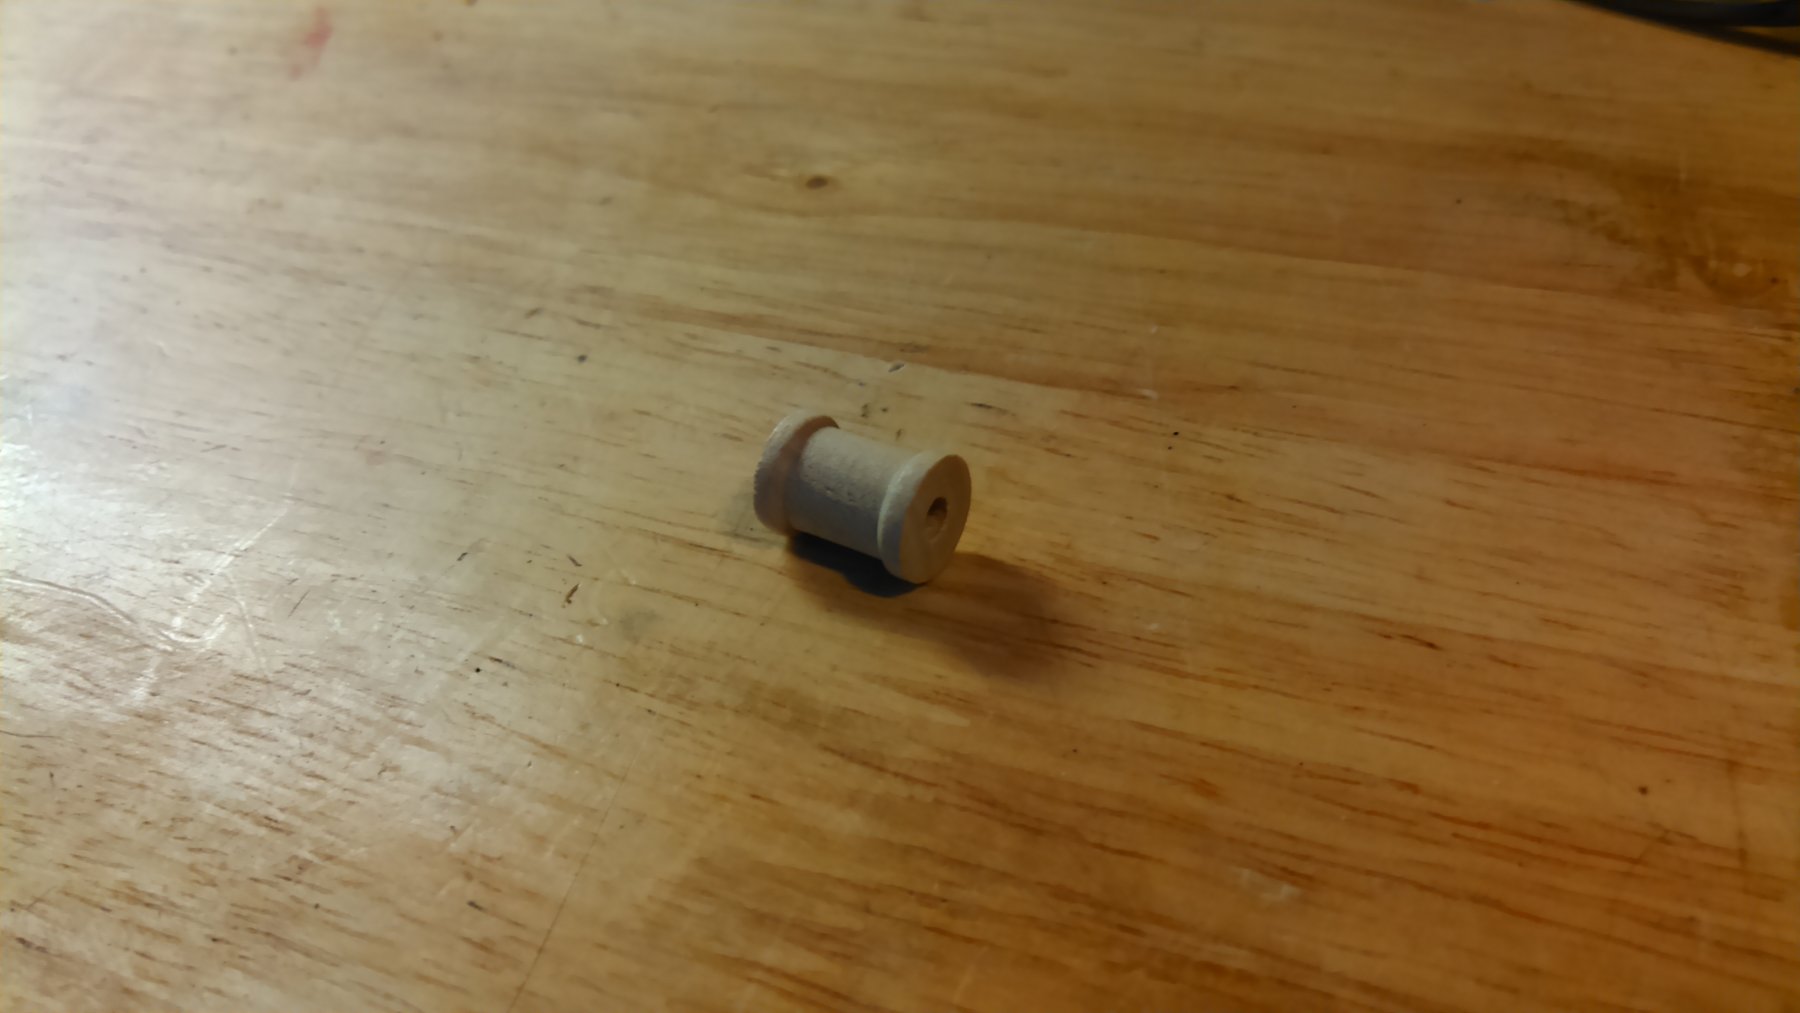
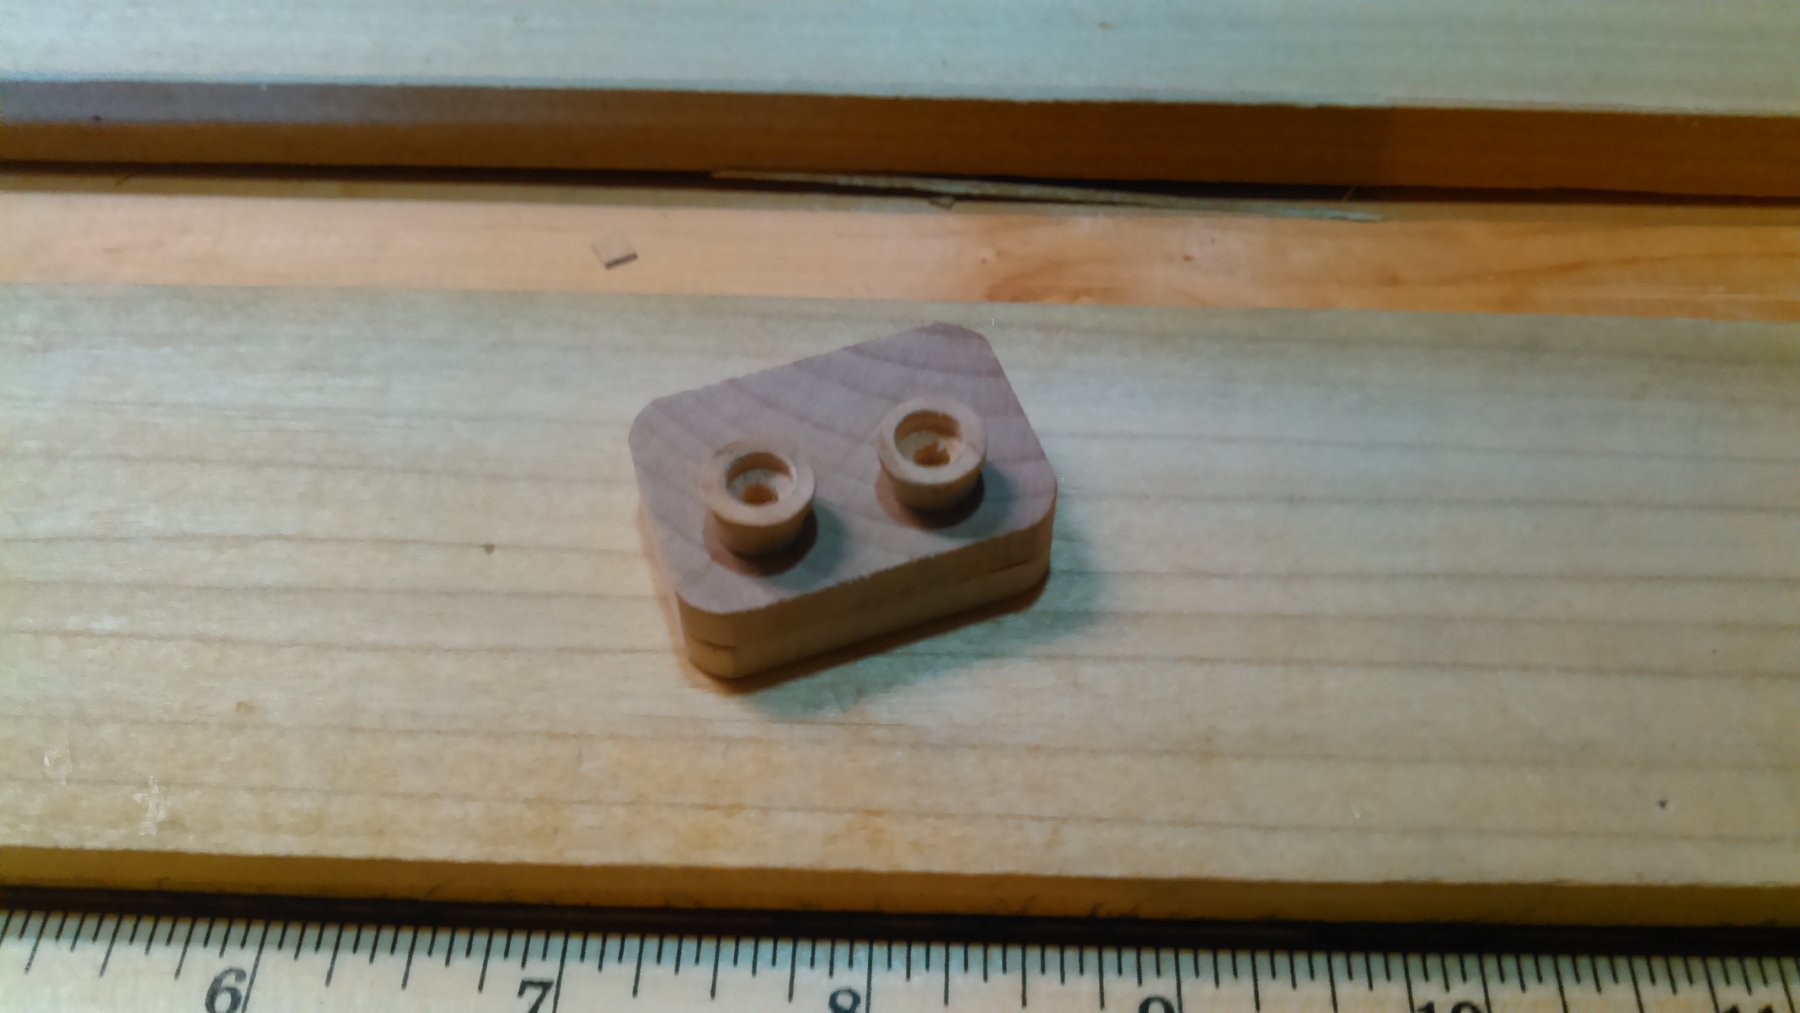
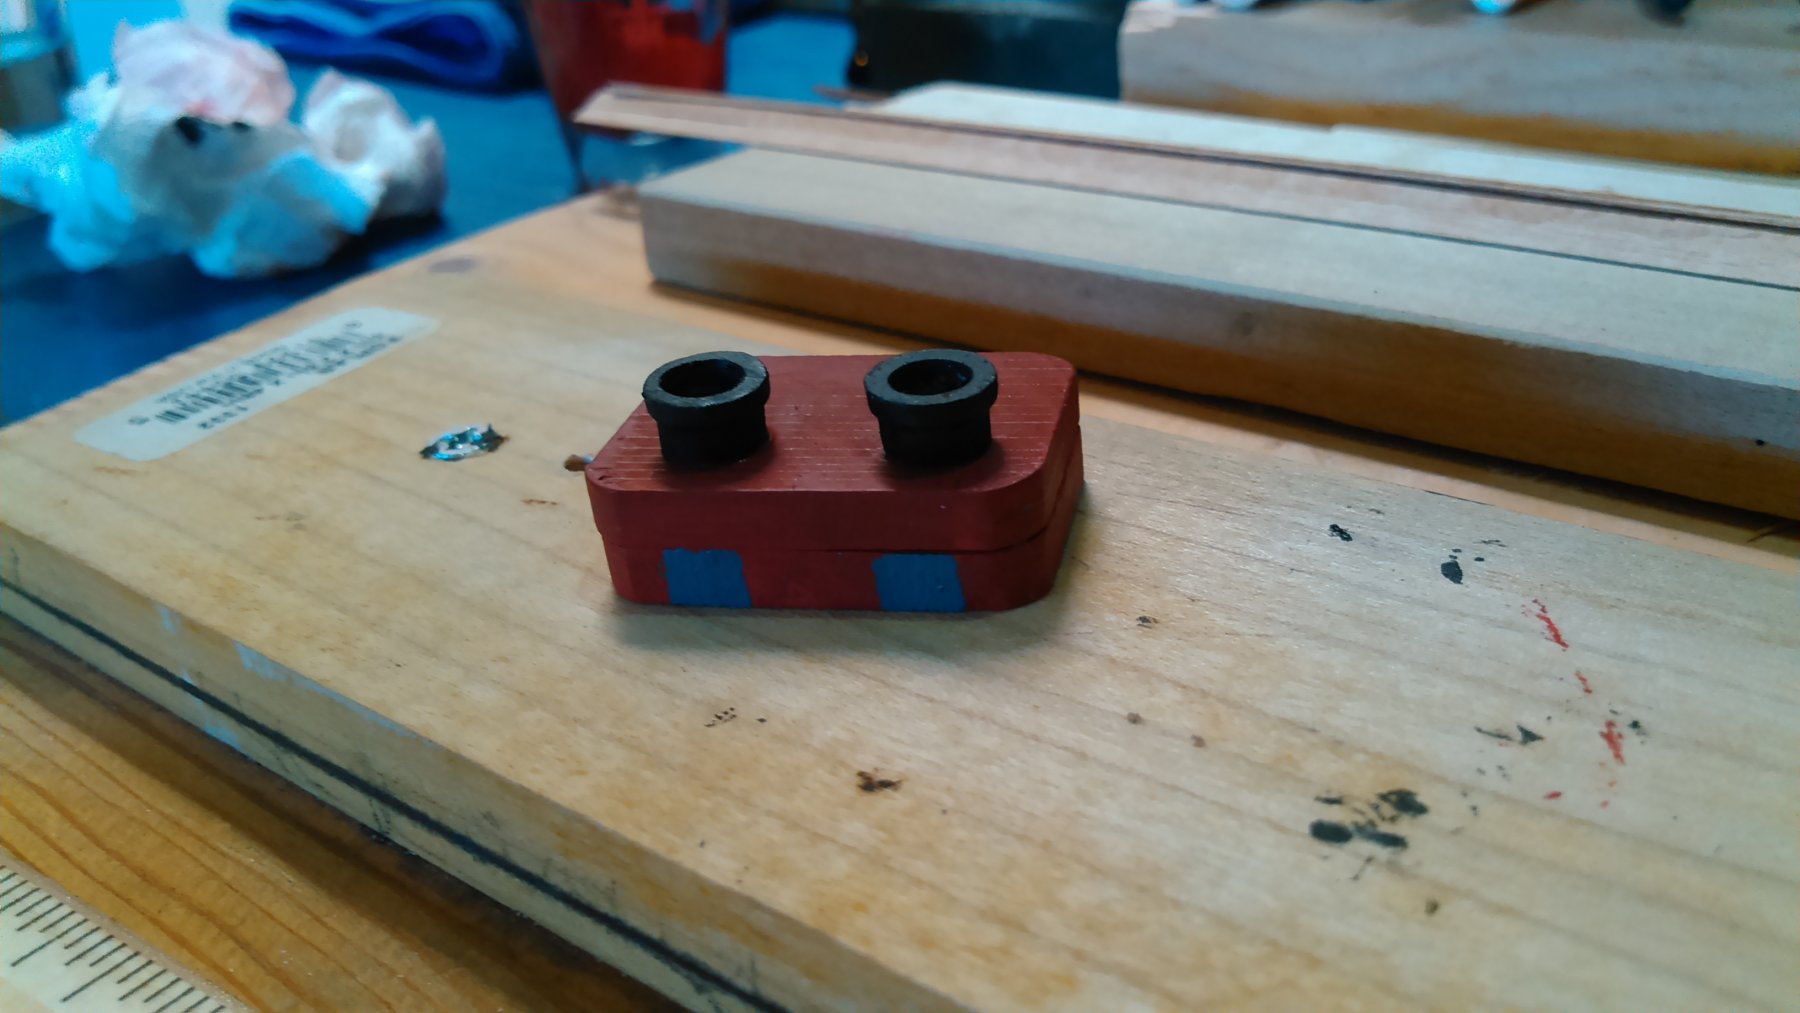
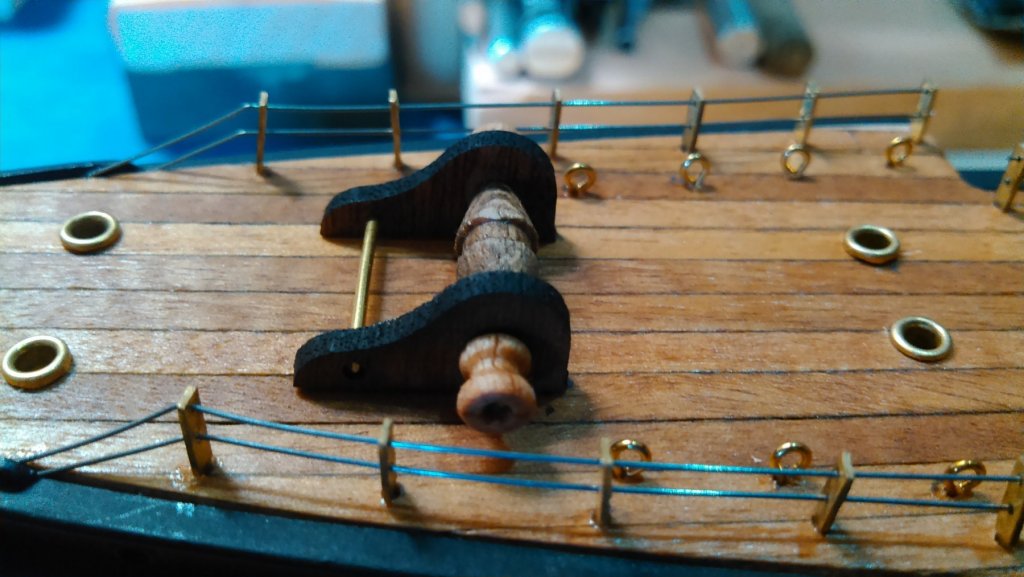
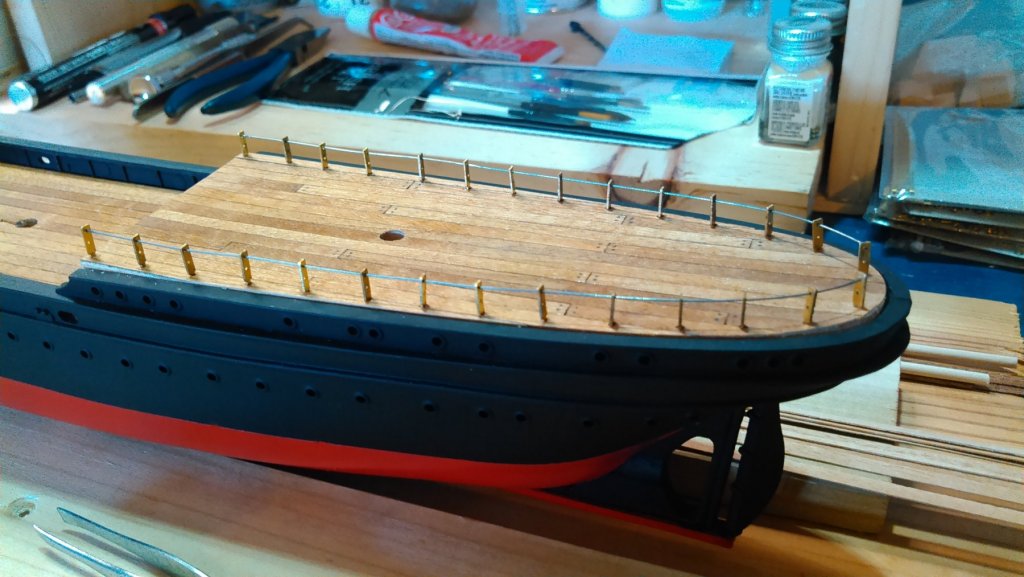
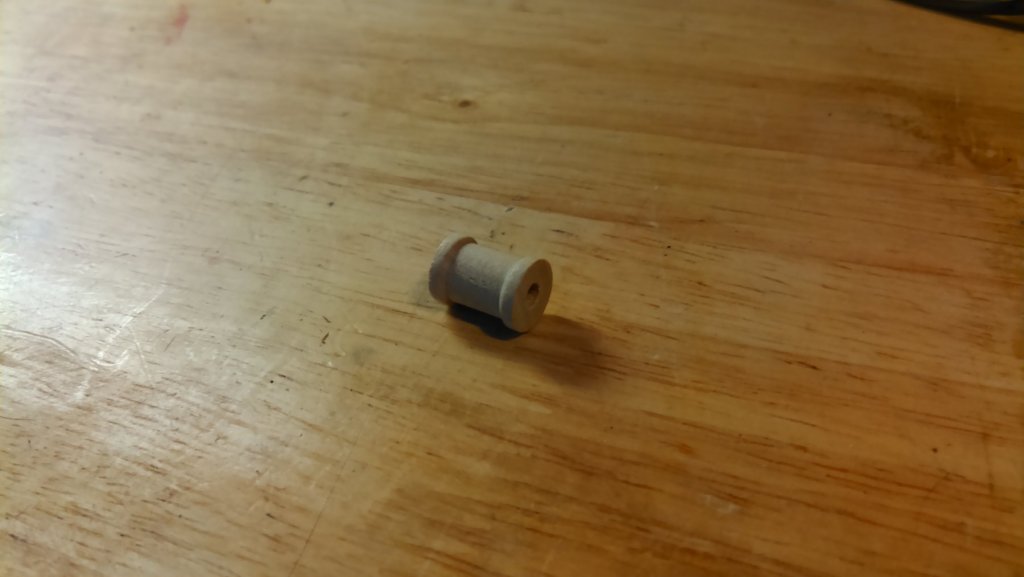
Today was railing day for the most part, with some added fun. The first thing I did was replace the bright brass wire that comes with the kit with some .015 gauge steel music wire from Hobby Lobby. I didn't like the shiny look of the brass. It looks fine on a spiffy Coast Guard training vessel, but didn't seem to suit a more blue collar whaler. So I ran the wire on the fo'c'sle, the flying deck walkway and the aft/quarterdeck. This was an exercise in patience for me, and quite a learning experience. At the taffrail I ran into a bit of an issue. Regardless of the fineness of the wire I could not get it to make the turn all the way around without continually dislodging stanchions. Another lesson learned. So, in lieu of removing a bunch of stanchions and having to wait another day to finish, I added a brass rail between the aftermost stanchions, and will add a piece of wire above it at some later date. After these photos were taken, I adjusted, straightened and secured all the stanchions that had become loosened by the wire tension. Once the railings were finished, I went back to my Hobby Lobby bag. While I was there a few small woodcraft items caught my attention. I've been thinking about how to scratch build a tryworks, and came across these small spools: I took a couple small wood scraps that I had handy, glued them together, then cut this little spool in half. After some drilling to open up the tops, lots and lots of sanding, I had something I think will work. So, after a little more sanding, some painting, and scoring in some brickwork lines, I had this: After looking ahead at some of the plans, my best bet is that it will fit in somewhere in this vicinity... But we'll see. I still have to figure out where my smokestack will be going as well as whaleboat davits, so.... So after this little experiment, I finished up for the day by placing and securing the foredeck eyebolts, as well as the chocks and pinrail. So that's it for today. Until next time...


- 37 replies
-
- 3
-
-
- eagle
- constructo
- (and 1 more)
-
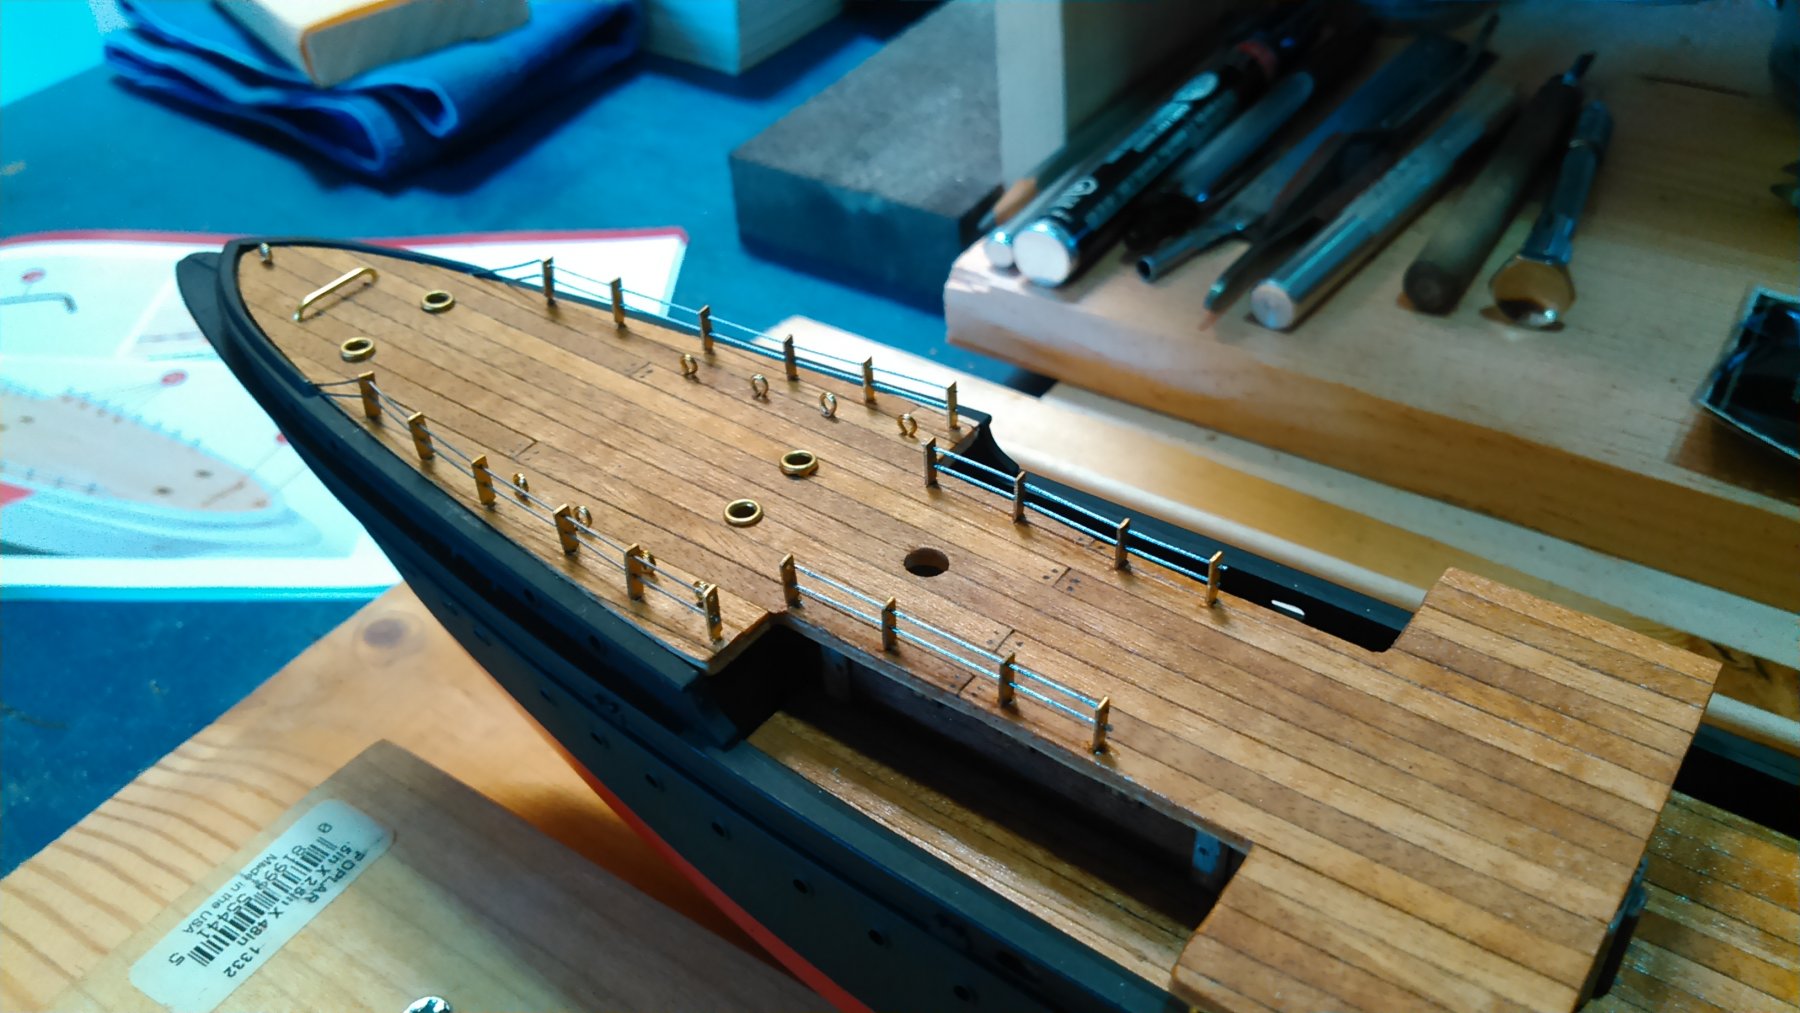
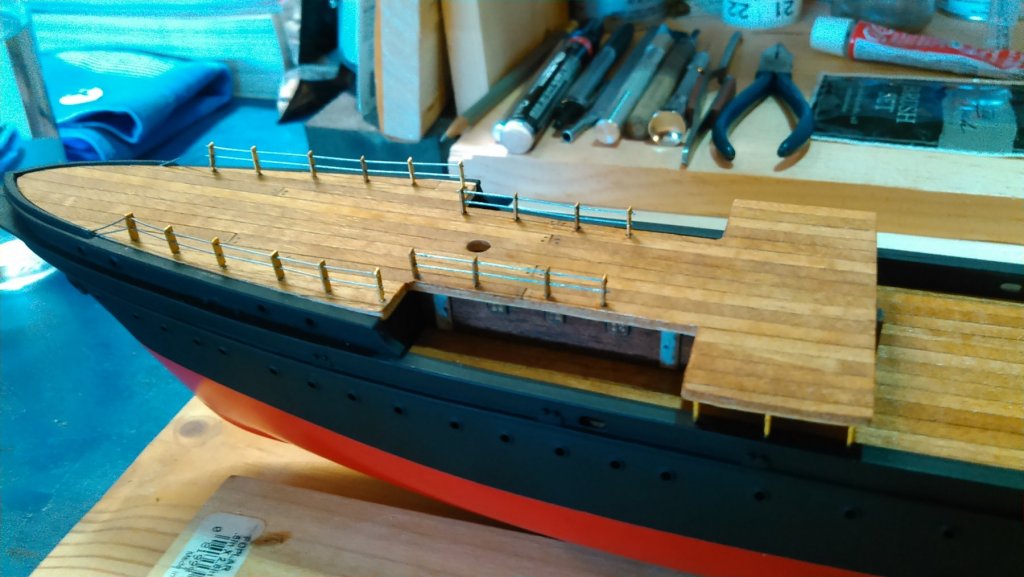
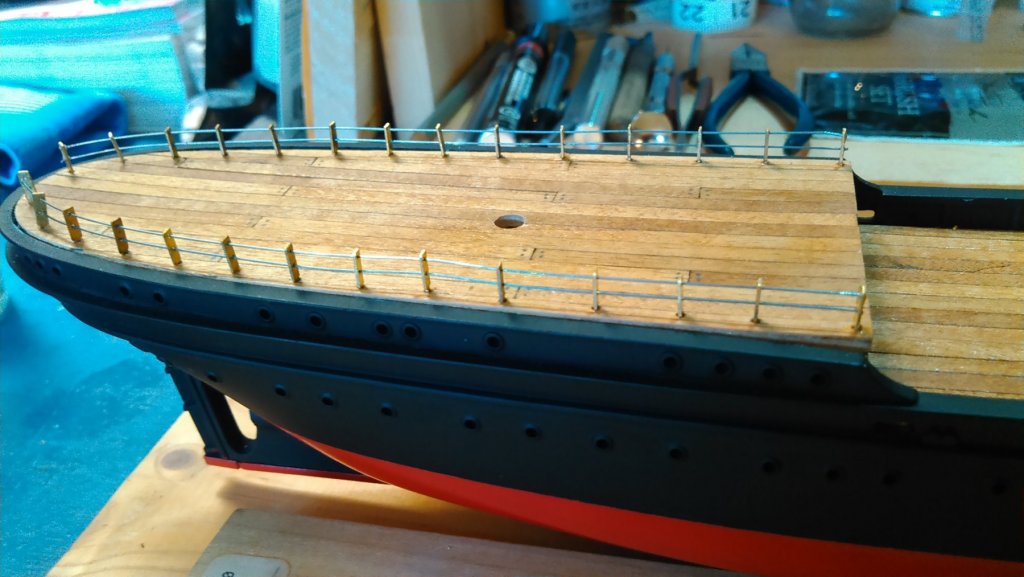
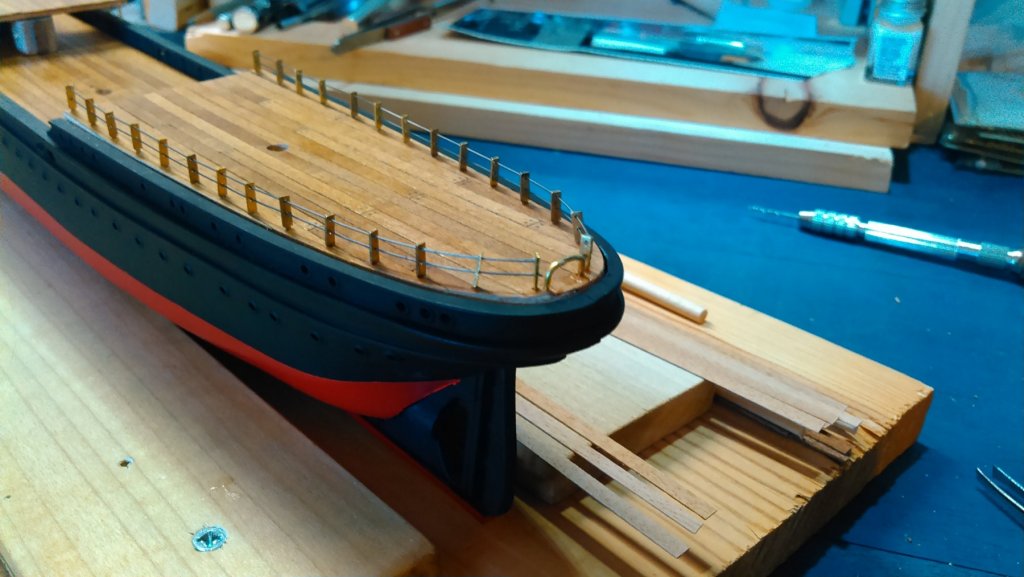
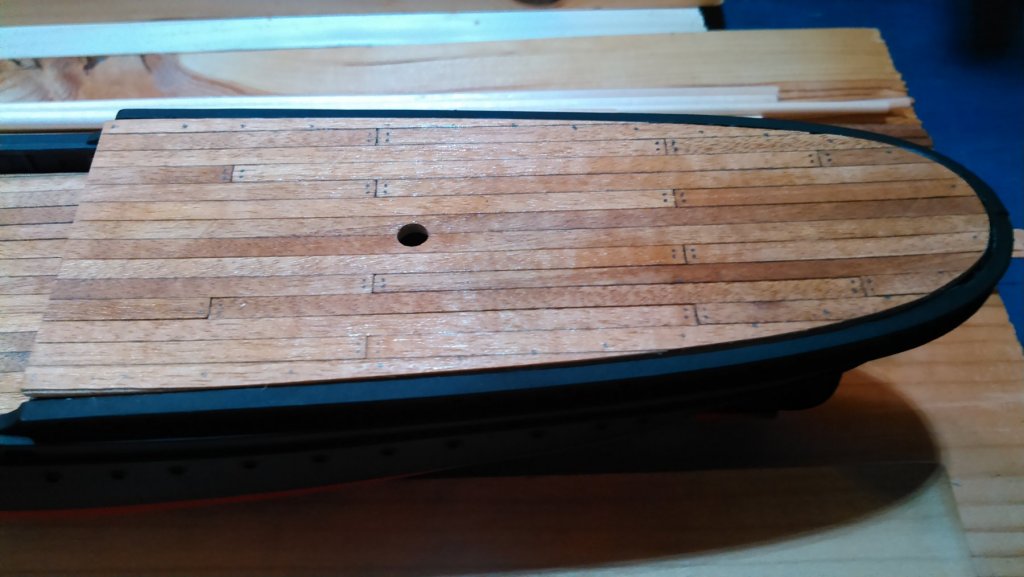
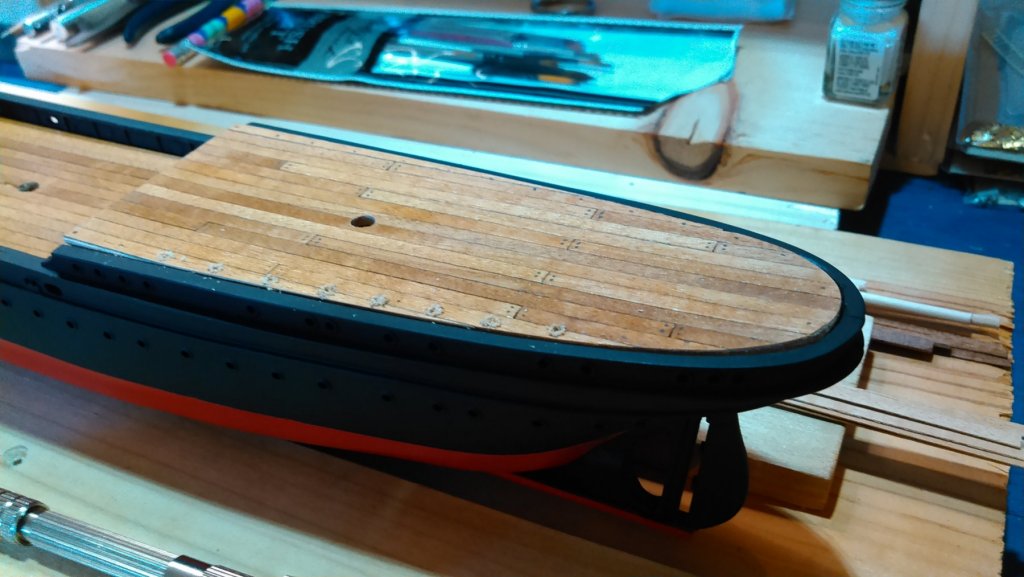
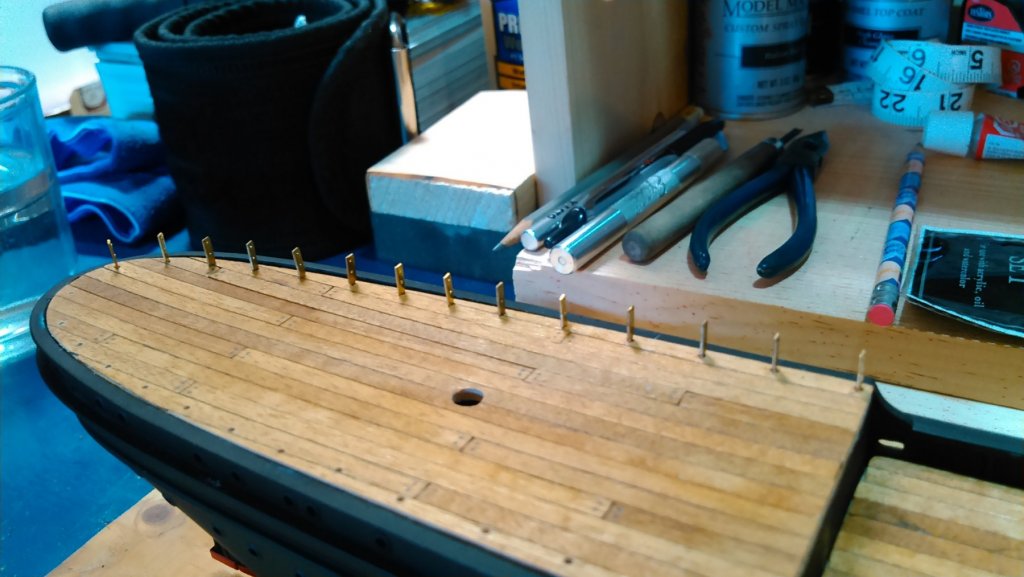
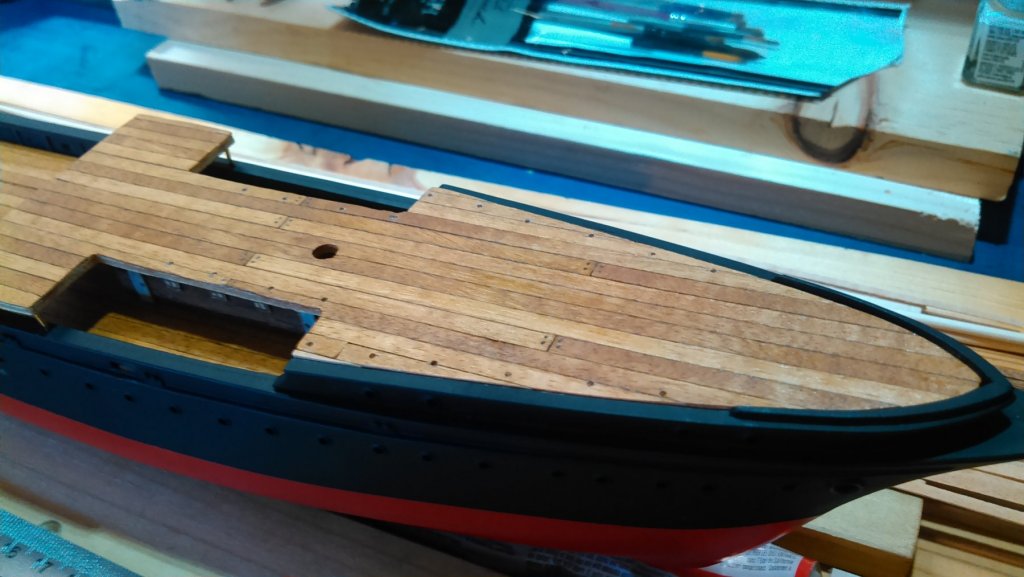
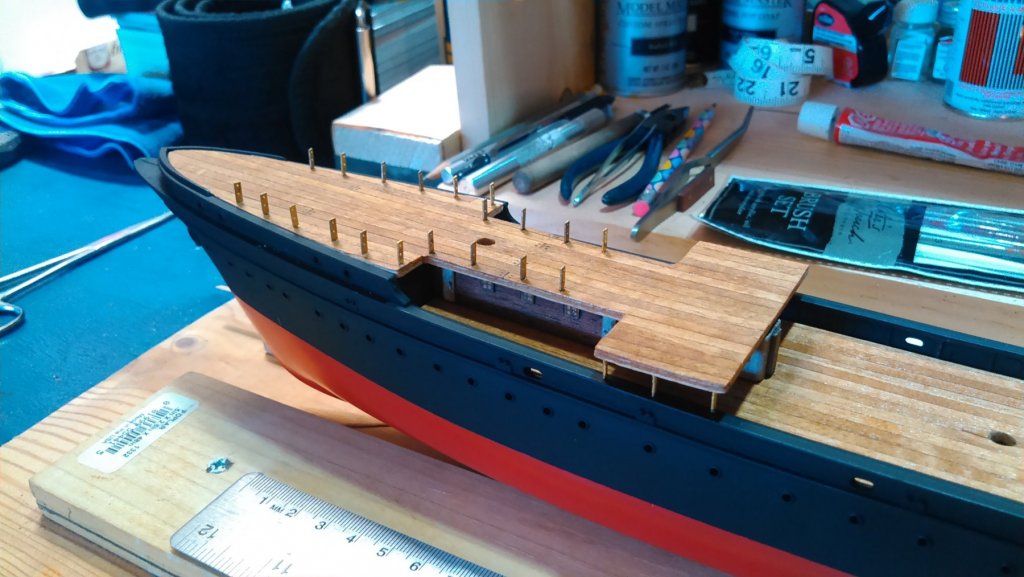
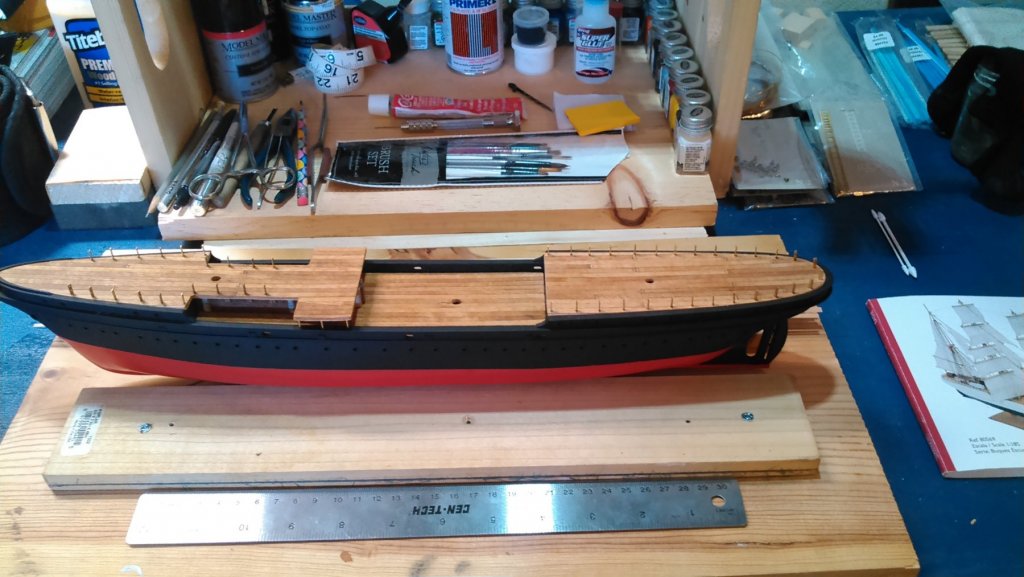
So, today was a day I've been trying to avoid.... Deck supports and stanchions. This is definitely a first for me, and I am continually aware of my propensity to screw something up royally. Lol. Anyway, the first thing I did today was permanently set the fore/fo'c'sle deck. This sounded easy enough, but then I realized I have to somehow fit three pieces of brass wire as deck supports between the underneath of the flying deck and the bulwarks... It did not seem possible to do all of this at once, so I set the deck, glued it in place, and then cut my deck supports out of the provided wire, and fitted, sanded and fitted and sanded. I then glued to the underside of the deck, but not to the bulwark, as I did not want glue showing there. I wanted them to look inserted.. I had to trim and sand just so, so they were solidly in place. I tried to take my time with this, as these brass supports will definitely stand out.... Now all the decks are secured in place, and the mastholes line up. Next up was the stanchions. The plans call for a very large number of them - especially on the aft/quarterdeck. I spaced them out, marked their locations, drilled with a .75mm bit, and then slowly glued them into place. Once the aft/quarterdeck was done, there were stanchions to set on the fo'c'sle and its aft flying portion. This is probably very simple stuff for all of you, but it took me about 2 hours to get all of this done today - including the deck supports. Lol. Good thing I'm retired. I'll let these stanchions dry well overnight, and the next step will be running the railing wire and then start on the foredeck appointments. Until next time....


- 37 replies
-
- 3
-
-
- eagle
- constructo
- (and 1 more)