MORE HANDBOOKS ARE ON THEIR WAY! We will let you know when they get here.
×


Winnie
-
Posts
31 -
Joined
-
Last visited
Content Type
Profiles
Forums
Gallery
Events
Everything posted by Winnie
-
let me know if you're headed to Winnipeg! there's a fantastic hobby shop here, that's online as well. Hobbysense. It has a good online store as well. Cheers H.
-
I have heard that the E6000 glue/adhesive available from Amazon and others, is great to maintain flexibility, yet have a good bond. I purchased some for my Hood and Missouri builds, as there are some large plates on flat plastic surfaces. I'm unsure how that will work on metal to metal though. It's relatively inexpensive though. Will allow for shifting of parts while curing though! I got paint on my hull, but now have to fix it... I decided to not go wild on the PE hull parts and happy I didn't do the superstructure! Cheers Harald Southport (Edited to add:) Warman... I must have driven through many times on my trips from Saskatoon to Weyakwin or LaRonge... Never stopped though. Went to a hobby shop in Saskatoon, but can't remember the name, been since 2013...
-
Oh wow! Love the chart! Immediately downloaded! if you have s smartphone, the Hobby Color Converter app is amazing and has most paint lines available, in it. I use it as a source for which paints to get, and also which paints I have! As far as Vallejo thinning go, I made my own "mix" of thinnner which has 60% flow improver, 40% proprietary thinner, and 1 to 2 drops retarder, in a 250 ml bottle with markings on the side for appropriate mix. it is slow to dry, because the glycerin in the retarder, but it is worth it, as you don't suffer from as much tip dry. the Model air paints I believe are the same formulation, with just more thinner, but I may be incorrect. I use the same thinner for them all, Vallejo (brushing only for me), Vallejo Model Air, Mig, and AK Acrylic. Cheers! Harald
-
I believe part of the problem is the paint you're using. I see Vallejo bottles, but no "model air". The Vallejo paint is formulated to brush painted and is quite thick. As for the model air by Vallejo, the thinning of the paint requires a bit of finesse to get it right, and you have to use their branded thinner AND flow improver! and the paint has to be very thin, and a reasonably low pressure (12-15 psi). The Vallejo type paints also require a primer underneath, or it tends to bead up. Hope that helps! Harald
- 45 replies
-
- 4
-

-
- academy
- Admiral Graf Spee
- (and 5 more)
-
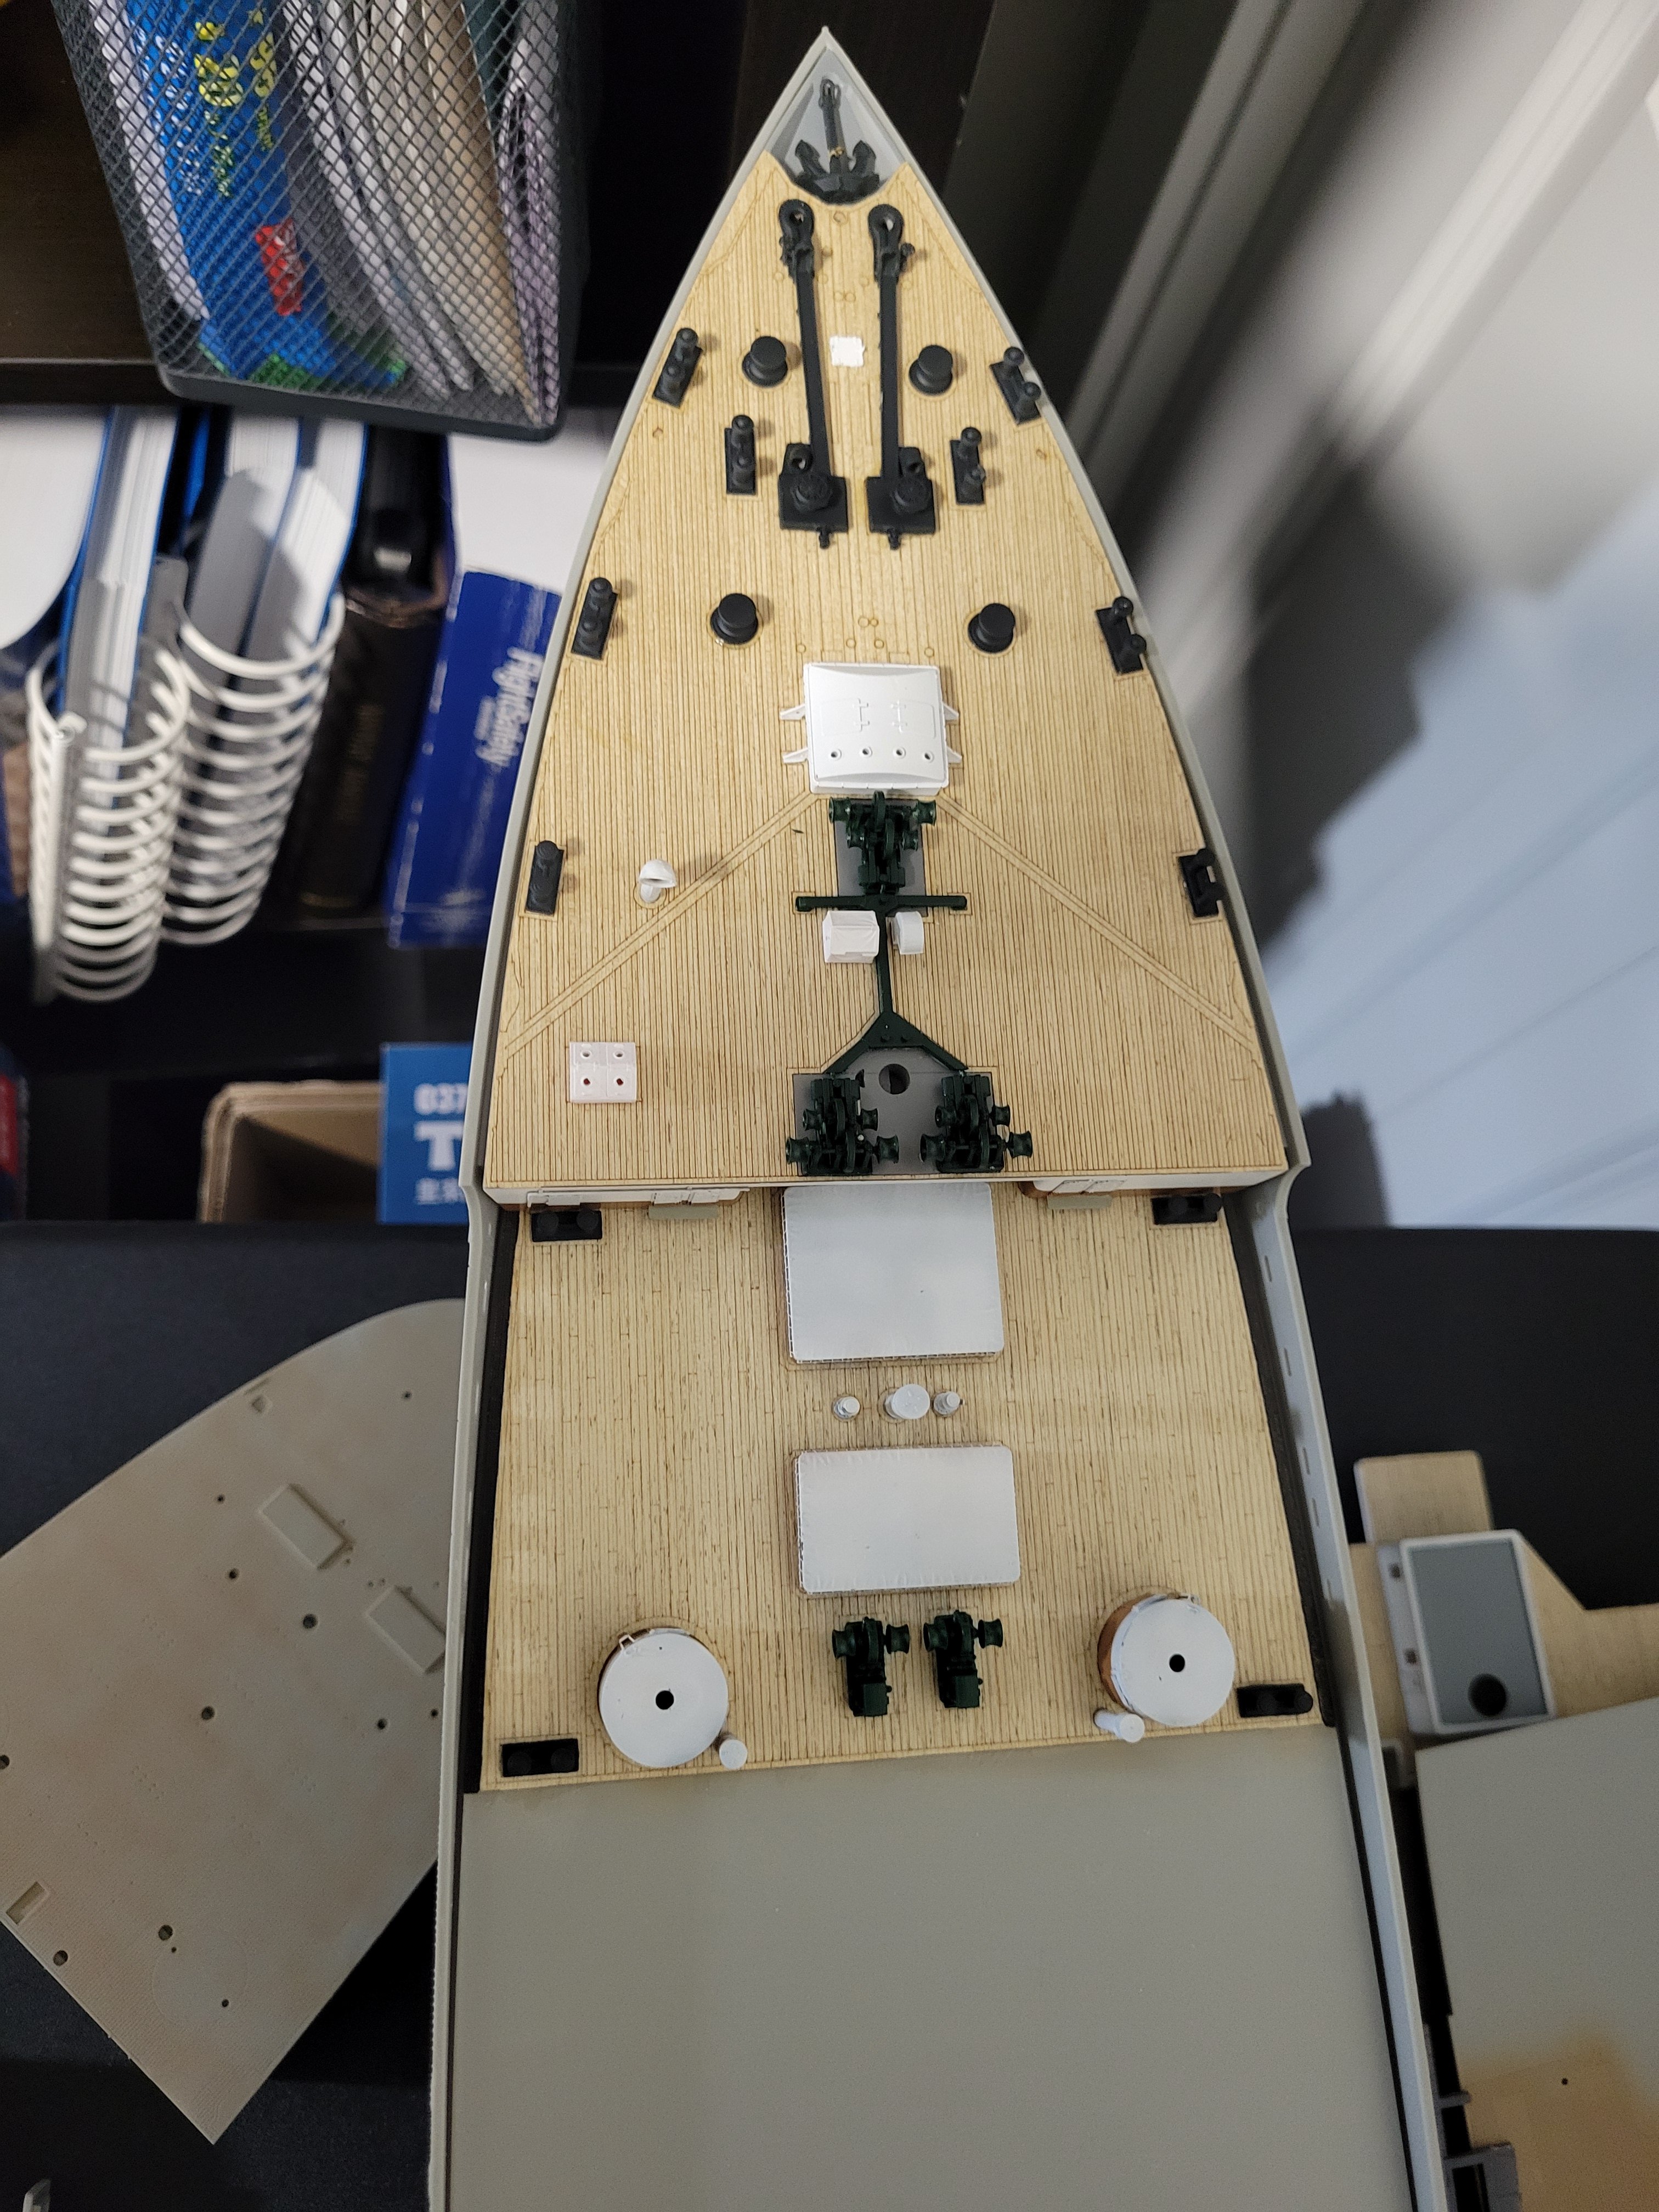
Yup, But I decided to forego the smallest PE pad-eyes. I rebuilt the rudder, added the zinc-plates and the biggest pad-eyes, but I doubt they'll show very well. I also laid the anti fouling. Had to make my workspace in the garage first... and build up nerve. Next up is white and yellow details, then hull black, then I can begin to fit the superstructure...
-
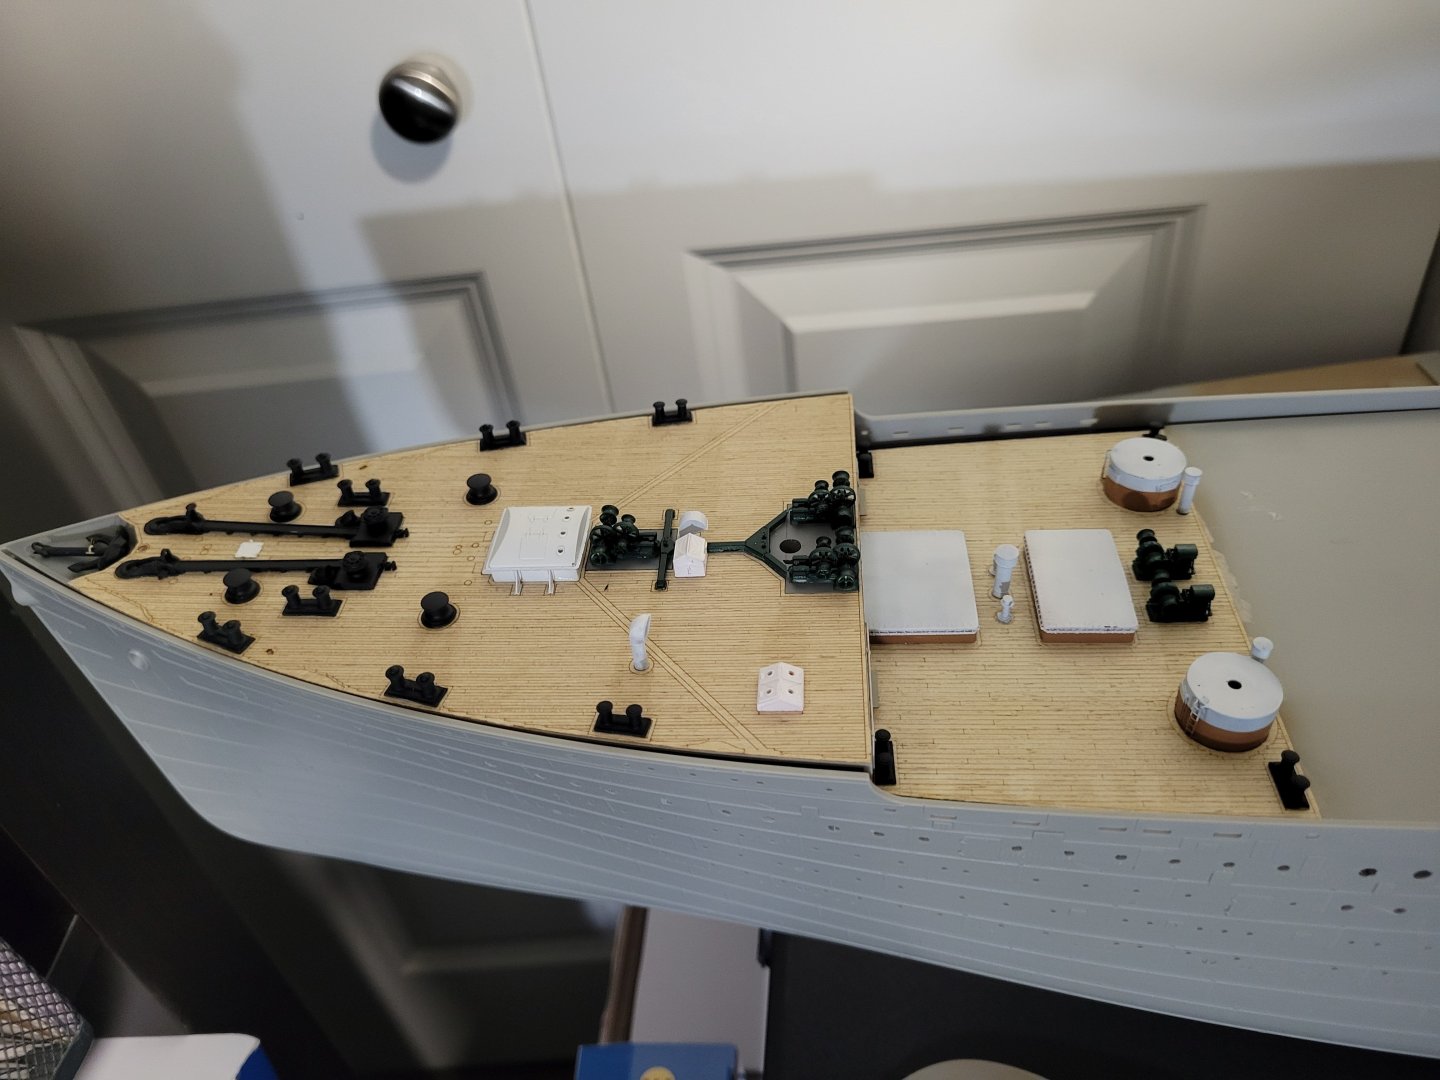
Minor progress... It's slow going, I did finally get the airbrush I need for the hull, now I just need to start on it, but it requires working in the garage... There's a ton of PE to attach, so I guess I may have to just bite the bullet and get at it... It's a little intimidating to say the least!! Here is the Fo'c'sle and forward well deck, not 100% complete, but the stuff I can do without knocking bits off as I maneuver etc. good fun though, and it looks good! a chunk at a time is how we do it!!

-
Incredible work! I have some of the same to do! Oh no... I have the same work to do.... lol! Inspiring!
-
I bet you a filter wash will help "hide" some of the over/under spray. Looks fantastic. Will you share what colors you used for the ship?
-
It's easier to clean up ultra glue than CA if you do it while it's setting. Dip a tamiya micro cotton bud in water and wipe away. but it may be easier to use medium CA glue. That is the part I find most annoying on model ships.... Gluing the parts without making it messy. Your work on the paint is just perfection, but be careful of taping the wooden decks!
-
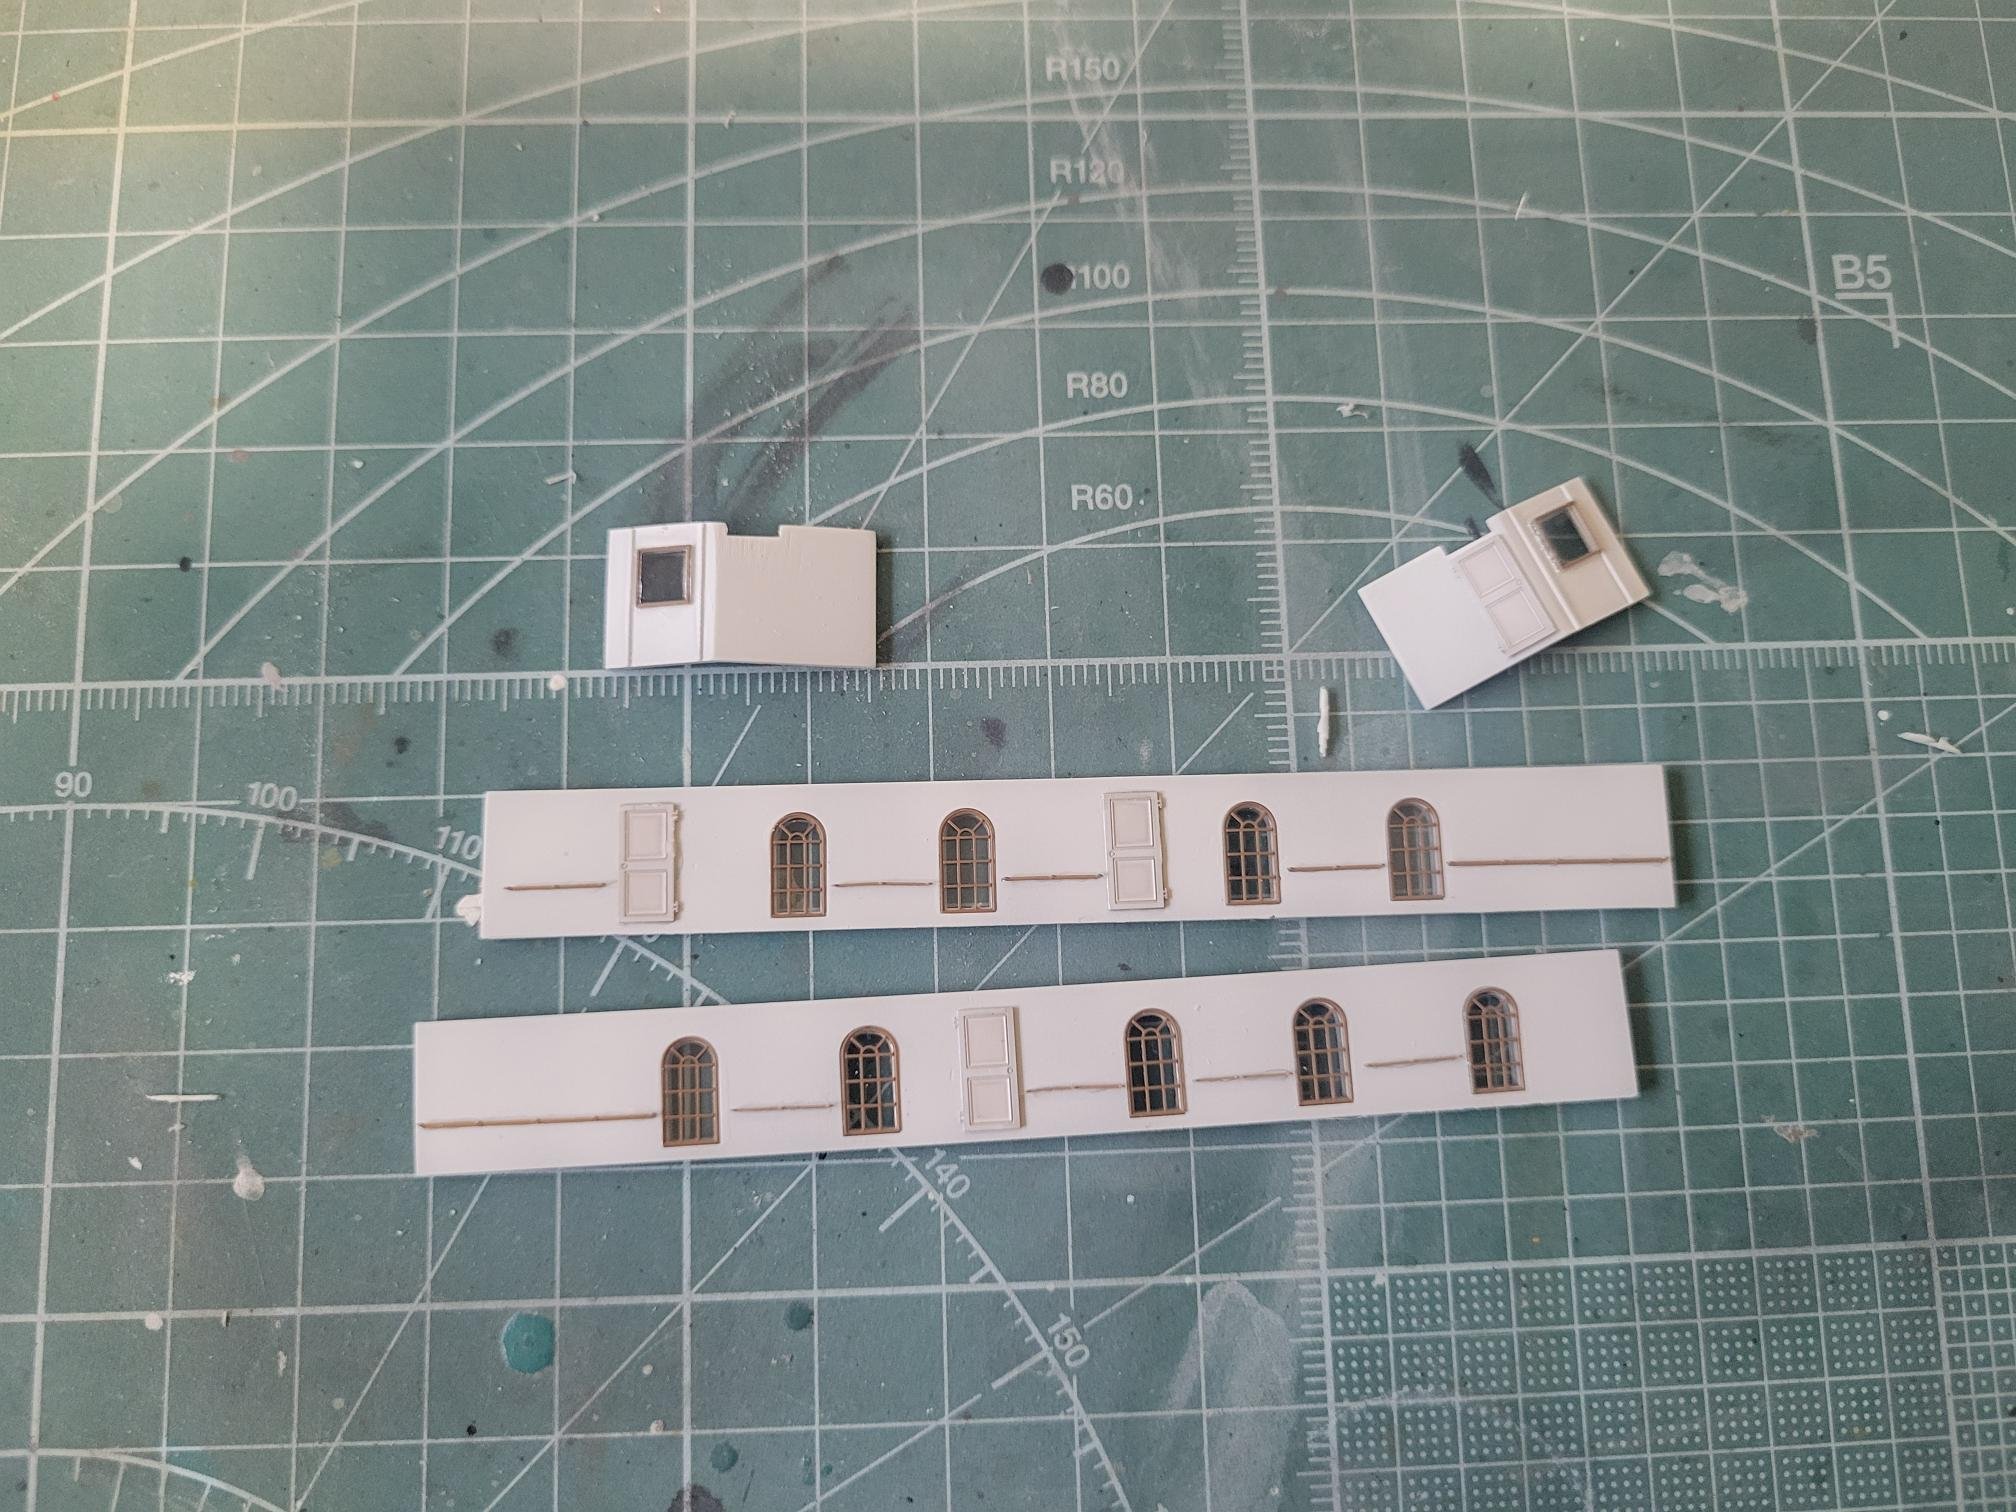
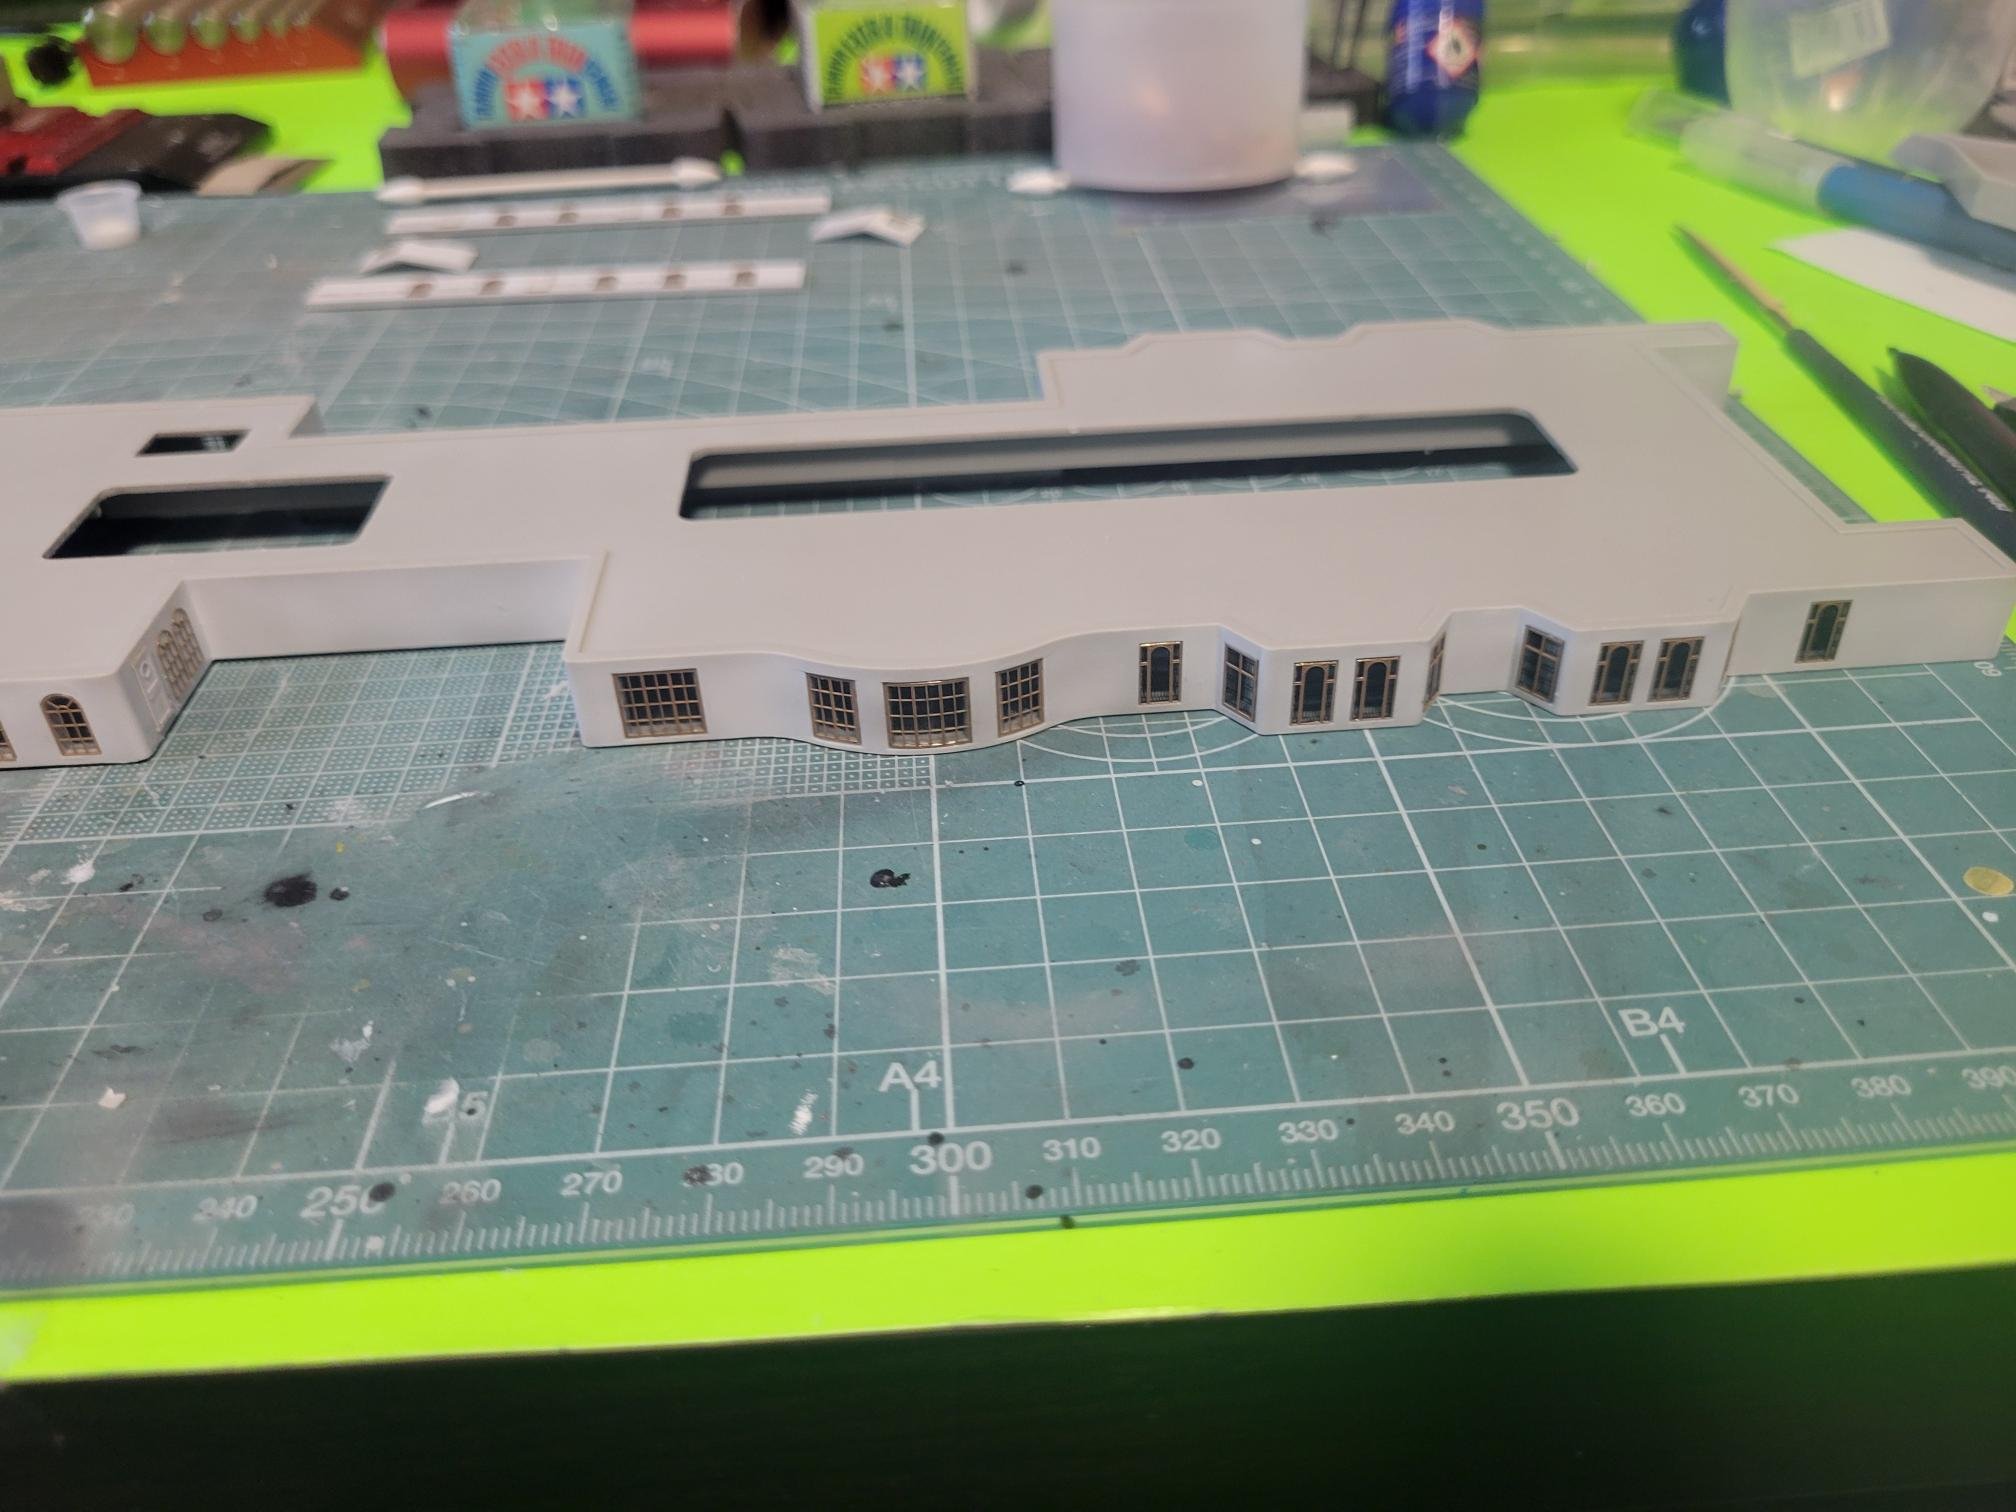
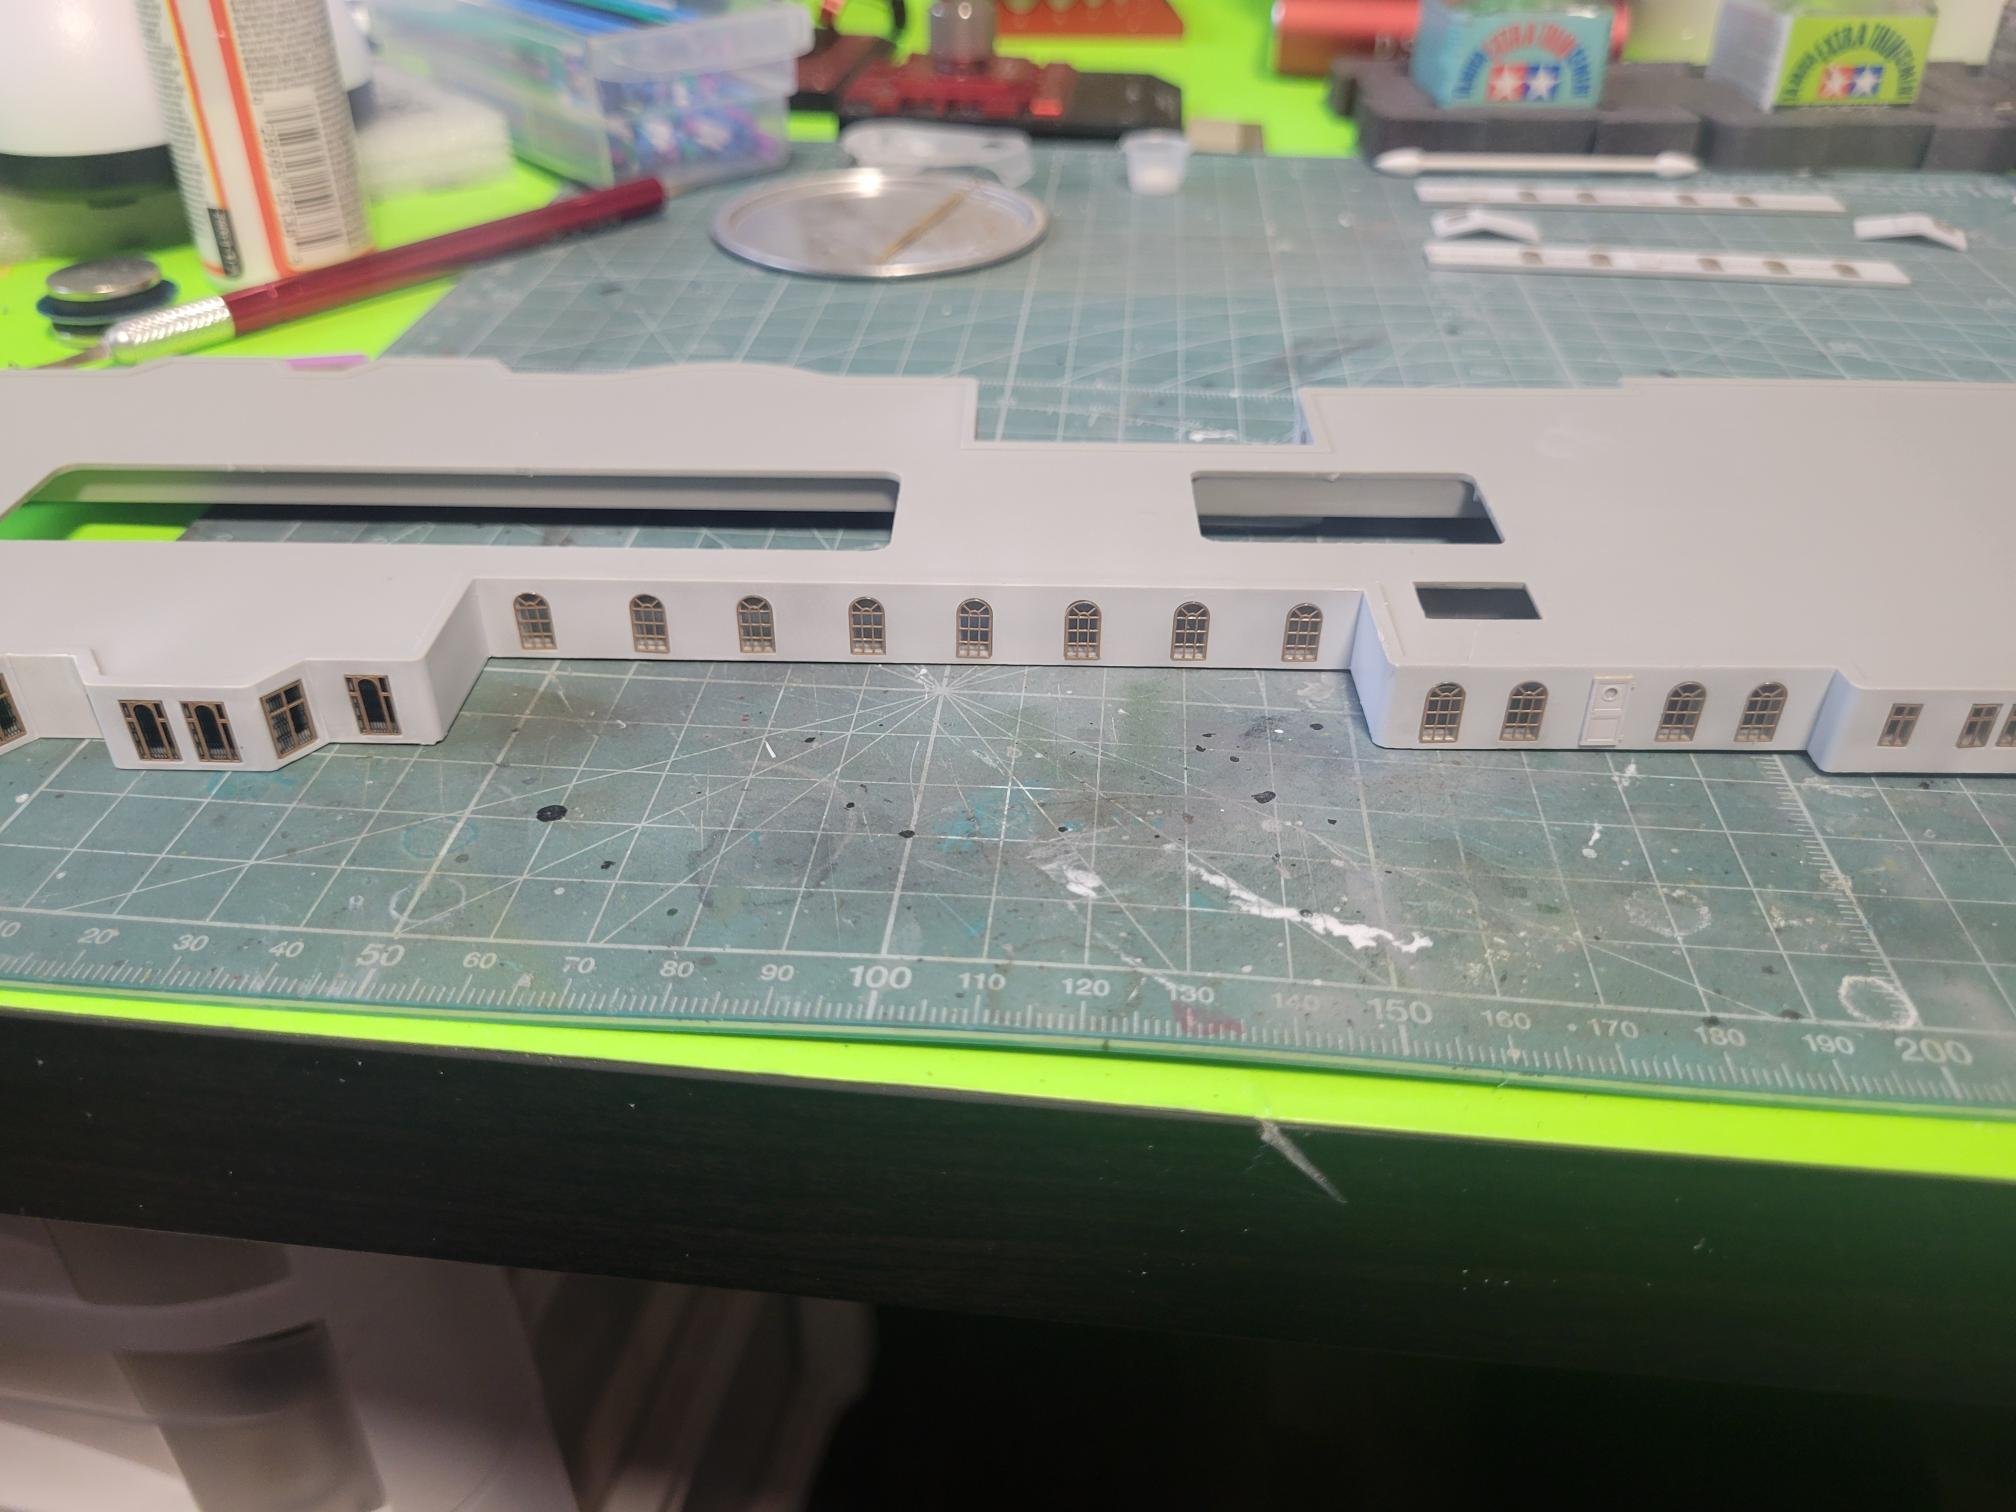
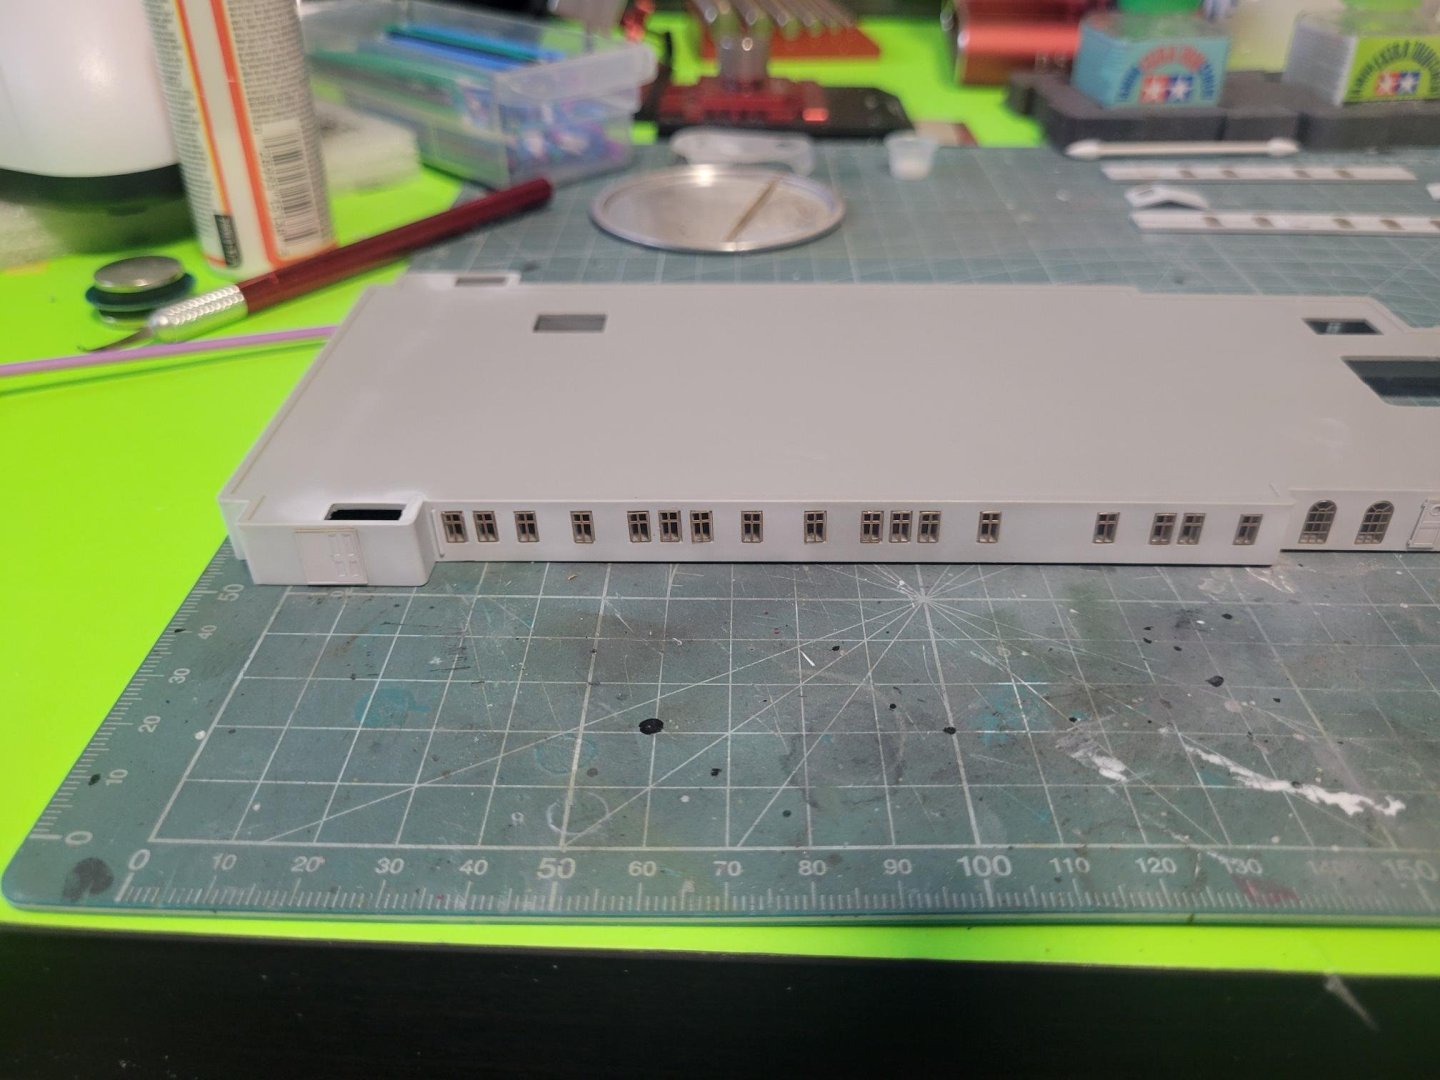
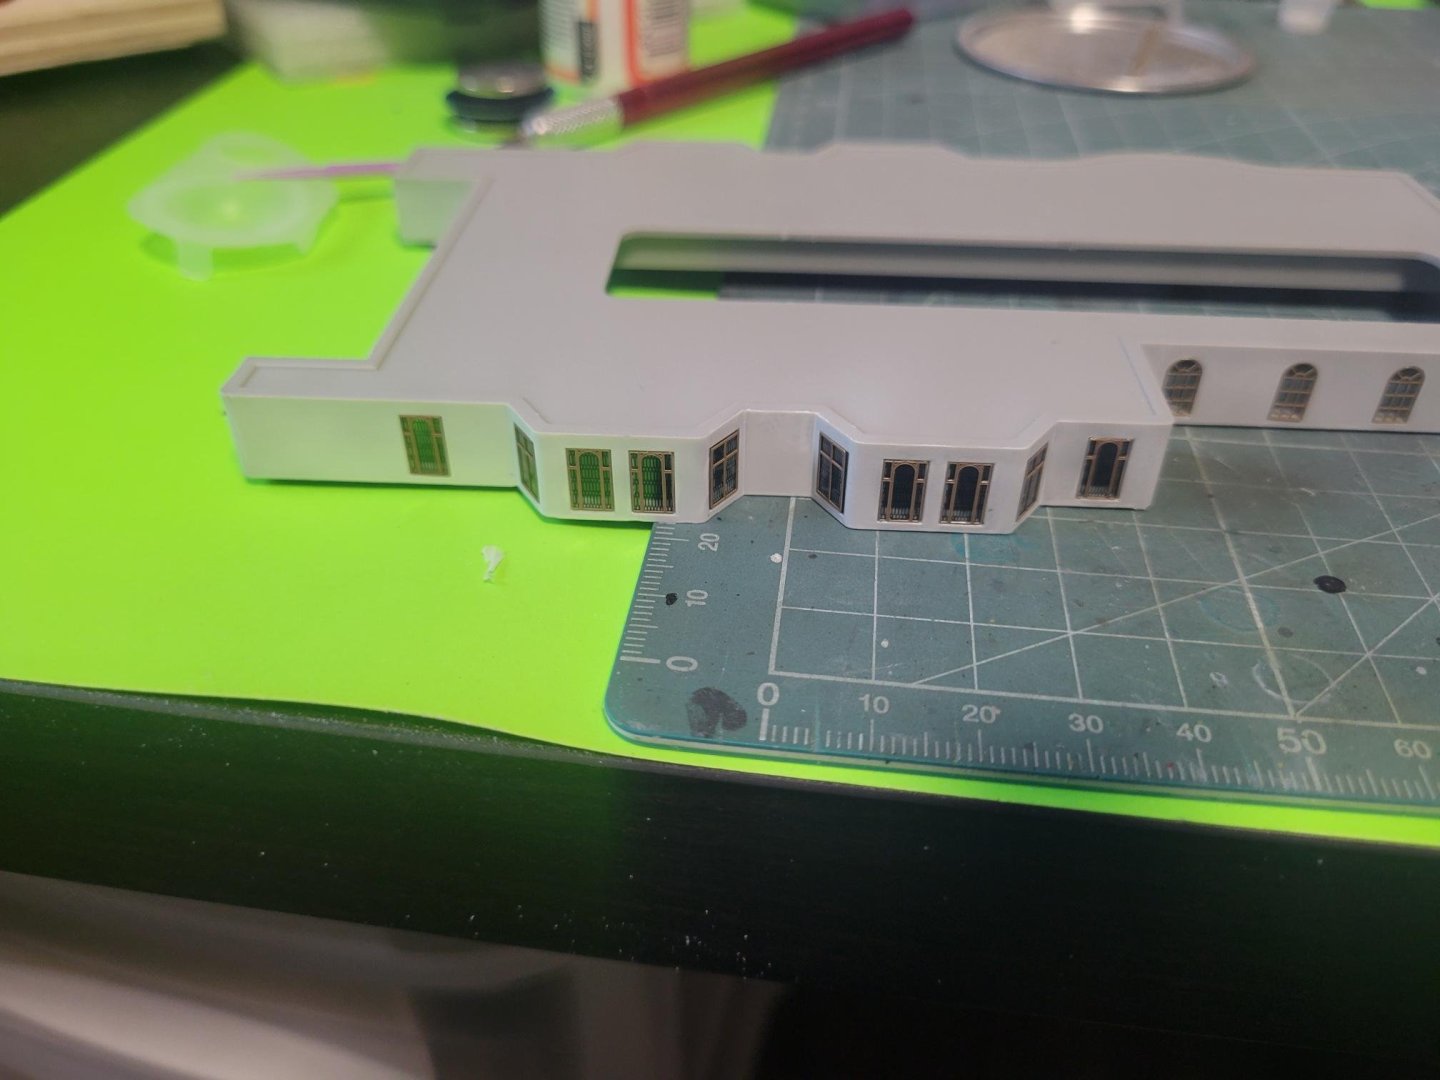
Need more medium CA... Anyway, the white glue (using Mod Podge gloss), works a charm so far. Easier clean up, and does wonders in sticking small pieces of PE to plastic. A deck structures: One door missing, the handrails are a bitch to get/keep straight... Thankfully this will be behind a bullwark on A deck, 1 deck below the boat deck. Some of these windows have the "stained glass" from the KA set... Micro cutting with very fine scissors on slippery plastic... NOT easy, but whatever! Looks really cool The most time consuming part of any, is cutting the PE from the fret, cutting the nubs, then filing the nubs... There are 44 of the smallest windows on the longest structure shown... So there are TONS of windows. But, I think this is an excellent primer to more advanced warships, because even though there is a dearth of PE parts, most are easy subassemblies requiring a single fold, if any. Or a gentle curve. So there are thousands of parts, but they're relatively easy to affix! I'll probably eat those words later. Cheers H.


-
I'll try to add a few pictures! A Deck, deck veneers laid down, waterways and expansion joints laid down. I've been using white glue for all of it. It's flexible enough to allow for temperature differences, and seem to hold the PE better than CA glue... https://i.imgur.com/R1P8tzd.jpeg She's a big lady! Still have to finish the hull plating at the stern, I will try with the metal plates again, but if that fails, I can add in the plastic plates from Midwest Model Shop. https://i.imgur.com/5v38cgr.jpeg Cheers H.
-
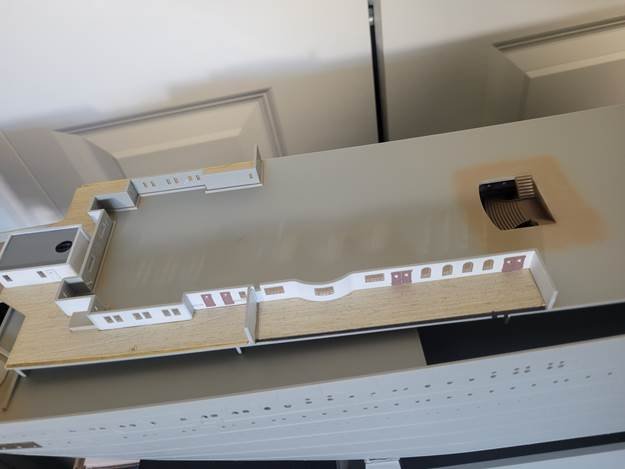
So got a tiny bit completed on B deck, not much to do, 2nd class restaurant and a couple promenades. and the deck below the bridge. had to work to get the deck to fit, minor surgery. Also fitted the PE sheets for the rails on the outside bulkhead, but only the back plate, the spars will have to happen AFTER the decs are inserted. Pictures are bad, because I was in a rush... Waterways still need a dash of black there! and the ladders came off the rear bulkhead, those will be reattached shortly, with the last deck equipment needed. Shapeways bridgefront there. The doors seem very red, they look more brown in real life. Cheers!
-
Nice! I just won the kit and the Pontos upgrade in a raffle, and can't wait to receive it!!
-
Looks great. I'm envious of the skill to work in 1/700. I still struggle with 1/200...
- 9 replies
-
- 2
-

-
-
- Bunker Hill
- Flyhawk
- (and 2 more)
-
Followed the build on Youtube, I'm thoroughly impressed, and I'll be getting the kit shortly!
- 97 replies
-
- 3
-
-
- Curtis Wilbur
- I Love Kit
- (and 2 more)
-
We have an amazing hobbyshop here... Hobbysense, not too much in the sense of aftermarket, but tools, paints and models... wow. The images I'm looking for are these ones: Cheers I'll send you a message through the messaging system
-
I'm going to need those pictures from that other site if you can share... I have been banned from the titanic 1/200 scale ONLY... Even IF you had stents put it, doesn't mean you can't buy golf balls... lol Get well soon, come to Winnipeg and I'll take you to my course. Just managed to get in 2 rounds before I went back on tour. New personal best and all! but also cutting into model bench time!
-
No, nothing wrong with the kit! Total operator error(s), didn't get the 2nd 3rd and 4th plates set accurately and it skewed everything. I removed it all and tried again, but it's almost impossible to straighten all the buckles you put in the plates, and they don't look good after, so I put it (the entire kit away), and now finally I have the MMS set in styrene. I'll use other elements from the set, like coaling ports, and maybe entrances, but nothing is set in stone yet. Cheers Harald
-
Ahh! Not forgotten about, but stalled out, about to get her back in the dock again! I got a new job, which involved travel, move to smaller place, more travel, move to a bigger place, and now, finally have the "Harlan and Wolfe" yad open again. I'm just completing another smaller and quicker project first. Also, I screwed up the minbrass plates something fierce, but the Midwest Model SHop made the same plates in styrene, so the first order of business will be working those on! Cheers Harald
-
Go BOMBERS! Anyway, from a fellow Canadian, I also have the kit, will get back to it in short order, I'm just finishing up a Sea King that fell into my lap from a local hobby shop in Winnipeg... I managed to get myself kicked out of that facebook group, might have said something less than flattering about the owner... He is a curmudgeon for sure. I have the Mk.1 set, some China 3D print stuff, and bough Minibrass for the stern (bad mistake) and now Midwest Model Shop for the stern, the same Utley sidelights as you, and made my own acetate windows for the larger windows. I also have "fibre optic" for the portholes. I decided to go cheap, and only do 5 different sizes, we'll see if it's enough! Best of luck with your build, and I look forward to seeing more, and perhaps playing along!
-
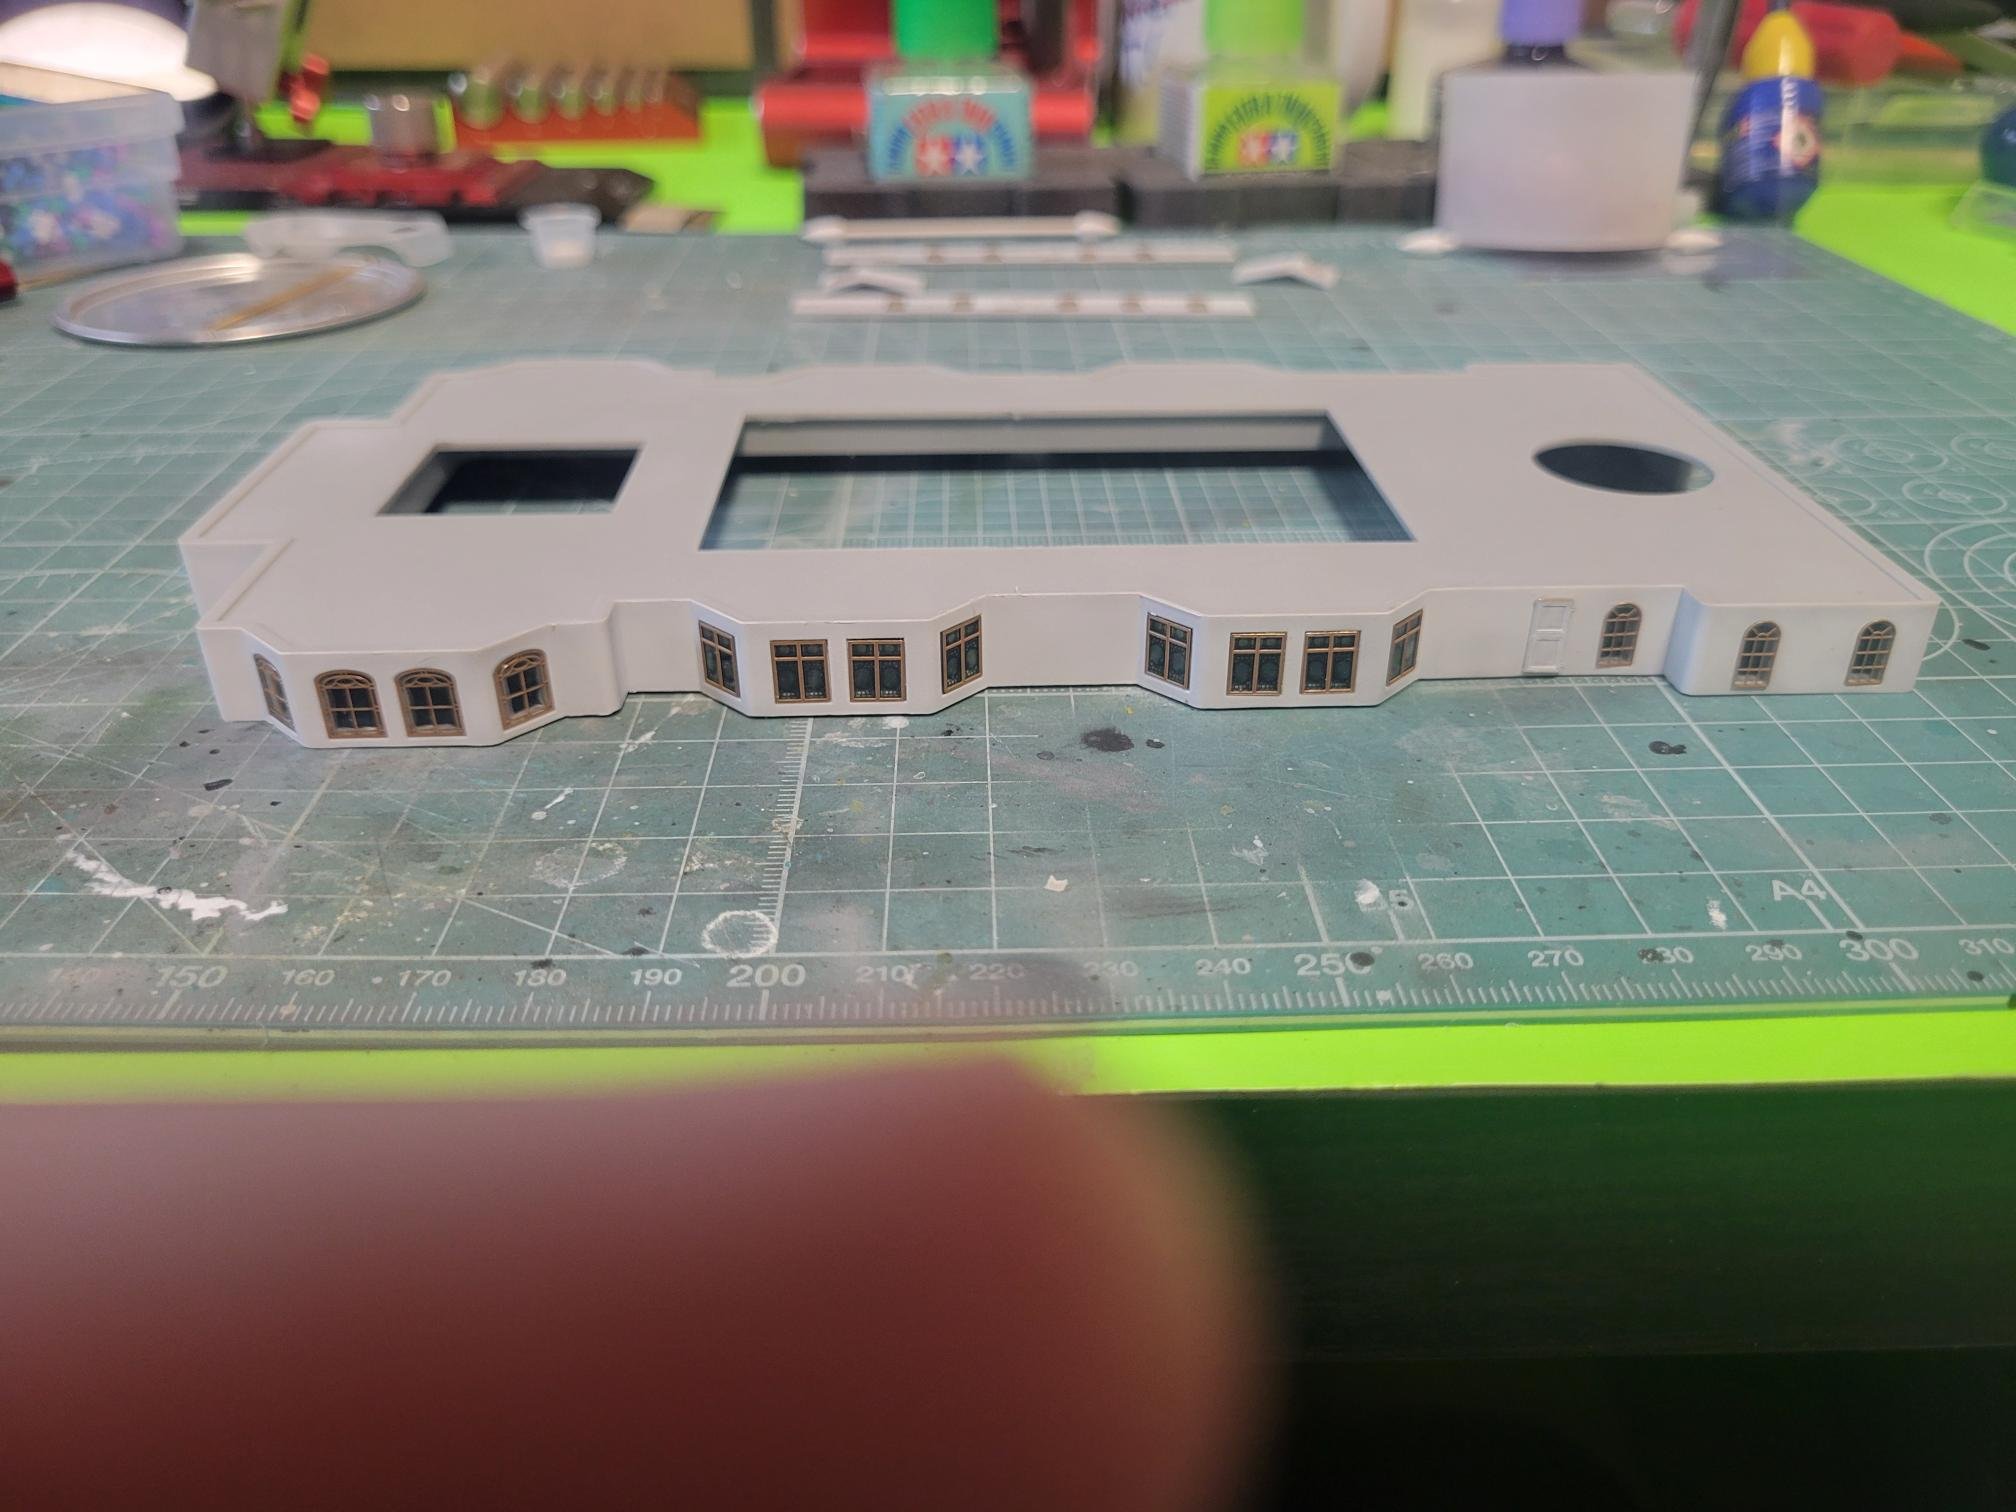
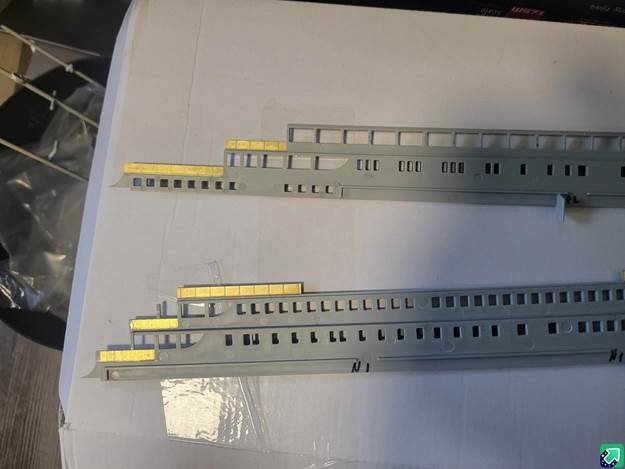
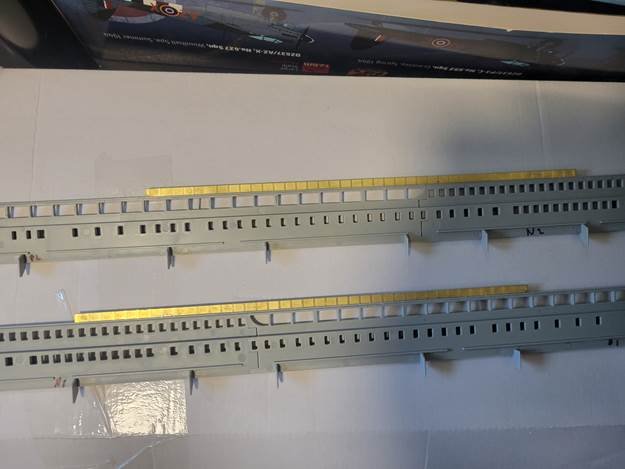
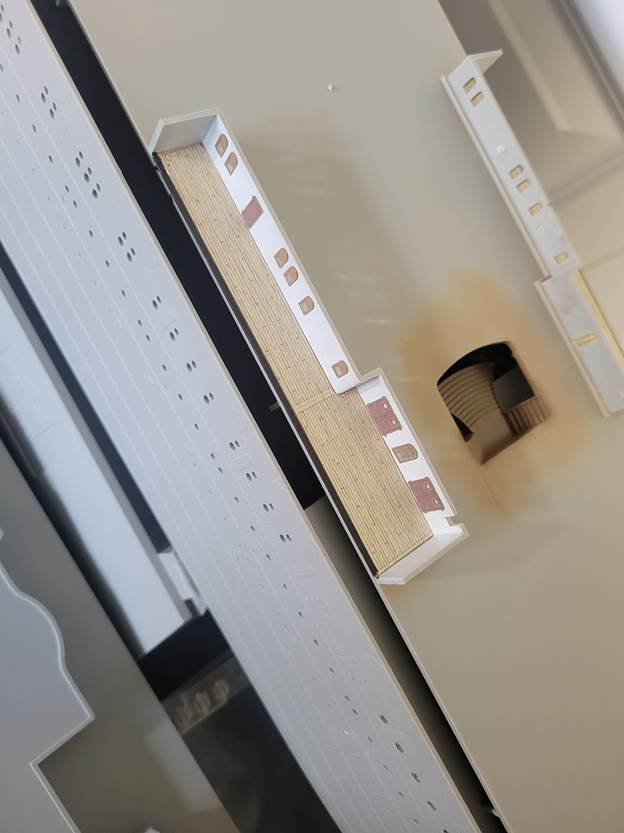
I obviously don't know my Tamiya LP colors yet... LP-4 is white! lol. No I shall use LP-3 Flat Black internally, a much better choice. I also decided to do the windows on the deckhouses, instead of manually cutting them in acetate, I decided to utilize my wife's Silhouette Cameo 4, after all I bought it for her (with ulterior motives...) Without the windows the houses would look something like this: when I added the "glass" they look more like this: I obviously have to add the frame on the second one, I just used this as an example. I made almost all the windows that are on the various decks, except the ones that already have "stained glass" included from the aftermarket set. I thought of making it for sale, and I had good response already! Anyway, A good use of my time at work, sitting alert!
- 23 replies
-
- 11
-
-
Thanks for the tip @yvesvidal! I will certainly paint the interiors! I will use the Tamiya LP-4 flat black lacquer paints!
-
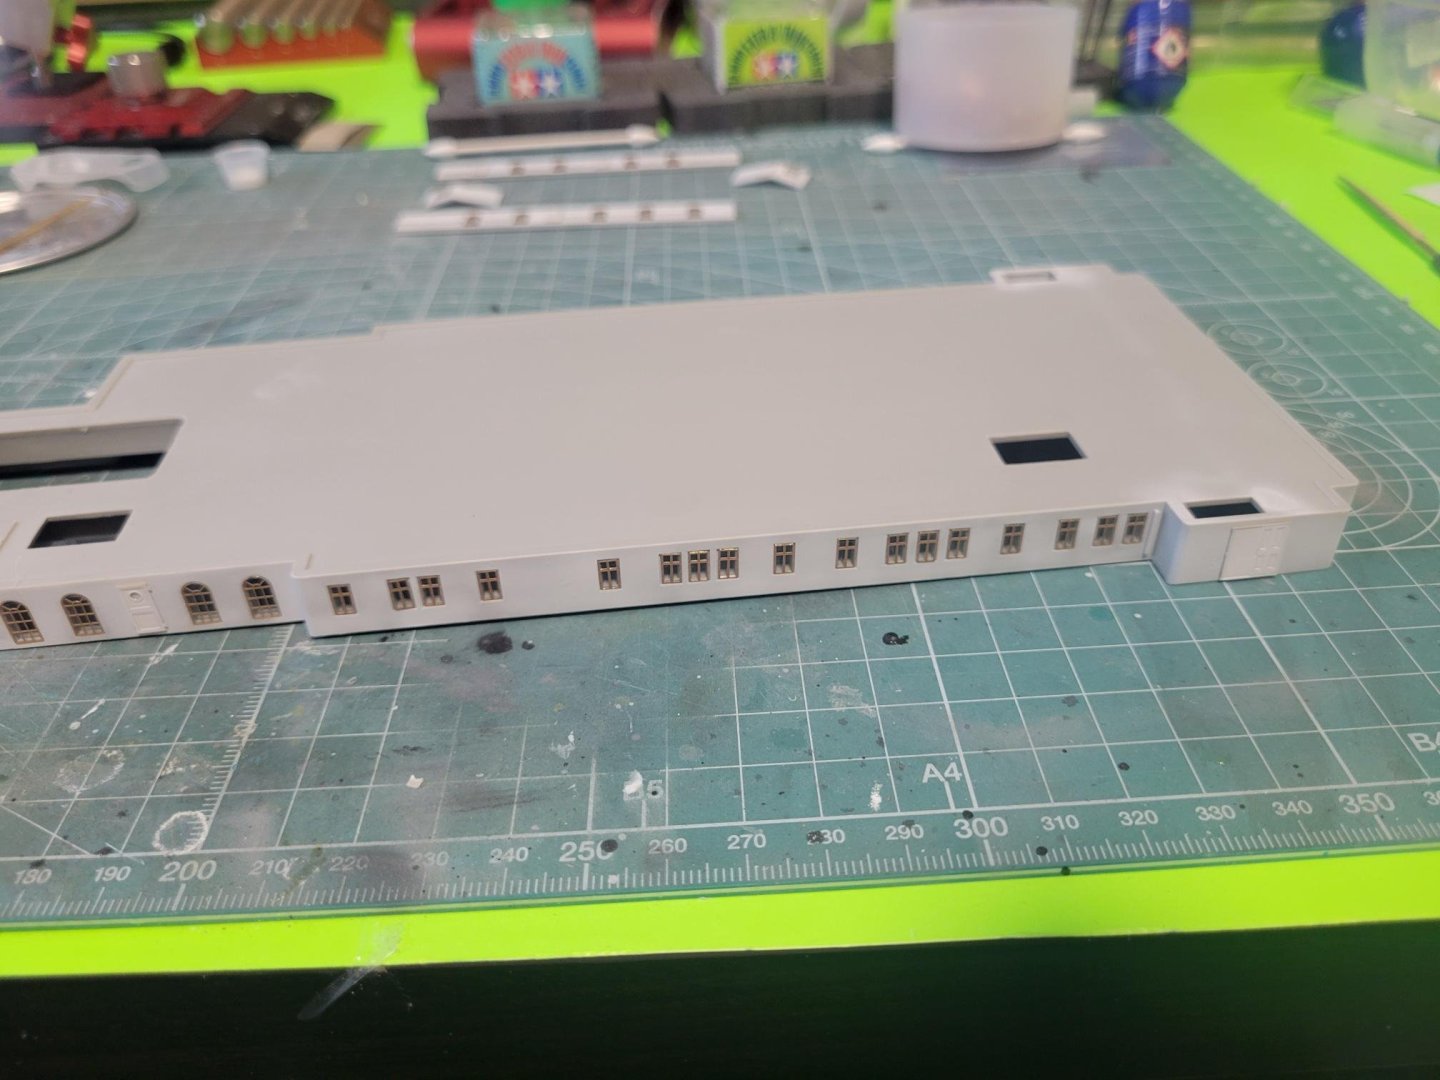
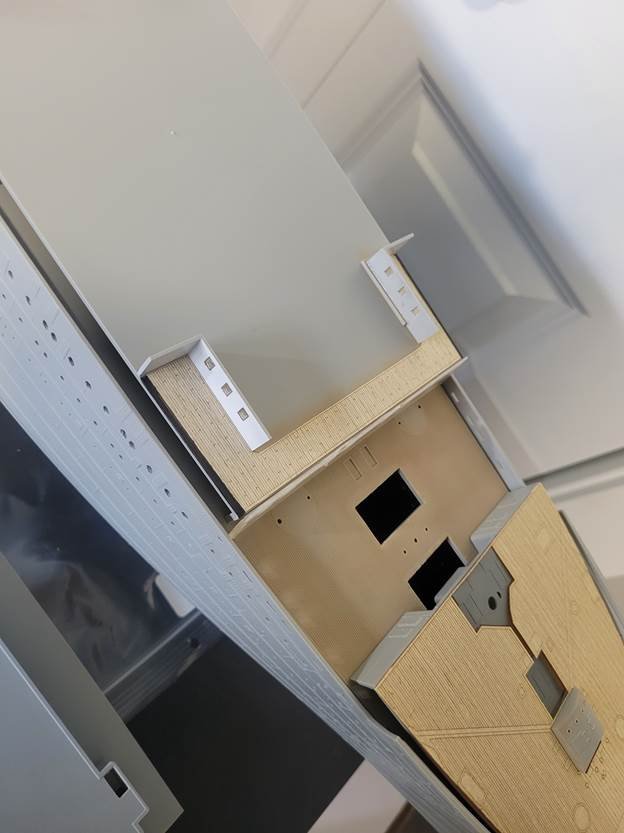
Thanks for the kind comments sailors! Much appreciated. I too was surprised there was no builds here. I've ben looking for some that have done the ship just to see techniques etc. I've been watching a couple of video builds on YouTube, but they are slow, just like me! OK, I wanted to touch some glue to plastic, I decided to start with the deck houses, and do them as mini-kits within the kit itself. I started with sanding off any minor detail that needed gone. Basically I have cleaned all the decks to be ready for the wooden deck, and now I did all the sides of the Boat Deck-houses. there were hatches, railings and ladders to remove. The first one I completed only had 2 portholes, 1 hatch/door and a ladder. this one sits on top of the 2nd class promenade entrance. I also started with the windows, for the actual entry, but will have to figure out how to diffuse and distribute the light this far up on my kit. I have thought of using parchment paper without wax glued behind the windows, clear acetate behind the PE then the PE frame, I guess all I can do is try! So, not much to show, only had 1 hour at the bench yesterday, but better than no hour! Deck-houses with details removed The door looks crooked, but I swear it's straight! Where the little house goes: The window frames fit very exactly into the frames. Now I just have to figure how to get the "glass" cut. I may try to use my wife's Cameo cutter. There are quite a few of these, and there are 3 points to remove on each.. careful but relaxed work!
-
@RGL, I will take advice and light gentle banter and ribbing, like a good sailor! I will attempt not to disappoint.