HOLIDAY DONATION DRIVE - SUPPORT MSW - DO YOUR PART TO KEEP THIS GREAT FORUM GOING! (Only 36 donations so far out of 49,000 members - C'mon guys!)
×


Arthur Wayne
-
Posts
103 -
Joined
-
Last visited
Content Type
Profiles
Forums
Gallery
Events
Everything posted by Arthur Wayne
-
That framing jig is a great idea. I pondered how those frames could be installed evenly looking at other similar boats, now I know! Your boats looking really good Paul, have you started thinking about a color scheme yet?
-
Paul you are definitely a fast builder! I'm subscribing, although I have my next project lined up I plan to build this kit some day in the future.
-
Looking good, you have the hard part done now. Curious to know, were your thwart knees laser cut too deep to fit like mine were?
-
I'm just catching up to your build after being out of town a while. Your boat is looking super. I really like the color of the stain you're using, what brand and color is it?
-
Paul your model looks great! Impressive how quickly your build came together and how you personalized the build from the stock kit. I'm expecting you will have the Kate Cory half done by the time I get my own longboat finished up, and I'm looking forward to following along with that build as well.
-
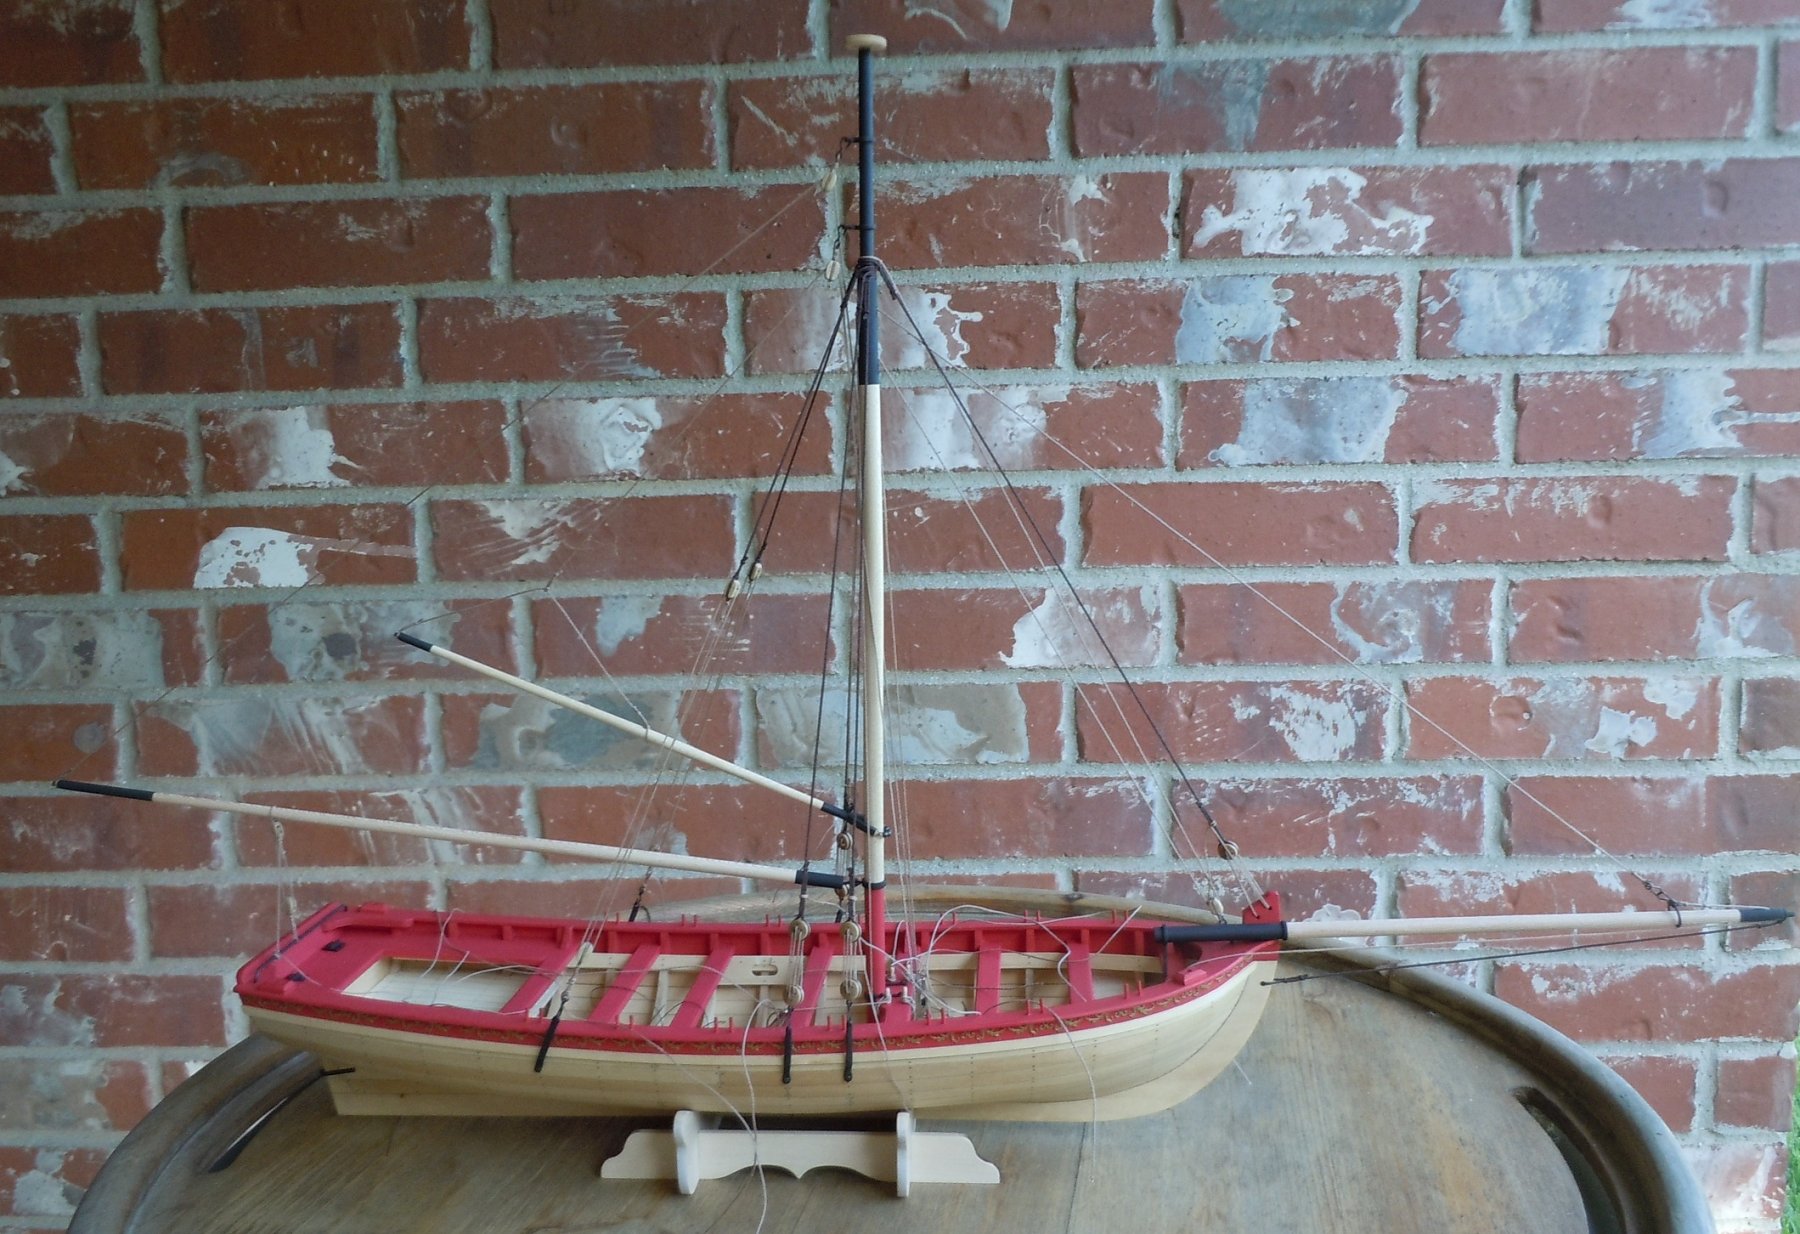
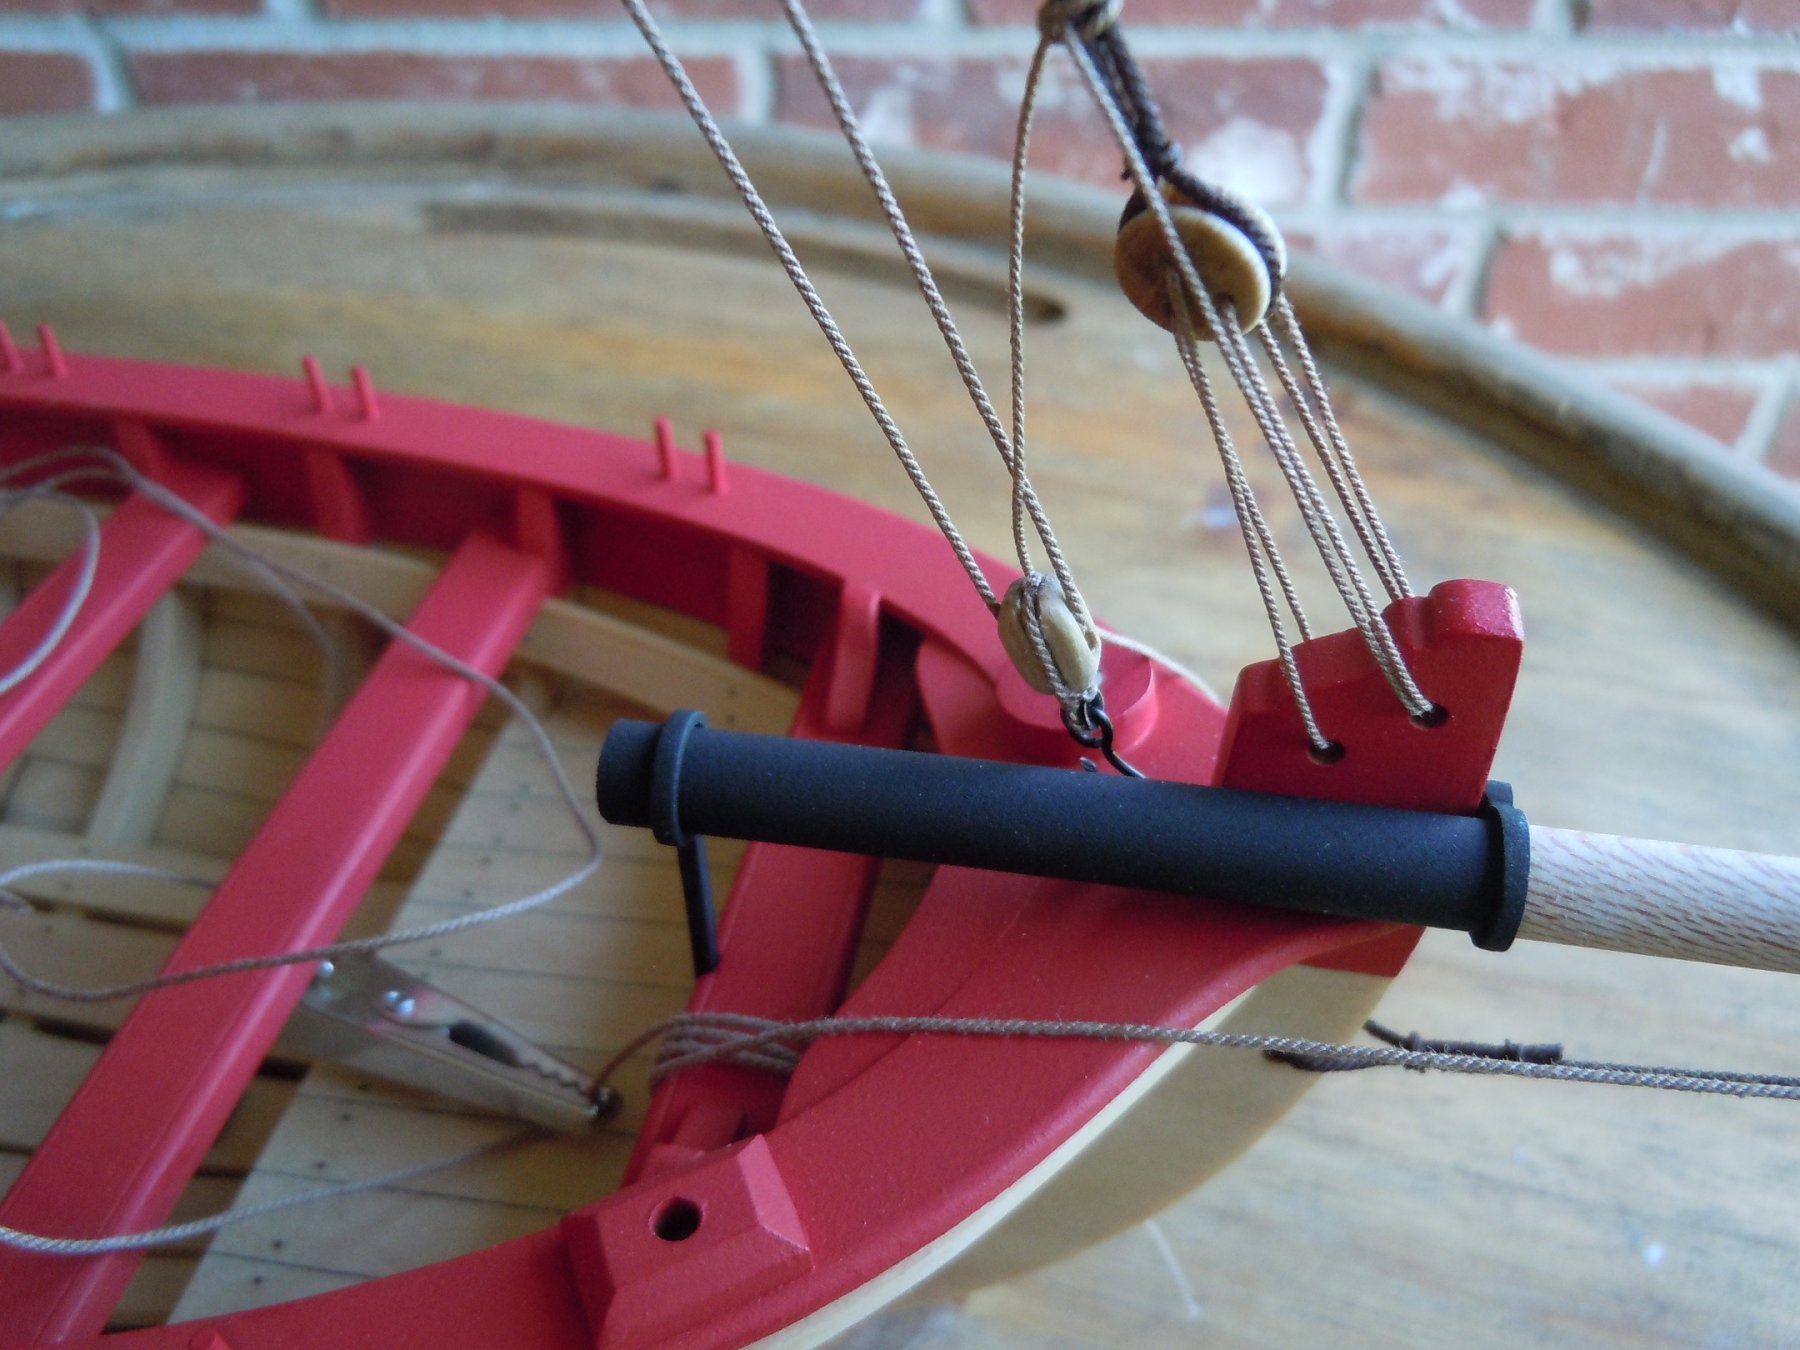
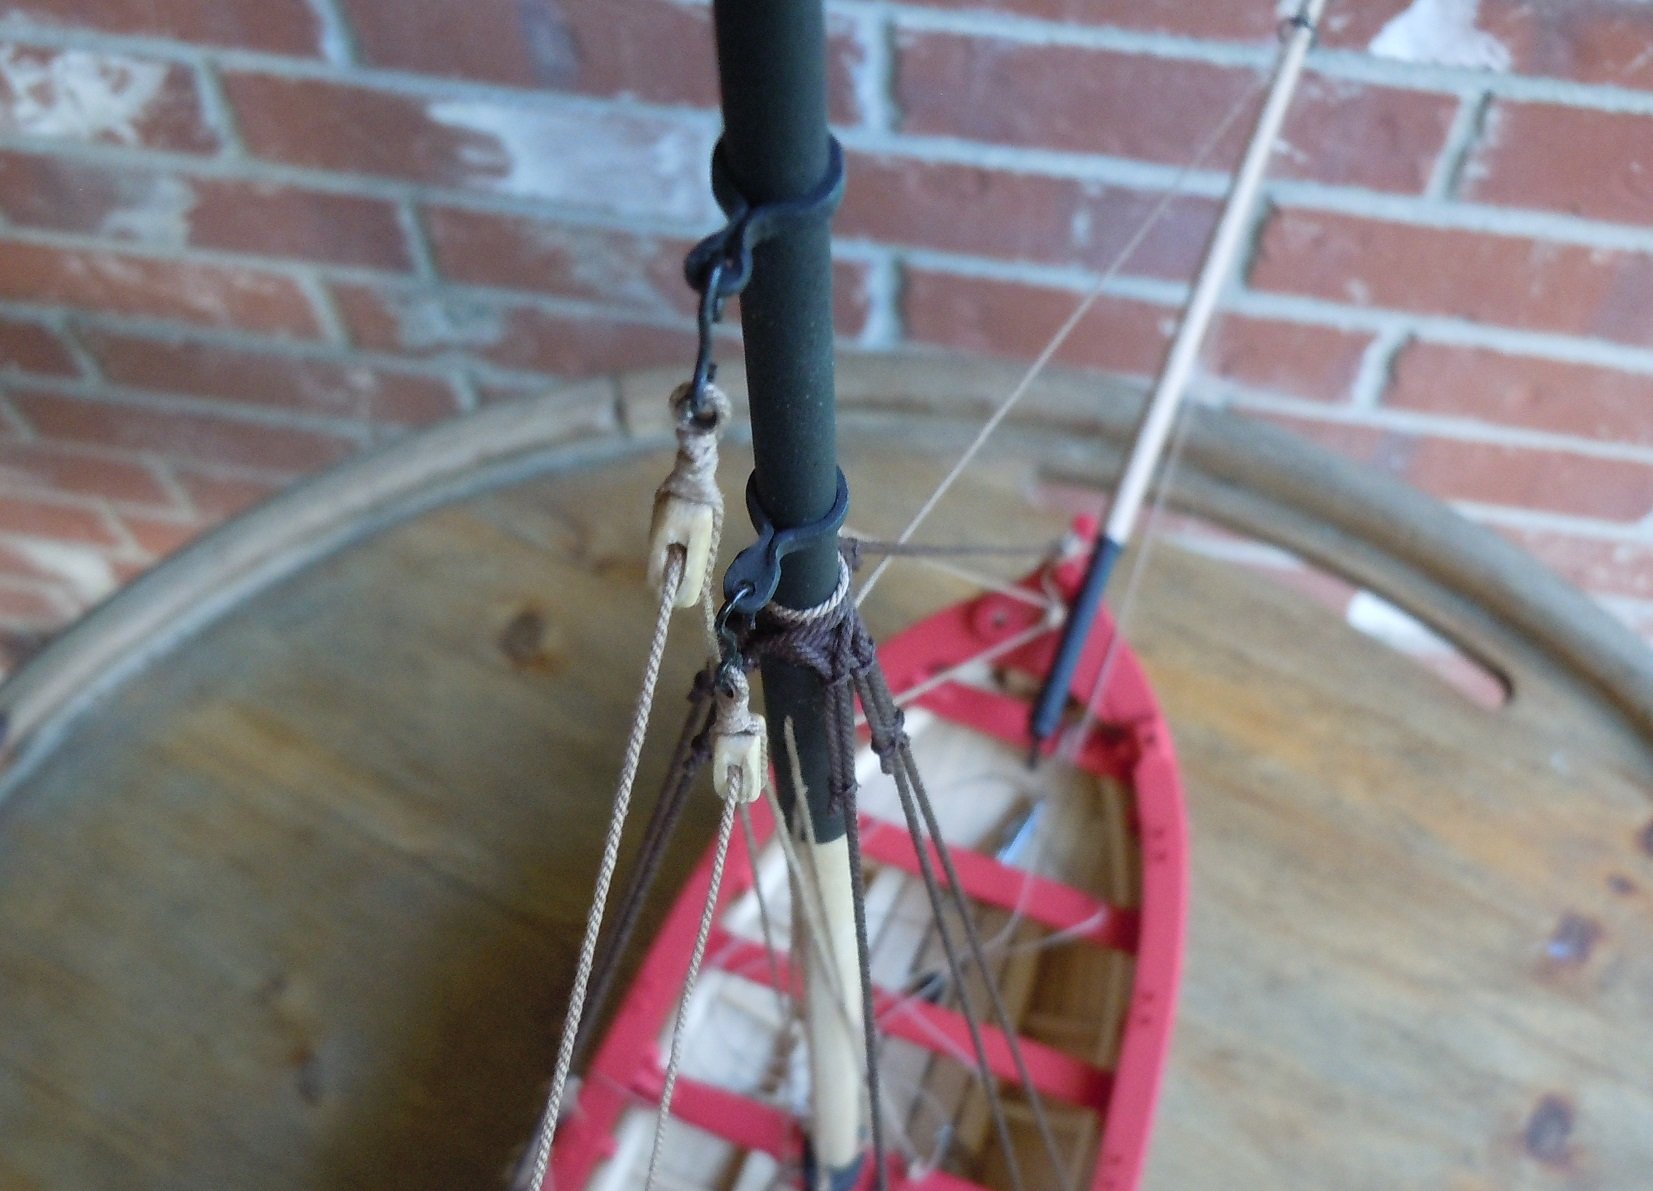
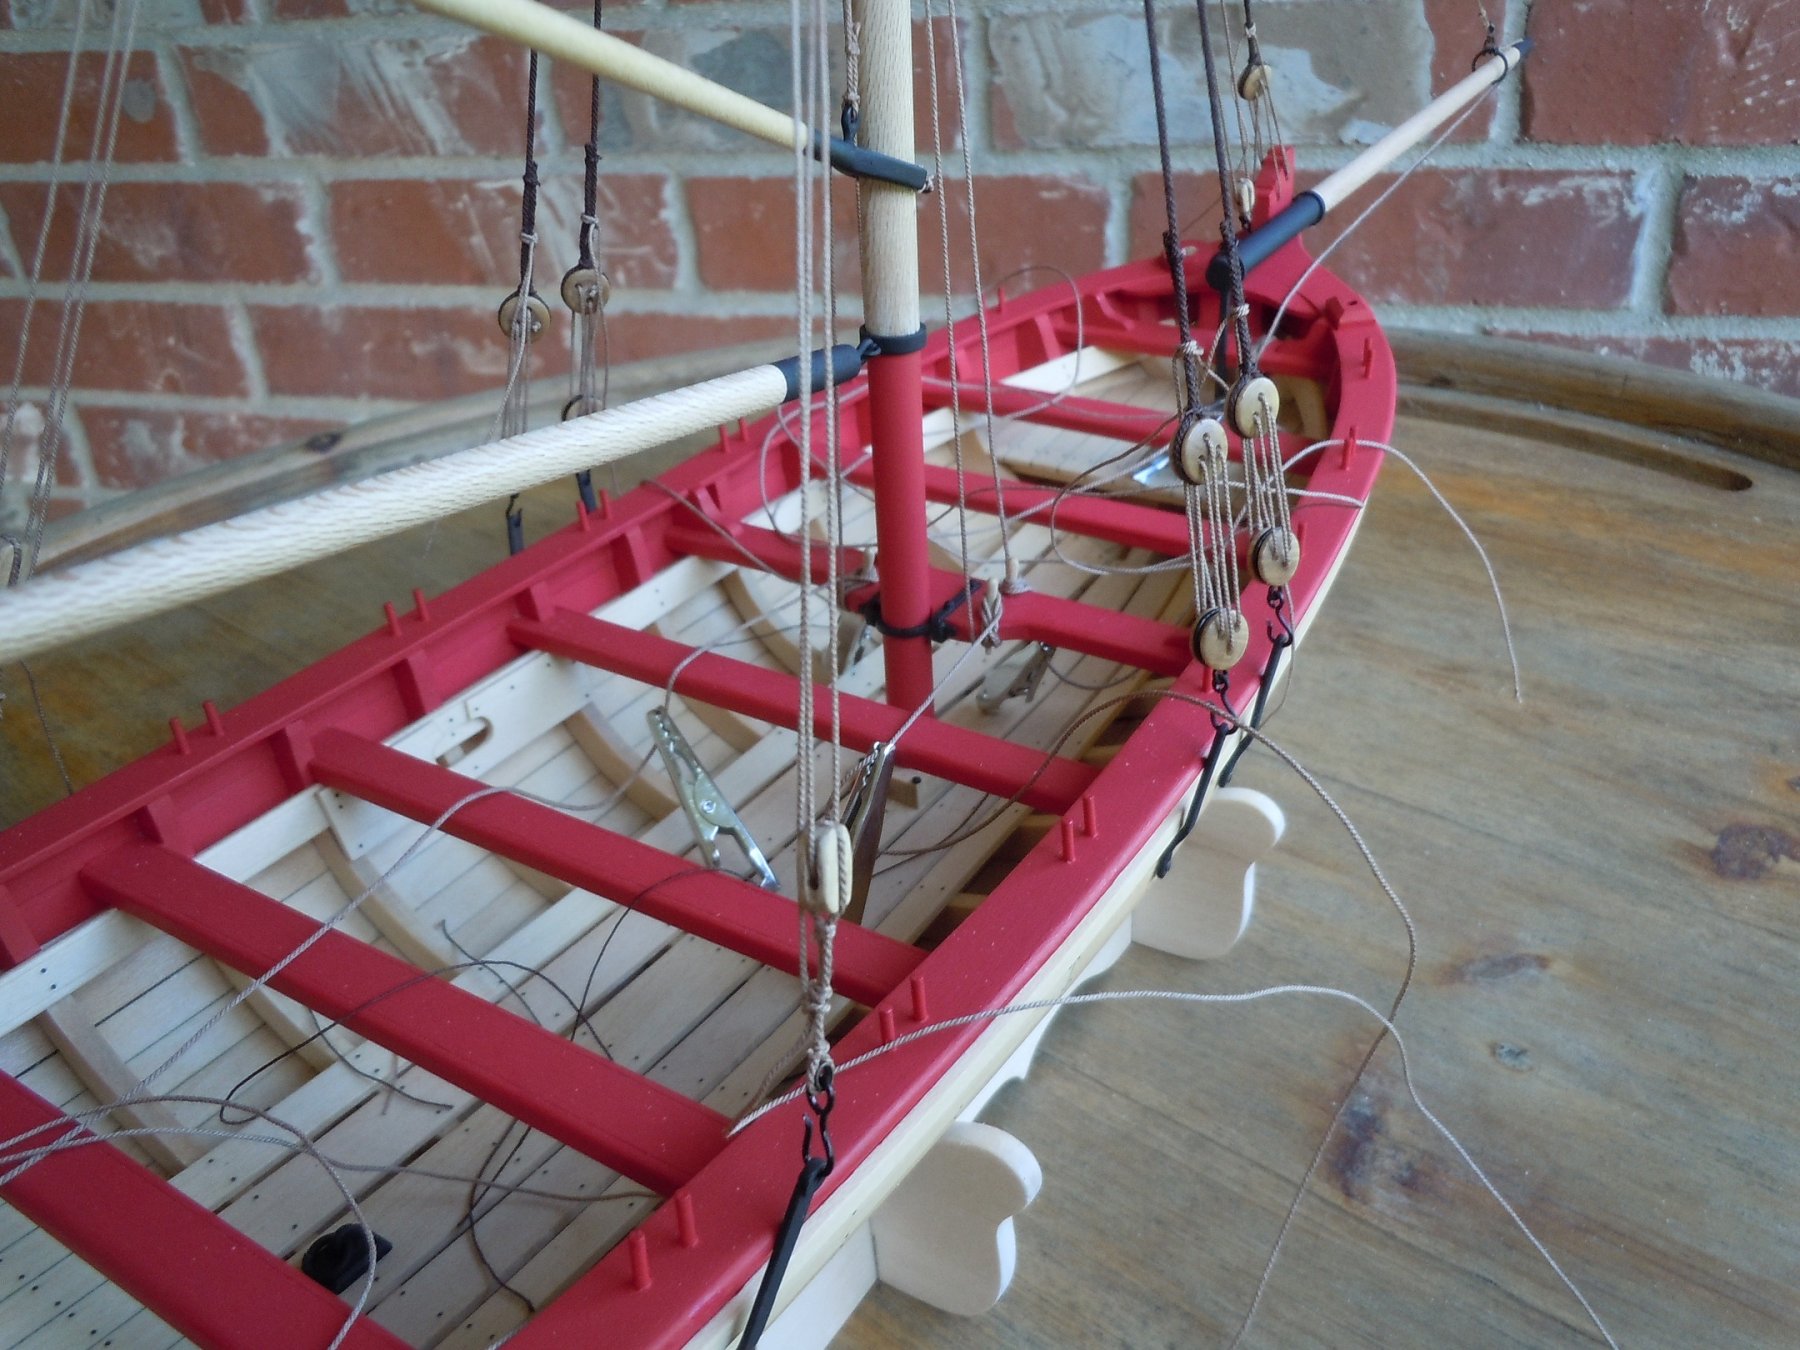
I'm nearly done with rigging, obviously lots of lose ends need to be trimmed up. I abandoned the instruction manual for this part. Not sure what MS is thinking but they provide 1.5mm line for the running rigging, which is .5mm bigger than the standing rigging! It would look to big for the anchor line. I gotta think something got mixed up between the prototype and production. 1.5mm will not even fit through the blocks. Unfortunately, the rigging instructions don't actually refer to the rigging size so there's no way of knowing, other than what you get in the kit isn't going to work. I purchased rigging from Syren Model Ship Company and it was well worth the investment. For those interested I used .88mm brown for the standing rigging (and .20mm brown for seizing). I used .63mm light brown for the running rigging, .45 for the back stays, deadeyes, main sheet, flag halliards plus .20mm for seizing these lines. In any event this is how the model looked yesterday. I borrowed another design feature from the Medway Longboat, that being the traveler. Not sure why the stem doesn't have a 3rd hole for the deadeye rigging, had I noticed earlier I might have added it. I'm still working out a way to get the deadeyes for the shrouds to behave and line up a little better, they are Twisted Sisters right now. This is just shot of the shrouds up top. I ended up chamfering the holes in all the blocks so that the lines would ease out of the block rather than have to make a right angle turn. I did this with a pointed diamond encrusted bit in my Dremel and it took all of about 15 seconds per block. Not sure if I mentioned this earlier but I also rounded off the ends and softened up the edges on all the blocks which made a vast improvement in their appearance, at least I think so. At least my deadeye sets are level with each other, and there are only 2 on each side! This photo shows how chamfering the holes in the blocks helps the line exit in a more prototypical manner. Last but not least the stern. I ended up not using the kit provided horse traveler. I've been making fake coils of rope today, still striving for predictable repeatability. I have 1/3 of them done now, but will be playing Army in the field for the next 5 weeks so this boat is gonna have to wait for me to come home. I think just might make my goal of getting this done before I head off on a longer term adventure in September. As always, thanks for looking and please feel free to point out anything that doesn't look right.


- 95 replies
-
- 9
-

-

-
- Model Shipways
- 18th Century Armed Longboat
- (and 1 more)
-
The pirogue looks very cool Tiger65! A side project is always a cool thing to have going, sometimes it keeps the "other" projects interesting! Please do continue with your log, I think I read every Longboat build log start to finish before starting mine and always found something worth tucking away for use now, or later. Also if people keep seeing the same issues with the same boat, they will be able to better plan around it. If you plan to use the kit parts, your idea seems like it's the easiest method. I wasn't thinking outside the box, if I was I might have gone this route myself. Add Paul's mod to the locker and you should be golden.
-
Another patented DR.P jig! Looks great Paul, I wish I had as good of results with the square hole as you did!
-
Thanks guys! Paul I purposefully left the thwart supports out, only because I didn't see them installed on any other similar boats. As for the belaying pins, I made some from basswood and it may just be the batch of wood I have on hand but the bottom half of the pin was extremely fragile. I'm surprised by how strong the boxwood is in comparison, and after fooling around with the rigging I'm glad they have that bit of extra strength. What matte spray are you using? I thought about using some, the red area of the mast is going to get bumped into a lot and it might be worth giving it a coat.
-
Looking good, once you put cockpit and stem floors in it will really look cool. Hard to see how dark your barn red really is but if you intend to use the etched brass decorations the darker color will be a better contrast than the red I used. I don't know if the thwarts will be that high, a scale 6' tall human would be 3 inches tall and to my eye looks about right on my build. Keep up the great work!
-
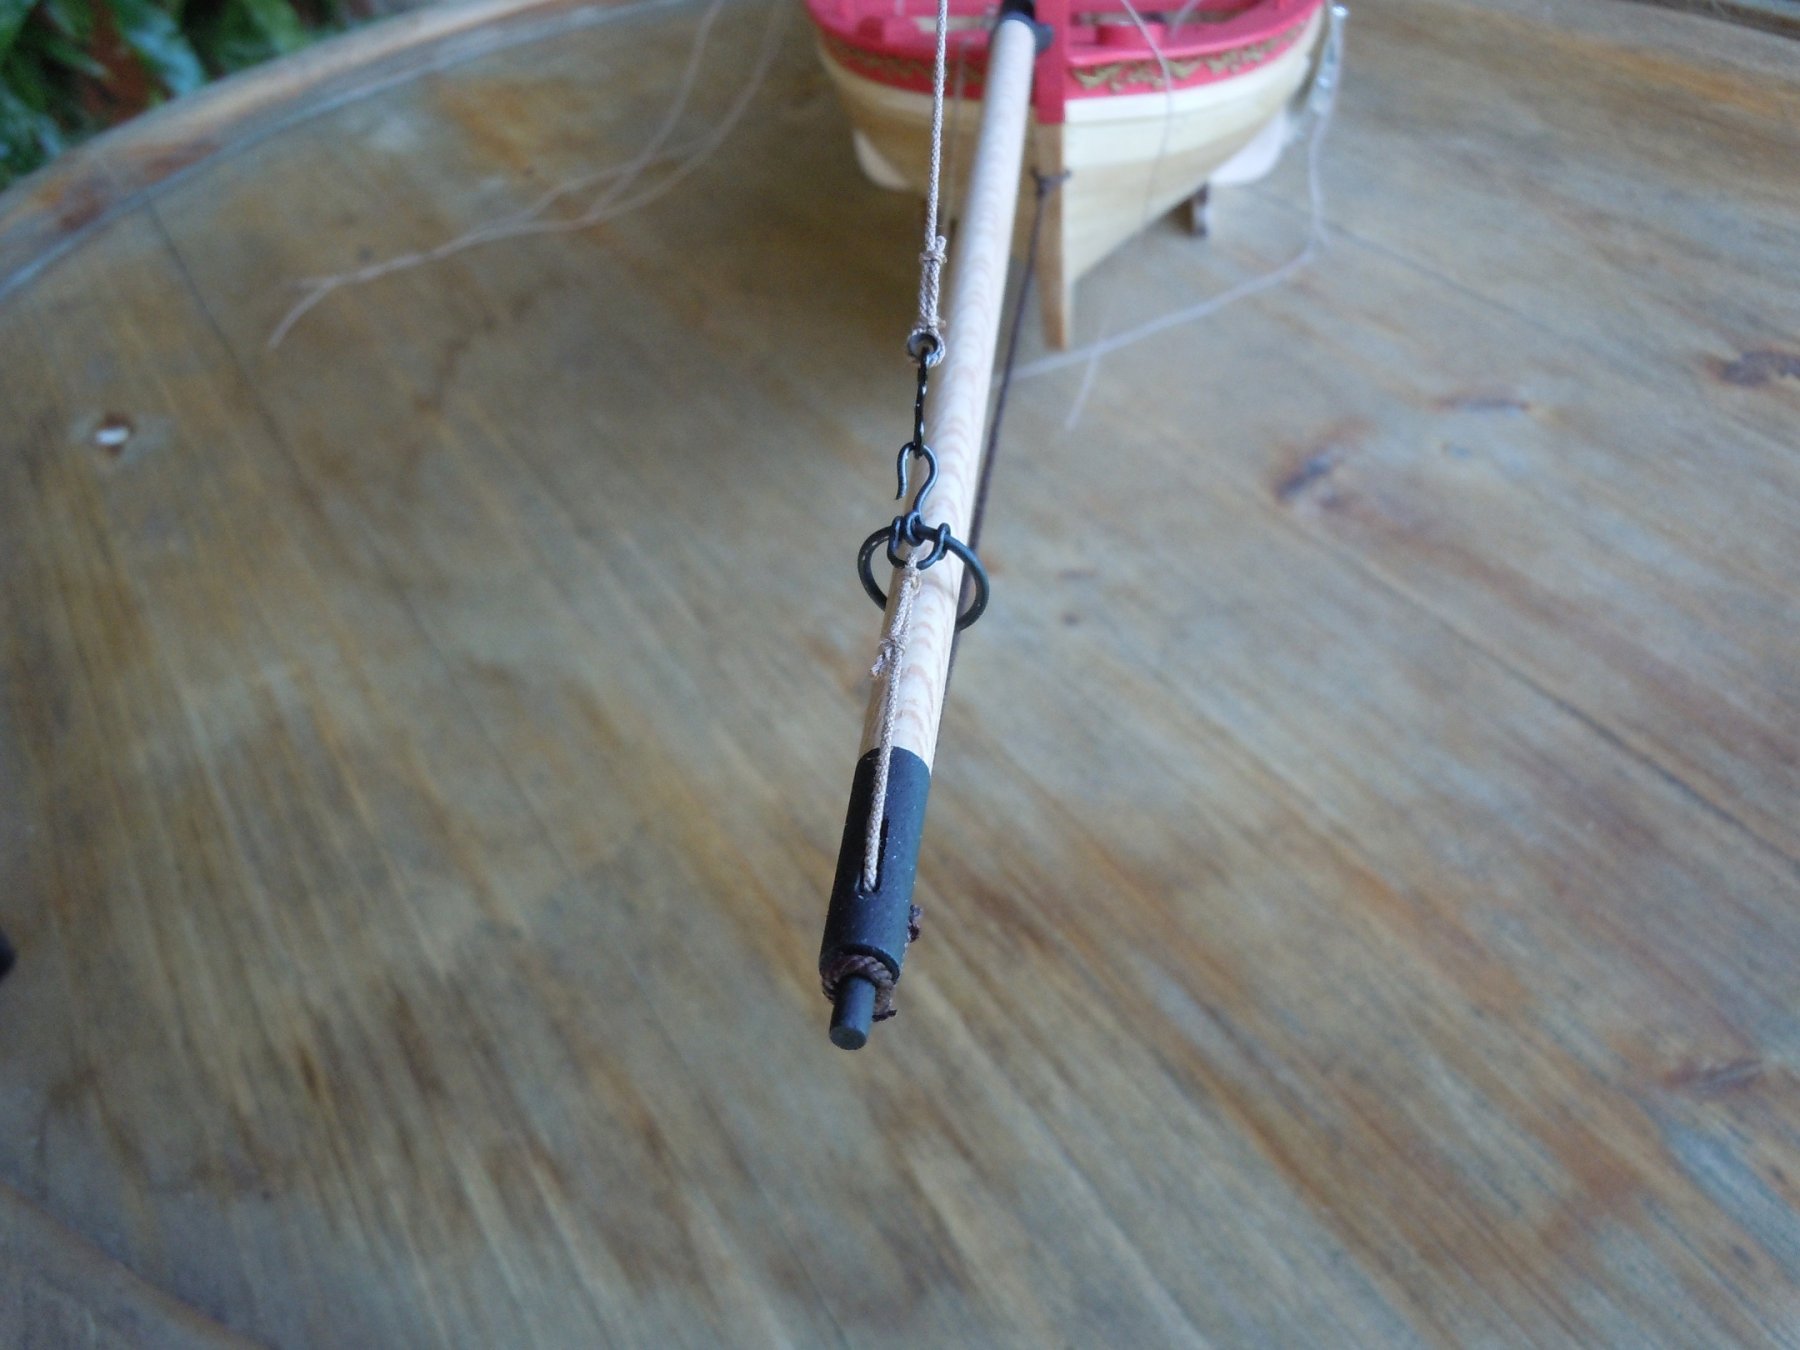
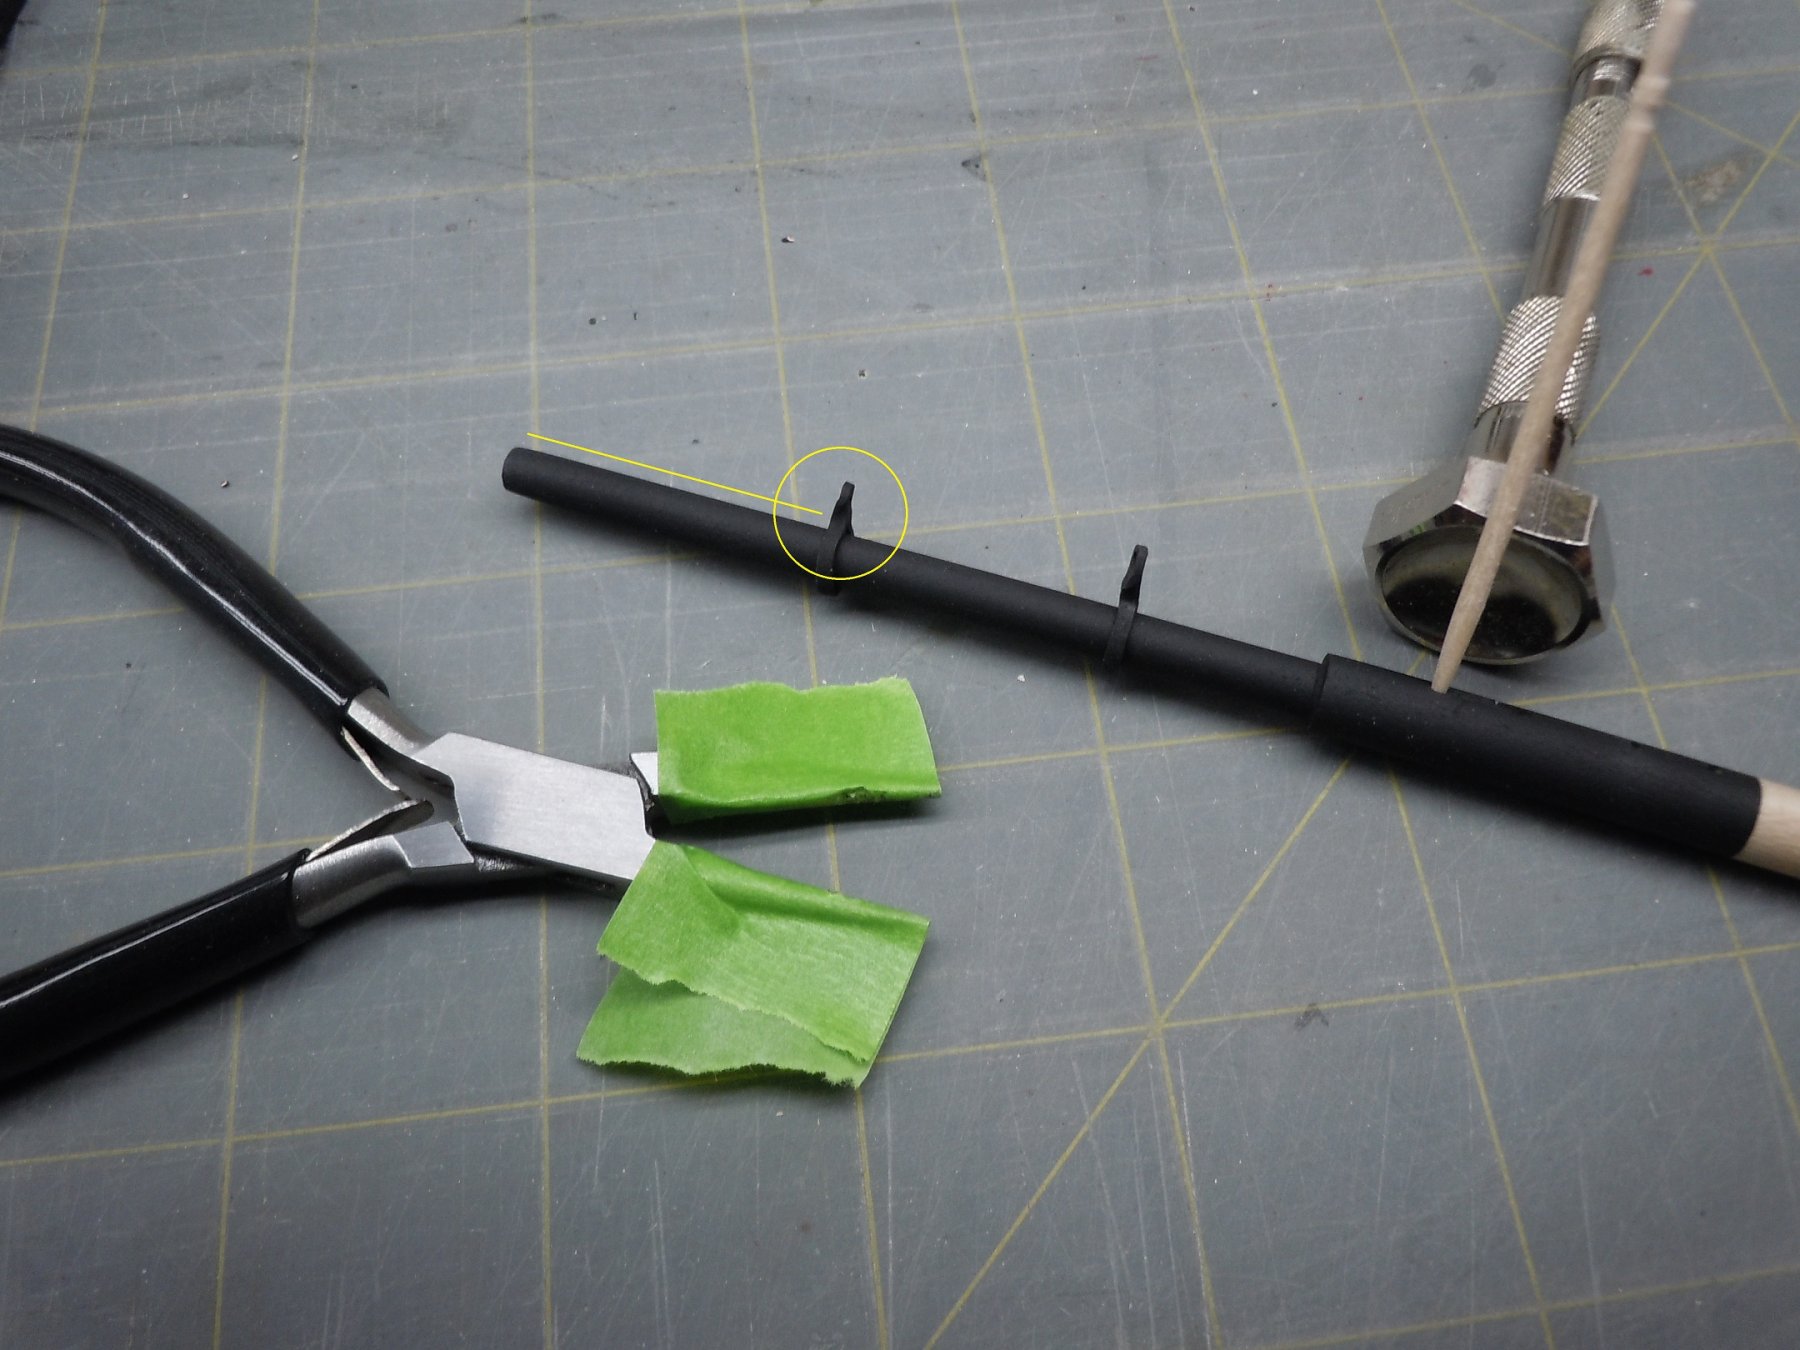
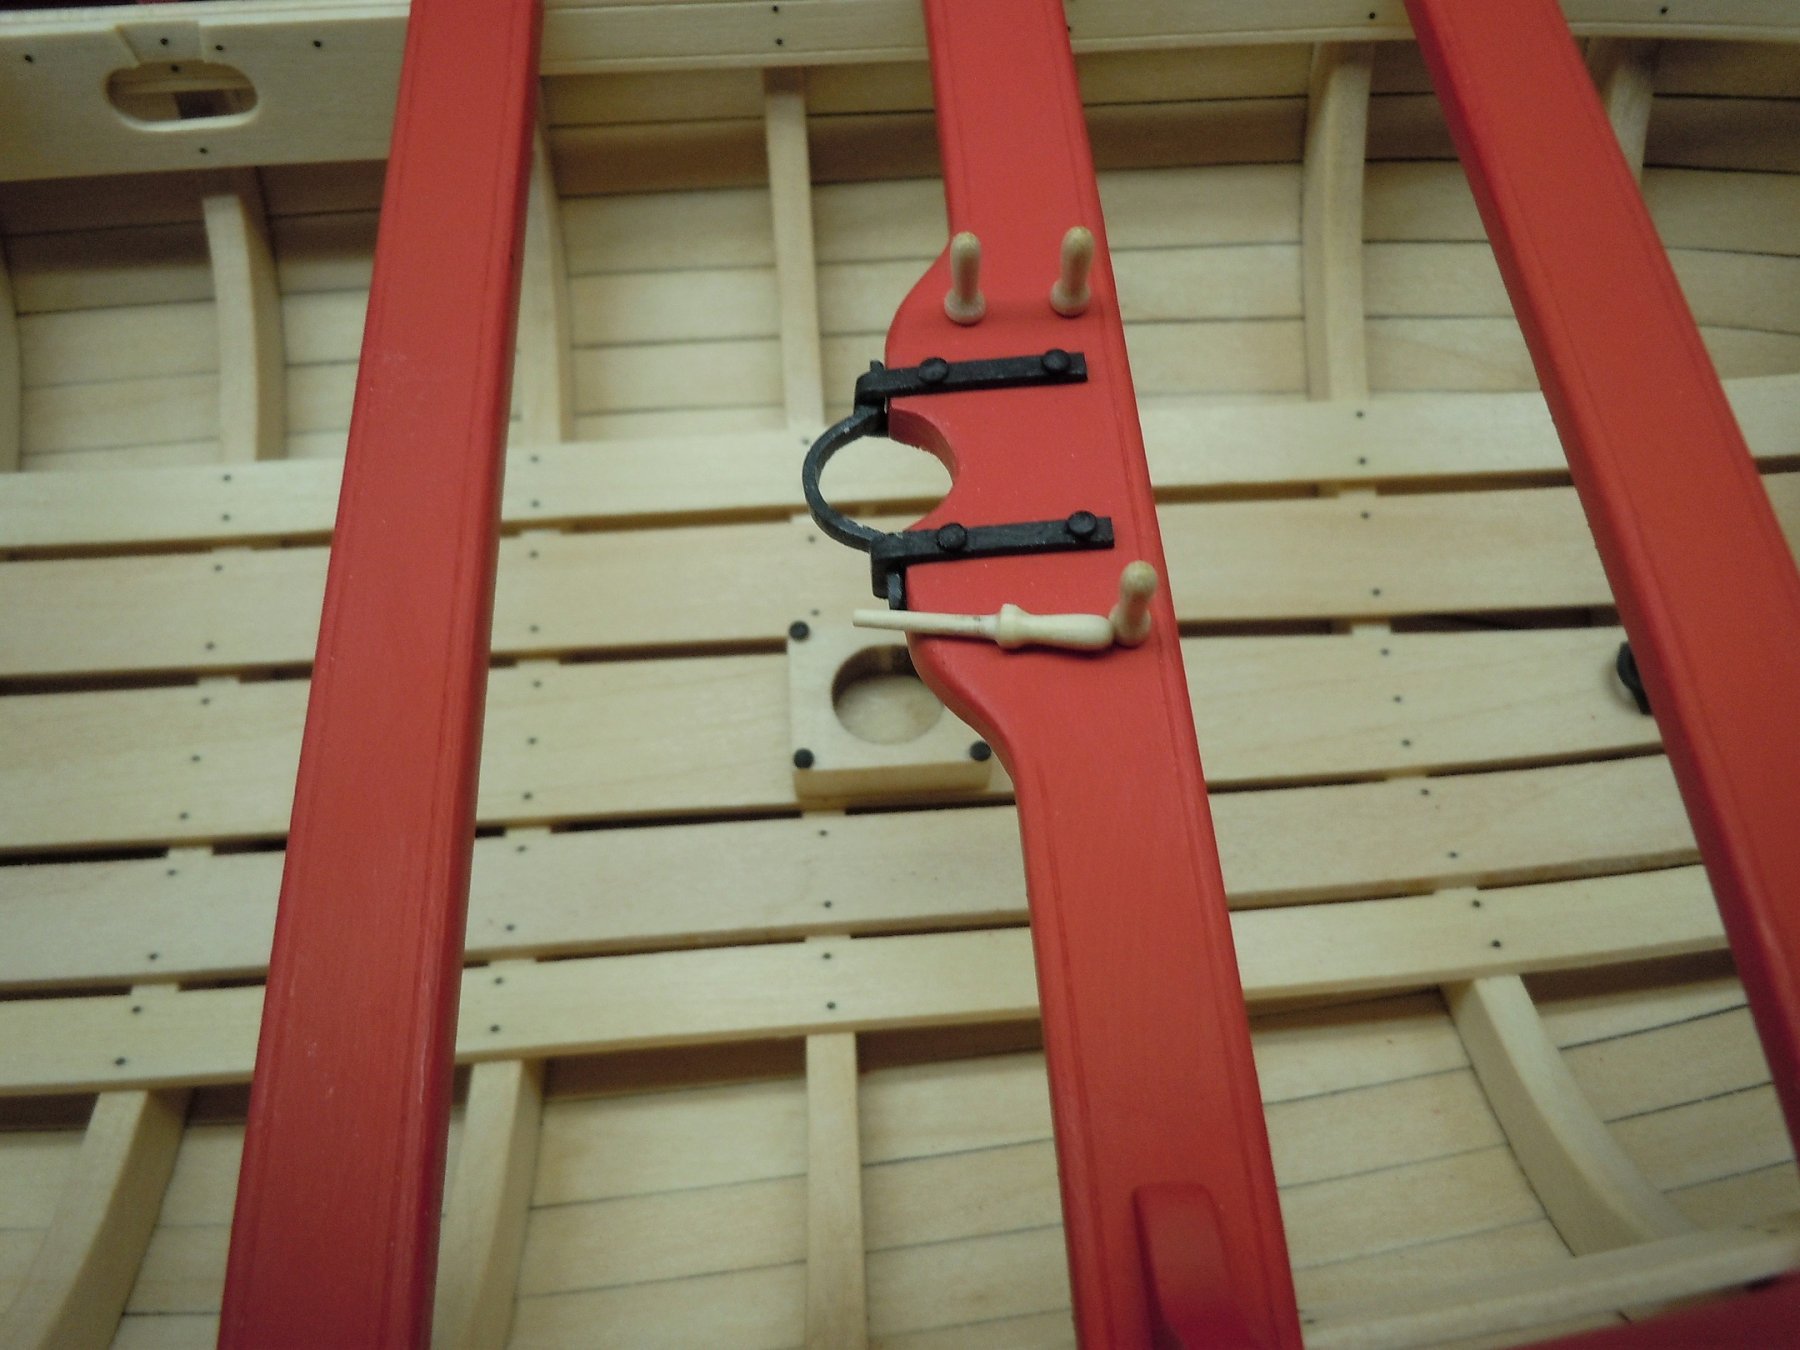
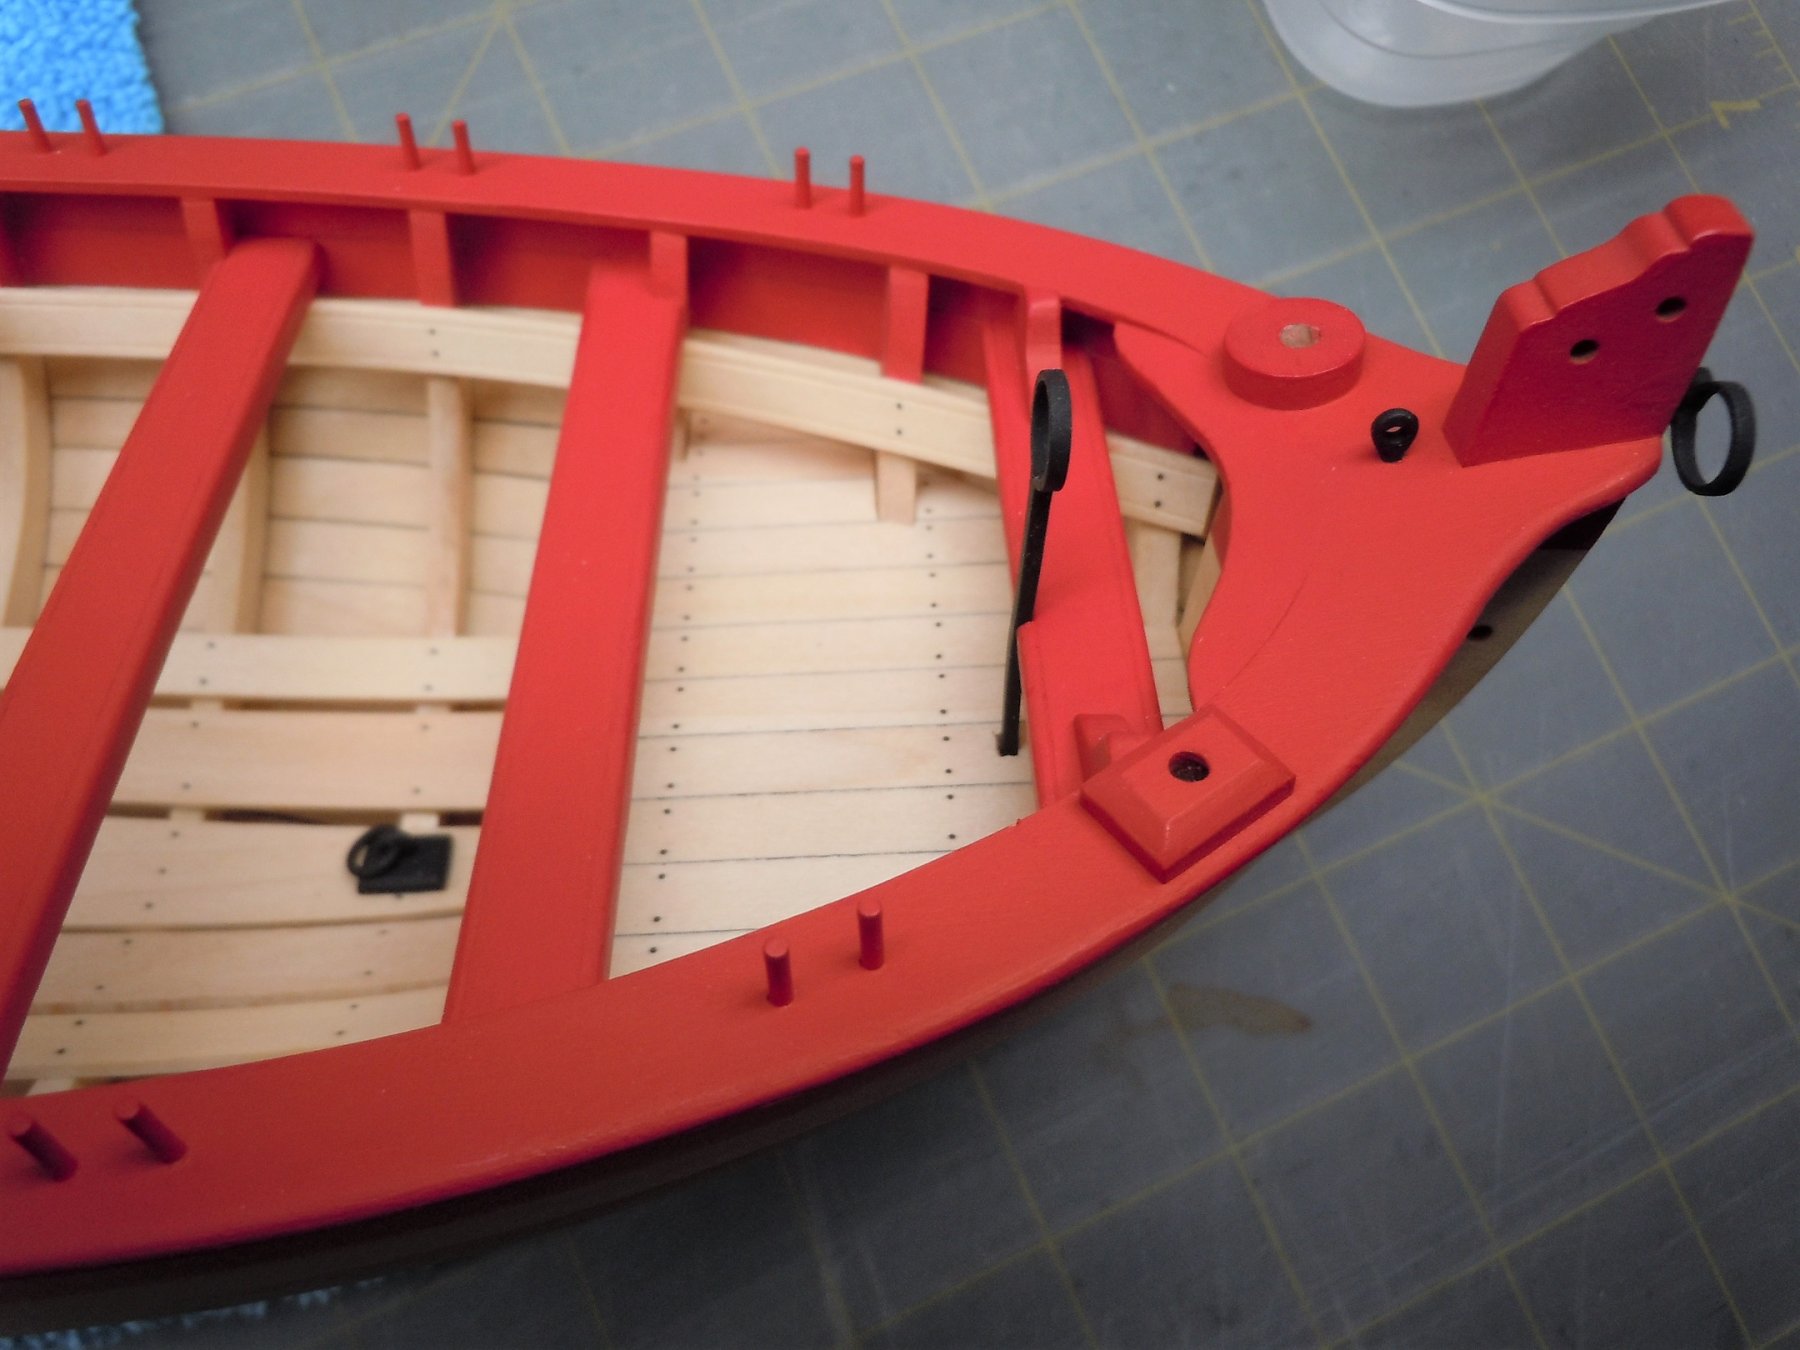
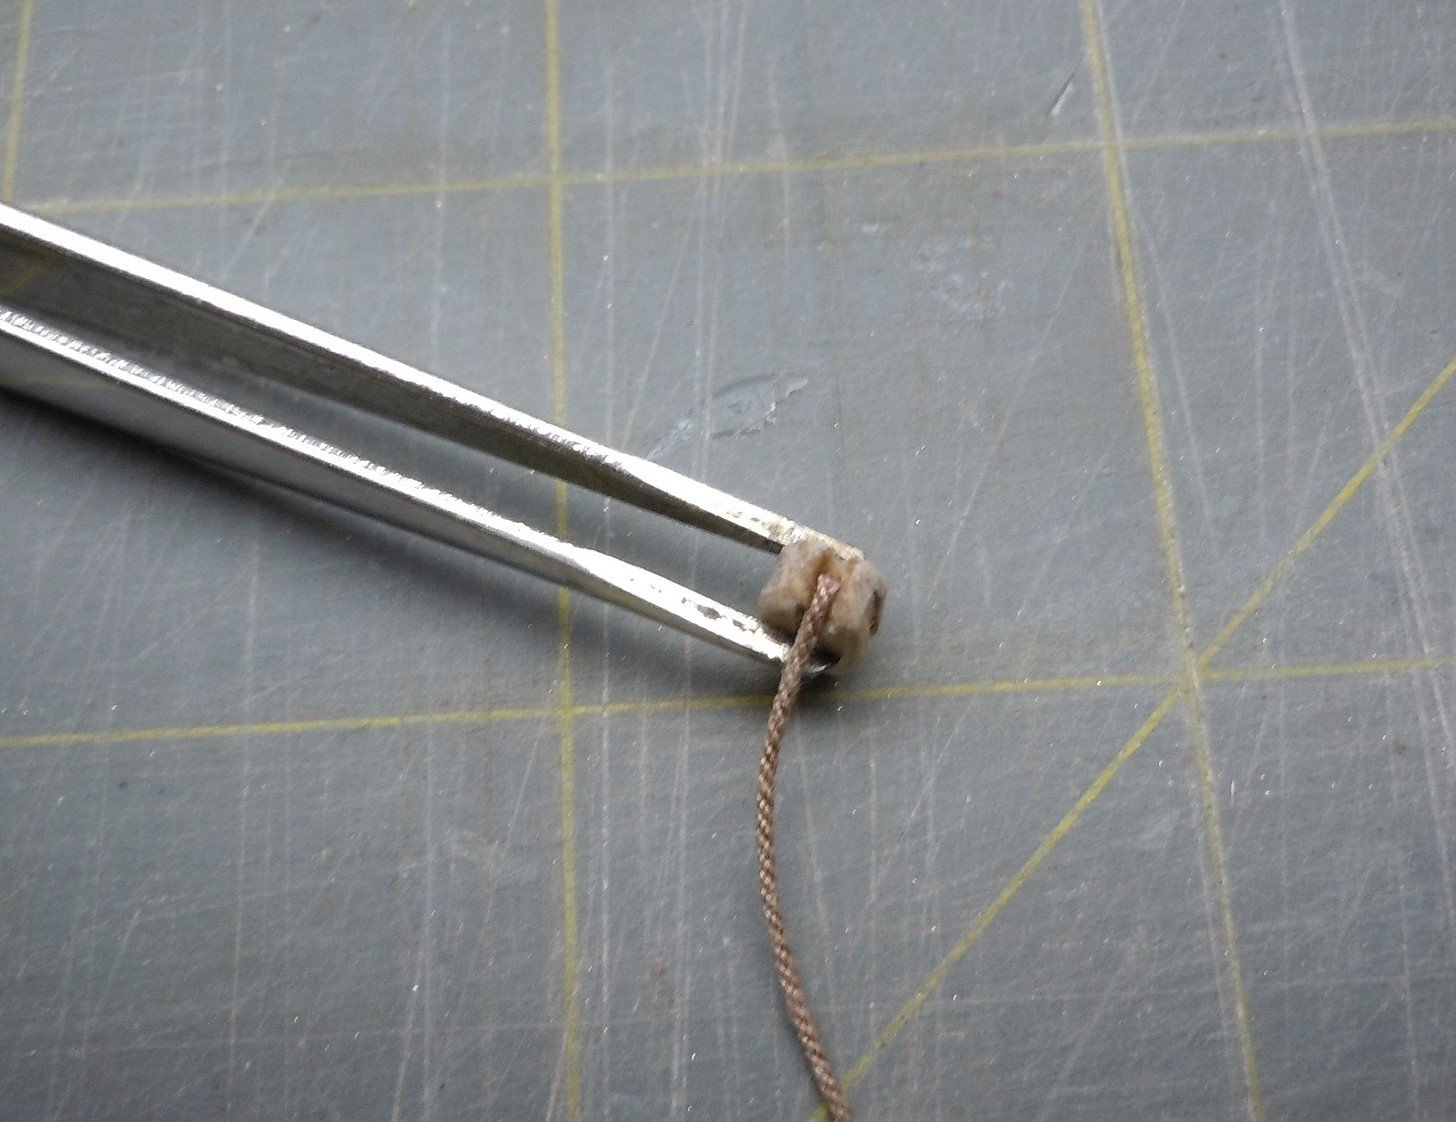
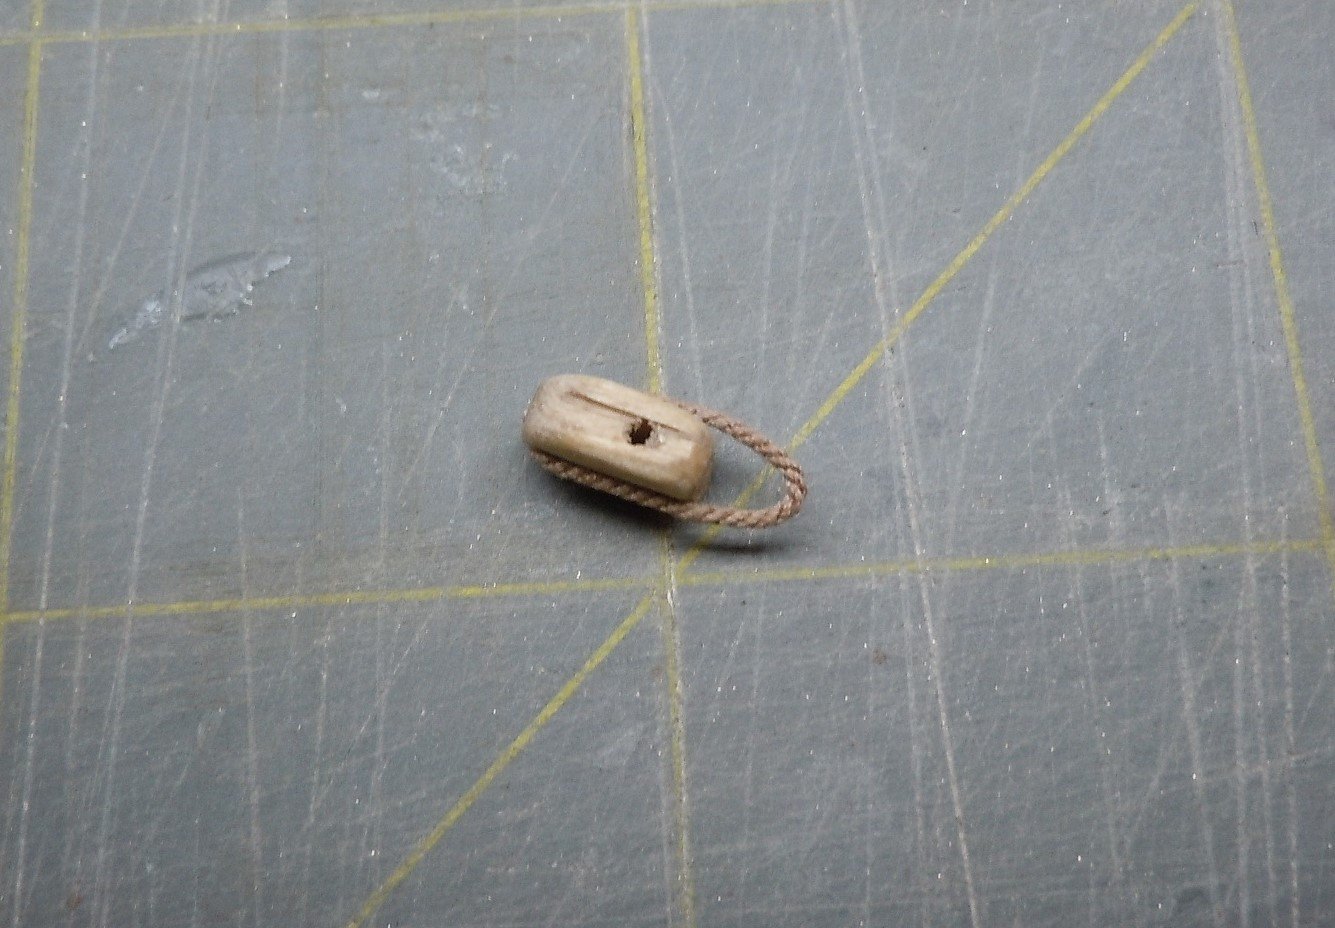
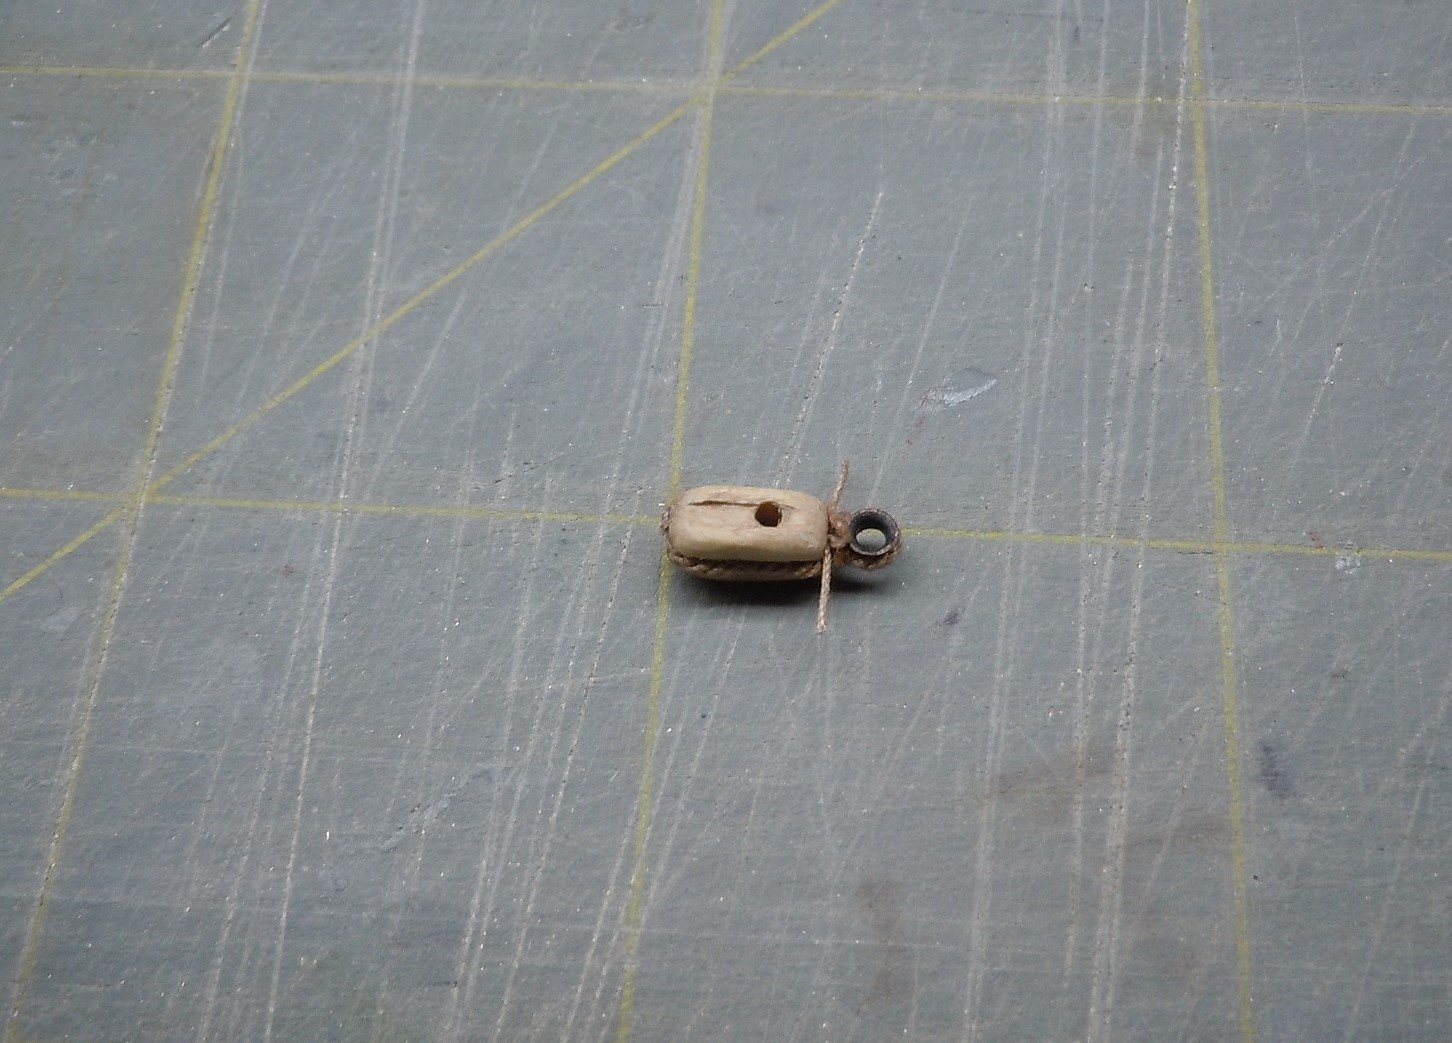
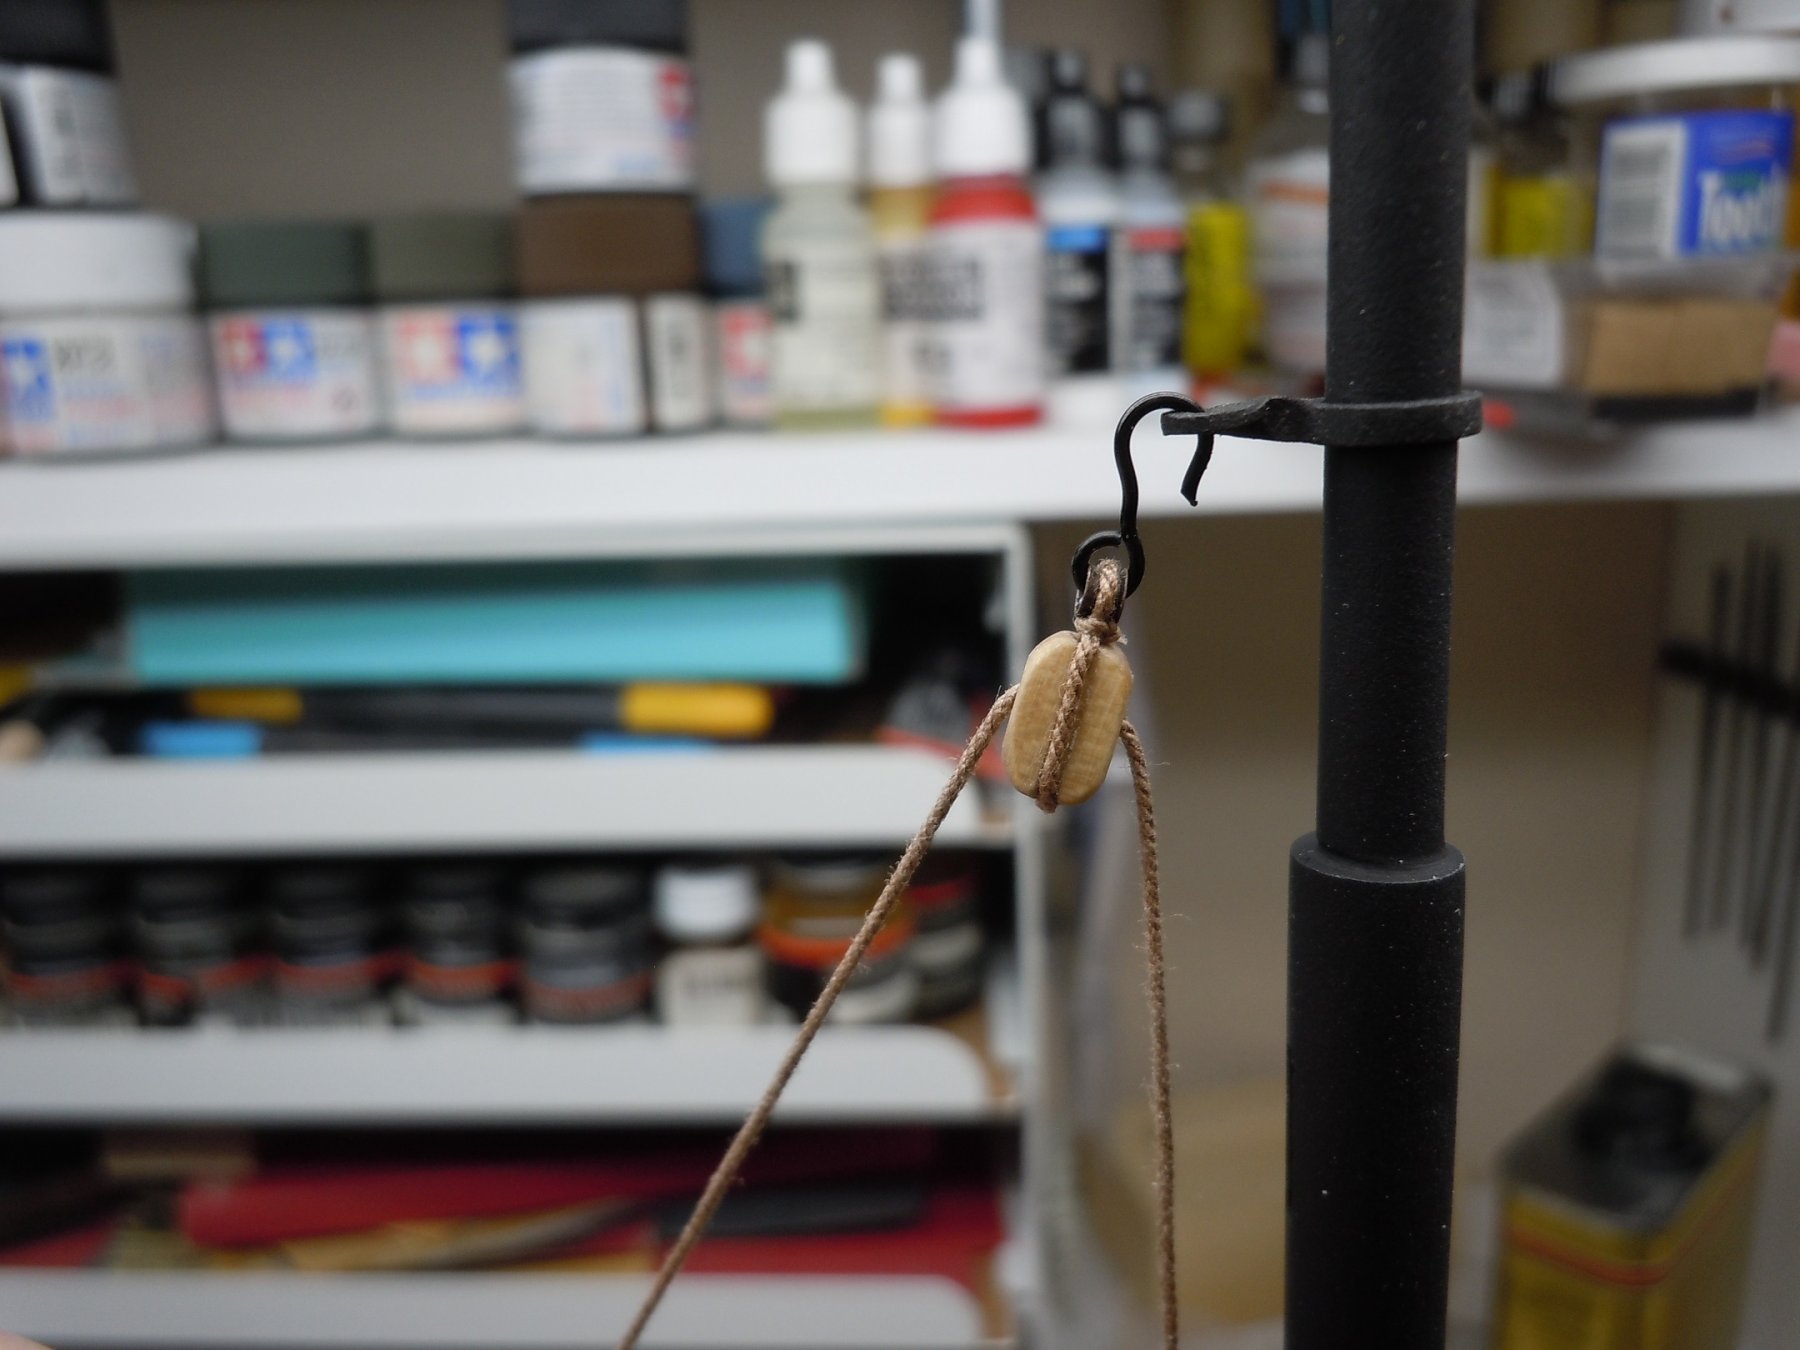
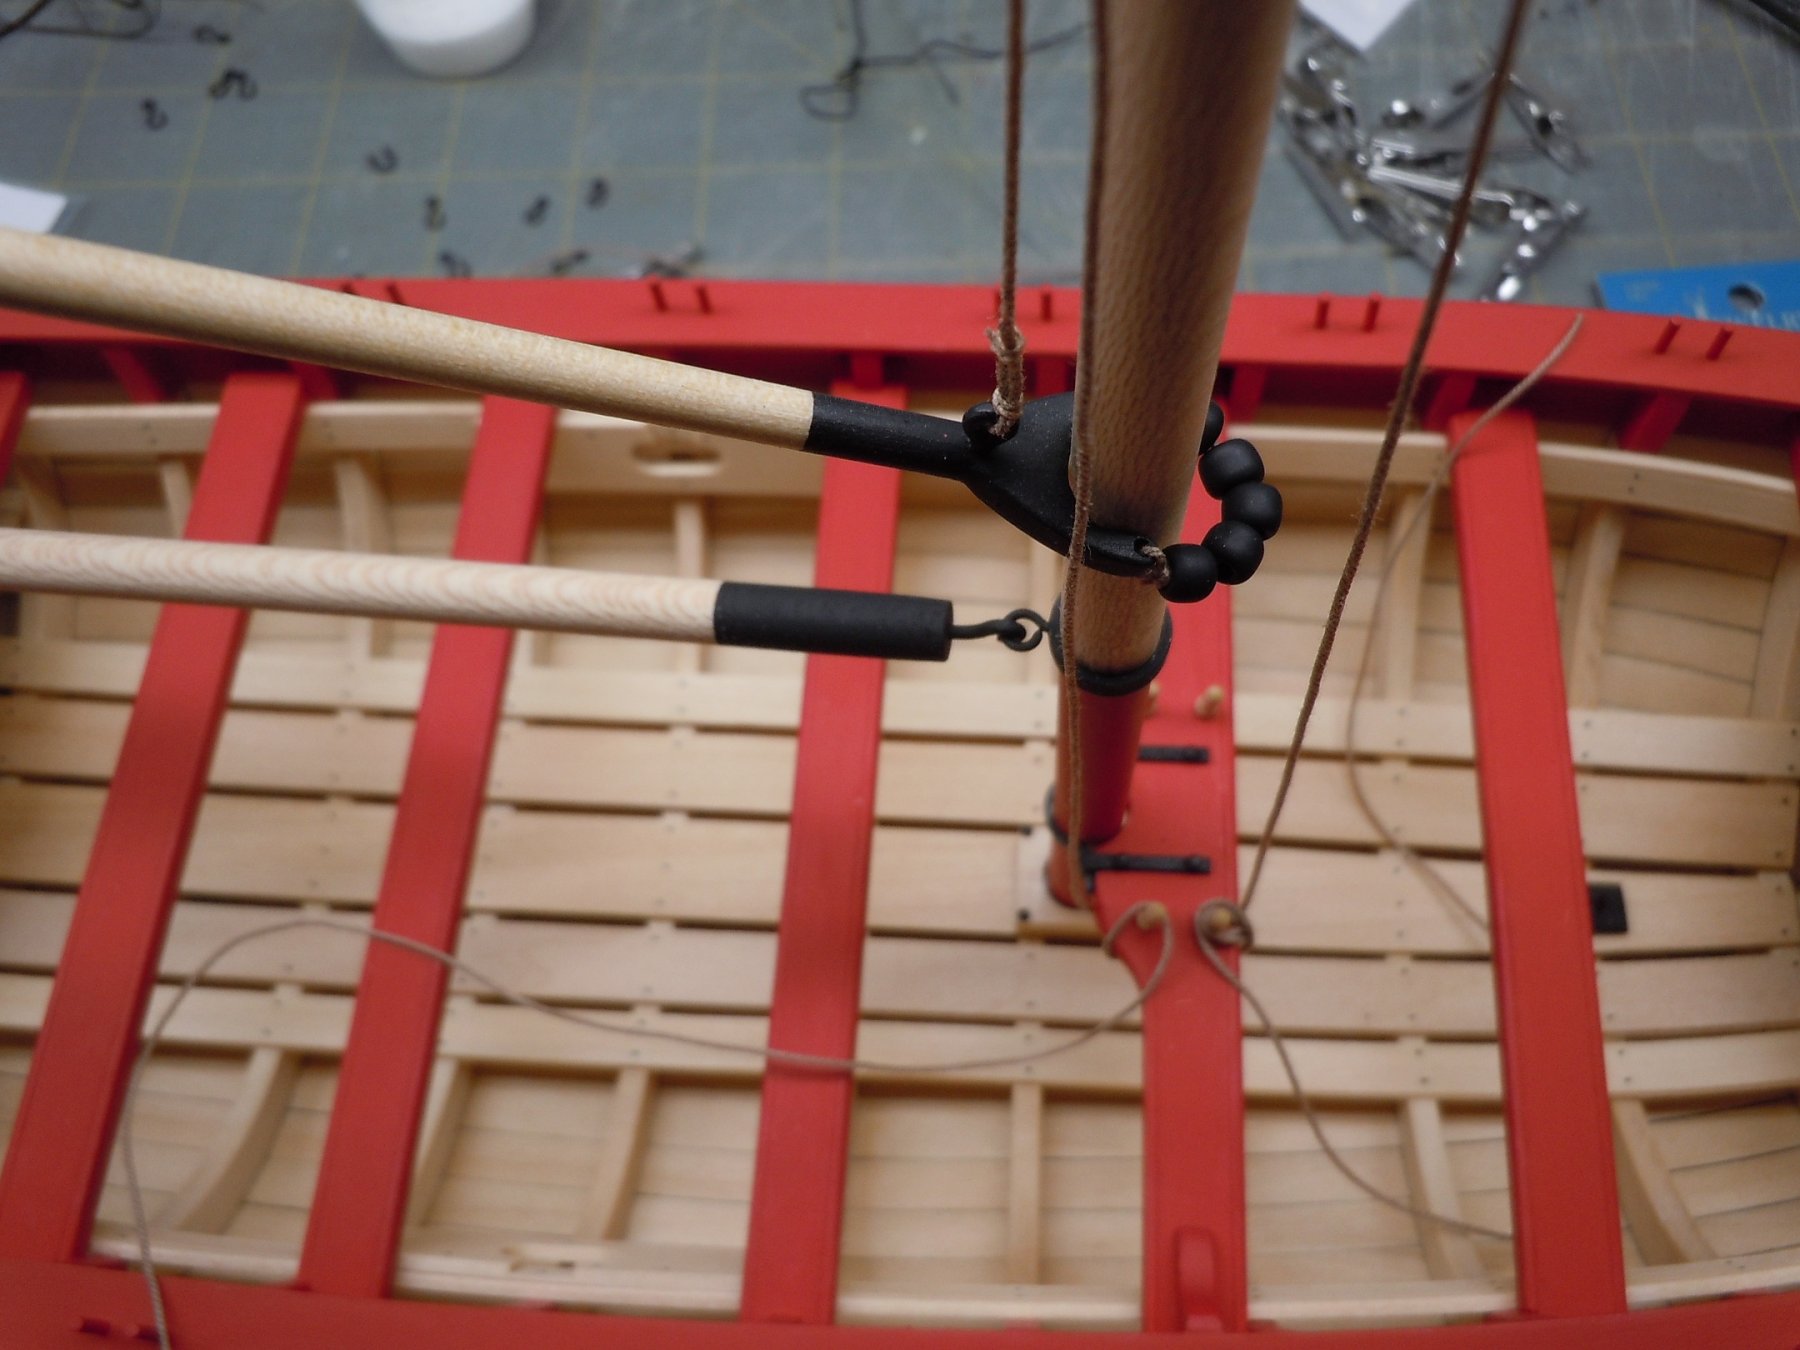
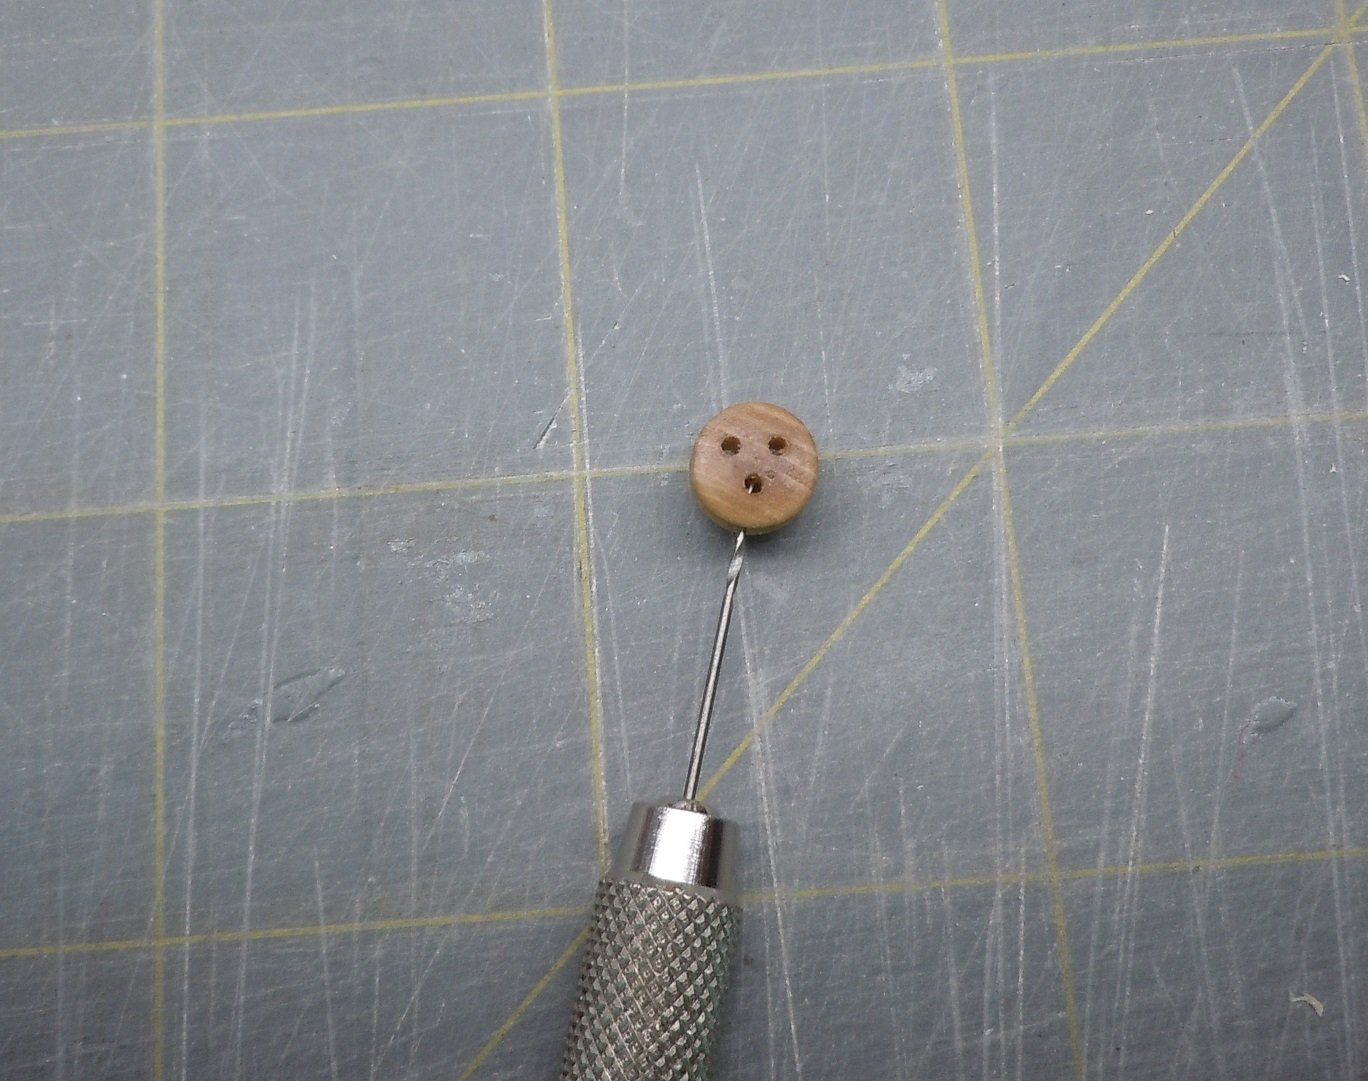
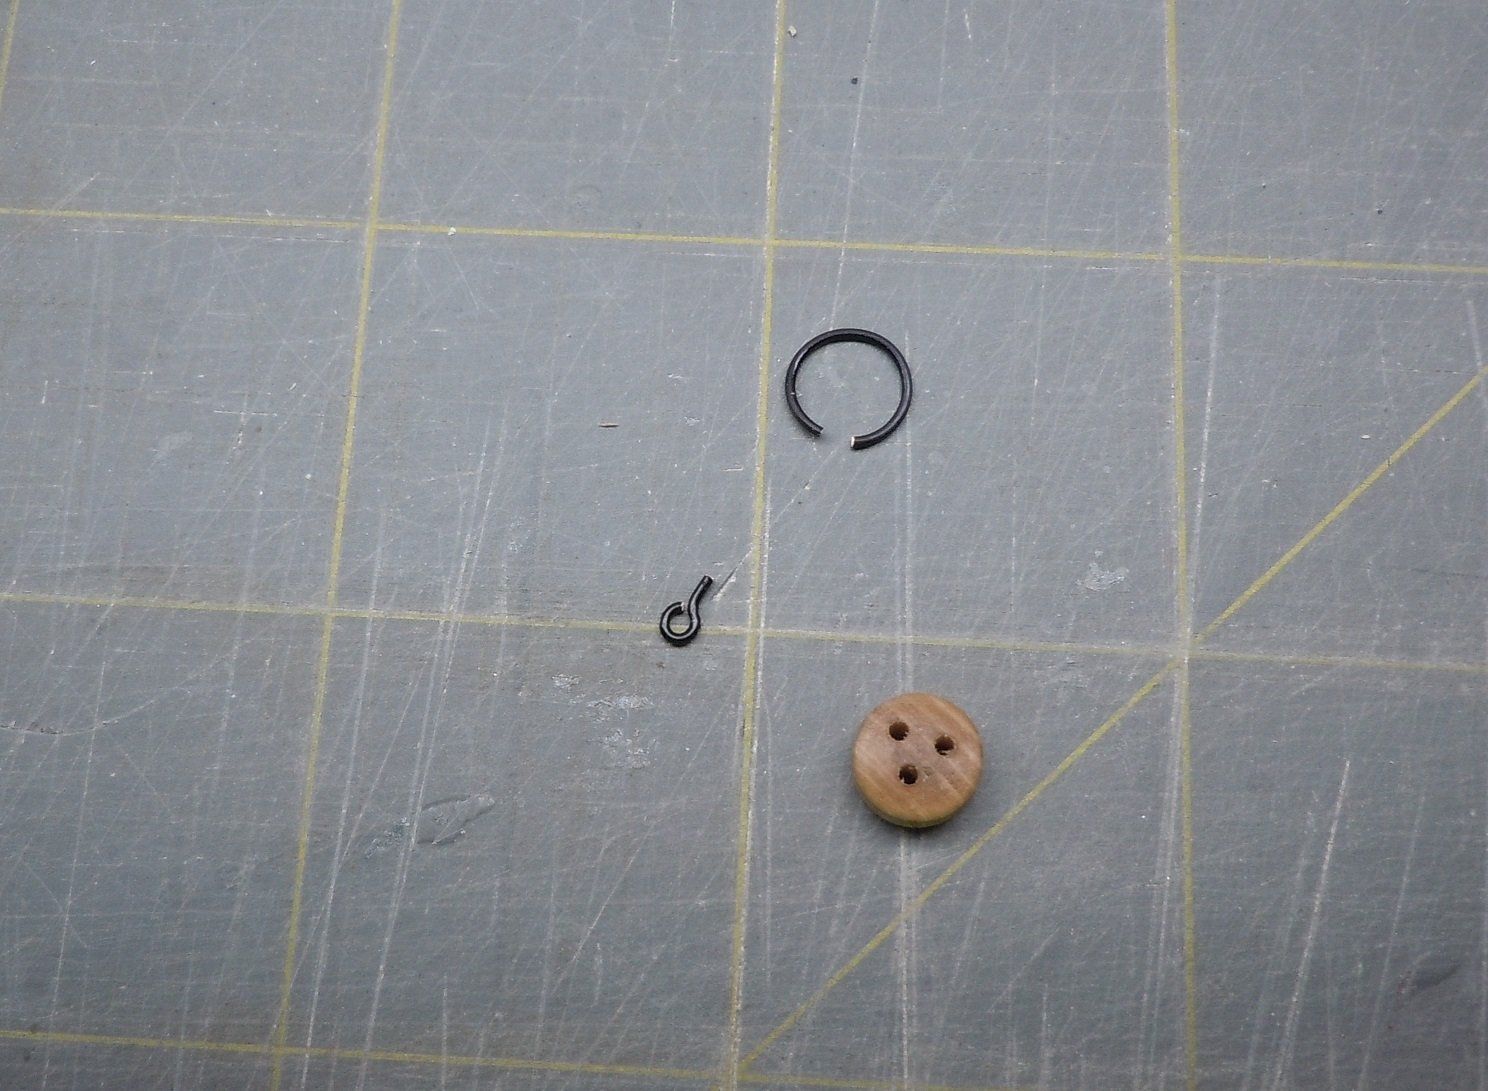
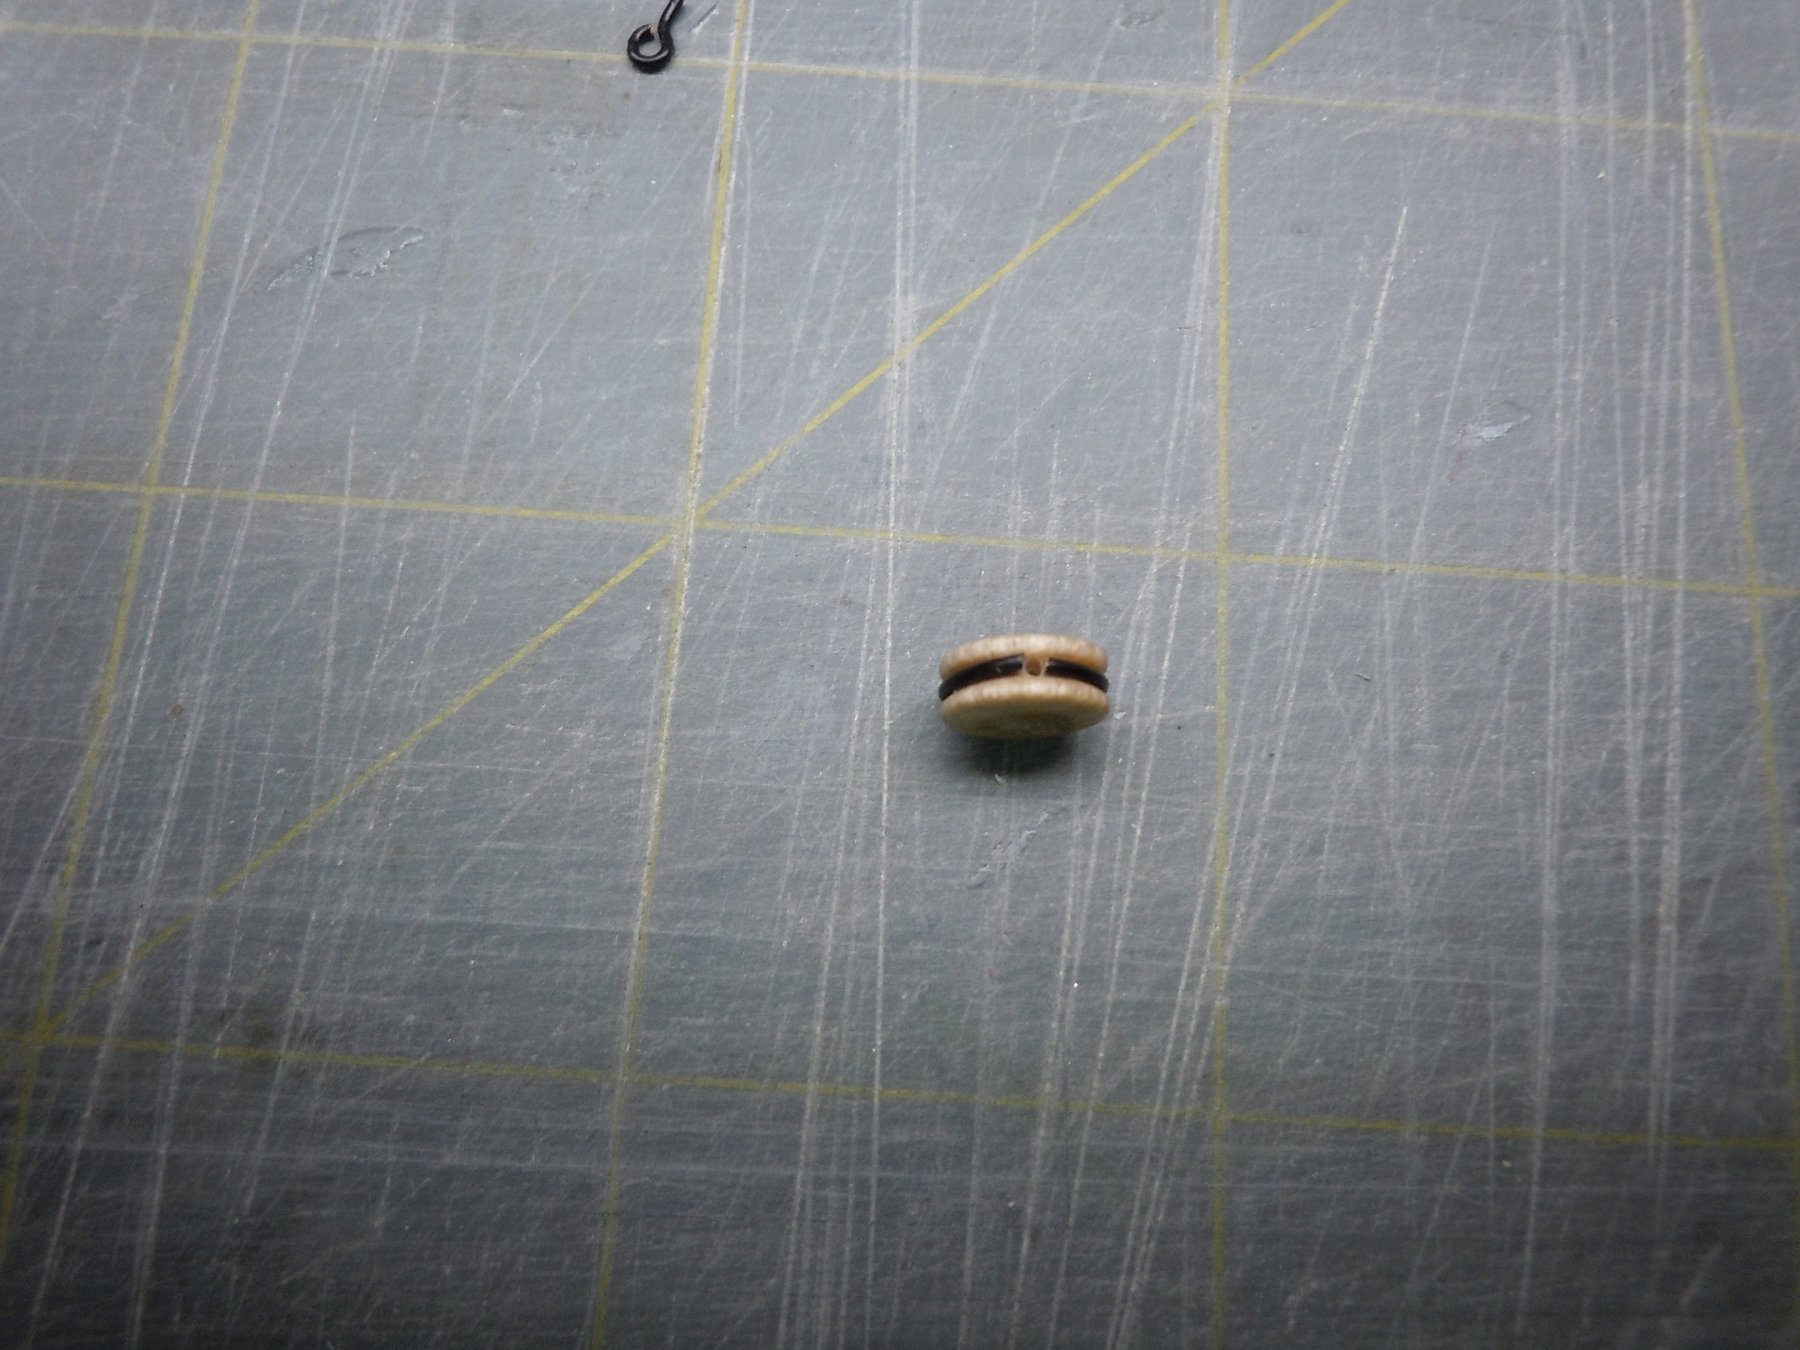
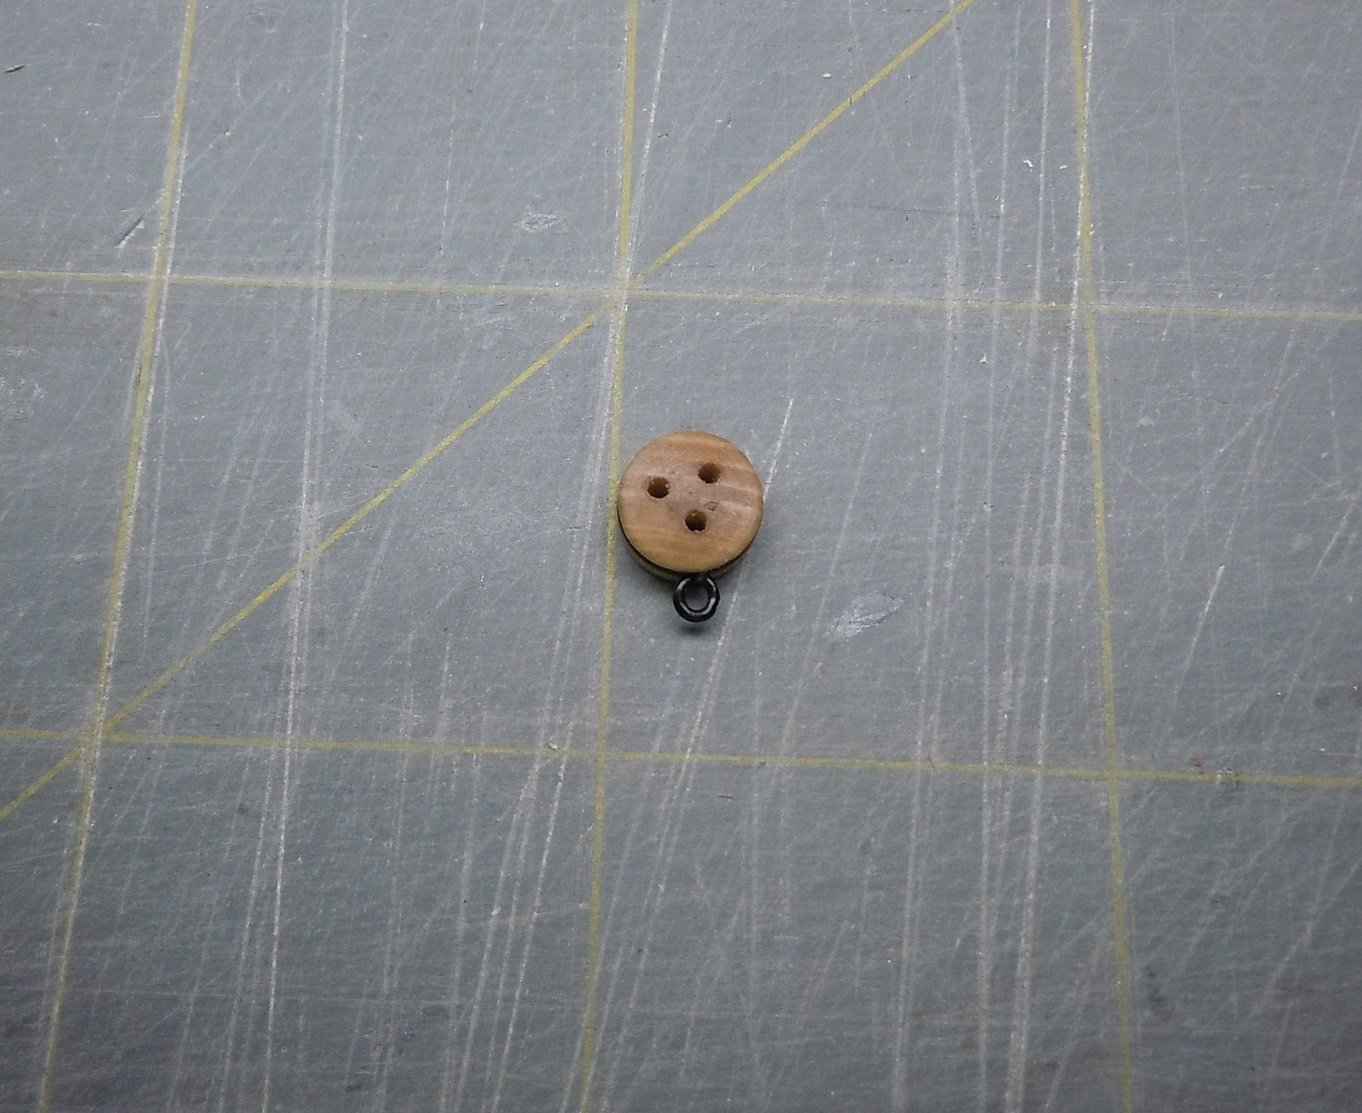
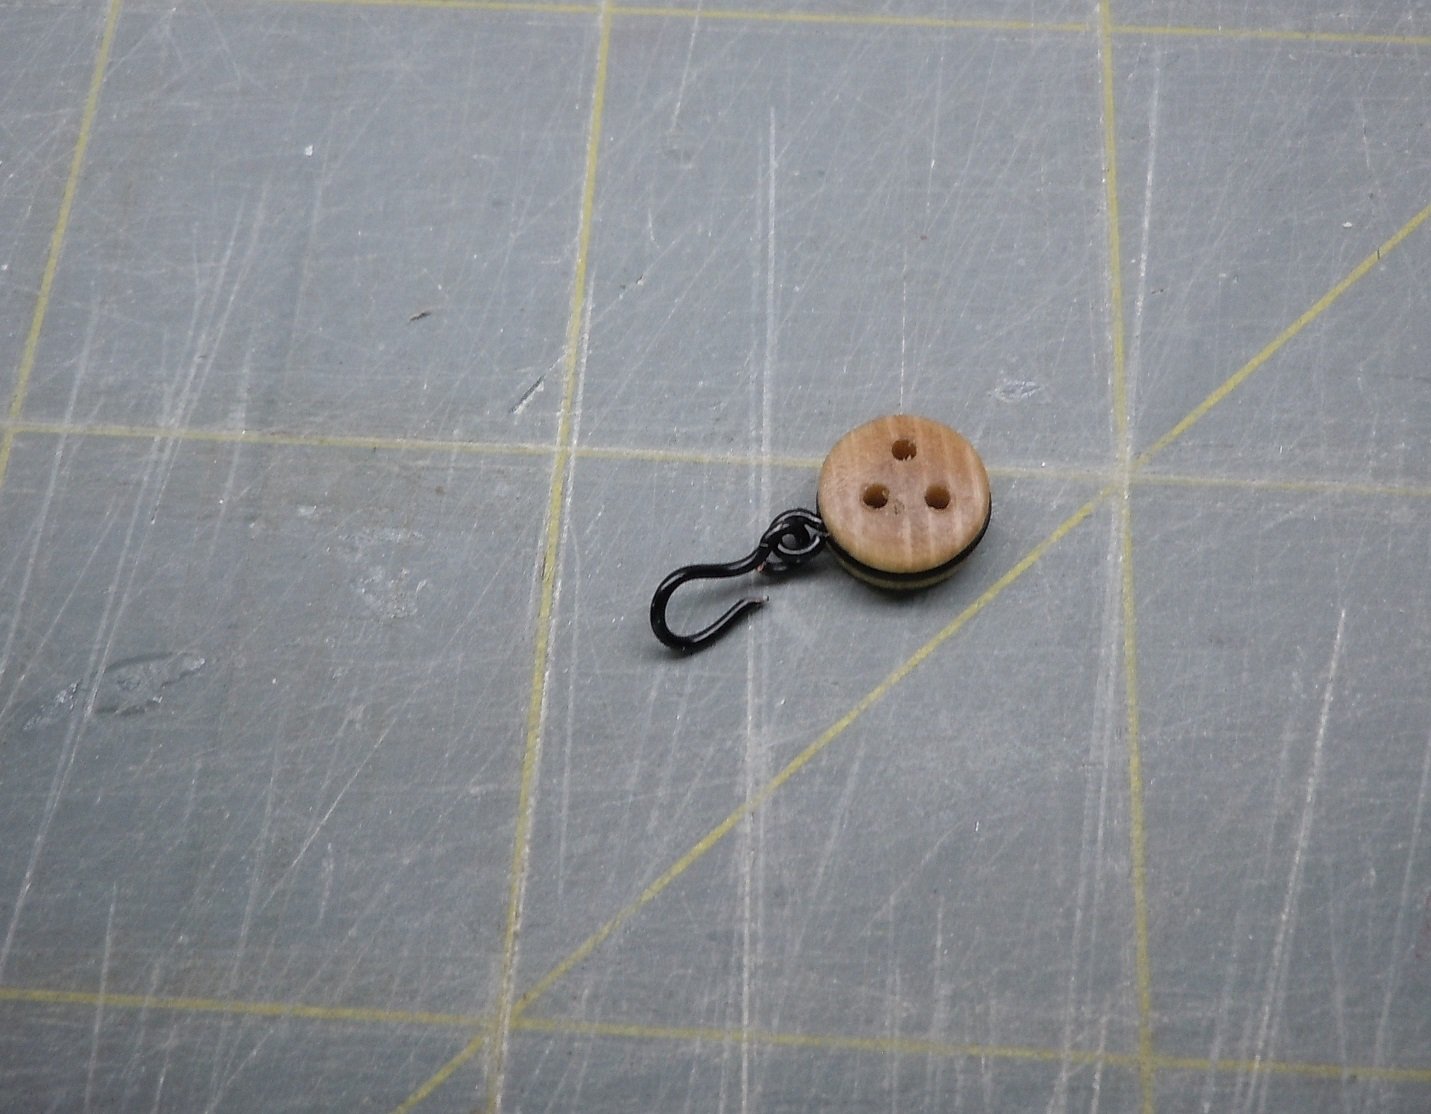
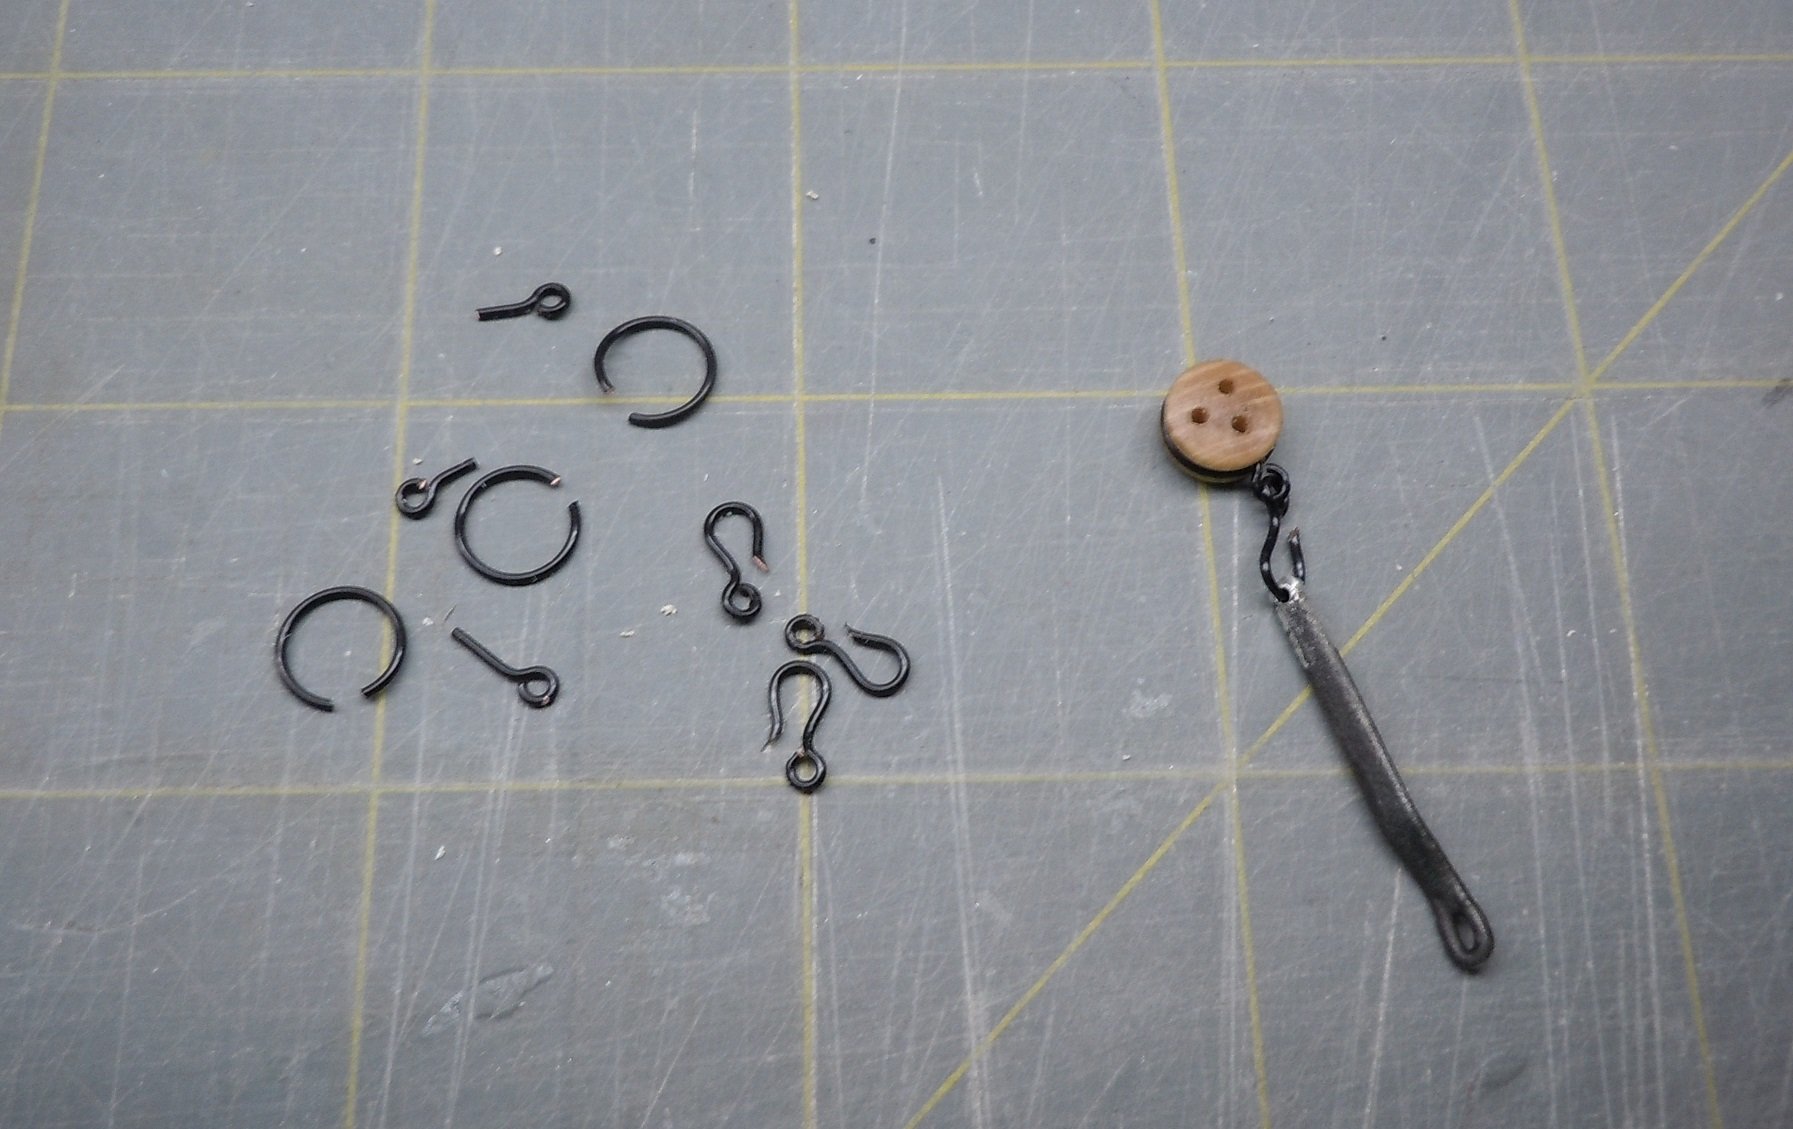
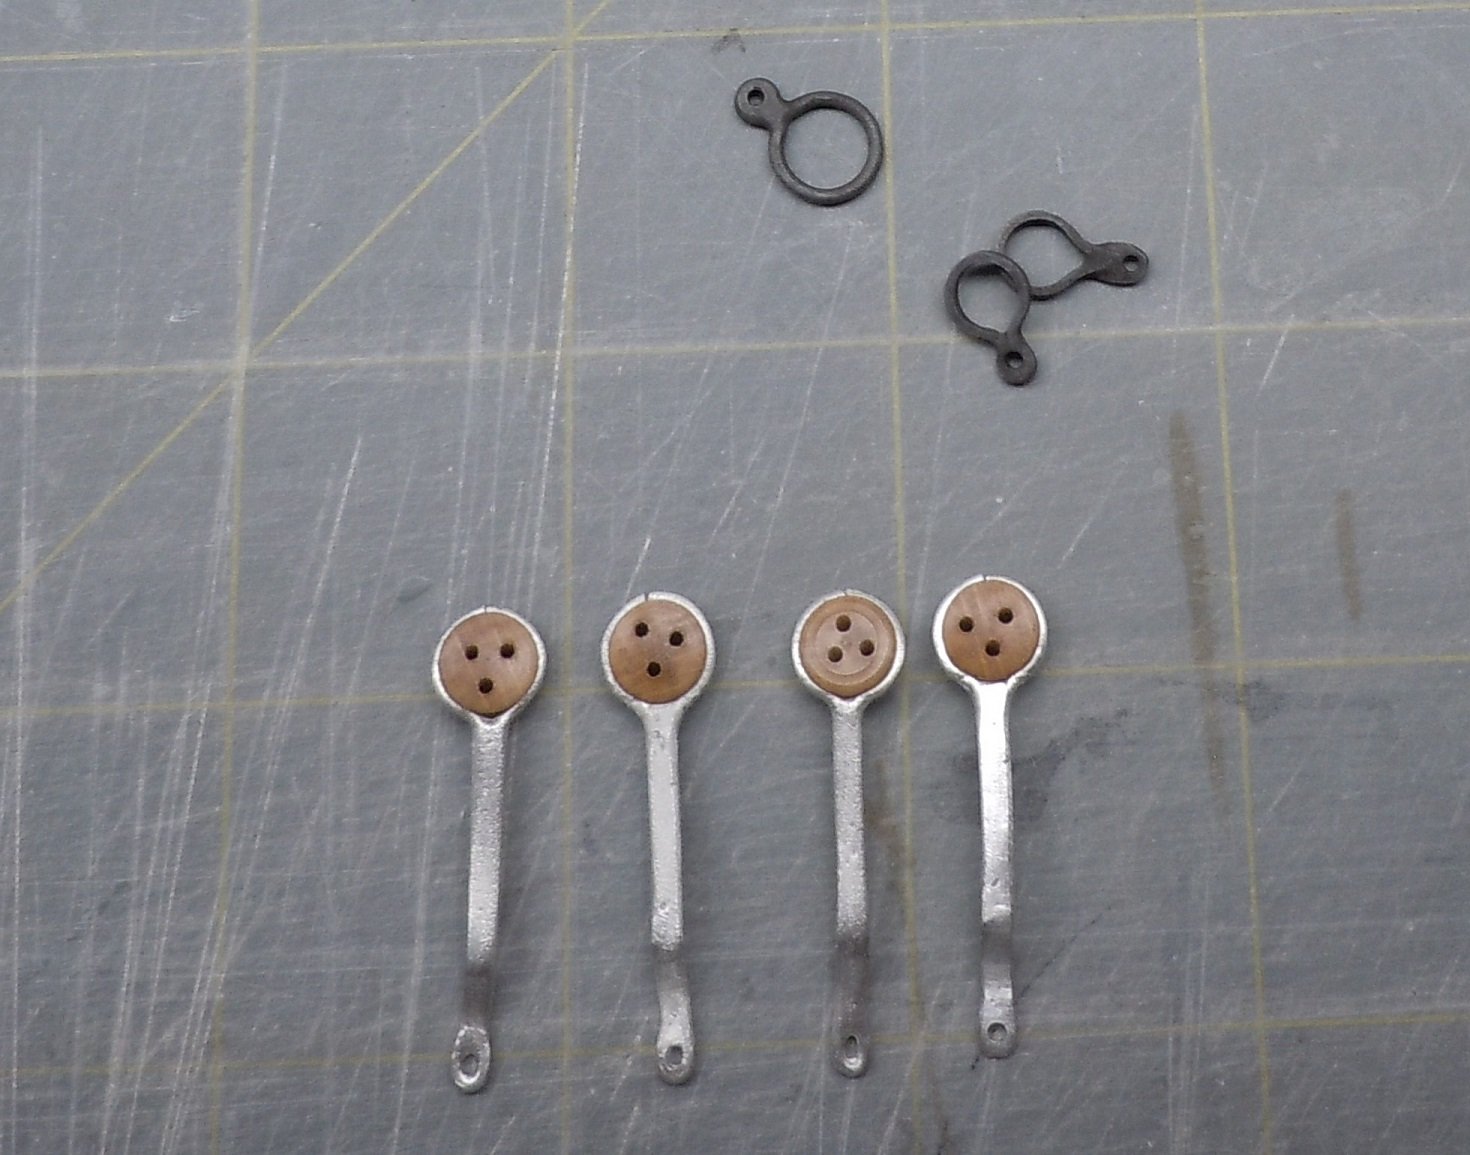
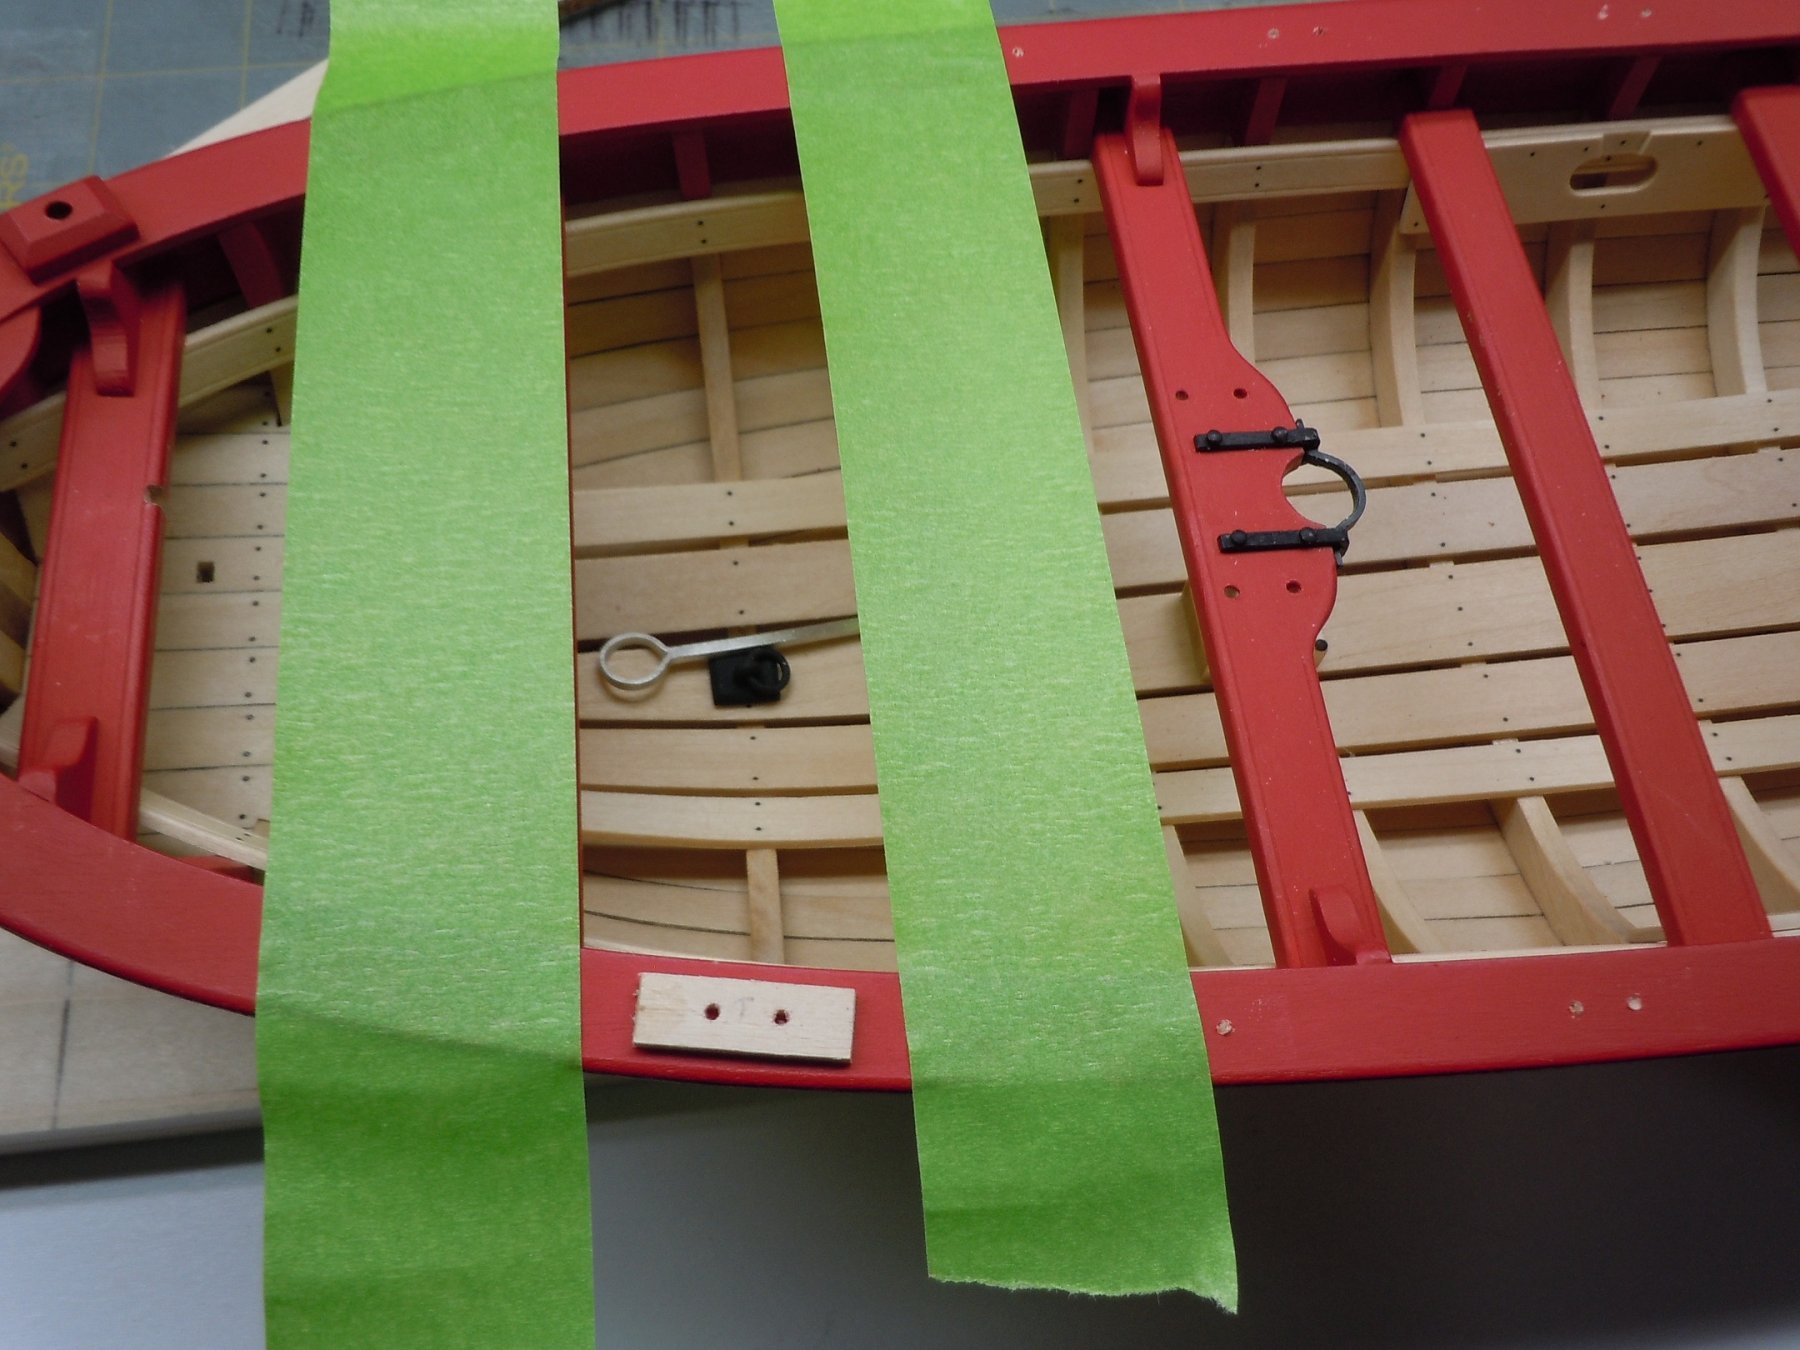
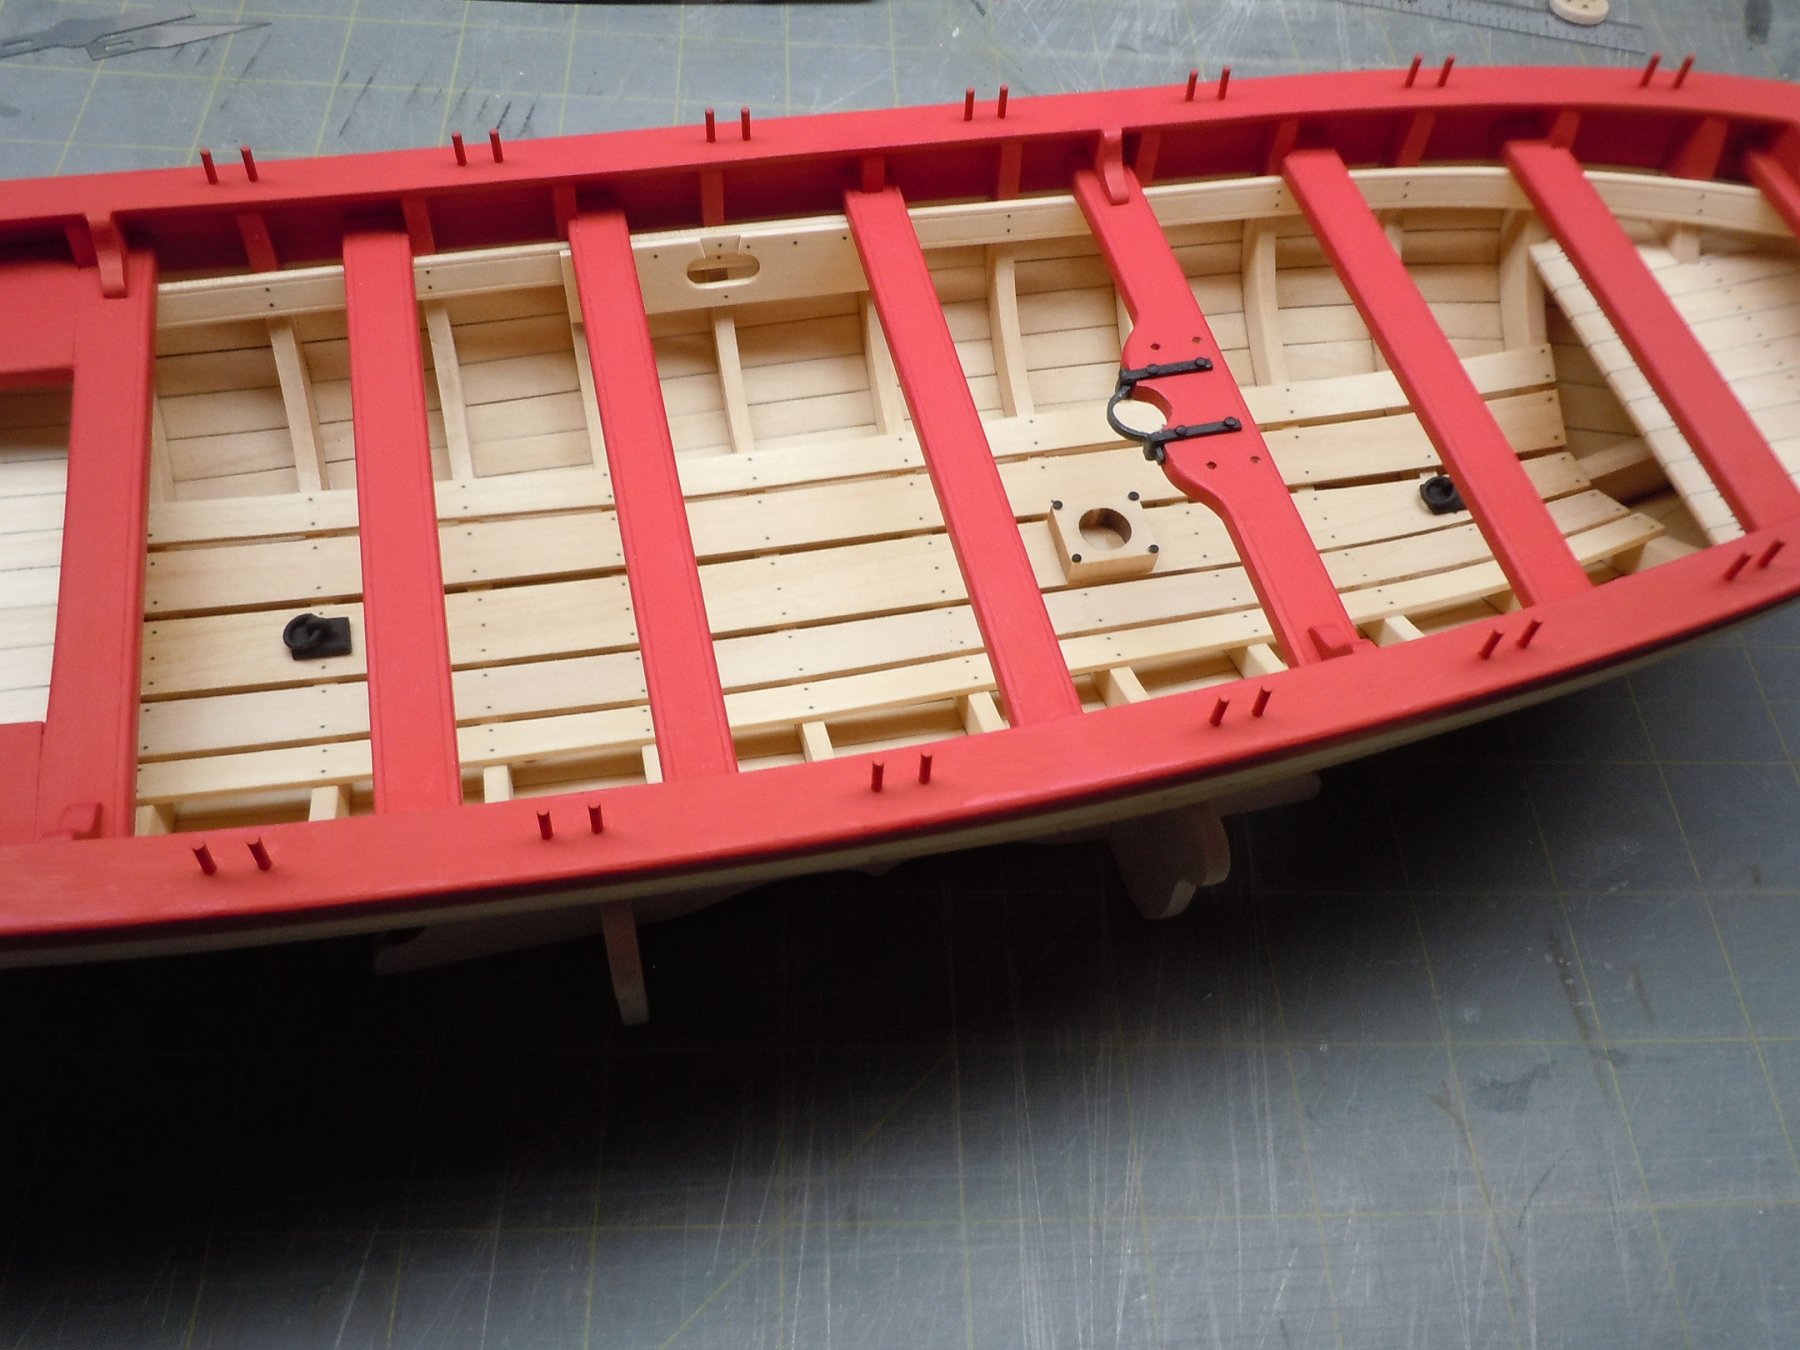
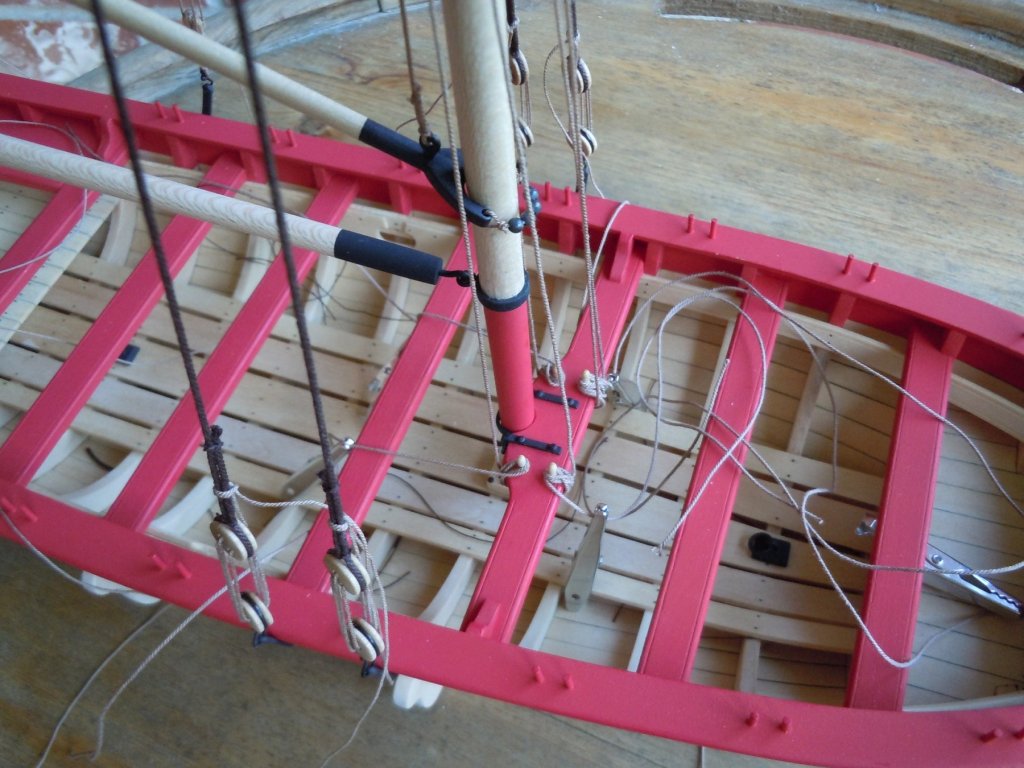
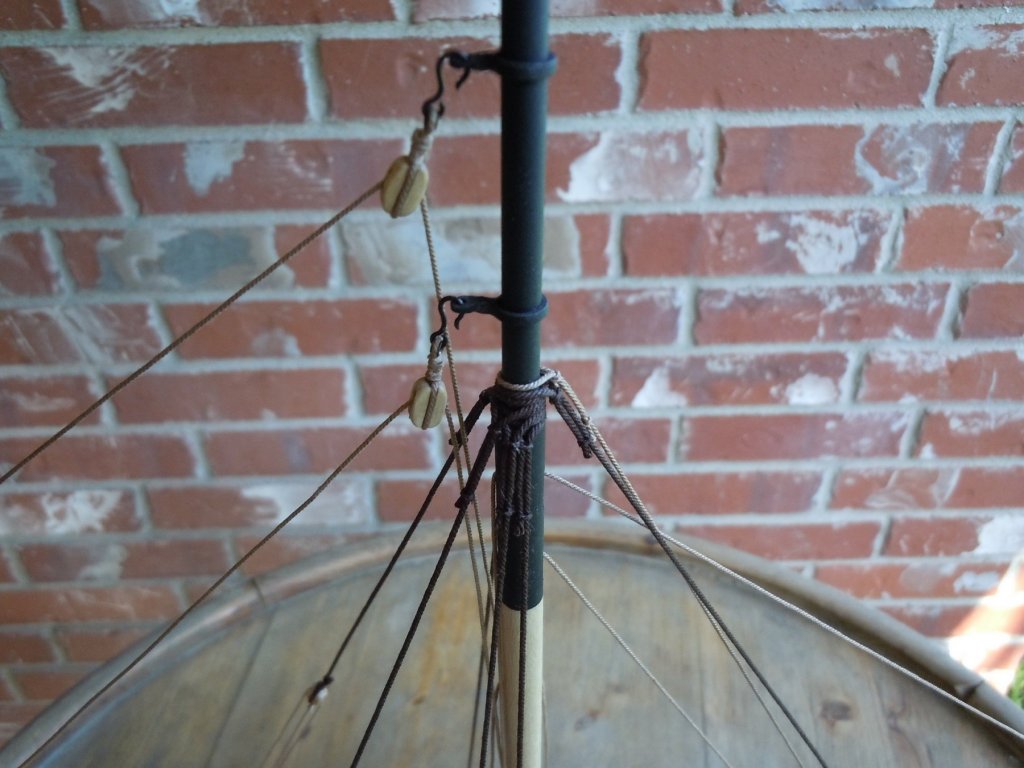
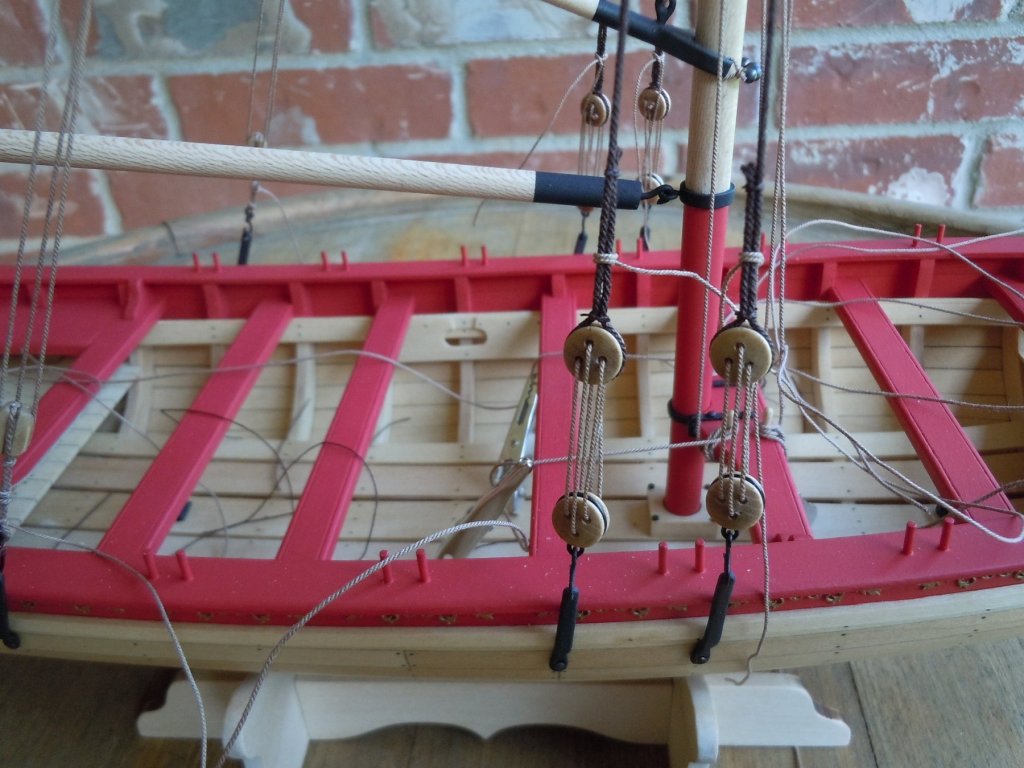
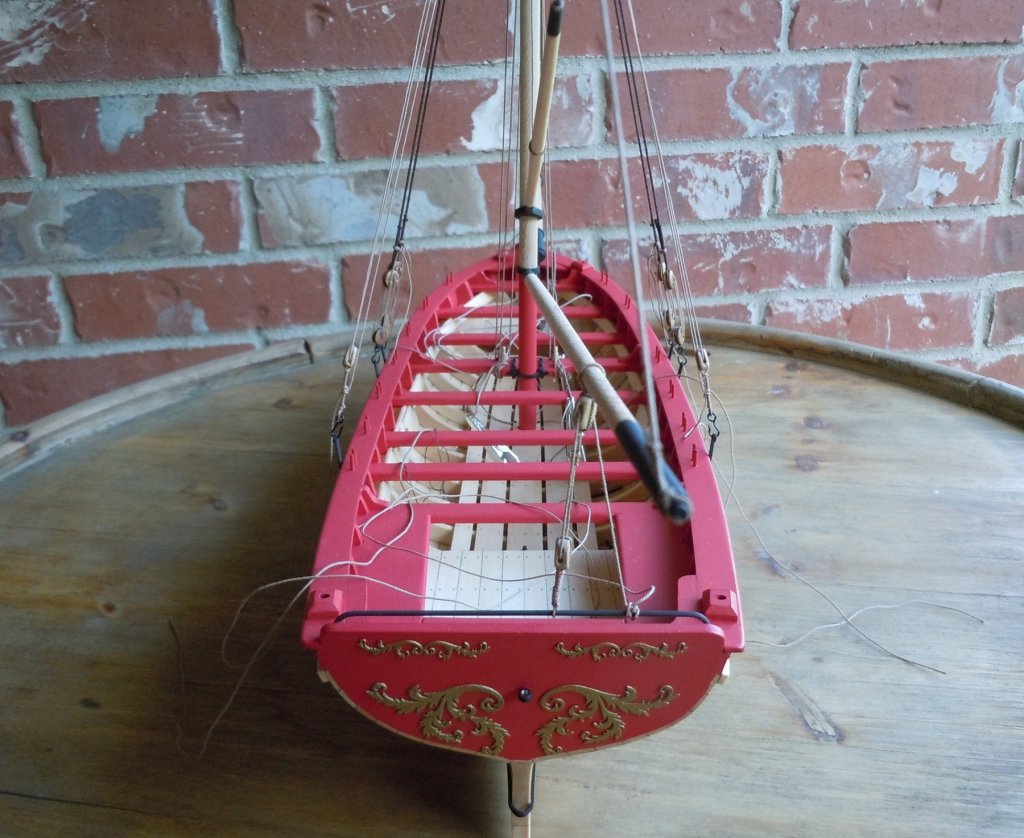
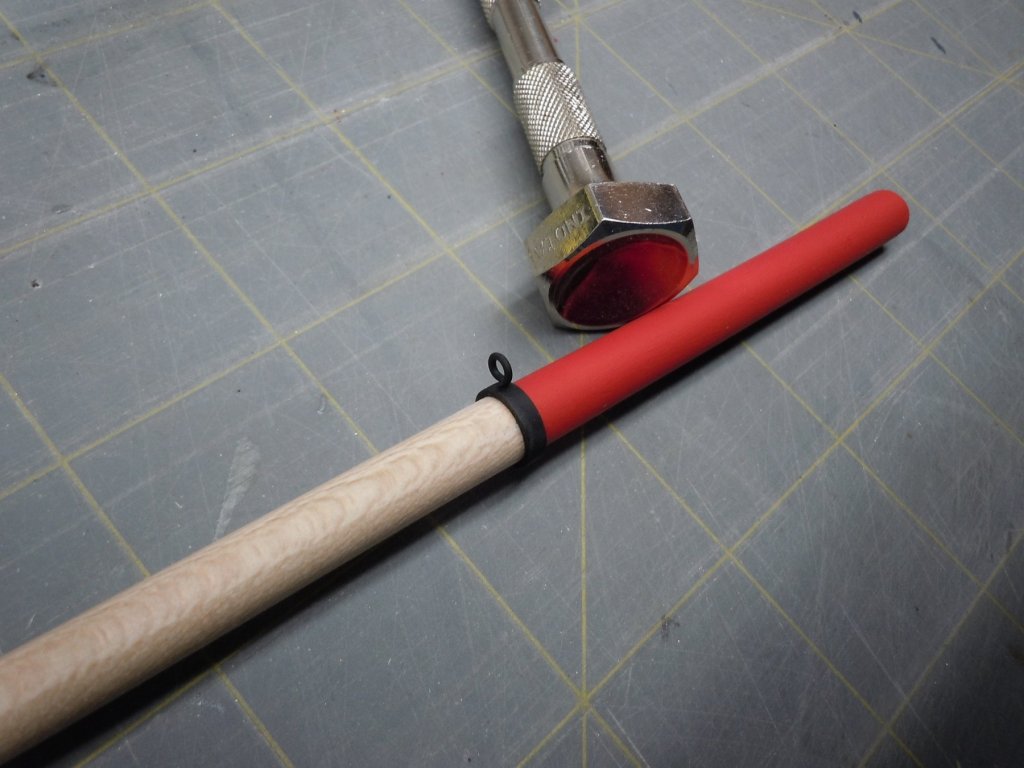
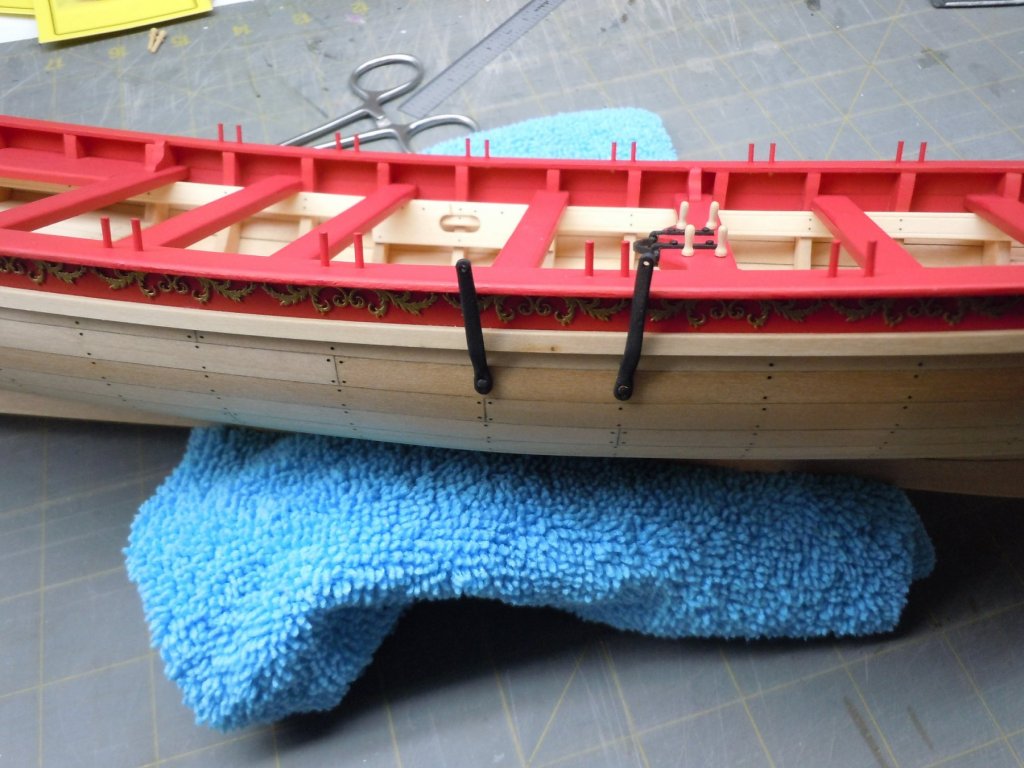
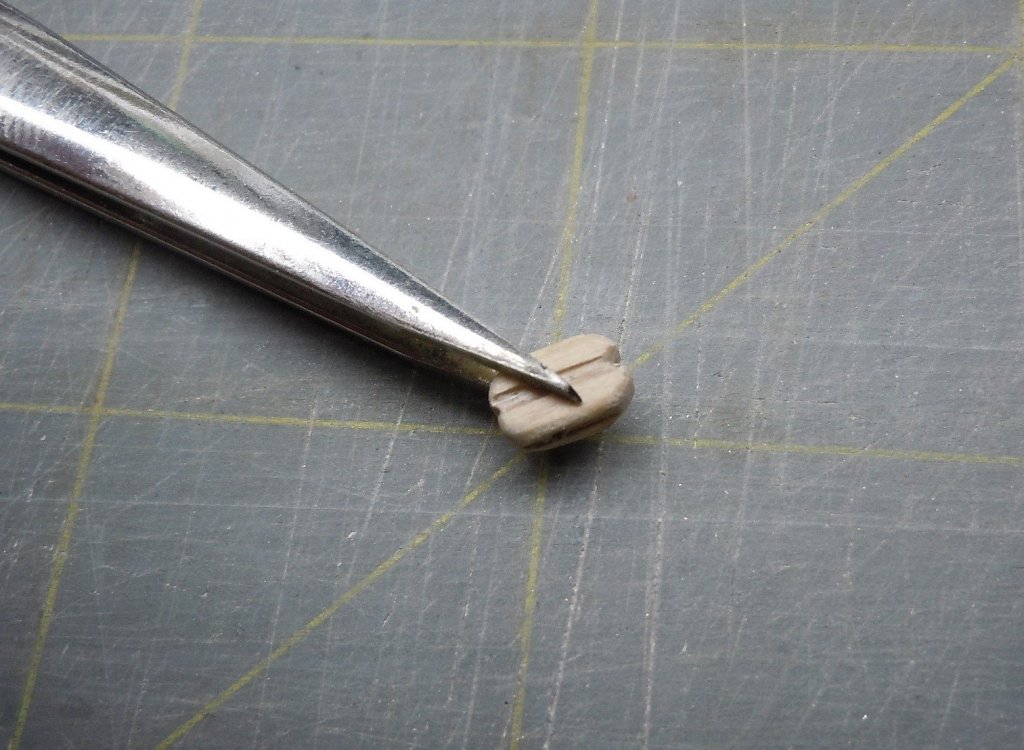
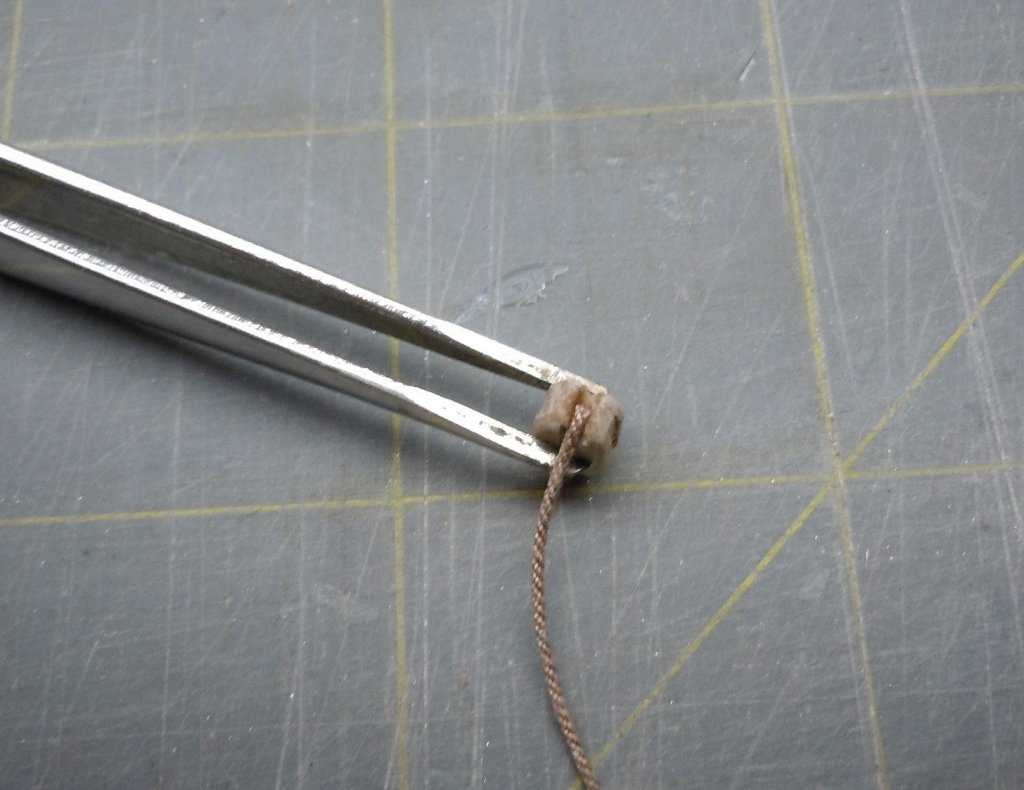
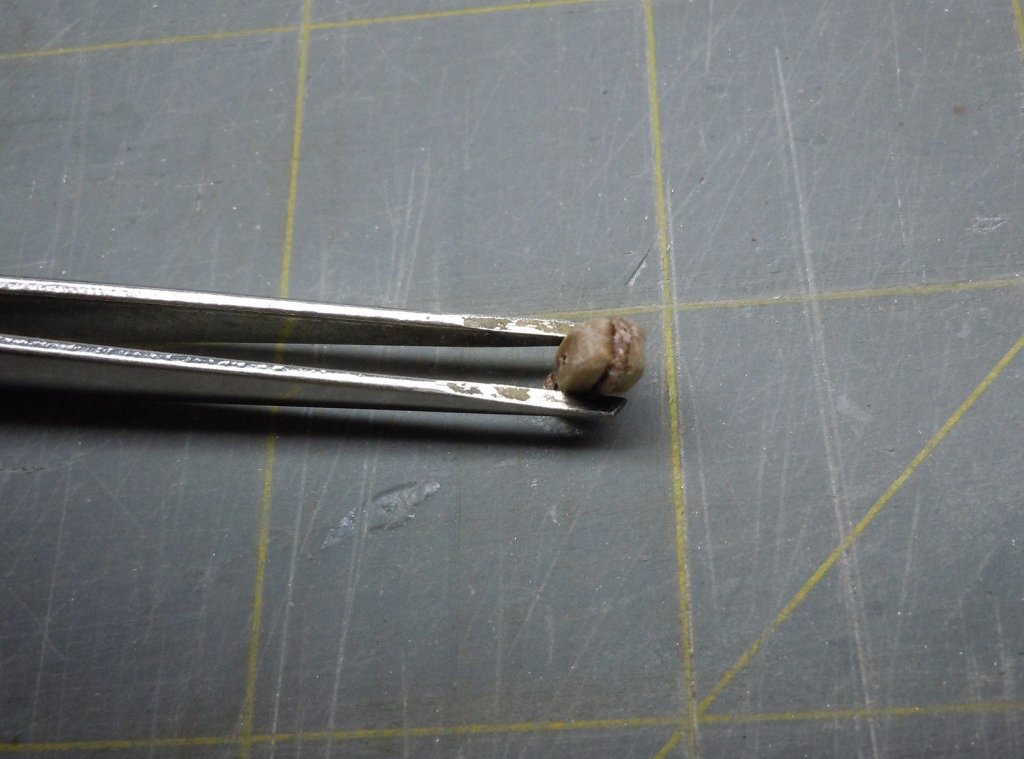
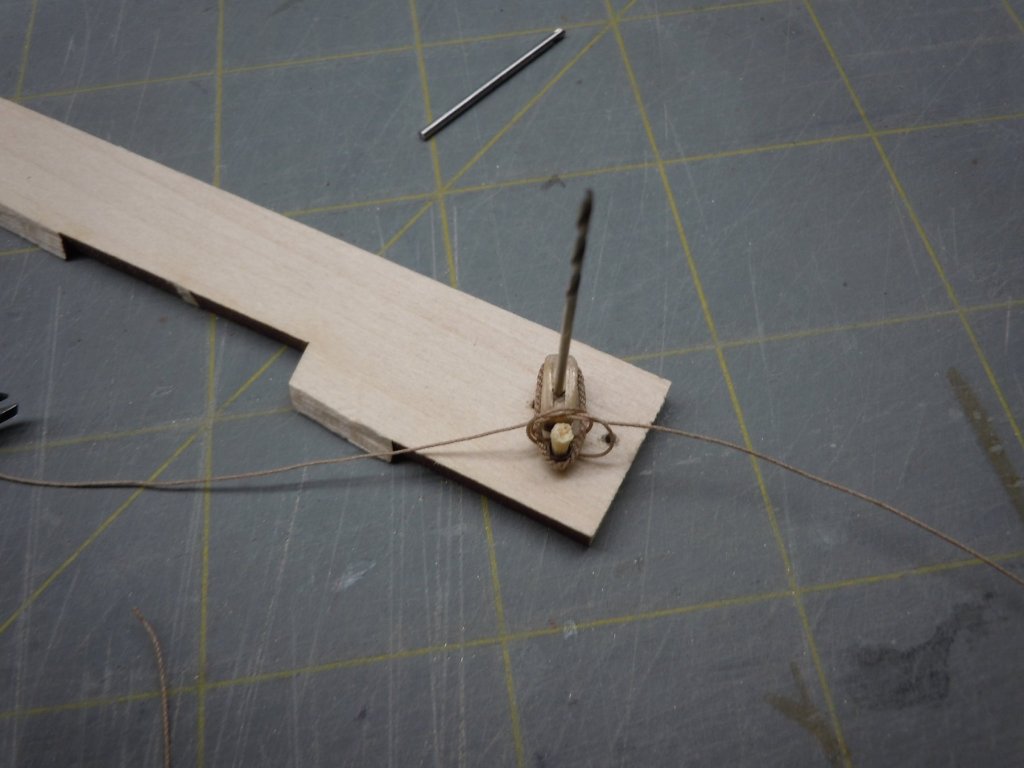
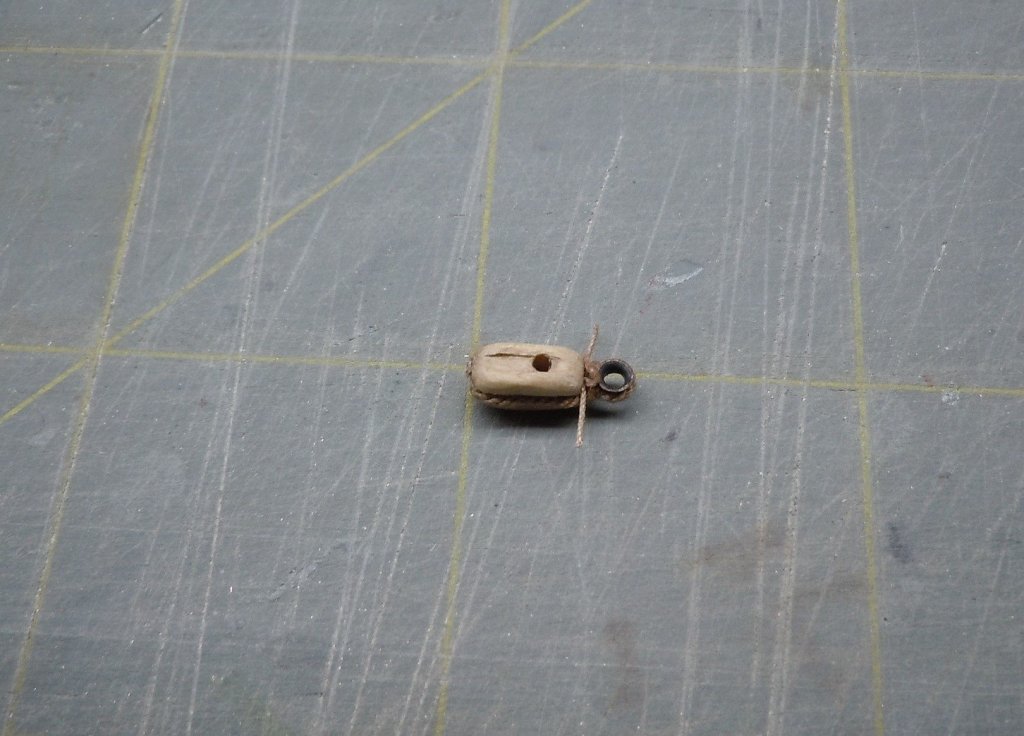
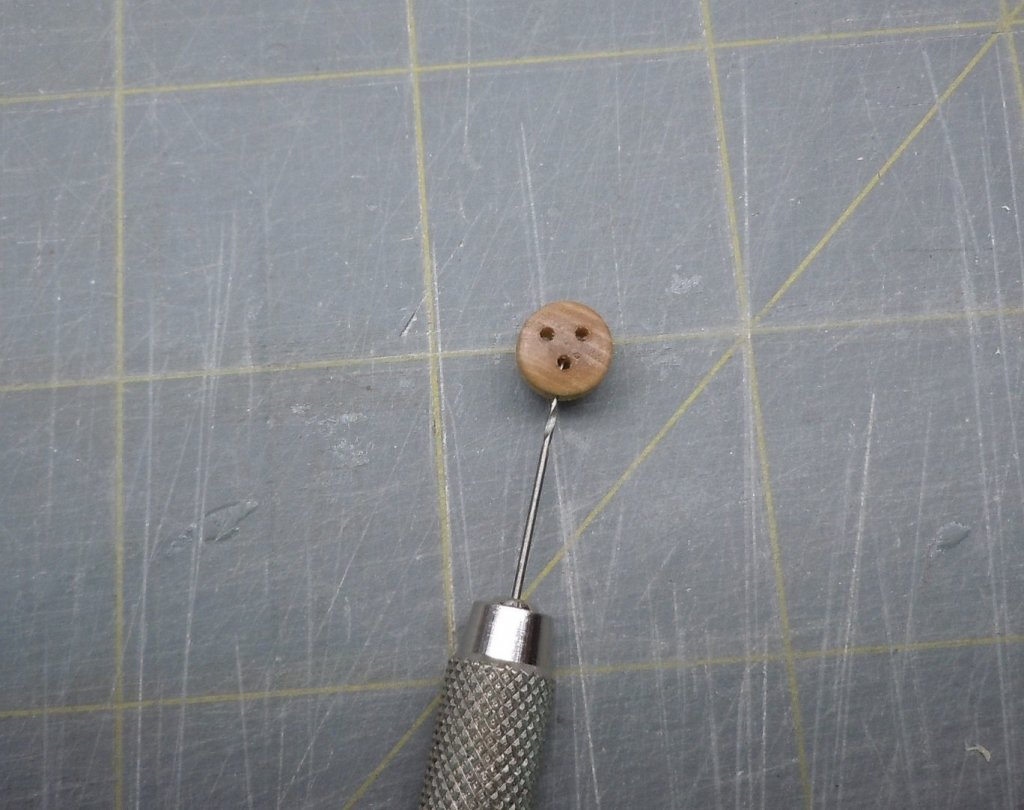
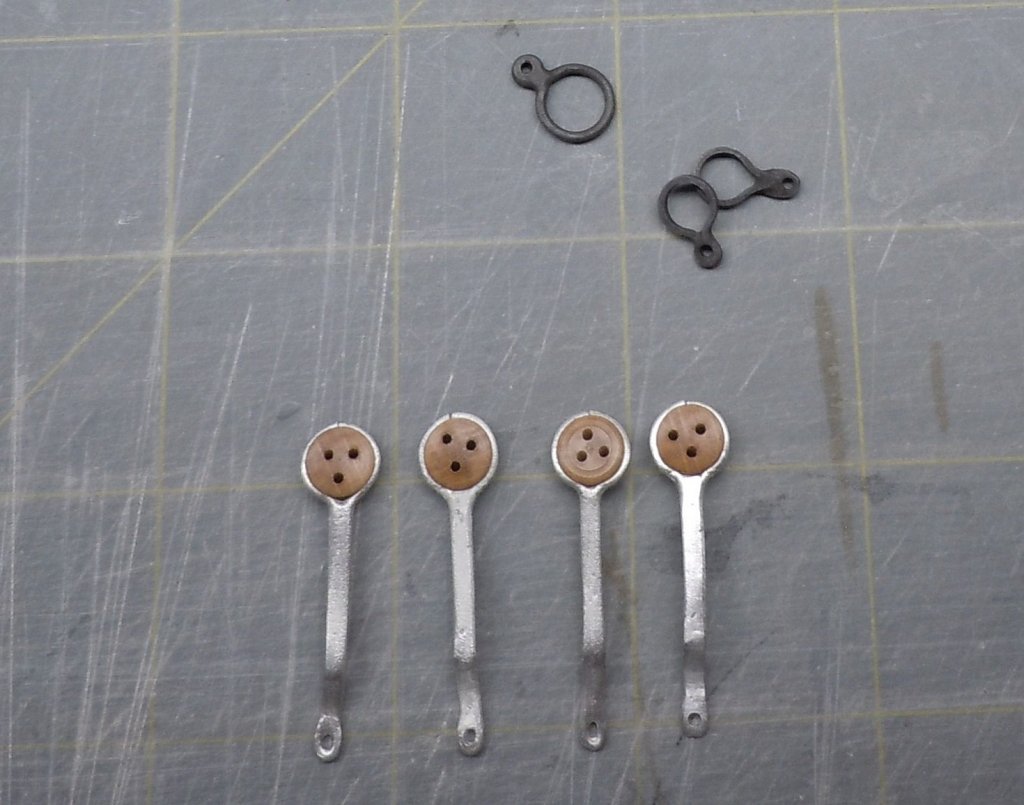
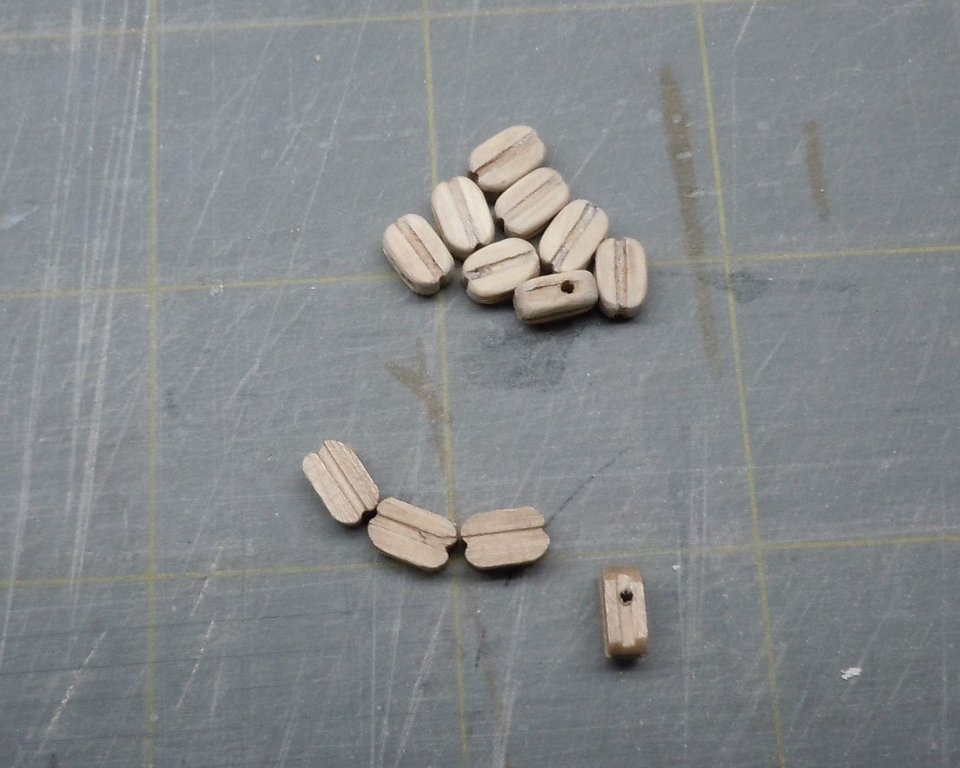
While I consider imagineering gun mounts that are more prototypical I have kept plugging along in preparation for the rigging. I installed the upper 2 iron bands on the mast. These were friction fit and the instructions direct you to wick thin CA to fix them in place. So that I don't have to paint the shiny cured CA I chose to tighten the bands with round nose pliers (the masking tape prevents them from damaging the bands surface). Fortunately there is a slight V where the band turns out to form a loop, pinching this down with pliers locks it into place (see the yellow circle where I pinched the bands holding the pliers parallel to the mast. A toothpick inserted into the false sheave helps keep the bands oriented correctly. I have concluded based on the mast thwart and boom band that the kit should have included a 3/8" dowel for a mast. DrPS opted to go with a 3/8" dowel, I was too far into the build to make the change so... my boom band was far to big to fit the mast correctly. I created a new boom band from 2 pieces of telescoping brass tubing and soldered. This may make the band a bit too thick however it matches the thickness of the upper bands. I made a brass eye and drilled the band so that I could bury and glue the shank of the eye into the mast. The provides pretty brass belaying pins but I wanted to make mine from wood. I tried turning basswood but the results were not spectacular. I ended up buying 14mm boxwood belaying pins from MS. I didn't care for the shape turned down using my Dremel and sanding paper. Now I understand why boxwood is such a ship modelers favorite, it very dense, strong and not prone to splintering and breaking the way basswood does in such applications. I installed the modified chainplates at the locations indicated on the plans, nothing noteworthy for this operation. I used the bowsprit to fit it's metal supports. Cutting a square hole in the decking was a challenge, in the end my squarish hole ended up being slightly oversized which was disappointing and not practical to repair. I decided to try my hand at adding thimbles to some of the blocks ala Chuck's Medway Longboat. Besides the challenge I'm getting more bang for my modeling buck doing a little extra work. After several failed attempts I came up with the following for anyone interested in trying. The end of the block opposite of the end with the hole (on the right side in the picture below) needs to have the channel deepened with a file. A dab of medium CA and then place the clean cut end of the line in place and press down so that it sets and holds the line. Next just loop the line around and hold in place with your finger. By trial and error you need to figure out how long the resultant "loop" opposite of the glued end needs to be. For me, it was 15 hundreths of an inch. With the loop sized correctly glue the line down tight where it meets the previously glued end. Once set, you can cut straight down the into the line where it is glue and remove the tail. The joint should be all but invisible. This is the loop (15 hundredths of an inch) we were concerned about prior to gluing the loose end. I made thimbles from brass tube flared with a homemade tool. These were the hardest parts to make, I threw out quite a few failed attempts! Mine are not as small as Chuck's, he has definitely mastered miniature thimbles! I made a small contraption to hold the block and the thimble so I could tie it all up. I'm sure there's a better way to do it but I spent very little time coming up with something that would work for the small amount of these I needed to make. Now the hardest part, tying tiny knots! I found the constrictor knot worked very well since you need to cinch up the rigging so the thimble is trapped. Finally on the opposite side of the constrictor knot I tied a square knot and then soaked the knot with 50/50 water Mod Podge Matte. Once the Mod Podge set, I trimmed the tails of the knot flush. Temporarily installed, I'm not digging the look of this hook, I think I need to close it up a bit more. And finally my failure of the week. I thought I had found just the right bead for the gaff parrels. Alas they are way too big! I'm going to blacken the kit supplied brass parrels and so how those look, they had appeared too small to me but now I'm thinking they might be the best option. I'll find out soon enough! As always, thanks for looking!


- 95 replies
-
- 10
-
-
- Model Shipways
- 18th Century Armed Longboat
- (and 1 more)
-
I've already started the rigging, but I may see how much effort it will take to gin something up.
-
Gutsy move Paul! I thought about doing something along these lines but chickened out. LOL
-
Nice work Paul, we are running neck to neck on this build now and the end is in sight!
-
I'm guessing the kit is a 200% enlarged and slightly modified version of the 1/48 scale version. Perhaps the guns and etched brass decorations were added to make it different enough from the original? Where did the bowsprit stay originate? I noticed this doesn't seem to be present in any of the contemporary models or on the Medway Longboat. Since the hole was already laser cut in the keel I can either install it per the plans or leave it off and leaves folks wondering what the purpose is served by mystery hole in the keel. In any event this build is a laboratory for my learning the ropes of ship modeling. It doesn't hurt my feelings one bit if someone points out I've made a mistake or something doesn't look right, that's why I created this log.
- 95 replies
-
- 2
-
-
- Model Shipways
- 18th Century Armed Longboat
- (and 1 more)
-
Thanks for the advice Chuck, what I know about boats would fill a thimble!
- 95 replies
-
- 1
-
-
- Model Shipways
- 18th Century Armed Longboat
- (and 1 more)
-
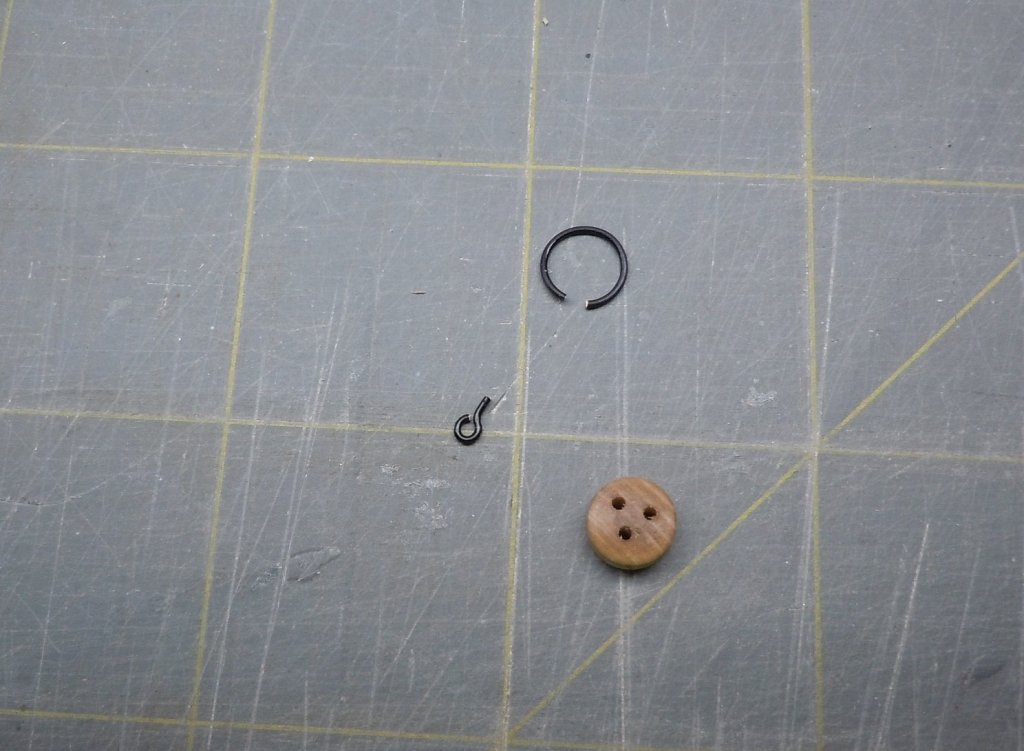
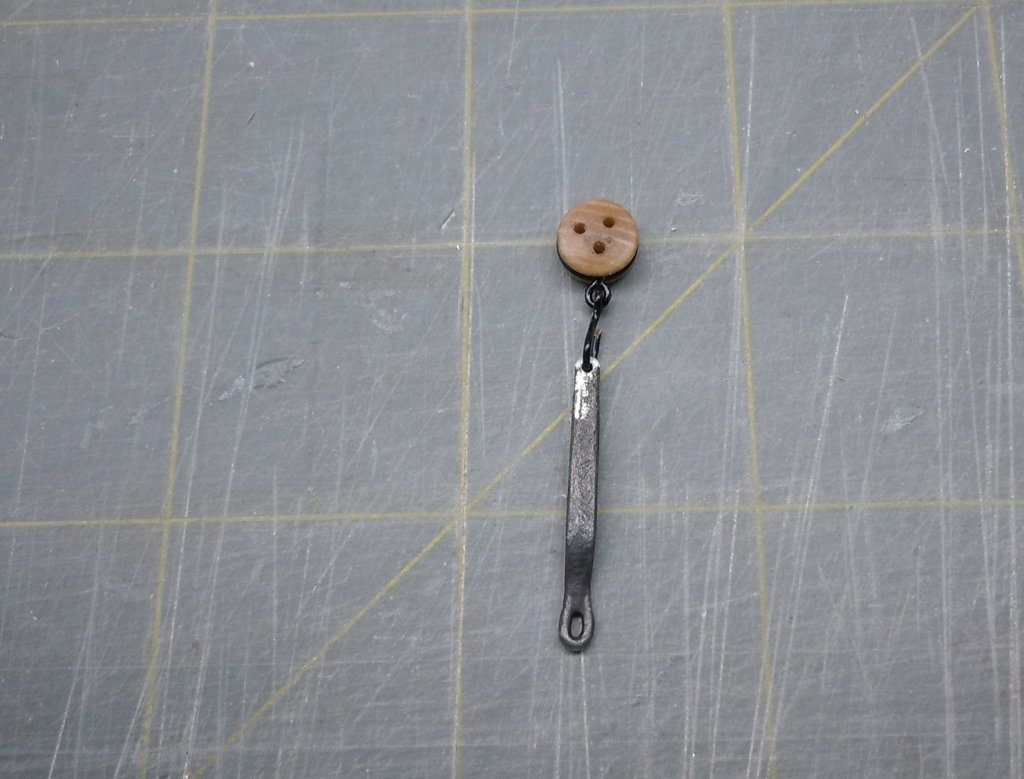
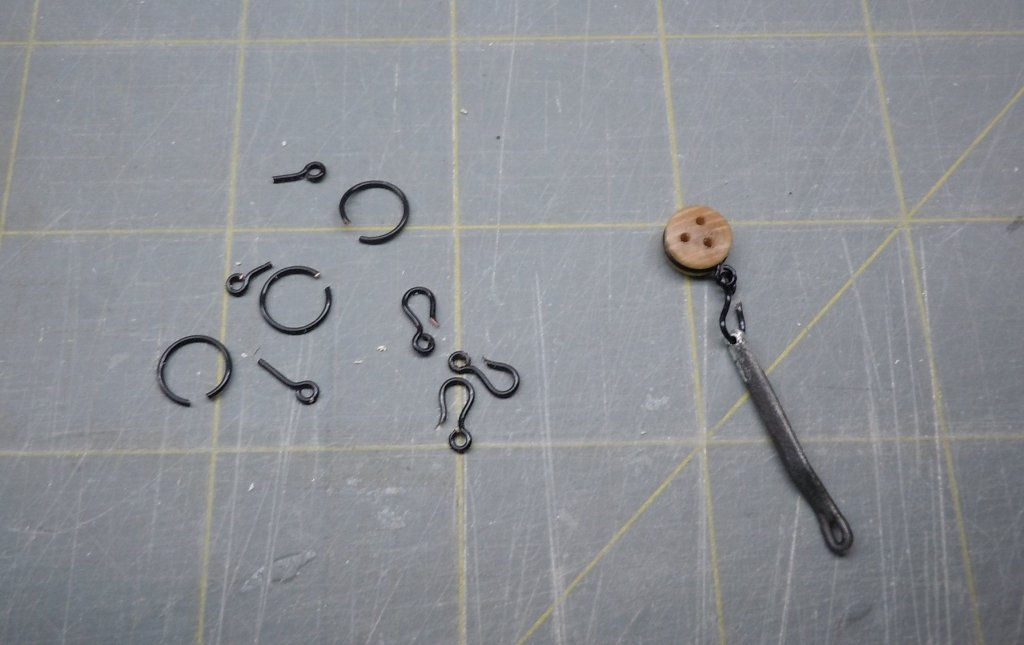
I'm back with another update. As previously mentioned I wasn't in love the kit solution to the chainplate/deadeye arrangement. Although mechanically it's fine, at this large of scale I wanted it to look a little more prototypical. As I have continued to draw inspiration from Chuck's Medway Longboat I chose to emulate his design. I'm starting to think of this boat as "The Poor Mans Armed Medwayish Longboat". LOL I would like to fit in that I had several metal casting that were short shot. I sent Model Expo an email and a few days later the parts appeared in the mailbox. They didn't communicate back to me which I find interesting but, they didn't request I send back the defective parts or photo proof like most vendors will. I have to say it's refreshing to find a company that will stand behind their product, no questions asked. I have 2 additional Model Shipways kits in my stash and will definitely be buying more in the future. I couldn't come up with a repeatable and acceptable method of making a strop that was an unbroken piece. While this method may not be the expert's choice, I think for the average guy such as myself this is a way to make a strop with basic tools. I used a product called Artistic Wire (free next day shipping for Amazon Prime members). It's 22 gauge copper wire with a very thin (think paint layer) plastic coating. I have a lifetime supply for 6 bucks. I suppose annealed wire would be a better choice, but it's not quite as easy to form. At any rate I came up with the following to make a strop, or a faux strop if you prefer. LOL Step 1 is to drill through the deadeye to the predrilled hole. I tried to stay perpendicular to the hole with moderate success. I used a drill bit (forgot the size) that was just a hair smaller than the 22 gauge wire. I had by trial and error determined the diameter needed for the ring that goes around the deadeye leaving a gap no smaller than the diameter of the hole I drilled. I also made a bunch of eyebolts from the same wire, these will be used shortly. Next step is to add the ring, I worked it with my fingers and some jewelers pliers (gently!) to get a tight fit. Make sure your previously drilled hole is still visible! The final step for the strop is to insert the eyebolt. Just a dab of CA is needed. I also made sure the shank of the eyebolt didn't penetrate the predrilled hole in the deadeye as rigging will need to go through there. Next I added the hook.... And finally, I used the kit suppled chainplates but clipped of the "Y" portion. I then rounded the end off and drilled a 1/16" hole for the hook to easily pass through. The remaining parts for the other 3 deadeye/strop/chainplate assemblies. After I blacken the chainplates I'll go back and touch up the wire ends with black paint. I'll also close the gaps off on the eye bolts and the eye of the hooks. I also made a jig to bend the hooks since there are a number of them used around the rigging which, I'm finally about to get started on. As always, thanks for looking!!


- 95 replies
-
- 5
-
-
- Model Shipways
- 18th Century Armed Longboat
- (and 1 more)
-
Paul I'm updating my log in just a minute that should answer most of your questions regarding the strops. Also for the bowsprit traveler I copied Chuck's design on his Medway Longboat. After reviewing the instructions again, I see now that the kit arrangement actually will work. For rigging I have .88mm brown for the shrouds, and some .20mm brown for seizing etc. I also have light brown .63mm, .45mm and .20mm (for seizing etc). The .63mm is for the haliards and .45mm seems to be used anywhere the rigging is going through a block.
-
I'm copying as best I can, the way the Medway Longboat is rigged. I'm using the kit chain plates but lopped off the "Y" and I'm making metal strops for the deadeye and will attach via hooks. Hopefully I can post some progress tonight. Also I picked up rigging from Syren Model Ship Company which just arrived, I think the kit supplied tan 1.5 mm rigging is way too big for running rigging, it's quite a bit bigger than the standing rigging which doesn't make sense to me. I think something got crossed up between the prototype and the kit. And the kit model doesn't look like it's using that large of rigging either. I noticed this when Dwight rigged his boat. Lastly, have you looked at the traveler on the bowsprit? As rigged, it can't travel. LOL While I don't think most folks will know the difference, it bugs me so I'm continuing with my theme of ripping off ideas and designs from Chucks Medway Longboat. Like they say, imitation is the highest form of flattery so.... I may be imitating, I'm certainly not capable of duplicating.
- 168 replies
-
- 1
-
-
- 18th Century Armed Longboat
- Model Shipways
- (and 1 more)
-
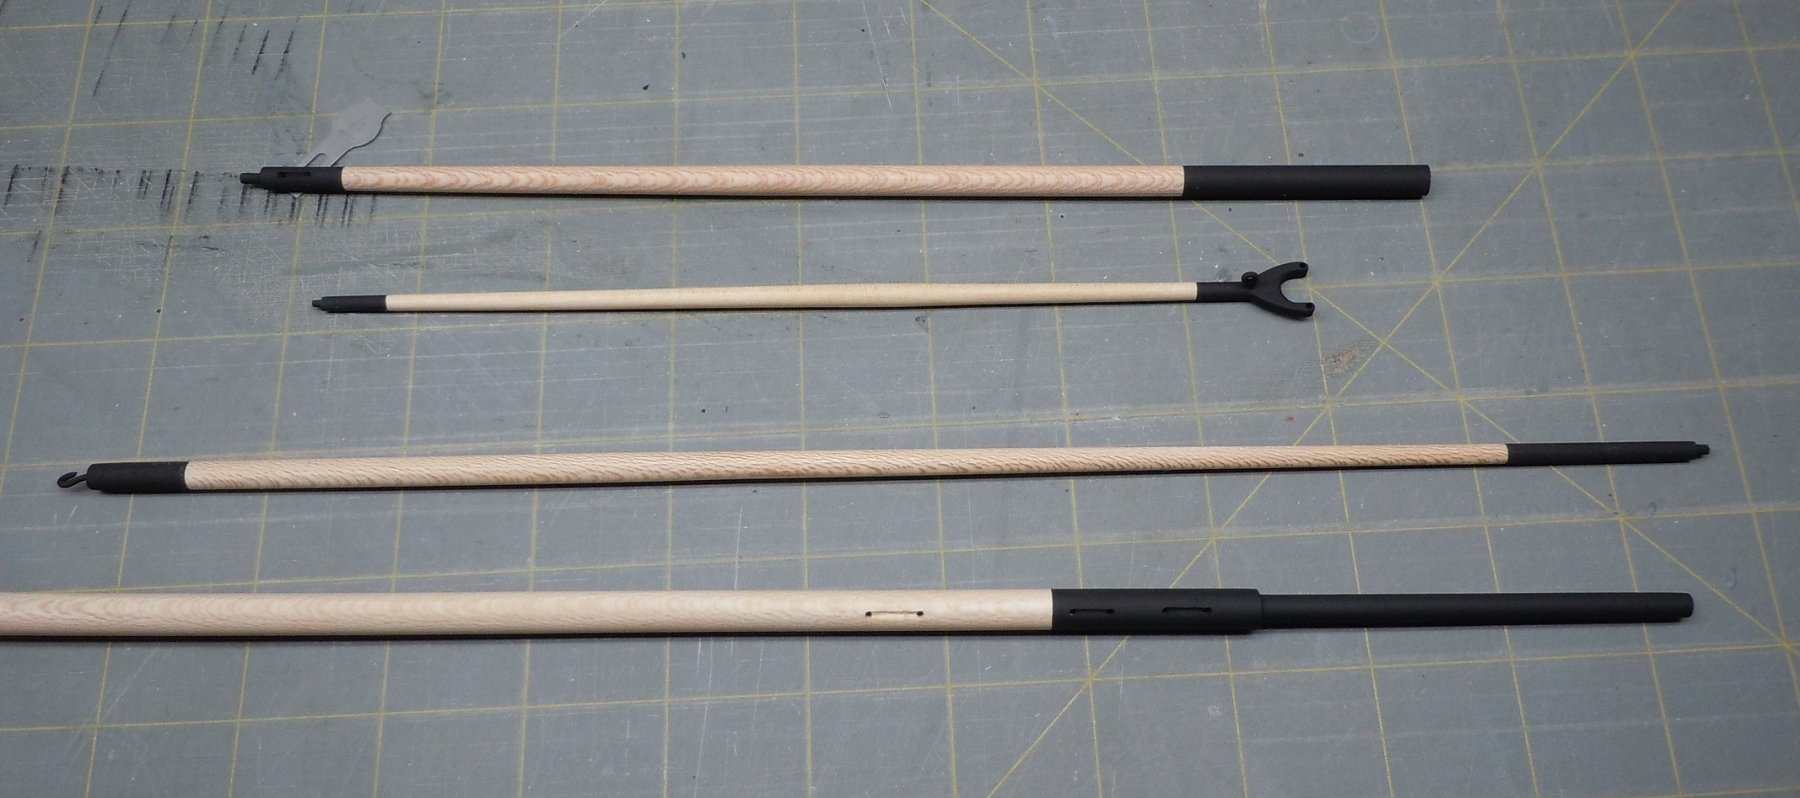
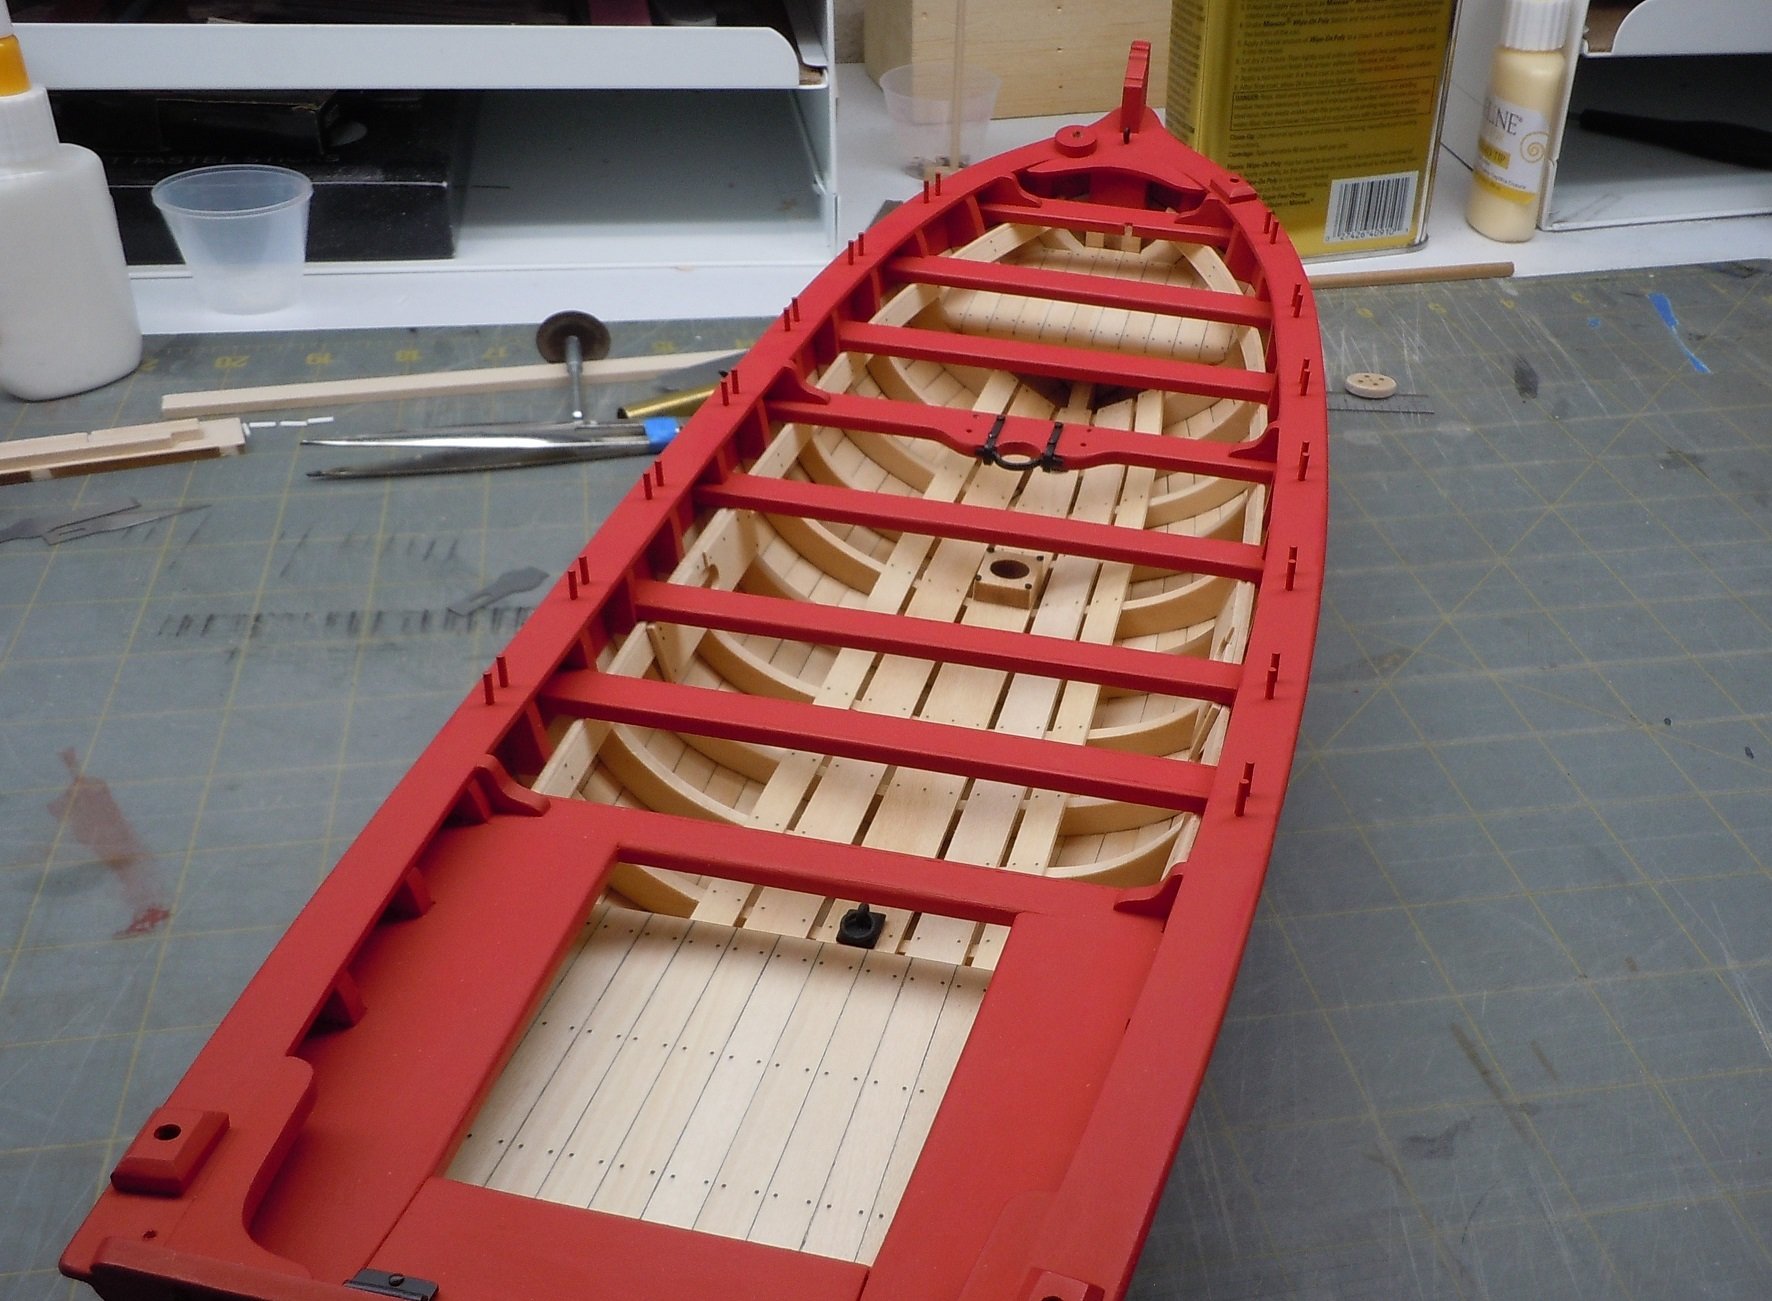
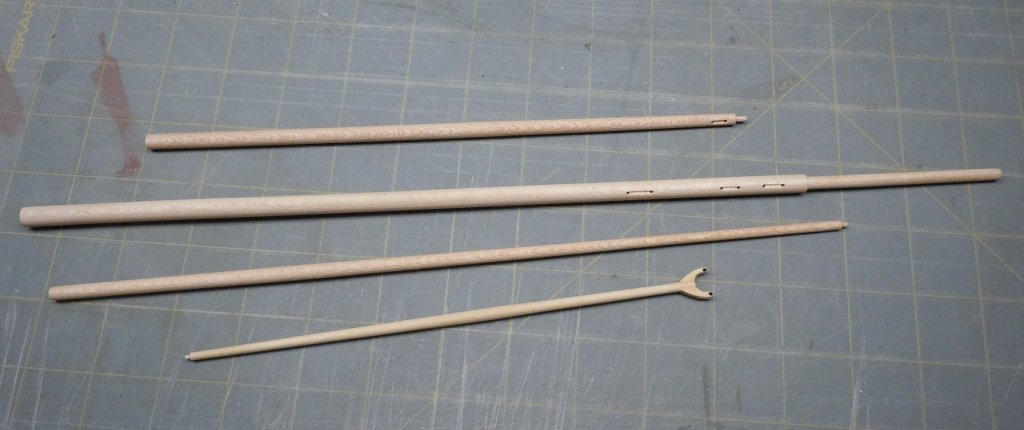
Thanks Curtis, hopefully you will find something useful/helpful in this log. I've been off work this week and have had plenty of time for modeling. I shaped the mast, boom, gaff and bowsprit using the measurements provided in the instructions. I used my cordless drill and sandpaper, starting with 120 grit and finishing up through 400 grit. The instructions tell you to get measurements for the false sheave(s) locations of the mast from the plans. Sadly my plans are about 105% scale so I swagged where they should go. Although it doesn't mention this in the instructions, the laser cut gaff jaws are flat sided but attach to a rounded surface (the gaff). I used a Dremel and a drum shaped grinding bit to shape the gaff jaw to form around the gaff. I also used a bit of minwax wood filler to form a fillet between the jaws and the gaff. If you go this route beware the gaff jaws will be too narrow if you don't double check as you go. Lastly I applied a coat of wipe on poly and set these aside to dry for 2 days. After the wipe on poly had cured I painted the ends of the mast/boom/gaff/bowsprit black instead of the kit's recommendation of red. I admire the way the black and red work on Chuck's Medway Longboat so went this route. While I was waiting for poly to dry I experimented with the chain plates as well as the Jax Pewter Black recommended by DrPS. I'm not sure I like the way the chain plates work in this scale, specifically how they wrap around the deadeye. I may alter these or come up with something completely different. In the meantime, my experience with the pewter black is that is works 1,000% better if you brush in on, and use the brush to work the liquid on the part. Submersion doesn't work all that well and I've noticed other threads here folks have reported the same thing. Another activity that has filled in the time waiting for WOP or paint to dry has been sanding the blocks. There's not that many so in my opinion it's worth the tiny time investment to improve their appearance. Finally the oarlocks, or tholes. I made the kit oarlocks and painted them black then set them on the cap rail without glue. I just don't like the way they look. I've been thinking of copying the Medway Longboat tholes and after seeing DrPS do the same I decided to give a shot. I spent an eternity turning square basswood in to tiny 1/4" long dowels. I planned on making them 3/64" in diameter but since a 3/64" drill bits seems to make a hole in wood that's more like 3.5/64", I made the tholes a few thousandths of an inch larger (I couldn't do this without digital calipers) for a press fit. Once they were complete a made a jig from scrap 1/4" plank to mark the holes. I also used masking tape lined up with the thwarts spanning both sides so that I could center the jig on the cap rail and centered between the thwarts. I then used the pin vise and drilled dimples. Once all of the holes were marked I went back and drilled through the cap rail. I used a piece of tape to set the depth of the drill bit after I realized I had nicked the inside of the cheer plank. Finally I glued the tholes in. I made a miniature framing square from scrap to ensure the tholes were at a 90 degree angle to the caprail and parallel to each other. I would have taken a few photos of this operations but a third hand, I do not have. The tholes received a few coats of paint. I expect the few minor gaps between the tholes and the cap rail here and there will fill in with a few more coats of paint. As always, thanks for looking!


- 95 replies
-
- 4
-
-
- Model Shipways
- 18th Century Armed Longboat
- (and 1 more)
-
Awesome thanks! I'm going to go the same route.
-
That looks great Paul! How did you turn those down, with an emery board or....?
-
Welcome to the Armed Longboat group Curtis! Looks like you're off to a great start, your fairing looks great! If you don't mind constructive criticism, you might want to recheck frames F, C, 1,5, and 7. From the last picture they look like they are not level with the rest of the frames. You might consider repositioning them before you start planking, these frames will cause you a lot of grief later in the build. If you used CA, they should be easy to break free and straighten out. I'm subscribing to your build and looking forward to watching your progress!
-
Paul I like how the frieze looks. I hope you get to work on the oarlocks, I'd like to see how they look in contrast to the kit version. I had the same thoughts, they look overscale to me but what I don't know about boats would fill quite a few books. LOL I have mine assembled and painted black, just setting them on the model I am not convinced they are the look I want. I'm working on shaping the dowels and blackening hardware (thanks for the tip on Jax Pewter Black, it works great!) so you have time to get the oarlocks done before I have to make a decision.... just sayin.
-
Paul this is an interesting development. I considered doing the same with the frieze and oarlocks but chose to stick with the kit version instead. I'm curious about what made you decide to go this route instead?