Arthur Wayne
-
Posts
103 -
Joined
-
Last visited
Content Type
Profiles
Forums
Gallery
Events
Everything posted by Arthur Wayne
-
Your boat looks awesome, really nice craftsmanship! Trying to make decent rope coils ended up being one of the hardest tasks of this build for me.
- 66 replies
-
- 1
-

-
- Finished
- Model Shipways
- (and 1 more)
-
I basically copied Chuck's Medway Longboat. Medway Build Log There was a "plan" somewhere in the build log or on his Syren website that showed the sizes used for the rigging but I can't find it now. If you follow his build log though he calls out the sizes and colors he used. All my ship building supplies are packed for a move, otherwise I could tell you the sizes versus having to hunt them out of the build log.
- 66 replies
-
- 1
-
-
- Finished
- Model Shipways
- (and 1 more)
-
Your boat is looking really awesome! I had the same issues with the mast/thwart and the cockpit seats not fitting. Like you, mine were off by a lot. If I may I would caution you about the provided rigging, it's not even remotely close to the correct size. I ended replacing it all with Syren rigging and I'm really glad I did. If you decided to go that route, for a few bucks more I would buy new blocks from Syren as well, I only got some after I was done with my build and boy are they nice!!
- 66 replies
-
- 1
-
-
- Finished
- Model Shipways
- (and 1 more)
-
Hi Paul, we were mostly packed and ready to move to Colorado Springs when the DoD stopped all movement. Sadly this build is on hold till we get to our new home, hopefully we will be there by the end of May. Until then I'll be getting my ship model fix watching all the amazing builds going on.
-
You're off to a terrific start, and wise to make sure your bulkheads are perfect before moving on. When you start laying planks from the keel to the transom you're sure to see that you removed the right amount of deadwood!
- 66 replies
-
- 1
-
-
- Finished
- Model Shipways
- (and 1 more)
-
Thanks for taking time to comment Bob, I appreciate it!
-
Your boat turned out great Paul! I agree with the others, mounting it on a whale carving is a great look!!
-
I wondered where you ran off to! I like your color scheme. I can't say I envy you for having to make all of those oars! You must be in the home stretch now, if you get it done soon enough maybe Santa will drop off another cool model.
-
There's a number of build logs in the quick find index in the small boats sections: Quick Find Index to Build Logs I have some pretty good photos in my build log of these areas (see link in my signature) , though I don't know that they will answer your questions they might help.
-
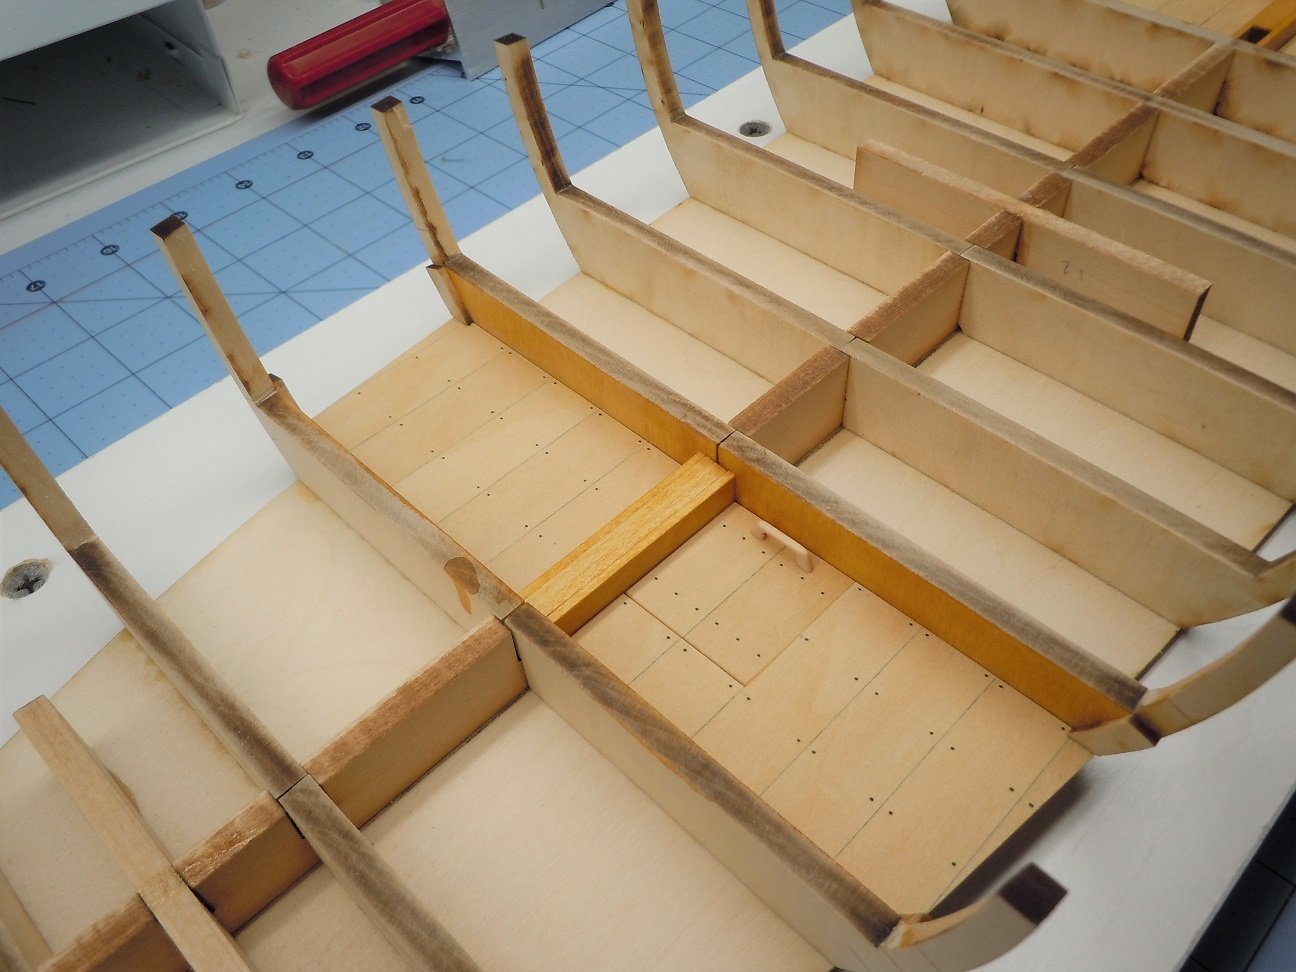
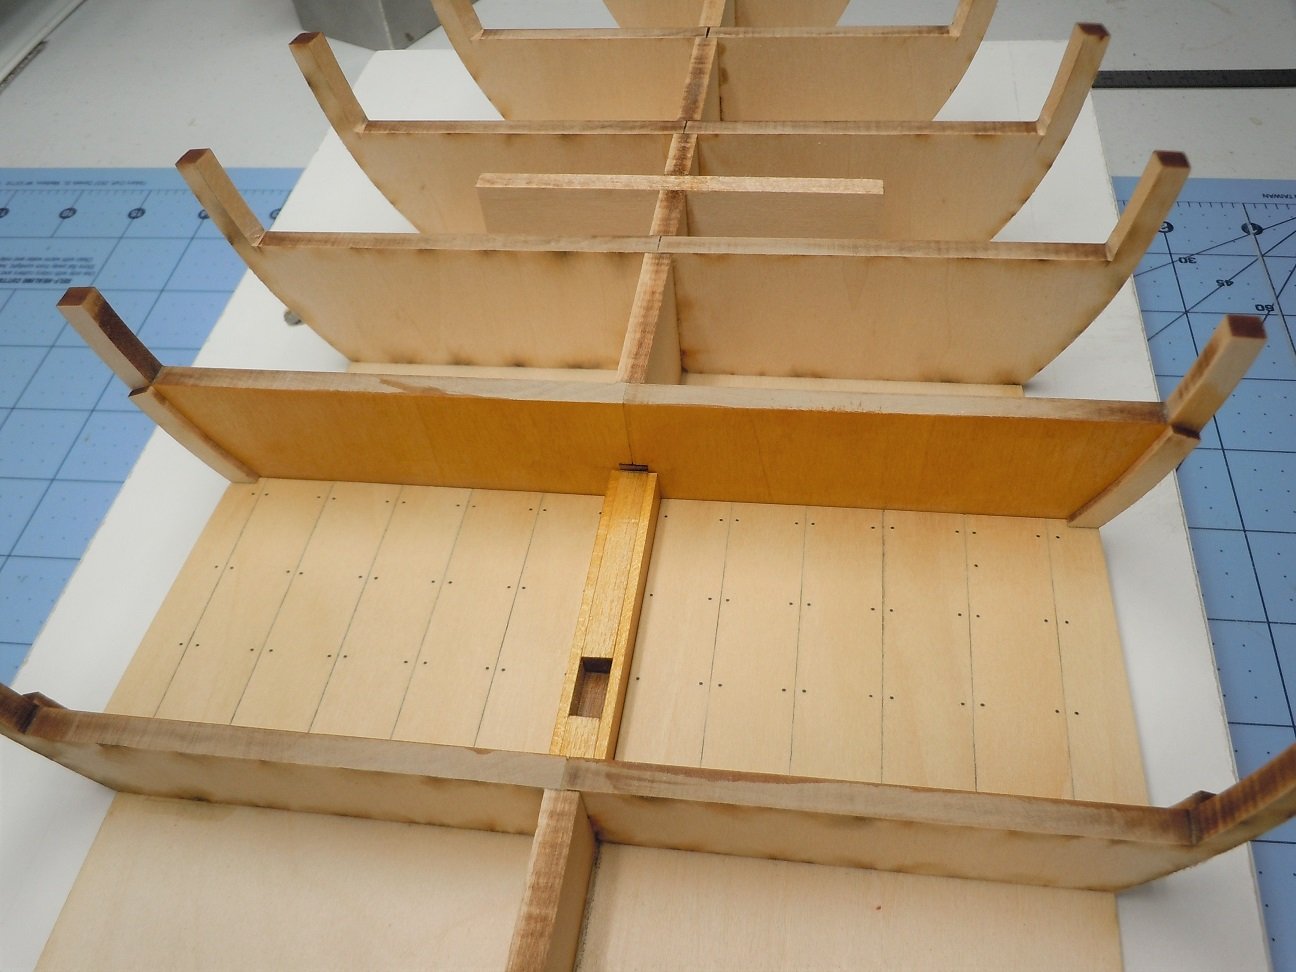
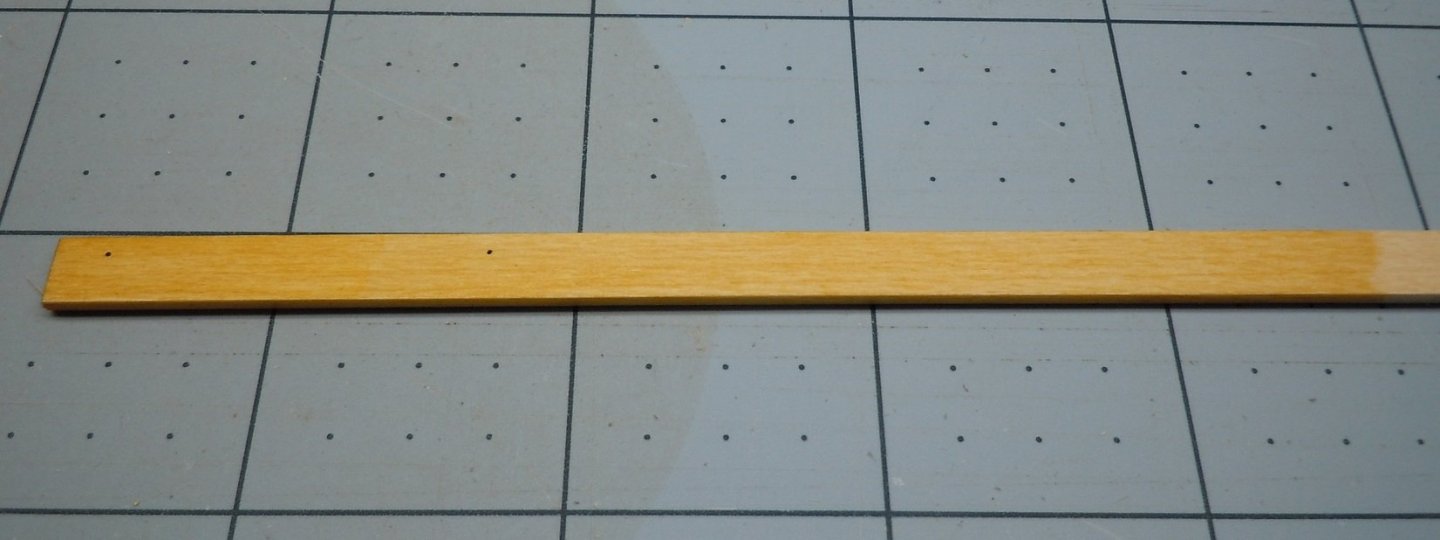
I picked up the book The Gondola Philadelphia & The Battle of Lake Champlain by John R. Bratten and I also purchased the article on the Philadelphia published in Nautical Research Journal back in 1984. I was pleasantly surprised by Mary who handles orders for past articles, what an amazingly pleasant and super fast transaction! So having gotten some reference materials and gone through all the build logs I could find, I discovered this kit took a few minor shortcuts. To be fair, unless you study the real boat you'll never know the difference. The most glaring to me is the laminated keel. On the real boat, this was a solid timber. The keel is only visible in the fore and aft cockpits, I considered milling the keel down flush with the cockpit floors and laying on a solid suitably sized piece of wood. However this would only leave about 1/4" of the original keel in place and I'd rather not risk having a bowed hull. I'll live with it, and unless you have nerded out on the real boat you probably wouldn't know the difference. So far the only kit modification I plan to make of consequence is to replace the kits 2 narrow strakes above the wale with a single strake. I think the kit went with 2 narrow strakes to avoid requiring the builder to have to spile the top strake. That's my guess anyway. I completed the cockpit floors as sub assemblies. I extrapolated where the nails would go from plans and dimensions in the book/article. The nails are black monofilament. I also used a #2 pencil to color one edge of each plank. The real boat didn't have a single scupper and there's no information suggesting the decks or cockpit floors were caulked, but this helps define the planks. The rear cockpit also has a bailing well. I don't know why but the plans call for it to be smaller than it actually was, I sized the well according to dimensions from the real boat. There is also an opinion that the bailing well had a hatch/cover which makes complete sense to me (the Philadelphia replica has a hatch/cover) so I chose to create one. I also made a handle for the hatch. Once the cockpit floors were complete and sanded smooth I applied a coat of wipe on poly. This is the aft cockpit: This is forward cockpit. I settled on using amber shellac to finish the majority of the boat. It is easy to apply and dries in minutes. I have quite a collection of stains and gel stains, none of which did a very nice job of staining bass wood to my happiness. Shellac can be thinned with denatured alcohol so between that and or successive coats a nice amber tones can be achieved. Below is a test strip, the left most 1 inch has 2 coats of shellac while the middle is just one and you can just see a bit of unfinished natural bass wood on the right. I also noticed that the shellac does not seem to raise the grain after application. I may feel differently when the boat nears completion but I'm kind of surprised I don't see more folks using shellac. Clear shellac is also available, I will be experimenting with that next to see if it's a good substitute for wipe on poly. That's all for now, I'll be starting the strakes this week and hope to post more progress soon. Thanks for looking!
-
Paul I agree with Jonathan, that's a great color scheme. It's coming along nicely as expected!
- 103 replies
-
- 1
-
-
- new bedford whaleboat
- model shipways
- (and 1 more)
-
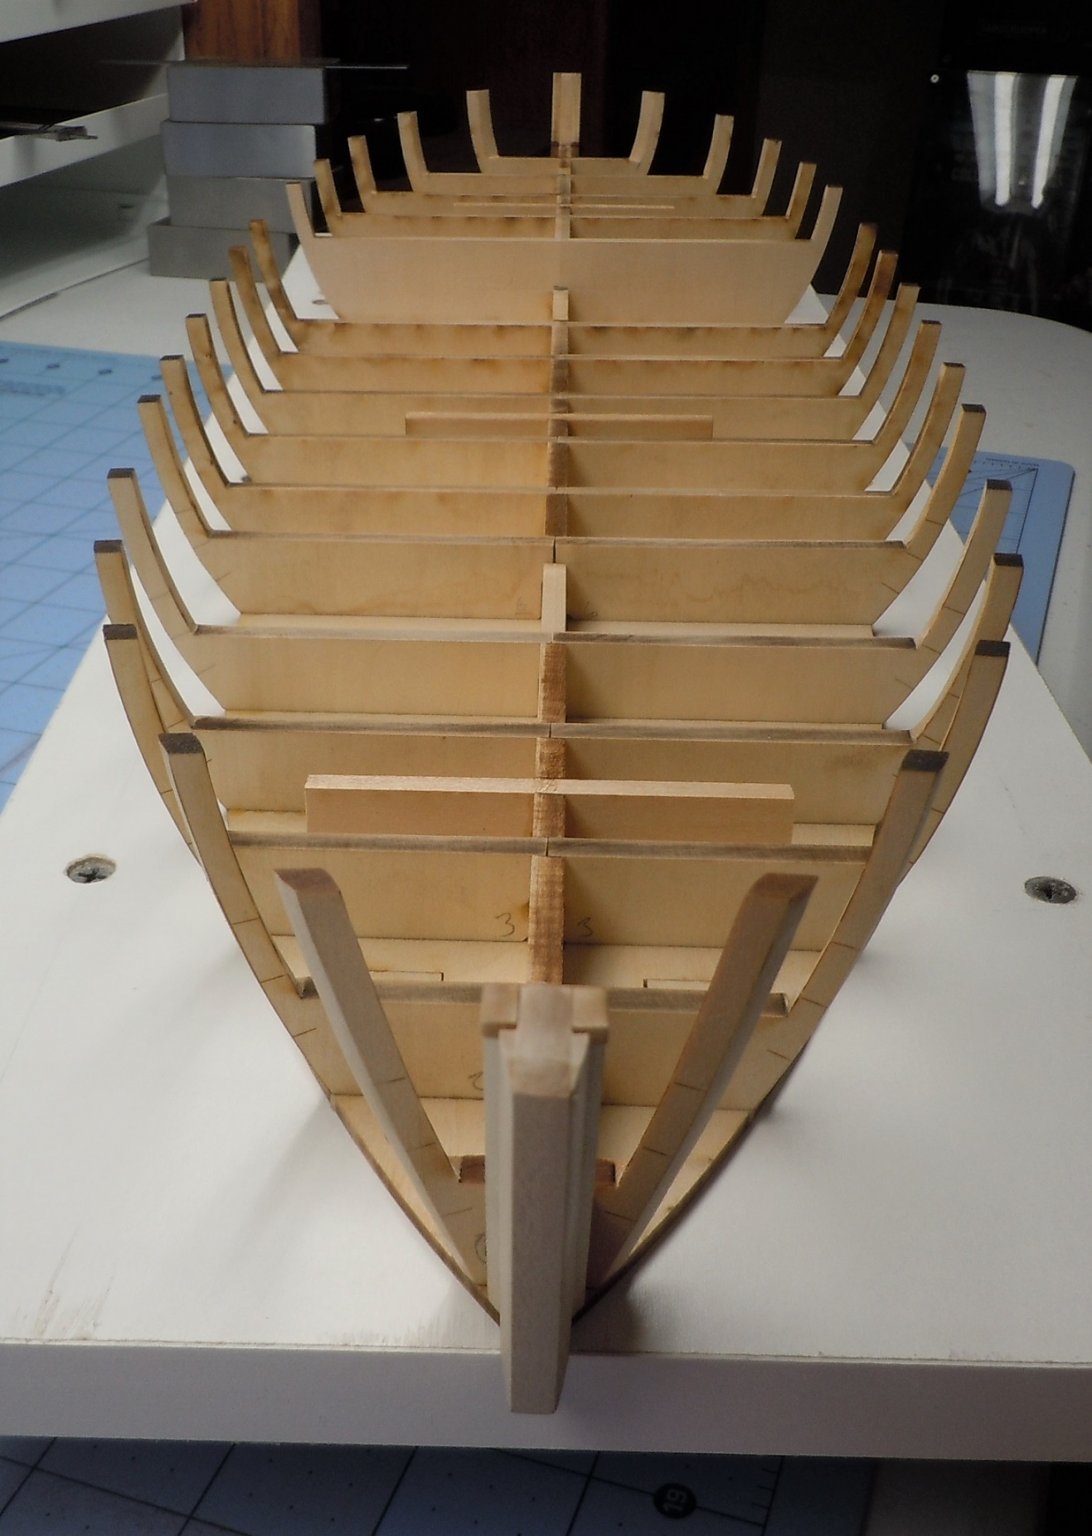
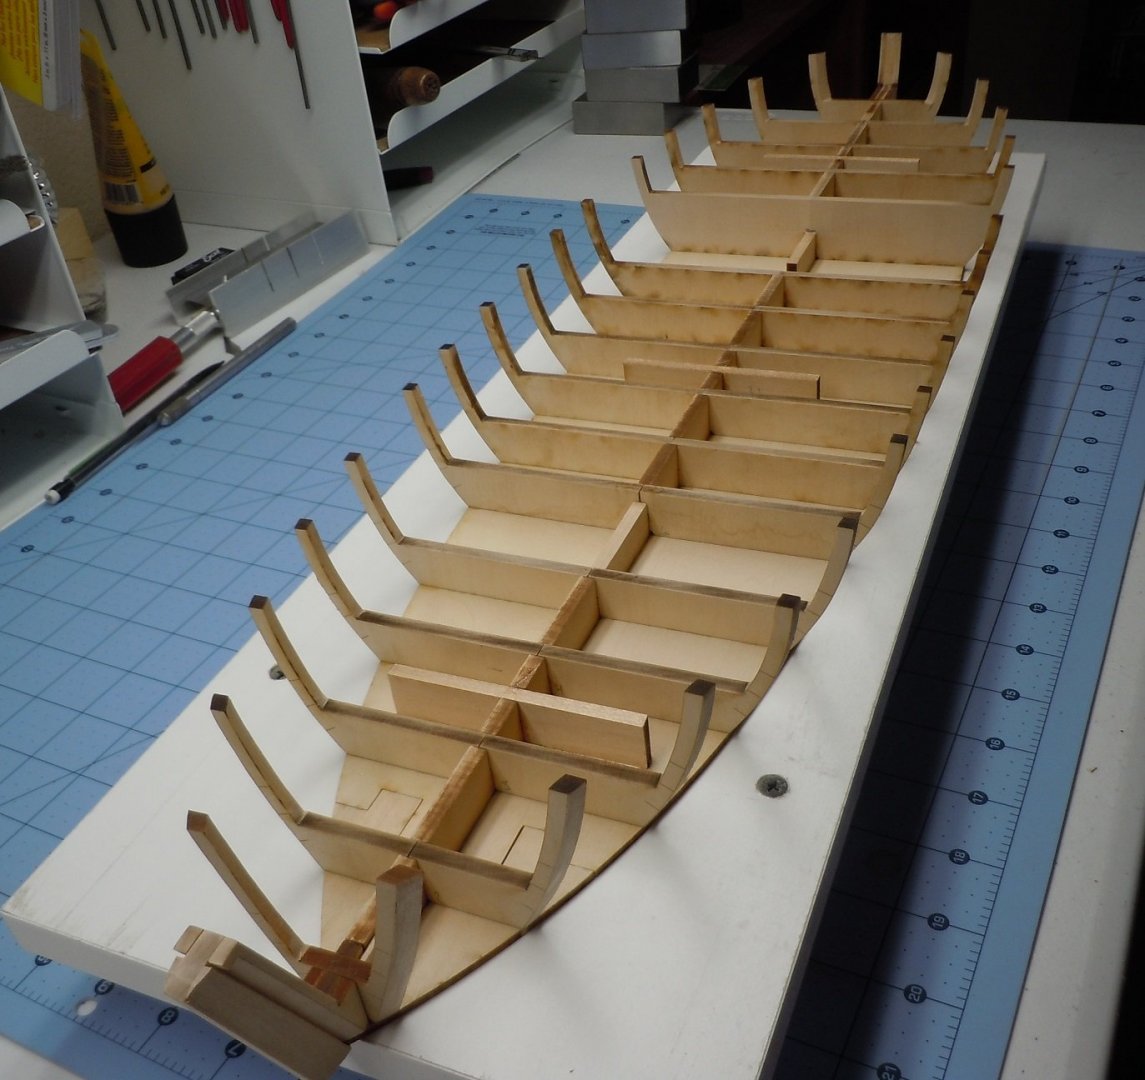
Thanks gentlemen! I've managed to make some additional progress. As I expected, the laser etched bevel lines on the bulkheads are as accurate as one could hope. Once the exterior bevel was complete, I used a compass to mark the interior of each bulkhead so that it could be beveled to match the exterior. The entire interior will have ceilings installed so the bulkheads need to be beveled. Once I had a bulkhead set shaped, they were installed using Titebond. I found machinist's 1-2-3 blocks to be fantastic for holding bulkheads vertical and 90 degrees from the keel. I was able to complete bulkhead installation this week, despite not having an abundance of hobby time. So far everything has turned out straight and true! I'm working out how I will mount the boat, I intend for it to be mounted on a couple of as yet to be determined decorative pylons so that the boat appears to be floating 2 or 3 inches above the base. Next up will be creating the cockpit floors, but installation will have to wait until I settle on a stain color scheme. I would like shades of a honey/amber color for the majority of the boat but will leave the decks natural with a coat of wipe on poly. Hopefully I'll be able to post another update soon, thanks for looking!


-
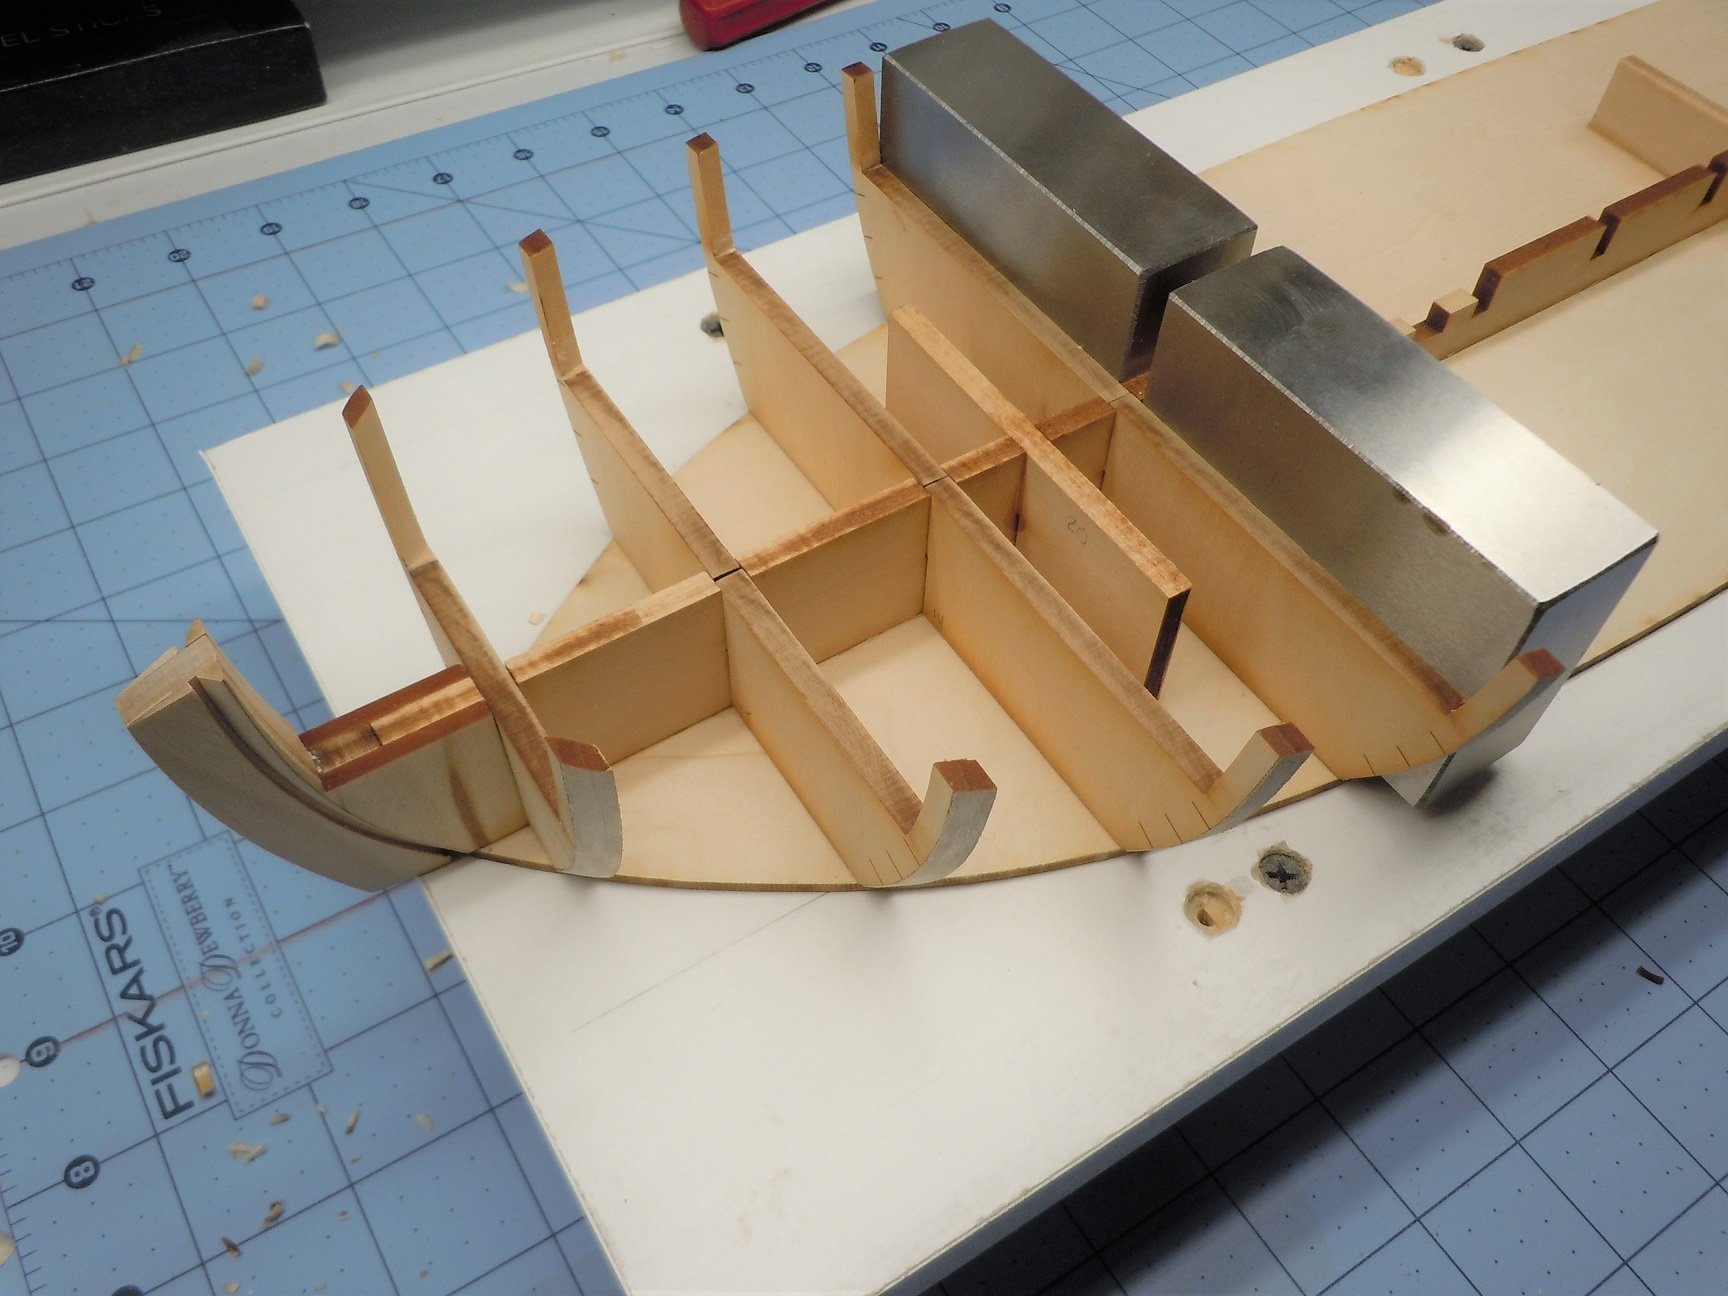
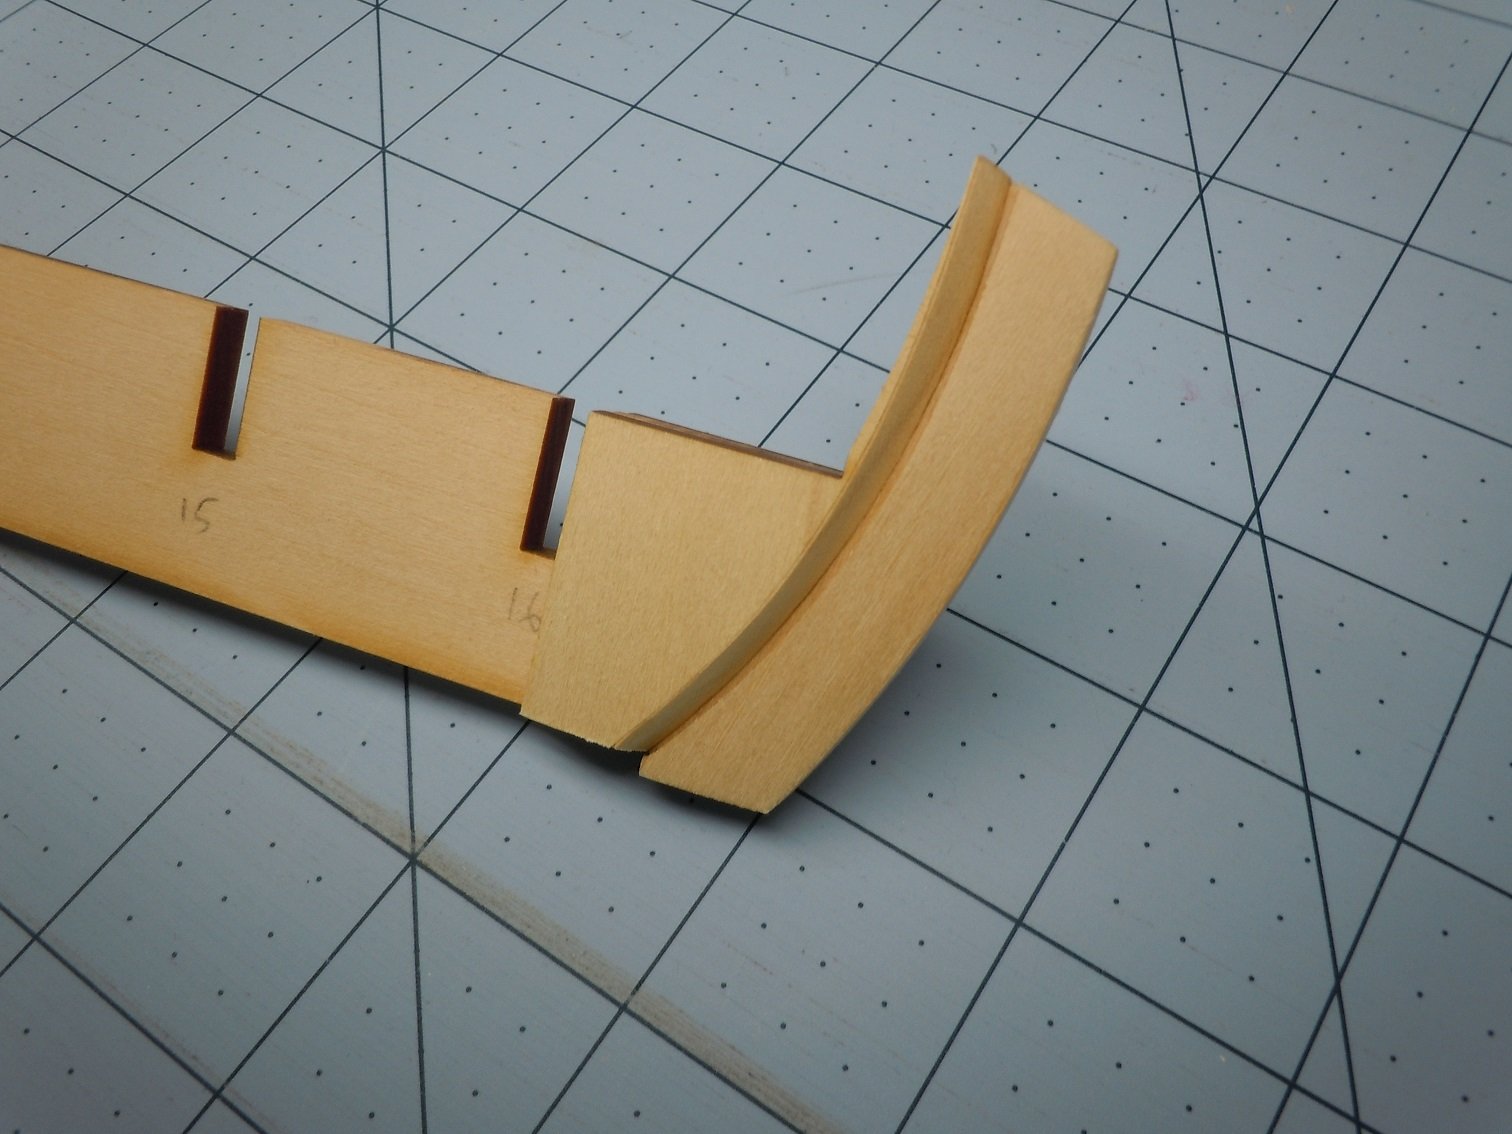
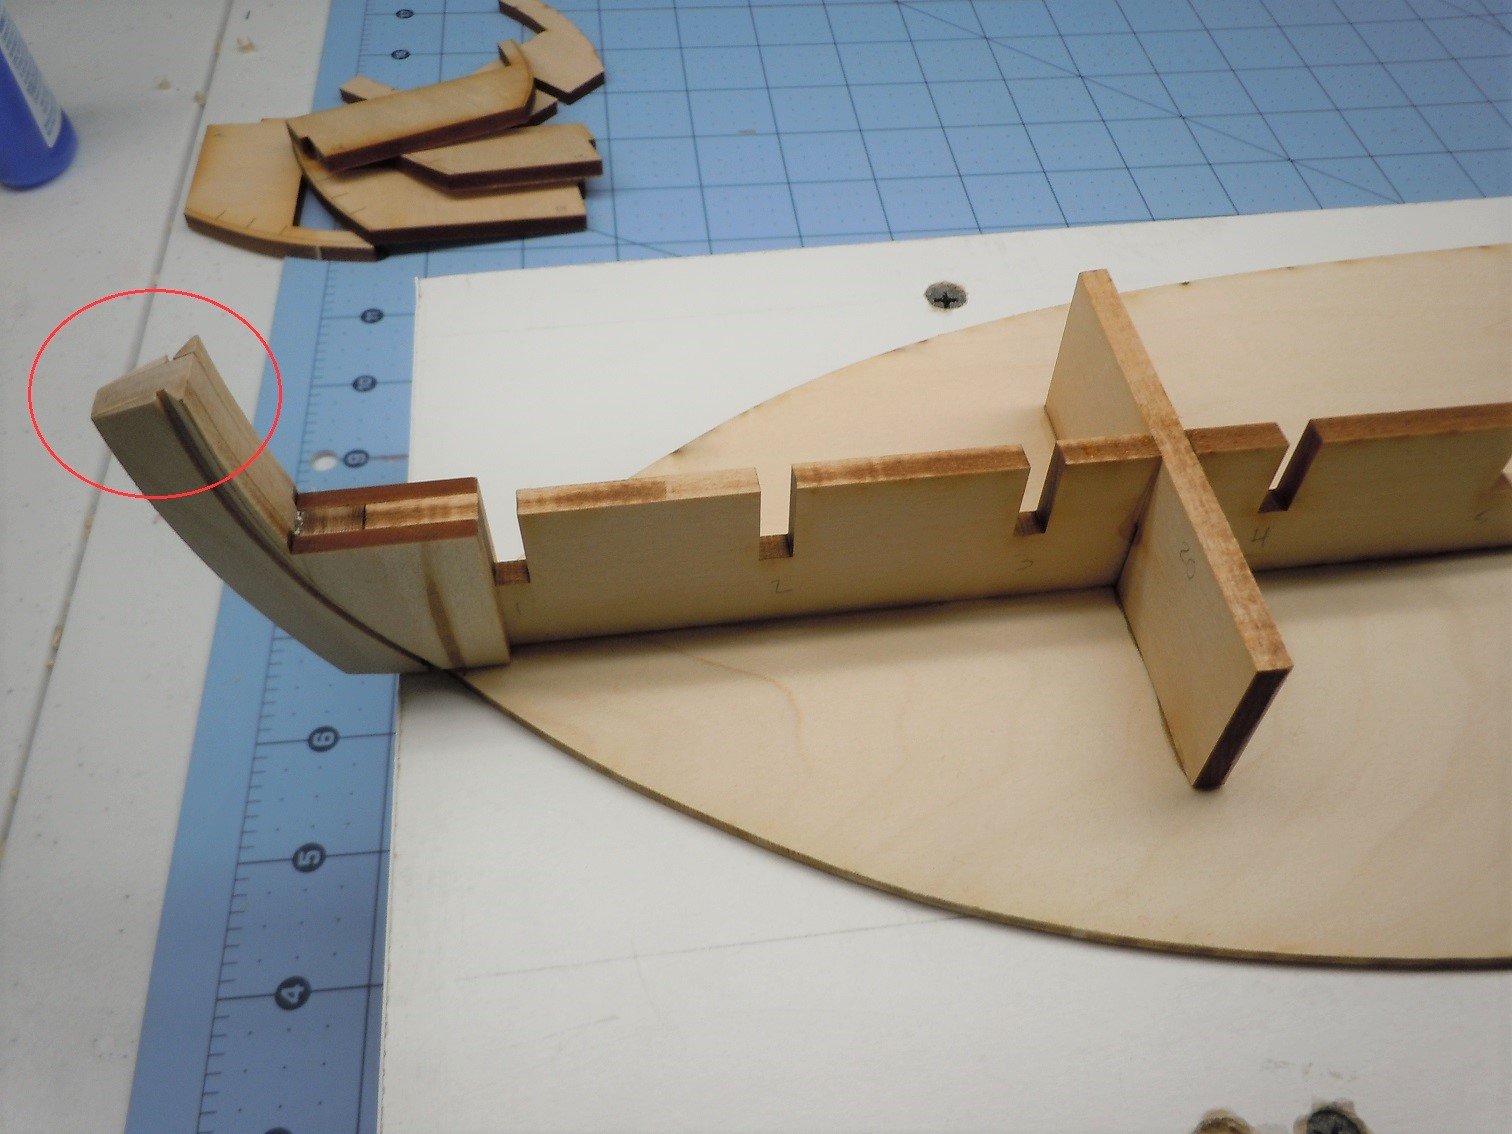
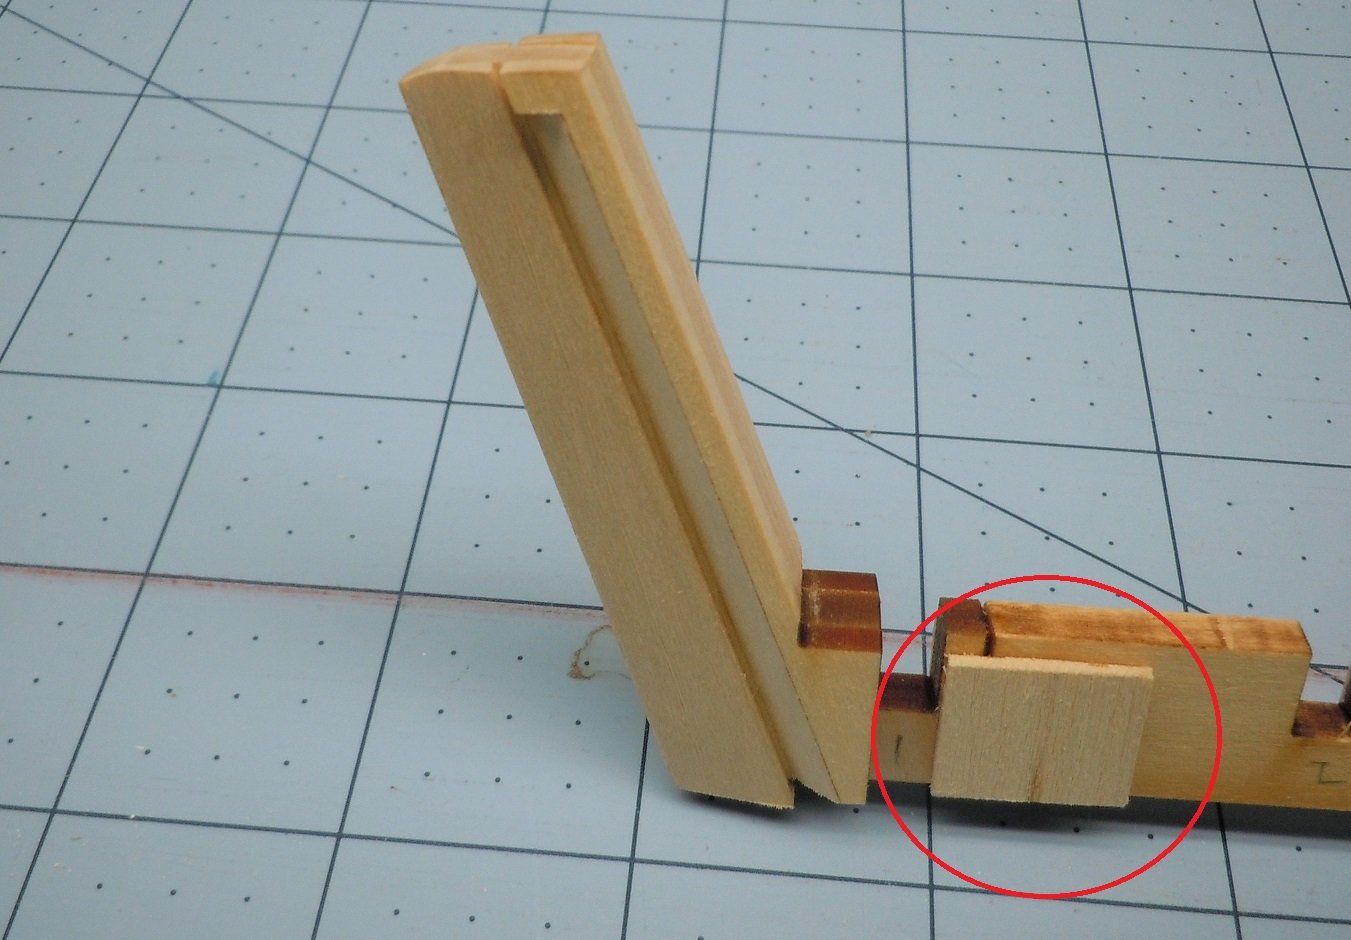
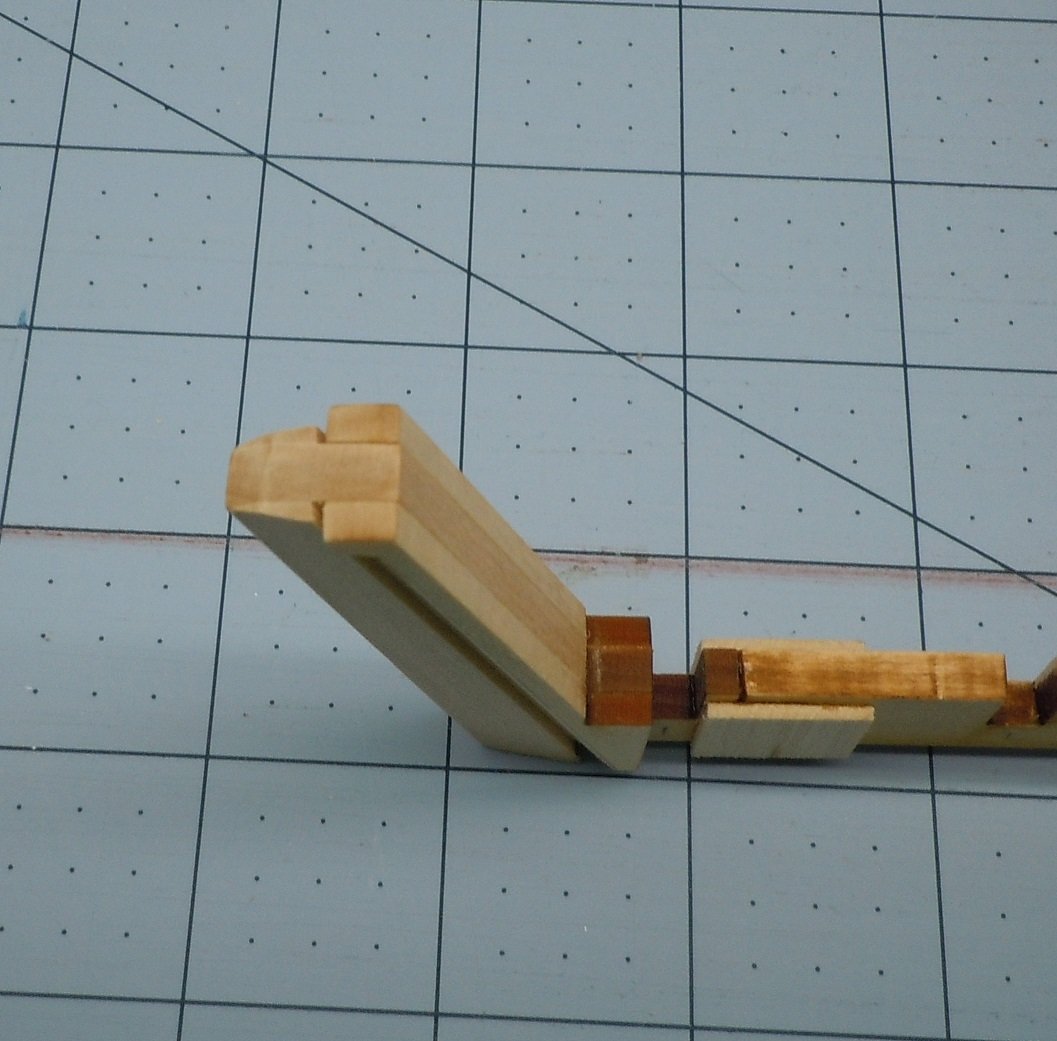
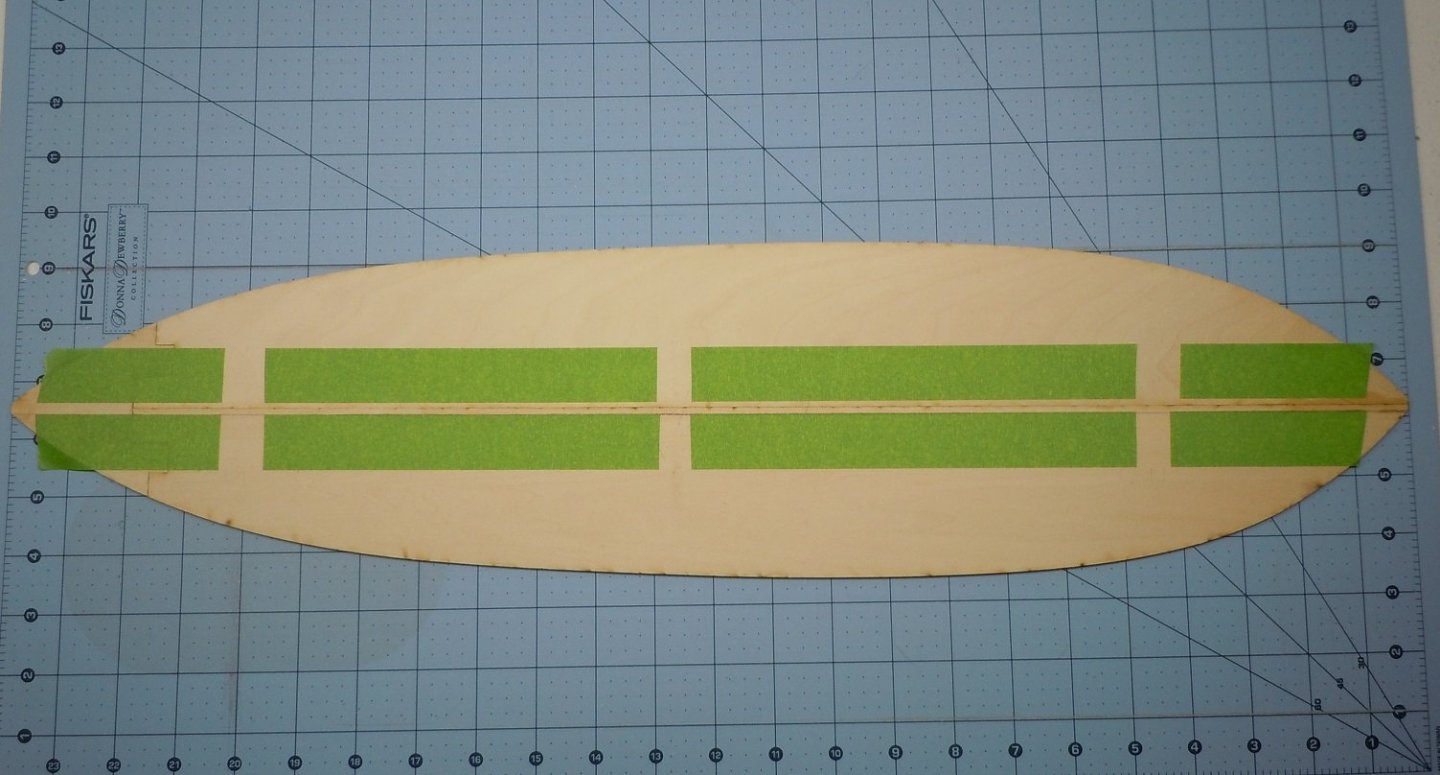
The engineering of this kit is really quite nice. The only thing to be mindful of is that the laser creates a slight bevel which for thinner parts, isn't that noticeable. For thicker parts such as the keel, it is quite noticeable. Don't count on the edge being square because it wont be. Luckily the plans are actually to scale so I was able to determine that I didn't need to square up the edges of the parts. The stem and stern have parts that are laminated to the keel. With laser etched guides it's child's play getting the correct bevel. There are 2 parts per side for the stem and stern that when shaped and glued in place, form the rabbit for the planks. I managed to break stem extension to the keel after epoxying it on. The glue joint didn't break, the wood did. Luckily I was able to scab in a scrap piece of basswood that will not be seen in the finished model. The only thing I haven't figured out how to camouflage is the top of the stem and stern. These are visible on the finished model since it isn't painted, so the laminations give a not prototypical "butcher block" look. Perhaps a faux wood paint job? If anyone has an idea I'd love to hear it. The bottom of the hull is simply 3 pieces of basswood sheet. Nobody is going to see the bottom of the boat anyway so makes sense to save labor here. After gluing these parts together, I laid out the center line with painters tape so that I could glue the keel in place, centered and true. I used epoxy to glue the keel and keel braces to the bottom, after squeegeeing out excess epoxy I removed the tape. I did use a cheap bookshelf screwed to 1x3 oak runners so that I had a nice flat surface. I weighed the keel down to the hull bottom while the epoxy set. Finally another view of the stem top, showing the "butcher block" effect I want to eliminate. I've started fairing the formers, the bevel and planking tick marks are laser etched! How accurate these end up being we shall see. From what I've seen of this kit so far, I expect they will be pretty darned accurate. I'm not fishing for compliments, I welcome comments, criticisms or just pointing out what I may have missed or goofed up. Thanks for looking!!


-
Congrats on finishing another terrific boat Sea Hoss! What's next?
-
That is a beautiful diorama and I would love to see more photos! I picked up the book The Gondola Philadelphia and the Battle of Lake Champlain. I was hoping for more photos of the replica than what's in the book but, the text has been very illuminating and helpful. If you have a link to site please share or, feel free to post them in this thread!
-
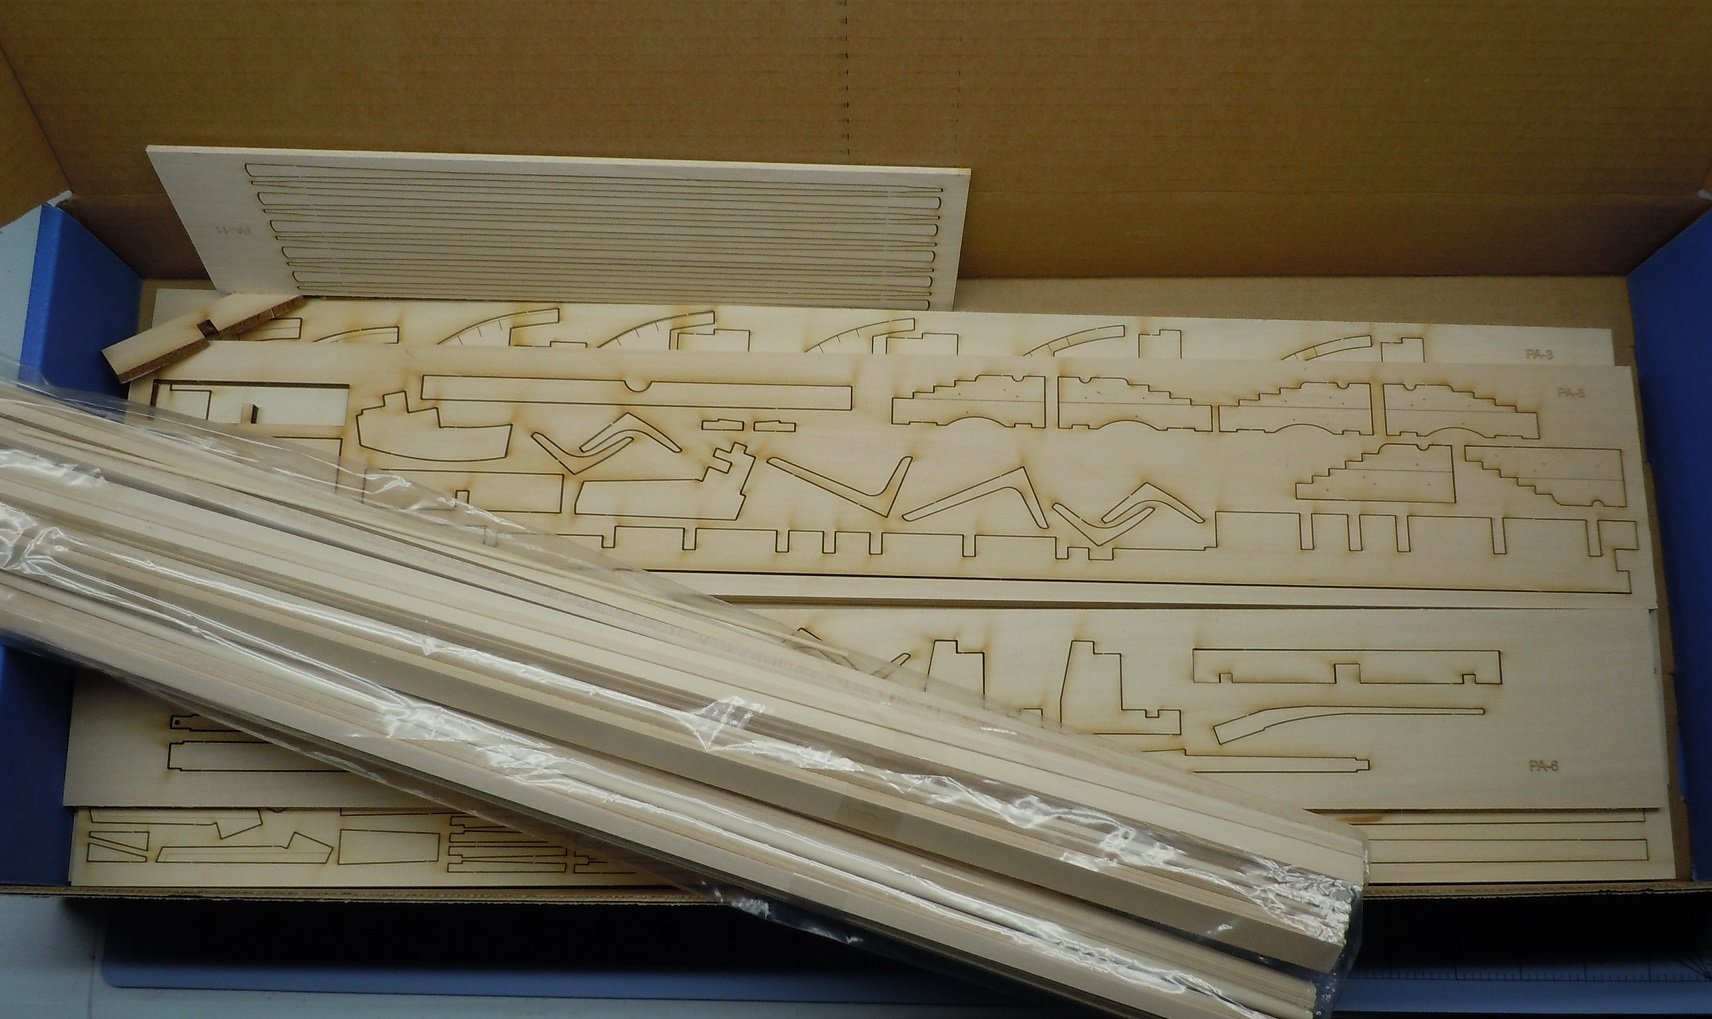
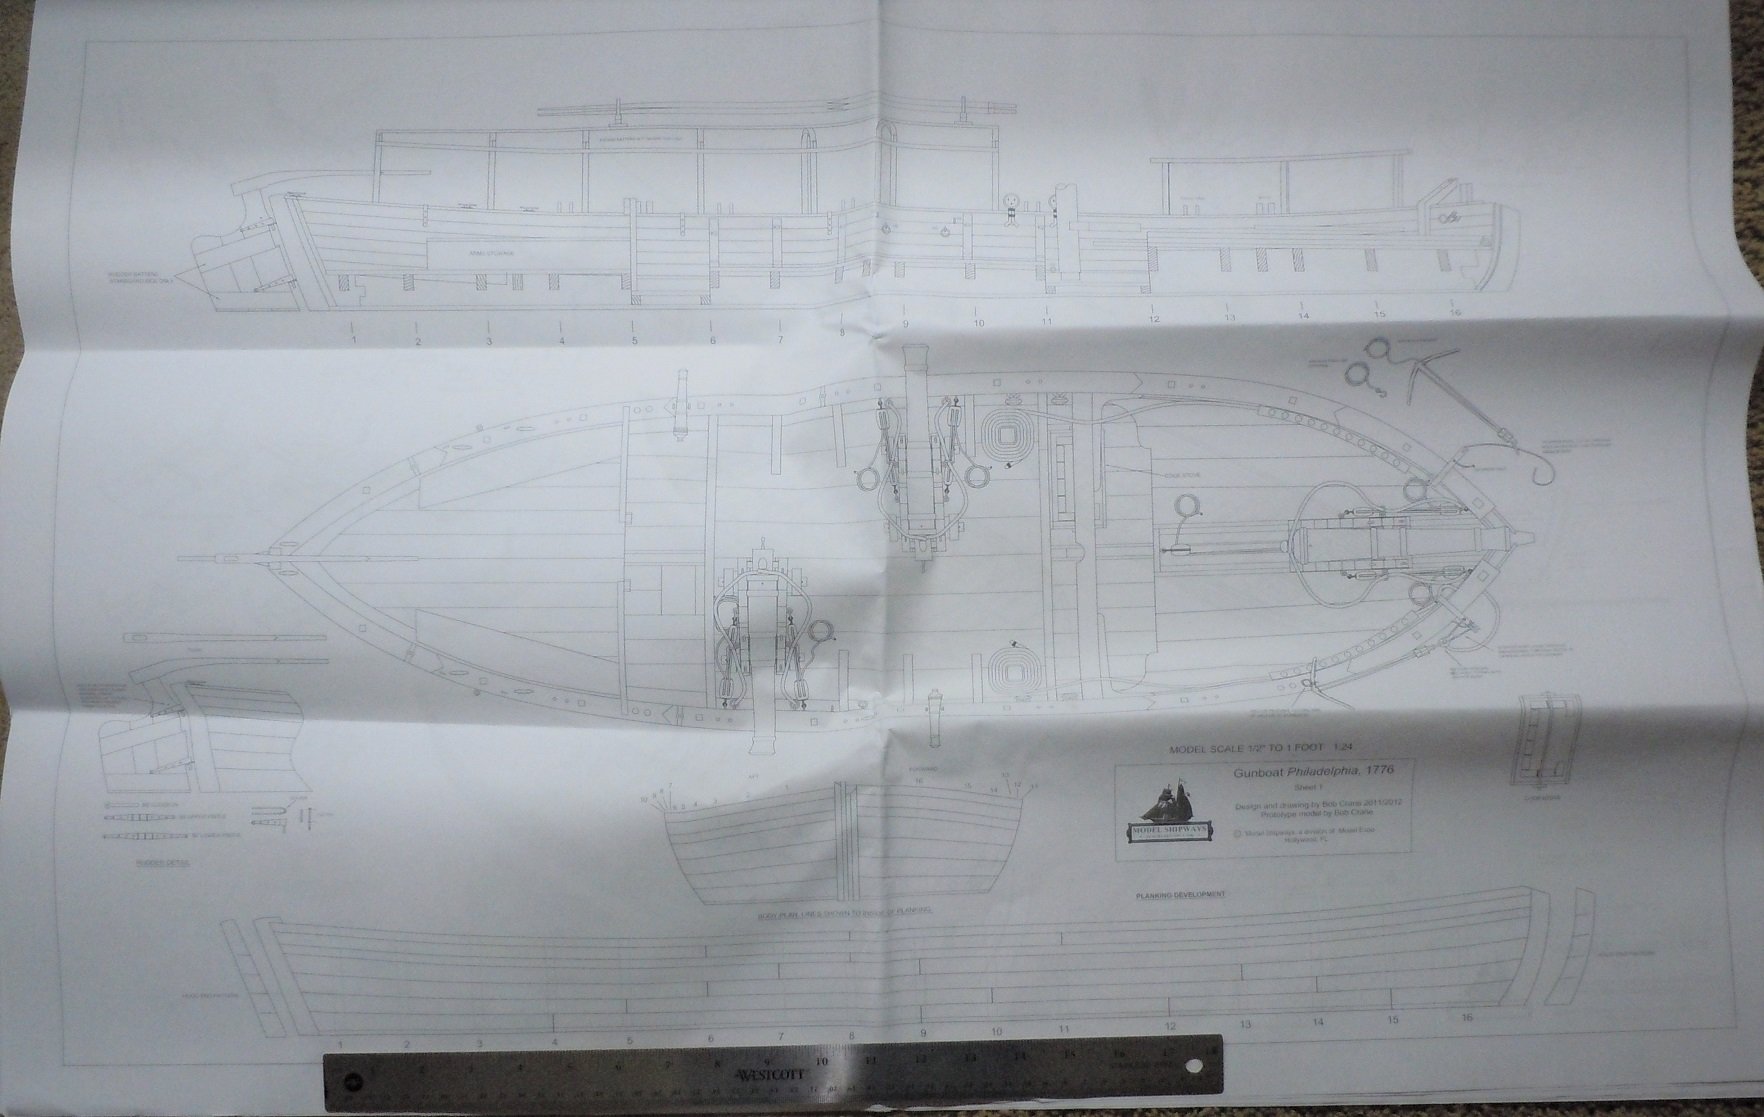
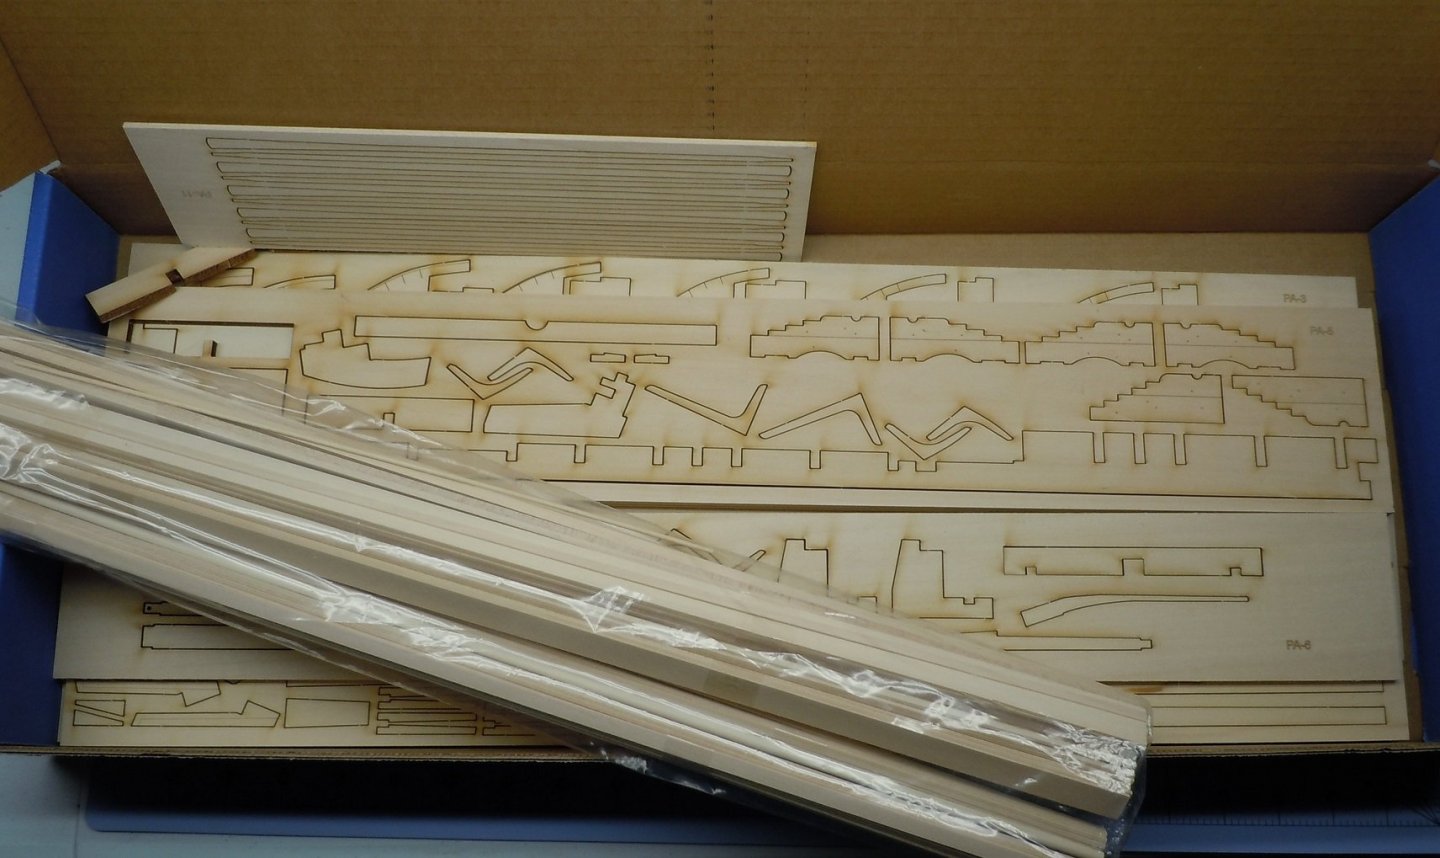
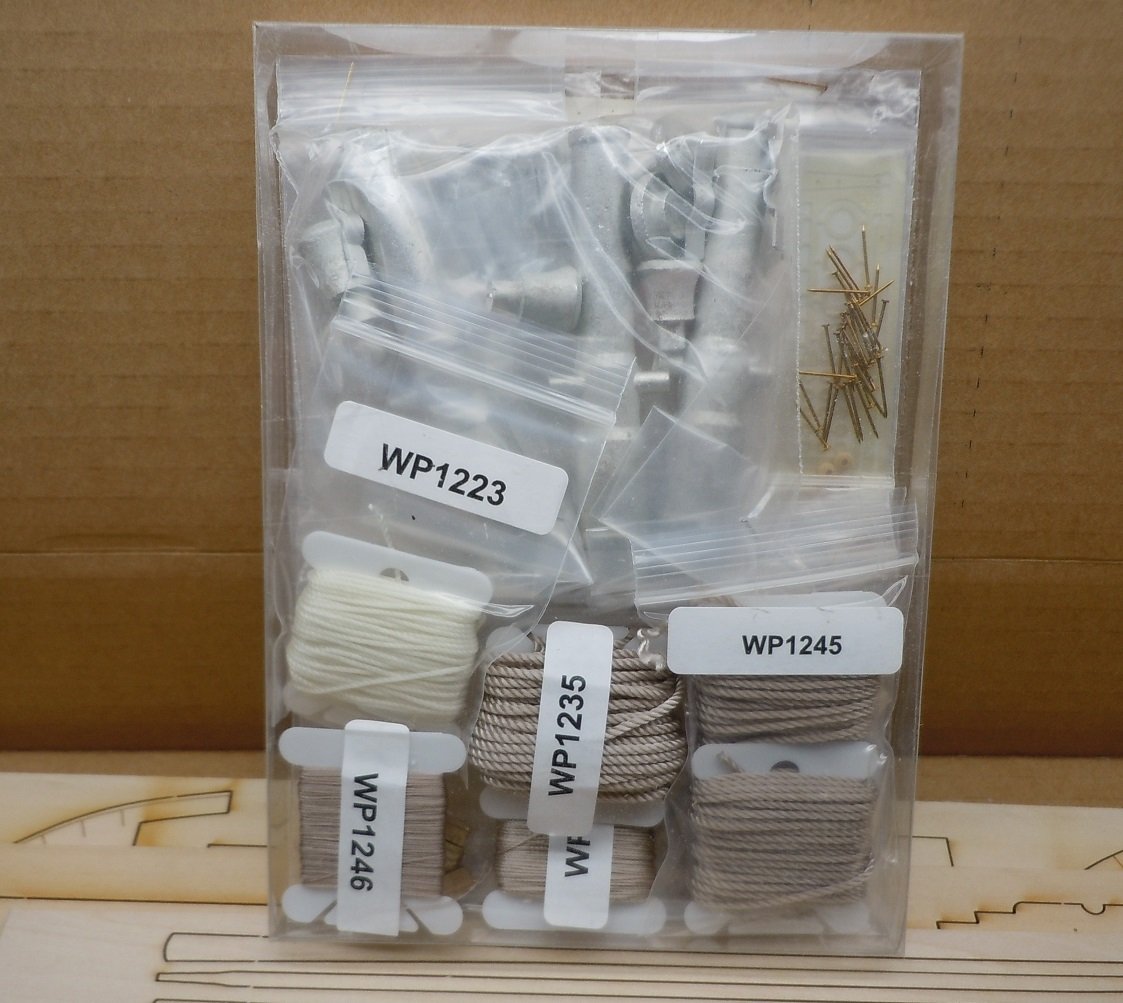
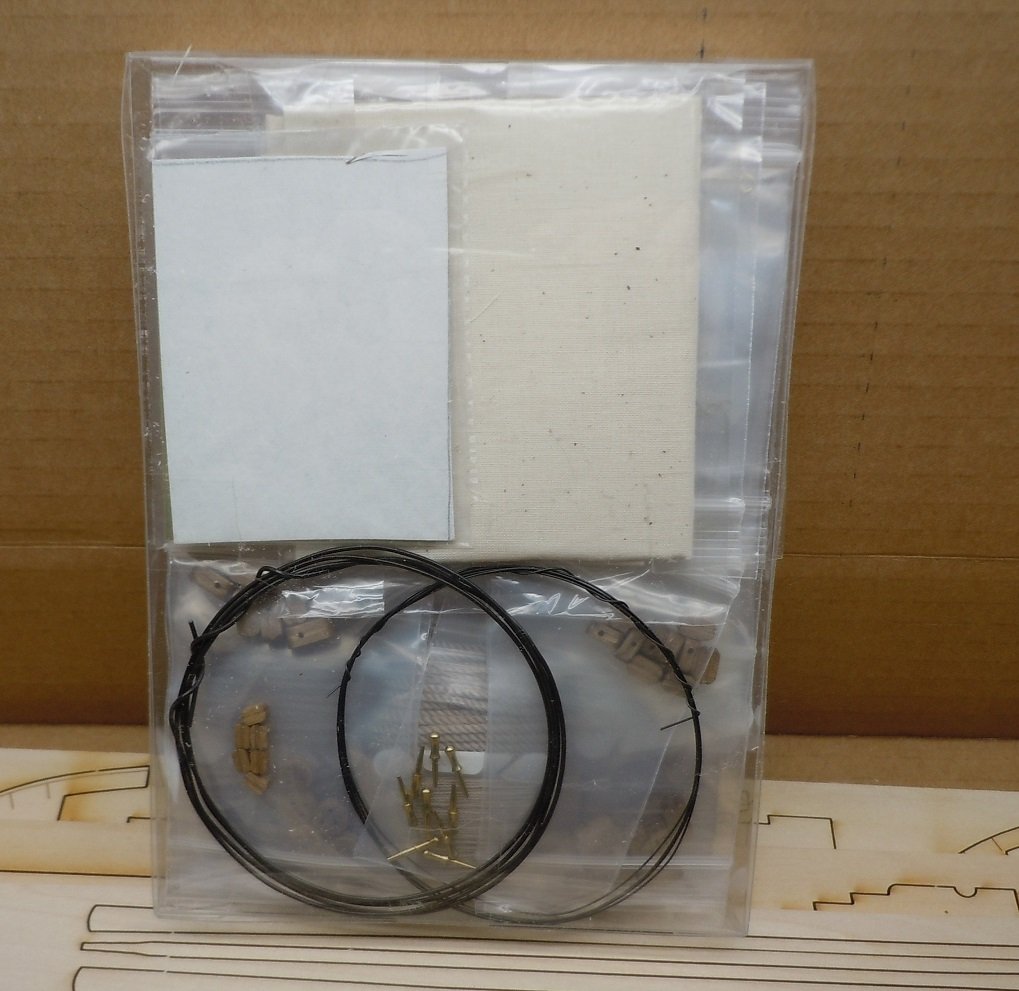
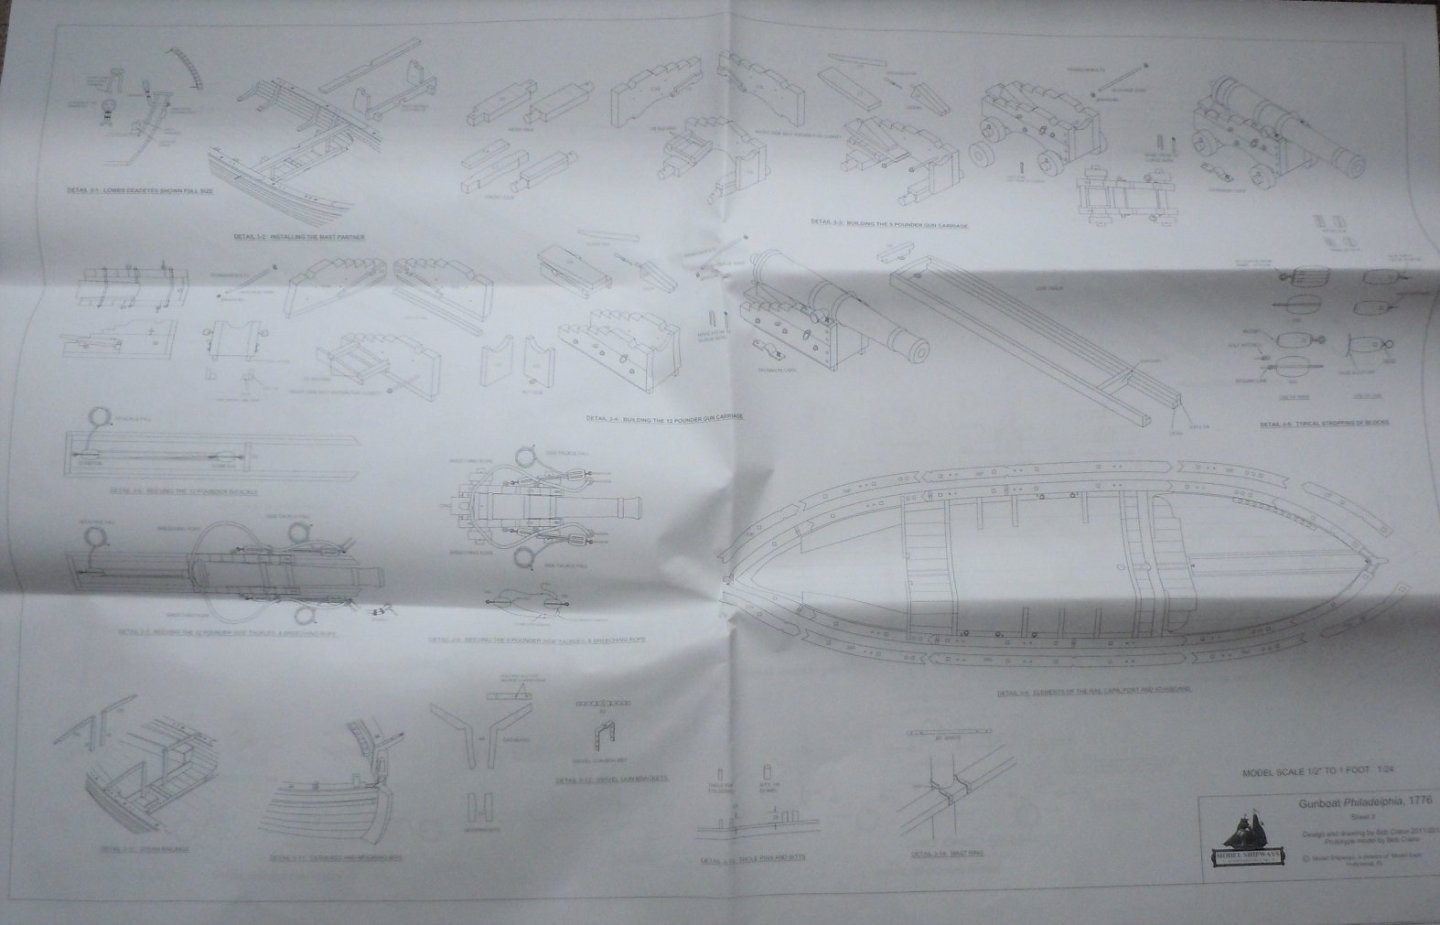
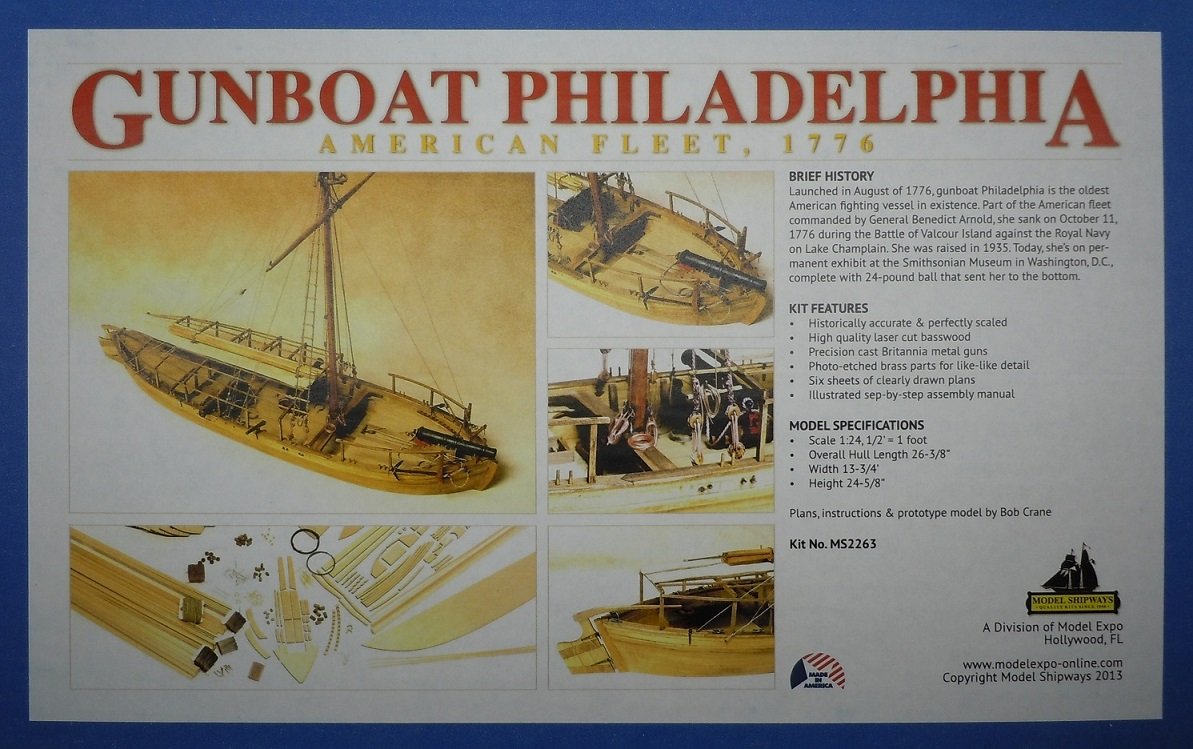
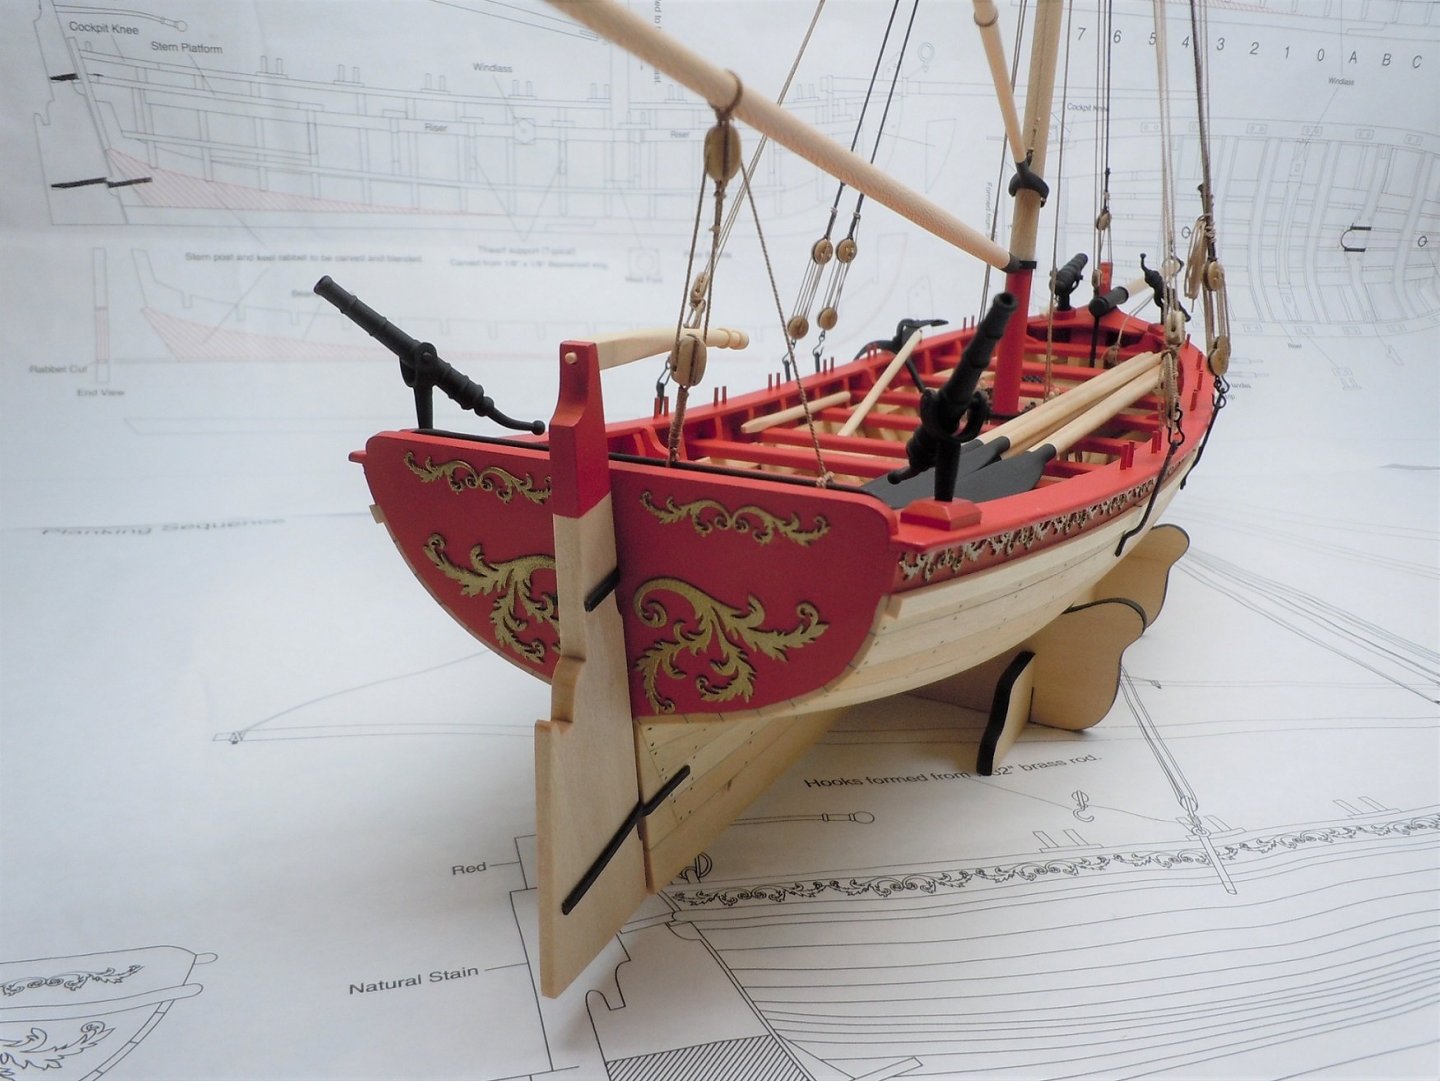
I wasn't going to start another boat until after I moved however, the Army is slow in producing orders so.... I'm hoping by starting another build my orders will be dispatched with much haste. That's how it's always worked in the past, get in the middle of a project and it's time to move! I chose this kit for 2 reasons, it seemed a logical next step after building the MS Armed Longboat in terms of complexity and secondly, my interest in the American Revolution. So without further adieu, here's the obligatory photo of the box, or at least the label on the box: Kit contents. The hardware. This boat was armed with 8 swivel guns however, there are only 2 guns included in the kit. I don't know why MS likes to provisions boats for more guns than they supply, the longboat has 3 mounts and 2 guns. In any event I will order 6 more, my cursory inspection of the kit swivel guns is that they are very nice. Had I seen these sooner I would have ordered some to use on my longboat. The instruction booklet is very thin, however the plans are extremely detailed and I doubt I will be left guessing what goes where. This plan set is really amazing. This is just 2 of the 7 sheets. The ruler is 18" for those interested in the size of the finished model. I'm already sanding and gluing parts so hopefully I can post an actual build update soon. Thanks for looking!

-
Congrats on finishing this project off! It's amazing how many builds get started but never finish. Everything looks great but in particular the tiller and thwart supports are super.
-
Boy the paint really changes the appearance of the model. I think I know what scheme you are going with, will it have brown thwarts? In any event your boat is looking great, and at the speed you work you will have one heck of a collection in short order!
-
I don't know how I missed your post yesterday. Your model has really turned out quite nice! I had the same problem with the gaff jaws, one of the few aspects about this kit I find curious. Had I known you needed belaying pins I could have sent some to you. If you got the 14mm size you'll be in good shape, if not let me know. You're in the home stretch now!
-
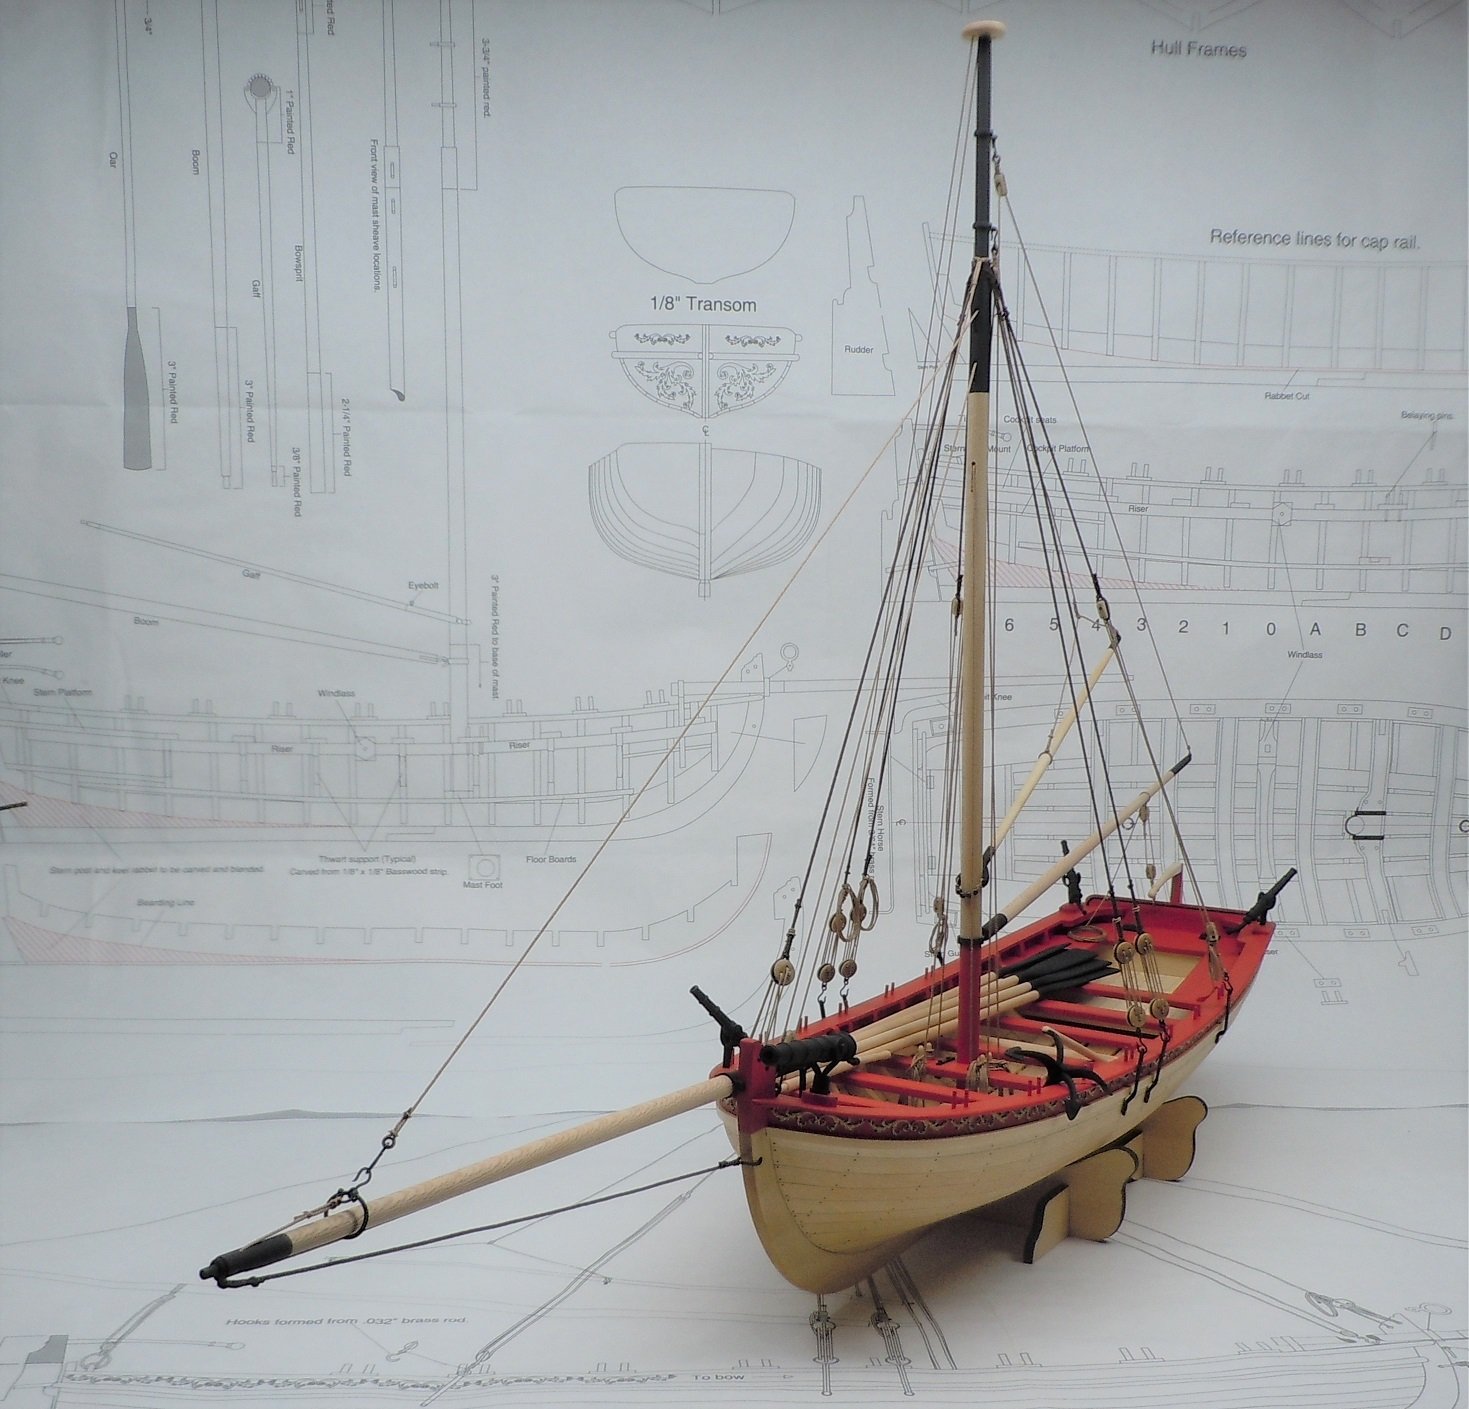
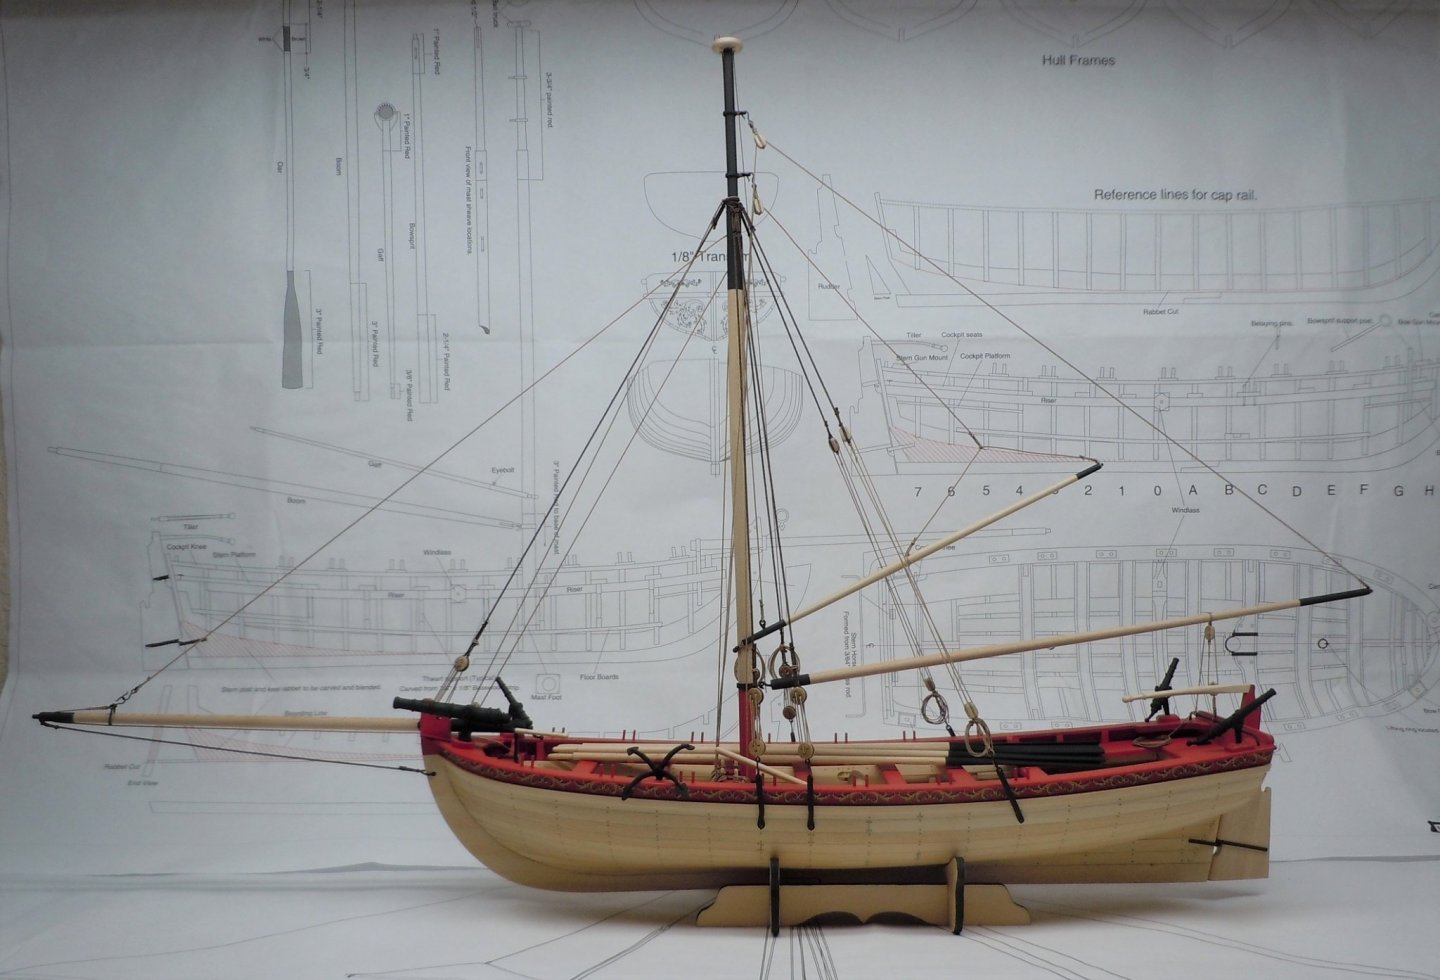
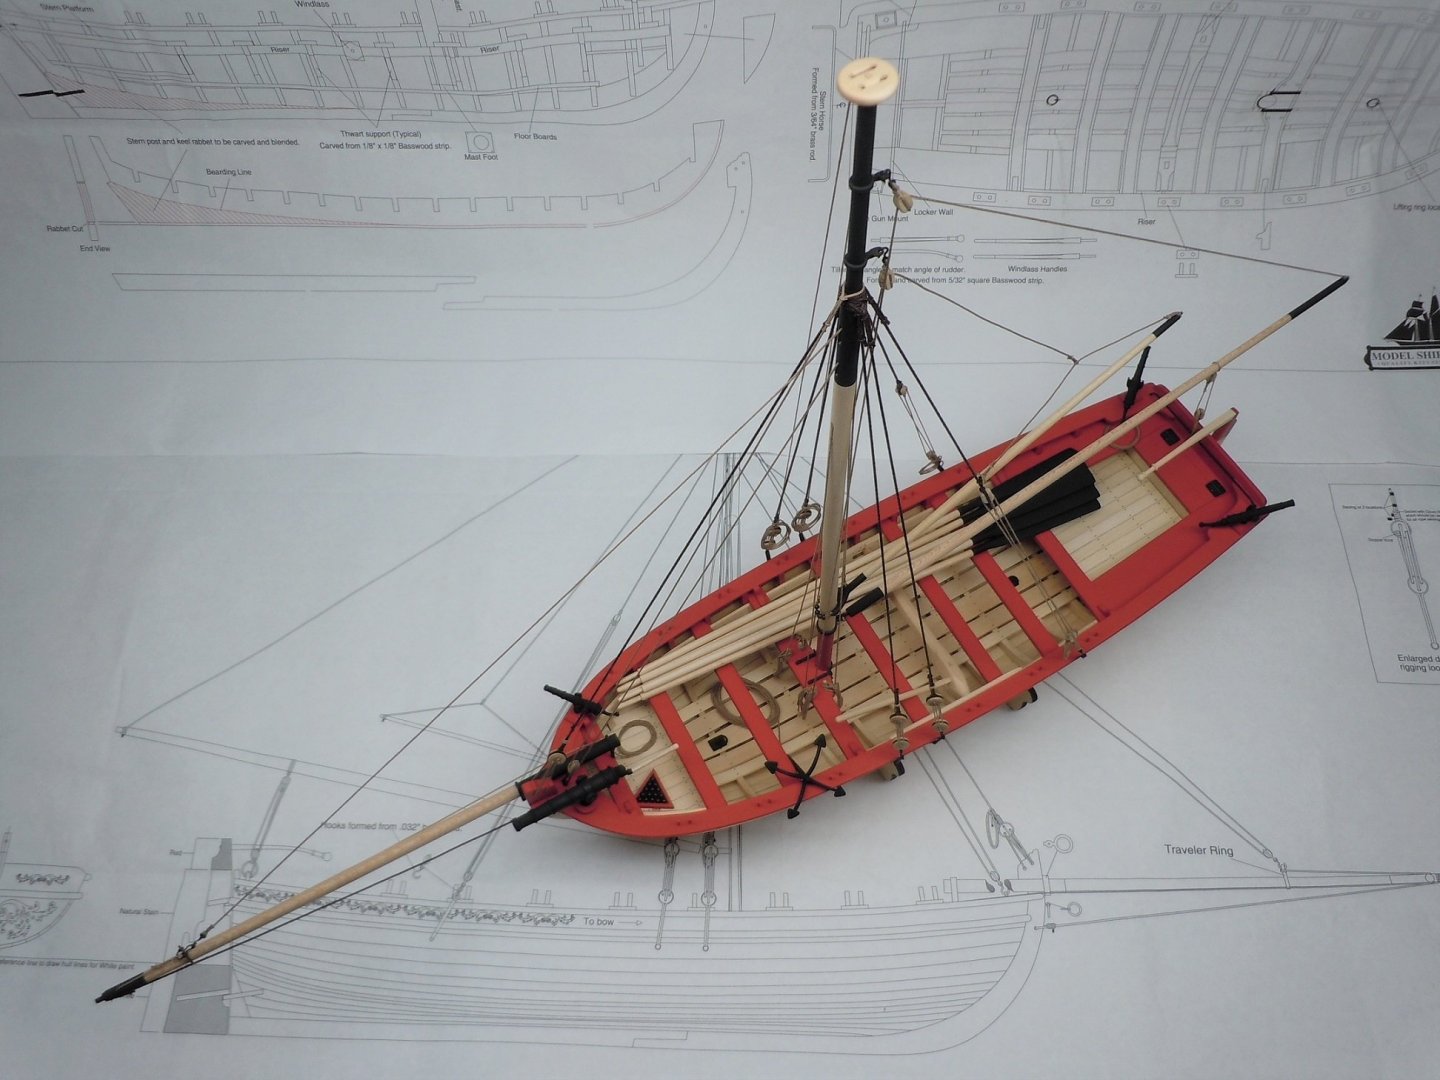
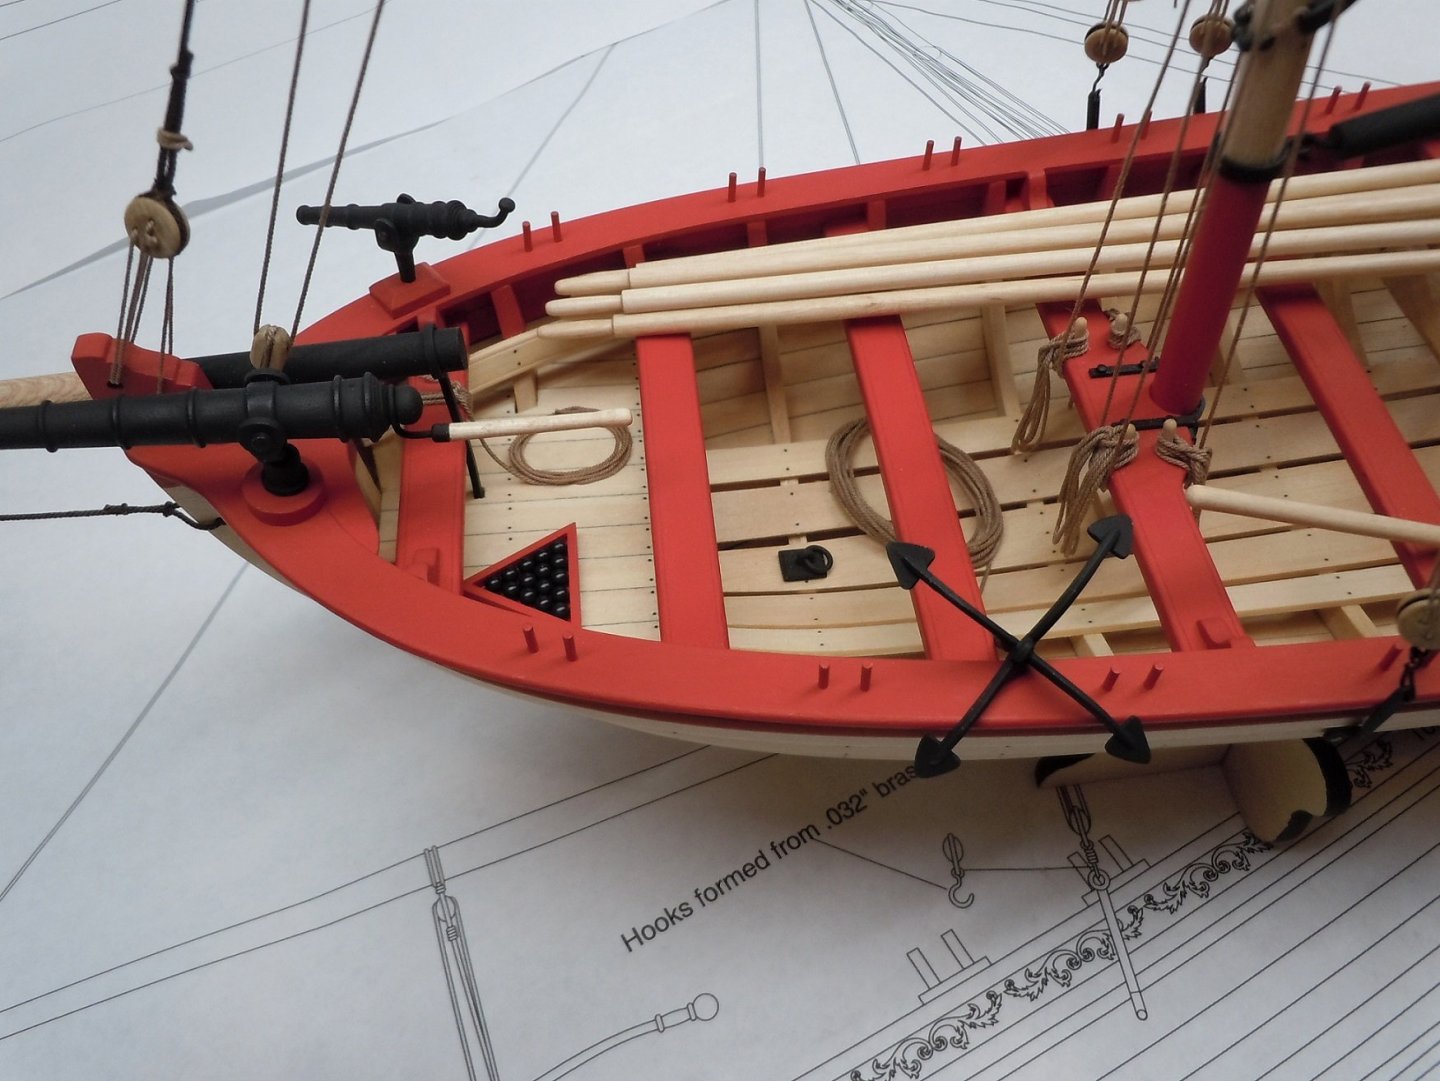
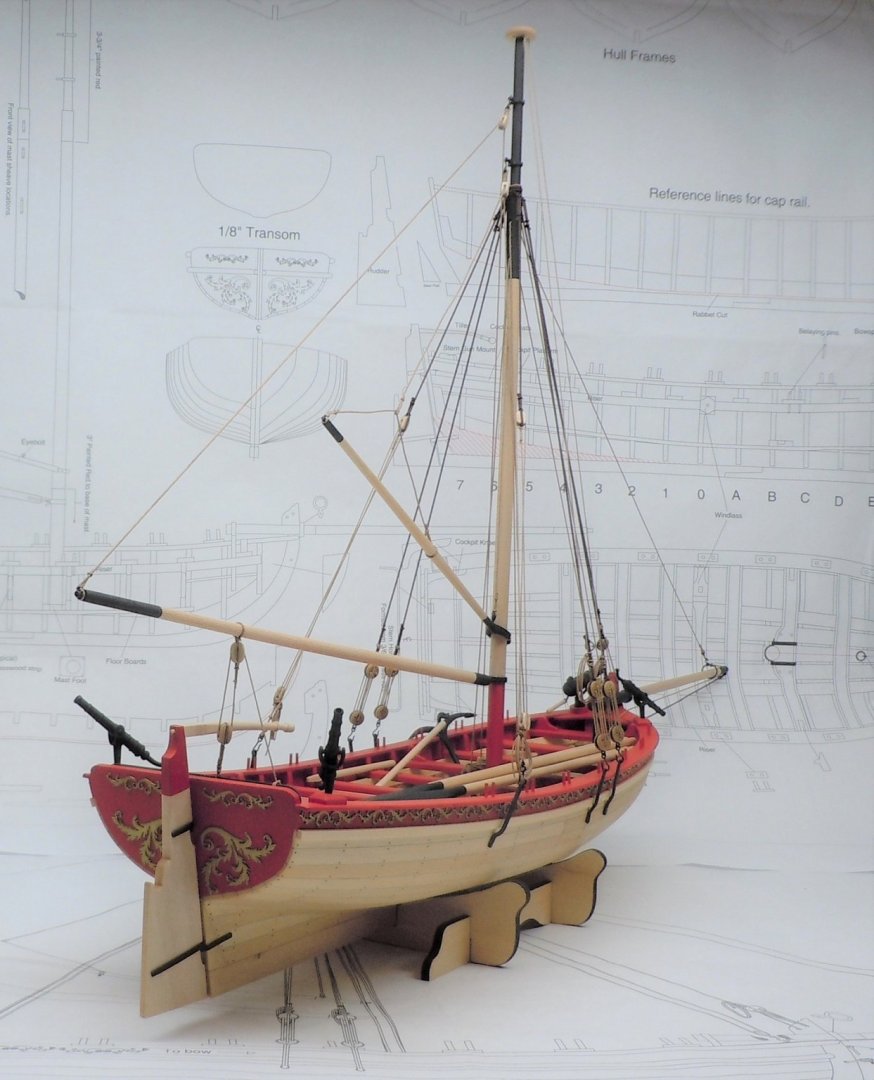
I'm calling this boat finished! I considered making some additional items but as Sea Hoss pointed out above, there's no end to it all! Besides that, it's at the point now where it's starting to look cluttered already. I will make a glass display case but the Army is moving me very soon so, that will wait till I get to my new home away from home. I will also add a flag at a later date. The only things I haven't addressed already in my build log are: 1. Thanks go to Dr Paul Schultz for supplying me with an extra swivel gun. I'm sure we aren't the only ones finding it odd that the kit has 3 mounts for the same gun, but only supplies 2 actual guns. 2. I added a handle to the large swivel gun with brass rod and a turned wood handle. I don't know that much about such guns but it defies my experience how one would aim such a weapon. As always, thanks for looking!! And thanks for the help/advice to all that offered.


- 95 replies
-
- 14
-
-

-
- Model Shipways
- 18th Century Armed Longboat
- (and 1 more)
-
I knew you would get this figured out! I'm glad your building this boat, I'm planning to build one as well and having your log will be a big help.
-
Thanks Paul! I don't really know how long it took per oar, I'd guess around 2 hours of actual work for all 6. I'm glad their done though, just waiting for the WOP to dry so hopefully I will have them painted tomorrow.
- 95 replies
-
- 2
-
-
- Model Shipways
- 18th Century Armed Longboat
- (and 1 more)
-
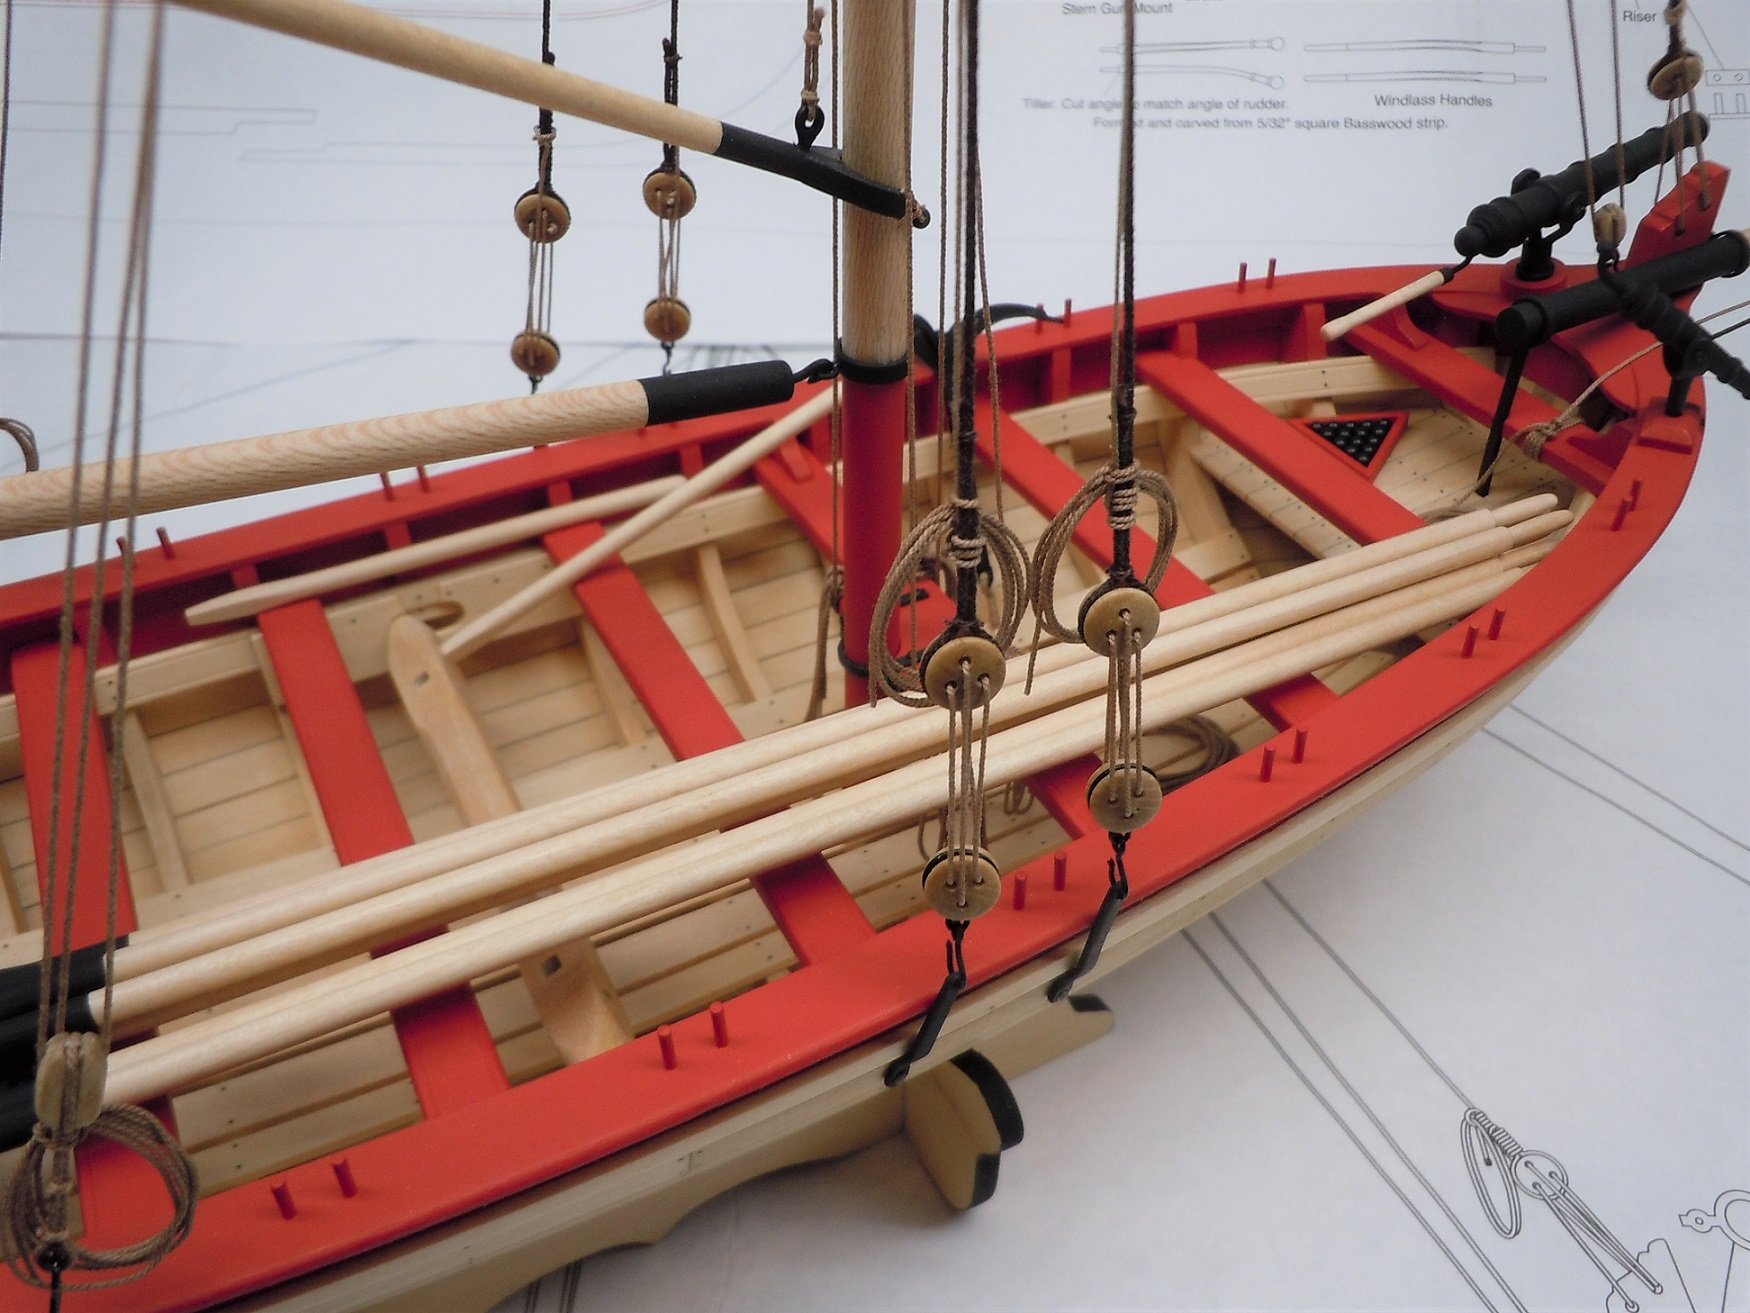
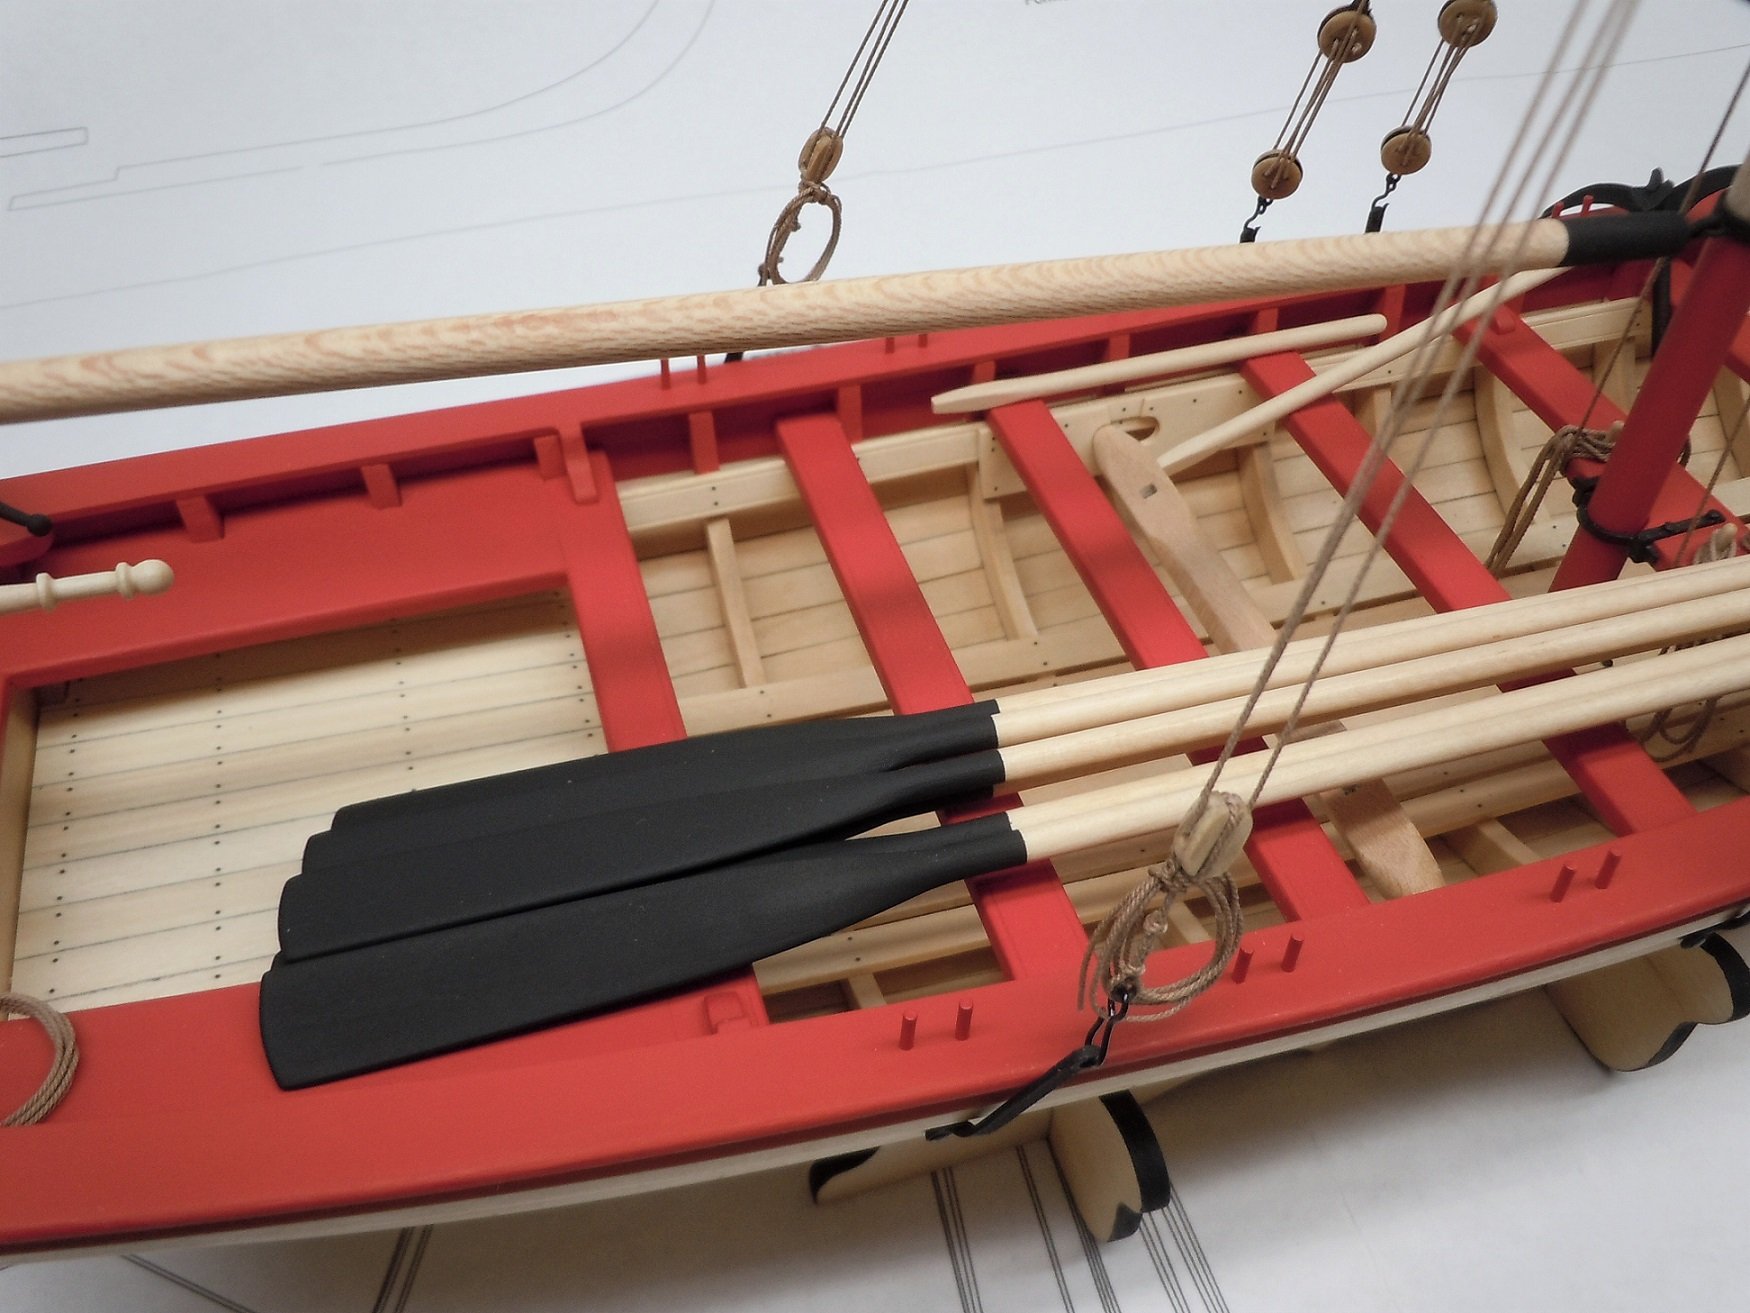
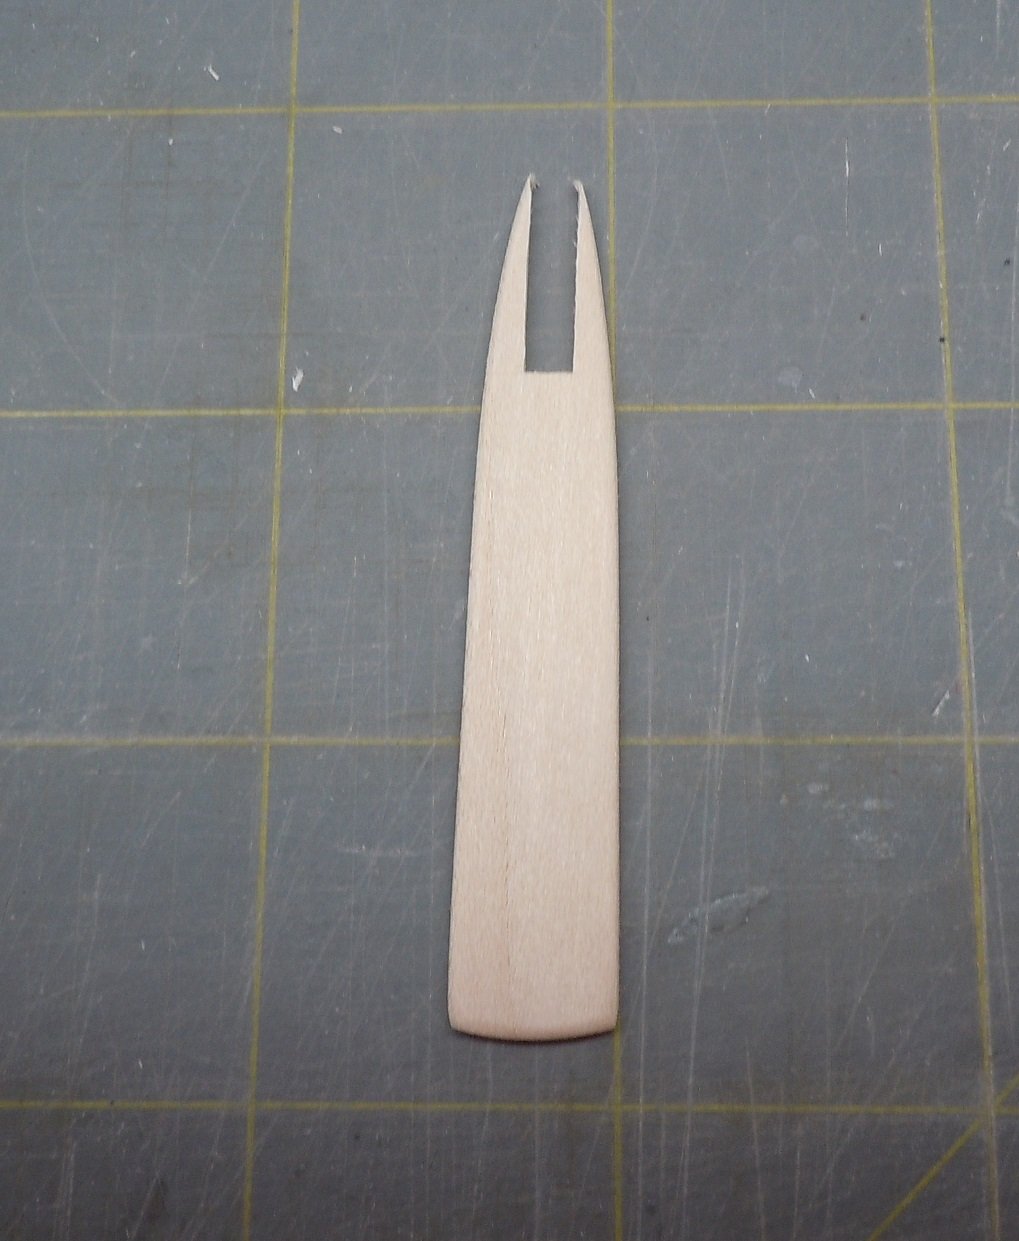
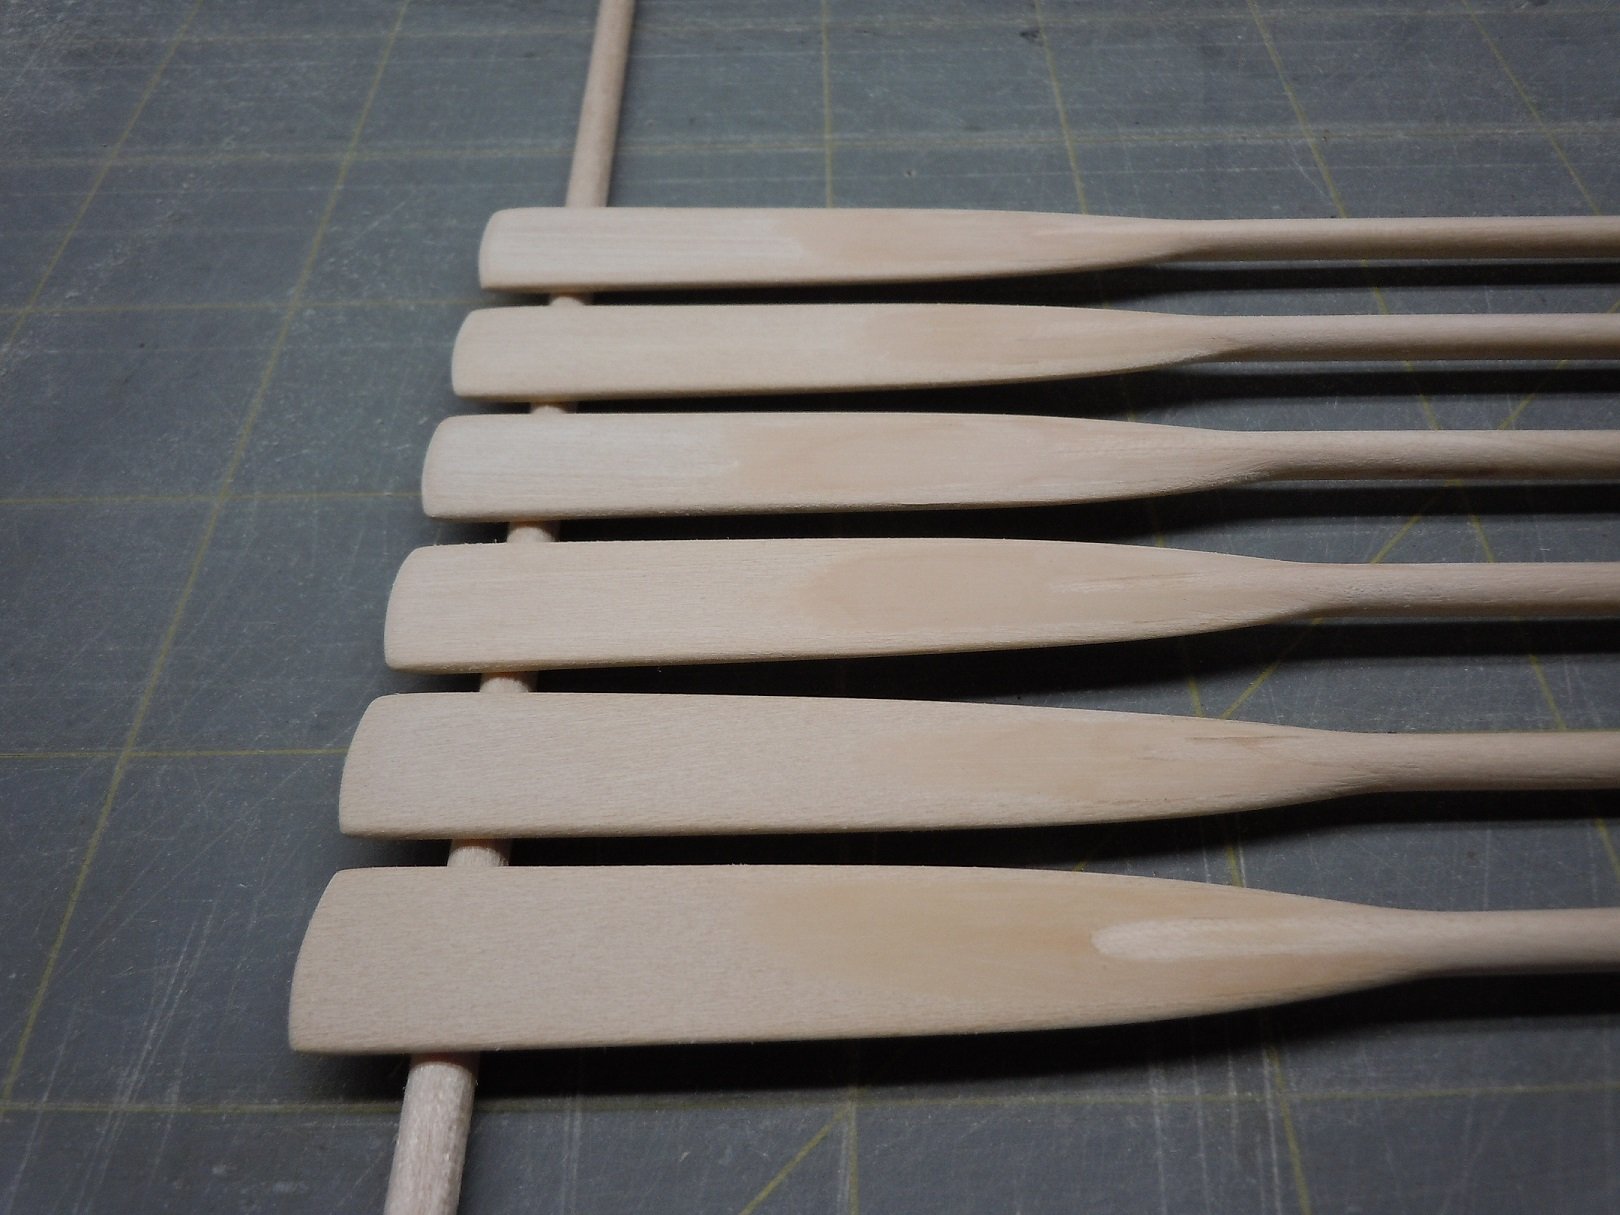
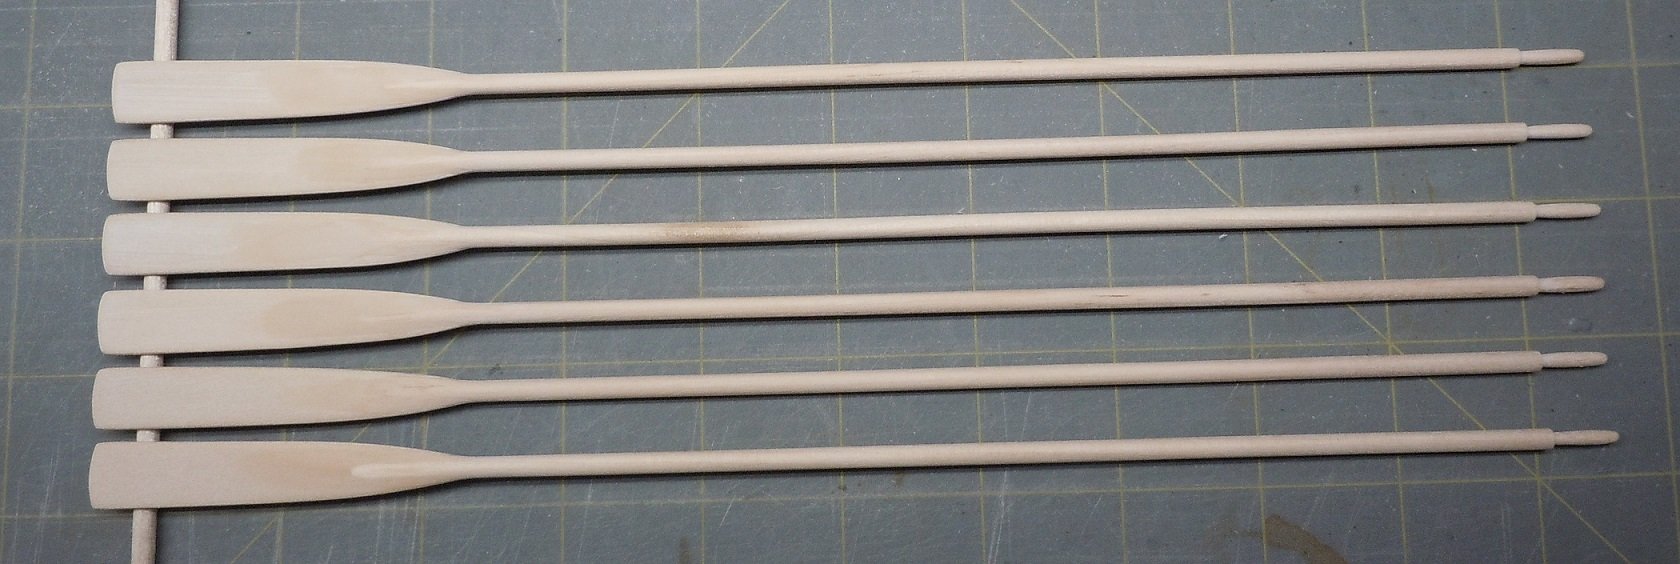
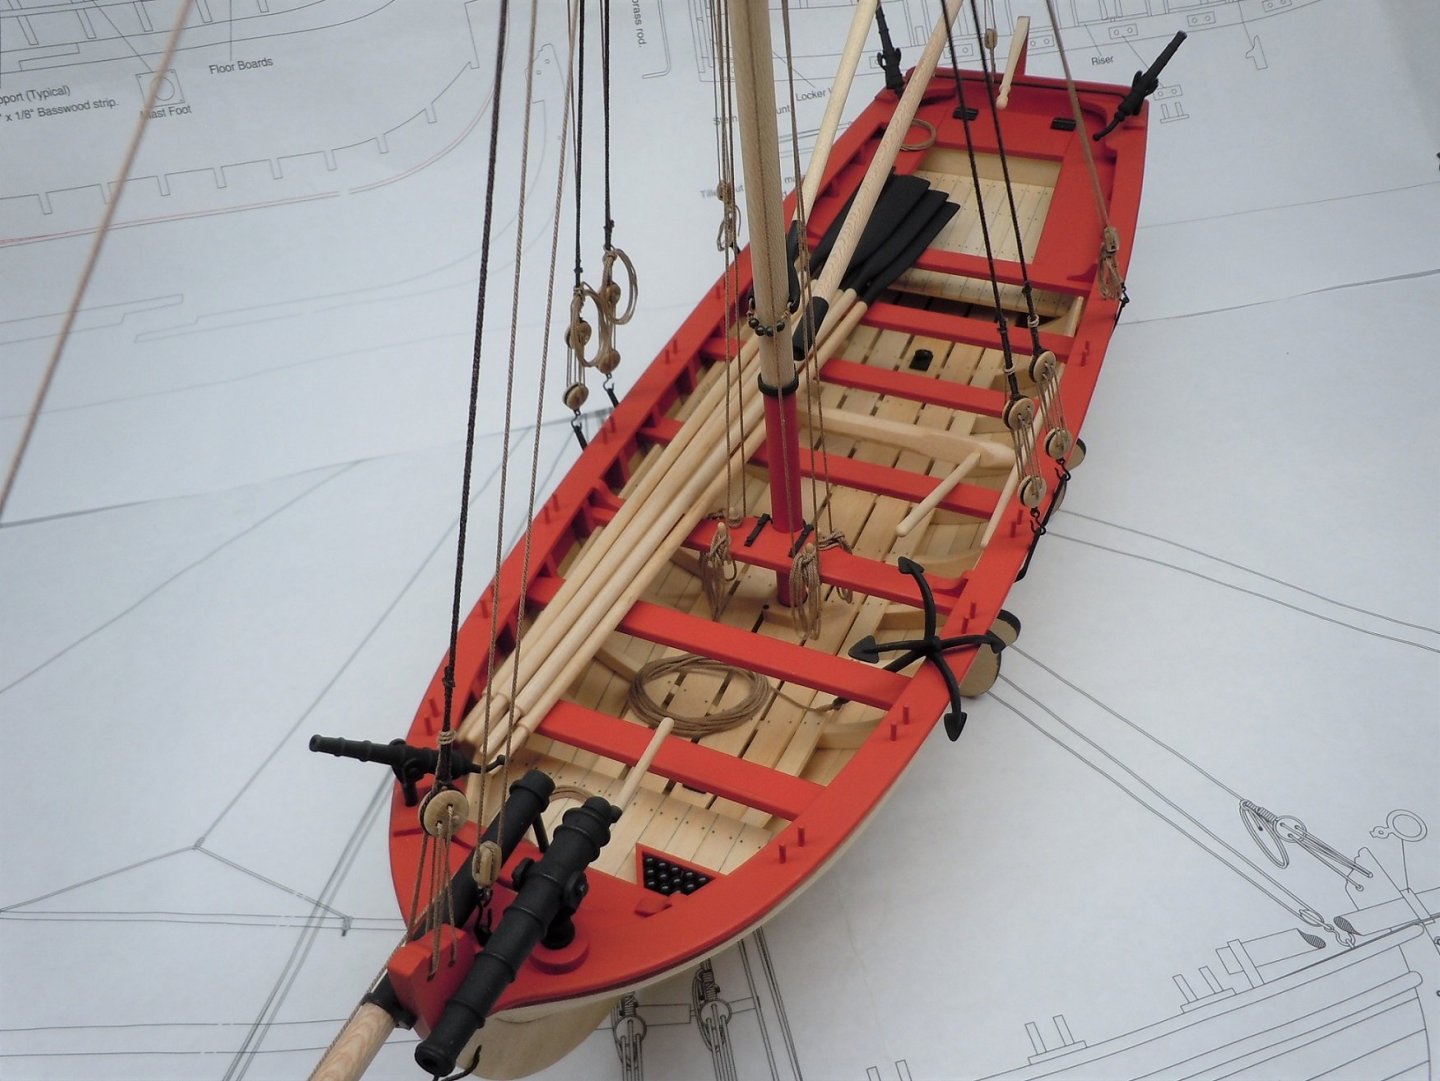
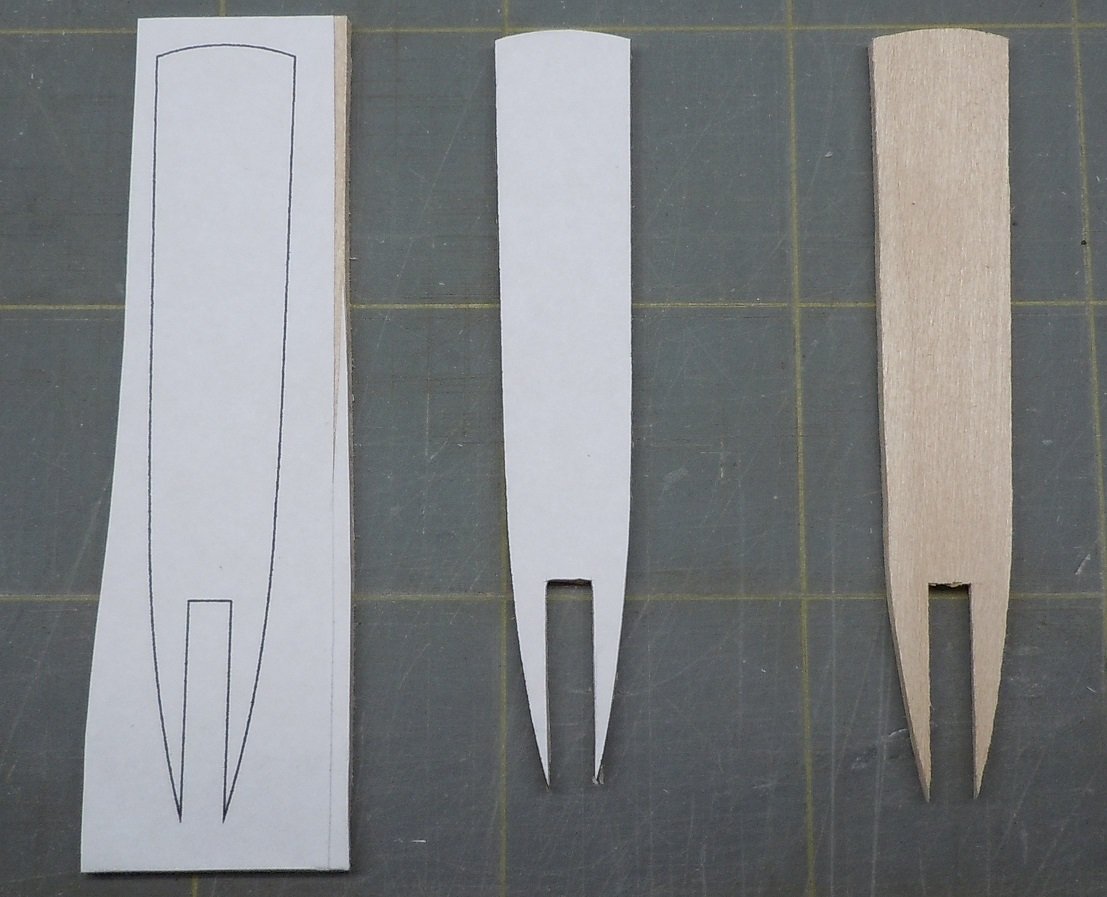
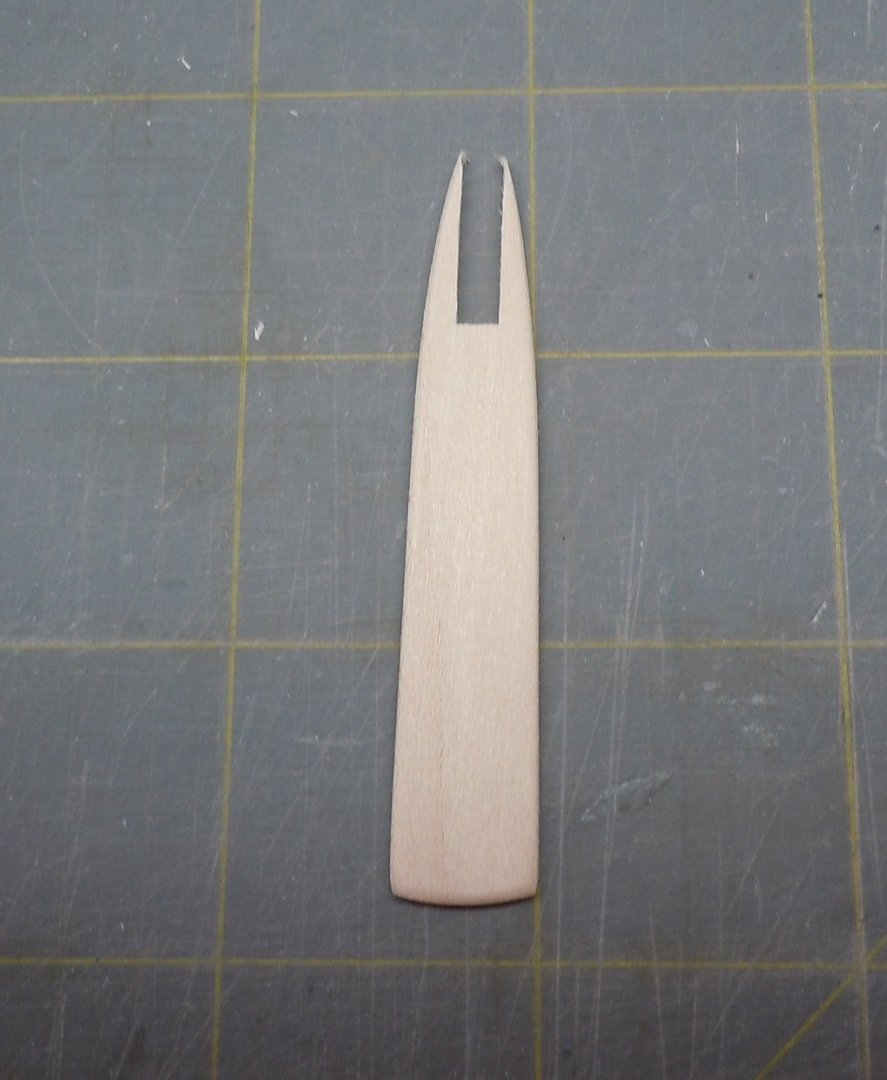
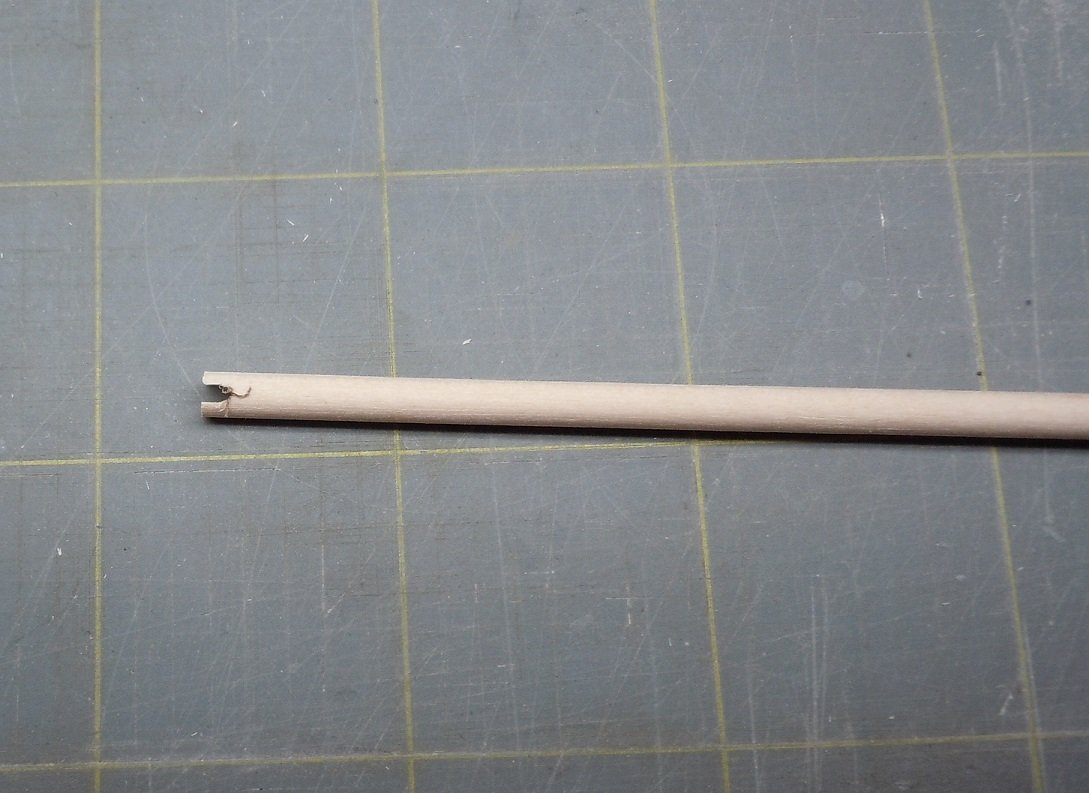
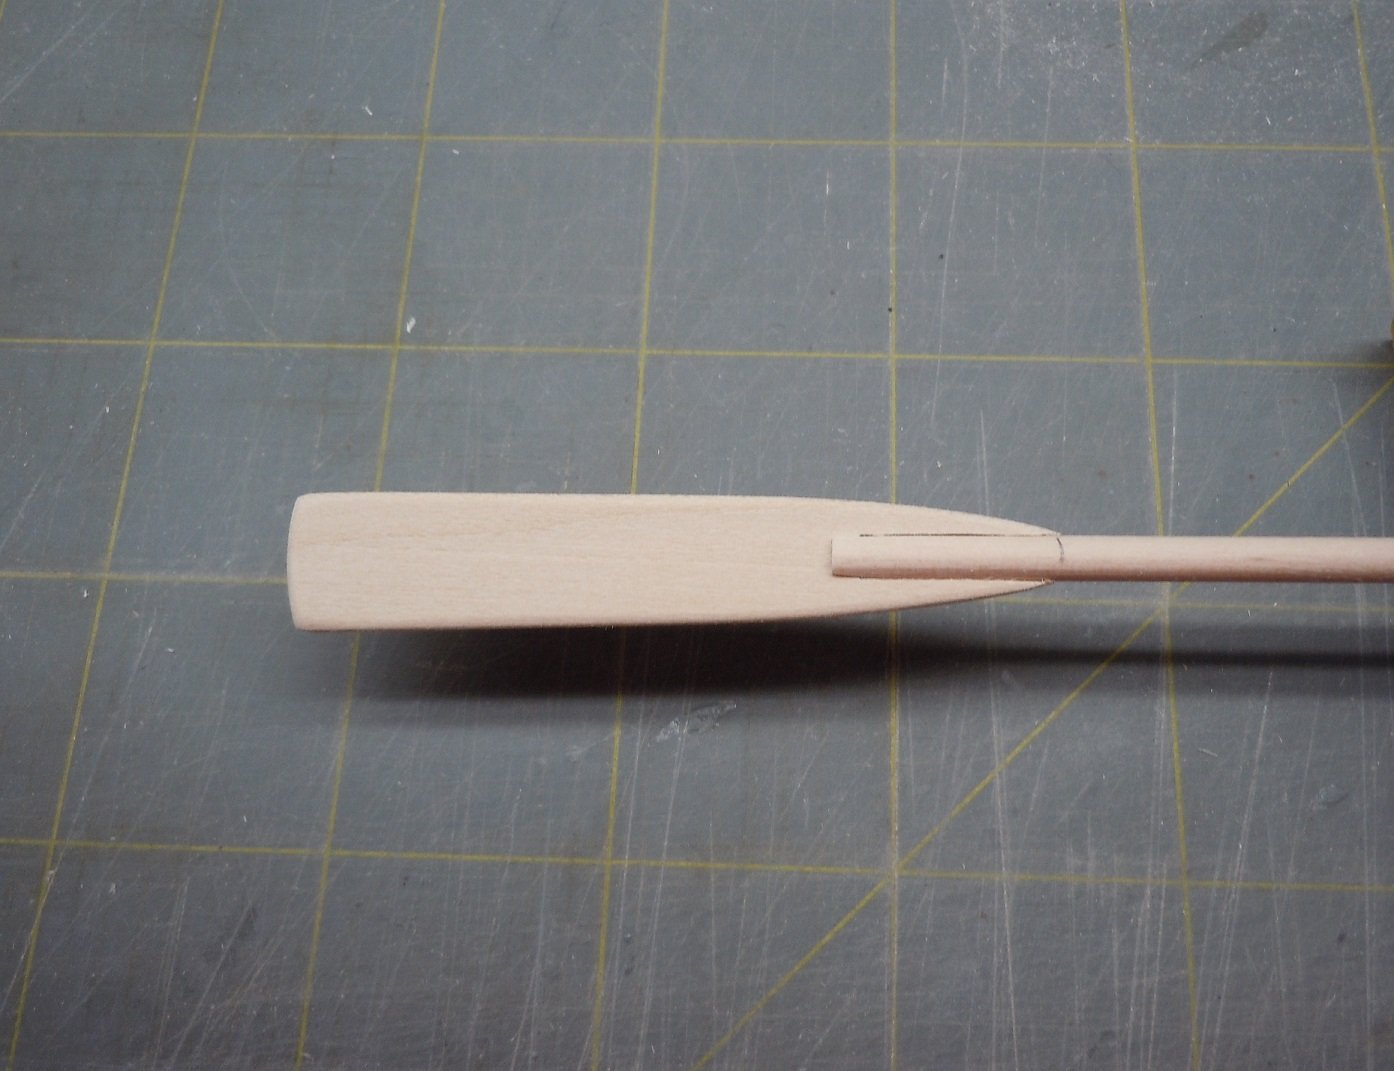
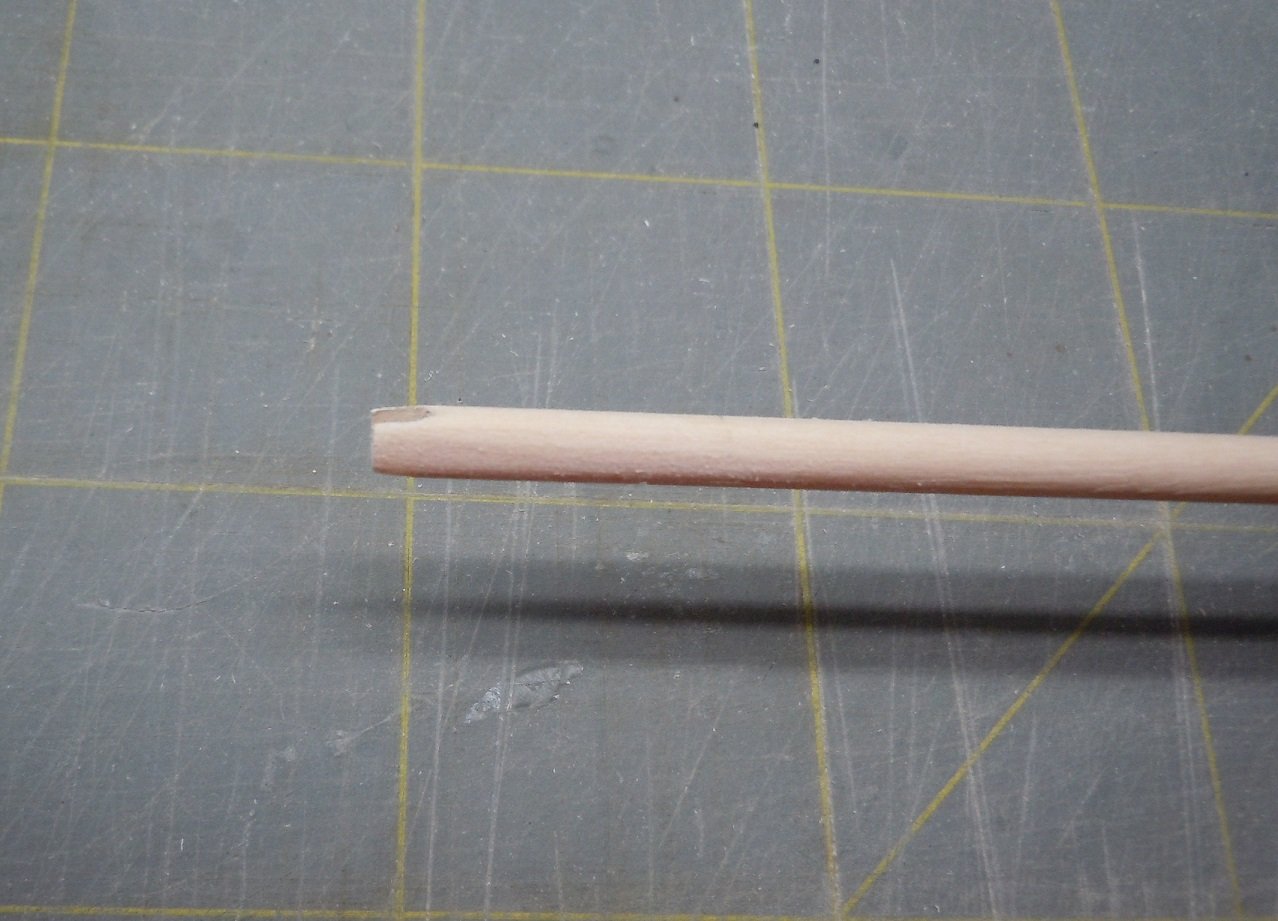
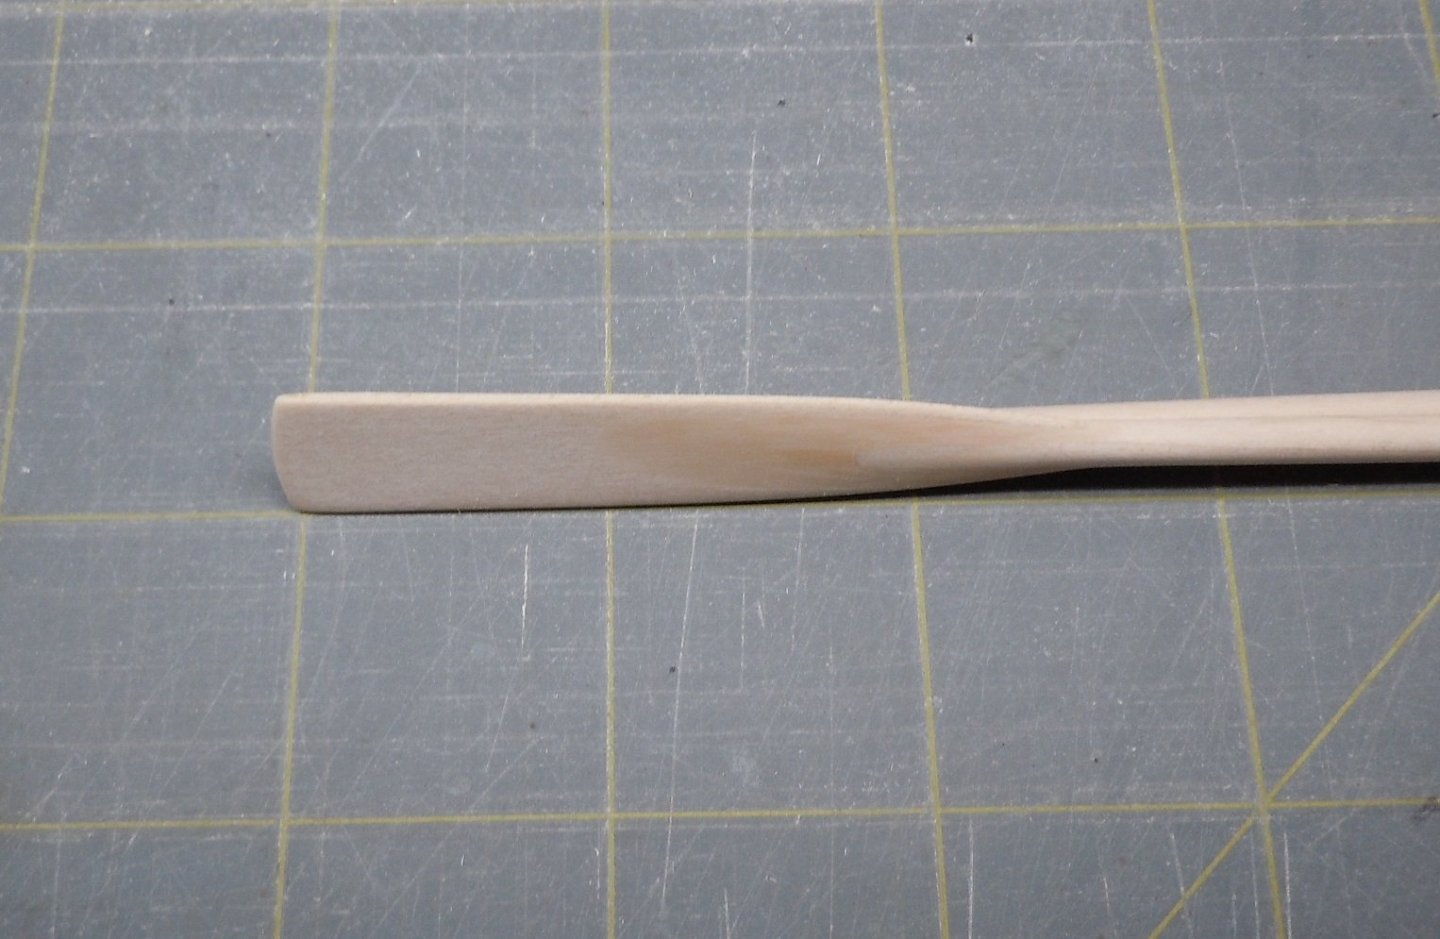
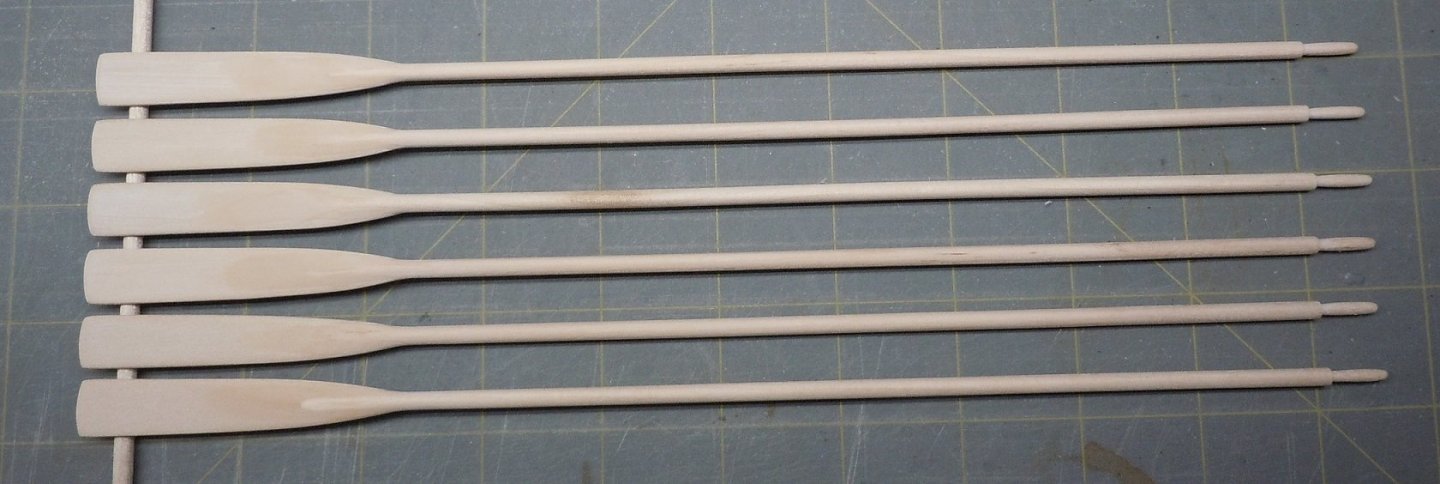
I was out of town for a while since my last post and work has been bananas since, however I have been on leave this past week so I was finally able to get back to my build. I decided to make my own oars versus using the kit supplied versions. It seemed like an awful lot of work carving and sanding flat laser cut parts into an oar, and I had to make more than just one so this is what I decided to do. Hopefully this will be helpful to anyone else considering the same. I used the laser cut part for dimensions. I created a blade pattern using Adobe Illustrator that is a close enough approximation of the kit part. I printed these patterns out and glued them to 1/16" thick basswood sheet with Elmers stick glue. After cutting the part out I just wetted the paper pattern with my finger dipped in water and the paper peeled right off. Next I sanded the blade edges to a round contour. My next step was shaping the handles, I chucked 1/8" dowel (cut a few inches longer than needed, no worry about the chuck jaws leaving marks) into my drill and used a Dremel and sandpaper to shape. The biggest challenge is making all the handles the same shape, I threw a few failed attempts away. Now I cut the dowels to length, allowing a 1/4" extra for the blade end which I notched with a Dremel cutoff disk. Next was test fitting each blade, most of the dowels needed to narrowed a hair with a sanding black as the notch in the blades was a tiny bit narrow. This was also the time to mark the dowel with a pencil line on both sides at the blade end for shaping in the next step. The dowel was then sanded to taper starting at the pencil line and terminating to where the notch fits over the blade. It should be paper thin where it terminates. I did this with a sanding block, then smoothed off the rest by hand with sandpaper. Finally the blade was glued to the dowel with thin CA. I used Minwax wood filler to blend the dowel to the blade. This product is water based, dries fast, and sands easy. It took 4 applications with some quick sanding between to build up these areas. If I intended to leave the oars natural I would have done this differently but the blades will be painted so it seems a reasonable cheat to me. Overall I'm happy they all turned out to be reasonable oar clones. I only made 6! In my view after a quick placement in the boat, 6 may even be a bit much to pose in the model. There are actually 7 tholes per side, if I made 14 oars they would take up way too much room in the boat for the look I want because bundled together, they just look like a big clunky bundle to me. I'll apply a coat of wipe on poly and then paint these this weekend, after I settle on a color scheme. In the mean time, I'm working on the final bits and contemplating making a few wooden buckets and barrels, the kit provided cast metal bucket and barrel are not very nice in my opinion. I will be moving very soon so I remain hopeful to wrap this project up before move day gets here. Thanks for looking!!


- 95 replies
-
- 7
-
-
- Model Shipways
- 18th Century Armed Longboat
- (and 1 more)
-
Looking really good Paul! You have cut and formed a ton of wood to get this far, I envy your ability to get so much done so fast. I can't wait to see your next update!
-
Looks like you're off to a great start! You were wise to make the bulkheads as perfect as possible, it will save you a lot of work later in the build.
- 66 replies
-
- 1
-
-
- 18th Century Armed Longboat
- Model Shipways
- (and 1 more)