John Gummersall
-
Posts
265 -
Joined
-
Last visited
Content Type
Profiles
Forums
Gallery
Events
Everything posted by John Gummersall
-
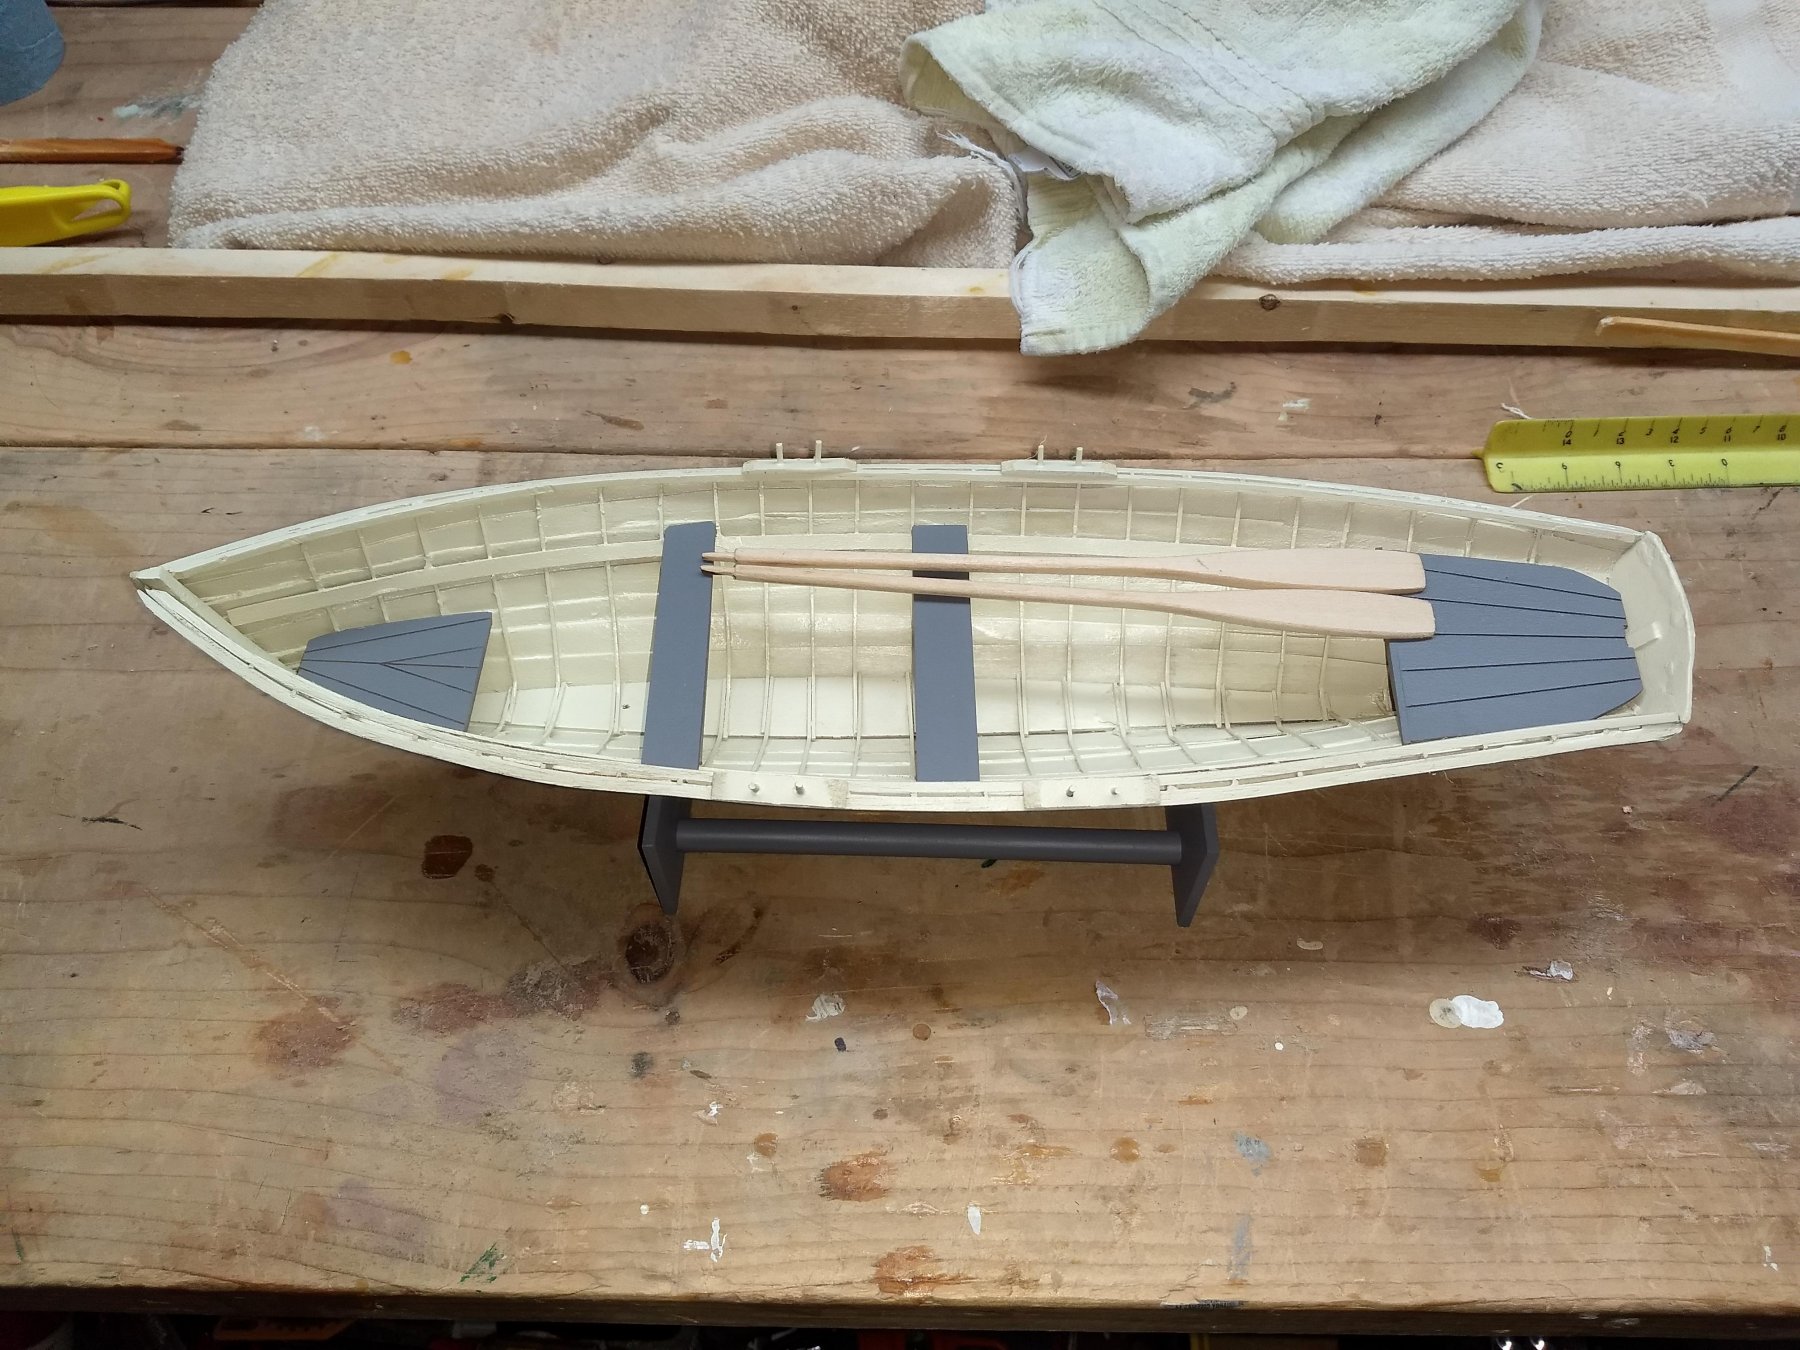
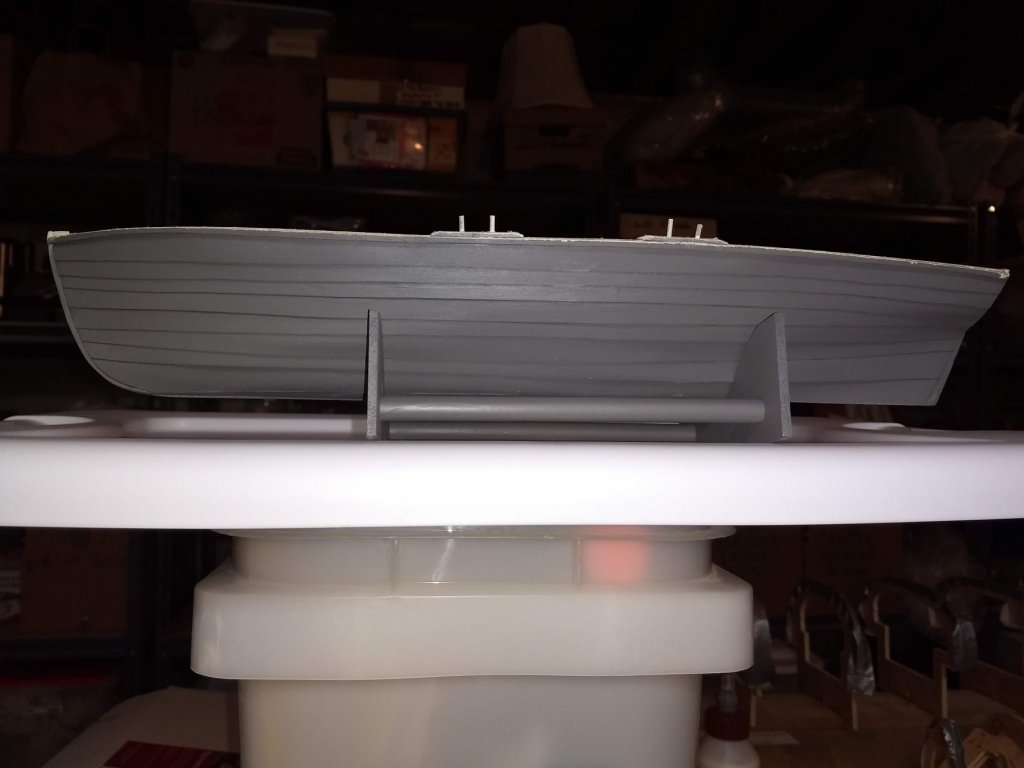
 Added some paint,,, Inside is off white Seats and topsides are grey View from the top Add the oars Just about done,,, need to add the bow ring and tow line,,,, and then do a little touch up paint,,,,
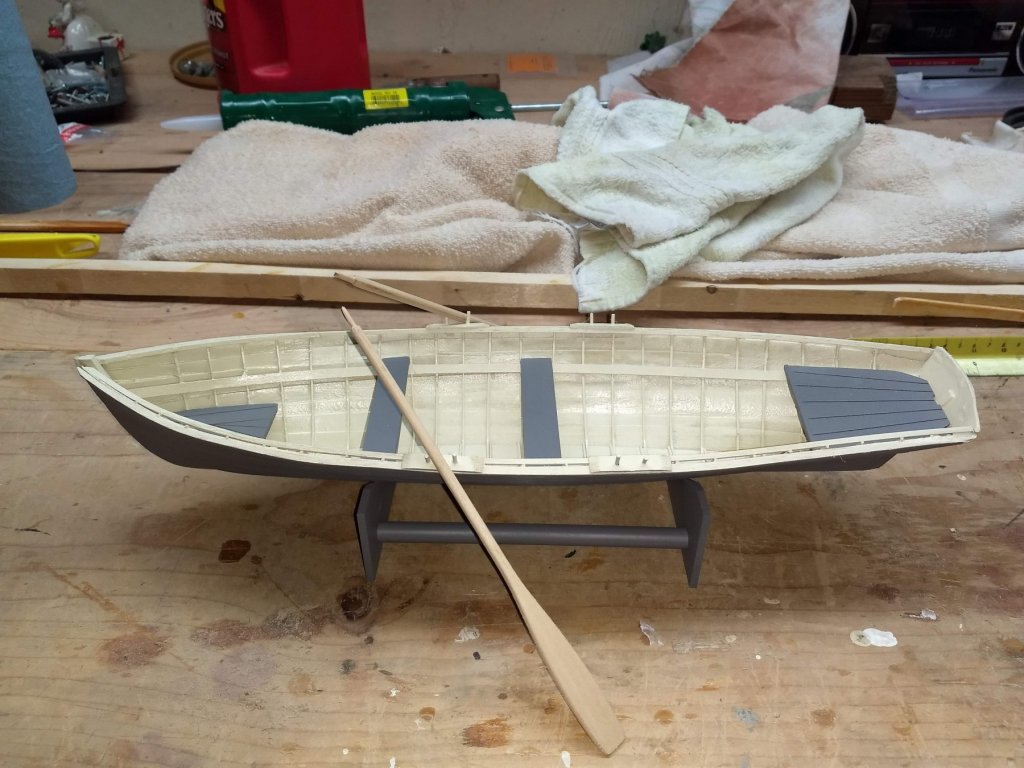

- 12 replies
-
- 3
-

-
- lincolville wherry
- finished
- (and 1 more)
-
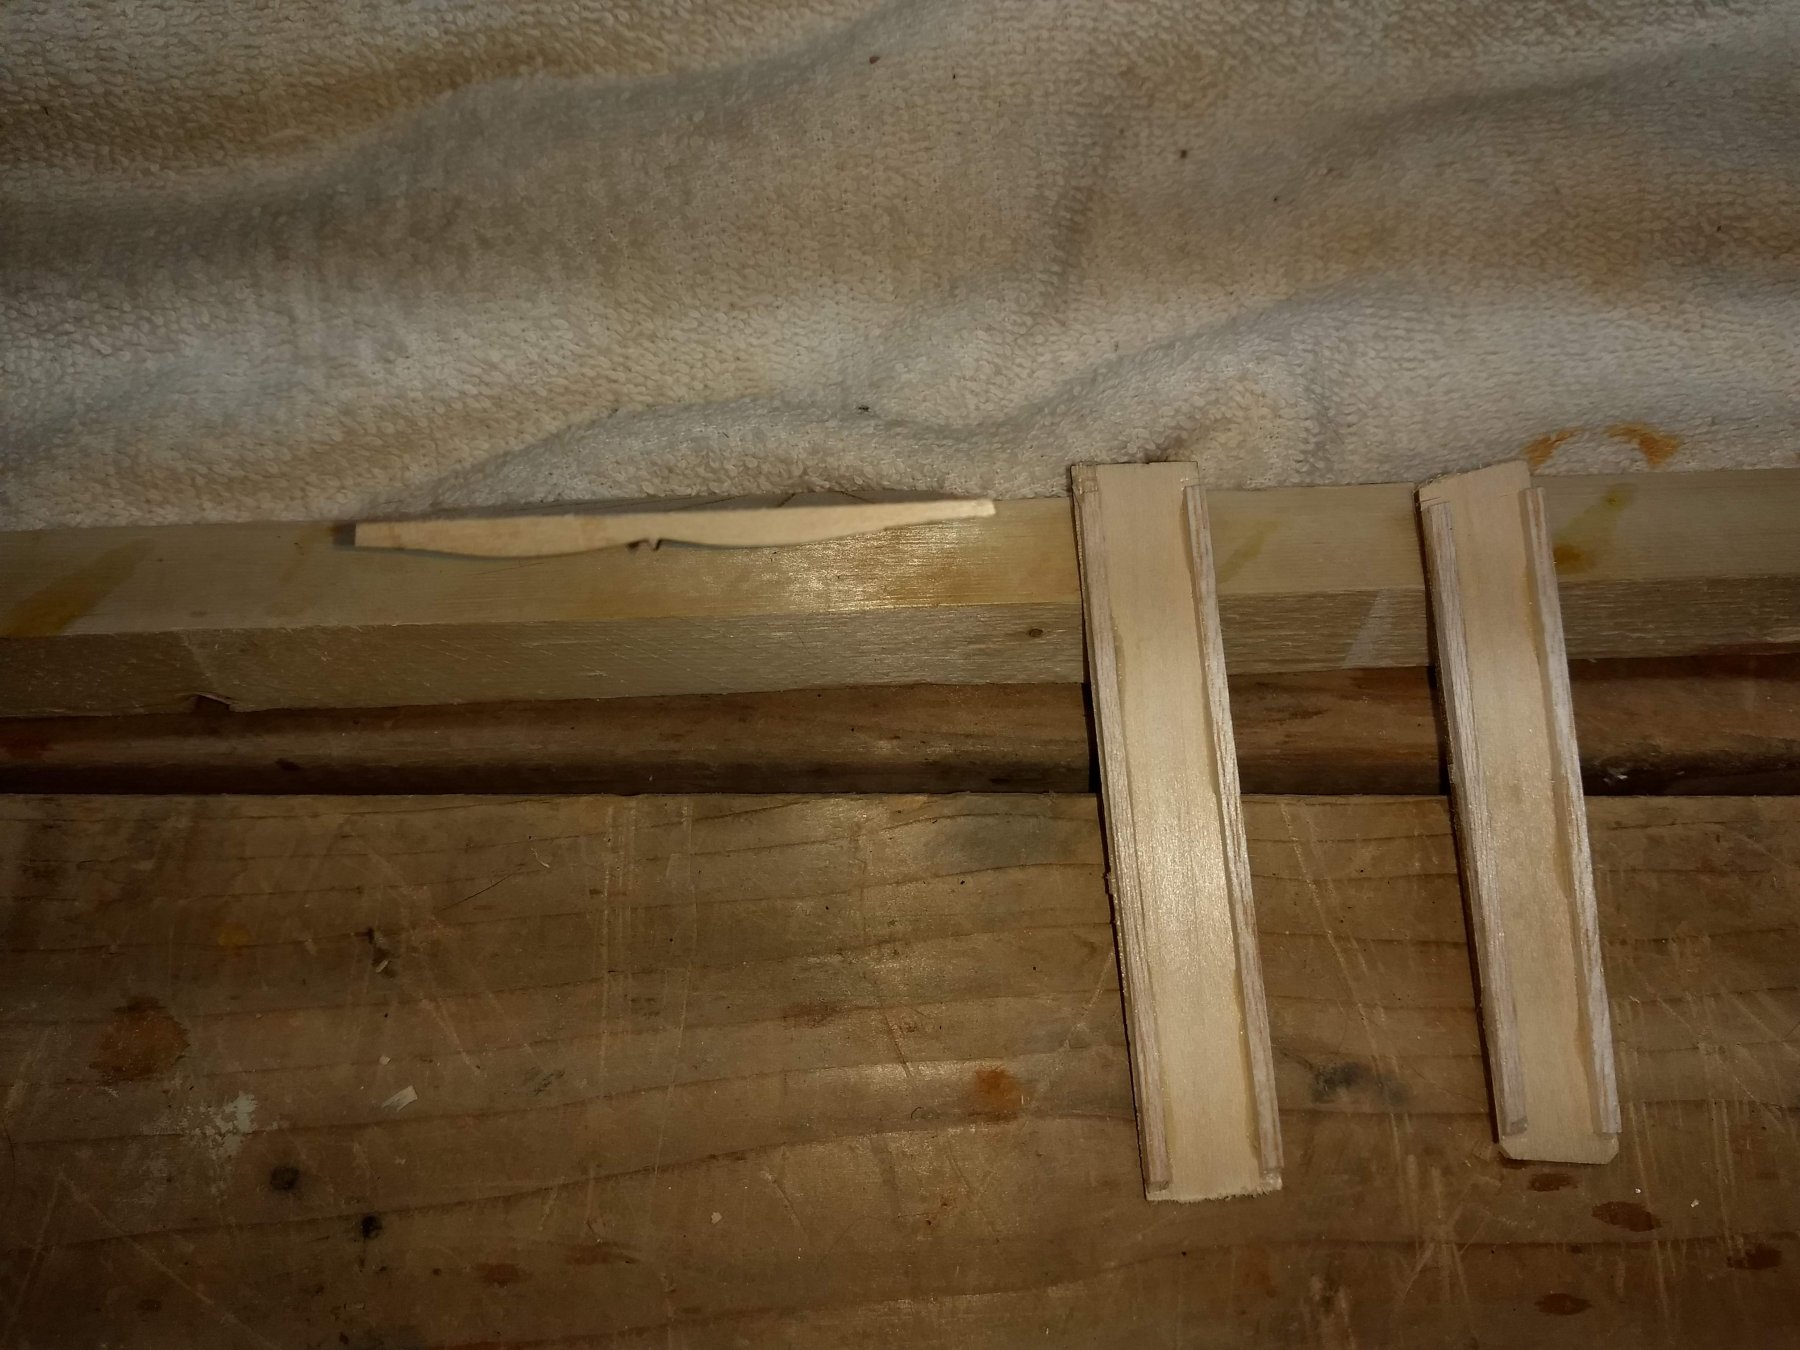
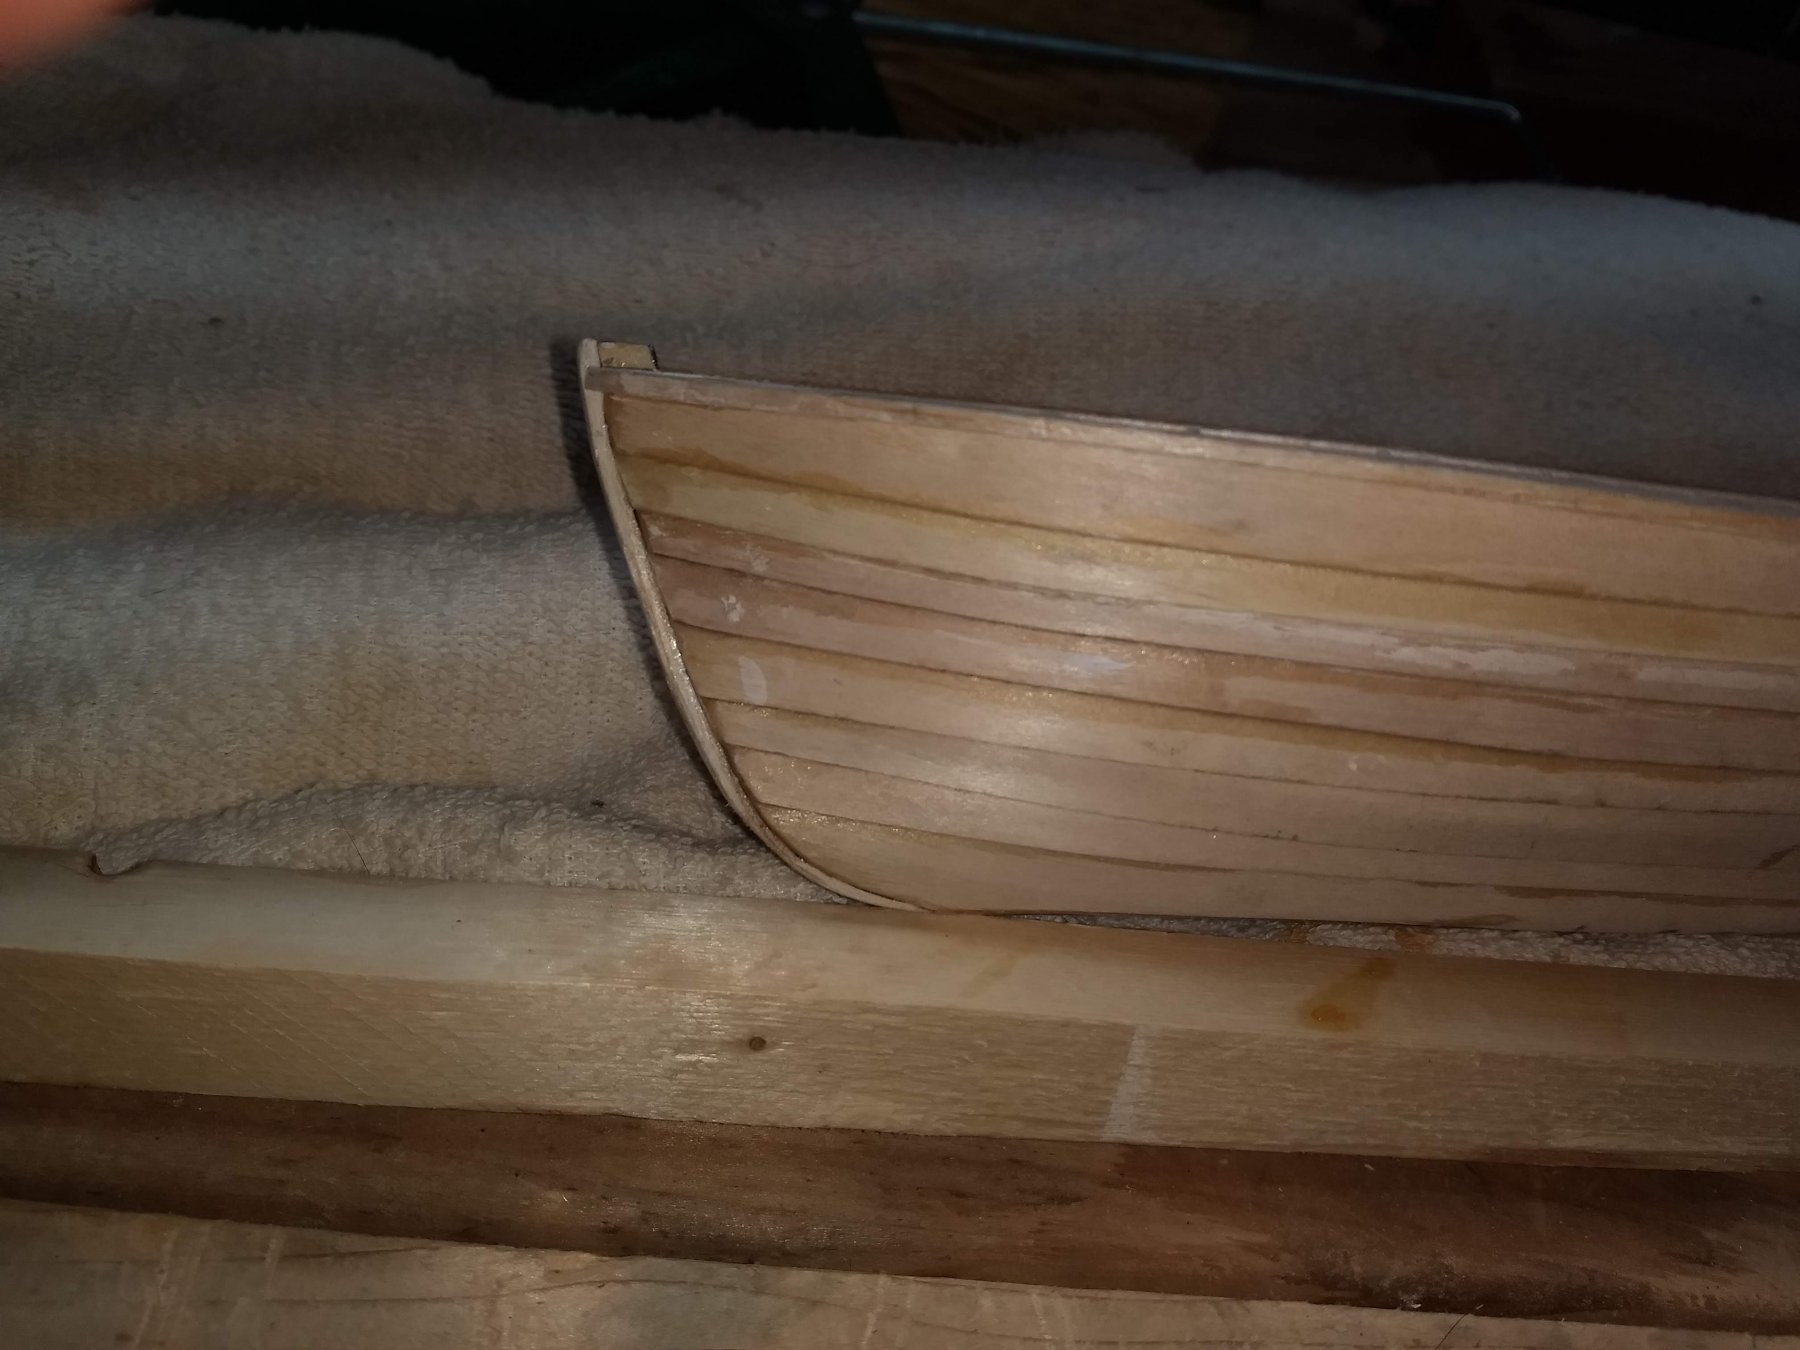
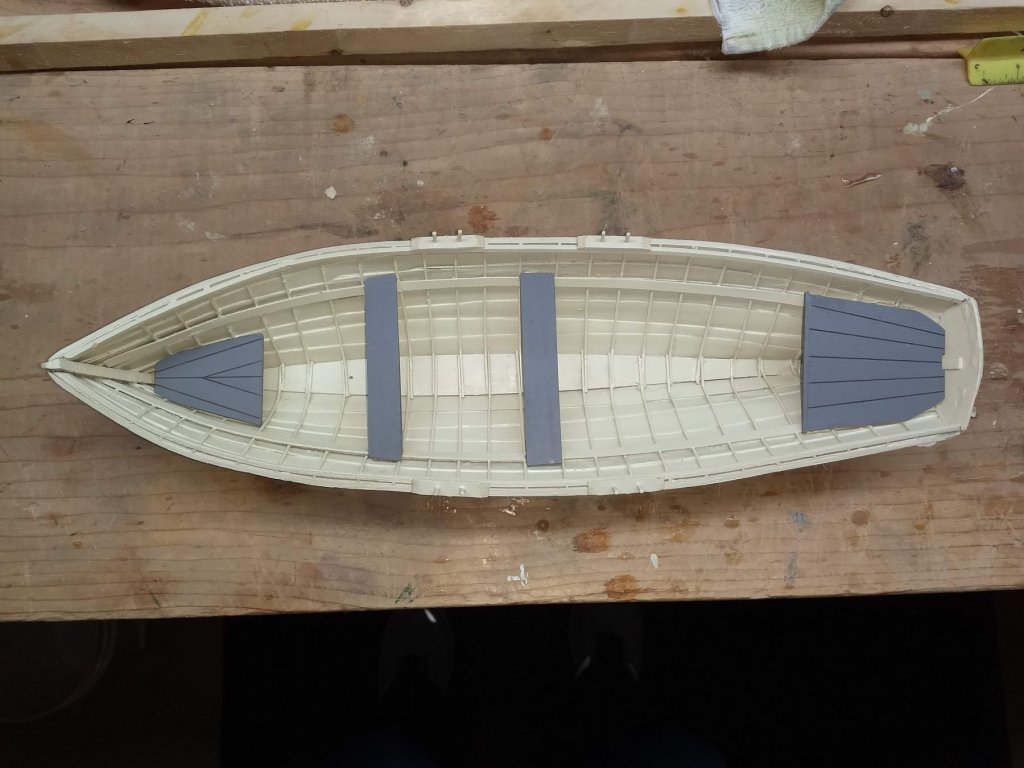
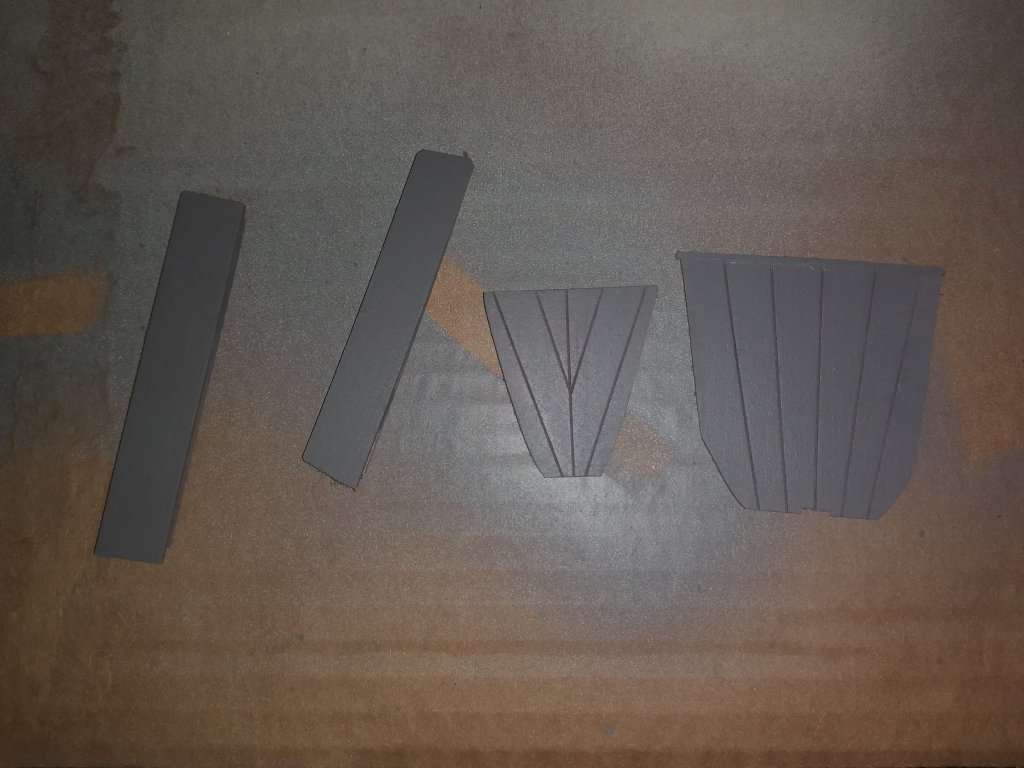
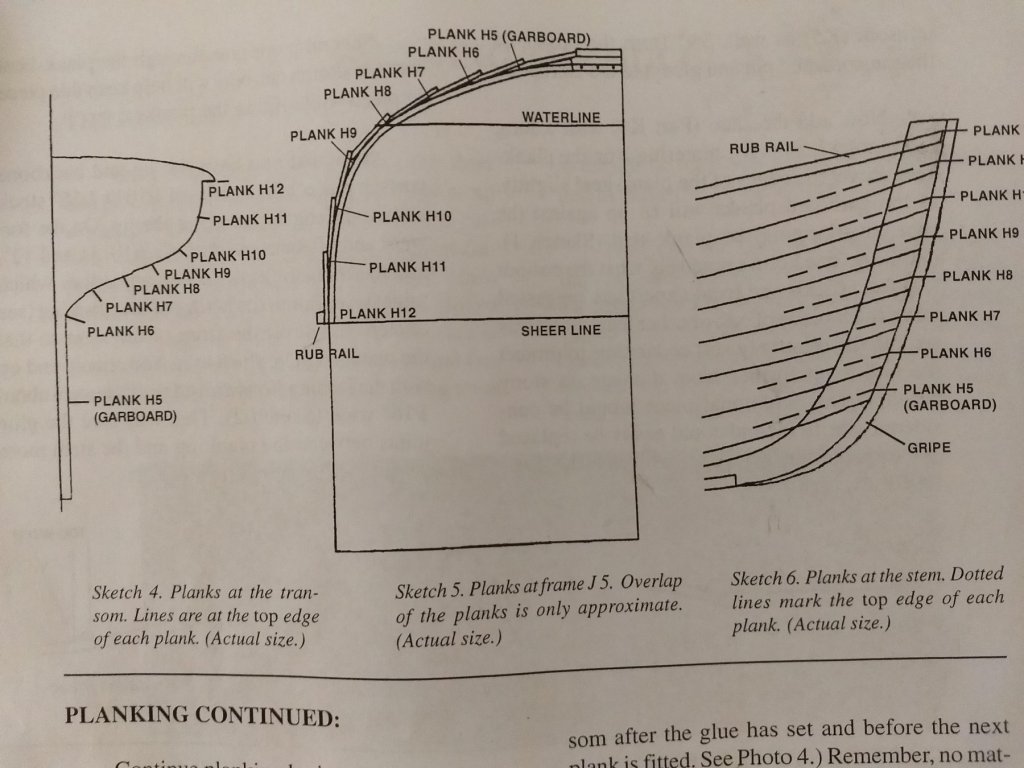
Plans call for a 1/16" gripe along the bow where the planks meet. To me that looked a little thin so I choose to make the grip out of 1/8" wood. Plans also called for the inside and outside rub rails to be 1/16" bass wood,,,, again to me it looked too thin, so I used 1/8" basswood instead The extra width also (to me) allows for the pin pads (for rowing) to better fit the edge of the boat. The 1/32" x 3/16" stringers were supposed to run only in the middle of the boat... I decided to run them from bow to stern. Again to me they just seemed to look better running the entire length of the boat Below shows the ornamental cleat added to the forward edge of the stern seat The middle two seats were intended to be thin planks. But since the ornamental cleat was added to the forward edge of the stern seat, they just seem to thin. Below show I added a 1/8" strip to the forward and aft edges of the bottom of the two seats. The seats will look better (stronger) when they are placed into the boat. Normally at this time, the seats should be glued into the boat. I have them out at this time for painting,,, Painting comes next,,,,


- 12 replies
-
- 1
-
-
- lincolville wherry
- finished
- (and 1 more)
-
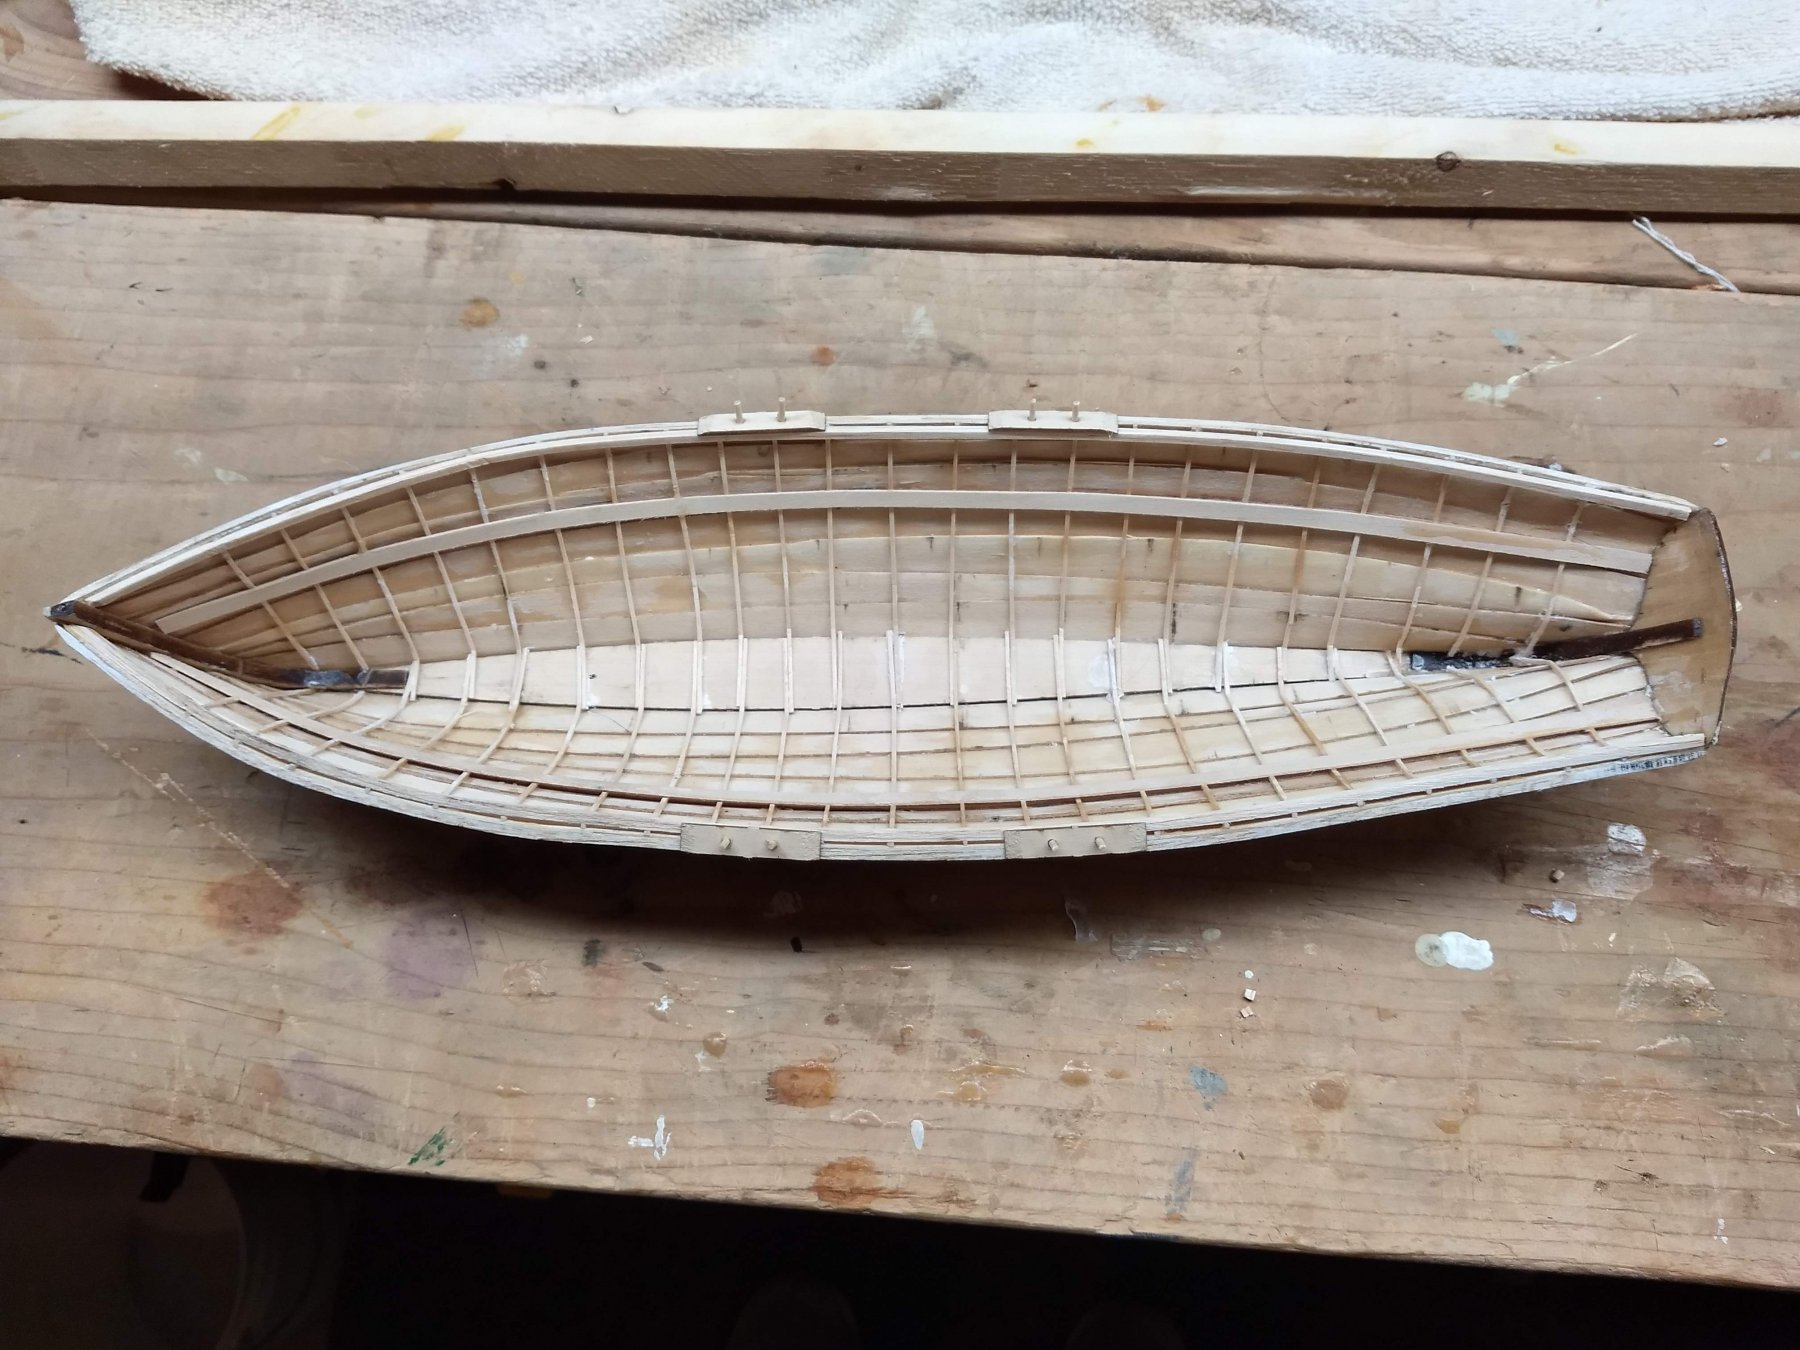
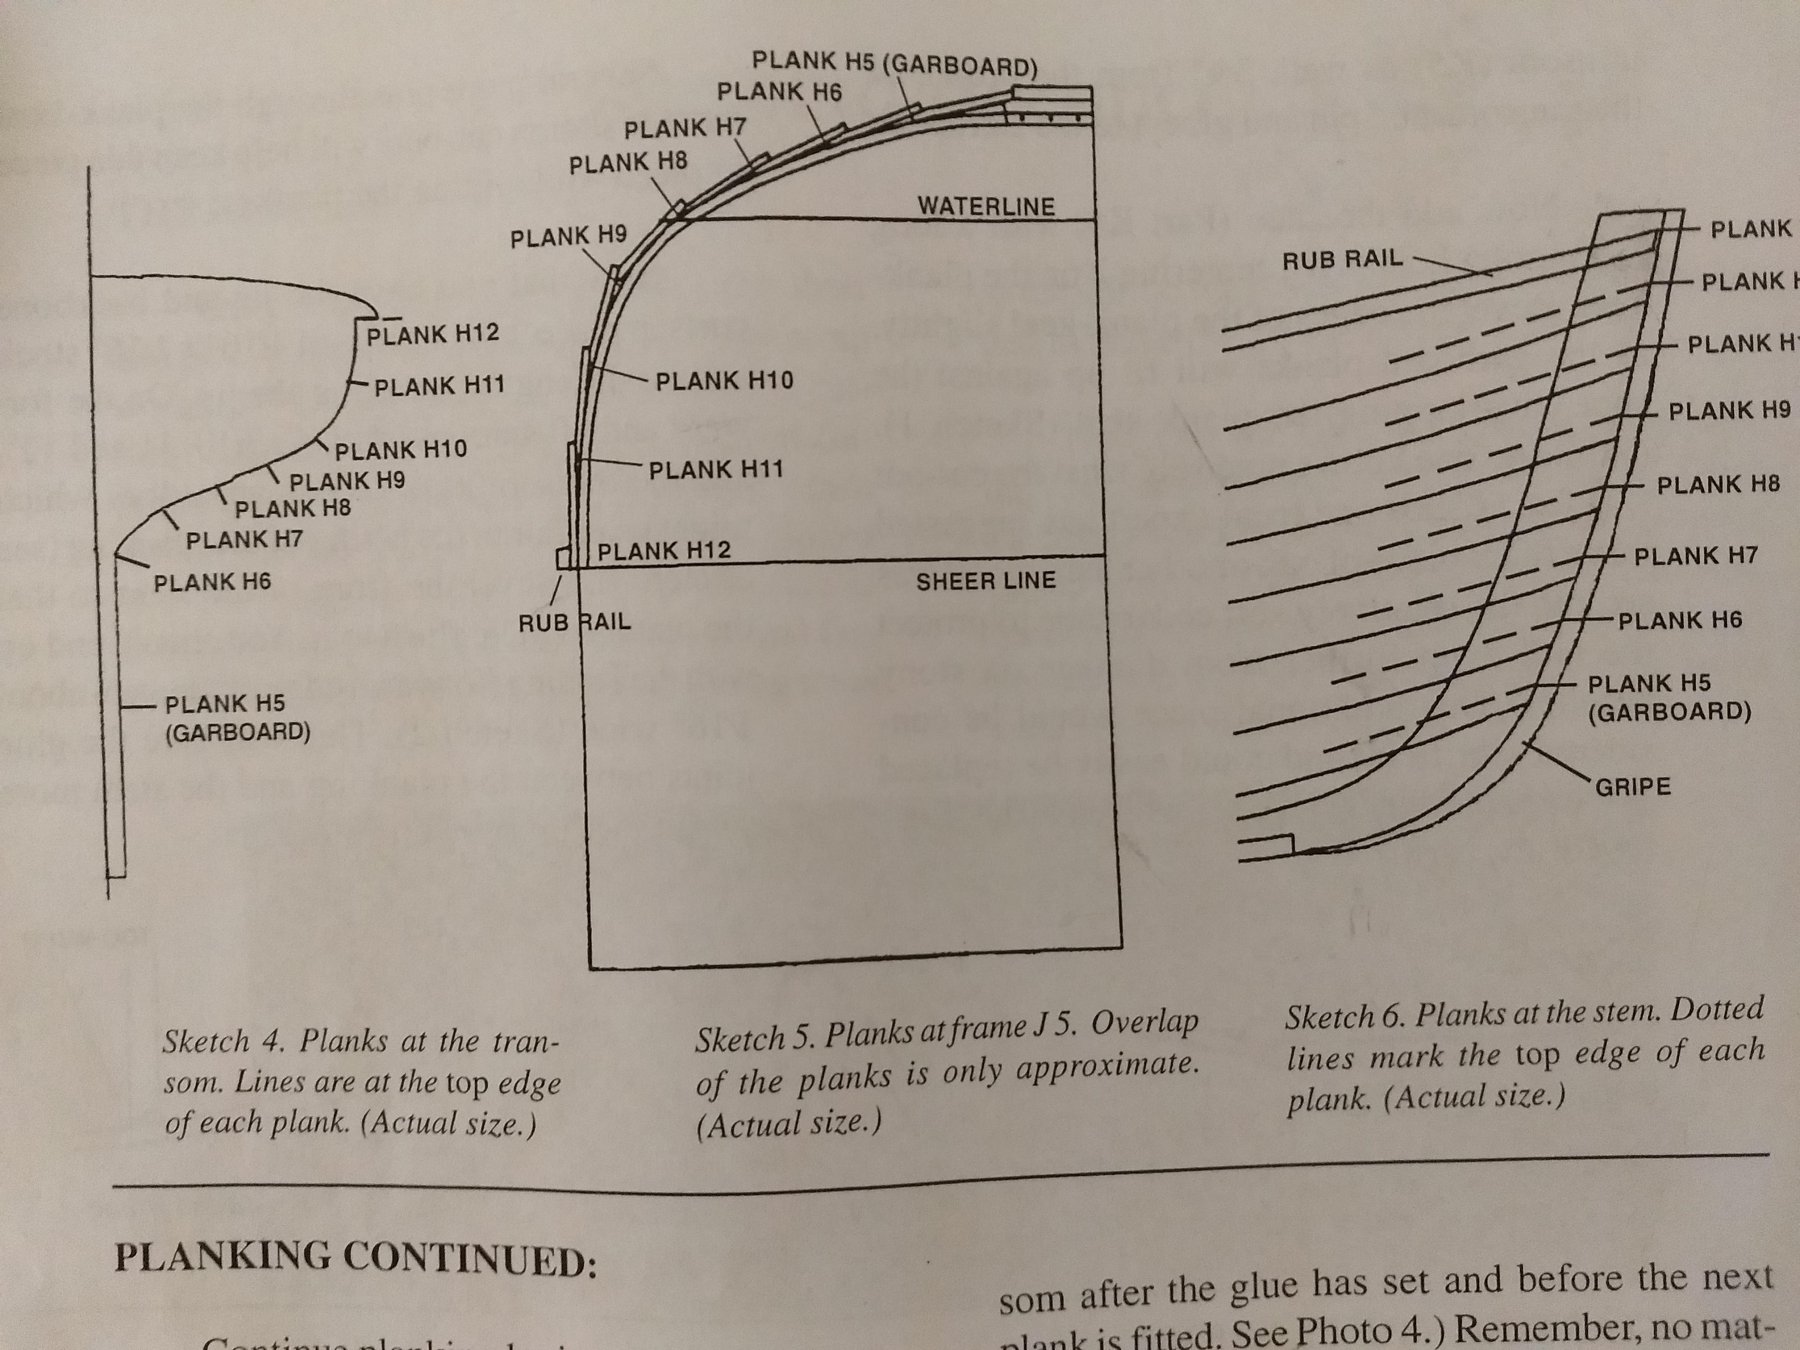
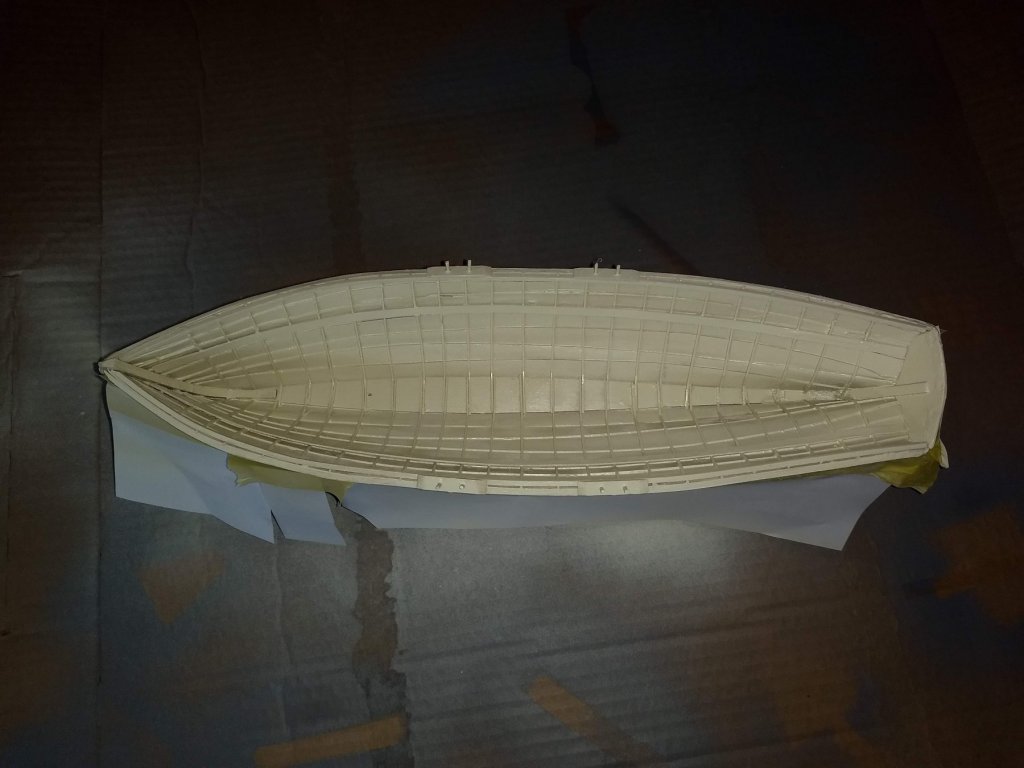
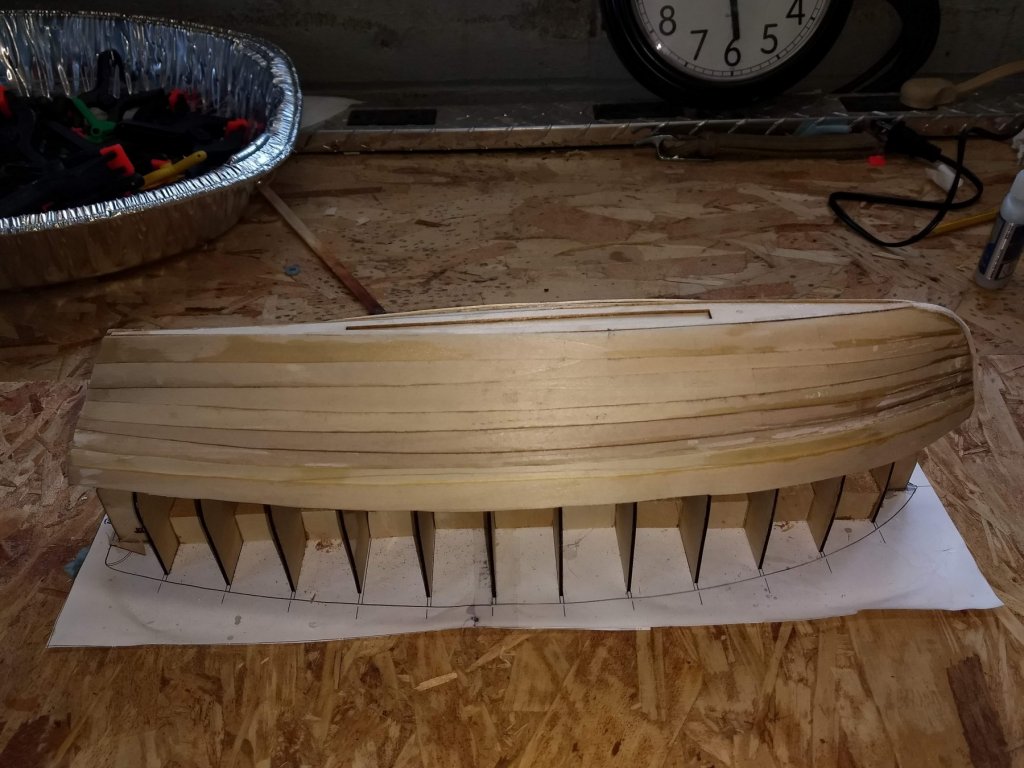
Planking complete..... Planking went very easy,,,, Probably too easy as I see to have an issue by not really paying attention to what I was doing,,, 🙂 The planks have a very subtle difference (to me anyway) as to which end is the bow and which is the stern. Will all the planks soaking in water as I pulled each out to glue to the jig I have a feeling I glued a few of them reversed,,,, ugh. From the outside (which is all we see as the wherry is being built) all looks good. I matched up the jig markers on the planks and all seemed OK. But when the boat was taken off the jib it is obvious I had reversed a copule of the planks. Planking on the inside has a couple planks overlapped too much and some overlapped less than should be. I might suggest next time to maybe mark each plank as to the bow and stern. It is too easy reverse some of the planks if you are not paying attention. A rookie mistake,,, but then again I am a rookie,,,, This is my first model with planking,,, making mistakes is how we learn.... Hopefully I learned something there and will pay more attention to my next planking model 🙂 Anyway,,,, need to sand the outside and then move on to the inside of the wherry....
- 12 replies
-
- 2
-
-
- lincolville wherry
- finished
- (and 1 more)
-
Danny, I am sorry, I did read the top of the Build Logs for Kits page titled "Starting and Naming your Build Log"... But looks like I did not read it carefully enough. I now see what I was missing in the build log title. Thanks for putting up with my poor reading of the "Starting and Naming your Build Log" documentation John
-
Danny, Thanks for the information... I now see it in "Small Craft" section and index. I am sorry, I just assumed my log was going into the Wooden Ships section. Never thought to look in other sections - For the future, when I create a new log, how do I know what section it goes into? Is there some field I missed that would indicate what section the log is created? Thanks for your time - I appreciate it John
-
Danny, I joined MSW back in early January. At that time I started a log for the Lincolnville Wherry. I see since then the Index has been updated several times, yet my log has not yet shown up in the index. I was just curious if I failed to update some field that is preventing my log from being included when the index is rebuilt? If it is just a question of your time, then no hurry on my part... I totally understand. I just wanted to know if I missed some step in creating my log, Thanks for your time John
-
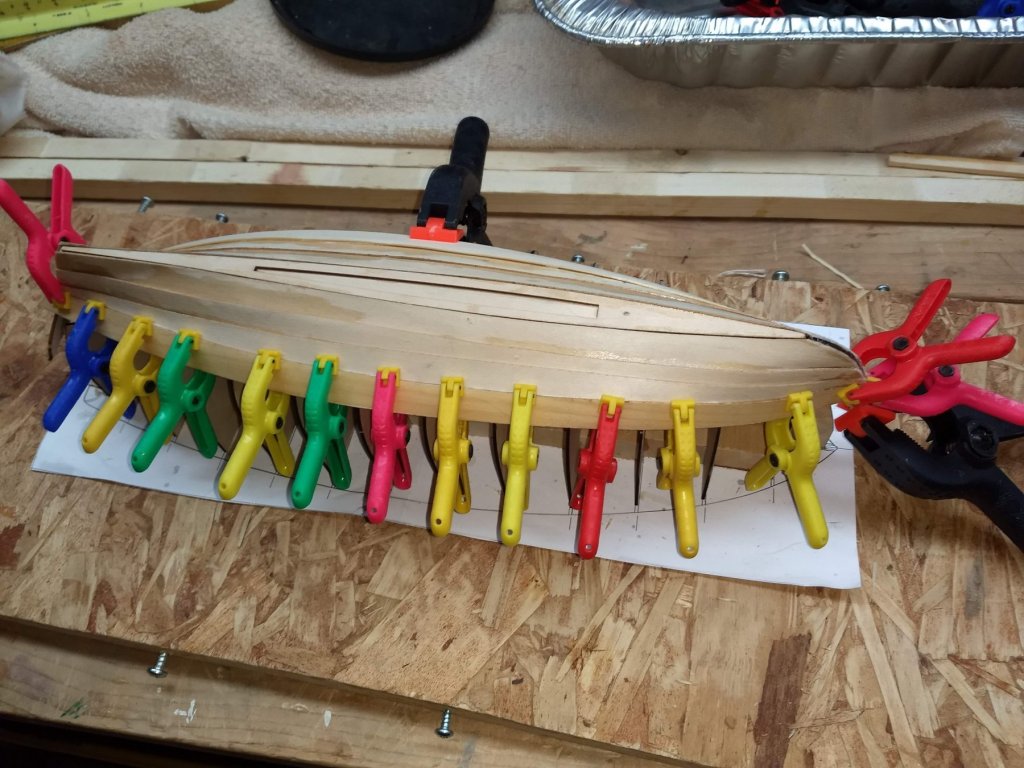
Planking going along very well,,, should complete the planking in a few days,,, I am not working at it full time Die Cut planks are perfect.. As the instructions indicate, soak for a few minutes, position the plank at the bow section, and then let the plank go over the stern to be trimmed later. As I noted in earlier posts, I am the world's worse CA "glue'er"... I am not worried about the CA glue marking on the planks as the boat will be primed and painted in the end.
- 12 replies
-
- 1
-
-
- lincolville wherry
- finished
- (and 1 more)
-
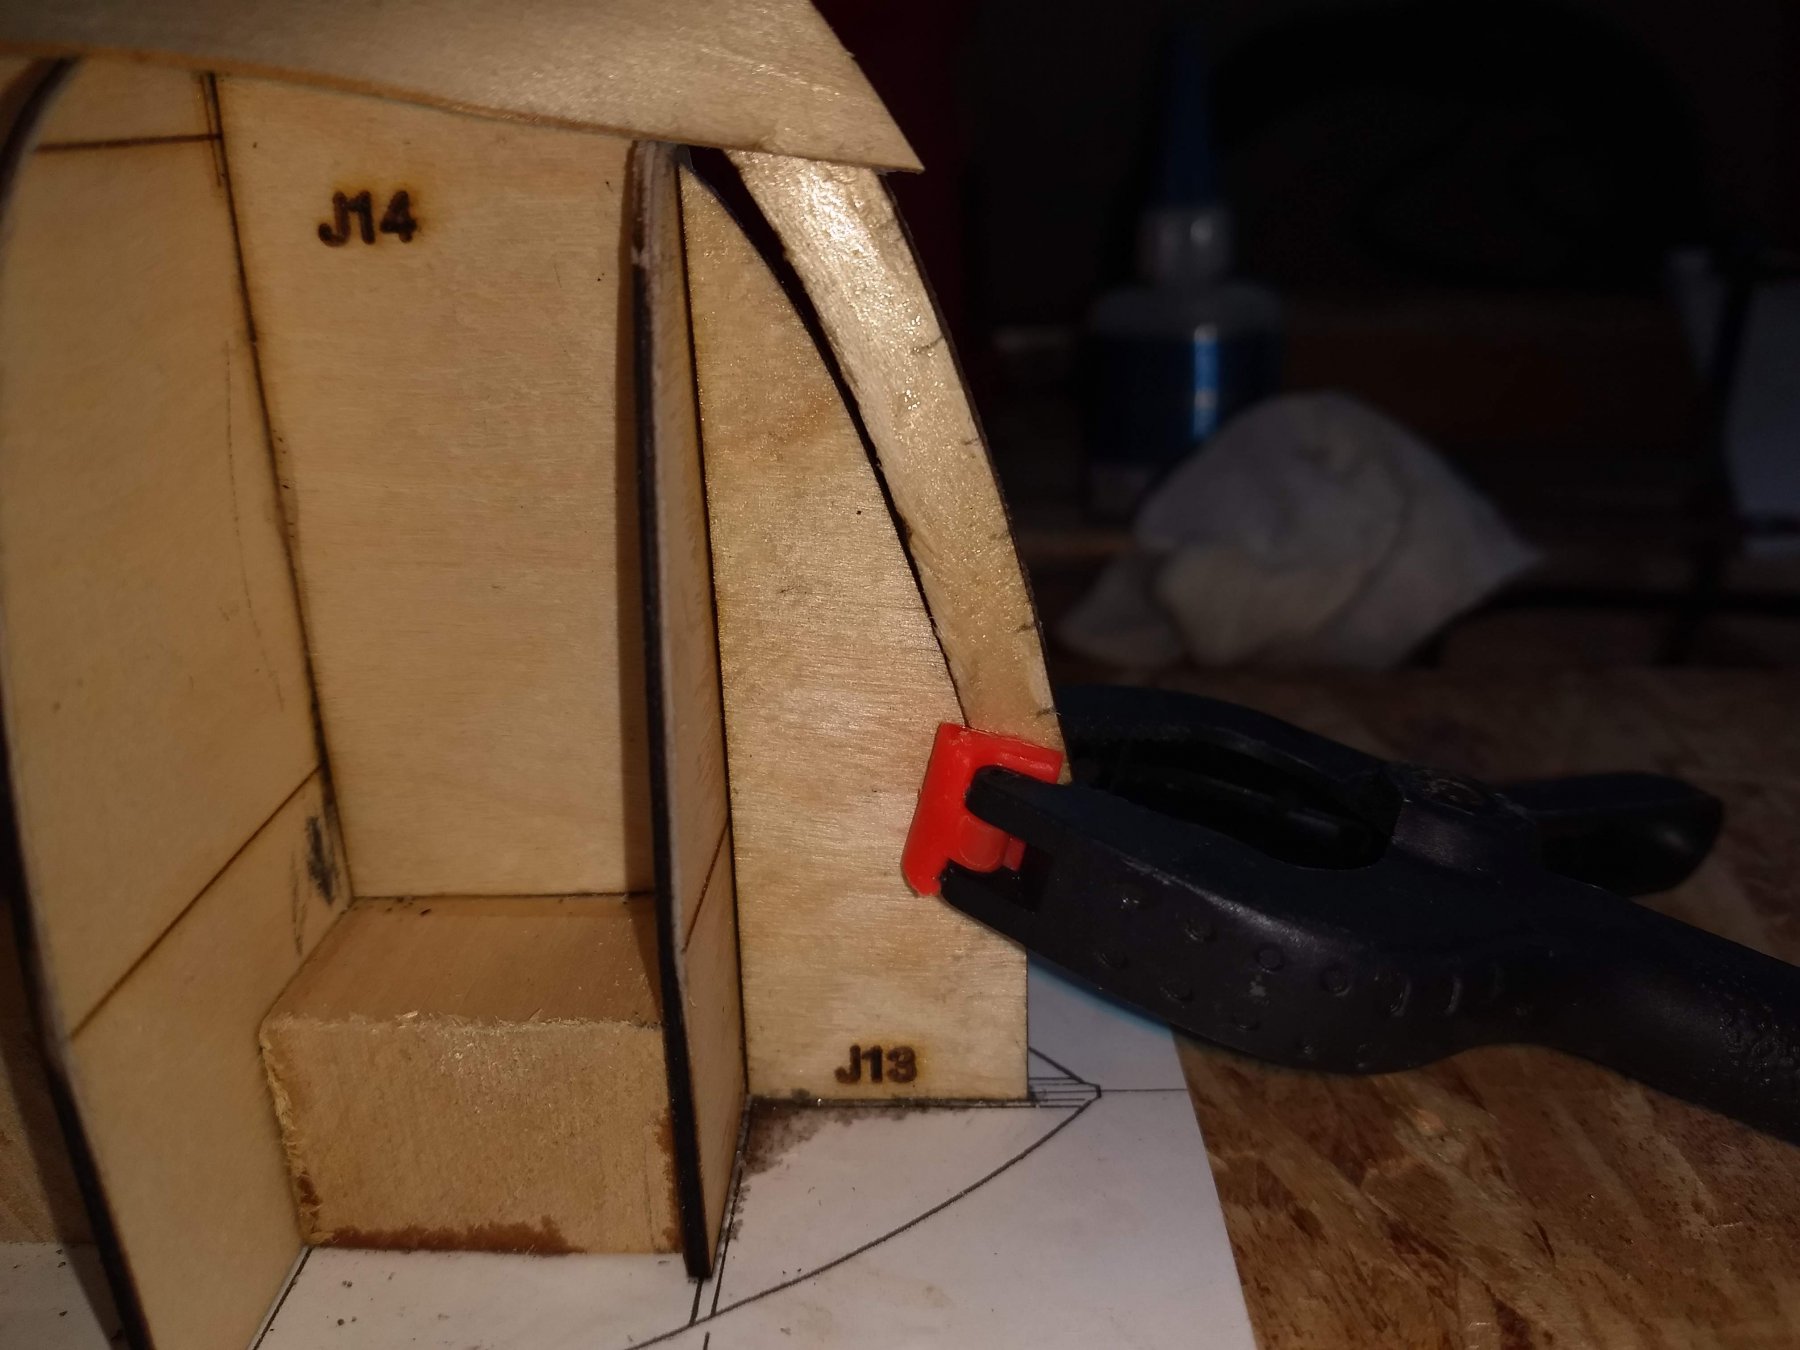
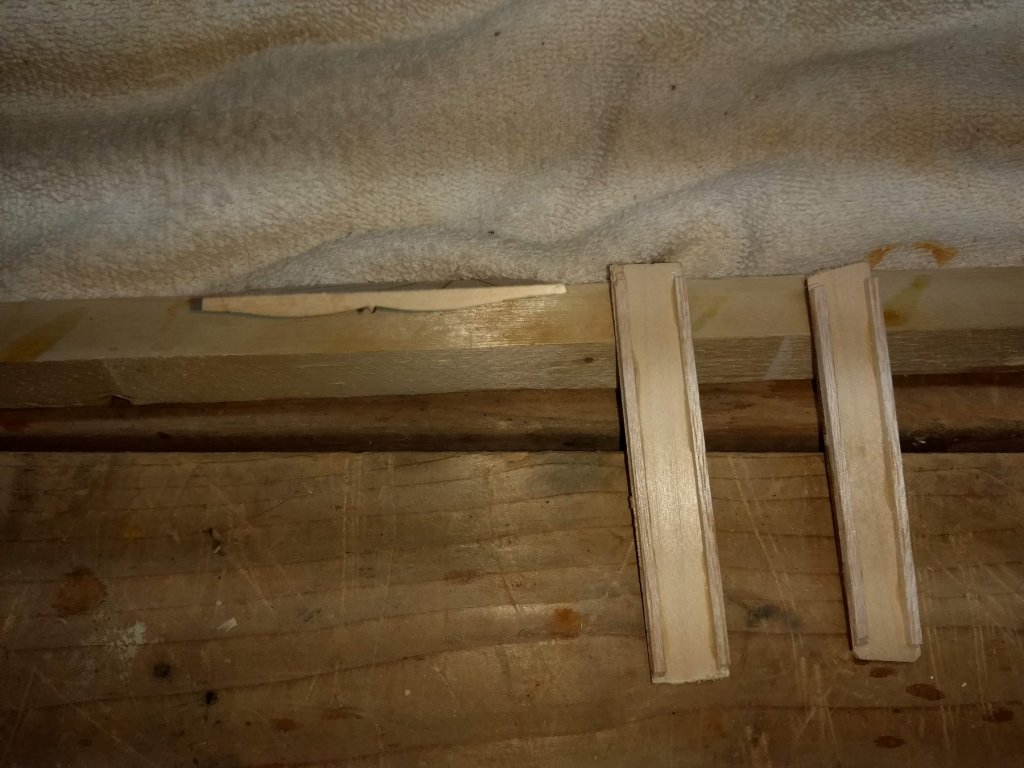
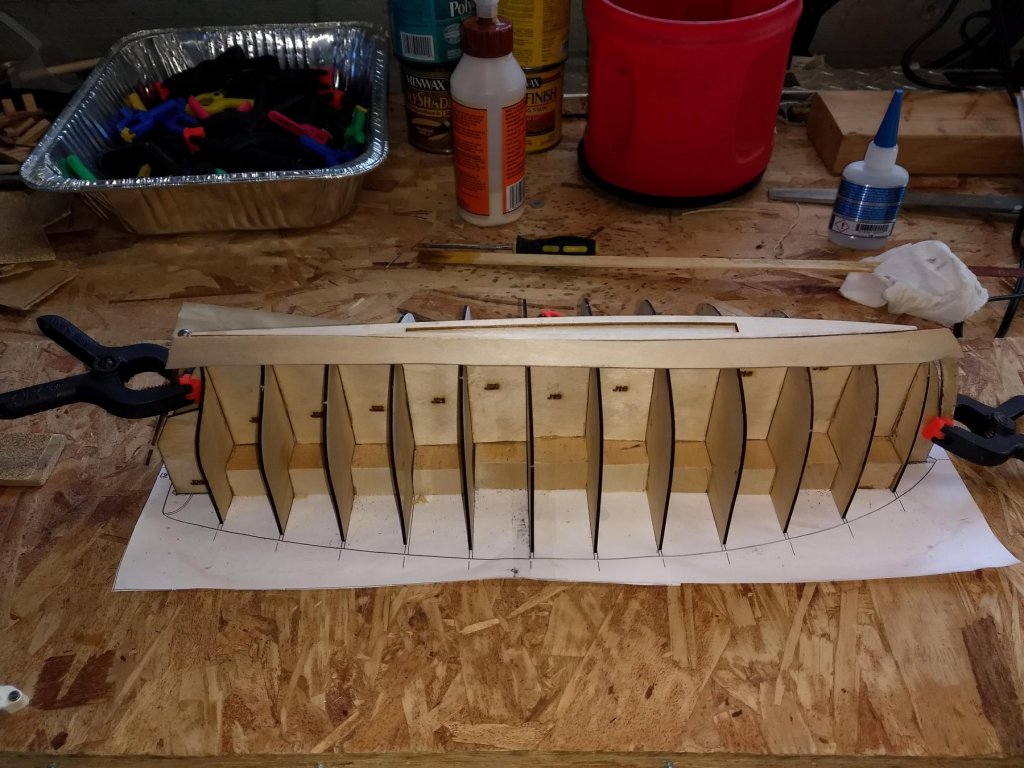
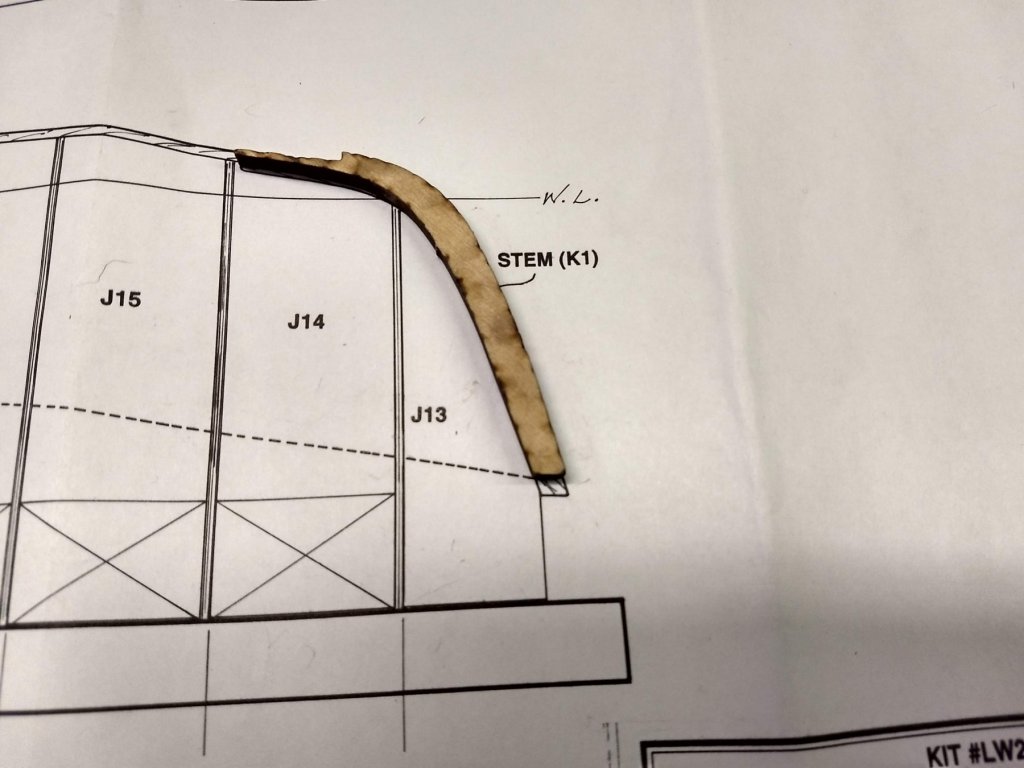
New Stem from BlueJacket showed up 1 week later so I am off to the races,,,, Below is a picture showing the marks on the stem piece I mentioned earlier,,, as you can see, these marking were a whole lot easier when they are marked before they are glued to the stem. The plans call for drilling holes in the Stem, Keel, and Stern sections and pinning these sections to the jib... In the past I have never had very much luck pinning model pieces to a jig... It seem pins usually come loose or fall out,,, I just do not have the knack for it. Instead I used a couple clamps and just clamped the Stem and Stern pieces to the jib. Seem to hold pretty well, but is loose enough to when the planks are glued on, I can wiggle the frame some to insure I do not accidentally clue the planks to the frame. With CA glue being as running as it is, and me being as sloppy,,, Not being able to wiggle the fame some, I am sure I would have glued some of the planks to the jig. Below you see the clamps on the Stem and Stern sections and the first plank glued on.

- 12 replies
-
- 1
-
-
- lincolville wherry
- finished
- (and 1 more)
-
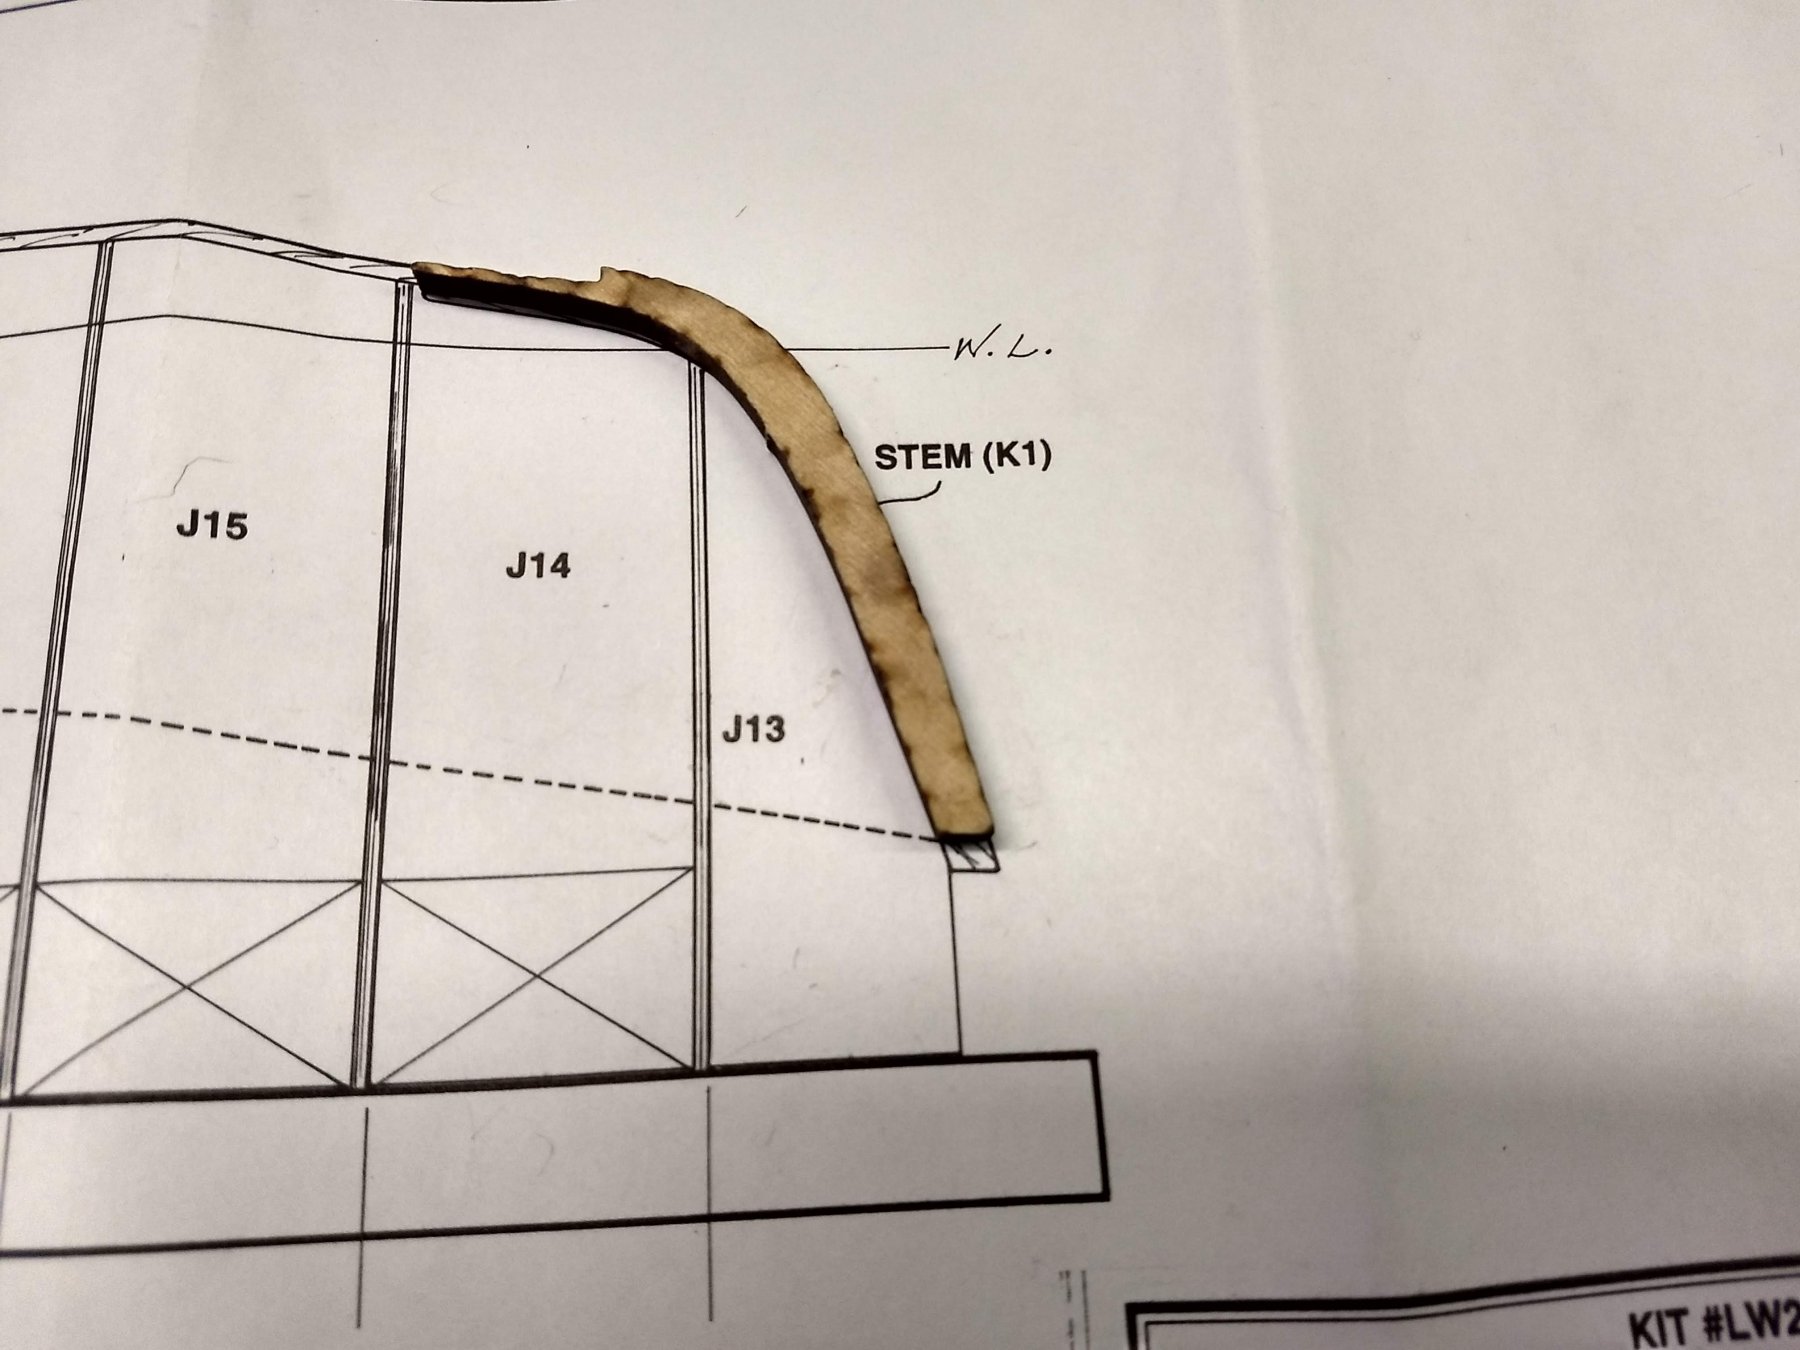
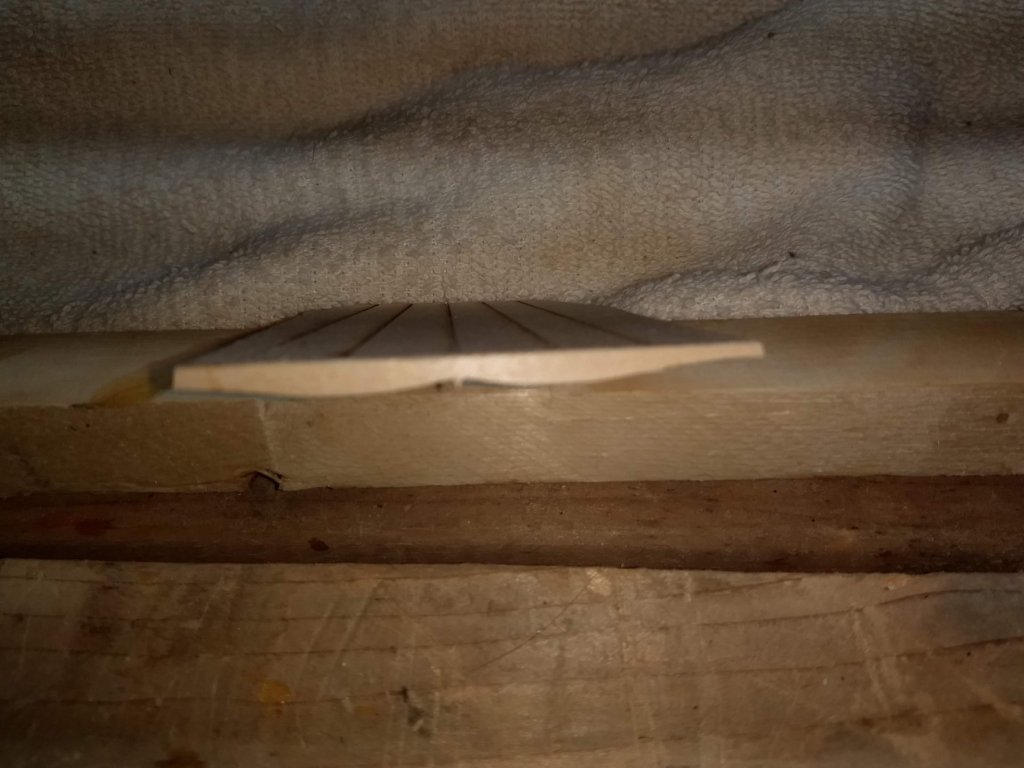
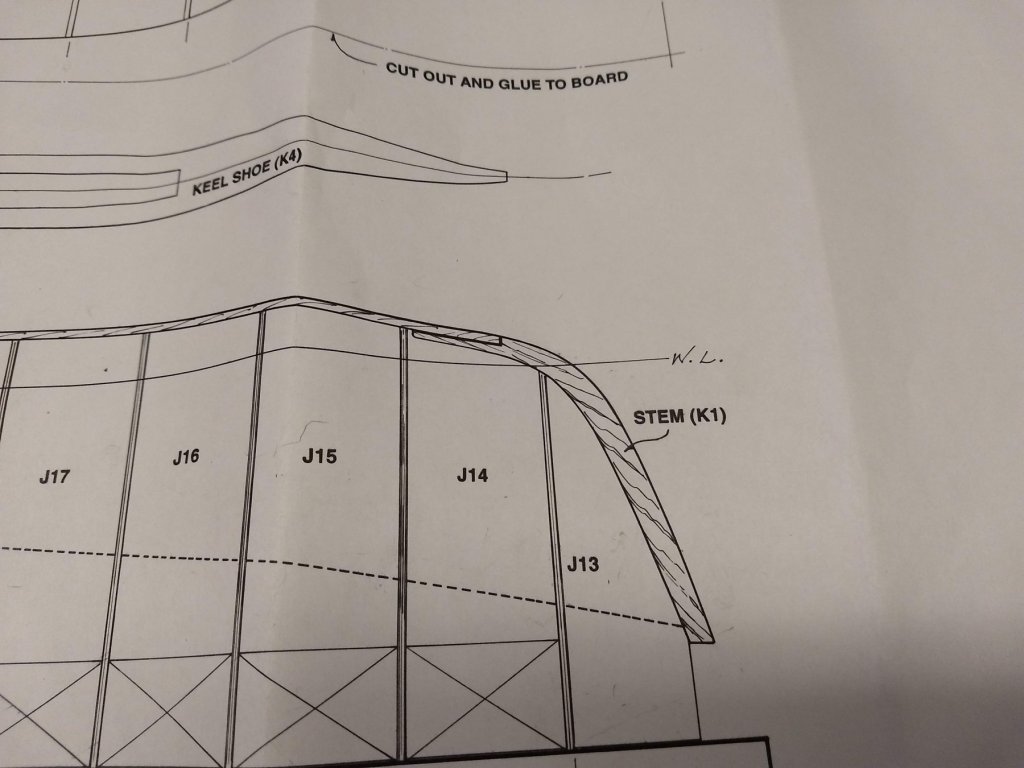
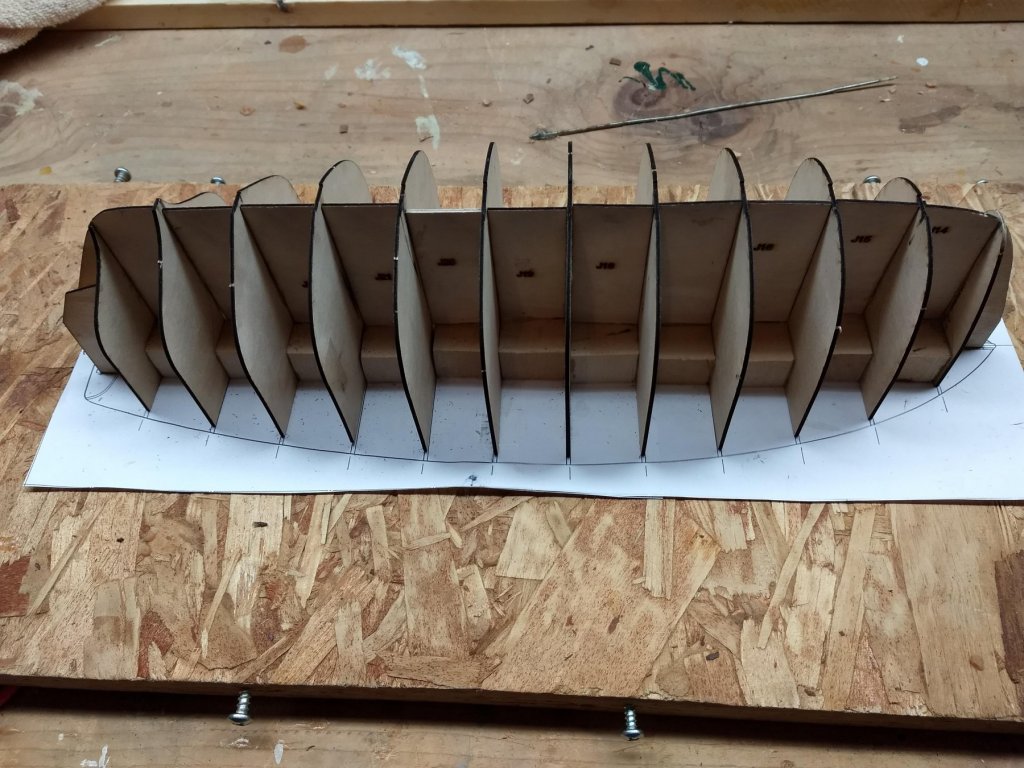
I have decided to take on the Lincolnville Wherry... Seemed like a good one to start with....being a rank beginner,,,, This is my first build log, so hopefully I will make it informational and interesting for other beginners that would like to build the Wherry... Be sure to read instructions carefully and try to build the entire model in your mind before you begin. Wherry is built from a jig, and instructions start out explaining the jig build process and showing pictures of the completed jig. One issue (if you did not read the instructions first) is that, after the jig is built it mentions that you should mark the Stem, frame J5, and the transom pieces with a pencil where the tops of each planks are to be placed. These marks show the position of the planks before gluing. It would be very difficult to use the sketches and mark the frame J5, and the transom pieces with the jig completed. I suggest marking the frame J5, and the transom pieces before you build the jig Below is the completed jig. You can see it would be very hard to mark the Stem, frame J5, and the transom pieces from the completed jig, Die cut parts for the Jig were very good. Only a little sanding required to make the part fit the jig diagram. Next step is building the Keel and backbone. Ran into my first issue. Note in the next two photos that the stem piece (K1) does not match the plans Note the Stem (K1) piece seems to be about 4 mm short. I called BlueJacket and brought the issue to their attention and they said they would cut a new piece and send it out. I know,,, you more experienced folks probably would have blown right by this and either built an entire new part or added the 4 mm piece at the end, but I wanted to follow the plans and at least bring this to the attention of BlueJacket,,, At this point I am in limbo waiting for the new stem piece to arrive,,, Hopefully it will show up in the next few days,,,, 🙂
- 12 replies
-
- 2
-
-
- lincolville wherry
- finished
- (and 1 more)