HOLIDAY DONATION DRIVE - SUPPORT MSW - DO YOUR PART TO KEEP THIS GREAT FORUM GOING! (Only 24 donations so far out of 49,000 members - C'mon guys!)
×


John Gummersall
-
Posts
265 -
Joined
-
Last visited
Content Type
Profiles
Forums
Gallery
Events
Everything posted by John Gummersall
-
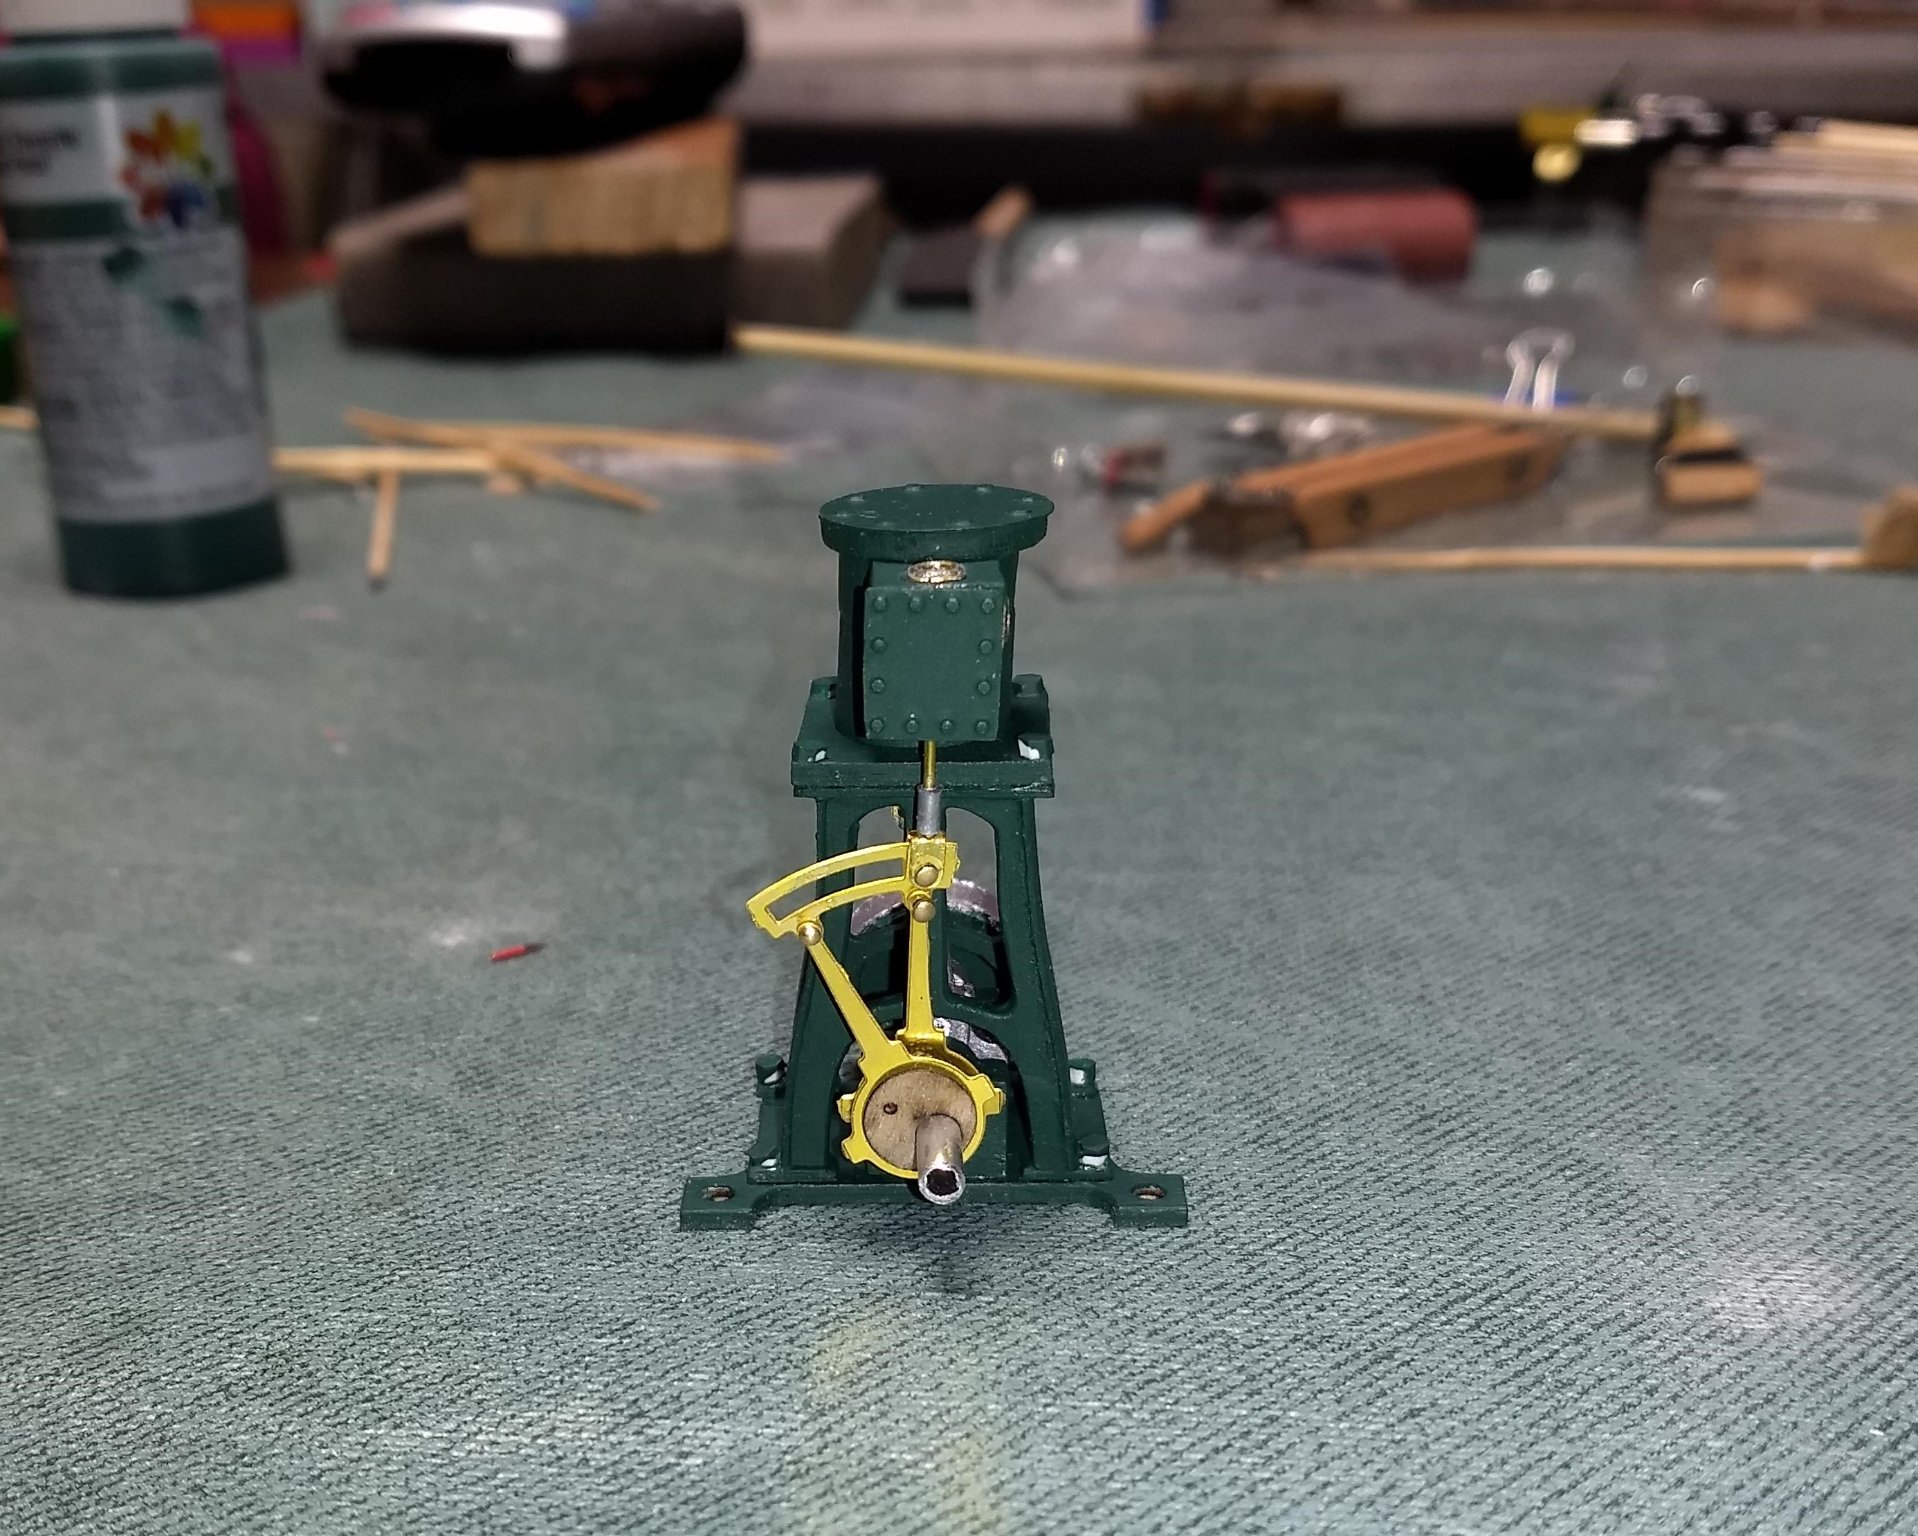
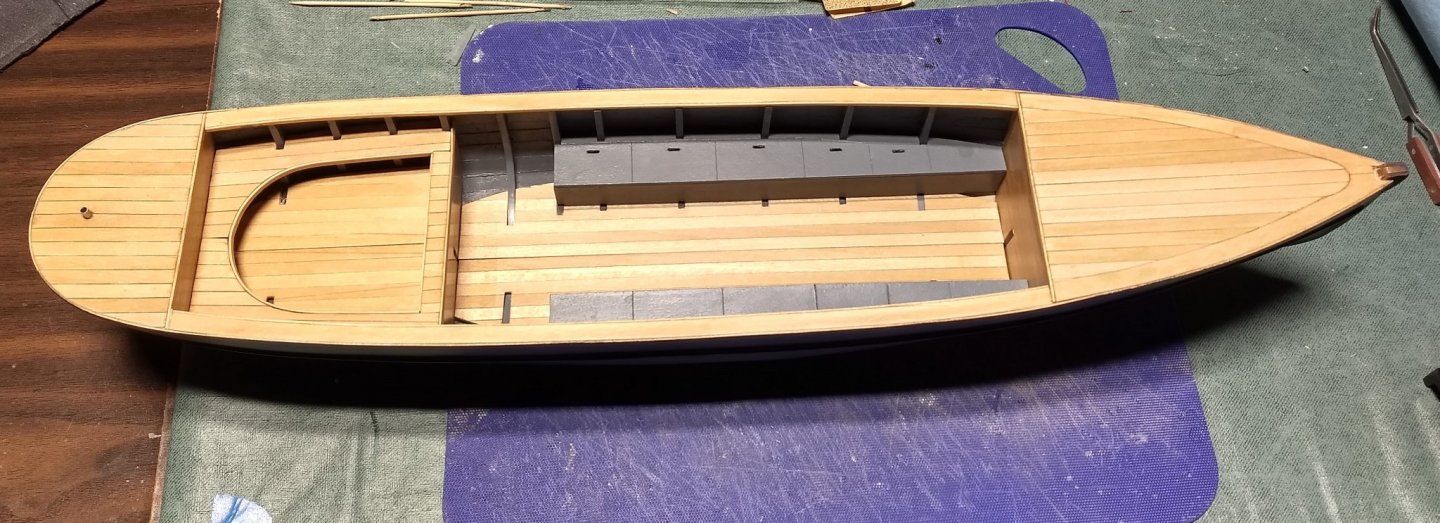
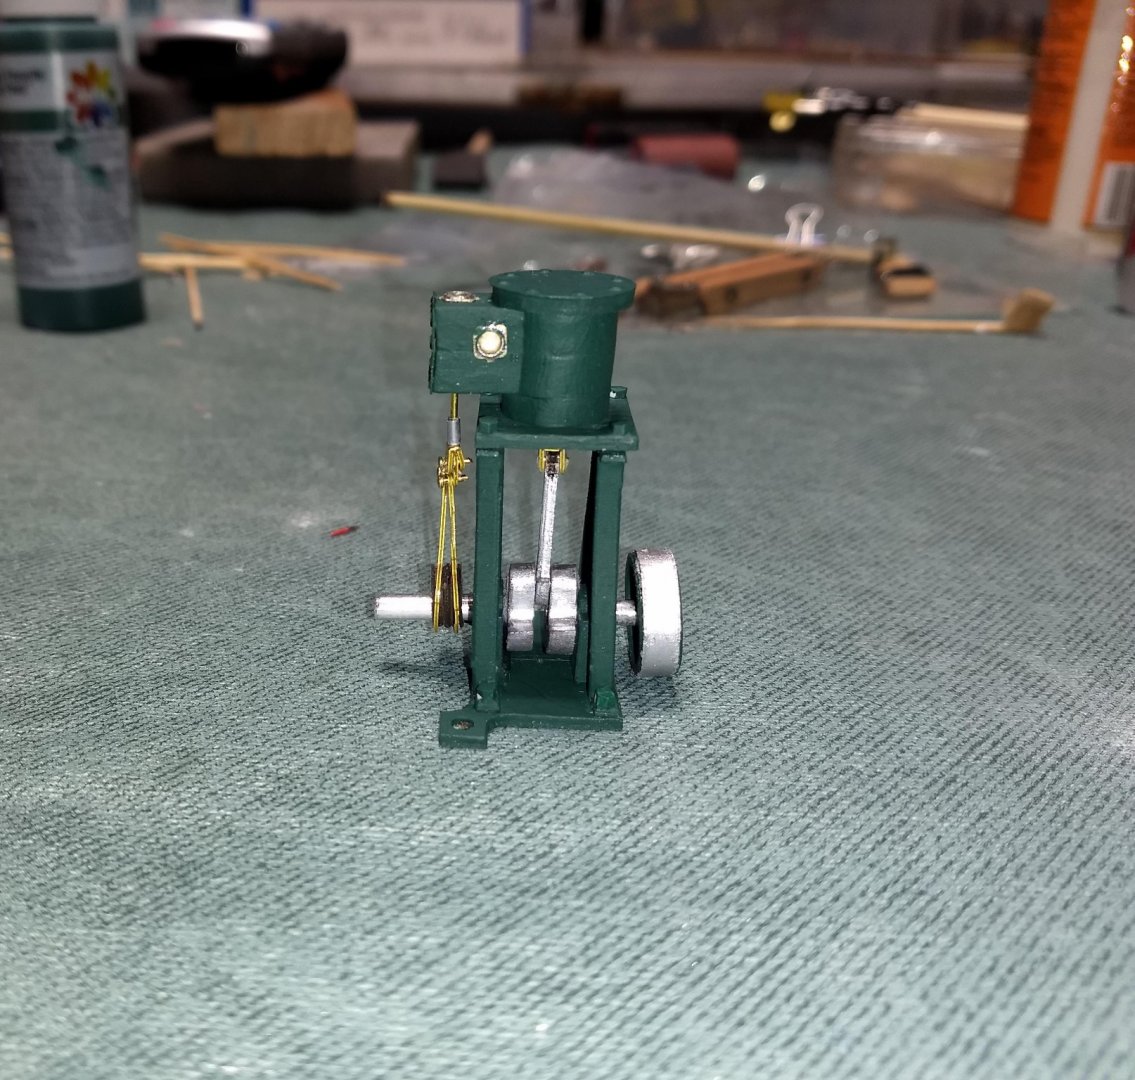
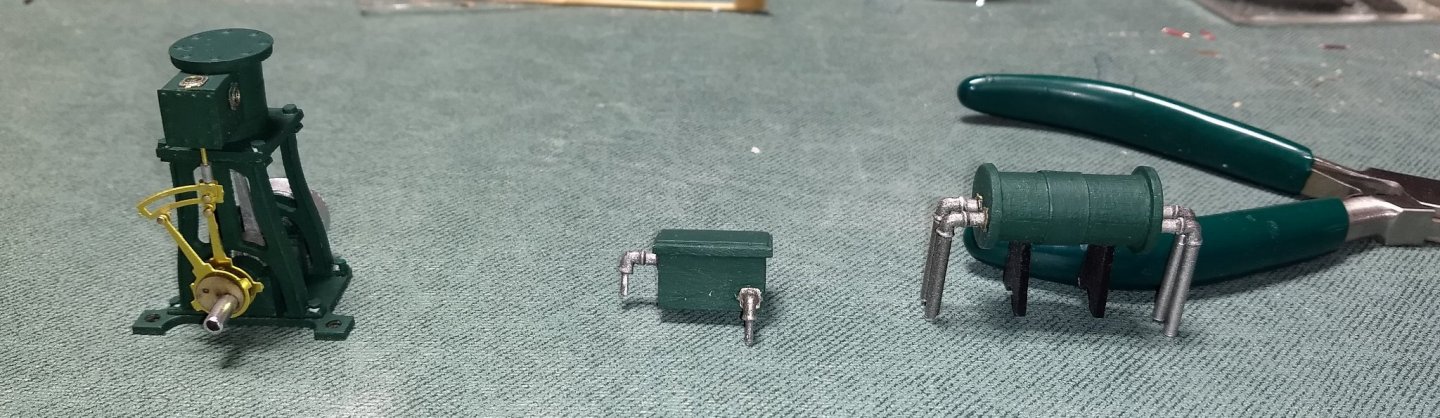
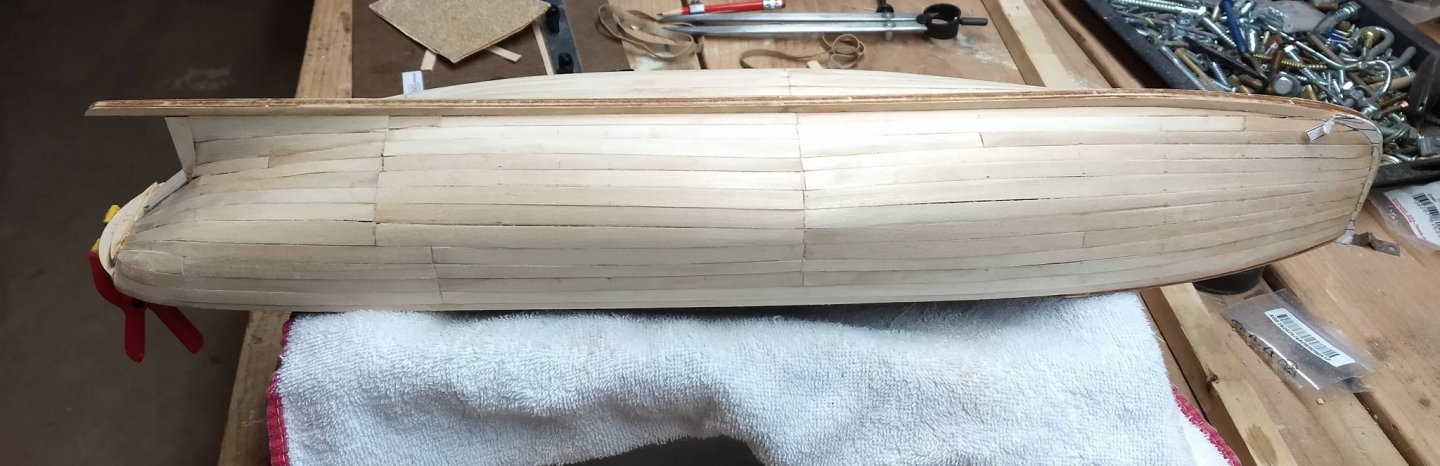
 After a fair amount of sanding and re-painting the final hull. It still has a few "dinks" on the bottom, but you won't see those, and the sides look great, so I am going to "call it" done. Turning the hull over - getting close to done here too. Still have to mount the coal bin hinges and tiller. Getting set up to add the machinery. The build of the condenser and hot well are as easy as they look. It is hard to see, but the pipes that are intended to go through the deck are a little longer than the feet. Rather then just have the pipes stop at the deck, I plan to drill holes in the deck so the pipes actually go through the deck. A little more realist look than just have the pipes stop at the deck. Building the engine is a lot easier than it looks on the diagrams. Diagrams are very good and show the exact way the engine should be built. The accurate detail on the diagrams I supposed is why (until you actually start the engine build) it looks so complicated. Study the engine build sequence and when you start to put the pieces together it really is easier than it looks. One thing to mention, (and this is probably obvious to more experienced modelers), is that the holes in the pieces on etched brass sheet need to be increased. One idea (do as I say and not as I did) is to expand them all at one time while they are still on the sheet. Pieces that are to take pins (like most the engine pieces) can be expanded with a .8mm drill bit. Pieces that are to take the 3/32" pipe can be expanded with the drill bit that came with the model. Bit is not labeled but I assume that bit is 3/32". Once that is done you will not have to stop what you are doing with each piece to expand the holes. Only issue I had with the engine (and you will too) is dealing with the very small parts of the engine. It takes a good eye and a couple good tweezers, but it does go together. Instructions call to "rivet" the brass pieces together. No way someone of my skill (and large fingers) should even attempt to rivet those very small brass pieces. A small dab of CA glue works great. Much better option than riveting... to me anyway. Instructions call to complete the plumbing of the engine at this time. Not knowing exactly where the engine will be located on the deck, I figured best to complete the plumbing when the engine is positioned on the deck. Just noticed the simulated bolts on the engine are showing a little white... Will touch that up before final deck placement
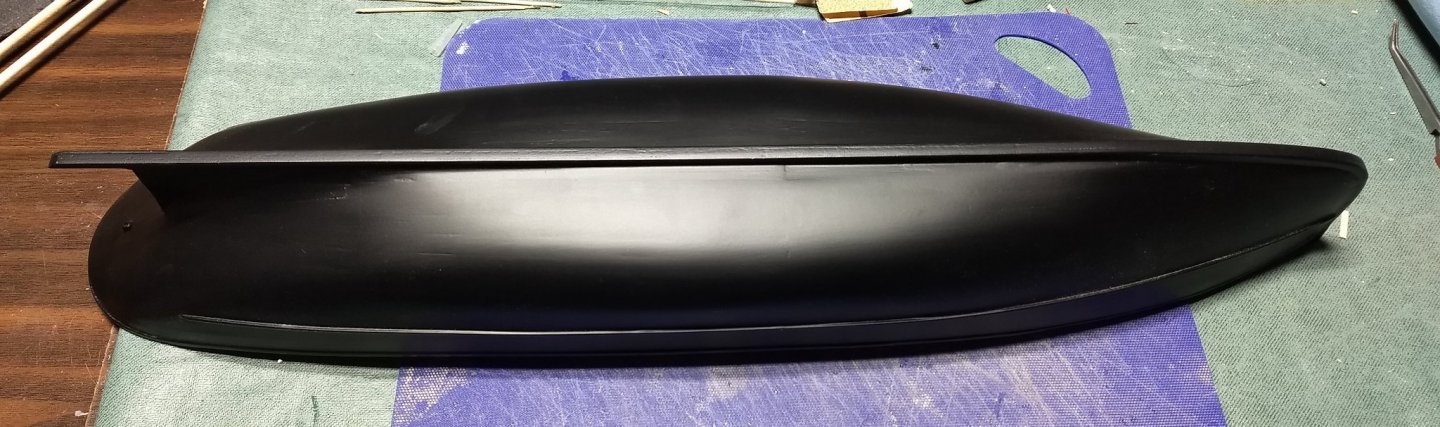

- 51 replies
-
- 5
-

-
- model shipways
- picket boat
- (and 1 more)
-
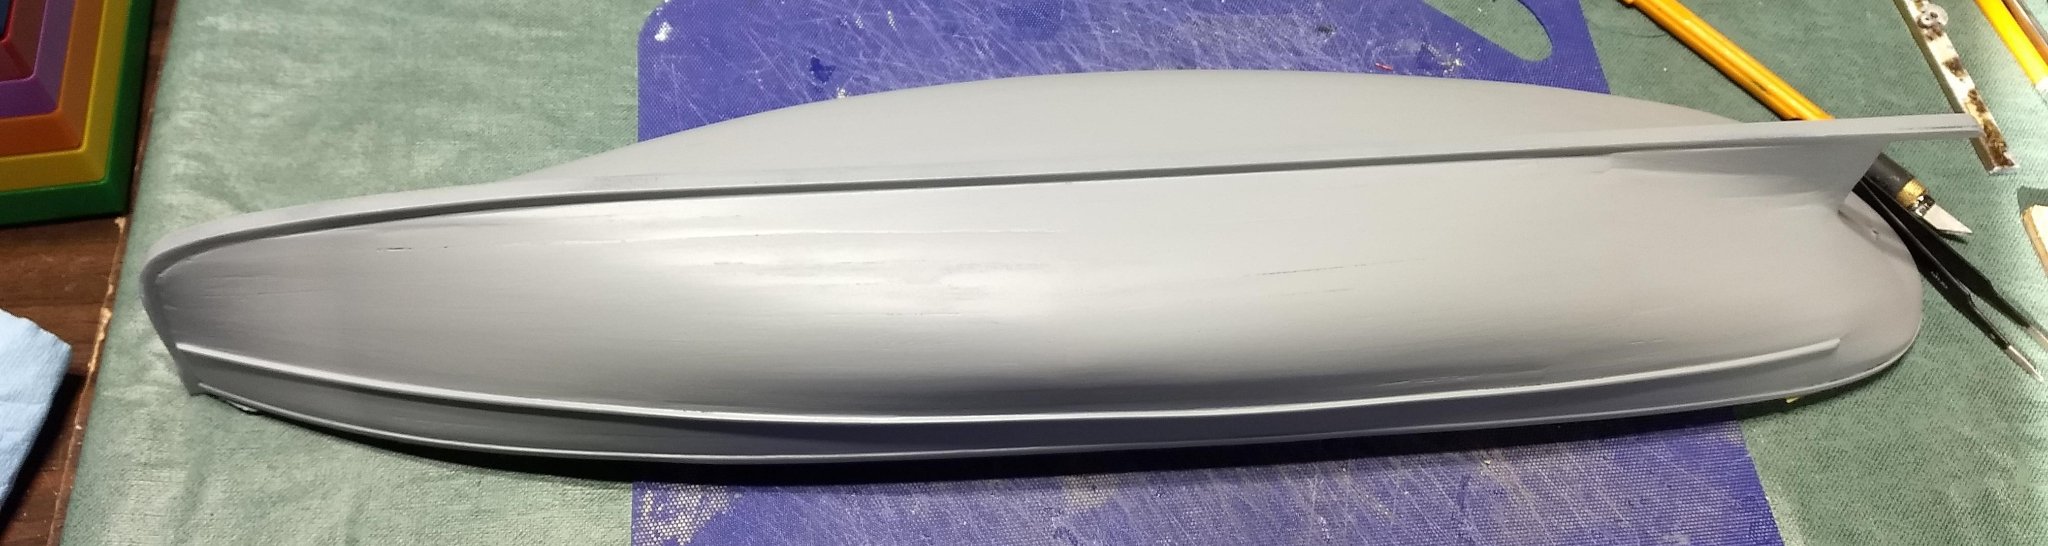
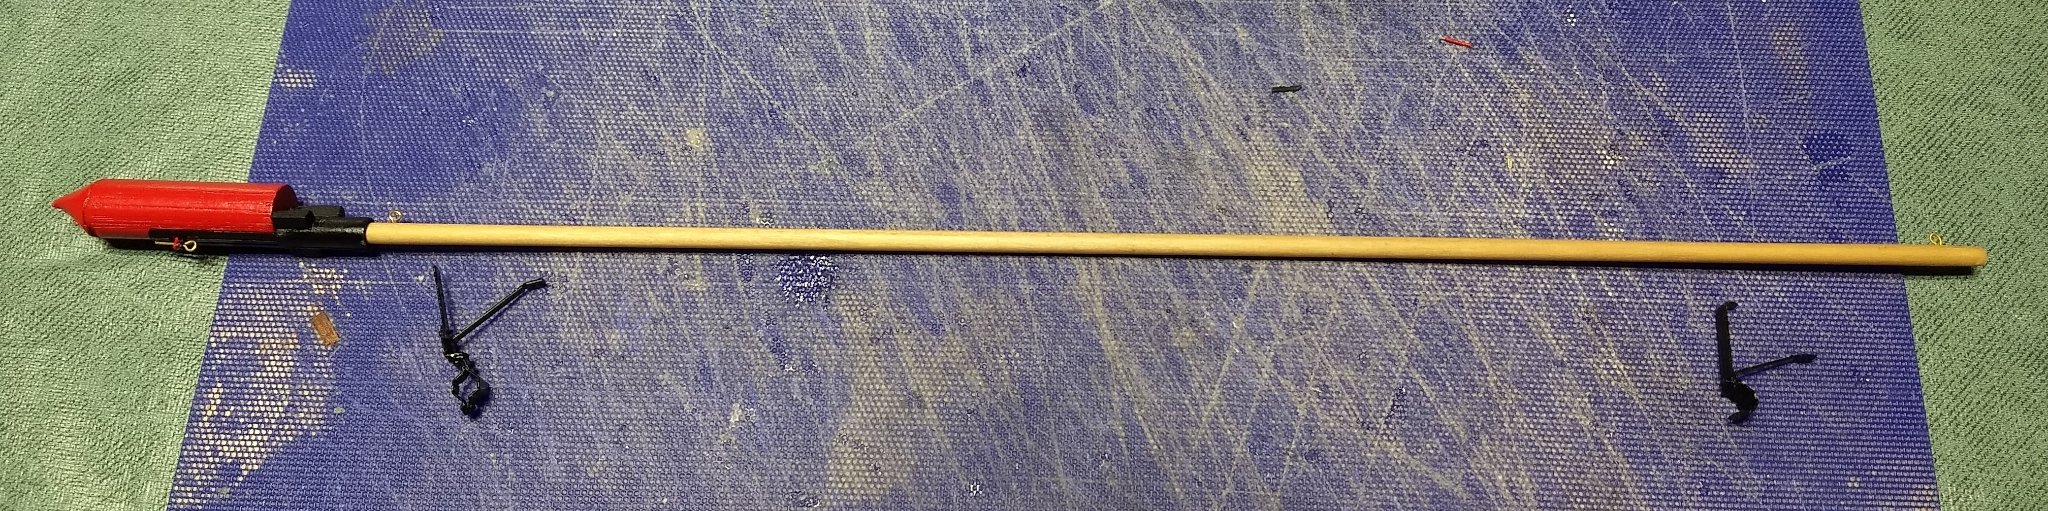
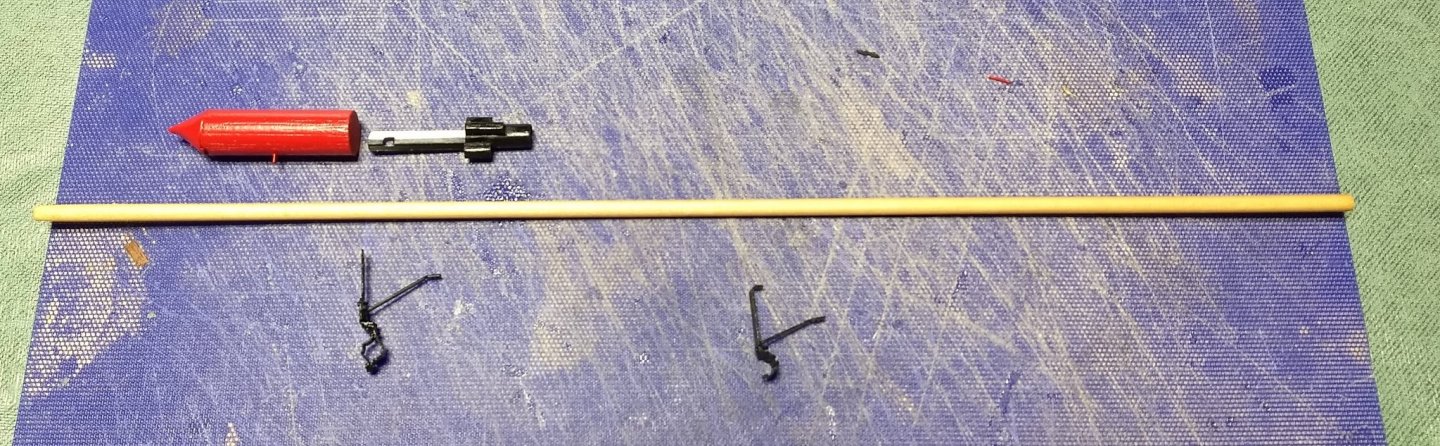
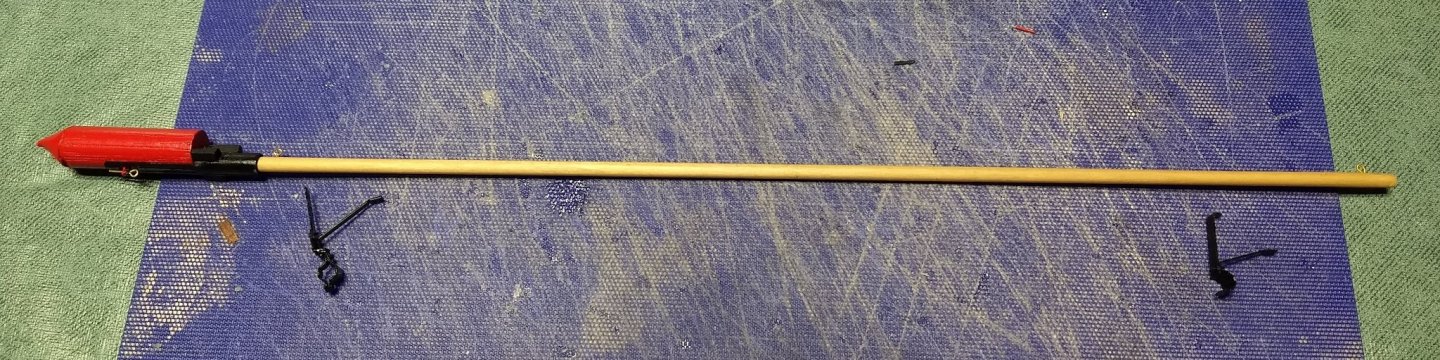
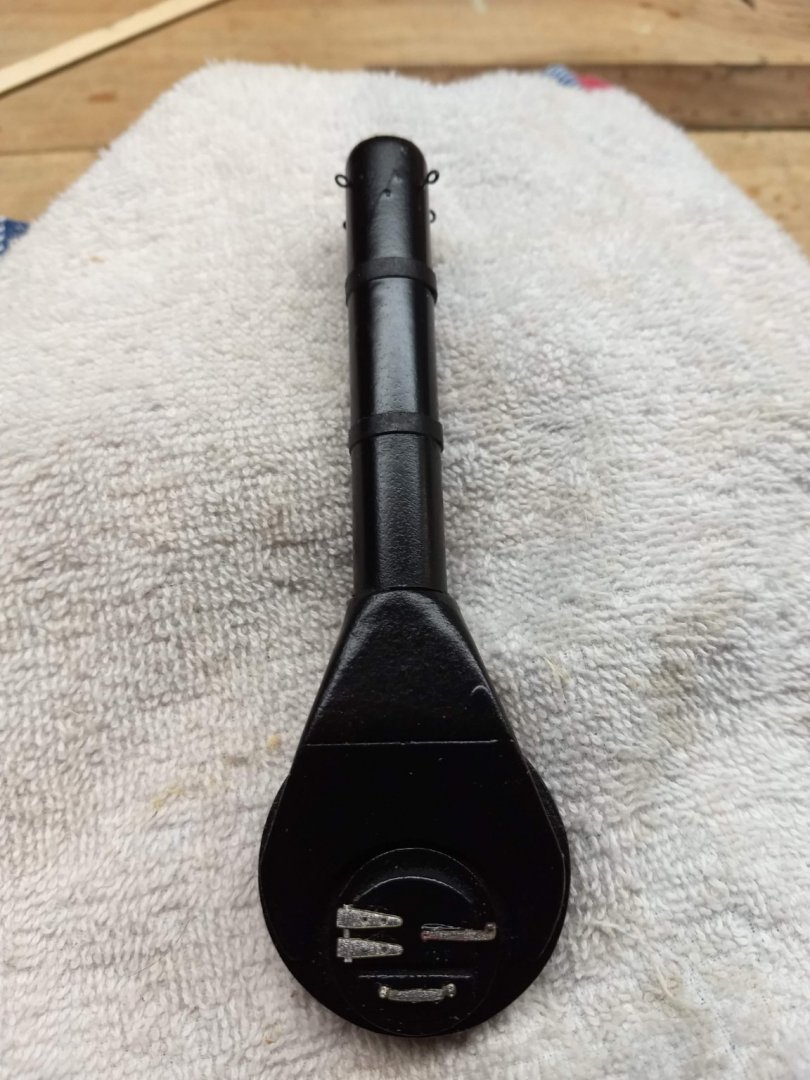
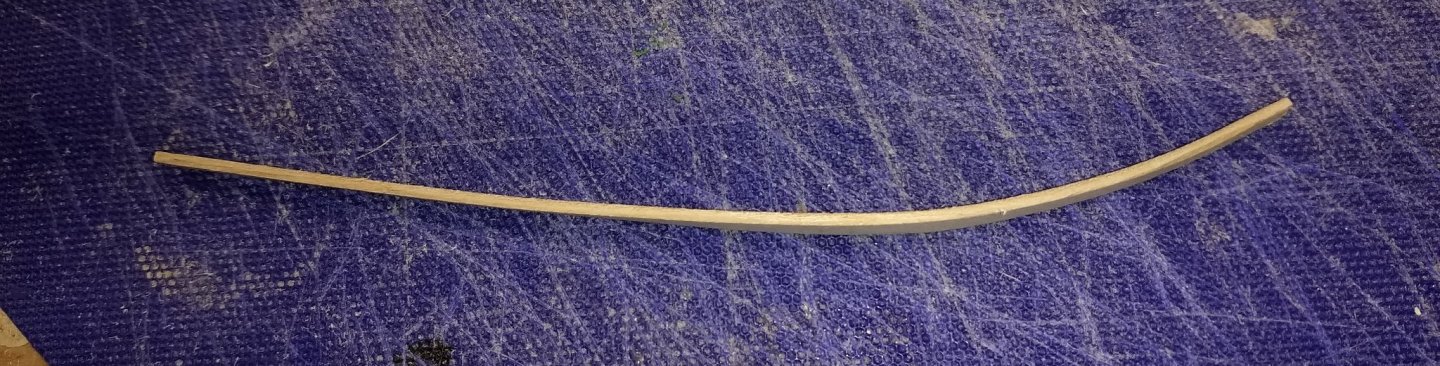
Turangi Thanks for the comment on the stack. I too am pleased with how it turned out. However, I am way too much a novice model builder to have any original thoughts. If it is not in the plans or in someone else's MSW build log, it is not in my build. In this case the thought for the stack did come from another Picket build log. After some filling and sanding ( a lot of filling and sanding) and a coat of grey primer below is the result. Before the primer I thought the hull was pretty smooth, but as they say... "primer magnifies your blemishes by 10% and paint magnifies them by 100%".... As you can see, I have some more filling and sanding to do before the final test of paint. However, when it comes to painting I will be cheating... as I plan the final will be a flat black. A whole lot more forgiving than if the hull required a gloss finish. Took a break from the filling/sanding and wanted to take on something easier. Decided to tackle the spar torpedo next. Below are the results. Nothing really hard about the torpedo configuration - that is if you do not follow the instructions. The instructions call to pin and (somehow with a hammer) rivet the various pieces together. No way someone of my skill could do that rivet process with such tiny pieces - or any pieces for that matter. Instead I just pined and then CA glued the pieces together. A strong bind and way easier then riveting them. As to the tip of the torpedo, when I attempted to carve the point at the head, it did not turn out well. Looked more like a bullet than a point. Further work on it just could not get a point that looked good to me. Again taking a page out of other Picket build logs, I make the point out of card stock. Started with a compass and drew a circle. Cut out a 25% pie wedge from the circle and then rolled it up to see the point. From then continued to cut a bigger and bigger pie piece out of the circle until I got a point I was happy with. When gluing the final result to the dowel, have the seam on the bottom of the torpedo and no one will see it. With the spar and all steps in the future that require the use of pins or eyelets. Use a .6mm drill bit to make the hole. It fits the pins exactly. Also, the holes in the pieces in the brass sheet (that are to take a pin or eyelet) are not quite big enough to take a pin or eyelet. Use the .6mm drill bit to enlarge each hole. Looking ahead I expanded holes on all the brass pieces with the .6mm drill bit. Same issue with the parts on the brass sheet that are intended to pass a 3/16 pipe. Those holes are also little too small. Best to expand them with a 3/16 bit before taking them out of the sheet. Final spar mostly assembled. I plan to attach the fittings to the spar when they are attached to the hull.
- 51 replies
-
- 4
-
-
- model shipways
- picket boat
- (and 1 more)
-
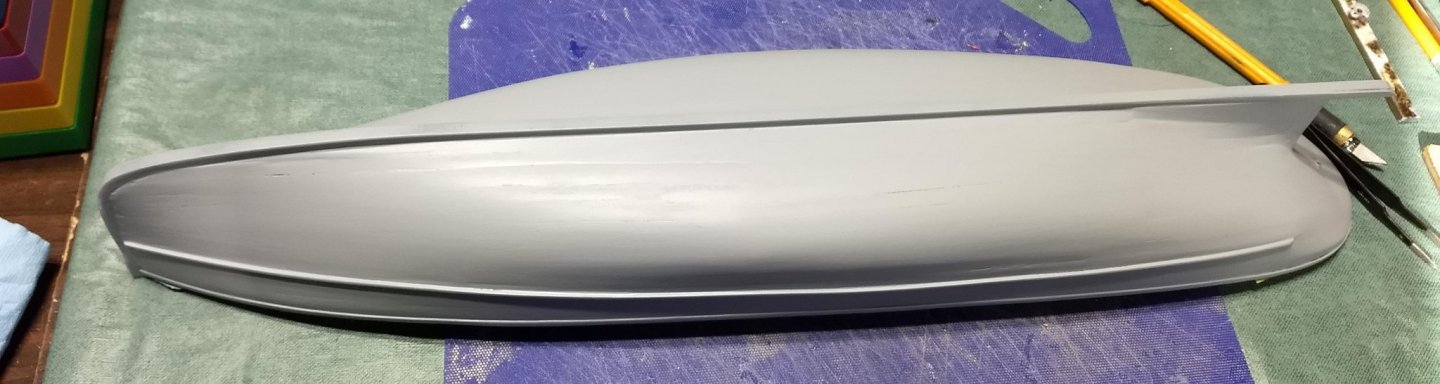
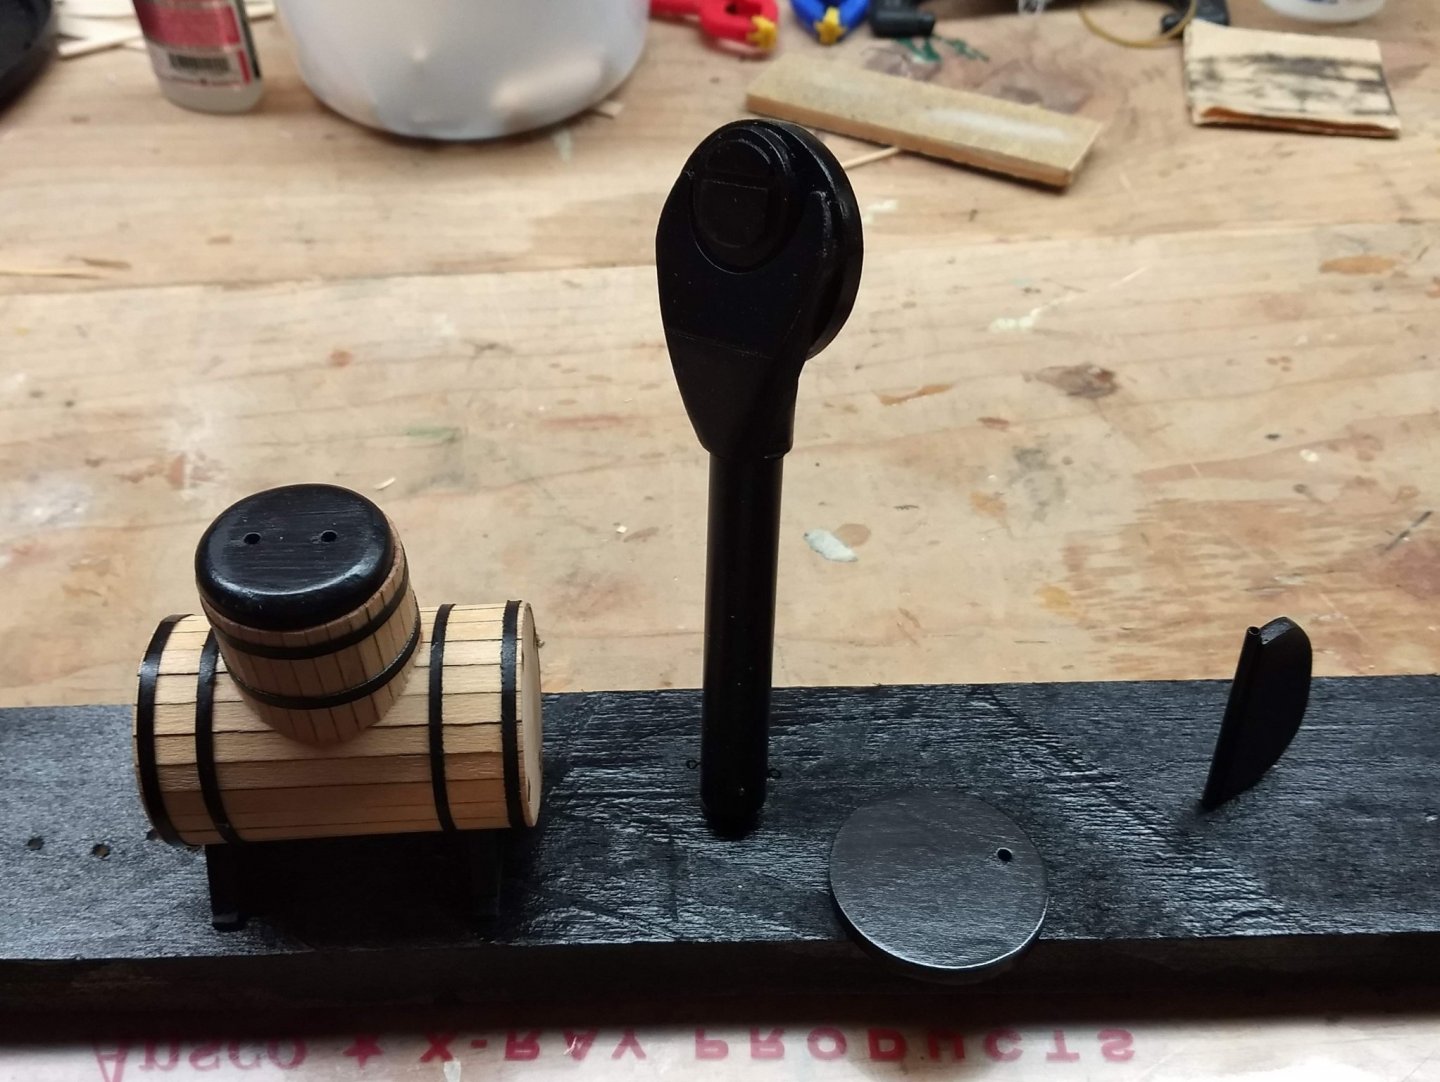
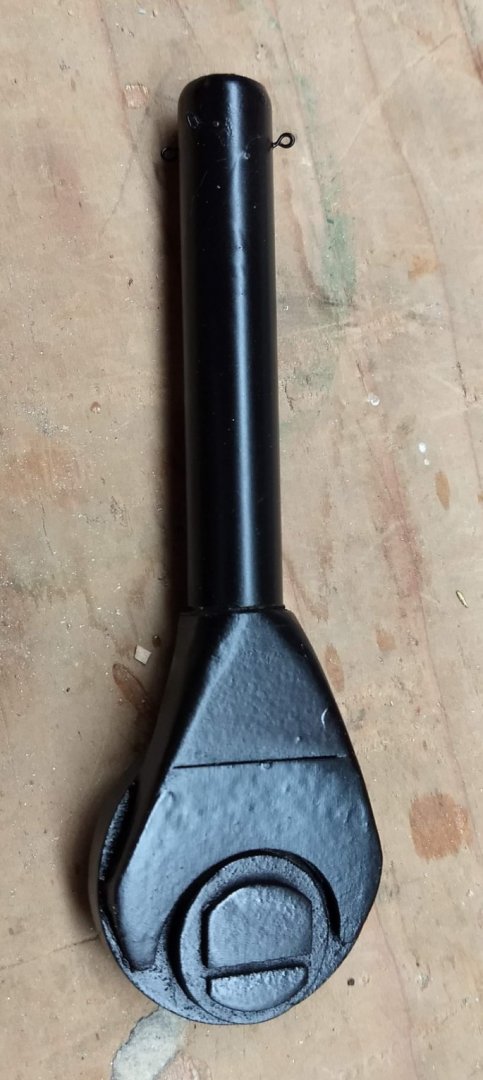
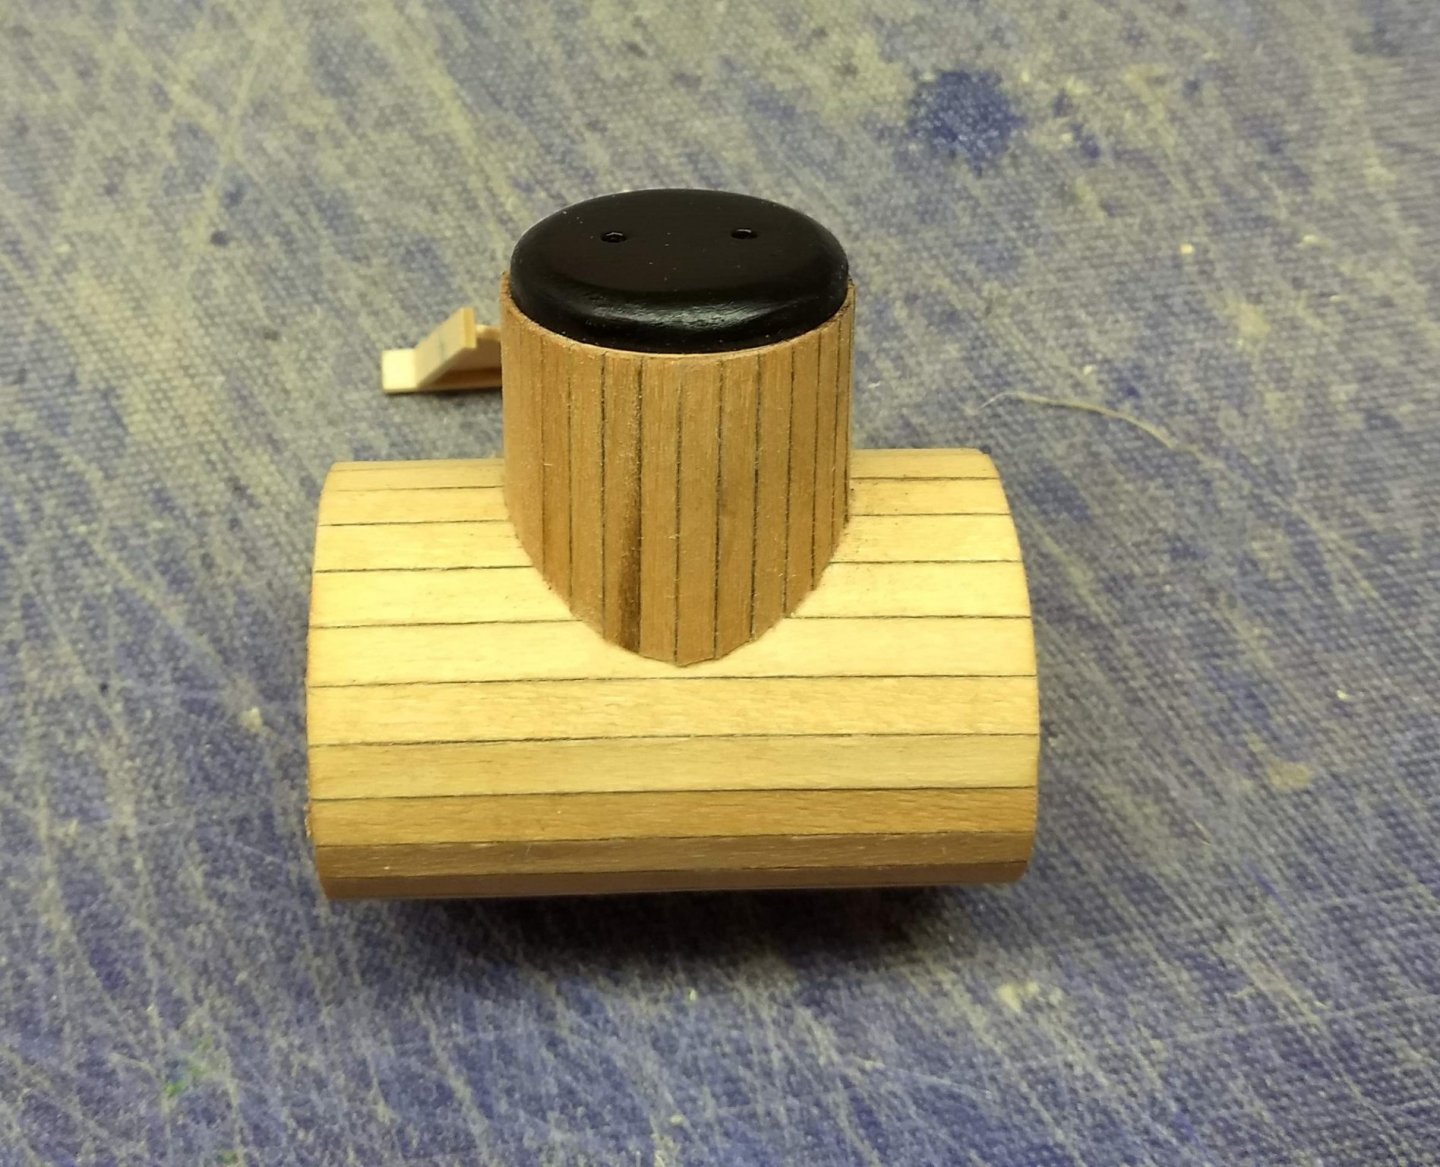
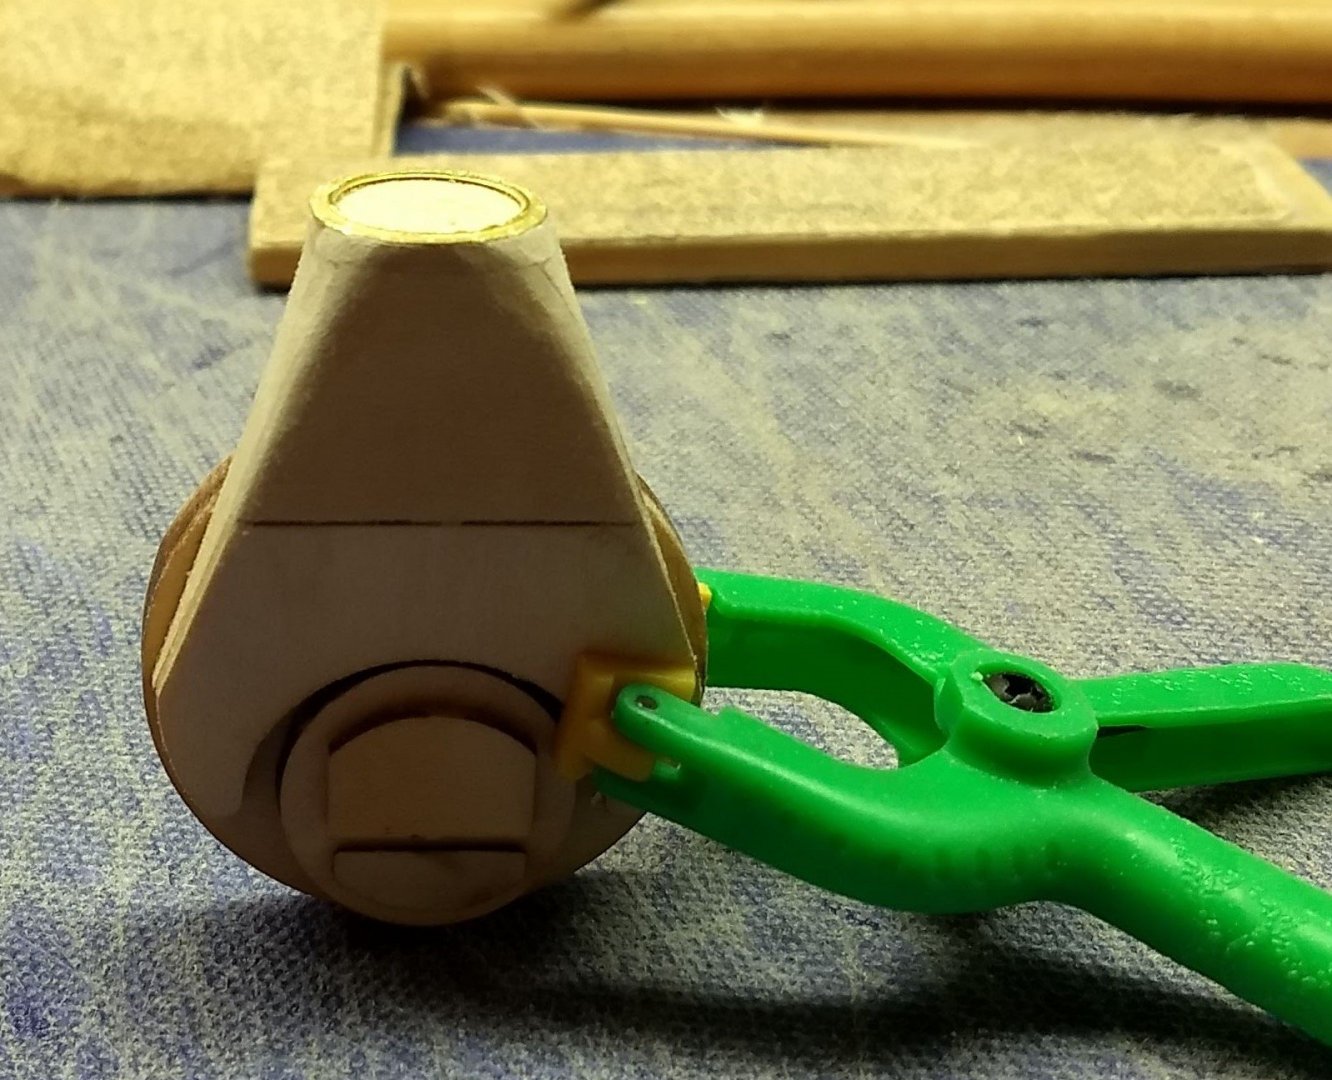
Began to work on foreword side of the boiler. Rather than use the 1/2'' dowel rod suggested in the instructions I changed that out for a 1/2'' pipe. I just looked more like a smoke stack. Interestingly enough, the dowel rod was 1/2'' outside diameter and the pipe was 1/2" inside diameter, so it slipped easily over the dowel. Cut about a 1" length off the dowel and glued it to the top of the structure then glued and slipped the 1/2'' pipe over the dowel. Added the doors and painted the entire stack black Below is the stack along with the steam barrel and rudder. I was thinking of using metal straps instead of the card stock for the steam barrel straps, but could not find a 1/8" metal straps. Everywhere I looked at local hobby shops and the internet were all out of them and did not know when they would get more in. I guess blame Covid 19 for supply shortages. Later added the stack bands (again card stock) and the door hinges and handles. Instructions talked about soldering the hinges but they were easy enough just to glue then. Back to the hull,,, After an initial sanding and some filling After adding the both rub rails and some basic sanding - - still have a lot of sanding/filling in my future,


- 51 replies
-
- 4
-
-
- model shipways
- picket boat
- (and 1 more)
-
Add the top of the steam dome and it is starting to look like something Boiler stand pretty straight foreword On to the foreword end of the boiler. This is were the fun starts. I am looking foreword to this... Instructions pretty straight foreword with the first part. Note the four 1/8 x 1/8 corner pieces inside the structure. You will need these if you plan to round out the corners going into the smoke stack. Again a few minutes with the Dremel and the structure is rounded going into the smoke stack. Still need a little more sanding.


- 51 replies
-
- 7
-
-
- model shipways
- picket boat
- (and 1 more)
-
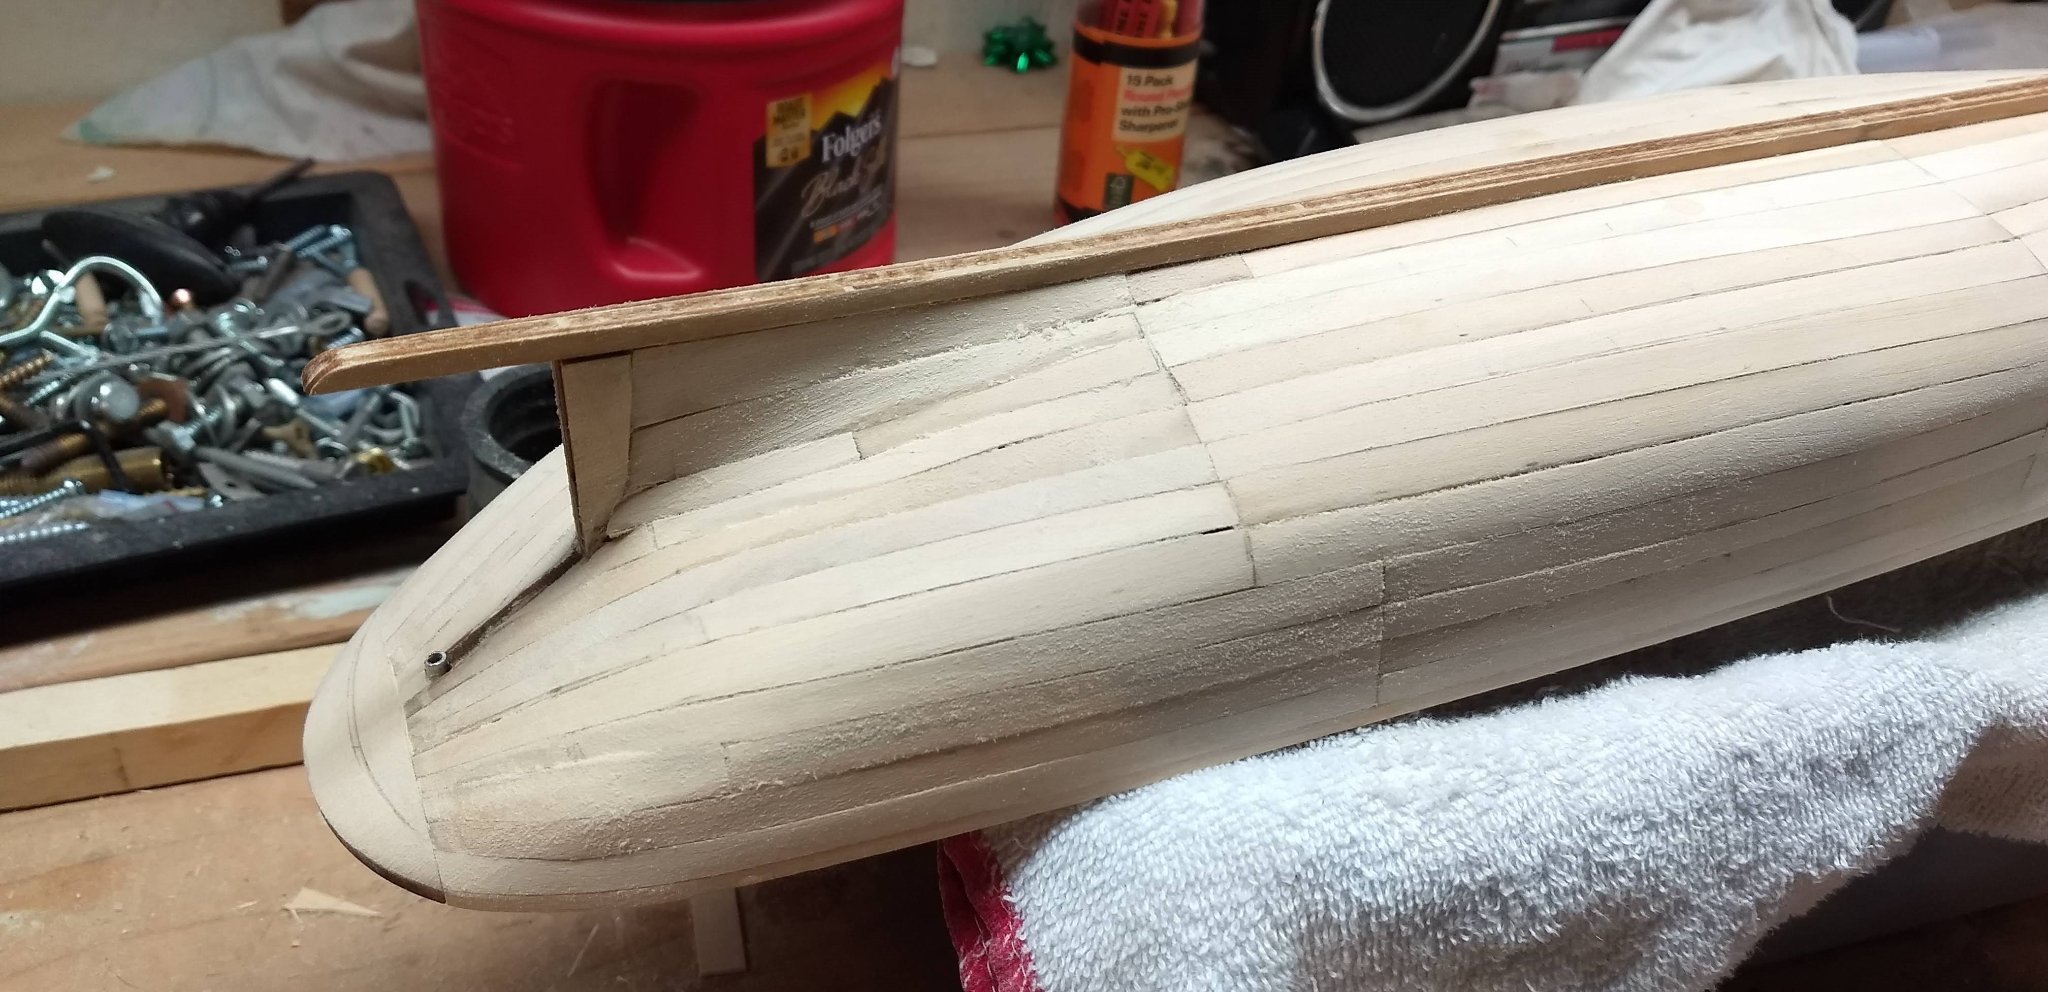
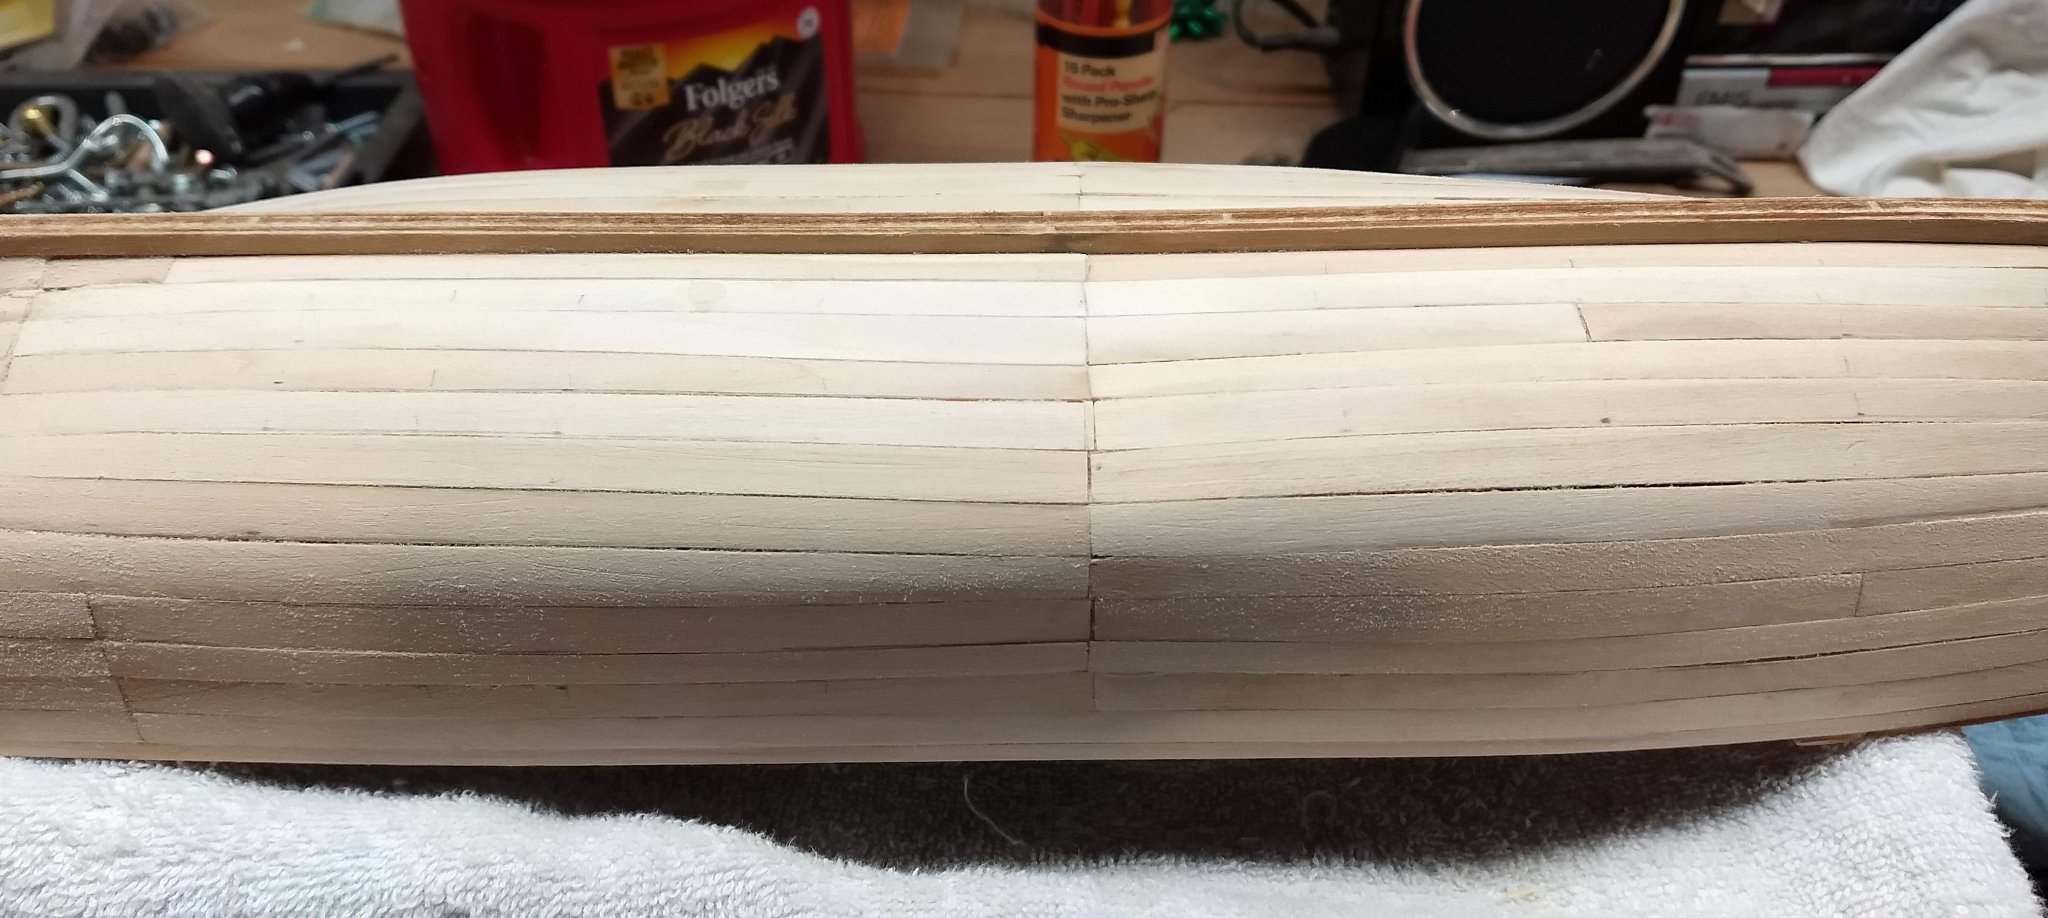
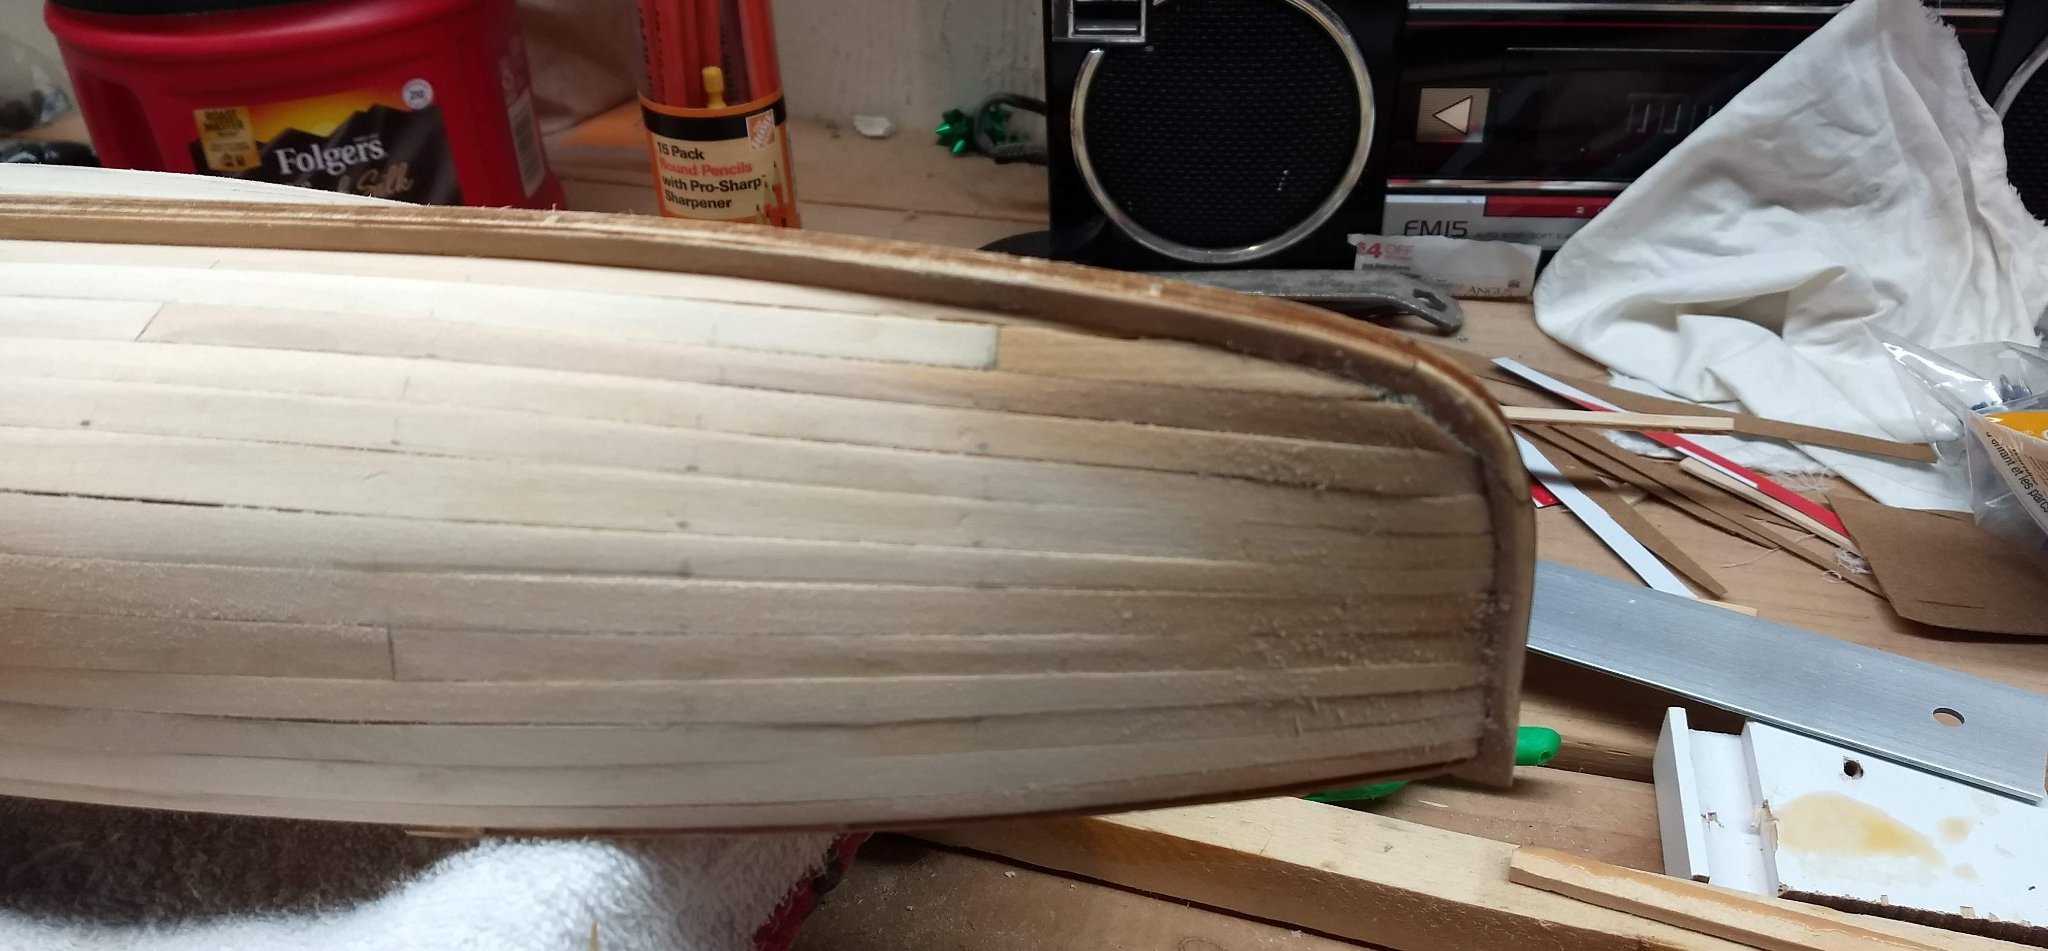
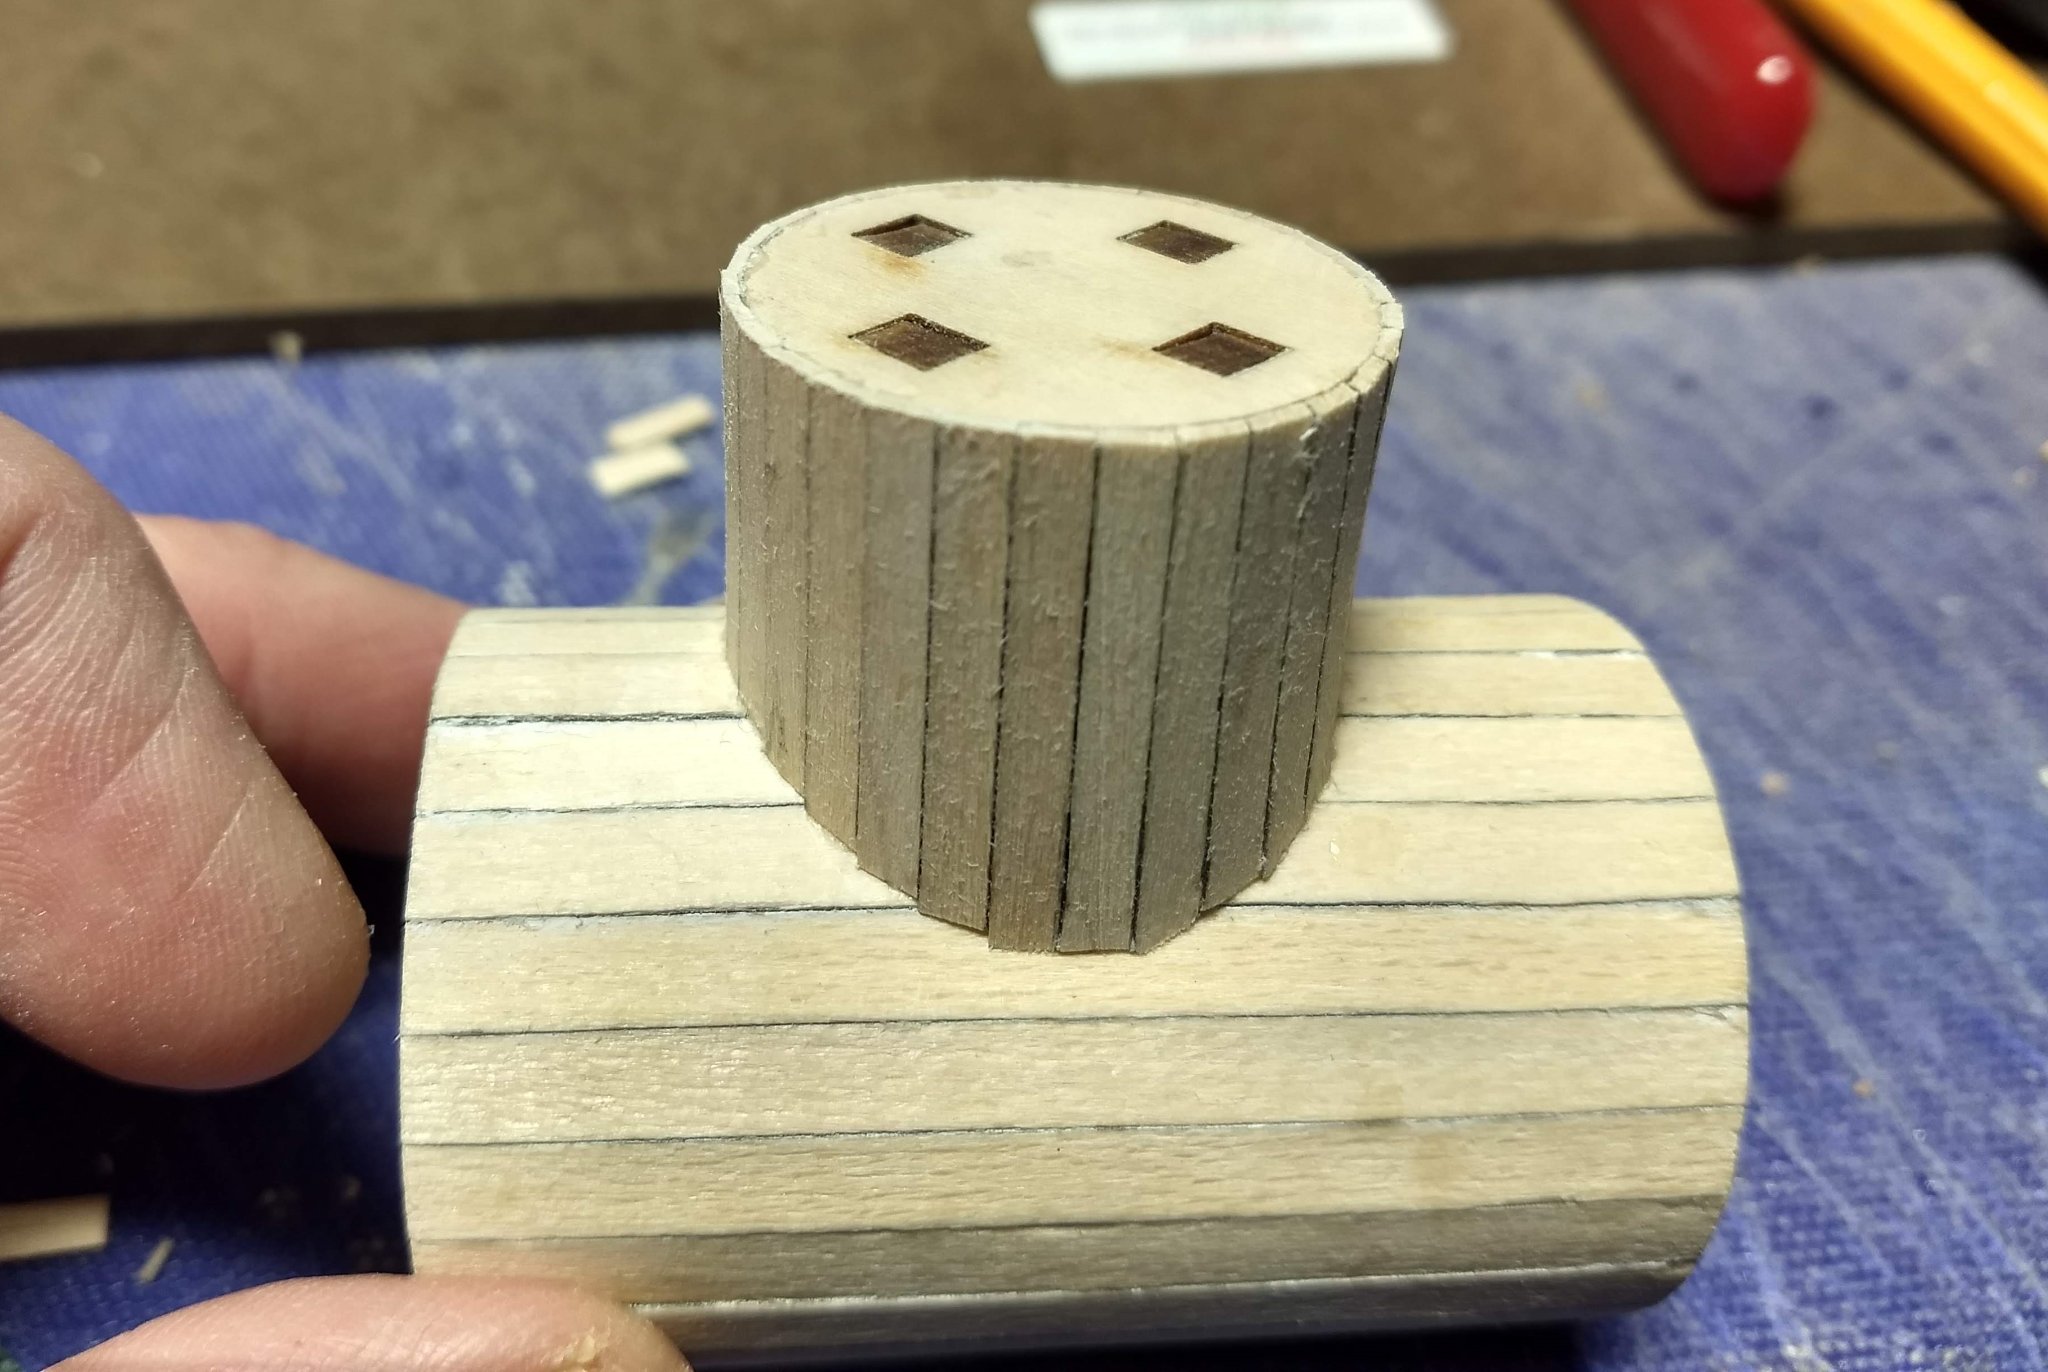
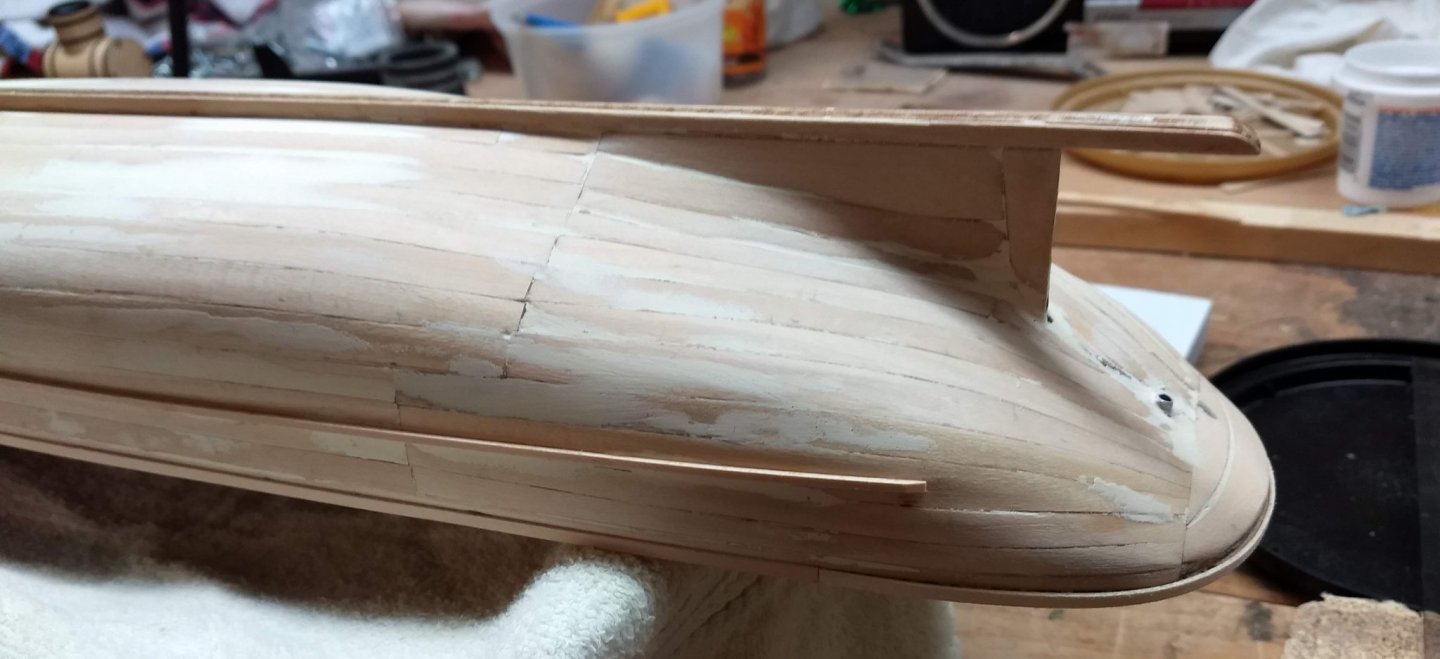
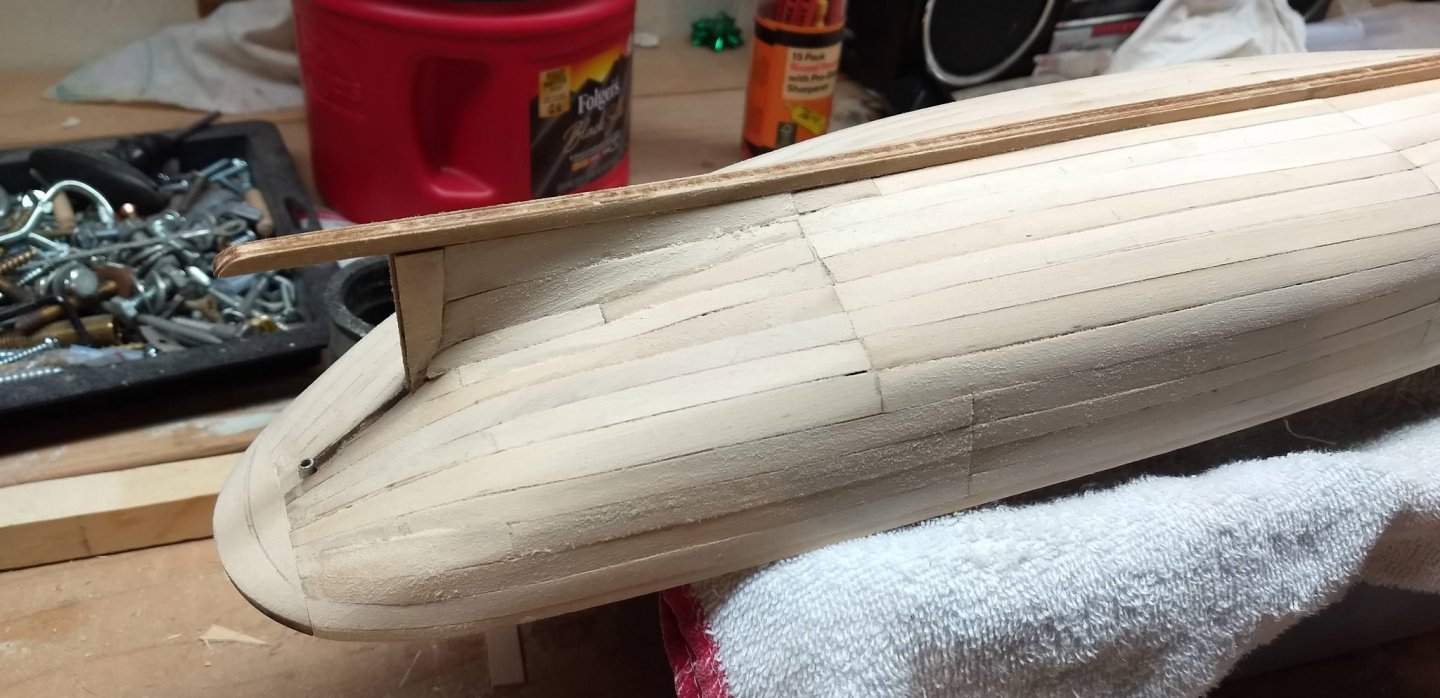
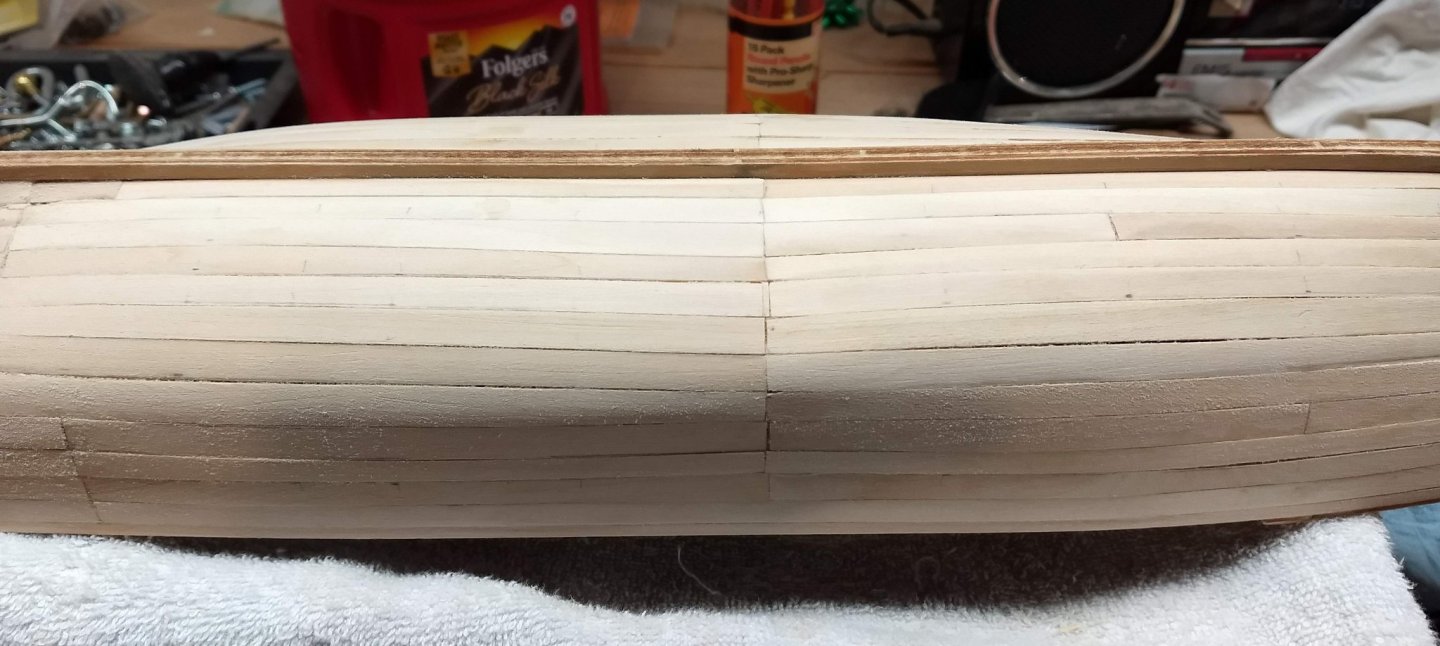
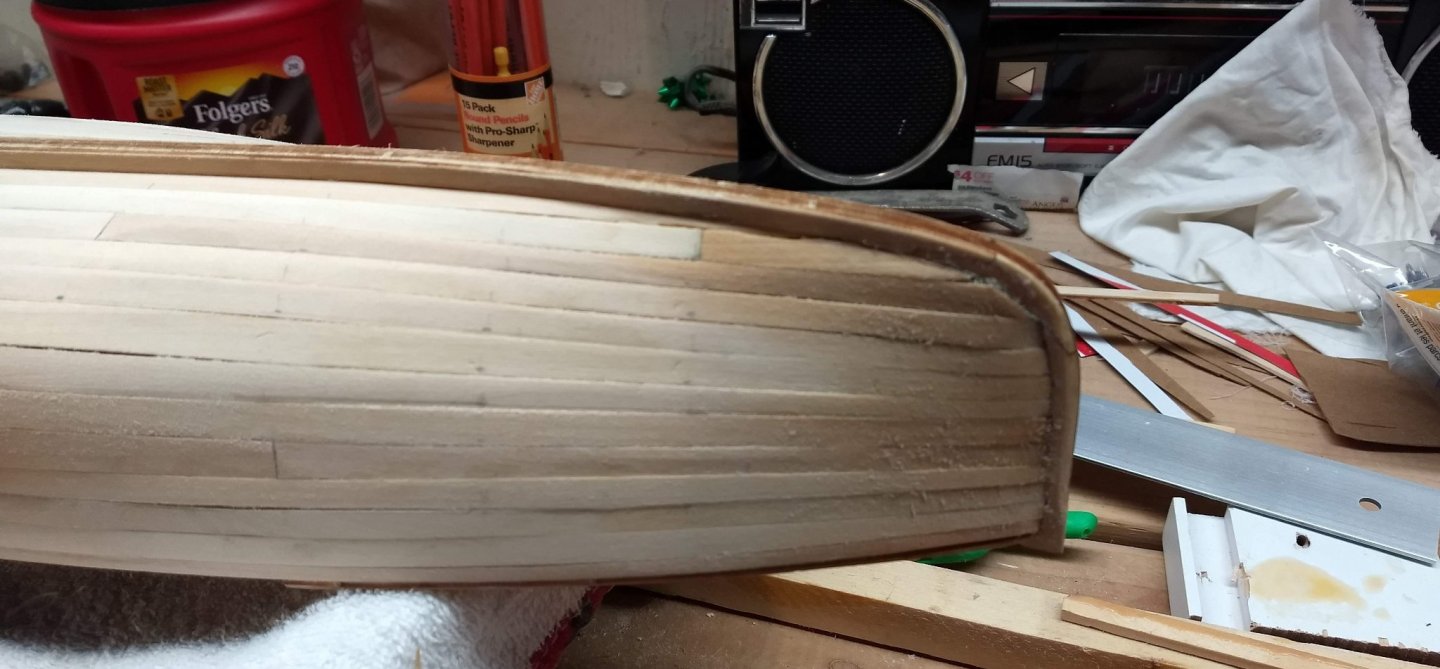
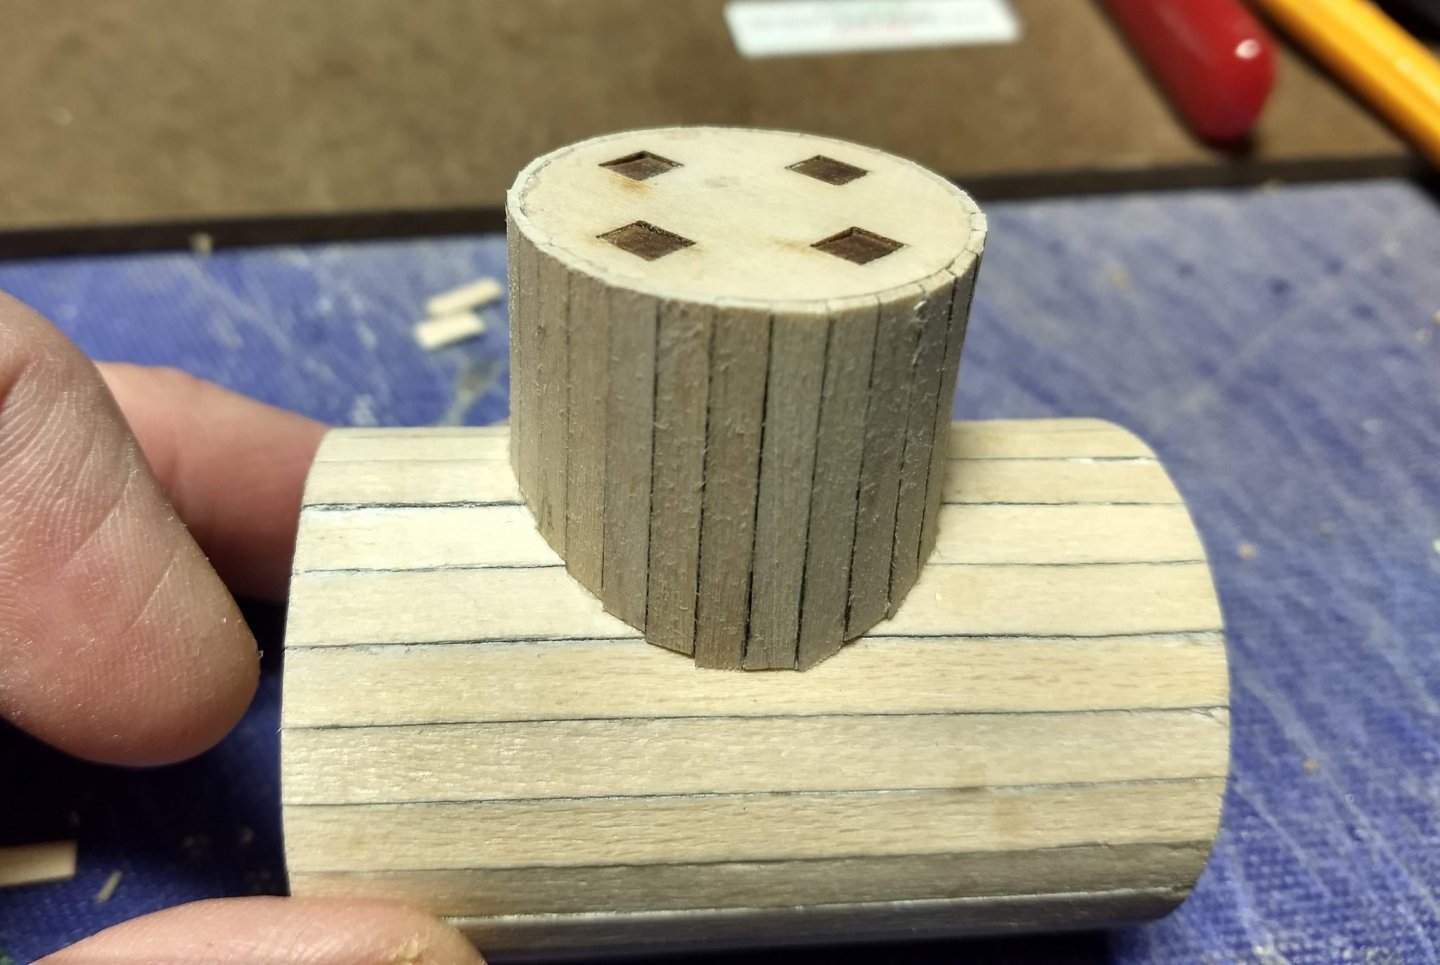
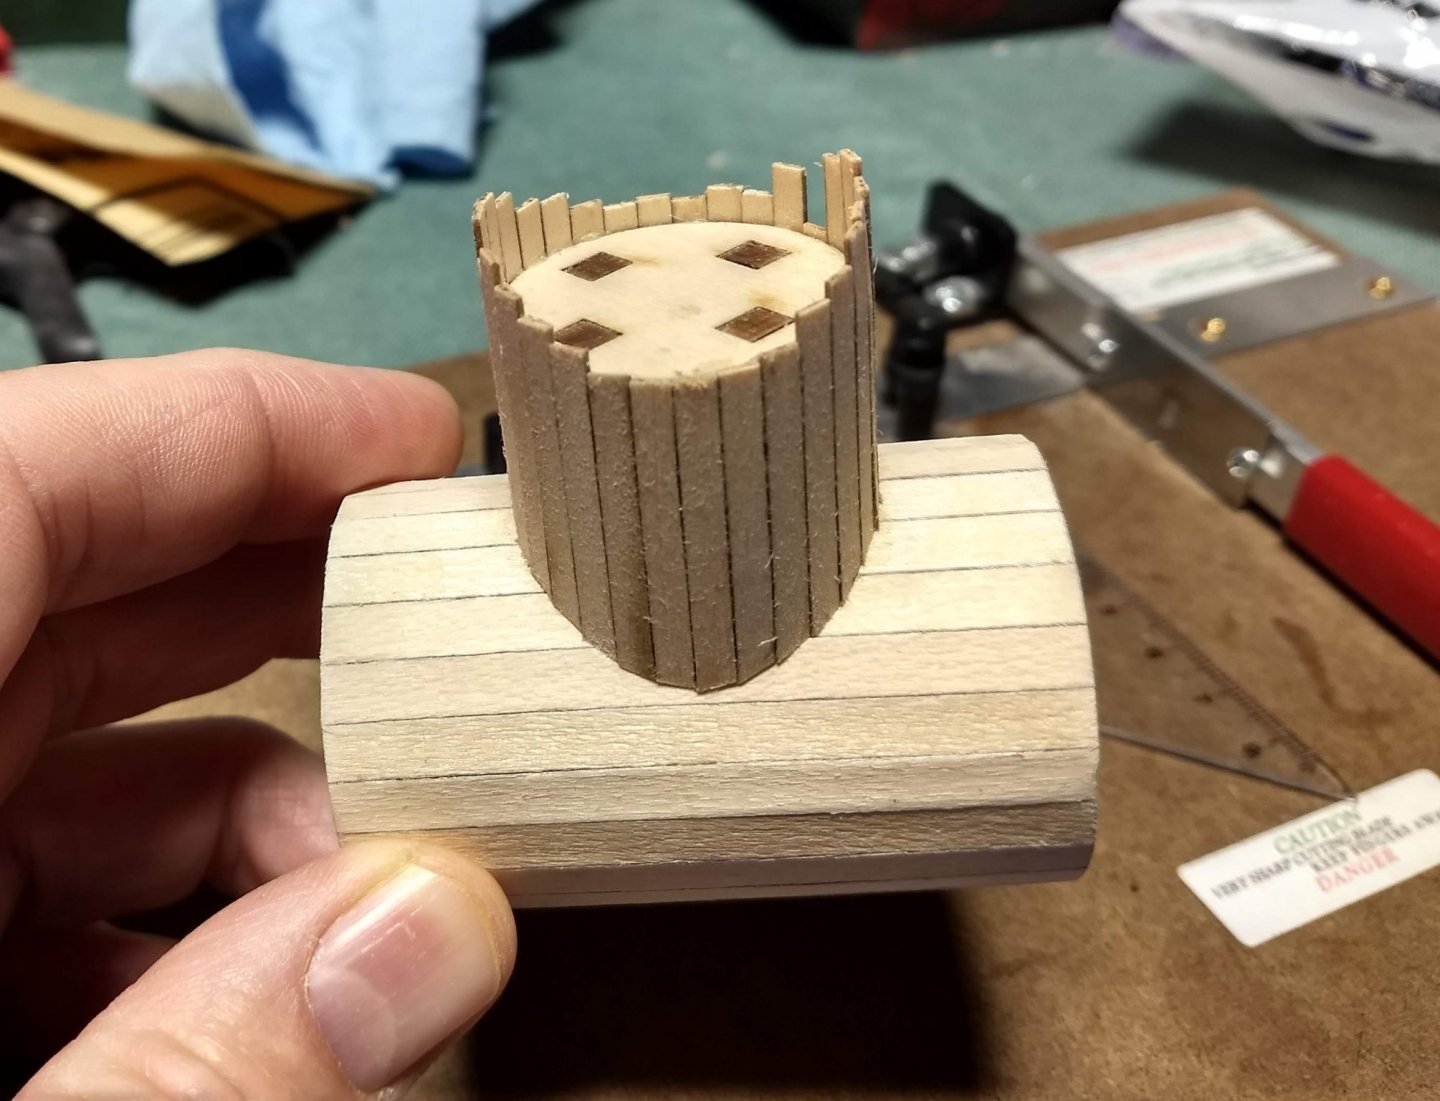
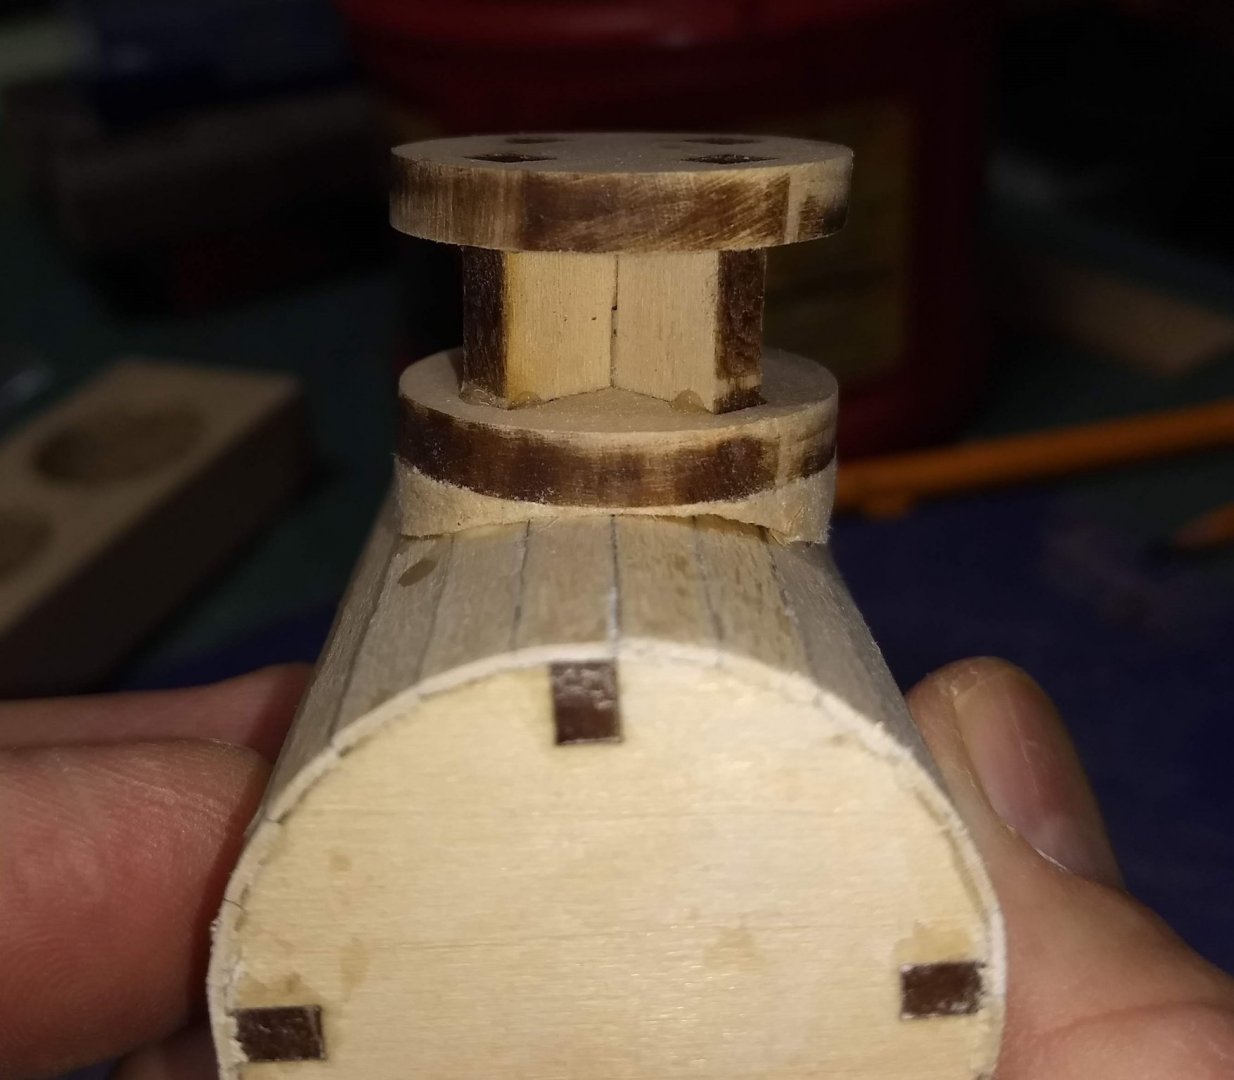
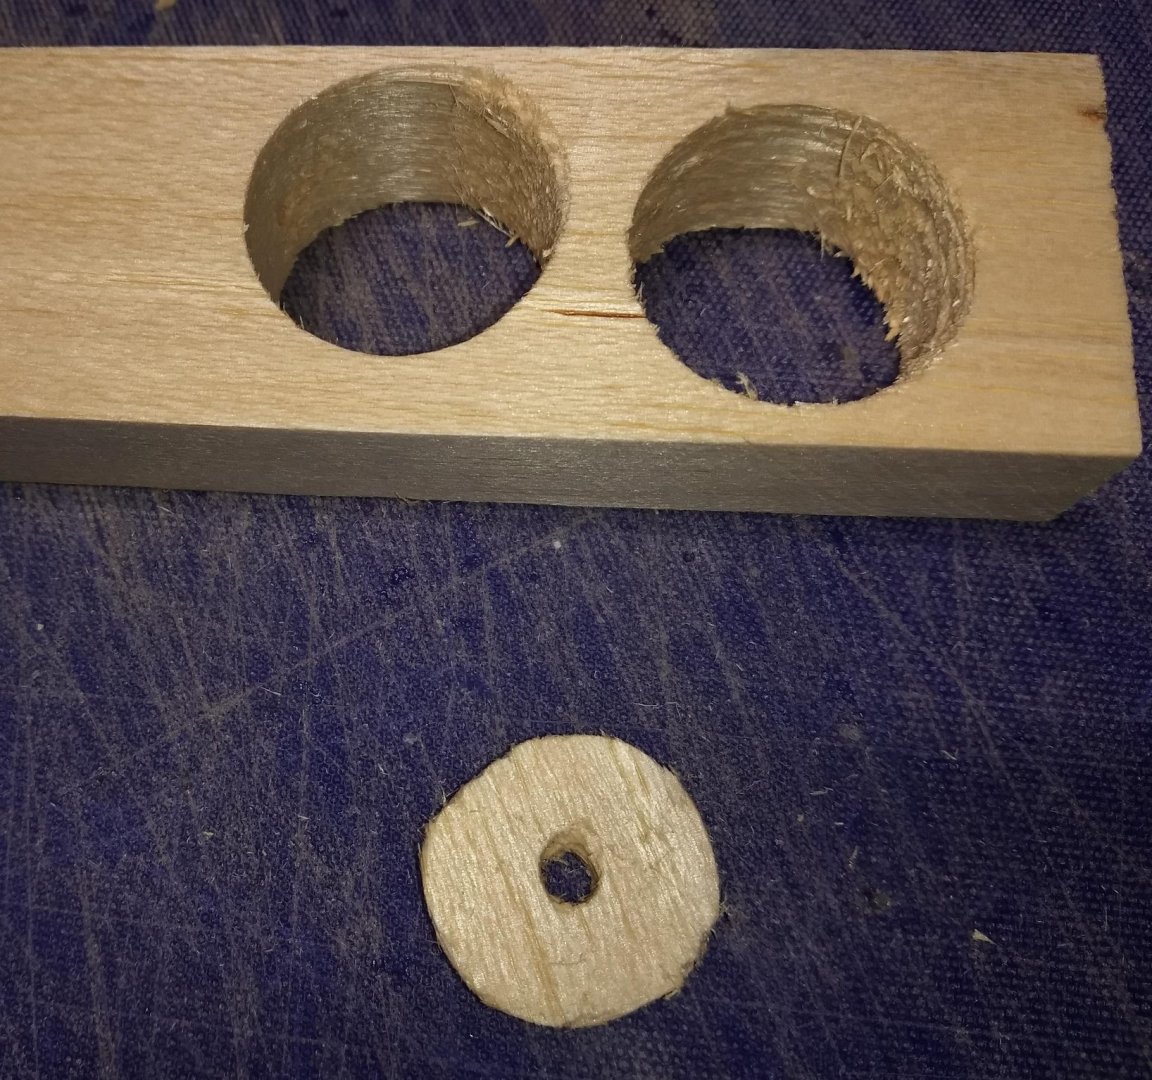
Planking of the hull complete. Time to add the stern section (parts 33-35). Glue them to the hull then trim them to match the curve of the stern section. A few minutes with a Dremel tool and the stern section was complete. If you do not have a rotary tool, you could do with with a file and sandpaper, but it will take a long time. Get some sort of rotary tool, you will not regret it. There is a slight gap between pieces 34-35. When trimming down the stern section, it just seemed like the correct angle. Trying to get a smooth curve that would eliminate the gap just seemed it would be too steep and not match the flow of the hull. This will easily be filled by wood filler later on. The final hull after an initial quick sanding..... I have a lot of sanding and filling in my future. Purists will note I did not use the usual 4 staggered plank pattern with the planking. Instead I mostly just lined of the planks on the same rib. I figured I was painting this hull, so no need to stagger the planks. Having said that,,,, I should have used the 4 staggered plank pattern with the planking. Even though I will not be seen after painting,,, It definably looks better before painting. On to the boiler,,, Instructions call to just somehow glue the steam dome to the main boiler and then somehow plank it. Gluing a flat surface to a round object and then try to plank it, seem a little to tricking for someone of my skill. Instead I did what some others have done and glued a piece of balsa to the top portion and then wrapping the main boiler in sand paper. From there you can easily rub the two pieces together to from a tight fit. Then it will be easy to plank. In my case I use a hole saw to cut the section to be glued to the top portion of the boiler. Balsa is so soft by no means do you need a hole saw to cut it. The Balsa could easily be cut with an exacto. If fact, I am sure it took me more time to set the hole saw set up to drill the hole than if I had just cut the balsa by hand. But,,, I just liked playing with hole saws. Do not show the process here, but this is the final result. Balsa sanded to fit the boiler curve and can easily be glued to the boiler Once glue dries, the top portion can easily be planked,


- 51 replies
-
- 5
-
-
- model shipways
- picket boat
- (and 1 more)
-
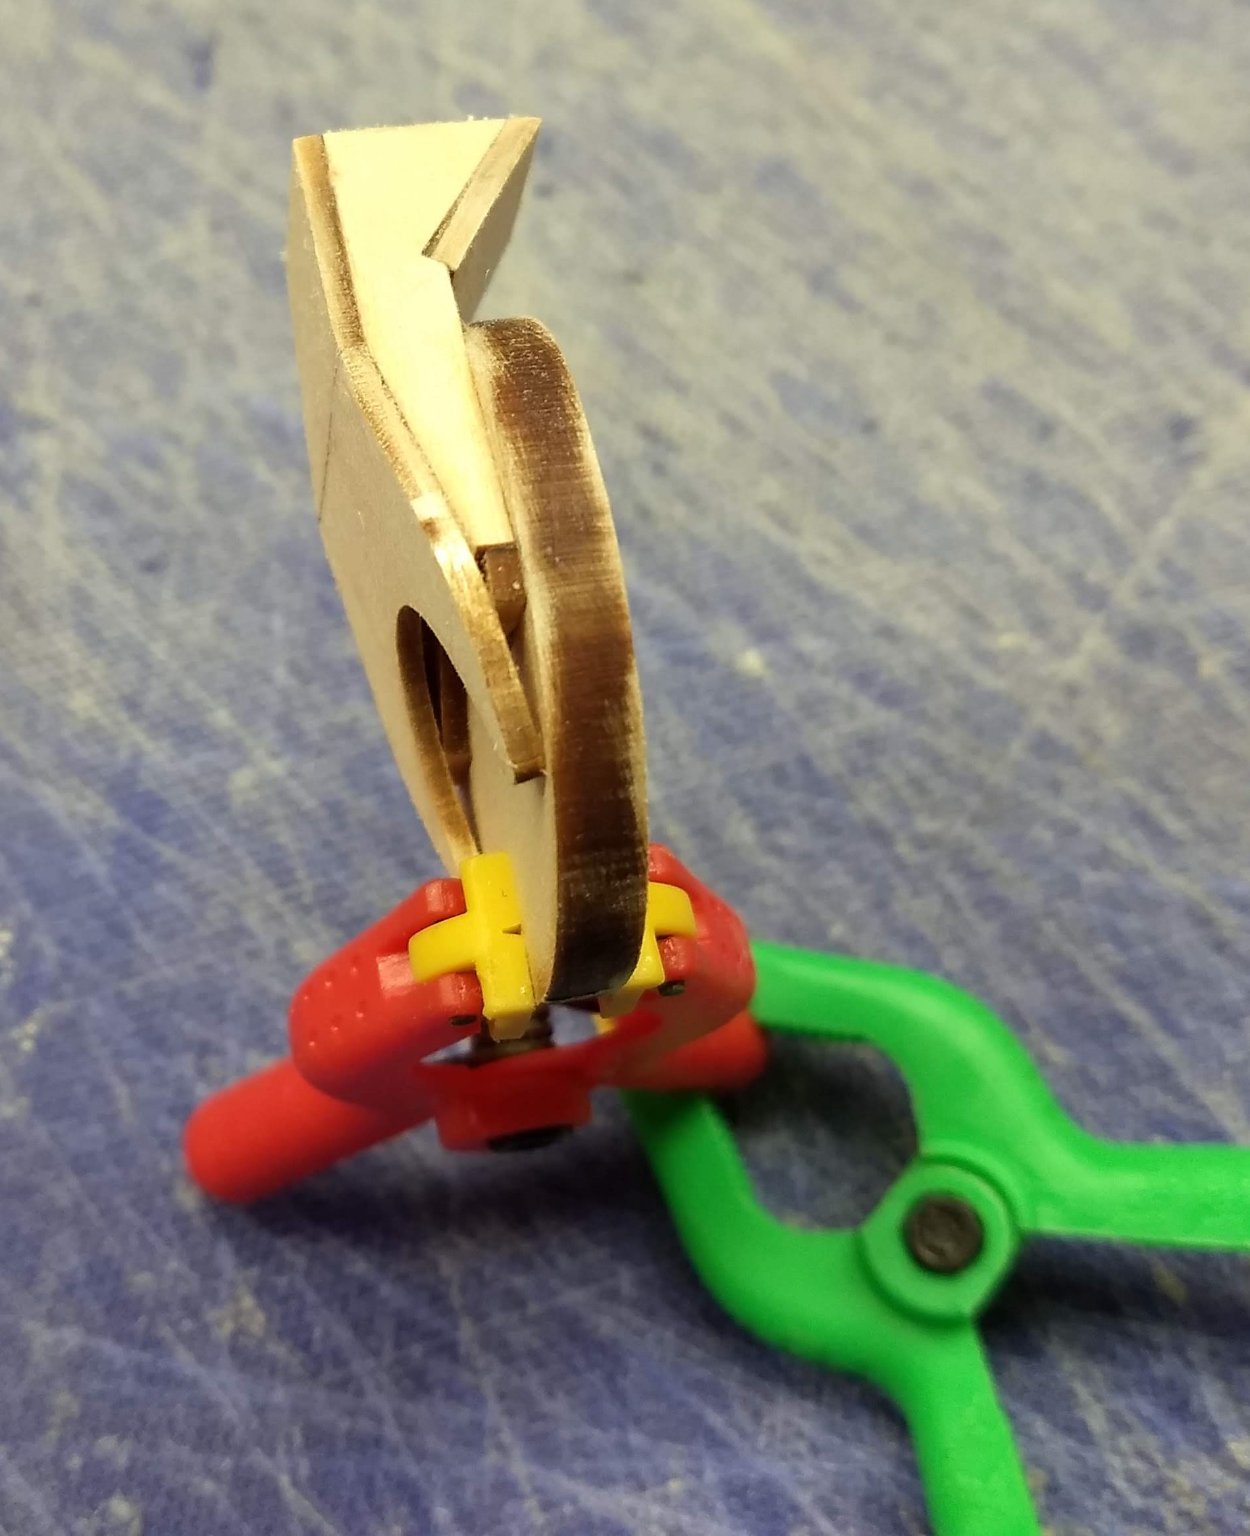
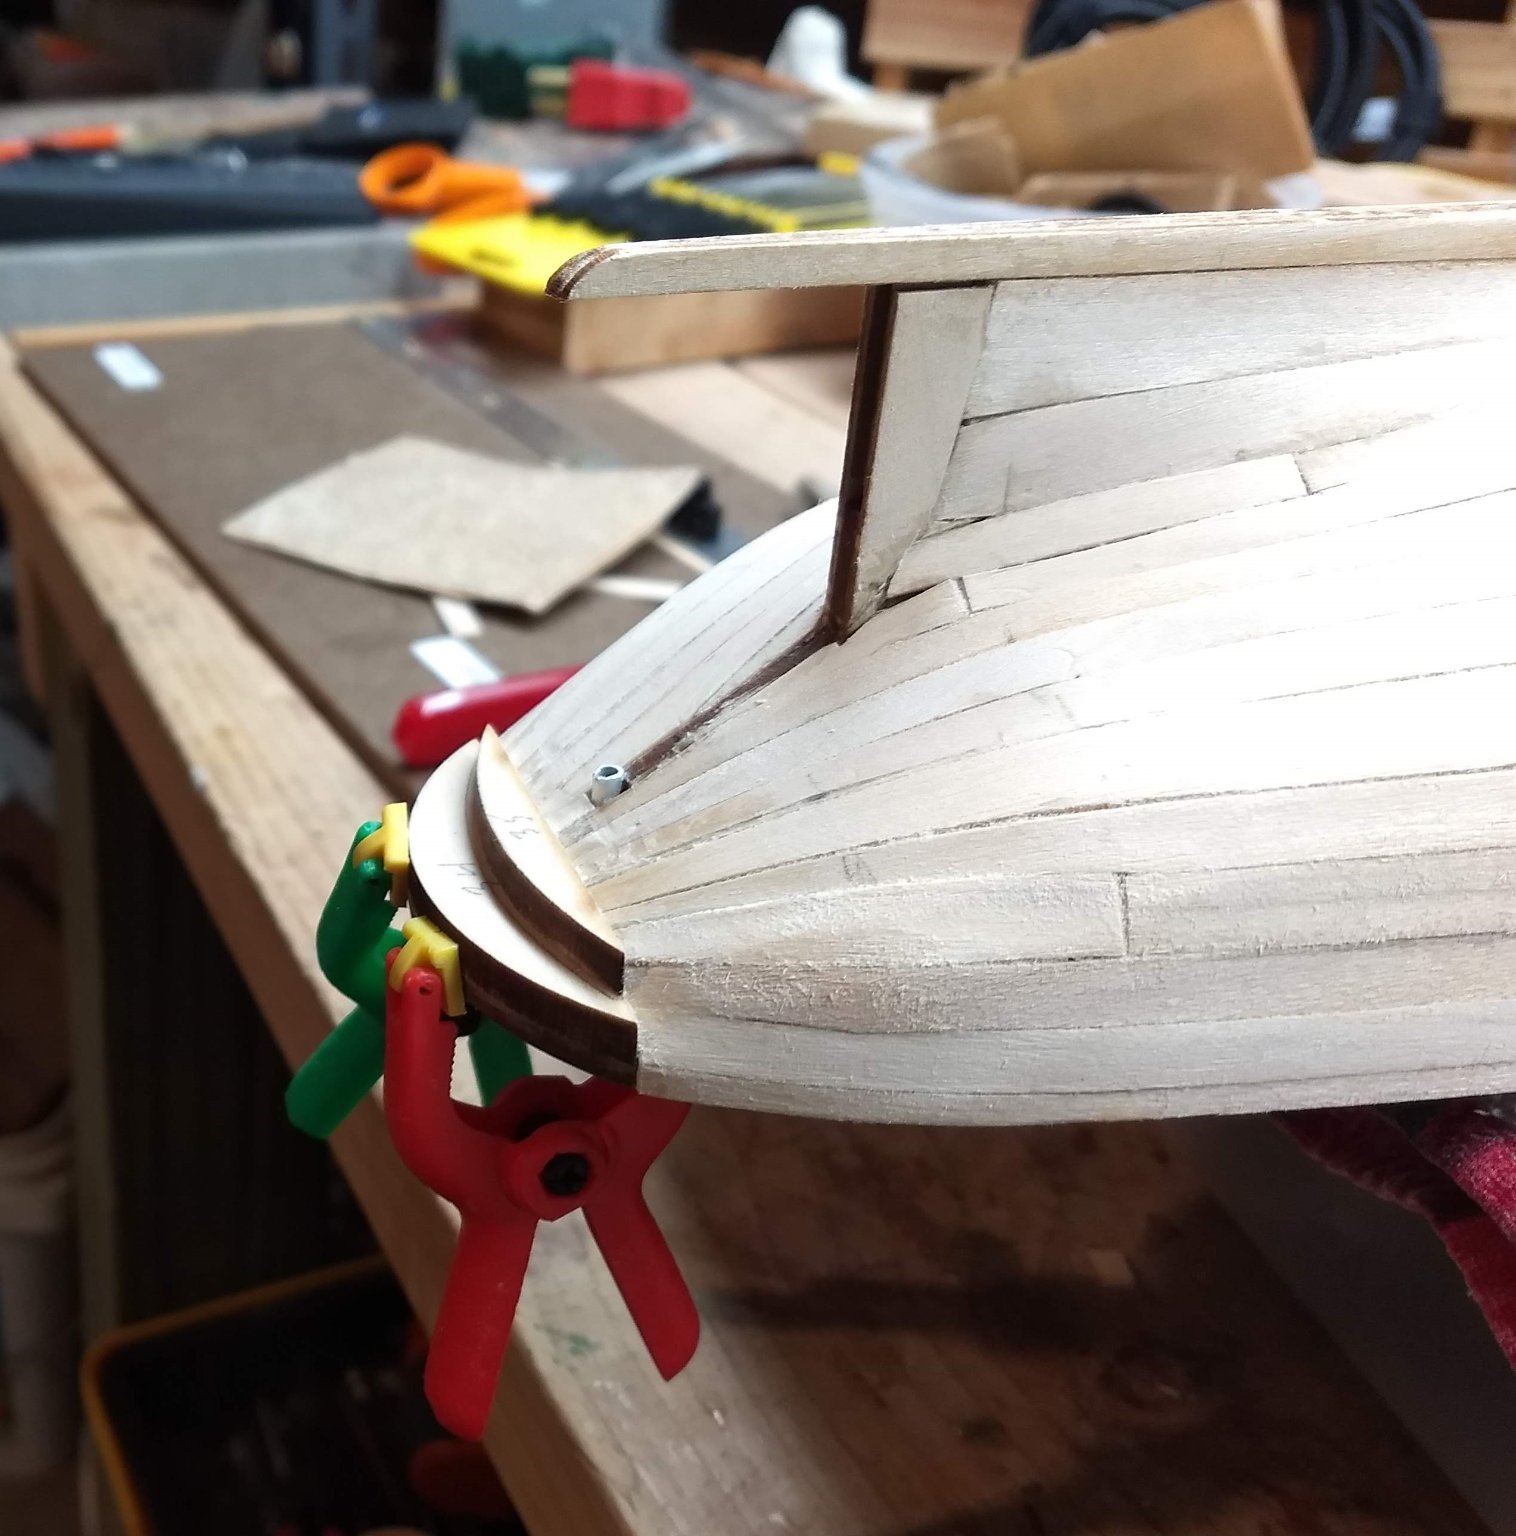
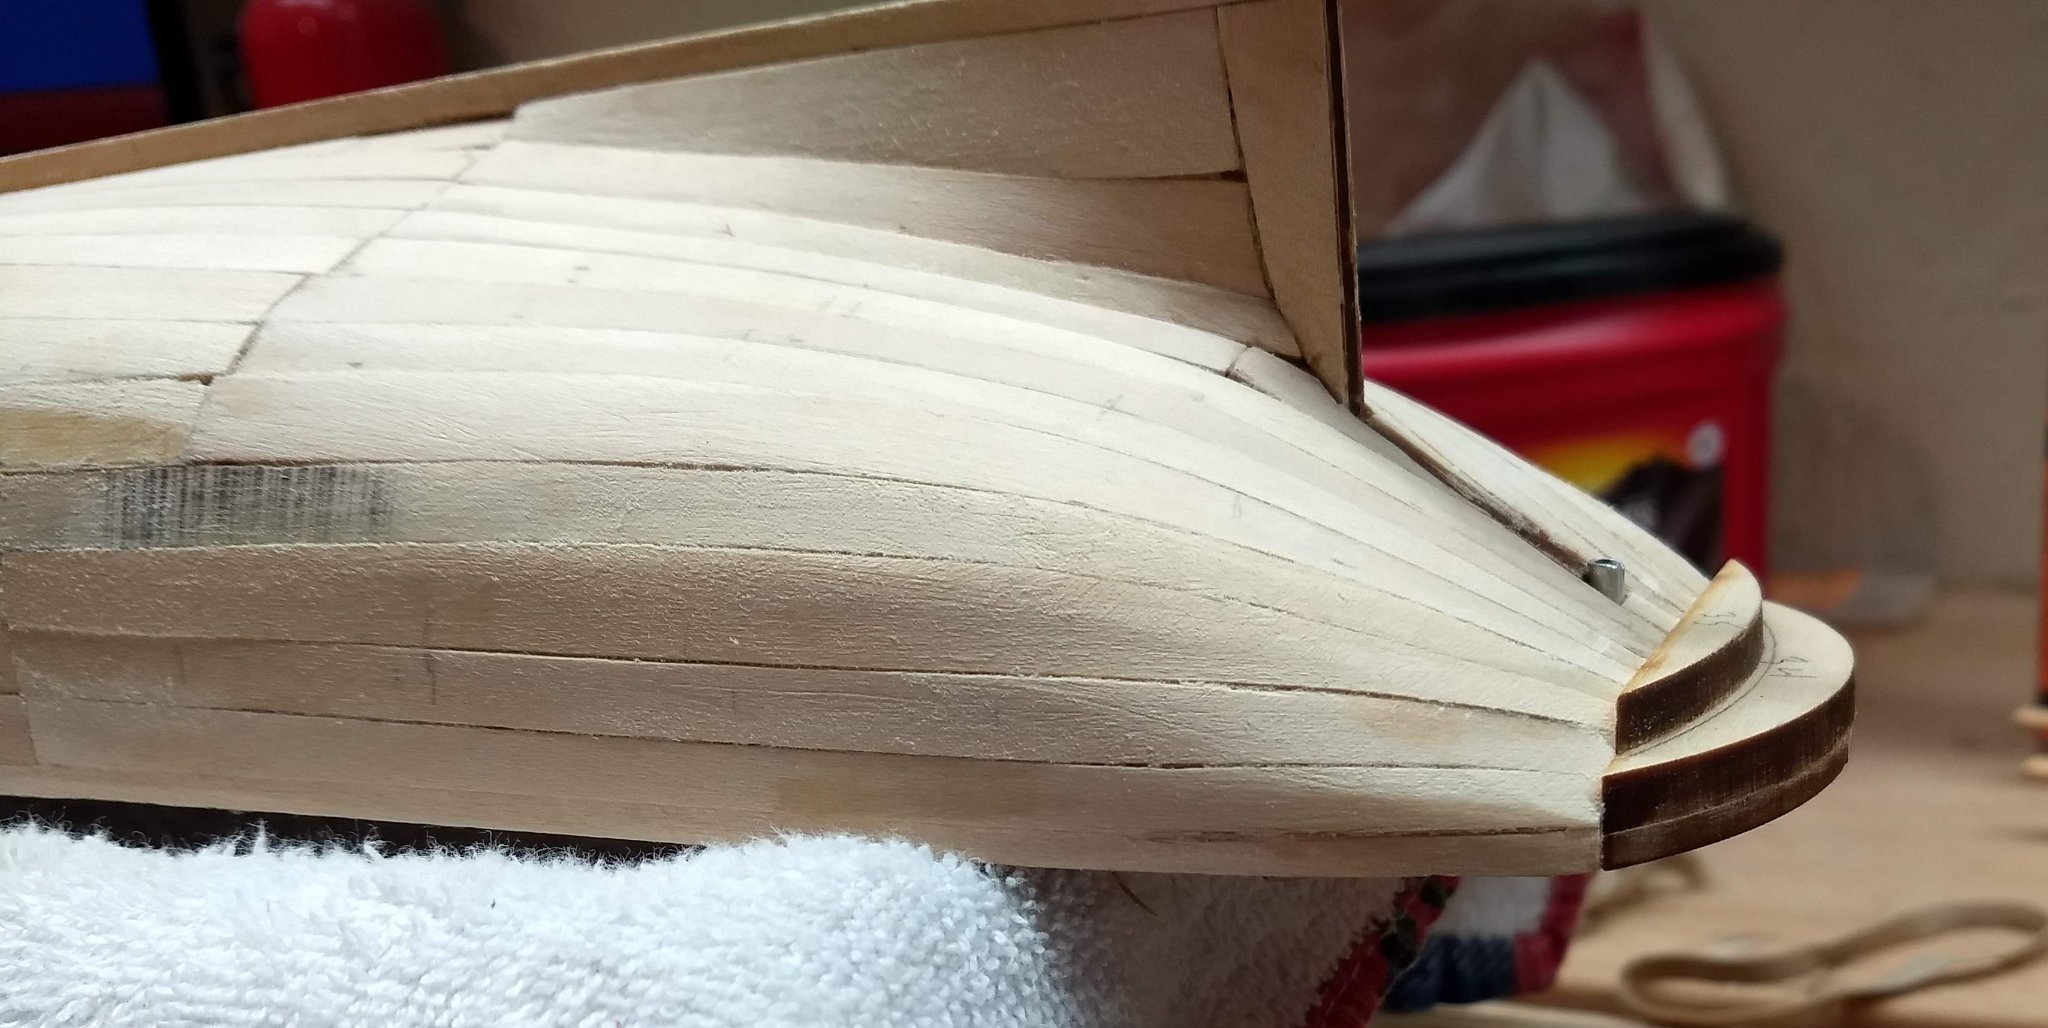
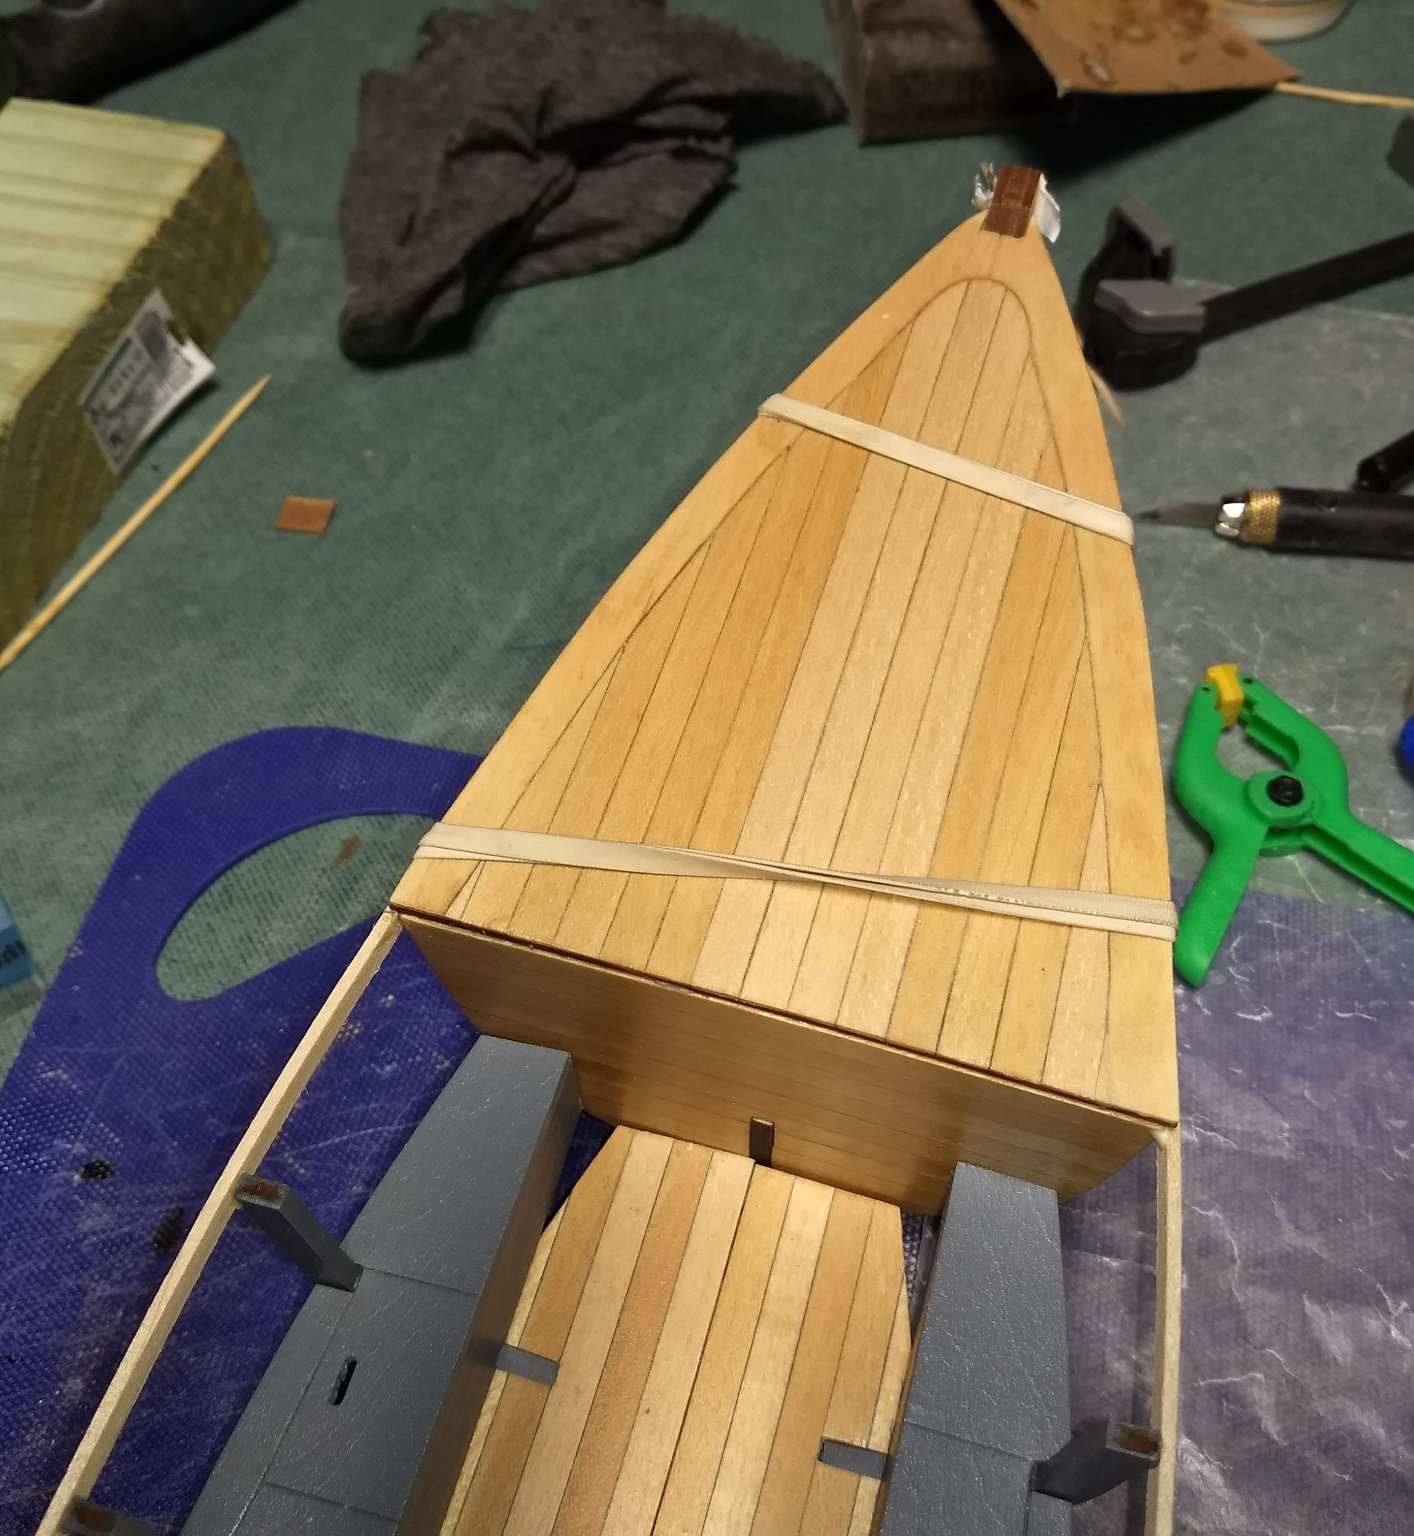
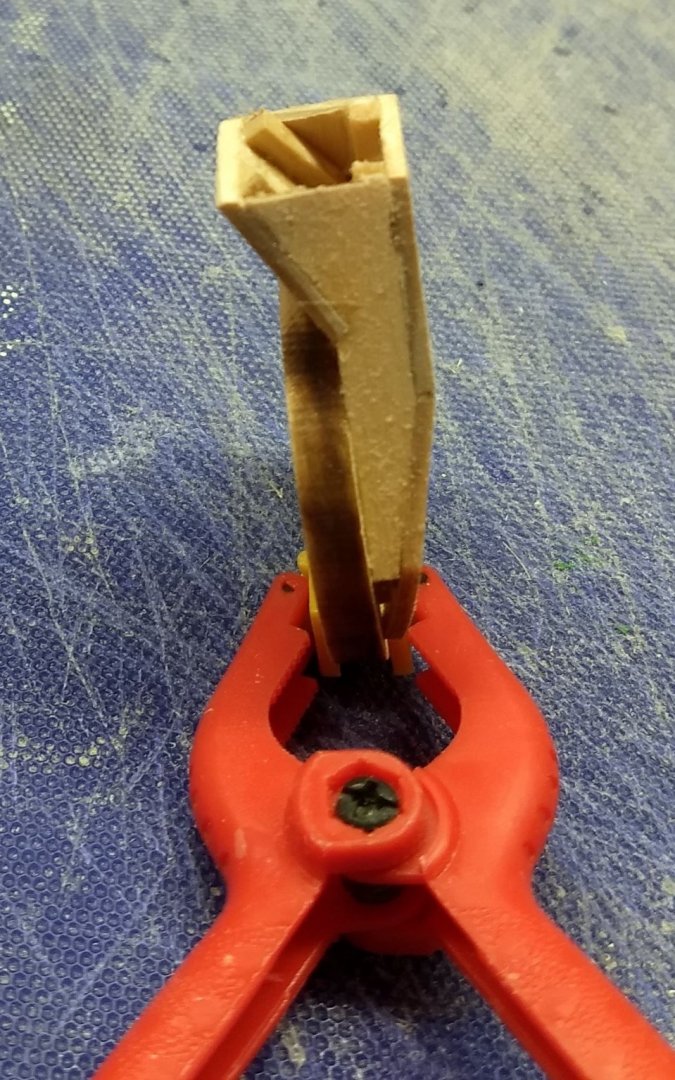
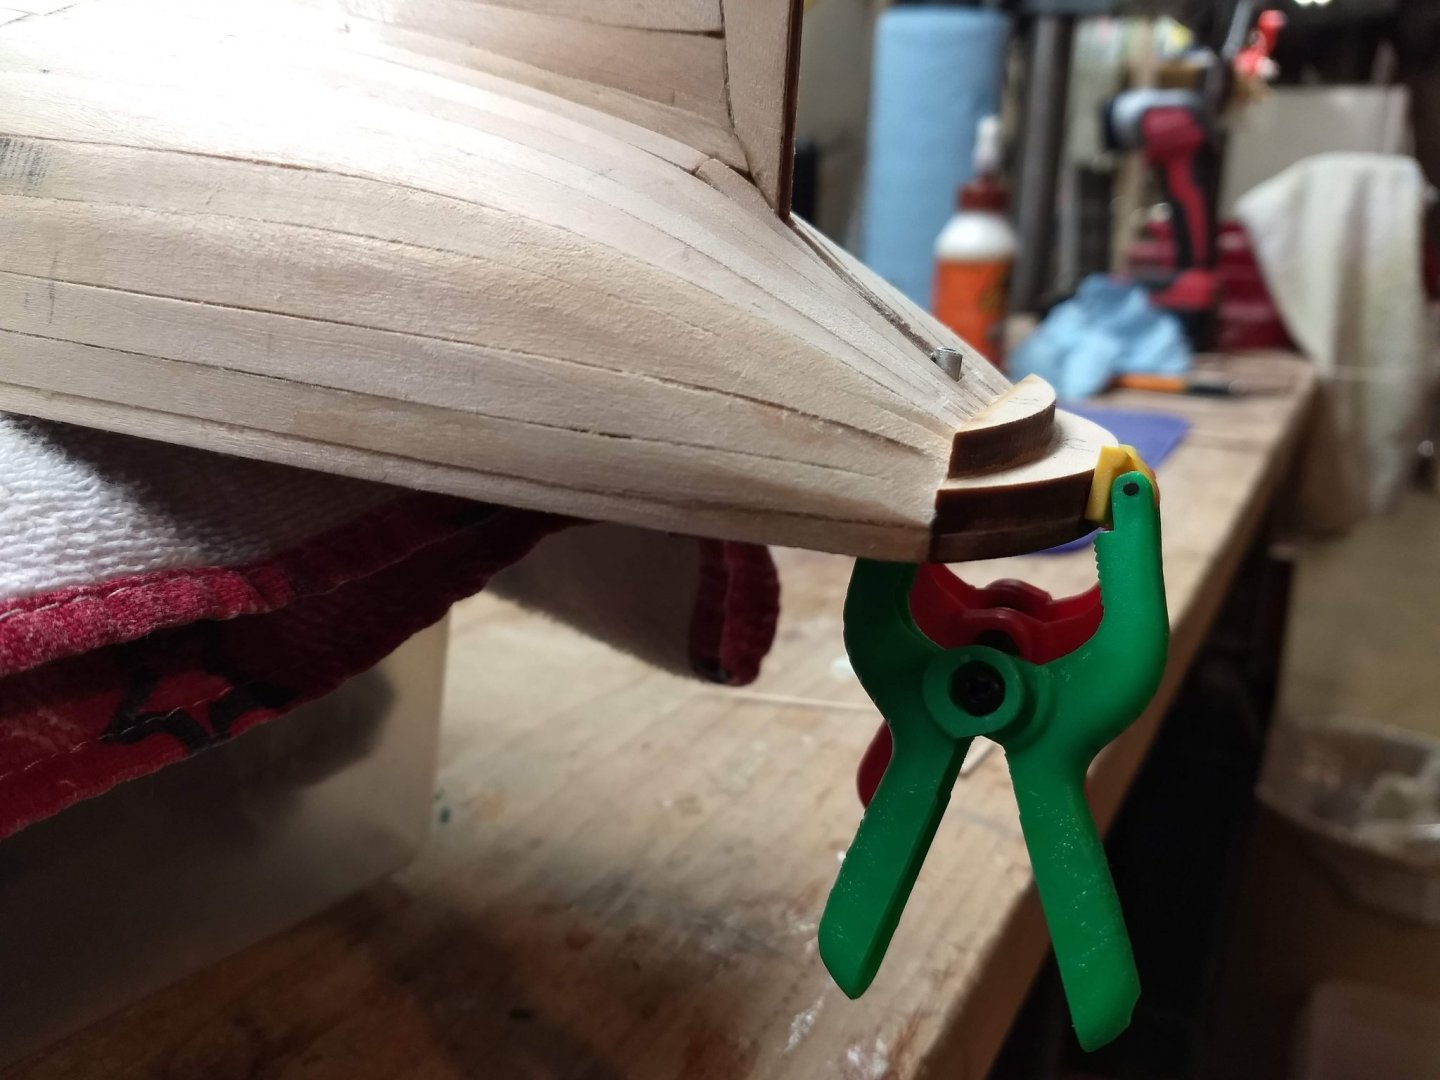
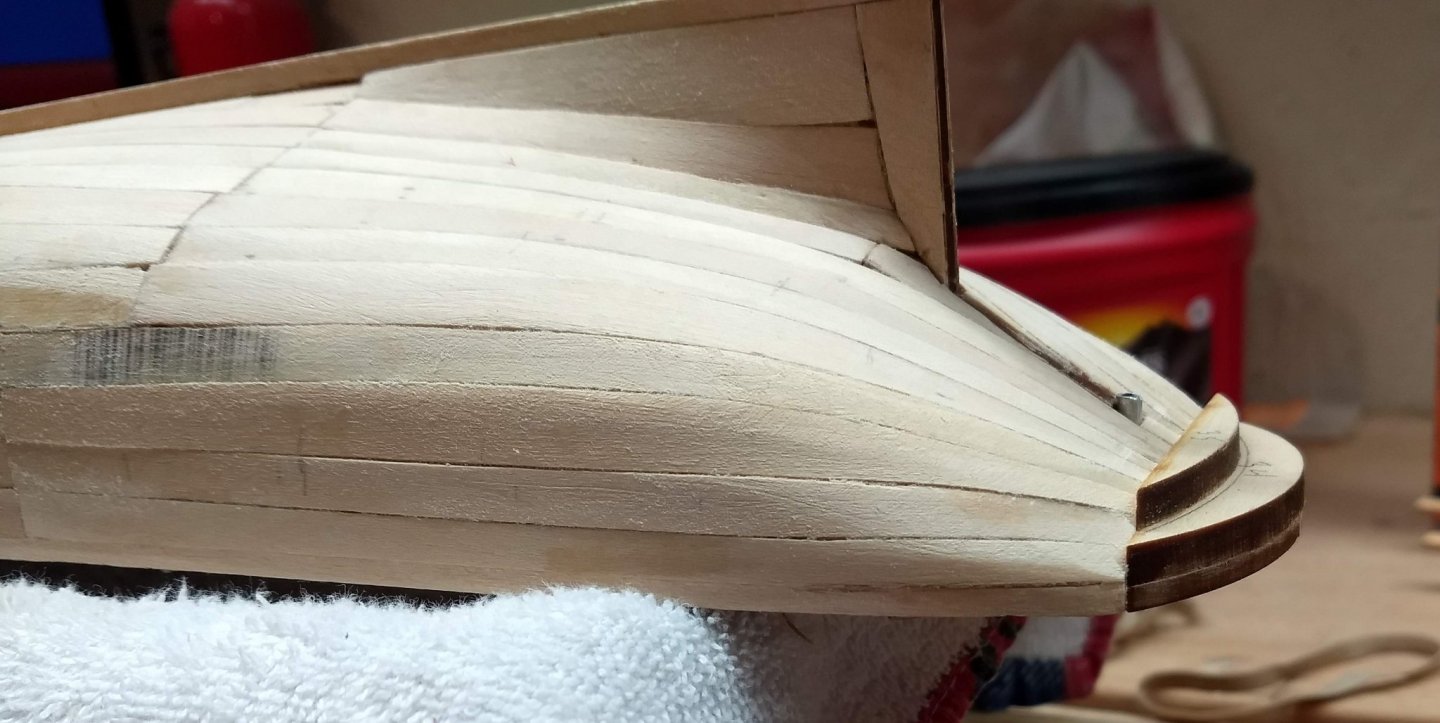
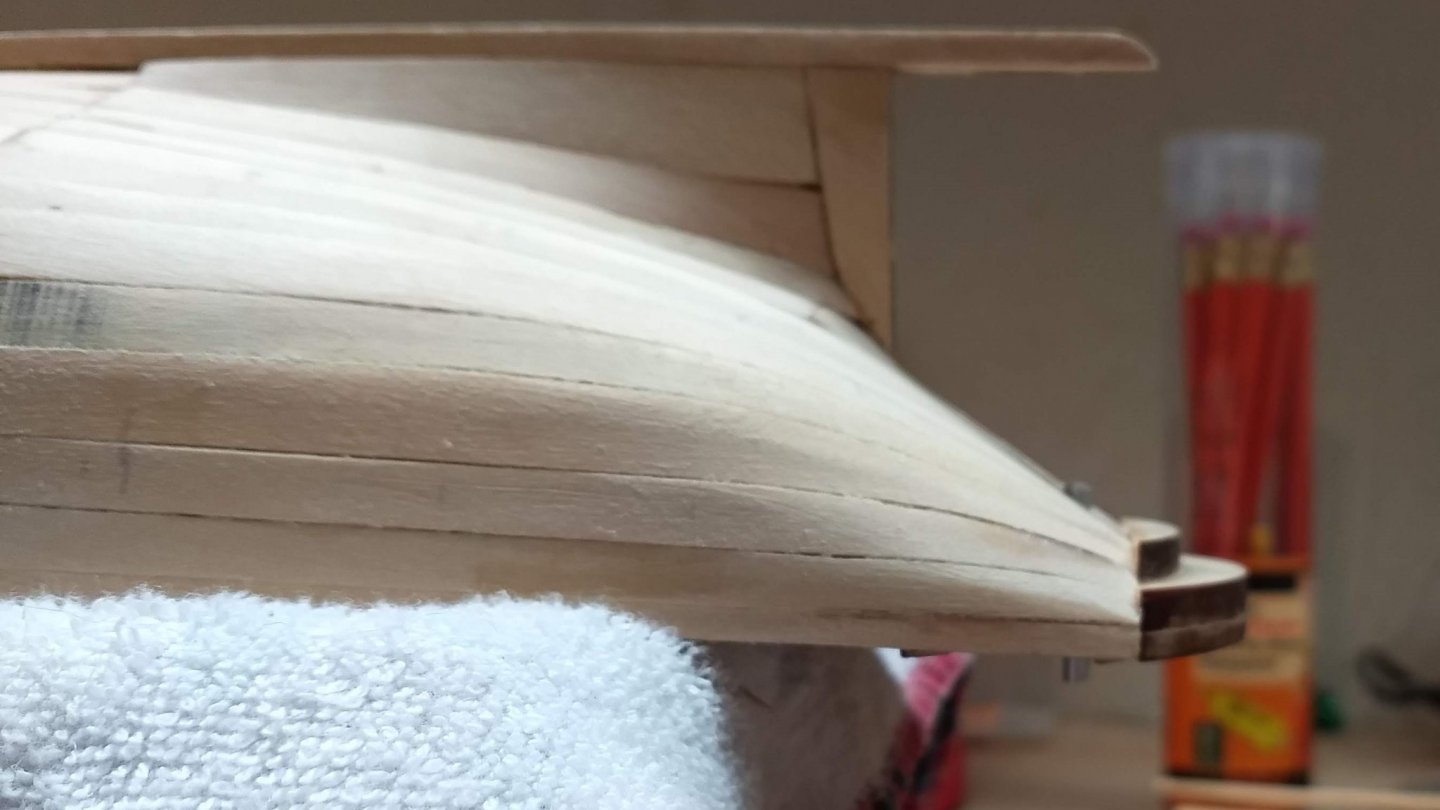
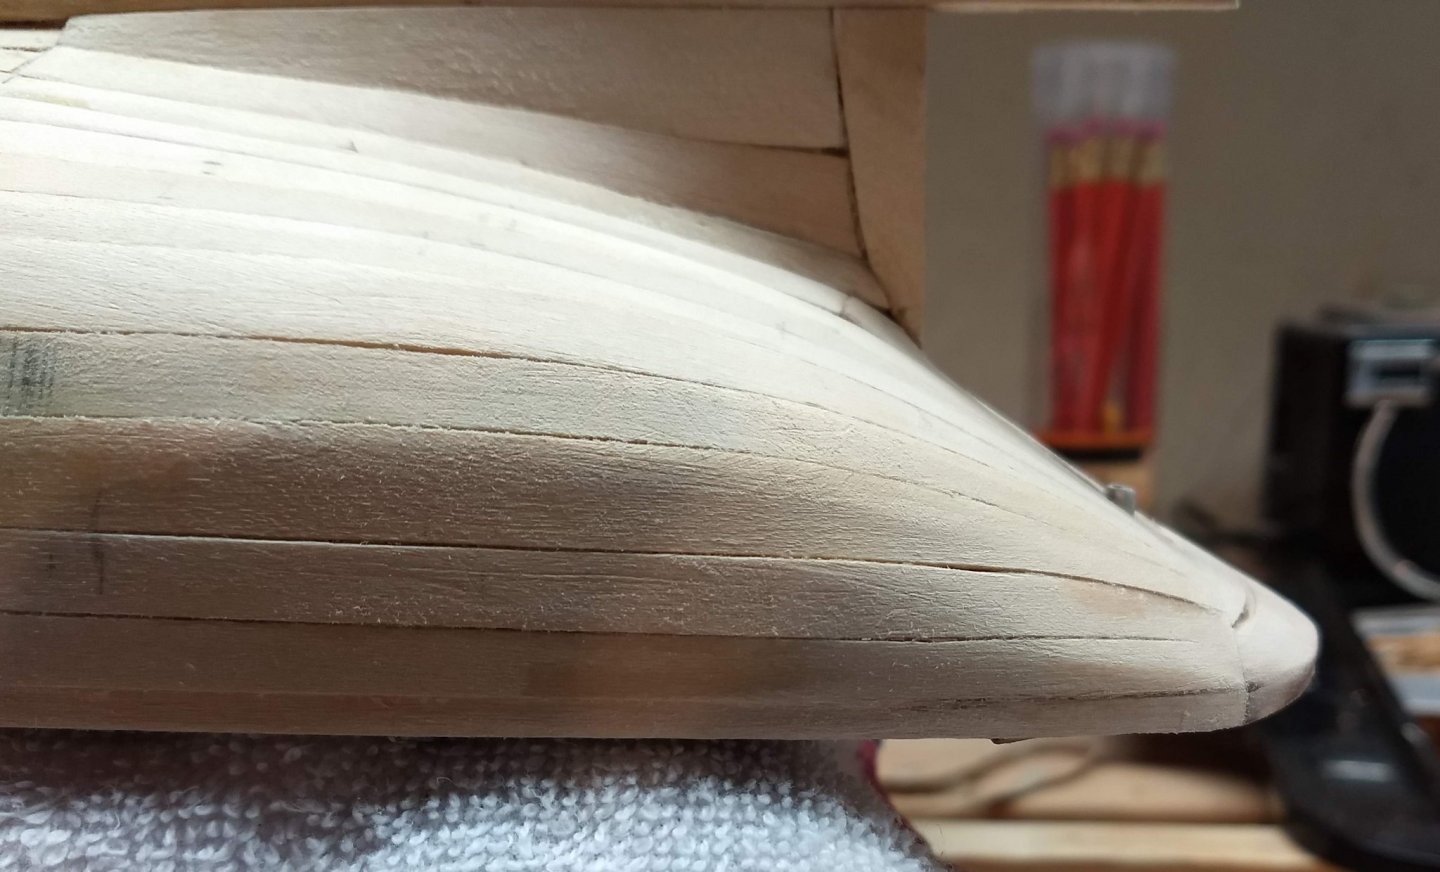
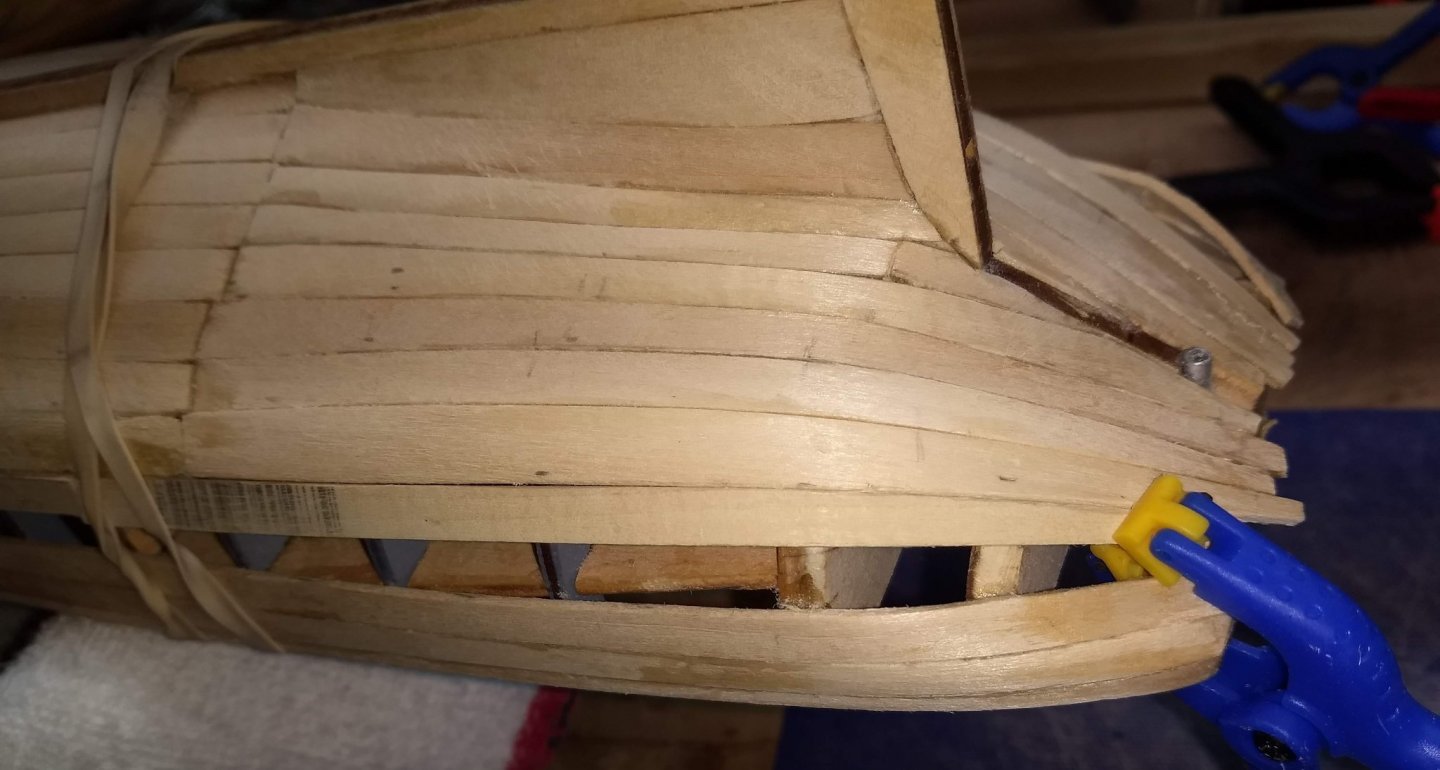
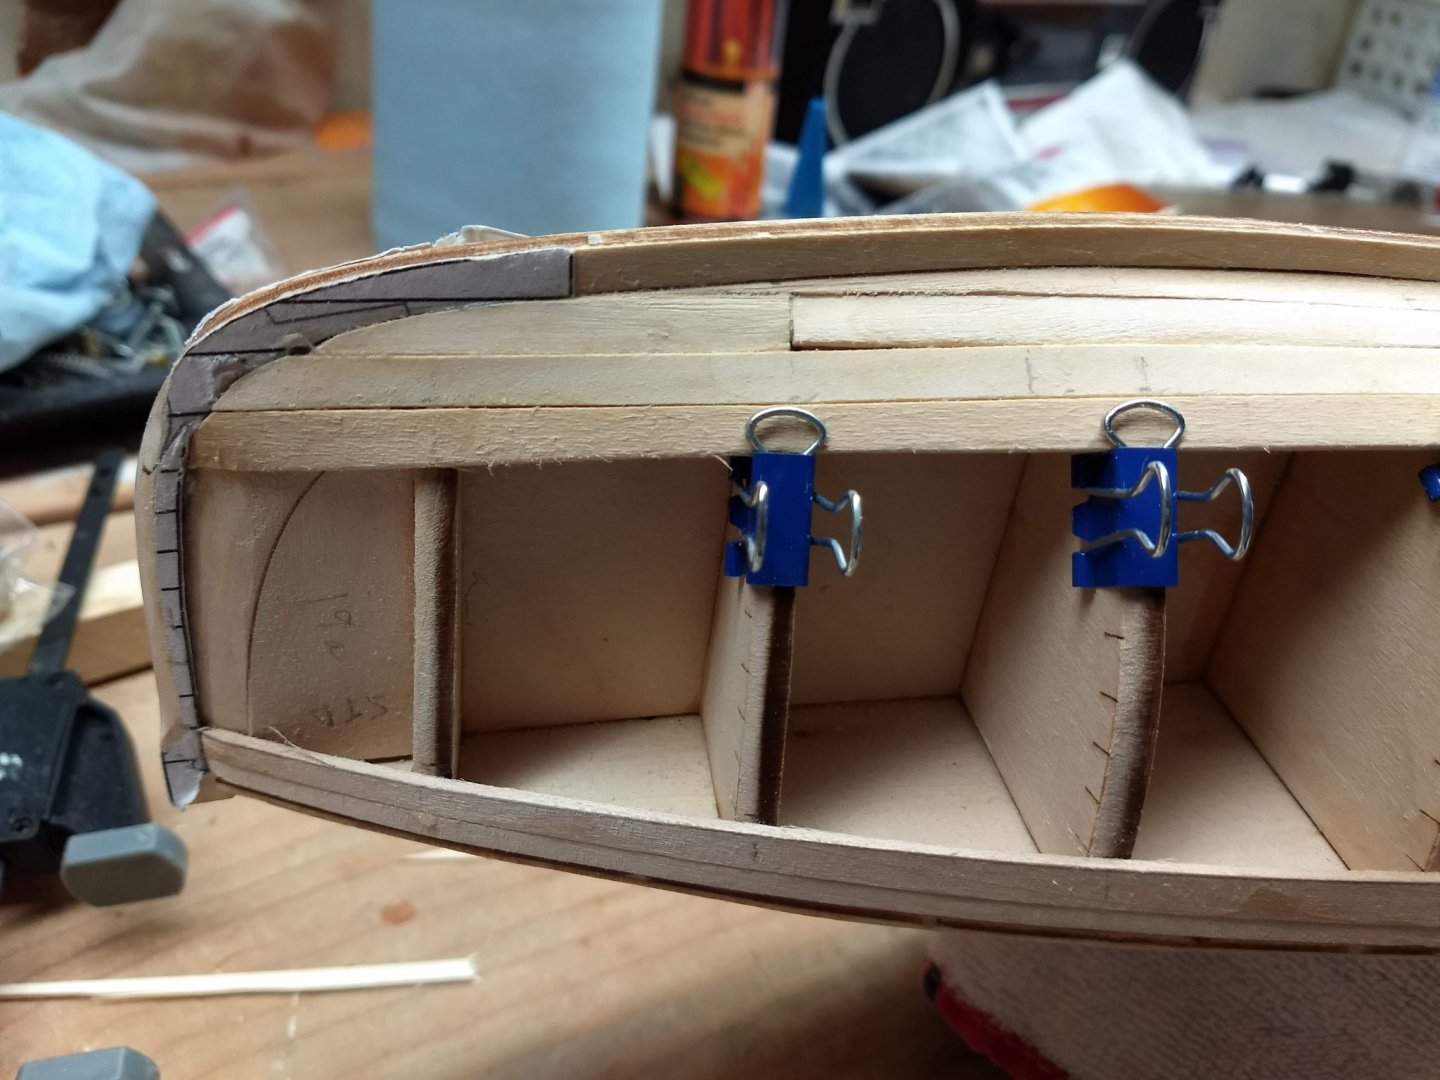
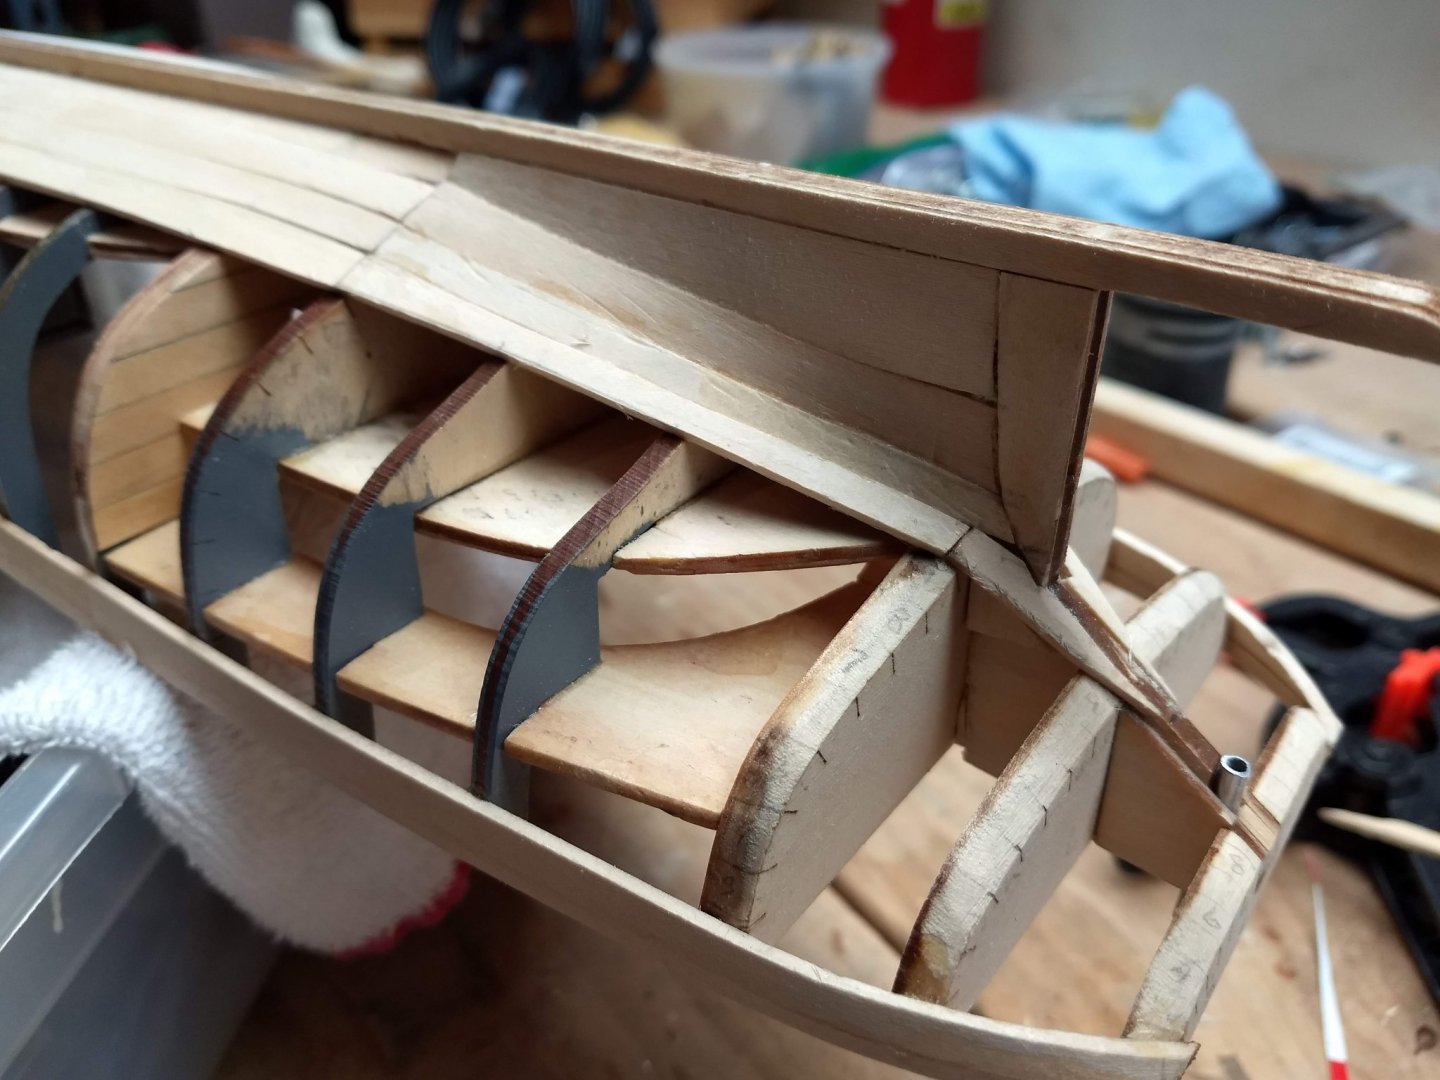
Remainder of the planking is pretty straight foreword and more or less go straight up the hull. One issue I would like to point out is the planks at the stern. Not only are they curved, they also twist. Best way to accomplish this is to soak them and pre-bend them. The wood is very thin and only about a 5-10 minute soaking is all that is needed. Once soaked, the plank bens/twists very easily and can be clamped (with very little effort) into place. Below show strake #5 being held in place by only one clamp and a rubber band. Be sure to let the plank completely dry before gluing to the hull. Once dry, the plank will maintain the shape you clamped it to and can easily be glued to the hull. Don't be tempted to glue it before it is dry as the planks shrink as they dry. If you glue wet planks to the hull, when the plank shrinks, you will have a gap between your seams. Below is a picture of the dry strake ready to be glued to the hull. Note the bend and twist. Again with only one clamp and a rubber band the dry plank is easily glued to the hull. It can be a pain waiting overnight for each plank dry. If you like, you can soak and bend/twist the corresponding planks on each side of the hull stern. That way two planks dry at the same time and next day you can glue two planks instead of just one.
- 51 replies
-
- 4
-
-
- model shipways
- picket boat
- (and 1 more)
-
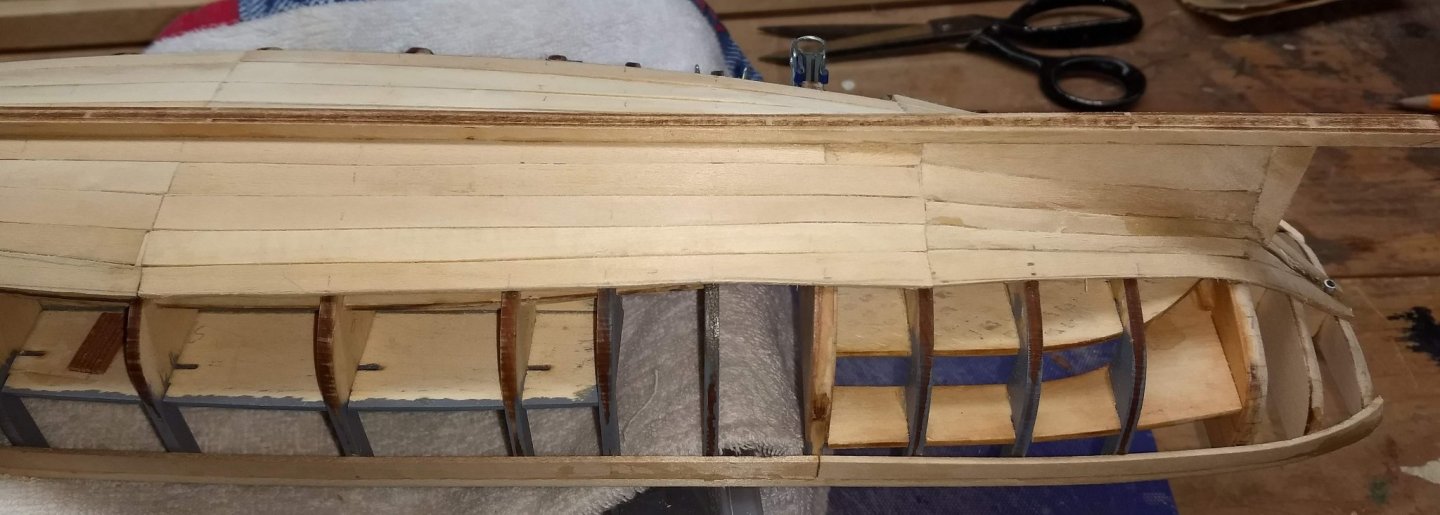
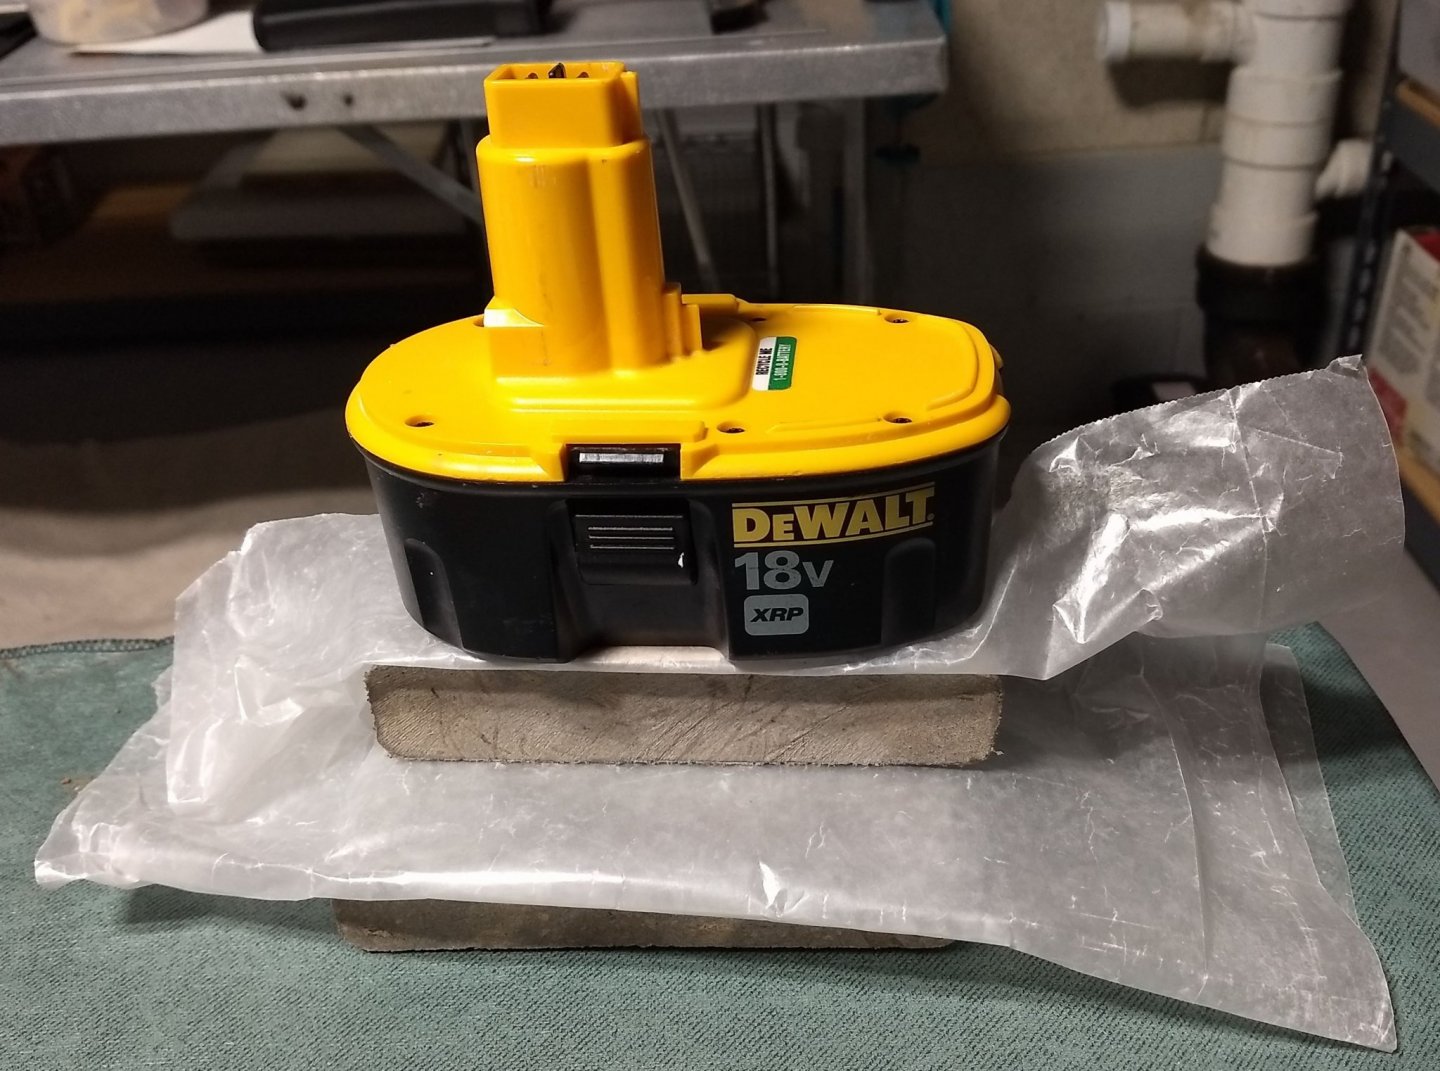
Moving on up the hull (from the keel) the remaining strakes seem pretty straight foreword. Not nearly as complex as the initial strakes 10-13. I would like to point out where the hull curves the most (around strakes 7 & 8 ) it is pretty hard to get a good fit without some fiddling. Trying to make straight wood go around a curve leaves some somewhat wide gaps between the strakes. Not really a big deal is you plan to follow up with wood filler, but one option to make the strakes match up as this curved section of the hull is to pre-bend them to somewhat match the curve. Many ways to do this, but in my case I used some wood molding quarter round and a PVC pipe section. Soak the wood well and then clamp the strake between the molding quarter round and a PVC pipe as shown below. Give it plenty of time to dry (maybe overnight) and then viola you have a curved strake that will match up with the hull curve.


-
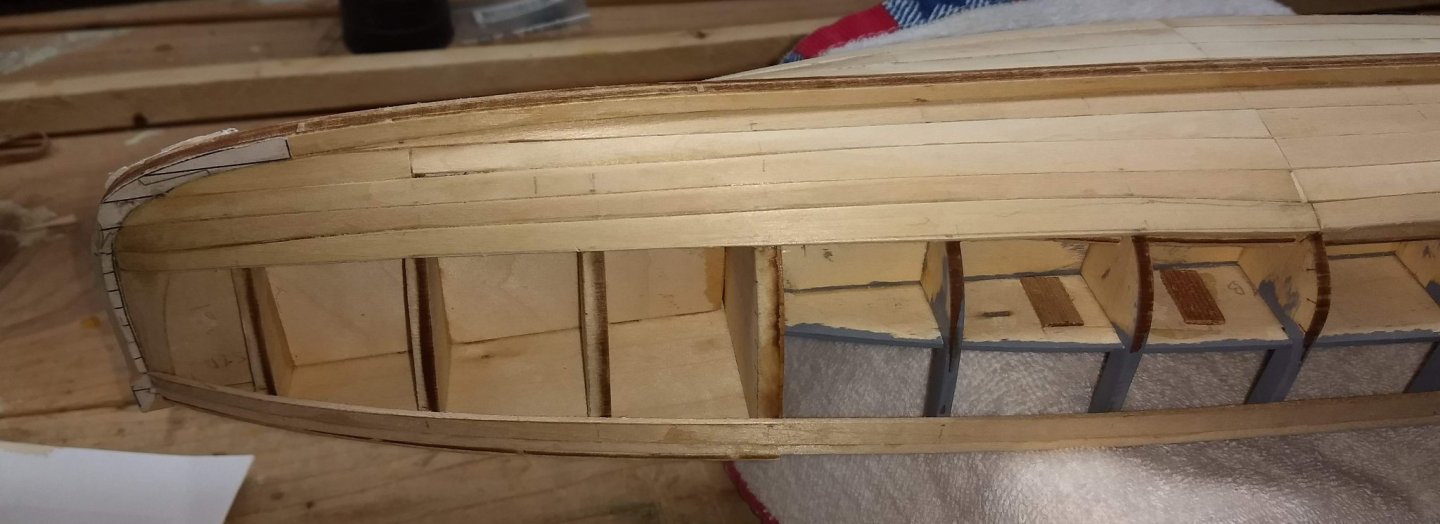
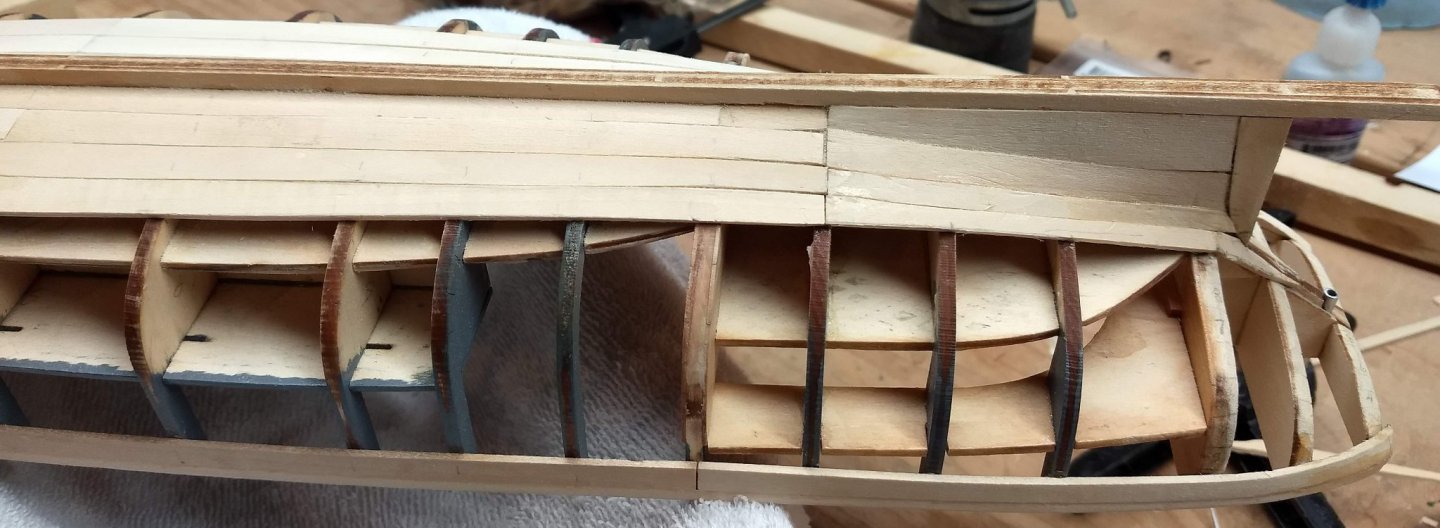
Instructions call to next build strike 13 (the one along the keel) and build strikes up from the bottom and down from the top. I guess meeting in the middle about strike 6 or 7. Looking at the plans, strikes 9-13 are the most challenging as the plans are not really clear as to where they lay at the stern - especially as they lie relating to curved part 23 and the steering column. In the bow section only strikes 12 and 13 took a little studying. For a seasoned builder, the plans may seem easy, but for me I had a really hard time figuring out where strikes 9-13 start and end. Having said that, the plans do seem to be correct. Just take a lot of studying. Make sure you fully understand the location of strikes 9-13 and you will be OK. Below is my interpretation of strikes 9-13. I think they are correct as to the plans, but I will let you be the judge. One more thing. I am with out a doubt the worlds worse "spiler" (if that is a word). Spiling the plans was a challenge for me, and I would be very disappointed if this was to be a natural wood finish hull. Fortunately with wood filler and paint, the hull in the end will be fine - just looks a little (shall we say) "rough" at this time. Below are some pictures (in my opinion) of strikes 10-13 as the stern section In the bow section, note where strikes 12-13 end. After that the strikes at the bow are pretty straight foreword. Below are some pictures after strike 9 was added. As I mentioned,,, pretty crude, but should turn out of OK in the end - A good wood filler can be your best friend. Photos (15).zip


- 51 replies
-
- 3
-
-
- model shipways
- picket boat
- (and 1 more)
-
Forgot to mention above but could not hold off any more without gluing in bulkhead #4 do to the fact that it is glued to the first row of planking. As expected I had to do some "adjustments" to the foredeck and bulkhead to account for the 1/32 planking. End result came out pretty good. One issue, I did not think about,,,,,, I was so excited to finally get the 4th bulkhead and foredeck to match that I ended up gluing on the foredeck. Instructions say to glue it in later. At the time I felt I might as well glue it in now as I could not see a reason to wait. Naturally after I glued it in I discovered the reason to glue in the foredeck later. Main issue is that now there are no bulkheads to hold the hull upside down while I put in the planking.. I guess I will be planking with the hull on my lap... On to the rest of the planking.... It has been a while since I last posted do to the fact (that to someone like me who has never spiled a plank) the instructions are about as clear as mud as to the planking process. The are especially unclear as to where strakes 11-13 start/stop and how they work with the Stealer planks. In addition strakes 9-10 around the stern post seemed pretty unclear as to their location at the stern post. Anyway, after a lot of study of the plans and other log posts I feel I finally have a handle on the planking process. So here we go. Below is the first section of the 2nd plank. Instructions call to break up each strake into three parts, but for this 2nd plank I decided to just make it two sections. The curve/twist is not to great that a few clamps can not handle it. I will break up each strake into the suggested three sections later on when the curve/twist is more severe.
- 51 replies
-
- 2
-
-
- model shipways
- picket boat
- (and 1 more)
-
Ryland I appreciate your comments,,, I am pretty new to modeling and appreciate the feedback. john
- 51 replies
-
- 1
-
-
- model shipways
- picket boat
- (and 1 more)
-
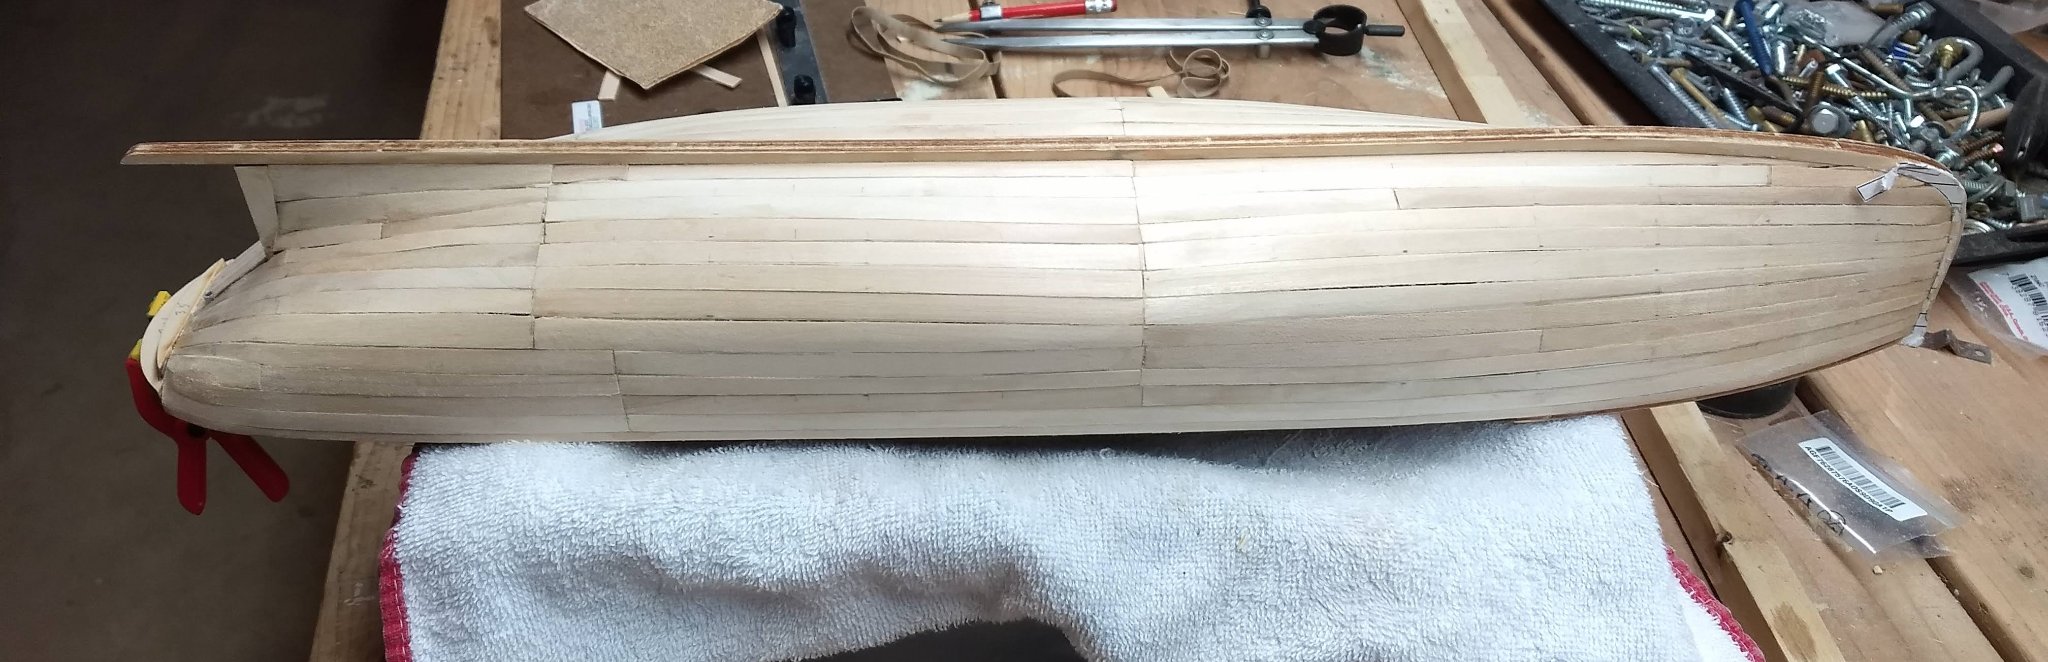
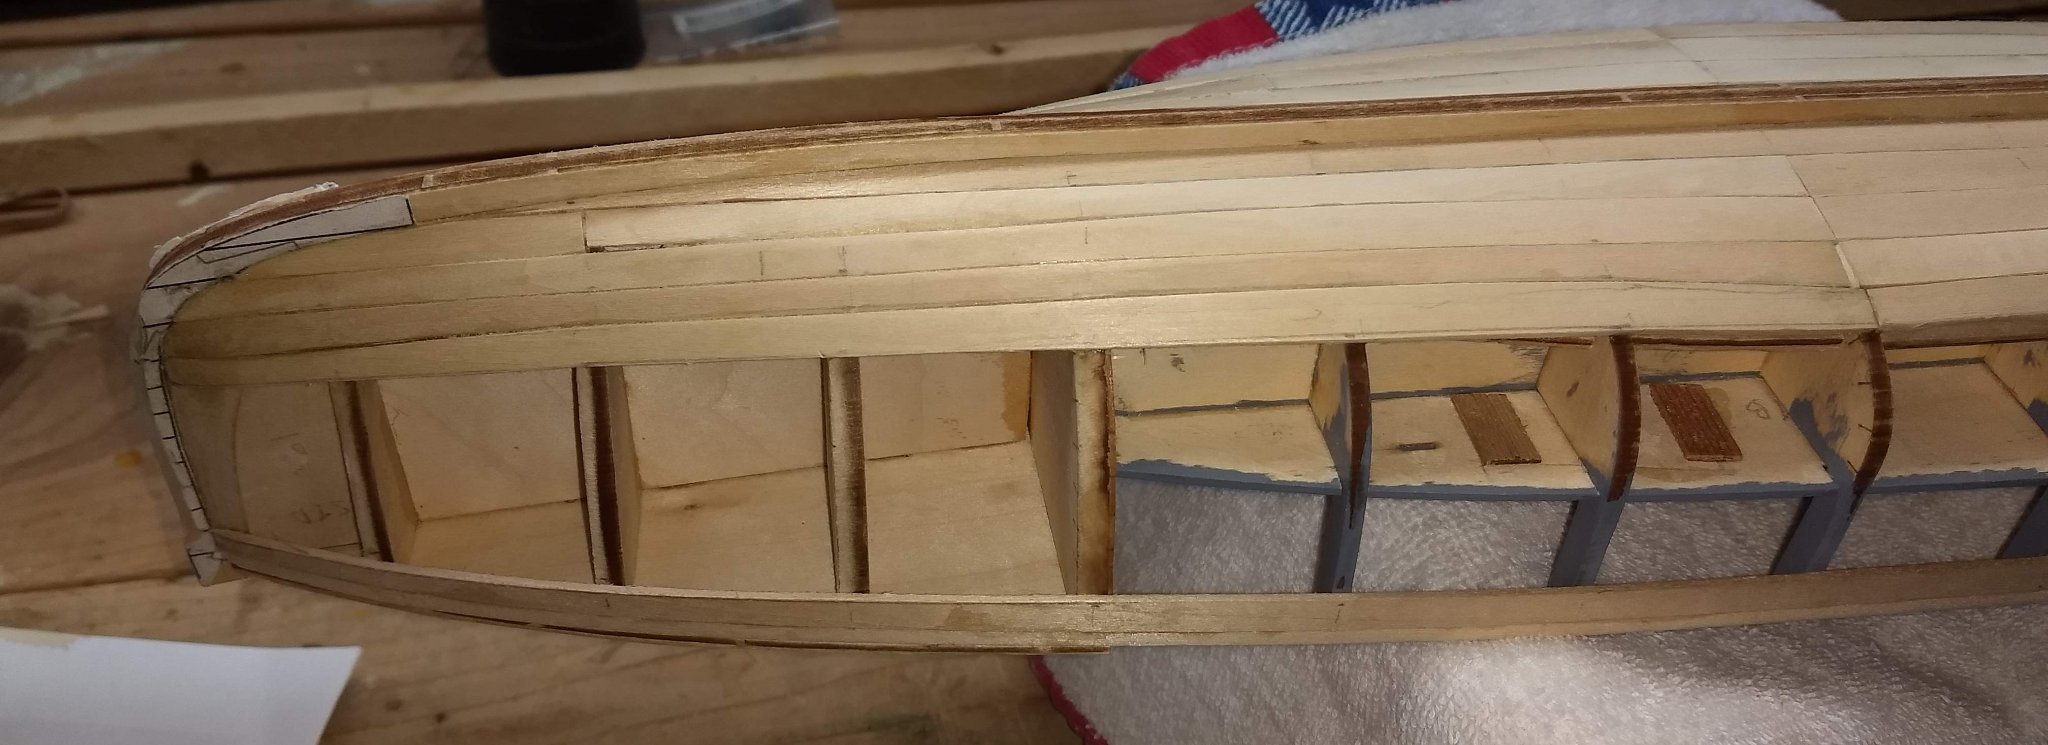
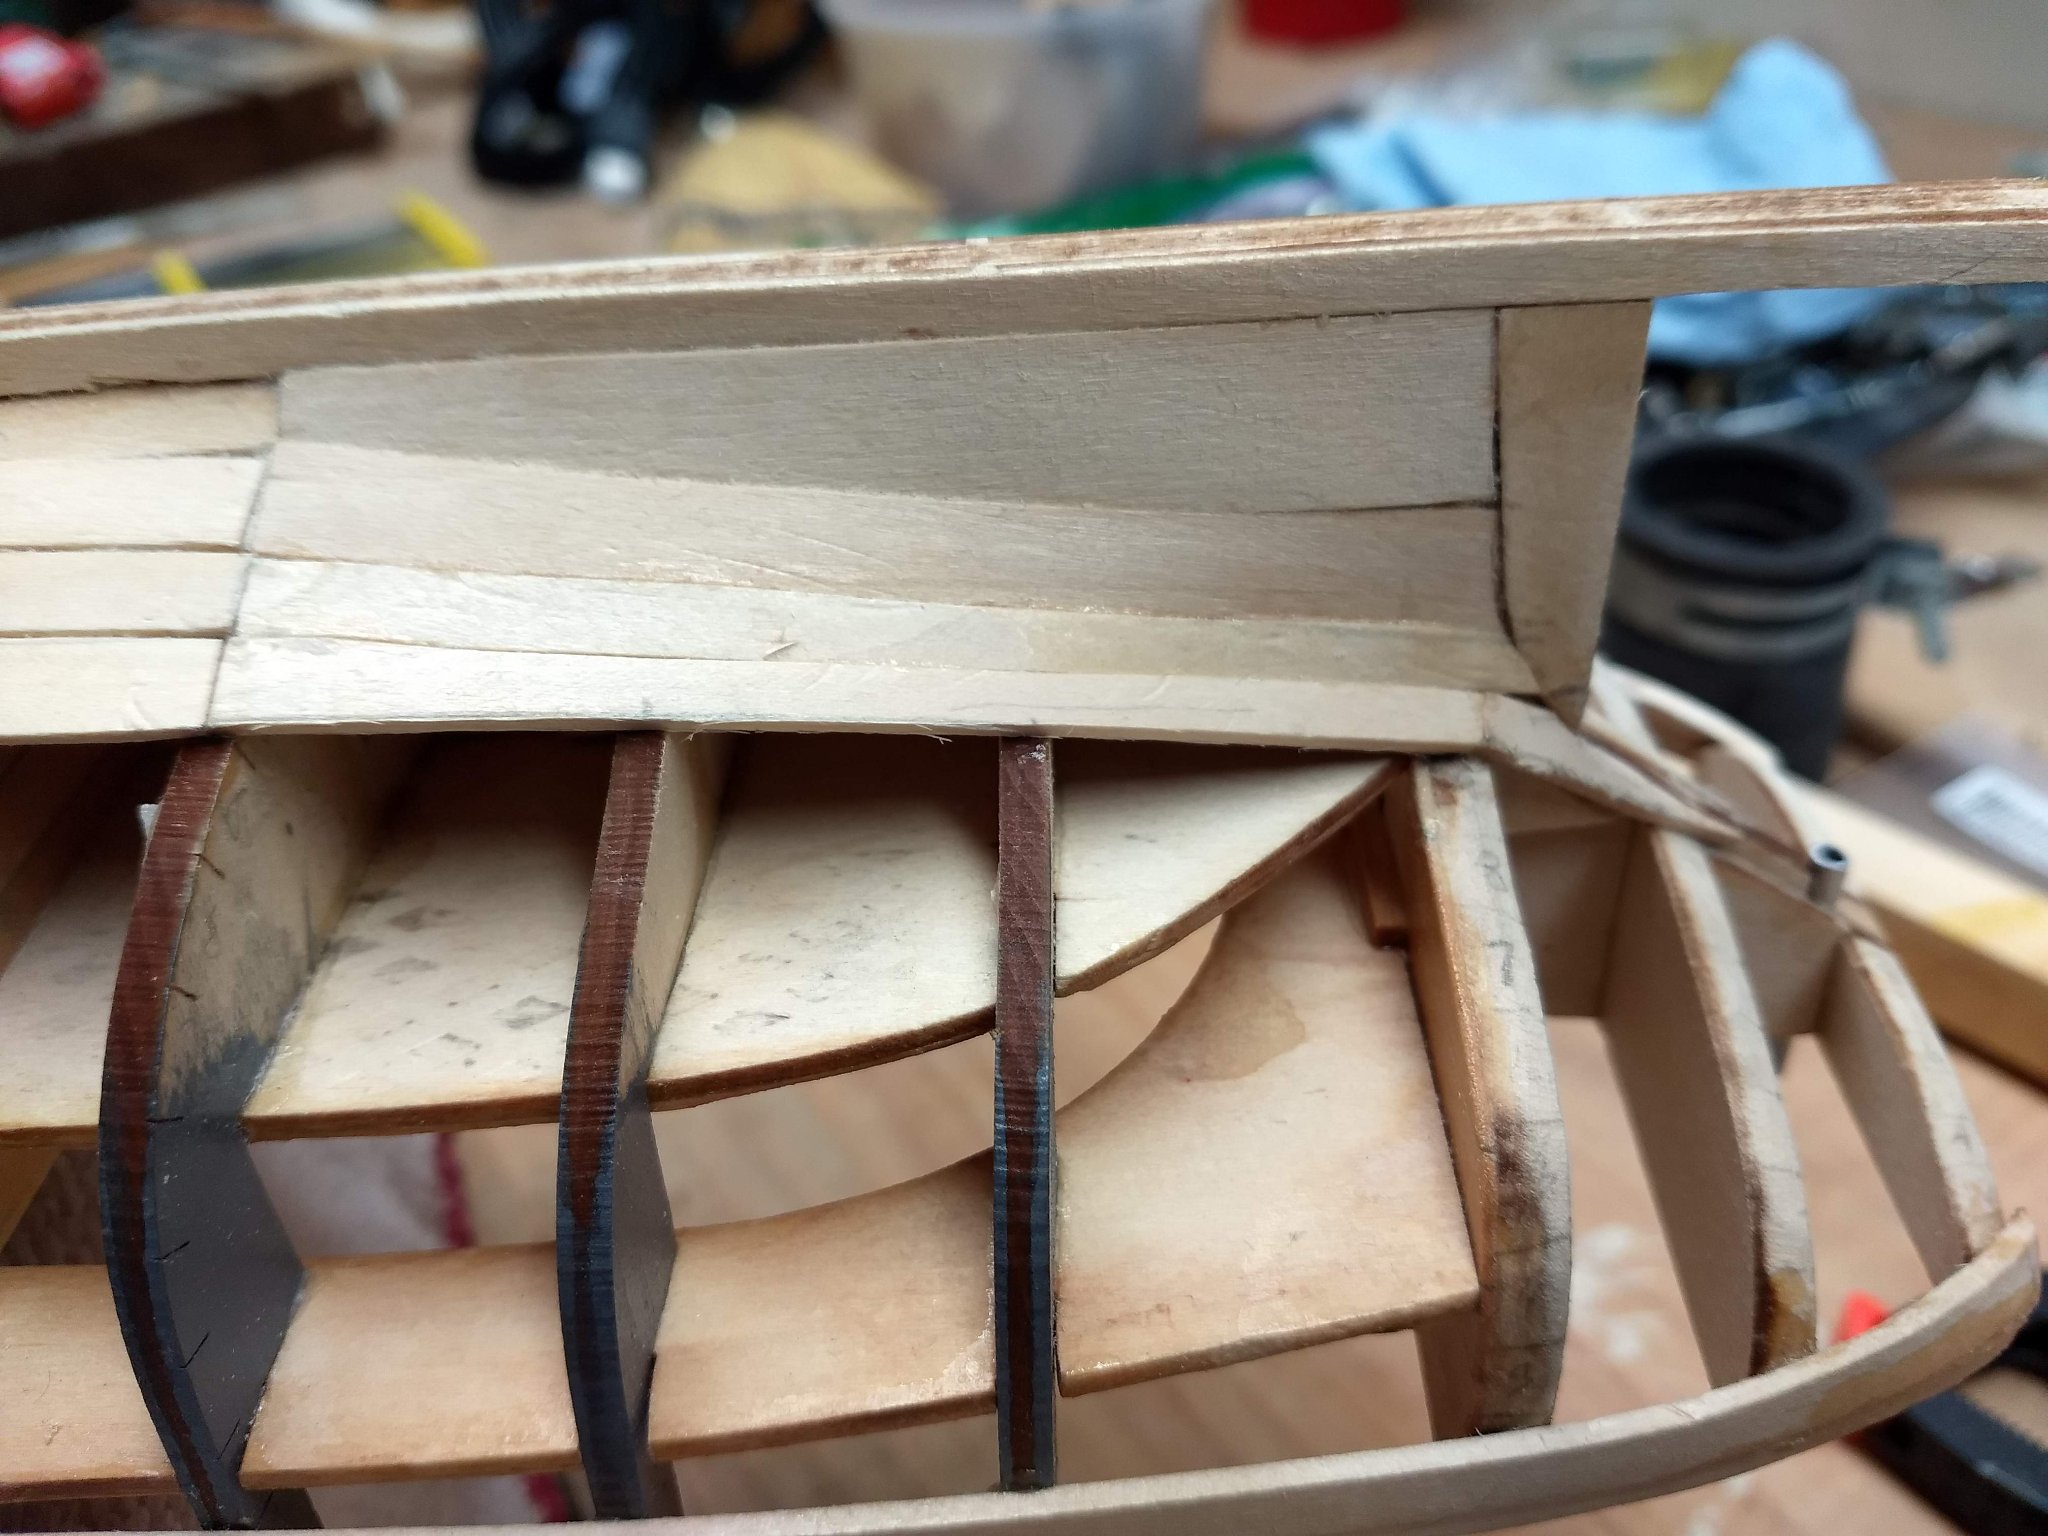
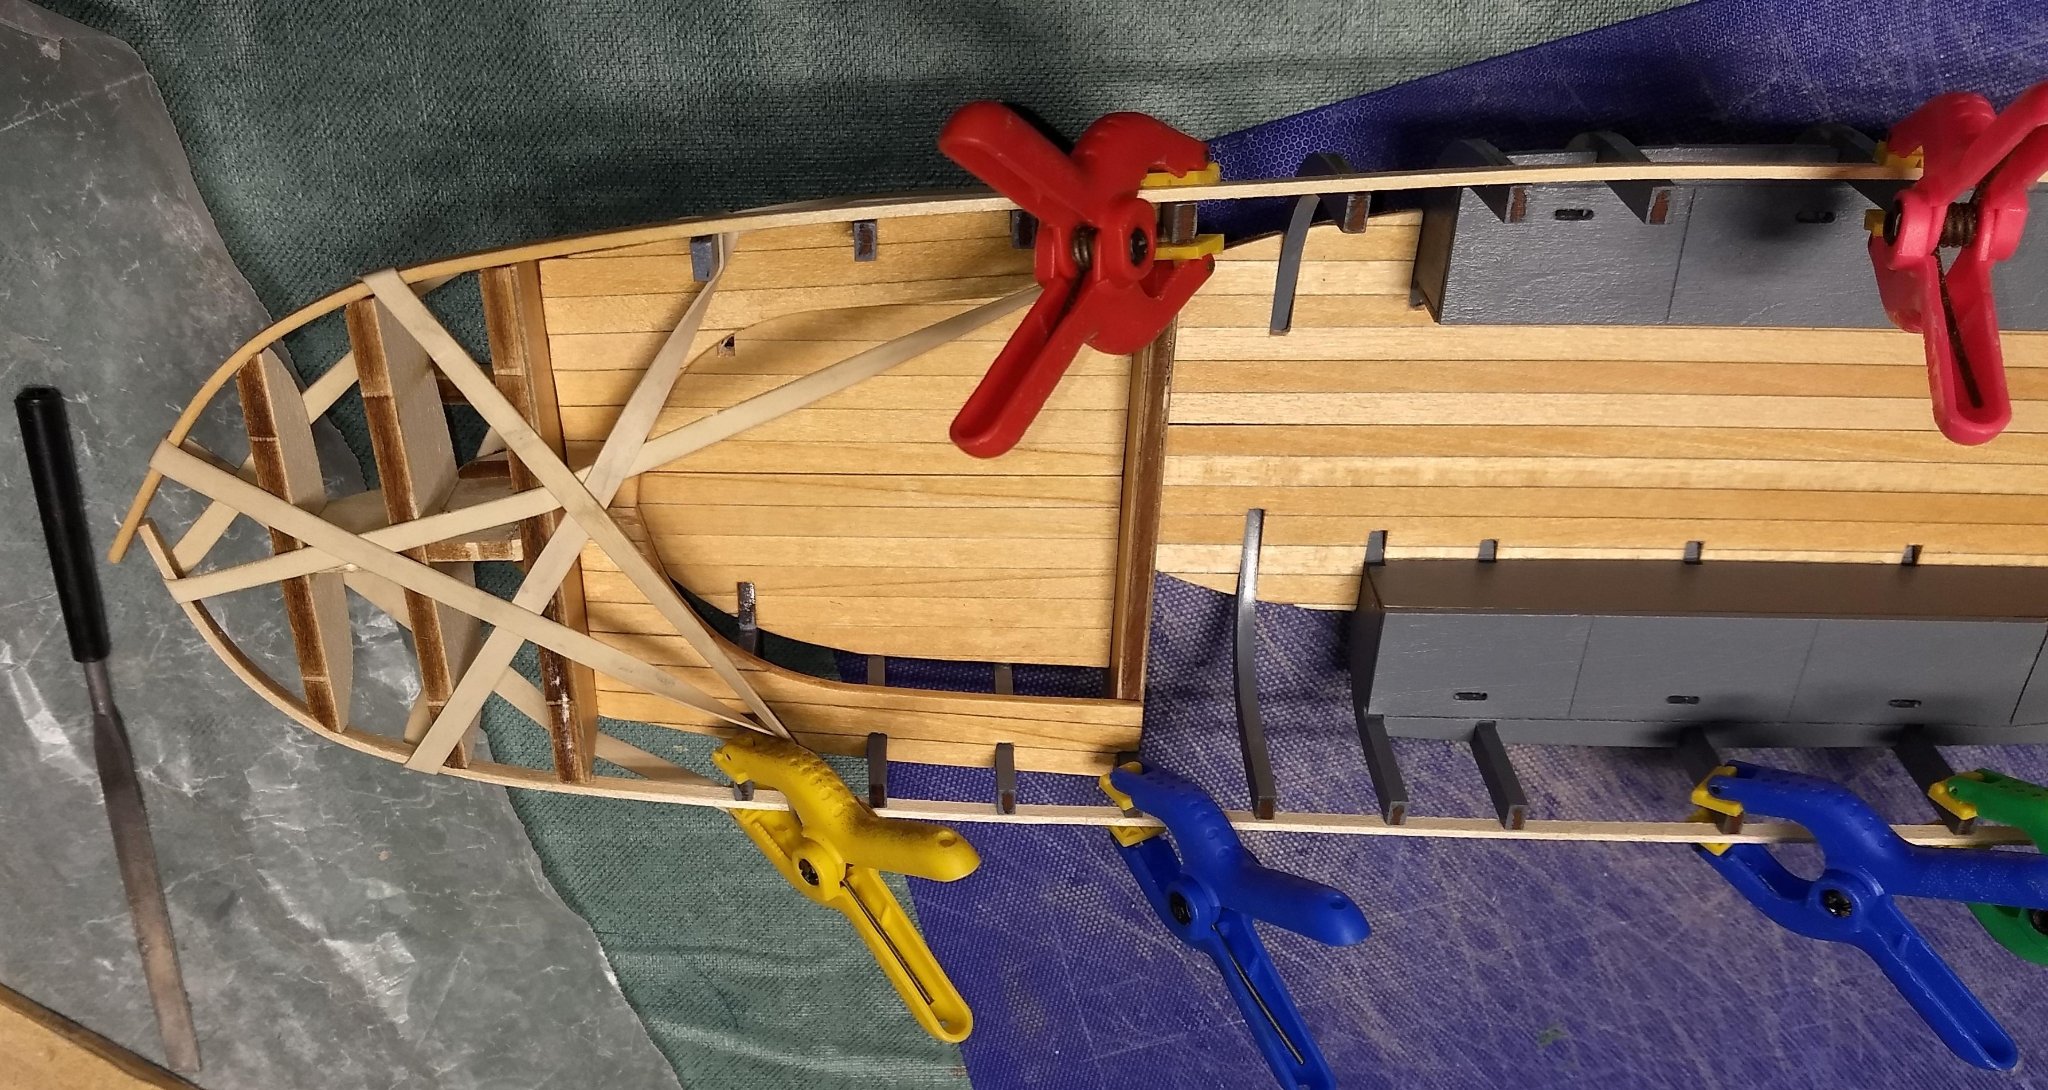
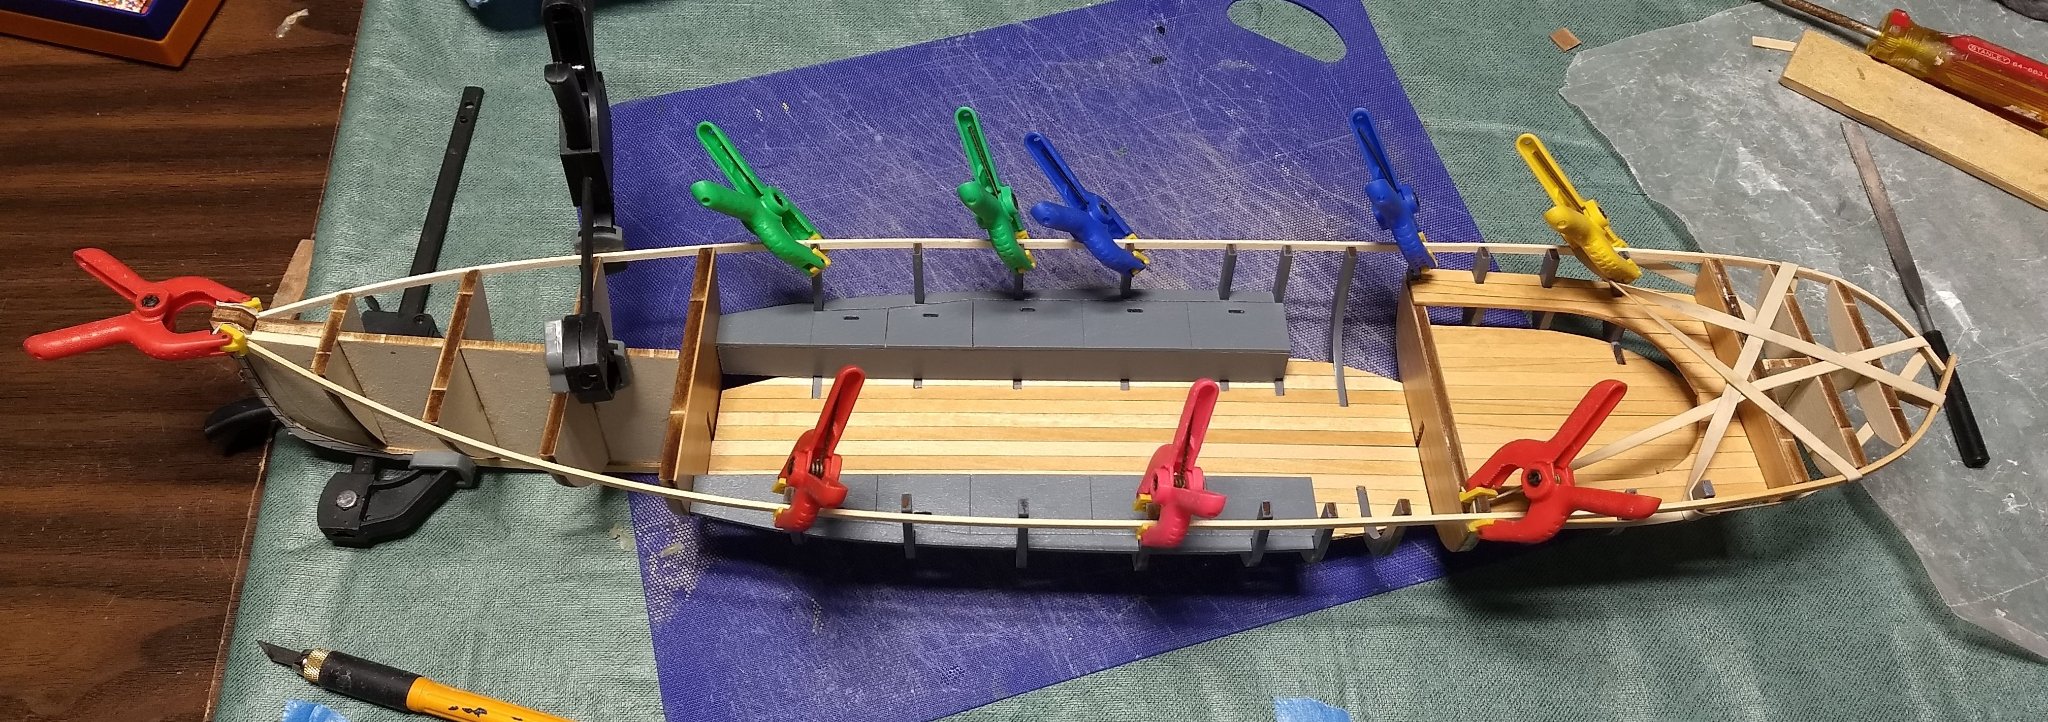
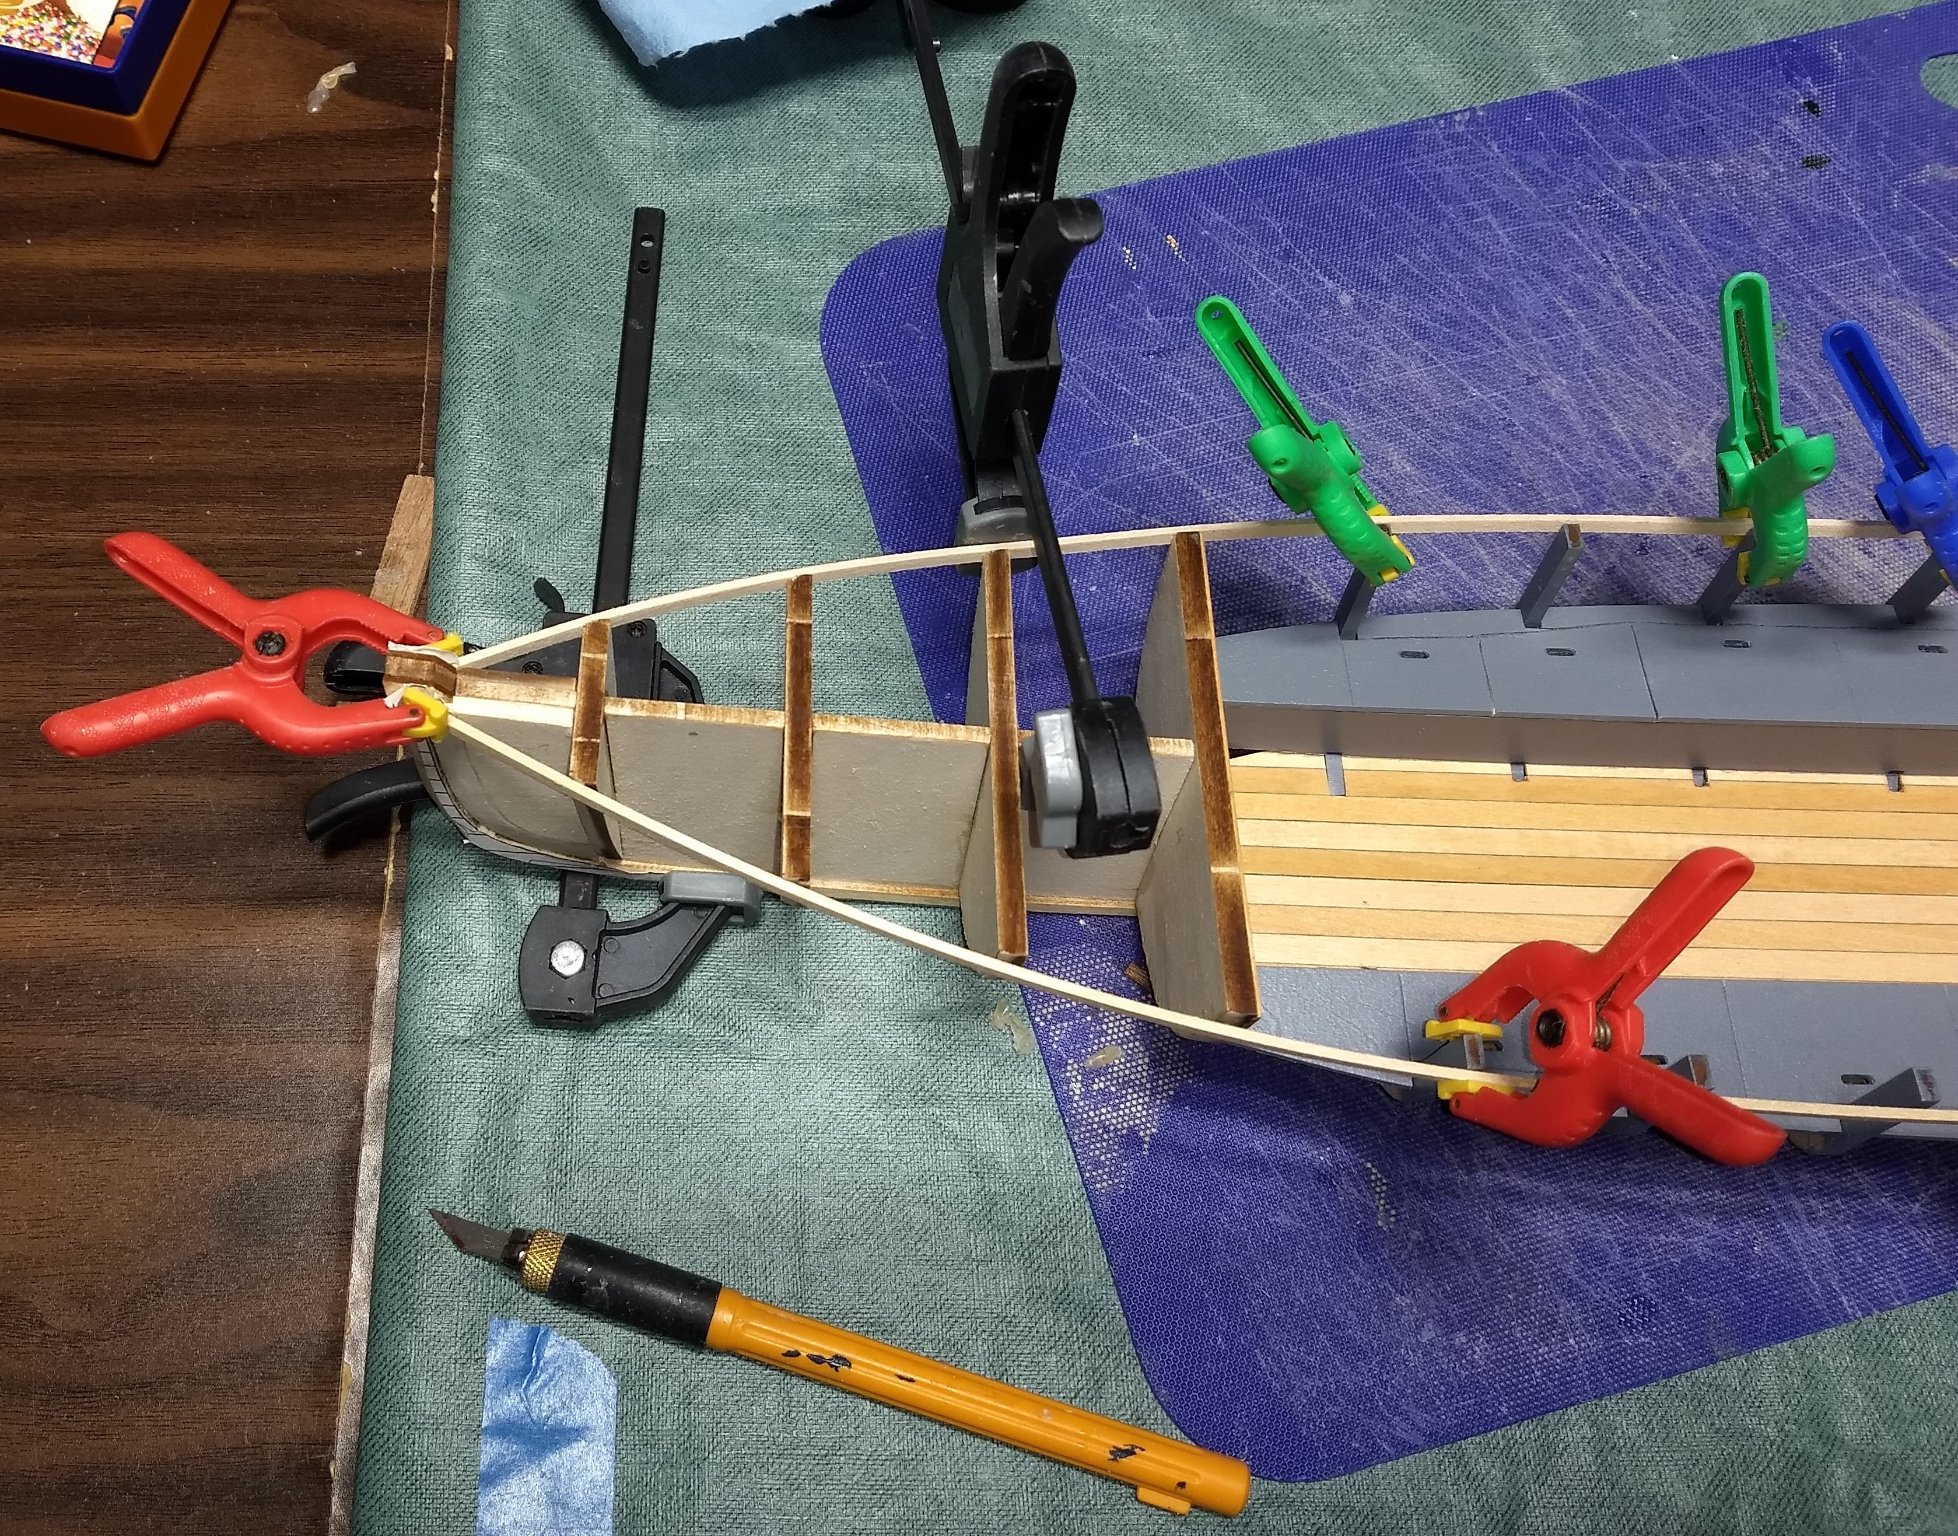
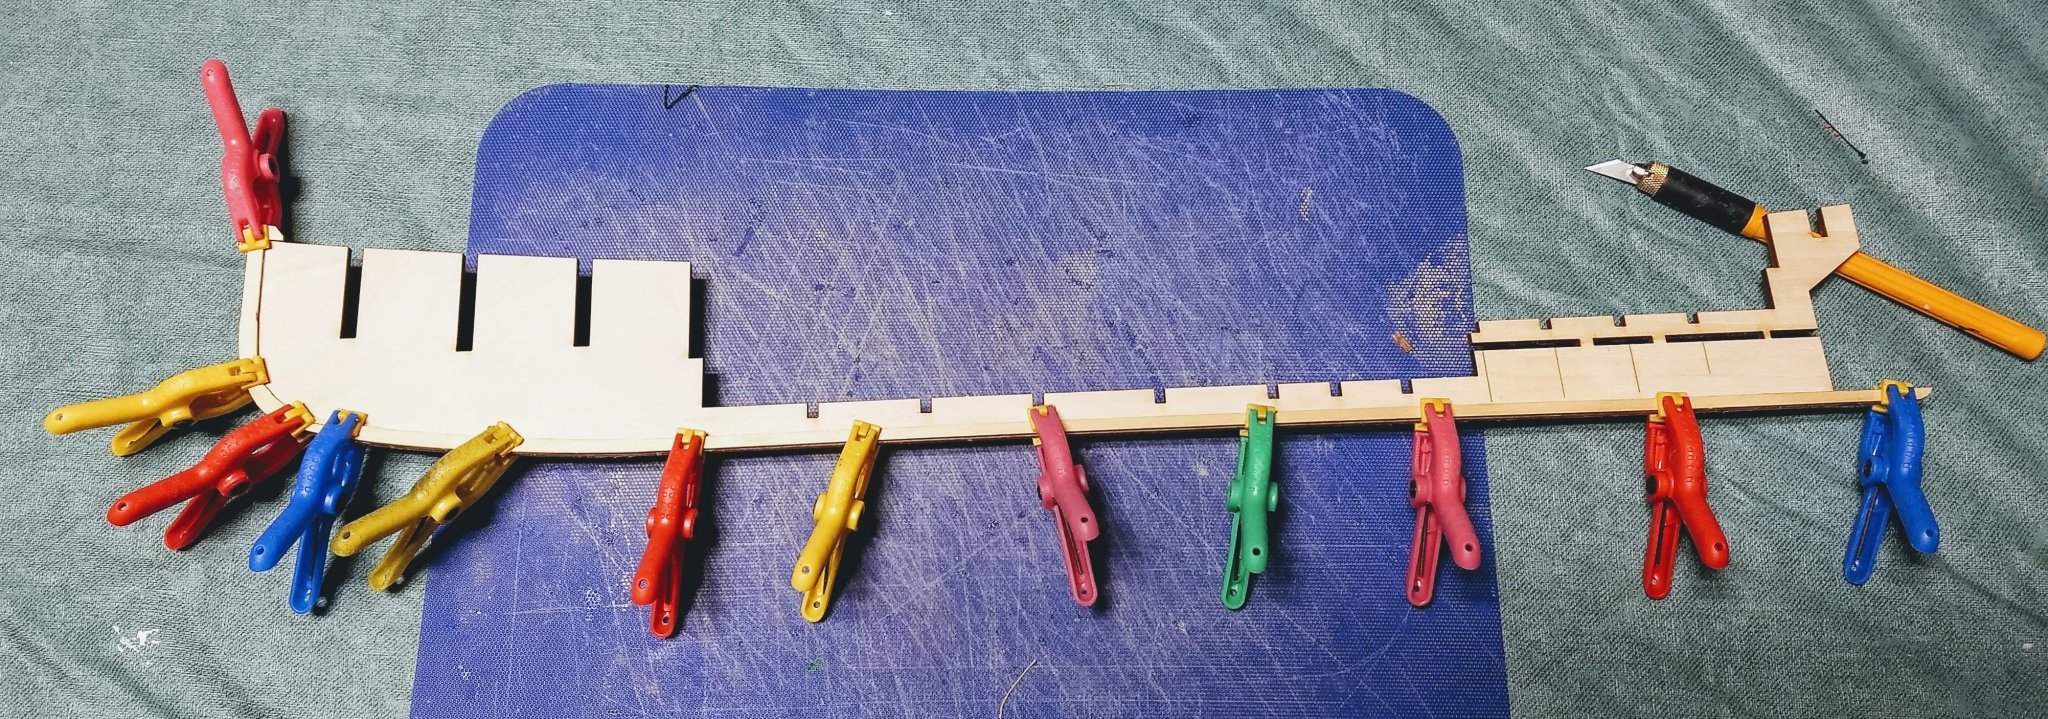
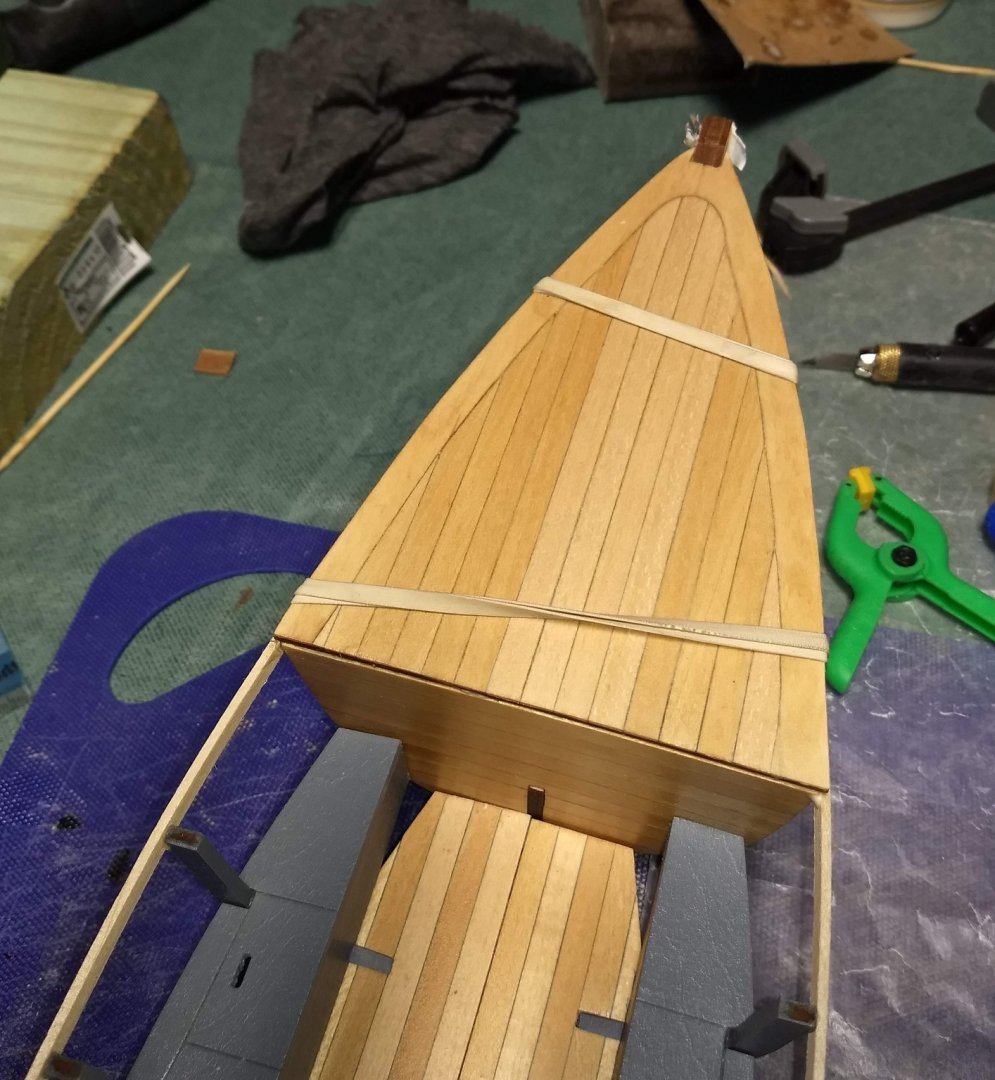
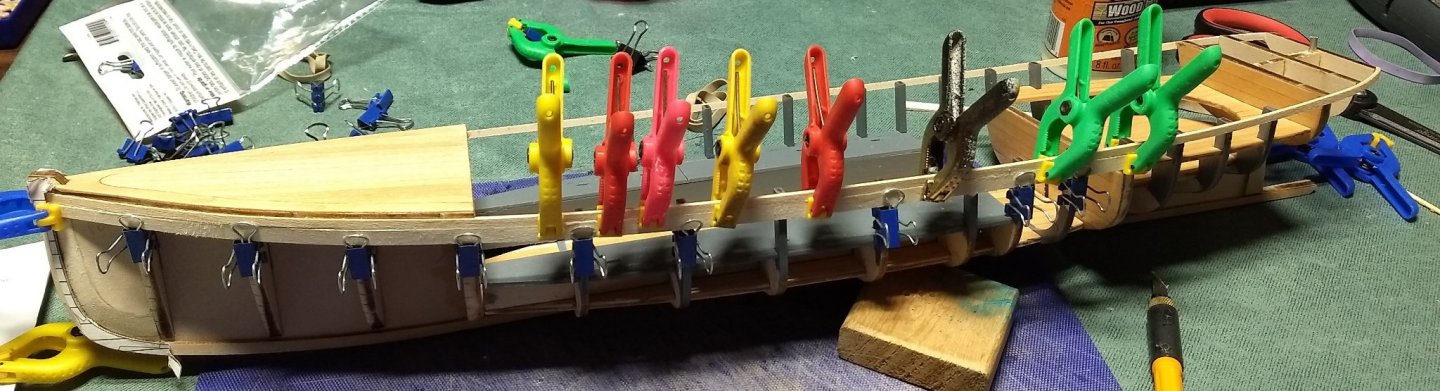
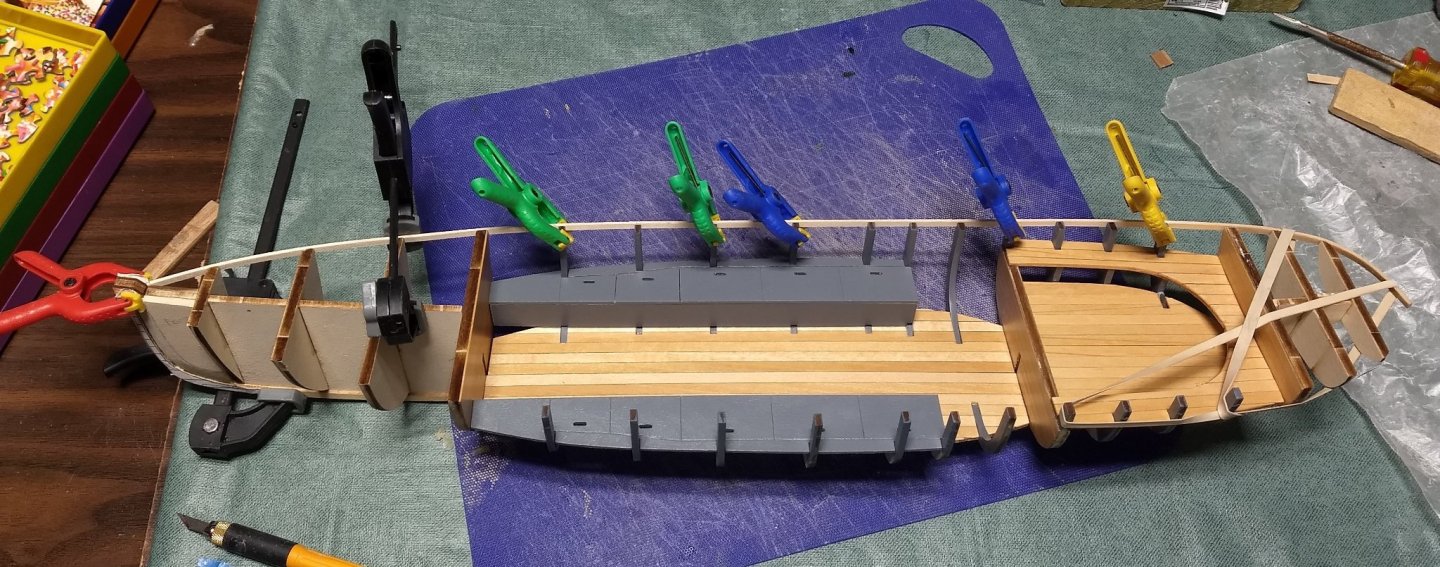
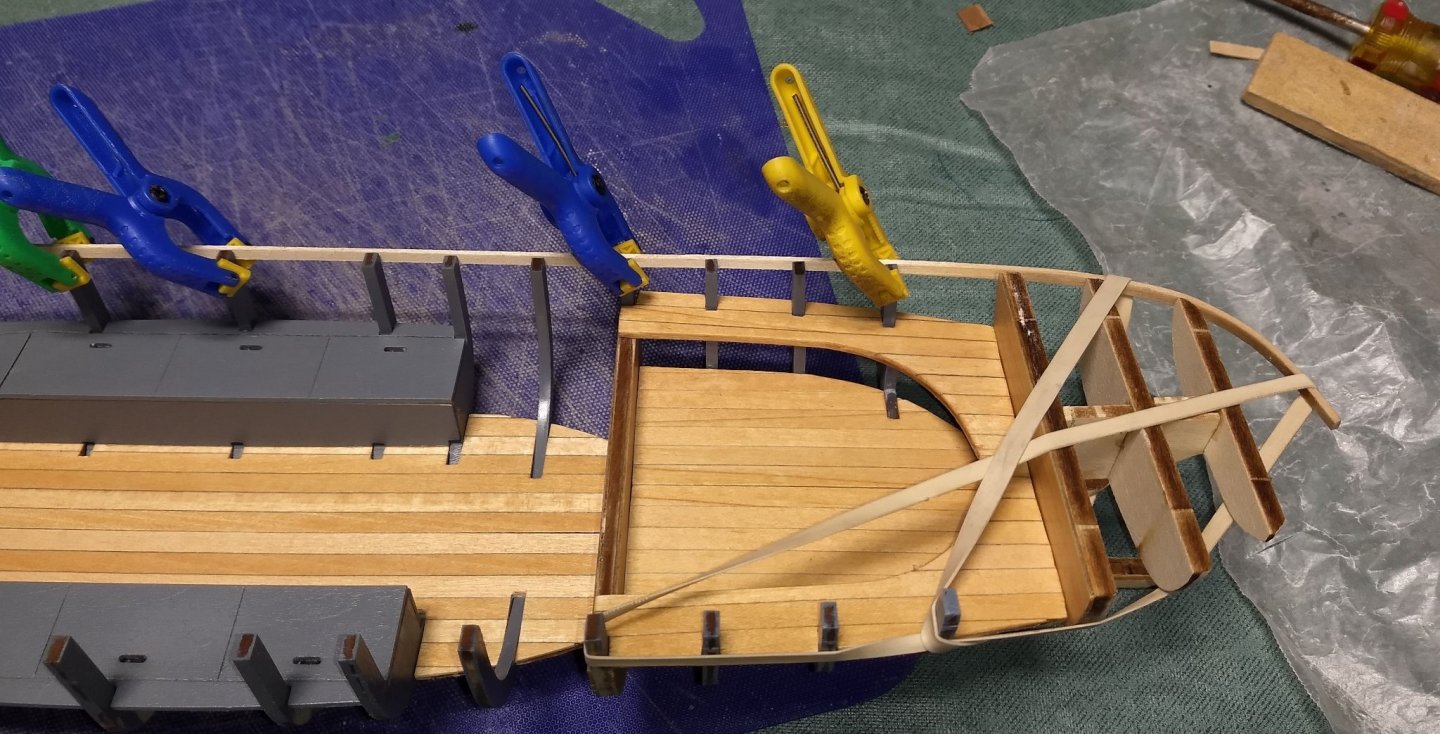
Coal bin glued back in and all is forgiven.... Again I am sorry I did not open that bin, but with my limited skills I just do not think I would do a good job of it this late in the build. One additional do to the increased floor boards. The vertical portion of the coal bins need to be trimmed for the top to fit correctly. You can trim the top or the bottom edge. In my case I trimmed the bottom edge as I wanted to make the slots for each bulkhead less pronounced. Use a sanding stick for this as it would be somewhat hard to get an even edge alone the floor using a dremel tool. On to putting on the first (top) plank. Except for the stern section, the plank can easily bend around the bow and mid-section of the hull. In my case I just soaked the last 5 inches of the plank for about 5 minutes. Then using a soldering iron (my version of a plank bender) I bent the last section of plank until it easily fit the bend at the stern. At that point I clamped the plank to the hull and let it dry over night. In reality, the bent plank easily fit the bend and I could have just glued it at that time, but it was late and I figured I would get to it the next day. Easy bend around bow and mid sections of hull Below show plank around hull including the stern section. Blow is close up of stern plank, Very little pressure on the rubber bands due to pre-bending of the stern section of the plank one thing to mention. prior to gluing on the plank, check the beveling of bow and stern bulkheads to insure a solid fit of the plank. Easy to make last minute adjustments prior to gluing on the plank. Below shows the other top plank added to the hull and let to dry... Once glued into place, will trim the plank (at the stern section) and move on to the other planks,


- 51 replies
-
- 6
-
-
- model shipways
- picket boat
- (and 1 more)
-
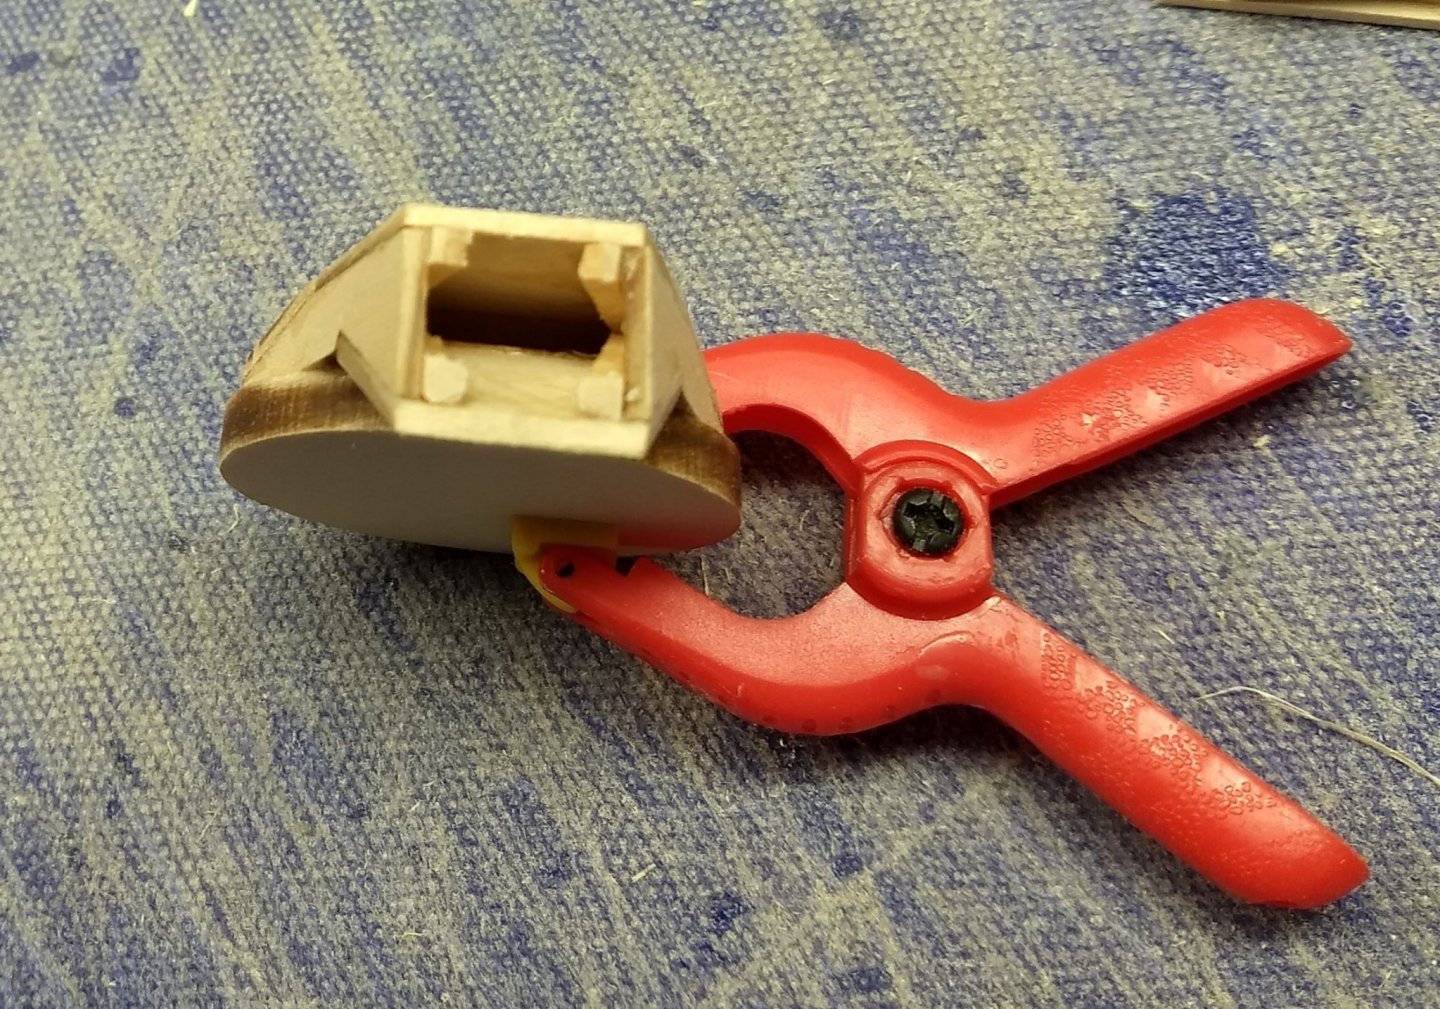
Not a lot to post, but I have finished up gluing in the seats and flooring. Took a far amount of trimming (due to the 1/32) flooring and probably some inexperience of the builder(me) to get all to line up. End result looks pretty good. One point,,,, the instructions indicate to glue in bulkhead #4 and #12 pretty early on in the build, and before the flooring and seats go in. I did not do this, and I feel that is the right thing to do. In the picture below I glued in bulkhead #12 at the same time as the seats. Issue is the seats have to exactly line up with bulkhead #12. Any overlap or underlap will be very obvious. Even if the bulkheads are put in at exactly 90 degree angle to hull (really hard to do even with right angles), the seats my not be the exact length and thus could be some overlap or underlap. No real reason to glue them in prior to the seats, and much easier to verify a good fit to the bulkhead. Same issue with bulkhead #4. Instructions call for it to be glued in much earlier in the build, but has to match up with the foreword decking. Again, lots of room for error there to get a good fit to bulkhead #4. I plan to glue in bulkhead #4 when the forward decking gets glued in. At this point I decided to open up one of the coal bins. As you can see below, bulkhead #6 gets in the way and would have to be majorly trimmed to allow for coal to be added. At this point, the coal bin tops have not been glued in but the bulkheads were already glued in. I decided (even with a dremel tool) it would be too risky for me to try to severely trim bulkhead #6. So I decided to put the seat back and go with no open seats. I knew I had to build a container in the bulkhead to hold the coal and thought I would do that after I opened up the coal bin, but I did not realize the bulkhead would have to be trimmed until it was too late. I guess I did not fully think this through, but I really did not want to fiddle with the glued in bulkhead. I kind of regret that decision, as I really wanted to have on open coal bin, but at this point it would be better for me to have closed bins. In the world of "do as I say and not as I do", if you want to open up a coal bin, trim the bulkhead and build in the area to hold the coal before you glue in the bulkhead.

- 51 replies
-
- 4
-
-
- model shipways
- picket boat
- (and 1 more)
-
David I too would like to someday take on the 1:35 version of the Endeavour.... Originally I wanted to take on the 1:35, but my wife felt we did not have a place to fit such a large model and thus talked me into the 1:80 version. But after building the 1:80 version, I really want to build the 1:35 version. The Endeavour is a really neat model. If you ever decide to build the 1:35 version,,, let me know,,,, Maybe by then we will have found a place for the 1:35 and I could build one too along with you.. We'll see,,
- 45 replies
-
- 1
-
-
- j-class yacht
- amati
- (and 2 more)
-
Turangi, I too plan to open a bin and show coal.... I got that idea from looking at your build log, but I appreciate your comments above. Thanks for the reminder on making some sort of bottom to the open bin for the coal. I have been out this past week with some friends visiting,,,,but should get back to the Picket build later this week. I have added the clear coat to all the stained parts, but have not yet opened the coal bin. I will probably have to touch up the coal bin as opening it up will expose some unstained wood. Hopefully by the end of the week the Picket should actually start looking more like a boat than just a pile stained parts. 🙂
-
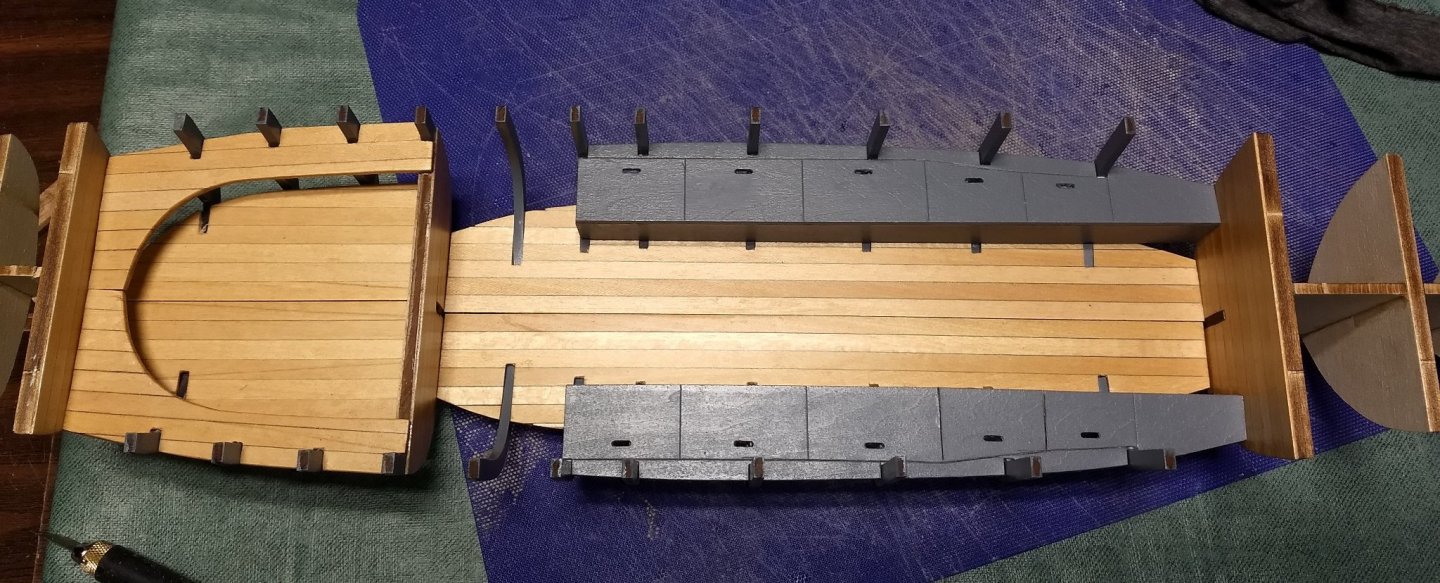
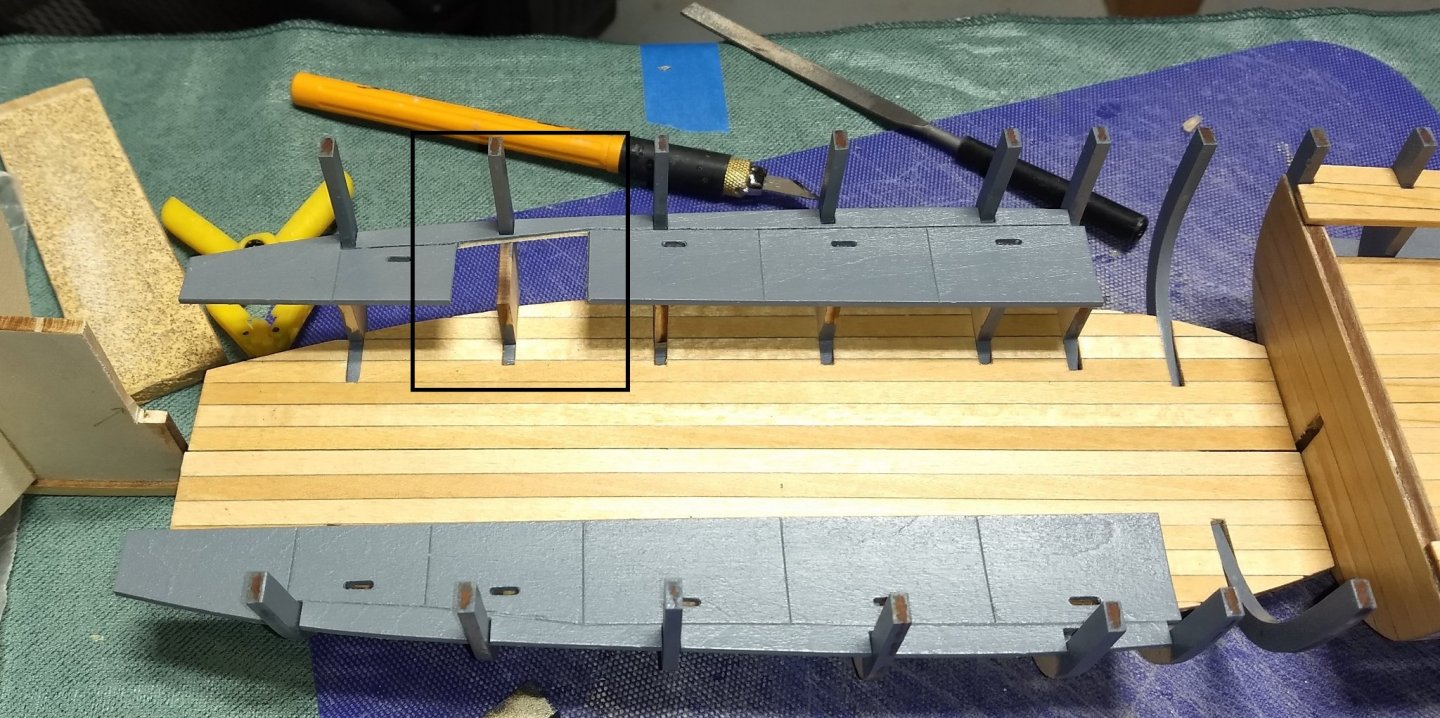
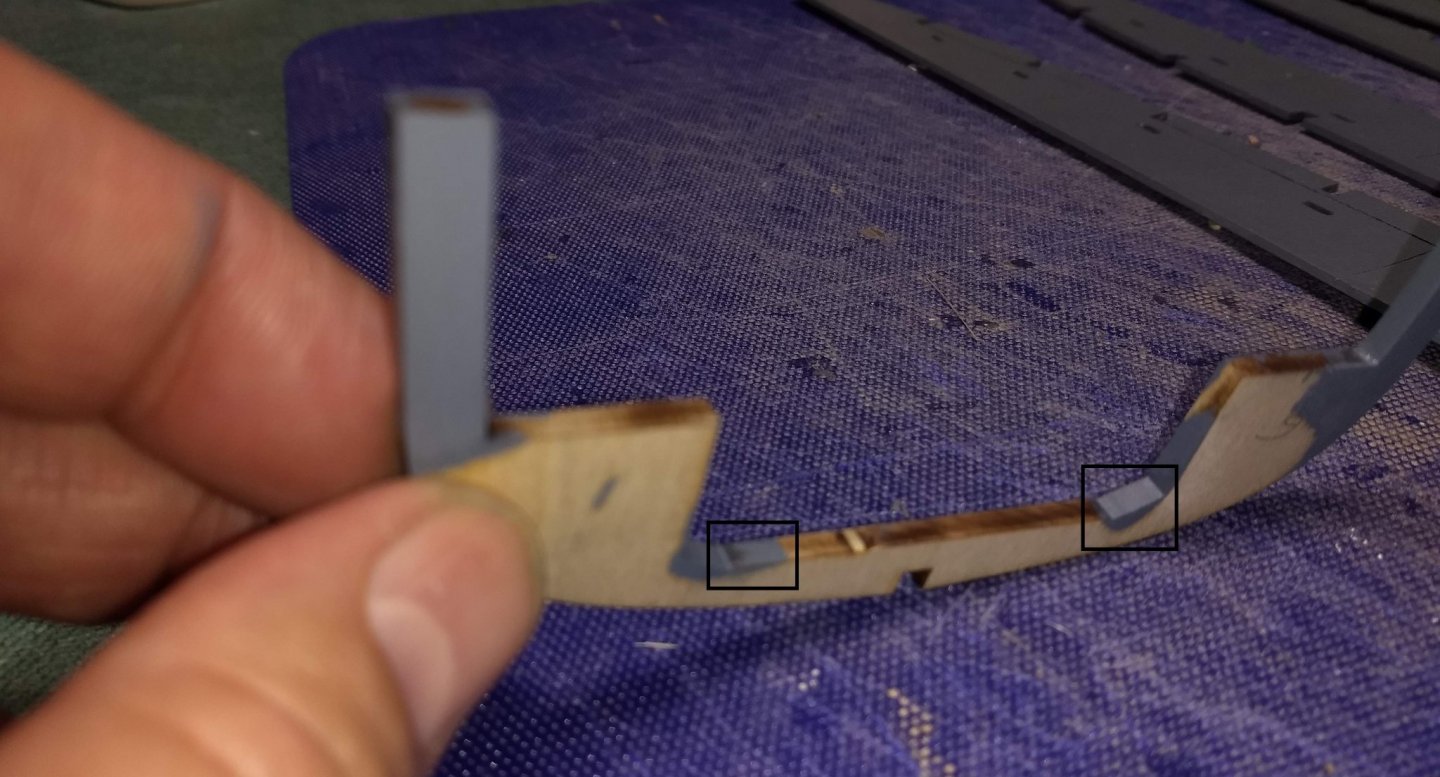
Planking and staining complete. just need to get some clear coat on them now. I decided to plank bulkheads 4 and 12 verses making them grey. Even though I used a pre-stain, it would appear the wood did not take the stain uniformly... but it has a unique look to it. For the grey, I used a stain instead of paint. A little easier for me to use and looks OK Note below, it all depends on the look you are going for. A small section of the bulkheads shows under the coal bins. Some have opted to make those the same color as the floor. Since they are part of the gray bulkhead, I decided to paint them gray. Either color your choose, don't for get these little tabs. I did on first go around of dry fitting the flooring and coal bins and and to go back and touch them up
- 51 replies
-
- 5
-
-
- model shipways
- picket boat
- (and 1 more)
-
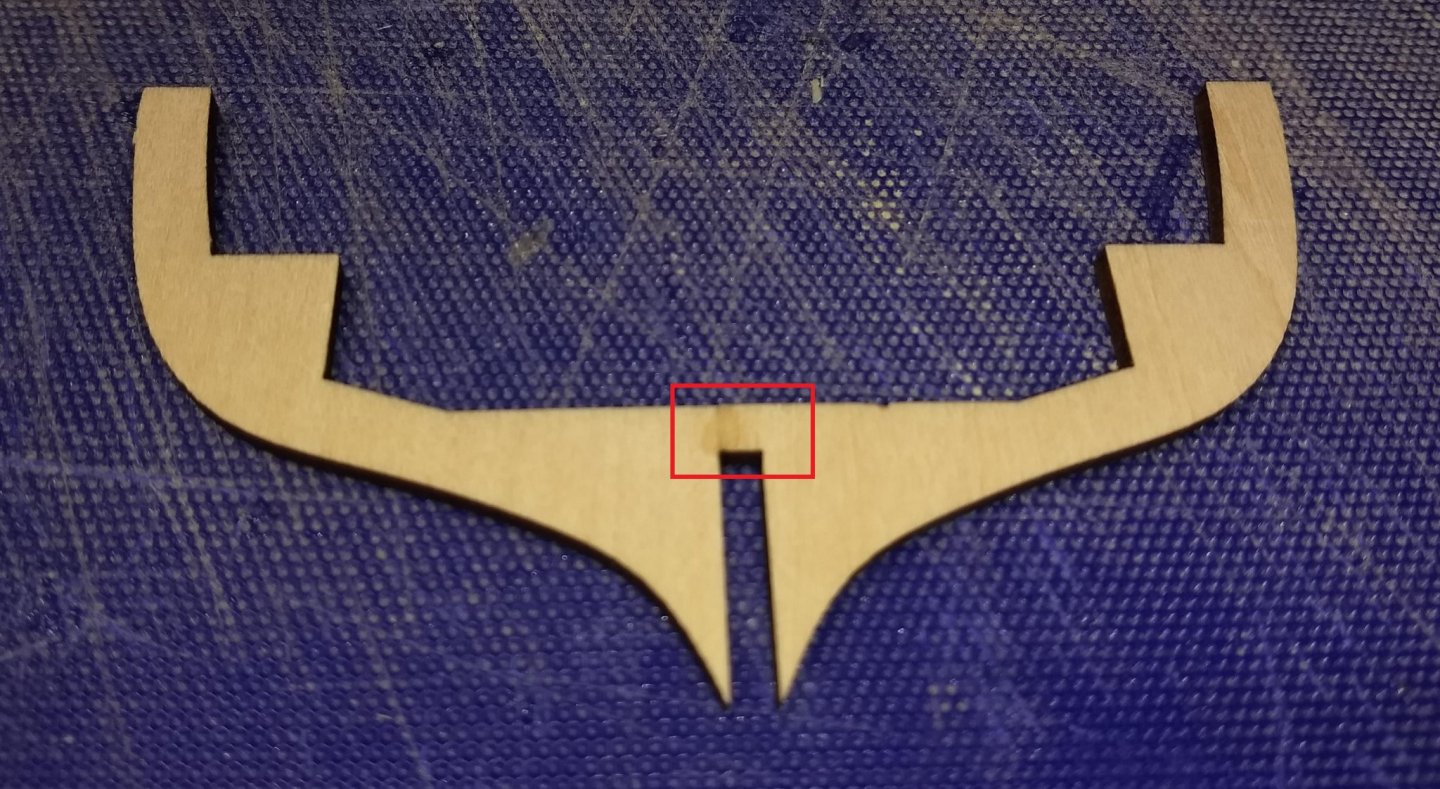
Turangi, Thanks for the comment on how you dealt with the broken ribs. Actually my first thought was to add an extra piece of wood to the bulkhead and glue it to the keel, but "nixed" the idea thinking the floor would not lay flat. I did not think (as you did) that the extra piece of wood could easily be just knocked off after the bulkhead dries... The idea of temporarily adding a piece of wood (when needed from time to time) and later knock it off is a neat trick.. I will keep that in mind. john
- 51 replies
-
- 1
-
-
- model shipways
- picket boat
- (and 1 more)
-
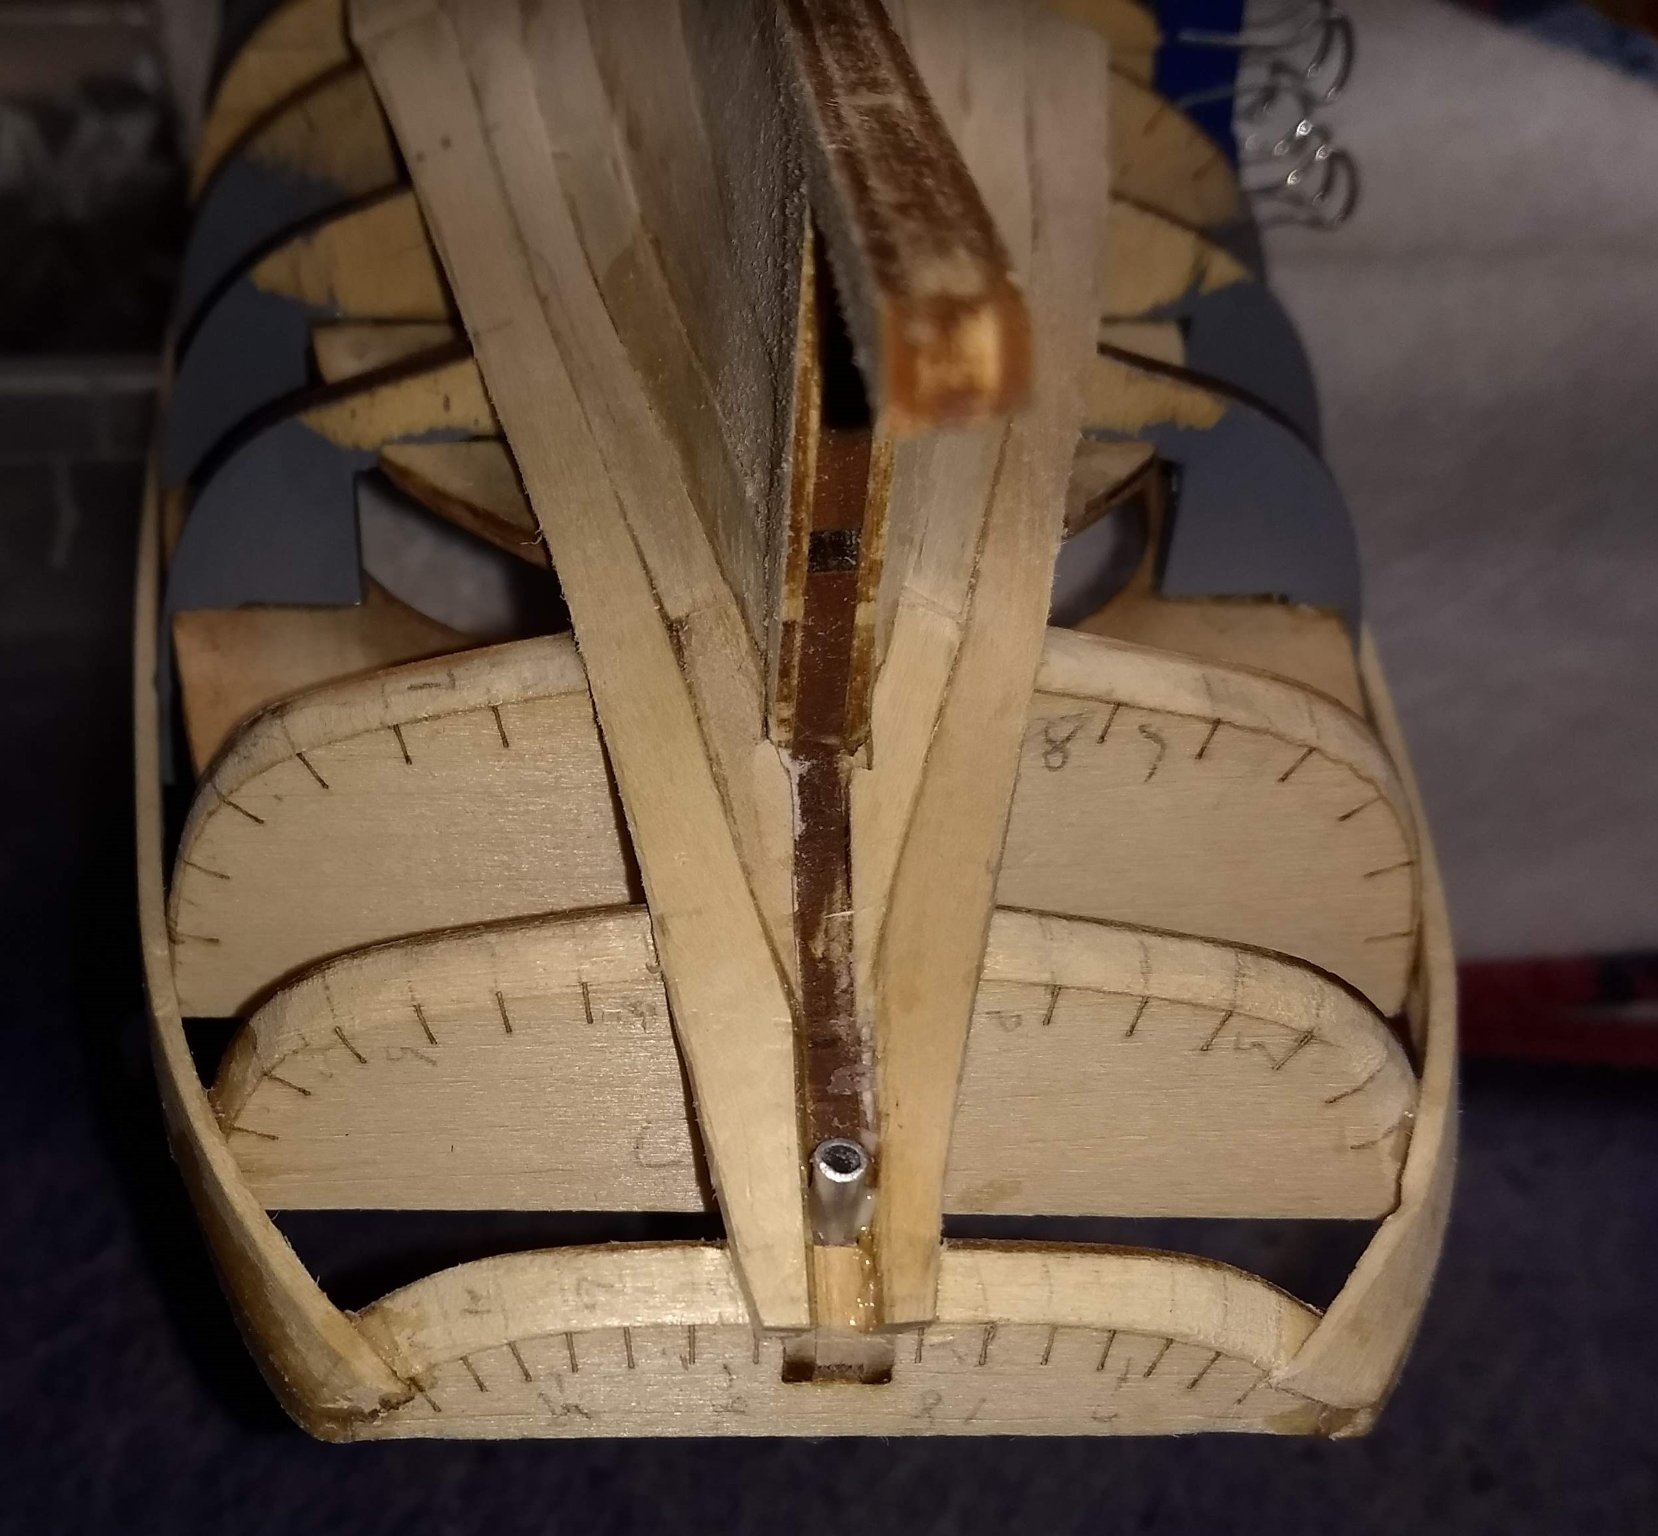
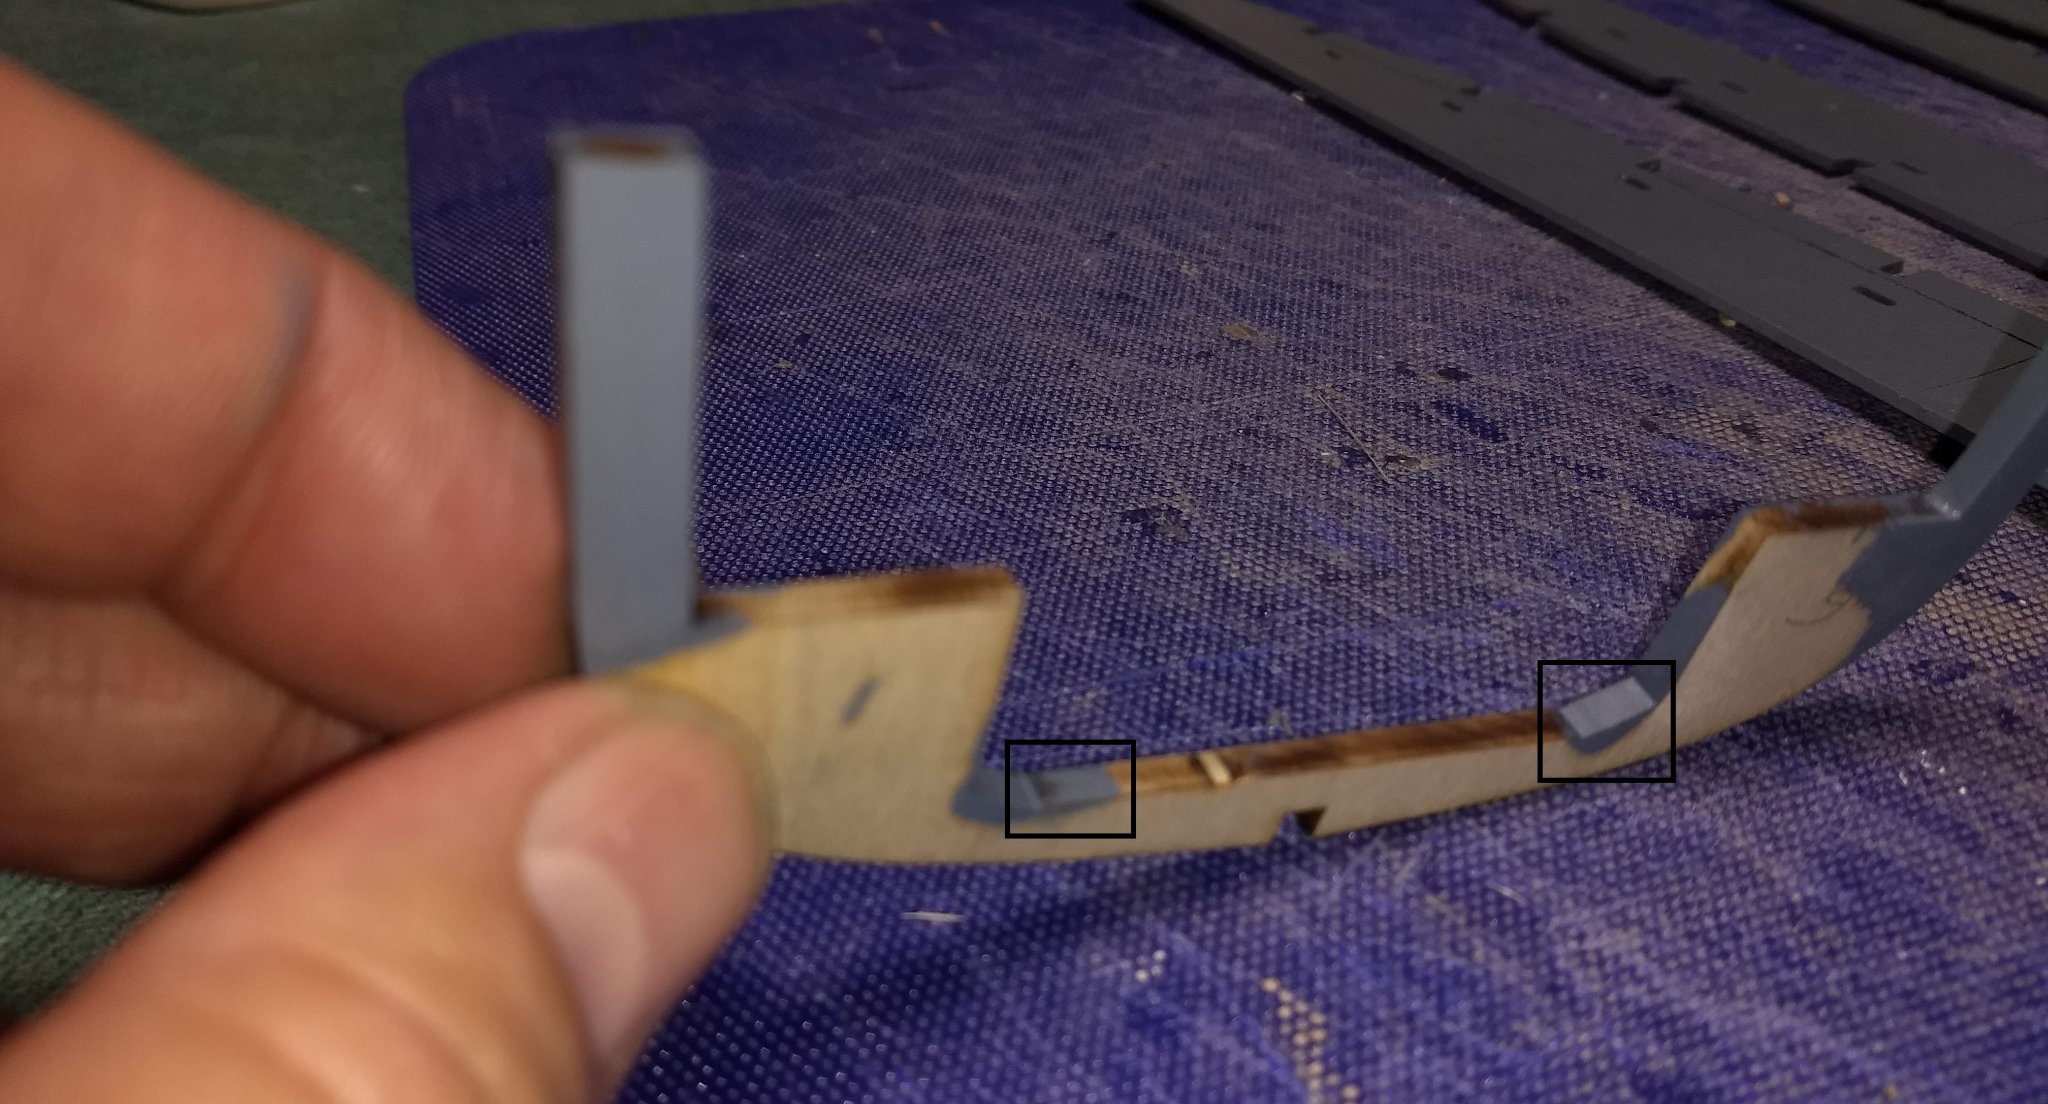
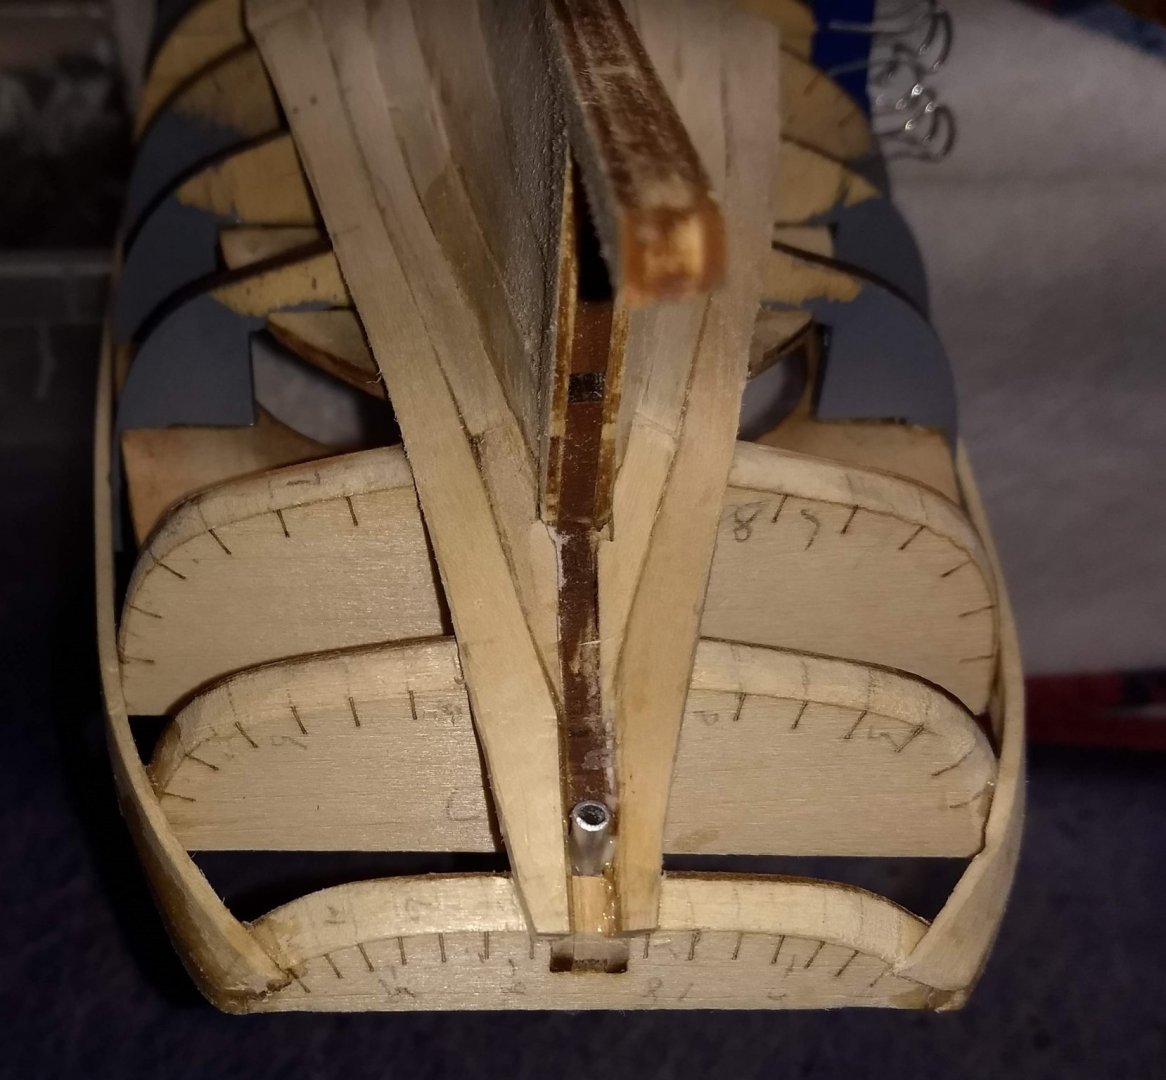
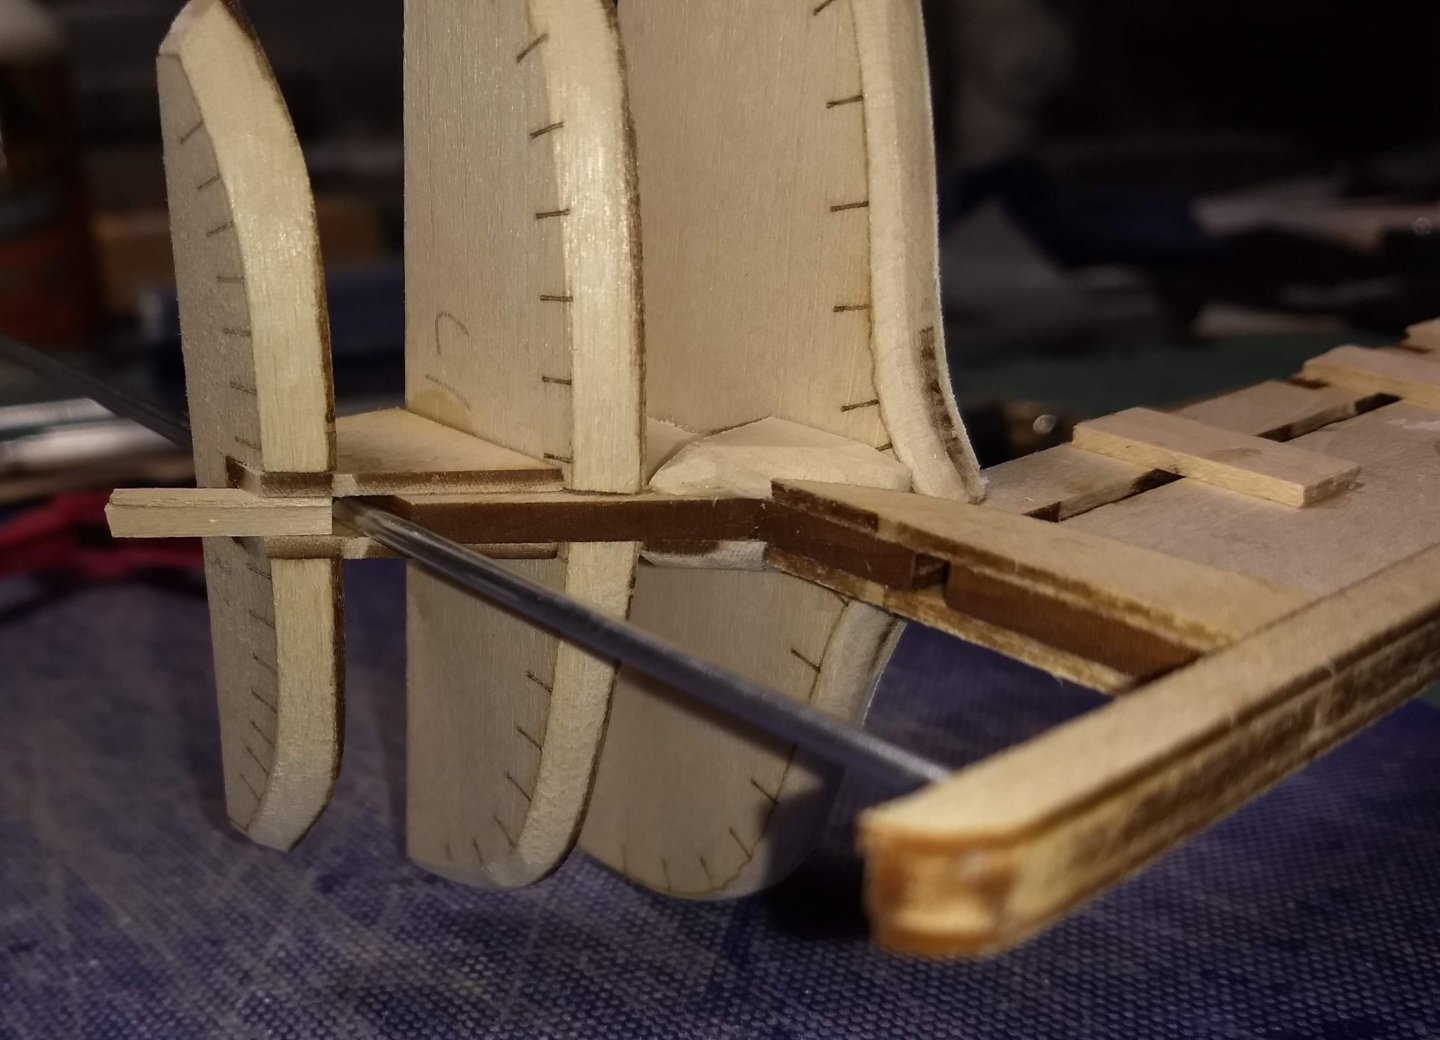
Just completed the 1/8 inch insert into bulkhead 18. Instructions do not mention the angle and diagrams seem to indicate the 1/8 inch insert is parallel to the decking, but to me that does not really make any sense. Assuming the 1/8 inch insert should be more even with the slope hull, I made it that way. Hopefully I will not regret this decision later in the build. Insert still need to be trimmed even with bulkhead #18 but the pictures below show it's location (I hope). Temporarily put in the 3/16 rudder shaft to insure the 1/8" insert does not interfere with the rudder shaft put in later.

- 51 replies
-
- 1
-
-
- model shipways
- picket boat
- (and 1 more)
-
Back to the build.... Not much physical progress as several hours have been spent studying the instructions and diagrams. I really want to make sure I fully understand what is going on. Trying to avoid making a decision now that I will regret later in the build. As mentioned earlier, the instructions and diagrams leave a lot to the imagination,,, especially if you are a "newbie" like myself. It seems that every time I go over them I see something I did not realize before.
-
Turangi, No good deed does go unpunished... I ended up breaking a 3rd bulkhead.... and then two more (of my previously glued bulkheads) broke again when they fell off the table on to the cement floor. On the plus side, they broke in a new location - not where they were previously CA glued. So the good point in all this, is that a drop of CA glue is the answer and these bulkheads are easily re-glued together. With my fat fingers I am sure I have some more bulkhead breakage in my future.
- 51 replies
-
- 1
-
-
- model shipways
- picket boat
- (and 1 more)
-
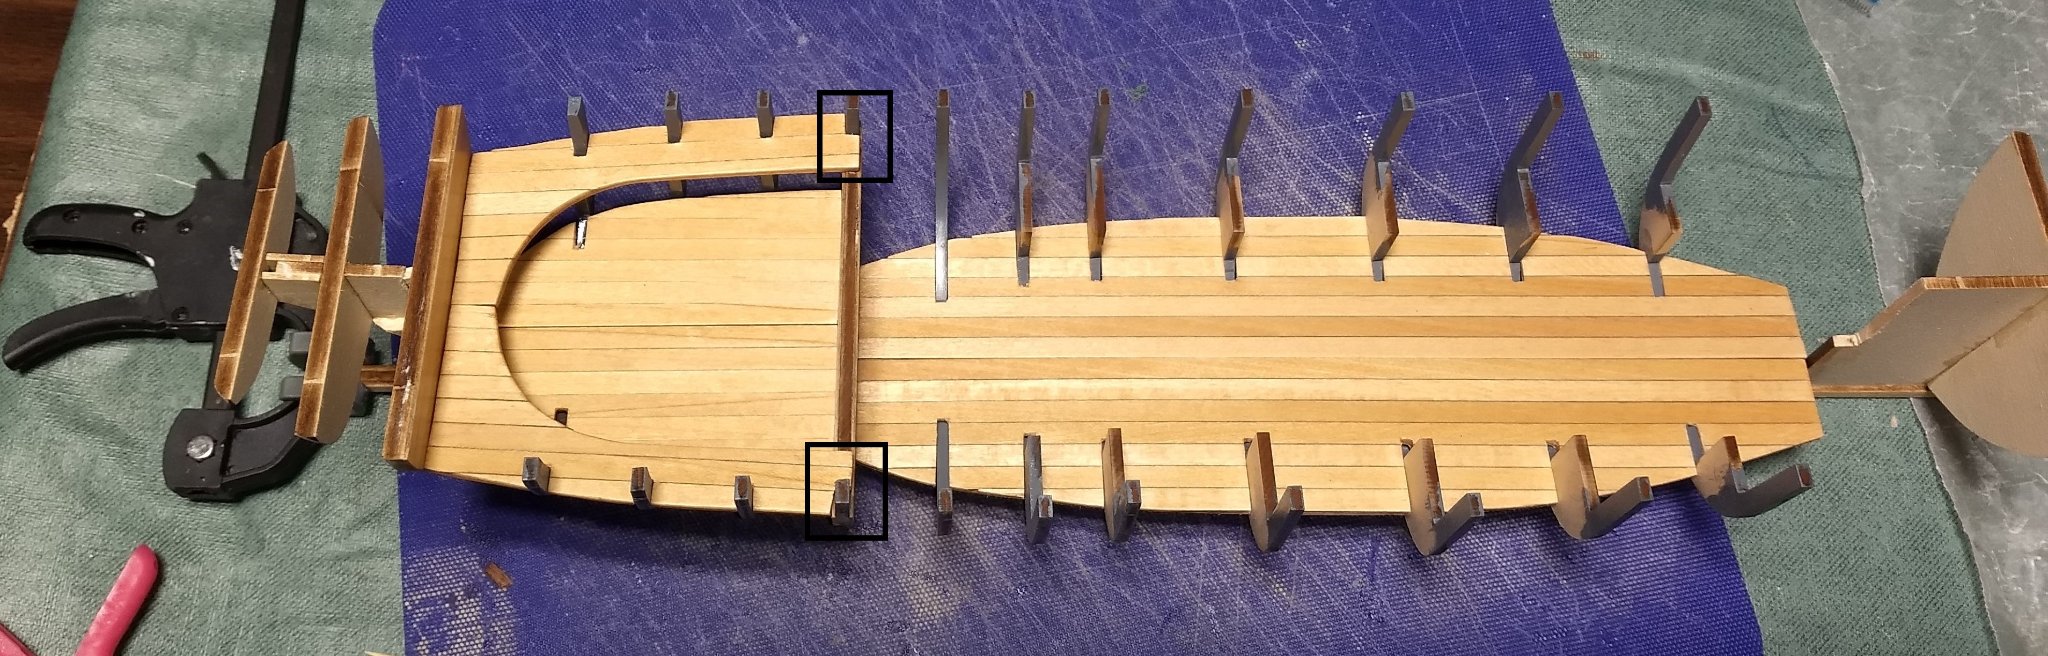
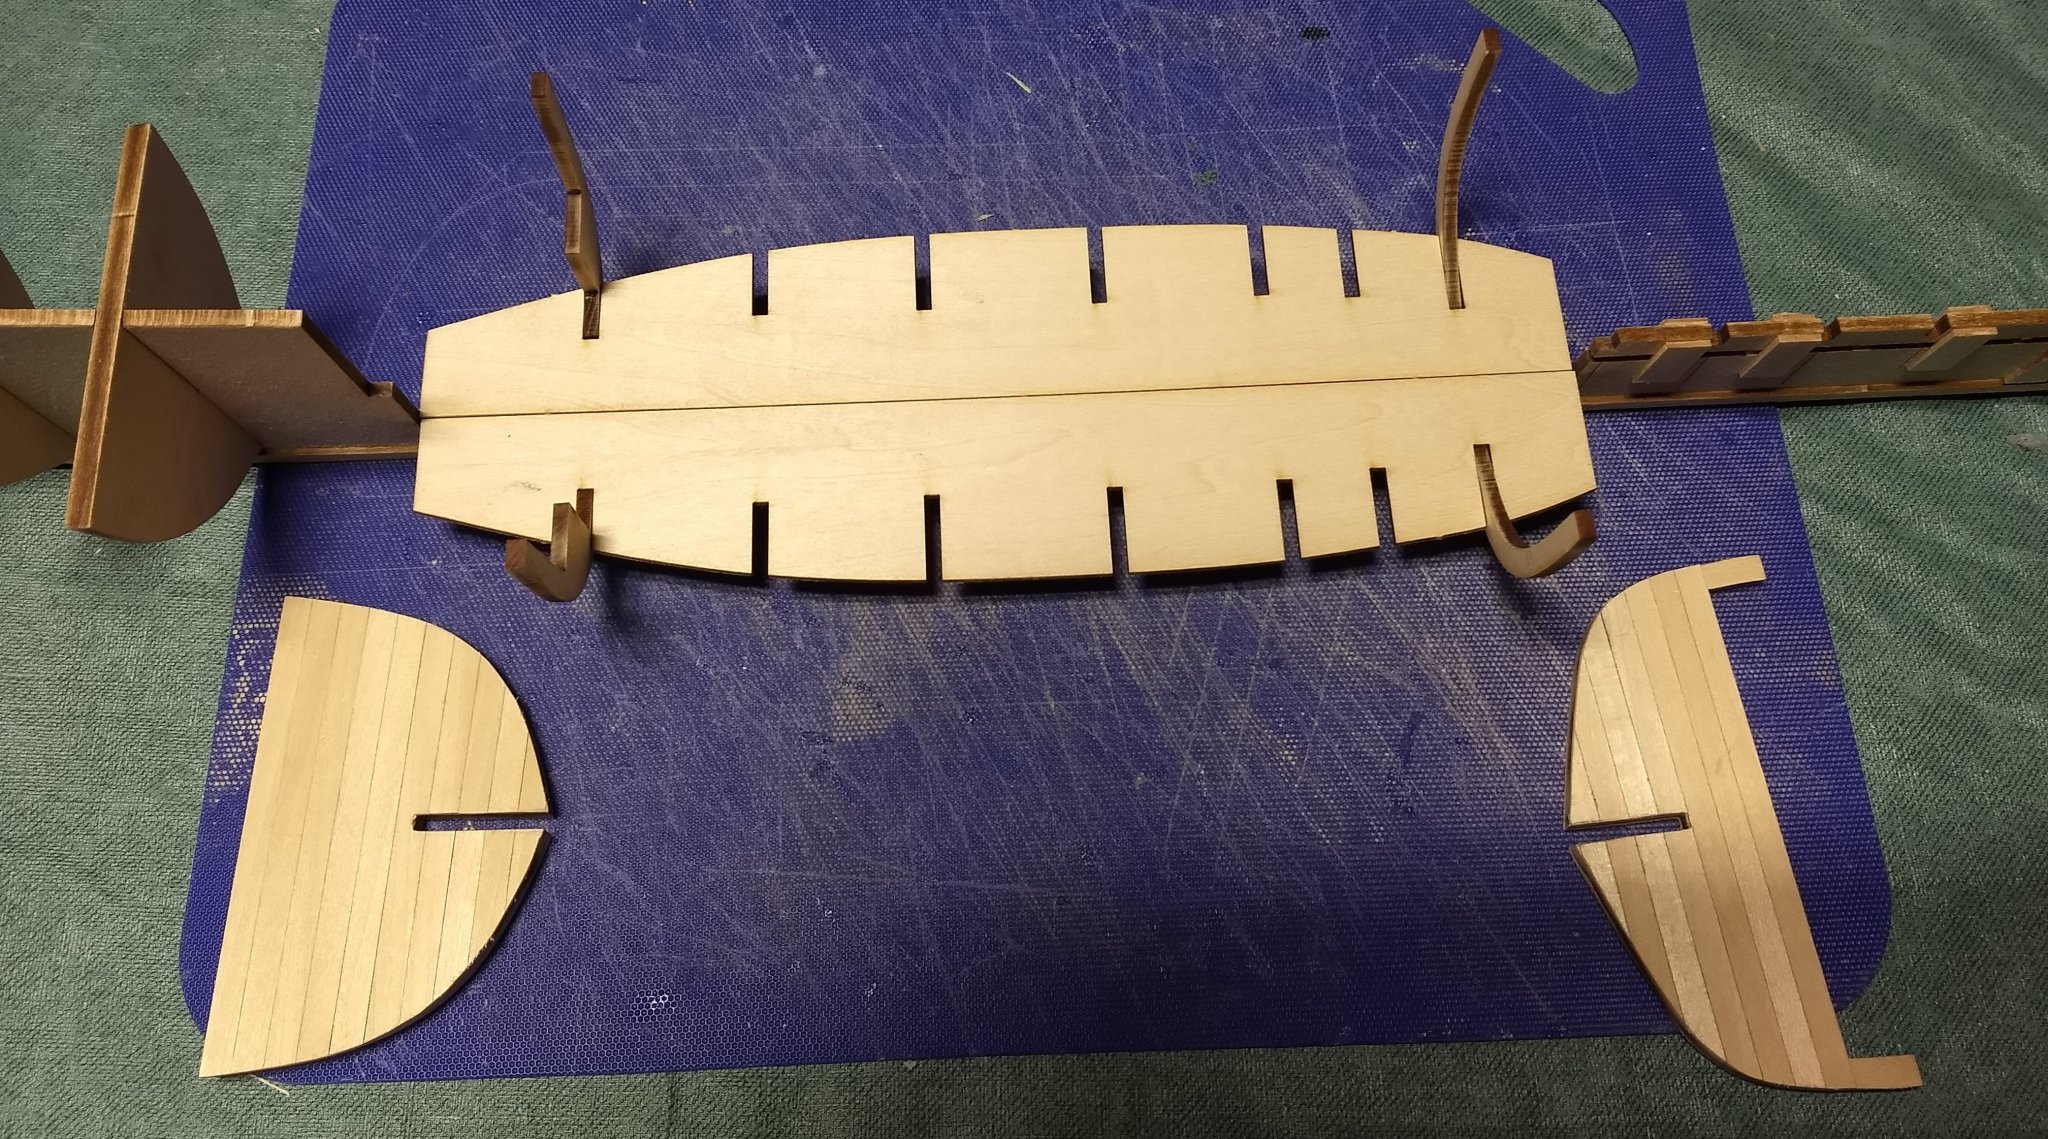
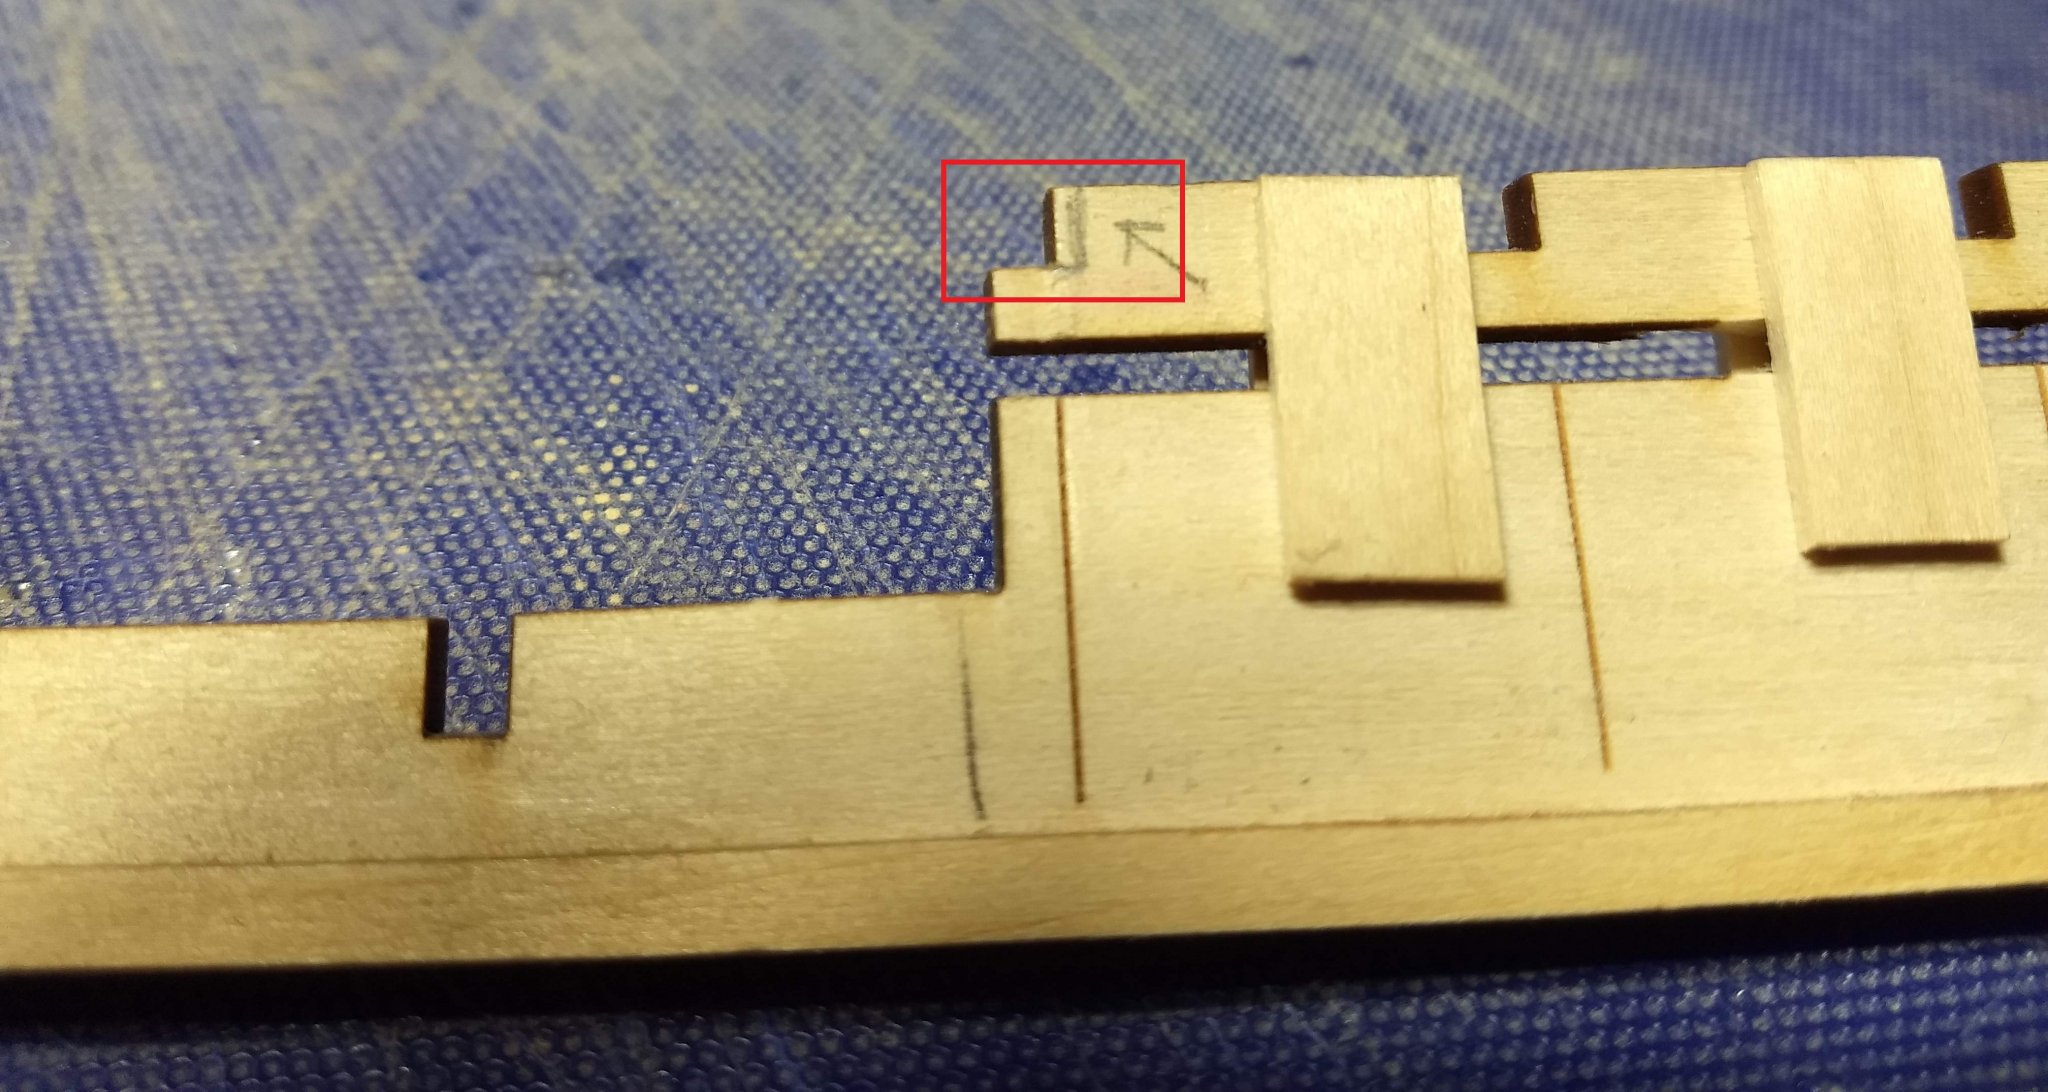
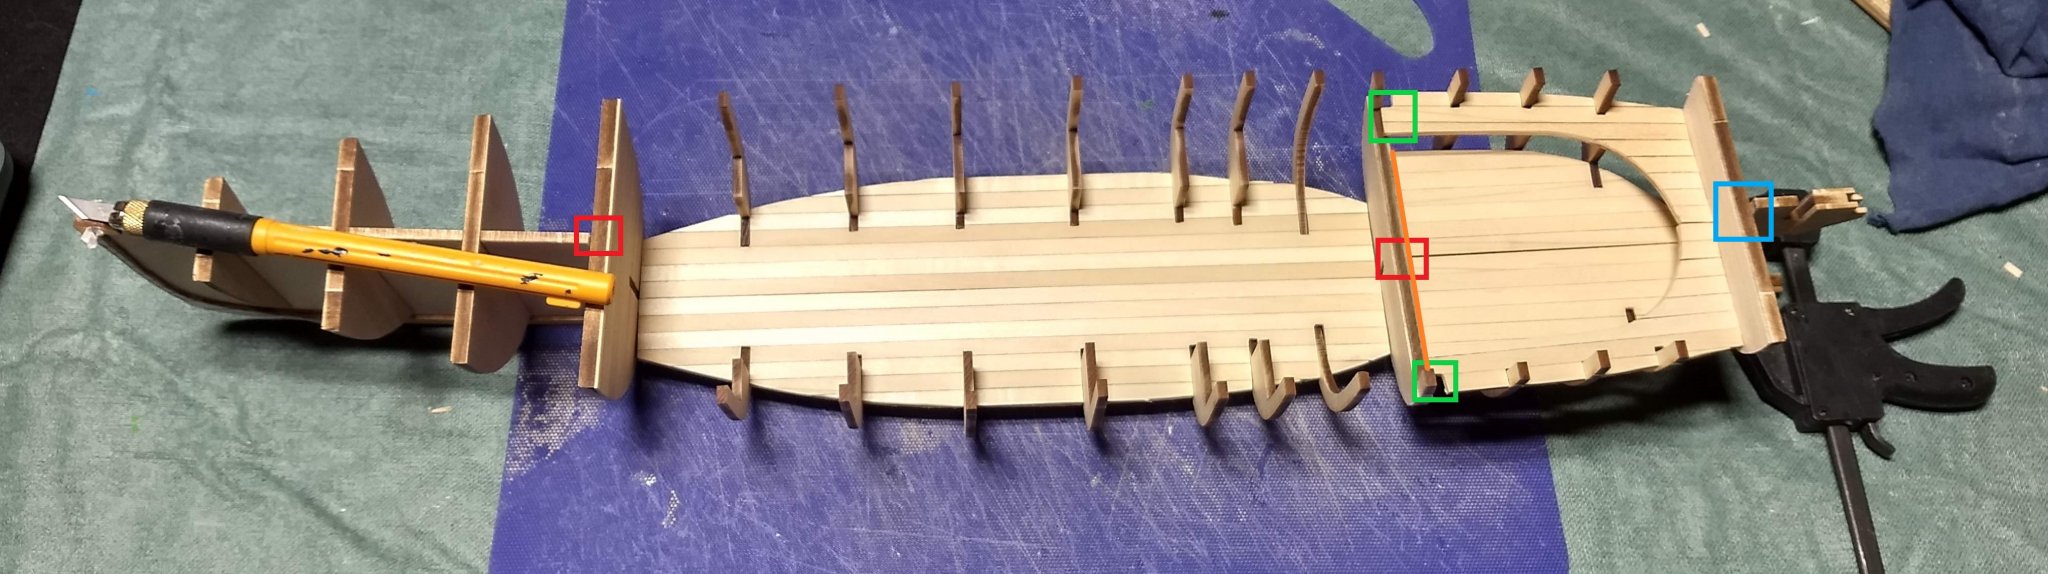
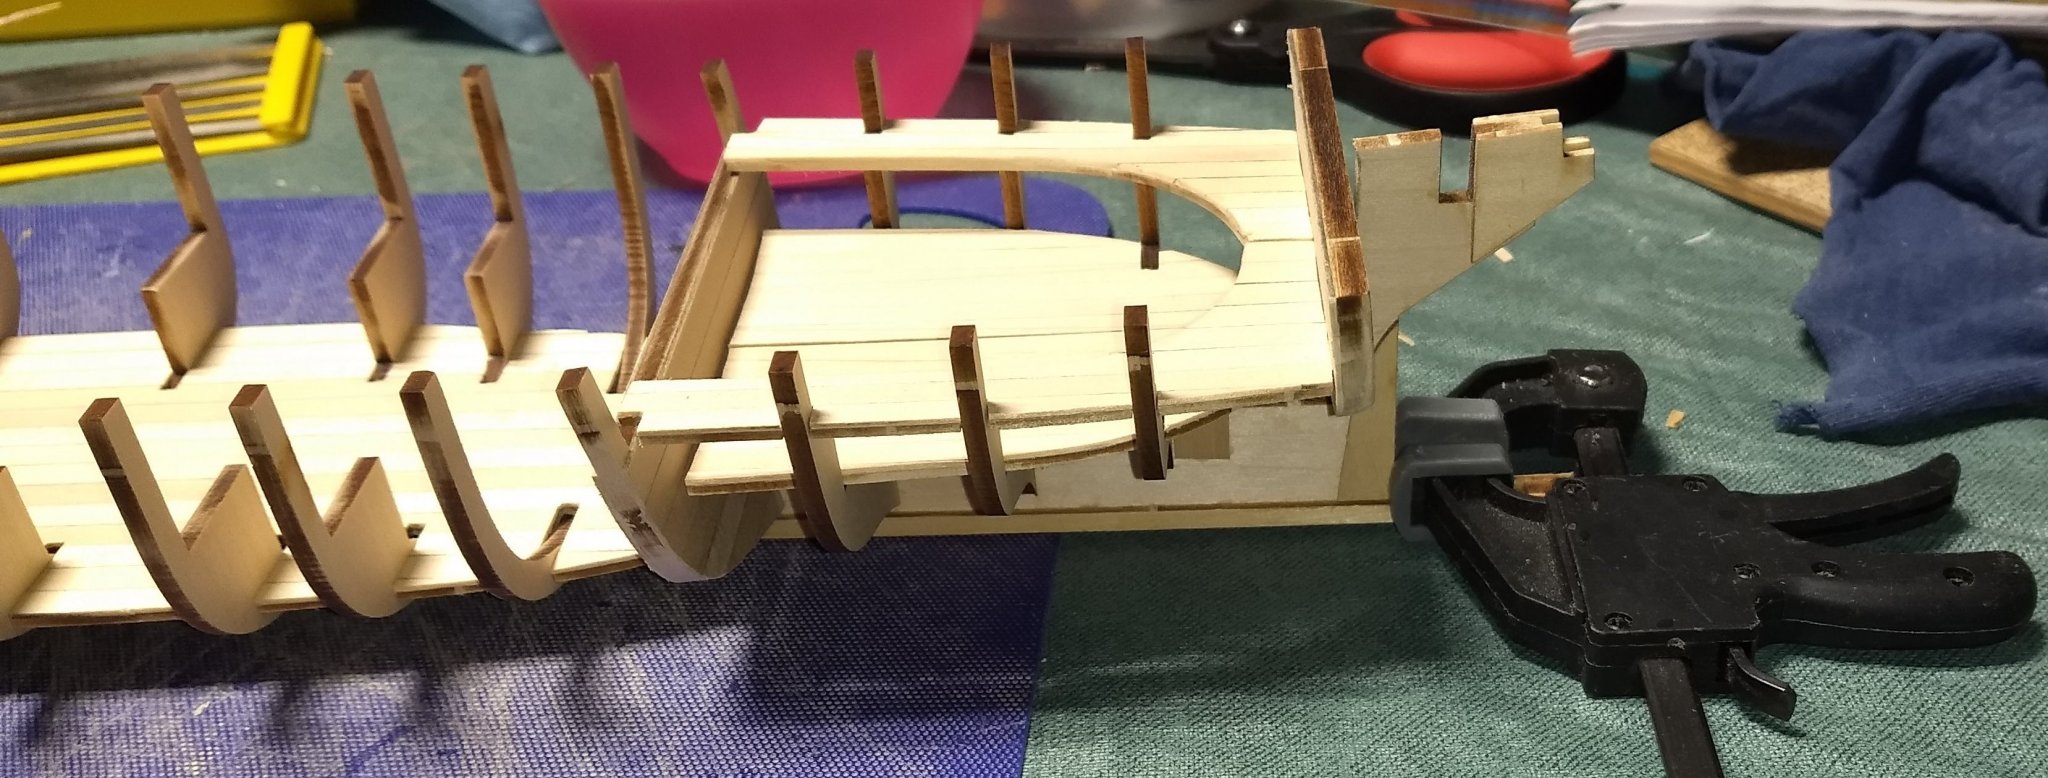
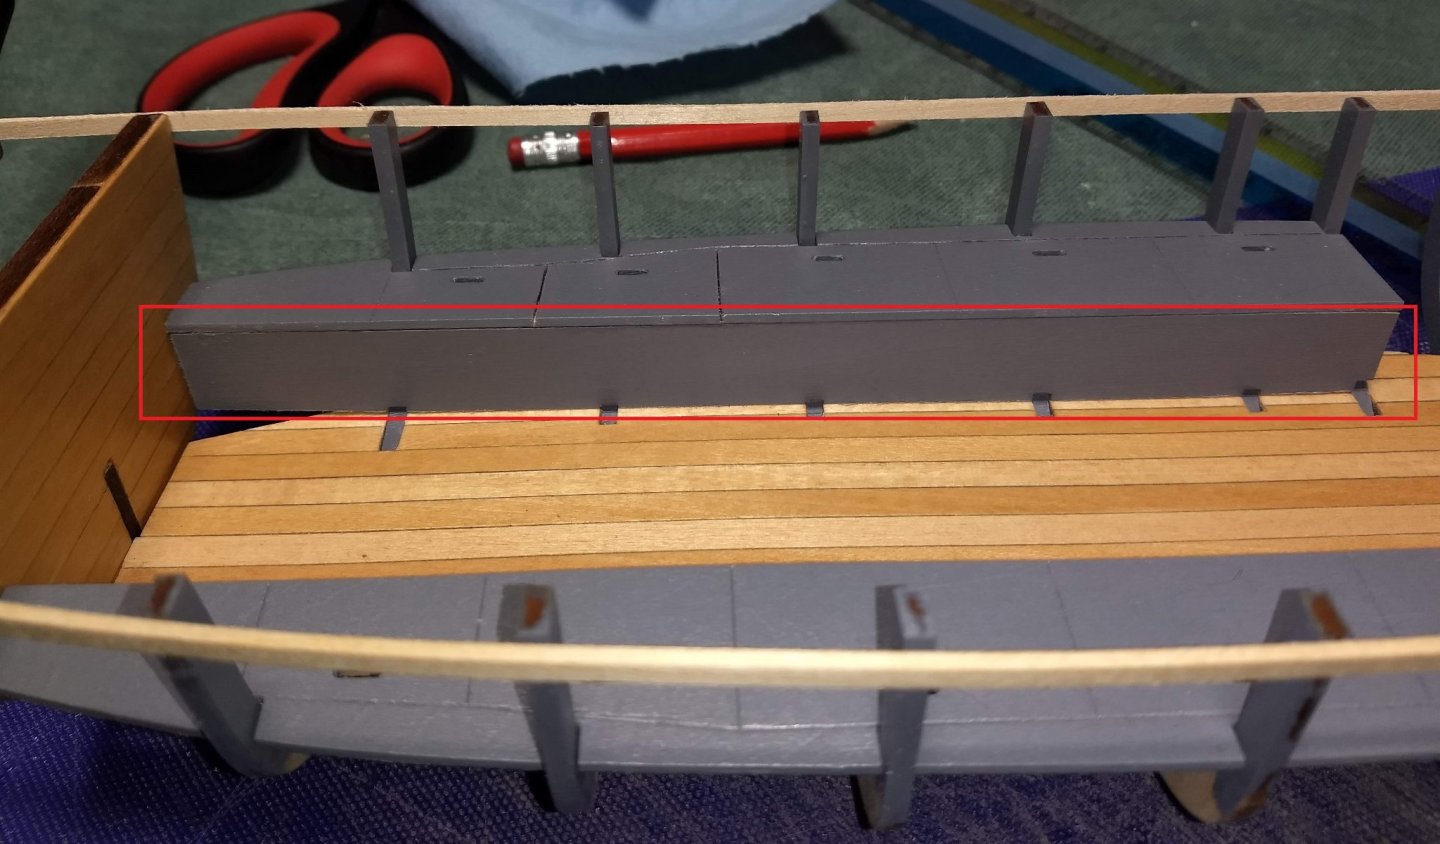
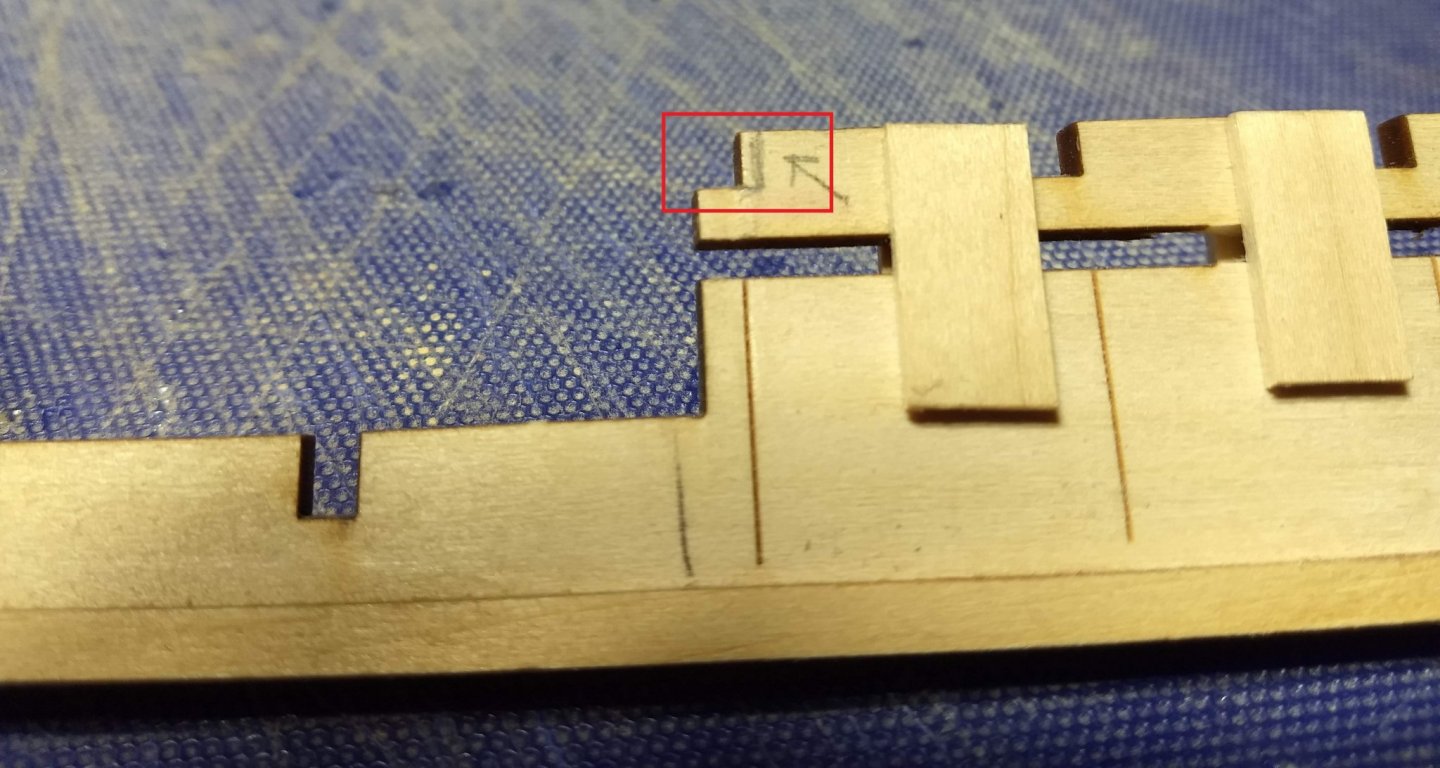
Moving on to the "adjustments" that must be made (or at least known at this time) do to the fact of the 1/32 increase in the height of the planking. For the main decking bulkheads #4 and #12 must be moved forward/backwards 1/32 each to account for their increased height. This is a easy adjustment - I have marked them on the following two pictures. This will move bulkheads #4 and #12 forward/backwards so the floor will fit in. Next dry fit the main floor decking. Neither flooring or bulkheads are glued at this time. Below are all the parts that I wanted to plank with the 1/32 basswood. All have been trimmed and ready for staining. As mentioned earlier, warping is an issue. After adding on each plank they were put under heavy weight until I was sure the glue was completely dry. As mentioned in the instructions and several other build logs,,,,, the bulkheads are extremely delicate at this point. Even knowing this and trying to be careful, I managed to break two of them. However a dab of CA glue and "all is forgiven". Both bulkheads are very strong due to CA glue- at least that the break point anyway.. Blow show dry fit on the decking and seating areas. I attempted to highlight the areas ( up until this point) that I have had to alter due to the 1/32 height increase do to the planking. Parts in red showed bulkheads #4 and #12 moved foreword/backwards (discussed above). Parts in green and orange show where trimming was required do to bulkhead #12 moved back. Part in blue shows bulkhead #16 moved back due to increased planking. One area I did not want to adjust was the 1/32 height increase in the floor. Technically the floor is 1/32 higher and this can been seen up close of you look where each bulkhead come through the floor. To me a minor detail and will mostly be covered up by the coal bins later on. I am sure a true purest would deal with this issue, but not at my skill level... One more thing to note,,,, Look at my "ghetto version" of a keel holder (black clamp at the stern). This works great for now, but it will be a different story when I have to turn over the model for the planking. Someday I may break down and buy an official keel holder - but for now this is what is have...


- 51 replies
-
- 3
-
-
- model shipways
- picket boat
- (and 1 more)
-
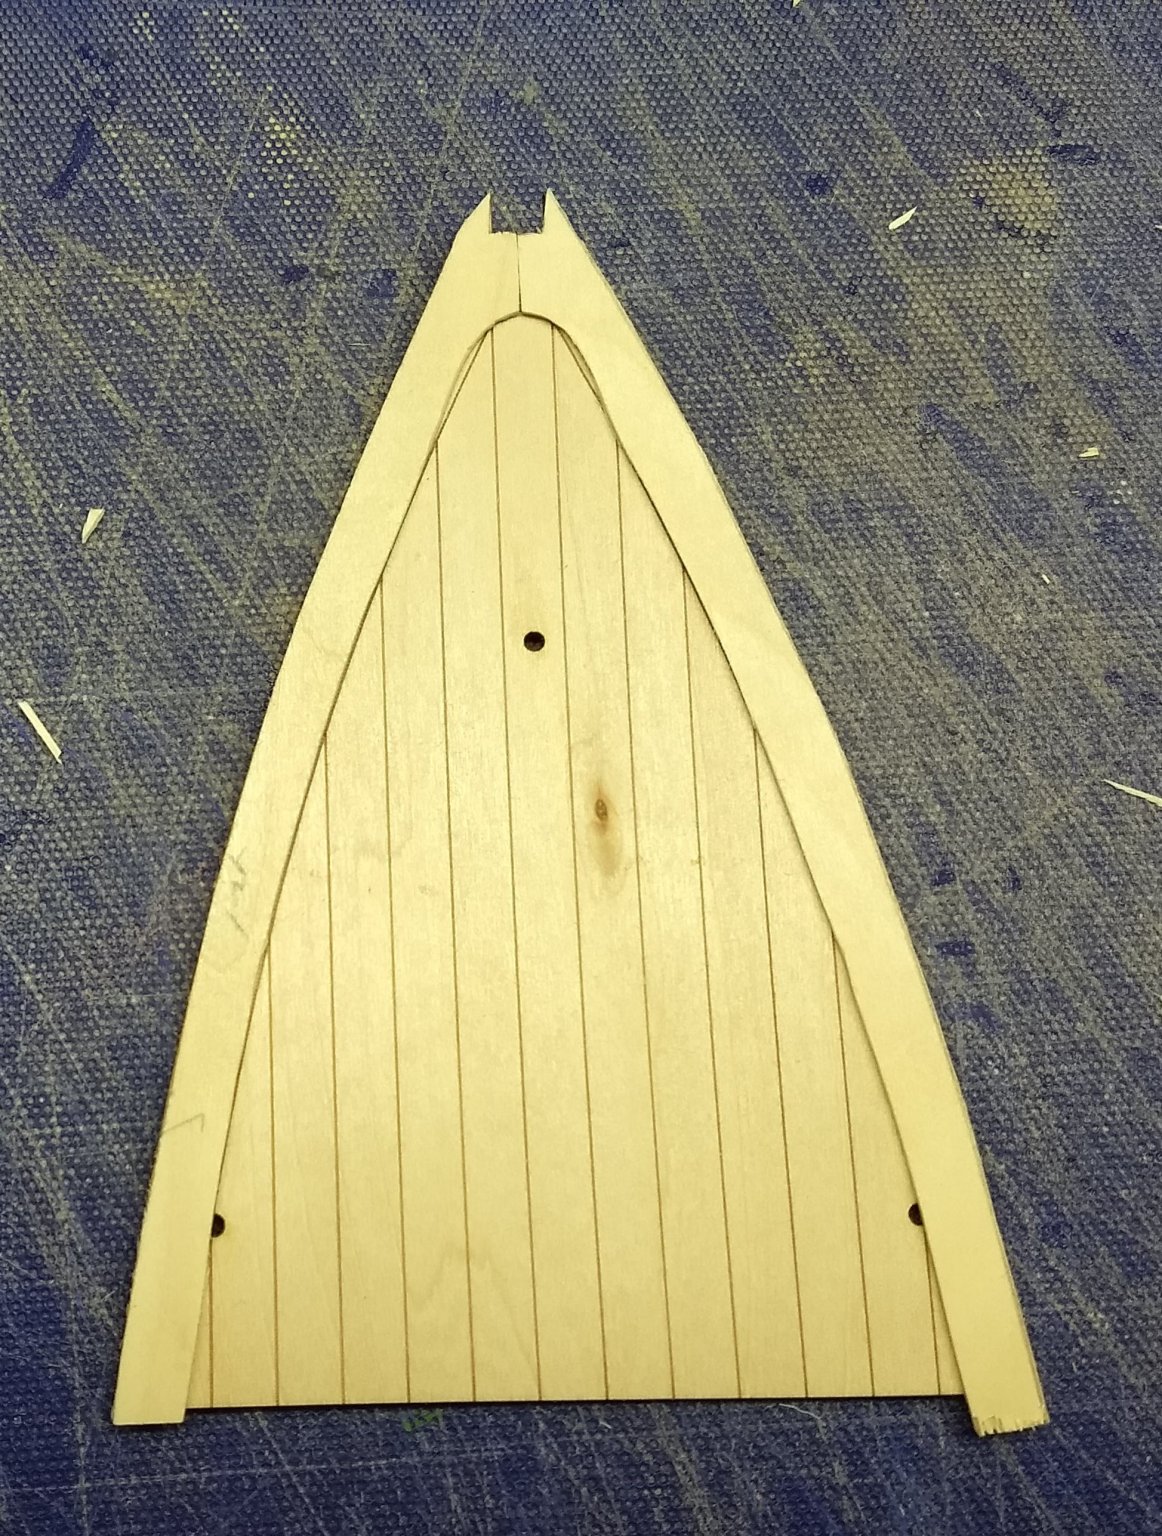
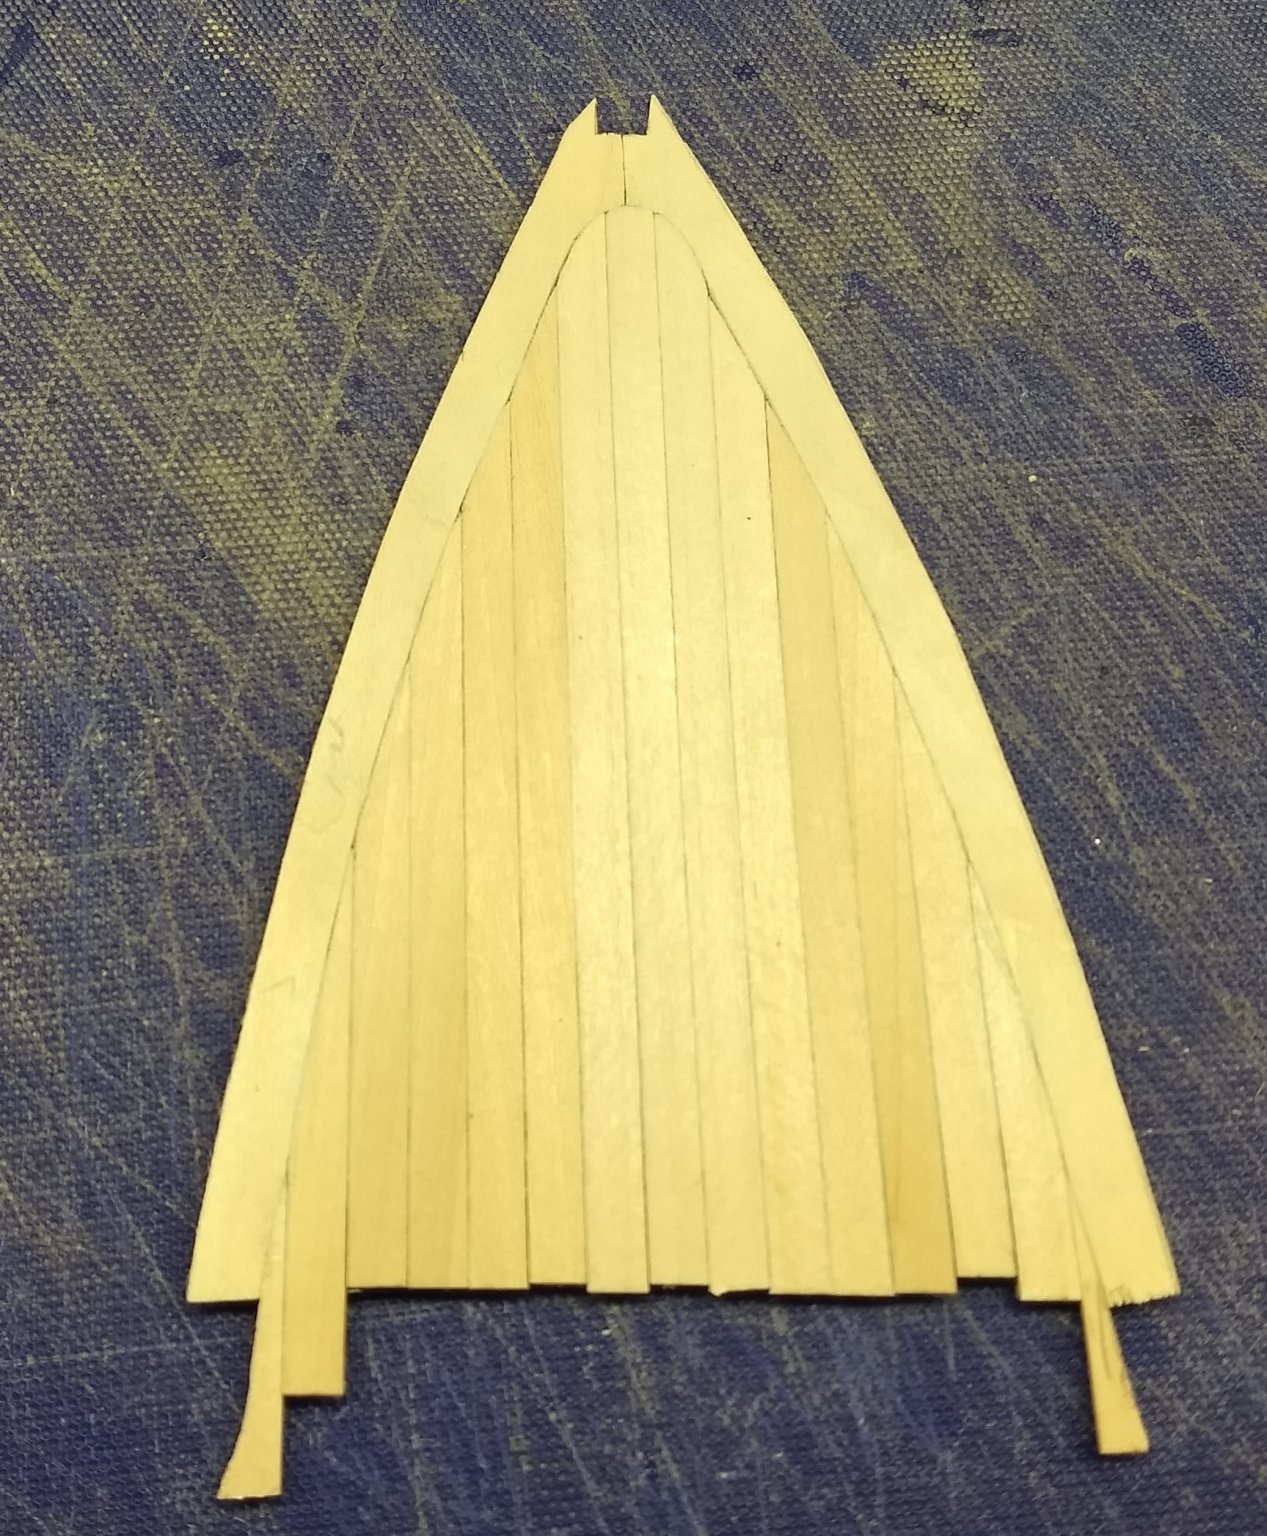
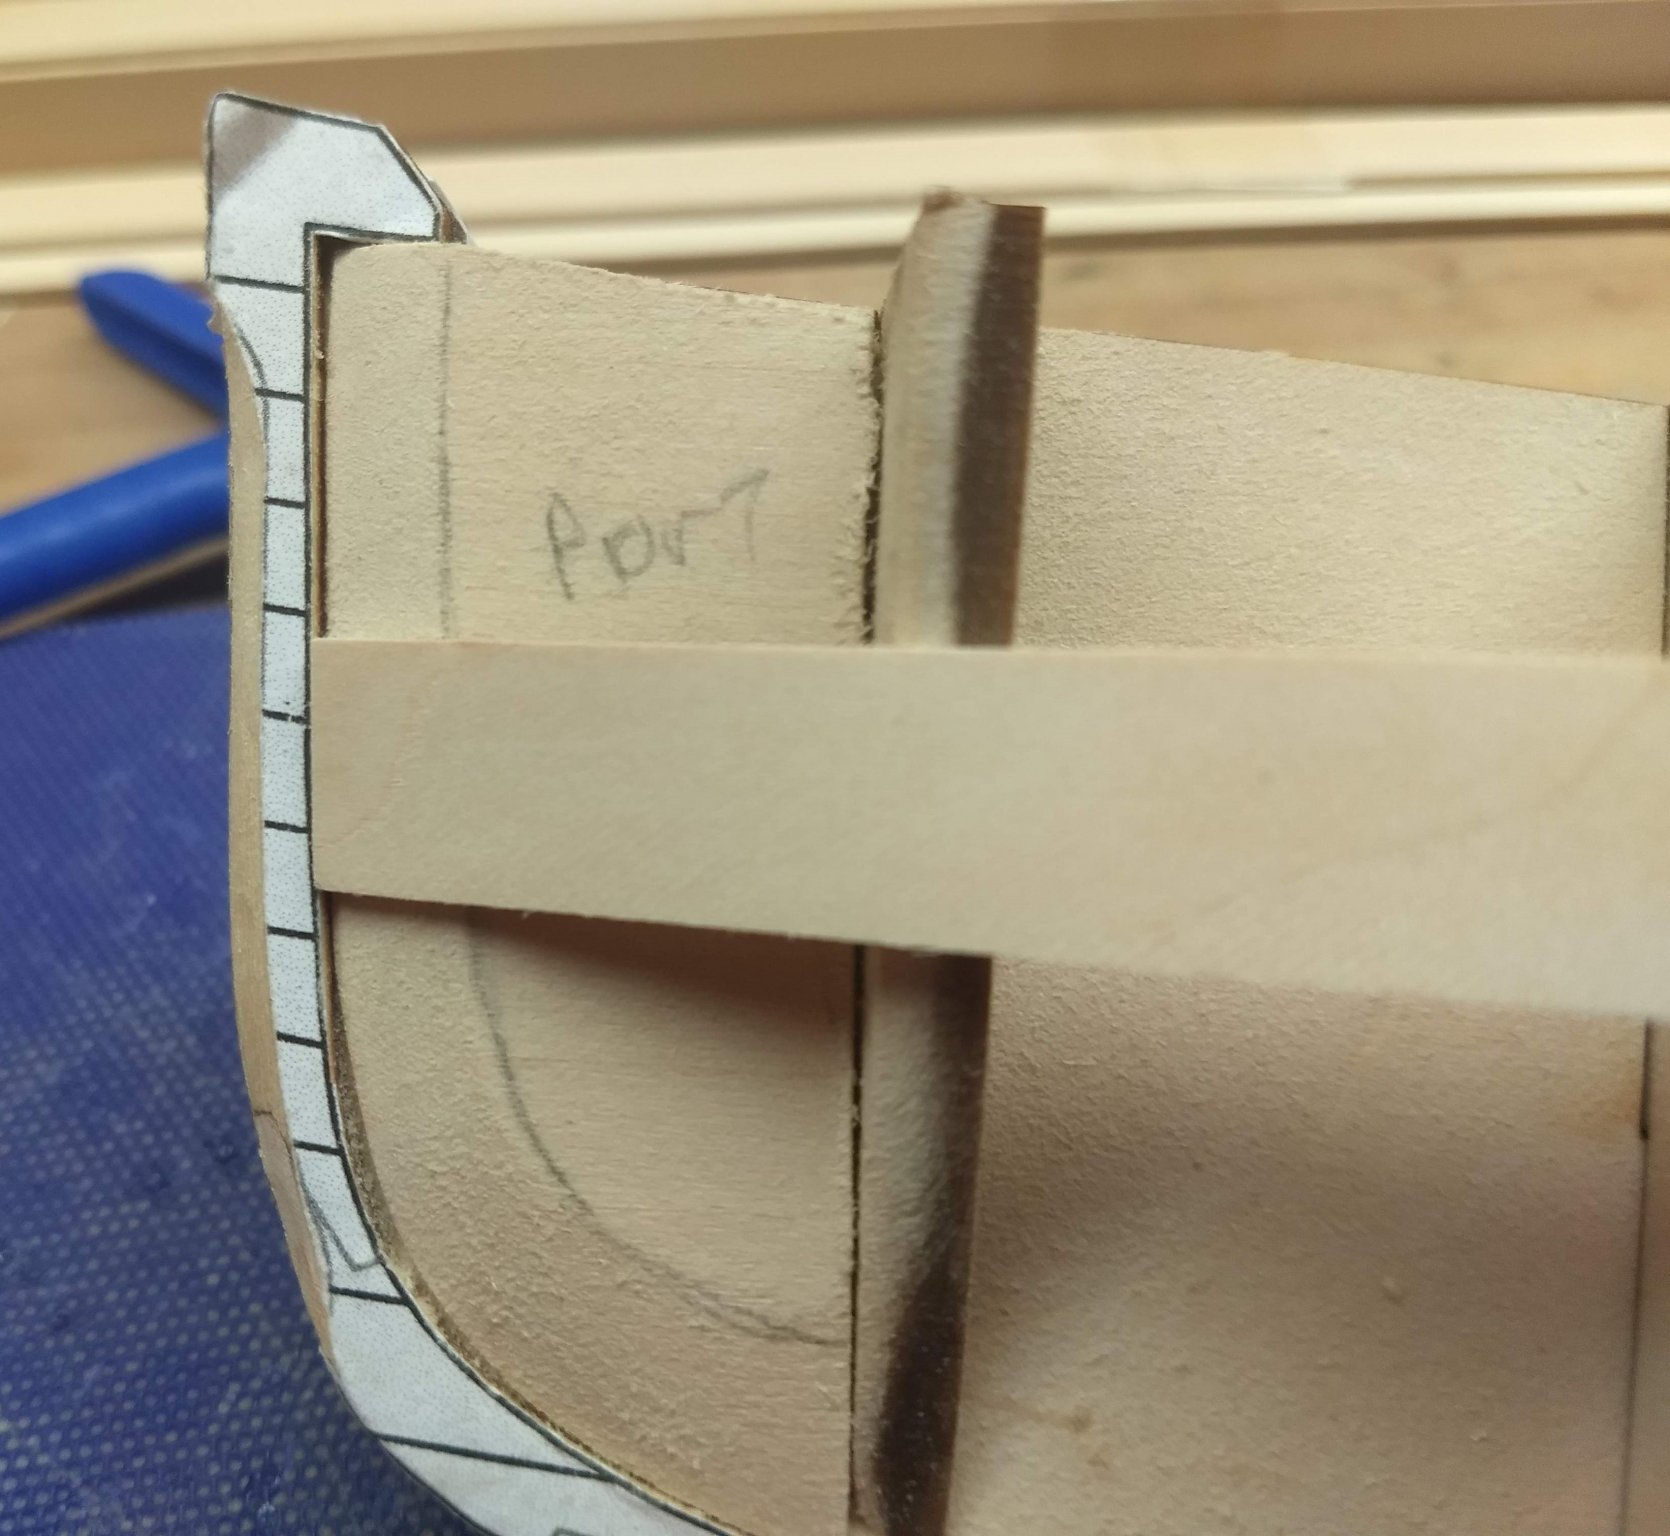
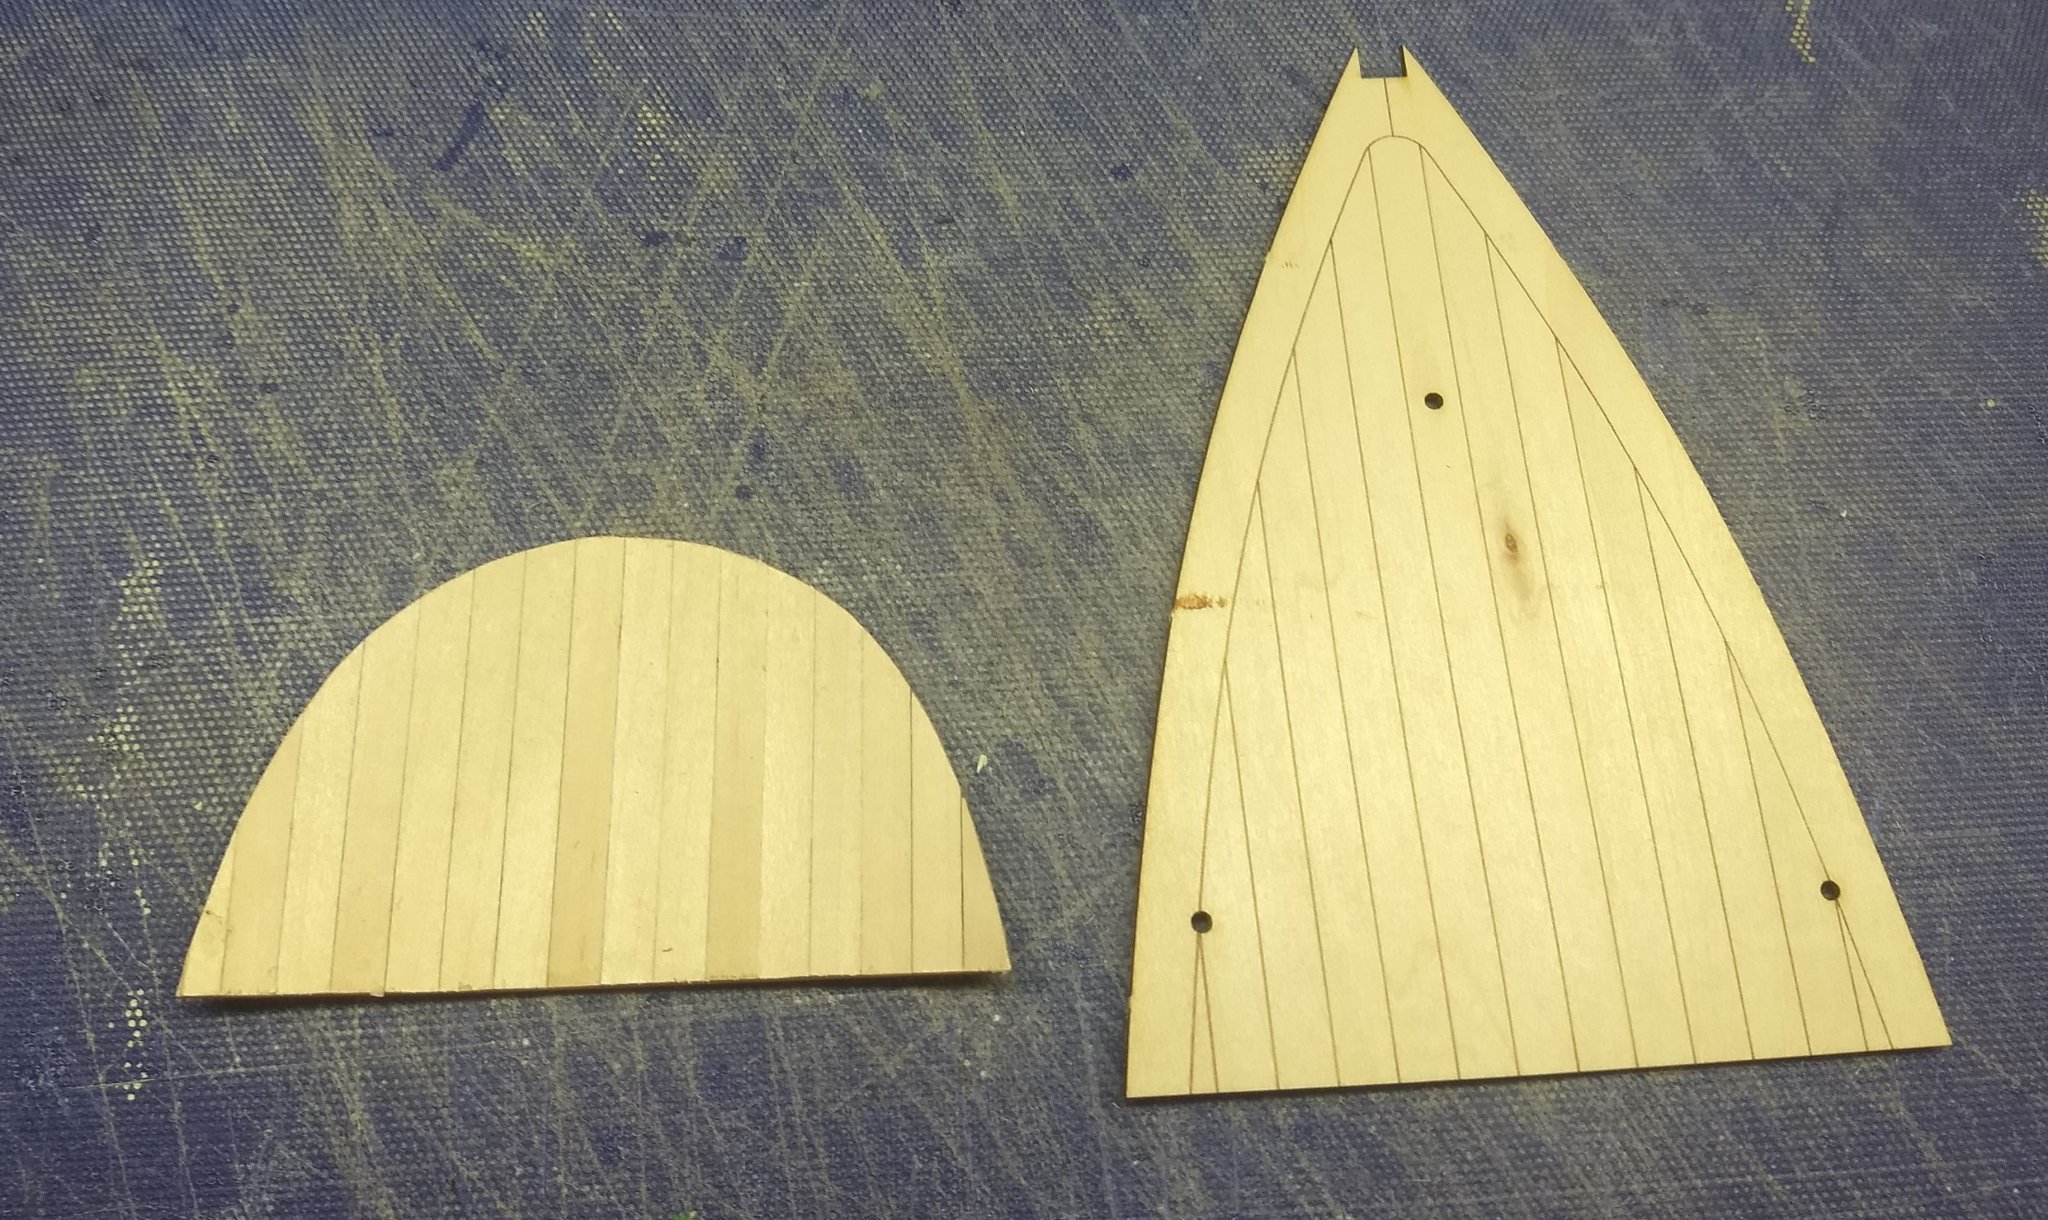
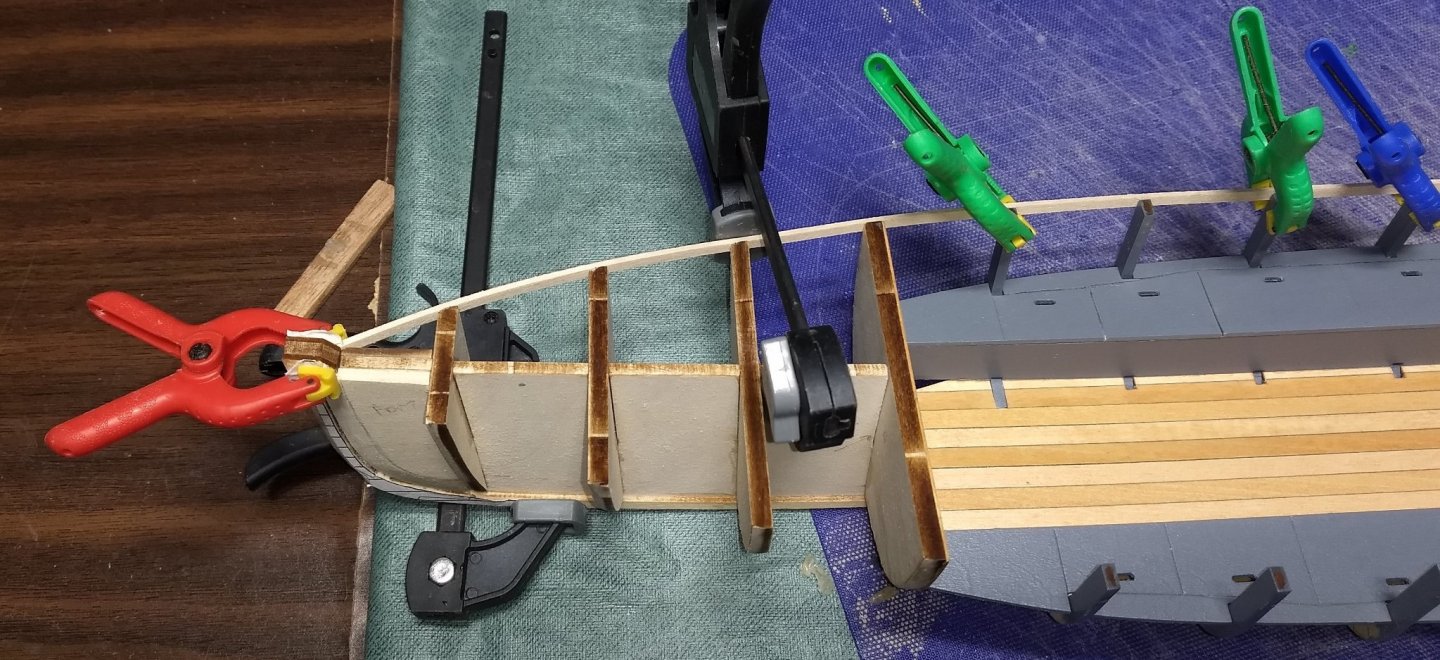
Decision made,,,my wife (shall we say) "advised" me at to the correct way to go. I will be doing the planking of the bow section. Below shows the bow section and the first row of aplanking round the border. It does not match the bow section exactly at the tip, but I think (close enough) and will not be noticeable when all the planking is in place/ From there it is just a matter of filling in the planks. It takes some time an patience. Start with the middle strip and work your way to the outside. Cut a plank close to the final shape, sand, and dry fit..... Repeat over and over again until the plank fits snug. Glue it in and go on to the next plank Below is my final result. Still needs trimming, sanding, stain etc, but overall not too bad for a "newbie" modeler like my self


- 51 replies
-
- 5
-
-
- model shipways
- picket boat
- (and 1 more)
-
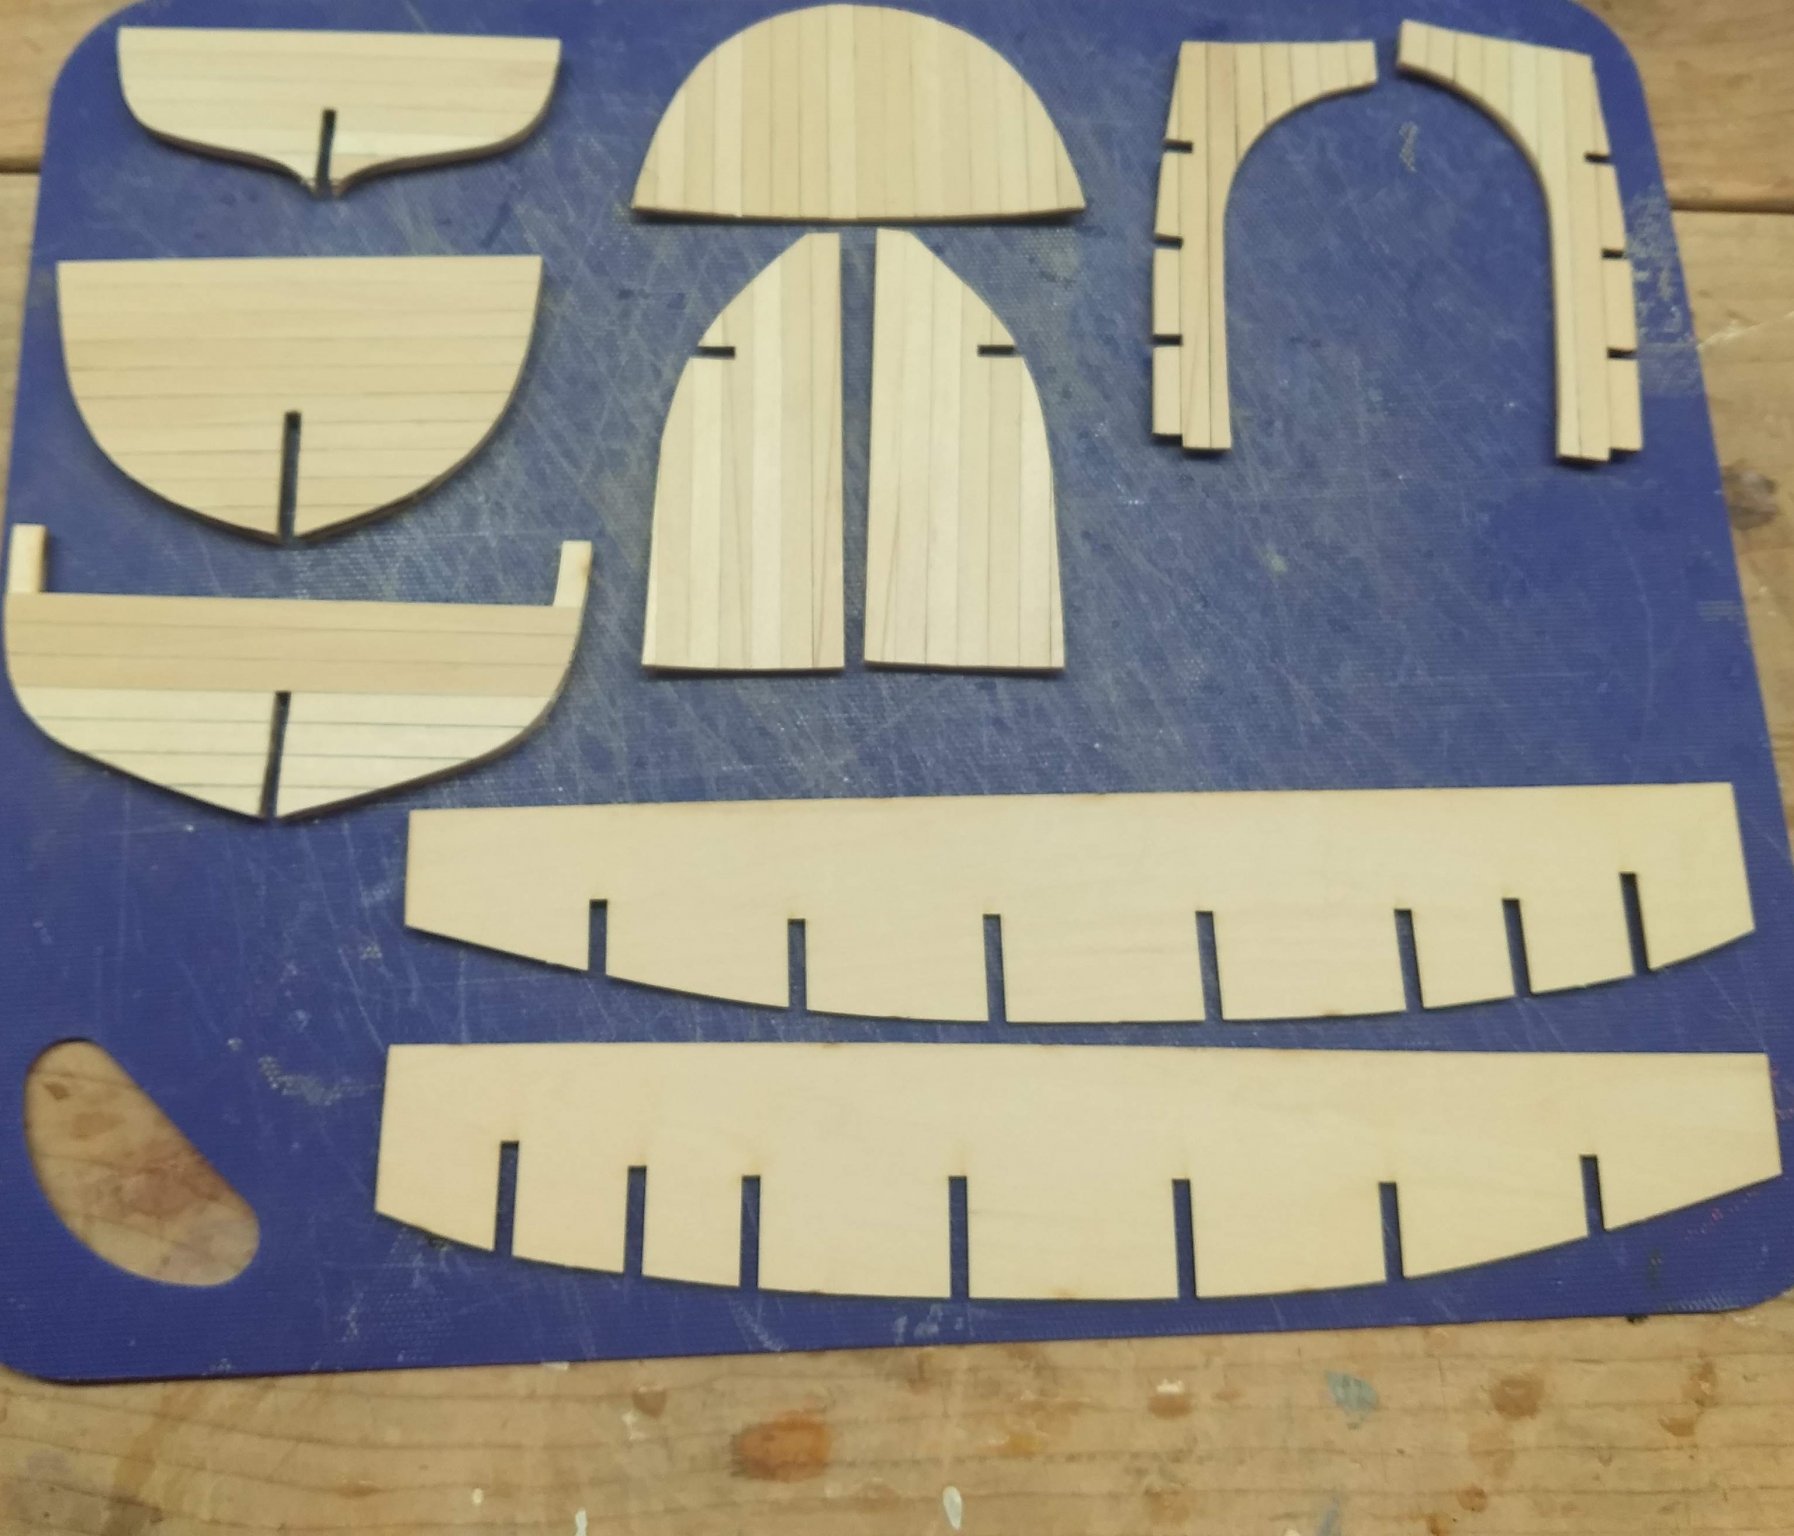
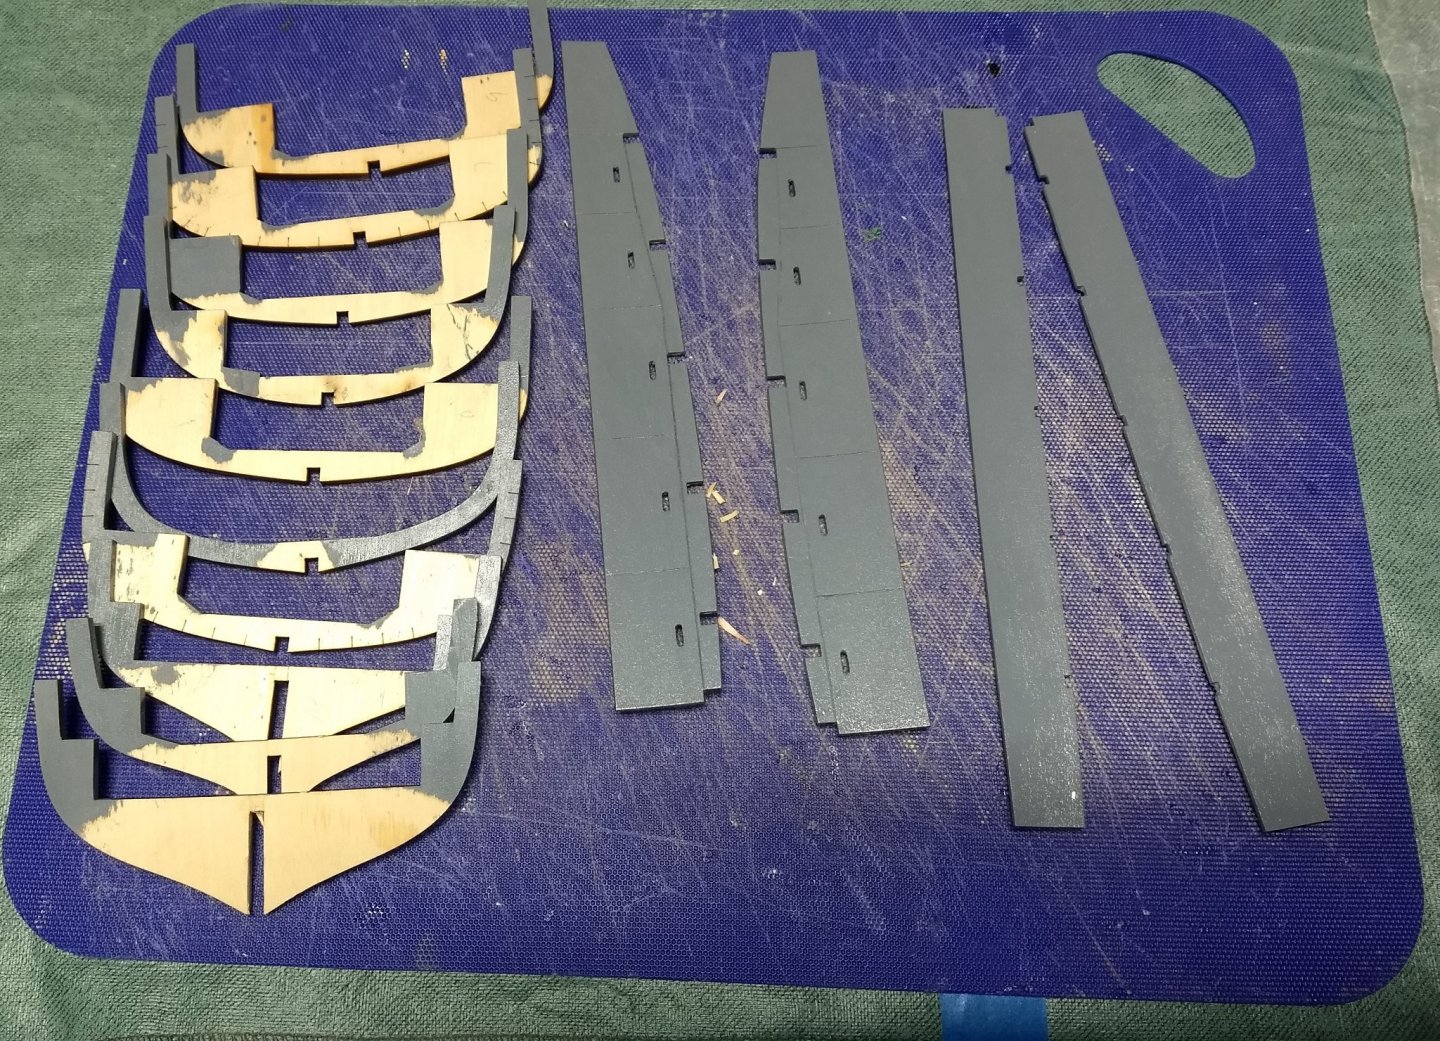
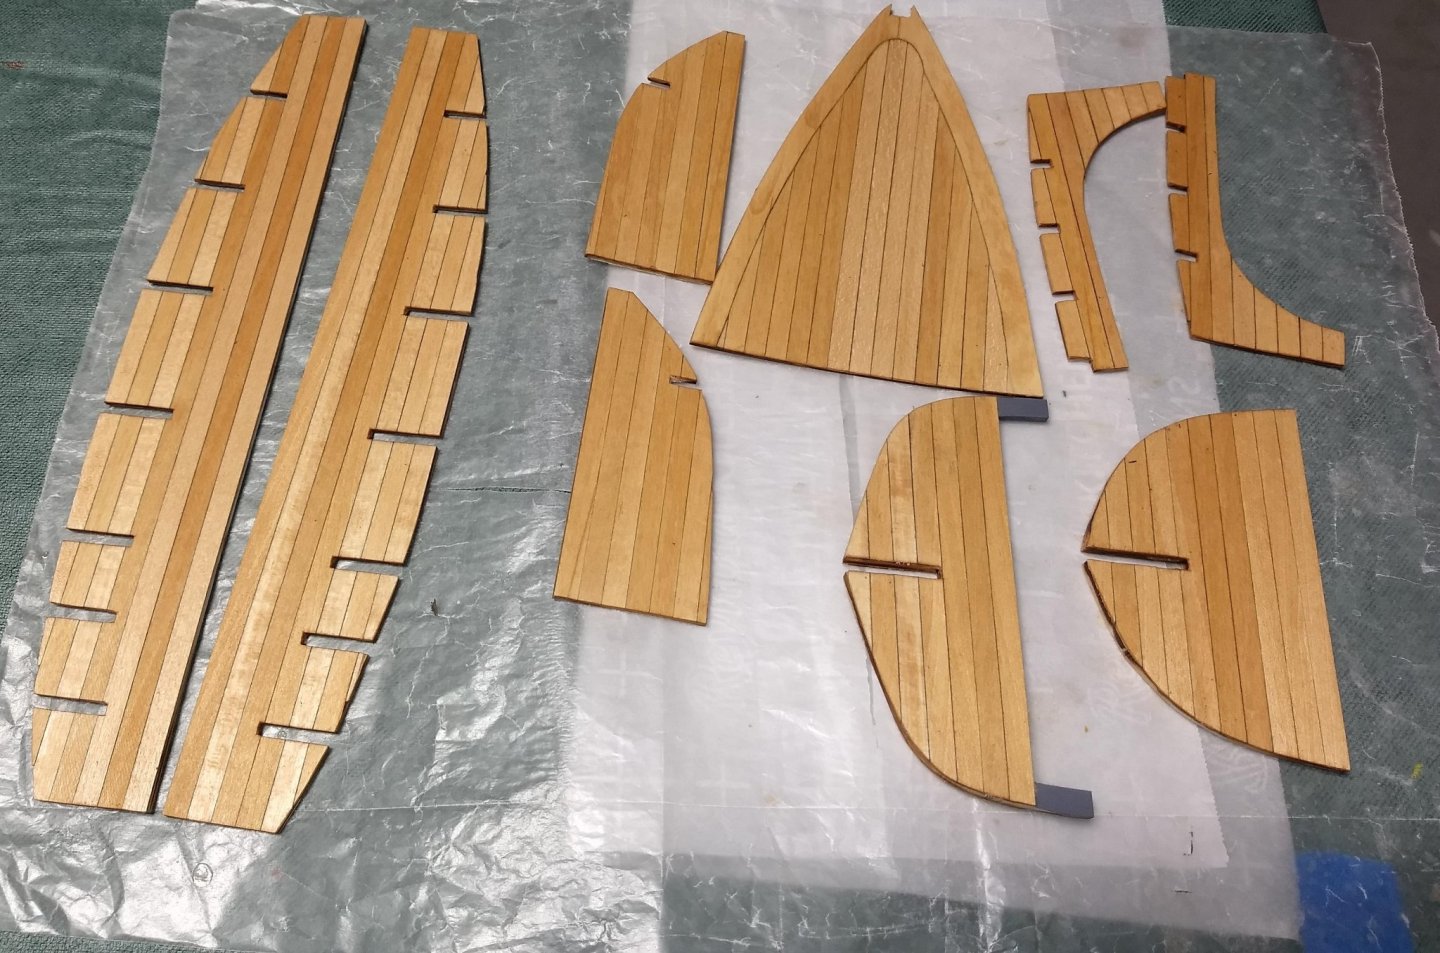
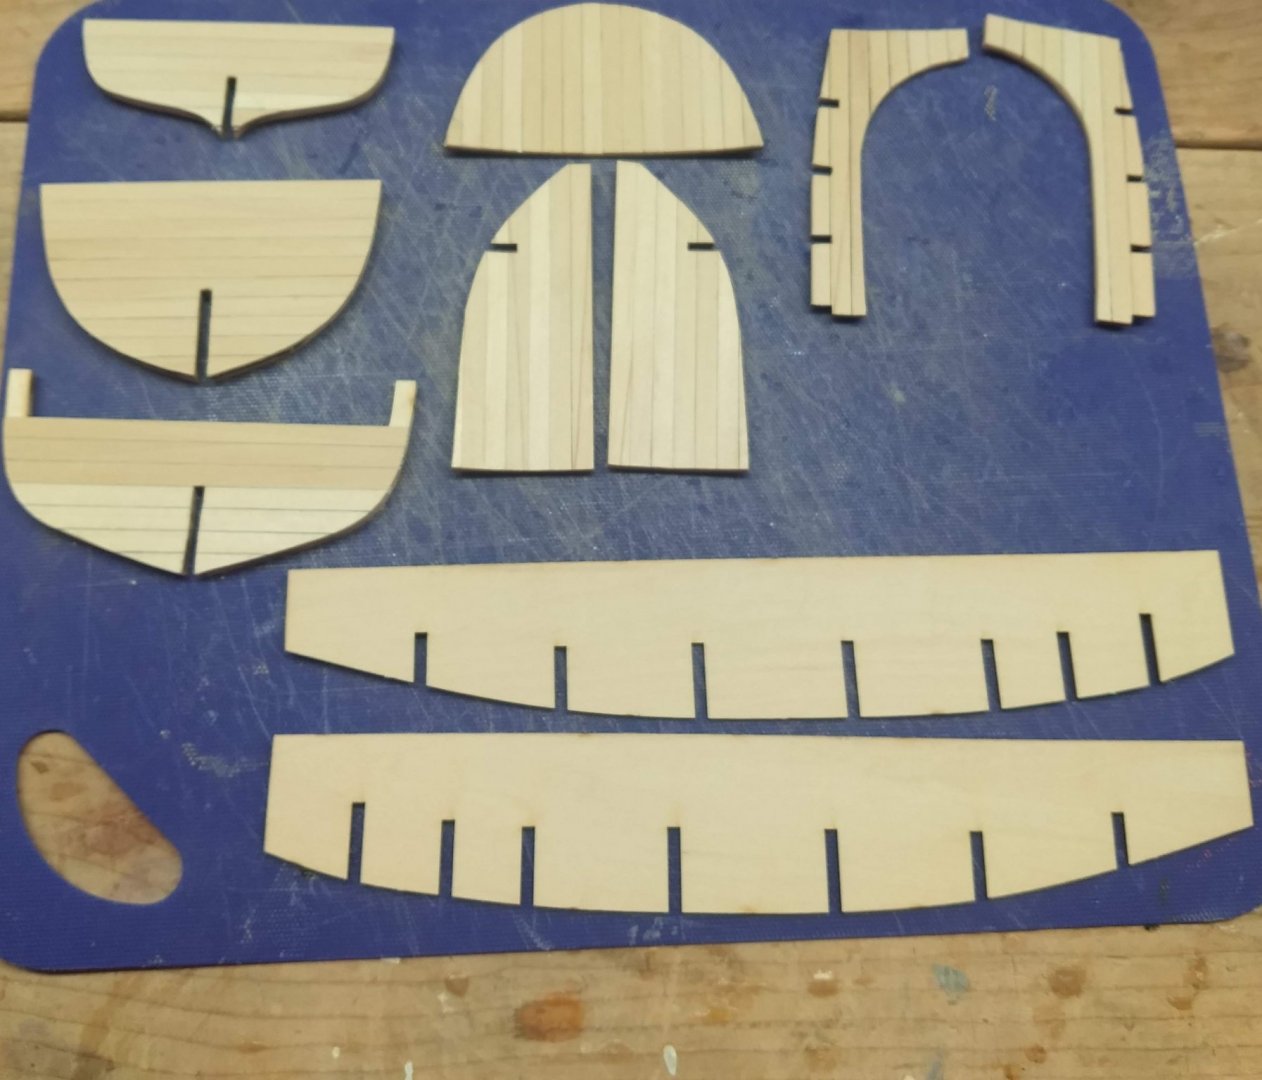
Next trimmed down the bow filler planks. Demel tool makes short work of this task. Only real guess work is how much to trim. Pieces come pre-marked as to where to trim, but not real sure how thin to make the leading edge. It all depends on how much indentation you want on the cut water of planking. Not shown here, but the bow and stern bulkheads were also trimmed. Same story as with the bow filler planks - pre-markings on the bow and stern bulkheads show where and how much to trim off. I am sure there will be some fine tuning when I get to gluing them to the keel, but this is a good start on the bulkhead trimming. Made an executive decision and decided to trim the bow fillers to where the planking will be about flush with the back of the cutwater. Looking at the picture below, I am not sure I will stick with this decision.. Maybe the planking should be indented some where it meets the cutwater. Bow pieces are not glued in yet, so I have some time to re-think this decision. We will see what "calls my name" when I get back to the ship. Next I followed that age old philosophy that says "why do something easy when you can make it hard".... As other have done, I decided to plank the various seats, flooring, and decks verses just drawing lines on the them to simulate planking. Included with this decision will be all the (shall we say) "fun" that goes with customizing some the pieces due to the increased length/width of the parts. To make it a little easier I am using 1/32" x 1/4" planking so the increased length/width should be a little easier to deal with. In addition the pre-drawn deck lines on the stern and bow sections are 1/4" wide. Very easy to get that planking correct - just cover the pre-drawn deck lines. In the below picture, all the parts, except the main flooring have been planked. I am holding off on planking the main flooring until I can more verify the length. Due to bulkheads #4 and #12 being planked, the length between them will be 1/16 or 3/32 shorter. It will be easier to trim the main flooring without the addition planking on top. Will probably have this same issue between bulkheads #12 and #16, but this have already been planked,,, so I will just have to deal with it. This is going to be (shall we say) "fun" One thing others have come across is warping when planking is applied. The decks/floors are only 1/16 thick. When gluing 1/32 planking on top of it, as the glue dries, they tend to warp. If fact, even before I finished planking each piece they already started to warp. Below is my attempt to keep the warping down during the drying process. Basically wrapped the pieces in wax paper and stacked them between weights. Even so, if you look at the picture above, there is still some warping in a few of the pieces. Hopefully they will easily be able to straighten out when they are glued into the ship. Below shows the stern piece planked and the bow piece not yet planked. When planking the bow piece the complex part is dealing with the border around the bow piece. You have to make a border piece and then trim planking to fit inside the border. The stern piece does not have border. Others have noticed this difference and custom fit a border on the stern piece to match the border around the bow piece. I have to admit, that looks really neat......but,,,,and here is where the purest are going throw up their hands and run out of the room..... Rather than make a border on the bow piece and custom fit planking in the border, or make a border on both the bow and stern piece to make them match,,,, I think I will go a third way and make the bow piece match the stern piece - that is, not have a border on the bow piece. Just make it look like the stern piece... Again,,, having just written that,,, I think I may give this some more thought,,,,Starting to 2nd guess my decision... Like with the bow filler parts, we will see what "calls my name" when I get back to the ship.

- 51 replies
-
- 4
-
-
- model shipways
- picket boat
- (and 1 more)
-
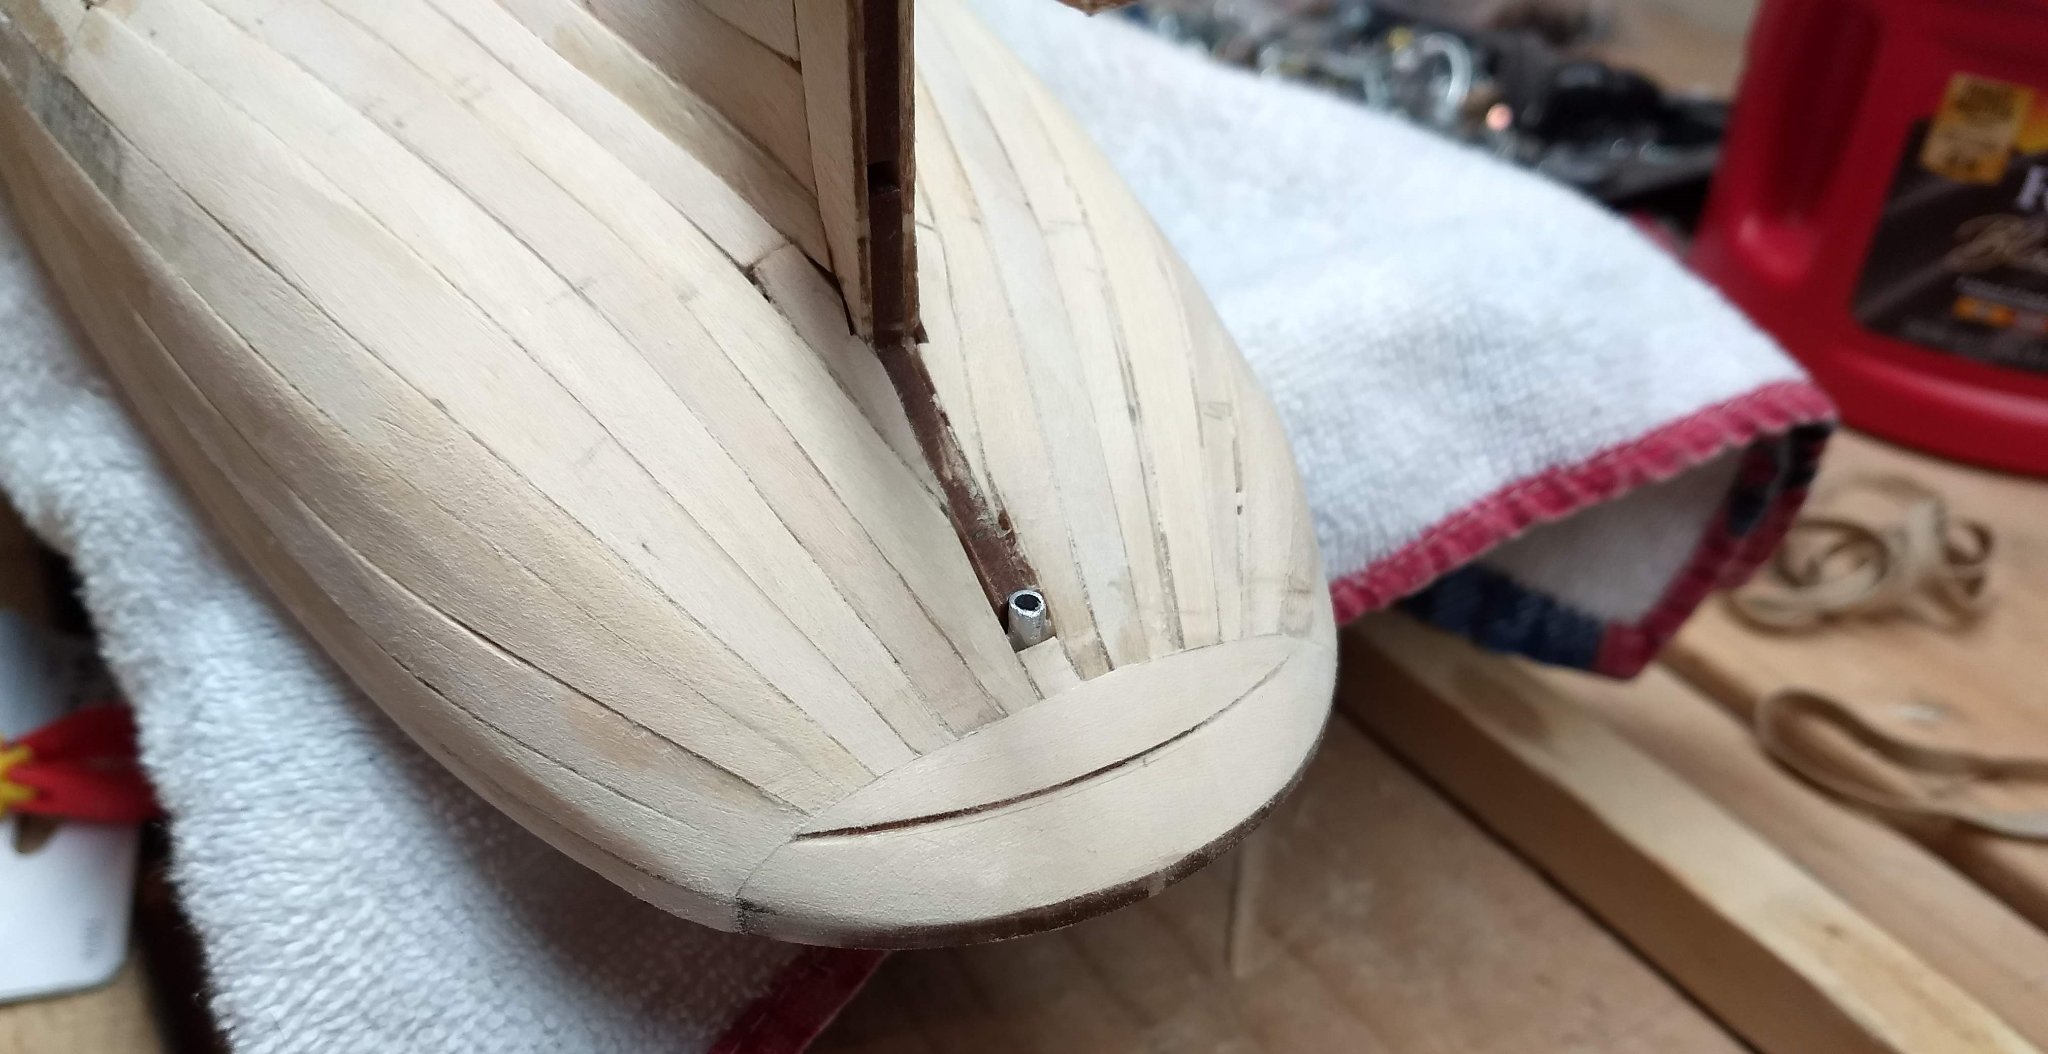
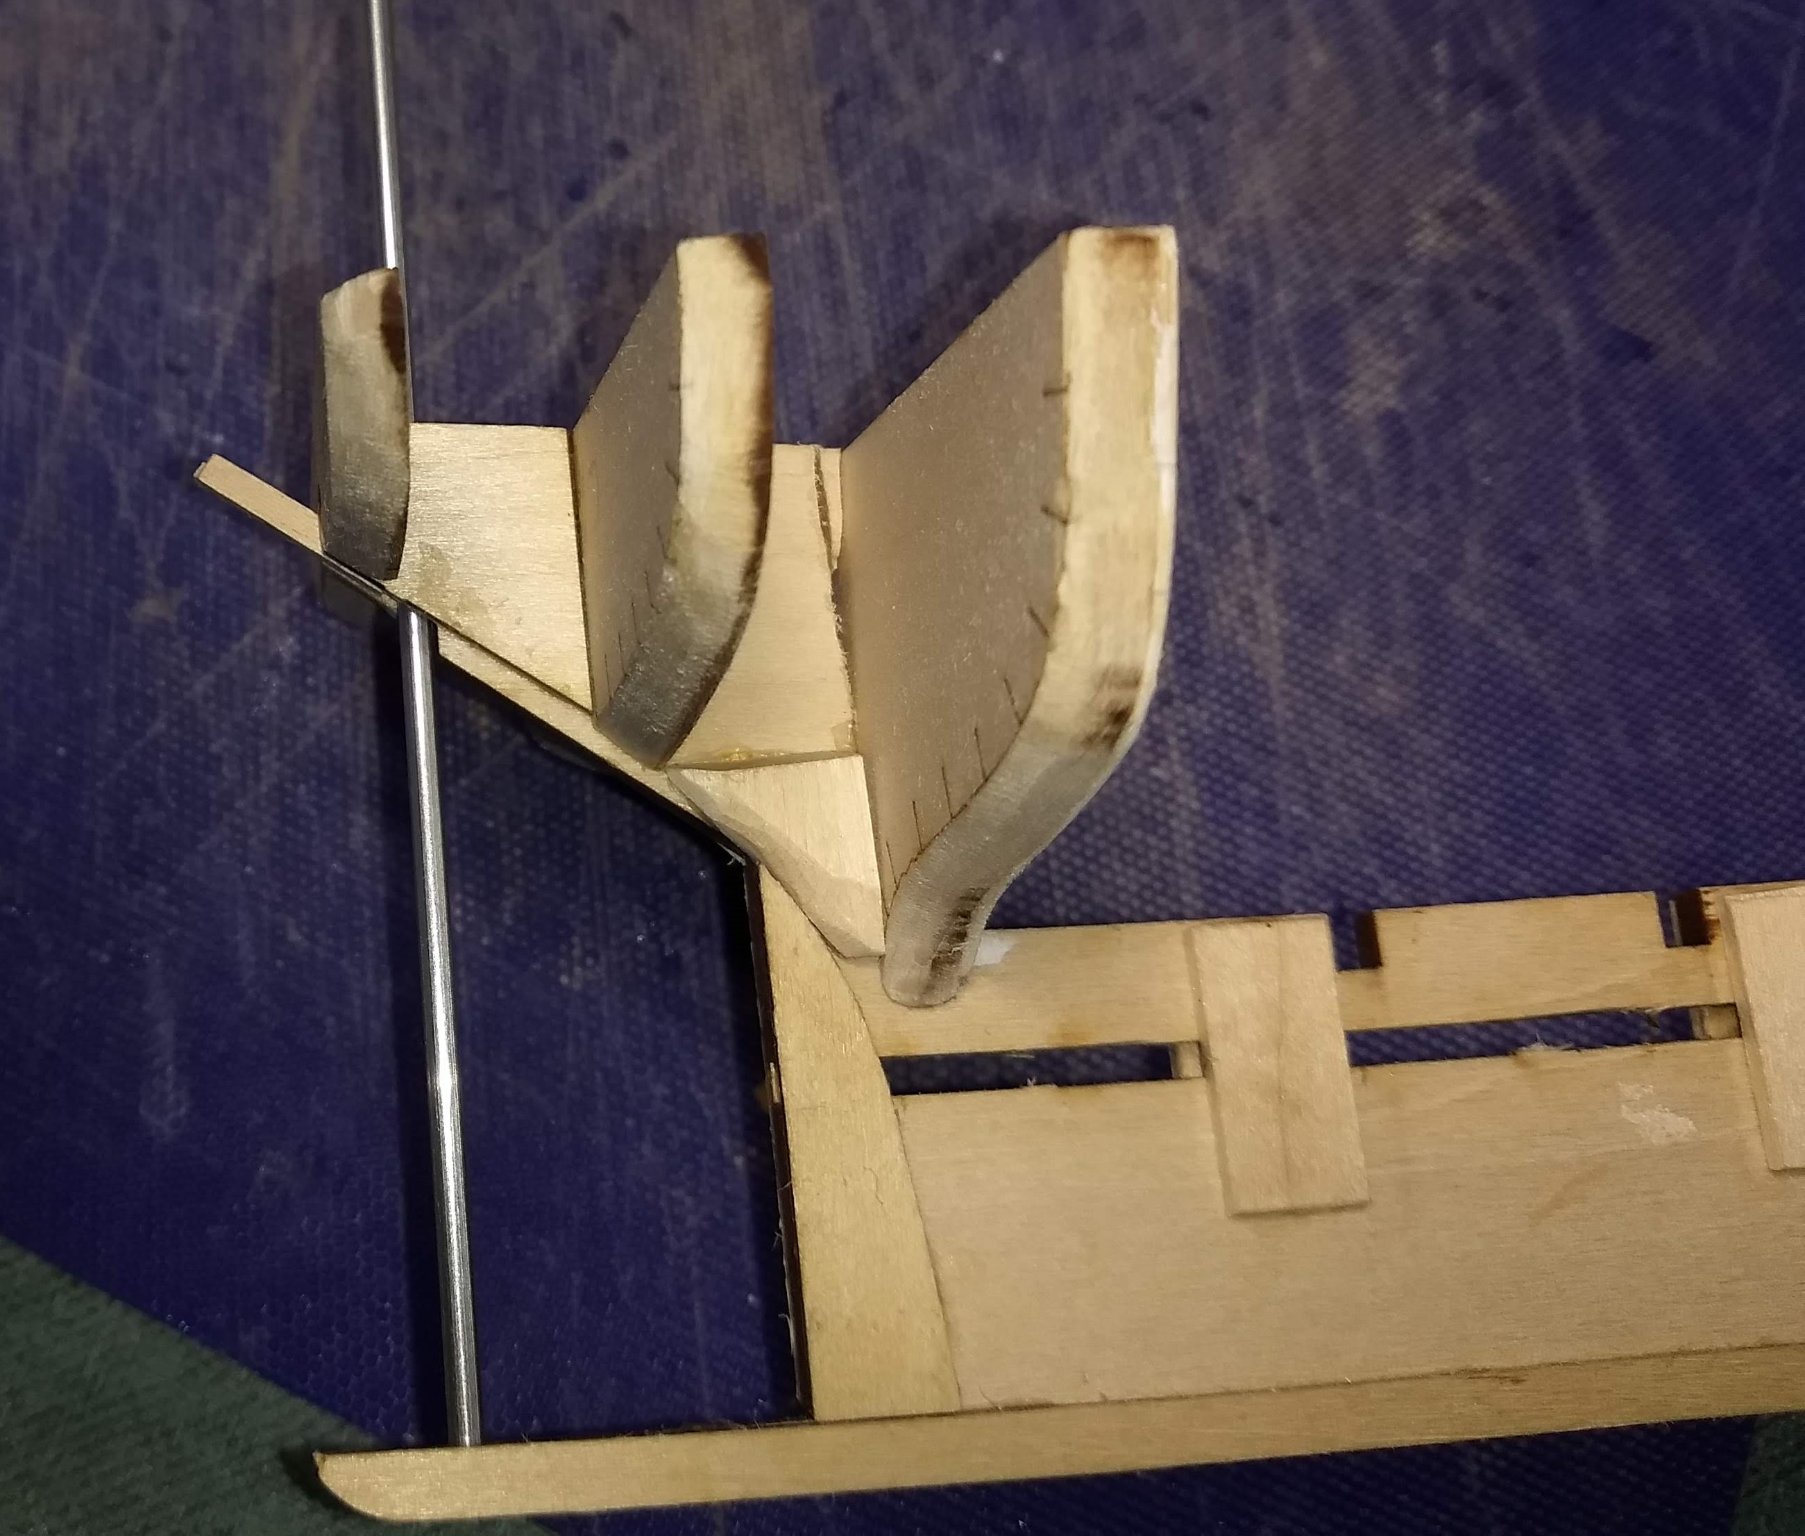
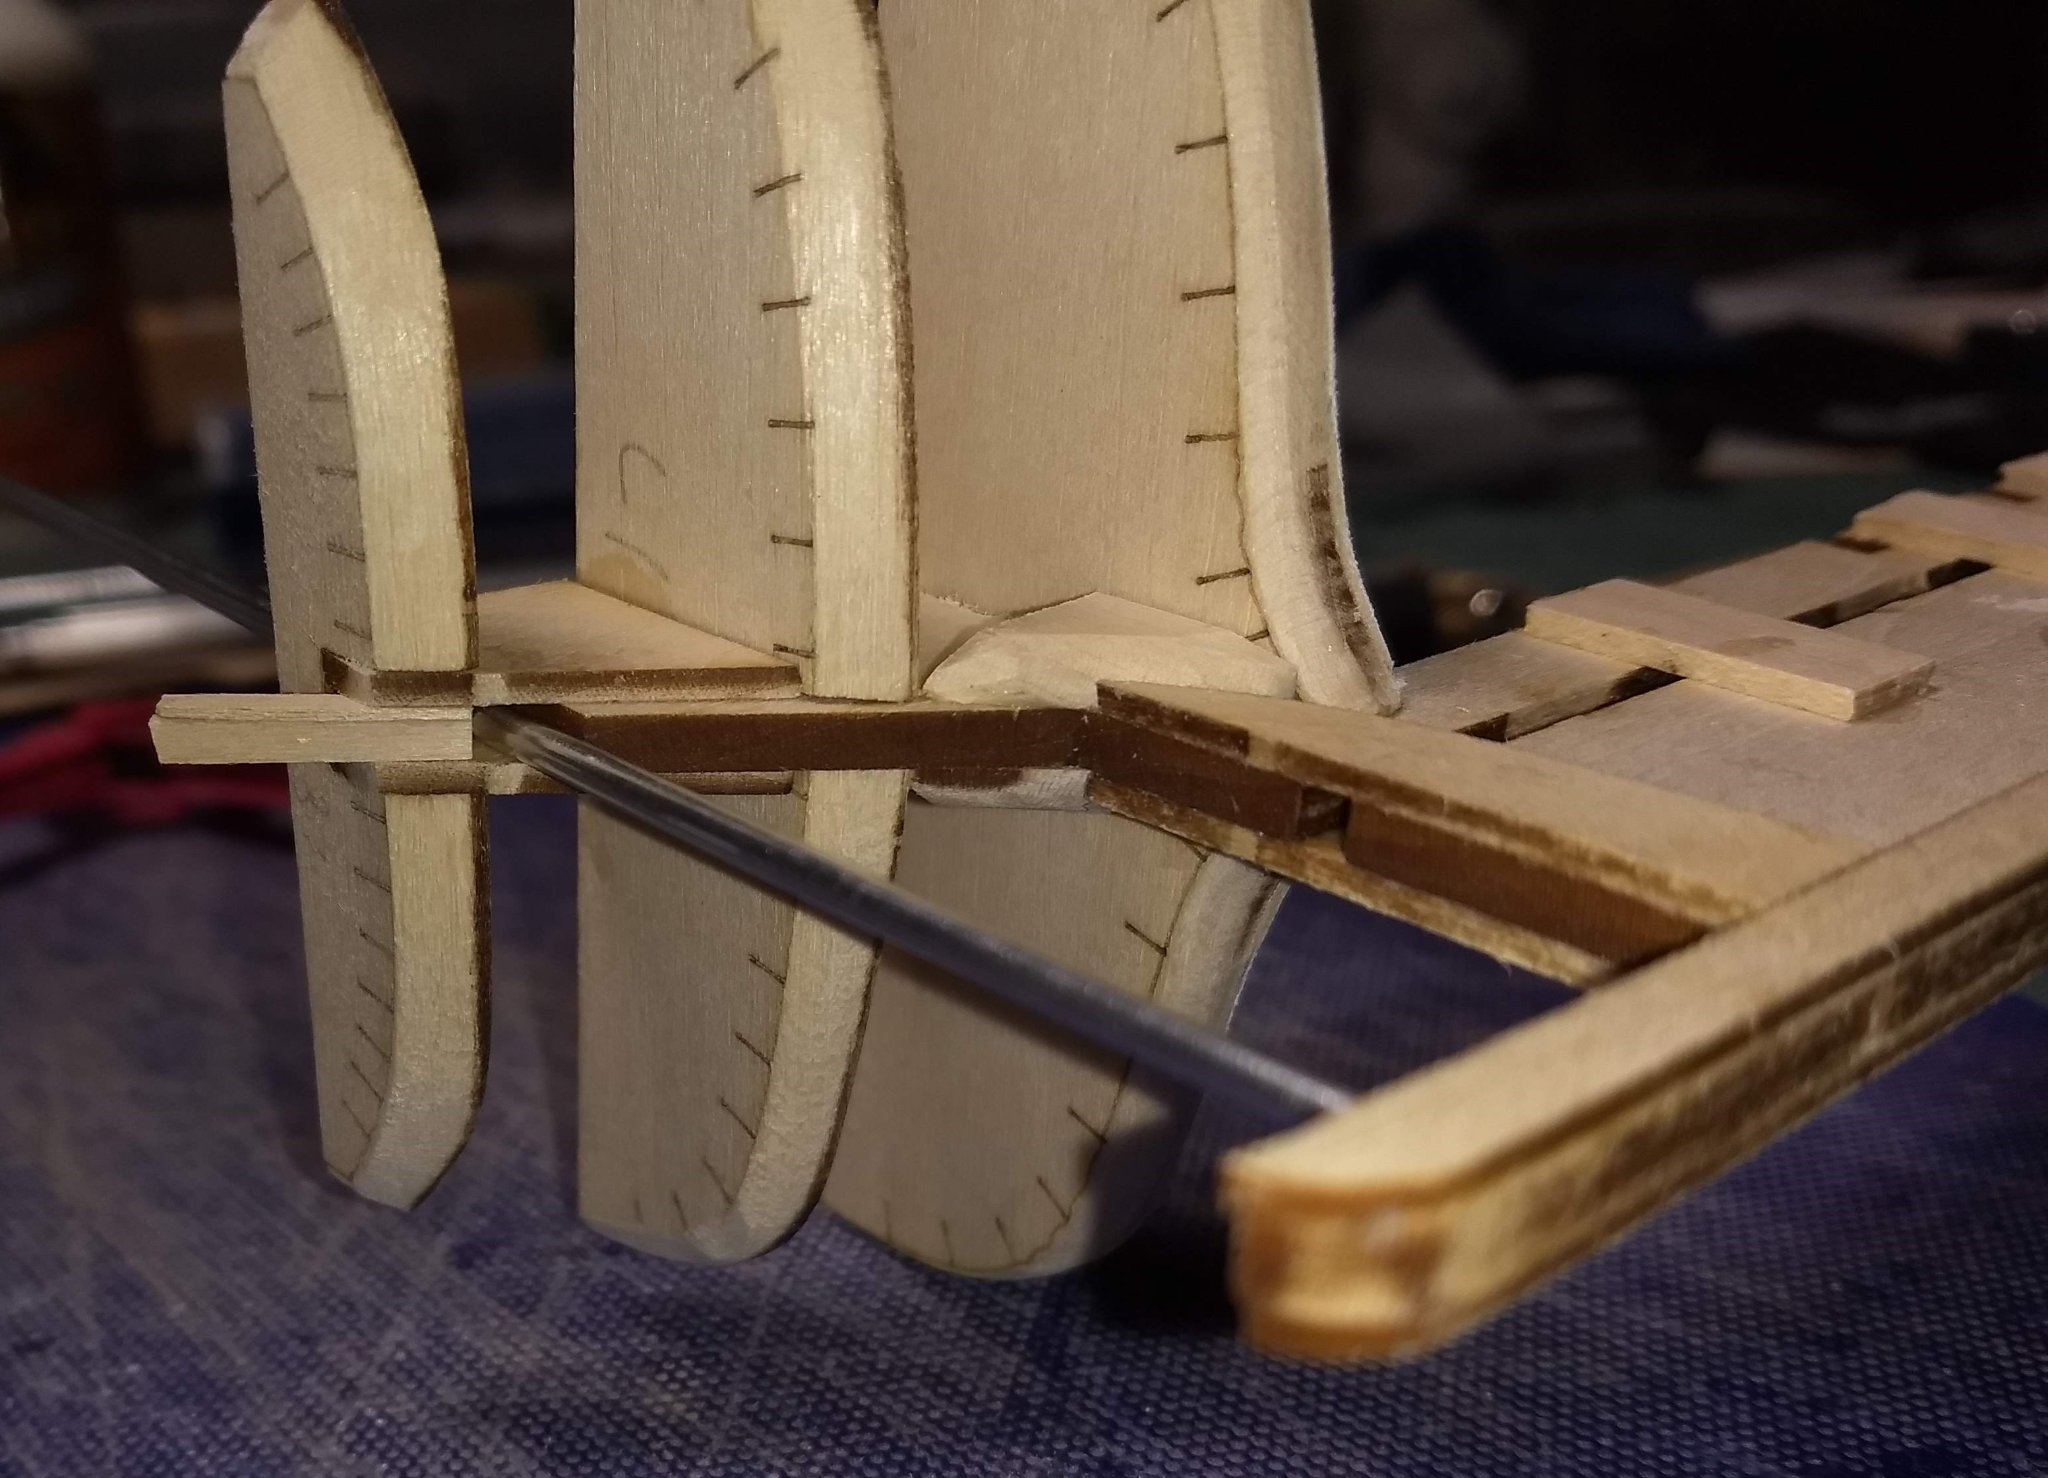
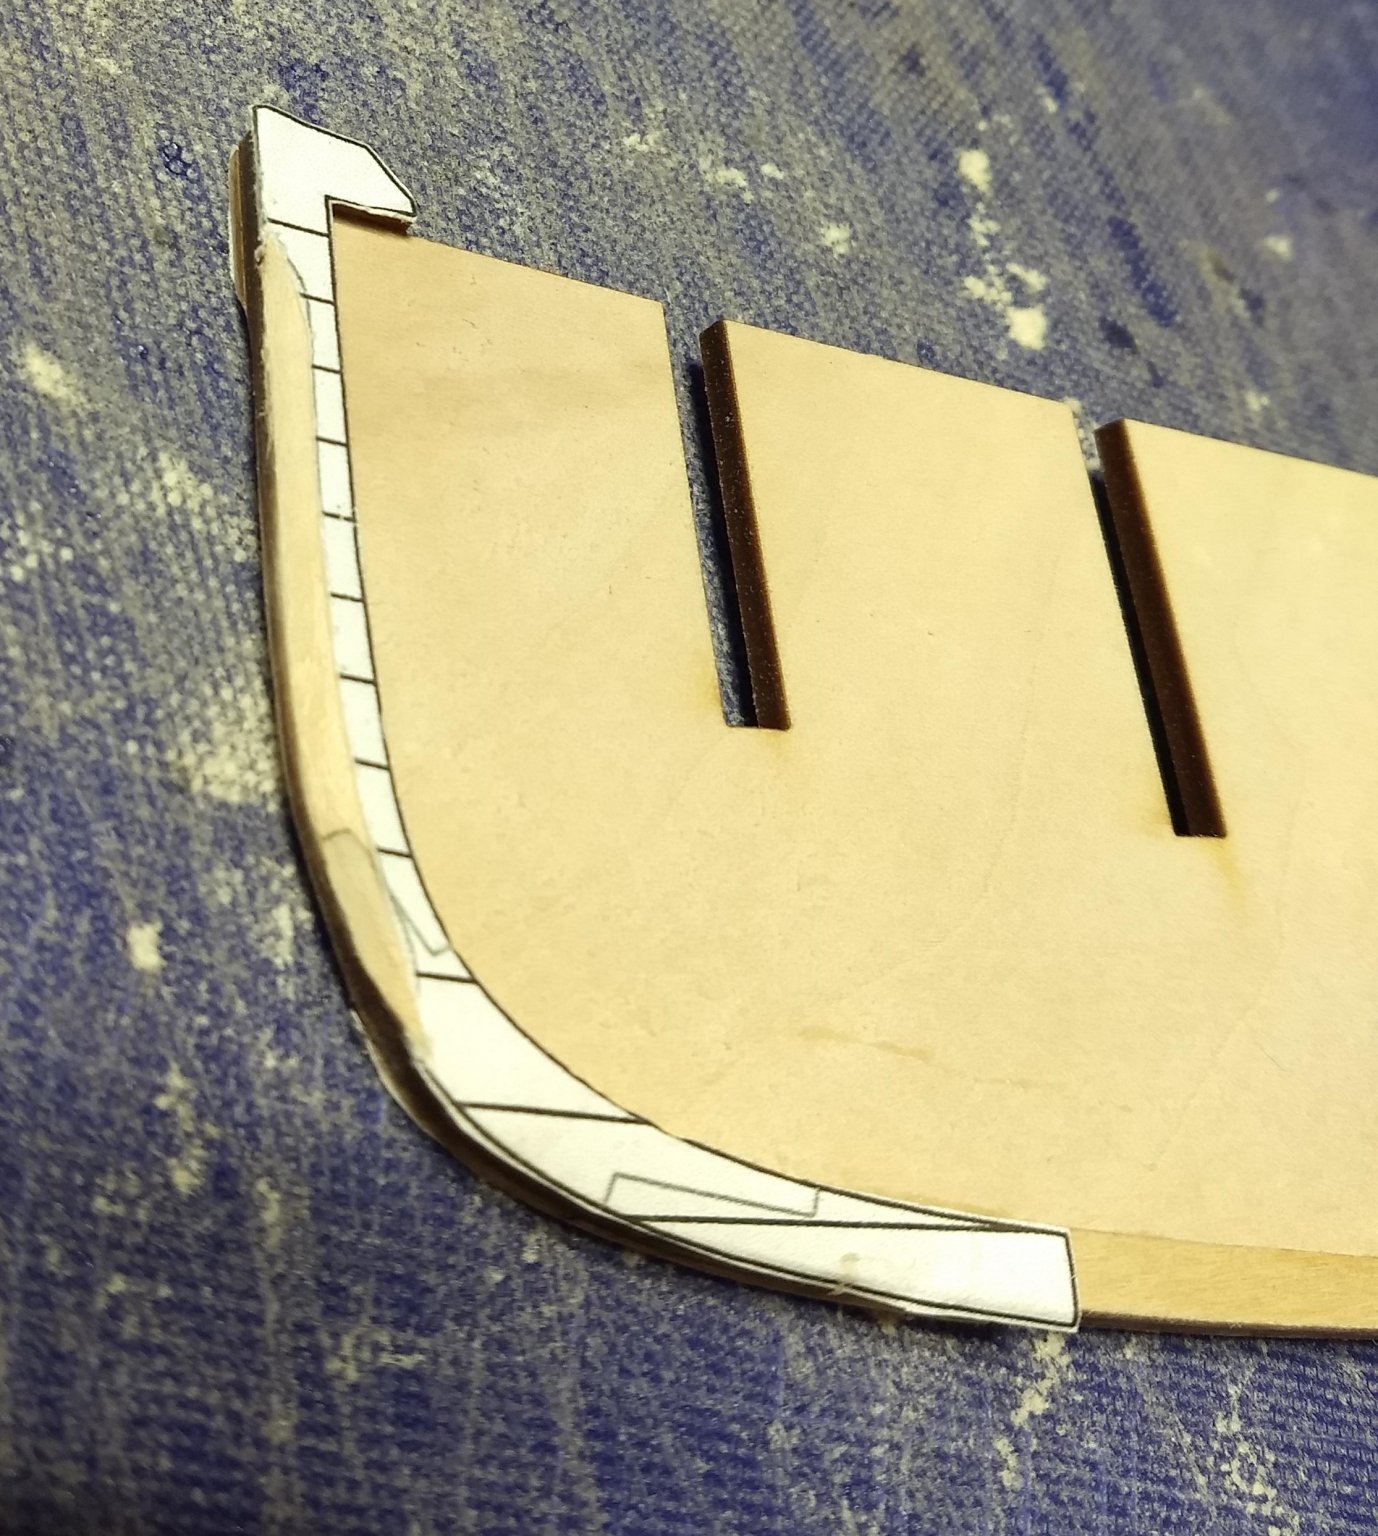
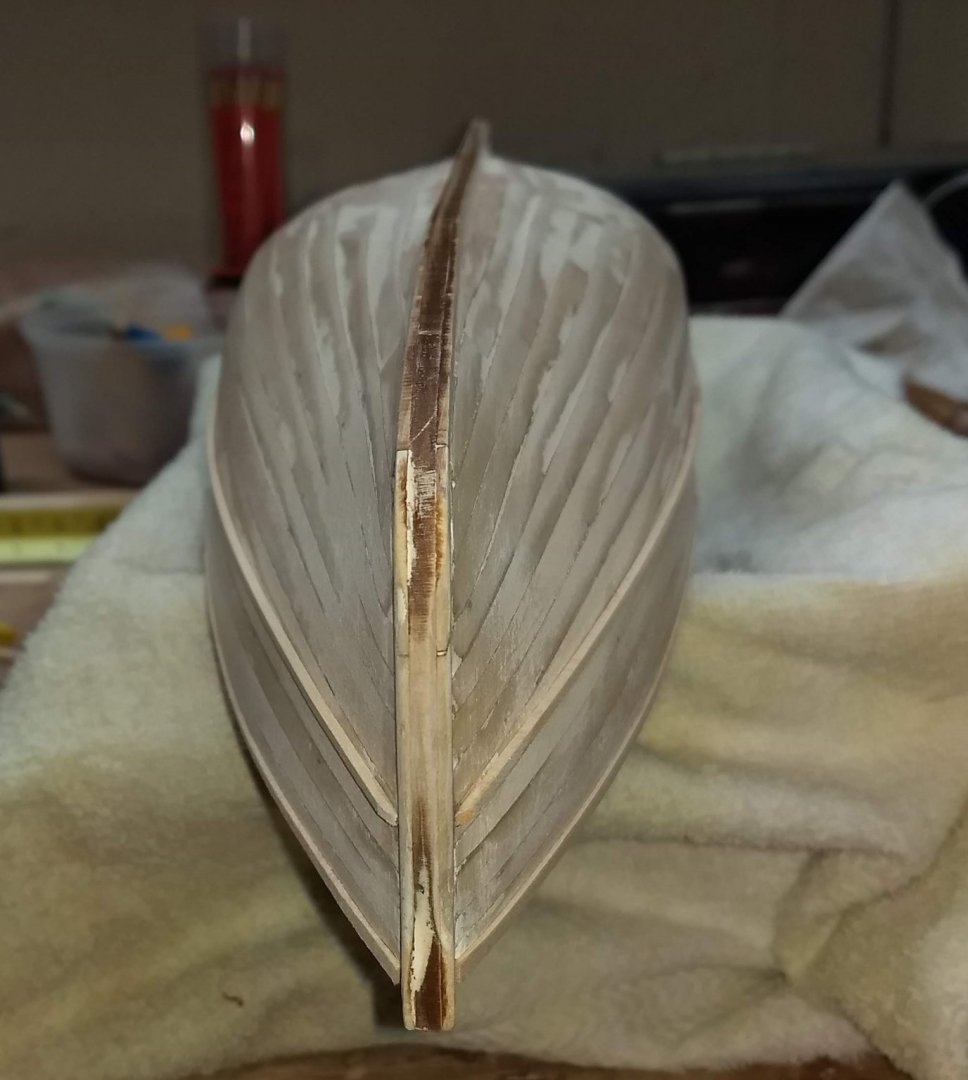
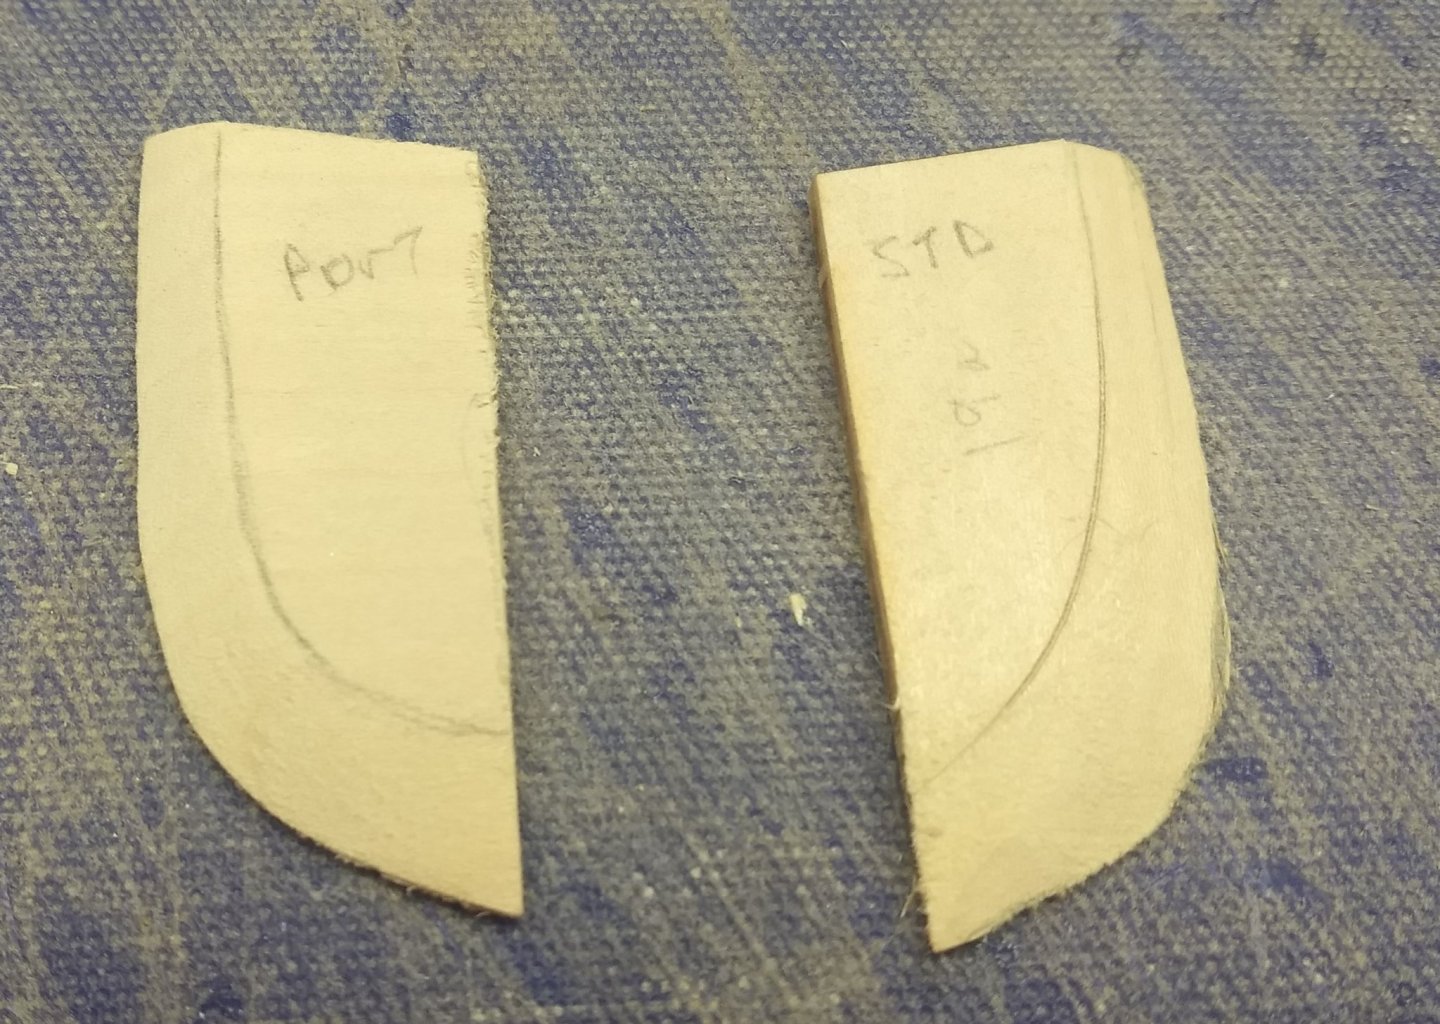
Turangi, Glad to have to follow along... Thanks Before going on, be sure to test out the 1/8'' propeller shaft is able to slide through the Keel. If not, trim the canal until it will fit. Then remove it for now Below shows the cutwater after trimming. Looking at the diagrams, I trimmed off about 25% on each side to the leading width is about 1/2 of the full width.
- 51 replies
-
- 3
-
-
- model shipways
- picket boat
- (and 1 more)
-
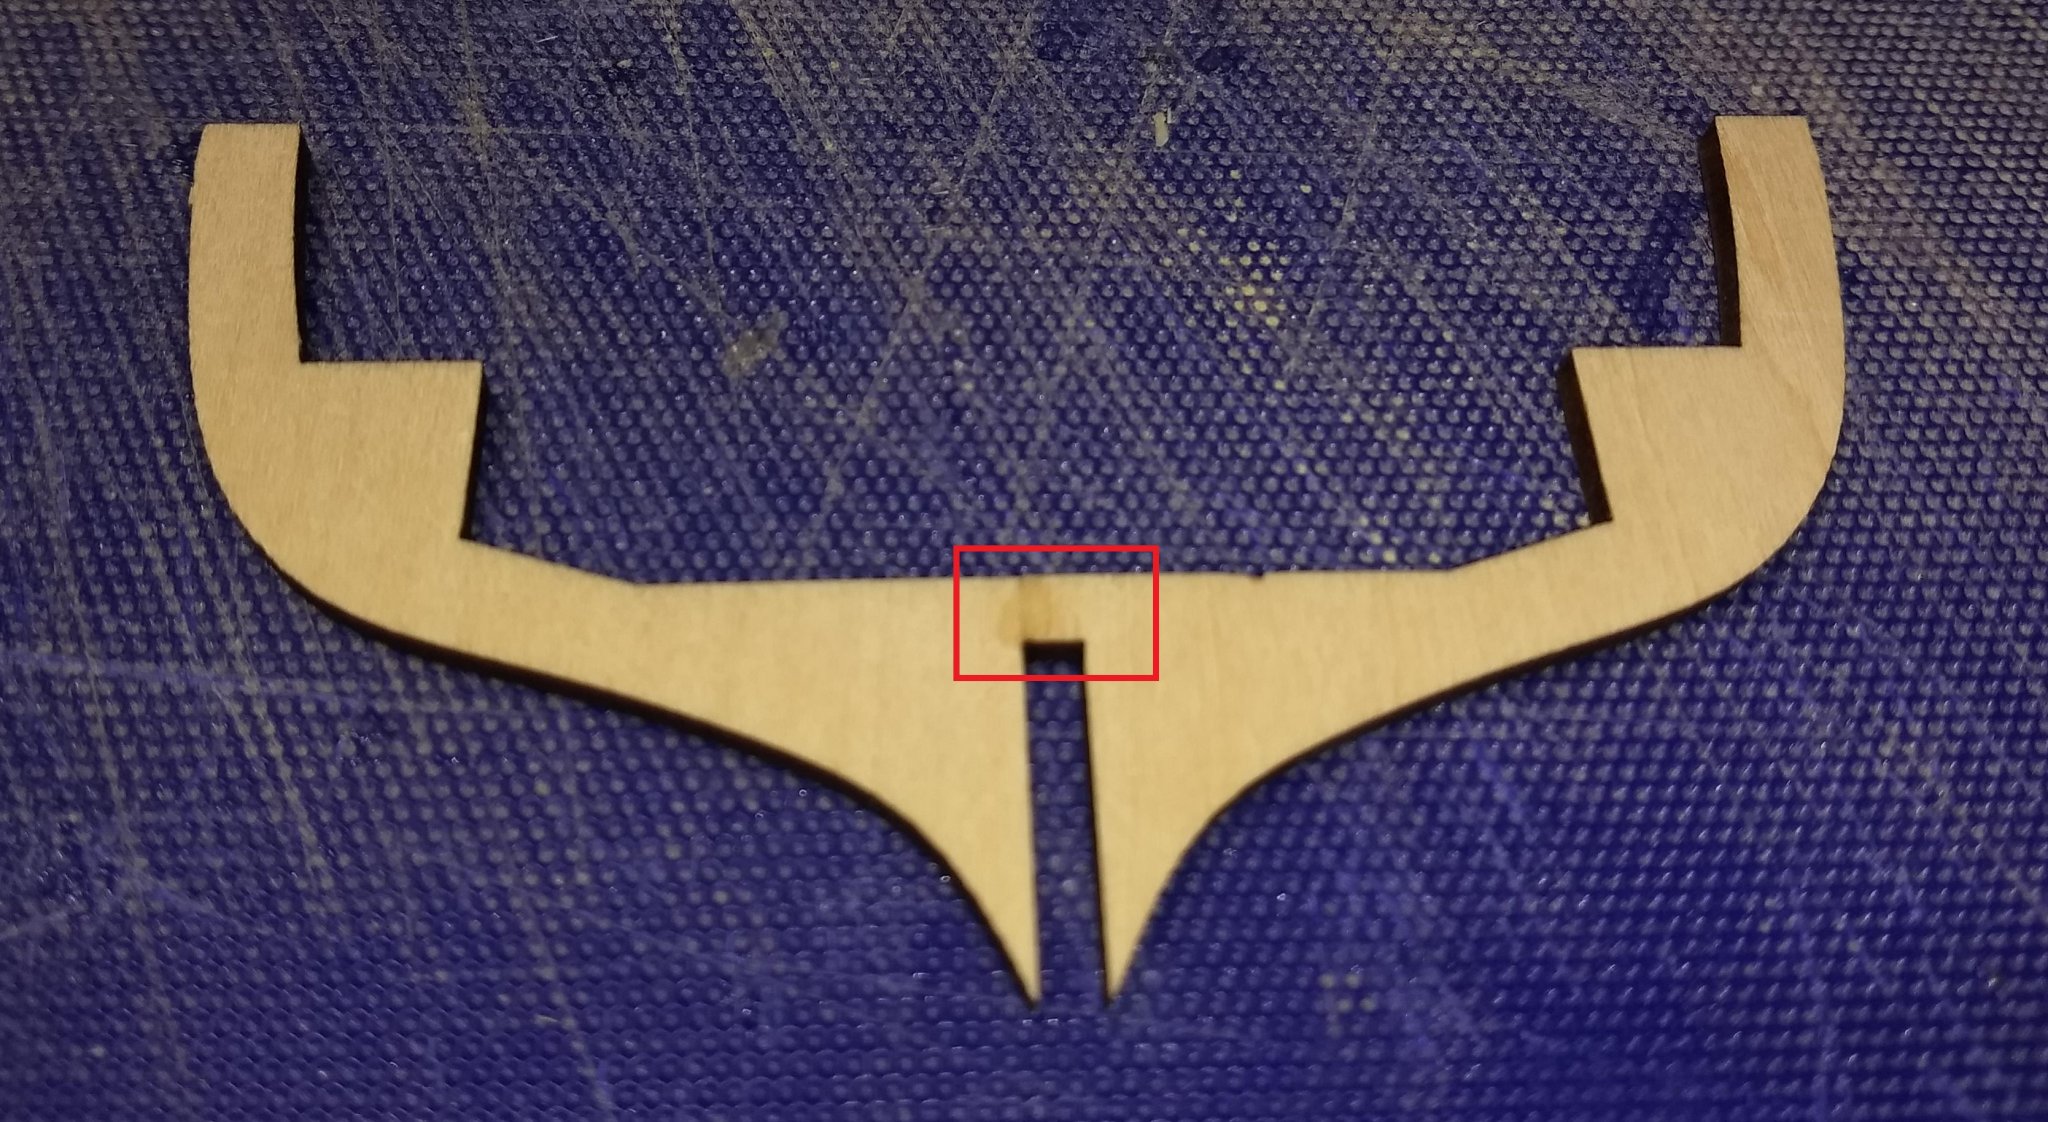
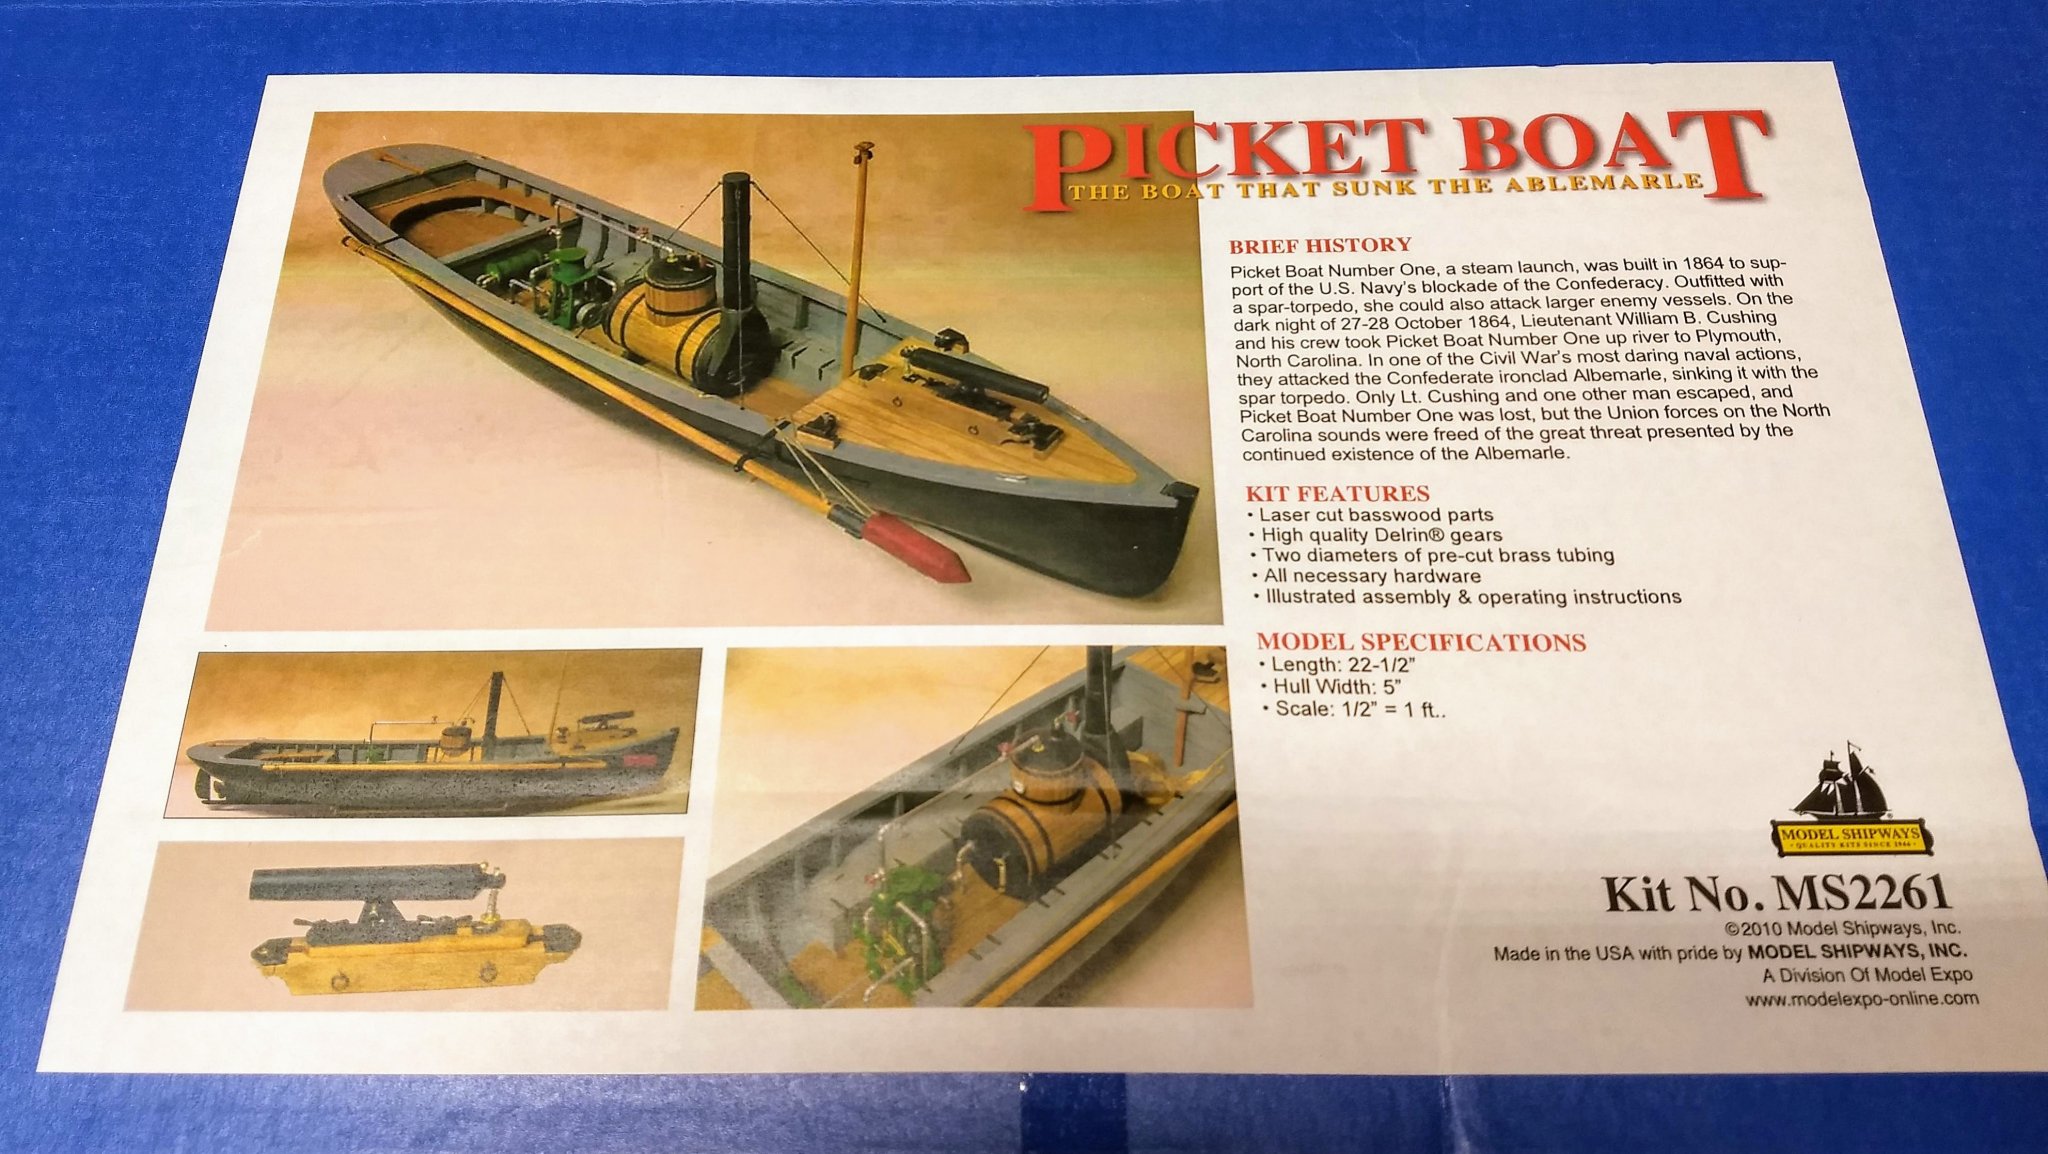
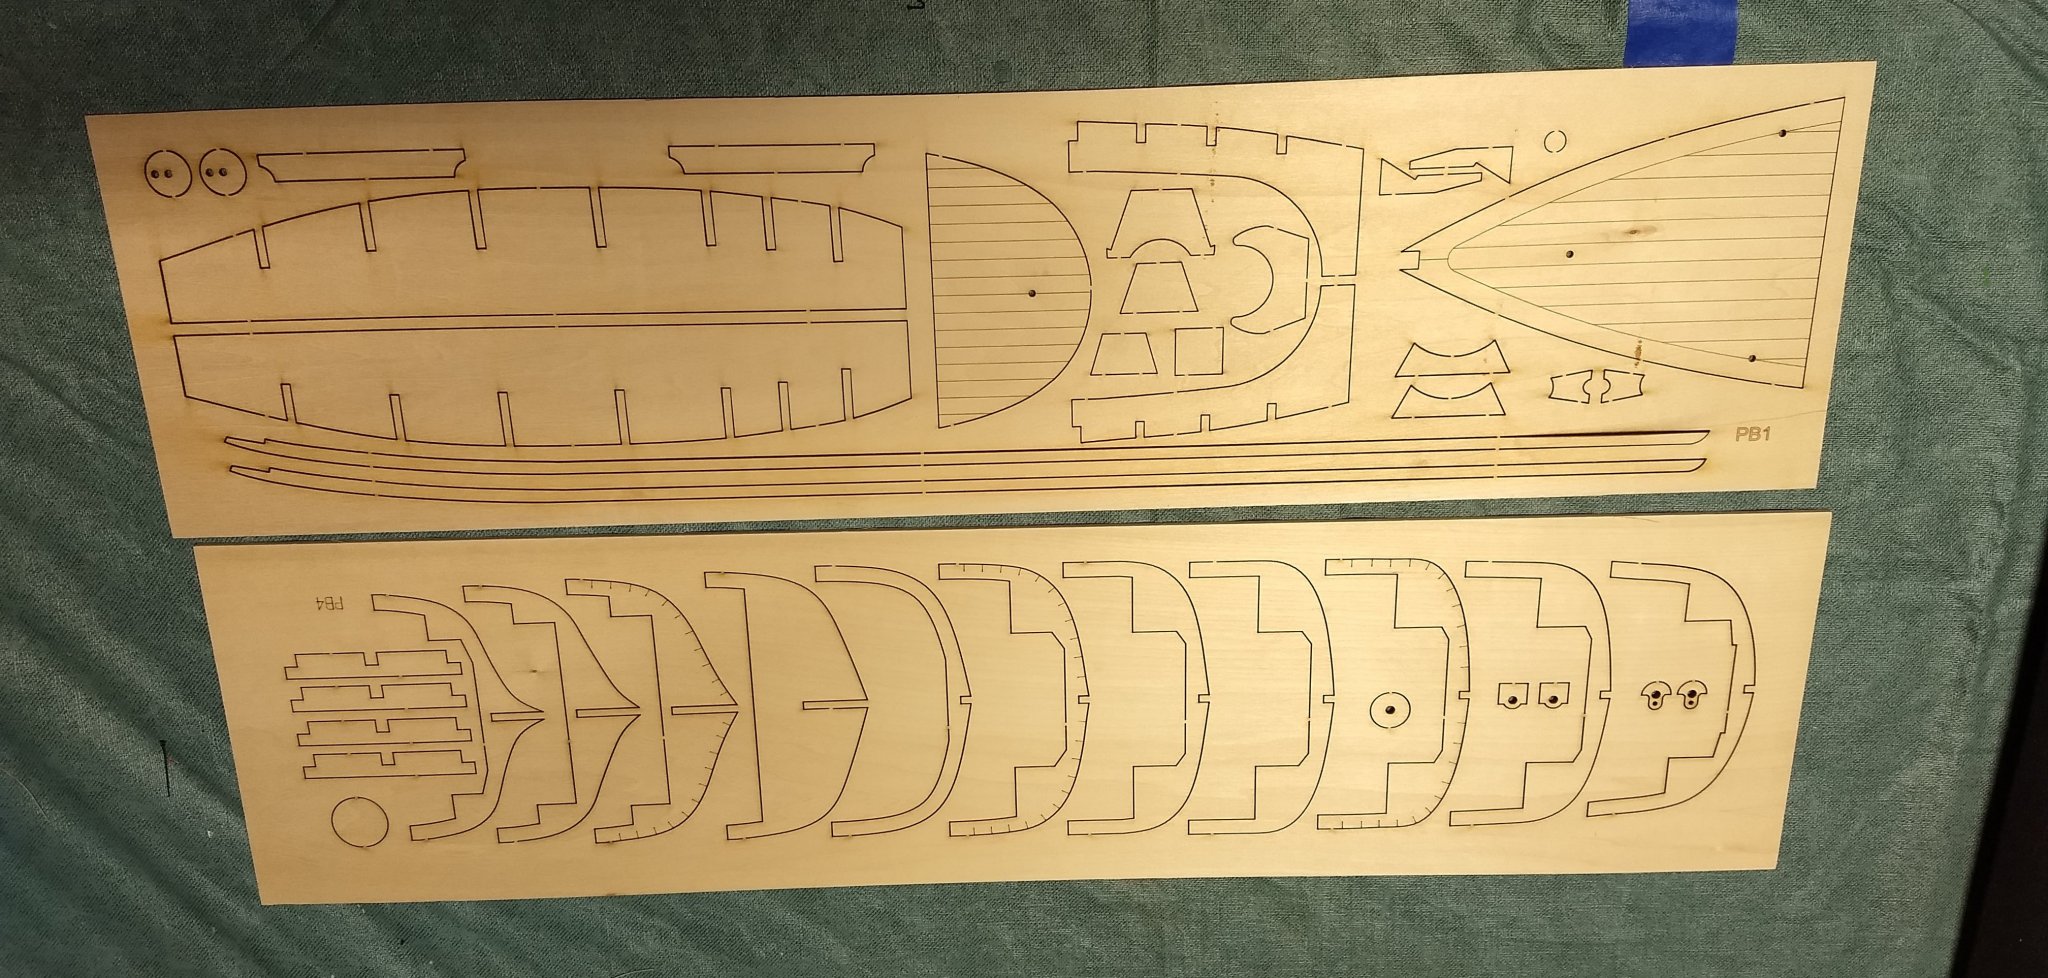
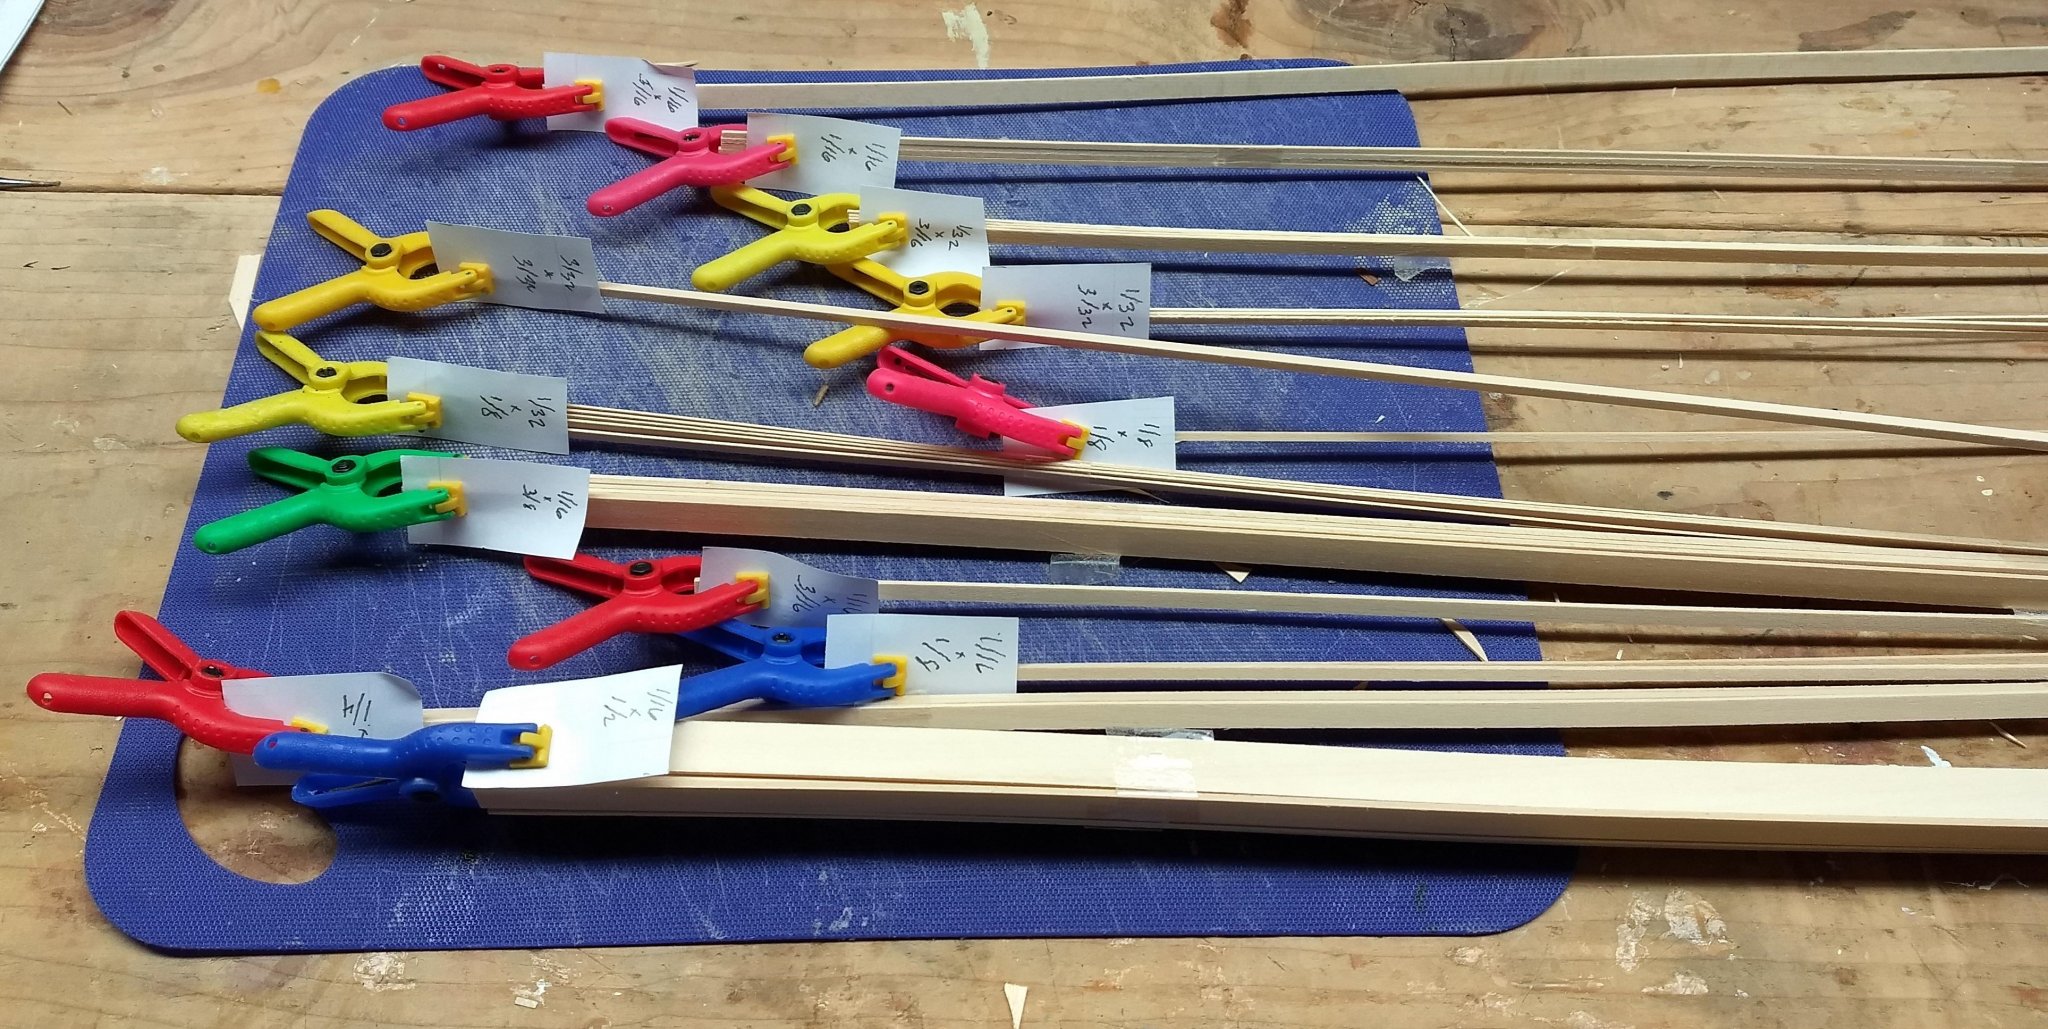
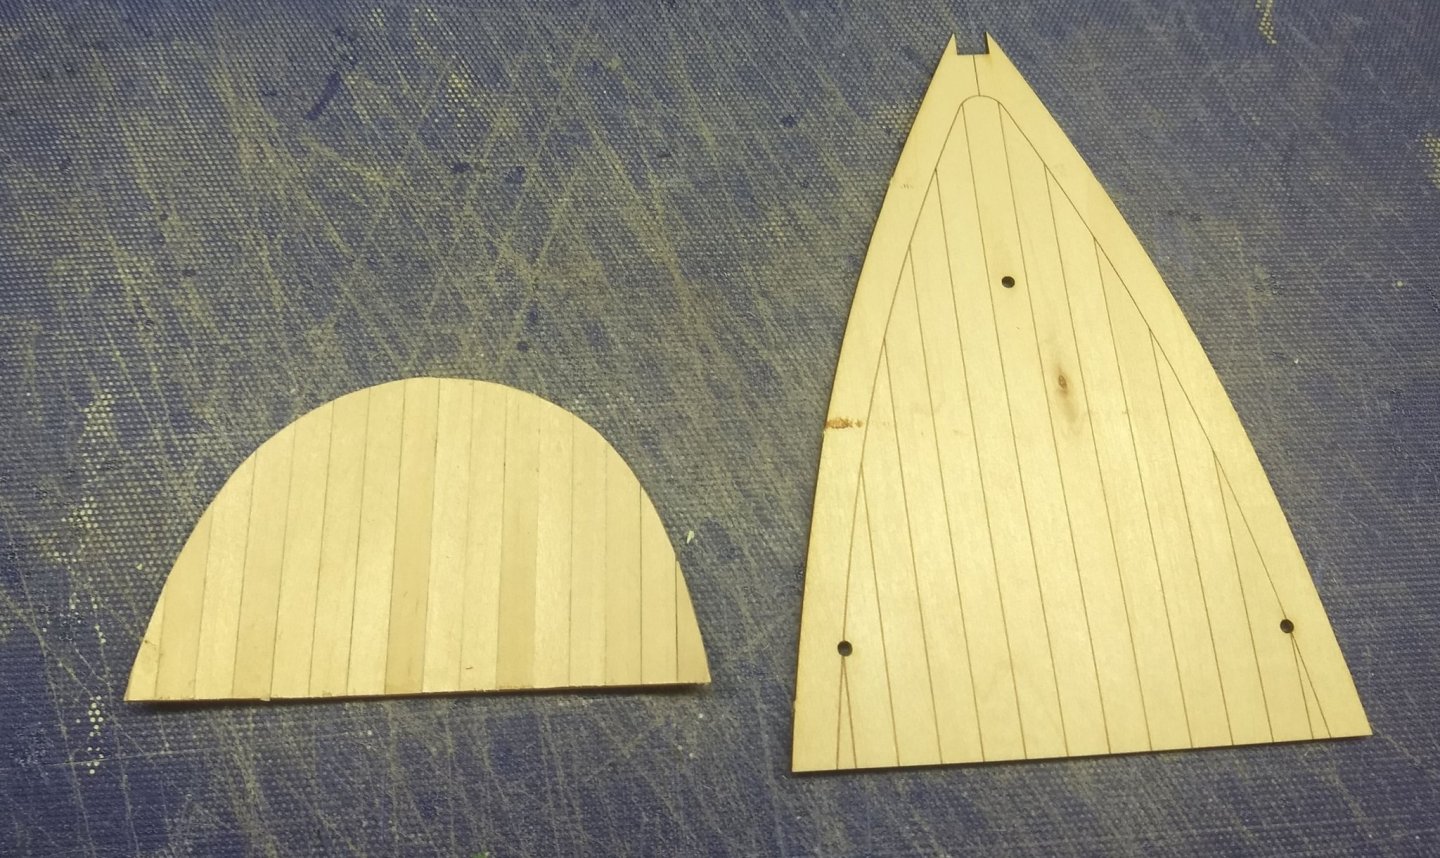
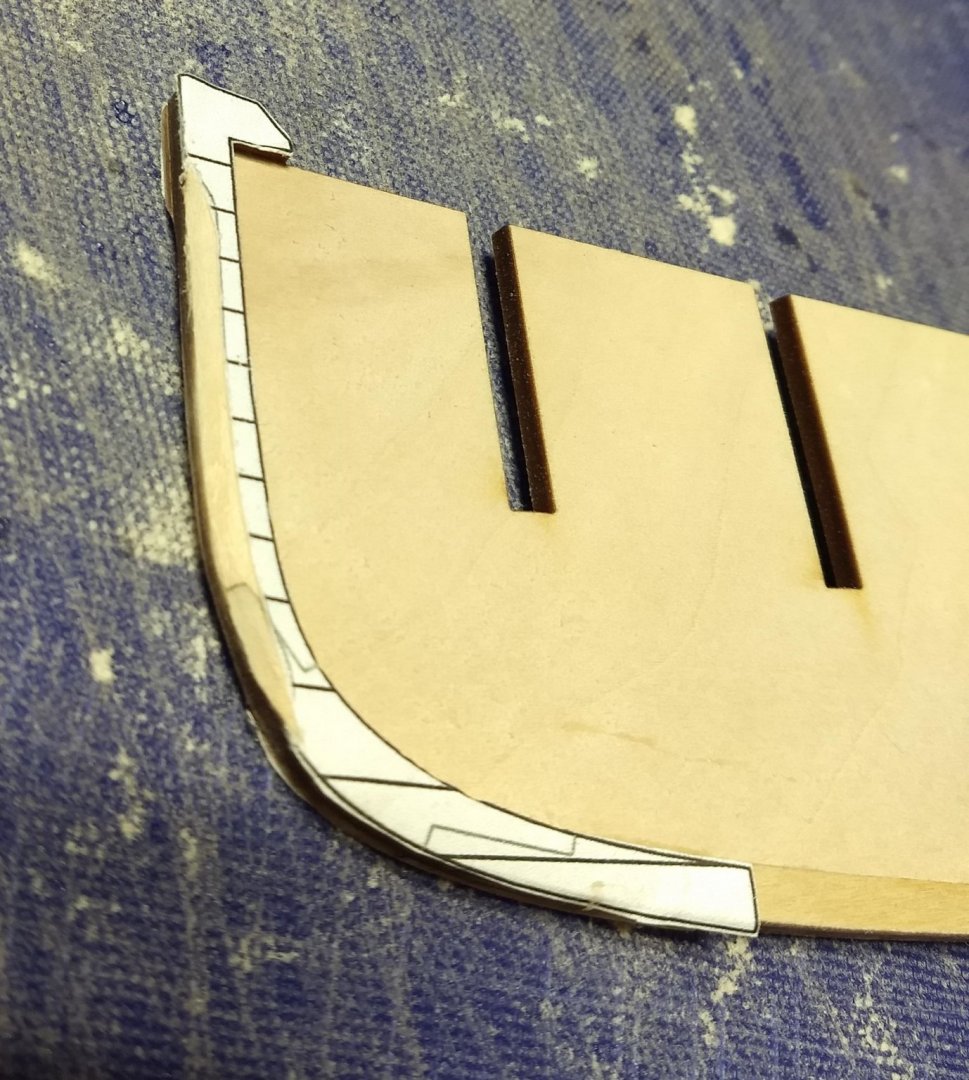
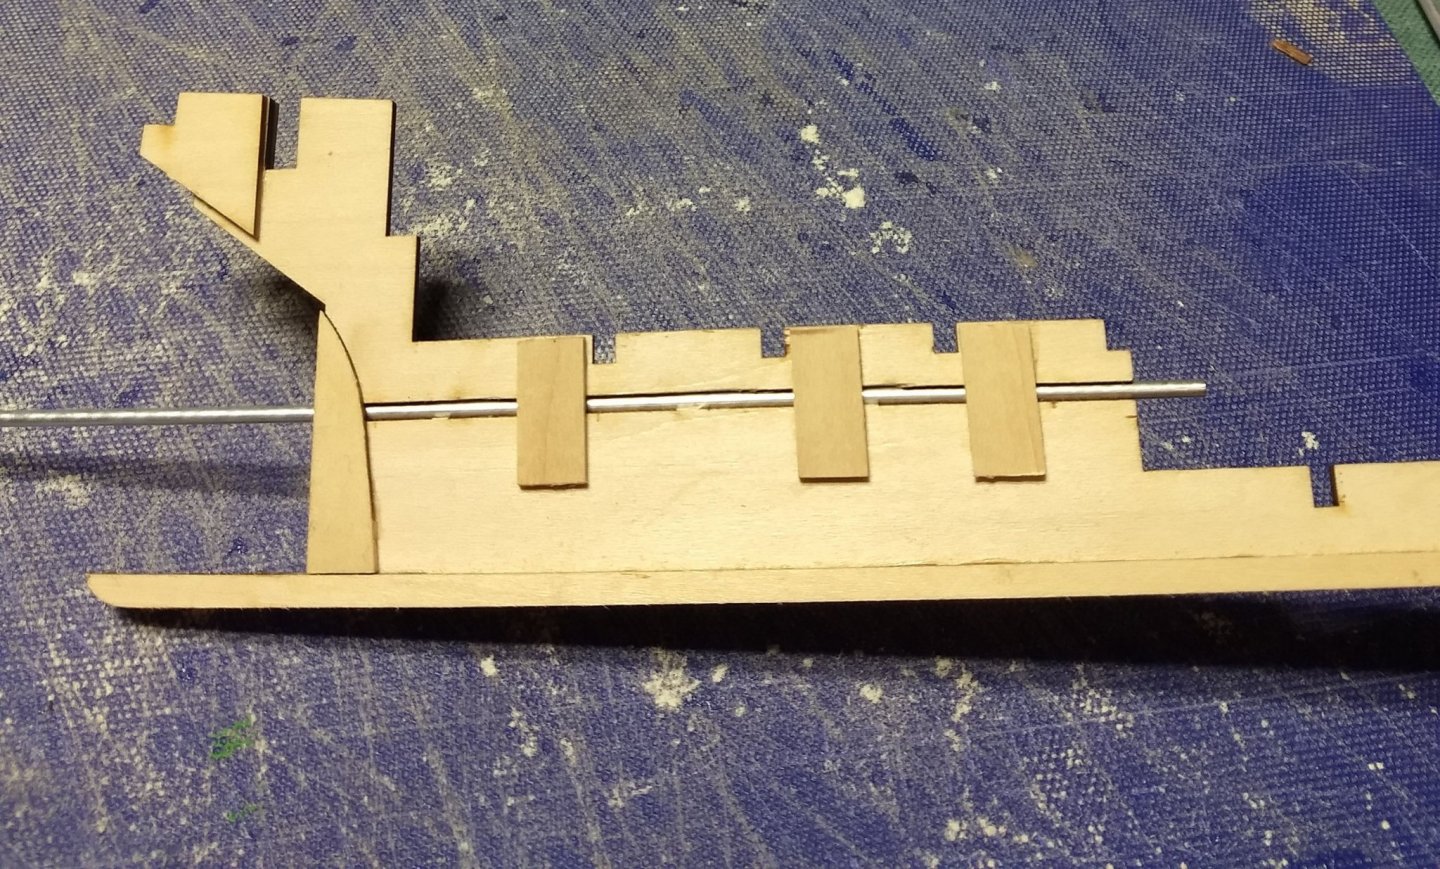
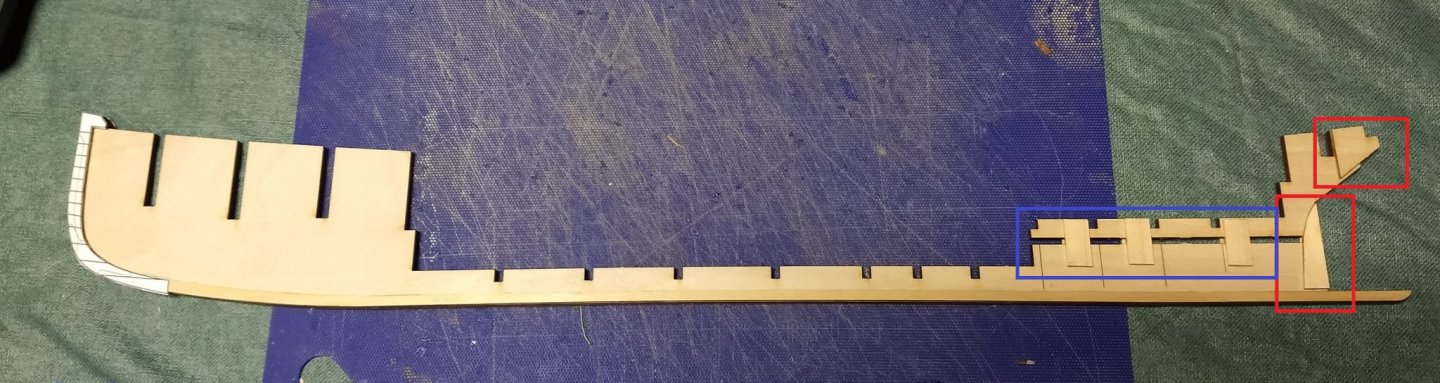
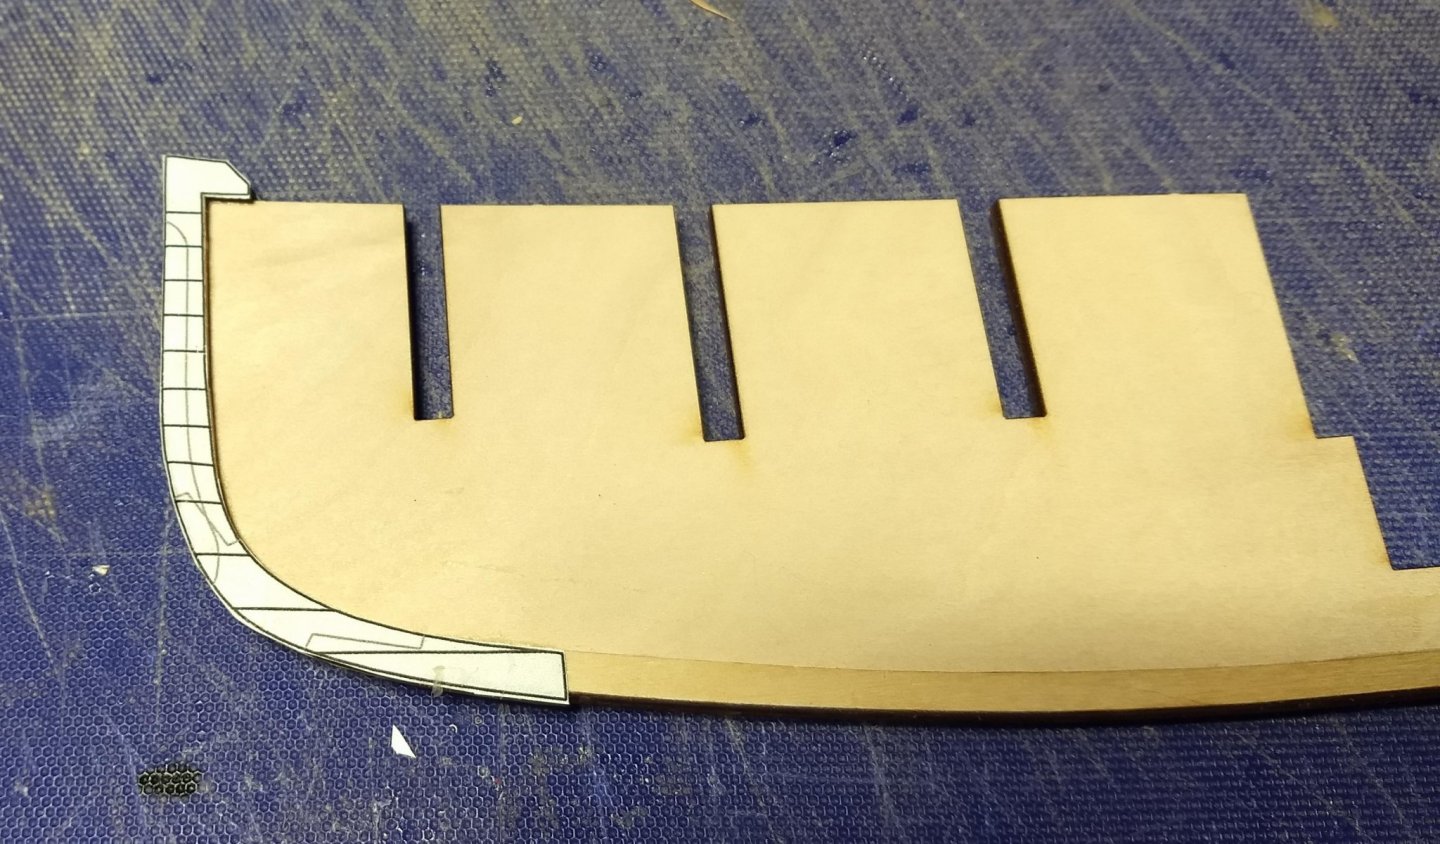
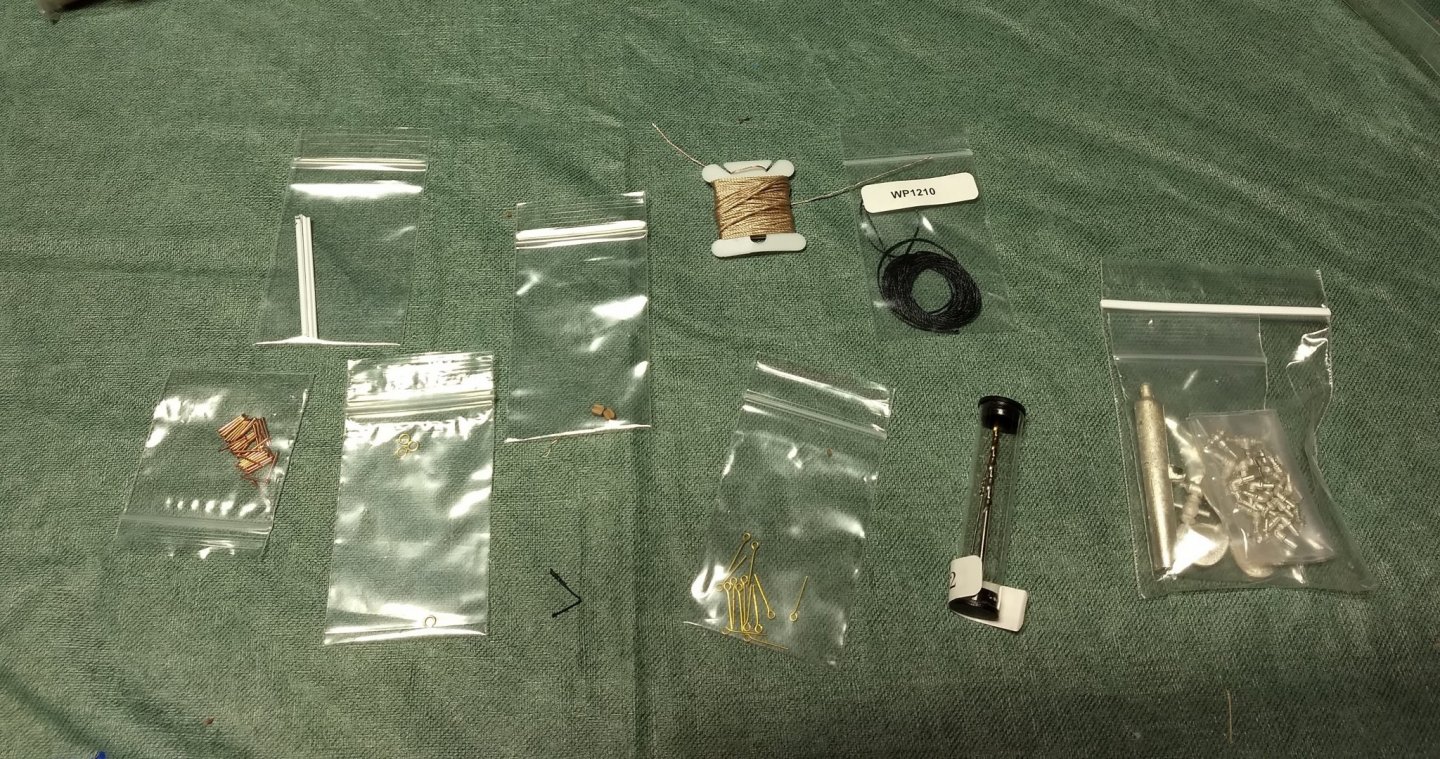
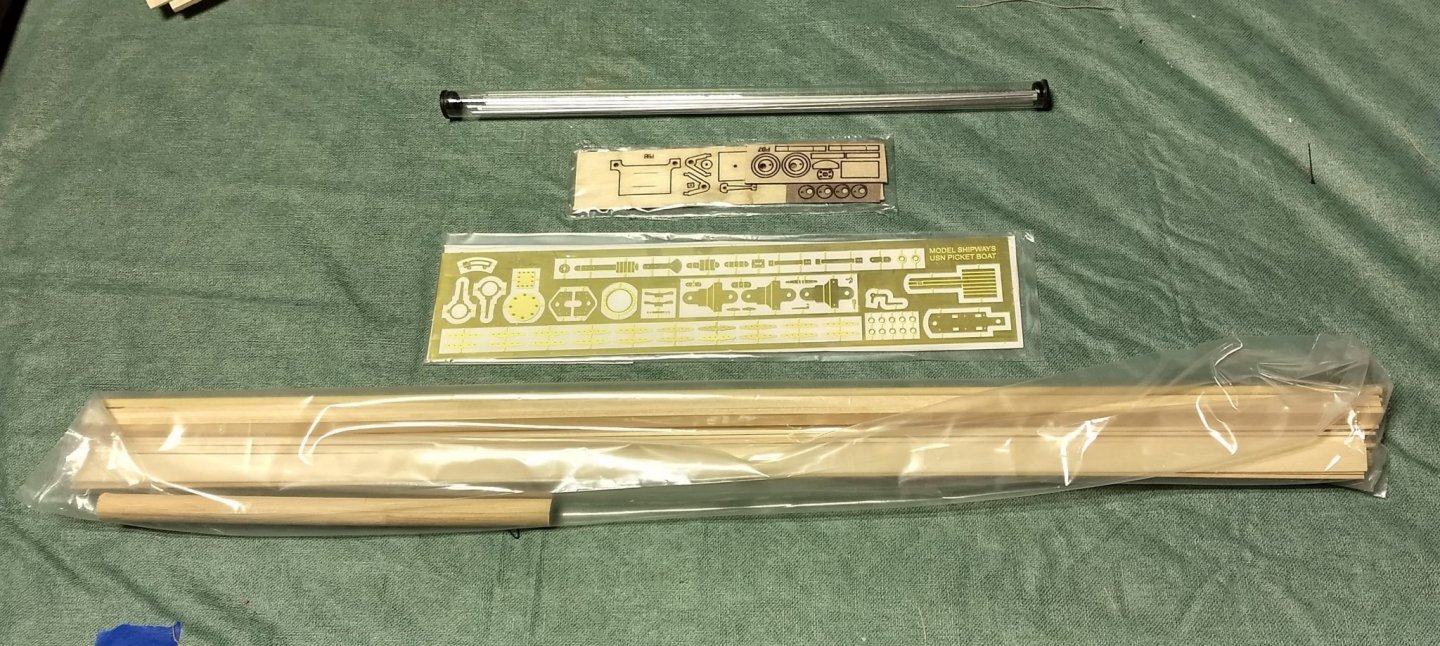
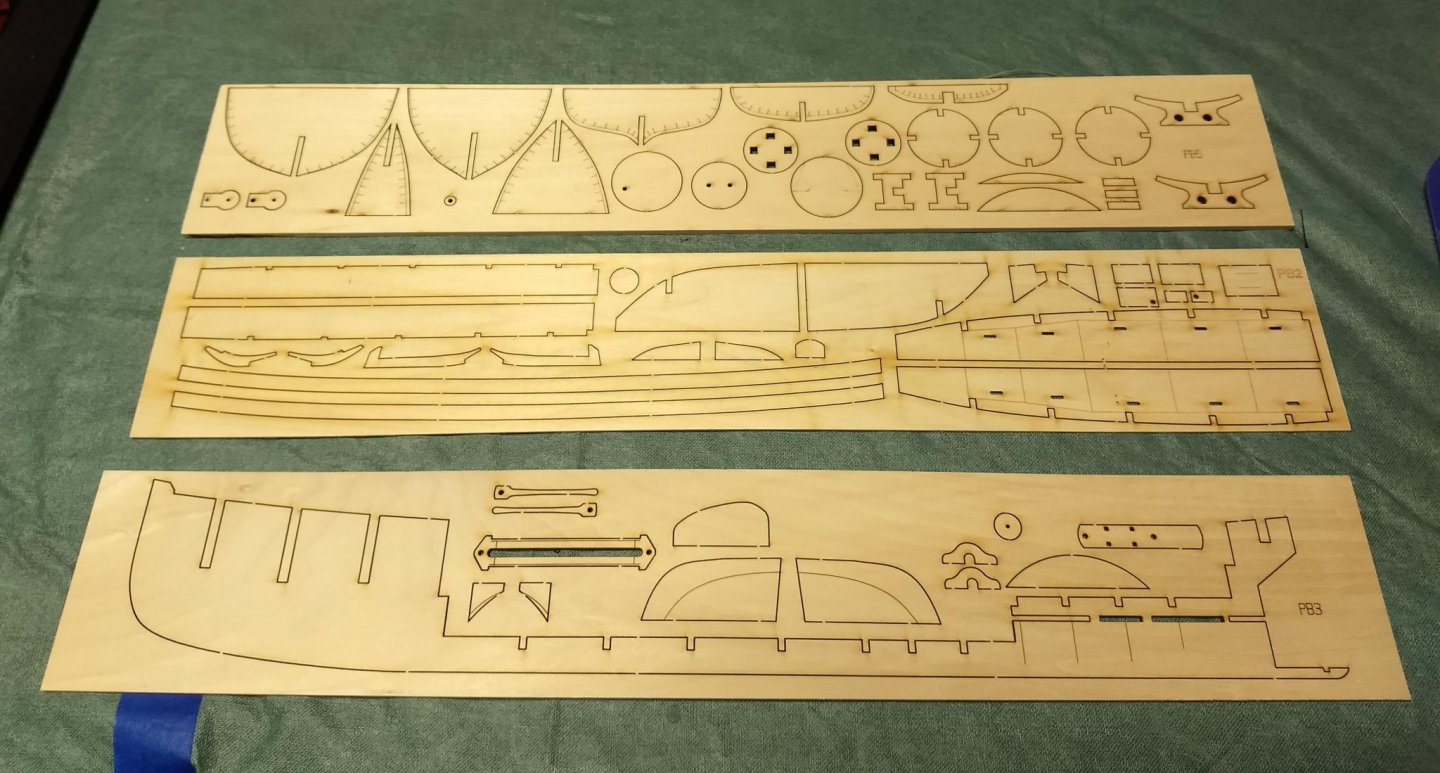
Ryland, glad to have you aboard....i have been looking forward to the Picket for some time. Here we go... First the box contents. I know others include it, but I always like to see it in a log. To me viewing other logs is how I determine what ship to build, and it frustrates me when I am looking for a new build and I have to look at several logs (that do not have the contents) to see the contents. First thing I did was label the wood strips... There are several very small strips that are so similar it is really hard to determine the difference. I figured it would be easier later on when trying to locate individual strips. Not so easy to determine the difference between 1/32 x 3/16 and 1/32 x 1/8. It took quite a while to determine each size but I am glad I did it. Below is the result... Lets start the build. Assembling the edges of the false keep is pretty straight forward. With some glue and clamps (never have enough clamps) goes together pretty fast From here things get a little confusing... In theory the Picket is for a beginner/intermediate builder. From what I have seen looking over the plans, that is probably true. Nothing seems overly complex. But you have to be an expert model builder to interpret the plans and diagrams. I have a feeling the writer of the instructions had built so many Picket models, he/she could build then in his sleep. Thus it seams many of the steps are lacking clarification - like everyone should just know how to build this model. However, If you go back and forth between the instructions and the diagrams ( a number of times), you will eventually figure it out, but to me the instructions "leave something to be desired". First is the Cutwater.... As others have done, the best way to get this right is to cut out the cutwater from the plans and glue it to the bow. From there it is pretty easy to trim the cutwater at the bow of the boat not real clear, but i have marked in blue the actual part of the cutwater to trim. Note the trimming extends into the 2nd bow piece. I trimmed down about 25% on both sides of the bow. On to the stern piece. The six (three on each side) support pieces (marked in blue below) applied to the stern assembly are pretty straight forward. These pieces support the slot for the propeller shaft later on. After they dry, remove the small pieces that temporarily supported the propeller shaft. Next part is to add the four (two on each side) stern pieces - marked in red below. It is a little confusing the exact location of these pieces - especially (as you see in the pictures) the parts do not really fit. Note the gap on each piece. About all I can say on this is the fact that I believe these pieces are correctly located based on other logs.


- 51 replies
-
- 3
-
-
- model shipways
- picket boat
- (and 1 more)
-
Just starting up the USN Picket Boat build... I just completed the J Class (1:80 scale) racing yacht and anxious to get started on the Picket. I am by no means an expert builder and from what I can tell the instructions for the Picket are sketchy at best, but with the excellent logs I have been reading on other Picket builds, I think I should be OK. Famous last words,,, One word of warning,,,,, this will be a painfully slow log to follow. I know most people hate slow logs. I am not a full time modeler so I only get to work on it when I have some spare time. While I plan to complete the Picket, it will not be at a very fast pace. We will see how it goes.
- 51 replies
-
- 2
-
-
- model shipways
- picket boat
- (and 1 more)