stelios
-
Posts
53 -
Joined
-
Last visited
Content Type
Profiles
Forums
Gallery
Events
Everything posted by stelios
-

Symiaki Skafi by stelios
stelios replied to stelios's topic in - Build logs for subjects built 1851 - 1900
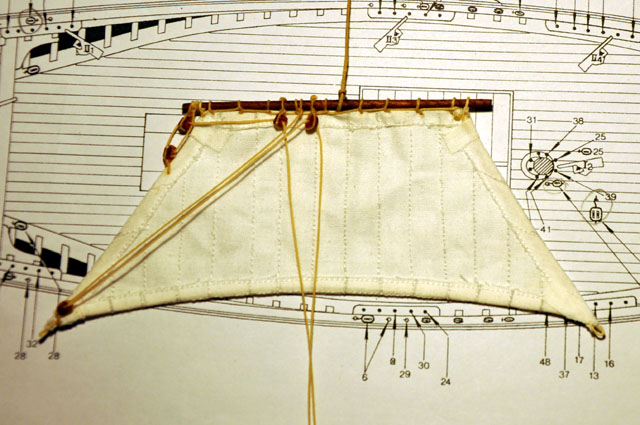
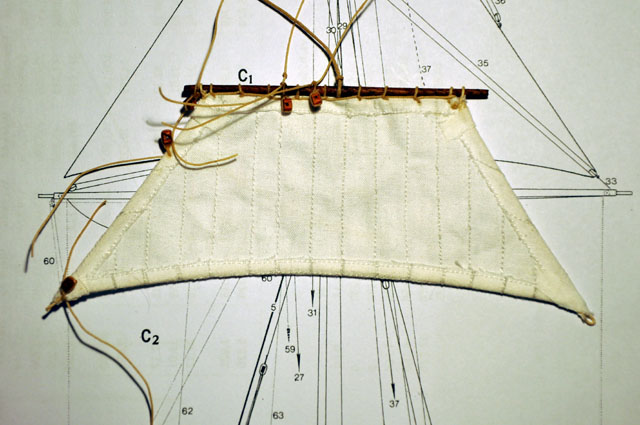
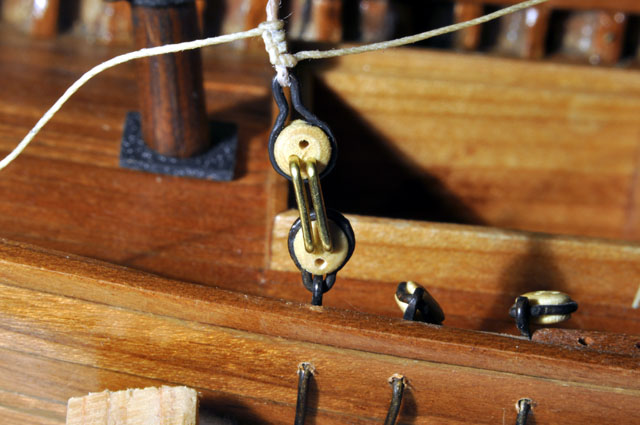
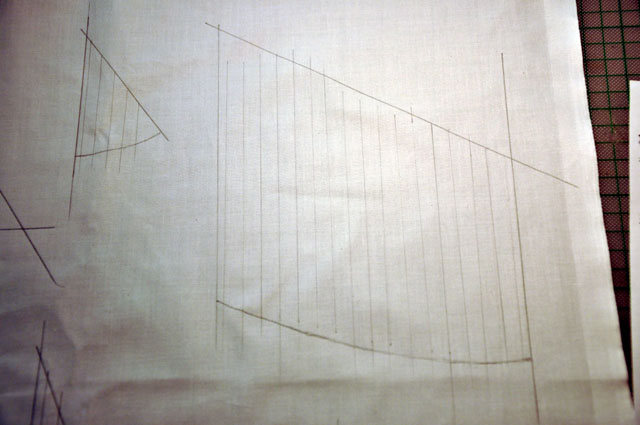
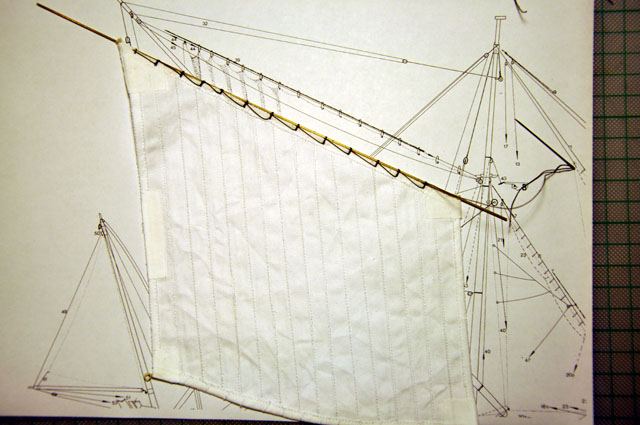
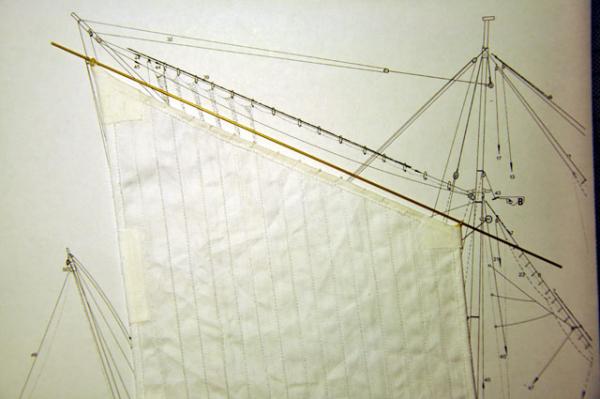
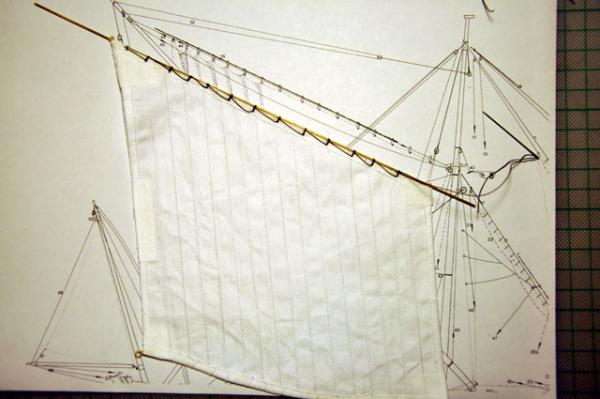
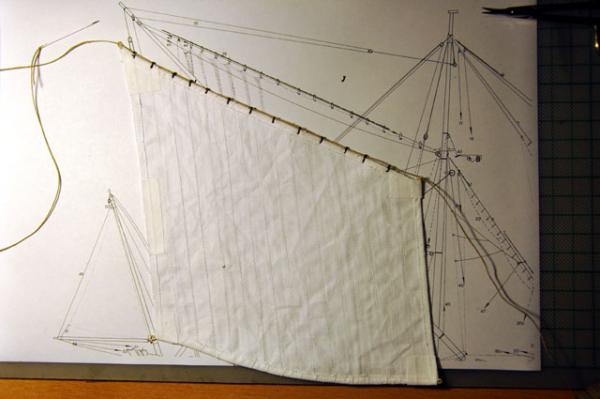
Rigging in the making From the captain's log- not much of the progress, as I spent some time to make some tiny blocks. In the two pictures below you can see the preparation of the main top sail. In the third one, the main yard with its foot rope.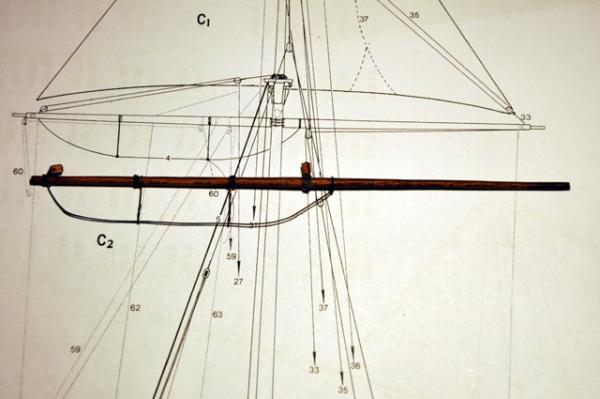


-
Symiaki Skafi by stelios
stelios replied to stelios's topic in - Build logs for subjects built 1851 - 1900
Ian, thank you; I'd agree with you the rigging is unusual. Just spare a couple of minutes and read the second posting from the beginning of this log., it explains in brief the reasoning behind it. -
Symiaki Skafi by stelios
stelios replied to stelios's topic in - Build logs for subjects built 1851 - 1900
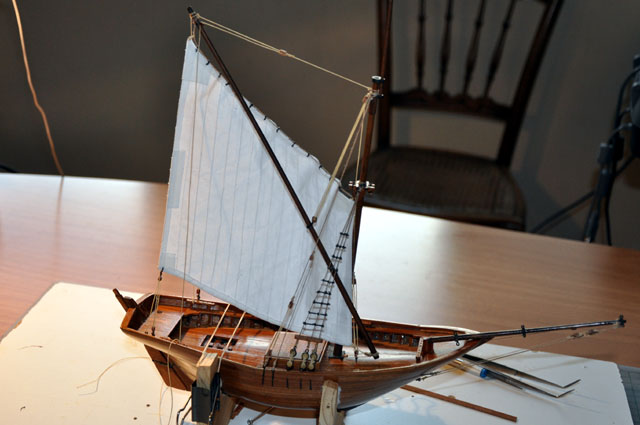
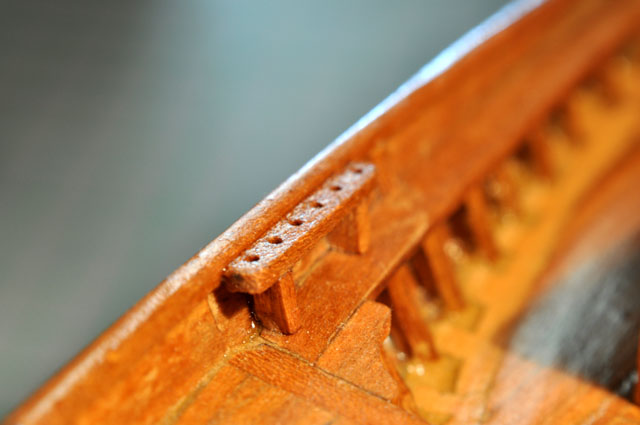
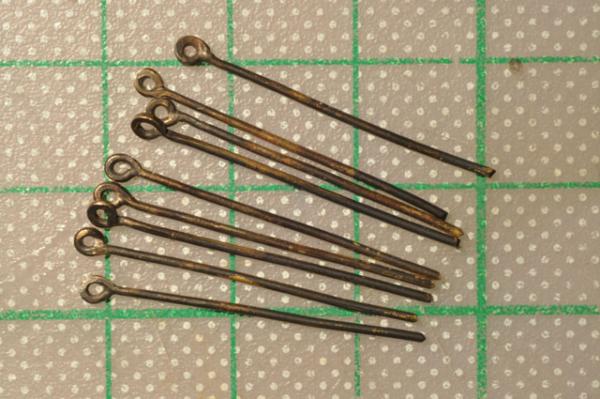
Dear all, The small mizzen sail proved to be relatively easy to fit. (unless if today was one of those days with inspiration...) In the first picture one can see the process and in the second the who thing fitted on the boat. The ropes were not secured yet,as I need to have "breathing" space on the deck. One of the side projects that I need to tackle, are the belaying pins. The challenge will be to make them small enough to be close to the ship's scale. The other challenge that will be dealt with at the end, is the rope coiling; to hang coiled rope so to add a touch o realism. cheers Stelios
-
Symiaki Skafi by stelios
stelios replied to stelios's topic in - Build logs for subjects built 1851 - 1900
This is an updated picture showing the sail secured to its final position. Next step: to setup the small mizzen sail: The picture below shows the very first steps. cheers Stelios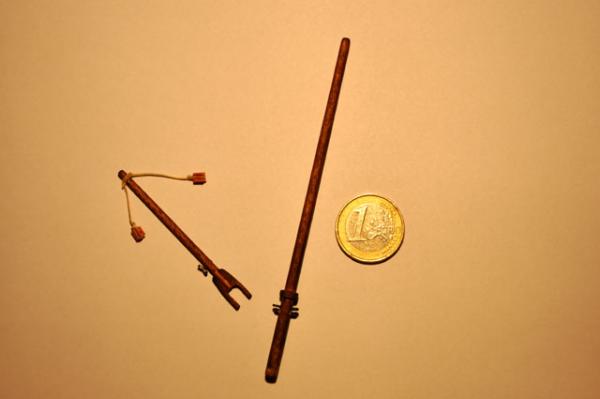

-
Symiaki Skafi by stelios
stelios replied to stelios's topic in - Build logs for subjects built 1851 - 1900
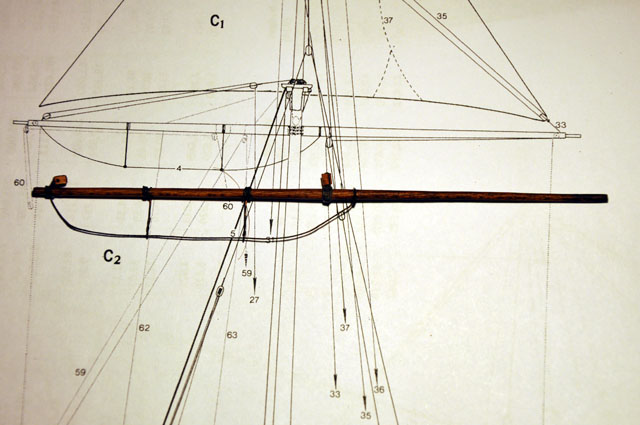
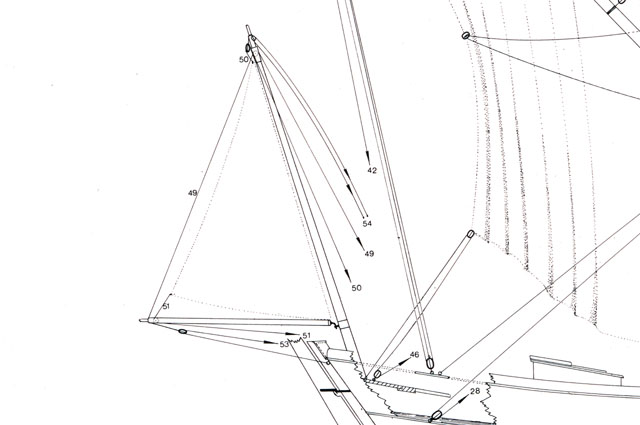
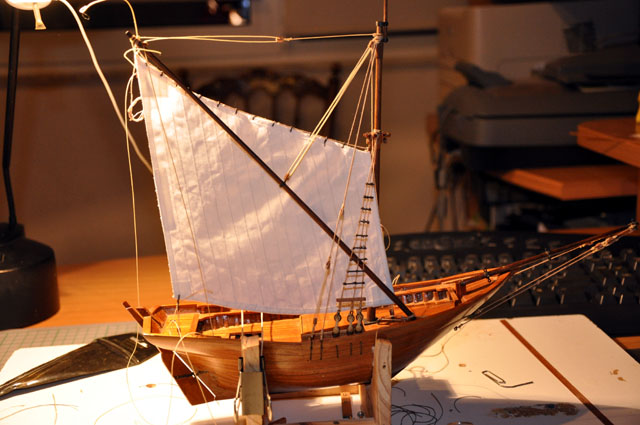
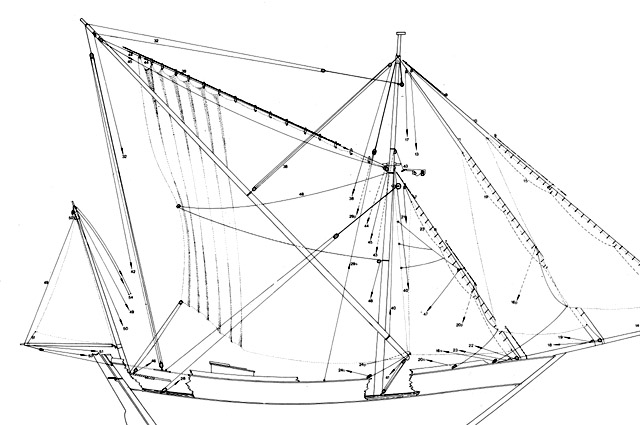
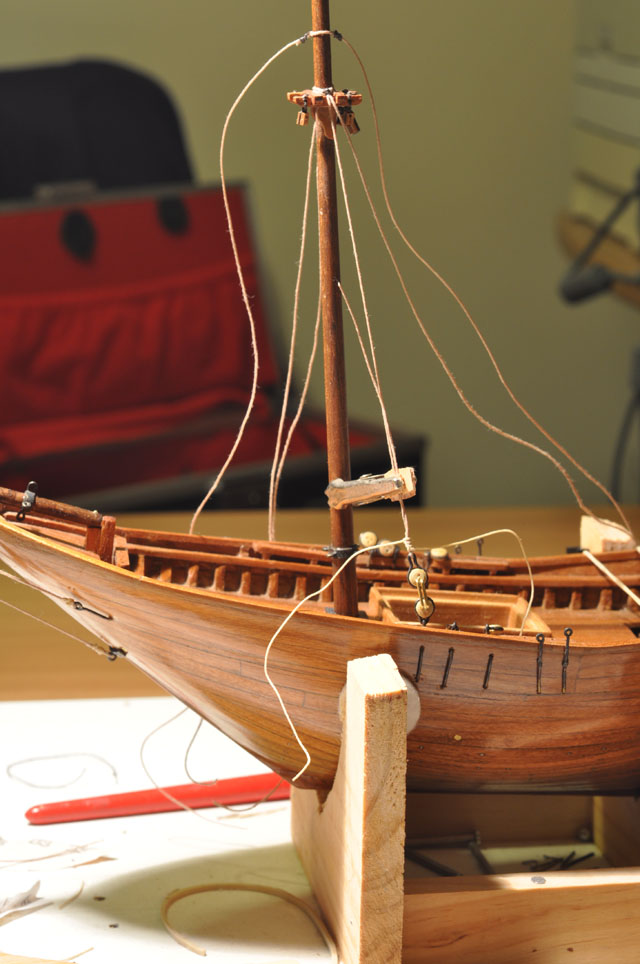
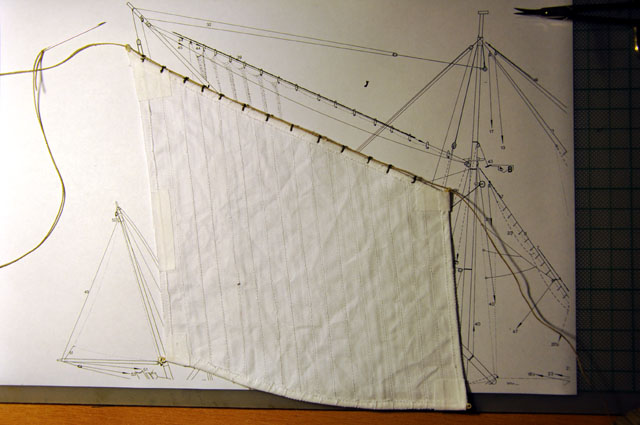
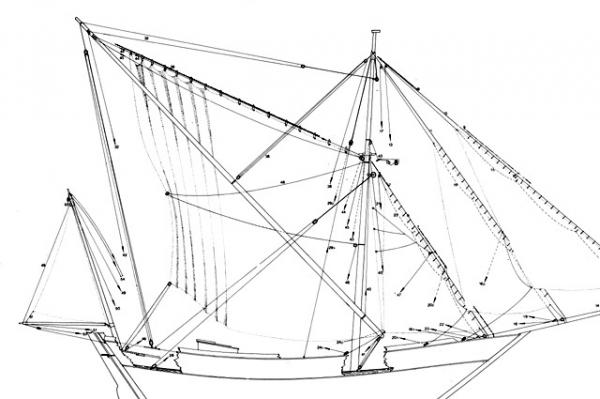
Dear all, The time has come to start rigging and fitting the sails. The process of trying to understand the plans it is a real fun (read:pain in the neck). Anyway, this is how I ended with the main sail (it is called sakoleva). The threads are not secured yet, I need to adjust it a bit higher, in order for the mast to hang on the air, currently touching the deck. The picture below shows how the plan depicts the position of the sail.Hopefully, I will manage to fit it it and adjust to its correct position. Stelios
-
This is a neat job Sam.
-
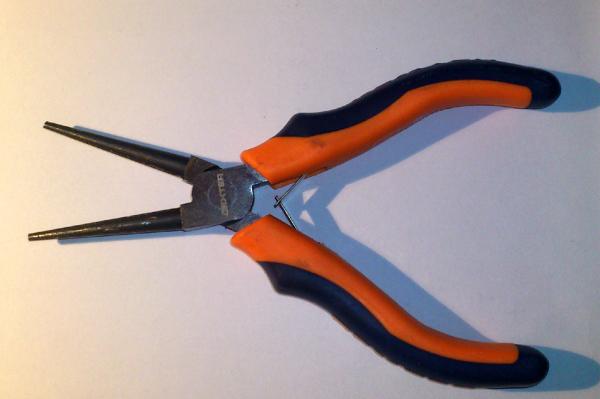
Sam, apologies for the belated response, activities other than ship modelling are keeping me busy... First of all, the attached picture shows is the pliers I use, not an expensive one, it just gives me the flexibility to choose the inner width of the ring. The soldering material I use is in tube (1 oz paste) and on the label it is stated: Fusion Brazing Paste prod: STL-1205-655. As I mentioned earlier in this thread, I used Russ' tutorial. I think it mentions the same paste. It is very easy to use especially for novices like me. The blackening process comes at the very end. The dead-eyes (wooden) were not affected. Cheers Stelios
-
Symiaki Skafi by stelios
stelios replied to stelios's topic in - Build logs for subjects built 1851 - 1900
That's a long time ago John! I was at junior high school at the time. I do recall the carrier and the sixth fleet. I still remember the sailors with their distinctive Popeye hat. -
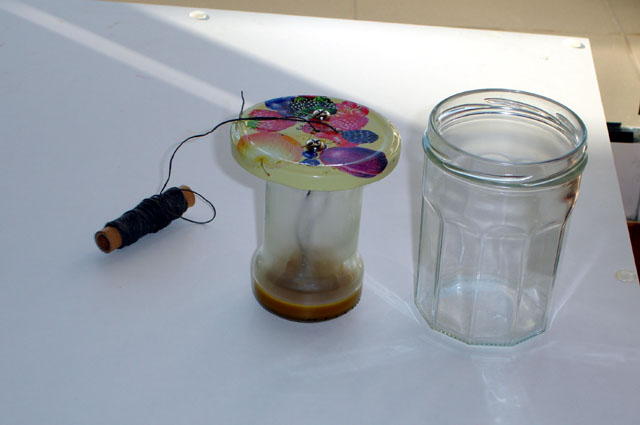
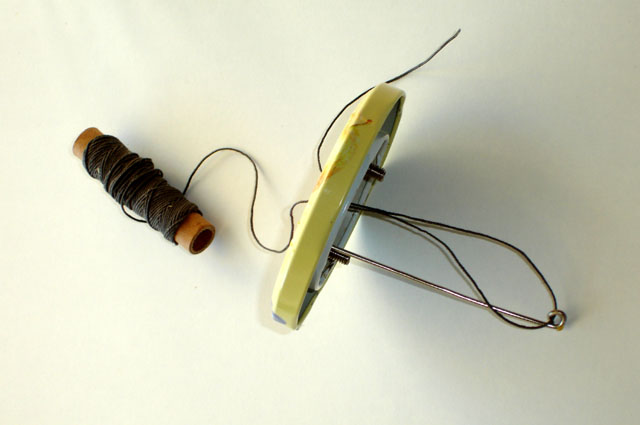
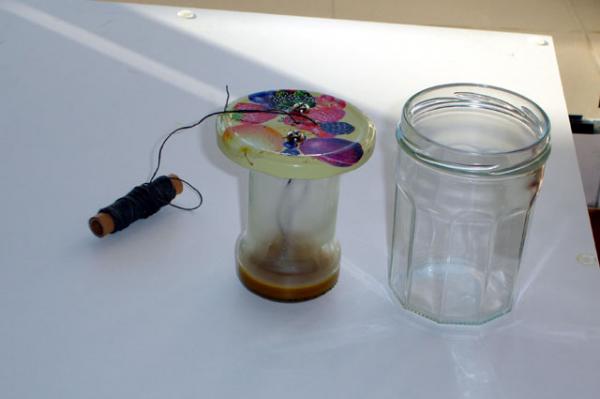
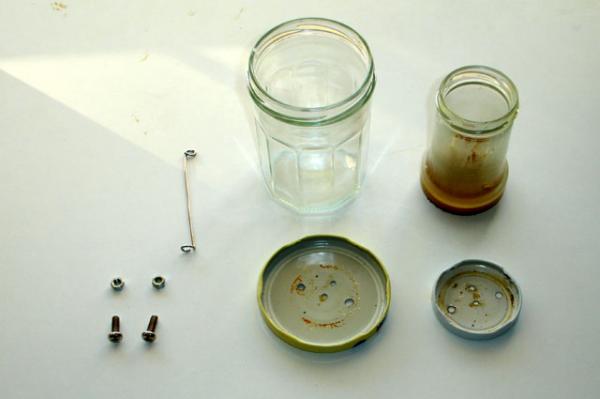
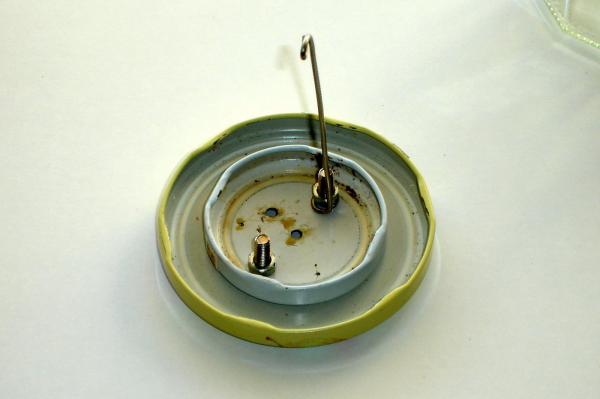
Dear all, I was browsing my archives and I found the pictures of my first working jig. I still remember the pride I felt when I managed -easily- to wax the threads for my then first build. It was used after the Bounty build with my two scratch builds and still rests in a self waiting for the next build. ( I hope). It is a rudimentary construction based on similar jig (more refined I must admit) I found in Ship-modeling forum. Since it works, I followed the rule number one: if it works efficiently, just don't touch it! The principle is very simple: Bring to melting temperature the wax in the small jar. This can be accomplished if you place it into boiling water (bain marie they call it) Pour some boiling water in the big jar and the then emerge the small one and seal the lid. Pull the string and wipe it with a rag. it is so easy. The construction itself I think is explained in the pictures. cheers Stelios

-
John, impressive work! what is the next step?
-
Michael, I was thinking, to build so many details is one thing, to spend time on top and record the progress by taking pictures, is something else. We all know how time consuming it can be when we want to take pictures, especially when the pictures are of such quality and detail like yours. A job well done! Stelios
-
Ilhan, I remember this build from the old MSW, thank you for re-posting, it is a good reference for the rest of us! regards Stelios
-
Symiaki Skafi by stelios
stelios replied to stelios's topic in - Build logs for subjects built 1851 - 1900
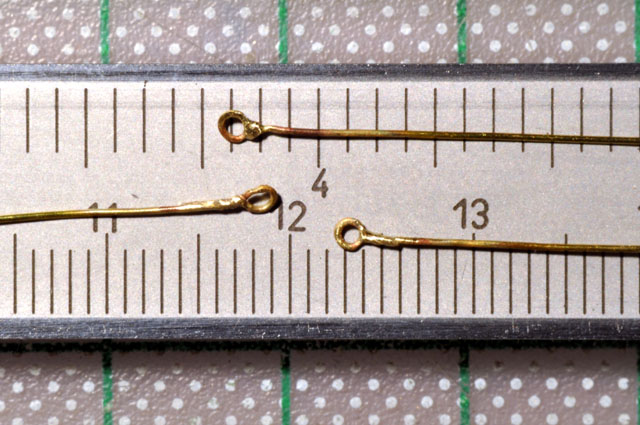
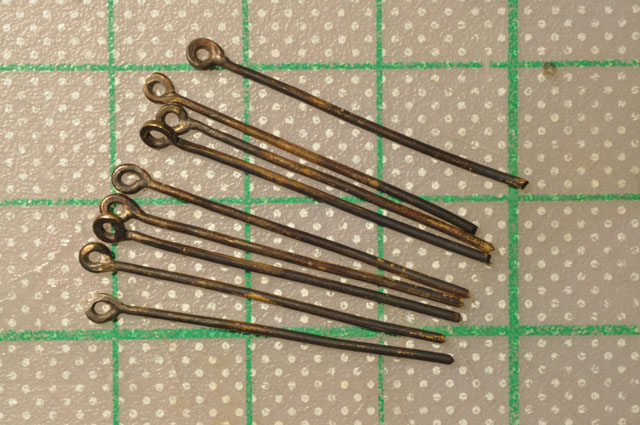
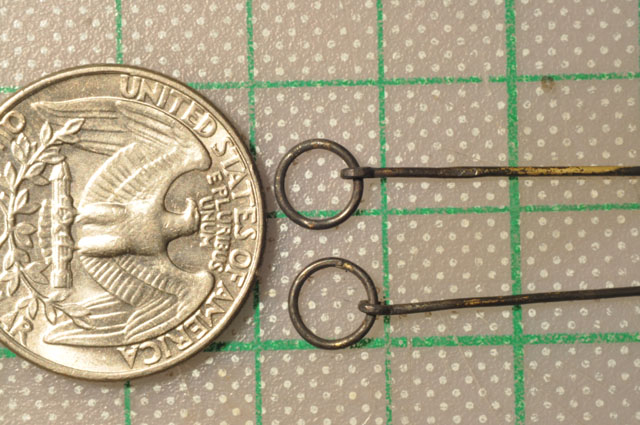
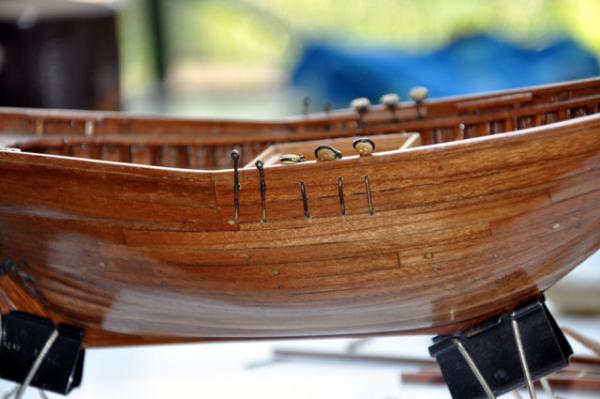
Dear all, Until the rat-lines are finished, I occupy my mind with the next steps, in relation how to fit the sails. Being ignorant about sails, I try to decipher the plans and figure out how to proceed. What I recall from Dry Docks (before the MSW era) is that normally you start from inside going out, when it comes to sail rigging, and this is what I'm going to do, at least, I'll try. So, this afternoon, just for fun, I made the stirrups out of 0.6 mm brass wire. I managed to solder the rings, without melting the wire... the finishing with the needle file was a challenge, as together with the wire I was trimming my finger tips... Anyway, the next step is to blacken them and attach them. In the past, when I built my first kit -a Bounty- I had settled with black thread hardened with CA glue. I think brass wire will look better... Stelios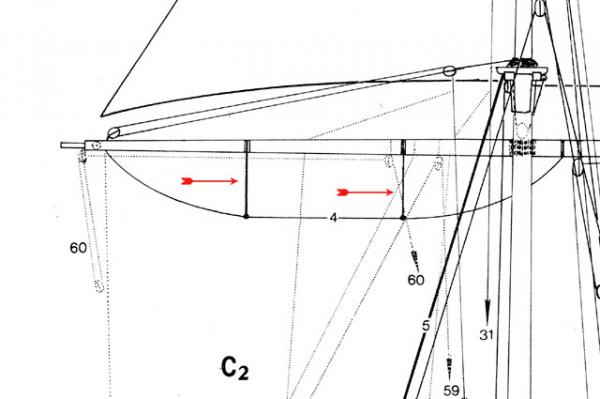
-
Elia, Greetings from Athens and Happy Birthday! I silently follow your project! cheers Stelios
-
A job well done Dave! If I may add my own experience: make sure the sewing machine is well tuned. I did not know that sewing machines need tuning, util a professional seamstress examined my work... (I use an old singer a 60ties build). Actually she played with those rods that regulate the feed of the string. Once fixed, the stitching was even. If you ask me If I can do it by myself, no, I can't. I'll have to consult her again... I used some textile glue, only tiny quanities to secure the corners. Not visible, acceptable results. regards Stelios
-
Symiaki Skafi by stelios
stelios replied to stelios's topic in - Build logs for subjects built 1851 - 1900
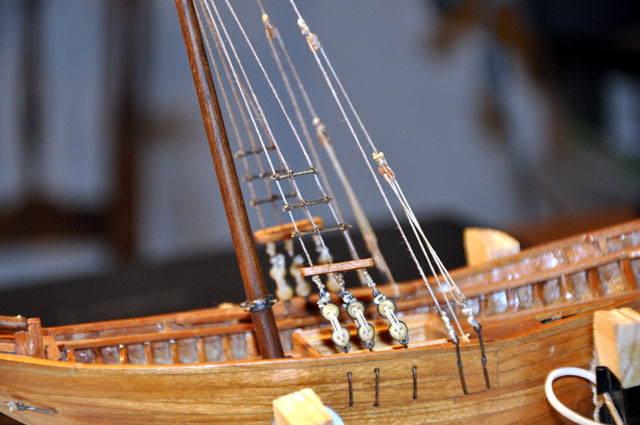
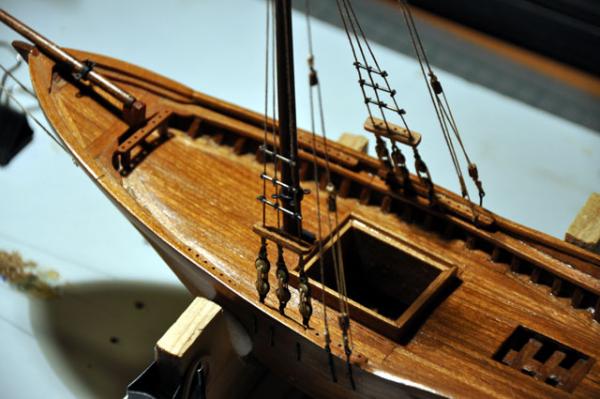
Dear all, the below are the most recent pictures, showing the sheer poles installed and the installation of the battened rat-lines still in process. I'm looking forward this weekend to continue! Stelios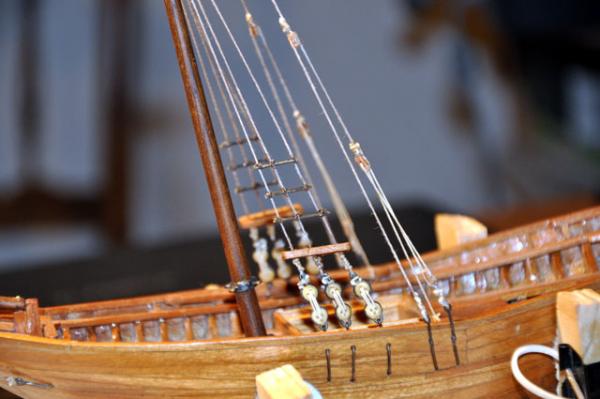
-
Symiaki Skafi by stelios
stelios replied to stelios's topic in - Build logs for subjects built 1851 - 1900
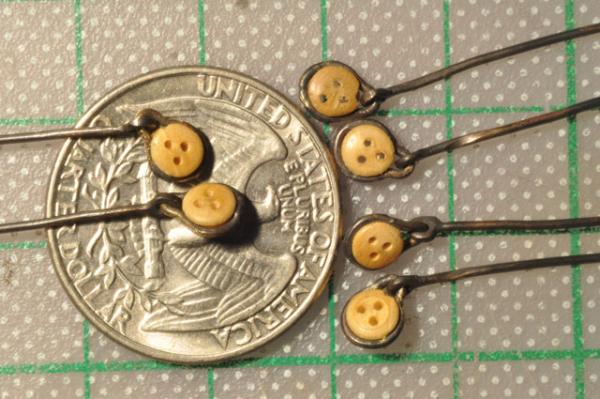
Dear all, I think that with this post I arrive from past to the present, as the picture from now on are considered as current. In the following pictures another milestone is logged, and this is the installation of the main mast on the ship. I decided just for fun, to show the details first, then the overall picture: The dead-eyes ready to be fit on the shrouds. In order to have an understanding about the dimensions, just note that the square on the mat is 1cm x 1cm. The jig (spacer) used between the dead-eyes. Nothing fancy, just to brass wires, in the shape of a staple. NB. all my threads are waxed that's why you don't see any fibers coming out and around the thread. The mast with the shrouds before the installation.


-
Symiaki Skafi by stelios
stelios replied to stelios's topic in - Build logs for subjects built 1851 - 1900
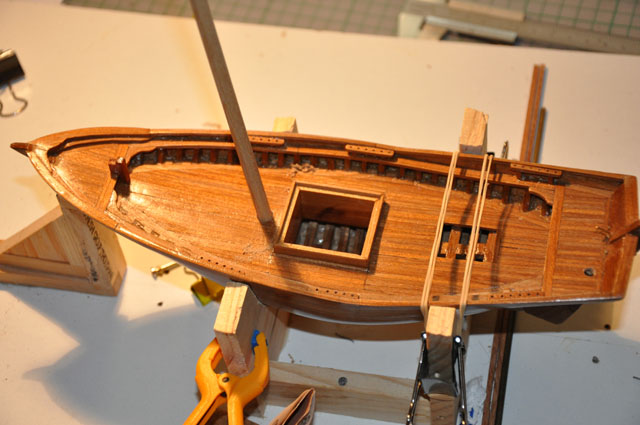
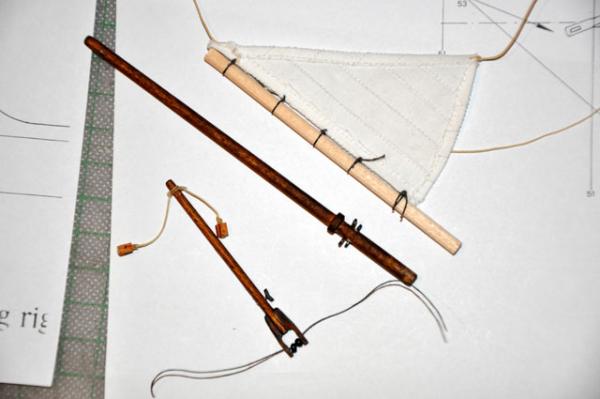
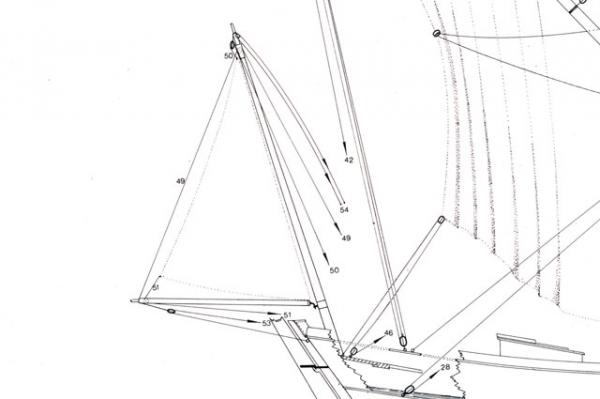
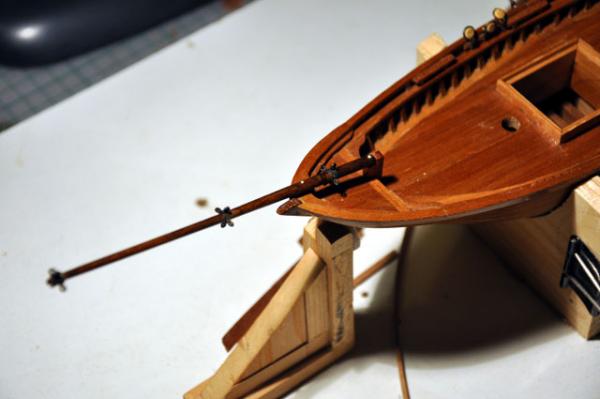
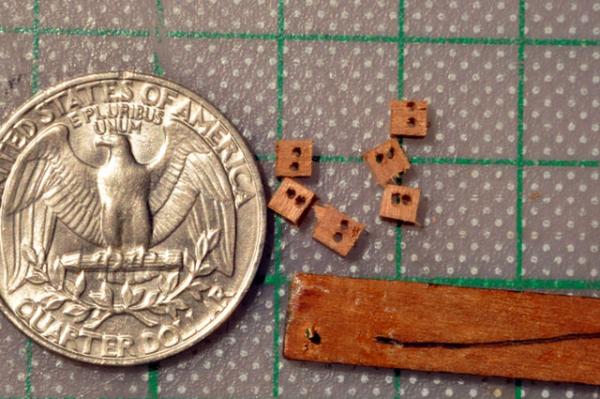
The bowsprit. The bowsprit is finally fit on the vessel. In the next two pictures I just tried to make some double blocks, to be used to the guys. I did not finally used them,(i did not like how they looked on the sprit) but the methodology I think is worth noticing. The strip of wood with the little nail, is the jig to hold the small bits in place and attach the thread around. Stelios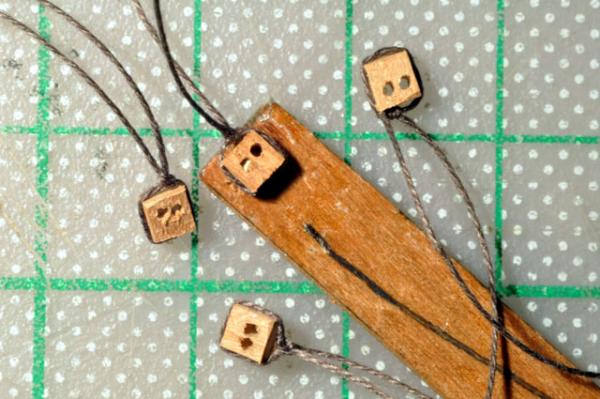
-
Symiaki Skafi by stelios
stelios replied to stelios's topic in - Build logs for subjects built 1851 - 1900
John, Thank you.I cannot tell if I'm accurate or not. The truth is that for this build I do not rush and I spend more time studying the details, which is fun actually! Michael, I'm honored! Stelios -
John, a fine job! I really enjoy the log. Stelios
-
Symiaki Skafi by stelios
stelios replied to stelios's topic in - Build logs for subjects built 1851 - 1900
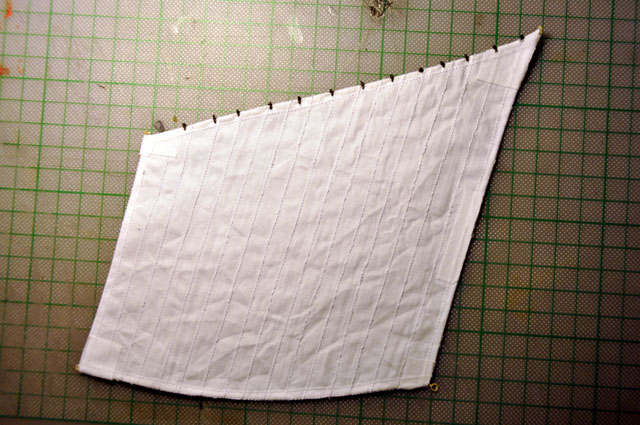
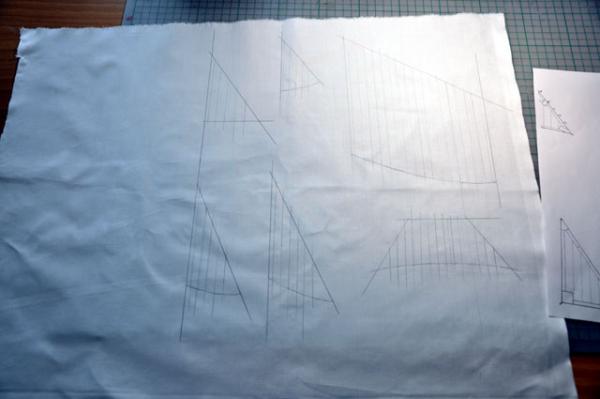
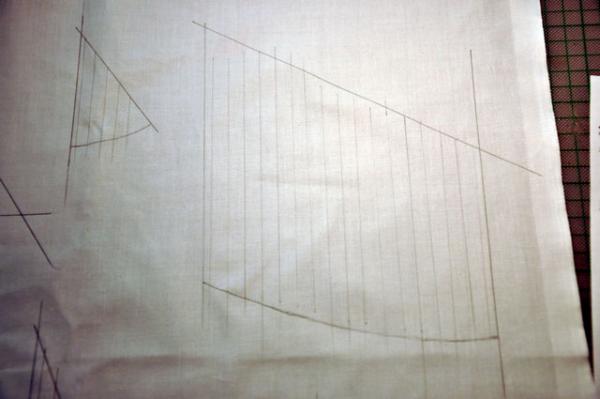
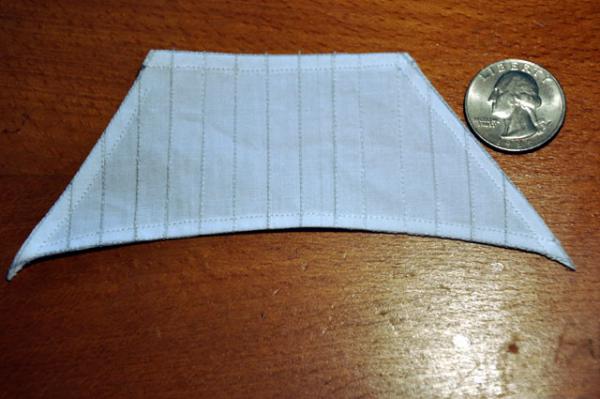
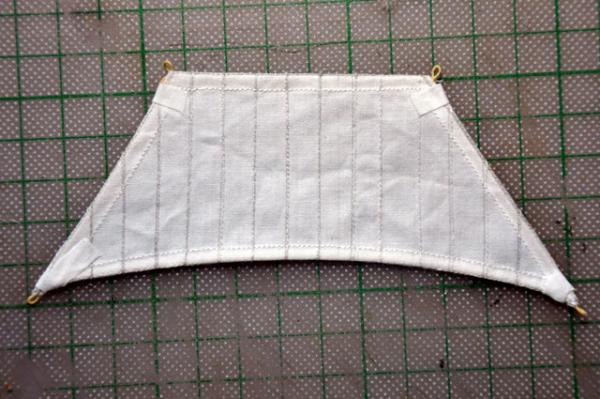
In today's economic environment, people need to be multiskilling (and sometimes) multitasking. Oops, wrong forum! What I wanted to say is that this hobby requires to develop many skills, one of them is to know how to use a Singer. Actually, I use an electric sewing machine made back in the early 60ties. the mechanical parts are line new. I only had to replace the motor, as after so many years, it simply died; it had lived beyond its normal life expectancy.... In the following pictures I try to portray the various steps, I think they are self explanatory. Stelios Notes: The fabric in use is poplin. The pencil marks were removed at the end my hand washing the sails with detergent. the patches were glued with textile glue the eyelets were mabe from black thread, hardened with some CA glue, to give the metal "feeling" ah, yes, at the end I steam ironed them (that skill please do not share with my wife...)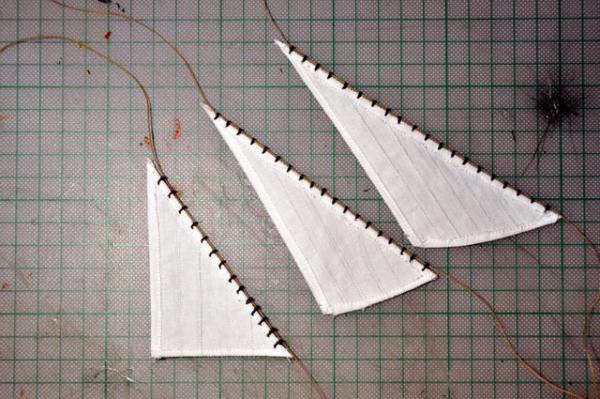

-
Michael, When I'll grow up, I want to become a ship-modeller like you! Now, seriously, I enjoyed every bit of this log, but especially the metal works. Your work is really inspiring! cheers Stelios
-
Symiaki Skafi by stelios
stelios replied to stelios's topic in - Build logs for subjects built 1851 - 1900
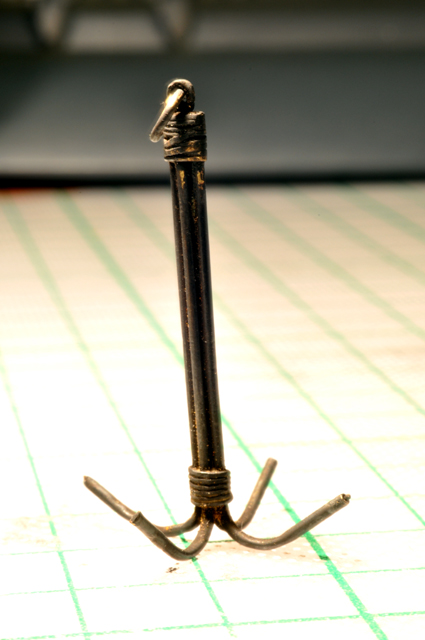
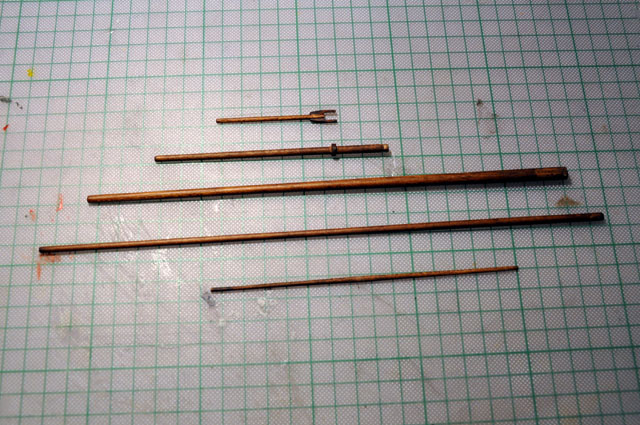
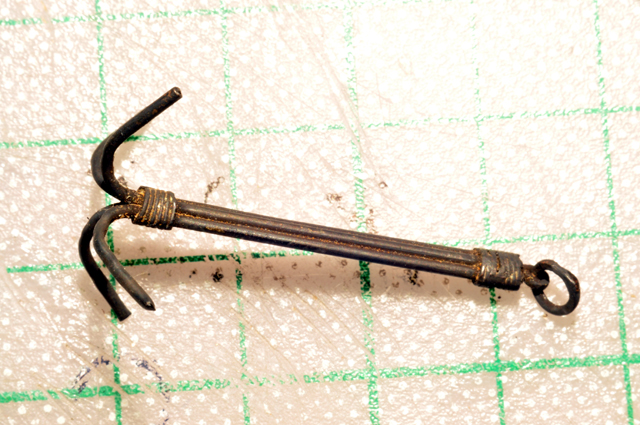
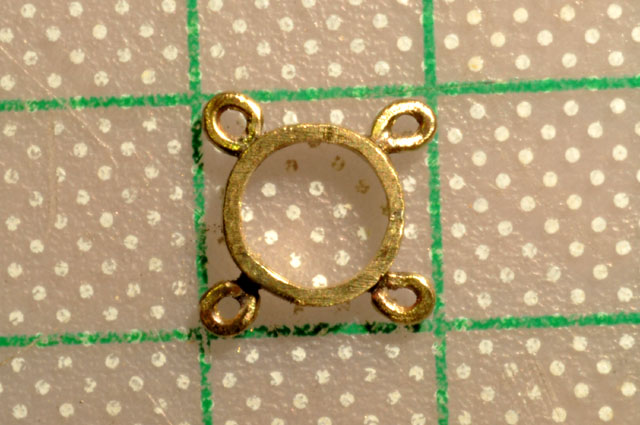
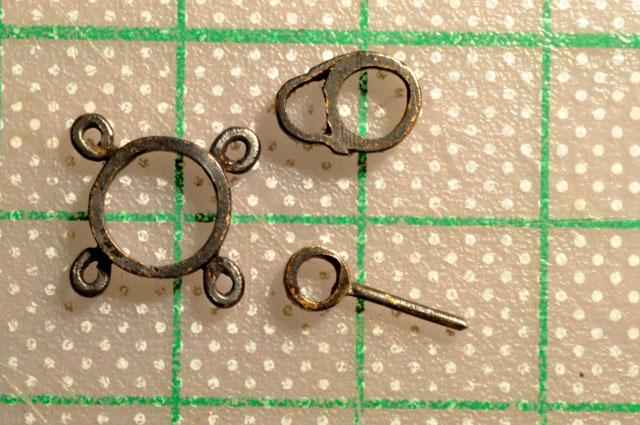
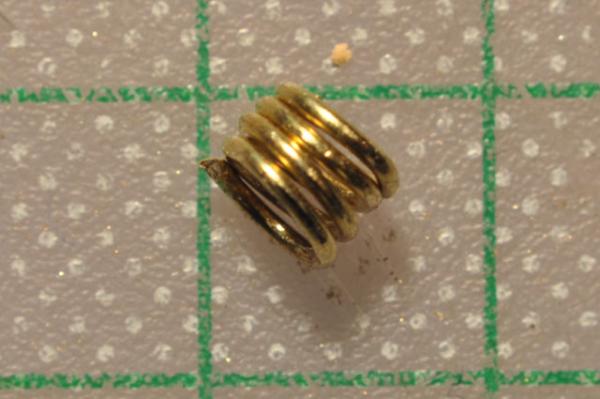
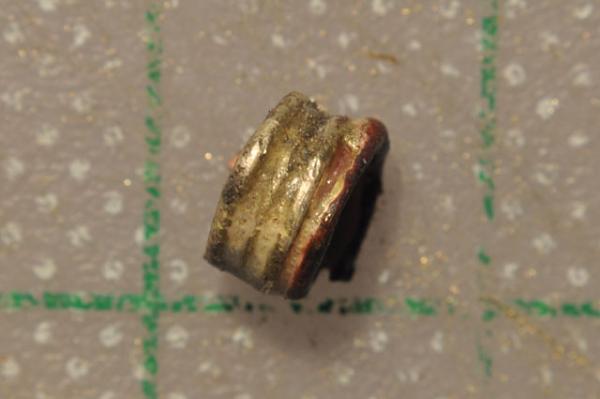
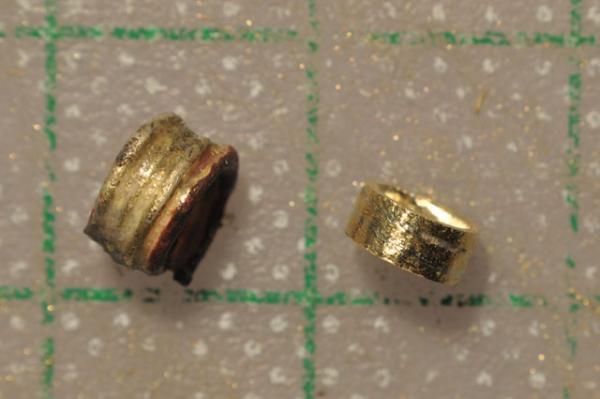
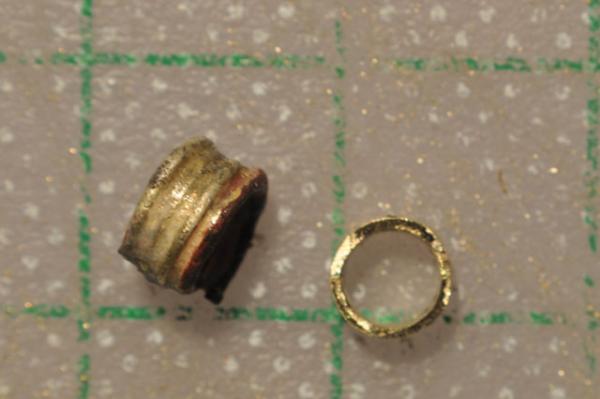
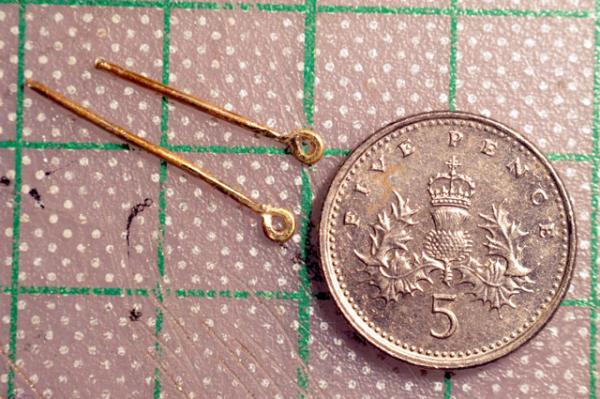
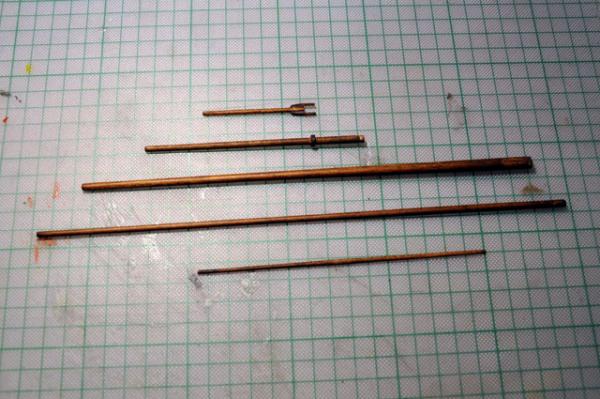
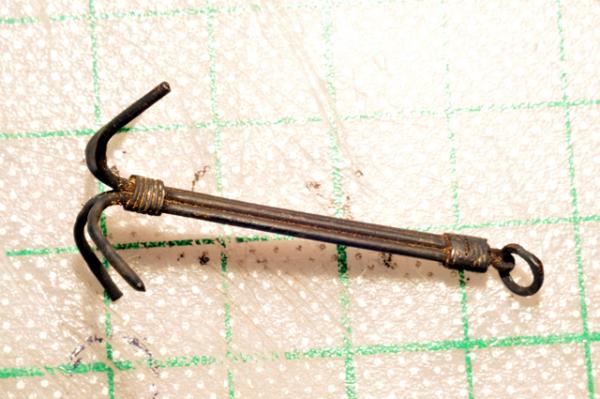
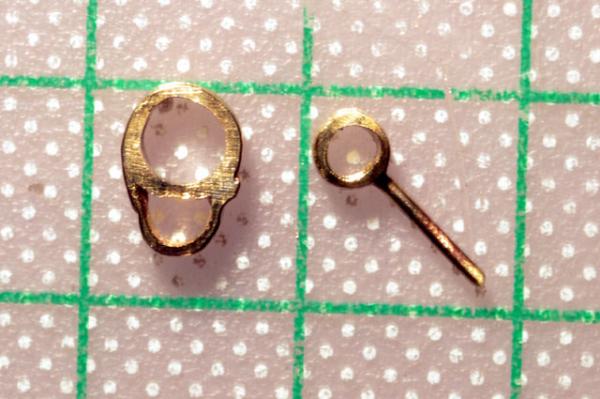
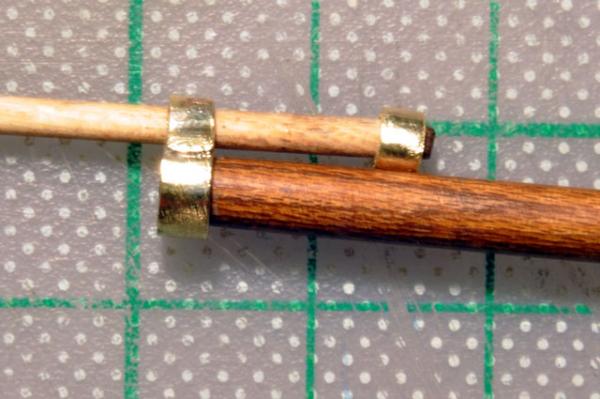
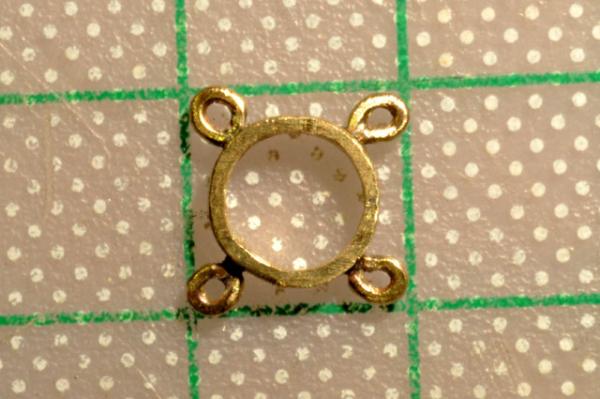
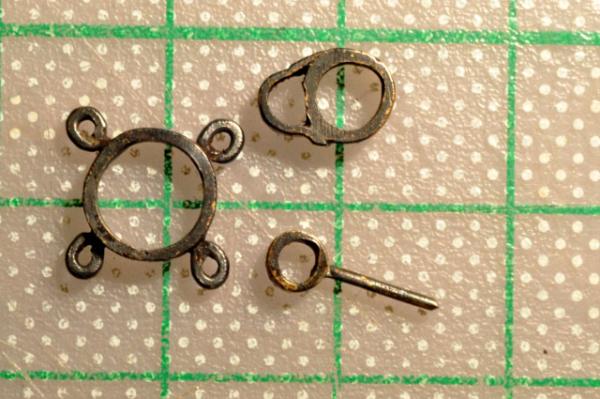
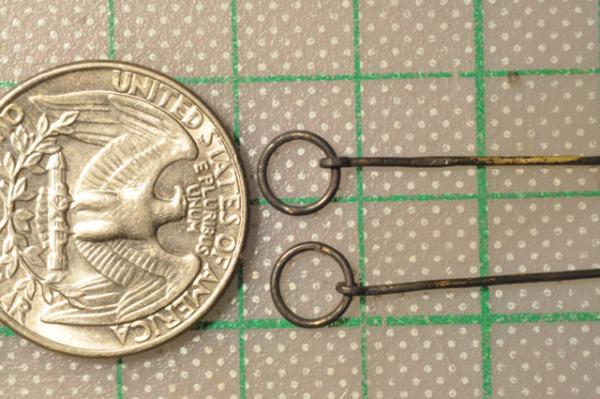
In the following pictures I try to portray the construction of various metal parts. For some reason, when it comes to metal works ans soldering, I really enjoy it. There is always room for improvement, the more I exercise, the better the outcome, (I like to believe). In the next four pictures, you can see how I make the rings, as I did not have tube available to cut. The principle is simple: coil the wire and then solder it. With some trimming it becomes a nice ring. The methodology of the little ring construction was already mentioned.I just share a better quality picture. Anyway they will be used further below, so it is relevant. Some wood work: the masts, sprits etc. A small deviation to make my anchor; yes it is an ugly duck, but I love it, it is my first anchor! In the following picture you can see various metal works, I think they are self explanatory. Stelios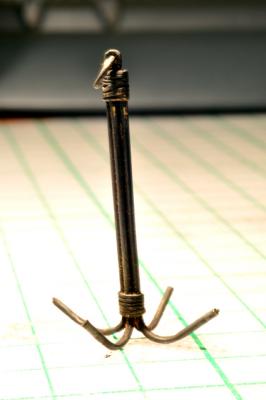


-
Symiaki Skafi by stelios
stelios replied to stelios's topic in - Build logs for subjects built 1851 - 1900
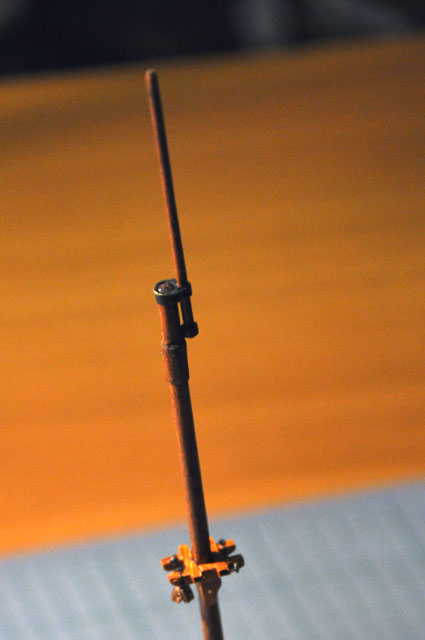
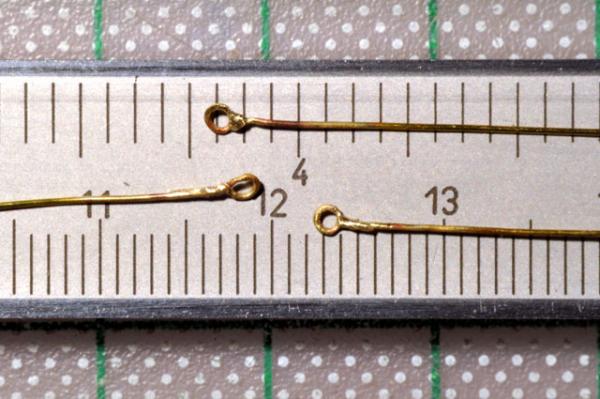
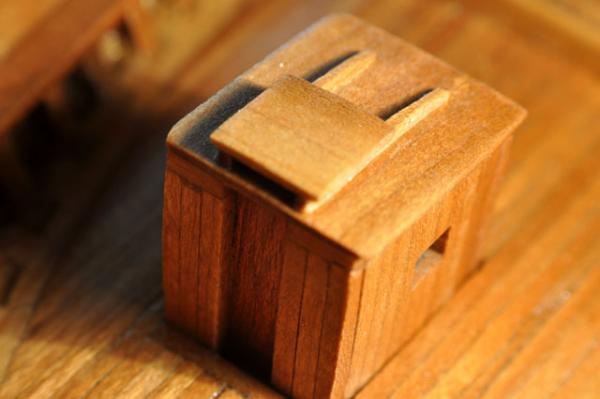
...and while I was preparing myself for the next step, (the construction of masts and their paraphernalia), I stepped back for a while and took some macro pictures. I'm always fascinated from macro pictures as they give you an entirely different perspective. Stelios PS. for the record, the date was 24/12/2011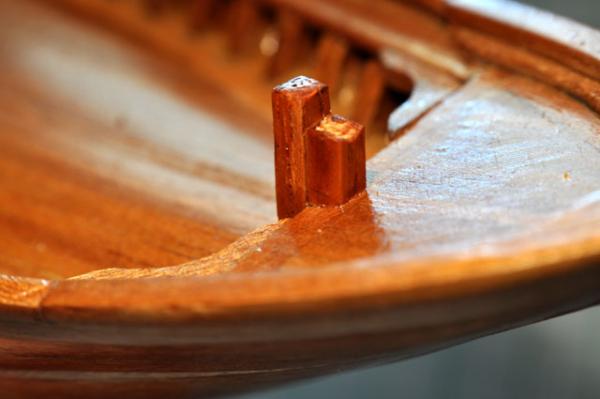

-
Russ, Just to say hello, I'm back and following the progress of your build. regards Stelios