
DBorgens
-
Posts
327 -
Joined
-
Last visited
1 Follower

About DBorgens

- Birthday 01/20/1957
Recent Profile Visitors
2,173 profile views


.thumb.jpg.62d1d69fed1f32364417cb1f9cdeb009.jpg)


-
 DBorgens reacted to a post in a topic:
NRG Rigging Project by tlevine - FINISHED
DBorgens reacted to a post in a topic:
NRG Rigging Project by tlevine - FINISHED
-
mtaylor reacted to a post in a topic:
Hello from Seattle - looking to buy a built ship
-
Keith Black reacted to a post in a topic:
Hello from Seattle - looking to buy a built ship
-

Hello from Seattle - looking to buy a built ship
DBorgens replied to wyapa's topic in New member Introductions
Wyapa, Welcome to MSW. You’re asking the right question. A good place to start is here http://modelshipworldforum.com/ship-model-plans-and-research.php A common starter is Model Shipways Bluenose. It is a good starter with many build logs on this site. Dave B -
Darius, Just found your log. I like the work you’re doing, she looks good. I’m also building Pegasus and have not updated my own log in a long time. Love the blue paint, it will look sharp. regards, Dave B
-
MajorChaos reacted to a post in a topic:
Bluenose by MajorChaos - Model Shipways Kit No. MS2130 - 1/64 scale - Canadian Fishing Schooner
-
Just found your log and will pull up a chair and follow. You’re doing a great job, especially the transom. I wouldn’t worry about the number of stanchions, the ship will look just as nice. First builds are like school, every task is a learning experience so don’t beat yourself up (BN was my first build as well). I found Bob Herman’s log very helpful.
-
FrankWouts reacted to a post in a topic:
Sloop Speedwell 1752 by Chuck - Ketch Rigged Sloop - POF - prototype build
-
KenW reacted to a post in a topic:
Sloop Speedwell 1752 by Chuck - Ketch Rigged Sloop - POF - prototype build
-
Nirvana reacted to a post in a topic:
Sloop Speedwell 1752 by Chuck - Ketch Rigged Sloop - POF - prototype build
-
When I eventually finish Pegasus, I plan to build Speedwell. Your kit will be perfect as I don’t have the machine tools. Dave B
-
 DBorgens reacted to a post in a topic:
Germania Nova 1911 by KeithAug - FINISHED - Scale 1:36 - replica of schooner Germania 1908
DBorgens reacted to a post in a topic:
Germania Nova 1911 by KeithAug - FINISHED - Scale 1:36 - replica of schooner Germania 1908
-
Wow, awesome build. I’m glad I came across your build. Dave B
-
Welcome!
-
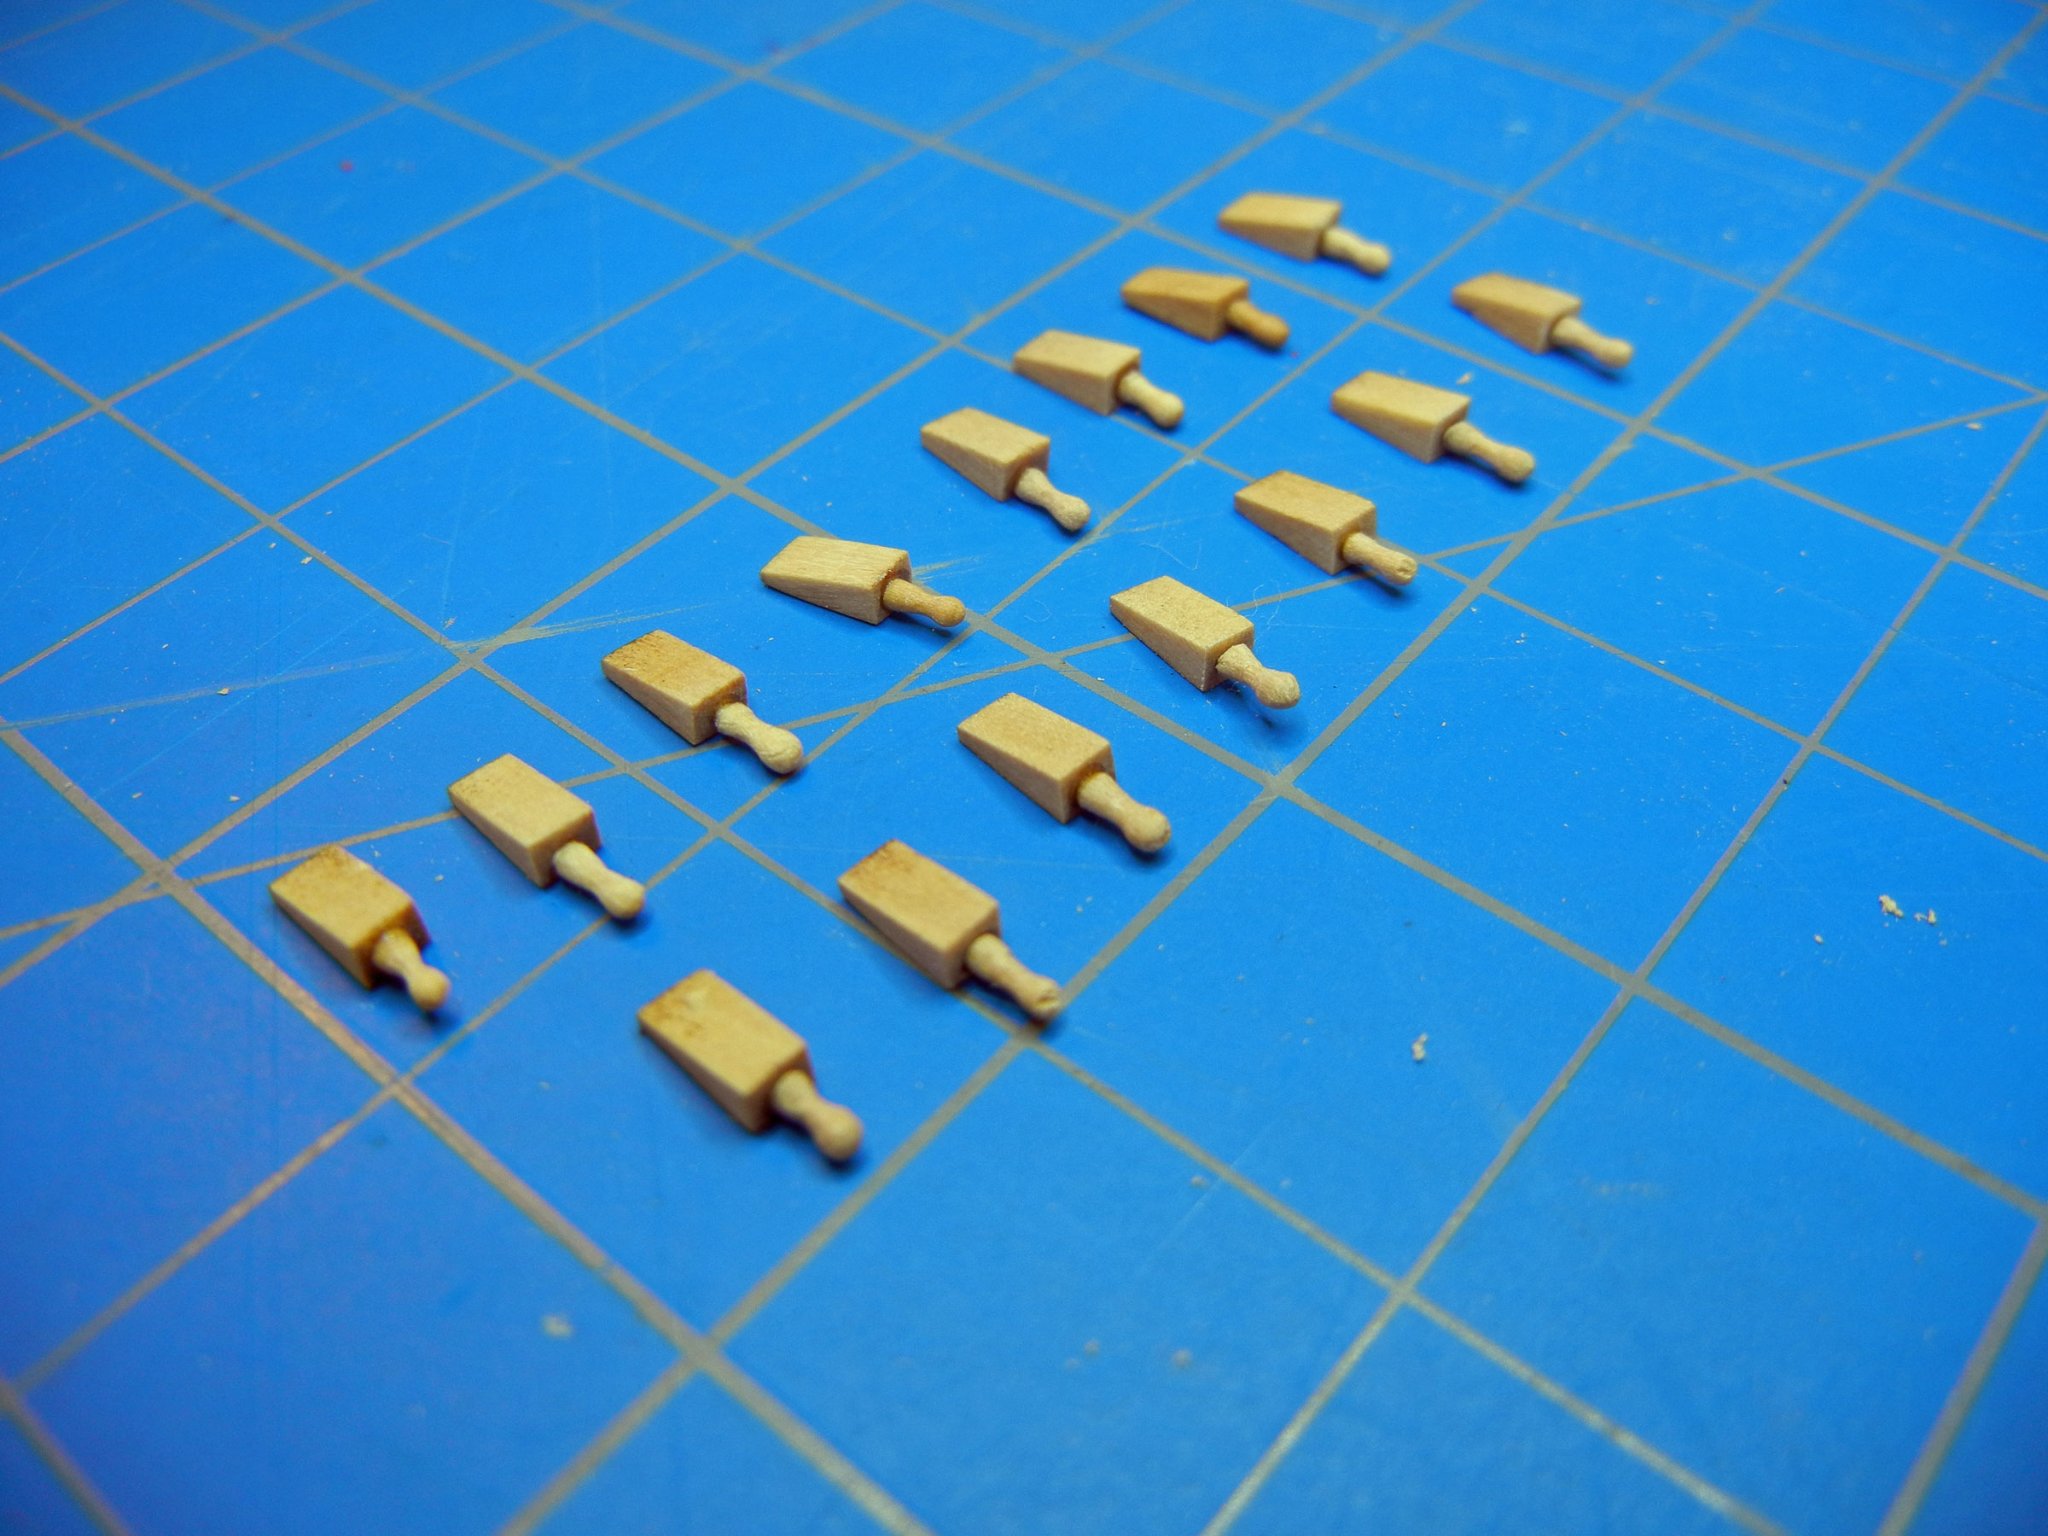
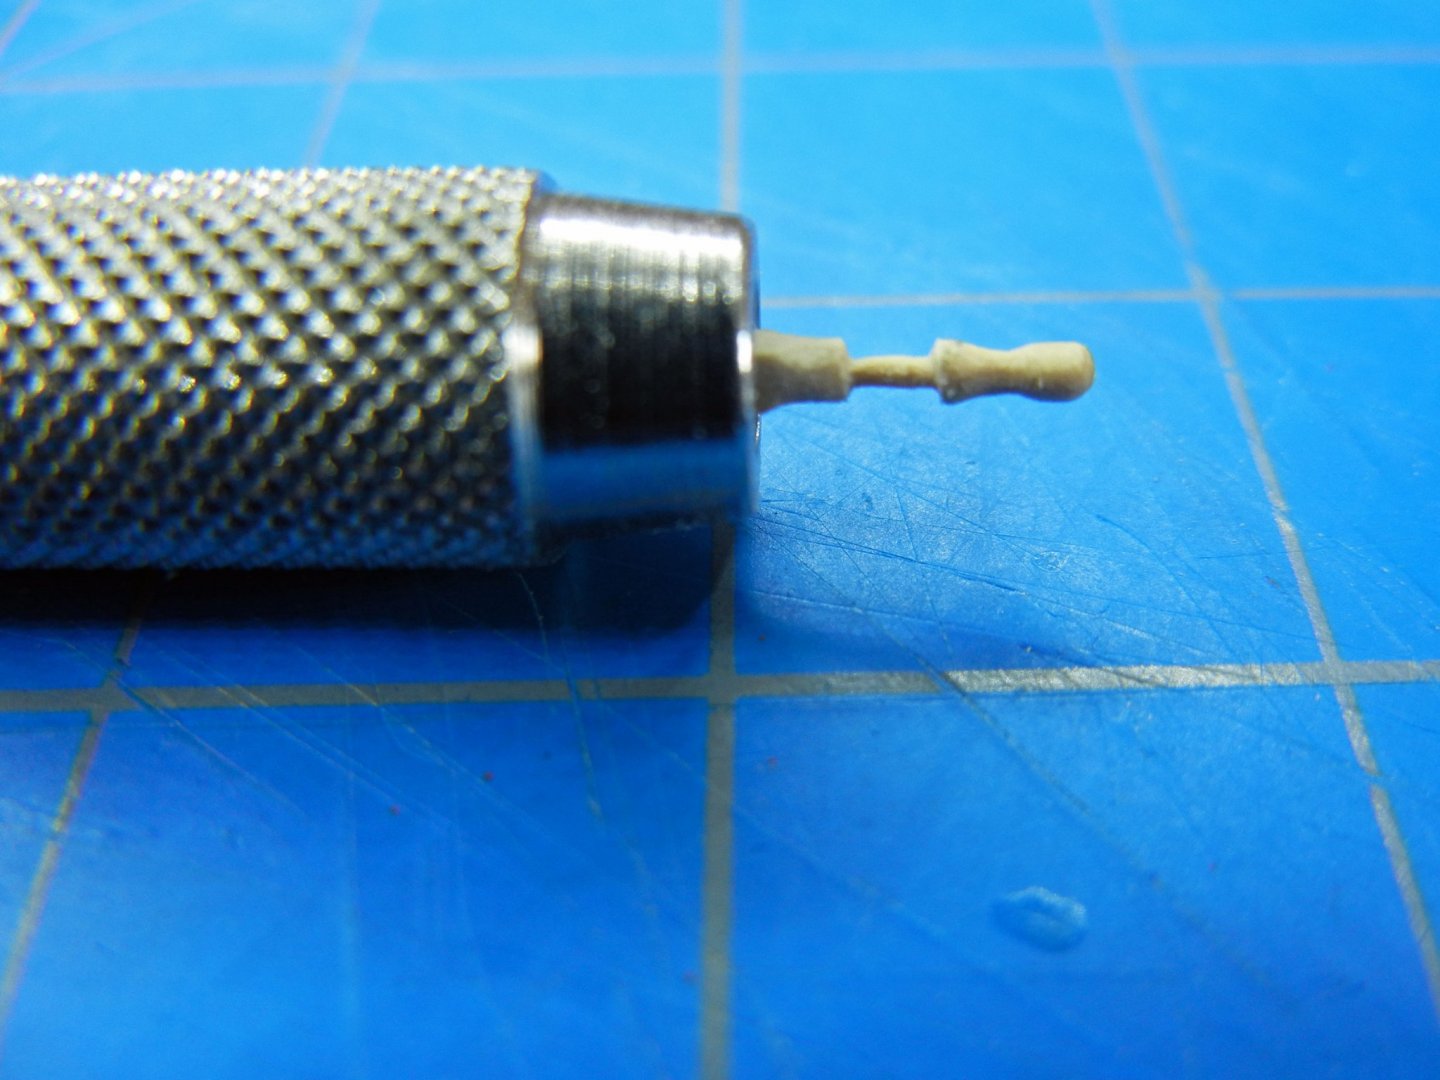
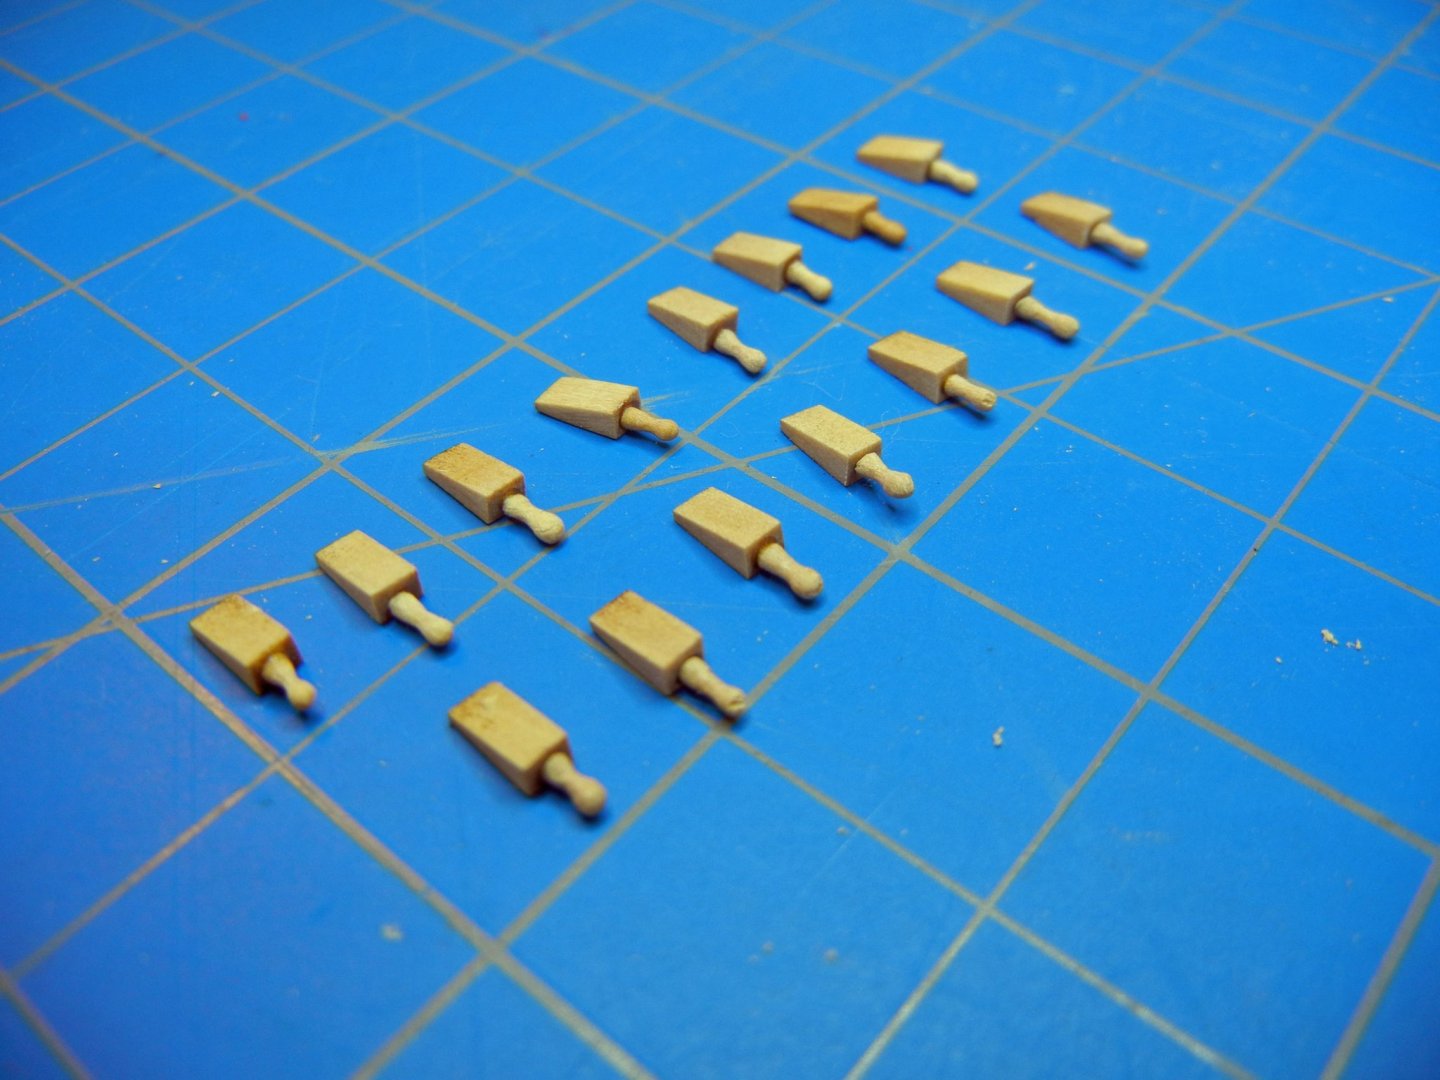
Quoin handles. I started by using my Dremmel to turn these but had a few problems. The Dremmel is fast even on low speed and I tended to make them too small (if that is possible at 1/64). I also discovered my Dremmel does not run true. I switched to a pin vice and it worked much better. It "only" took 25 pins to get 15 usable on the model. And I still have one spare. Dave B
- 9 replies
-
- 2
-
-
- pegasus
- victory models
- (and 1 more)
-
Your first build and you’re giving us a master class in miniature machining and assembly. I still wish I had some of your machining equipment, maybe someday if I can get away with the expense. Keep up the good work and photos to inspire us. Dave B
- 389 replies
-
- 1
-
-
- bluenose
- model shipways
- (and 1 more)
-
DBorgens reacted to a post in a topic:
HM Cutter Cheerful 1806 by glbarlow - FINISHED - 1:48
-
Ships vs Boats
DBorgens replied to Mike from Aus's topic in How to use the MSW forum - **NO MODELING CONTENT**
Boats are certainly welcome. Mine hasn’t been kicked out yet. Dave B -
Beautiful and inspiring. I look forward to your masking and rigging. Dave B
-
Unfortunately I don't have the proper tools now to for these good ideas. I did file another set using a lighted magnifier and a magnifying visor. Was able to make the axles round by working slowly. Found it somewhat relaxing which is good as I have a few dozen axles to file. 🙂 Dave B
-
Allan, Great solution! Sure beats trying to make them round with a flat file. Thanks, Dave B
-
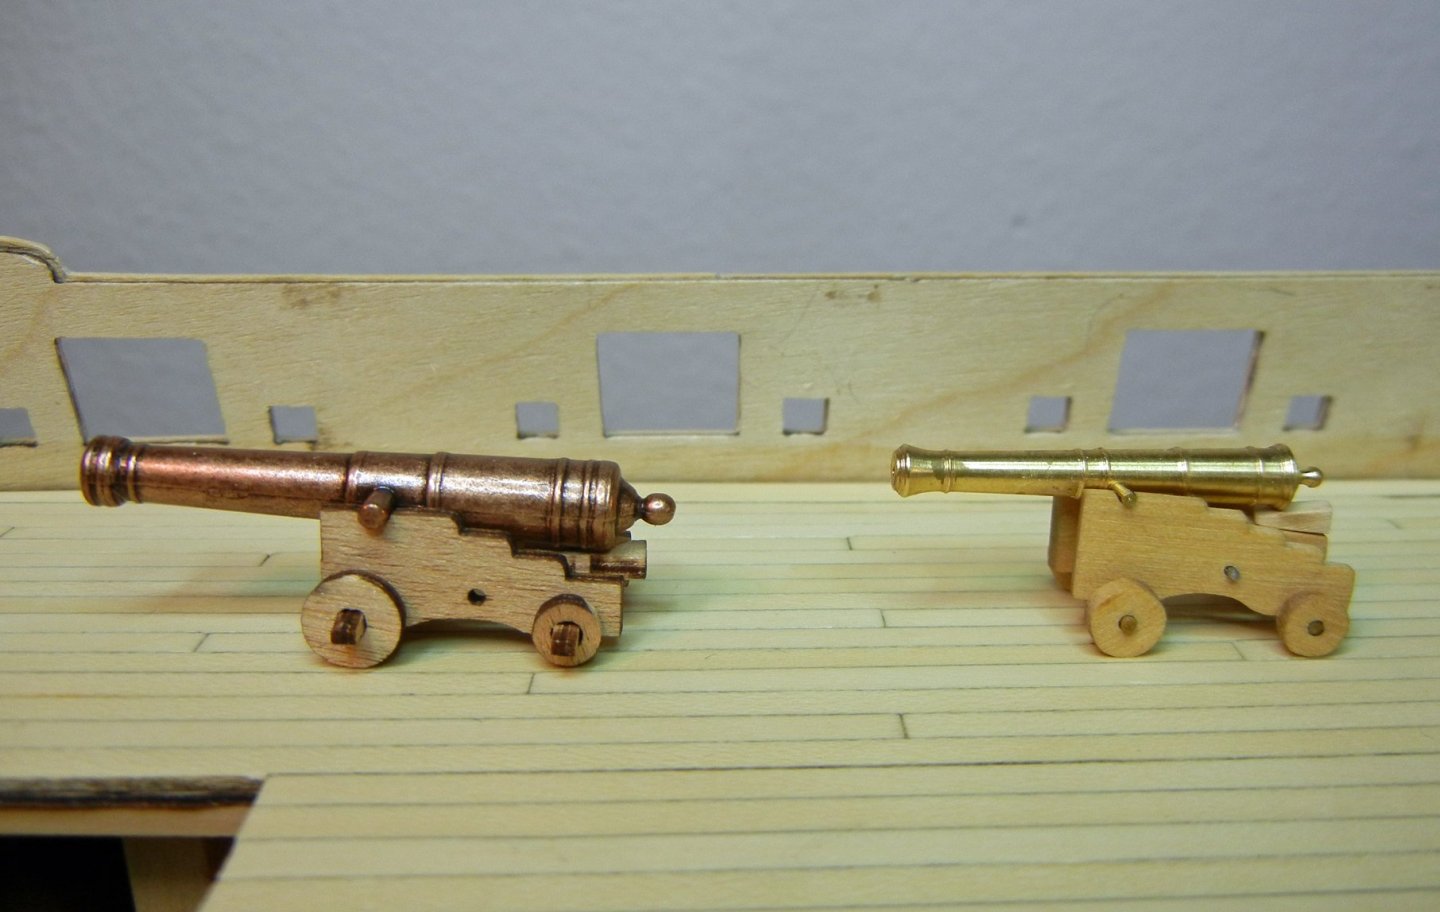
Switching to guns. As other Pegasus builders have mentioned the canons and carriages are out of scale and not the most pleasing. I broke down and bought canons and carriages from Syren. My first freehand attempt had too much taper, I can do better. As I considered making a jig to assemble the carriages, a group member pointed out Chuck's jig for carriages on his Winchelsea log. His is similar to what I considered. So I started measuring calculating and making jigs. My second one was a success. See my description in Discussion for a Ship's Deck Furniture, Guns, boats and other Fittings The Syren mini-kit is well made and of high quality. The only drawback is that these are the smallest size and the parts are fiddly little things. With a bit of care and they turn out well. There is no comparison between the kit and Syren parts. Dave B
- 9 replies
-
- 3
-
-
- pegasus
- victory models
- (and 1 more)
-
Welcome aboard Matey, You're in the right place. Look around the build logs and search for a San Francisco log. I have learned a great deal simply reading logs and looking at pictures. Don't be afraid to ask questions and pick our brains, at least those who still have some. Dave B
-
DBorgens changed their profile photo
-
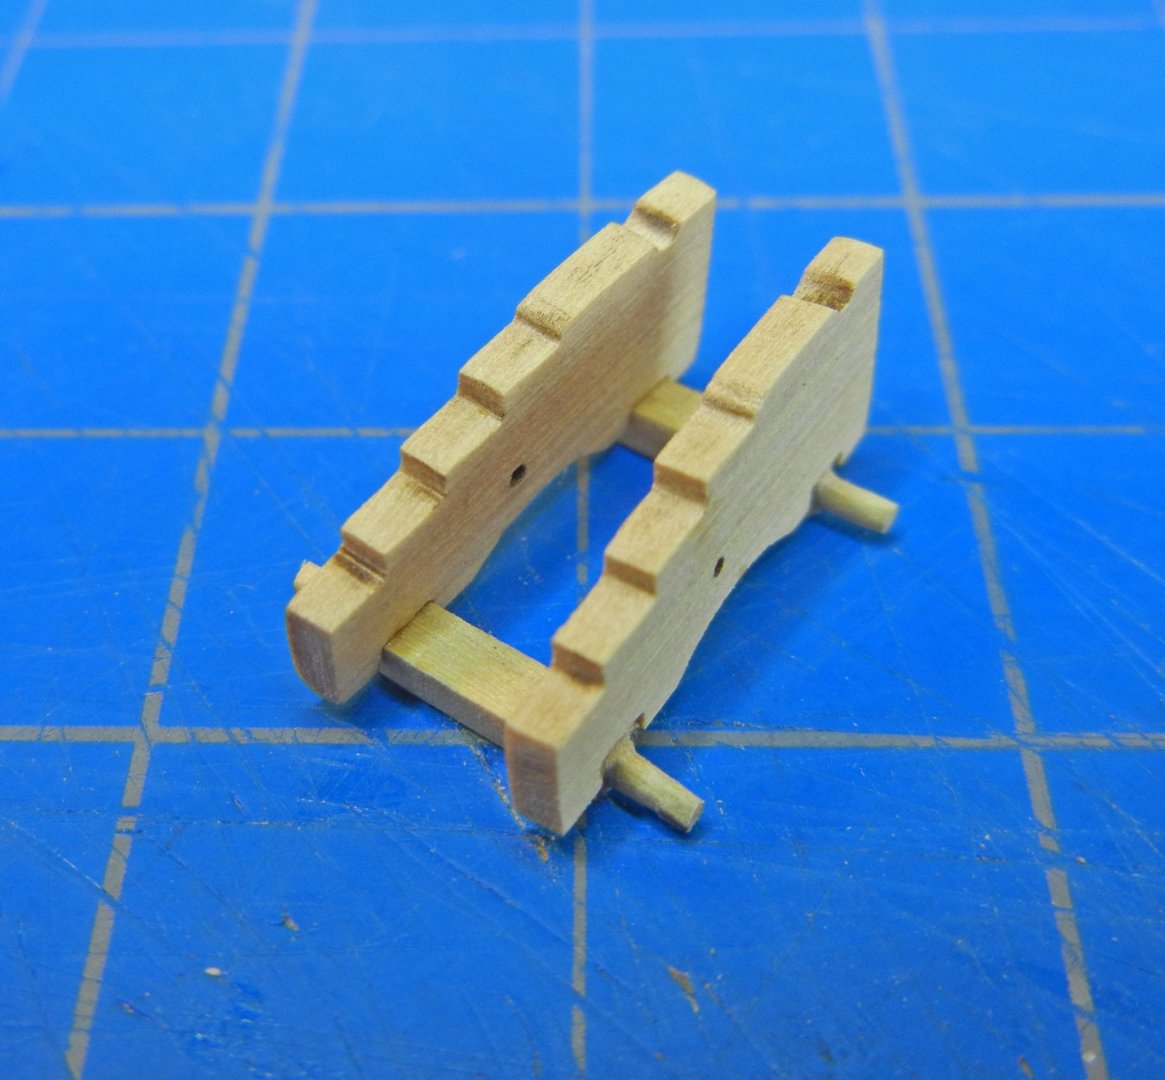
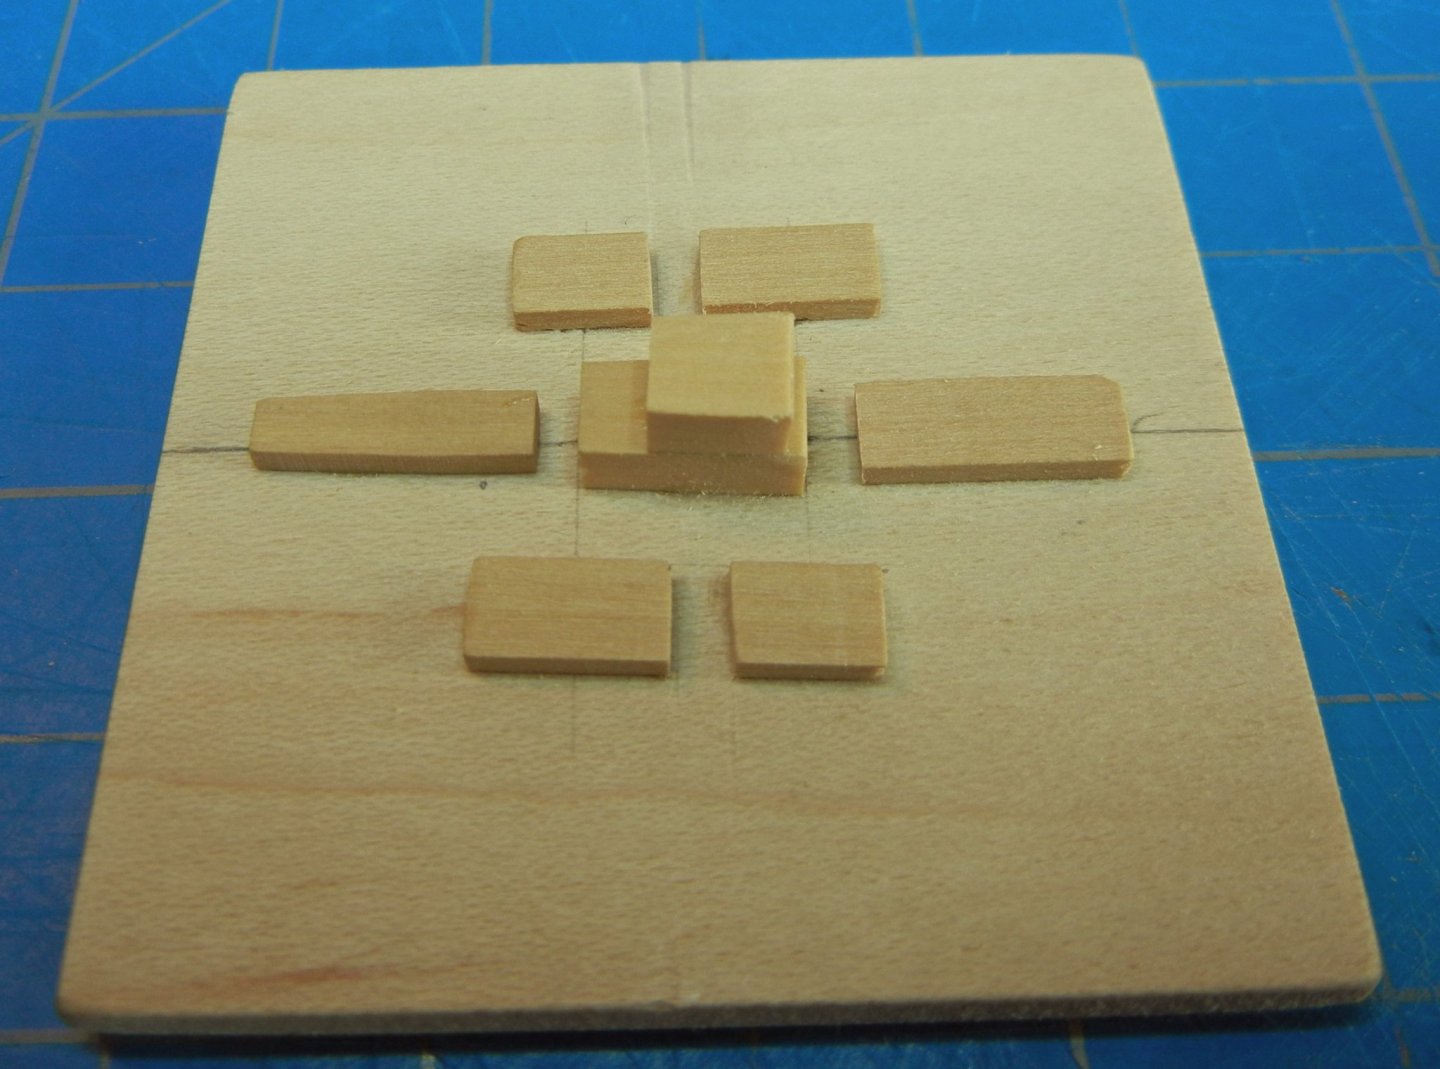
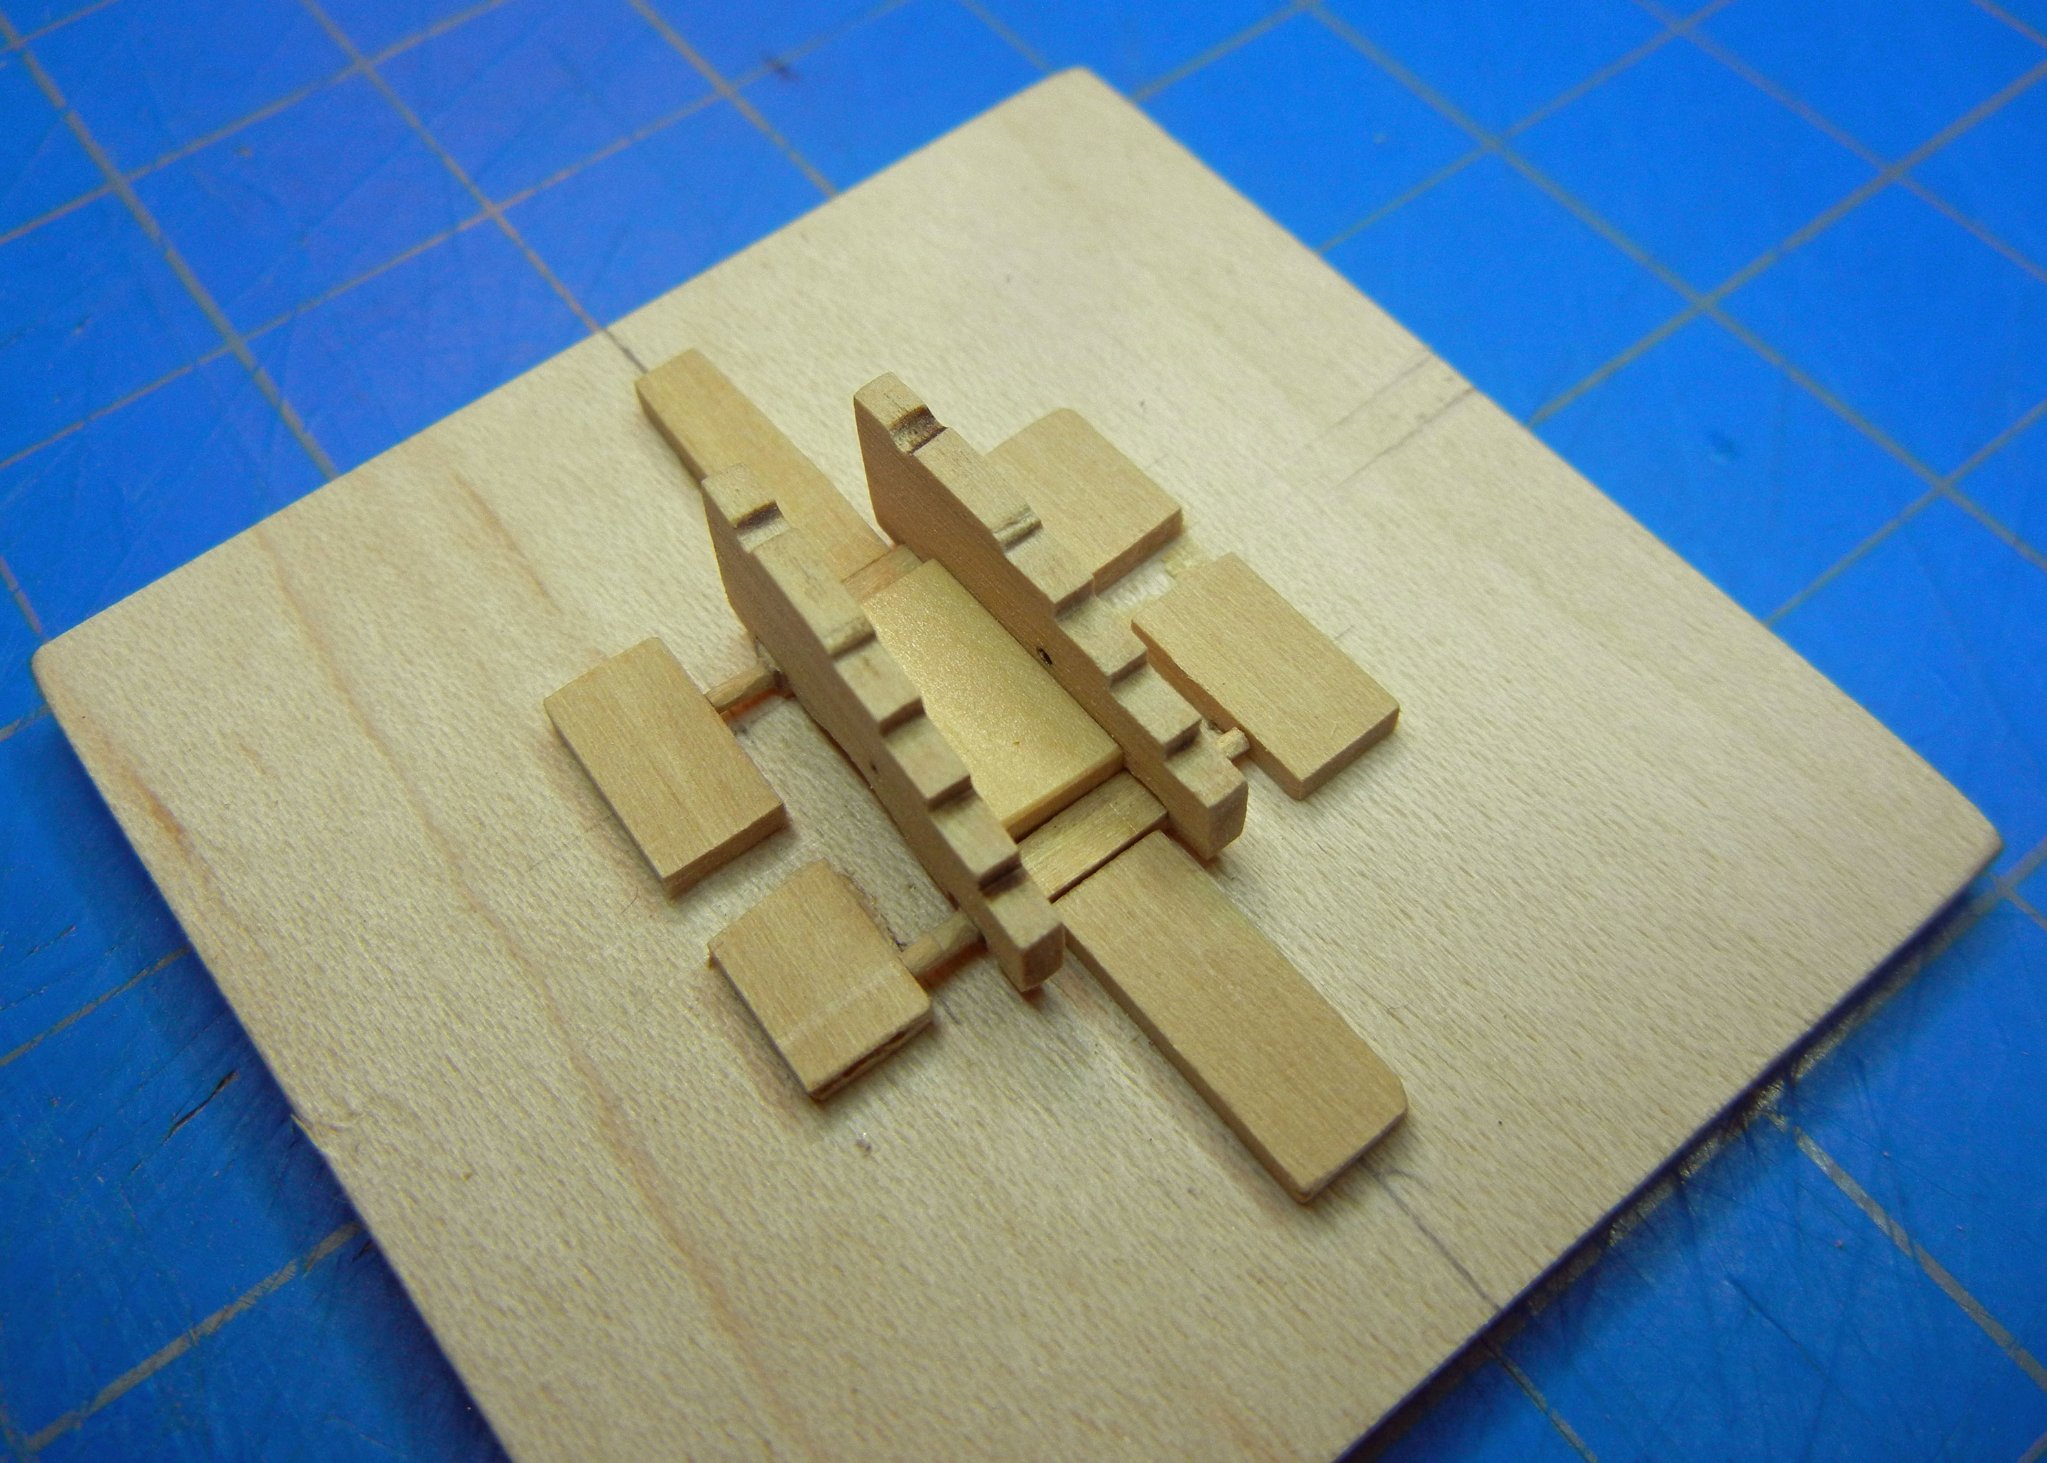
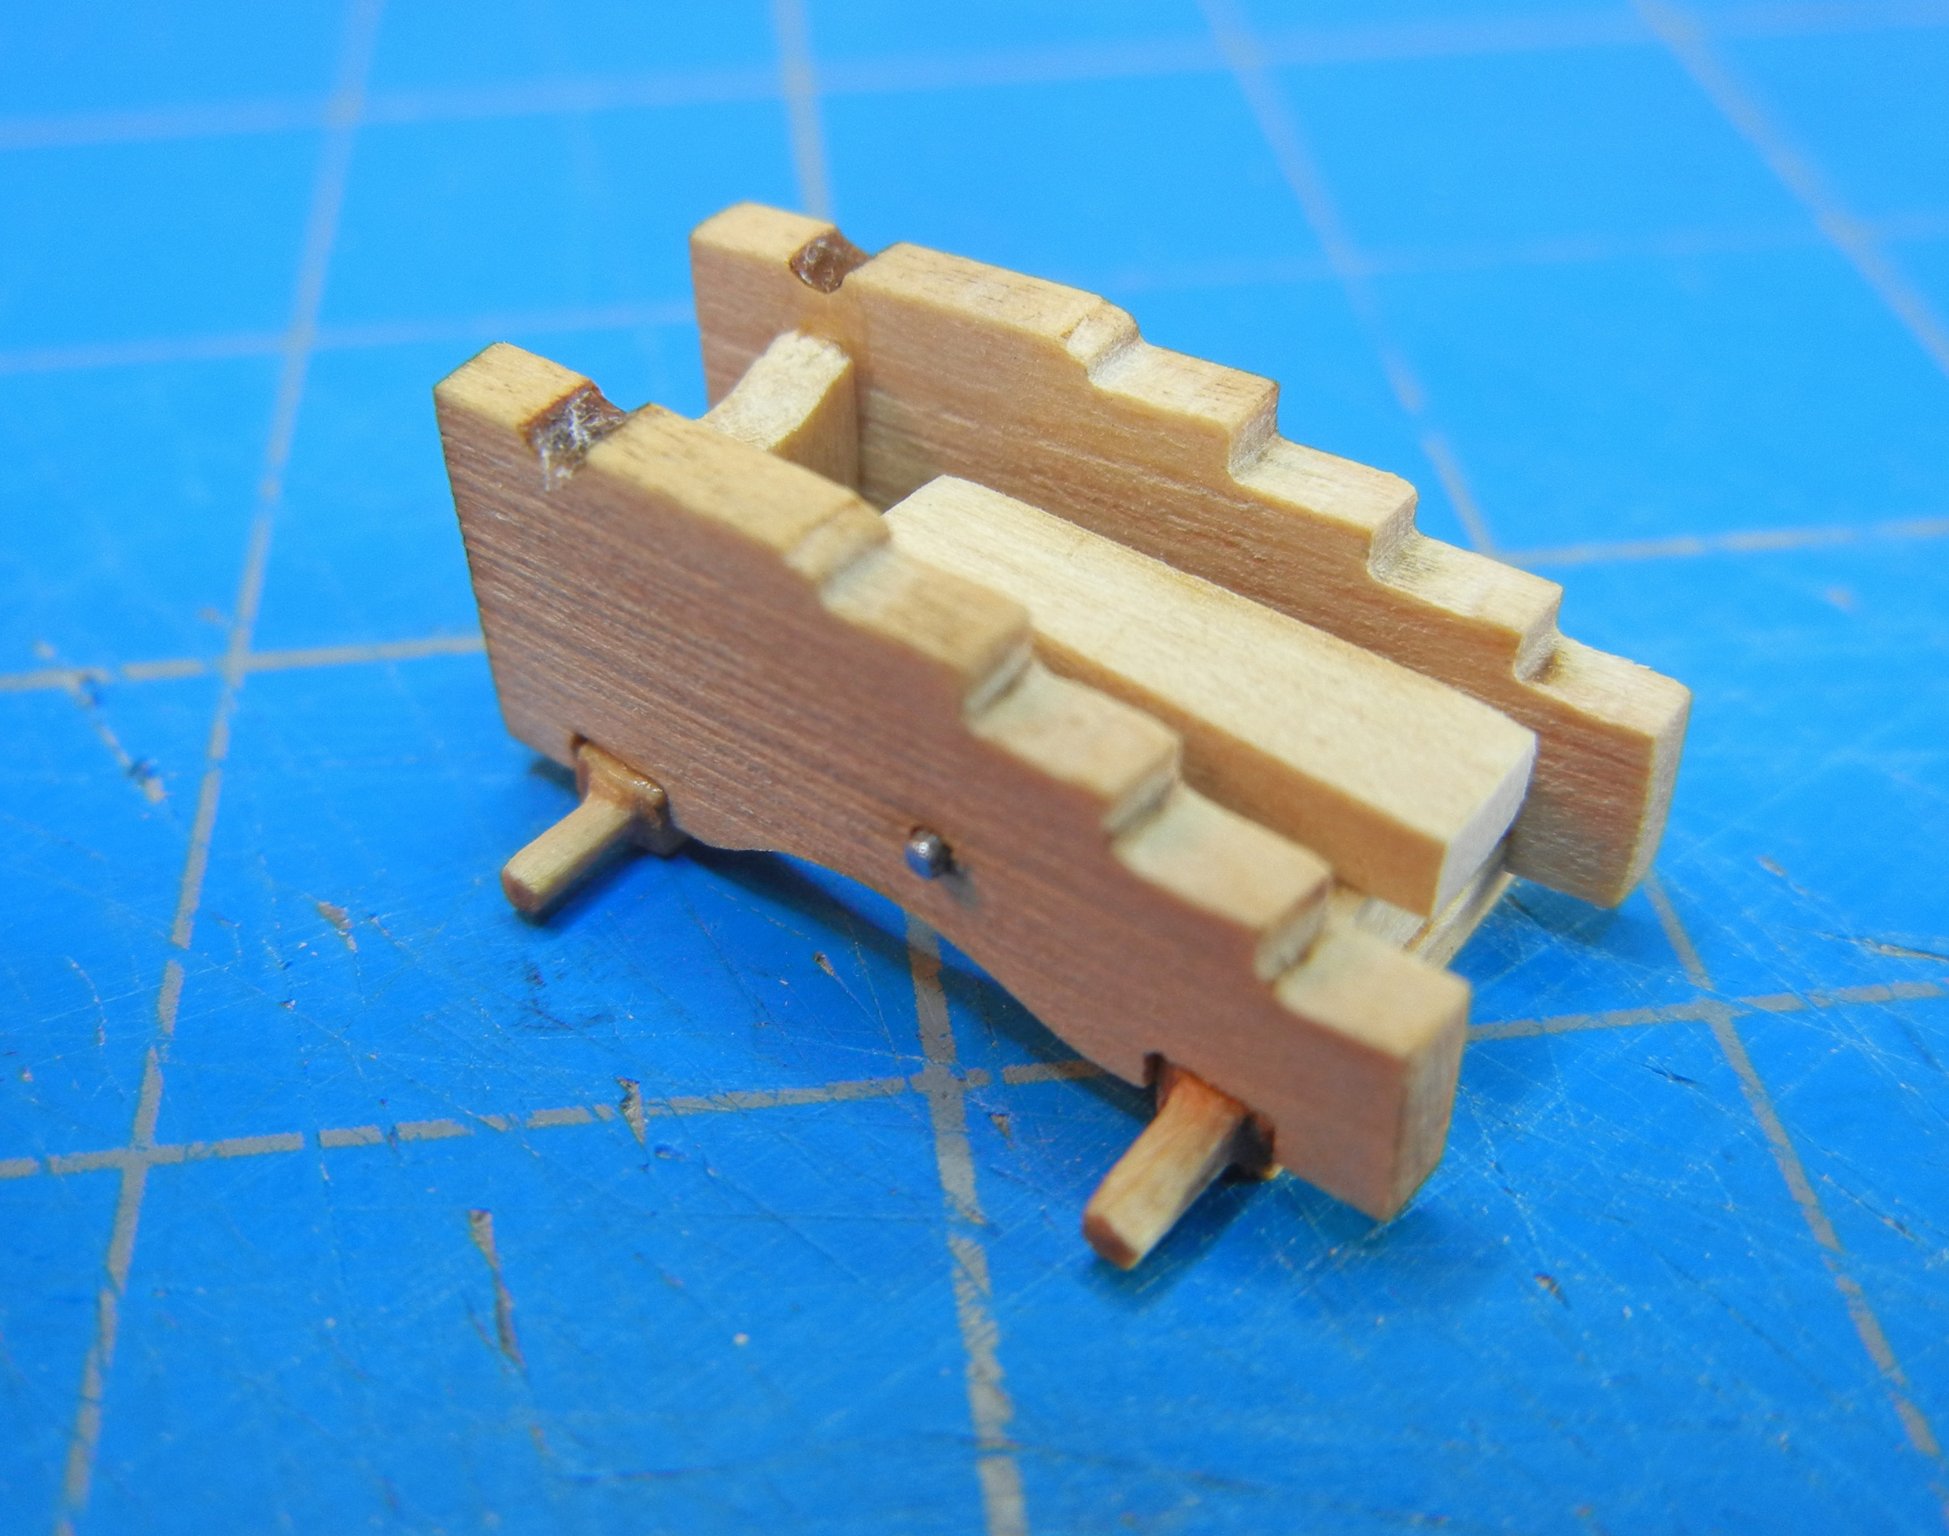
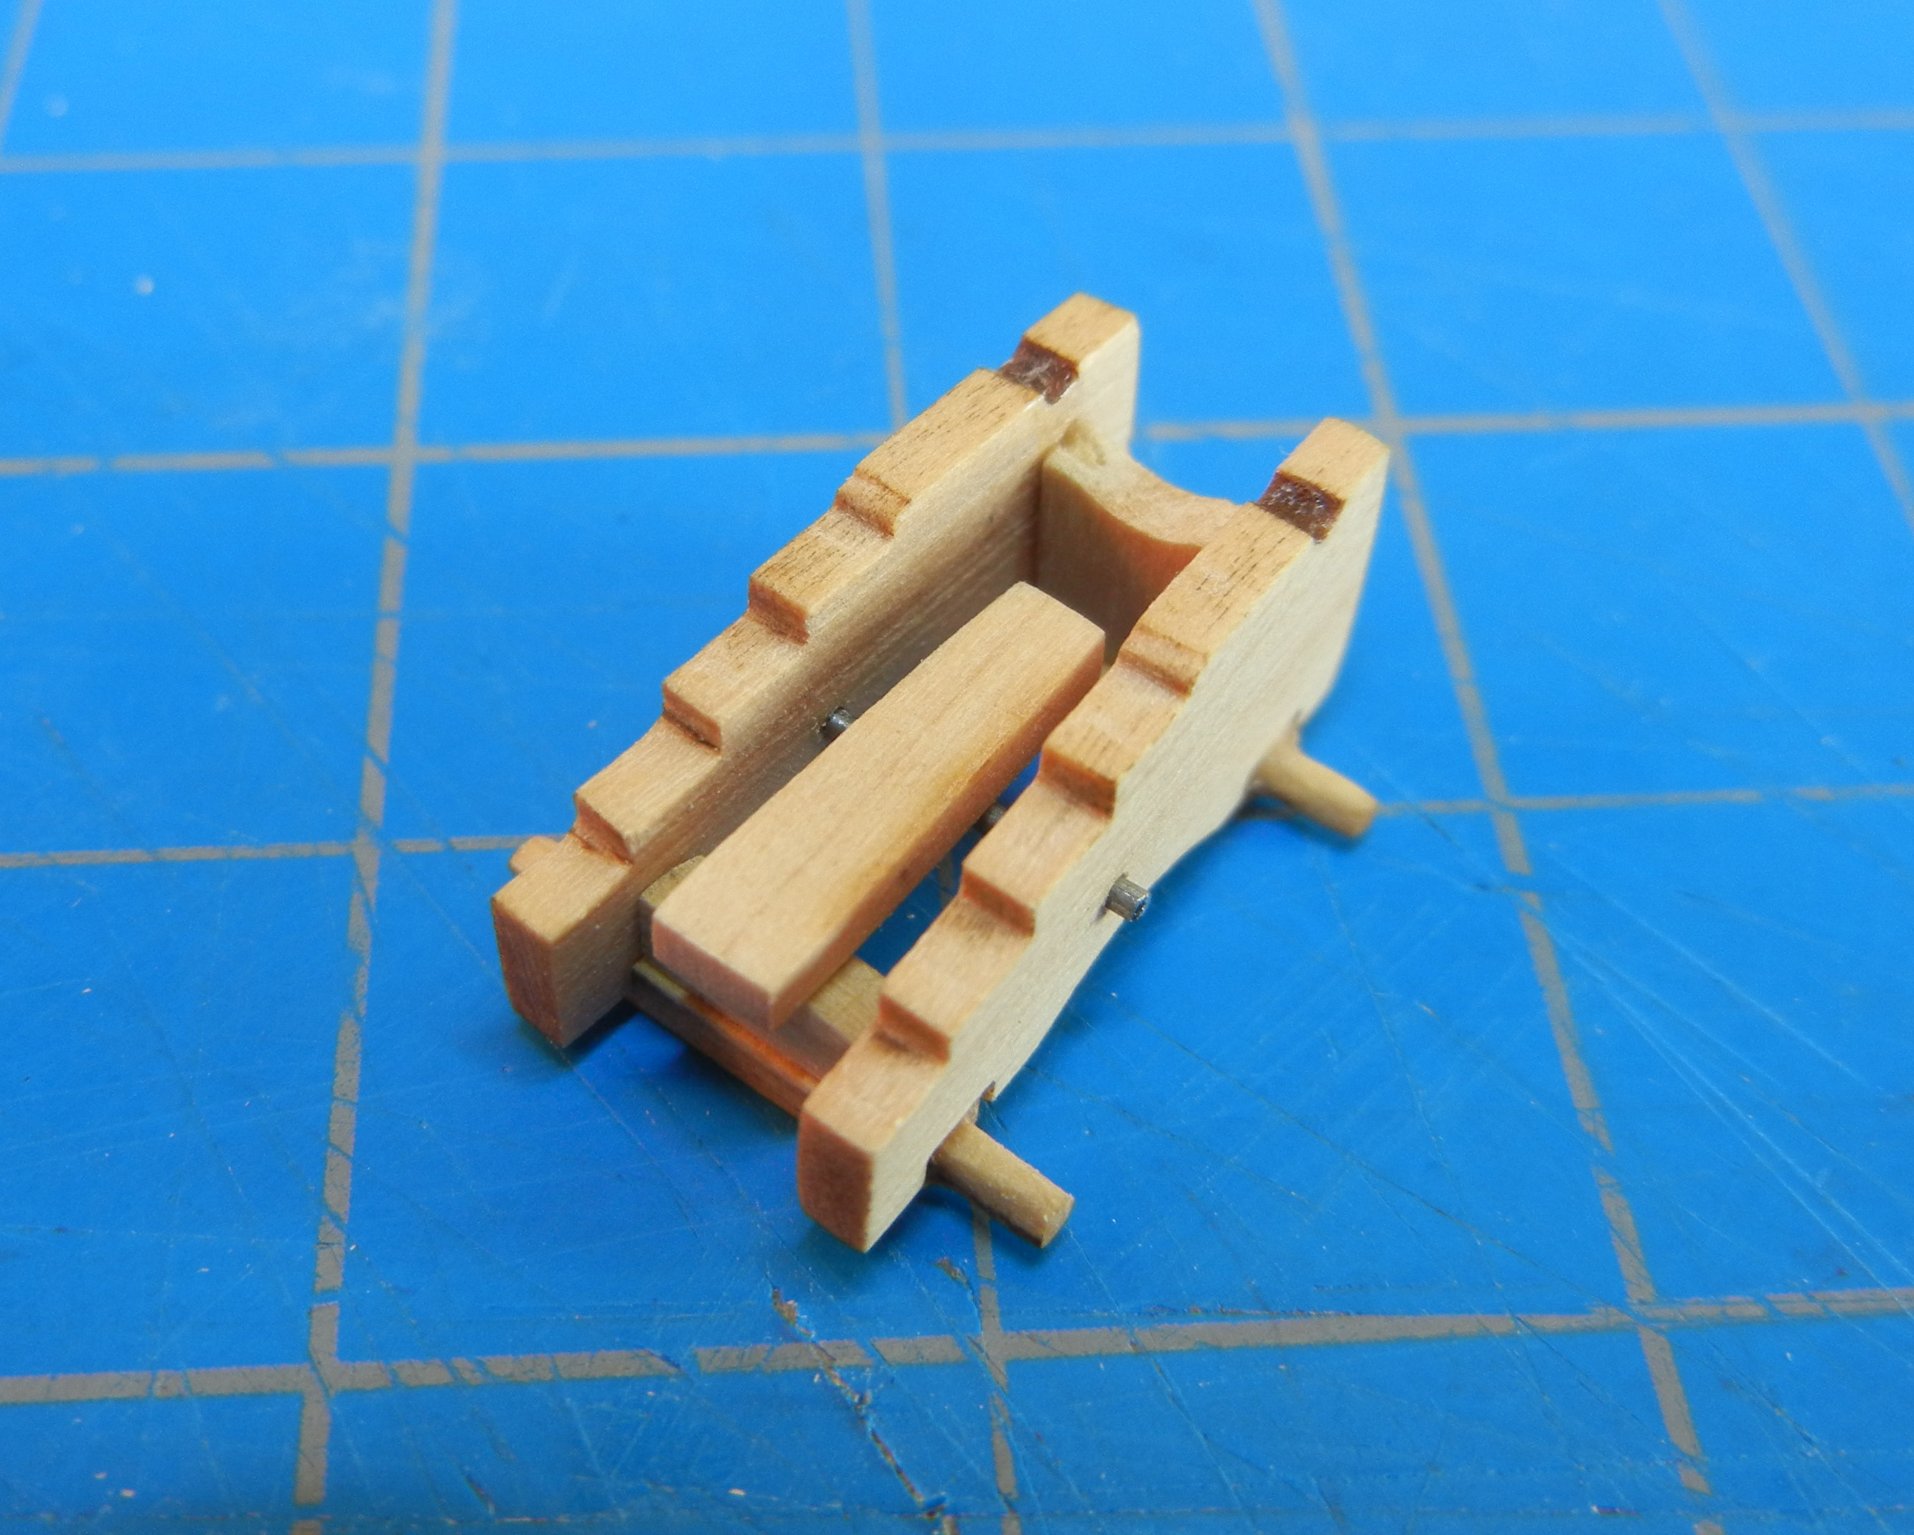
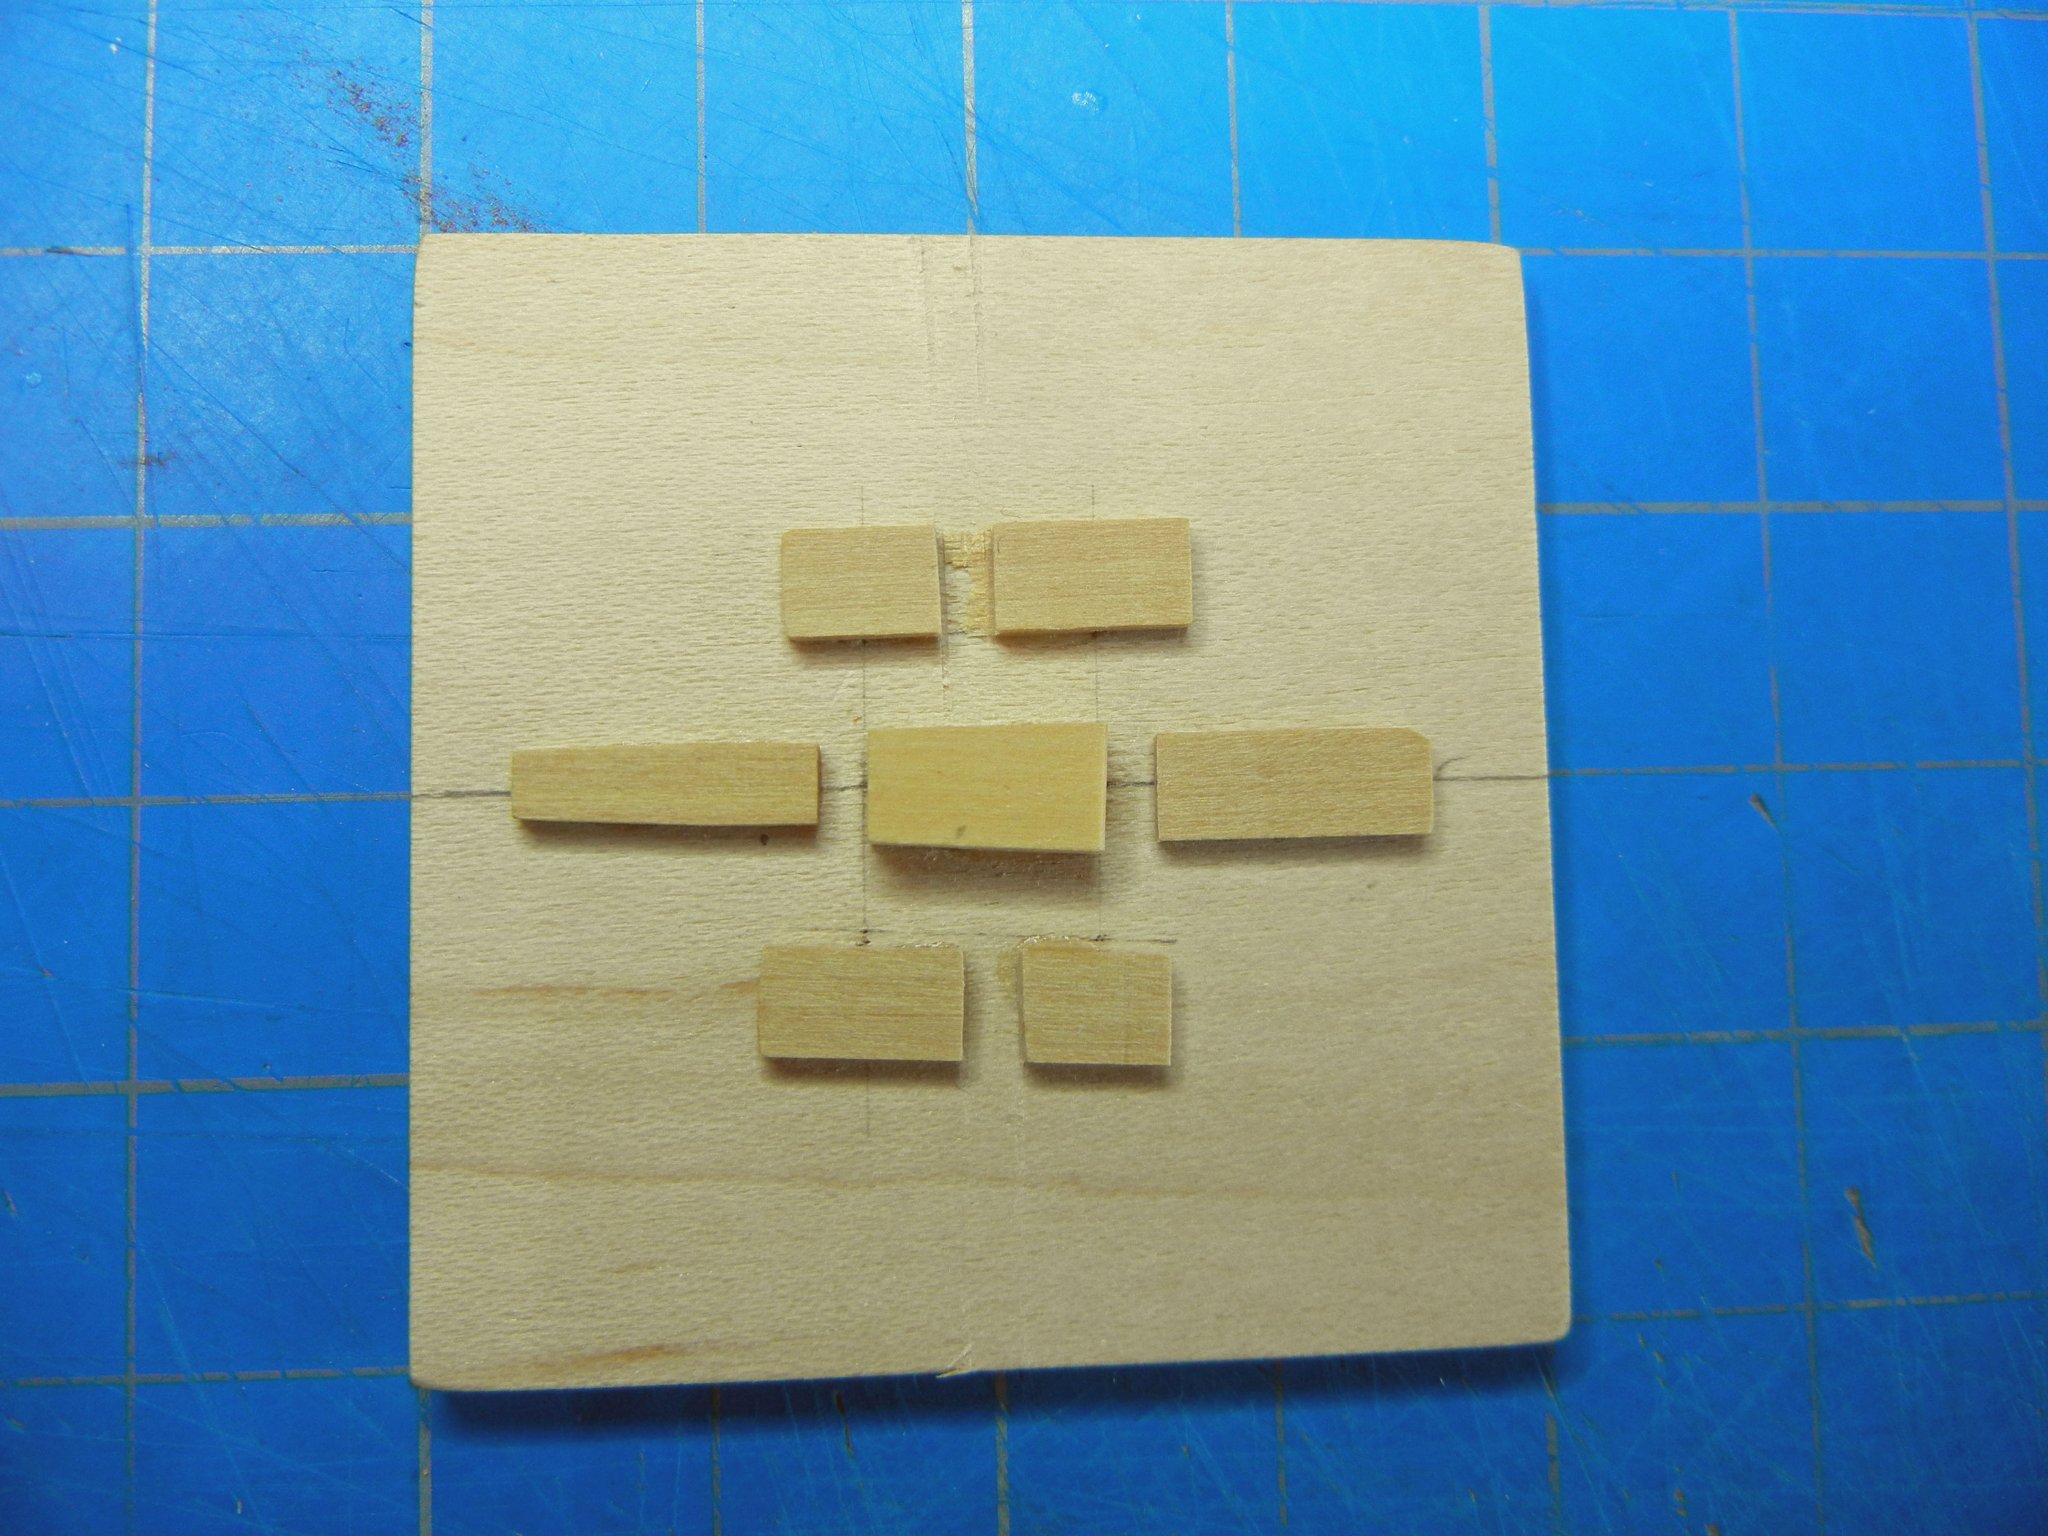
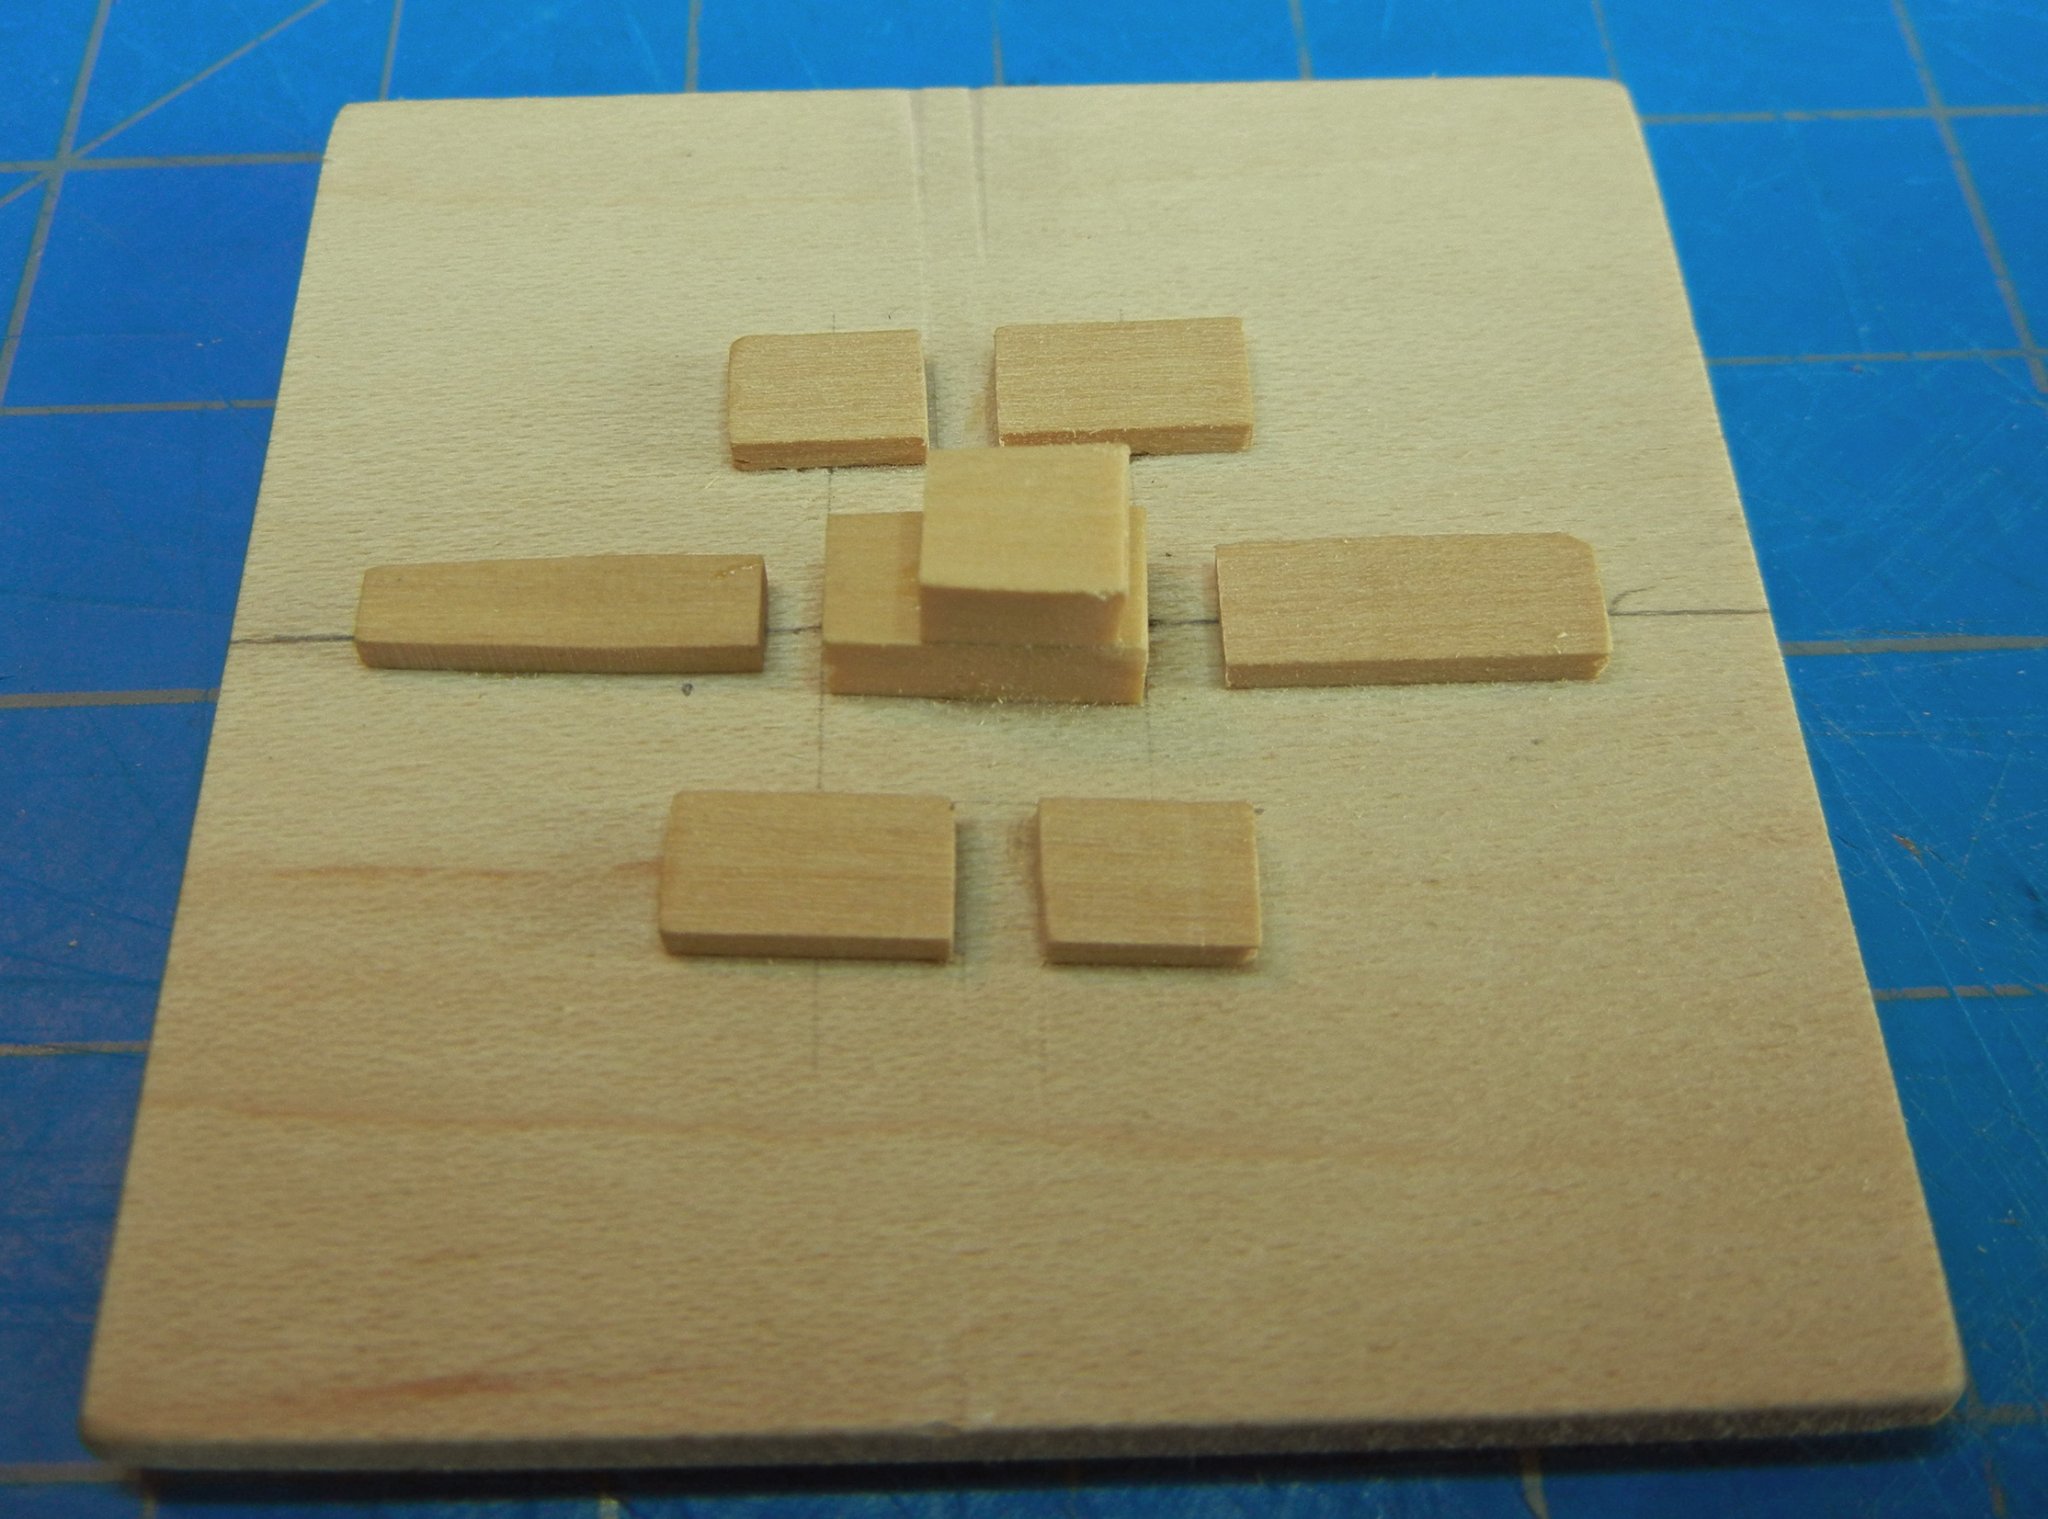
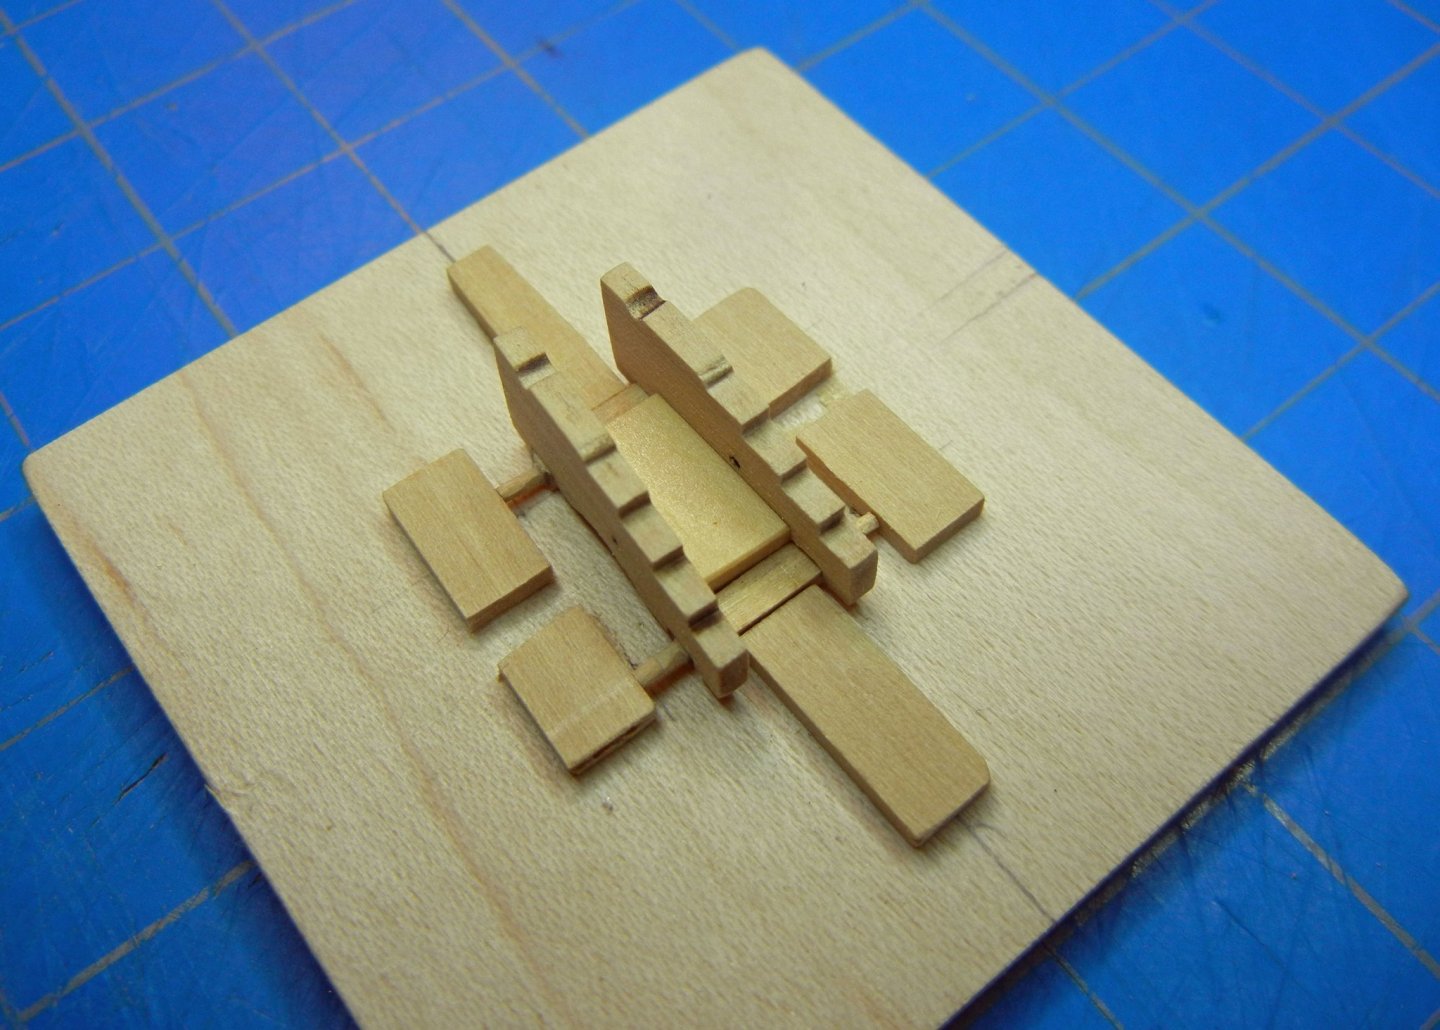
I purchased Syren canons and carriages for my Pegasus build and needed a jig to assemble consistent carriages. This article describes one method of making a carriage jig. This jig is sized for the smallest of Chuck's carriages. (Disclaimer; I considered making a jig when a club member pointed out Chuck's jig shown in his Winchelsea build log. Chuck's is similar to the one I planned.) Before building the jig, separate the sides and axles from the laser cut carriage kit and sand the laser char off from these parts. The first block is a trapezoid that sets the taper of the carriage sides (the center block in picture 1). The shape of this part is set by the width of the axles and the distance between the axles. Record the width of the lengths of the center portion of the axles as well as the distance between the axles on both sides of the carriage. In this case the front width is .19 in (4.8 mm), the back width is .22 in (5.6 mm) and the length is .40 in (10.2 mm). [The taper measured 2.25 degrees on each side, which is easily cut using a Byrnes saw taper gauge.] Block height is .125 in (3.2 mm) then raised to .25 in (6.4 mm) is better to help keep the carriage sides vertical. This block is cemented to the base along the center line. The higher block works much better than the original. Picture 1 - jig layout The front block (left block in picture 1), is also tapered to clear the carriage sides. Place this block using the front axle to ensure a close fit to prevent movement of parts when assembling the carriage. Be careful to ensure the axle is set wide side down as it is not square. The back block (right block in picture 1) is set with a small gap to the axle. This will allow the carriage sides to set the exact axle location. The side blocks (top and bottom in picture 1) are set using the axles in place to ensure symmetry (a small piece of double backed tape under the axles will prevent movement). Ensure that the axles are centered on the jig and parallel. I used one block for each side, then cut out the center of each side after gluing them in place. This allows use of a square (or short scale) to keep the carriage sides vertical when assembling. Picture 2 - partially assembled carriage in the jig. Remove the carriage from the jig before installing the front and back braces, the supporting wire and bed. Picture 3 - carriage out of the jig. Add the front and back braces (carefully trim to fit), the supporting wire and bed. Picture 4 - carriage ready for painting. Picture 5 - carriage ready for painting. Dave B