

alpayed
-
Posts
102 -
Joined
-
Last visited
Content Type
Profiles
Forums
Gallery
Events
Everything posted by alpayed
-
Planking Model Ships
alpayed replied to alpayed's topic in Planking Techniques's Planking Downloads and Tutorials and Videos
Hi Photog. I use a rope walk which I made years ago. I like to use rayon to make ropes as it does not make ropes with fuzz on them. -
Planking Model Ships
alpayed replied to alpayed's topic in Planking Techniques's Planking Downloads and Tutorials and Videos
Hi Jerry. I just downloaded it again and no problems. I am not sure what the problem is. Maybe someone else has an answer. Regards Allan -
Hi. The 3 green lines on the last photo look good for the planking. Some of these kits could do with a couple more frames at the bow and stern and a transom would help a lot. Sometimes I think that the people who design them have never built a model. Keep up the good work it will give you great pleasure despite the tears. Regards Allan
-
Just a note of interest. About 3 years ago I owned and ran a small business in Melbourne Australia. A regular customer who I had known for some 10 years came in to buy some goods. I knew he was a pilot and that he had given up flying because of his age and the authorities revoked his licence. During the discussion I asked him what was his favorite plane. I was somewhat surprised when he replied Messerschmitt 109. I had a few discussions with him after this and was in total admiration him. Imagine being taken off the streets of Berlin at the age of 15, given 2 weeks training, and sent off to war. He also flew the first Jets too. (363)? I have now lost contact with him but have good memories of his stories. Love the model by the way. Keep up the good work. Regards Allan
- 165 replies
-
- 13
-

-

-
Planking Model Ships
alpayed replied to alpayed's topic in Planking Techniques's Planking Downloads and Tutorials and Videos
A log would be nice. Usually dipping the plank in boiling water for a minute is sufficient to bend the them. The thicker plank allows you a bit more to sand off to finish the hull. Good luck I would like to see some pics as you progress. Allan. -
Planking Model Ships
alpayed replied to alpayed's topic in Planking Techniques's Planking Downloads and Tutorials and Videos
Hi Hashir. 2.5 to 3mm is a good thickness to work with. That would alter your overall width though. Maybe that doesn't matter. Allan. -
Hounds and Cheeks for Endeavour finished in 1761
alpayed replied to DaveBaxt's topic in Masting, rigging and sails
No problems Dave. Keep up the good work. Sometimes I will make something 2 or 3 times before I get 1 that I am happy with. They say practice makes perfect but that's optimistic in my case. I get better with practice and I am sure you will too. Regards Allan. -
Hounds and Cheeks for Endeavour finished in 1761
alpayed replied to DaveBaxt's topic in Masting, rigging and sails
That may not be obvious but essentially I would make the mast in 2 pieces. The round lower part and a rectangular upper part. Then dowel the 2 parts together and blend the upper part to the round lower part. The bibs then glued on. Add on the wooldings and battens. A blind man would be glad to see it as the saying goes. I have built many masts this way and almost impossible to see as a completed mast. Regards Allan. -
Hounds and Cheeks for Endeavour finished in 1761
alpayed replied to DaveBaxt's topic in Masting, rigging and sails
OK Dave. Allan' cheat way of mast making coming up. Stay tuned. Endeavour main mast_1.pdf -
Hounds and Cheeks for Endeavour finished in 1761
alpayed replied to DaveBaxt's topic in Masting, rigging and sails
OK Dave. Allan' cheat way of mast making coming up. Stay tuned. -
Hounds and Cheeks for Endeavour finished in 1761
alpayed replied to DaveBaxt's topic in Masting, rigging and sails
Thanks Dave. The rule of thumb is that the mizen cap should be level with the main top, not the top of the main mast. But yes that is where I would be heading.. Allan -
Hounds and Cheeks for Endeavour finished in 1761
alpayed replied to DaveBaxt's topic in Masting, rigging and sails
Here you go Dave. This may help. Built from 3 pieces. The spindle is 1 piece with a cheek added to each side. The foremast would be the same just proportionally smaller (x.94) according to the Woolwich dimensions. The short mizen mast is a whole new discussion. Personally I agree with Karl's argument that the Woolwich mizen length is an error. The woolwich dimension is 604" (easy to work in inches) which is 0.726 x main mast. Lees says x.86 and Steel x.85 although he lists x.75 for a sloop. There is a lot of discussion on this point. Regards AllanEndeavour main mast.pd -
Hounds and Cheeks for Endeavour finished in 1761
alpayed replied to DaveBaxt's topic in Masting, rigging and sails
Hi Dave. Hang on a bit while i draw this mast. What scale is your model? I will draw a mast as I would make it for a model. BTW the trestle trees have the recess in them not the mast. Regards Allan
-
Hounds and Cheeks for Endeavour finished in 1761
alpayed replied to DaveBaxt's topic in Masting, rigging and sails
Hi Dave. Yes in essence that gobble gook means the tops are level. Not 90 deg to the mast. I have to read and re read this stuff because I too have have difficulty understanding that queen's English, even though it is the only language I speak. There are so many terms used then that are now not easy to comprehend. That paragraph is the bit about the trestle trees being let in to the mast. I started to draw Endeavour's main mast but it got late and I gave up. I will finish tomorrow and post it. Regards Allan. -
Hounds and Cheeks for Endeavour finished in 1761
alpayed replied to DaveBaxt's topic in Masting, rigging and sails
Hi Dave A lot of these details are embedded in the fine print. As Investigator is smack bang in the time of Steel's Masting and rigging (1794) his work is most valuable. However it has errors in it as well. I have the "Foyle" copy and interesting how often the "C" word is used. All of the modern copies have bee sanitized. IE cut splice. Hope I didn't offend anybody with that. By the way the cheeks on Endeavour's masts would have been half the distance from the stops to partners not two thirds as in my drawing. (Investigator). There were quite a few changes in things between the two vessels despite being similar colliers. IMHO using Karl's ATOS book is the safest route. But then I am biased Ha Ha. Here is part of what he says about fitting the tresstle trees. https://maritime.org/doc/steel/part1.htm#pg24 The foremast ends are to drop as much below a square with the middle-line on the mast as the mast is designed to rake aft in the length, that they may be level when the mast is in its place. In this position they are made to bed firm on the stops, being square athwart from the middle-line. One inch and an eighth of the trees-trees to be set into the mast, and marked with compasses on the underside of the chock, and lowerside of the mast from their insides; and from the sides of the mast on the undersides of the trestle-trees. Then race by the upperside of the chock and underside of the mast upon the insides of the trees-trees, and the uppersides of the trees-trees down the sides of the mast. The trees-trees are then lowered down, and one inch set down from the upperside of the mast at the middle of the chock on each side, and one inch and a half at the upperside of the trestle-trees, and that wood taken away to the race upon the upper and fore side of the chock, then set up one inch and a half from the underside of the mast at the stop, and one inch at the upperside of the trestle-tree; strike a line, and cut away the wood square to the race underneath. The same is set off on the insides of the trestle-trees, and the intermediate wood cut away to the depth of the race on the upperside, so that what it is faced in on the mast remains on the trestle-trees. The trestle-trees are then got into their places, set close, and bolted to the mast-head, with three bolts, one inch to one inch and a quarter diameter, one through the underside next the stop, one through the upperside next the upperside of the trestle-tree, and one through the middle of the chock; the holes to be bored through three times their diameter from the edge. The bolts in the trestle-trees are driven from contrary sides, and are clenched on a ring. It is best not to bolt trestle-trees but when the mast is for present use. Regards Allan -
Hounds and Cheeks for Endeavour finished in 1761
alpayed replied to DaveBaxt's topic in Masting, rigging and sails
Hi Dave. This may help. Here is my reconstruction of Investigators masts and yards. A bit later than Endeavour but the cheeks/bibs were similar. Endeavour would not have had the front fish. Note also that the trestle trees were set into the mast head by about 1". that is the trestle tree had a groove cut in it to fit around the mast head. this is usually ignored in models. The drawing shows a made up mast. The cheeks were attached (coaked) onto the spindle along with the side fishes. The sheaves (for braces) in the topmast tressle trees were unique to a short period after Endeavour so don't copy those. Regards Allan Investigator_masting.pdf -
Hi Tony. It's a long explanation but the shape of the hull is essentially derived from the stations. amidships and fore and aft are constructed from a few basics, floor harpin, breadth sweeps, floor sweeps, etc. Both the waterlines and buttock lines are a method of controlling the hull form largely at the bow and stern. There are no formulas or graphical means (like controlled sweeps) to develop these areas. They were largely at the whim of the designer. There is more than enough data above to reconstruct the hull form above. The waterlines and buttock lies can be extracted from the stations given. the bow and stern shape can be derived also. The buttock lines are shown beyond station 10 which is where they are most useful. in developing the waterlines and buttock lines they are played off against each other until the hull form is fair. In the construction of the lines below I also used what I refer to as control lines. these are developed somewhat at right angles to the waterlines. The hull form is plotted into this view and the shape smoothed out. The points then projected back into the body plan and sheer plan and the waterline/buttock adjusted as required. See also the pdf on understanding ships draughts. understanding ships draughts.pdf This playing off of the lines is repeated many times until the hull form is properly faired. The mid body is well controlled by the floor harpin, breadth sweeps, floor sweeps,rising line of the floors. Regards Allan
.thumb.png.a6f3483b19f4ffb891067babf2f32342.png)
-
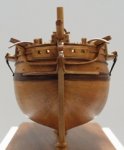
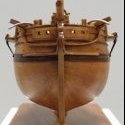
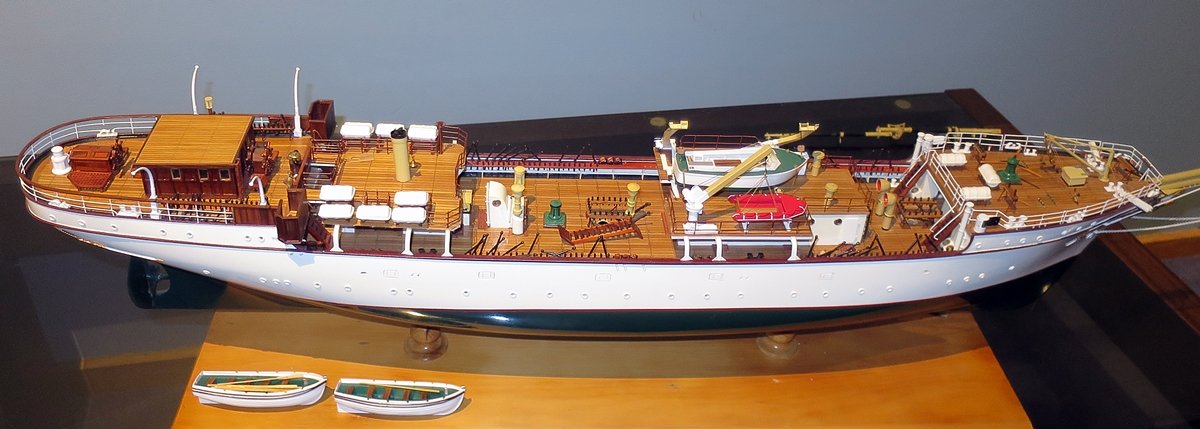
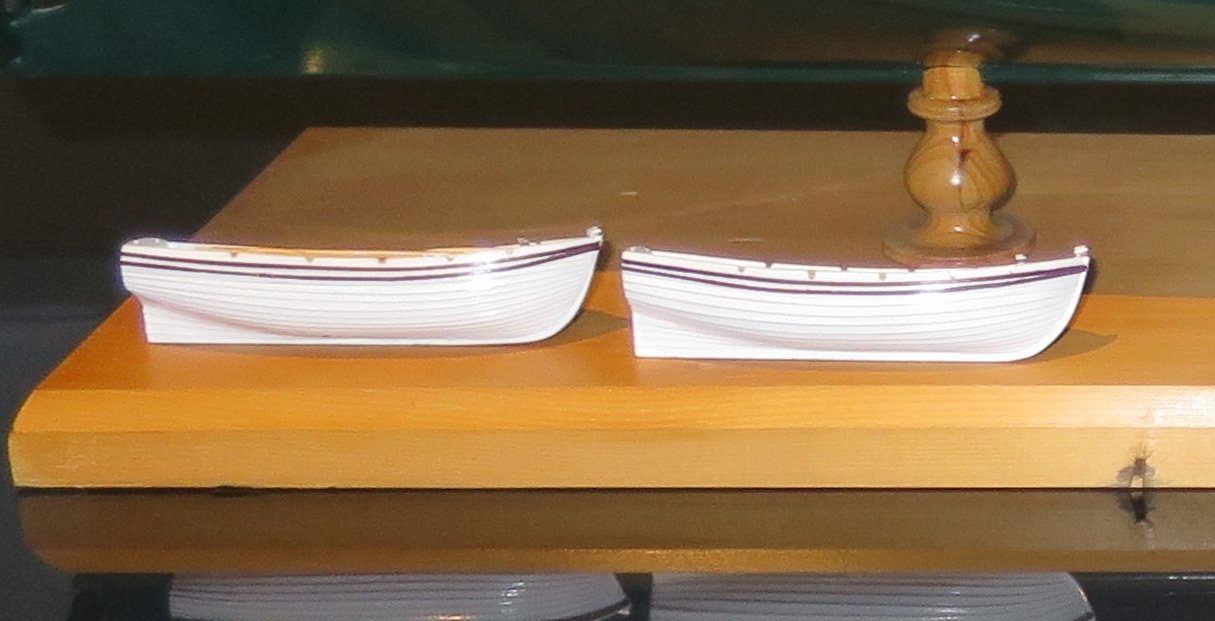
Hi Guys. A couple of pics (before my attempts at defying gravity) Much better now. I will be starting the rigging soon. When I get bored drawing Investigator plans.

-
Planking Model Ships
alpayed replied to alpayed's topic in Planking Techniques's Planking Downloads and Tutorials and Videos
Hi Guys. Here is the revised booklet with Fig 1 included. Regards Allan -
Planking Model Ships
alpayed replied to alpayed's topic in Planking Techniques's Planking Downloads and Tutorials and Videos
Hi bud. You are correct. Fig 1 is missing. I will fix it an upload a revised version. Stay tuned. Thanks for pointing it out. Kind regards Allan. -
Thanks guys
-
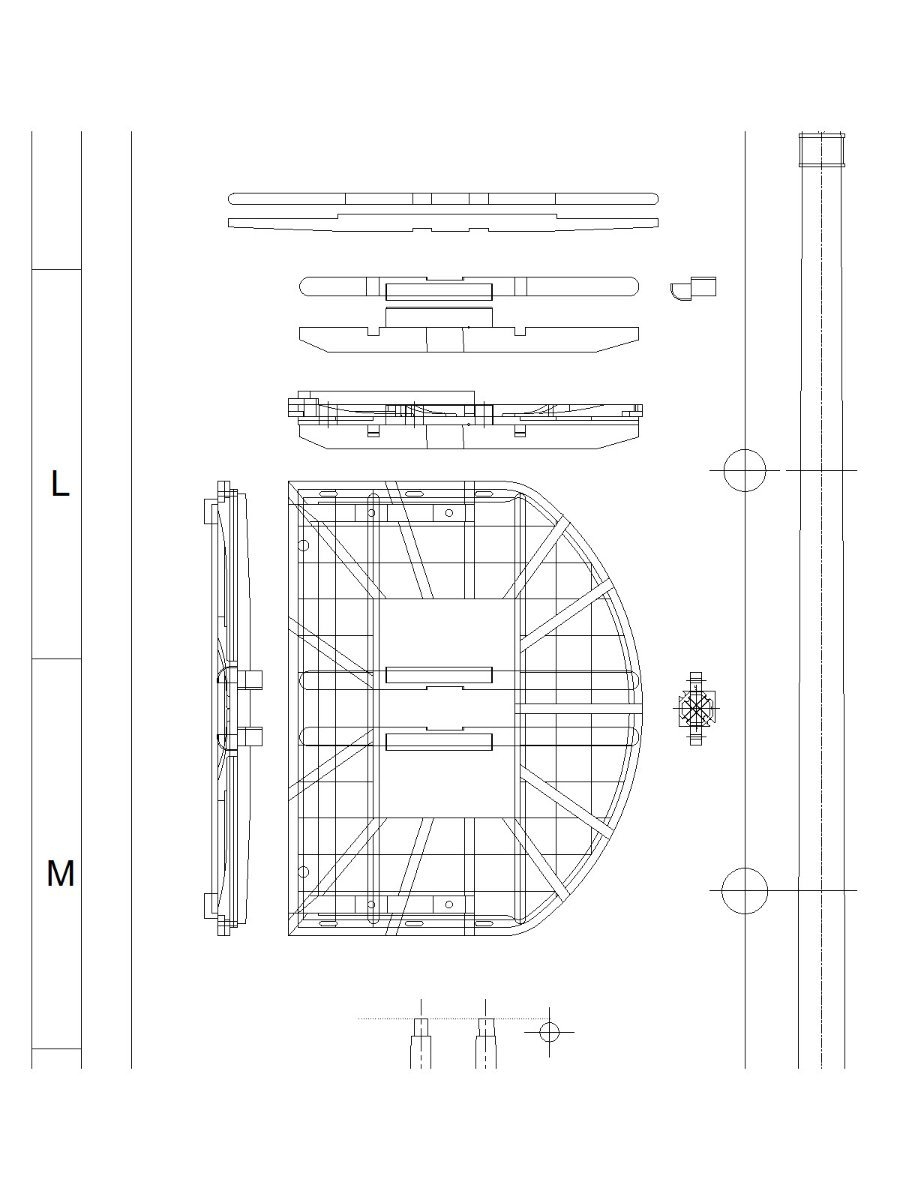
Hi everyone. Not much model making ATM. Got over some health issues and then fell off the roof, broke my arm and fractured my back in 7 places. So it's left hand computer work for a while. This is what I have been doing. A set of rigging plans for Danmark. I got distracted into HMS Investigator. It is a drawing from first principles as very little is known about her dimensionally. Some other reconstructions are around but I have some short comings about them.
.png.cad17dfe776fa06e4bcba45104ca6d13.png)
.png.63c1b1e00ae5f5e5799080ab9e7d440c.png)
.png.b9c446b8d3b11516979cd659e5f4e7a3.png)
.png.071bdd4217d5167e49cb33e2ab2d89a3.png)
-
I can only thickness up to 25mm. So 4 pcs 25 x 260 x 1 each colour. I am south of you. Could post them. Regards Allan
-
Huon pine and close grain cedar. How wide do you need the planks. Regards Allan
-
Planking Model Ships
alpayed replied to alpayed's topic in Planking Techniques's Planking Downloads and Tutorials and Videos
Hi Vic. That looks like a nice kit. Keep us posted with the build. Regards Allan

.png.bf3574bf567502bcdcd4fd2d83cae3bb.png)