.jpg.1f80adf1a9b14a937cfcf2ca6af0f0d4.jpg)
WalrusGuy
-
Posts
1,009 -
Joined
-
Last visited
Content Type
Profiles
Forums
Gallery
Events
Everything posted by WalrusGuy
-
.thumb.jpg.62d1d69fed1f32364417cb1f9cdeb009.jpg) Thanks all for the warm welcome backs Thanks, Werner. I never realised this until you pointed it out! I started searching if this was intentional and found this plan on the RMG website where the ladders have the same orientation: https://www.rmg.co.uk/collections/objects/rmgc-object-82329 Maybe there’s a reason it comes upwards towards the grating? Hi Kenny, the 3D printed parts look really good! There’s so much detail in them. That’s another option to consider. Harshil
Thanks all for the warm welcome backs Thanks, Werner. I never realised this until you pointed it out! I started searching if this was intentional and found this plan on the RMG website where the ladders have the same orientation: https://www.rmg.co.uk/collections/objects/rmgc-object-82329 Maybe there’s a reason it comes upwards towards the grating? Hi Kenny, the 3D printed parts look really good! There’s so much detail in them. That’s another option to consider. Harshil -
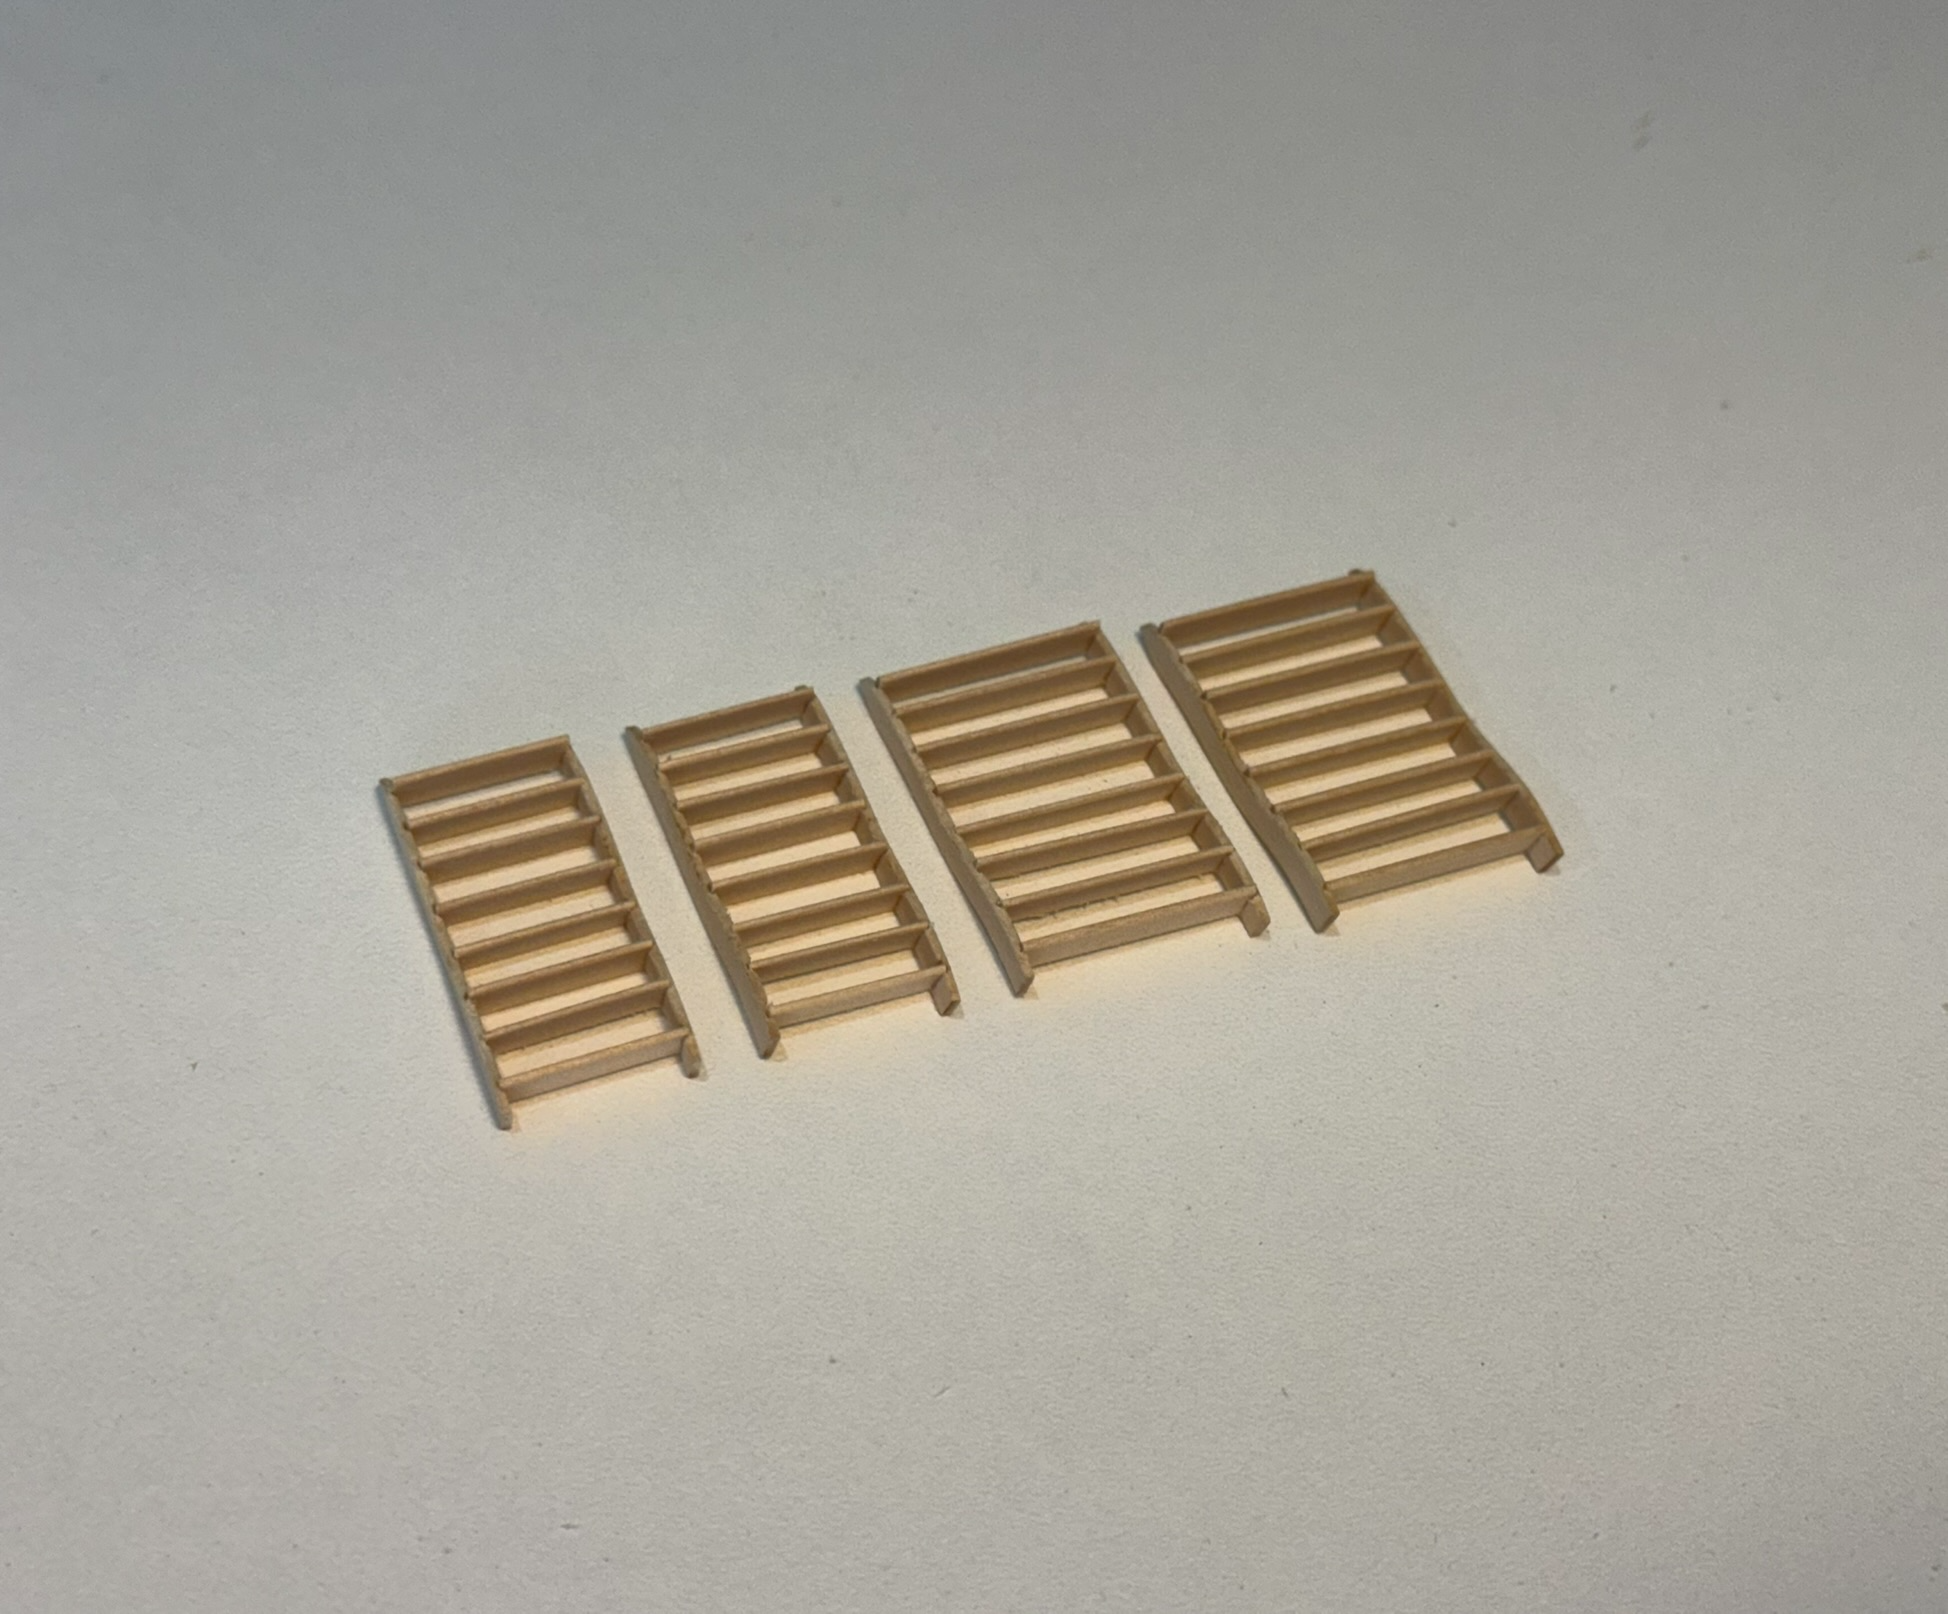
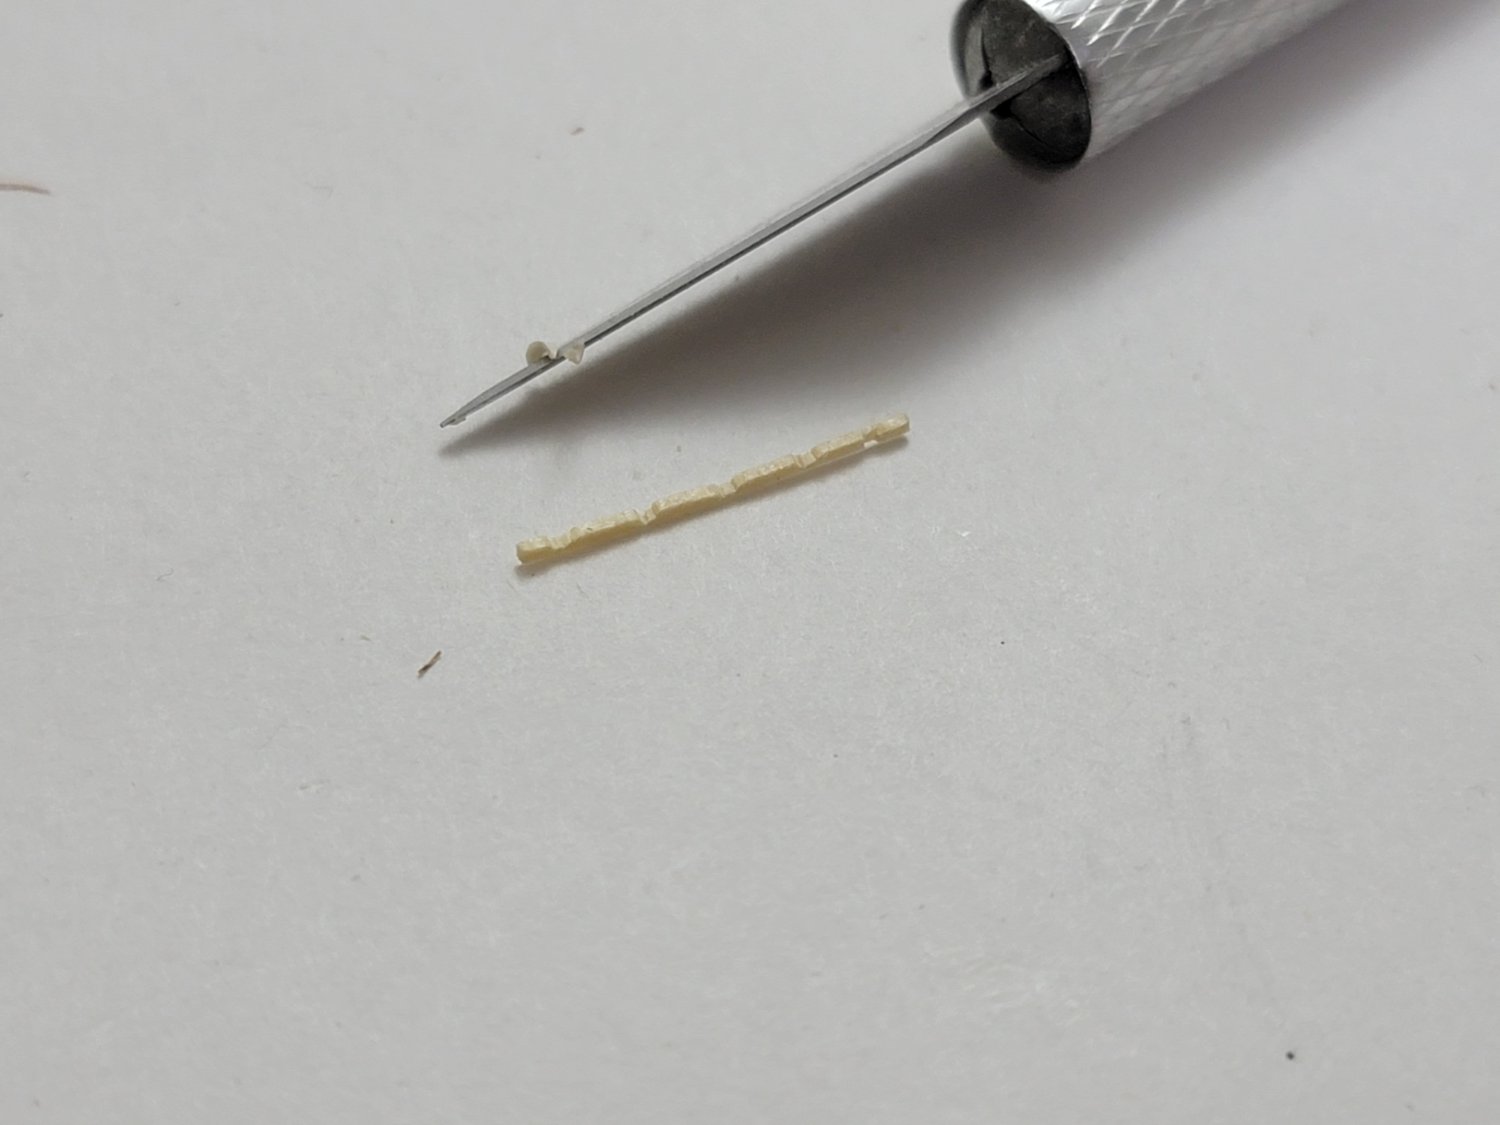
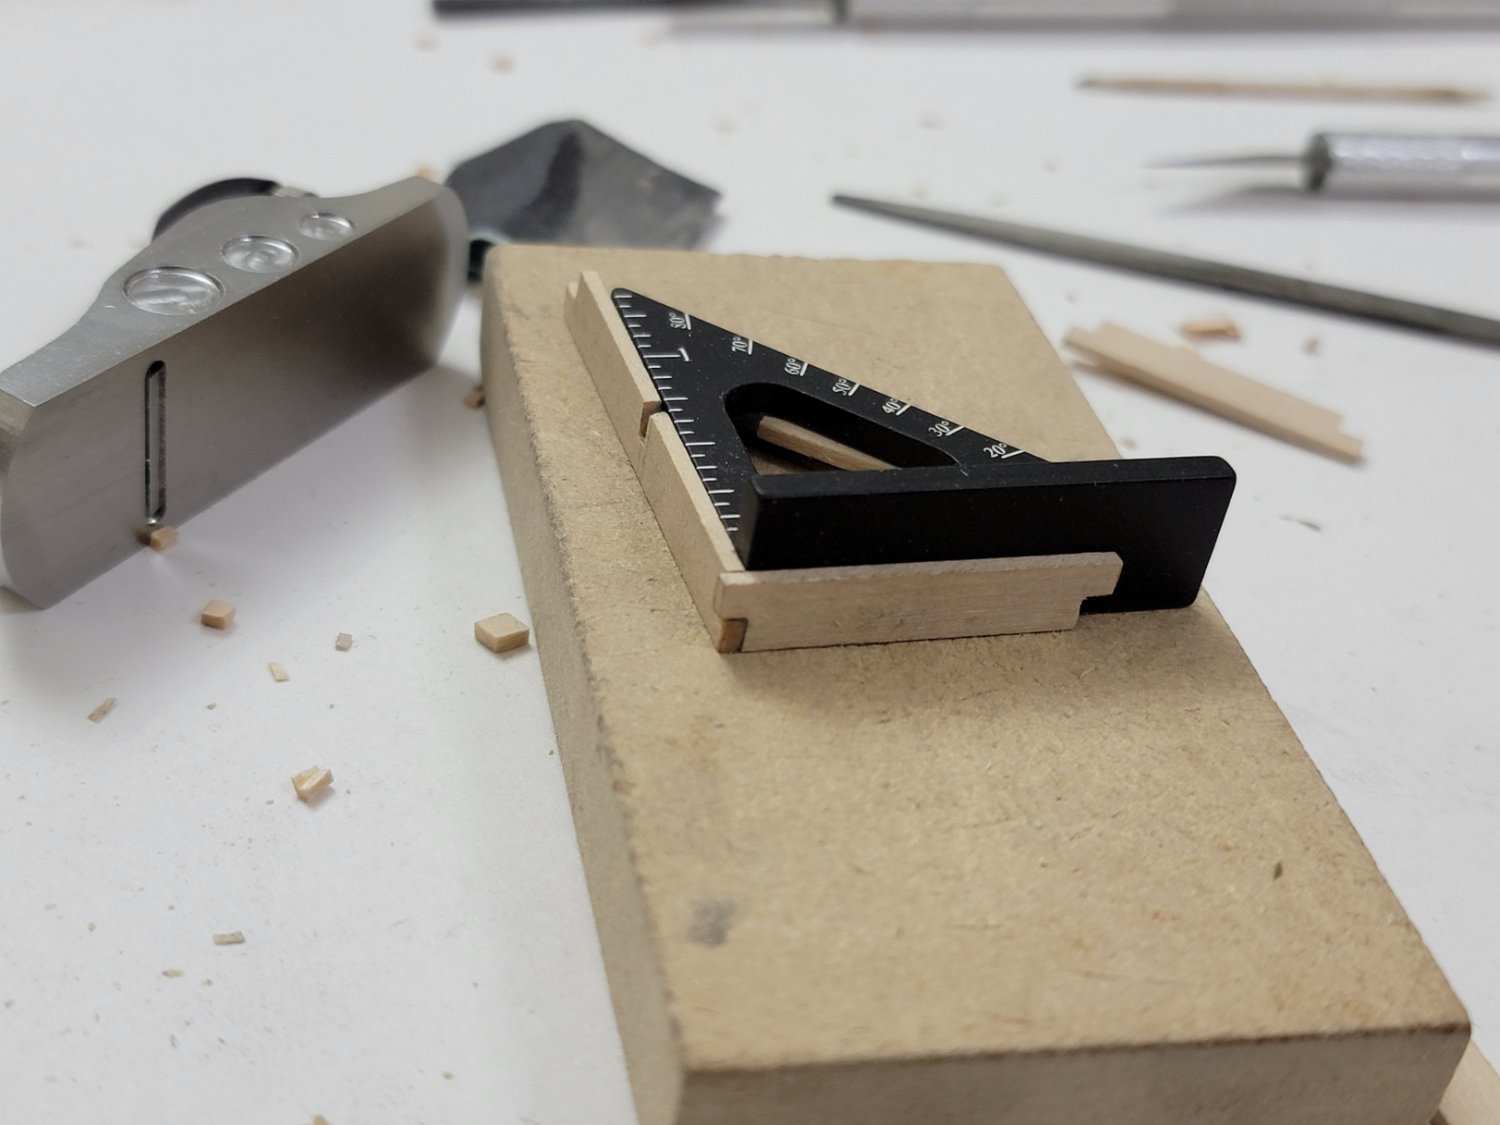
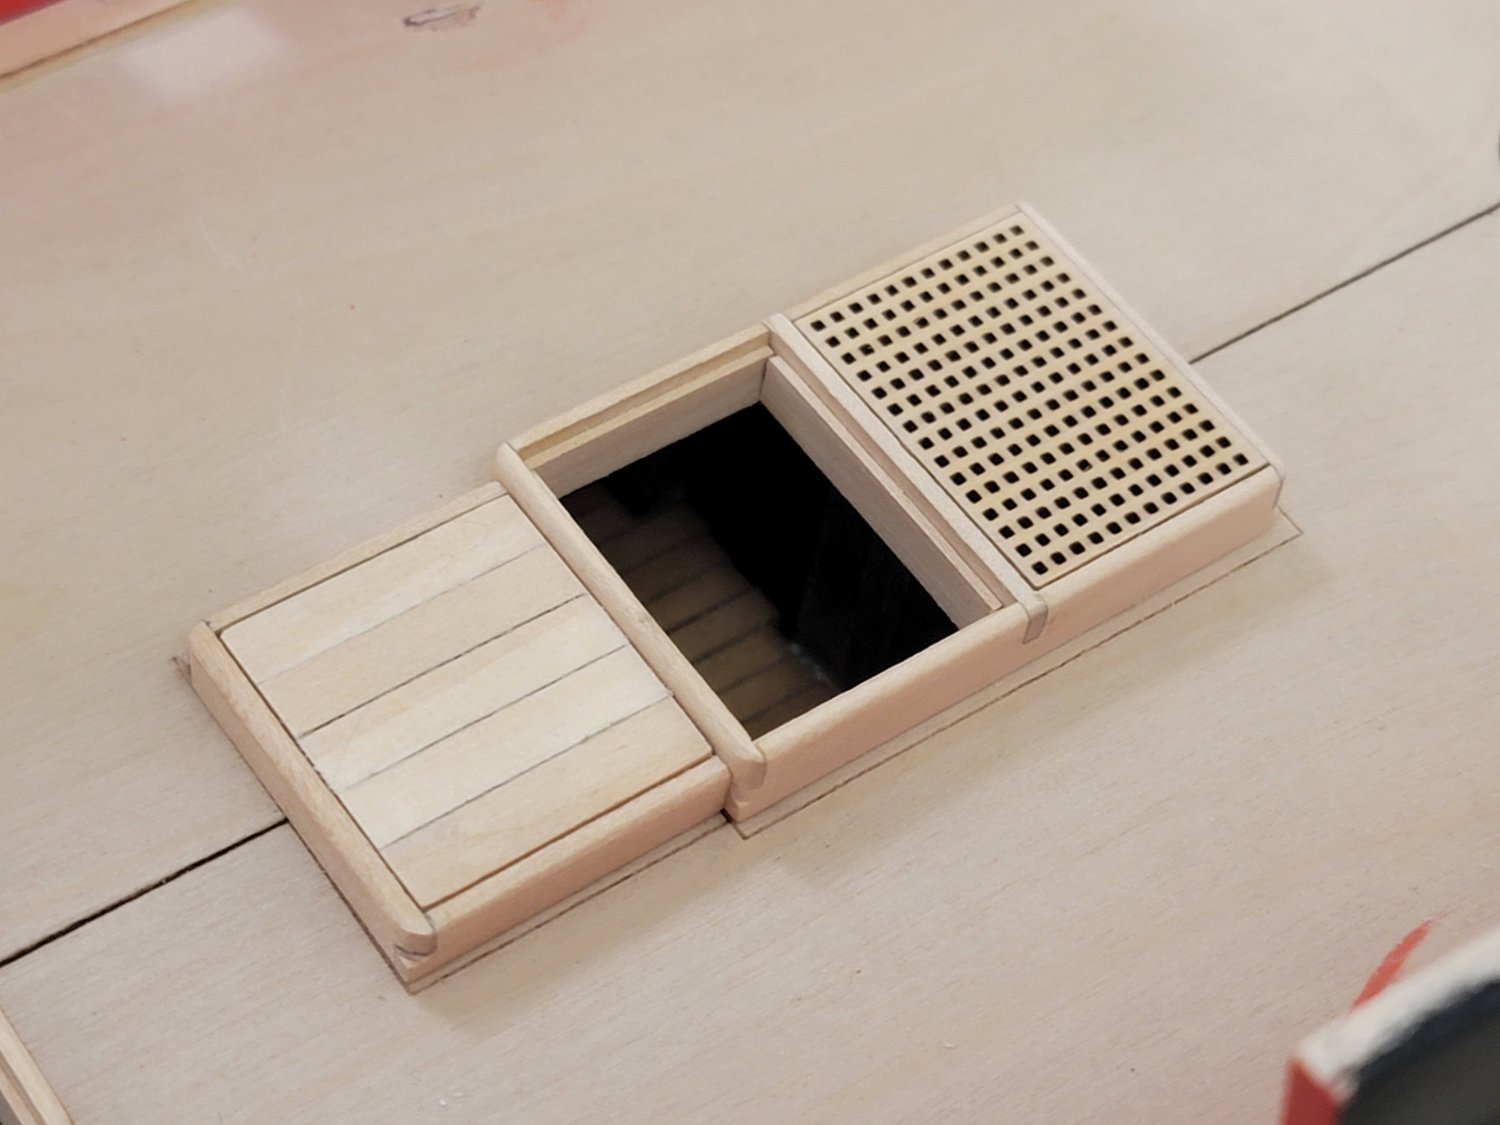
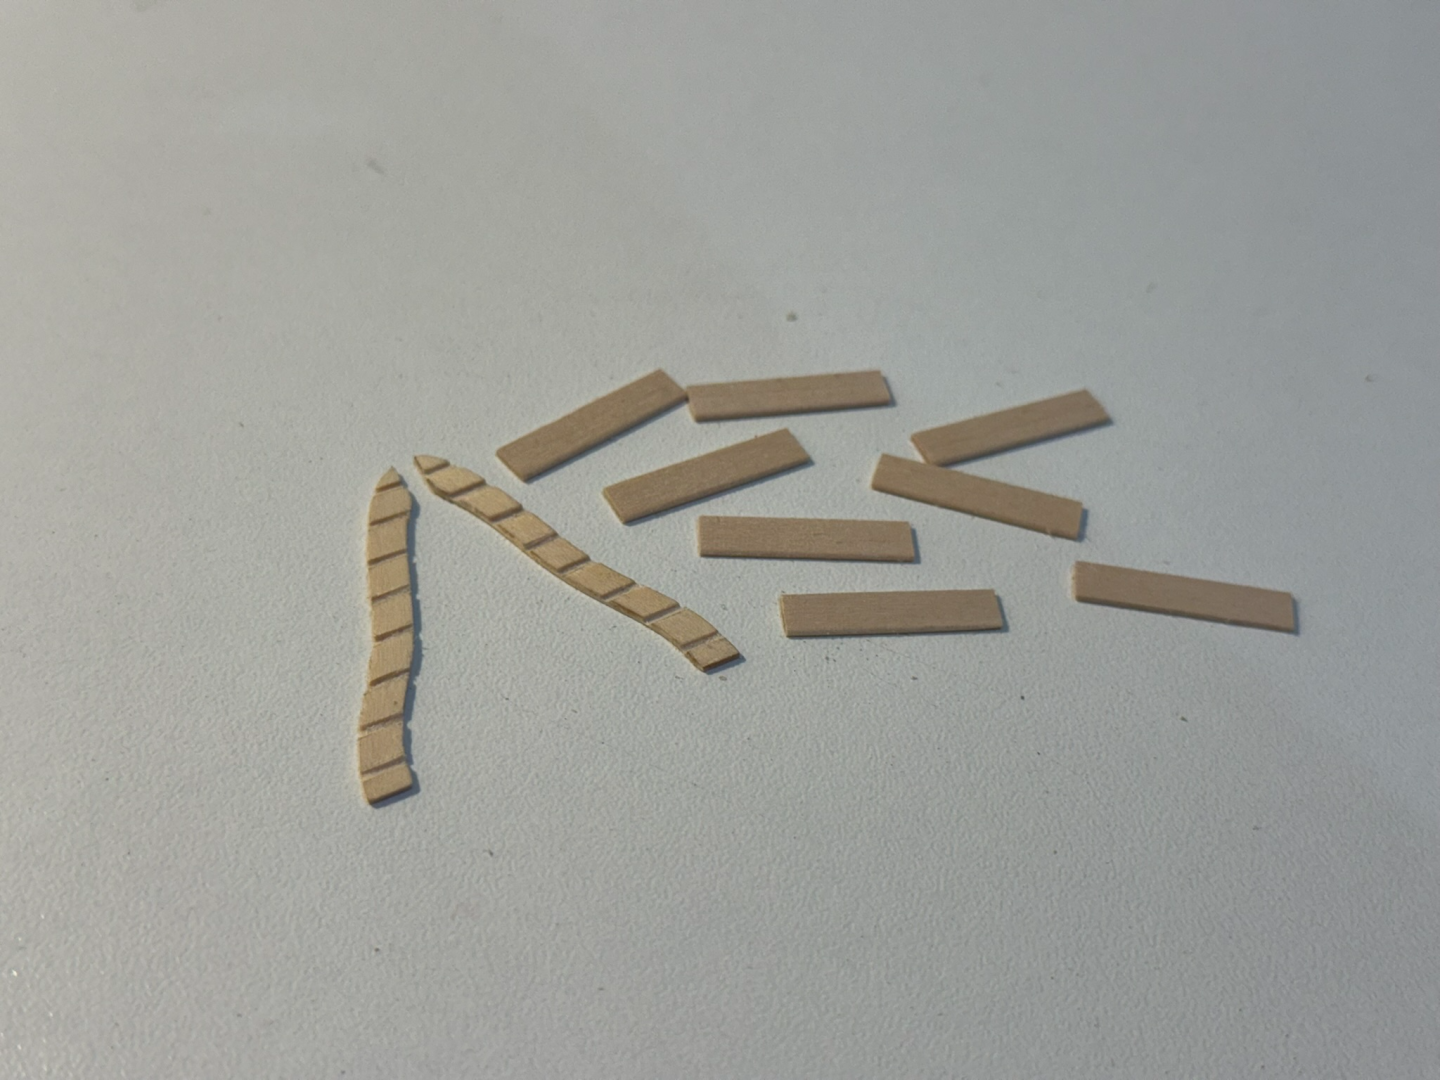
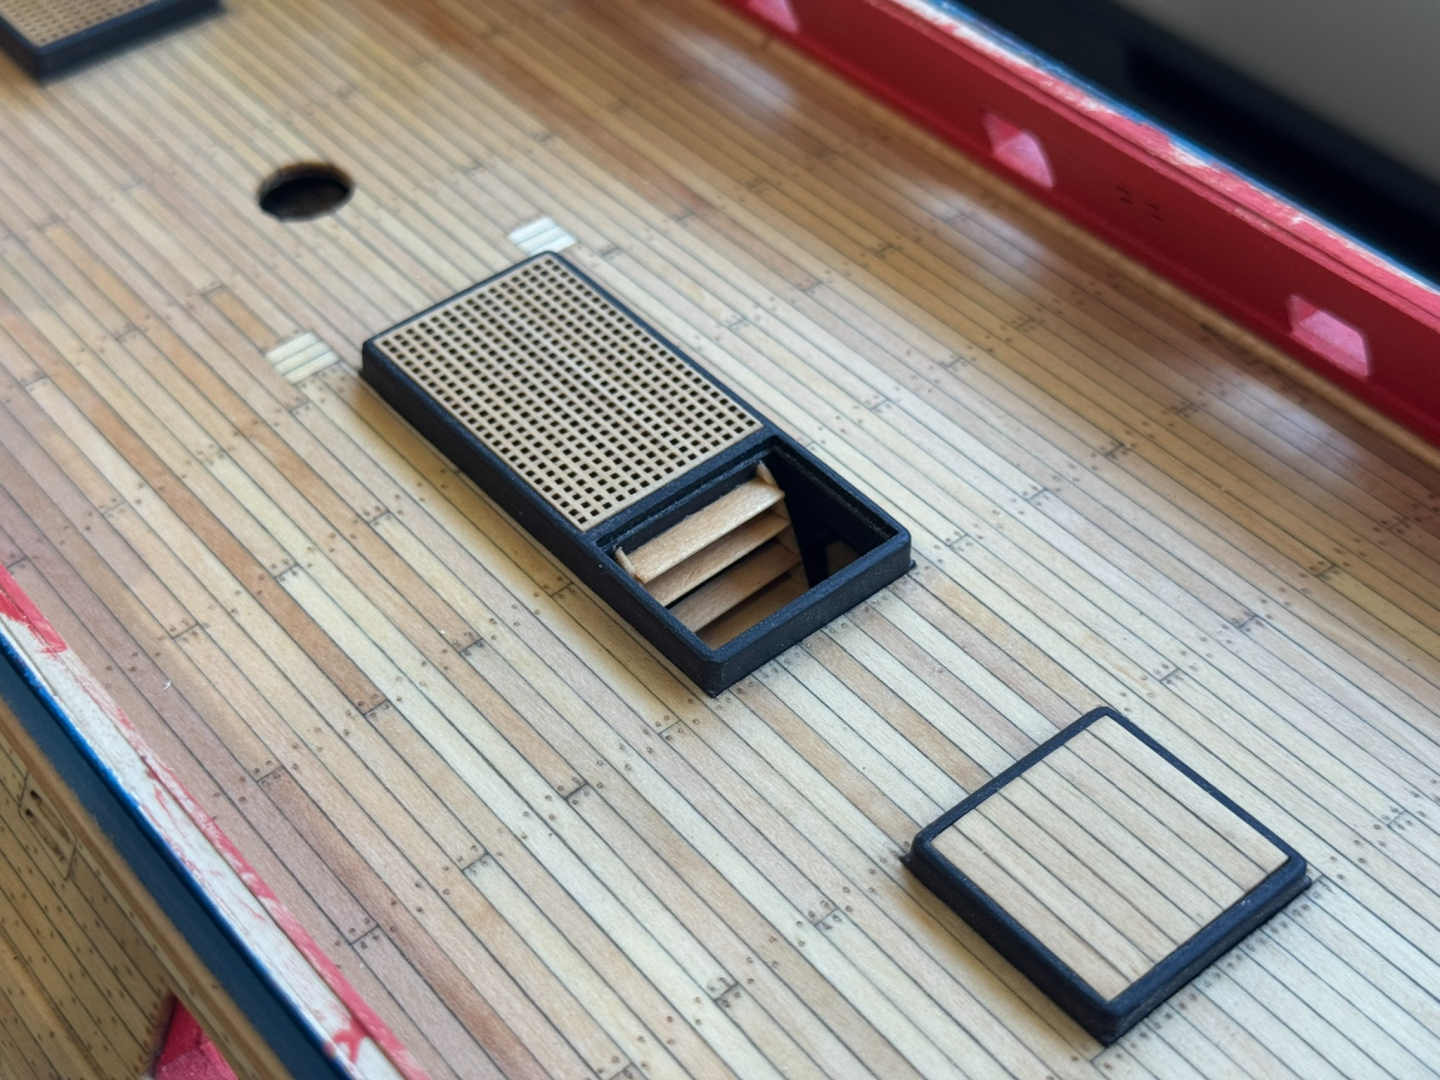
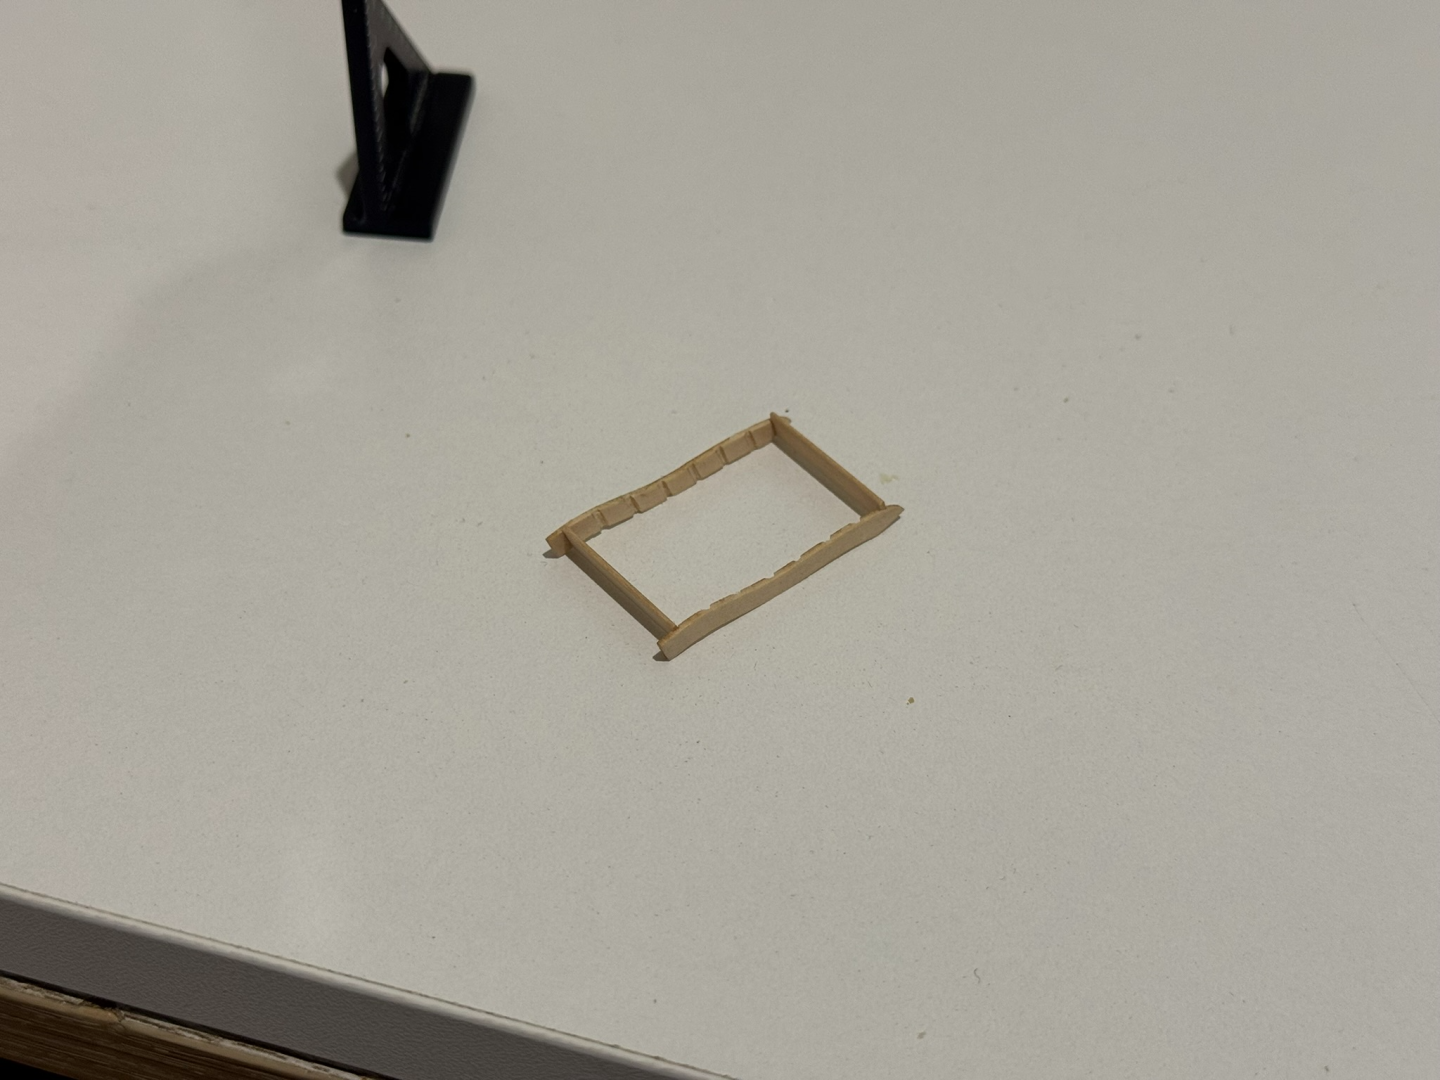
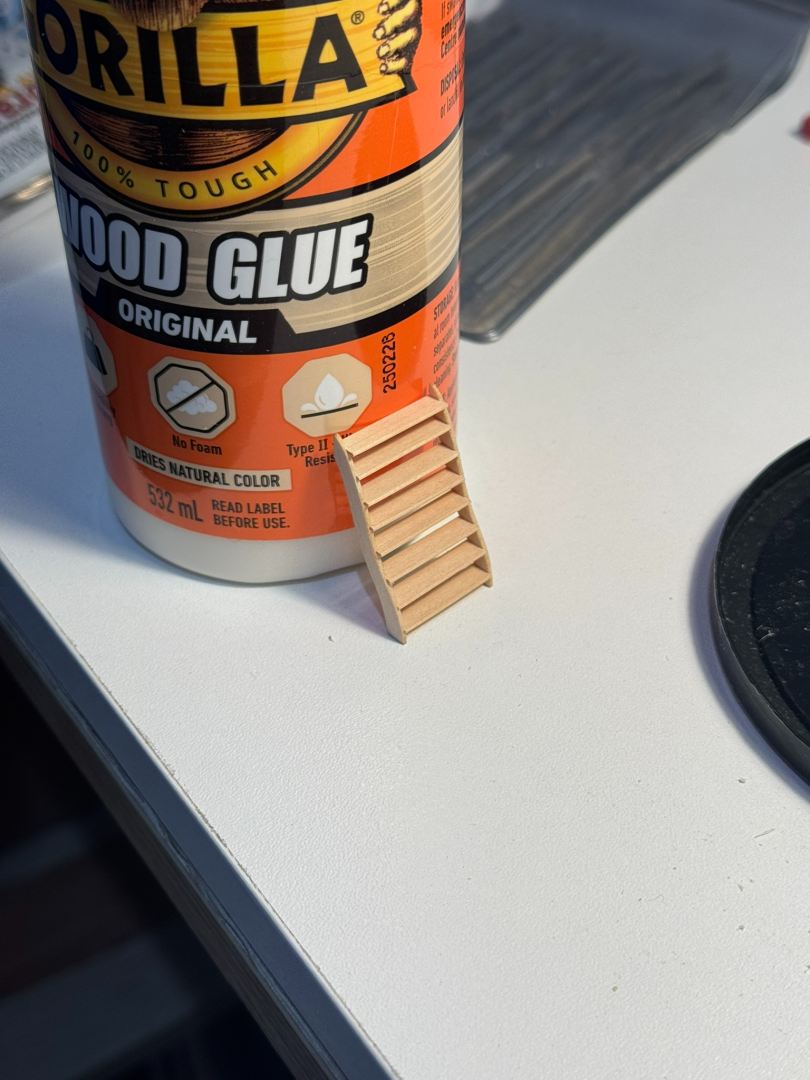
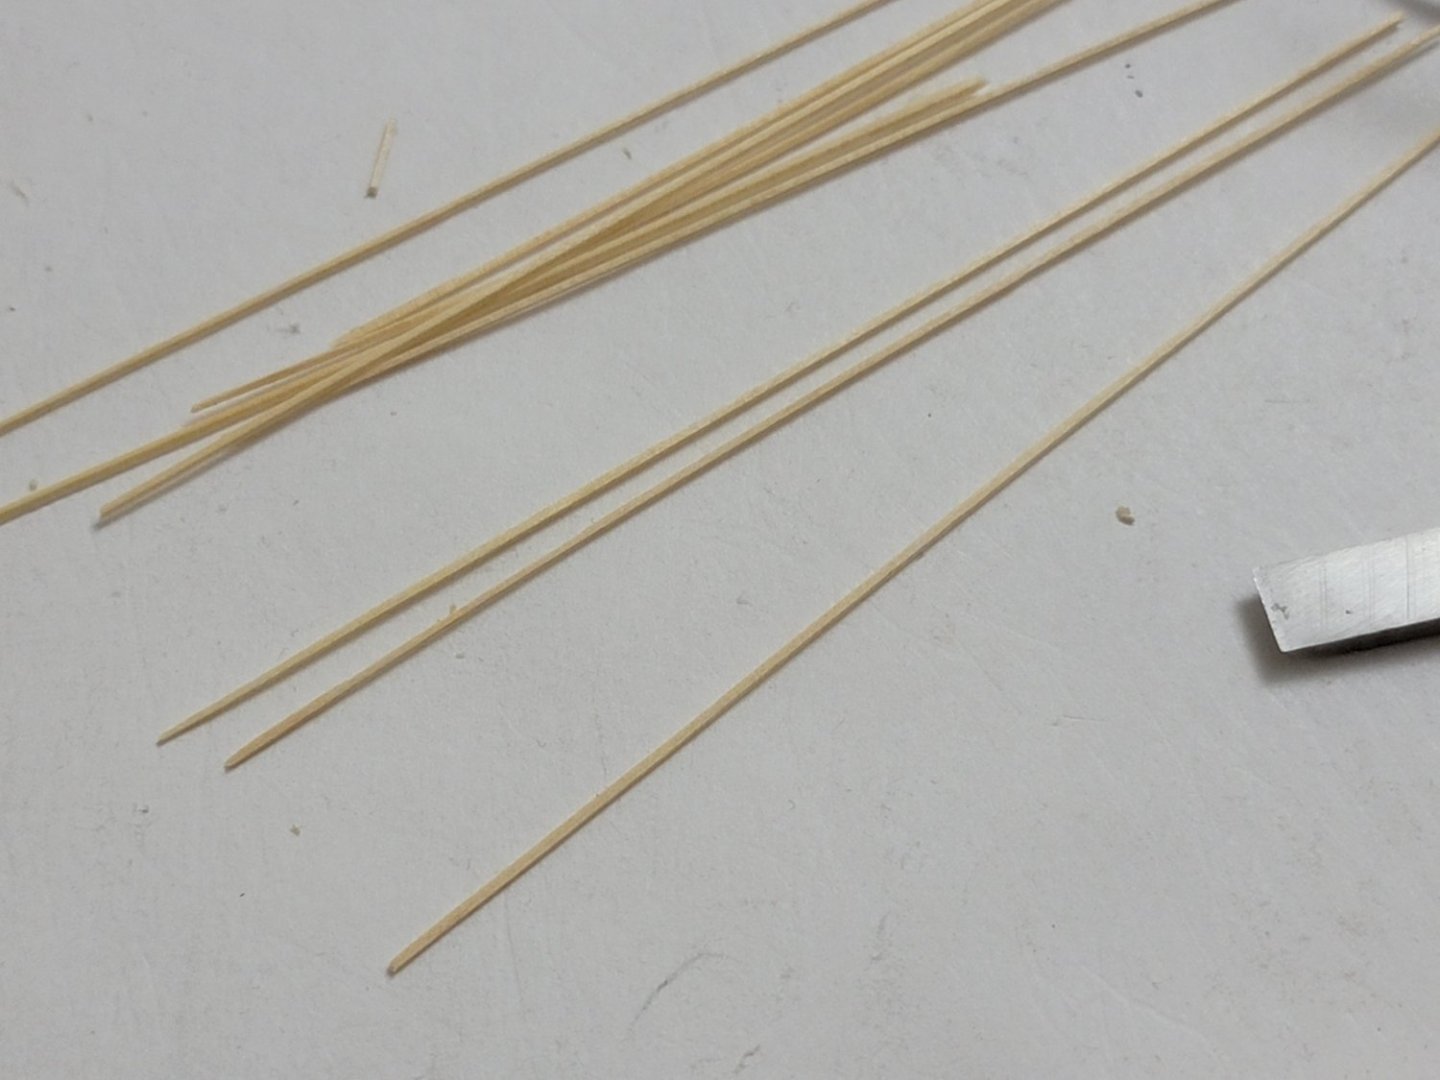
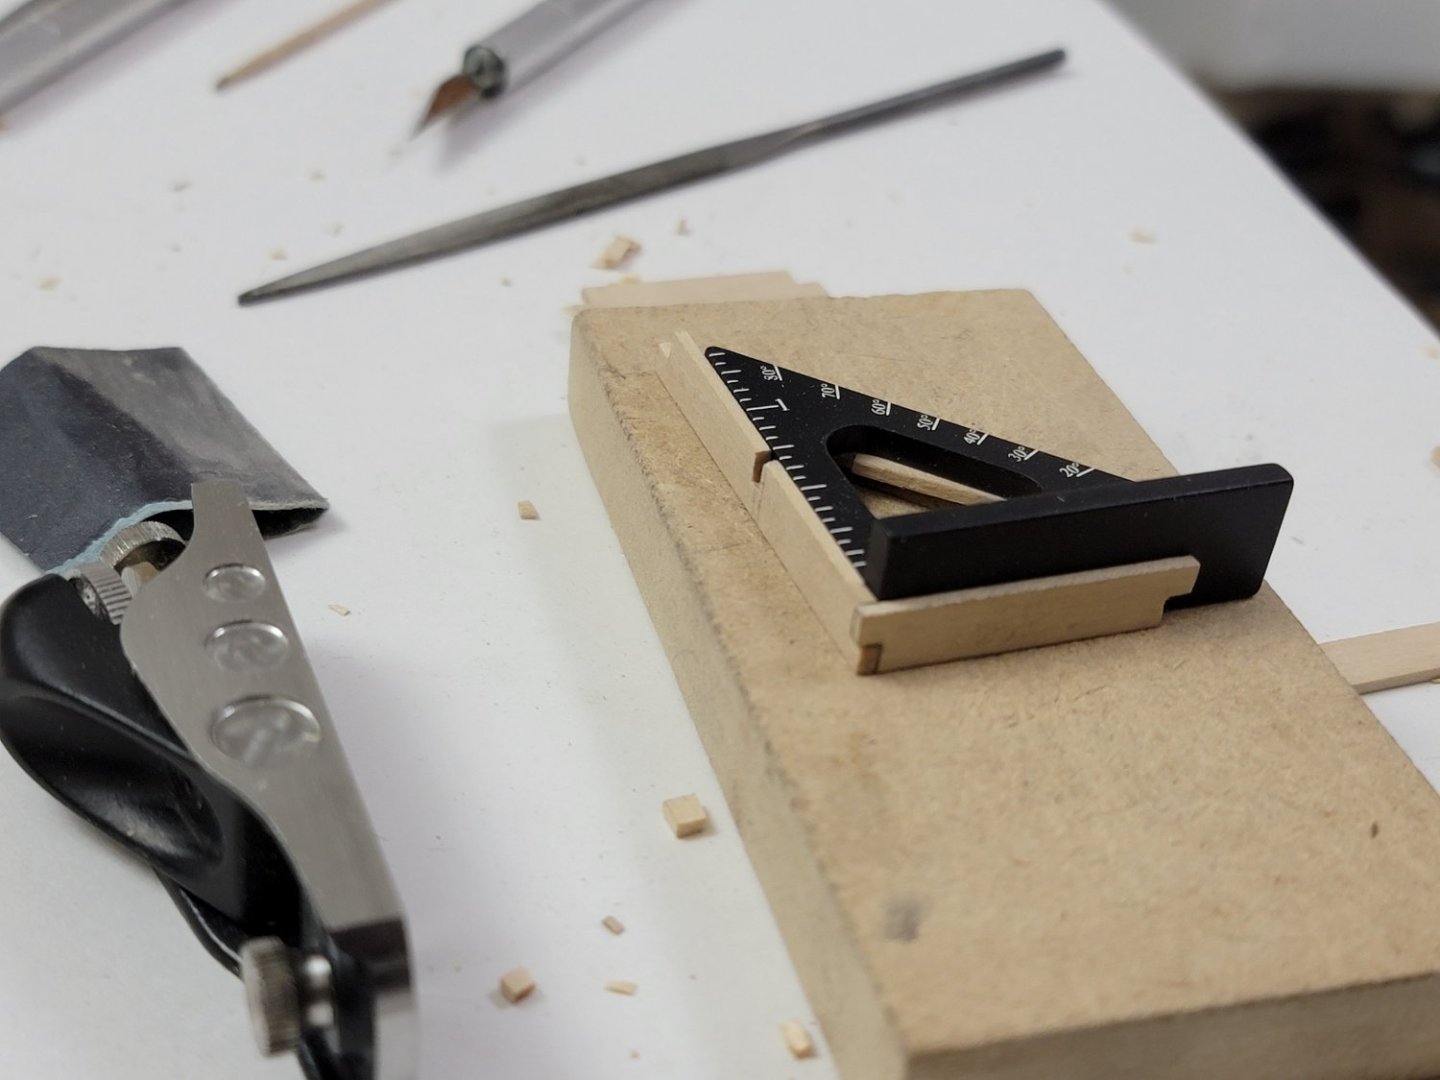
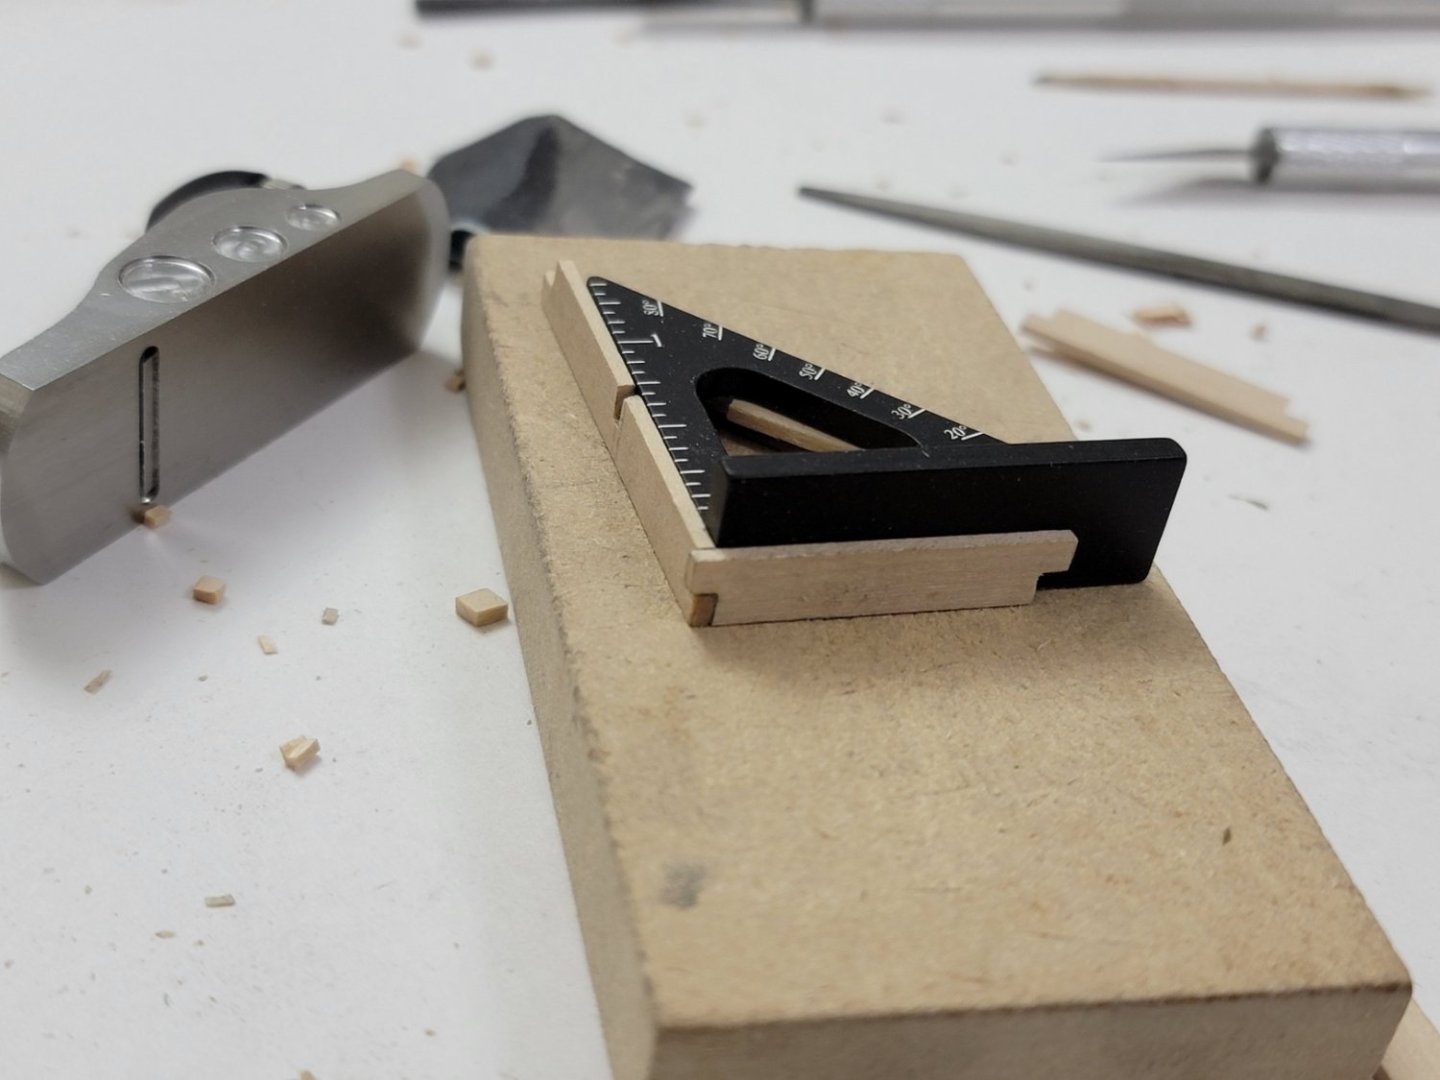
Hello all, and happy new year! It has been a while since my last update. I hadn’t worked on the model for nearly three years, as I relocated to Australia and was busy settling in. I’m happy to say that I’m now in a position to continue the build and have even set up a dedicated room as a modelling workshop. Given the long break, I went back through my build log to remind myself where I had left off. I was surprised by how much progress I had made, and I initially thought it might be difficult to get back into the groove. To make the transition back to model building a bit easier, I decided to start with the ladders (since they will mostly be hidden anyways). To begin, I cut grooves for the steps using a chisel and then rounded off the forward-facing edges of each step. The steps were glued into position using a square. The photos below show this stage of the process. For the ladders to fit properly into the companionway, I needed to trim the bottom of each ladder so that the steps sat parallel to the decking. Once adjusted, I glued the ladders onto the coamings, making sure the bases sat neatly and securely. Below are photos of the result. Note that the coamings, gratings, and the ladder base have not yet been glued in place yet. There’s no specific reason for this, other than keeping them removable in case it proves useful later on. Some other pending items that are at the back of my mind are: 1) How best to protect the printed tiles in the cabin. I am considering using a self-adhesive clear film (similar to a book cover protector) and cutting it to shape to fit the tiles. Open to other suggestions for this. 2) Deciding whether to carve the scrollwork and figures myself or use the castings for the stern. I think I may be biting off more than I can chew with the carvings and will likely end up using the castings. 3) Determining the right time to start working on the rudder. For now, I am planning to work on the gun carriages before returning to the instruction manual and continuing with the remaining bits and pieces that I didn’t get to earlier. As mentioned before in my build log, I am always open to suggestions and constructive feedback Harshil


-
Thank you so much for the kind words! I’ve taken a pause on the build but hoping to get back in the coming months.
-
Hi Werner, the headrails look fantastic! This is probably the most trickiest part of the build.
-
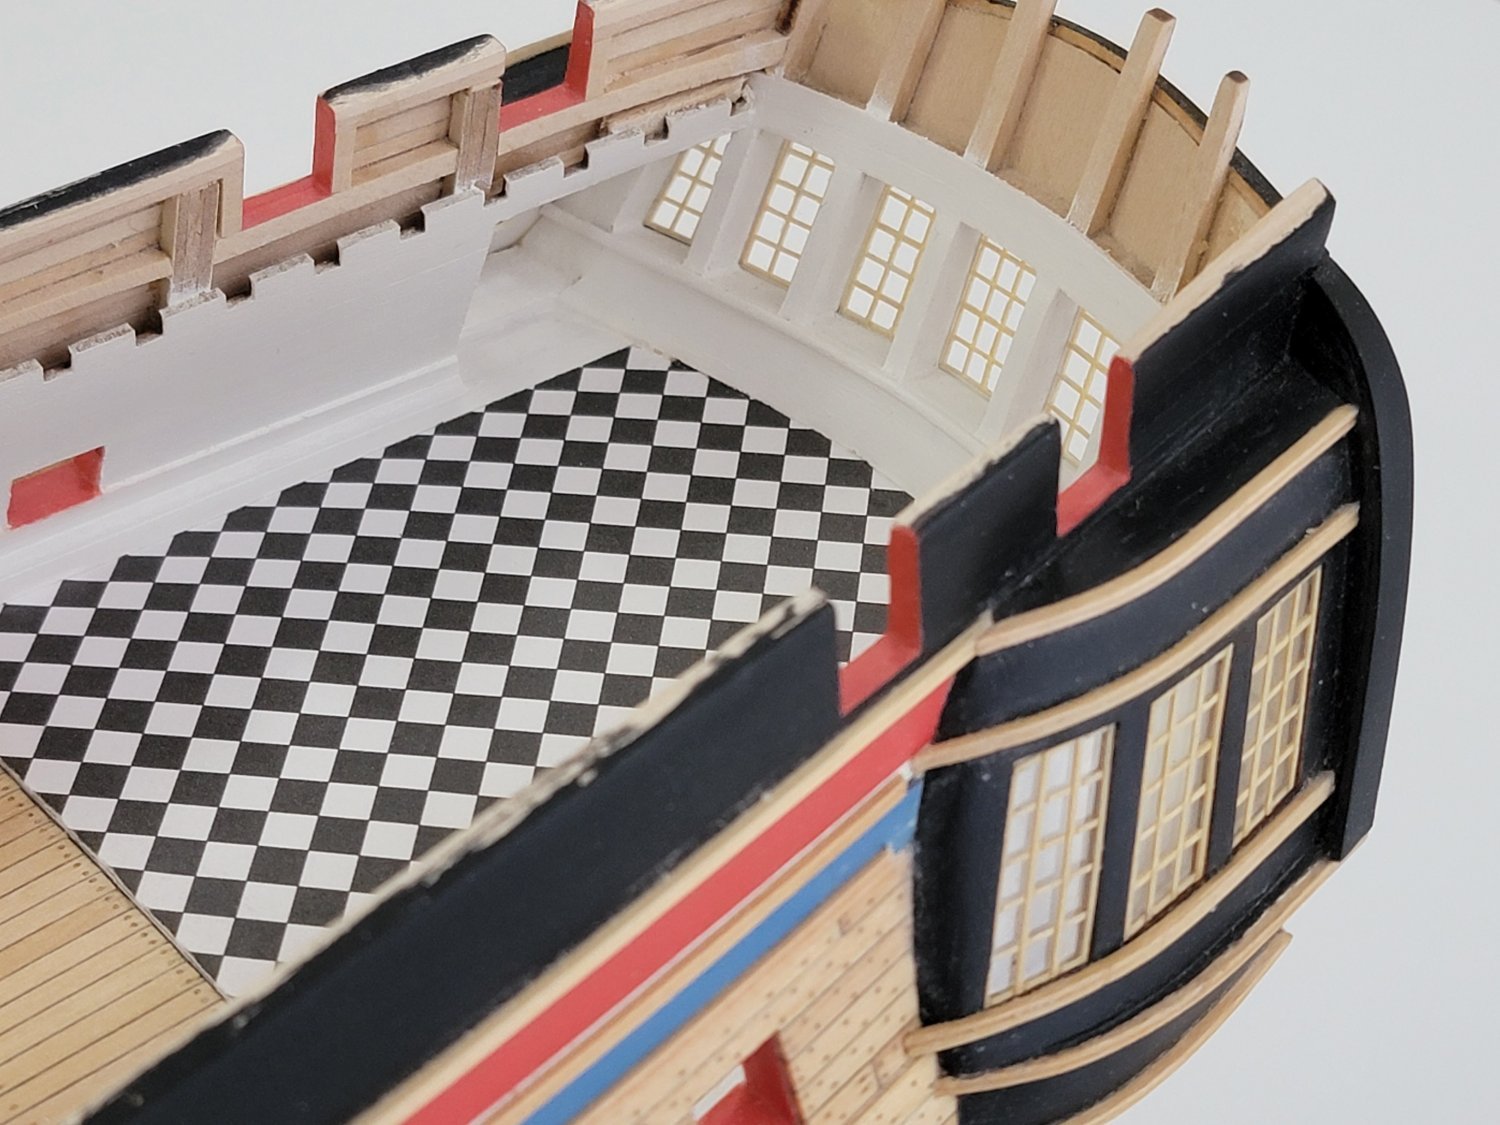
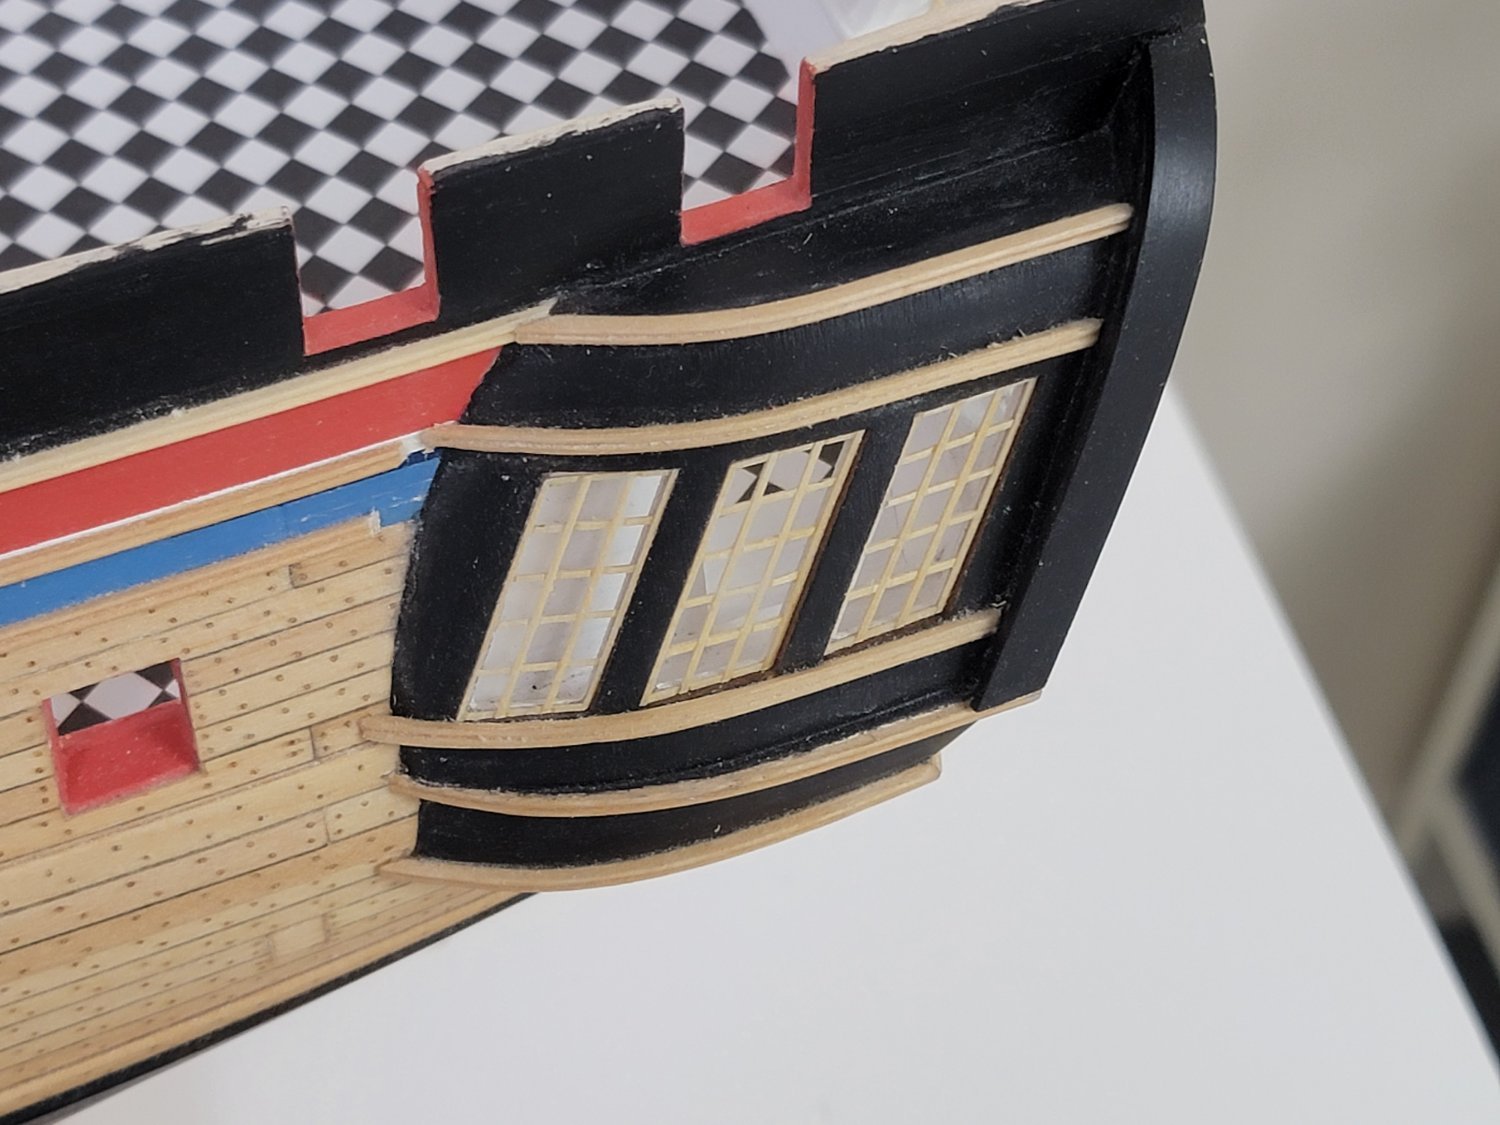
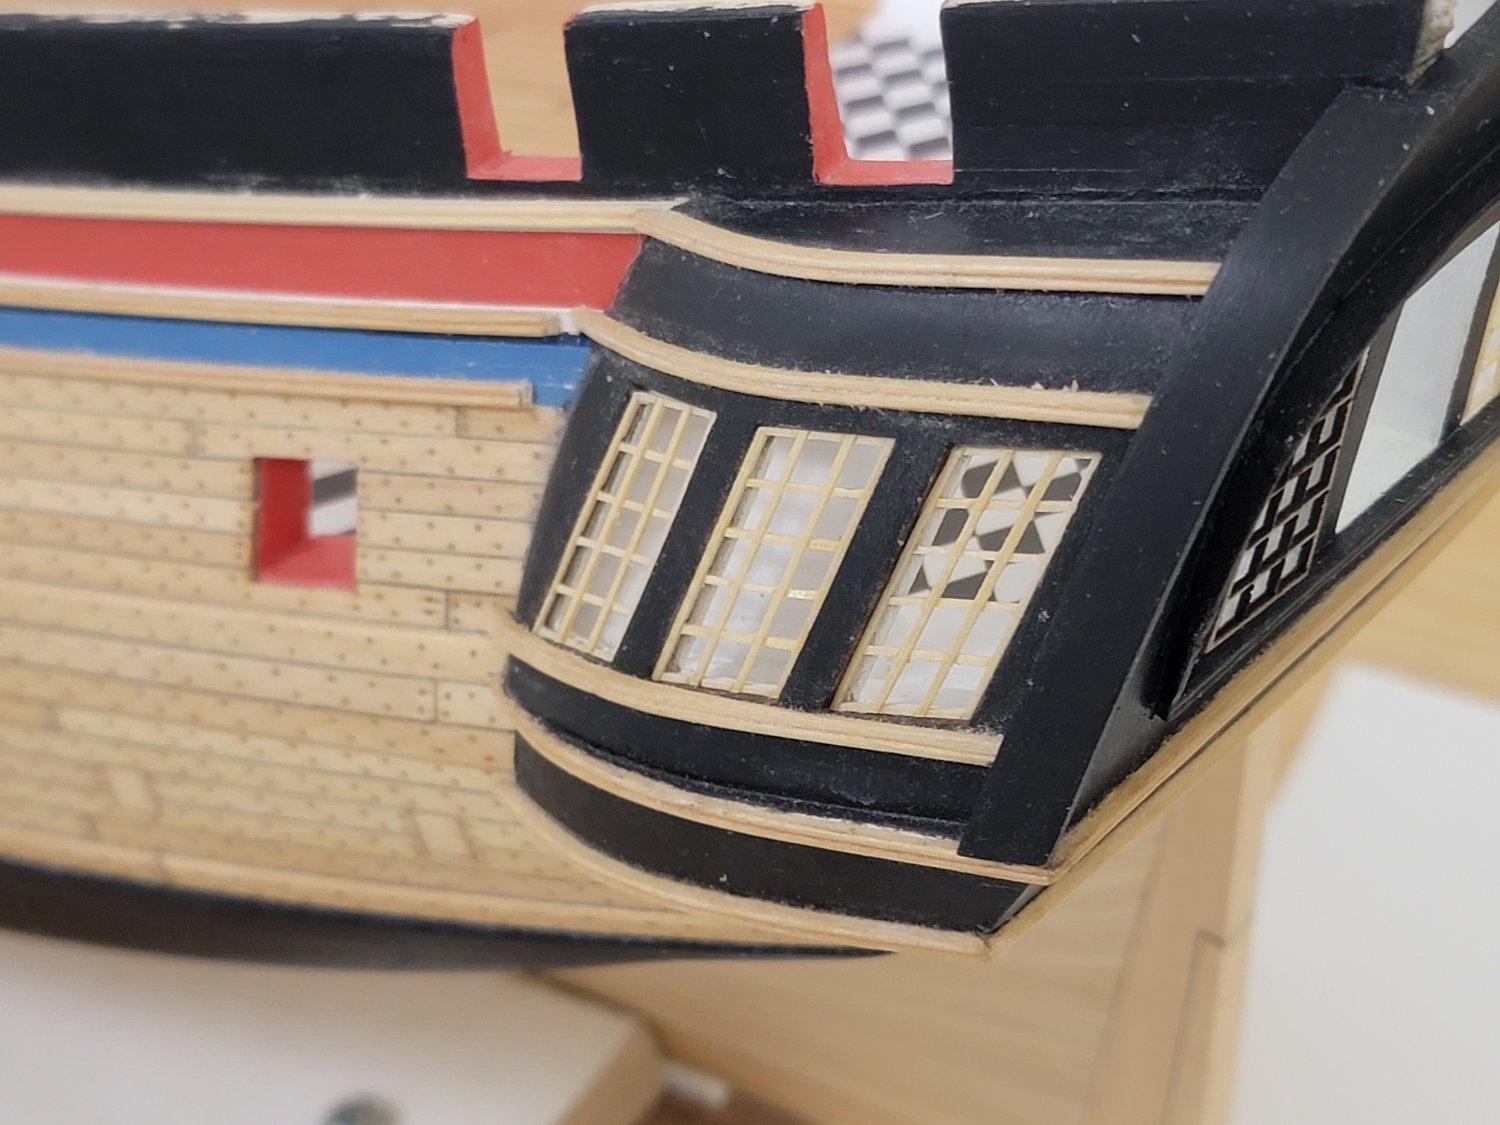
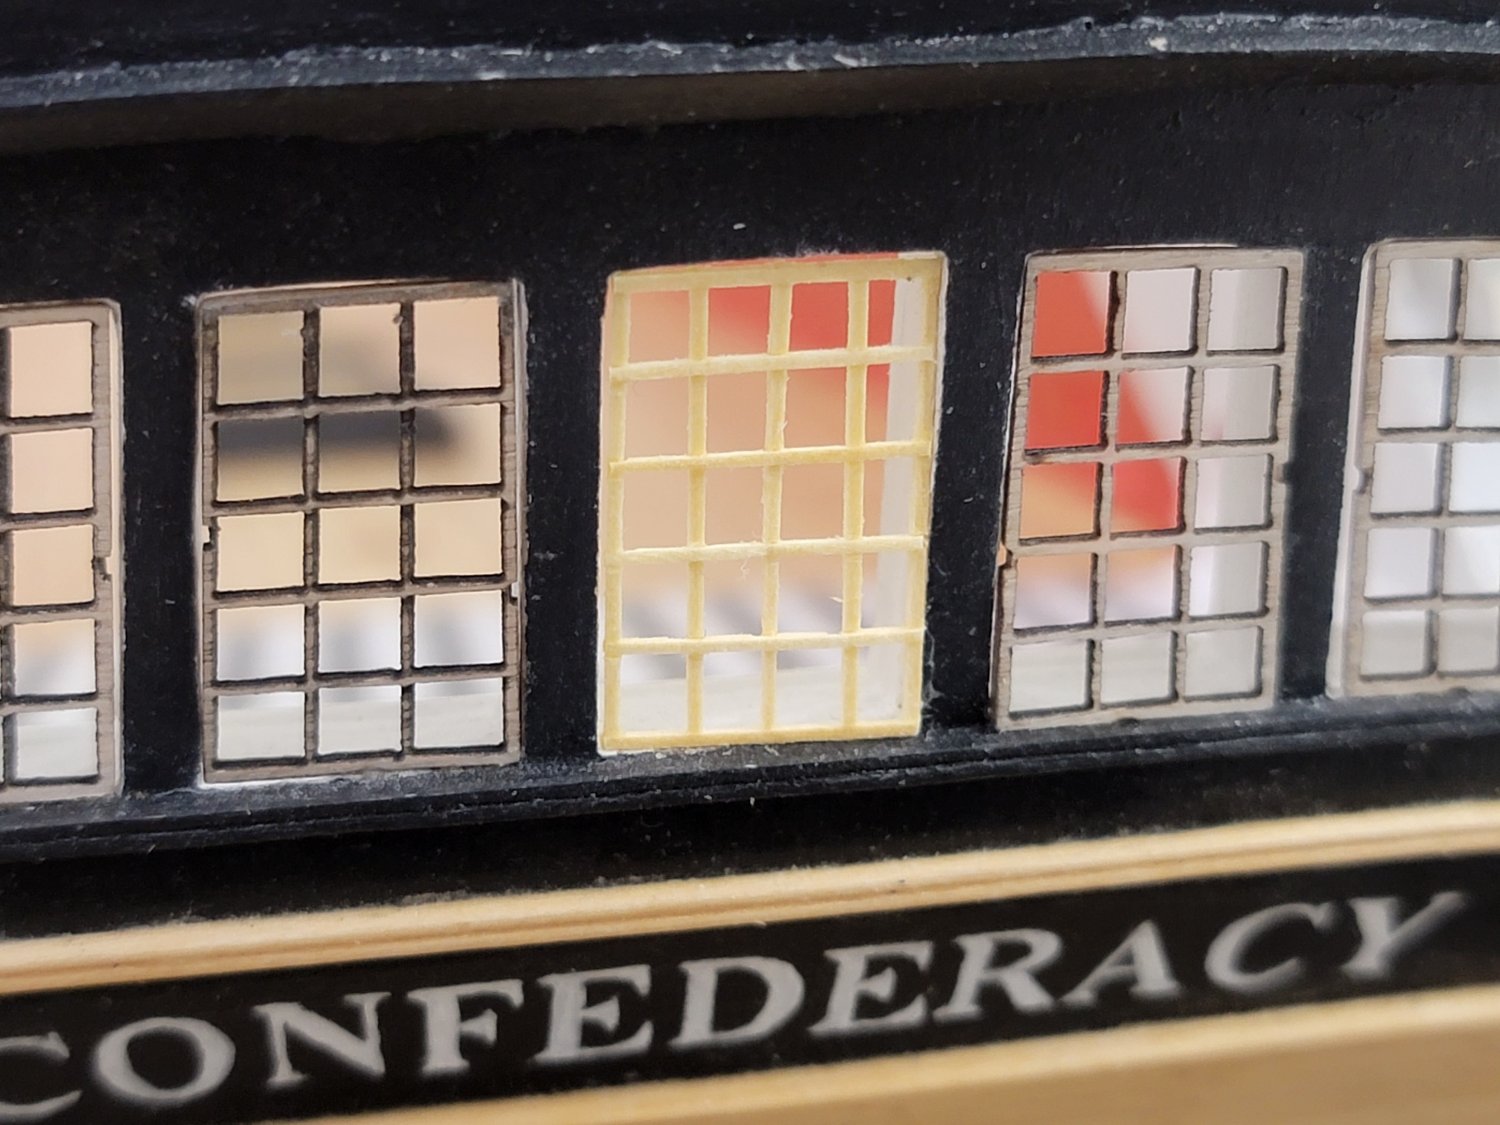
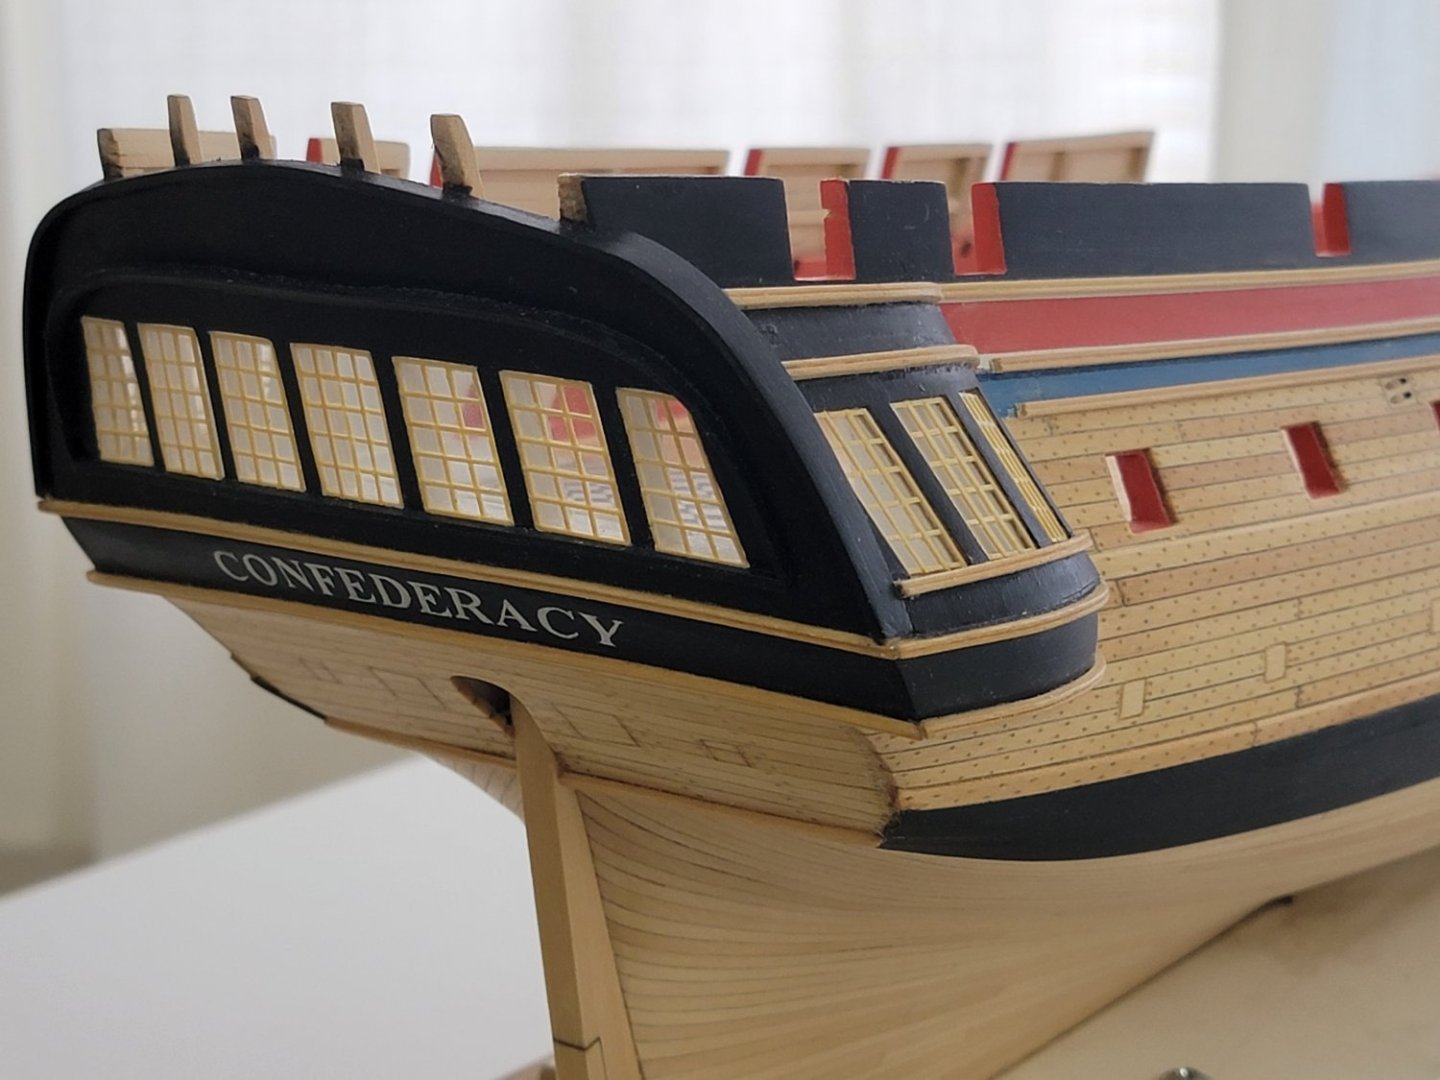
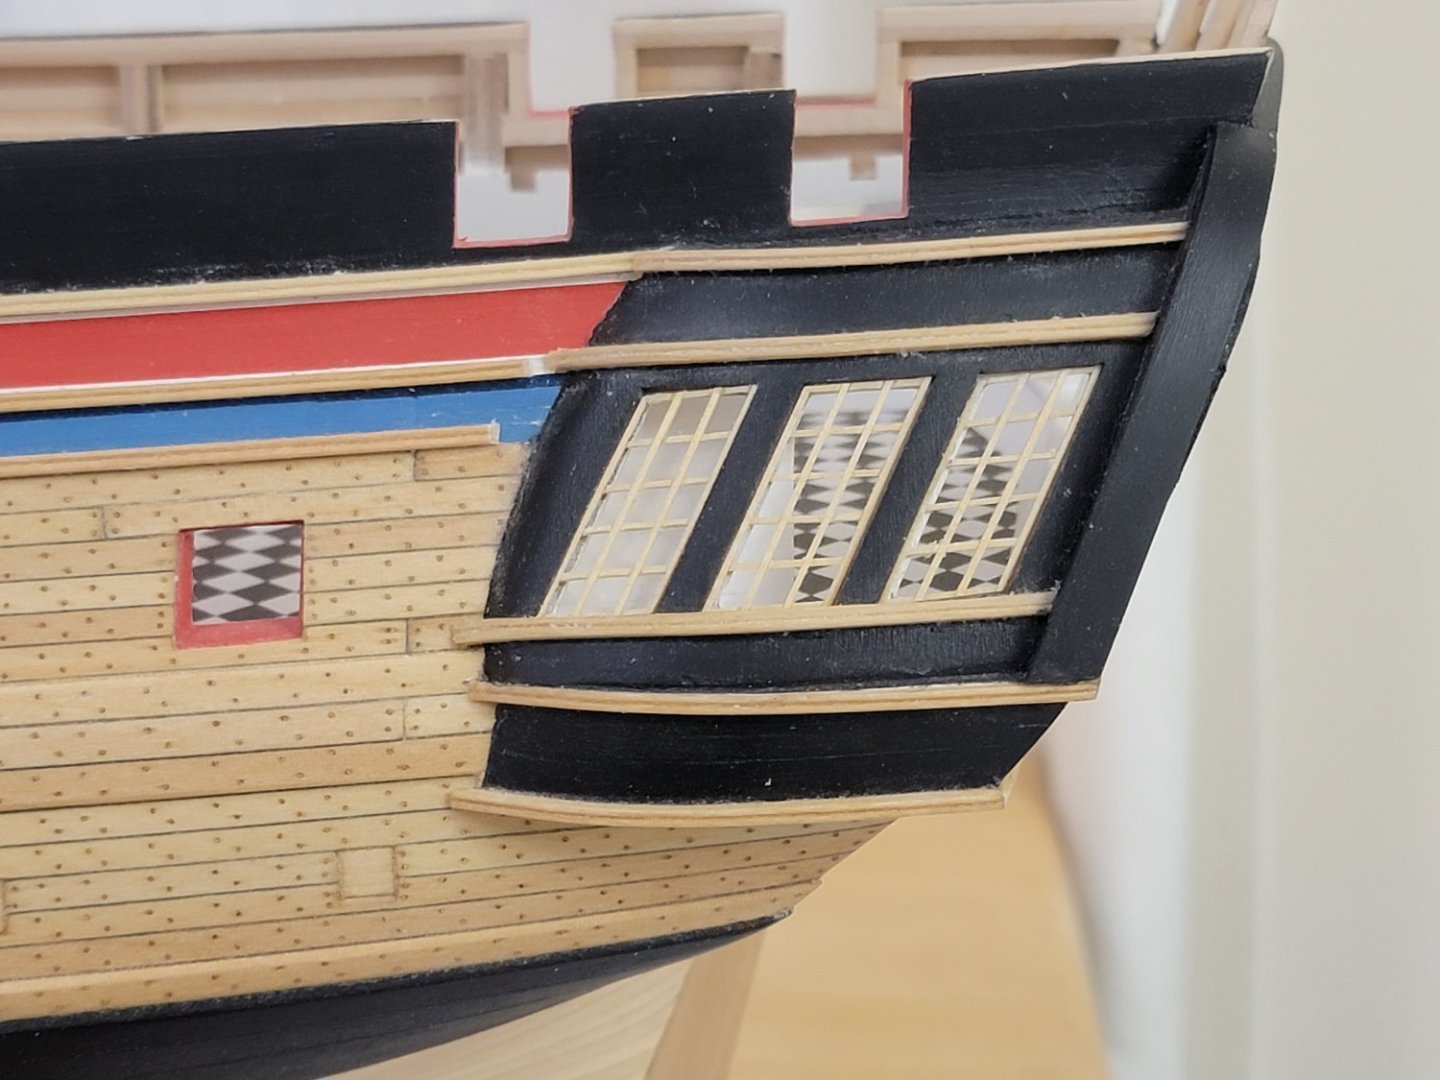
Thanks so much, Tom, Kurt, and David!! I finished up with the windows! A very tedious task... but I did become quicker in assembling them towards the end. I tested the micro crystal clear solution for the windows but I wasn't too big of a fan of the frosted window look. So I opted to use the acetate instead. I placed each window frame on the sheet, ran a #11 blade on the outside edges of the frame, lightly marking the acetate. Then I used a metal ruler as a guide to run the blade multiple times until it went through. Finally, I used the micro clear solution as a glue for the frames on the acetate. Here are some photos with the windows+frame dry-fitted in the openings:


-
Thank you so much for the kind words and the 'likes'😄 I have been slowly working through the window frames. I finished the portside frames. For the angles windows, I used the kit supplied ones as a guide. Here, I glued the two outer strips and used the kit frames to get the right angle by letting the glue set as the strips rest on the edges of the kit piece.. After letting the glue set and doing the same on the opposite corner, the 2 'L' shaped pieces were then glued together, followed by all the internal strips: Here are a few photos of how it looks on the ship (only dry-fitted for now): I got to say, all this is really really fiddly work. Getting the notches in the correct spots on each strip is very tricky. Had to discard twice as many as those that made the final round!


-
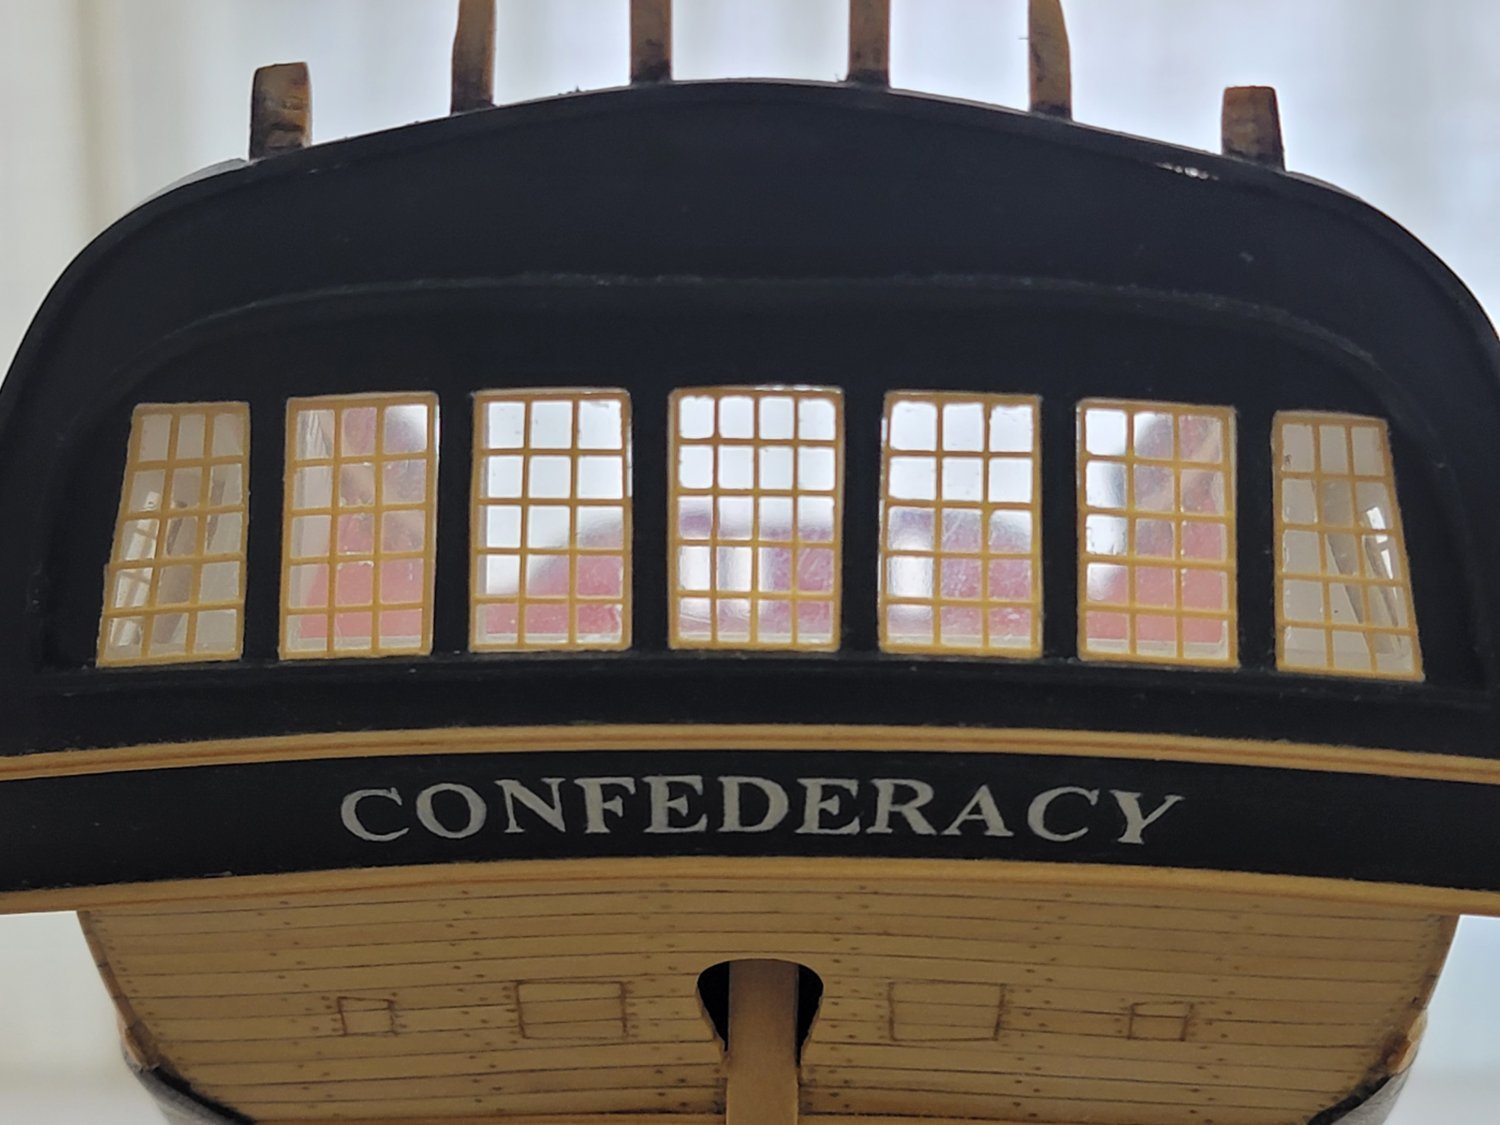
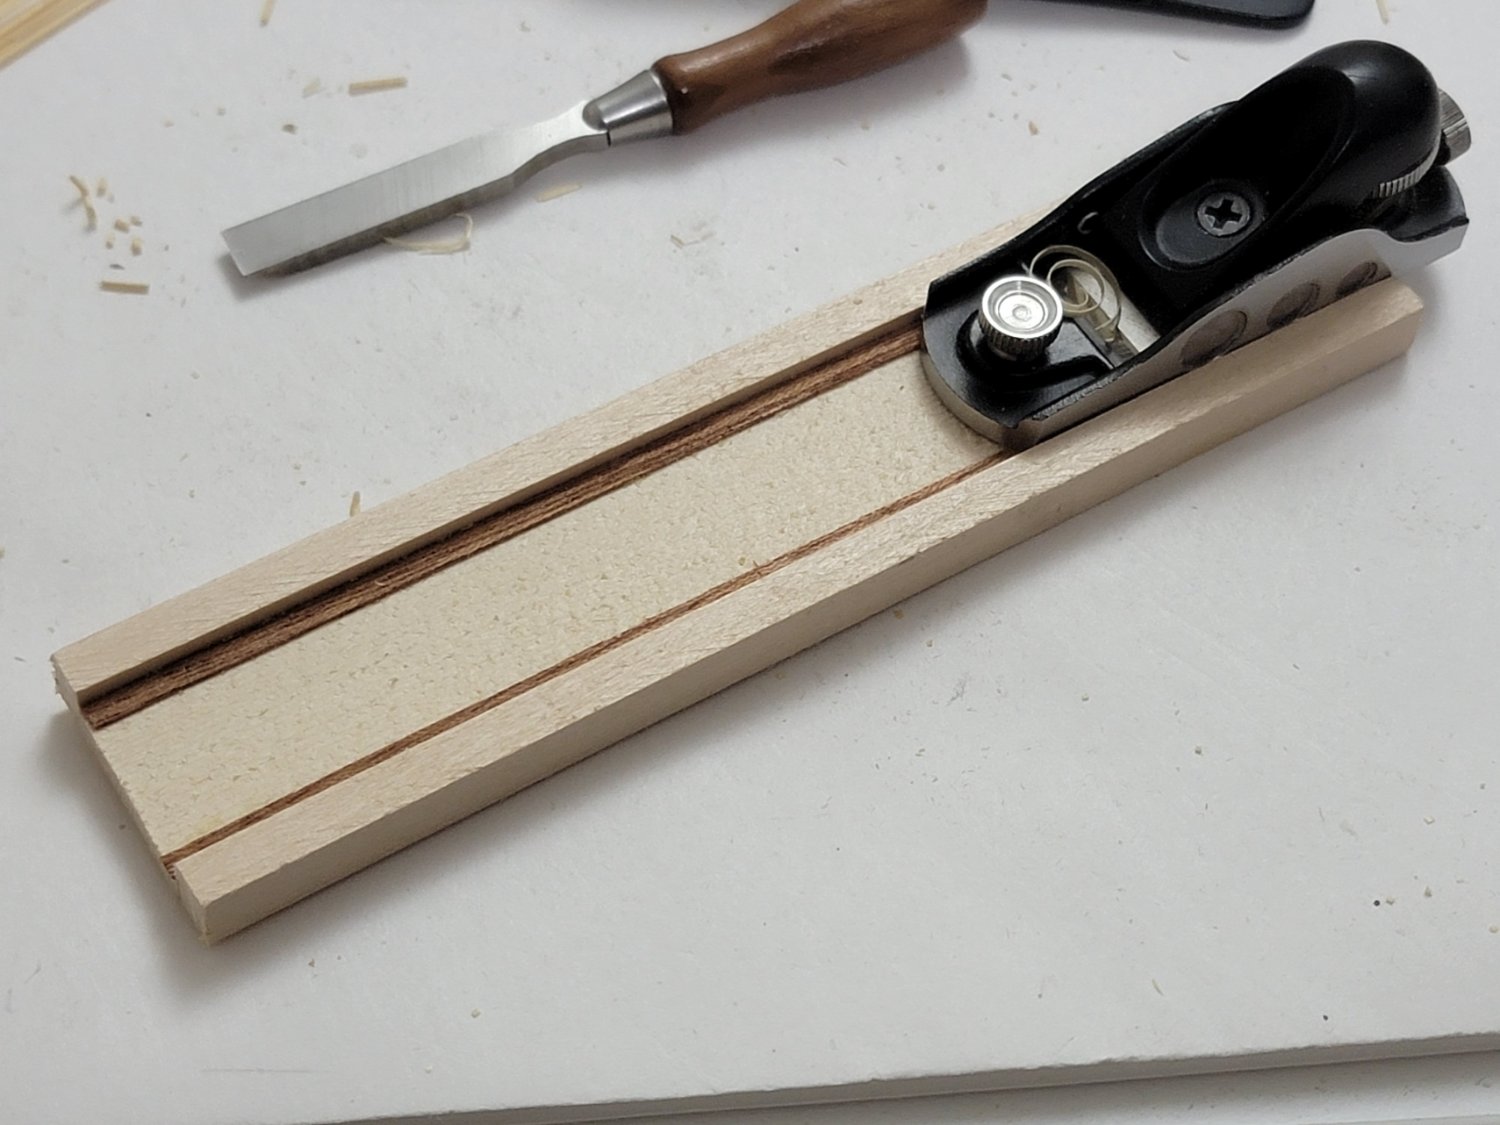
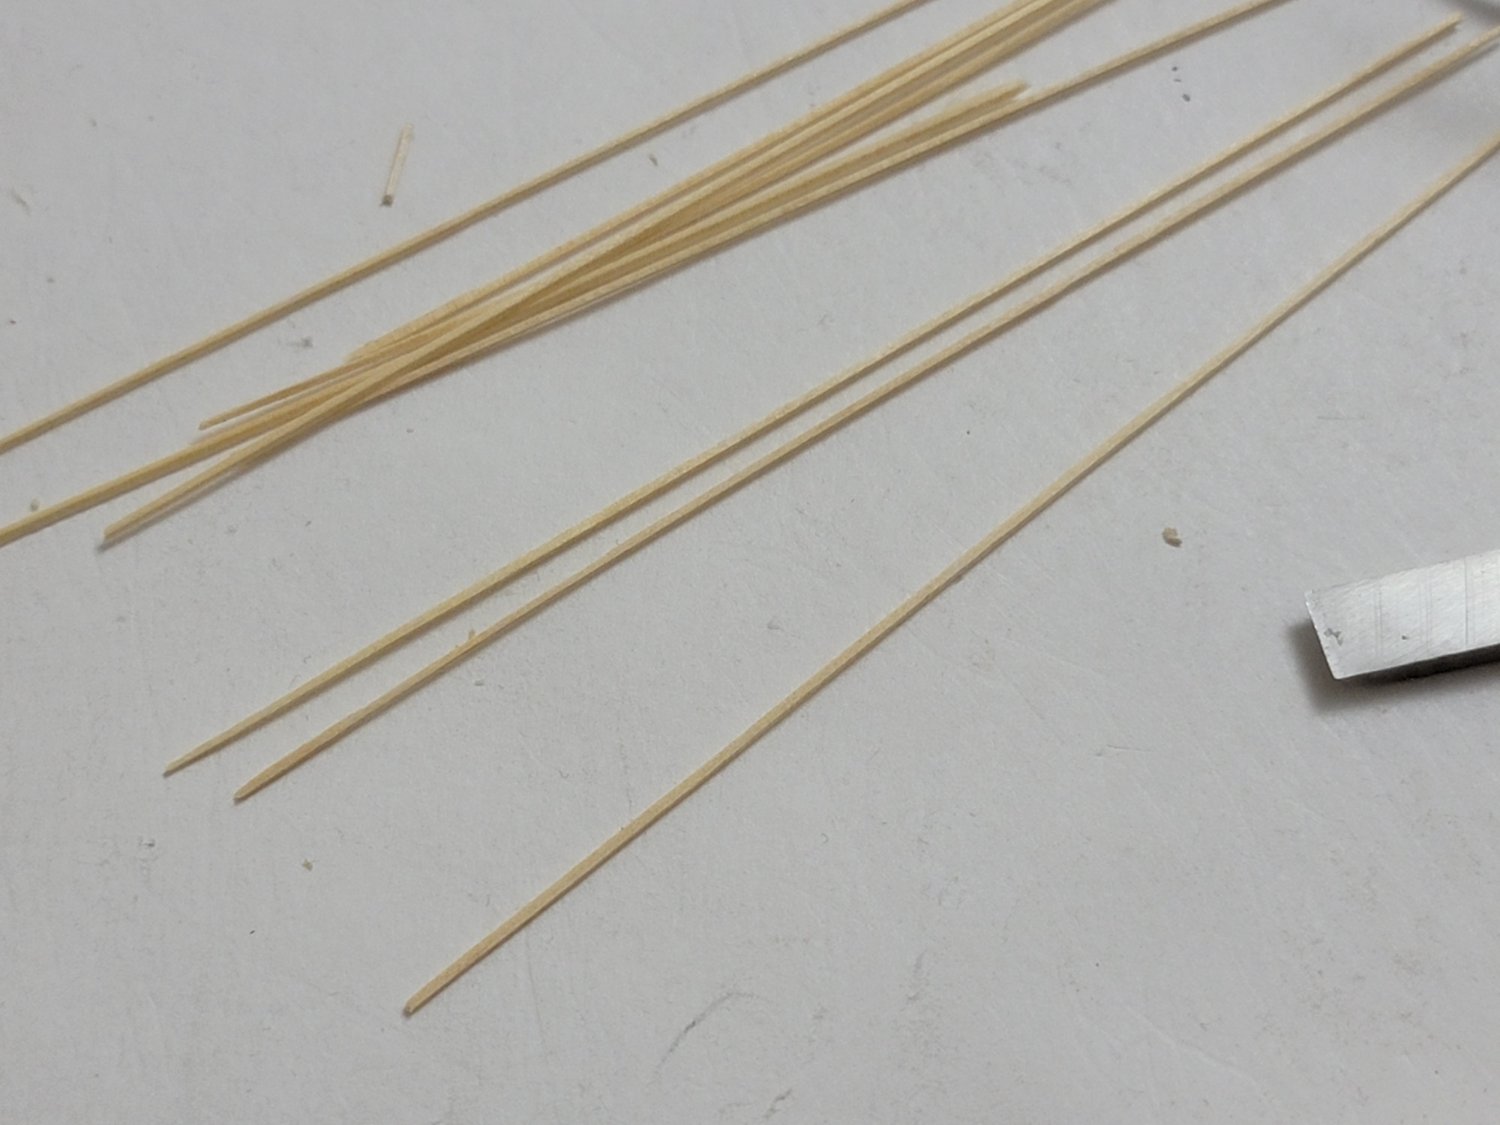
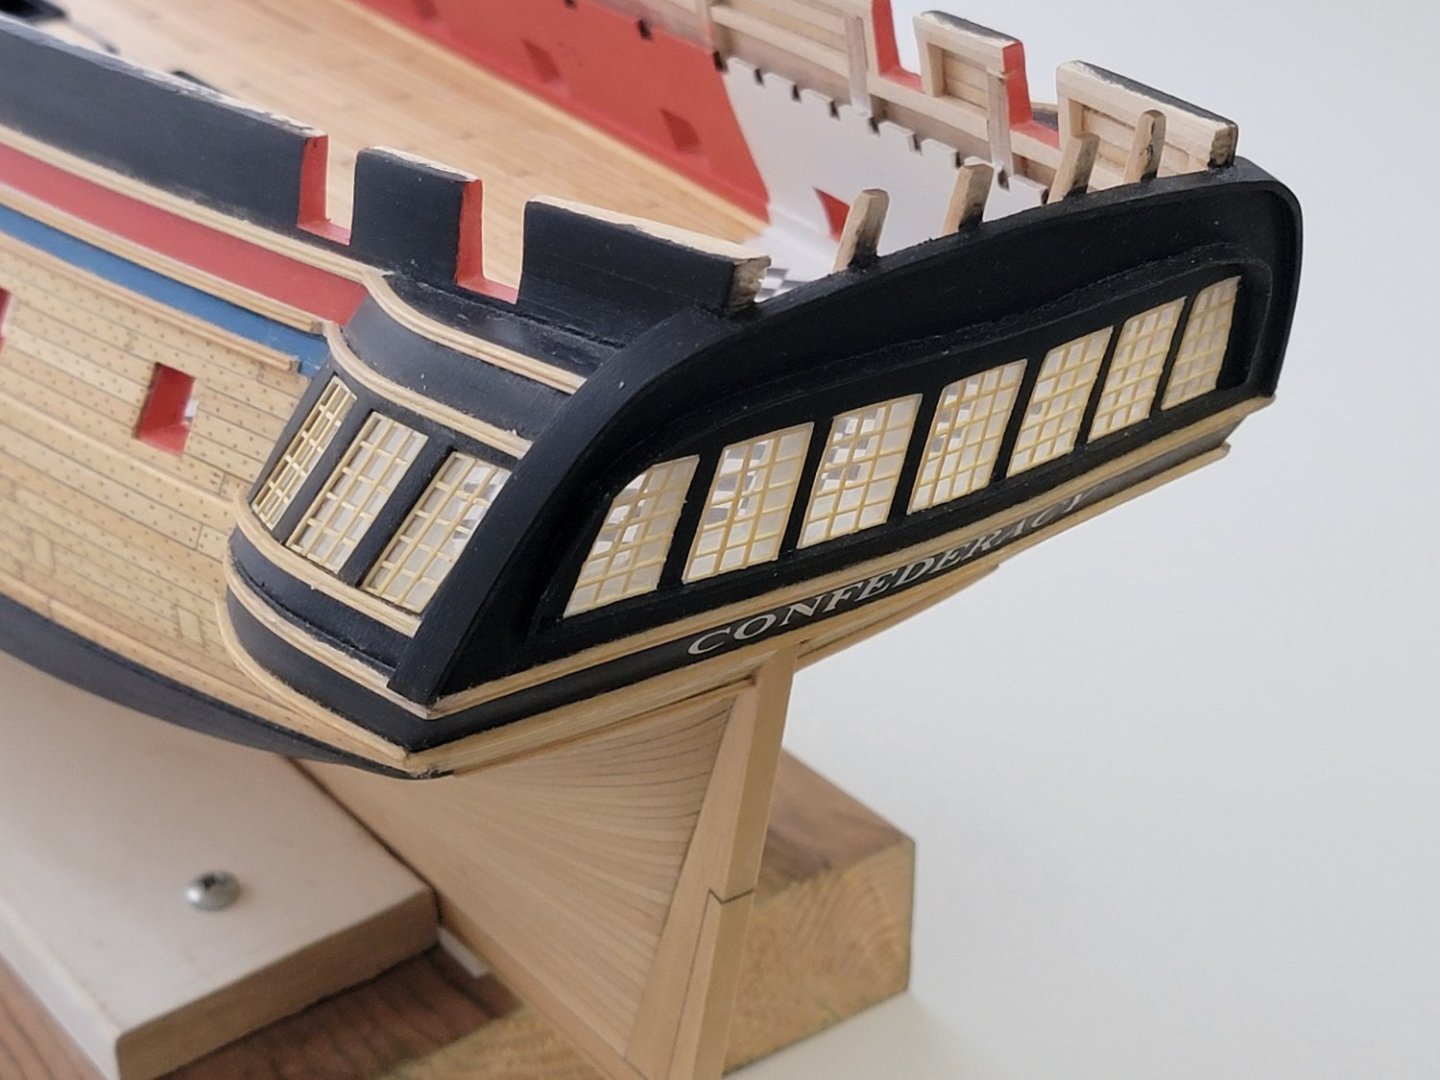
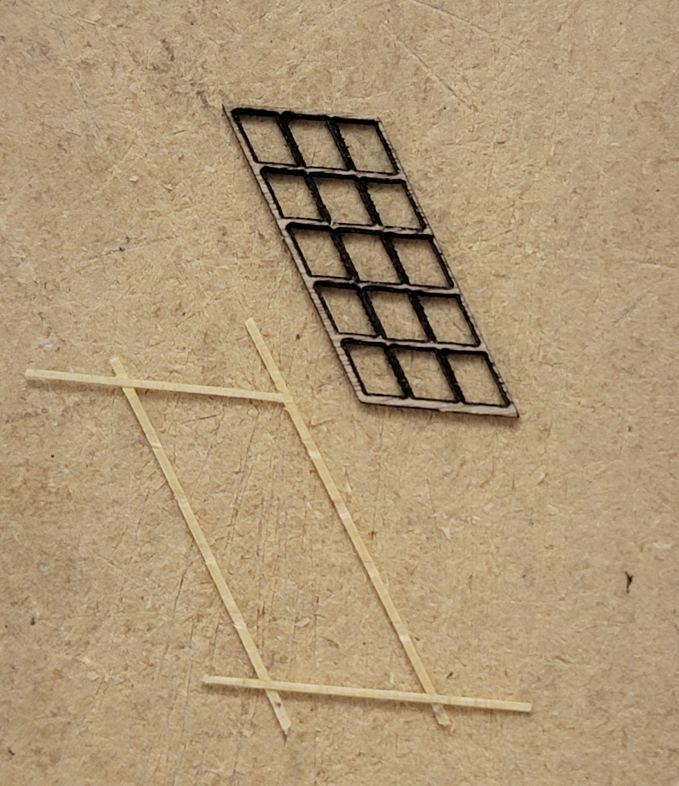
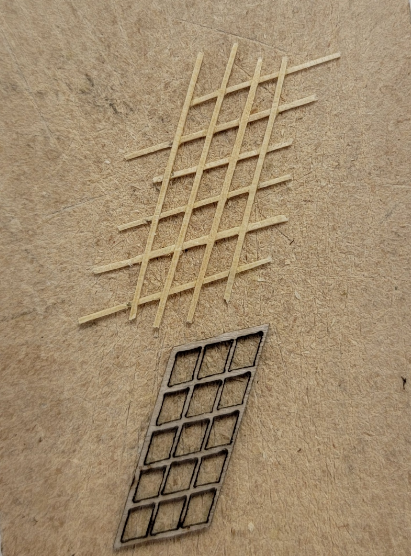
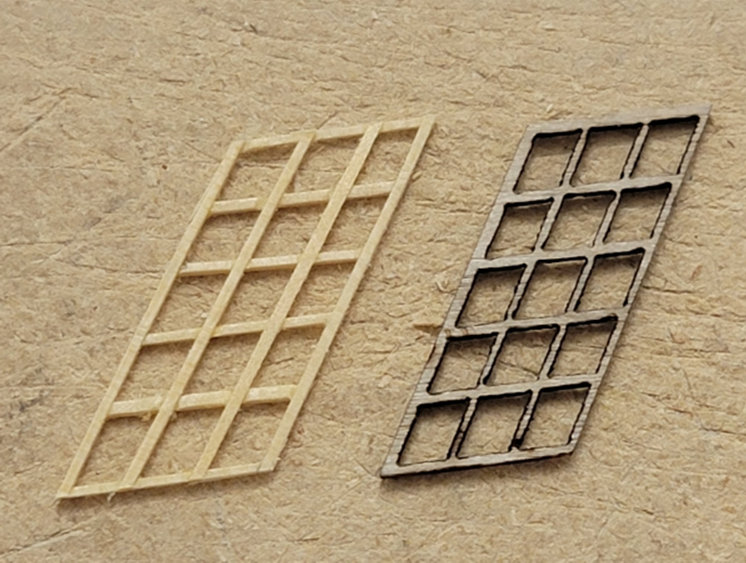
Thank you, Werner. Thanks all for the likes as well 😊 A bit of a shorter update. I was not very happy with the kit supplied window frames. They did not fit well on model for some reason. I am not sure why as I did check their fit during the initial framing stage of the build. Also, they had some notches on the sides (not sure why it has these). So decided to try building my own ones. While working on them, I did think I may have taken on more than I can chew... However, I thought it would be best to take some time off and think about this problem for a bit and tackle it more systematically. So, first I made a simple jig for my mini planer to glide on the rails to thin down some larger pieces of Alaskan yellow cedar I had laying around: Using this jig, I was able to create relatively square strips (around 0.5mm x 0.5mm): Next, I used the kit supplied frame as a reference to notch out sections of strips, then glued them together to make the entire frame assembly. Below is just a test piece I made to make sure the method I used can work. The strips are not parallel since I did not pay much attention to the notch placements. The second iteration will be more carefully done to ensure it is better aligned. And here it is on the ship: I will use this test piece to try out the Micro Krystal Klear solution as well. So next I will redo the frame for better alignment. But I am sure the angled windows will definitely be more challenging....


-
Hi Werner, your build is gorgeous, everything's so neat and tidy. Very inspirational! Harshil
- 60 replies
-
- 1
-

-
- Confederacy
- Model Shipways
- (and 1 more)
-
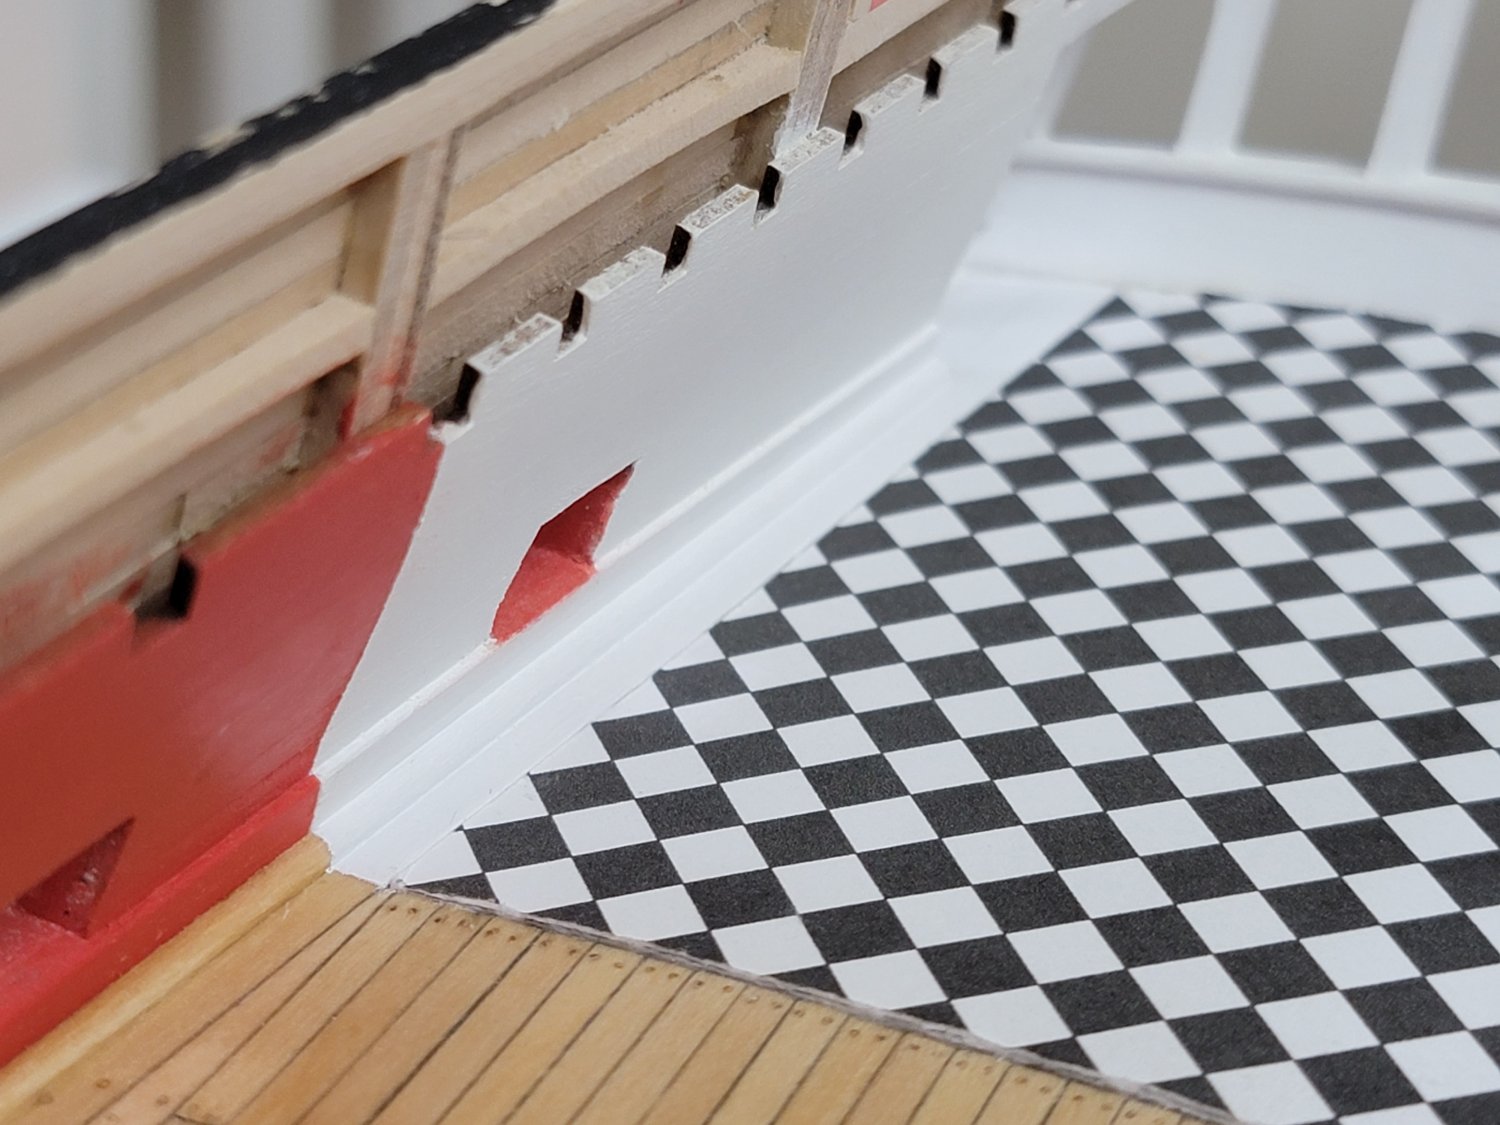
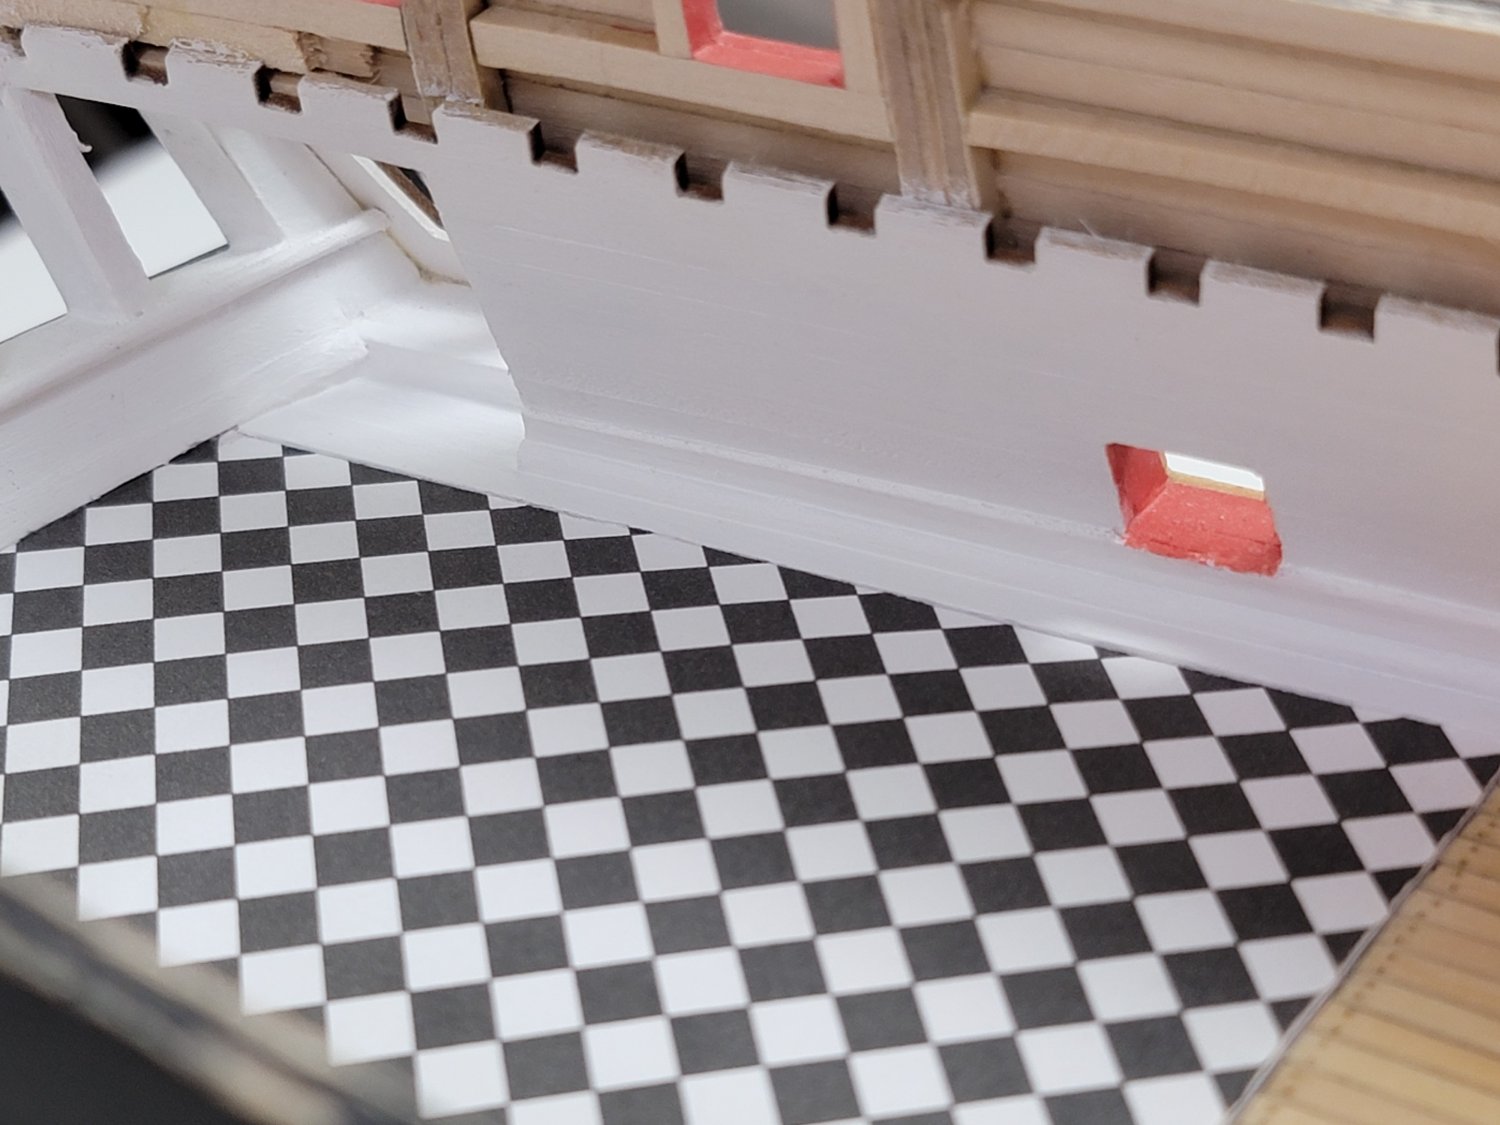
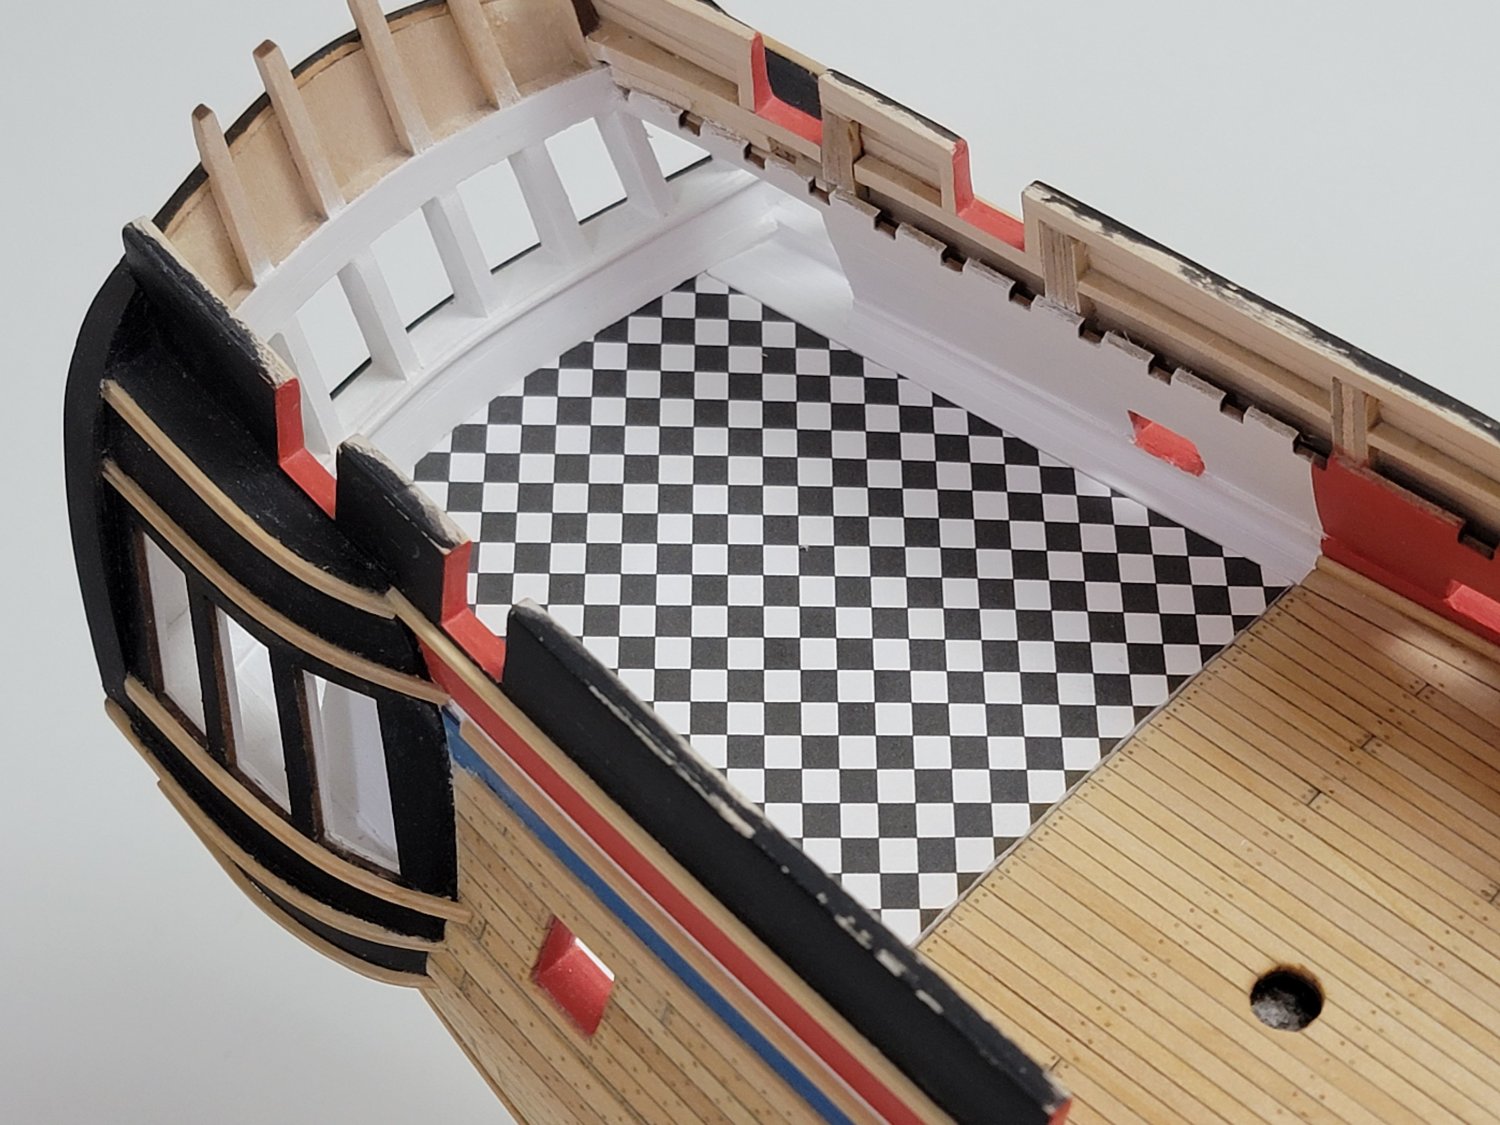
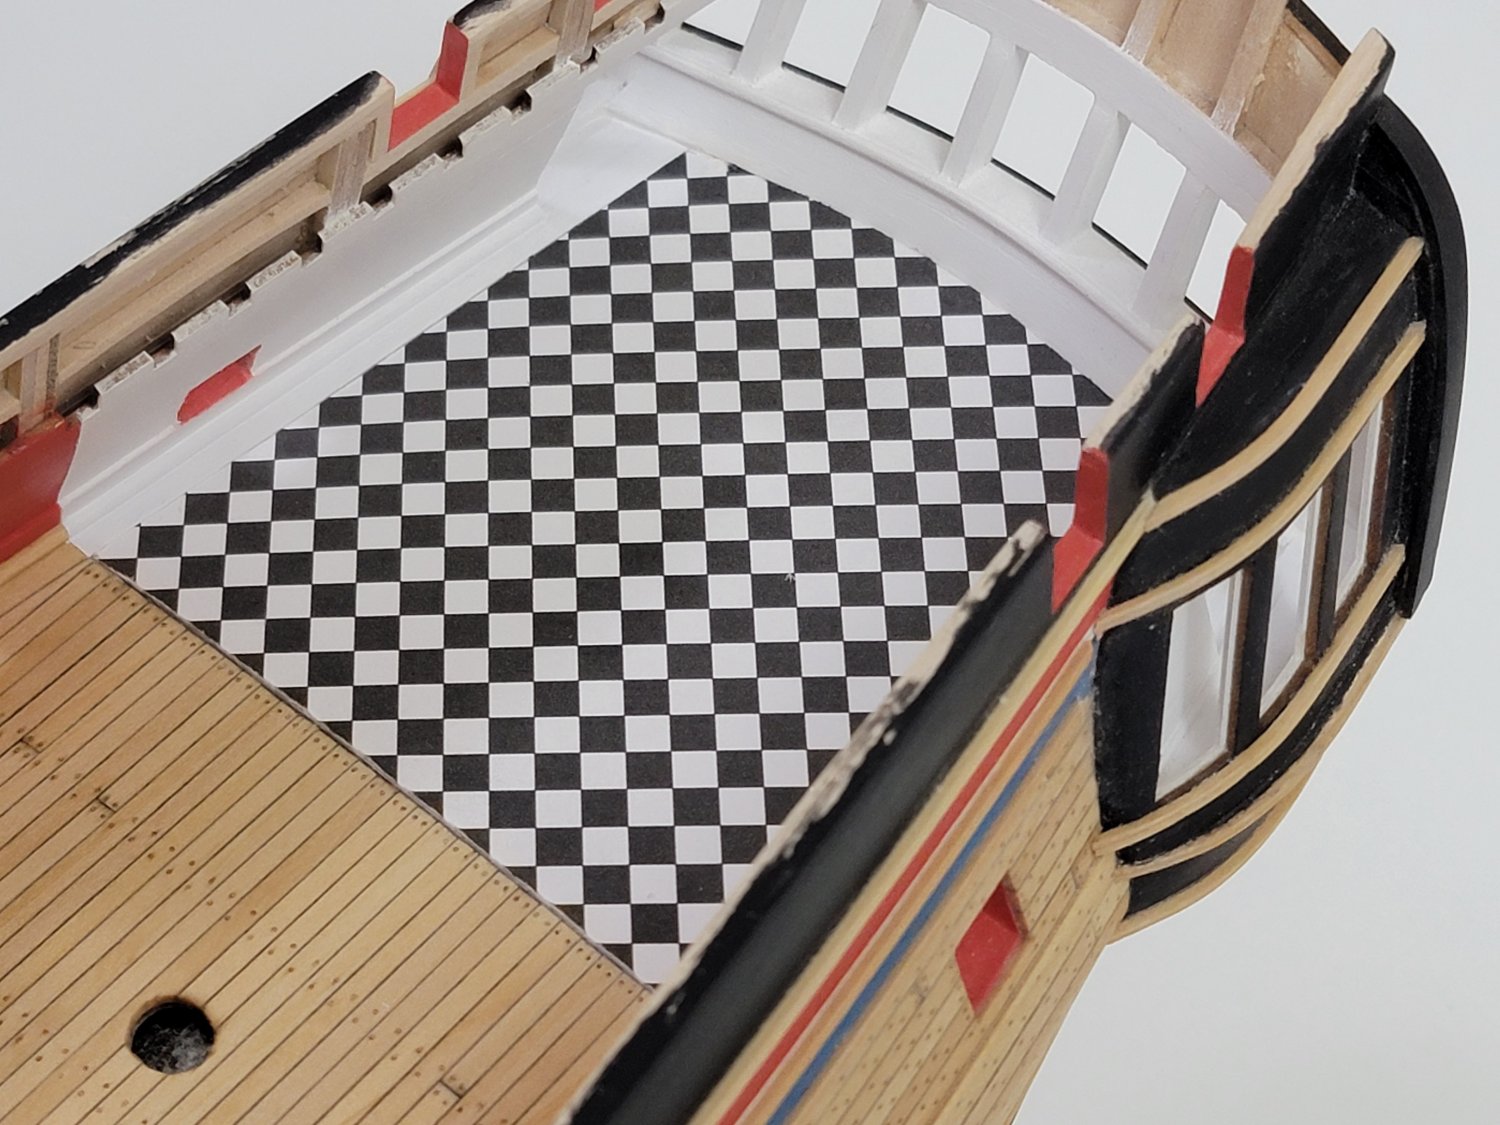
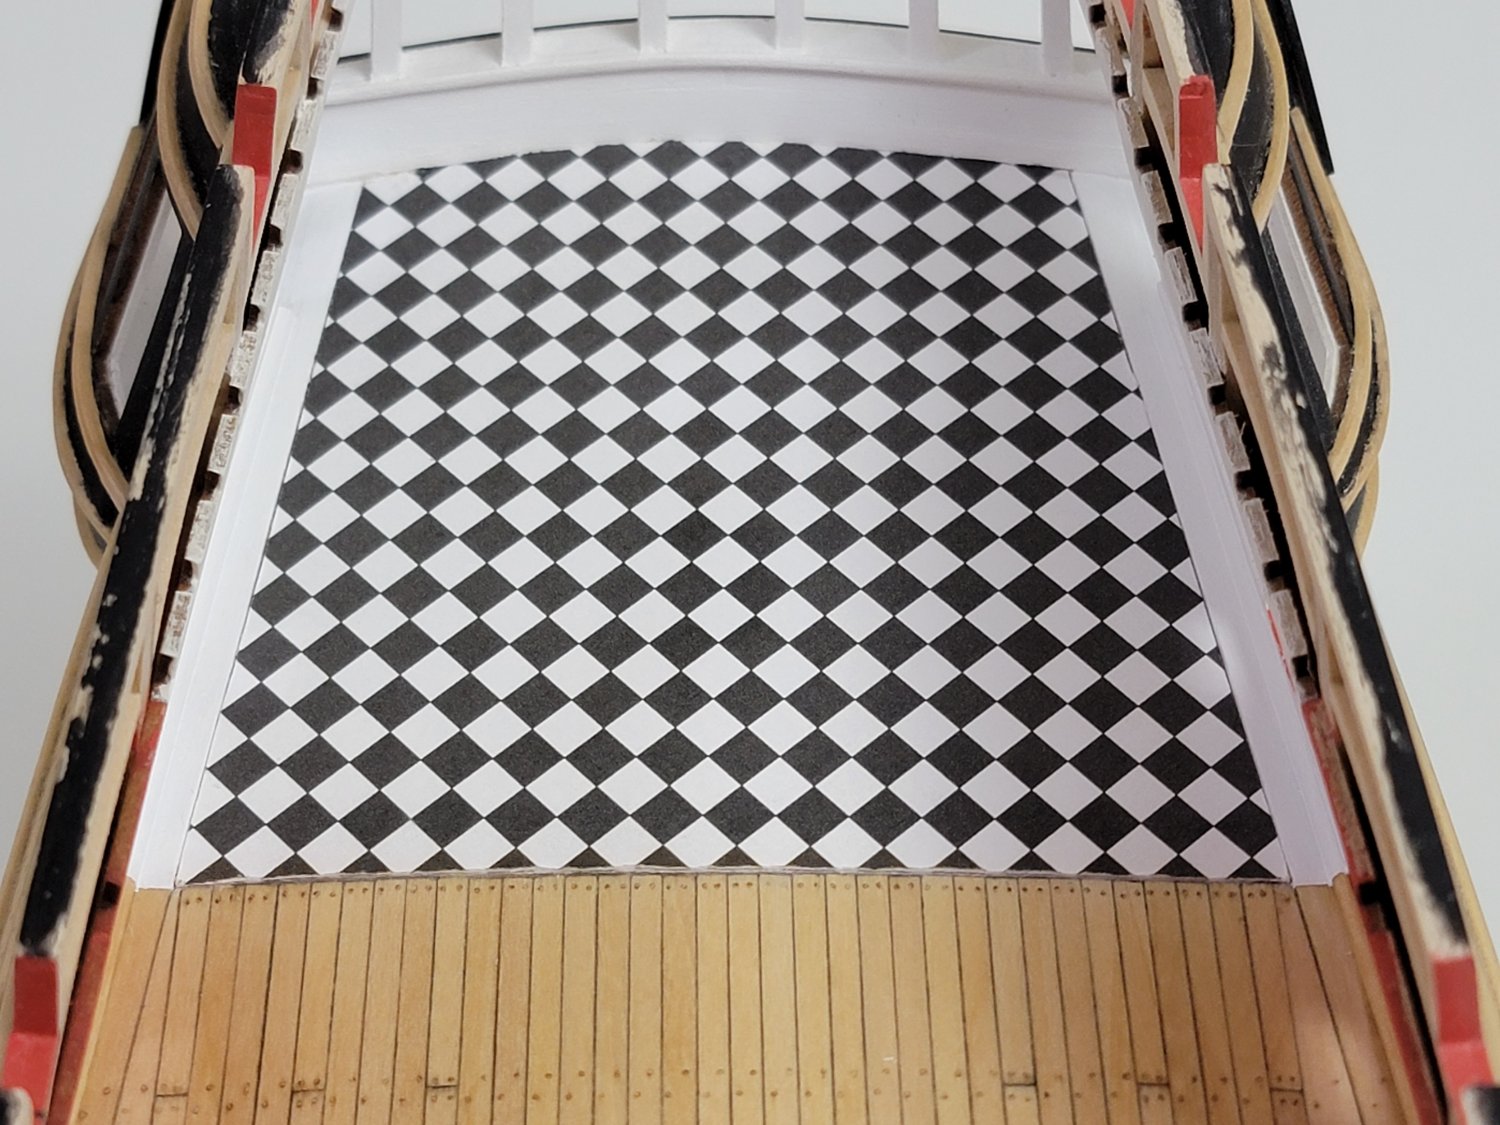
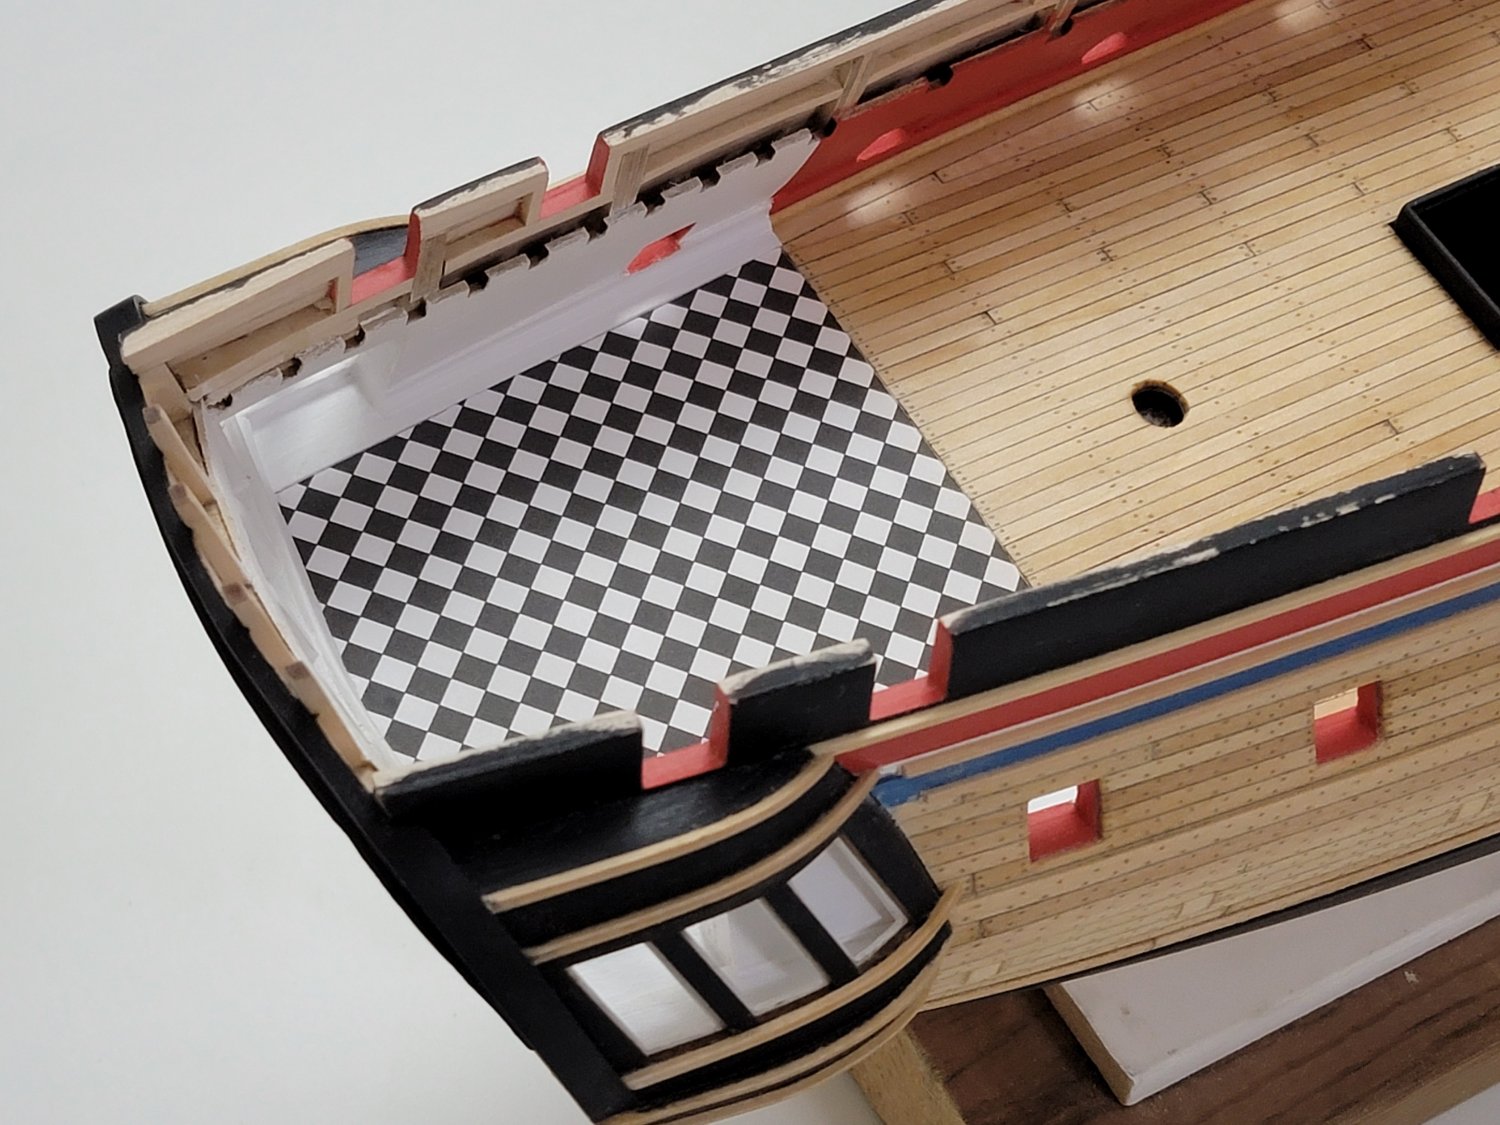
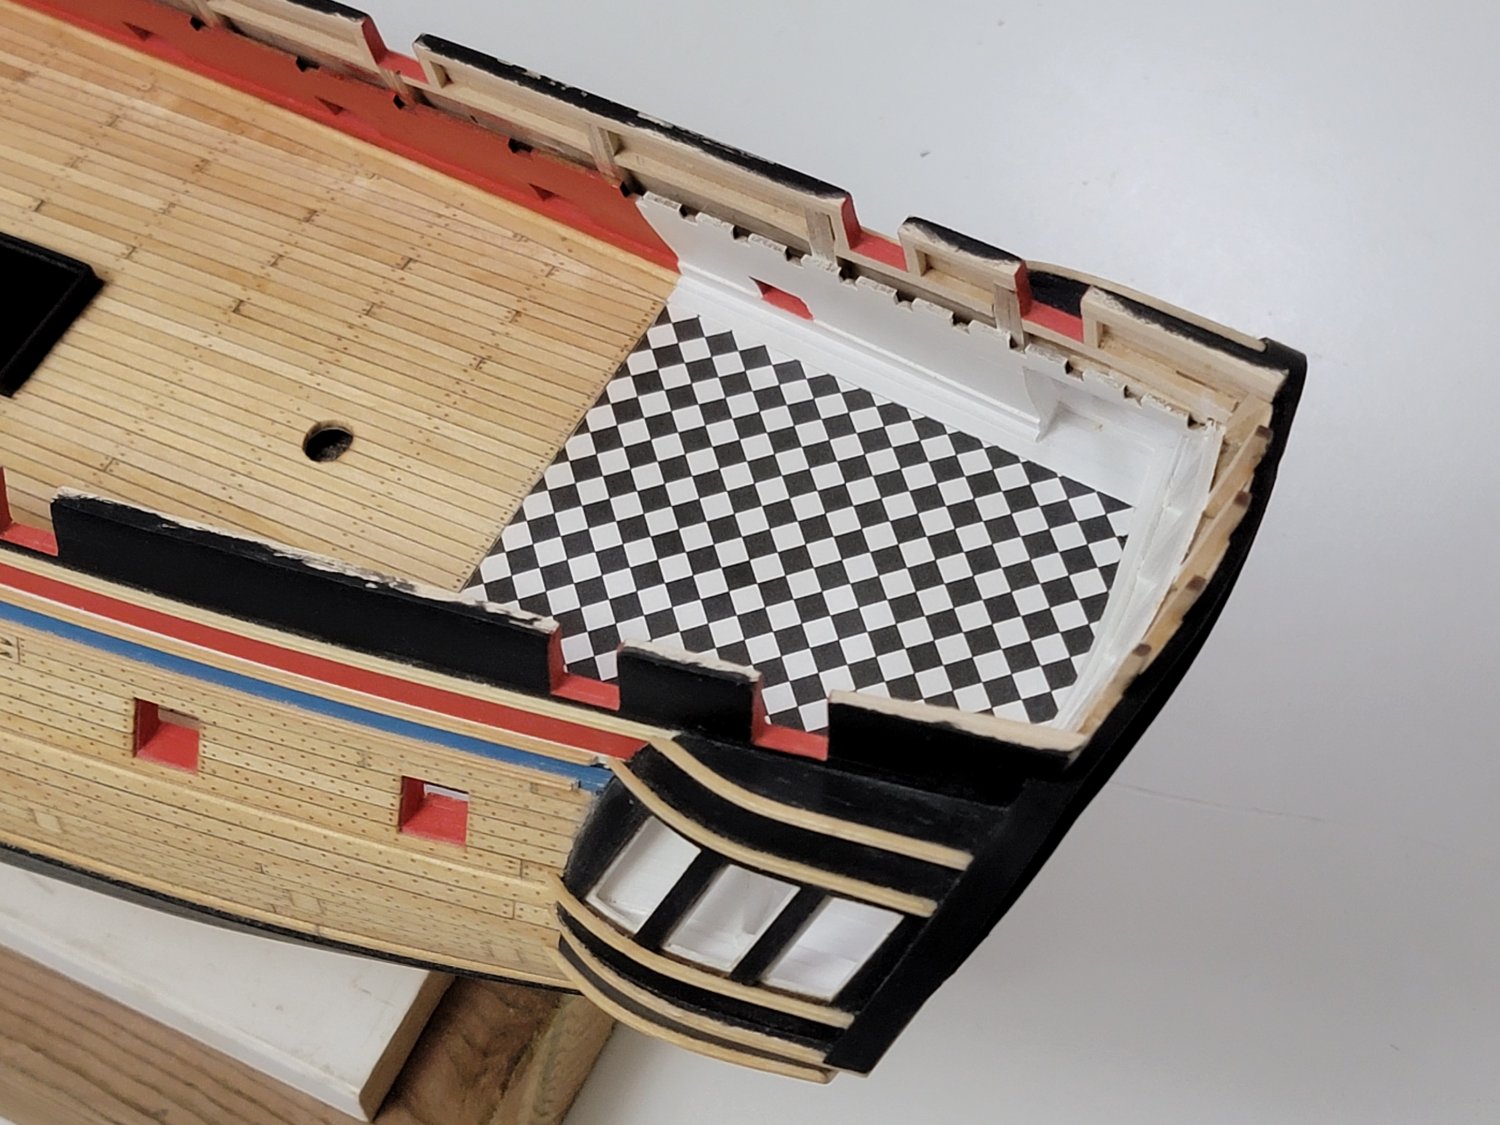
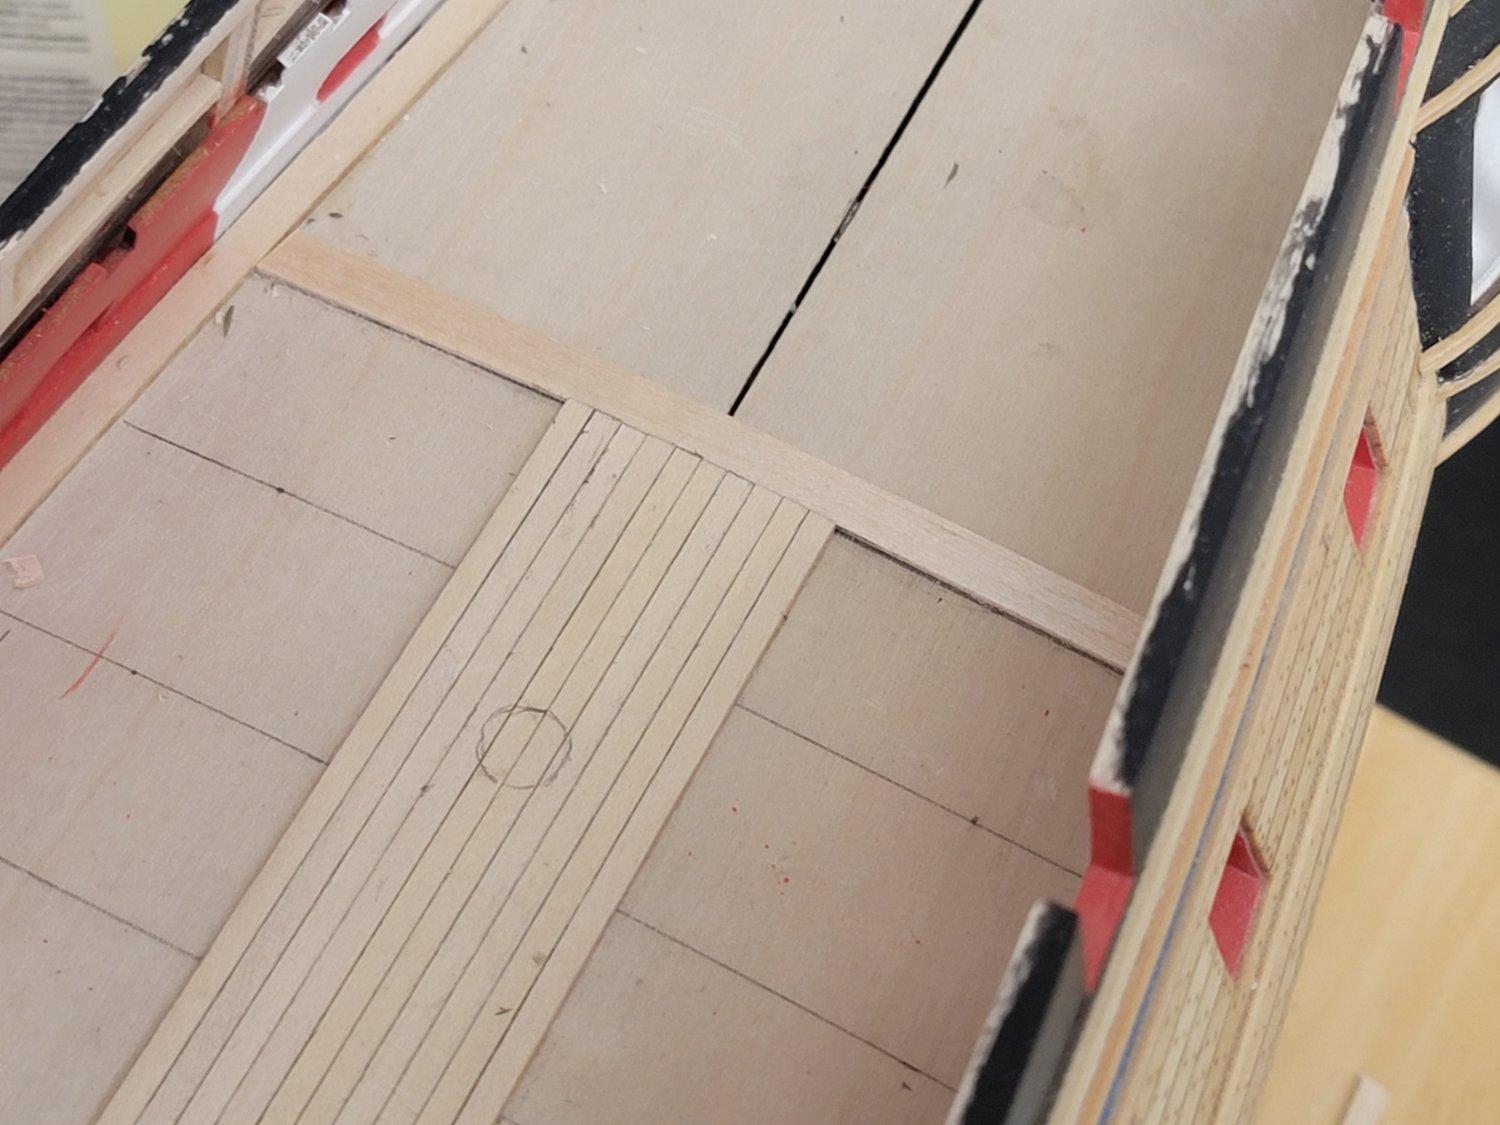
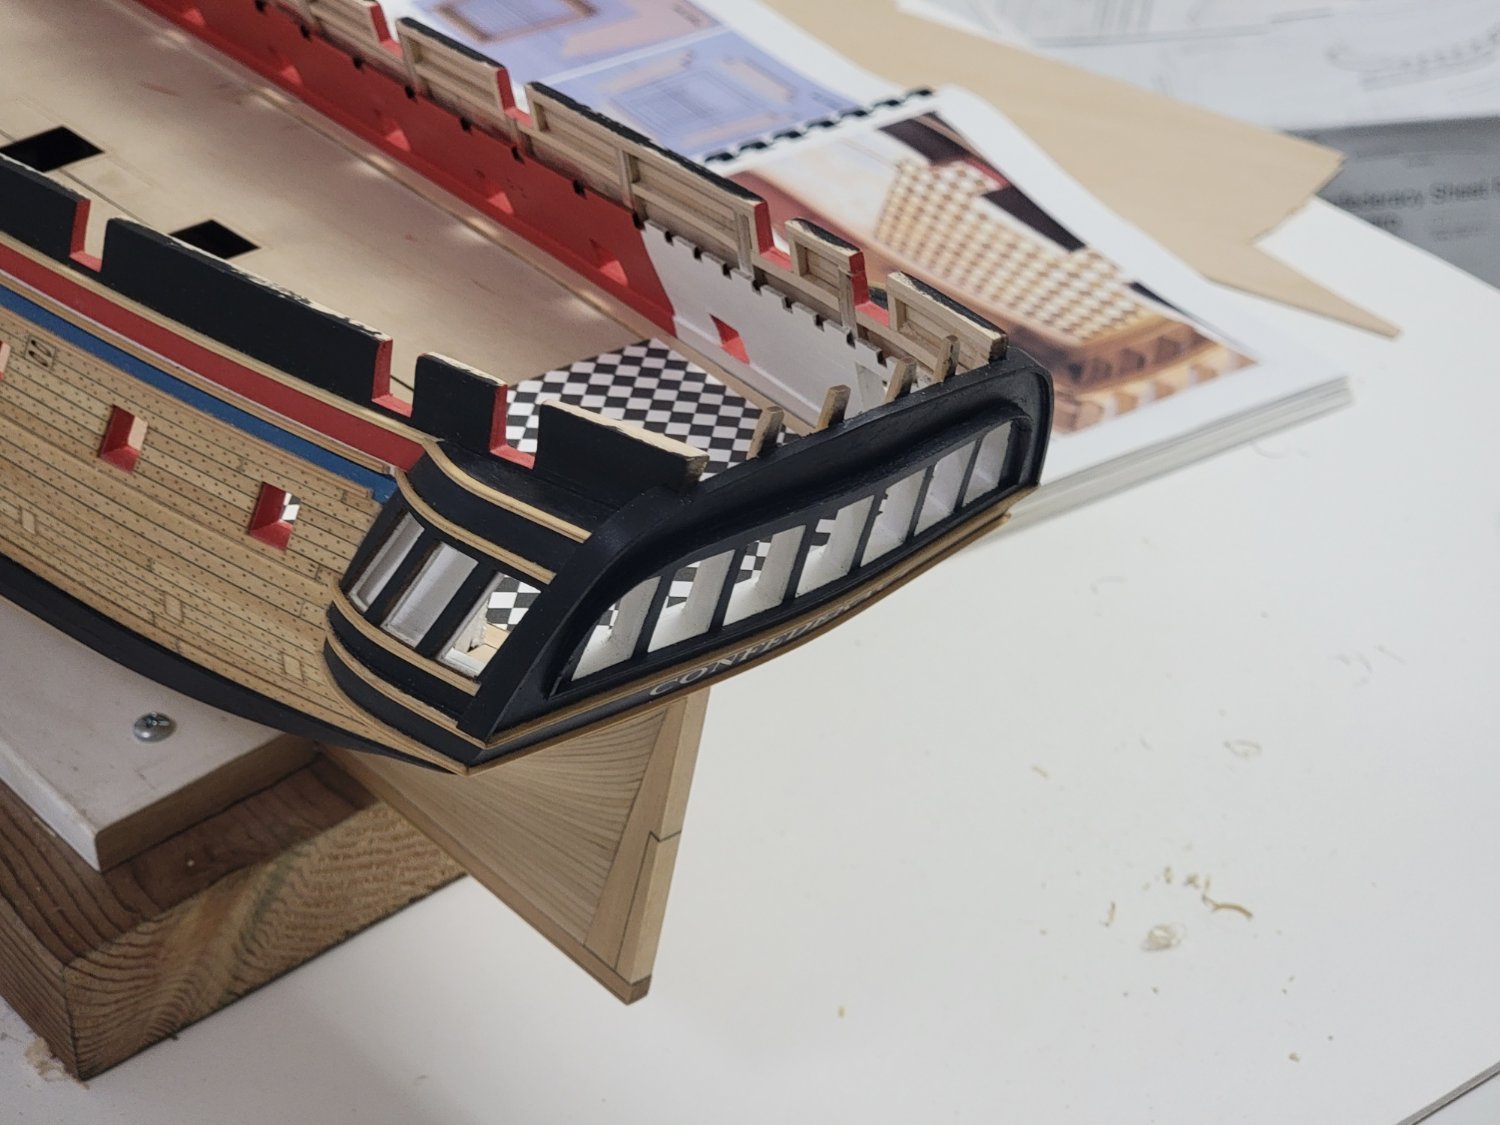
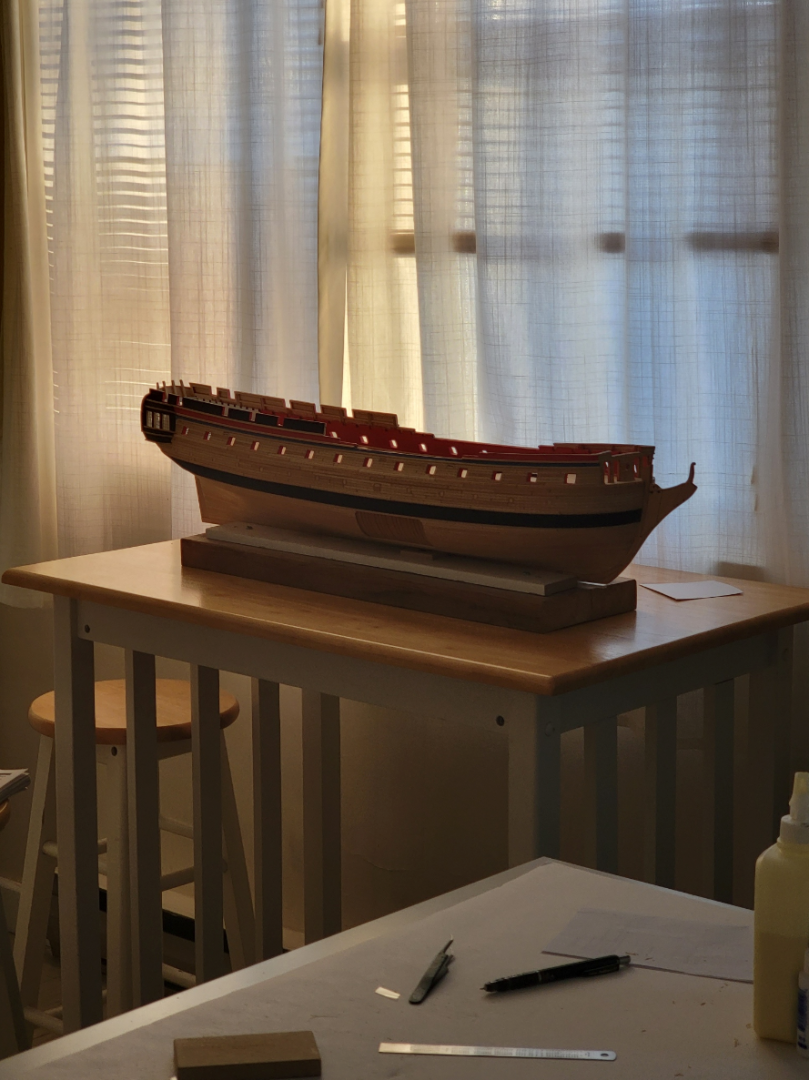
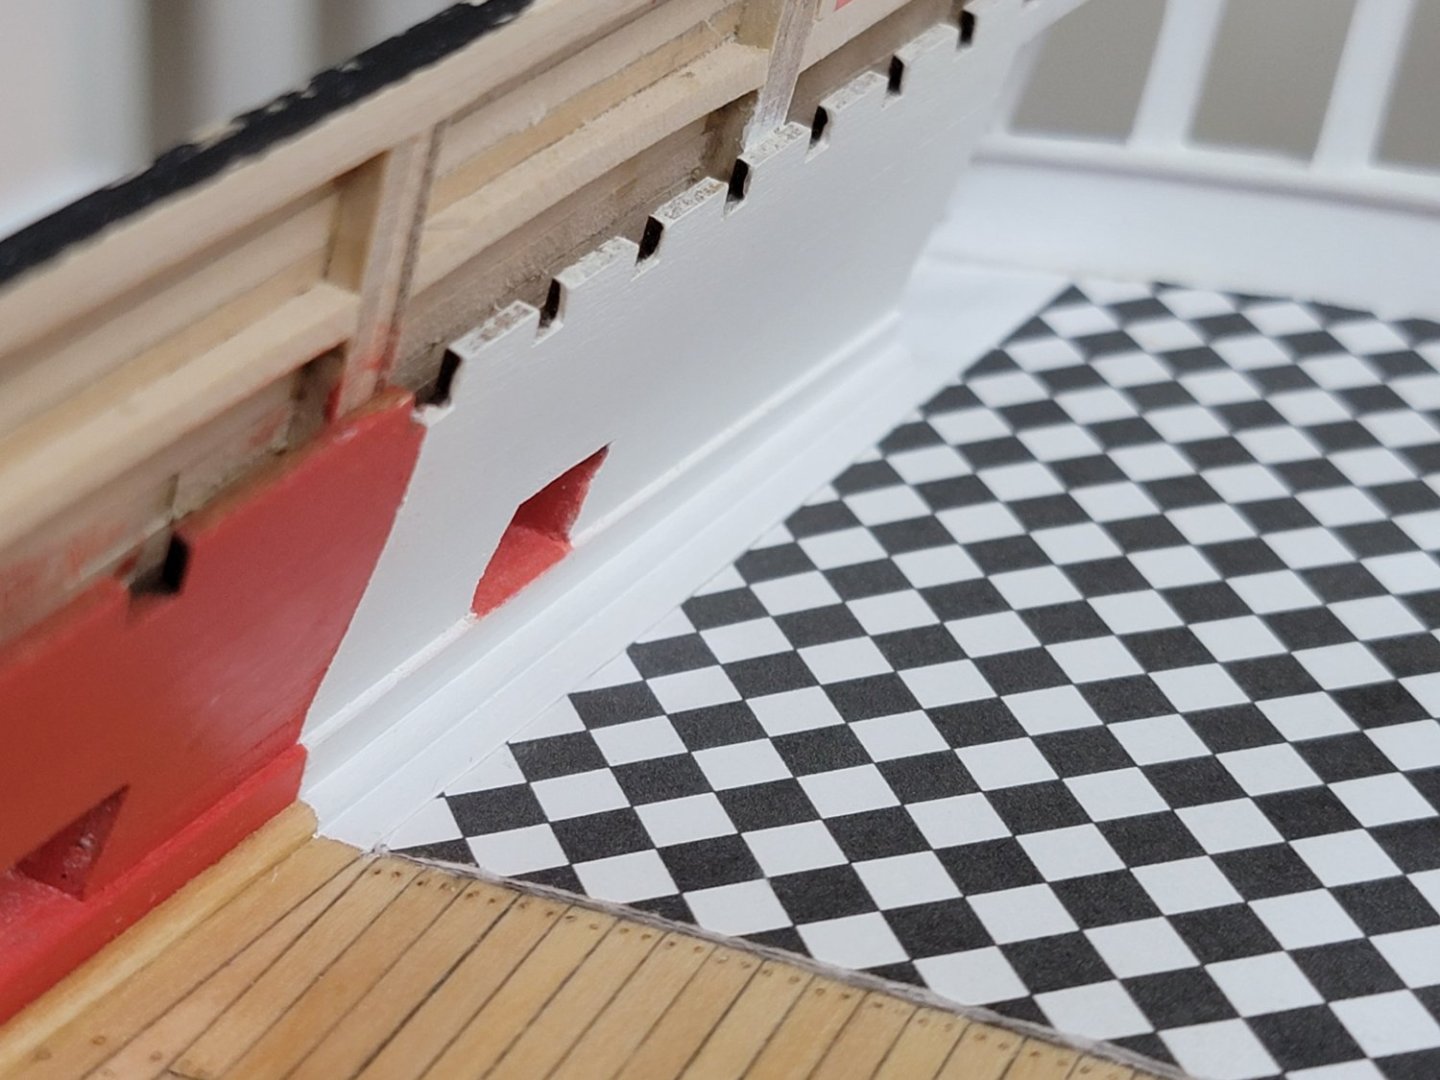
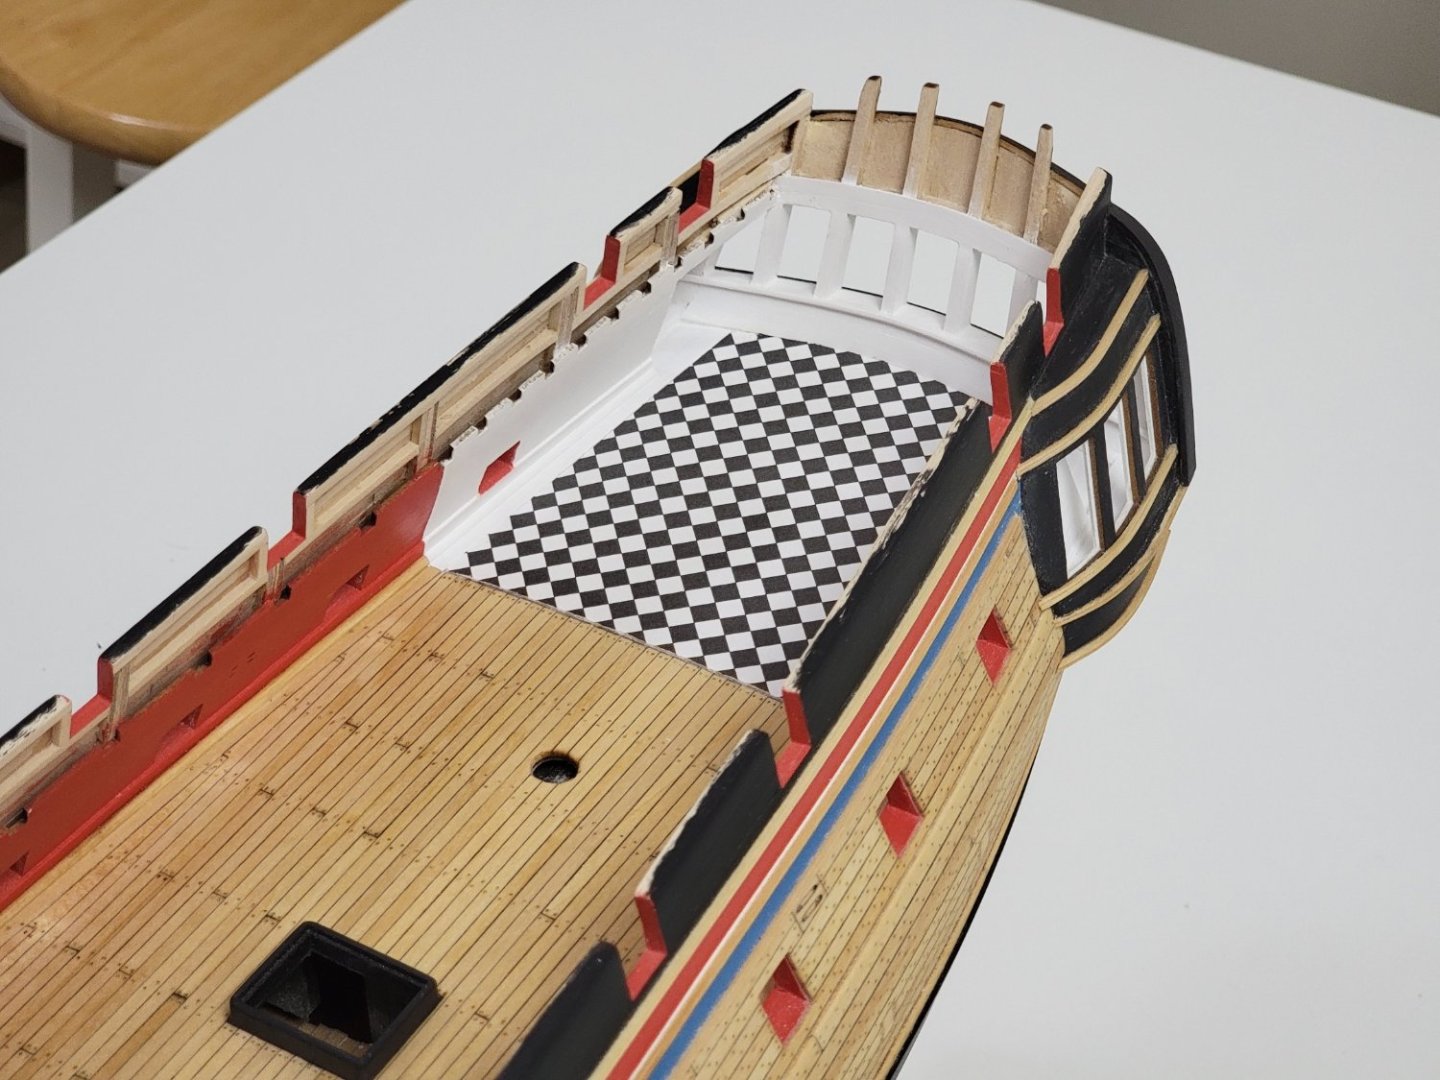
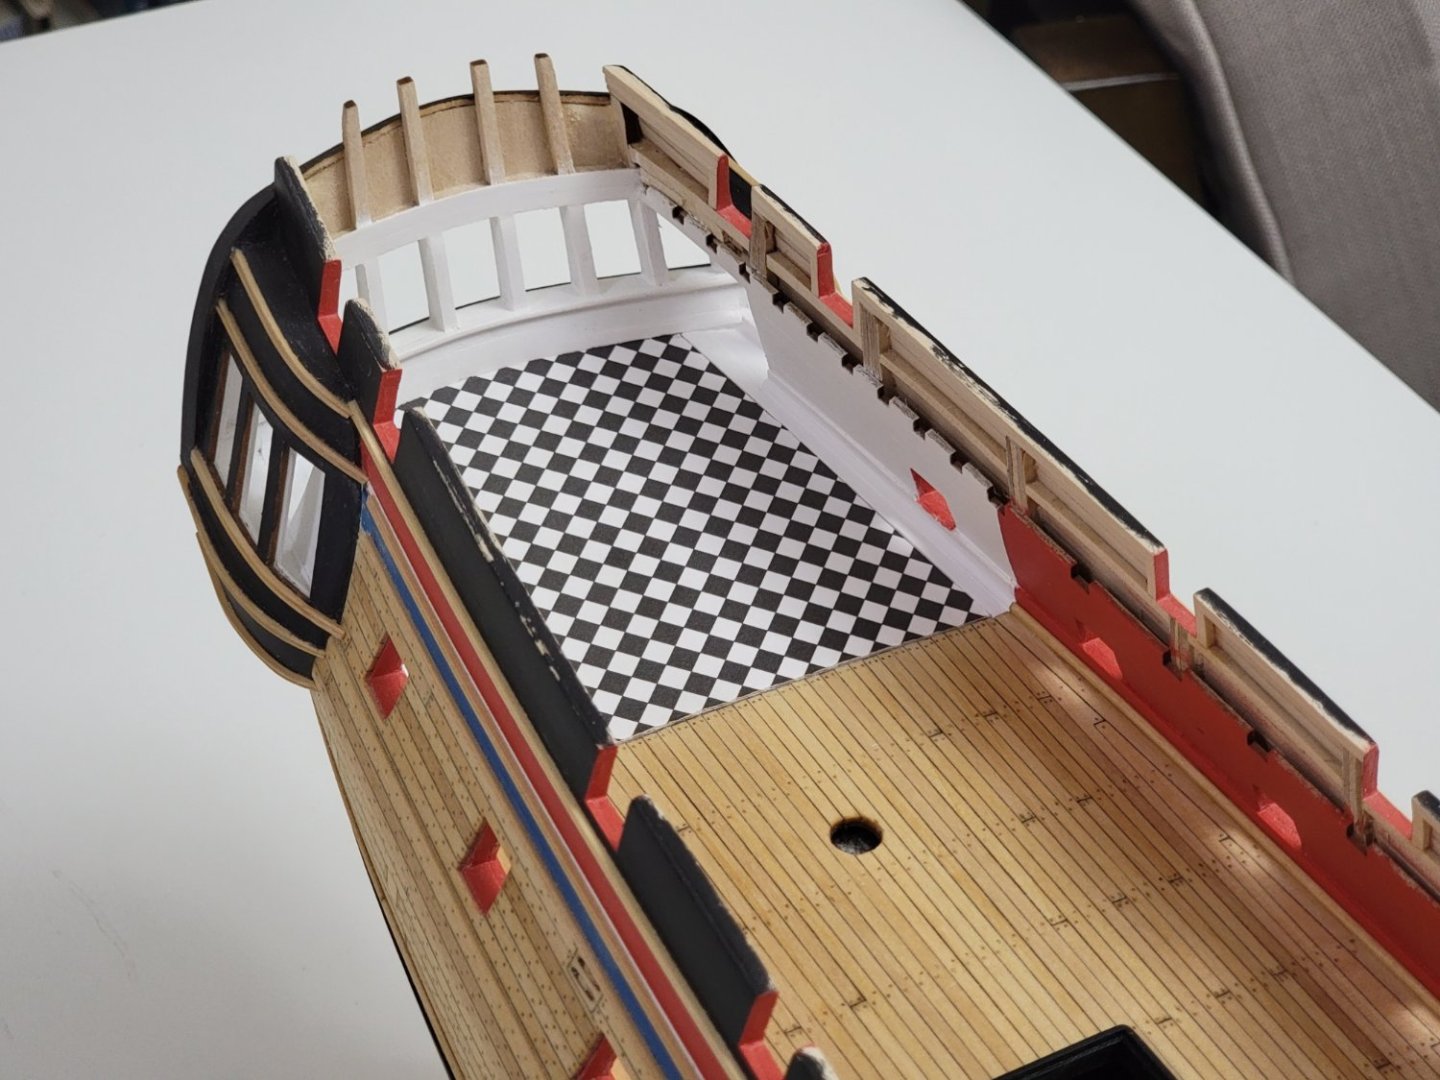
The checkerboard pattern is now glued to the false deck 😬 Fingers crossed I don't mess it up during the build. I'll try to be as careful as I can. Also, I hope the stick glue I used to bond the card stock onto the thin basswood sheet would hold up over the years. So far it seems good, but let's see.... Anyways, below are some photos. I guess this marks the completion of Chapter 10! For the next step, I am thinking to backtrack to finish up the stern. Hoping I can get better at the carvings this time around! Harshil


-
Thank you, Werner. After correspondence with Chuck, I think the best option would be to glue in the pattern section, then covering it with paper to protect it until its time to install the guns. Looking forward to seeing your update post 😁. Thanks again for the nice words and thanks all for the likes! Harshil
-
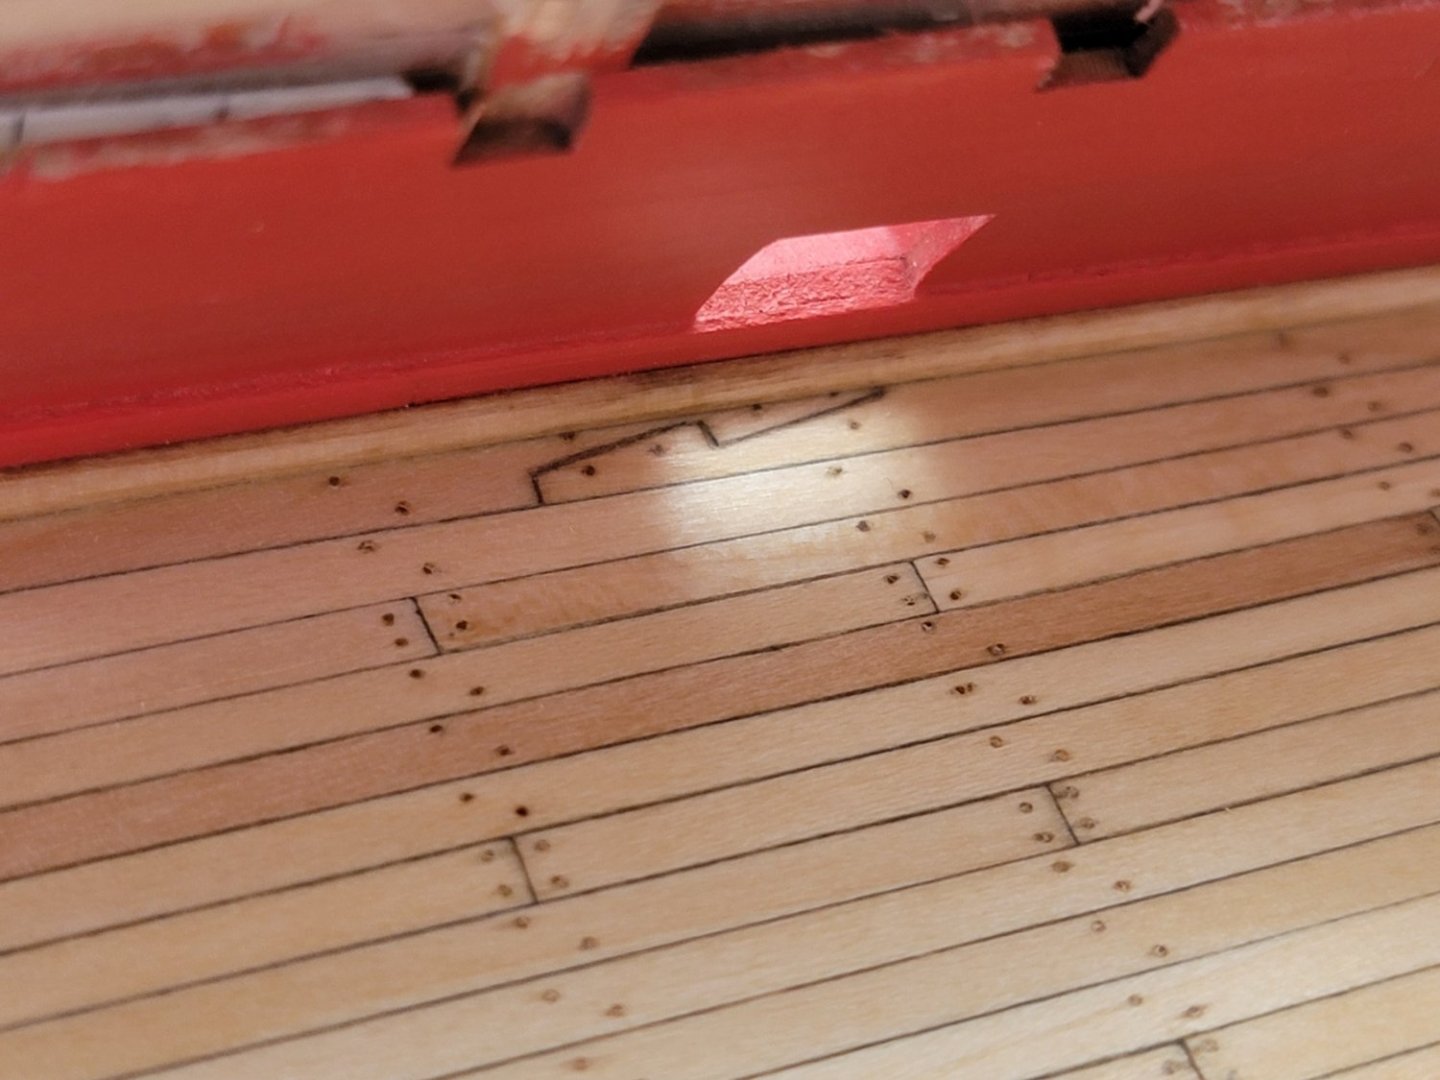
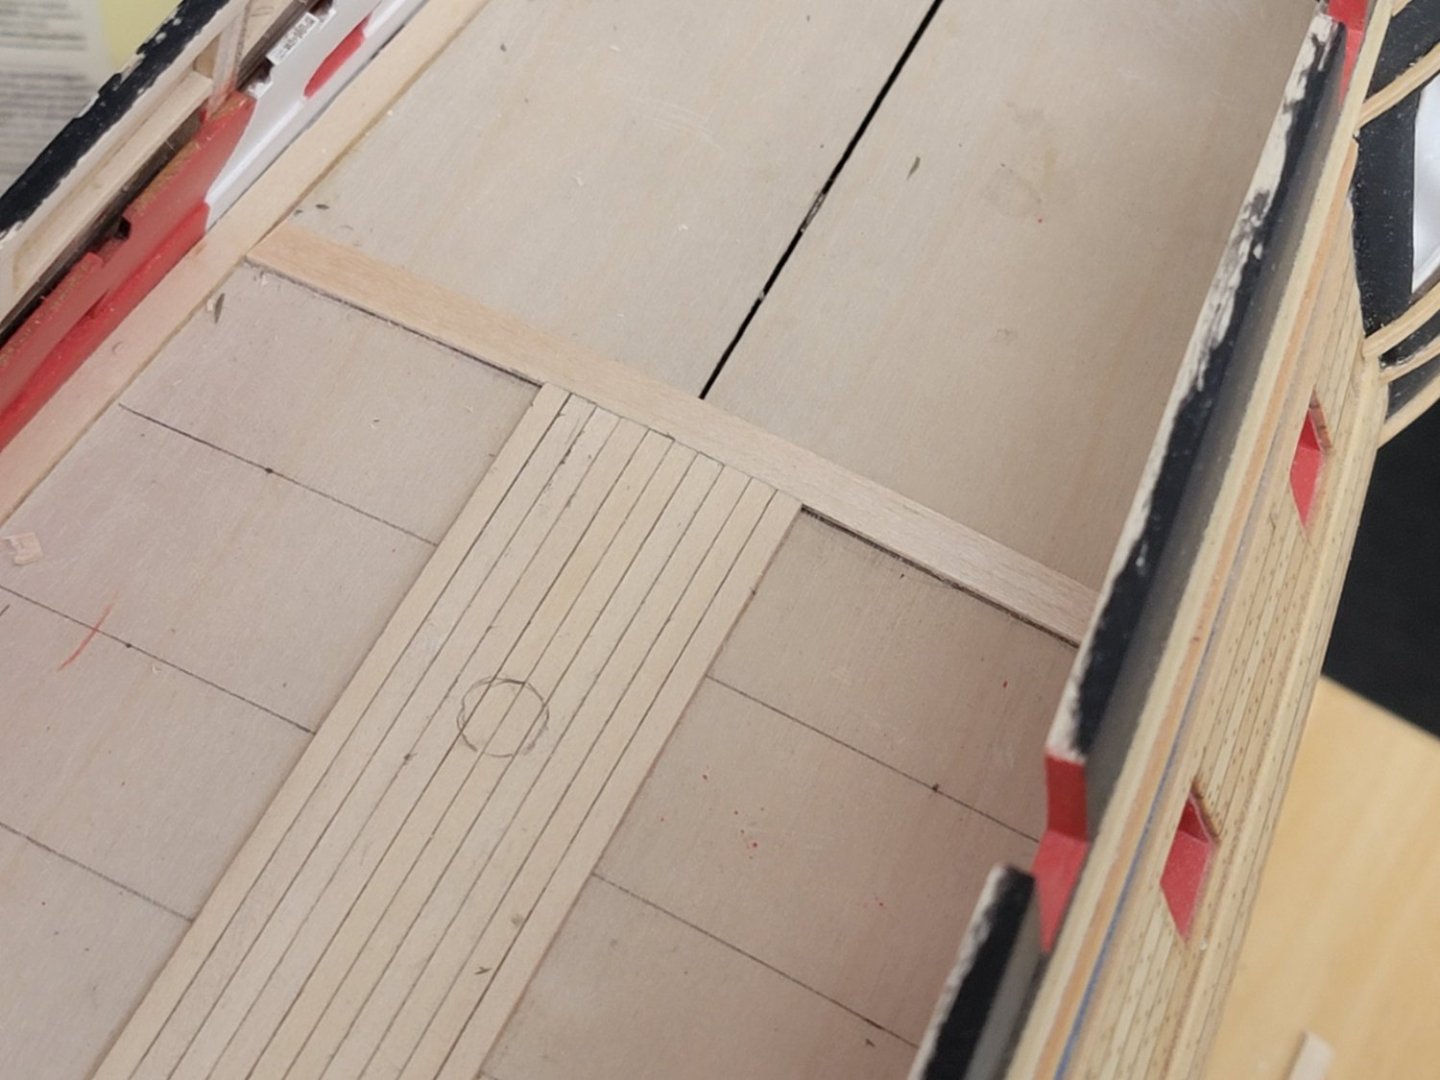
It's been a while since my last update! I finished treenailing the deck, installing the waterway, and have stained everything with tung oil. I shaped the waterway to be in a convex shape using a planer and sanding sticks. I have not yet glued any of the deck fittings in case they come in the way when installing the ladder etc. Here are some photos of where the model is at currently: The next step would be to paint the margin plank + waterway in the great cabin white before gluing the checkerboard pattern. In the meantime, I will also continue thinking of different options for the checkerboard pattern as I am not too confident that I can keep the printed card stock pristine throughout the whole build...


-
Thank you Steven, David, and Rick! Your comments are much appreciated I think using thinner planks should be doable, but some adjustments should be made for the wales, and decking (since the gunports would be slightly higher from the deck level with thinner planks). But curious to hear what @Chuck thinks. Harshil
-
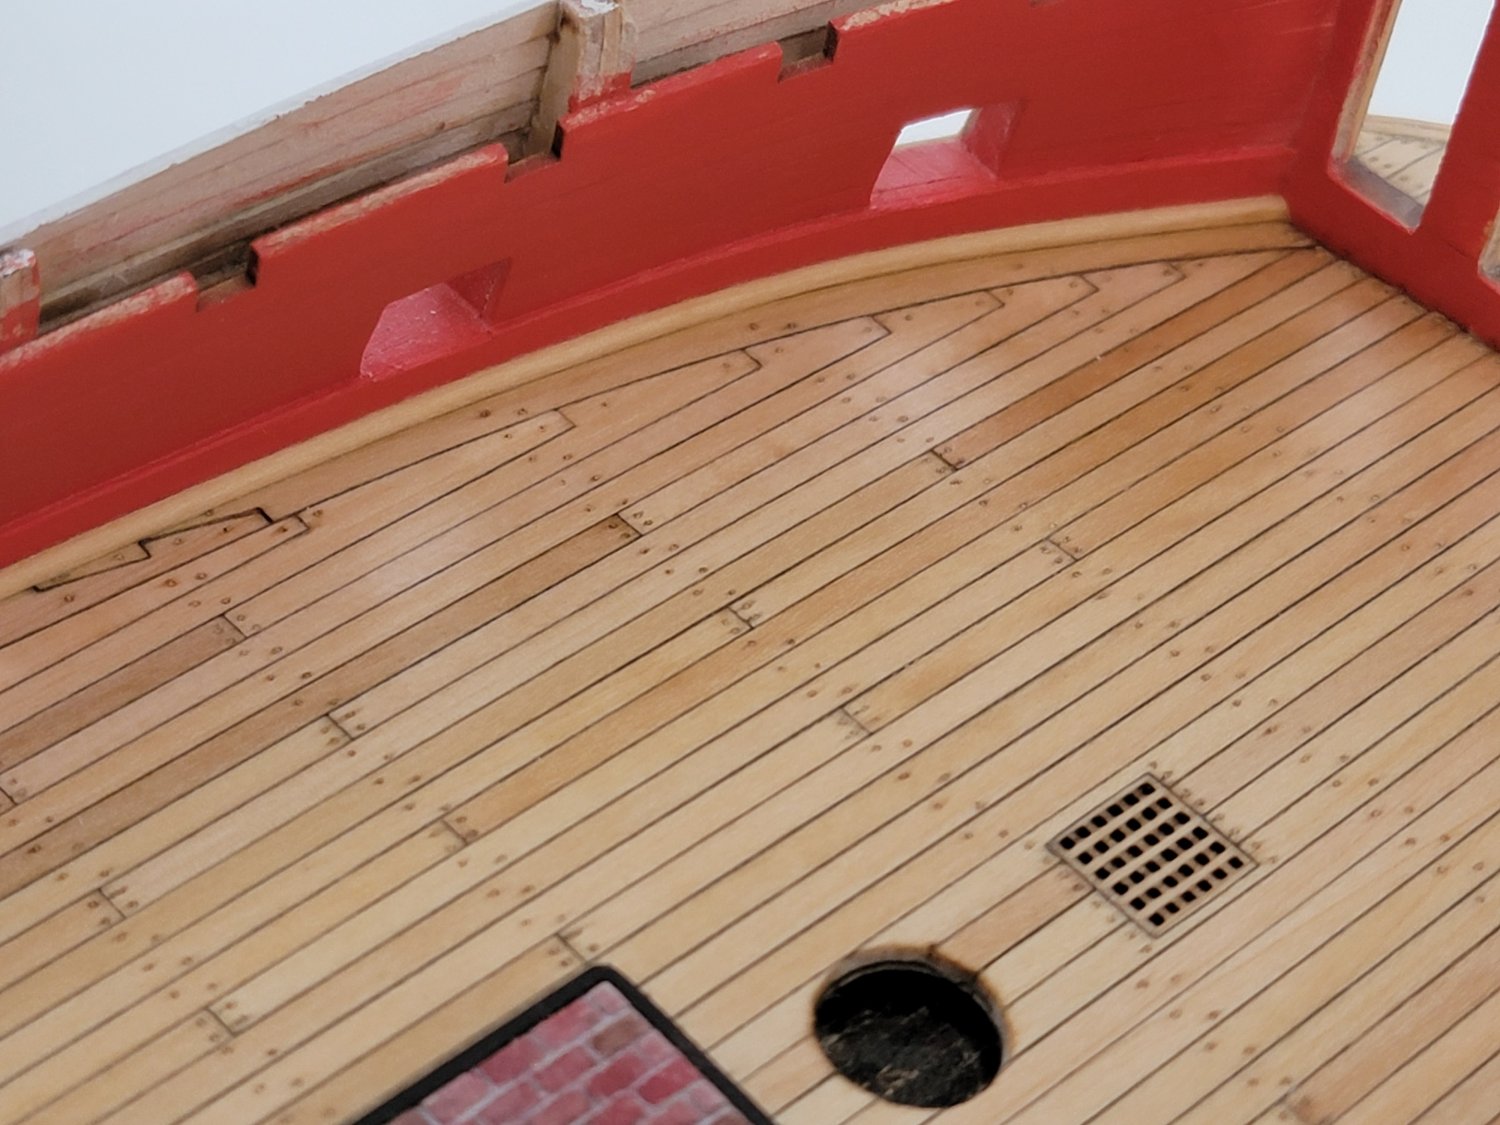
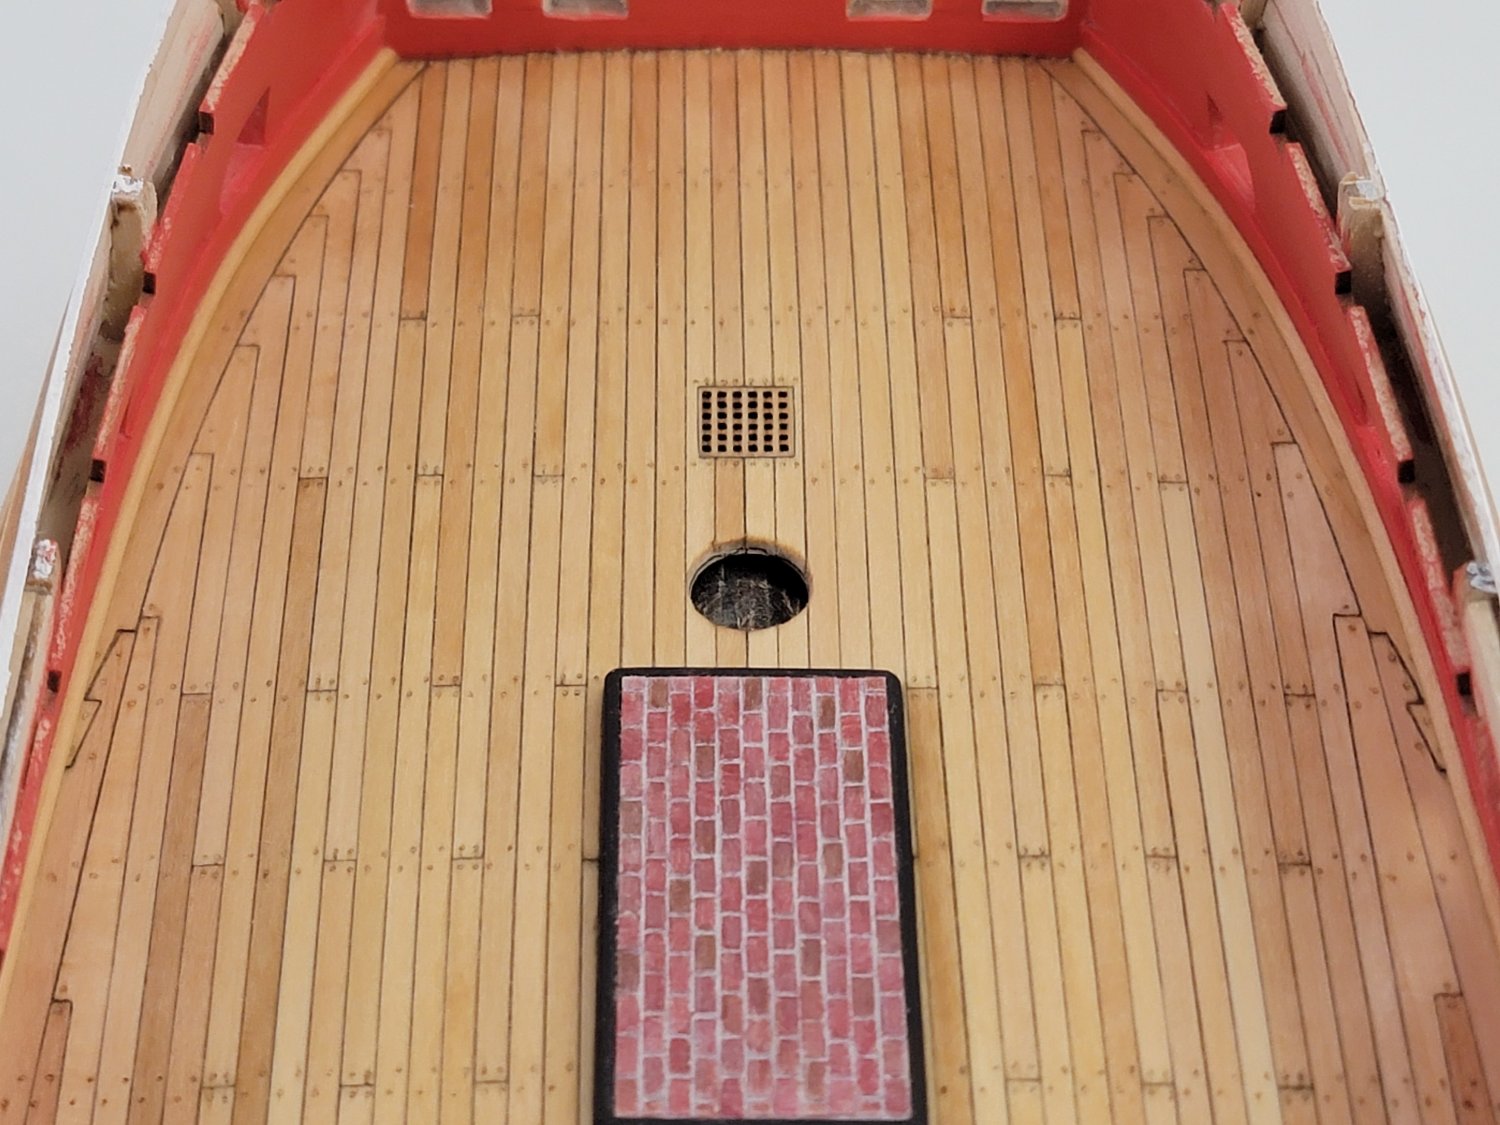
Thank you all for the likes!! Decking is now completed 😁 There are some mistakes with symmetry, especially for the edge planks. That made me realize, it would be best to plan ahead of time and mark the plank locations (similar to the hull). I also had to redo the aft planks as I realized I did not follow the same pattern as the forward part of the ship. But glad I found that before it was too late! Before I forget to mention, I spot glued this plank to make sure the decking would be flush with the great cabin And here are some photos of this stage completed. Next is the treenails, waterway, and then lastly finishing with tung oil.


-
A quick update on the decking. Managed to get some hook scarfs at the bow. For this, I used a planer for the long end, and an X-acto blade at the forward-end of the plank where the planer could not reach. Then carefully peeled of 0.1mm slices until the plank was completely flat. I checked the end result against a normal plank facing a source of light to make sure no light seeps in any potential gap. In some cases where light did seep in, I used sandpaper glued to the edge of a flat piece of wood and lightly sanded it straight. Harshil

-
No worries Werner. I'll be sure to be very careful when the tiles are glued to the false deck. I plan to glue it once I finish with the treenails and apply the finish to the deck.
-
Thank you, Werner! Yes, printed directly on card stock and glued to to a thin sheet of wood. And yes, I did mean the self-adhesive paper. Is the surface of the self-adhesive paper similar to normal paper? Harshil
-
Thank you, Bob! Currently working on the decking. Here are some few progress photos 😊: Also, I was thinking of exploring more ideas for the checkerboard pattern. I am worried that any small mishaps or stains (like glue seepage or paint droplets) on the printed cardstock may be hard to remove since it is very porous just like paper. Might test out label paper.. Harshil


-
Thank you for the kind words!! Yes I am a bit sad that most of the work will be hidden.. Thanks all for the likes as well 😊
-
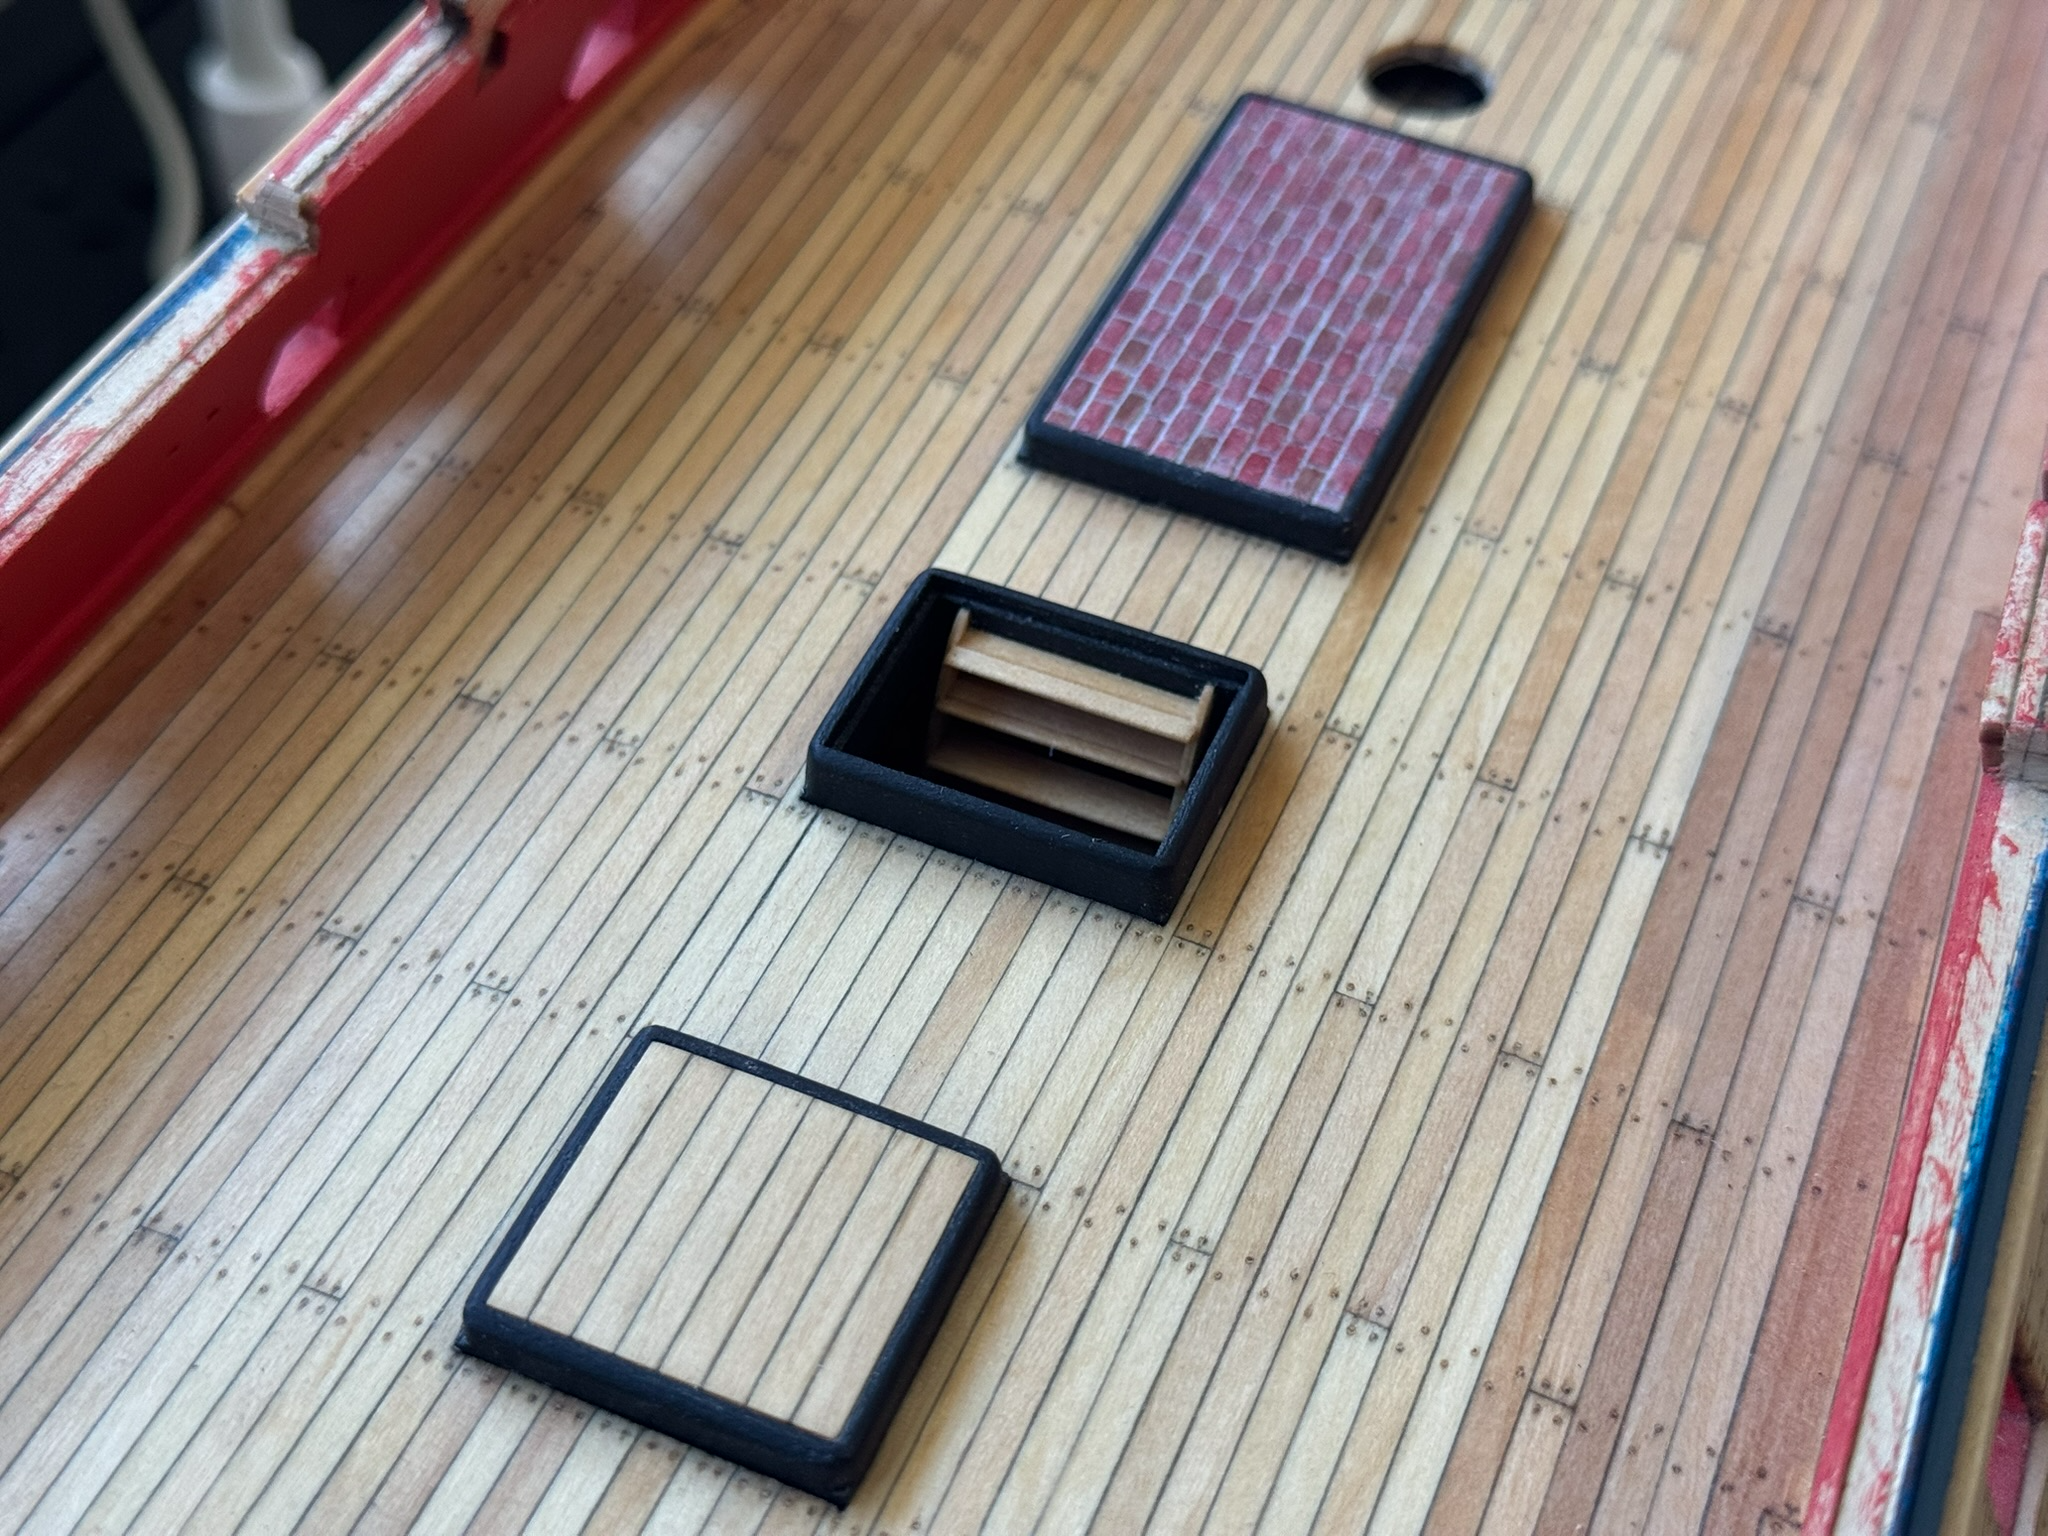
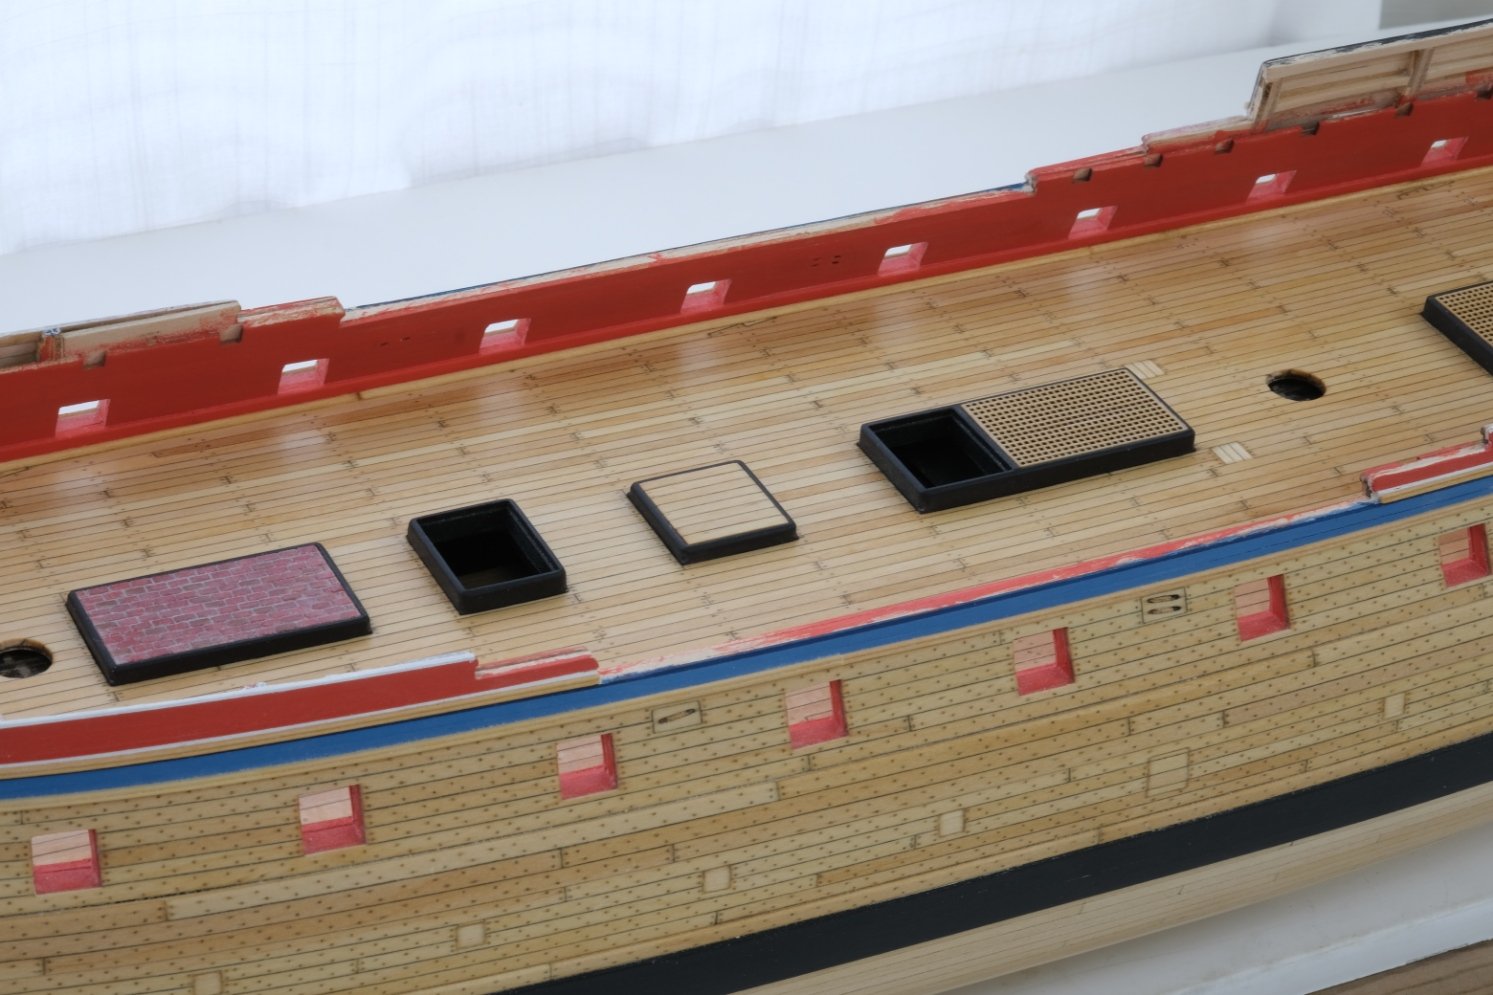
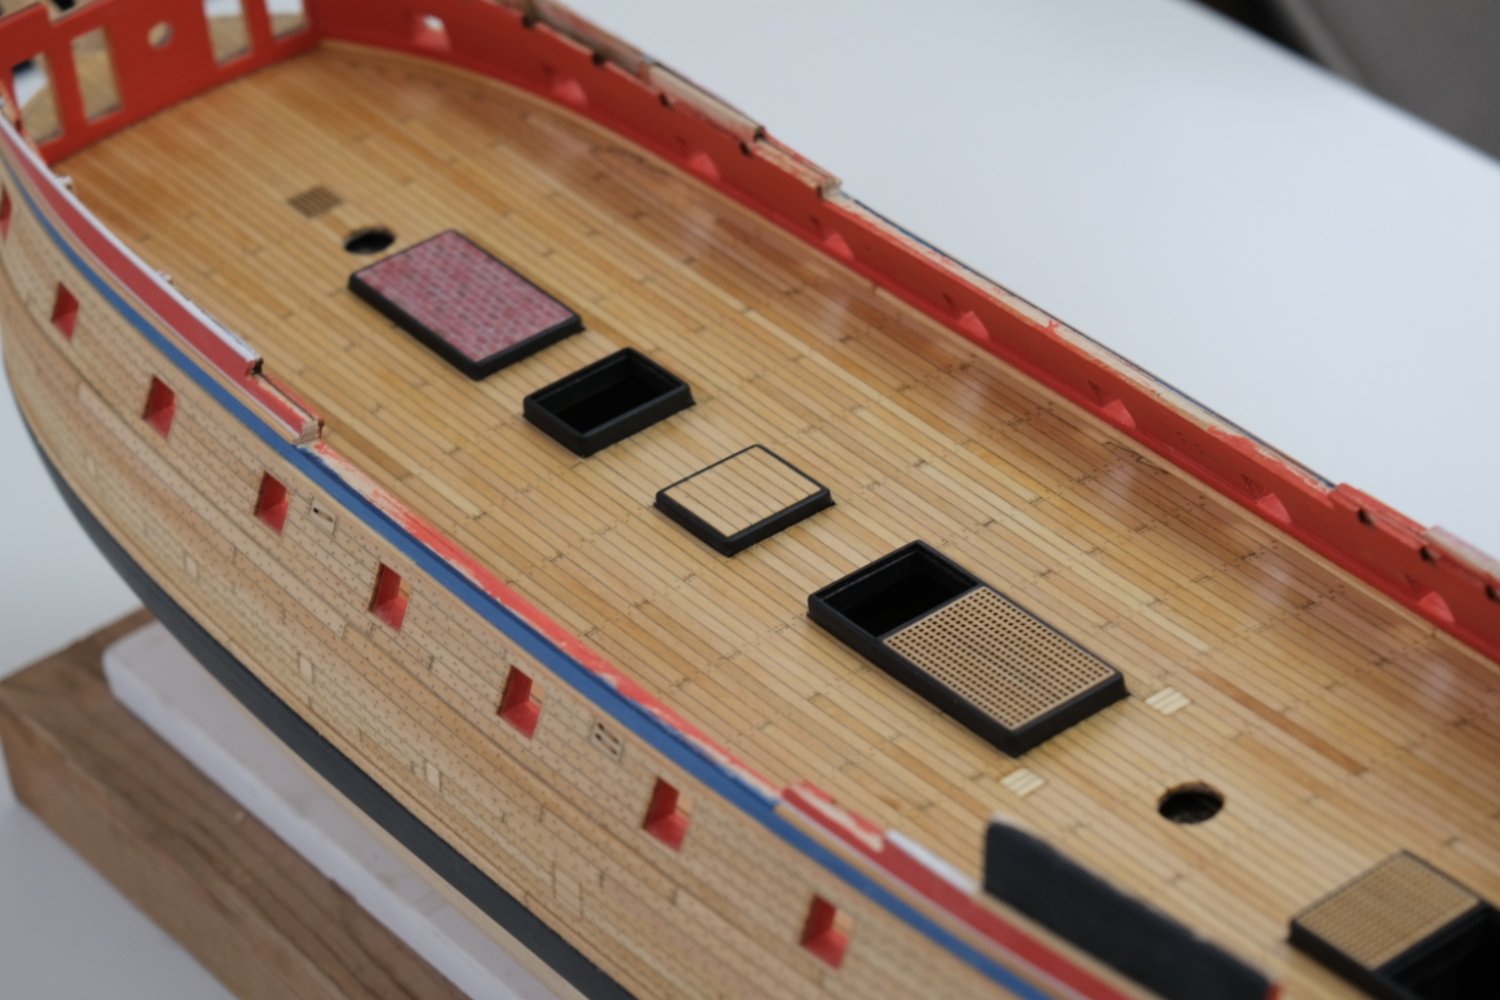
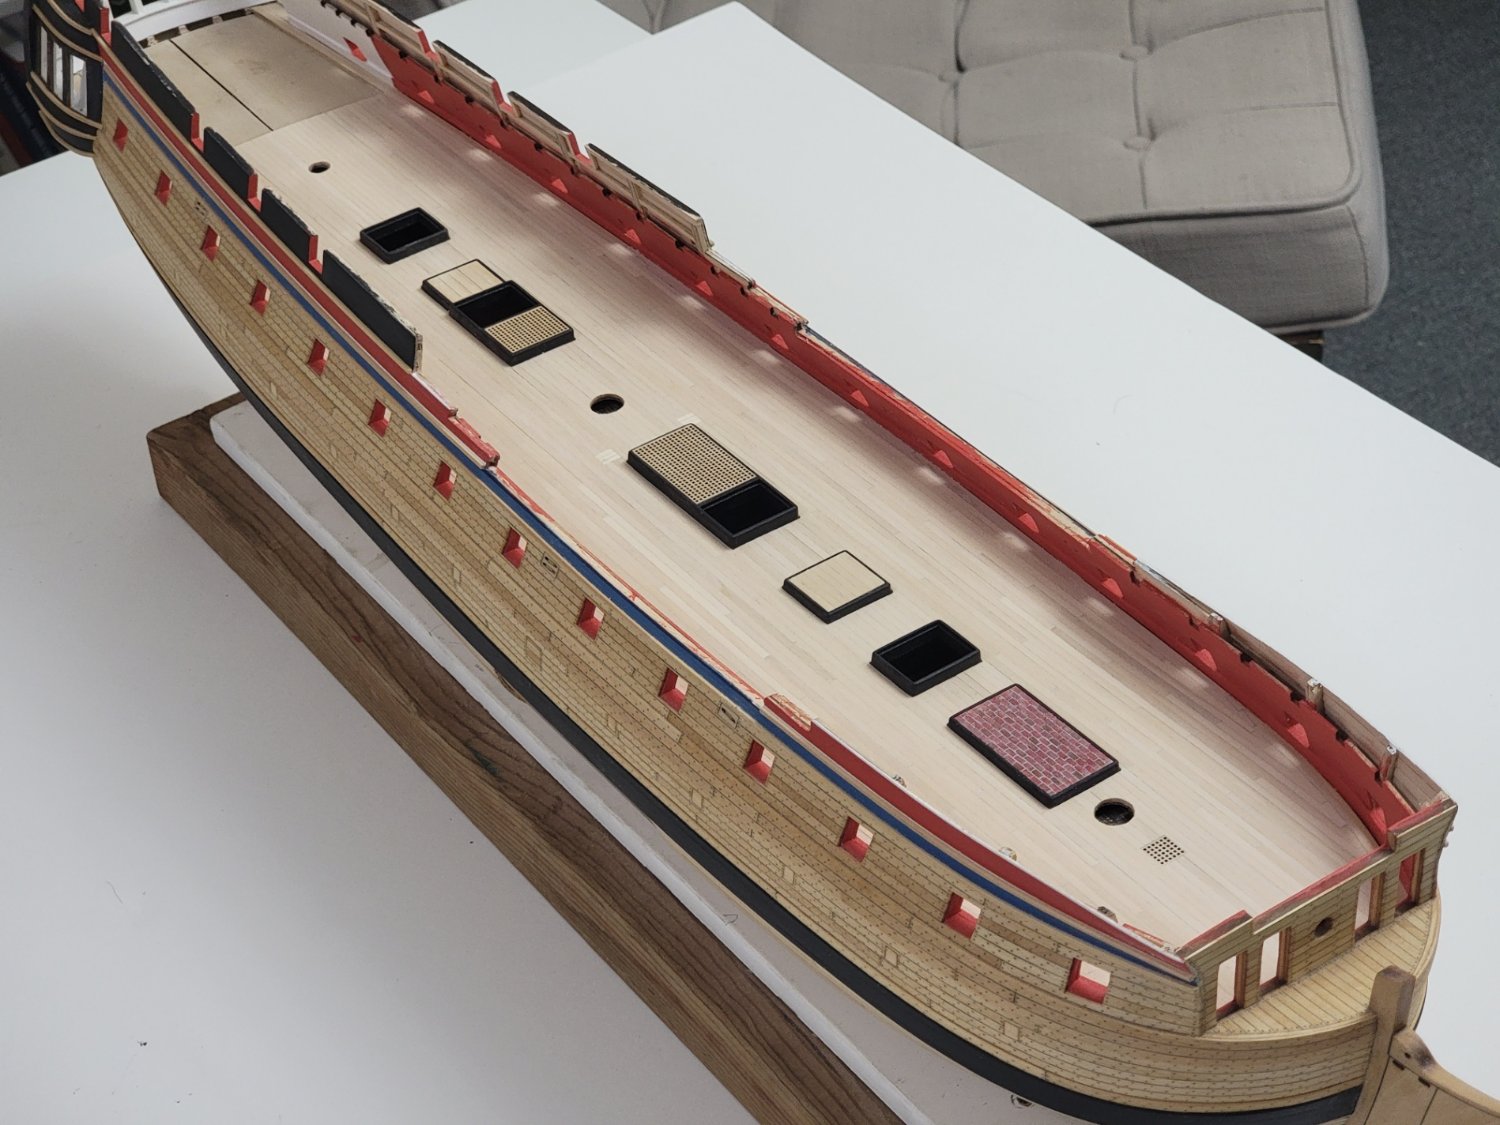
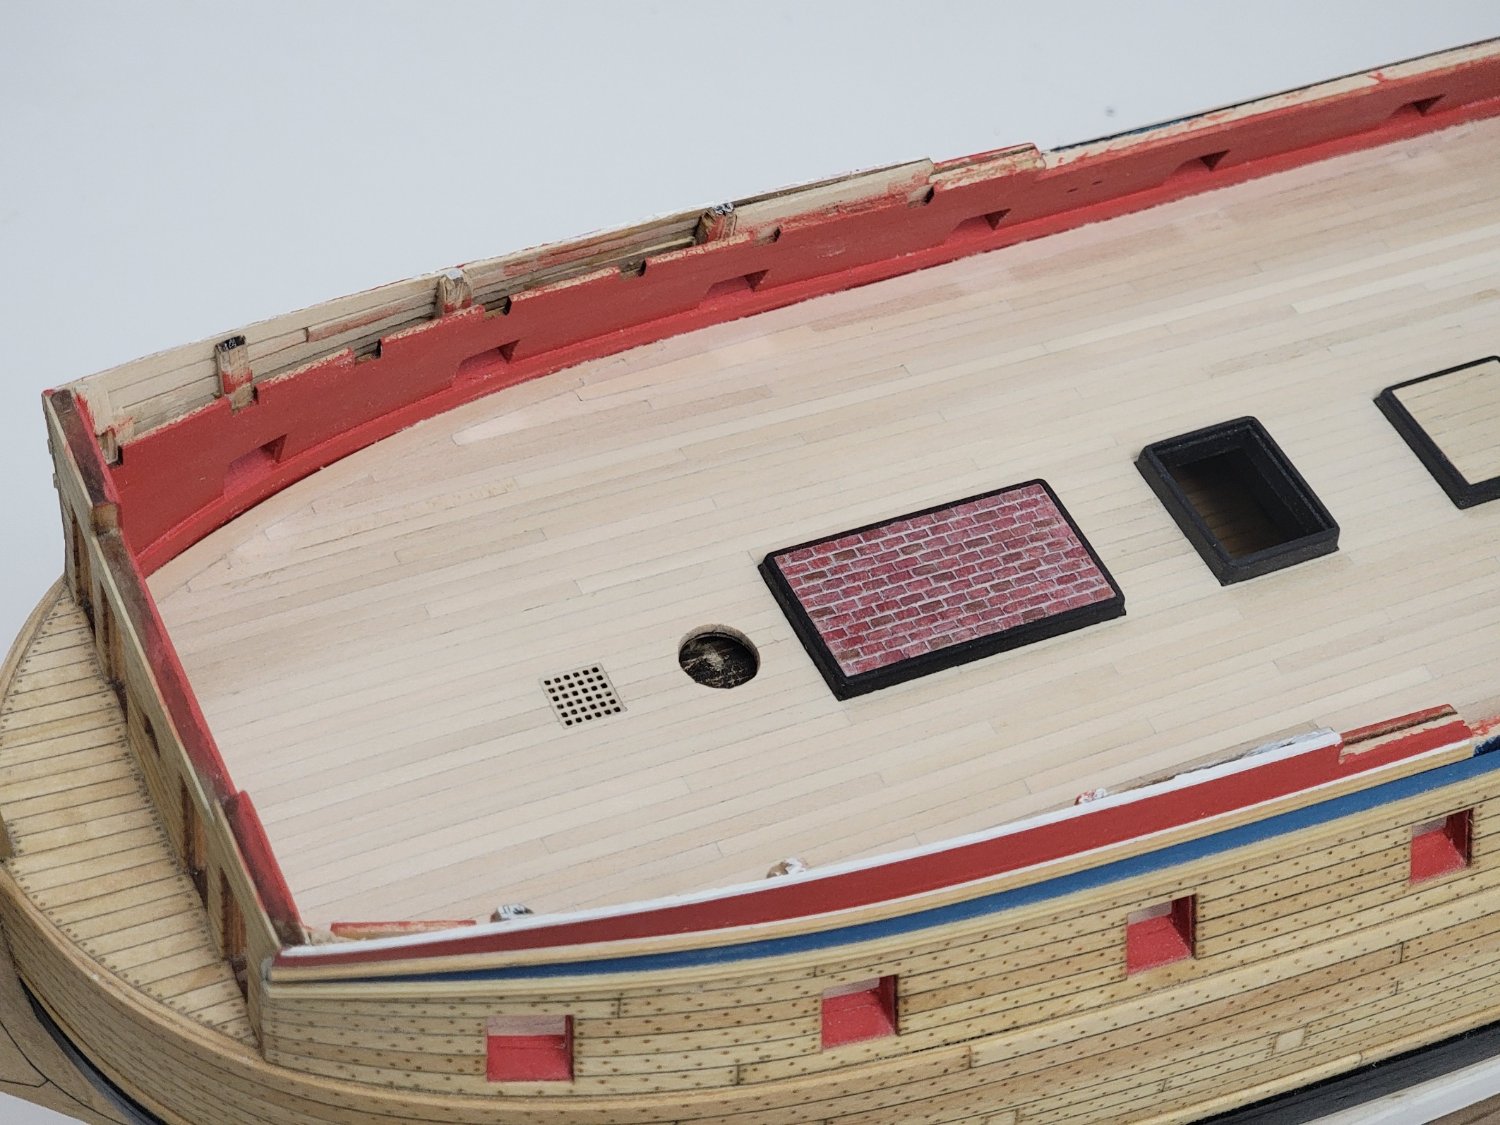
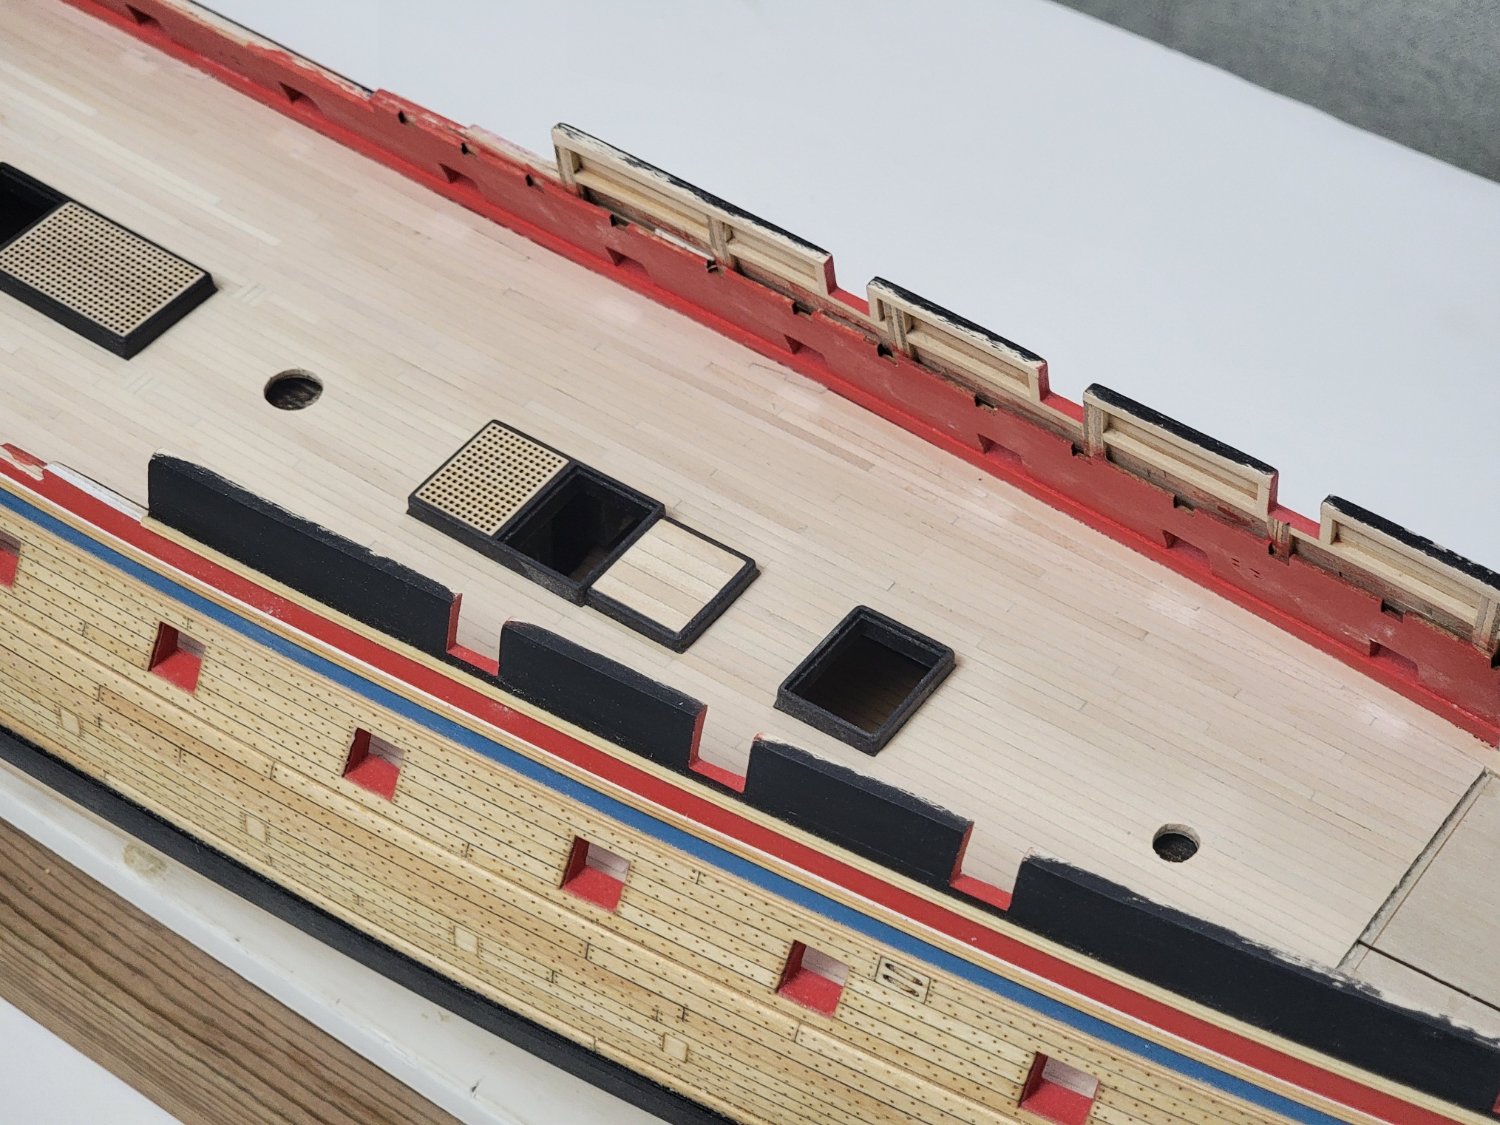
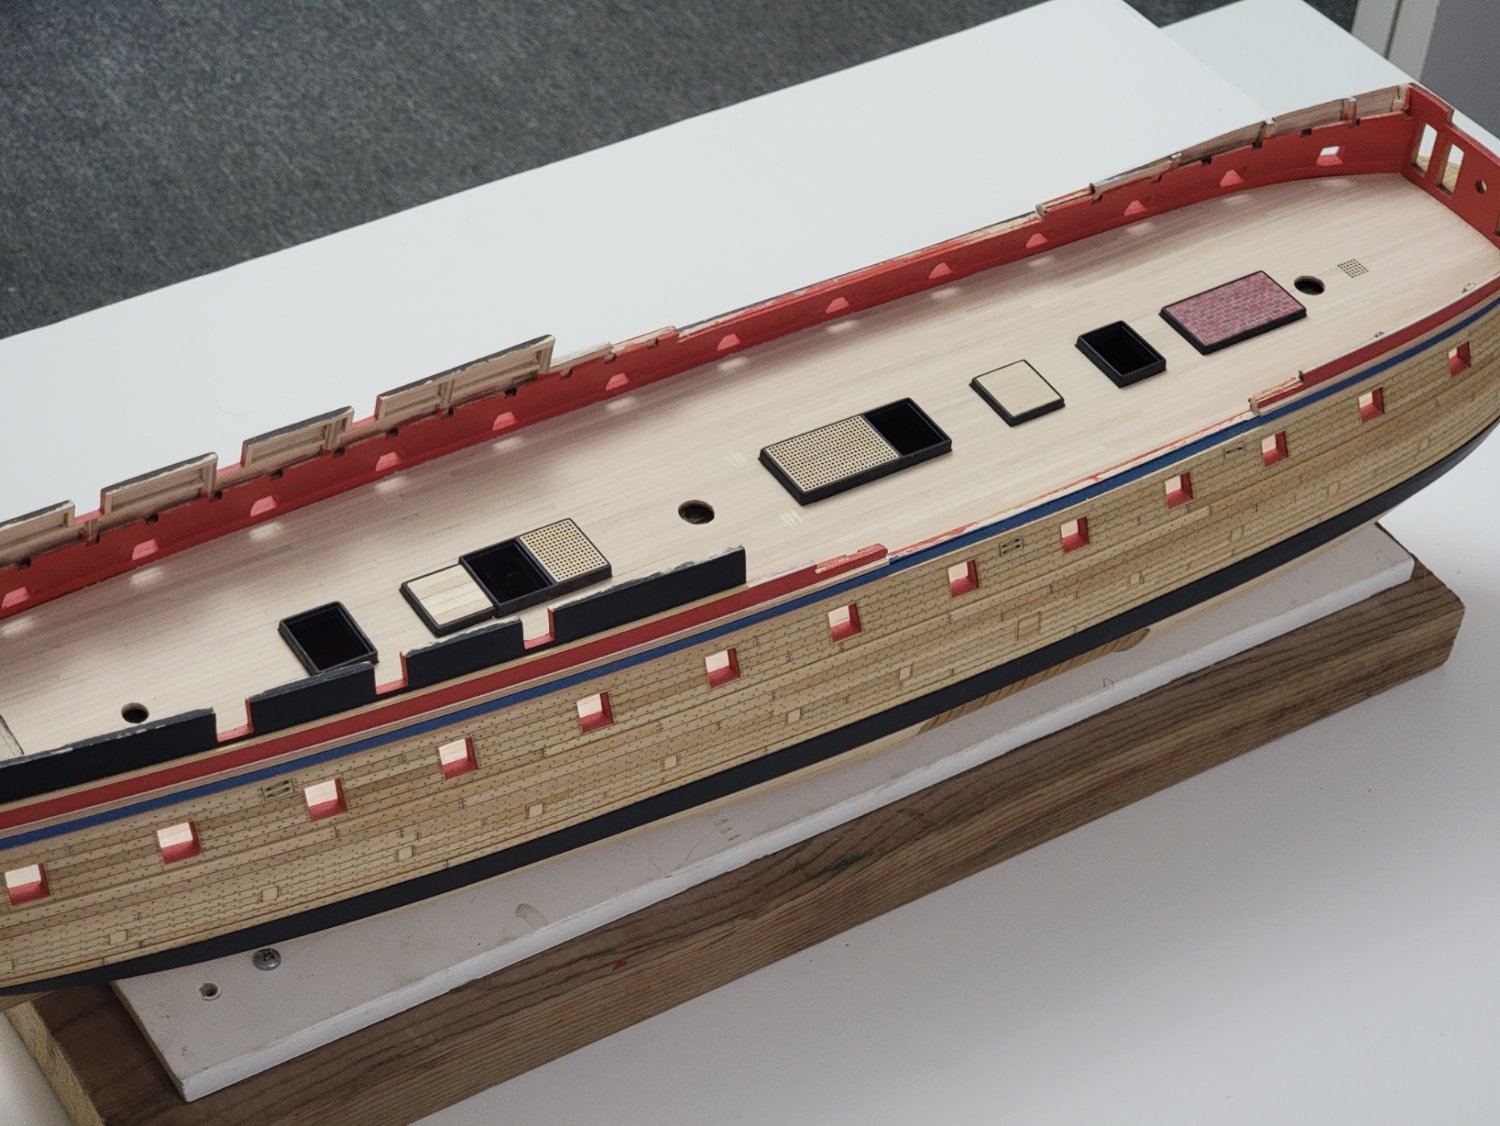
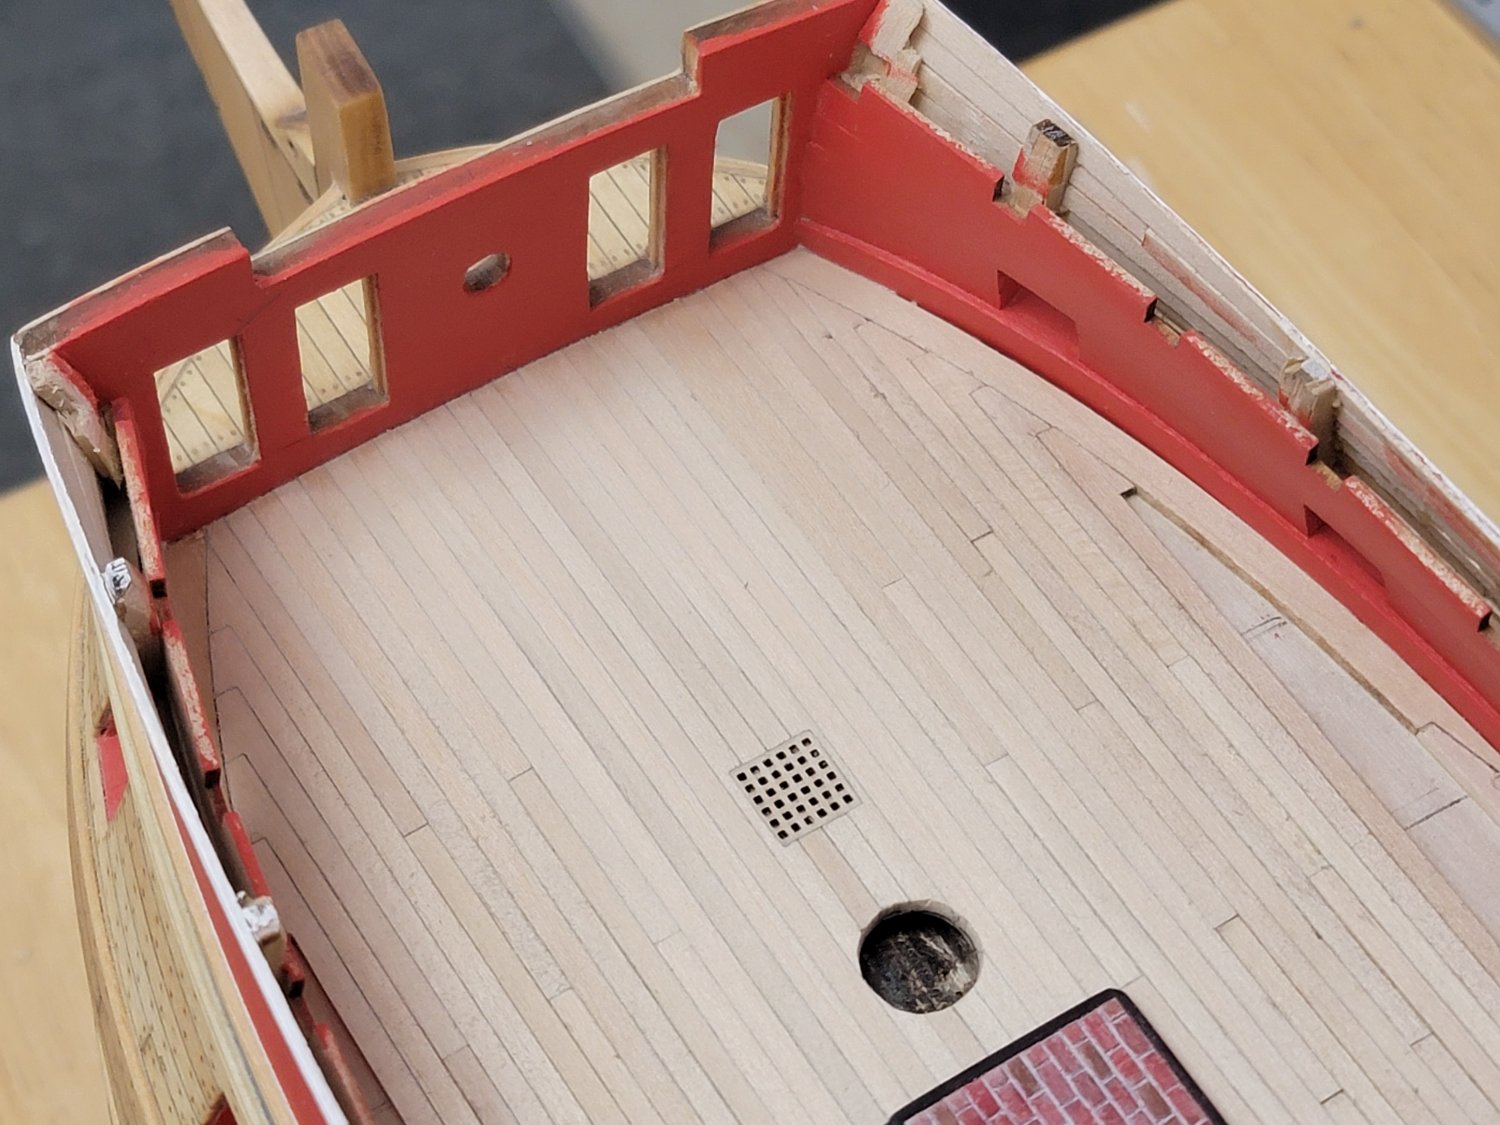
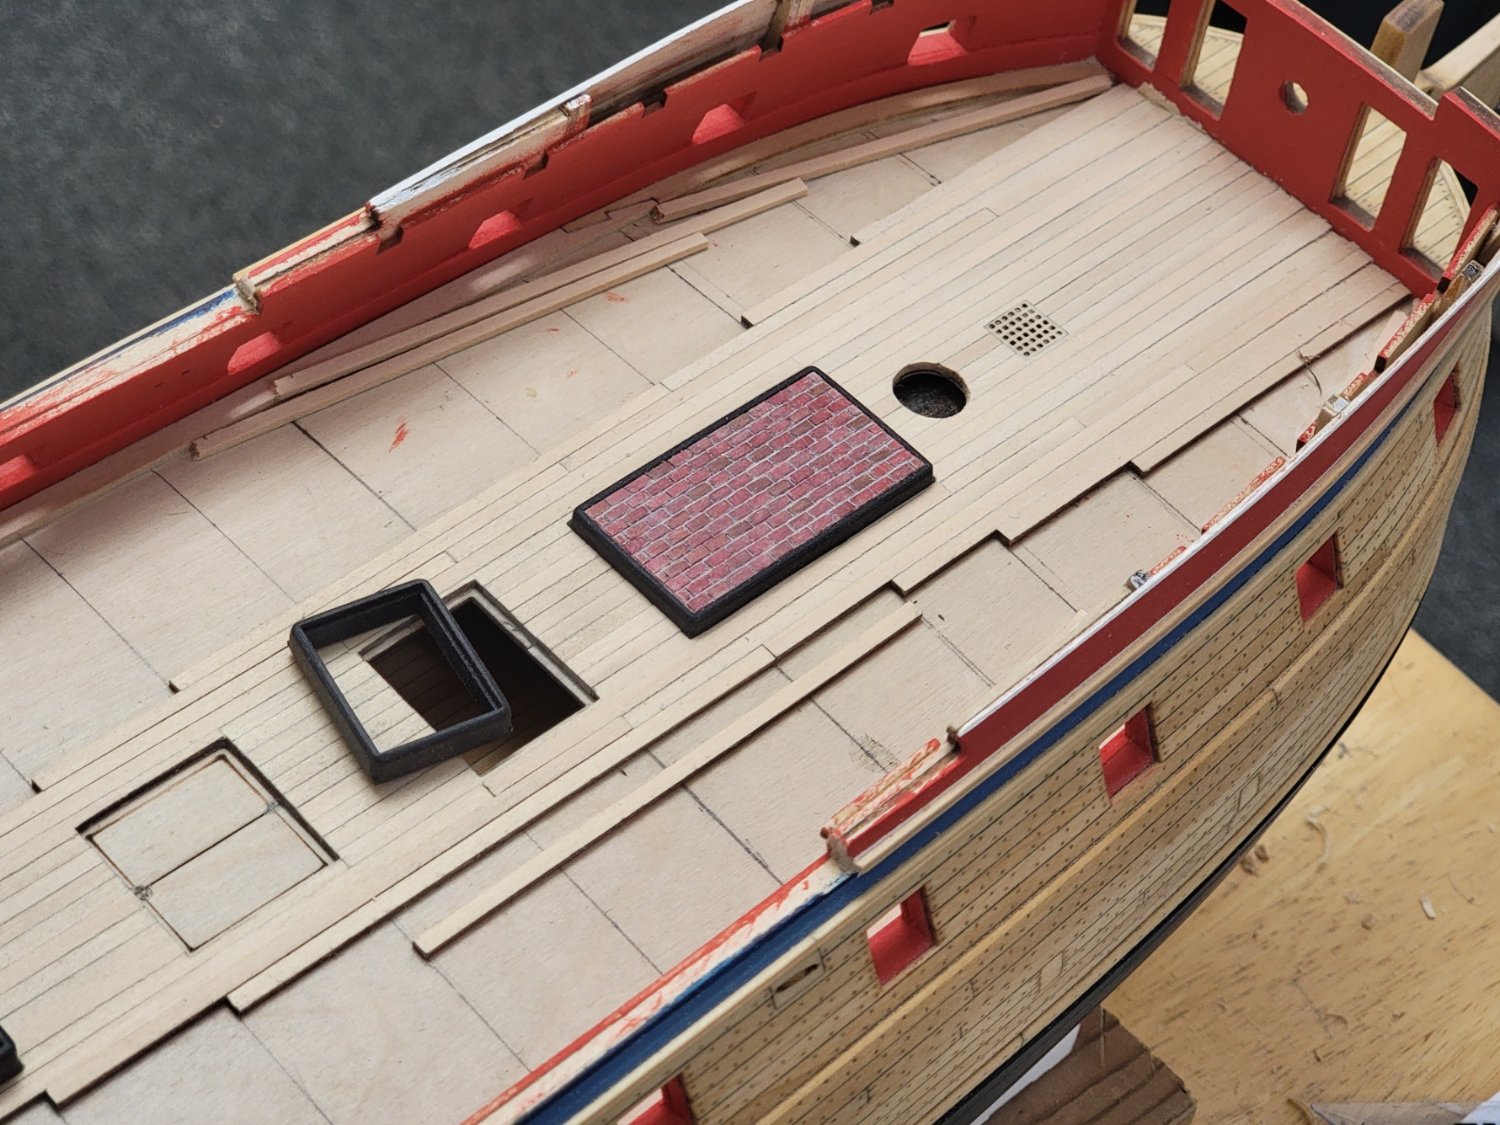
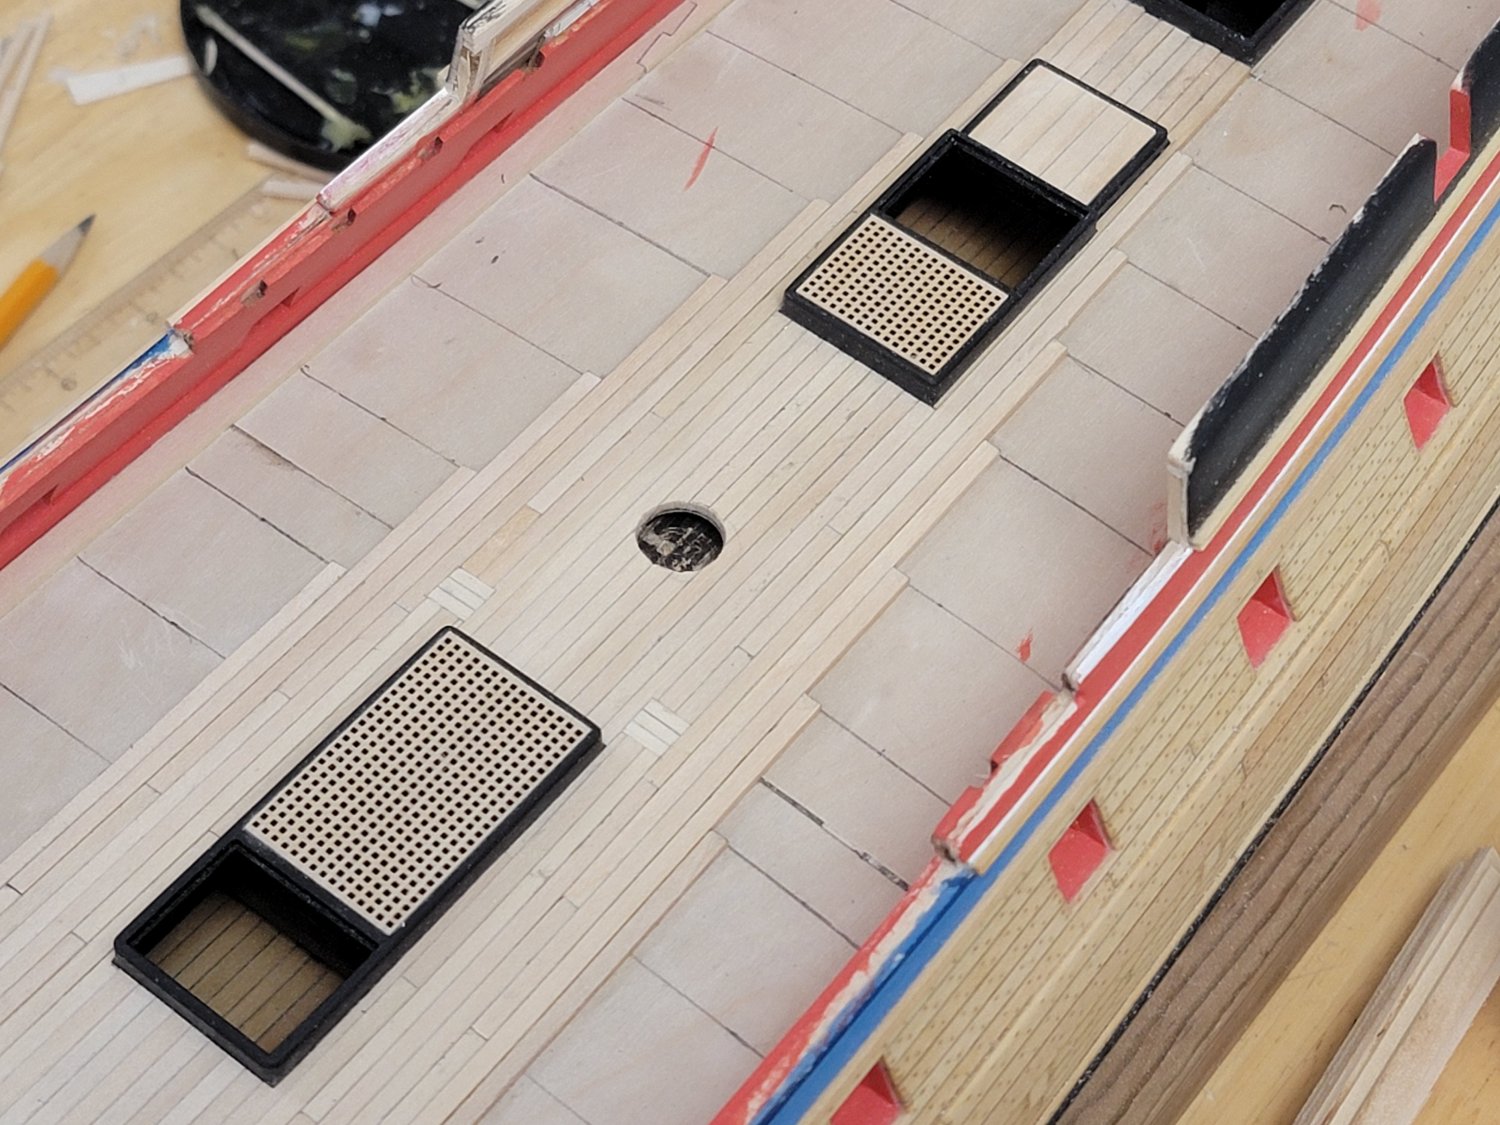
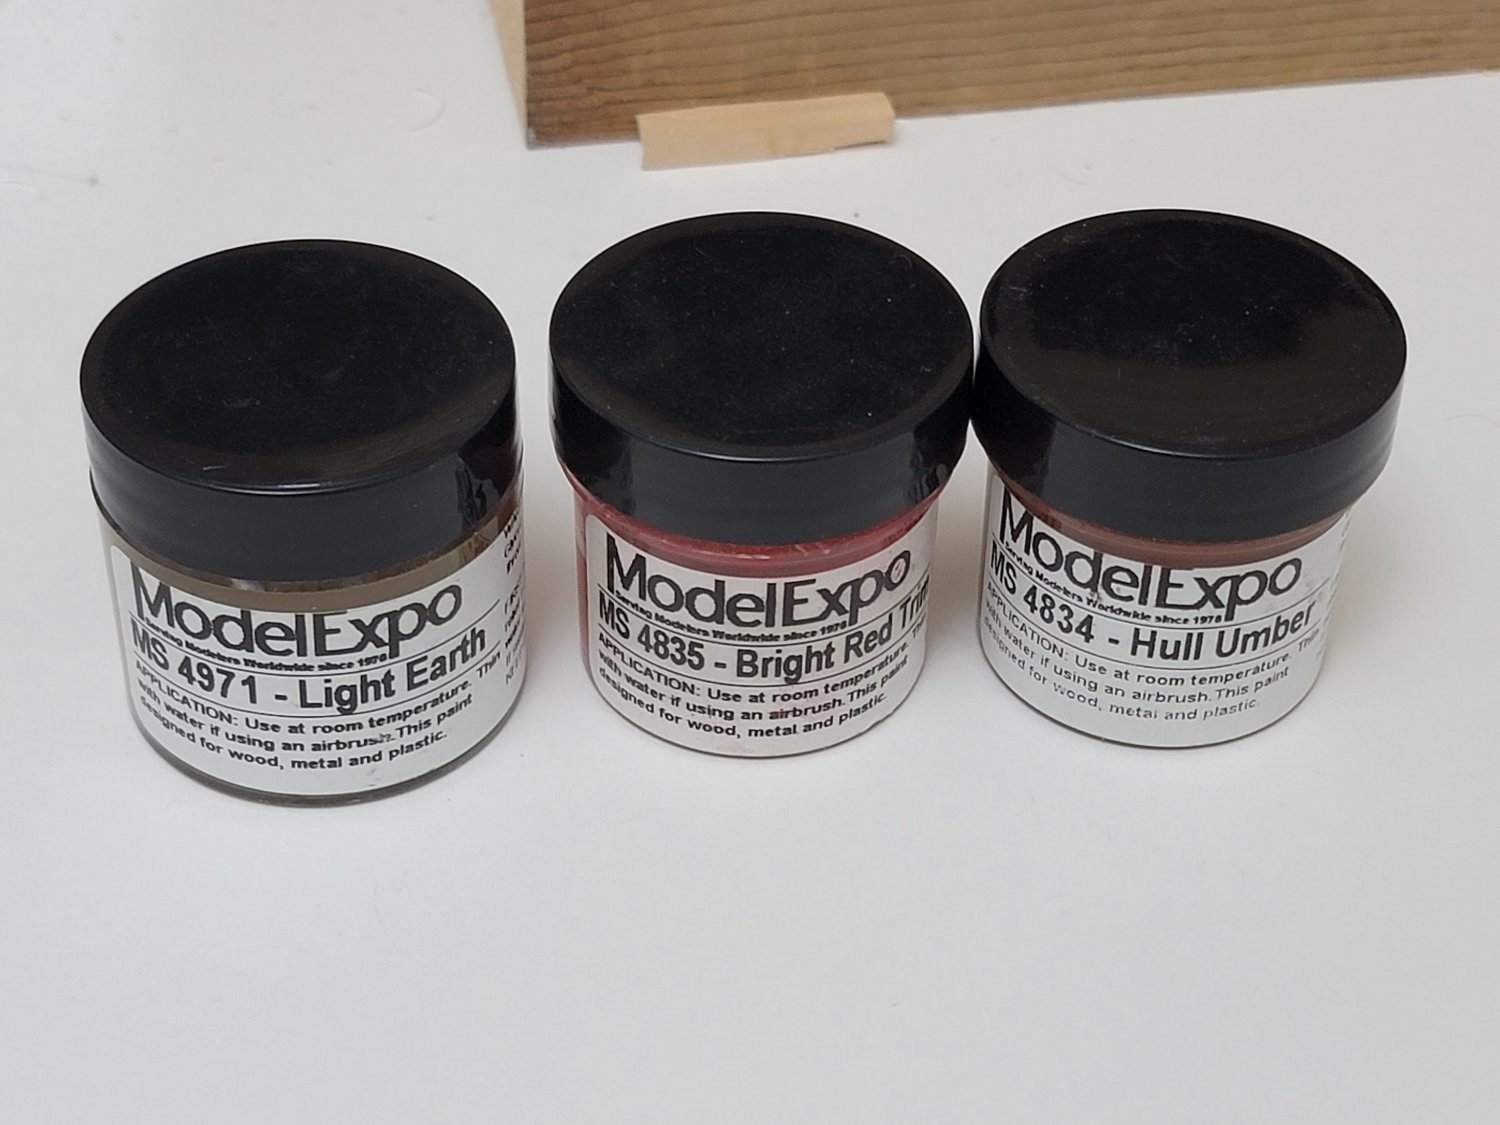
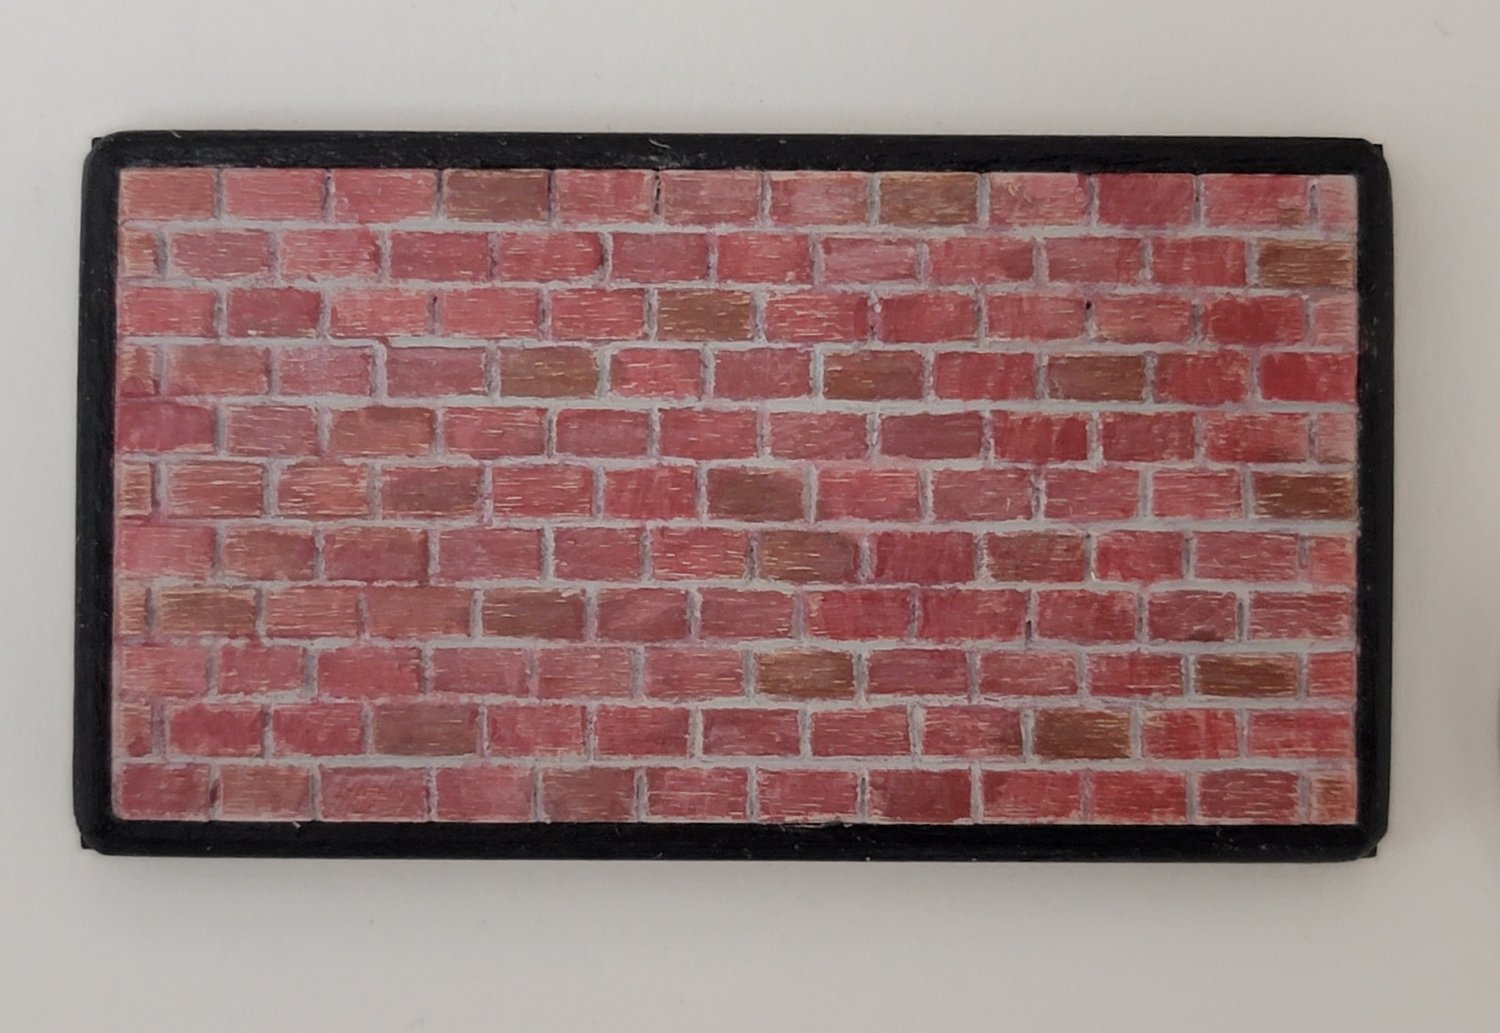
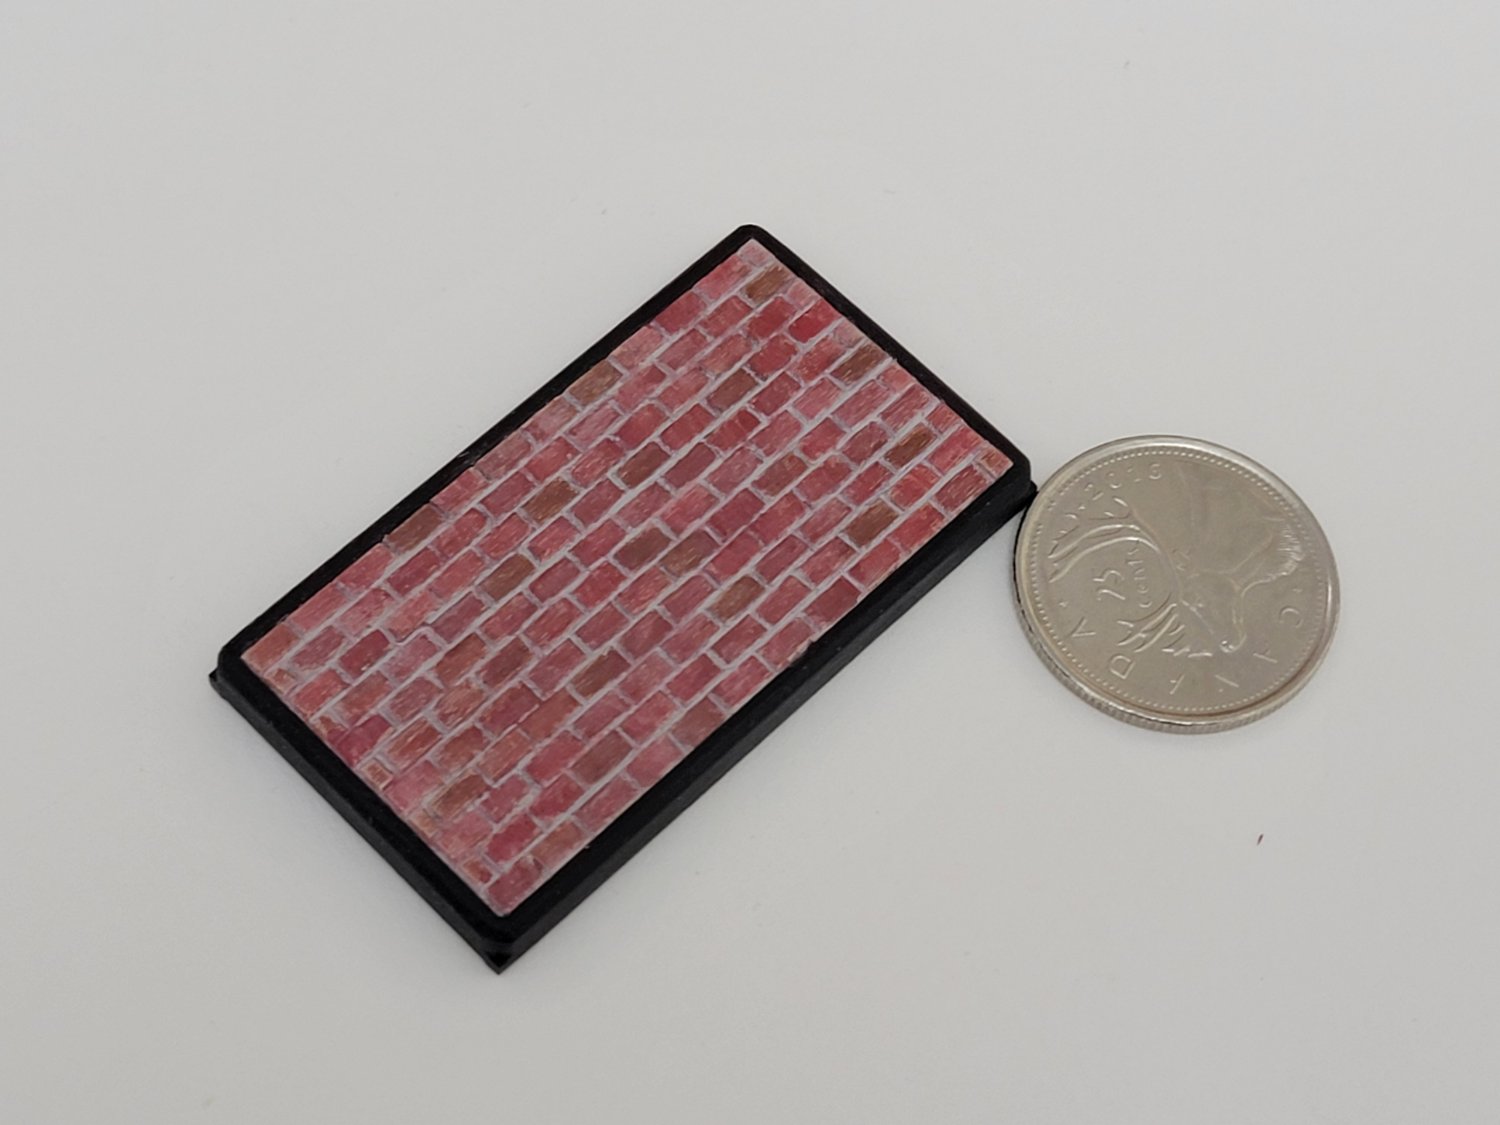
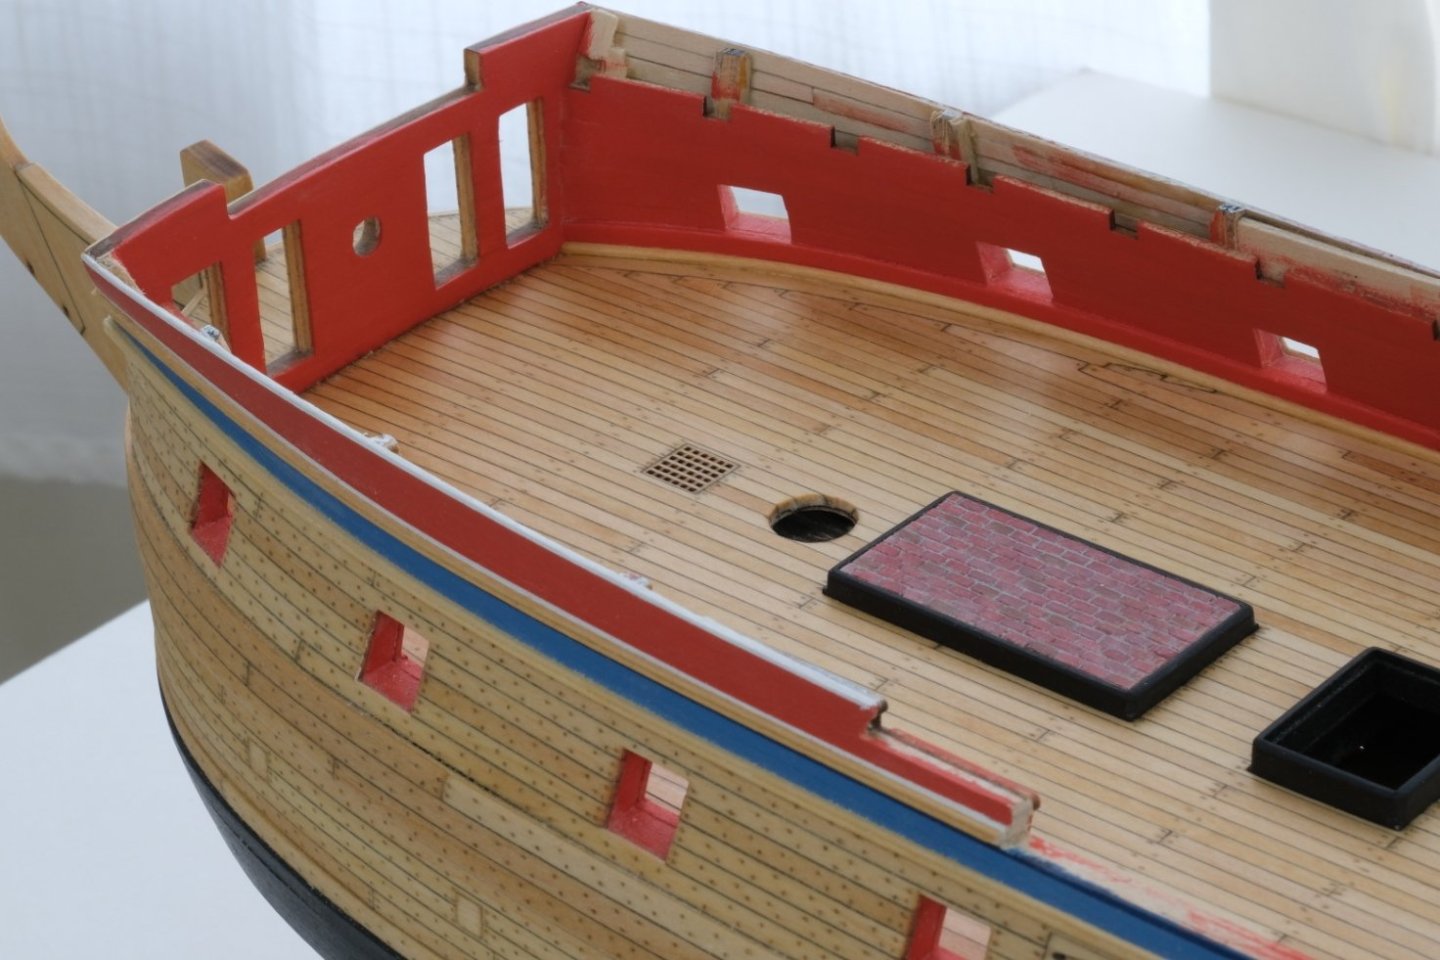
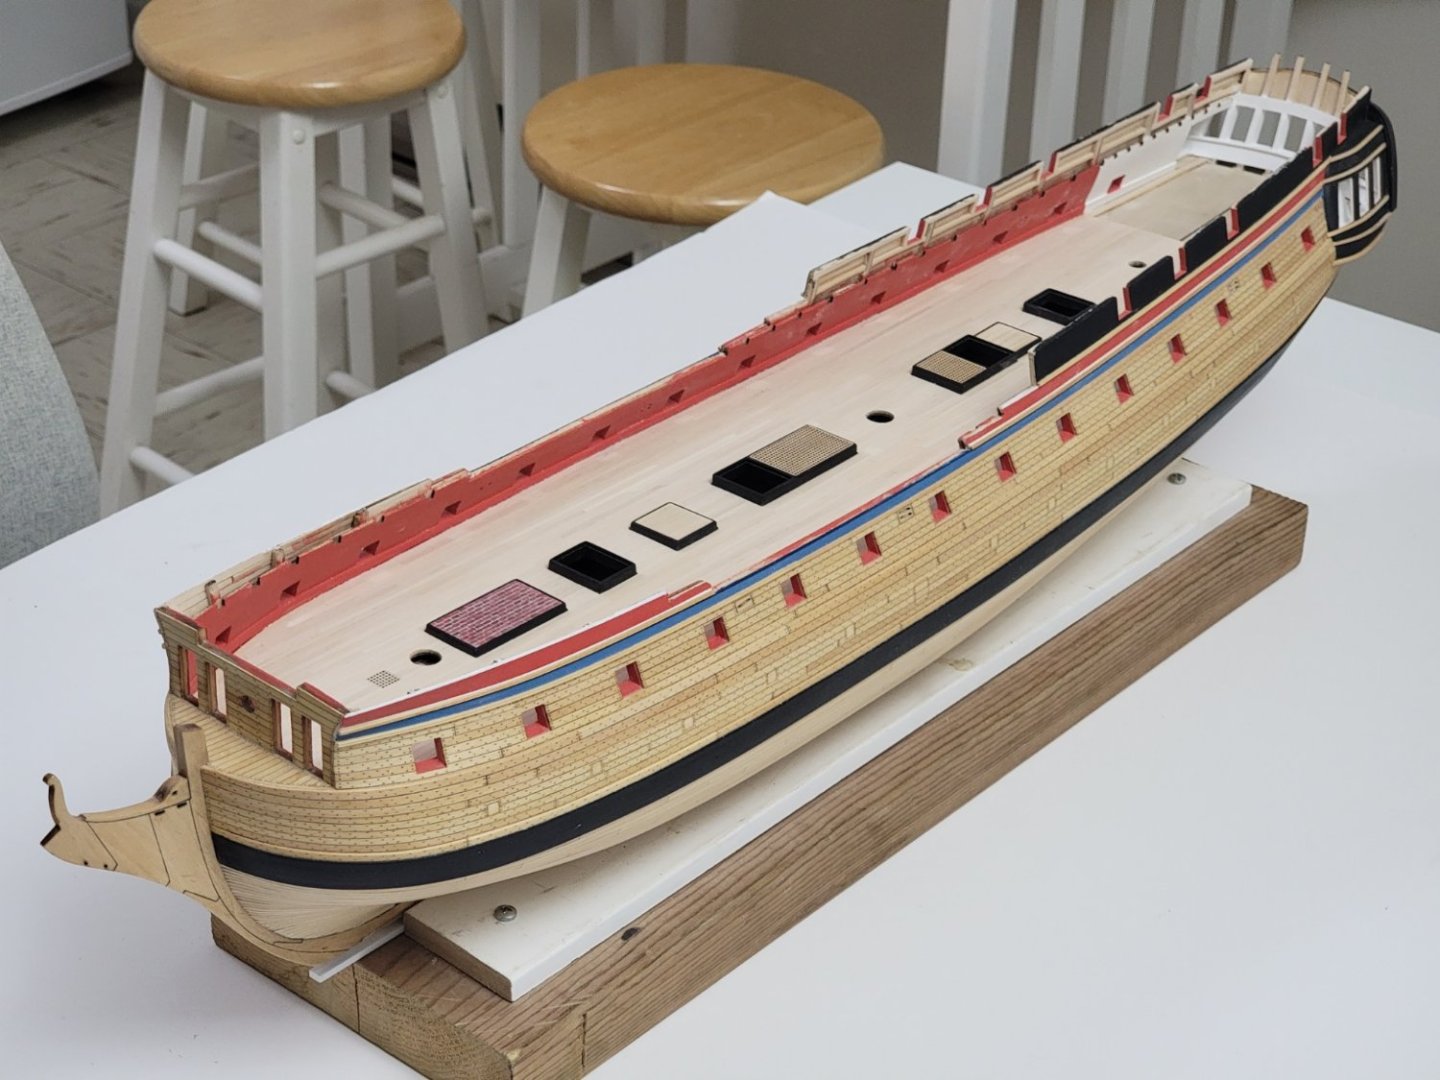
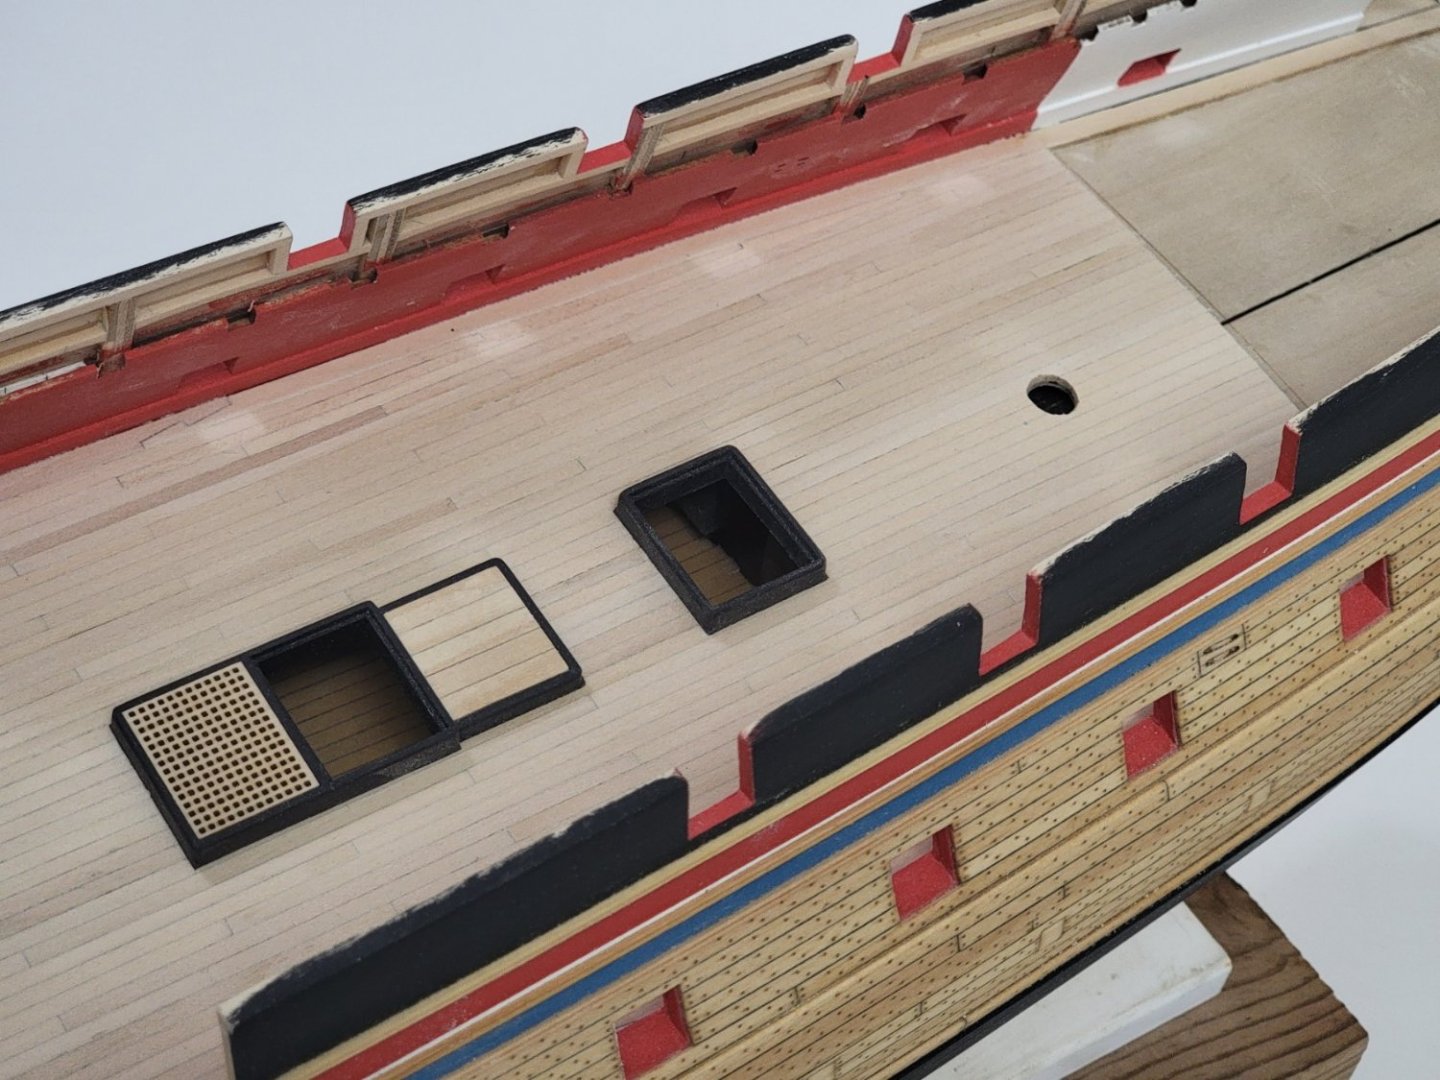
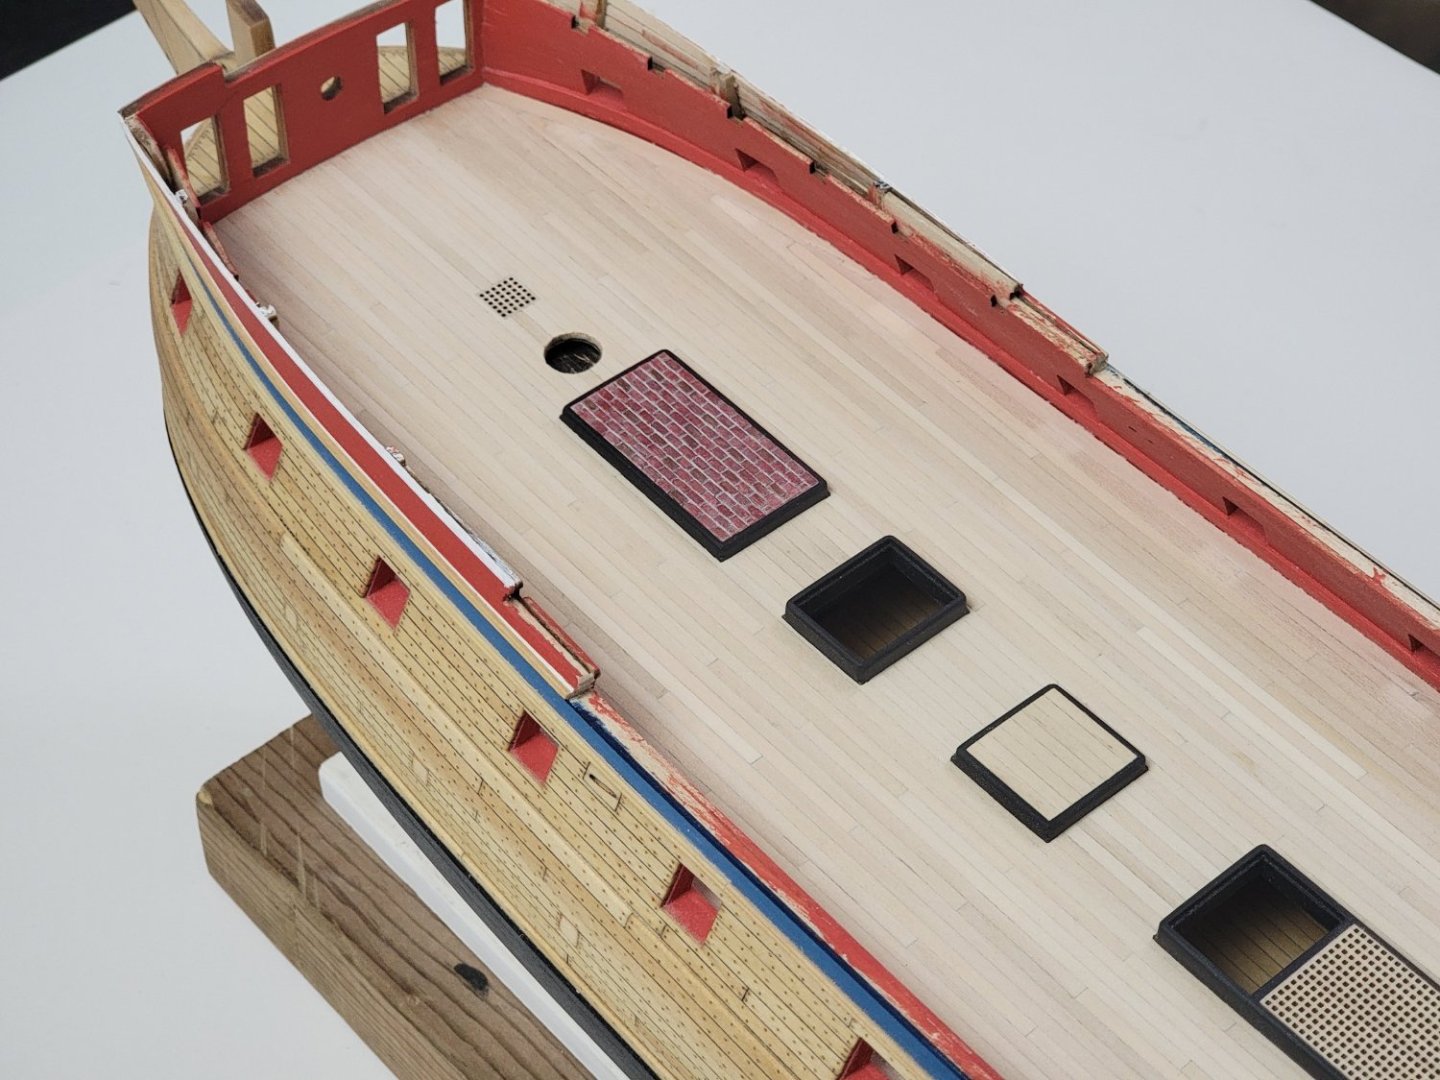
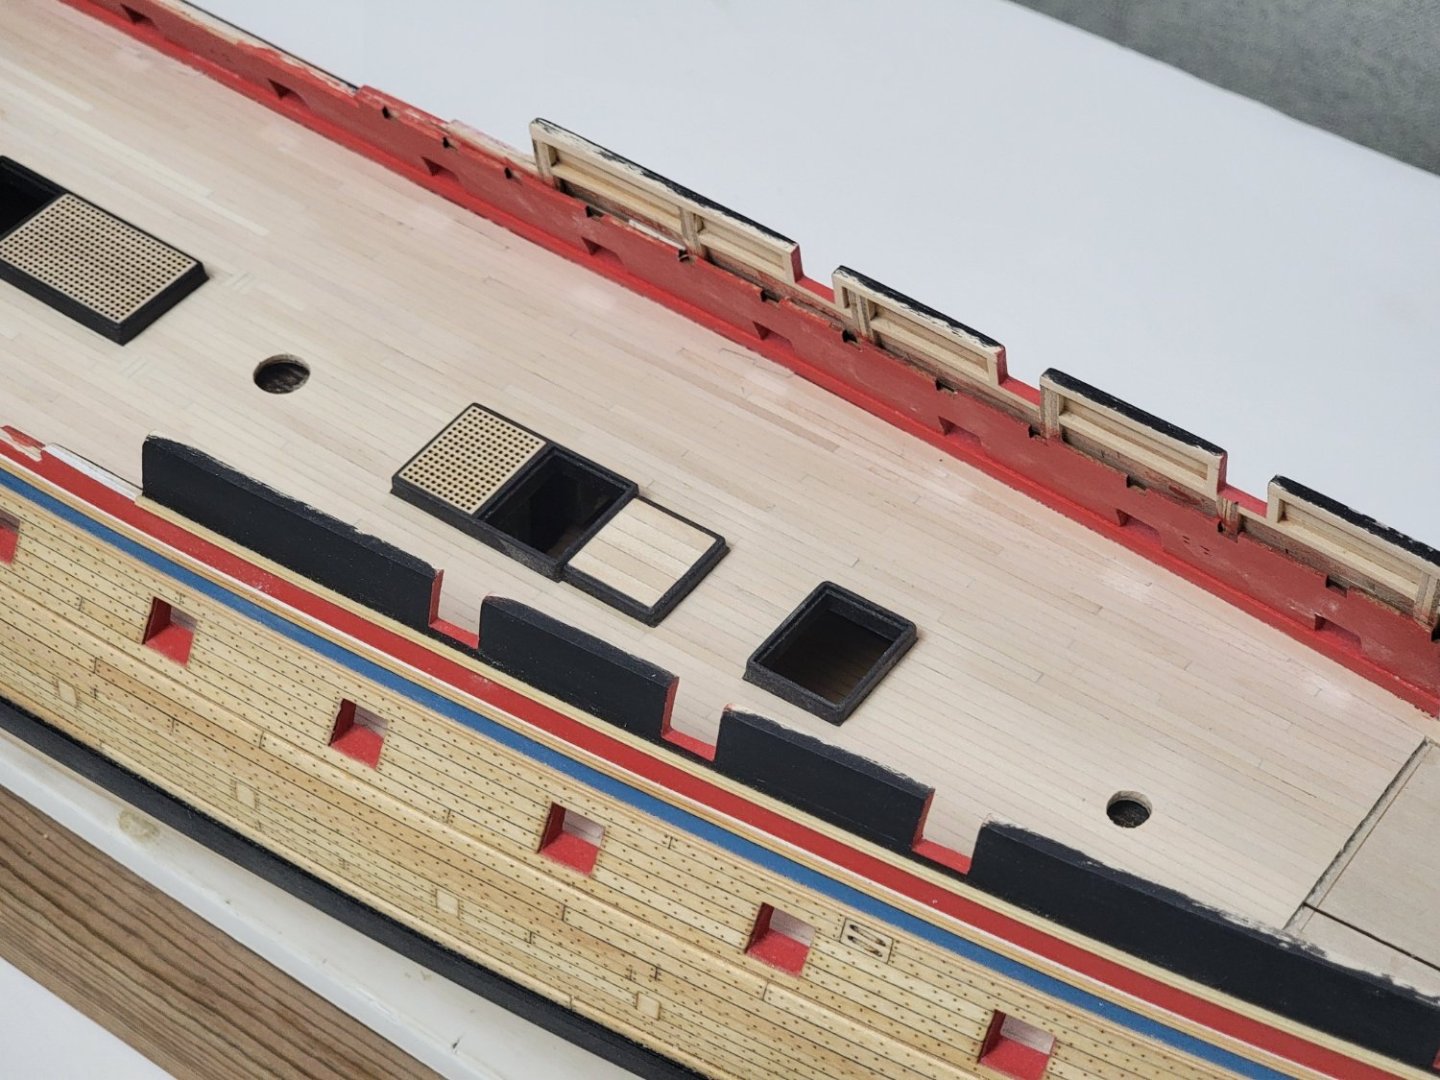
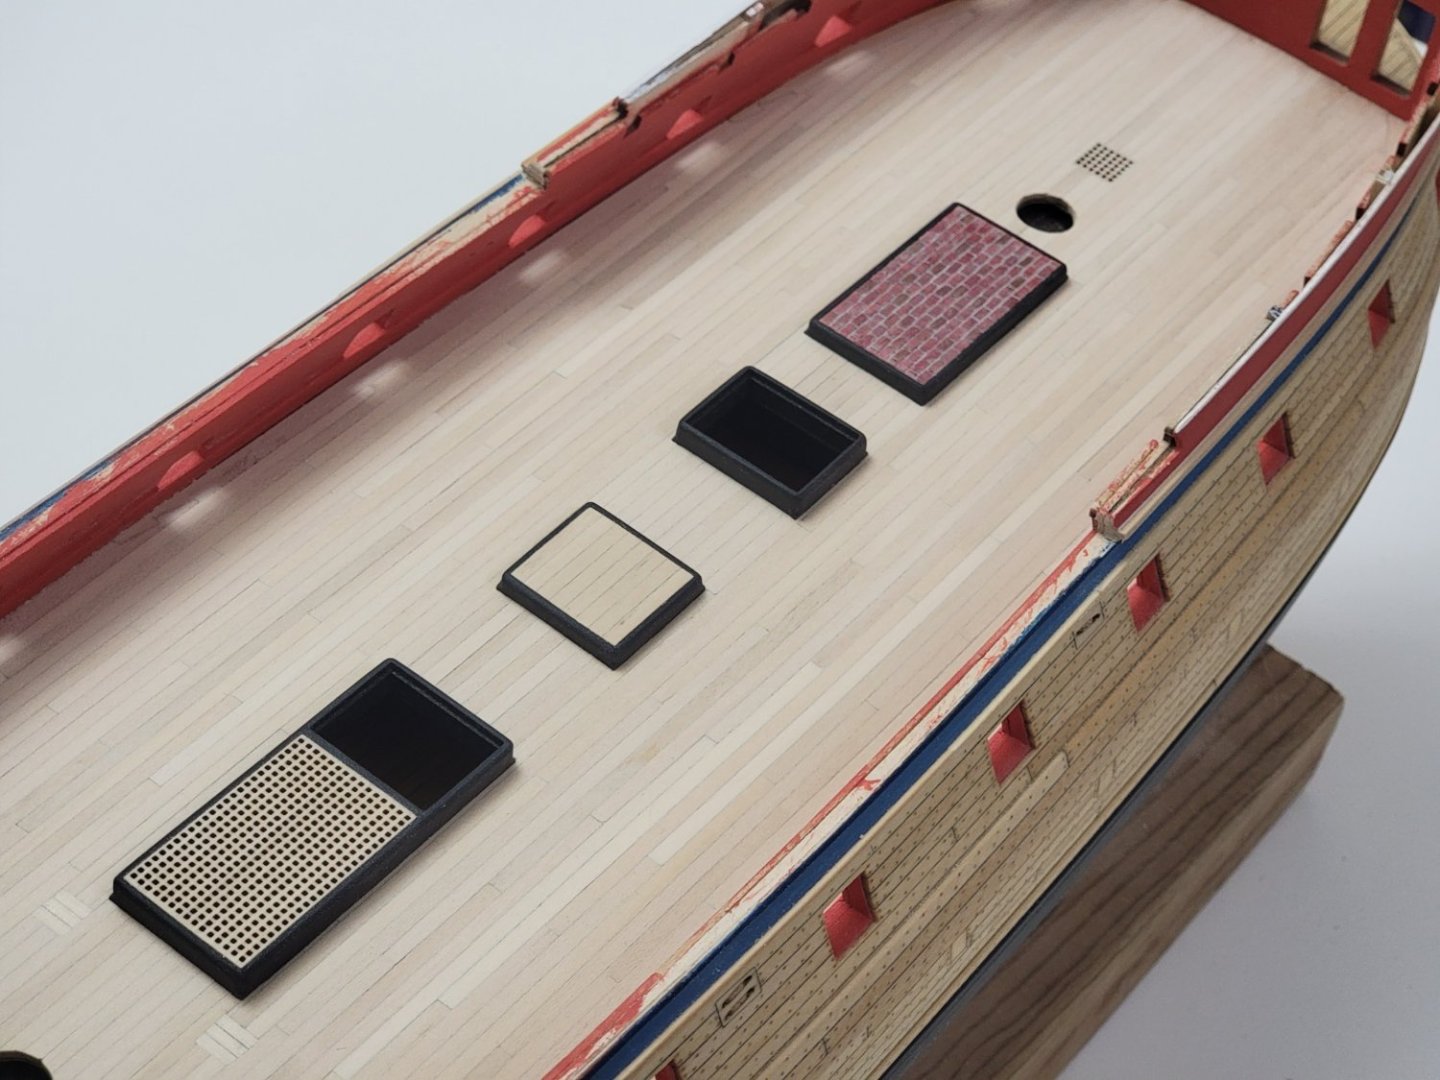
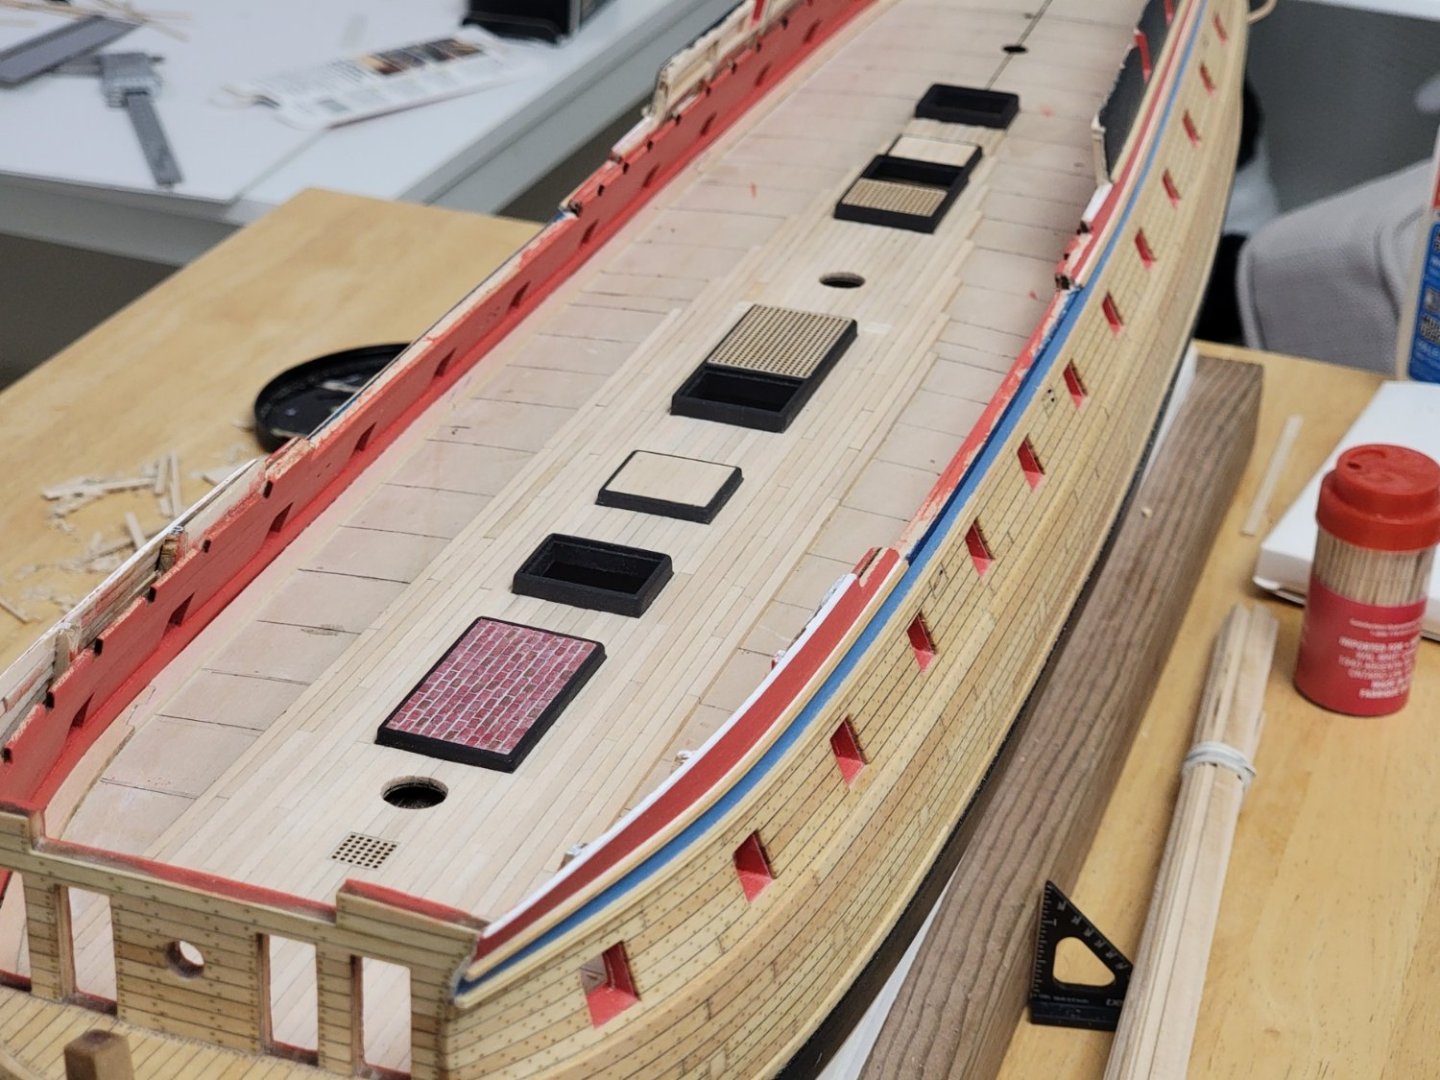
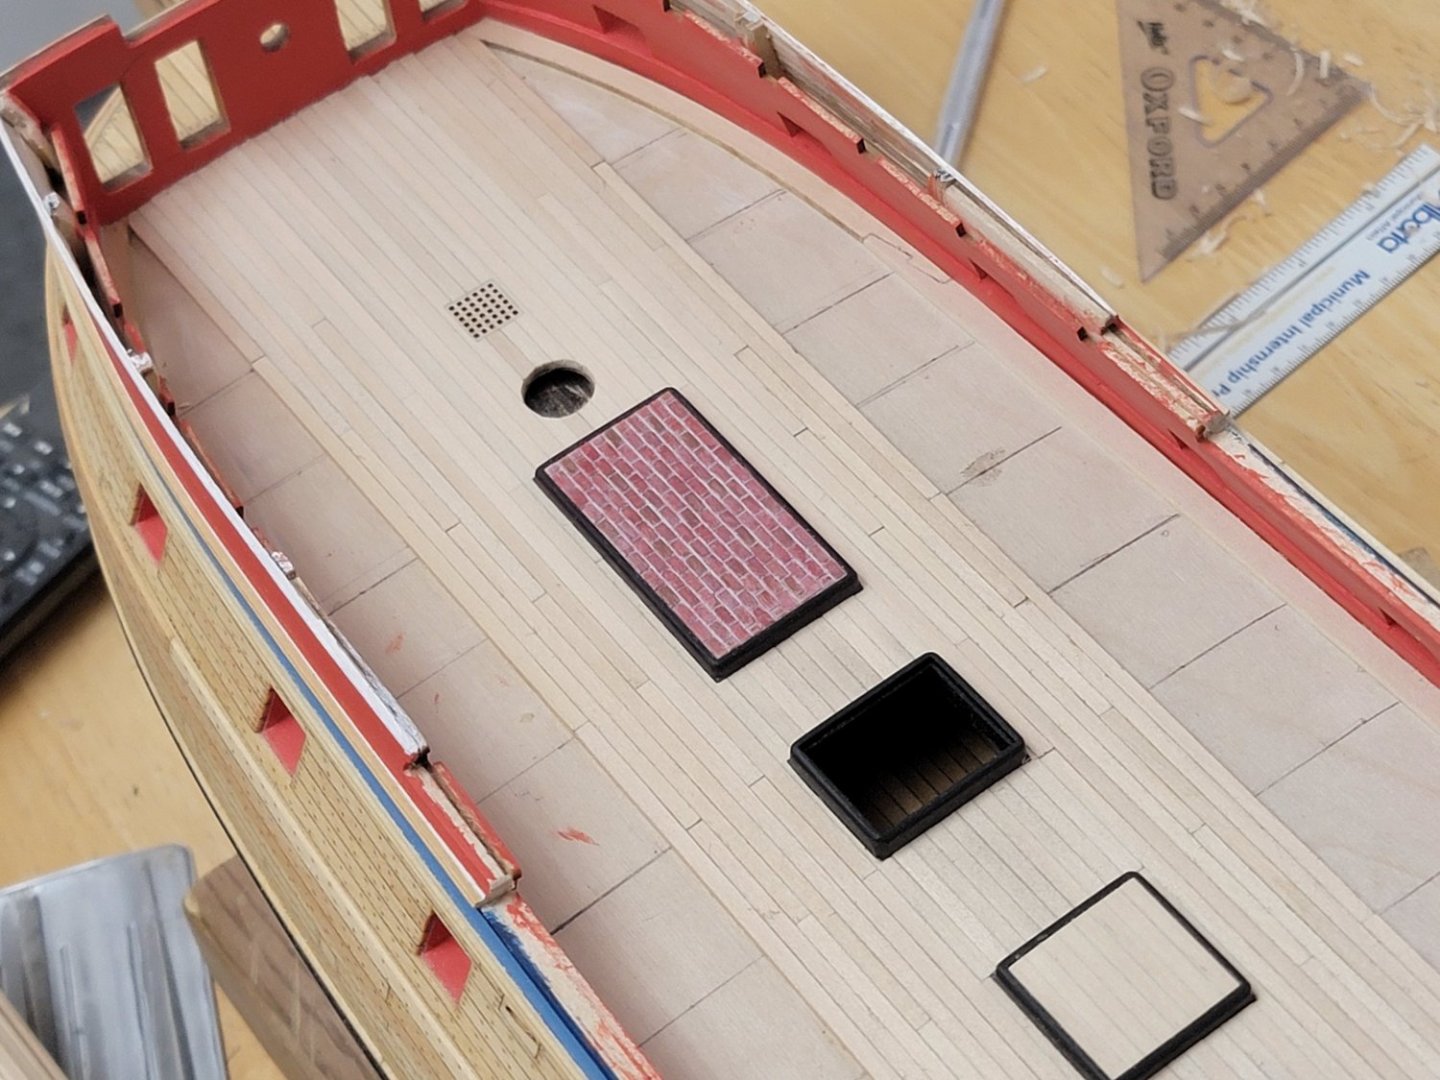
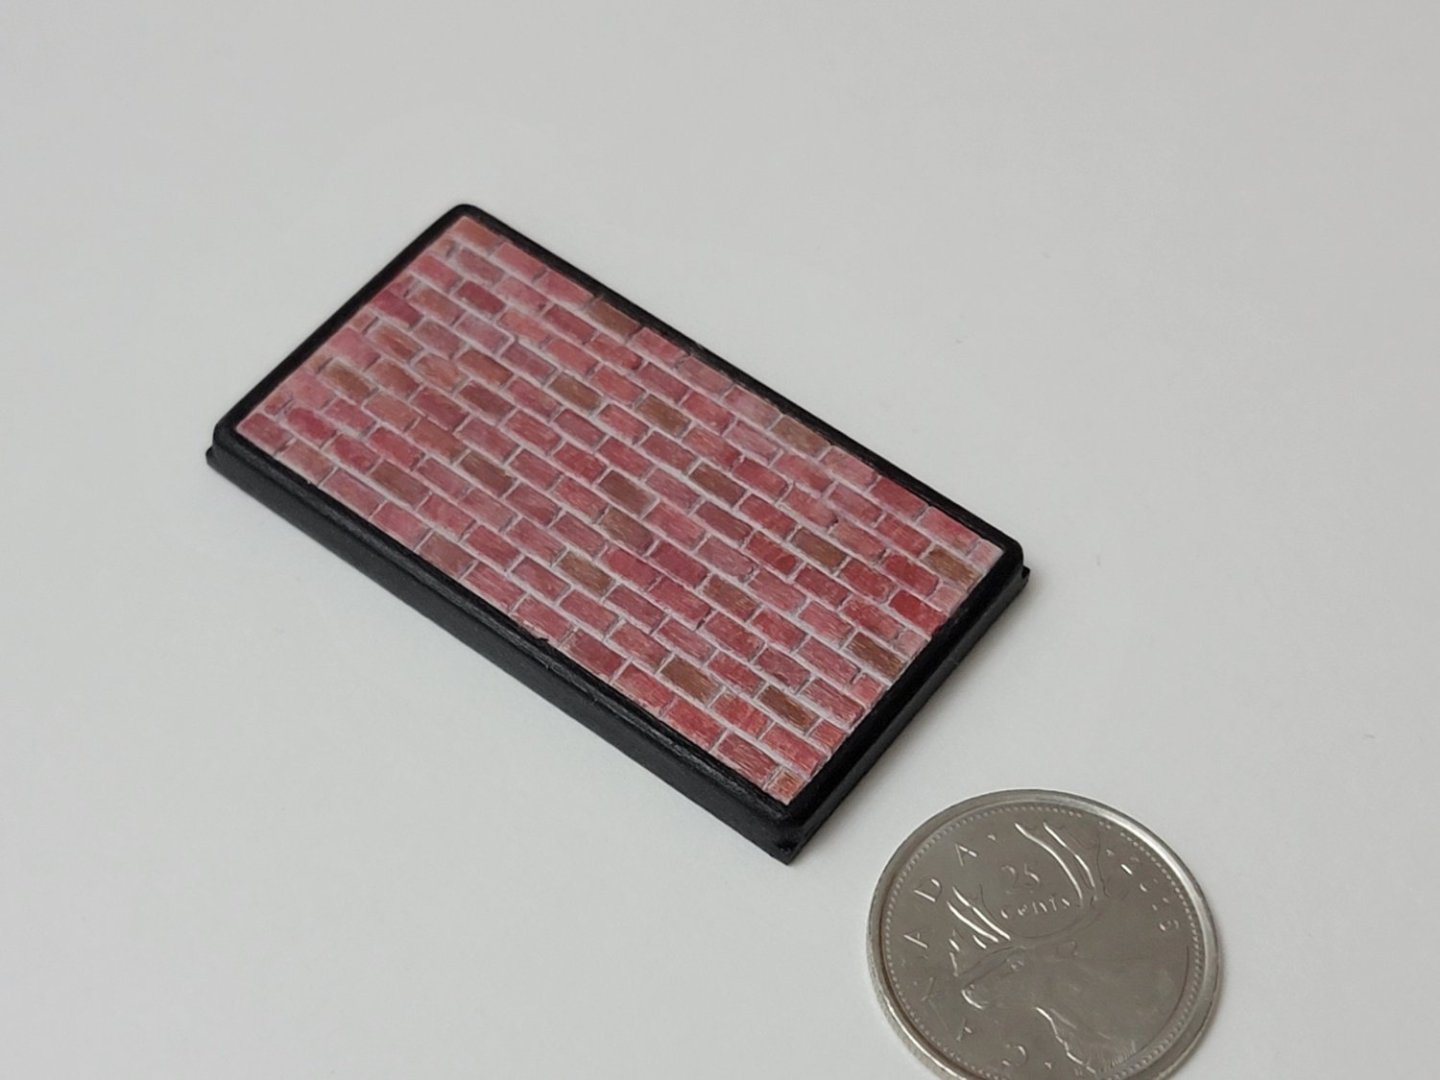
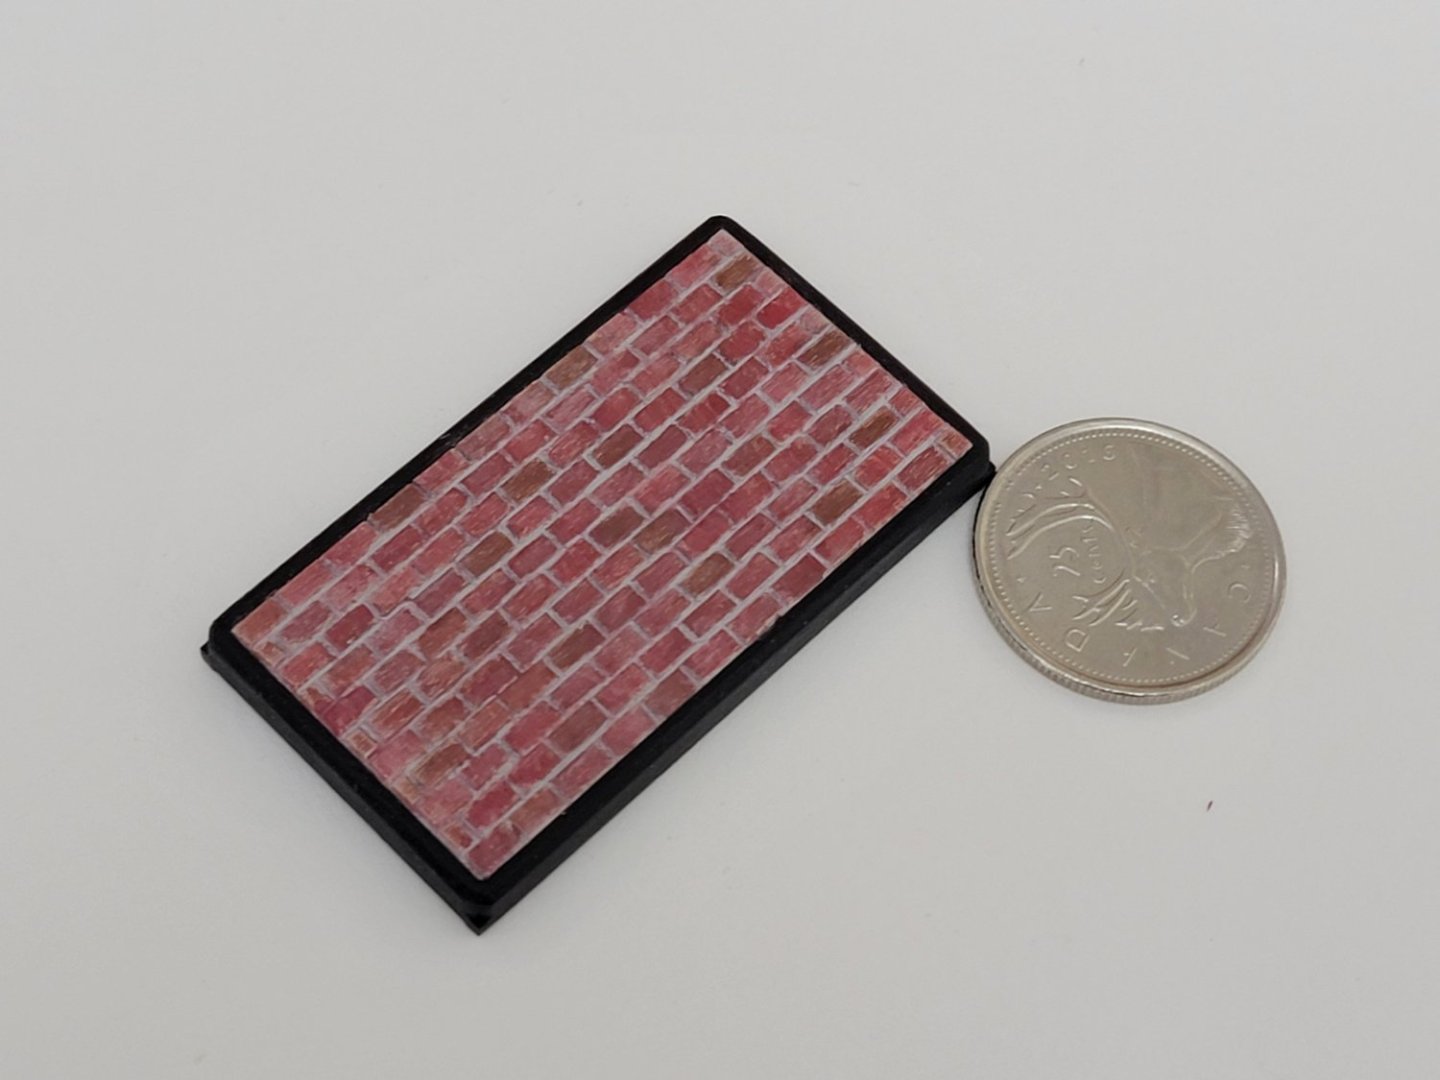
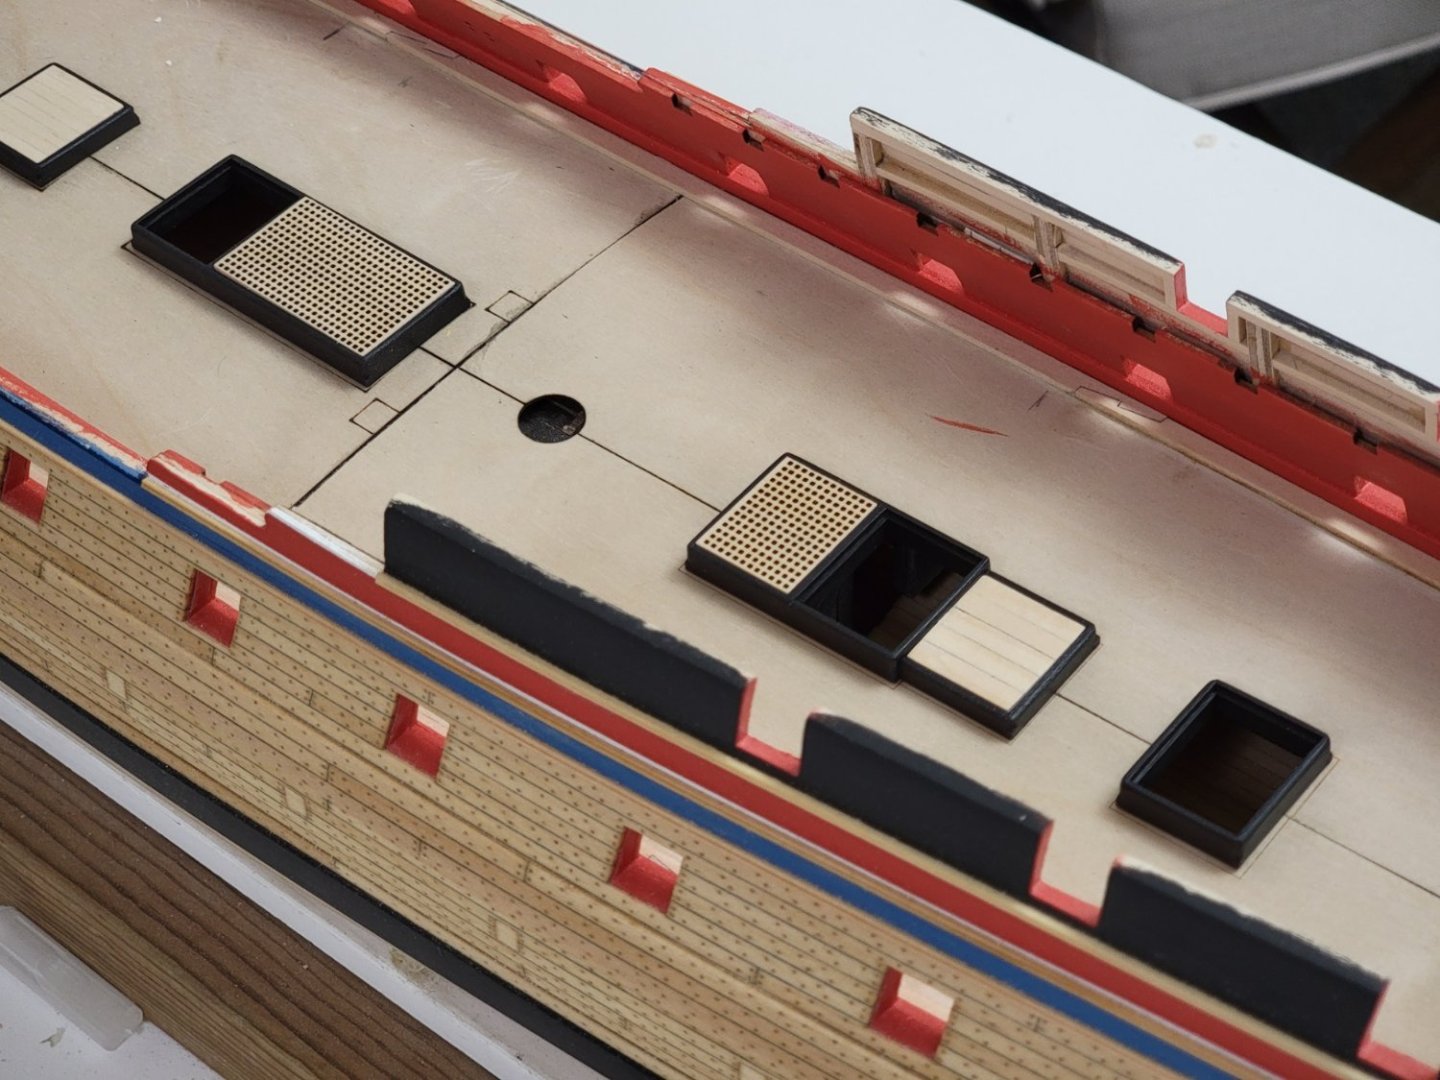
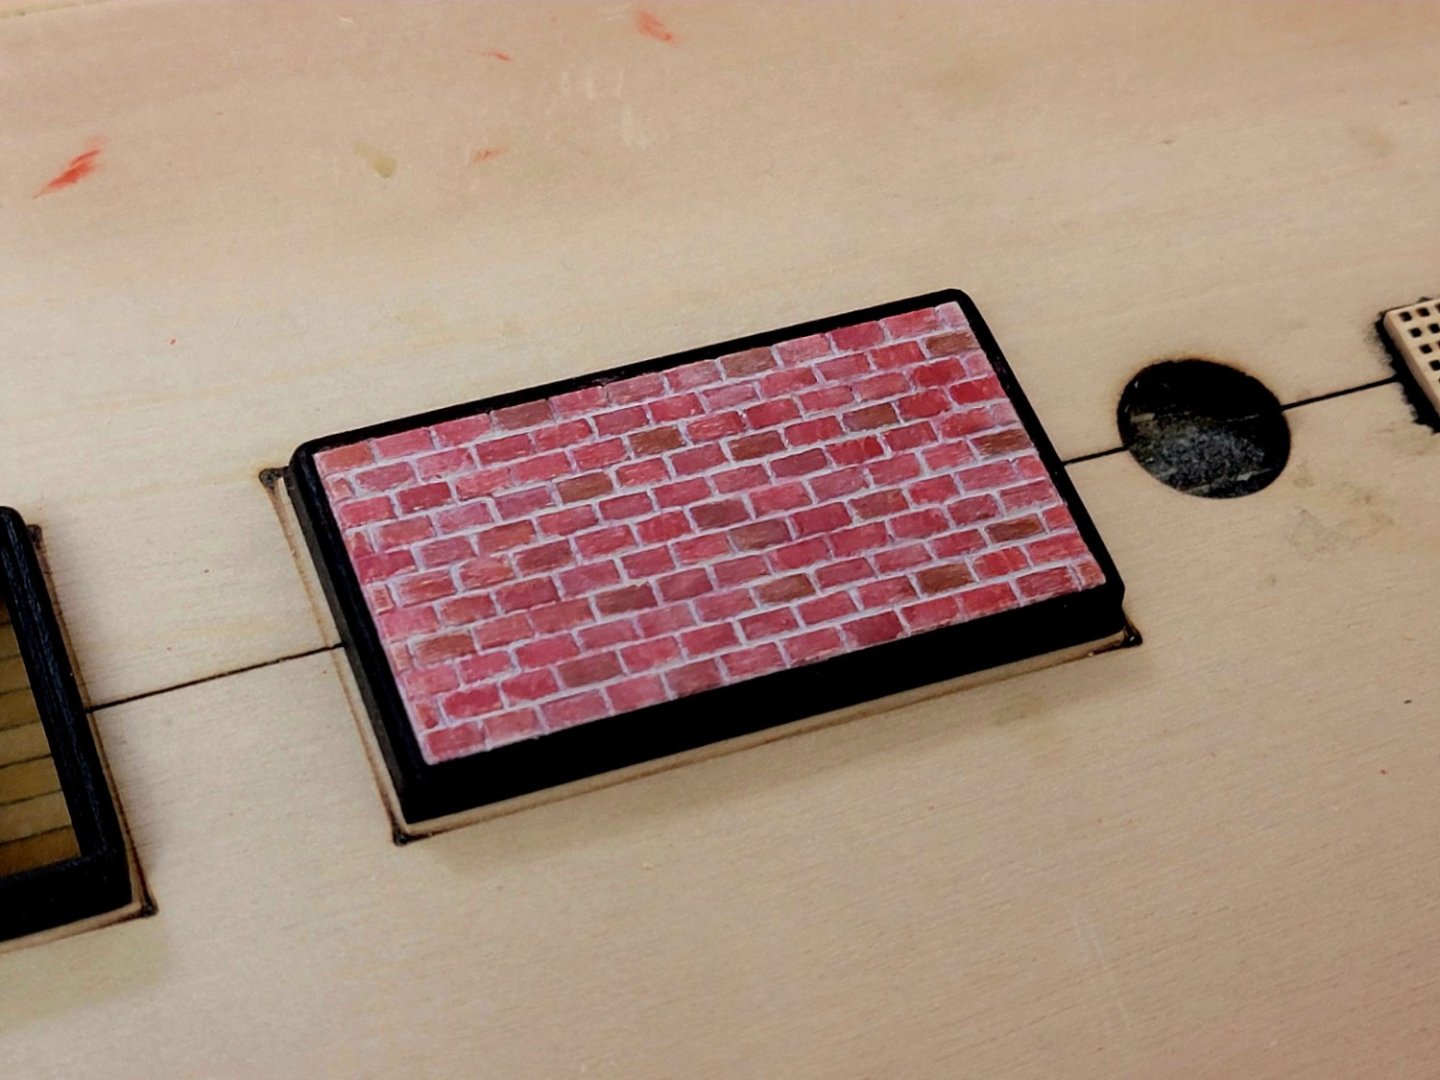
Hi Werner, nothing is glued to the deck as I was constantly thinking about things getting in the way when it is time to sand everything smooth. But thanks for the reminder! Also thanks a lot for the tip on painting the bricks. It worked out for me. I did however add a few more steps in the process. I first painted the entire section grey, then painted each "brick" with different shades of red and brown (by mixing the below paints in different variations). Some of this paint did seep into the grooves. After the paint dried, I painted everything again with thinned grey paint making sure the grooves took all the paint in. The last step was to wipe out the grey paint quickly with a kitchen paper towel. For this I placed the towel on the bench and then applied even pressure on the platform onto the paper towel making sure all the surface paint was wiped off. Here is the end result: Also, from the above photos, I ended up painting the coamings black. I really liked the look of the black against the deck in contemporary models and many Winchelsea builds and I wanted a similar look. As usual, any constructive criticism, recommendations, or tips are more than welcome! Harshil


-
Thanks, Werner. I'll do some testing on some scrap bricks with your method to see if it works on wood. I used the supplied basswood for the simulated brick pattern.
-
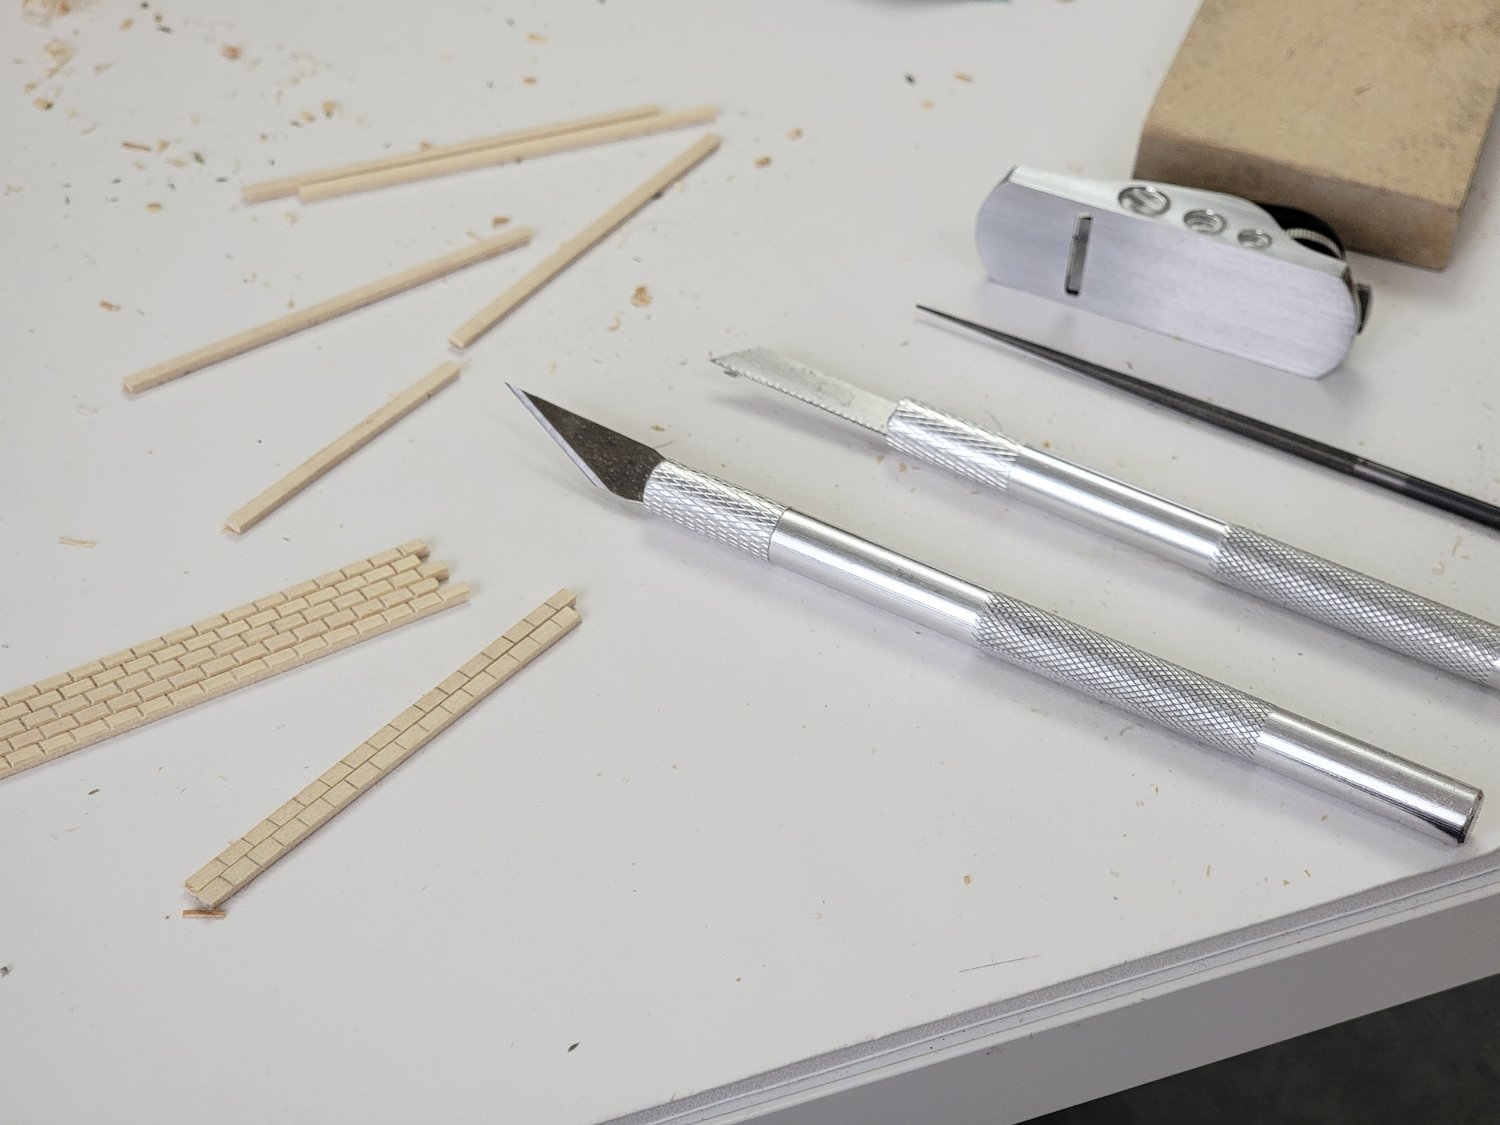
Hi Werner, Thank you for the compliments!! From my eyes I see the black going well with the wales, but I can see how the contrast may be too much. I'll ponder over it some more. The bricks look so lifelike! Especially for the scale we are working with, this is amazing. What material did you use? And how were you able to create the texture on each brick? Thank you for sharing 😊 I followed the instructions and this is what I was able to accomplish: Here are the tools used for the individual strips: X-acto knife for scoring Saw blade for a deeper cut Tip end of the needle file to make the grove Planer to create a 45 deg chamfer on the edges


-
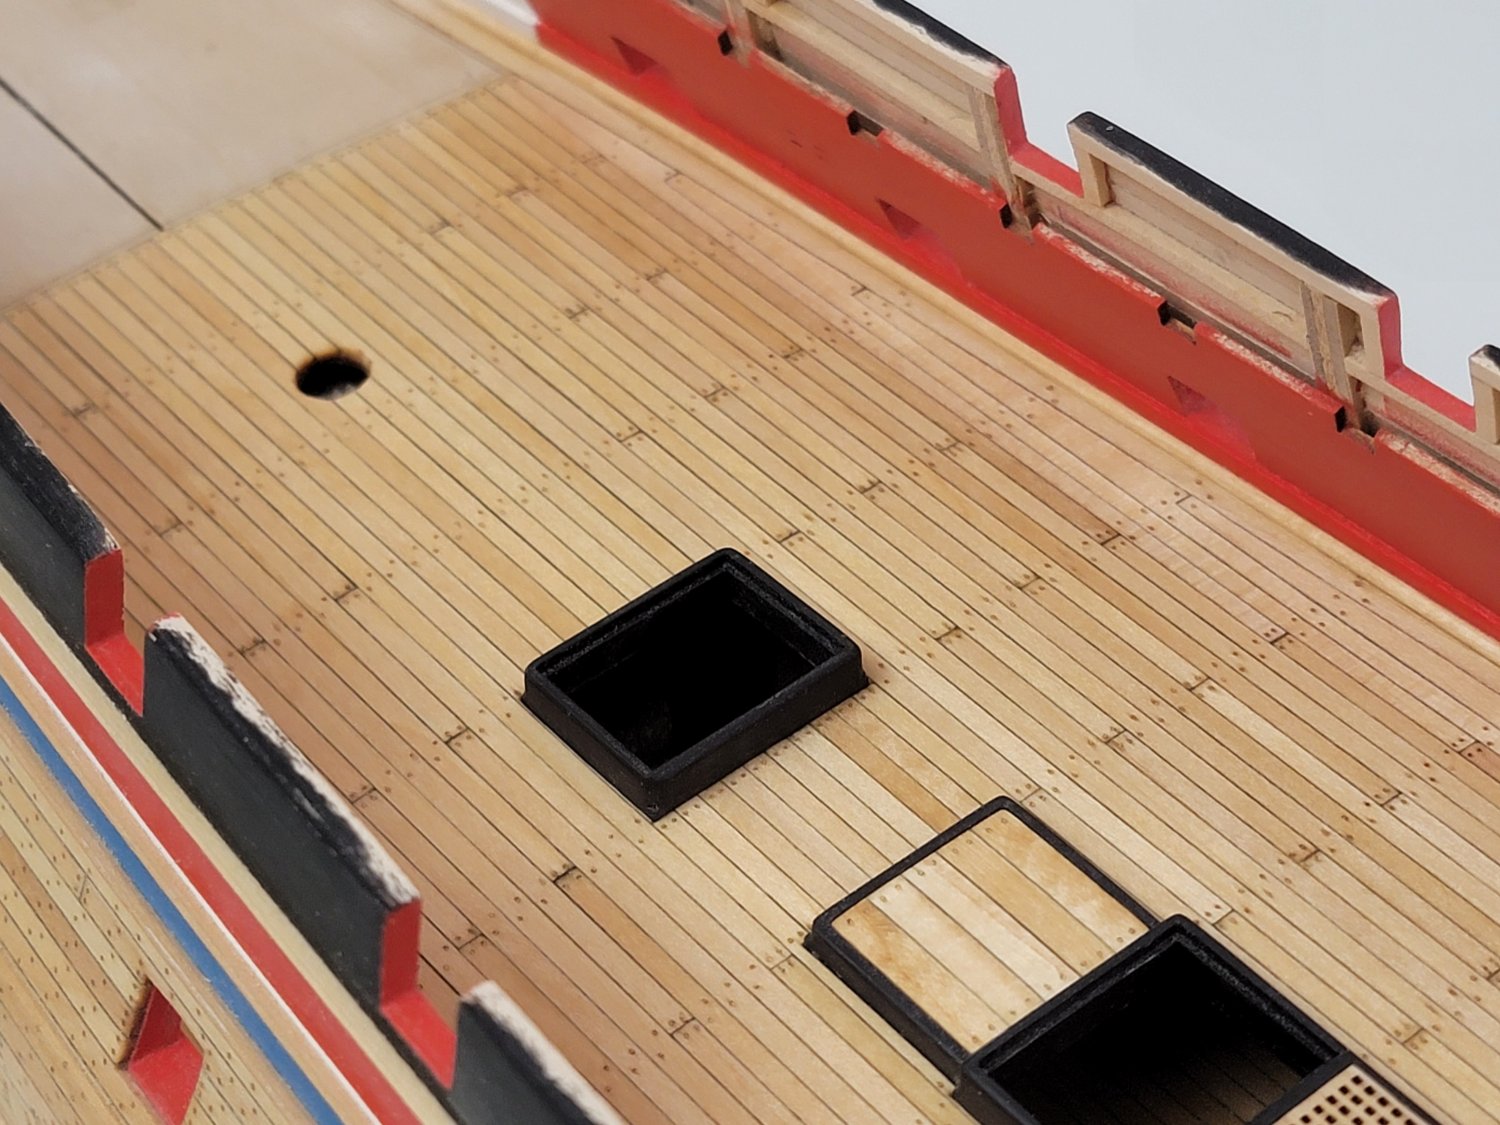
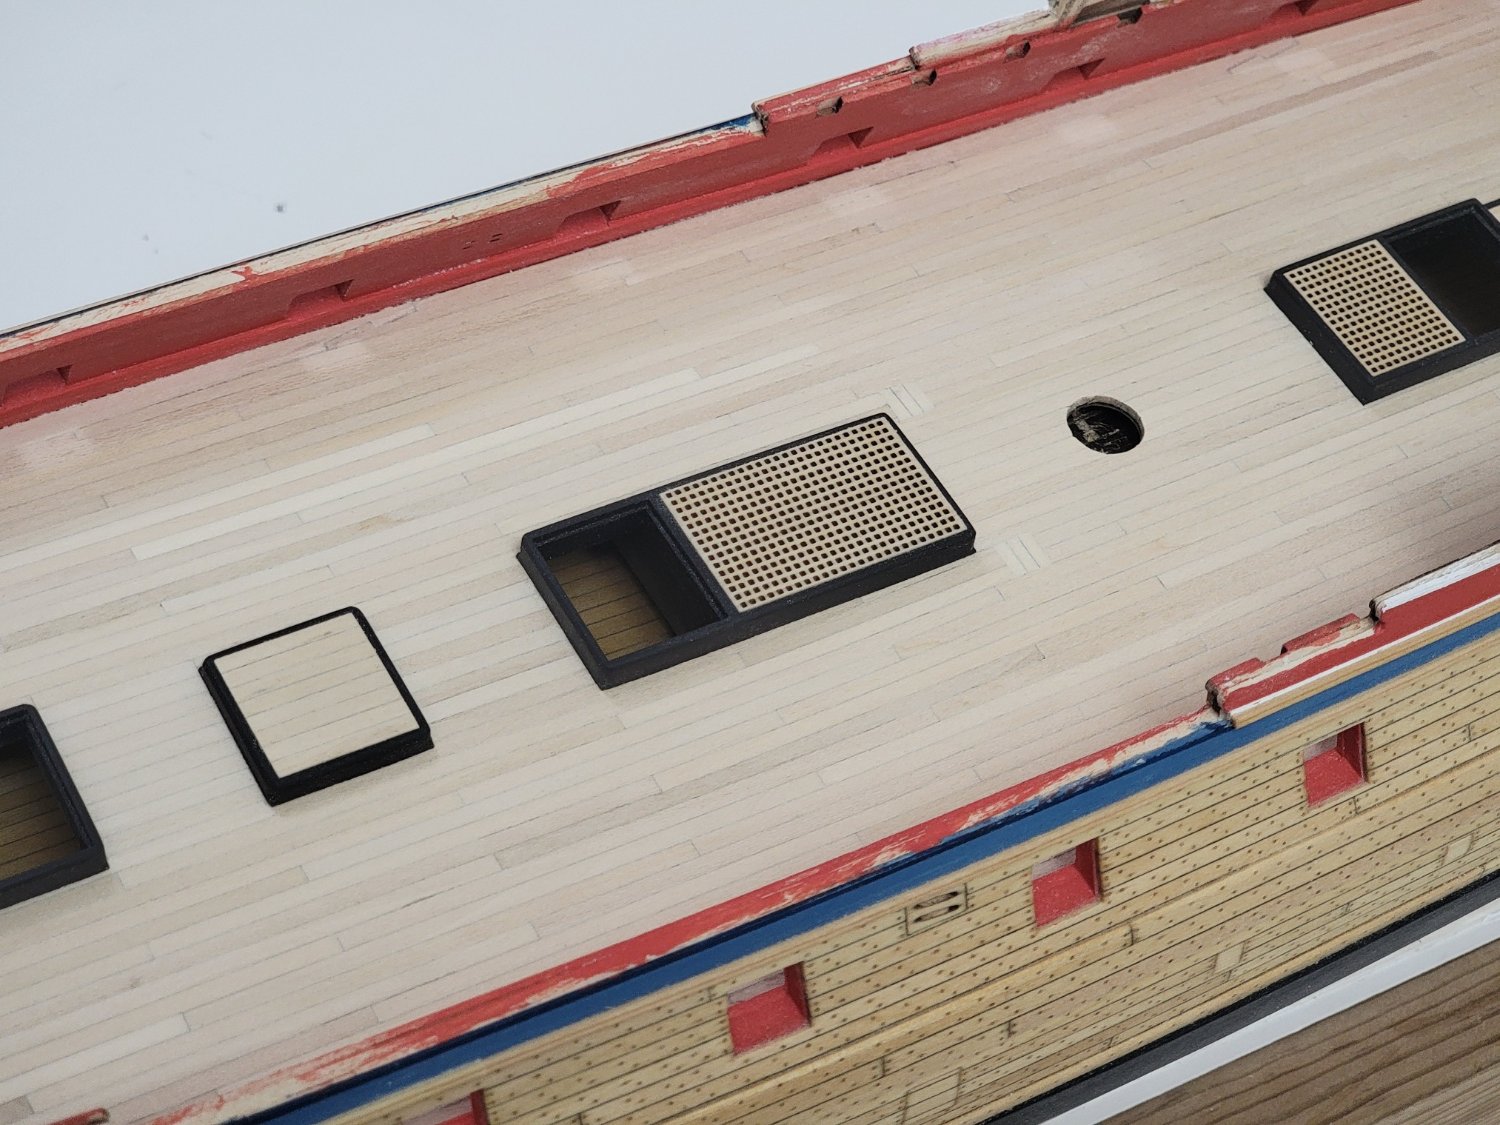
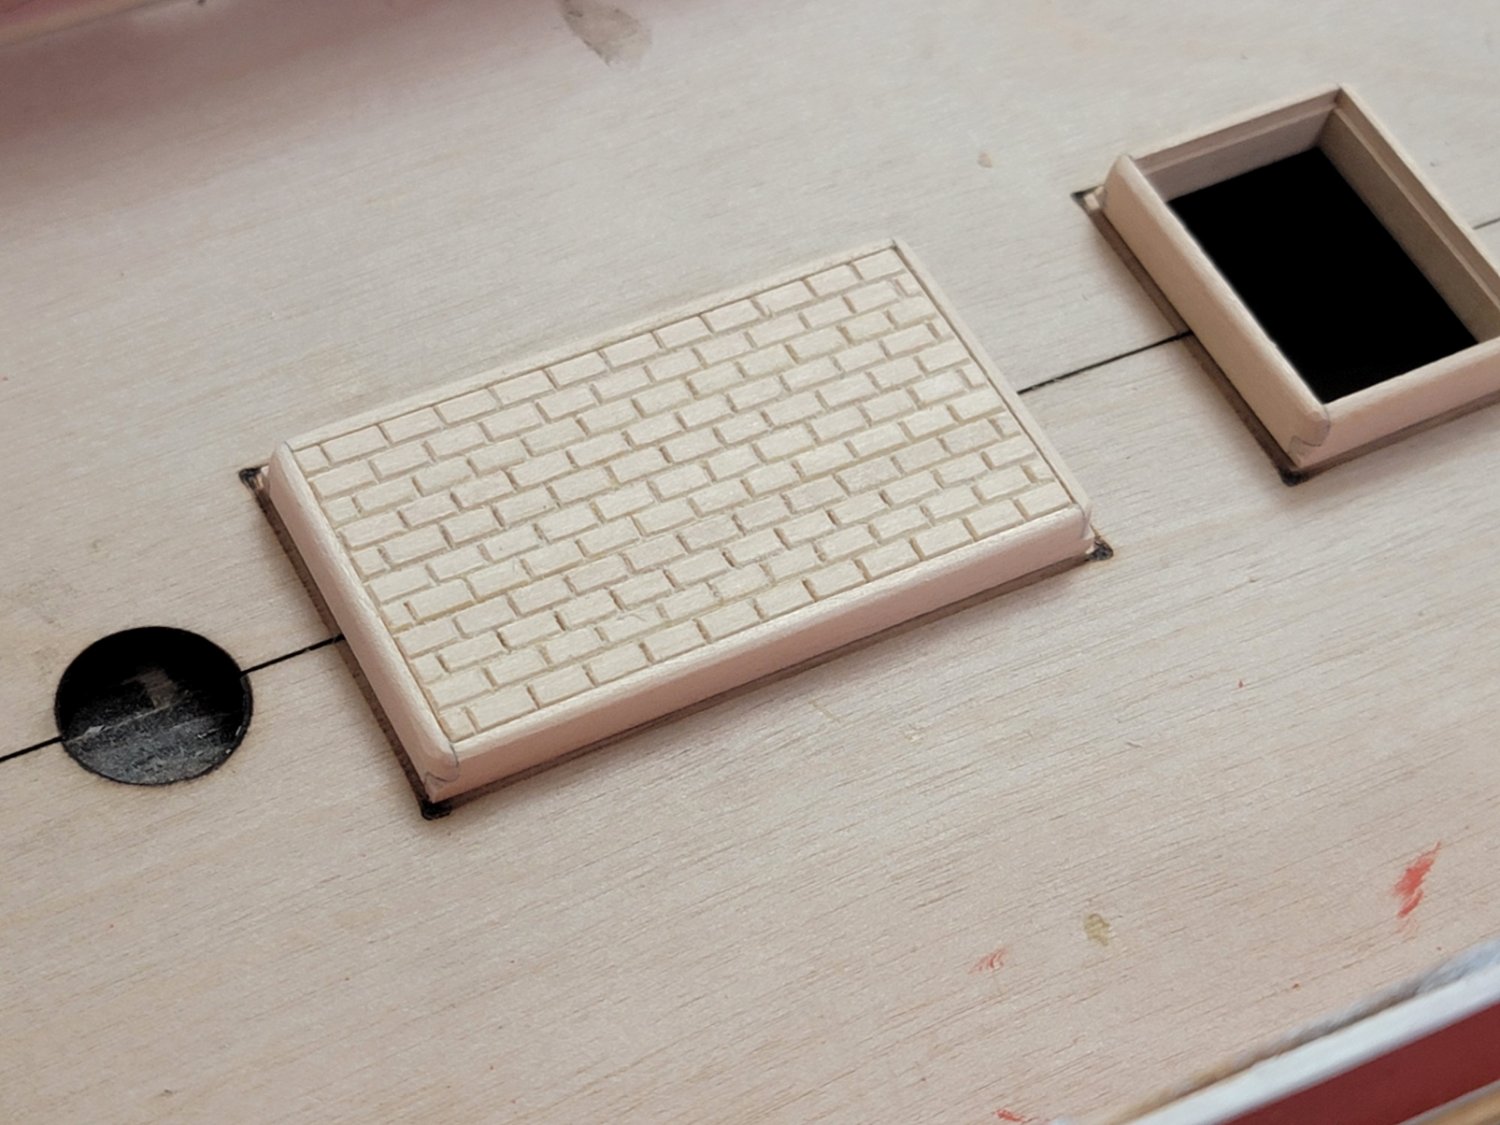
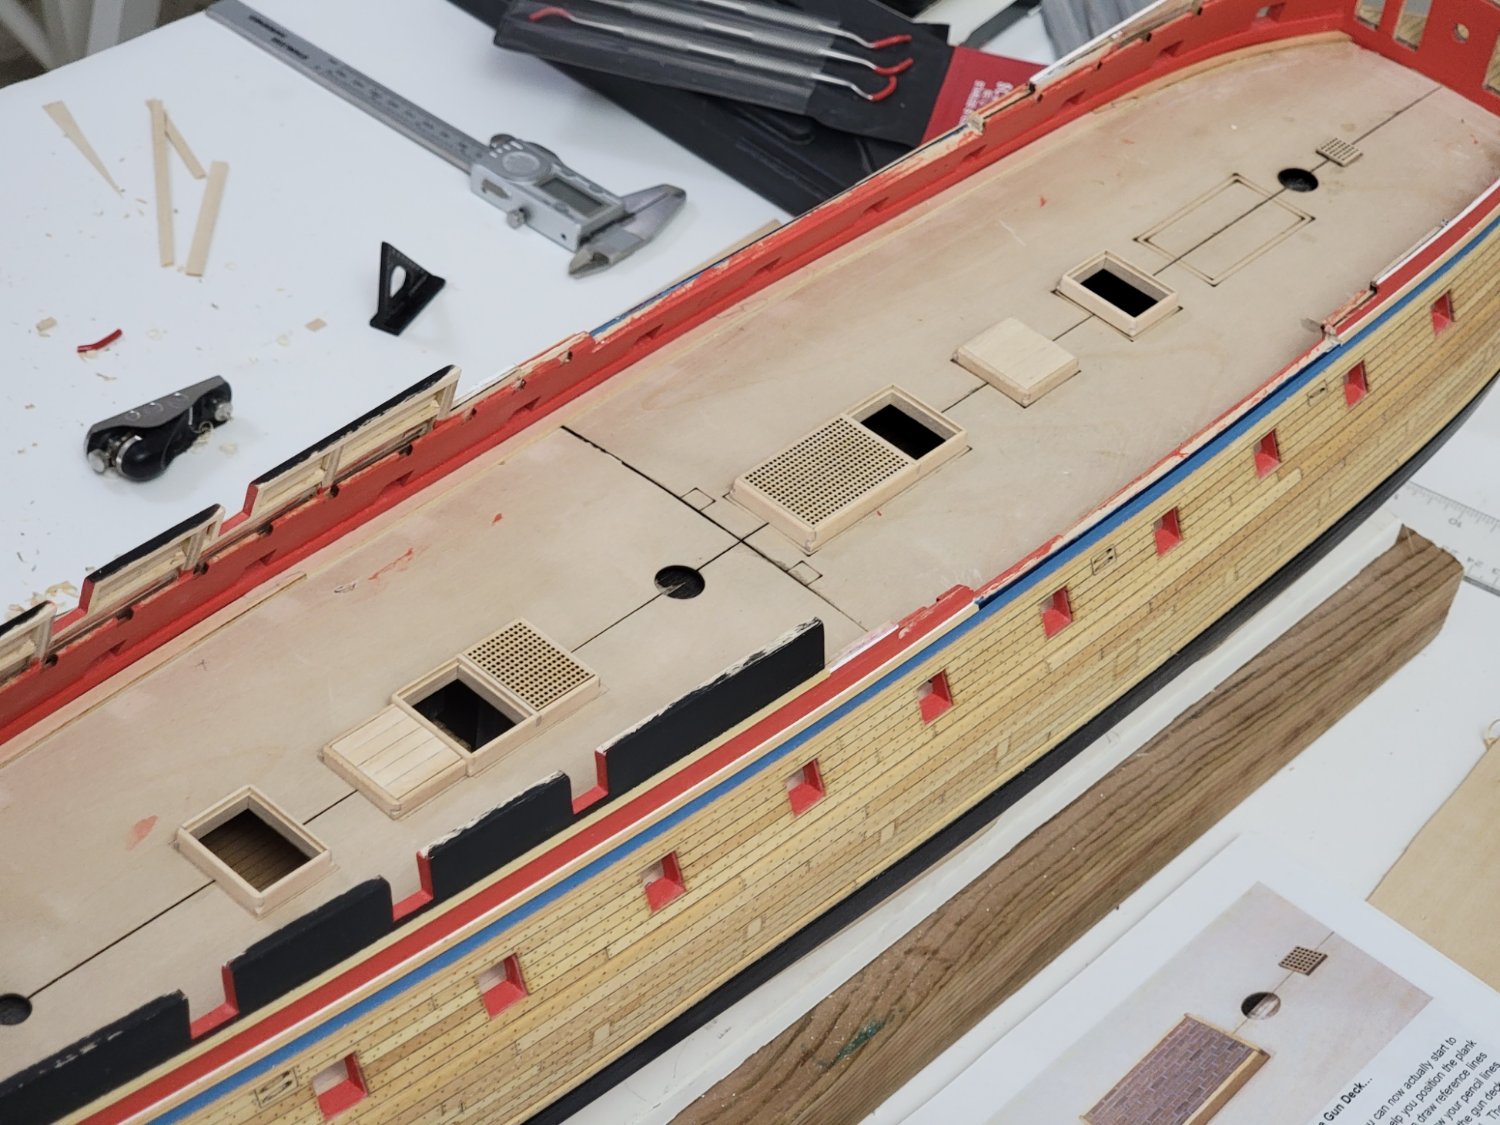
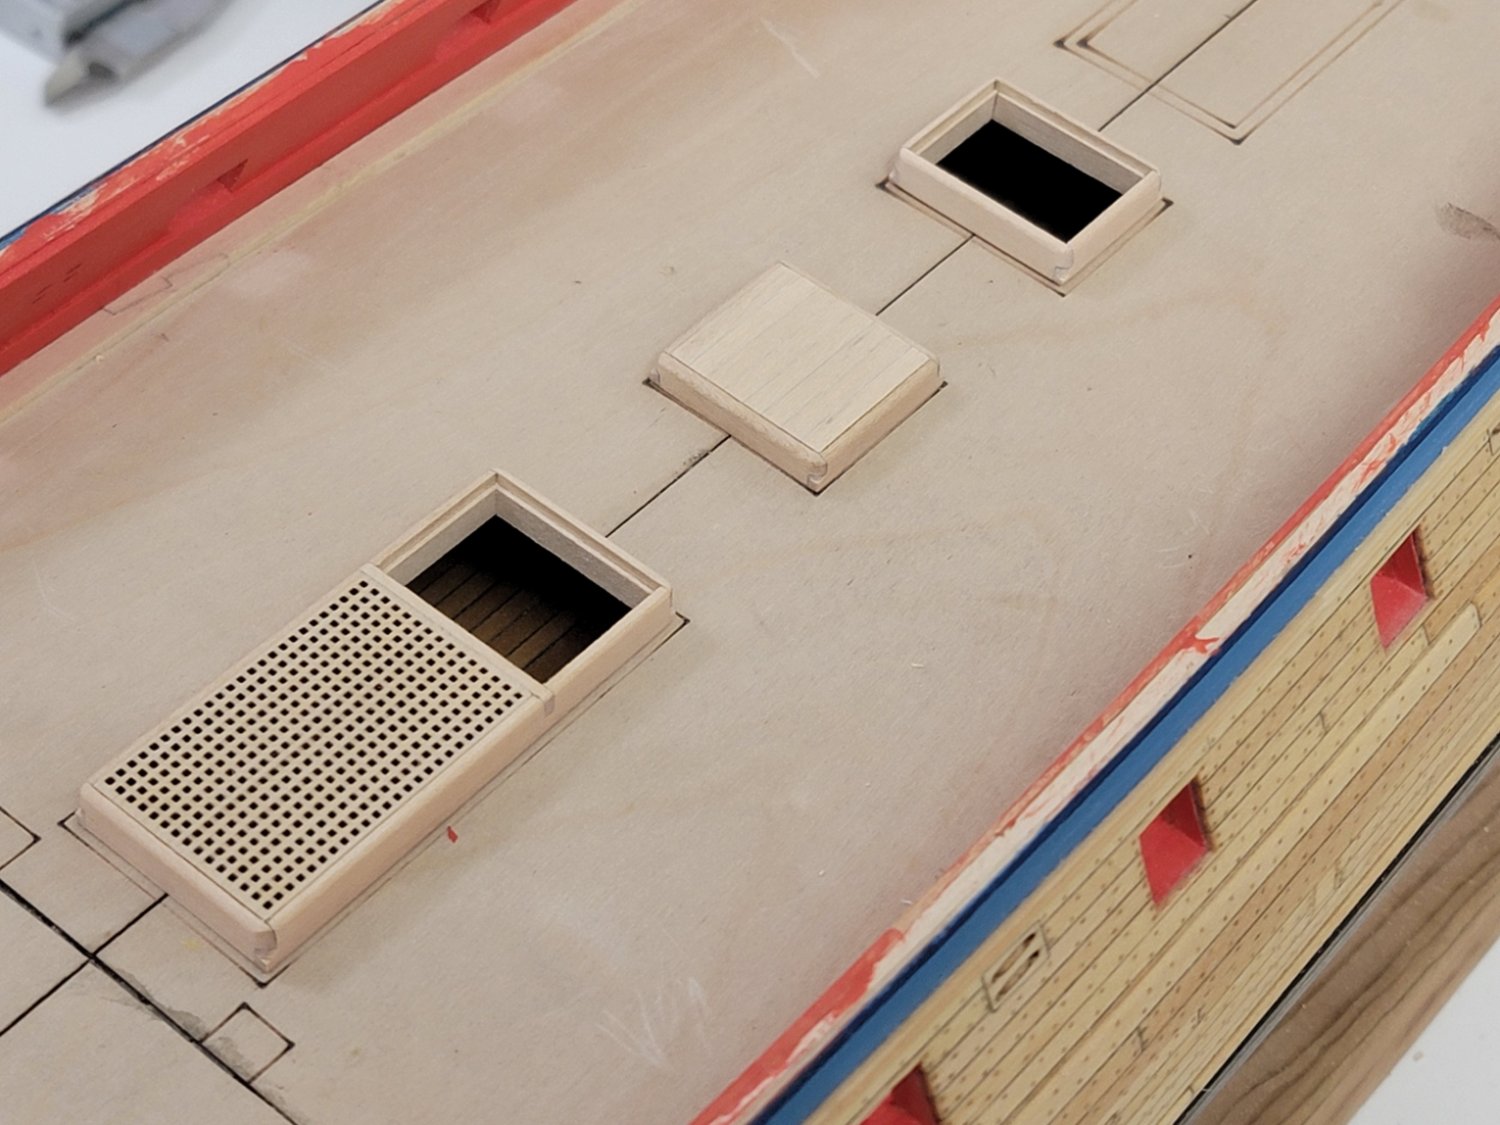
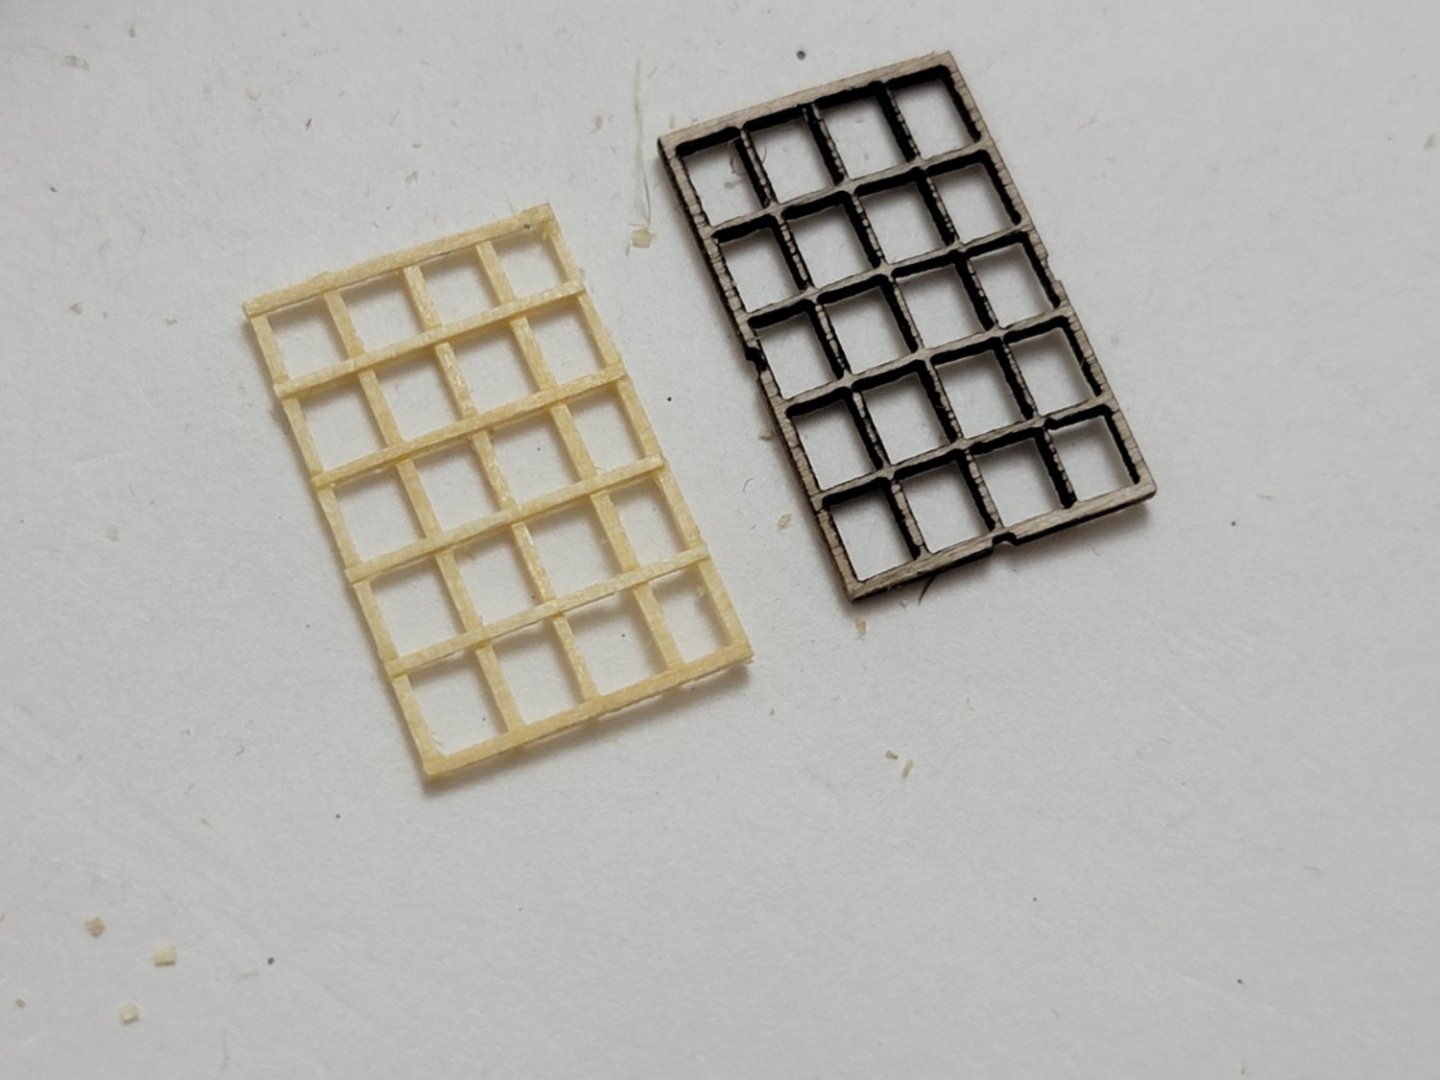
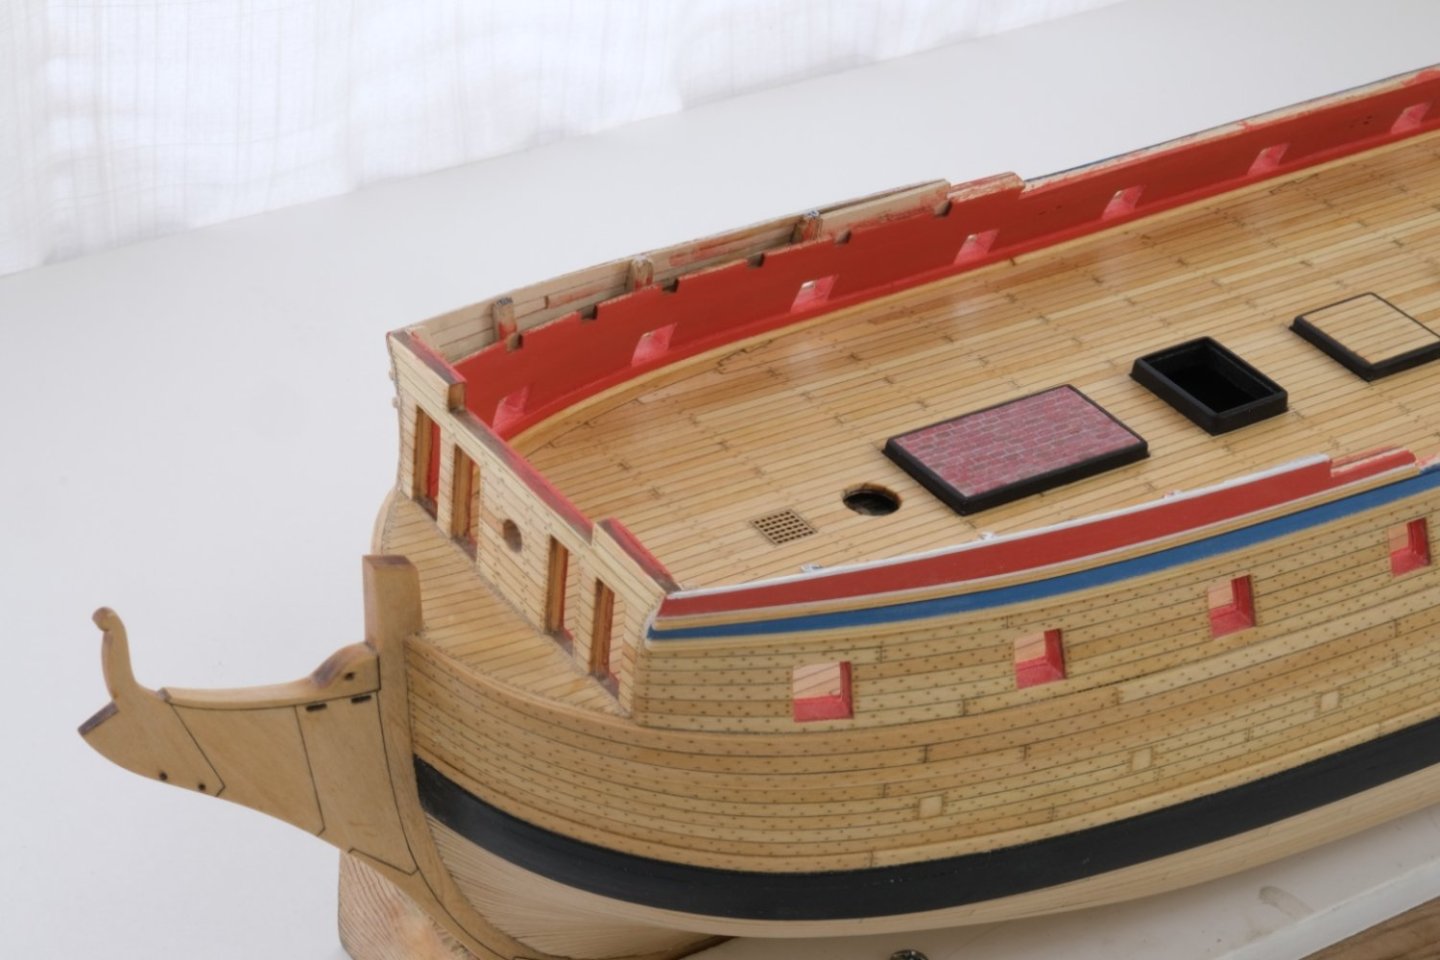
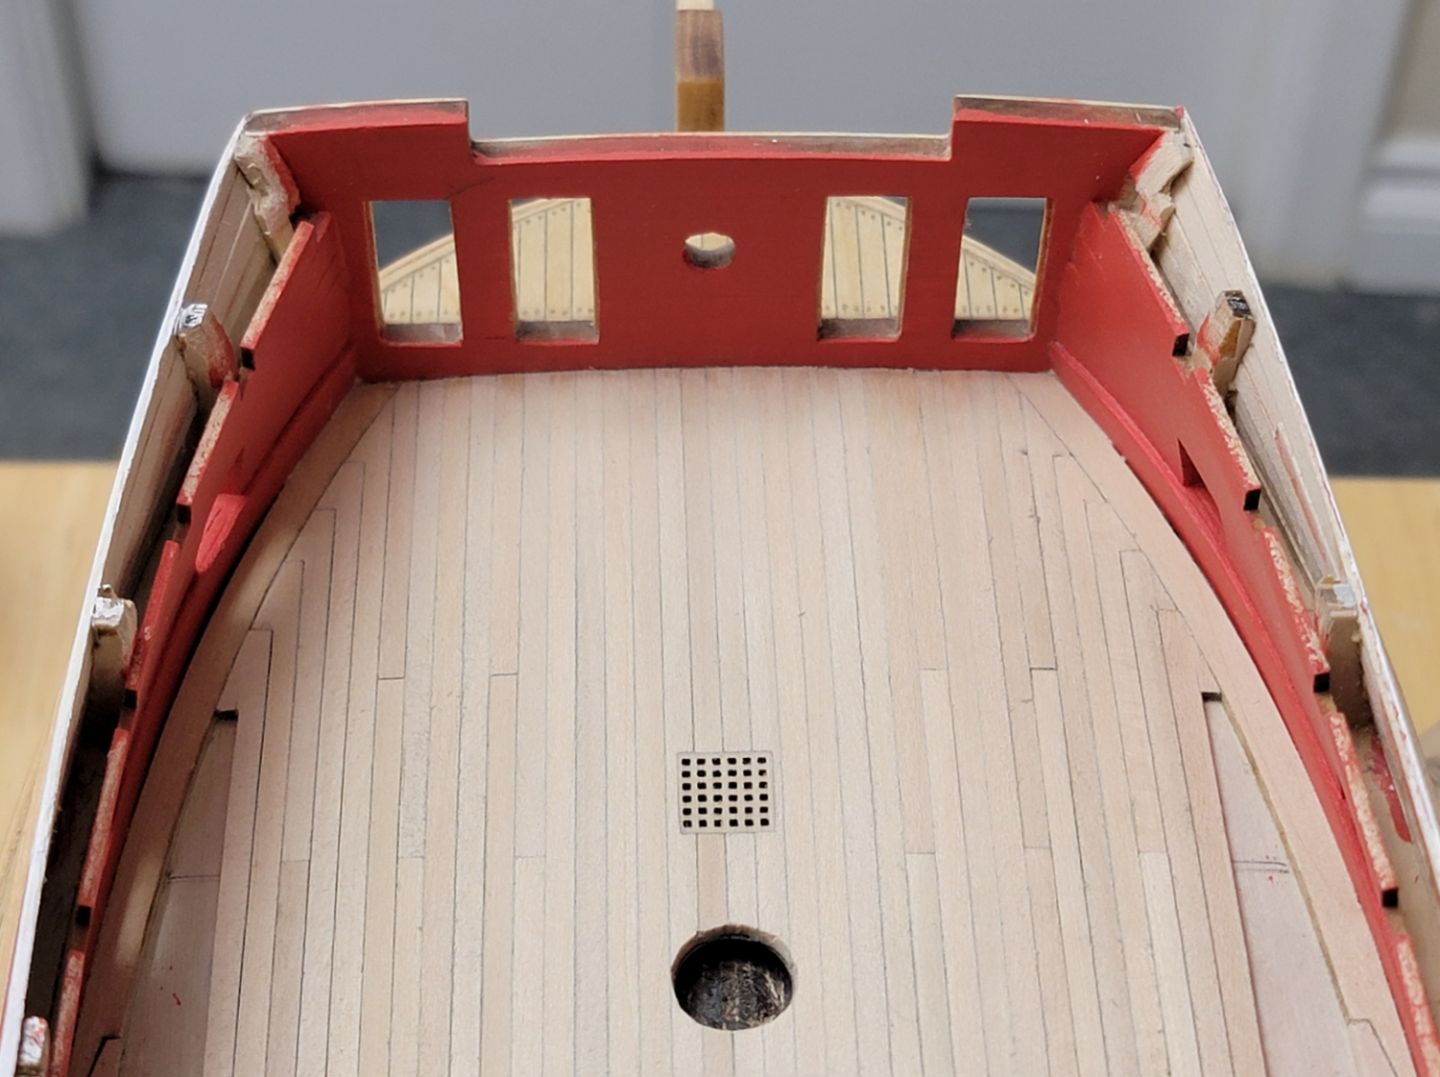
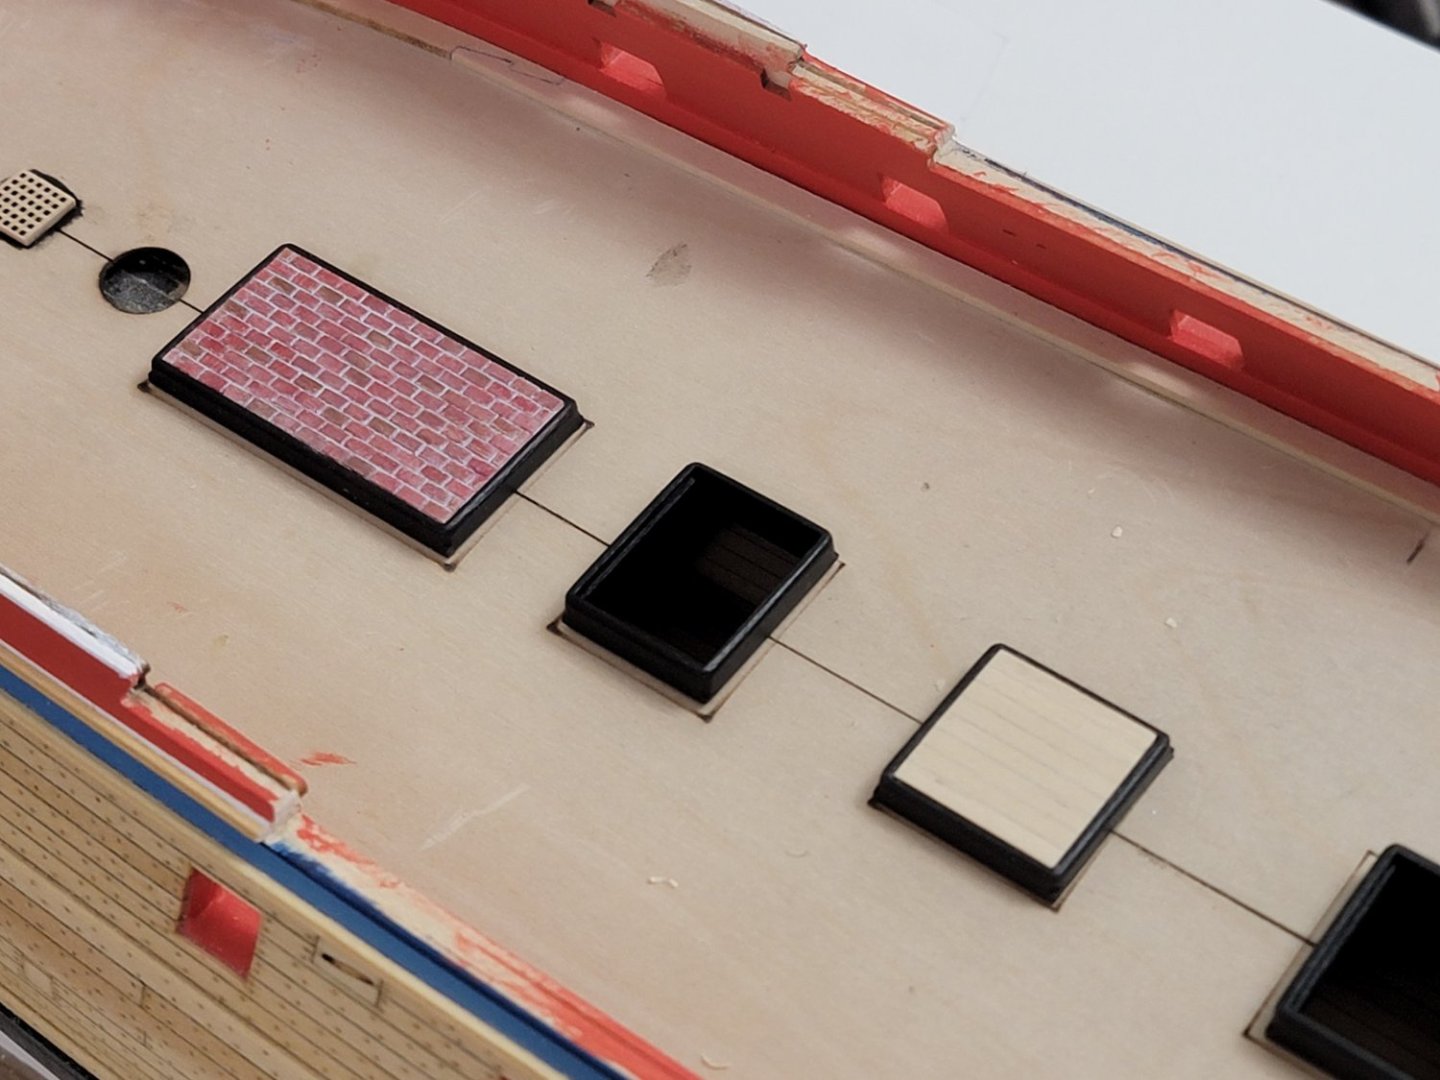
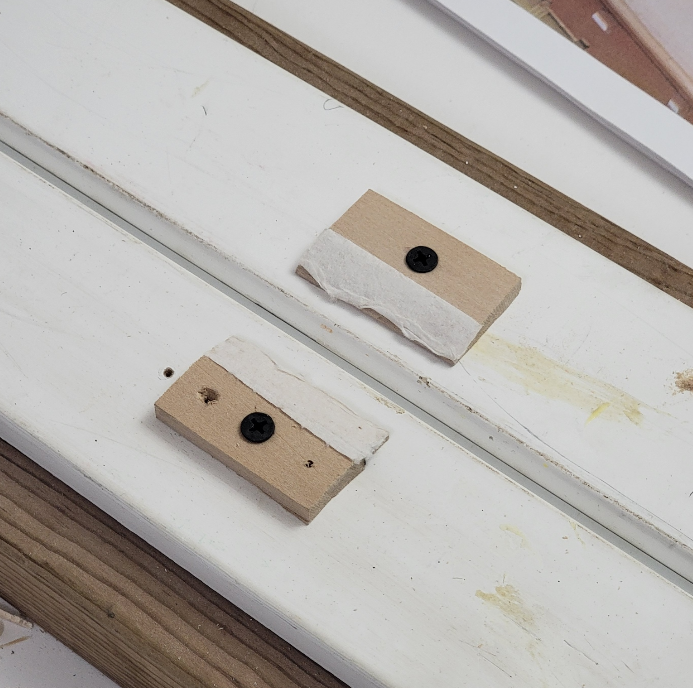
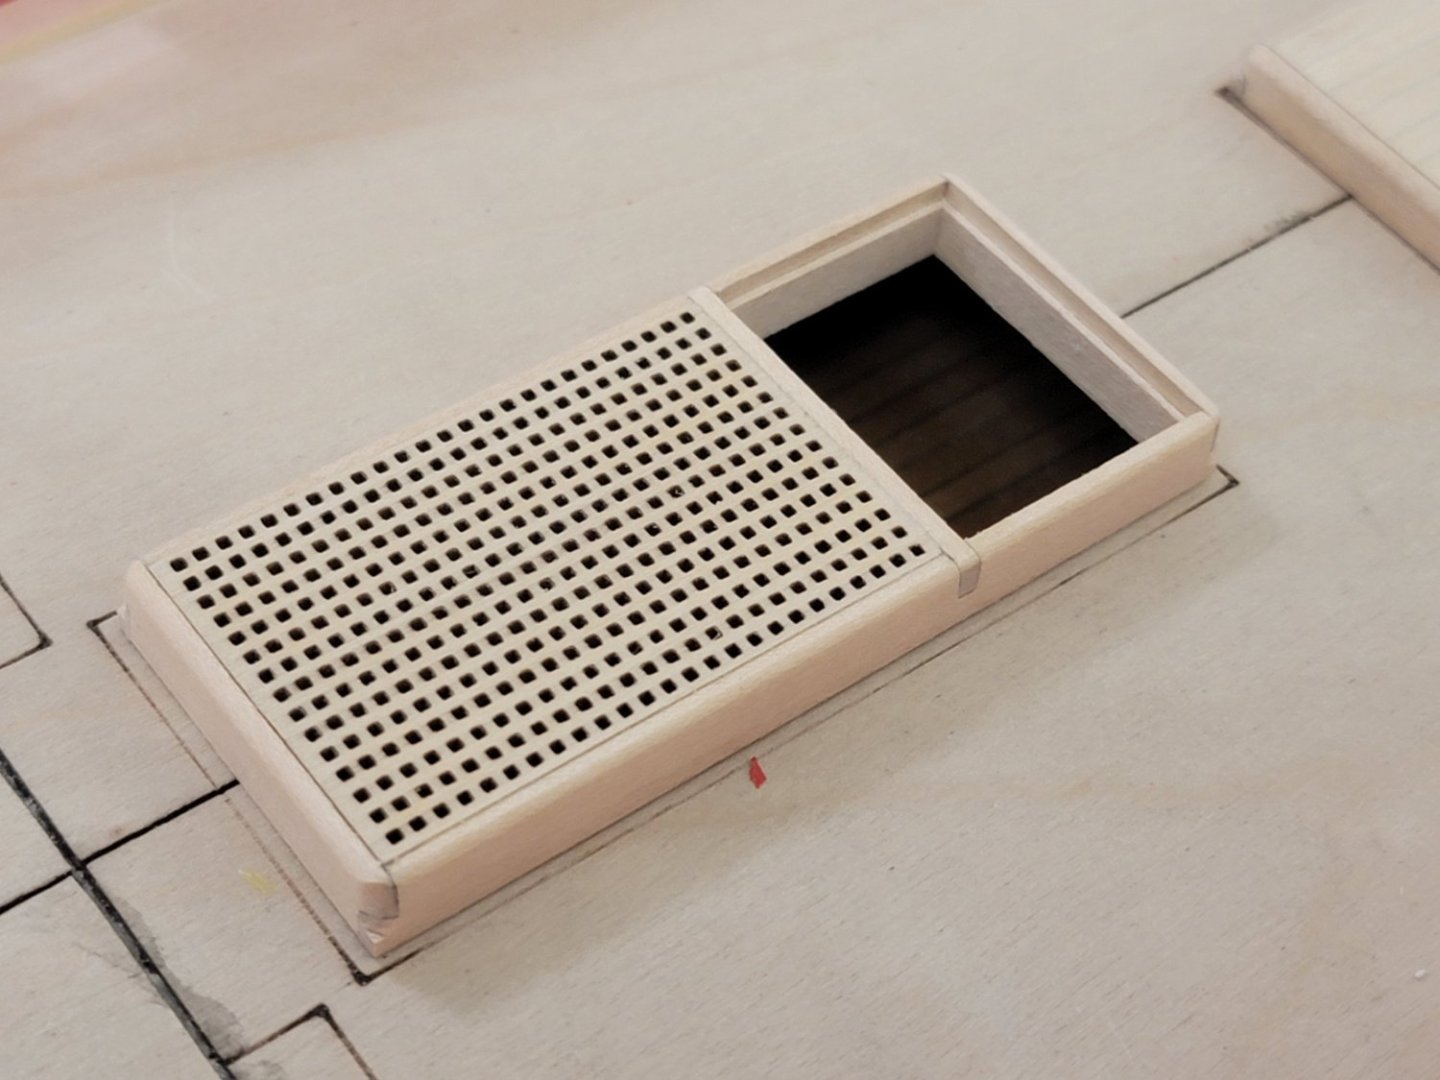
I forgot to mention in my last post, I made some modifications to the build stand so that the ship is more stable when working on her. It's not the prettiest but works great 😁 I also ended up painting the cap rail at the stern black as the different shades of basswood was still bothering me. Before, I felt like it would be too plain with all black. But after painting it, I like this look much more. Lastly, I started working on the hatch coamings and gratings. The corners were cut to 45 deg with a sharp blade (just to where the deck would be) and then rounded with sandpaper and files. The top edges were chamfered to 45 deg with the plane, then rounded with sandpaper. Here are a few photos of where I am currently at (nothing is glued on the false deck): I am thinking of painting the coamings black after seeing Chuck's Winchelsea, but I will think about it for a couple more days while I work on the bricked platform. Harshil


-
Hi Werner, she's looking really beautiful. Do you plan to rig her?
-
Thank you for the kind words! Hmm I haven't given much thought about the cabin furniture. Right now I'm leaning on leaving it plain but let's see if I change my mind 😁
-
Thanks for the tip, Werner. I'll trim the aft end of the tiles a bit so that the hole has more space. Hi Pete, it's good to be back! It'll take a few more days for me to get back to the groove so I'm trying not to rush things. My solution to this is uploading a screenshot of the image. That seems to work fine so far, but glad you found another solution! Harshil