HOLIDAY DONATION DRIVE - SUPPORT MSW - DO YOUR PART TO KEEP THIS GREAT FORUM GOING! (83 donations so far out of 49,000 members - C'mon guys!)
×

.jpg.1f80adf1a9b14a937cfcf2ca6af0f0d4.jpg)
WalrusGuy
-
Posts
1,007 -
Joined
-
Last visited
Content Type
Profiles
Forums
Gallery
Events
Everything posted by WalrusGuy
-
.thumb.jpg.62d1d69fed1f32364417cb1f9cdeb009.jpg) Very nice, Peter! The furled sails are a nice touch.
Very nice, Peter! The furled sails are a nice touch.- 4 replies
-
- 2
-

-
- Modellers Shipyard
- Finished
- (and 2 more)
-
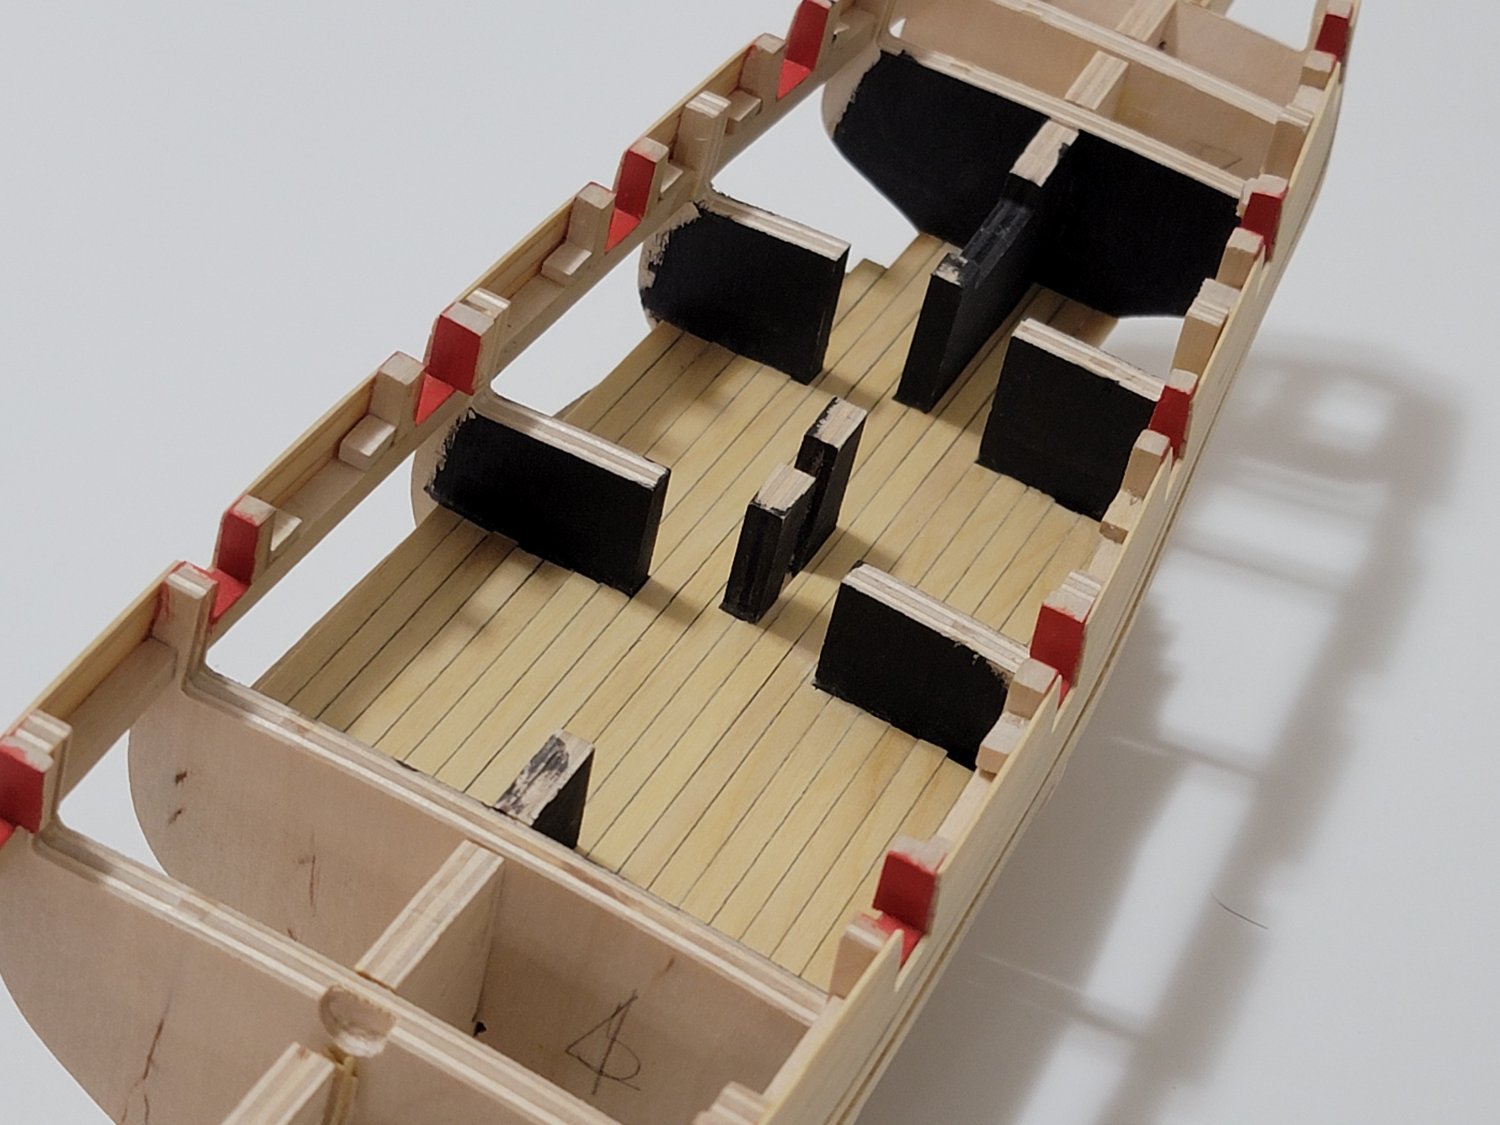
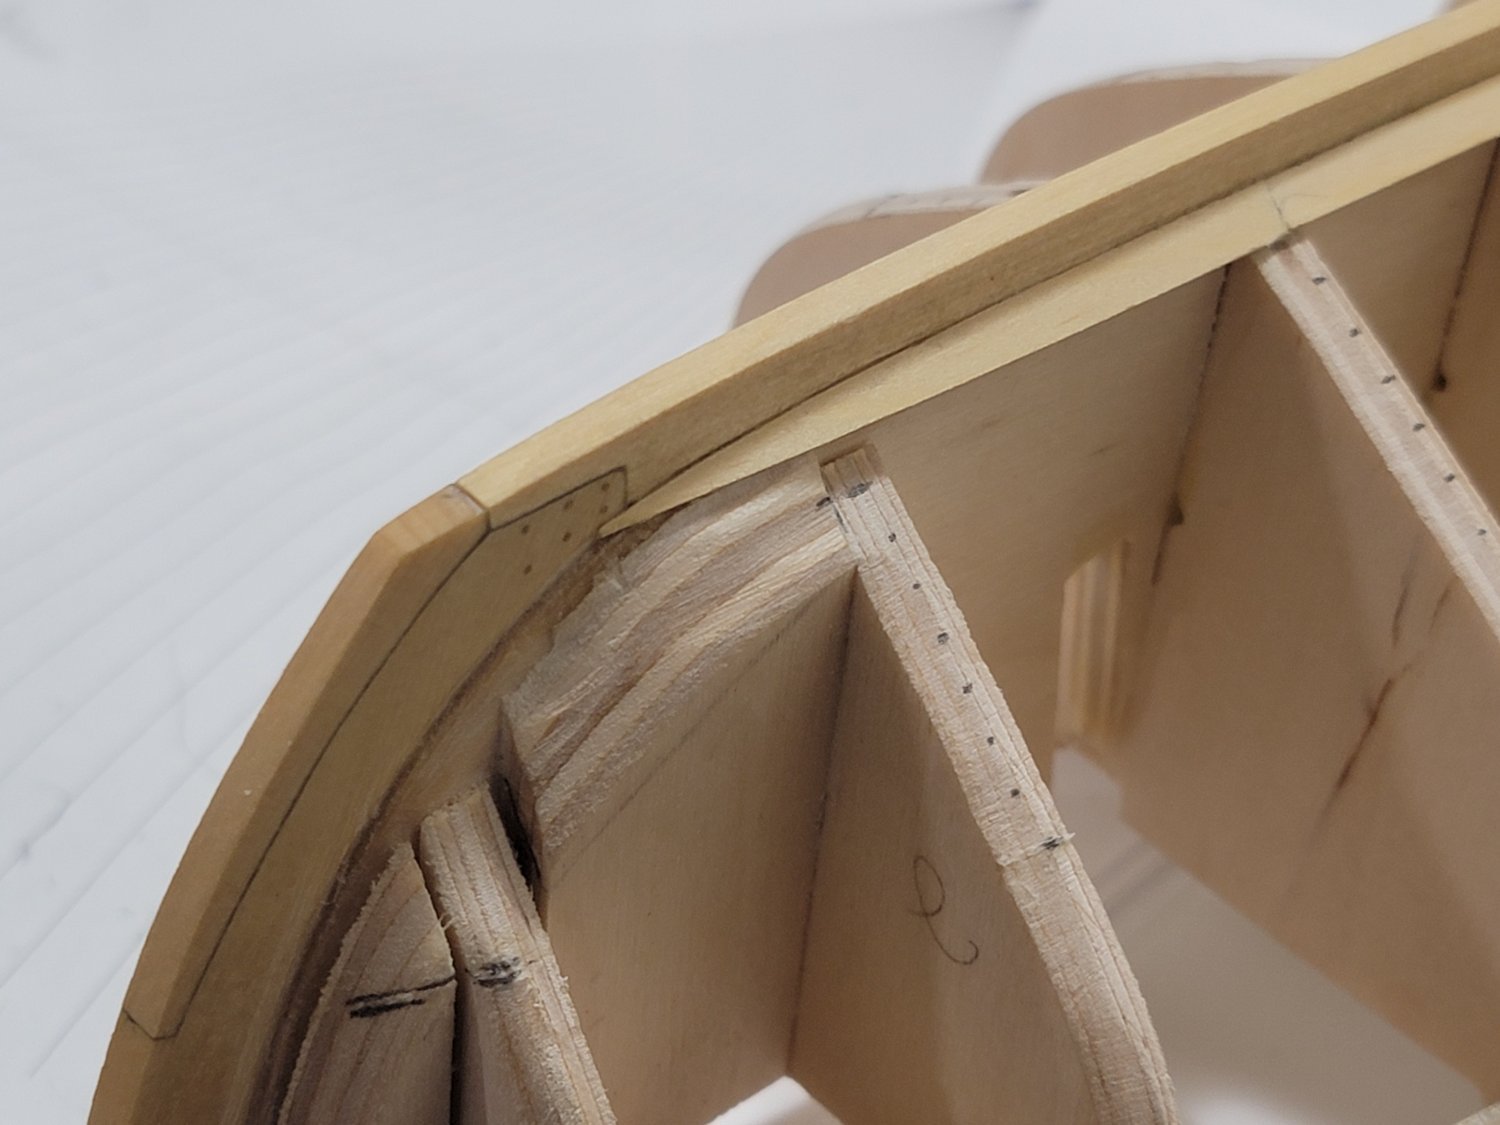
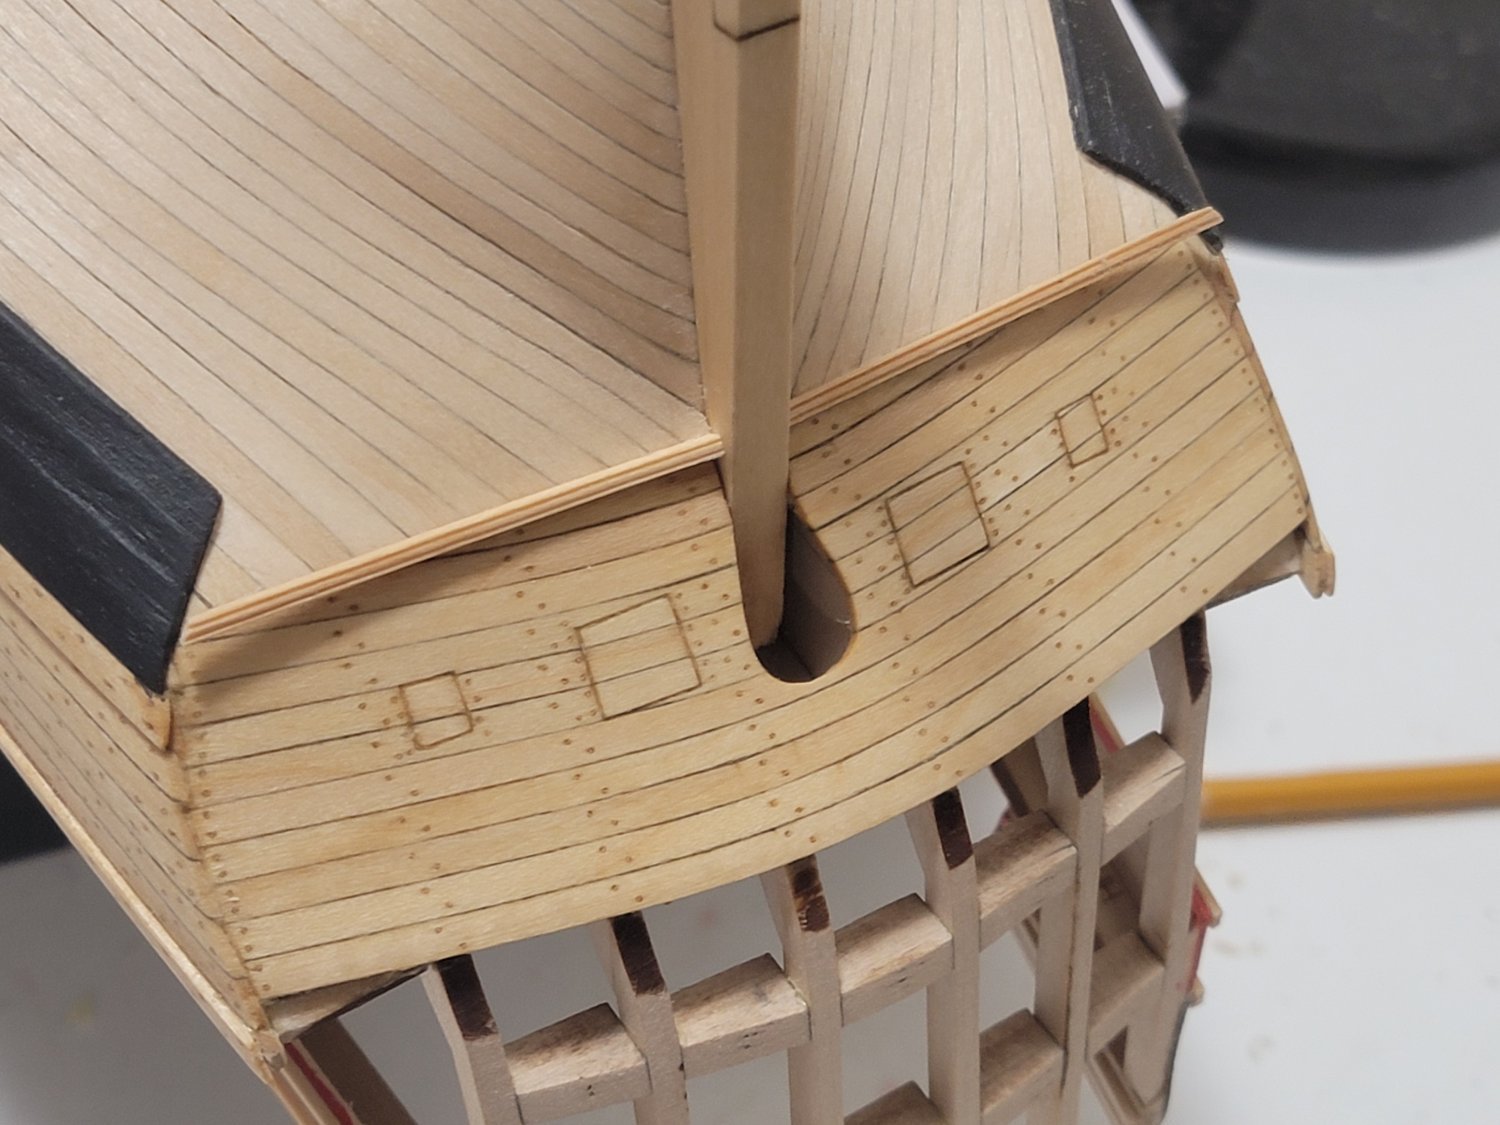
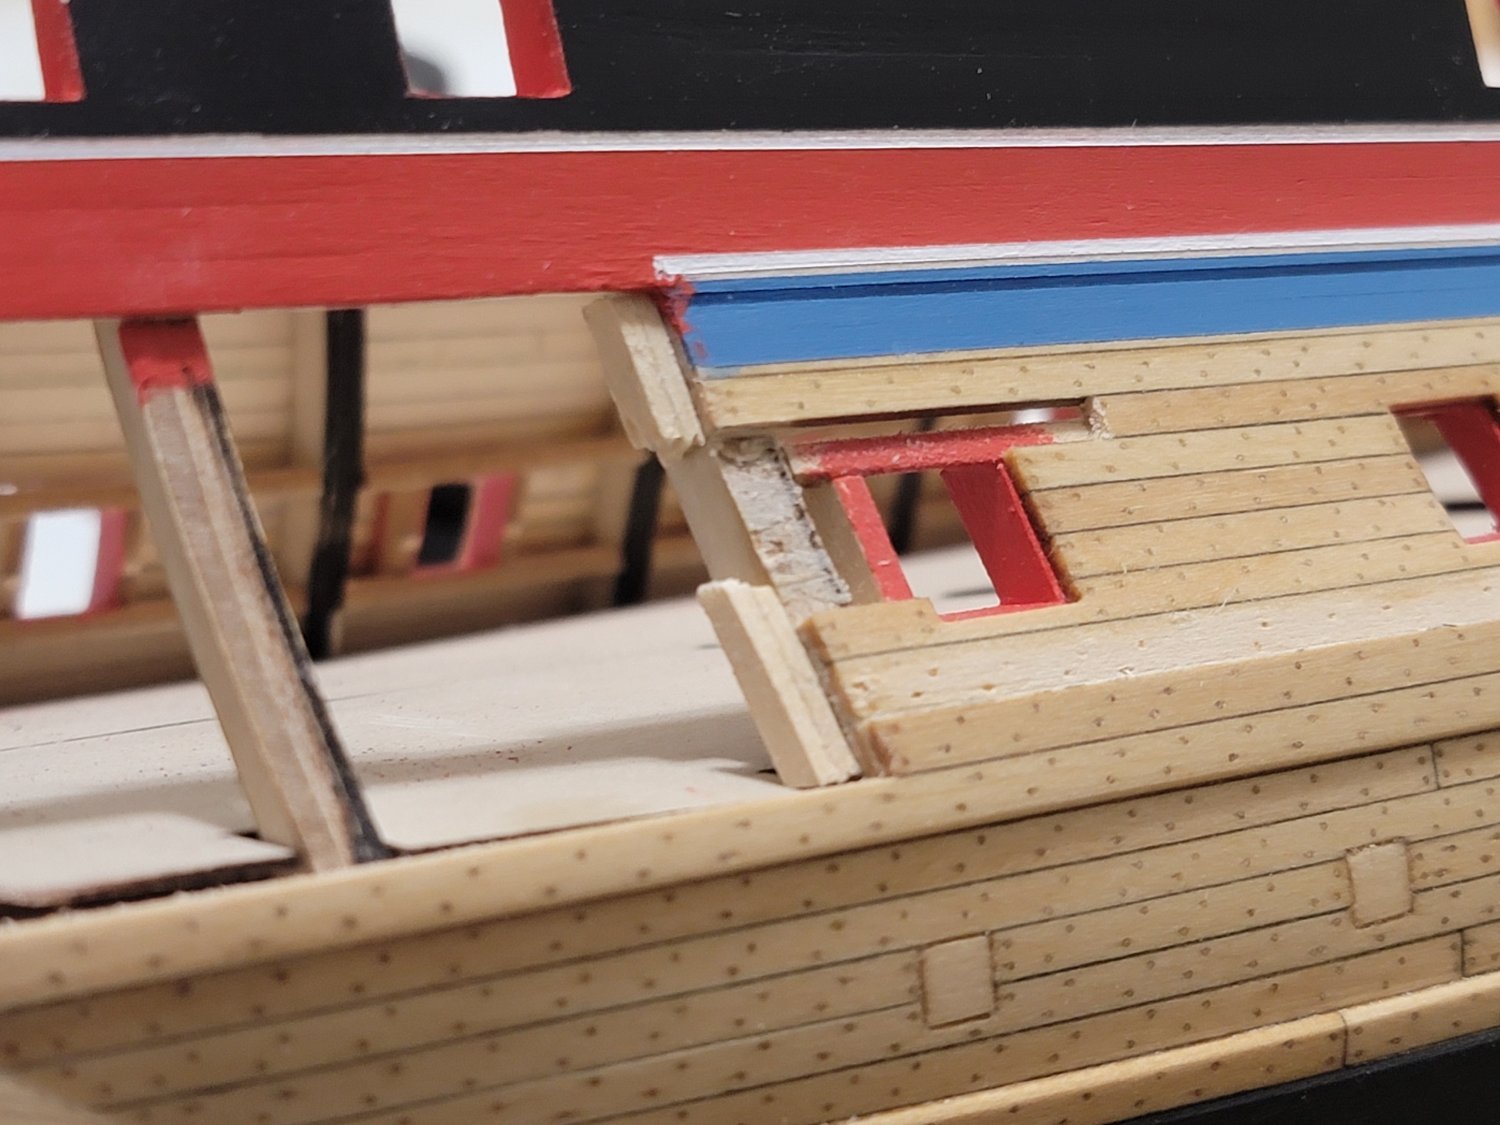
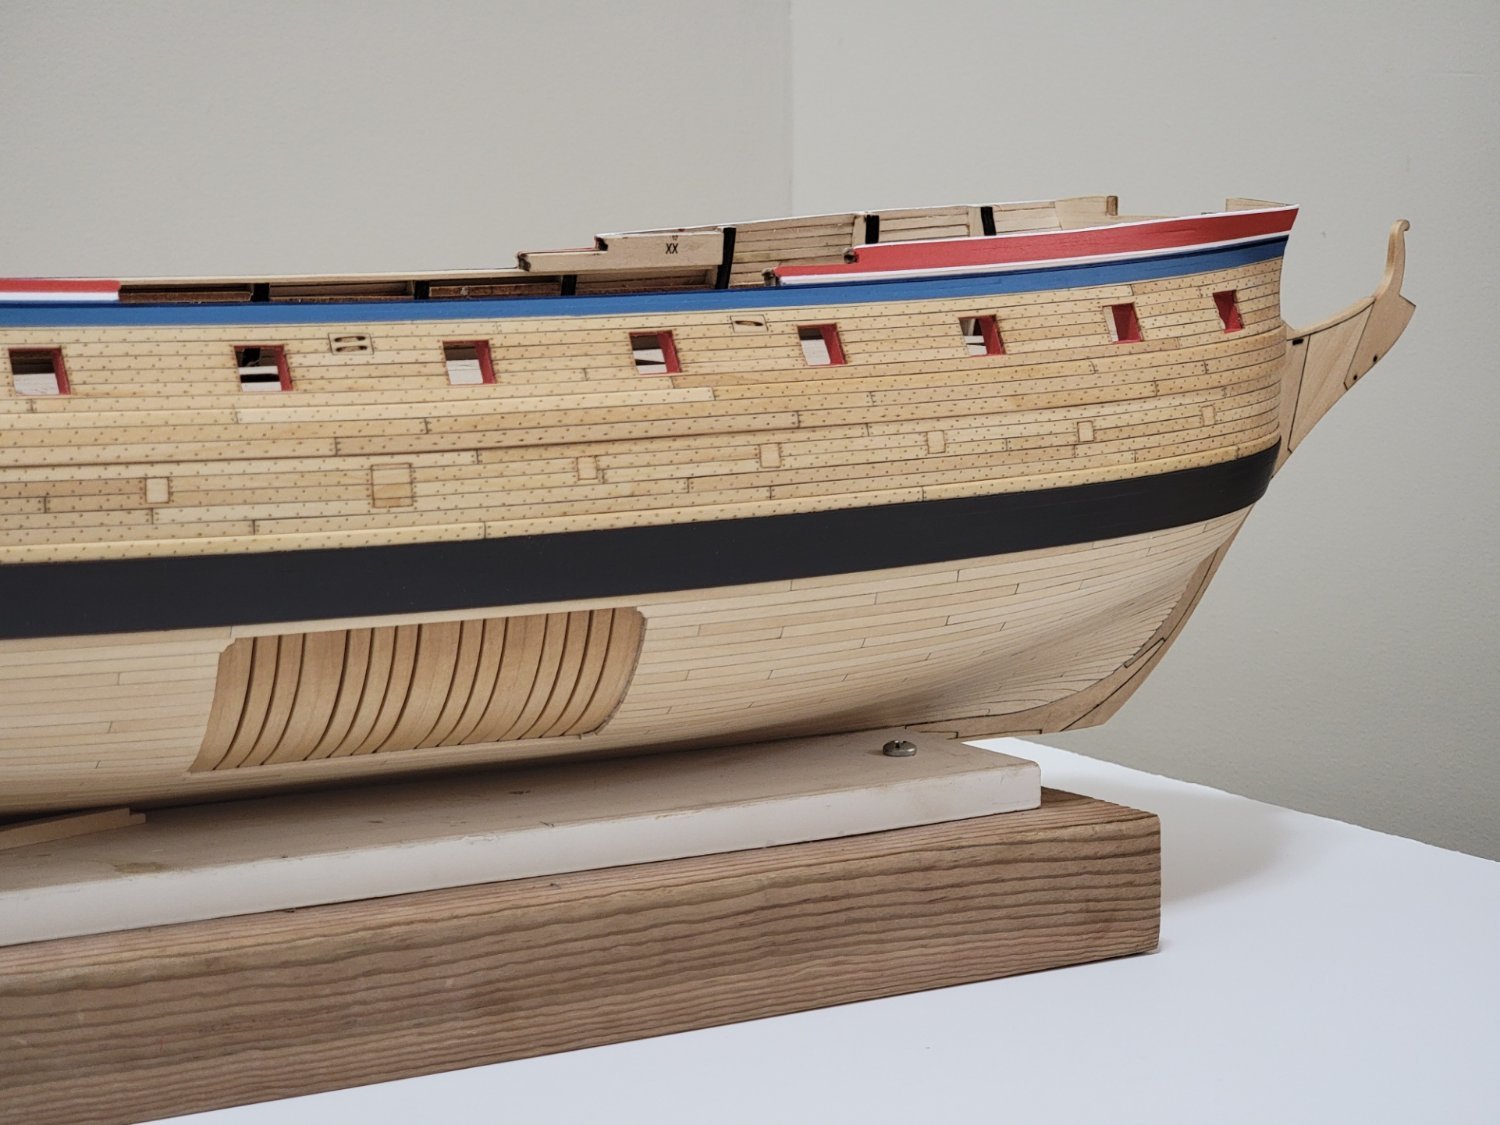
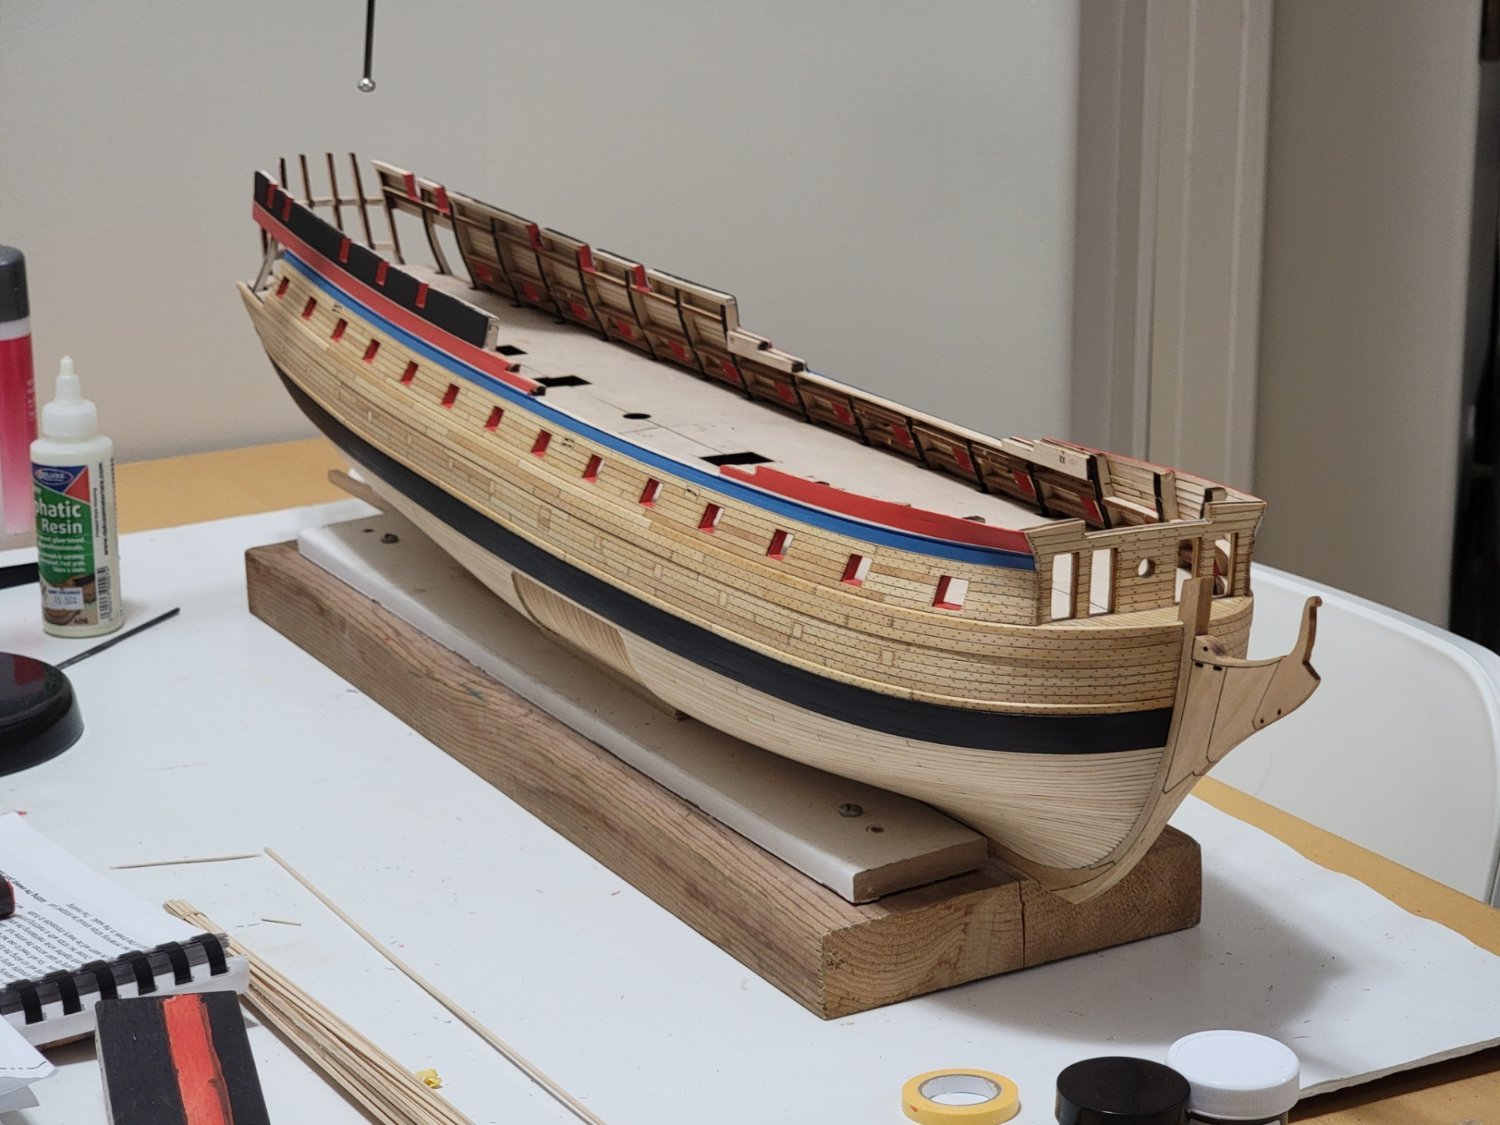
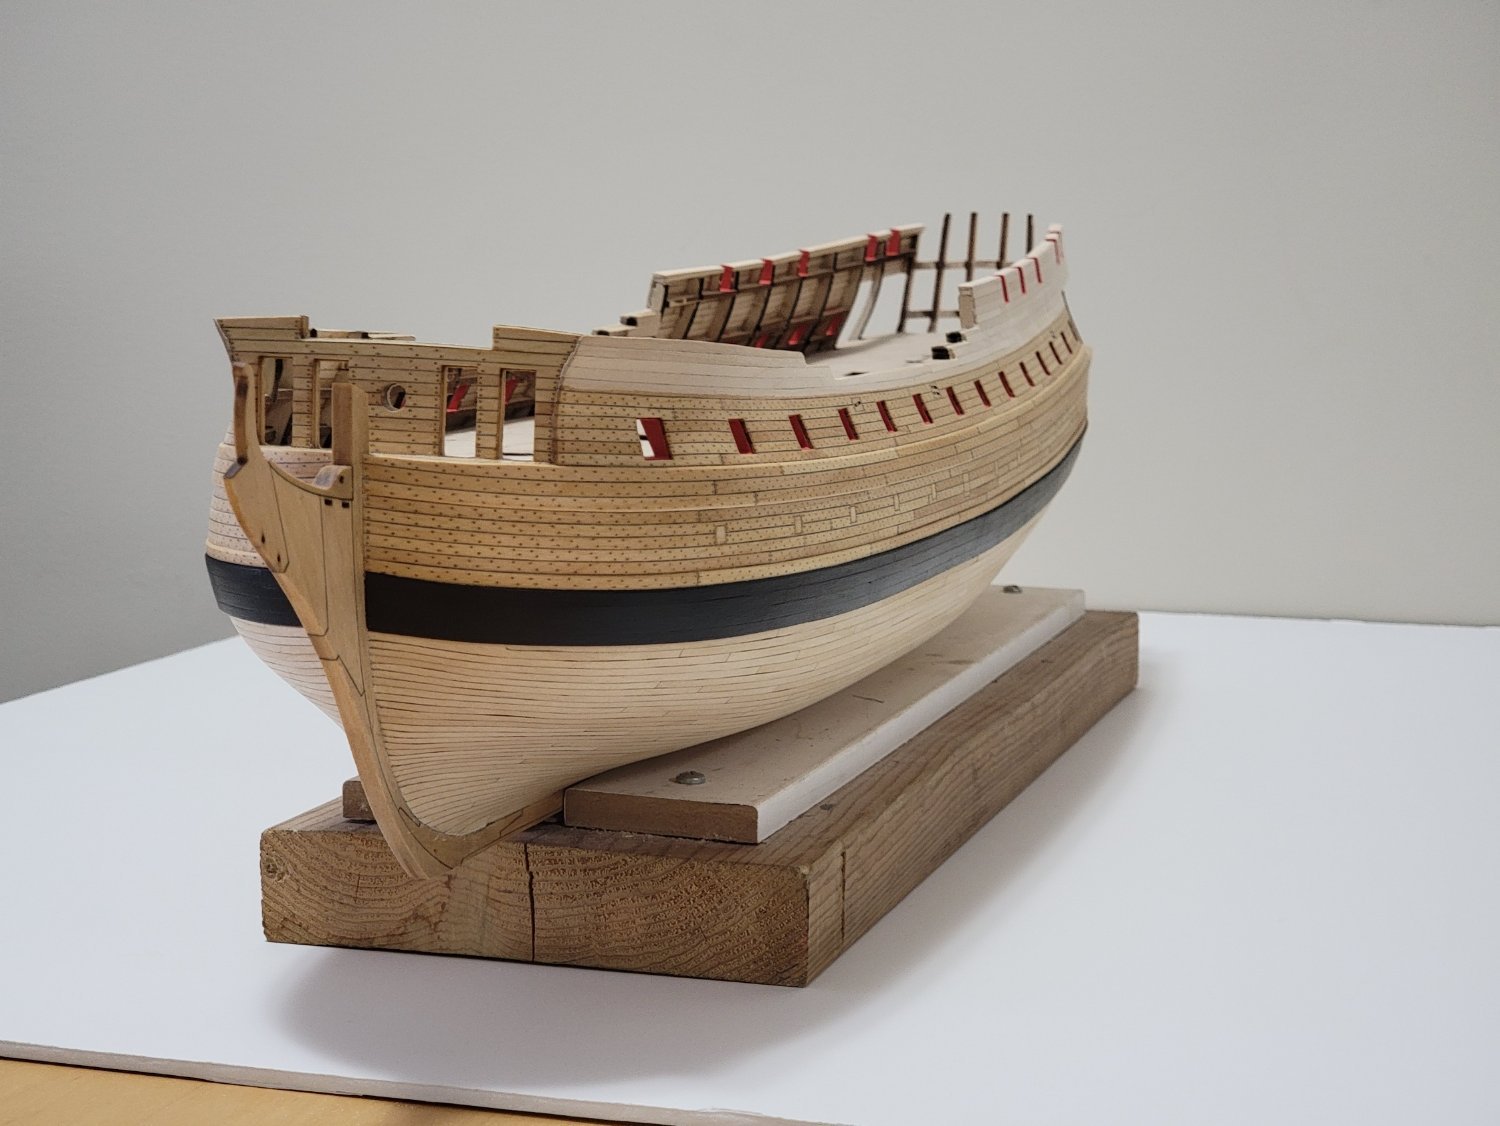
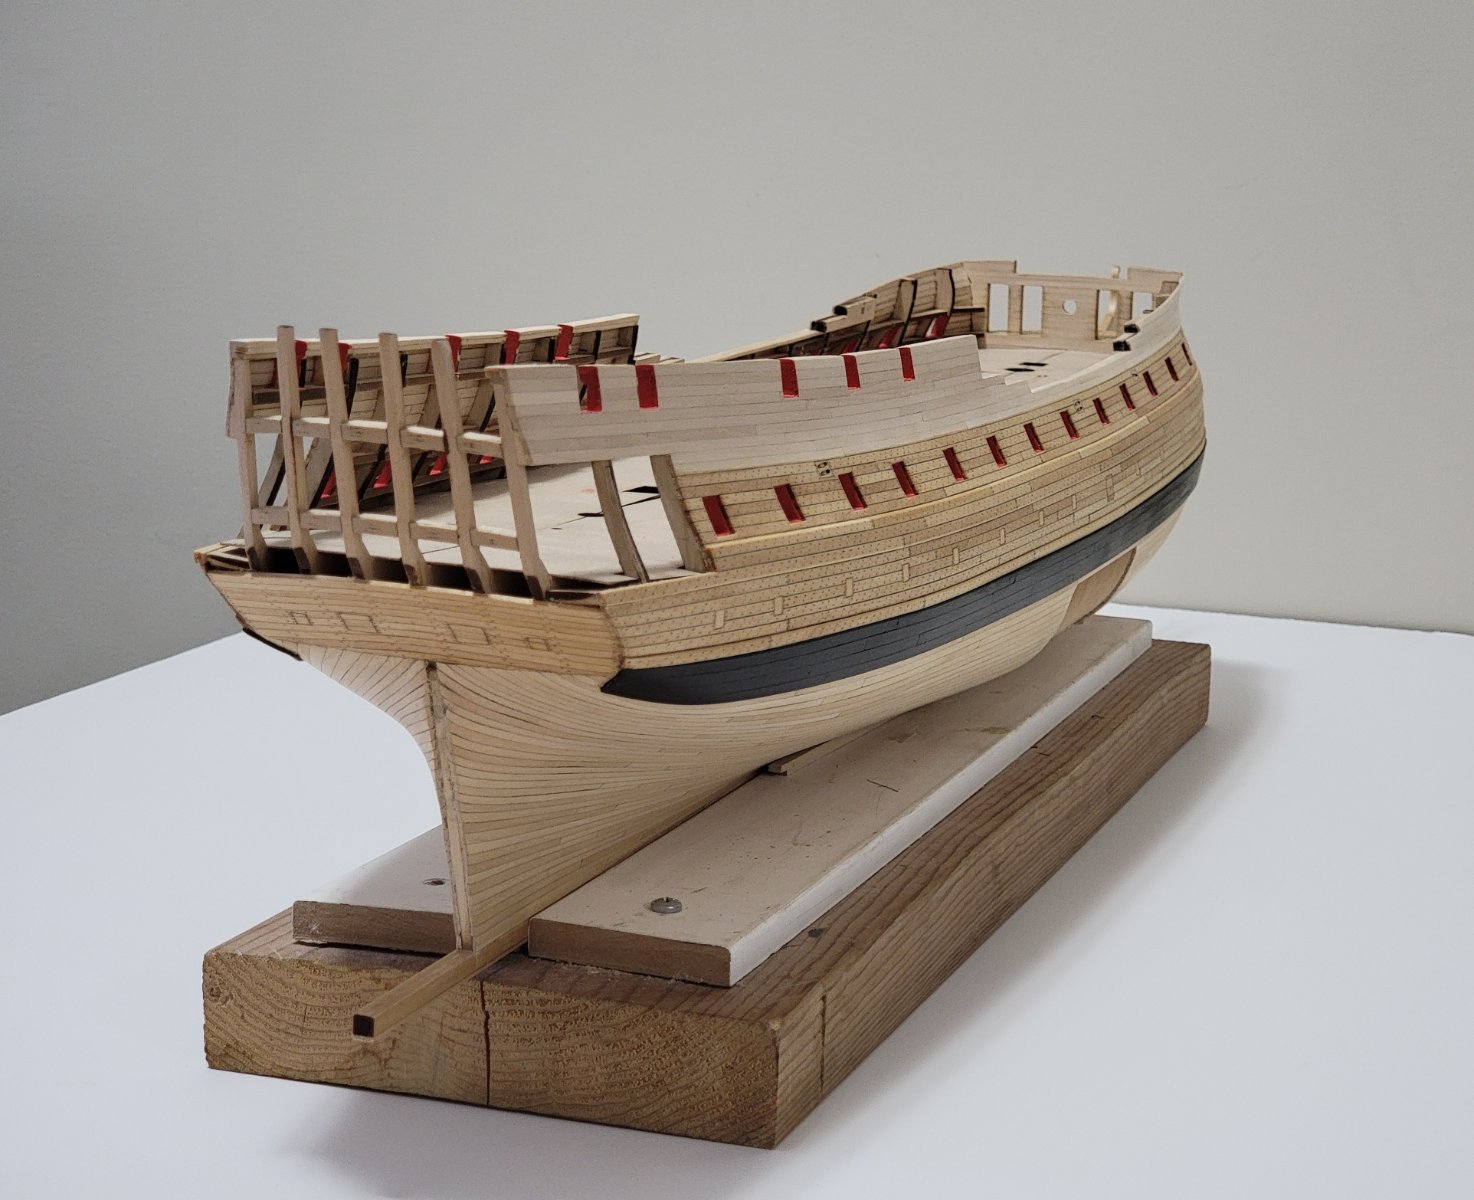
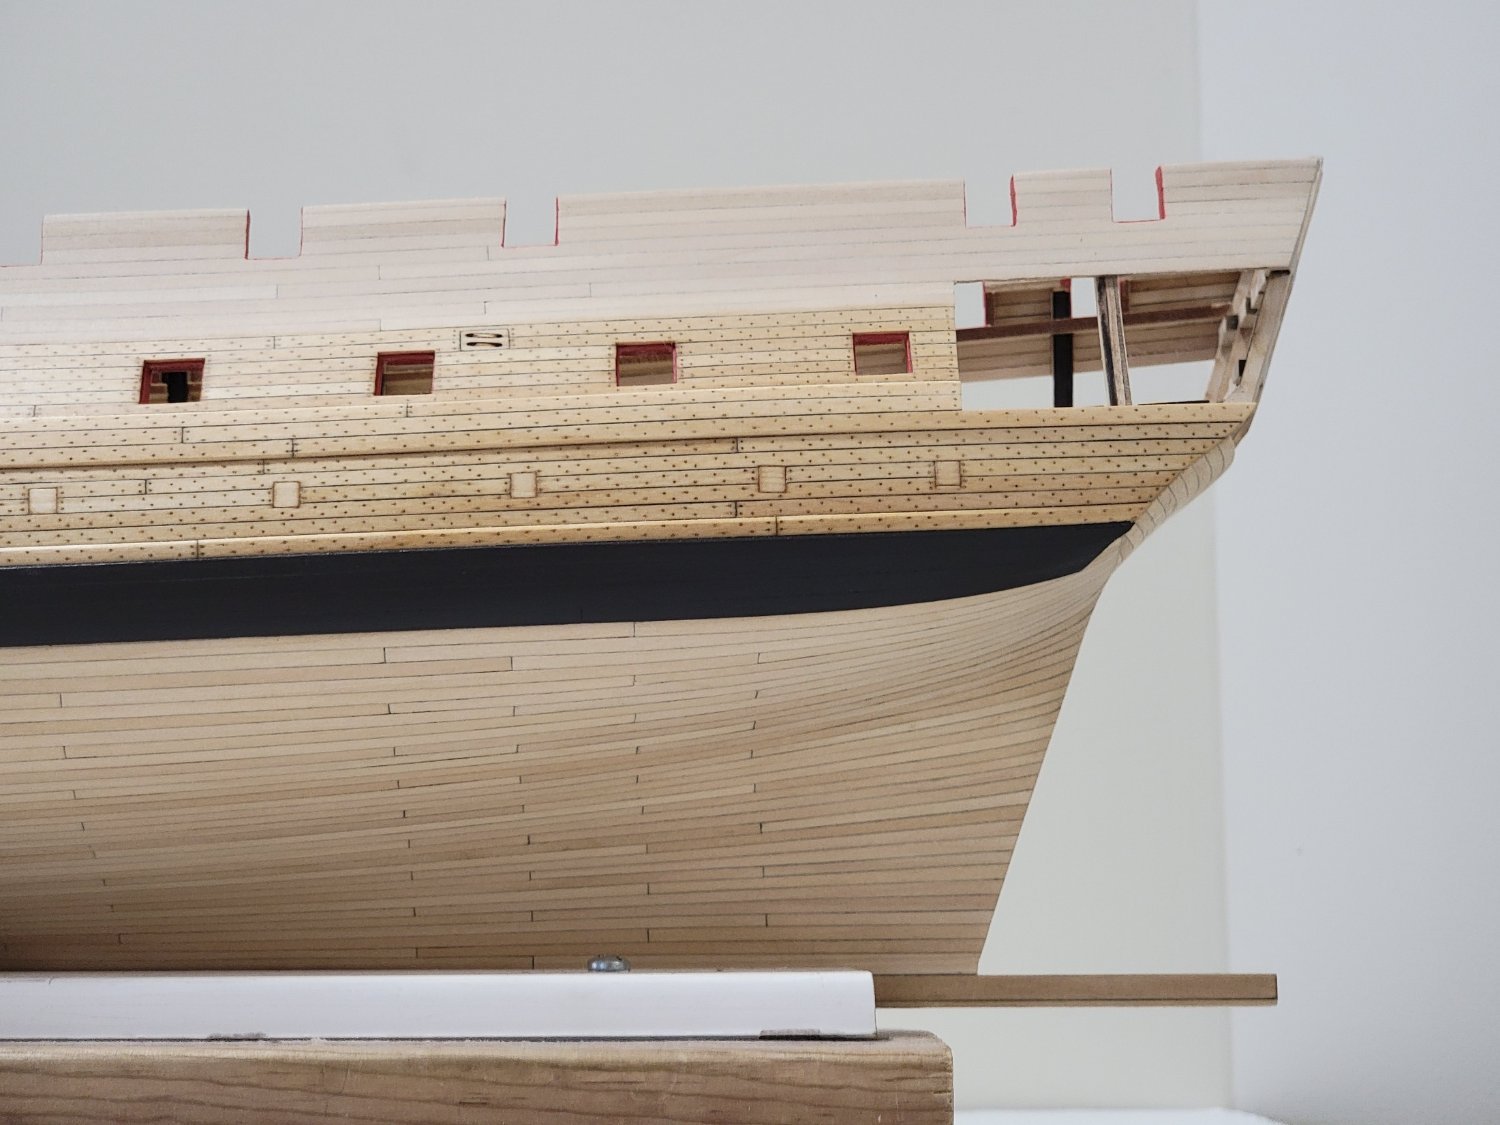
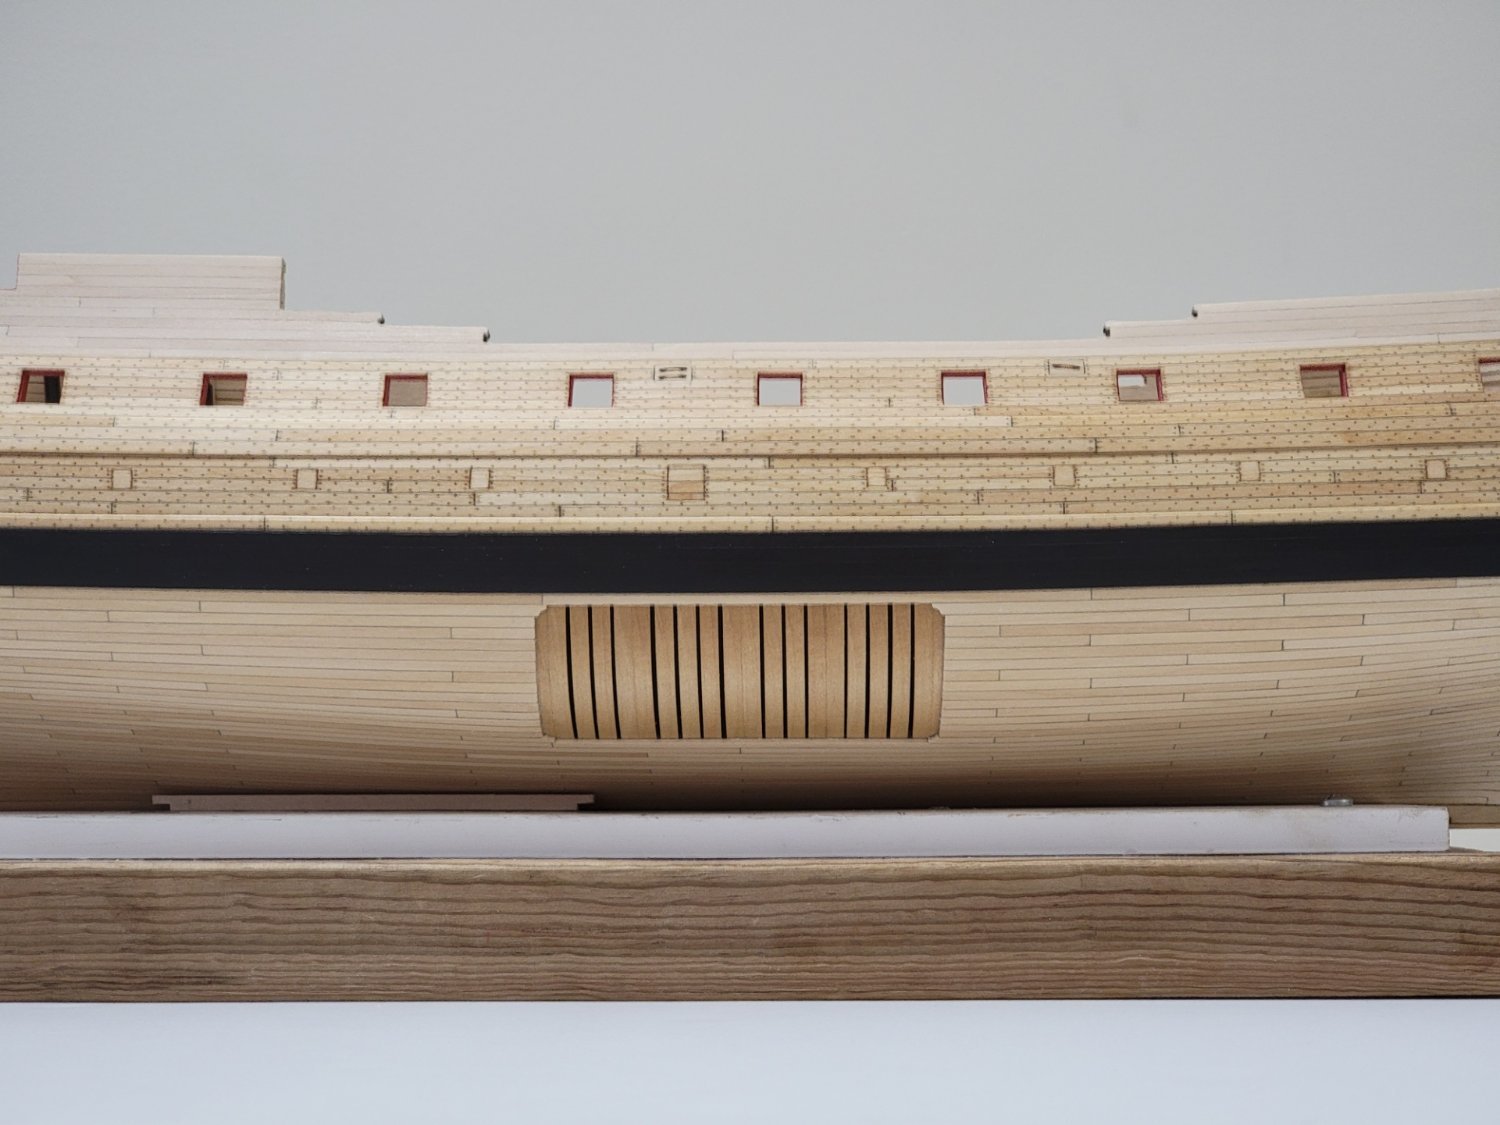
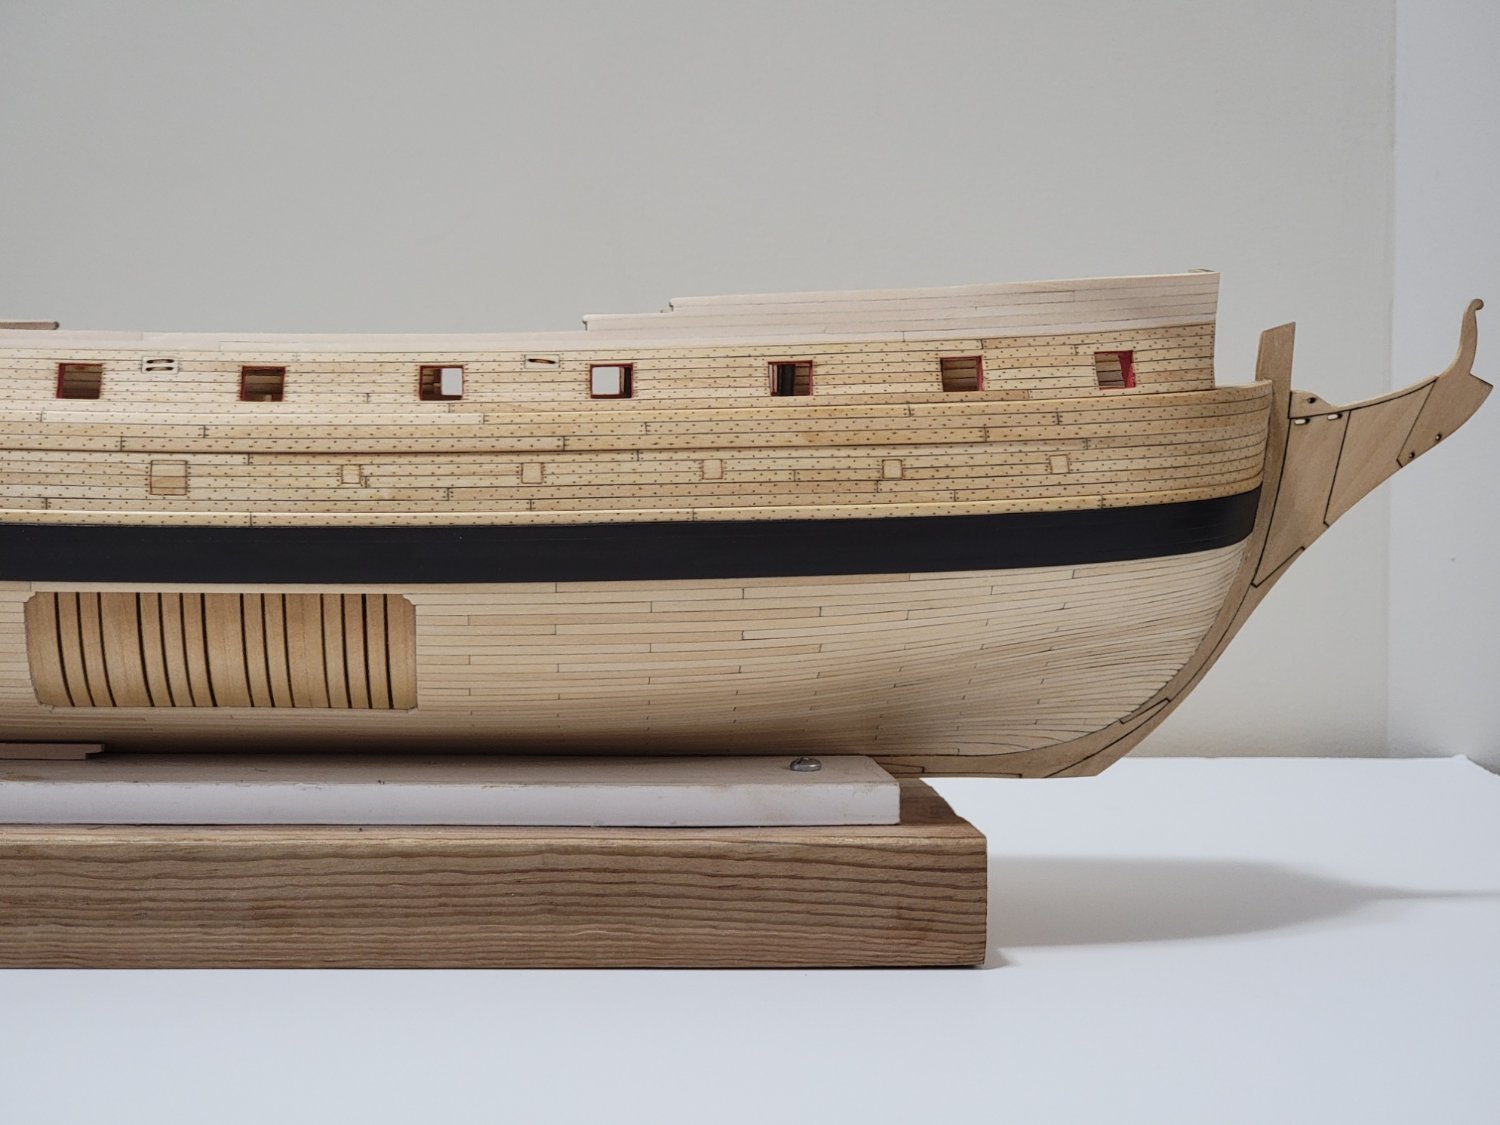
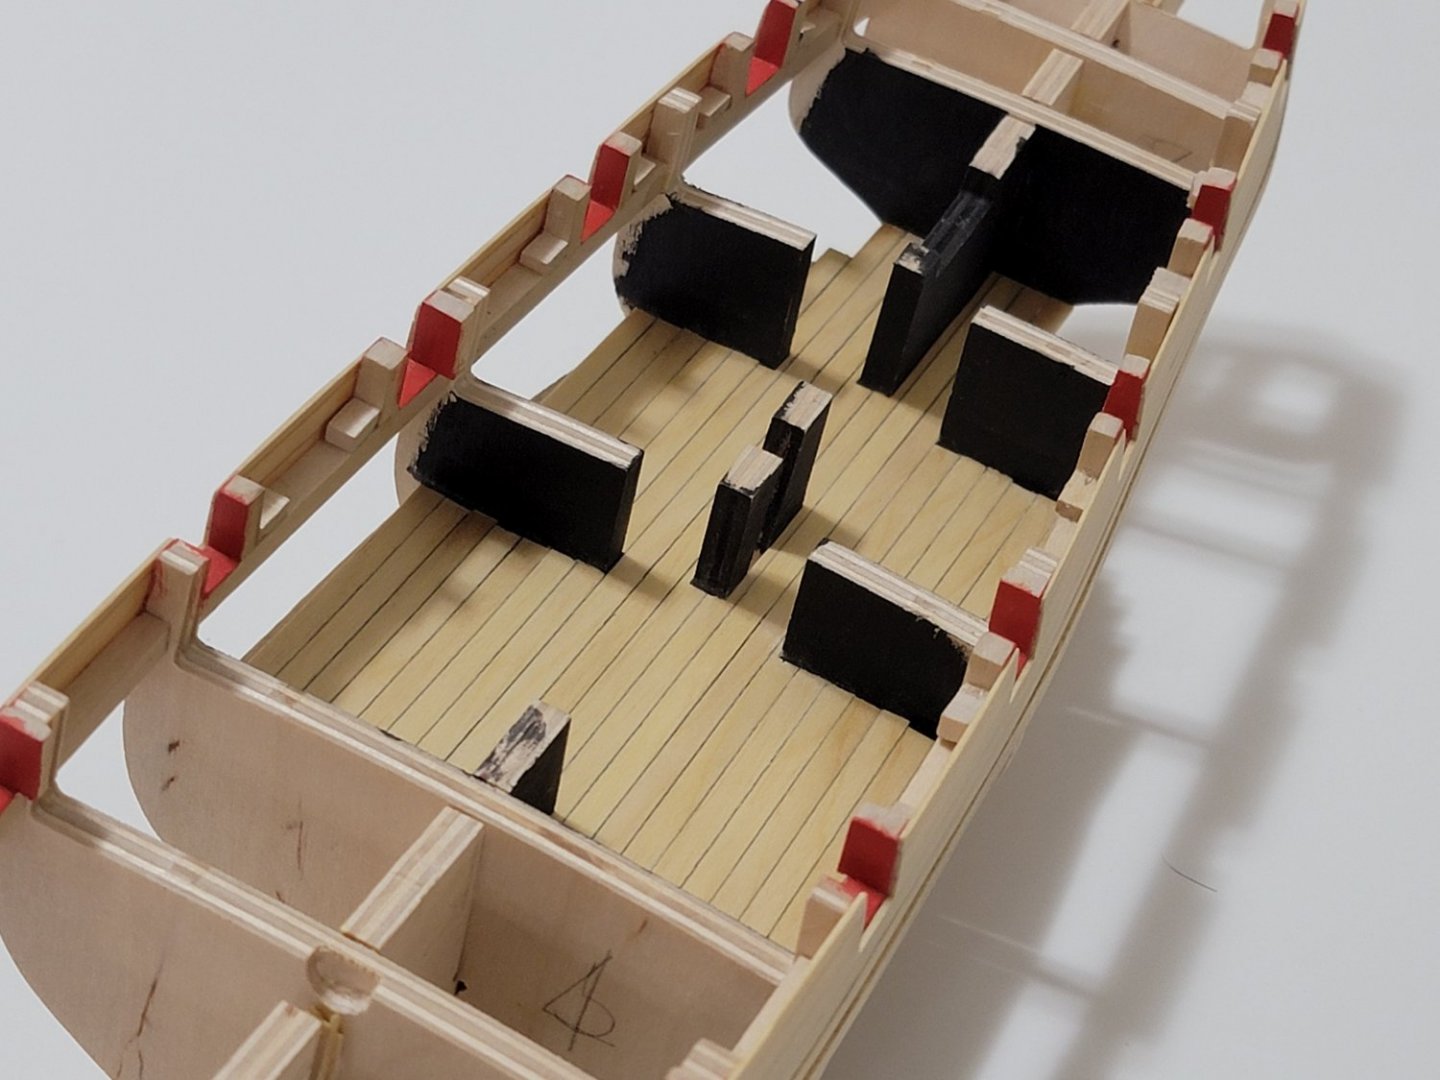
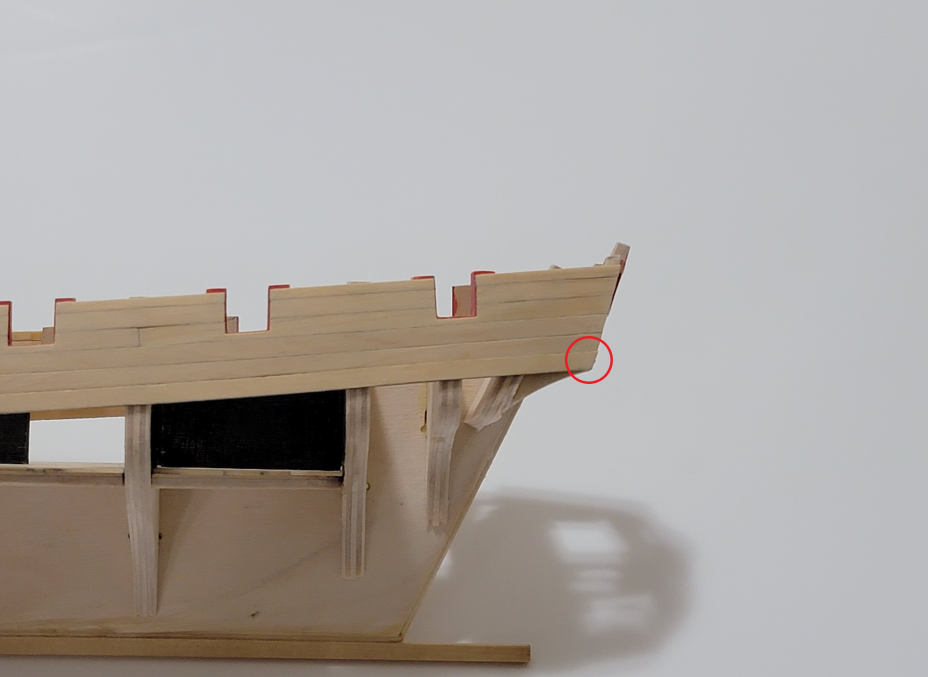
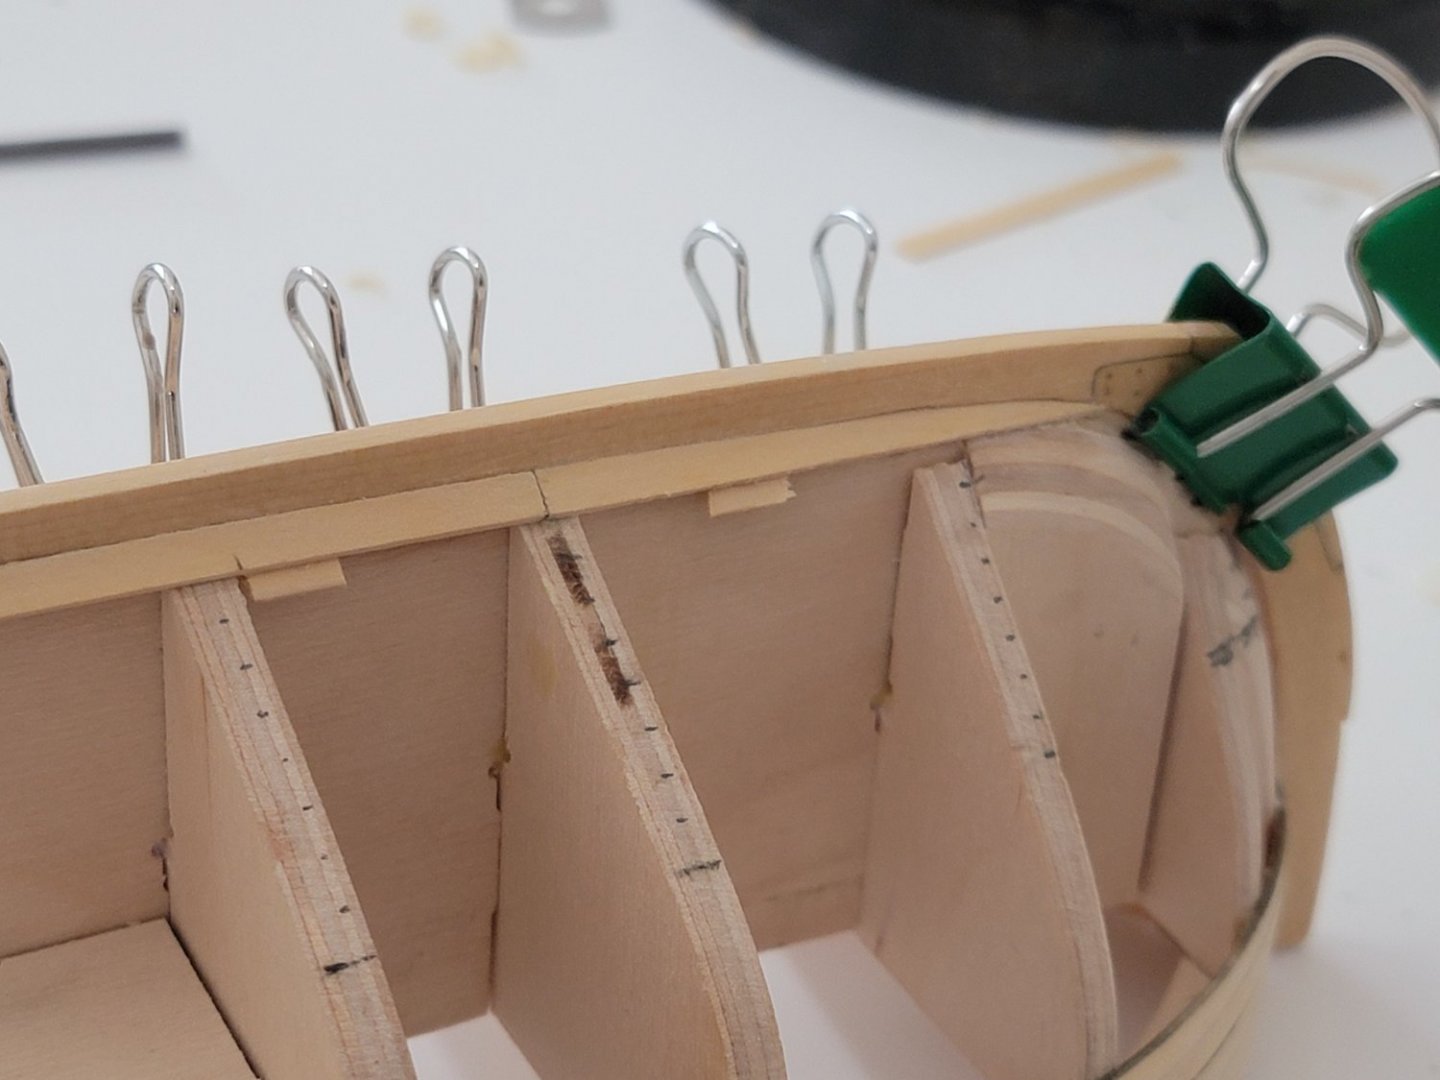
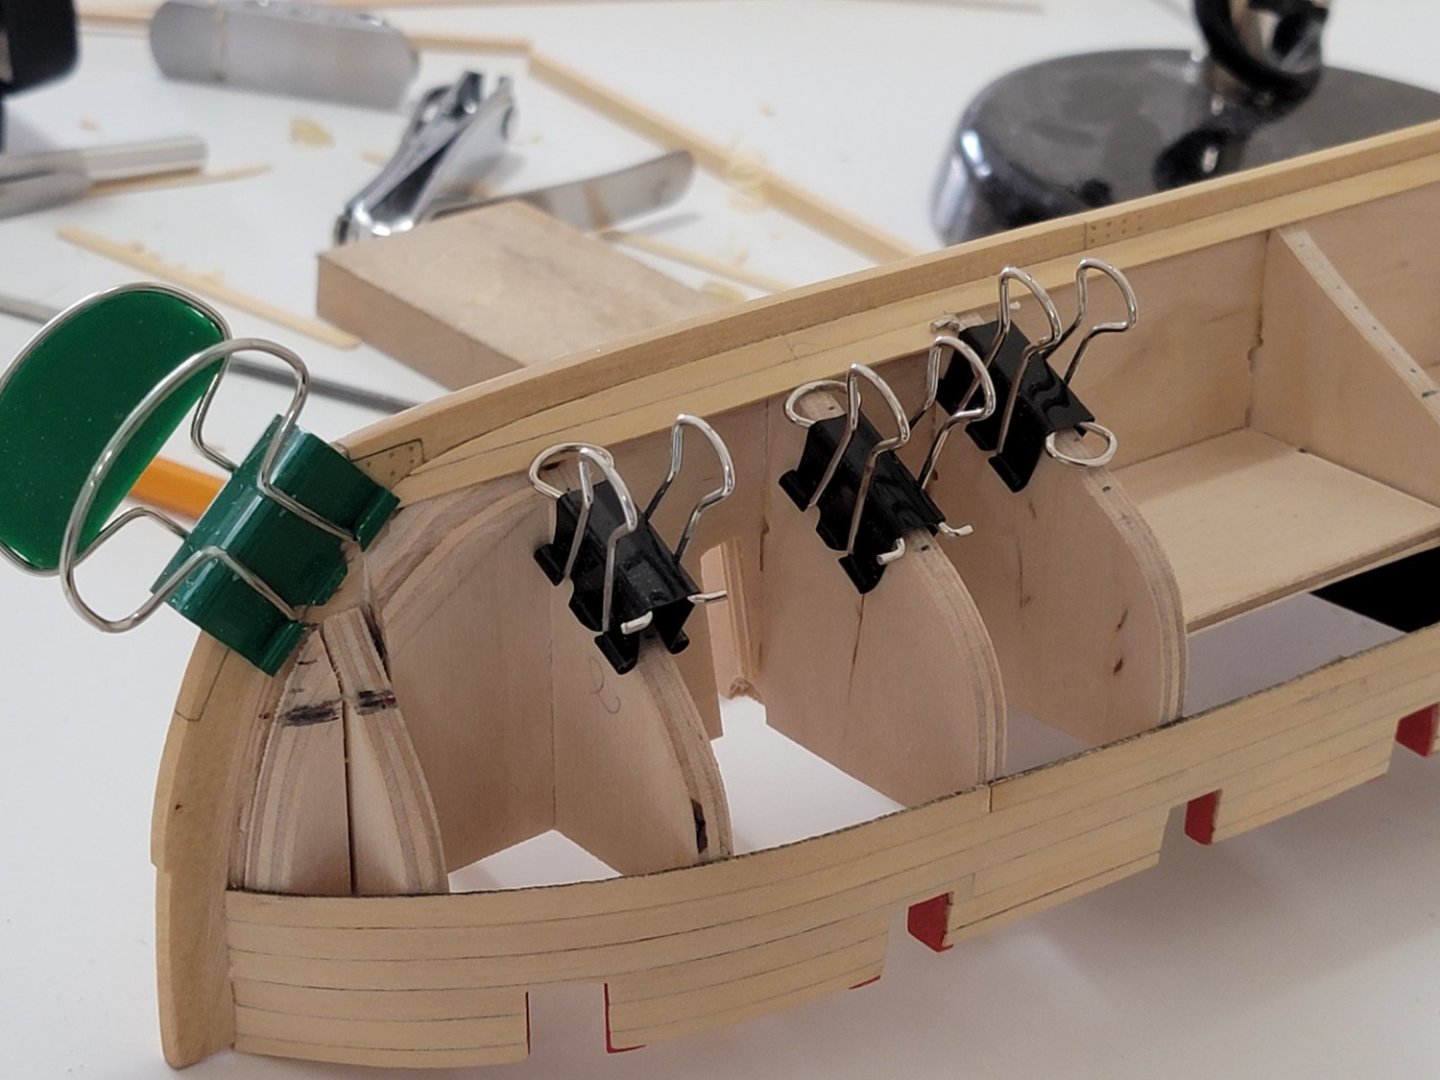
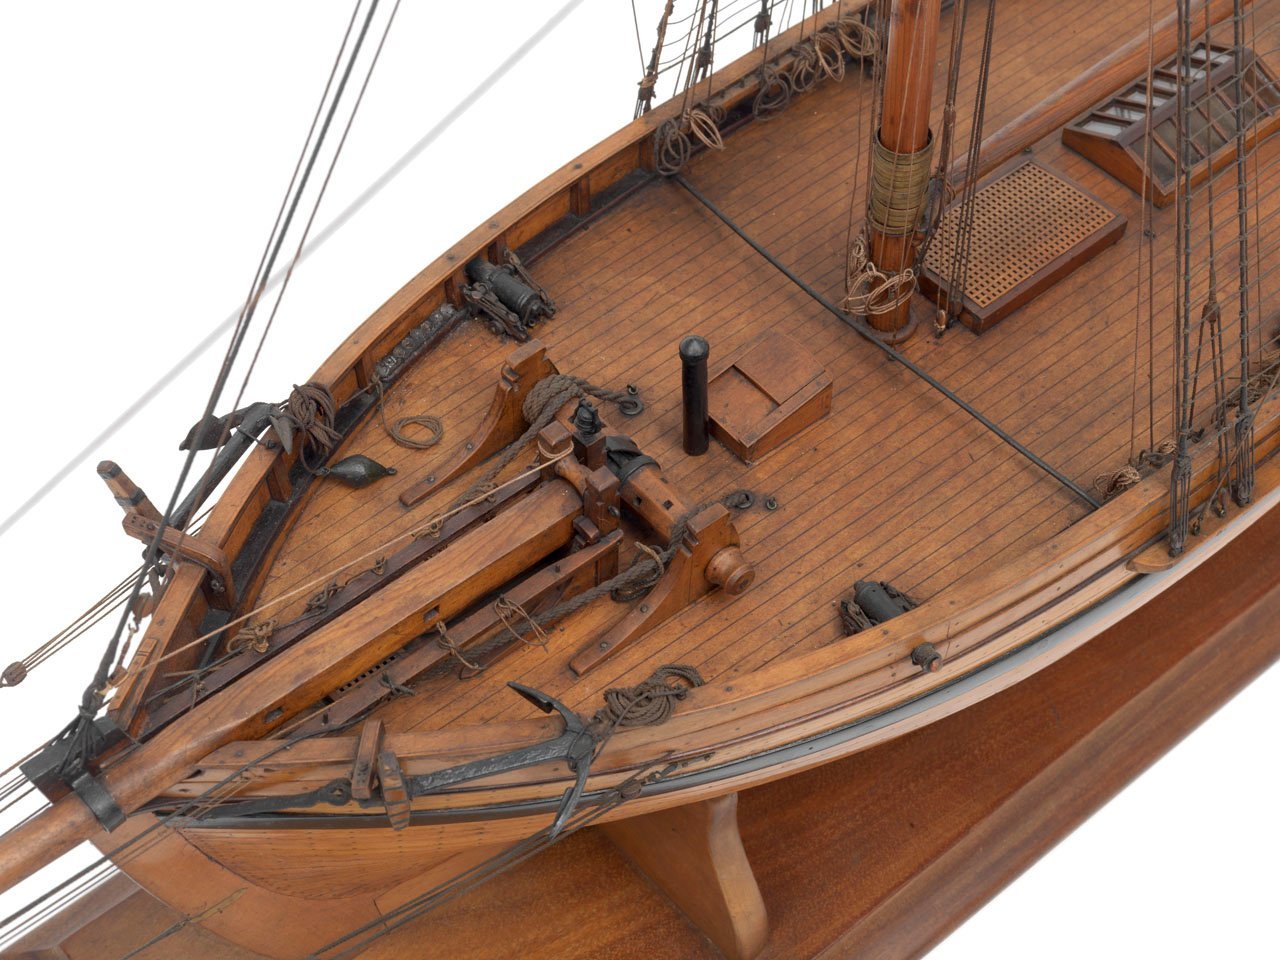
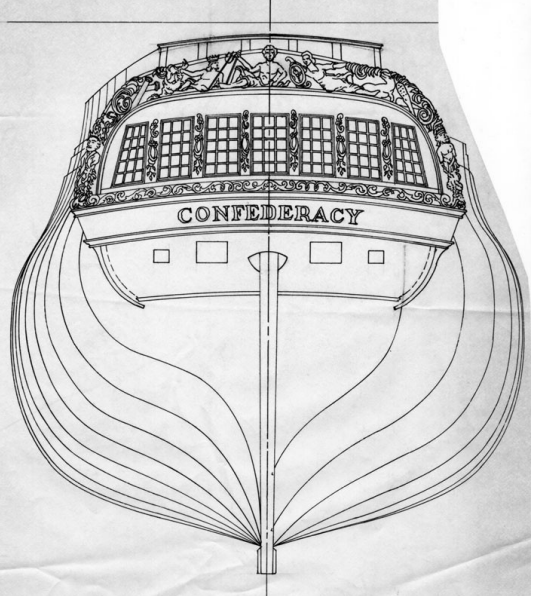
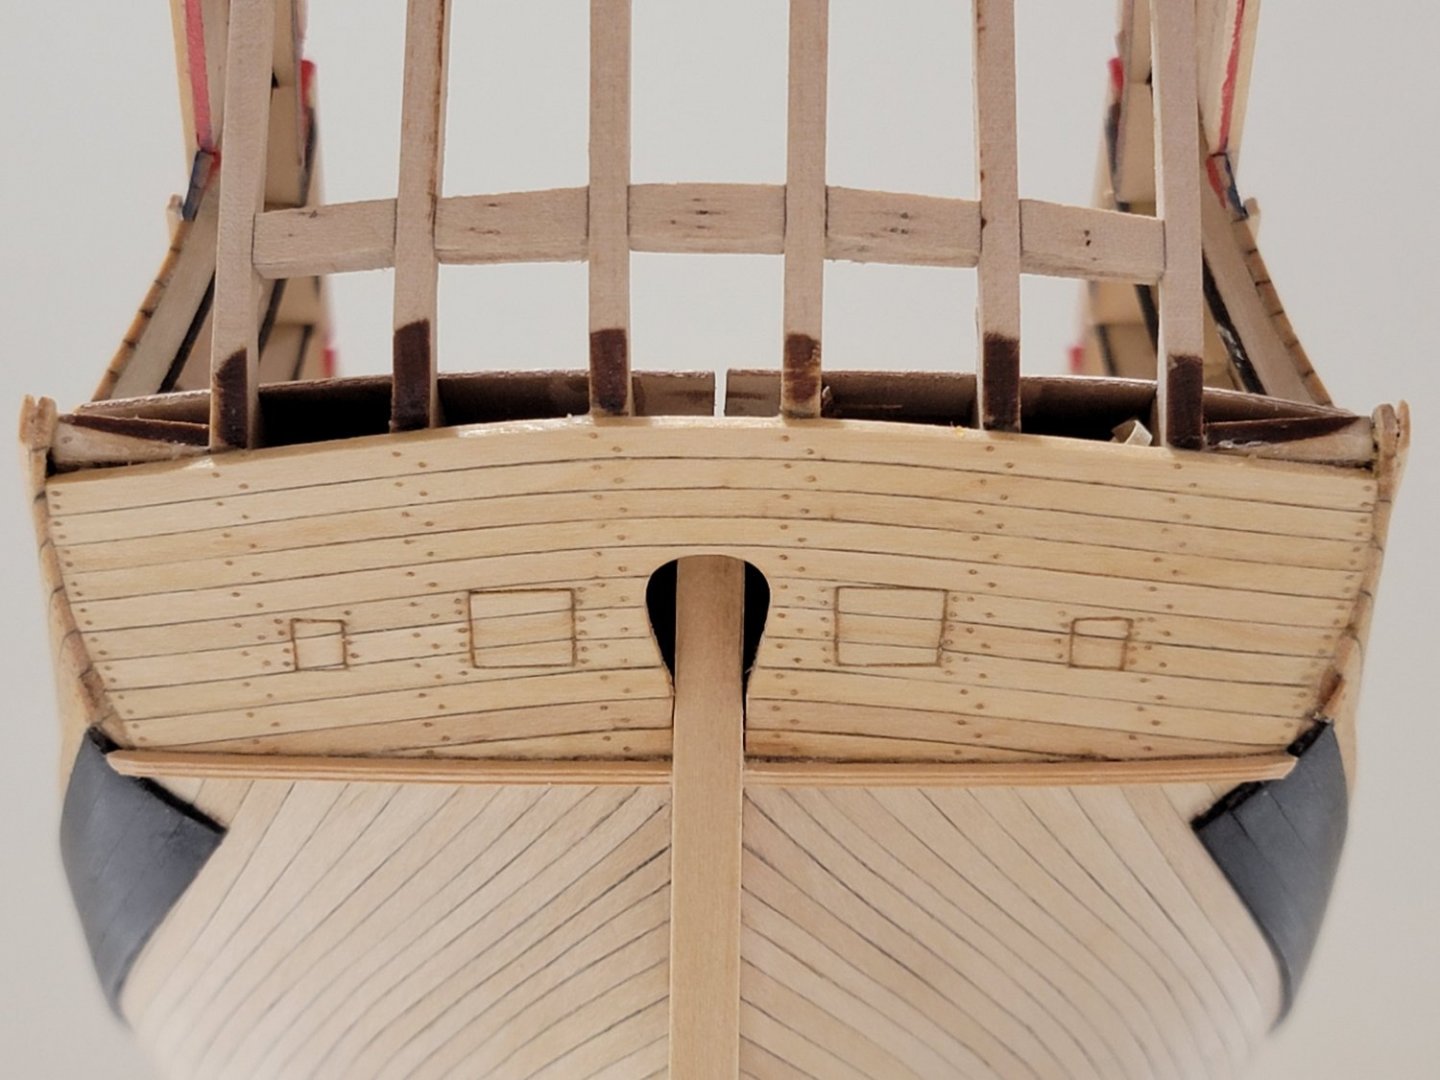
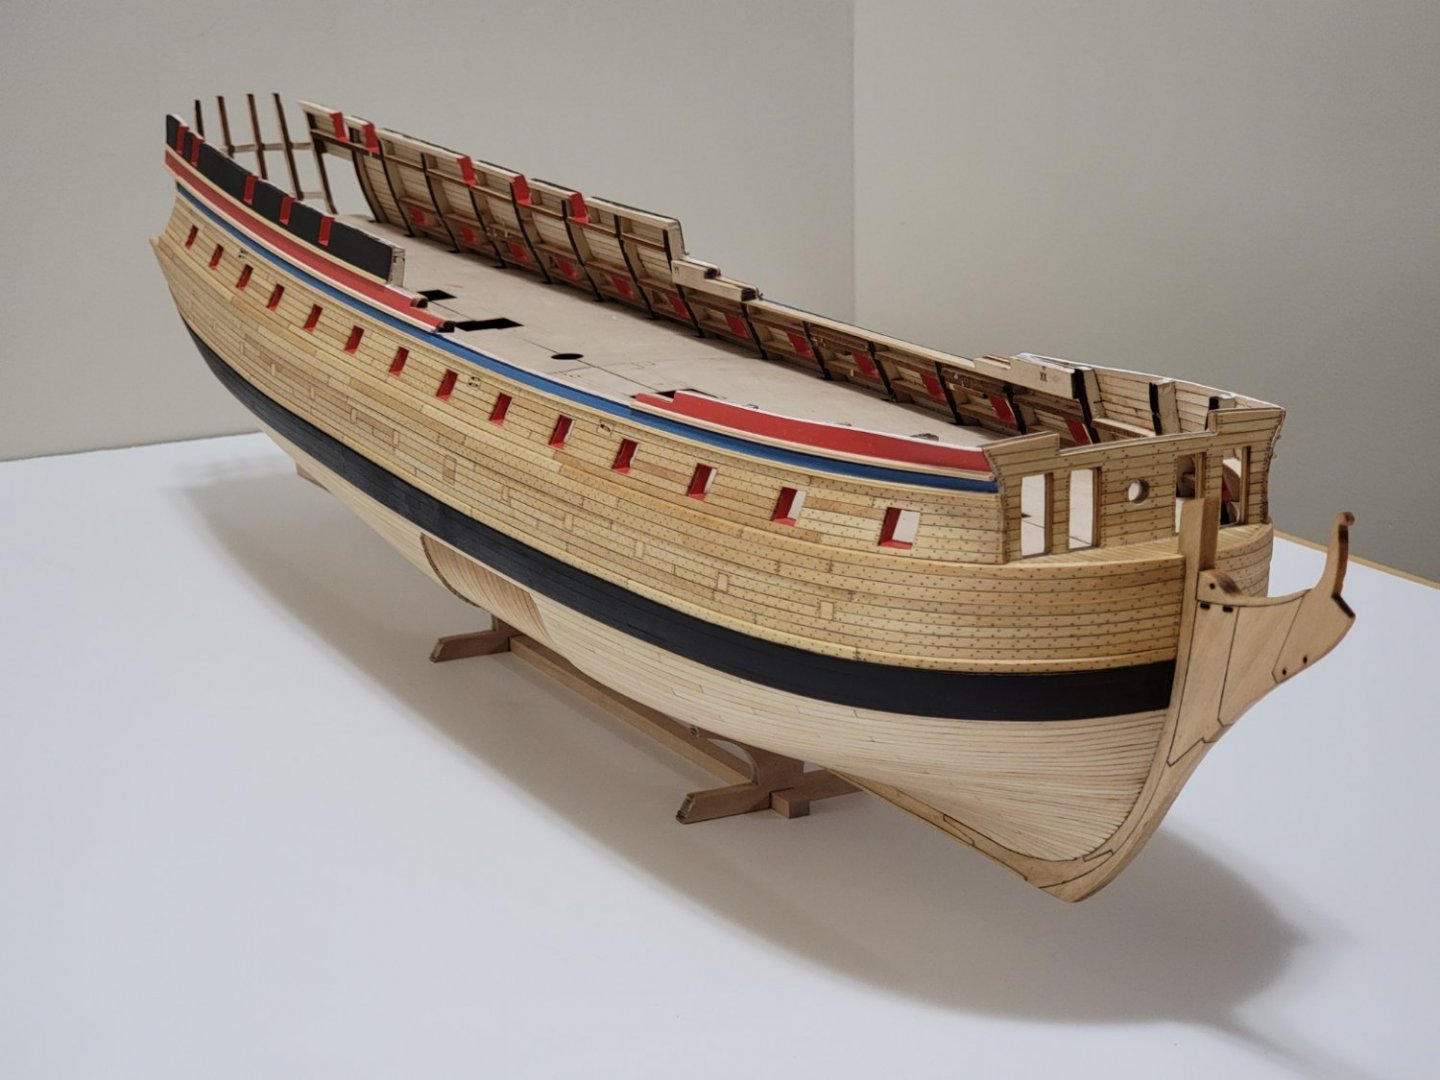
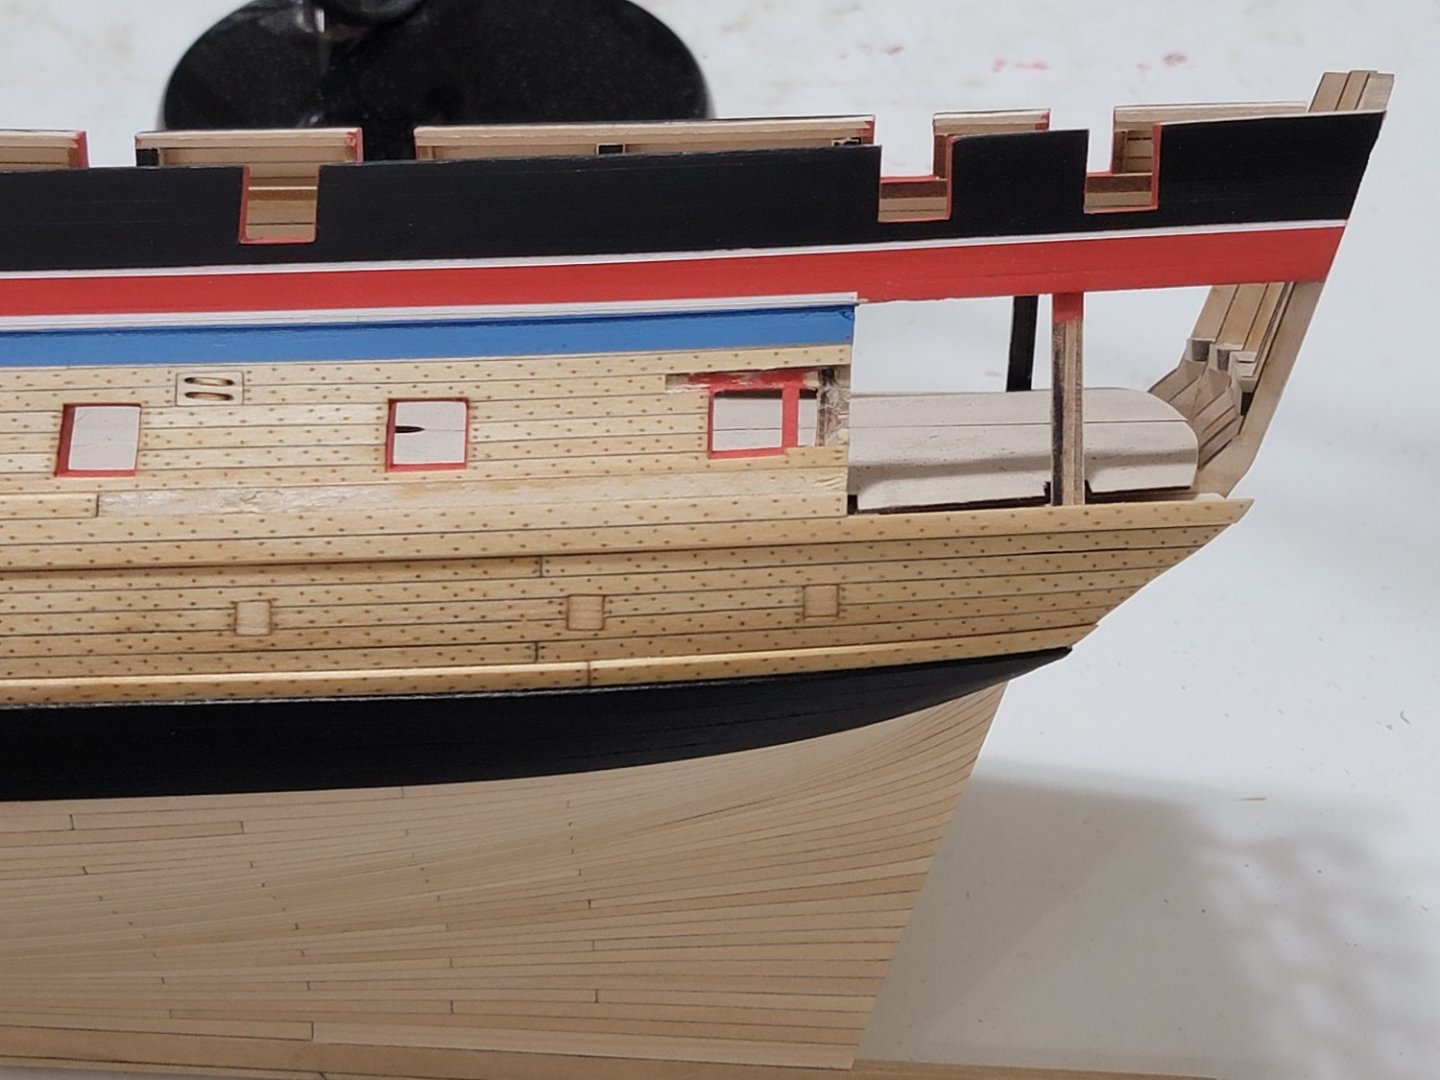
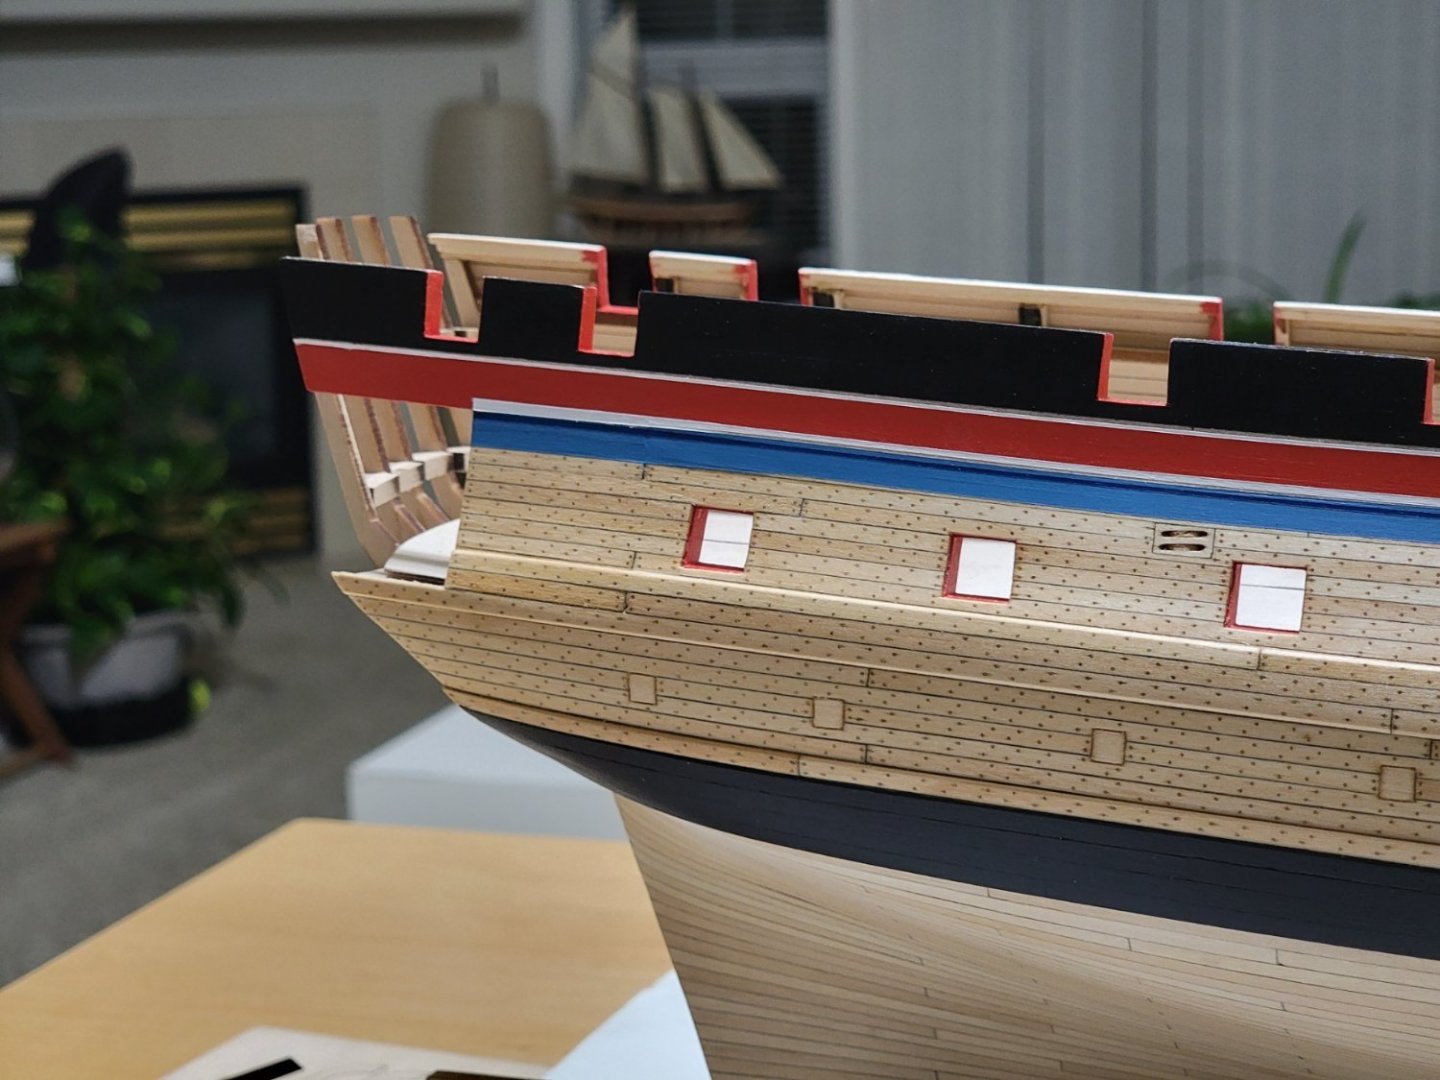
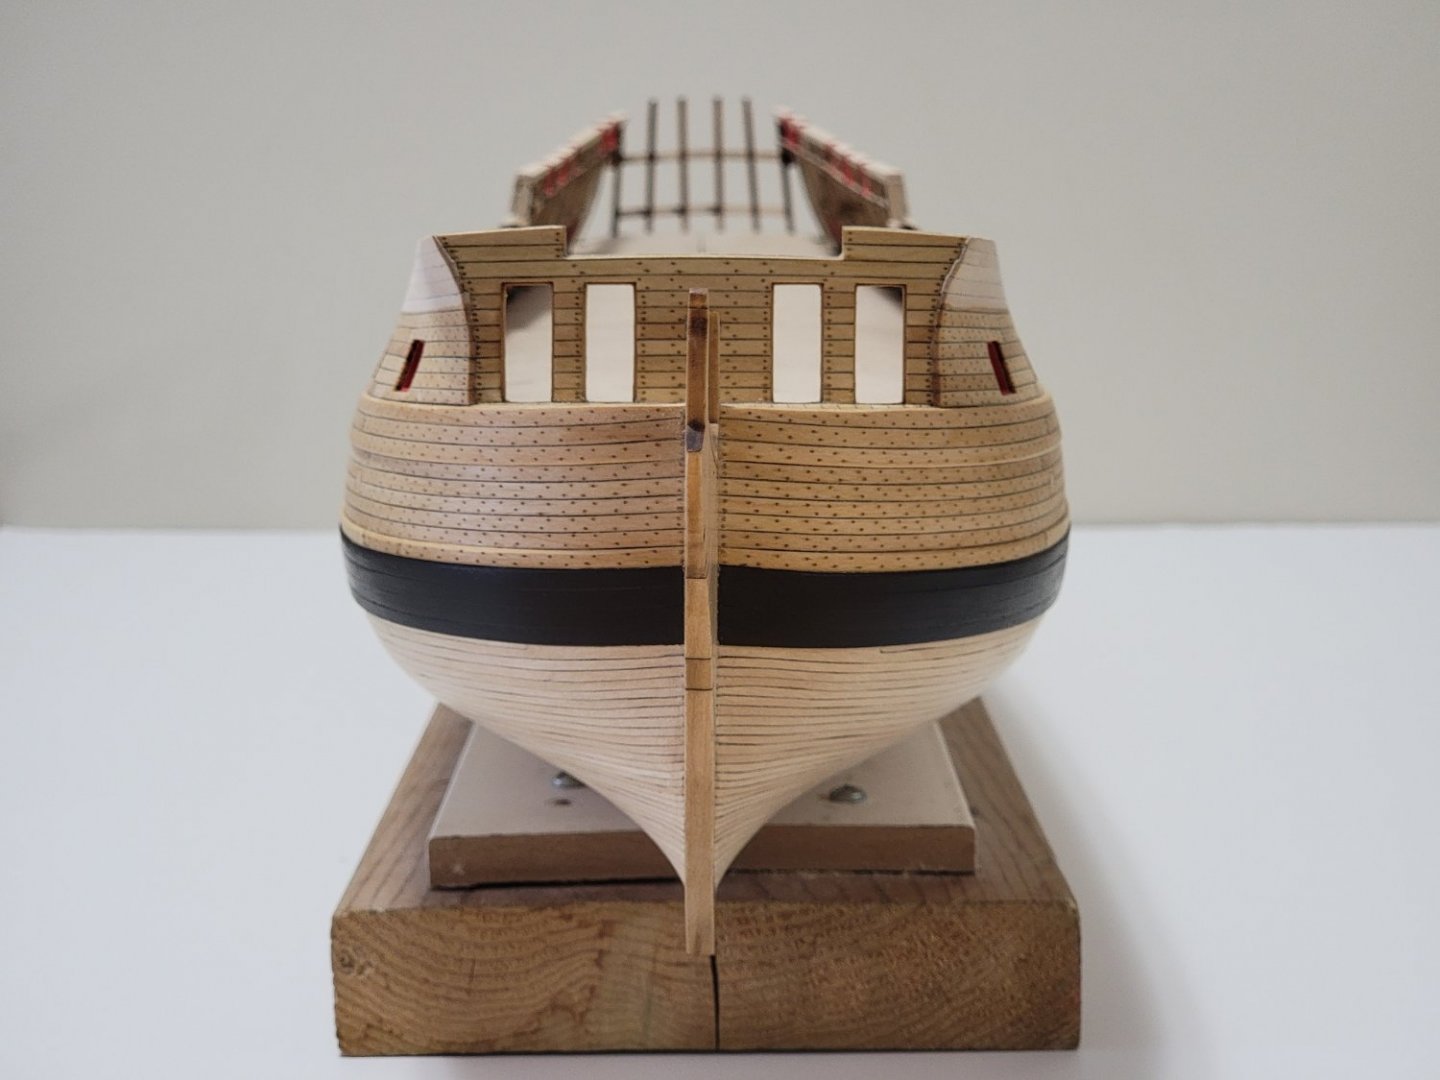
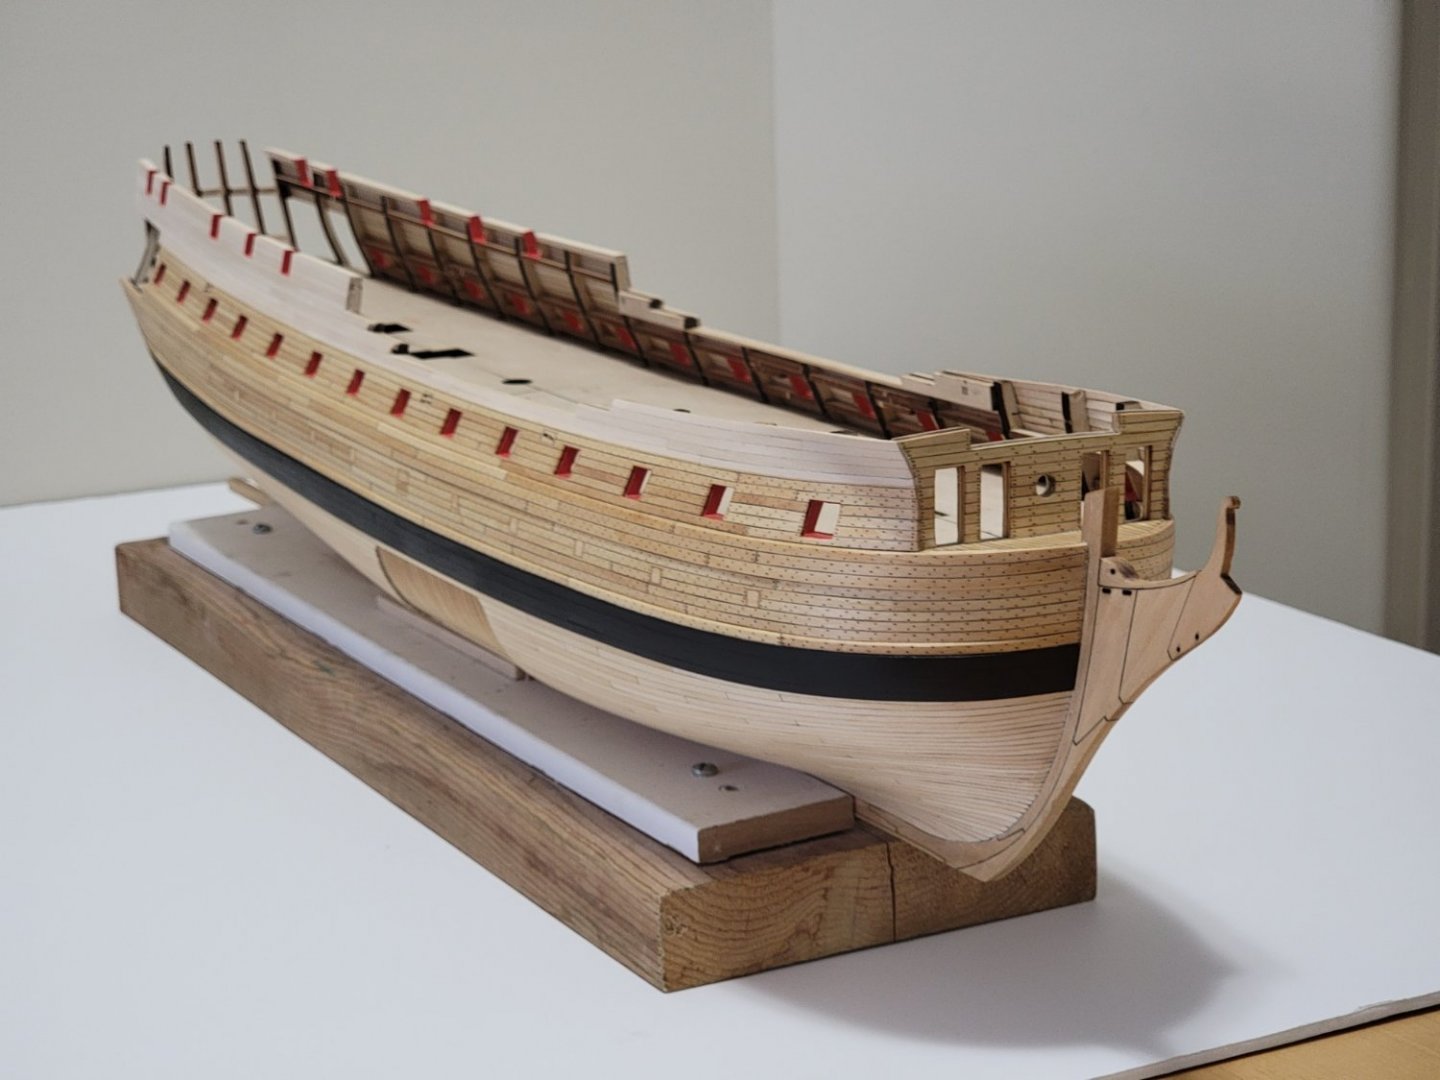
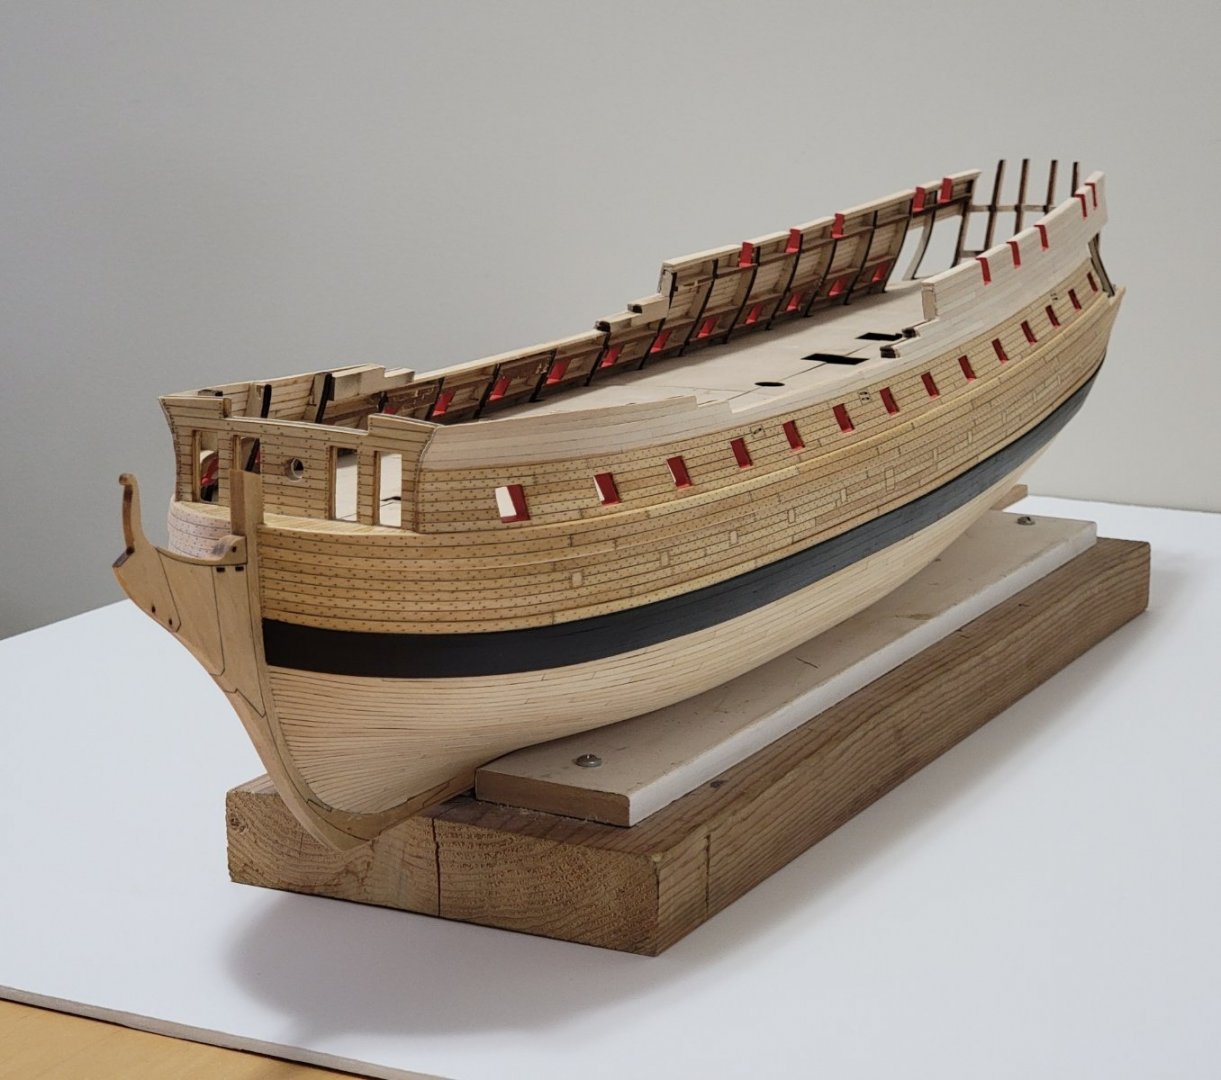
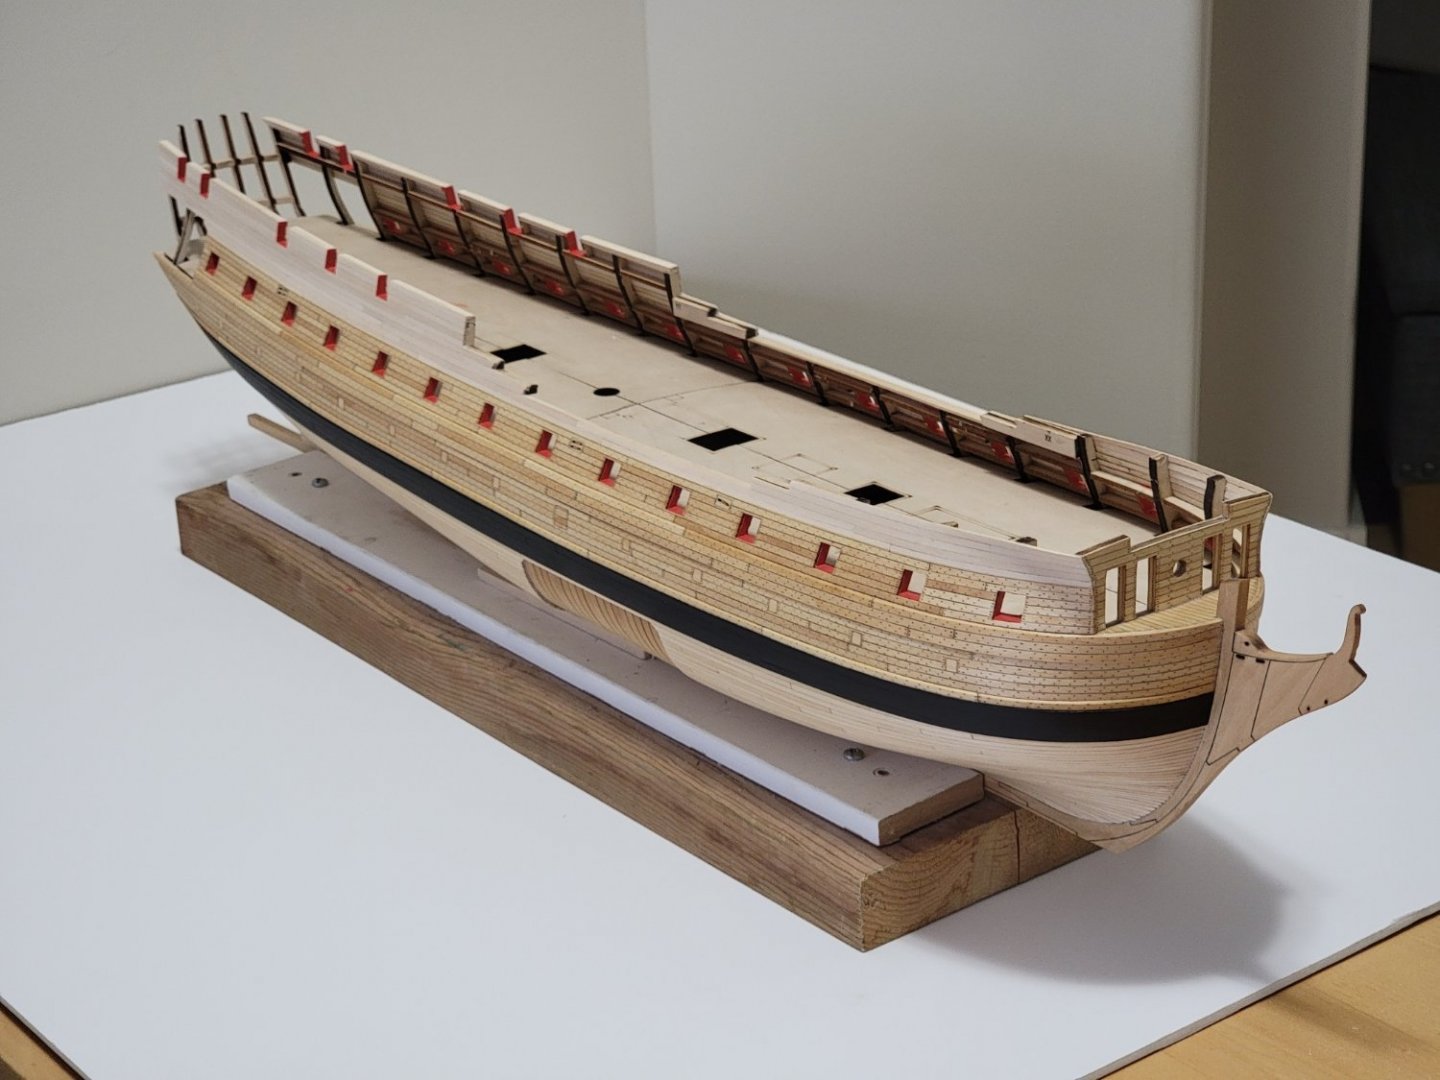
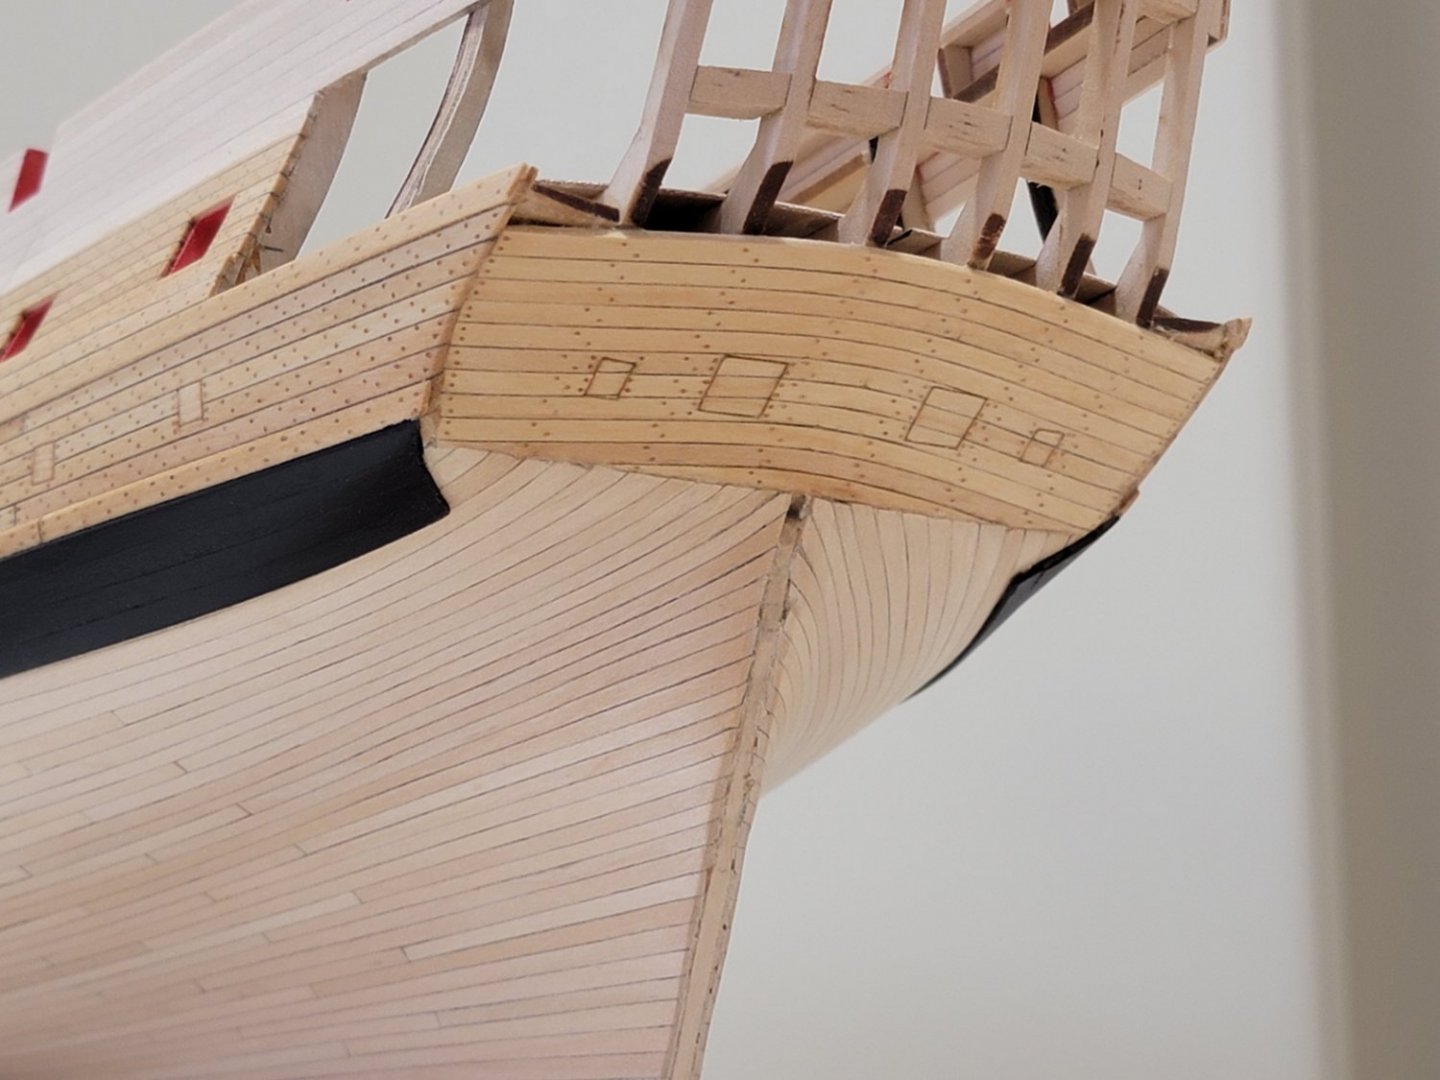
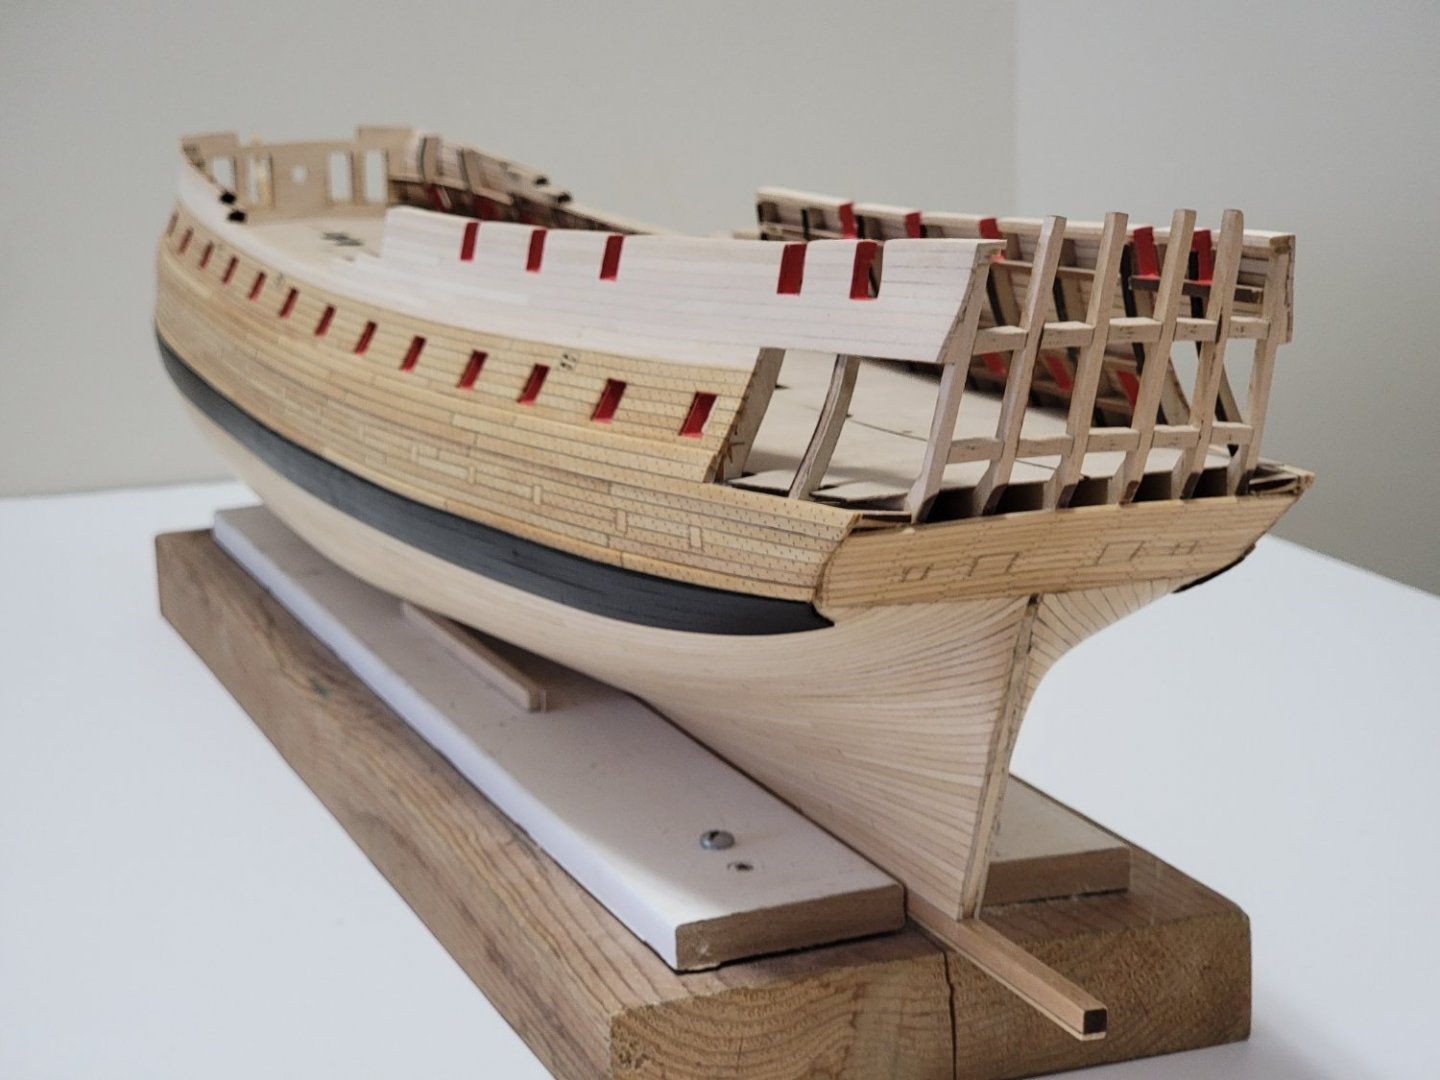
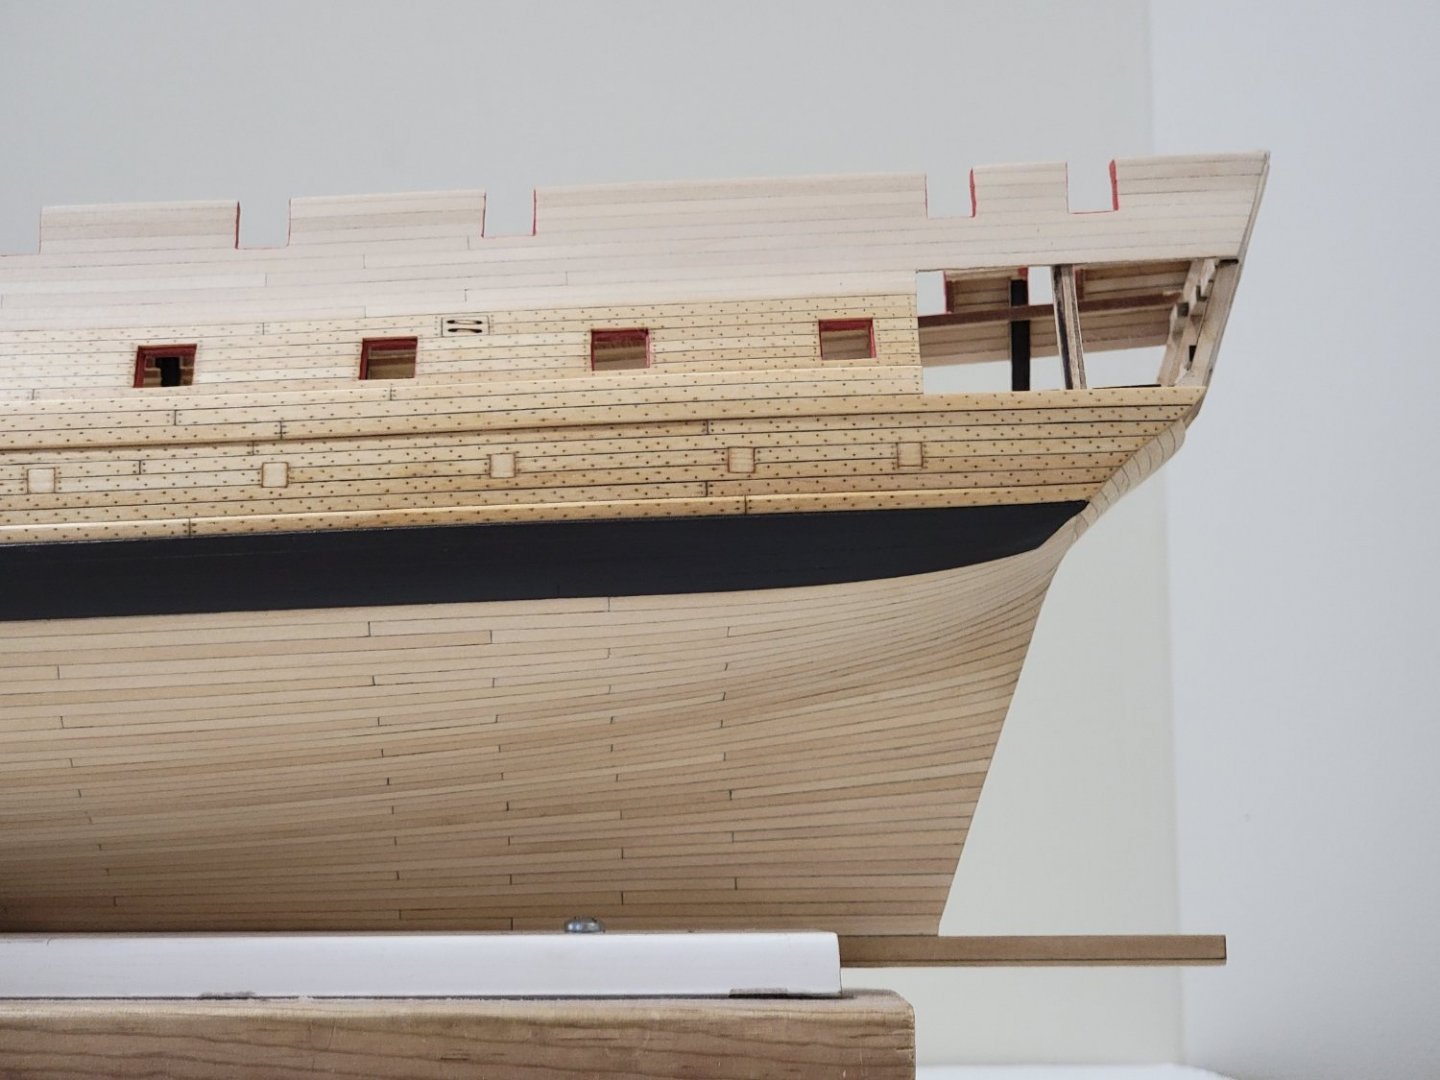
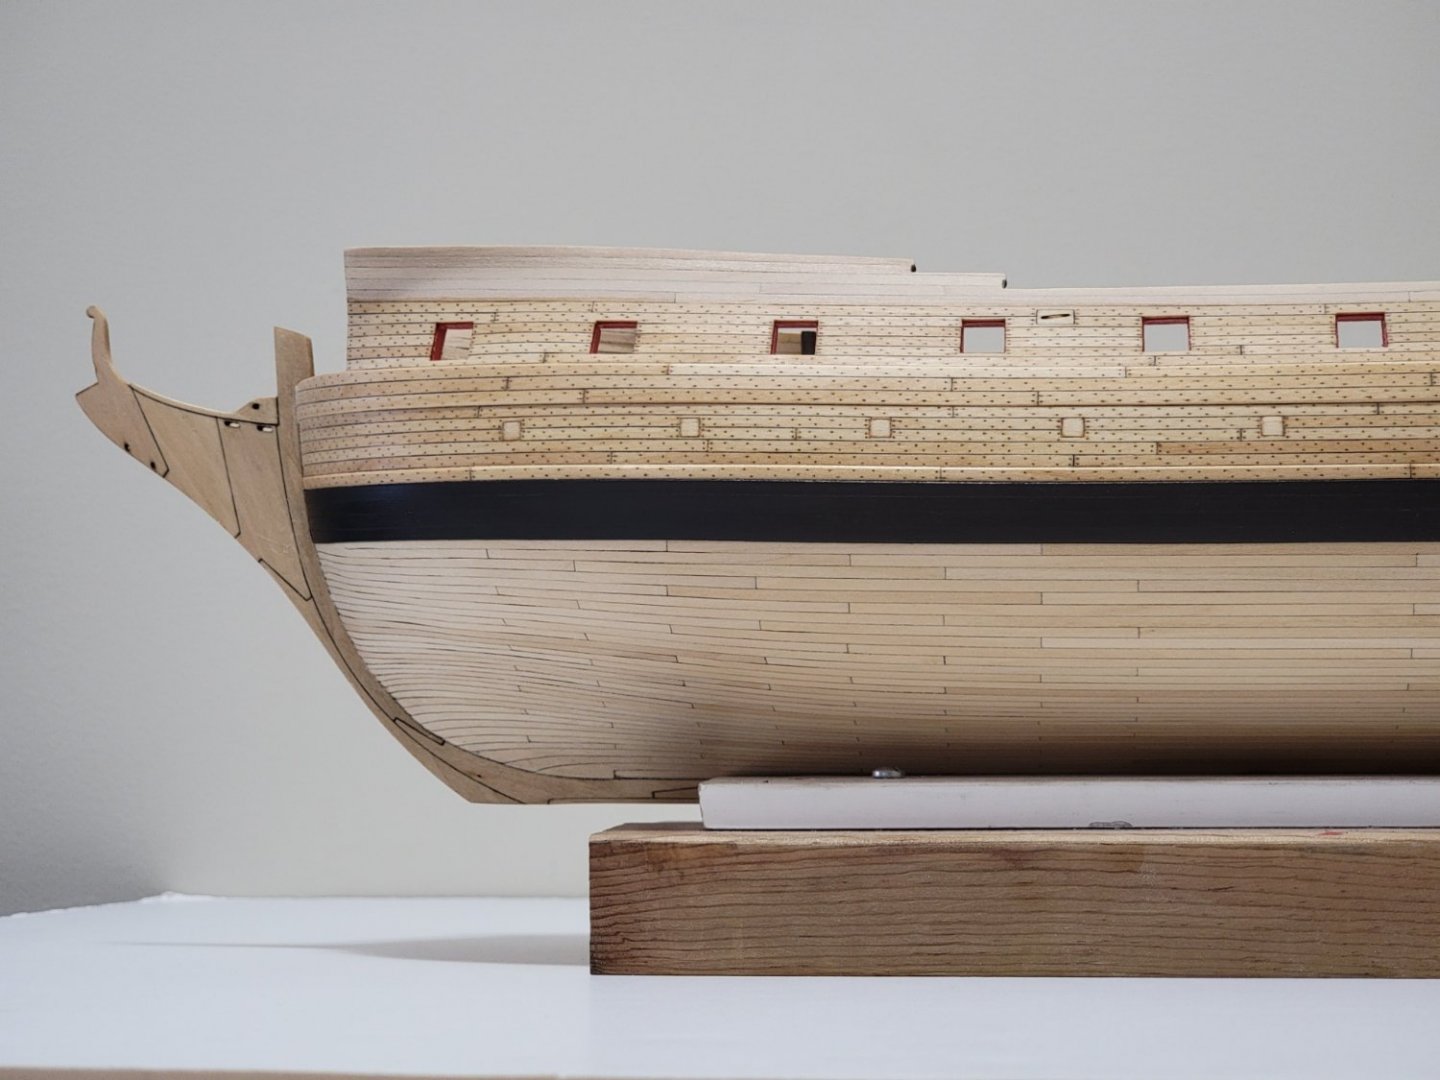
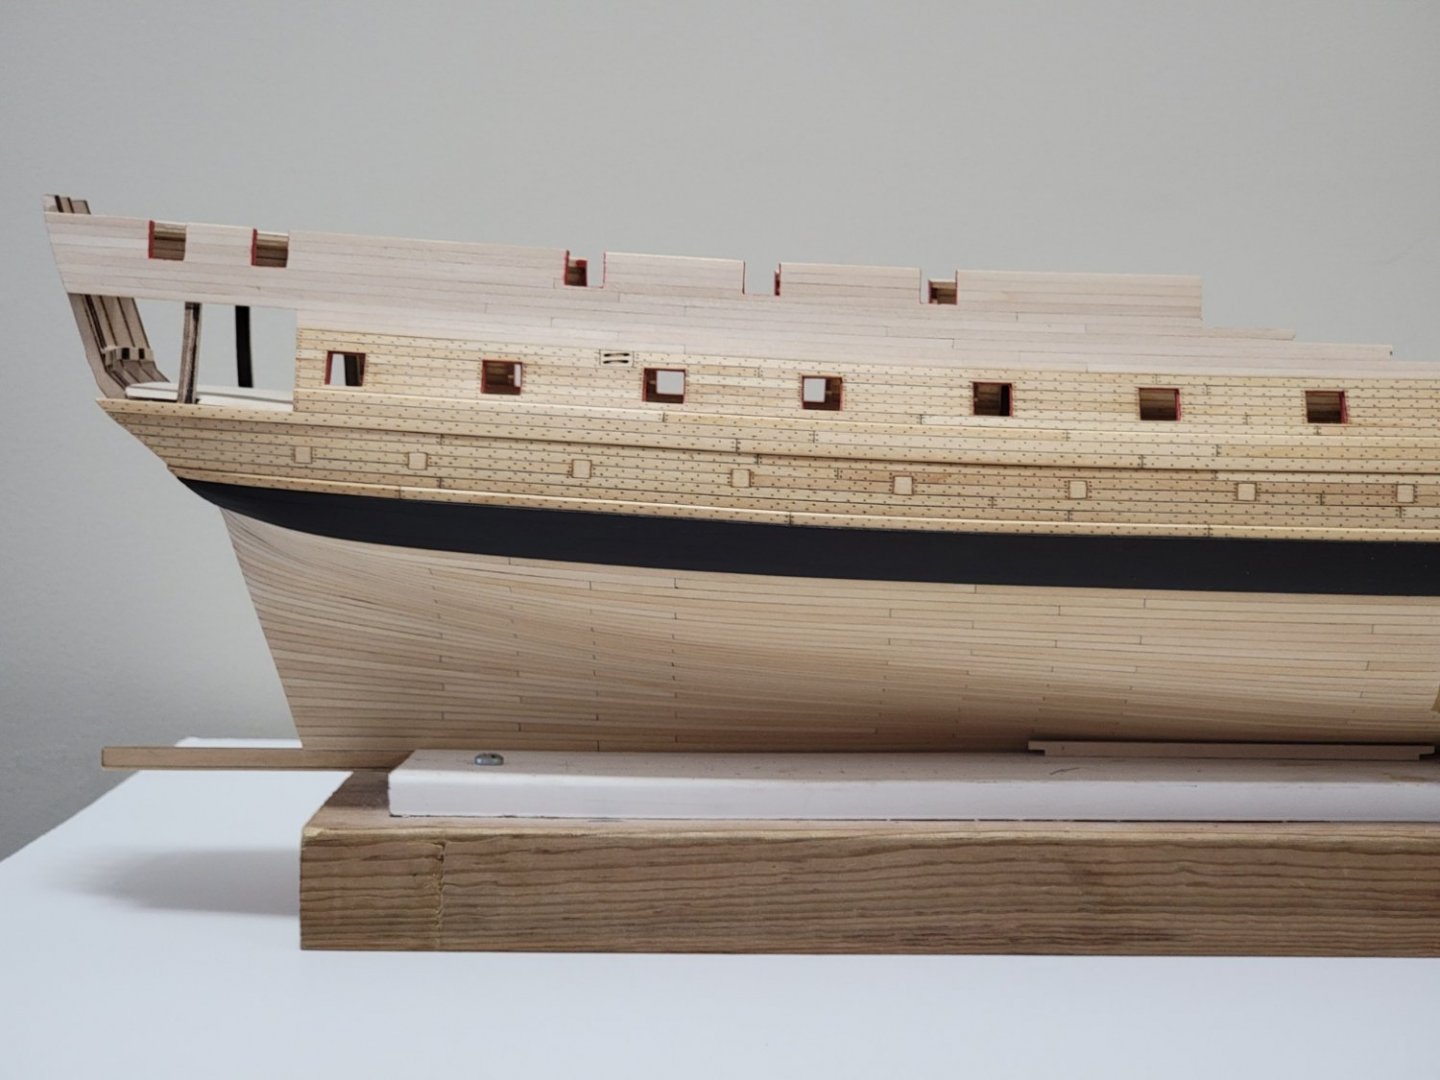
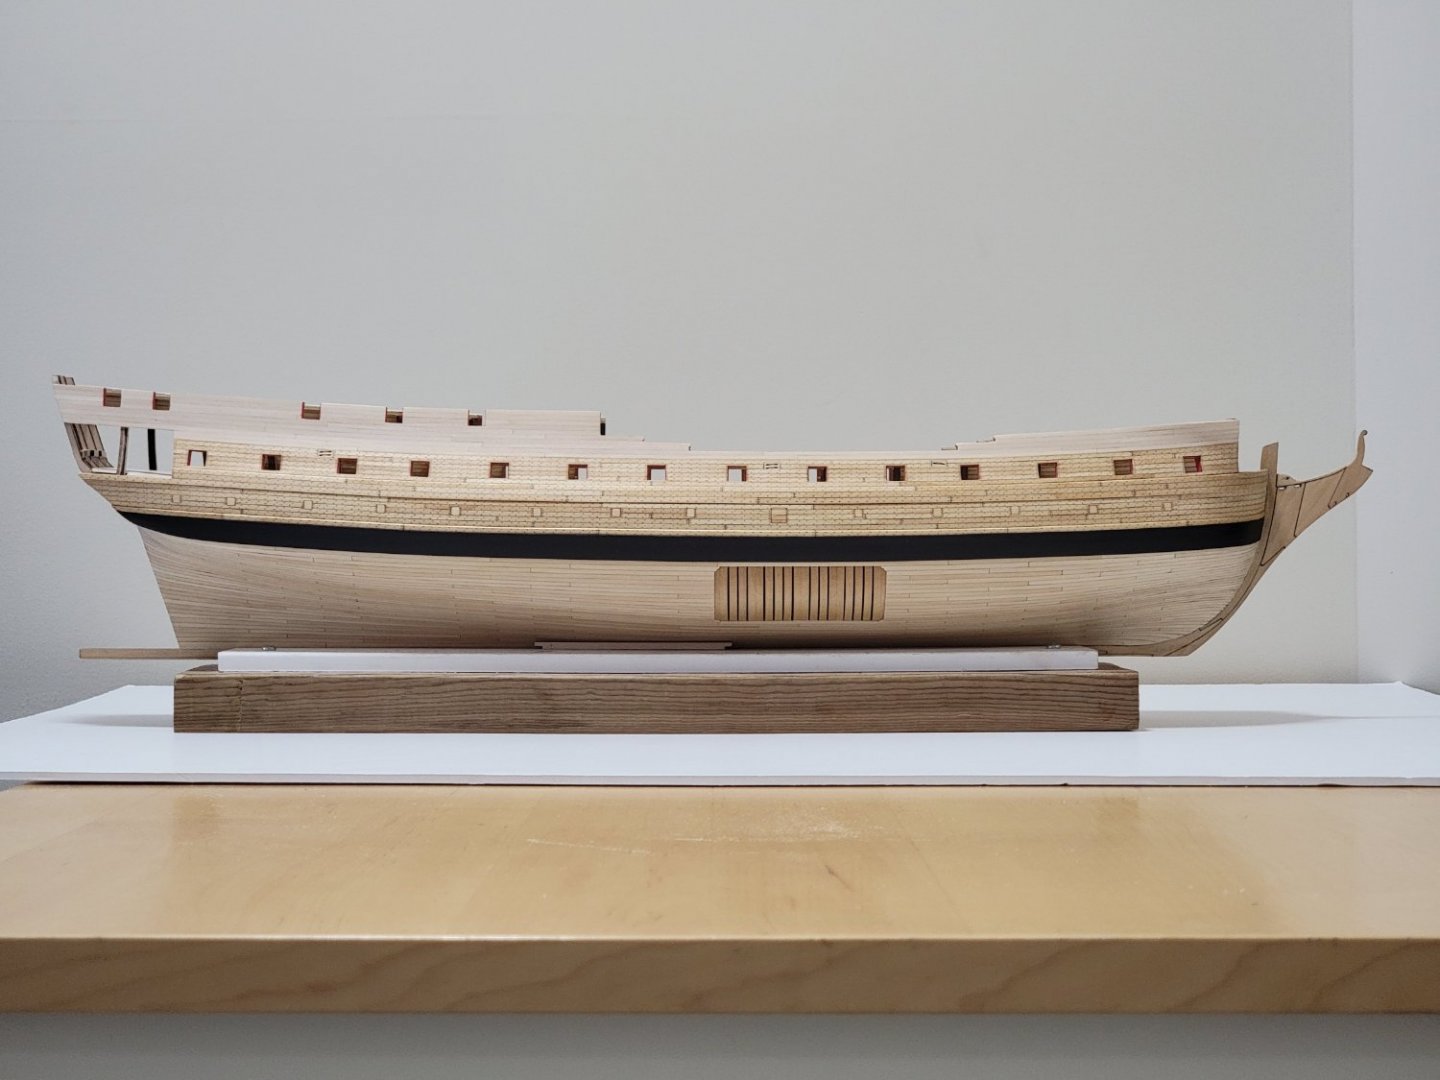
I am taking a small break from Confederacy, so thought this would be a nice time to catch up on Pickle. The lower deck area is now planked after painting the surrounding bulkheads black. I was not too worried about tolerances with the ends of the planks since a lot of this would be hidden. After sanding, I applied 1 coat of WOP. If I were to do this step again, I would probably have decked the area before gluing the base in place. It would have made it so much easier to sand the planks! I am deviating from the plans a bit by installing two strakes of main wales as opposed to one. I did this since the bottom wale strake will be inline with the top of the counter (as shown in the circled area). Next, I installed the garboard strake and then lined off the hull in preparation for planking: I used scraps of wood in the middle of some bulkheads to secure planks since the bulkheads are spaced too far apart. Next time I will consider a build with closer spaced bulkheads for an easier time planking. I was also looking at schooners and cutters from the Royal Museums Greenwich website for some inspiration and ideas. The 1:24 contemporary model of Harriet (1843) caught my attention. I wish more photos were available showing details of the various parts. The forward side of the model looks so good! https://www.rmg.co.uk/collections/objects/rmgc-object-66775

-
Looks great, Bruce!
-
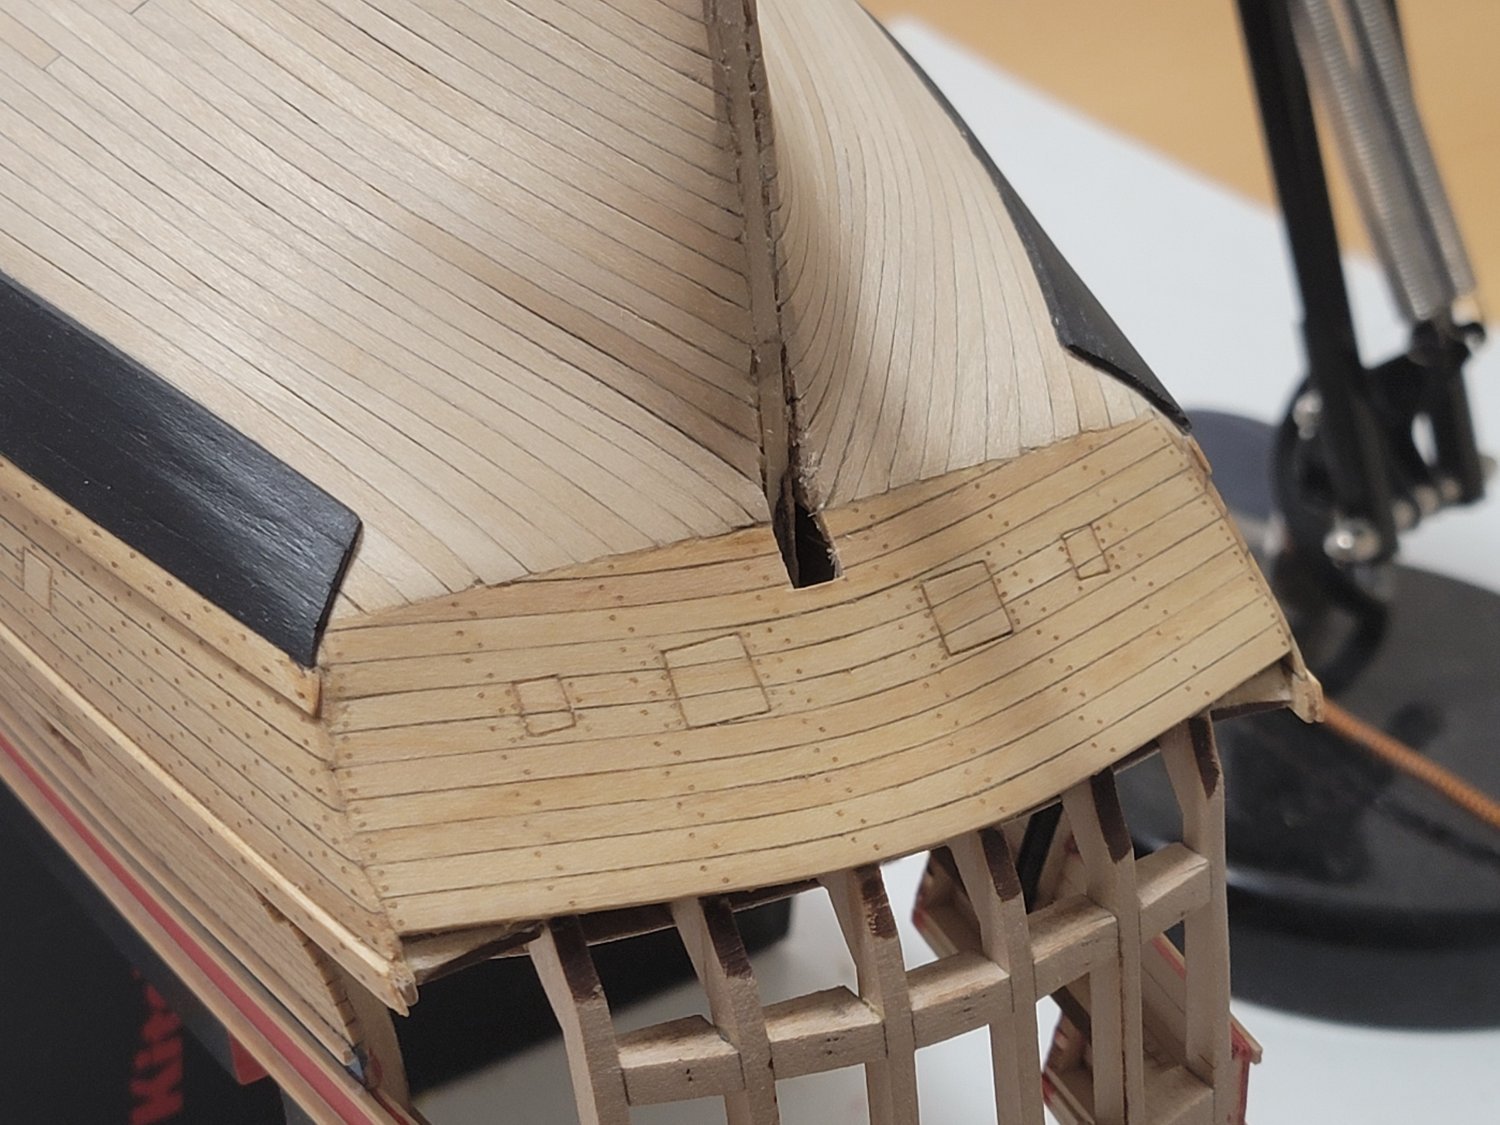
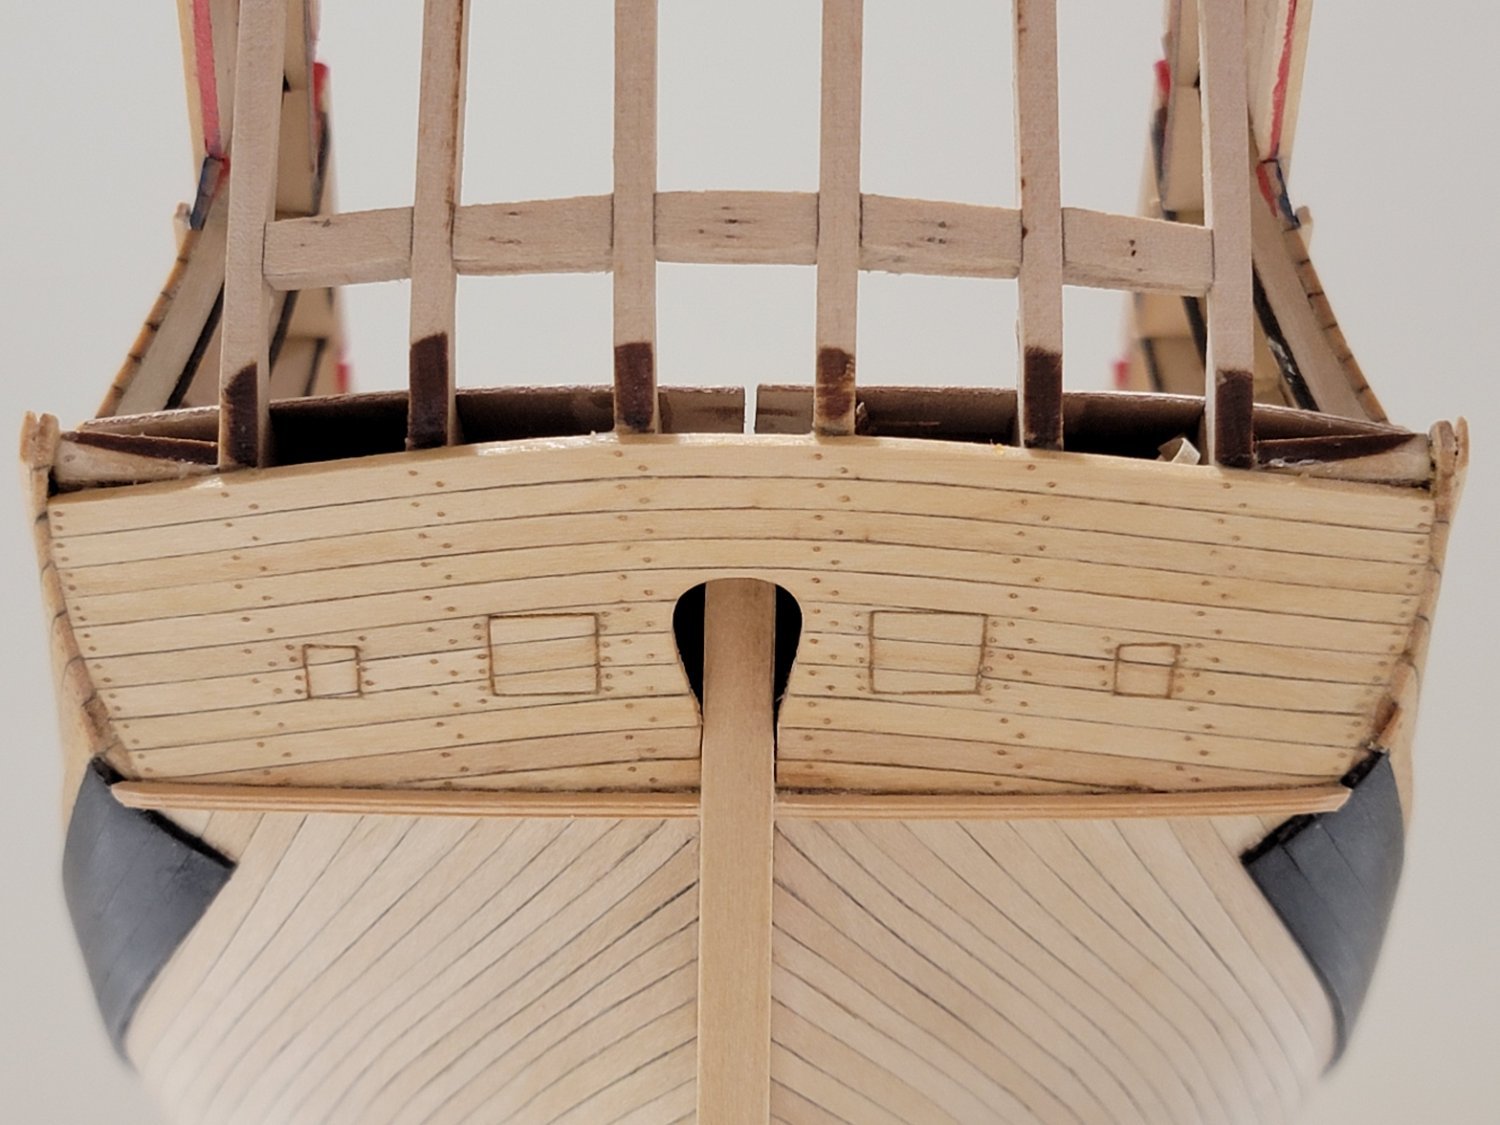
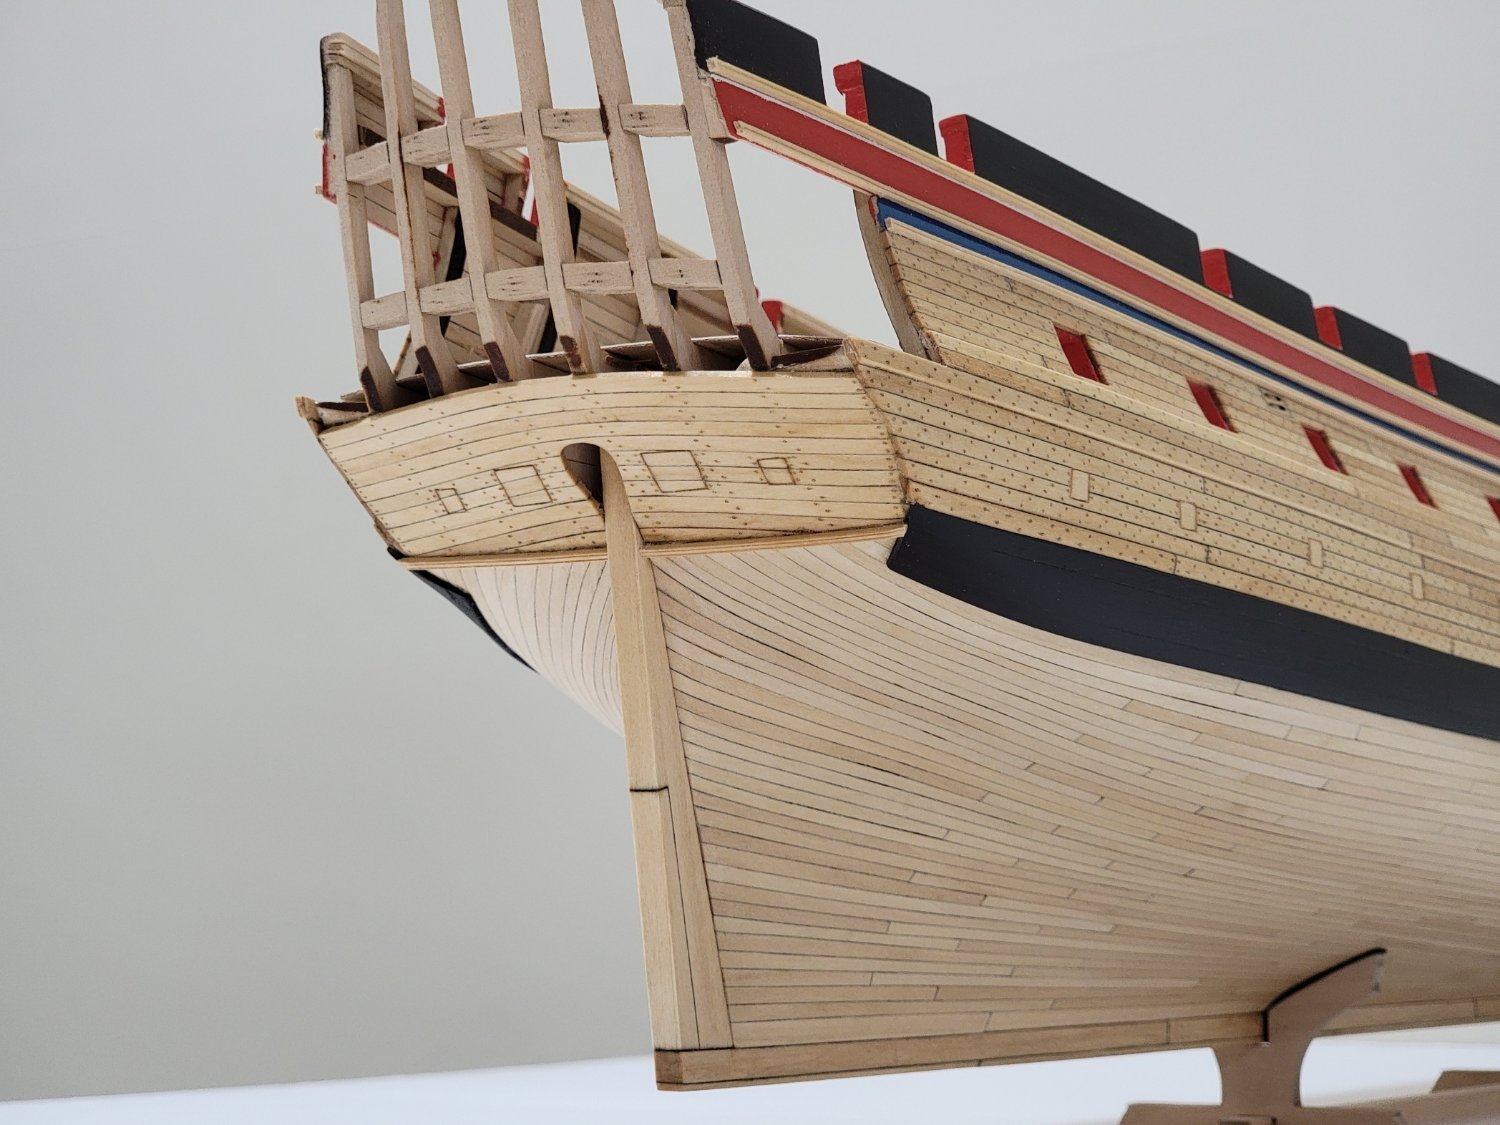
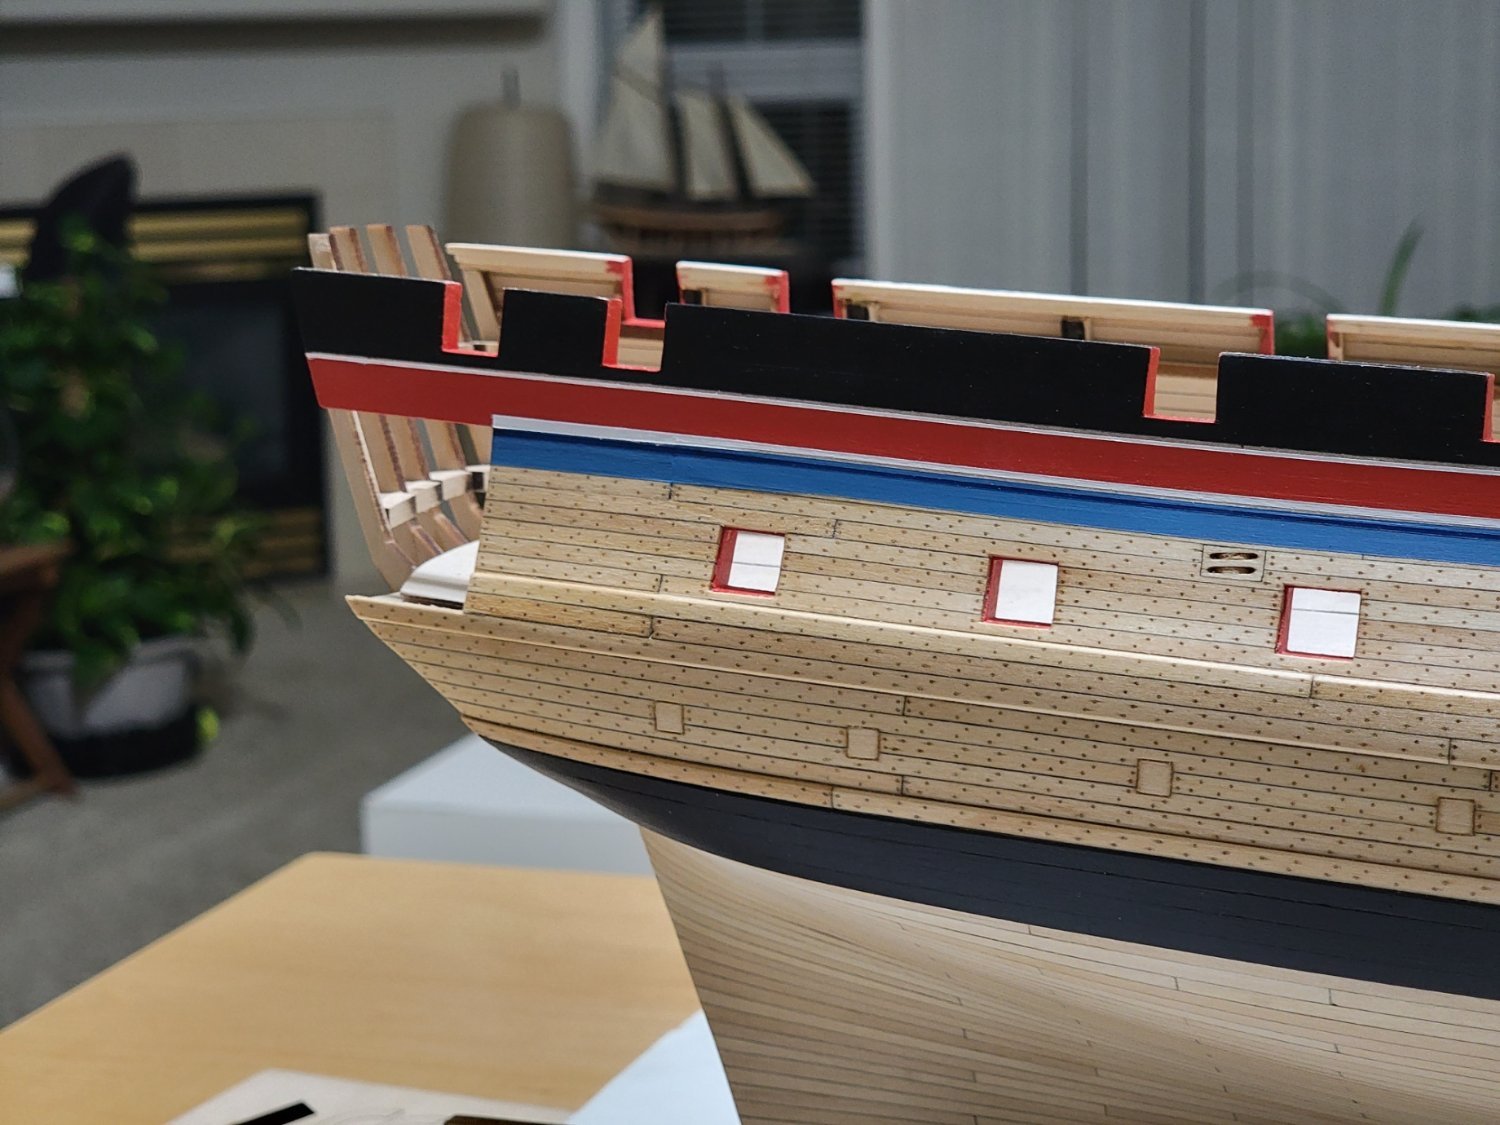
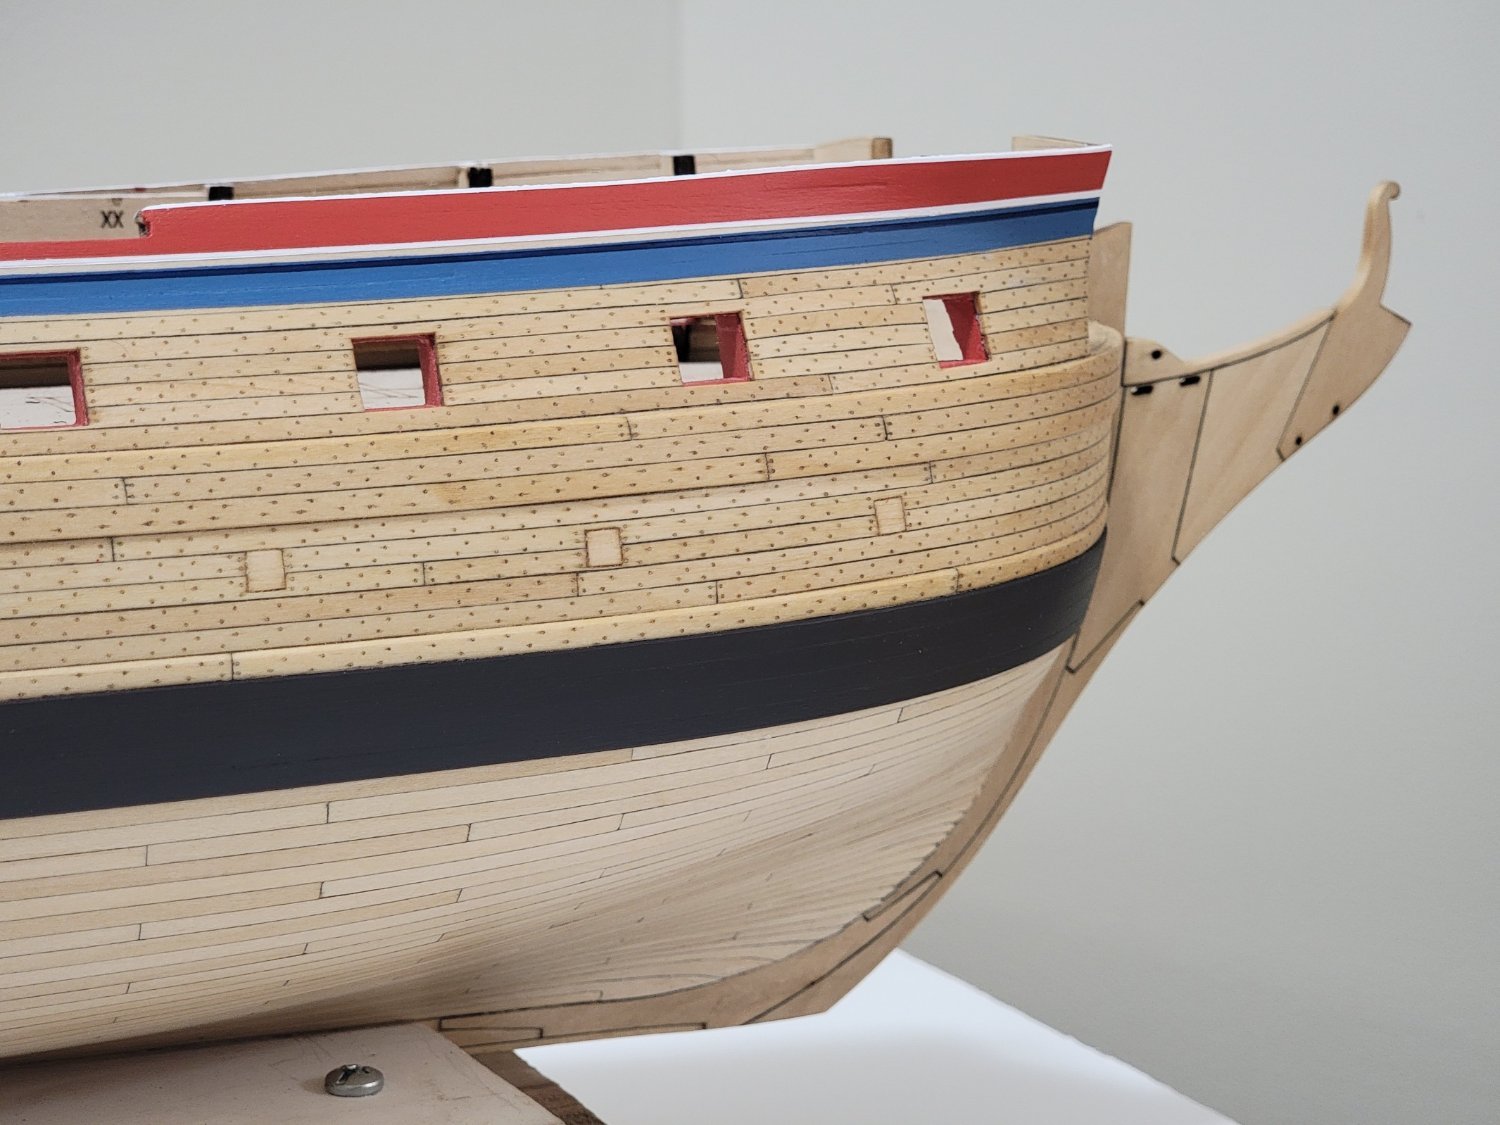
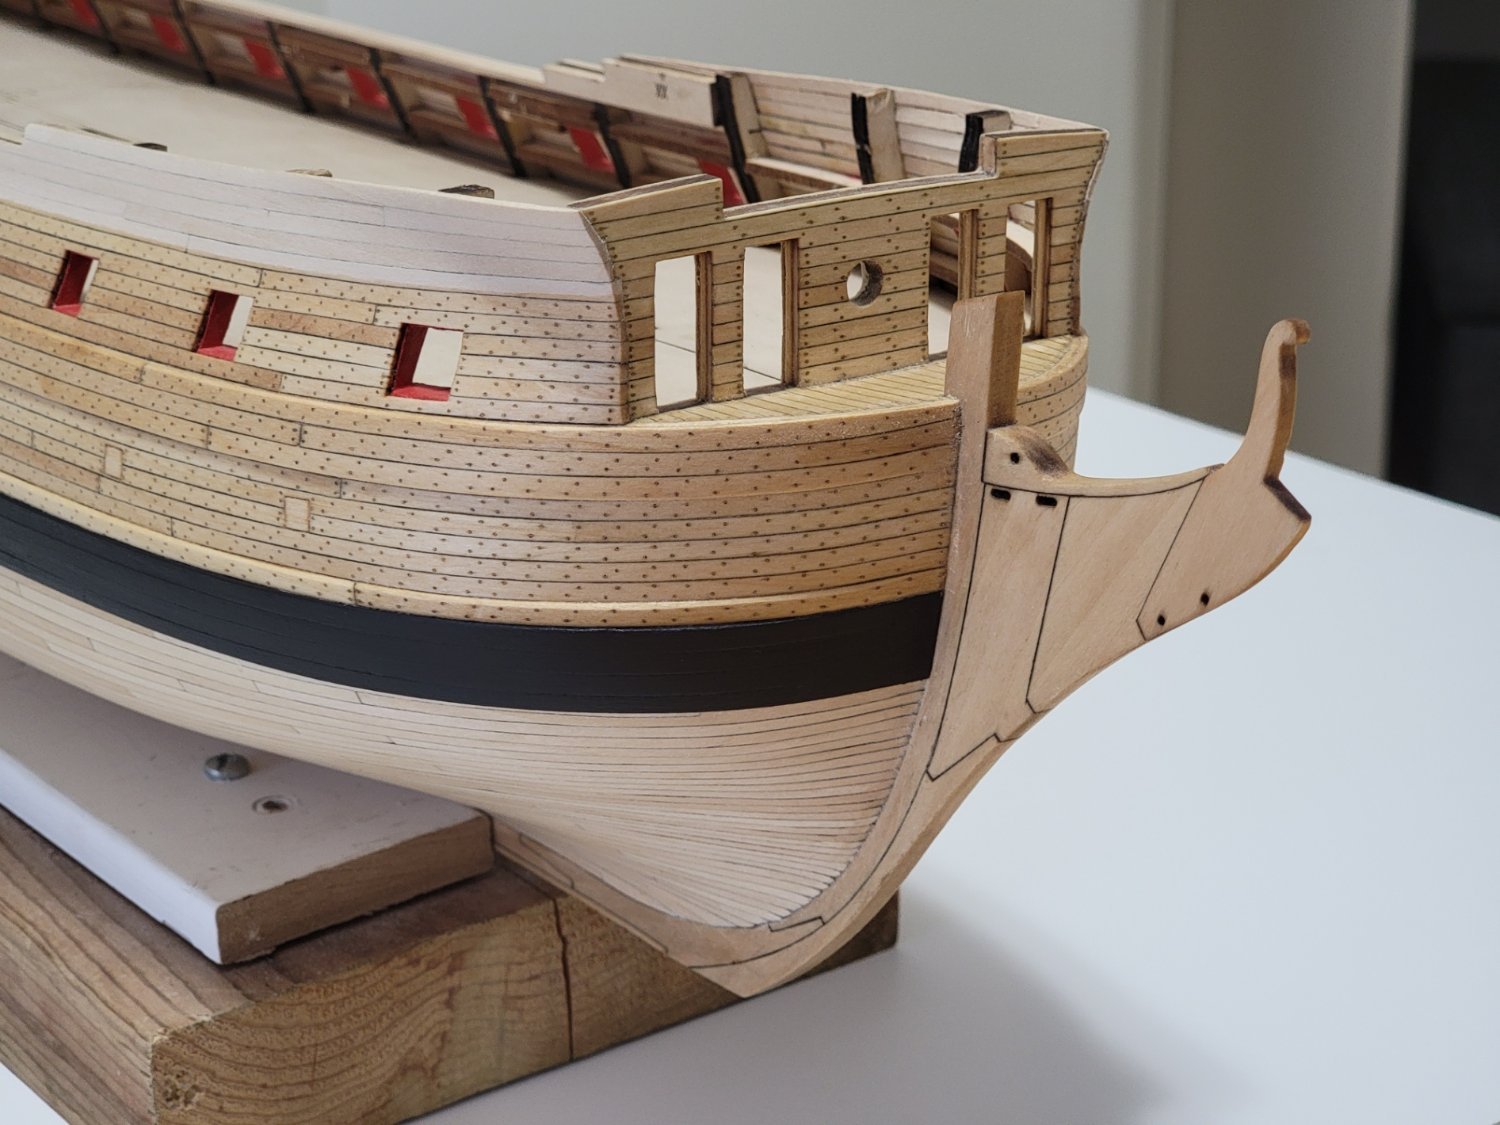
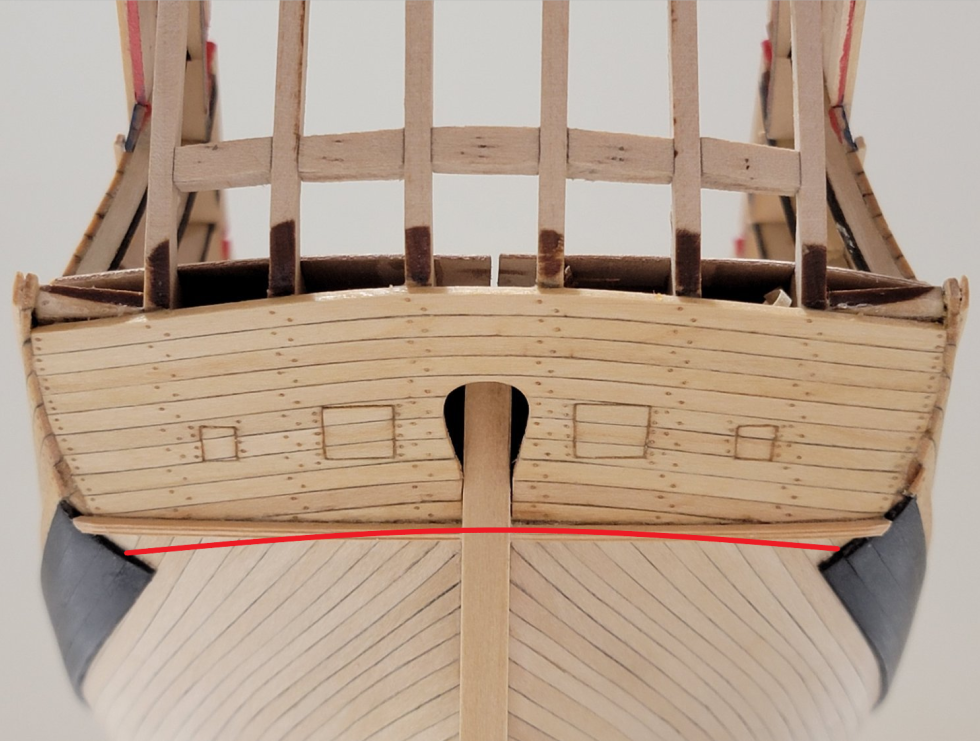
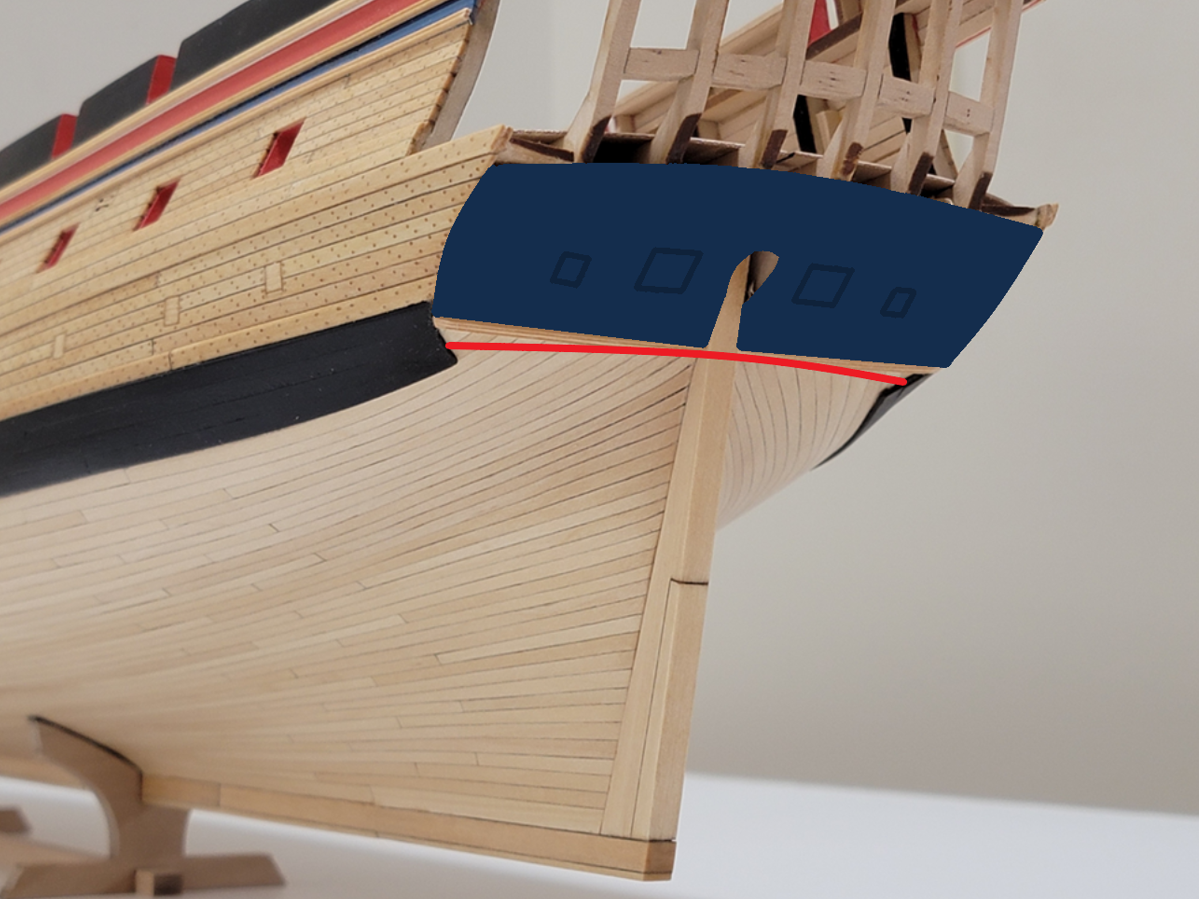
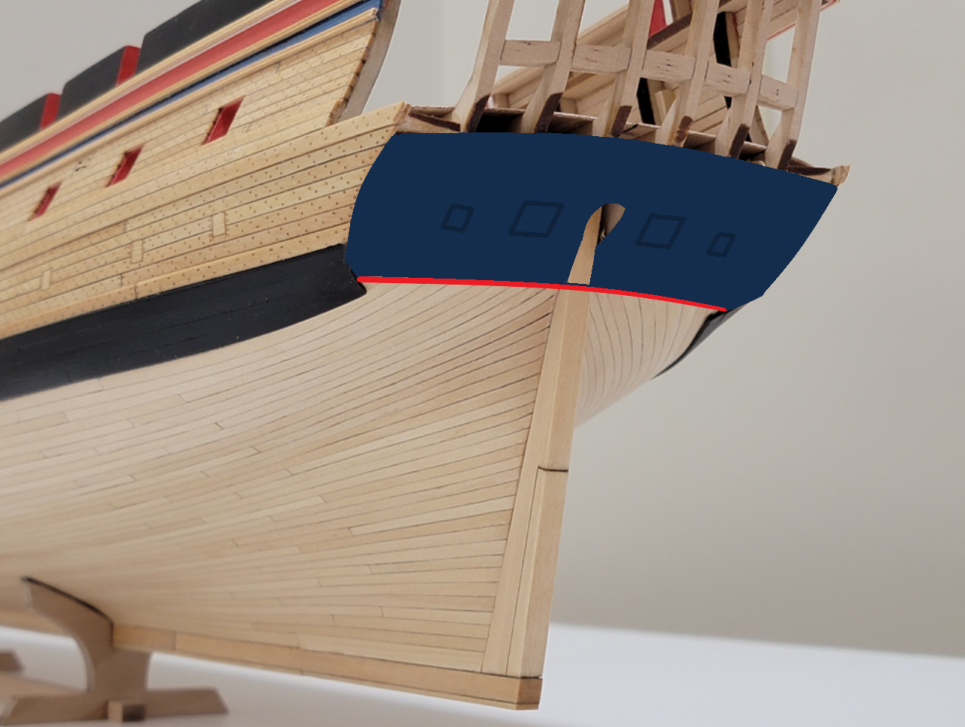
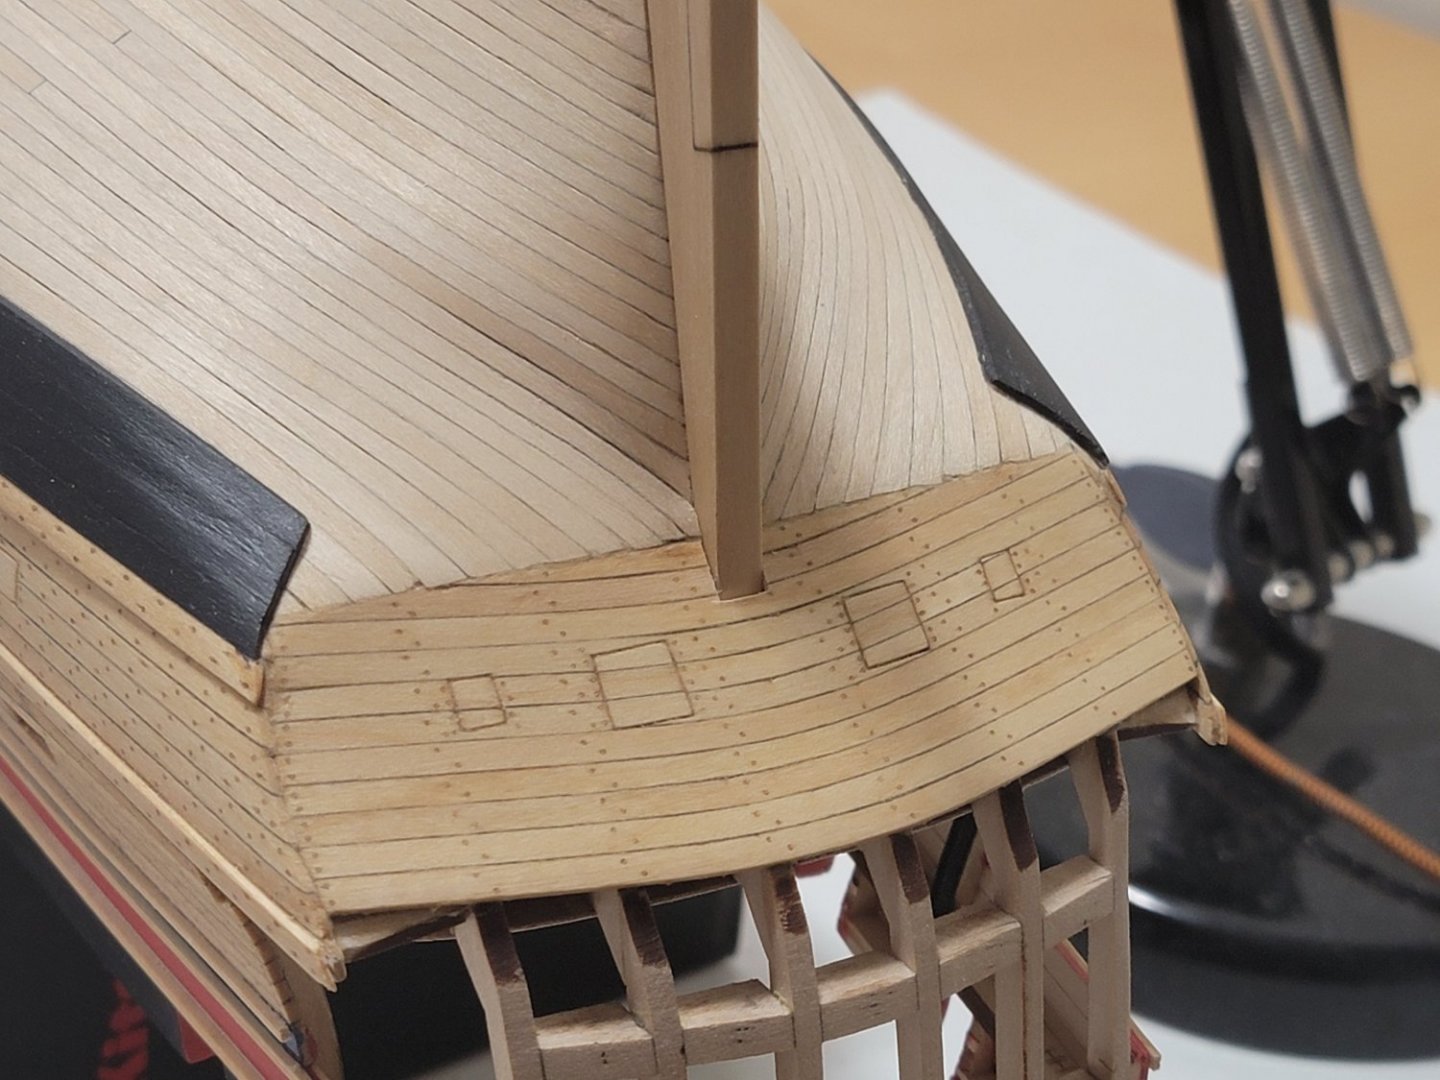
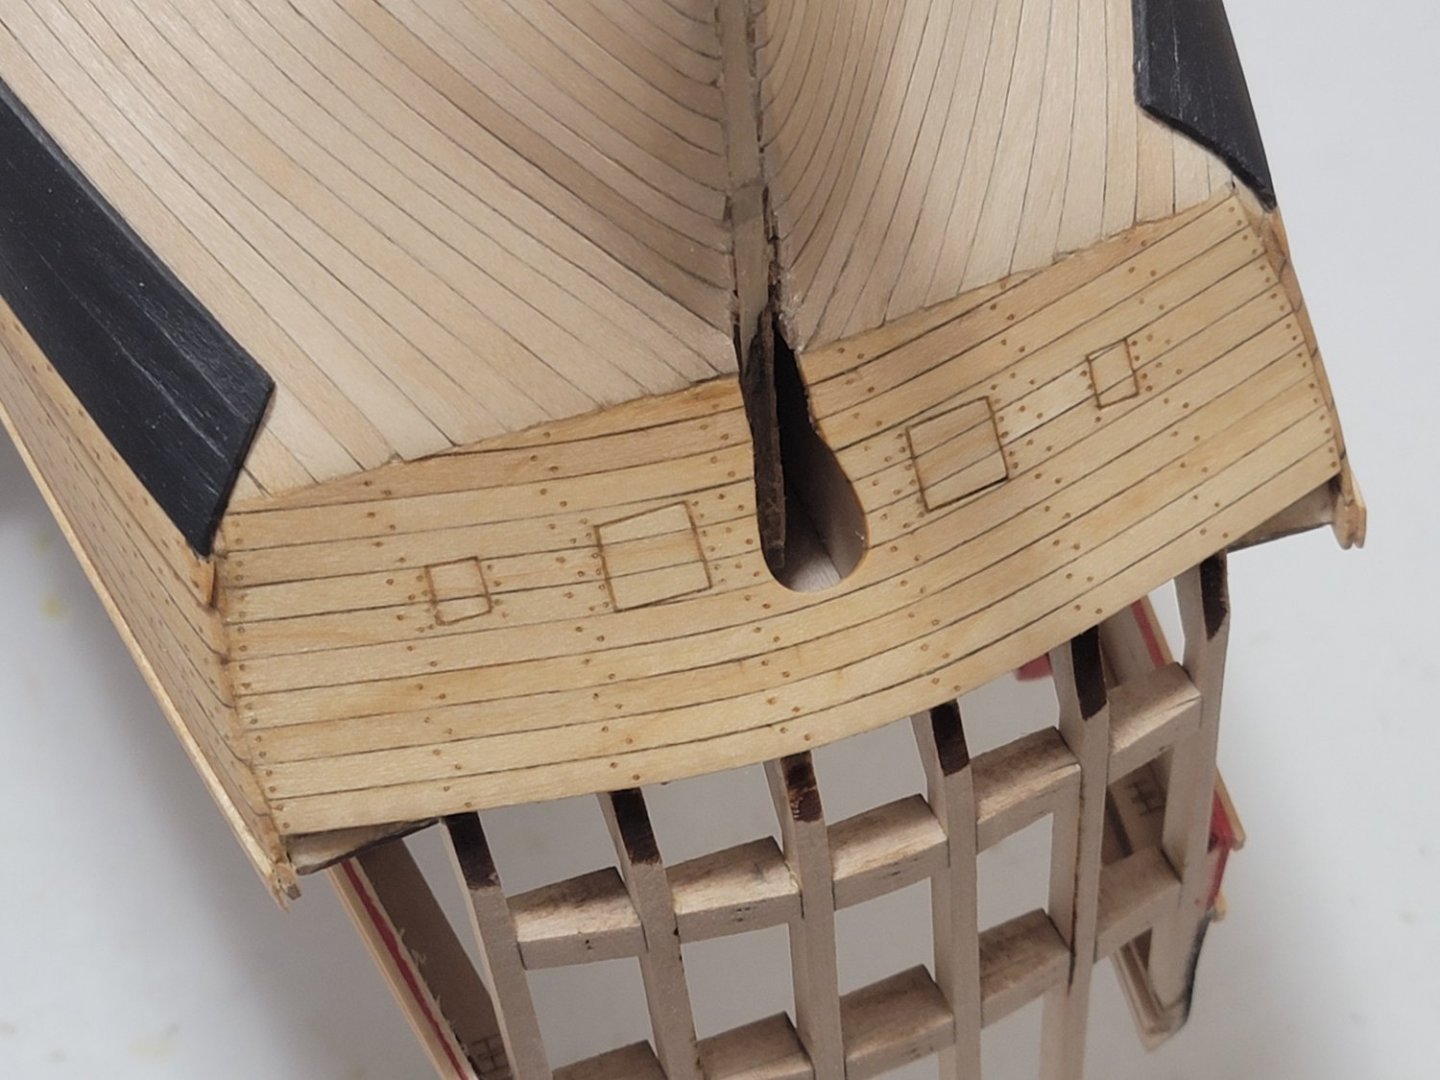
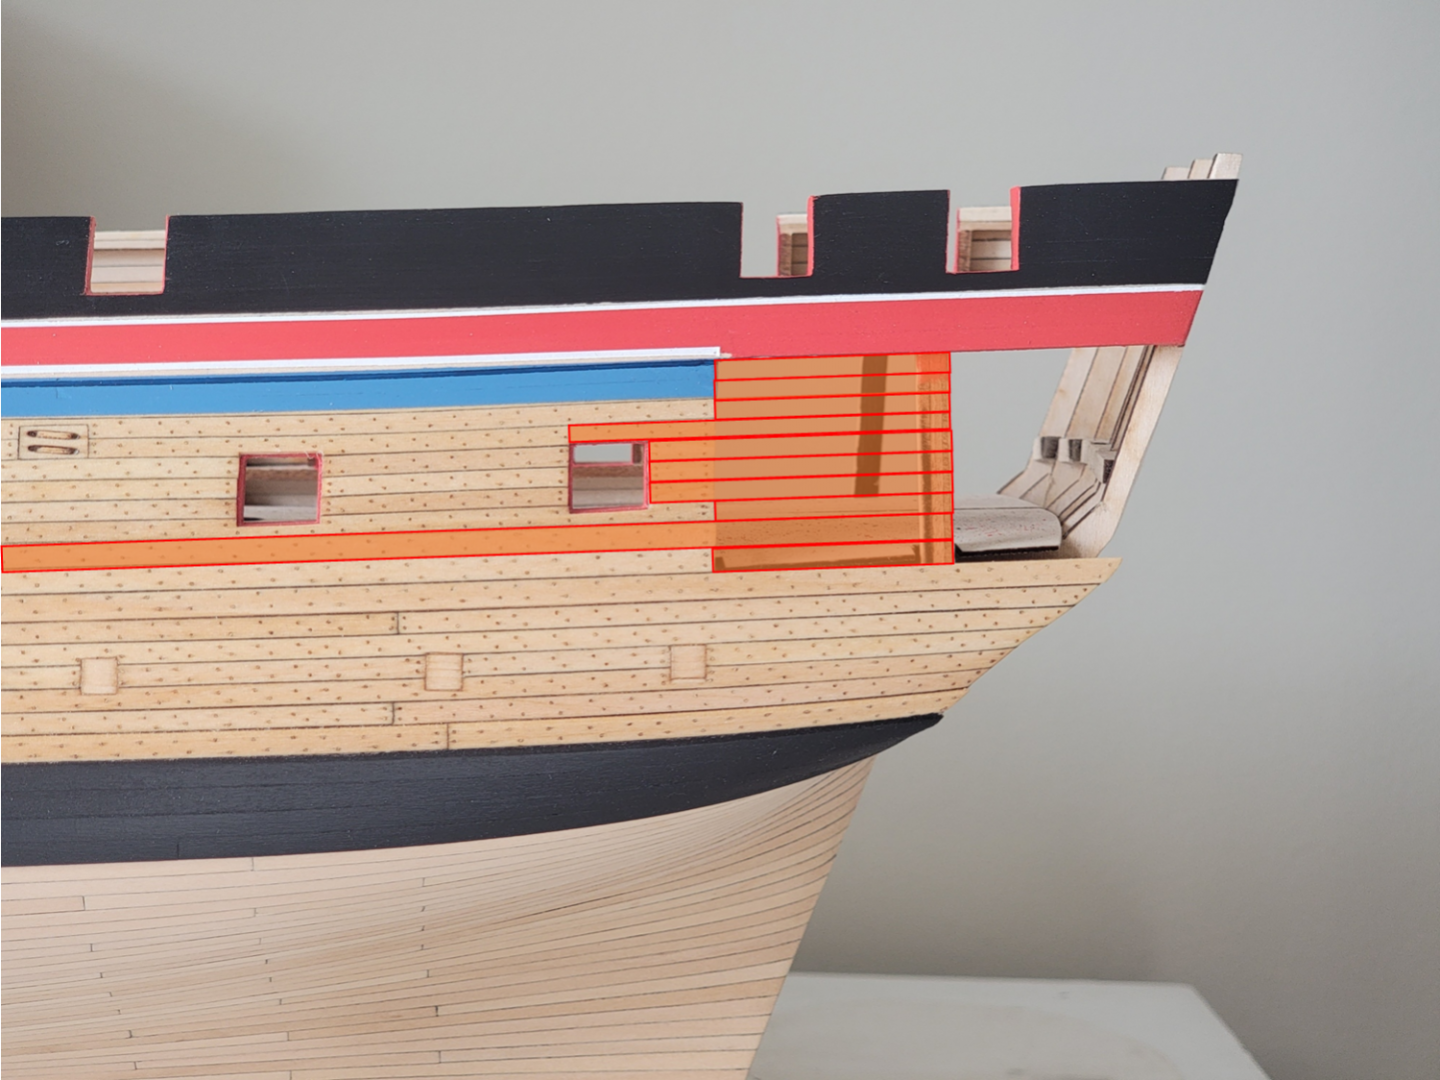
It was brought to my attention that the lower most plank at the stern counter should follow the entirety of its length together with its moulding (I really appreciate the feedback since I can fix it early on!). After seeing it end partially, it is starting to bug me whenever I see it. So I plan to fix this before progressing with the build. I am also considering to paint the counter planking blue. Another option I am considering is to slightly open the gun ports. I want to try making working hinges (no idea if I can pull this though), so this will be a good experiment for me. The red line here indicates the required curvature of the bottom moulding to follow the curve of the plank. This curve is consistent to the plans as well (http://www.modelshipbuilder.com/e107_images/custom/hahn/confederacy/Article_confederacy_03.pdf) I'm going to take a small break before commencing on this fix. It's a good chance to continue working on Pickle. I always welcome constructive criticism to my builds. It helps me improve and avoid mishaps 🙂
-
Thank you for the generous comments and the likes. Looking forward to seeing photos of your model, Werner. I did not fully realize that the channel wales go in the locations of the lower mouldings. I think it shouldn't be too big of an issue to remove the strips at those locations. I plan to use sharp blades and carefully removing them. There is a seam where the two mouldings meet (since the strip I used was not long enough to cover the entire hull), so if this seam is between two channels, I'll replace it with a full strip. I hope I remember this when the time comes!
-
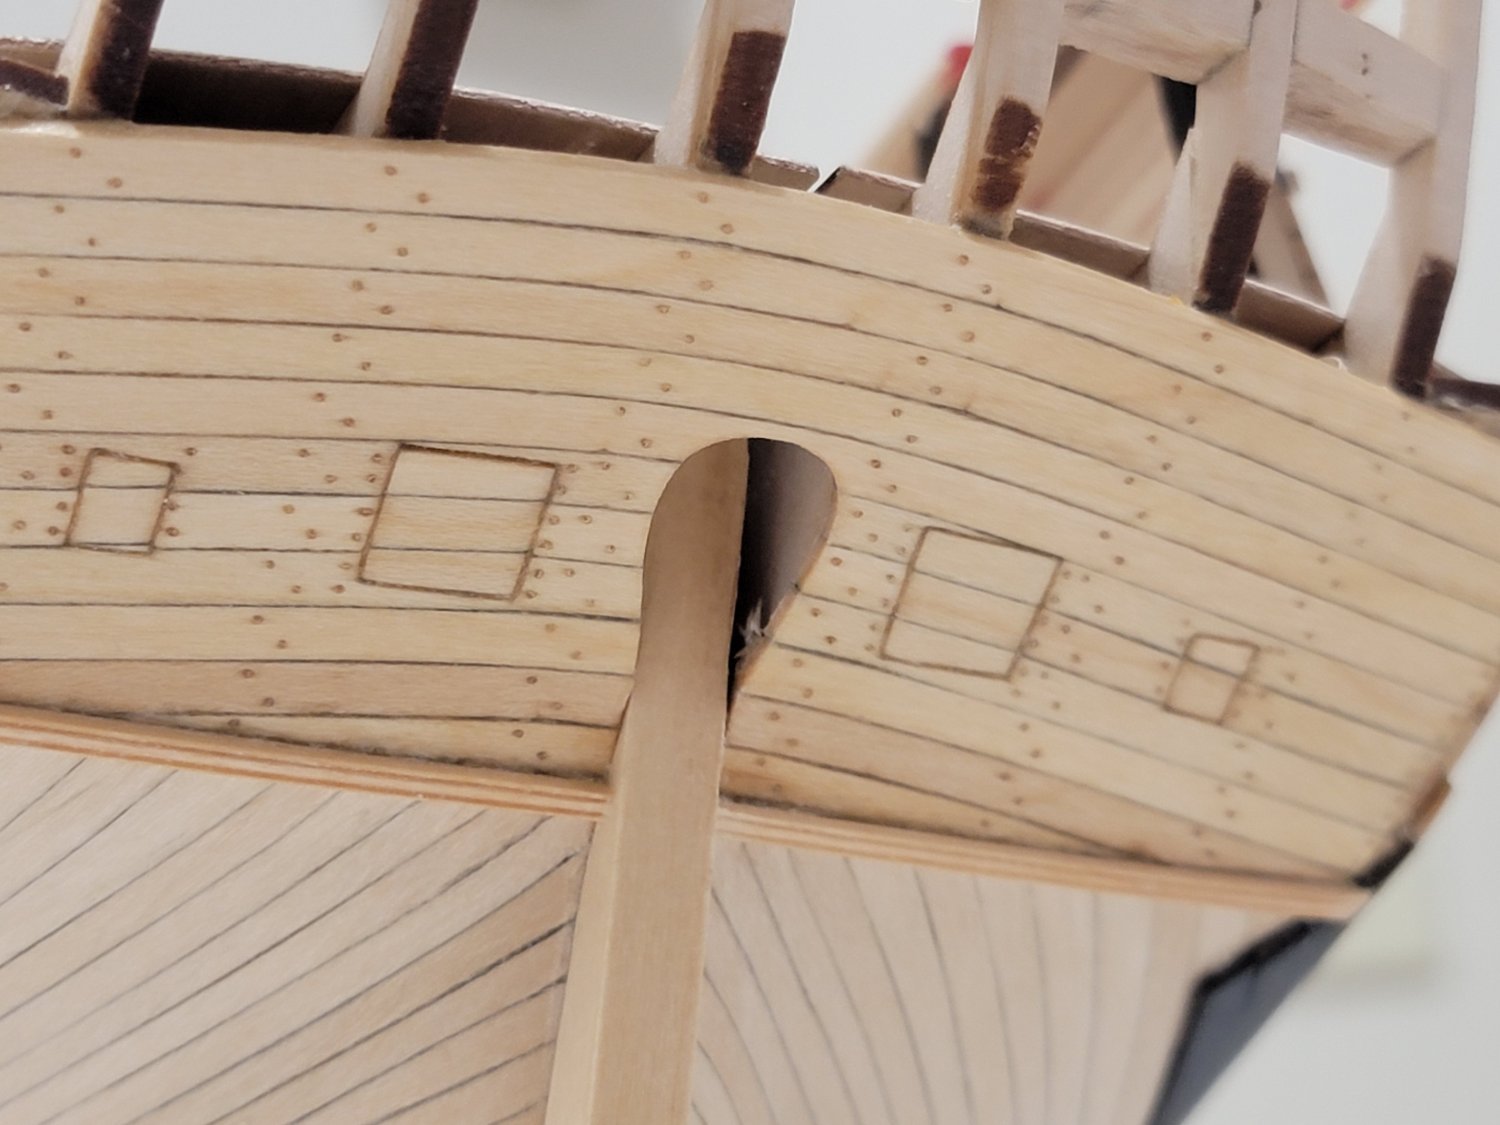
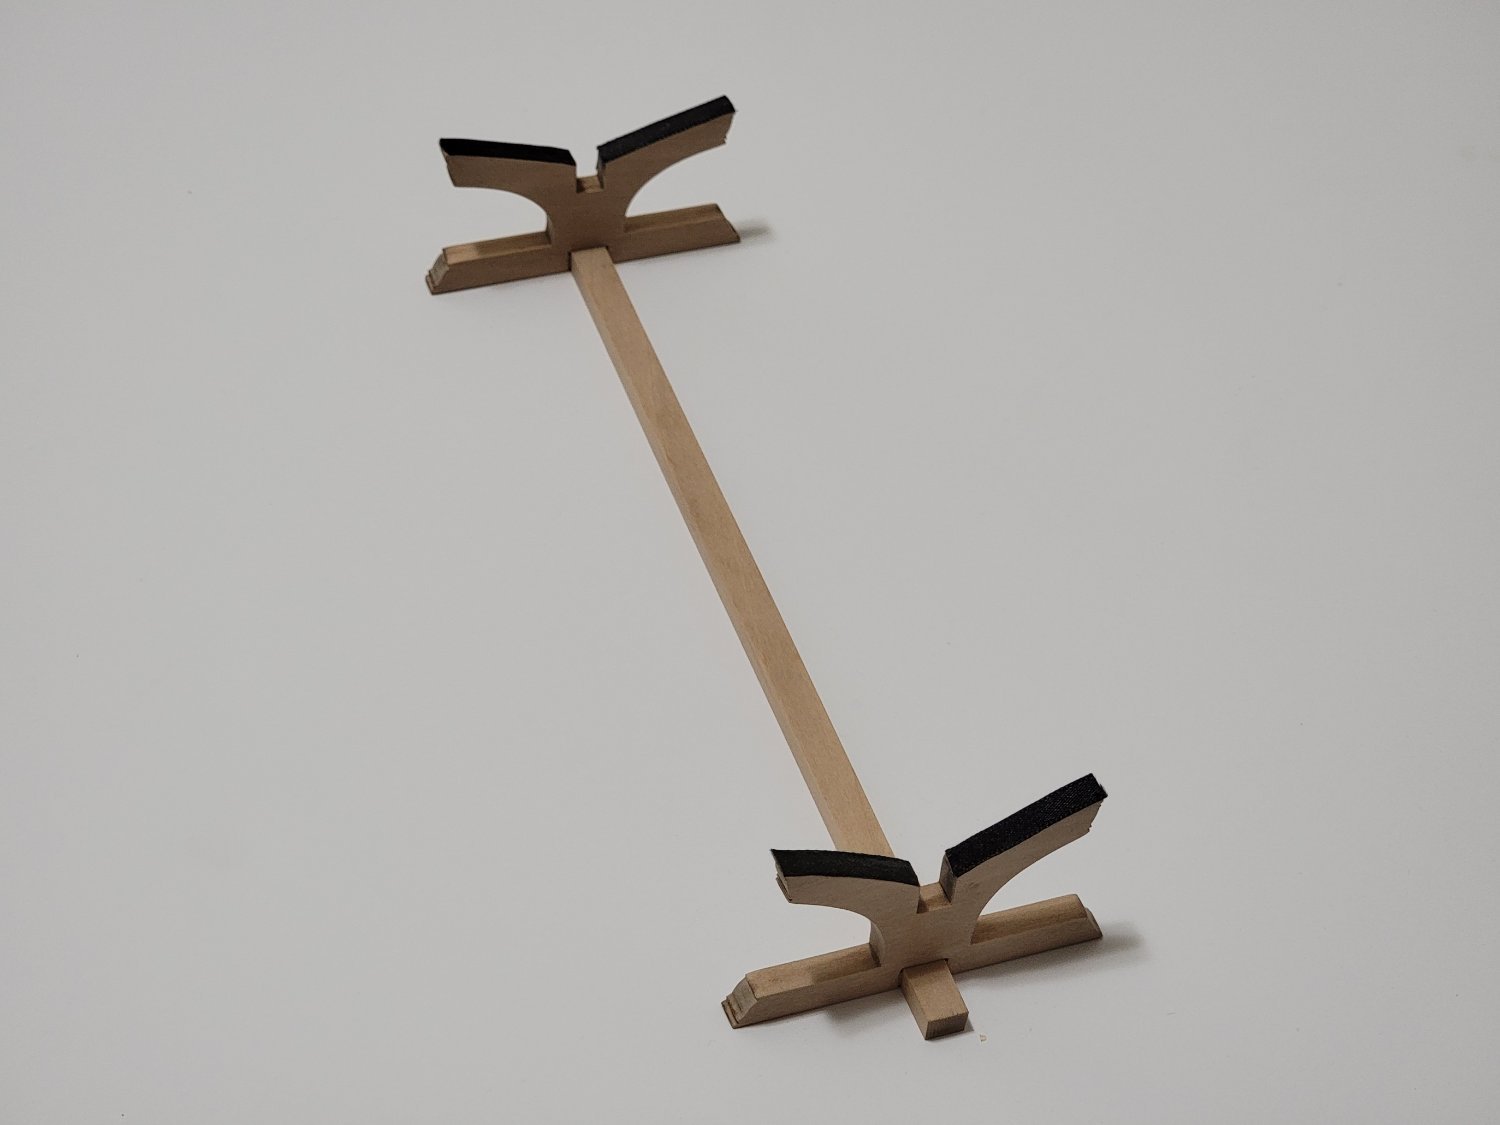
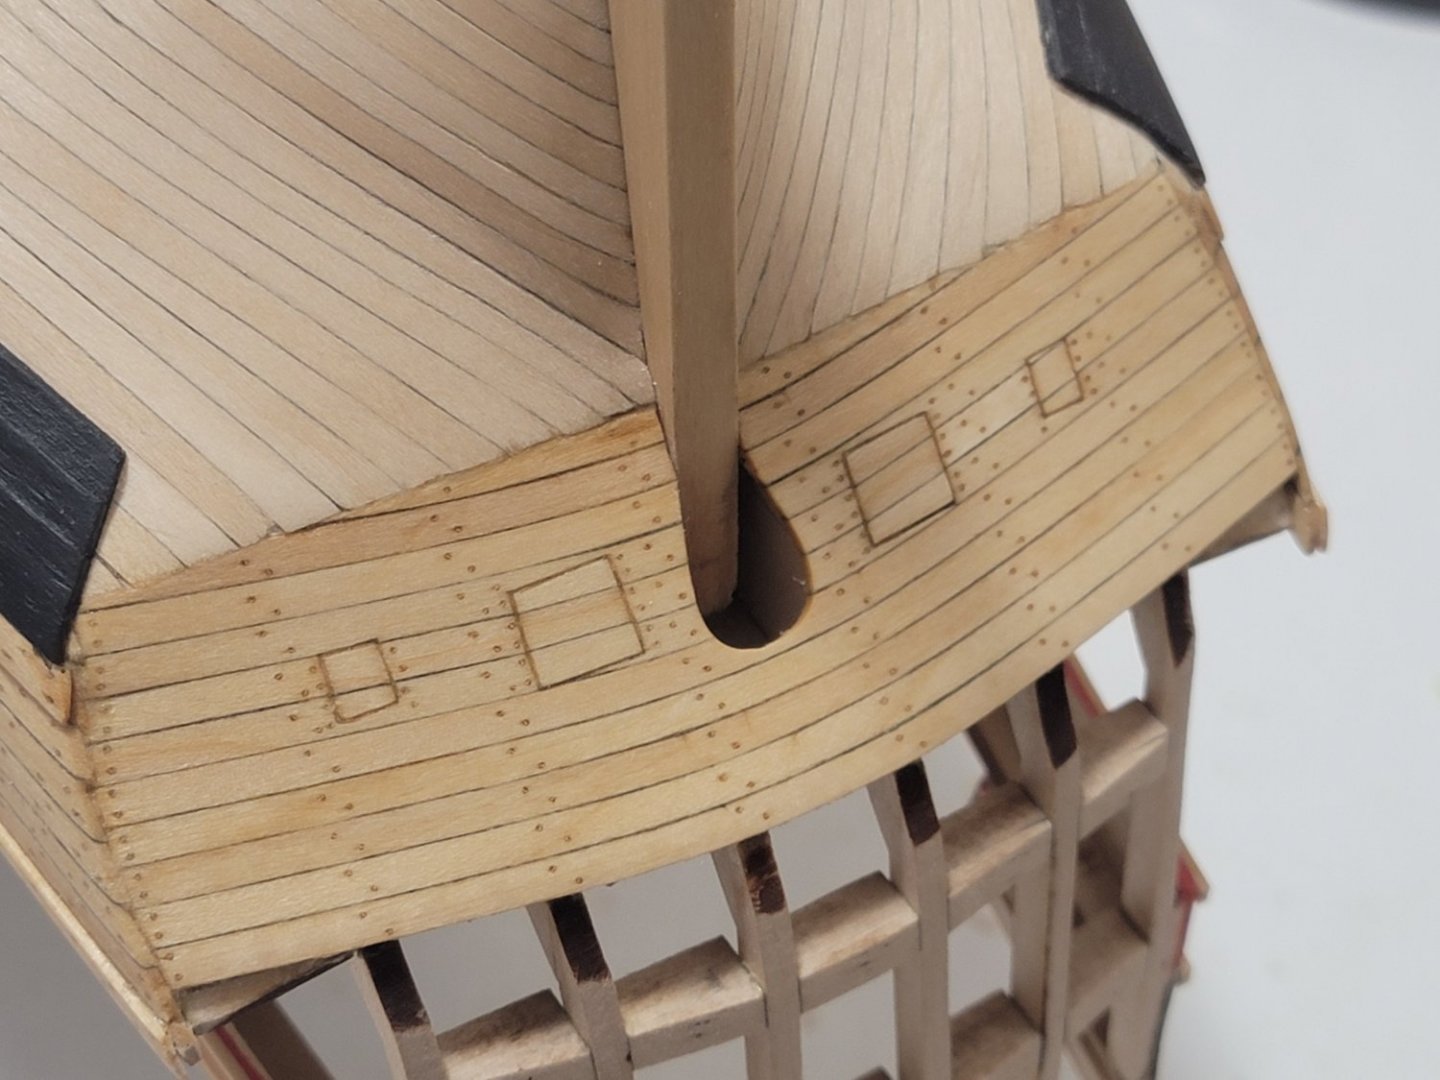
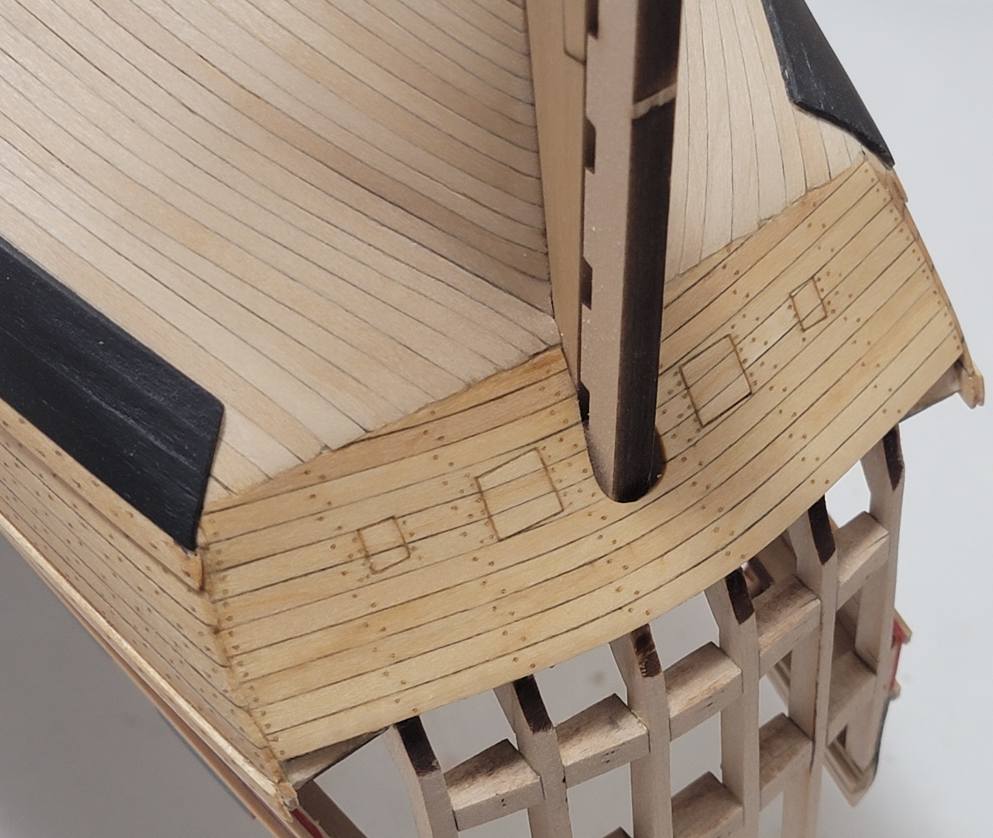
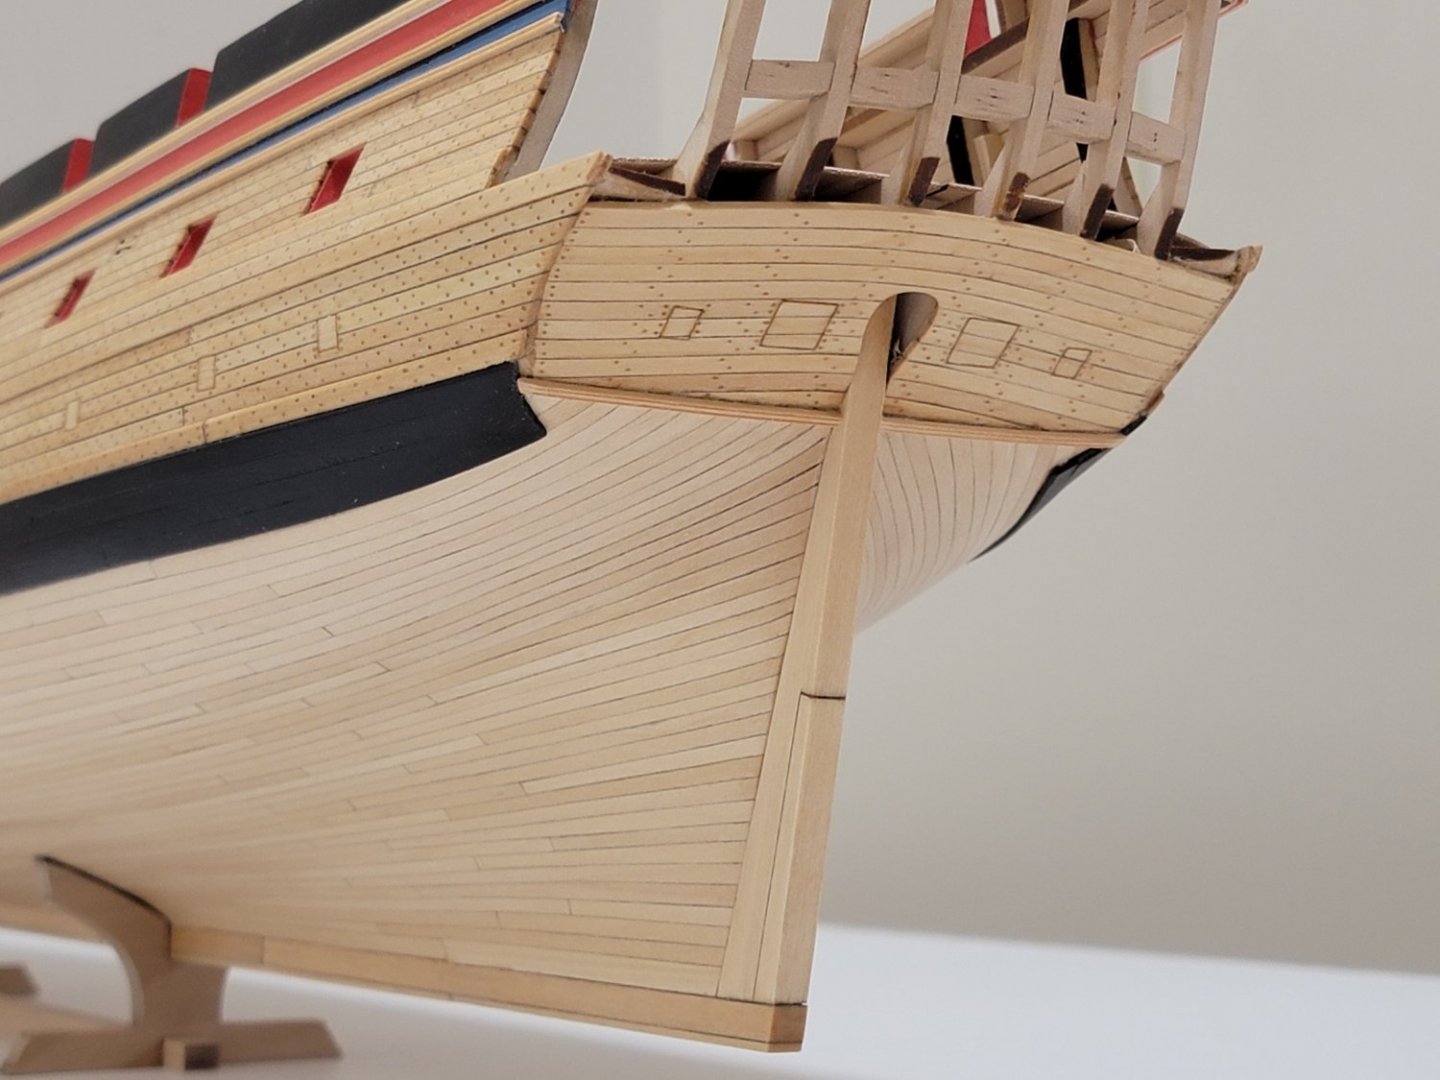
A bit of a long update! The sternpost is fitted. Instead of gluing it directly on the counter planks, I opted to cut out a notch so that it fits through. I used a combination of mini chisels, #11 blade, and files to make this notch: Since the sternpost was still removable at this stage, I decided to cut out the helm port. First I drew an outline of the port, used progressively bigger drills on the plank right beside the sternpost, then used chisels and blades to make it bigger. The final 1-2mm was done using a semi-circular file Here is a photo with the sternpost dryfitted: I used the rudder piece to make adjustments to the port making sure it can rotate freely: The moldings were also added after gluing the sternpost. I first only glued the 1-2 cm of the molding that touches the stern post. Then after the glue was set, I applied glue to the rest of the strip. This was done since there is a slight curvature and I needed one part to be fixed before gluing the other end. I also assembled the stand that came with the kit. I think I will use for further construction to prevent scratches on the keel from the board from previous posts. I just sanded the char off and did not apply any finishing. Ribbons were glued to prevent any scratches on the hull. The rest of the moldings were also added to the hull. This now completes the major hull work! 😀


-
Great photos! I love the contrast between the different woods.
-
Hi Thomas. I'm not sure if you have already mentioned this in your log, but how did you simulate/model the scuppers on your hull?
-
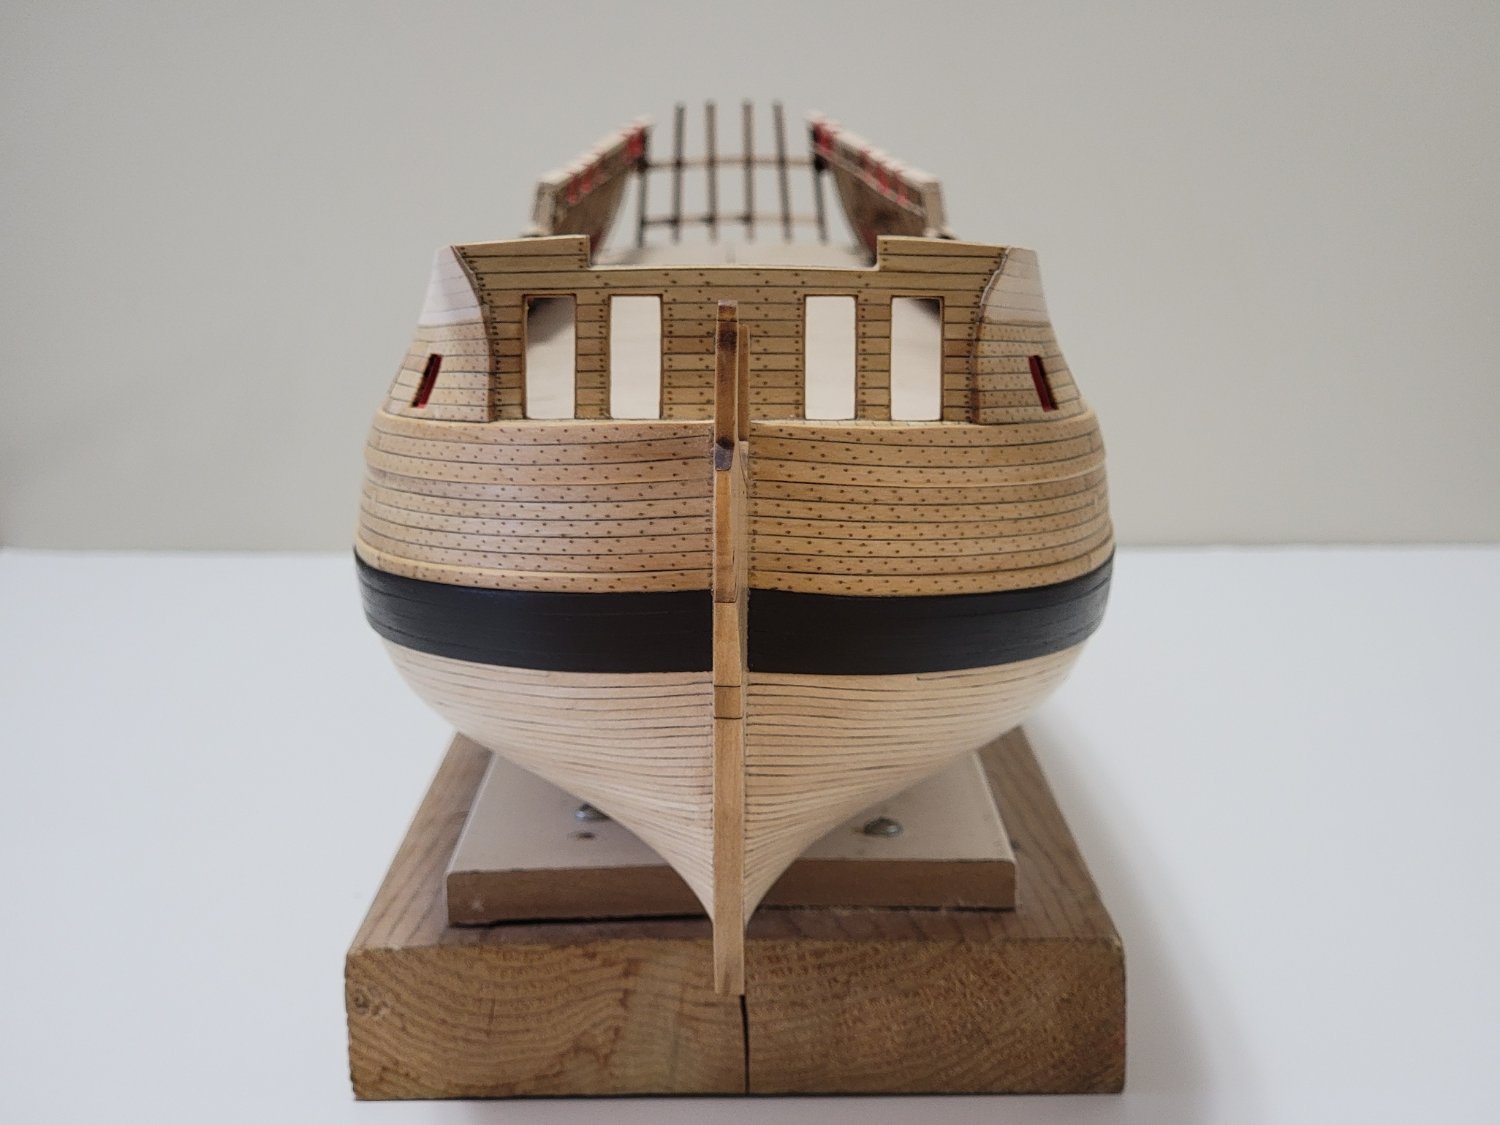
Thank you for the kind words! Thank you, Allan. I used bamboo skewers drawn to the 2nd smallest hole on the Byrnes drawplate.
-
Beautiful! Congrats on completing this fine build. I'm sure I'll be referencing your log a lot 😁
-
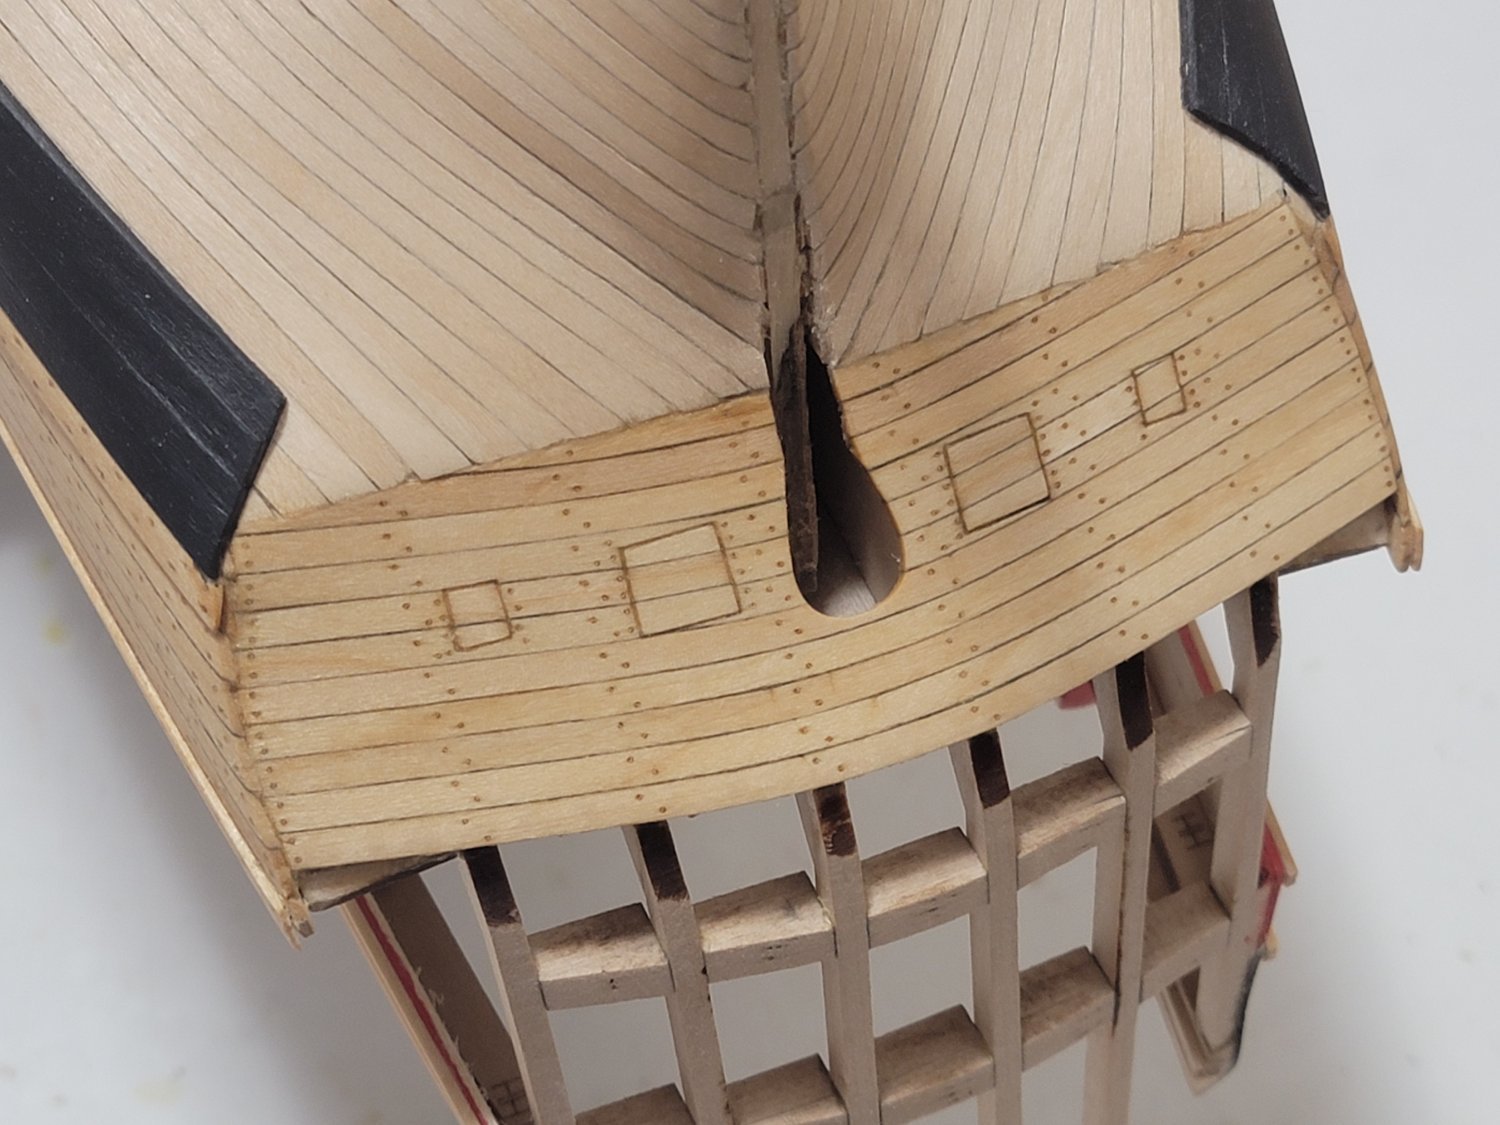
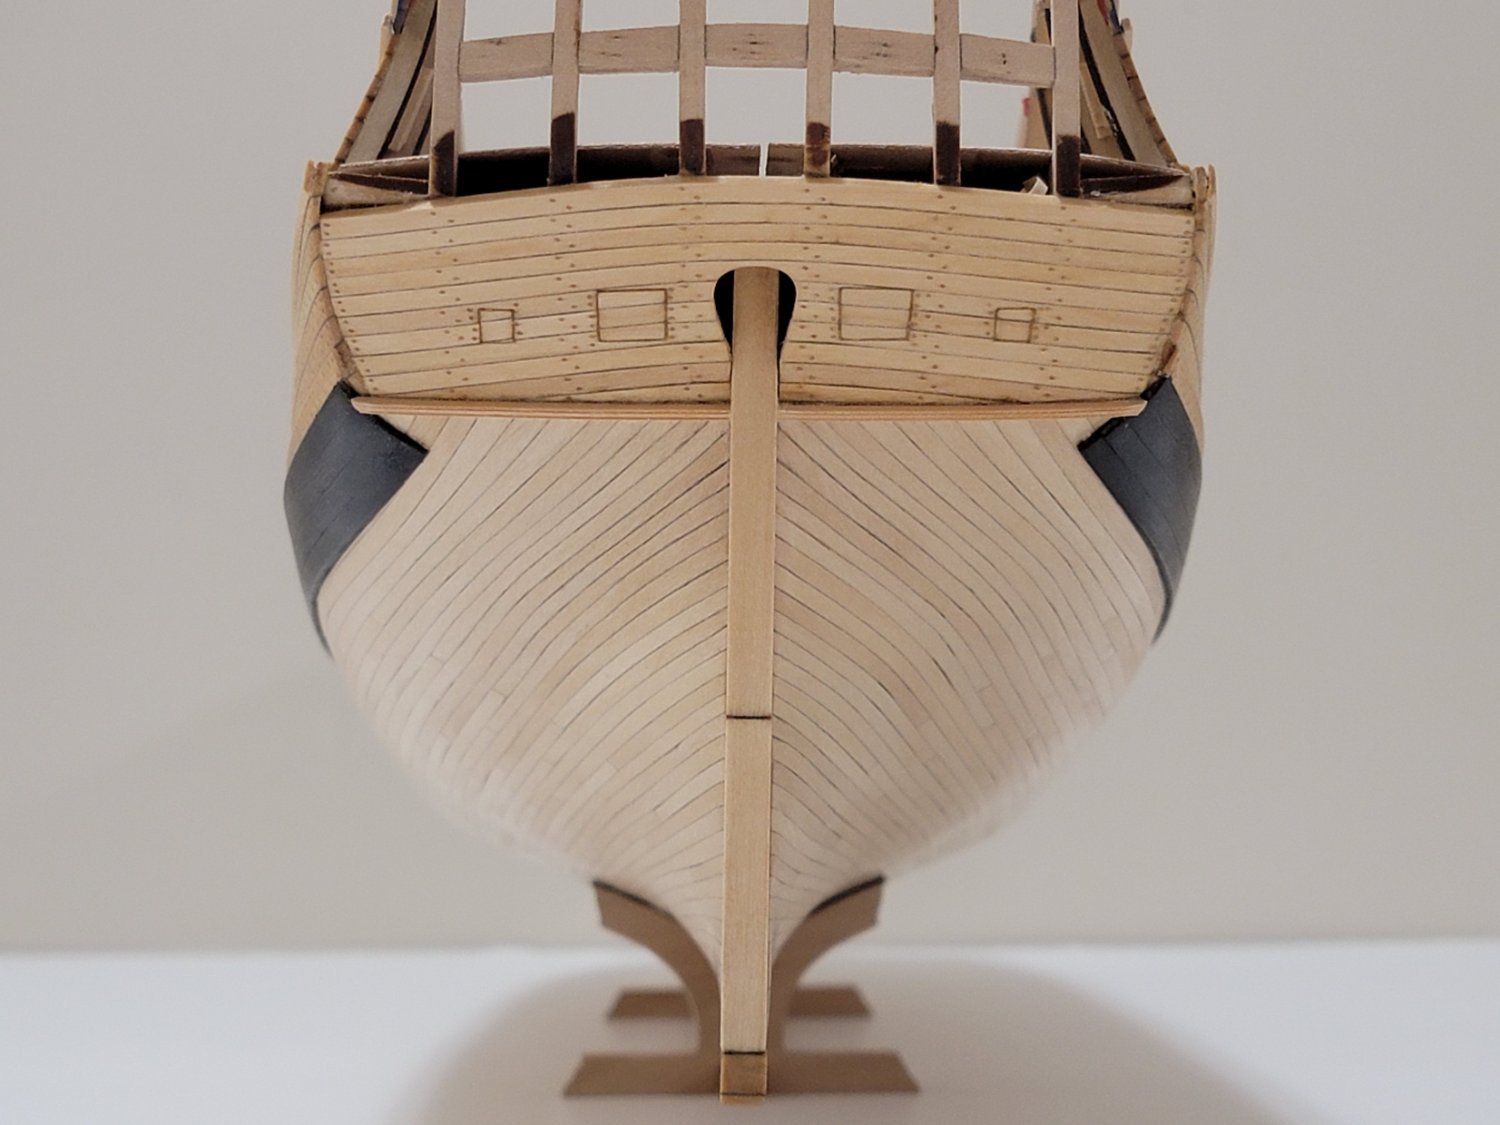
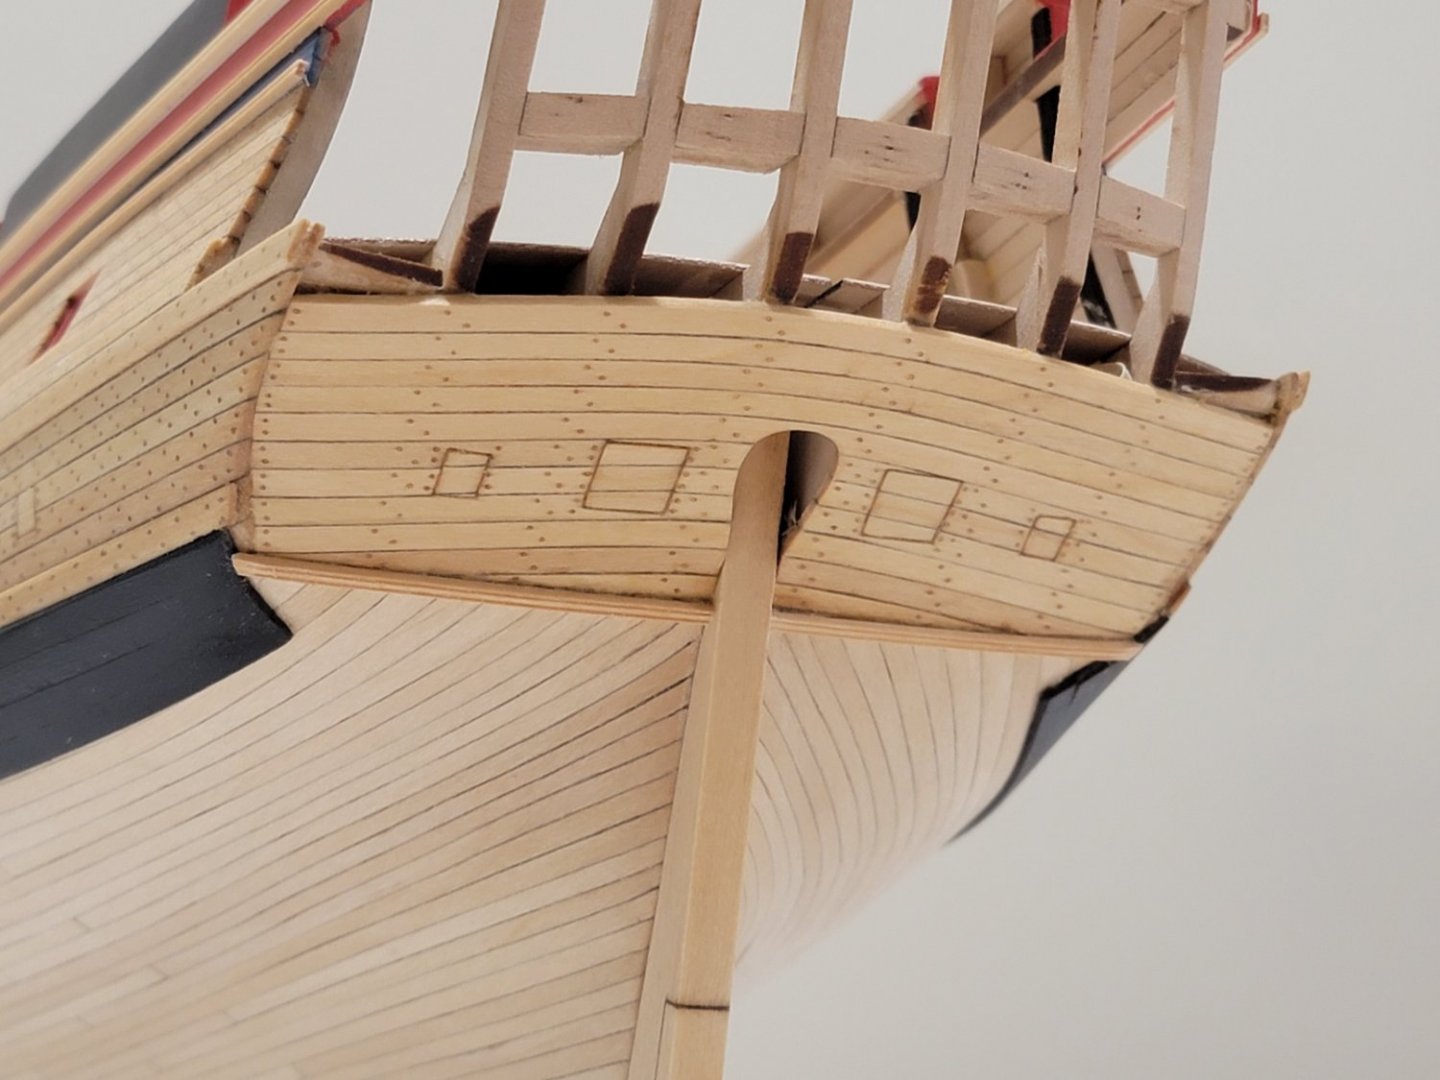
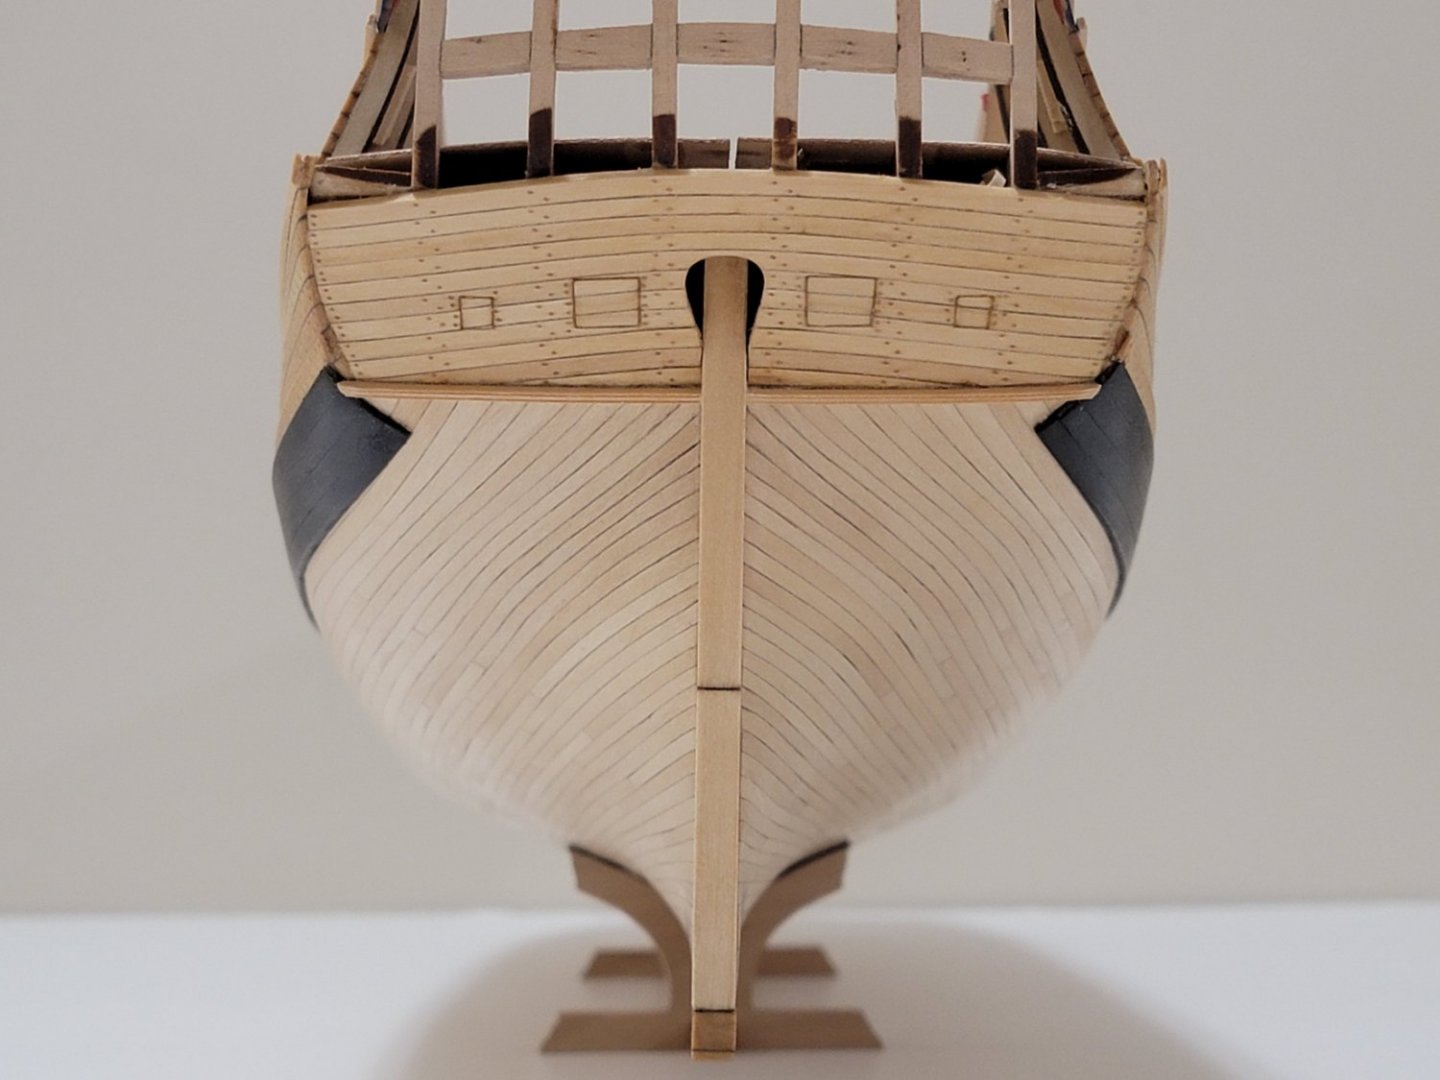
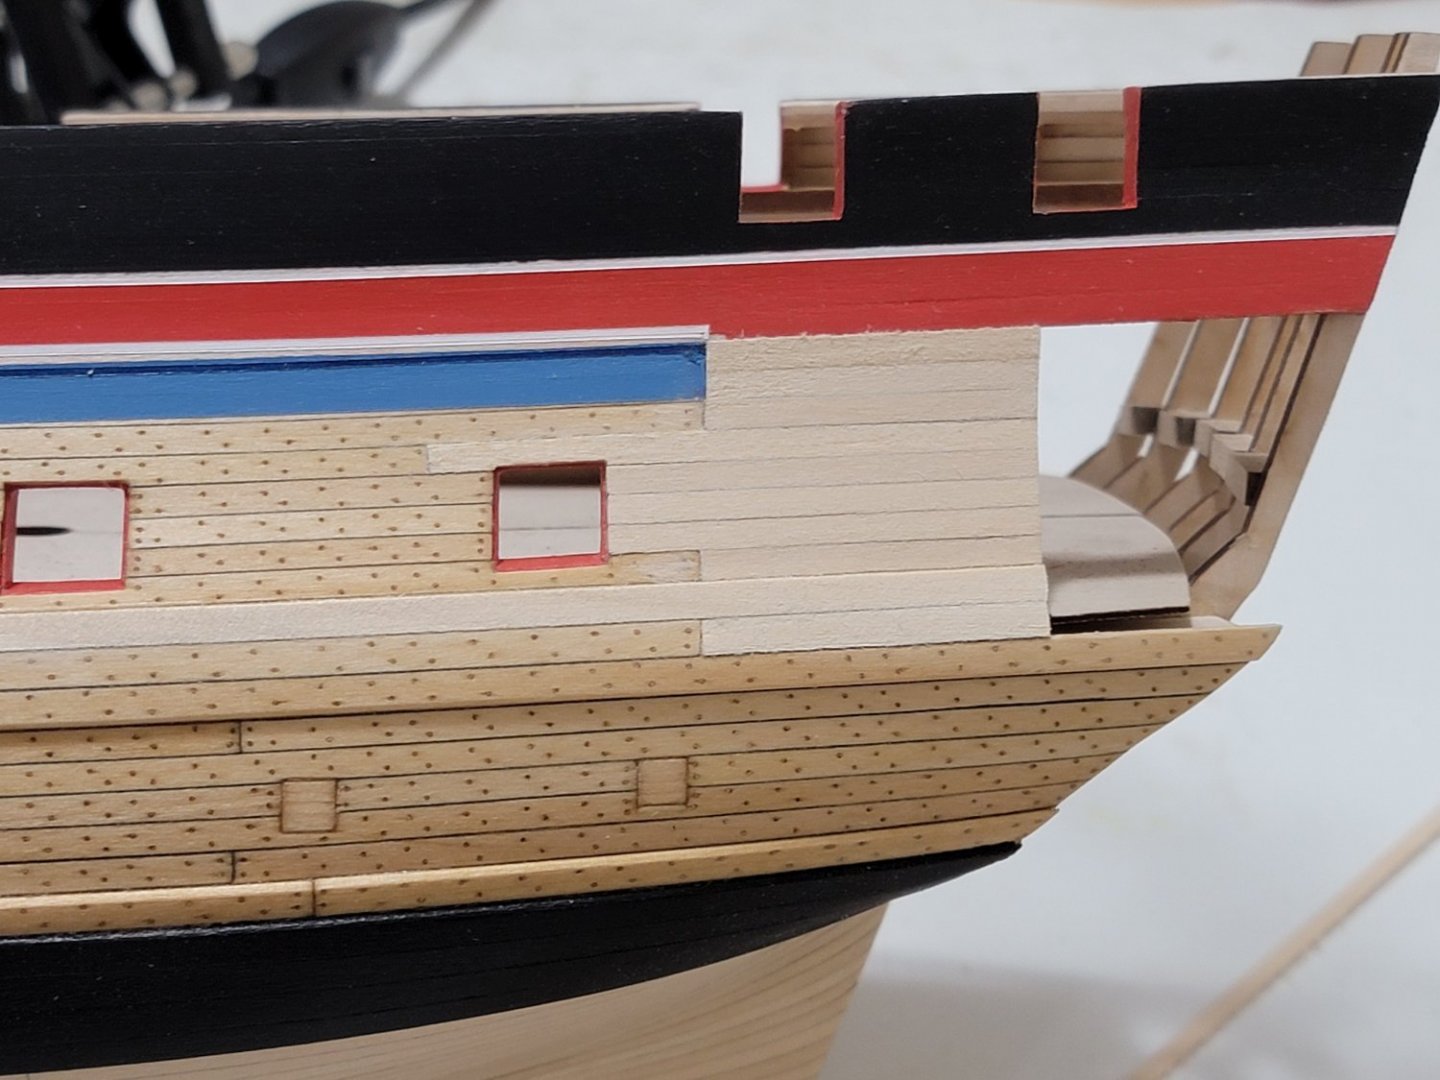
Thank you, Steven. I managed to fix the issue with planking at the stern. I first cut out the planks as shown: Then added these filler pieces: Did some planking and treenailing, then applied tung oil: Lastly, I finished with the painting. It is not as perfectly seamless as I had hoped, but a lot of it will be covered up with the quarter gallery parts and some scrollwork so I am not very worried. I hope there will be enough visual distractions to hide any mishaps. And to note, I widened the area of the white pinstripe since there is a small section where the mouldings stop, and I wanted that part to seem like the white part met the dark blue. And I made some of the mouldings using a scraper. The only parts left to complete the major hull work is to install these and work on the sternpost.

-
Beautiful job! It's very nice seeing the yards on the ship.
- 157 replies
-
- 2
-
-
- model shipways
- syren
- (and 1 more)
-
The run of planking looks very smooth!
- 840 replies
-
- 3
-
-
- winchelsea
- Syren Ship Model Company
- (and 1 more)
-
I absolutely love the last picture of the transom assembly. Amazing craftsmanship.. I could be wrong, but should the helm port be more of a pear shape? Something like this?
-
One may think it's a computer rendered image. It's that perfect. Amazing!
-
😯 Just brilliant.
-
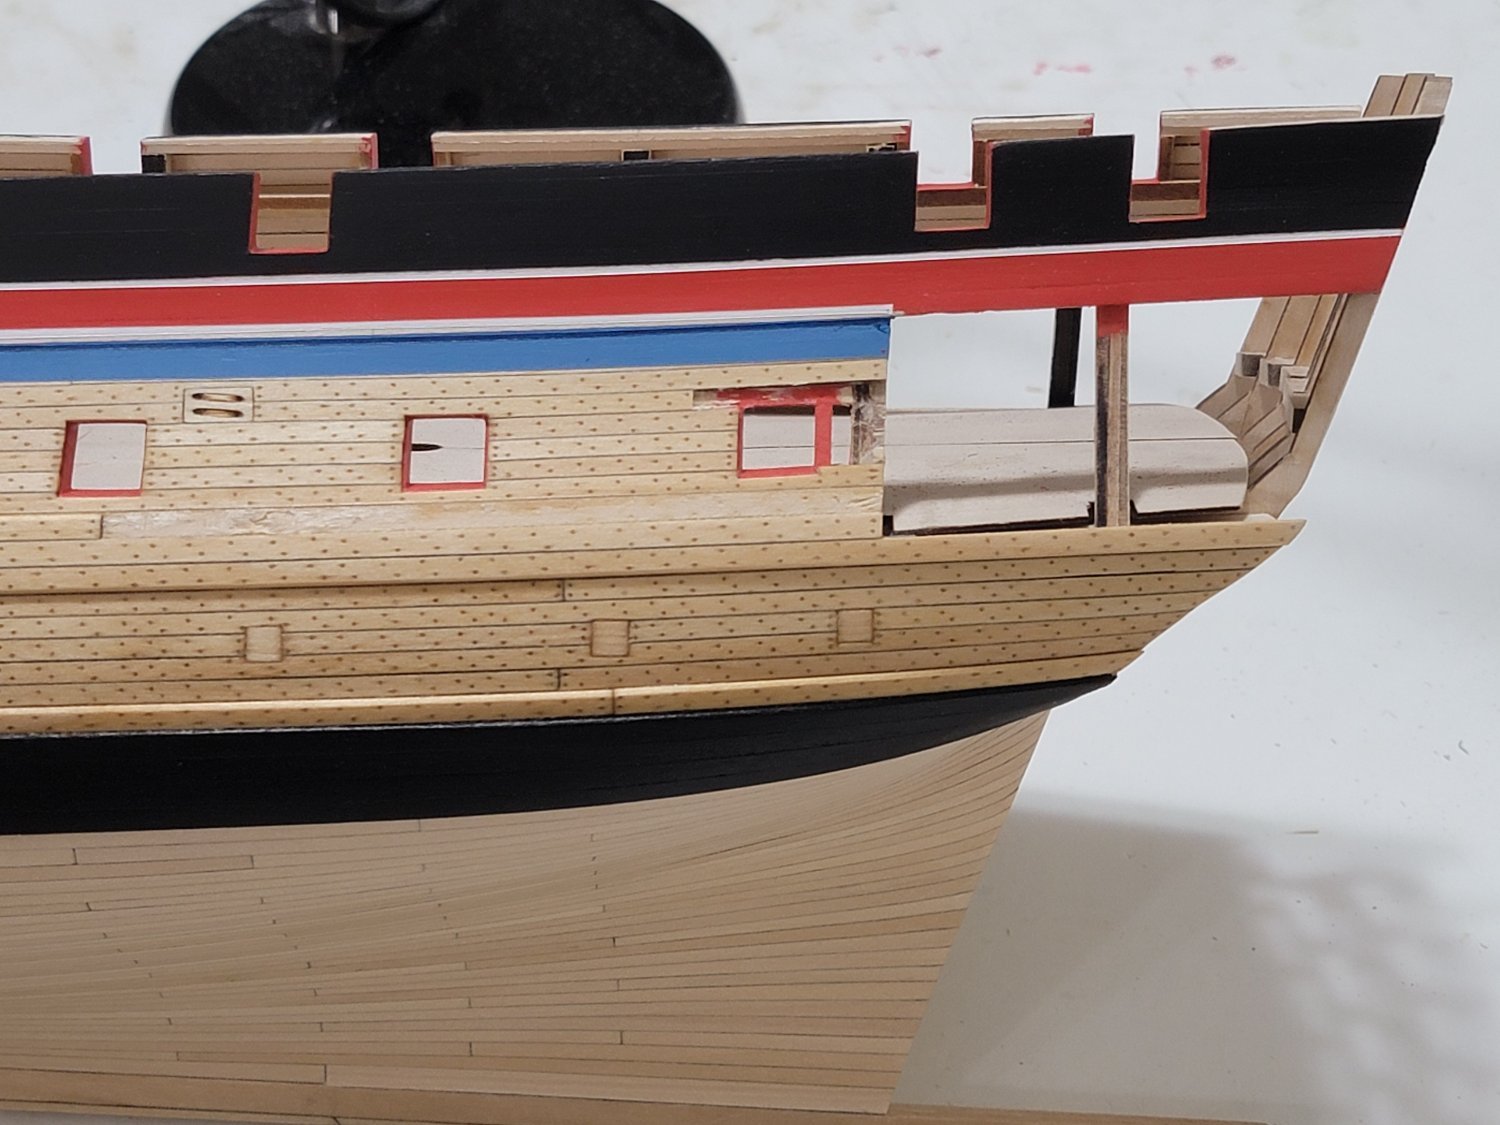
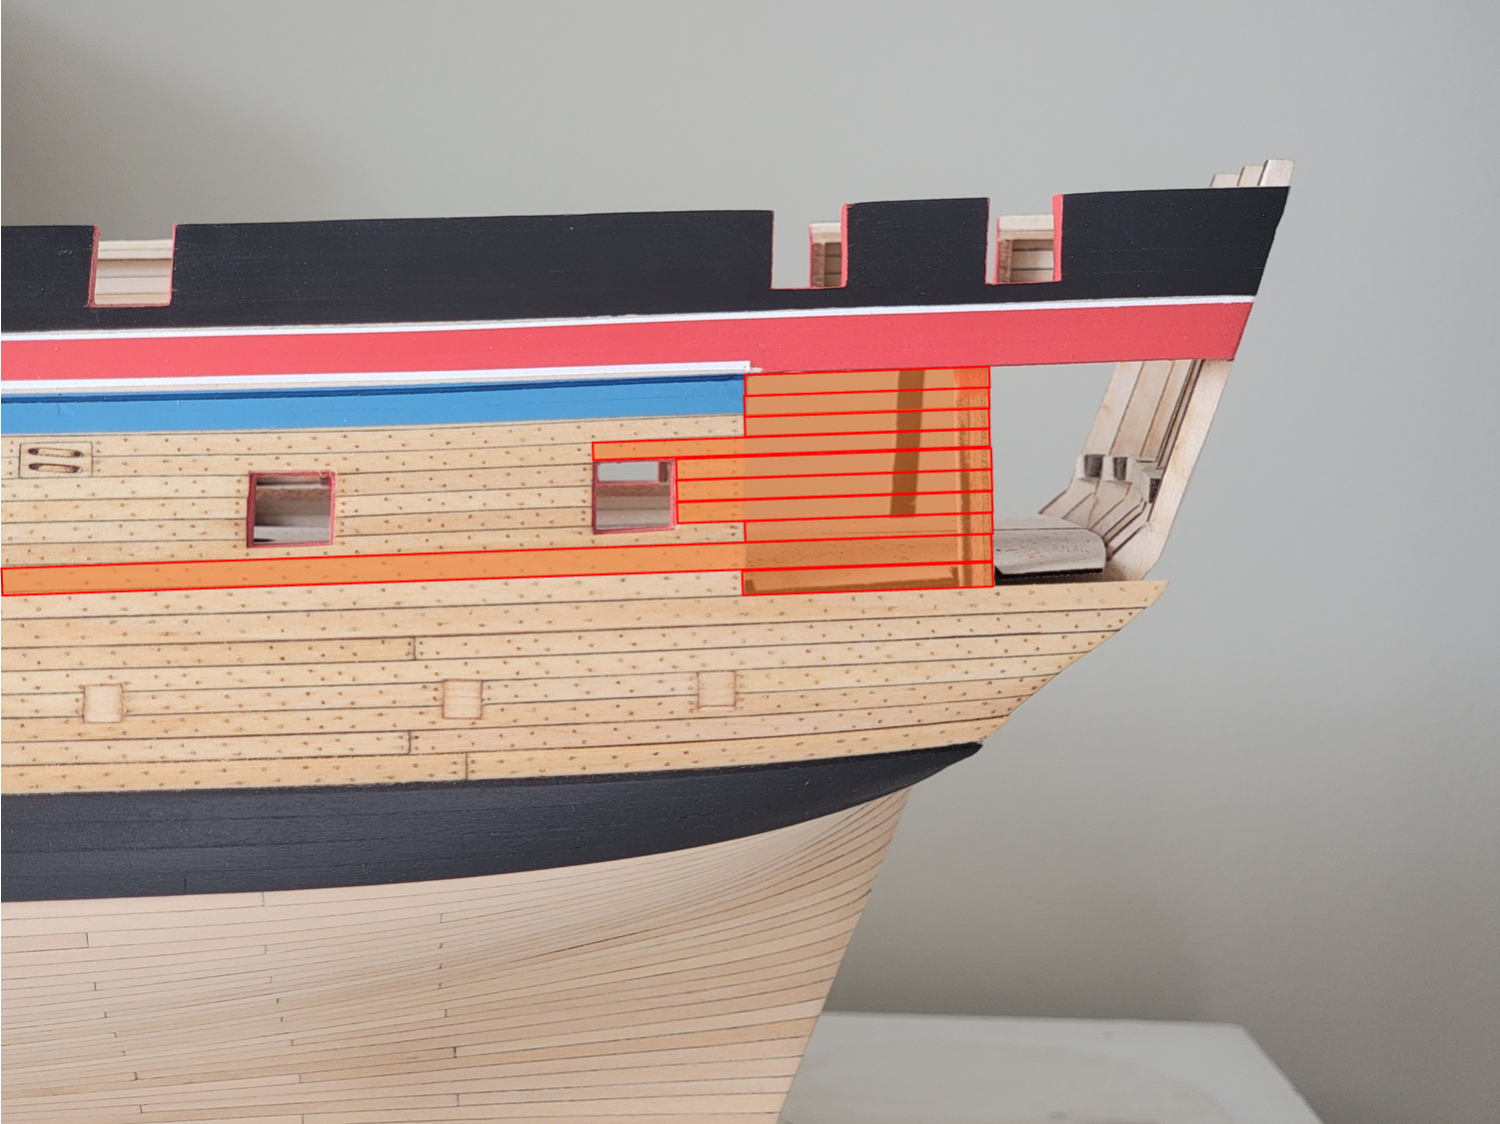
Hi John, thank you for posting that photo. I was browsing MSW a while back, saw the image, and immediately saved it as I was considering to try it out. I don't think I would have attempted to paint it that way if I did not see this picture. Hello Werner Yes I made a mistake on this. No need to apologize, I really appreciate you pointing this out. If I were to carry on the build I would be facing a lot of headaches trying to get the quarter gallery done. I'll fix this immediately before moving on to the next parts of the build. Thanks again! If you had not mentioned, I would be struggling to build the quarter gallery and would be wondering why. Below is my plan of action to solve this. The rectangles show the individual planks I will glue: I'll post the progress on the log on how I solve this issue.
-
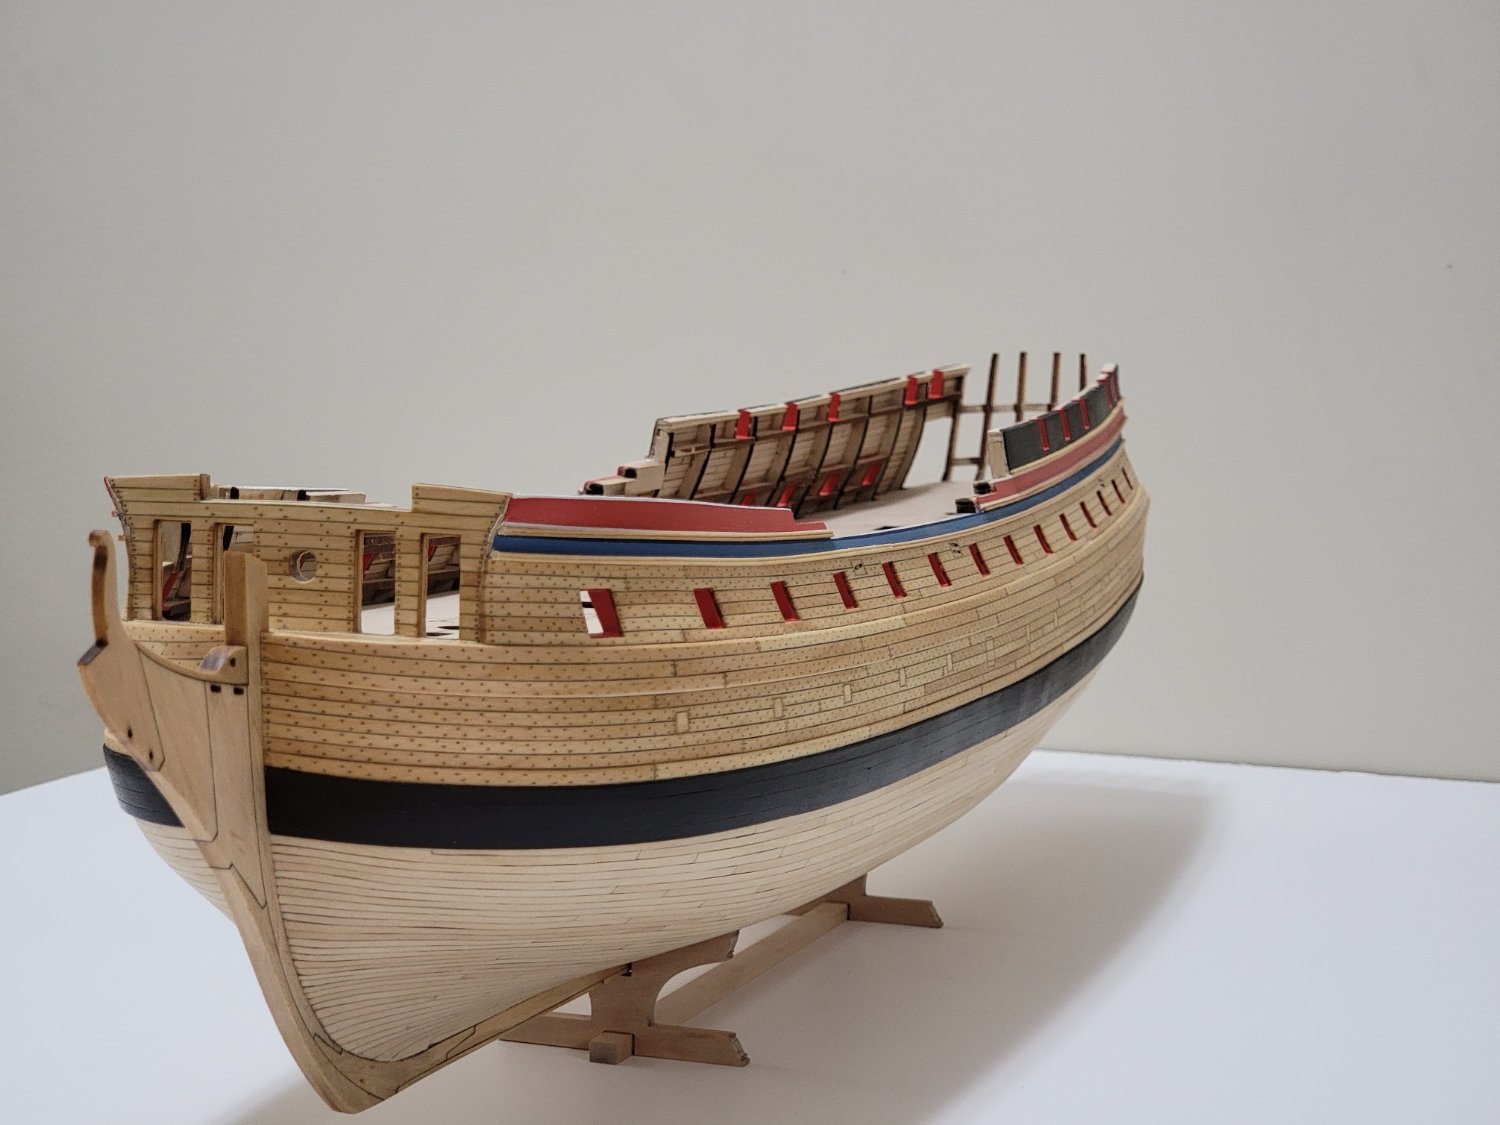
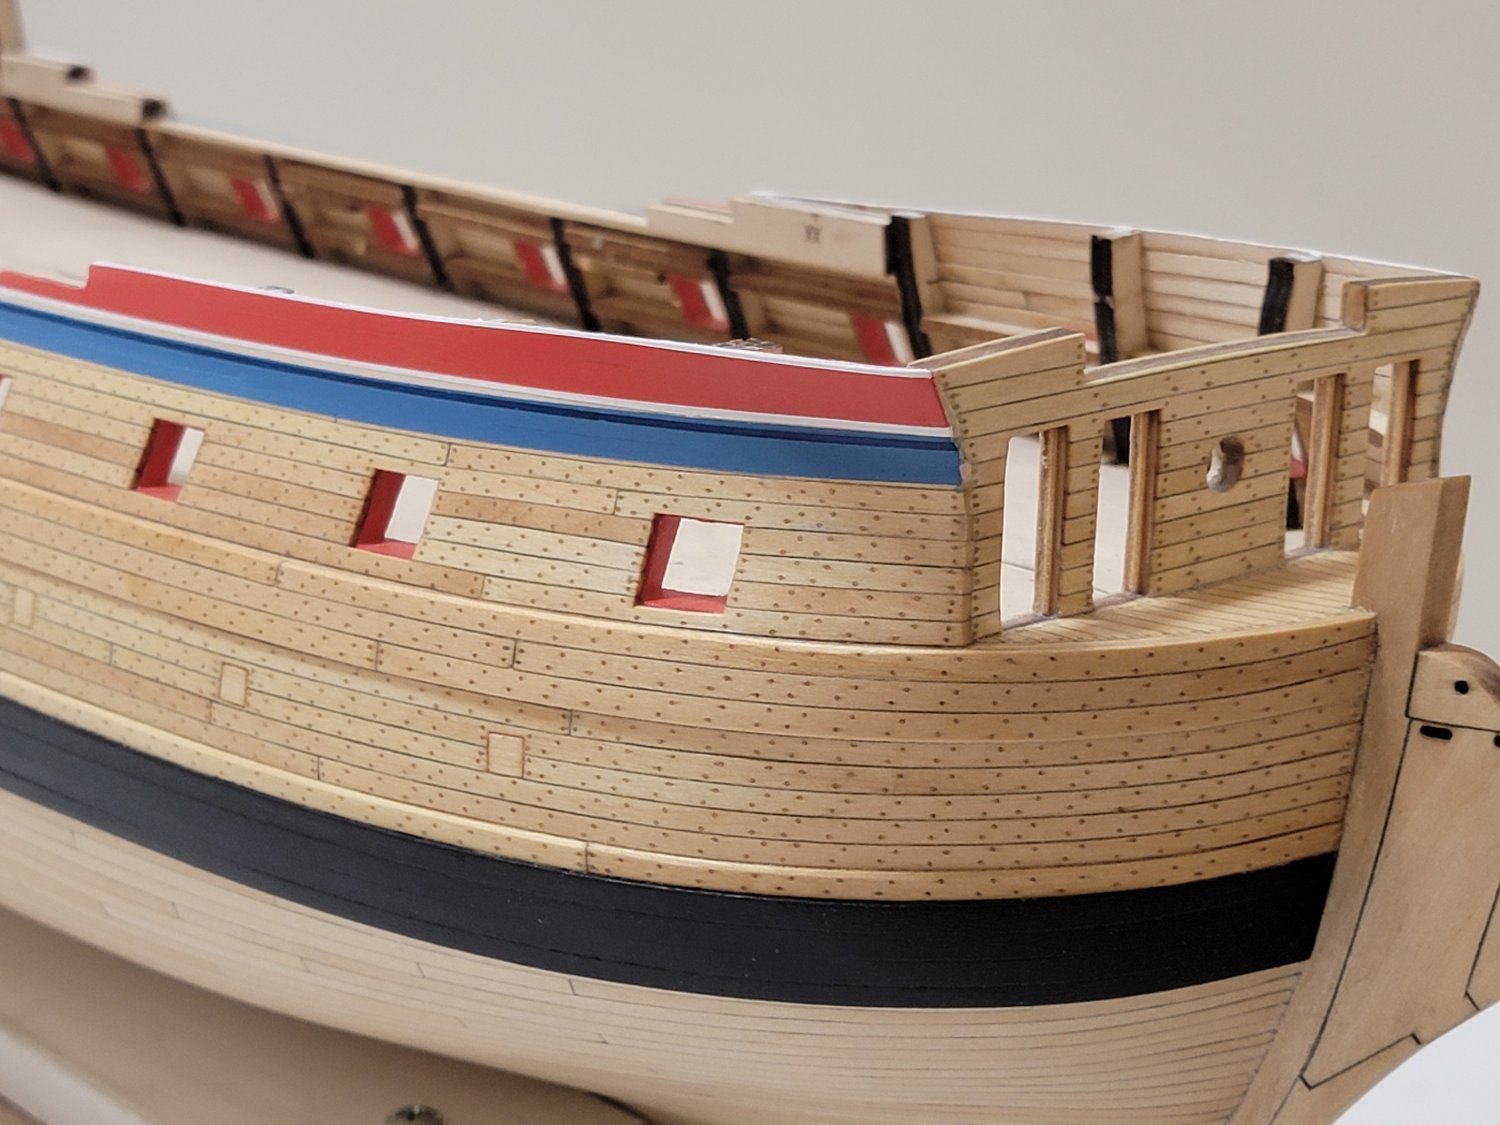
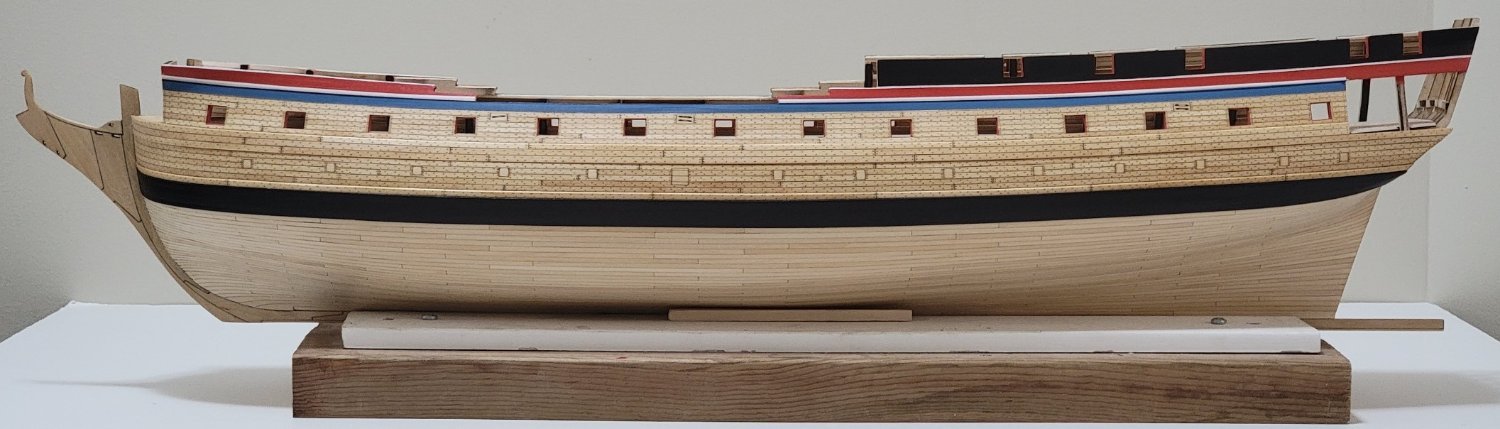
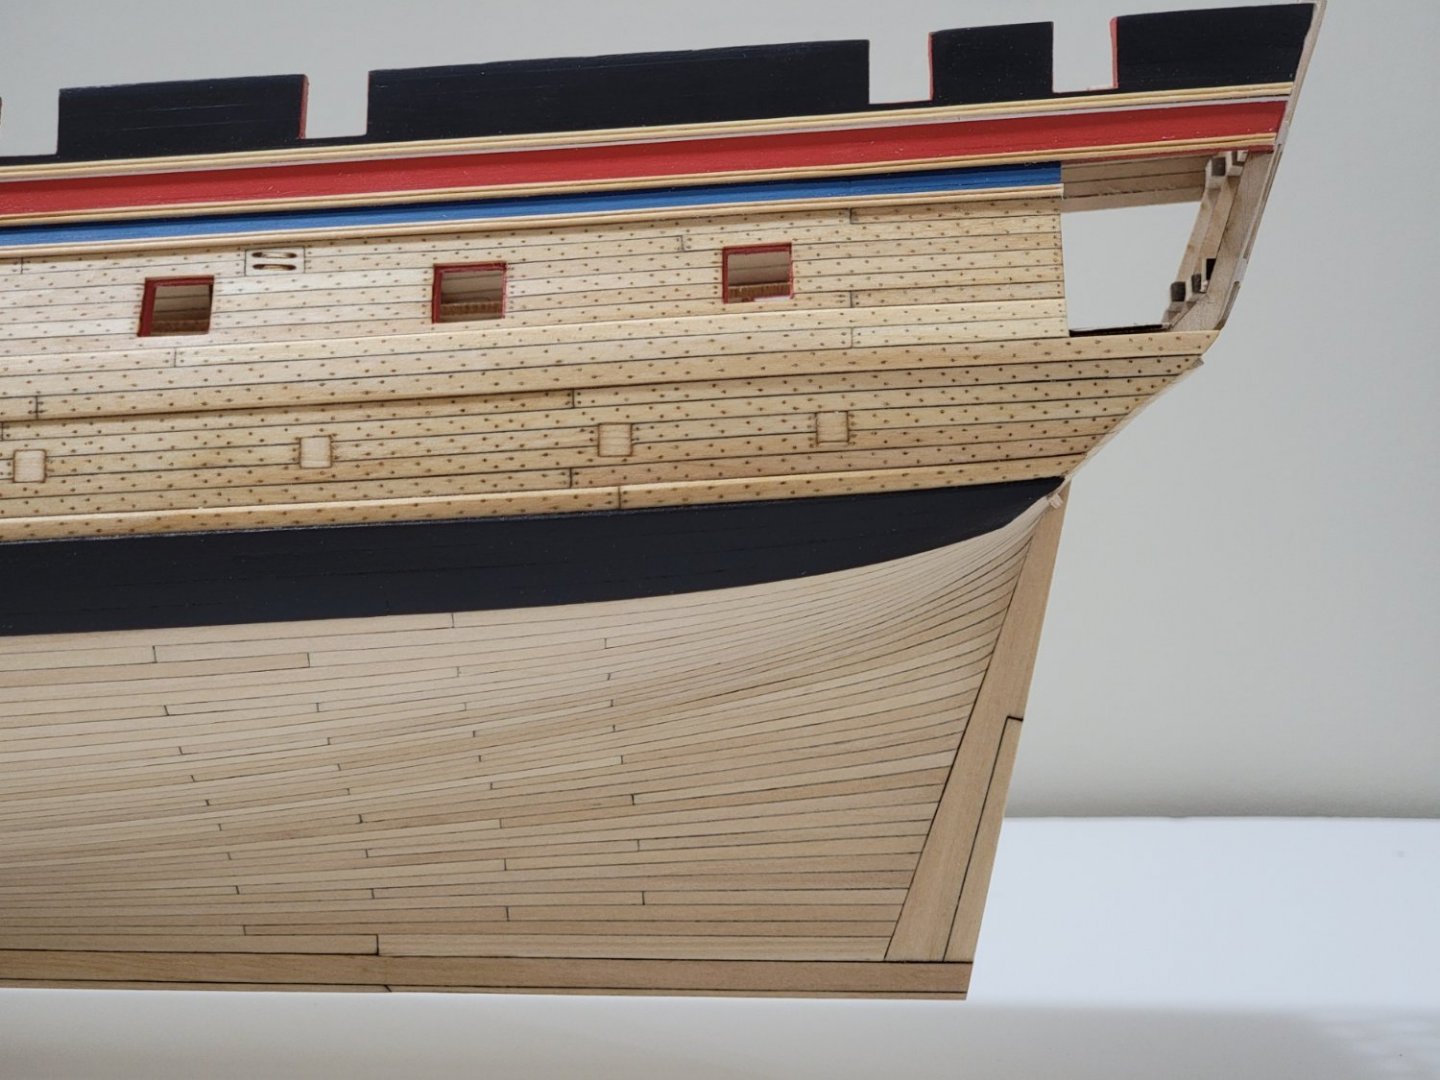
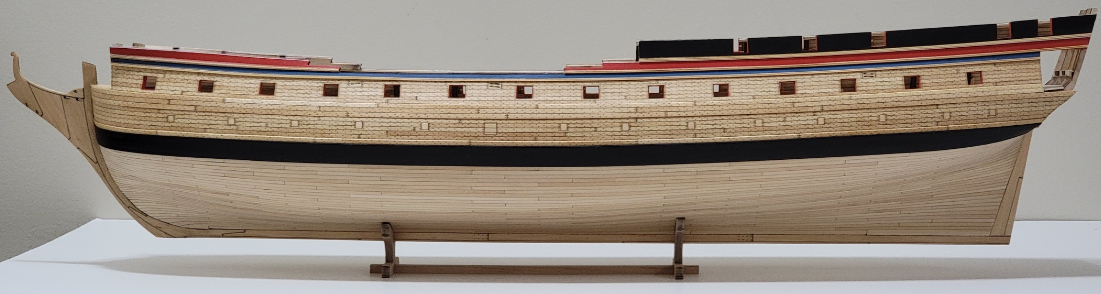
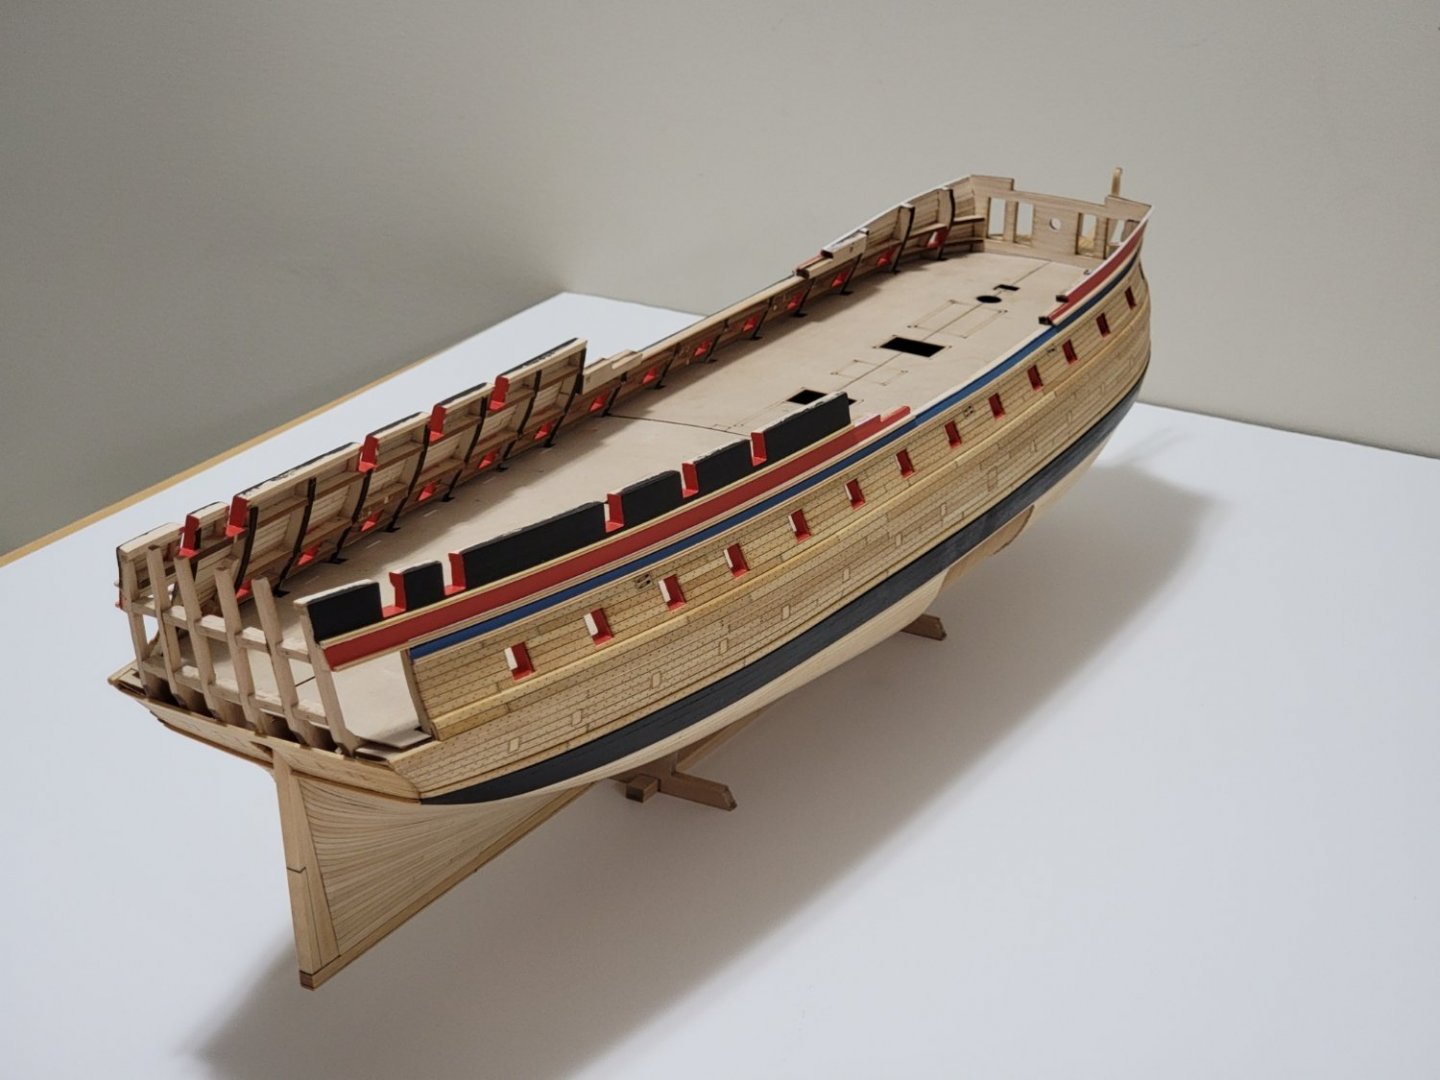
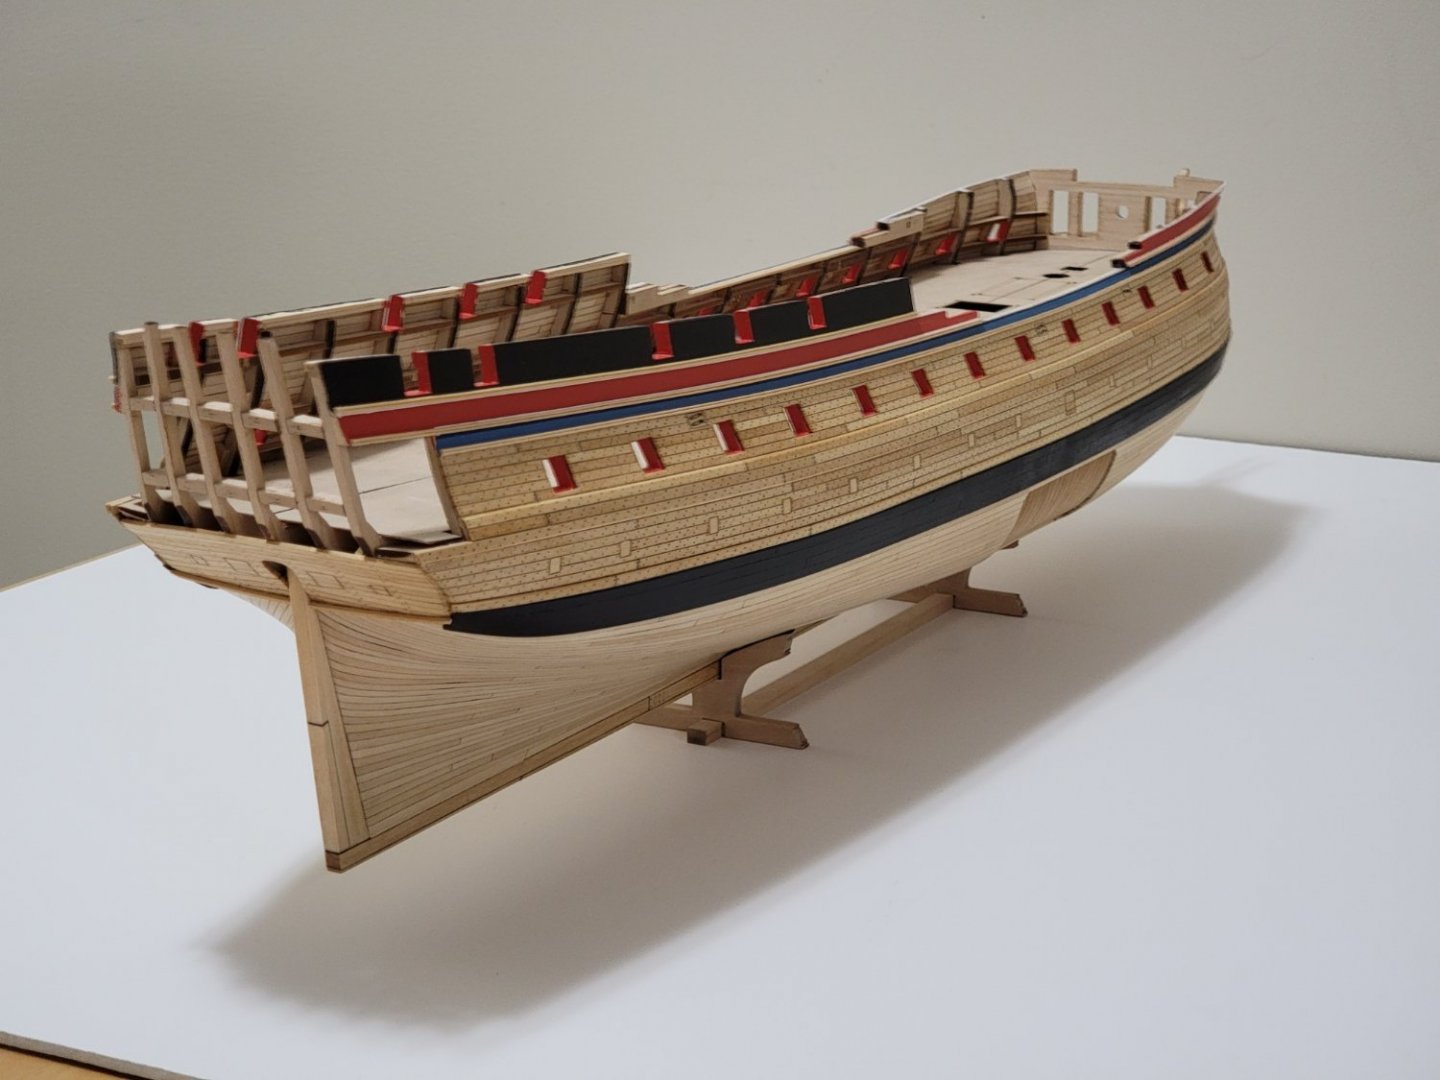
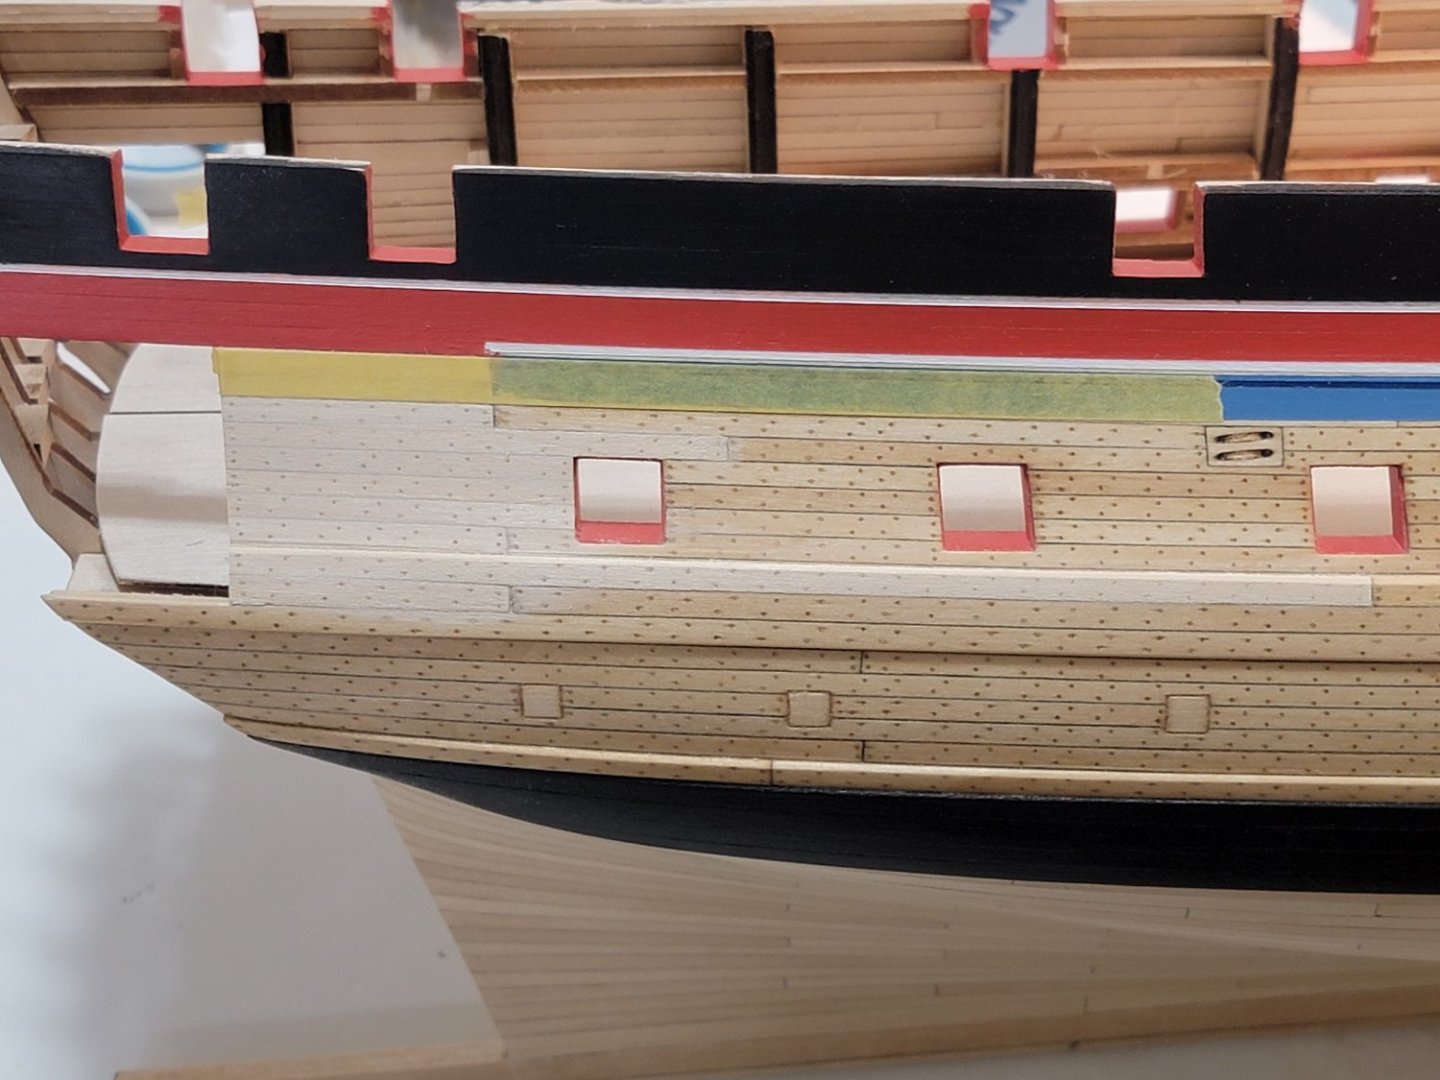
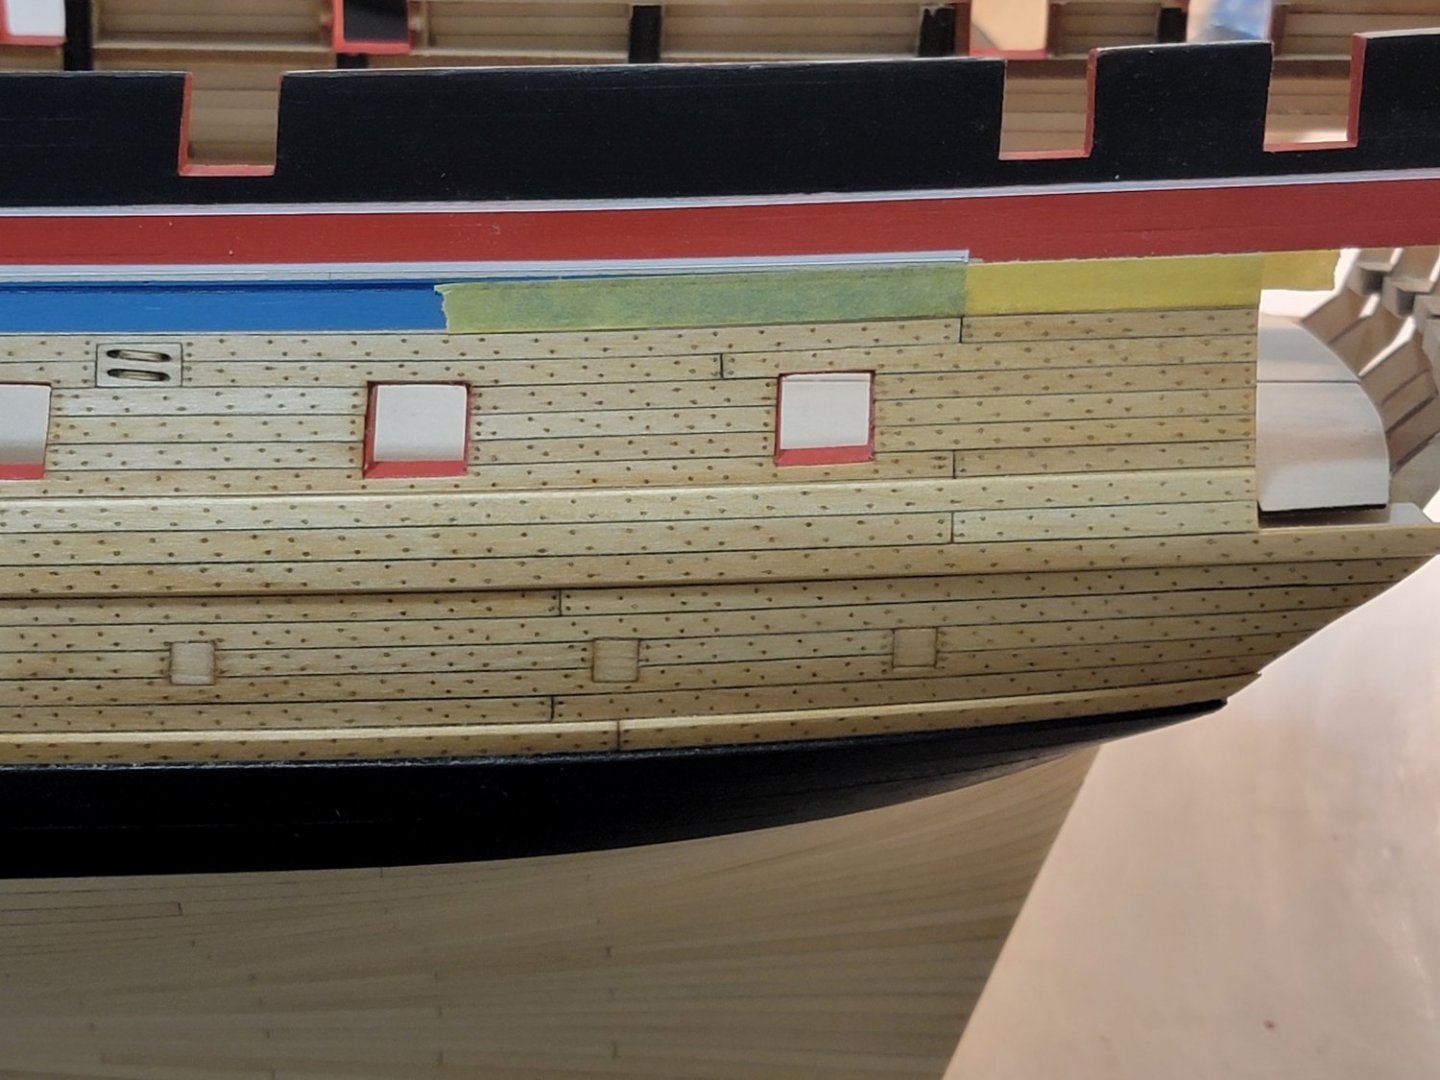
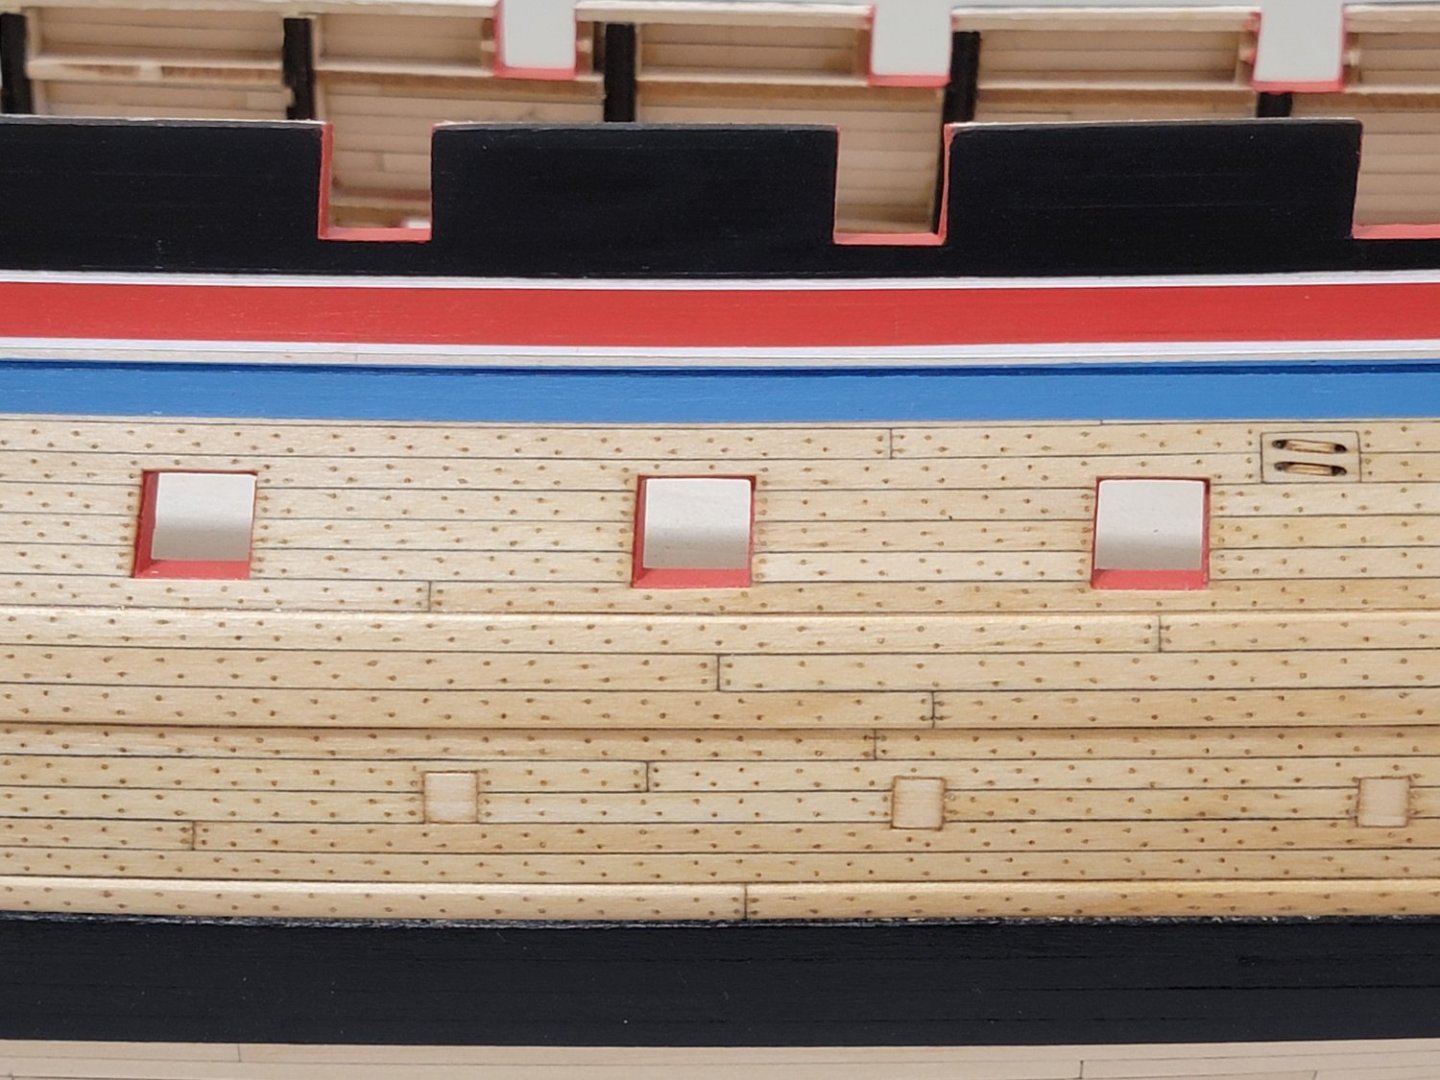
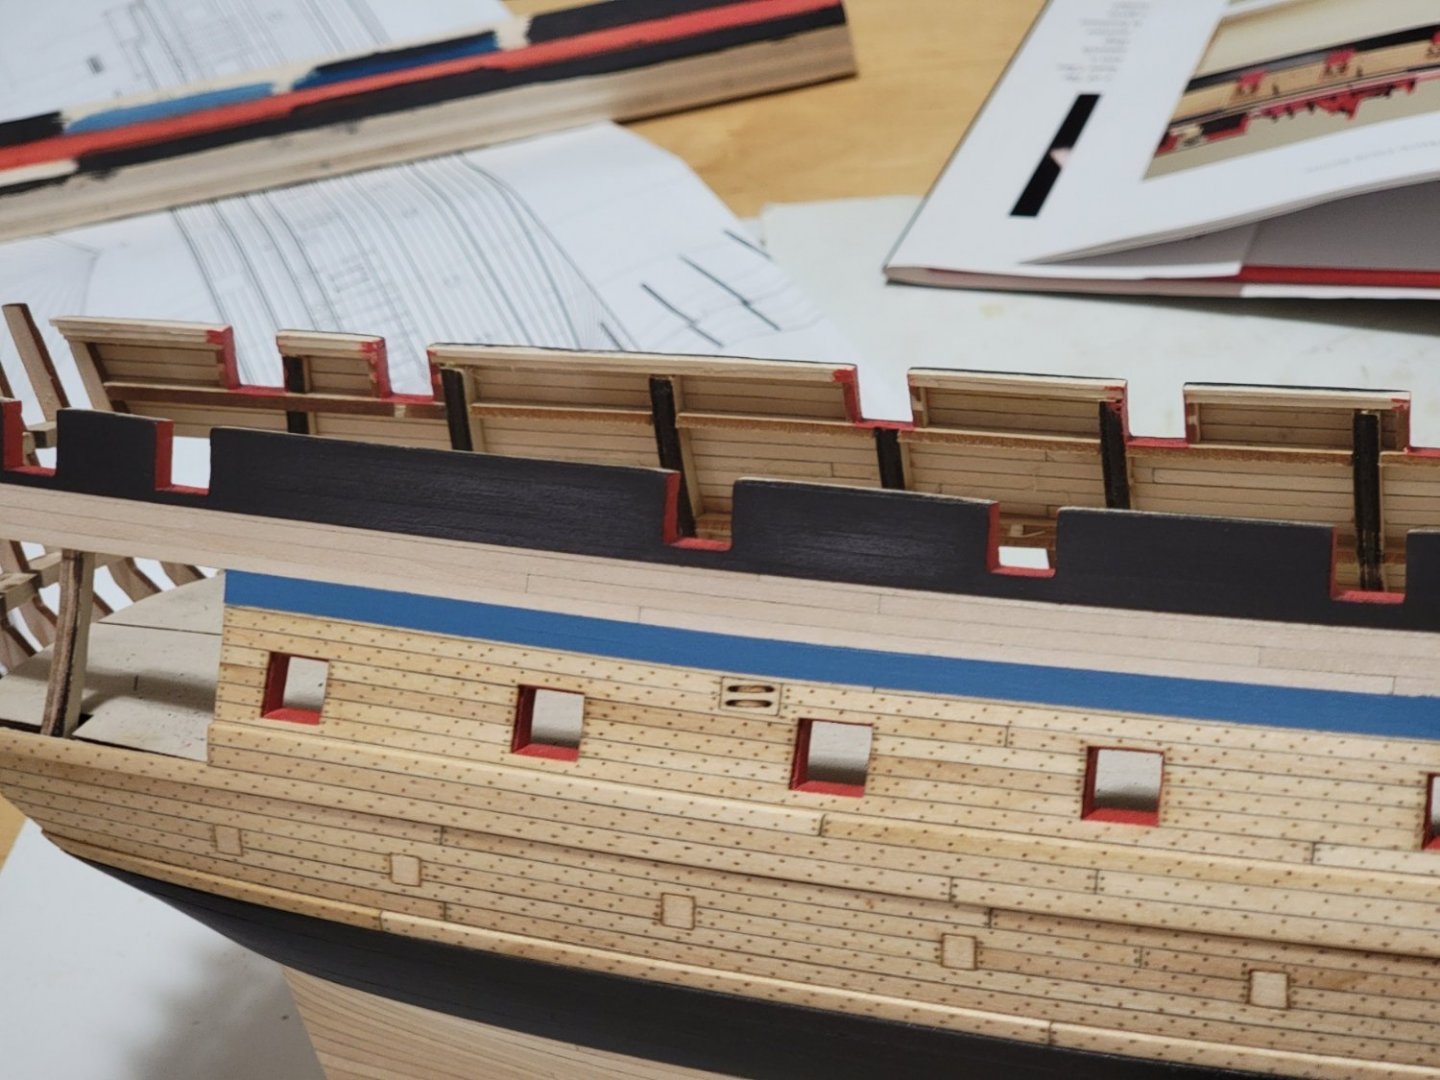
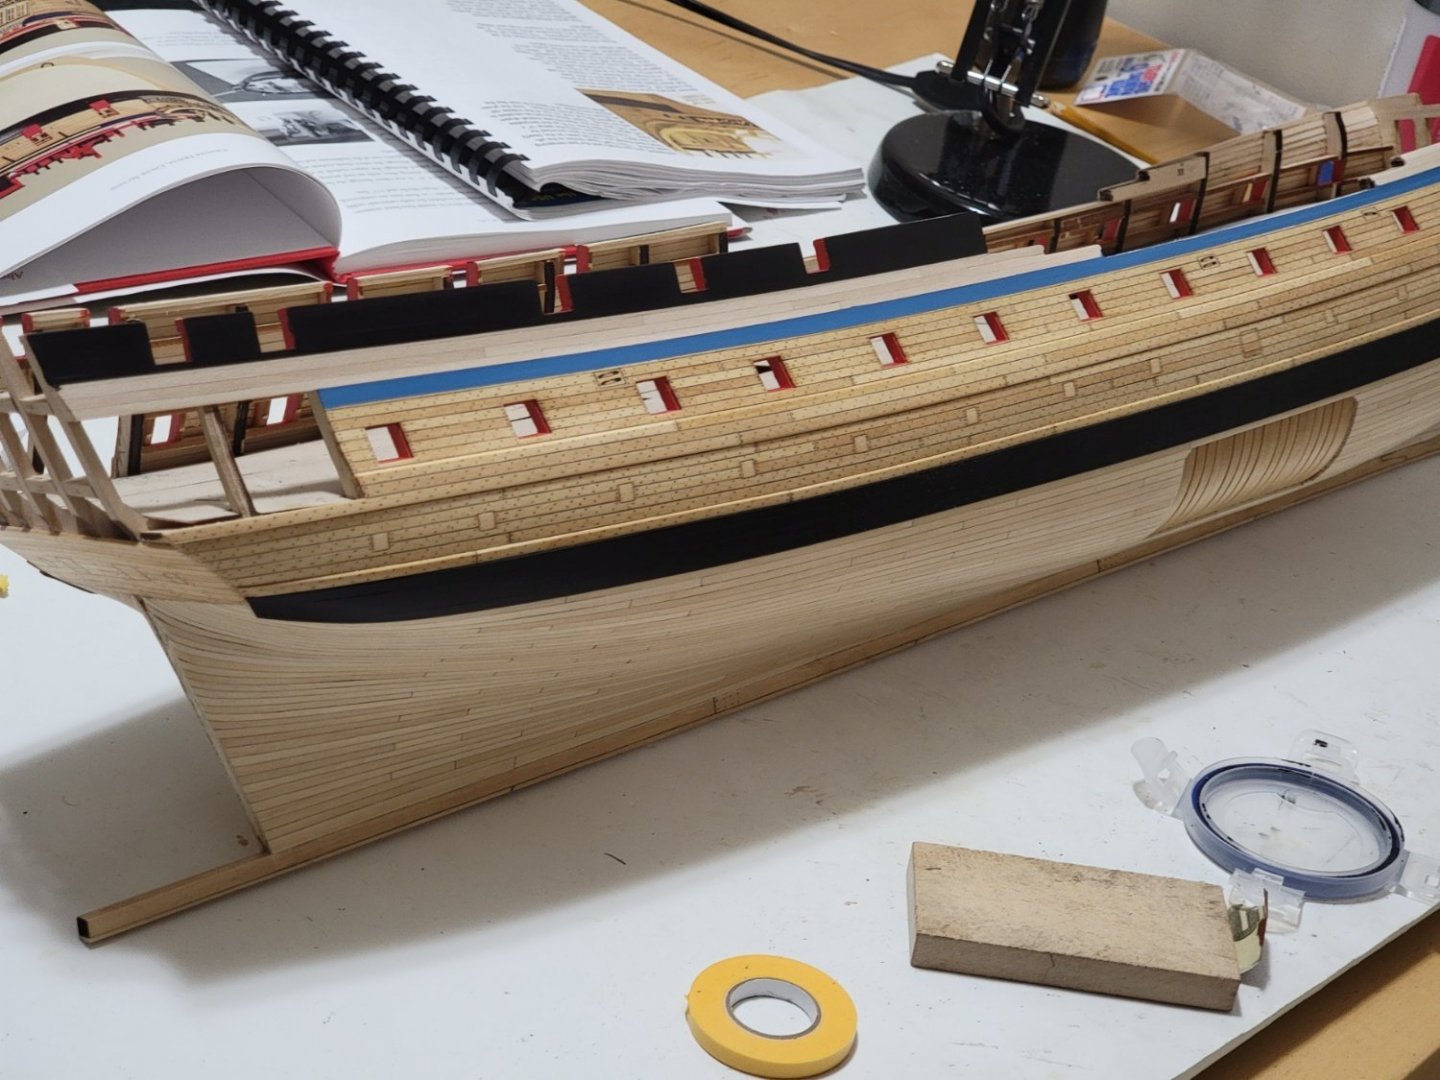
Thanks all for the comments! The color choice is really growing on me, especially when seeing the smaller details come together (like the dark blue and white stripes). I'll have another point of confusion with colors when I get to work on the stern gallery. Right now I am keeping an open mind and looking at other models for inspiration. I painted the white pinstripe on the top and bottom edges of the red part. I think this completes the major painting of the hull. To paint these, I measured the location of the masking tape 3+ times to ensure the white will be the same width throughout. The measurement also needed to accommodate the width of the moulding strips. Measuring this was the hard part. Right now, the lower white stripe is thicker than the top. Once the moulding is in place (just above the dark blue stripe), it will cover the lower portion of the thicker white stripe, so both white stripes will end up being the same width (well... let's hope so!).


-
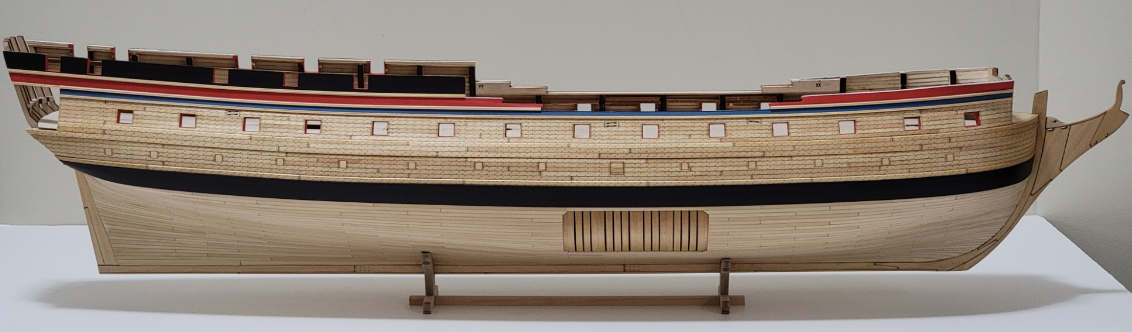
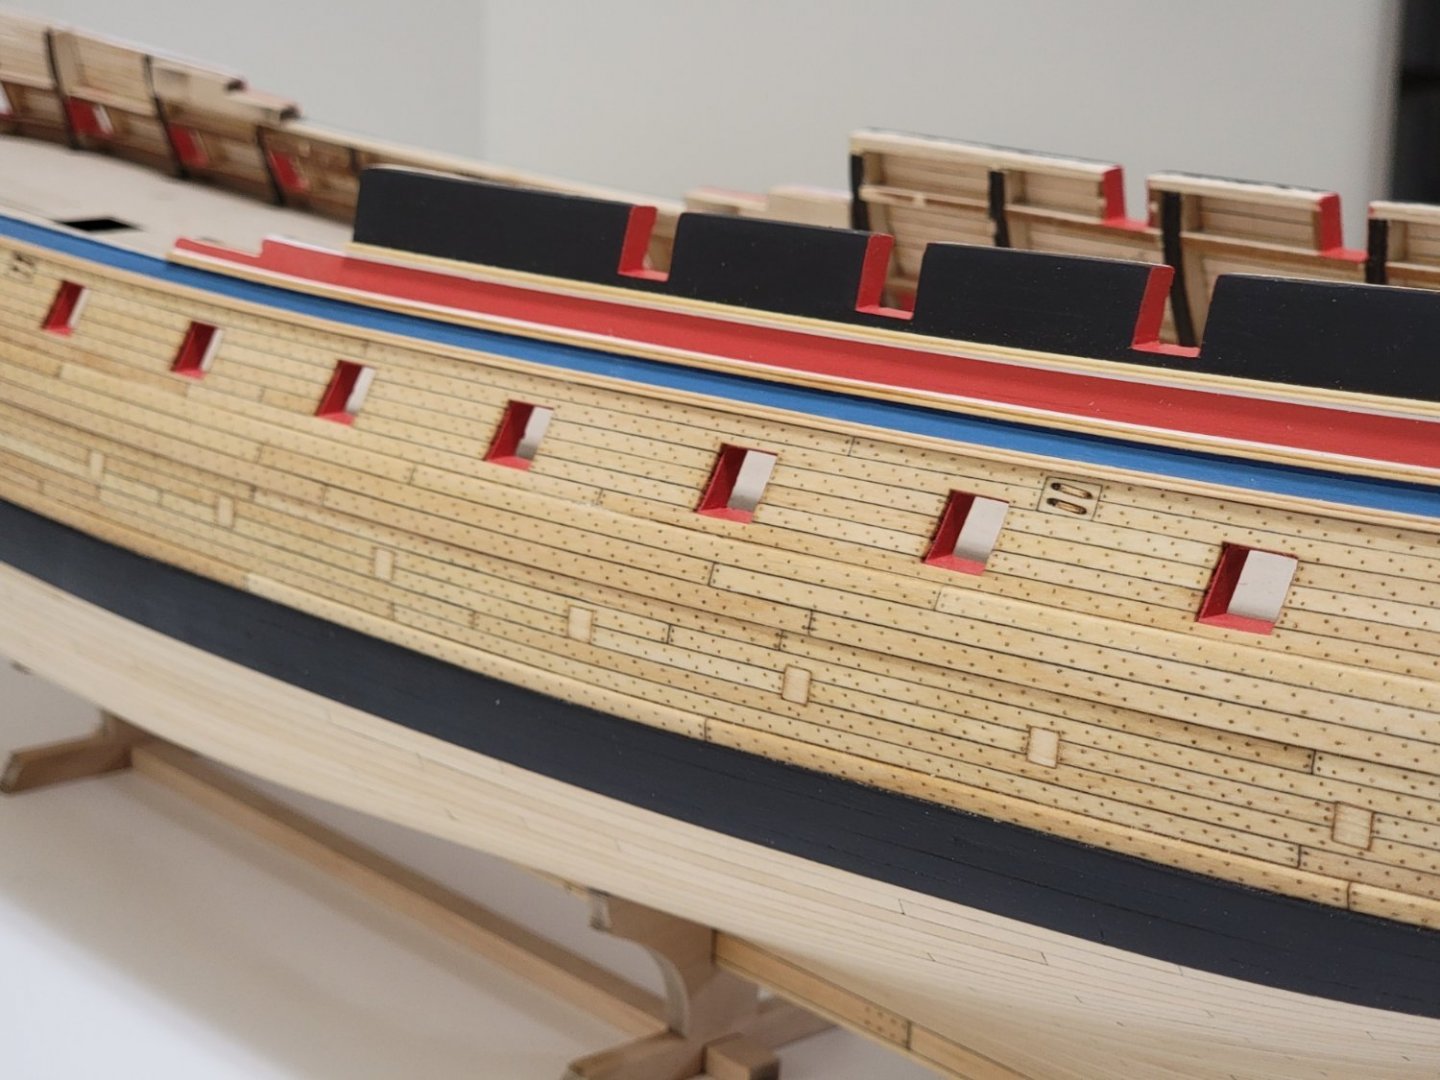
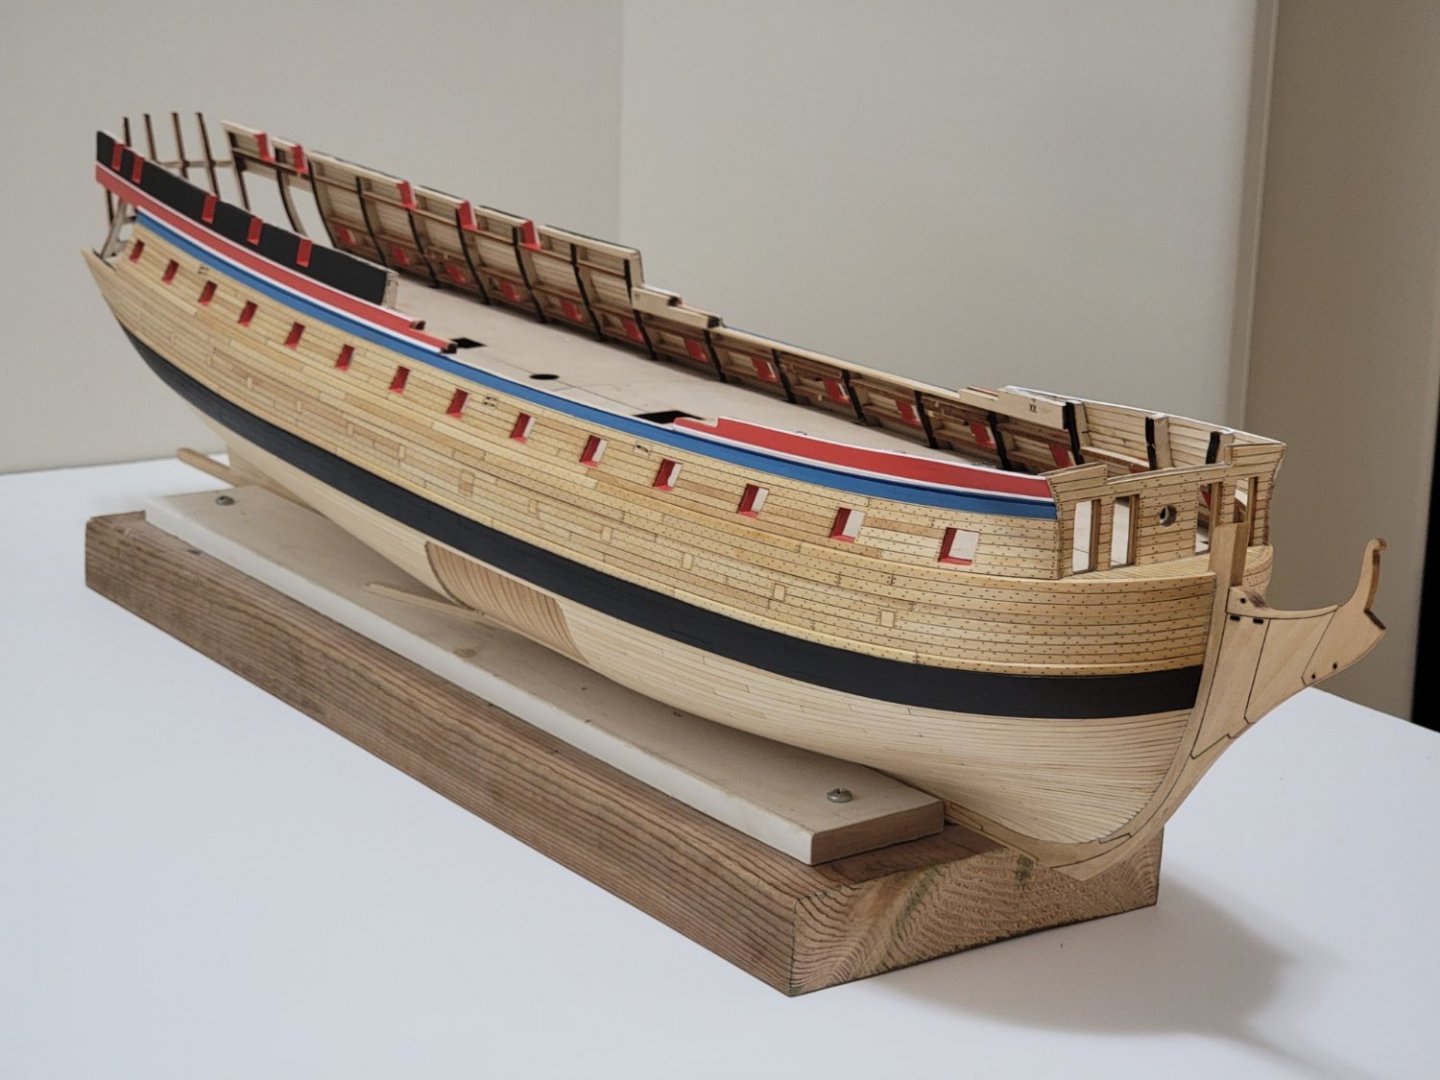
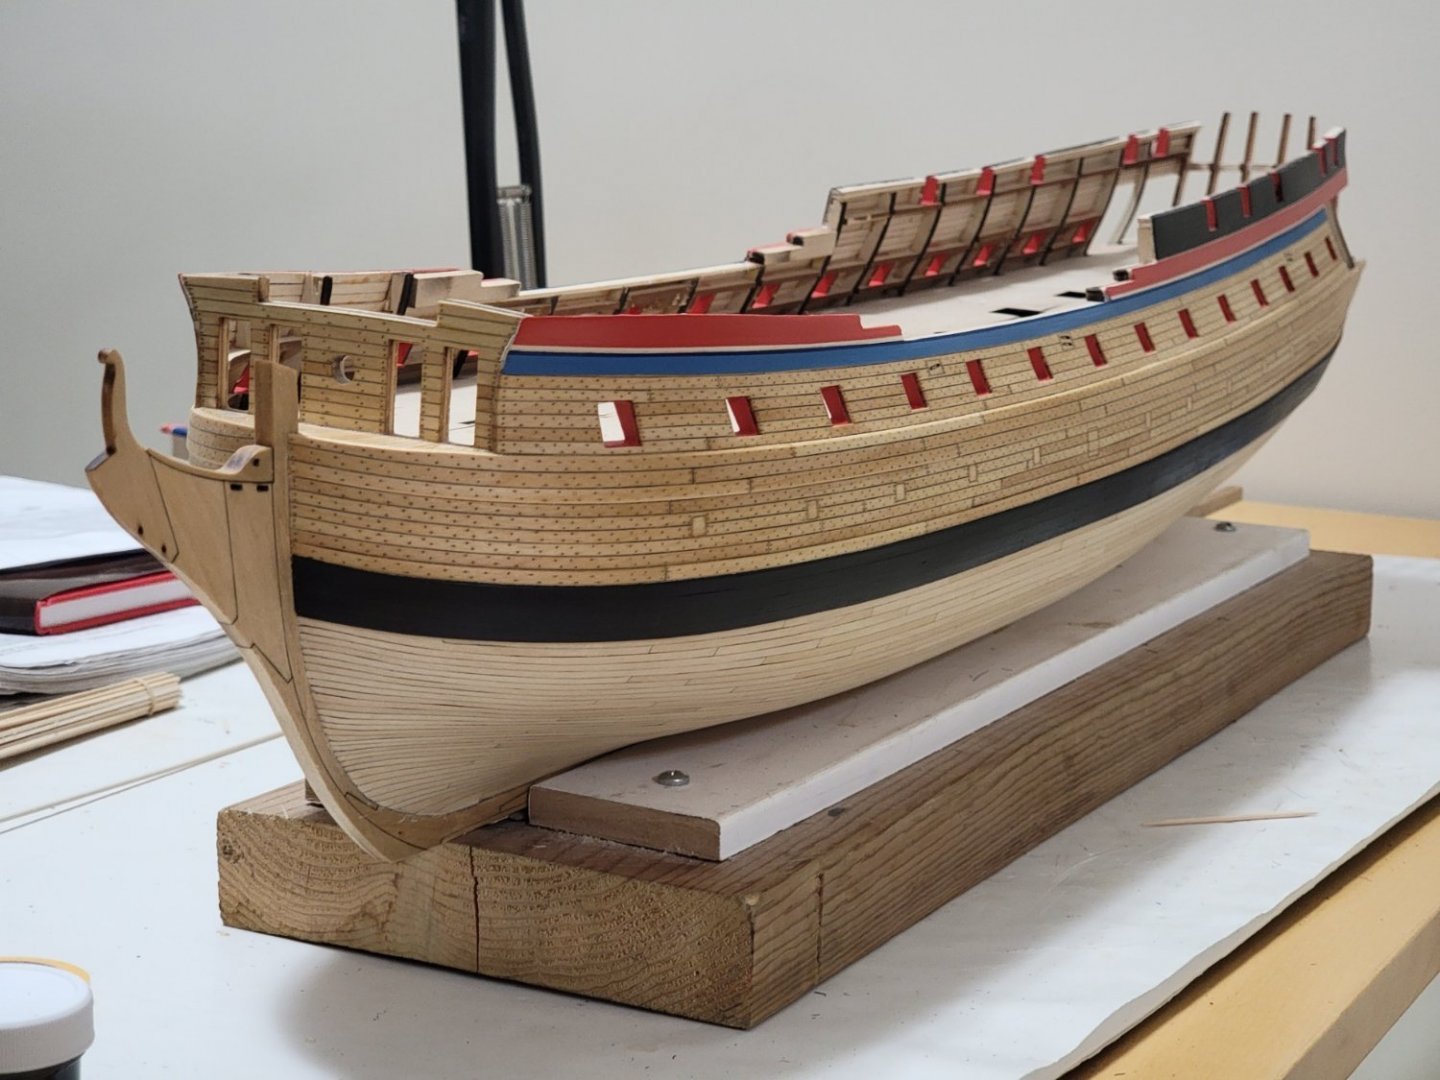
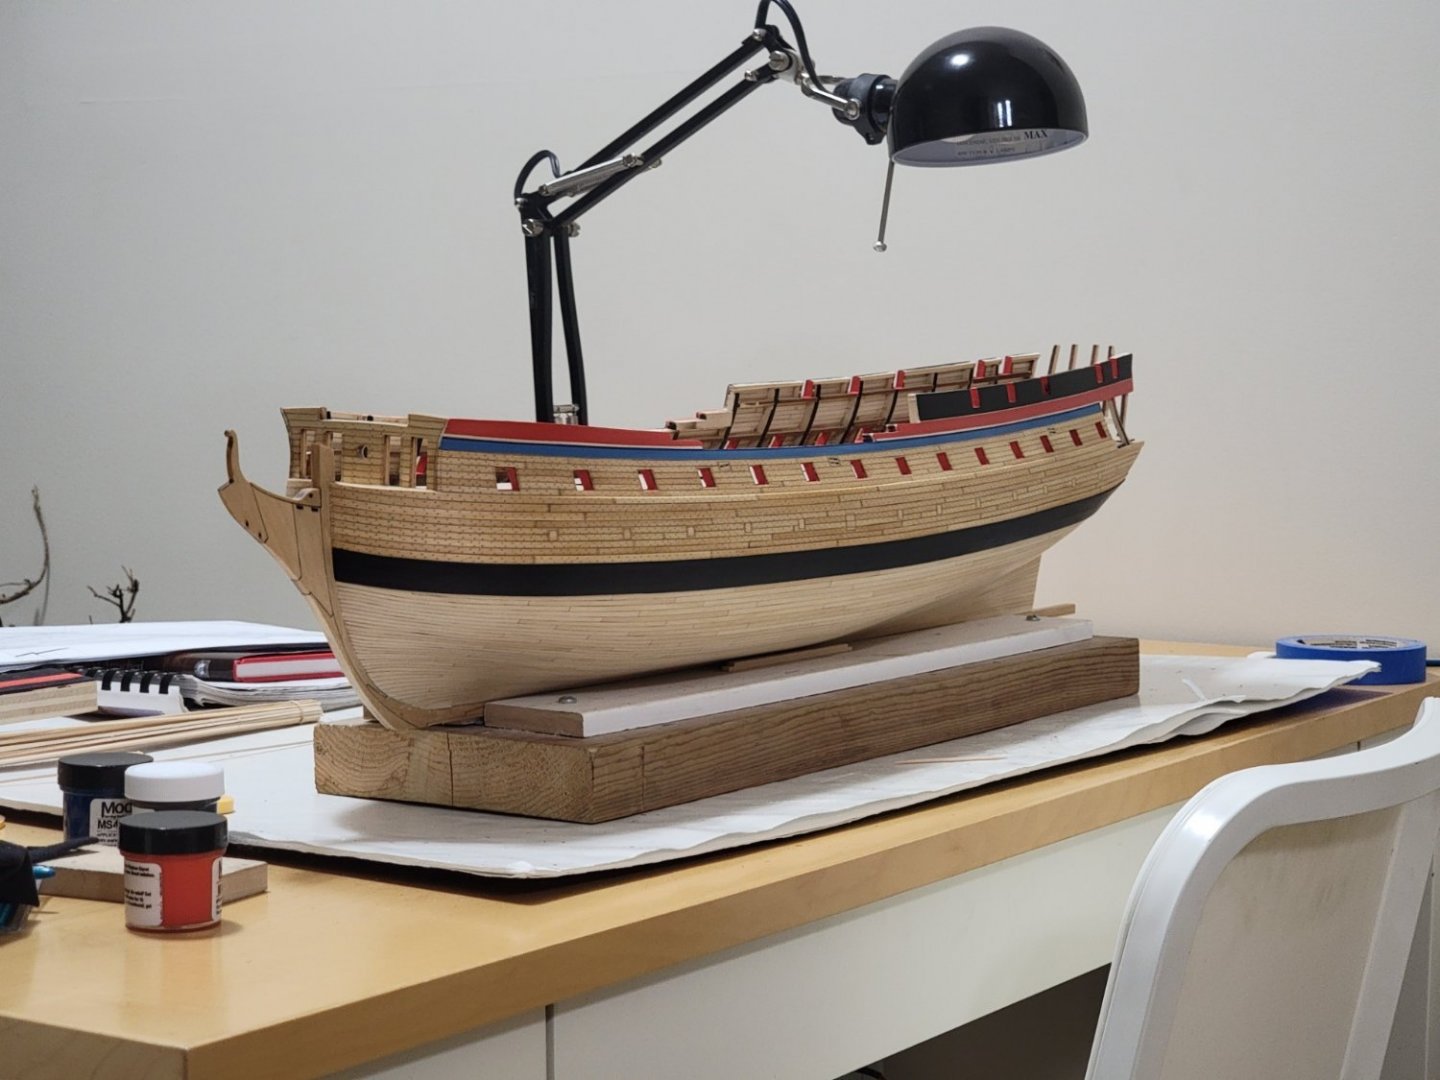
Here are some more quick snapshots with the red and dark blue trim (please excuse the messy desk 😅). What do you guys think of this color scheme? I left some wood unpainted between the colors so that the mouldings have some bare wood area it can glue on. Next up is the white pinstripes on the border of the red areas. I have no idea if this is correct for American ships, but I just love the look on the contemporary models and I am not going for 100% historical accuracy.

-
Thank you John. Your Confederacy is looking great! Do you have any updates on your build?
-
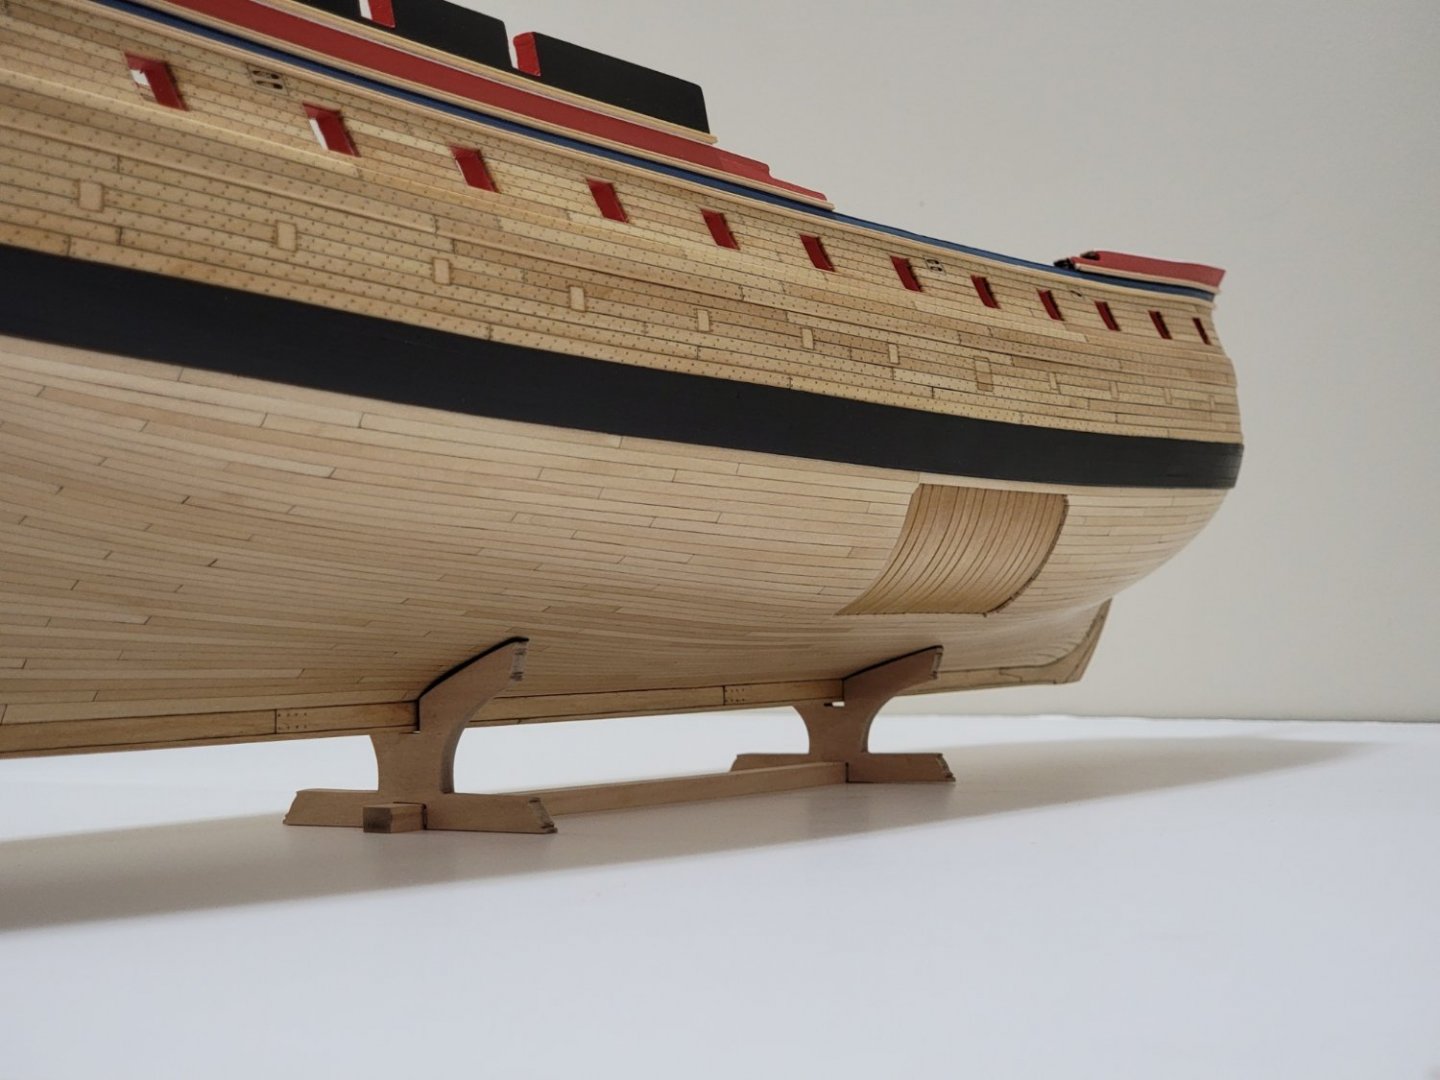
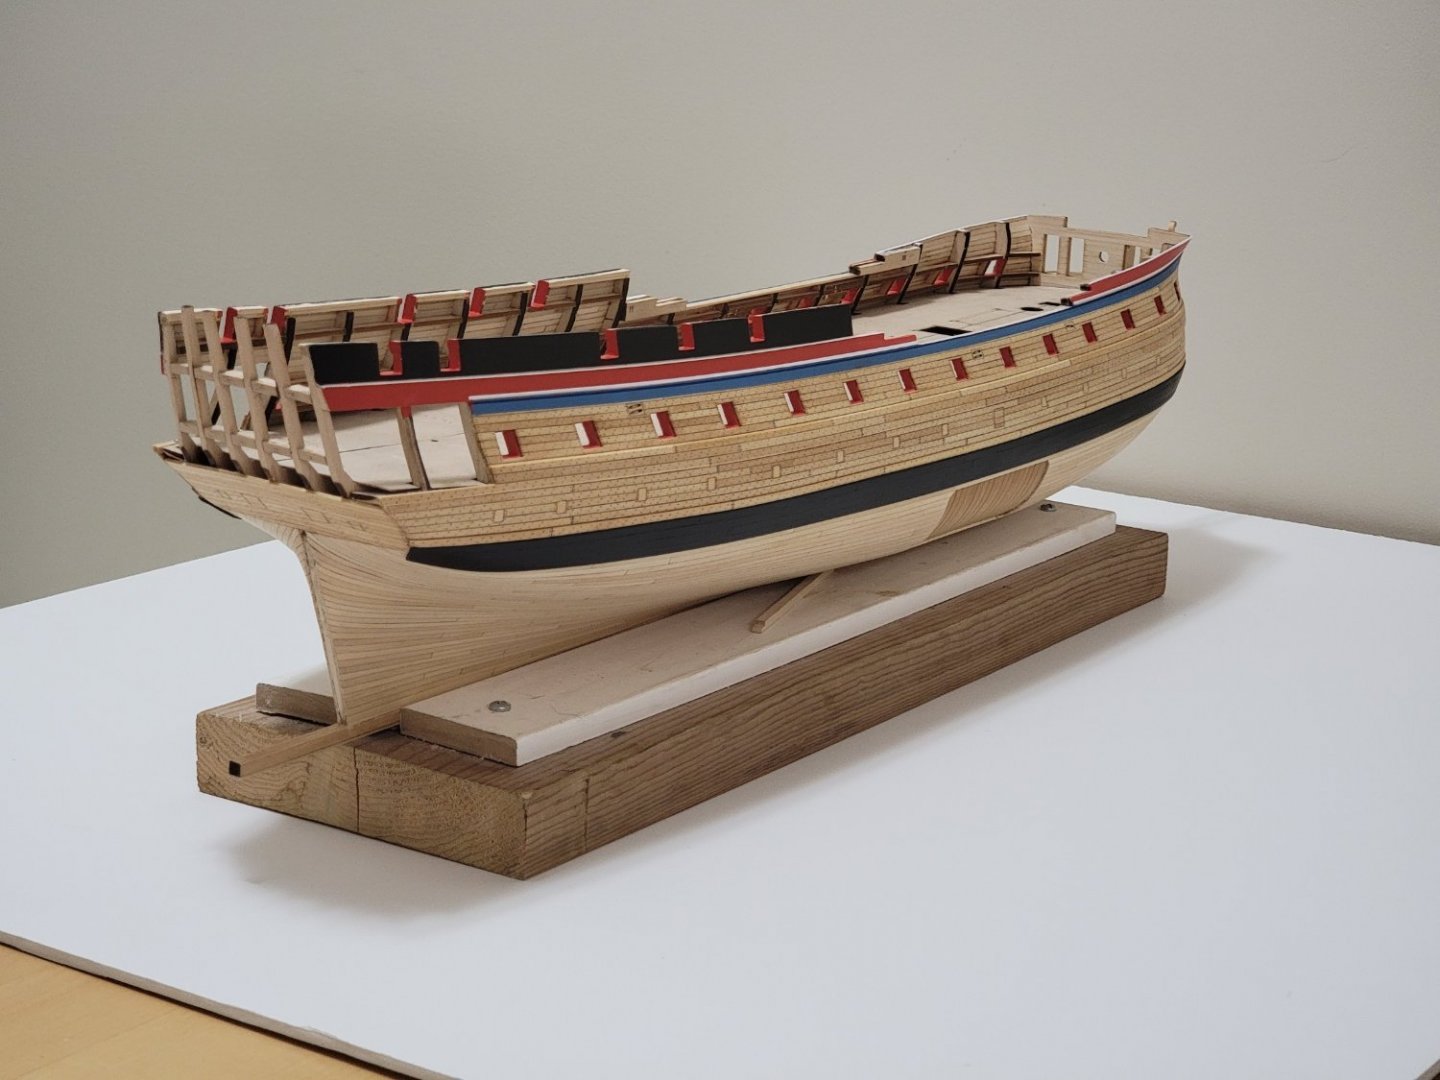
A quick update.. I ended up trying out the 3rd option with the black, red, and blue colors. I was inspired to take the plunge seeing Antscherl's model of the Comet. Here are some photos of the blue: I found that the black ended up with some glossy parts at the top layer (as seen in the first photo), so I have currently sanded it a bit and will repaint. I think I added too many coats and that's why some areas seem a bit too shiny/polished when viewed from certain angles. Once that is fixed, I will try creating a dark blue thin trim line on the top of the light blue section for some additional detail, then will start working on the red part with white pinstripes.
-
Thank you, Vahur!
-
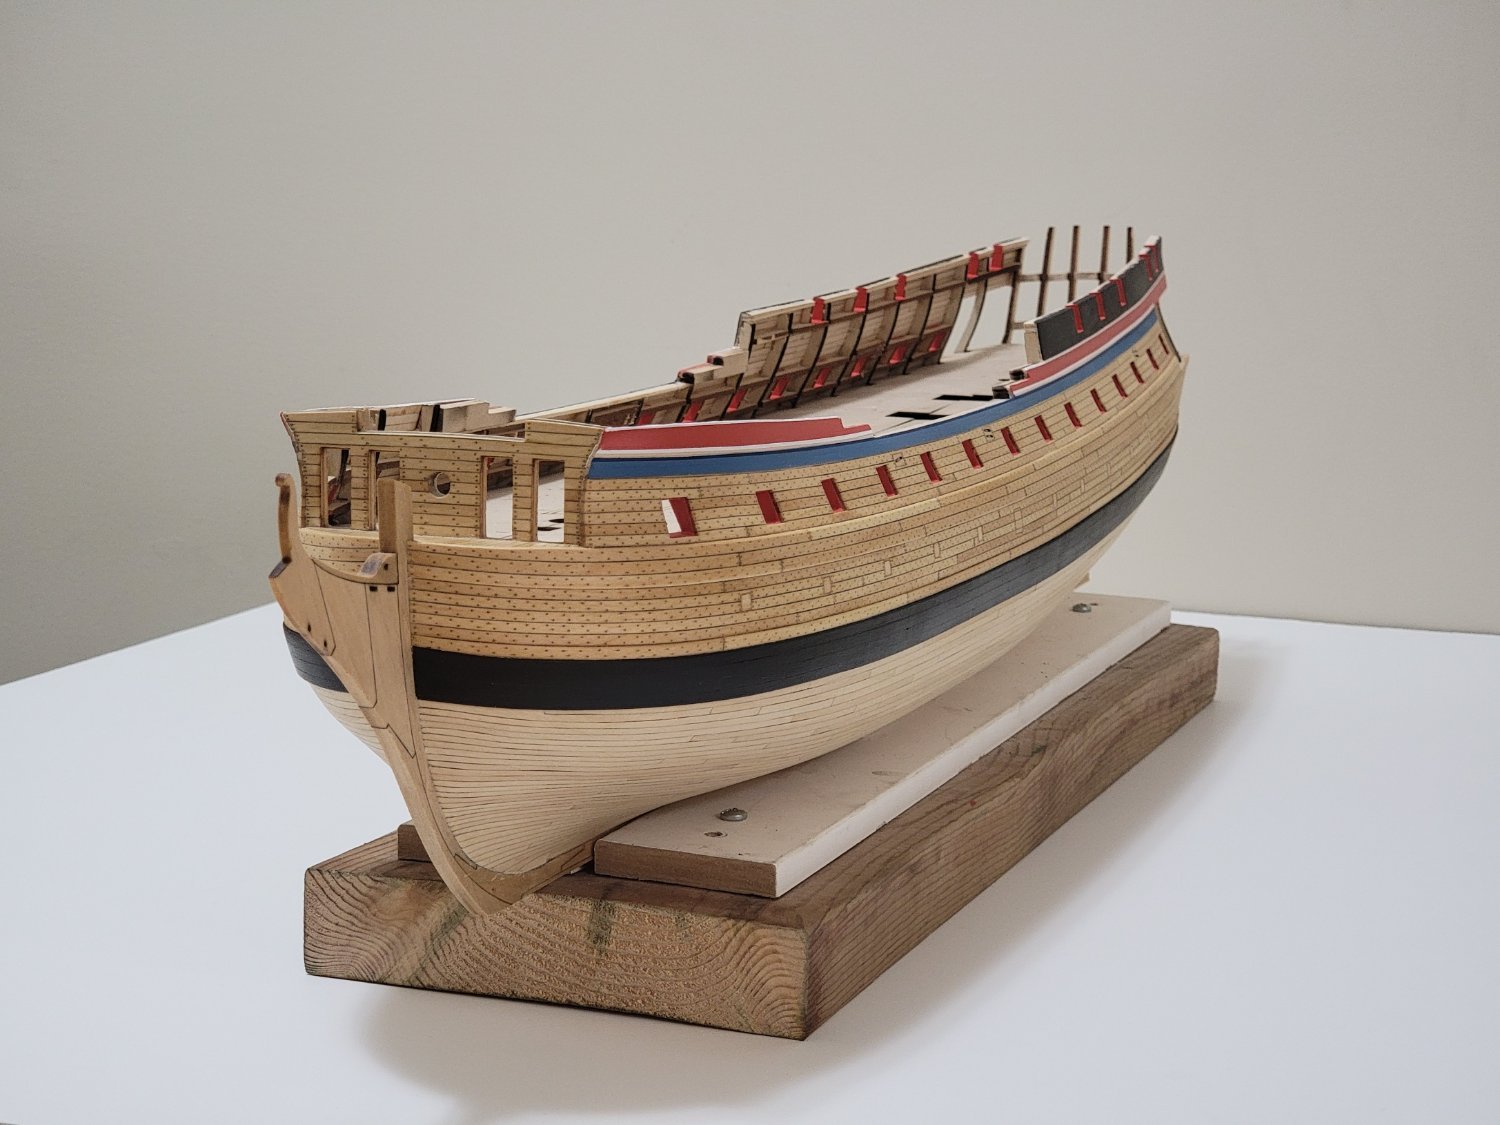
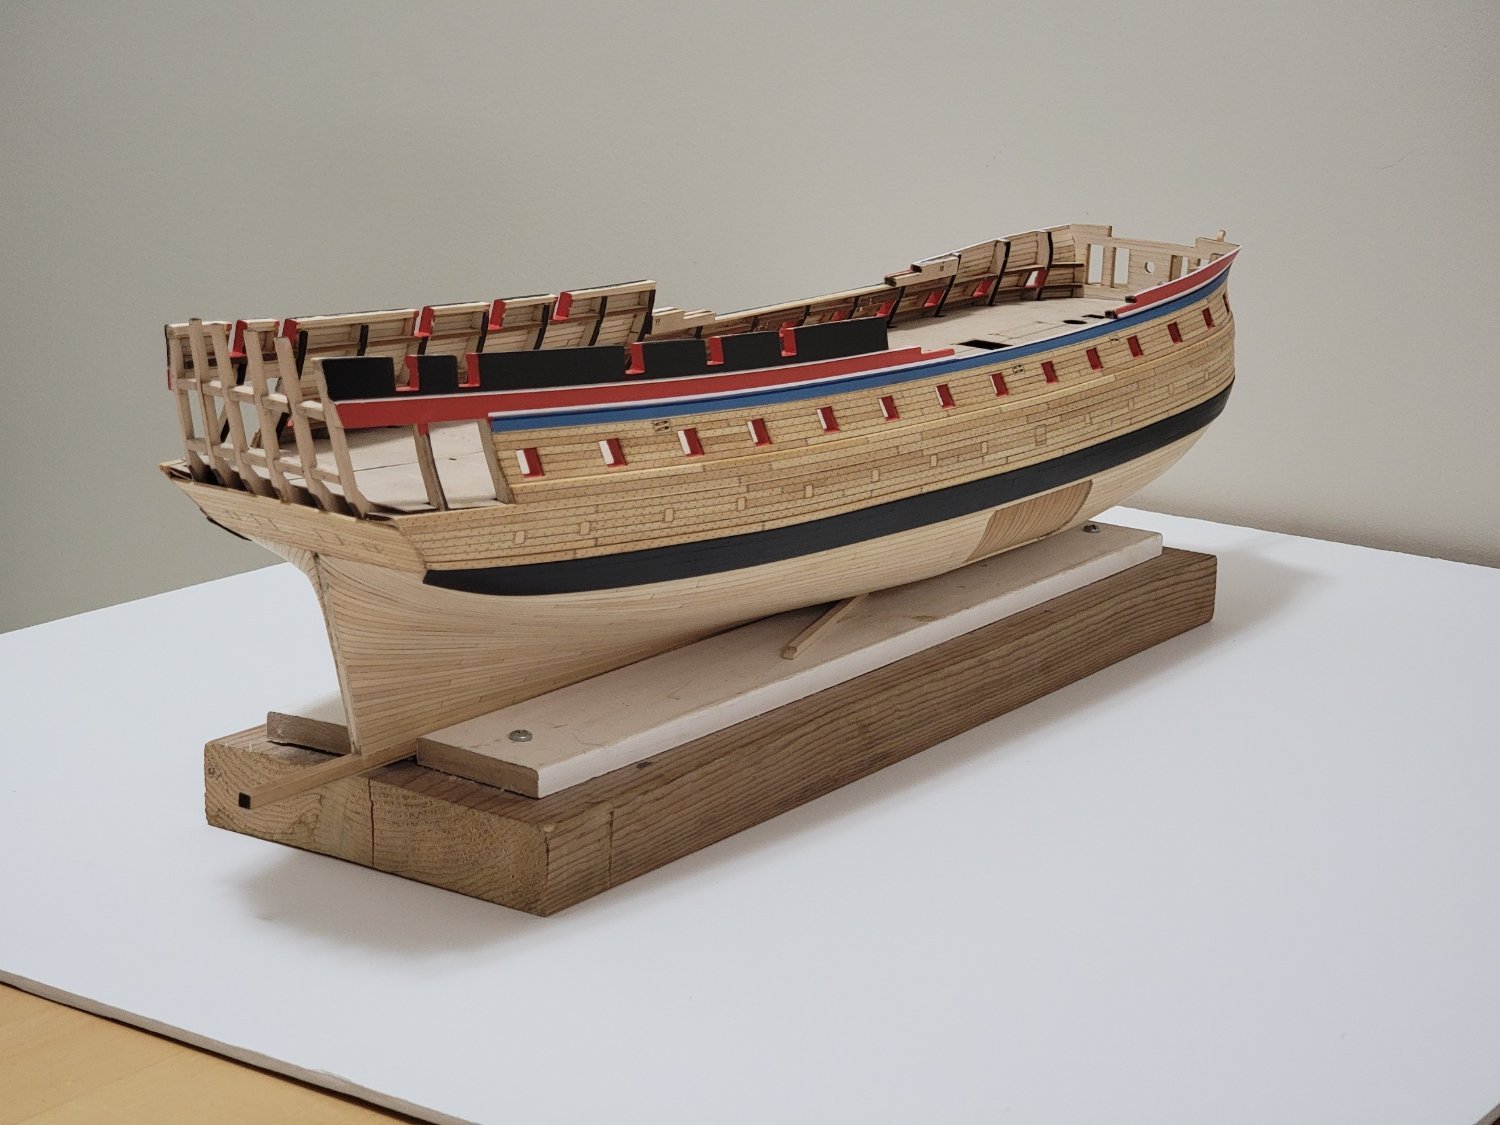
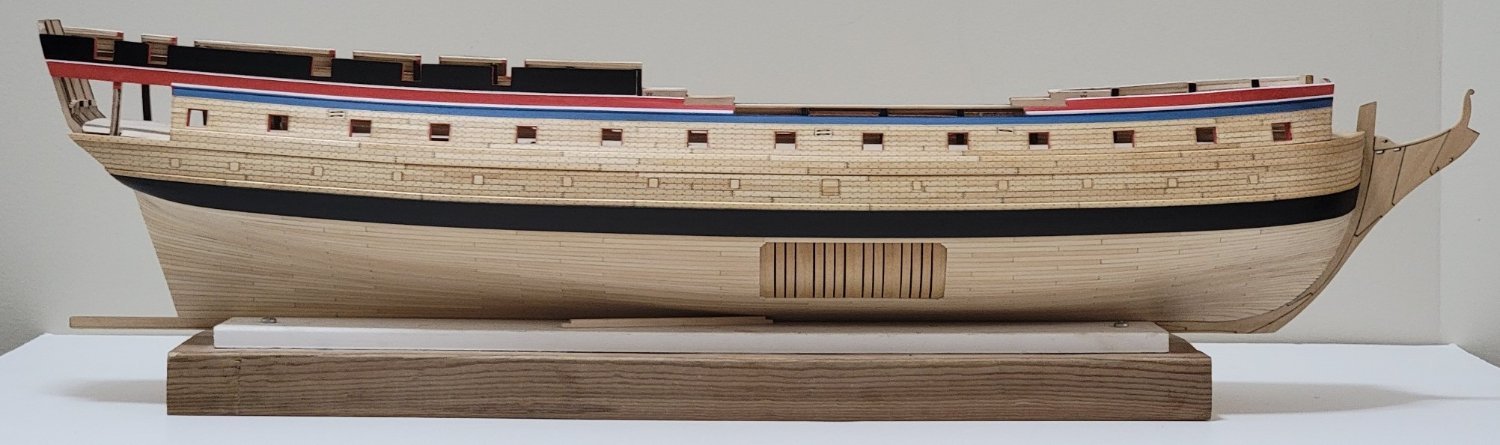
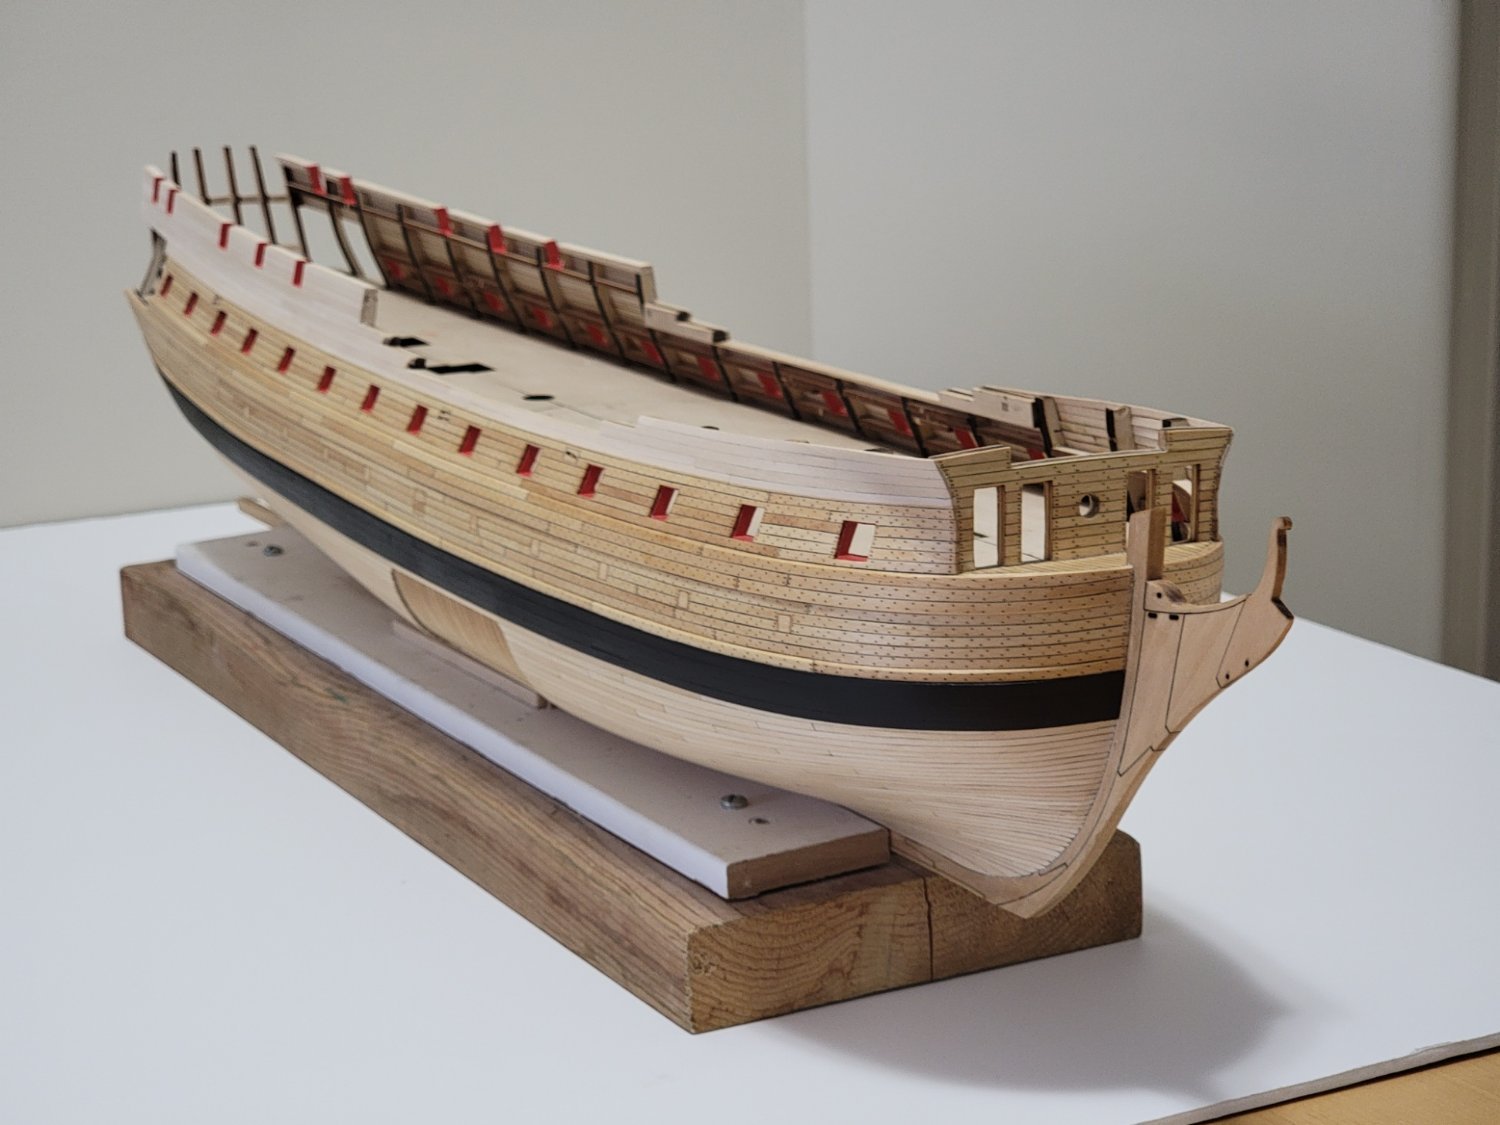
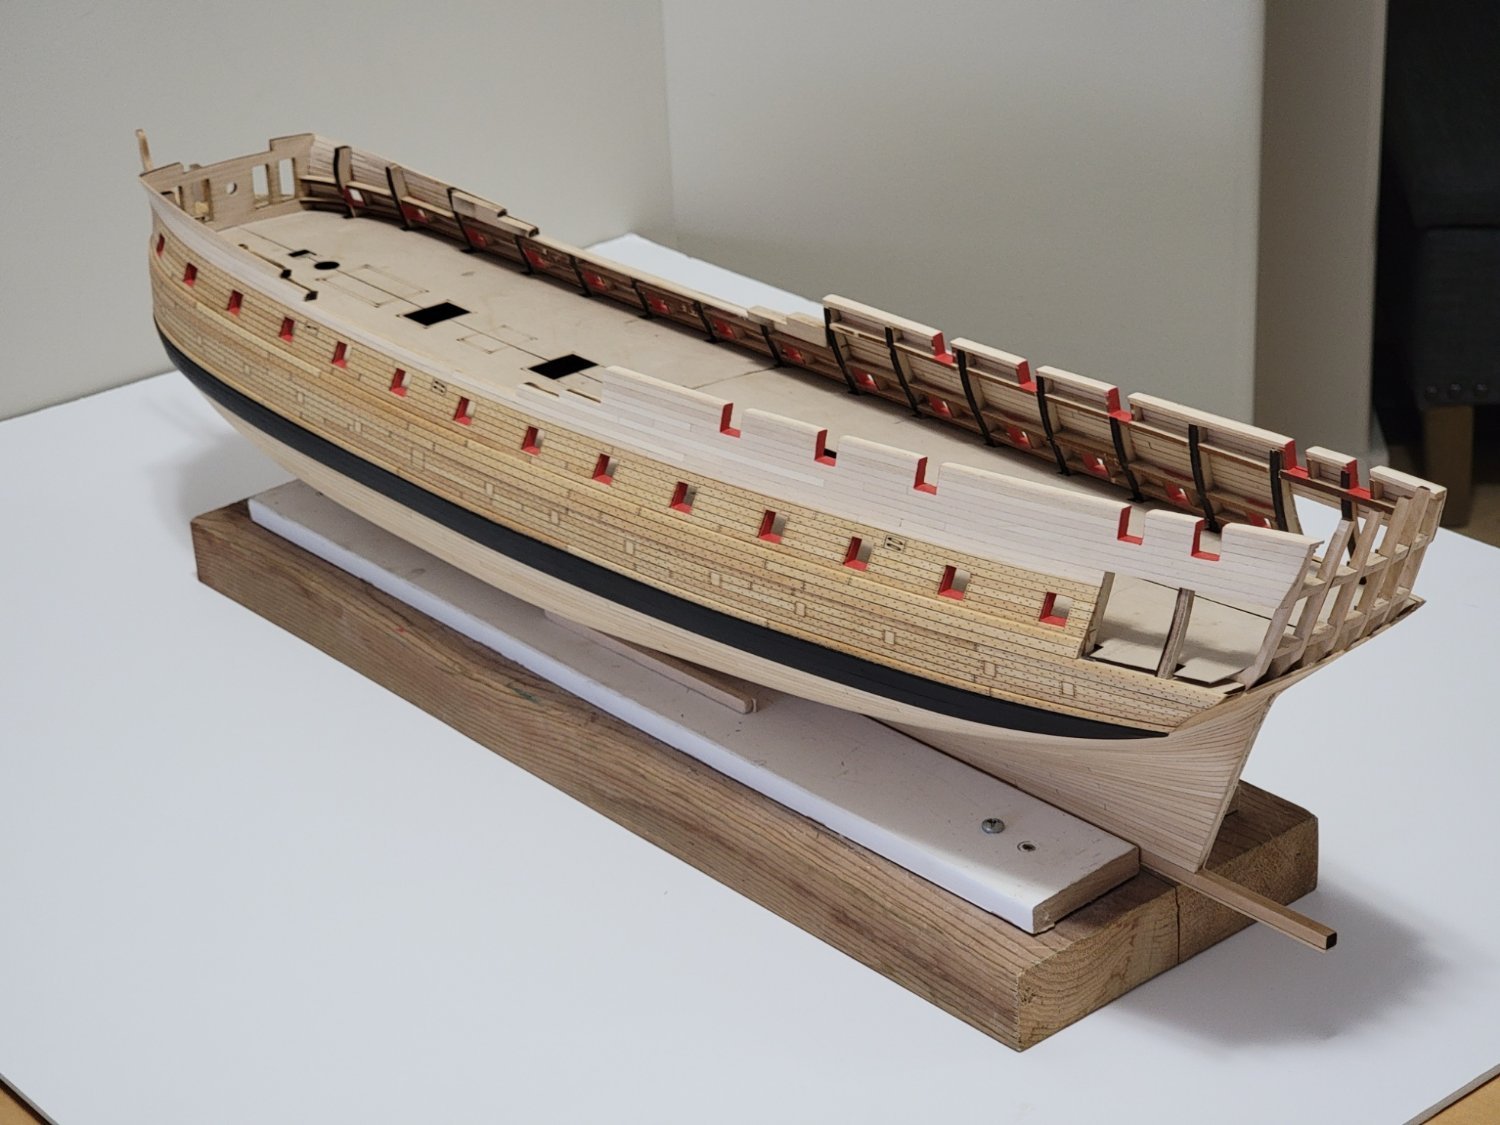
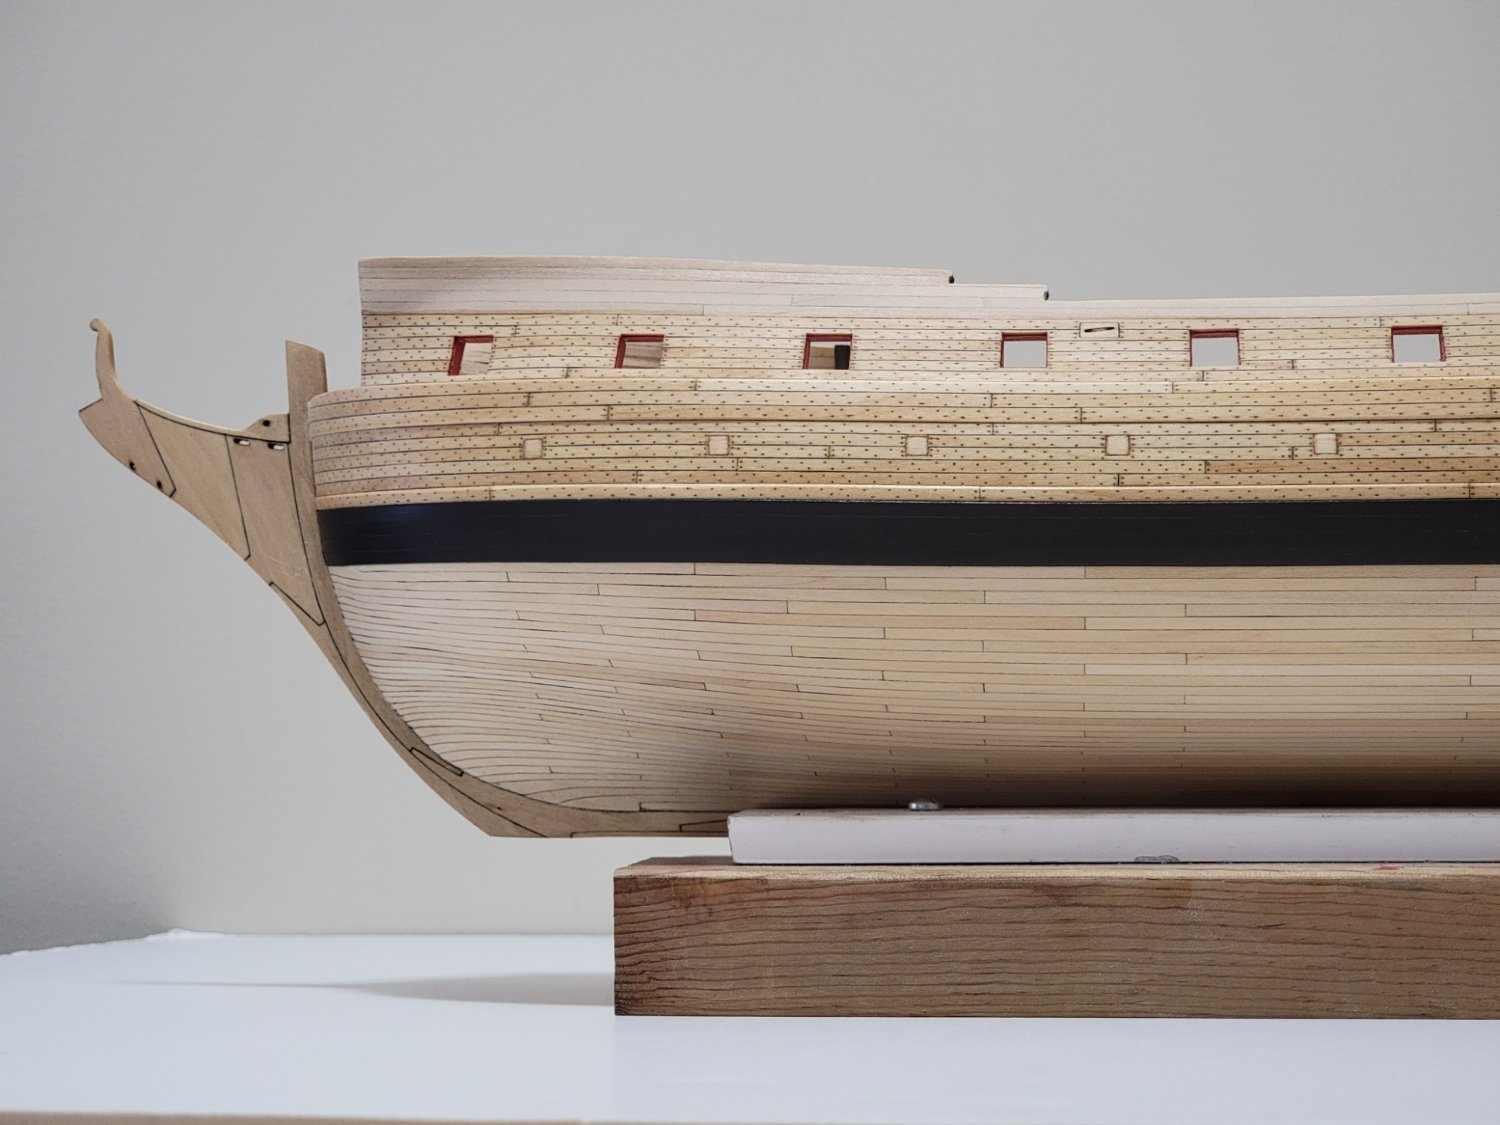
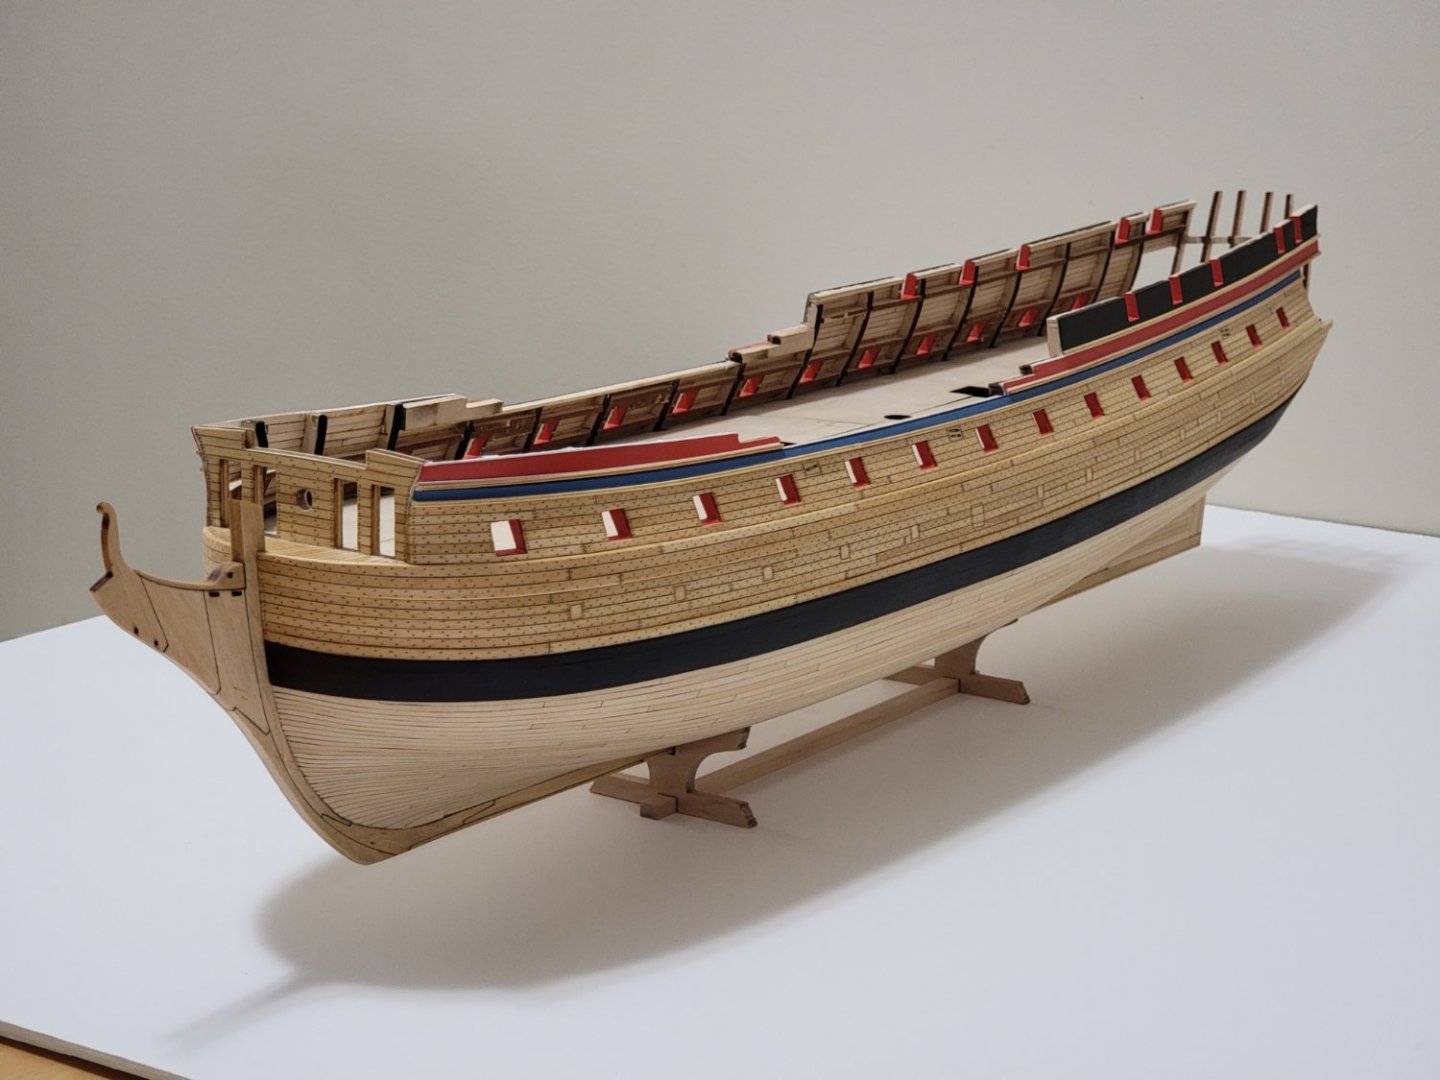
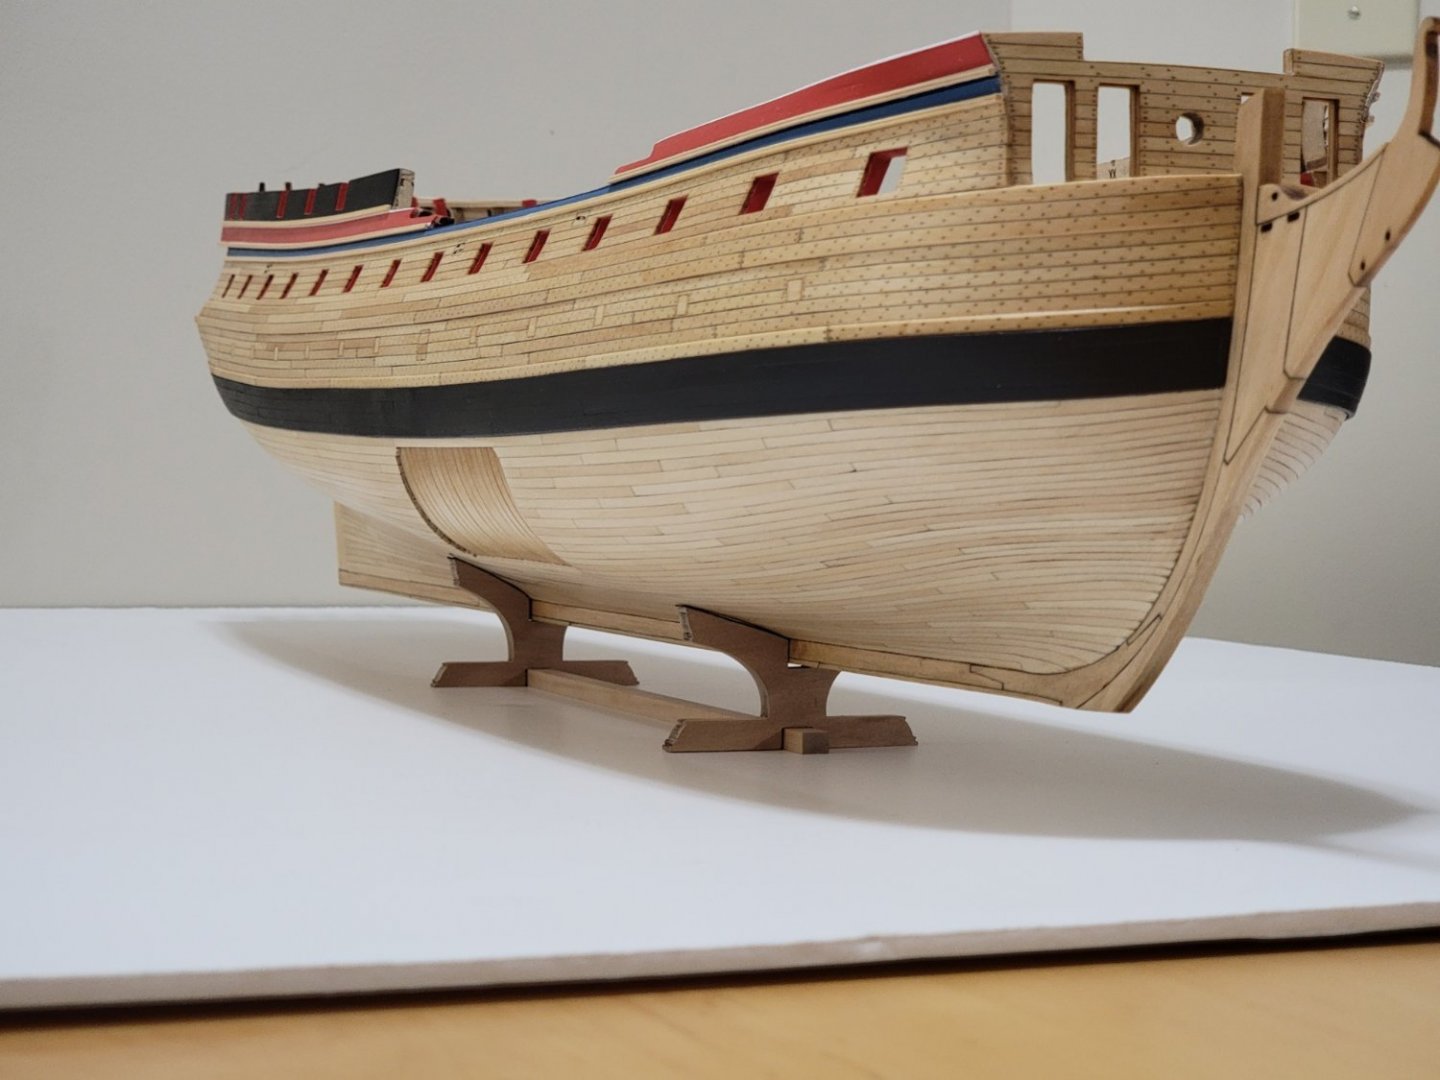
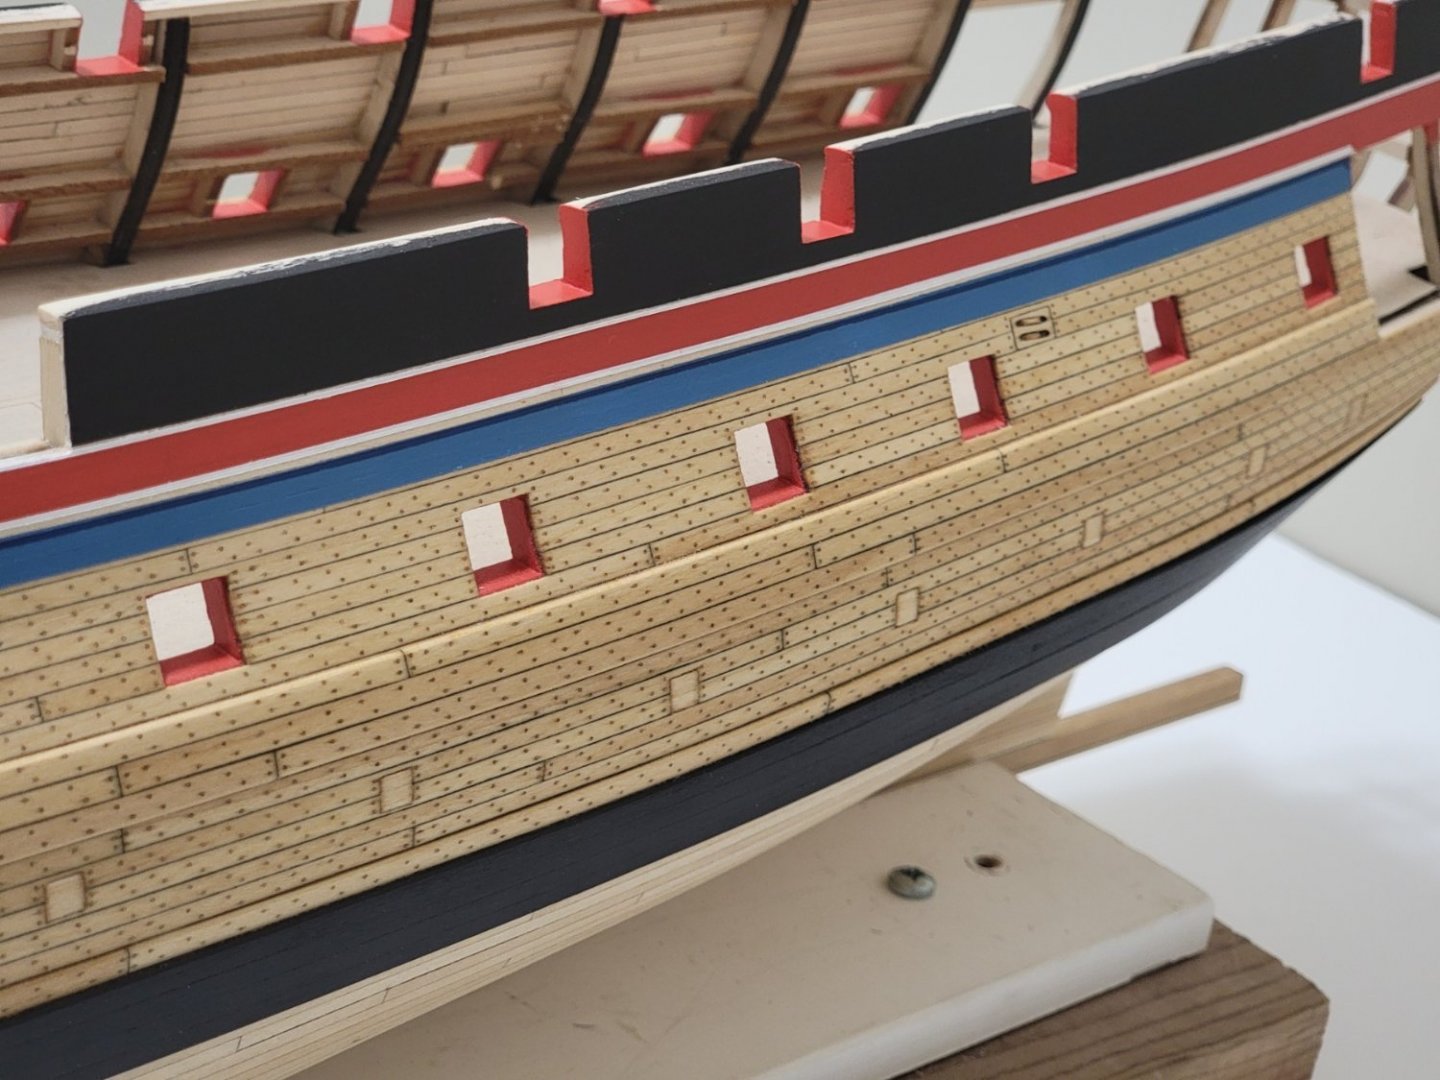
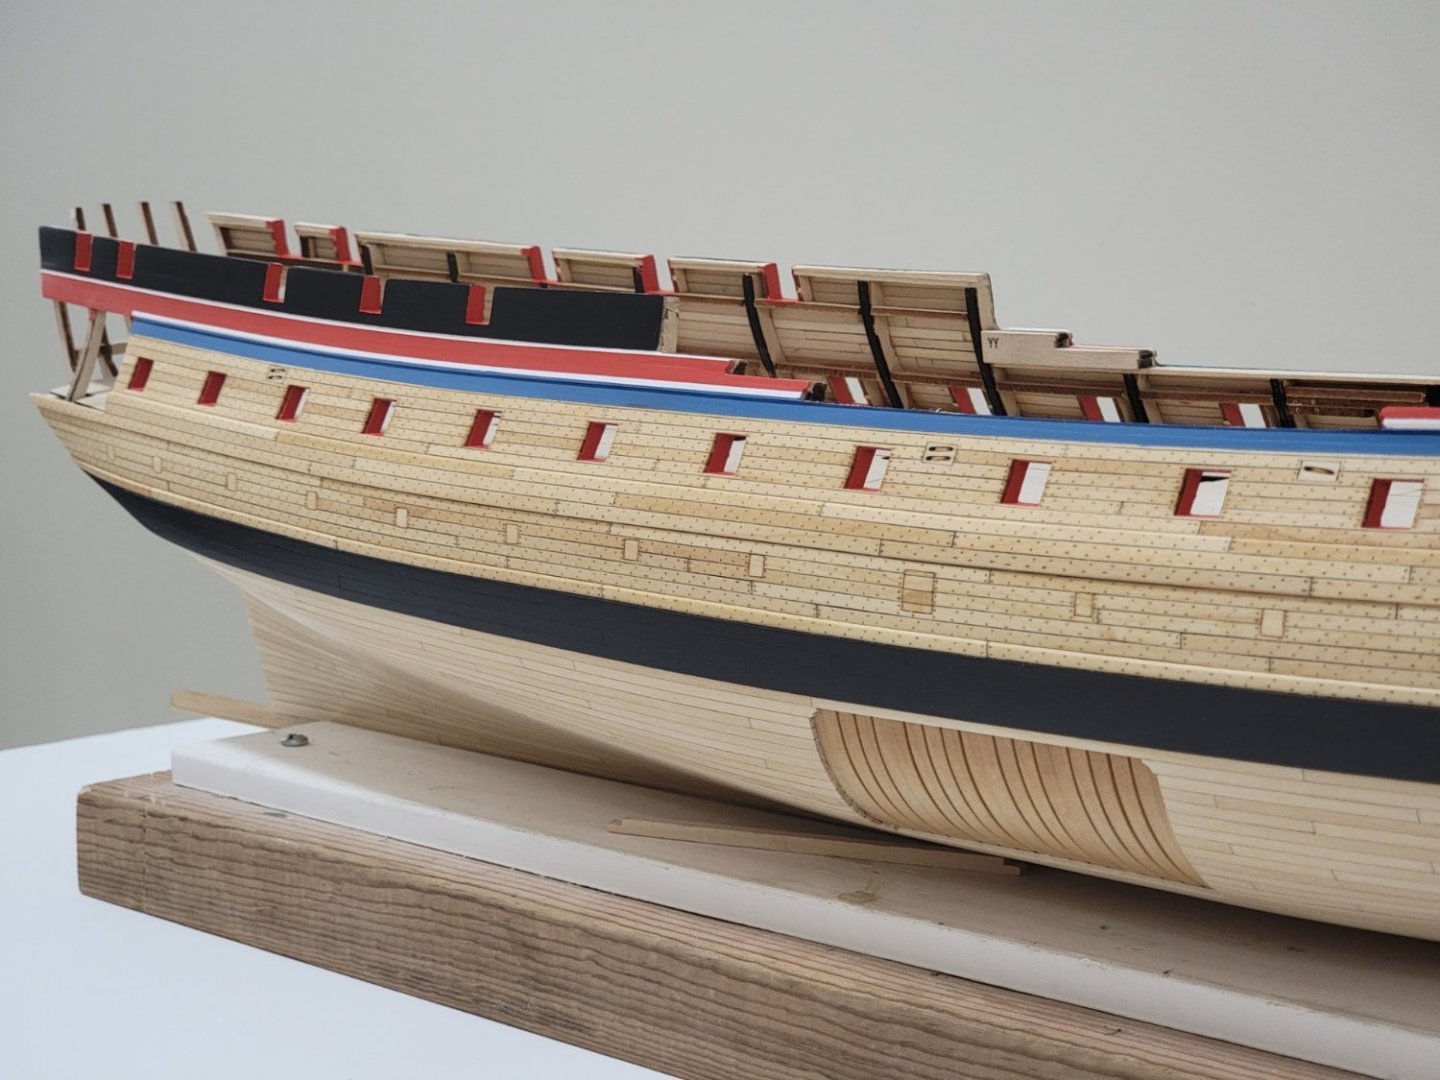
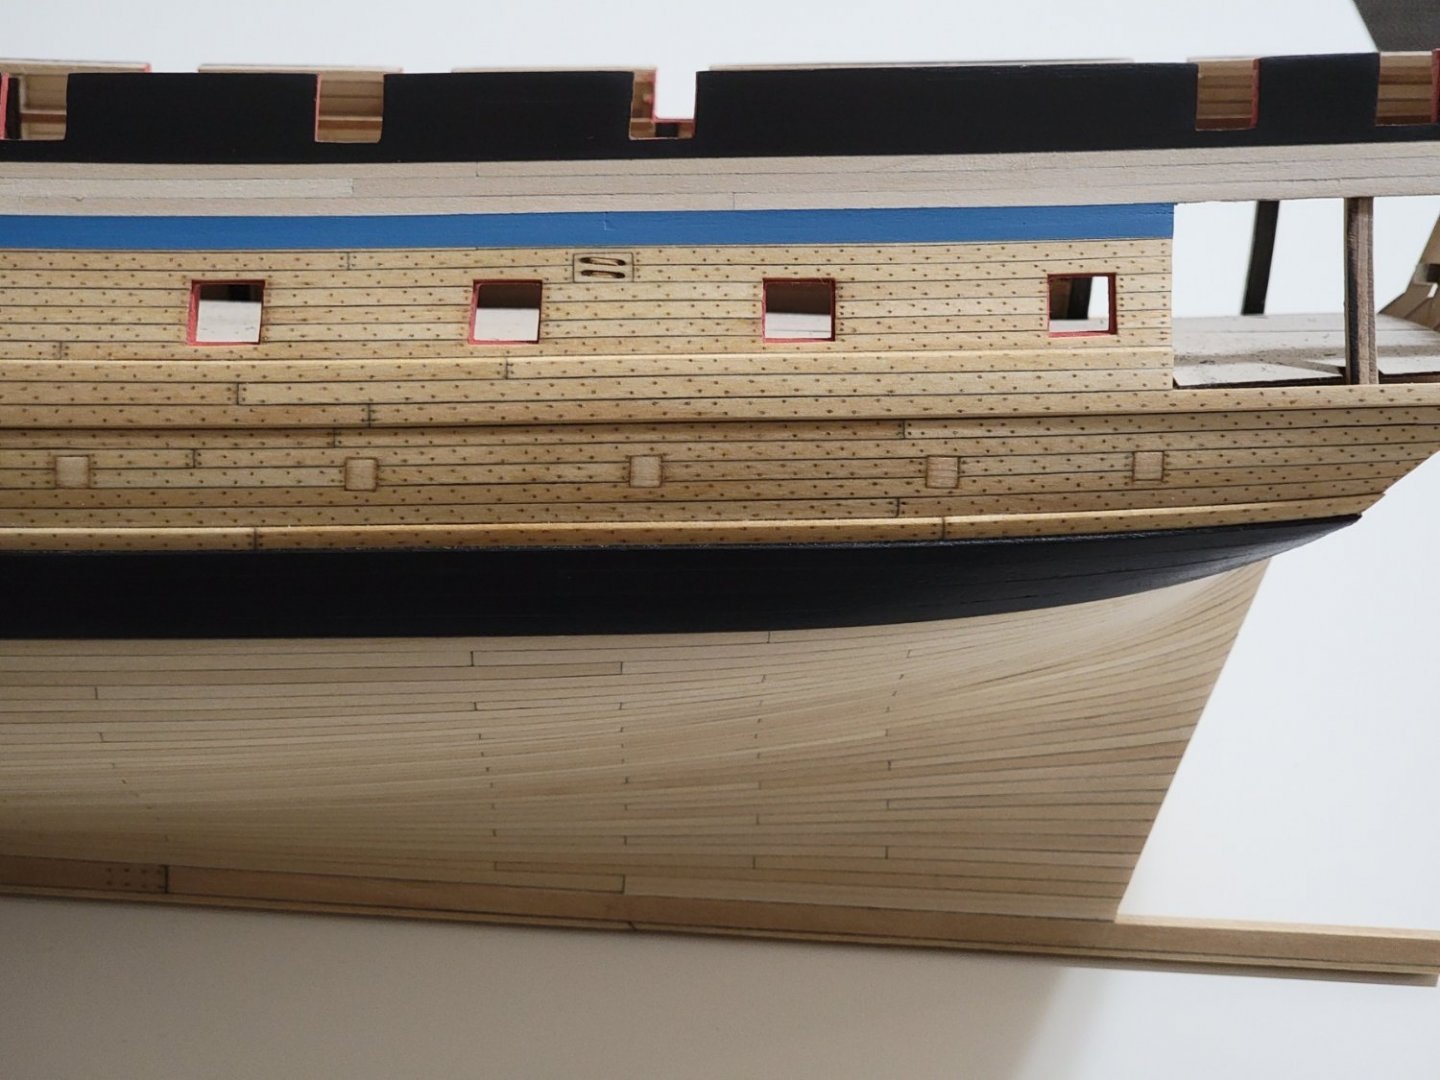
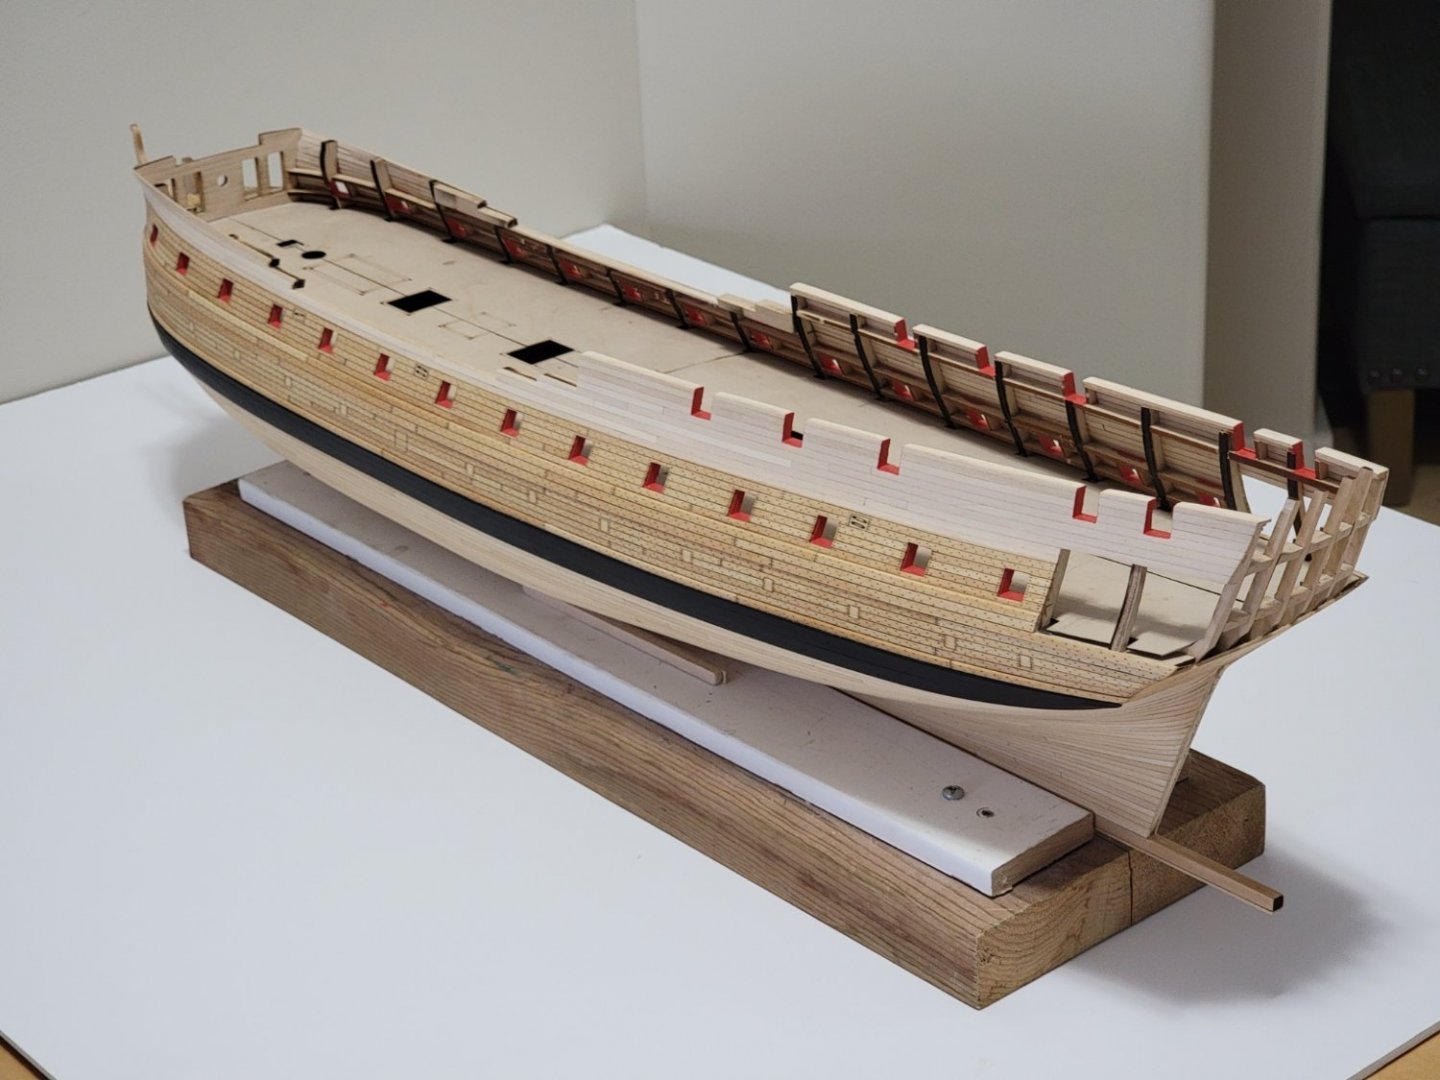
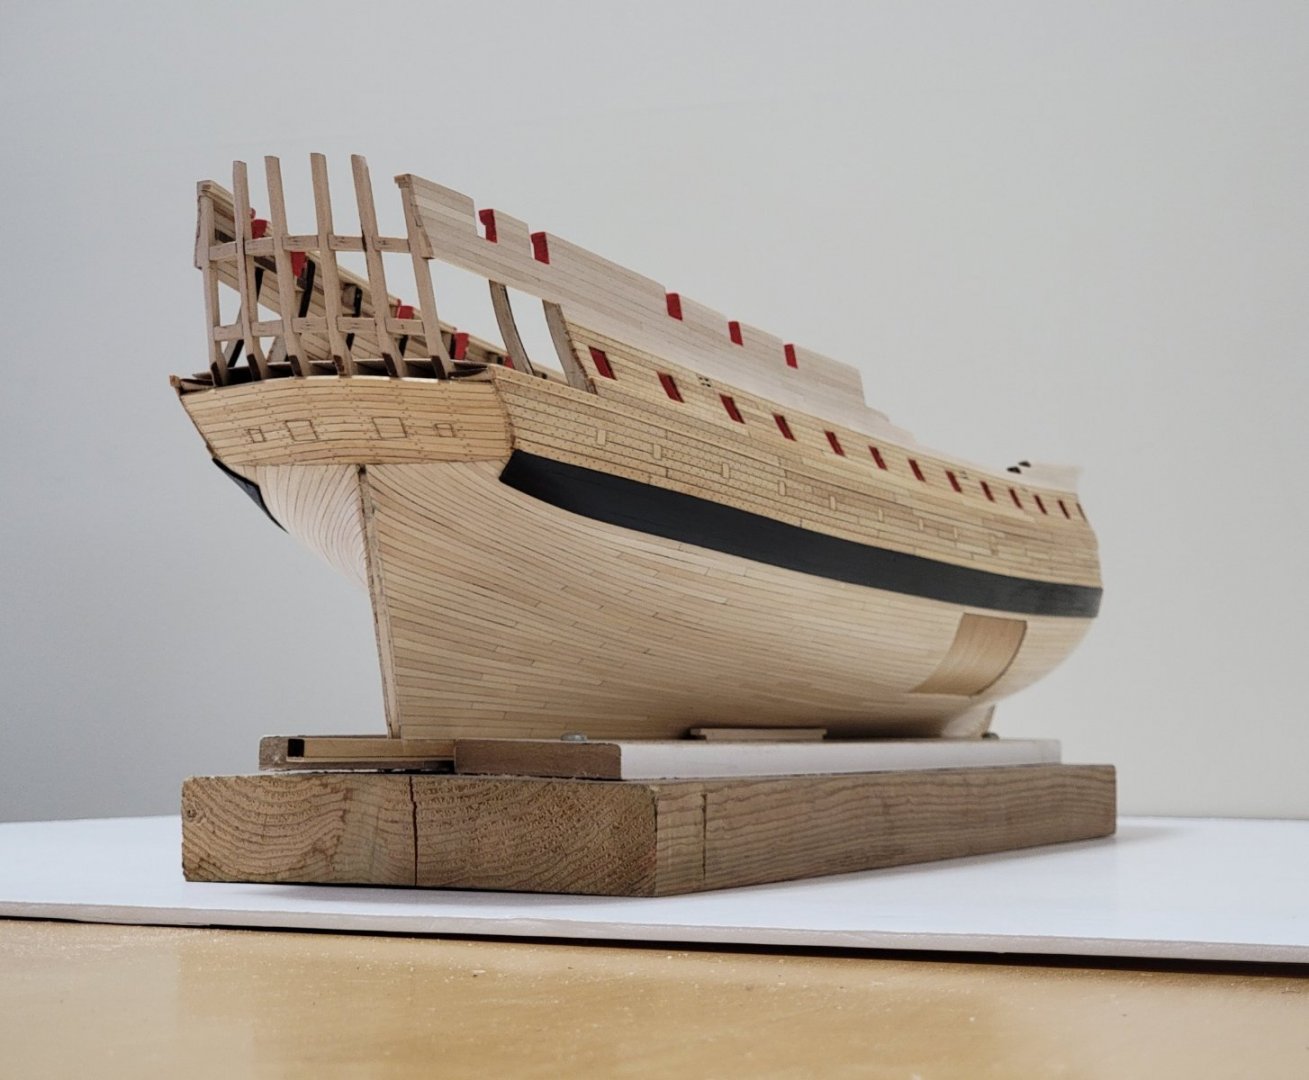
Thank you for the kind comments, Matt, Steven, Tom, and Mustafa! The main wales have now been glued, sanded flush, then I chamfered the edges. Once that was completed, I painted the wales black and used Tamiya yellow masking tape on neighboring planks. The tape was amazing, very minimal seepage of paint onto the wood. I will be using this tape for all painting from now 👍 The black paint (which was bought with the kit) was diluted with some water before painting. I sanded with 600 grit sandpaper between each coat. For the last two coats, I buffed out the painted area with a lint free cloth 15-30 mins after I applied the paint. I thinned down the thickness of the wale at the stern, and also at the stem so that it is flush with surrounding planks. Here are some pictures of where I am at: Next, I will be painting at the area above the treenails. I am very confused on the colors for these sections. The options I am thinking is to (1) paint it all black as it is the safest choice, and (2) have a thin red strip between the lowest two moldings, and (3) paint with the following black, red, and blue color scheme (I found this image somewhere on MSW, but I can't remember where it was): I am currently leaning towards the last option as this is something I have seen on lots of contemporary models (as shown below), and it will be a bit different to other Confederacy builds. Another thing to note is that red is always above blue, just something I found interesting. https://www.rmg.co.uk/collections/objects/rmgc-object-66278 Any comments/suggestions are more than welcome!


-
Vey crisp and neat work! Your work is very inspiring, Mark. Wishing you a quick recovery!