-
Posts
465 -
Joined
-
Last visited
Content Type
Profiles
Forums
Gallery
Events
Posts posted by slagoon
-
-
Hi guys thanks for the replies. I don't have any sheets of metal to create that lifter thing....so I'll pick some up in a couple weeks when I"m off from work again...but in the meantime I kept experimenting last night and figured out one idea that did work. I wrapped my wire in saran wrap and then did the seizing wrap. Once I put the CA on this time (and waited a couple mins) and it hardened I was able to pull the seizings and the saran wrap off the wire. Then once I cut the seizings down a bit I was able to use a drill bit that was nearly the inner diameter of the seizing and push the saran wrap out. It worked well enough....but I bet once I do get a piece of metal it'll help. Thanks for all the tips
-
Thanks Carl
Keith, I appreciate it - the scale, while tiny does give me leeway to omit some details that could be challenging...
Anyway, update!!!I have installed my deadeyes on the ship AND installed the running rigging to them.
Question....Do I install the rat lines now? Or do I wait till I finish all the rest of the rigging?
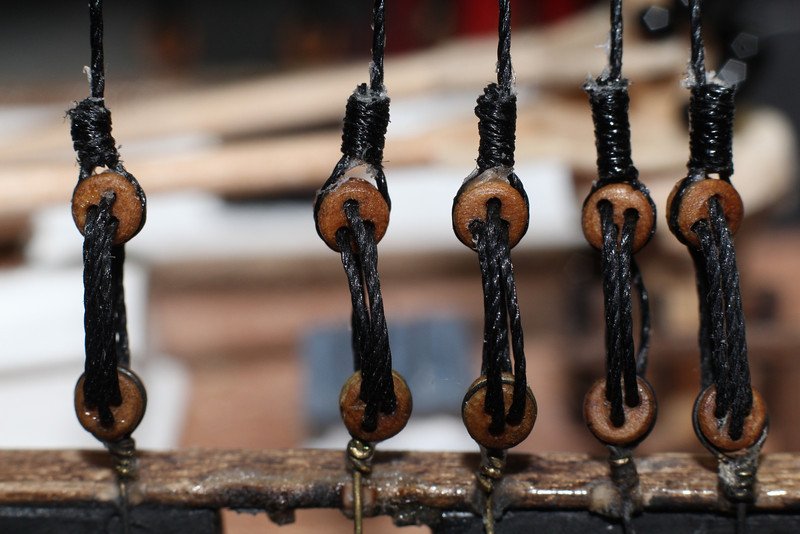
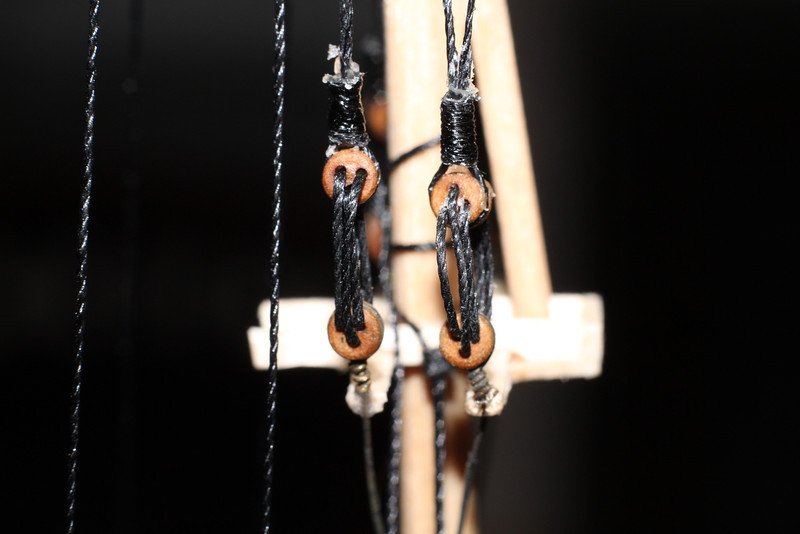
-
Guys, on the OLD MSW there were some folks teaching the zip seizing method that is explained on the dummies site....well, I've been trying over and over and can't get my seizings to come free of the rod I'm trying to attach them with....I've tried gap filling CA (and that sort of worked but looked horrible) and so I tried thin CA as recommended on the dummies site....I can't get the seizing to come free of the rod. When I do get it free of the rod it has all been shredded to pieces. I also tried waxing the rod first to add a little thickness that I could then melt away but that didn't work either...help please?
-
-
Also "BEAVER: Hudson's Bay Company 1835 Steamship" has loads of detail about the Beaver steamship - while it wasn't a blockade runner, it was the same basic ship as many others that were (like the Harriet Lane) and has loads of details about the inner bits.
That being said, I'd be interested anyway.
-
Wow guys- all I can say is thanks!
Wayne - that helps a ton!
Popeye, there's so much deck detail I really just want to have all the sails furled but its a good idea that I'll keep in mind in the future.
Augie - agree wholeheartedly
John - you are welcome! Glad it made sense
Carl - thanks - makes sense!
-
Are the old plans different than the new ones? I thought that the deck house tops were flat (at least they are in the new plans)
-
Loving it and all the details. That cooler is awesome!
-
scary trying to place a new mast. I look forward to seeing the 2billion rat lines

-
Uhoh - Gotta get my guard dog out!

Watson will guard everything - he'll lick you to death!!!!
ok now for pics of my progress....
I'll start with a tutorial for my tiny scale false dead eye reaving...
1) Start with a jig that places your dead eyes the correct distance apart.
Put a dead eye in each location with two holes facing two holes and and the one hole parts as far from each other as possible.... like this · : : ·
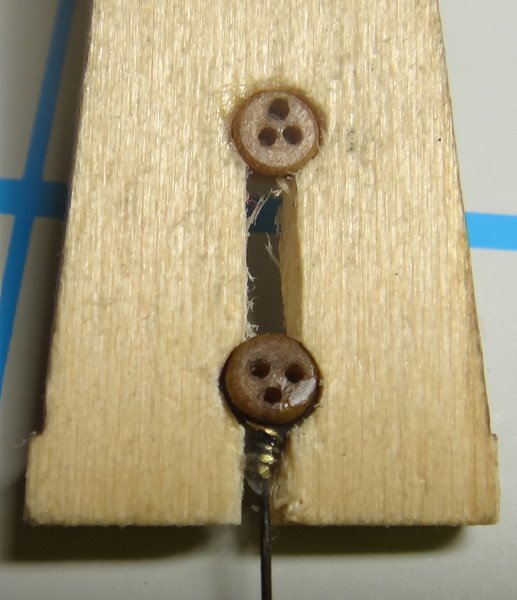
2) take the one end of the rope to do the reeving, the one you want your false end to be on
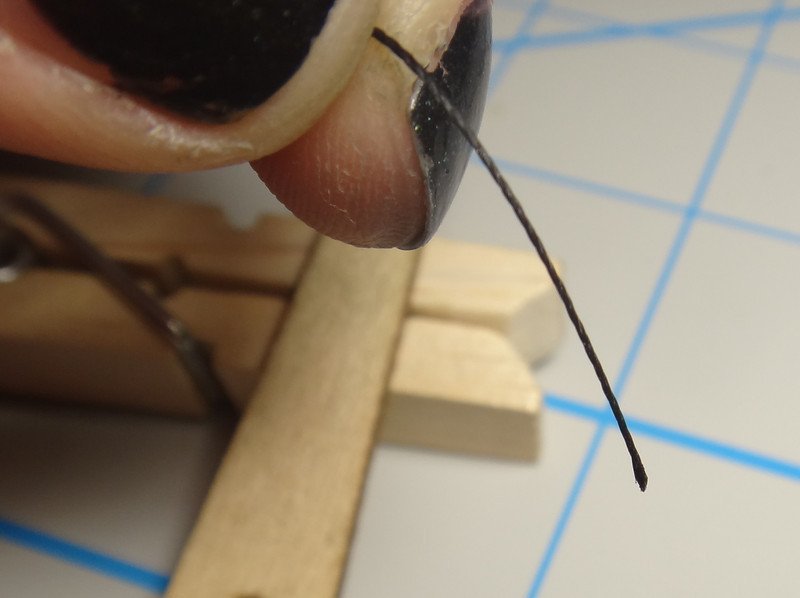
and burn it just a little so that the burn clump is larger than the hole (shouldn't take too much)
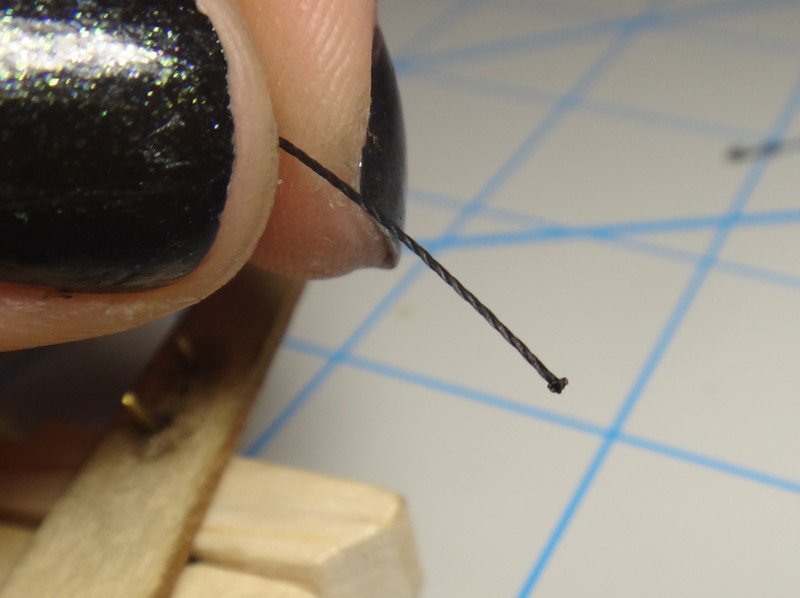
3)Pull it through the left top eye until you hit the stop area.
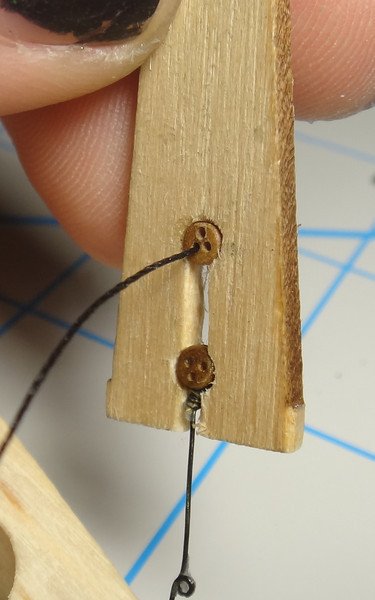
4) Run the line through the same hole on the bottom dead eye
5) Bring the line to the top middle part of the dead eye
5) Bring the line through the same hole on the bottom dead eye...it should now look like this.
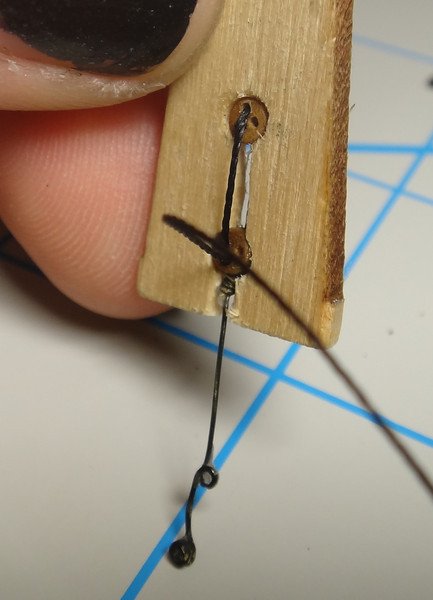
6) Bring it through the last holes on the top and the bottom dead eye.
7) normally you would then bring it up to the lines to splice them....but since this scale is really small and I'm not very practiced I brought the line to the top dead eye again and glued it in place.
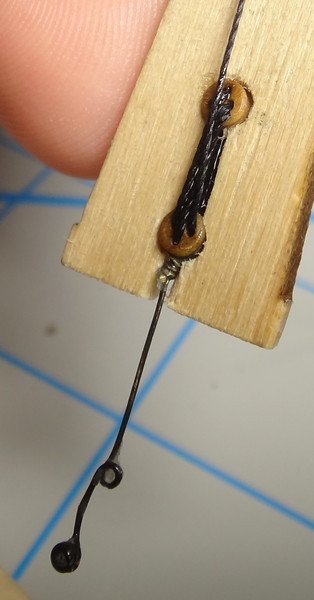
Here is what the front looks like
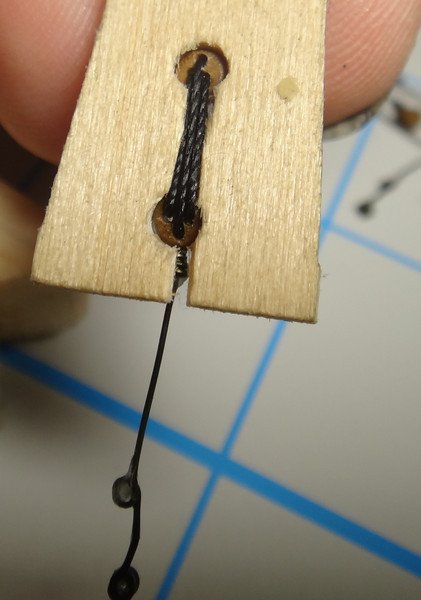
This is not going into a museum...so CA glue is allowed...I be the captain arrrrrgggggg
Here is how they look on the the part where the top mast meets the mast
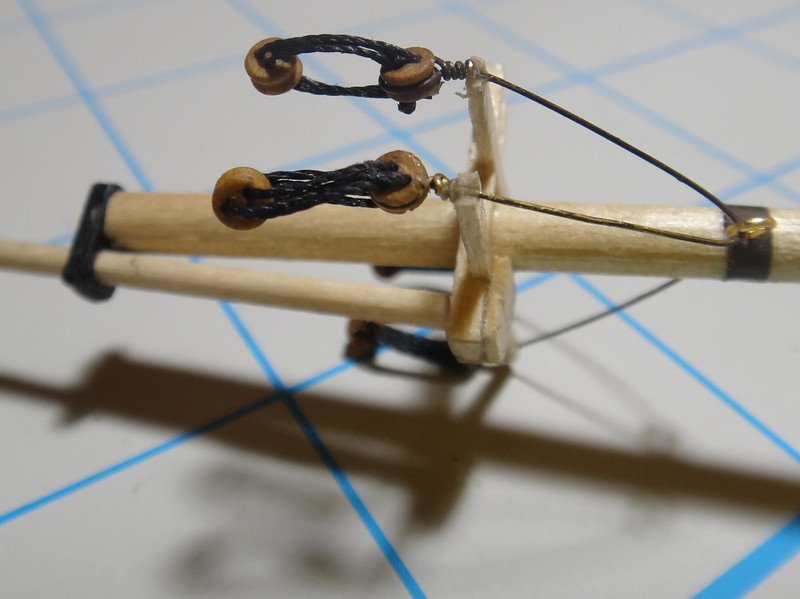
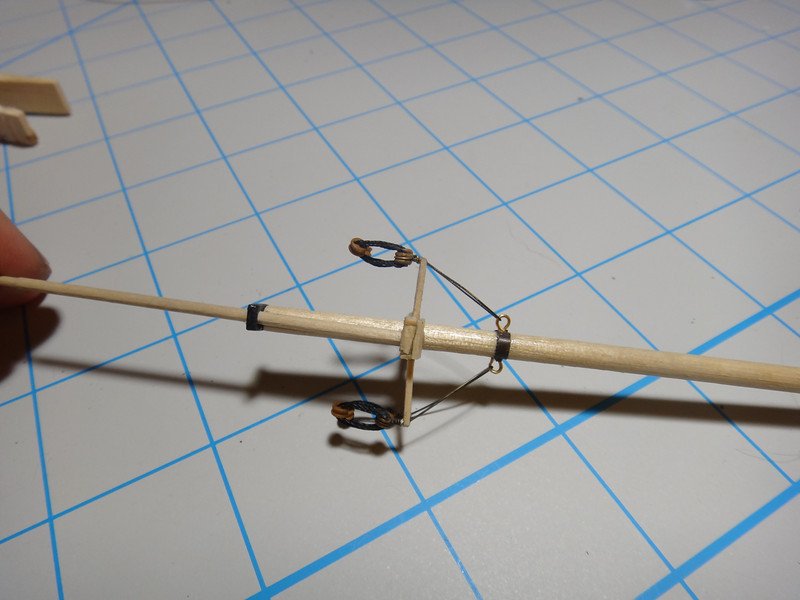
NOW.... On to the QUESTION!!!!!!!!!!!!!!!!
I want to build it with furled sails... so .... Here is what the drawing they gave me looks like (I colored in the lines trying to figure out what goes where)
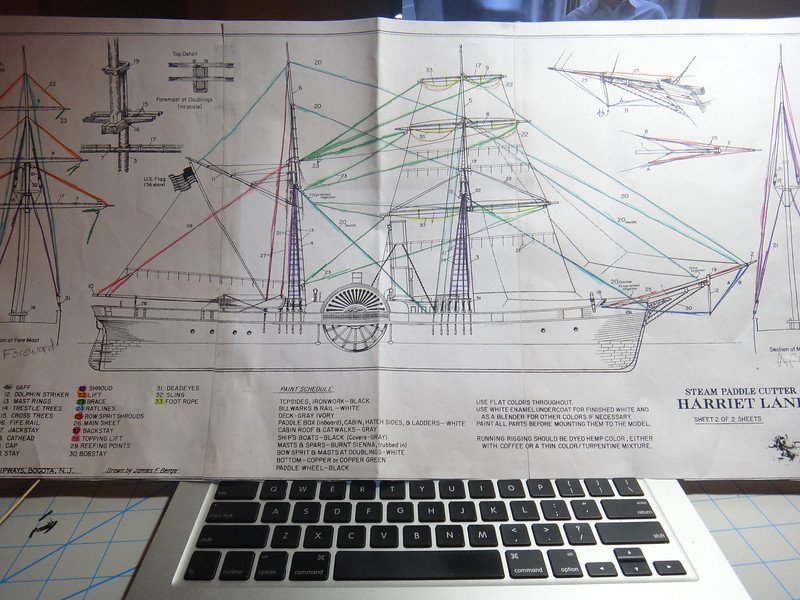
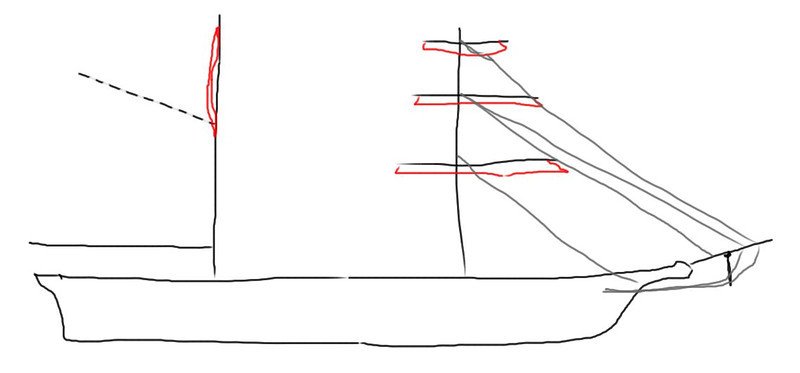
So, I'm guessing that the red is what I'd do with the sails to furl them.....but what about the sail that goes between the gaff and boom? Does that relocate the gaff or boom? and the three sheets in the front? Where do they go? Finally...The Mast Rings on the Main Mast...are they there or are they piled together because they are attached to the sail? What else moves?
Thanks in advance!!!
-
The blue shadow is on Model expo and it is $130 with this months discount code....I certainly hope it is good...
-
-
No I don't (Wish I did with the decrease in our currency's value) I found this page...helpful http://www.air-tites.com/coin_size_chart.htm#euro
-
that's a 22mm coin right? it is really looking good!!!
-
Nice grating. Can you put something in a picture so we can see the scale?
-
Carl, thanks - it's nice to see you and the horses around again

Pat, yes the board is 1" ( a penny's dimensions are 19mm diameter with 1.5 mm thickness) - similar to an australian six-pence (and canadian one cent). I'm glad you are enjoying the log!
Wayne - yeh hurry up would you? I need to see how it works? hehehe
Elia, thank you!
Popeye- we shall see - only 17 to go!!!!!
-
-
Nah, they just changed it to "first to file" from "First to invent" haha besides I'm sure others have done it anyway....there are way better jigs I've seen out there
 you guys are sweet.
 -
steal away. That is the ultimate compliment - imitation.
-
Jim, would that be the correct size for the wall siding as well? I suspect that will be his next question
-
oh boy - you guys are contagious - giving our sweet newcomer the desire to be a jokester. hehe. I don't think they are much to look at...but I did bring some photos with today.
Here is the jig for putting chainplates on. As you can see the other side has room for two deadeyes (this is for the shroud reeving)
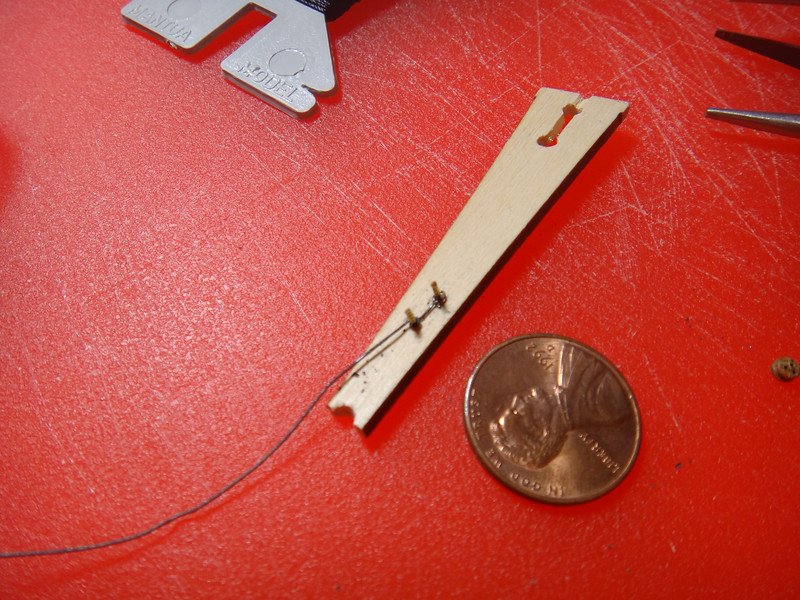
And here are the first 5 chainplates.
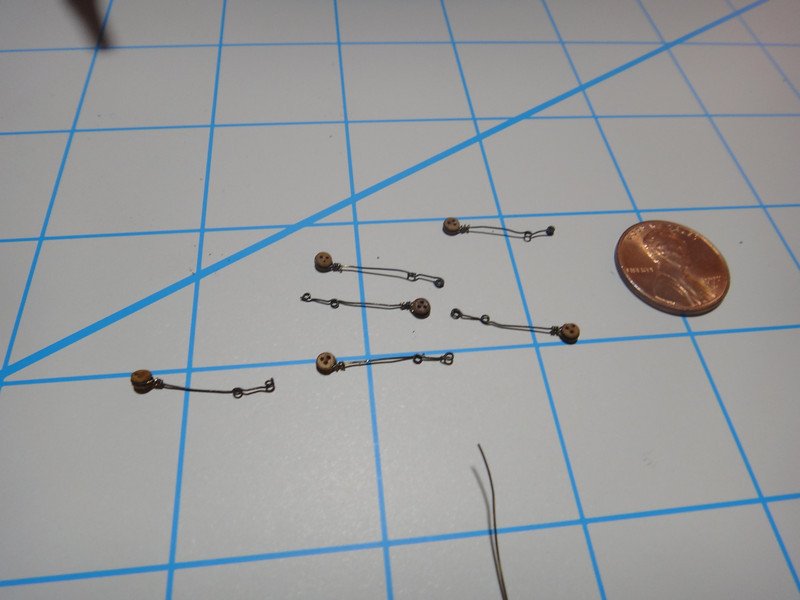
-
-
Jan you are correct...

Your turn
-


Harriet Lane 1857 by slagoon - FINISHED - Model Shipways - Scale 1:144 - steam paddle cutter
in - Kit build logs for subjects built from 1851 - 1900
Posted
Thanks Harvey, yeh my masts are only a little taller than a dollar bill....sooooooo yeh. I guess I'm also having trouble figuring out which lines in my diagram are running vs. standing.... grrr wish I knew more about real ships.