


slagoon
-
Posts
465 -
Joined
-
Last visited
Content Type
Profiles
Forums
Gallery
Events
Posts posted by slagoon
-
-
John, I'm just using CA glue so far. Since I'm sanding the mating surfaces I'm getting a nice strong bond.
Daniel I hope it turns out as good as your tiny models.
Doug, I hadn't either and since I like doing "different things" I knew I had to get them.
Mario, I need photos!!!!!! I want to see the falcon too
Wayne, no ratlines though!!
-
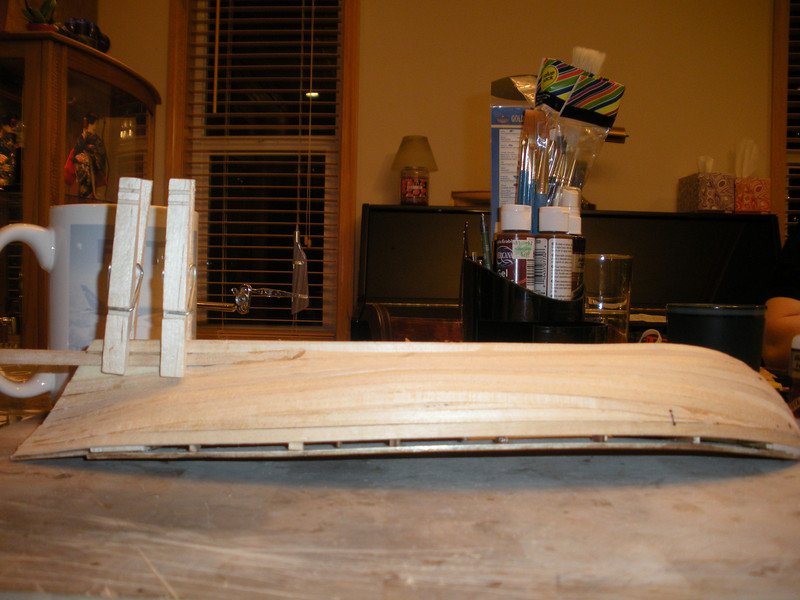
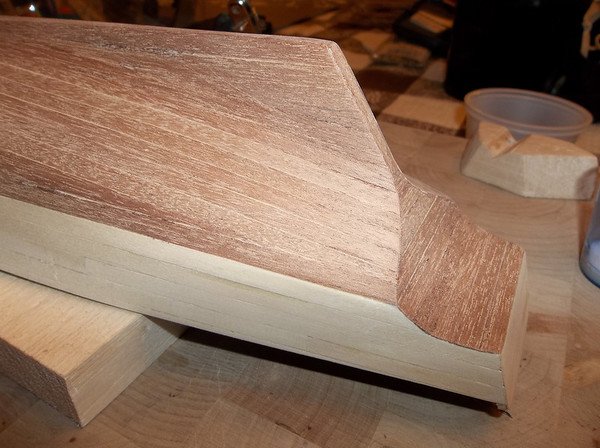
The balsa fillers are really useful, especially if you are new to planking. Balsa is so soft you can literally cut it with your fingernail. As Kevin said the Balsa allows you to have more area to glue the planks to, it also ensures you don't accidentally create an artificial concave region in your planking as the shape is continued with the balsa.
Not sure what you mean by plastic wood - there are no rules here - you can do whatever makes you happy and will have you happy when you've finished it as well.
Best of luck and will keep an eye on your progress.
-
thanks for trying - sounds like you got the same stuff as I was finding. I'll just leave the question out here - I don't think I'll get any work done on that one this week....things are weird at work - I can get away with on the computer stuff like this - but not building my card models...to much chance of an exec walking in. If you follow real sized aviation you'd probably be able to figure out why.
-
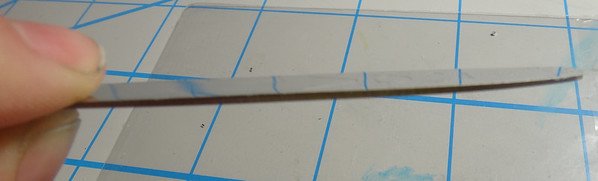
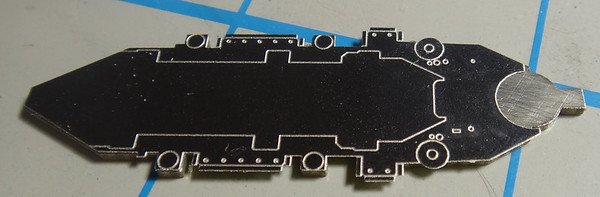
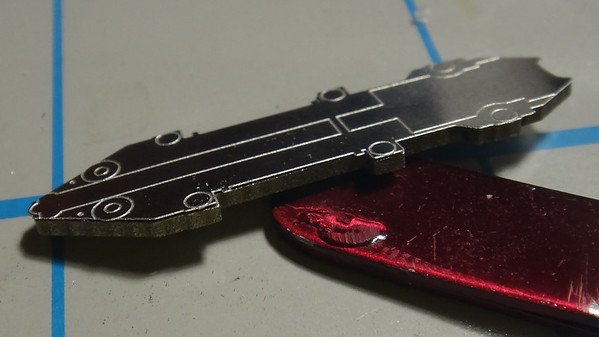
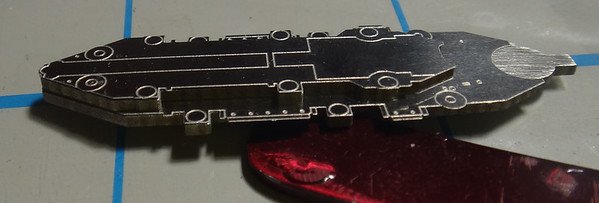
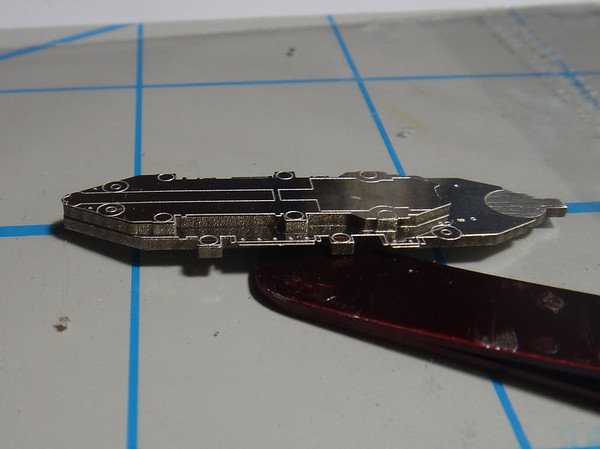
Then I made a photo copy of my plans which has the outline of the thick "base" parts so I could sort all my parts that are coming up - some of them are fairly similar.
Next it was time to assemble the 4th deck, which as two pieces as the base and one piece on top. It is pretty weird and cool.
I think that there is actually a passageway between those two main bases...
And now to add the top.
I believe this side view confirms the passageway
Then I had to leave for work....
 well, more to come tomorrow
Thanks for stopping by!
-
is popeye criminally insane too?????? cool we should hang out!
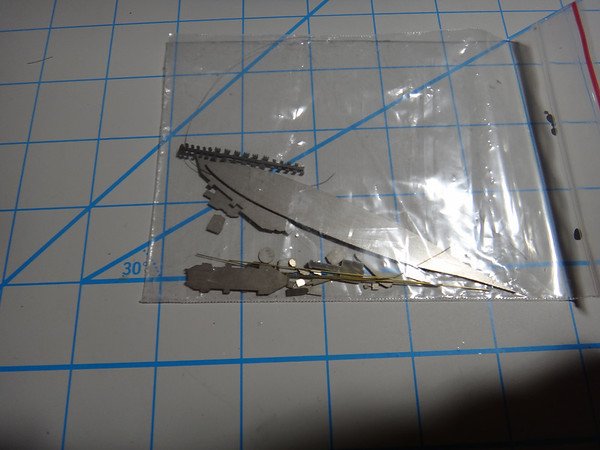
This is really tiny - I'm not sure what I was thinking when I bought this kit!
Harvey, no those are a different brand - and much larger scale
 hehehe this one requires glue - that one just required pliers.
Pete, I found it on ebay. SteelGolem makes a few micro mini sets but most are sci-fi related.
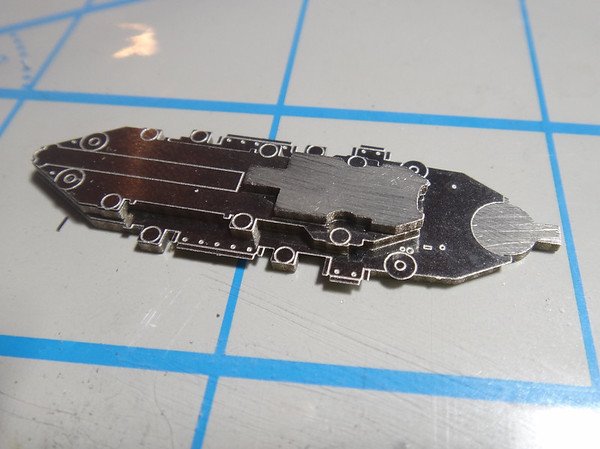
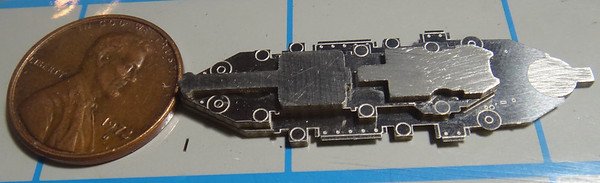
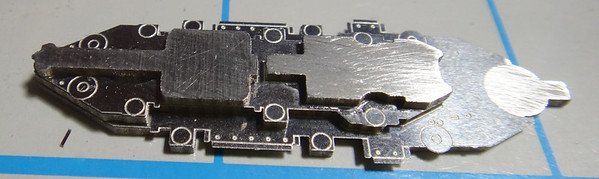
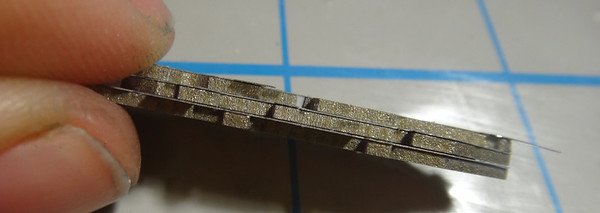
The good thing is I can have EVERY part for this build laid out on my desk and not take up more than 2 sq feet!
Lets get this build started.
The first thing I did was I put the first deck on the base. (I used gap-filling CA)
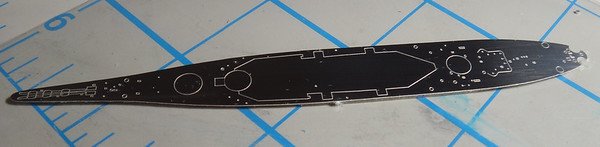
Then I put the second deck on the second deck base.
Repeat with the third deck....
hmmmm seeming logical so far.
We're about to get TRICKY!!!!
I put the third deck assembly on the second deck as indicated by the lines.
-
Here's a photo of what my husband did on the swift for the first and second planking - also similar to Brian, this was his first ship so it may or may not be "correct" but it looks good!
-
Hmmm...the page I linked said
Phantom Ship Model Kit With Tools, Paintbut there is one that doesn't have the tools and paint too. You can always call them (on Monday) to make sure you are getting what you want (and your money's worth) They are really great. I know about that stuff because I literally stalk their site looking for bargains.
-
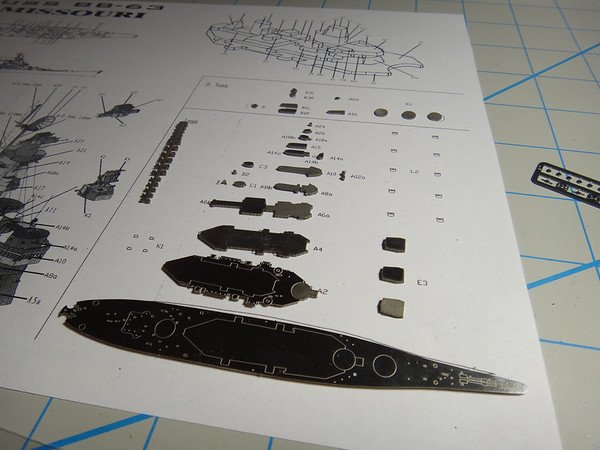
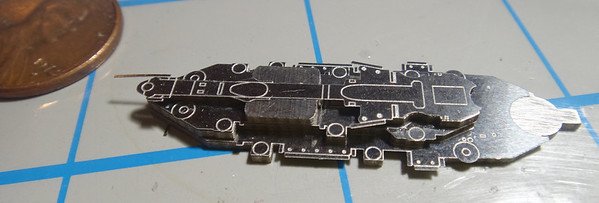
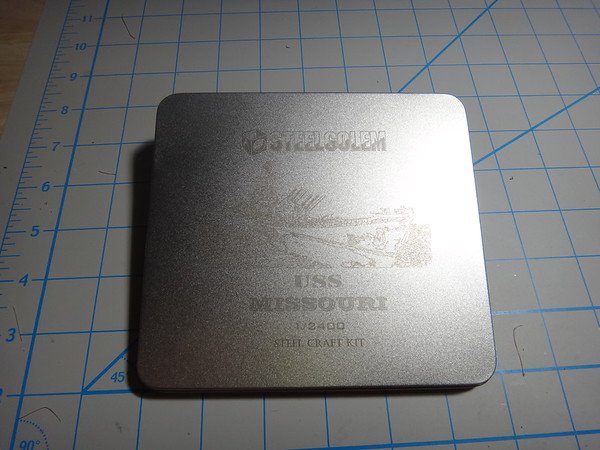
I'm actually going to do a TINY Missouri - we are moving in a couple months so I want to not be in the middle of something then.
THANK YOU soooo much Anja, Sam, Sherry, Grant, and John
-
I'm a girl - how do you think my tweezer collection is? hehehehehheehe
Grant - I hope so
Augie - SO true - they would be horrible at this scale....atom splitting nearly.
-
Nice job wrapping her up - some great details that you added there. Congrats!

-
looking really good. Someday I'll try scratchbuilding. It is encouraging seeing your work on yours since you only have a few models of your own so far.
-
-
That is huge! The one I'm about to start is basically the size of a keychain. what a difference - huh?
-
-
I don't know how the yellow compares, but model expo has a yellow ochre color....a note on their acrylics though, they work best when slightly watered down (I use ketchup portion cups like from costco) otherwise they are a bit thick.
-
Thanks for the pics...those are nice to know what they look like....but I'm still not sure how to make one
-
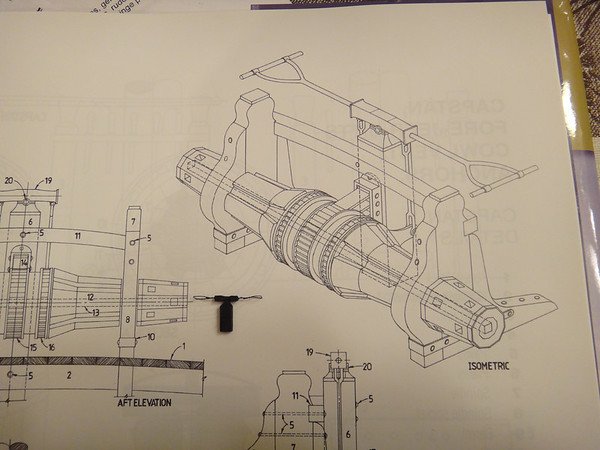
Rebecca, here is a picture that was in a book about an ocean going steamer....I don't know how similar it would be for a riverboat....(you can see my interpretation of the part that moves the gear there too)
-
Walter, have you soaked the bulwarks in water or are you trying to bend them dry?
-
Tony, I think in many cases you are right, but there are also many "Beginner" kits that have an expectation that you have built models before or know some terminology. When I look at my Harriet Lane by Model Shipways (Labeled a beginner kit) versus my husband's constructo Victory (labeled advanced) instructions-wise, I think the Victory would be much more attainable for a true beginner (though more discouraging due to the number of steps)
What is really nice about the Model Shipways is that you can look at the instructions ahead of time under their documents section. Whatever kit you pick, these guys on here will be able to help you if you stumble on anything.
- JPett and avsjerome2003
-
 2
2
-
Looks like Russ answered your questions. Also, if you haven't ordered it yet, if you can use the "rain13" code and get the phantom including a tool kit and paint for only $10.00 more....
http://www.modelexpo-online.com/product.asp?ITEMNO=MS2027SP
($85.00)
If you have any other questions, just ask
-
Hi guys,
You read it right, it is 1:2400. The finished model is roughly 5 inches long. Crazy? Yep that's me. Lets see how it goes!
Here I'll just show you the kit. I haven't really gotten started yet.

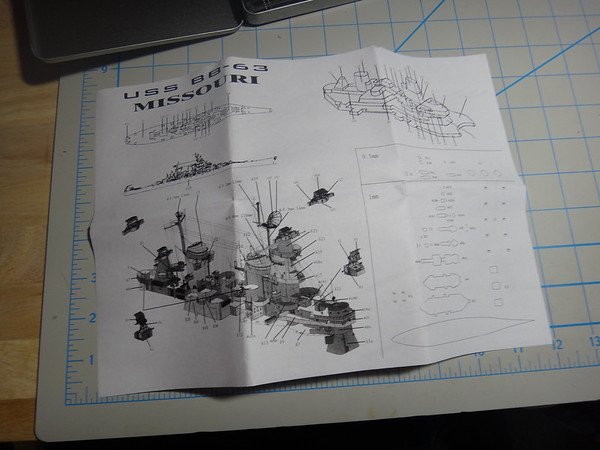
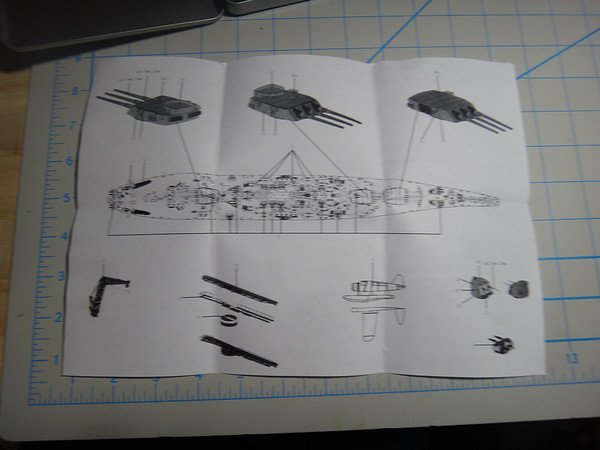
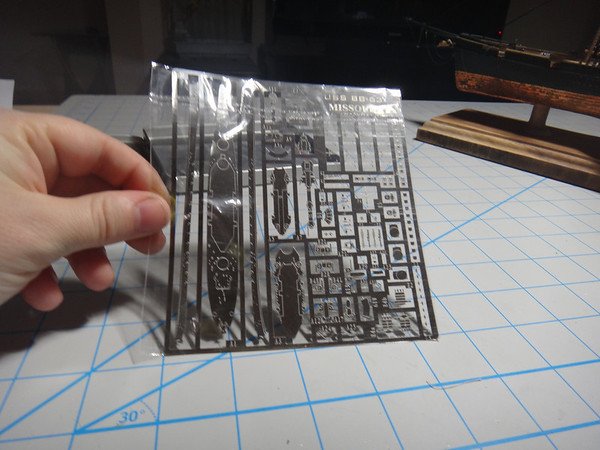
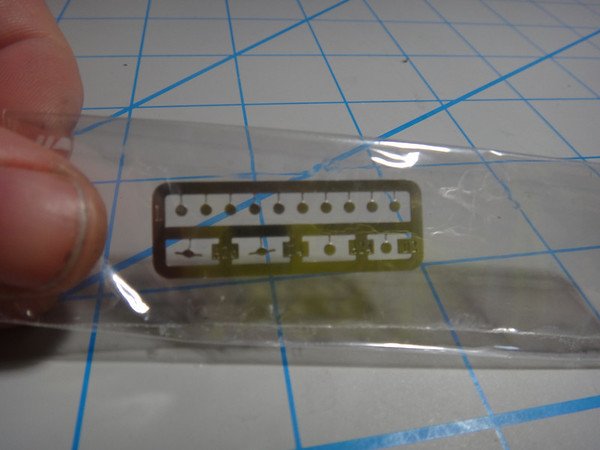
Any votes for my insanity yet?
I can't wait to get into it.
-
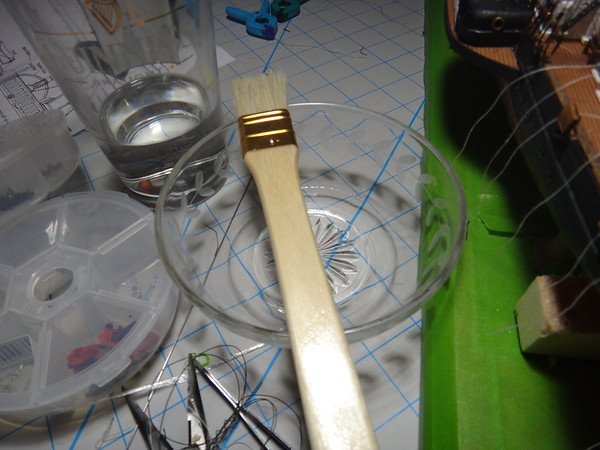
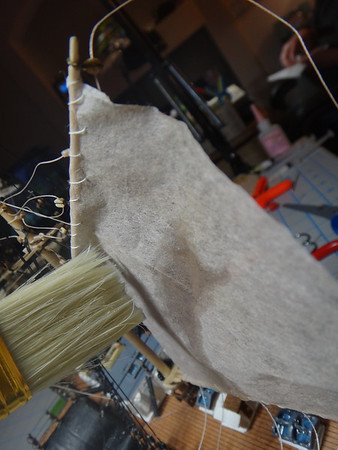
Here is the paintbrush and water I use to wet the sails.
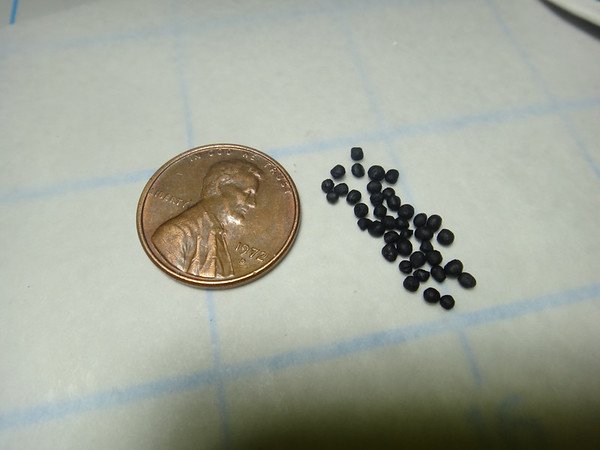
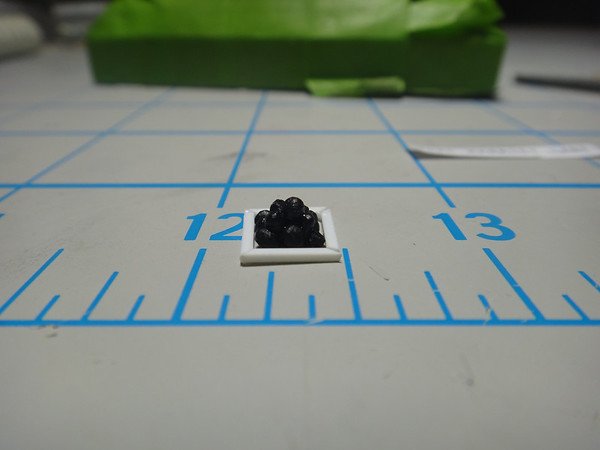
Then I decided to make some rabbit turds...er....cannon balls.... out of sculpy.
Jared, my husband, gave me a great idea about how to make a cannon ball pyramid.... Use tape, sticky side up to hold the cannonballs how I want them, then use glue to stack them.
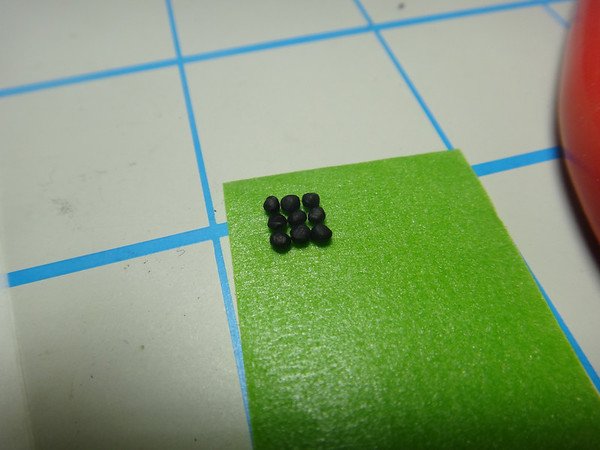
Then I added a little boarder around them.
I also added some decals to the back to name the ship

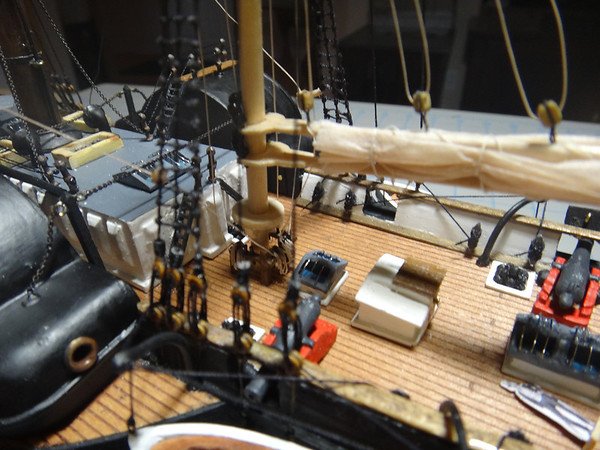
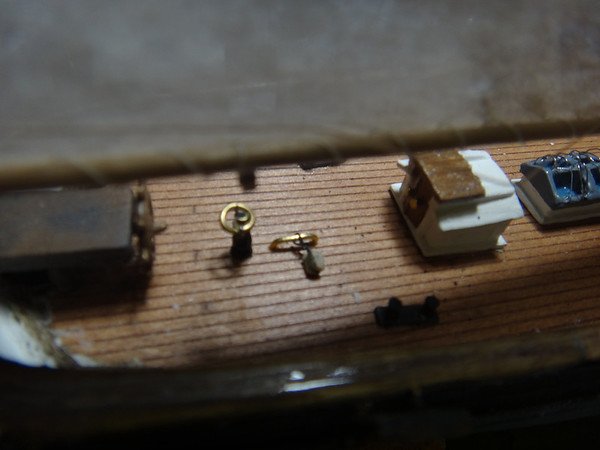
Time to put on the ships boats....I just basically followed the directions. Note - I am REALLY glad I waited until the very end to add these, however I wish I had added the cleats before the deck furniture and I also wish I had drilled the holes for the things that hang over the side back at that step too...would have been easier.... but waiting to install those and the rigging for it was a great idea.
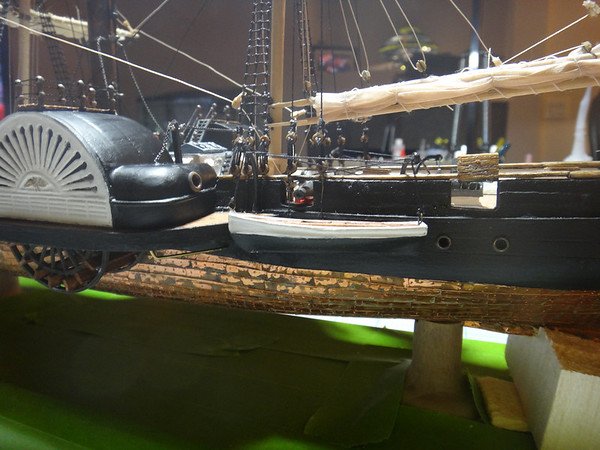
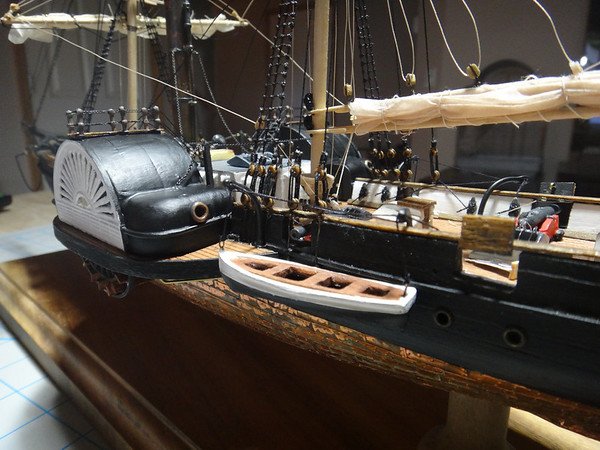
I added my cannons and cannonball holders. I also put on some ropes on the belaying pins.
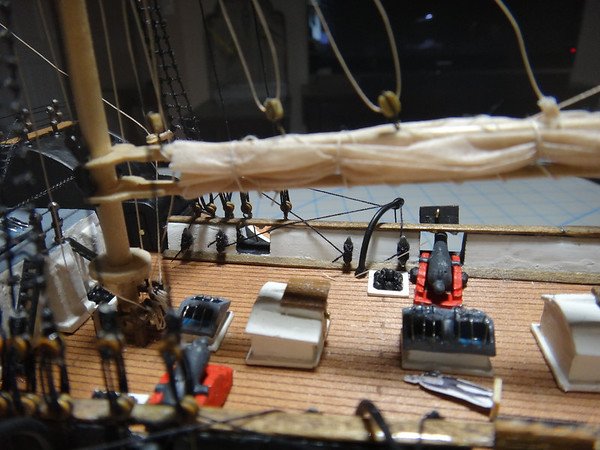
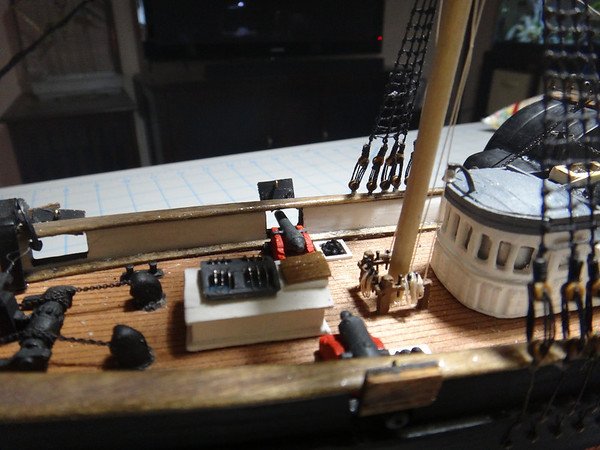
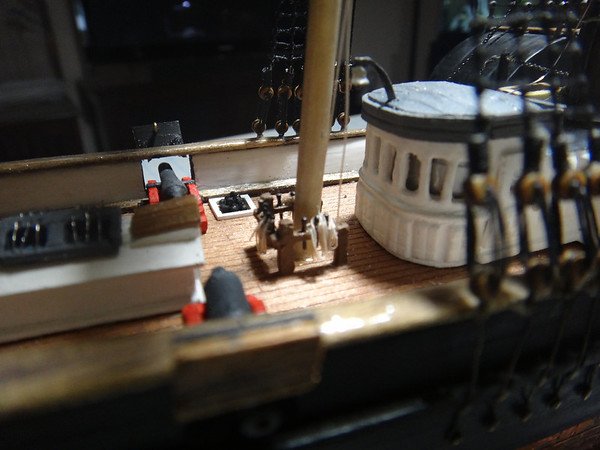
All that is left is putting on the nameplate and oiling the base!
YAY. Will be starting my next build log soon
There will be another update once I have the base done. I'll also do some really good photos later
-
Guys, thanks all for your congratulations! It is really heartwarming to be asked to do something like this.
I have some bad news now....
ready?
are you sure?
ok....
There isn't much left to this build log! I am nearly finished!!!!!!!!!!!!!!!!!!!!!!!!!!!!!!!!!!!!!!!!!!!!!!!!!!!!!!!!!!
Time to catch you up.
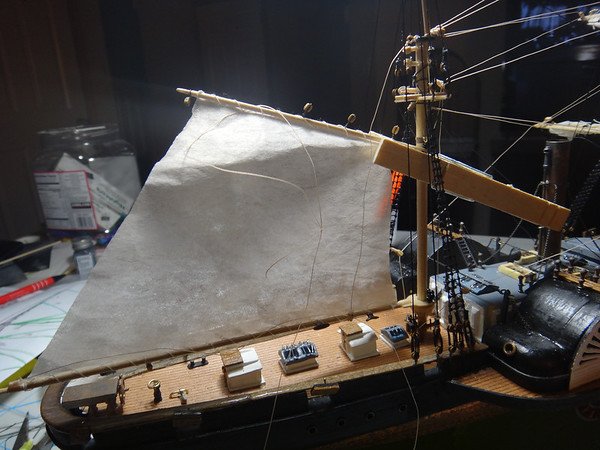
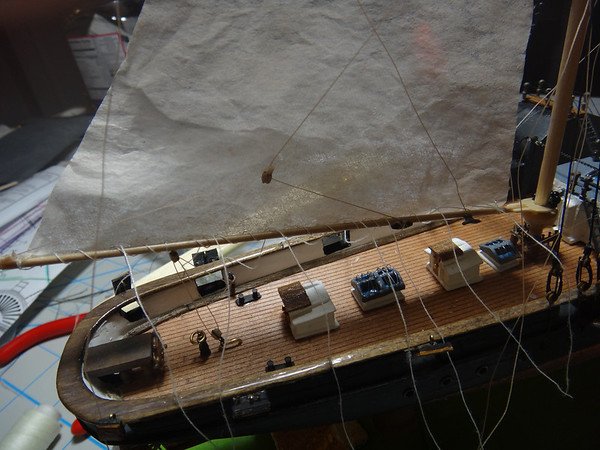
I added the sail to the main mast.
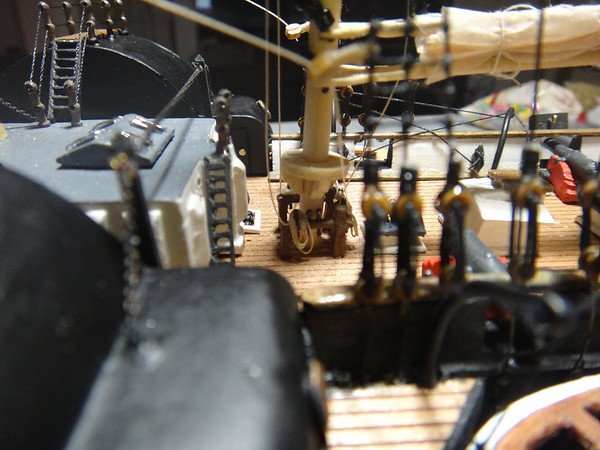
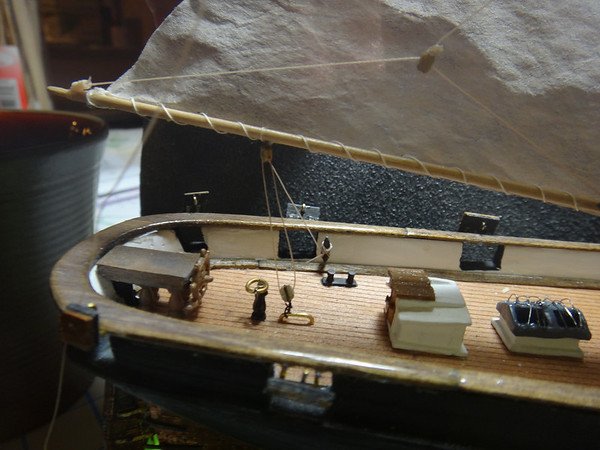
I then added the traveling rod right behind the binnacle.
Next I added all of my blocks to the mainmast.
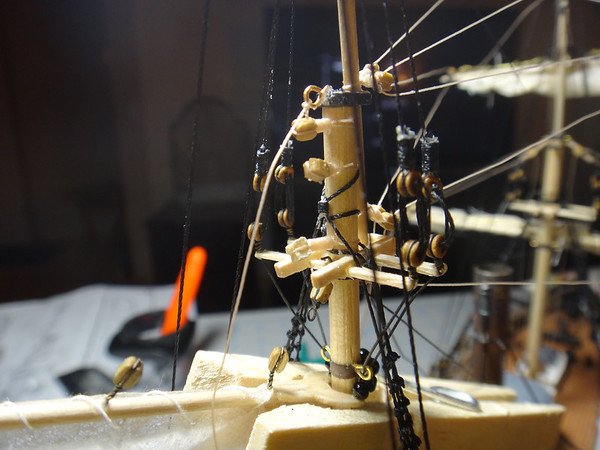
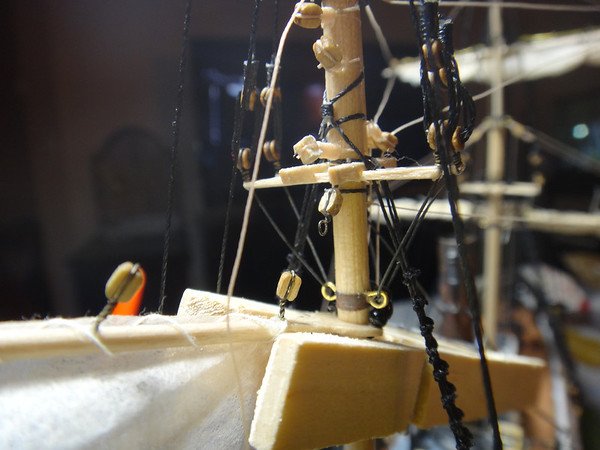
I added the flag block to the jibboom.
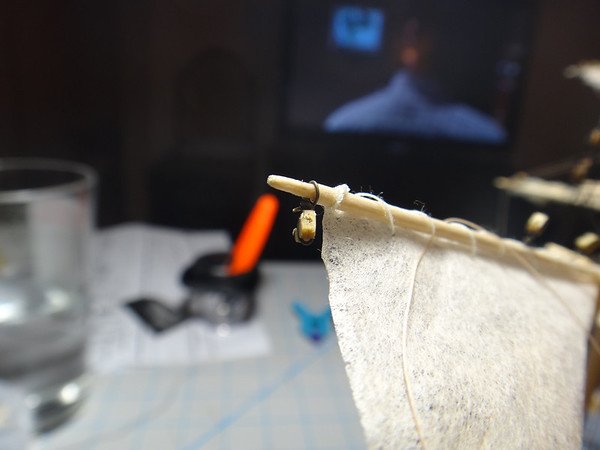
Then I put the rigging on while the sail was still raised....I figured it would be easier to make sure I did it right since the drawing shows the sail unfurled...
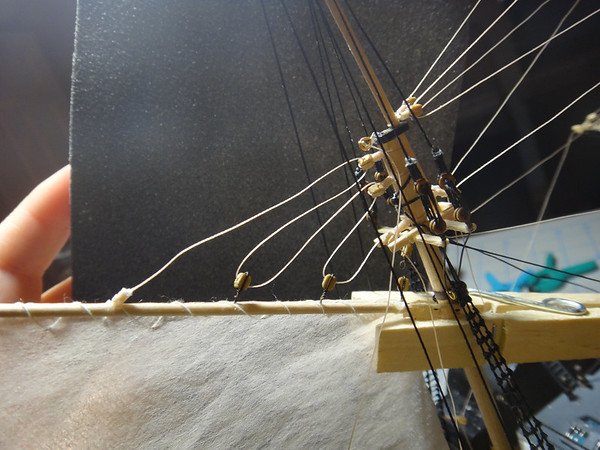
Then I added the rigging to the traveling rod and the rest to the gaff.
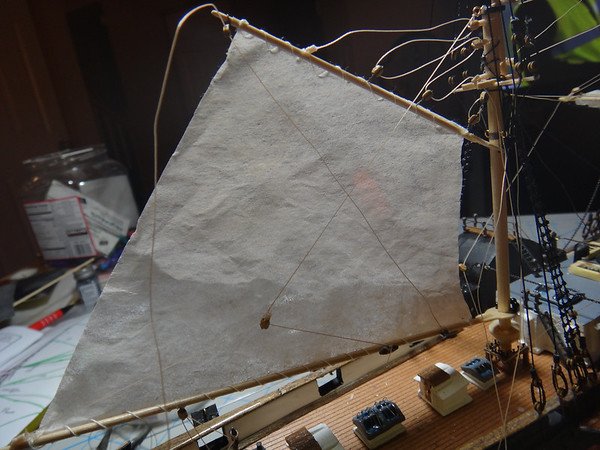
Then I added the strings for tying the sails.
-
ok I think I have it. Thanks guys!
Harriet Lane 1857 by slagoon - FINISHED - Model Shipways - Scale 1:144 - steam paddle cutter
in - Kit build logs for subjects built from 1851 - 1900
Posted
Wow guys - thanks everyone. Immediately I'll be working on the Tiny Missouri. My next after that will be the Krabbenkutter from Billing Boats (much better scale). I can't wait!!!!!!
As far as moving - just a few towns away to a house that we will rent for a couple years then (fingers crossed) be able to buy.
All of your support (even the silent folks) helped me get to the finish line on this lil gal.