HOLIDAY DONATION DRIVE - SUPPORT MSW - DO YOUR PART TO KEEP THIS GREAT FORUM GOING! (89 donations so far out of 49,000 members - C'mon guys!)
×

bolin
-
Posts
482 -
Joined
-
Last visited
Content Type
Profiles
Forums
Gallery
Events
Everything posted by bolin
-
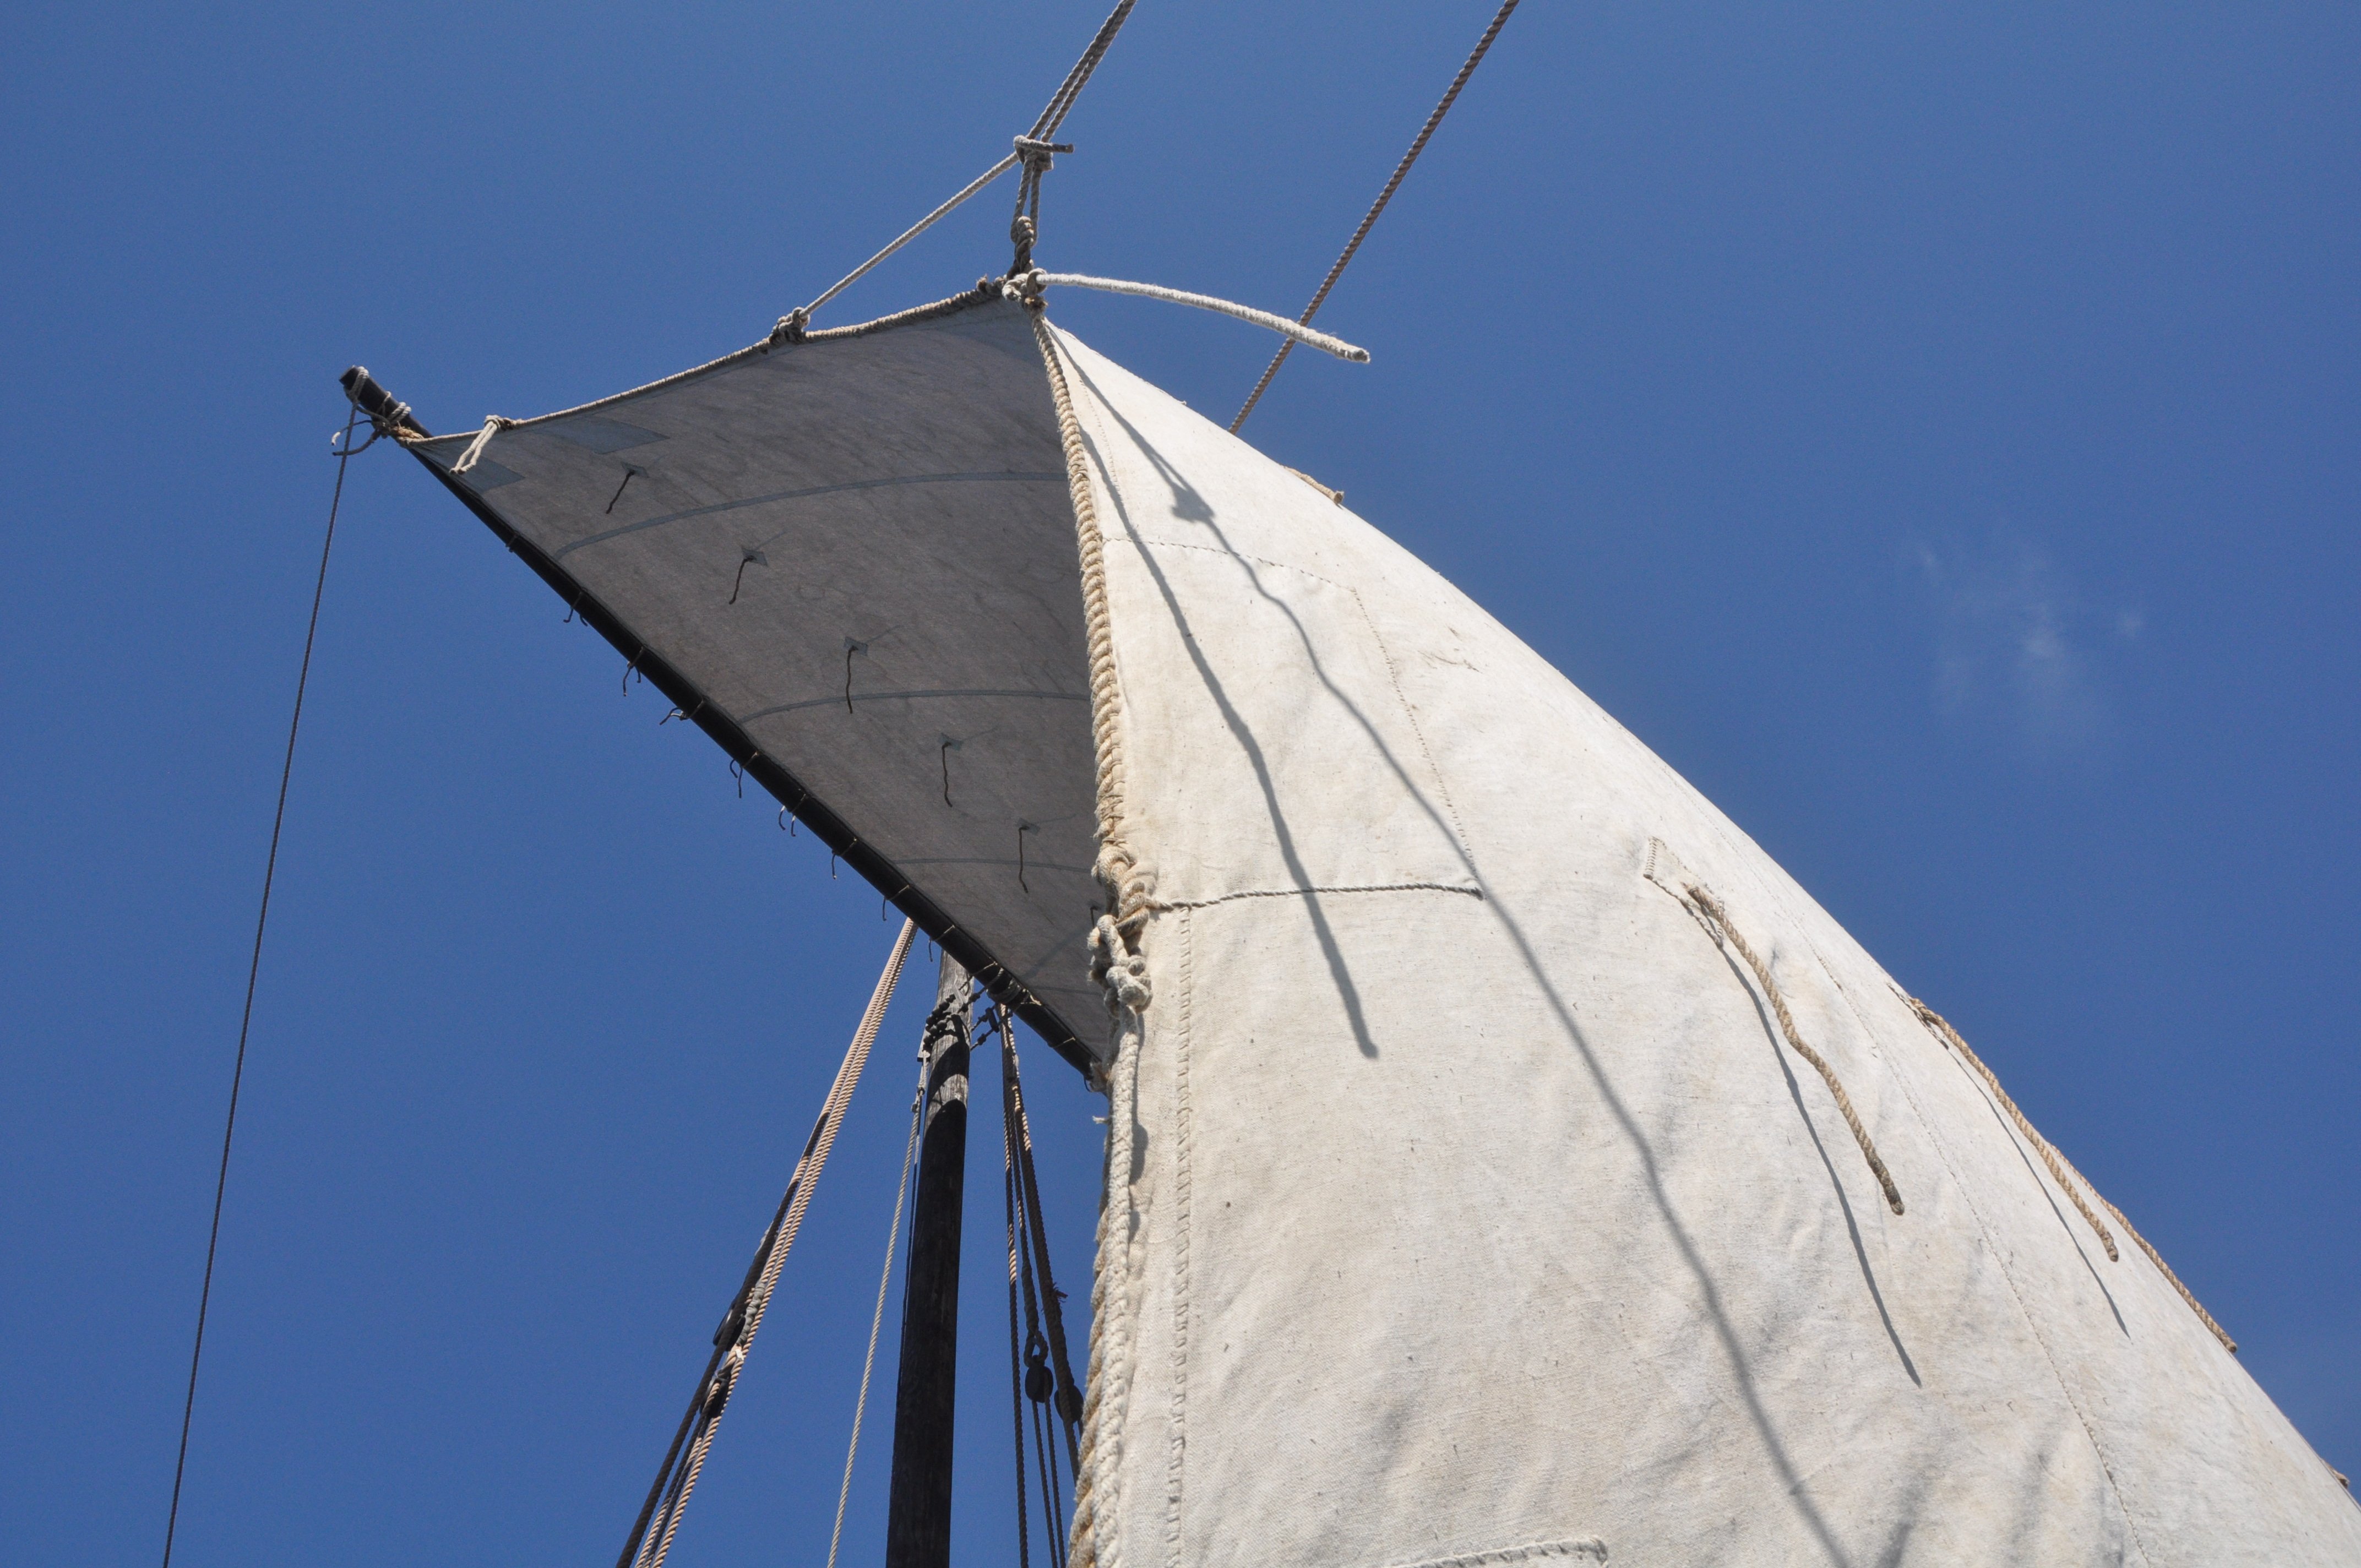
 I'm working on a model of the Thames sailing barge Will Everard from Billing Boats kit (see build log). I will soon start with the rigging. Now I'm starting to wonder if it should be steel wire in the rigging (in particular the standing rigging?). The ship was built in 1925 and has a steel hull. I intend to model her circa 1940. I have searched online and found various photos. From what I can gather it looks like she nowadays have at least shrouds and fore stay of steel wire, but that is after several rounds of renovation and having turned her into a charter boat. The old black and white photos I have found are not detailed enough to determine the type of line. Are there any other details that could help determine the type? Is the use of deadeys and lanyards an indication that the shroud is rope rather than wire? It looks like that is what she had until at least 1960s. Is the use of a turnbuckle for the shrouds an indication of a steel wire? Does anyone know? Can anyone help me with some pointers to some better references than what I have found online?
 -
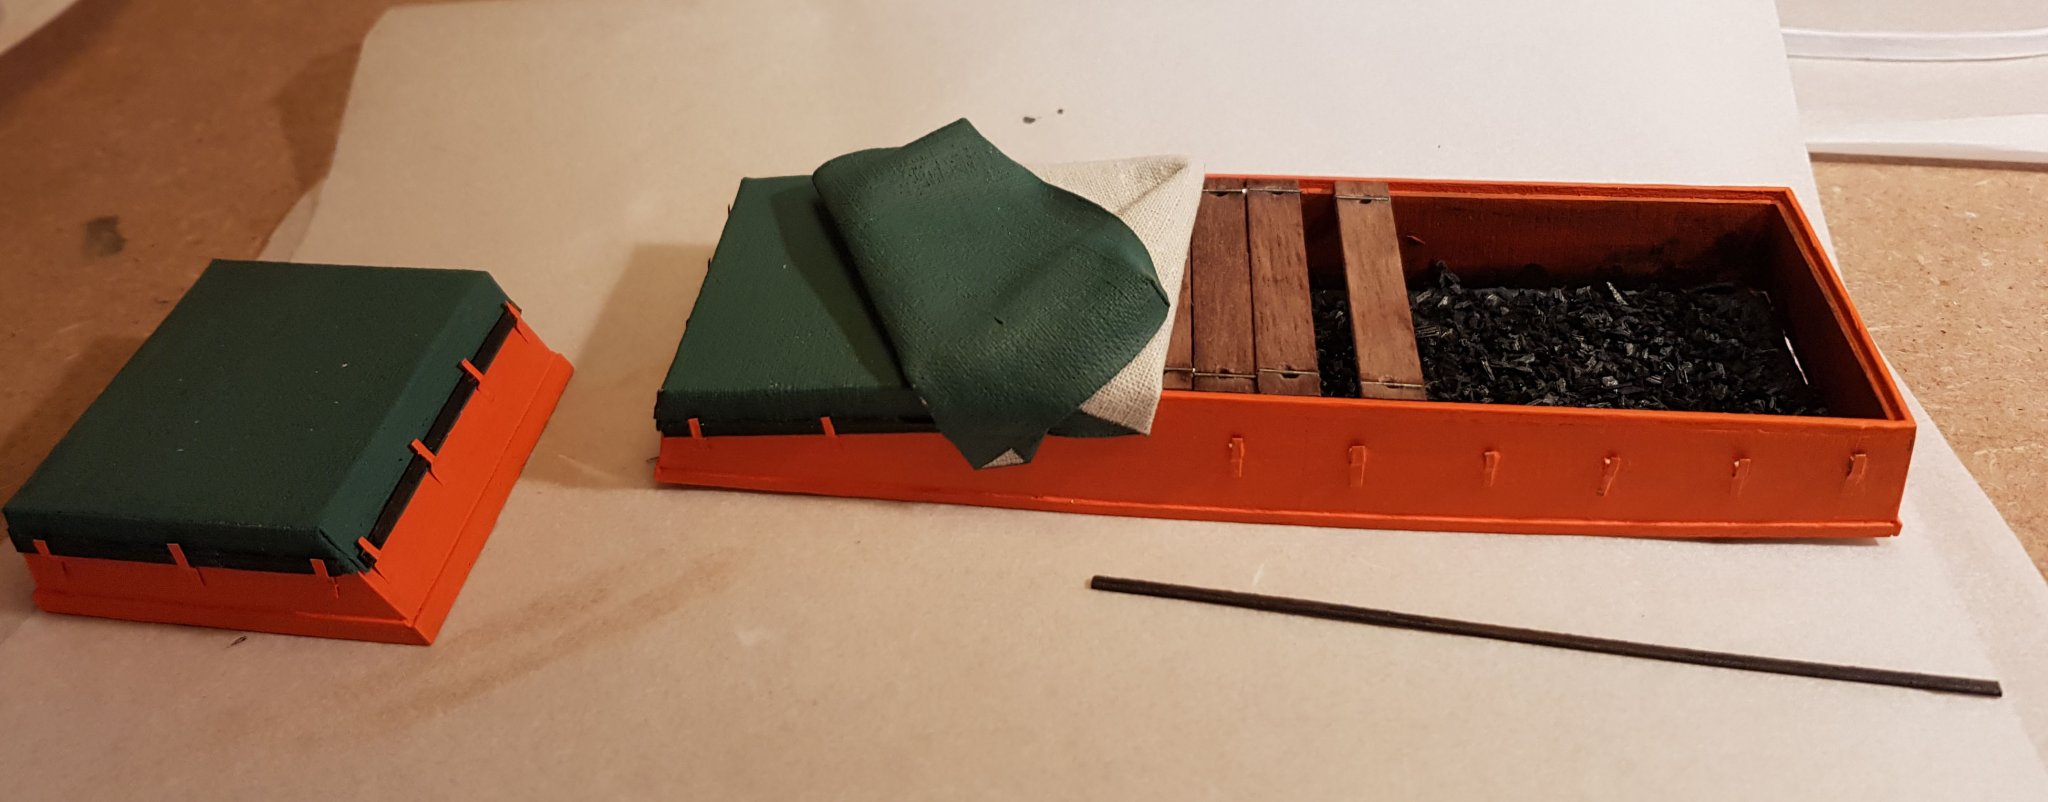
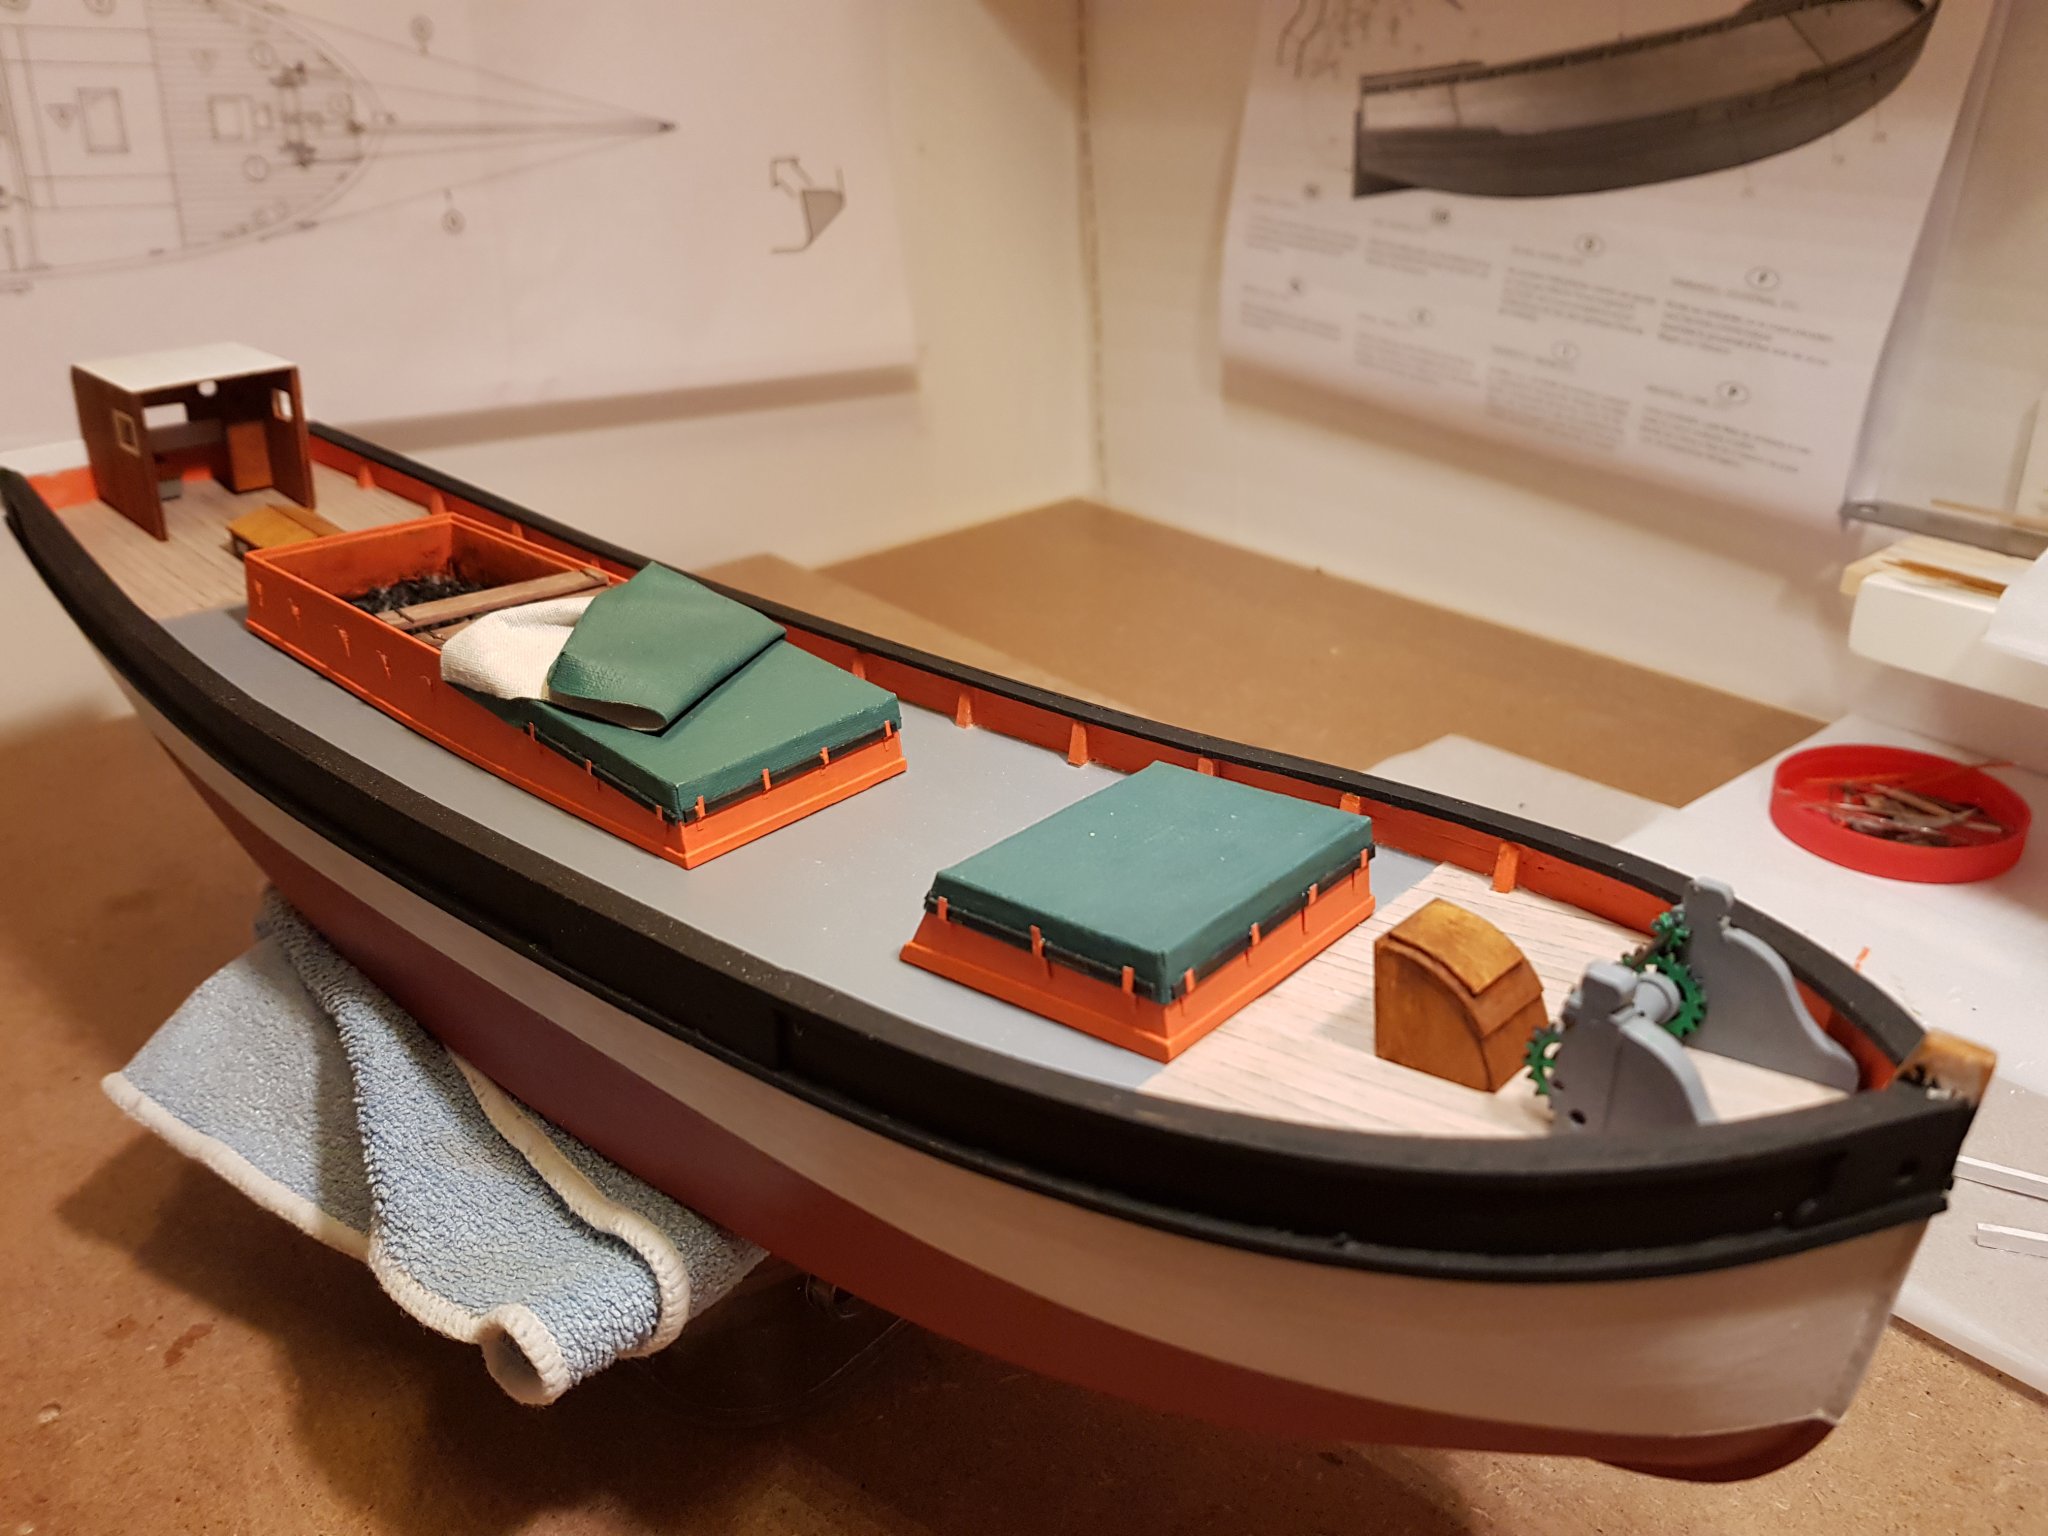
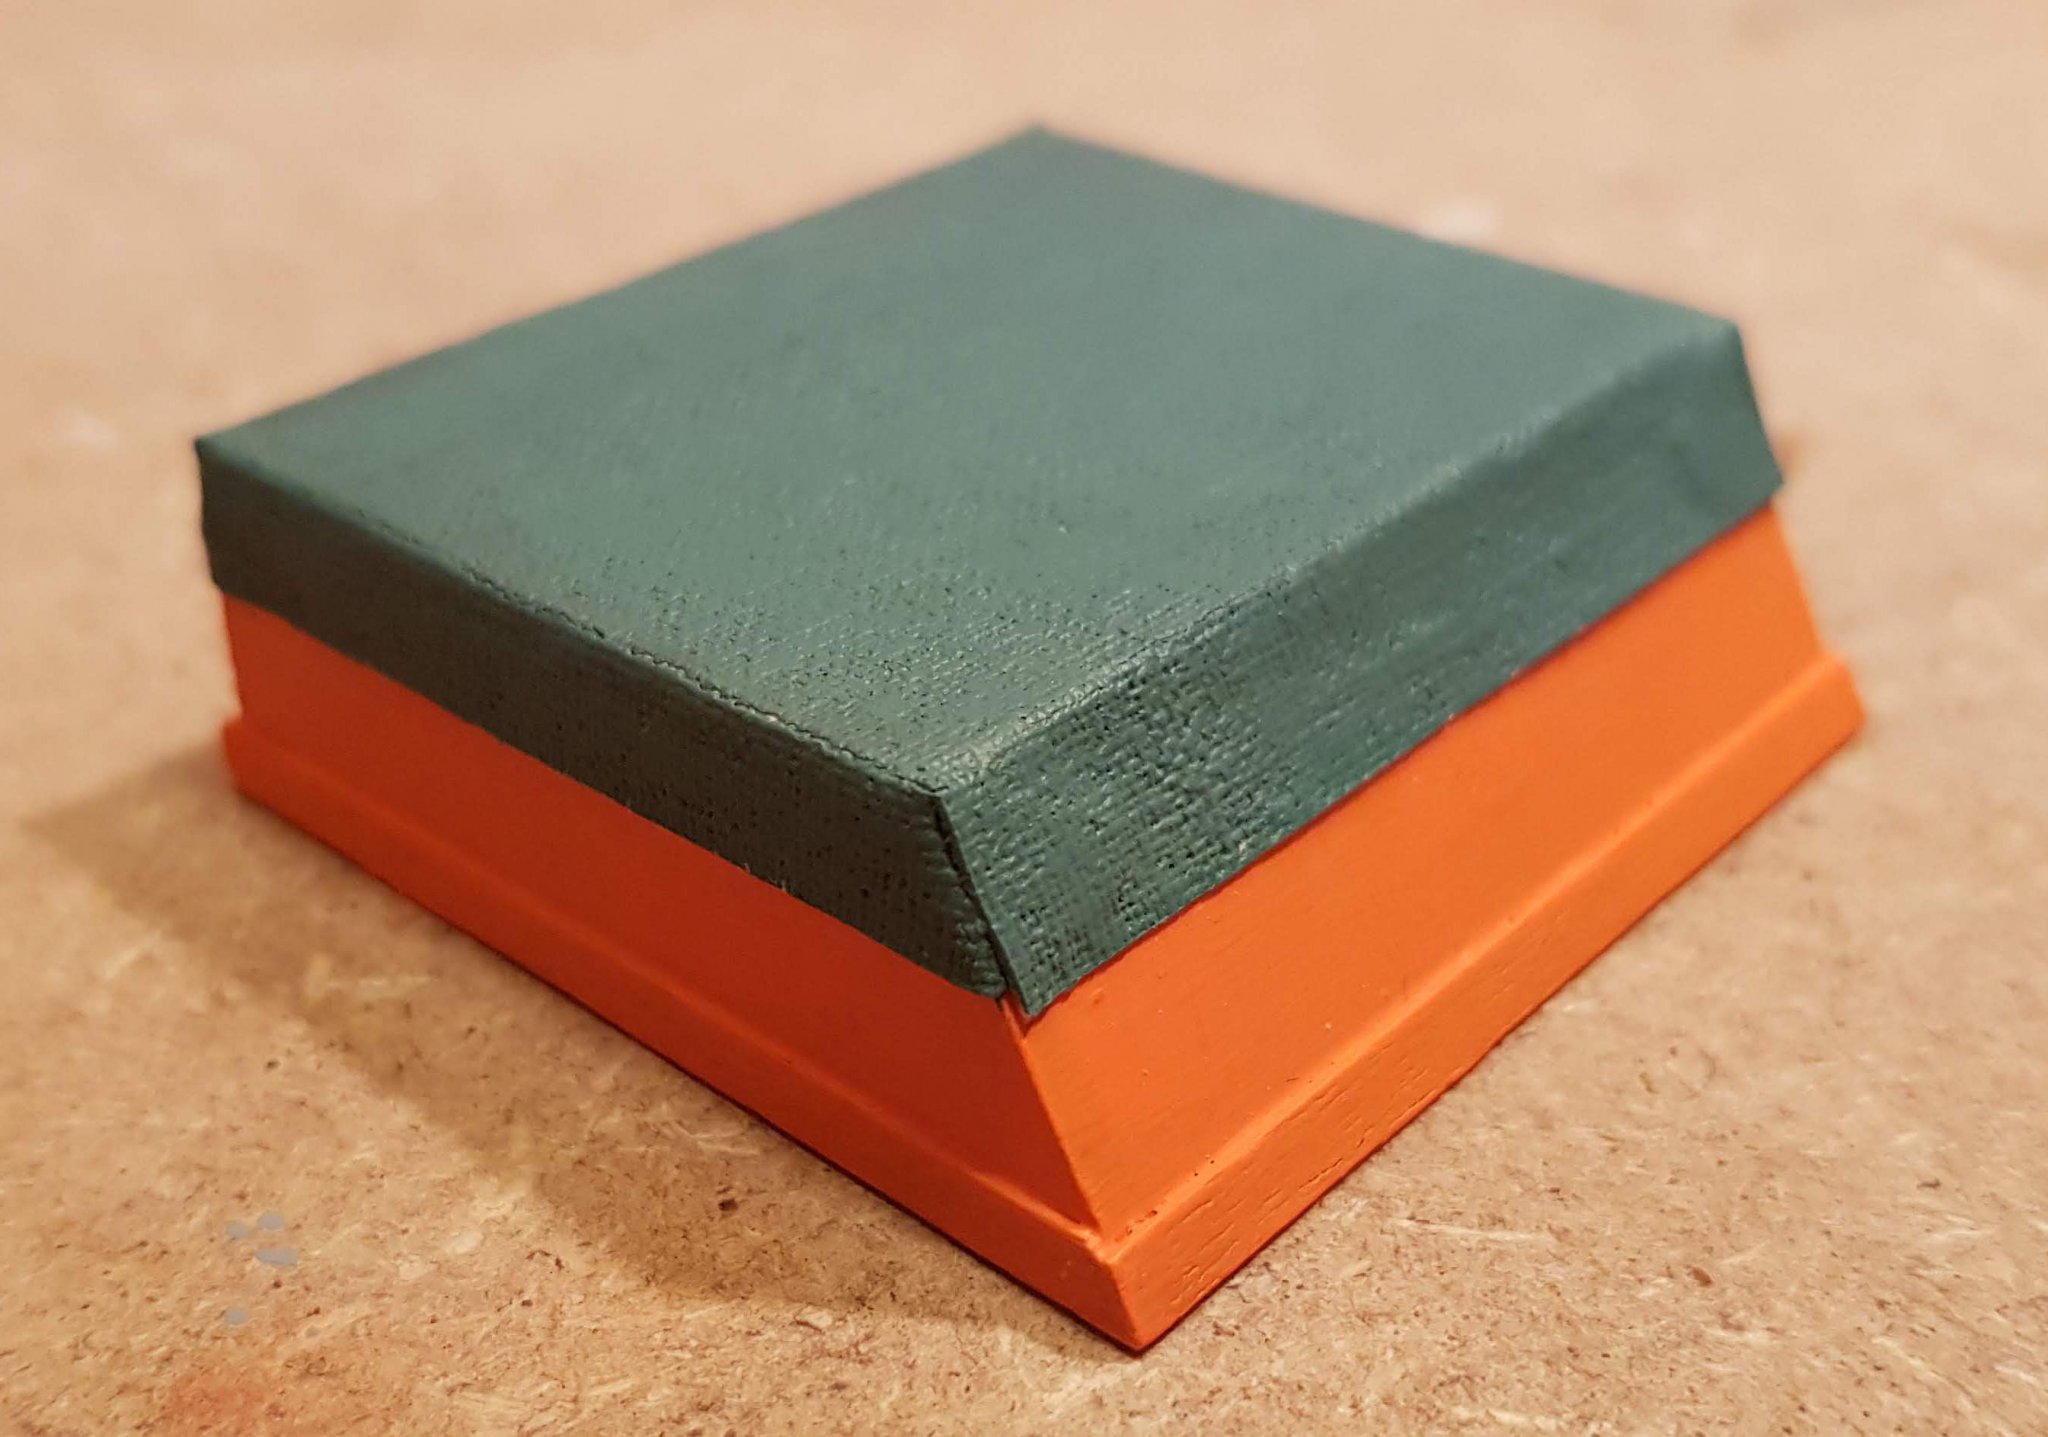
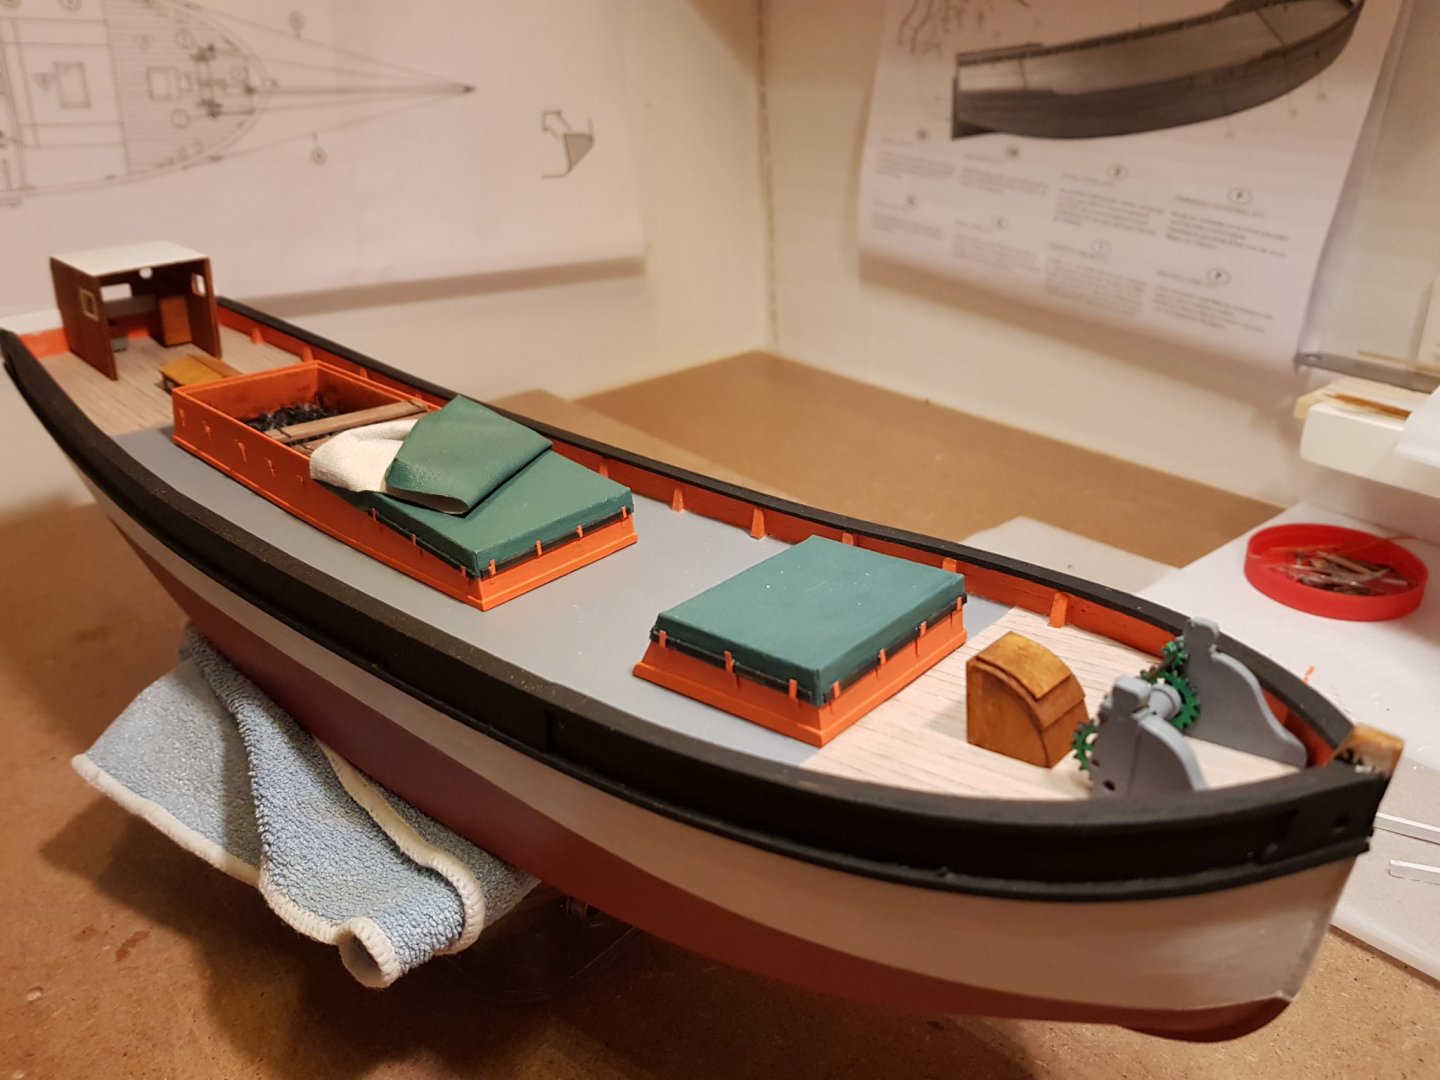
First of all, thanks for all the thumbs up from everyone that is reading this. It's a great encouragement for a beginner like me. Several things came together today and I feel that I can see some real progress. First of all, the project with in the project, the hatches are finally complete (except for varnish). The tarpaulin turned out as I wanted. After wetting it was easy to form and with some tape to hold down the sides the heap got the impression of thick and heavy rubberized canvas that I wanted. The hooks was a bit tricky. They are made of aluminum from a cut up can, and are glued wit CA glue. The railings and the painting of the hull is mostly complete. There are some extensions to be added on top of the railing in the fore and aft parts. I took the opportunity to place (without gluing) the currently finished deck fittings and get a feel for it. Cheers

- 83 replies
-
- 11
-

-
- finished
- billing boats
- (and 1 more)
-
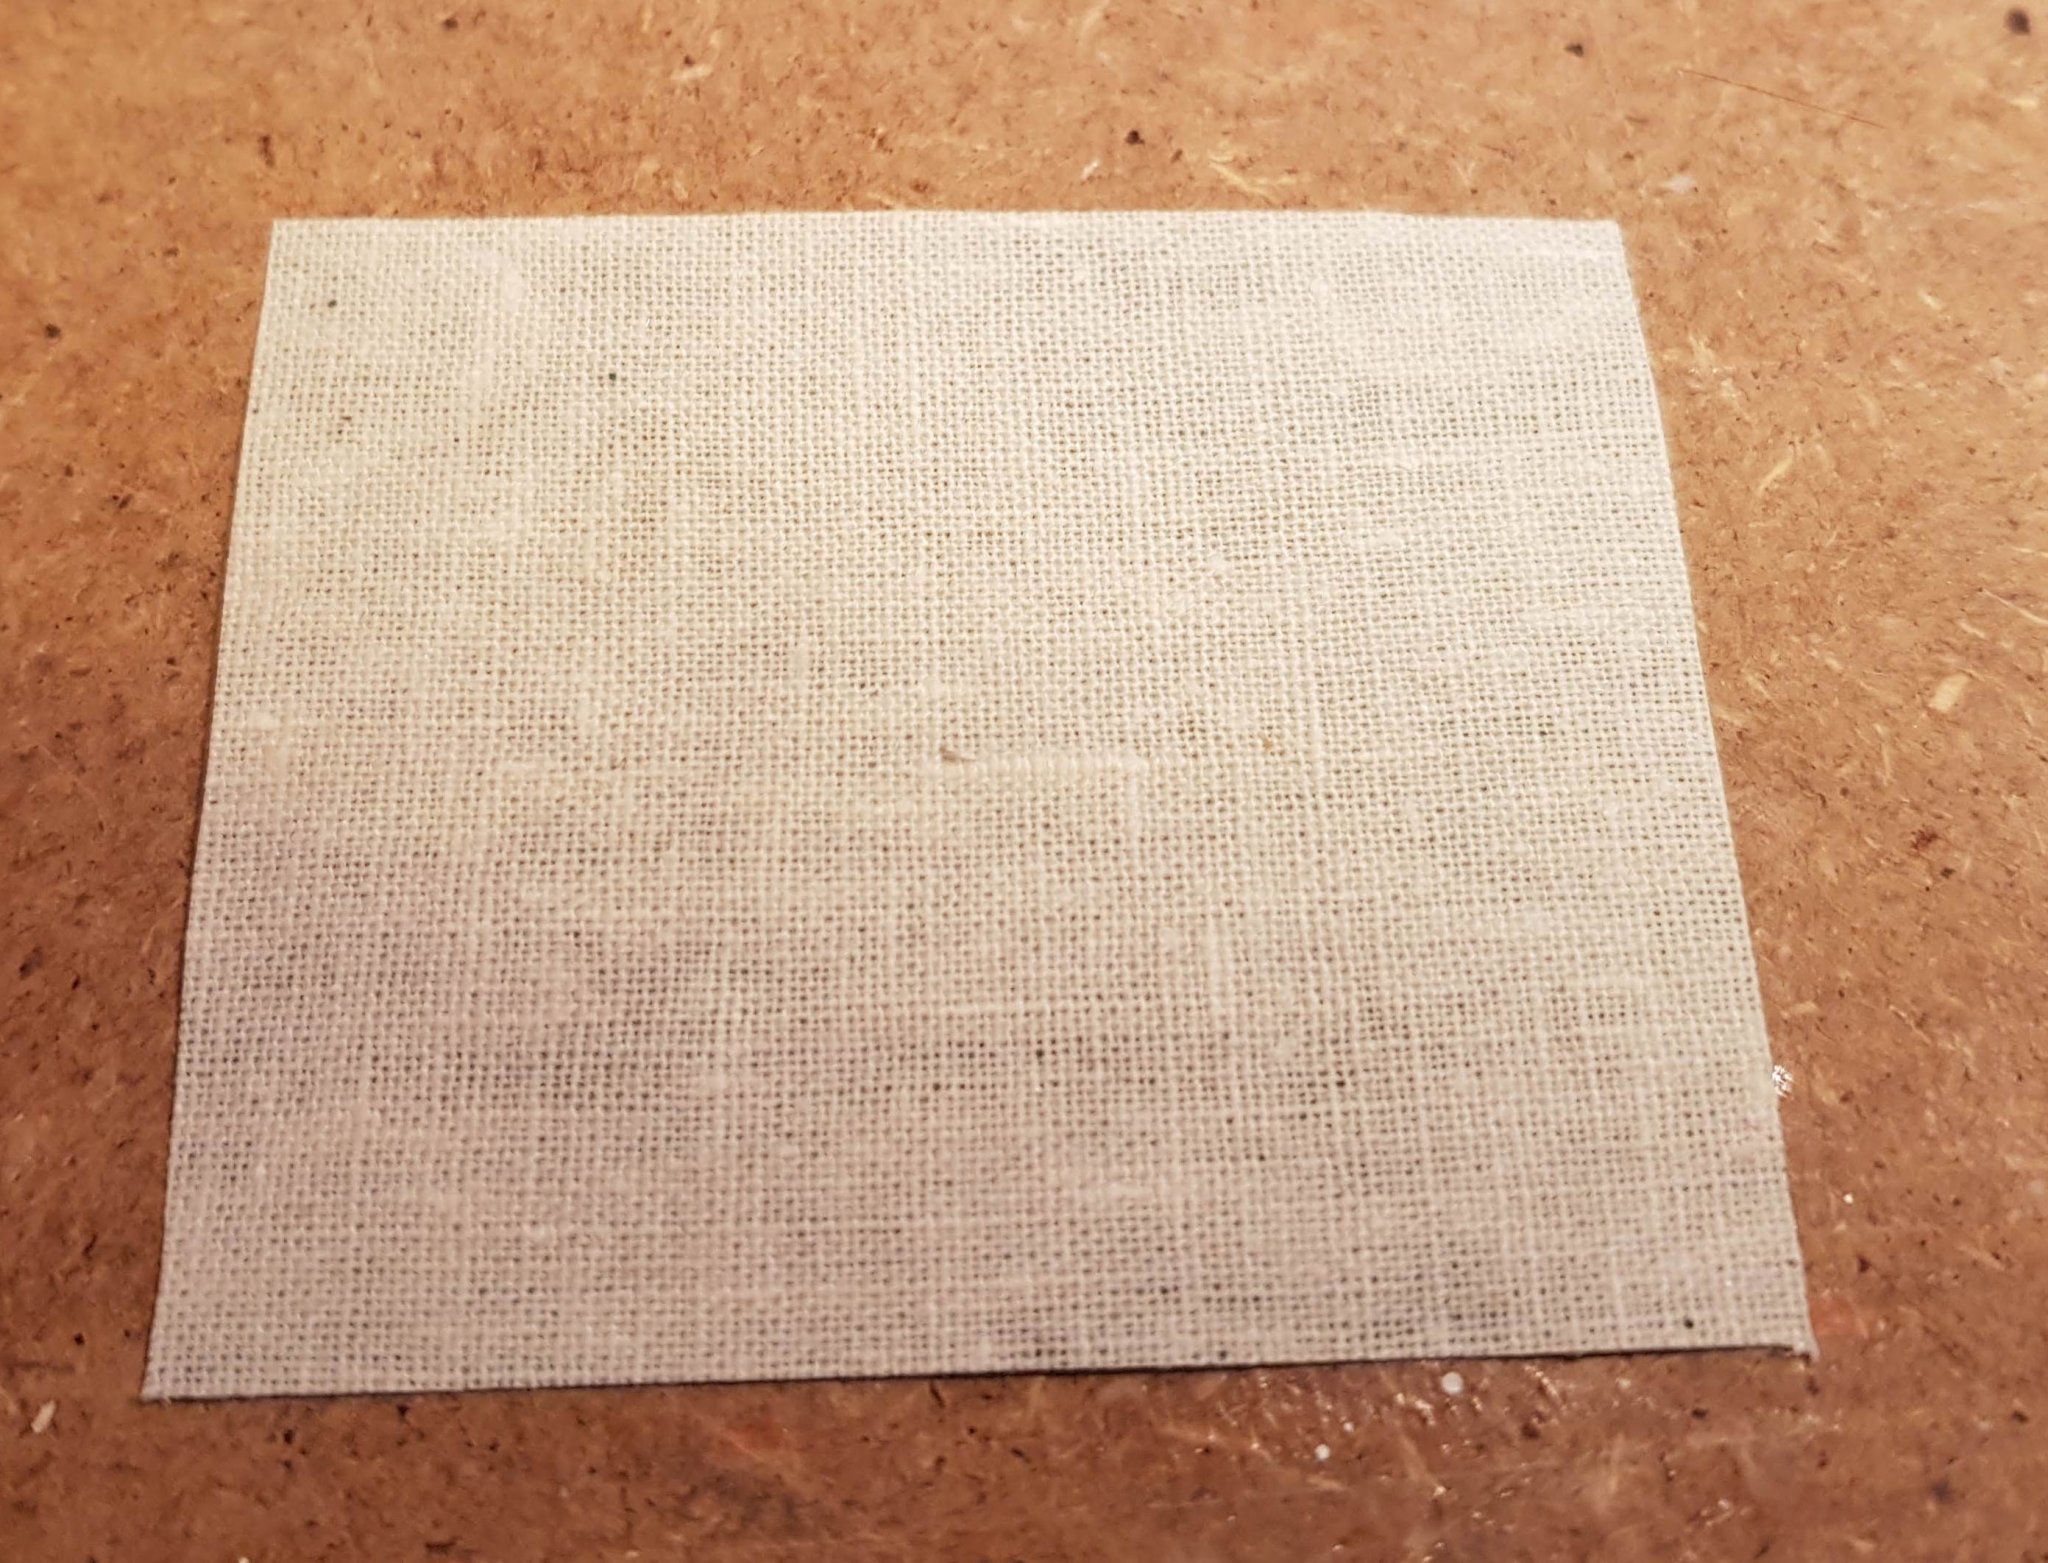
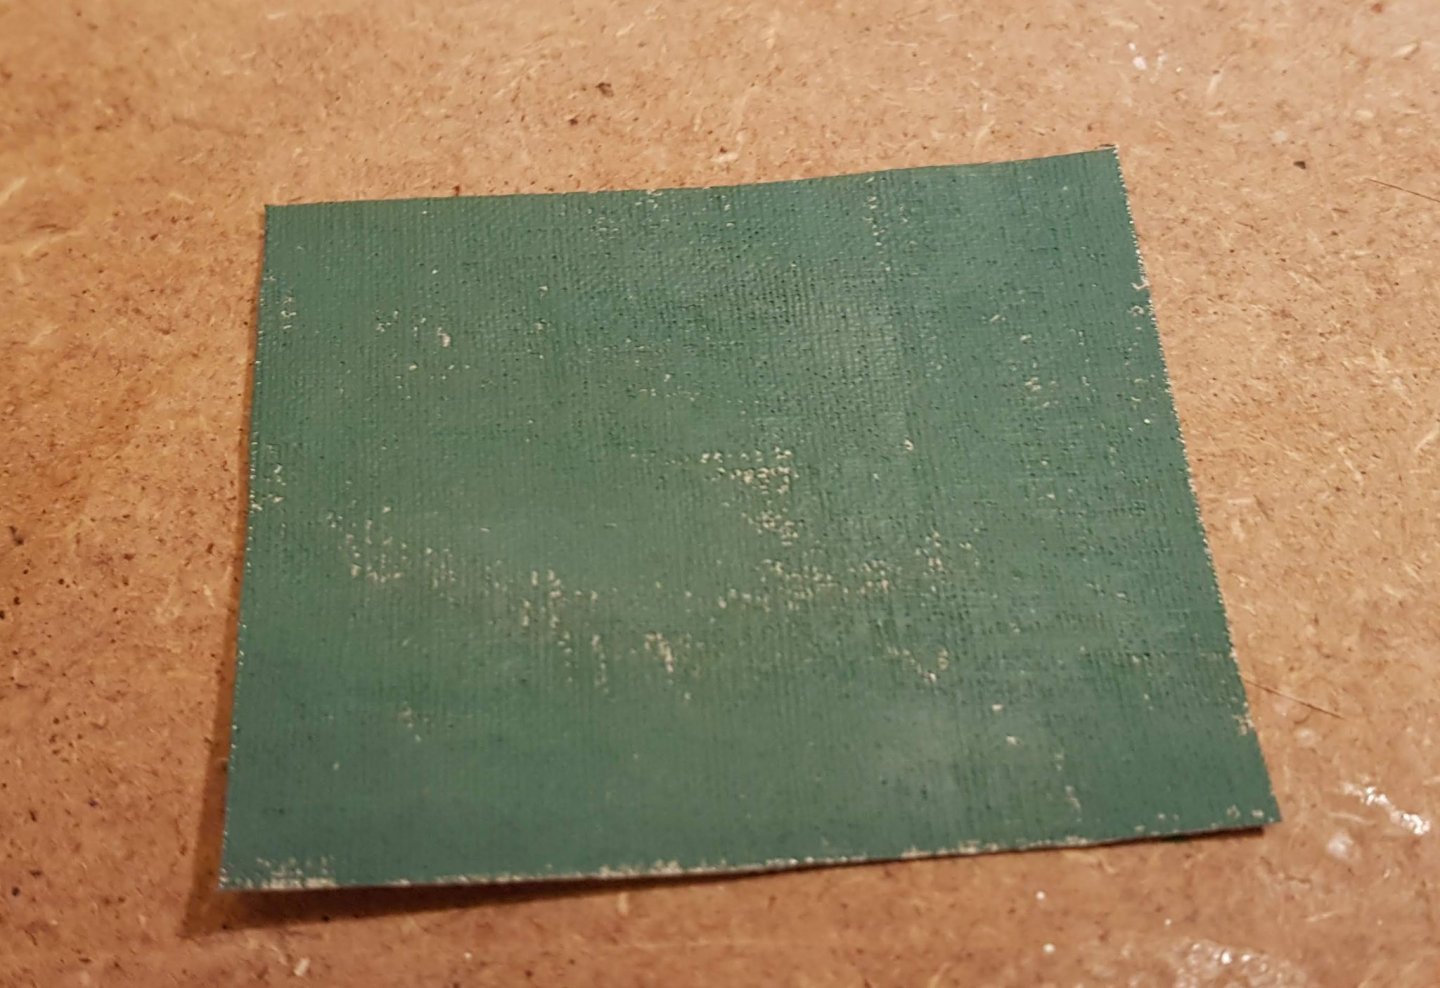
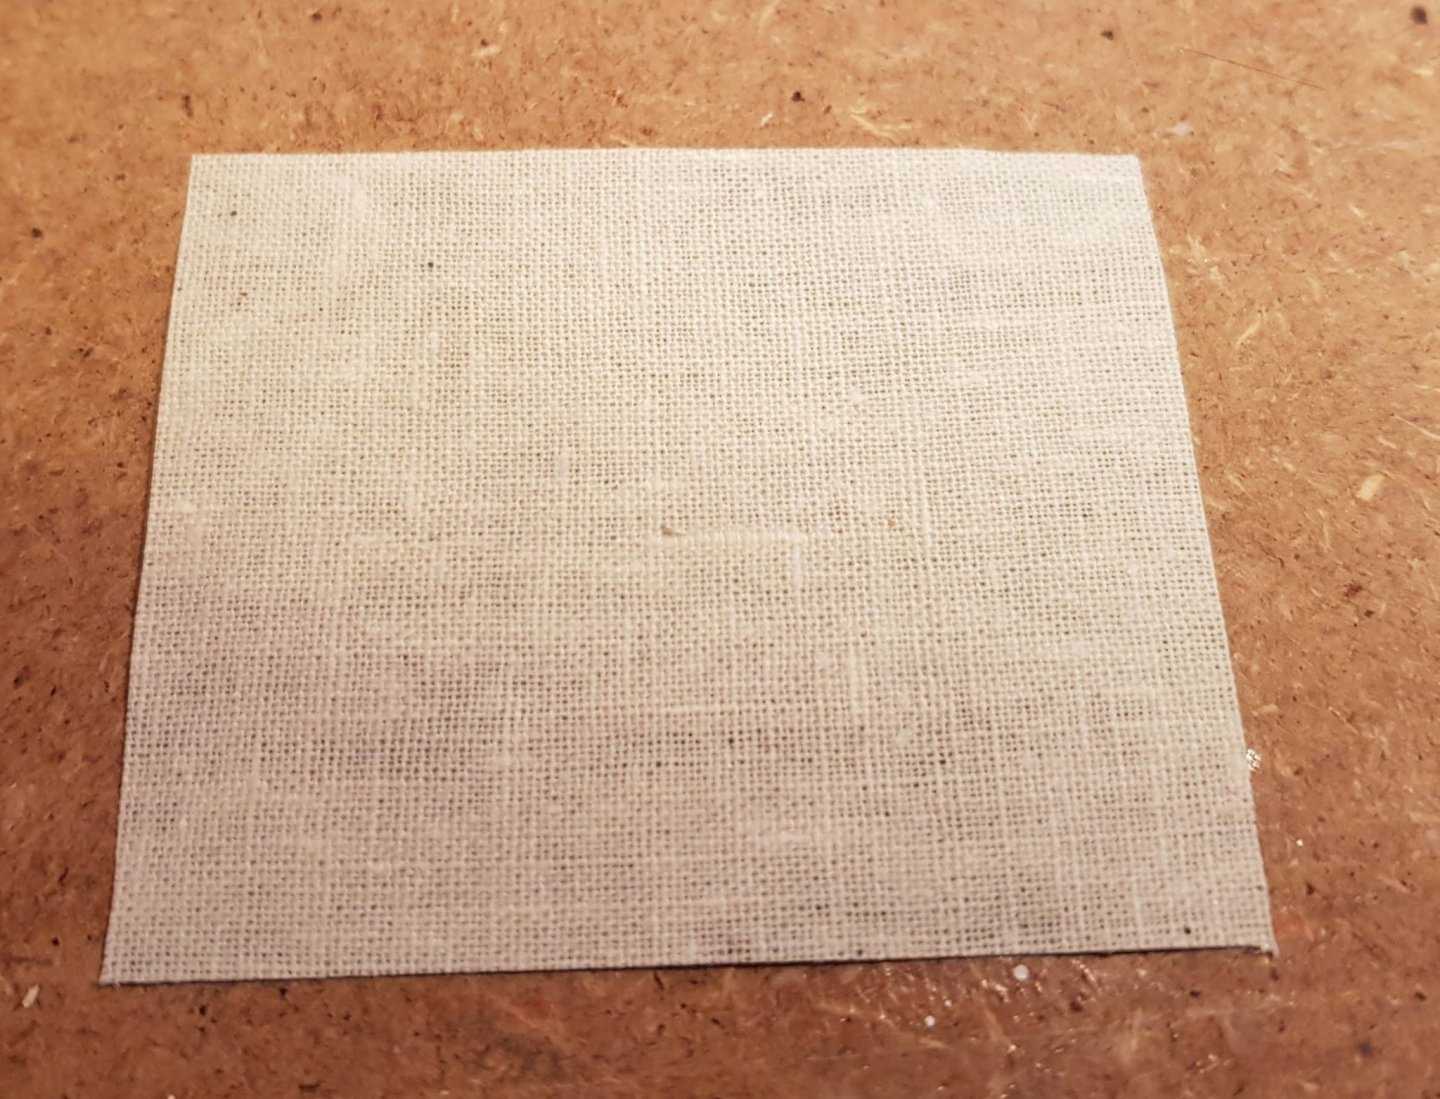
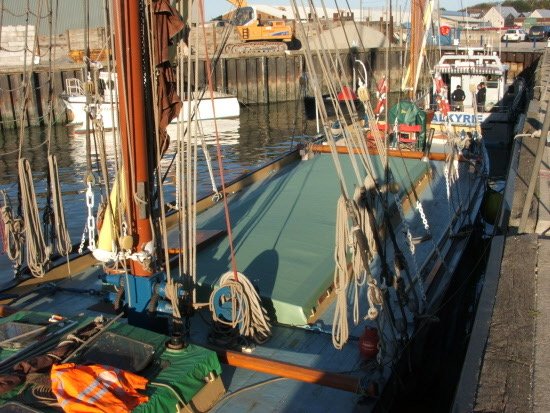
I finally got a length of lime strip so I can continue with the railing. In the meantime I have continued with the tarpaulin for the hatches. As mentioned earlier I treated a piece of cloth with wallpaper glue (2 applications with drying between). Then I painted one side with acrylic paint. The result is a quite good, no paint bleeds through, see below. As I wanted to minimize the risk of bleed through I painted with an undiluted paint, so it was a bit hard to get it to cover well. I had to touch up on the paint after i covered the hatches. Front hatch The tarpaulin on the mid ship hatch is only glued in the right part in the picture below. After I have glued the overlap together at the side I will wet it and try to form it in a heap. The next step for the hatches is to add some hooks for a metal bar that will hold the tarpaulin in place. See picture below (from another Thames sailing barge). Cheers


- 83 replies
-
- 8
-
-
- finished
- billing boats
- (and 1 more)
-
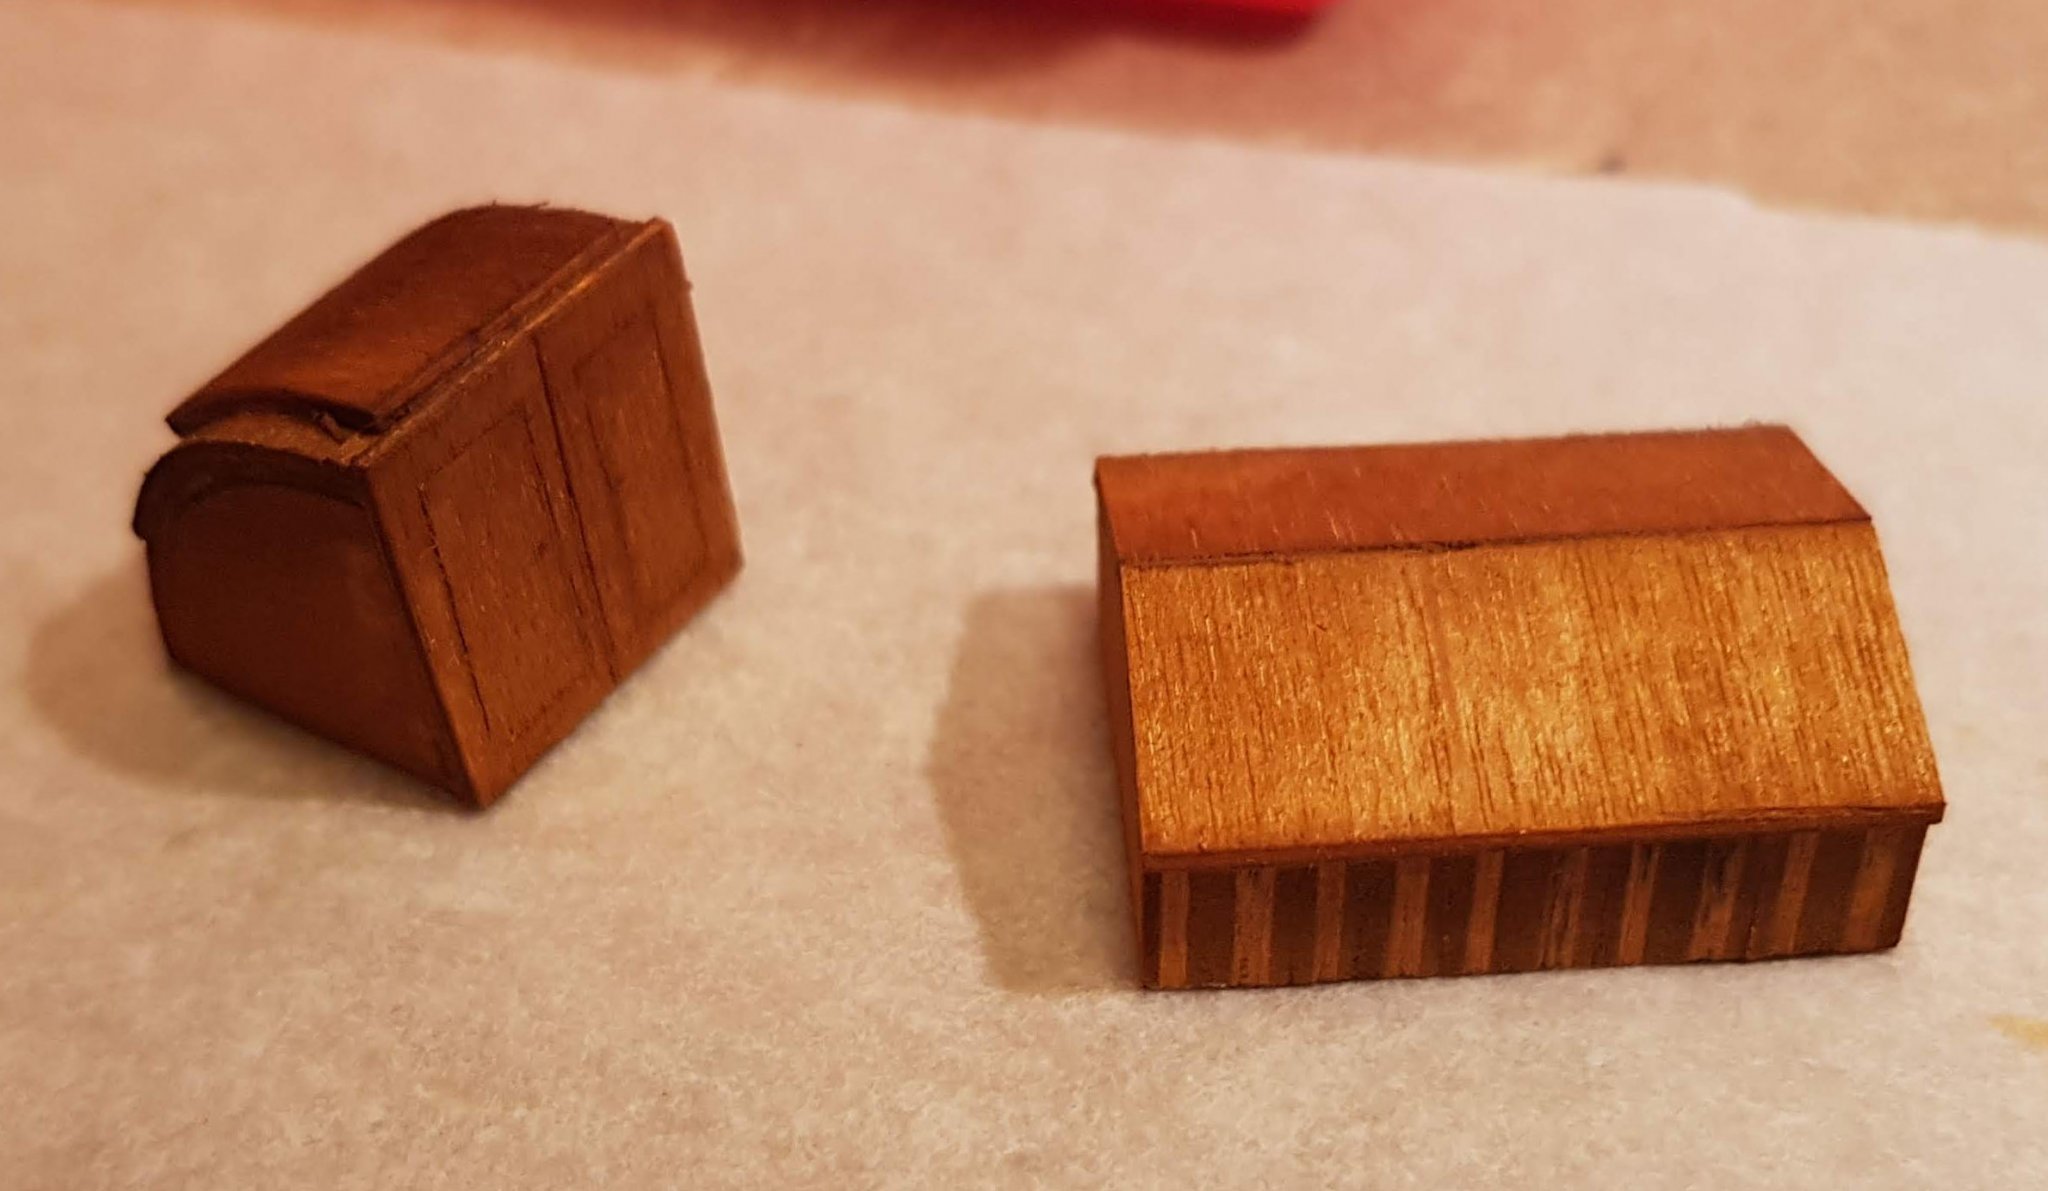
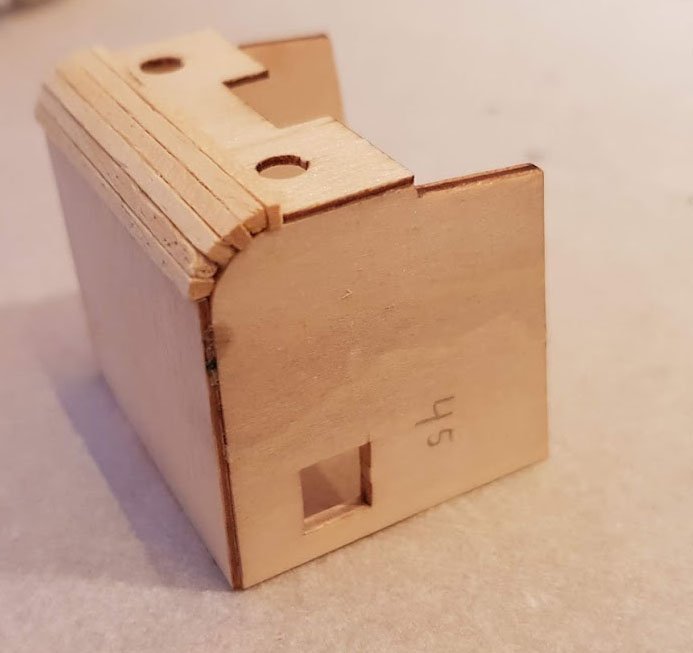
No luck in getting a 1x2 mm strip at the local hobby store. They could get it for tomorrow. Instead I have continued with some deck buildings, both are somewhat deviating from the kit. The doors for the hatch are plastic in the kit, but I made them from spare thin plywood. The small "house" I have interpreted as being above the engine room in the kit version of Will. As I model her in the pre-engine version I have made it into a skylight. The "windows" are paper and the frames are painted cardboard.


- 83 replies
-
- 7
-
-
- finished
- billing boats
- (and 1 more)
-
In the end I did not even try to bend the railing, I cut it in three pieces instead. This made it much easier to get it to lay flat. However it also meant that there will not be an even 1 mm overhang on the outside. Instead I sanded the railing flush to the hull, but now I need an 1x2 mm strip to glue to the outside. Unfortunately I don't have a long enough strip at home, so I'm stuck for the day. I hope that my local hobby store will have something suitable, even if they pretty exclusively deal in RC and plastic models. Thankfully Sweden is not in lock down (yet). Cheers

- 83 replies
-
- 10
-
-
- finished
- billing boats
- (and 1 more)
-
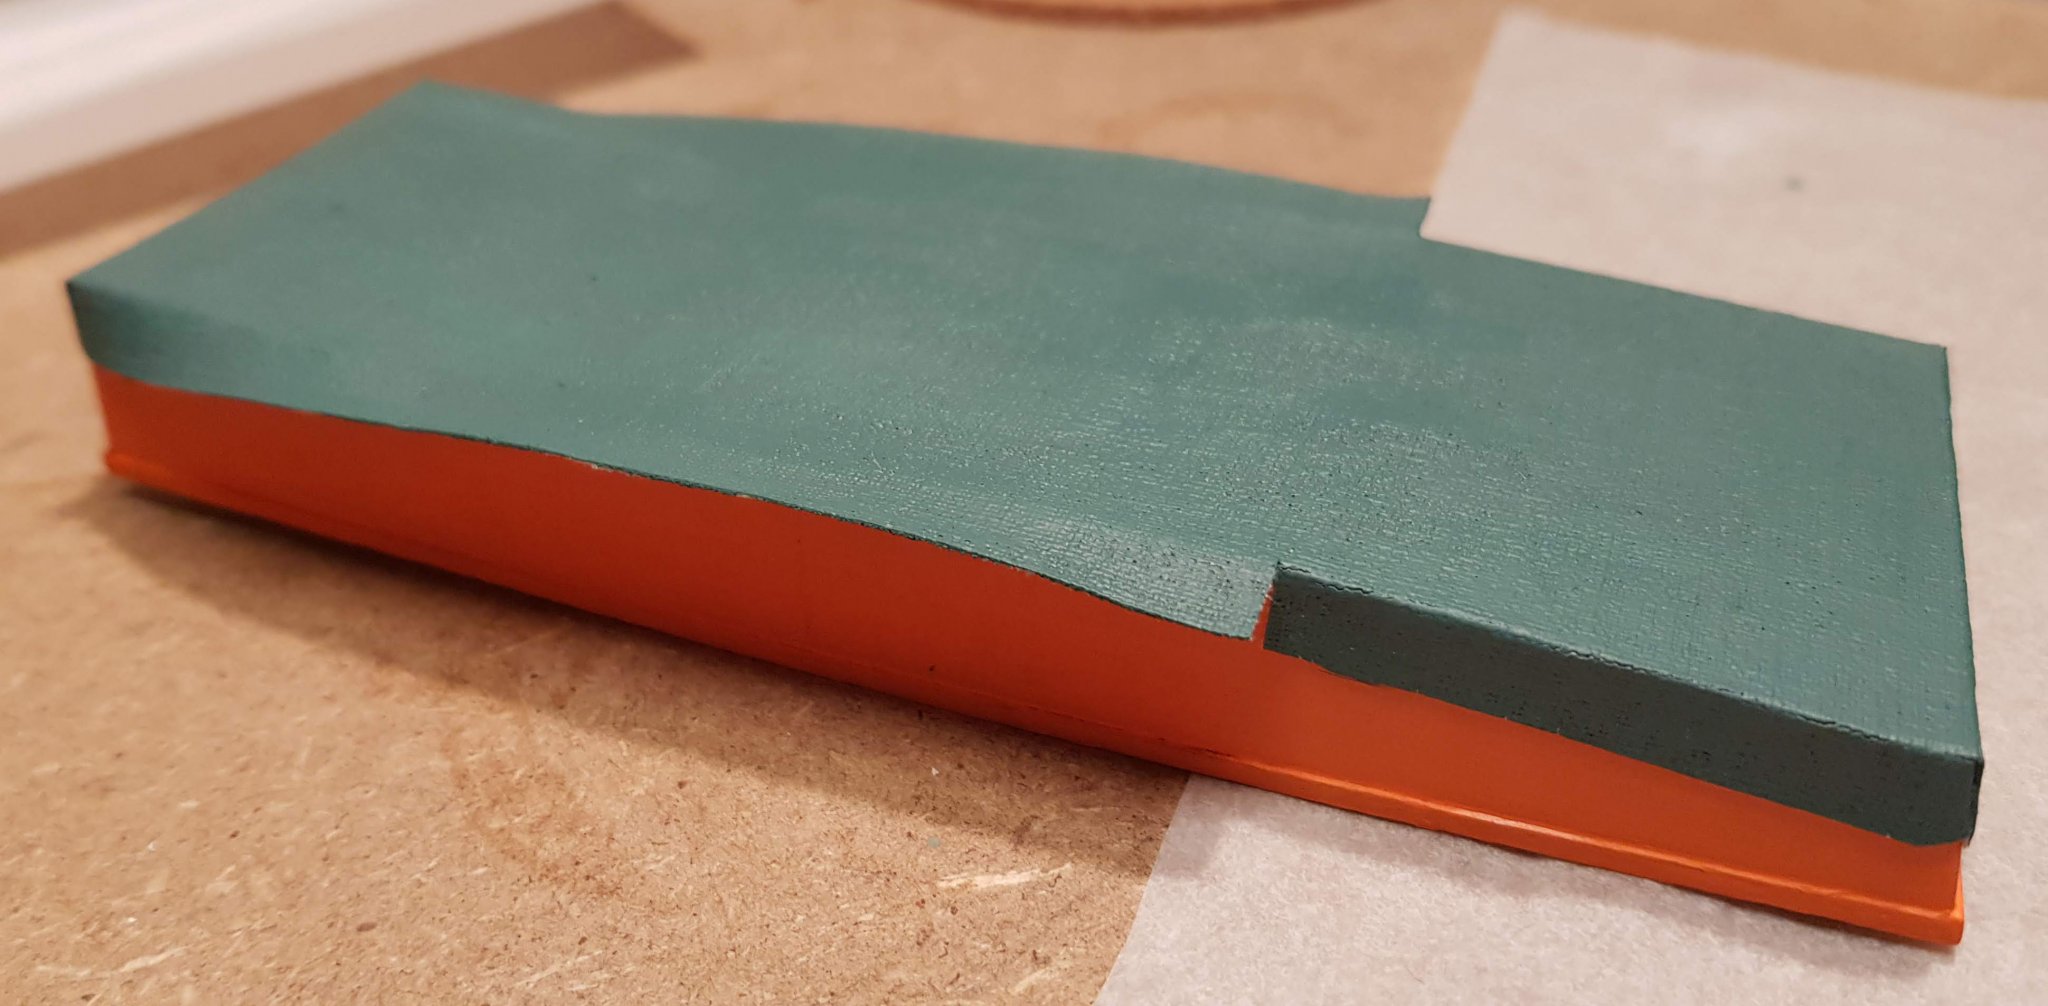
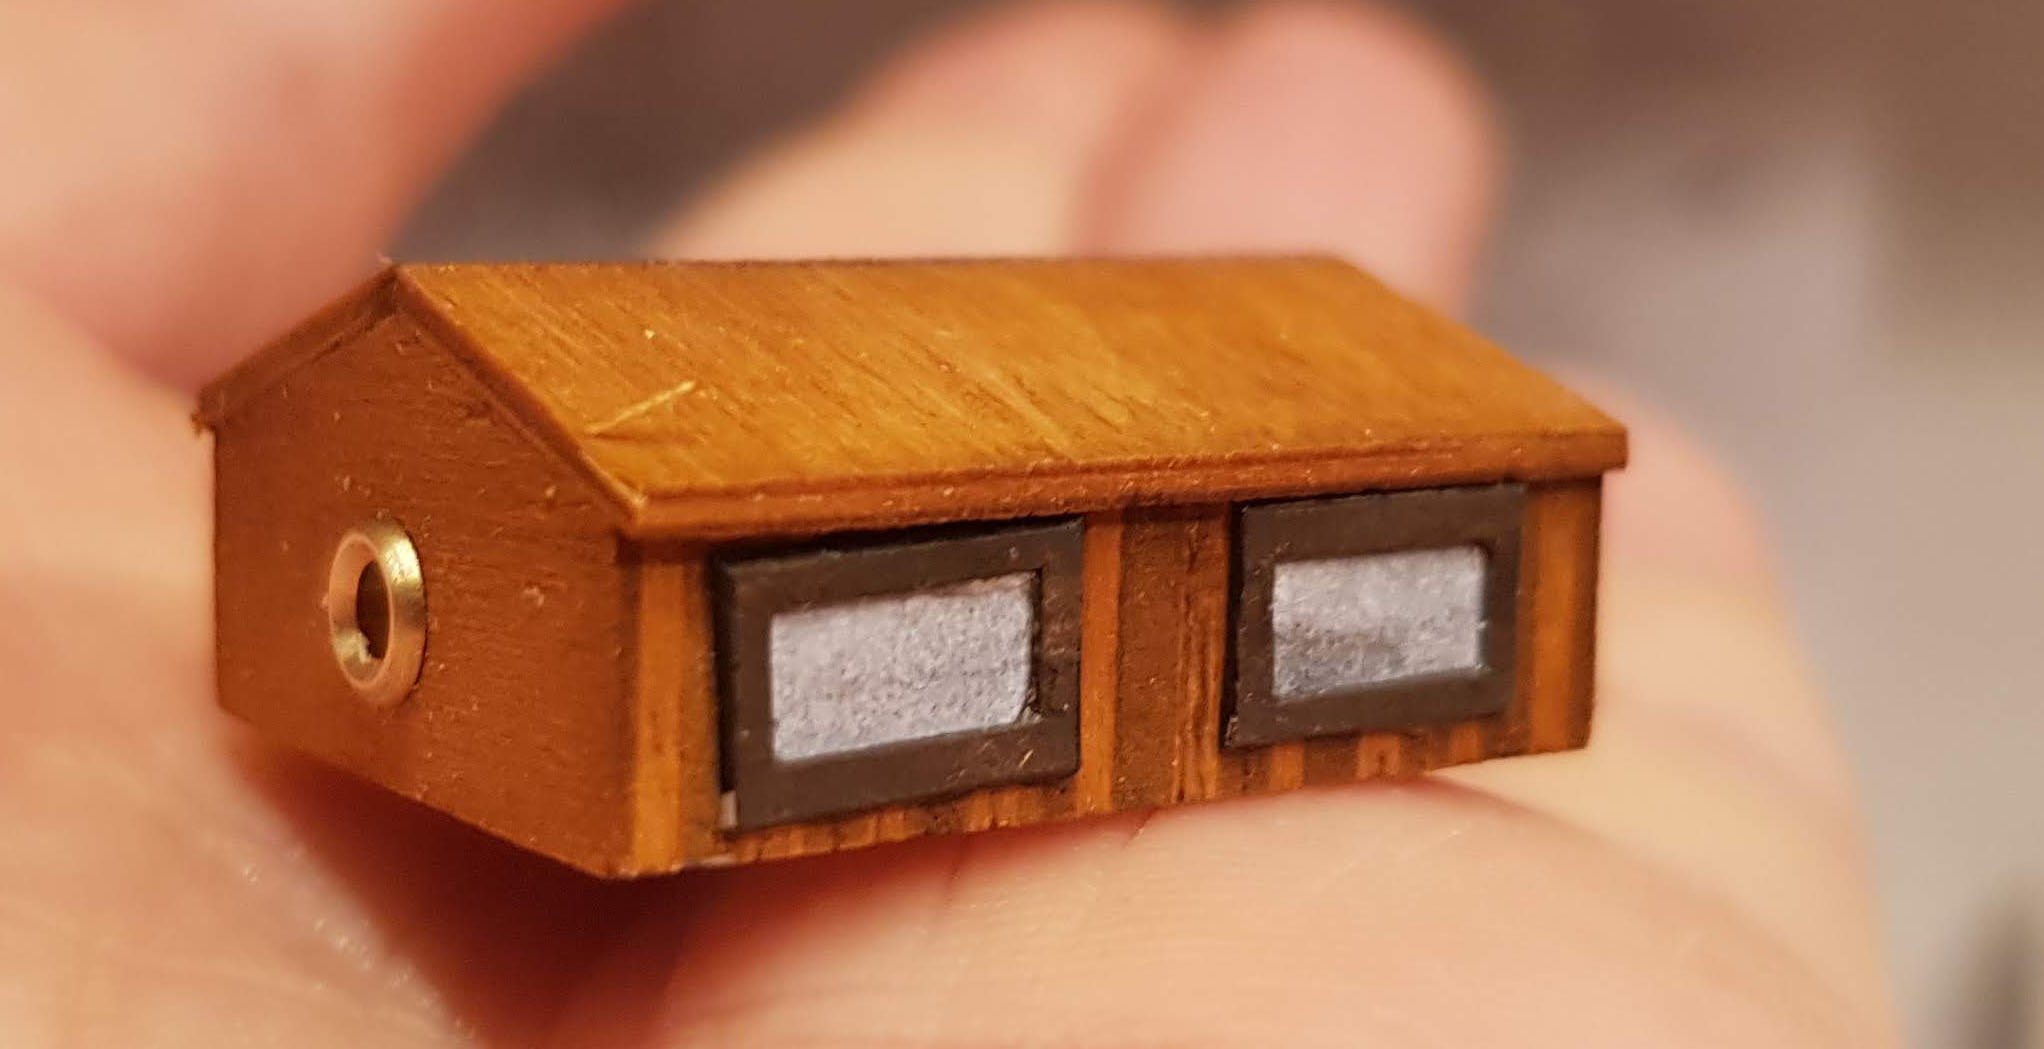
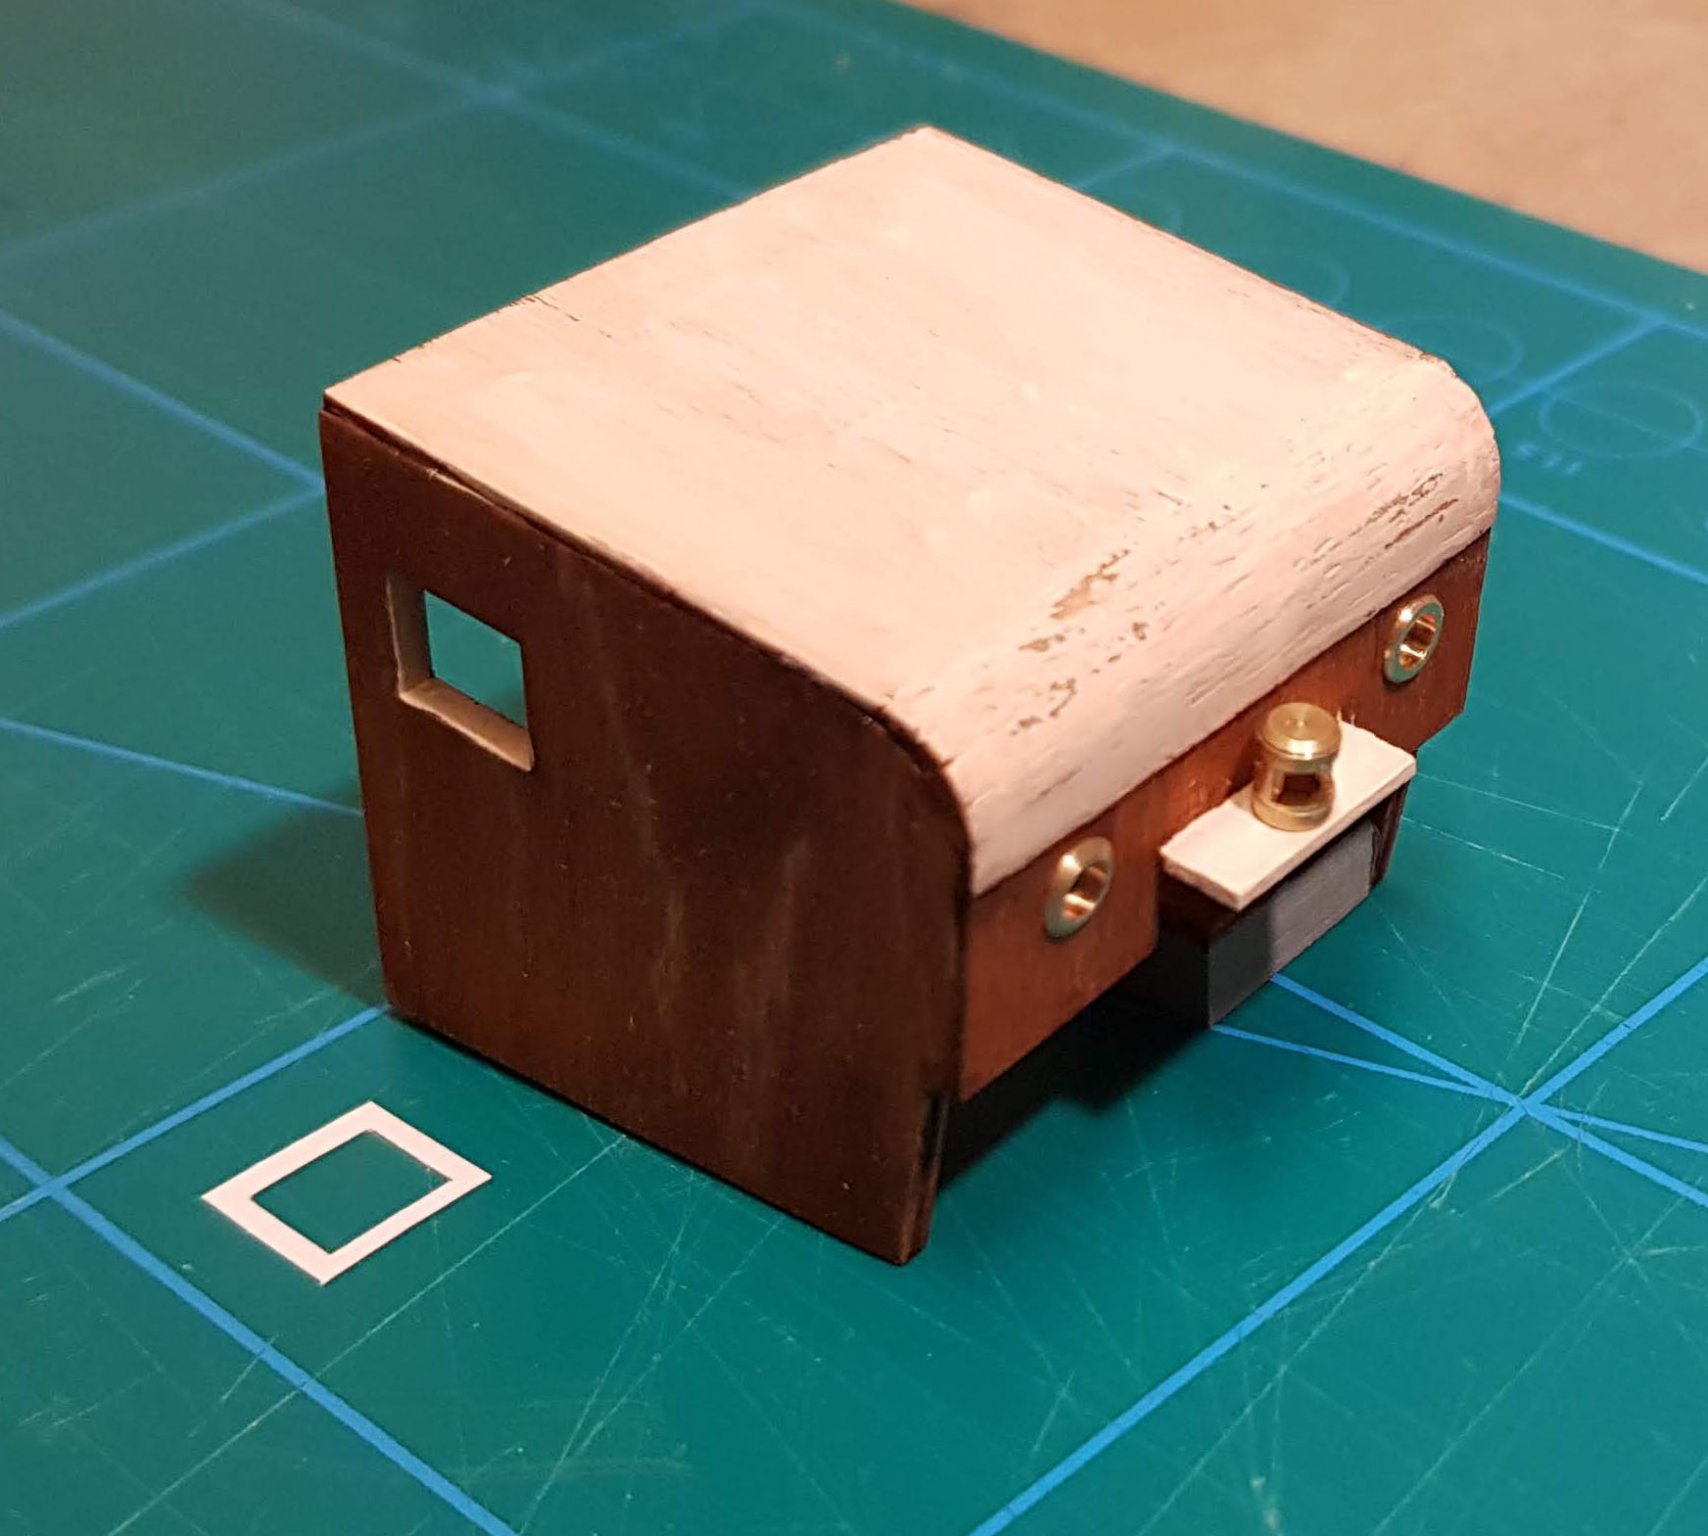
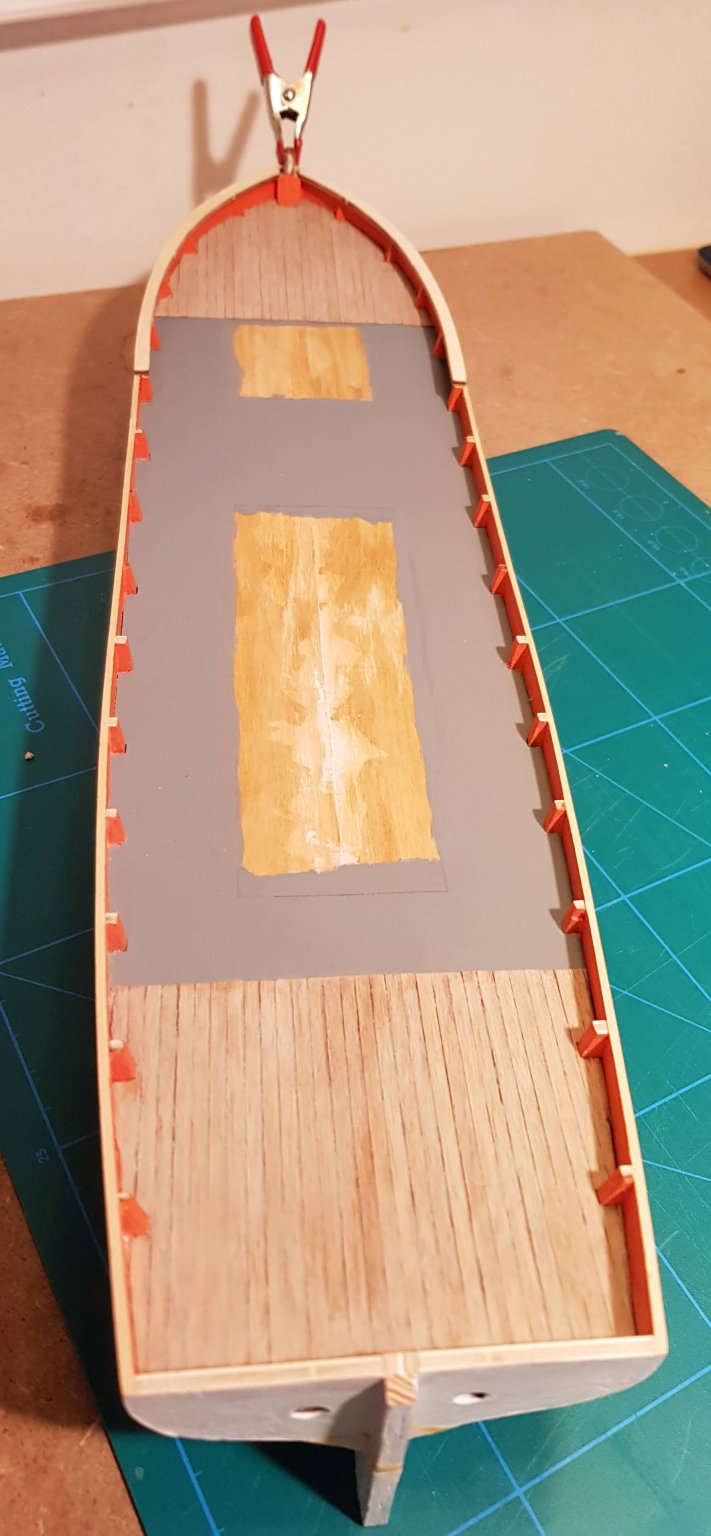
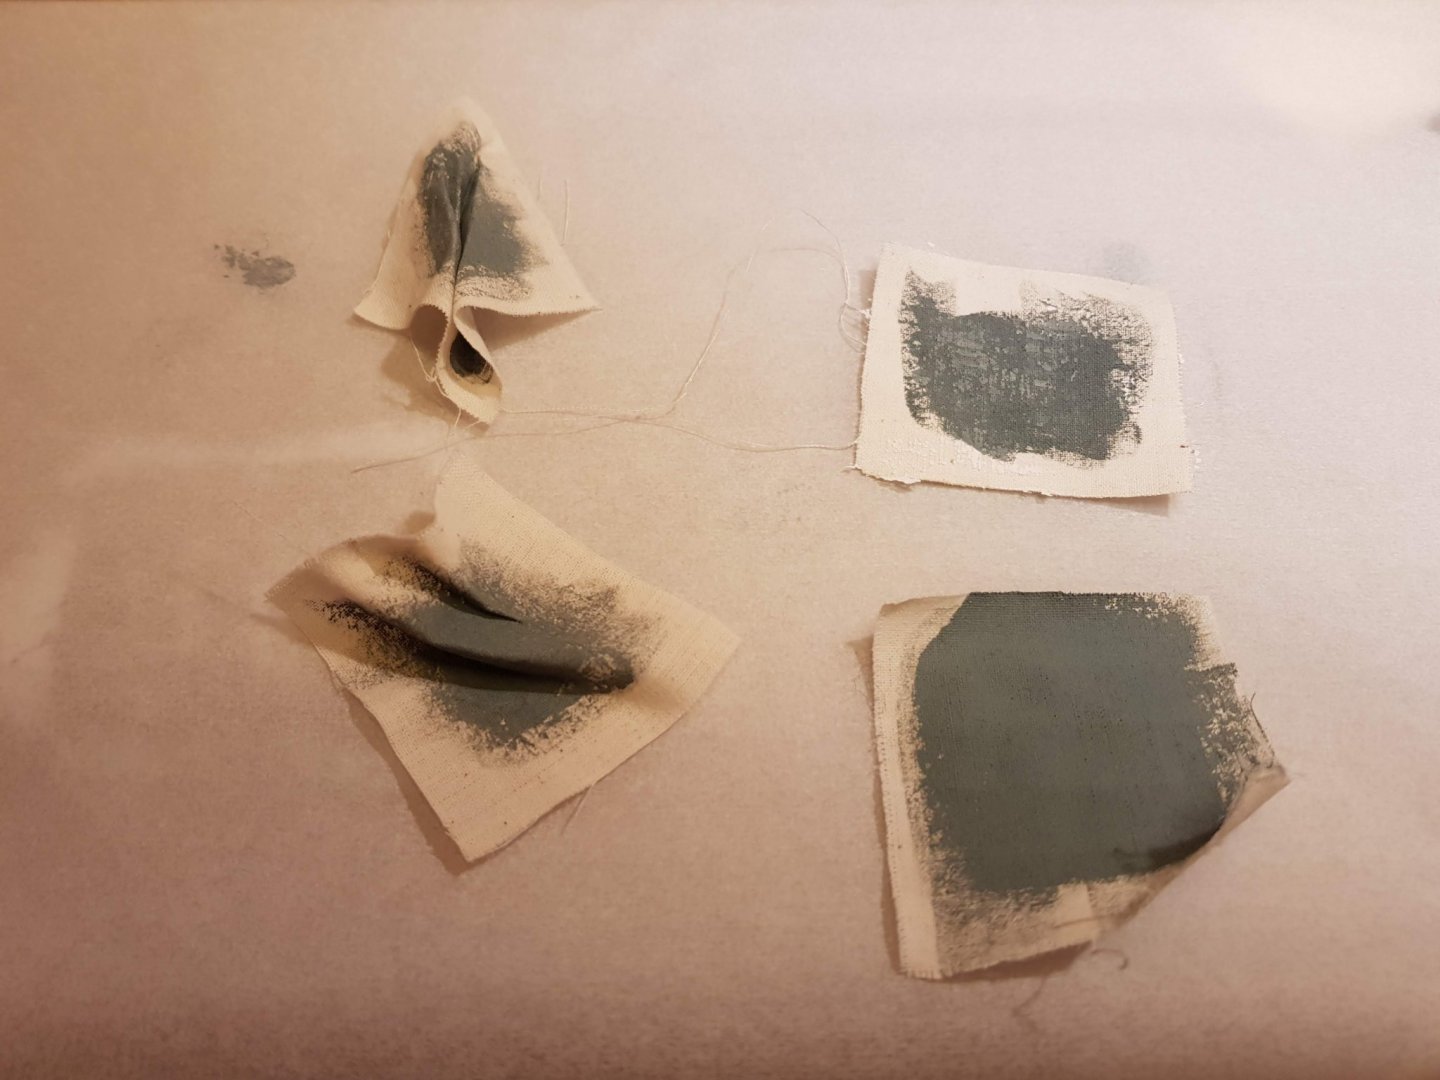
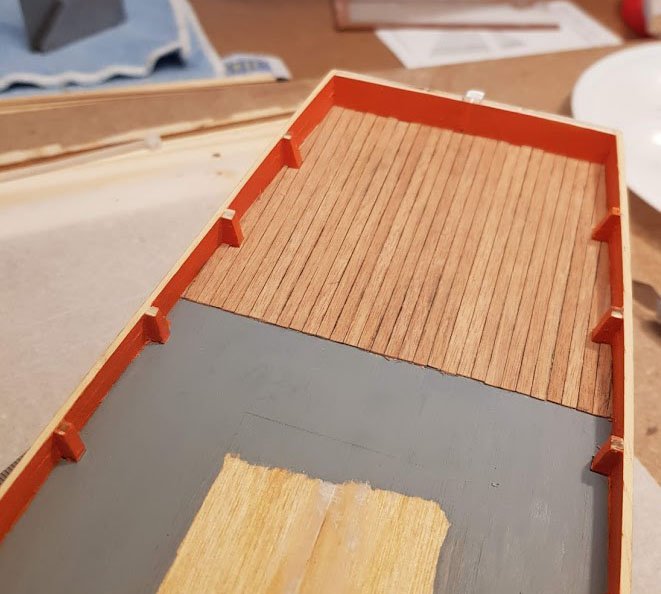
Thanks Bob for your appreciation. It is nice to know that there are people reading and following what I do 😄 Today I have continued on several things. The steering cabin received some stain, and then I started to paint the roof. However as I had stained the whole thing the paint dissolved some of the stain and it turned pink. Some extra layers will be needed... The brass parts are only dry fitted to see how it looks. I have decided to put a white frame around the windows (ordinary 80g copying paper), but no window pane (the hole is only 8x8 mm). The deck is done. The planked part did receive a white wash before the whole deck was given a layer of varnish to protect it during building. Now I can start with the rails. The bow part was pre-cut from plywood, but the rest will be strip wood from the kit. This will actually be rather tricky to get in place, as the strip needs to bend both up and sideways (which is not really possible), and there is no good holds for clamps. I will see tomorrow how much can be achieved with some hot water and mild force. Finally the hatches have gotten thin strips in the lower part of the sides (coming) to hide the gap towards the deck. The large hatch has turned out to be a small project in it self. The next step is the tarpaulin. For this I would like to make something that looks like rubber coated heavy canvas, where one side is colored and the other have the canvas structure. My idea is to treat the fabric with something that will make it possible to paint on one side (but not let the paint bleed through), while not making it to stiff. My experiments has led me to to soak the cloth in wallpaper glue and then paint in several thin layers. The fabric can be softened and formed if damp, but will keep its form when it dries again. This should make it possible to create a realistic heap on top of the unopened part of the hatch. The wallpaper glue to the upper left in the picture below. The other tests included diluted PVA glue (lower left, not so easy to form afterwards), white paint (lower right, to stiff), no treatment (upper right, paint bleeds through). Cheers


- 83 replies
-
- 8
-
-
- finished
- billing boats
- (and 1 more)
-
Thanks for the encouragement Clare. What I can see from the other build logs the ply might have been different (thicker but softer?) in the oldest kit (by Izzy Madd), but its still plywood. Tobias
-
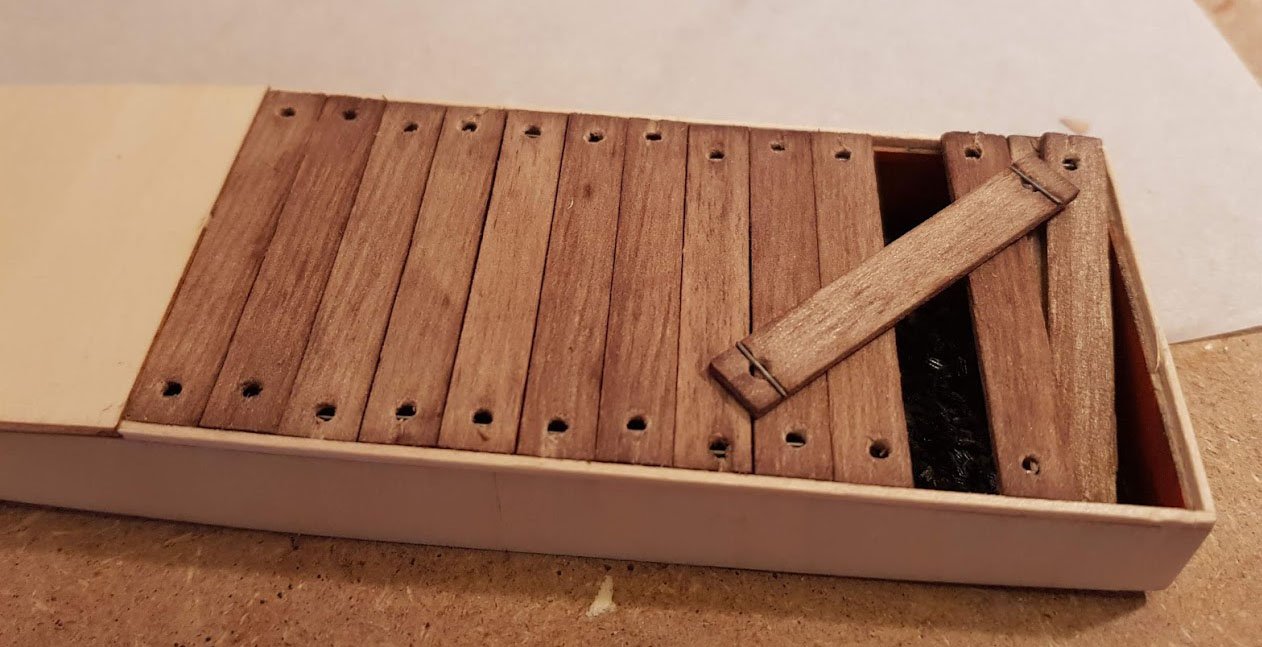
It feels like slow progress when one is working on several things in parallel. I have been mostly working on the deck, the hatches and the steering cabin. For the hatches (that will be half open) I have made cover planks. They don't exist in the kit and I have no clear idea of how they should look. One old black and white photo showed something that I interpreted like below. A hole in the planks and some kind of handle. The planks have been aged with white vinegar and steel wool. I plan to have most of the planks stacked on deck and a tarp half dragged up to the part where there are no planks. I have also planked the aft deck. The planks have been "caulked" by drawing a soft pencil along the edges. I have briefly considered painting the deck planks, that would probably be most realistic. Currently I have fallen for vanity and don't want to hide the nice look. I will test on some spare strips to see how it looks with varnish on. Maybe a light touch of a white wash could make it look less like a pleasure boat? Finally I have started on the steering cabin. The only tricky thing thus far is that the planked curve on the back is quite sharp and required some tricky beveling of the 2x2 mm planks. I have been considering if the square windows should be glassed, and if so how? Cheers
- 83 replies
-
- 8
-
-
- finished
- billing boats
- (and 1 more)
-
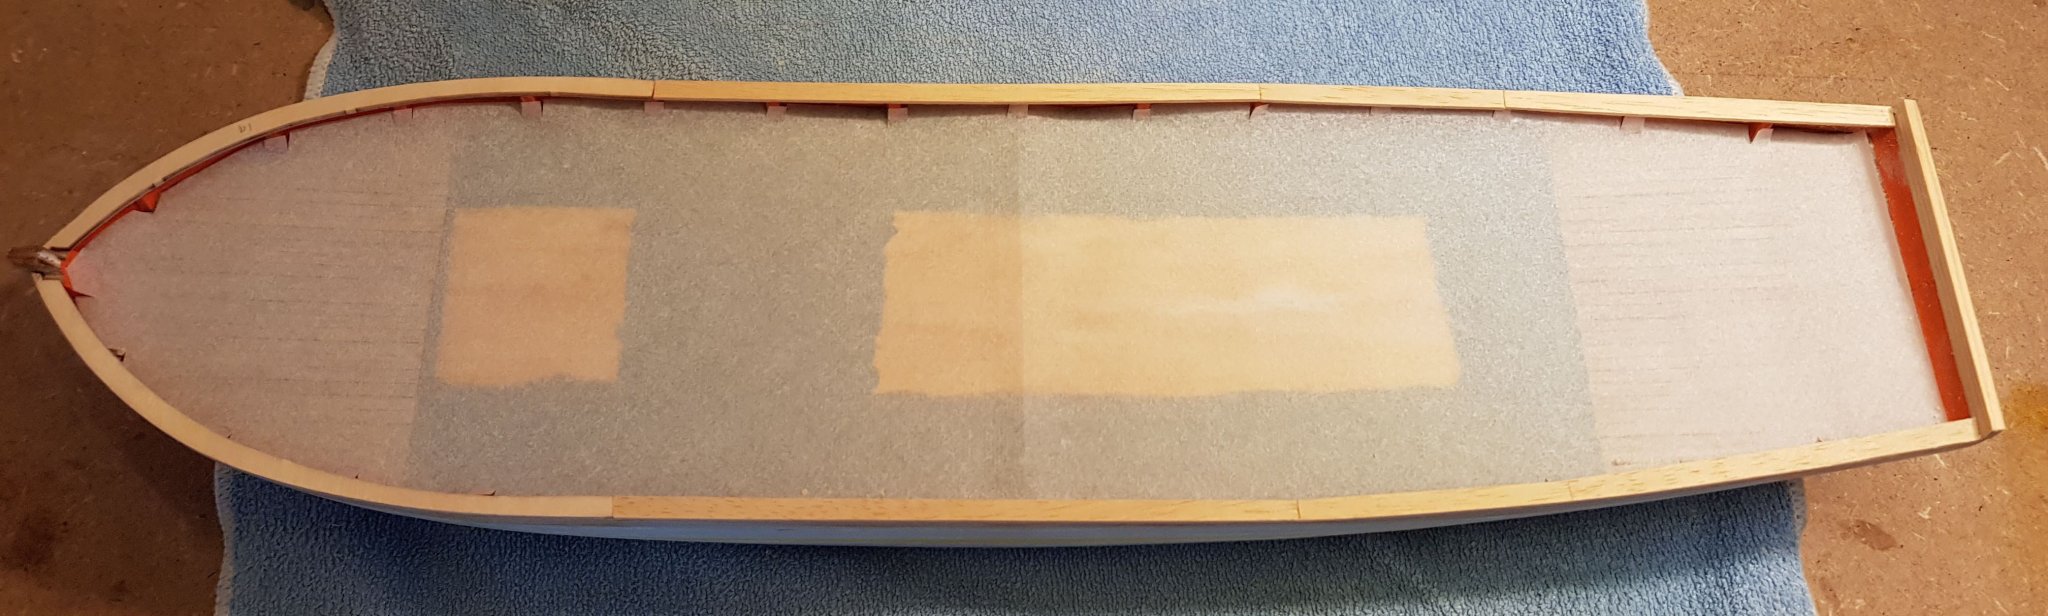
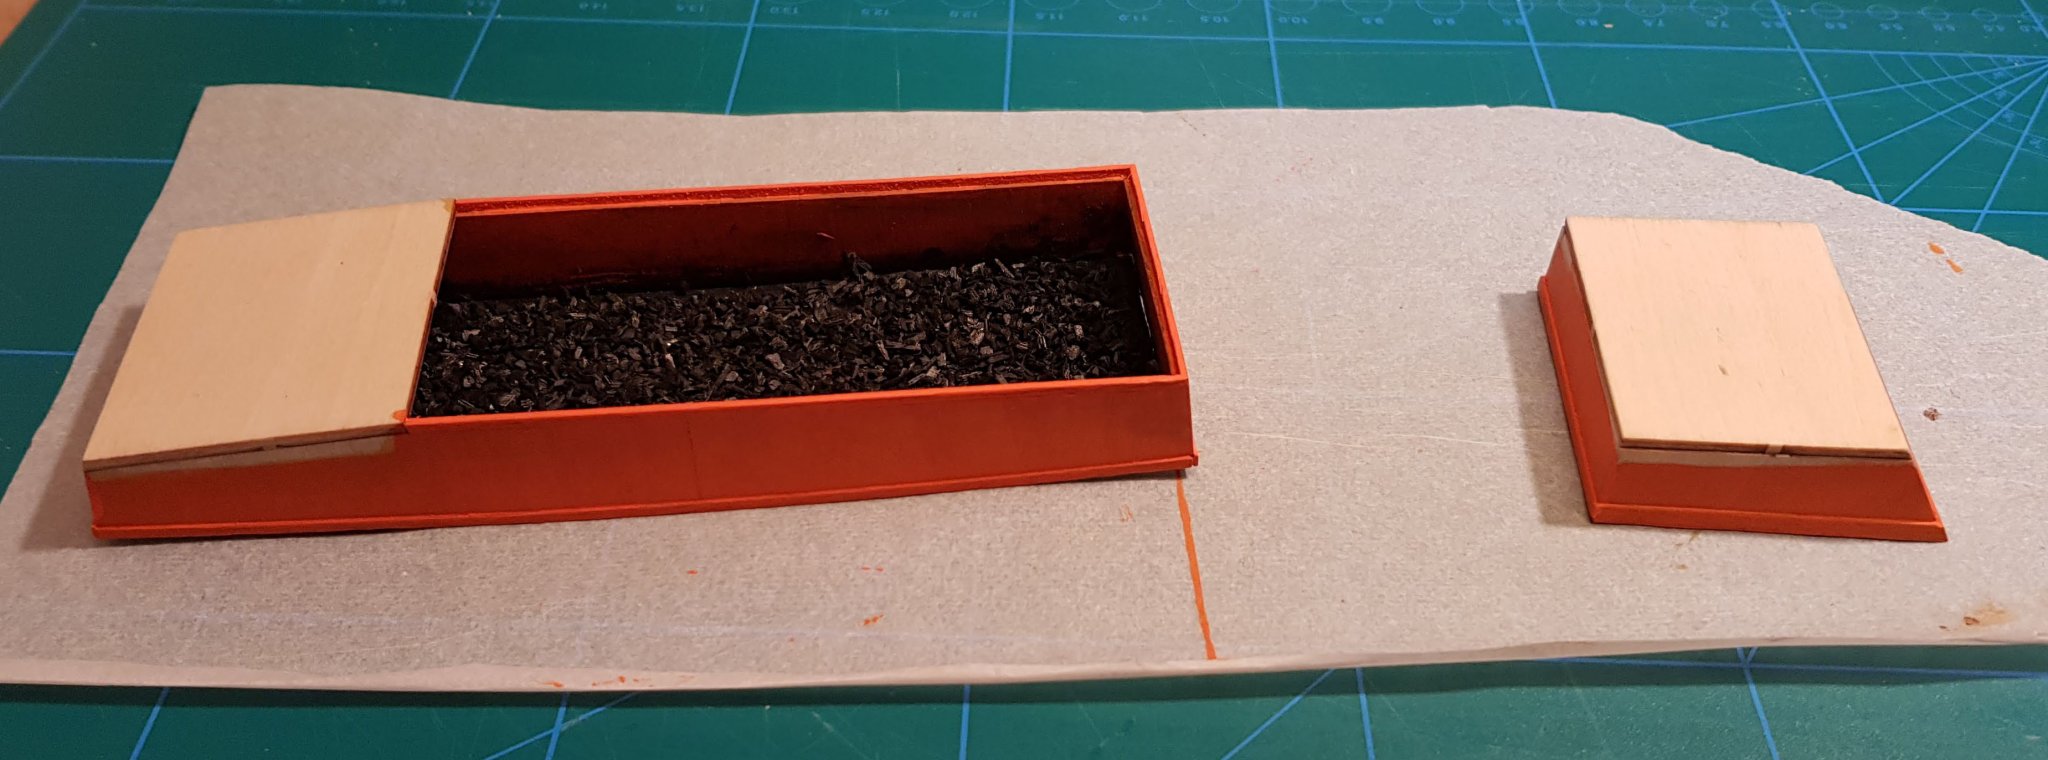
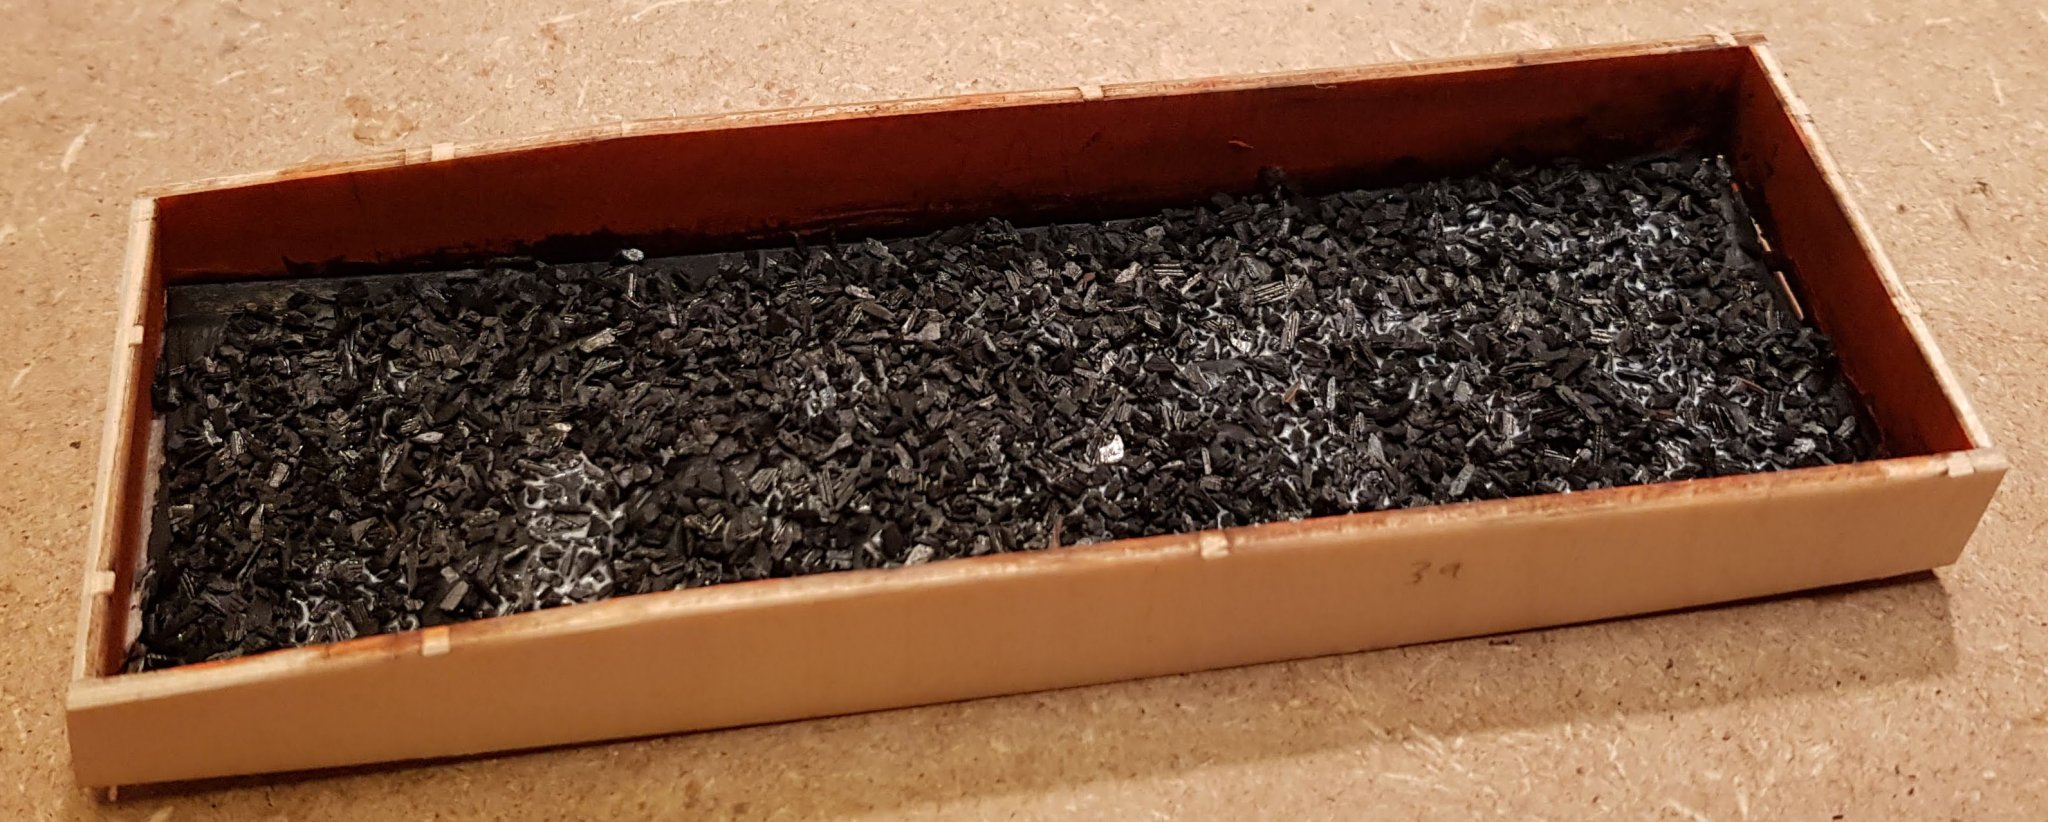
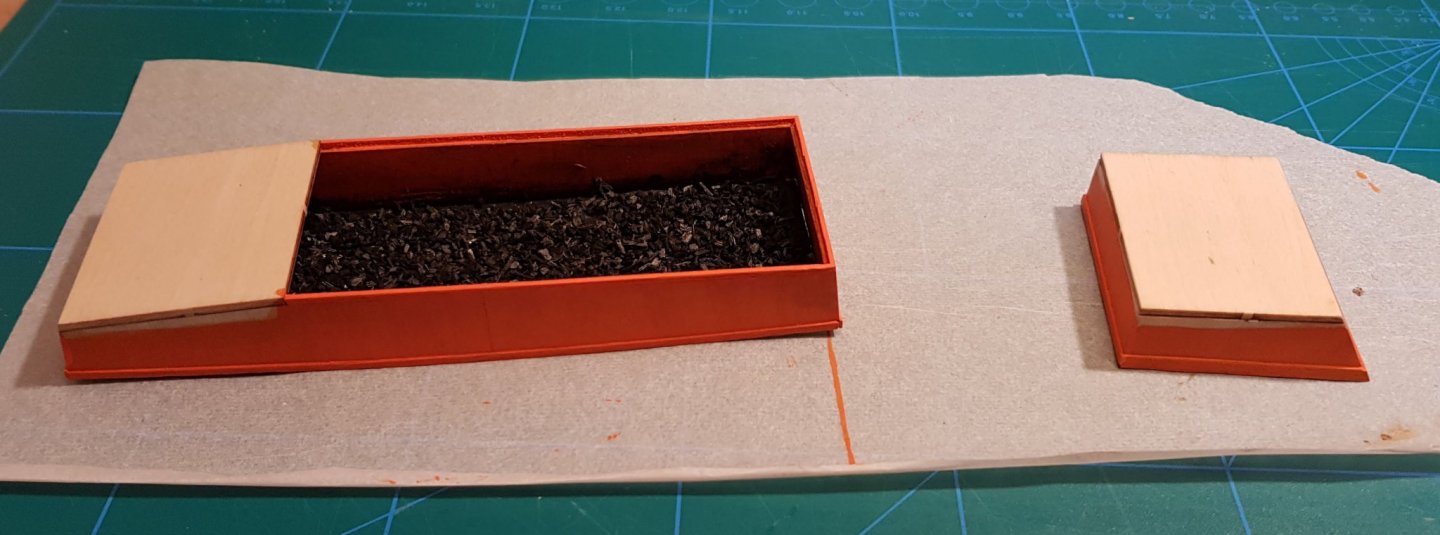
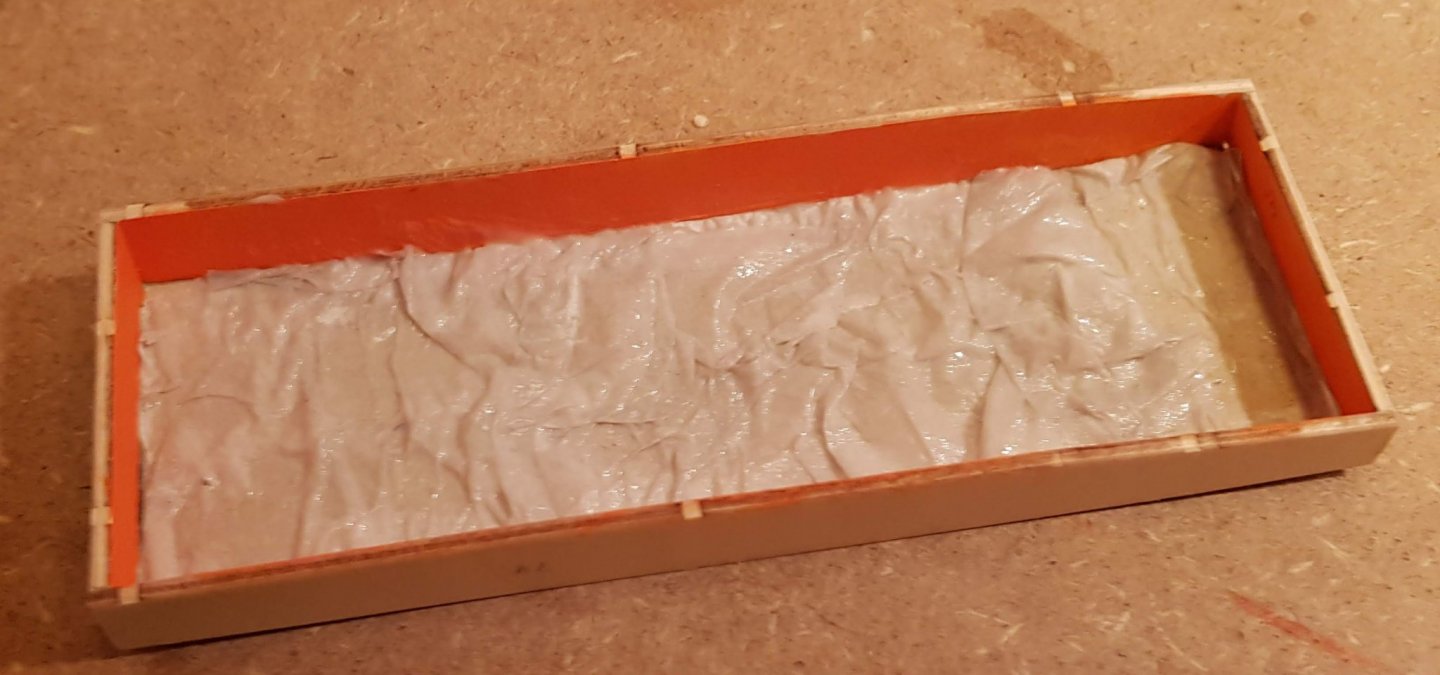
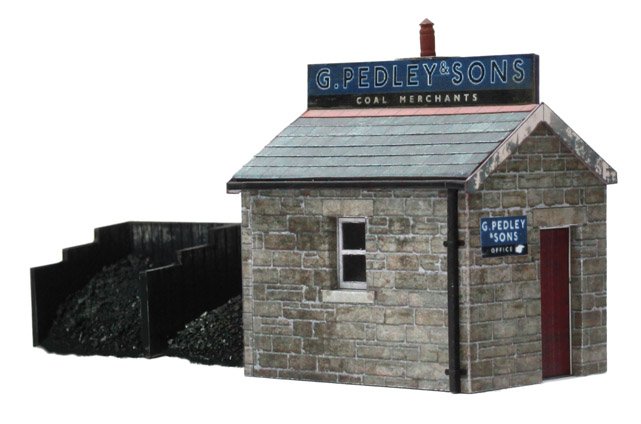
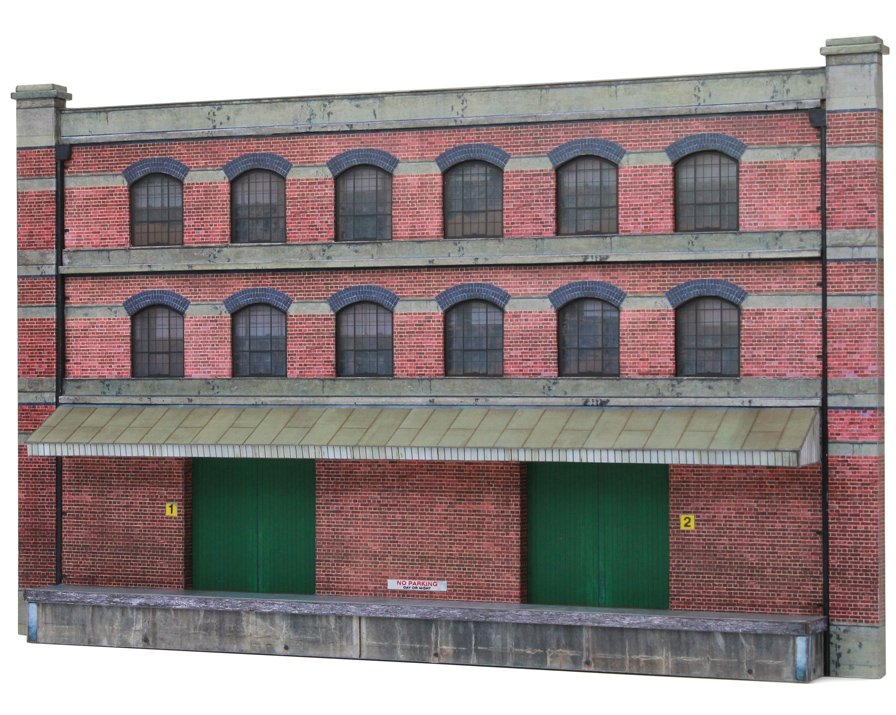
I have built one of the cardboard models from Scale Scene to be able to check out the proportions. It was a fun little side project. I really like the level of detail in this little model. I think that it might work, even if it is in OO scale (1:76). But I might change track and go for S scale instead, as Yves suggests. I will look do a bit more research. At the same time I have started building the hatches. In the kit they are closed, but I want one of them to be half open and show whats below. Since the hatches are actually raised a bit from the deck I can do this without opening a hole in the hull. I put a false bottom in the frame of the main hatch. Then I put some paper tissue in, soaked it in diluted glue and roughed the surface a bit. It was then painted black. Then I put a thin layer of coal on top and soaked it with dilute glue. (In the picture the glue has not dried yet so there are still some white areas.) The next steps are the hatch cover and tarp. Cheers

- 83 replies
-
- 7
-
-
- finished
- billing boats
- (and 1 more)
-
Thanks for the tip. I did not know about the S scale, seems to be most popular in the US? I will look in to it and what I could find that’s suitable.
-
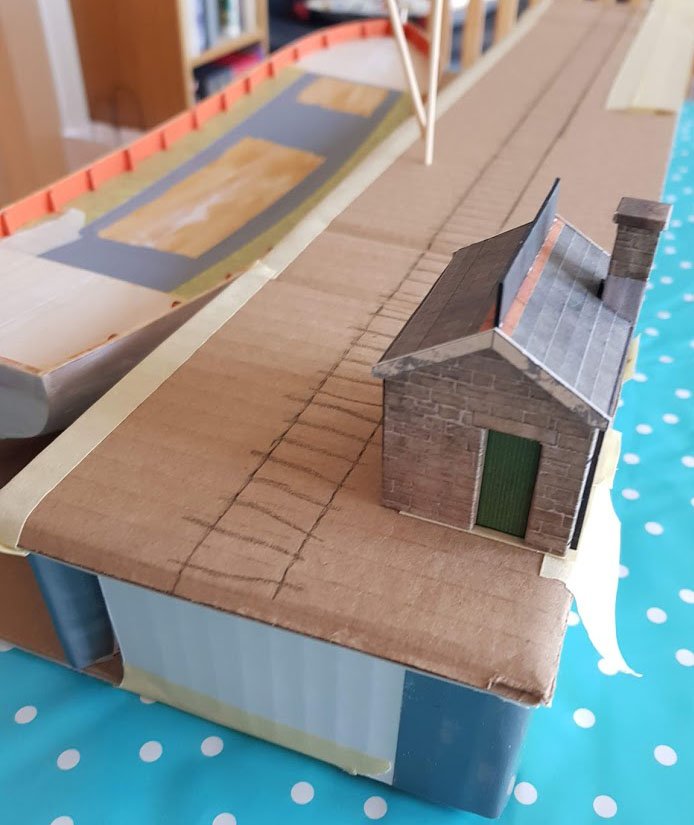
I have started to play a bit with the size of the diorama. Therefore I built a simple mock-up. I want to have some railroad tracks, some buildings and a crane. The tape markings on the quay indicates buildings. I have found some nice cardboard ones from Scale Scenes in the U.K. Their railway model scale OO is 1:76, which hopefully is close enough to Wills 1:67. Cheers

- 83 replies
-
- 8
-
-
- finished
- billing boats
- (and 1 more)
-
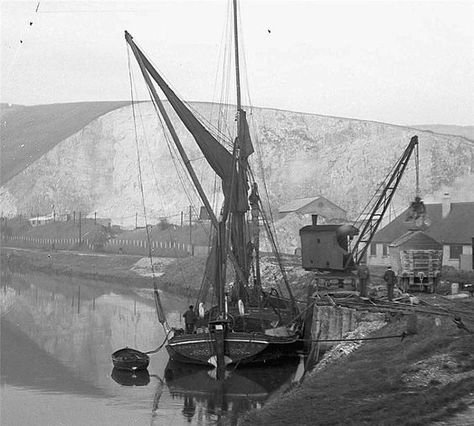
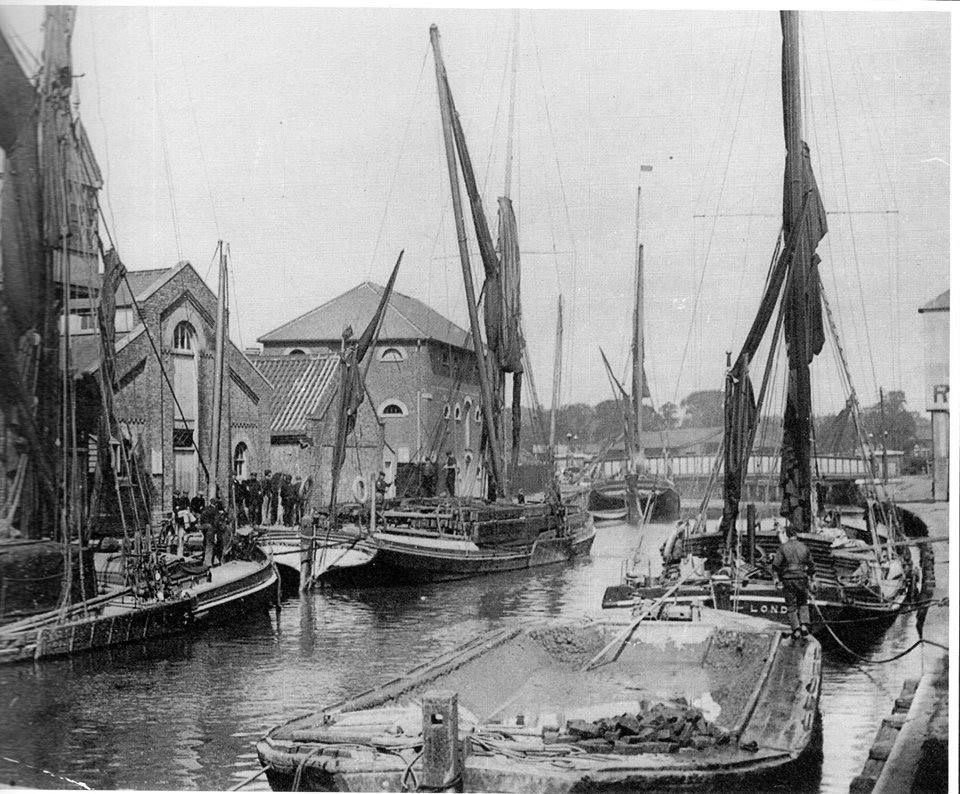
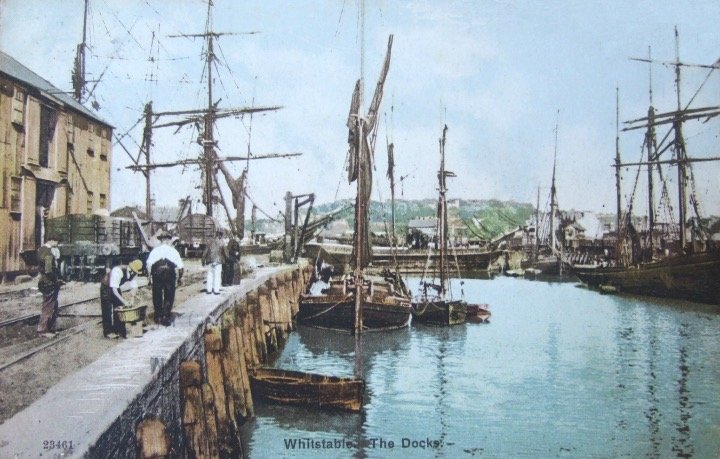
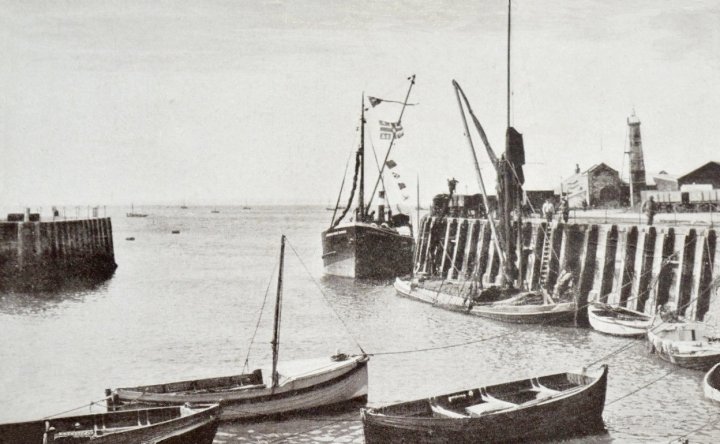
For my next steps I have started to think about how I want to present the finished model. I do want it to be obvious that it is a working boat and not a pleasure yacht. I want the atmosphere from the authentic photos of Thames sailing barges to come through. A Thames sailing barge loading coal. My idea is to build a quay side diorama of a scene similar to the one above from the Whitstable docks. That picture is from 1911, but the scenery had not change significantly in the 1940's: Cheers
- 83 replies
-
- 7
-
-
- finished
- billing boats
- (and 1 more)
-
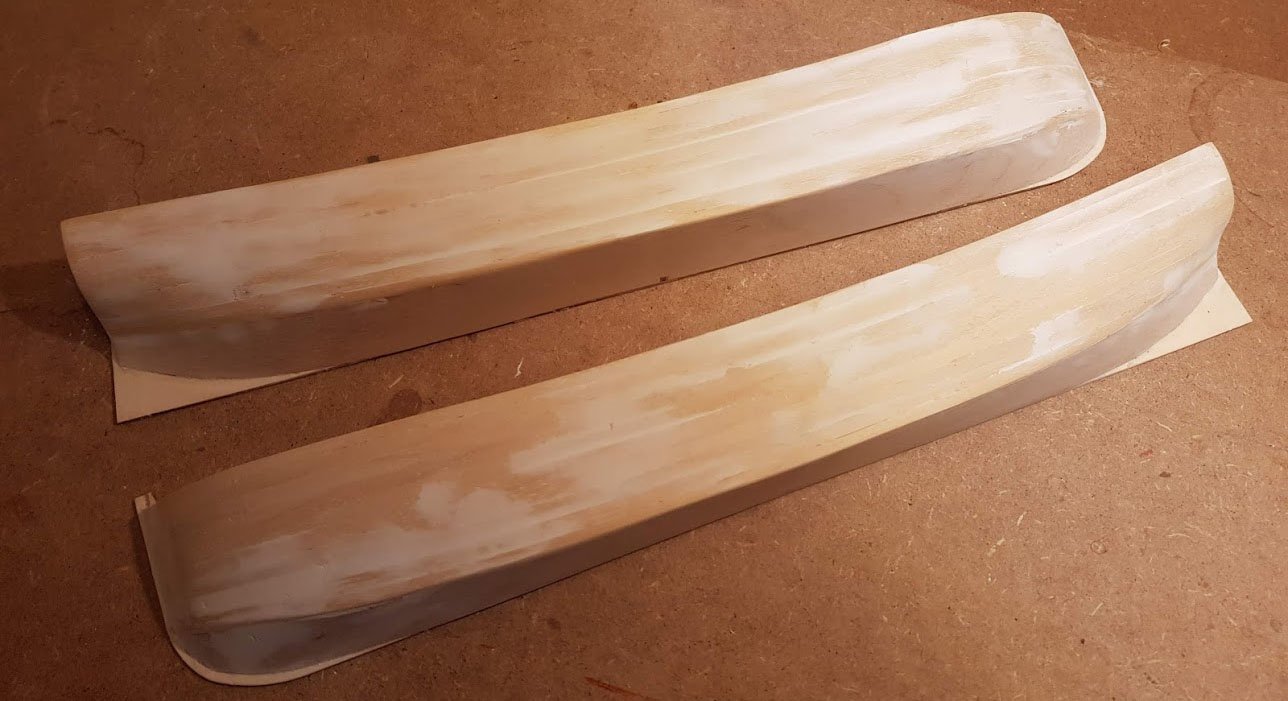
The two halves are now glued together. The fit is very good where it counts (i.e. at the stern and stem and along the deck). As mentioned earlier the bottom required some putty to fill out a gap. After this I have applied two layers of shellac sanding filler with a rubdown using steel wool between. The surface is really smooth and nice. I will apply a coat of white paint over the whole of the outside to be able to easier spot any remaining imperfections. Then I will continue with painting, including the deck and the gunwale before adding any details that would come in the way. Cheers
- 83 replies
-
- 11
-
-
- finished
- billing boats
- (and 1 more)
-
I've been busy with other things, but have managed to finalize the planking and are now sanding and adding putty in the the small gaps and imperfections in the hull. I have dry-fitted the two halves and found that they have varped slightly. There will be an about 1 mm wide gap between the halves along the keel when glued together. I guess that it came from the clamping and bending I had to do to get the plywood to align with the second bulkheads. Fortunately the gap will be easy to fill with putty and is along the bottom, so it will not be noticeable after painting. In hindsight I think that it would have been better to deviate from the instruction and glue the halves together earlier and do a more traditional planking of the whole hull at once. Cheers
- 83 replies
-
- 10
-
-
- finished
- billing boats
- (and 1 more)
-
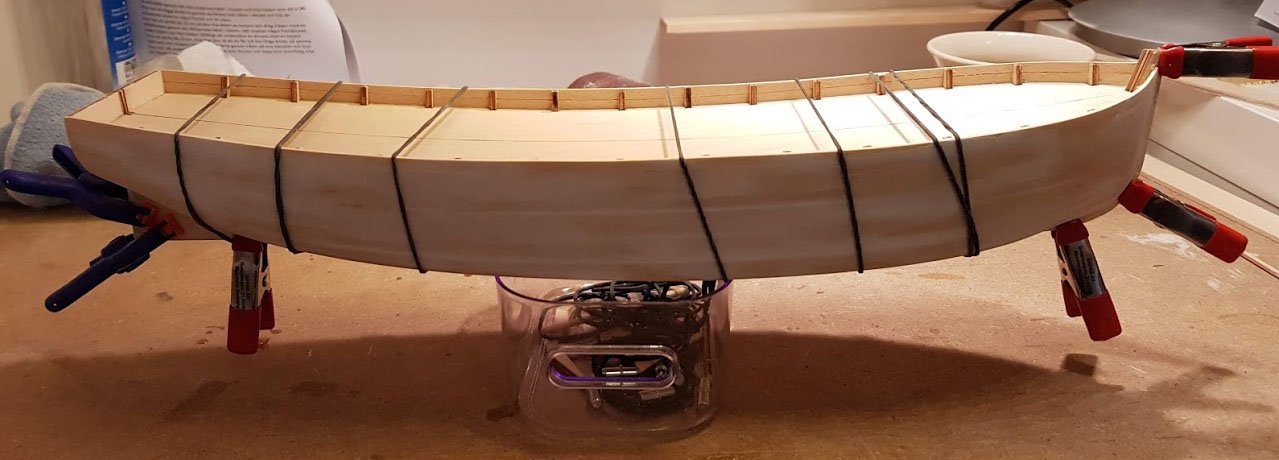
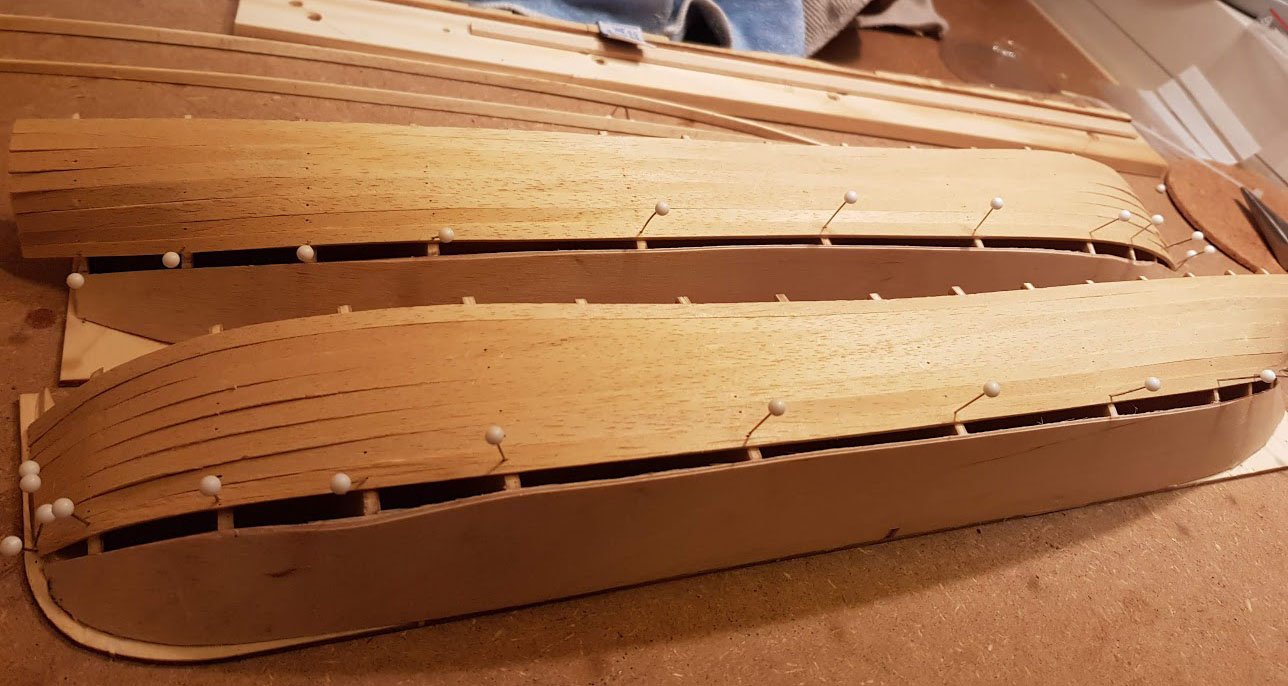
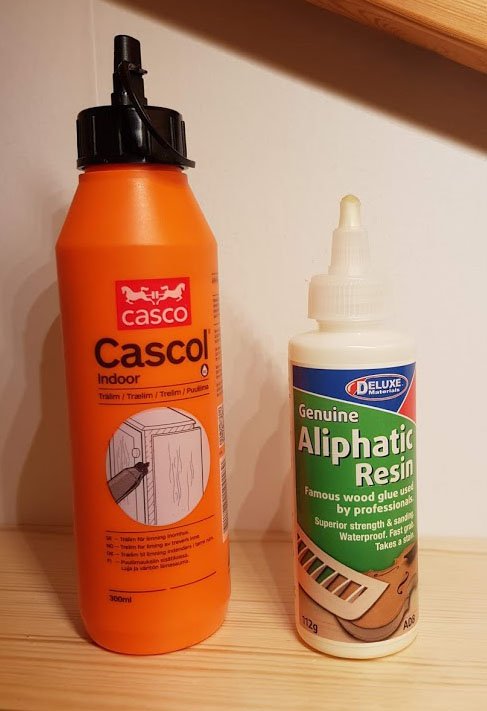
Now I'm almost done with planking both halves. Just the last strip to fit on both sides. All in all i think it has gone well. No problems that sanding and a bit of filler cannot solve 😉 My impression of the Aliphatic Resin I started using for this is positive. It is quite similar to white glue in handling, but is a bit stickier and the pieces does not tend to glide when pressed together. The only problem I have is with the bottle. It has a special screw "tap" on the tip that makes it easy to close the bottle with one hand after applying the glue and holding the pieces with the other hand. However, I find it hard to control the tap to get a very fine sting of glue (for example on the sides of the strips). Cheers
- 83 replies
-
- 8
-
-
- finished
- billing boats
- (and 1 more)
-
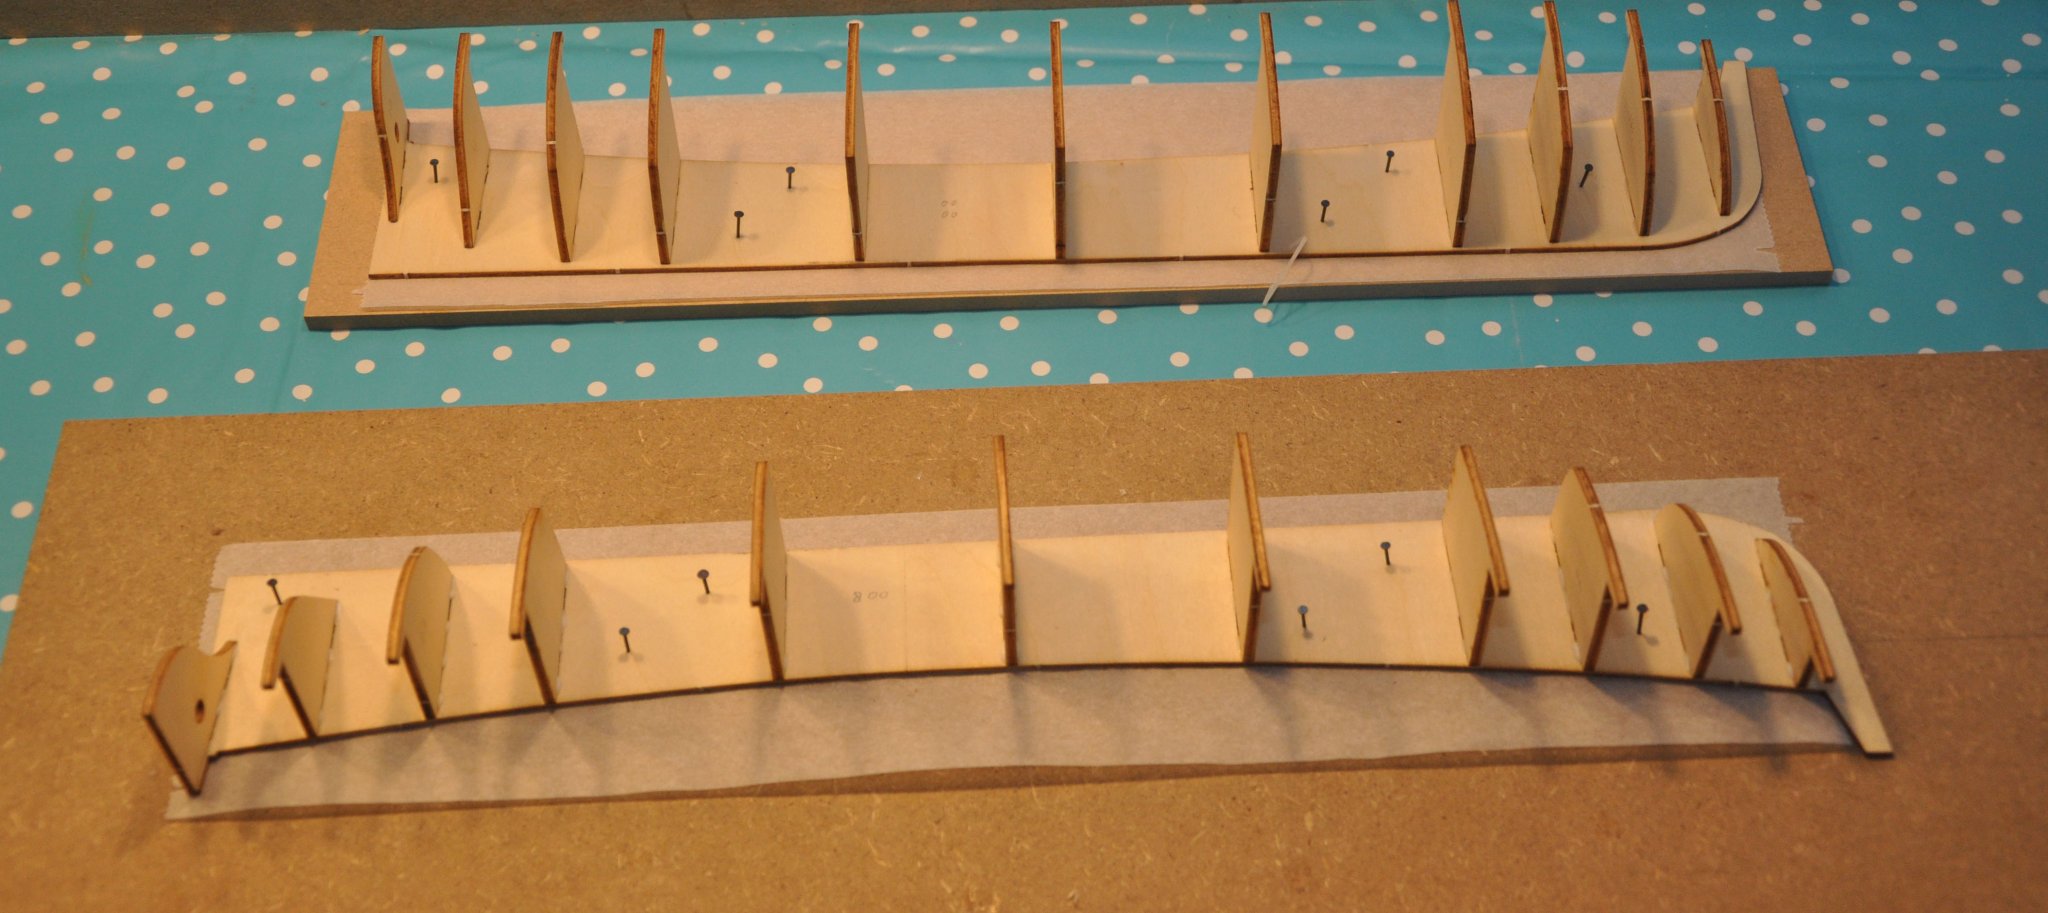
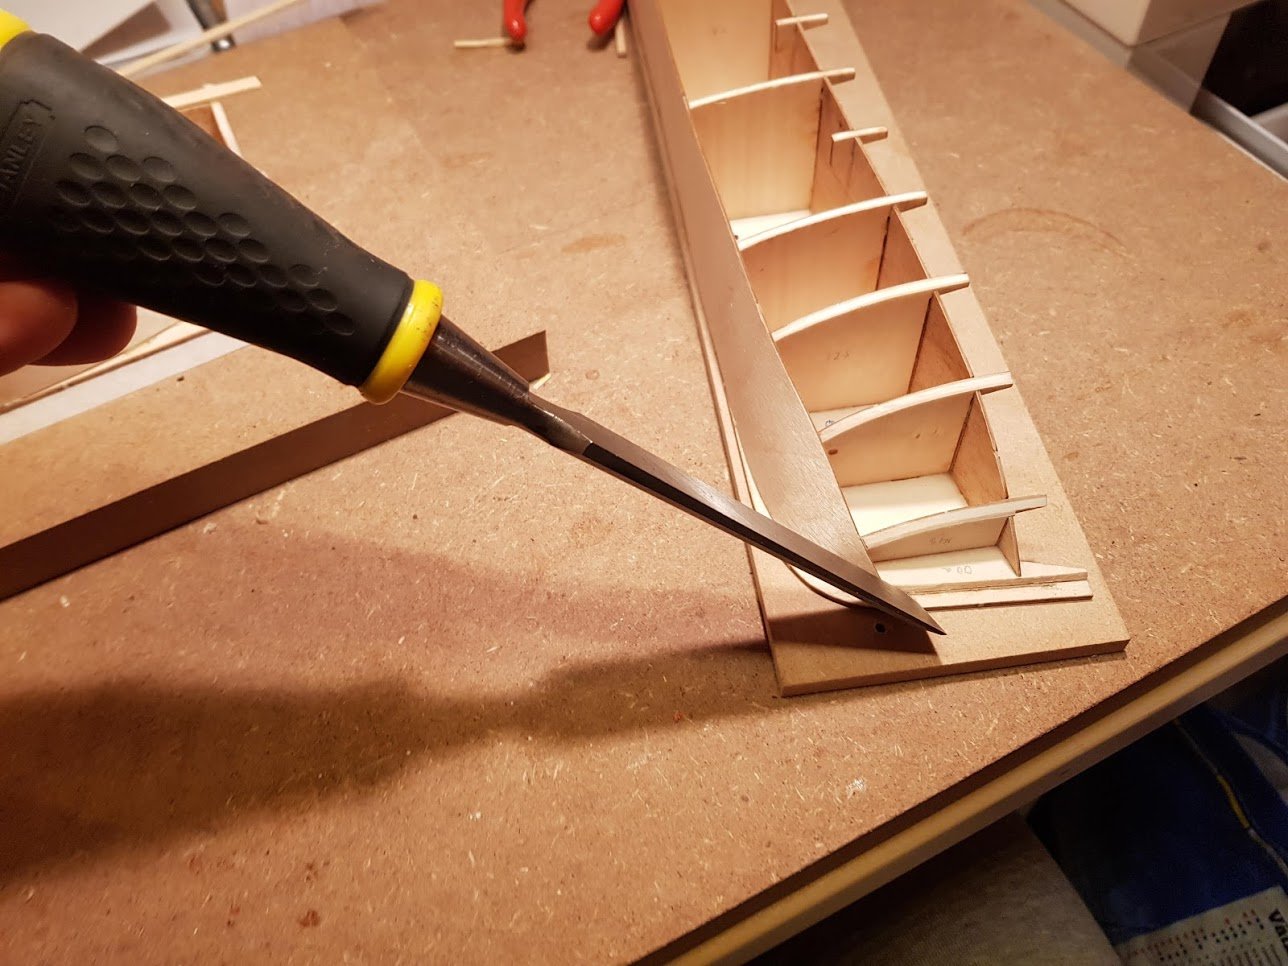
My new method of bending the bottom sheet worked better. There is still a small gap to the stem, but I can live with that. I have continued with the upper planking. For this I'm using my new glue "Aliphatic Resin". Previously I used ordinary white PVA glue. The new glue should be a bit more suitable for model building as it sticks together quicker and possibly dries quicker. On the other hand it is at least twice as expensive. I will use it for a while and see what I think of it. Cheers
- 83 replies
-
- 10
-
-
- finished
- billing boats
- (and 1 more)
-
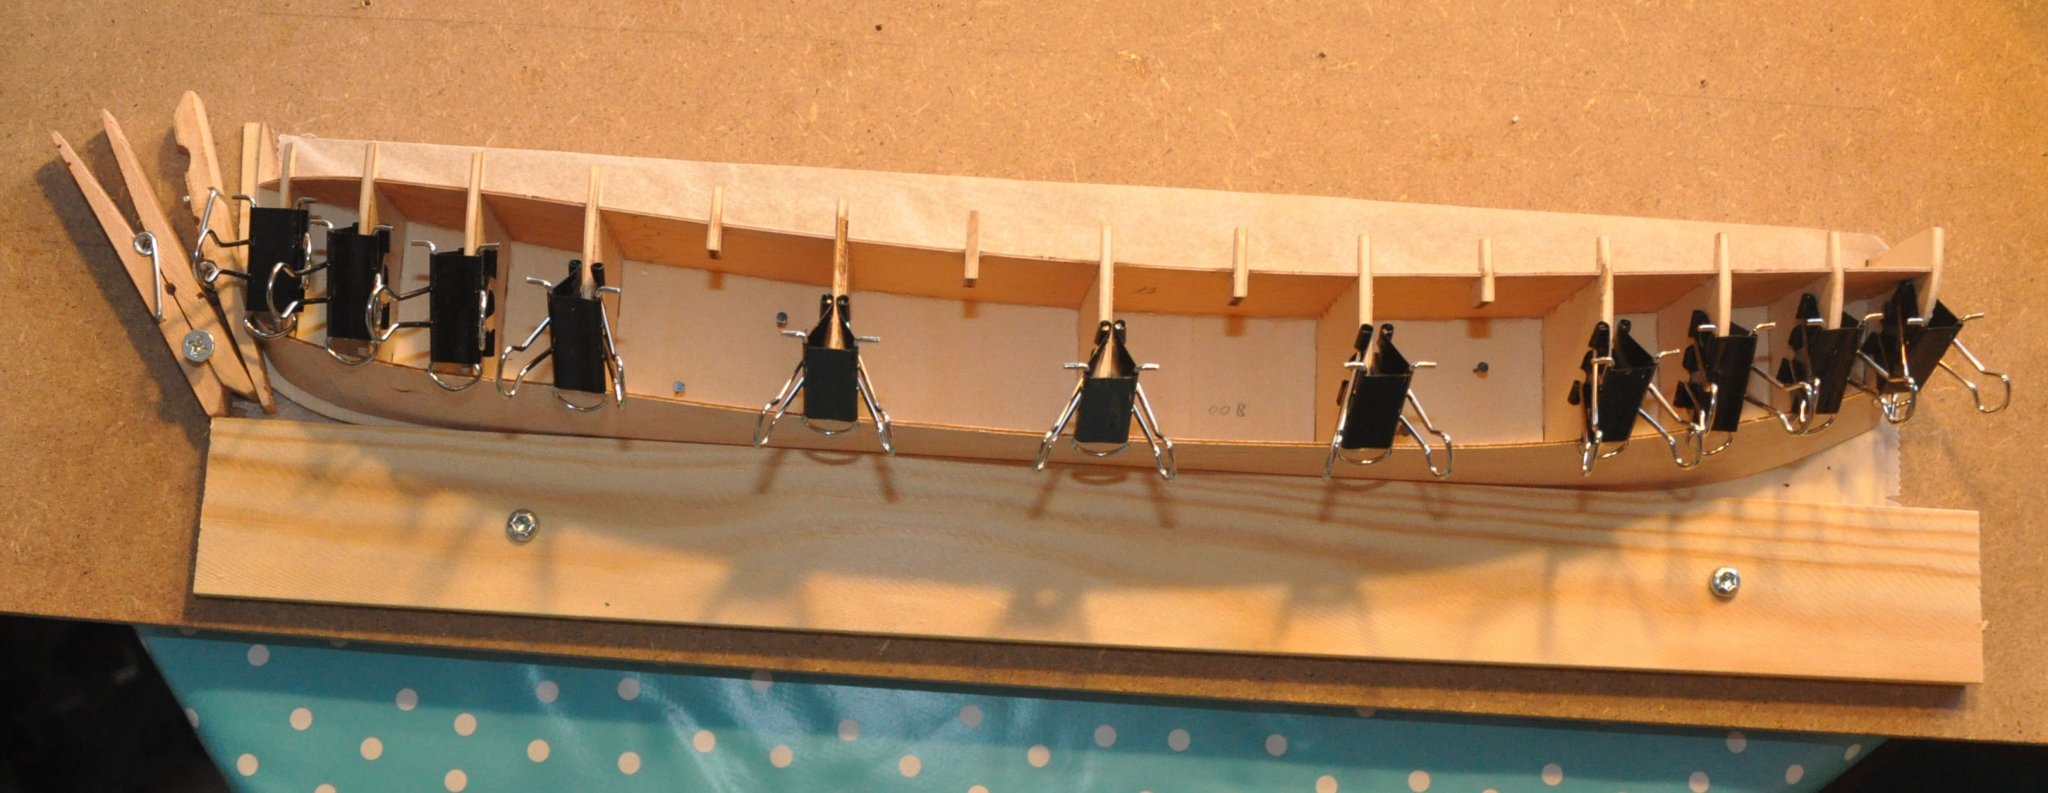
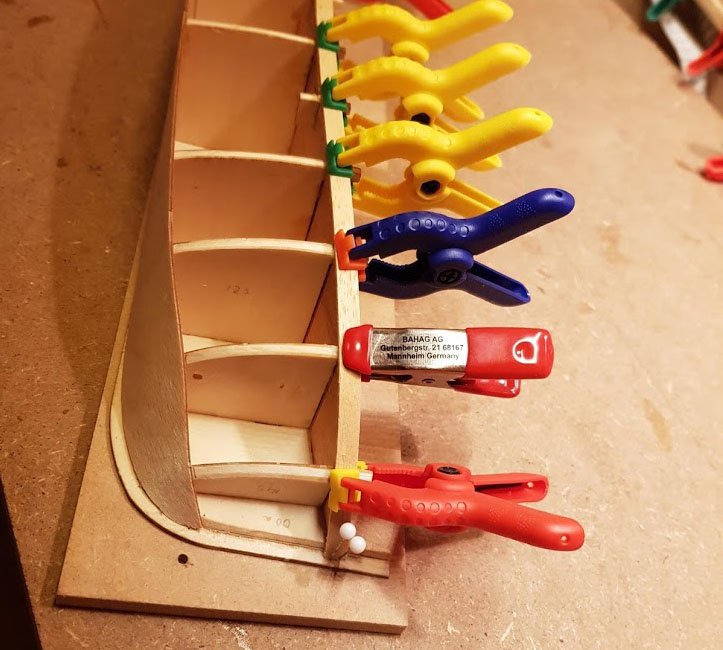
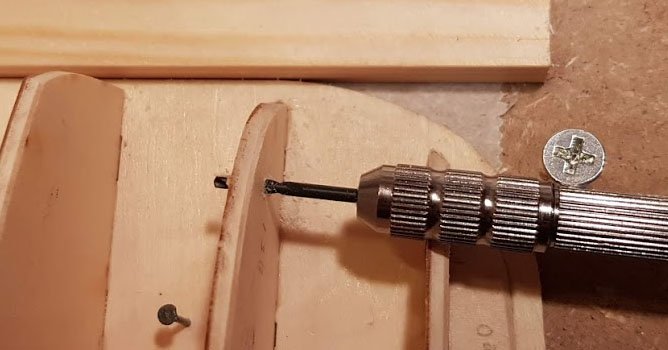
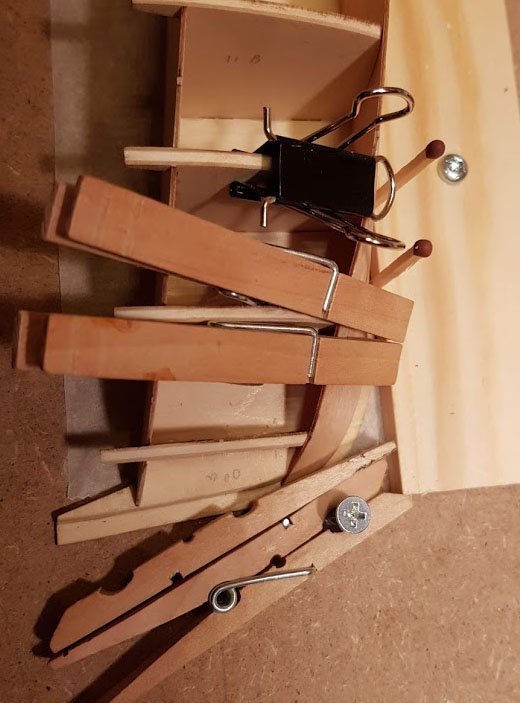
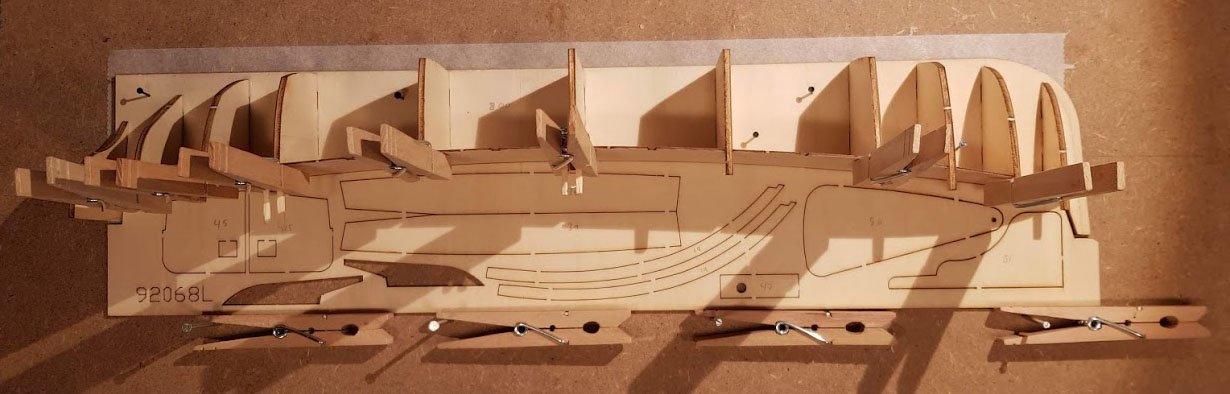
So, the first try at bending the plywood sheet was not fully successful. The modified paperclips I used didn't provide enough clamping force, so there became gaps to the bulkheads. I need a new approach. I drilled a hole in the second bulkhead and put a matchstick through it. This provided something for the clothespins to clamp against. So I re-soaked the plywood in hot water and clamped it down better this time. There was also a gap towards the stem, so I cut a groove (rabbet) for the plywood and planks to end in. Cheers

- 83 replies
-
- 10
-
-
- finished
- billing boats
- (and 1 more)
-
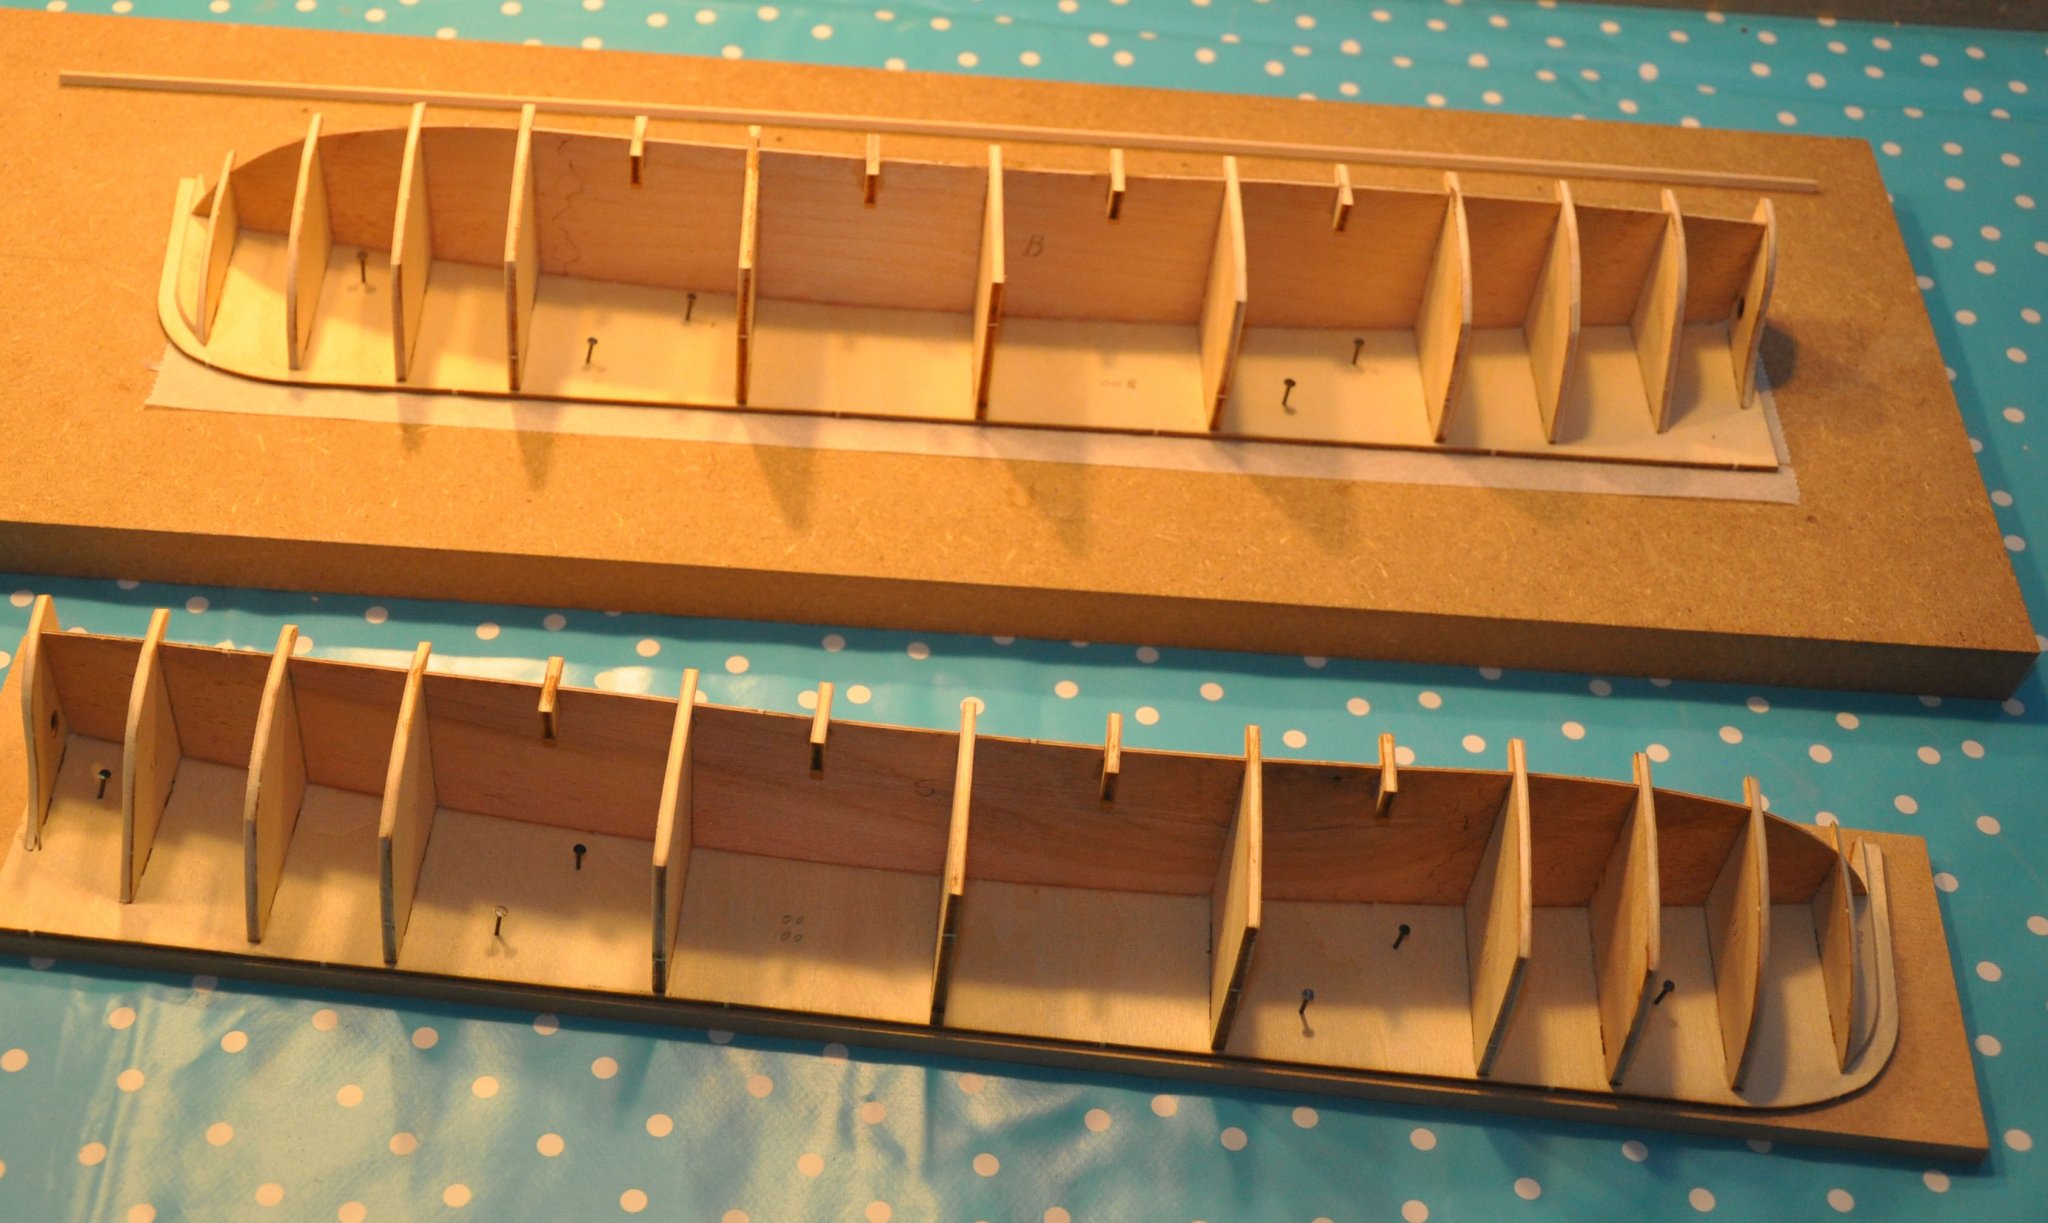
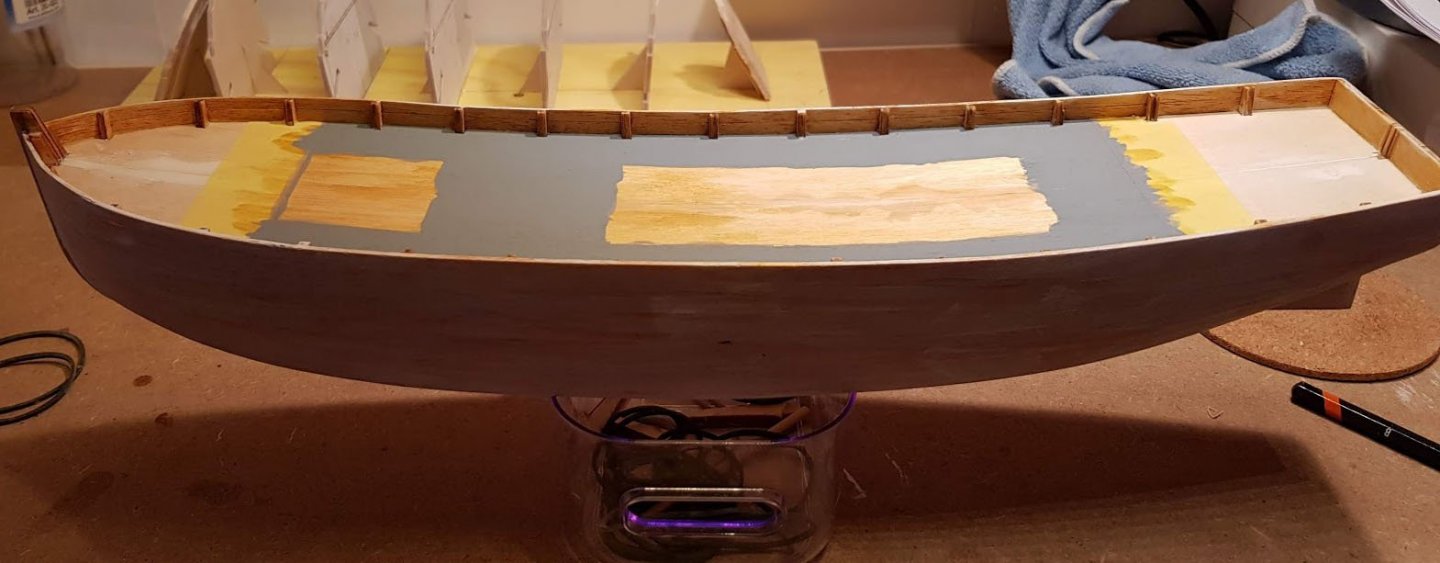
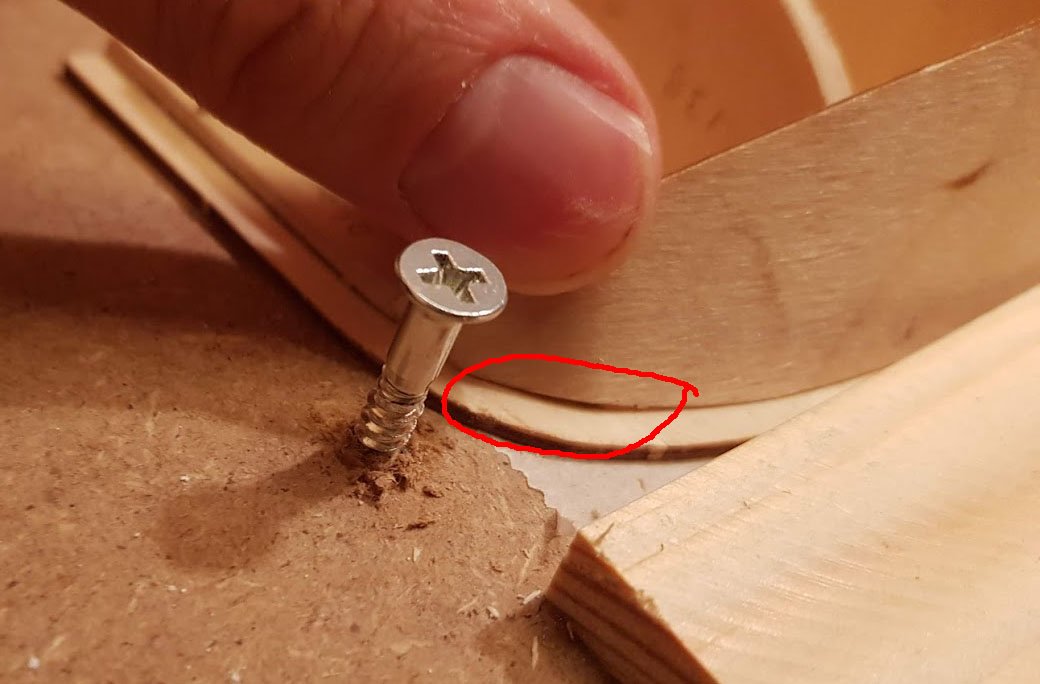
Next step is to glue the deck to the frames. When comparing the build logs mentioned above they follow somewhat different paths, either gluing the deck or the bottom first. Maybe there instructions are somewhat different since the ages of the kits are different. Anyhow, I followed the instruction in my kit and glued the deck first. I used the part of the plywood sheet where the false keel was cut out from to get the correct curvature to press the deck to the frames. This worked excellent, the deck got really tight towards the frames. Next step is fairing the hull. As this is my first ship model with a traditional planking I want to go carefully. The curves are not extreme (compared to other build logs) but the bow comes in at about 45 degrees to the stem. The hull form is (as Chris Watton mentions above) rather box-like and the bottom is almost flat. To simplify the planking the bottom half is "planked" with laser cut thin plywood. As the plywood piece tapers sharply towards the fore and aft the rest of the hull, which will be planked with strip wood, will need much less tapering. However the plywood piece is not so easy to bend, especially in the bow, even after soaking in hot water. I tried to solve this by putting a screw in the build board and put a wedge to hold the curve in place while drying. Cheers


- 83 replies
-
- 10
-
-
- finished
- billing boats
- (and 1 more)
-
I've started with dry fitting and then gluing the bulkheads to the two (!) false keels. As mentioned the hull is built in halves, which are then glued together. A building board in MDF is included in the kit, but I want to build the halves in parallel to get them as equal as possible, so I got a second one. The parts fitted well together. Below I have glued the frames to the false keels, with some waxed paper underneath so they wont stick to the boards.

- 83 replies
-
- 9
-
-
- finished
- billing boats
- (and 1 more)
-
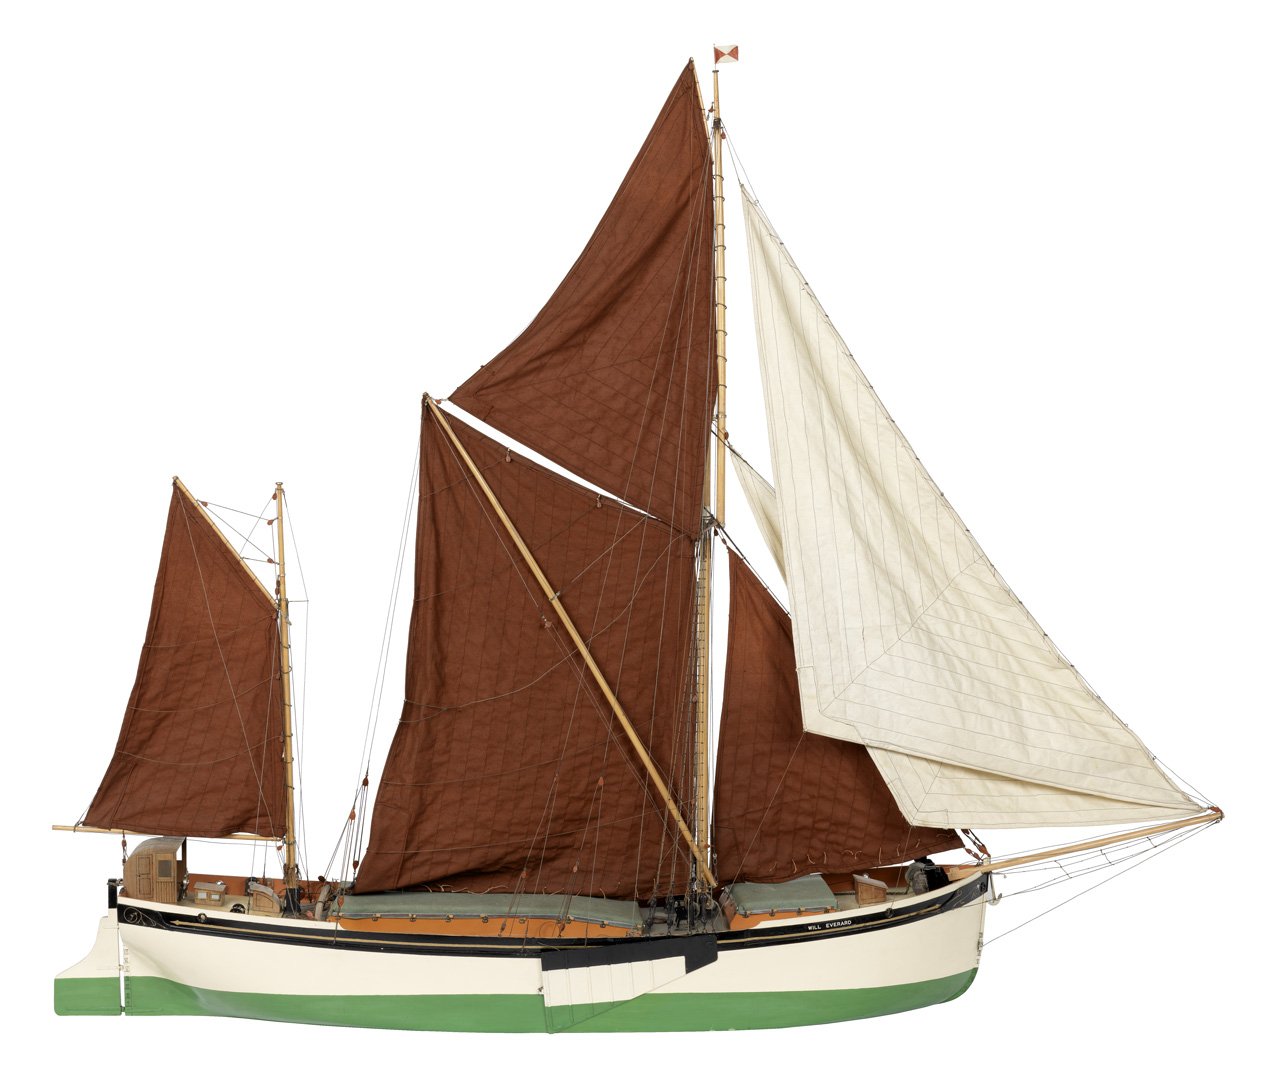
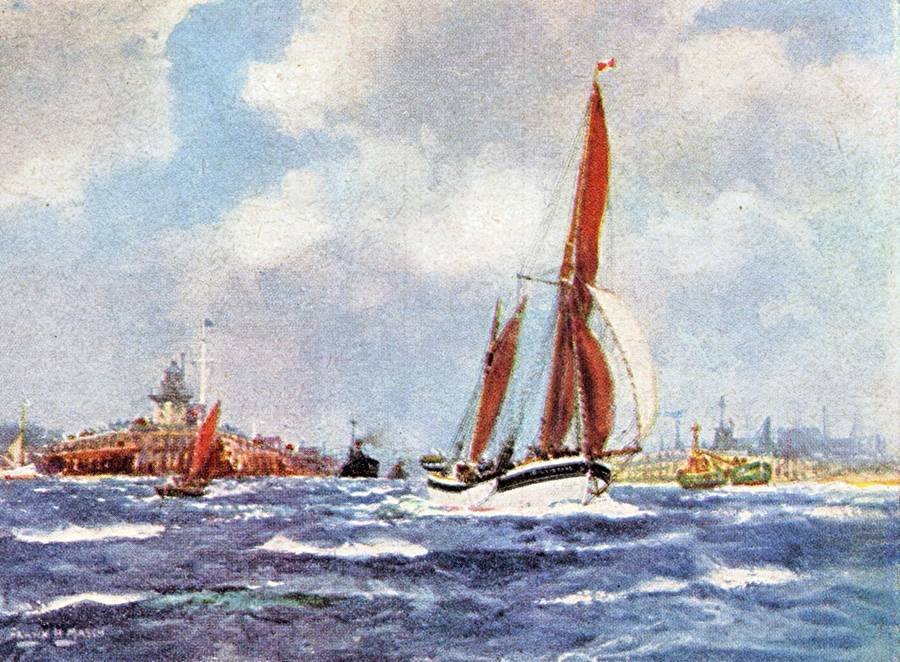
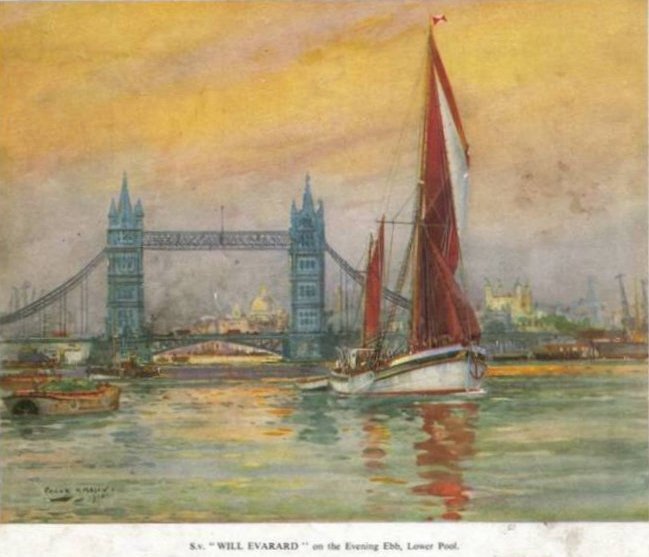
I have done some research about the real Will Everard. First out of curiosity, later to decide how I want my model to look. Will has goon through several phases in her life, and is still sailing on the Thames. Will Everard was originally built in 1925 as one of four sister steel-hulled spritsail barges for F T Everard and Sons Ltd shipping company. She was built so that an engine could be installed, but this was only done in 1950. In 1966 she was sold. In 1972 a restoration begun where among other things the cargo hold was converted to a saloon. She has since gone through several owners and is now a floating restaurant and charter boat. I have found several sources: https://www.nationalhistoricships.org.uk/register/234/will https://www.shippingwondersoftheworld.com/thames_barges.html http://www.hms-worcester.me.uk/page26.html https://collections.rmg.co.uk/collections/objects/67432.html http://rowifi.com/ndc/the-everard-story.html One key decision is what period I would like my model to represent. To me the pre-engine sailing period seems most attractive. This means that some of the fittings and parts in the kit will not be used, such as the skylights on the cargo hold and the exhaust pipe. An interesting observation is that the kit does not contain a propeller! One of my main references will be pictures of a model from Royal Museums Greenwich. The model is (according to the online catalogue) built in 1925 and should be an accurate enough reference. There are some details that I will not do as the model though. The sails looks to be to big and the bottom color should be an orange/pink color. The following are postcards from an unknown date showing Will Everard. The bottom color is not easy to see, but it is clearly not green. Other sources state is as pink, not green. Cheers
- 83 replies
-
- 10
-
-
- finished
- billing boats
- (and 1 more)
-
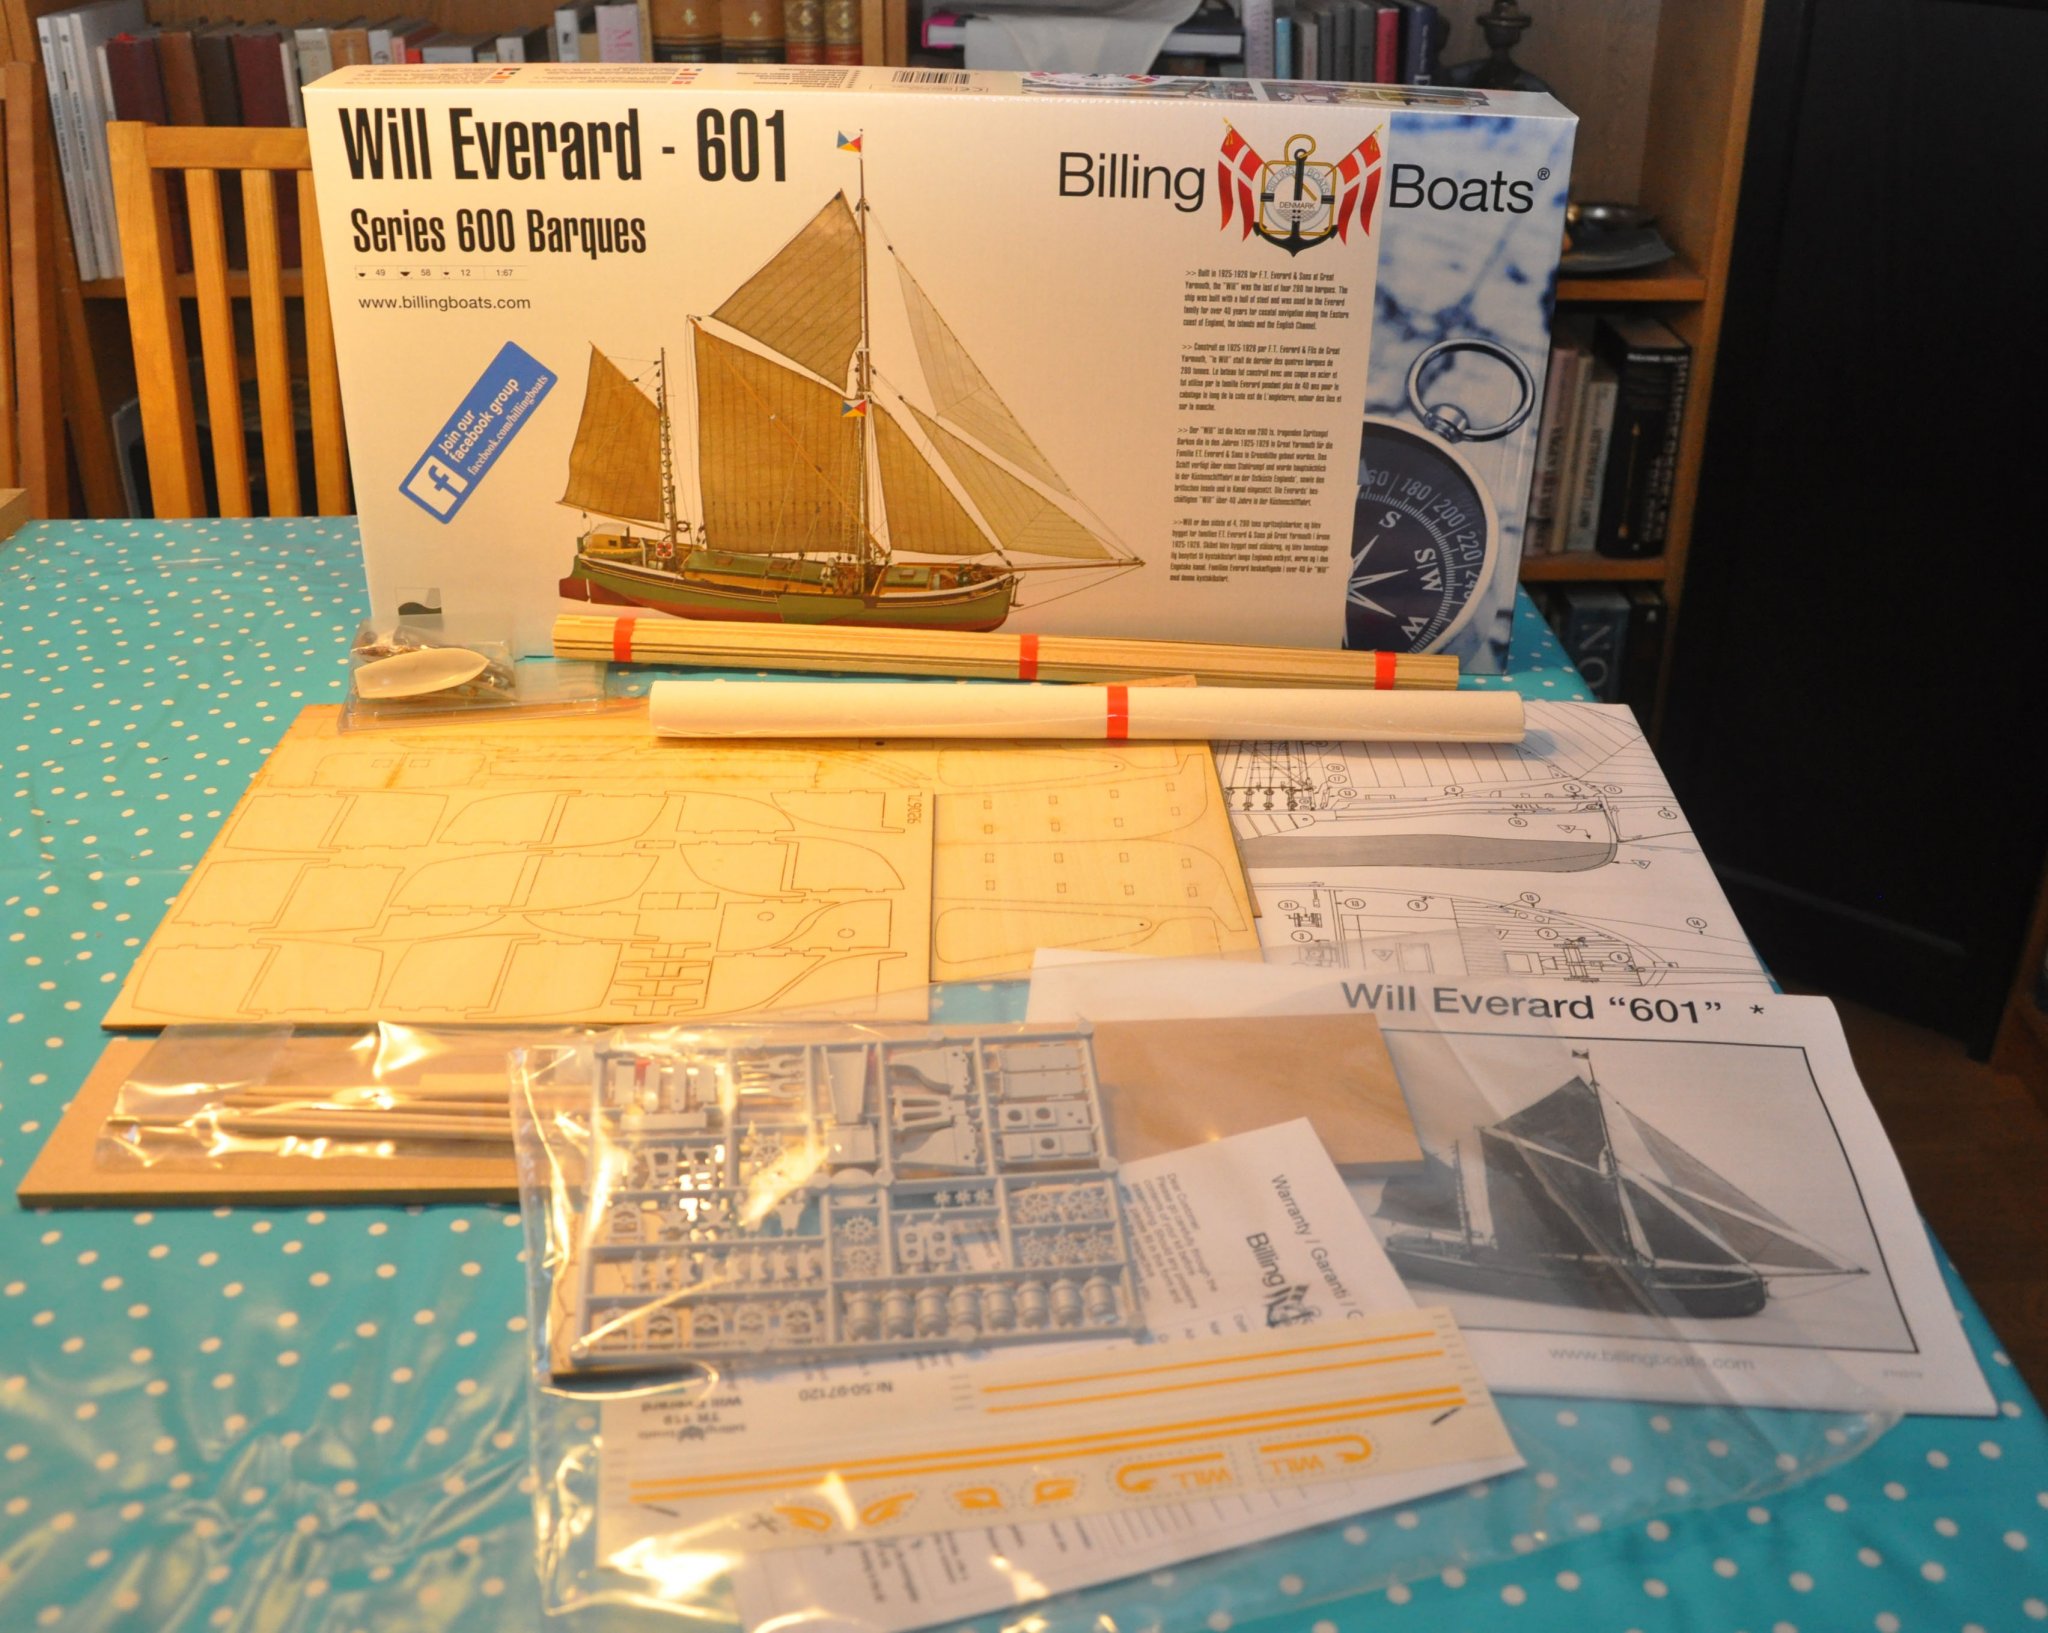
For my second model ship project I will build Billing Boats "Will Everard". It is the first kit I bought. But due to delayed shipment I bought another kit (Swampscott Dory by BlueJacket) from a local hobby store and built it instead as my first build. I originally selected this kit since I thought it "looked nice" and wanted to try model ship building as a hobby. I have since read a lot more about the hobby, the kit in question and about the ship itself. I still feel that it will be a fun kit to build, but now based on a bit of more understanding and knowledge. The kit is labeled as a beginners kit on Billing Boats website, but on the box it says "The Advanced Beginner". I think that should be about my level of experience 🙂 The content of the kit looks OK. There are laser cut plywood parts, strip wood for planking of the hull and of the deck and a building board in MDF. Fittings are a mix of plastic and metal parts. I have read in several places that Billing Boats instructions are lacking a lot of detail. After having read them I can confirm this. Even simple things, like that the numbering of the parts list is the intended order in which the parts should be assembled is not mentioned. I figured this out after studying the drawings for some time. Fortunately there are two good build logs for this kit here on MSW by Izzy Madd and by Micklen32 they should help me along. The hull of this kit is built in two halves, which are later glued together. It should (in theory at least) make it easier to do the planking. We will see... After reading the build logs mentioned I have noticed that Billing have made modifications to kit over the years (this is a rather old kit). In particular regarding how the bulkheads are mounted. The form it takes in my kit looks to be slightly easier than seen in Izzy Madds or Micklen32s builds.

- 83 replies
-
- 11
-
-
- finished
- billing boats
- (and 1 more)
-
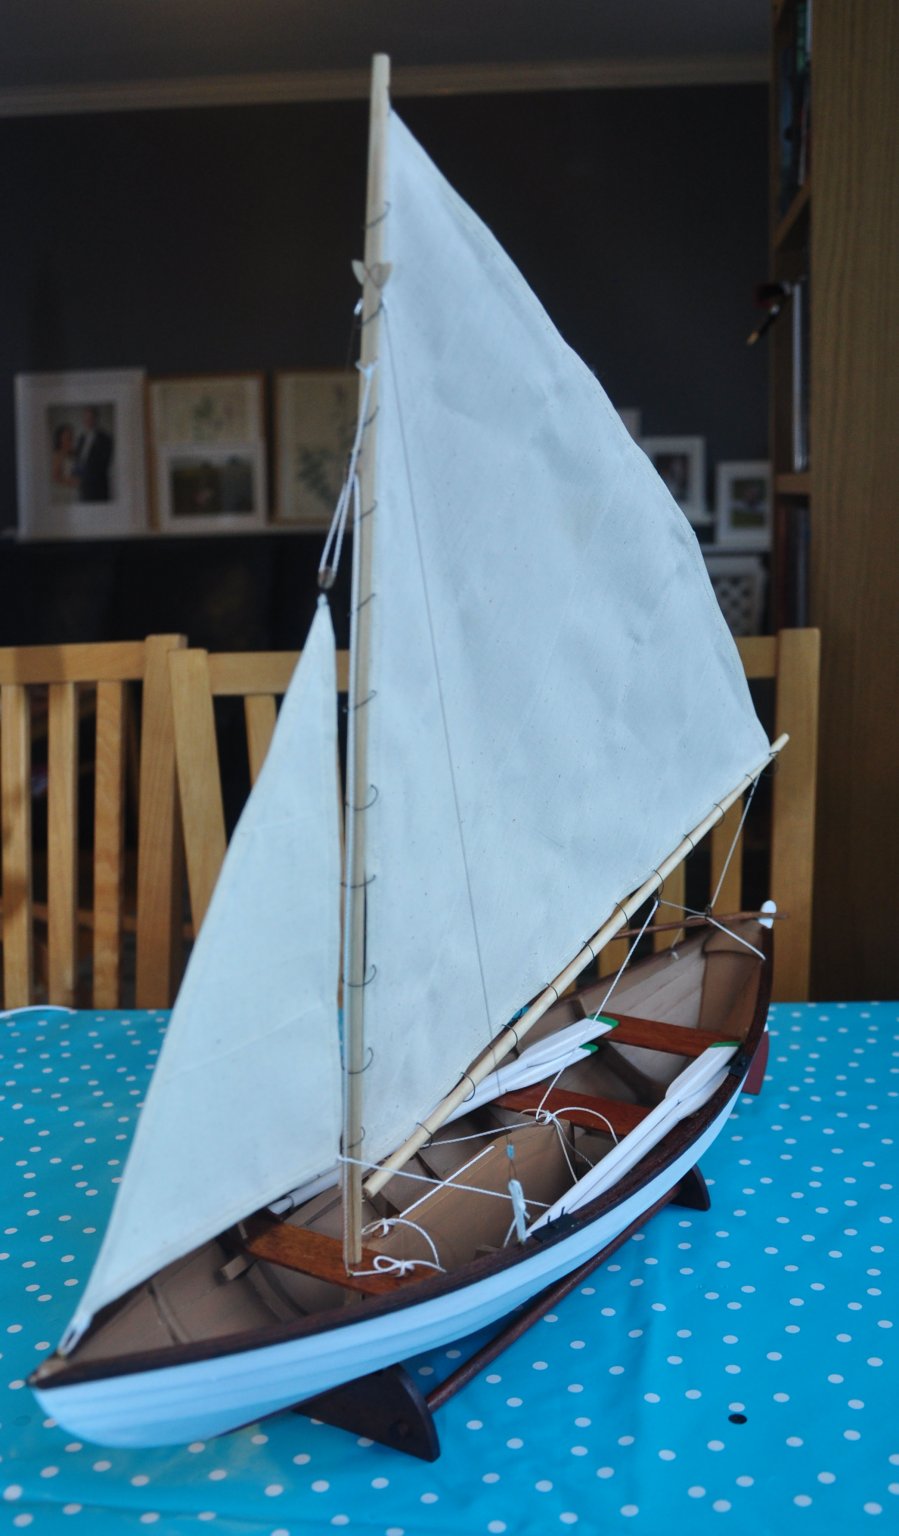
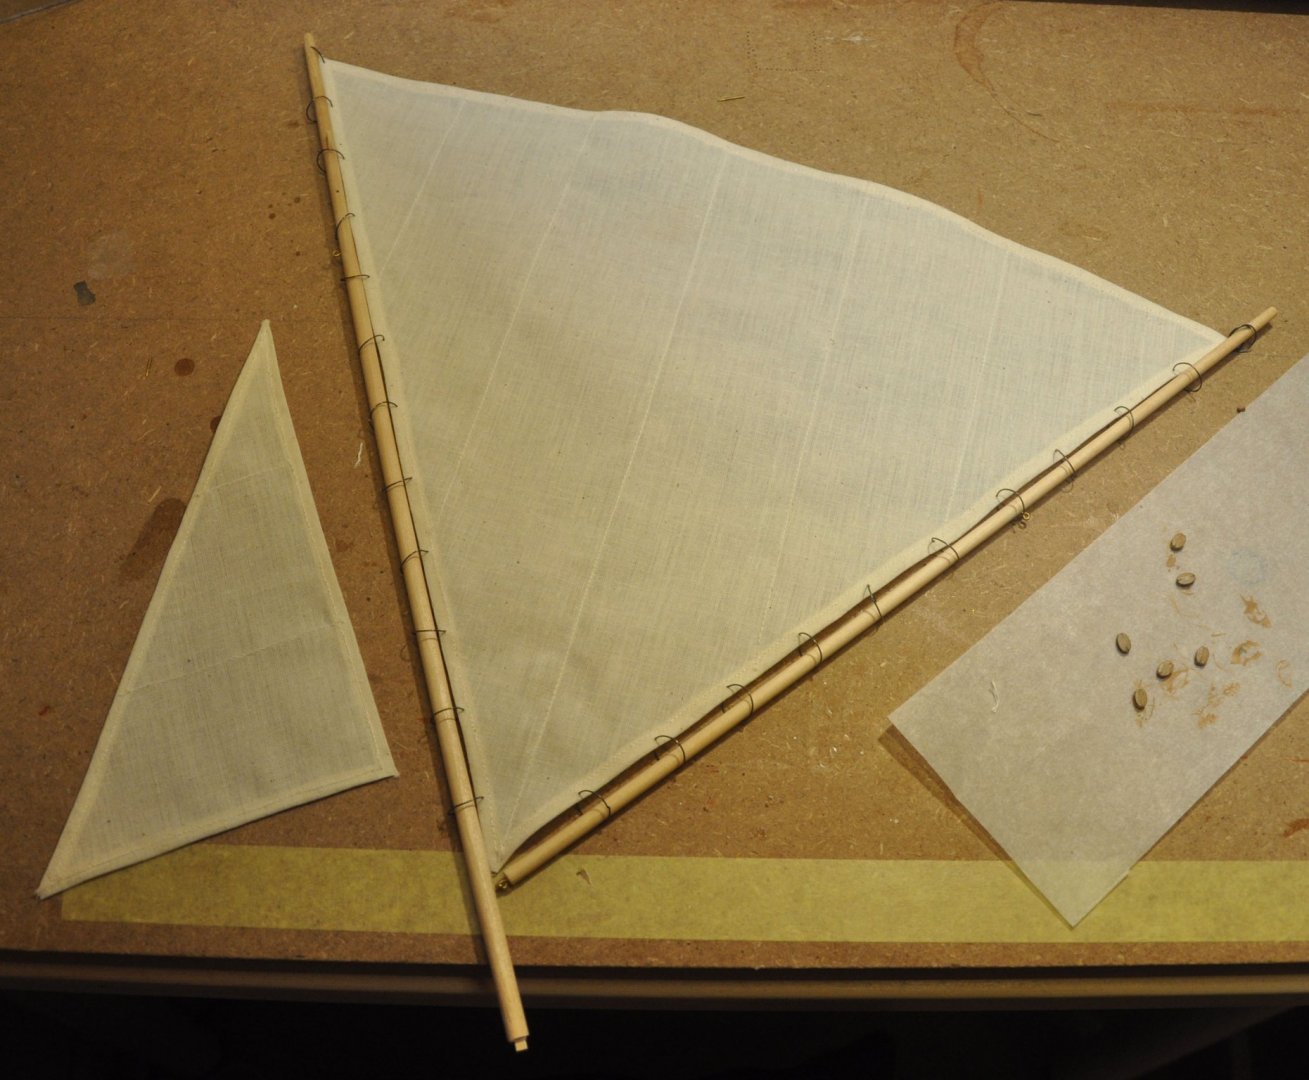
The last steps of this (rather short) journey has ended. The sail, mast and boom I had already prepared. The only step needed was to mount them together. For this rings made of steel wire was used. I'm wondering what they would be models of? In most pictures i find online the sail seem to be tied to the mast using rope. I have also mounted the cleats and eyelets for attaching the rigging. And finally everything is assembled and the rigging lines are tied to where they should go. All in all I'm happy with the result. Maybe the boat even turned out better than I expected when I started. I am a beginner, and most of the techniques and methods used where more or less new to me. The kit from BlueJacket turned out to be what was advertised, a suitable kit for a beginner. The material provided was of excellent quality. The instructions and drawings where good, even though there where a few places where the drawings, text and photos did not align exactly. Especially regarding the rigging. Now I will turn my attention to other projects. I have a small kit for a ship in a bottle, a kit from Billing boats and scratch build of a similar dory that I have started at a ship modelling course I started last week. I will be busy. Cheers


- 18 replies
-
- 11
-
-
- finished
- BlueJacket Shipcrafters
- (and 1 more)
-
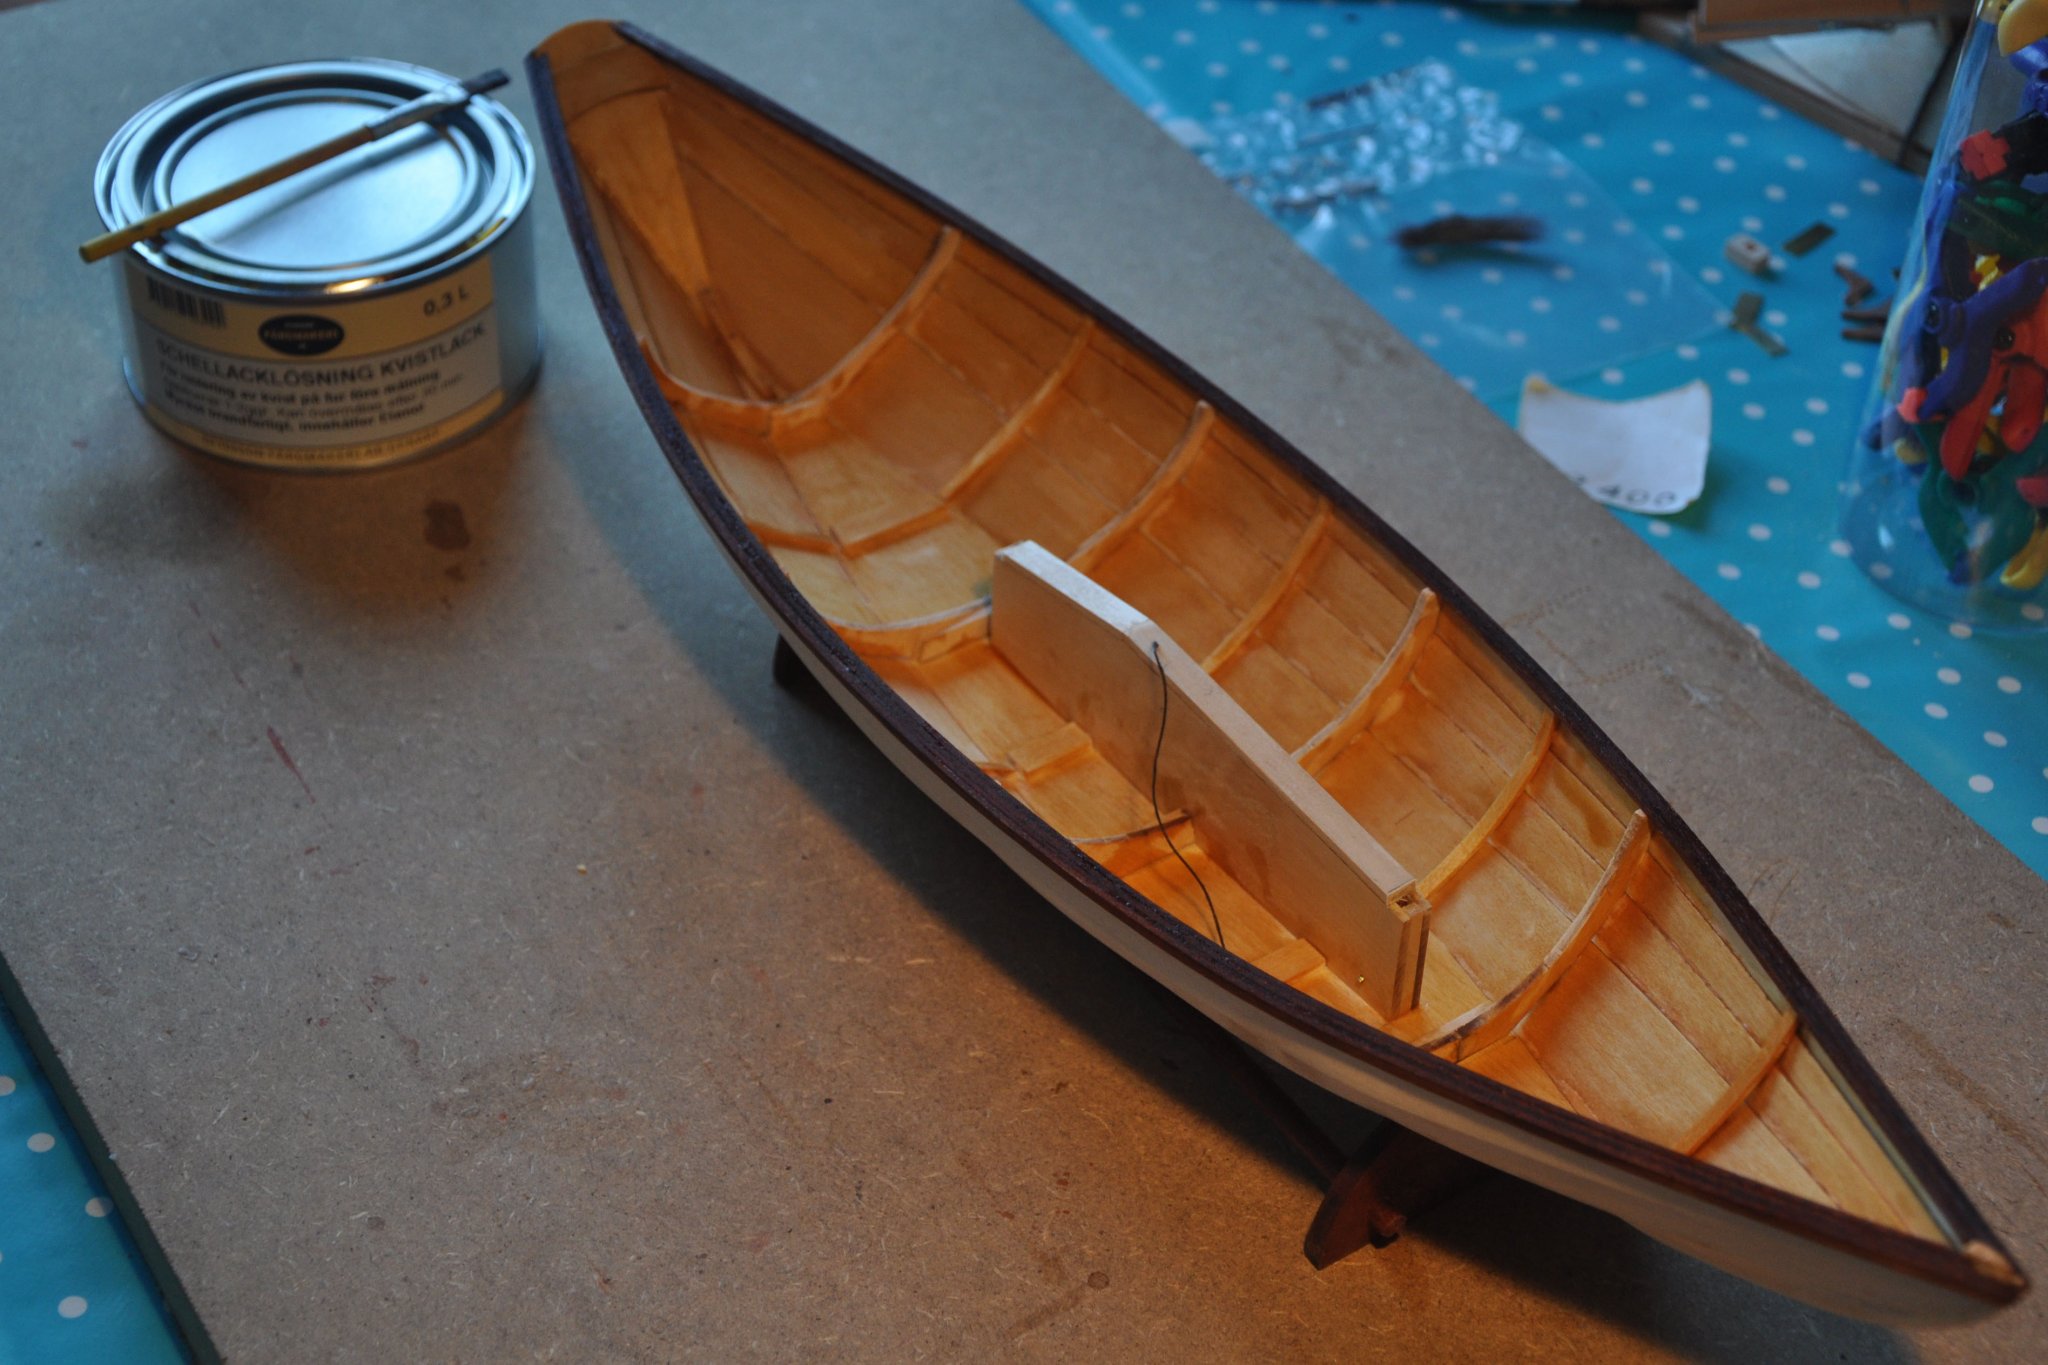
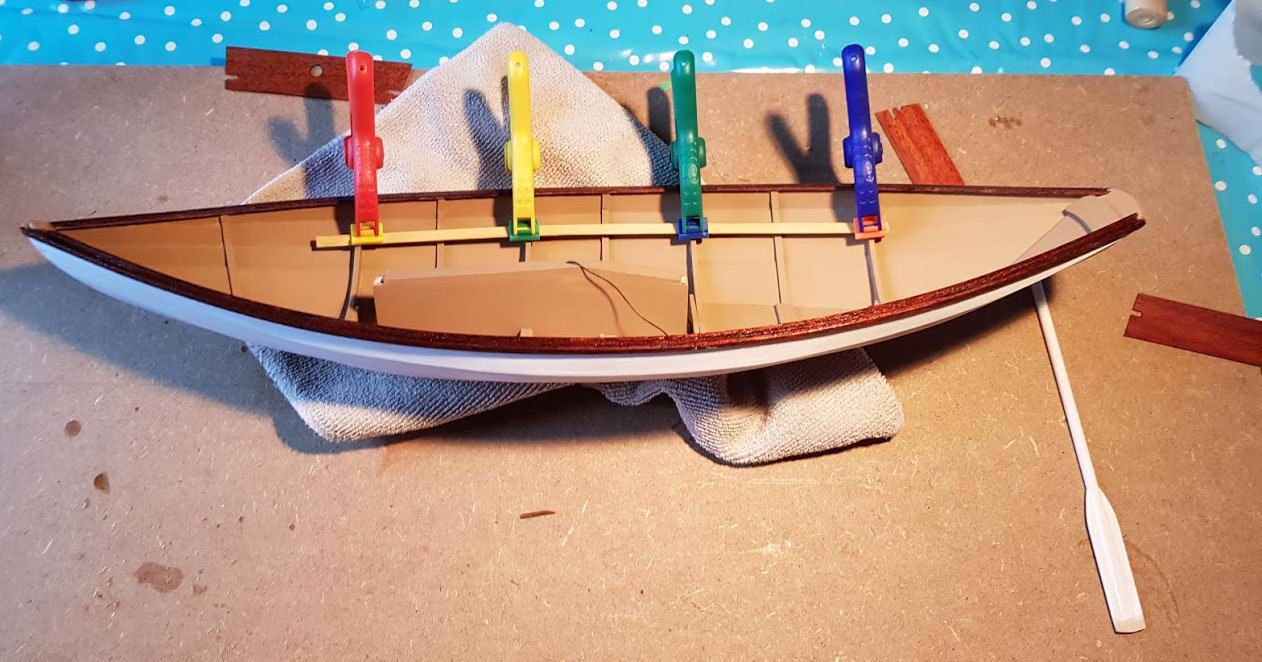
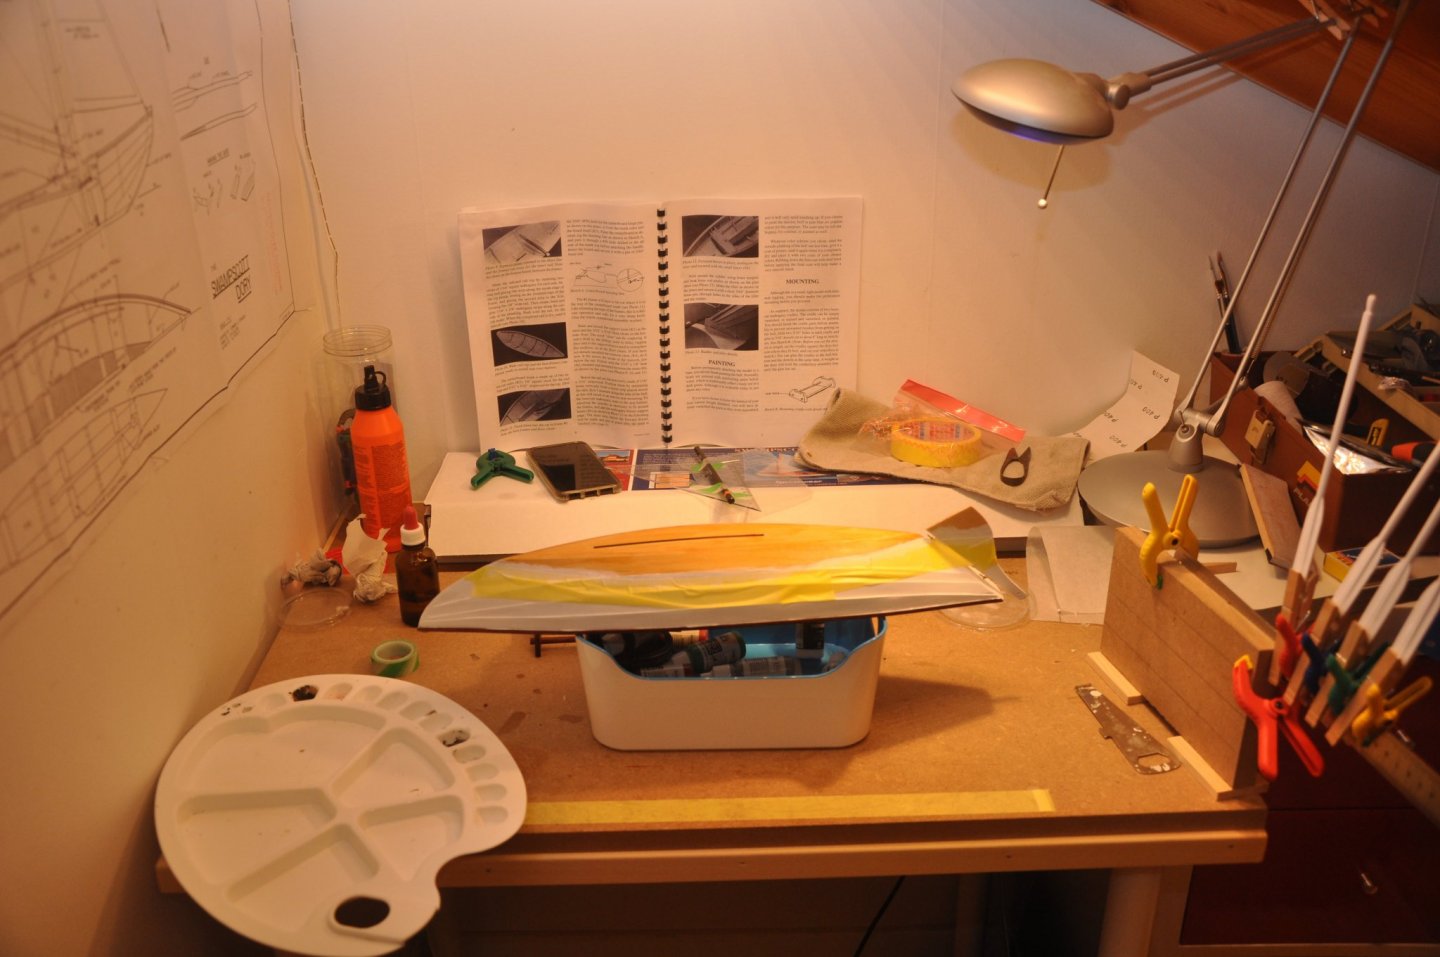
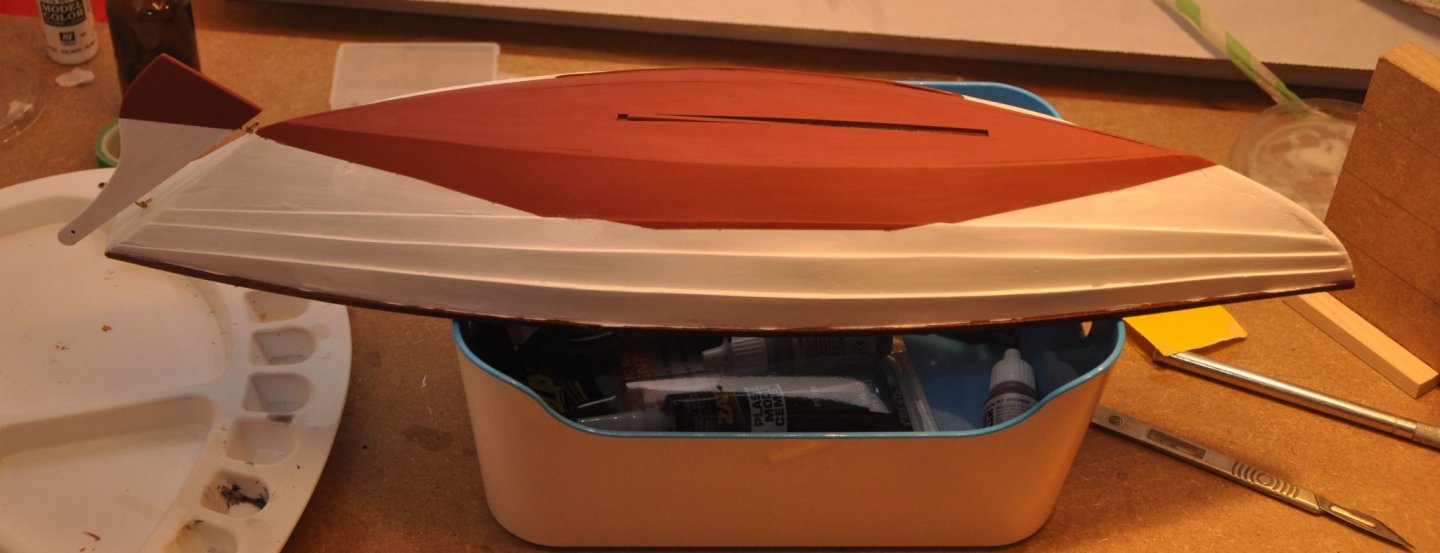
Hello again, Two weeks with only short periods at the building table. Mostly painting. The inside has been painted in vallejo cork brown. Maybe it came out to dark, could have used some brighter color. In the picture below I have started to fit the seat risers to the frames. I painted the inside before I mounted the seat risers as I though it would be hard to reach when they where in place. I scratched away the paint before gluing, to get a clean wood to attach to. Next I mounted the seats (which has been given two layers of shellac) and the rudder. I have also move into a new build area (below the stairs). It will be sufficient for this size of boat, but for any future larger projects someplace else is needed (but that is for a later time to figure out). The bottom has been painted as well. Next I will add varnish and then mount the hull to the stand so it will be steady when working with the rigging.
- 18 replies
-
- 5
-
-
- finished
- BlueJacket Shipcrafters
- (and 1 more)
-
Thanks. I opted for trying shellac as a sanding filler before painting. The result came out yellow-brown and somewhat spotty where the shellac did not stick to the places where there where some glue rests. However since I plan to paint both the inside and outside so it should not matter. I realized that it would be easier to paint the inside before I installed the seat risers, seats, cleats etc. Maybe I should have masked of the spots where I need to glue them, so that I wont glue on painted areas. But that would be tricky so I hope it will work anyway. I marked of the waterline so I know where to put the white color.

- 18 replies
-
- 3
-
-
- finished
- BlueJacket Shipcrafters
- (and 1 more)
-
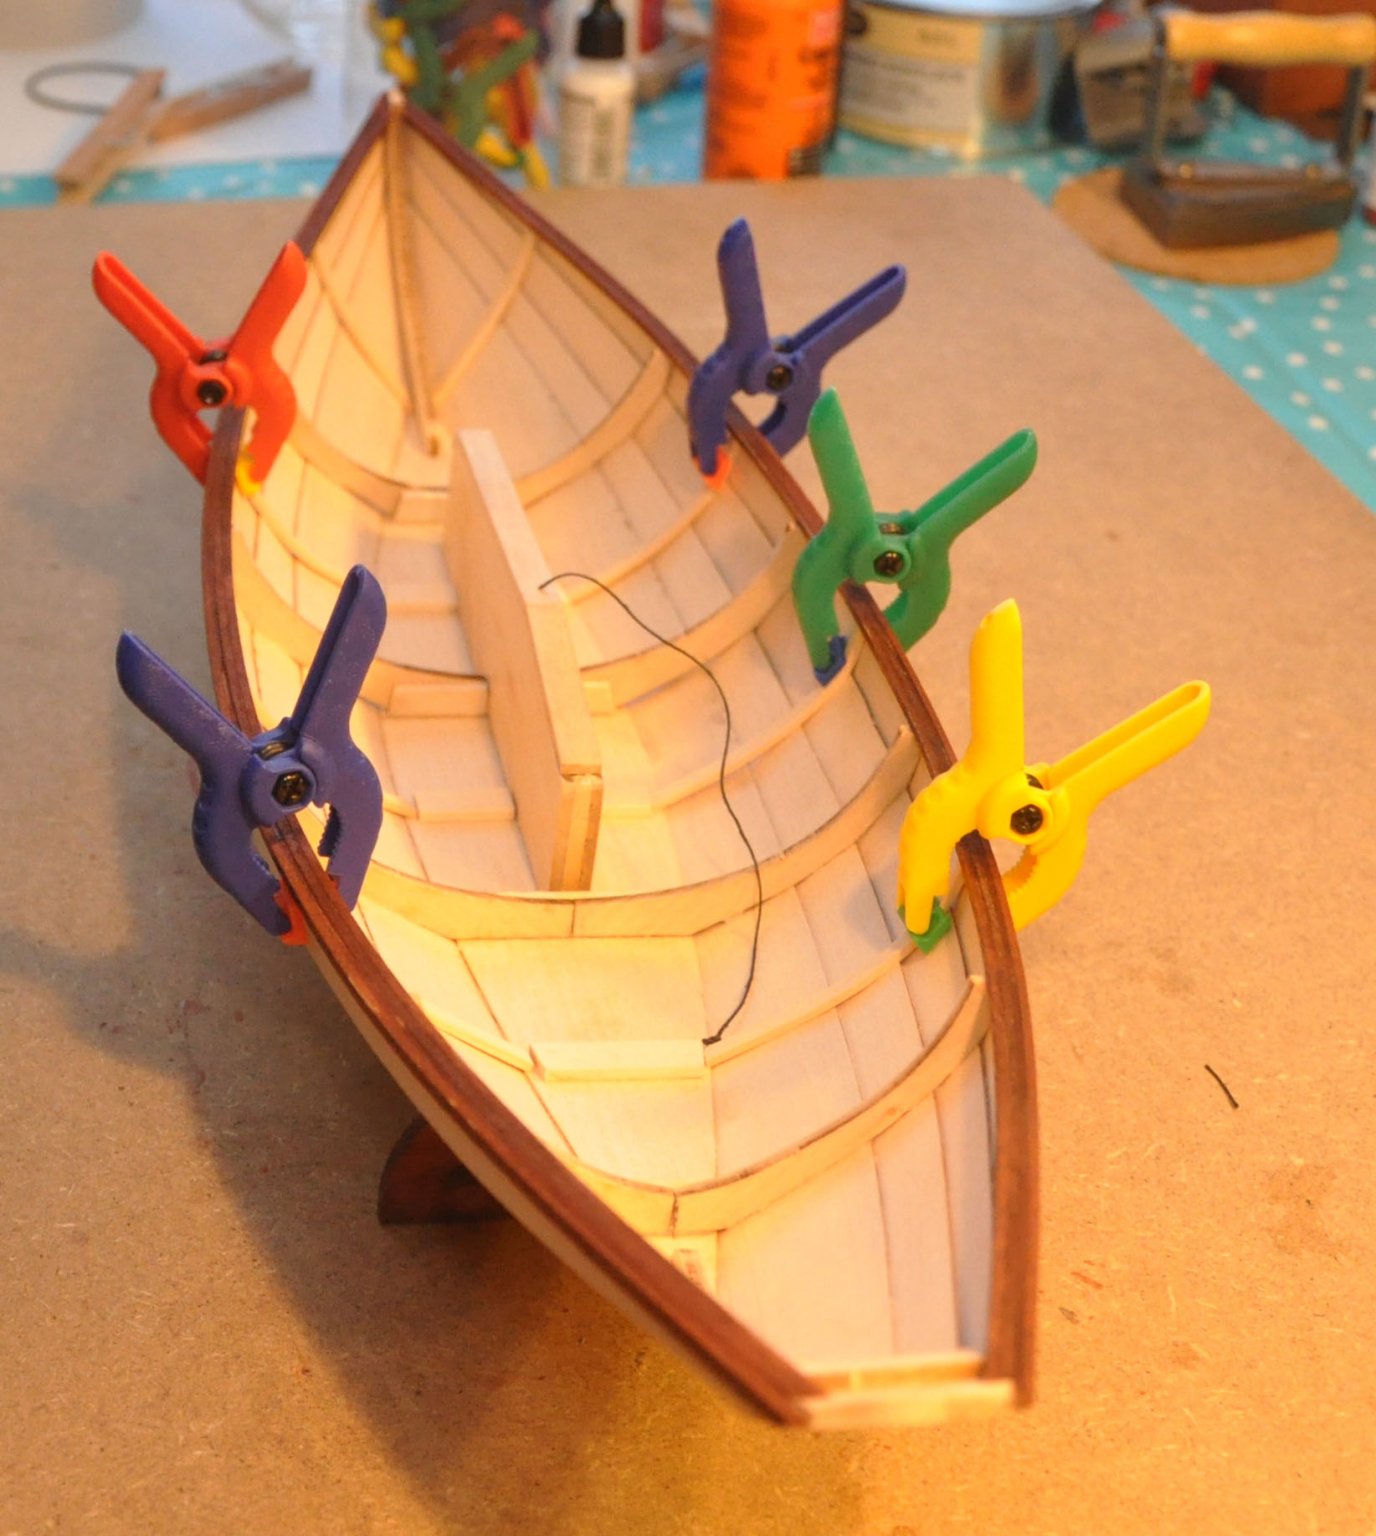
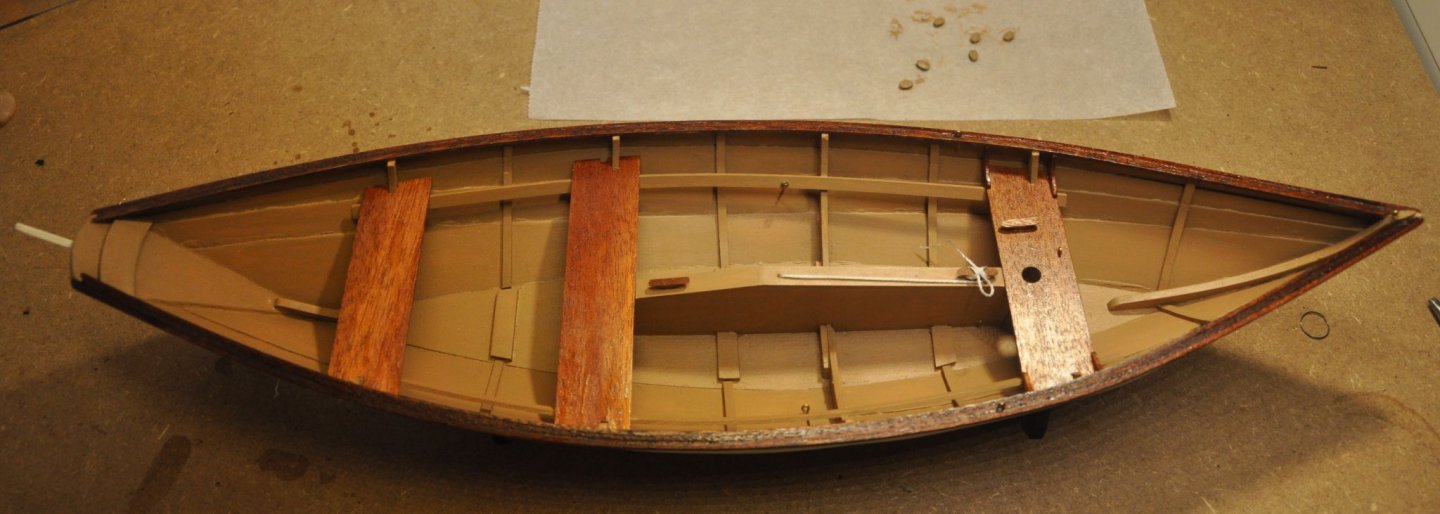
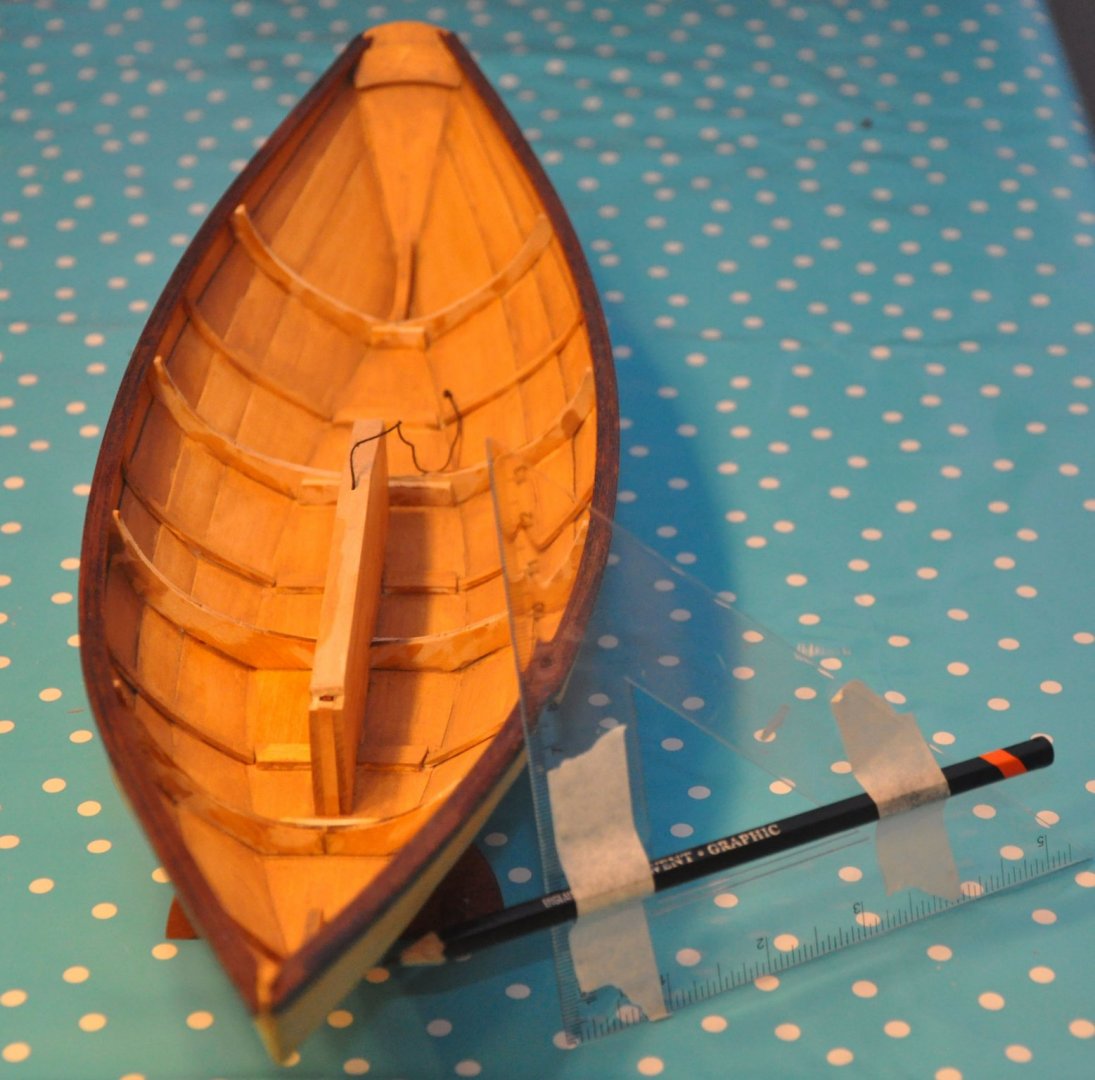
The result of the weekends work is starting to look like a boat: I have cut down the frames, stained and added rails, painted the centerboard and mounted it in the centerboard box, glued the assembly to the bottom and finally steamed and bent the thinner frames to the sides. The line from the centerboard box is used to raise and lower the centerboard. The next steps will be sanding the inside before installing and more details that would be in the way.

- 18 replies
-
- 6
-
-
- finished
- BlueJacket Shipcrafters
- (and 1 more)