HOLIDAY DONATION DRIVE - SUPPORT MSW - DO YOUR PART TO KEEP THIS GREAT FORUM GOING! (89 donations so far out of 49,000 members - C'mon guys!)
×

bolin
-
Posts
482 -
Joined
-
Last visited
Content Type
Profiles
Forums
Gallery
Events
Everything posted by bolin
-
 It looks like a nice kit and that you have gotten well under way. I'm looking forward to see your progress.
 -
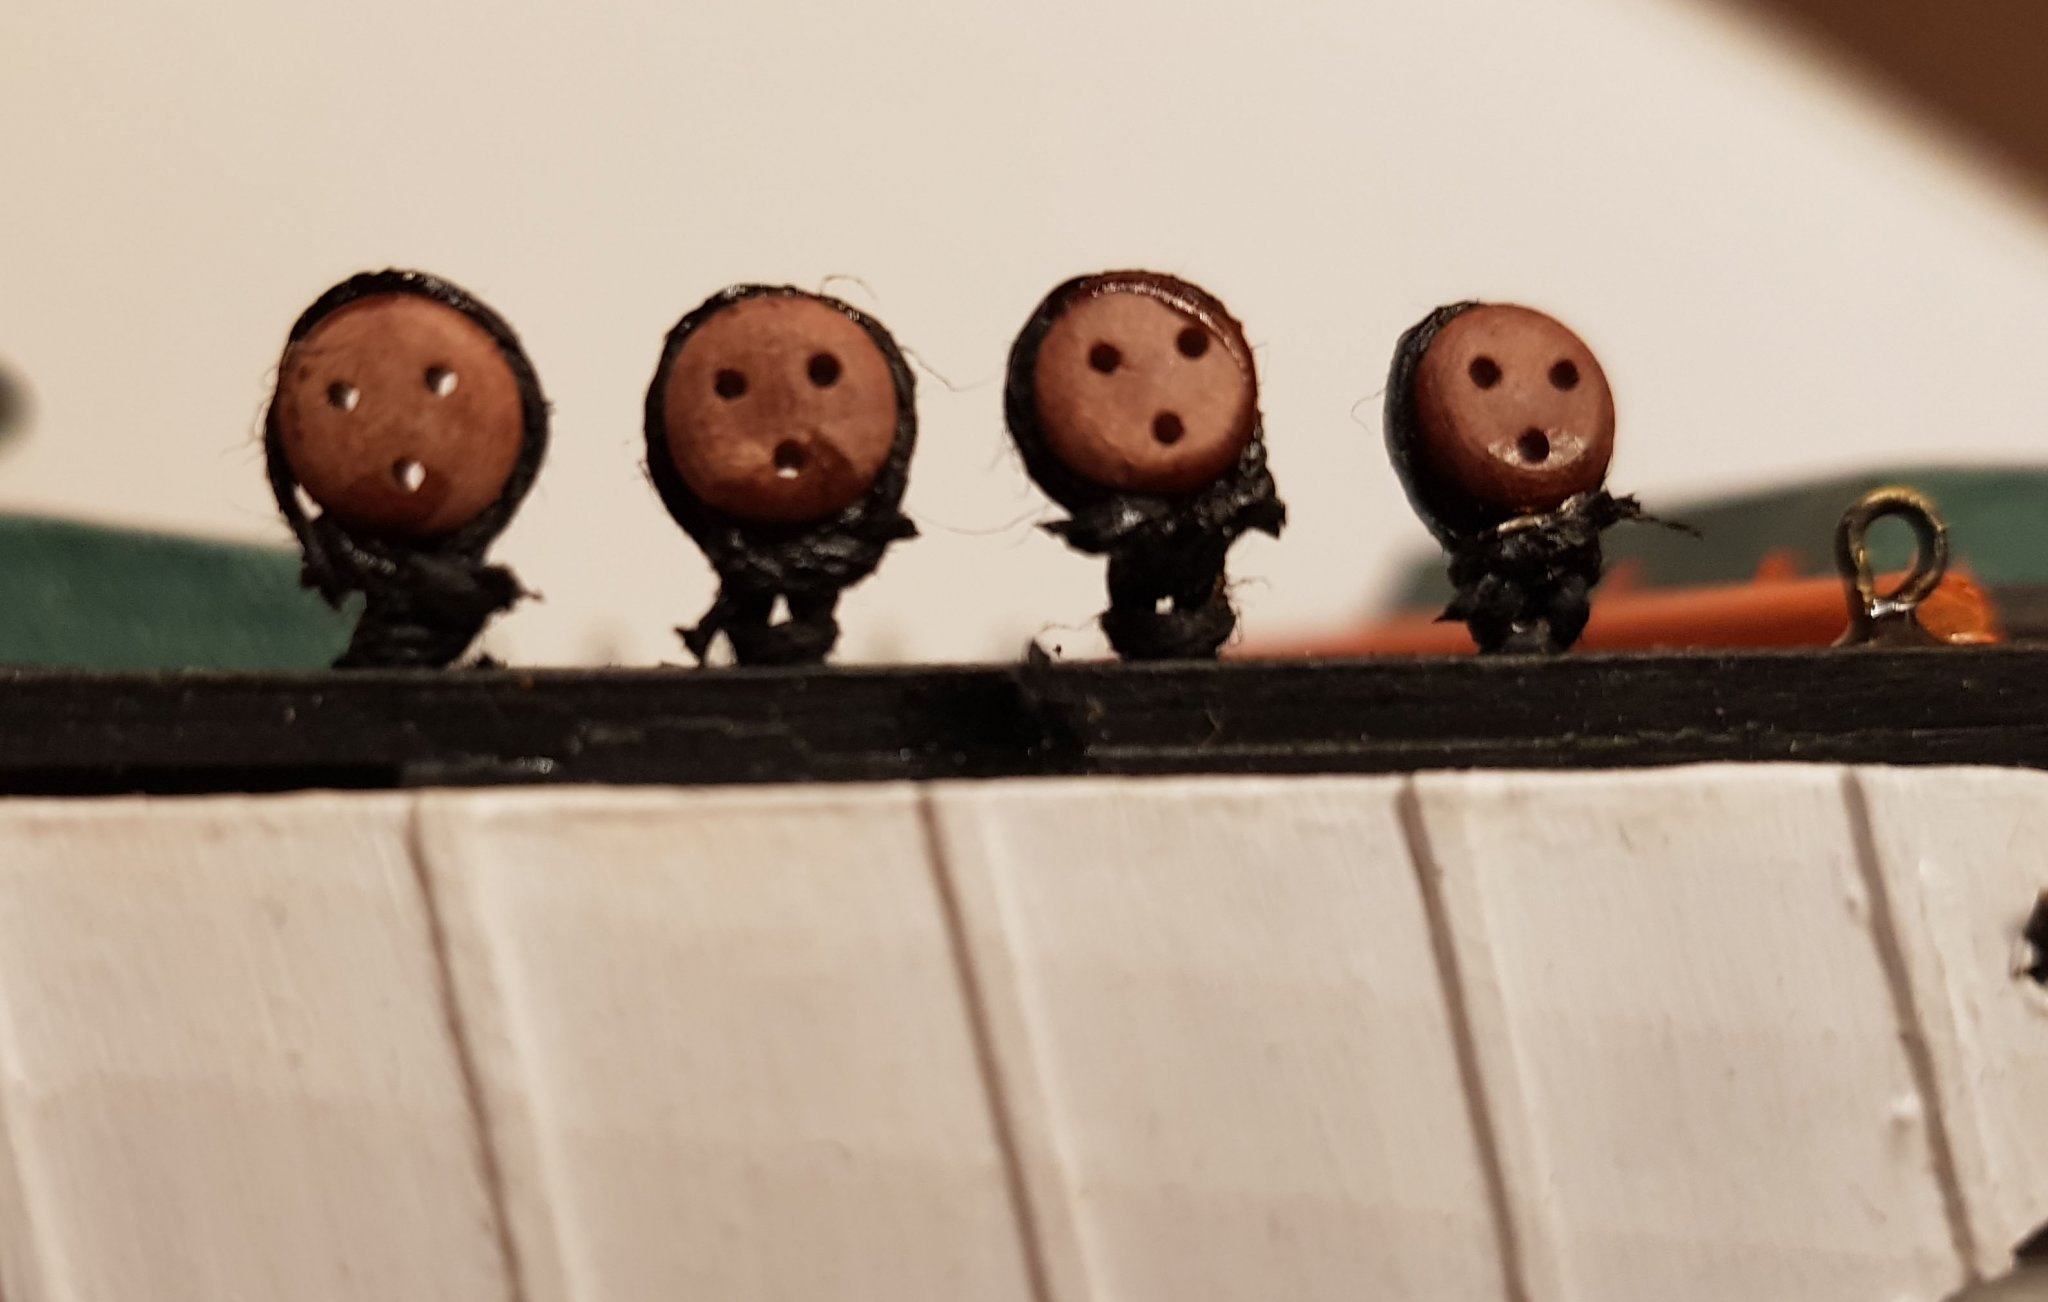
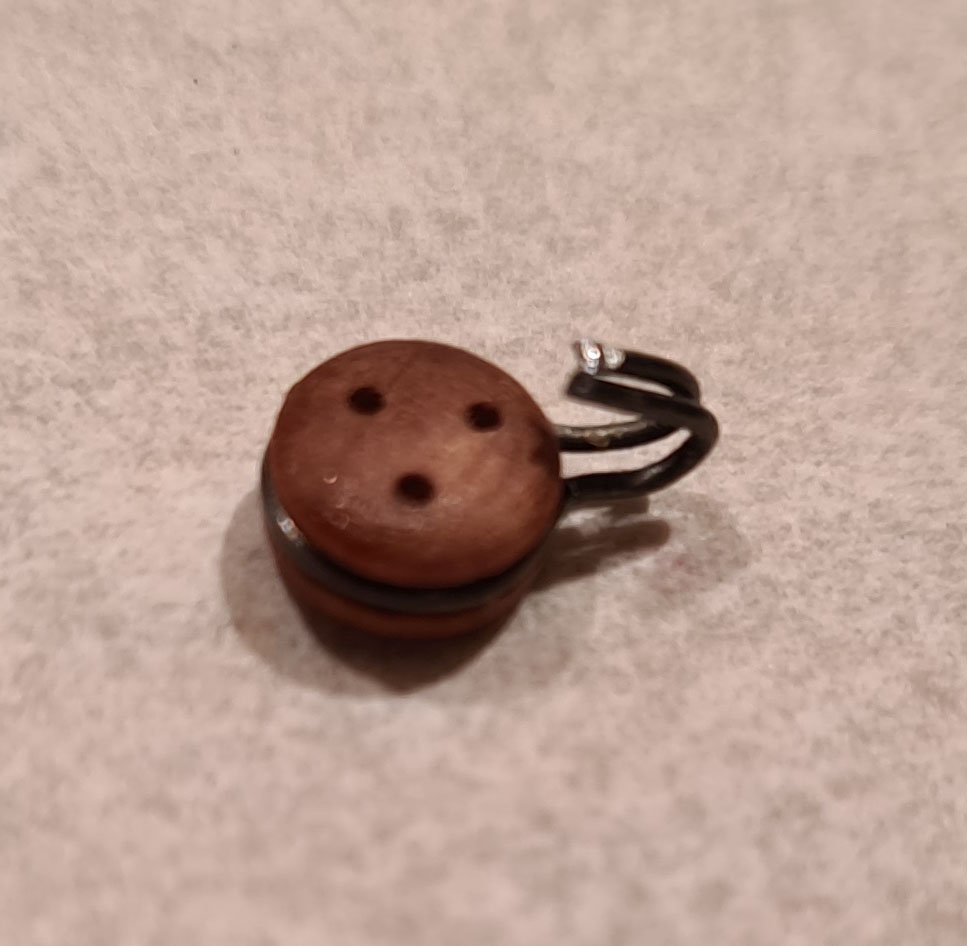
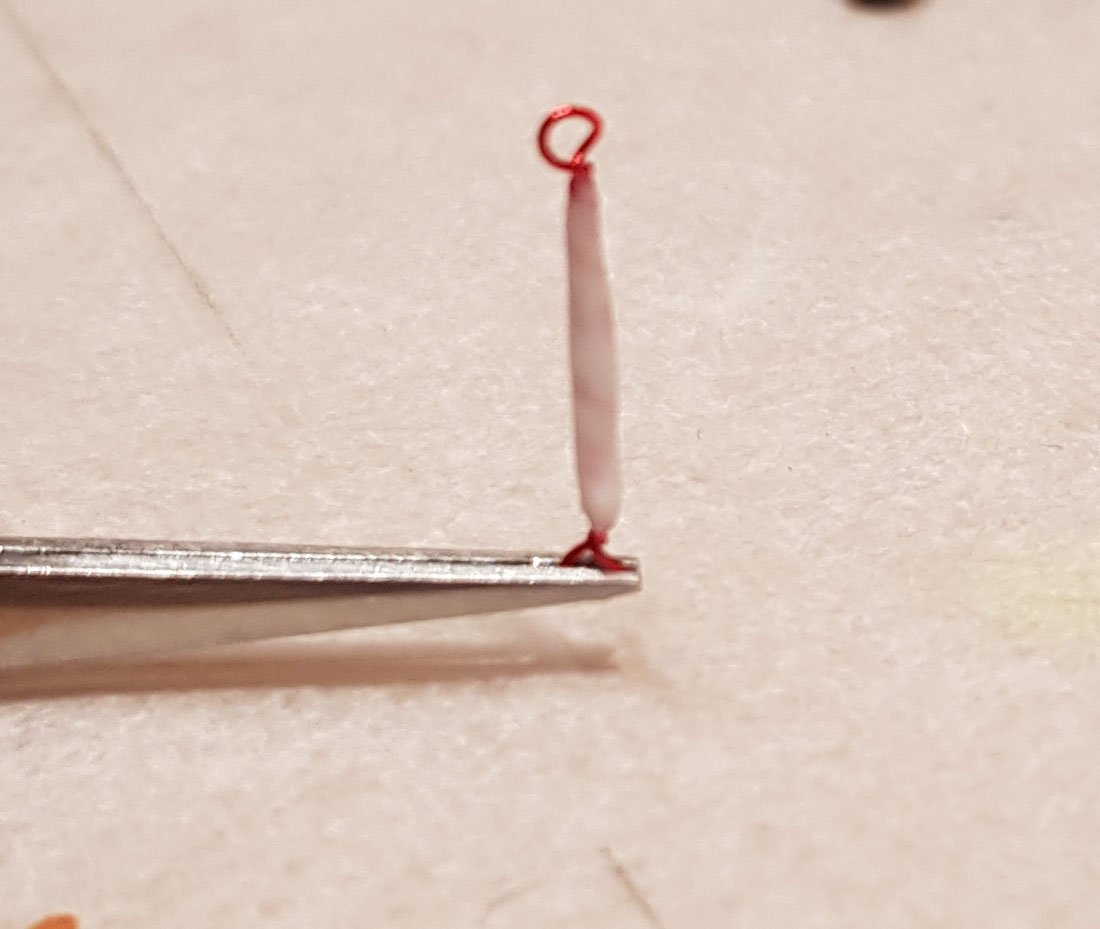
It was raining today, so I got some time in the shipyard. A milestone passed. The first mast is stepped! In preparation for the main mast all fittings has finally been glued to the deck, as they will be harder to add when the shrouds and all other lines has been tied. The only things still remaining are the davits and the boat. I also decided to change the method of attaching the dead eyes. I replaced the rather thick line I used before. Instead I clamped a steel wire around and made a small hook. Cheers
- 83 replies
-
- 3
-

-
- finished
- billing boats
- (and 1 more)
-
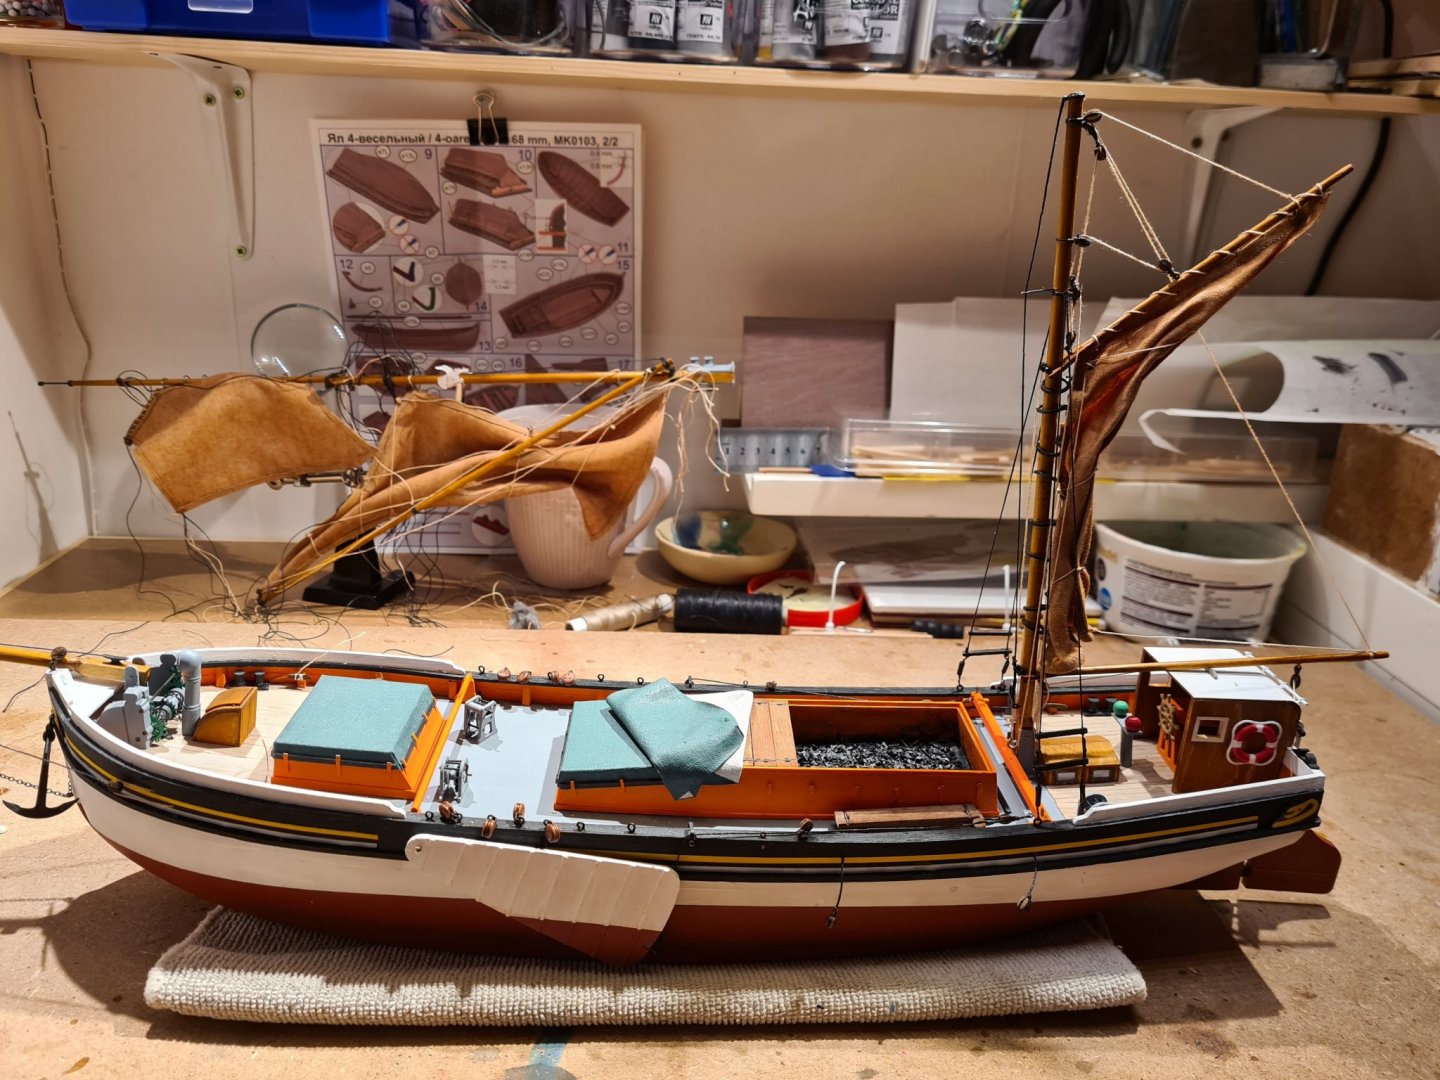
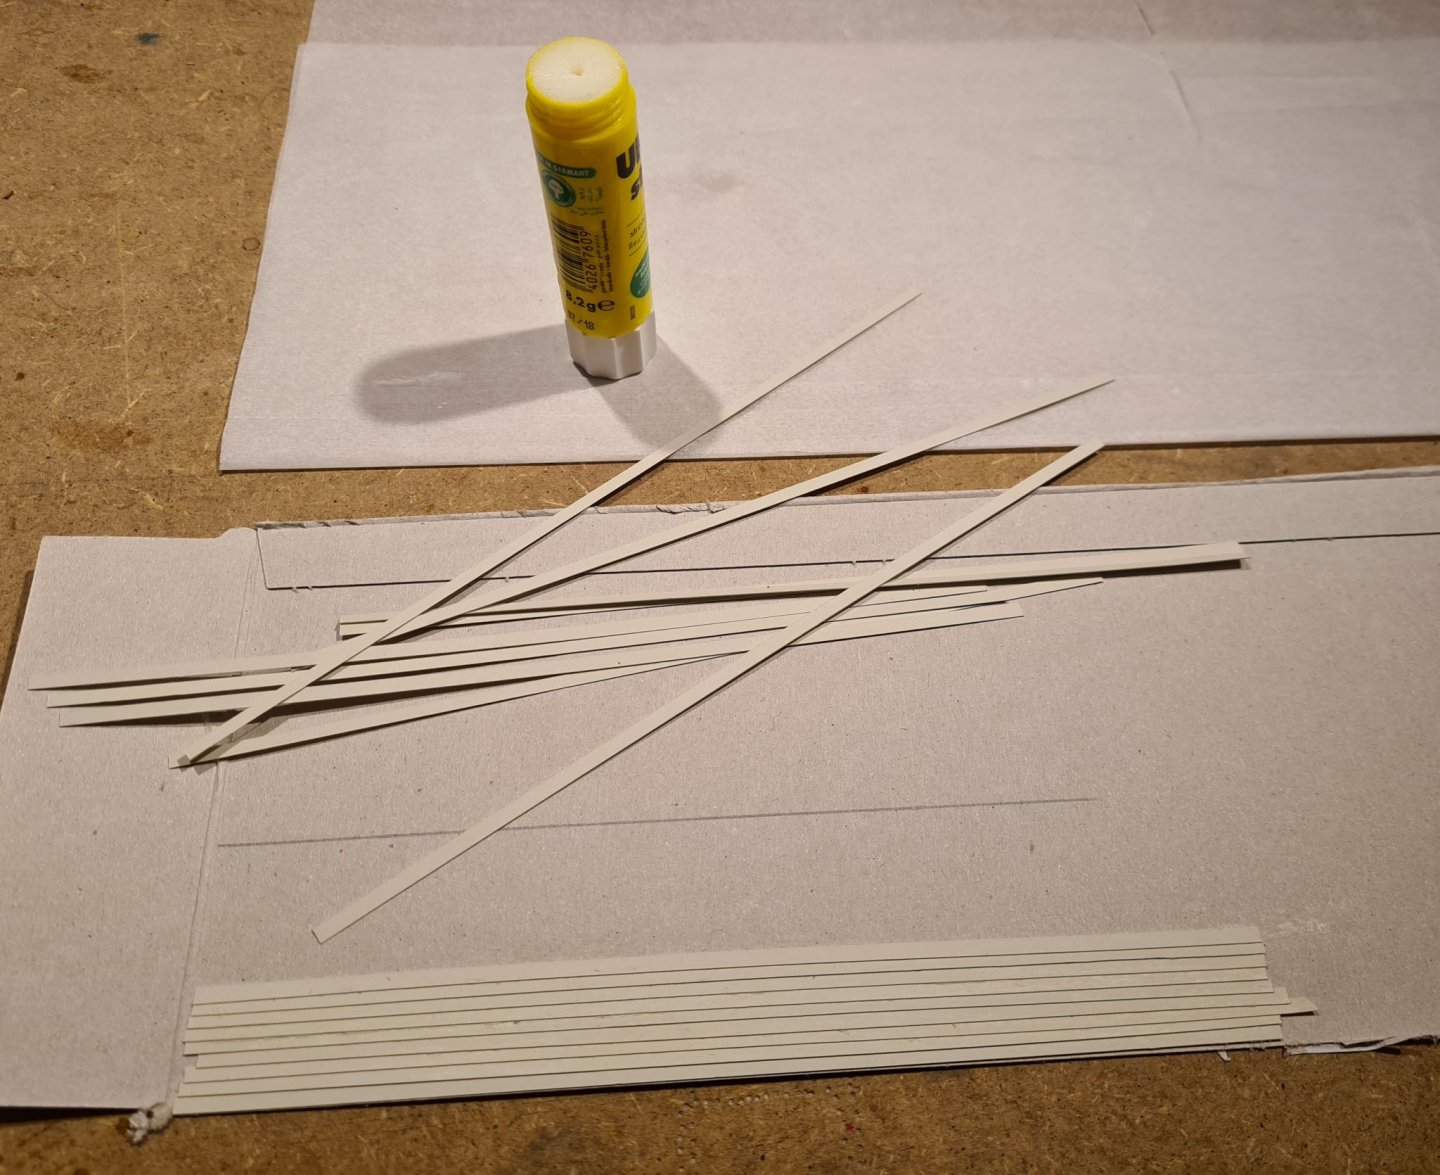
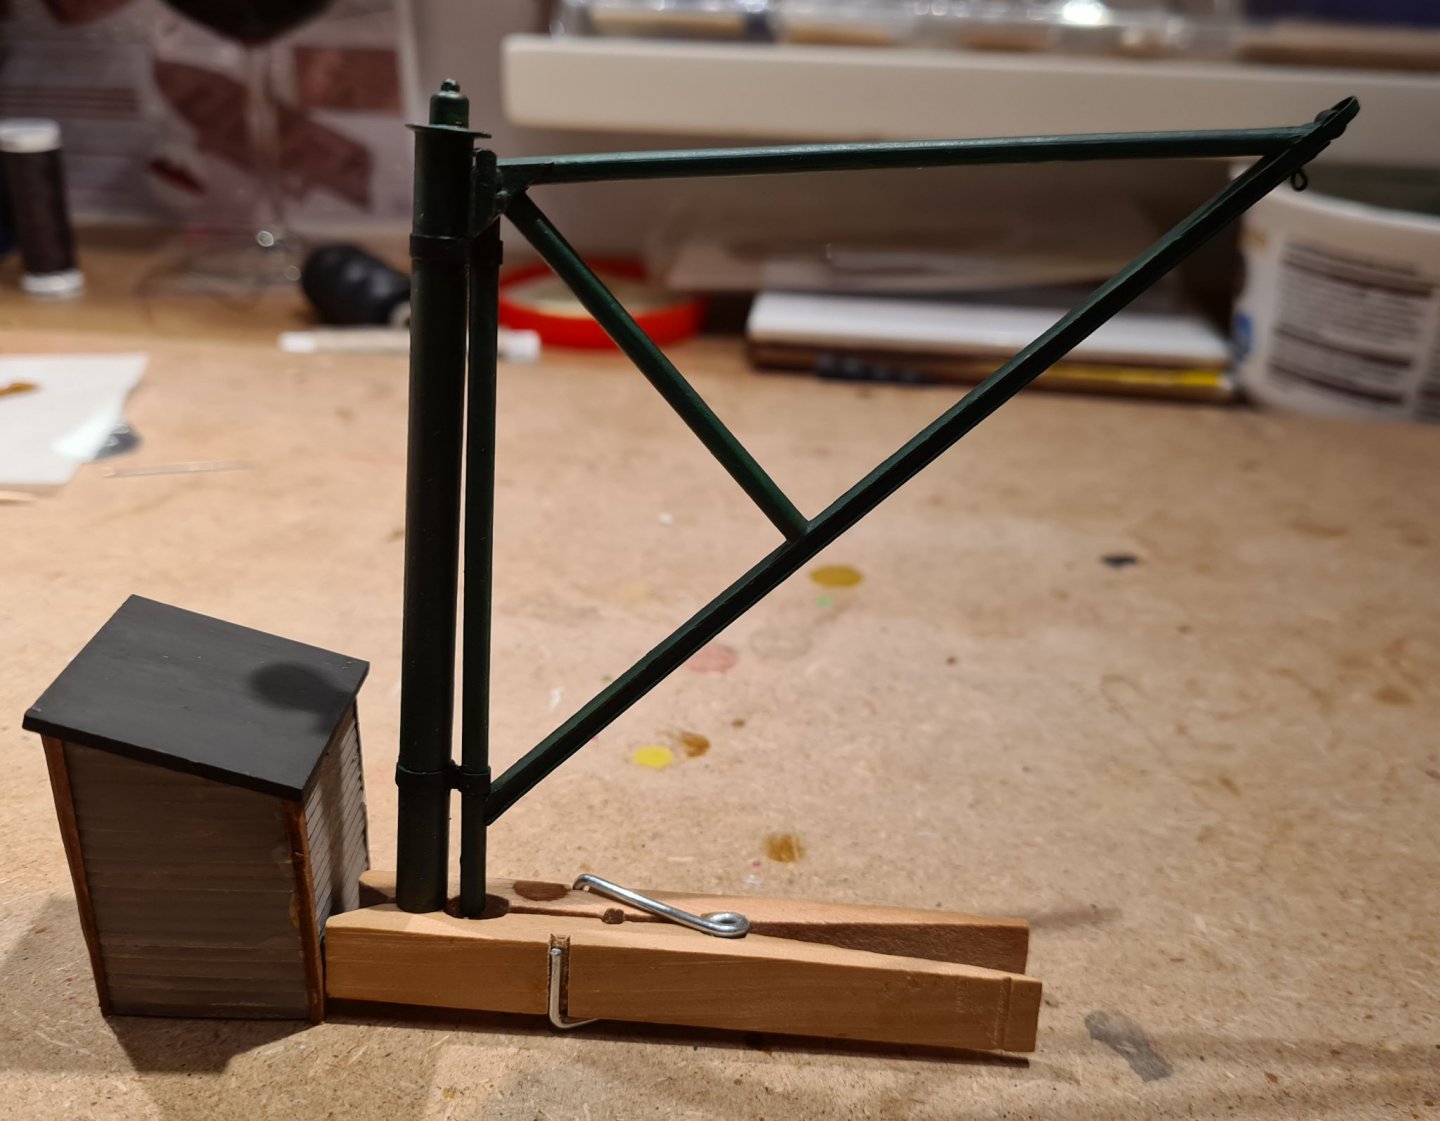
The crane is almost ready for mounting. I built a little shed for the hydraulic motor similar to the picture I showed above. The only thing remaining is the coal bucket and the line, but I think I will add it when I mount the crane on the quay. The walls of the shed was made by gluing overlapping paper strips on cardboard. I have also continued with the masts and sails. This is much more time consuming and tricky than I thought. Here is the mizen mast ready for stepping. The main mast is almost done. I just need to attach the main sail and draw some more rigging lines. I have studied the plans and instructions, and photos I have found before, for some idea on how the main sail is attached. I have concluded that it should be tied to the mast and boom in its four corners. There are no indications of mast hoops or lashings to the mast. I'm a bit curious on how that would have worked in practice.
- 83 replies
-
- 2
-
-
- finished
- billing boats
- (and 1 more)
-
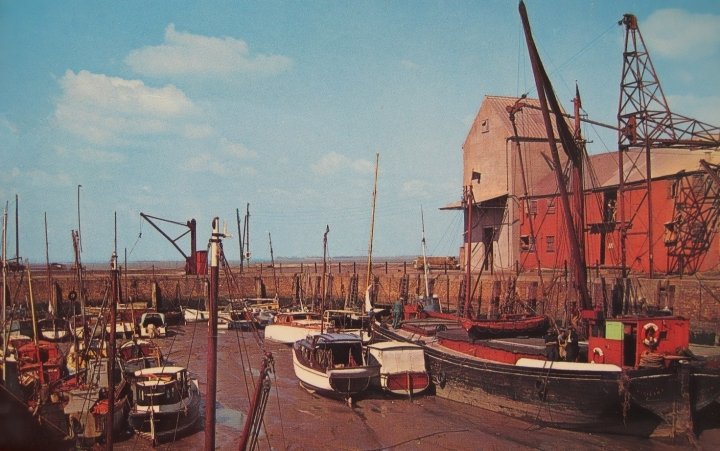
Summertime means lazy days at my shipyard. Other things, that are better suited for the short summer, such as sailing real ships, becomes more enjoyable. I did however start on the crane for the quay. I have a few photos to work from, and I'm trying to build something that resembles these. Cheers
- 83 replies
-
- 5
-
-
- finished
- billing boats
- (and 1 more)
-
Glad to see that you completed it. Nicely done!
-
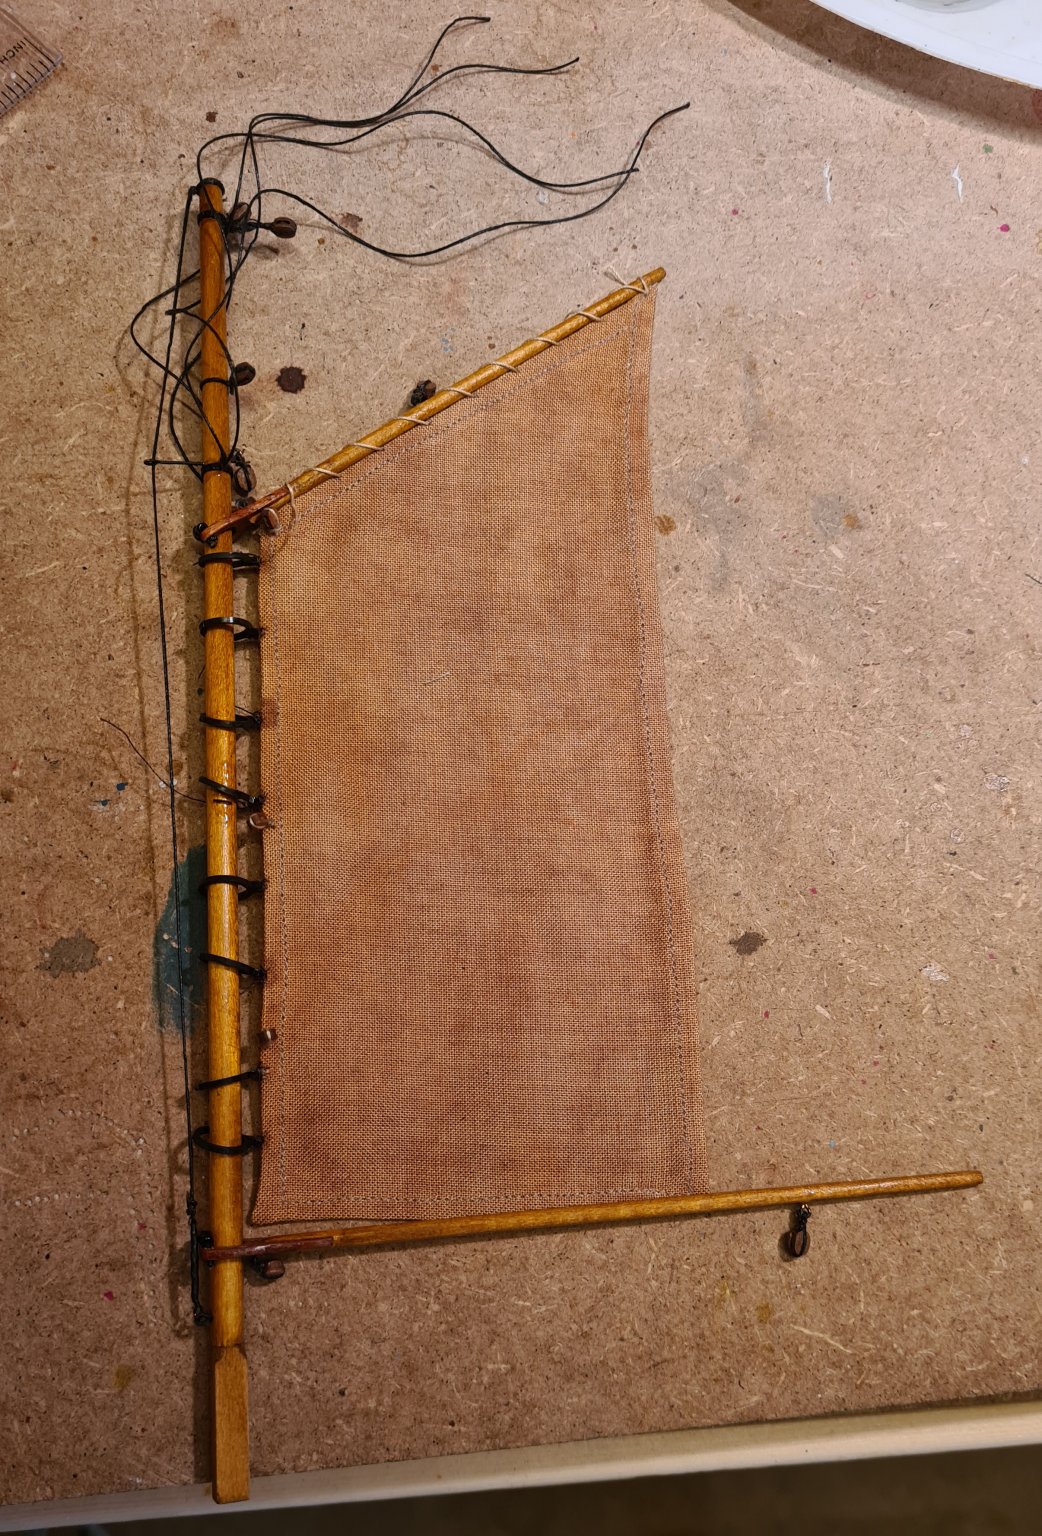
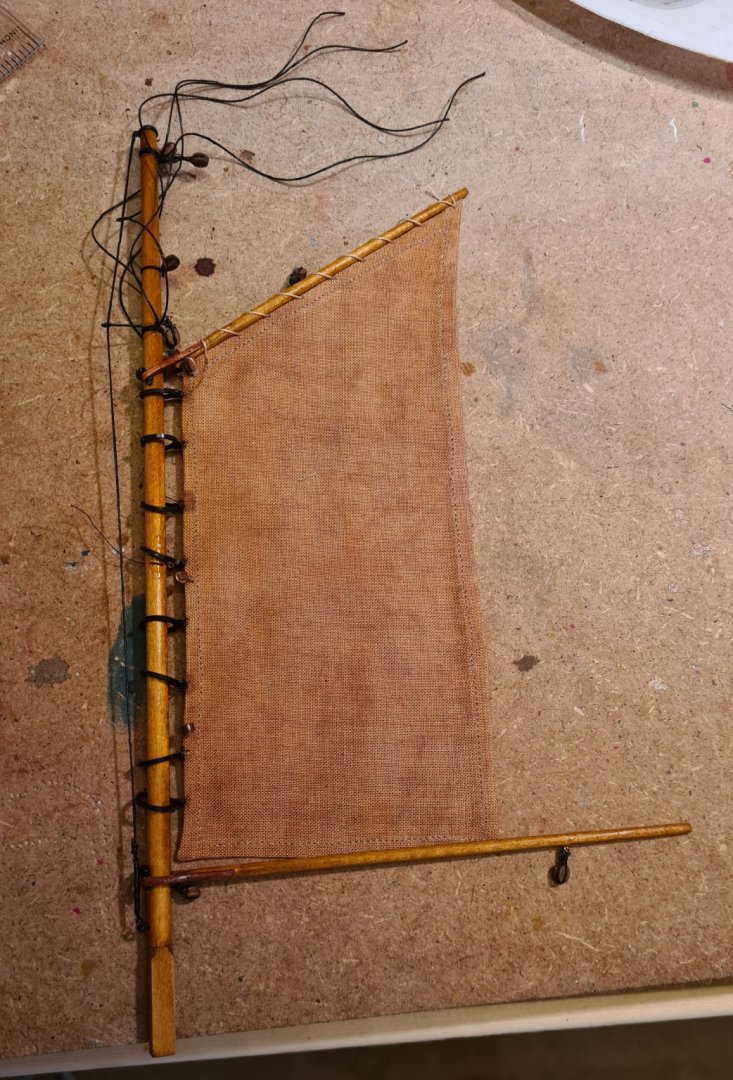
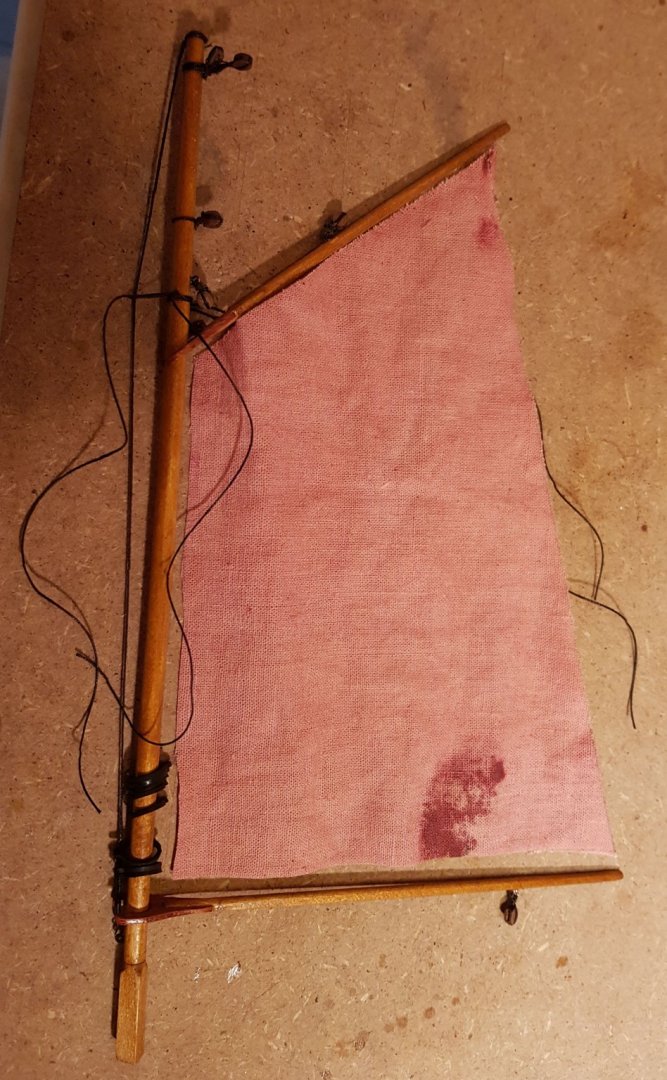
First sail attached to the mast and gaff boom. Now I will start to add the running rigging before I step the mast on the hull.
- 83 replies
-
- 4
-
-
- finished
- billing boats
- (and 1 more)
-
The rigging looks right to me. I just made a hook of the copper wire and hooked it through the jib sail peak on my model, like you have done. The twisted wire I only used for shrouds. I used the copper wire for stropping the blocks like you did on the one in the jib sail. I agree that the thread in the kit is a bit hard to make nice knots with, it is so smooth that they quite easily comes loose. For the jib tack corner I just tied a square knot like you described. It untied itself after some months, so I re did it and added a drop of glue and hopefully it will hold.
-
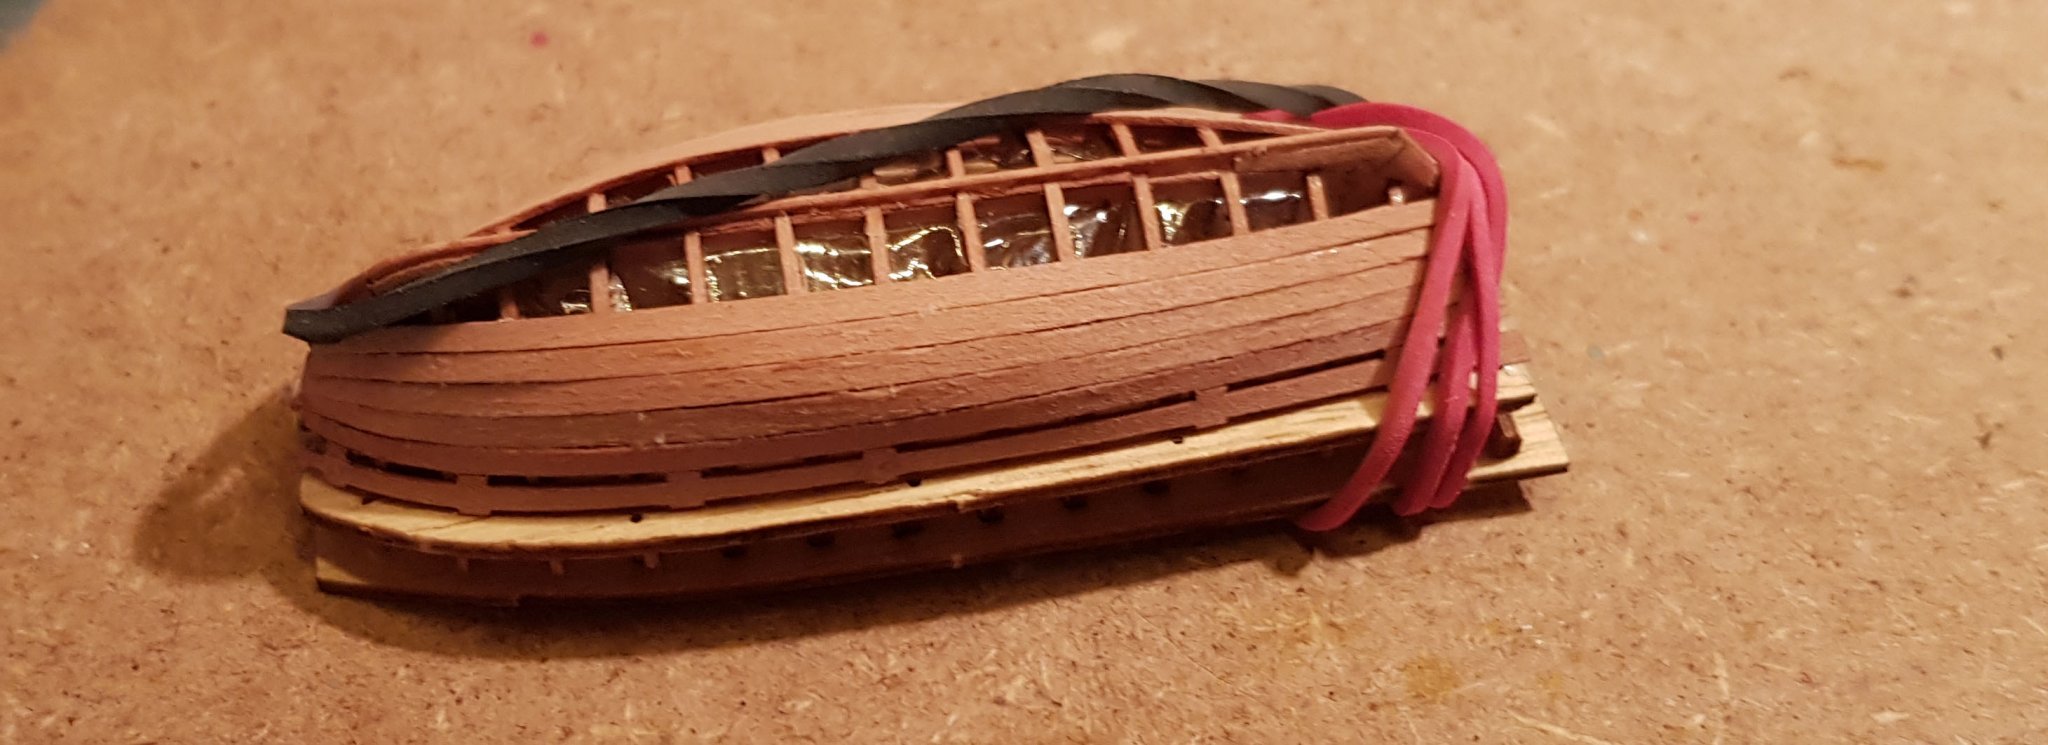
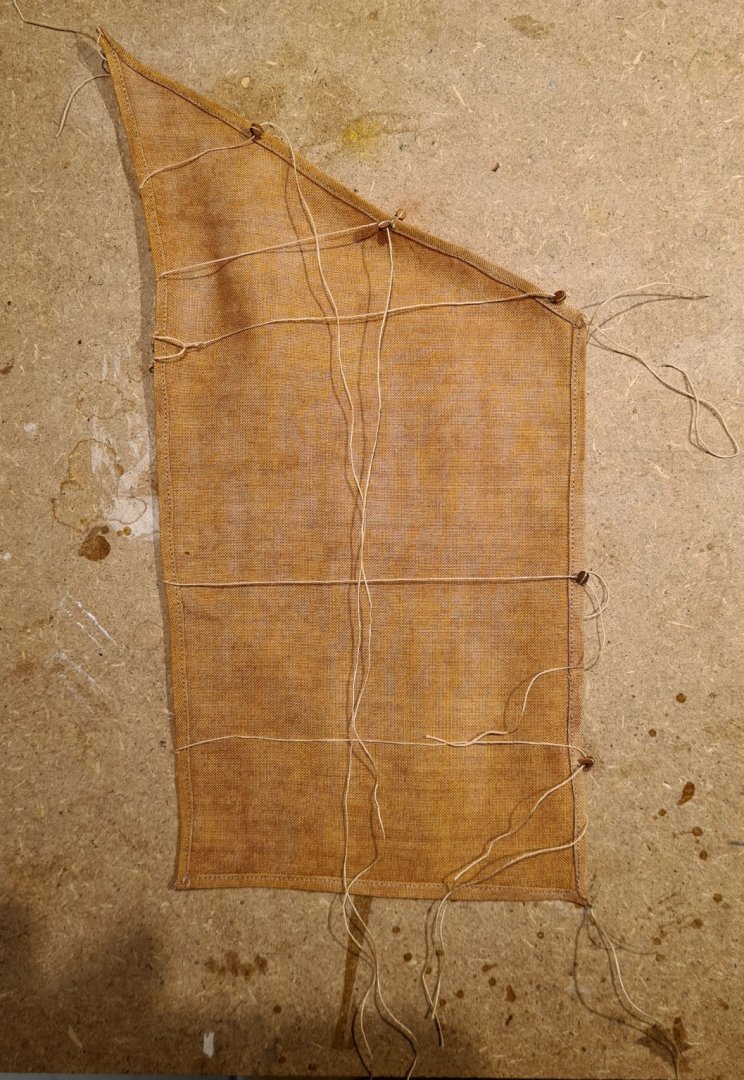
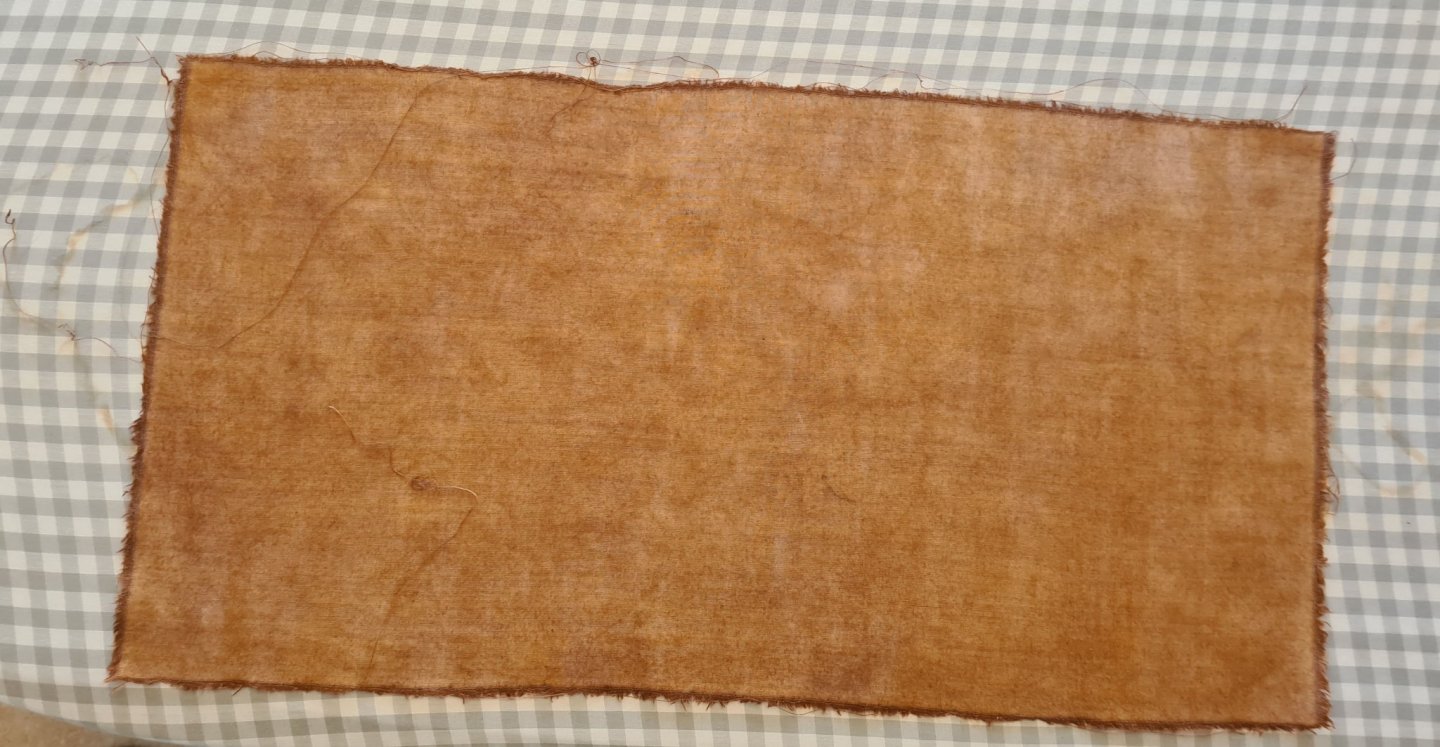
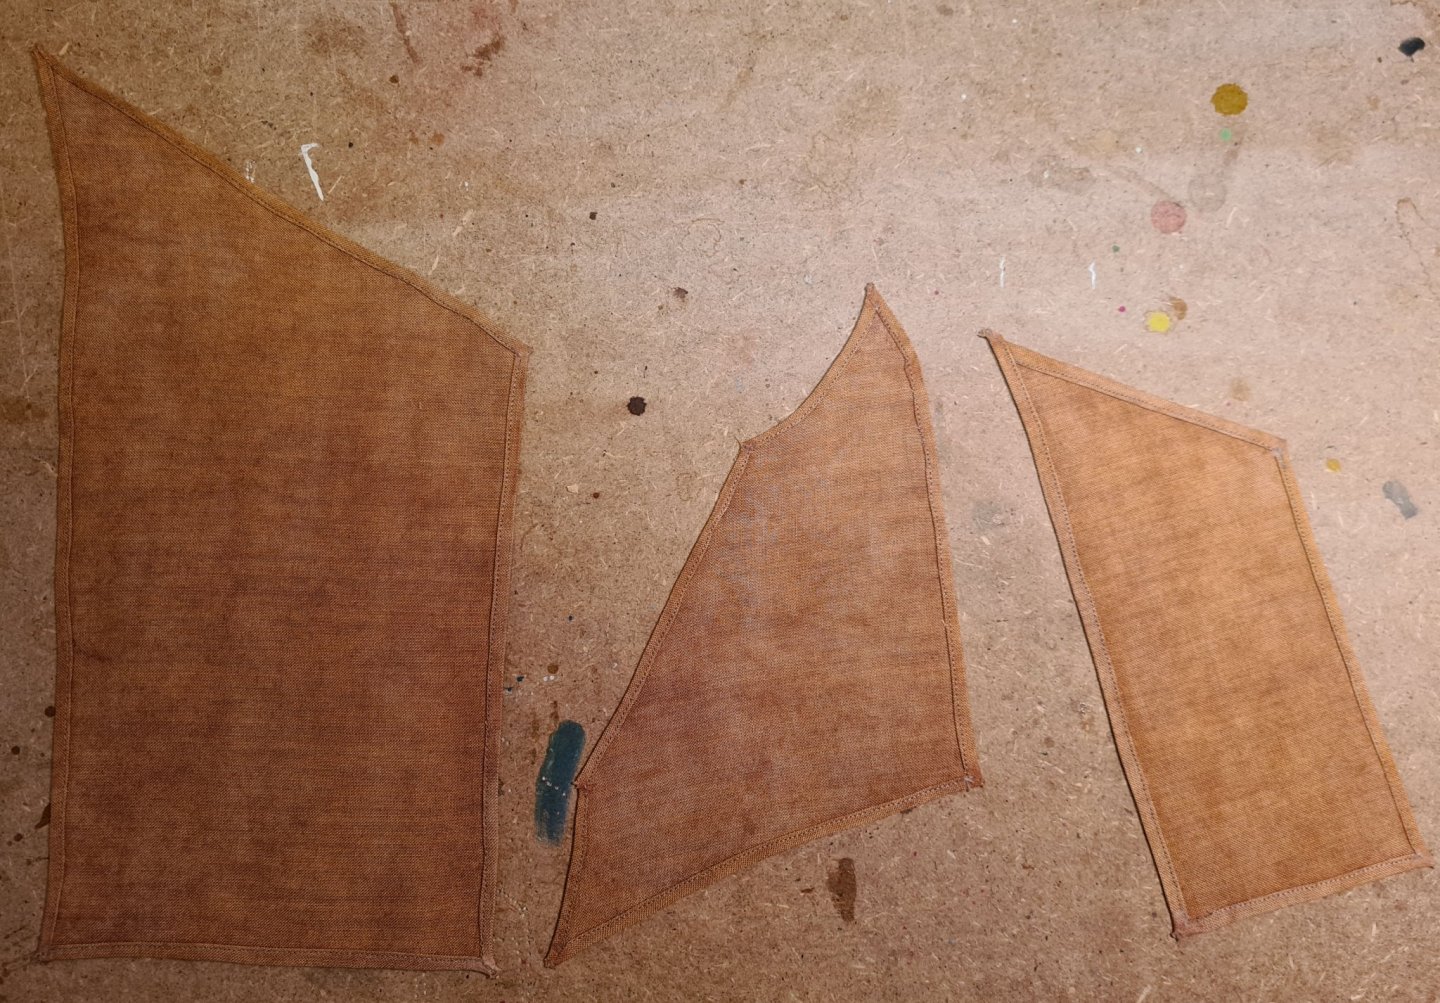
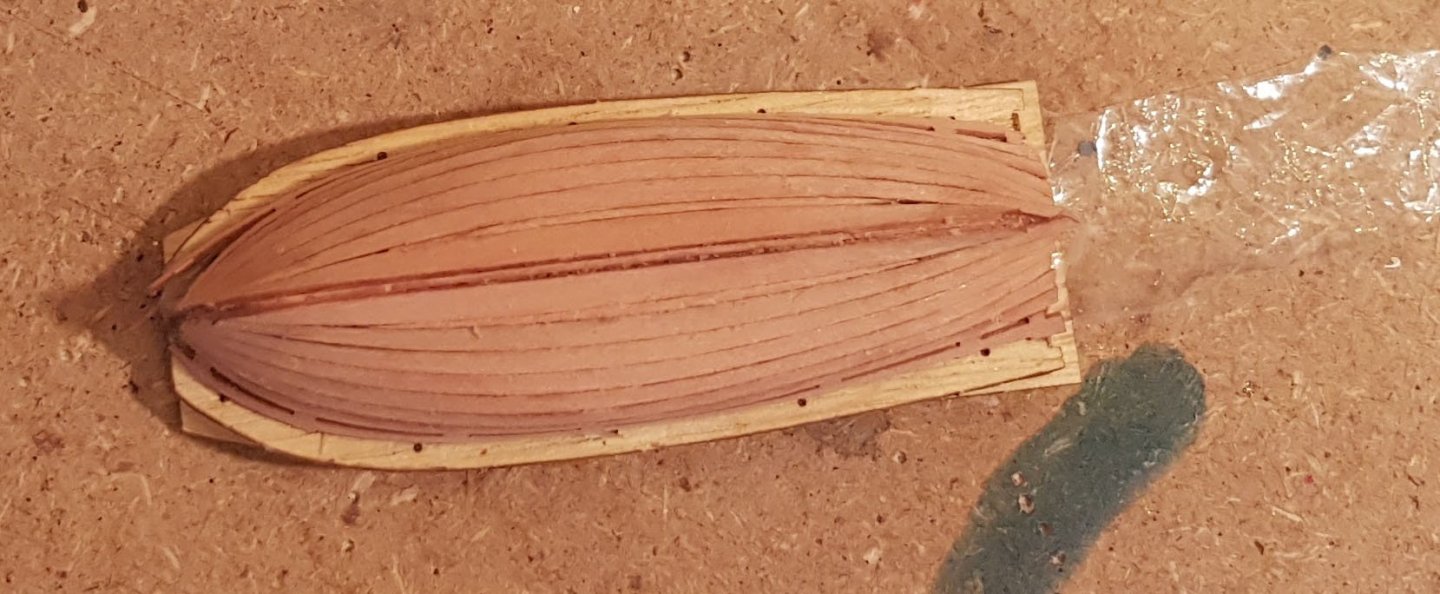
I completed the planking of the boat and was able to lift it from the jig. The glue stains needs to be scraped off before I can continue with the railing, keel and the rest. I have also worked on the sails. It took several tries before I was reasonably satisfied with the color. I aimed for something slightly redder, but I am happy with the uneven staining. I think it gives more of a weathered look to the sails than a uniform color would have given. So I decided to keep this piece. The sewing of the sails was in comparison a simple task. They are sewn only 2/3 as wide as in the plan, so that they are not to big when furled. I will now put some diluted glue on the frayed corners so that I can cut them to shape with a scalpel. After that my new blocks will be attached to the forward edge (luff) of the main and mizzen sails as described before.
- 83 replies
-
- 7
-
-
- finished
- billing boats
- (and 1 more)
-
I recently received a delivery from Vanguard models containing Lady Eleanor and some blocks. I will follow your build with interest until I have freed up space at the shipyard to start building her.
- 38 replies
-
- 3
-
-
- vanguard models
- fifie
- (and 2 more)
-
Interesting build. Card is a fascinating material, cheap and accessible. It will be interesting to follow this, and learn.
-
The sail is looking good. Now it’s only the home stretch left. Nicely done! The instruction says hoops also for the boom. But when I built the same model I found several pictures with lashed stiles as well. VTHoikEEs example would work well also. If I understand correctly the sail and mast are raised as a whole on these small boats.
- 60 replies
-
- 1
-
-
- swampscott dory
- finished
- (and 1 more)
-
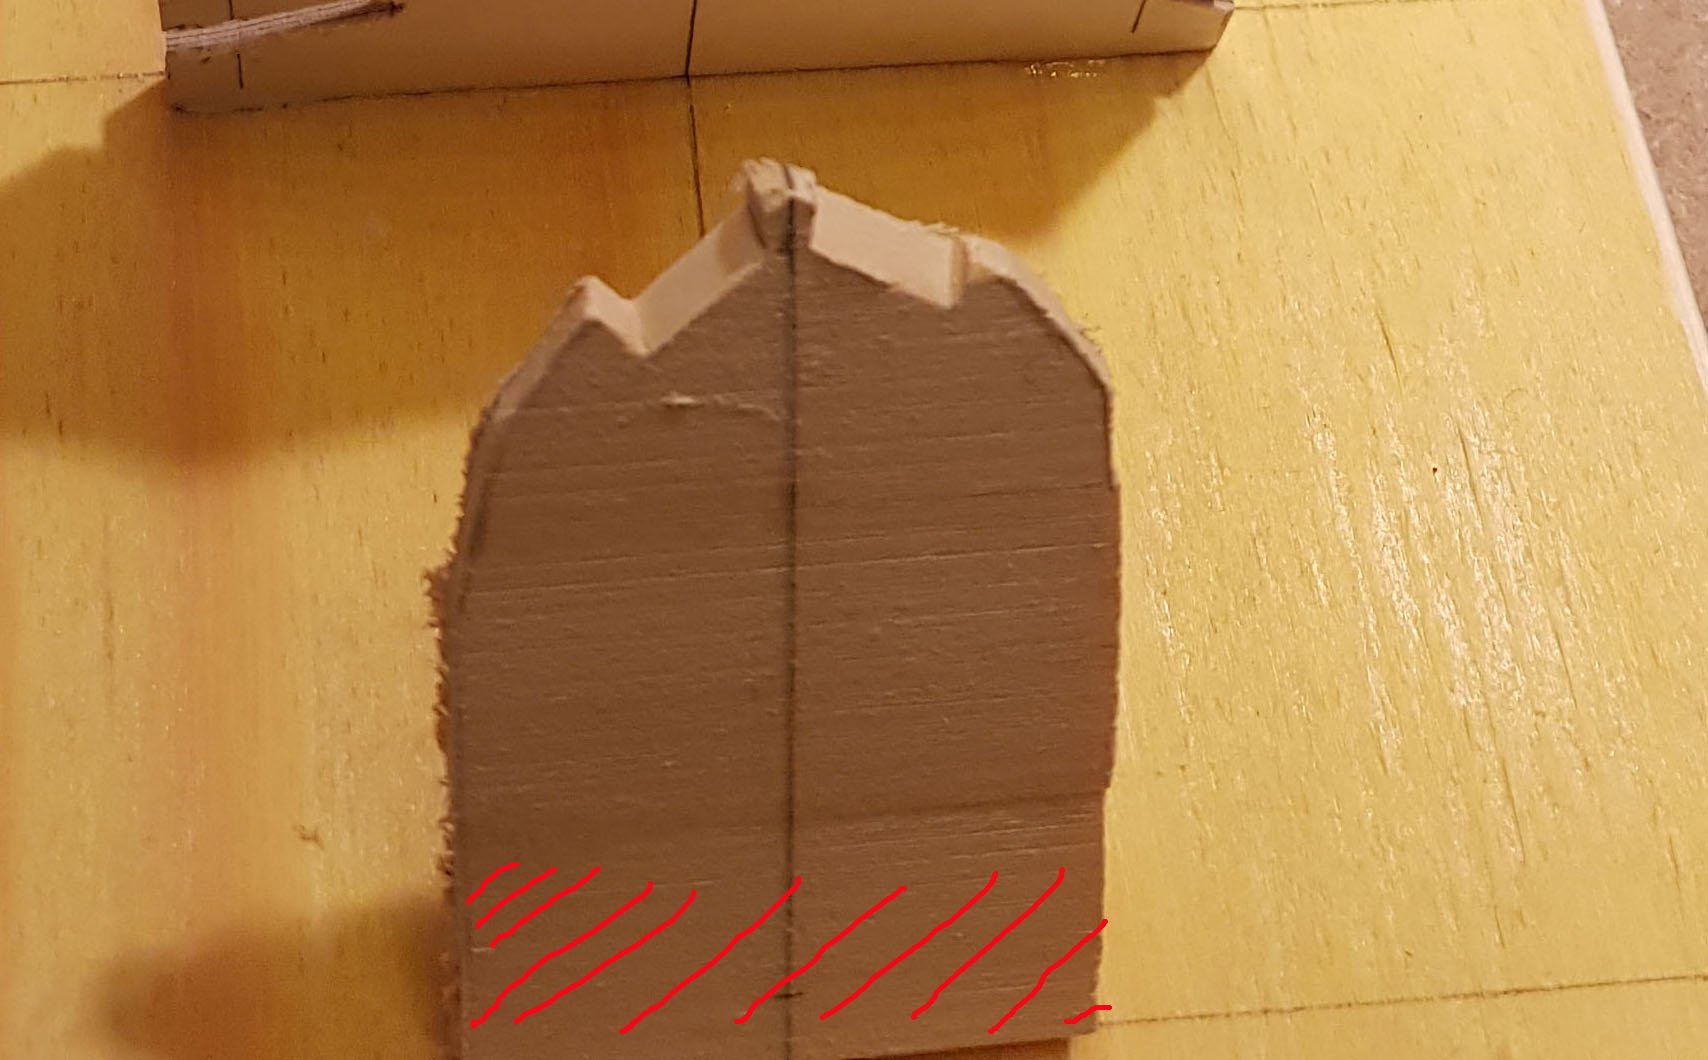
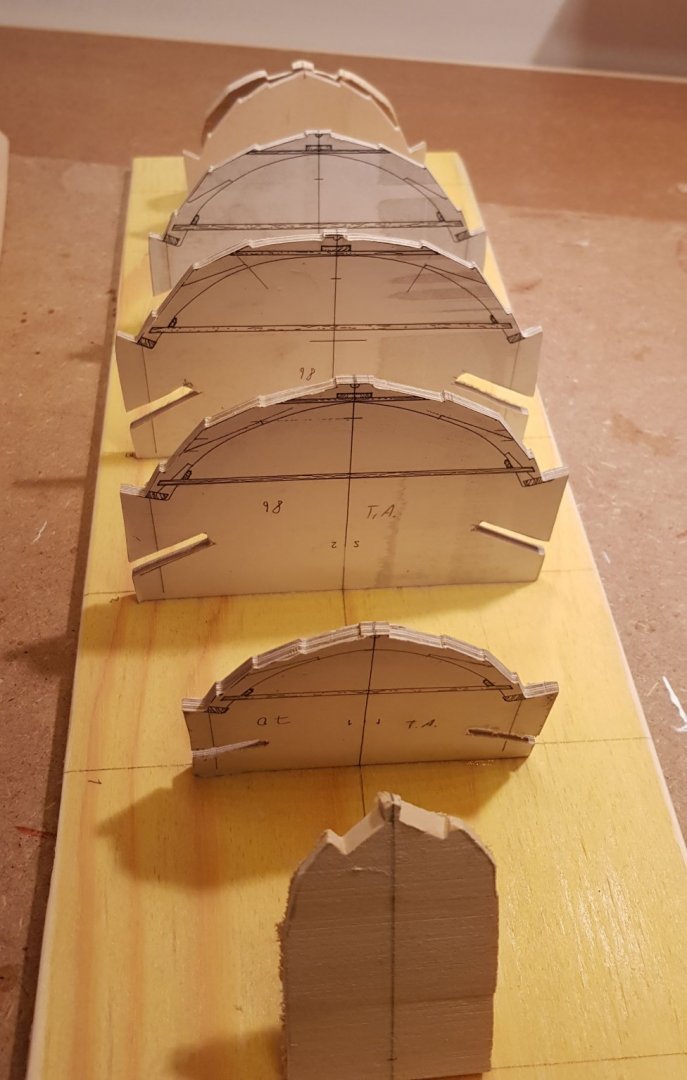
The transoms are glued to the jig, but only in the lowest part. When the shell is complete it will be released by sawing them of. In the picture above I have started to fit the planks. The transom pieces are cut oversized and are filed down to fit the individual planks. For the planks I have some templates, but no exact drawings. The process involves a lot of filing and adjusting. The wood is lime. The thickness of the planks are slightly over 2 mm, and the transom 3,5 mm. In the picture above the garboard planks are glued in place. I could have made a better job of creating a smooth curve over the length of the hull. An observation is that these planks are mounted before the bottom plank.

-
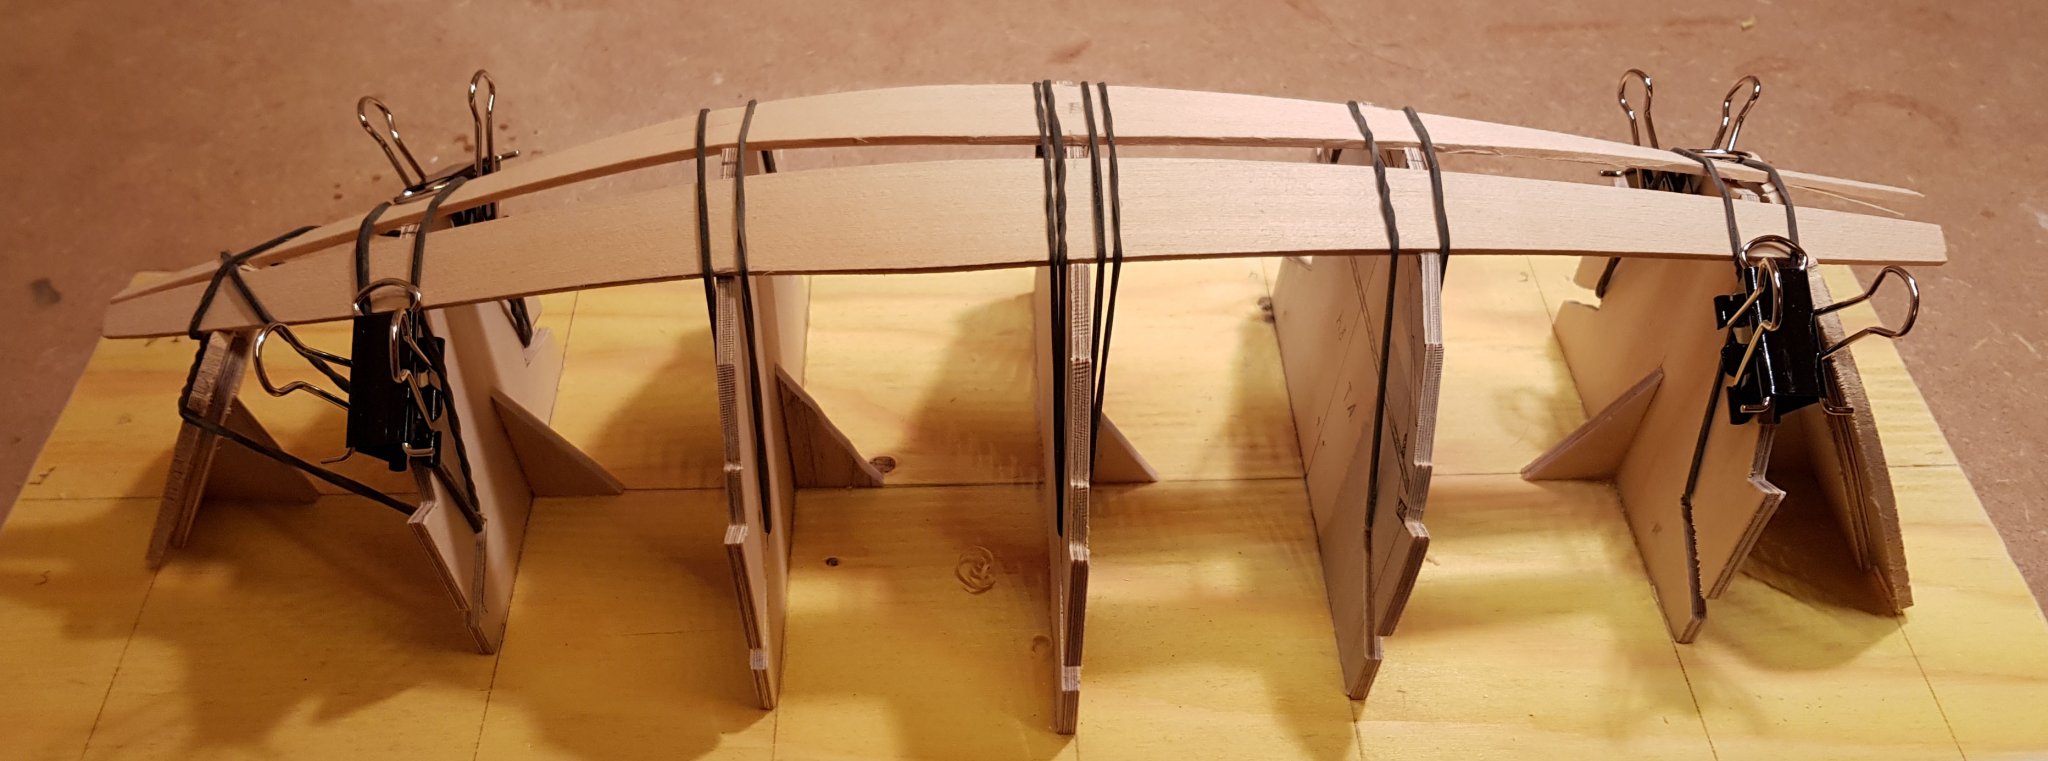
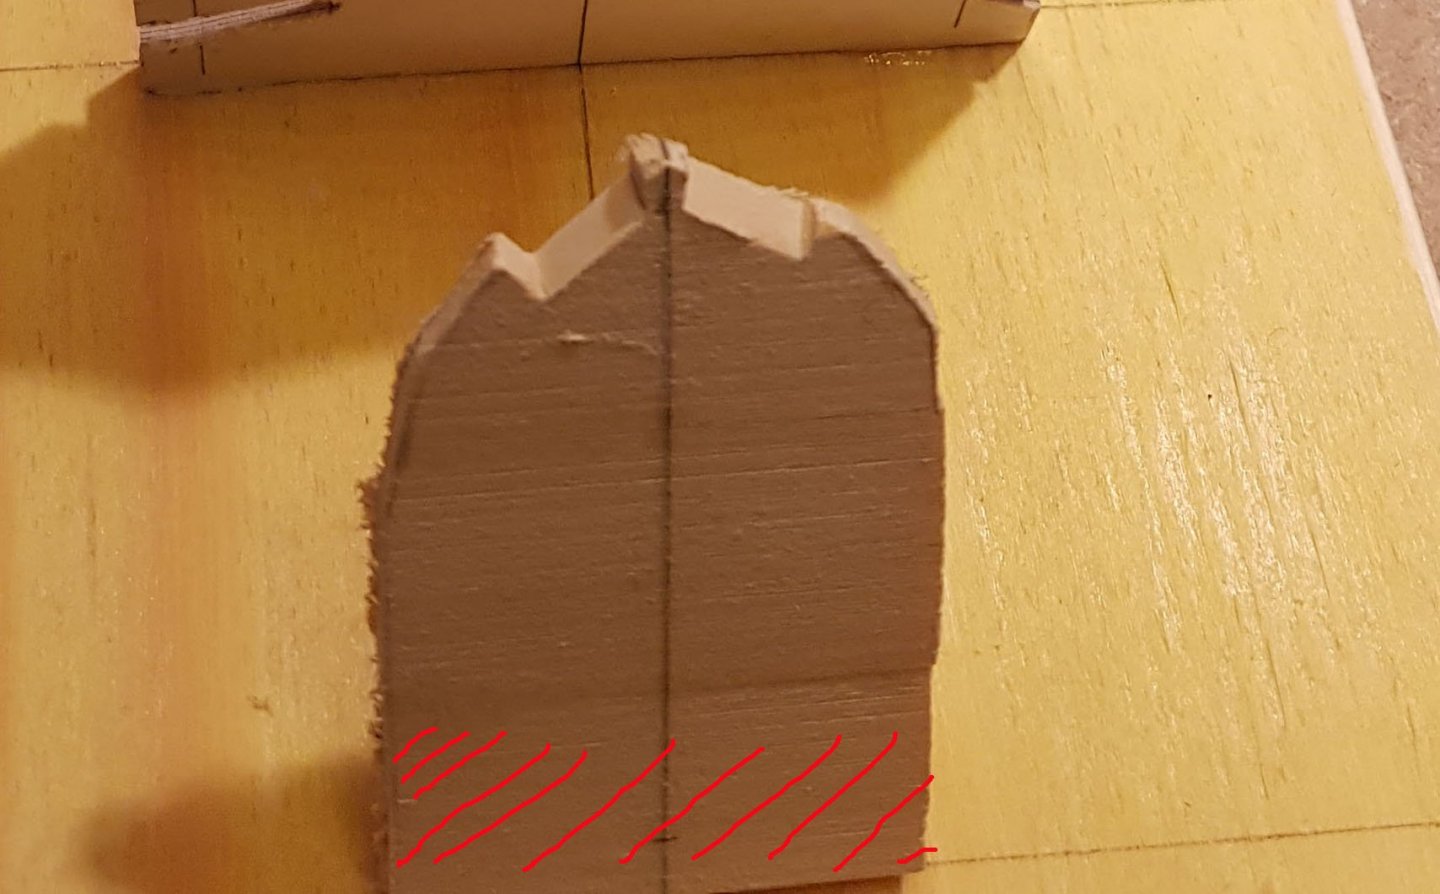
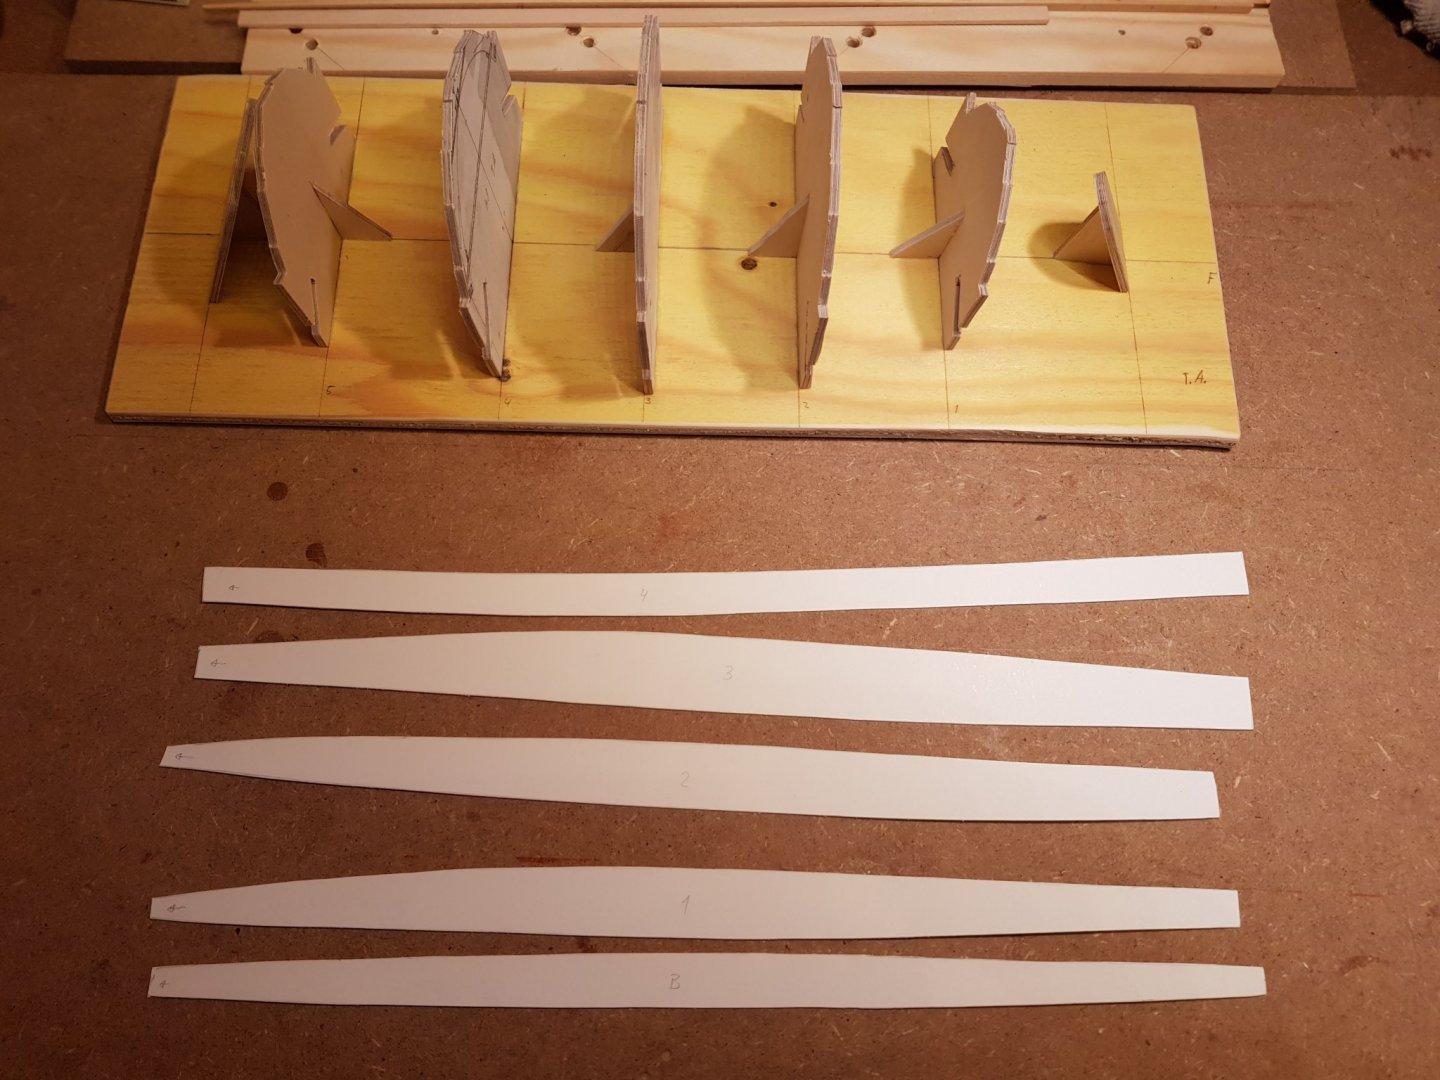
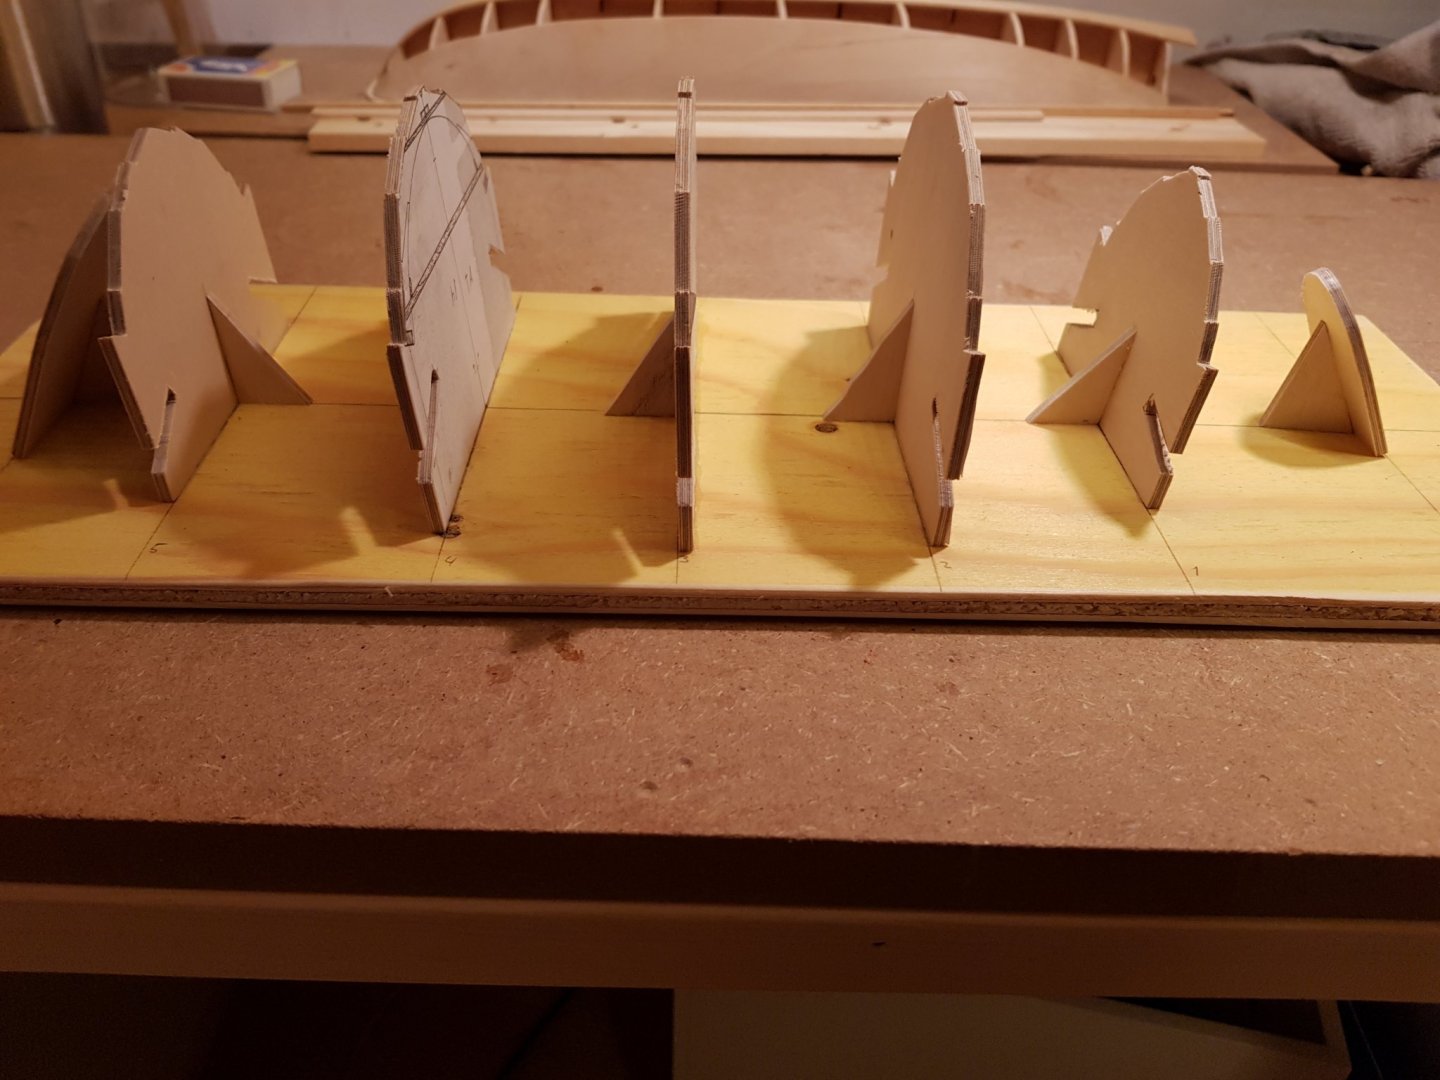
The construction method is shell first (as with most traditional clinker built ships). The first step was to build a jig to build the shell on. The plans included drawings of all frames. These where glued on good quality plywood and then cut out with a coping saw and trimmed to the drawing line with a file. The cut out in the lower part is for rubber bands that will hold the planks when bending and gluing them. A typical feature of many of these "ekor" is that the have flat transoms in both fore and aft. The fore one being smaller. As can be seen the frames are angled. When looking at the plans they are approximately perpendicular to the railing (but not to the bottom). The plans are based on measurements done in the early 1980s of a boat that was originally built around 1900.
-
This model I actually started a few months ago. I started a course in model boat building in February, and selected it as topic for the the semester. However, due to the corona outbreak the course got canceled. When I saw the schedule for the autumn recently I didn't find the course listed anymore. Then I realized that I will need to finish it on my own, and for that I will need the help and advice by the community here. I currently have another build ongoing, so the pace for this one might be slow. I will however document the build up to the point where I am currently. The subject is a small (4.4 m long) clinker built flat bottomed rowboat of traditional Swedish design. From the course I got a copy of the plans and templates for the planks. I'm rather certain the the plans was published in this book (which unfortunately is out of print): The white boat in the back on the cover looks similar to the one I'm building. It is primarily a rowboat, but a small sail can also be flown.

-
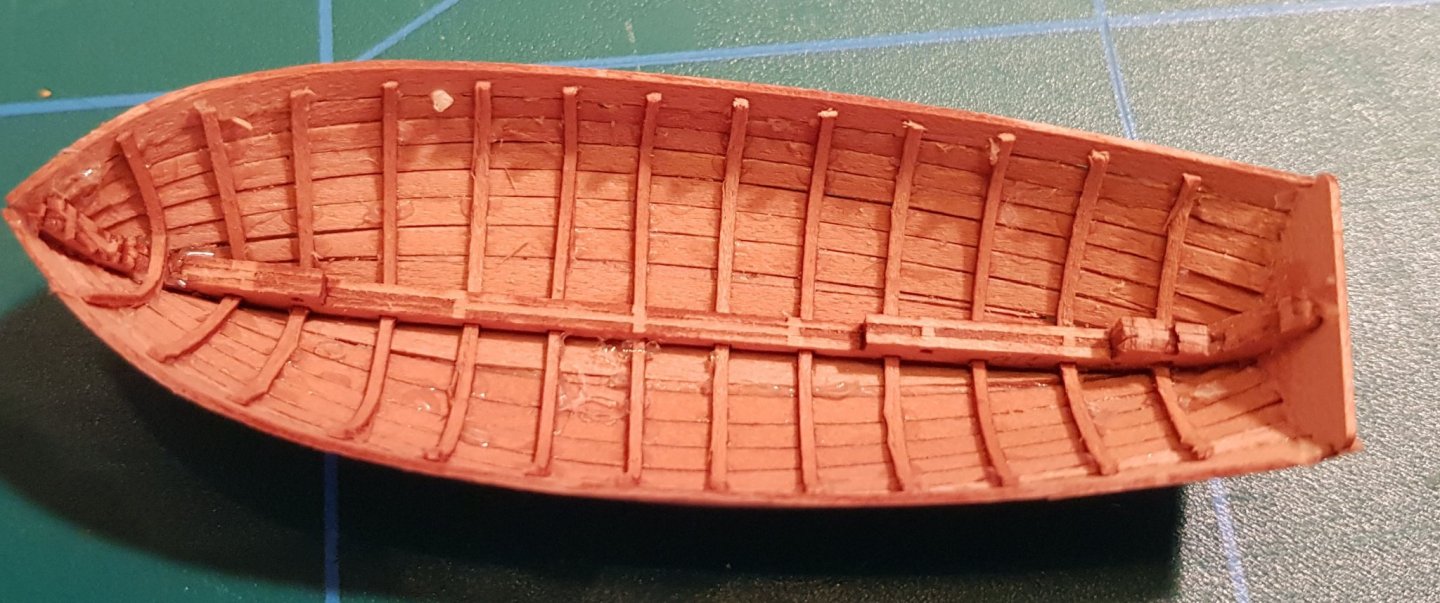
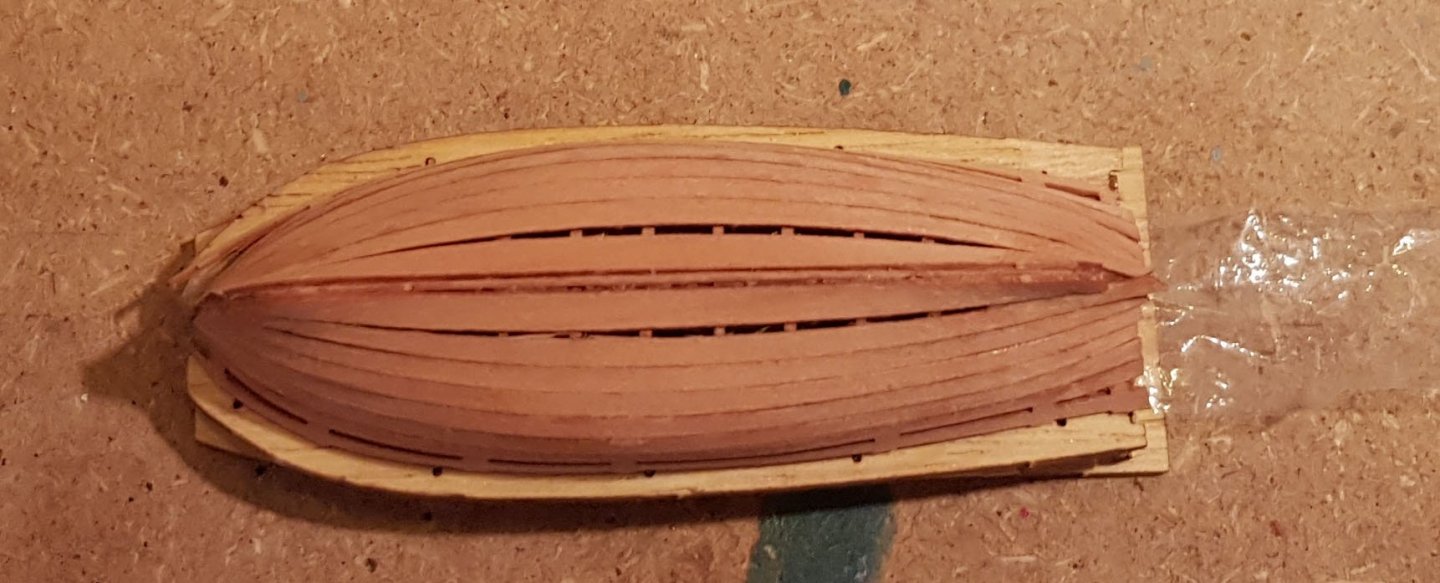
I managed to finish planking the hull on the boat today. I ran into a bit of problem towards the keel. When I had only two planks left I saw that there was not enough space for the full width of both of them. I needed to splice either the garboard or the first real plank. I decided to glue the garboard in first and then cut a thin sliver to put in the narrow gap. I'm reasonably satisfied with the result. I think I can fill in the remaining gaps with glue and sawdust and get an acceptable look on the hull. I'm still not sure why I ended up with the space problem at the keel. Probably a combination of things. The first is that I think I did not ensure that the jig was assembled snugly in all parts. Then the first plank was glued with a tiny gap from the jig, and then the rest of planks where beveled a tiny bit less than needed. It all added up. I hope that it is not an indication of some worse problem that may cause the keel an other part not to fit. I will see. BTW my blocks and Lady Eleanor kit arrived today, looking good!
- 83 replies
-
- 3
-
-
- finished
- billing boats
- (and 1 more)
-
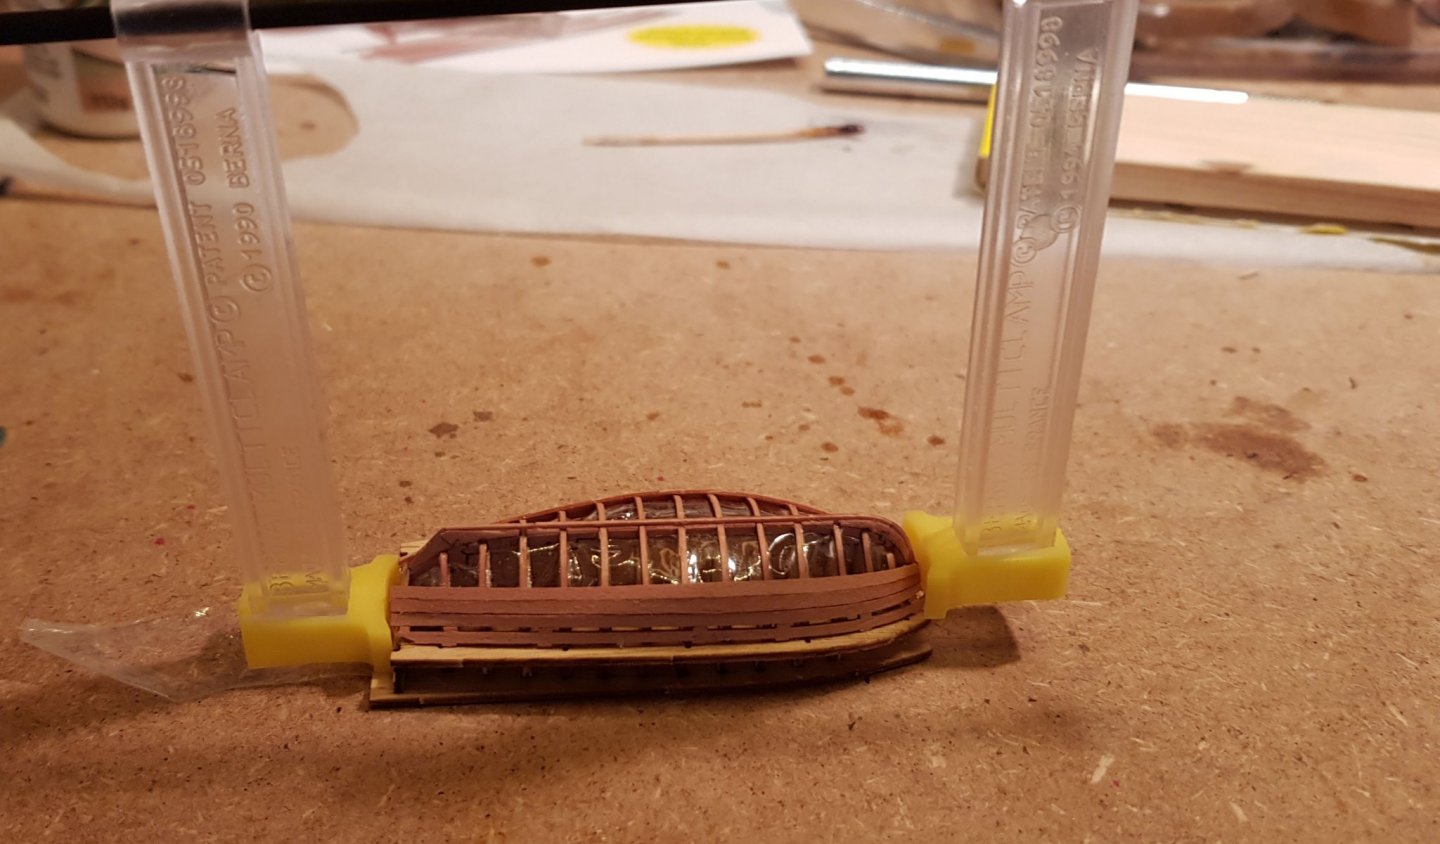
I ordered some more pear wood blocks from Vanguard models. (And I couldn't help myself but ordered the "Lady Eleanor" kit as well...) While waiting for that to arrive (scheduled for tomorrow) I continued with the boat. Clamping these thin strips while drying is hard, all my clamps are to strong. In the end I have mostly just held the strips in place with my fingers. First while the soaked strips dries to shape and then until the Aliphatic Resin sets enough to keep them in place. It is good to have something interesting to listen to in the earphones while doing this... (actually it does not take that long) Cheers

- 83 replies
-
- 5
-
-
- finished
- billing boats
- (and 1 more)
-
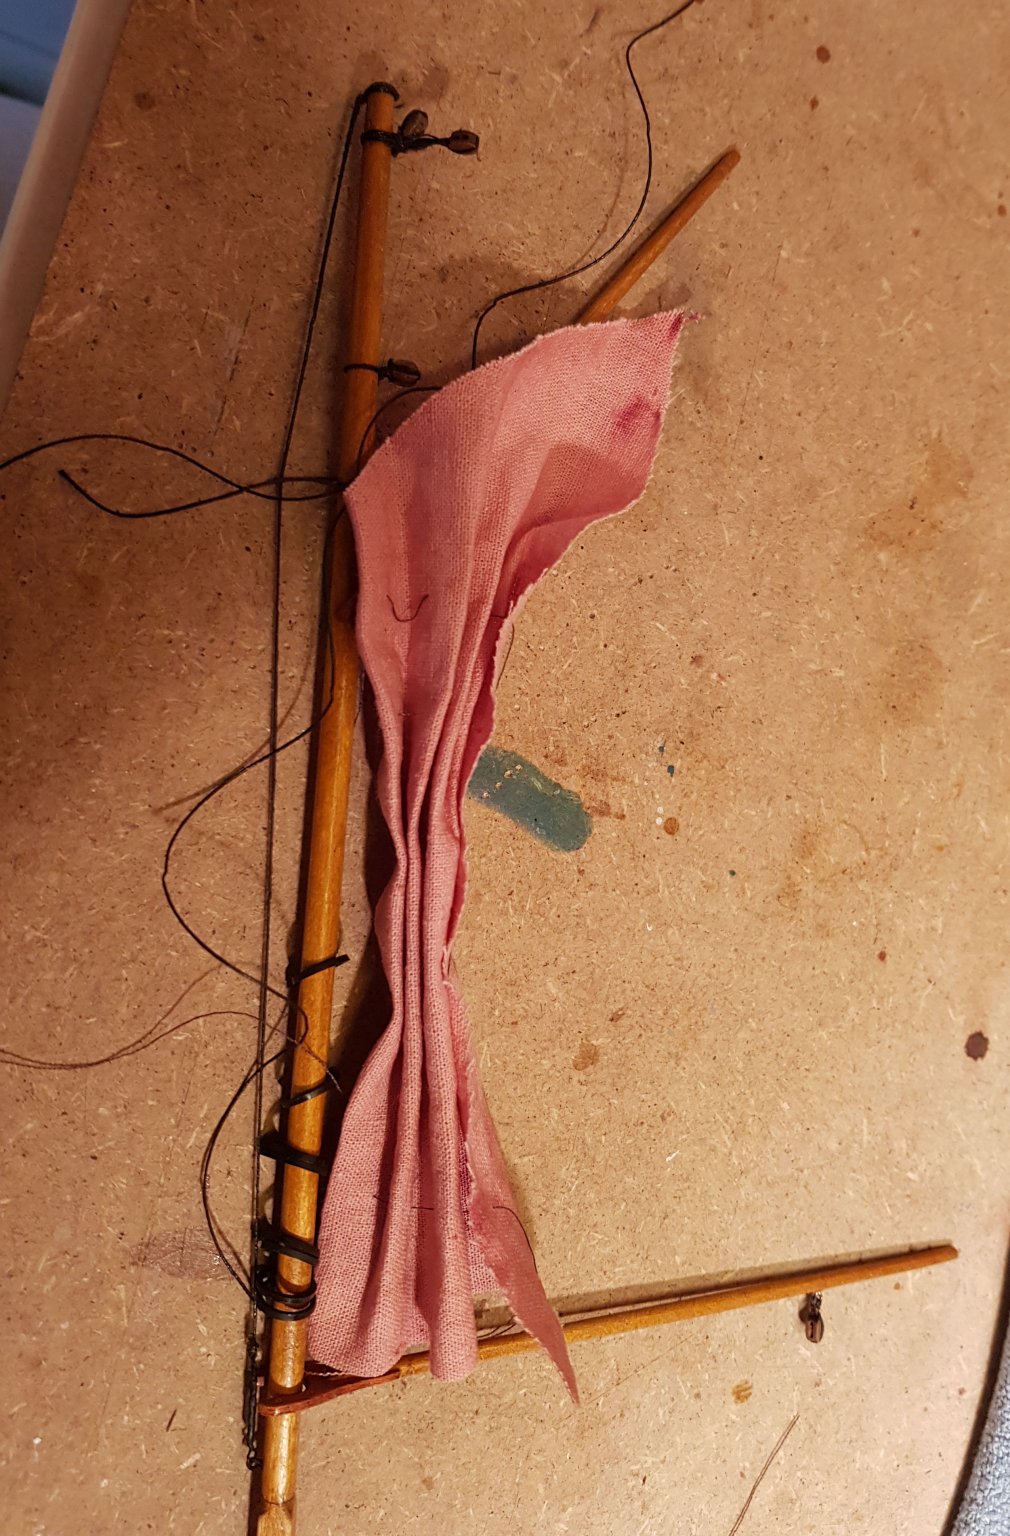
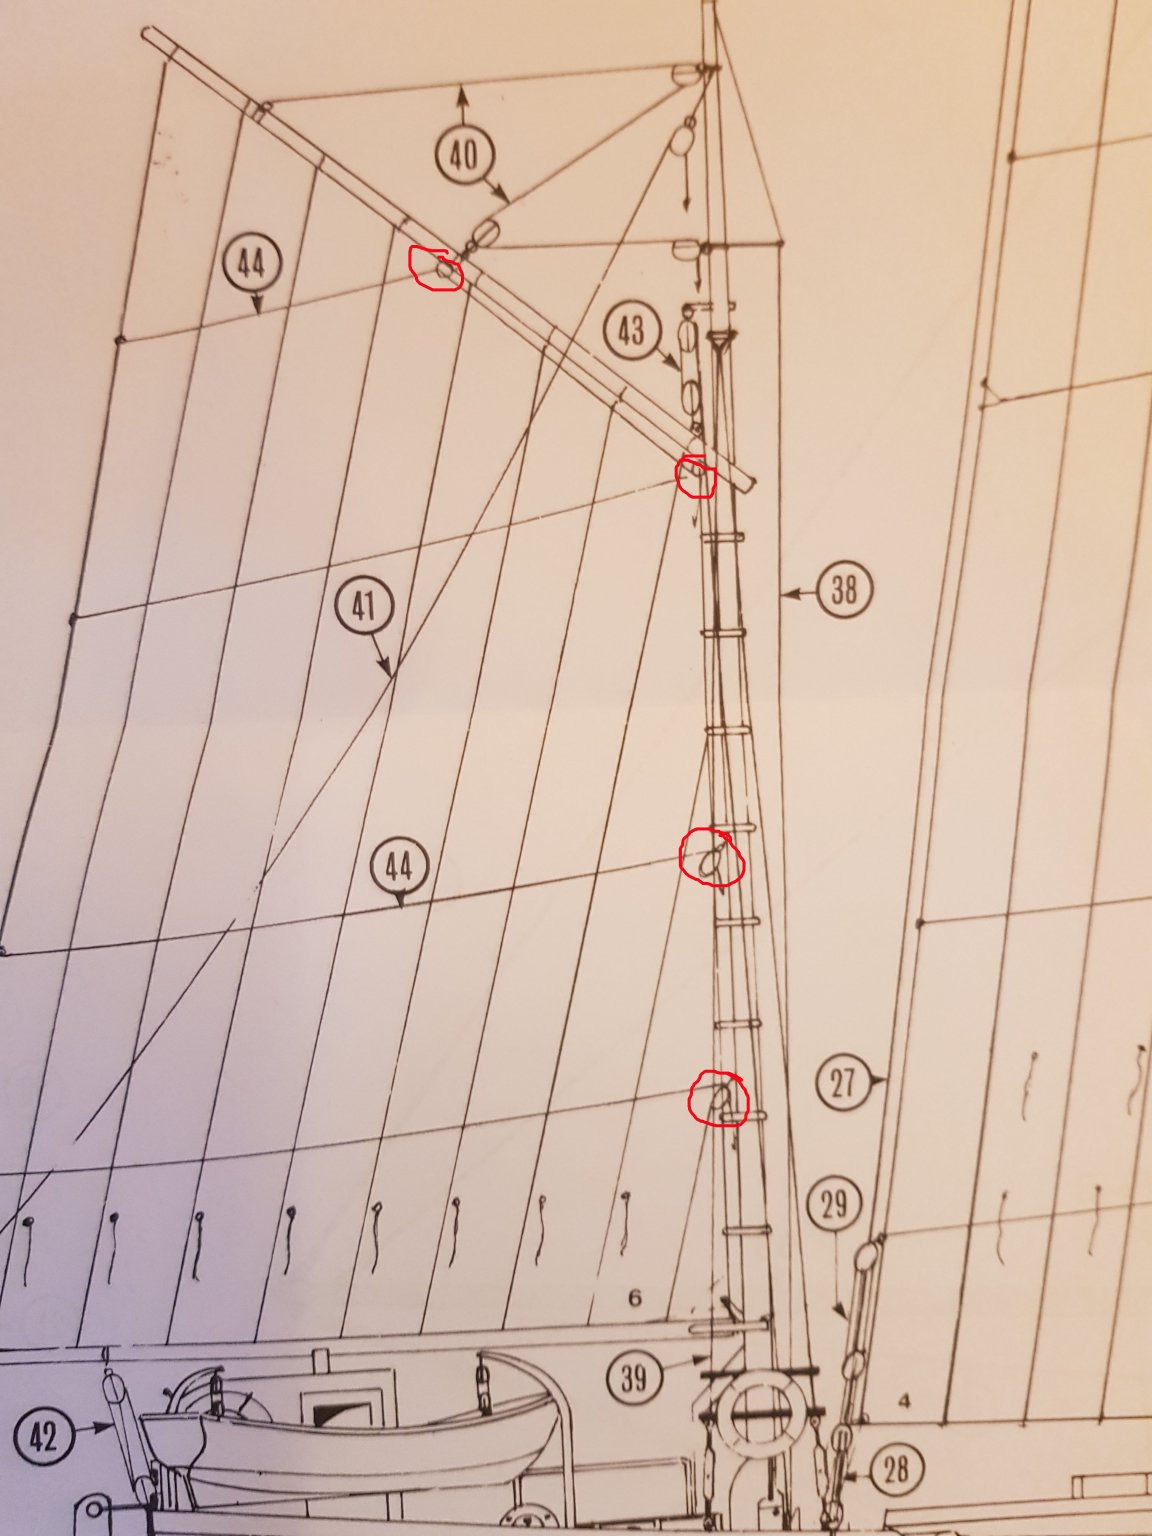
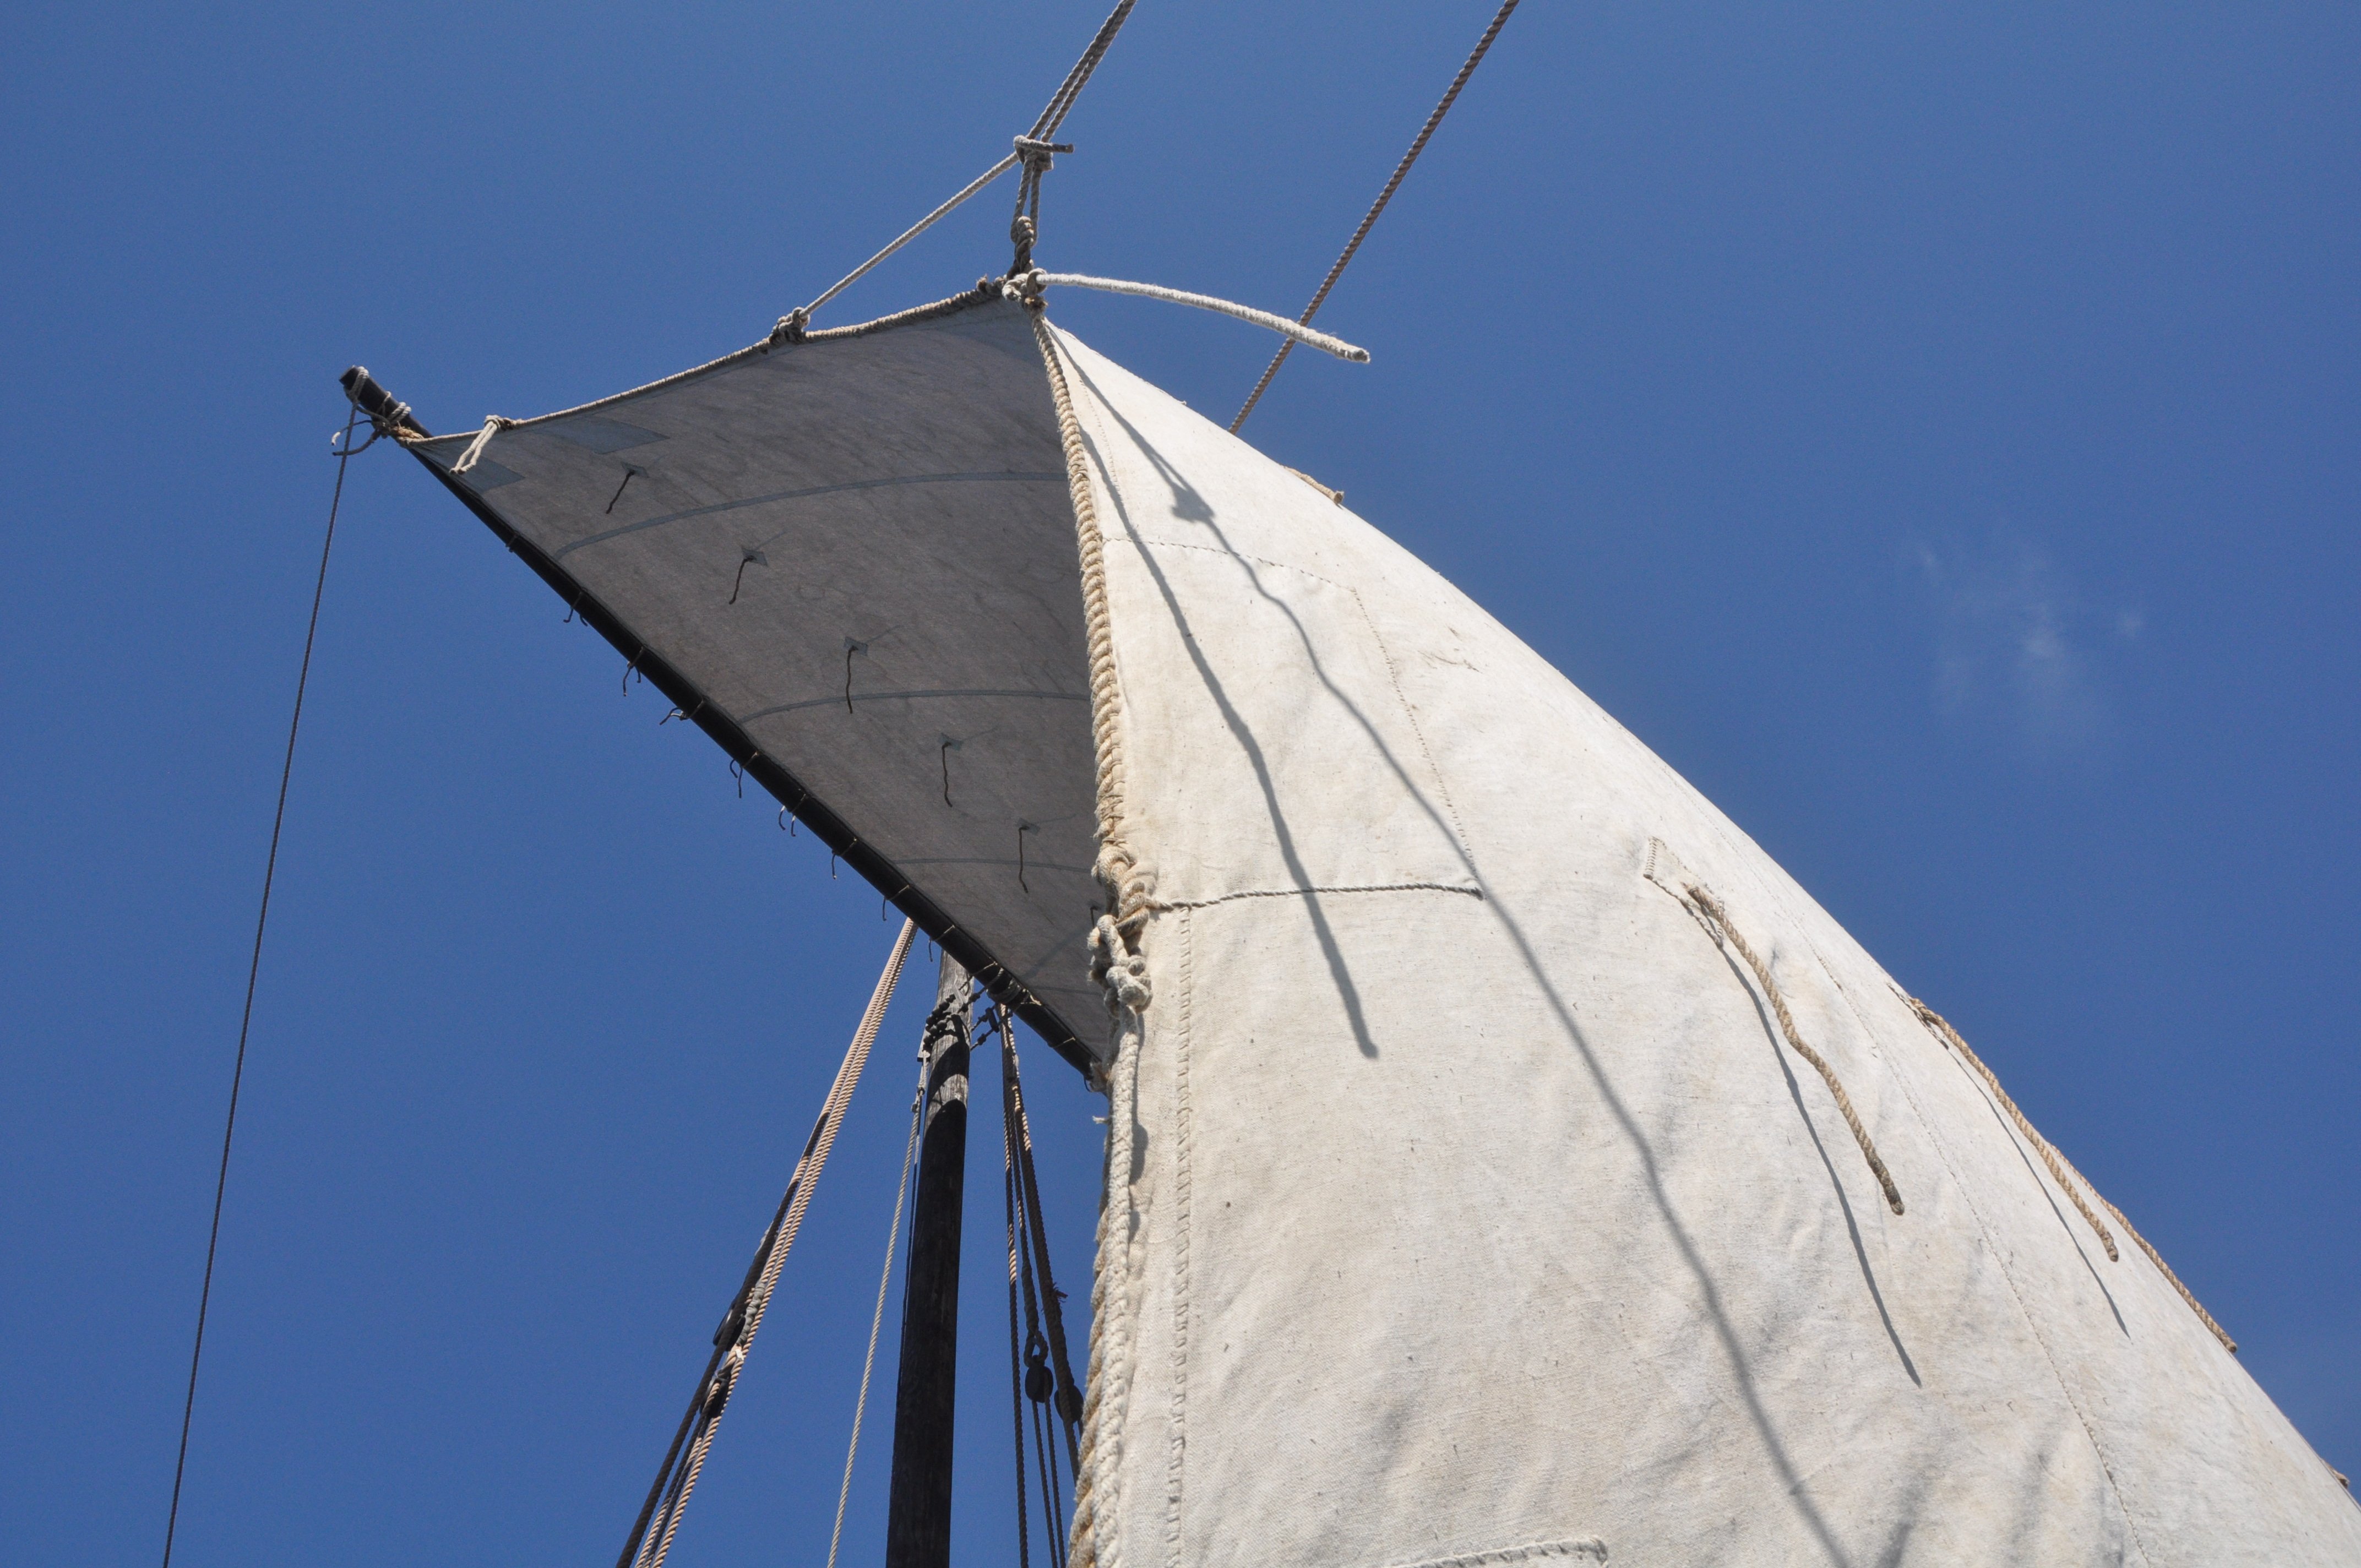
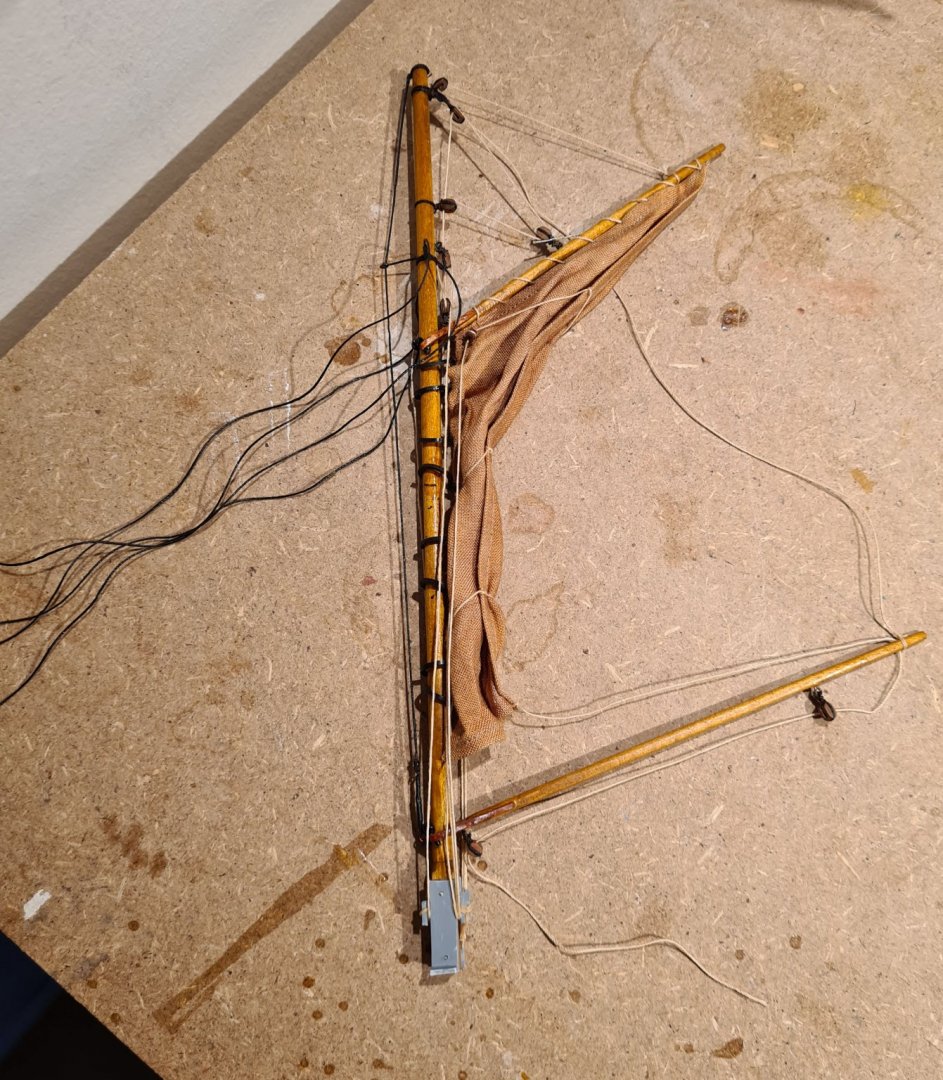
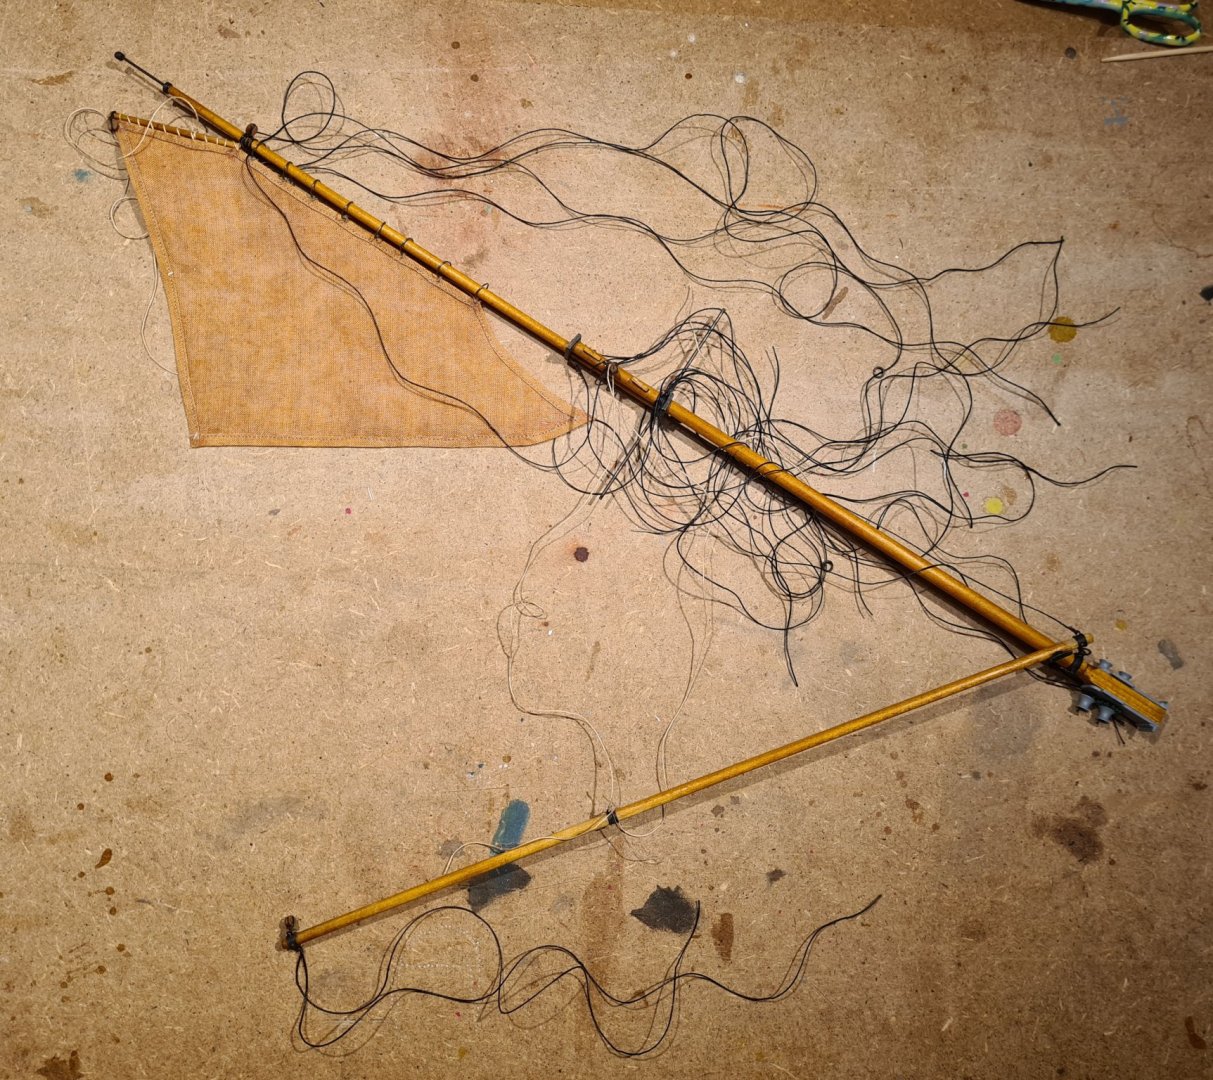
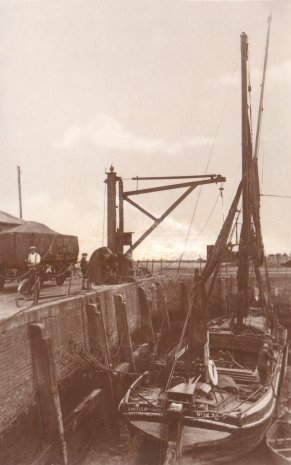
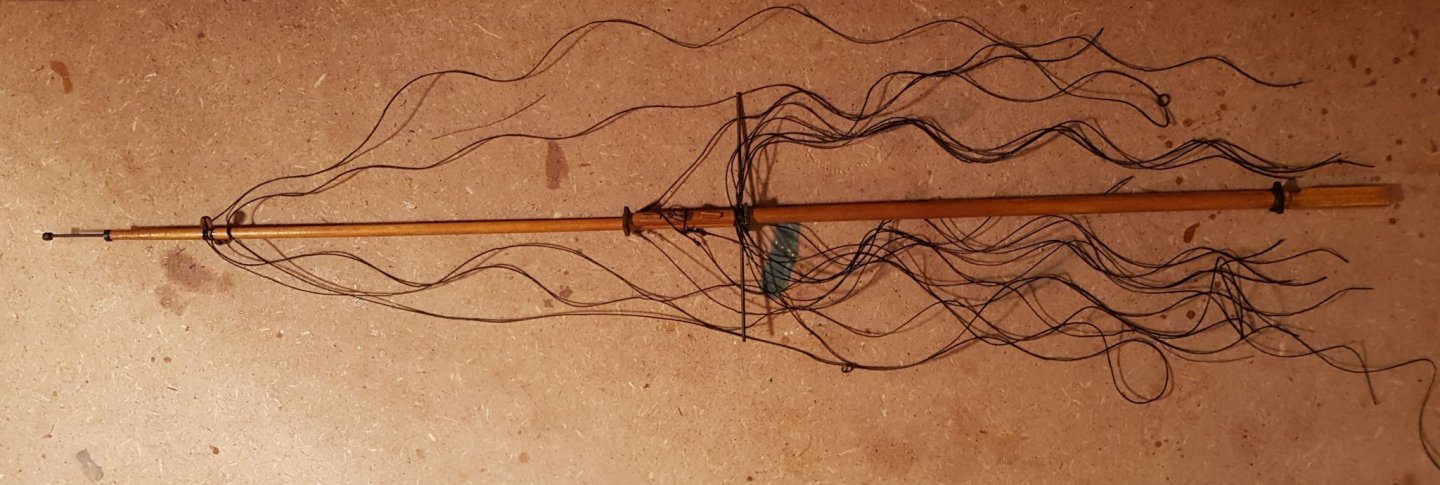
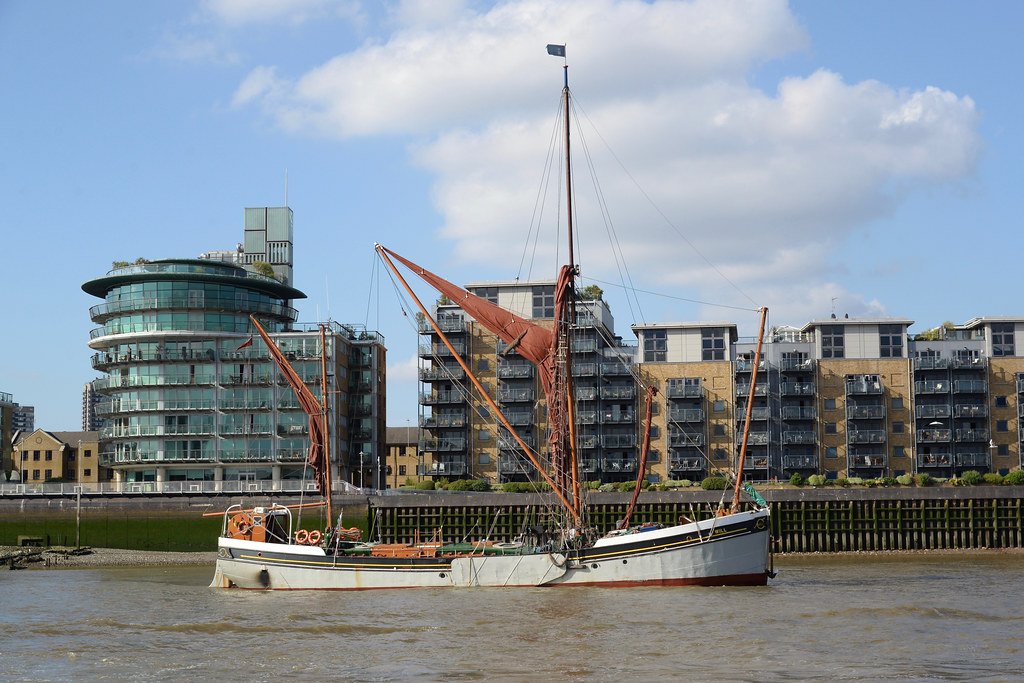
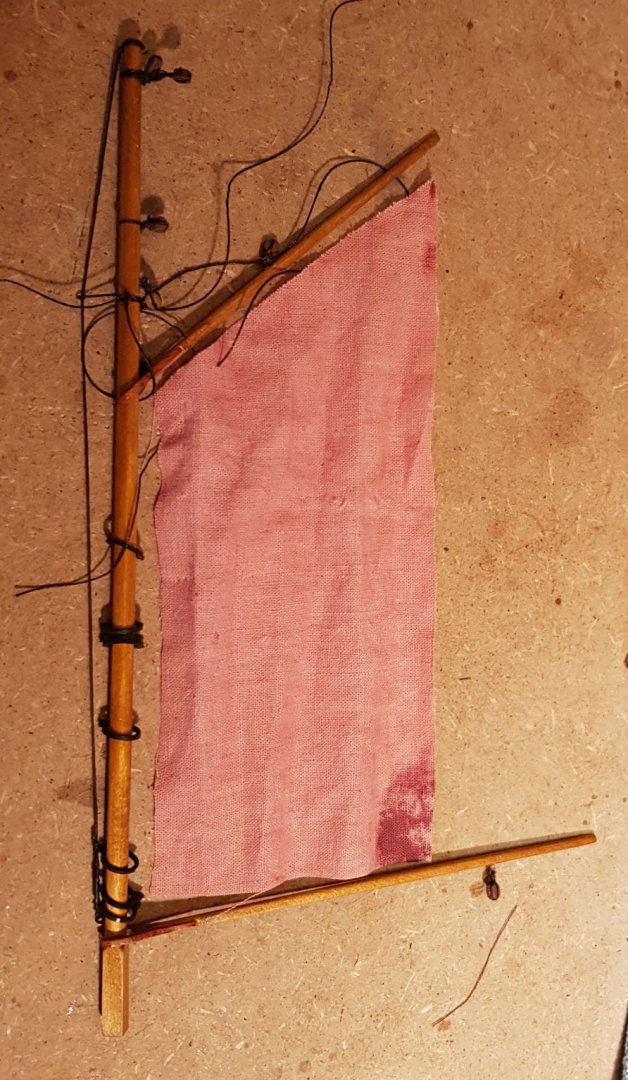
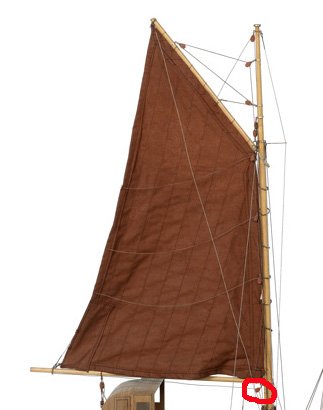
I have continued with preparing the masts. Now all the shrouds and stays are attached, the next step is the sails. The main mast: I have not used the serving machine I built. The black linen thread looks good enough to my eye without it. I intend to have the sails furled. The look I'm after is something like the picture below. As can be seen the sails are not extremely tight when furled, which is good as it means that a thin fabric might look rather good scale wise. I experimented with coloring a scrap piece of fabric (didn't turn out to well...). It is a bit heavier than I intend to use, but could serve as an indication. Still to big when furled. So I cut away the aft third and then I think it will be OK (with a lighter fabric). So far so good. But I also took a minute to study the plans once more. (In my experience Billings has a deserved rumor for very scant instructions. The plans on the other hand, at least for Will, contains a lot of information). Now I found a number of lines to control the sail (I think they are called brail lines), and accompanying blocks. When I look closely on the picture of the real Will above, these blocks and lines are visible. There are similar lines and blocks on the main sail. But this also means that I'm 16-18 blocks short. Even though they are drawn on the plans, they are not included in the kit so when I bought replacement blocks I did not count these. From what I can gather these lines are symmetrical on each side of the sails. It also looks like the blocks are attached to the sail rather than to the mast or gaff. This makes sense as it would be hard to raise and lower the sail otherwise. I think I need to order some more (smaller) blocks for this. When I found this I started to double check my sources for any other missing parts in the rigging. Then I found another missing line in Billings plan. There should be an out haul for the mizzen sail. Its easy to see on the museum model, but can also be seen on the real Will above. Cheers


- 83 replies
-
- 4
-
-
- finished
- billing boats
- (and 1 more)
-
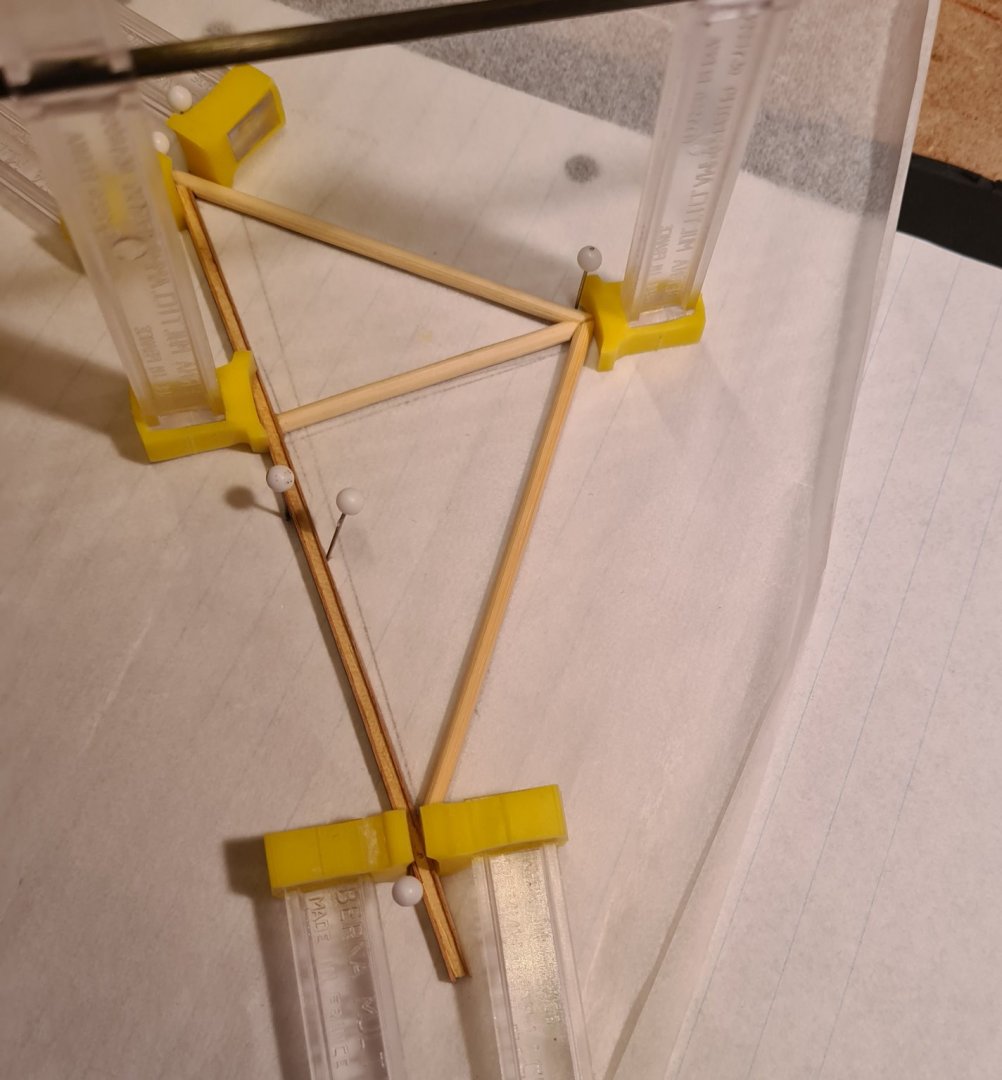
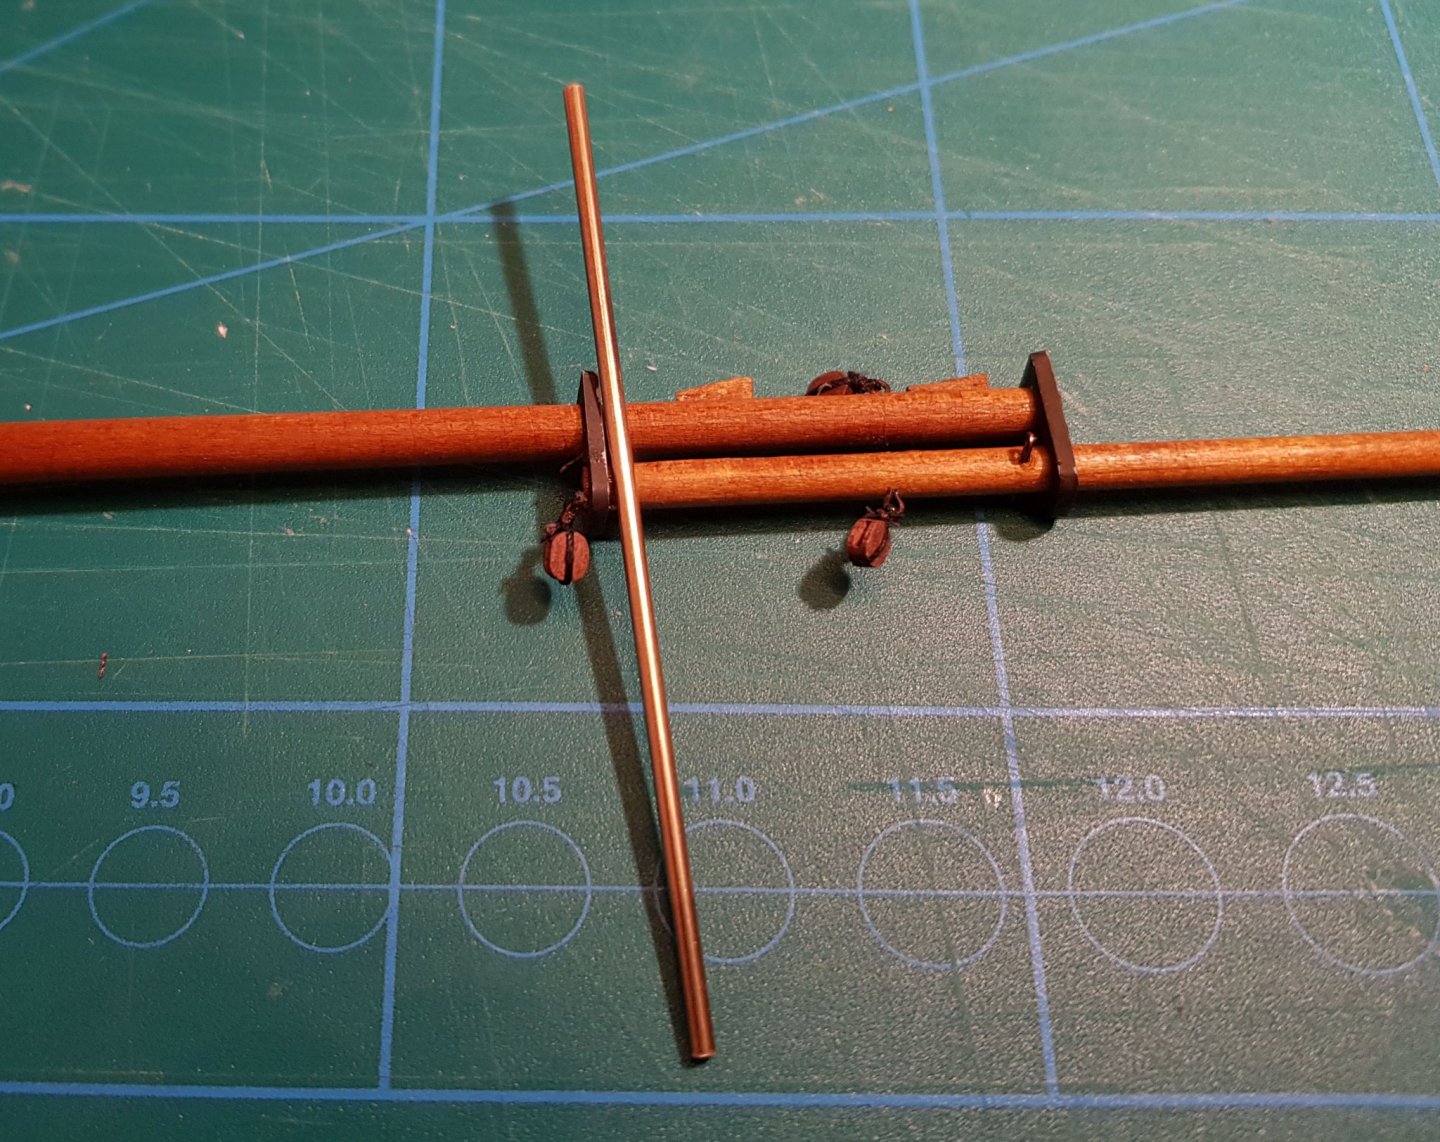
Thanks for the advice on the drilling. I did check the dimension of the rod against the plan again. You where right Clare, it was to thick! The part number on the drawing actually points to a 1mm wire. However that seems to weak to keep its shape after I have tightened the lines (and also make drilling holes even harder). Fortunately I have a piece of 1.2 mm wire, and I decided to use that. It also corresponds almost exactly to the dimension on the drawing. Now I'm wondering where the rod I planned to use first is supposed to go... Drilling 0.5 mm holes with the pin wise turned out to be rather easy. I flattened the top with a file as Eamonn suggested and punched a small dent so that the drill would not wander about. Cheers

- 83 replies
-
- 4
-
-
- finished
- billing boats
- (and 1 more)
-
Thanks för the advice, I will test on a piece that I cut of from the rod. Cheers Tobias
- 83 replies
-
- 1
-
-
- finished
- billing boats
- (and 1 more)
-
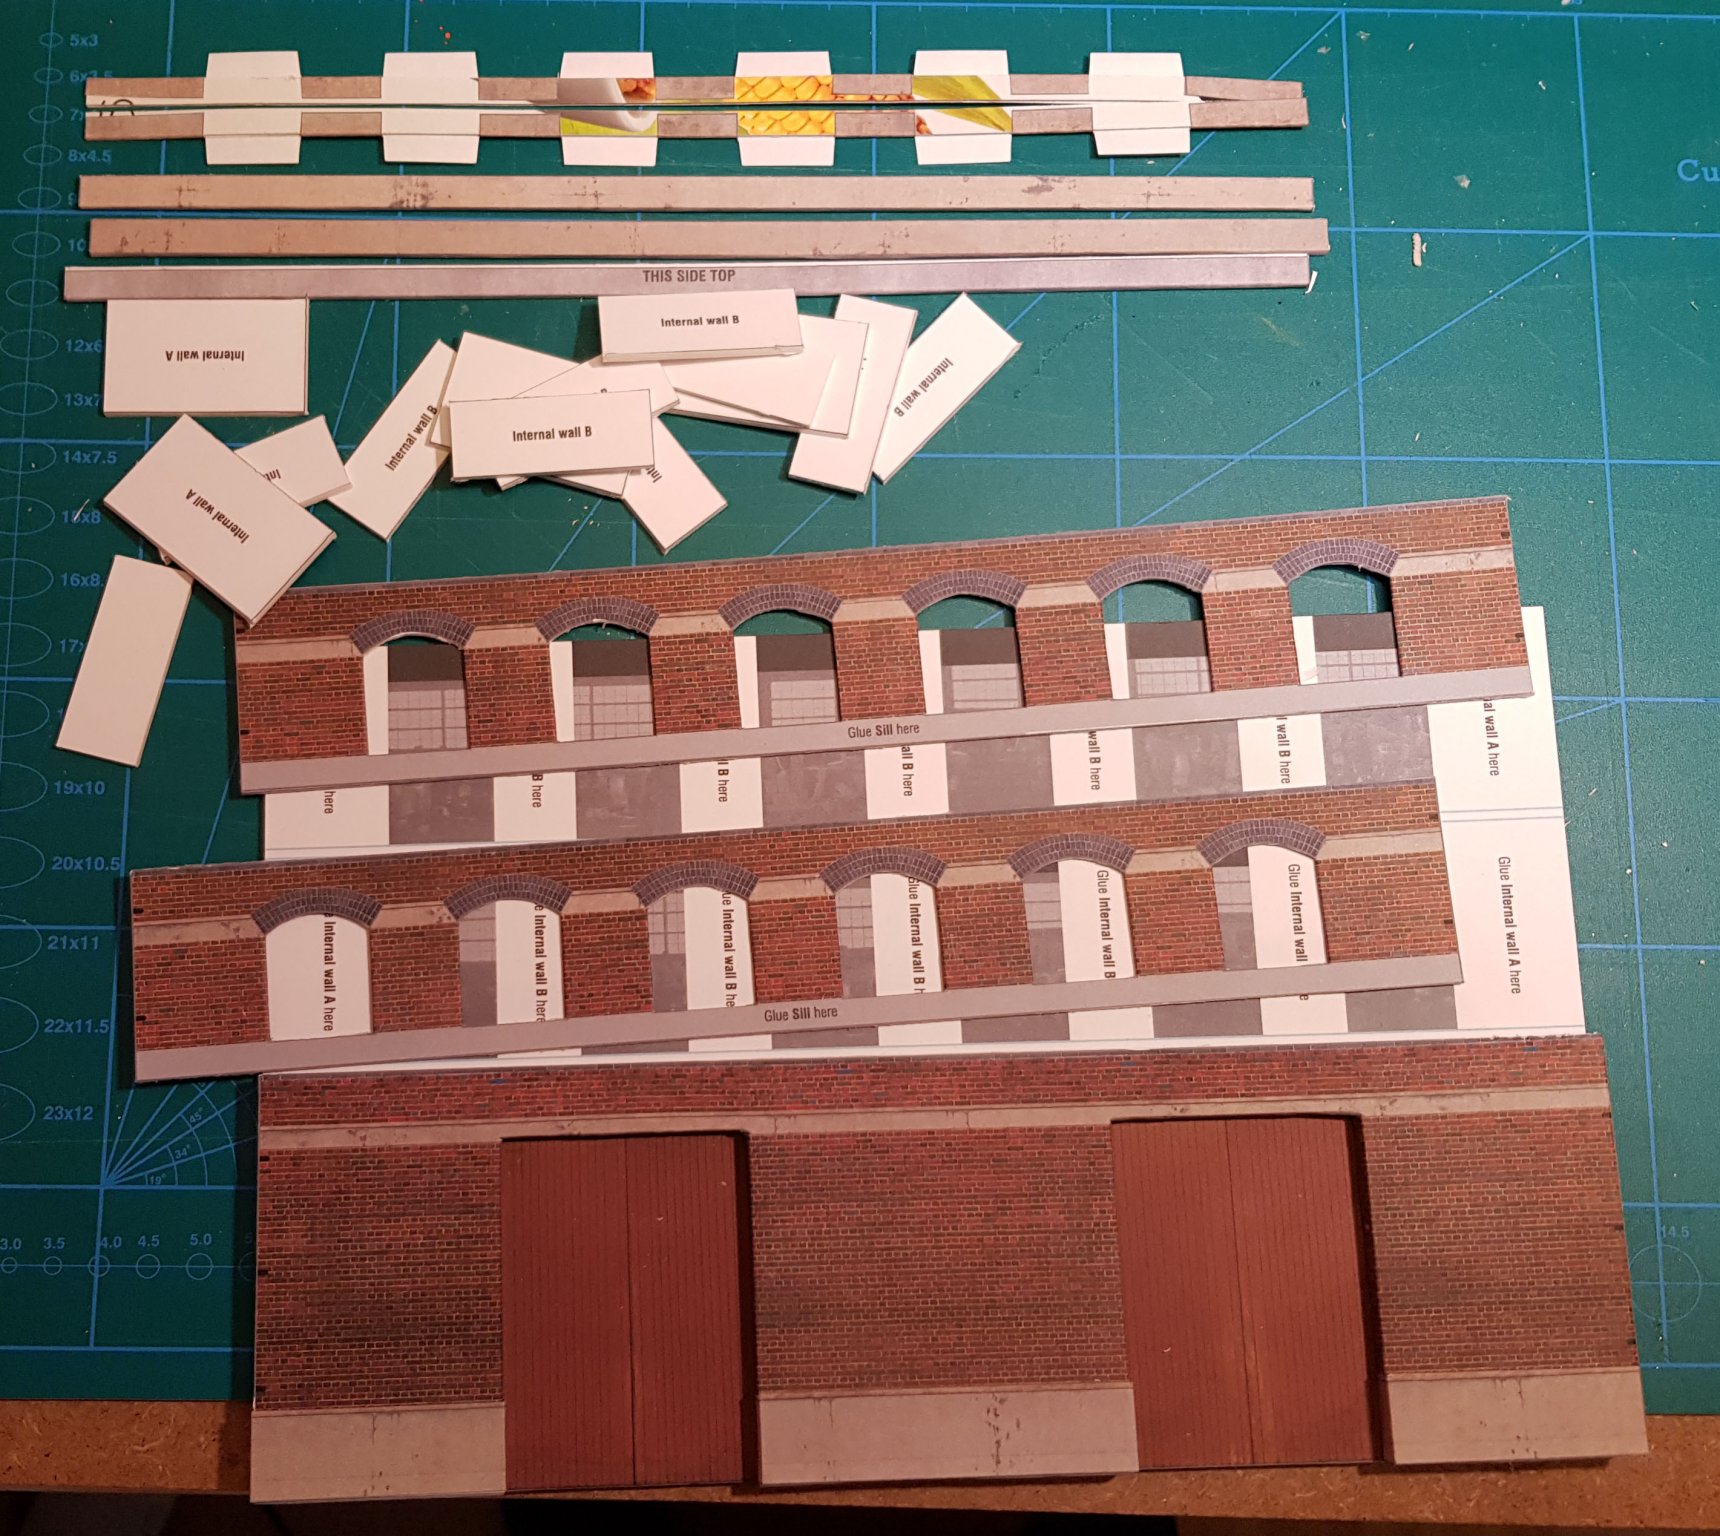
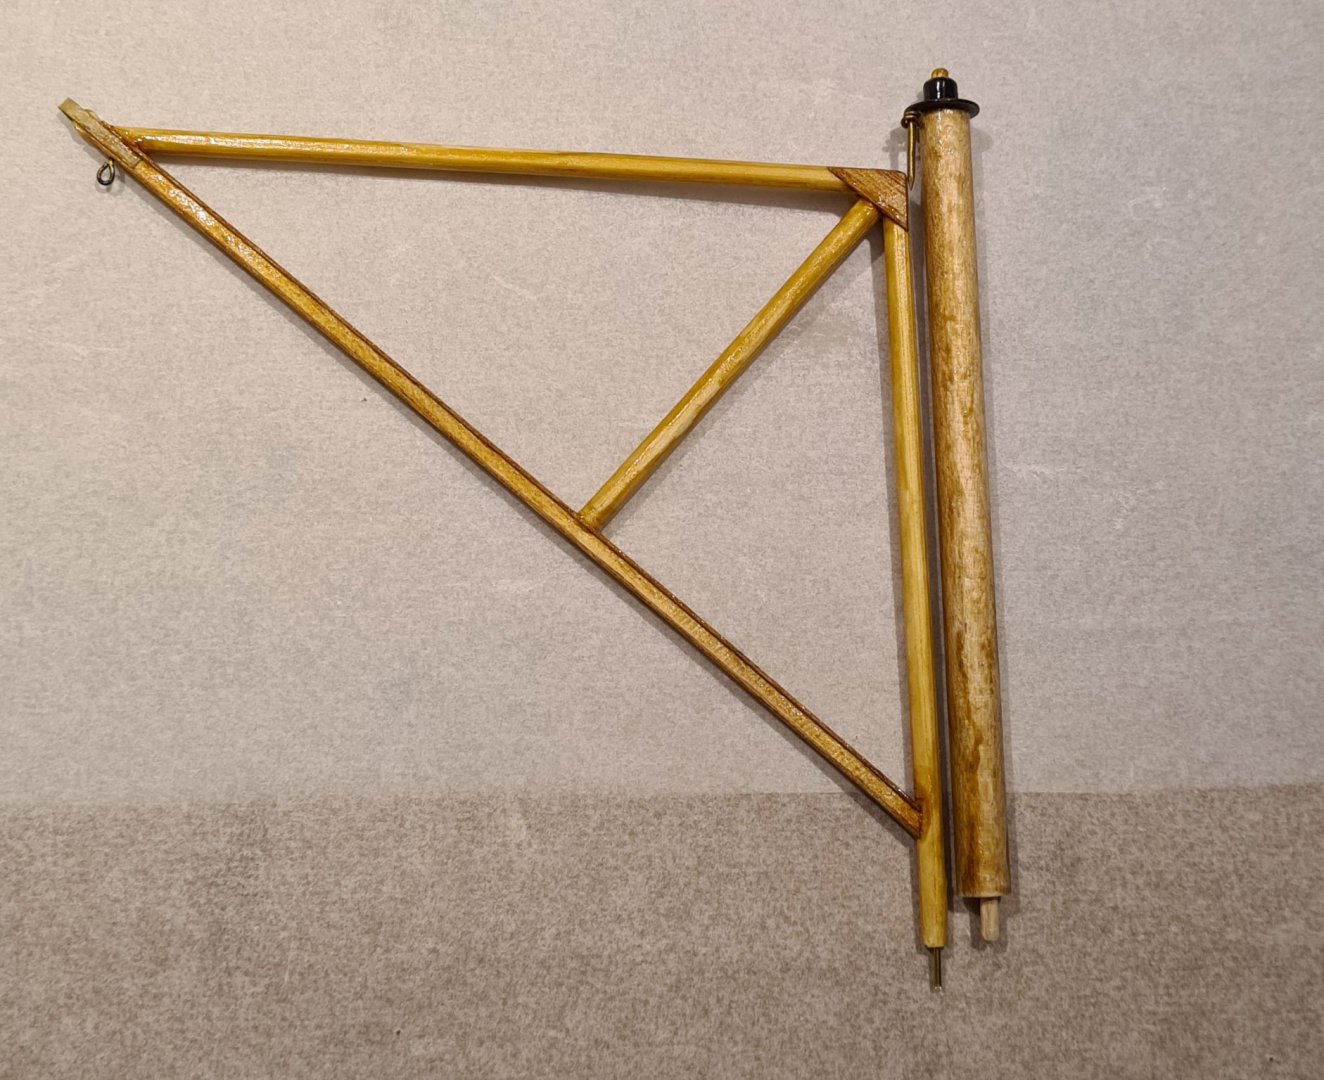
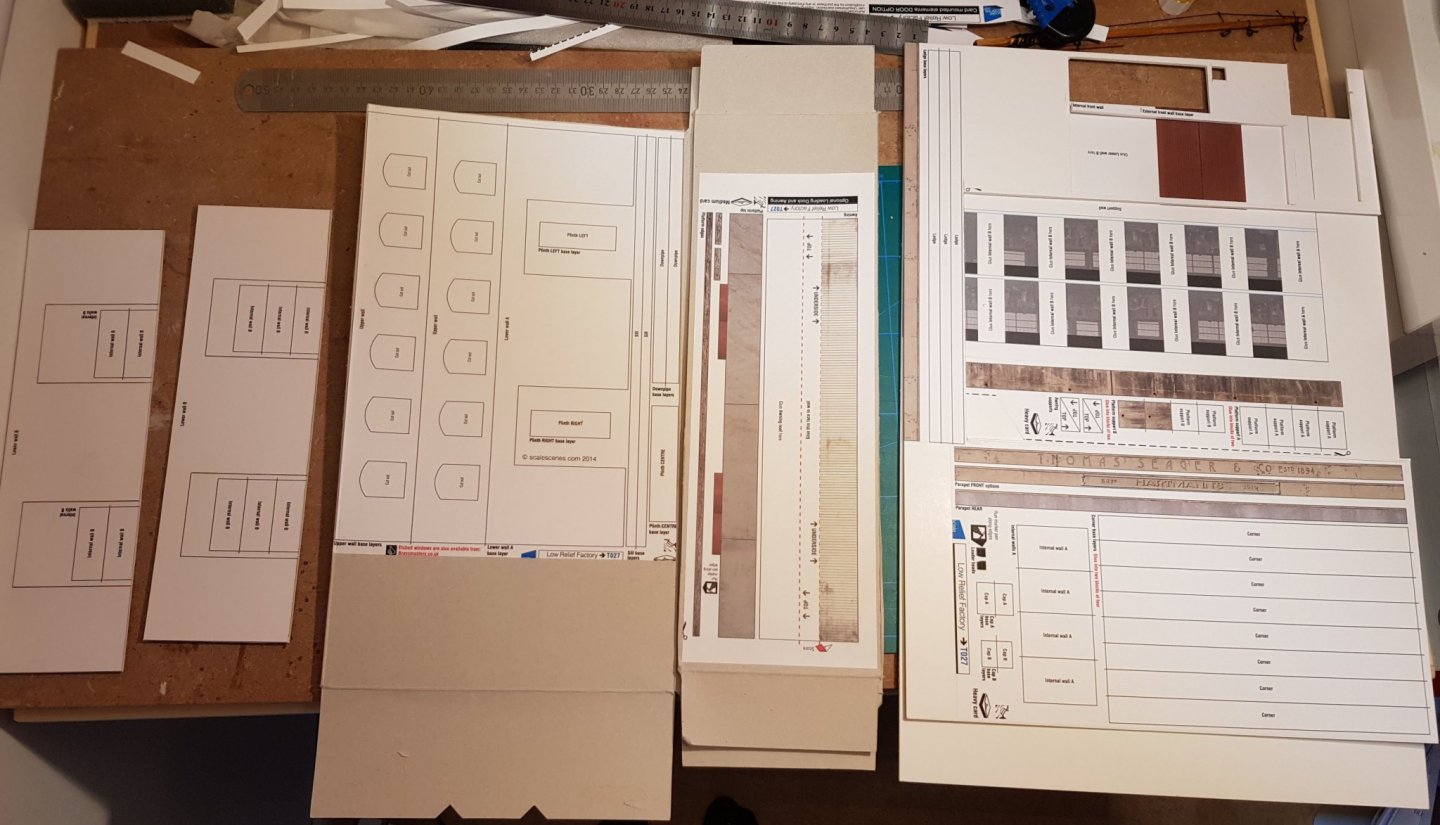
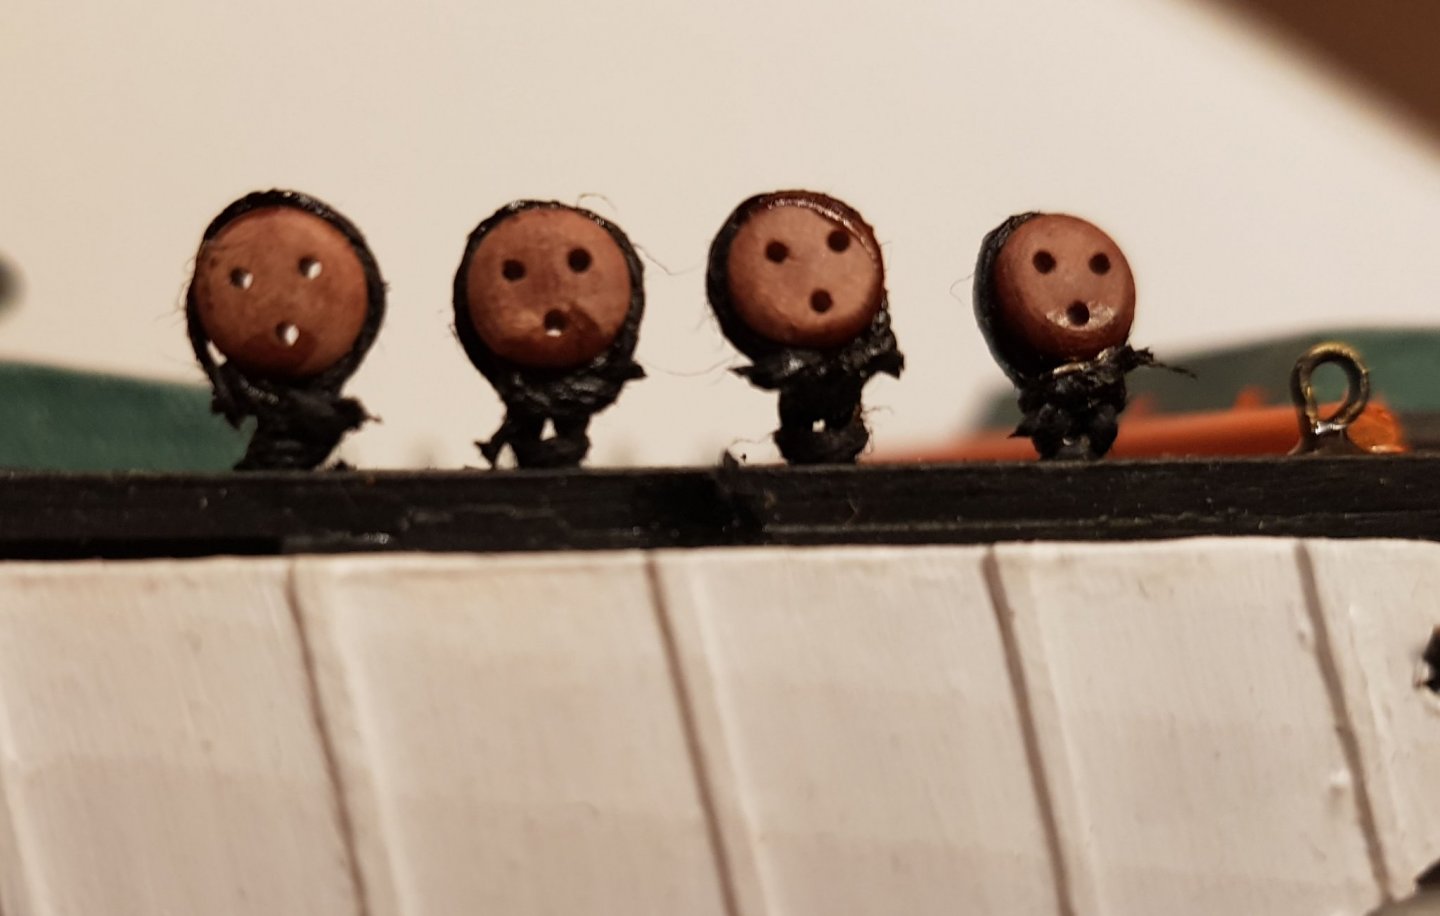
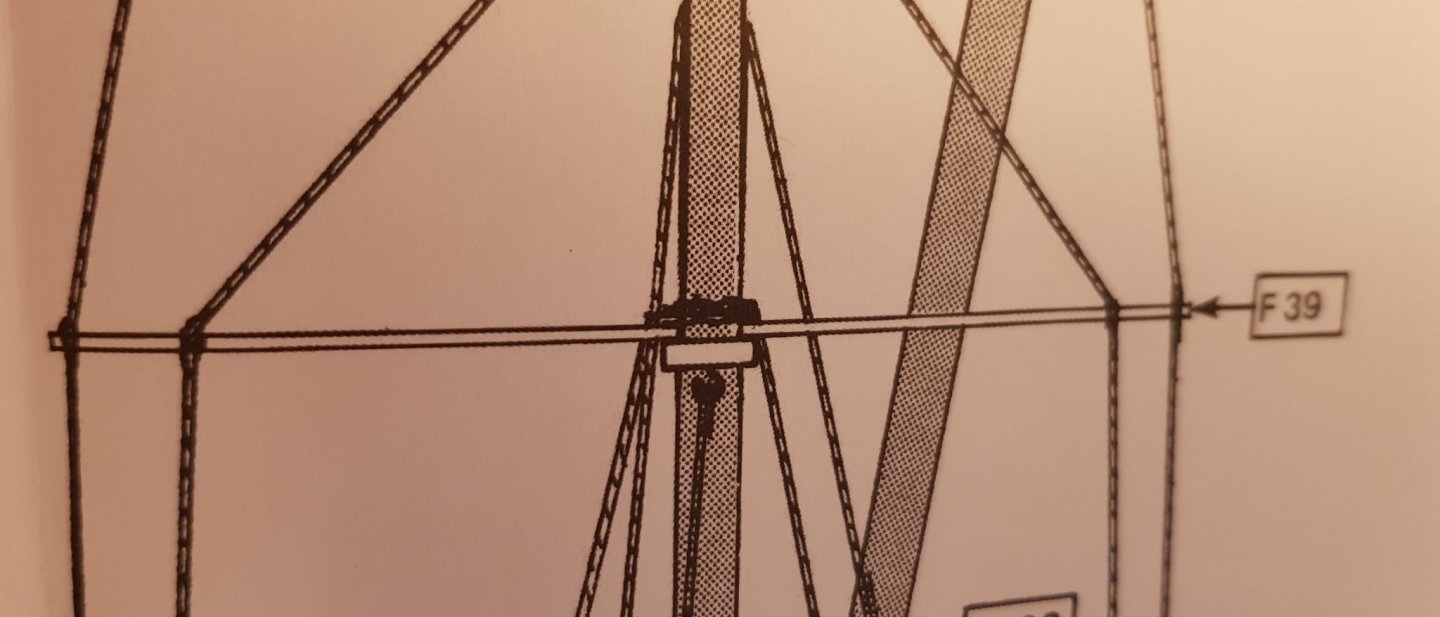
I have continued with preparing the masts et.c. I came as far as to mount dead eyes on the railing. The result is not as good as I hoped, to thick and a bit uneven. I took a pause to do something else wile I decide if I should redo, or not. So I started with another building for the quay, a facade for a factory. The printed sheets are glued to cardboard of different thickness... ...and is then cut out and assembled. The main mast is now almost ready for starting to attach lines and sails. Only the shroud spreader remains. According to the plan the shrouds should be tied around it, but I think there should be holes for the lines to go through. I don't have access to a drill press or similar, so I'm not sure how I should drill a 0,7 mm hole in a 2 mm rod... Cheers

- 83 replies
-
- 5
-
-
- finished
- billing boats
- (and 1 more)
-
Thanks. Yes I have seen and read about some variants for material in furled sails. I’m particularly intrigued by silk span. However I have not been able to find any supplier here in Sweden, and orders from US seems to take forever at the moment, if at all possible. So I will start with my boiled linen an see how it turns out.
- 83 replies
-
- 1
-
-
- finished
- billing boats
- (and 1 more)
-
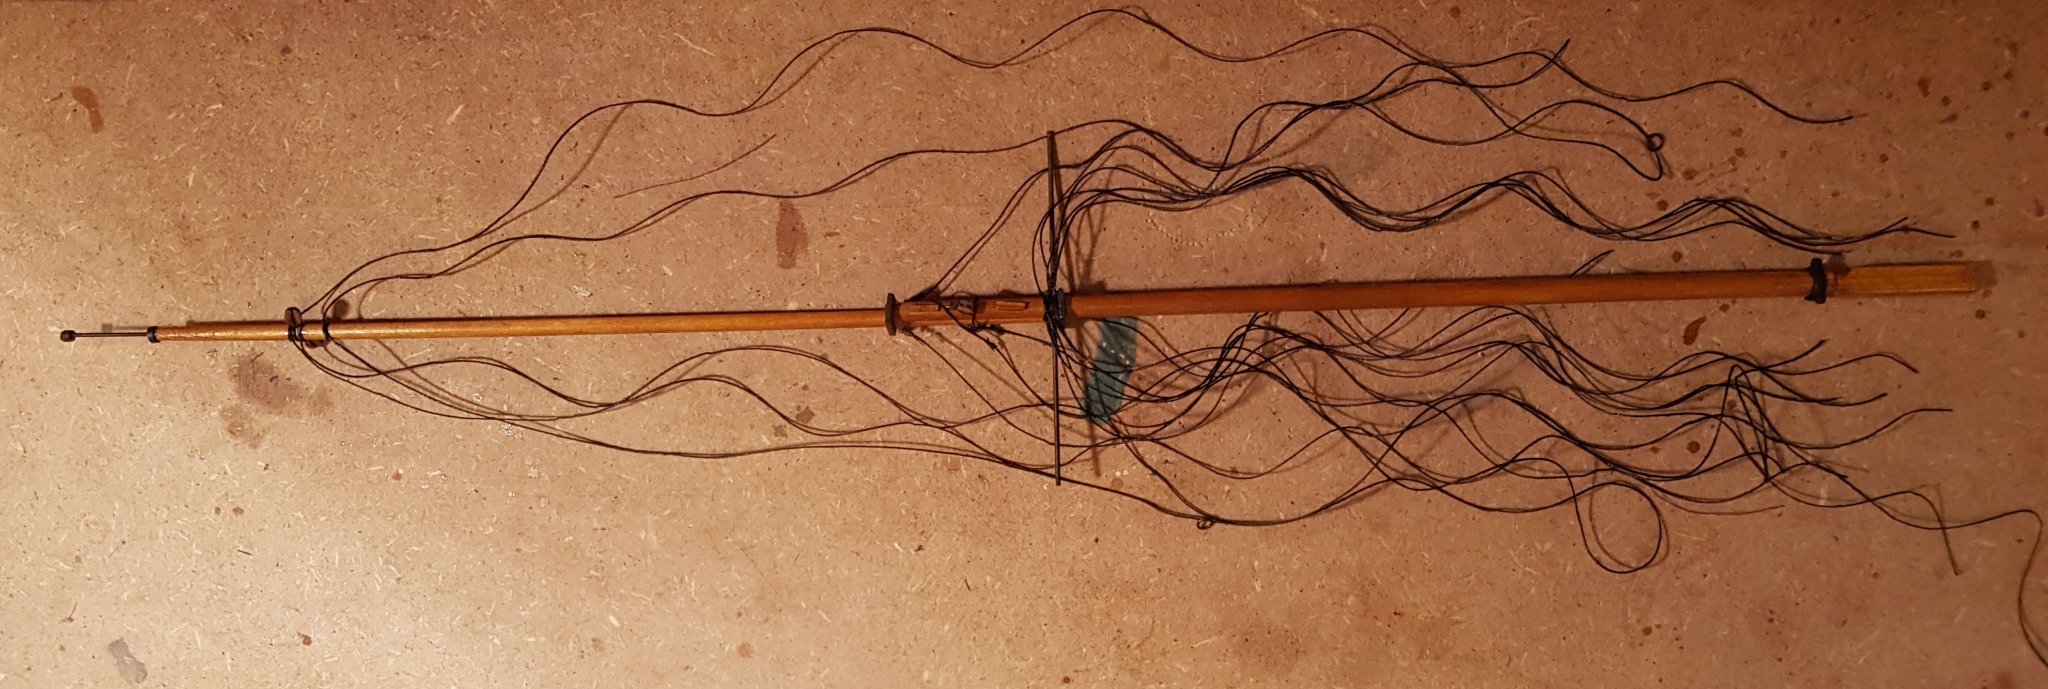
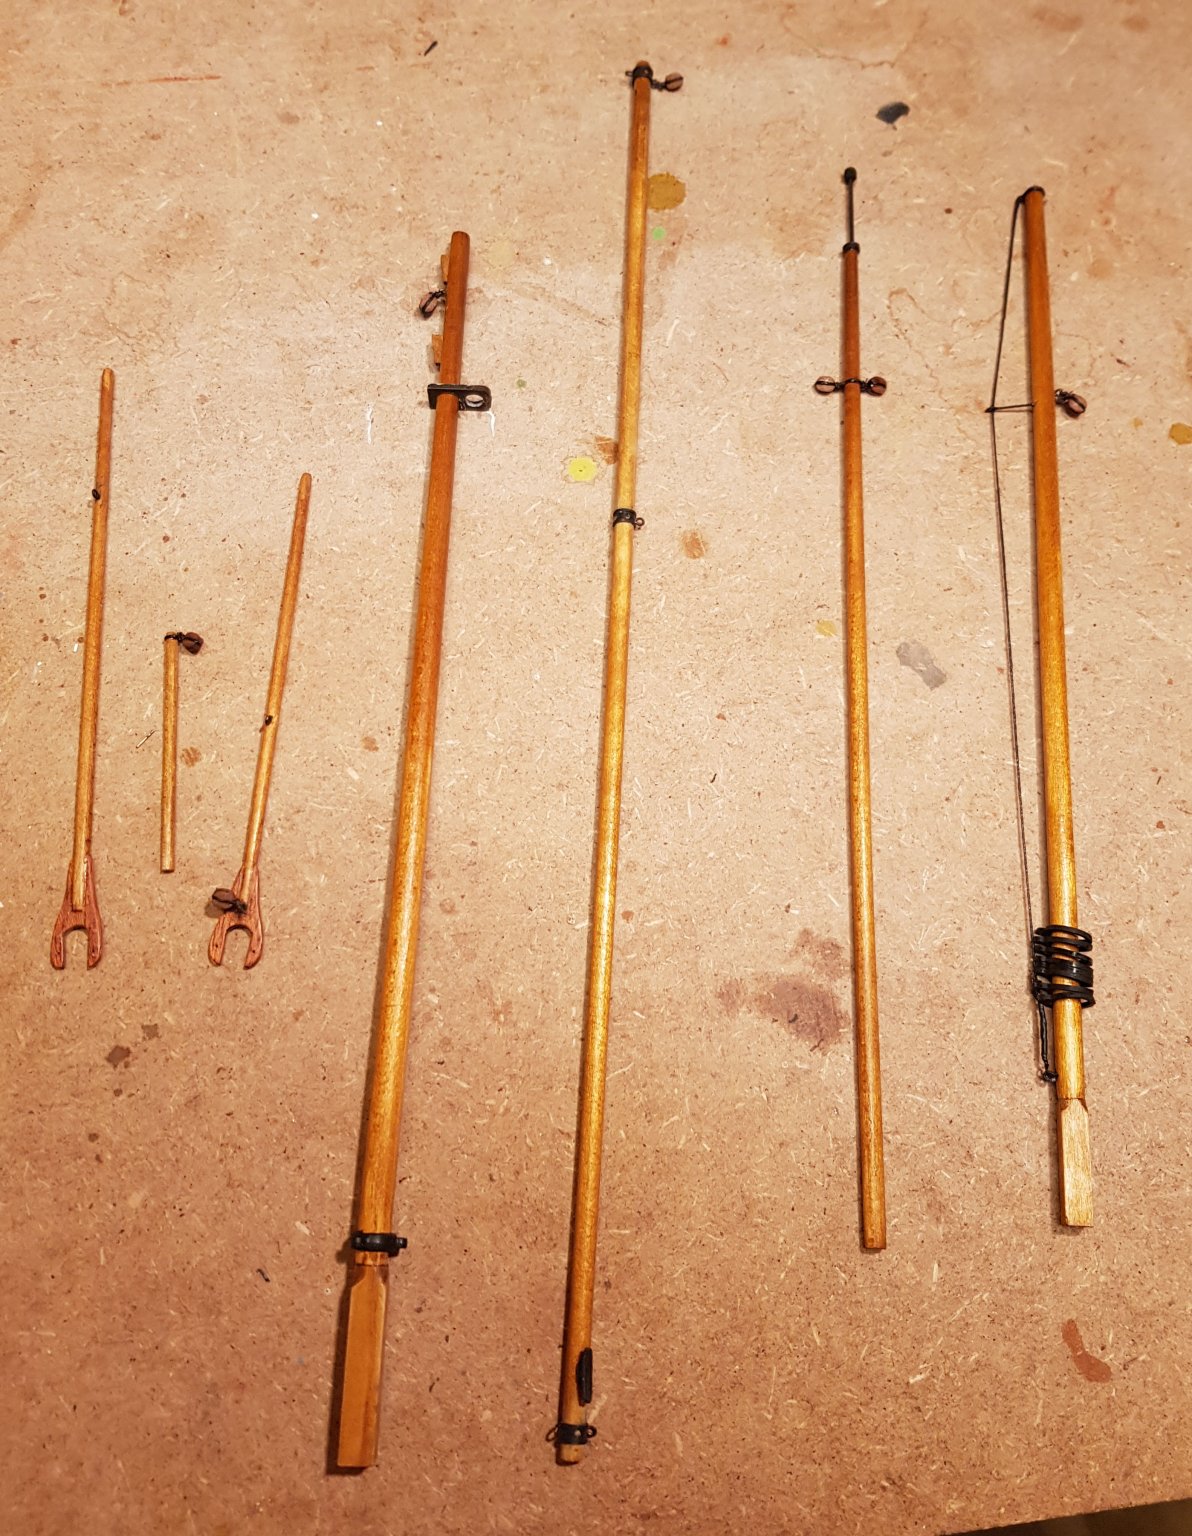
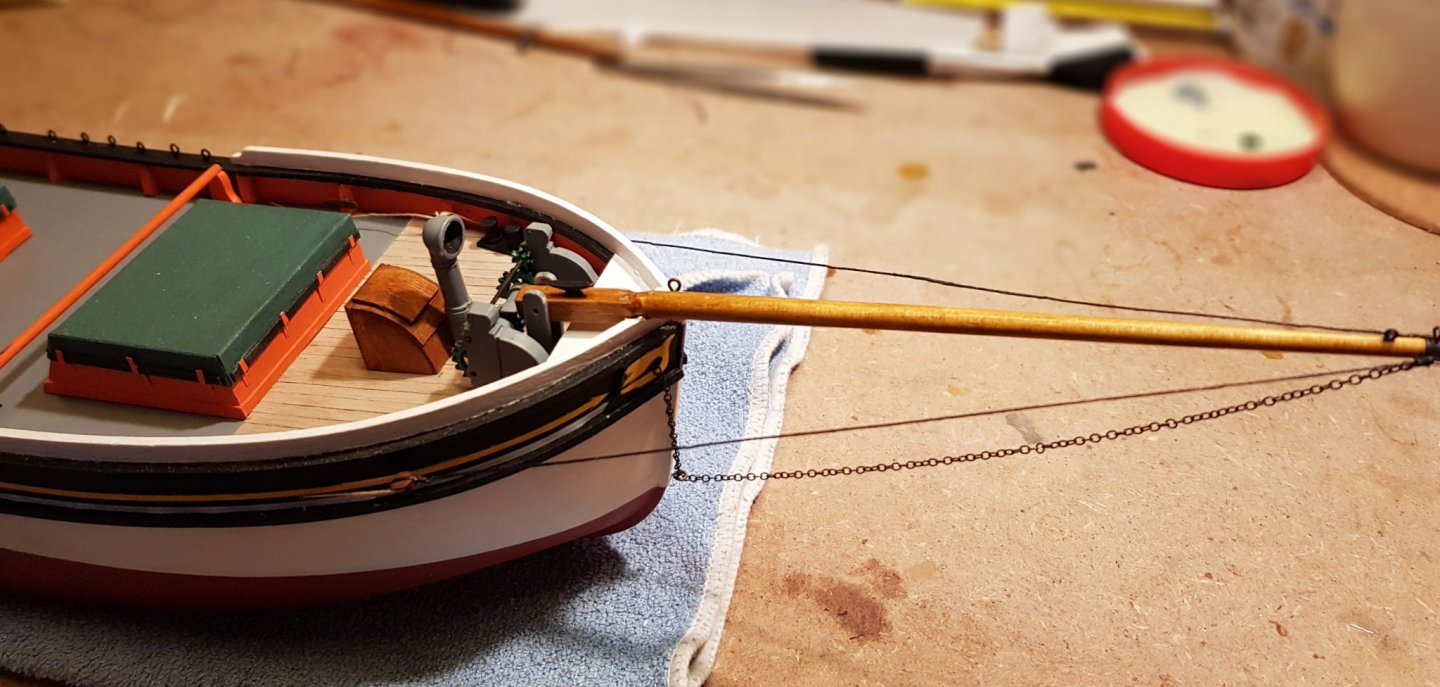
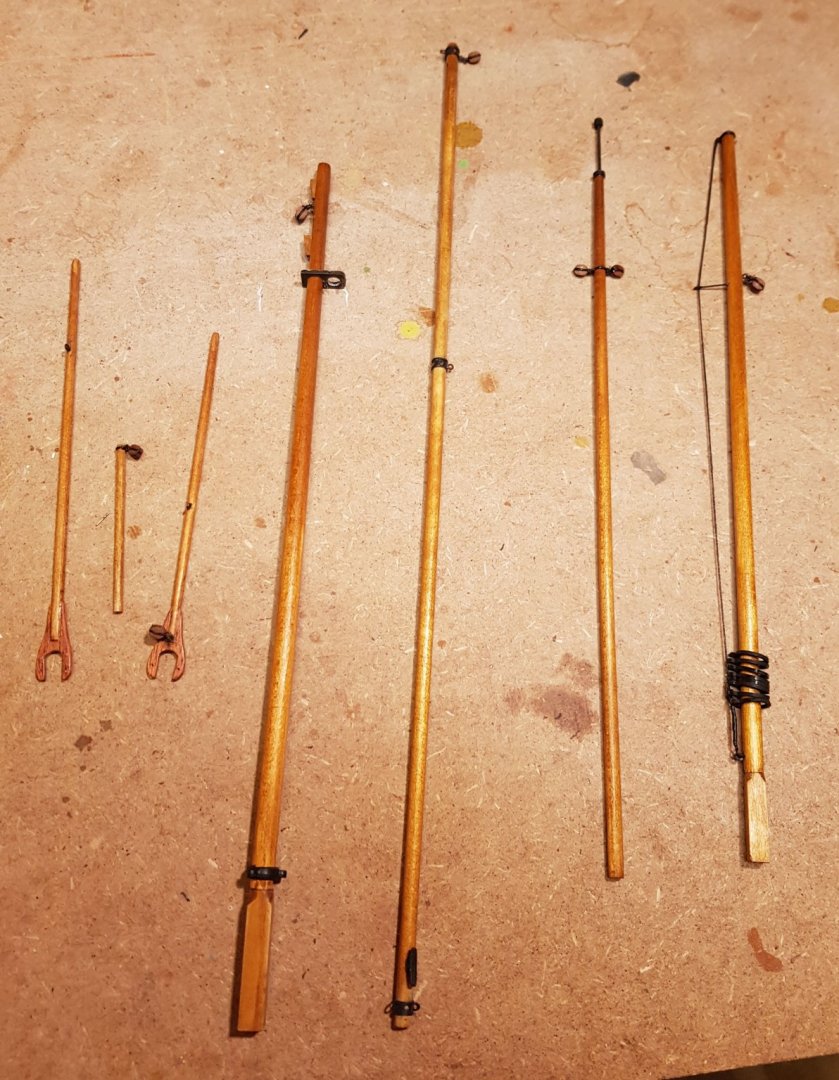
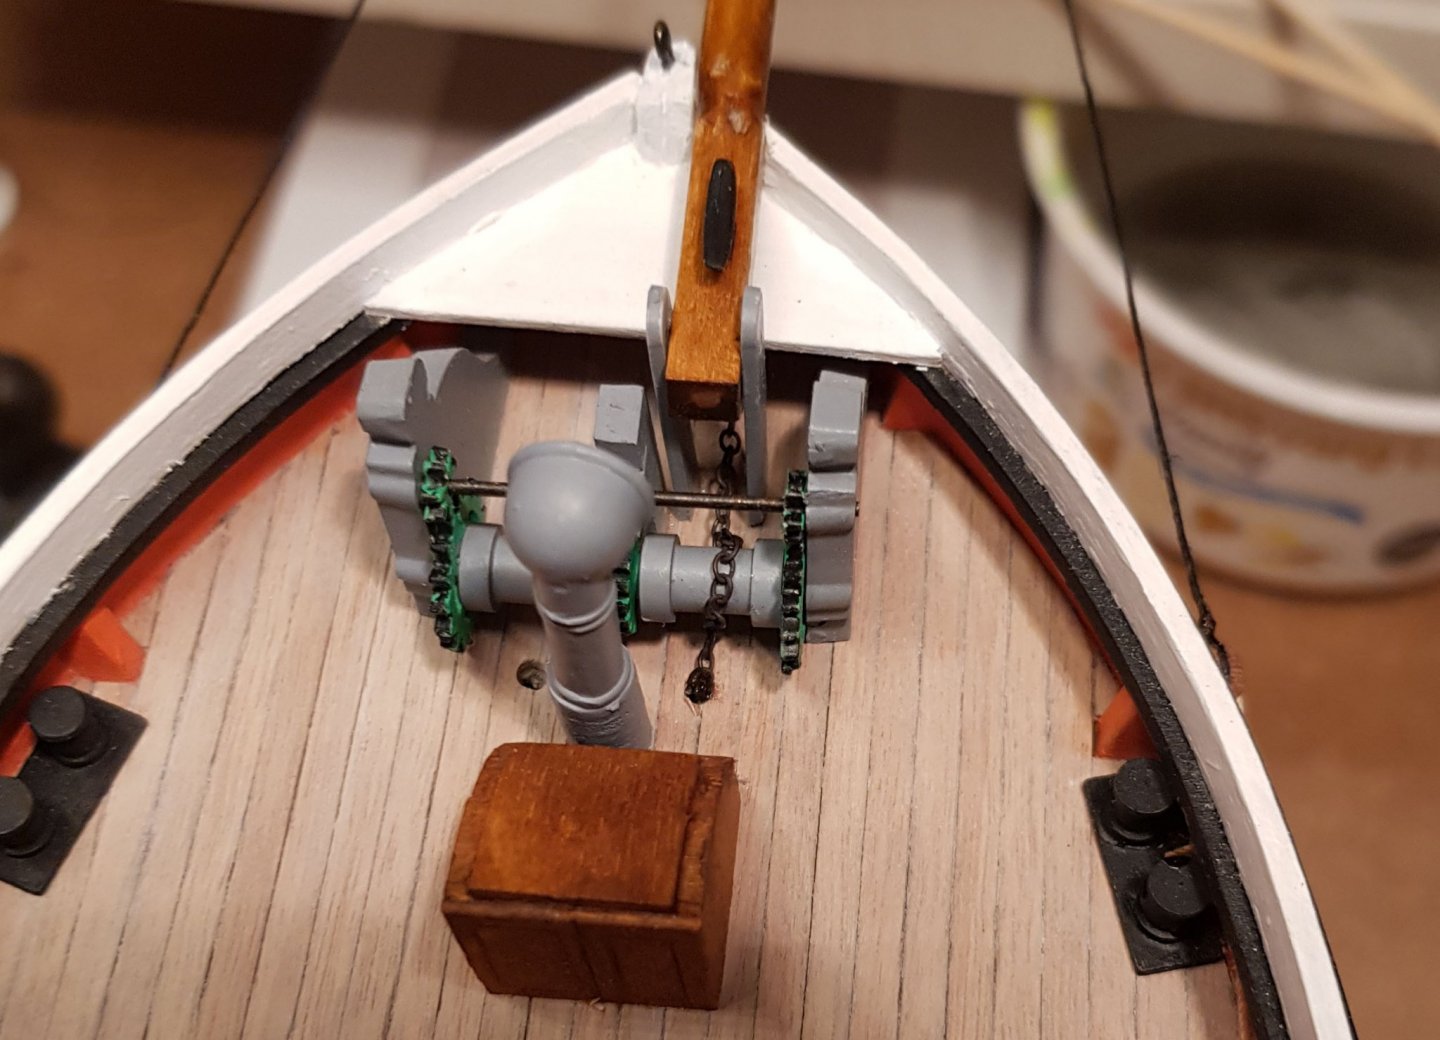
Today I started with mounting the bowsprit. On the real ship this is easy to lift up (and on many picture it is lifted). This means that all the lines should be easy to loosen and tighten. For the lines to the sides its easy to understand how this is done. For the chain going down to the tip of the bowsprit to an eye bolt just above the water line I have not found an exact answer. The plans just indicates that the chains continues up to the railing, but gives no indications on how it is attached. None of the photos I could find has good enough resolution to make it clear. My solution was to run the chain through the starboard porthole and to the windlass. After this I continued with preparing the timber for the rigging by attaching blocks etc. The plan for the mizzen mast indicates that there is a turnbuckle to tighten the line going from the top to the bottom (I don't know what its called). There is no part for this in the kit so I built one from twisted wire that I covered in PVA glue. Here are all the pieces as they look now. There are a few things left to do, but soon I need to start with the sails. They probably need to be attached before the masts are stepped. As I want the sails to be furled I need to do some tests for the bulk. Maybe I need to reduce the sail area so that they don't look so bulky when furled. One thing is certain though, I will not touch the cloth provided in the kit. It is horribly thick and stiff, very far from any kind of scale appearance. Instead I plan to use some boiled linen that I have at hand, it is really soft and light. I also think that I will join the top mast to the main mast before I step it. Common practice seem to be to step the lower mast first, and then the topmast? In this case I think that It will be easier to get everything straight if assembled on the workbench first. Cheers Cheers
- 83 replies
-
- 6
-
-
- finished
- billing boats
- (and 1 more)
-
I have no experience with using enamal on wood so I'm not sure exactly what happened to your paint. What I can see from your picture though it looks like the surface is still quite rough. I would suggest sanding it down with successively finer grain (maybe starting at 120 and going to 400) in three or four steps. Then apply a primer or sanding filler. There is a lot of discussion on these pages on this topic, there are several ways to go. Personally I mostly use shellac as primer but also have a cellulose based clear primer. A spray on primer as Jim T suggest above would also work well (and is probably easier to get hold of). Then use steel wool or a very find sanding paper on the primer to get a smooth surface for the paint. Plan for several (many) coats of thin paint. Thick coats are hard to get smooth. Cheers
-
Thanks for the appreciation. I hope to continue with the boat tomorrow. Today I broke a plank and I’m now waiting for the glue to cure thoroughly in the repair before continuing.
- 83 replies
-
- 1
-
-
- finished
- billing boats
- (and 1 more)