HOLIDAY DONATION DRIVE - SUPPORT MSW - DO YOUR PART TO KEEP THIS GREAT FORUM GOING! (89 donations so far out of 49,000 members - C'mon guys!)
×

bolin
-
Posts
482 -
Joined
-
Last visited
Content Type
Profiles
Forums
Gallery
Events
Everything posted by bolin
-
 I’m not exactly sure about the Norwegian design, but typically the planks are beveled along the overlap. That is easier to do than cutting a rabbit. It is only in the absolute ends where they end in the rabbit of the stem or stern that a rabbit is cut in the planks. I’m not sure how much you would need to that in this model where there are transom sin both fore and aft.
- 54 replies
-
- 2
-

-
- norwegian sailing pram
- model shipways
- (and 1 more)
-
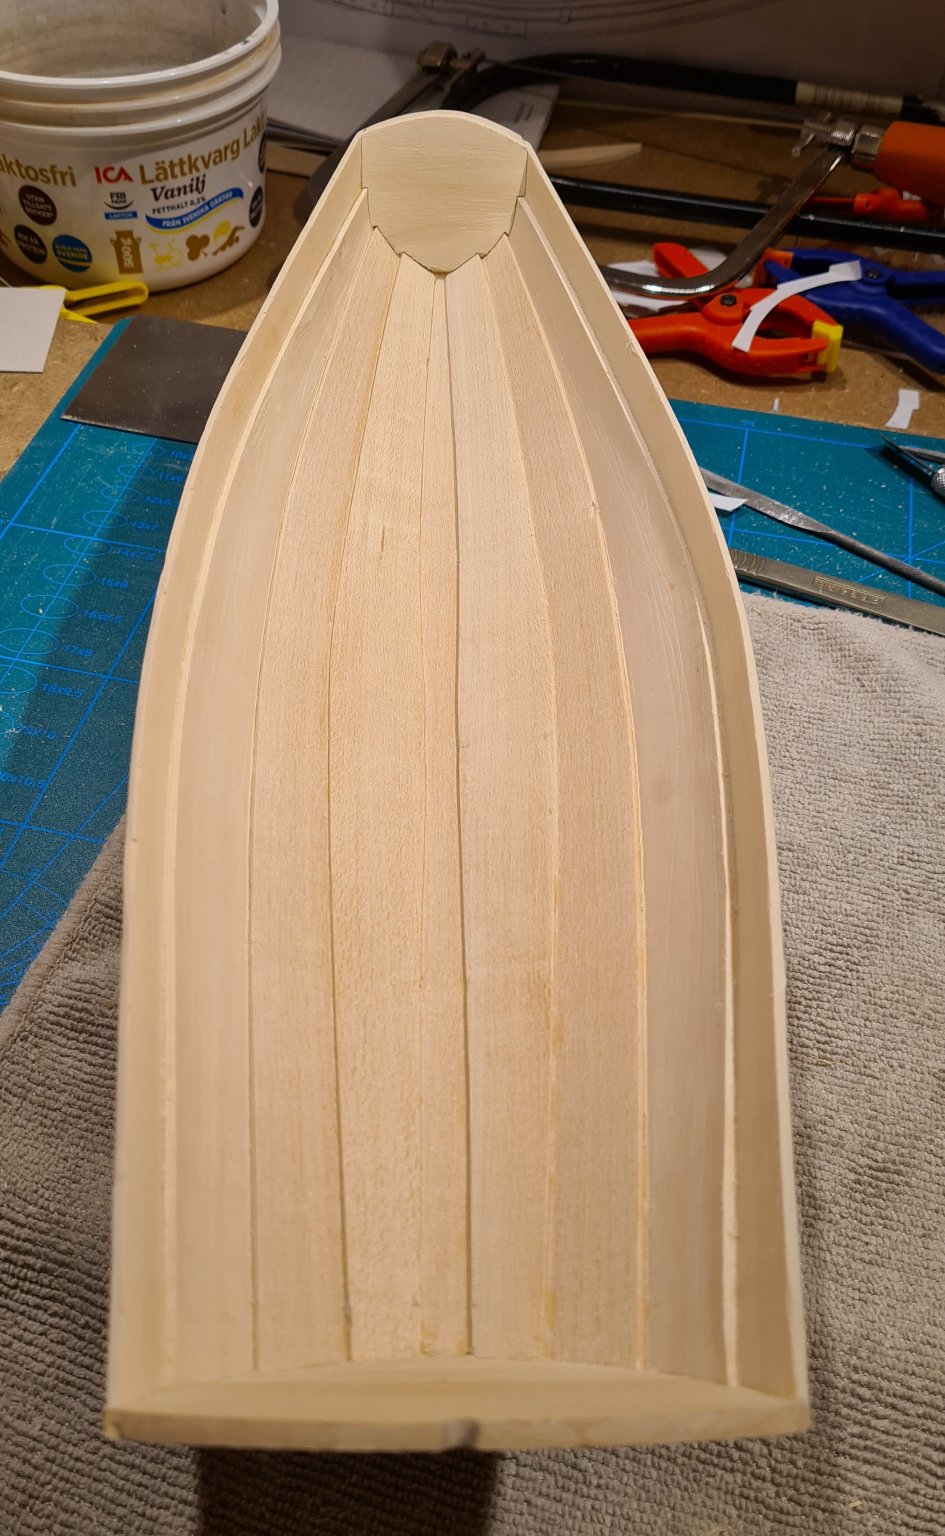
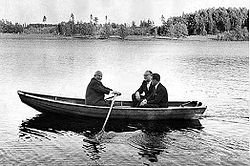
Thanks Per. You have a good eye wefalk. That is actually the same boat as documented in the book and the measured plans I now follow. It would have been nice to have found it earlier, then the small forward transom would have been made even smaller :-). I made an observation, there are three oarlocks on each side, the plans only shows two. But based on the text describing the boat it is still clear that it is the same. In Swedish the boat type is called "eka". In its most specific meaning it is just such a flat bottomed clinker built boat that is meant, but the term is also used in a broader meaning for similar small boats. The most famous eka might be the "Harpsundsekan", the row boat at the prime ministers summer residence Harpsund. Here a picture 1964 with Swedens then prime minister Tage Erlander, and soviet leader Nikita Chrustjov with interpreter. My model has made some progress. First the inside has been sanded and scraped. The frames have been fitted and glued: With the final result:

- 31 replies
-
- 10
-
-
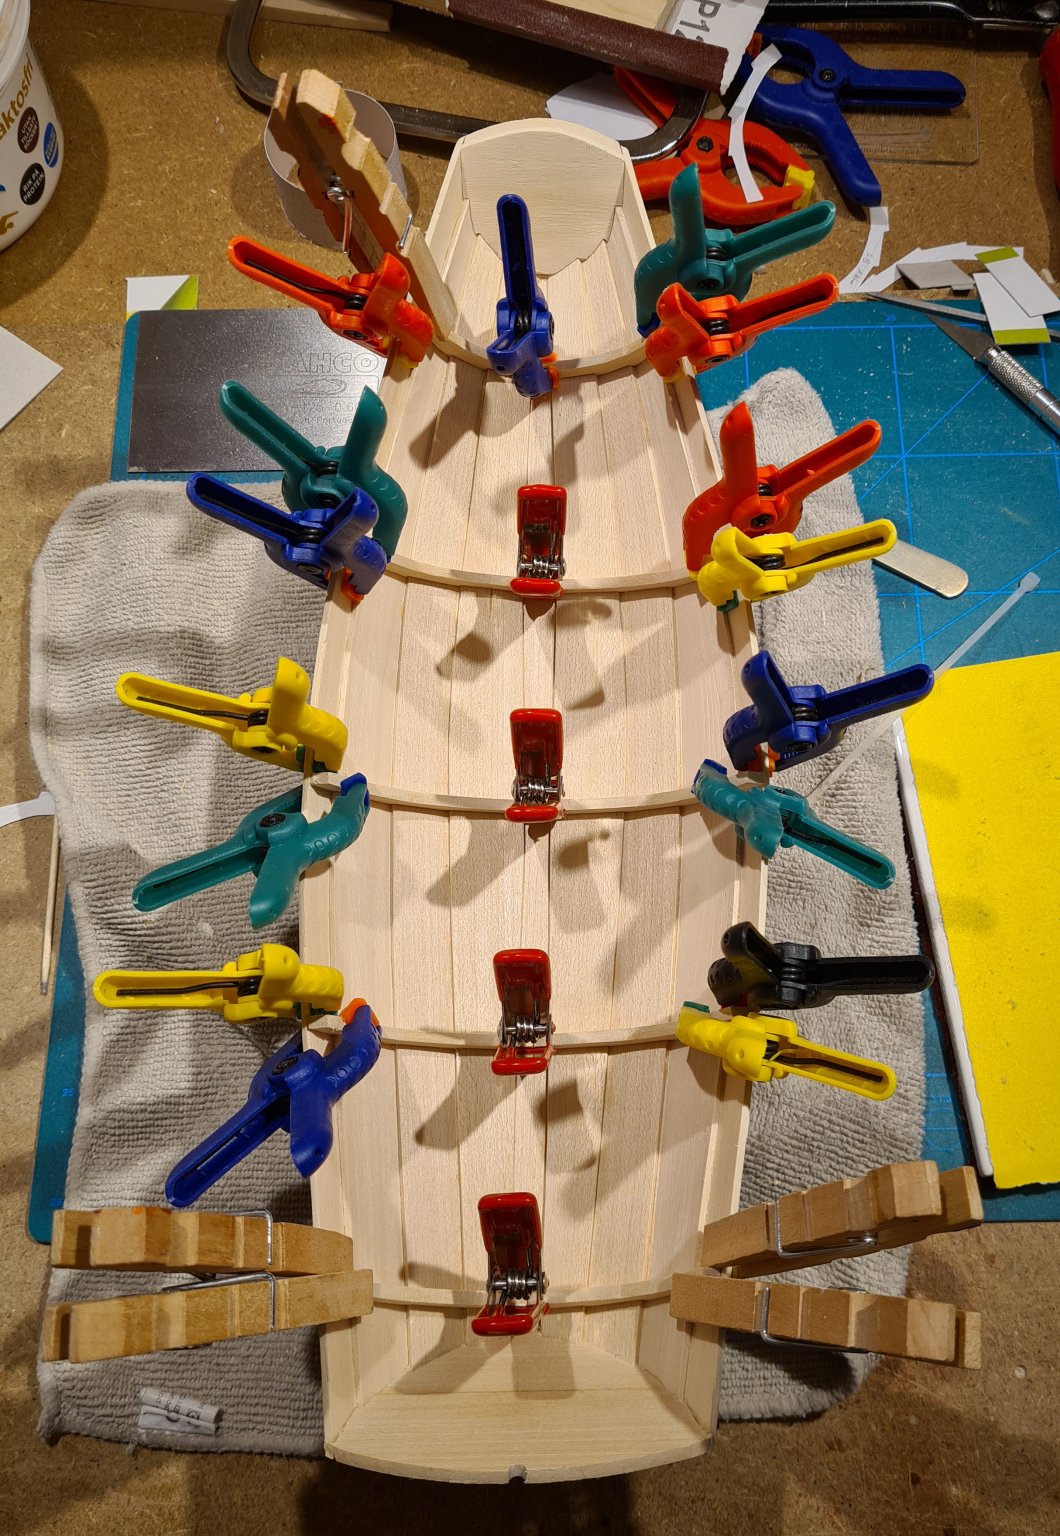
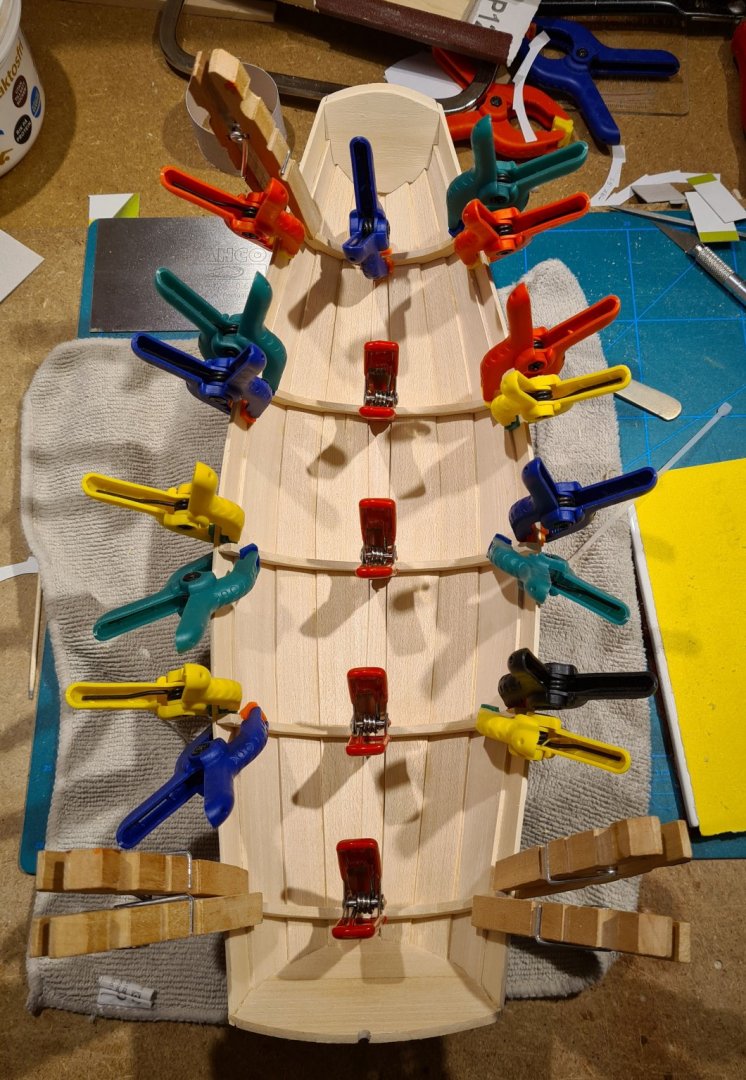
The cover piece turned out nicely, I can live with the minor gaps that remains. Today I continued with the frames. First I wanted to test if I could make a frame in a single piece by bending a strip edge wise and then cut out notches for the plank overlaps. My conclusion is that it might have worked if I created a proper jig for bending. Some of the strips would probably have broken. If I had used some wood than Lime wood it might have been easier. I decided to make the frames in two pieces instead, cut from a wider piece of wood. Getting the shape of the frames. The first frame dry fitted.
- 31 replies
-
- 10
-
-
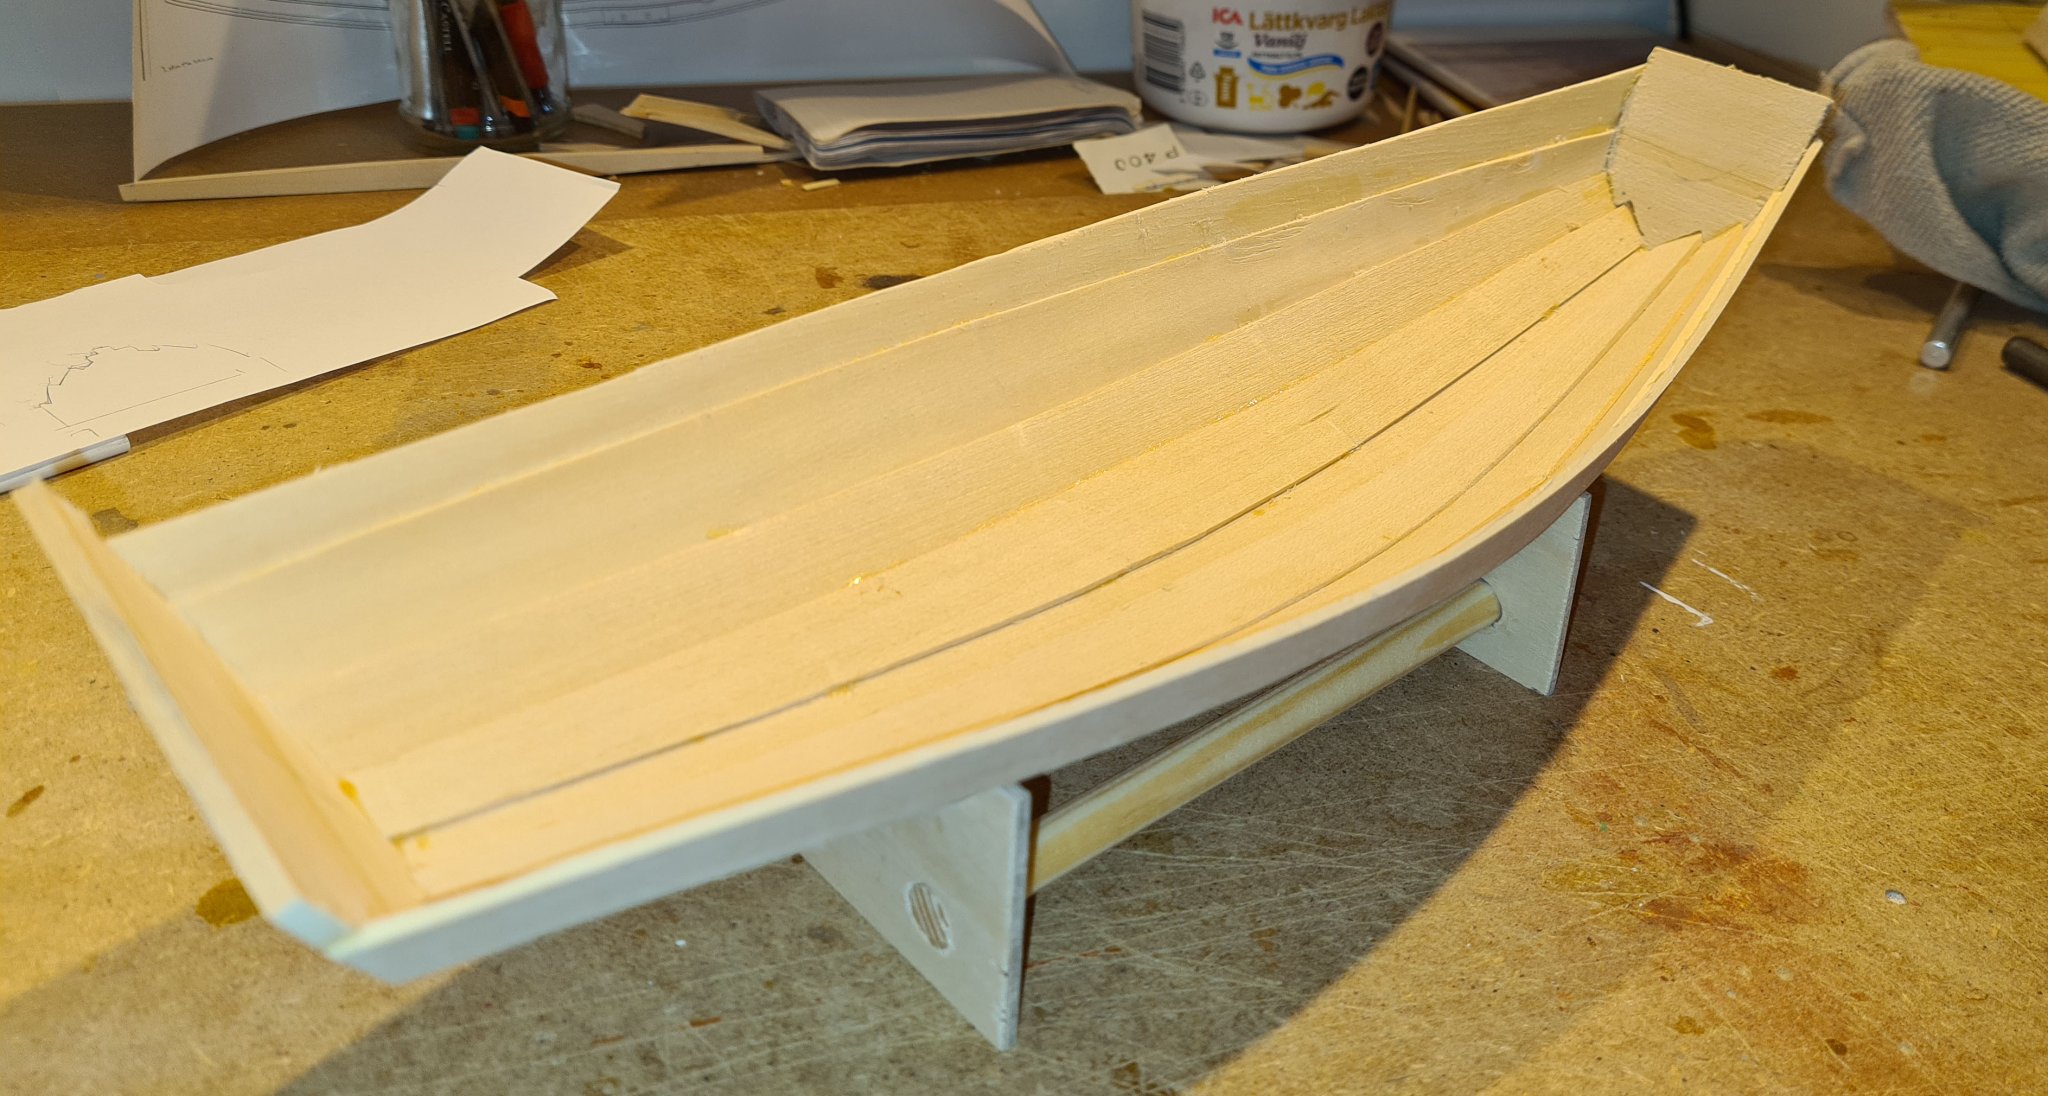
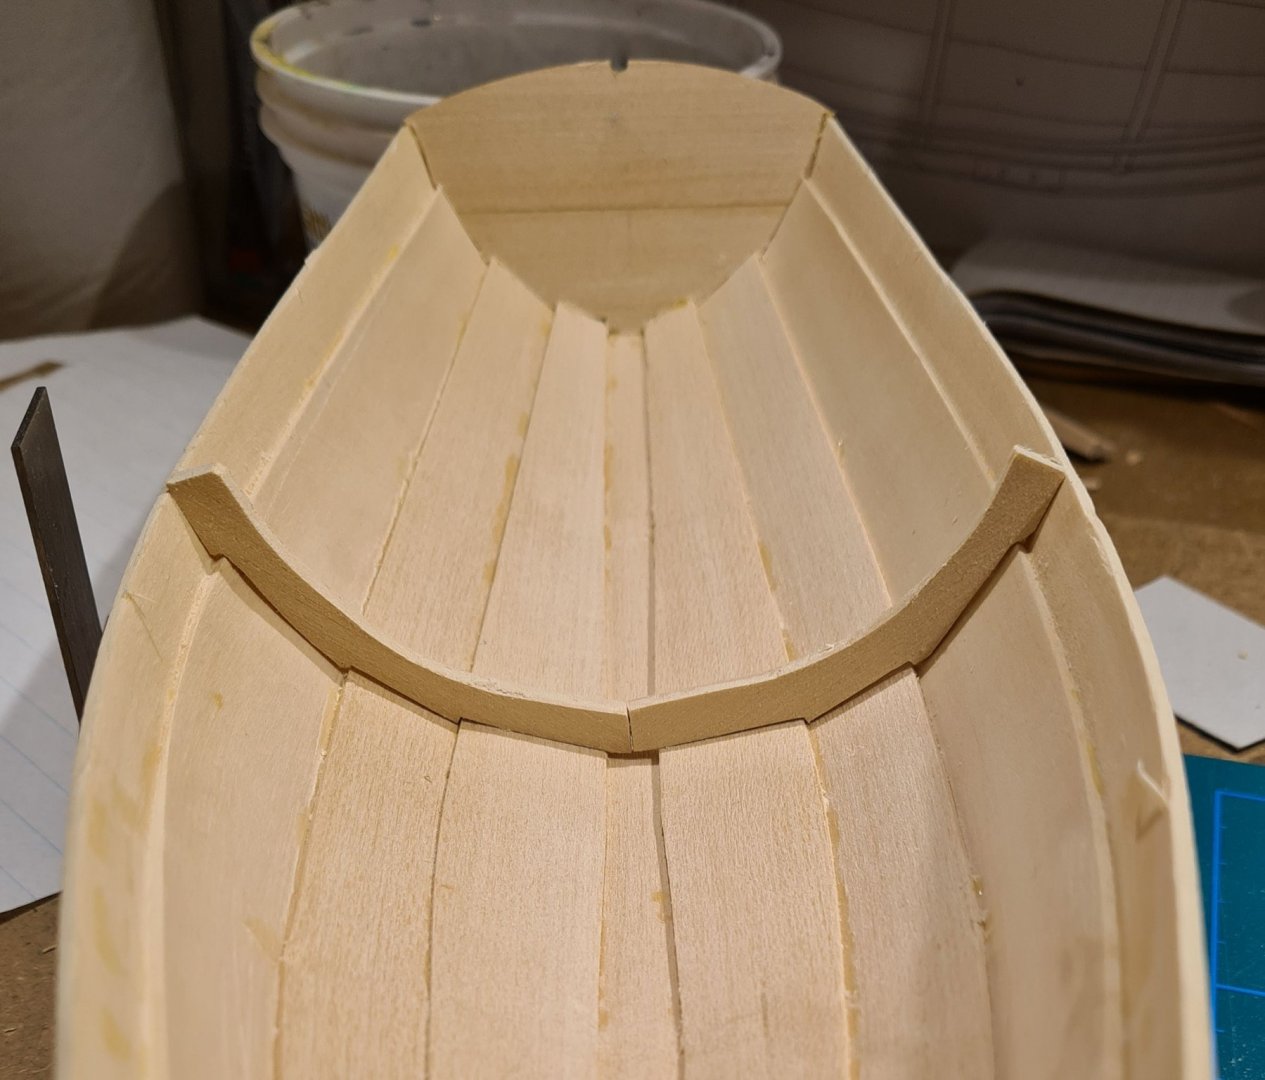
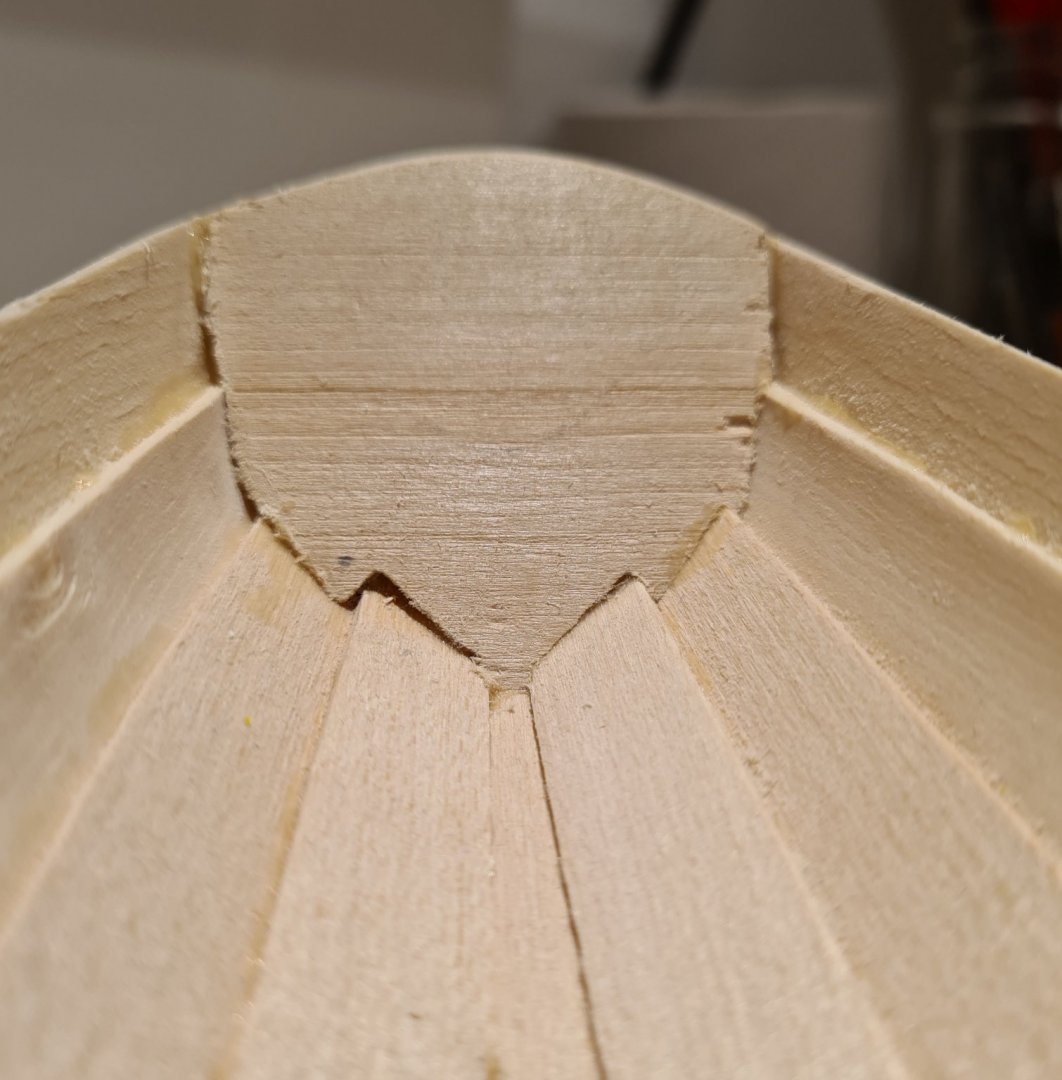
I got confused, it's the stem where the gaps where. The stern looks much better, and there will be a seat there. If I'm still not satisfied with this fix I can put a coil of rope there to cover it up.
-
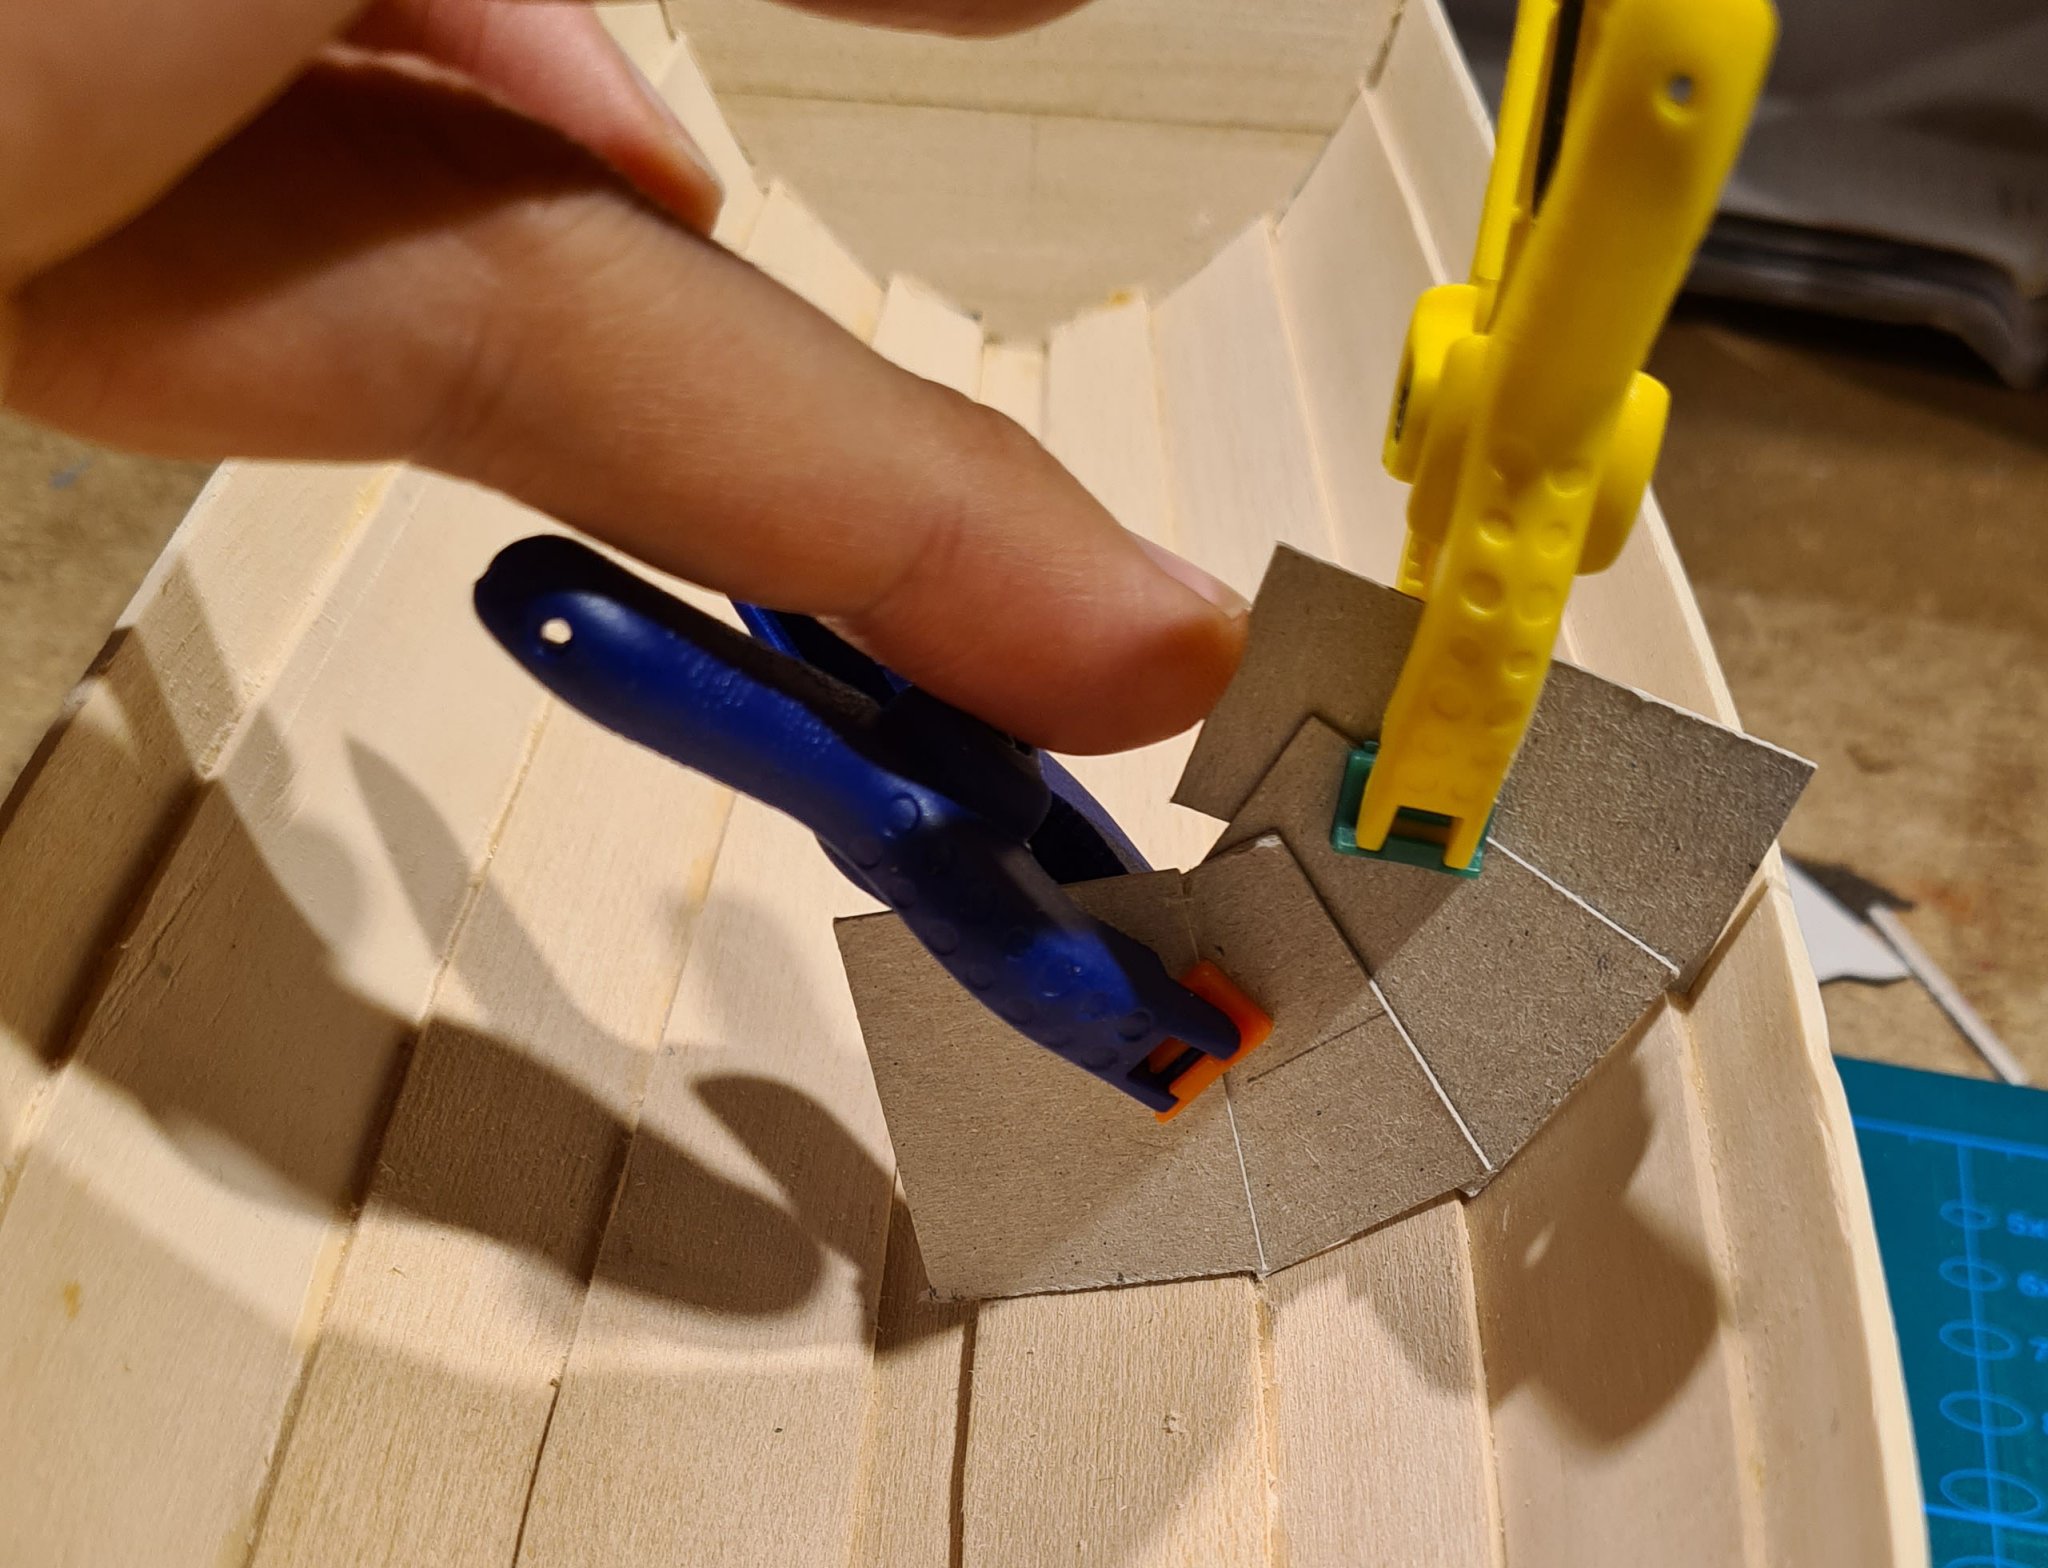
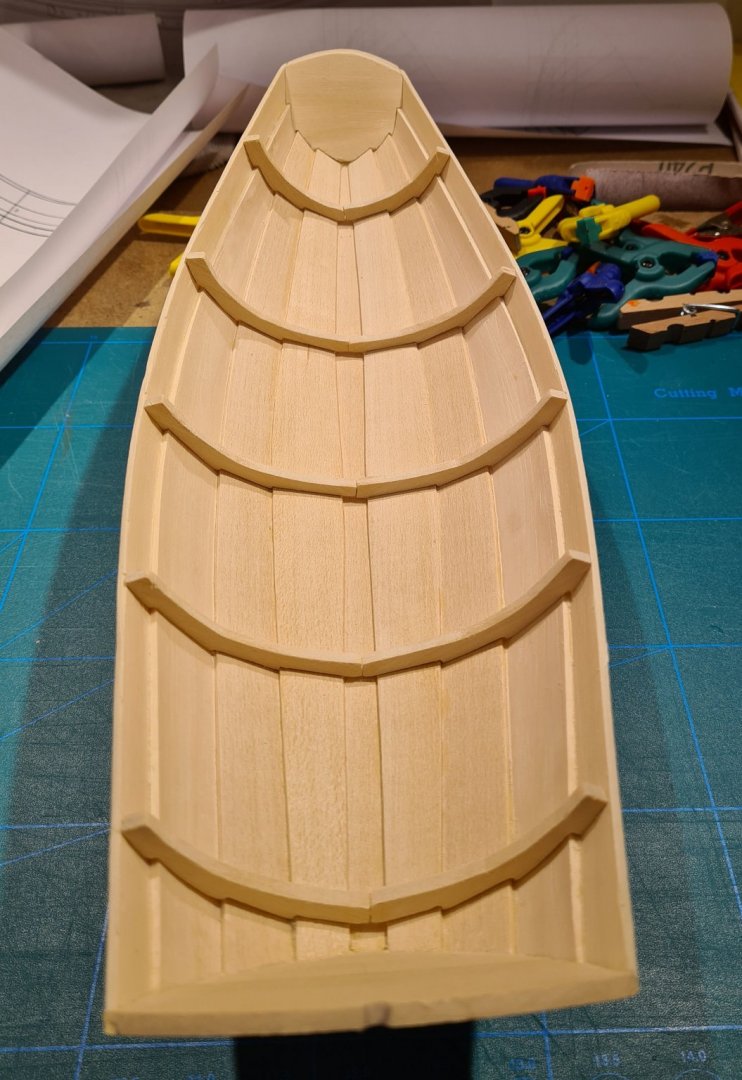
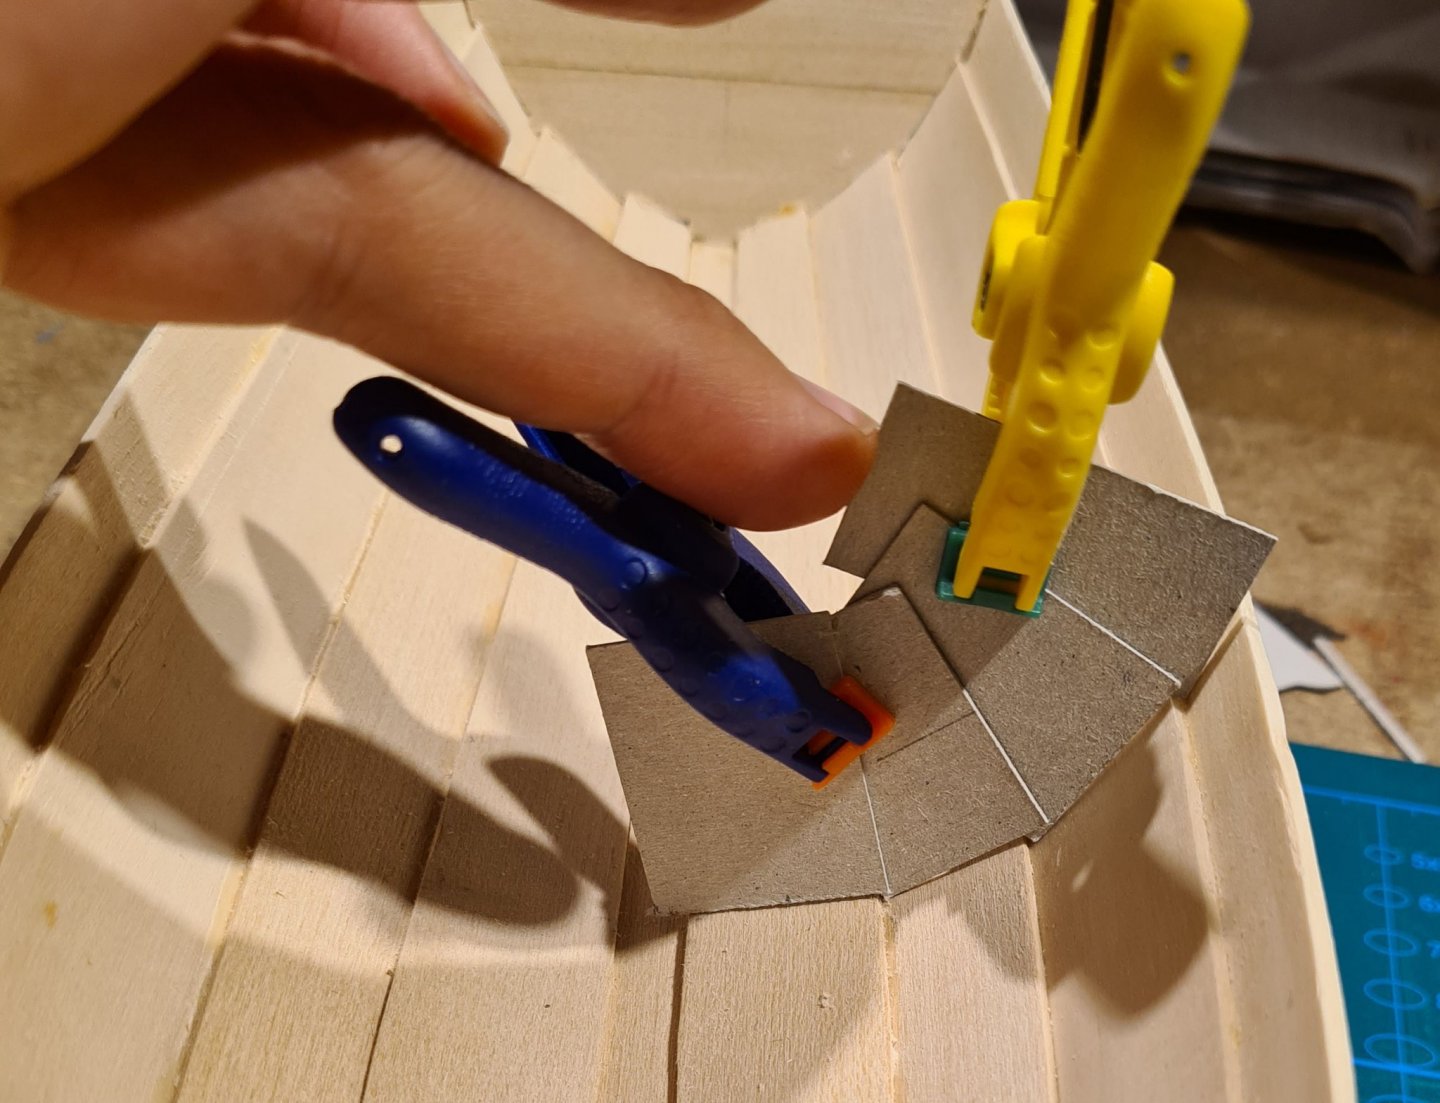
The time for release has finally arrived: The hull is cut free from the plug. And the inside can finally be inspected. Overall OK, but there are some lessons to be learned for other builds. There is to much glue spill. I should have used less, and I should have tried harder to wipe it away, even when it was hard to reach on the underside of the boat. There are marks in the planks from where one of the frame templates in the a plug was sticking up too much. Lime is a soft wood, especially when wet. I should have worked more on checking and fairing the plug. Fortunately, since the frame template was in the position of the frame, the marks will be covered. The biggest mistake is in the stern: These gaps must be corrected. I cut a cover piece from 1 mm lime and glued it in. Cheers


-
Sloop from Roslagen by bolin - FINISHED - 1:50
bolin replied to bolin's topic in - Build logs for subjects built 1851 - 1900
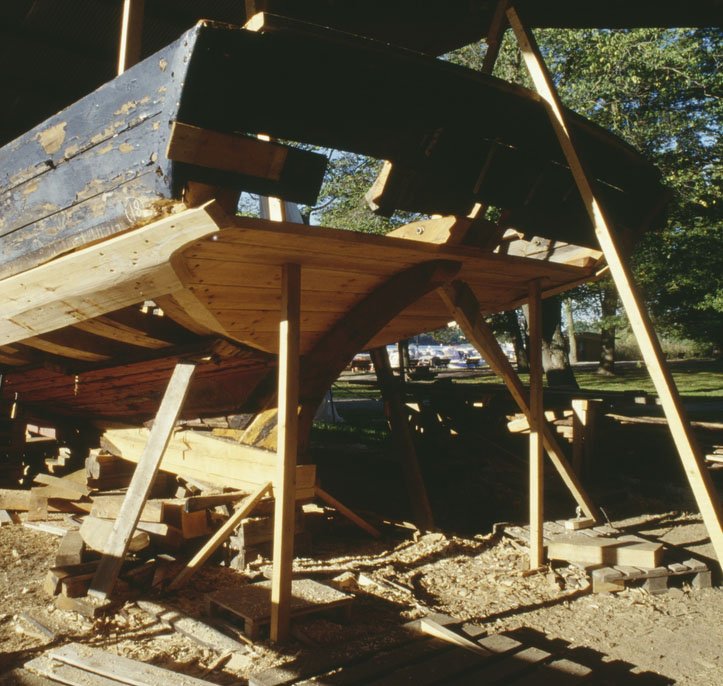
I have now started the build for real. The first pieces has been glued together. First a few pictures on the construction of the plug. I work almost exclusively with hand tools. There is no place for a real workshop in the house, so I have not bought any power tools. The center piece was filed and checked against the keel, stem and stern pieces before I started sawing the slots for the bulkheads. All pieces cut out (with some margin on the bulkheads to allow for corrections during fairing). The pieces have been dry fitted. And on to the pieces that have been assembled. There are some margin left on the "outside" of these pieces as well so that the lines can be adjusted after they have been assembled. I have made a simplification of the joints in stem. There should have been a more advanced scarf joint both for the two pieces of the stem and at the joint with the keel. The transom has given me some trouble. The modeling plan indicates that it should be flat, all the way down to the keel. As far as I know that is an unusual form for similar clinker built ships or boats. The lowest part tend to be pointed towards the end. The plan I showed in the first post of this thread has that form. I went as far as to go to the shop that sold the plan (Eskader in Stockholm) and looked at a built up model they have there. It has a flat transom. Since the plans I have does not provide any details about the arrangement of frames I had to look for other sources. The best I could find is a series of pictures from the renovation of a similar ship (known as Helmi) in the 80s. This ship is the last original hull of a sloop from Roslagen. She was discovered rebuilt to a houseboat and was renovated with help from the Maritime history museum in Stockholm. The pictures are from their collection. In the picture above a row of nail heads indicates a cant frame in the corner between the side and the transom, and also a piece of timber on each side of the stern on the inside. My interpretation of this information is version of a flat transom (seen from the inside). Cheers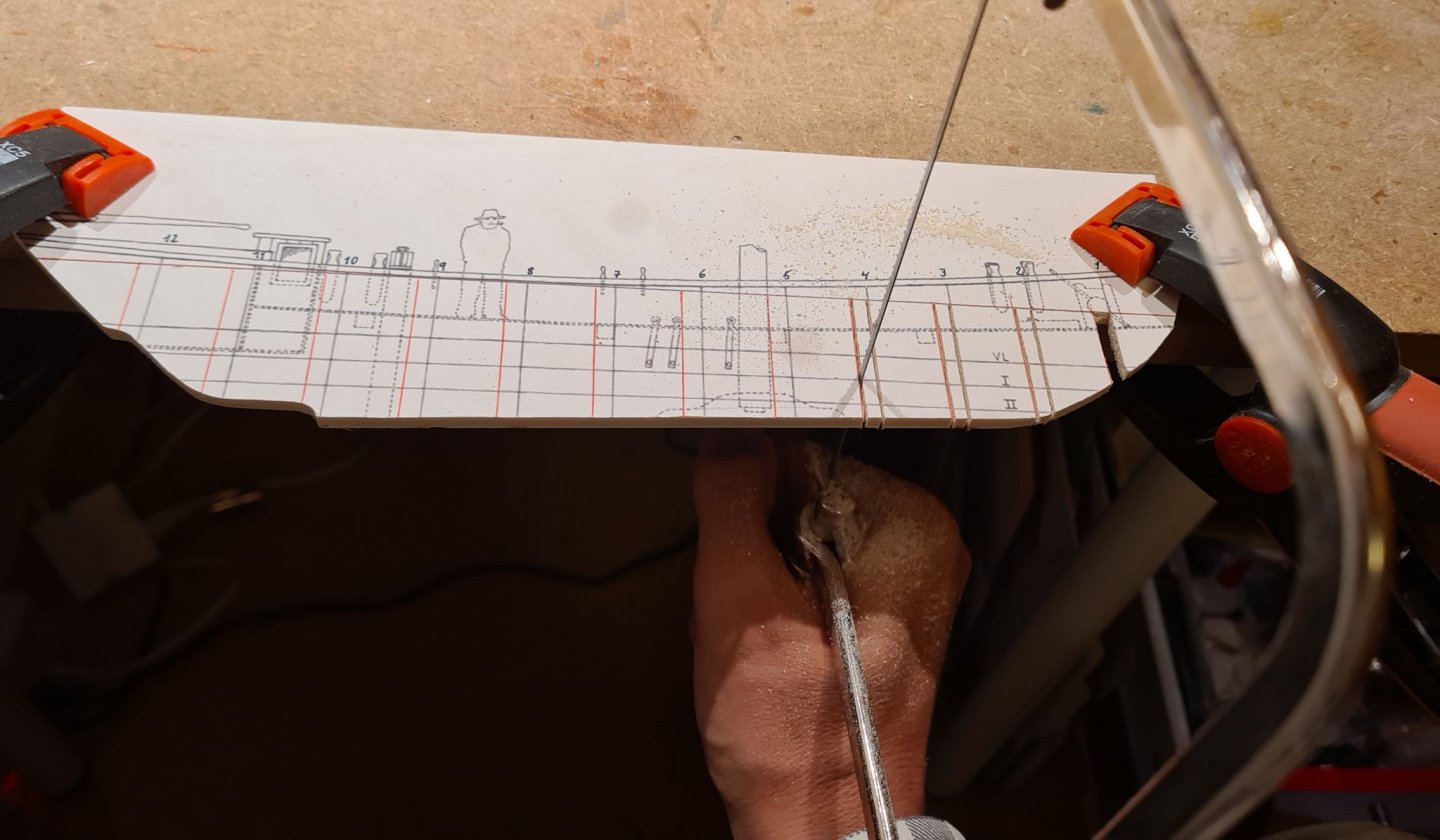


-
Sloop from Roslagen by bolin - FINISHED - 1:50
bolin replied to bolin's topic in - Build logs for subjects built 1851 - 1900
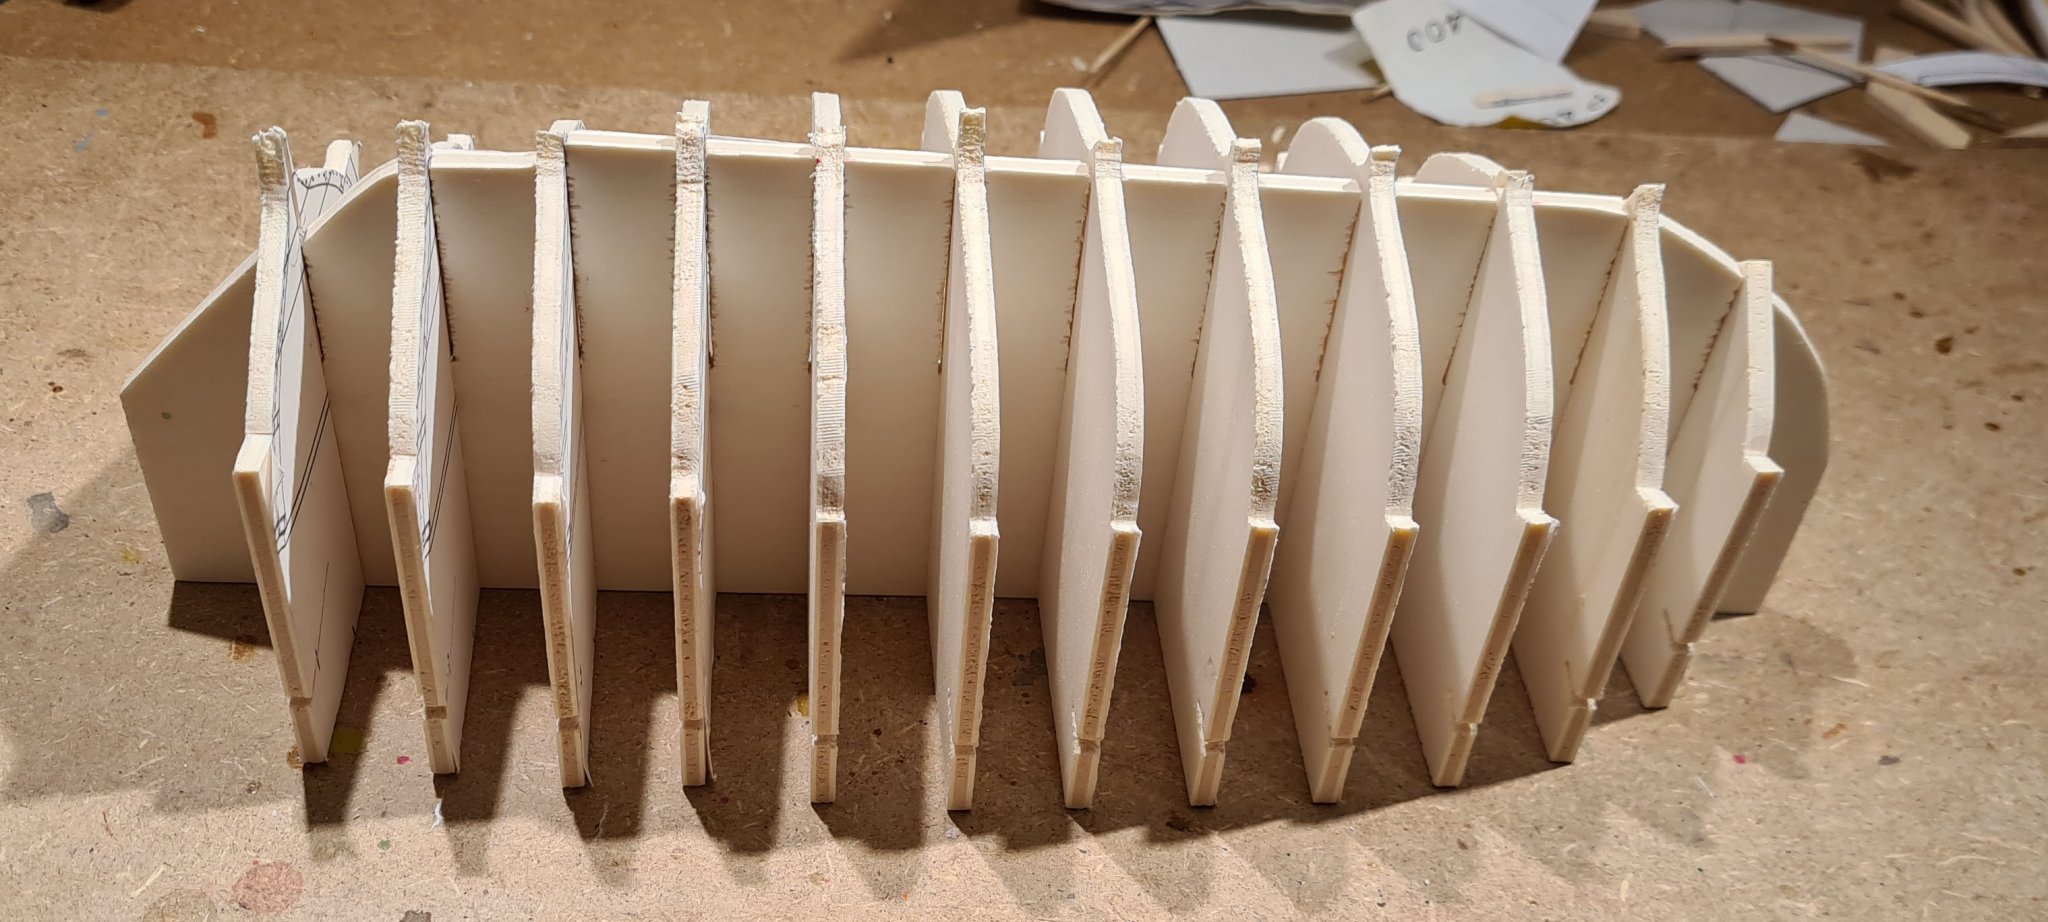
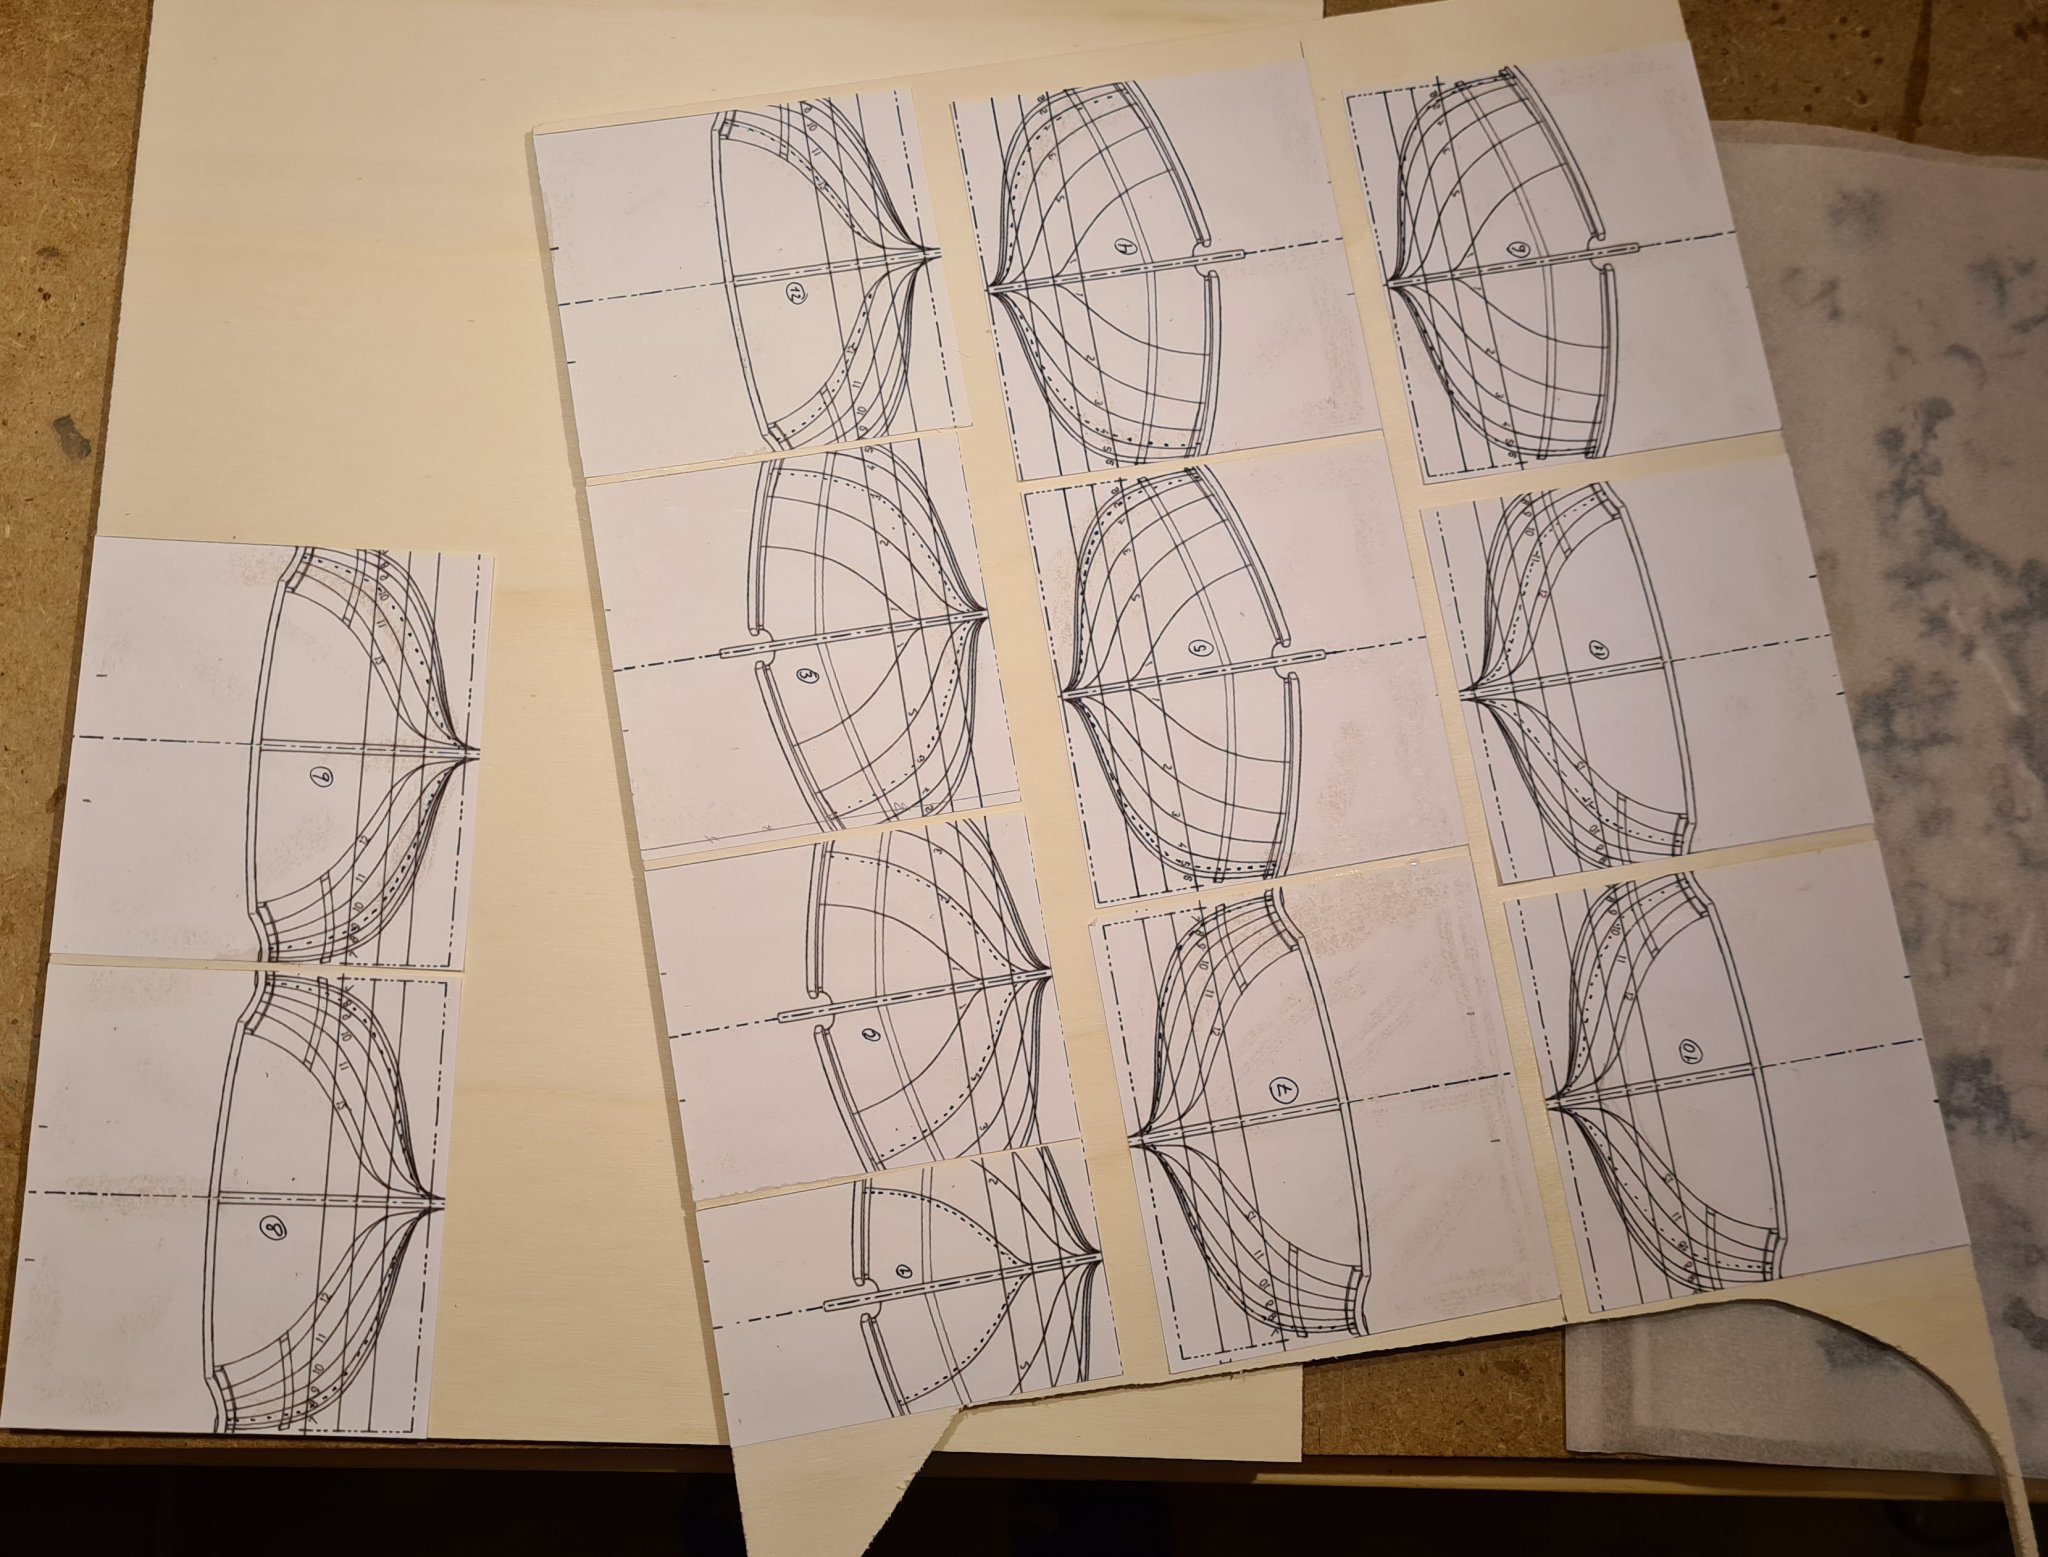
My build of Will Everard was declared finished yesterday, so now I can focus on this build instead. Today I completed the drawing of lines on the frames for the plug and glued them to plywood. Twelve frames for a hull that will be less than 30 cm means less than 2.5 cm between each frame. This will give ample support for the planks.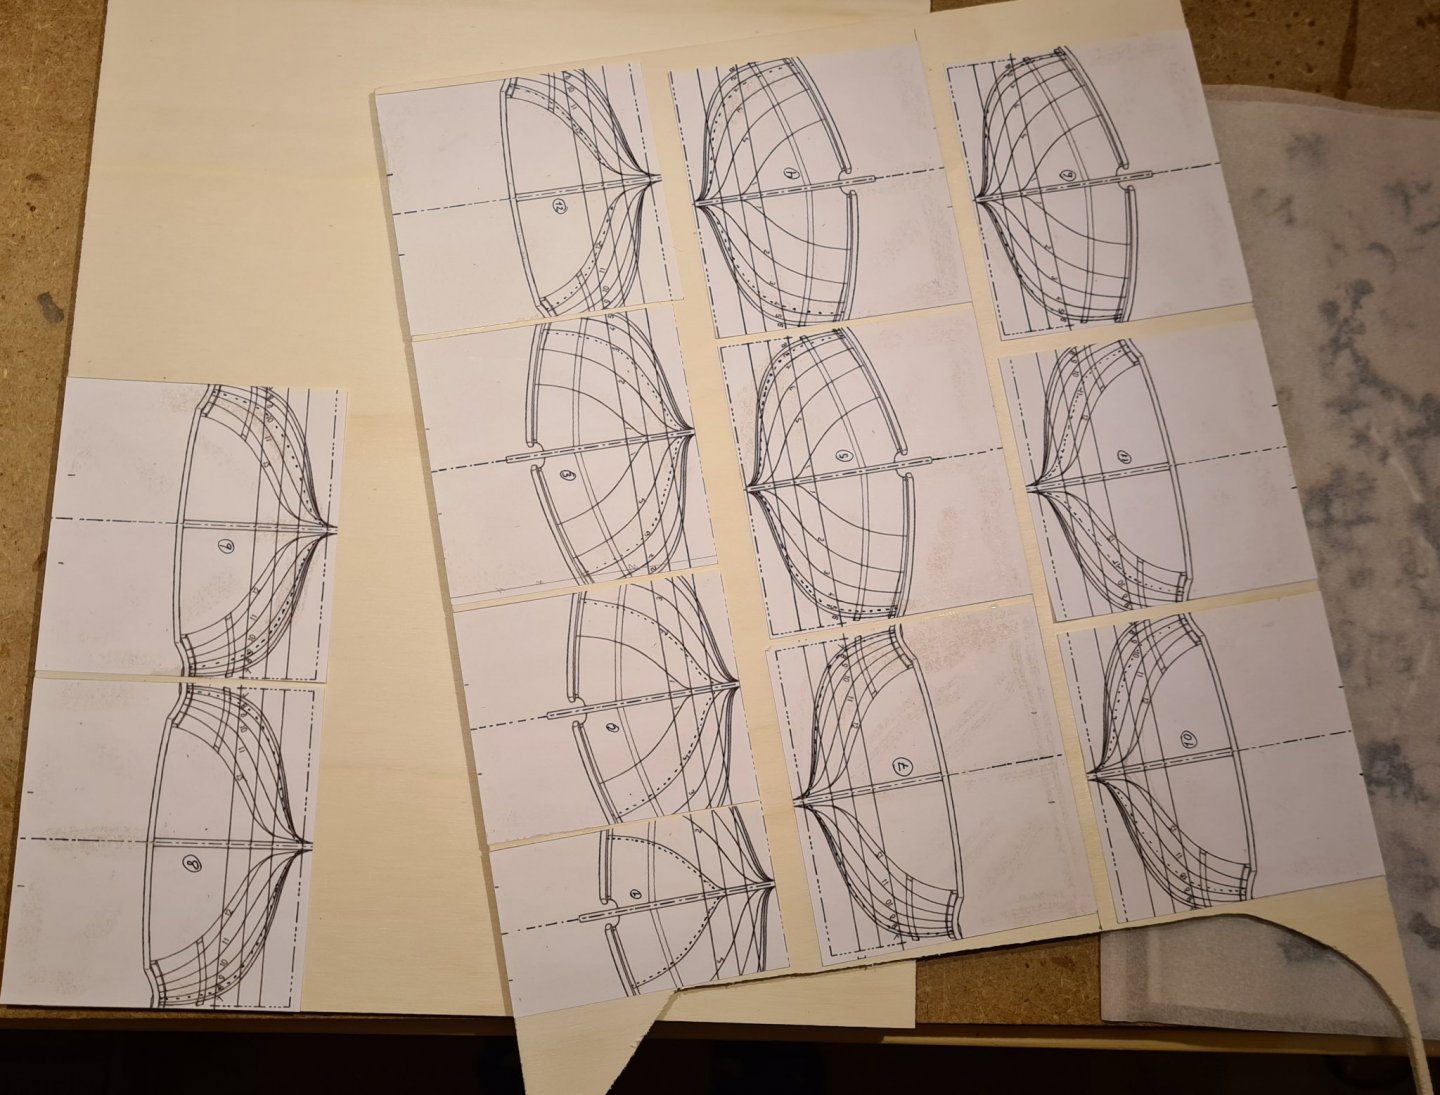
-
Now I have completed the things I can do on the underside of the boat. A sacrificial keel strip has been added together with a "deadwood" area under the stern. The next step will be to cut the fore and aft transoms above the glued section so that the boat can be removed from the plug.
- 31 replies
-
- 10
-
-
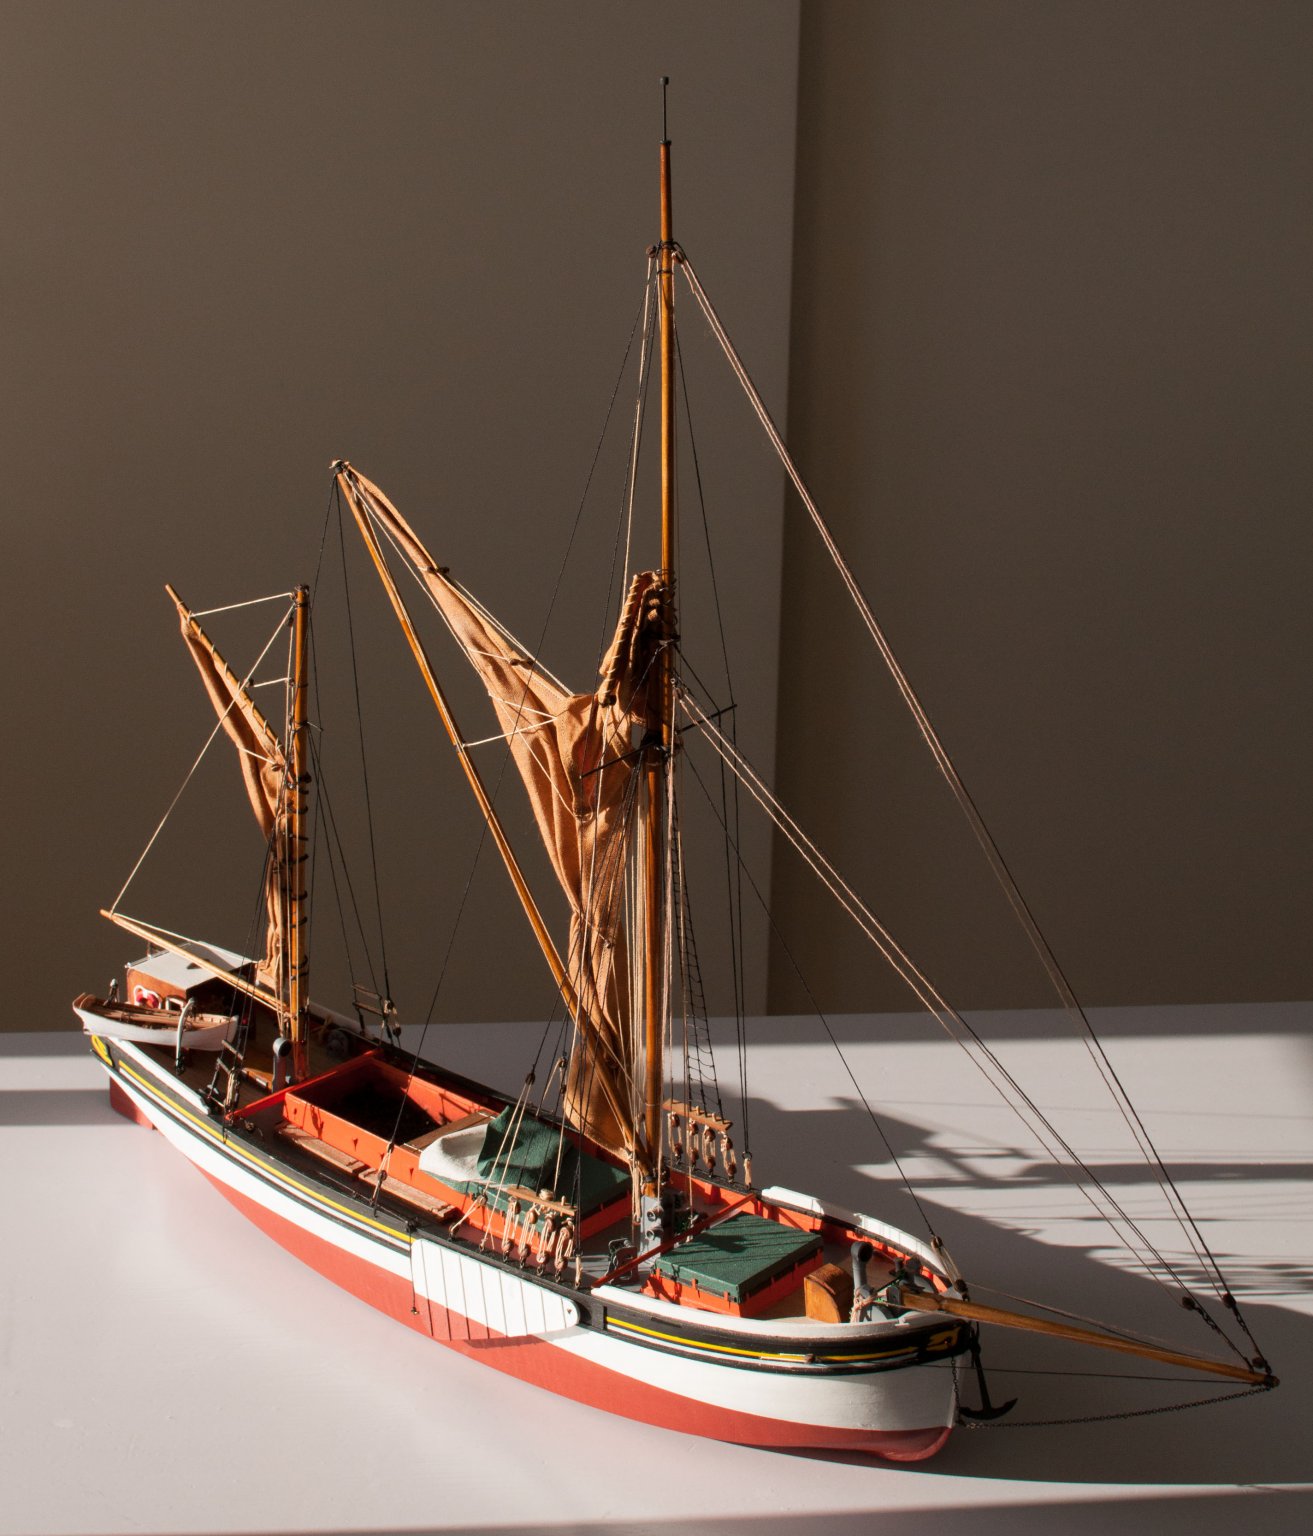
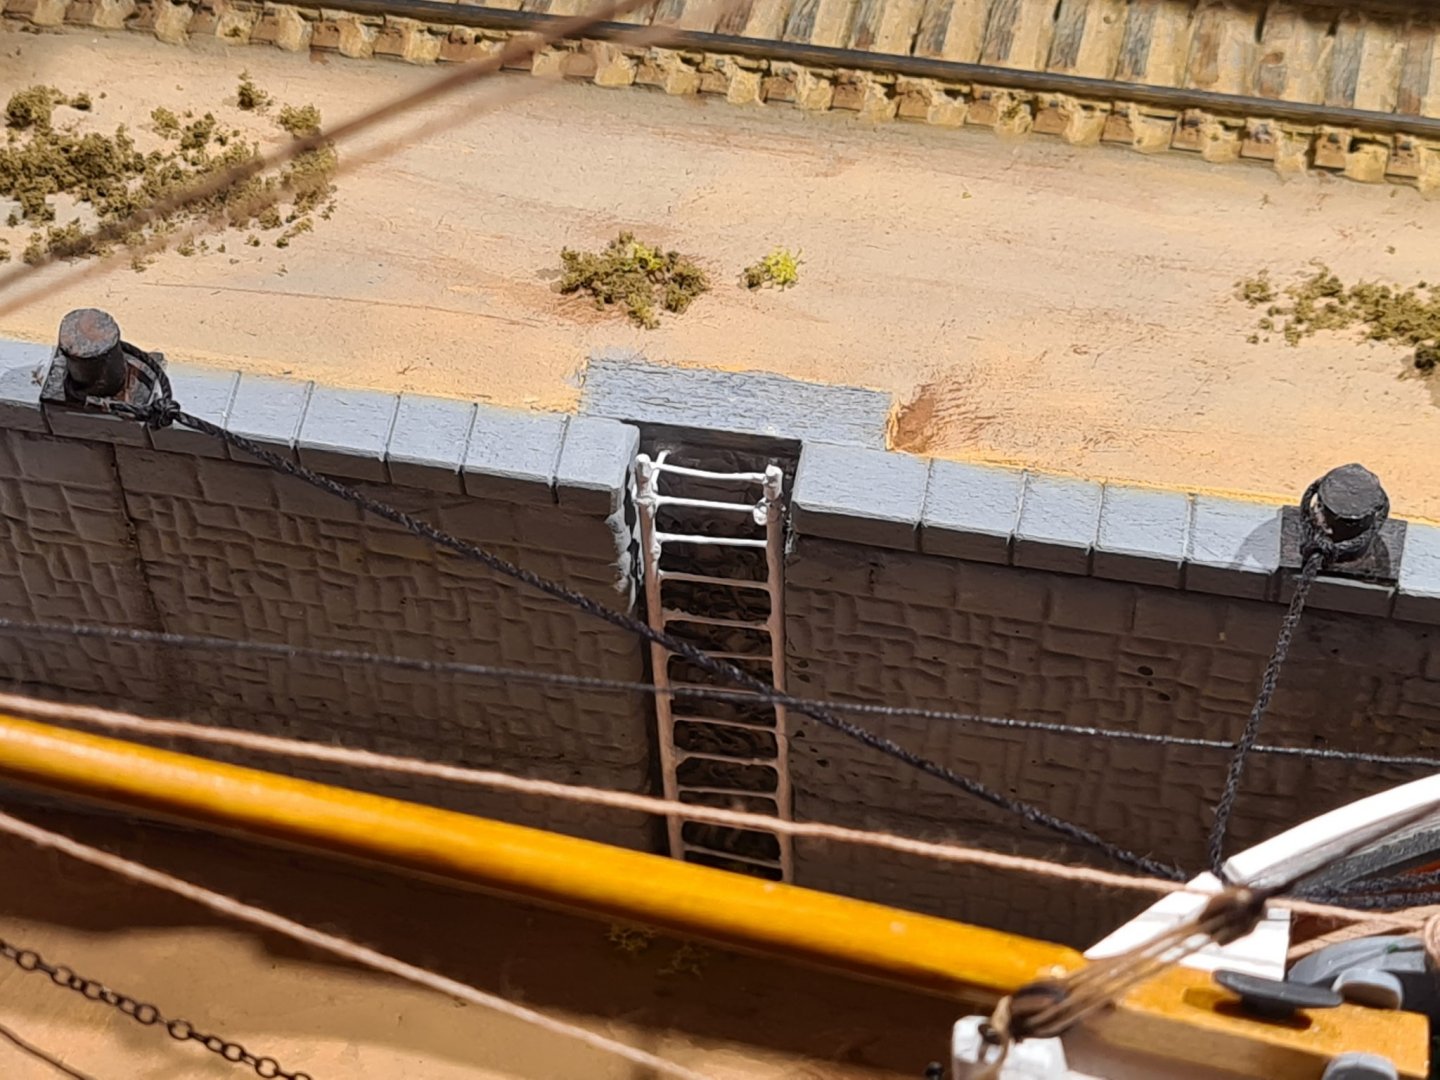
...and now the glue has dried. Here are the pictures: All in all I'm really happy with the result. The decision to add the quay may have made the build twice as long, but I feel that result was worth it. It also let me test out many new techniques, and also inspired me to try scratch builds for my next projects. The reward of seeing my own ideas come to fruition is sweet, even when they may not look as good as I first imagined. Cheers
- 83 replies
-
- 7
-
-
- finished
- billing boats
- (and 1 more)
-
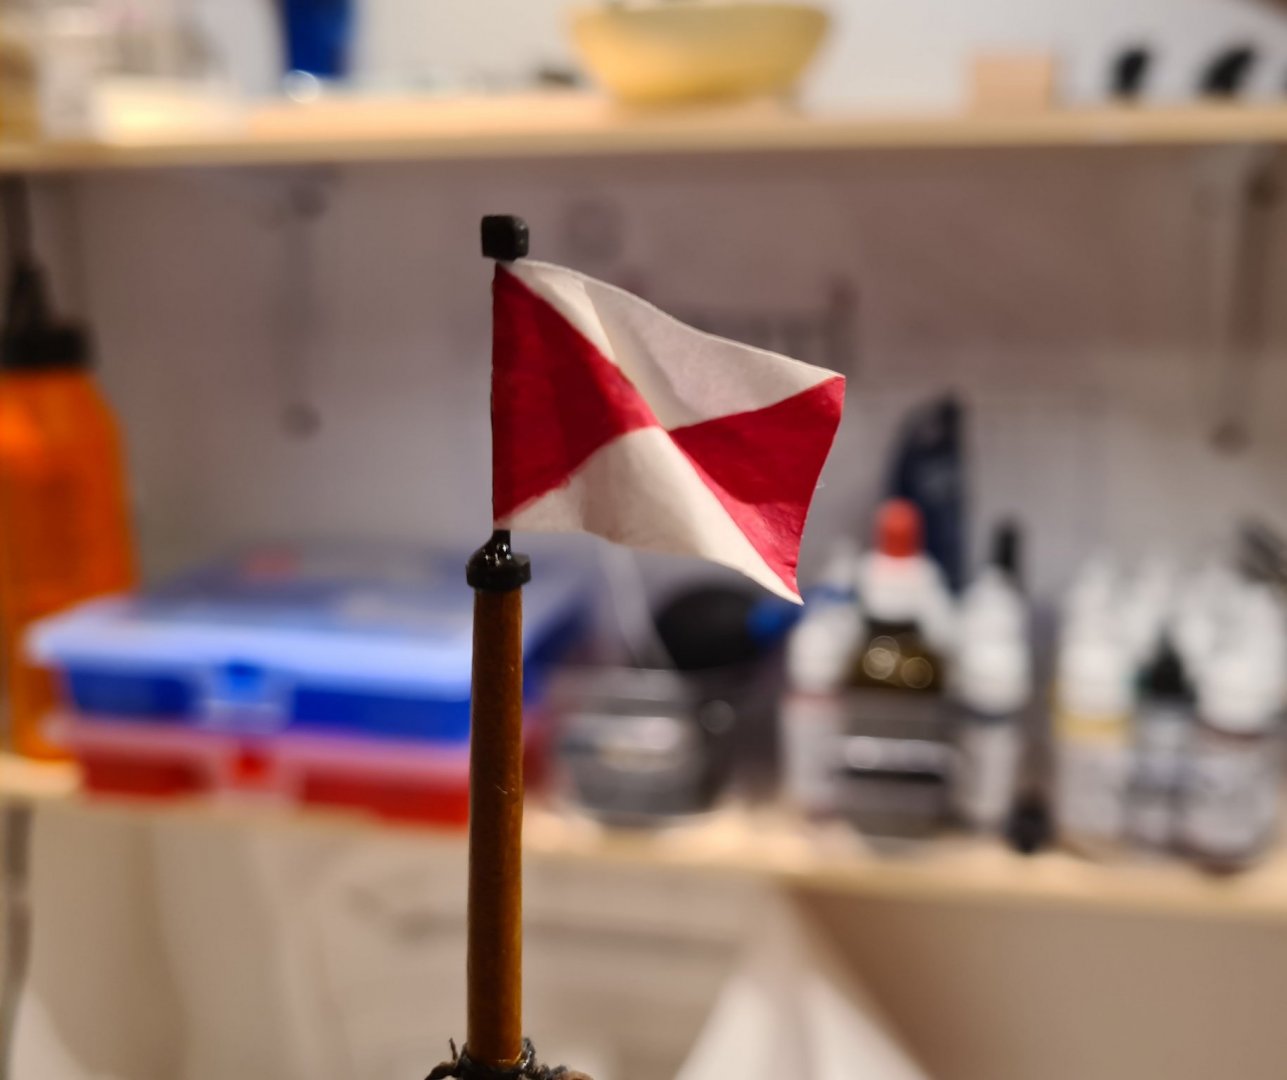
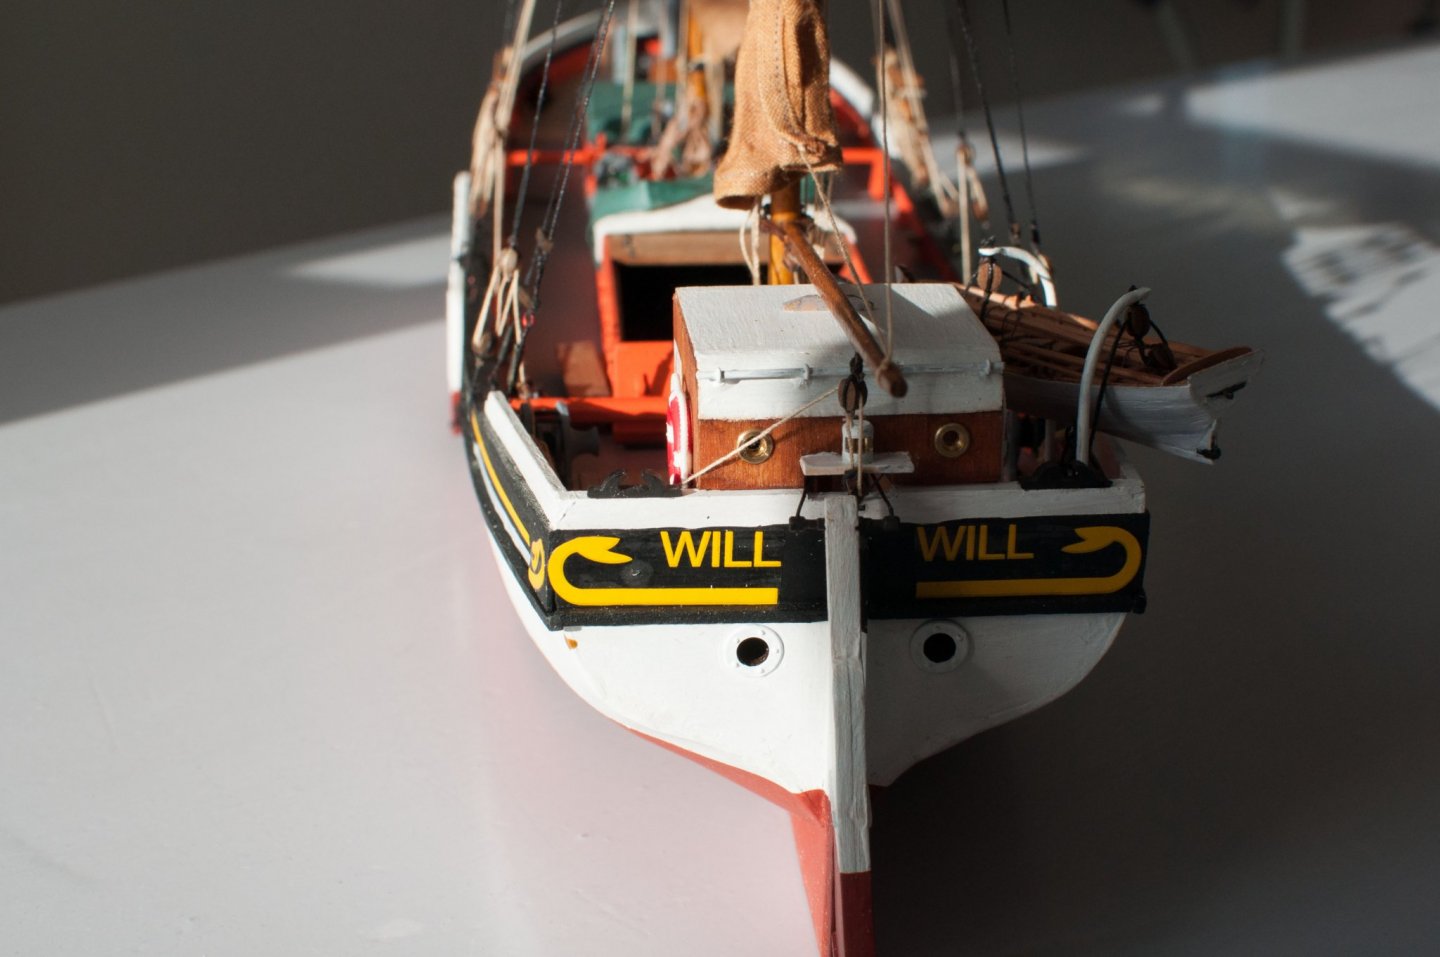
And the thread for mooring cables has finally arrived, so I can properly moor Will to the quay. and that means that I can raise the Everard pennant this is the last piece in the model! I will post picture of the final look as soon as the glue as dried.
- 83 replies
-
- 6
-
-
- finished
- billing boats
- (and 1 more)
-
Sloop from Roslagen by bolin - FINISHED - 1:50
bolin replied to bolin's topic in - Build logs for subjects built 1851 - 1900
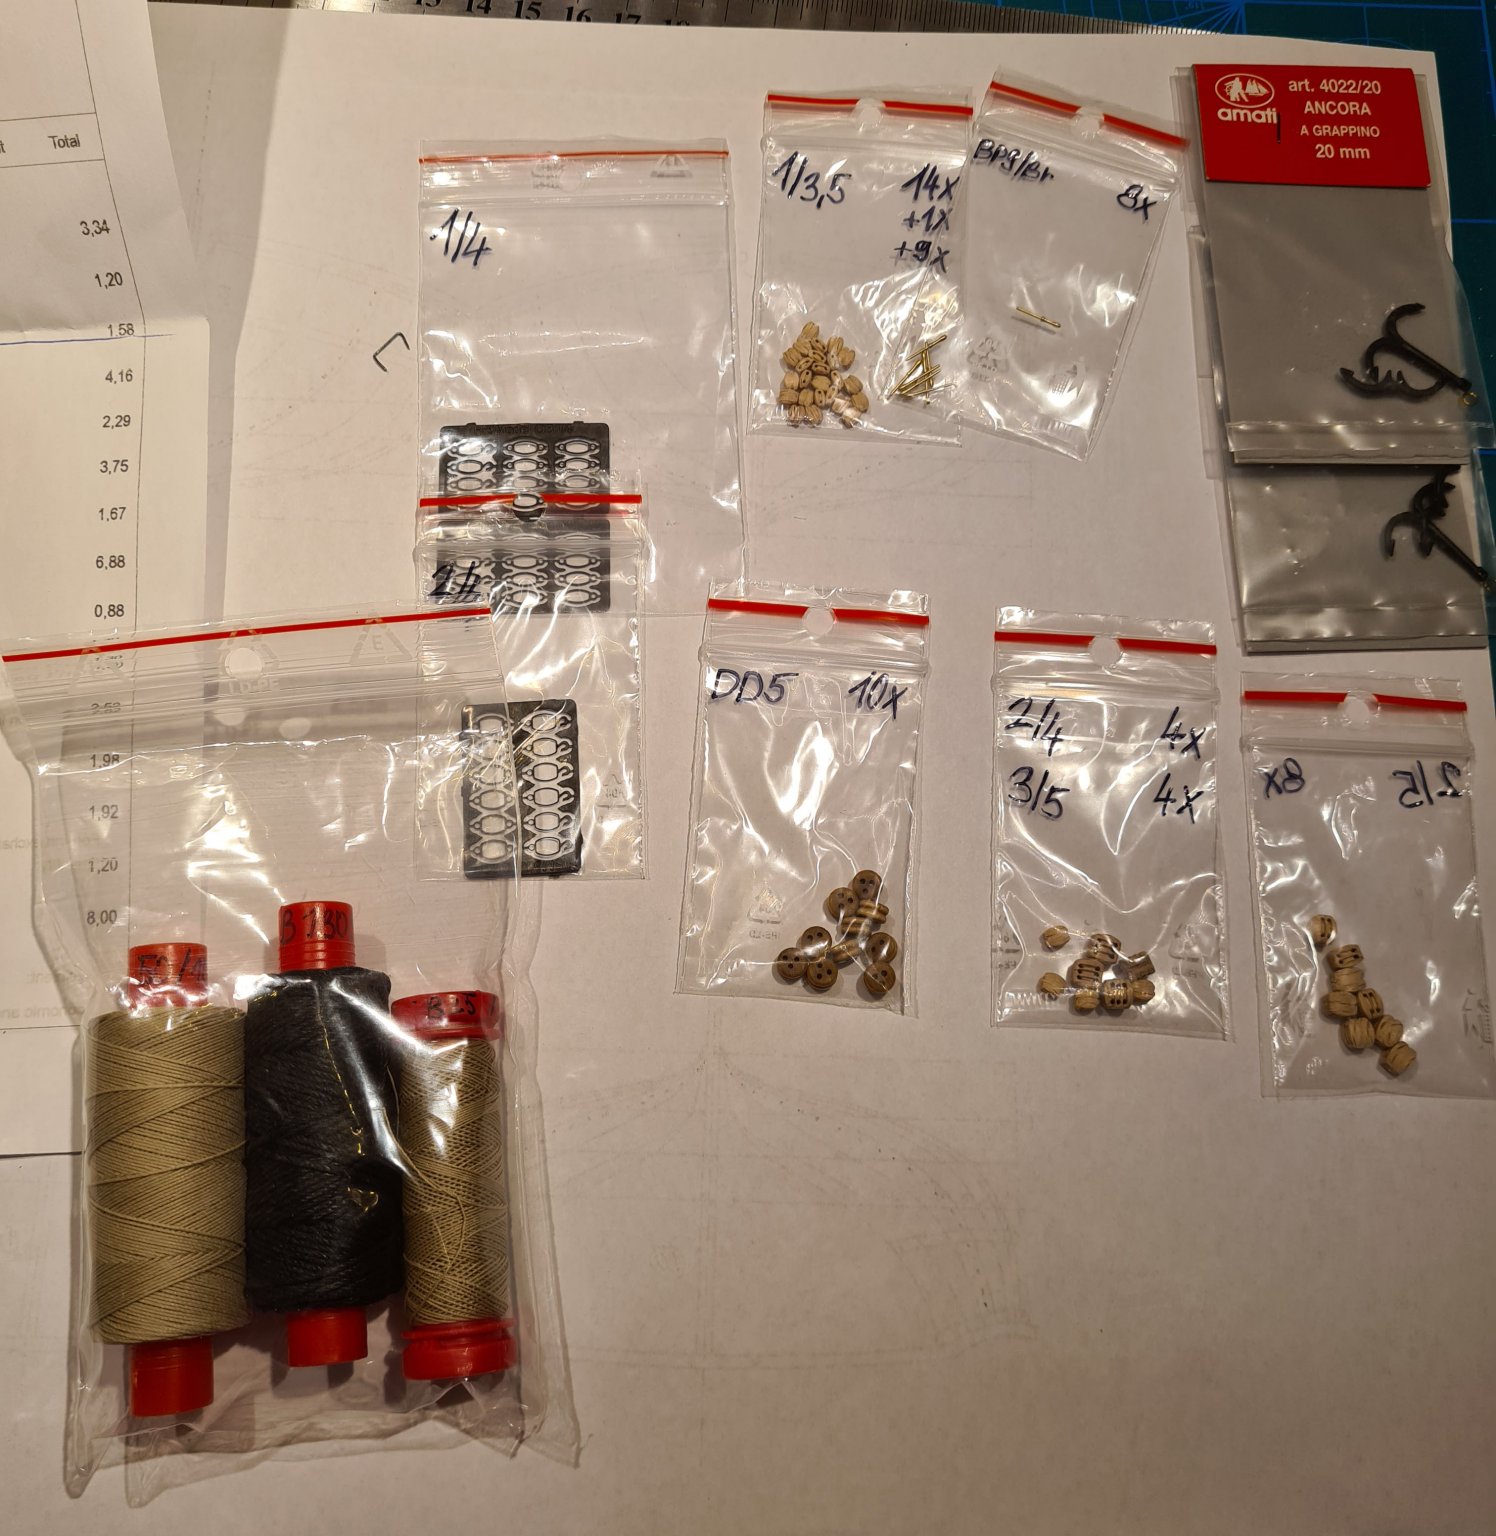
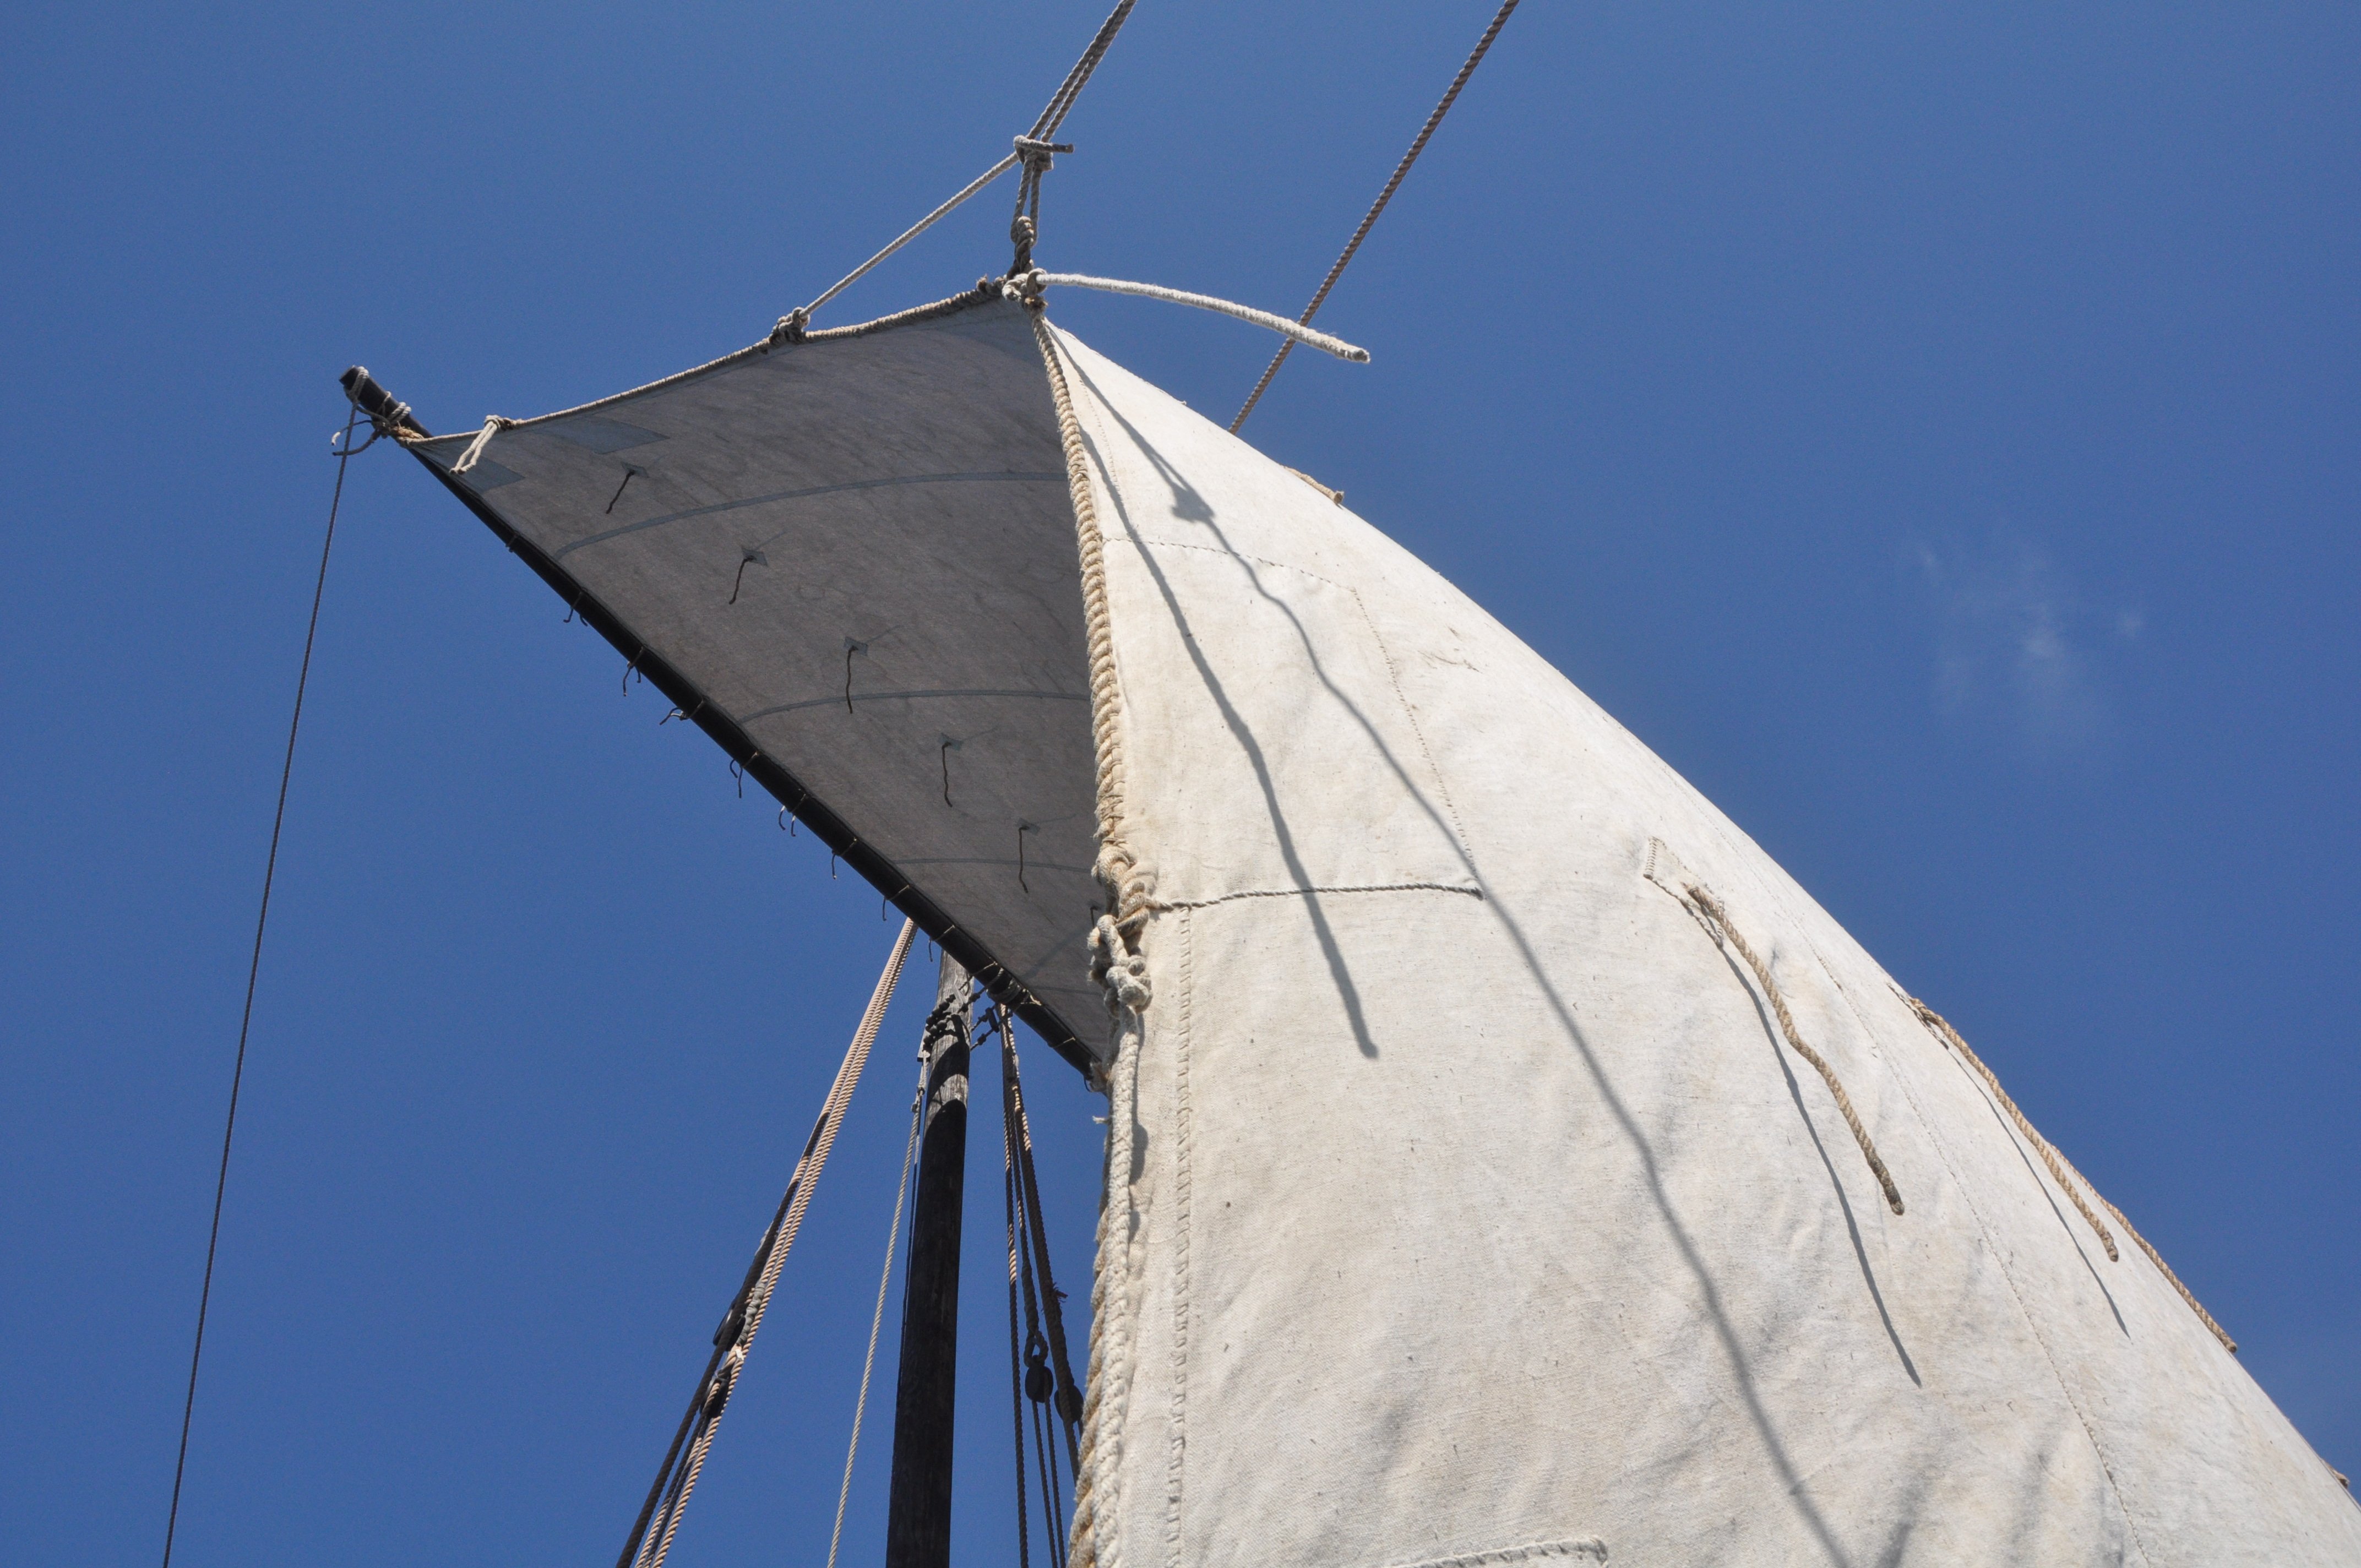
Per, you are very welcome to the show. Actually my last name is not Bolin😉. I picked it as a handle since its a ship term I'm familiar with, and can say know how to handle on a square rigged longship. My avatar picture shows a sail with a bolin set (or a bow line as the English term is). Today I received a small package from HiSModel (hismodel.com) in the Czech Republic with fittings to be used (very much) later in the build. I have earlier bought aftermarket blocks from Vanguard Models (I think Chris gets them from Russia), and those are good. What HiSModel offers are photo etched clamps with rings or hooks that fits the blocks. Regarding the quality it is not really fair to compare them as Vanguards blocks are pear wood while these are beech. My initial assessment is that these blocks looks more realistic, but that the quality is slightly less consistent than Vanguards blocks. In the package I also got some heavier black thread, which means that I can finalize my ongoing build of Will Everard. This may keep me away from this build for a few days...
-
Sloop from Roslagen by bolin - FINISHED - 1:50
bolin replied to bolin's topic in - Build logs for subjects built 1851 - 1900
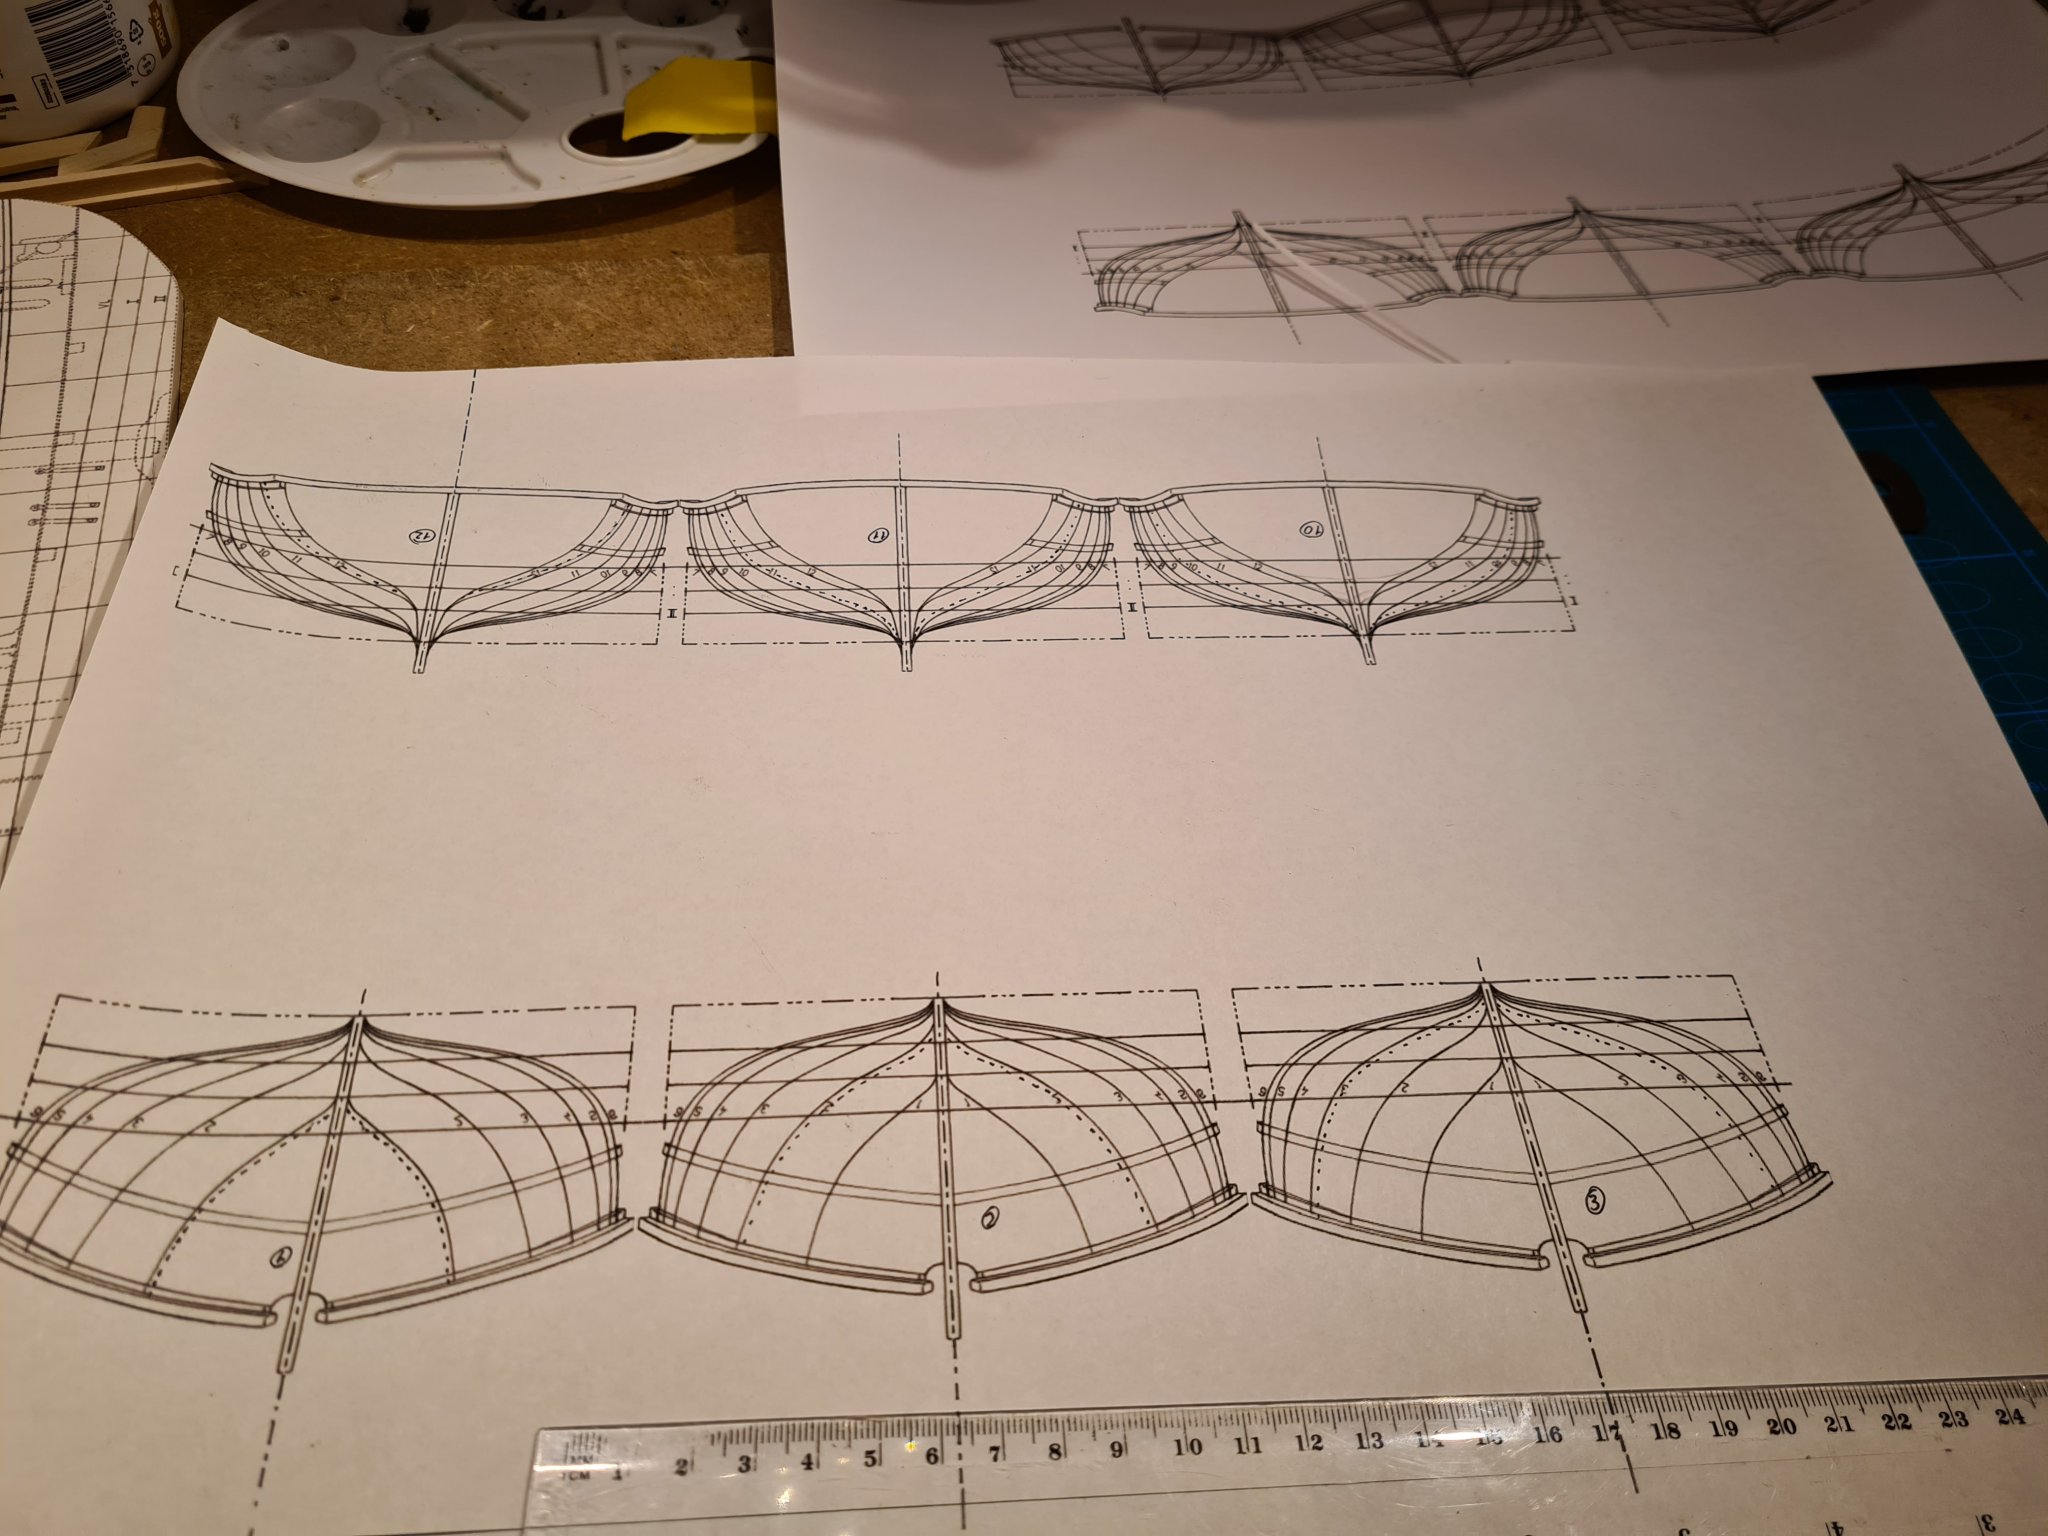
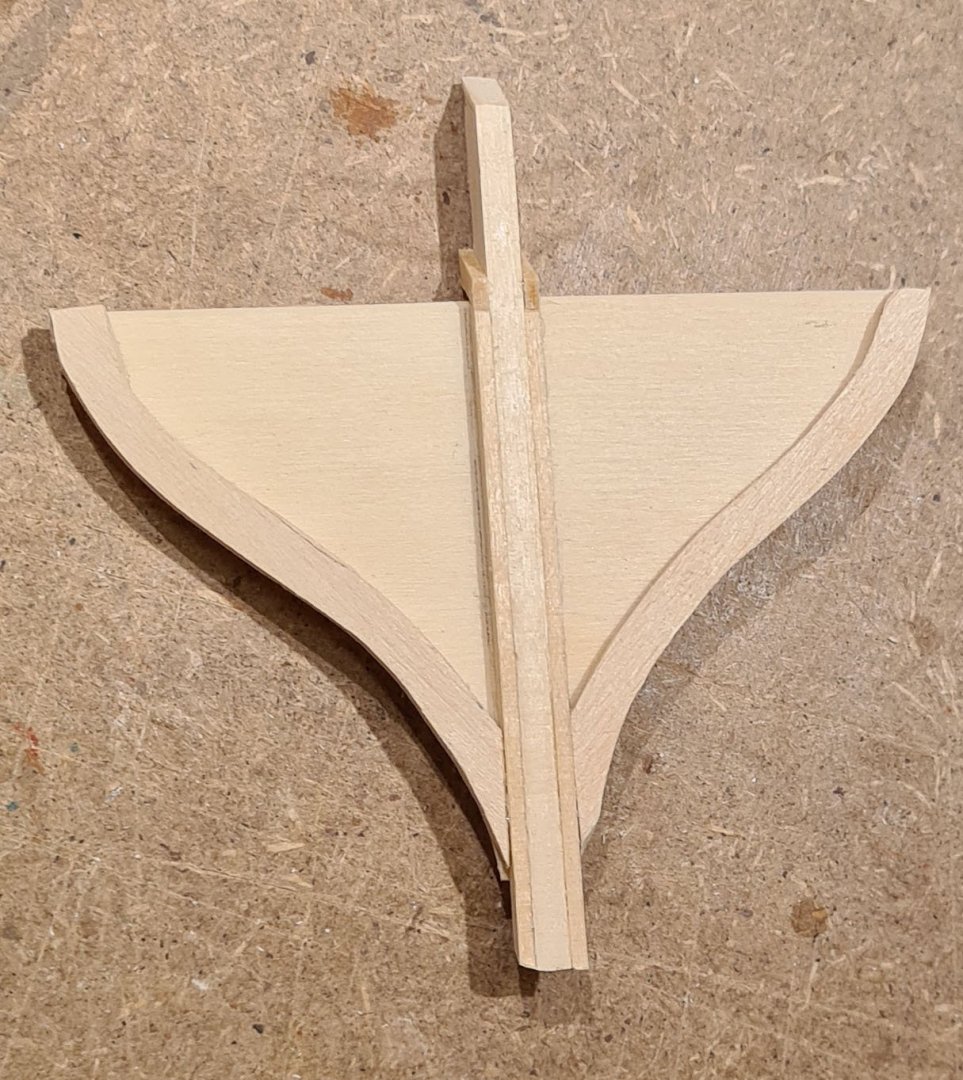
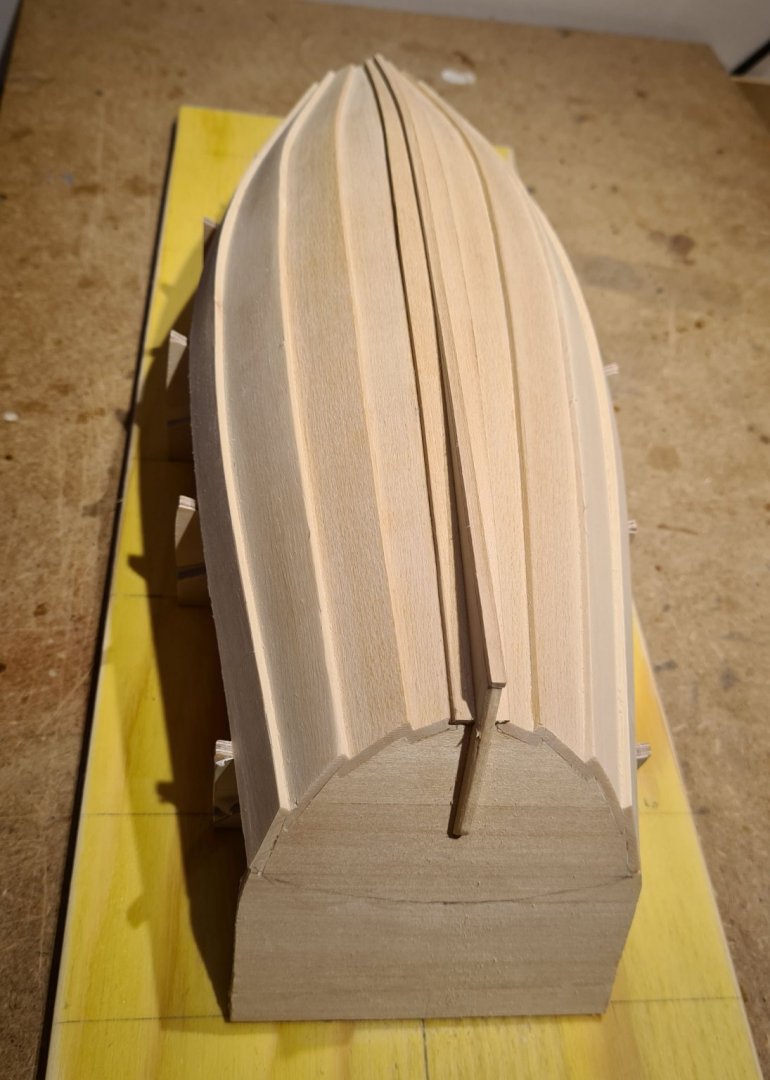
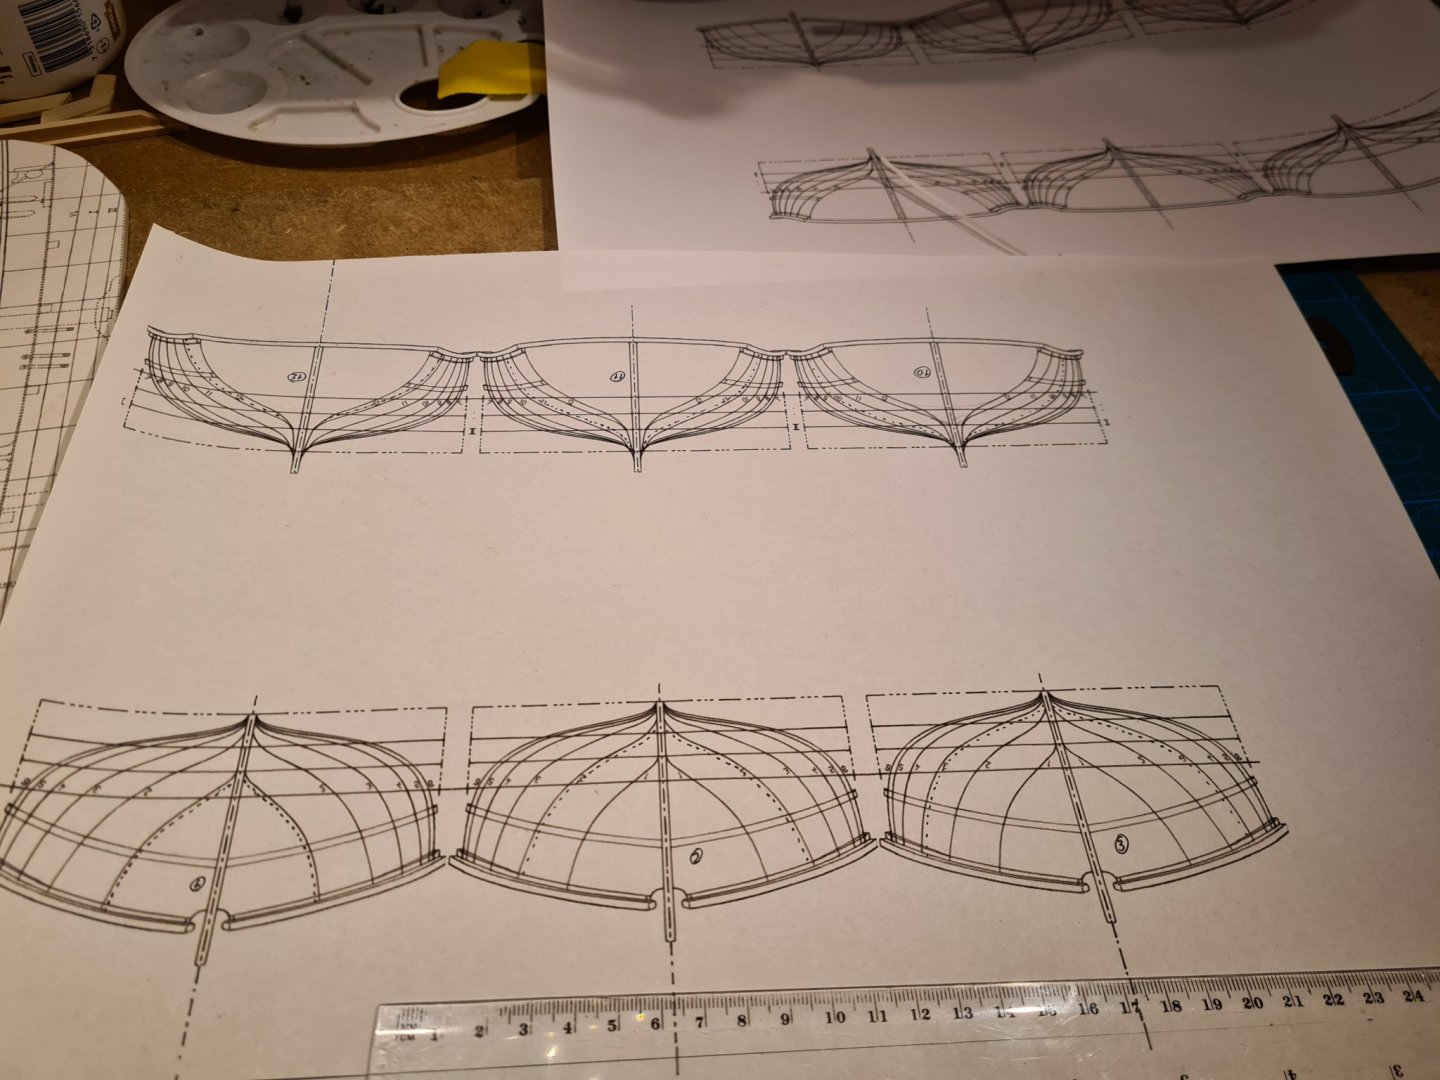
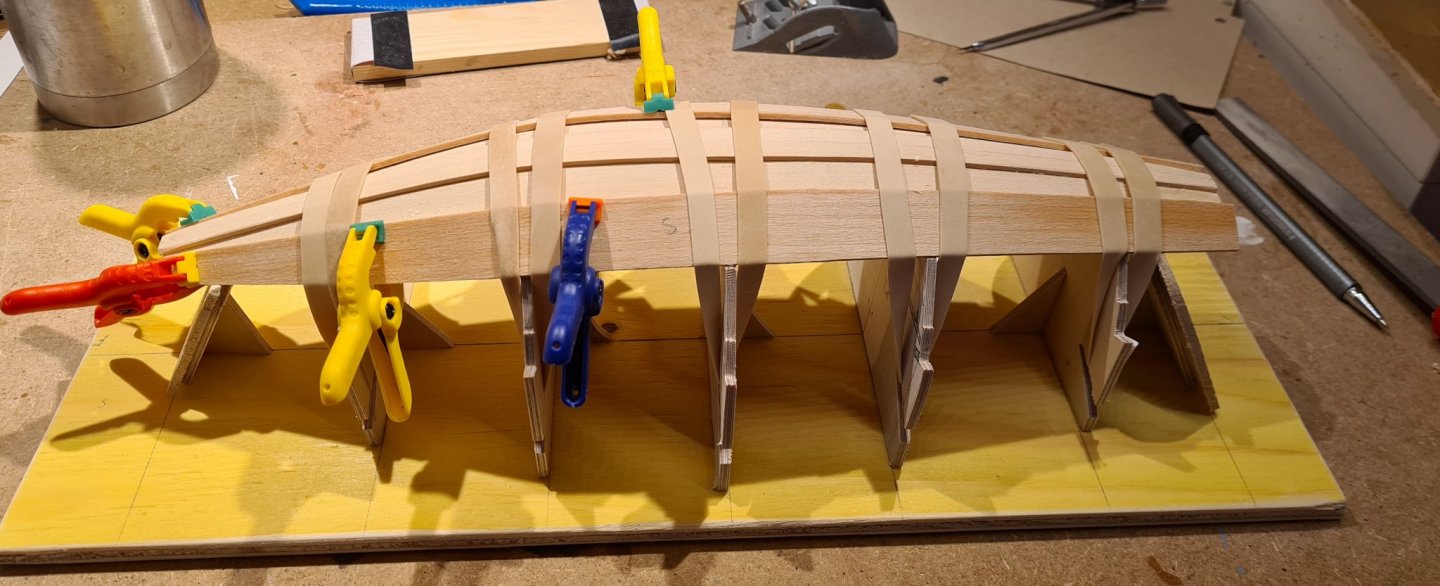
The initial shaping of the keel turned out quite well. Now I need to gradually change the angle of the "T" to a "Y" and more like an "I" towards the stem and stern so that the garboard plank has a flat surface. Before I start with that I want to make the frames for the plug to make sure I get the angles right at each station. I have started to draw a line 1 mm inside the hull line at each station so I have the correct size. The planking will be 1 mm so the plug must be reduced by that much.
-
Sloop from Roslagen by bolin - FINISHED - 1:50
bolin replied to bolin's topic in - Build logs for subjects built 1851 - 1900
You are both very welcome Tom and Vladimir. I do have some other clinker builds that I would like to try, and this will be a step in improving my skills. The wood i selected for this model is European Lime wood. That the color is rater similar to pine, which is the typical wood of the original ships, was one reason. It's also rather soft and easy to work with only hand tools. I have read that yellow cedar is an excellent wood for modelling, but I think its hard to get here in Europe. The keel is actually not lime wood, but Obechi. I needed a piece with 10 x 10 cross section to carve the keel, an the supplier only had Lime wood up to 8 x 8 mm. Obechi is also soft and easy to carve, and the color is very similar to Lime wood. -
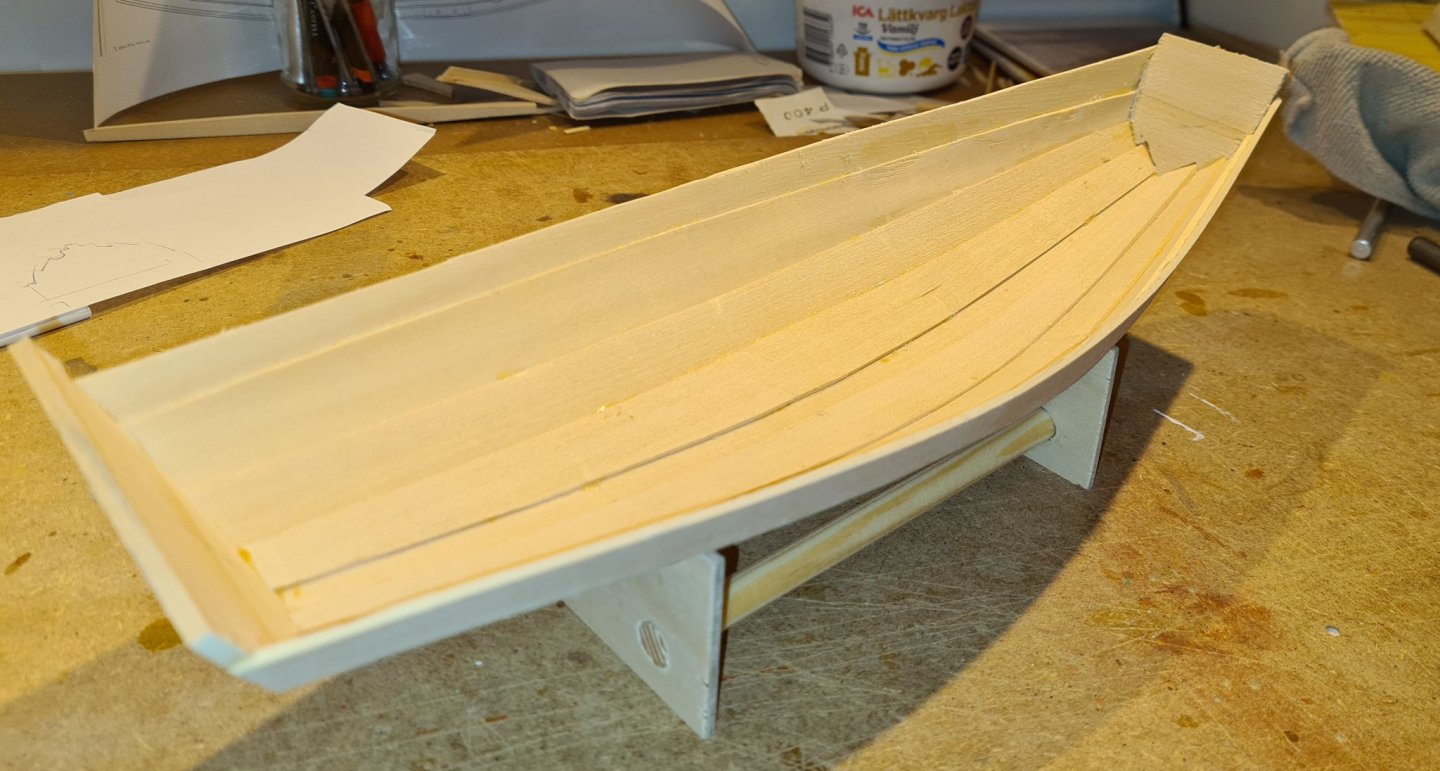
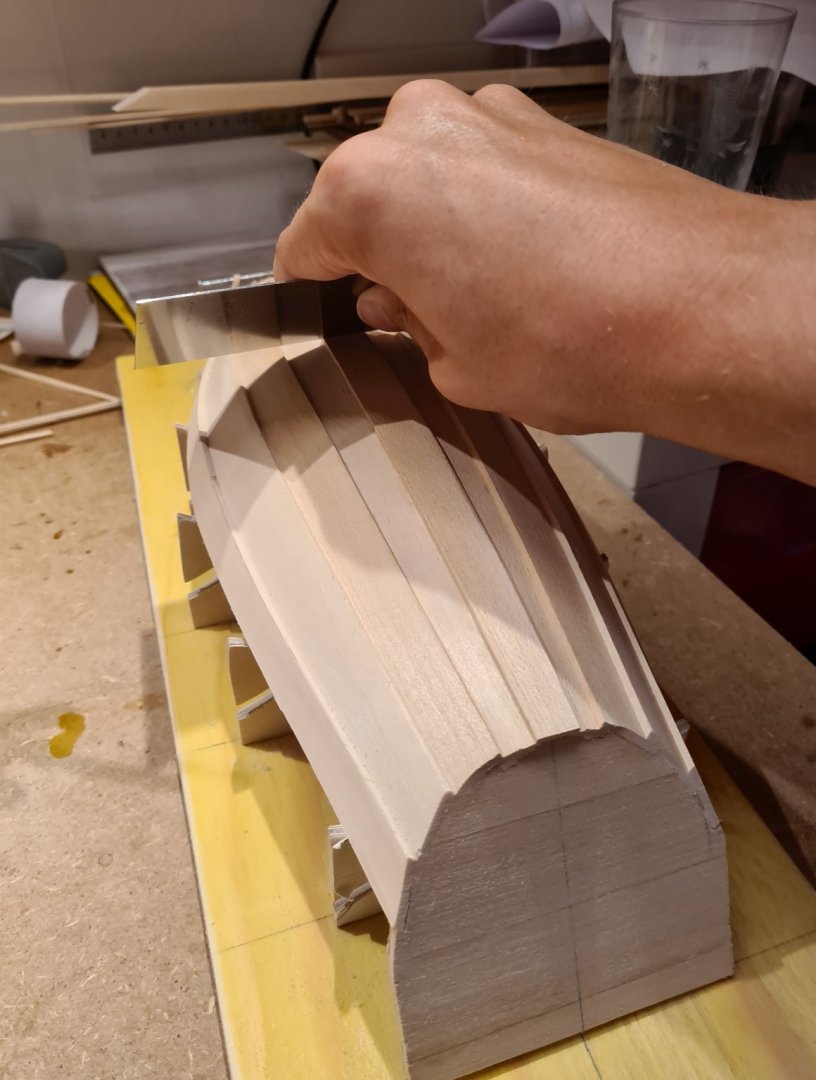
The last plank has been glued and I have cut away the excess in the stern. In the bow I discovered a gap and had to re-glue the foremost part of one of the planks. I have also started with the finishing of the underside. I have not decided on what type of treatment I want to give it. Probably just linseed oil. For that to look good the surface must be as smooth as possible. My experience is that lime wood (which I use in the model) get more of a satin finish when sanded. Therefore I opted for scraping. It seems to work OK, even where the fibers had raised up when the plank was soaked and bent.
-
Sloop from Roslagen by bolin - FINISHED - 1:50
bolin replied to bolin's topic in - Build logs for subjects built 1851 - 1900
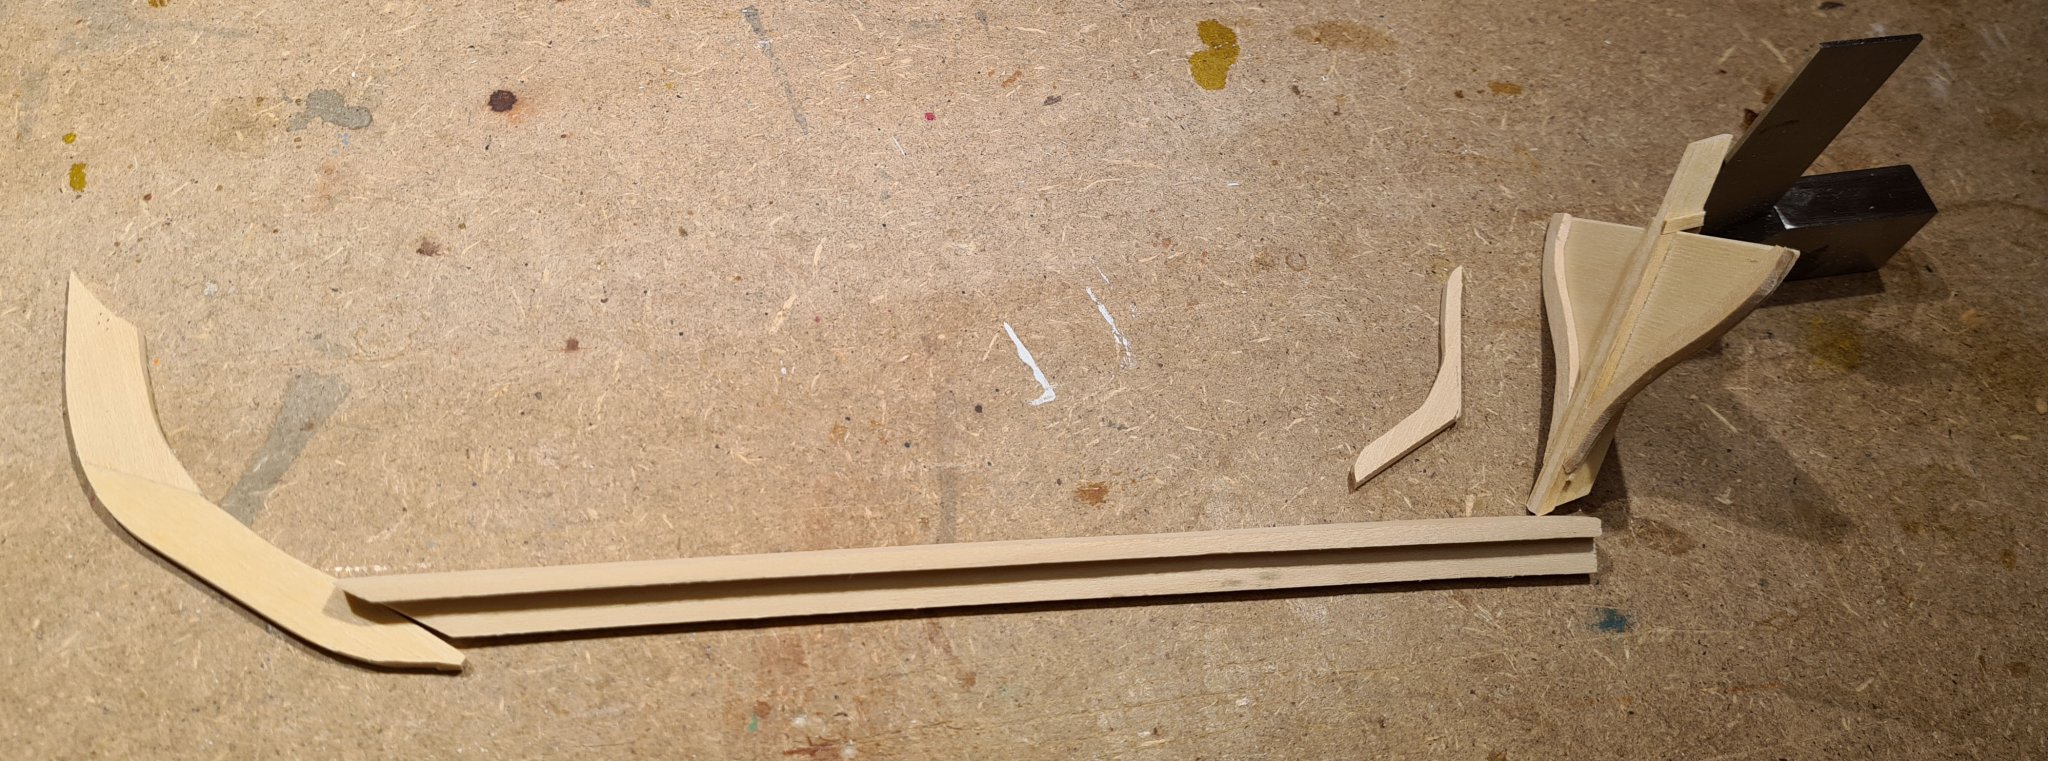
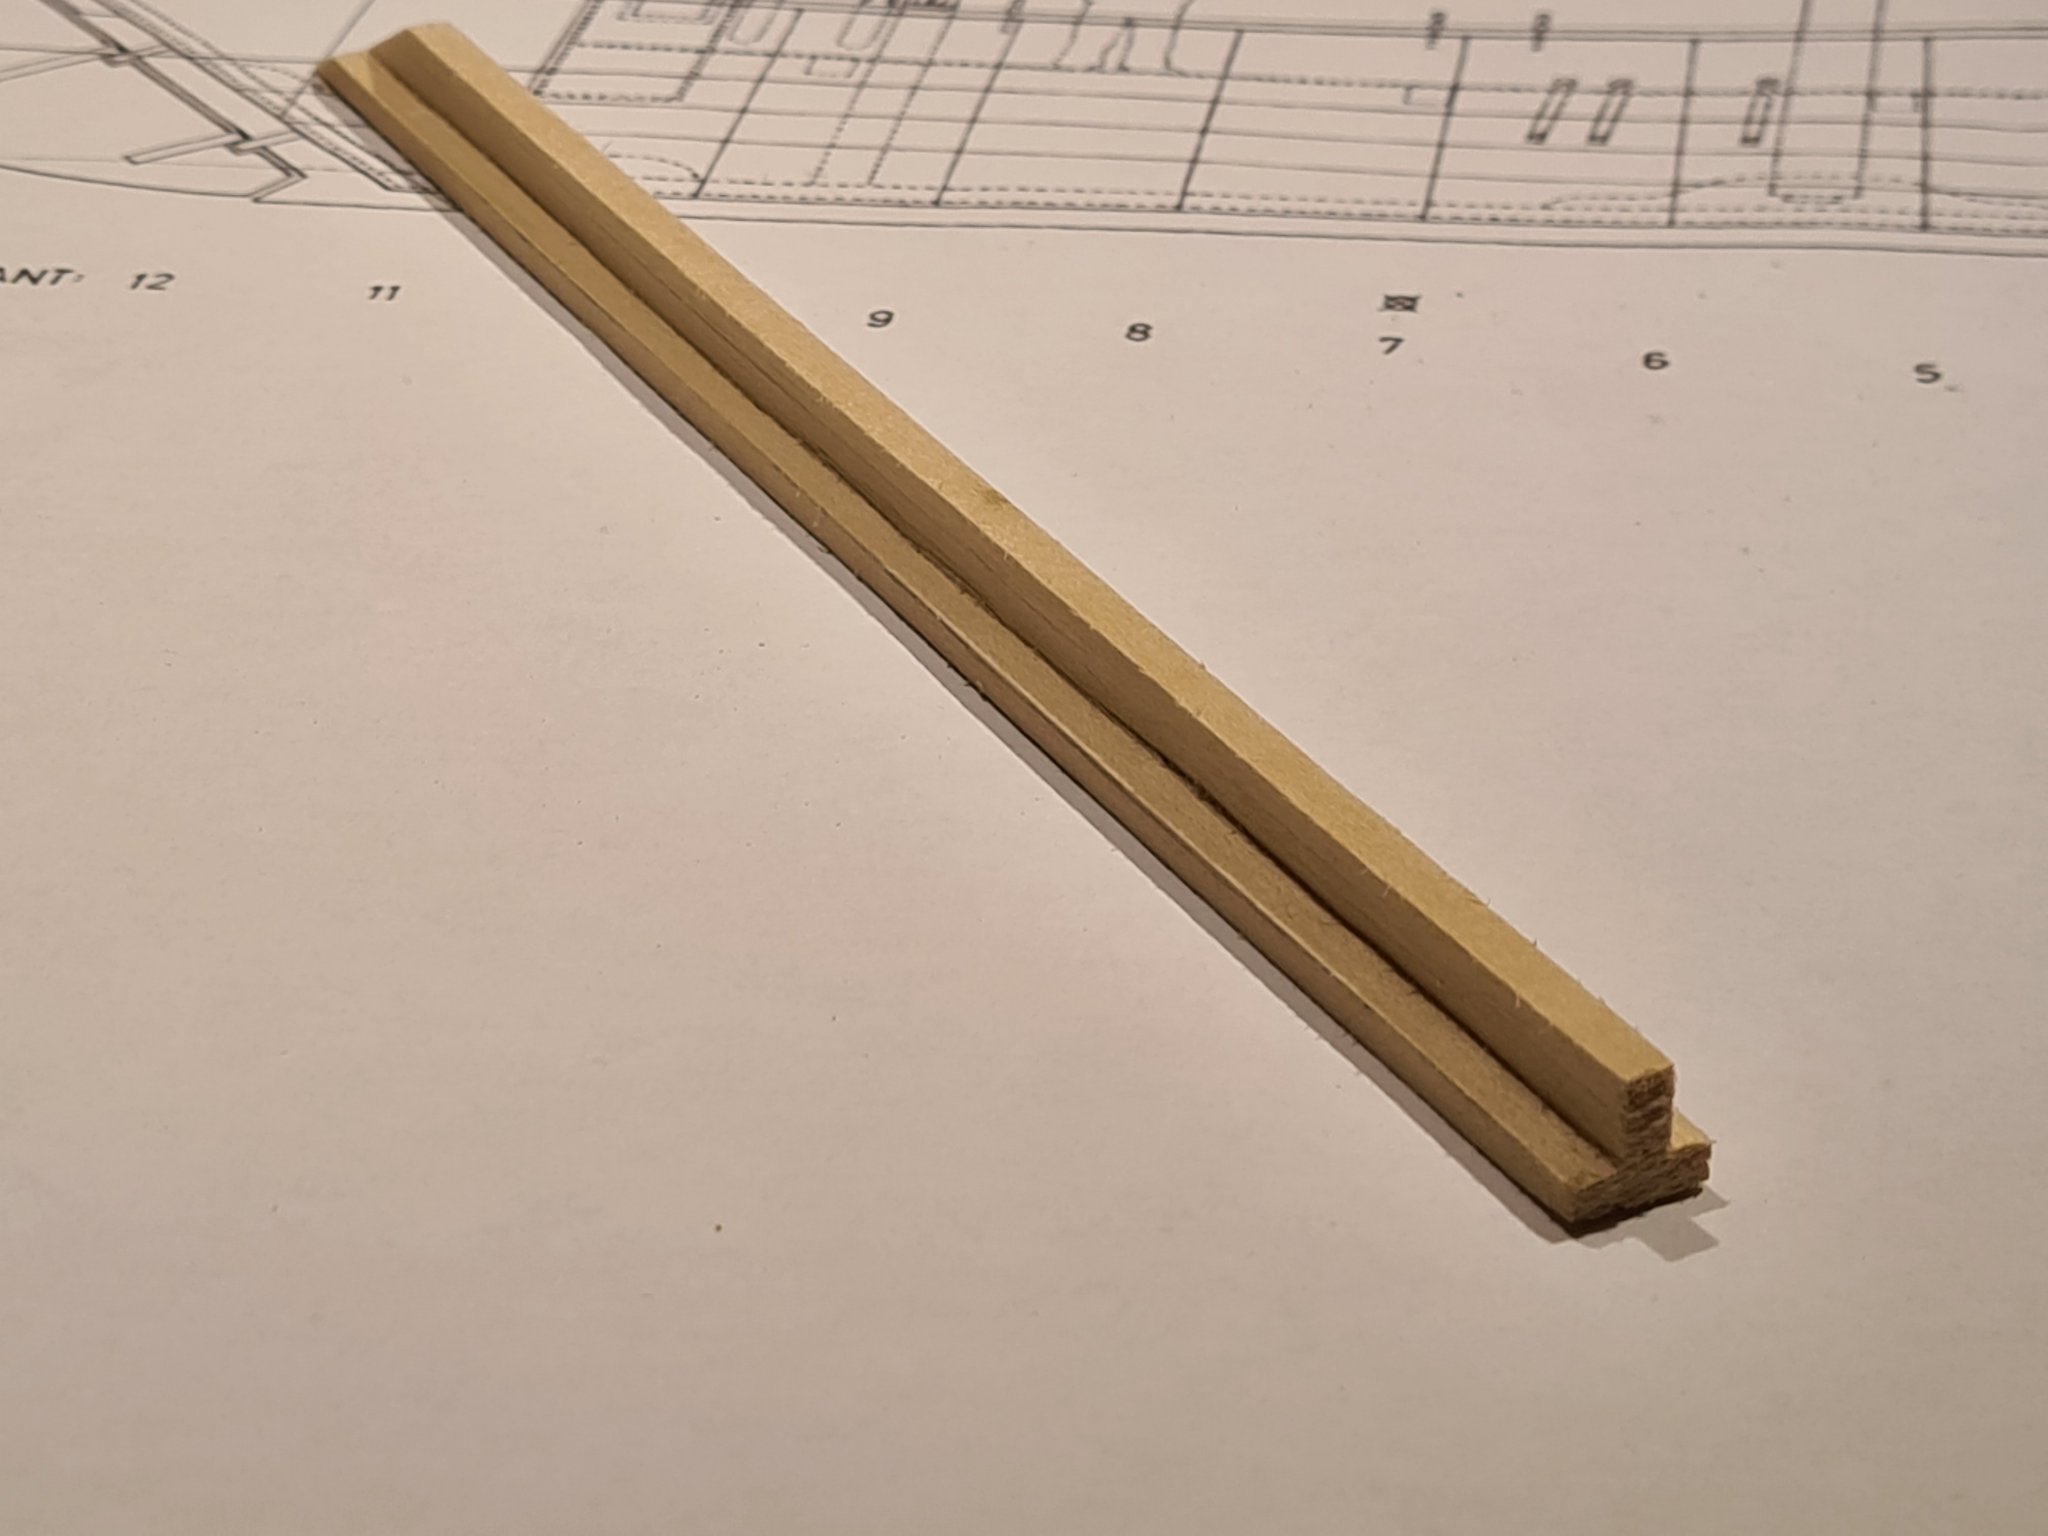
And today I started to make some sawdust for the model itself. I follow the advice in Harold Underhills book to cut the pieces that are going to be joined to larger assemblies (such as the stem) with extra material, and trim the assembly to its form rather than then the individual pieces. Regarding the placement and the type of joins in the stem and for the stern the plans I'm working from does not provide any information. I did find the drawings for a reconstruction of a similar ship in the collections of the Maritime history museum in Stockholm and put the joins in the same places. The keel should have a "T" cross section. I will try to carve it from a square piece. As I don't have a milling machine, and no special planes for this type of work, I will try to do it with a scalpel and a chisel. I do have material for three more tries if the first one does not turn out to well...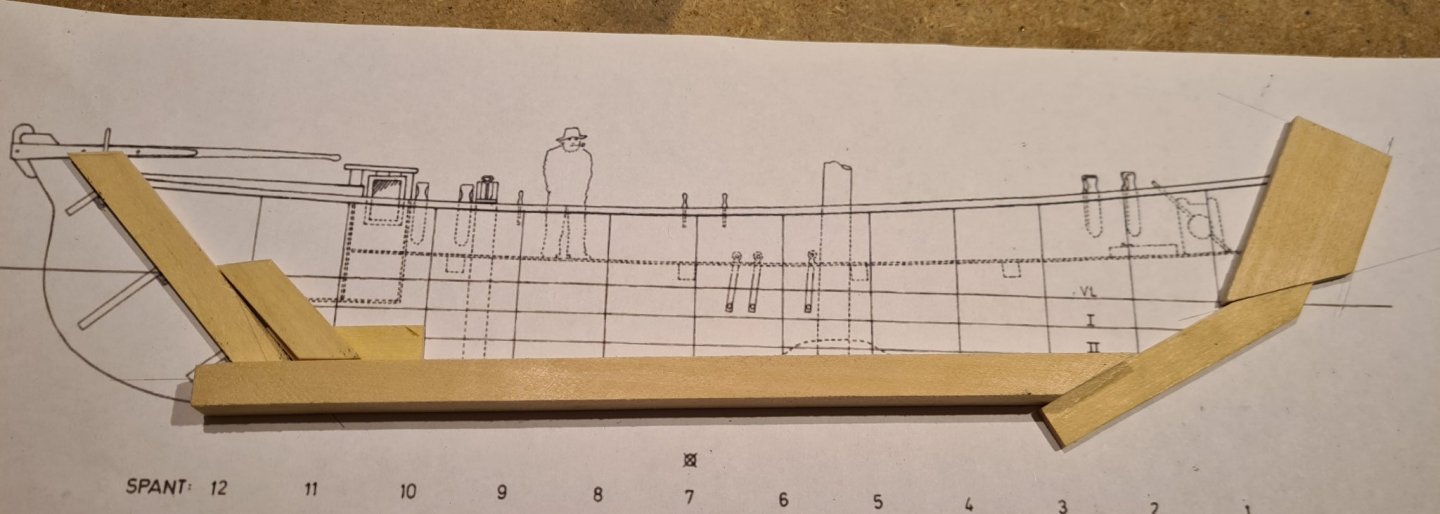

-
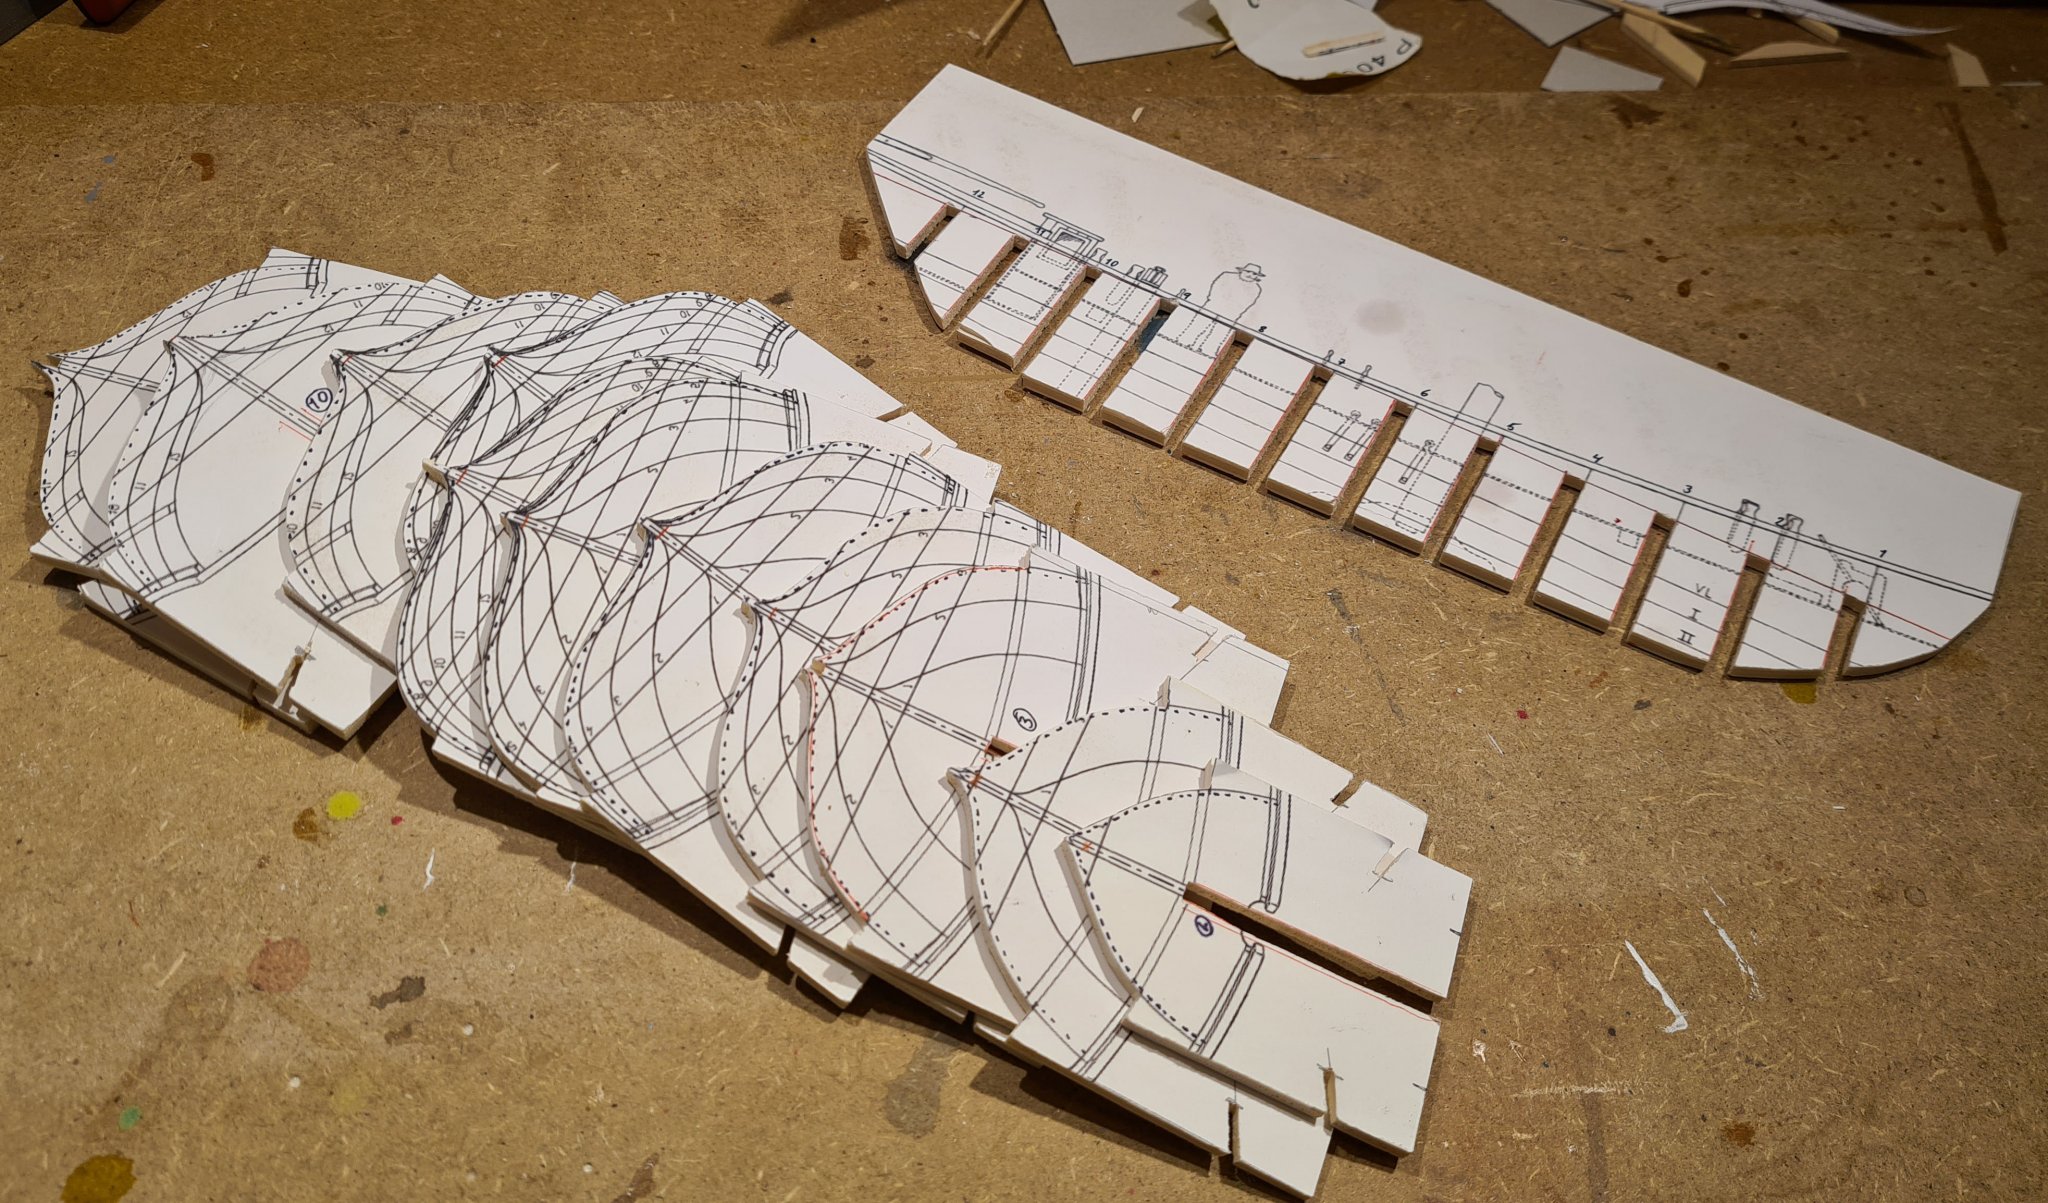
Today I made the first cut for a model I have been planning an researching for a while. This will be a typical sloop from Roslagen (an area in the Stockholm archipelago and the coast north of it). Once, such sloops where a common sight along the quays of Stockholm, but from around 1920 they started to disappear quickly. They where typical working boats and where usually not built on a shipyard. Instead they where built by the fisherman/framers on the islands of the archipelago. Maybe with the help of a master ship builder that was hired to help with the critical laying of the keel and forming the strakes and fitting the frames. Then the builder/owner used the ship for his own needs, and for transporting goods to the growing city Stockholm. The hulls where (with few exceptions) clinker built using traditional methods following principles that goes back to the viking age and beyond. Looking at the hulls they in many ways resembles enlarged open boats. And it seems to be the way that they had evolved. For the inhabitants of the archipelago there was a need for different sized boats for different tasks. So the same shape was more or less reused in different sizes. This model will be of a "Storbåt" (= great boat) or "Sandkil" as it was also known. The later name is derived from "transporting sand" and became the most common name as they where used for that during the late 19th century when Stockholm was growing rapidly and many houses where built. There where also larger variants, such as the "Vedjakt" (firewood yacht) that specialized in transporting firewood. My model will be based on a plan from the Eskader (eskader.se) hobby shop in Stockholm. The plan is, as far as I can tell, not based on any specific ship, but is a generalization of the type. It does resemble the following drawing quite a bit, so I think that that has been the primary source. The drawing above is from the collections of the Maritime history museum i Stockholm. The text under the title says that it is based on measurements of a real ship. However it does not say which one and when it was done. I do suspect that it was made somewhere between 1930 and 1950, while there where still some ships left to make measurements of. In the 1970s it was believed that none had survived. But then in the 1980s a hull that had been converted to a houseboat was discovered and renovated. I will use the photos from that renovation (which are available at Maritime history museum) to fill in some of the details that are missing in the plans from Eskader. What I miss most from the plans is any indication of the shape and position of the frames. My plan is to build the model as a traditional clinker built boat, shell first, upside down over a plug. The frames will be installed after the shell is complete, so I have some time to continue my research of where they should be placed. The first step will be to cut out the centerpiece of the plug, and then use that as a guide when building the keel. This is an approach that I picked up in Wintergreens log of Kågen. Cheers
.jpg.cd54a7cfef4108ce8d739b90836f2505.jpg)
-
With my other ongoing build coming to a close very soon, I turn my attention back to this build. The second plank was glued a few days ago. When I was gluing one of the planks I was so focused on not getting any glue to the frames so I forgot to glue it to the fore and aft transoms. Thankfully there was enough of a gap so that I could press some glue into the join afterwards. It seems to be holding. The third plank was fitted. I have become better at this with practice. It went much quicker and the fit is better. This is very good, as one of the primary reasons for completing this build is to get practice in building a scratch built clinker hull. My next planned build will contain much more of that... In the picture below the third plank has been formed to shape after soaking in hot water. My understanding is that it is primarily the heat that makes the wood easier to bend, not the water. So soaking for a long time does not add anything. I pour boiling water in a thermos and soak the strips in that for a minute or two. The third plank is from a different sheet than the one provided in the course. This one I bought from Elde Modelbau in Germany. Good quality, but slightly different that the original wood. Cheers

-
Välkommen till MSW! As has already been mentioned it is a really interesting subject you have chosen. Several unusual features in the construction of the find, such as the thin keel, frames that are wider in the top, and the bipod mast. This will certainly be interesting to follow! Is there any information available on the net of the find?
-
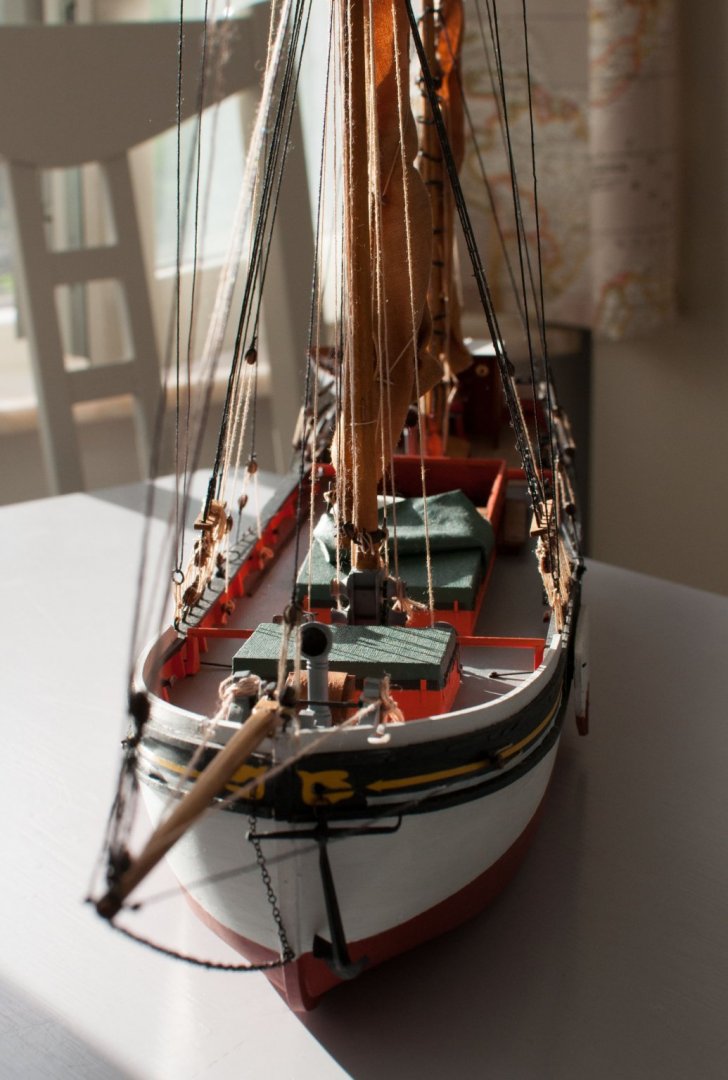
Yesterday the ship itself was completed (except for the Everard company pendant...) Now I can focus on finishing the quay, and after that decide how to display the diorama. Some pictures (taken with my Nikon rather than the phone).


- 83 replies
-
- 8
-
-
- finished
- billing boats
- (and 1 more)
-
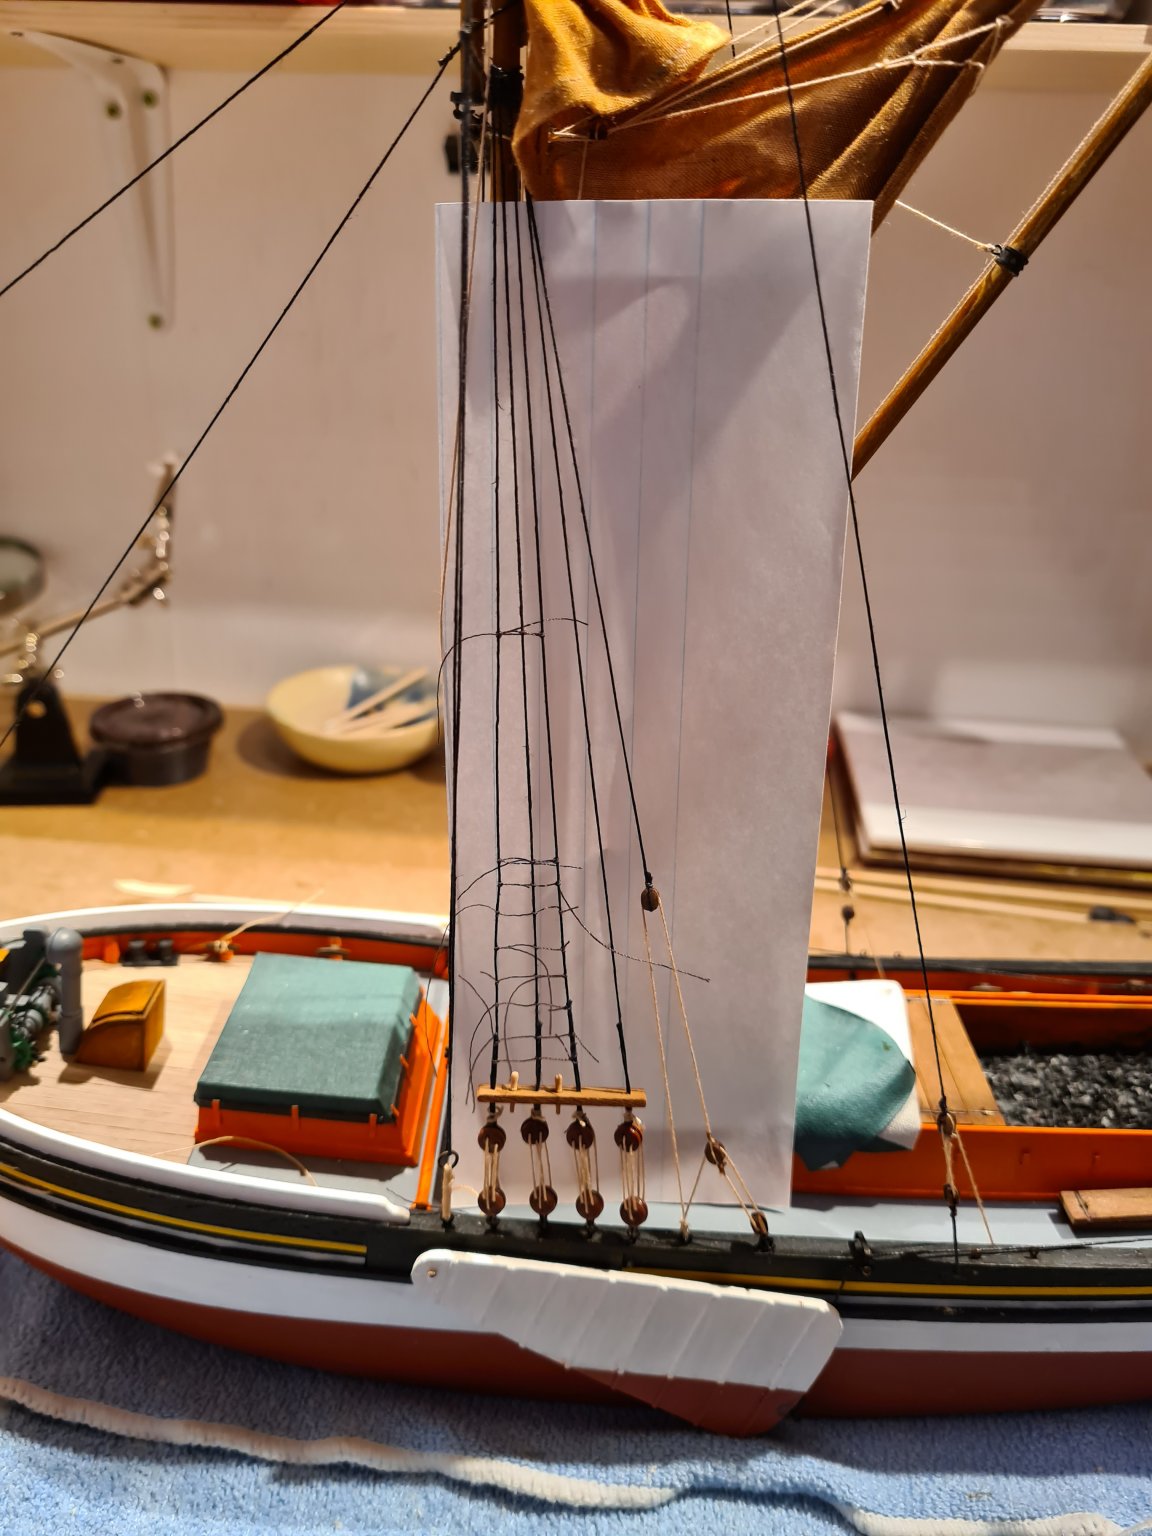
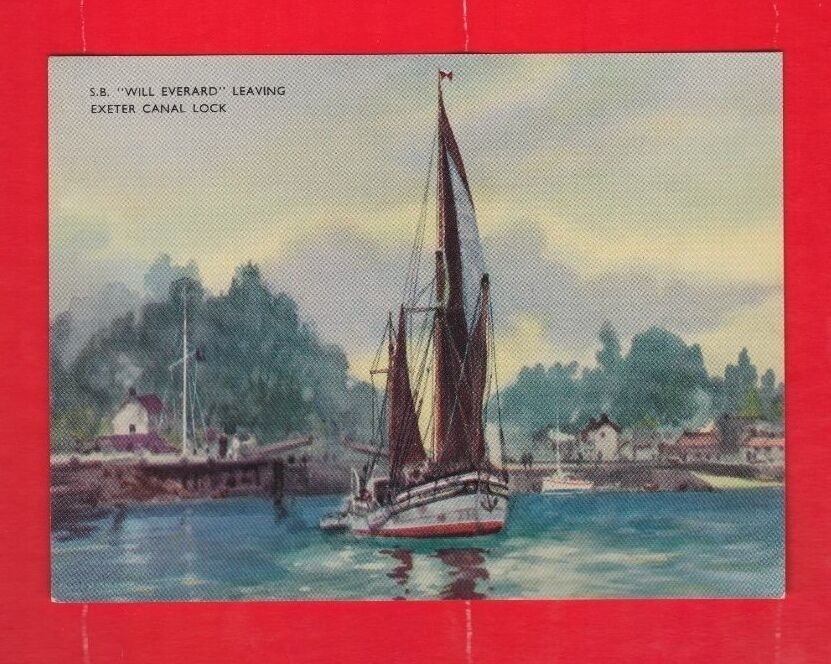
The boat is now complete. Before I mount it on the davits I will paint the outside of the hull. For one thing I could have made a better job planking it, but I also think that the original boat was white. I have not been able to wind to many pictures of it, but this postcard shows a white boat behind Will. I'm also come to the final parts of rigging the main mast, the ratlines. Thankfully there are only ratlines on one side, the side where the topsail is rigged. I have also decided that I should rig the halyard and out haul for the foresail and jib sails, even though the sails themselves are not rigged.
- 83 replies
-
- 3
-
-
- finished
- billing boats
- (and 1 more)
-
Looks like you are of to a god start. Does the bend in the keel get better if you install the deck? With such a slight bend, that could be enough to get it straightened. I agree that the wood grain does not look good scale wise. I guess OcCre has chosen a cheap material to keep the kit price down. If I remember correctly it is only about 60 euro for the basic variant.
-
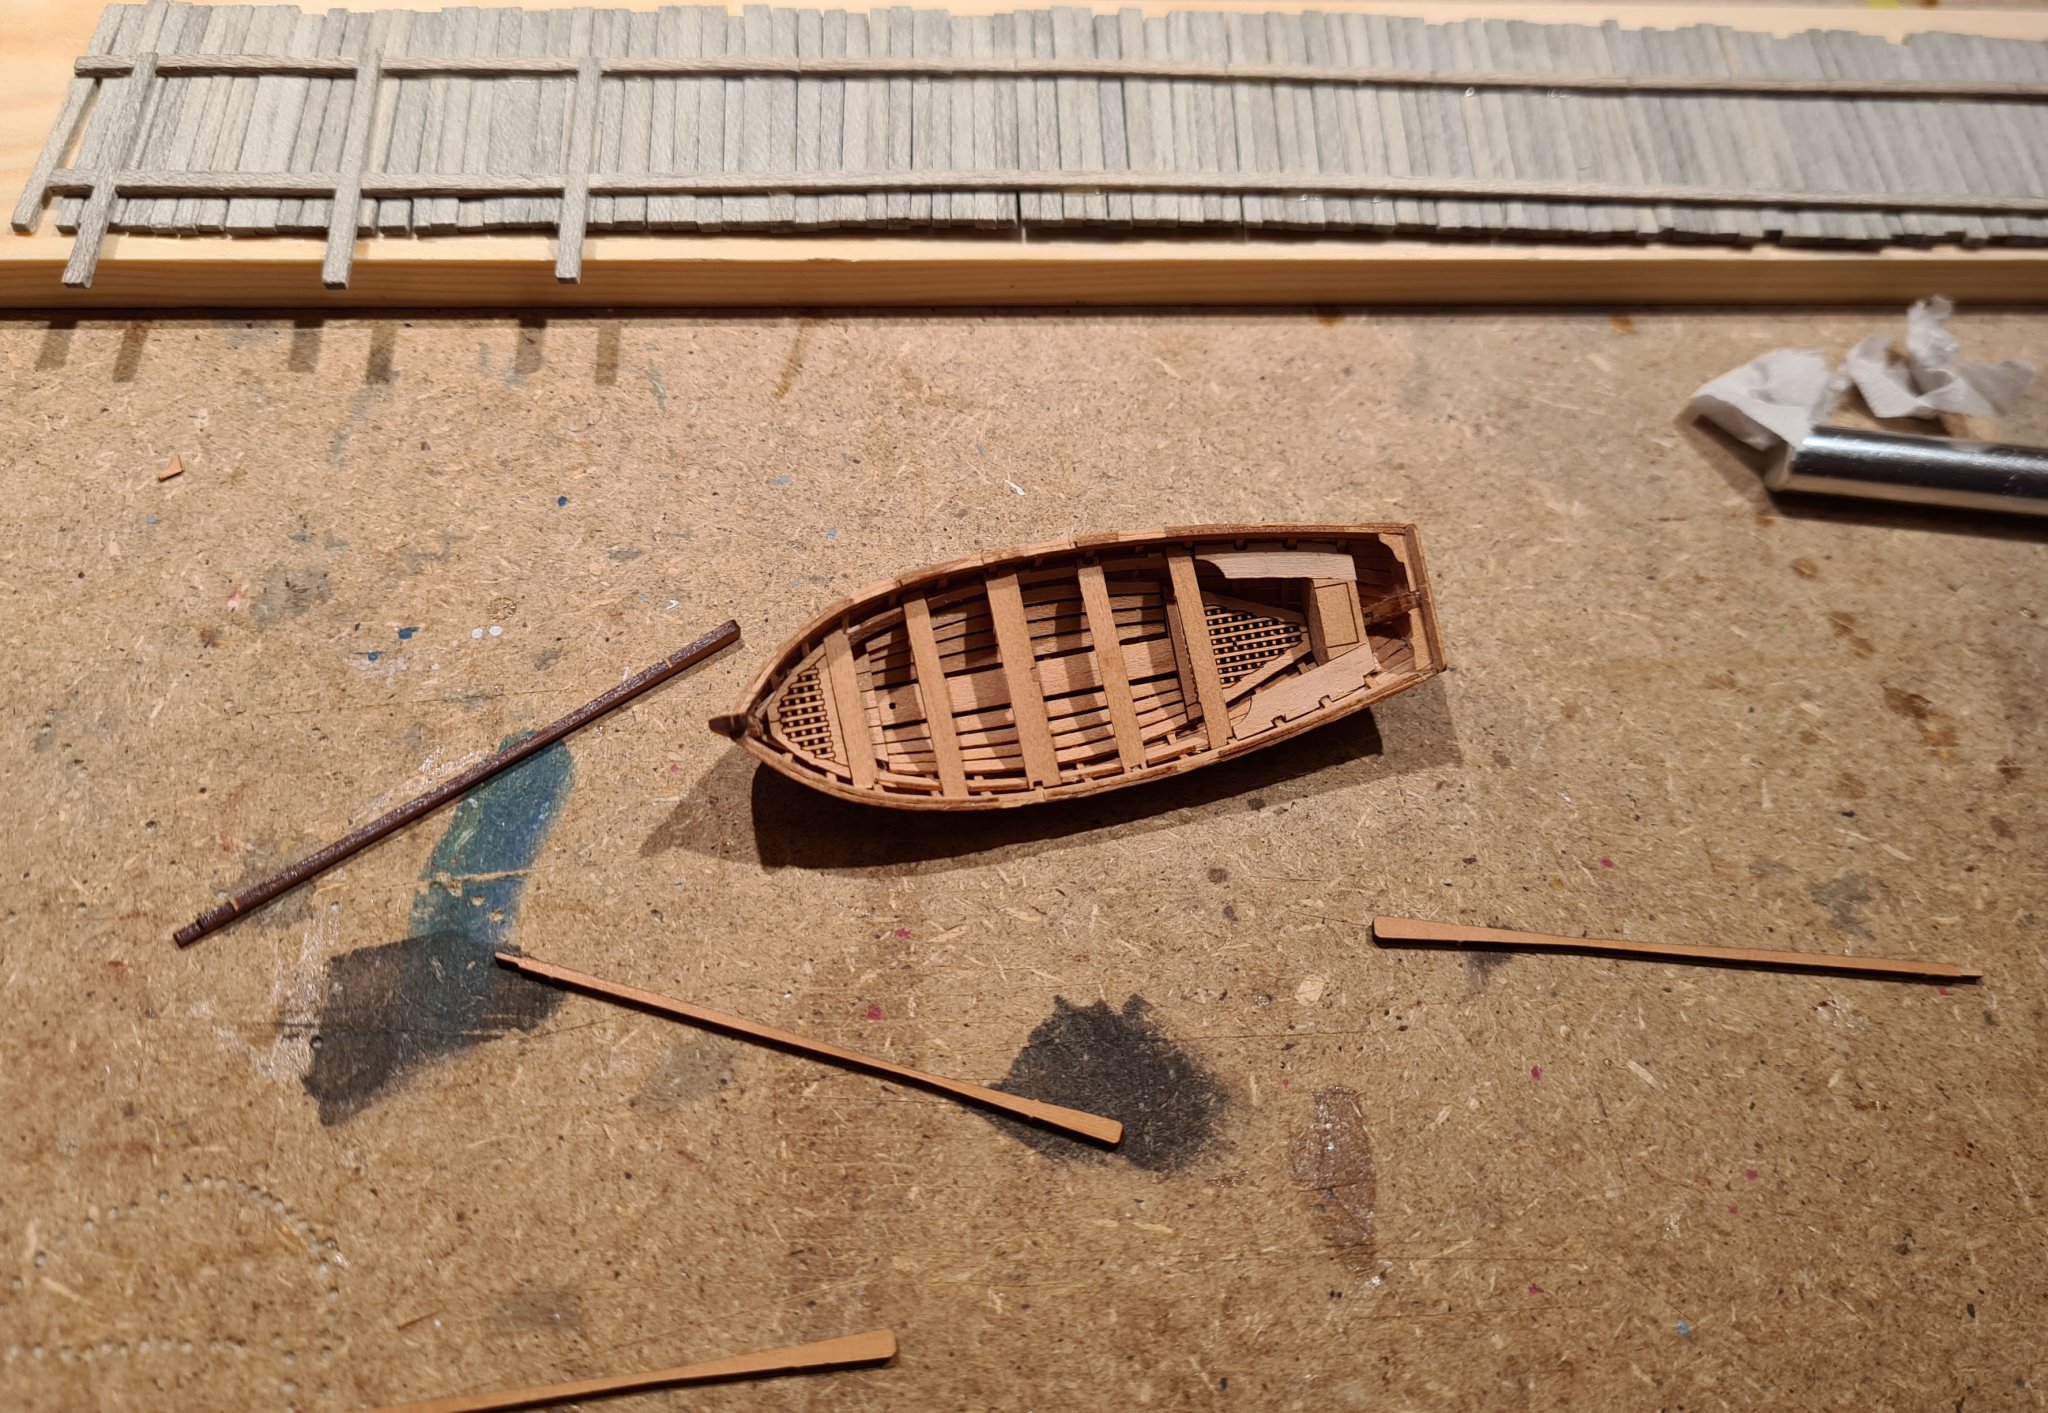
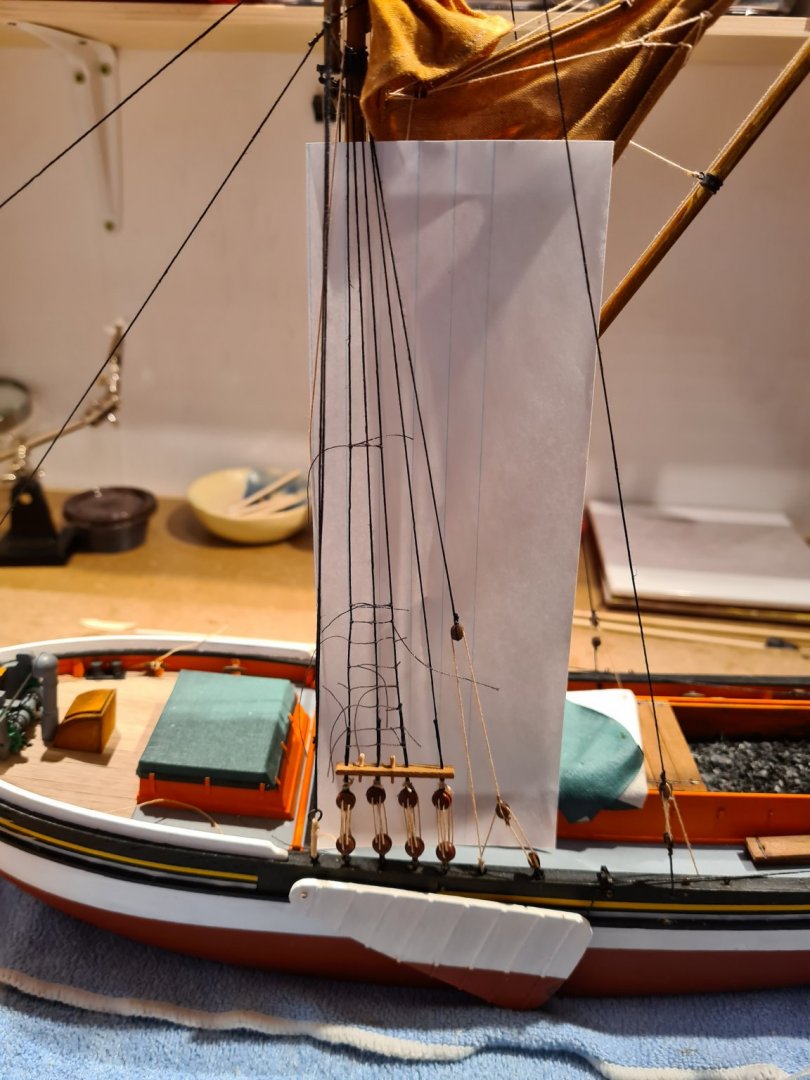
I was right in my concerns regarding stepping the main mast. The day before yerseterday it almost came loose while I was tying the rigging lines. I put some generous amount of epoxy glue around the base and hope that it will be enough. I recon that I can hide the glue splotches with some rope coils at the base of the mast. After that I lost the enthusiasm for finishing the rigging, so that will need to wait for a few days. Instead I have started with a plank fence for the back side of the quay. Its made of balsa sticks that have been dipped in a solution of steel wool in vinegar. I have also continued with the inside of the boat. Fiddly work, but it also goes quickly with such small dimensions and such a well designed kit.

- 83 replies
-
- 3
-
-
- finished
- billing boats
- (and 1 more)
-
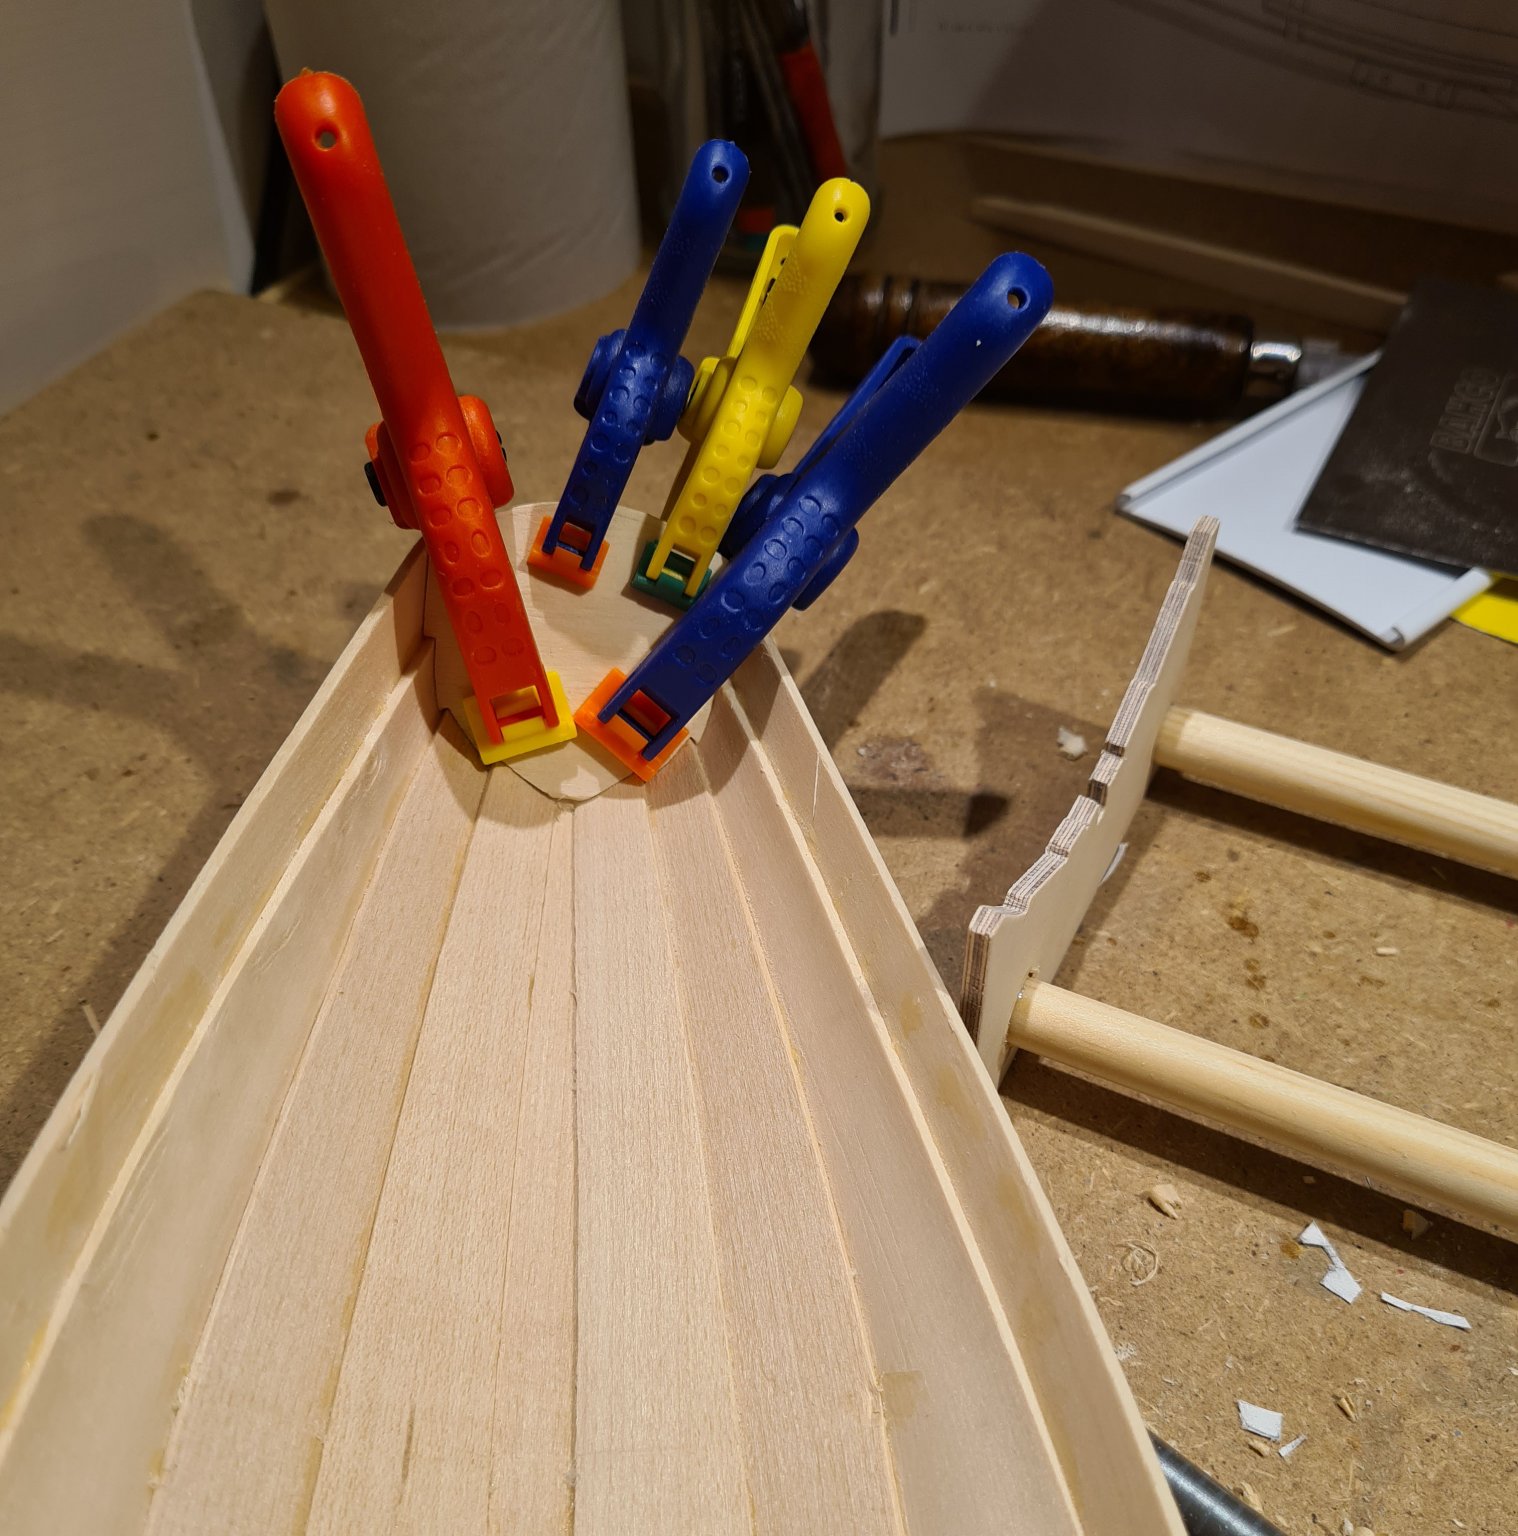
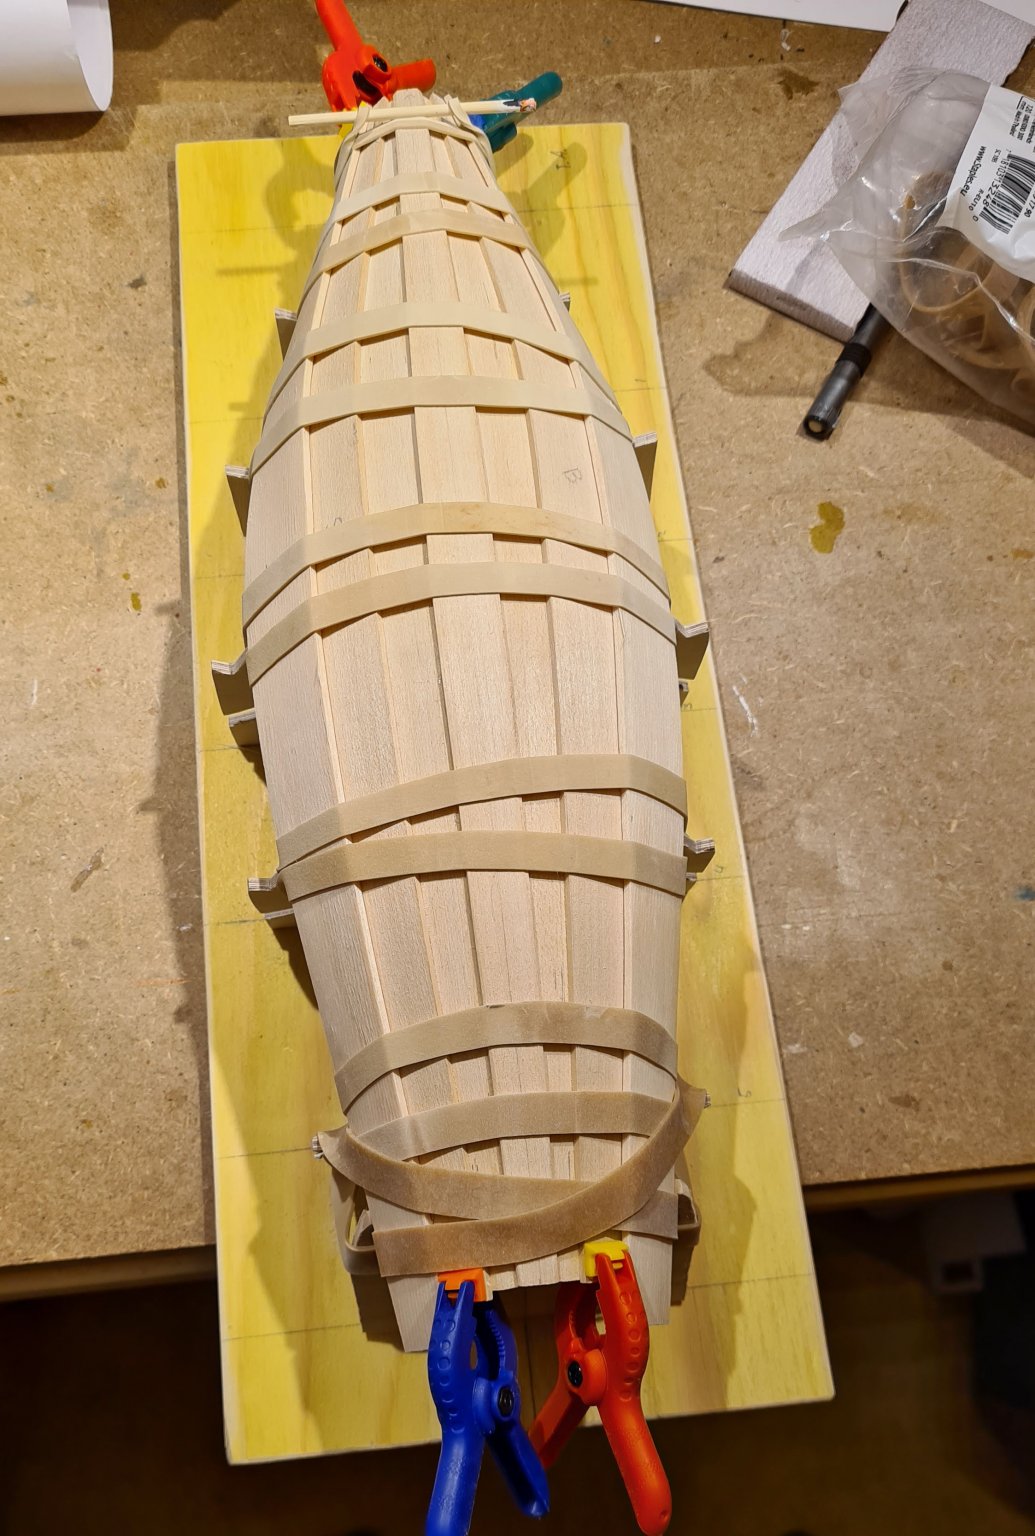
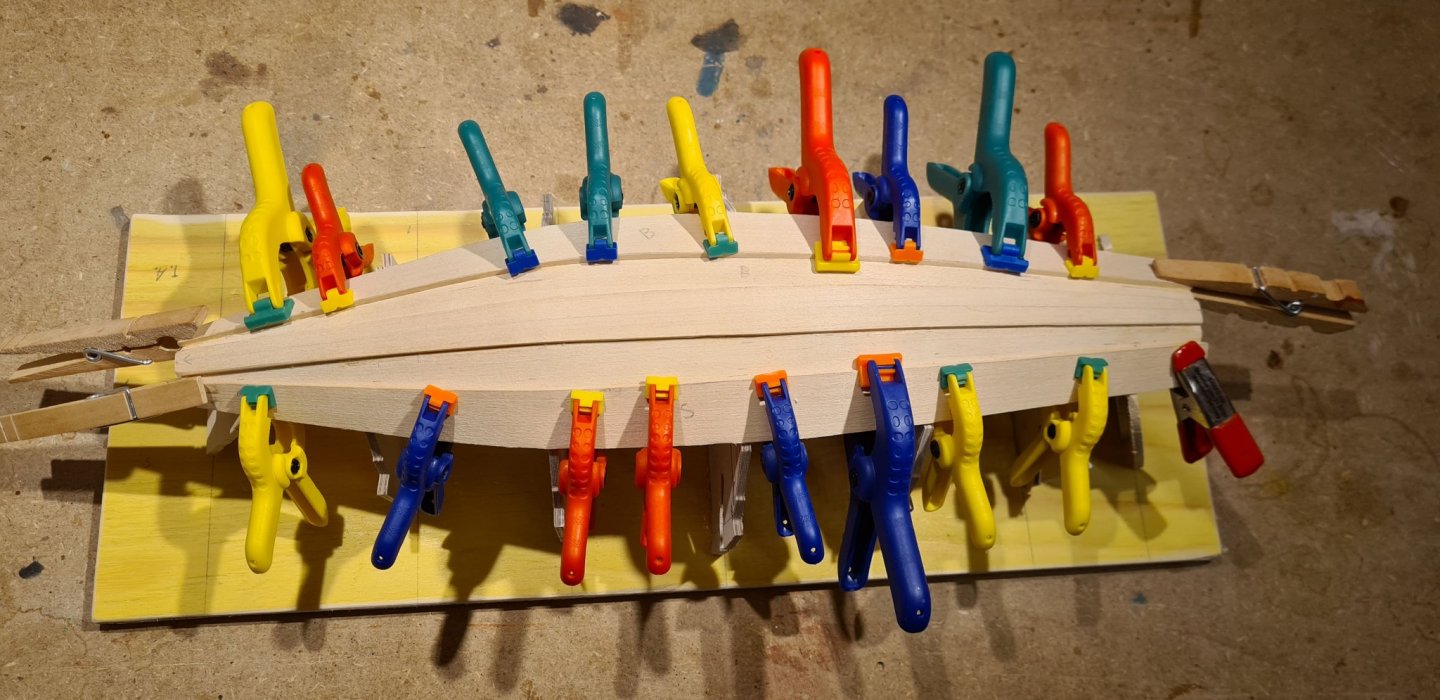
I took a break from rigging in my Will Everard build. I felt I wanted to do some work on wood... I glued the bottom plank in place already several months ago, now I continue with the next strake. This is far from kit-building. The planks are cut oversized and it requires a lot of filing and sanding to get them to lay nice and smooth without gaps. When reasonably satisfied I put the planks in hot water and bent in place for drying. As can be seen I have upgraded to stronger rubber bands 🙂

-
Very interesting project. I’m just finishing reading the Iliad and is seriously tempted in building a penteconter. I will follow along and enjoy and learn from your endeavors.
-
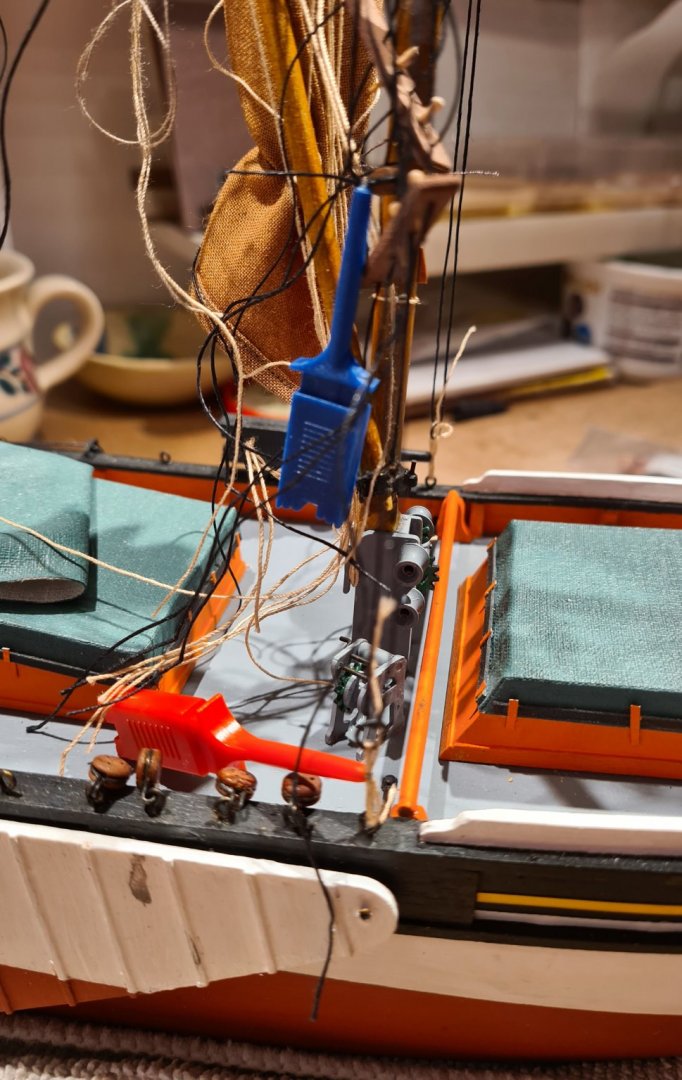
Thanks Eamonn! Today I stepped the main mast. I felt some trepadation for this step as there is just a small surface at the foot of the mast. The risk of misalignment is rather high. The kit was not constructed with any hole or support for the mast. Maybe I should have added one myself to be on the safe side. What I did was putting epoxy glue on the foot and then just held the mast in place with my hands until the glue cured. I also managed to find some small test clips for electronics. The common type are larger than these, so I was happy to get the last ones from the store. They immediately proved handy and excellent for clamping the rigging threads so they can be seized. Cheers
- 83 replies
-
- 2
-
-
- finished
- billing boats
- (and 1 more)