
bolin
-
Posts
482 -
Joined
-
Last visited
Content Type
Profiles
Forums
Gallery
Events
Everything posted by bolin
-
 I'm very late to this party it seems, but really interesting to find your build log. I'm currently building the same kit as a replacement for the boat supplied in my build of the Thames sailing barge Will Everard (see my build log). Your progress is nice to see and an inspiration. It's curious that you did not get an English instruction. I bought my kit here in Sweden and I got a good English instruction in the kit.
 -
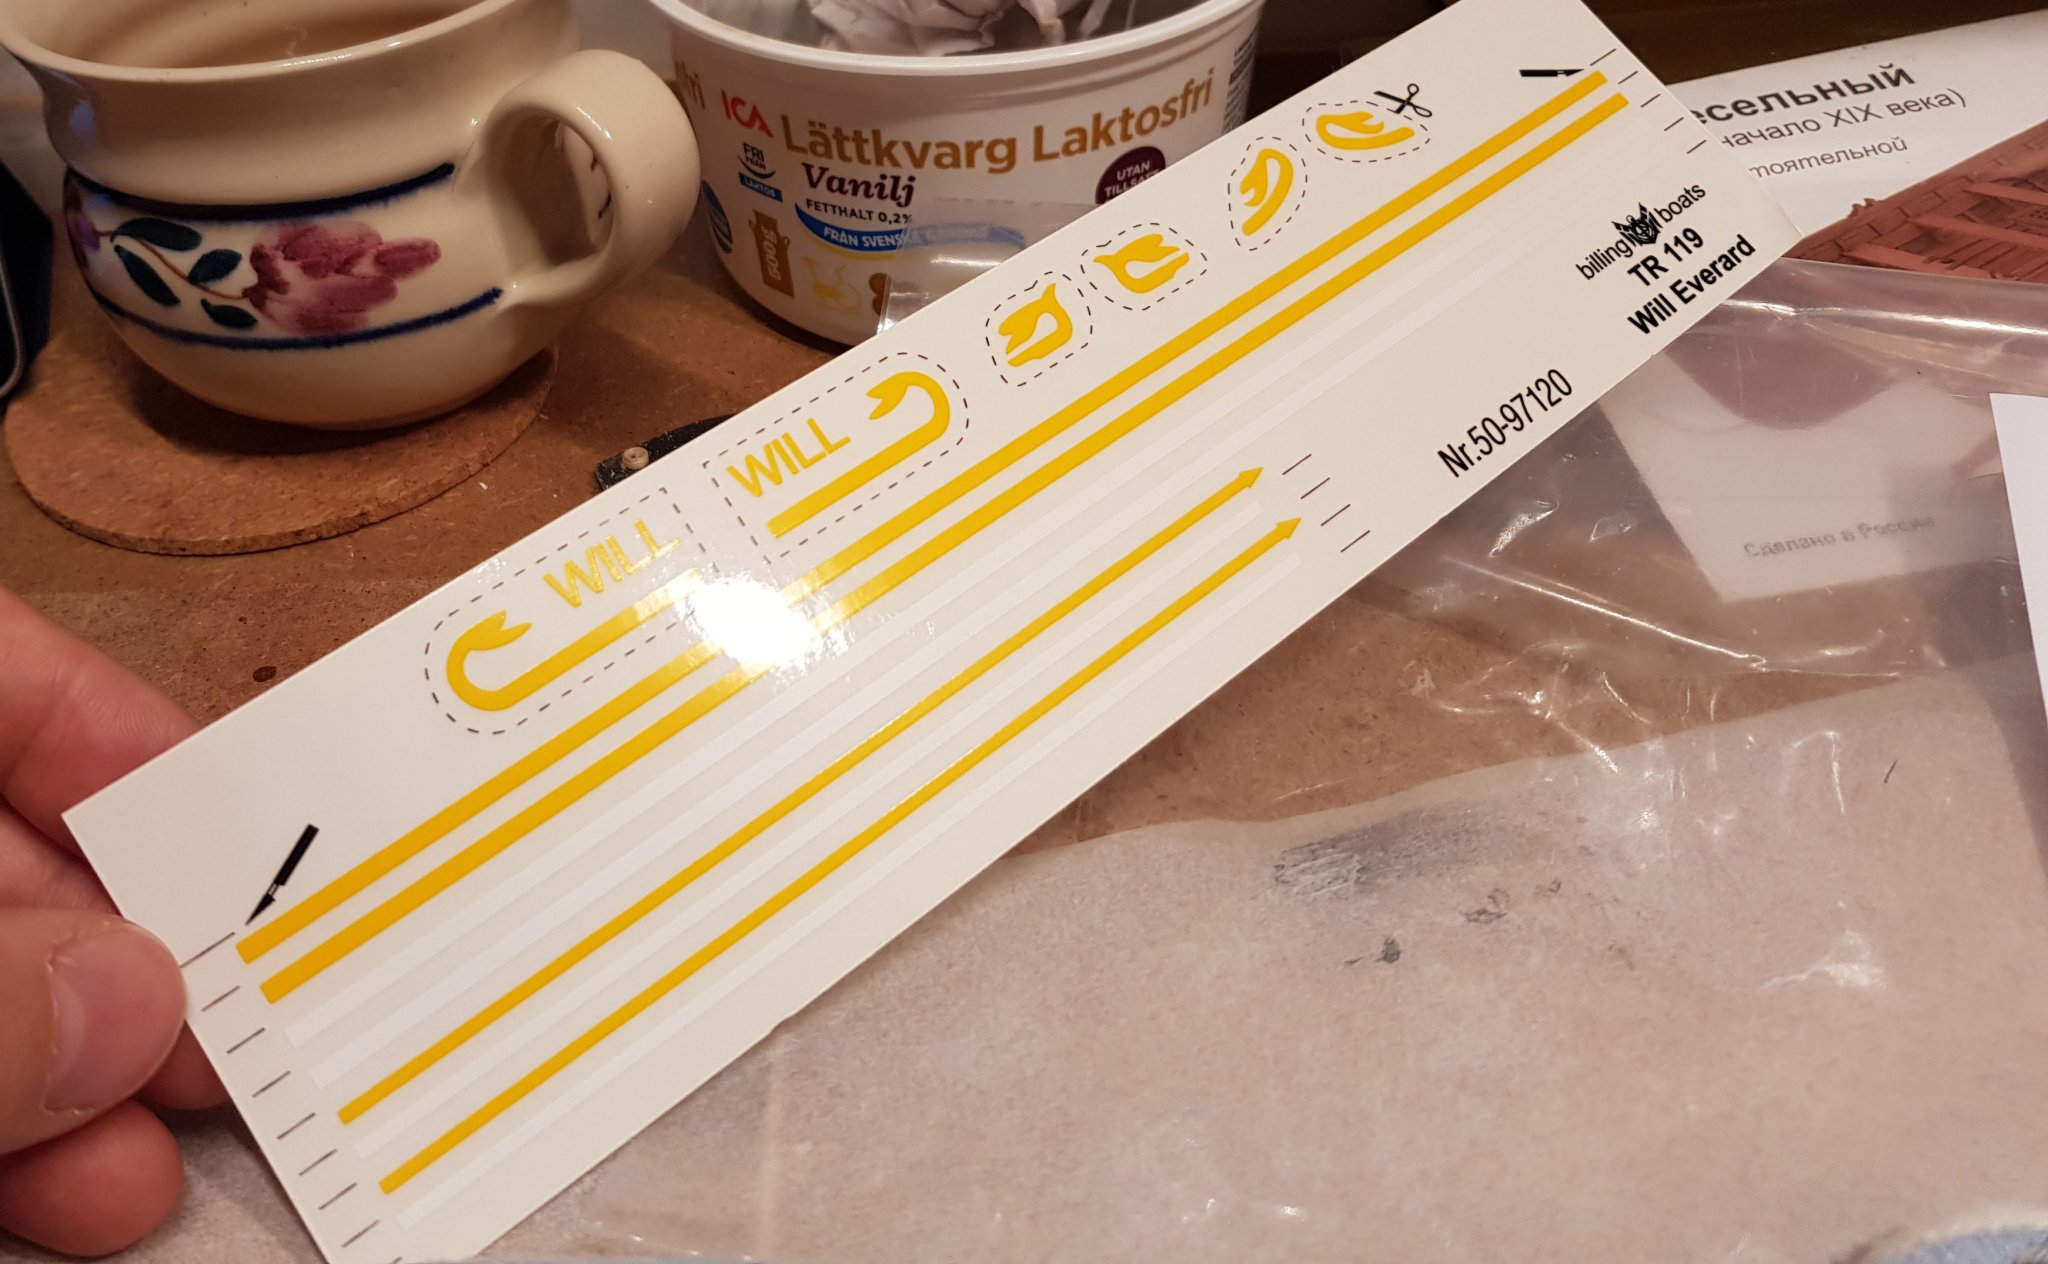
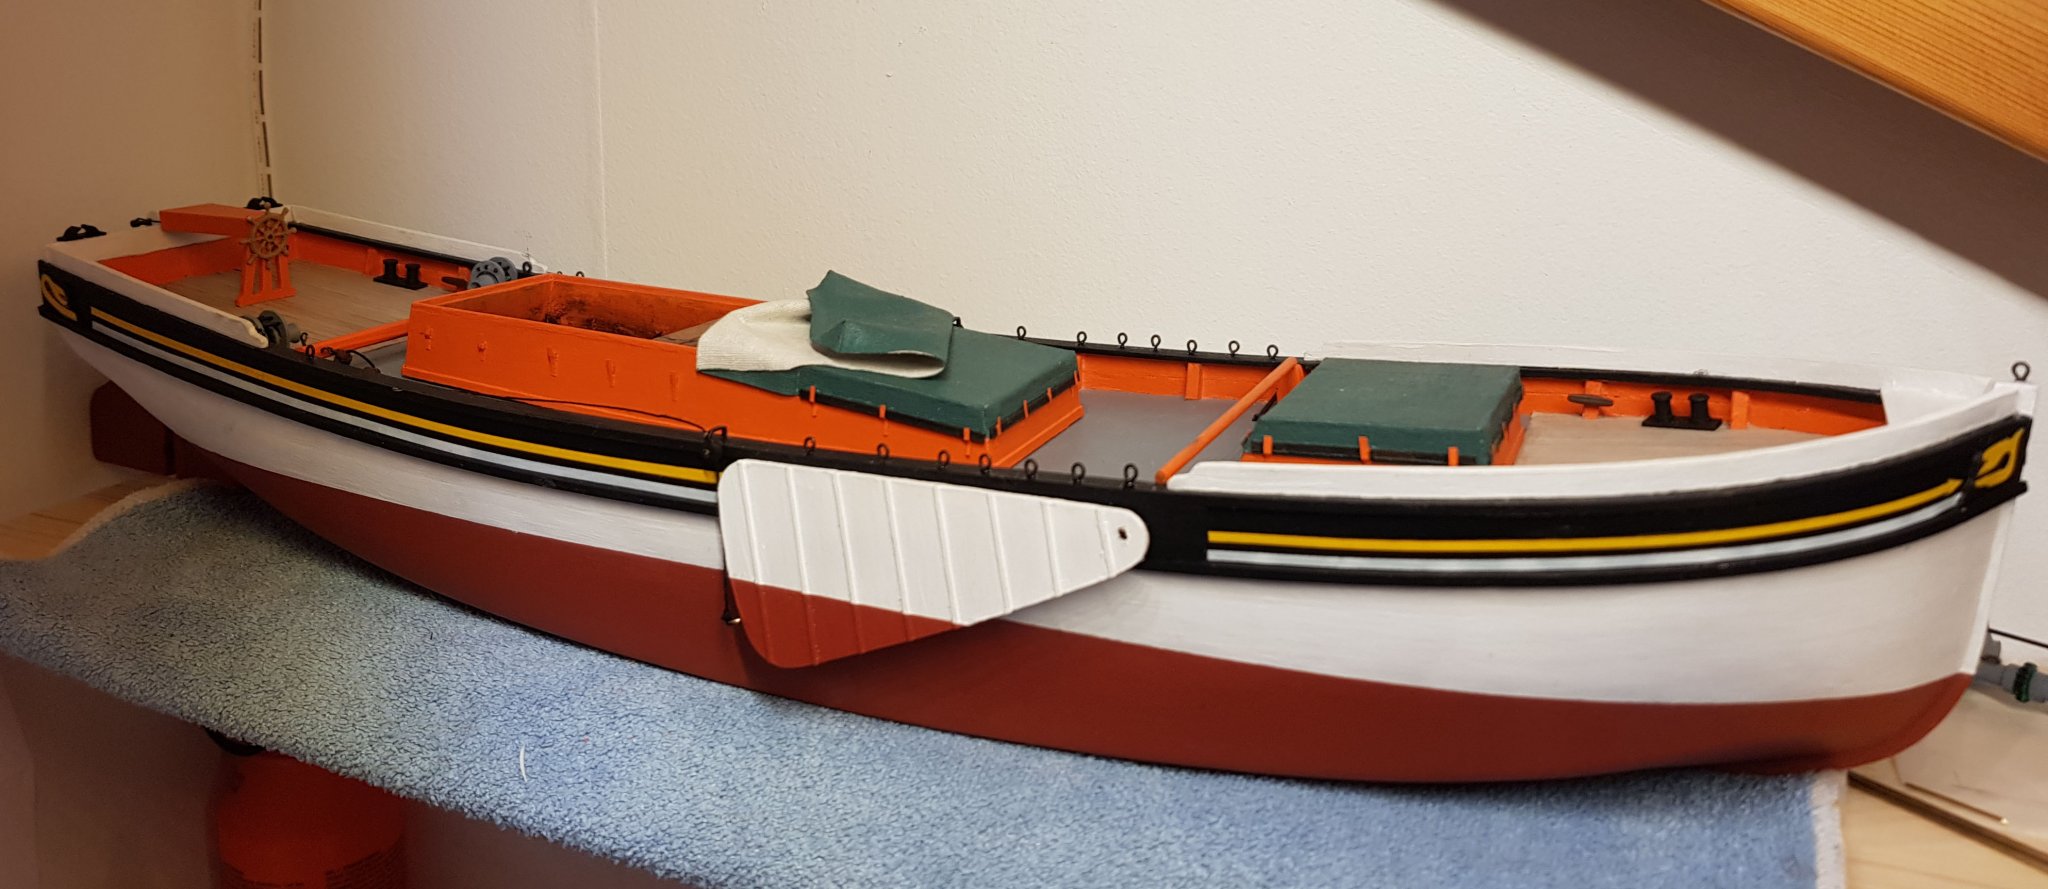
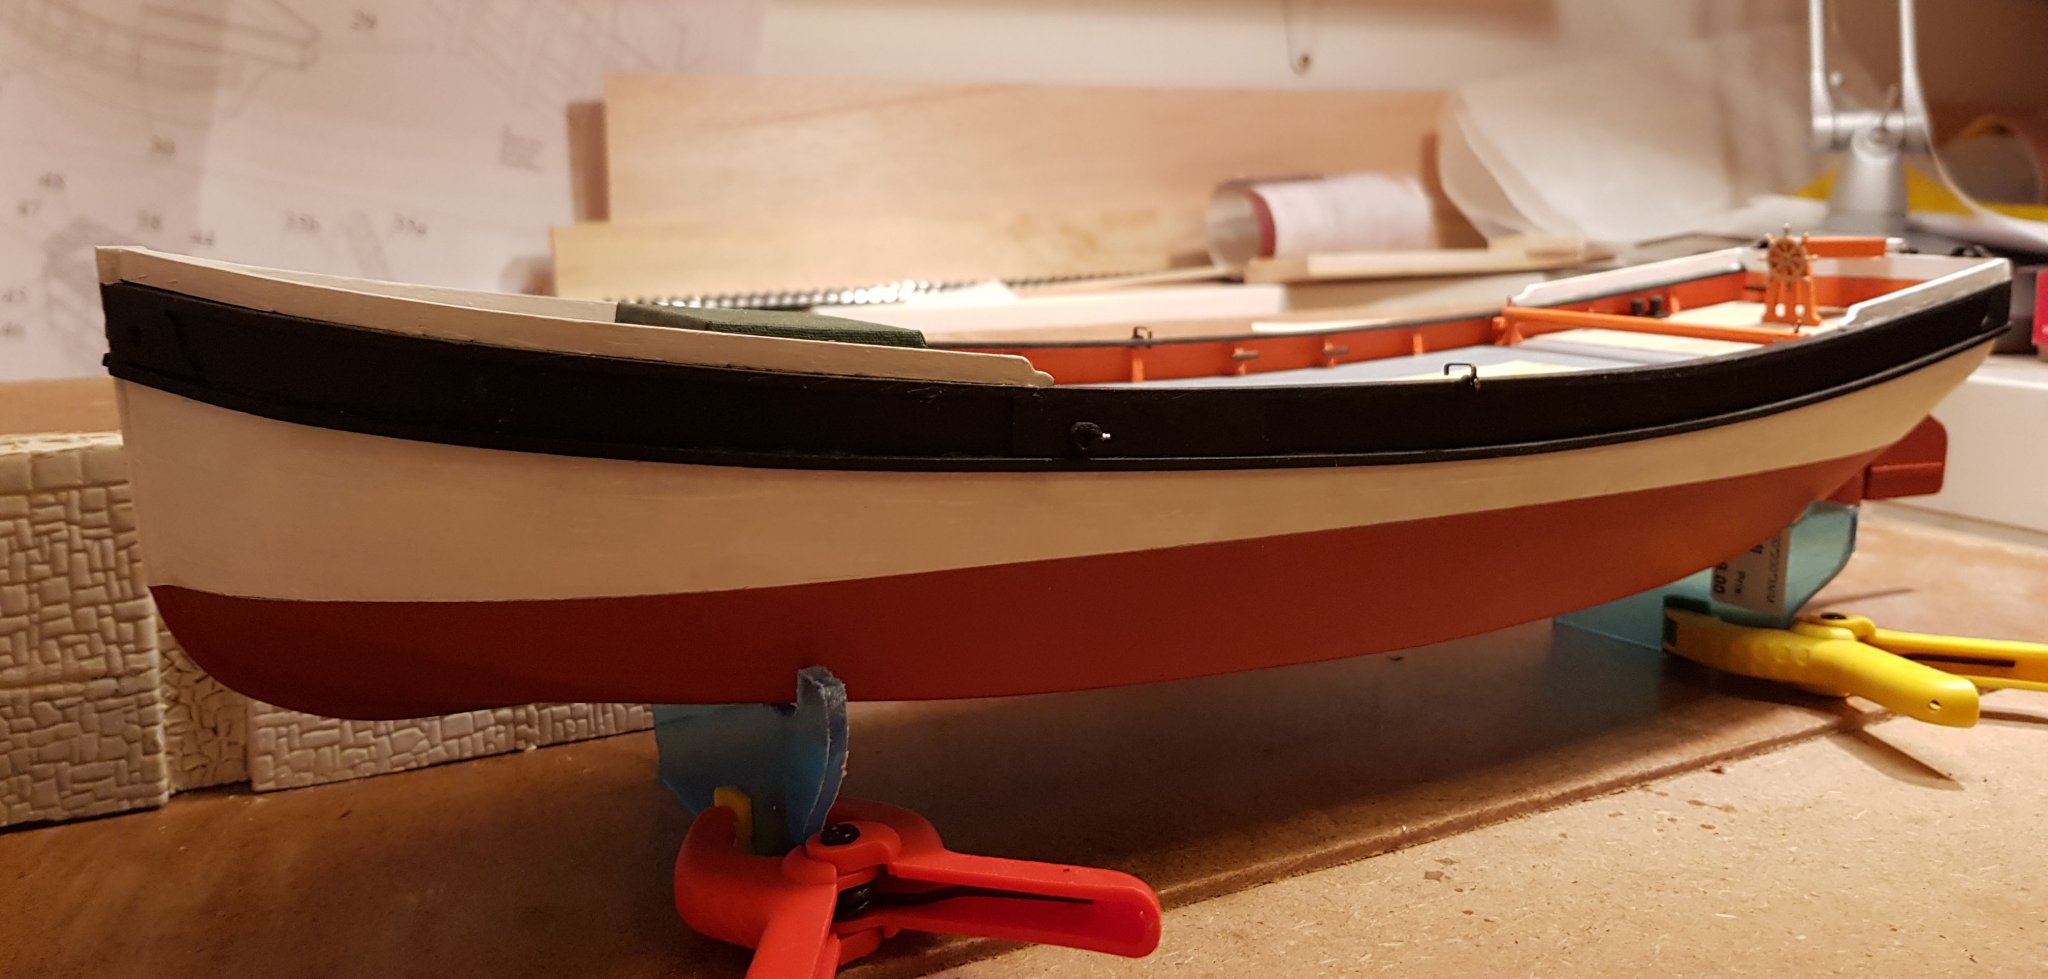
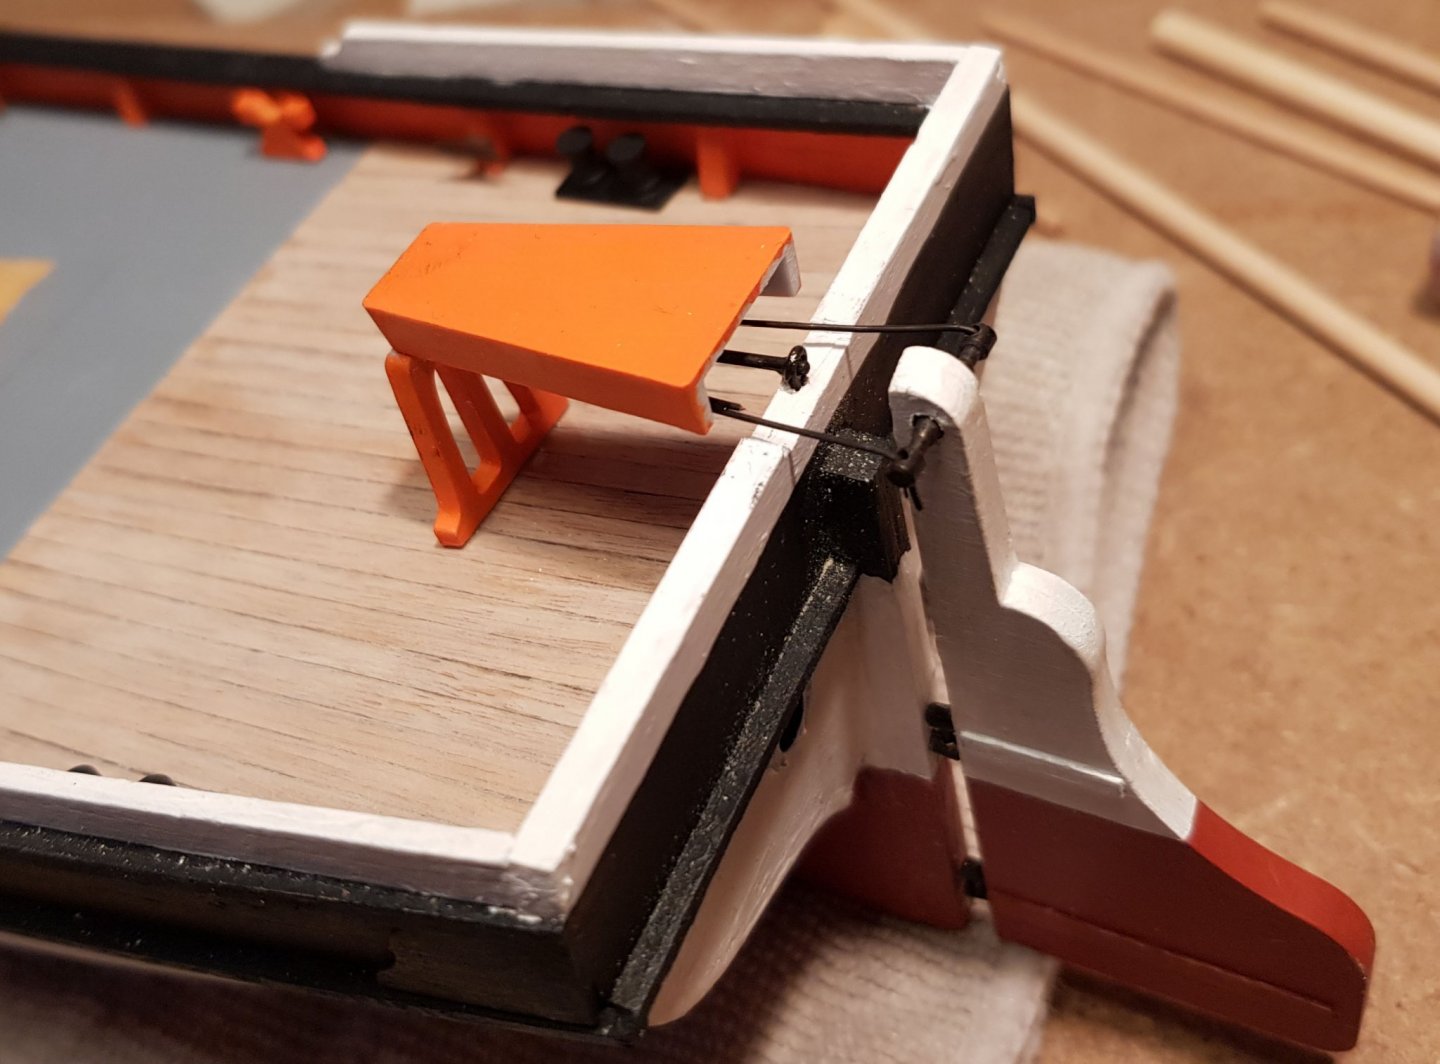
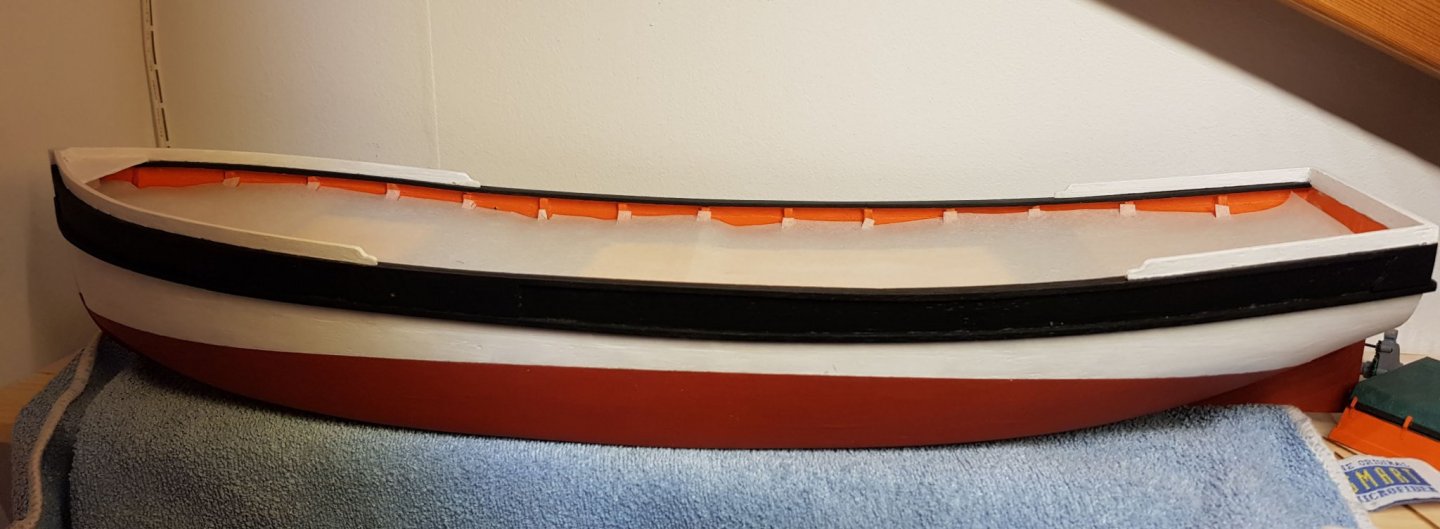
Today I thought that I should start with installing the lee boards on the hull. I have been a bit hesitant to begin this as it is the first step that include blocks and running ropes. I guess I have been a bit anxious that it will not turn out good. But, nothing will be done unless you start. However I realized that I should add the decals on the hull first, as it will be harder when the lee boards are in place. When I brought them out, I realized that it was actually the first time I had taken a good look at them. I thought that they would be the kind that you put in water. They turned out to be more like stickers printed on transparent plastic. As can be seen they are also rather glossy. I debated a while with my self if I should try to paint the lines and text instead. I decided that it would probably be OK if I just cut the strips exactly at the printed border and if I coated it with matte varnish. Then, when I started to place the stickers, I realized that they did not match the plans or the photos on the box of the kit. These must have been changed at some update of the kit without changing the plans or photos. I decided on something that fits and looks OK. Then I started with the lifting lines for the lee boards. I decided on black cord to simulate steel wire. I think I managed OK with adding the blocks and attaching a small hook to it. But I realized that I should probably construct or invest in some kind of "third hand" apparatus for further rigging work. Its hard to hold everything with tweezers when seizing the lines. So this is how she looks now with the decals and the lee boards. I also added the eye bolts for shrouds, fore stay and some of the running rigging. And a picture of the boat. Cheers


- 83 replies
-
- 7
-

-
- finished
- billing boats
- (and 1 more)
-
Testing on a scrap piece is good. I have used paper towels as well, it also works. You might want to thin the oil with white spirit or turpentine, it makes it flow better an enter the wood more. If I just want a surface coat I would use the oil directly on the cloth an wipe it on to get a thin coat. Only apply thin layers, linseed cures very slowly. If it’s to thick it will never cure and remain sticky forever. The important thing to remember is that the linseed oiled cloth could self ignite after you have used it. I have never seen it happen, or never heard of anyone seeing it, but it is still a possible danger. Let it dry in a well ventilated place without any flammable material close. I usually just put the rag outside somewhere.
- 60 replies
-
- 1
-
-
- swampscott dory
- finished
- (and 1 more)
-
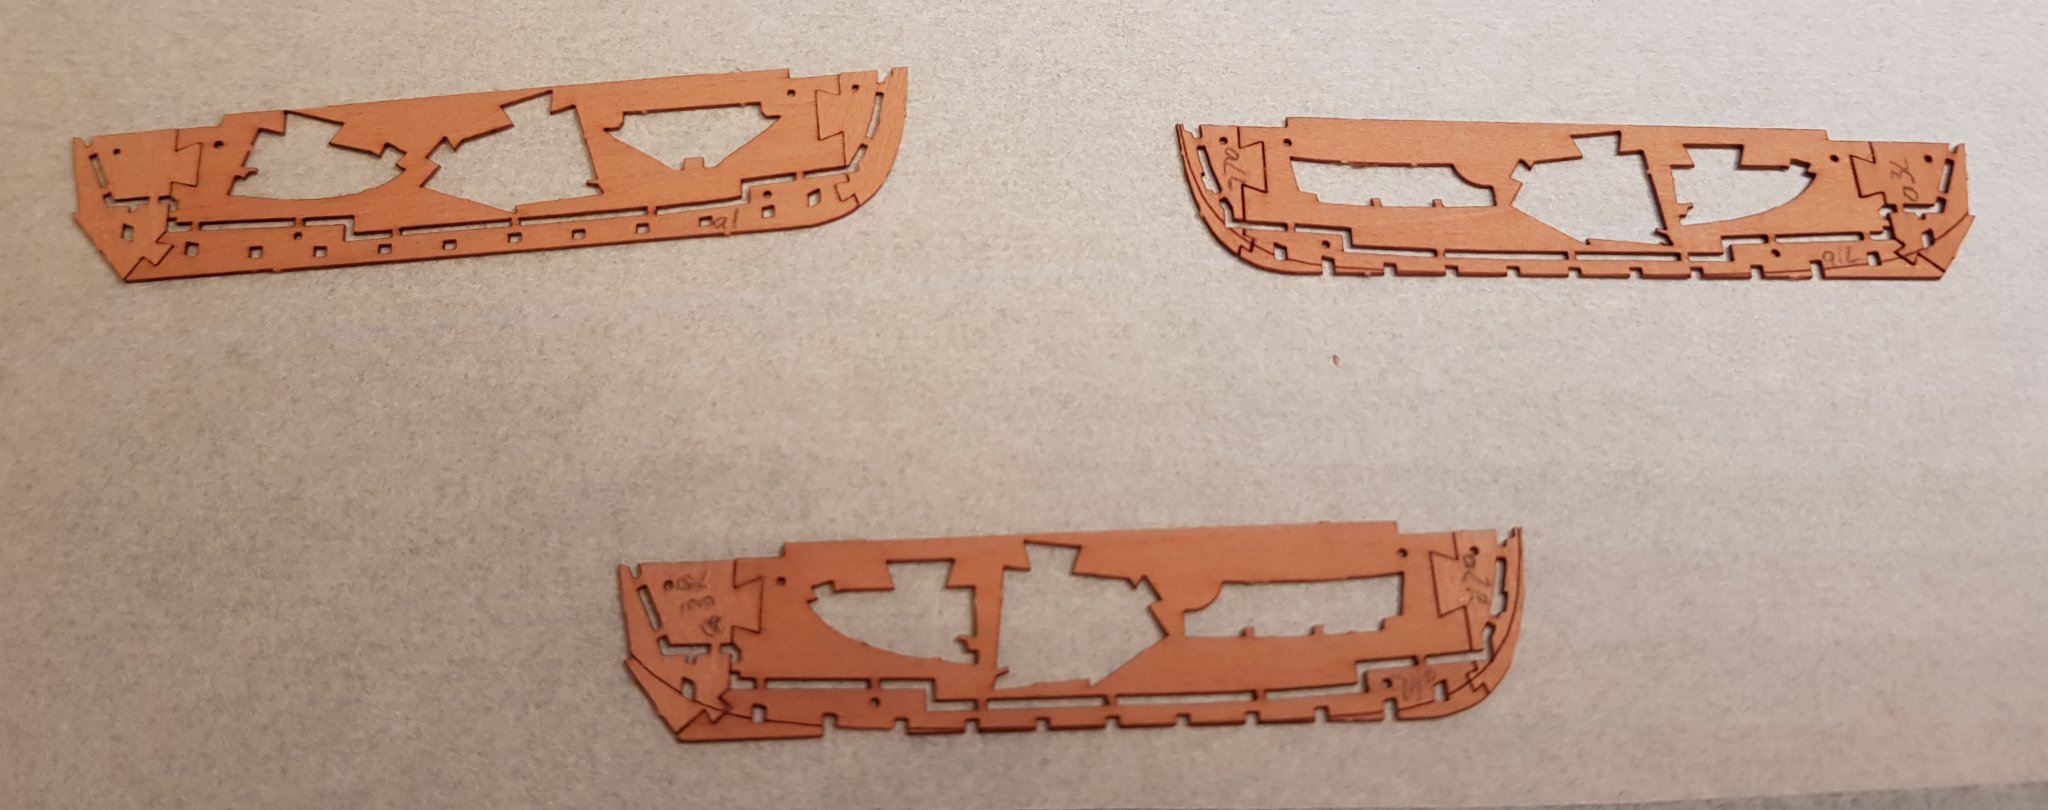
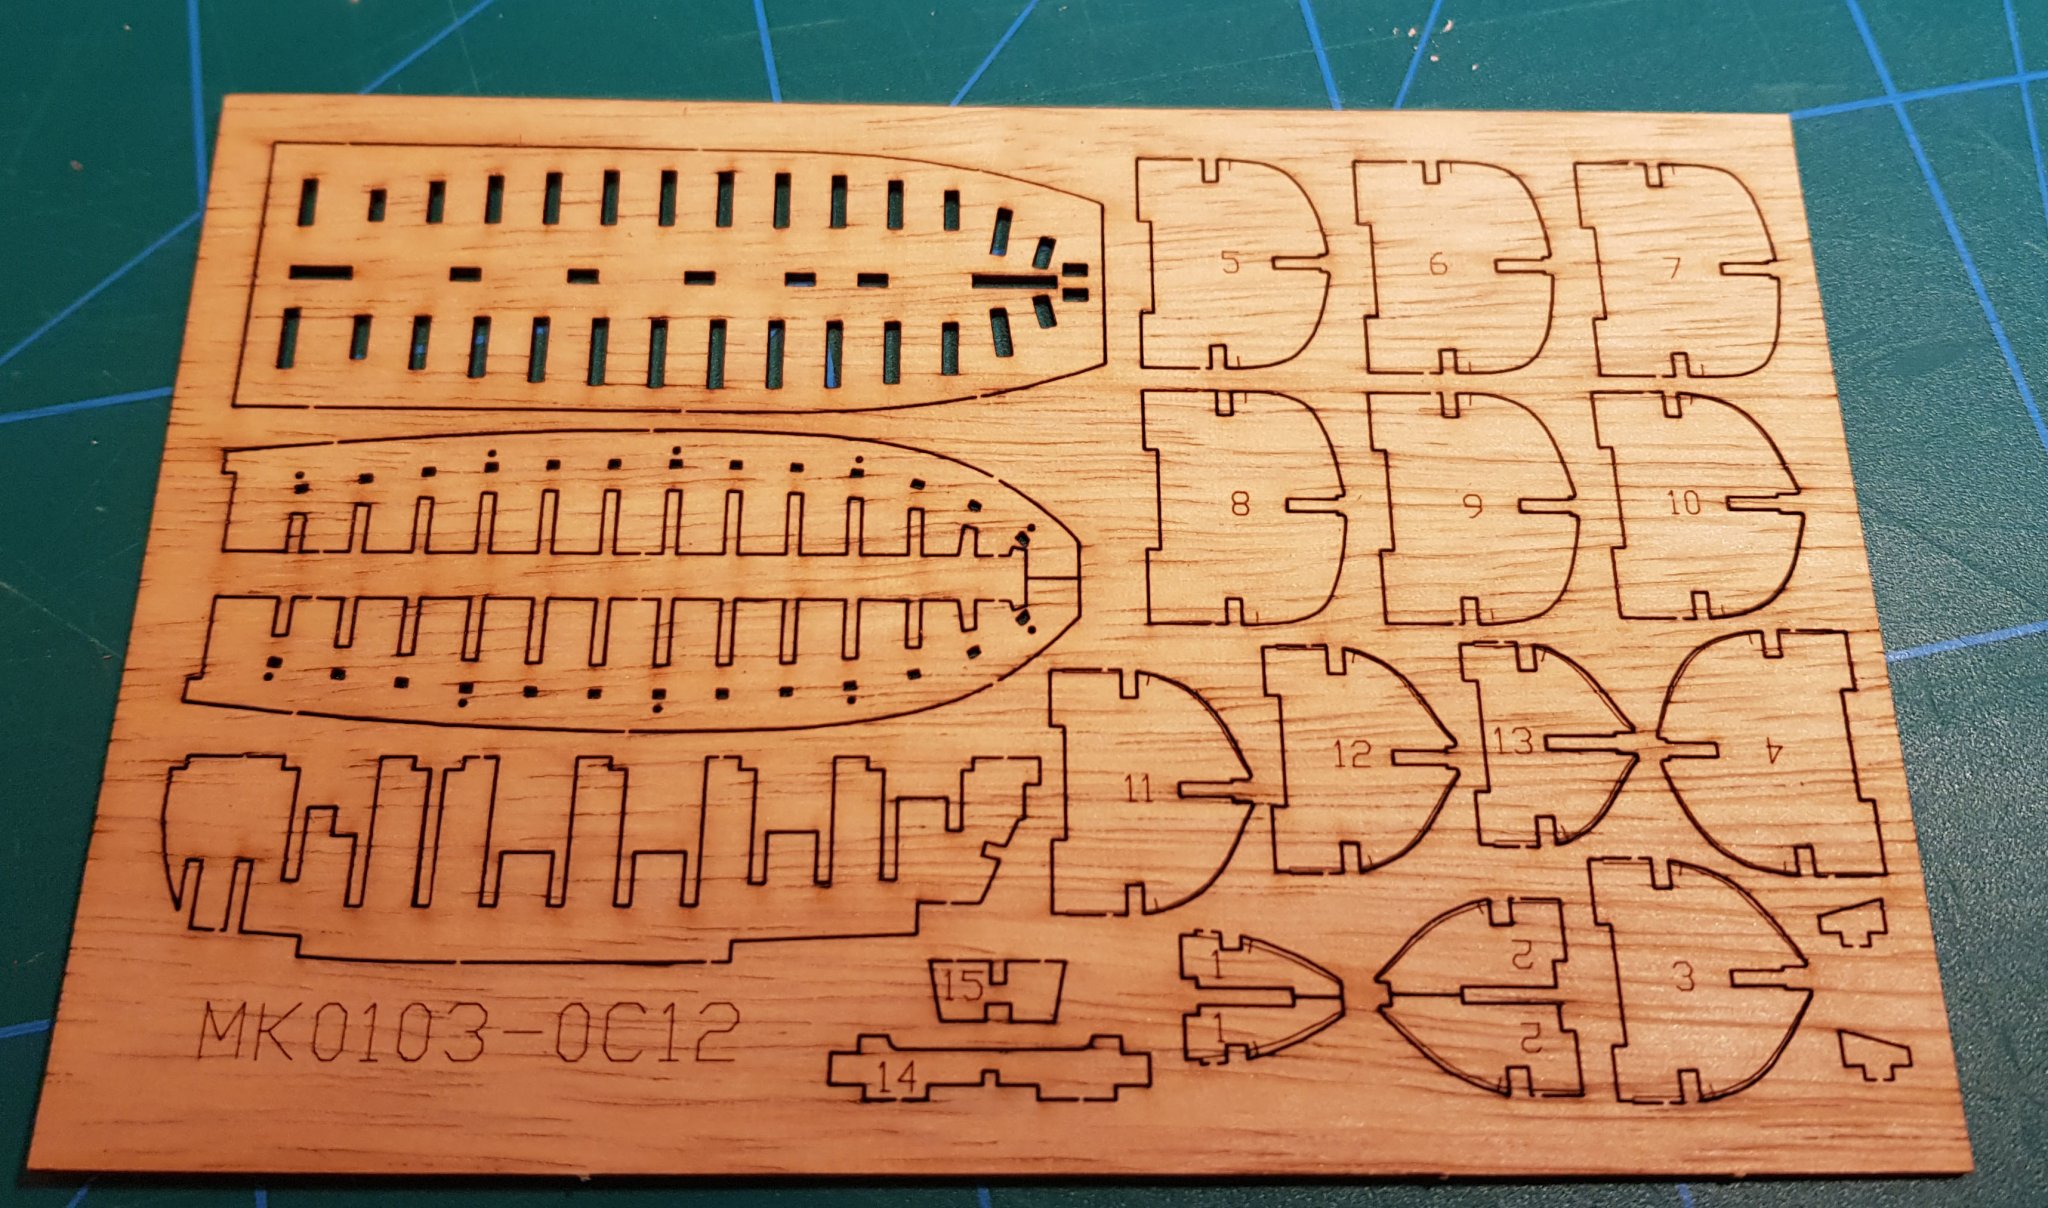
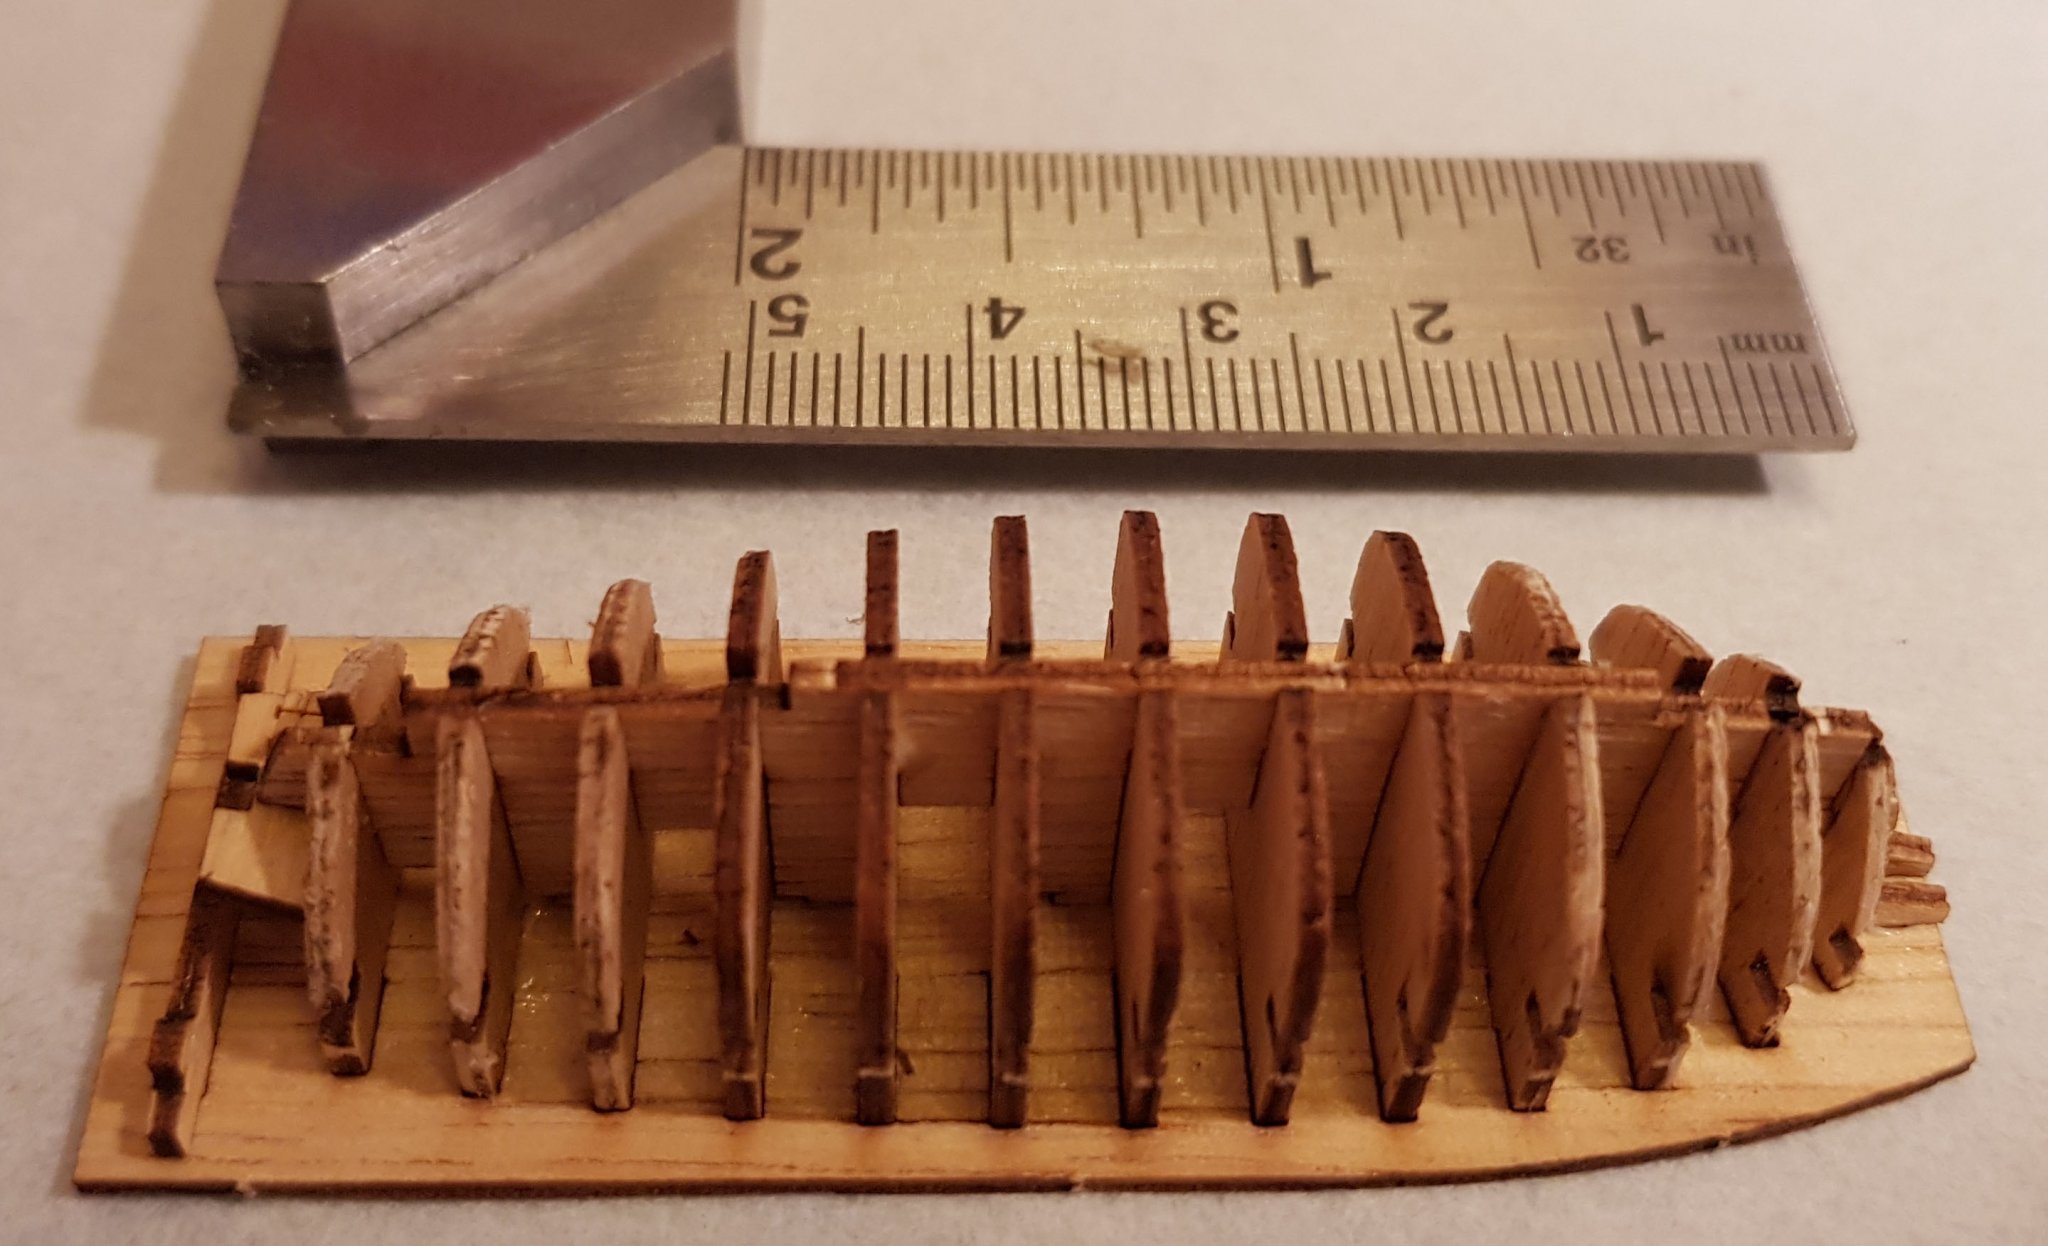
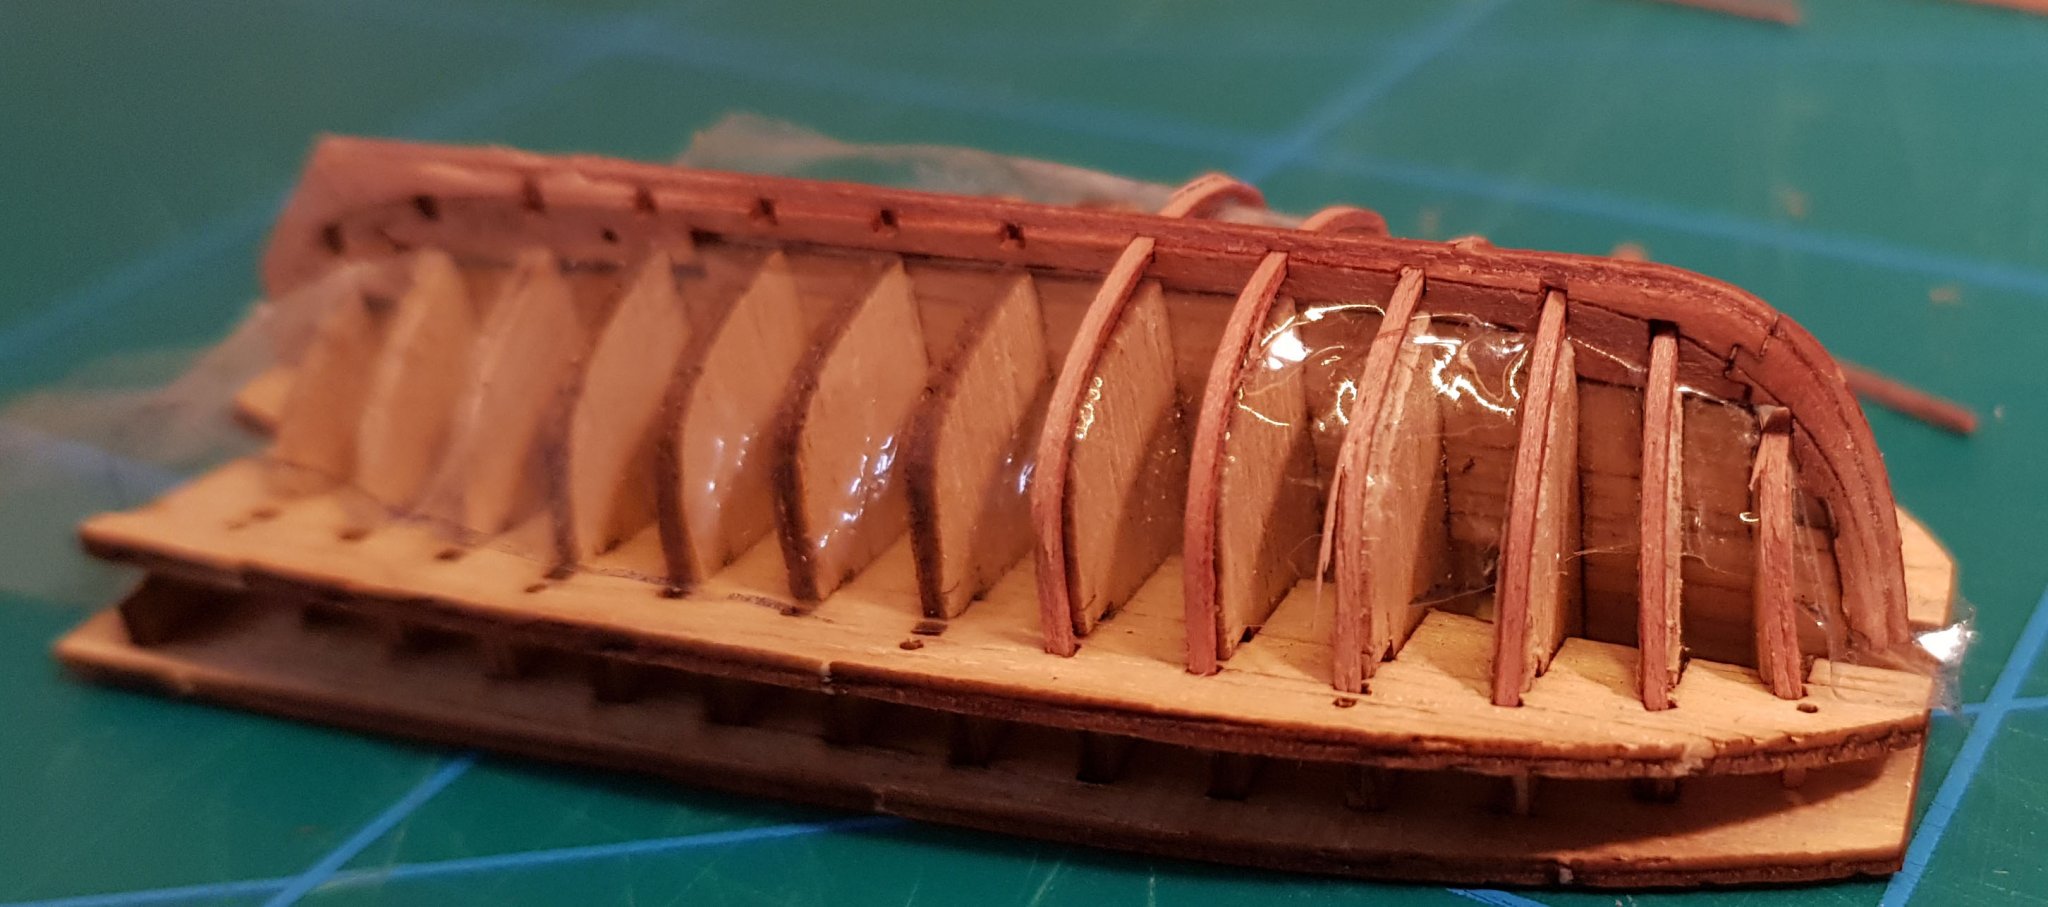
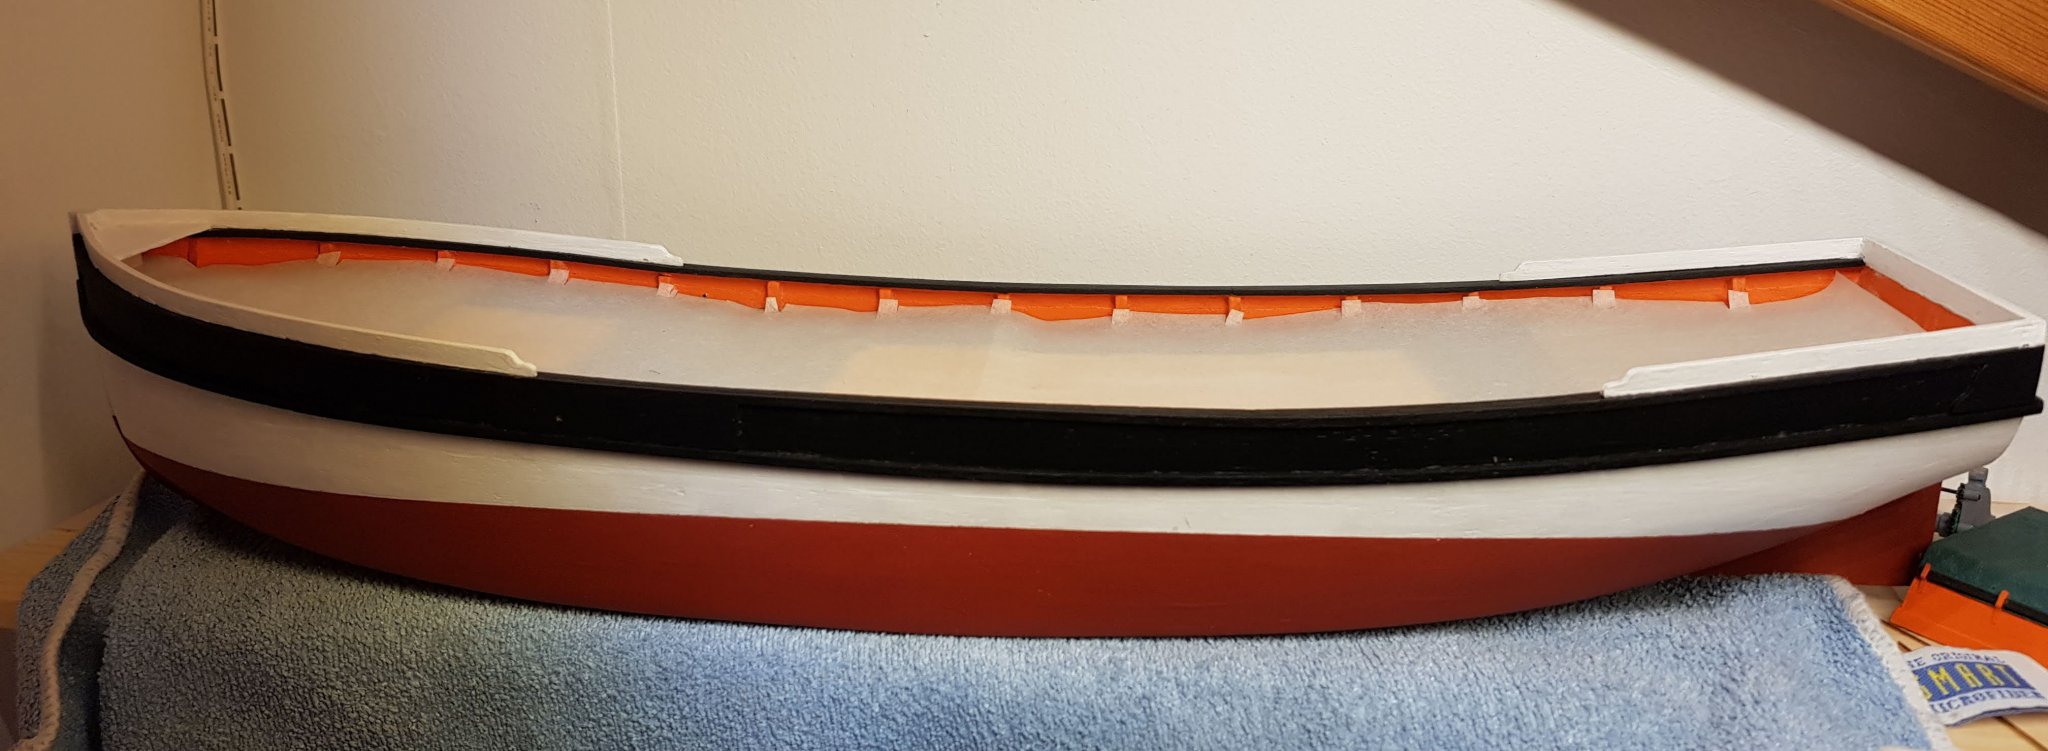
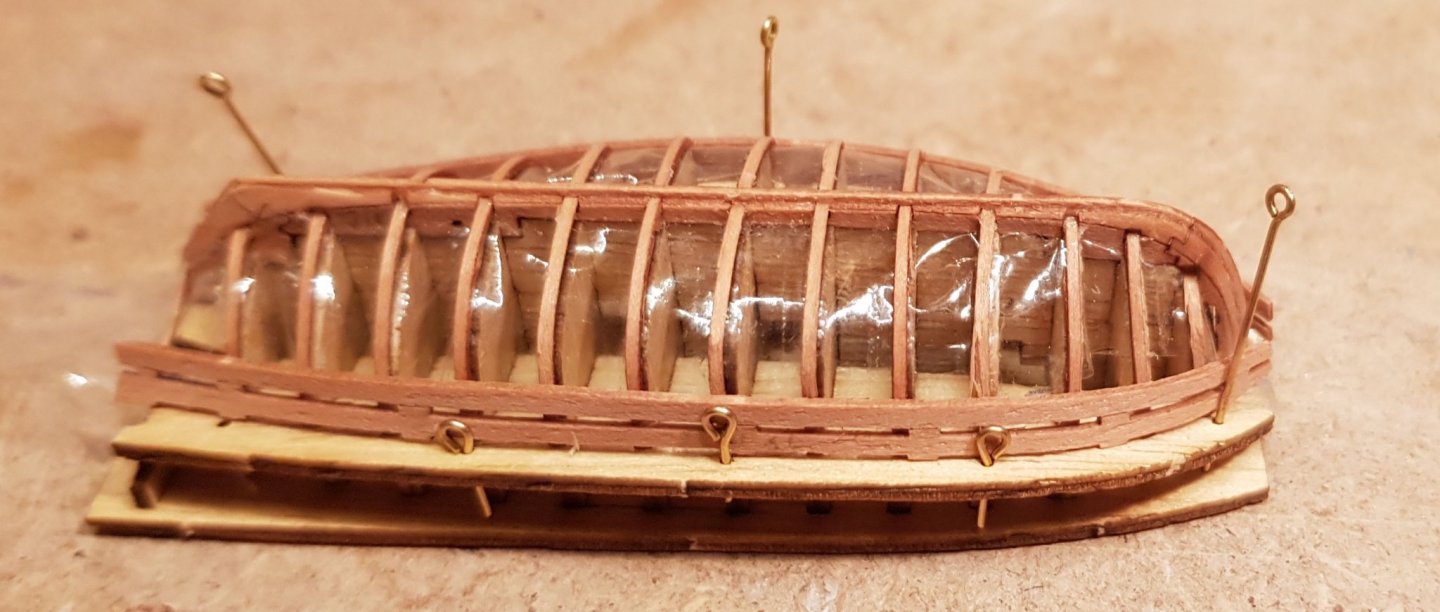
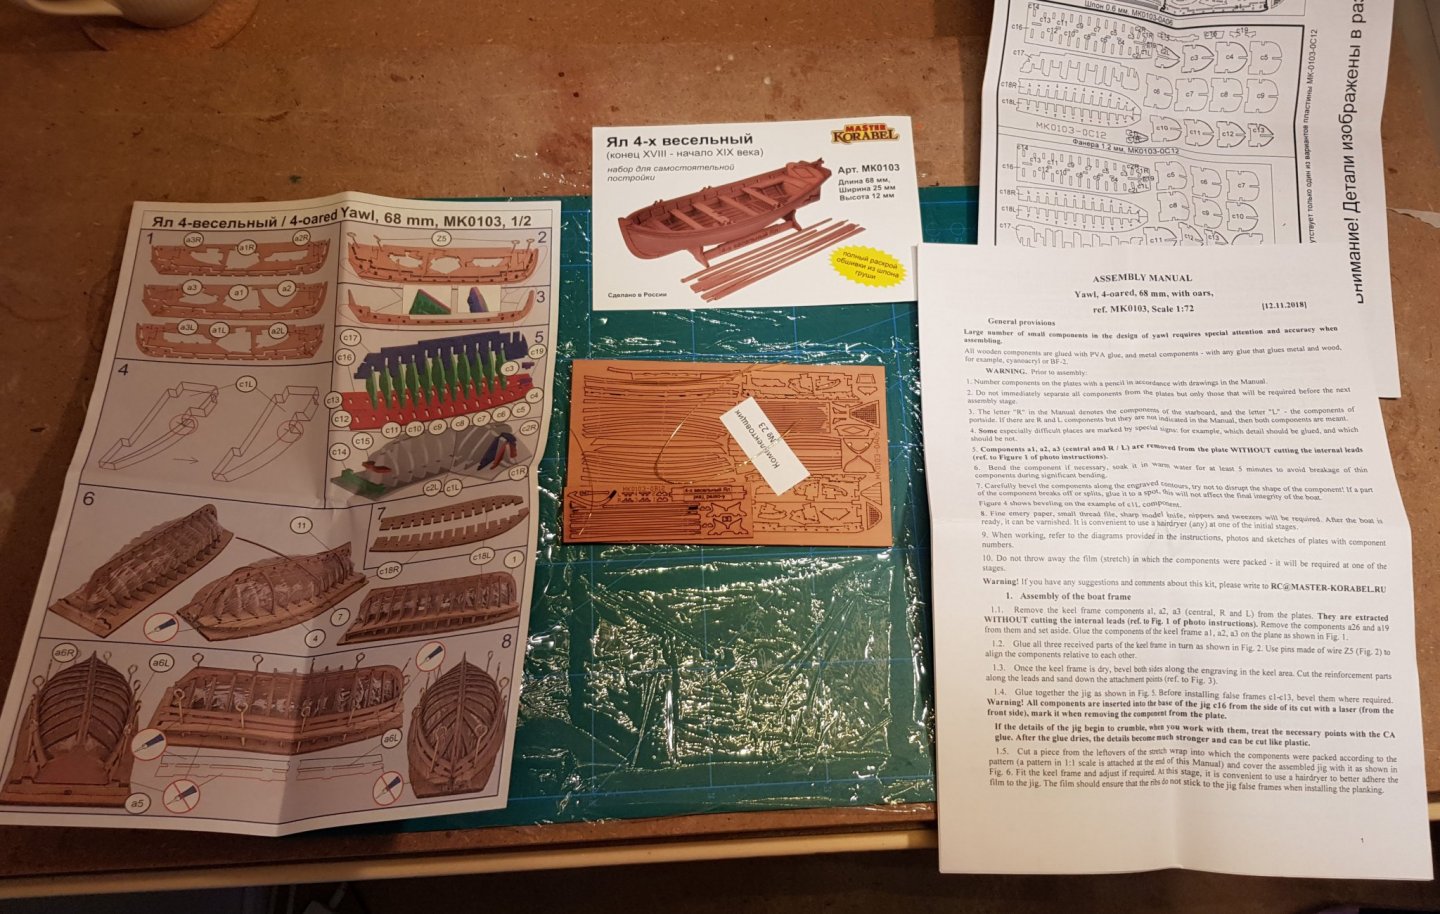
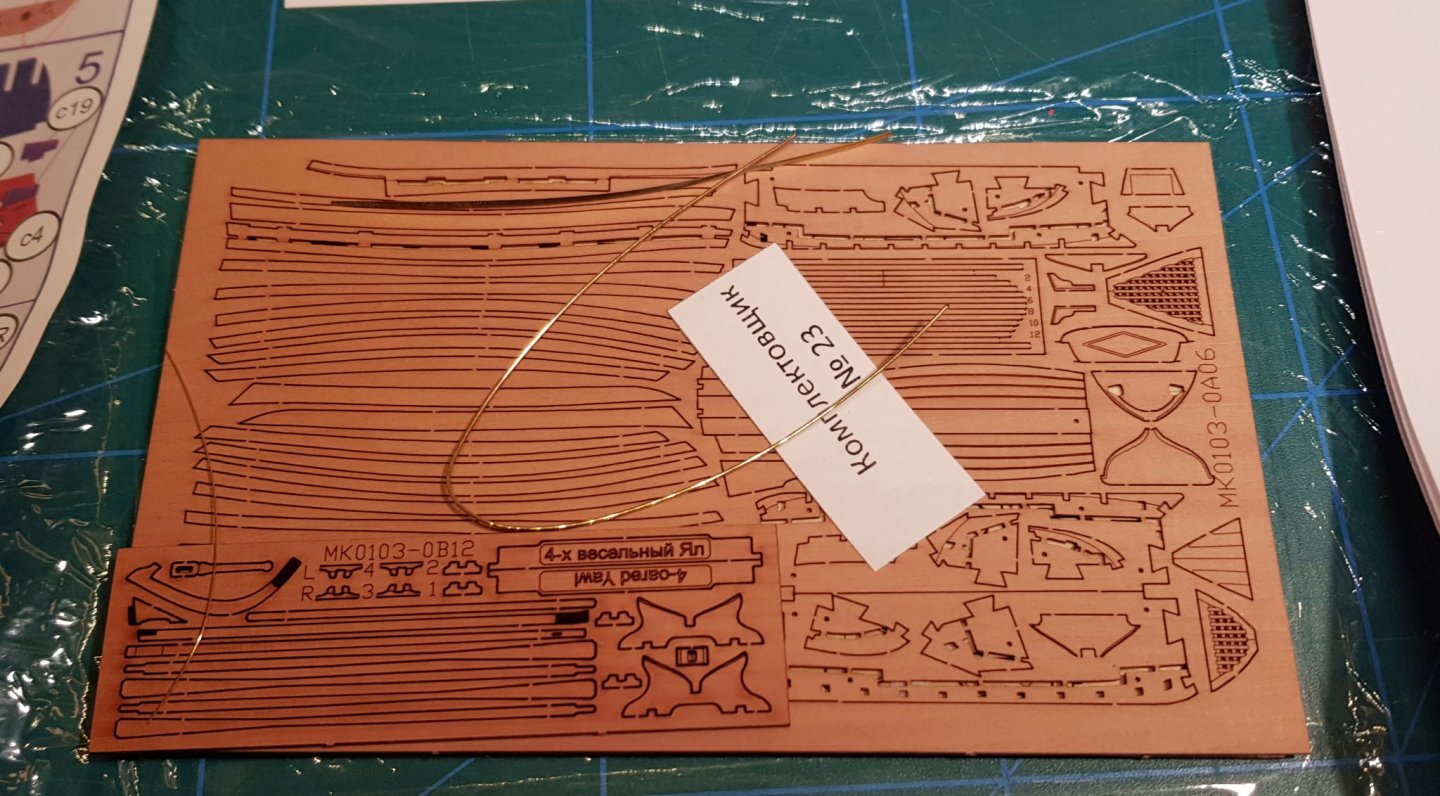
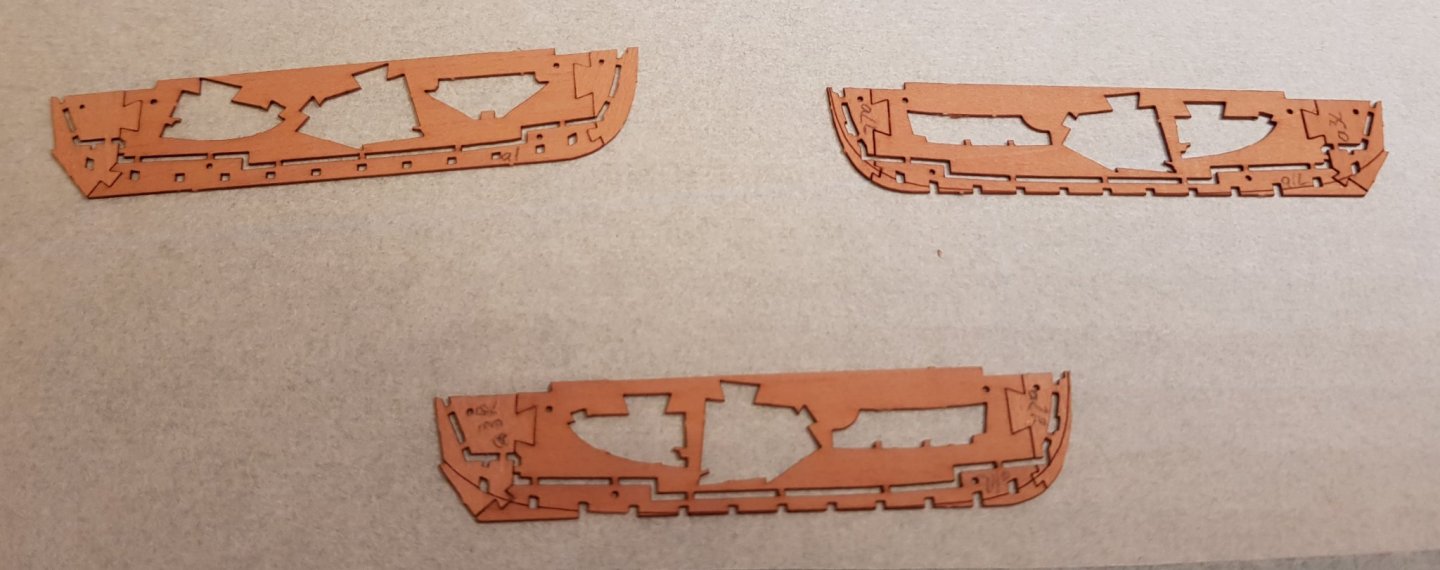
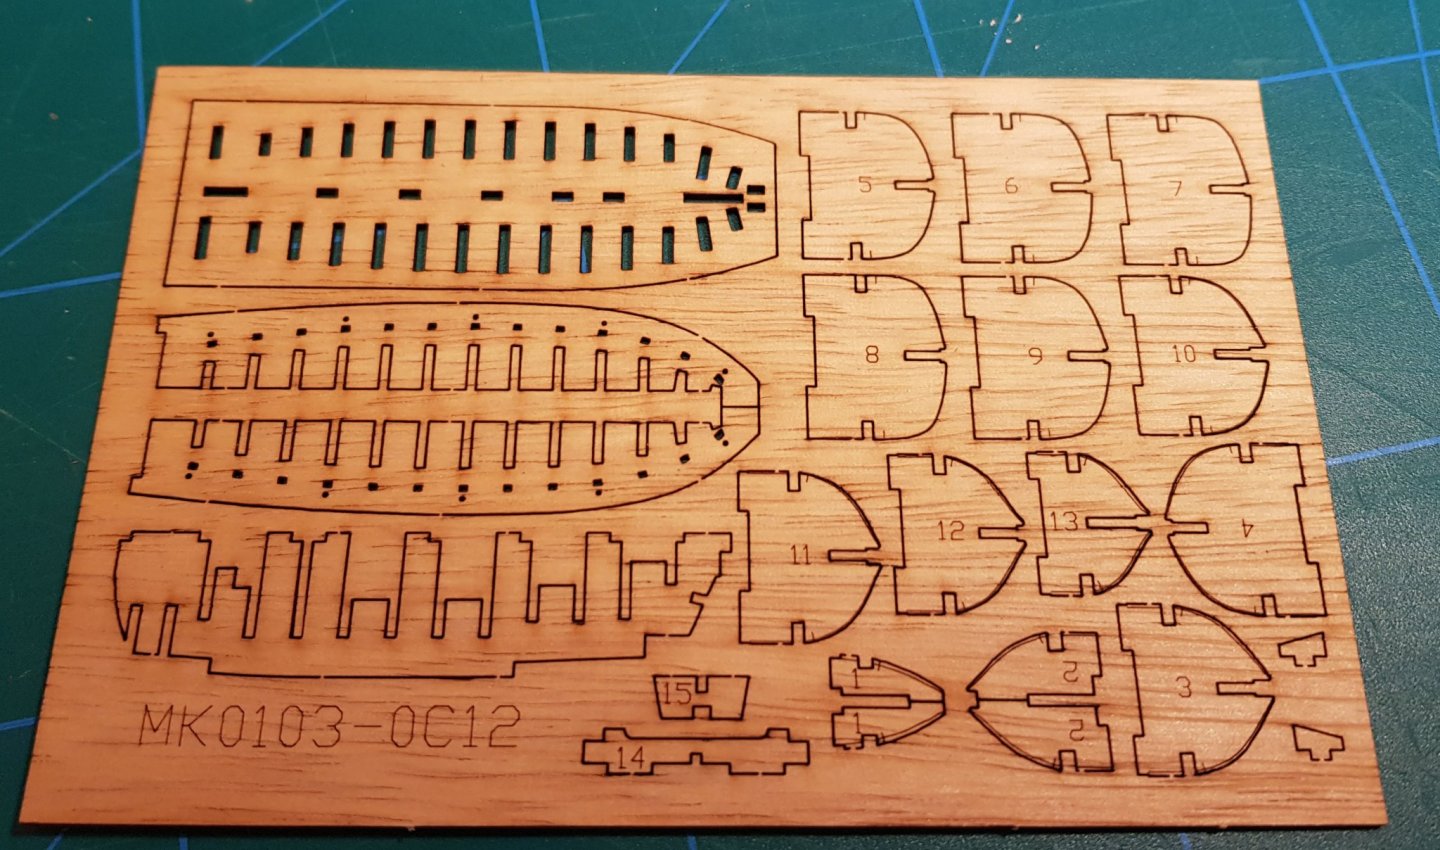
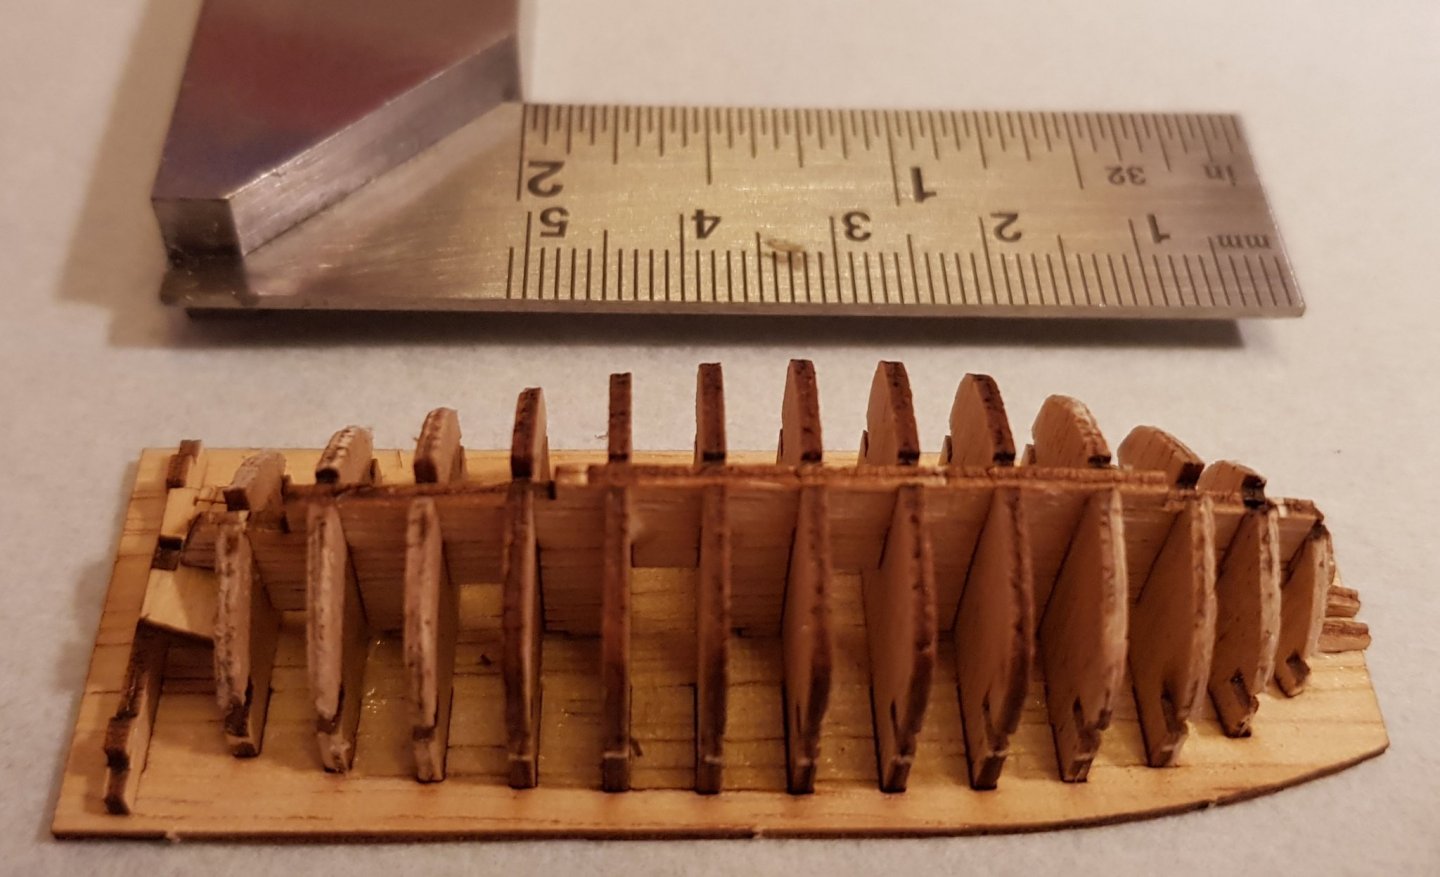
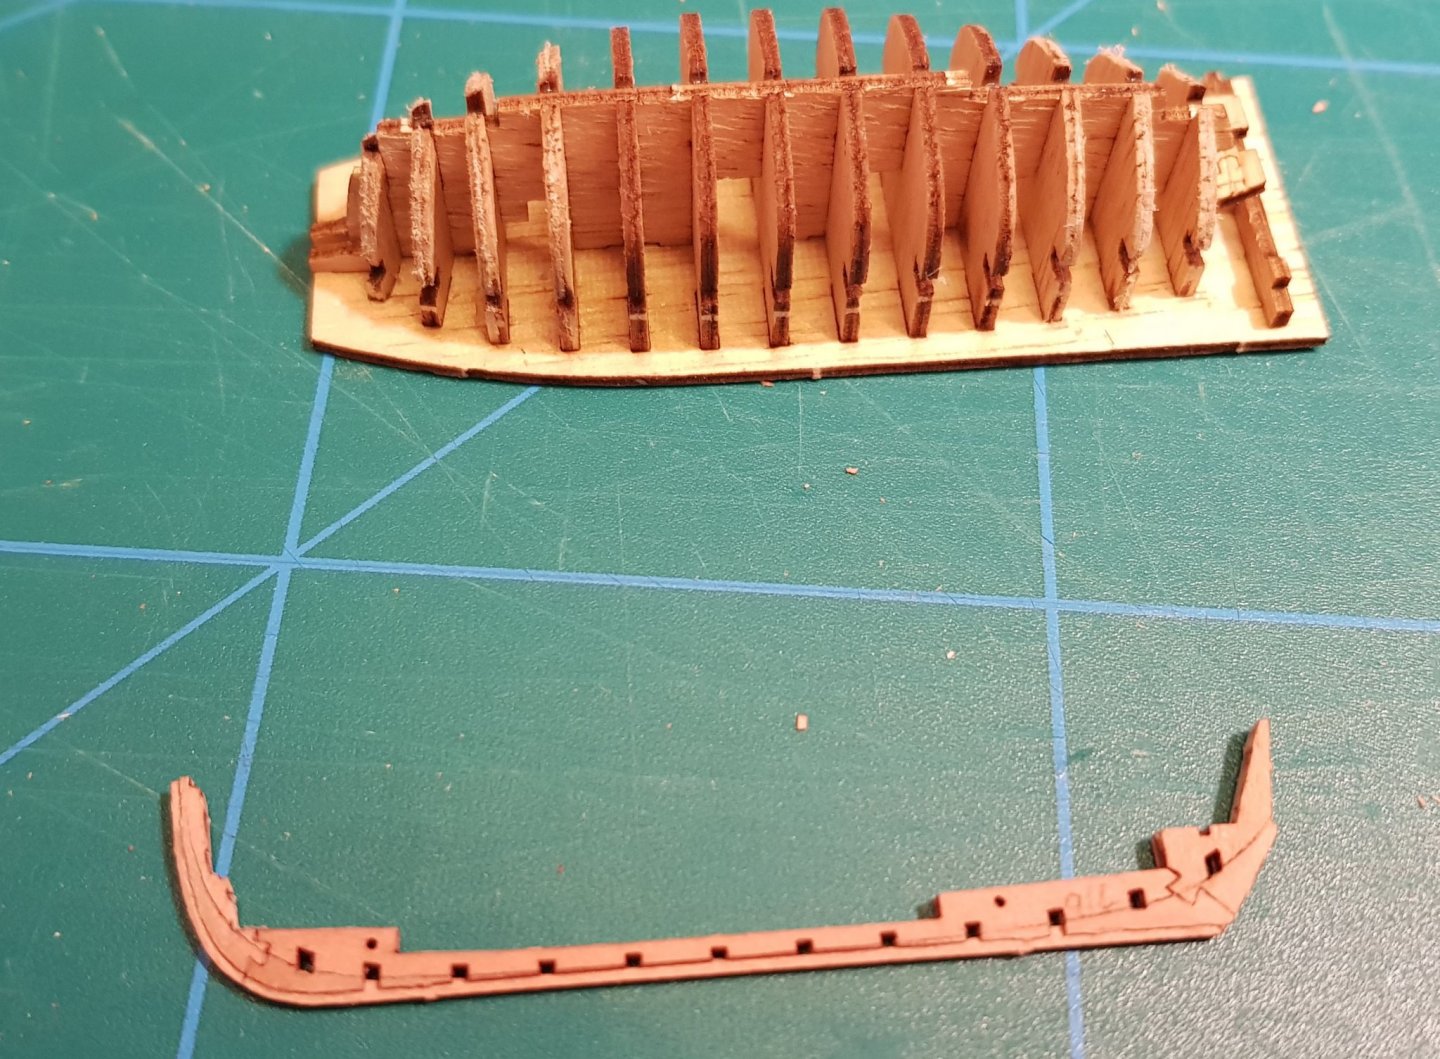
Back again! After a few weeks of other projects taking up my time I'm back with Will (and the diorama). I have several things to continue working on, painting the quay and the bottom of the river, building more houses for the quay side, stepping the masts, etc. But I have decided to go on another detour. I'm not very happy with the boat supplied in the kit. It does not look correct to the scale. Instead I hope to replace it with a boat built from a kit by Master Korabel. The instruction is much larger, and weighs more than the actual material in the kit 😃. The laser cut pear wood is very nicely done and detailed. With such small items, the building is rather quick. First a plug to build the hull on. The material for this is much cheaper and quite brittle. But The frames are soaked and bent into the slots in the keel and the plug. Very thin dimensions and easy to break. Thankfully Master Korabel has included spare strips for the frames in the kit. I only managed to destroy one, so I feel very proficient today 😀 Overall I'm impressed by the quality of the kit and the instructions. The design of the kit really makes it possible (but not easy) to work with such small details as this. Cheers

- 83 replies
-
- 5
-
-
- finished
- billing boats
- (and 1 more)
-
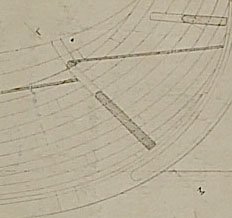
In this case "snit" does not actually mean "lay flat", but it points out the cuts in the drawing. The cut L-M is indicated on the drawing (see the letters above and below). And the corresponding frame The text below says "cut L-M seen from the fore". Cheers

-
The text on the drawing says “snit” which means cut along the lines A-B etc in the line drawing to the left. I.e. the frames are essentially drawn flat. Cheers
-
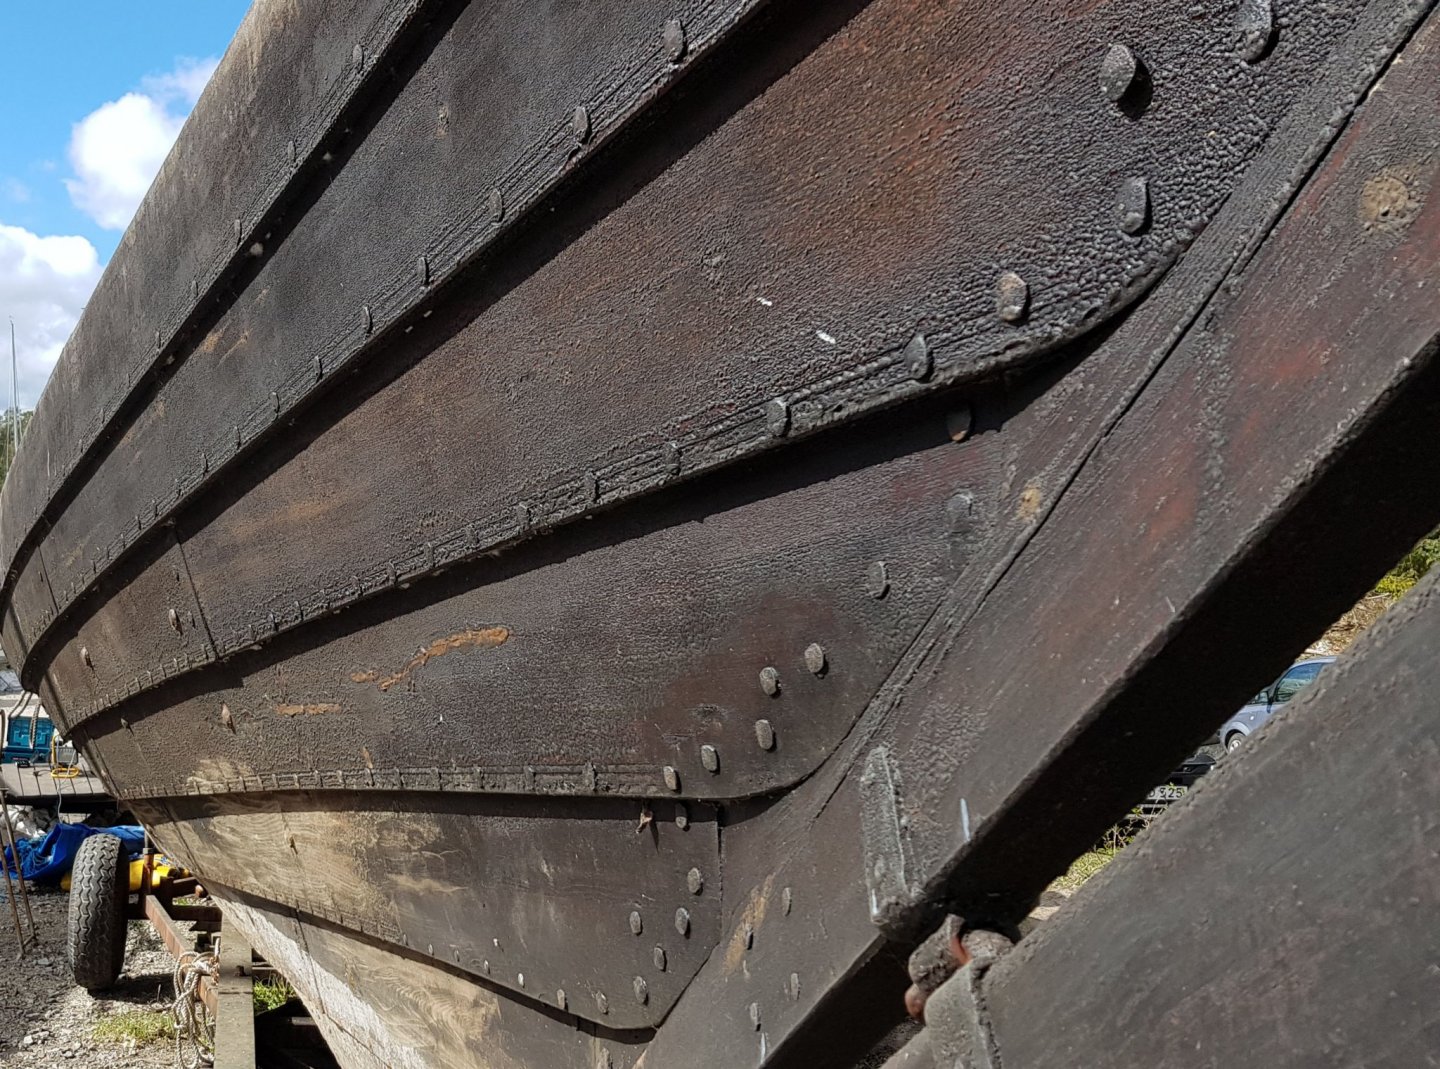
I have not started a build log for the dory yet as the progress got interrupted when the course where I build it was paused due to corona. I will start a log when or if I restart the build. Yes the garboard strake is very oddly placed on this boat, but the plans are from an actual boat in a museum, so it’s authentic. I don’t know if this was an oddity by just this boatbuilder, or if it was a more common pattern. Most of the rivets in the picture is real rivets. The ones closest to the camera are nails that holds the plank to the stern. The bigger heads seen along the hull are treenails for holding the frames to the hull. I guess those can be modeled using a toothpick or similar. Cheers
-
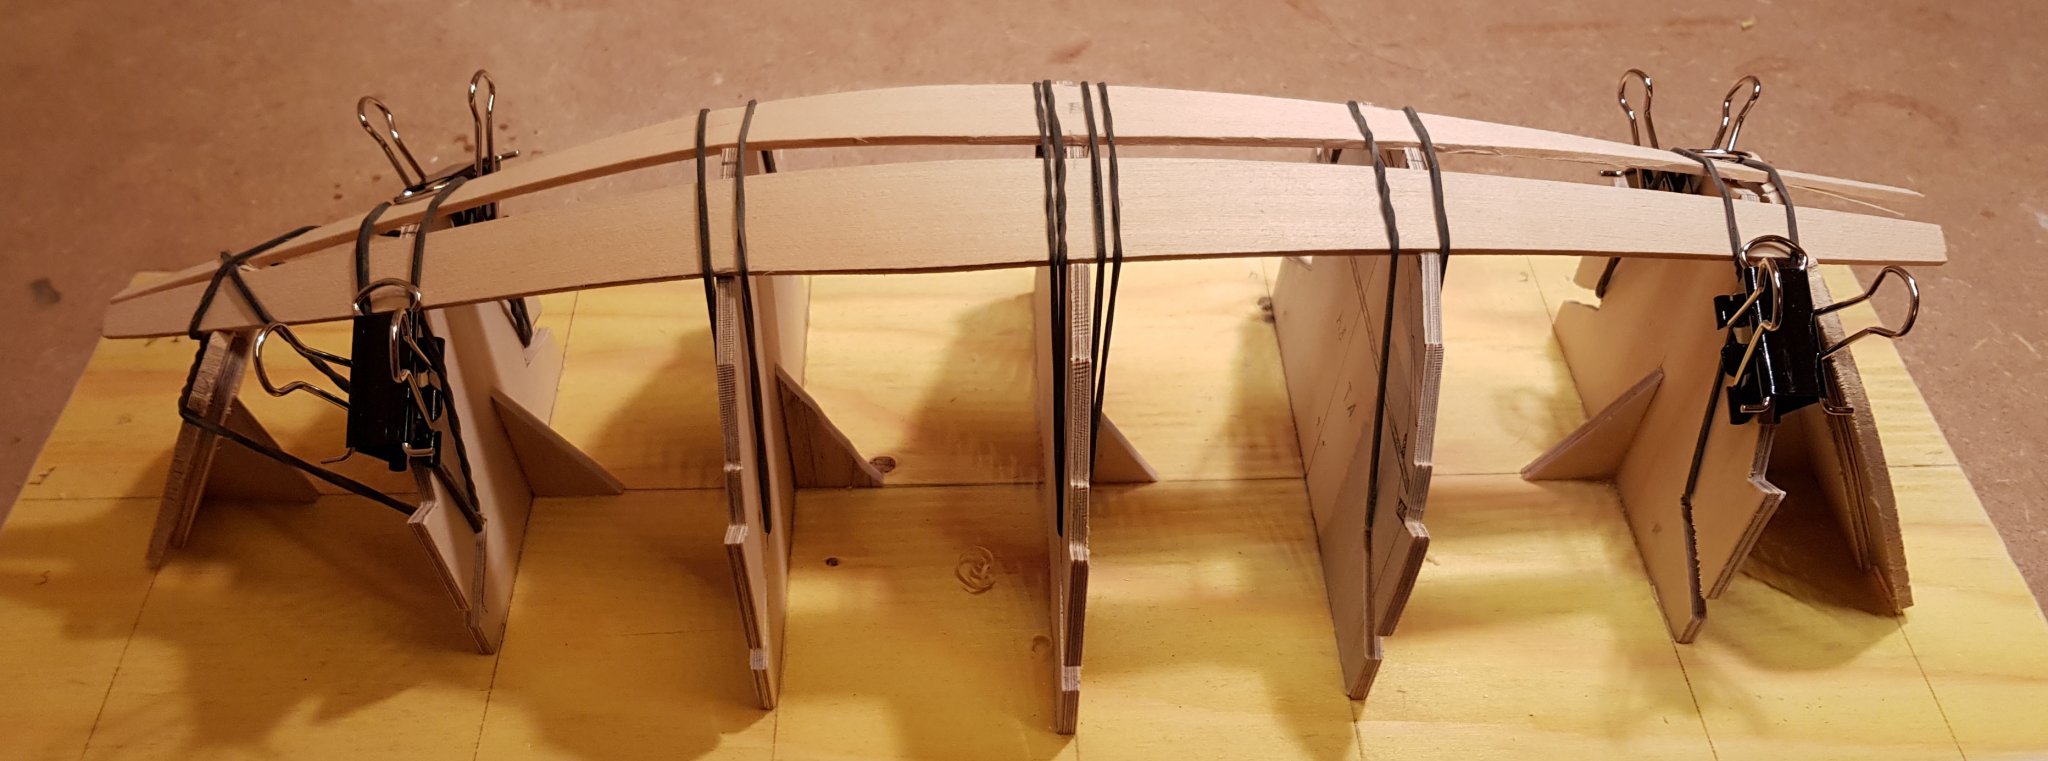
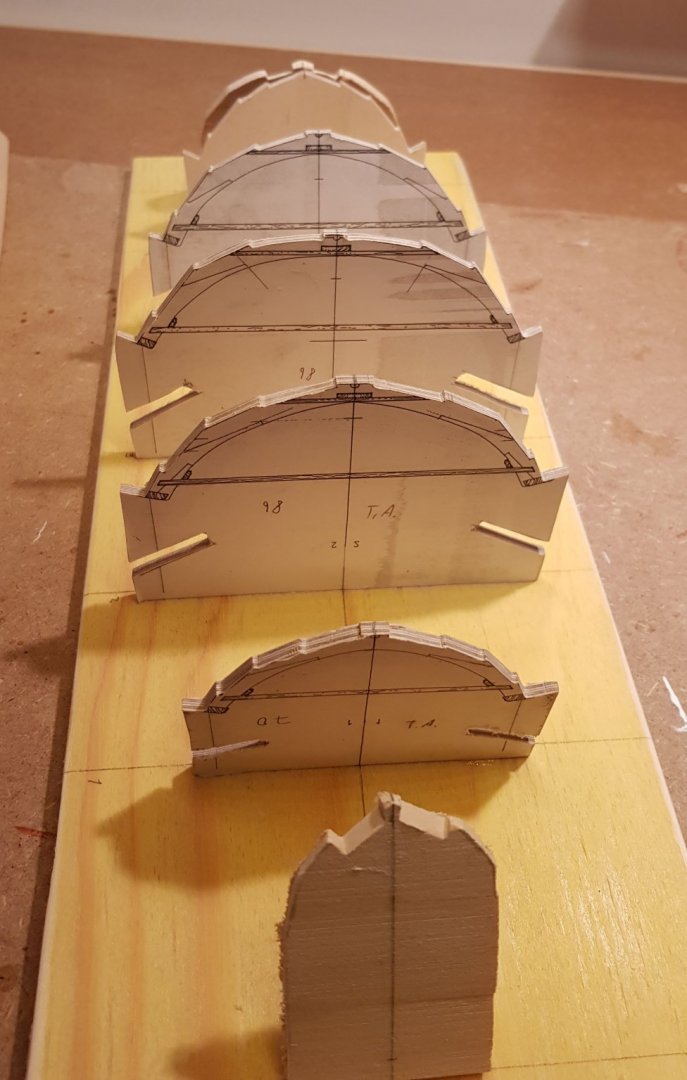
I am planning a similar build as your in the future and am following your progress with interest. Regarding the "plug" to build the hull on I have some ideas. A few months ago I started a course in model boat building and we are building models of Swedish clinker built small vessels. They are rather similar in concept to a viking age ship, so the construction method should be feasible. I haven't come very far with my model since to the course have a break due to corona. Here are some pictures. Note that my model is only a small dory, which does not have a keel nor a stem or stern post. It only has a bottom plank and flat transoms in the fore and aft. However, the same construction principles should be possible to use for larger ships and with keels. That is at least what I plan to do when I get to my build. The reason that the "frames" are angled is so that they align with the real frames of the original. If I remember correctly the Oseberg ship has angled frames in the for and aft? A comment on a rivets. They may not necessarily be visible at scale. The following picture is how a hull side looks after 35 years of tar and use. Cheers

-
Welcome back! I’m very happy that you will give it another go. My best wishes and hope for your success and enjoyment in the build.
- 60 replies
-
- 1
-
-
- swampscott dory
- finished
- (and 1 more)
-
Can't be THAT different from knitting... (New Member)
bolin replied to Grisha's topic in New member Introductions
Welcome to MSW. Swampscott Dory was my first model as well, an excellent starting point. Good luck! -
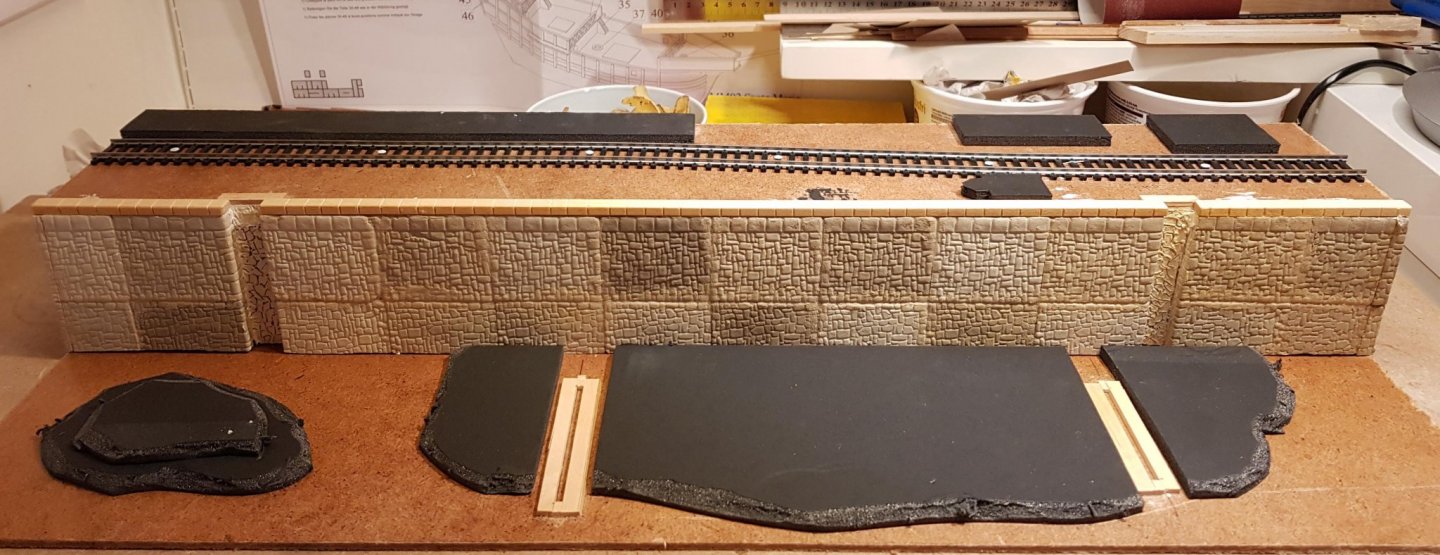
Nice to hear that I have another follower. I hope to be able to make her justice in my model. I have been reading some of the build logs for Syrens Medway long boat. It is on my list of possible builds for the future. I have been busy with other things the last week, such as getting a ship in scale 1:1 ready for launching after winter storage... But I have found a little time for continuing with the base and the diorama. I have added some foundation for the buildings on the quay and slots for the acrylic stands on the bottom. The bottom have then been covered with strips of news paper glued with wall paper glue. After it has dried I will use medium grain filler of the ordinary house renovation variety. It should give an OK texture that could imitate s river bottom. Cheers

- 83 replies
-
- 5
-
-
- finished
- billing boats
- (and 1 more)
-
Welcome onboard Kevin. There is still some way to go and your welcome to hike along. Cheers
- 83 replies
-
- 1
-
-
- finished
- billing boats
- (and 1 more)
-
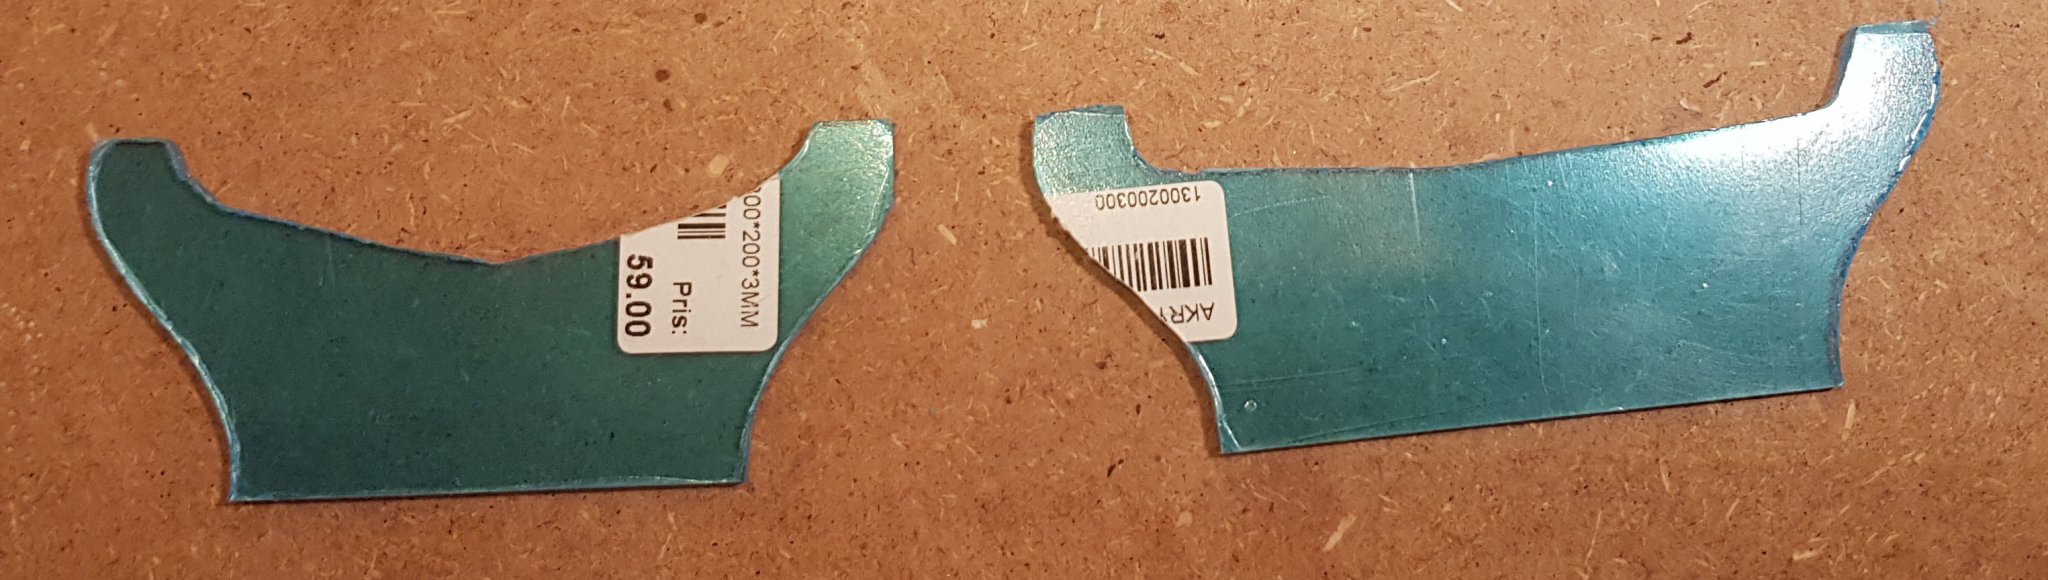
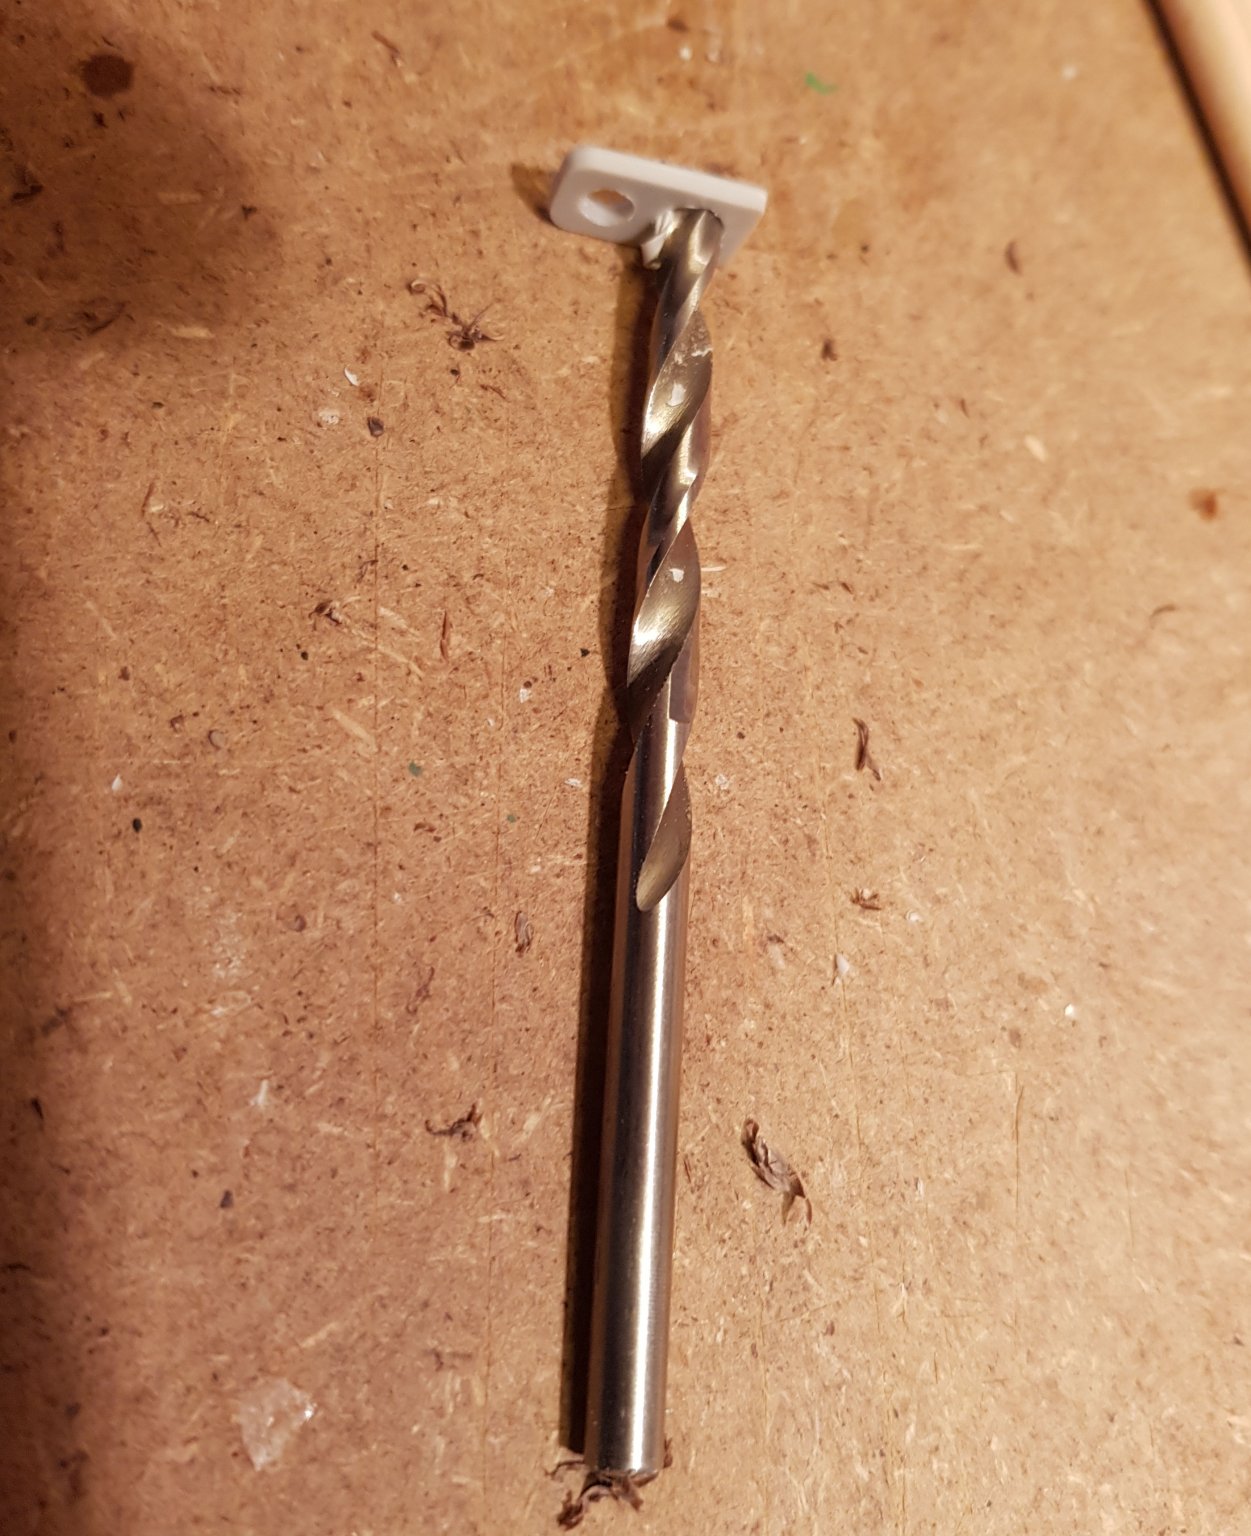
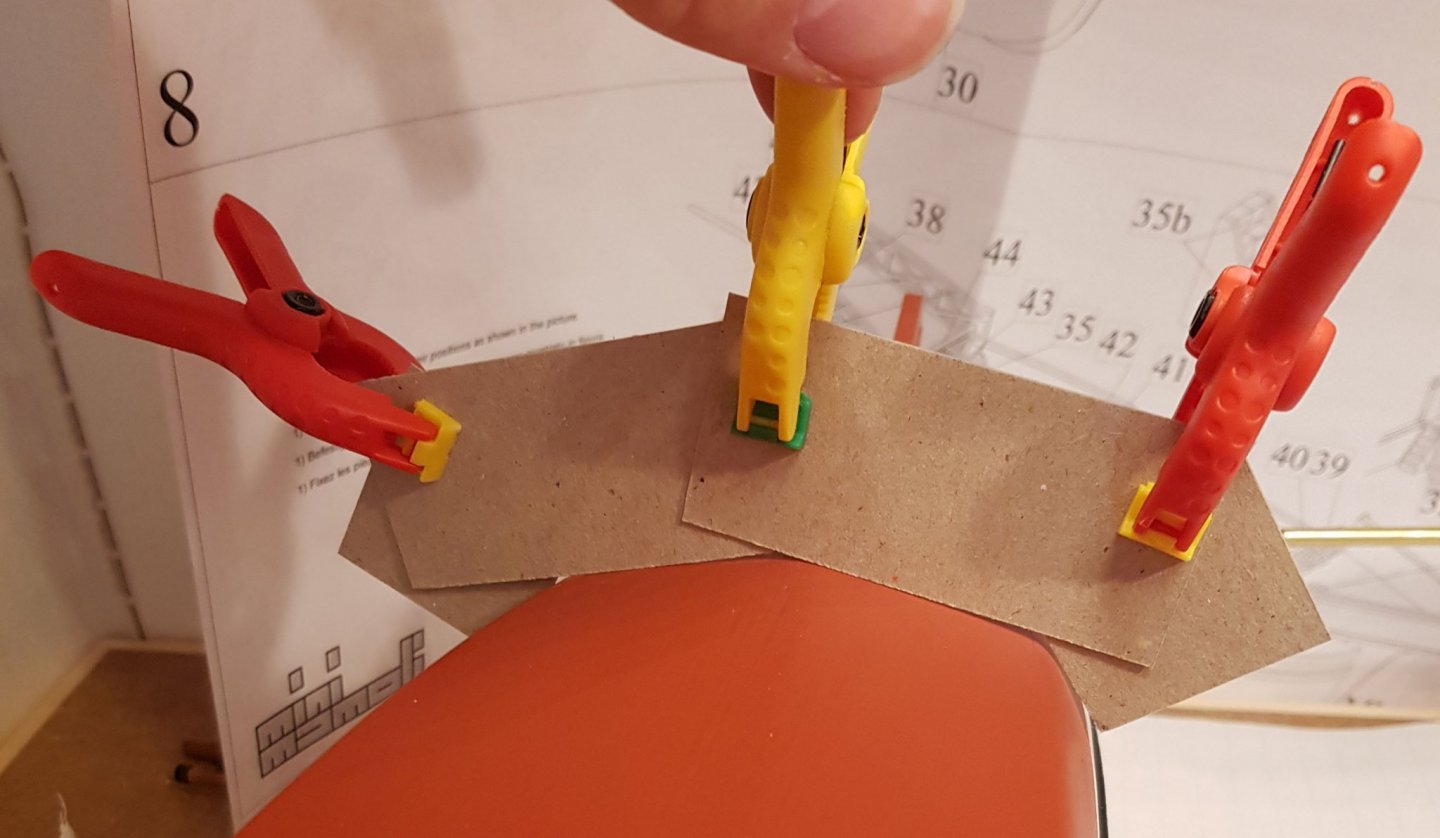
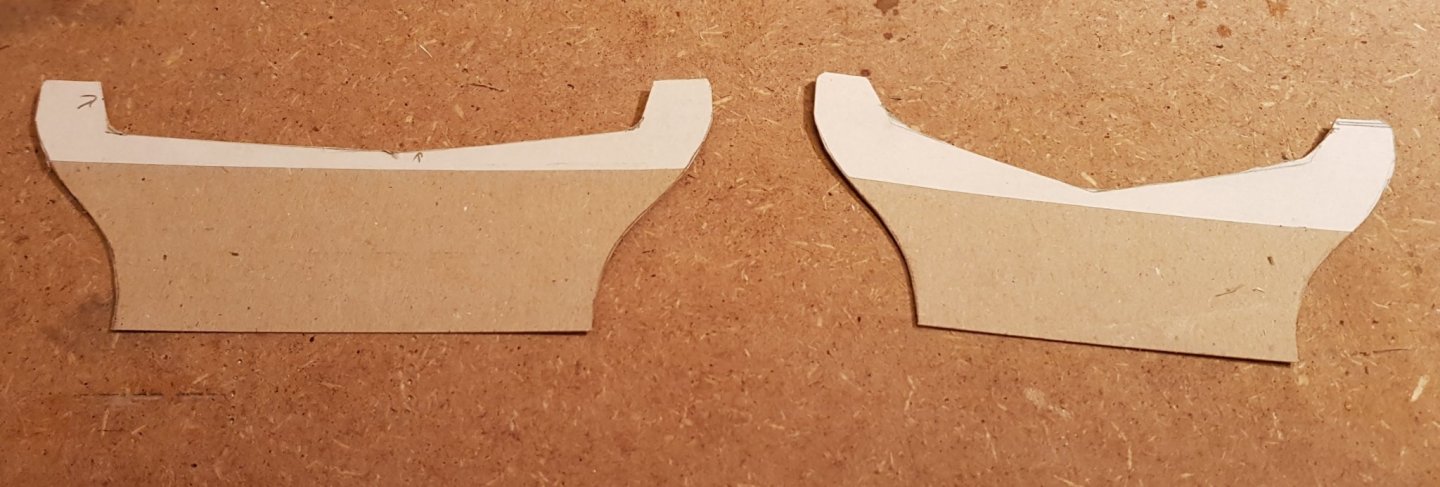
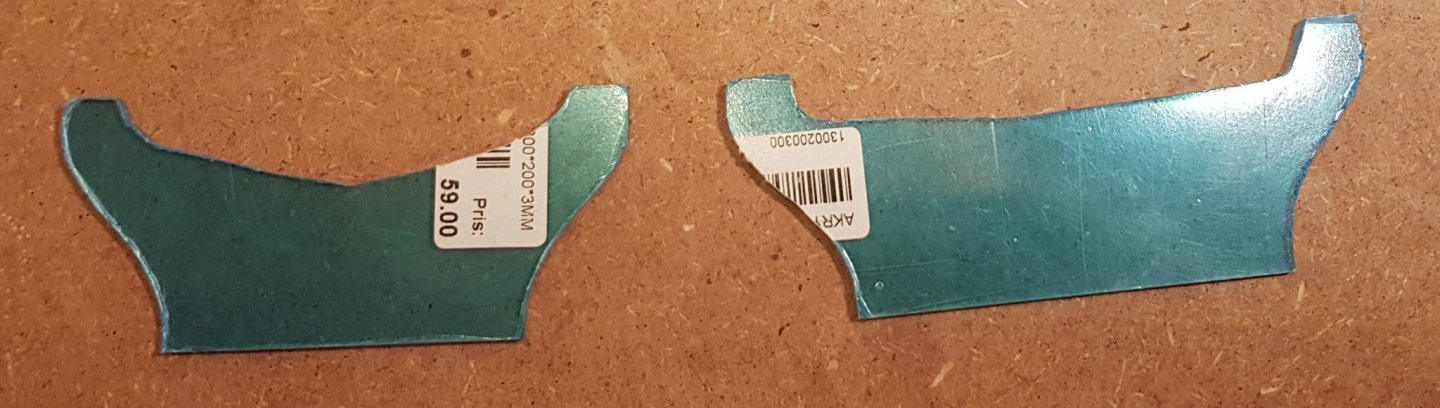
Sometimes the tiniest bits can thwart your plans. This time my 0.5 mm drill bit broke. Unfortunately it is needed to drill holes in the mast and in other places to preparing holes for eyelets. So while waiting for a replacement shipping I started with the stand. As mentioned I plan to build it in acrylic. Since the hull shape is rather flat it was easy to get the basic shape by using a couple of pieces of cardboard. From this I could make some templates that could be tested against the hull shape. And when I was satisfied they where sawed from acrylic (the blue shade is only the cover plastic). There is still more filing and sanding until they are done, but this is an idea of what it will look like. Cheers

- 83 replies
-
- 6
-
-
- finished
- billing boats
- (and 1 more)
-
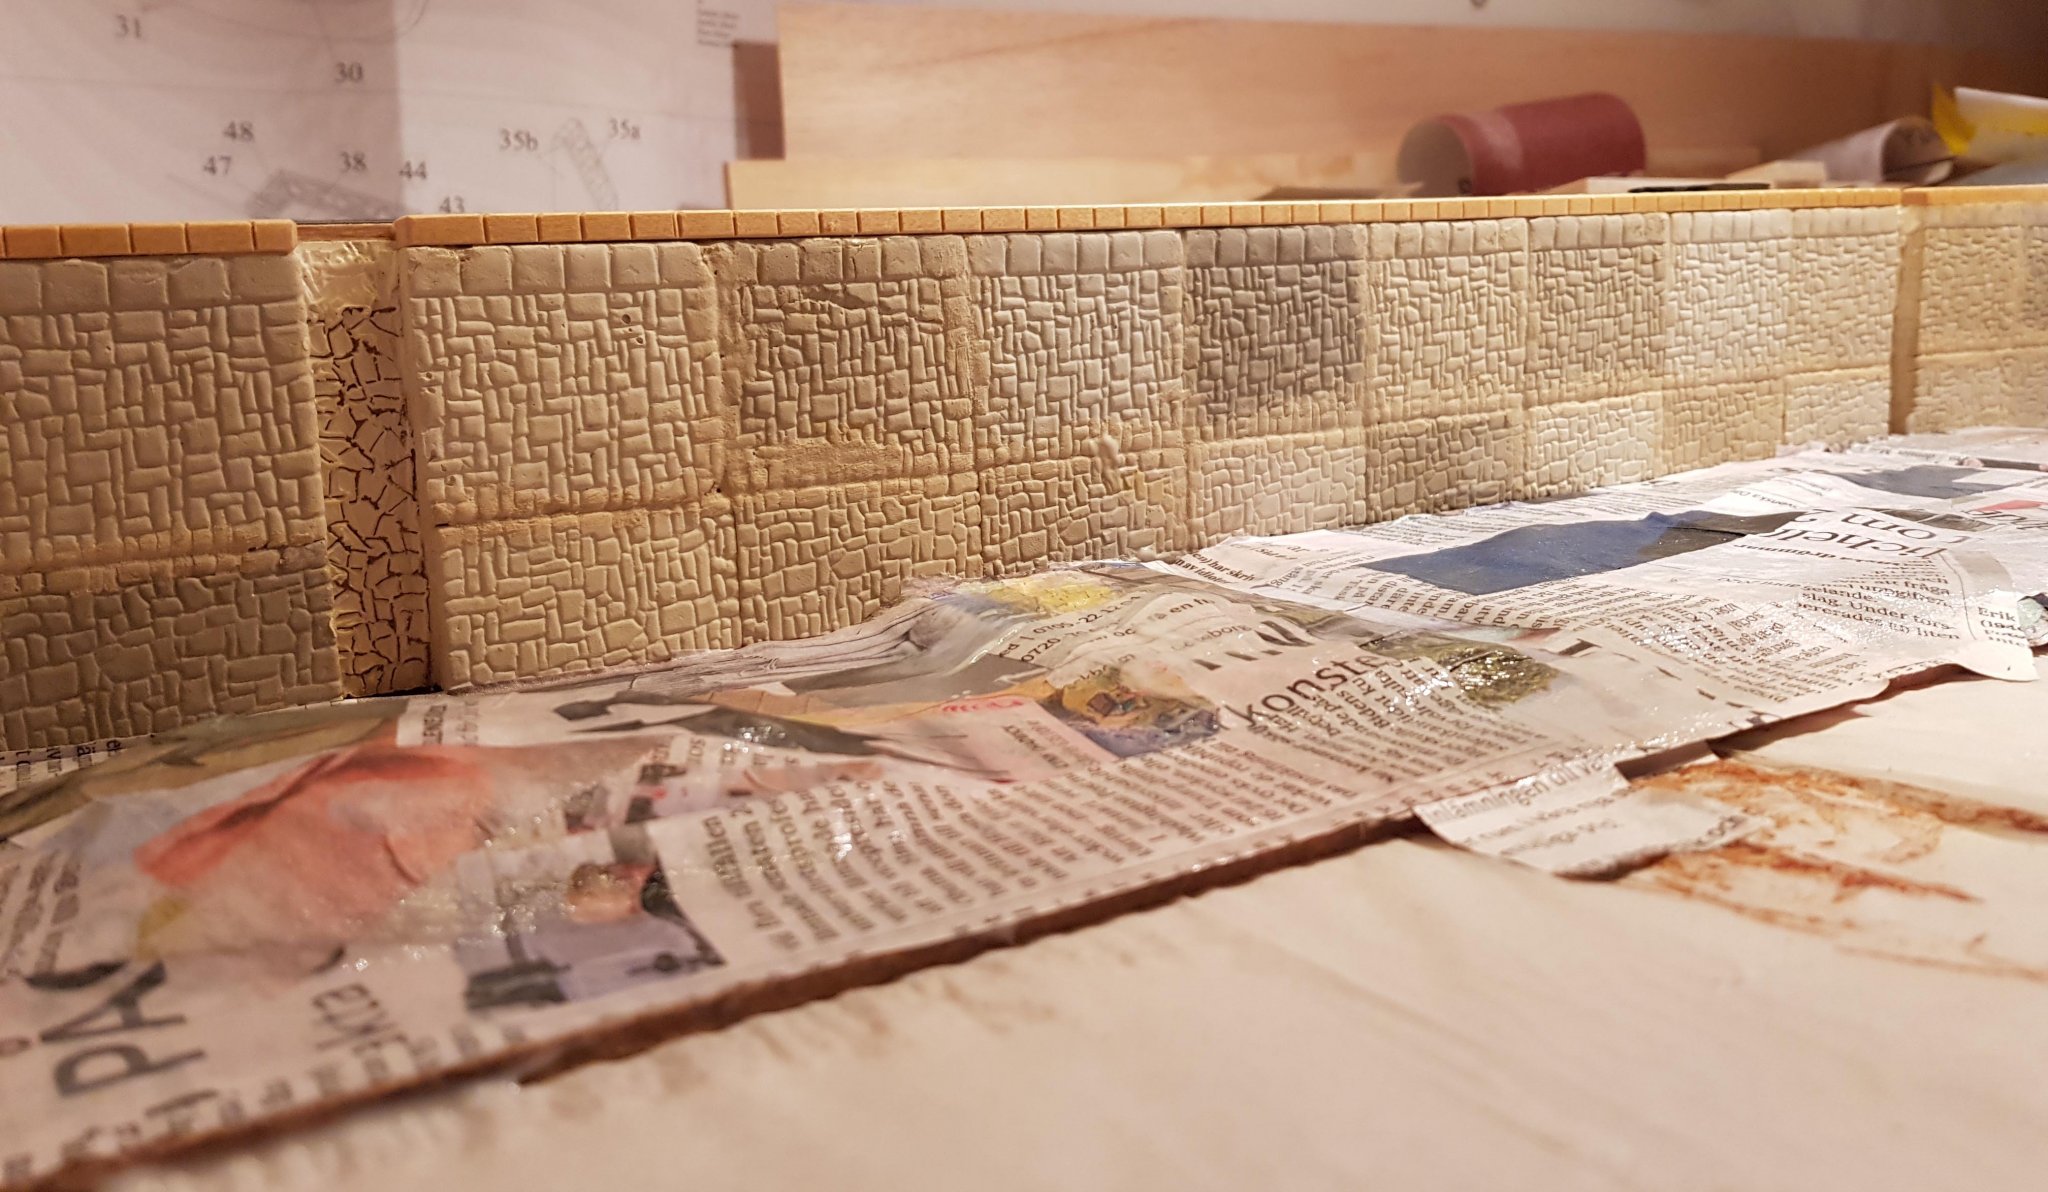
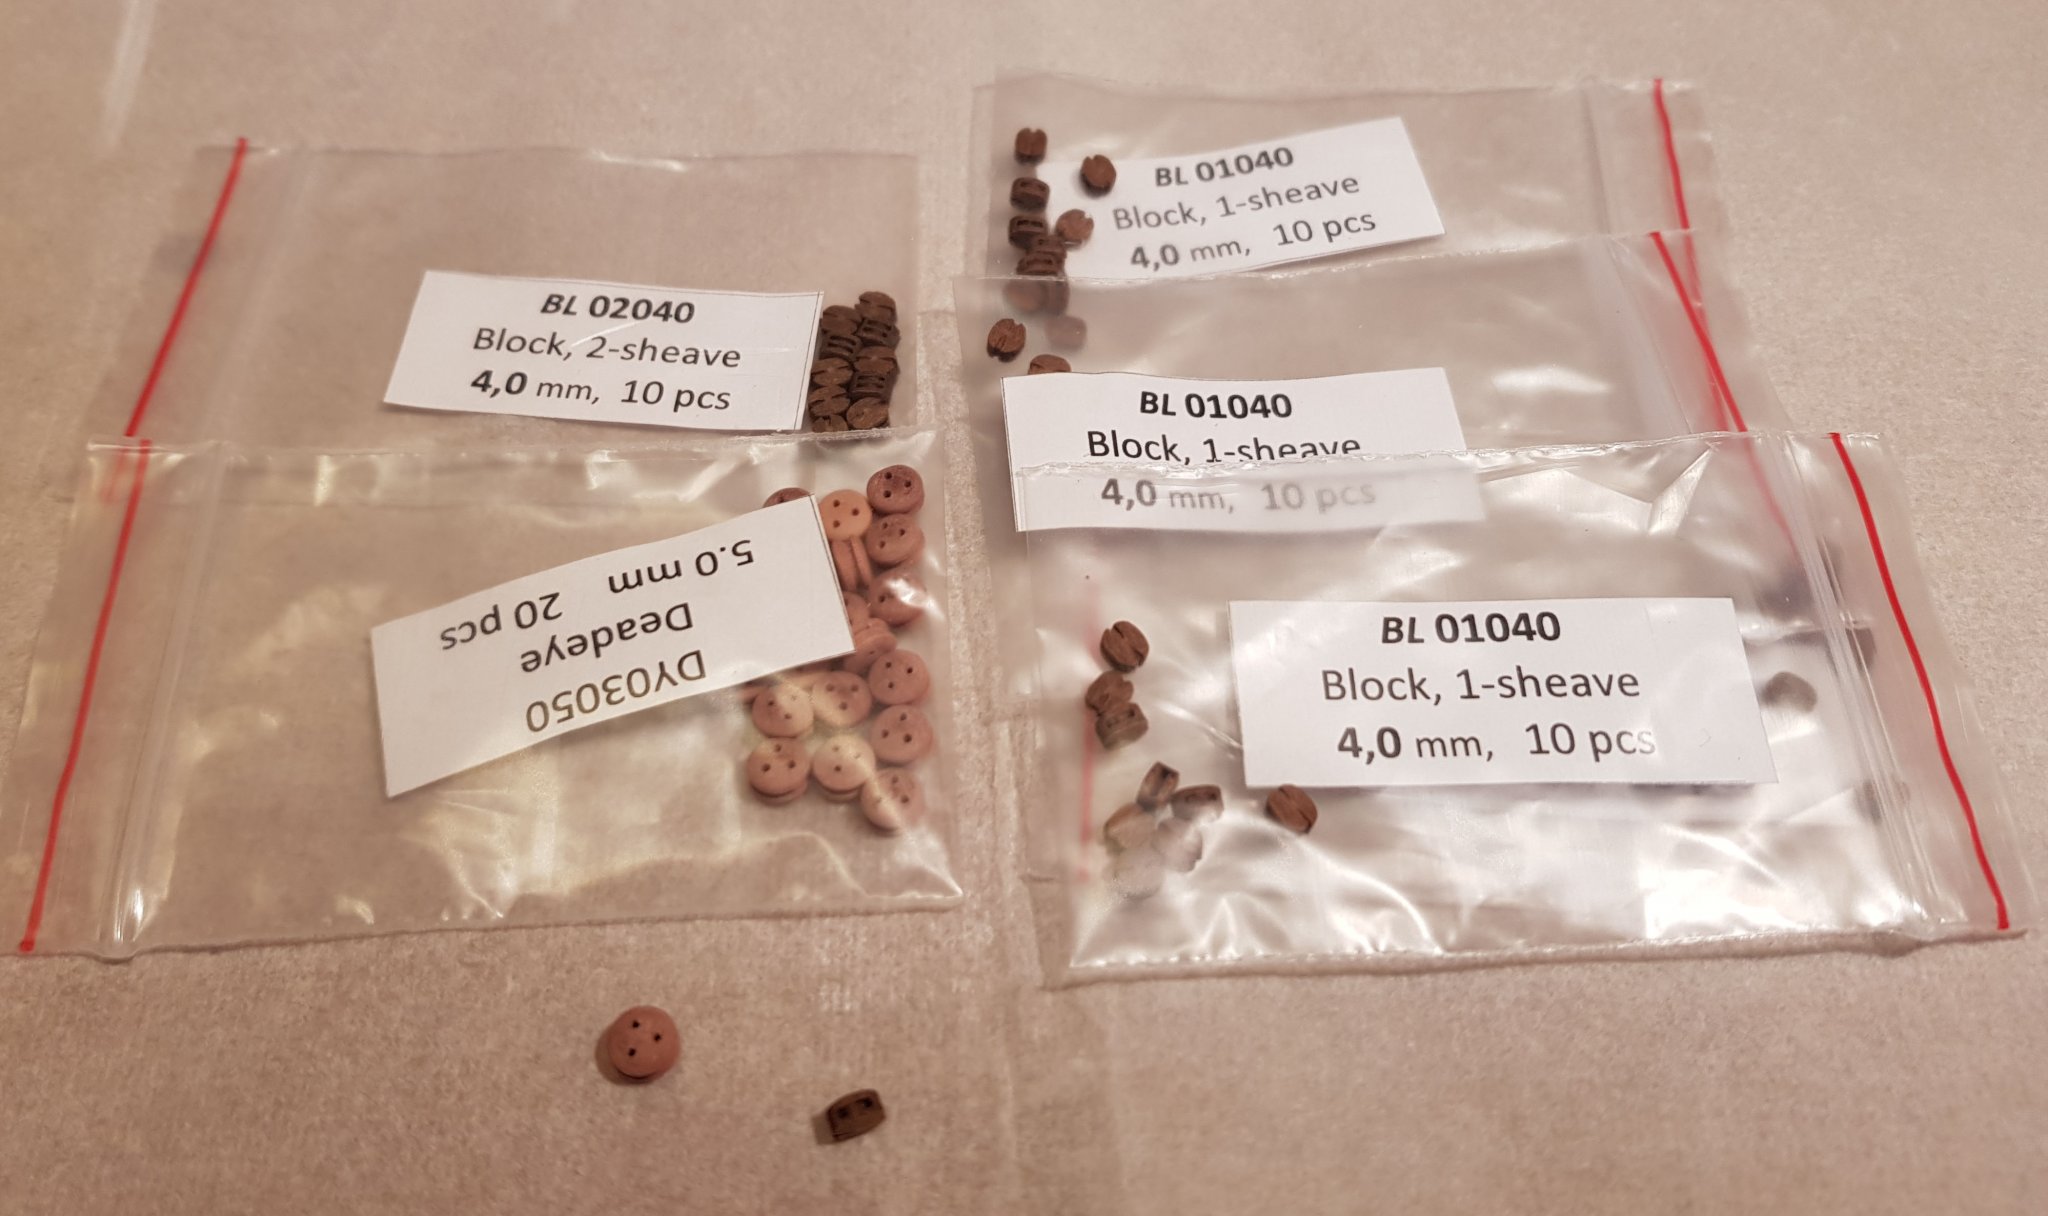
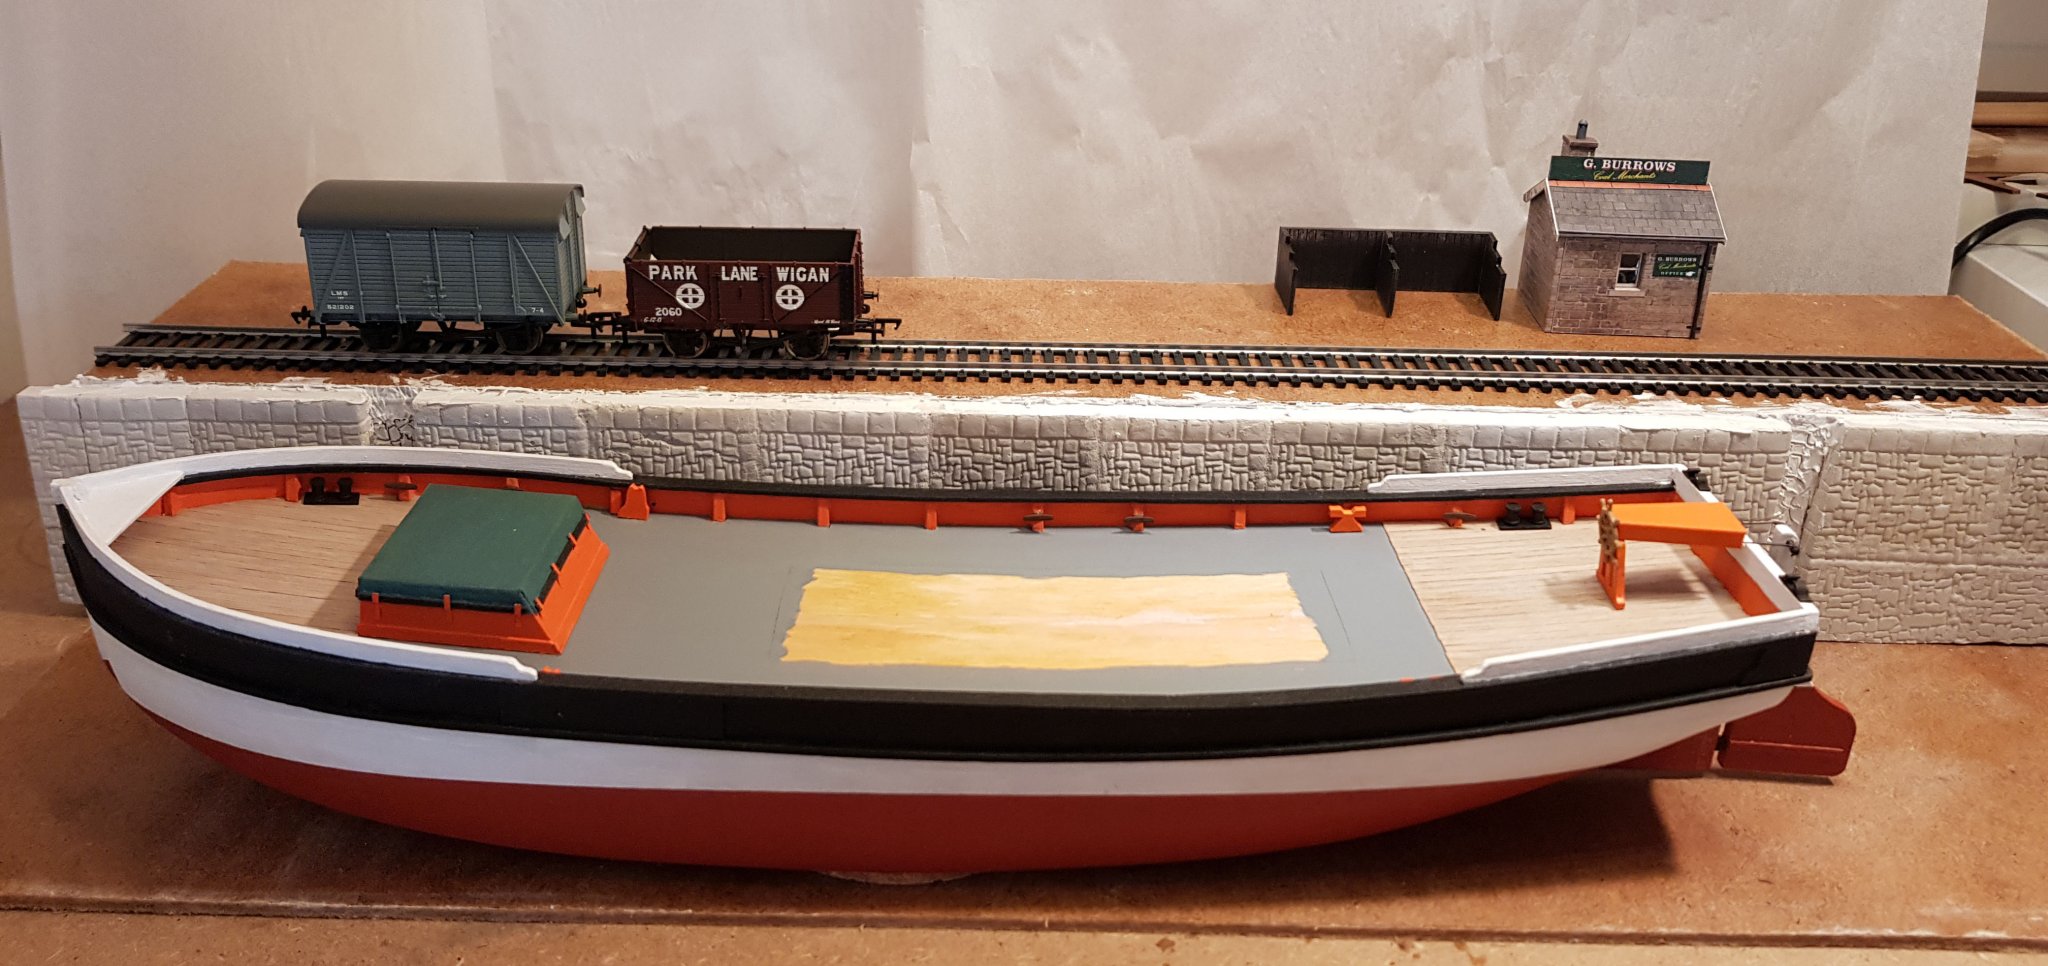
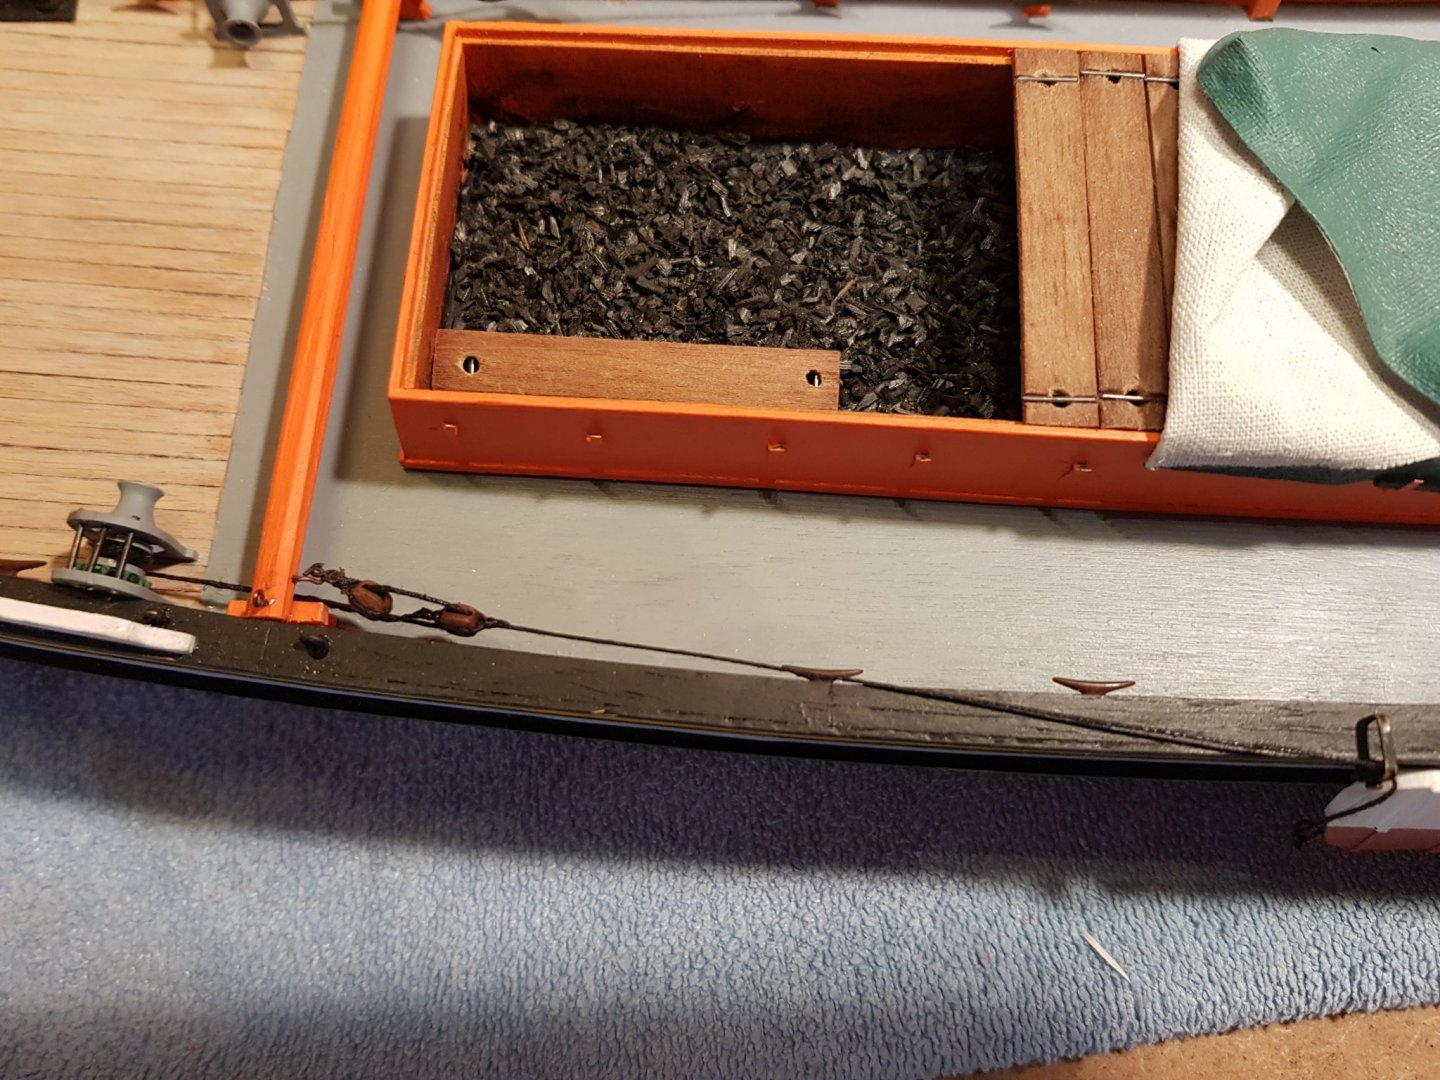
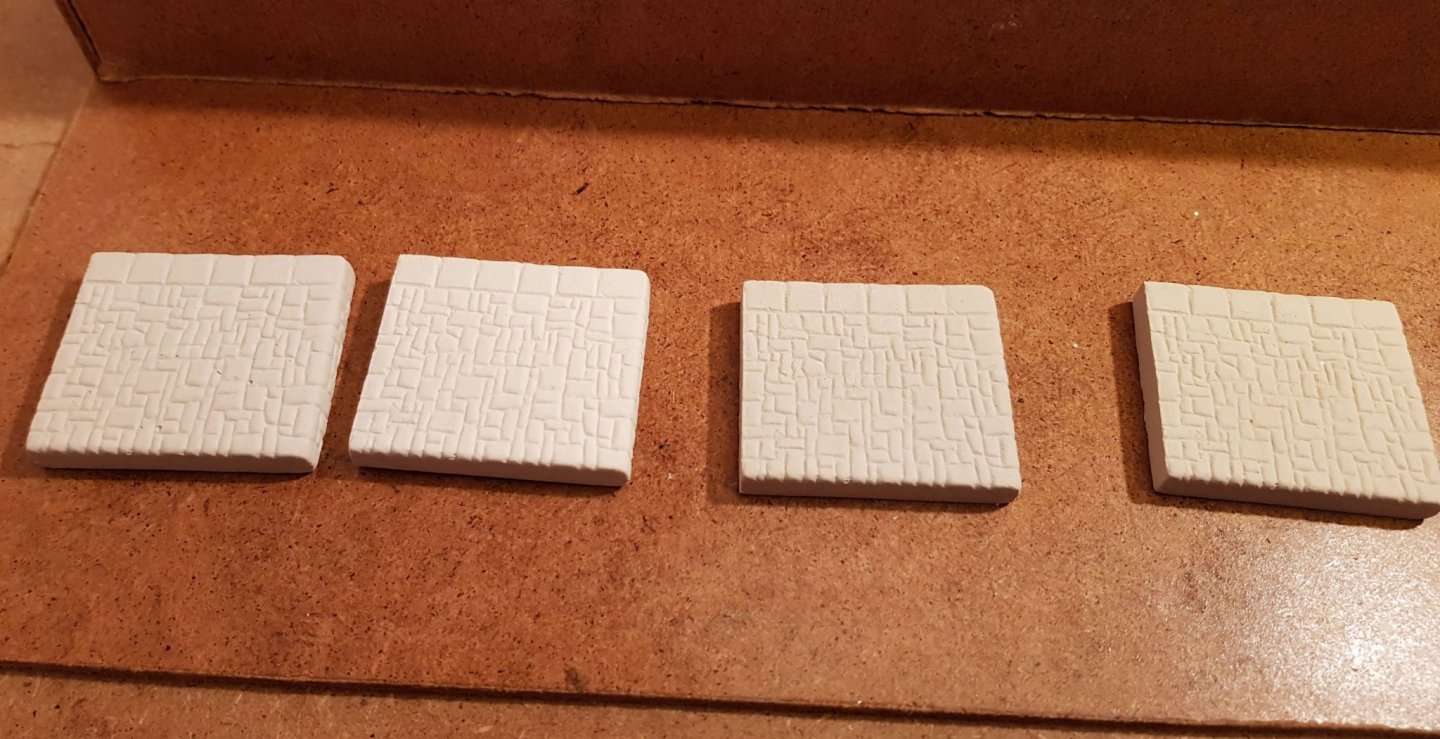
Today I received blocks and deadeyes from U.K. I will not need so many for Wills rigging as it is rather simple. In the weekend I hope to start with making the masts and booms as well as mounting more equipment on deck. I can also share a picture of where I stand with the diorama. The plaster wall sections have all been molded and attached to the quay side. I had an idea of mixing pigment into the plaster, but could not get the color even between the batches. Next step is to spray a layer of shellac and maybe start to paint it. The real painting will wait until I have made the bottom and ground on the quay side. My intent is not to show any water surface. Instead I will build clear acrylic stands from the bottom. On the quay there is yet only the coal merchants office and a railway track. The wagons are in OO scale (1:76). I bought them preowned from U.K. Cheers


- 83 replies
-
- 6
-
-
- finished
- billing boats
- (and 1 more)
-
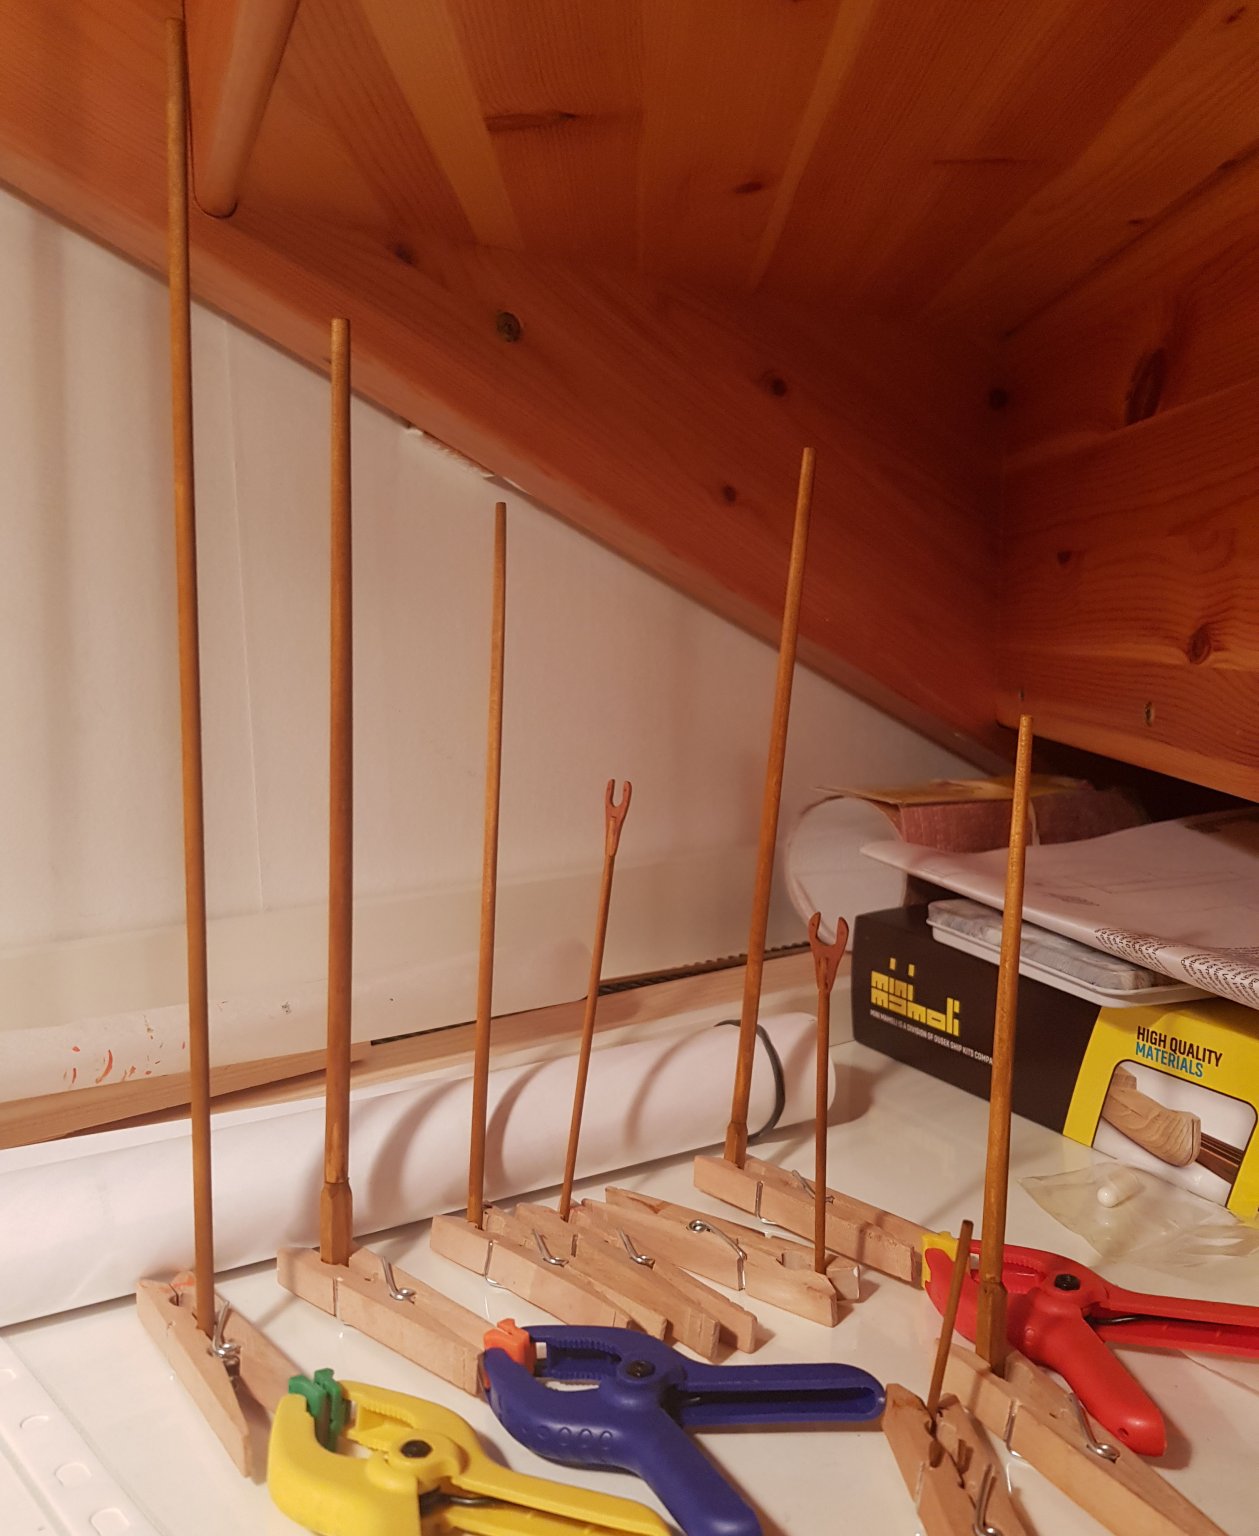
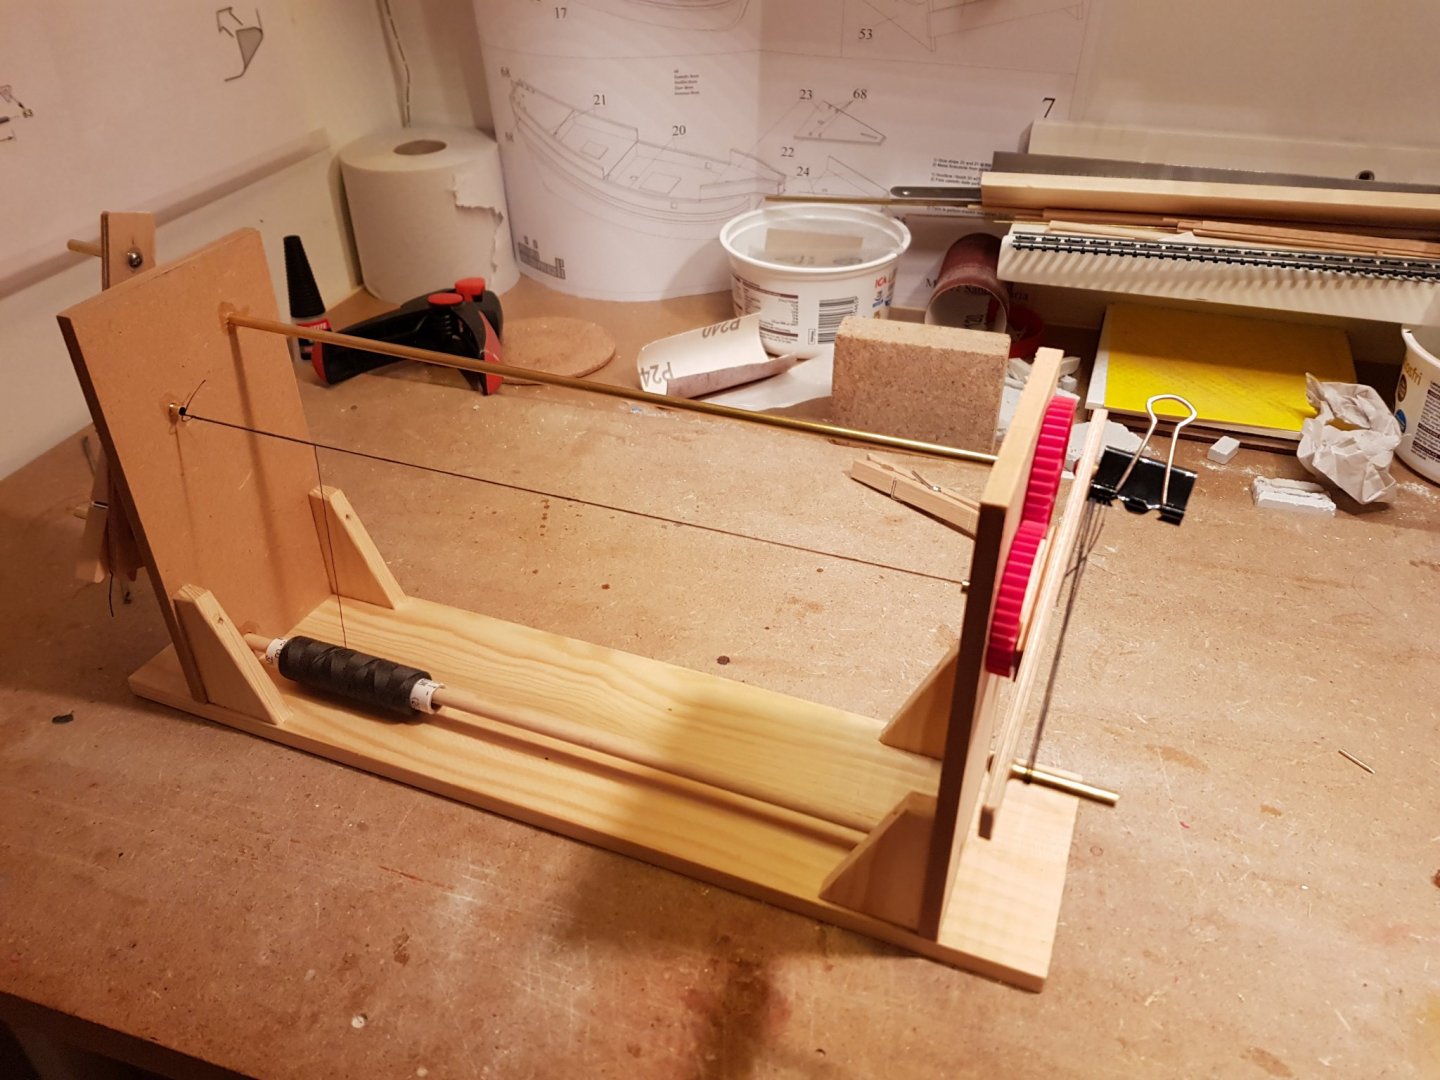
While waiting for the blocks and deadeyes to arrive from Vanguard models I have built a serving machine so that I can serve the shrouds and stays for the standing rigging. I have learned that they where probably wire, but that they where also served for protection. I built the machine mostly out of scraps I had laying around. The brass shaft and cogwheels are new for this little project.
- 83 replies
-
- 4
-
-
- finished
- billing boats
- (and 1 more)
-
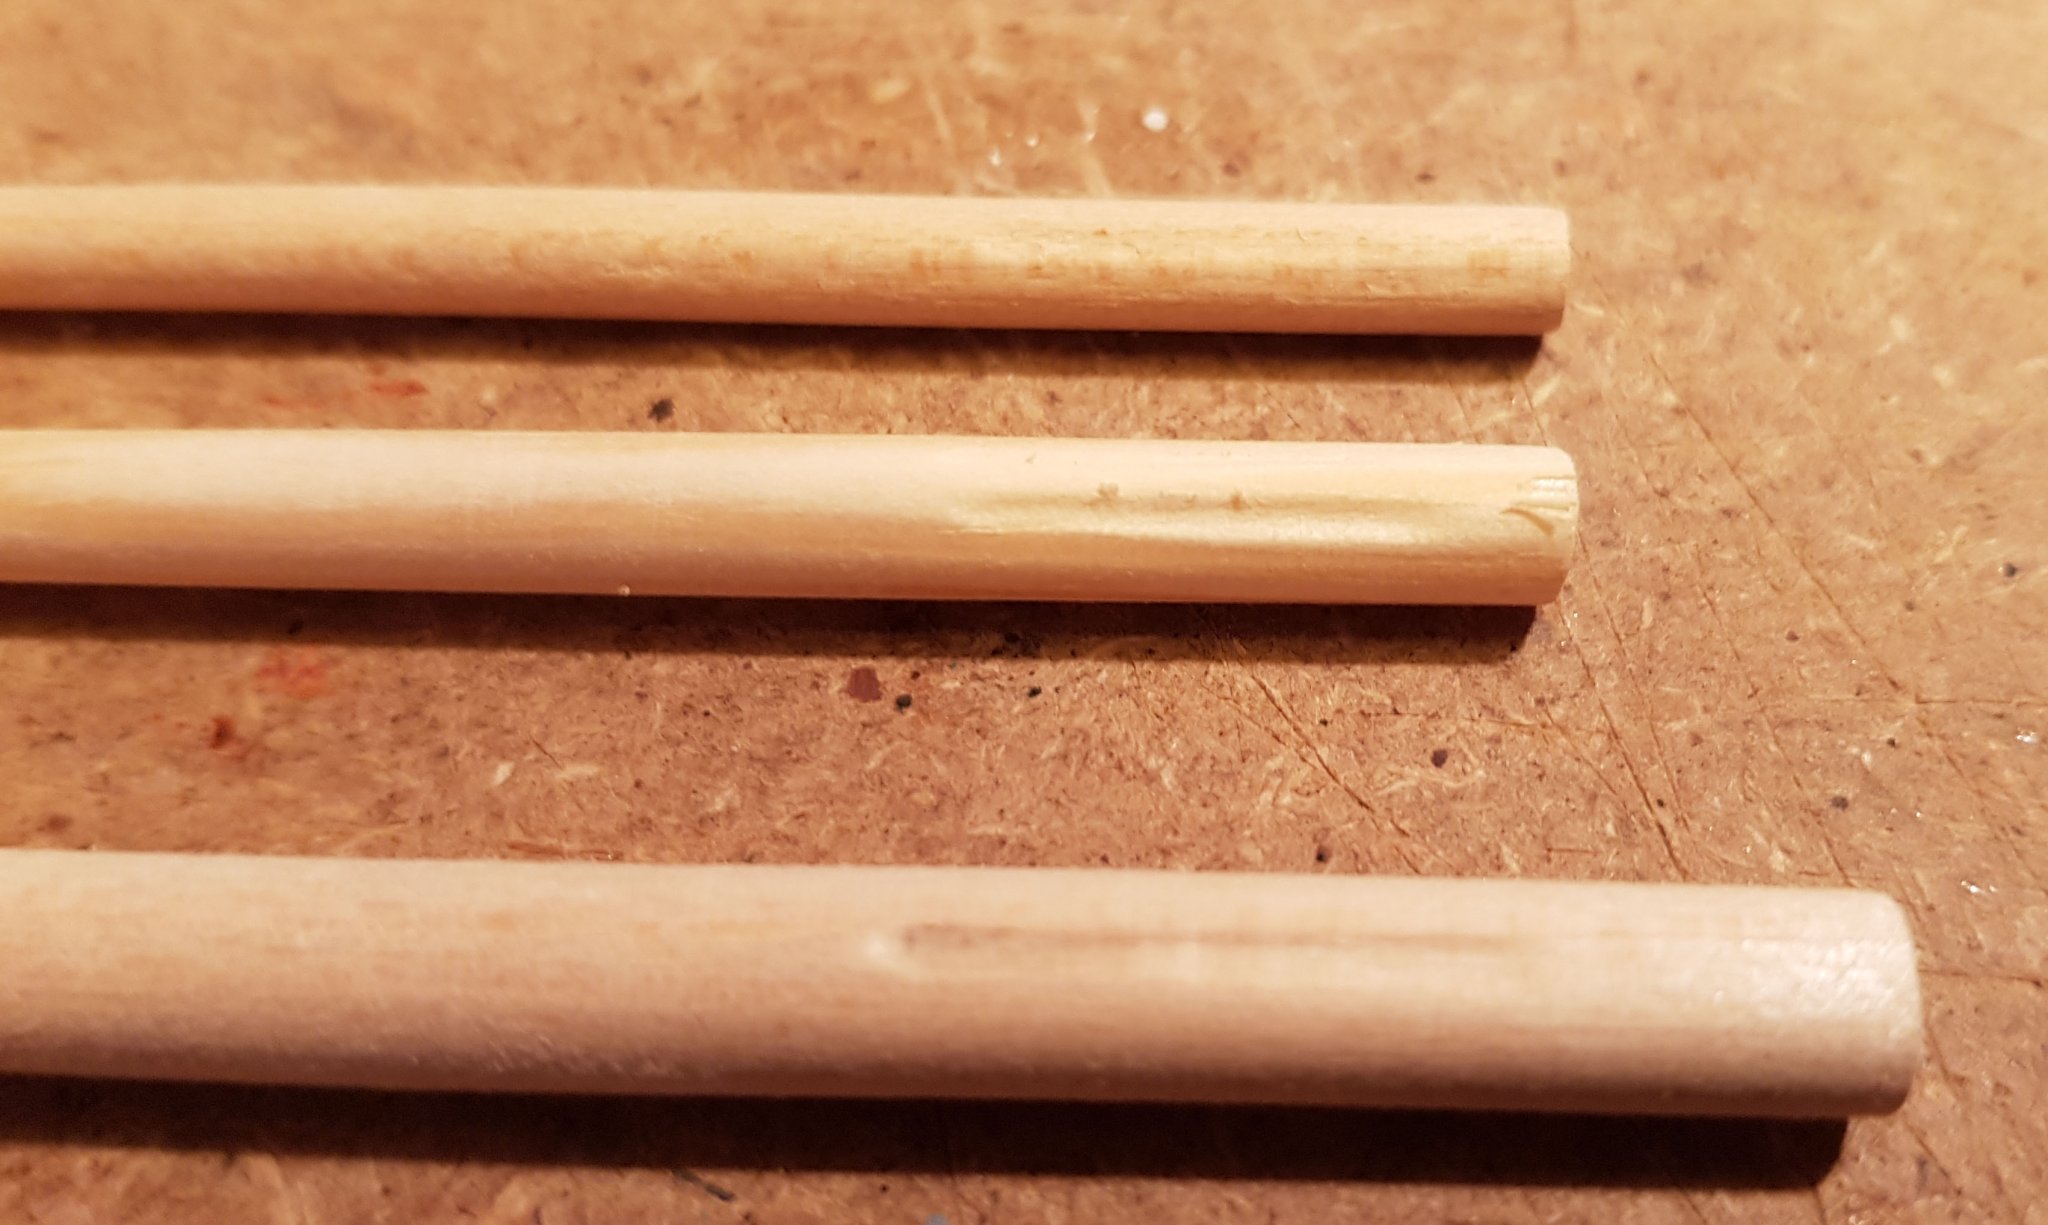
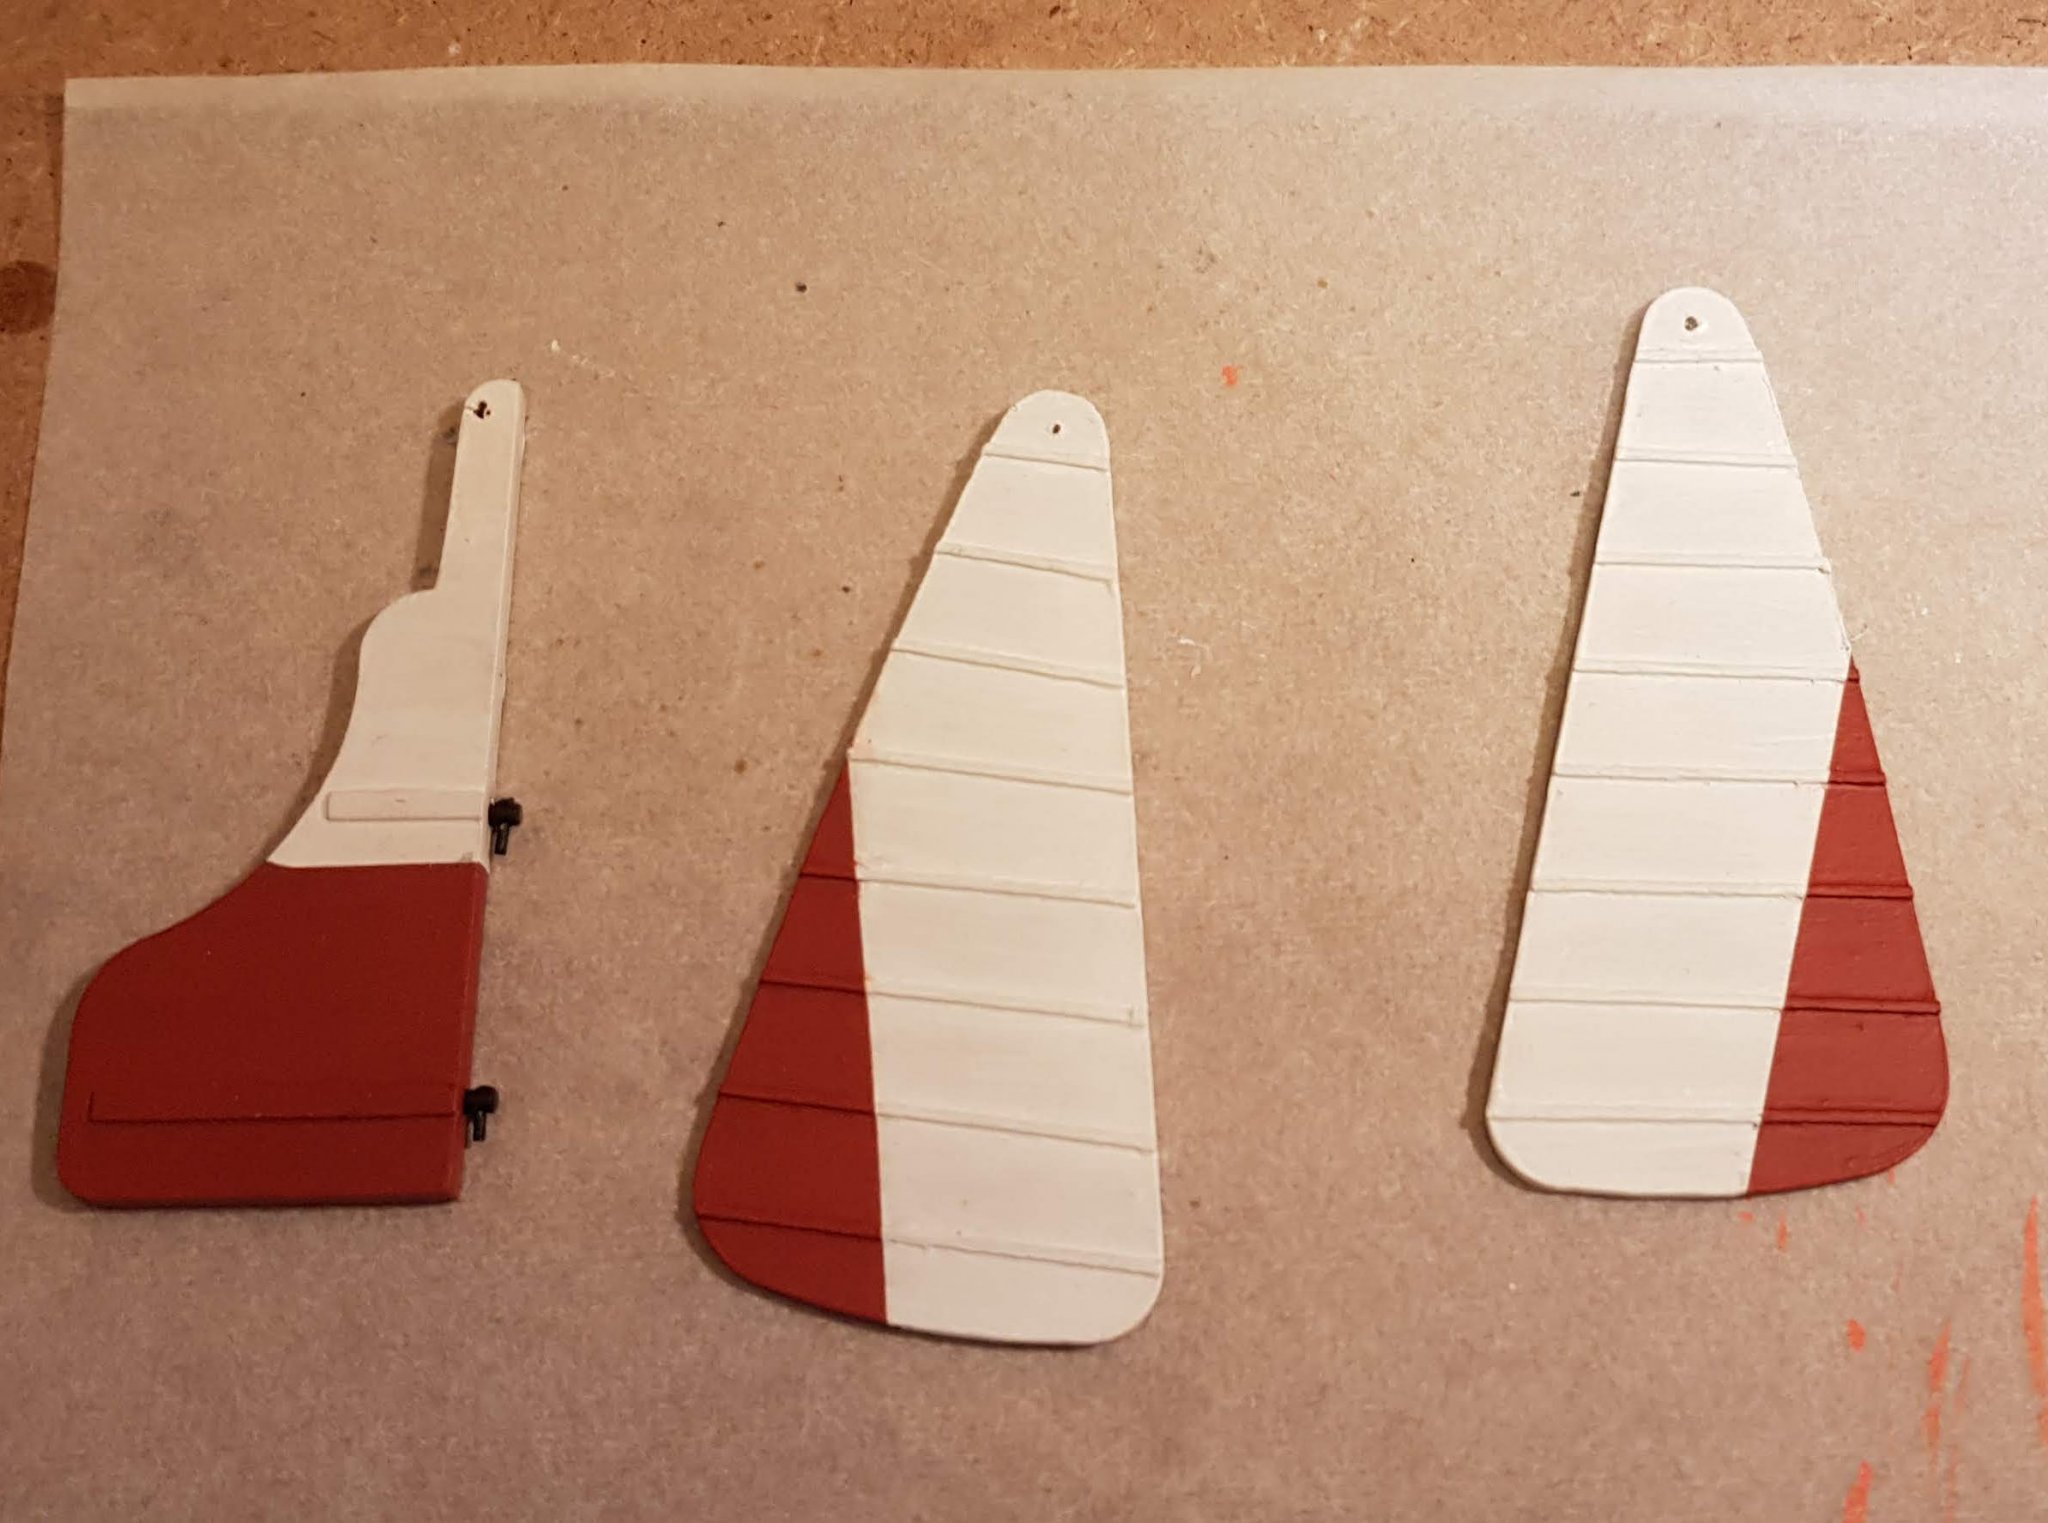
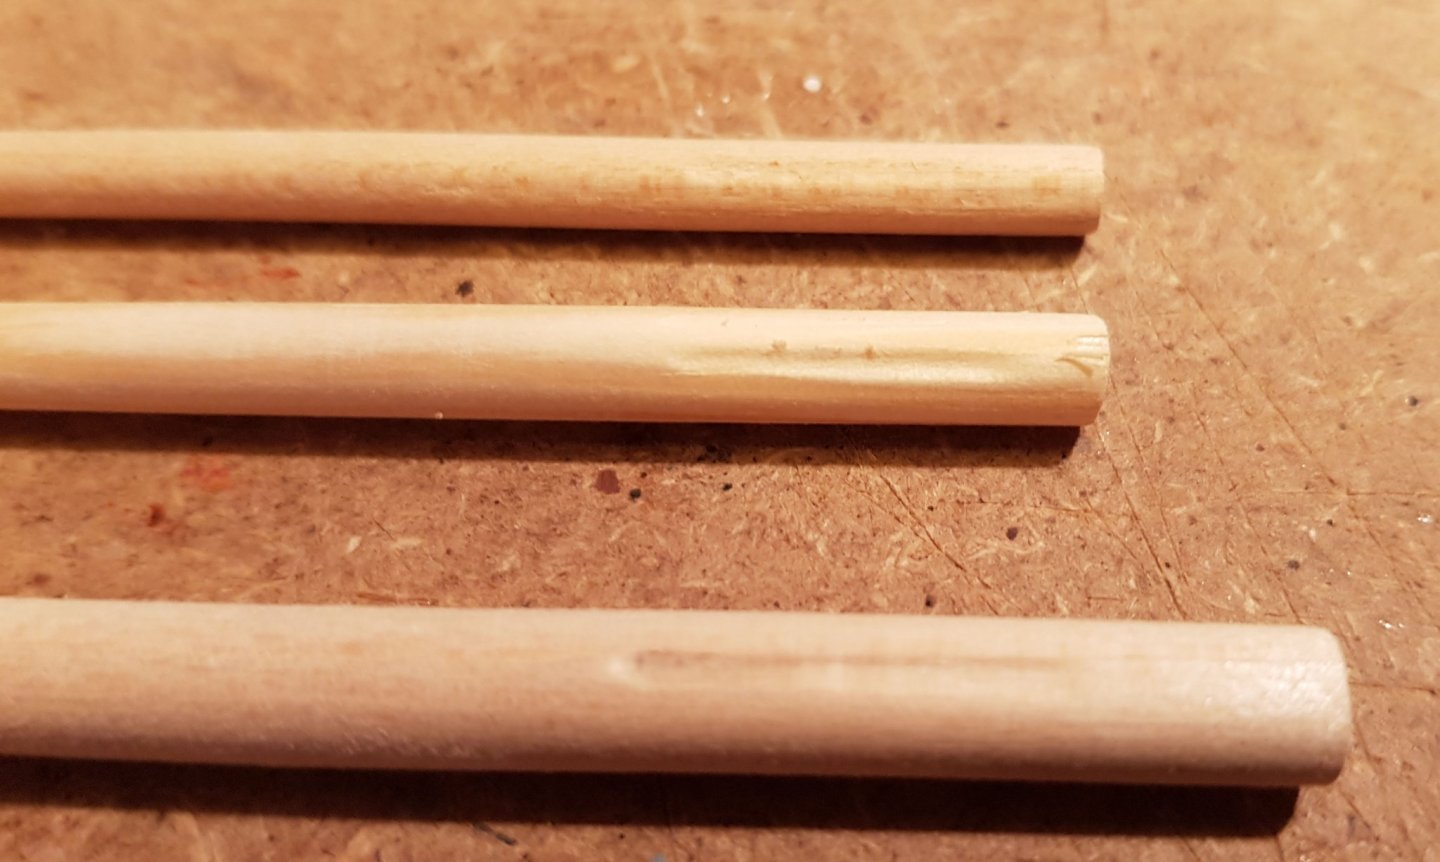
Treating the depressions in the dowels with warm water went well. After drying over night I have continued with assembling them. The lower parts of the masts ares square and short pieces of square material is glued to the round lengths. The instruction calls for a reinforcement of a brass wire in the center, but even so one of the joins got loose when I started to sand it. To fix it I tried epoxy glue for the first time, it worked very well. For the gaff sail I replaced the plastic piece from the kit with some mahogany that I had left from my previous build. I did this mainly to be able to use stain and not having to paint it. Finally I have stained all the pieces and will them dry thoroughly. But after that I'm sort of stuck with regard to the ship building. I'm waiting for the replacement blocks and deadeyes that I ordered from Vanguard Models. I will start to focus on the diorama instead. Cheers


- 83 replies
-
- 6
-
-
- finished
- billing boats
- (and 1 more)
-
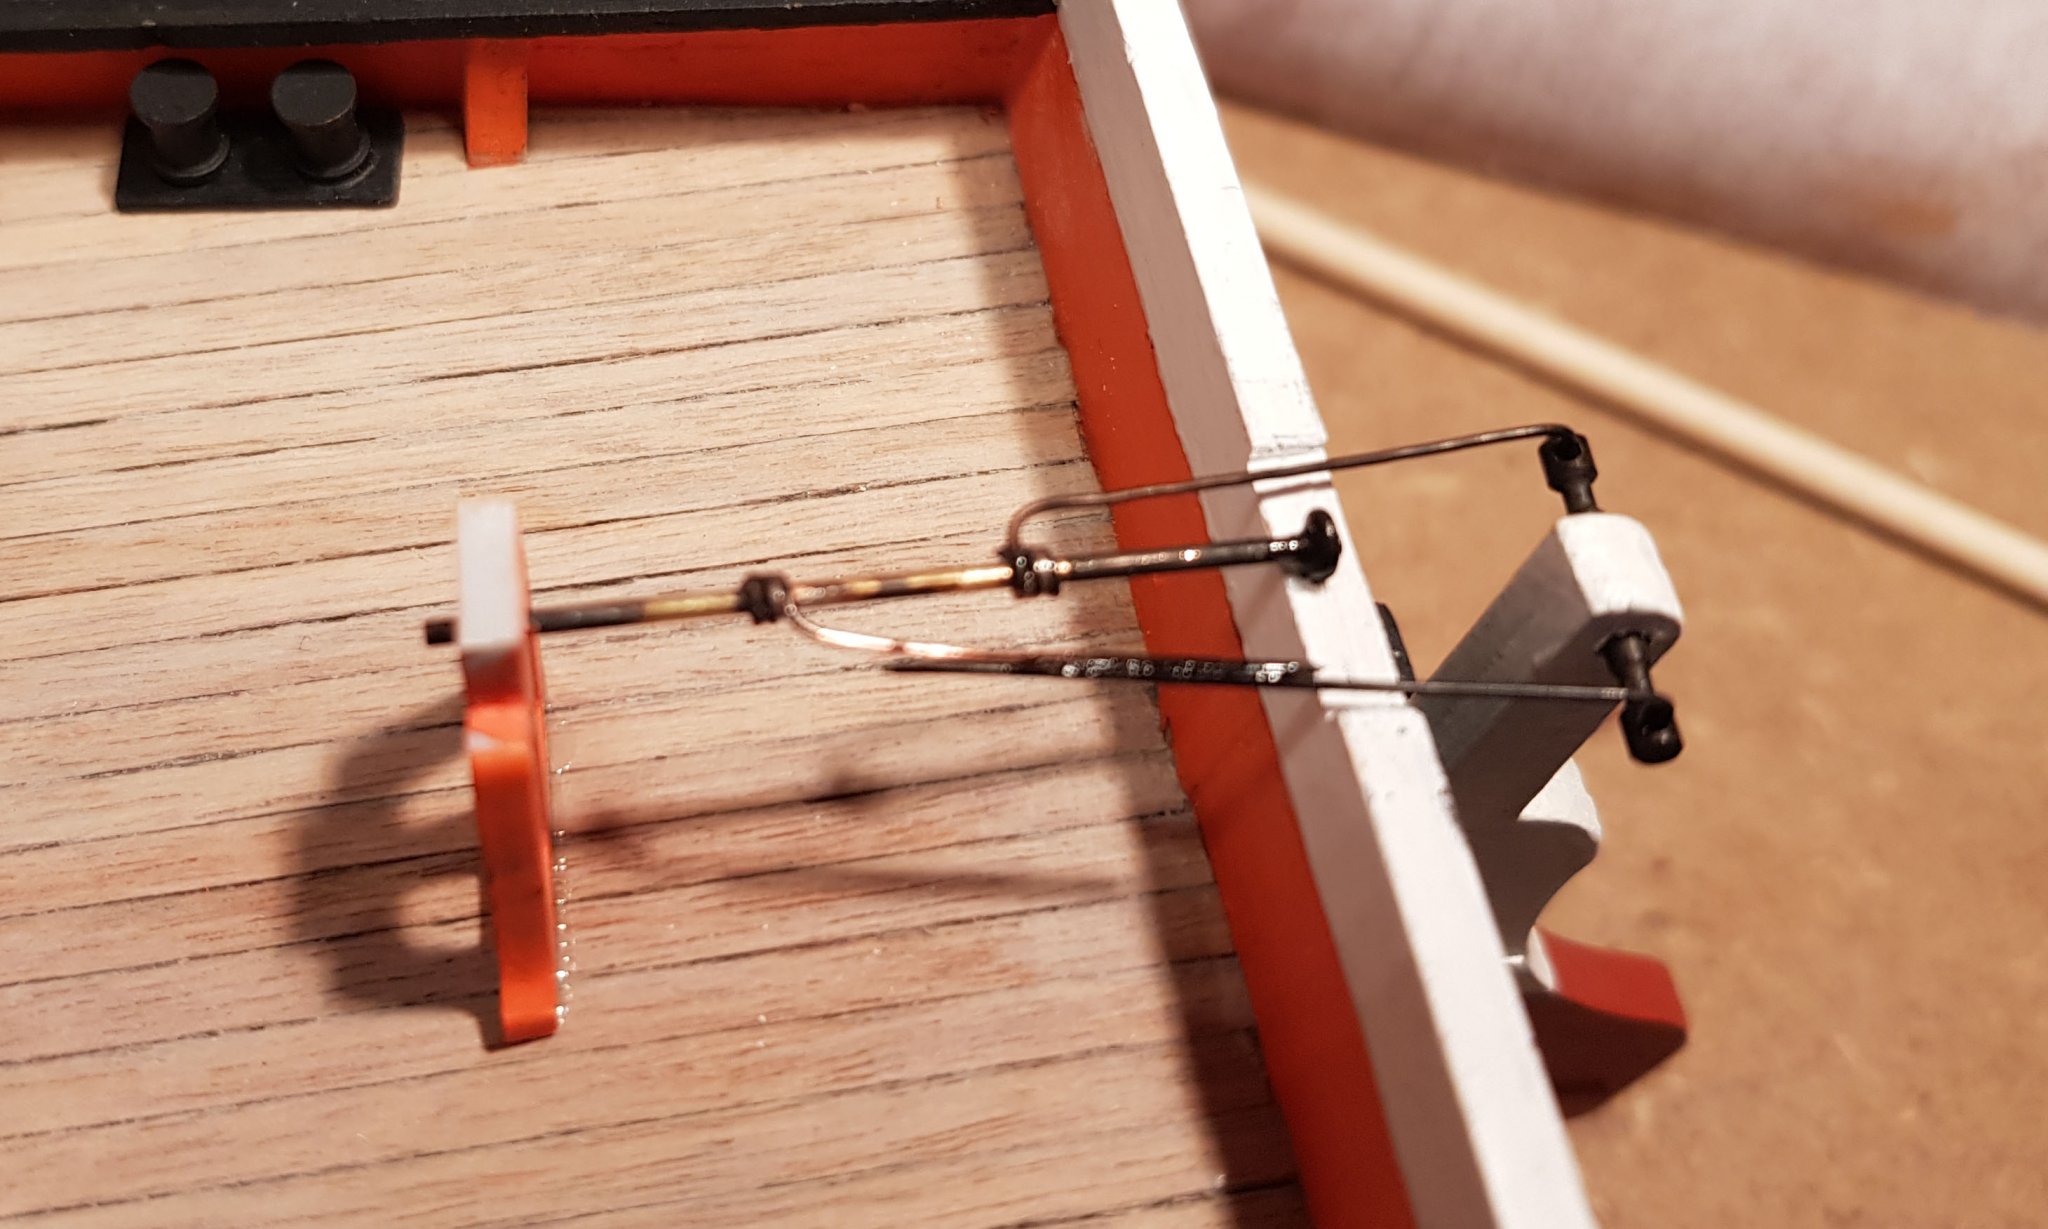
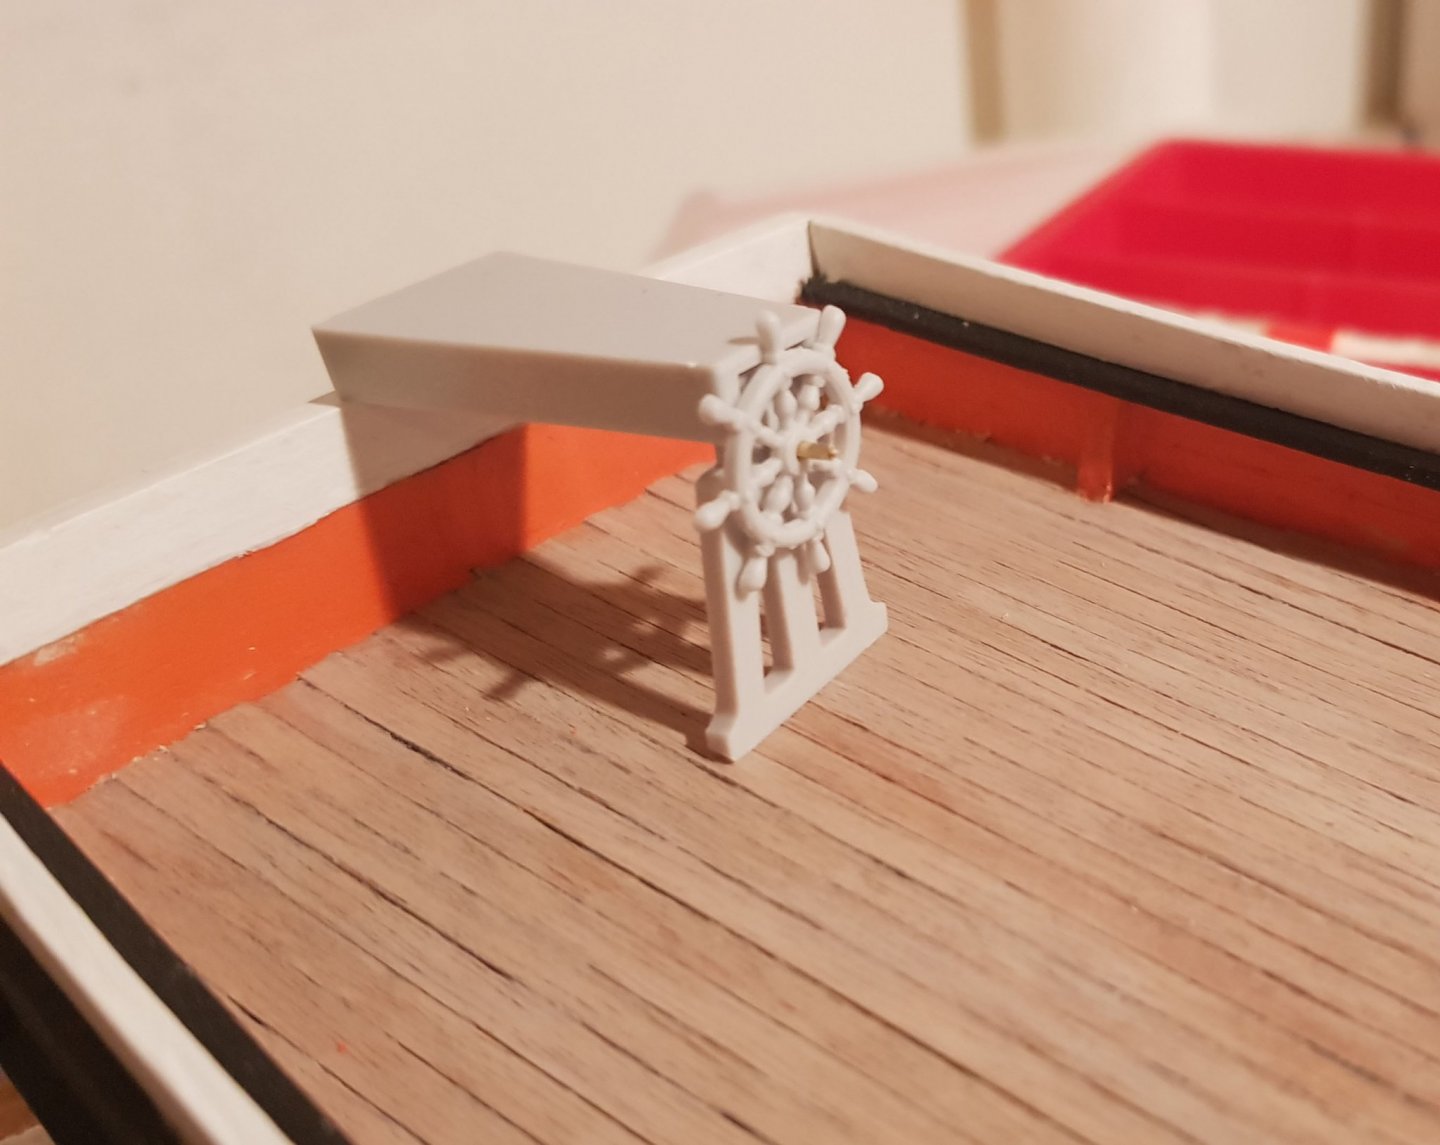
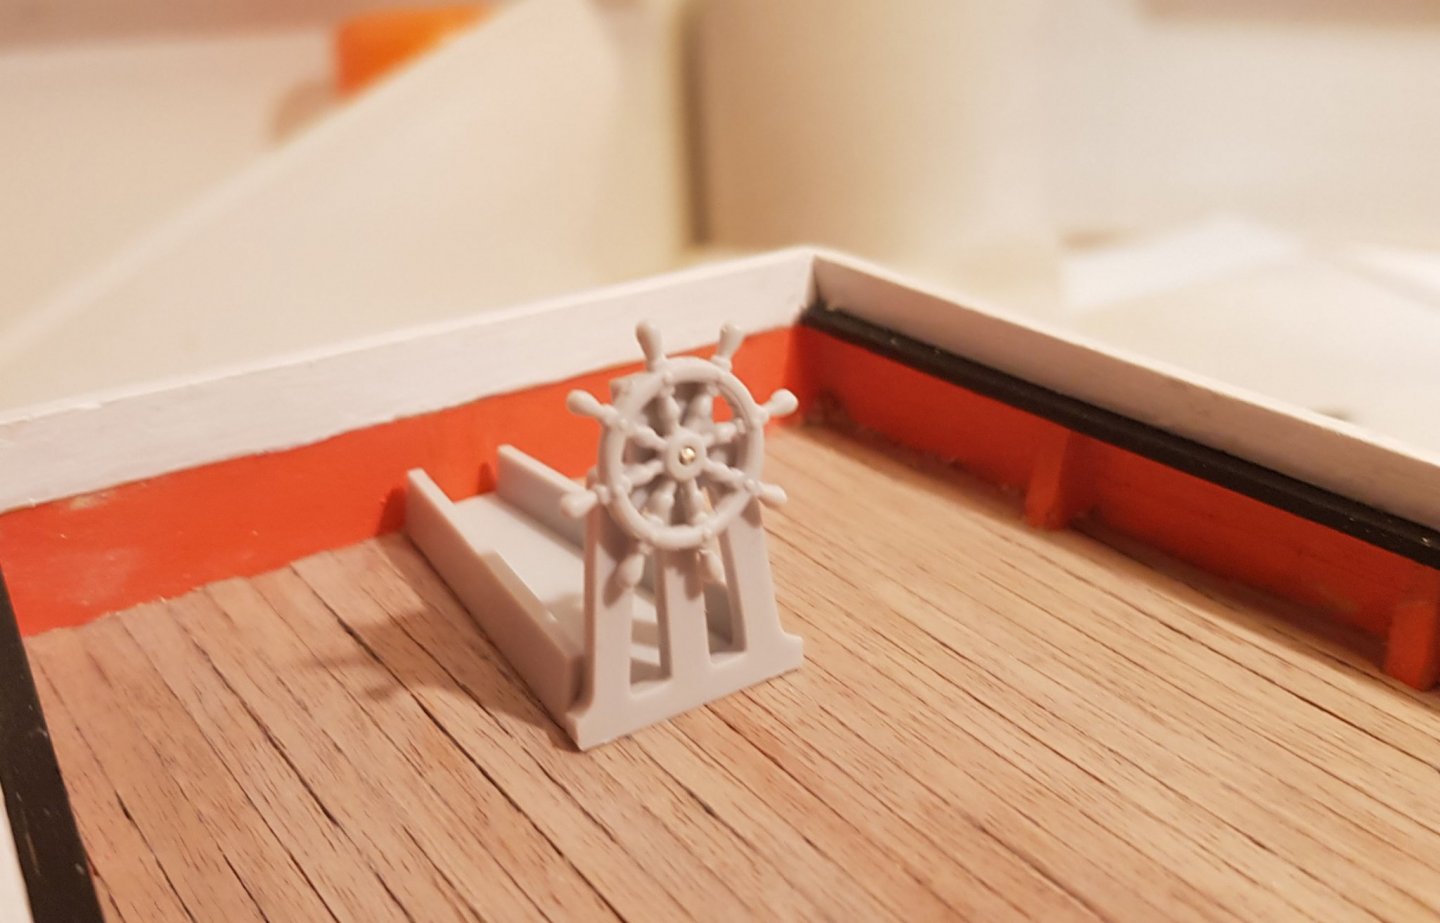
Today I managed to finalize the steering arrangement. There is almost no guidance on how this should be done in the plans or instructions, so I followed what I found in another build log. The brass blackening became very spotty on these parts, but since it will be covered I don't care. The cover is glued to the wheel pedestal. Cheers

- 83 replies
-
- 6
-
-
- finished
- billing boats
- (and 1 more)
-
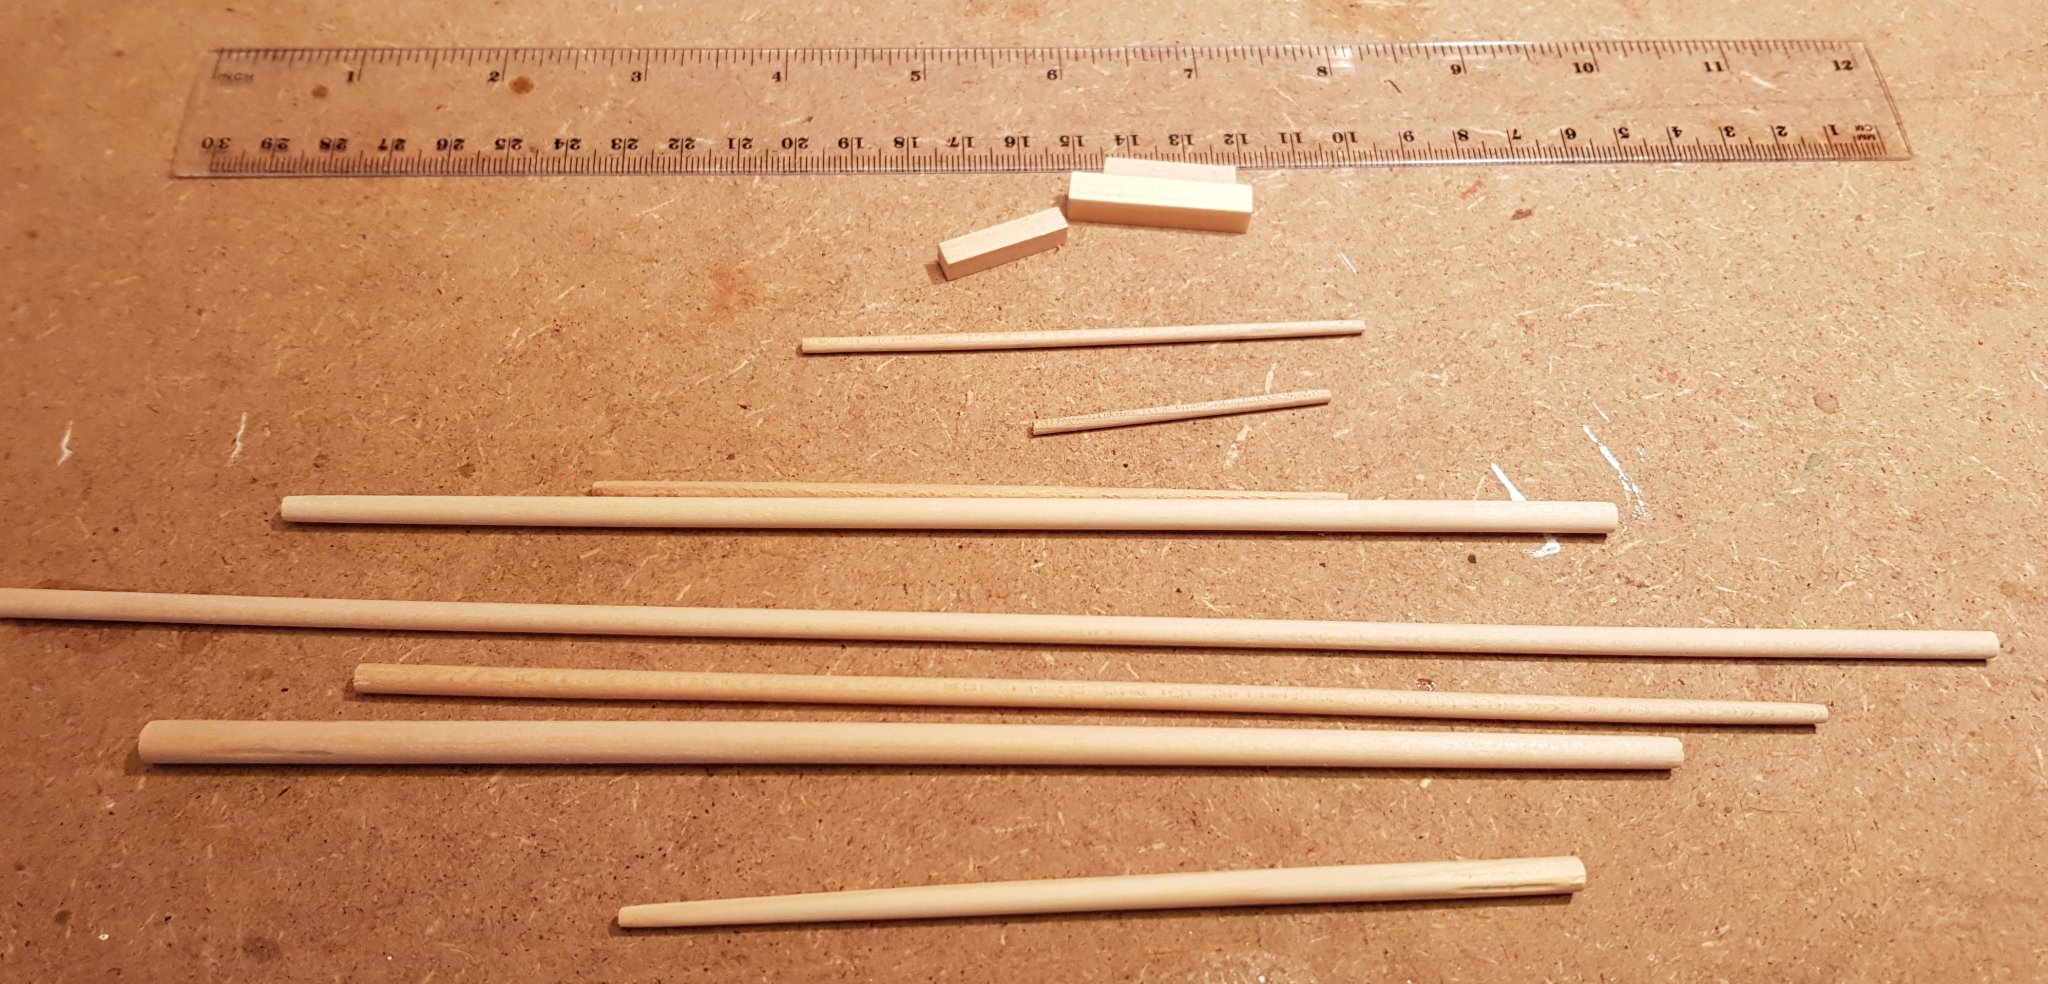
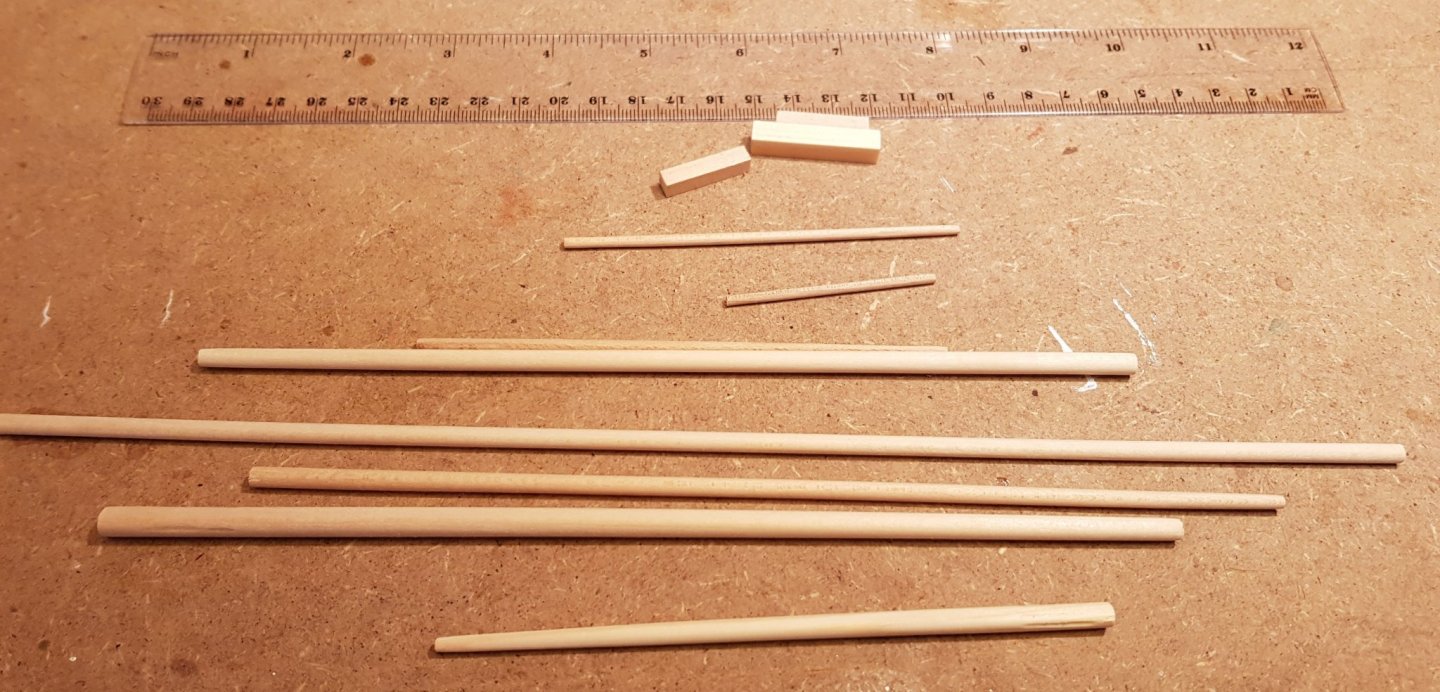
I started making the masts and booms yesterday. I put them in a electric drill (I have no lathe) and used sandpaper to taper them according to the drawings. This was a very quick and easy process. However, the wood in the dowels are rather soft (obechi and basswood). So even though i wrapped several layers of tape around the end that I clamped in the chuck I got depressions in the wood afterward. Thankfully no fiber seem to be broken so I hope that I can get the wood to swell if I put it in warm water. I also tried to dry fit the metal and plastic parts to be mounted on the masts and booms. The holes in the plastic parts where way to narrow so I had to widen them with a drill that i ran between my fingers. Cheers

- 83 replies
-
- 3
-
-
- finished
- billing boats
- (and 1 more)
-
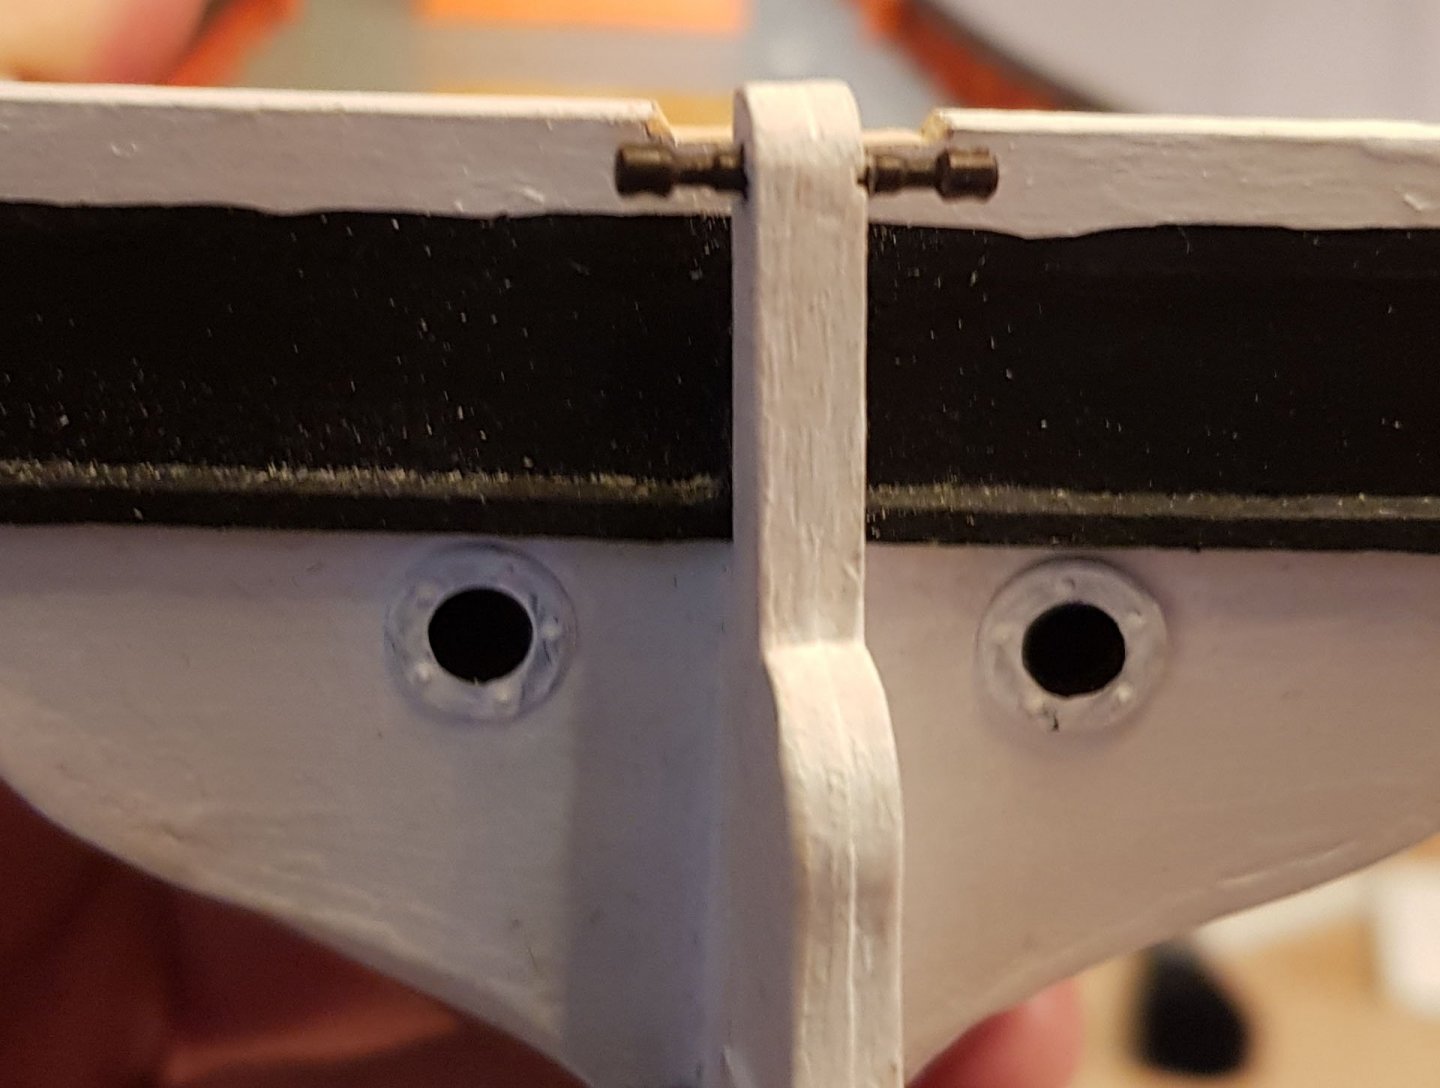
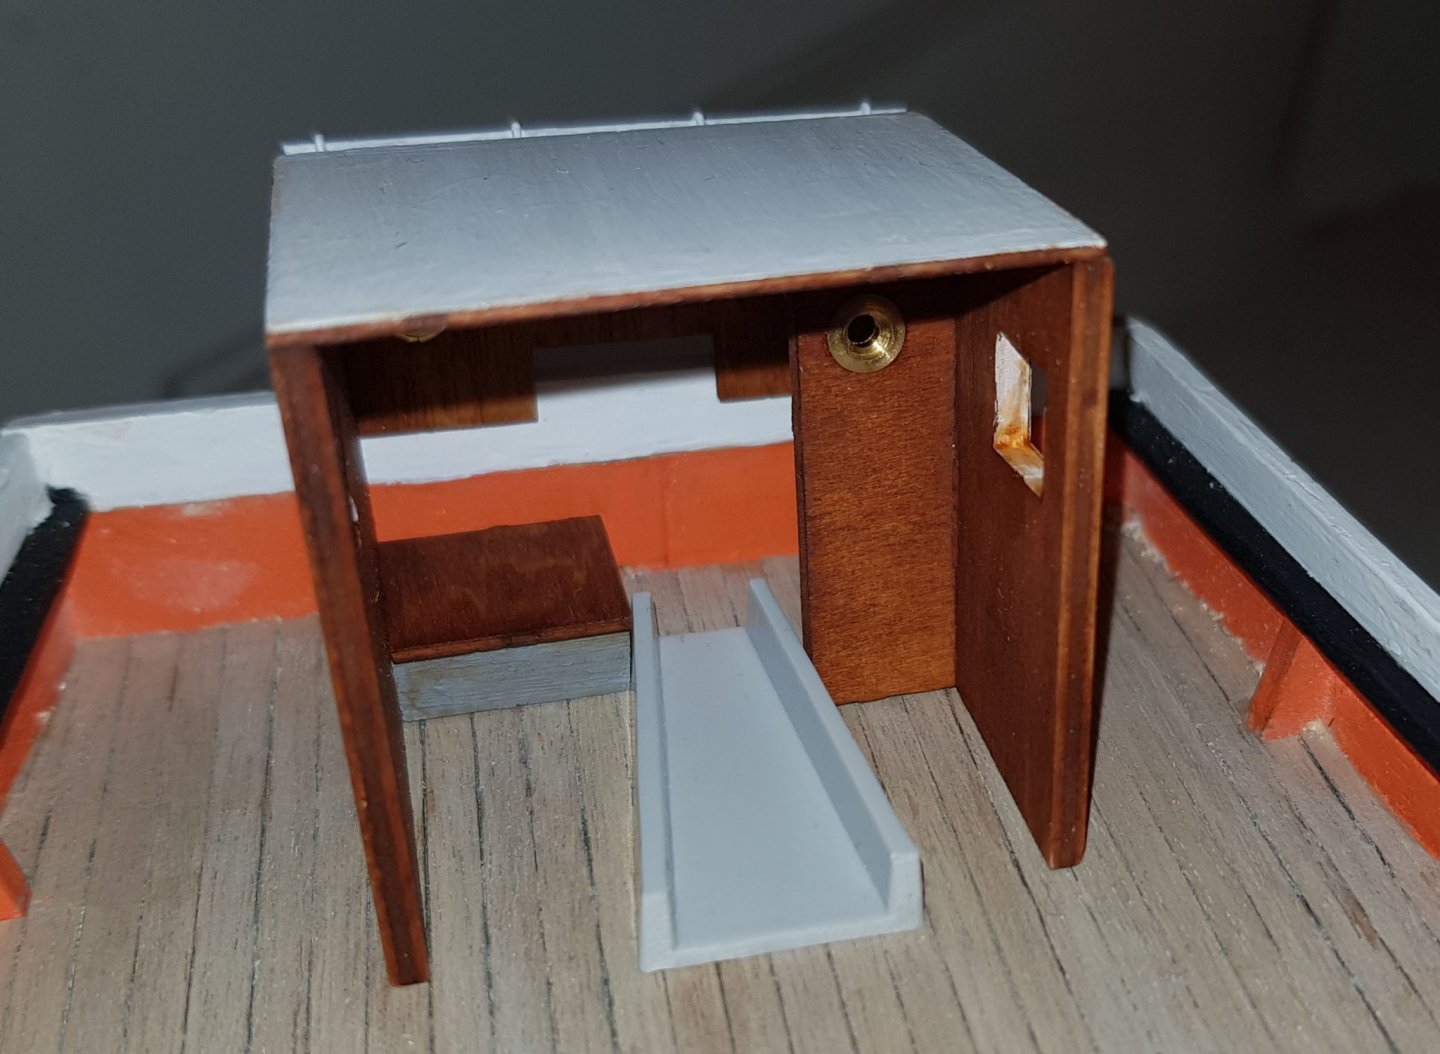
I continued with the steering parts and realized that I must not have paid attention to the plans or dry fitted enough. The transom is to high in comparison with the rudder. I need to make a cut out so that the shafts that connect the rudder to the steering column can go in a straight line. Cheers
- 83 replies
-
- 1
-
-
- finished
- billing boats
- (and 1 more)
-
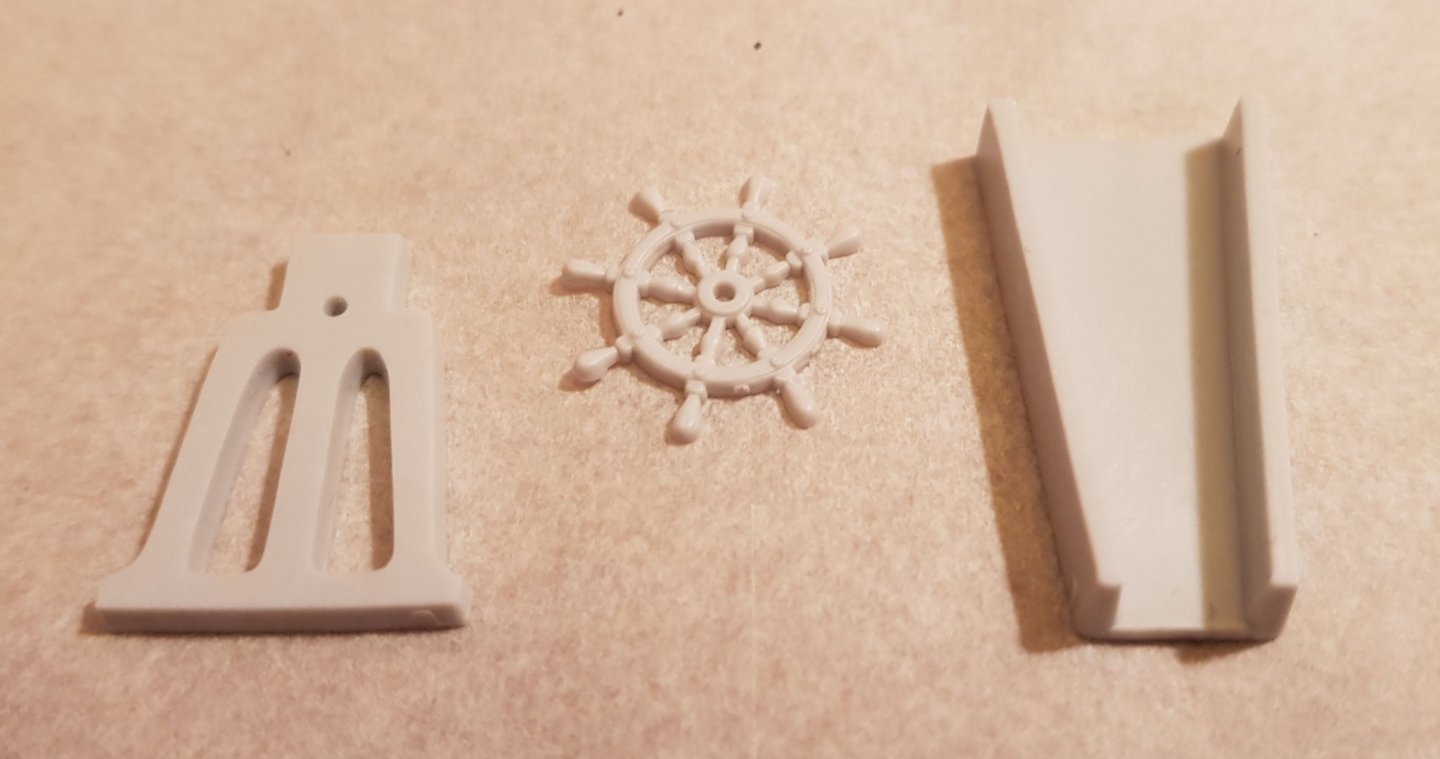
A bit of googling led me to another build log for an older version of the kit. If showed the missing details. The parts shall be mounted like this (which fits under the steering cabin). Cheers
- 83 replies
-
- 8
-
-
- finished
- billing boats
- (and 1 more)
-
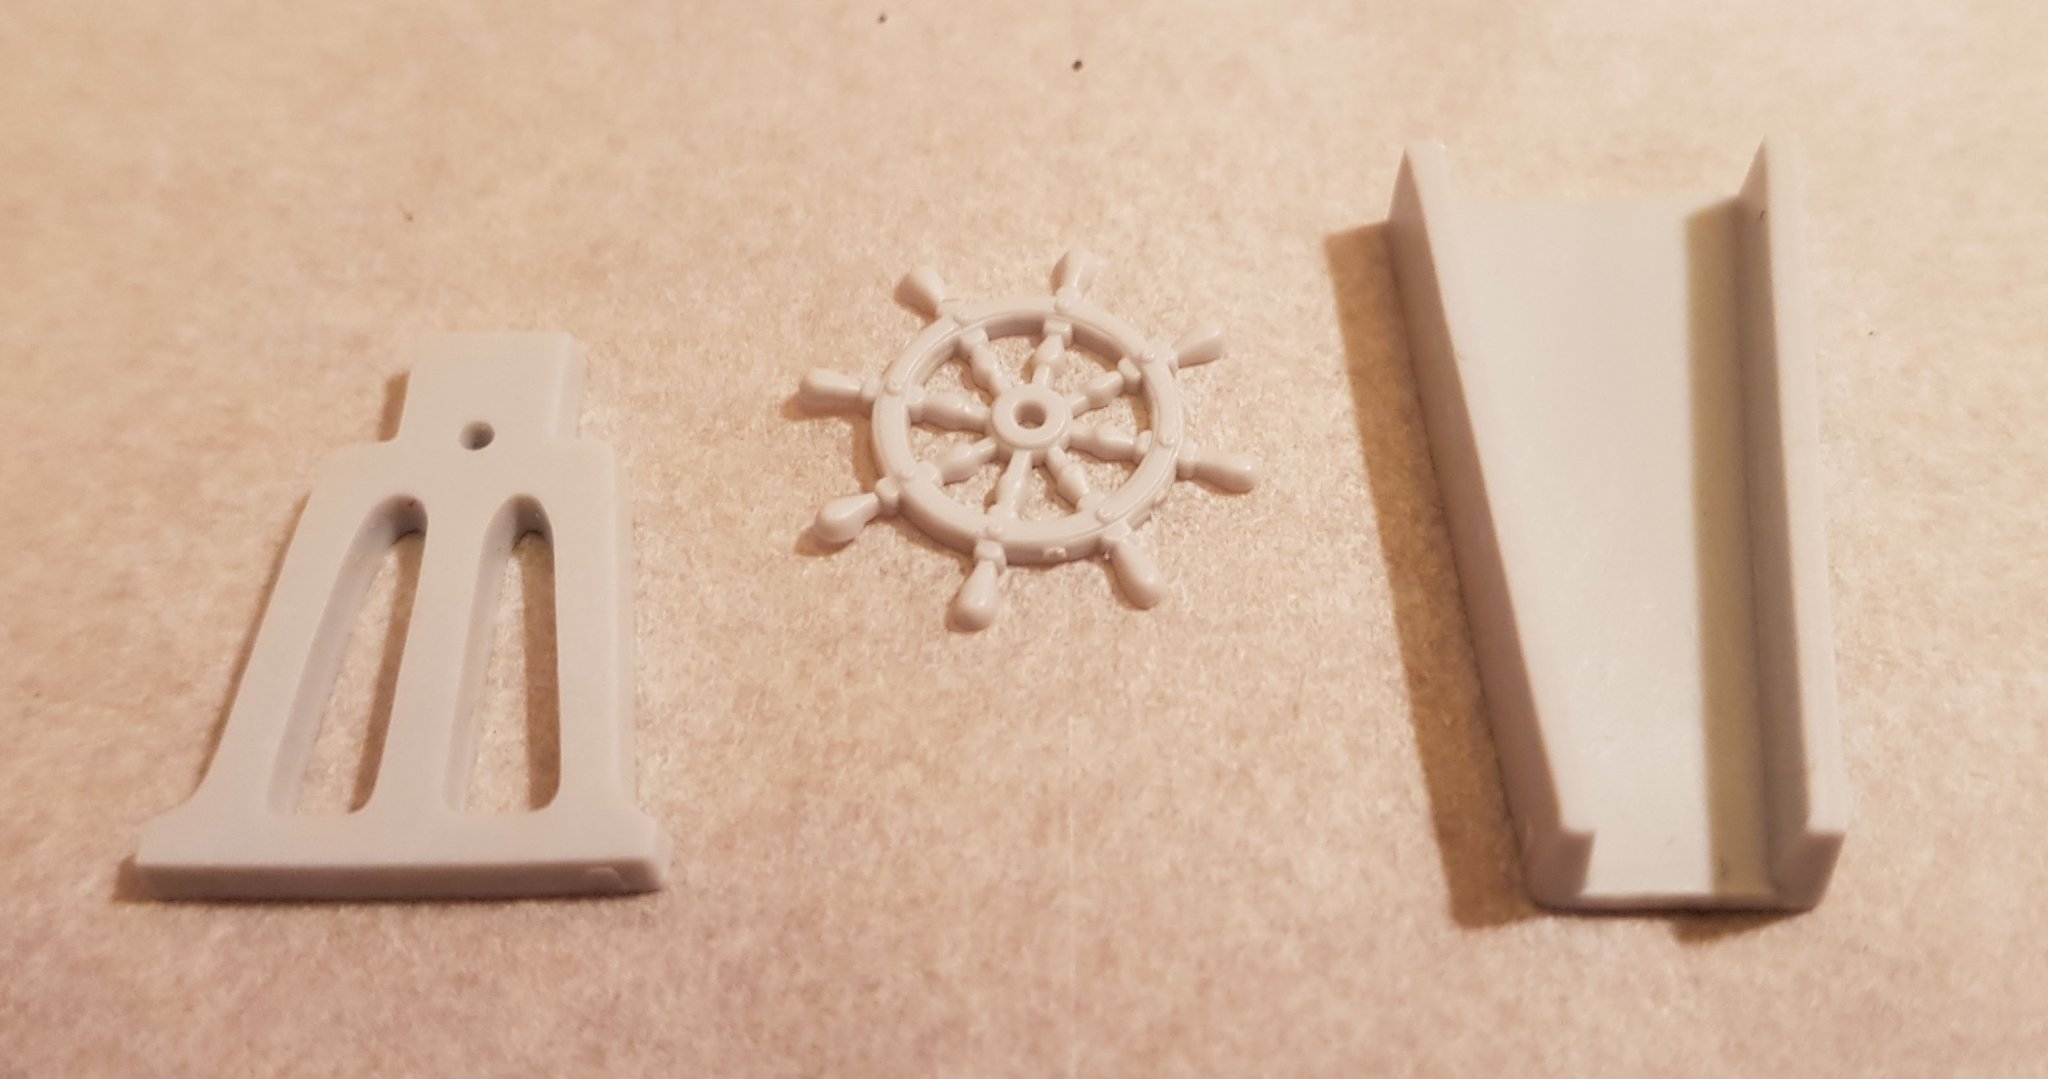
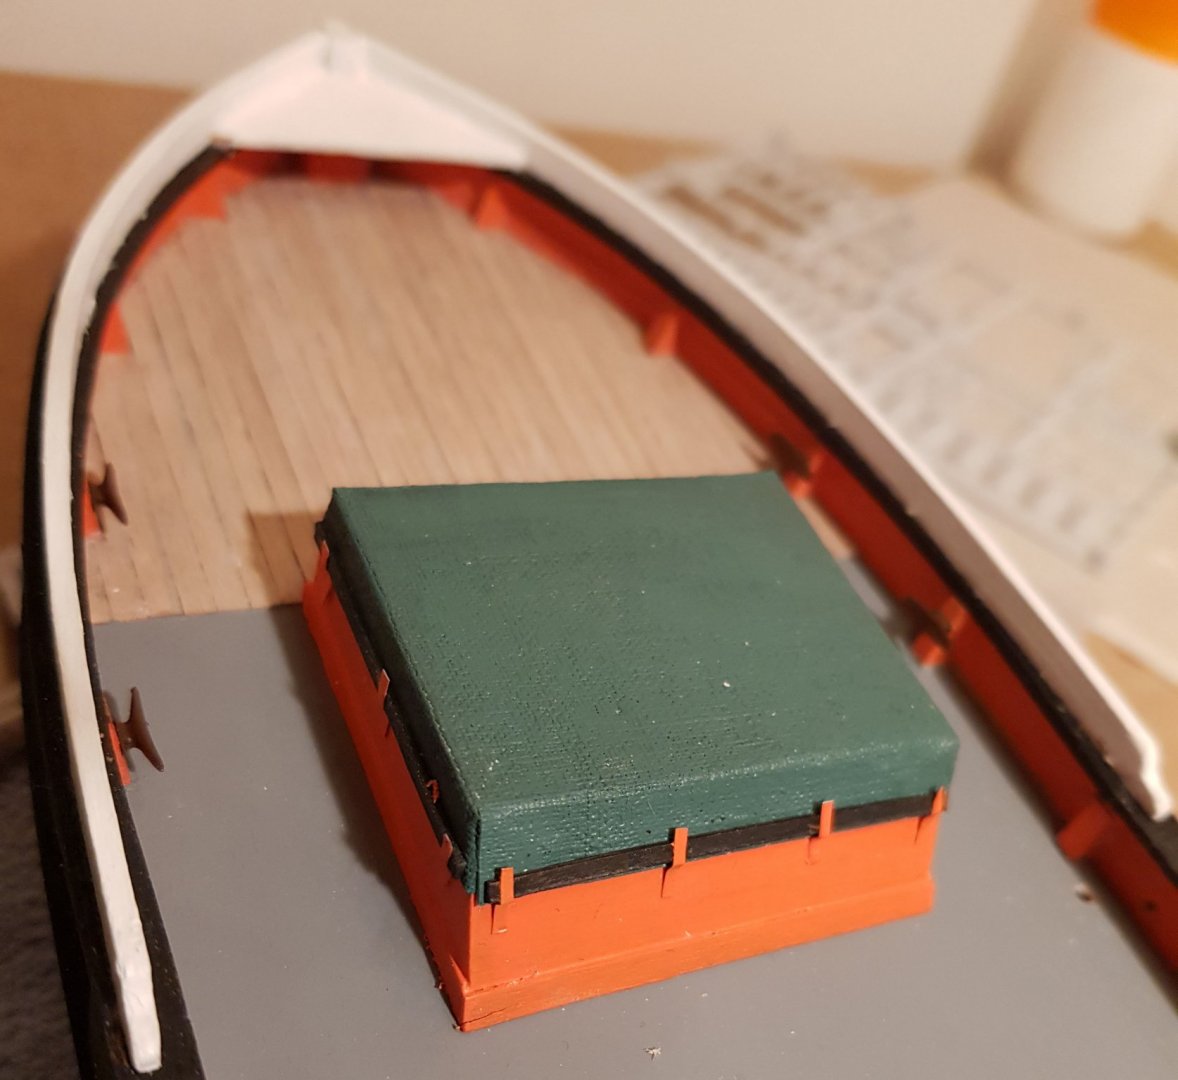
Thanks Eamonn. I somehow feel more inspired by the working vessels than by warships. There is more "real life" in them. Today I started to glue the fittings and deck equipment to the hull. It needs to be done in the right order, so that the already mounted parts are not in the way for later parts. The instruction gives no help what so ever regarding this. For example, I figured out that the hole for the cleats on the inside of the railing needed to be drilled before the hatch could be glued. At this point in the building I still have three pieces that are unaccounted for. These mystery parts are all plastic, which means that they are not listed individually in the parts list. They are not presented anywhere in the instruction and they are not shown on any of the plans. One theory is they are all related and could for example be placed like this: One problem with this is that it does not fit when the steering cabin is in place: Cheers
- 83 replies
-
- 4
-
-
- finished
- billing boats
- (and 1 more)
-
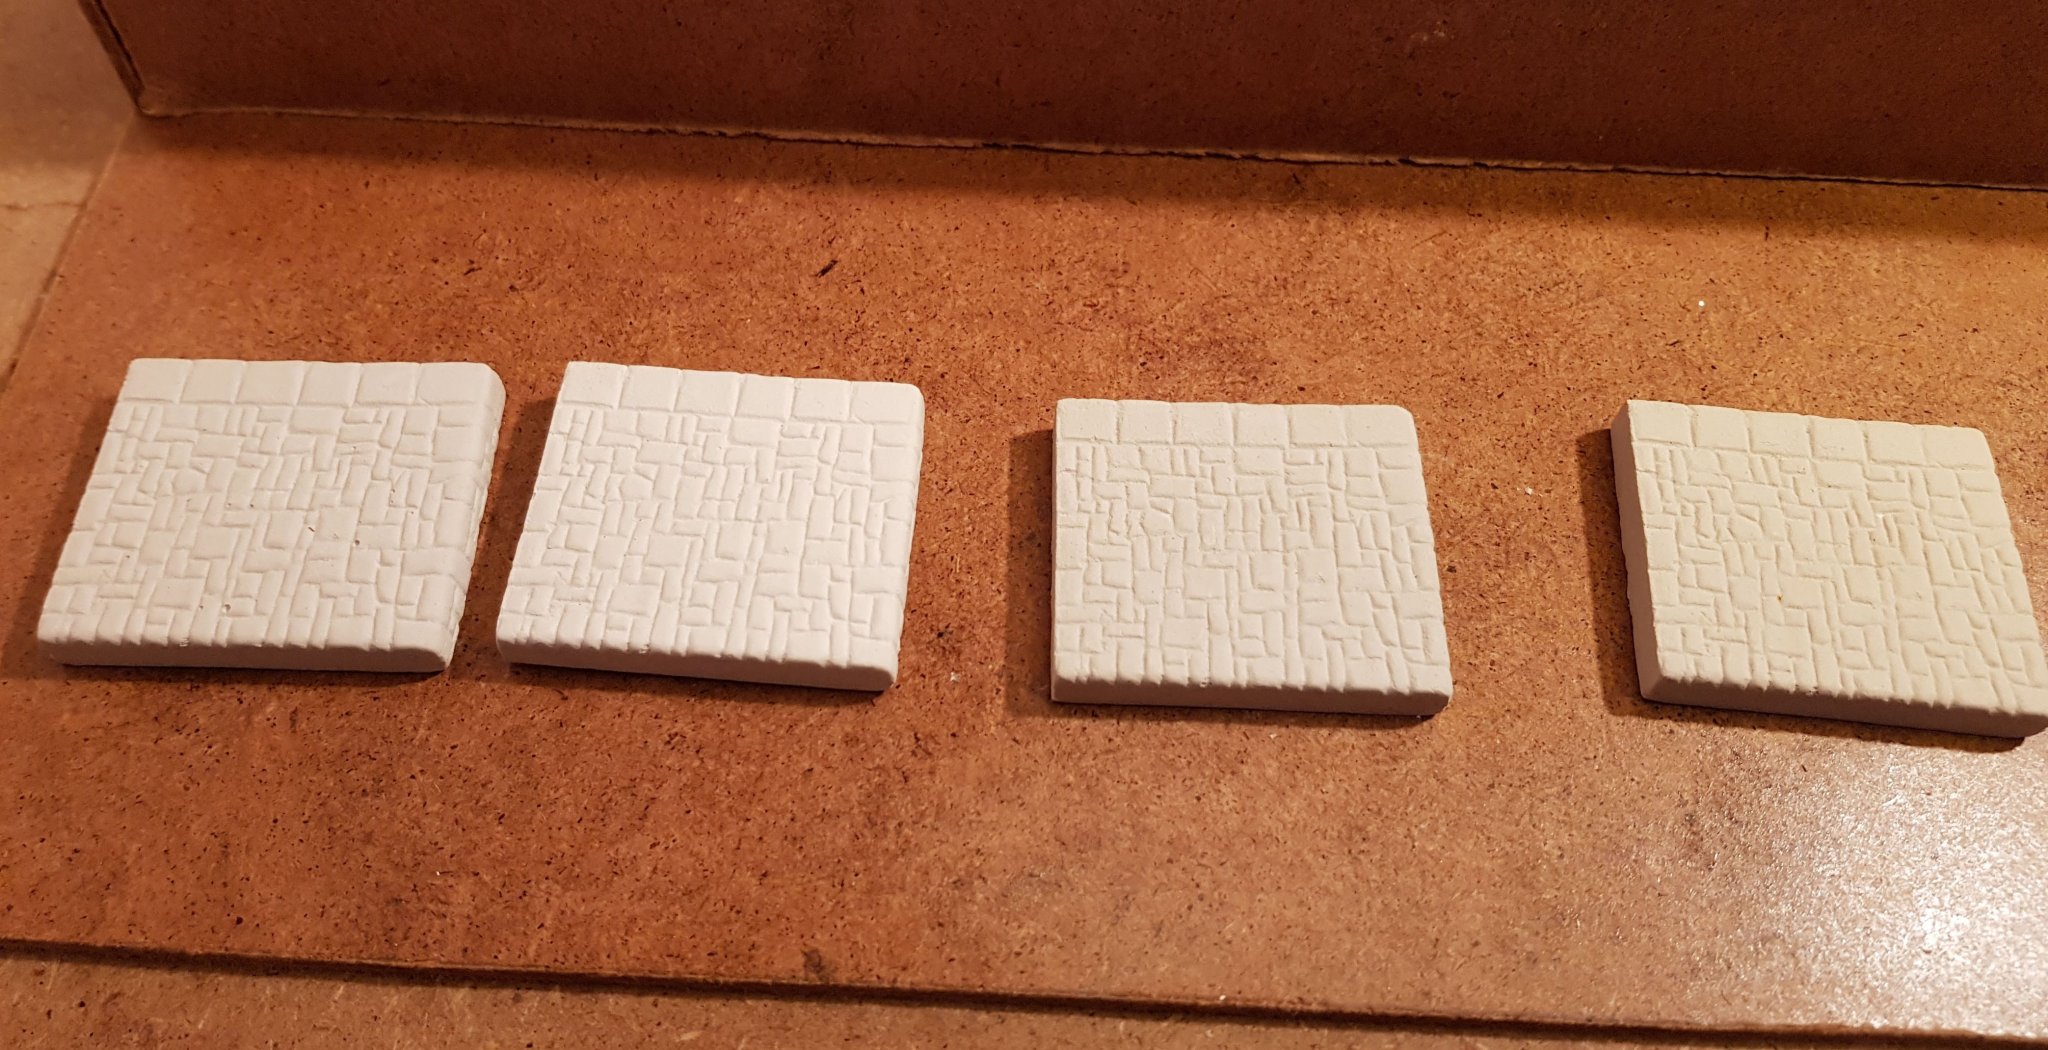
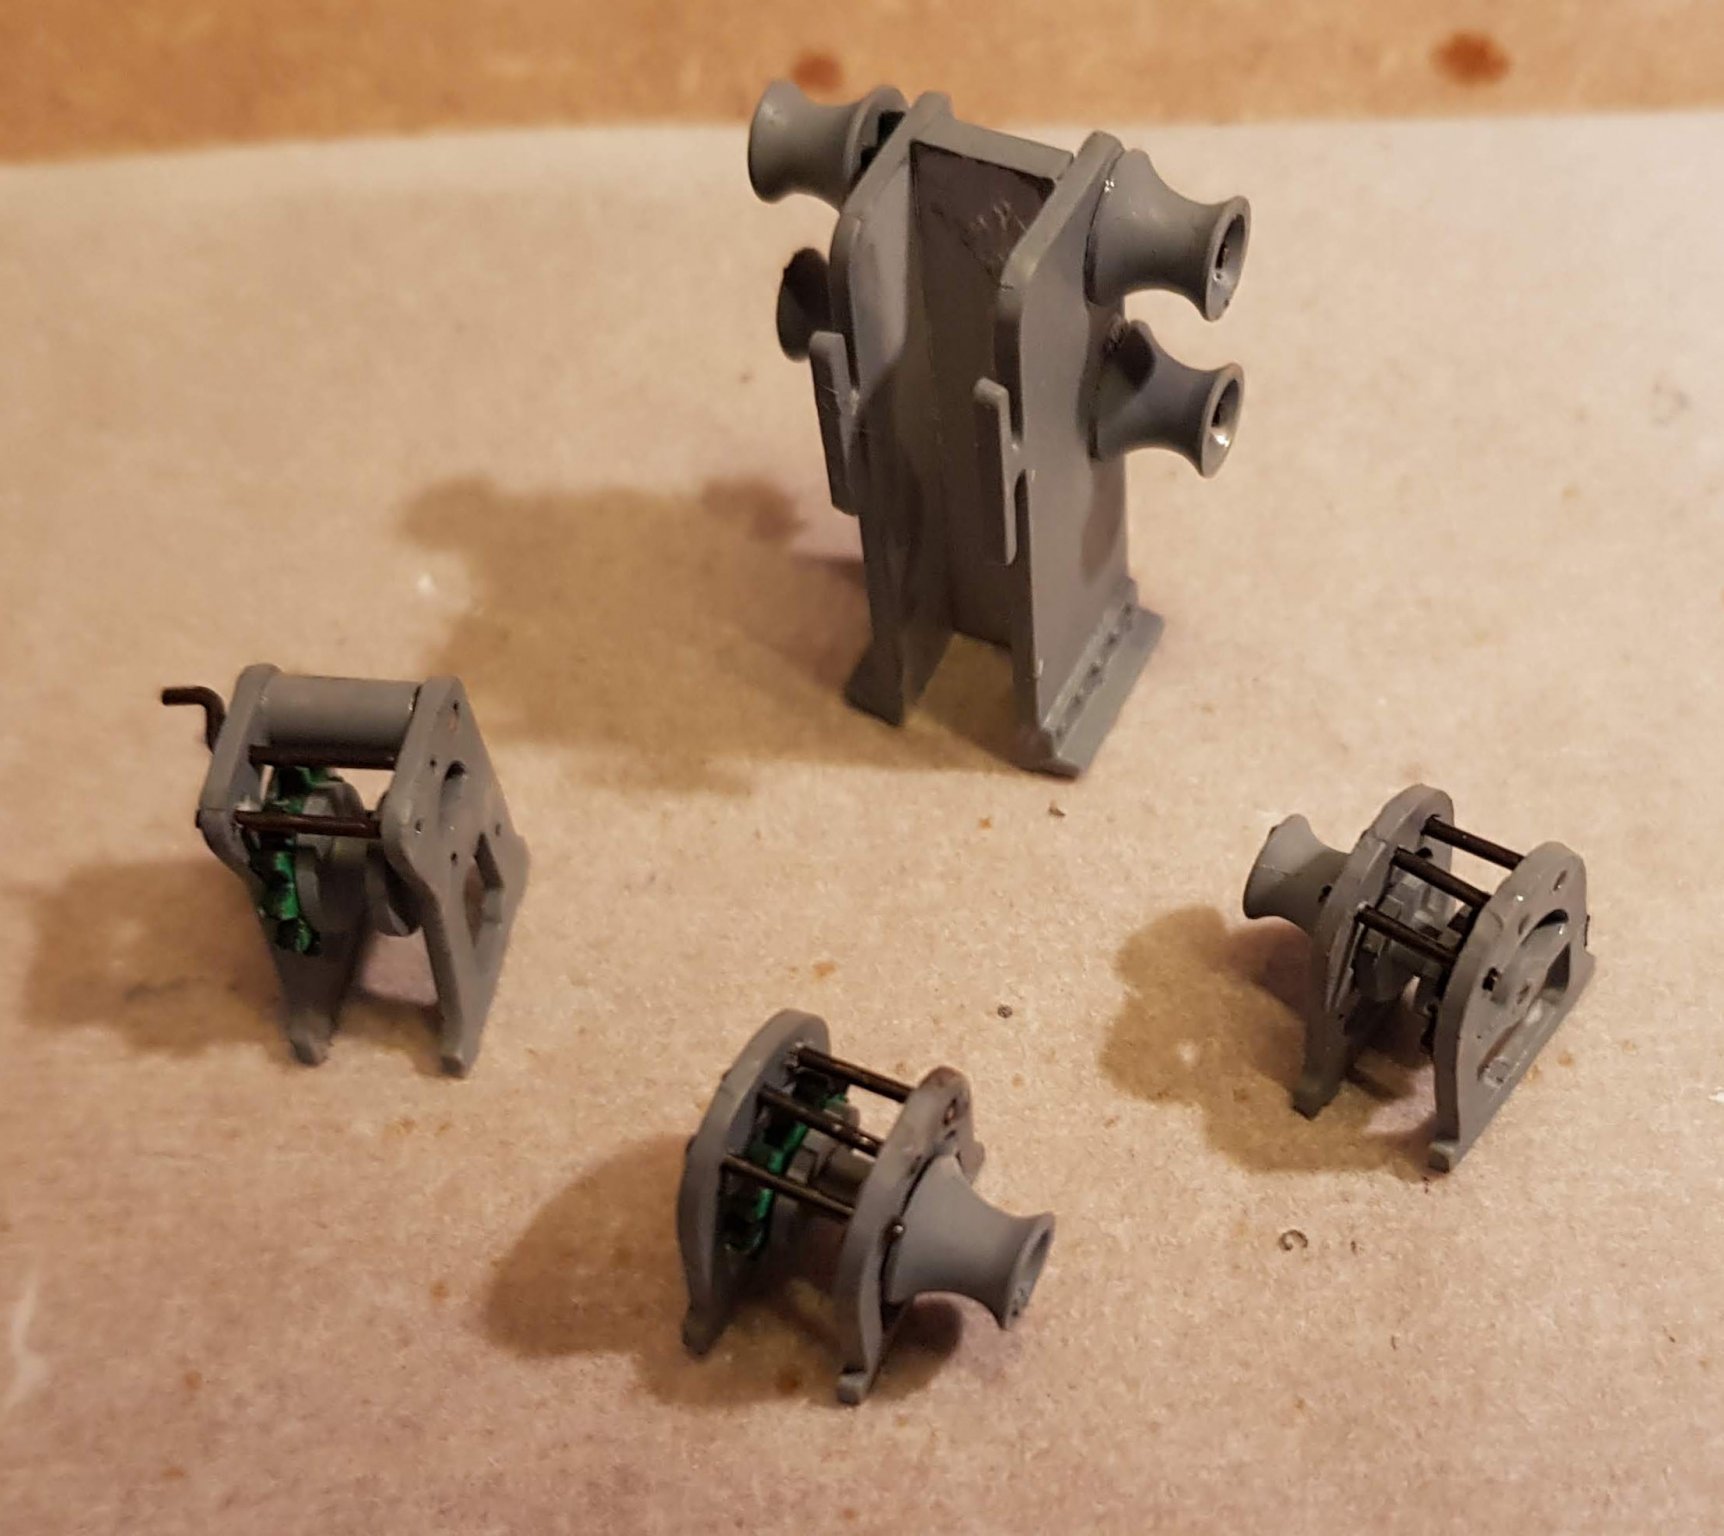
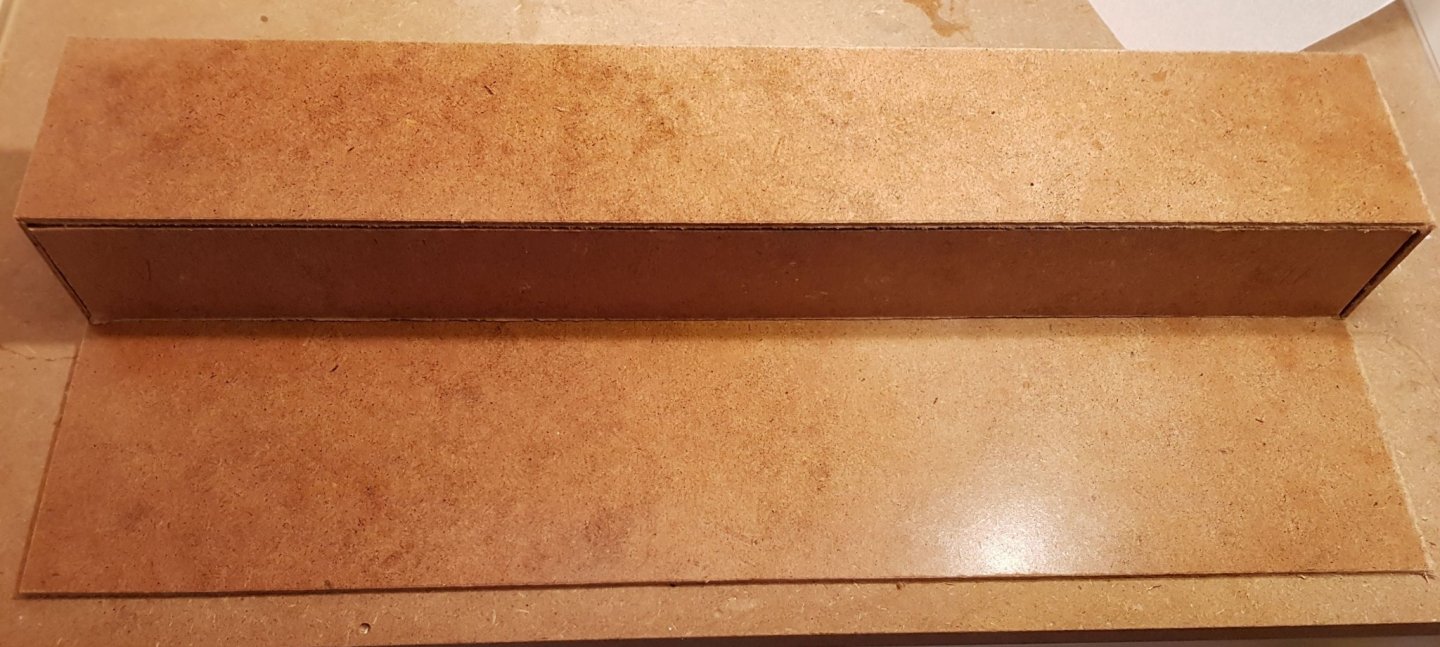
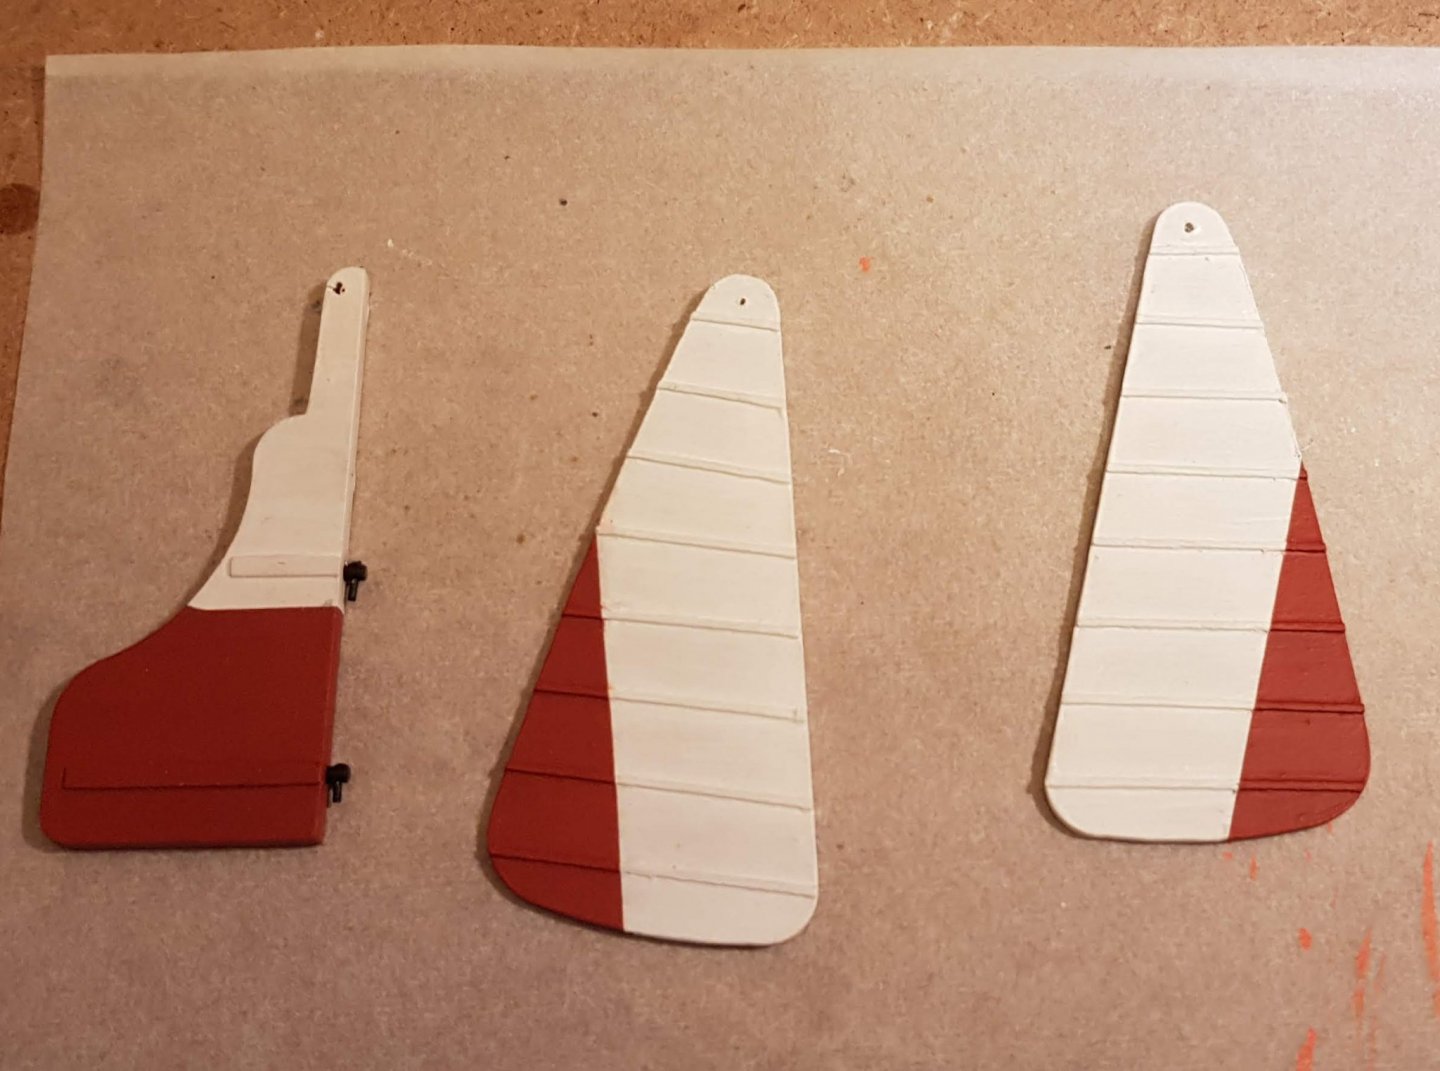
Thanks Clare and Bob! A week since i posted last time. Some small things has been completed, and some bigger ones started. All but one of the winches are assembled. Some touch up painting is still needed where paint peeled of during assembly. The rudder and lee boards are ready to be mounted: And the railing is completed and painted: For the bigger parts I have started on the quay structure for the diorama. For the lining of the quay I remembered that I had some molds for creating walls out of plaster. (A rest from a youth spent playing table top role playing games.) I just need to make 12 of them to cover the whole quay side. Cheers

- 83 replies
-
- 9
-
-
- finished
- billing boats
- (and 1 more)
-
Steel wire or hemp rope on Thames sailing barge circa 1940?
bolin replied to bolin's topic in Masting, rigging and sails
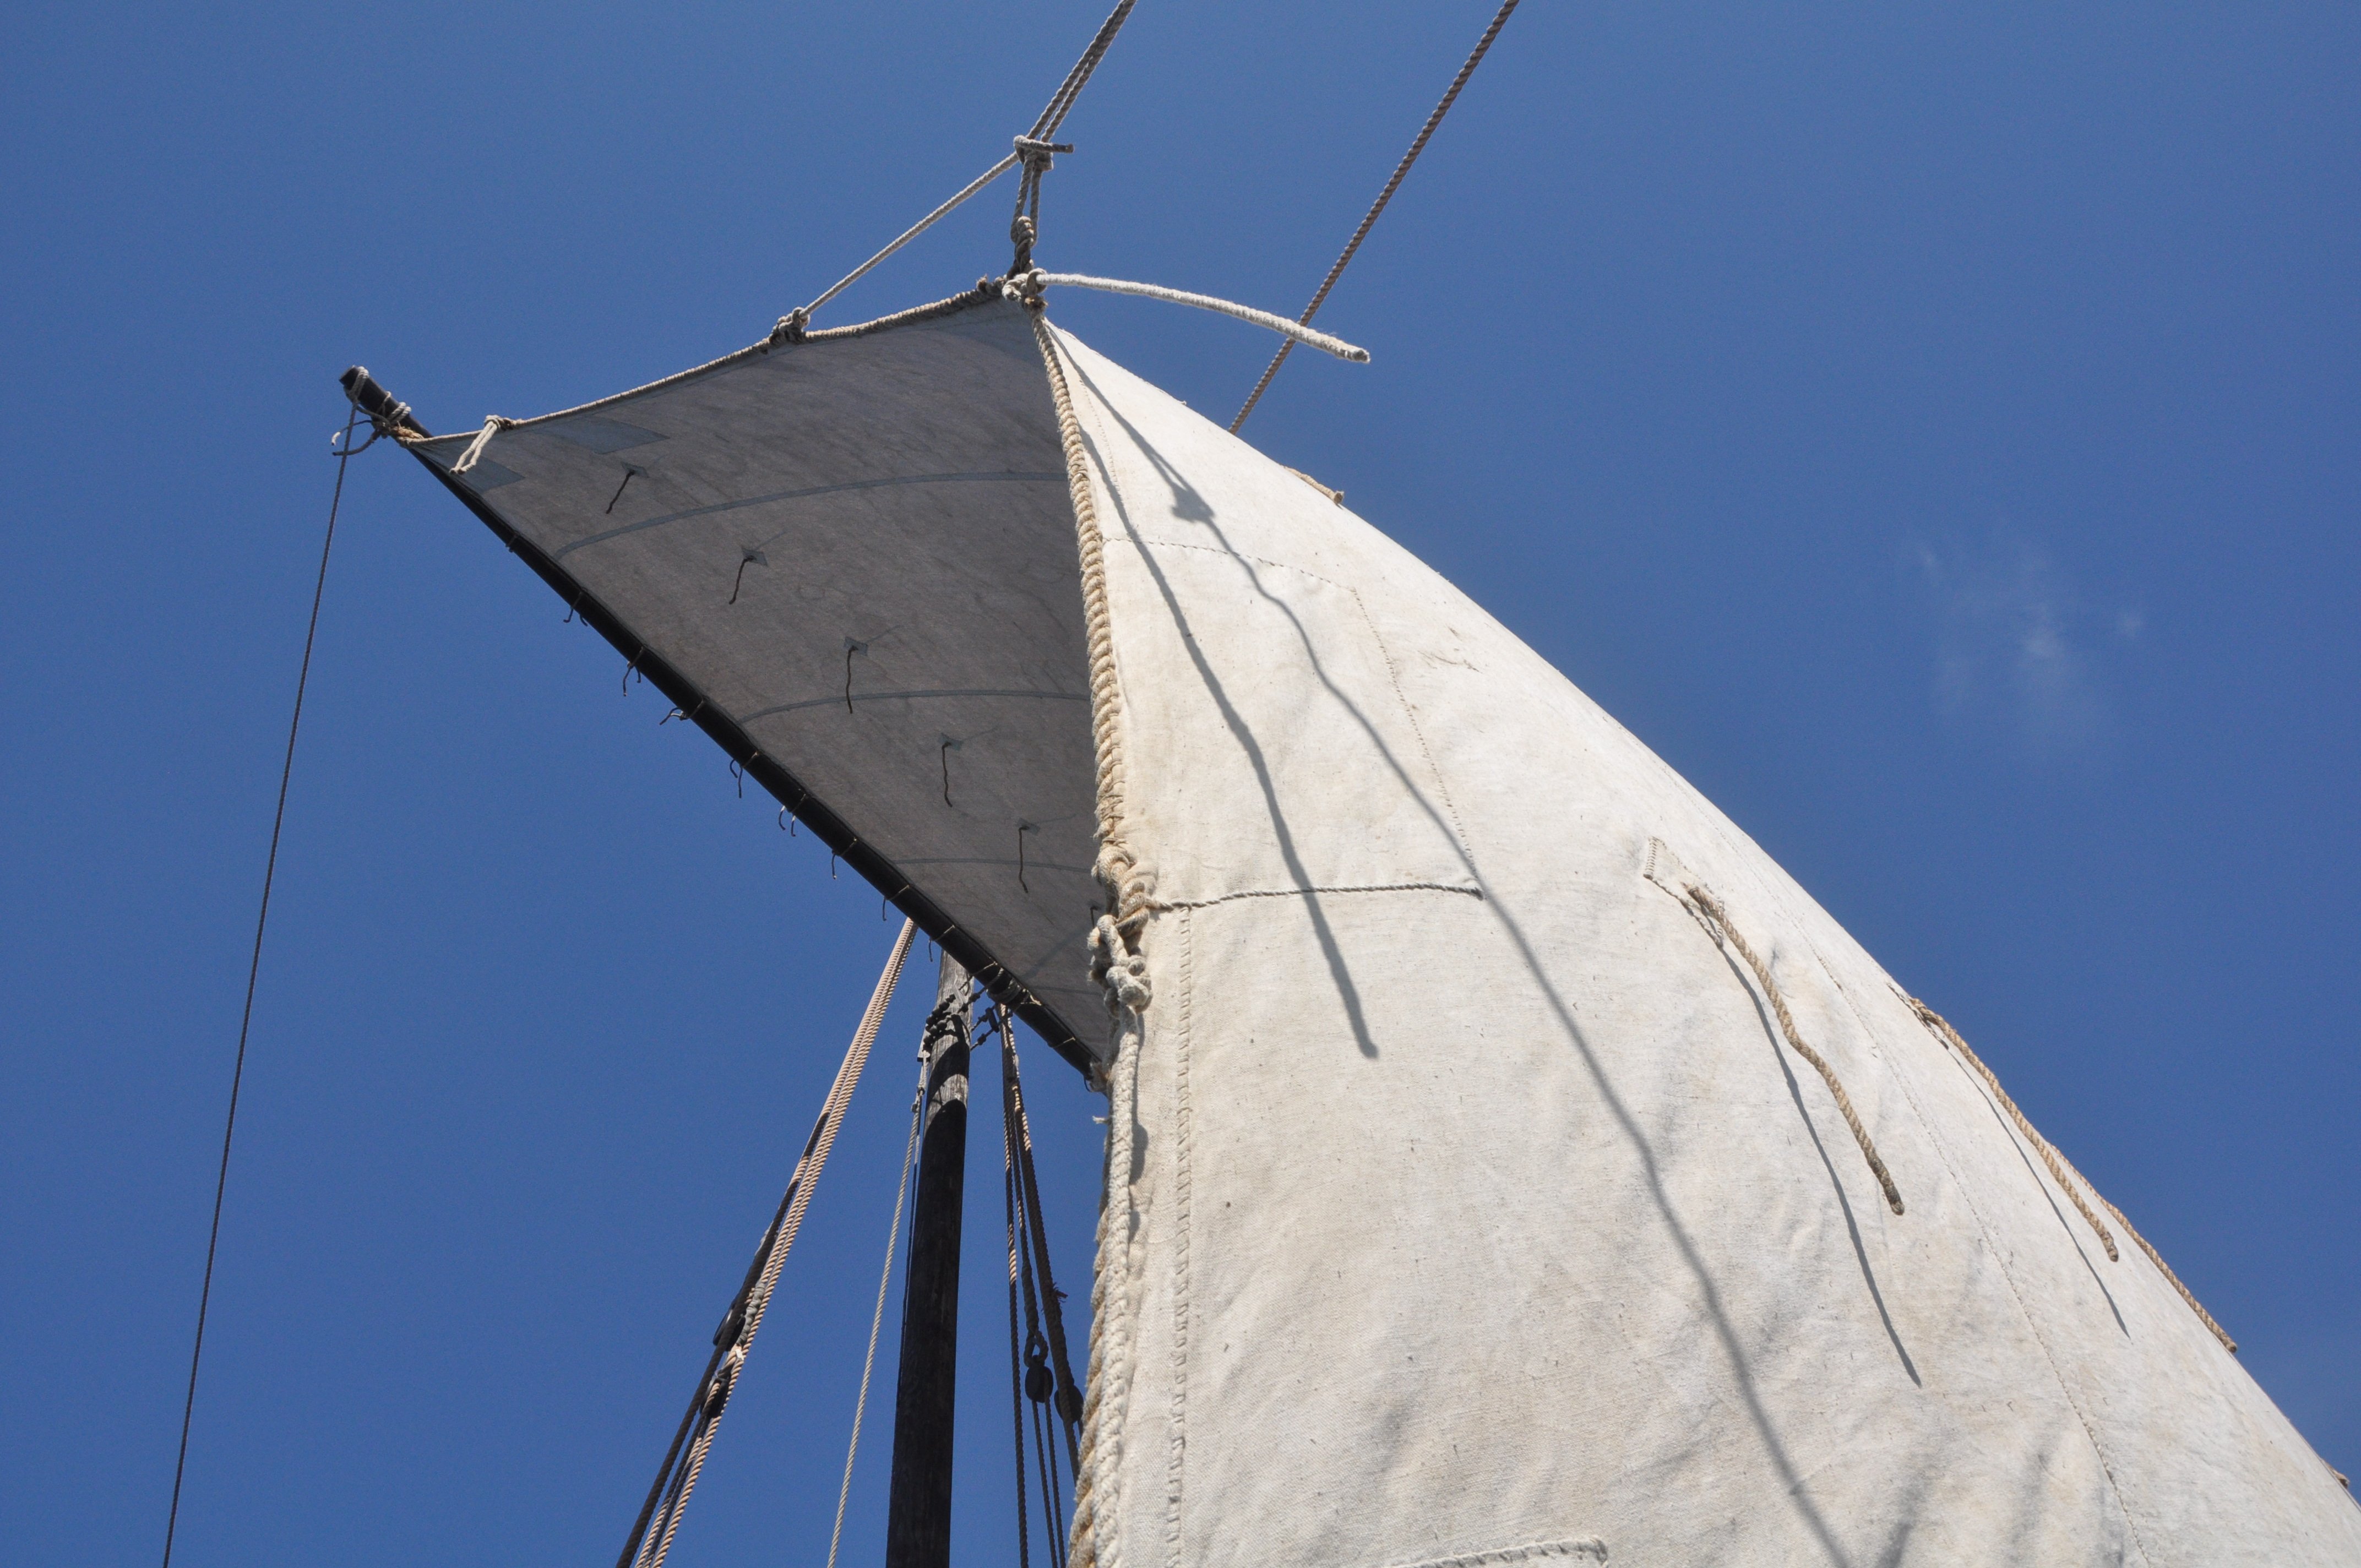
It is quite clear that Will and other sailing barges participated in the war effort, for example at Dunkirk where a sister ship Ethel was sunk. -
Steel wire or hemp rope on Thames sailing barge circa 1940?
bolin replied to bolin's topic in Masting, rigging and sails
Thanks for the help Bob. The more I look on different pictures, and with the input from Bob, it seem to confirm that steel wire was used. The main mast shrouds had deadeyes and lanyards, but the mizzen mast shrouds had turnbuckles. If the lines where served or not is impossible to see on the pictures I have found, but given Bobs answer its certainly likely. The apparent thickness of the lines in the pictures also seem to indicate that they where. So I guess that this means that I should look at getting myself a serving machine 😃 Cheers