
whitejamest
-
Posts
213 -
Joined
-
Last visited
Content Type
Profiles
Forums
Gallery
Events
Everything posted by whitejamest
-
 Such fantastic looking work. I'm glad you're posting in such detail, it's a big help to the rest of us.
- 725 replies
-
- 2
-

-
- vanguard models
- speedy
- (and 1 more)
-
Really exquisite work!
-
Wow this looks really fantastic!
- 263 replies
-
- 1
-
-
- Medway Longboat
- Syren Ship Model Company
- (and 1 more)
-
I sprayed the entire sheet of friezes with Testors Dullcote before cutting any of them out. I sprayed the back, let it dry for 15 minutes, and then sprayed the front. I used little thinly spread dots of super glue to attach the frieze. Because it was well sealed by the Dullcote none of the glue bled through. (That's one reason I would recommend sealing it before installing, whatever you choose to seal it with). The super glue doesn't give you much working time, but I found I didn't need it.
-
Thanks Derek, I appreciate the encouragement. I read and reread that part of your log before starting my attempt. Vane, I think you're right, it has become very popular. A testament to a well designed kit, and of course a beautiful vessel. I definitely am benefitting from the large number of build logs already underway for this model. Yours was the first one I saw, and the one that made me buy the kit. So thank you for that!
-
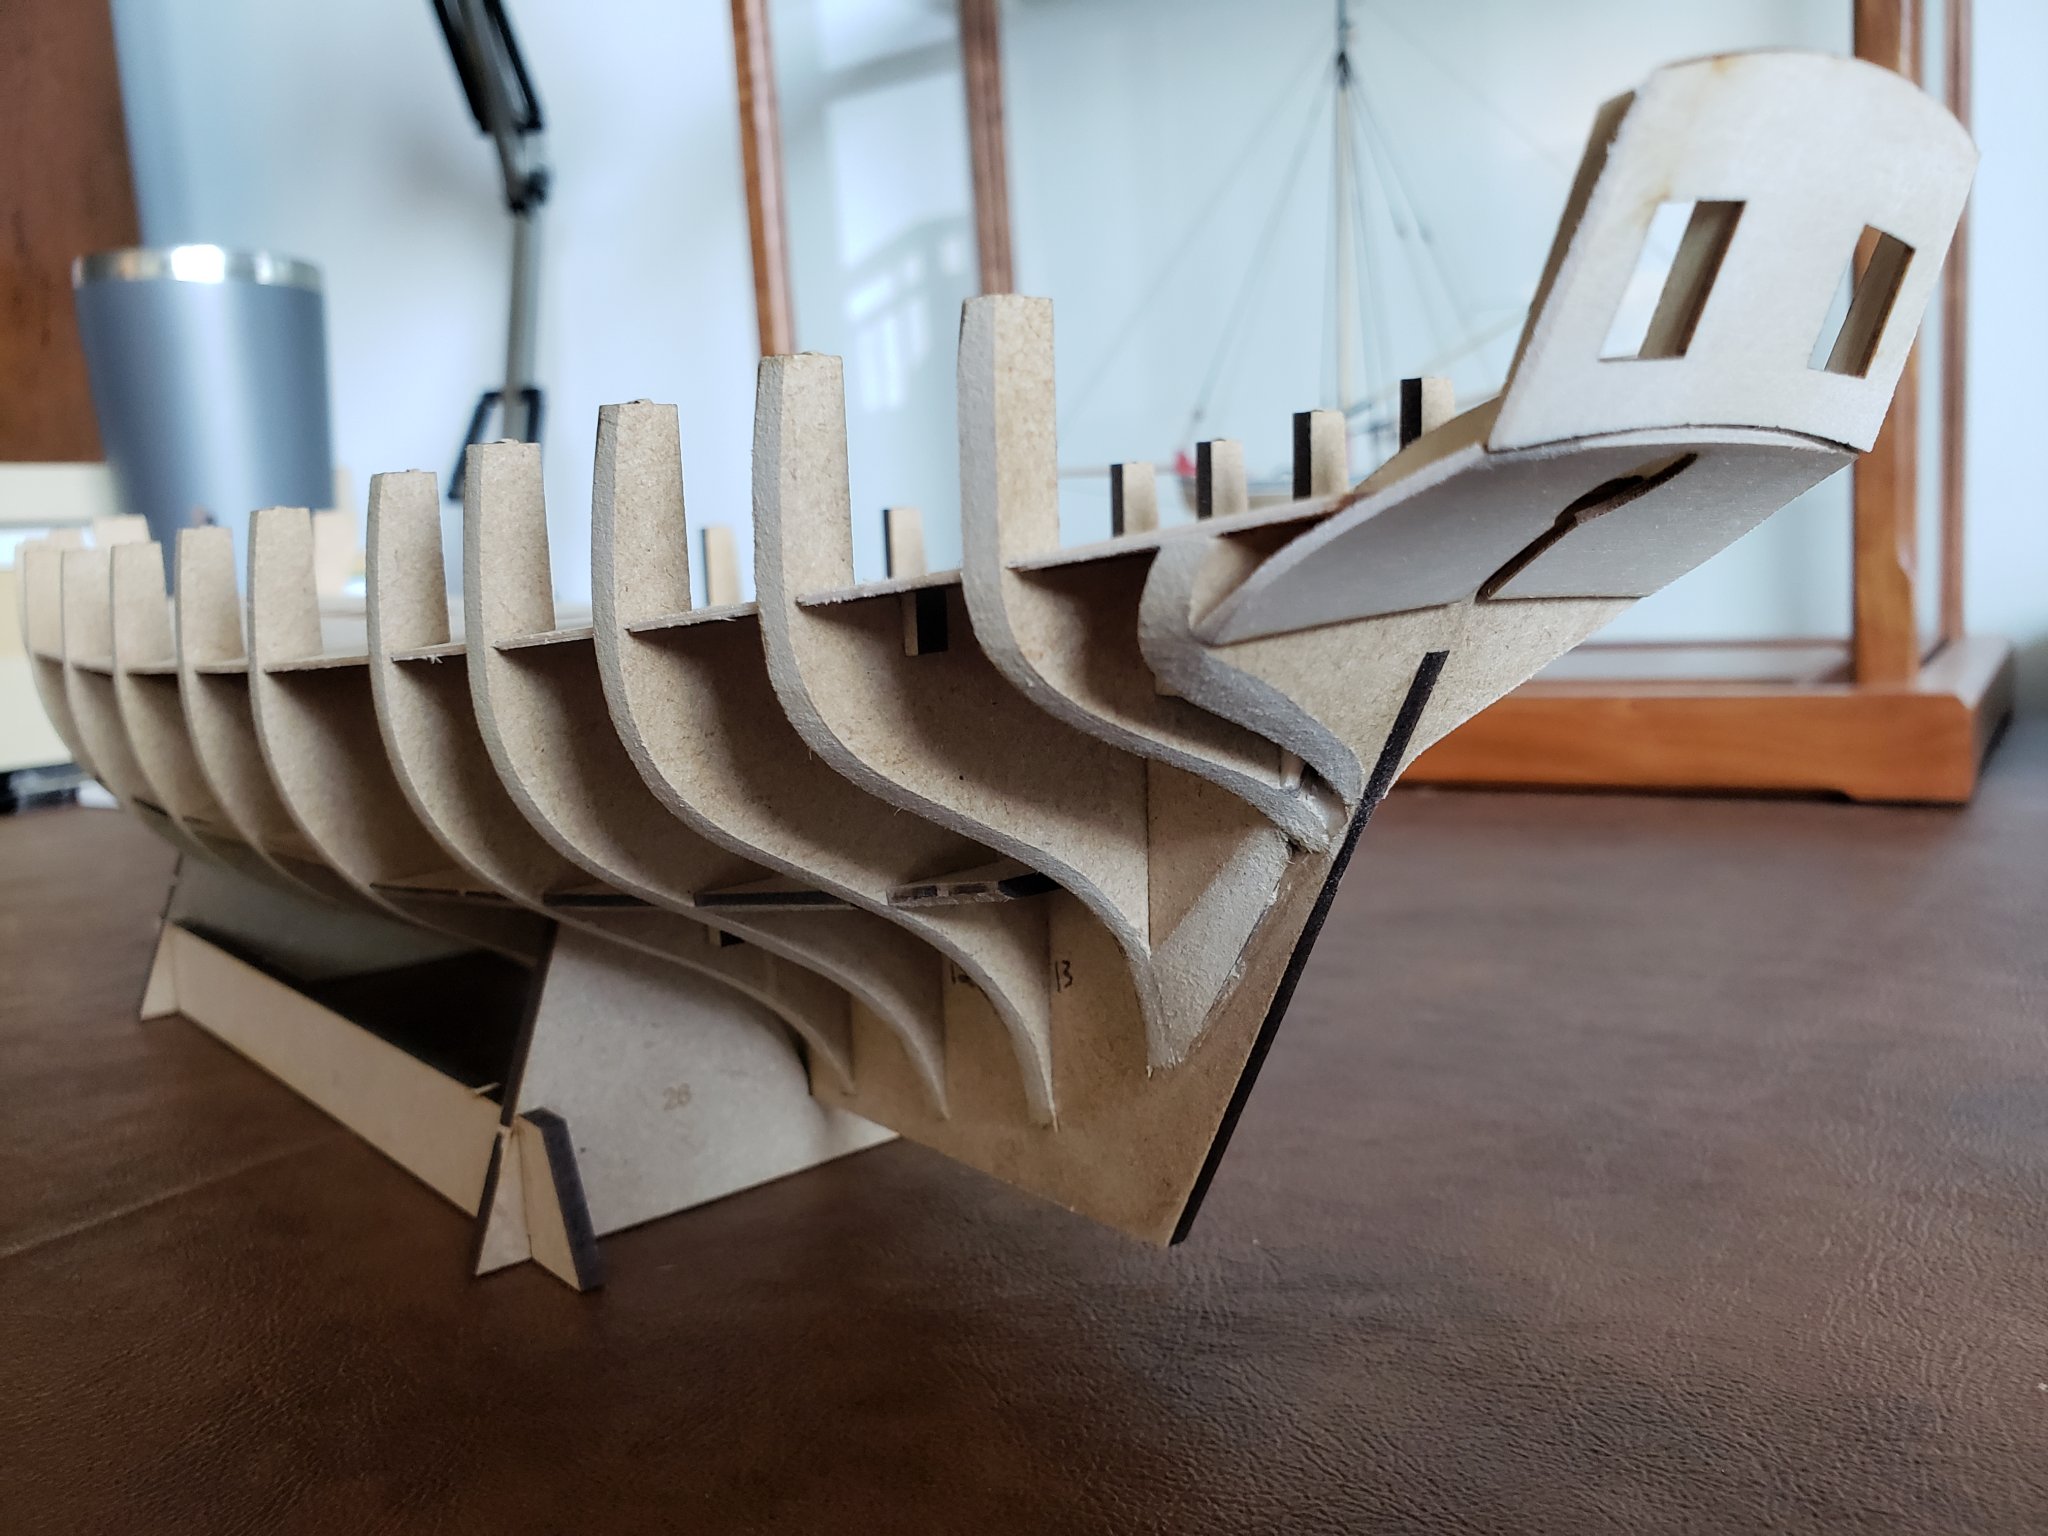
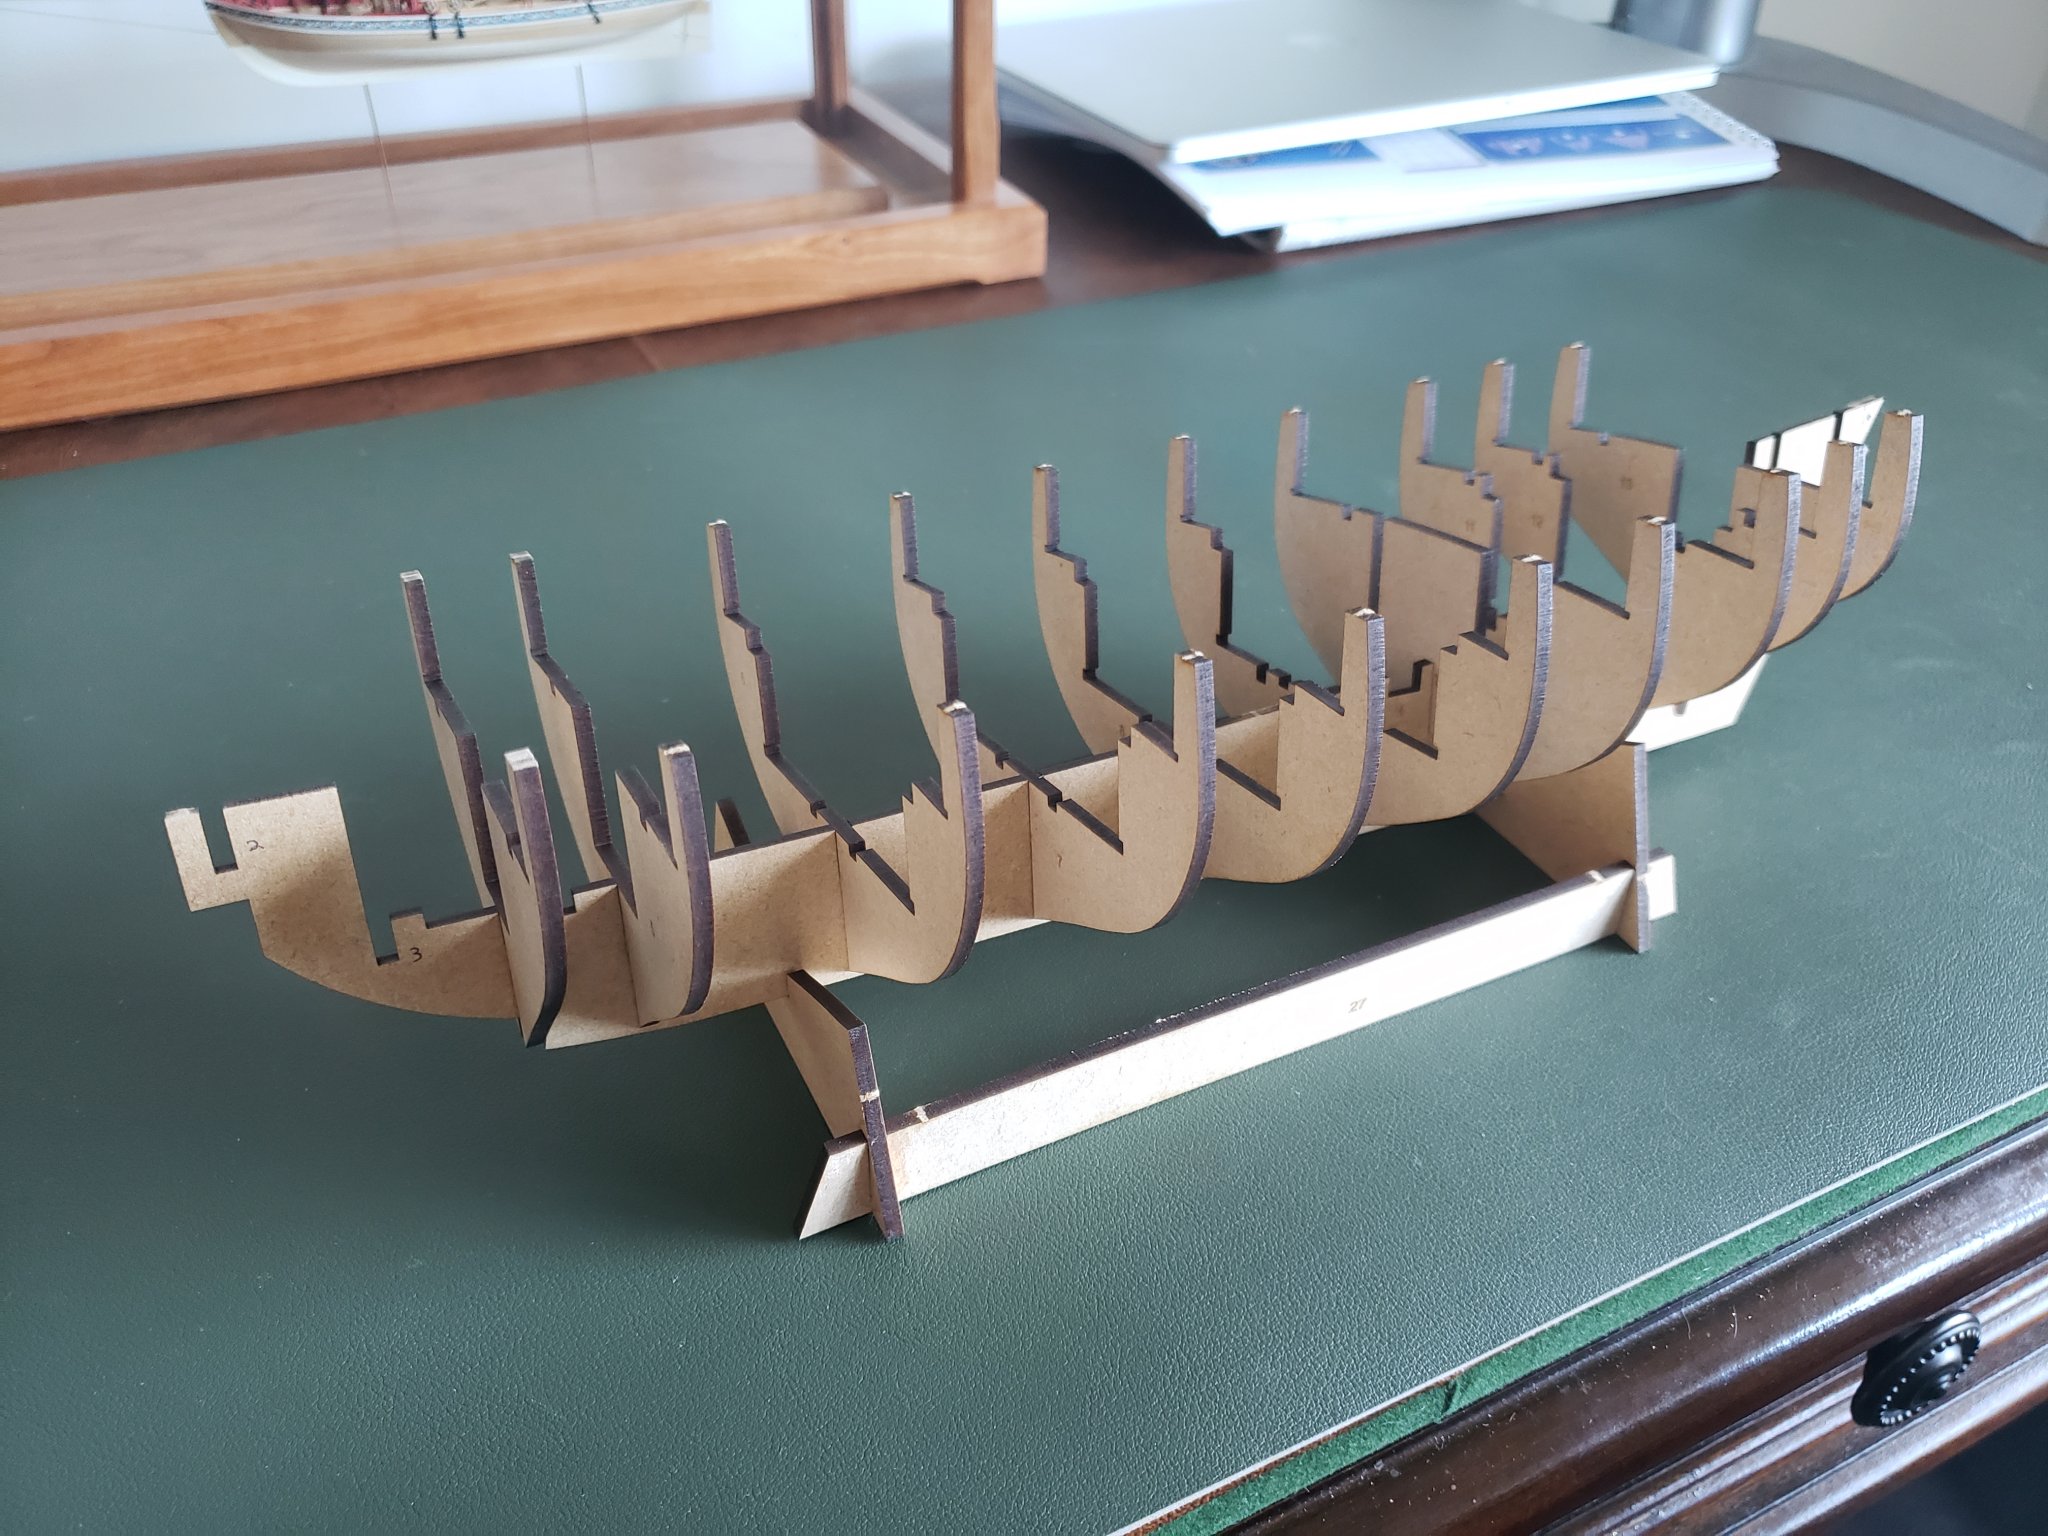
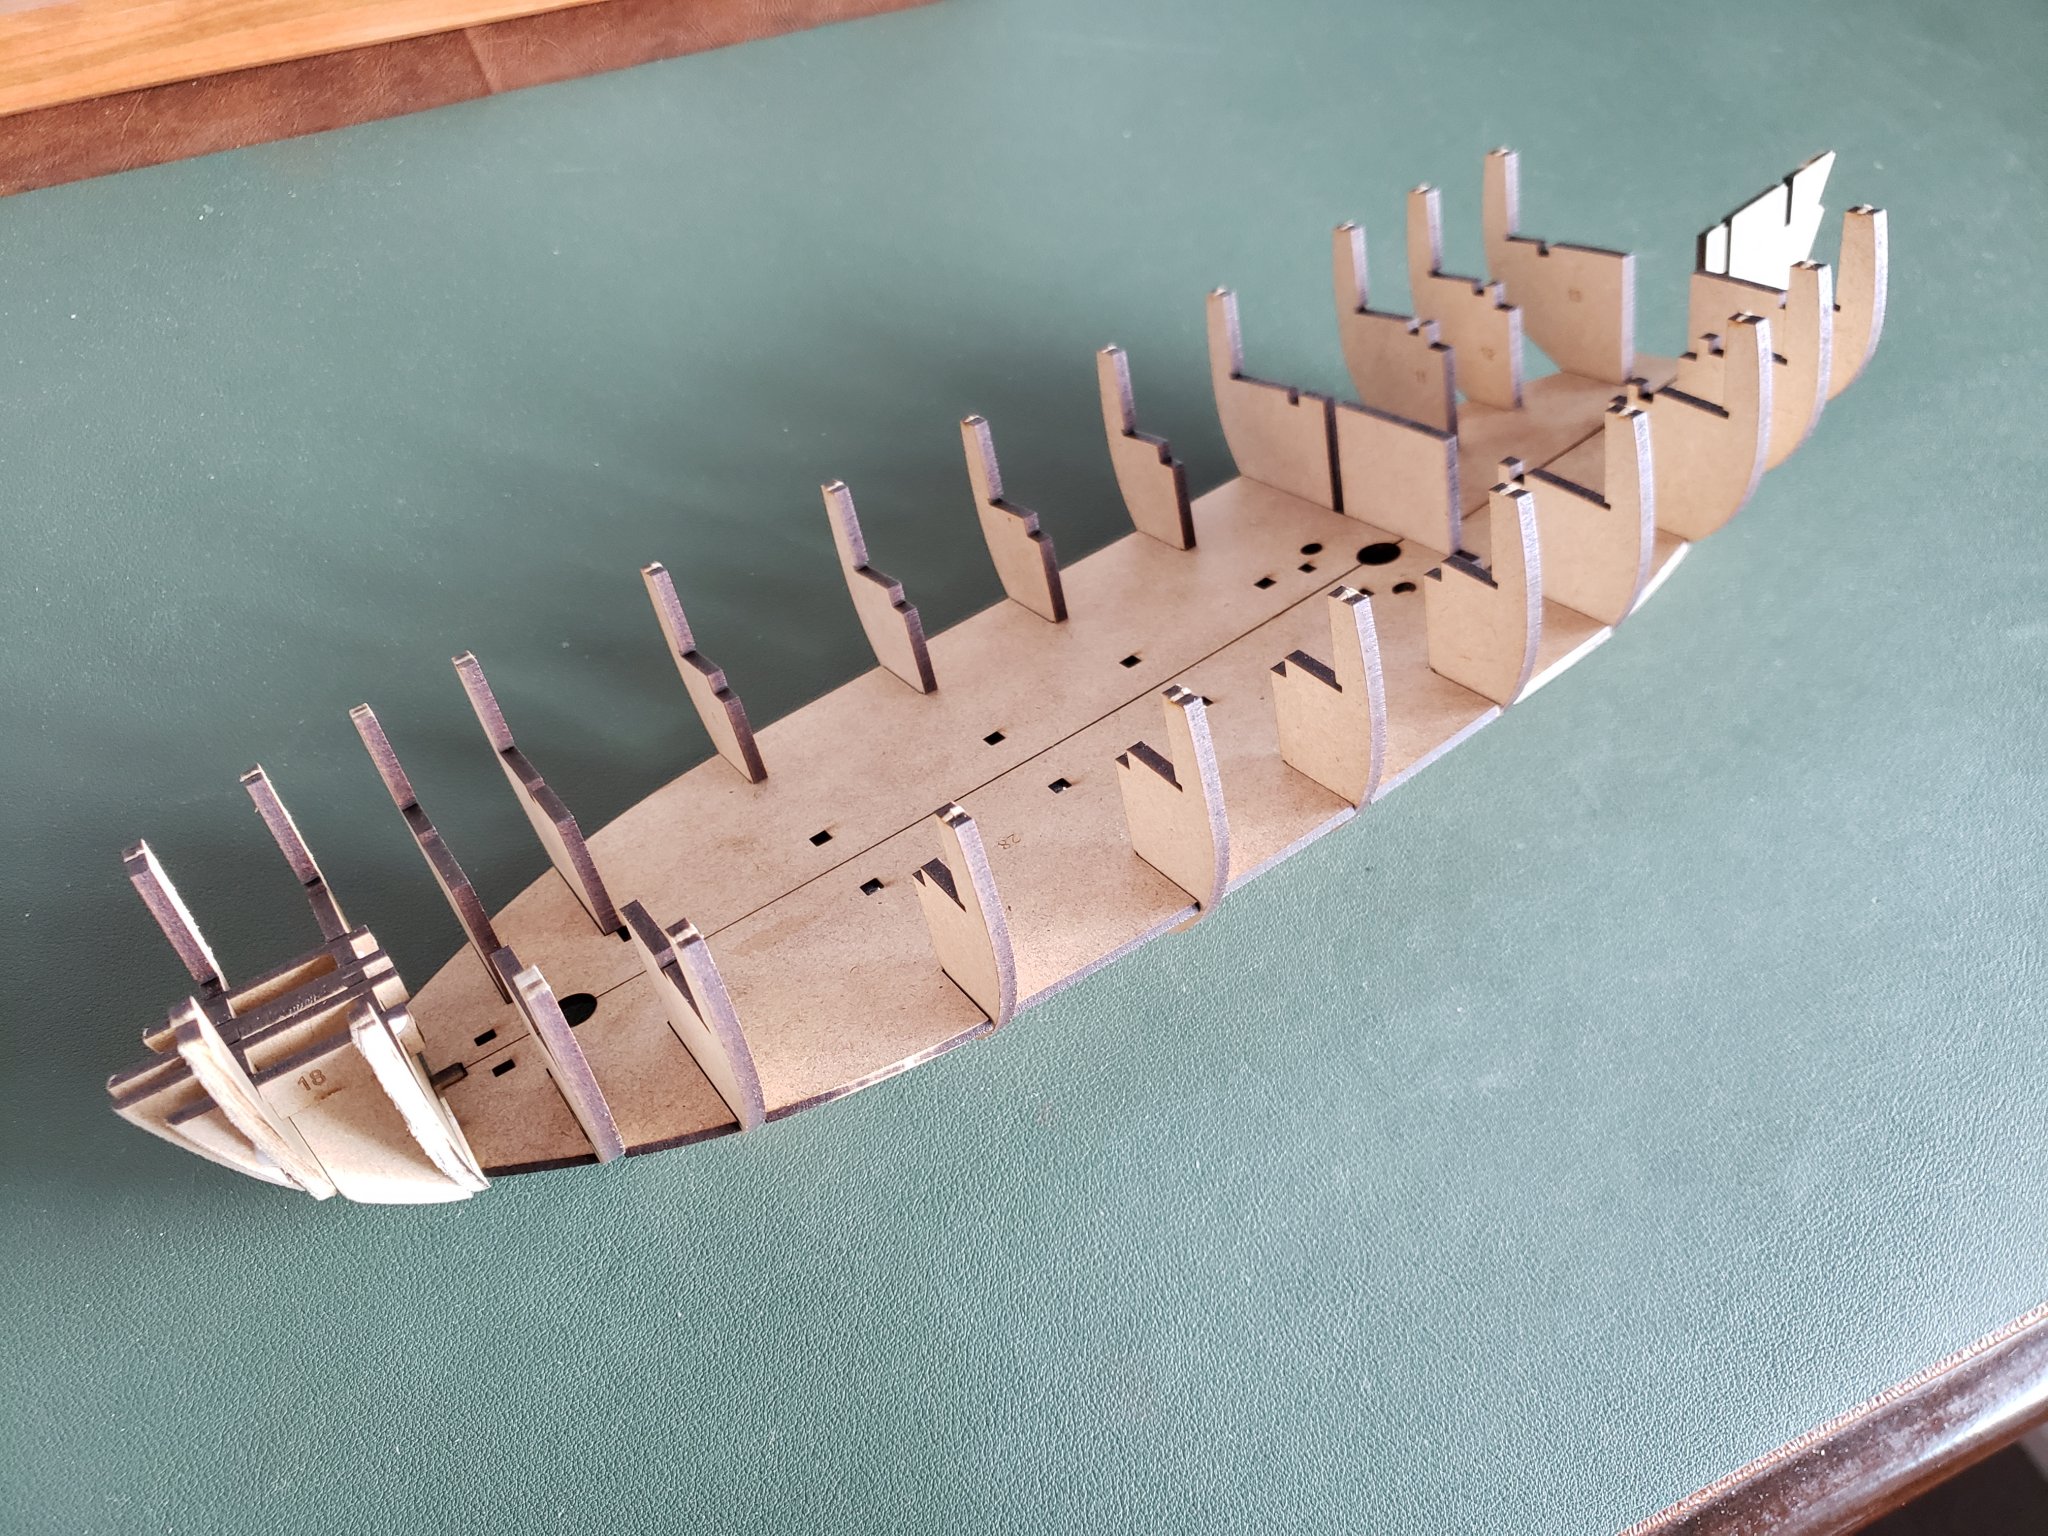
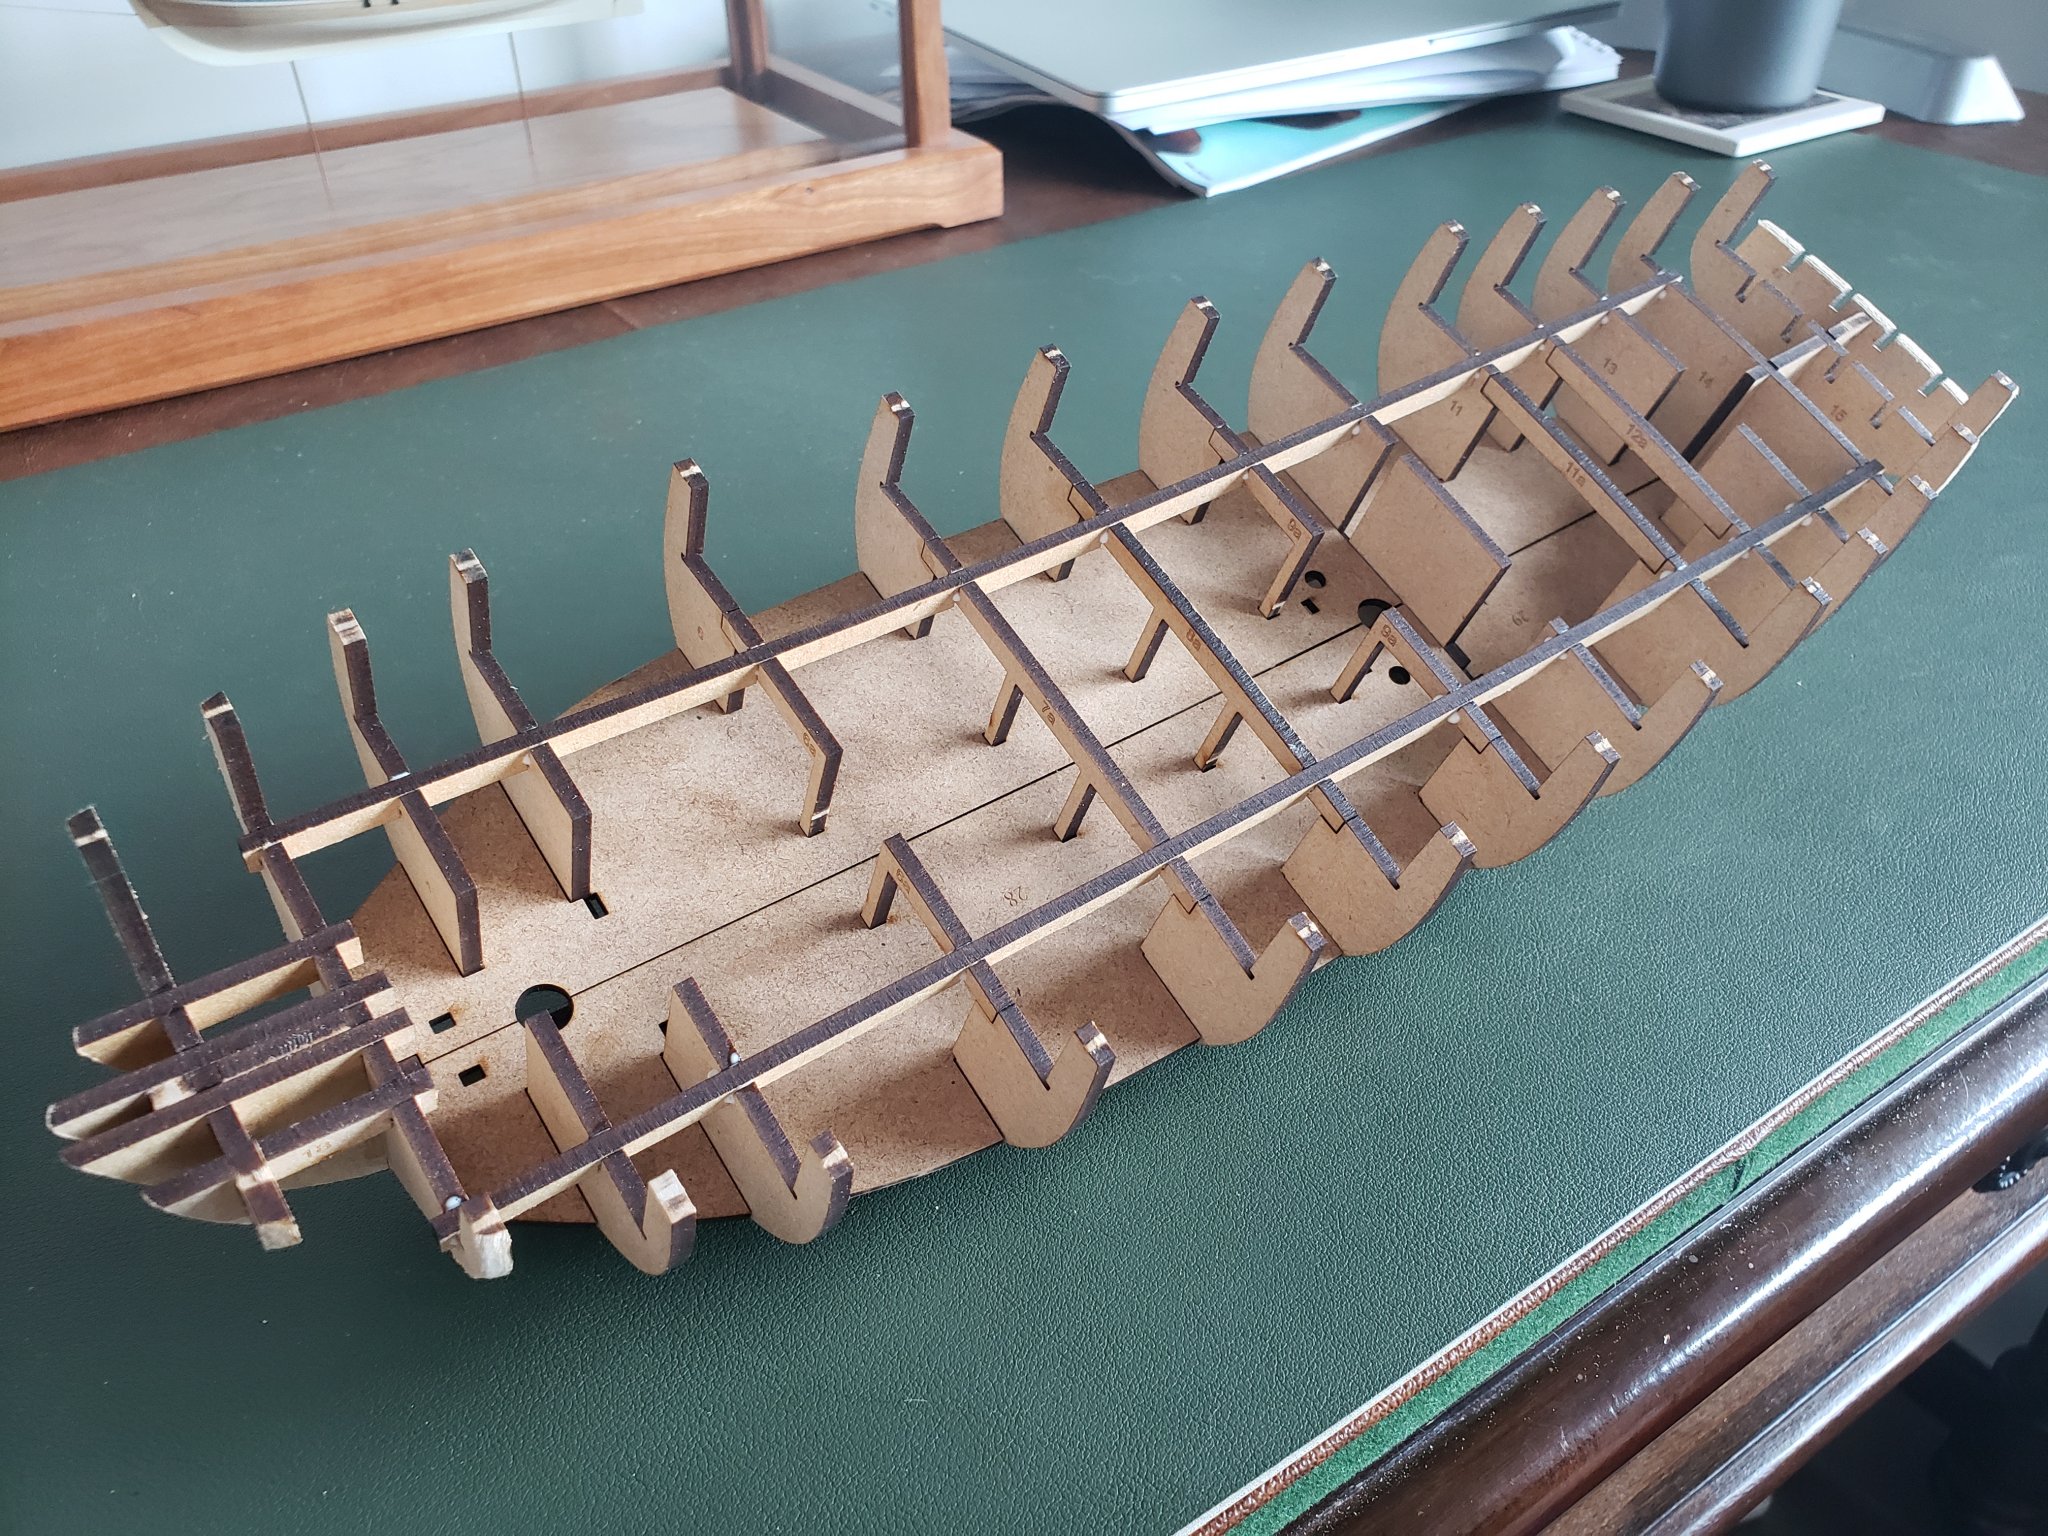
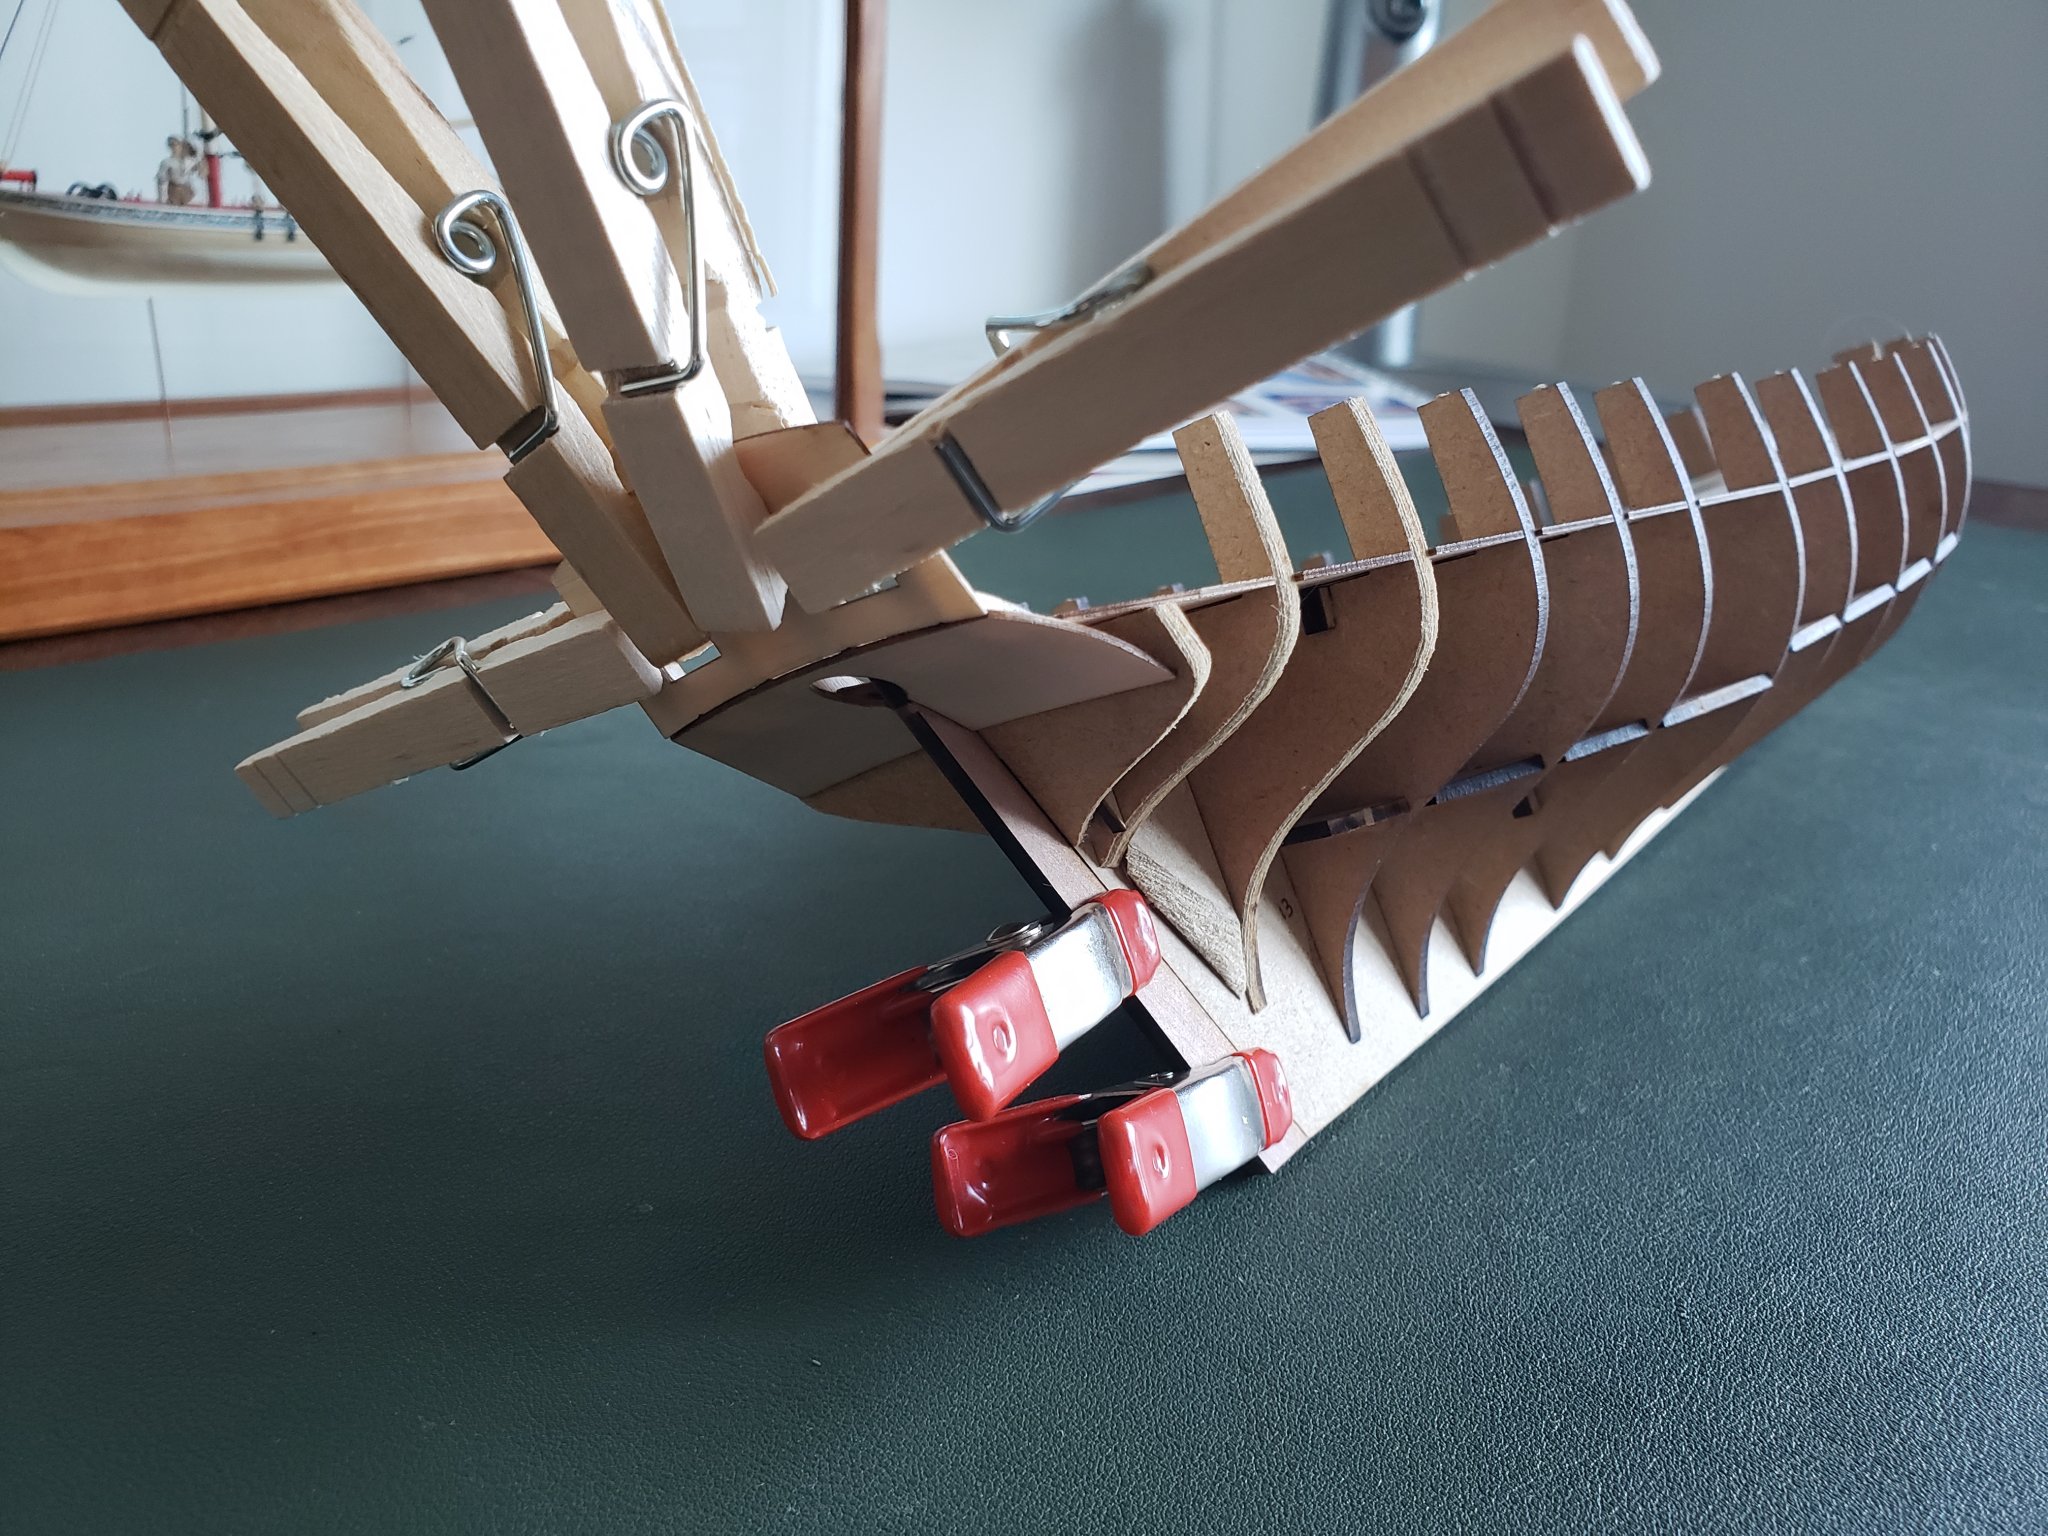
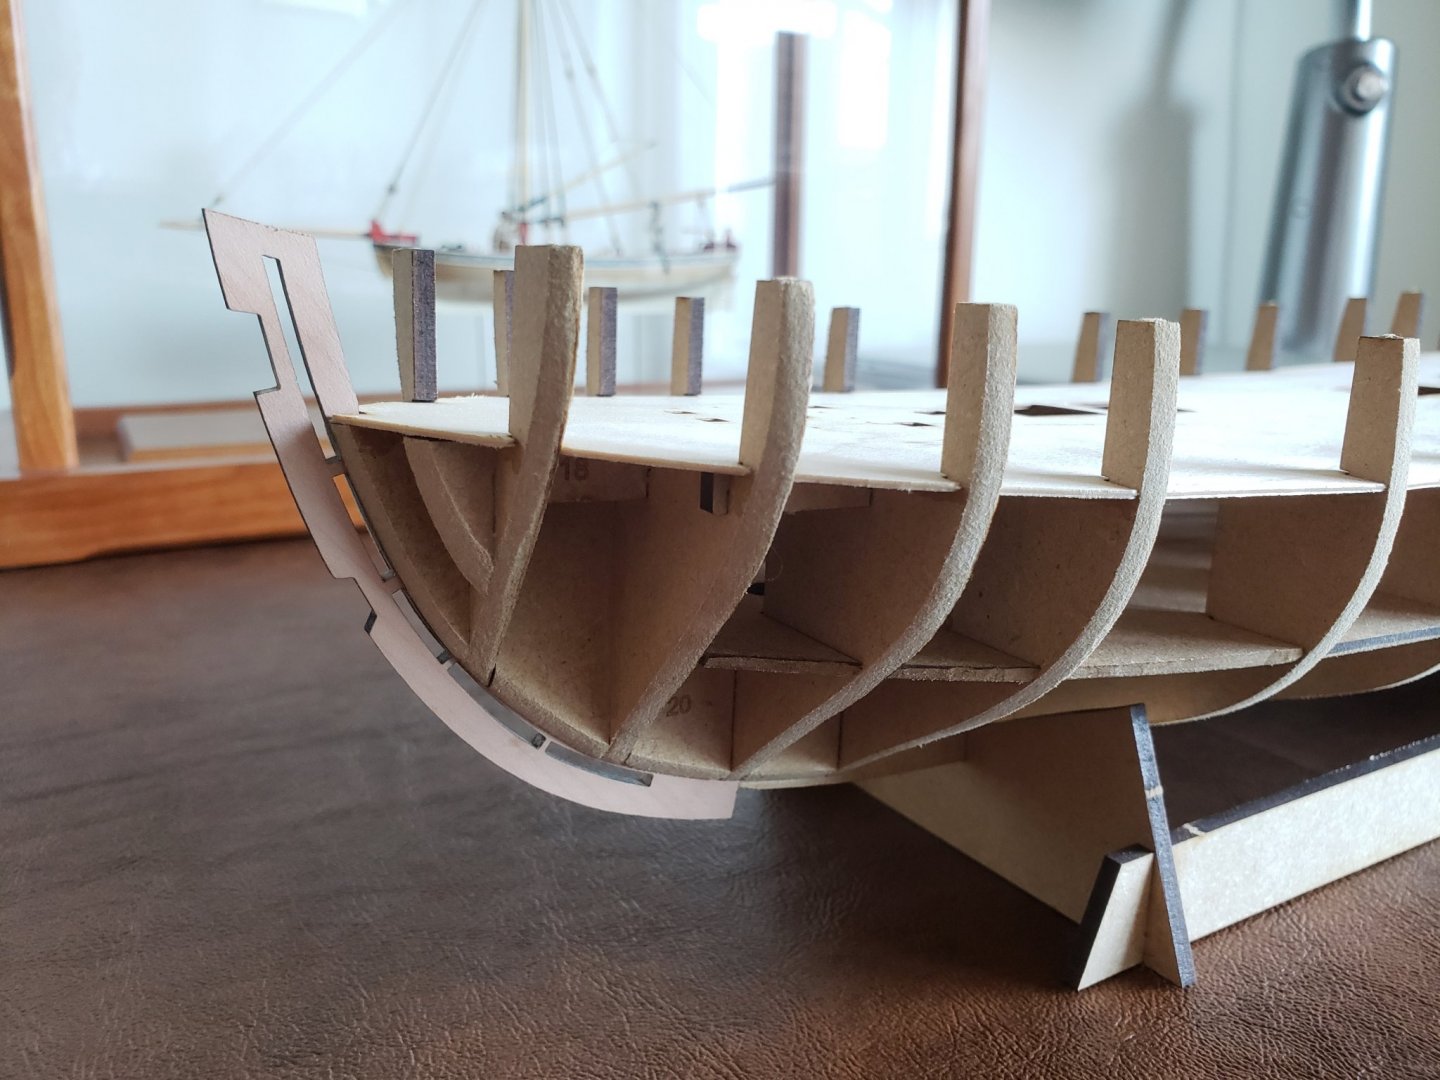
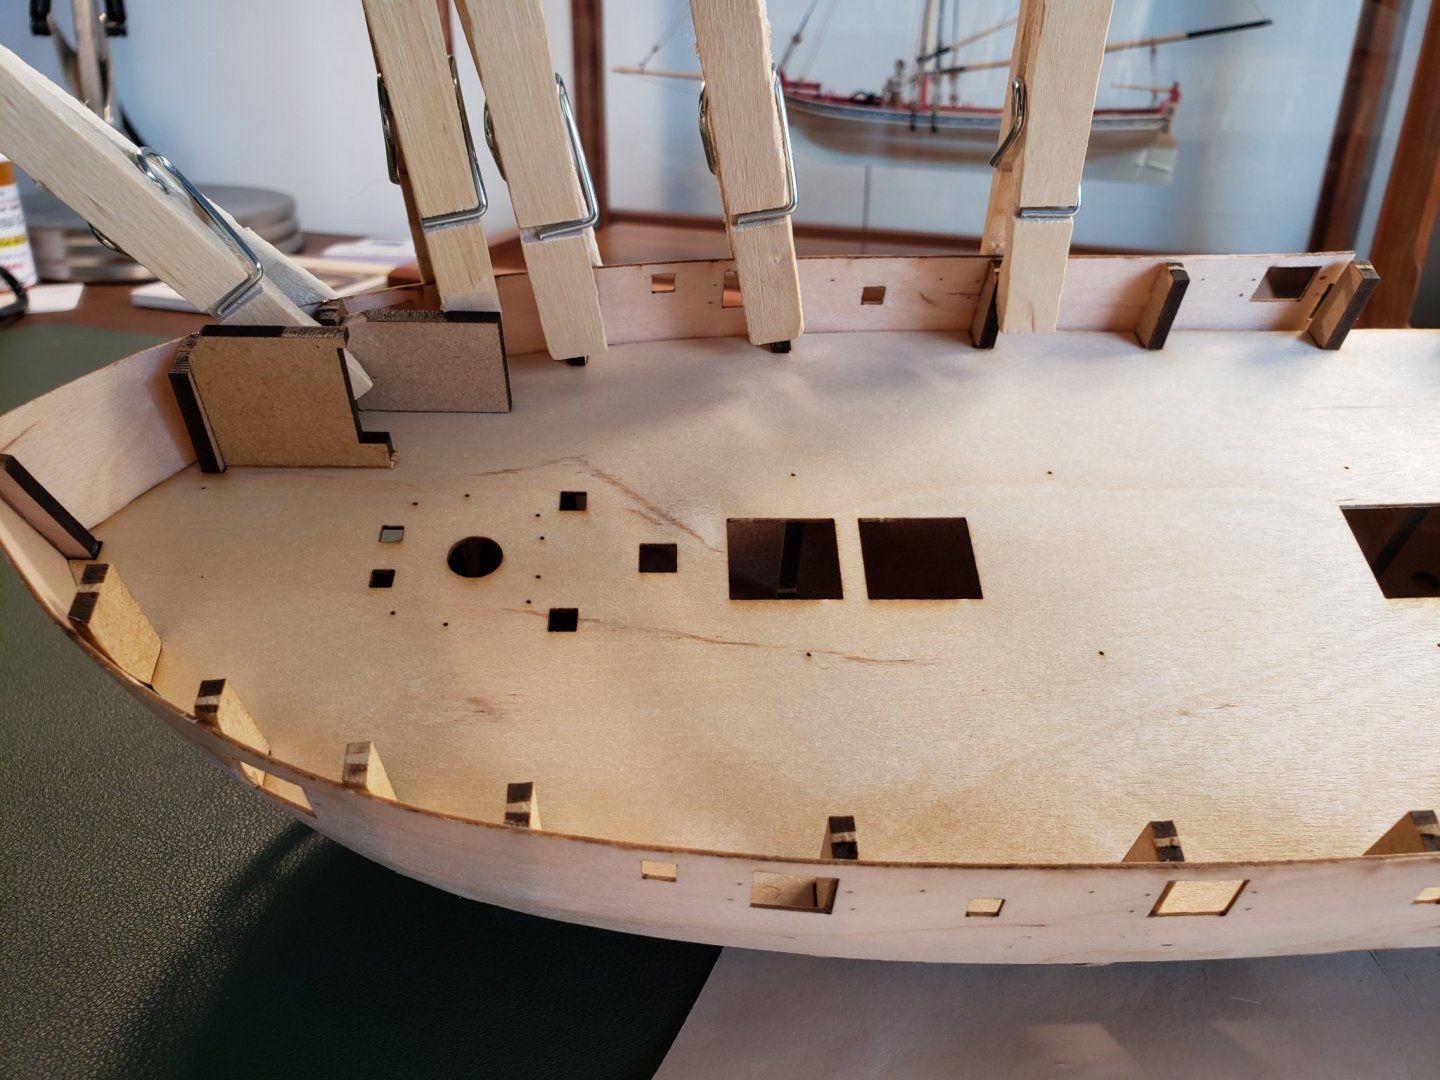
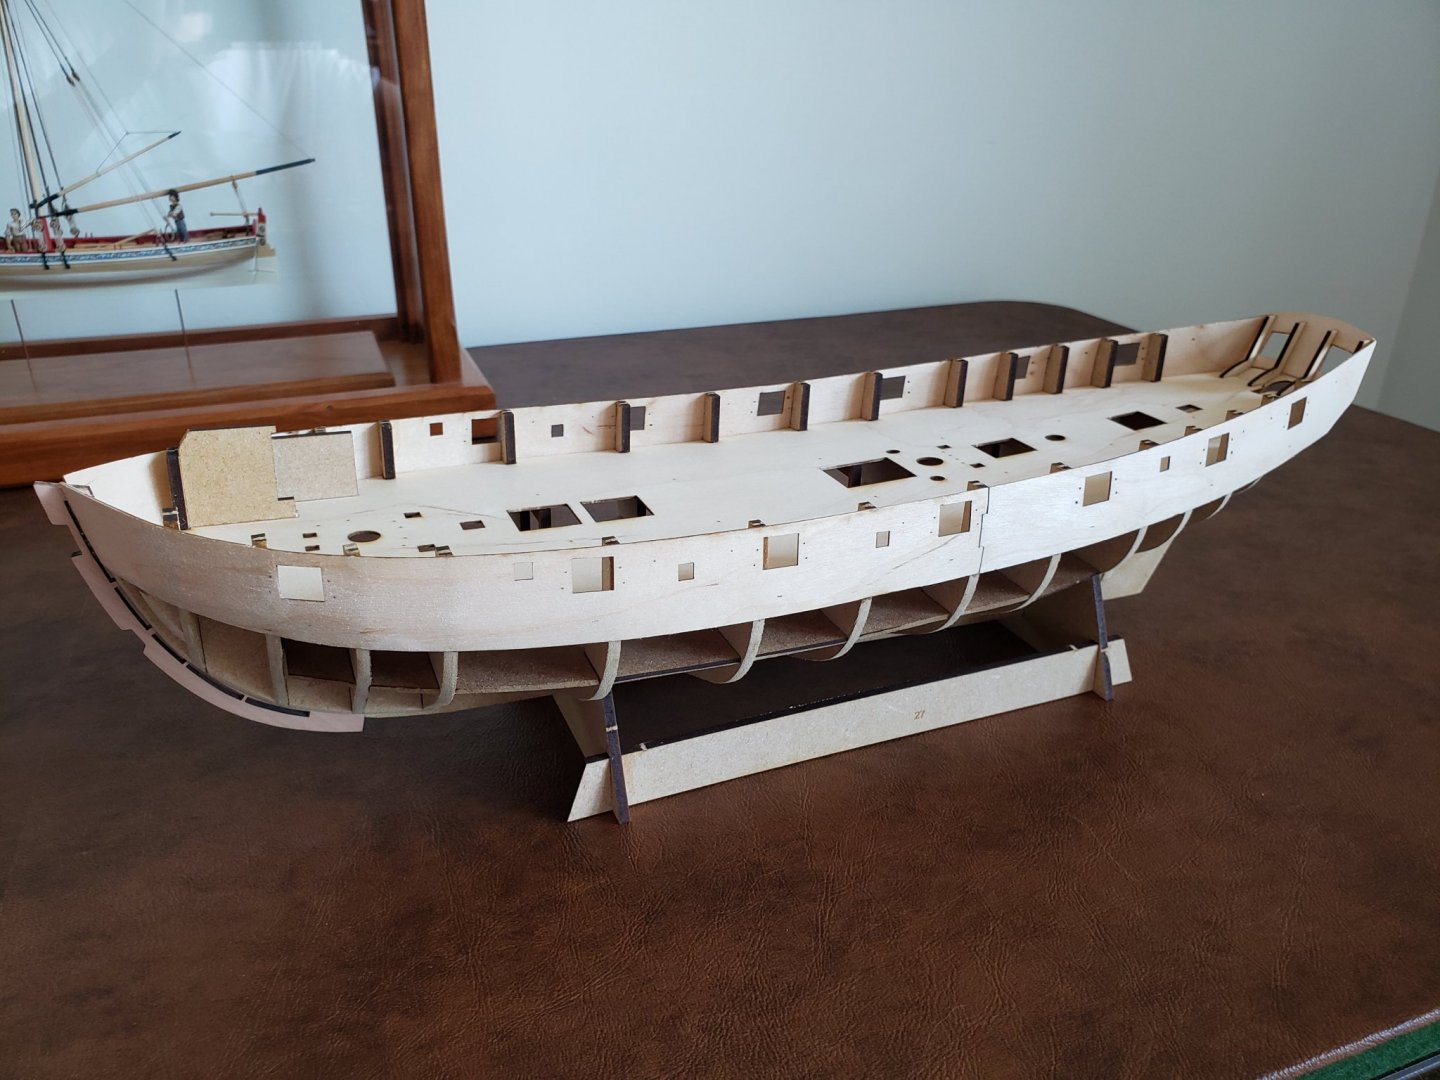
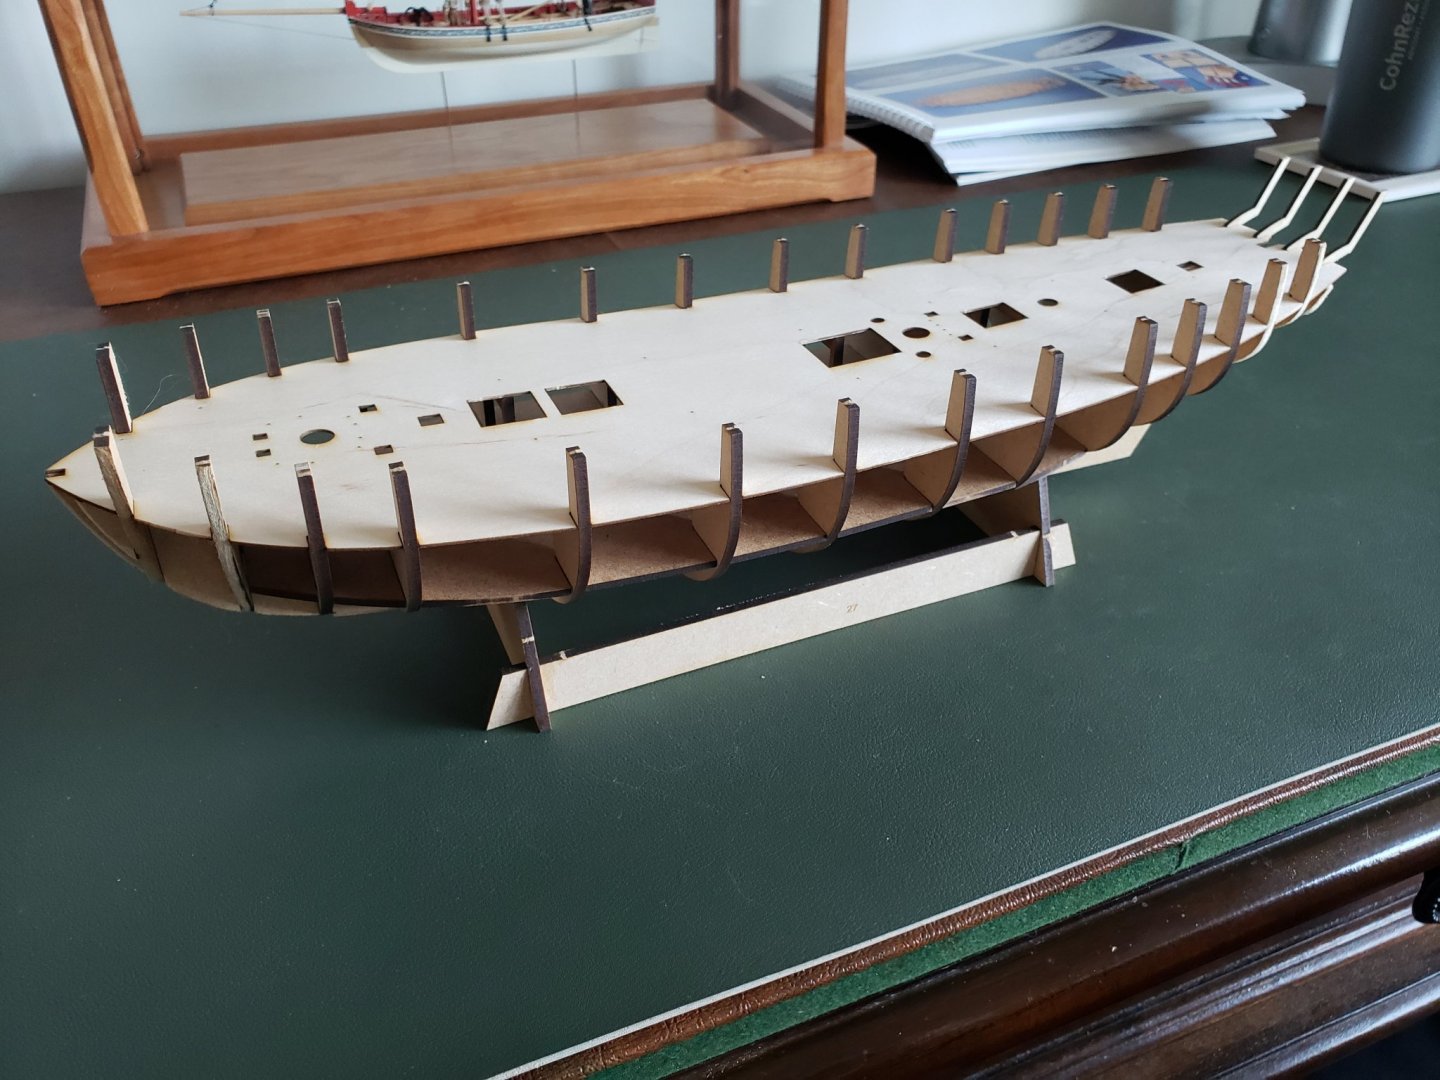
Well I've been moving very slowly indeed on the Speedy, partly because I wanted to take my time, but mostly because I've been pretty busy with work. Not a bad thing to have to complain about these days I guess. But here is what I've done over the last few weeks. First off, a lot more fairing. The Model Shipways Longboat build really showed me the importance of fairing, so I wanted to give this the attention it deserved. I've found I still have some more to do, as bulkhead 8 needs more attention. I see now that I could have done a lot more to fair the stern frames before attaching them to the model. At the time I was worried about overdoing it. Then I attached the inner stem piece. This fit very securely into the grooves in the MDF false keel piece. I just had to sand the stem a little so that it could slot in, as the fit was quite snug, a good thing. I was glad that it fit so well that I didn't have to worry about it being straight. Then the attachment of the gunport patterns. I was dreading this a little, having read other people's build logs and hearing that this was one of the more challenging steps in the early part of the build. I knew going into that it was going to be difficult to keep the pieces from going wavy, and that was borne out by my experience too. Herein follows a description by someone who has never done this before and doesn't even really know how to describe the process. Hopefully this will be intelligible to the more experienced. I immersed each piece (one at a time, as I was working each one) in near-boiling water for about 20 minutes before working on it. For me the first challenging part was figuring out the best possible pitch of the front pieces. If I aimed to make them perfectly level with the top of the first bulkhead, the pieces wound up sitting higher than the tops of bulkheads further down the line. Or if I tried to force them down further, the bottom edge was much more inclined to go wavy. I pulled the first patter off after attaching it to the first bulkheads, and redid it. The difference was very slight, but it seemed to help. So my gunport patterns sit slightly low on the first couple bulkheads. Just by a small amount, and I believe it is symmetrical. So hopefully the effect will look all right later on. Rather than pin the pieces in place and use white glue, I chose to use super glue, applying glue to one or two bulkheads at a time. I held the bottom edge in place with my fingers while the glue dried, and clamped the top with clothes pins. You can see in the photo below that I added a couple pieces of mdf scrap to brace the first two bulkheads on the starboard side. I had put a little too much weight on them while fairing the other side of the model, and they had bent slightly. Once the mdf bends it is much weaker, and so they would not have held their shape against the pressure from applying the patters. But it was a simple matter to glue those blocks into place, and they held just fine. Here is what it looks like with the patterns installed. You can still see some subtle waviness in the lower edge of the patterns at the bow. But I've sanded out some of it, will sand a tiny bit more, and am hoping that with the remaining opportunities for sanding that the planking will offer, I can successfully hide any remaining irregularities. So that's where I am right now. I need to fair bulkhead #8 a little bit more, and then I will be starting the first planking. I expect I will be soliciting a lot of advice as I take that step. Pointers more than welcome.

-
I've just recently started the kit, and am really looking forward to seeing your modifications. I (very) briefly toyed with the idea in my head of cutting a little of the hull away and trying to detail the interior, but I rejected the idea as far beyond my abilities. So I will live vicariously through you.
-
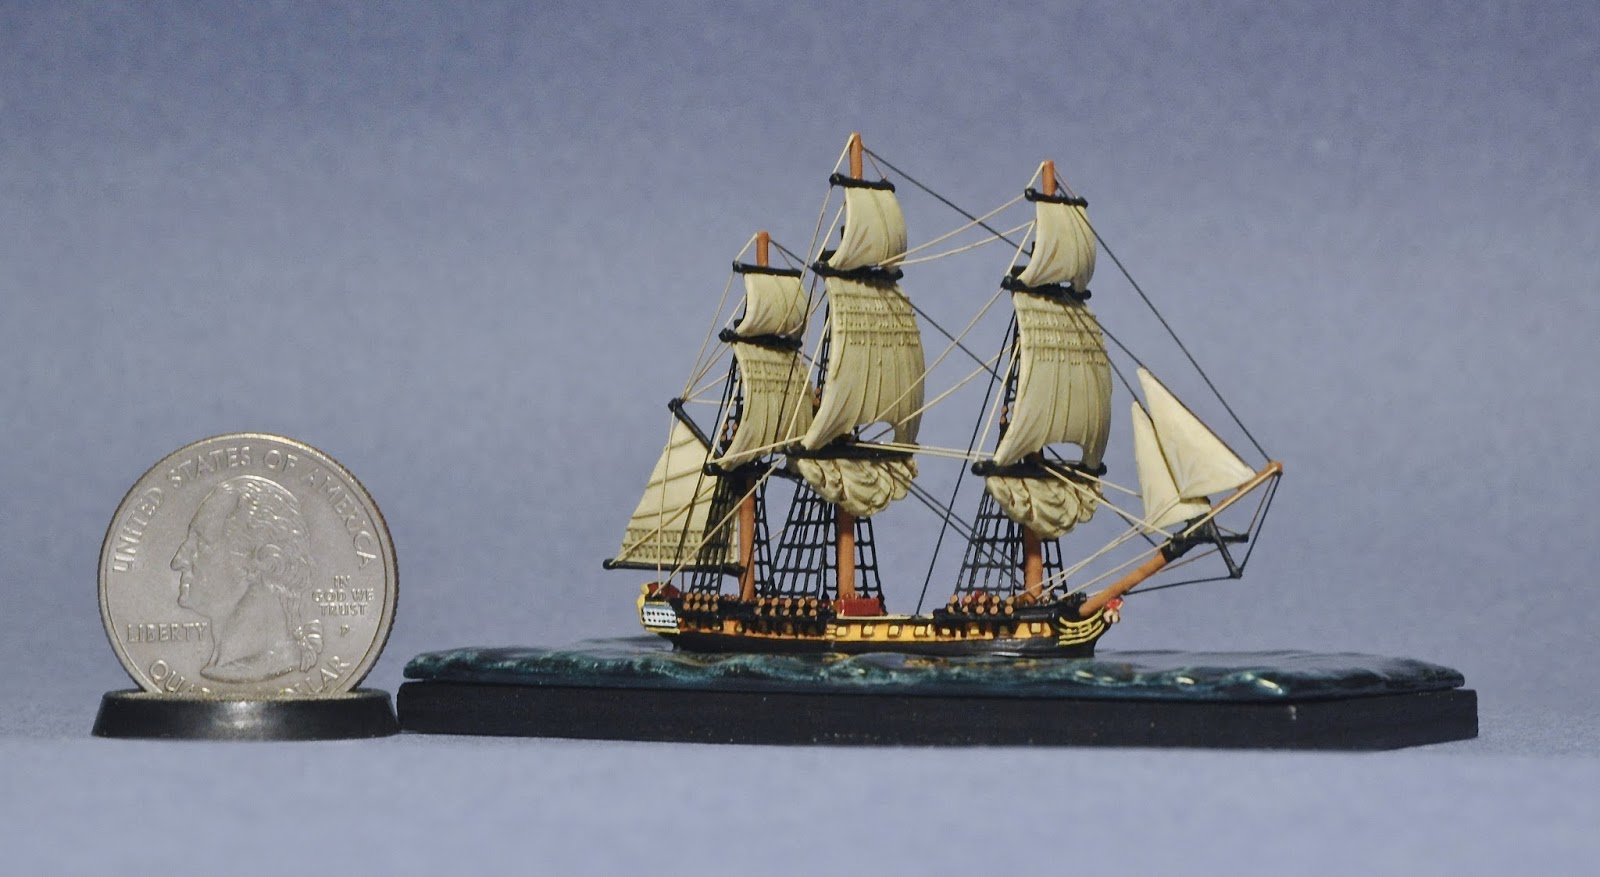
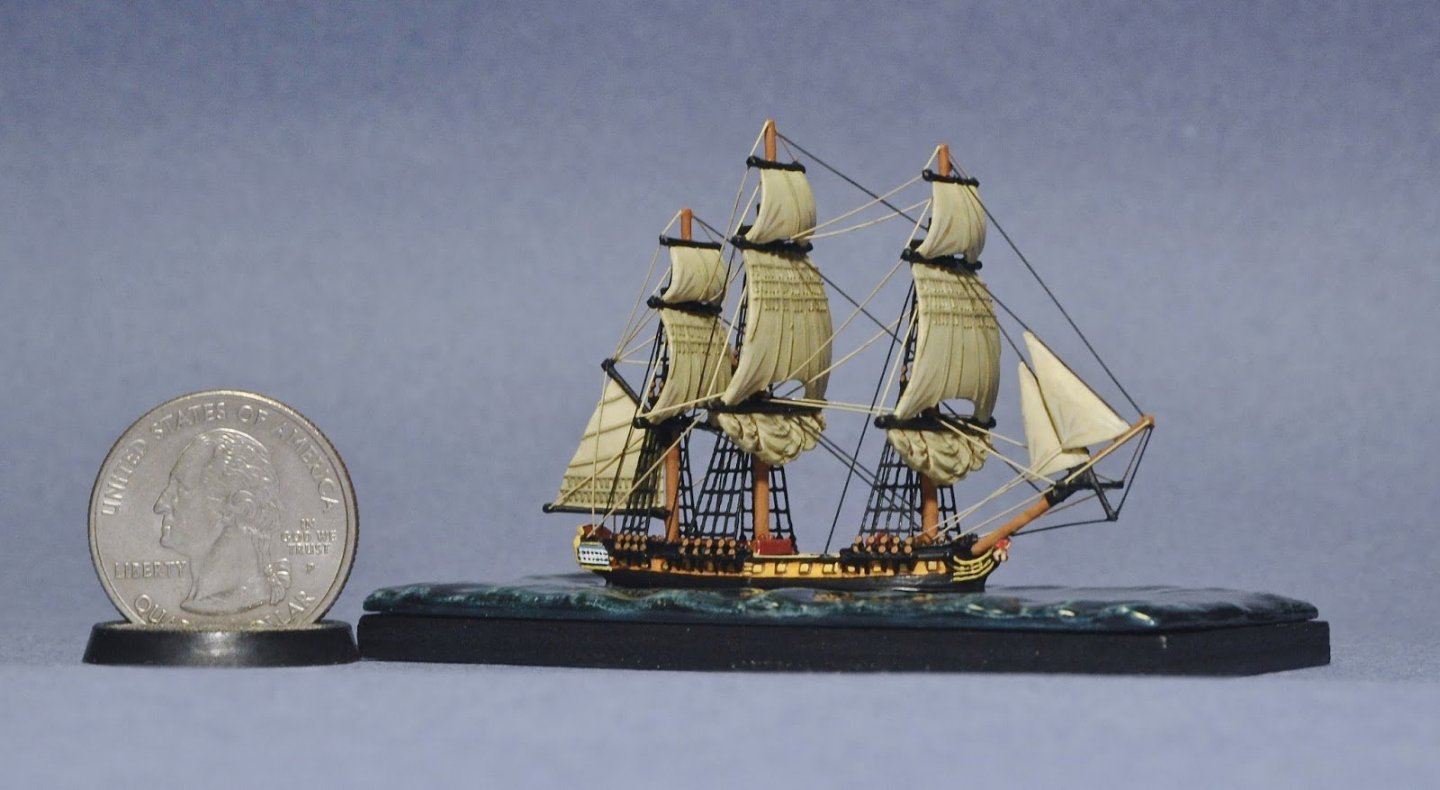
Thanks very much Derek. I've done a little work on wooden model ship kits before, but never got very far. The longboat was the first one I've attempted in years, and the first I've finished. I do have a fair amount of experience with model making in general though, for what that is worth. Most of the ship models I've worked on have been very small gaming pieces, like this one, a white metal kit from GHQ: It's pretty crude compared to wooden display models, but it is 1:1200 and just intended for use in games. (I know my rigging is not as accurate as it could be on this piece...) I did not make the case, but ordered it custom built from Chameleon Woodcrafting, a one man outfit in Washington state. Michael Jekubik was the creator, and he does excellent work. I'd highly recommend him to anyone looking to have a custom case made. https://chameleonwoodcrafting.com/ Ryland, thank you for the encouragement. Yes, the longboat was a very good learning opportunity for me. It was small enough that I could concentrate on trying to do each step as best as I could without it feeling overwhelming. I'm trying to carry the lessons of that build forward with me into the Speedy.
-
Thanks very much for the welcome Derek. I've had your Speedy build log open very often for instruction and inspiration, and will be relying on it heavily as I (very slowly) move forward. Your Speedy is looking absolutely beautiful. I've not updated this log in a couple weeks, partly because my work load suddenly increased, and partly because I am taking my time fairing the frames as throughly as I can. I think you will enjoy the longboat a lot. It is small but still very nicely challenging (for a rookie like me at least), since there is not much to hide a bad planking job. I look forward to seeing your build. Regards, James
-
Hello all. This is my first attempt at a ship model of this complexity, and coincidentally my first build log. I recently completed Model Shipways' 18th Century Longboat in 1:48 (I still need to take some proper photos and get those posted), had a really great time with it, and started looking around for my next project. I had read lots of reviews and some other build logs about Vanguard Models' HMS Speedy kit in 1:64, and everyone seemed to agree that it was a very well designed kit. That sounded ideal for a relative beginner like me, and then there was the matter of the actual size of the model. I live in an apartment in Union City, NJ with under 1000 square feet (and a wife and a cat), and doing something even the size of a little brig or ship sloop in 1:48 seemed impractical. It was a question of Speedy or HMS Pegasus, and in the end Speedy won because she seemed a little bit simpler. Well, Vanguard shipped the model extremely quickly, and it was with me in only about 4 days I think. Speedy indeed. I've been very impressed with the look of the fittings, and it seems that the kit has undergone a few waves of improvement, which is nice to see. For example, I had seen pictures of an older version of the photo engraved deck sheet that had some inconsistent burn marks. This version is dated only to May I think, and looks like a significant improvement. Some delicate parts that were originally supplied in MDF are now supplied in stronger plywood. That sort of thing. The instruction book looks very detailed, and has a great many pictures to illustrate the process. The mdf frames fit together so well that the first steps of the model have gone much faster than I had anticipated, so I am starting this build log slightly ahead of where I had intended to. I've gotten as far as attaching the stern pieces, and am going to start fairing the bulkheads tomorrow. As I say, this is the first time I've done a kit of this complexity, so if you see me doing something wrong, or are just spontaneously moved to offer advice, please don't keep it to yourself! -James


-
Tension on the Gaff Halyards
whitejamest replied to whitejamest's topic in Masting, rigging and sails
That's an interesting method Wefalck. What sort of varnish do you use? Do you not find it discolors the lines? -
Tension on the Gaff Halyards
whitejamest replied to whitejamest's topic in Masting, rigging and sails
Thank you for the recommendations Vince. I decided to go ahead with the pinning, and I am happy to report that it seems to have done the trick. I used a thin steel rod, so the joint is quite strong. It would have been easier to do if I had anticipated the problem, rather than having to try it out after building the gaff, but fortunately the operation went well. I tied a tight collar of nylon thread as close to the end of the gaff as the already-installed jaws would allow to discourage splitting, attached it to a wooden block to keep it vertical, and drilled out the hole with a drill press. The hole on the mast I drilled by hand with a pin vice, since the mast was already installed on the boat. I'll post some pictures once I clean the model up a bit. -
Tension on the Gaff Halyards
whitejamest replied to whitejamest's topic in Masting, rigging and sails
Thanks for the welcome Allan, and Bob thank you very much for the advice. I think I will indeed go ahead with the pinning. Lashing would be very convenient, and certainly a lot easier, but I like the look of the gaff being partially raised, as in Mr. Passaro's example. I think it shows off the details of the gaff a little better. I'll update this thread with details about how it goes, one way or the other... -
Hello all, this is my first post on the forum, though I have been finding it to be an amazing resource for a few months now. I've been working in that time on Model Shipways' 1/48 scale 18th Century Longboat, Mr. Passaro's design, and have recently begun the rigging. I am not especially experienced with this sort of thing, and would be grateful for some advice. My question is about keeping tension on the lines supporting the gaff. Unlike the boom, which is connected by its sheet to the horse at the stern, there is nothing pulling down on the gaff. It is pulled upward by the peak halyard and the throat halyard, and the gaff itself is a very lightweight piece. The consequence of this is that those halyards are visibly lacking in tension. I tried using a little bit of glue to secure the gaff directly to the mast, but that is not going to be strong enough. (I know I shouldn't be trying to put TOO much tension in the lines). I am tempted to drill corresponding holes in the mast and gaff and anchor the joint with a steel pin. But I thought I would seek advice before attempting it. Thanks for any help you can offer. - James