HOLIDAY DONATION DRIVE - SUPPORT MSW - DO YOUR PART TO KEEP THIS GREAT FORUM GOING!
×
Gaffrig
-
Posts
183 -
Joined
-
Last visited
Content Type
Profiles
Forums
Gallery
Events
Everything posted by Gaffrig
-
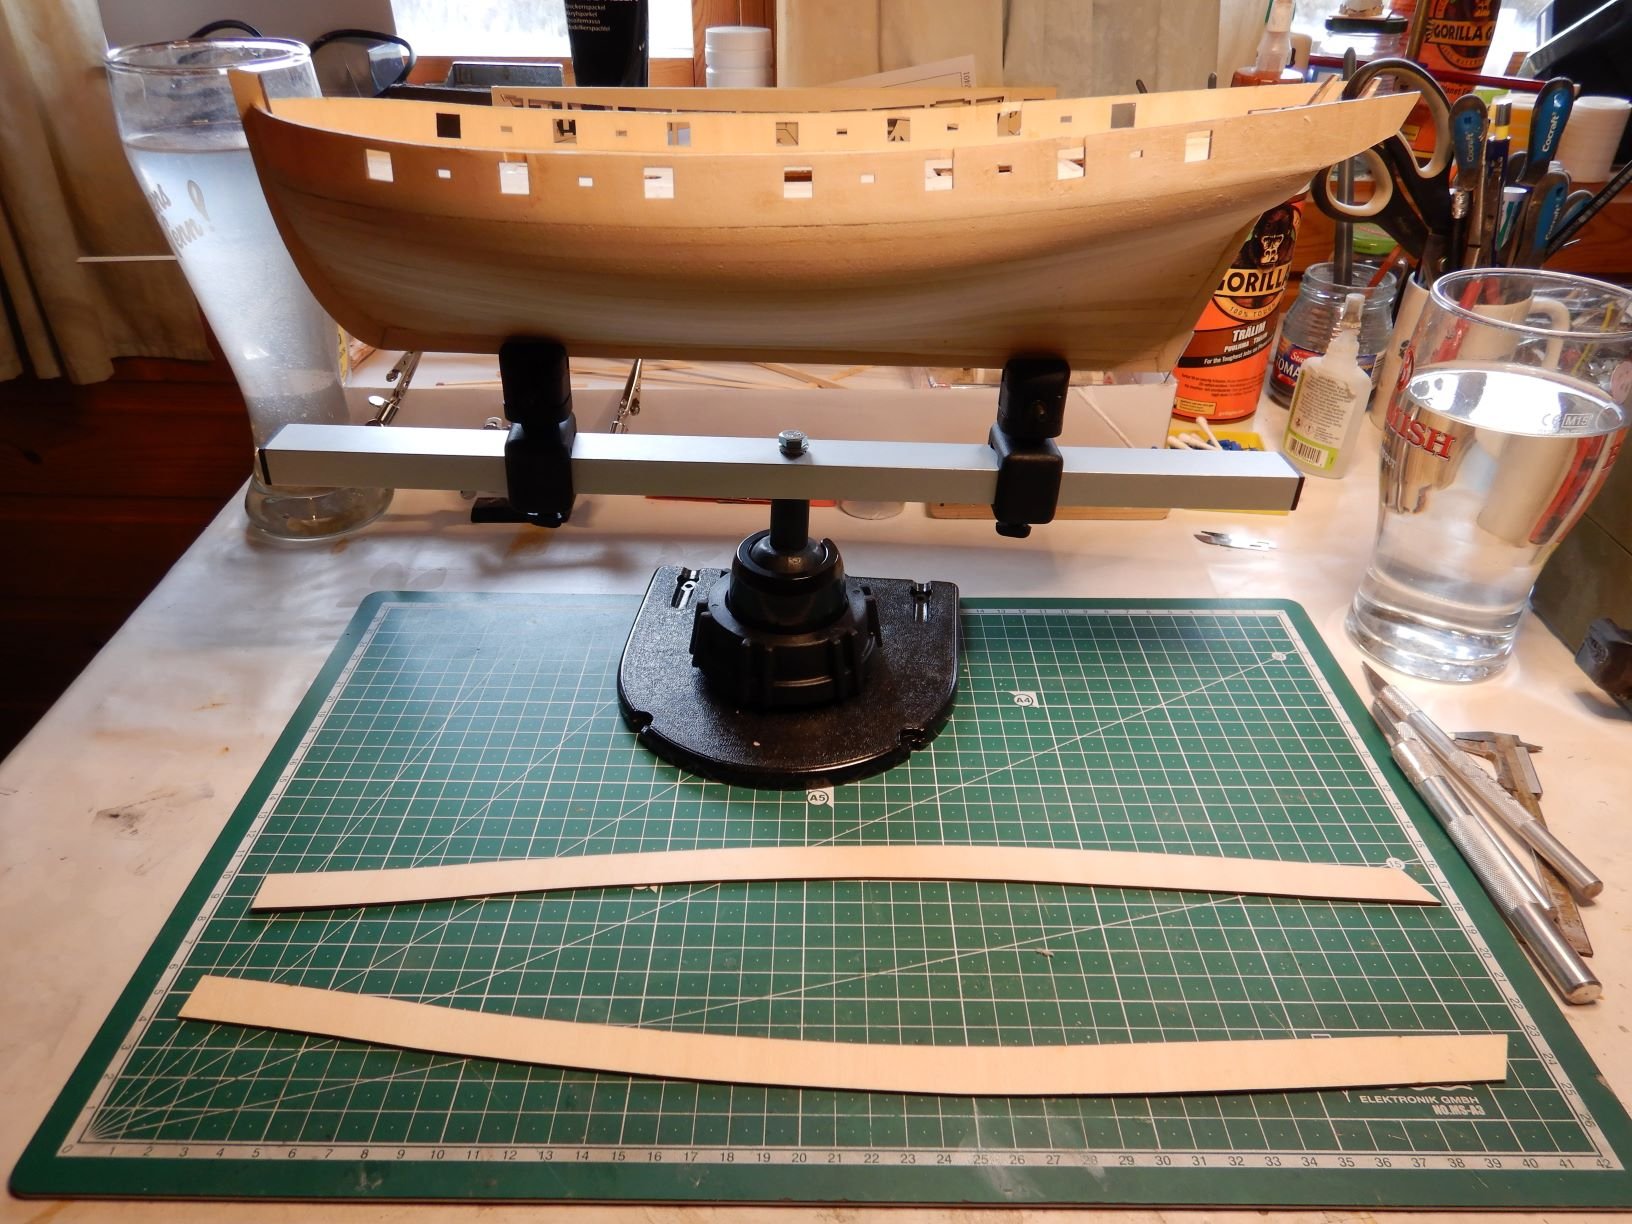
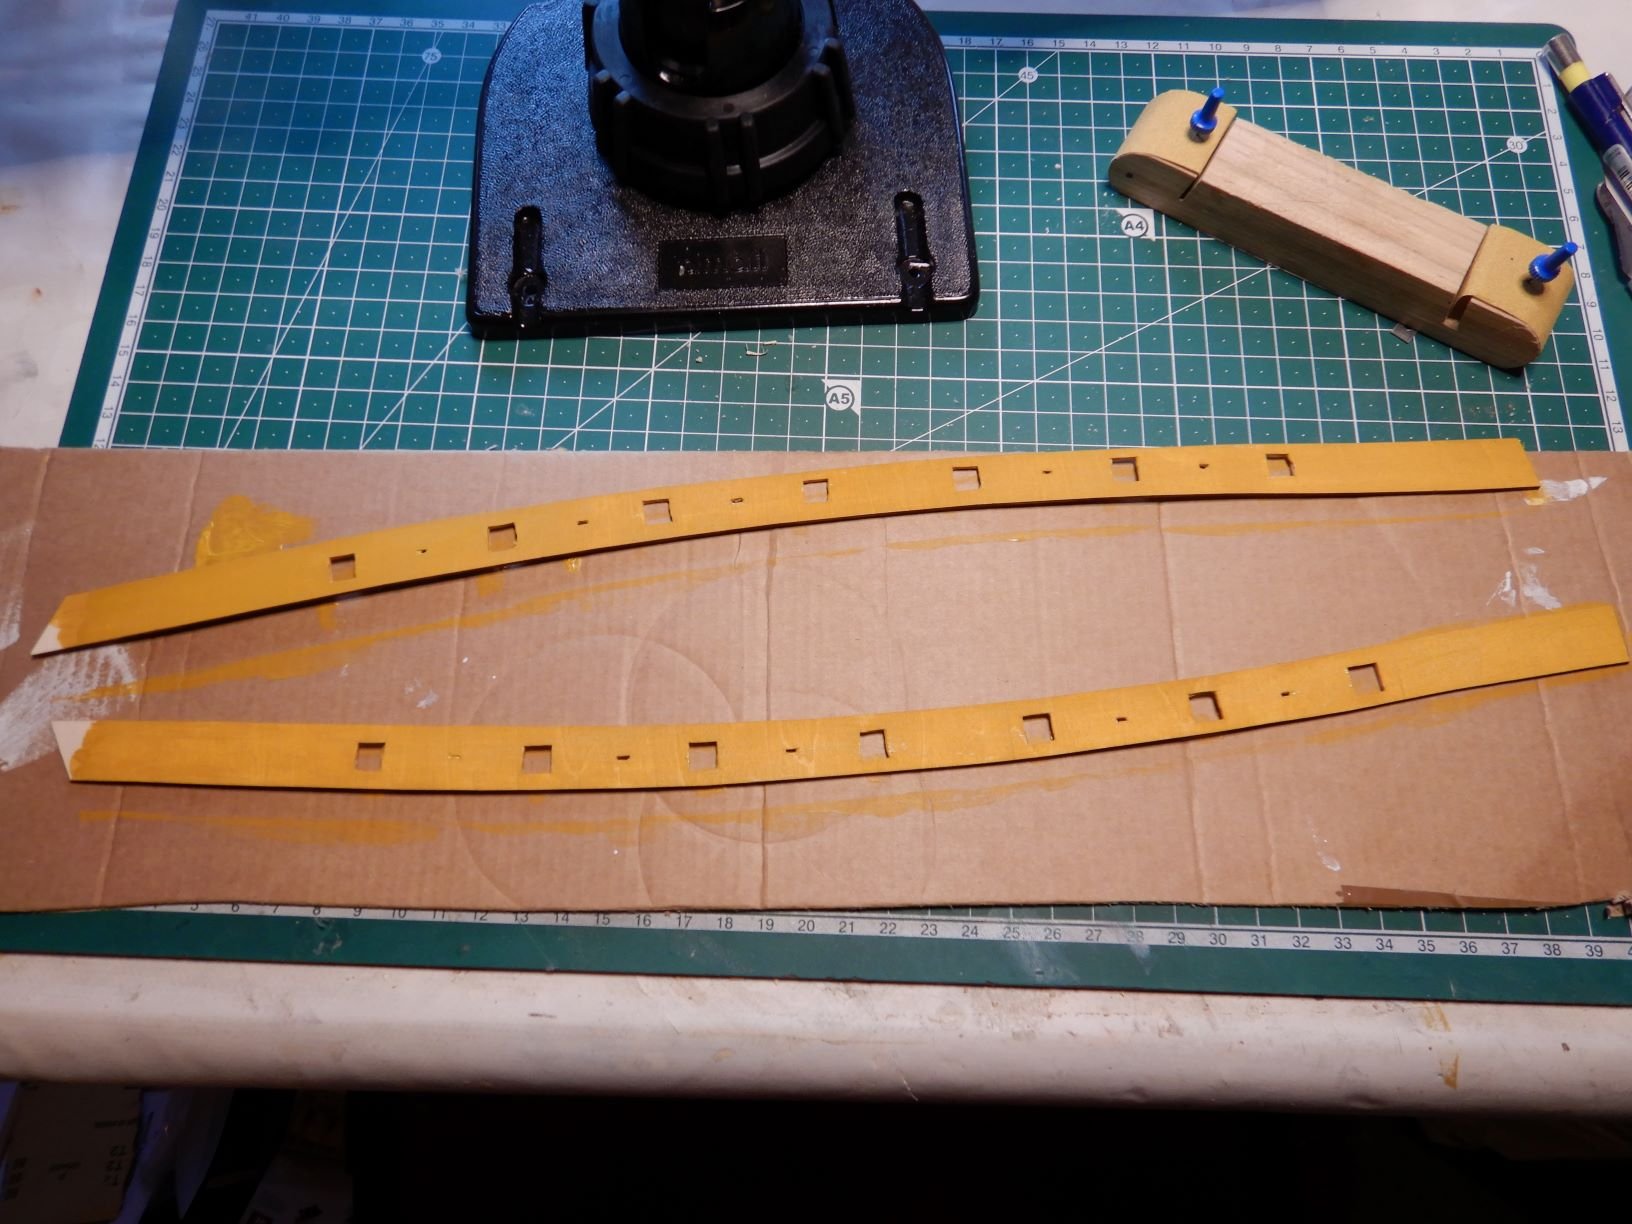
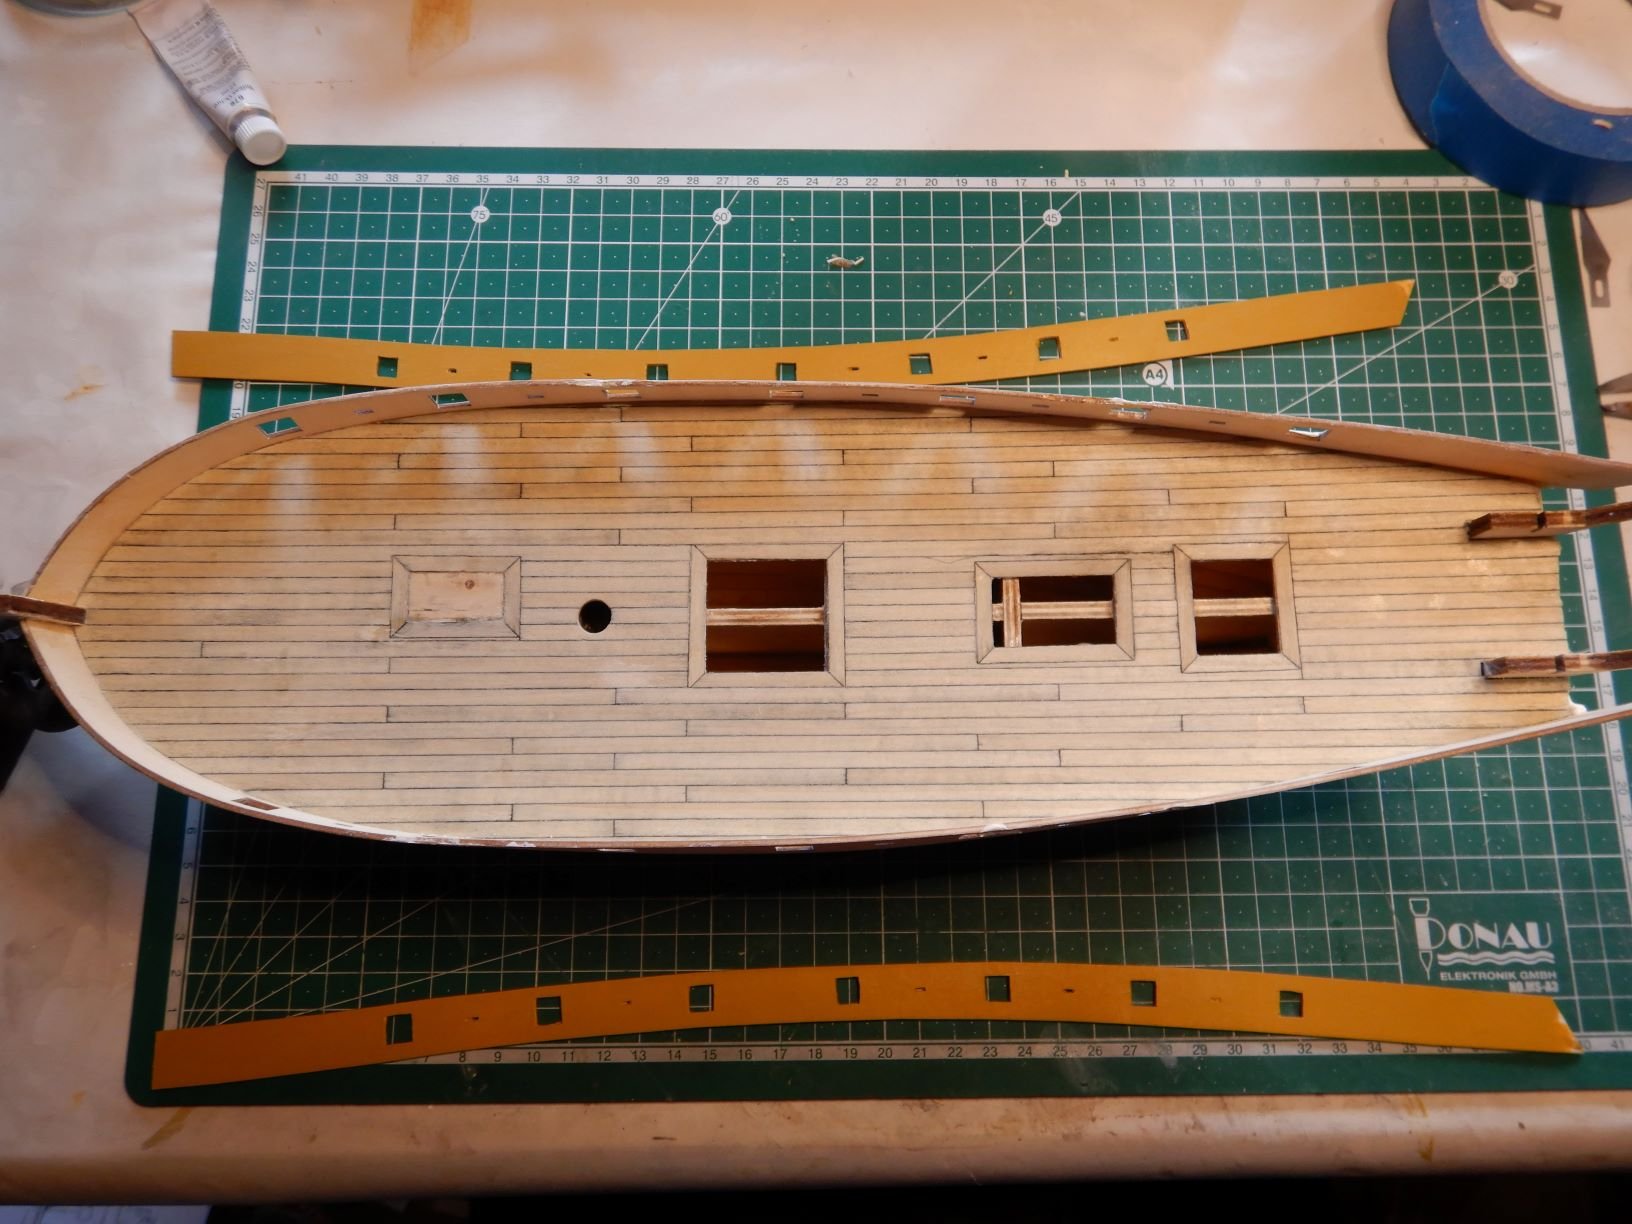
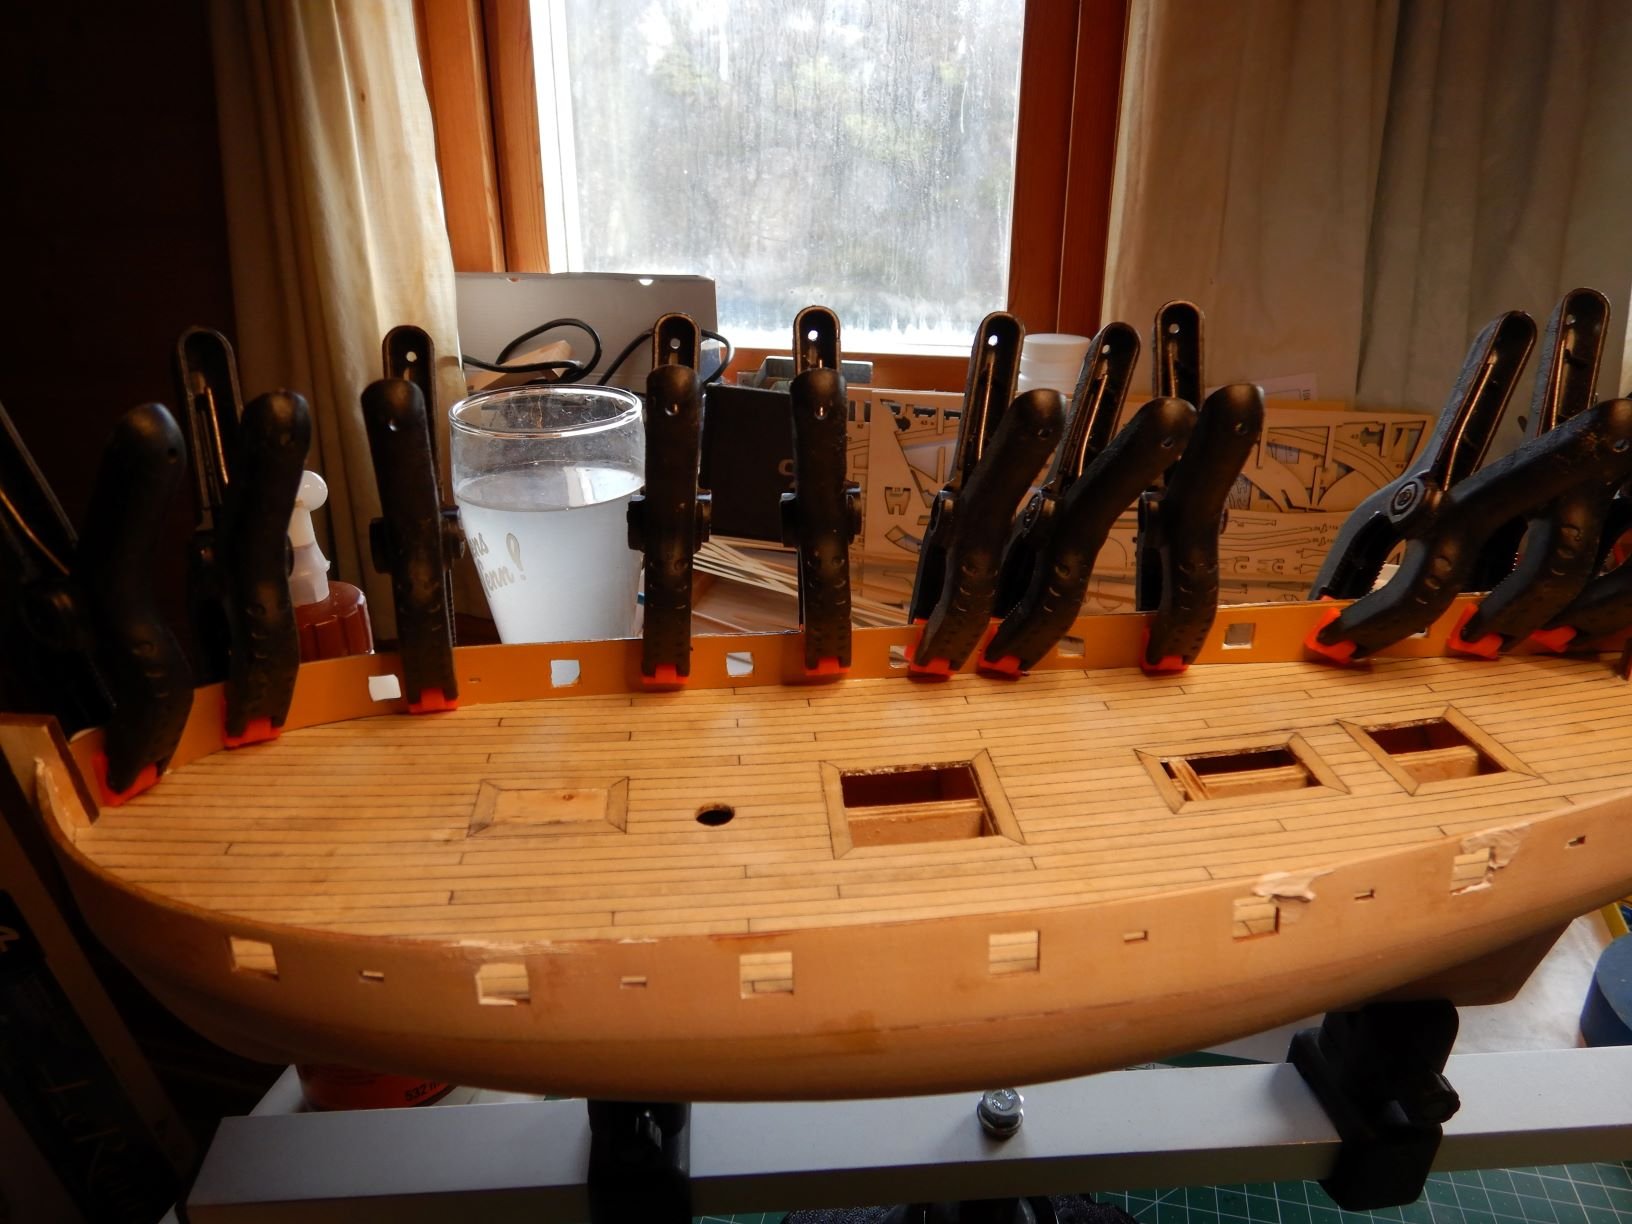
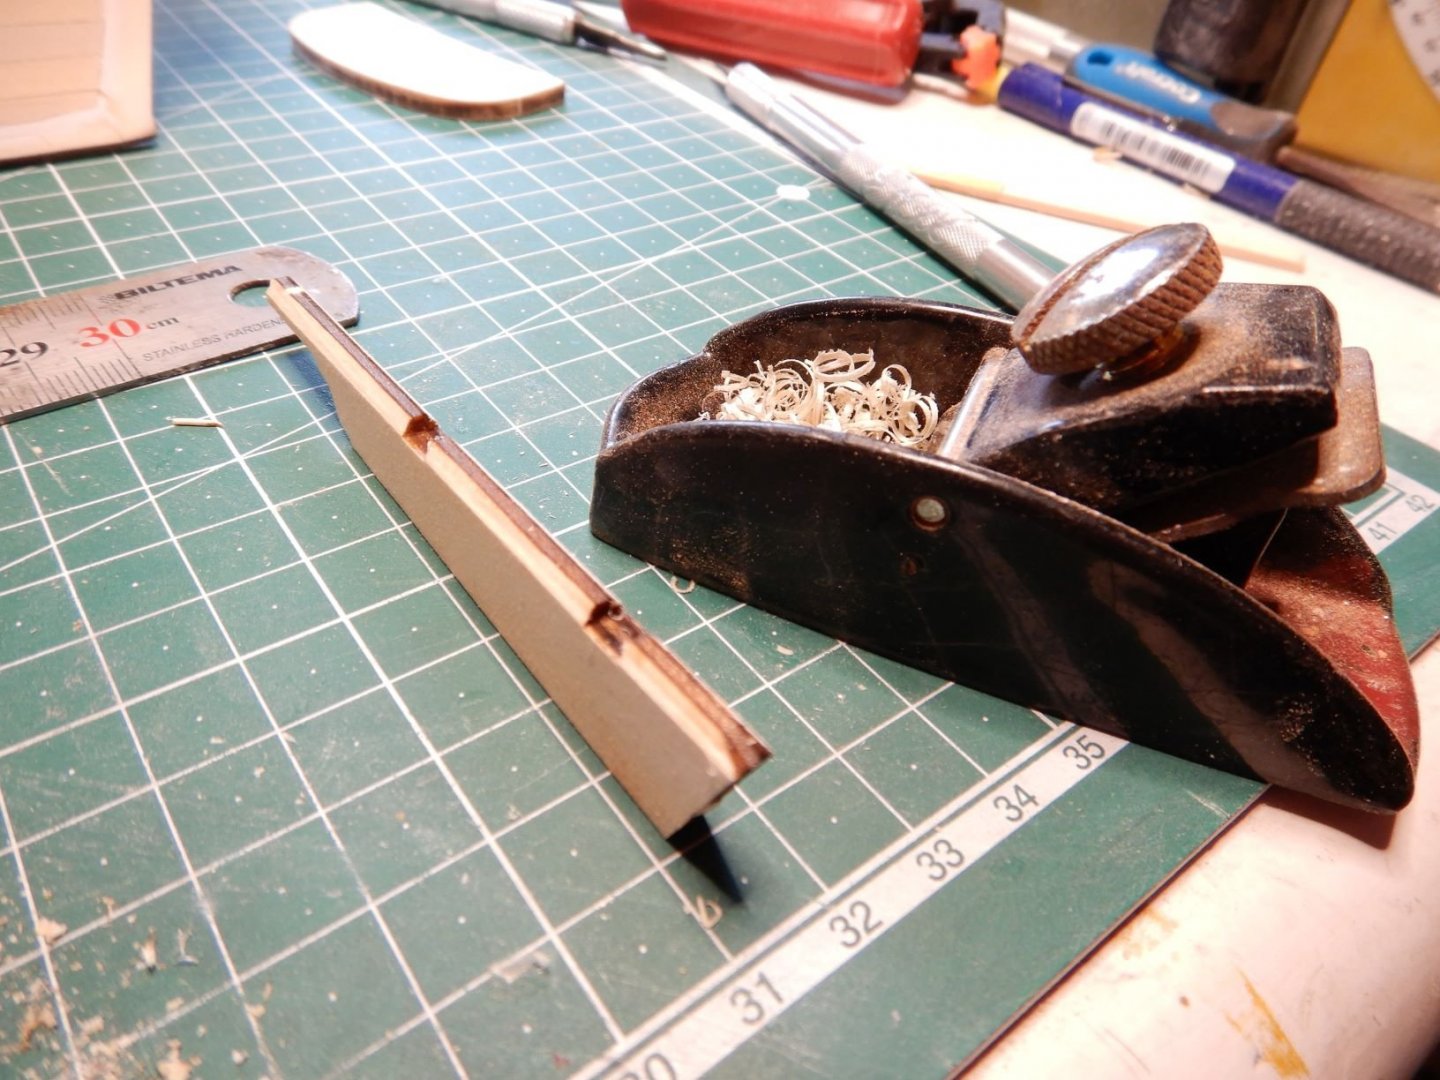
 Rick01, That’s something I am afraid might happen. Also getting the correct length on the rubrails to fit between the stem and transom. I think it will be easier to fit all the rubrails and the caprails, and then cut them of and sand to make the transom fit snugly against them all. Gaffrig.
 -
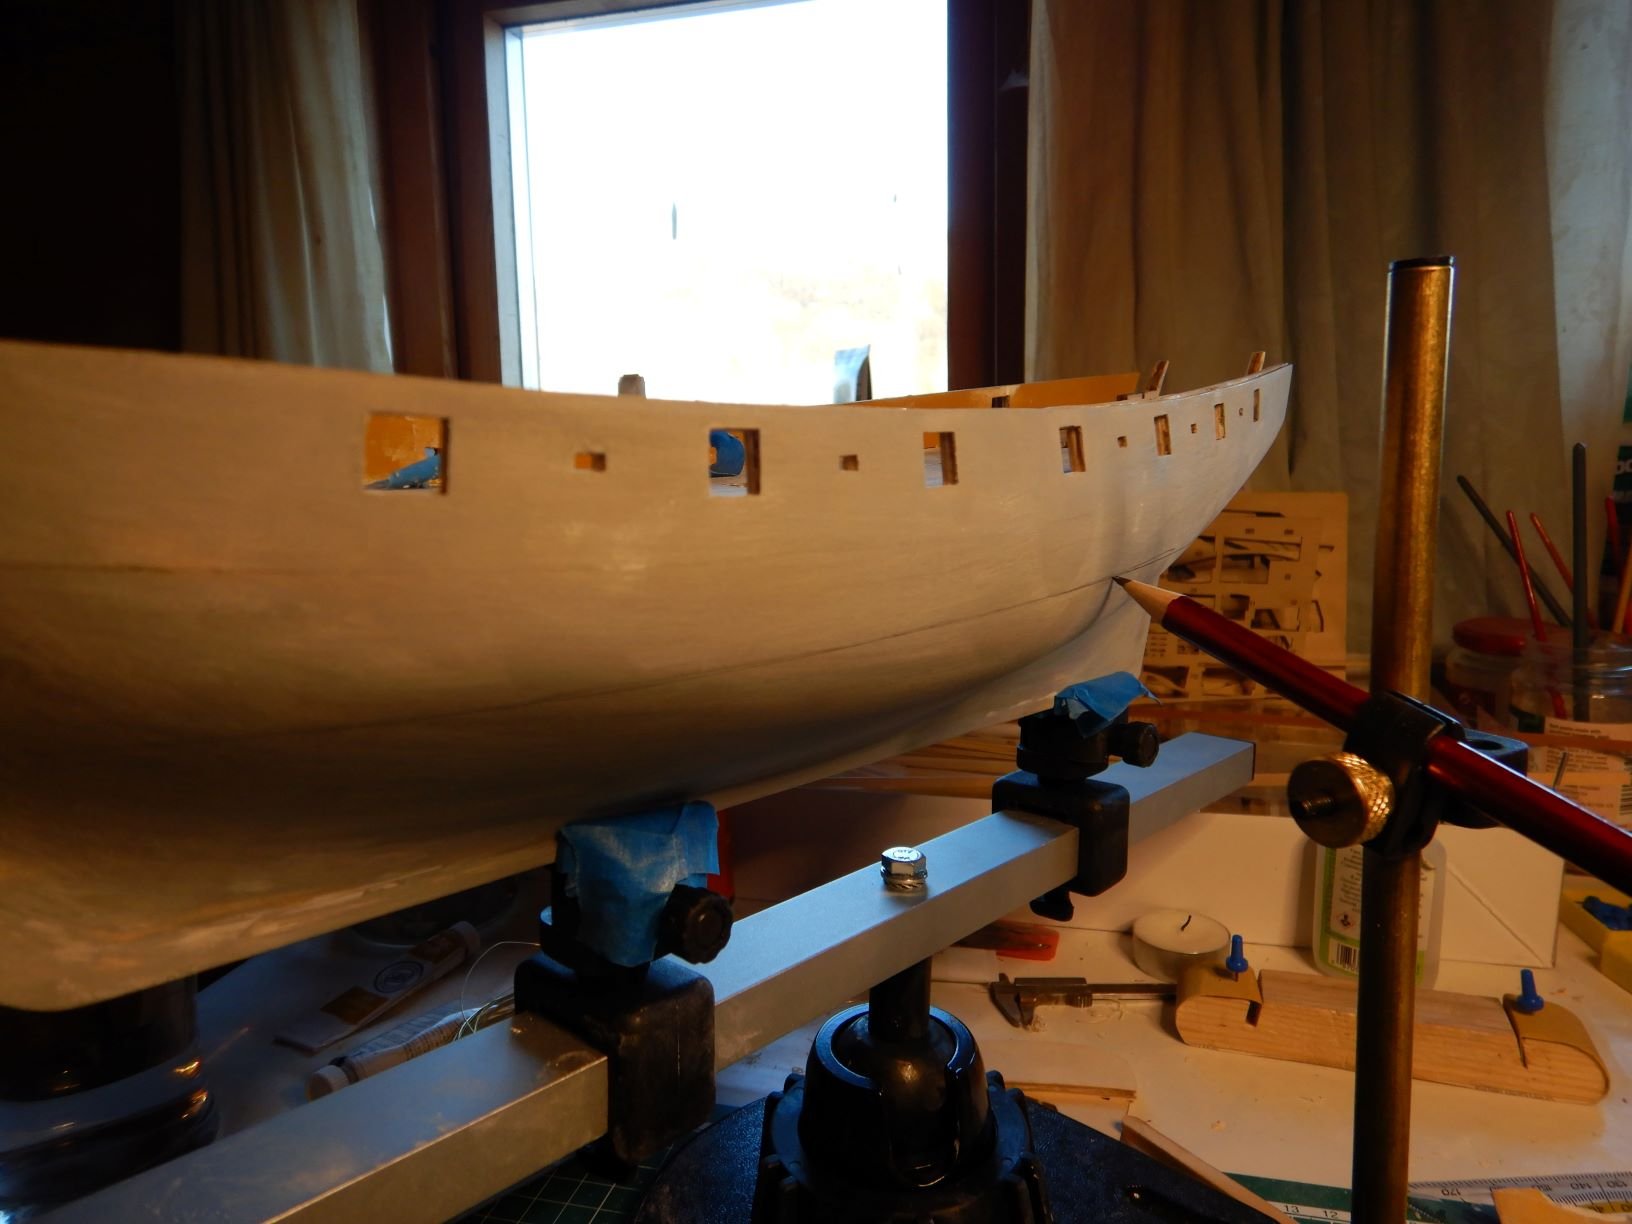
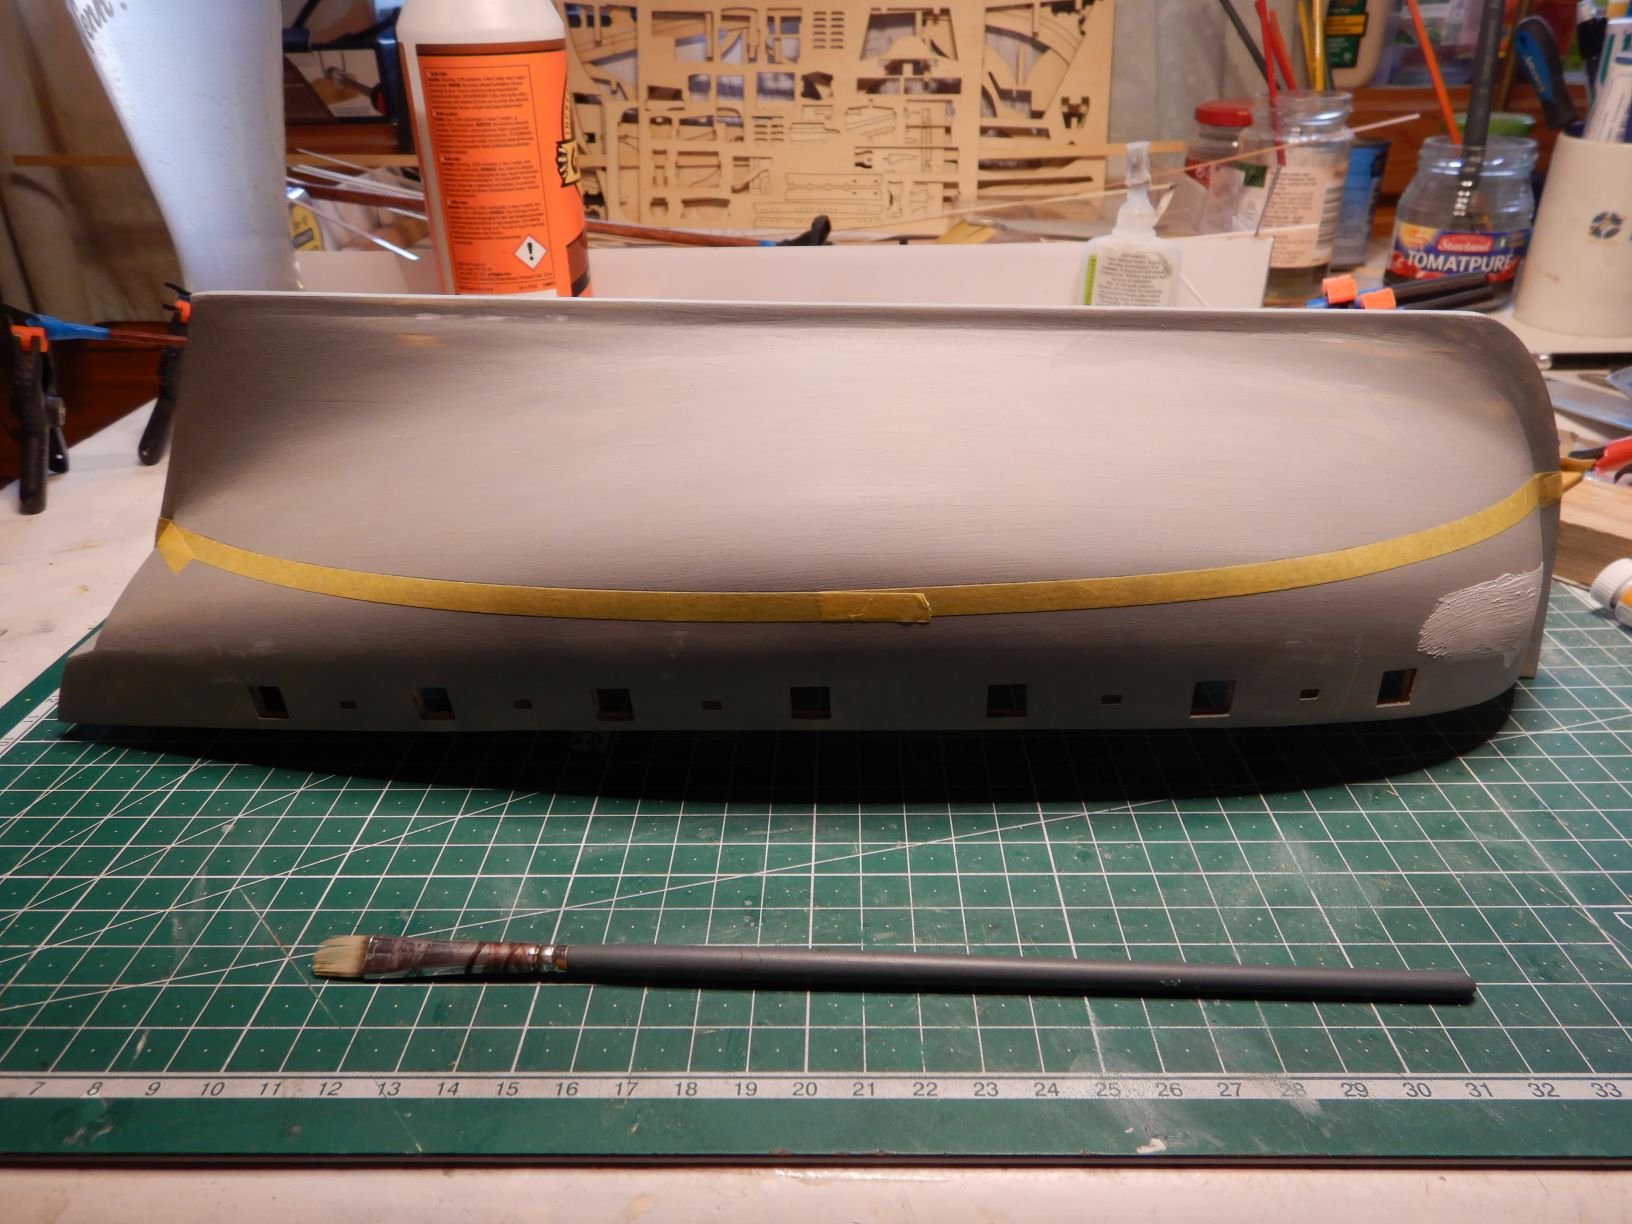
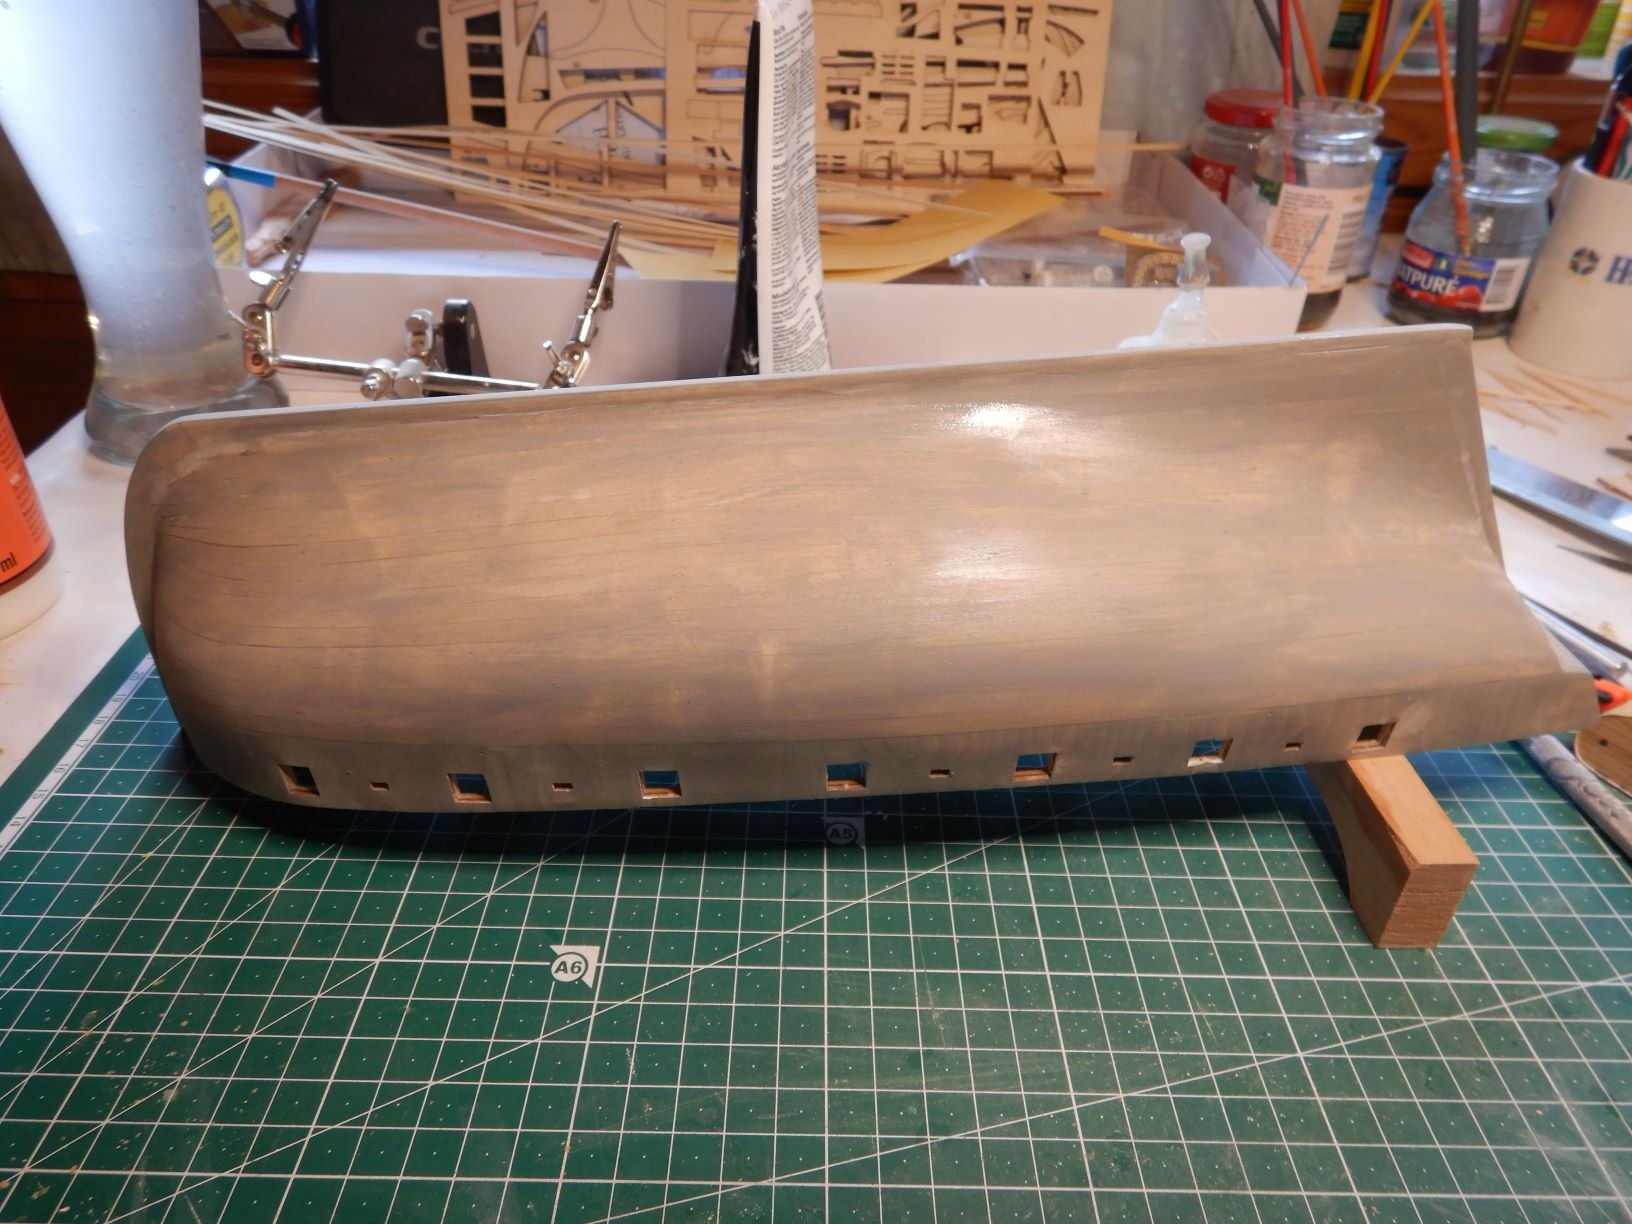
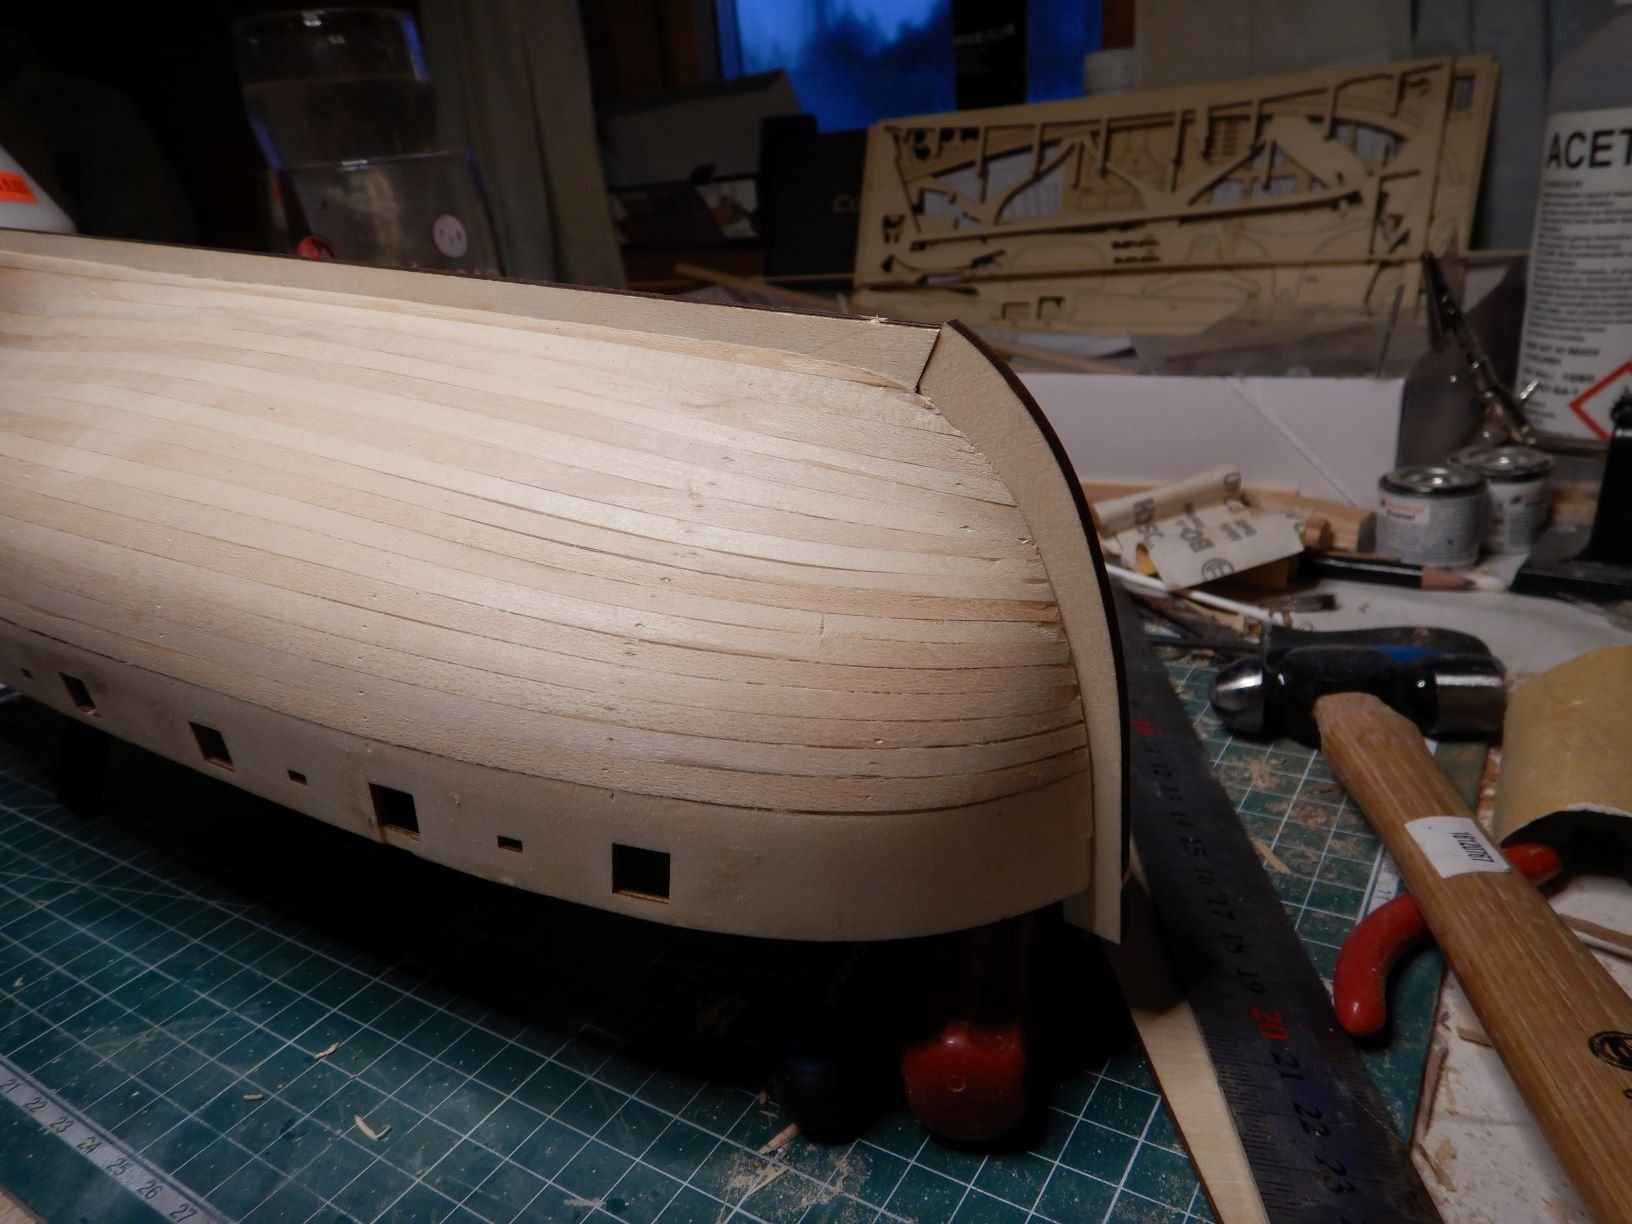
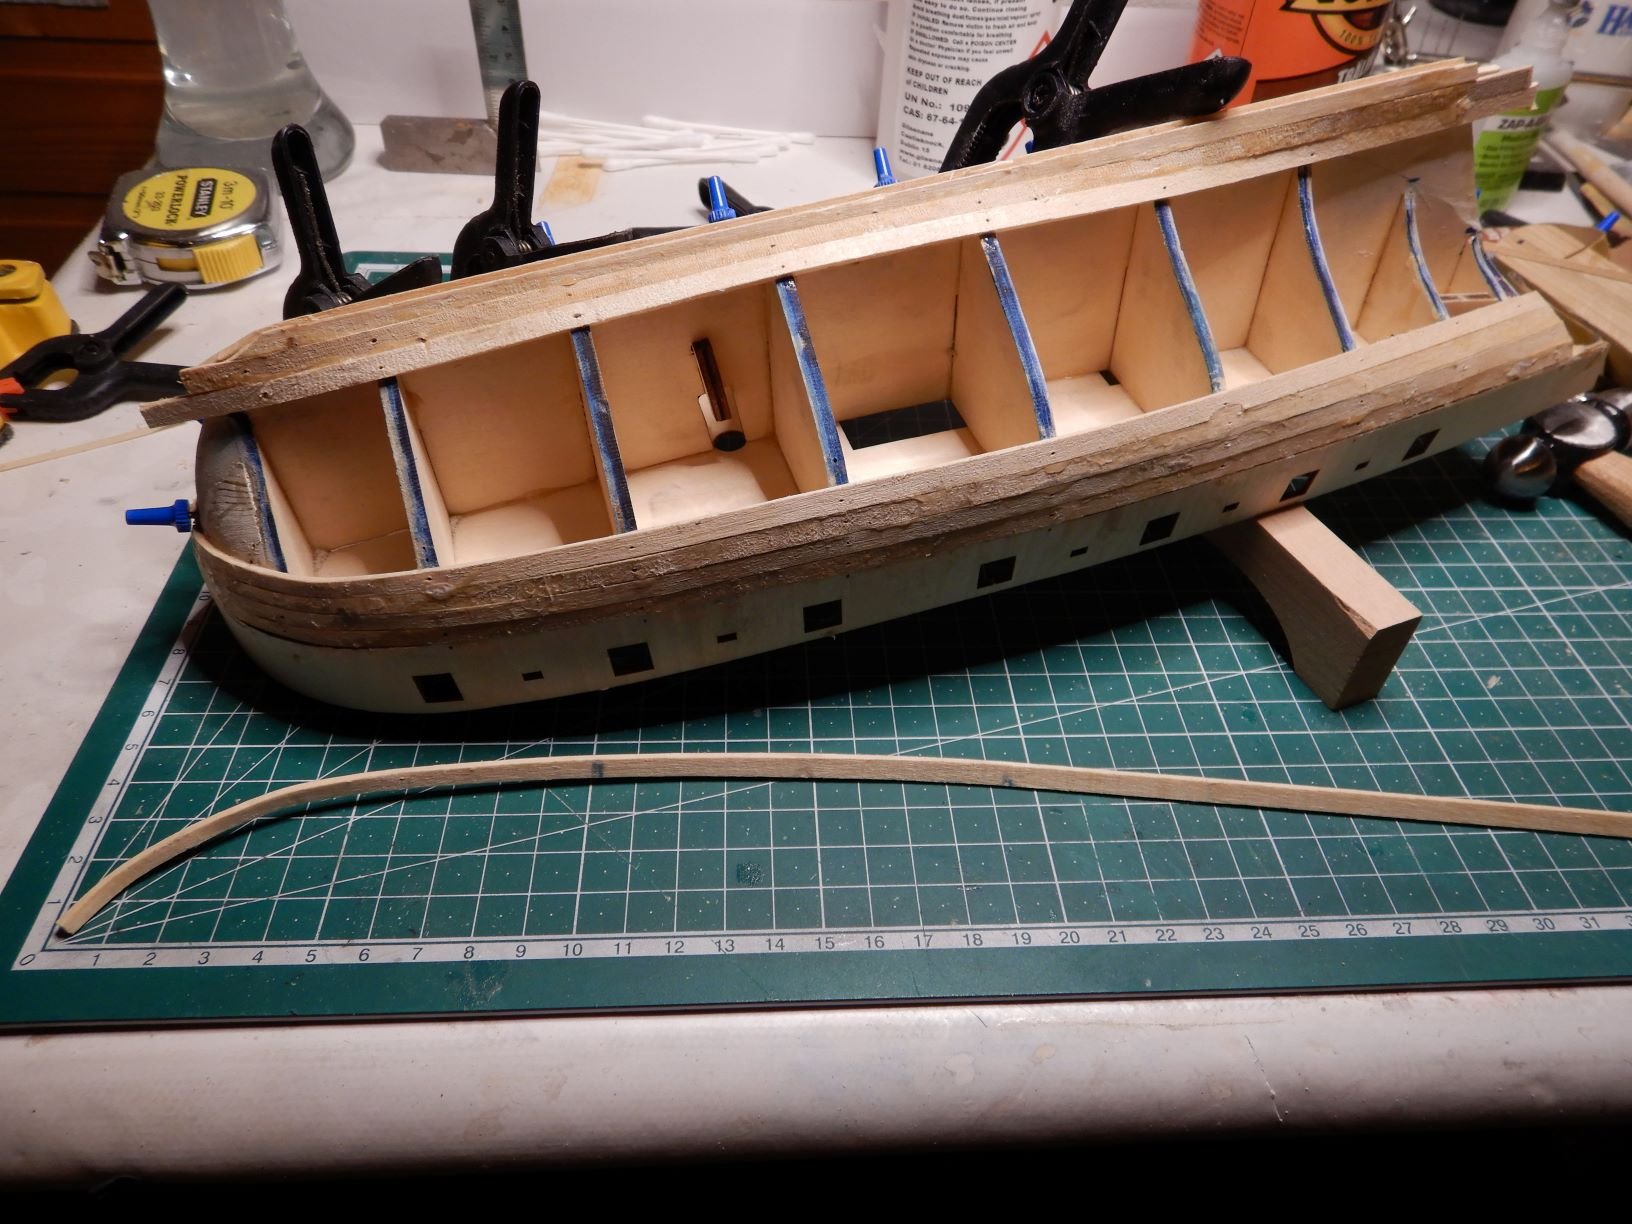
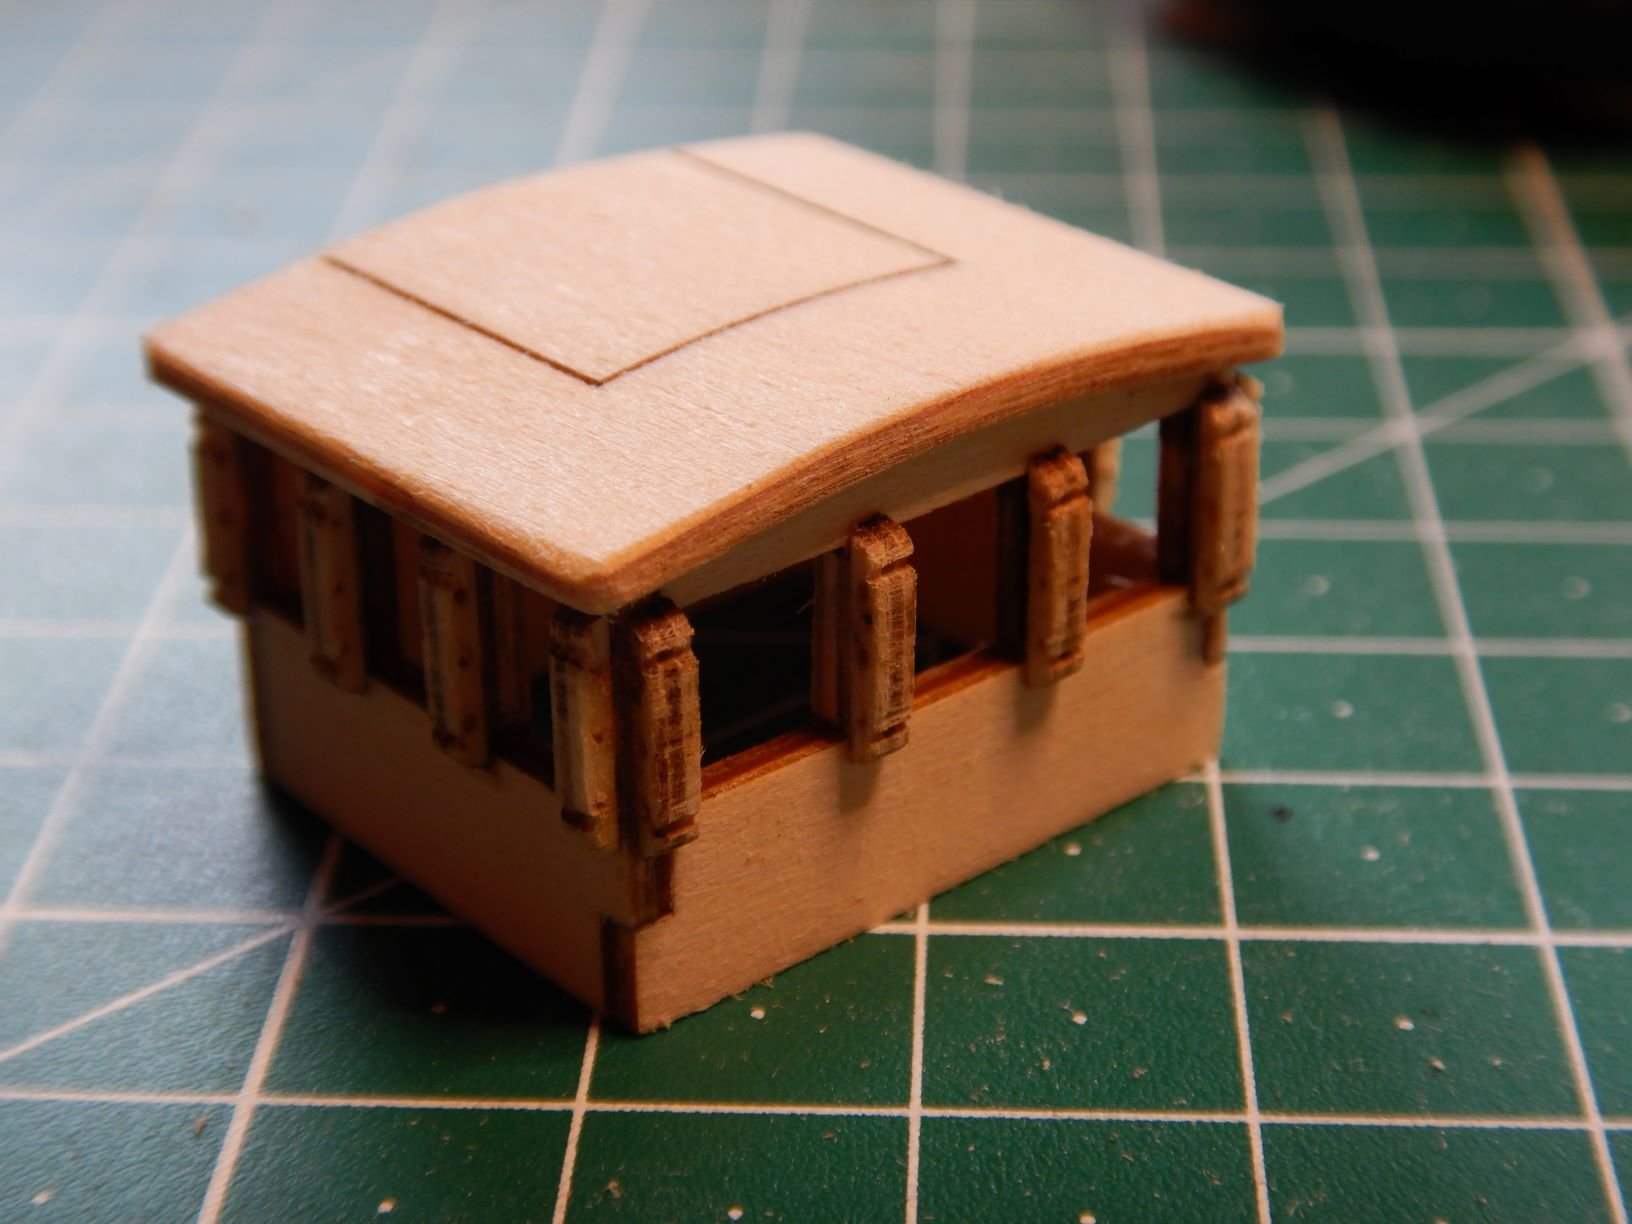
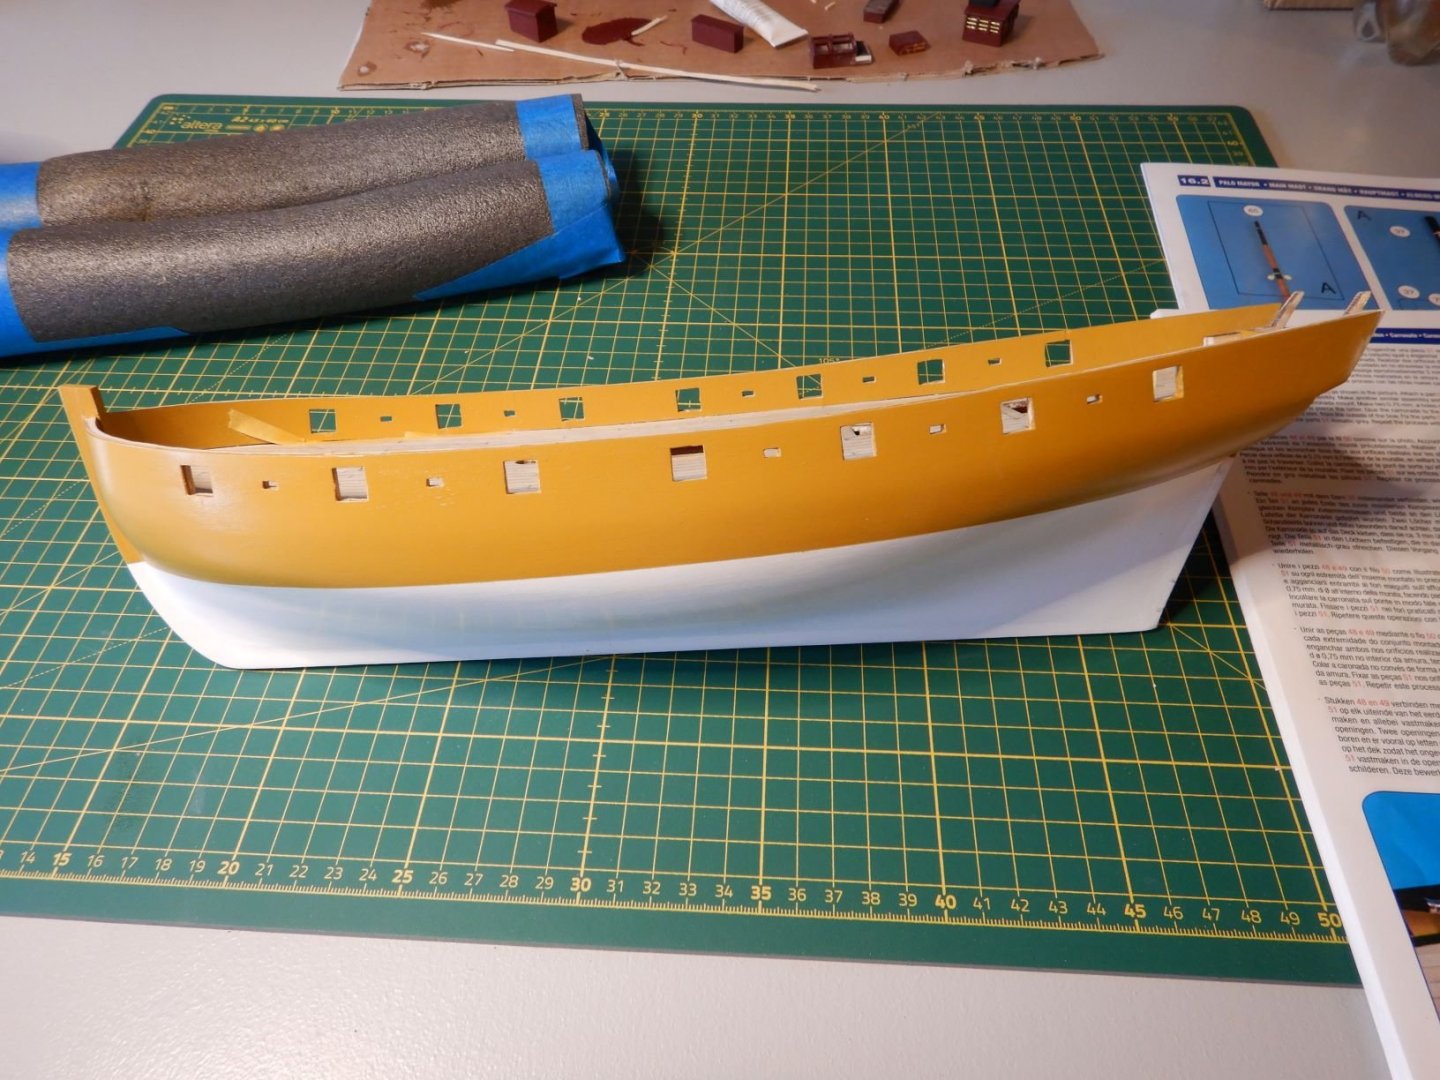
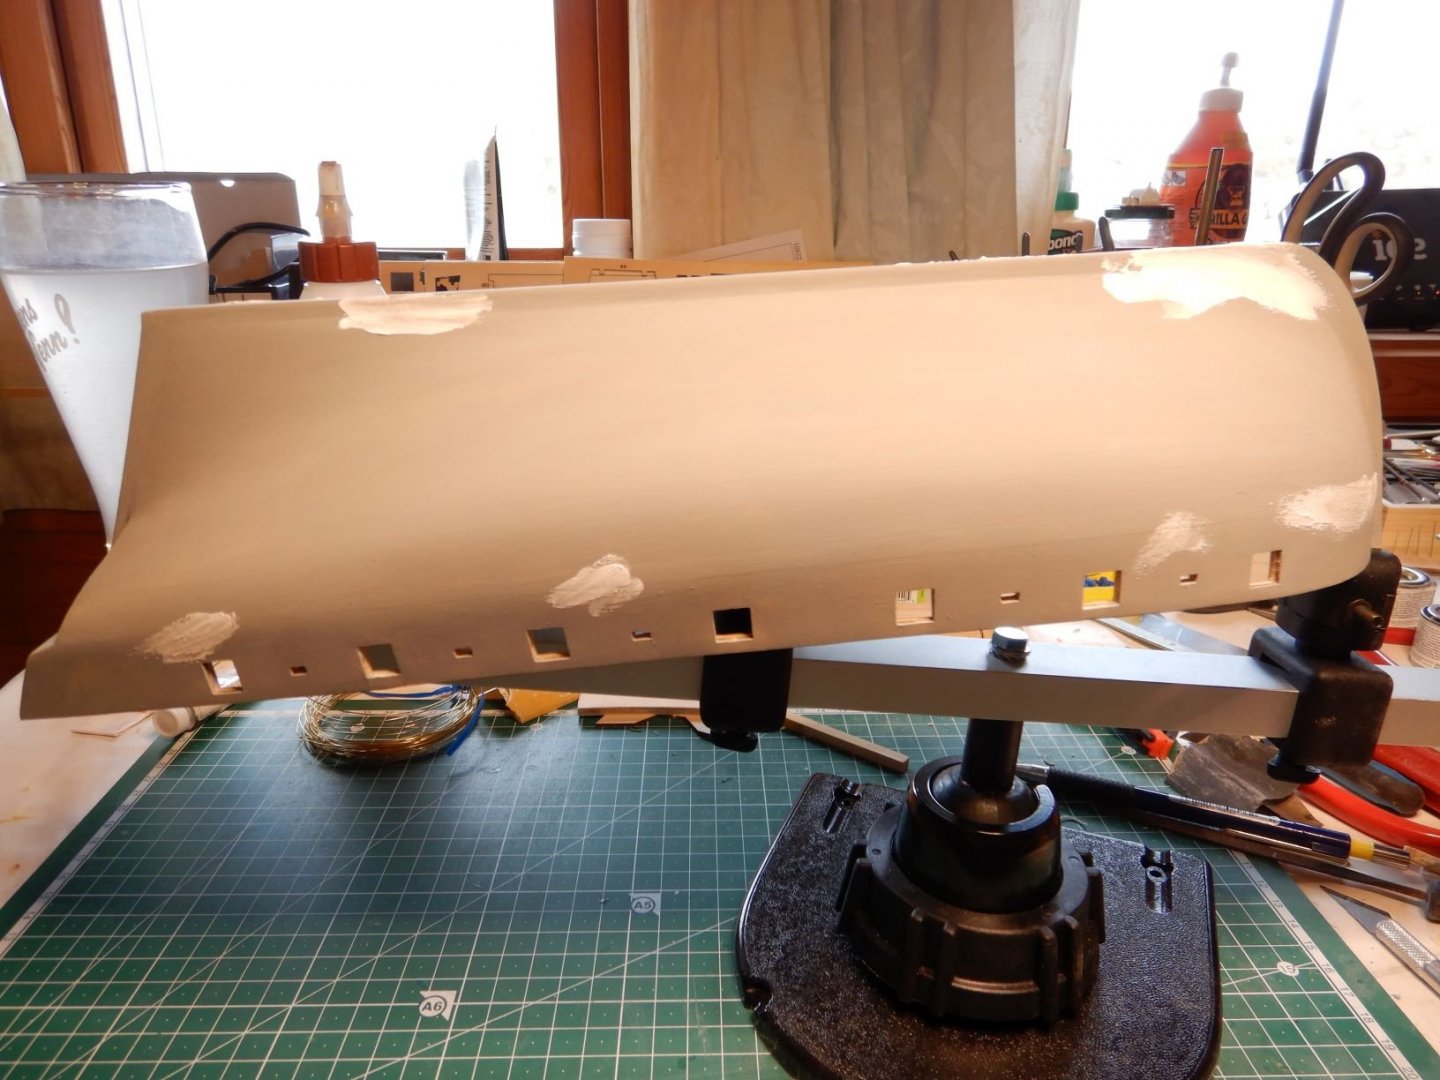
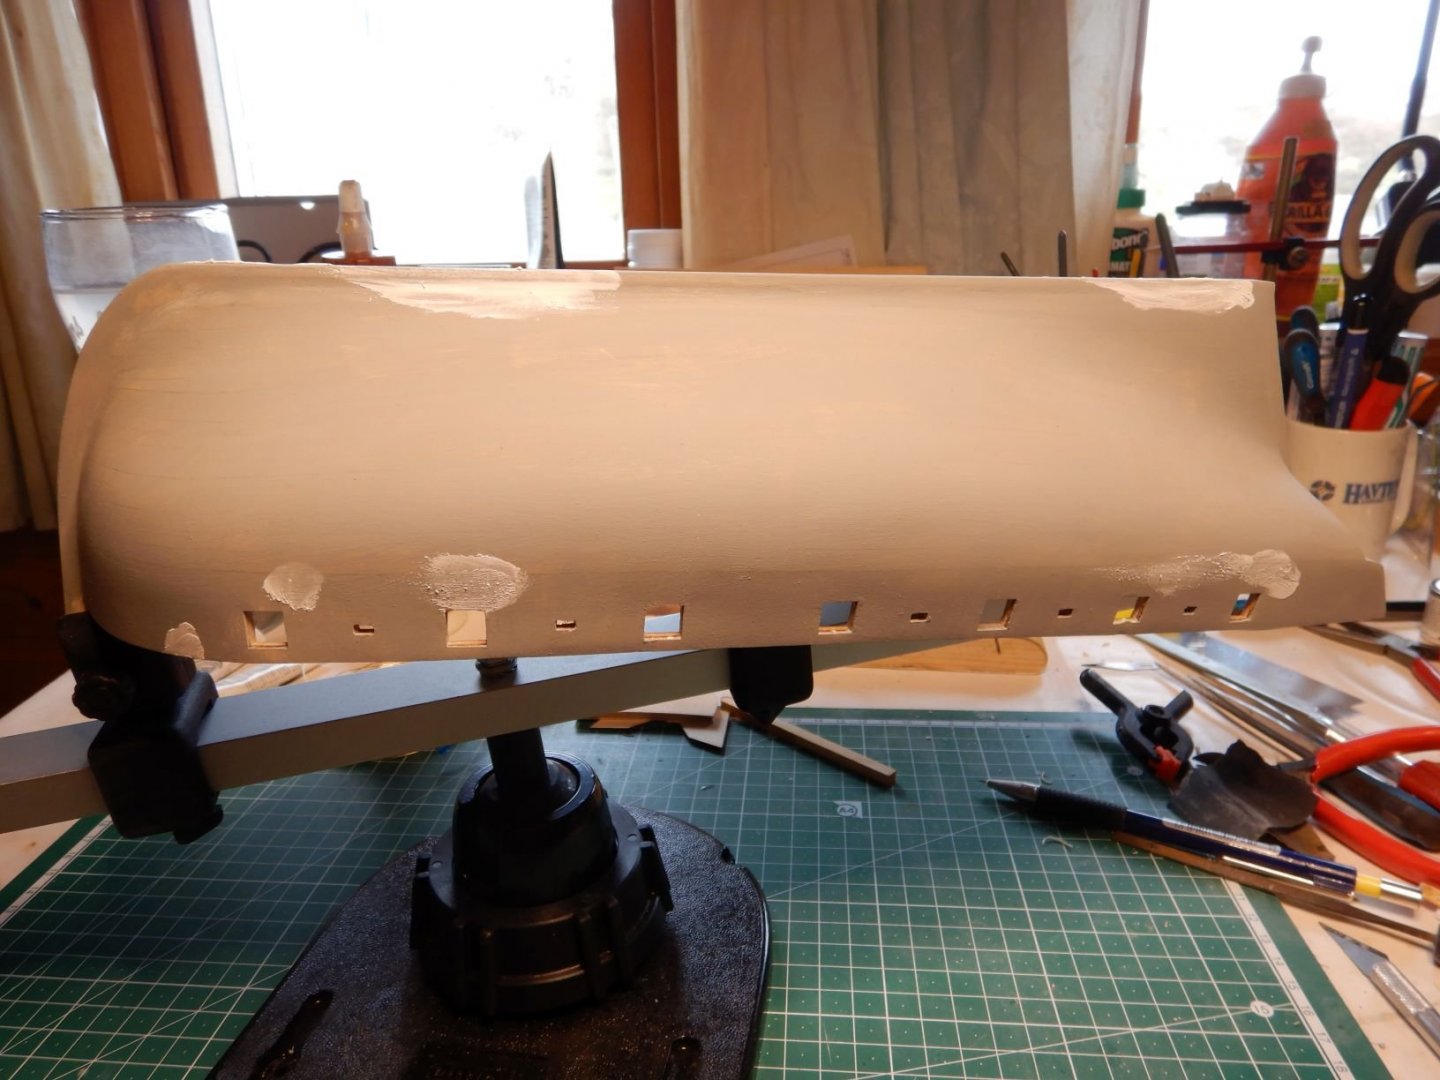
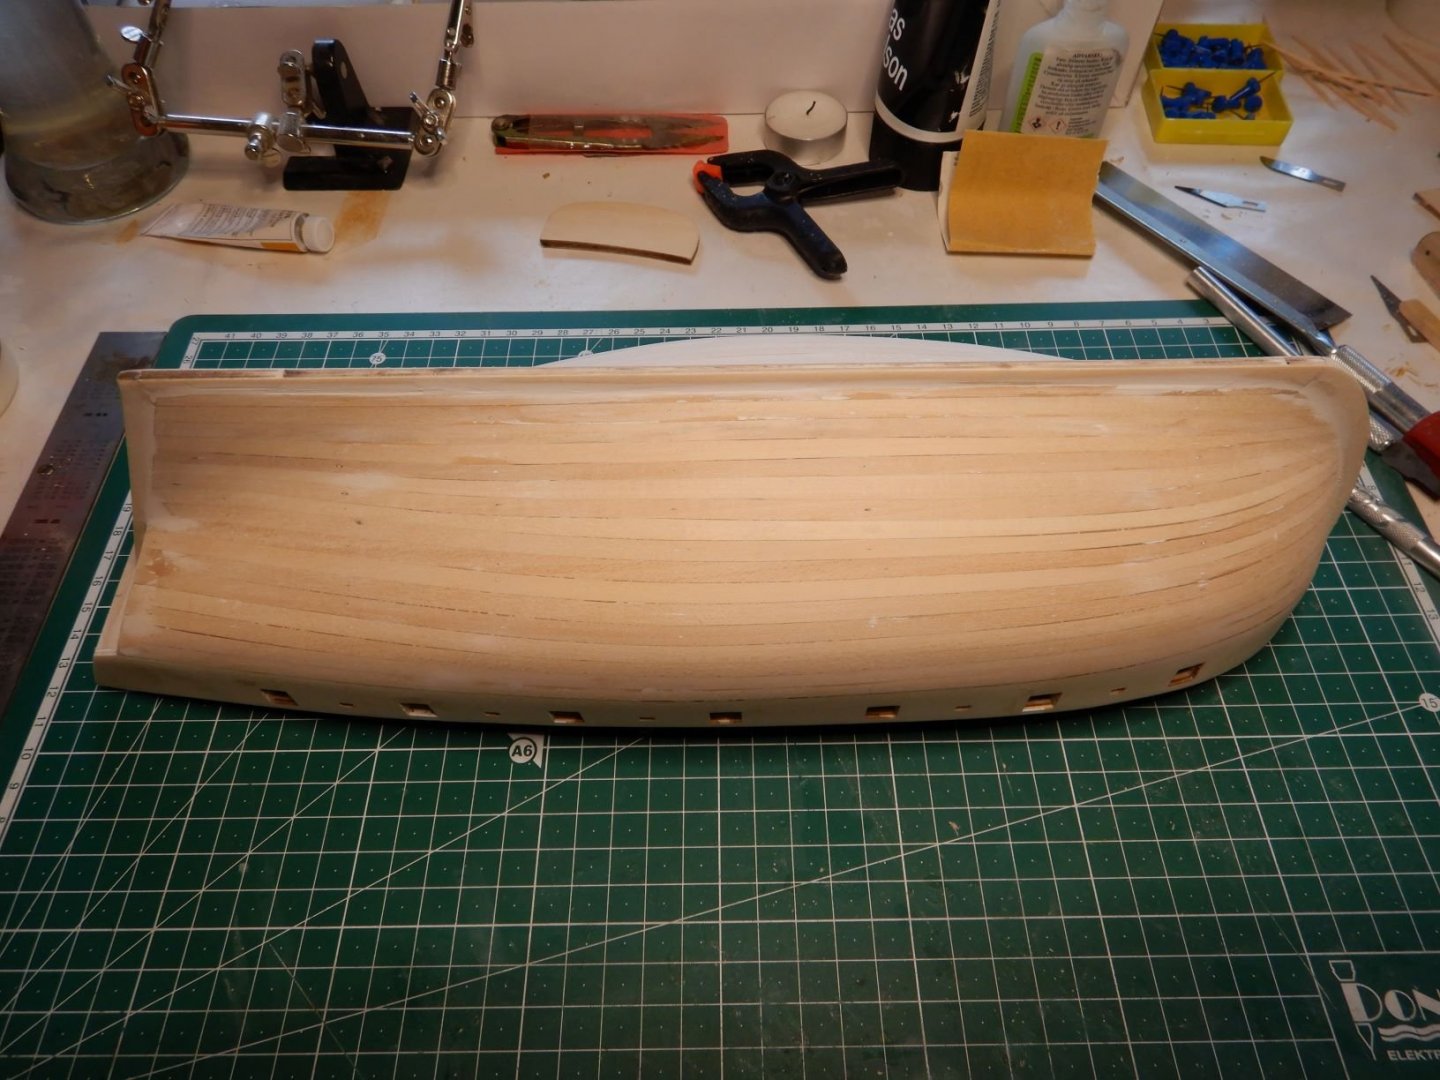
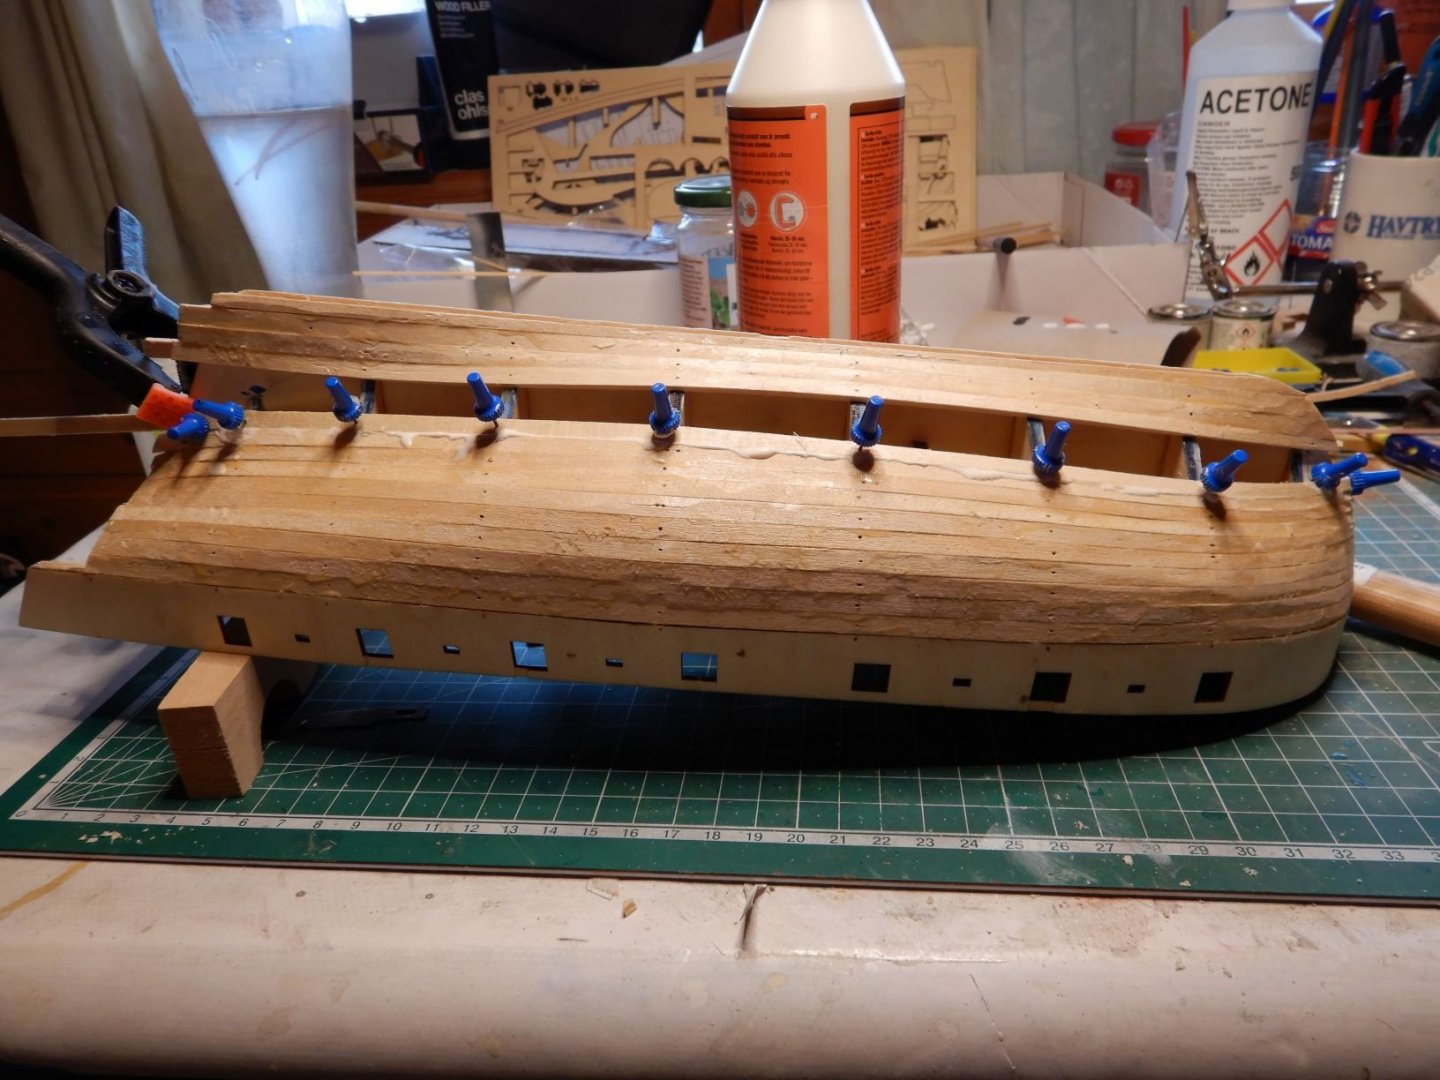
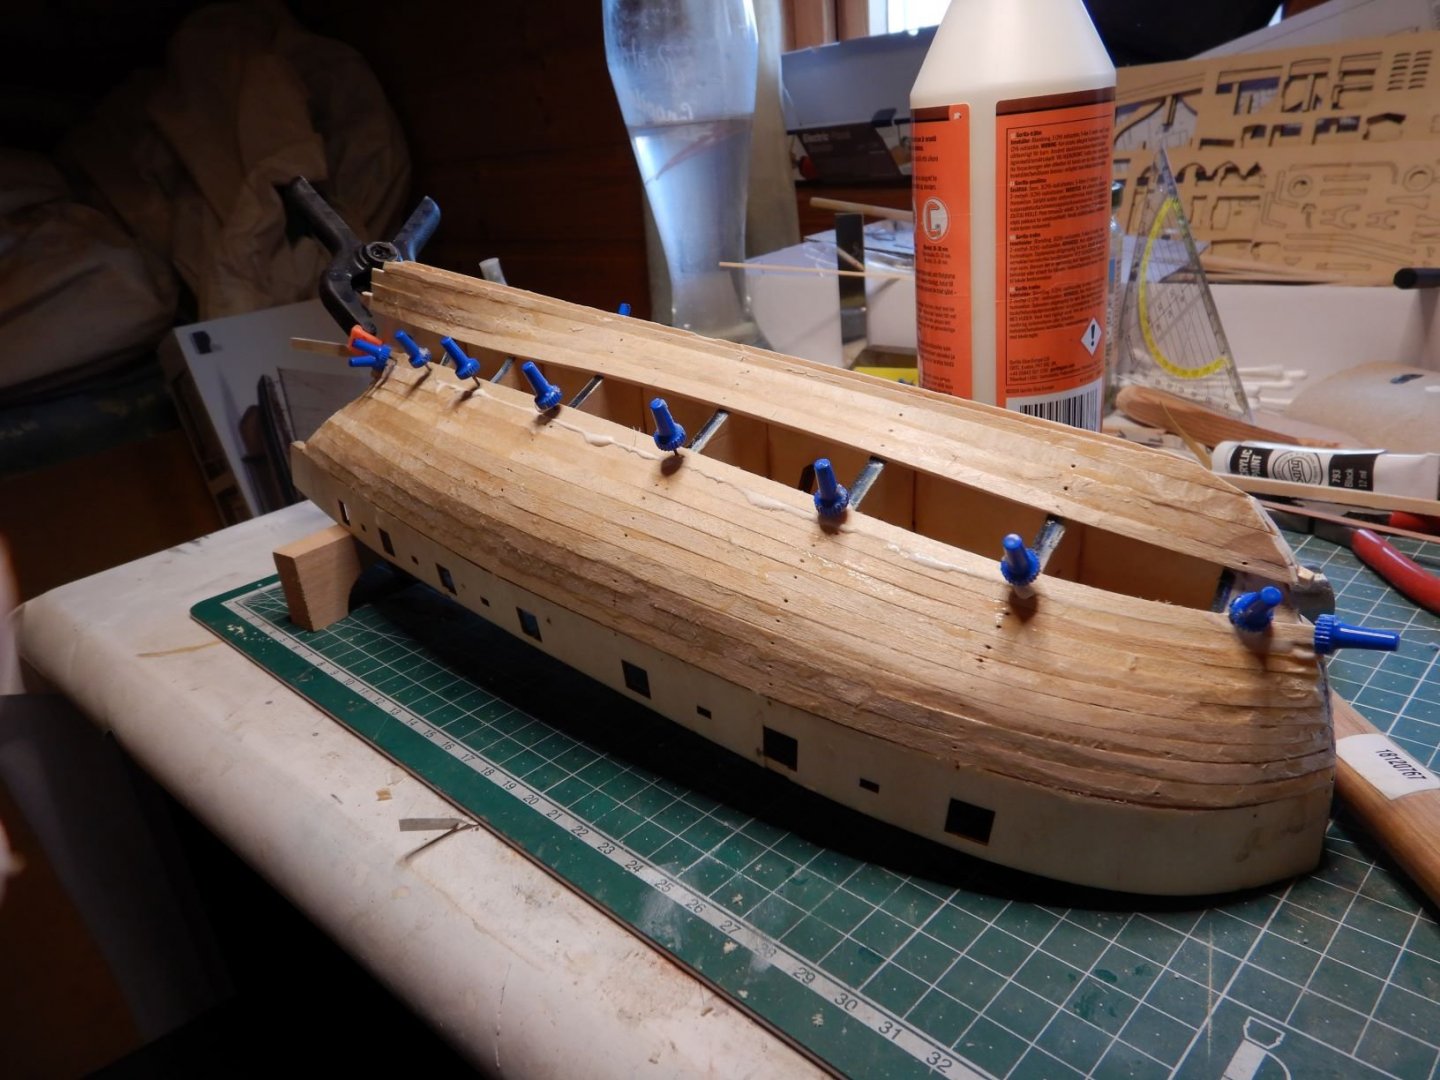
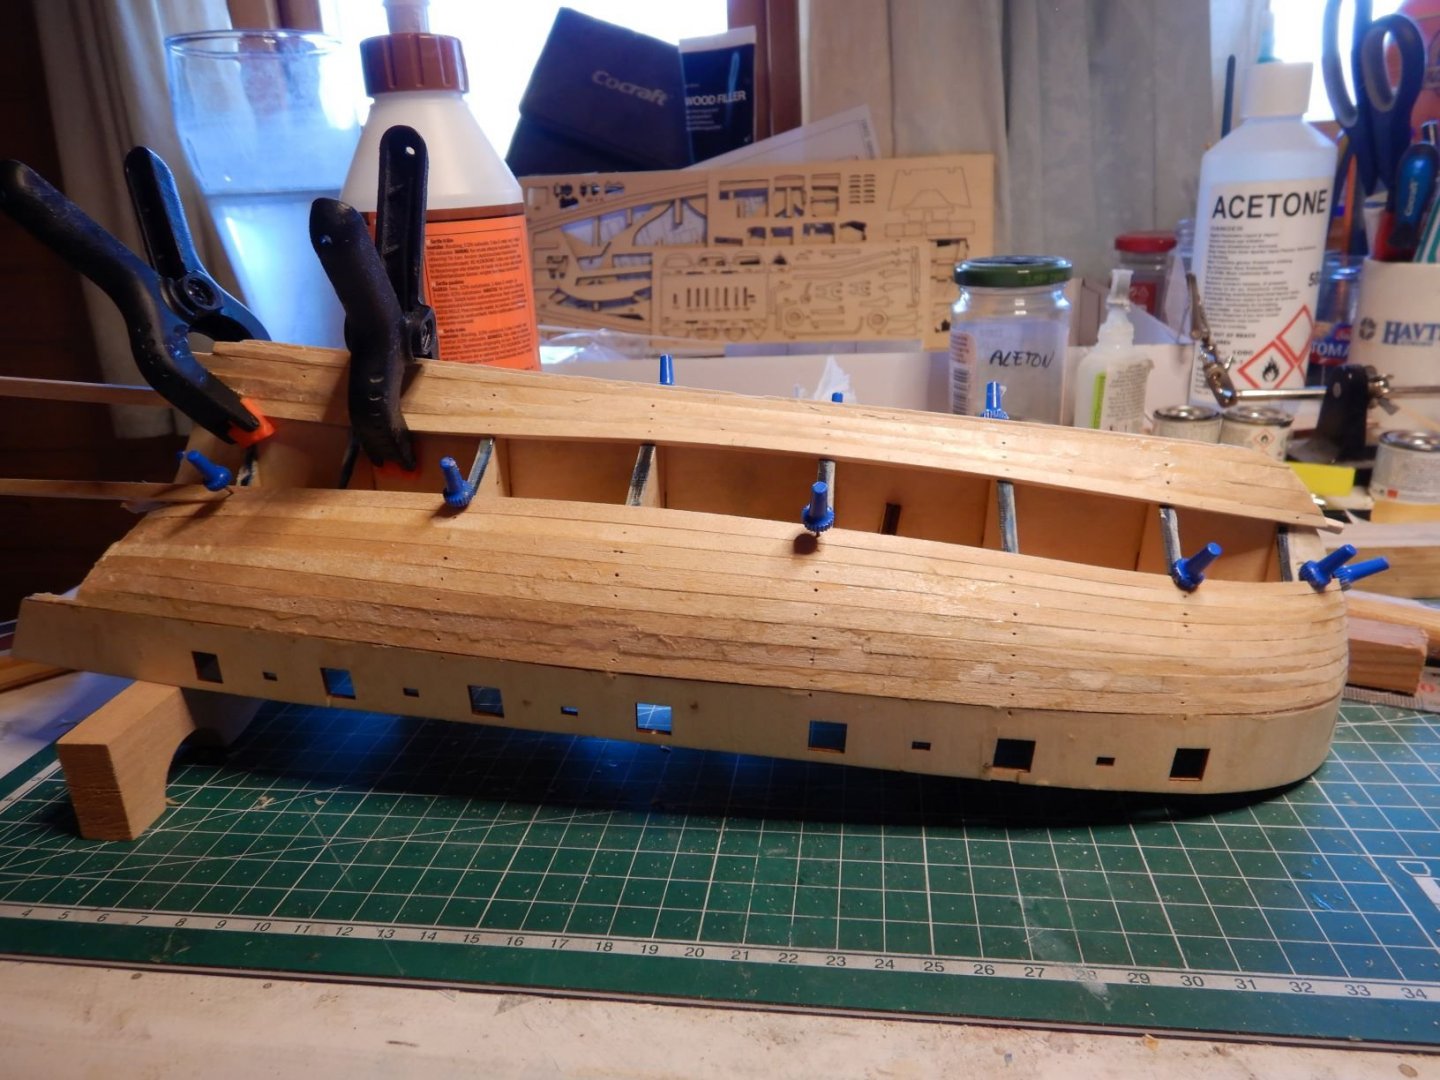
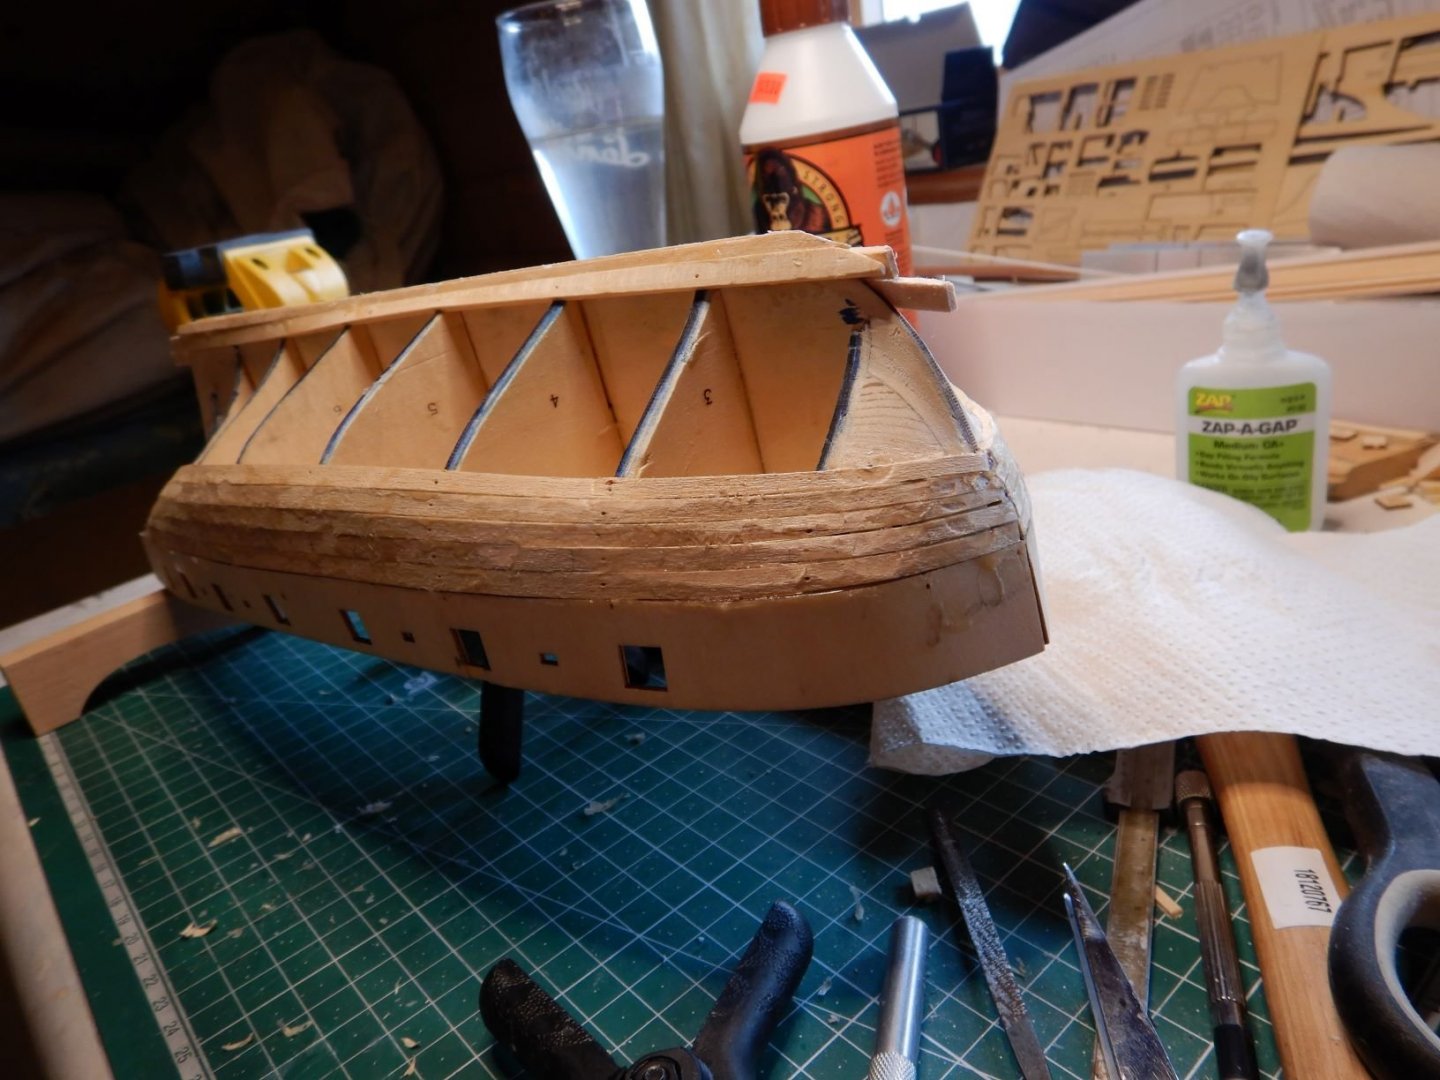
Hello all! Getting settled on my new workbench, the work continues on Le Renard. I have cleaned up the gun ports using a square file, and I have finished painting above and below the waterline. I have used acrylic paint for this. The skylights/deckhouses are getting close to finished also. I have also shaped the rudder and drilled the hole to fit through. I want to finish the rudder, caprail and rubrails before glueing on the transom. This is a different order of things than the instructions call for, but I think it will be easier. That's todays update. More to come.. Must say I really enjoy having more space to work on. Gaffrig
- 110 replies
-
- 3
-

-
- le renard
- artesania latina
- (and 1 more)
-
I’ll tell you, I’m well on my way to clutter it up! 😆
-
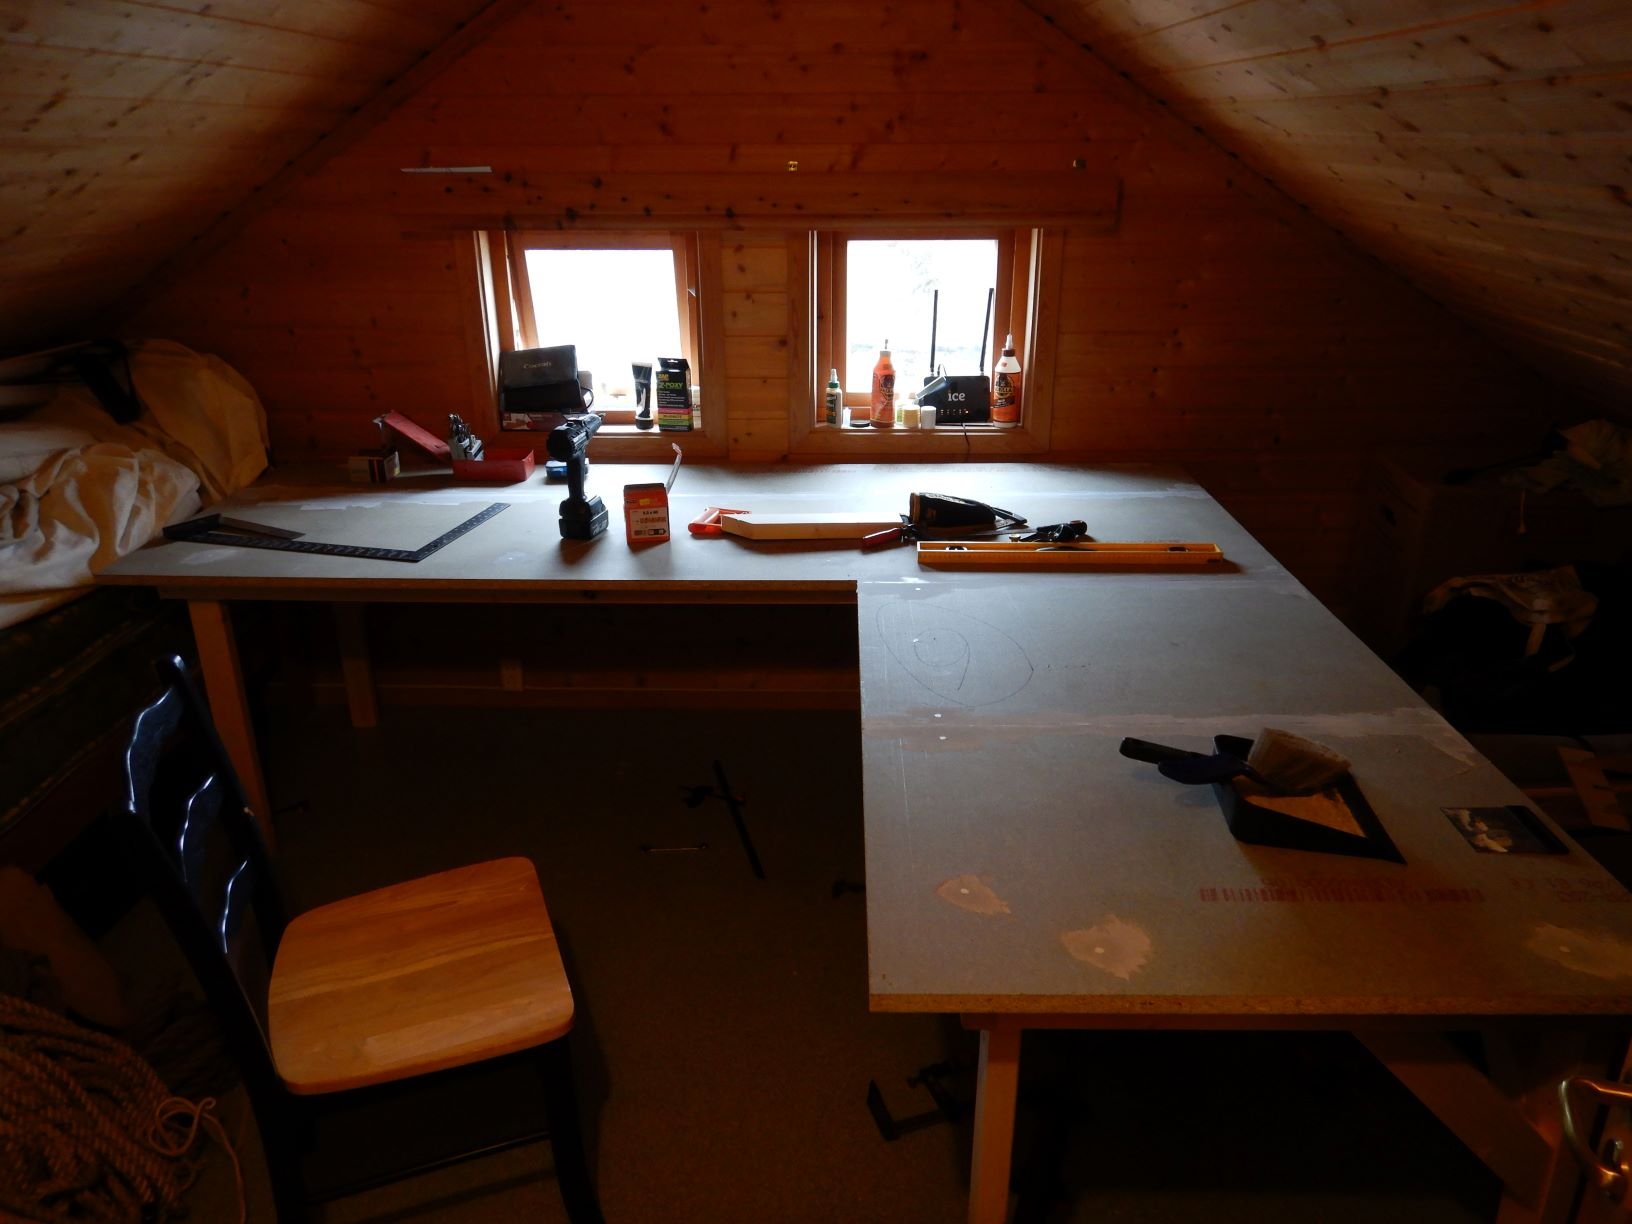
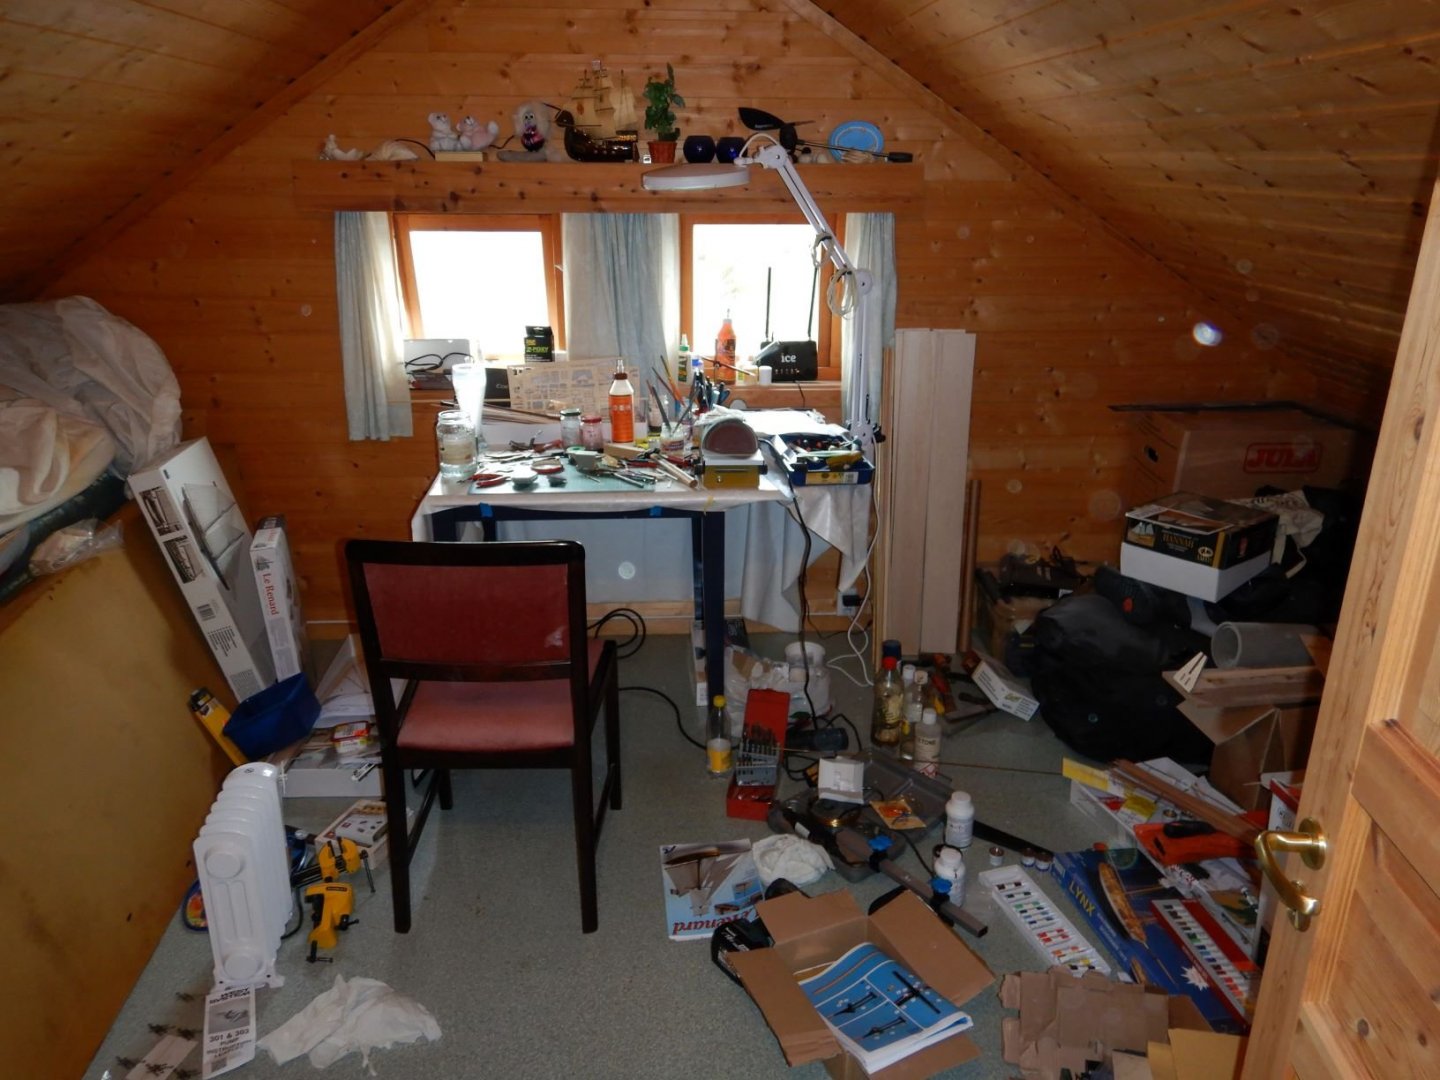
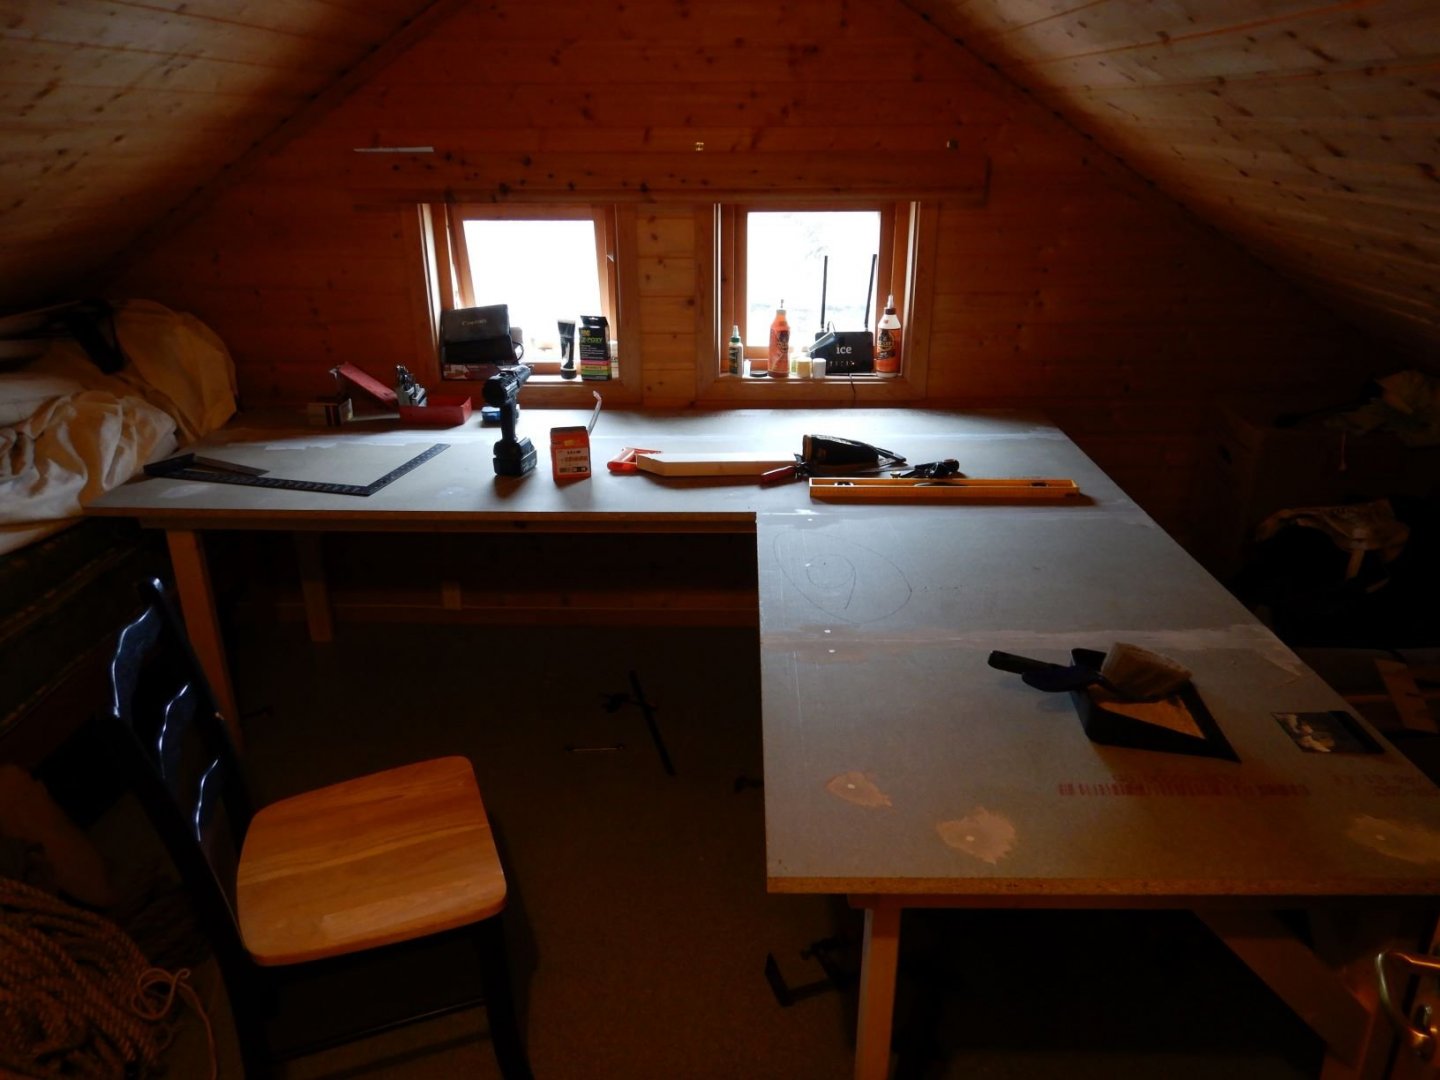
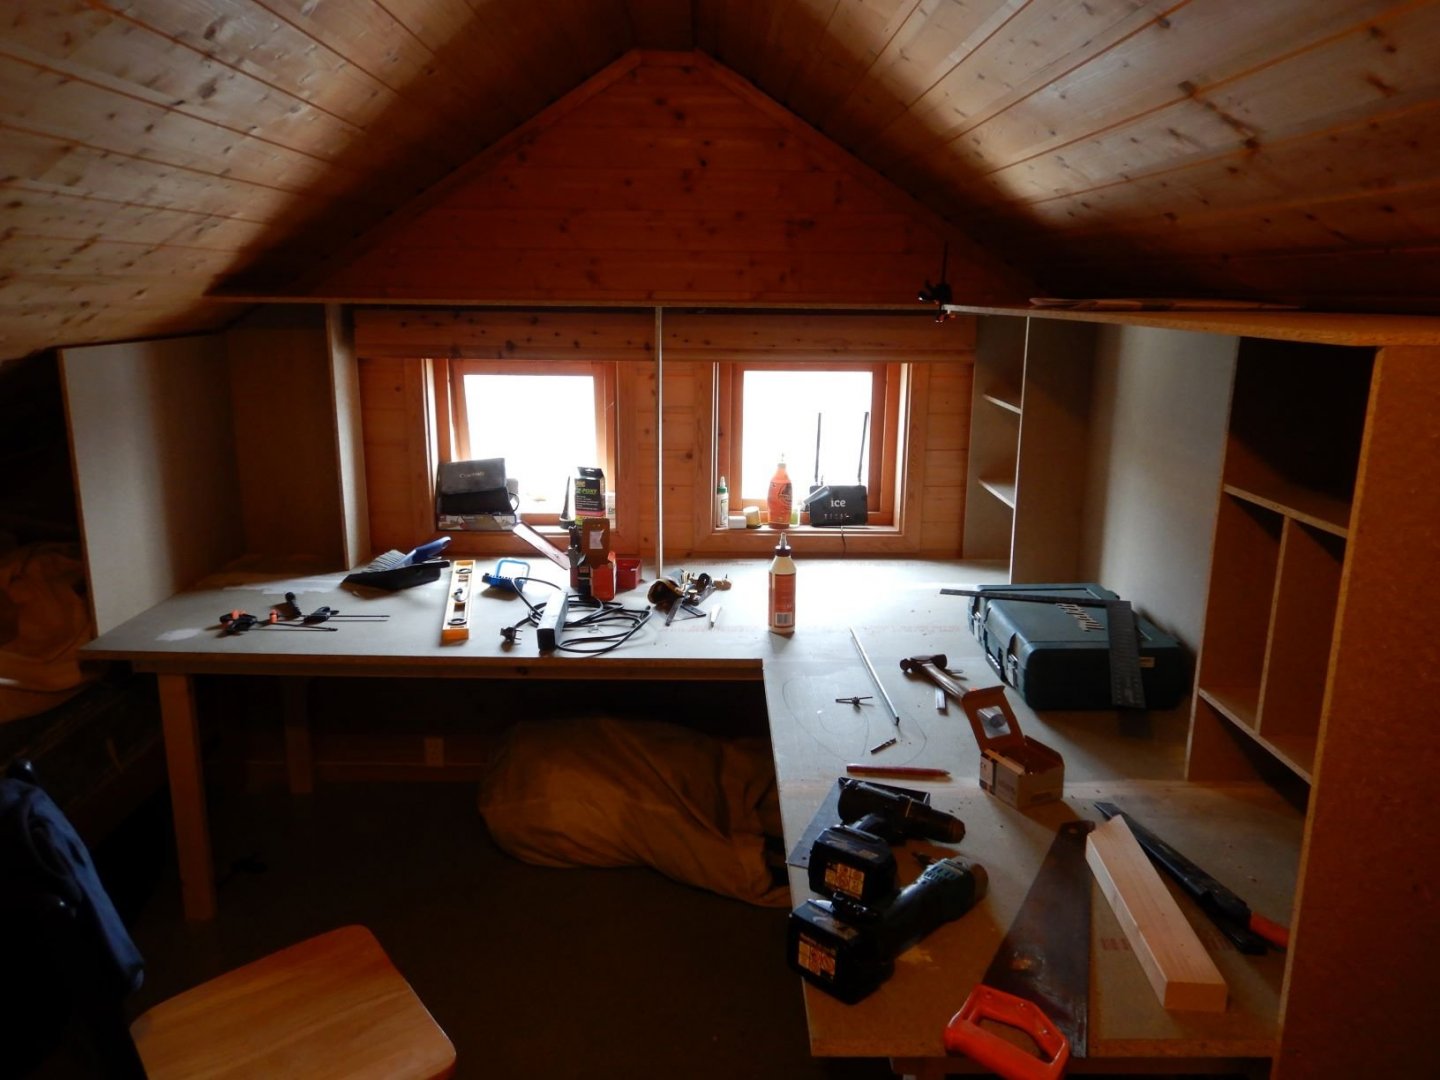
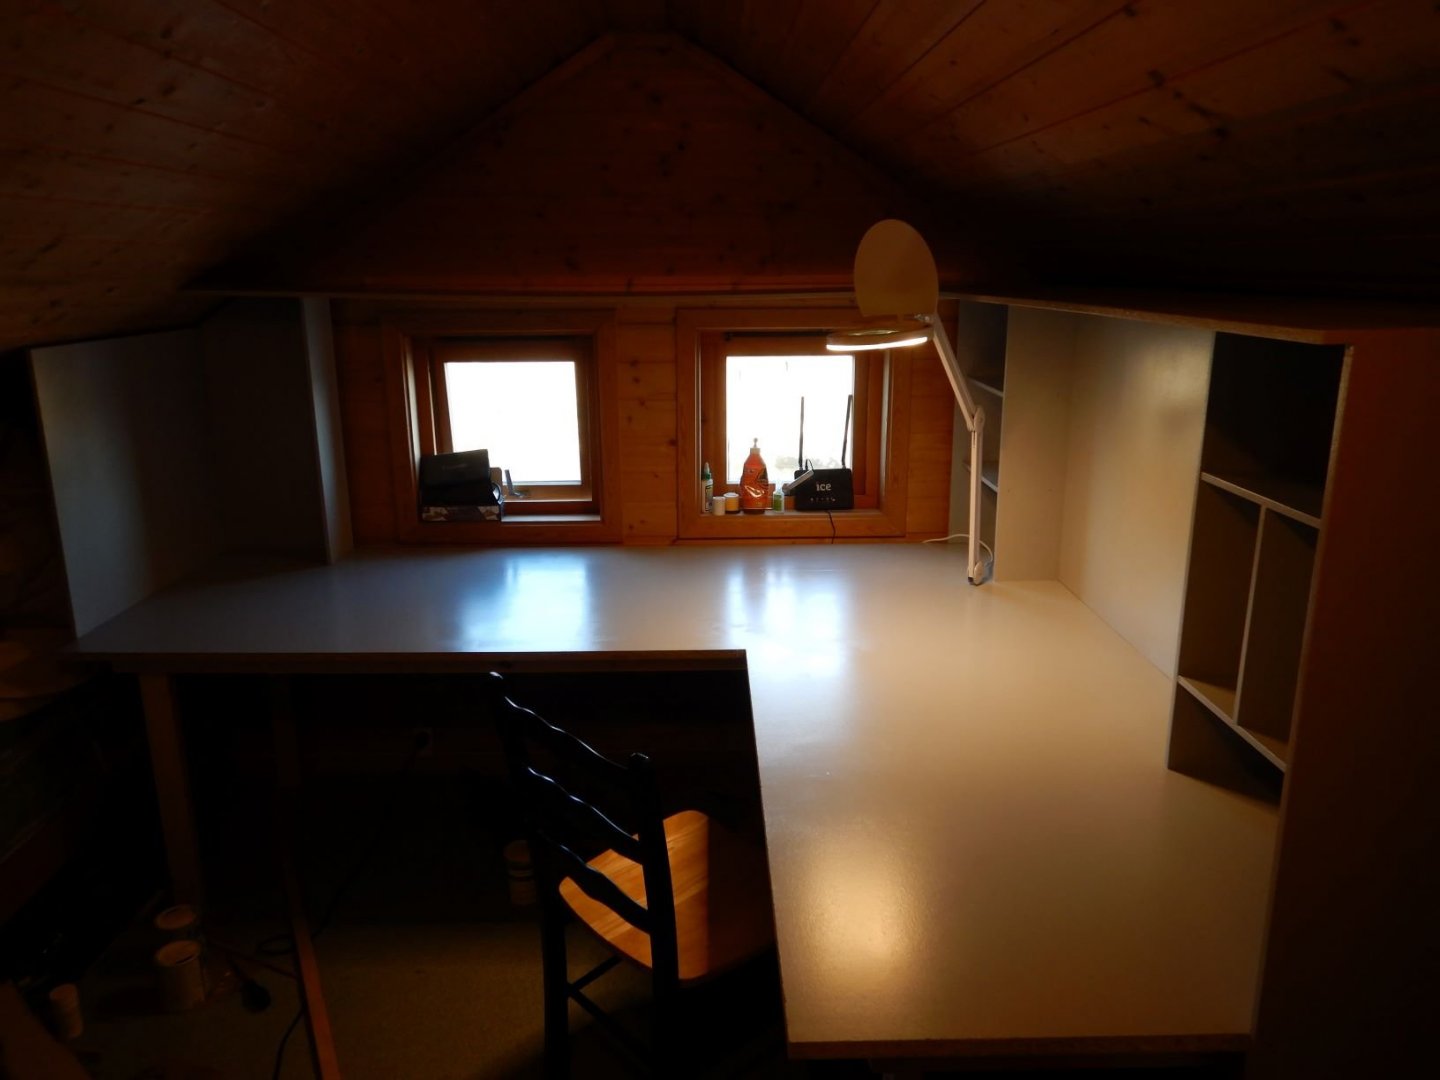
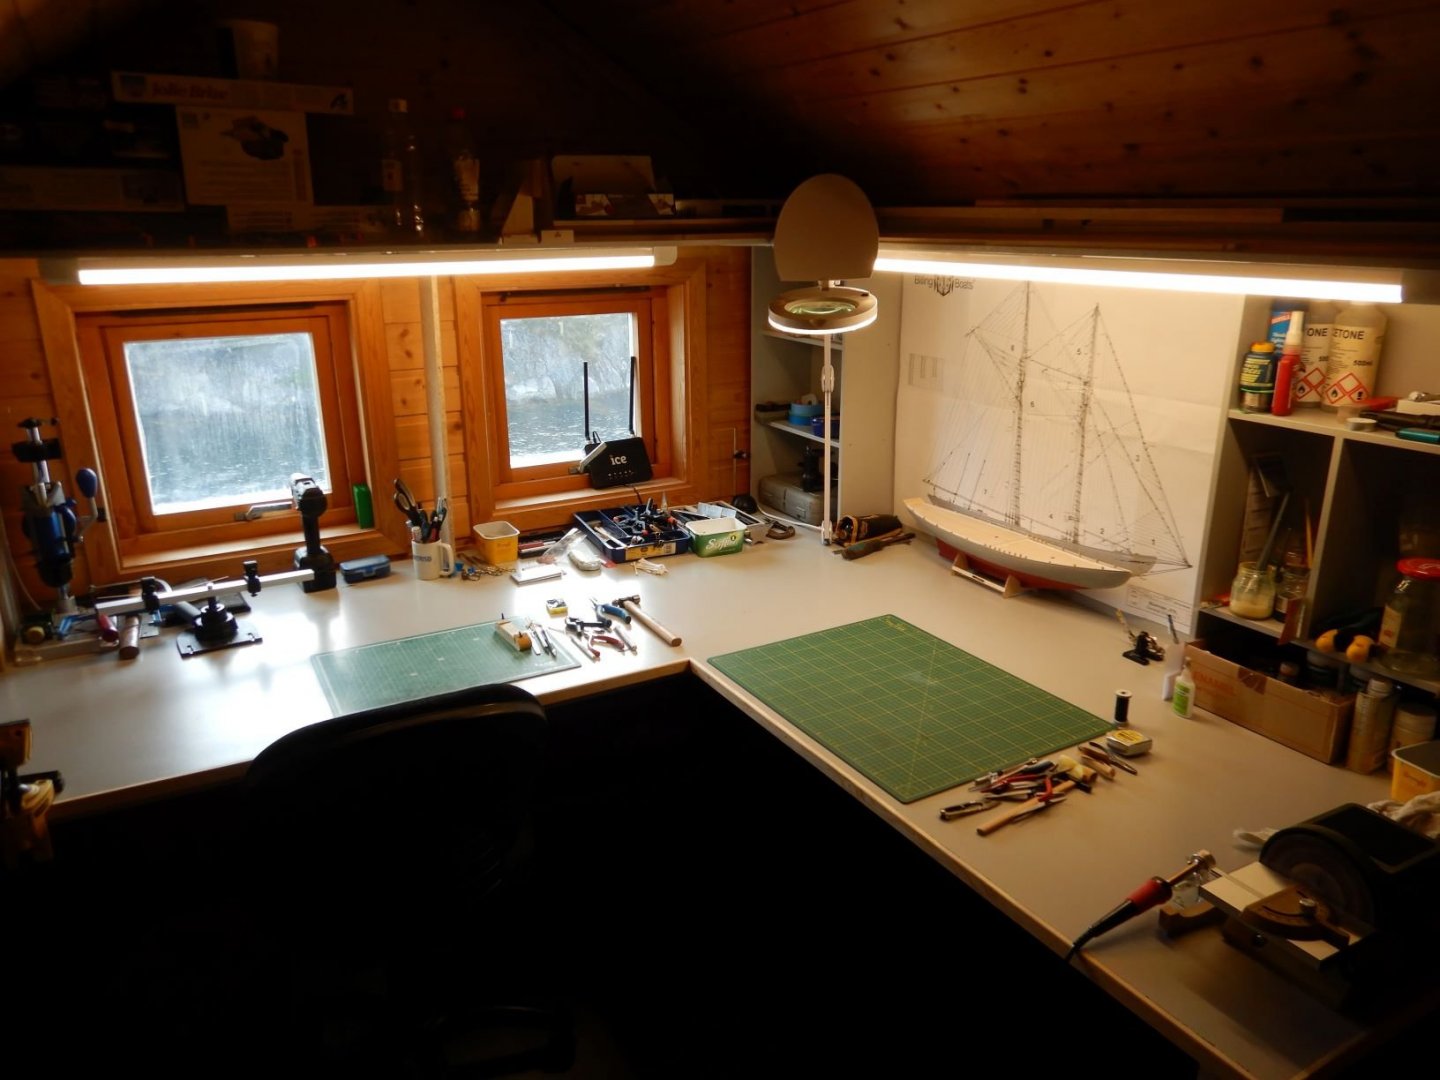
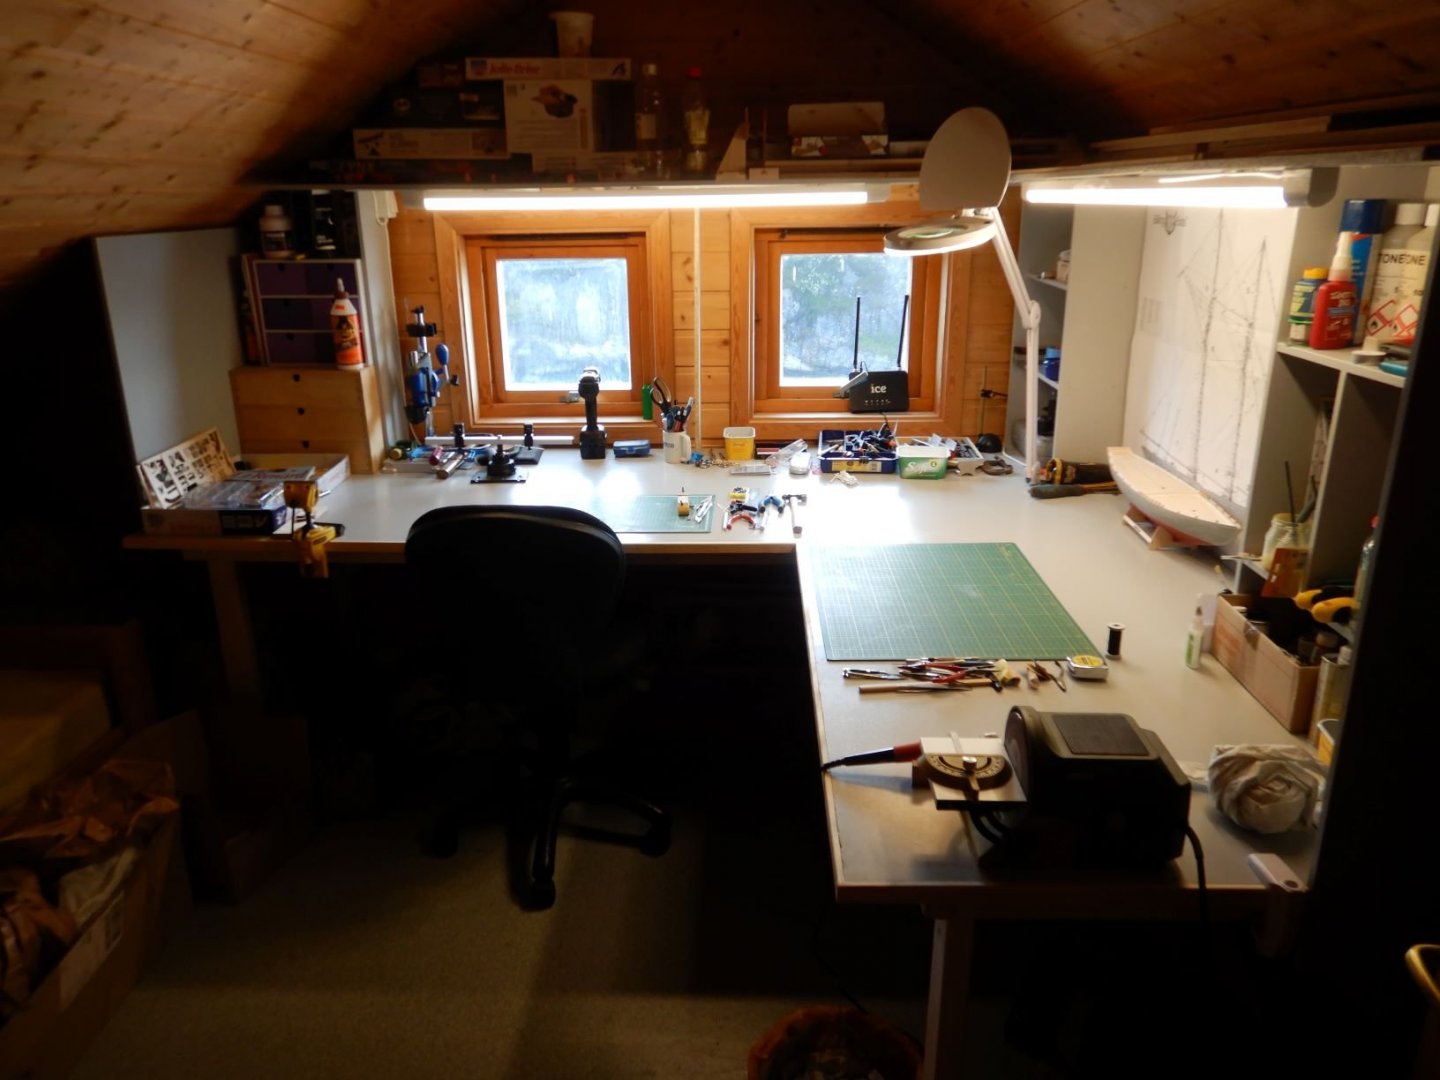
Hello to all. Rick01, thanks for the links, lots of good information there. Great modifications to the catheads's. The illustration you have shows how they should look. Regarding the binnacle, I agree with you regarding the glass, but it could be that the replica has removable lids to hide modern navigation electronics. They probably have a magnetic compass too somewhere though. About the caprails, I did a dryfit, and they barely cover the thickness of the bulwarks, so I think I'll glue on a strip on either side to make it a little wider and to hide the plywood edge. This will hopefully give the little ledge needed to fit the forward pinrail. Thanks for all the tips! My 3mm blocks for the gun rigging arrived yesterday, so that's something to start soon! Your model looks great, keep up the good work! 👍 As to my build, it has not been done as much lately as I had hoped. I decided it was time to take some action regarding my shipyard status... I have been home alone this past week, and me and the cats agreed that a new building table was in order. 😎 My previous shipyard, a total mess floating out on the floor due to lack of tablespace.. Some drastic measures are needed! So I took a trip to the local lumberyard and got some woodfibre board (don't know the correct english word for this) and some wood for framing and legs and got to work. Decided to make some shelves.. And a couple of coats of paint.. Used regular floorpaint for this. Added some decent lighting and all the "stuff" Must say I'm very pleased with the result. Made a dedicated space for hanging drawings. Still need to make a few more shelves and a better support for the big shelf over the windows, but I ran out of materials. Some work has been done on Le Renard too, I've painted the bottom and started painting the topsides, but no pictures of this as this has been done in between building the new "shipyard"! All the best, Thanks for all the comments and likes! Gaffrig.
- 110 replies
-
- 6
-
-

-
- le renard
- artesania latina
- (and 1 more)
-
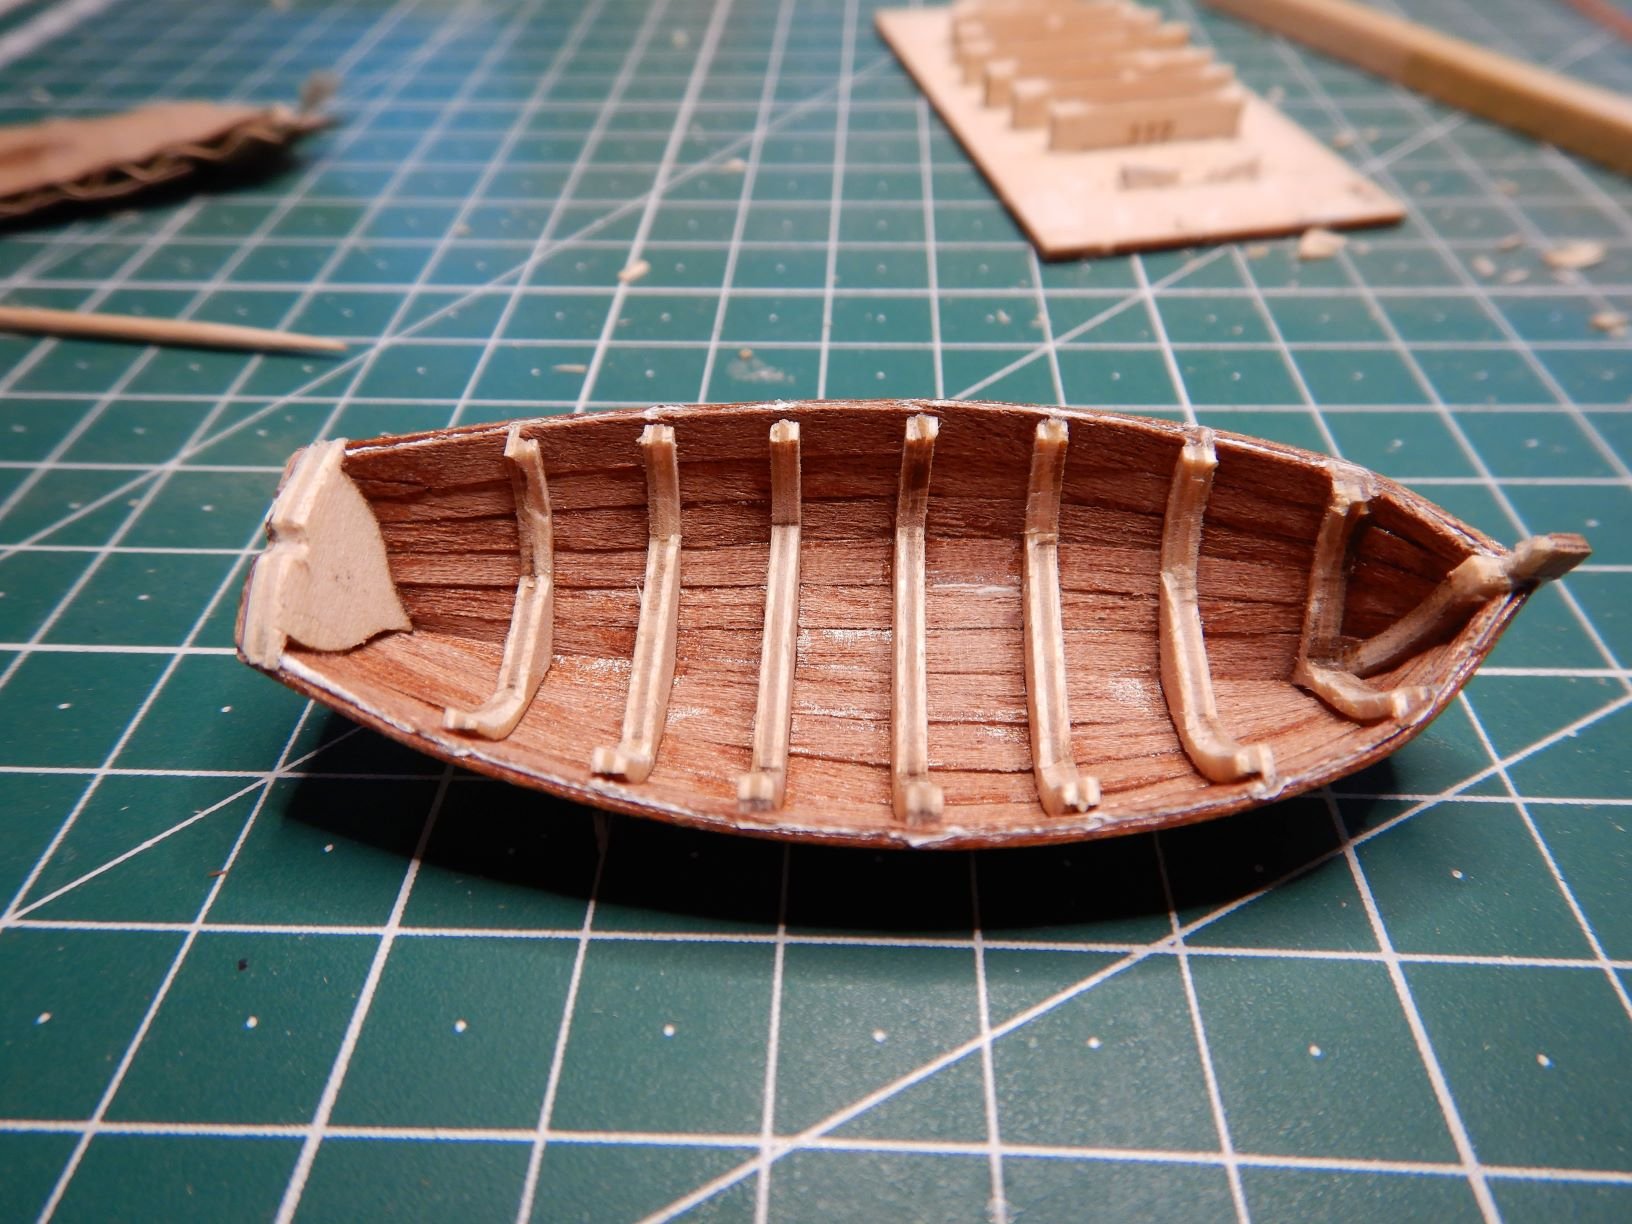
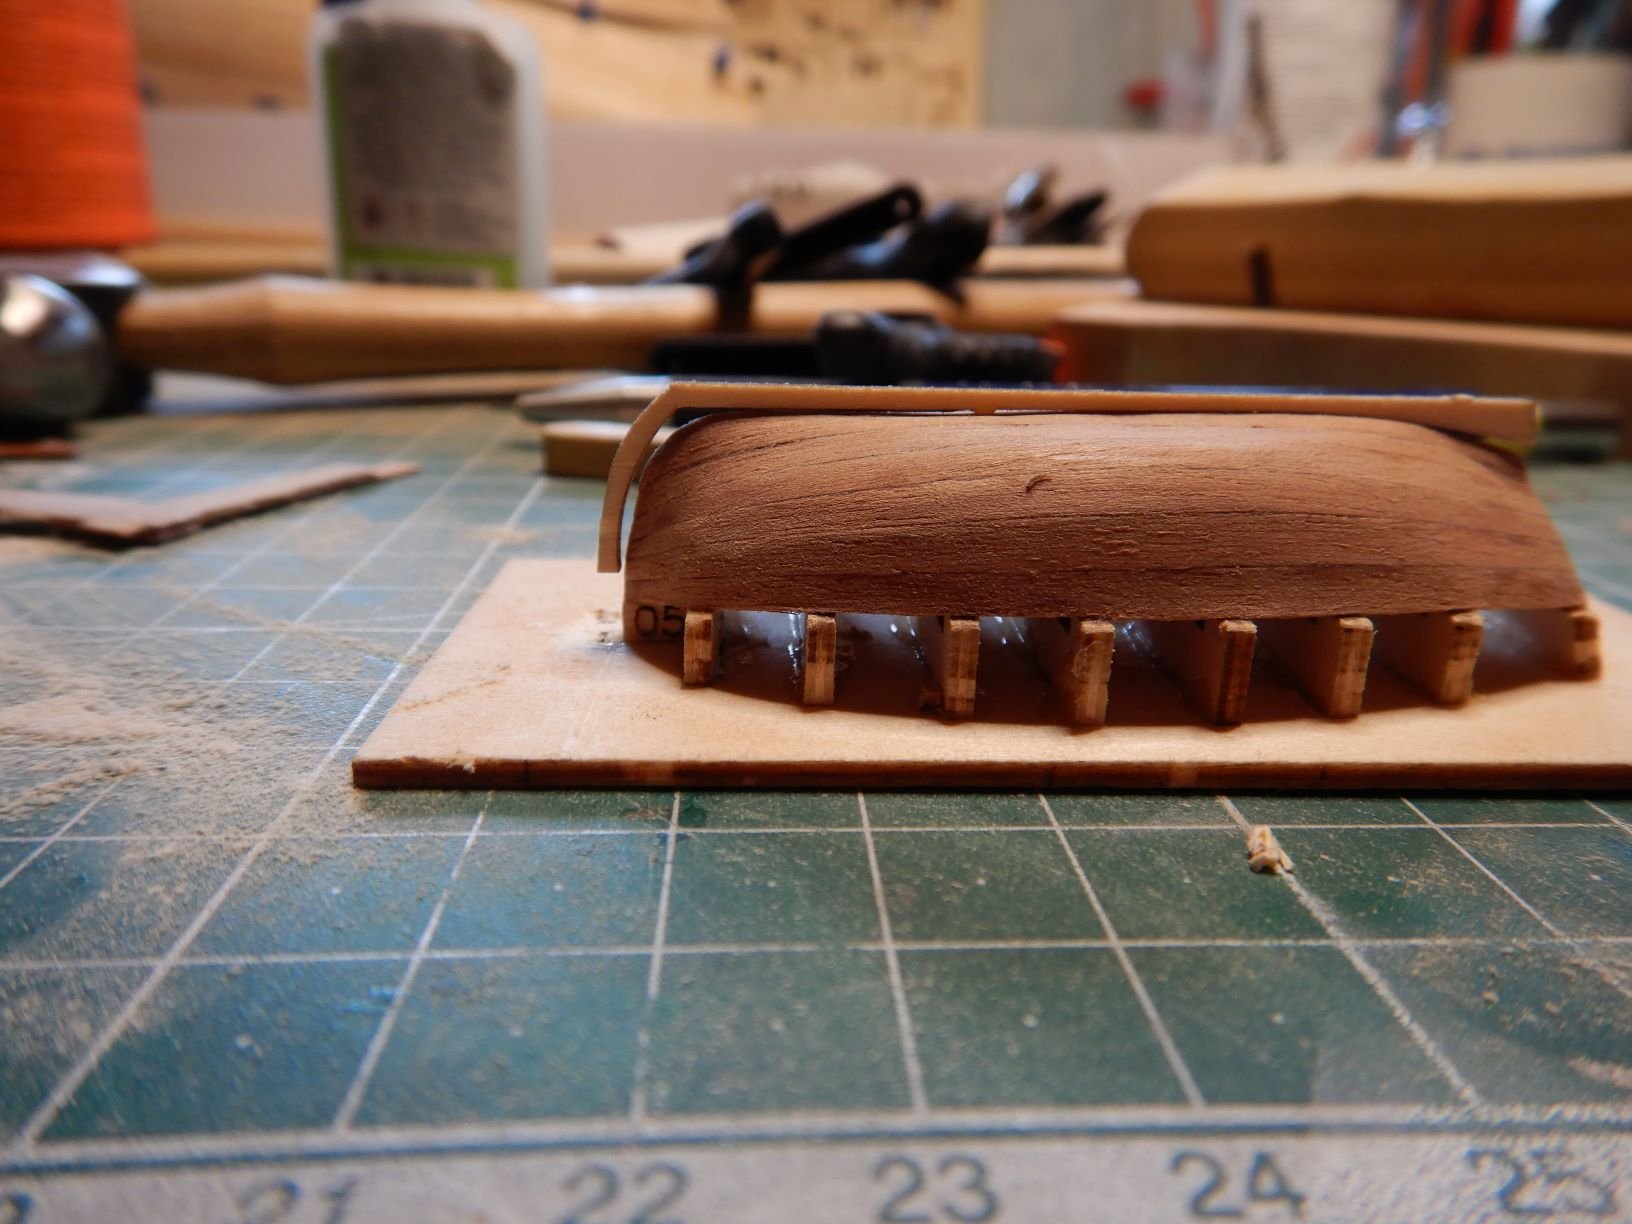
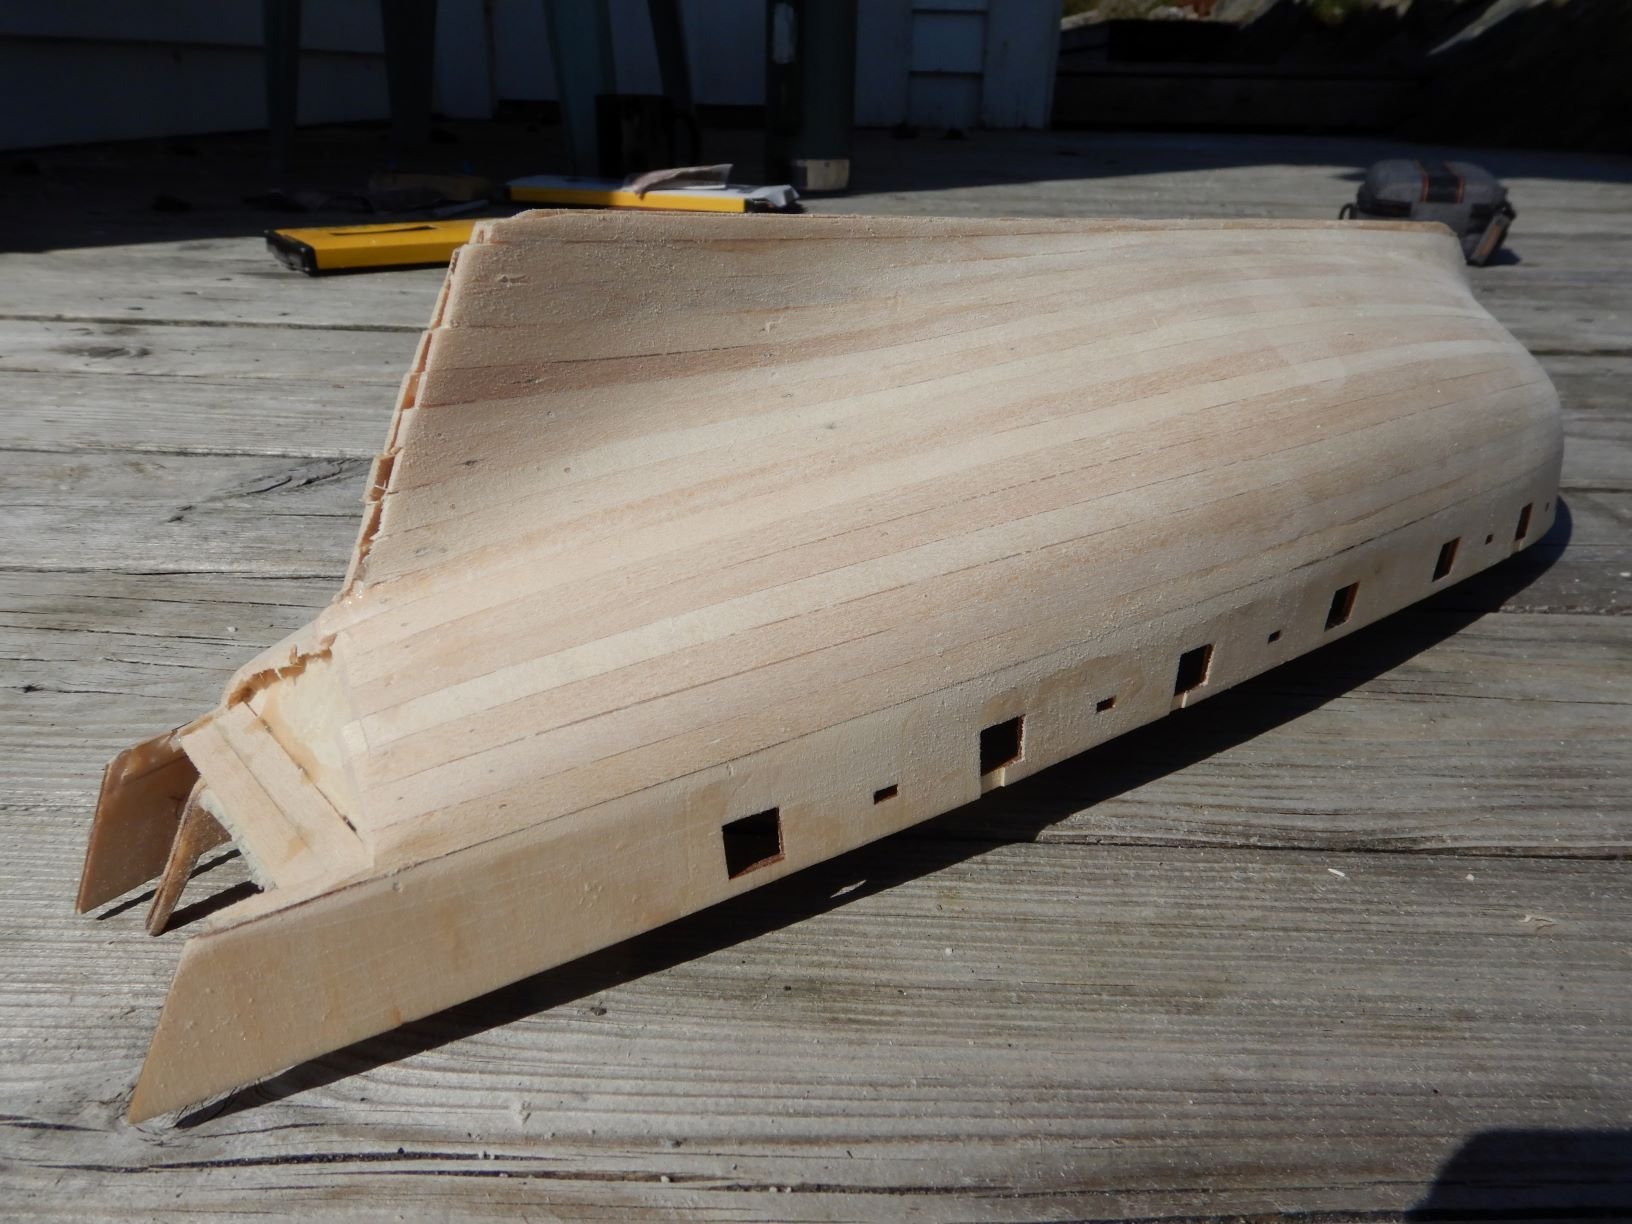
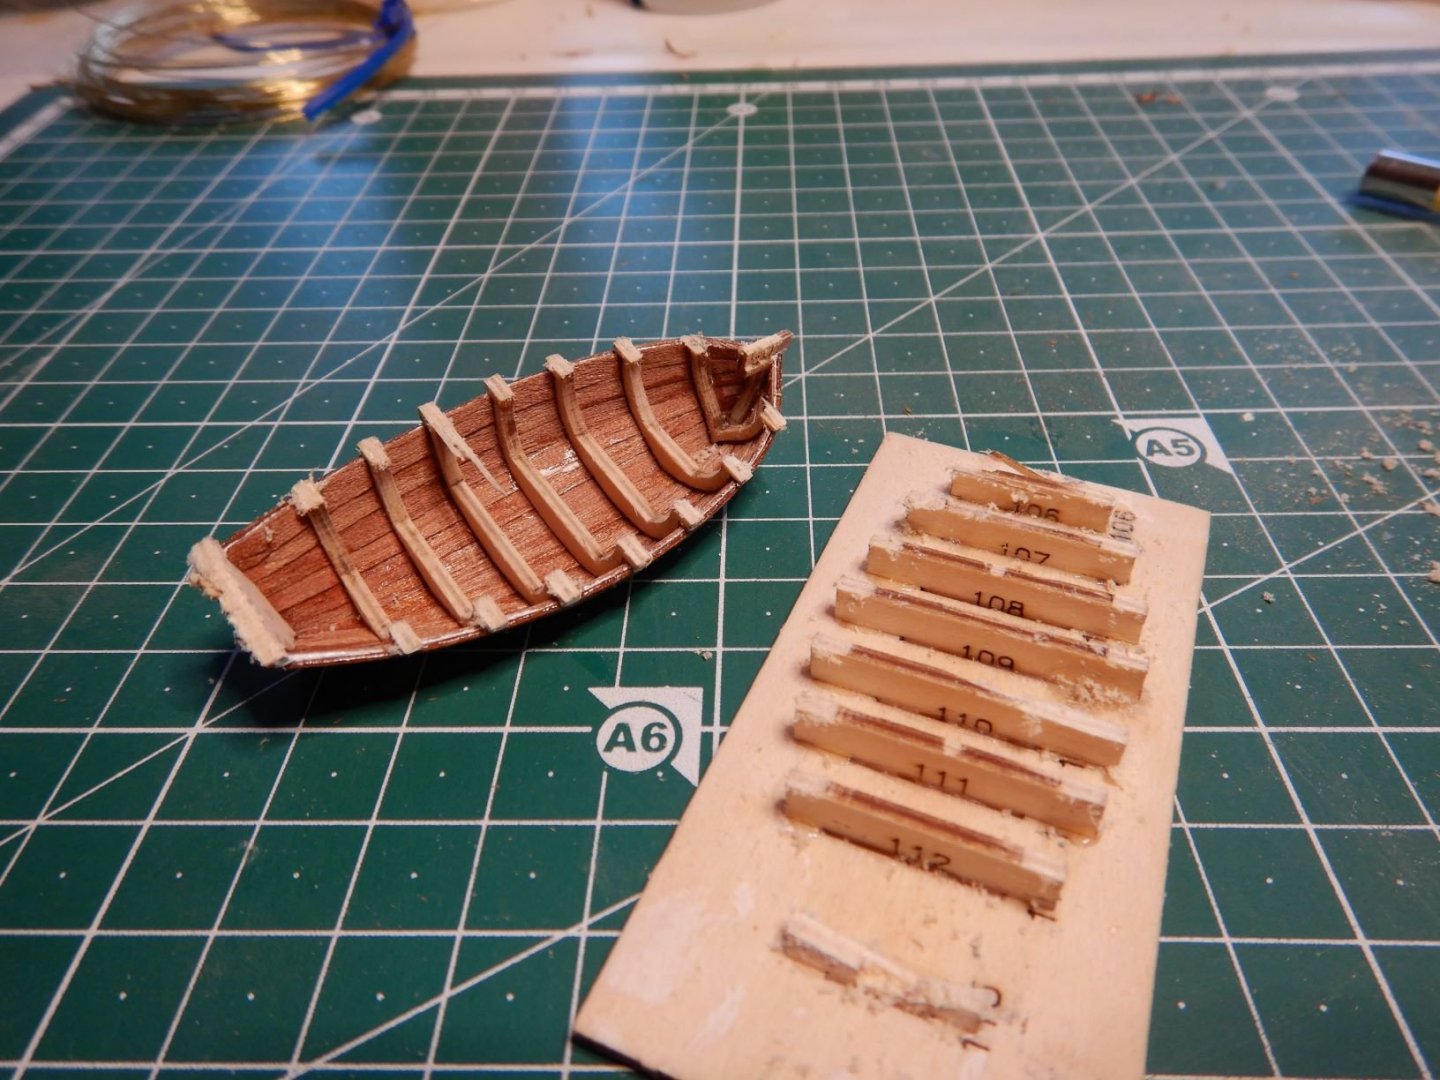
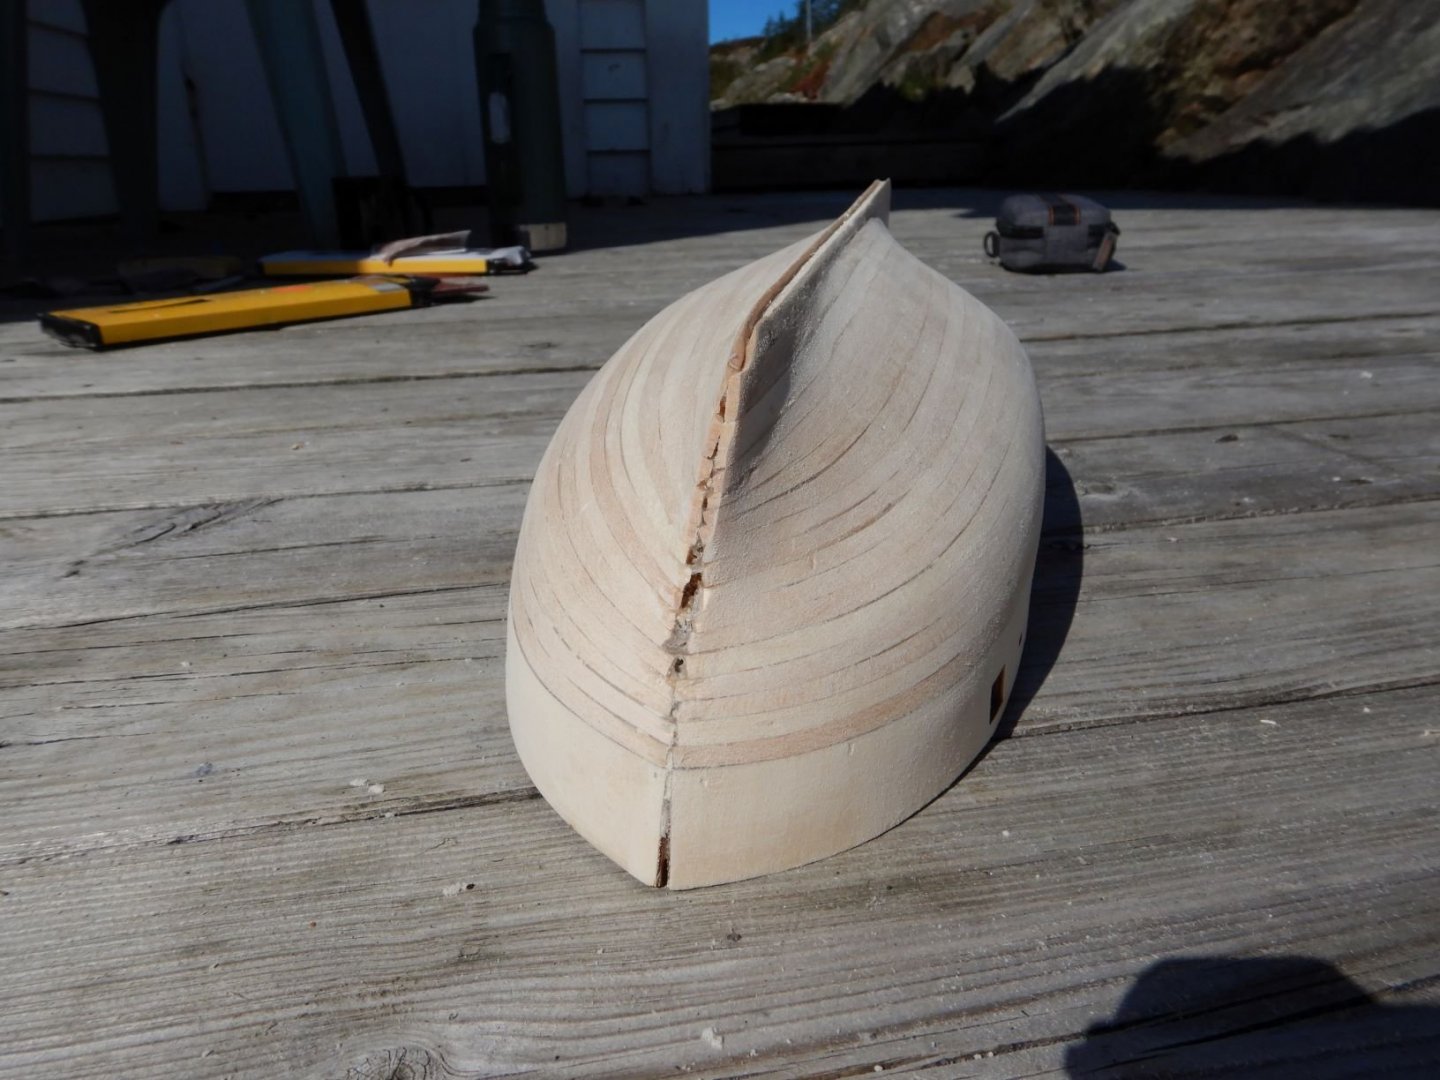
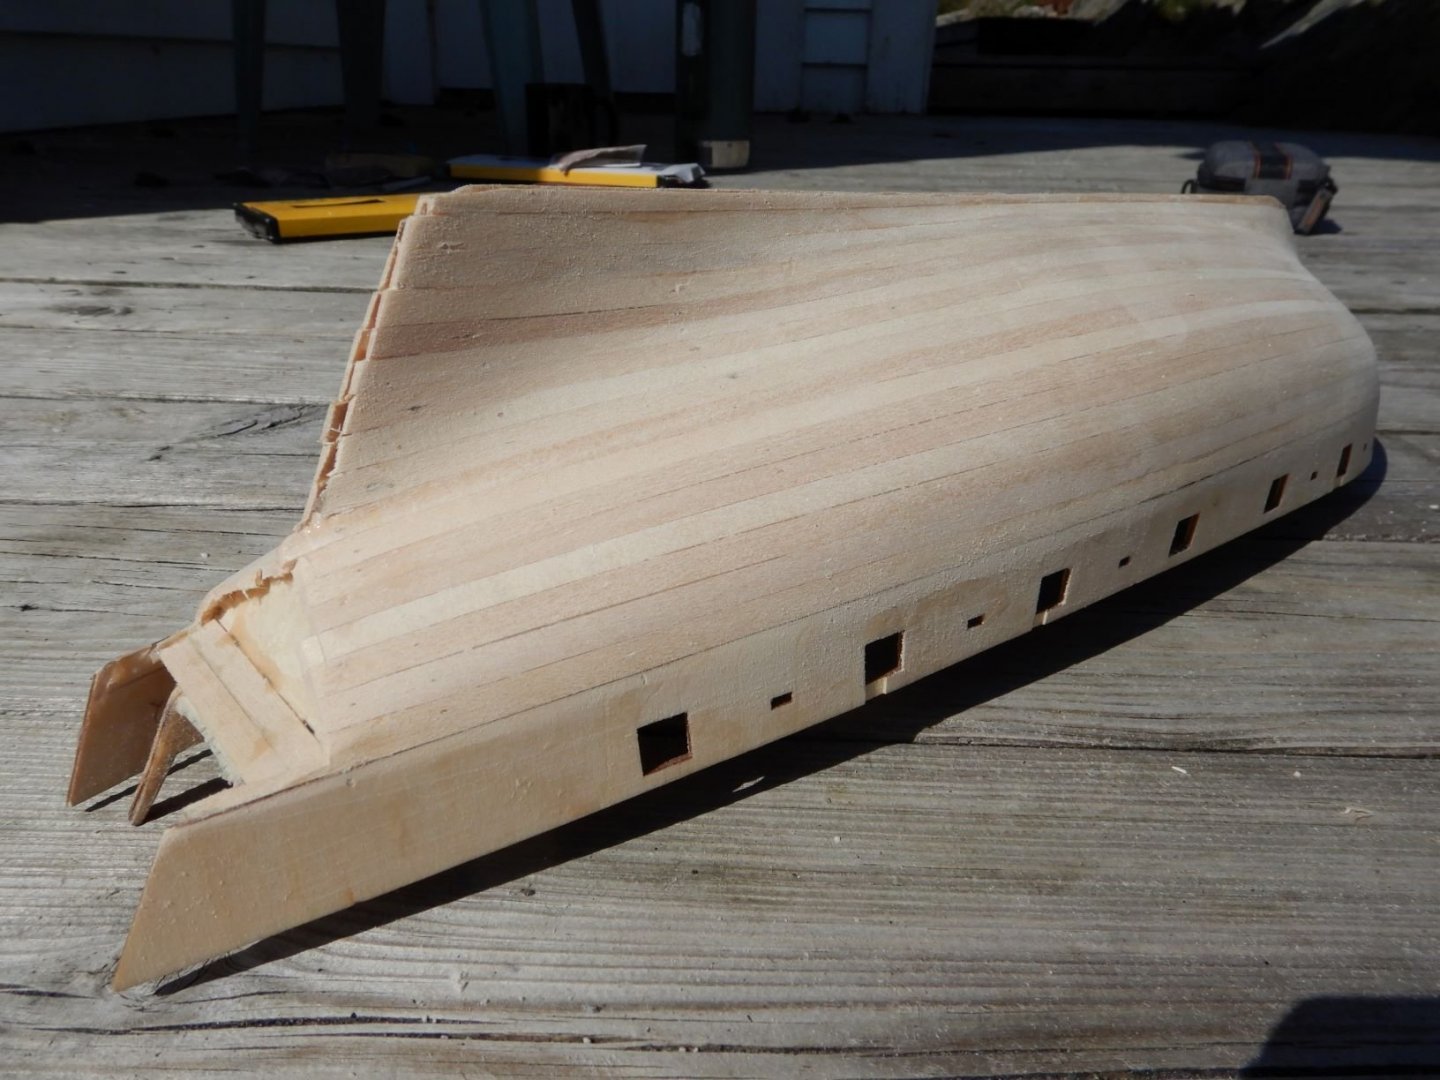
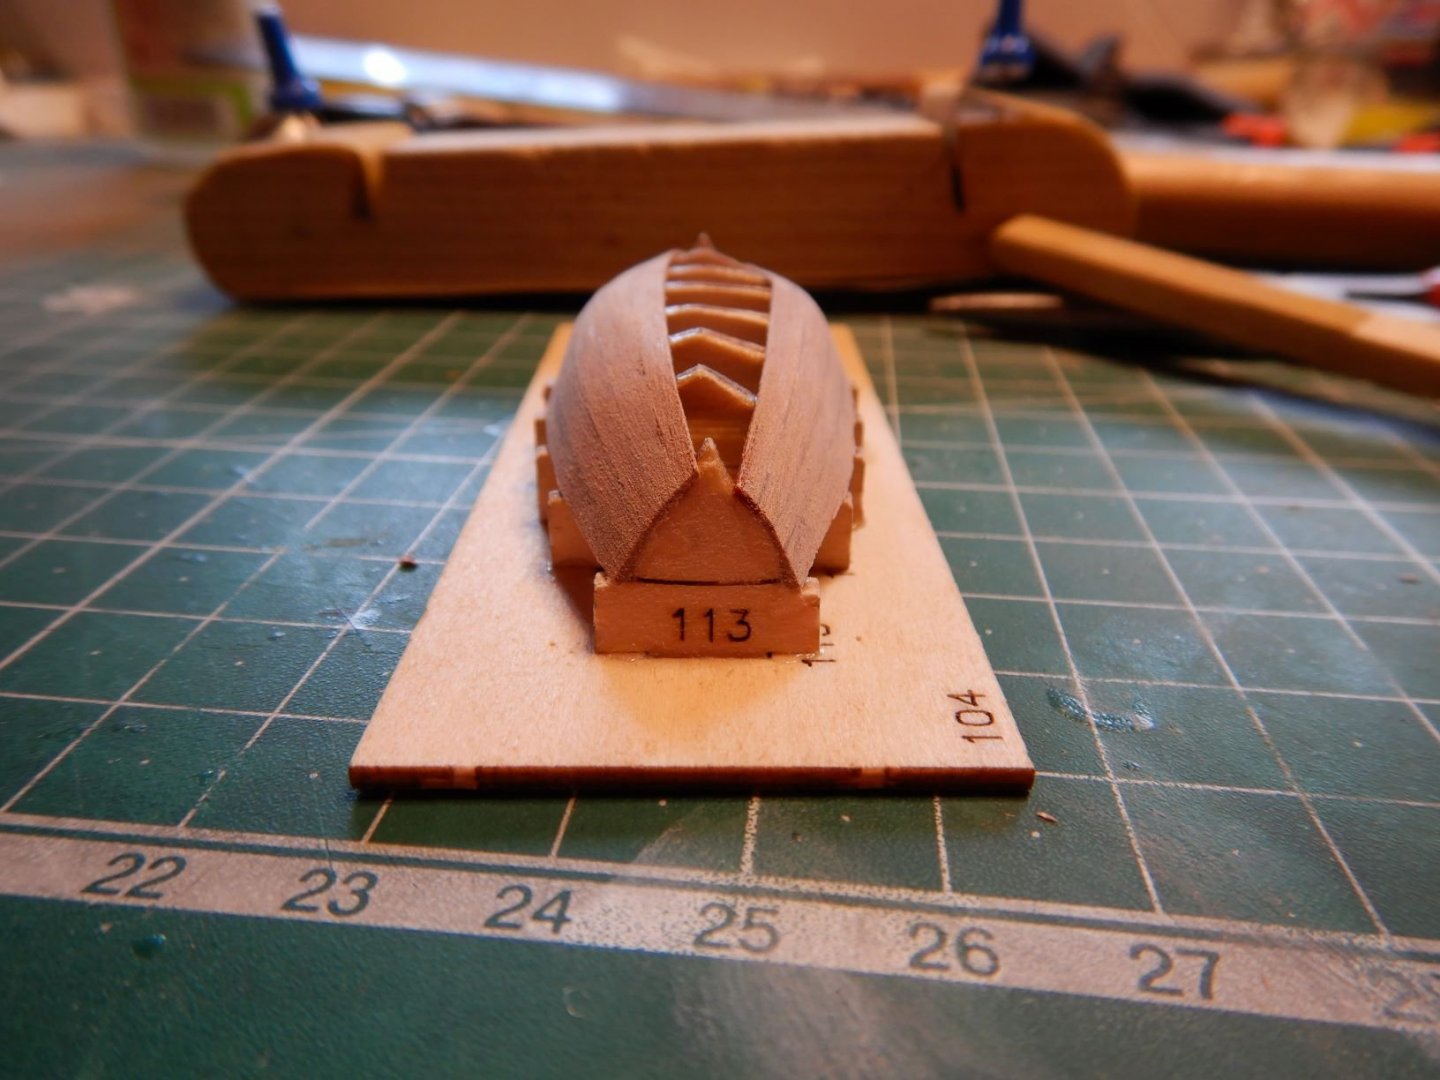
Hello all! Rick01, the carronades look great. I tried making up a tackle but as you say, the supplied blocks are a little to big. It doesn't look very good in the instructions either. 3mm blocks is ordered! The extra cannon, is that something you add just because you want to? or is there some source you found that says it should be there? Tompslattery, in my kit there was two lasercut pieces glued on top of eachother to make up the gun sled. Then a small PE brass bracket to hold the gun barrel. It seems your kit is an older version. The hull is getting ready for some paint shortly. A little more filler and sanding has been done. Marking the waterline.. Masked and ready for paint below the waterline. The dinghy has been removed from the jig, and is ready to be finished inside. And after sanding of the frametops.. I'm happy with the way the sheer of the boat turned out. It was very straight as the jig was before modification. That's it for now. Gaffrig.


- 110 replies
-
- 5
-
-
- le renard
- artesania latina
- (and 1 more)
-
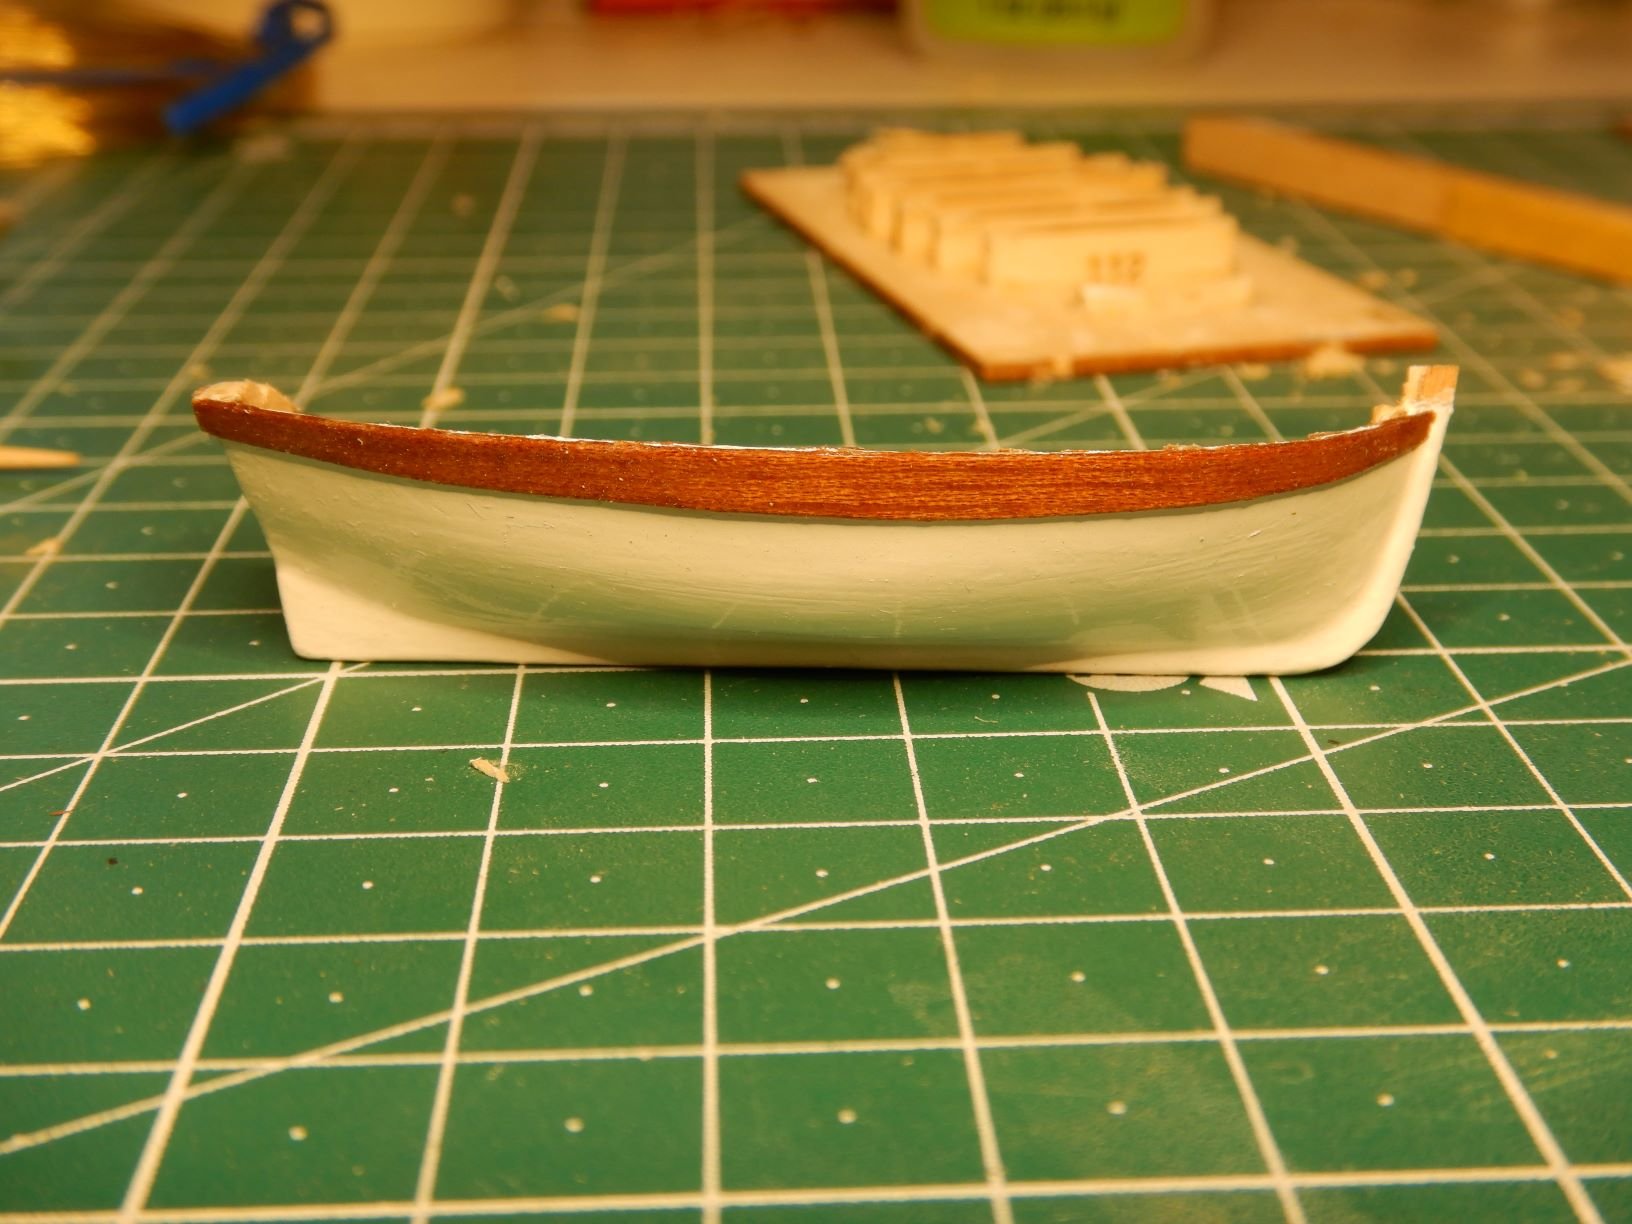
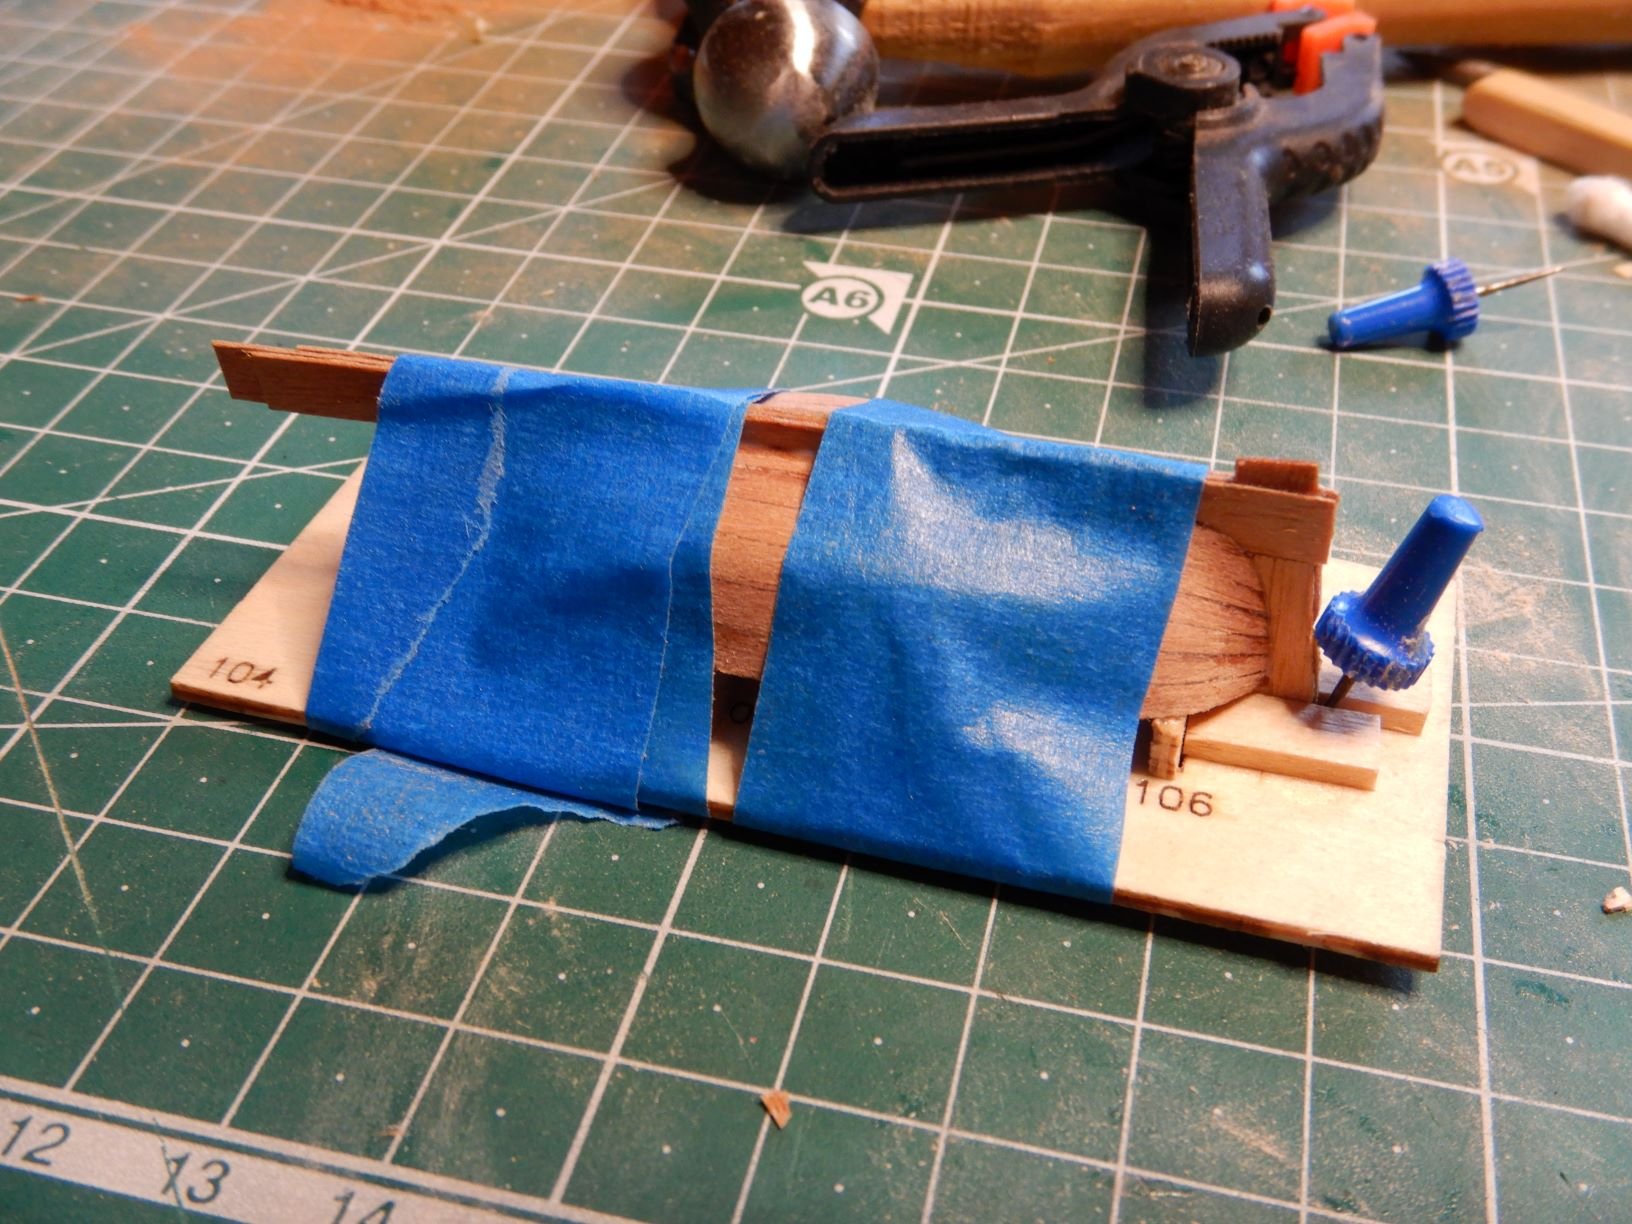
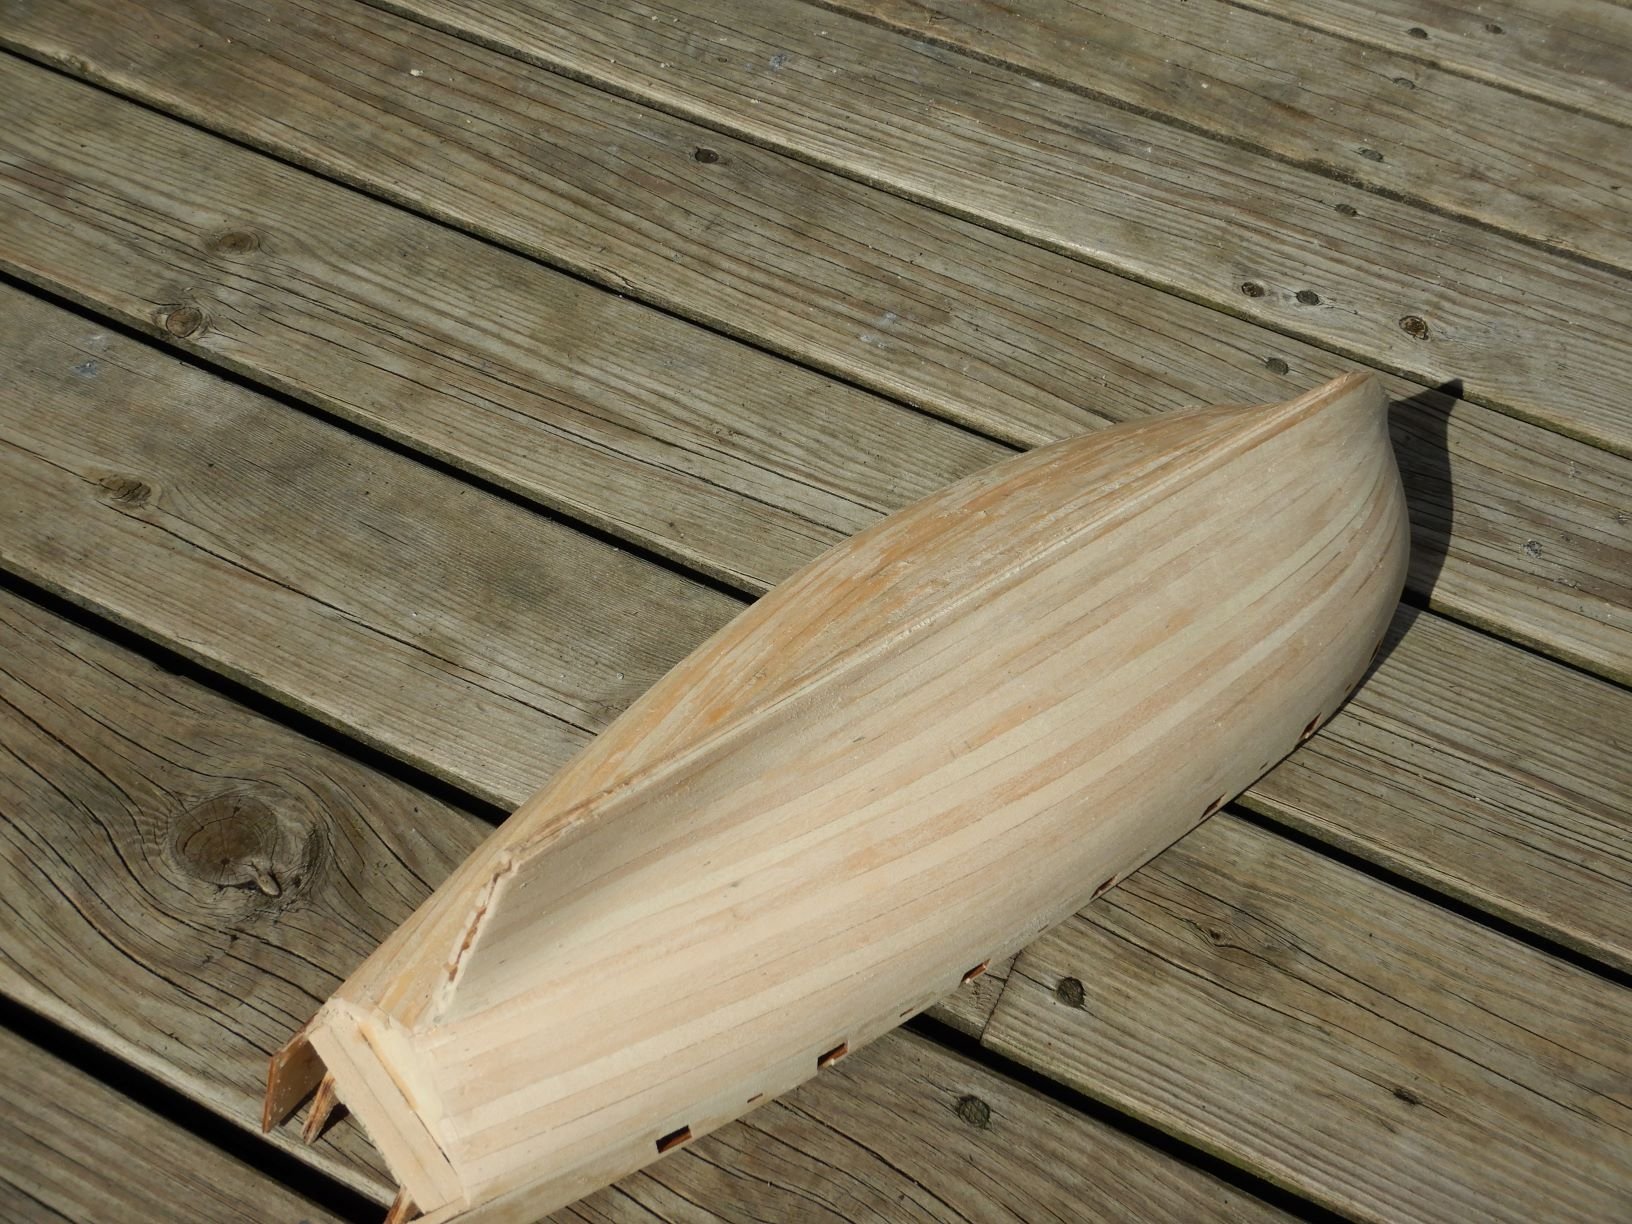
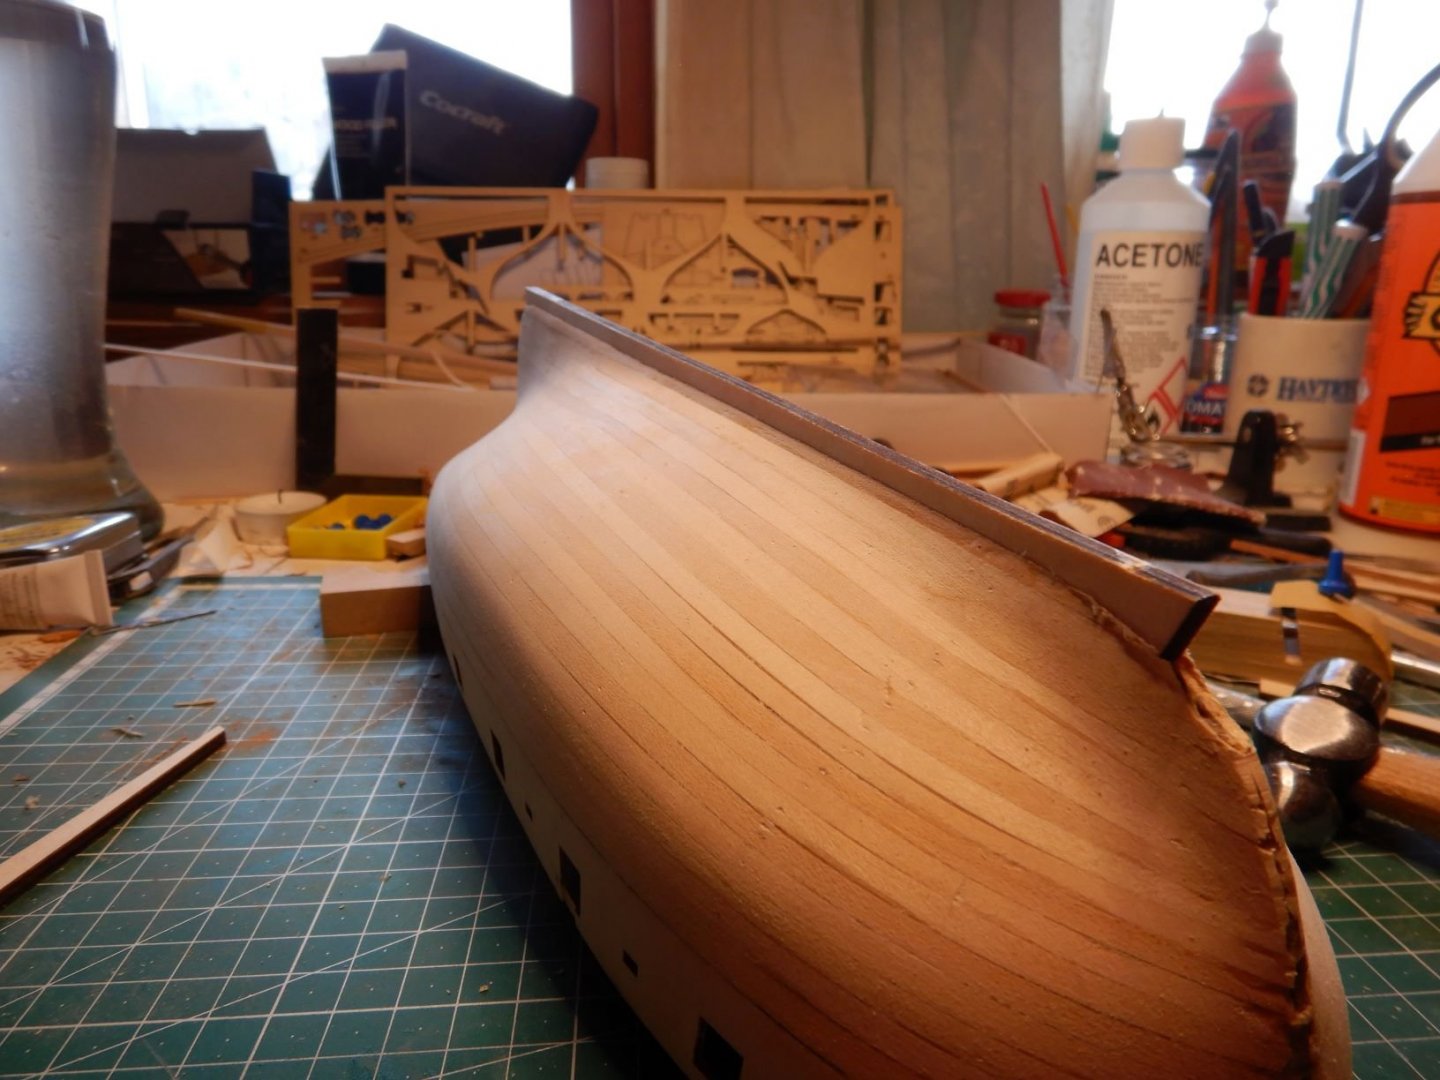
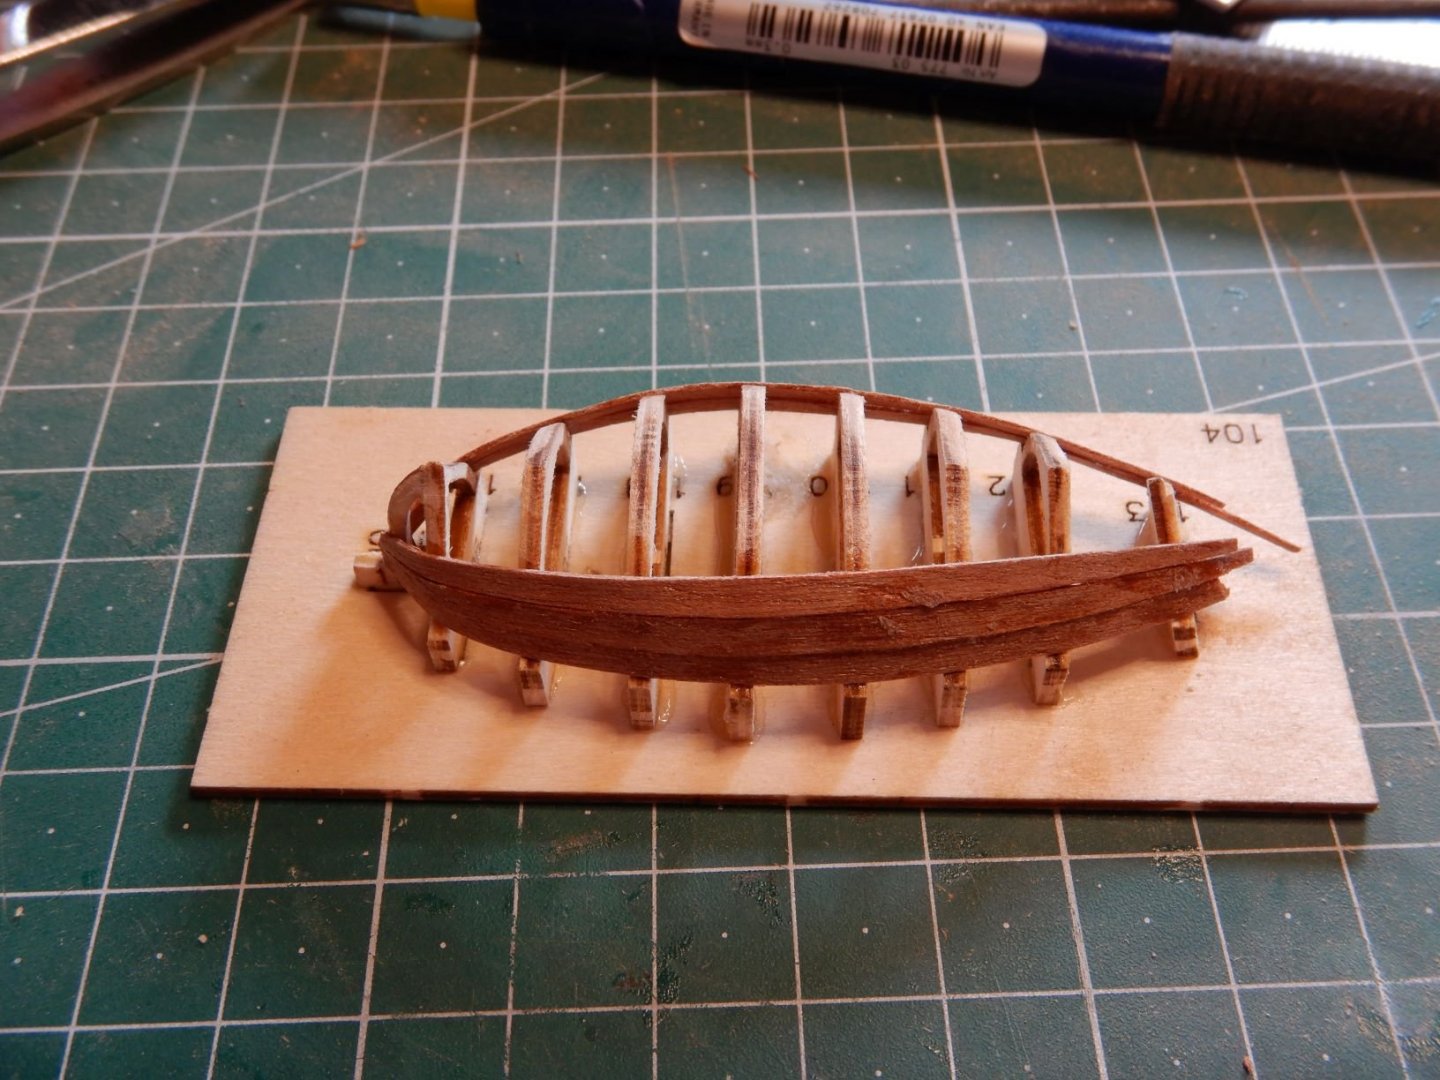
Hello to all! Rick01, Thanks for the tip. It seems I have done the same as you, and a couple of the carronades need a little adjusting before mounting.. Tompslattery, Thank you! After mounting the inner bulwarks, they stiffened up quite nice, and I'm no longer as nervous for breaking them when handling the model. I have now sanded and filled and sanded and filled to get the hull as smooth and true as possible. So, I gave the hull a coat of primer, to see the places I need to fill and sand some more... Still some to do, but I'm sure I'll get there soon! The dinghy has got it's sheerstrakes and a little varnish. Soon to be released from the jig. I decided to use mahogany for the sheerstrakes too. That's it for now. Gaffrig.


- 110 replies
-
- 6
-
-
- le renard
- artesania latina
- (and 1 more)
-
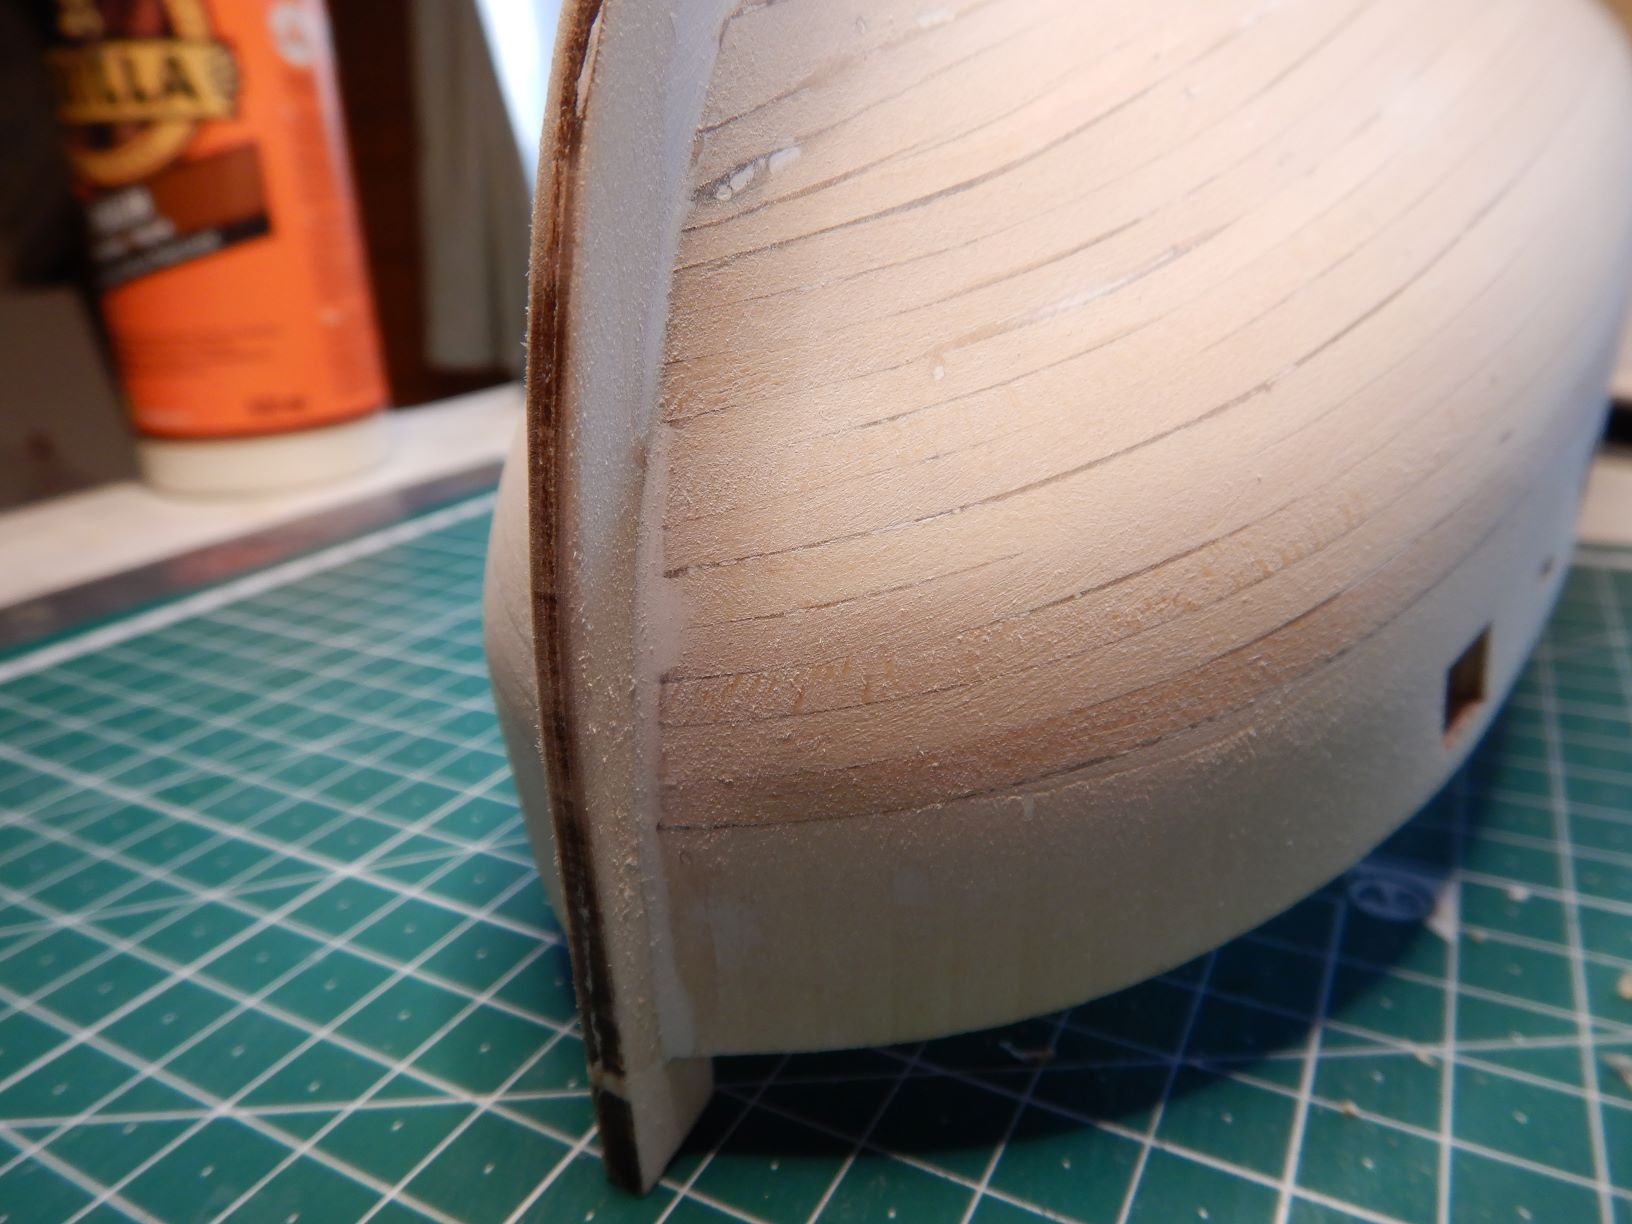
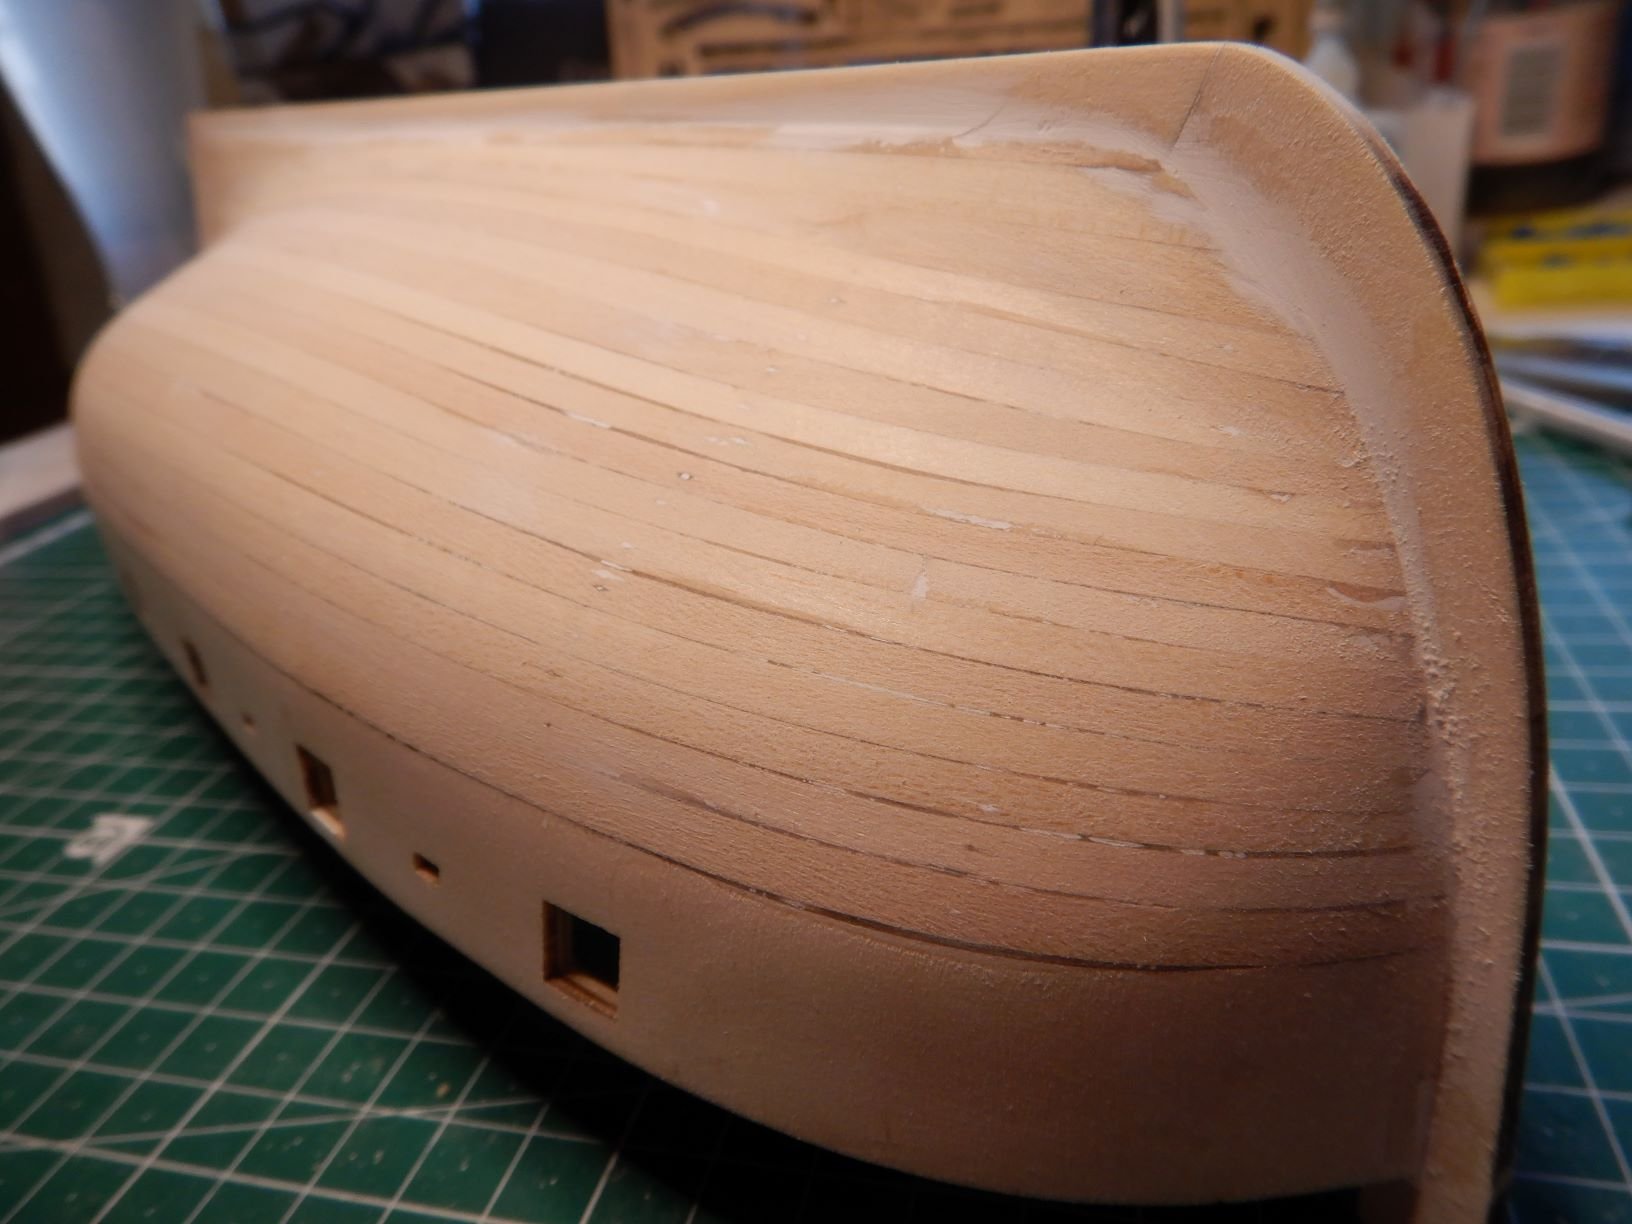
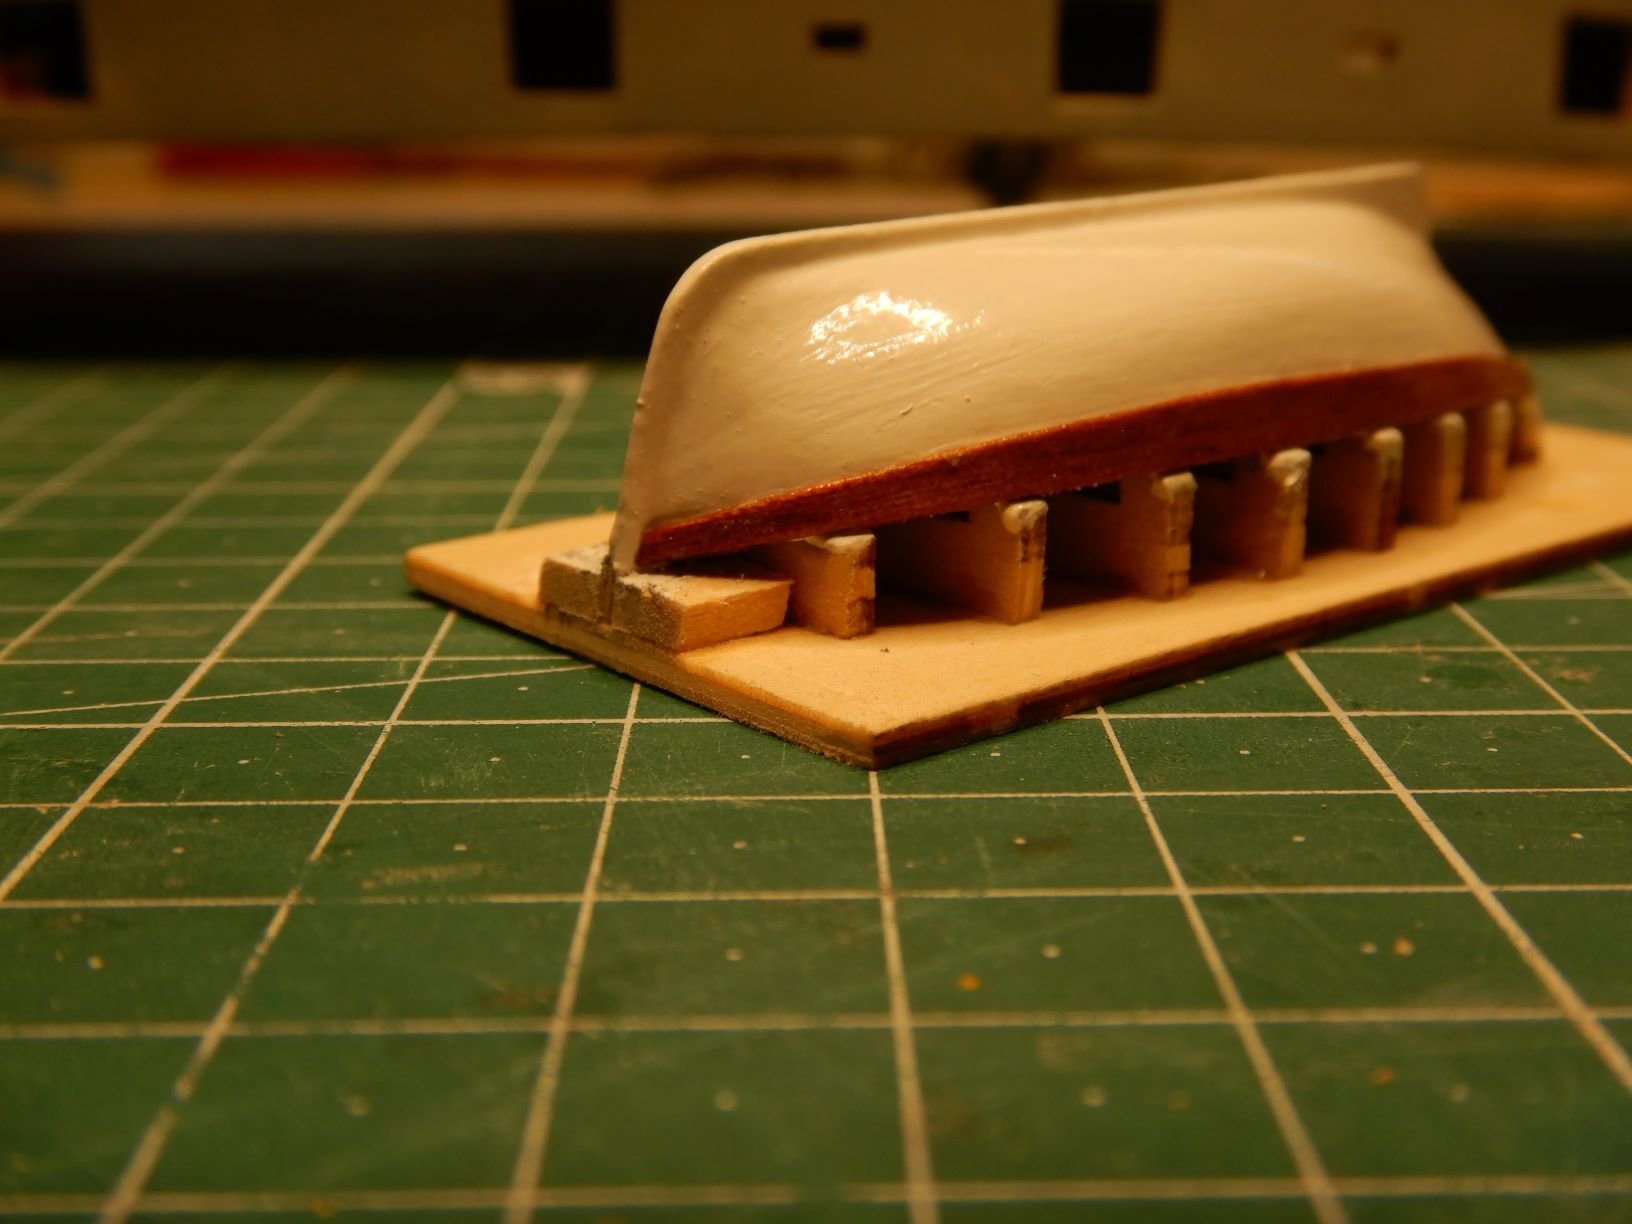
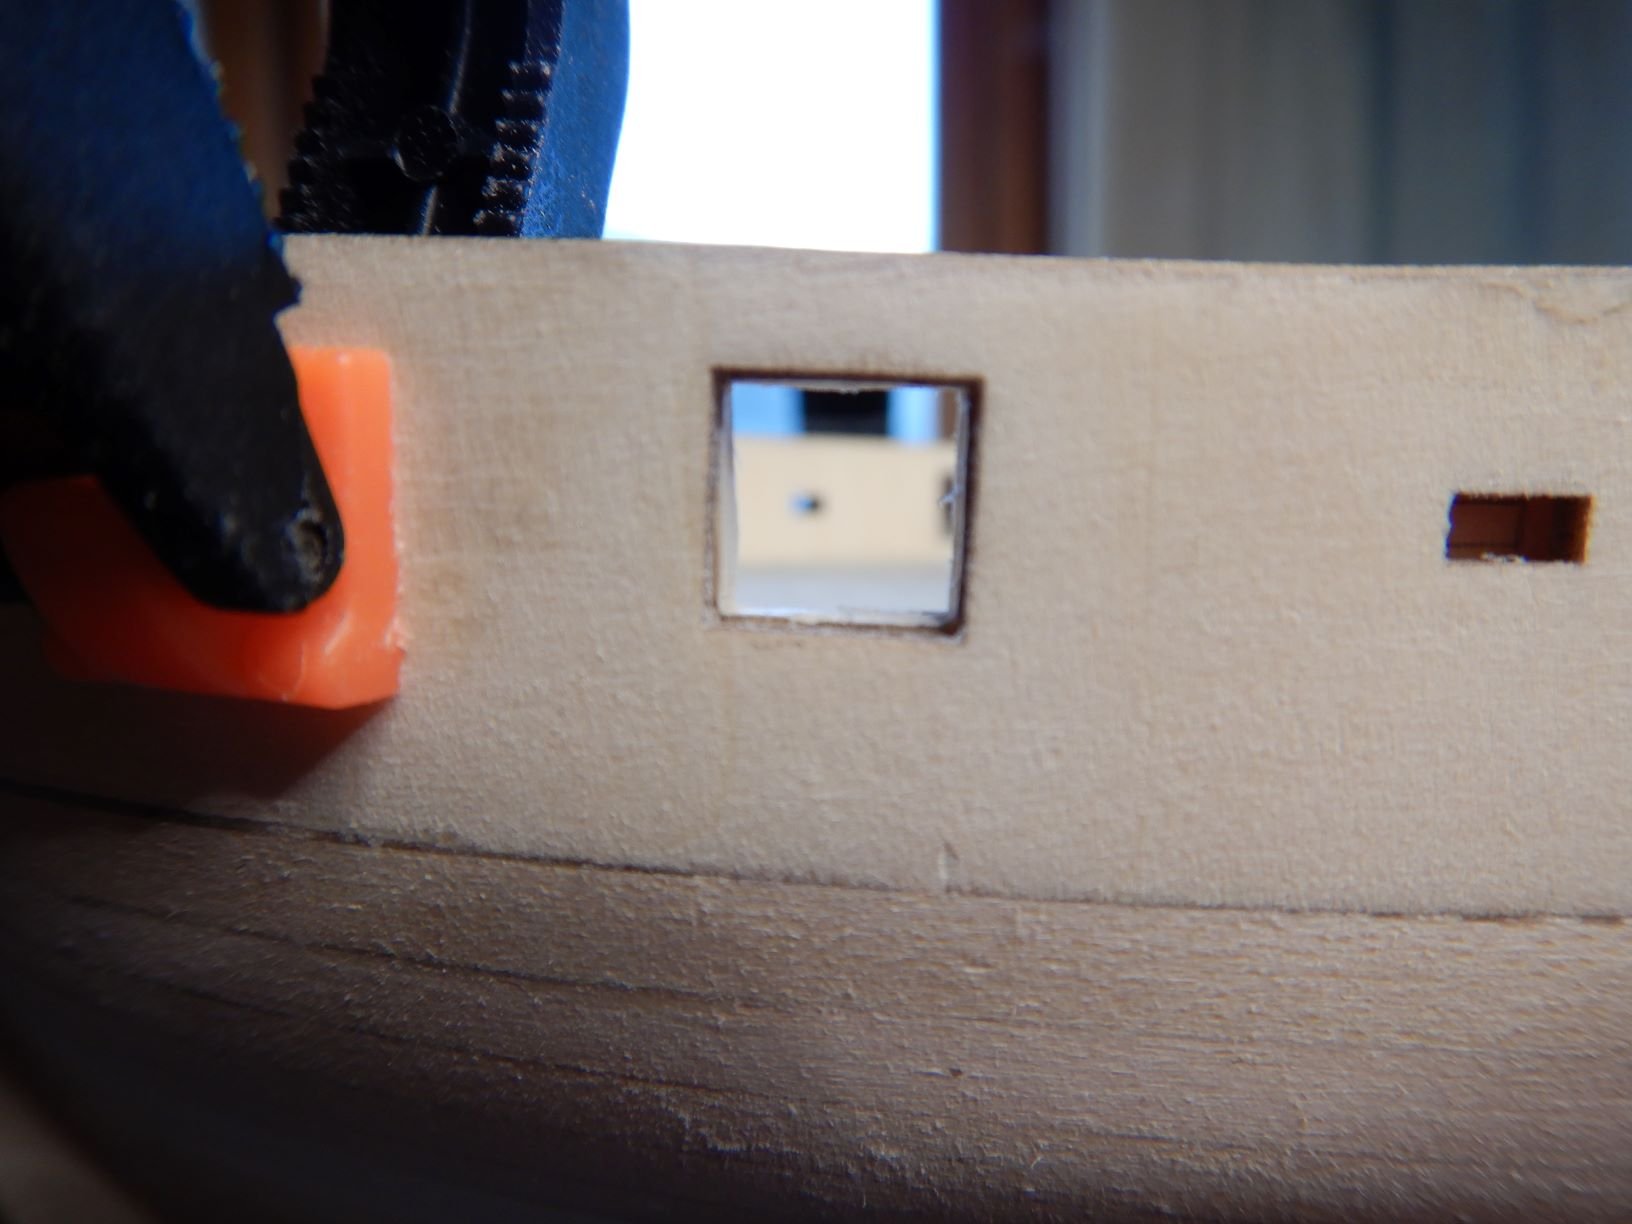
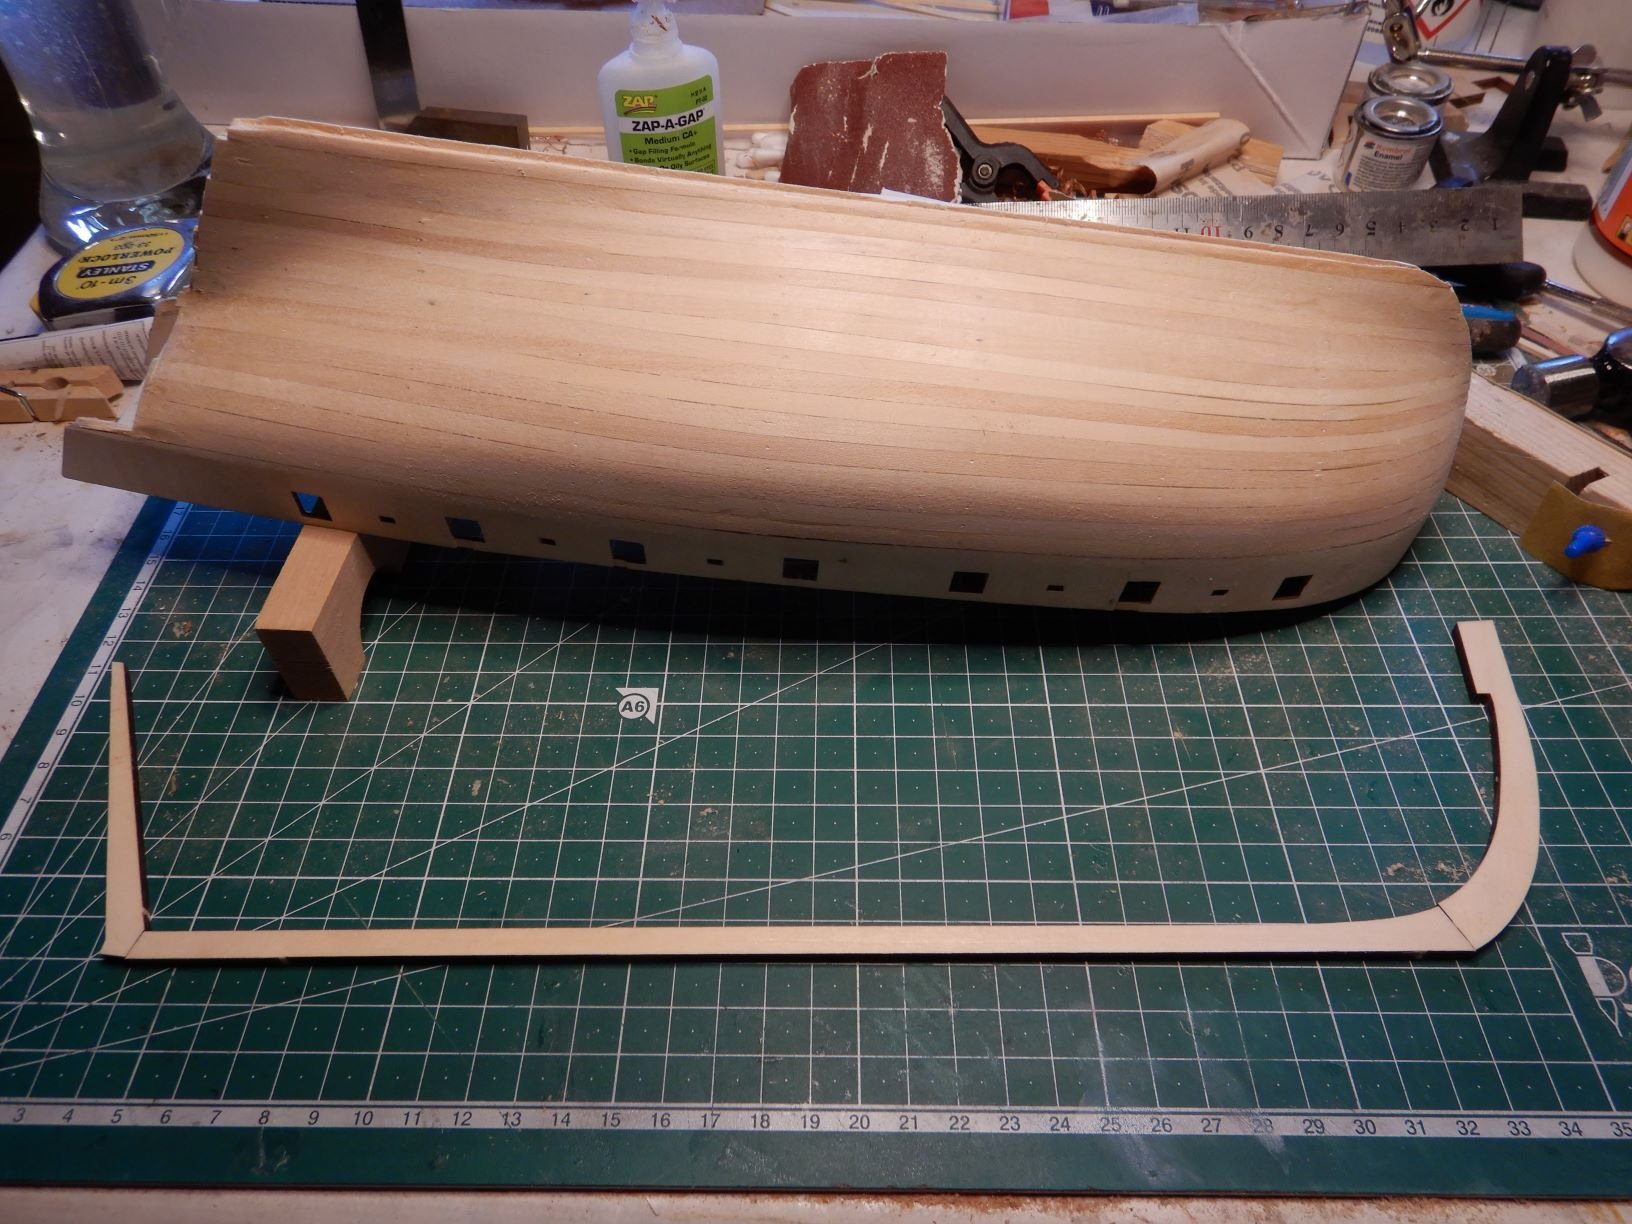
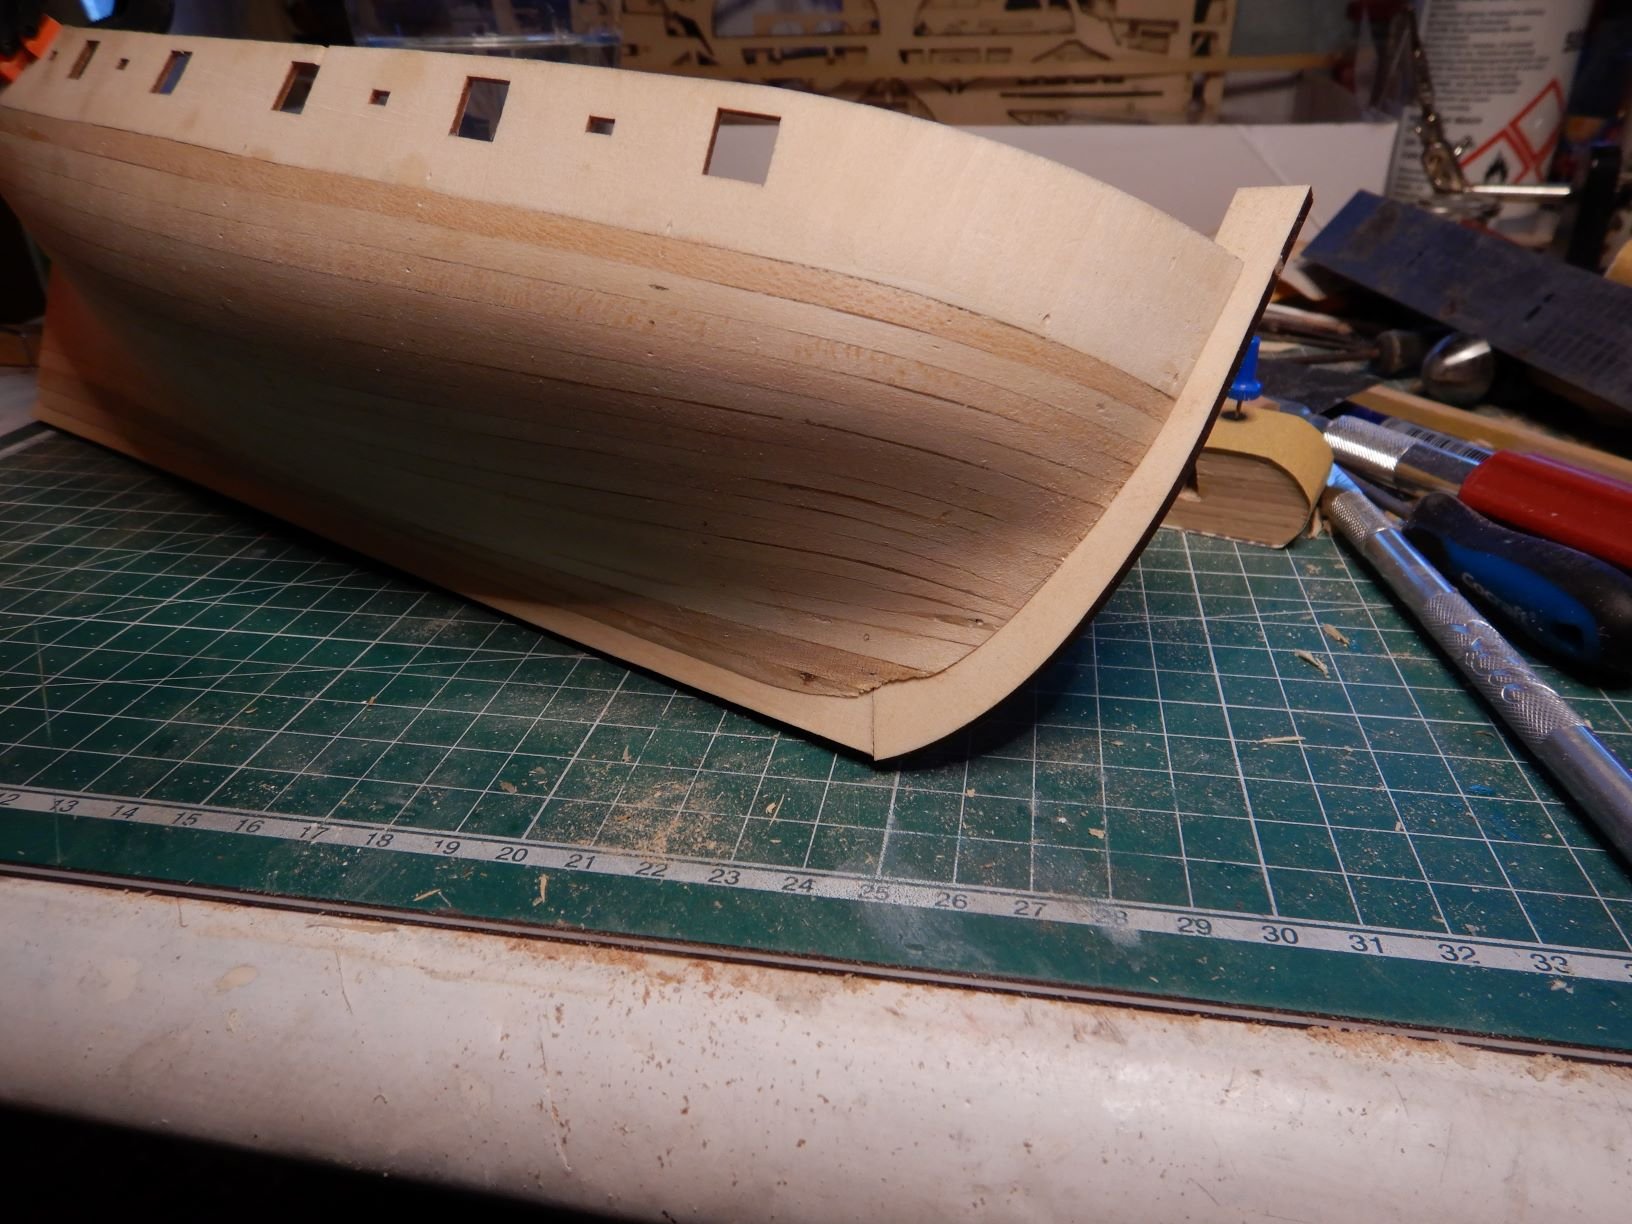
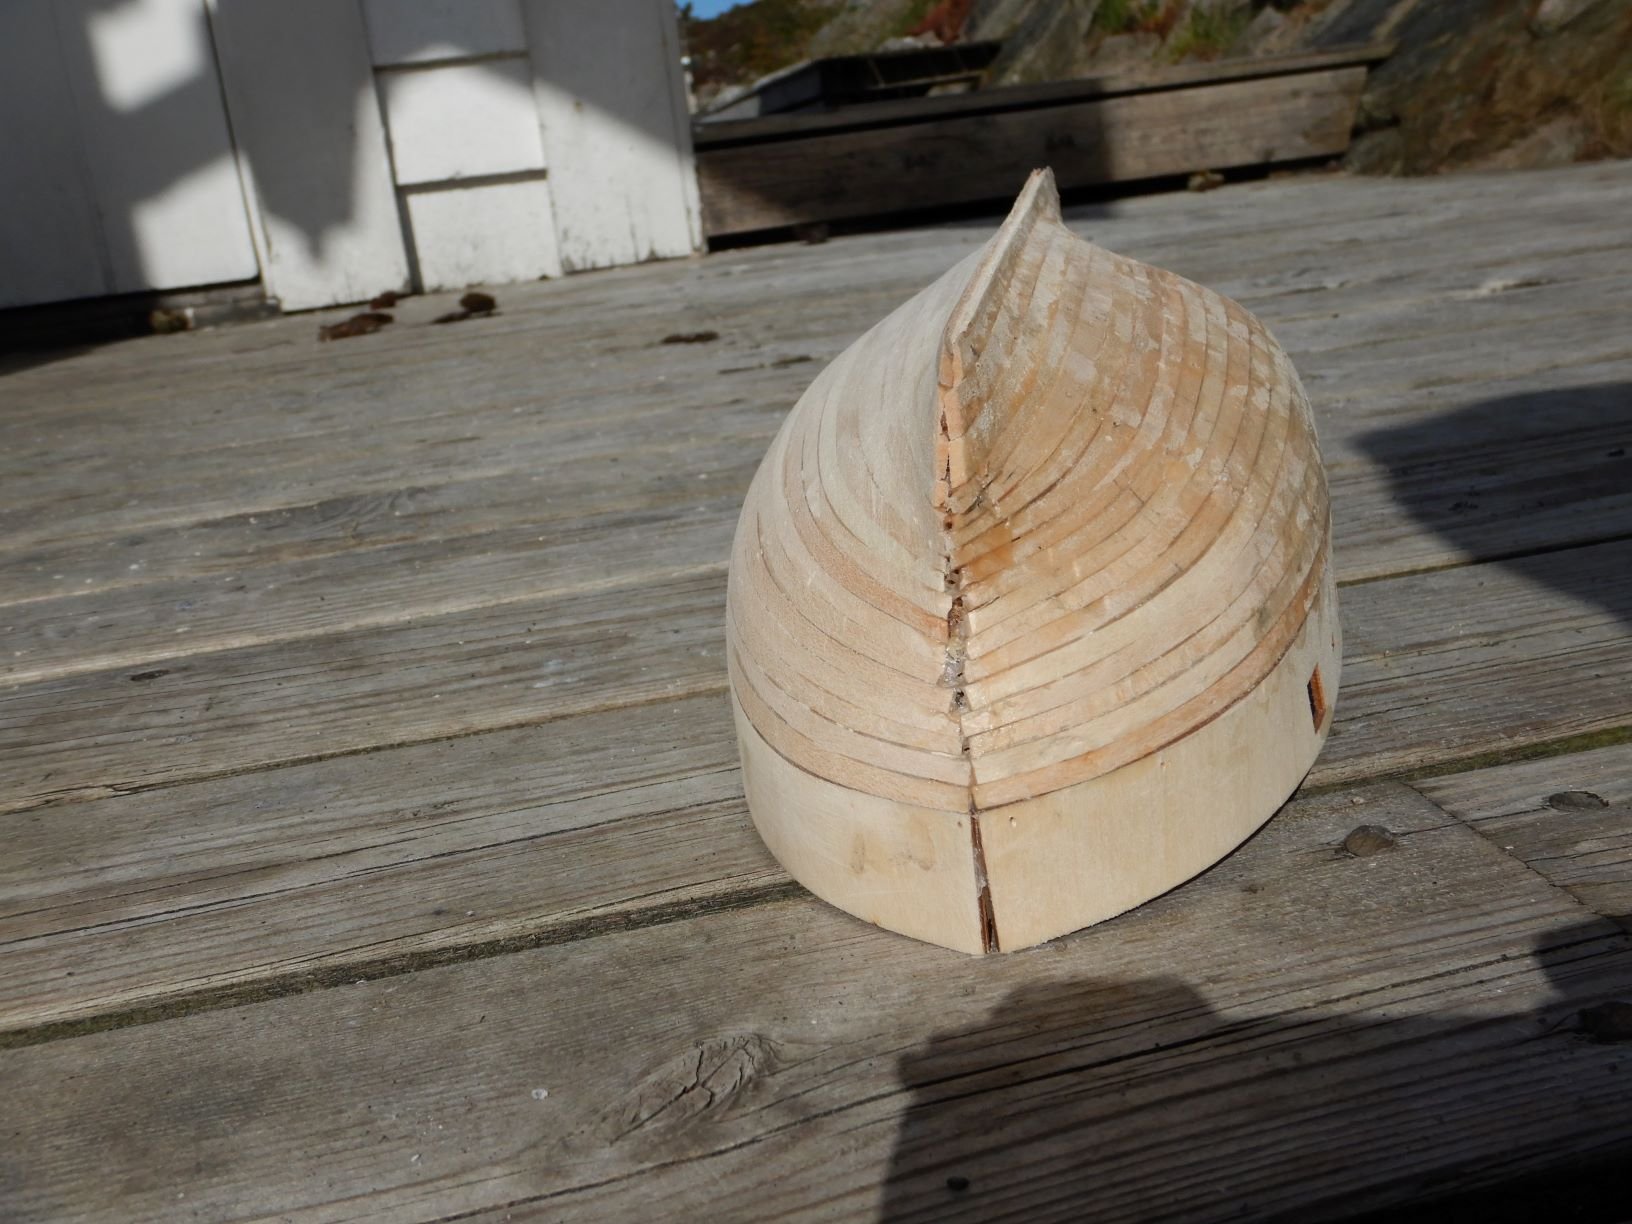
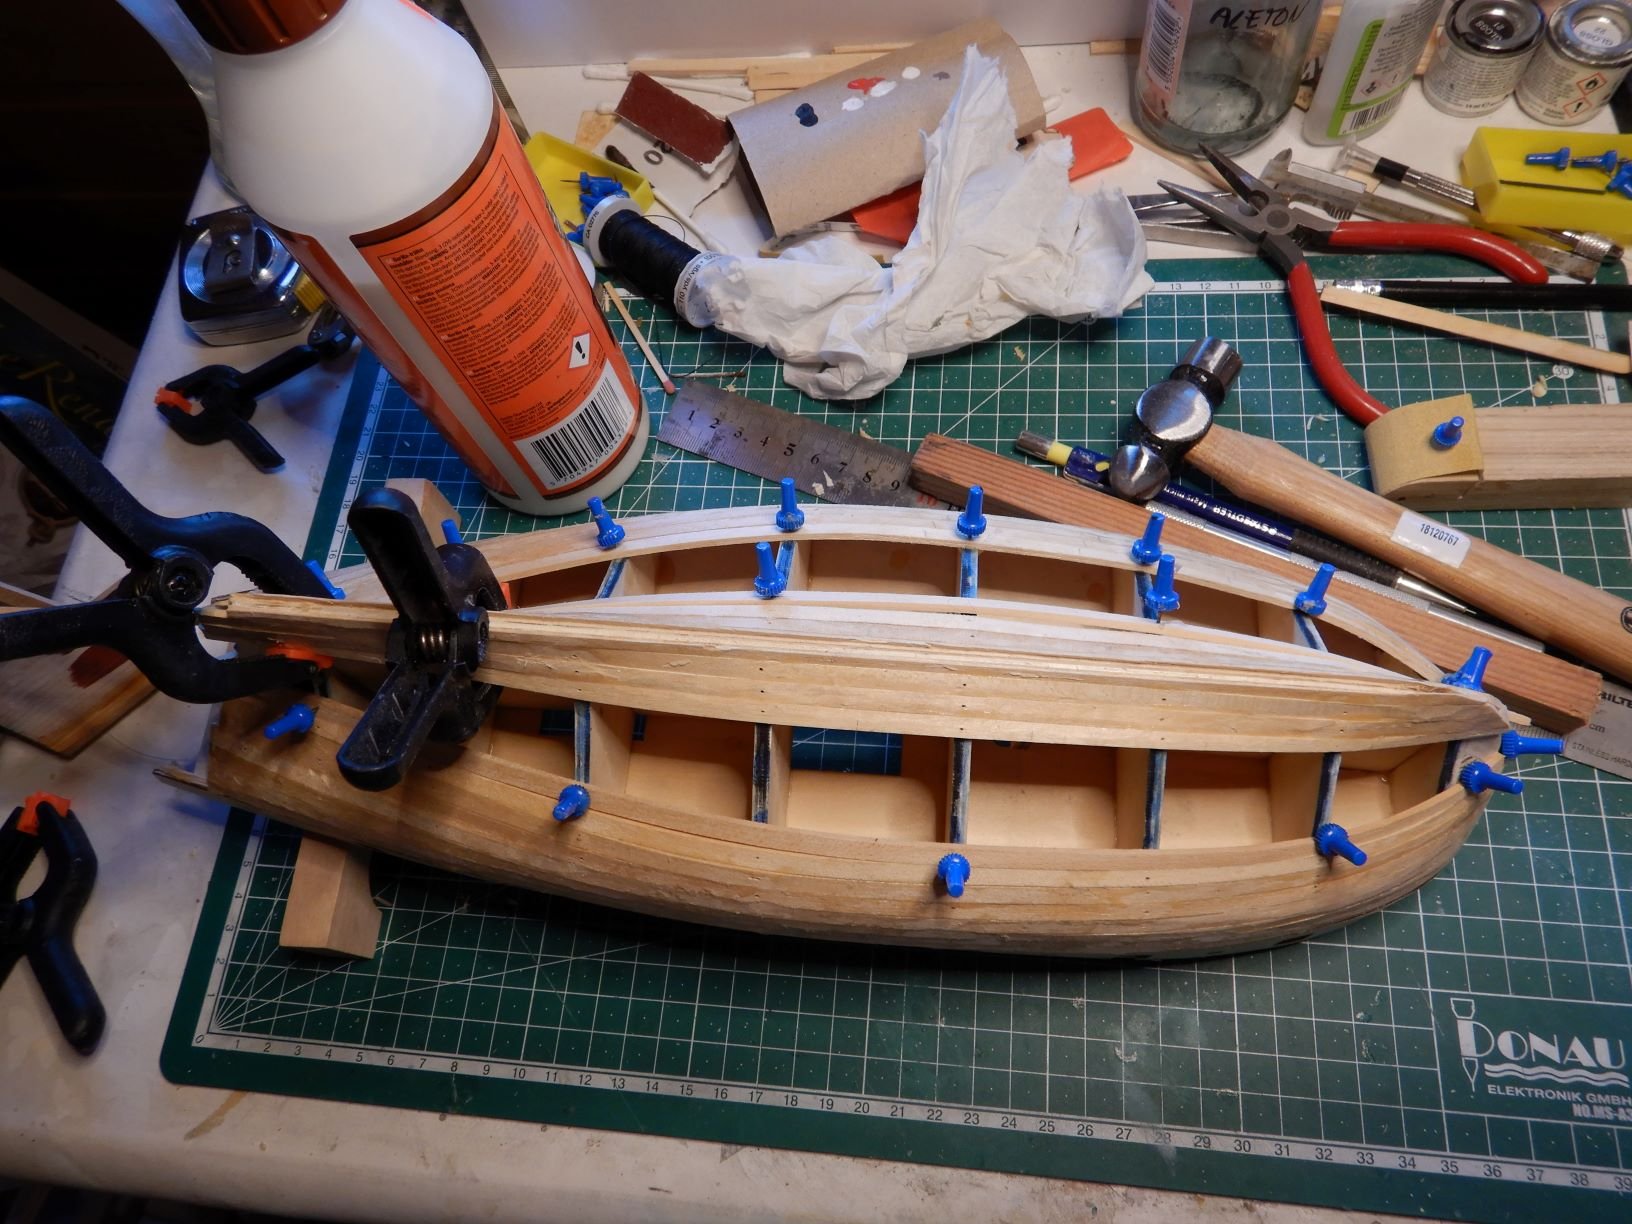
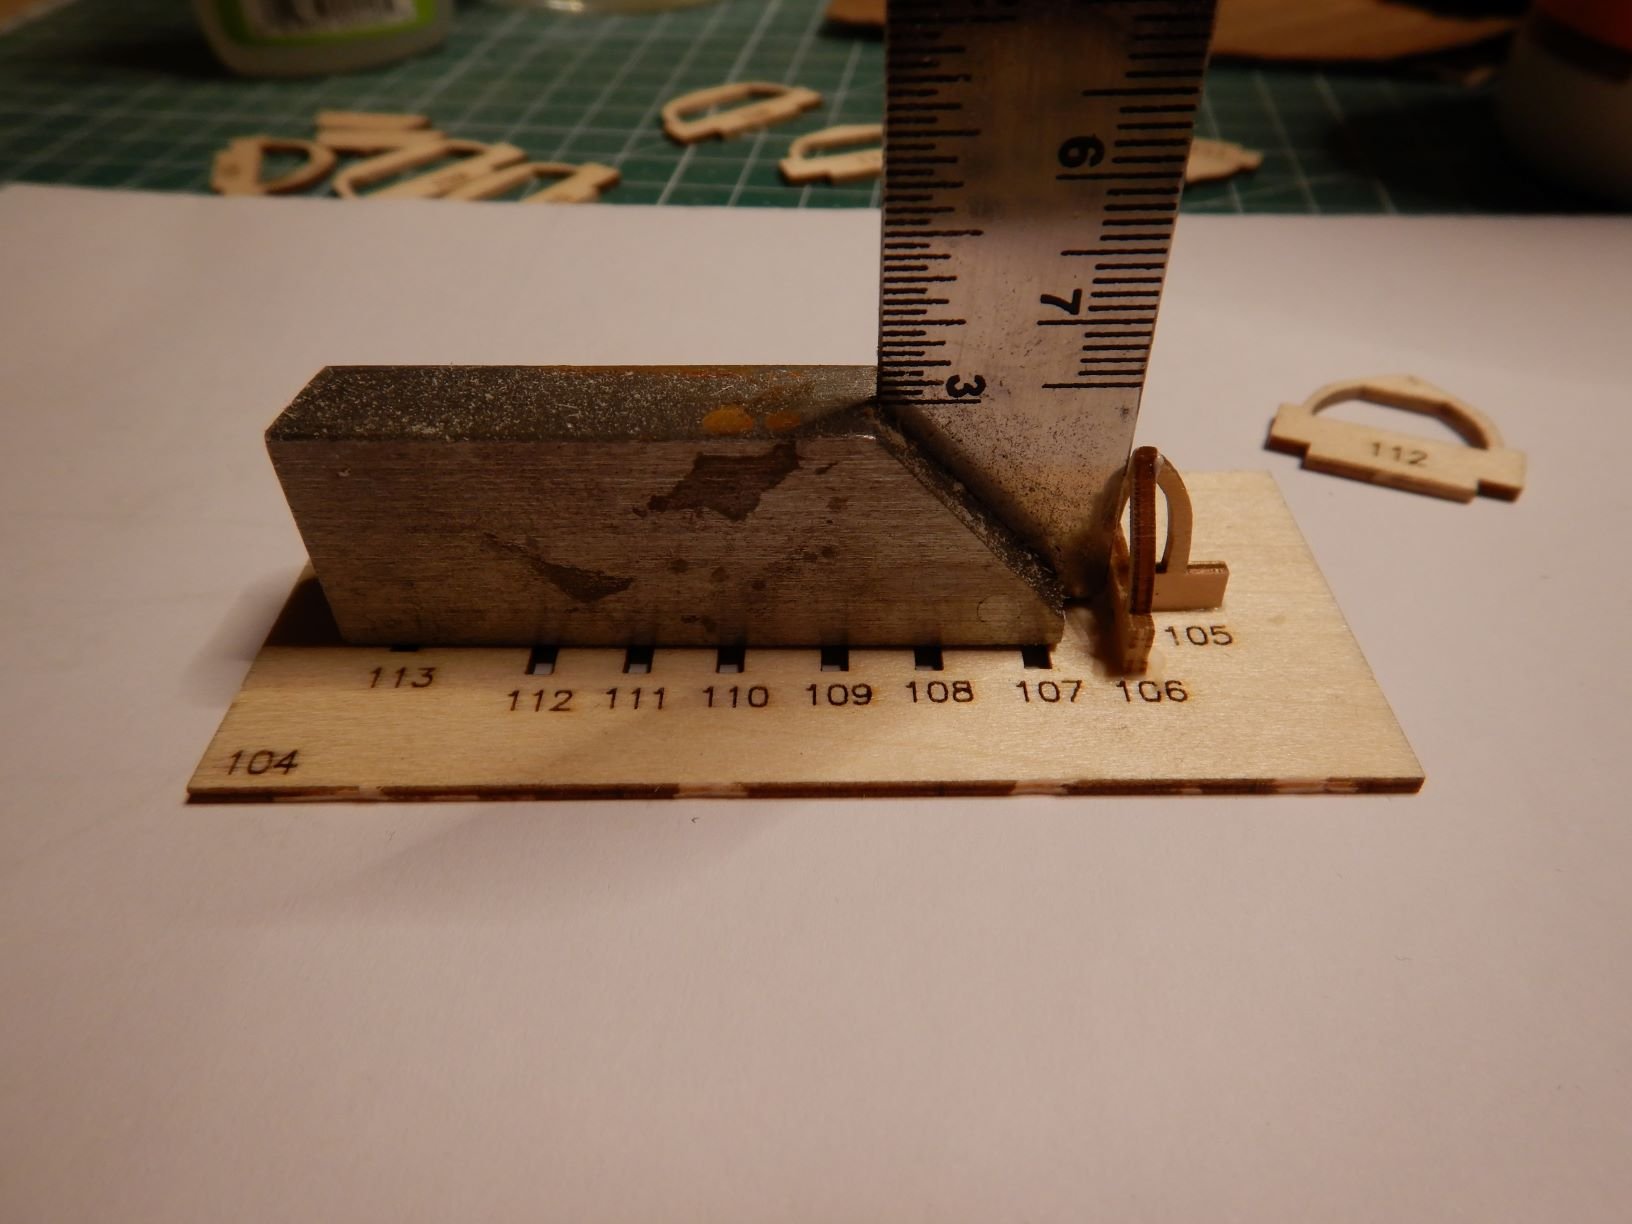
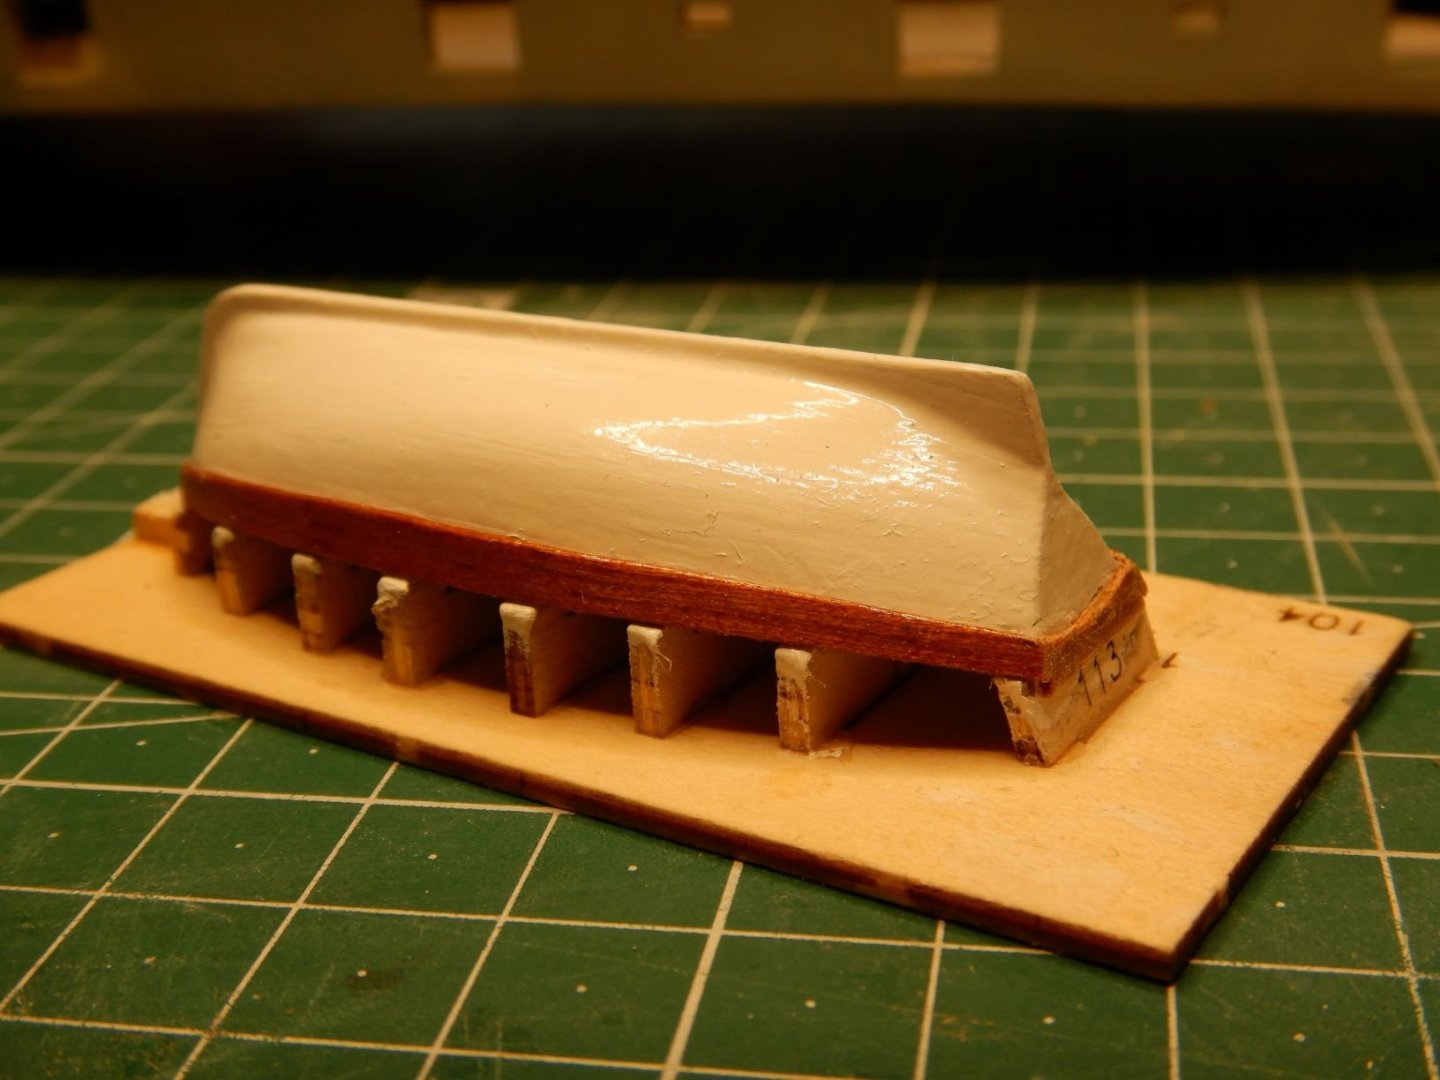
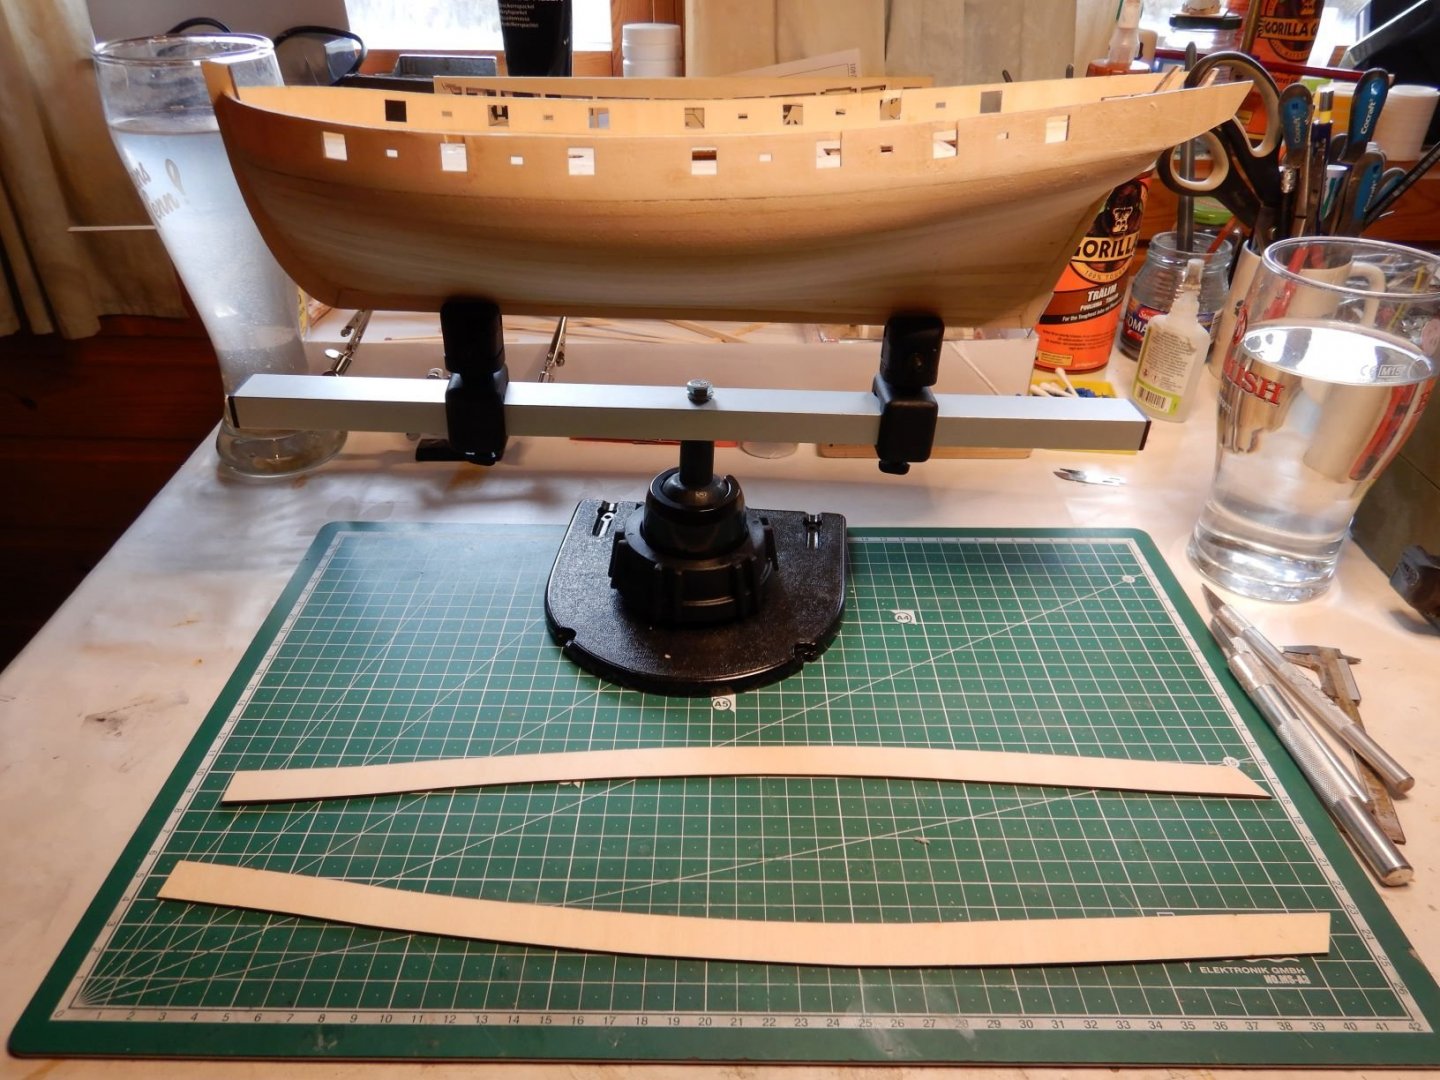
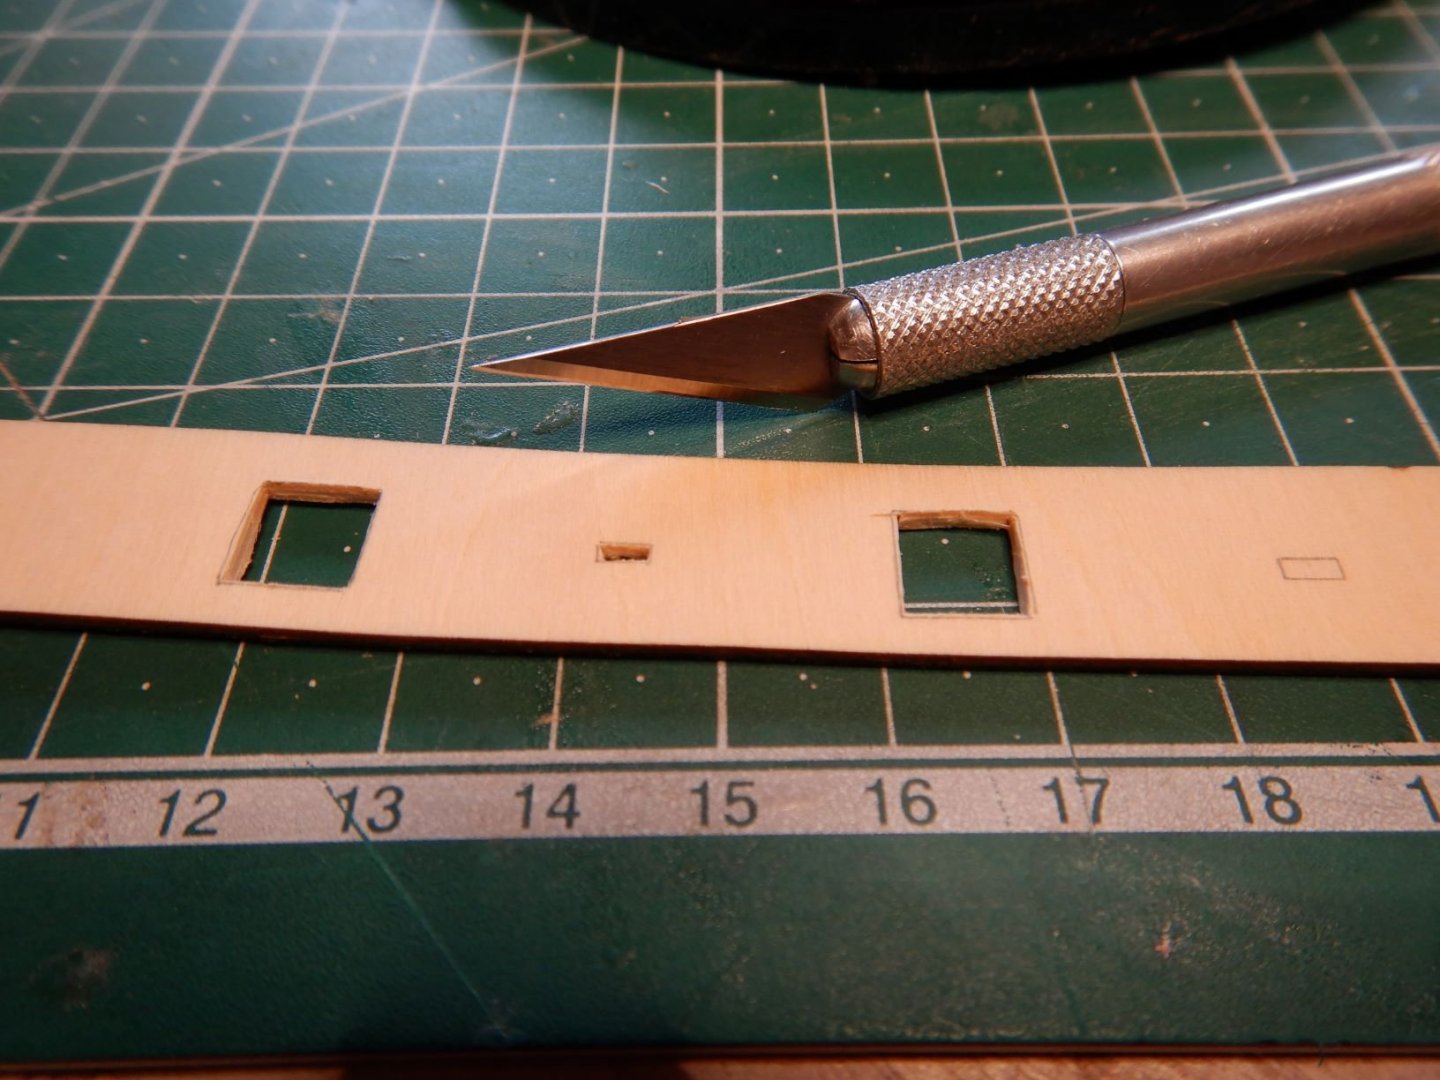
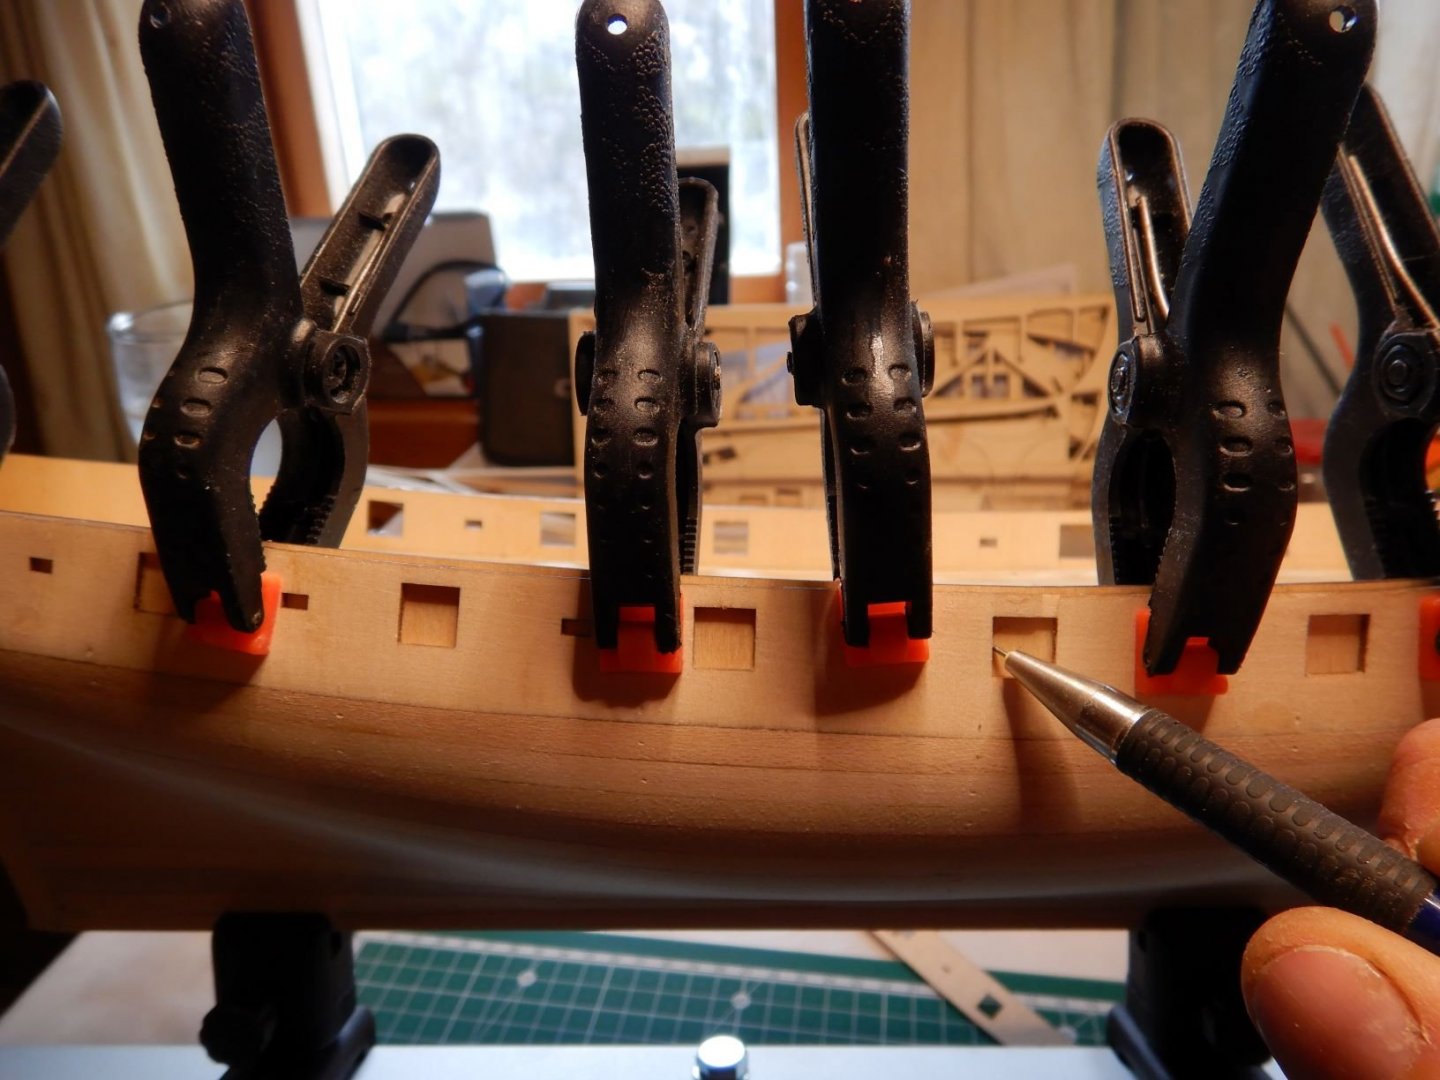
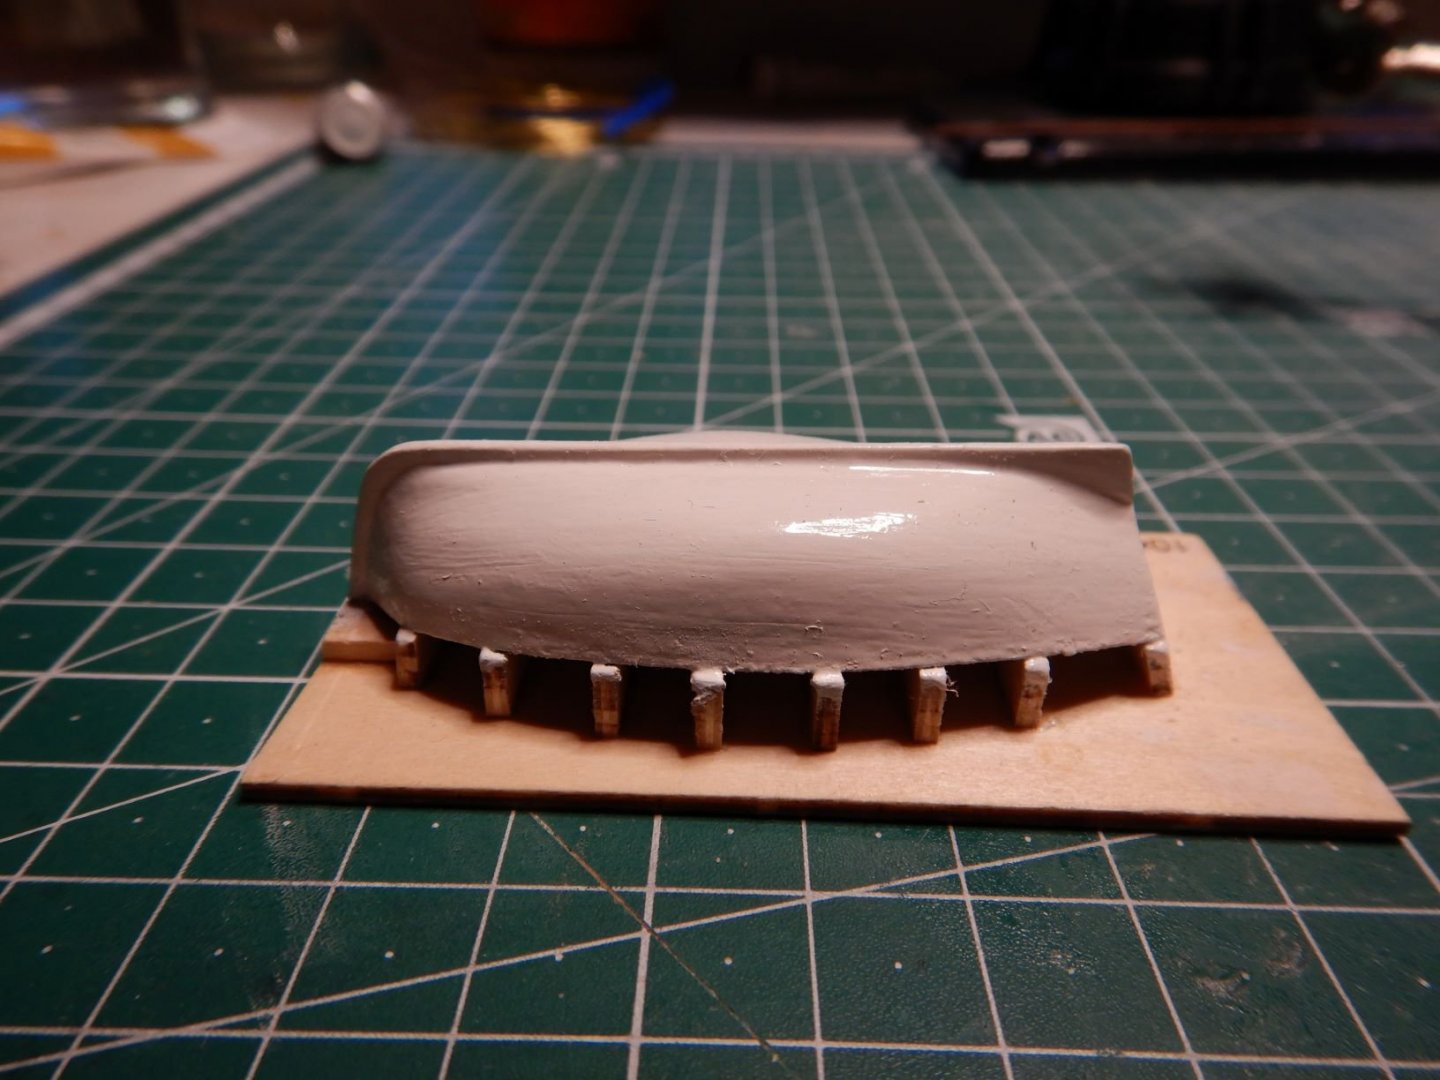
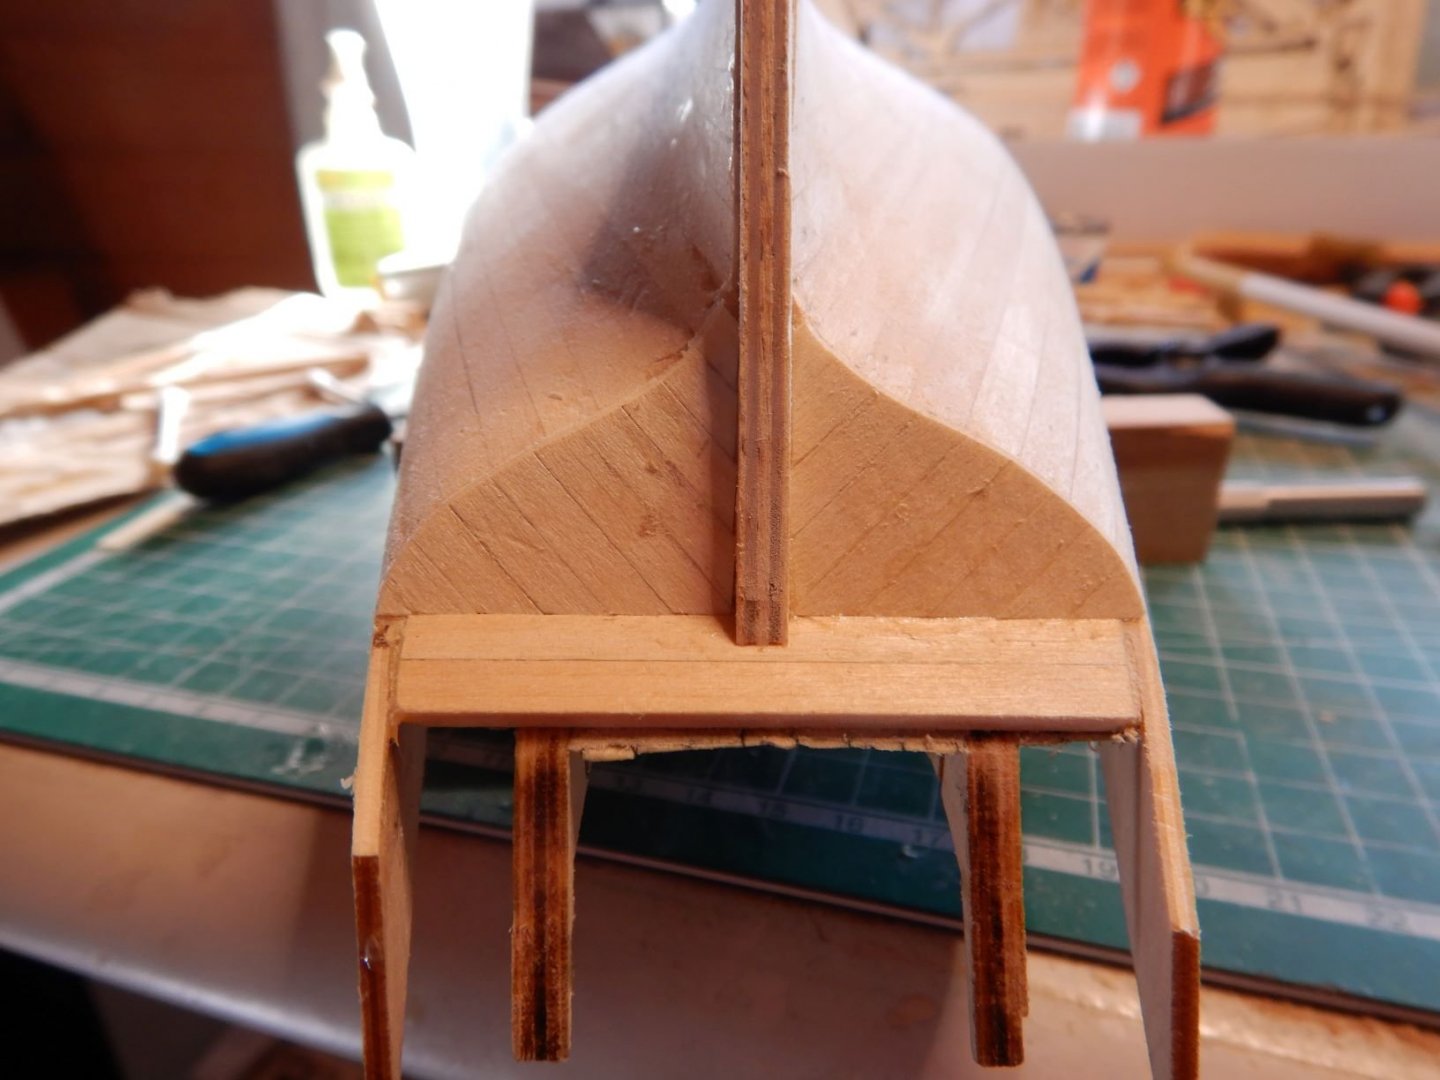
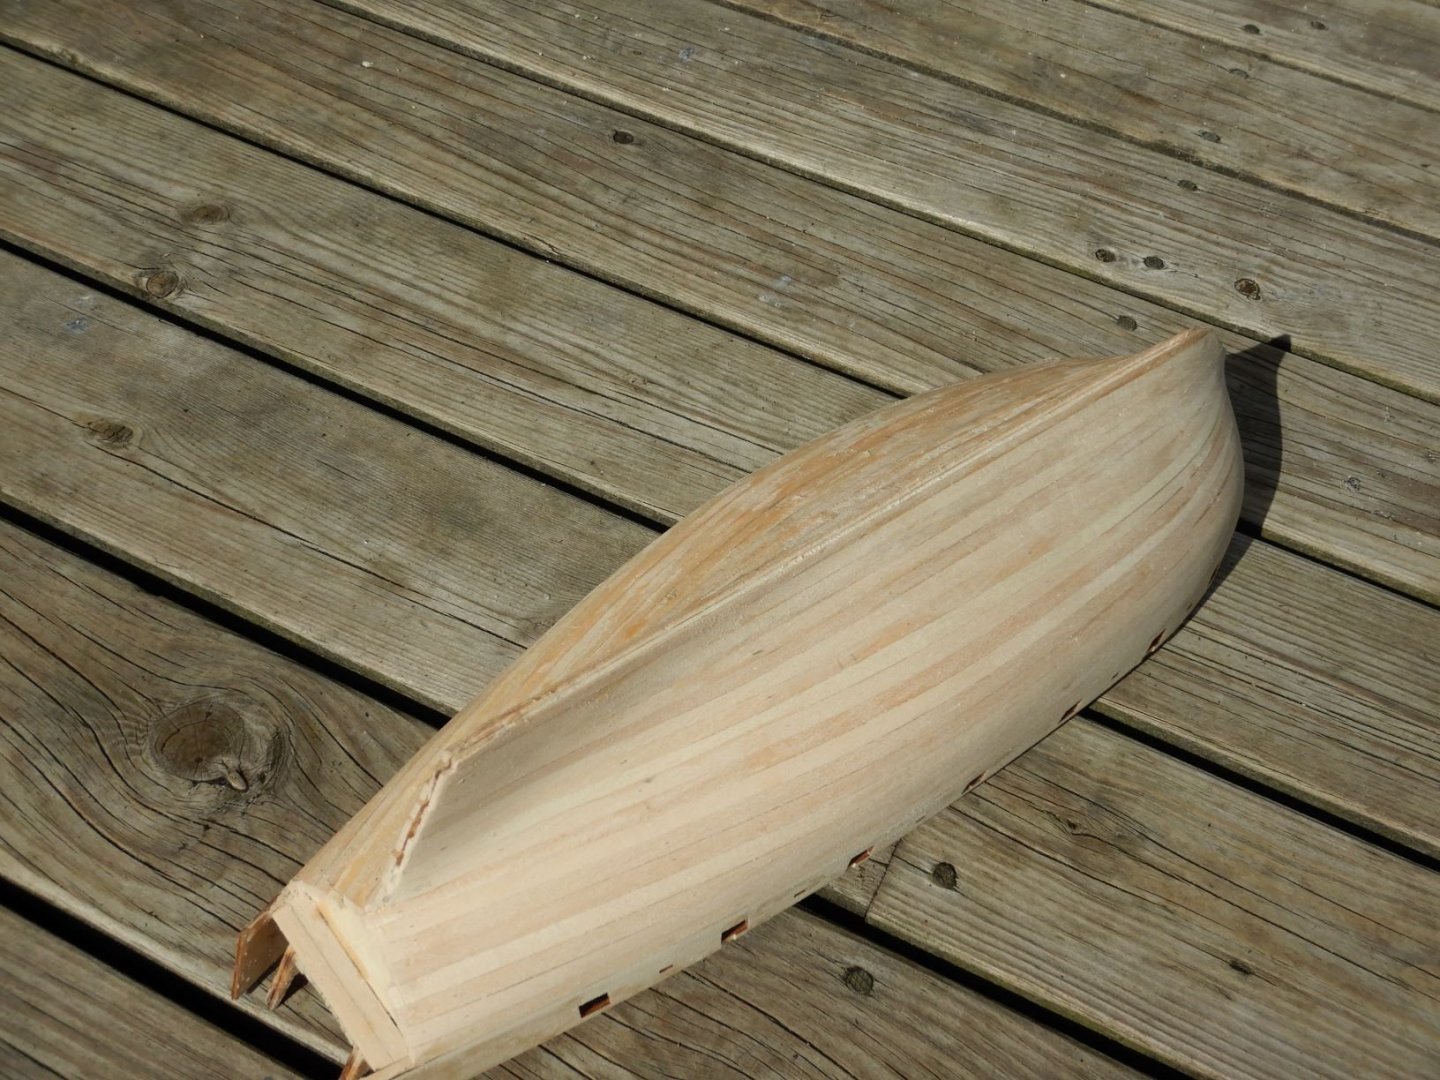
The build continues... Next step is the inside of the bulwarks. Another strip of plywood goes on the inside of the first one. I really like the new keel clamper! Before glueing this in place, I need to mark and cut out the gunports. I dryfitted the inner bulwarks with clamps, and marked the gunports with a pencil and cut them out with a scalpel. I made the cuts a little small, to have some material for adjusting after glueing. Then some yellow paint, and they are ready to be mounted. I glued them on, one side at a time. Not enough clamps to do both sides at once! I also made some more progress on the dinghy. Got the primer sanded and some white paint on it. It's coming together, next up will be the sheerstrake and then time to cut it loose from the jig. It will be fun to see how it will look inside! Thank's for the comments and likes! Gaffrig.


- 110 replies
-
- 10
-
-
- le renard
- artesania latina
- (and 1 more)
-
Wow! That looks great! Yes, it appears that the two benches fore and aft of the main hatch are lifebelt boxes on the replica. there is also what seems to be ventilation «ducts» on either side of the main and fore companionways. I think these can be omitted for the better. Gaffrig.
- 110 replies
-
- 1
-
-
- le renard
- artesania latina
- (and 1 more)
-
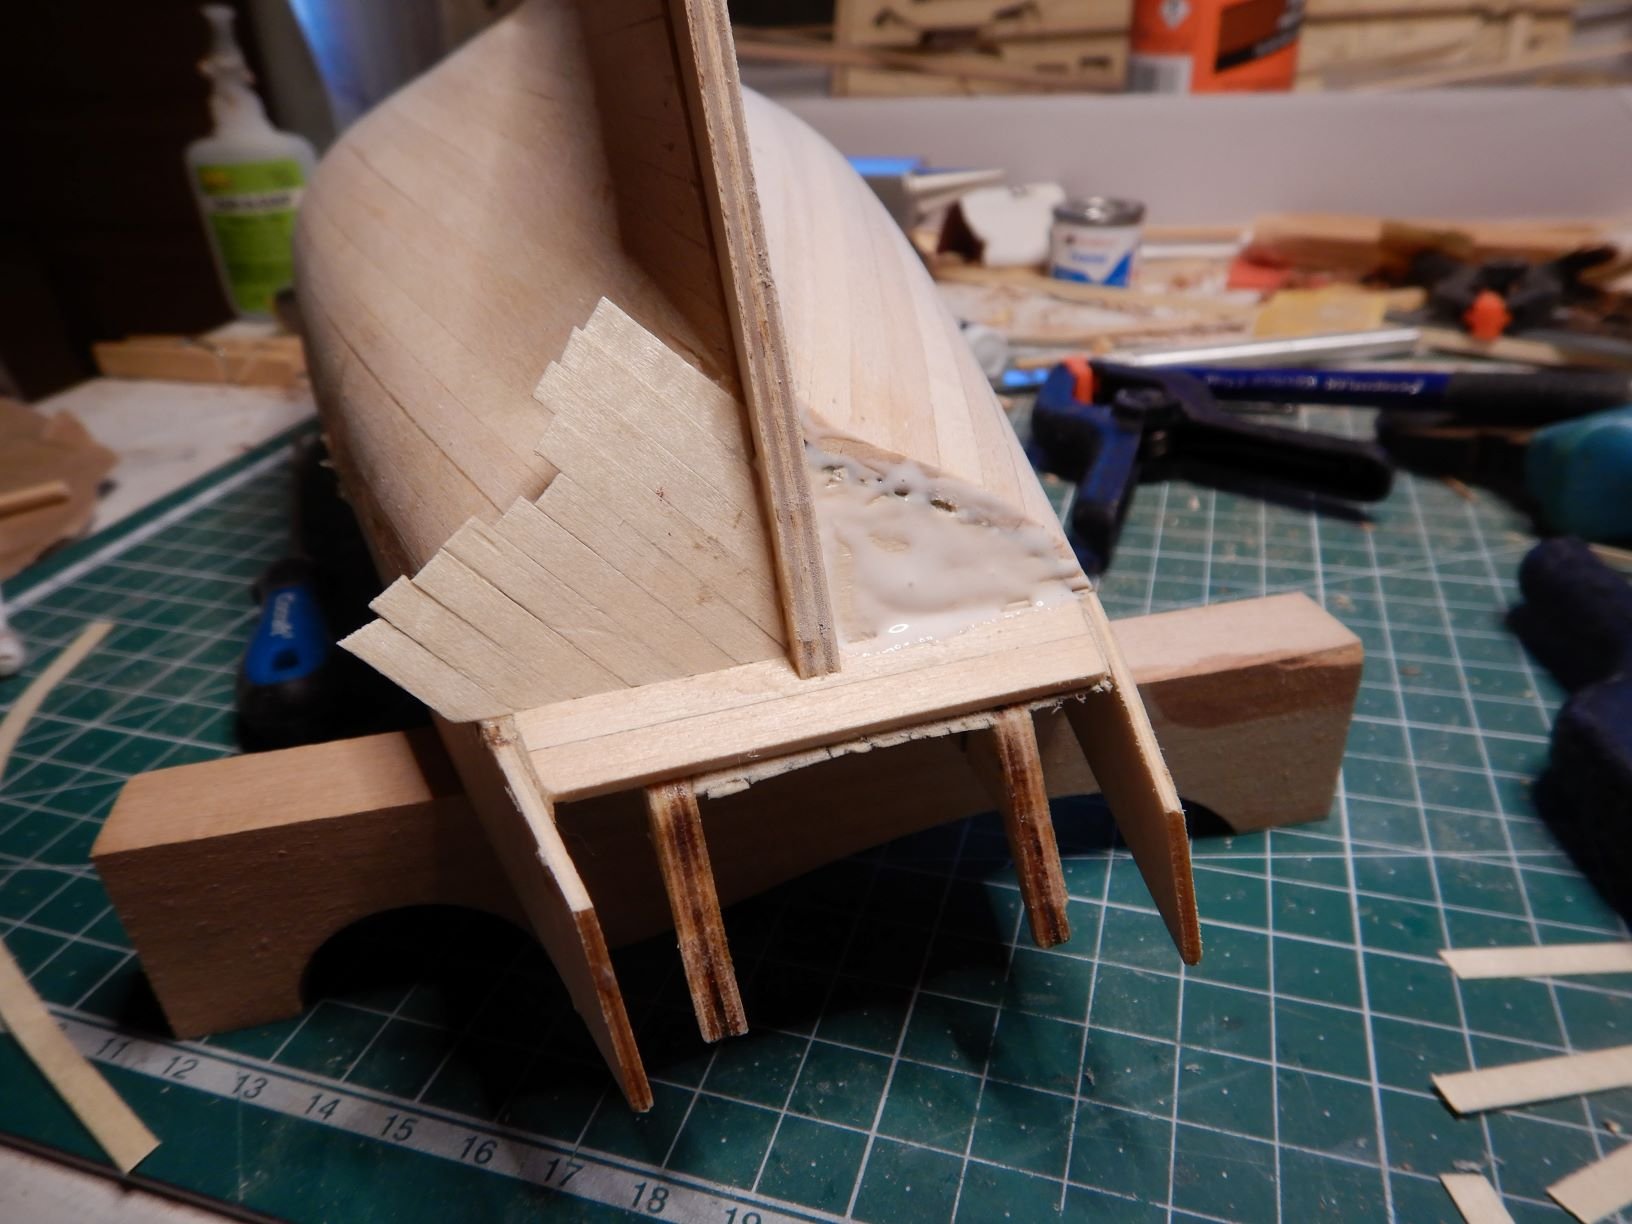
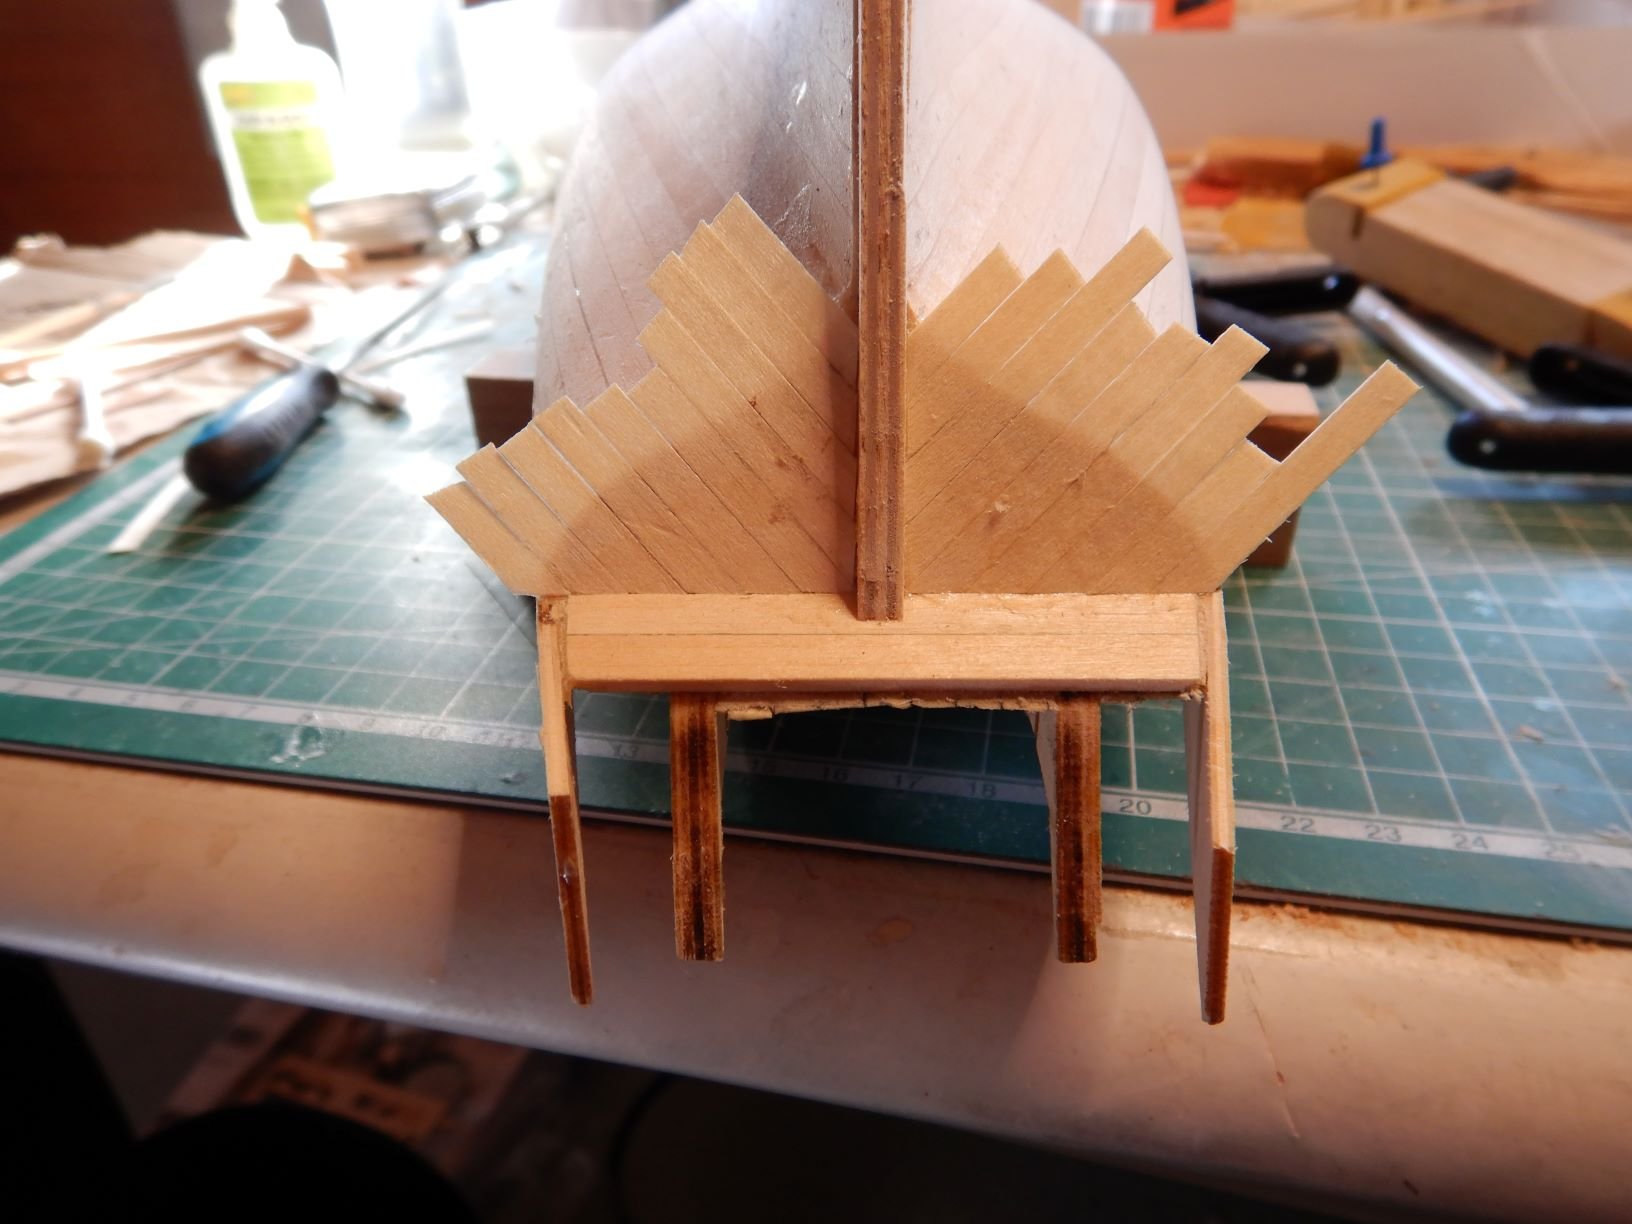
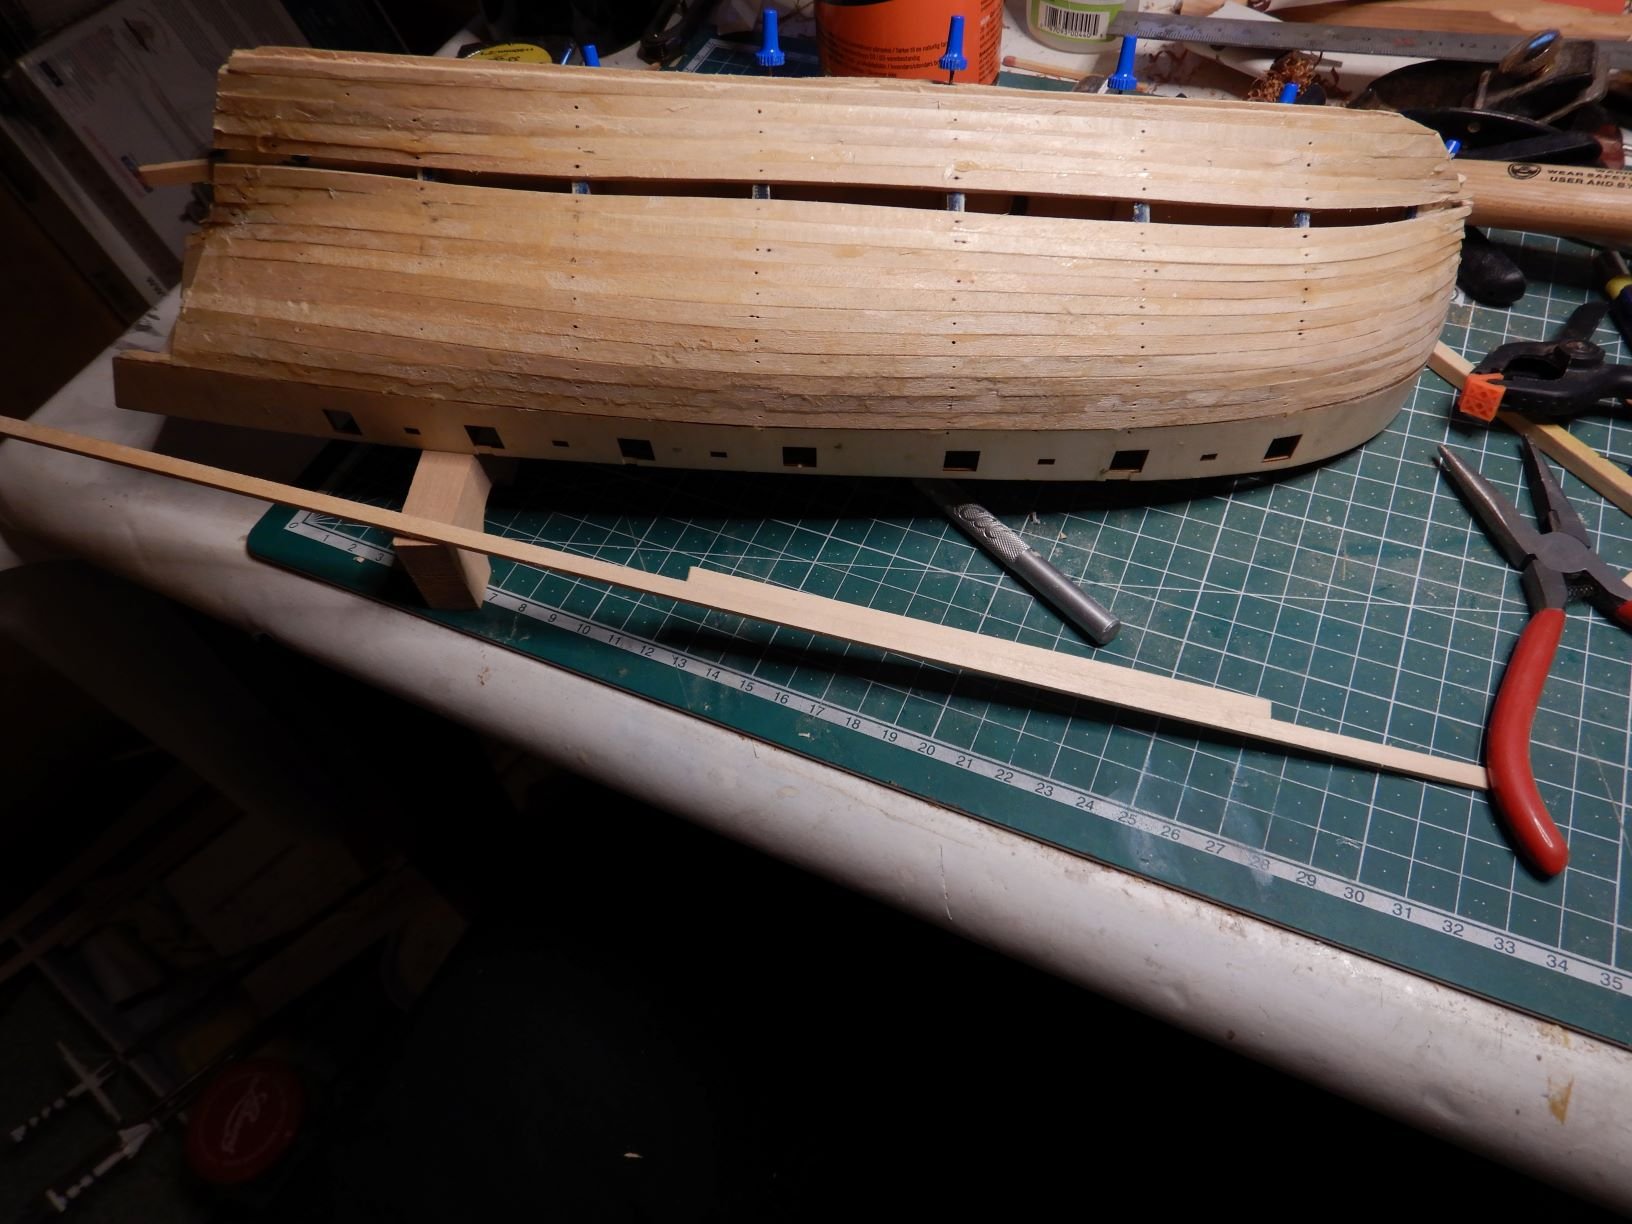
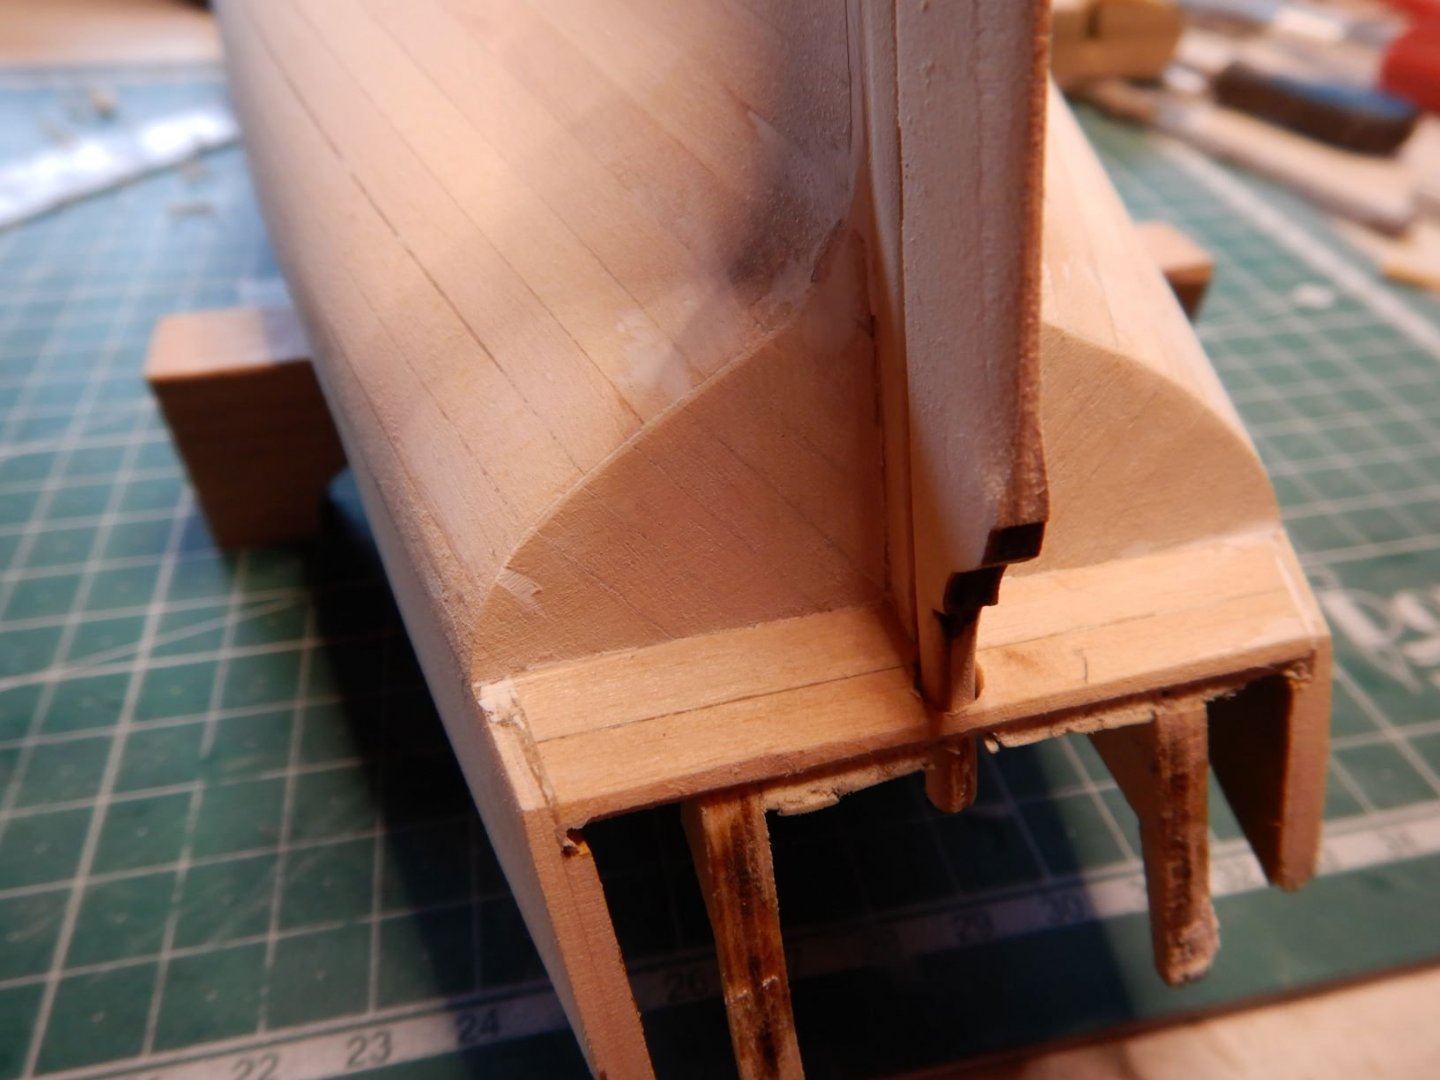
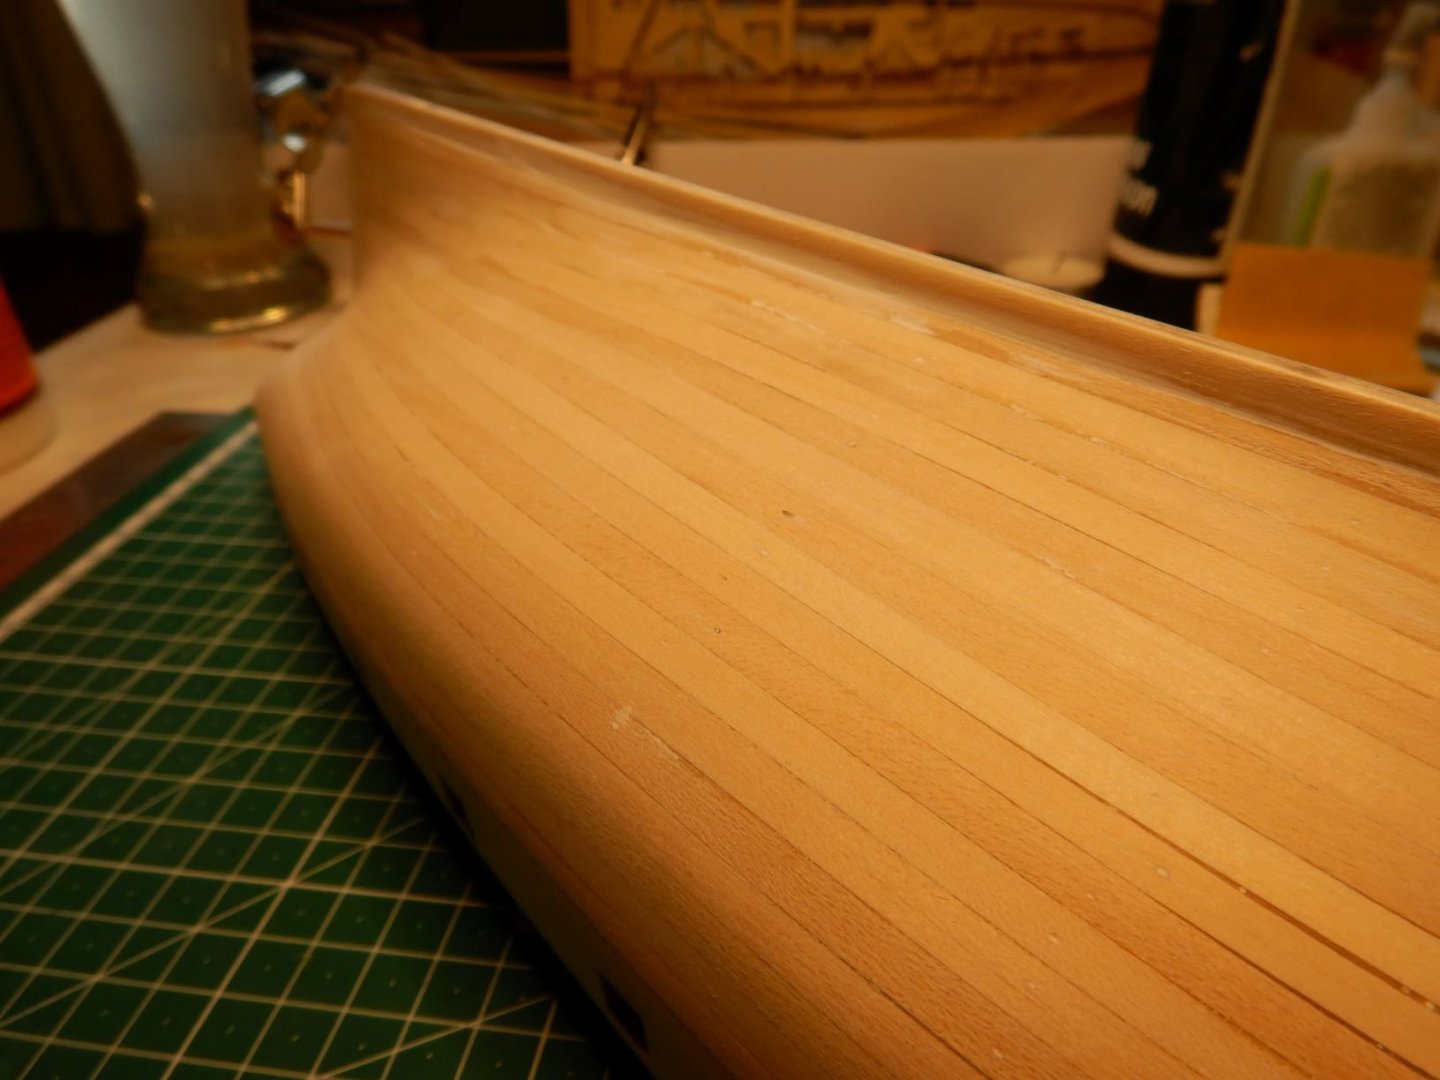
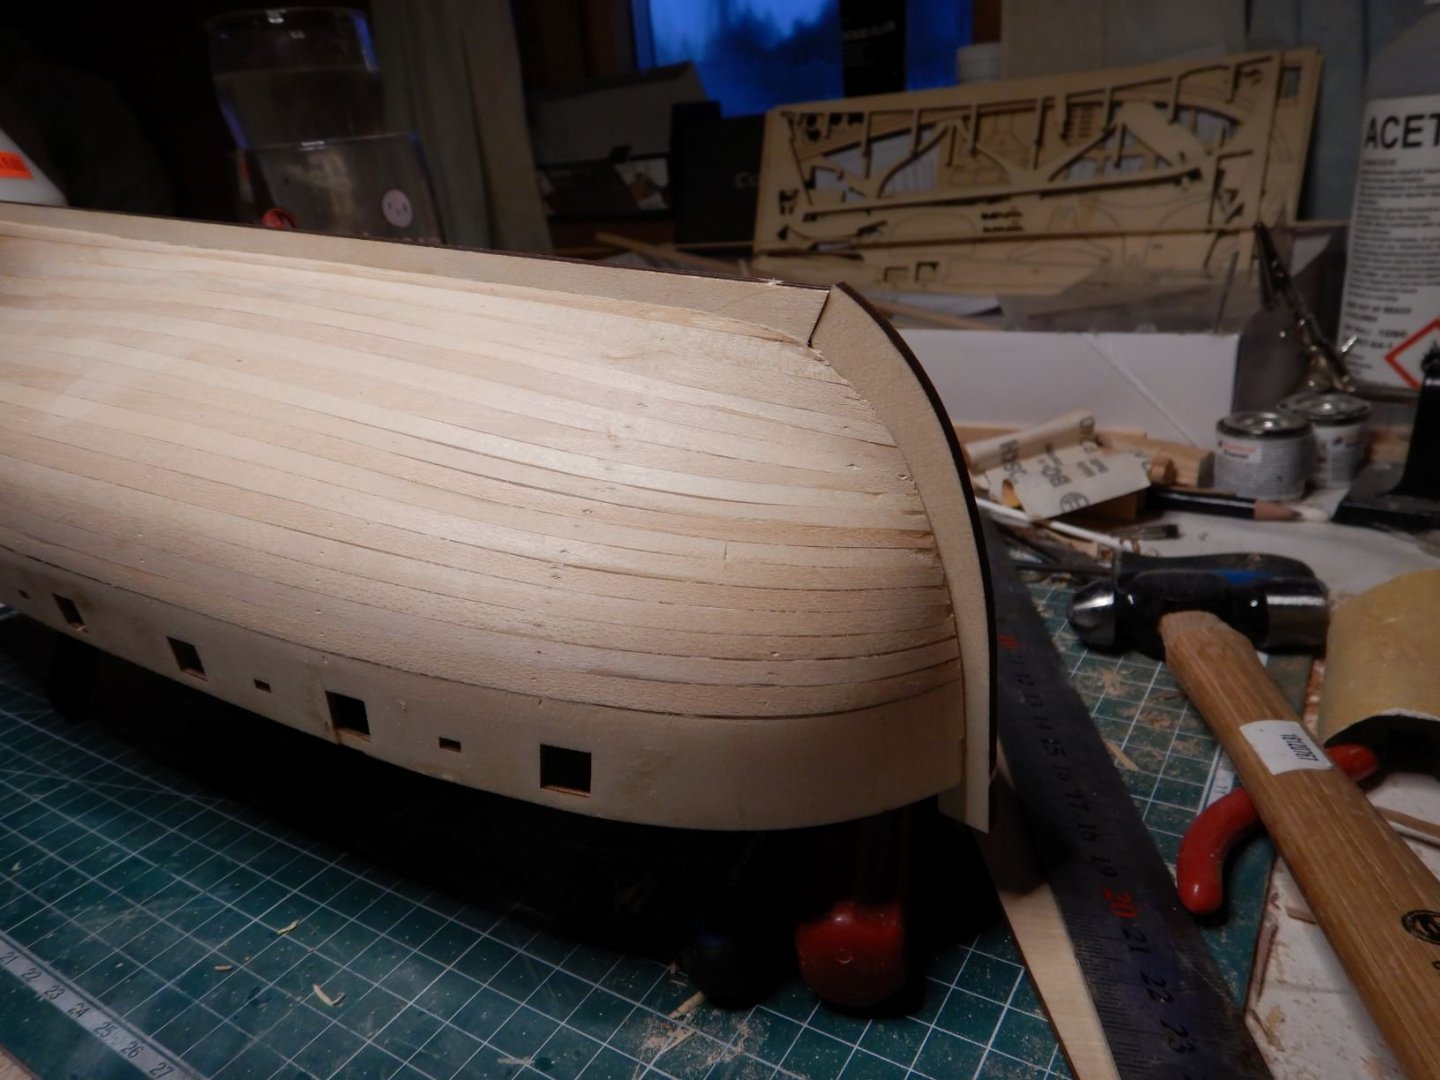
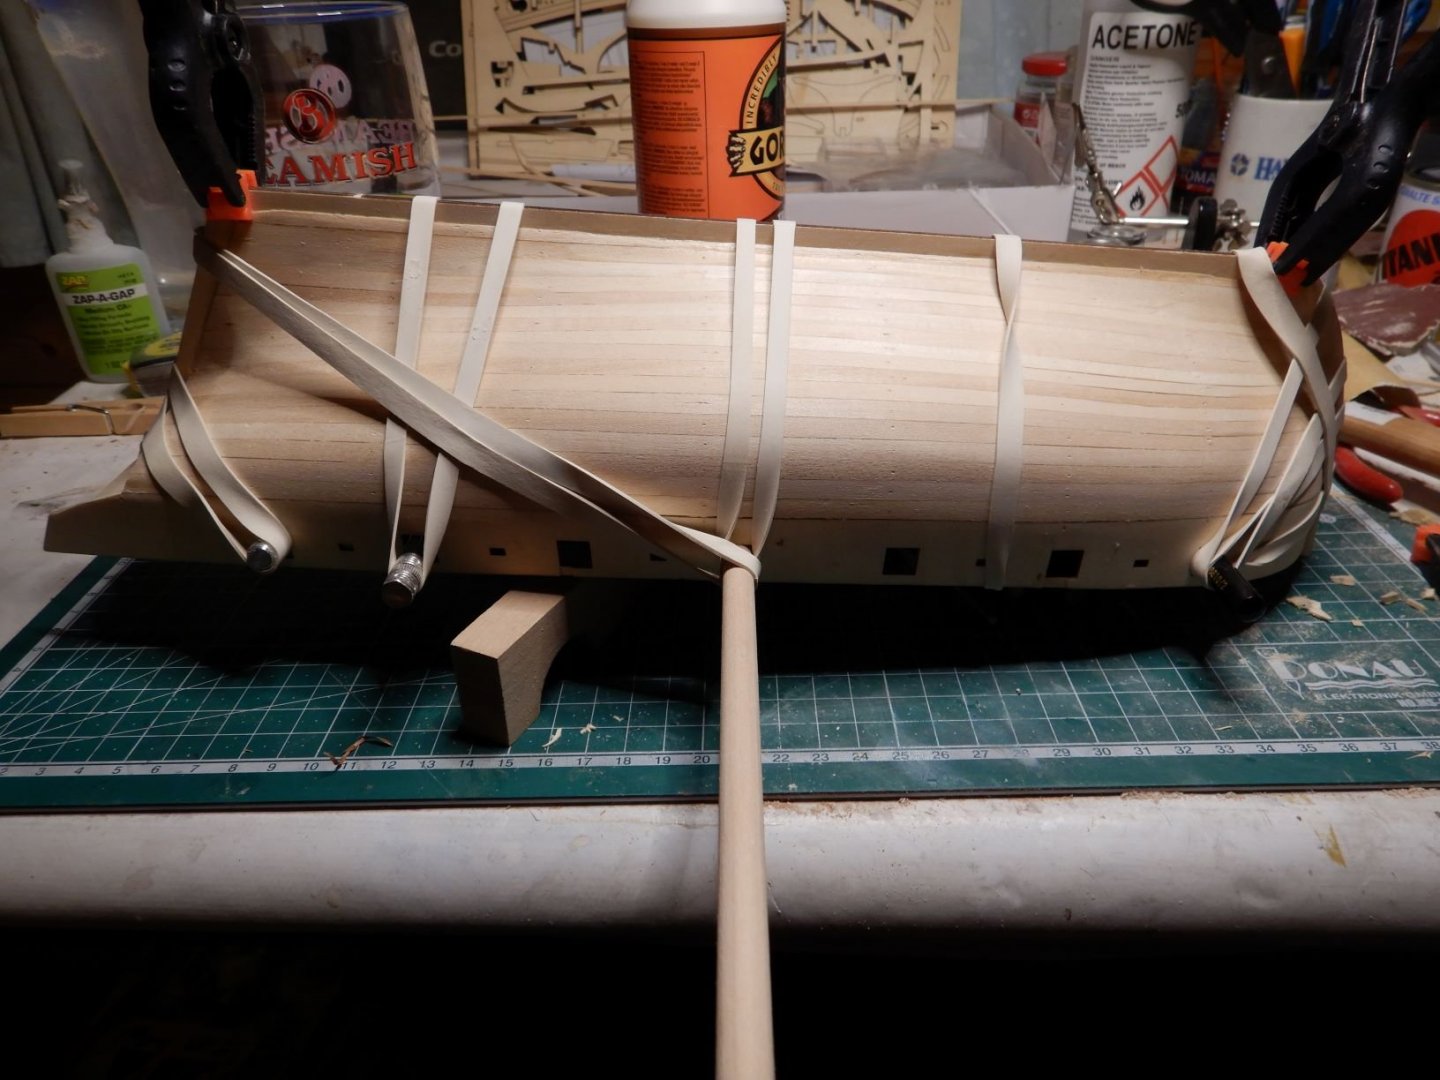
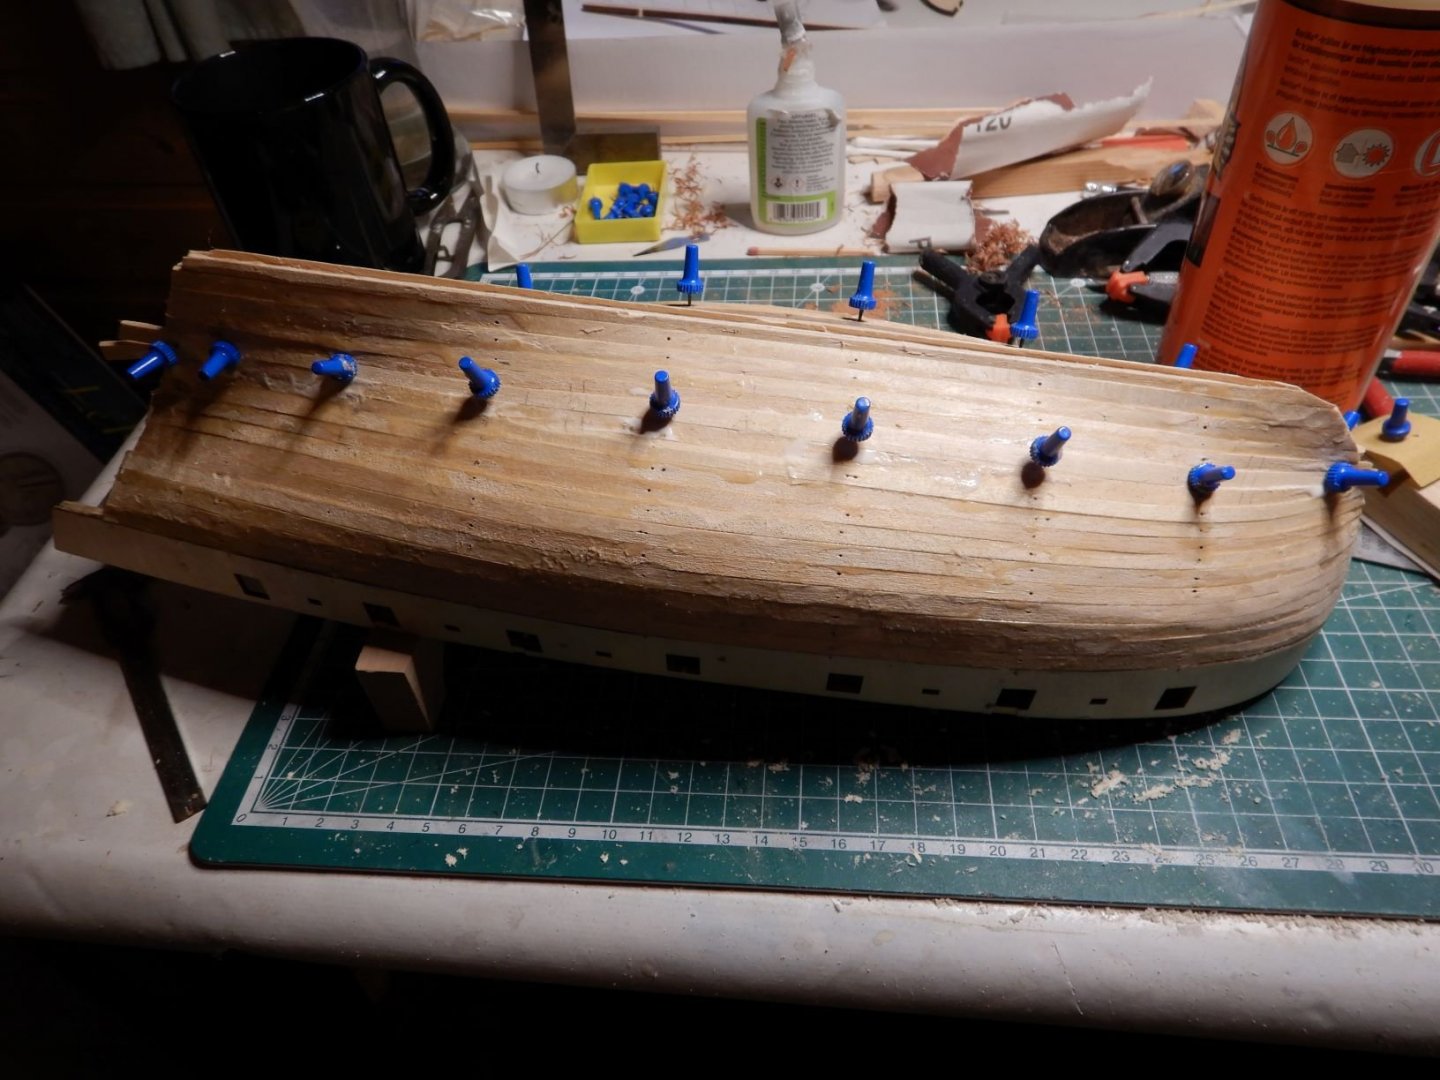
Hi all! Just a small update today.. With the keel, stem and sternpost mounted, I planked the transom with the same 0.5x4mm materials that I used on the deck. I used the gorilla wood glue for this. After cutting of the excess material and some sanding... Starting to look more and more like a boat! Also got some primer on the dinghy. Those brushstrokes really show up in the pictures! I guess some sanding is in order before painting! Thanks to everyone for stopping by and reading my log. Also for taking the time to comment and like! It is really appreciated! Gaffrig.


- 110 replies
-
- 9
-
-
- le renard
- artesania latina
- (and 1 more)
-
Thank you! I was a little worried during the planking, but it sanded out pretty good. Gaffrig.
-
Thank you! I had to think a little about how to do the clamping. It worked great with rubberbands. Gaffrig.
-
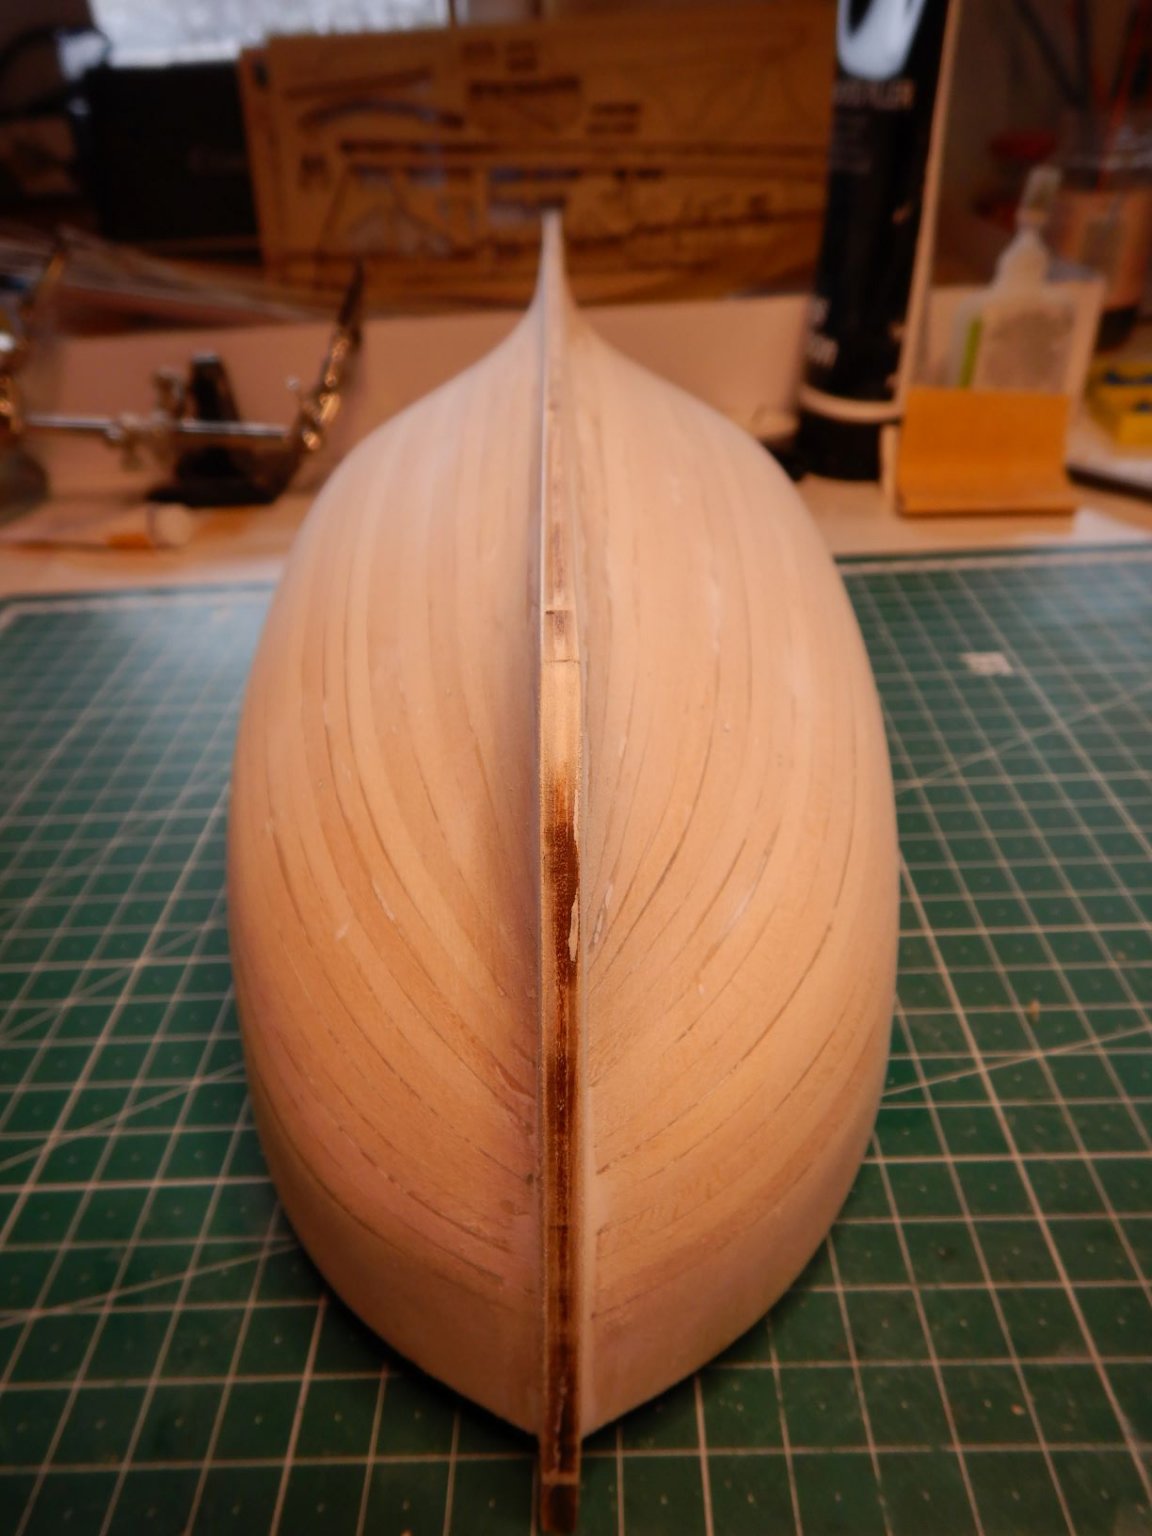
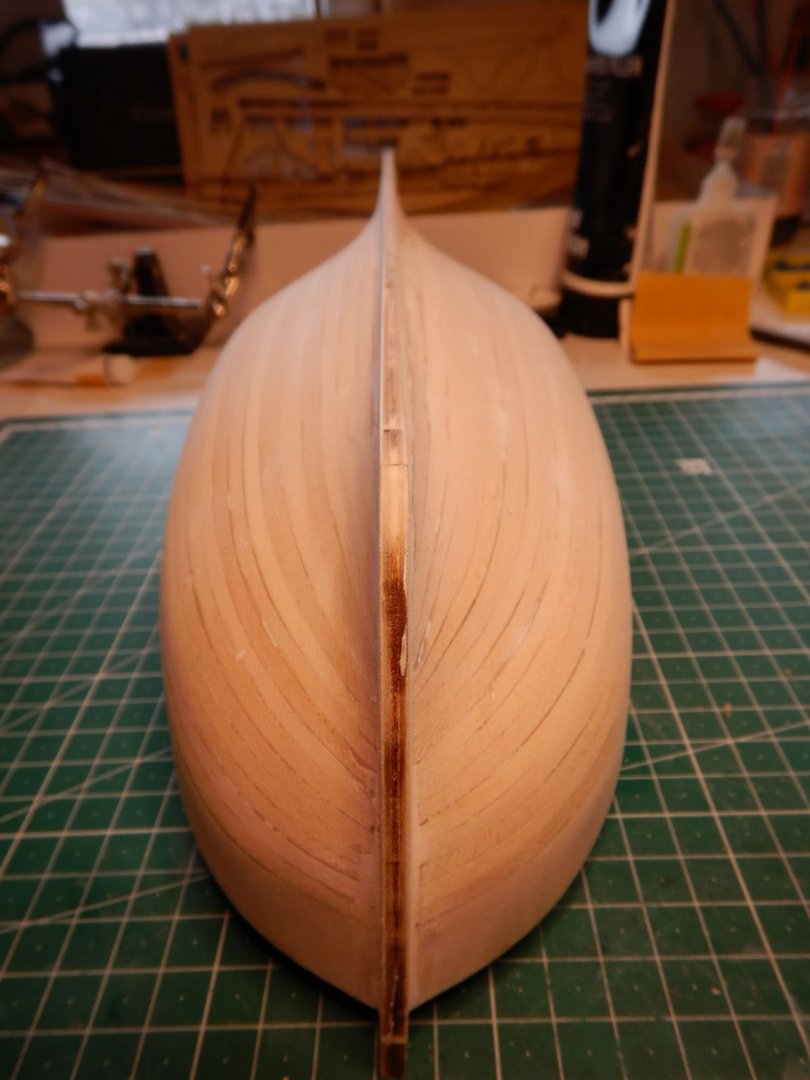
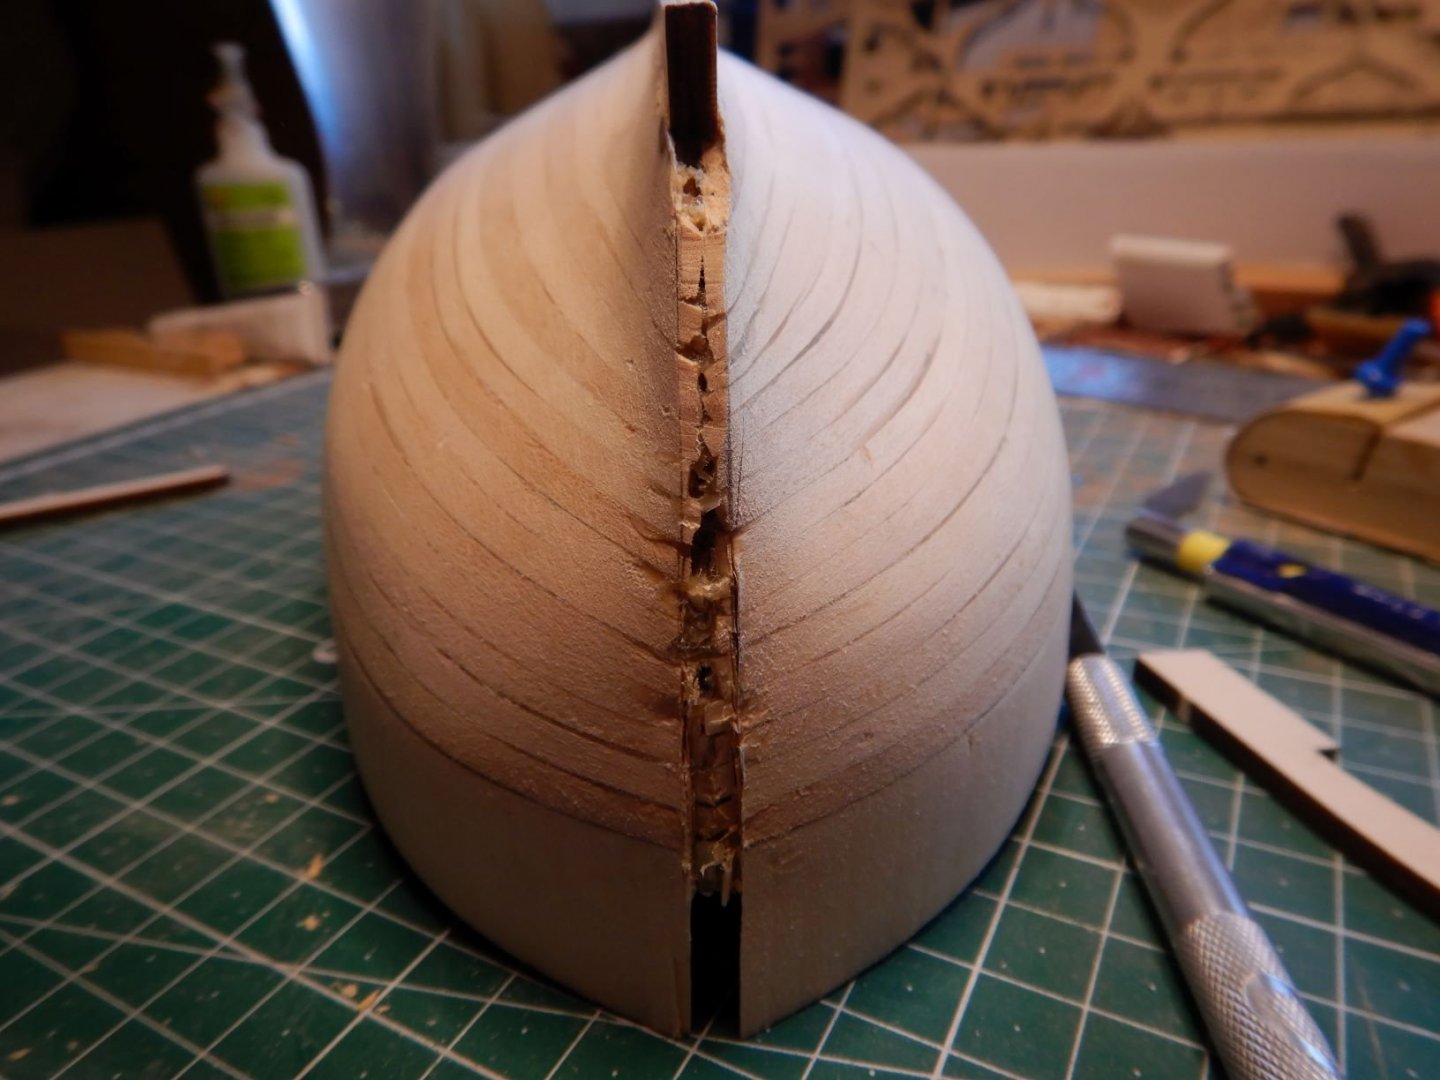
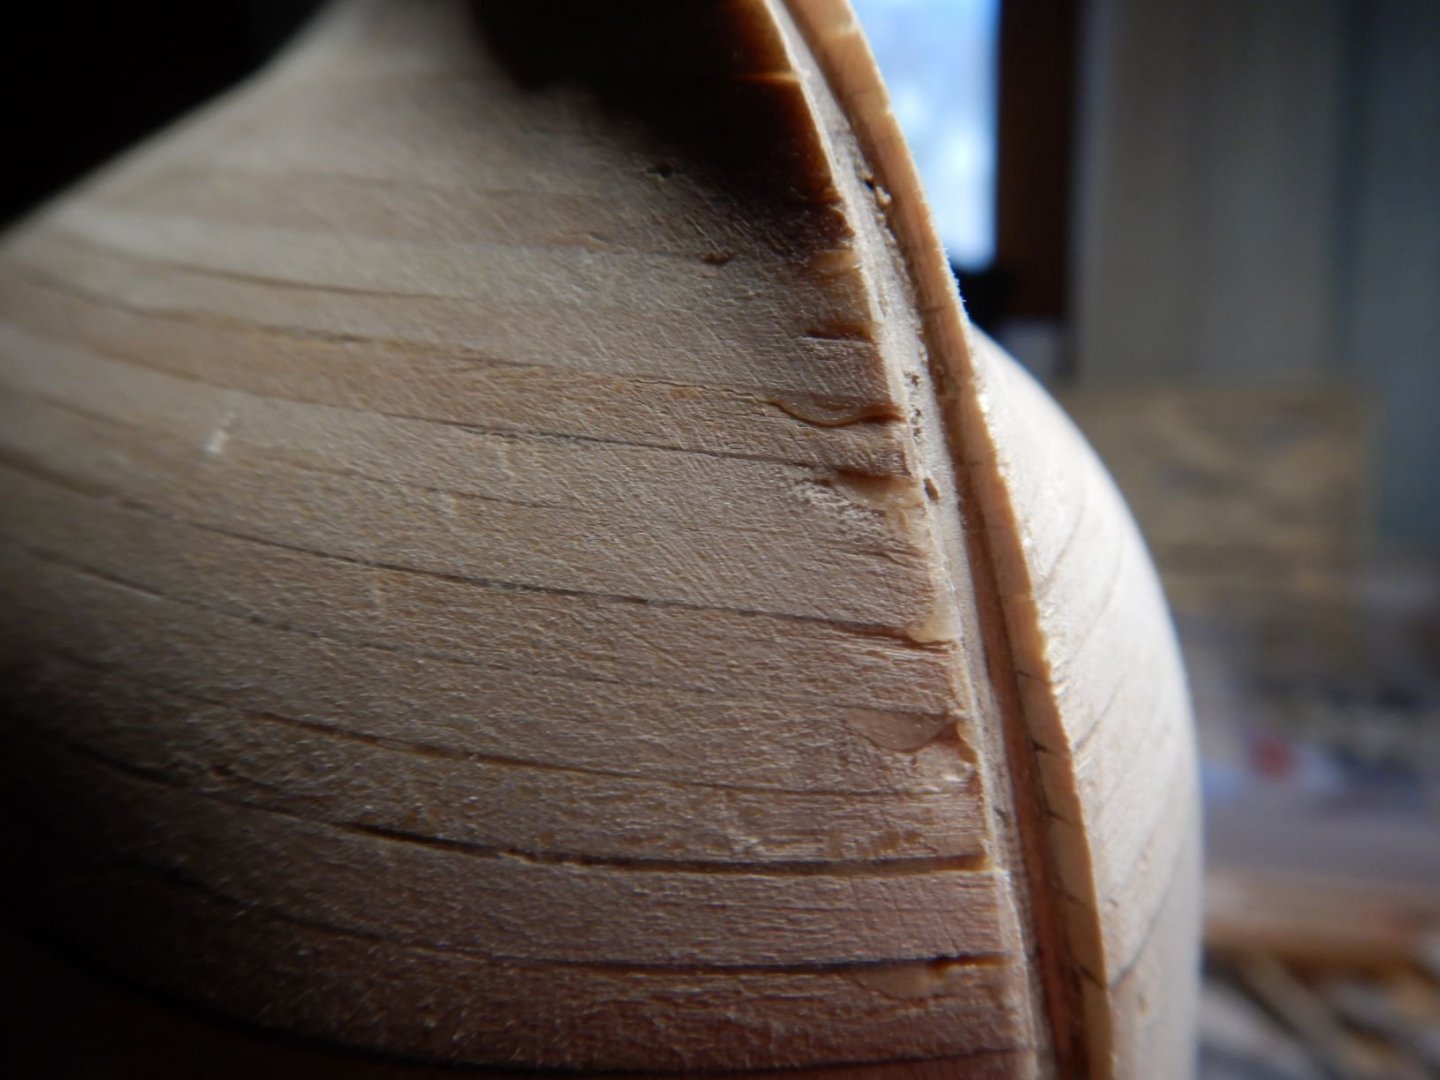
Hello all! Been away at a holiday for a week, but now I'm back at it! Tompslattery, Thank you. Yes the brass parts look nice. The gun sleds are just two lasercut plywood parts glued on top of each other. I was looking through your buildlog and it looks like you have an older version of the kit. Great work on it, your model is coming along nicely! 👍 Rick01, Thanks for the tip. I did use a drill to line up the holes. I used a brass wire for the bars instead of the steel supplied. I left this untreated. But the trick with heating is a good one! I've decided to leave the transom and the "bench" in the stern off until I fit the caprails, rubrails and rudder. I think this approach will be easier than following the sequence in the instructions. After sanding the hull, I prepared to fit the keel, stem and sternpost. This meant cutting a groove in the bow and opening up between the garboard planks to make the pieces fit in. First the keel.. And then the stem. I used a razor saw and a scalpel with a new blade to do this. I found it a little tricky to get it straight and nice but it ended up ok. I think it would have been easier to fit the stem and keel before planking, and make a rabbet to fit the planks in. With the keel, stem and sternpost dryfitted I glued it all in place. So, when the glue dries, more sanding, some filler and more sanding! 🙂 I've also made some progress on the dinghy, finishing the hull planking. My little changes to the sheer and transom made it so the lasercut keel/stem piece didn't fit. So I made a new one out of some scrapwood I had lying around. And after some shaping... A bit more sanding and some paint, I think it will look good! That's it for now! Gaffrig.


- 110 replies
-
- 8
-
-
- le renard
- artesania latina
- (and 1 more)
-
Thank you for your kind comment. This model has only one layer of planking, so I tried to make it as nice as I could! It’s been a little tricky at times, since the planking is 2mm thick. But with soaking and heating and patience I got there in the end! Gaffrig.
- 110 replies
-
- 1
-
-
- le renard
- artesania latina
- (and 1 more)
-
So, now that the whiskey and glue has dried, time for some sanding! Done on one side. Sanded first with 120 grit and then 240 grit. Sitting out on the porch for this.. Both sides sanded. Looks pretty good, if I may say so myself! I wanted to do most of the sanding before attaching the keel, stem and sternpost. These are up next, and then a little filler before the final sanding with 320 grit or so. Gaffrig.

- 110 replies
-
- 6
-
-
- le renard
- artesania latina
- (and 1 more)
-
I like the irish whiskey and folk music too! The Admiral and I spent last summer sailing the westcoast of Ireland. Really enjoyable! Lots of folkmusic and whiskey! And beer!
- 110 replies
-
- 2
-
-
- le renard
- artesania latina
- (and 1 more)
-
Hello everyone. The planking of my Le Renard build is now finished! The gap for the last plank on one side ended up at 6mm and the planks beeing only 5mm this presented a small challenge. I ended up gluing two planks together and that way I could make the plank to fit nicely. That's it! The whiskyplank is in! 🤪😝👍 Now time to sand when the glue (and whiskey) dries.. Work on the dinghy continues, and it seems like I will end up with the same amount of planks from stem to stern. Here I have sanded lightly to see how it will look when finished, and so far I'm pleased with the result! That's it for now. Gaffrig.
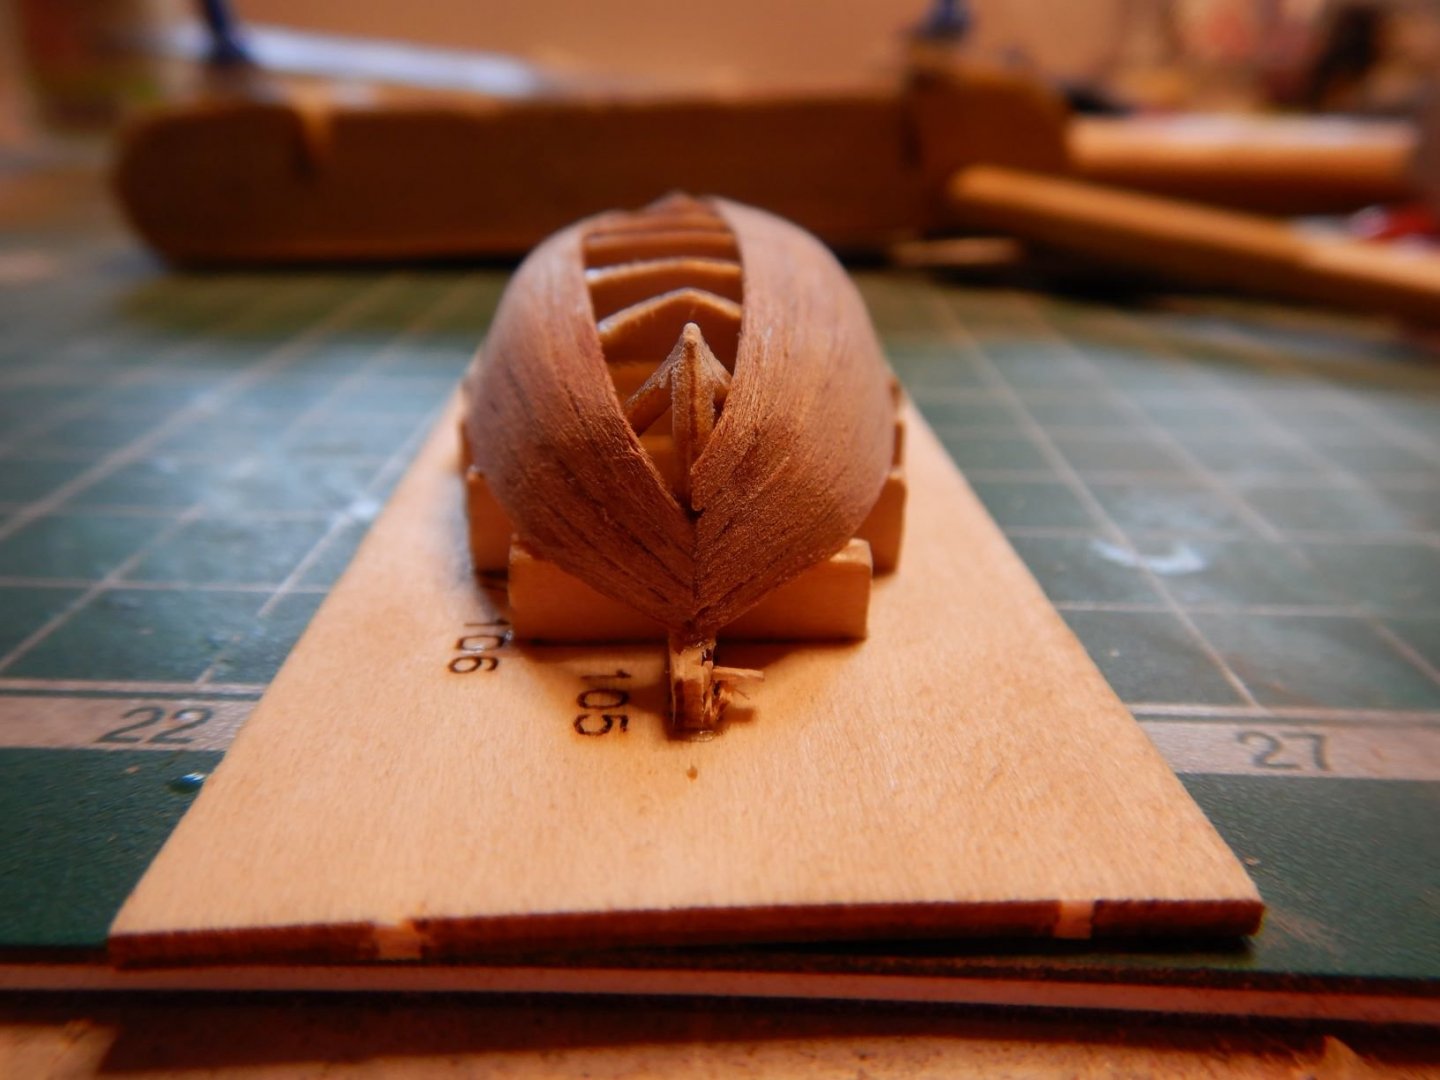


- 110 replies
-
- 5
-
-
- le renard
- artesania latina
- (and 1 more)
-
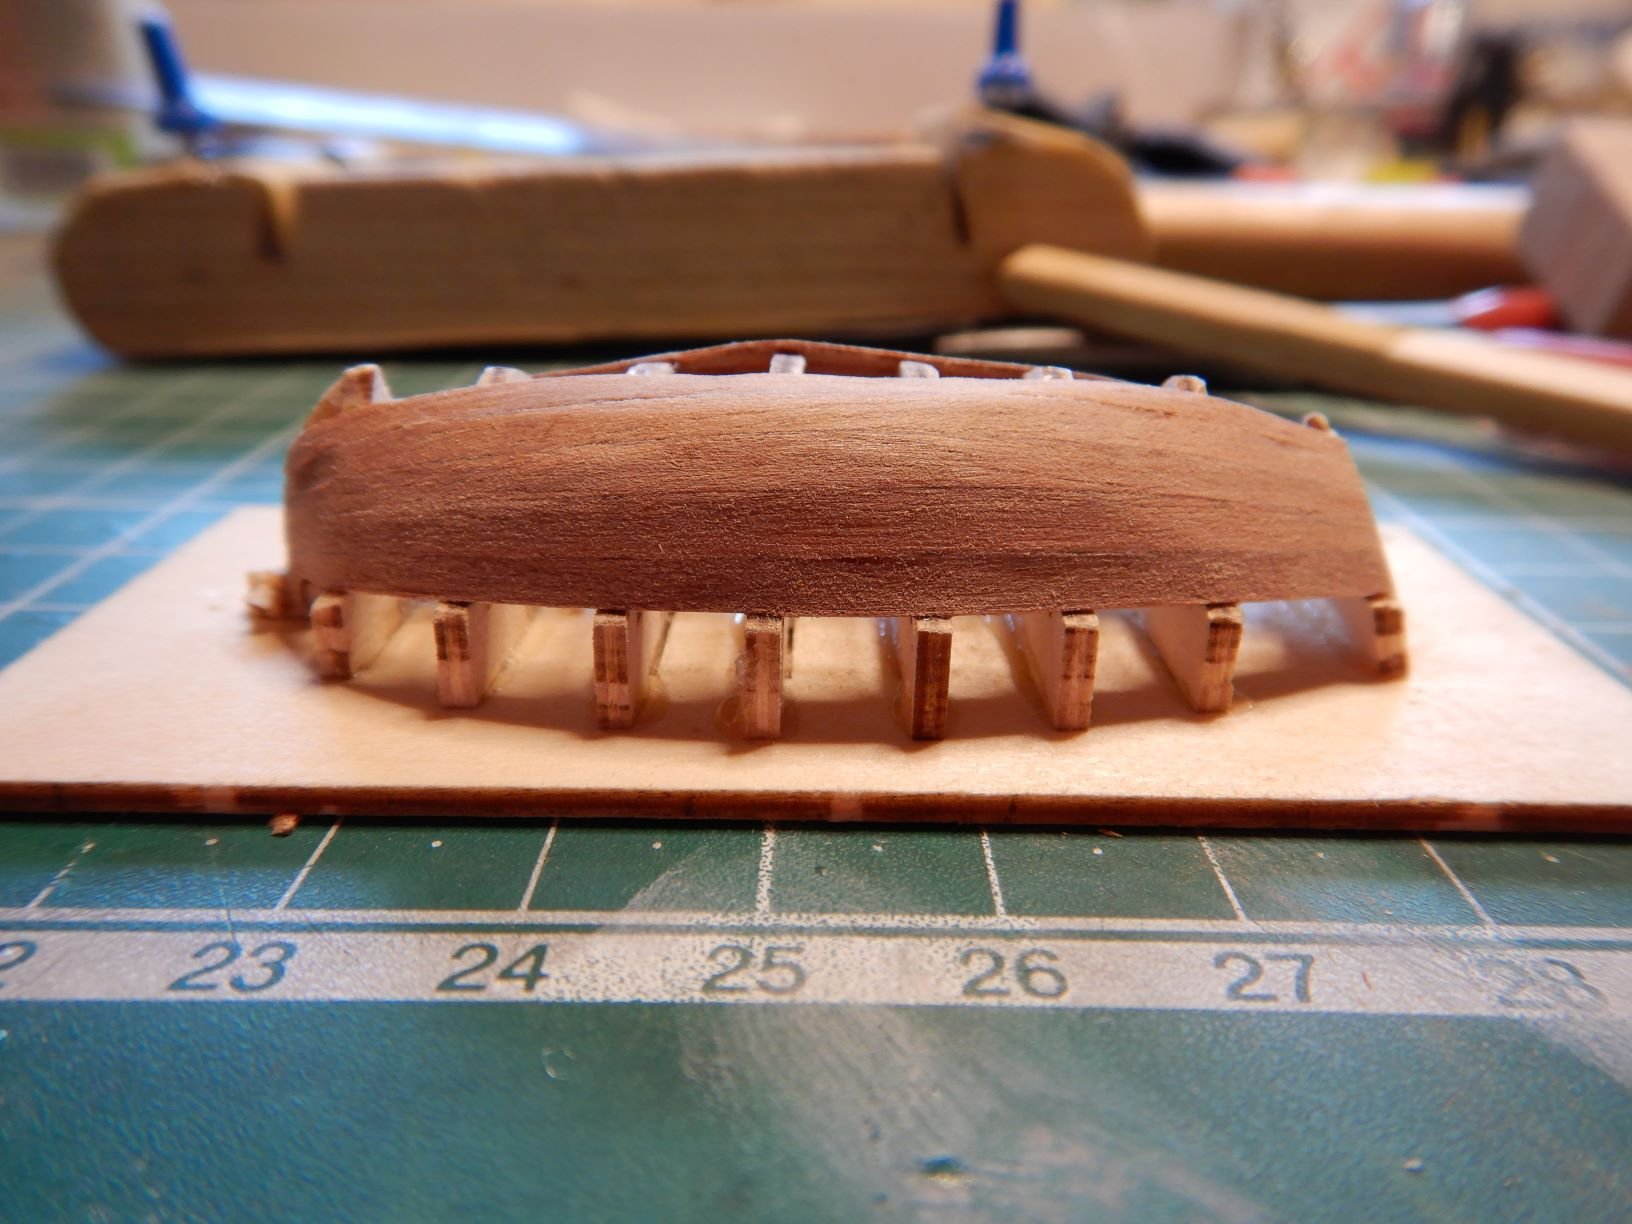
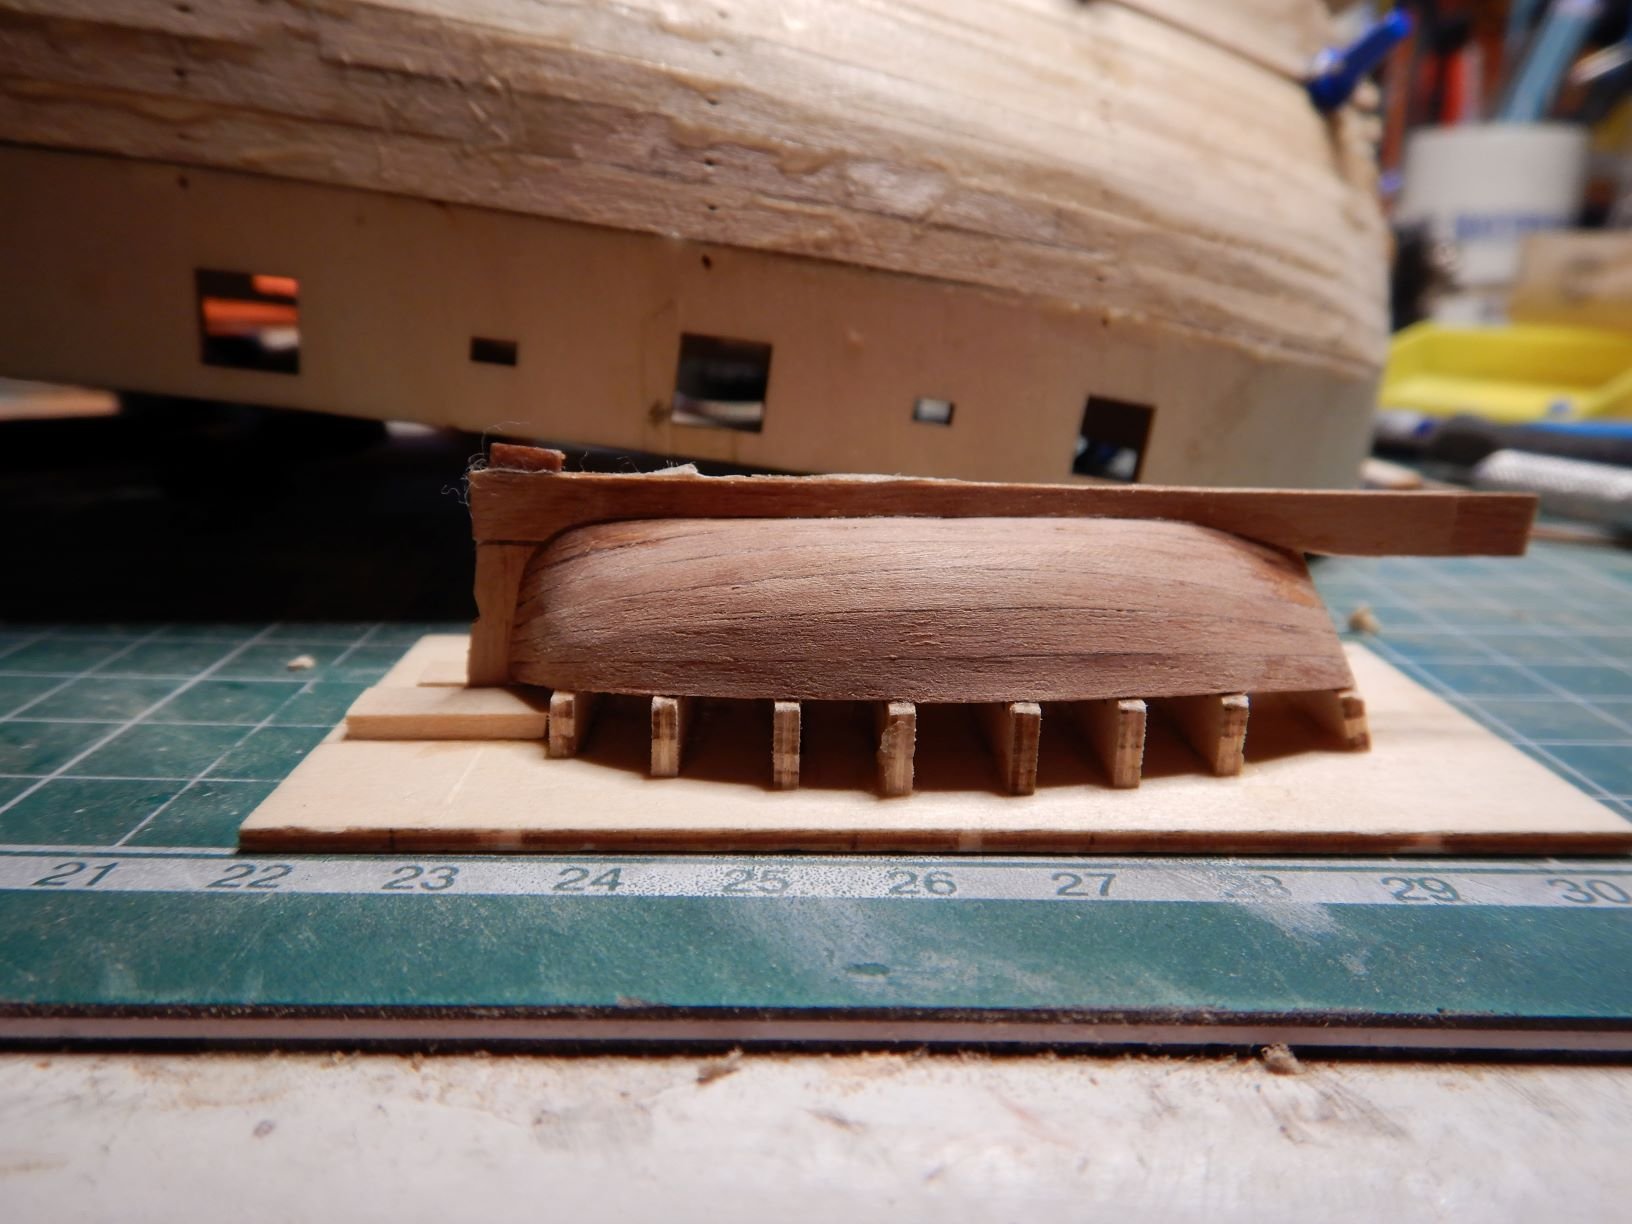
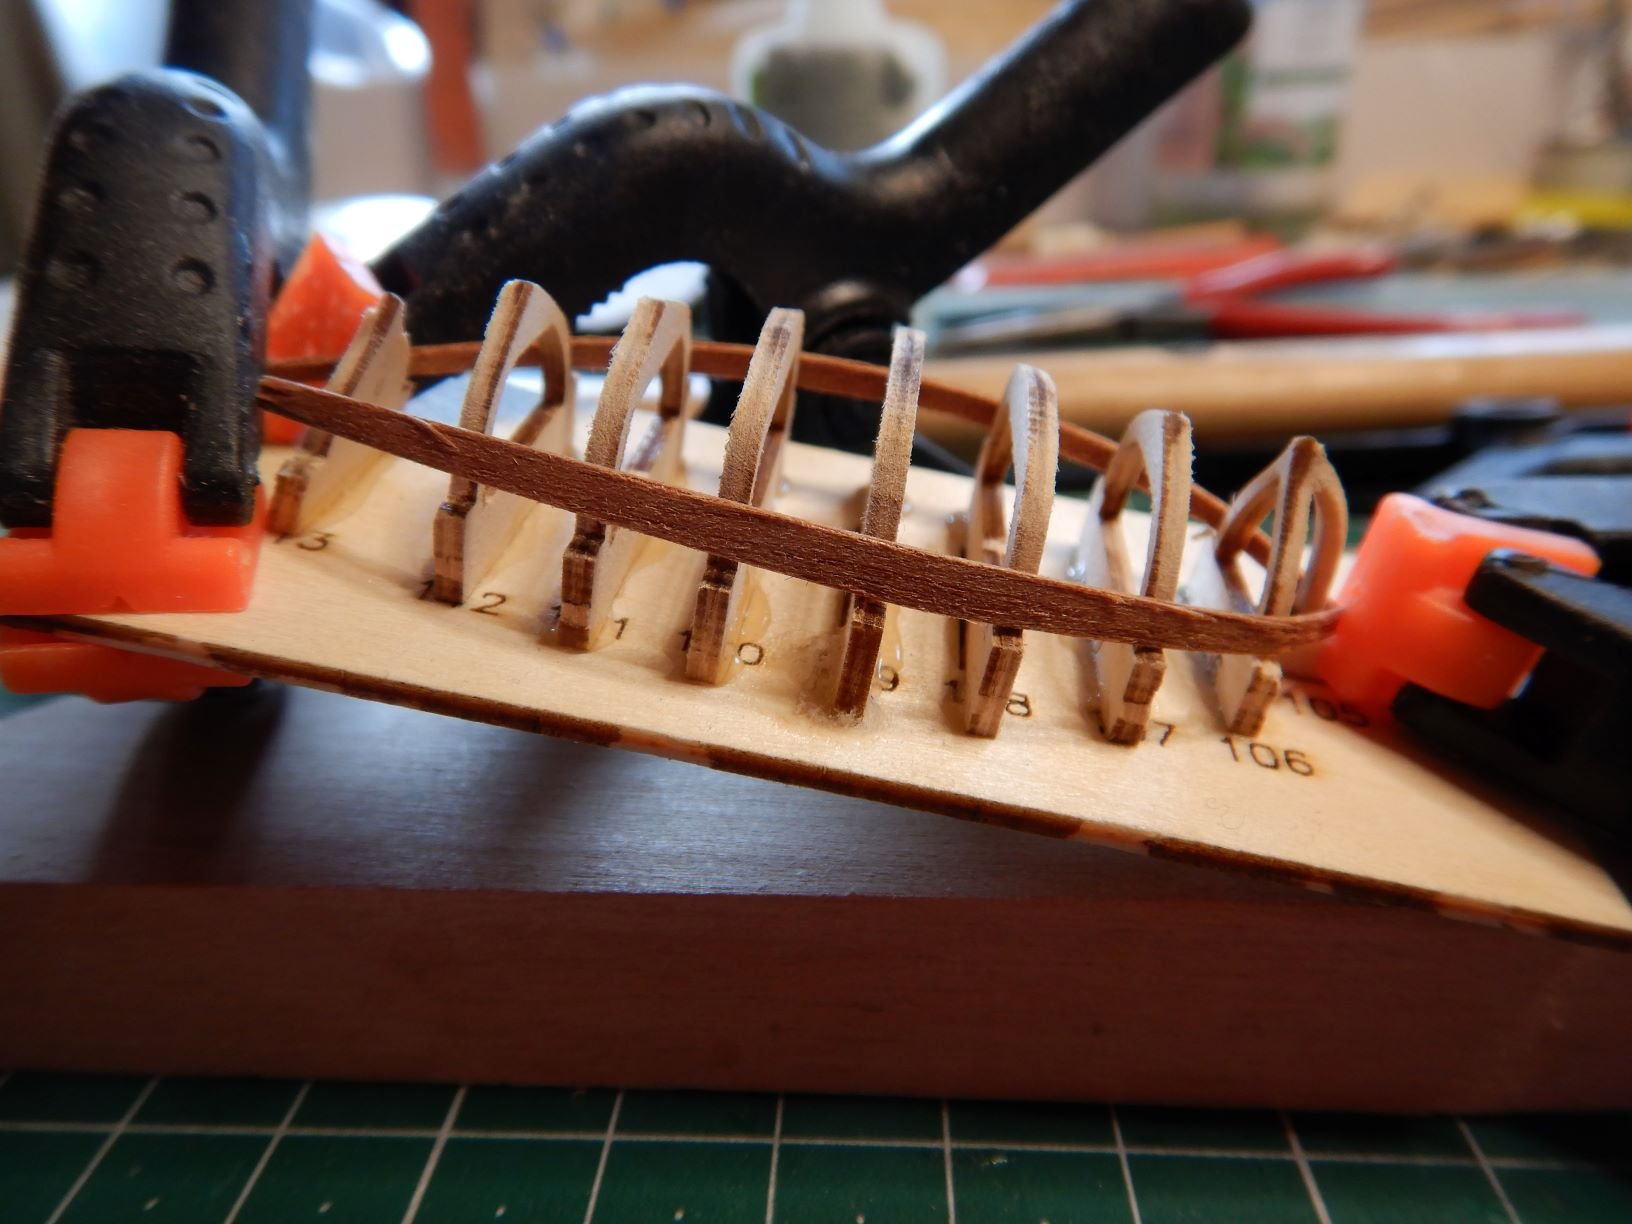
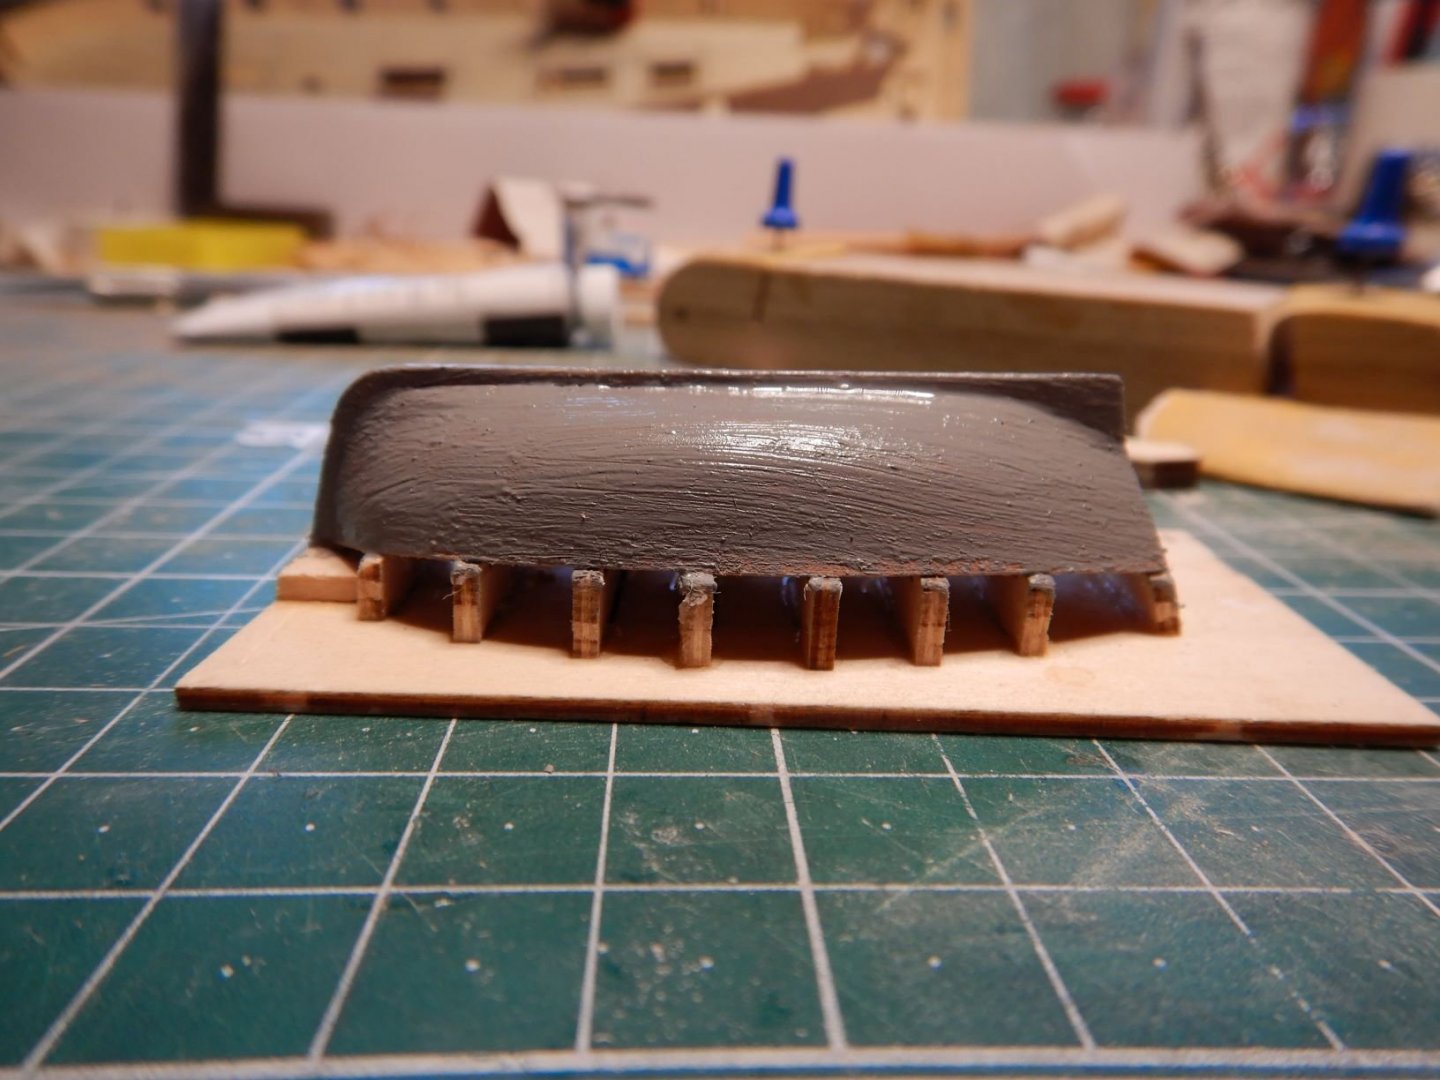
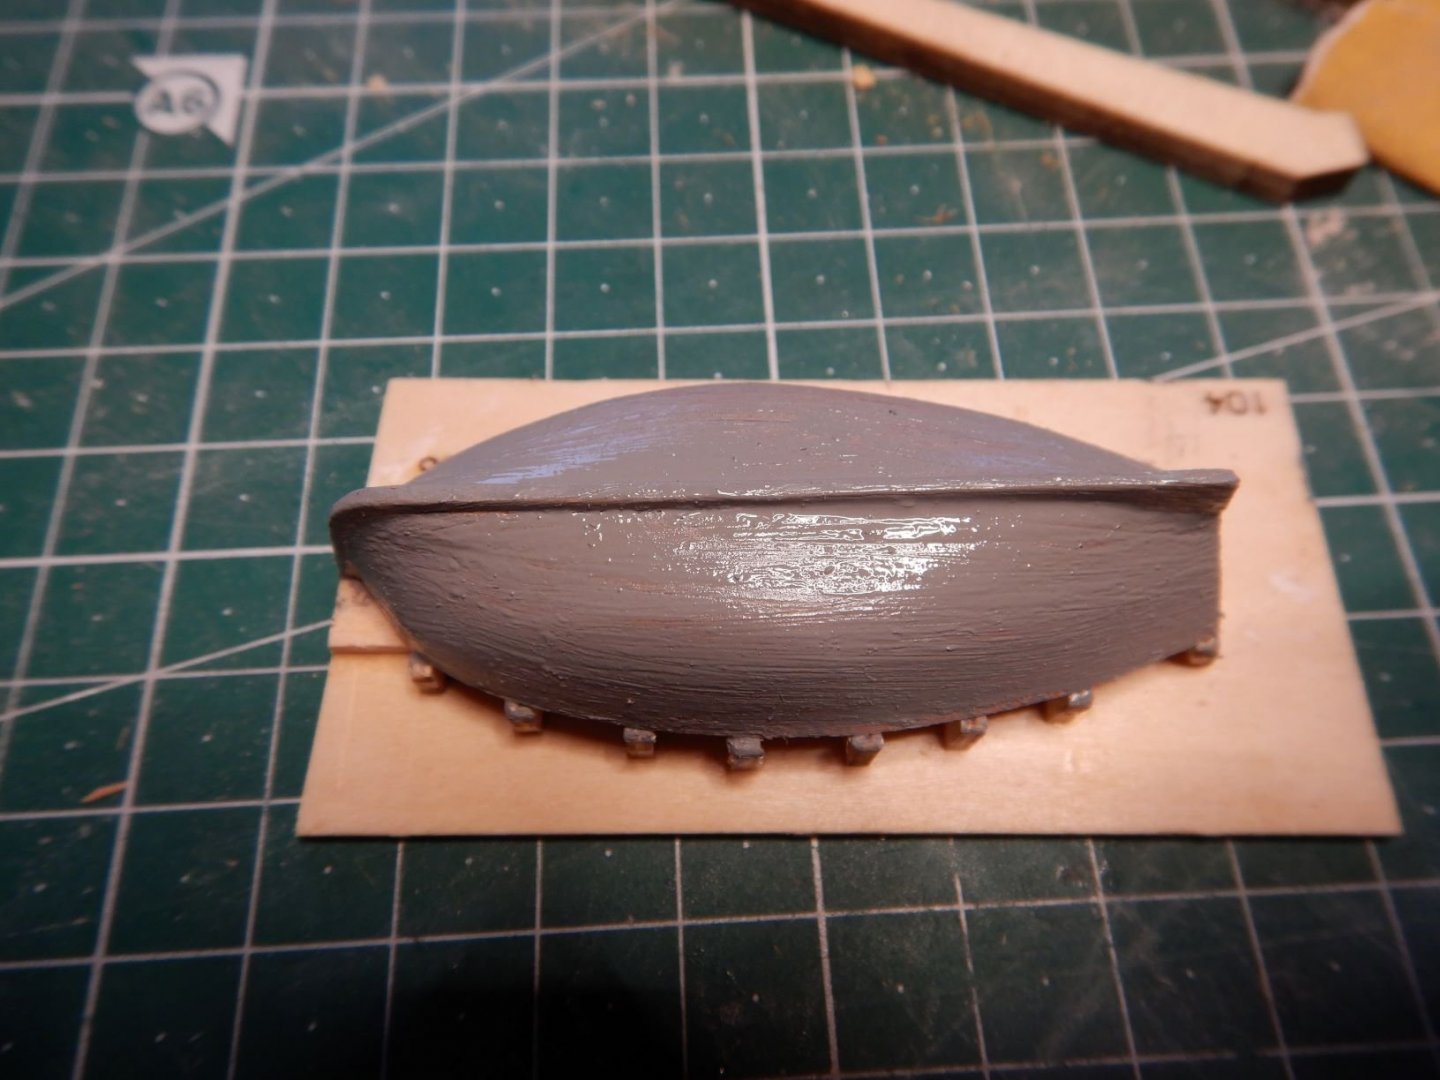
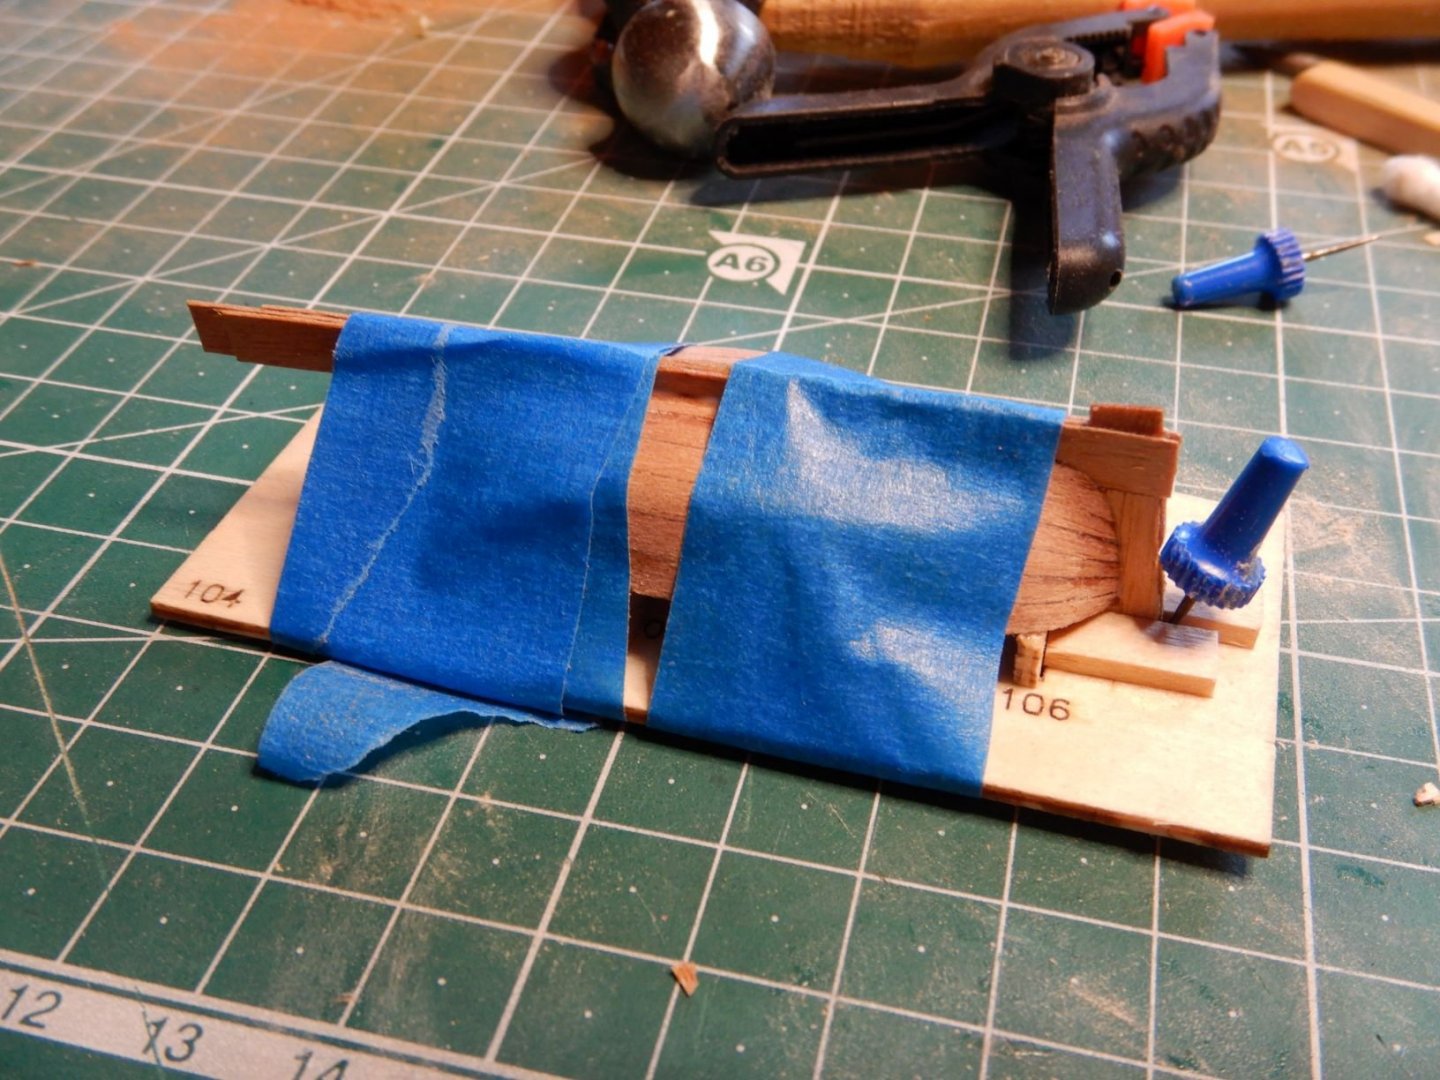
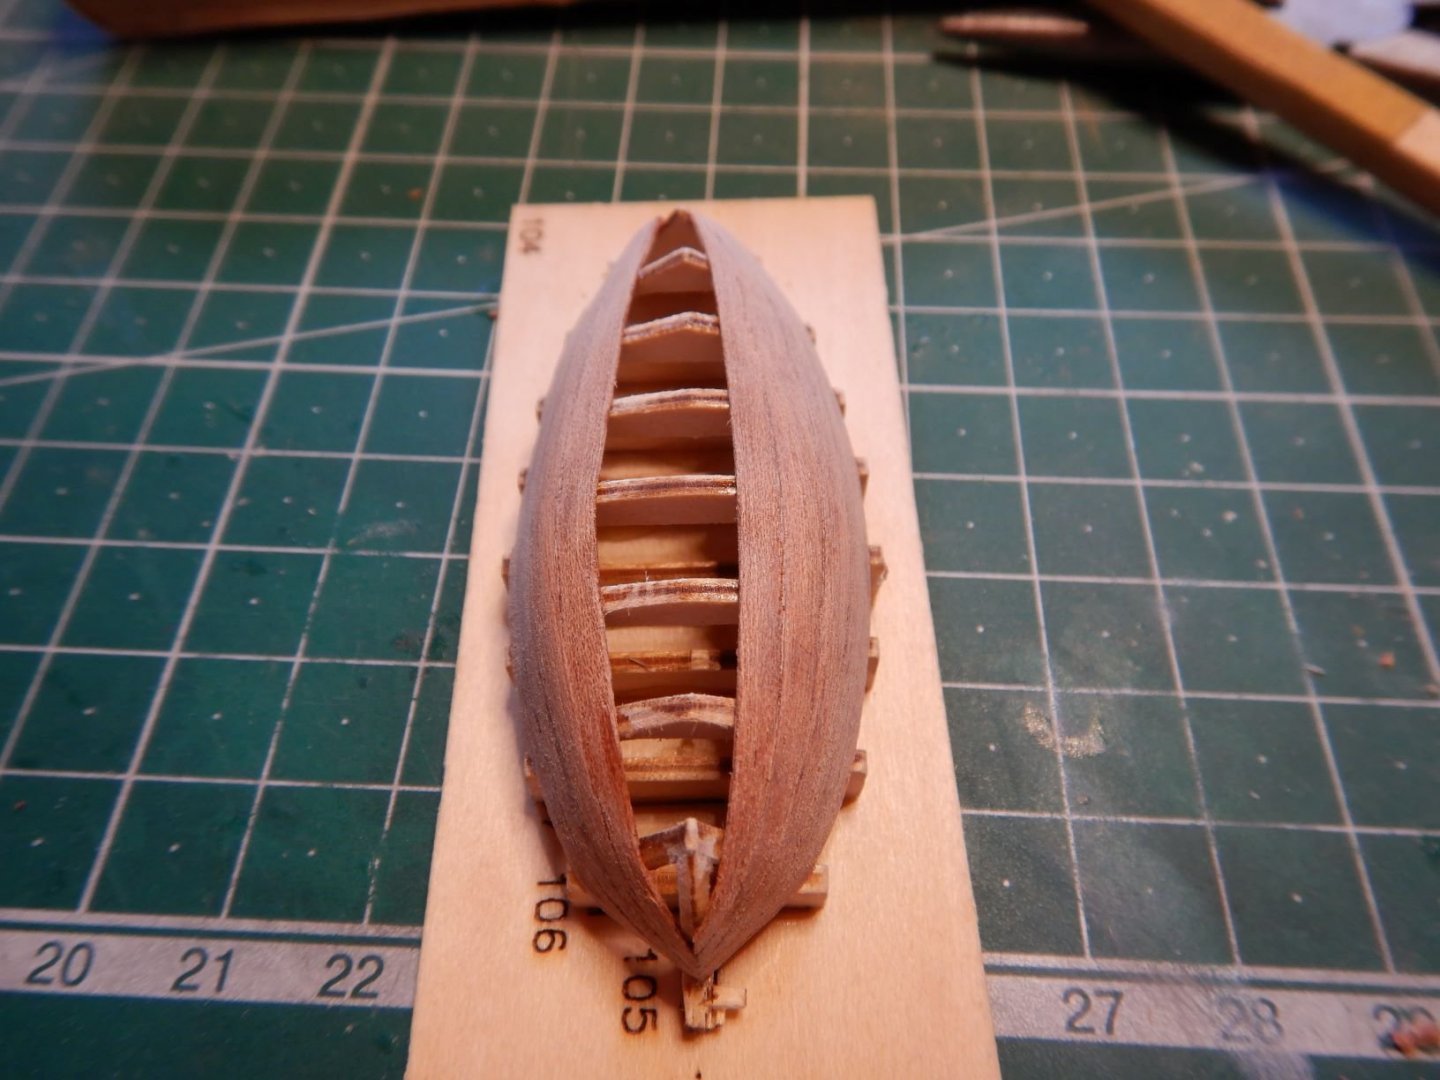
The strangest thing has happened... We've had several days of clear blue sky and warm weather! 😎 How enjoyable as this may be, it does cut into the time spent at the building table... The good thing is that the time not spent at the buildtable is spent aboard the 1:1 scale pilotcutter! Nice to get some work done there too. Some progress has been made though, the planking continues and is close to finished. The planking has started on the dinghy. A few more planks, and I'm ready to start sanding. There is a few dumps and humps, but hopefully it will sand out smooth. If not, then I have a can of woodfiller! The dinghy was (According to the instructions) to be planked with the same 4mm x 0,6mm material as the deck. I found this to be a little wide for such a small boat, so i decided to use the 0,7mm x 3mm mahogany that I'm not using for the bluenose. I tapered the planks "by eye" and felt my way as I went. The planks were then soaked and dried to shape on the jig. Once the planks had dried, I glued them on with CA glue. It shall be interesting to see how I end up with my "tapering by the eye" approach! That's it for now! Gaffrig.

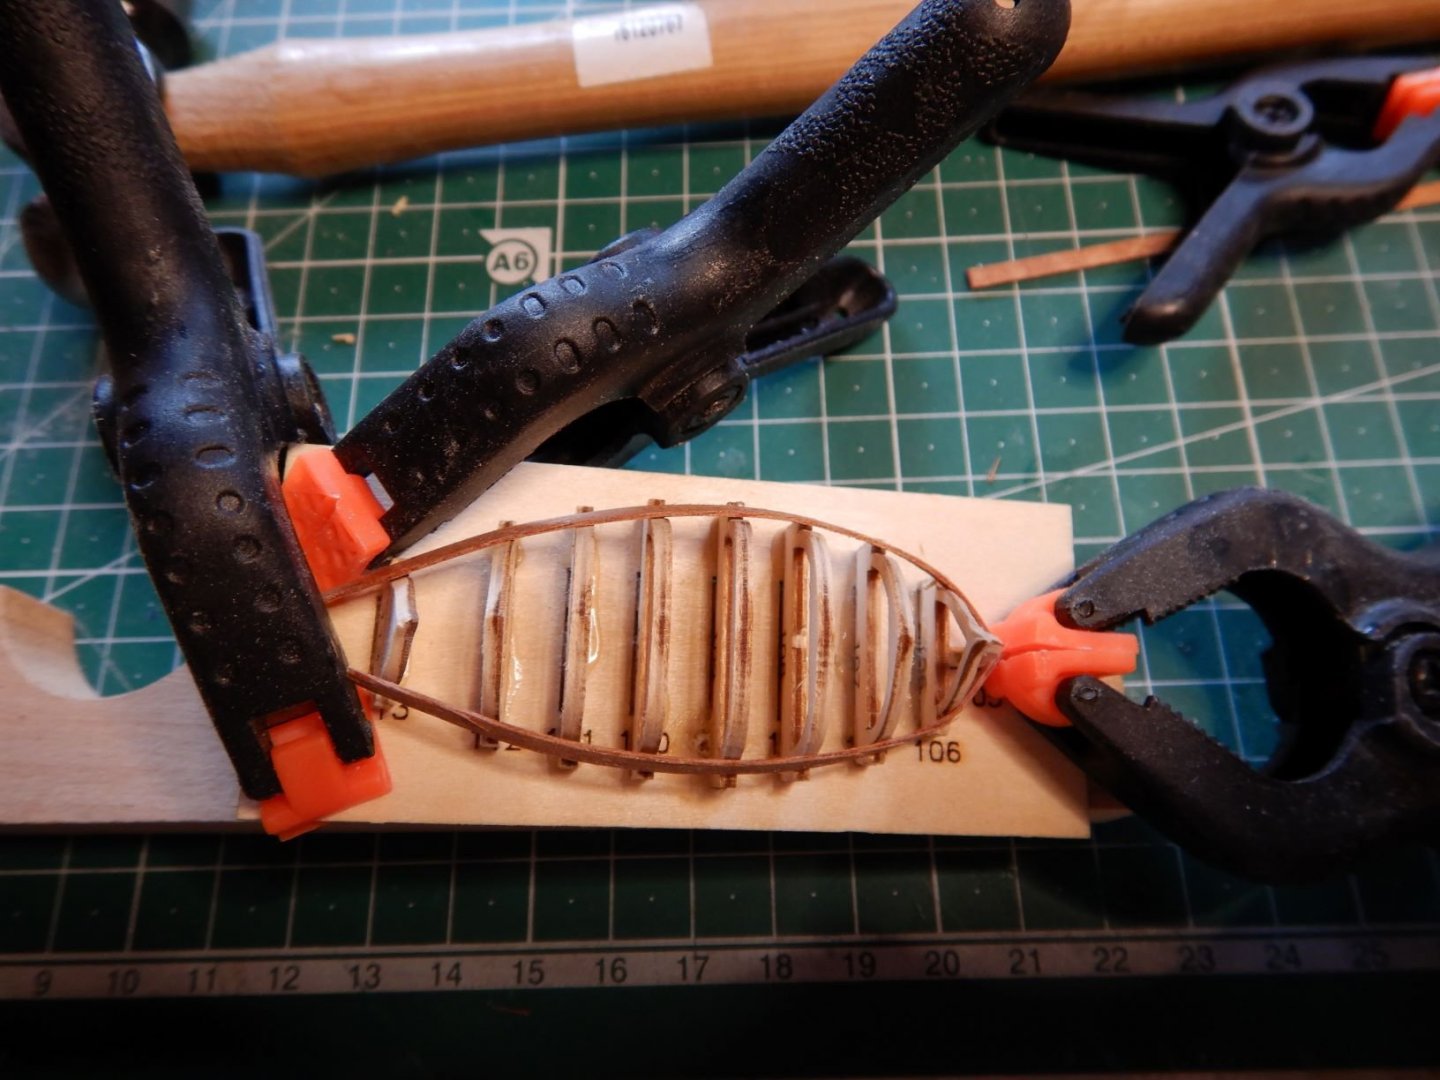


- 110 replies
-
- 5
-
-
- le renard
- artesania latina
- (and 1 more)
-
You may not know of the "Treskibssammensluttningen" which is a organisation for traditional vessels in denmark. A lot of info at their site, (Mostly in danish, unfortunately) but also among their members. You might try them for specific questions you may have. www.ts-skib.dk I looked a little at the site, (thank you for pointing it out to me) but my french is not very good. I could not find a language setting. I think you are quite right that the Artesania Latina kit is a model of the replica, rather than the original. The item that may or may not be the binnacle is very close to both the main companionway and the tiller. I think it may be a housing for modern navigation electronics. There is also what appears to be ventilation "pillars" four places around the deck. As for the windlass situation, it may be that the replica has a modern electric or hydraulic windlass mounted below deck, and the anchor rode coming out of the hull. I got the kit at a discount, as something to build while waiting for materials for the Bluenose. I'll probably build the kit more or less as is, rather than going for historical accuracy. About building the kit.. Here's a little update. The planking continues, slowly but steadily. Got a few more "laps" done during the weekend. I have a little clinker effect going on in the bow, but I think it will smooth out with sanding. While waiting for the glue to dry, I got bored and started another kit... 😎 It was in the same box though! And if I do it right it should be the dinghy. Got the parts out of their sheet, these are small, brittle parts. -And started building the jig. I just had to make some small adjustments... I gave the transom an angle and I cut away from the frames to give it more sheer. We'll see how this turns out. That's it for now. Gaffrig.


- 110 replies
-
- 5
-
-
- le renard
- artesania latina
- (and 1 more)
-
Ok. Will contact via pm. Good thing I asked first! Gaffrig.
-
If you send me your email in a private message, I can send it to you. Posting it publicly is not a good idea. (Either the instructions or the email)
-
Ok. Thank you for your answers. It’s just the instructions as there is no drawings for this kit. I guess that sharing the instructions with this member in private should be fine, as he already has the kit but has lost the instructions. Apparantly they are not available at the website. Gaffrig.
-
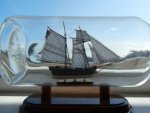
It would be the whole instruction booklet. The kit in question is the hannah ship in a bottle kit from amati. Gaffrig.
-
Hello. Just got asked by another member about instructions for a kit I have built. Would it be allowed to post this in the forum? I don’t want to do anything wrong, and reading the thread about pirated kits, posting instructions might not be the smartest? Hope someone who knows the in’s and out’s of this can advise. Gaffrig.
-
Hello. Yes, I can do that. If it’s allowed, I’ll post them here. If not I can send them to you privately. Gaffrig.
-
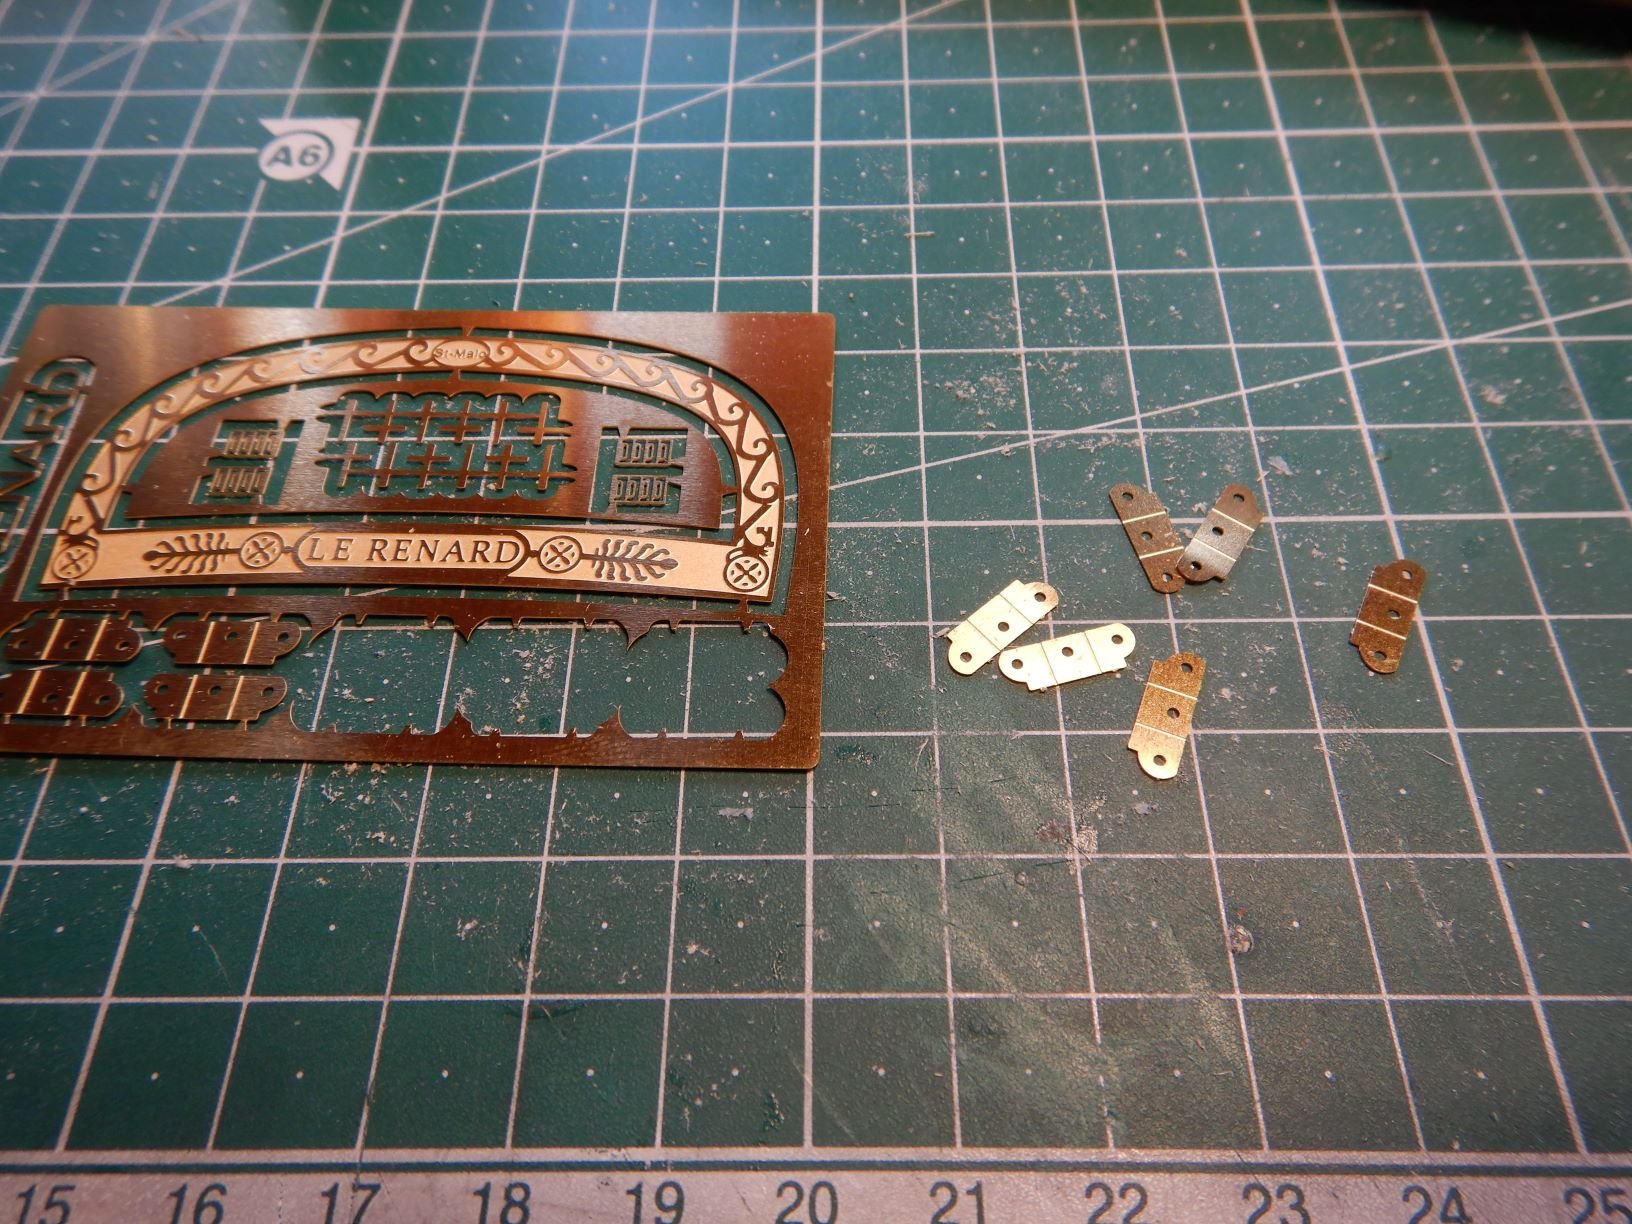
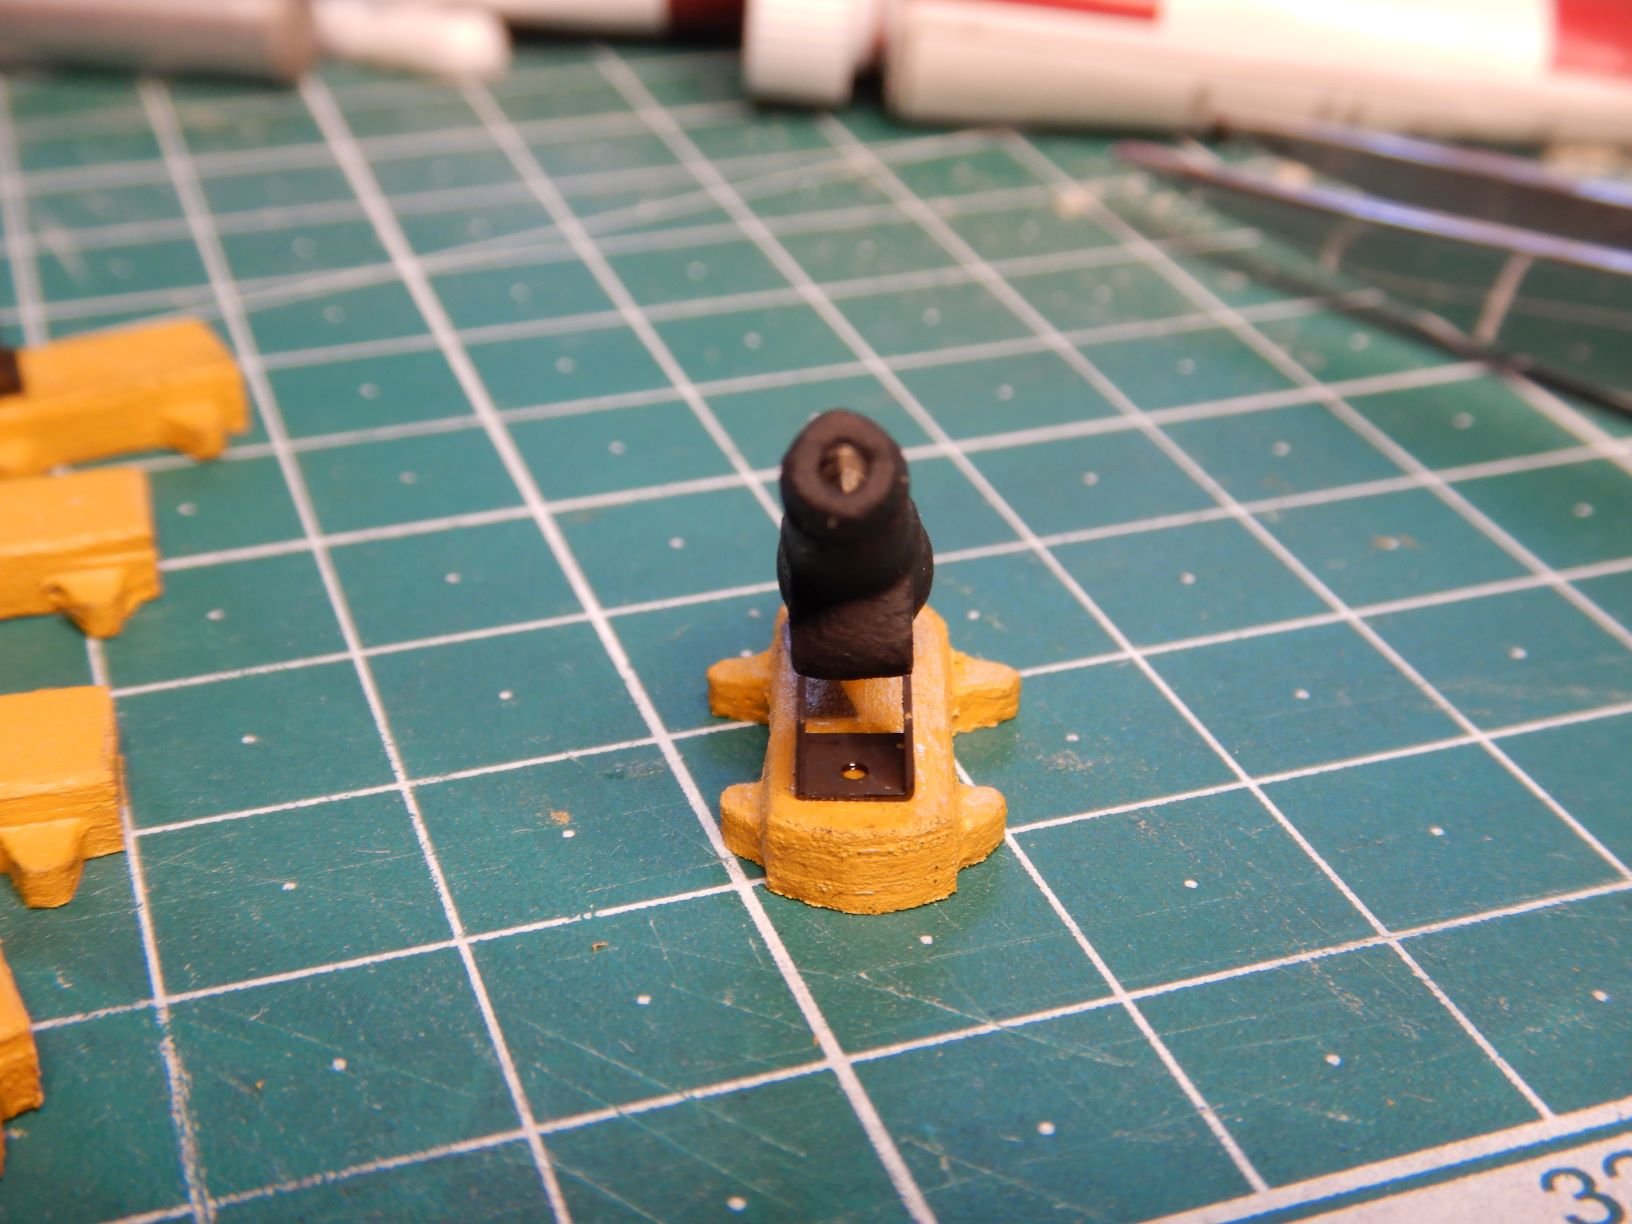
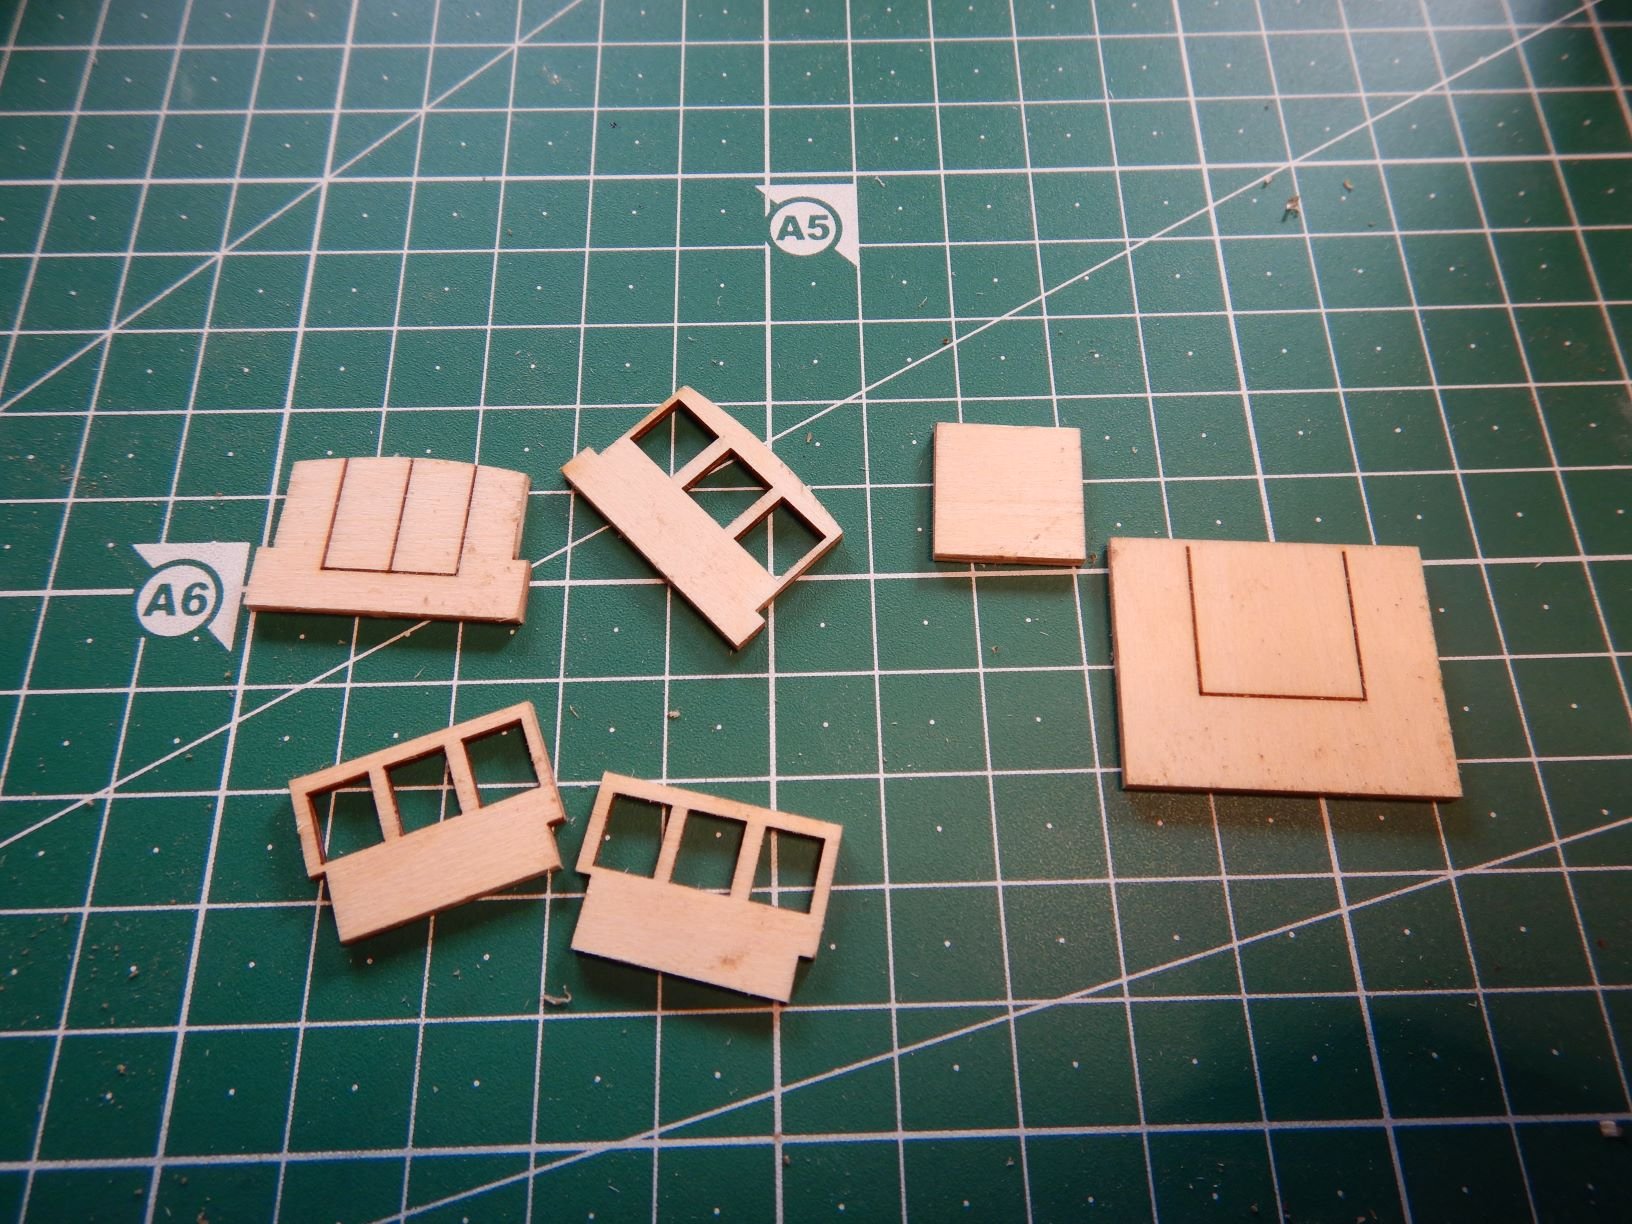
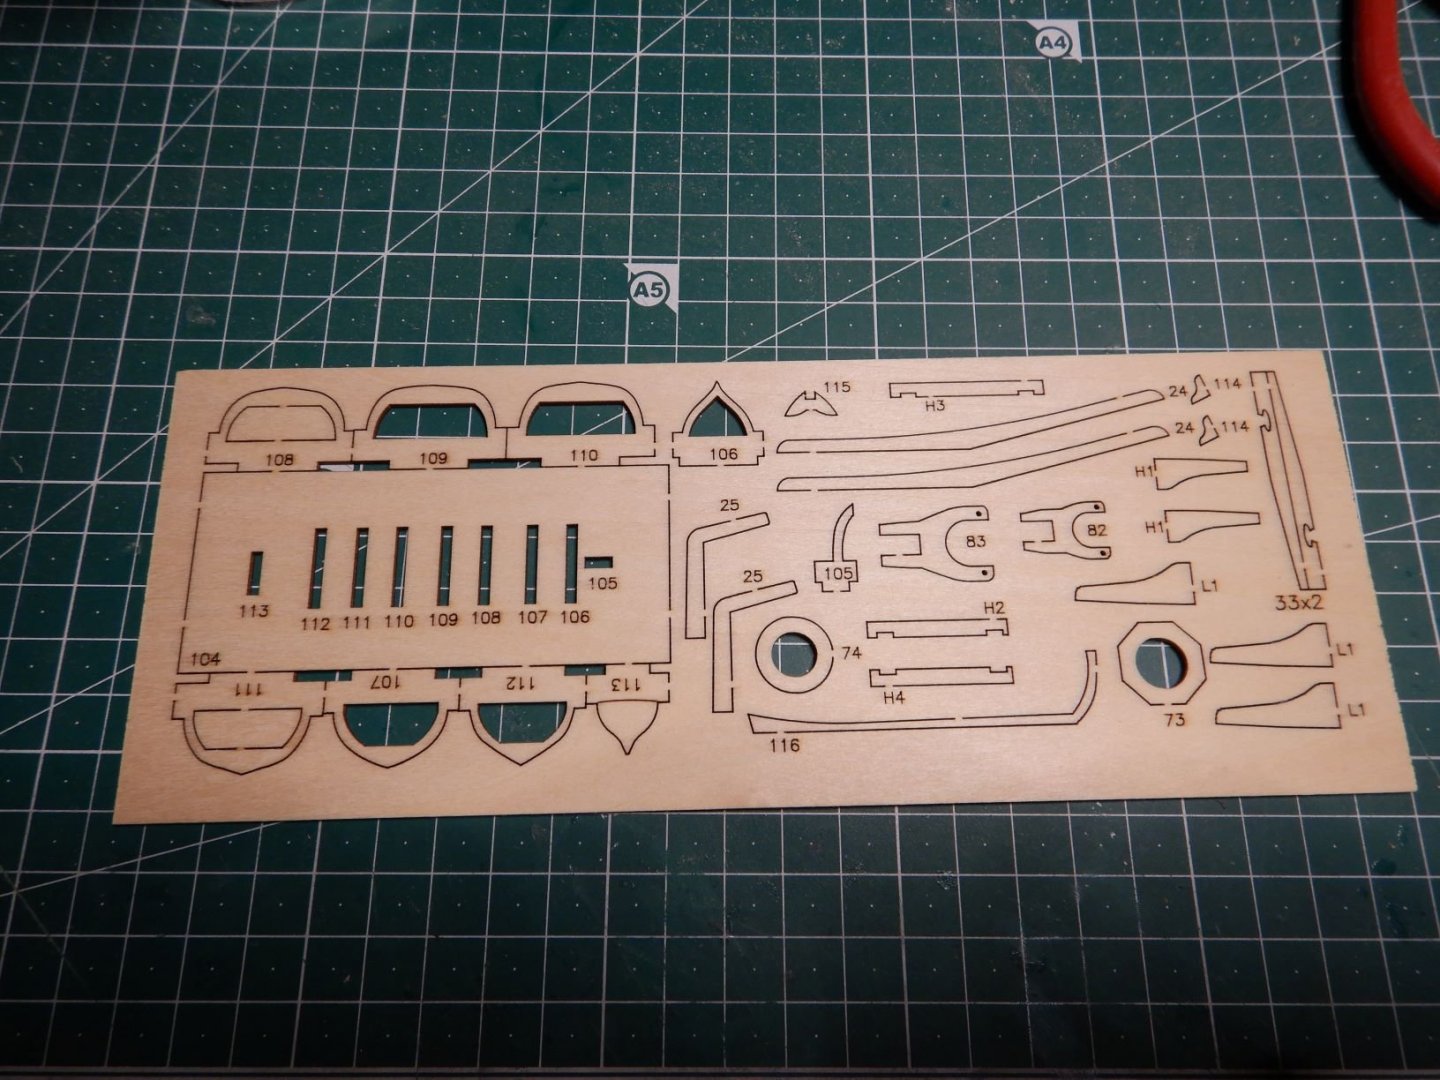
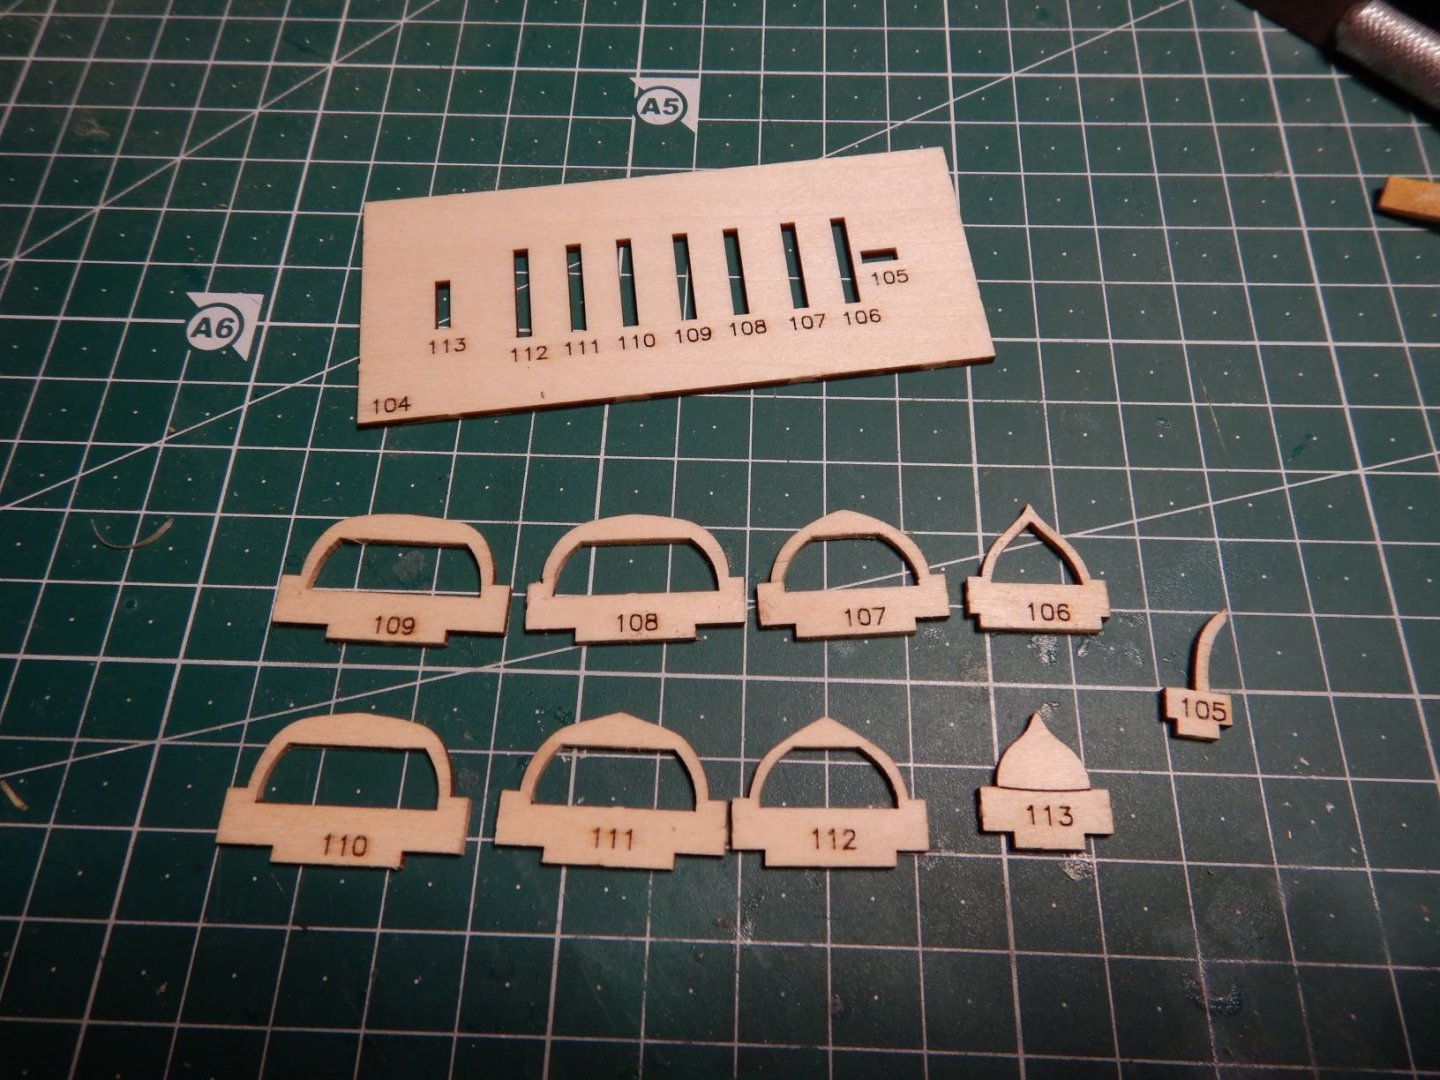
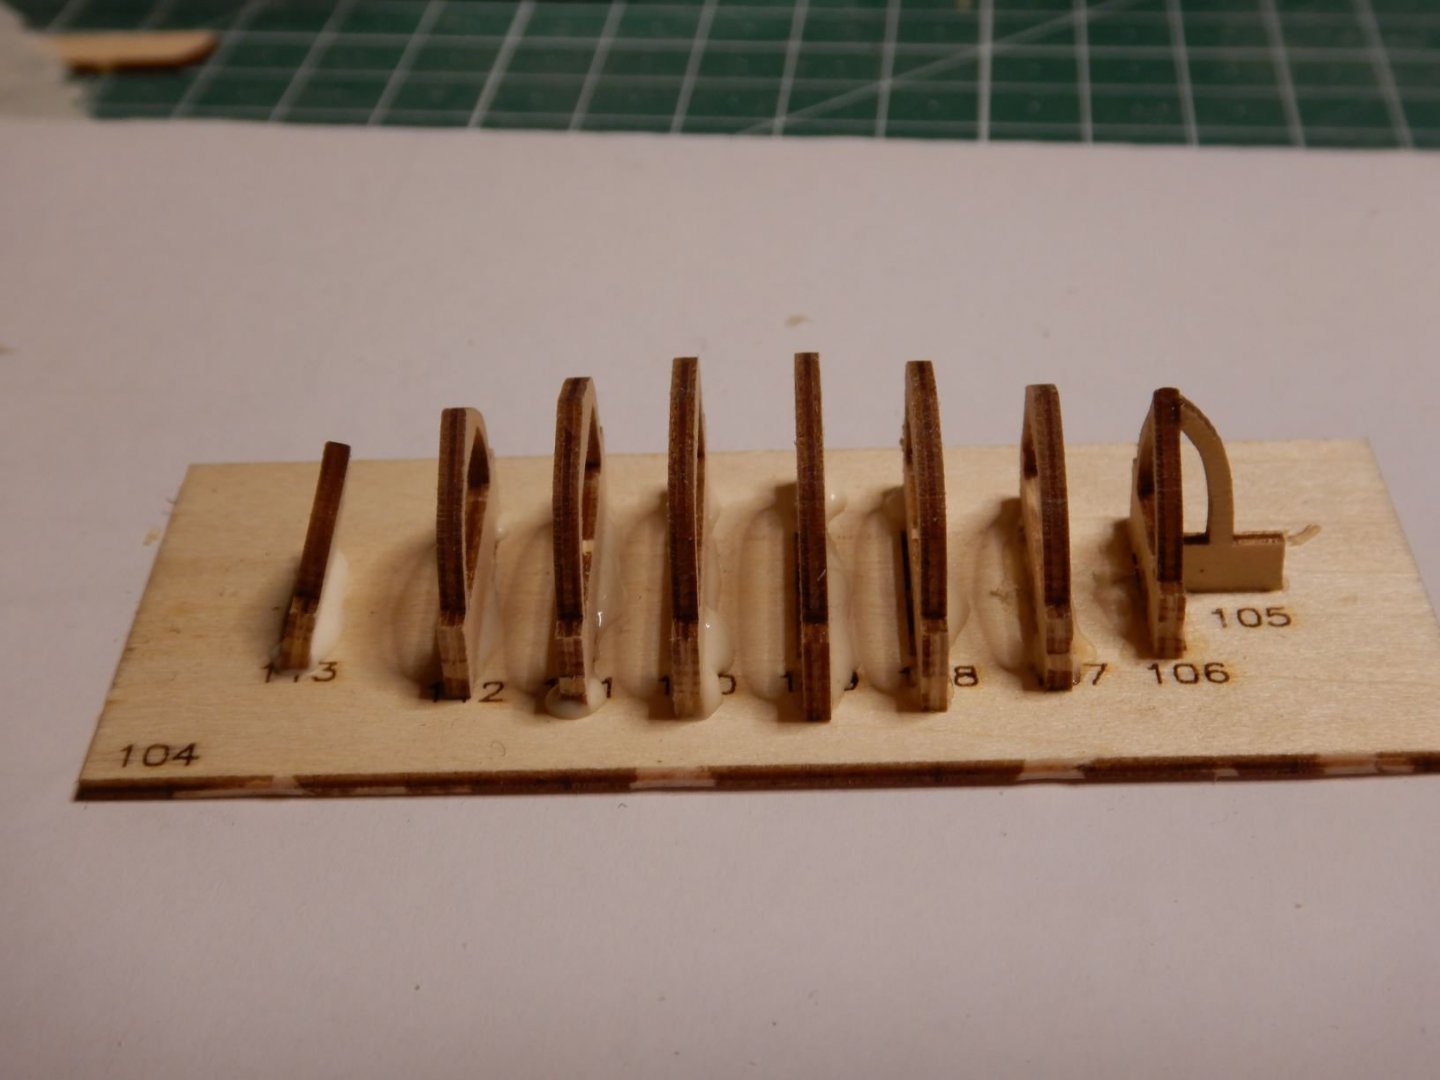
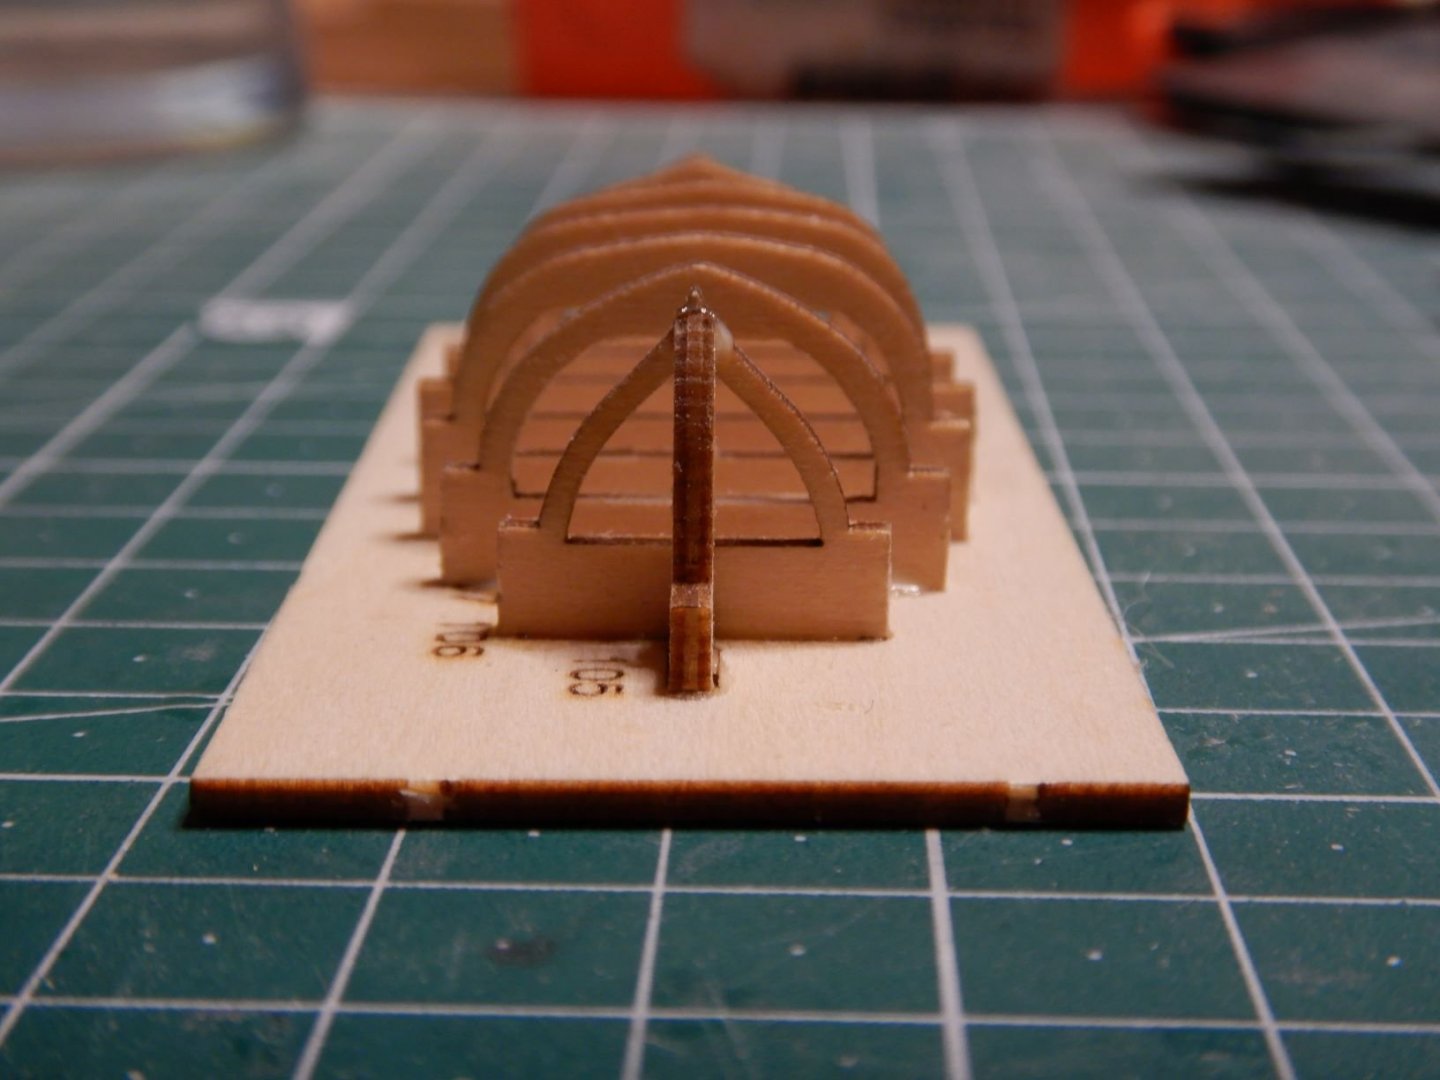
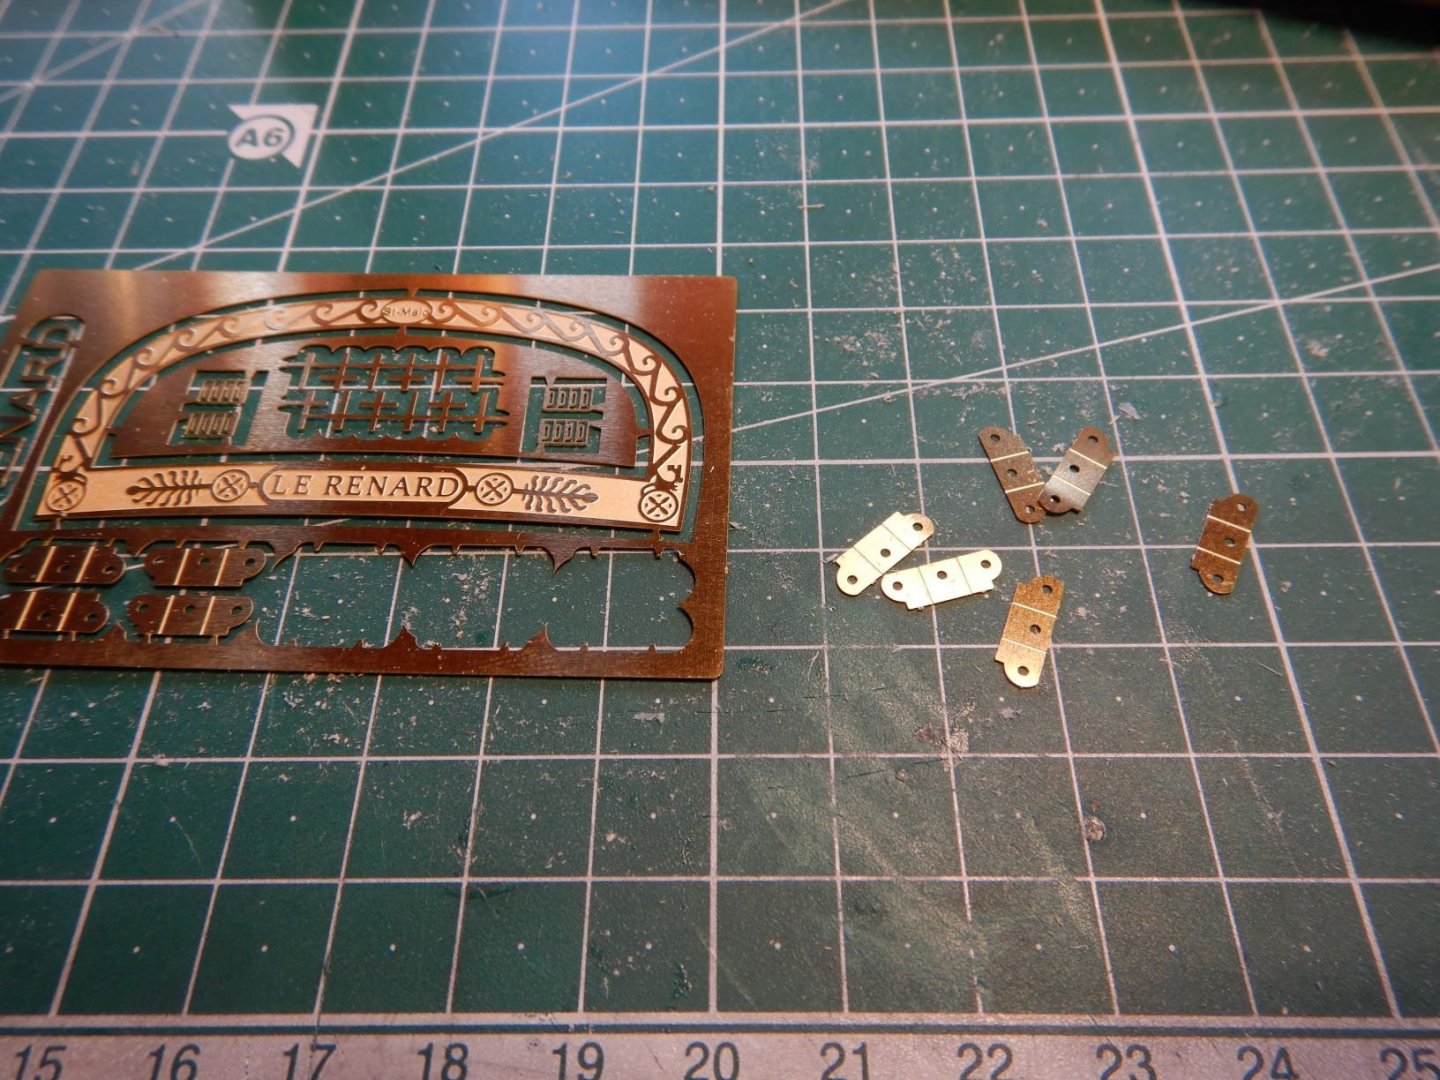
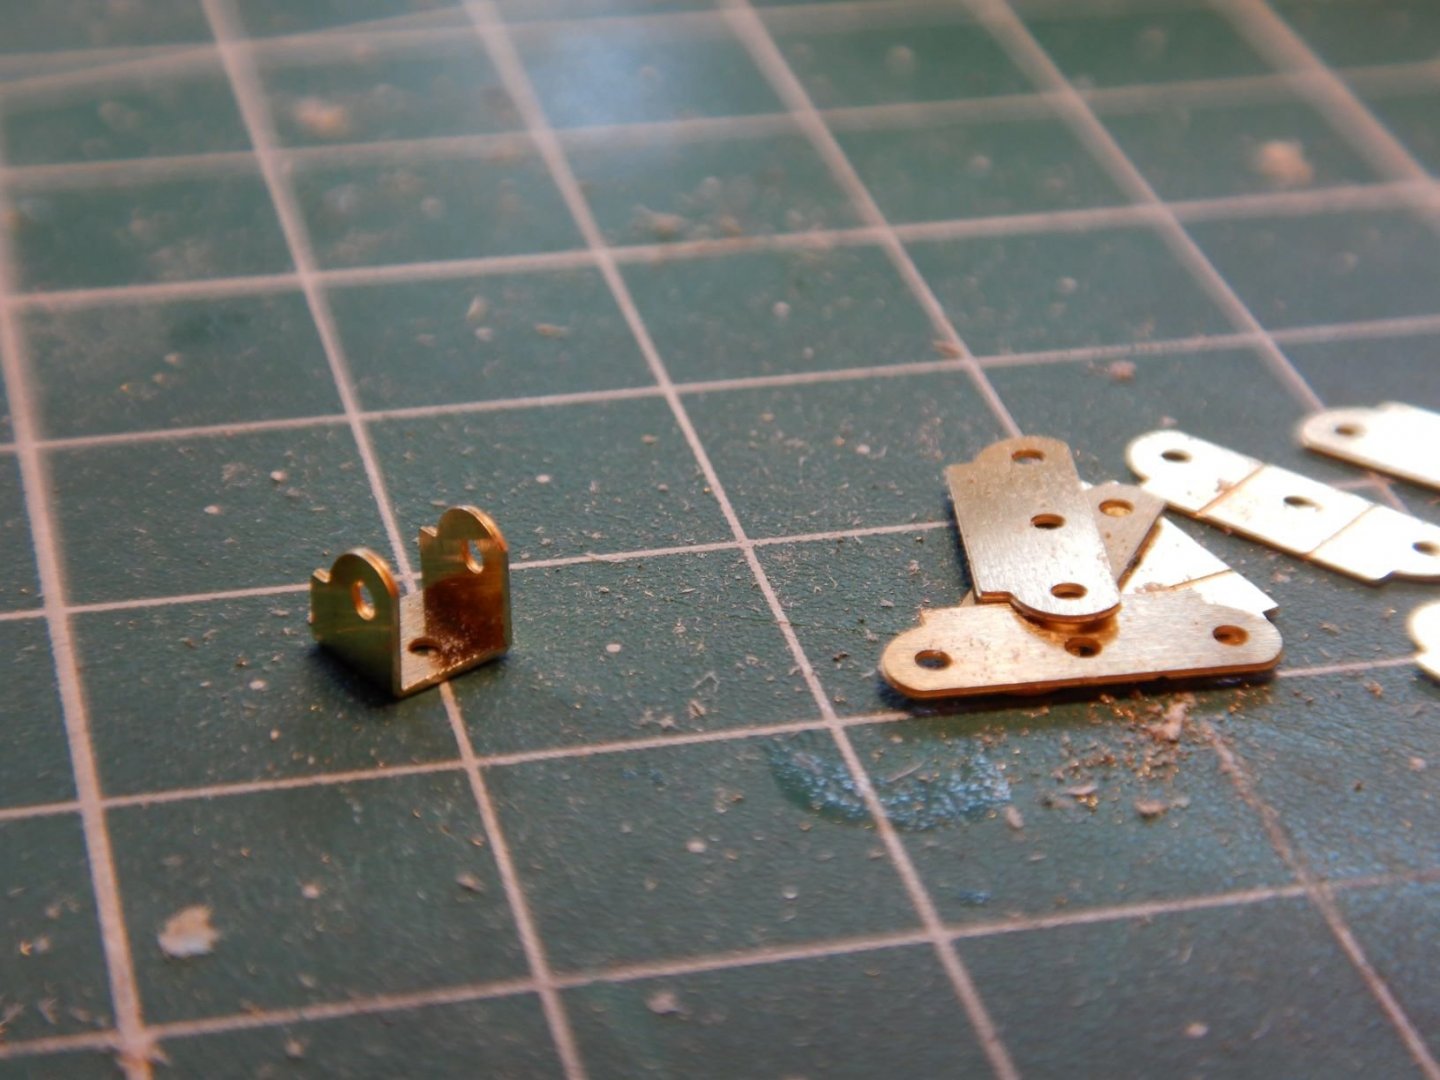
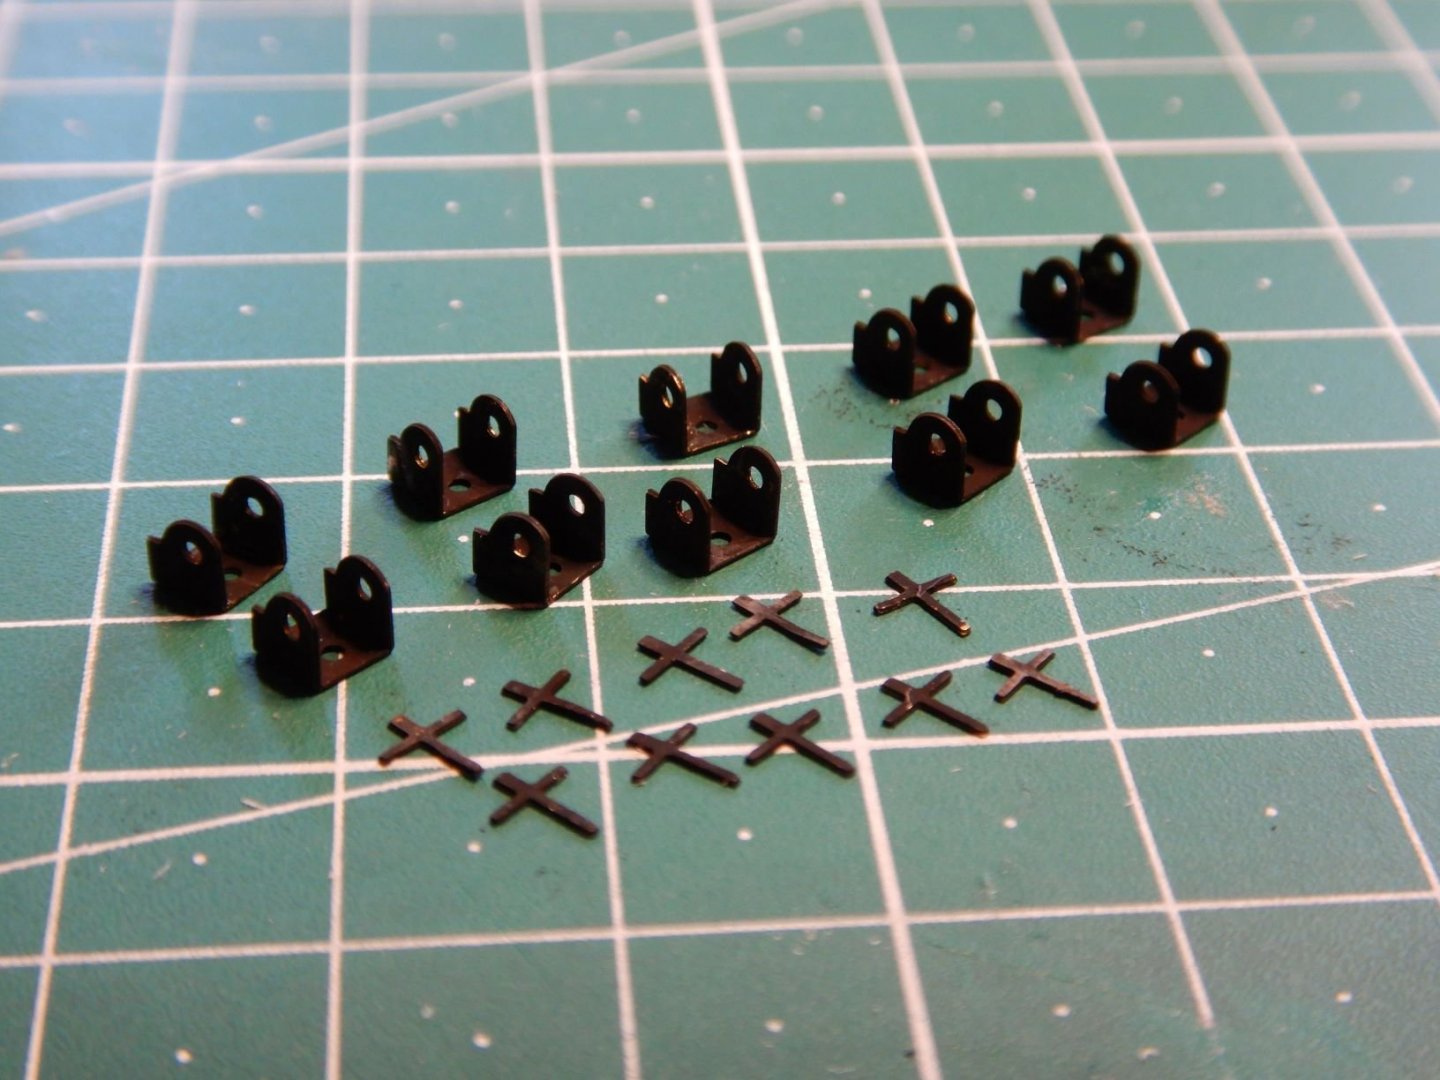
The planking continues.. Got four more planks on both sides. Eight in total. It's going slow but steady! Not the prettiest planking, but I think it will smooth out when sanded. The camera seems to highlight all the bumps and edges... In between waiting for the planks and the glue to dry I've continued on the cannons. Or carronades? There is some photoetched brackets that I cut loose from the sheet and "folded" and blackened. The little crosses are the back supports/adjusters to hold the backend of the barrel to the carriage. I'm not too sure I like those.. When mounting the gun barrel to the bracket I got a problem with the gunbarrel tab being too wide to fit.. So I have to file down the sides of the tab on my newly painted barrels.. 😟 Oh well. It's one of those little setbacks that's a part of the hobby I guess! That sounds like an interresting scratch build project! It will be a big model! Between planking and guns I also started at the deckhouses/skylights. These are pretty simple affairs of lasercut plywood that fits together pretty well. I'm jumping a little back and forth in the manual, but it's all gonna be done at one time or another. The main deckhouse is all that got captured on "film" 😆 That's it for now. Next update coming soon! Gaffrig.


- 110 replies
-
- 7
-
-
- le renard
- artesania latina
- (and 1 more)