Gaffrig
-
Posts
185 -
Joined
-
Last visited
Content Type
Profiles
Forums
Gallery
Events
Everything posted by Gaffrig
-
Hello. Yes, I can do that. If it’s allowed, I’ll post them here. If not I can send them to you privately. Gaffrig.
-
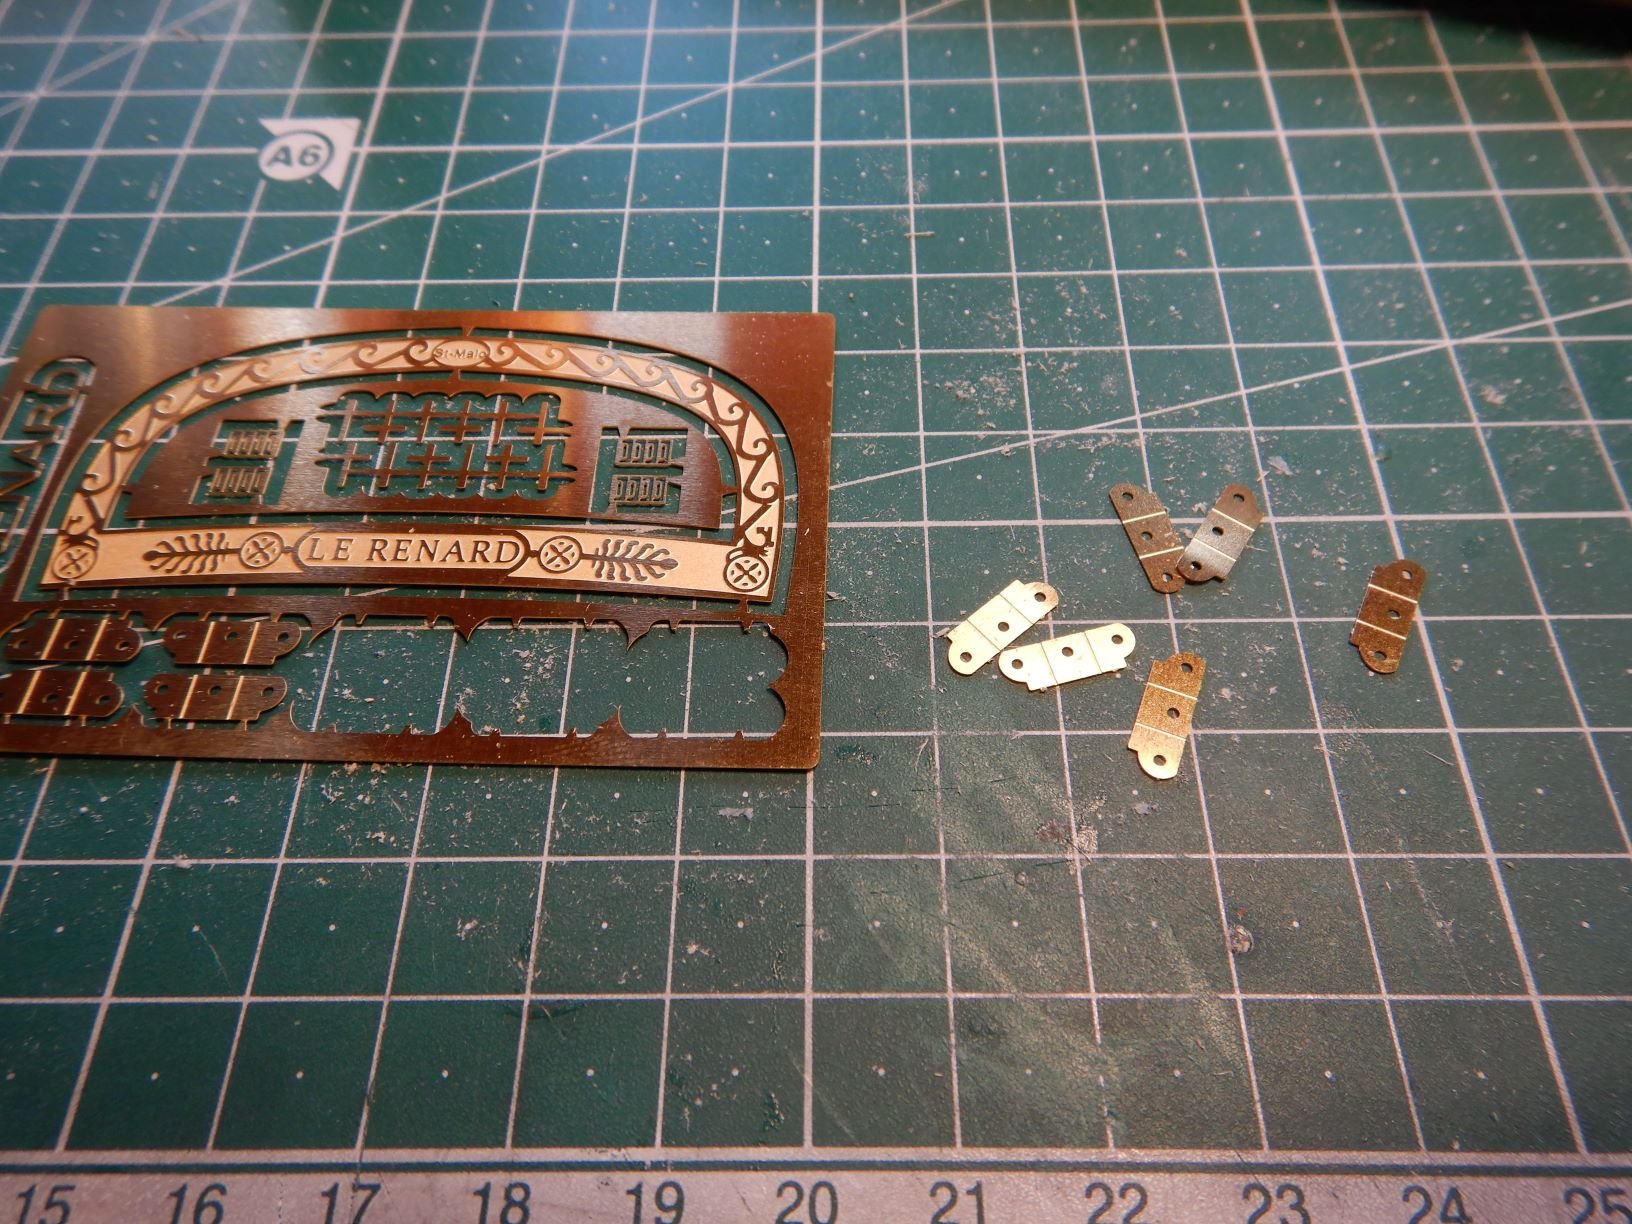
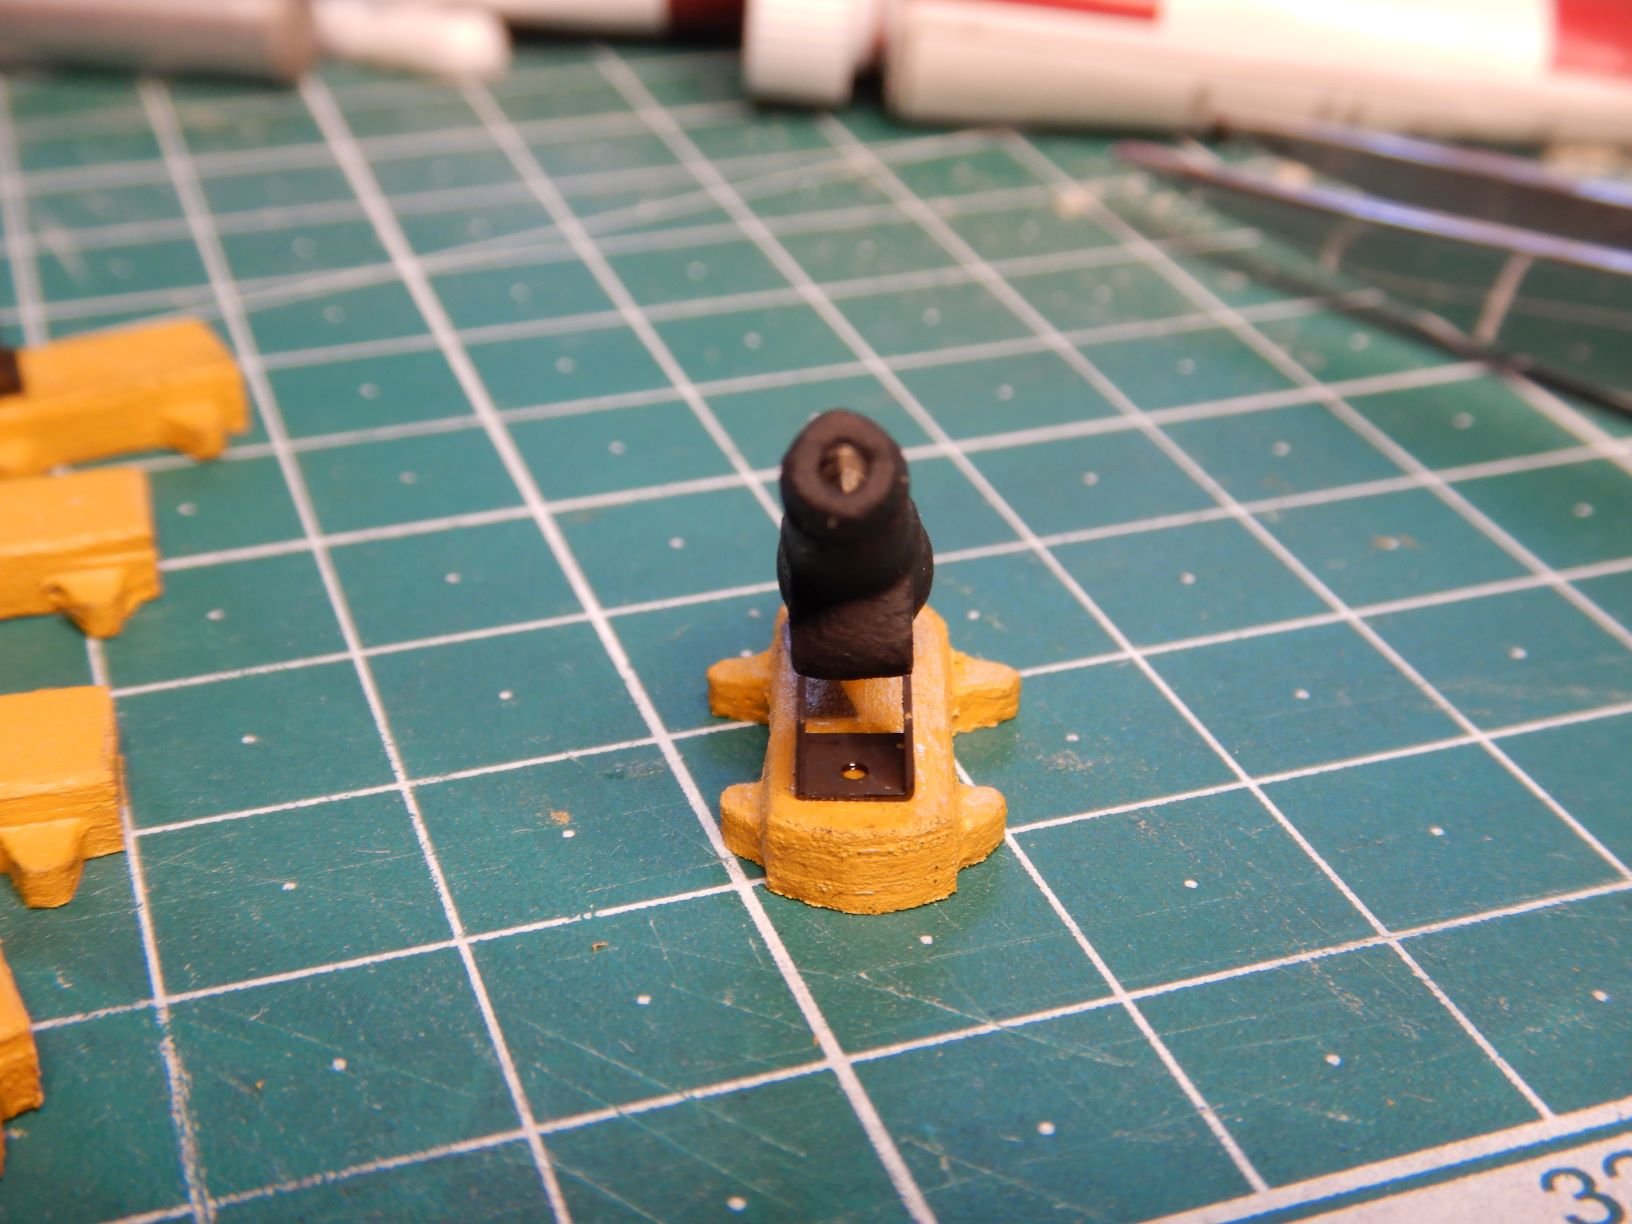
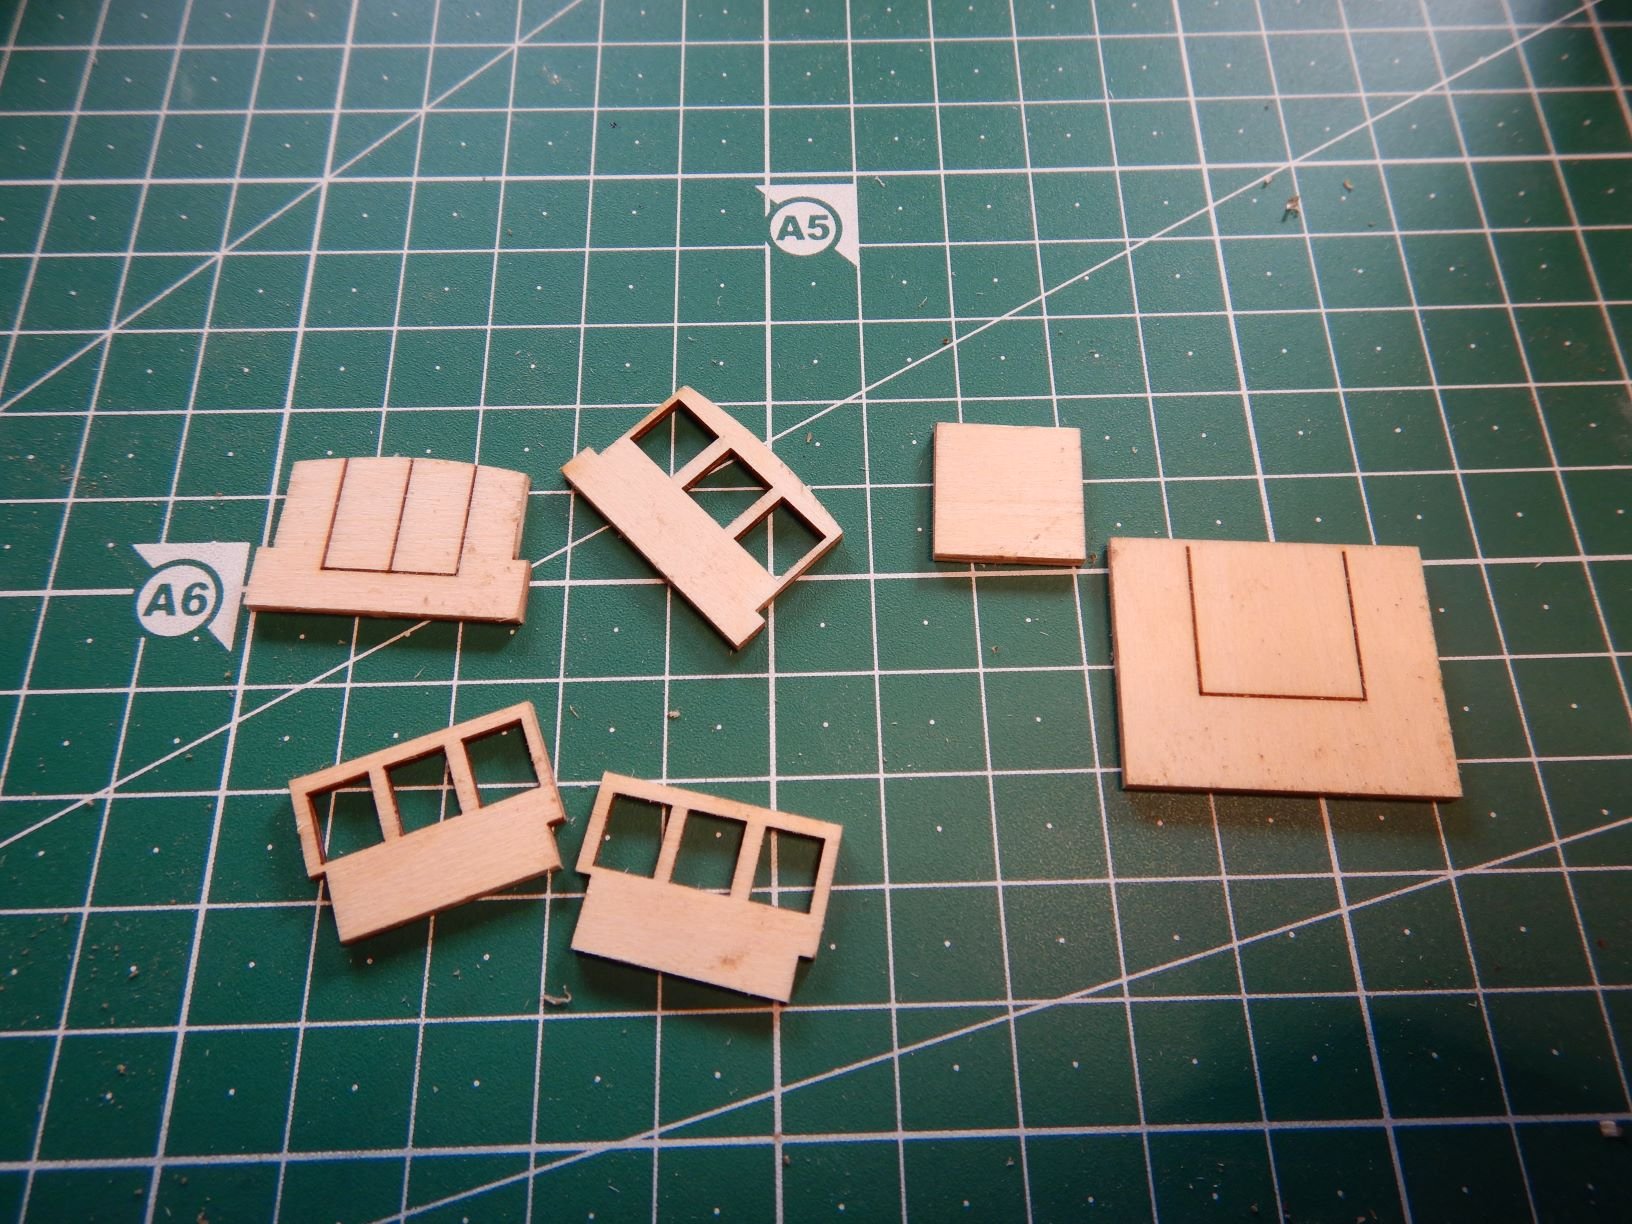
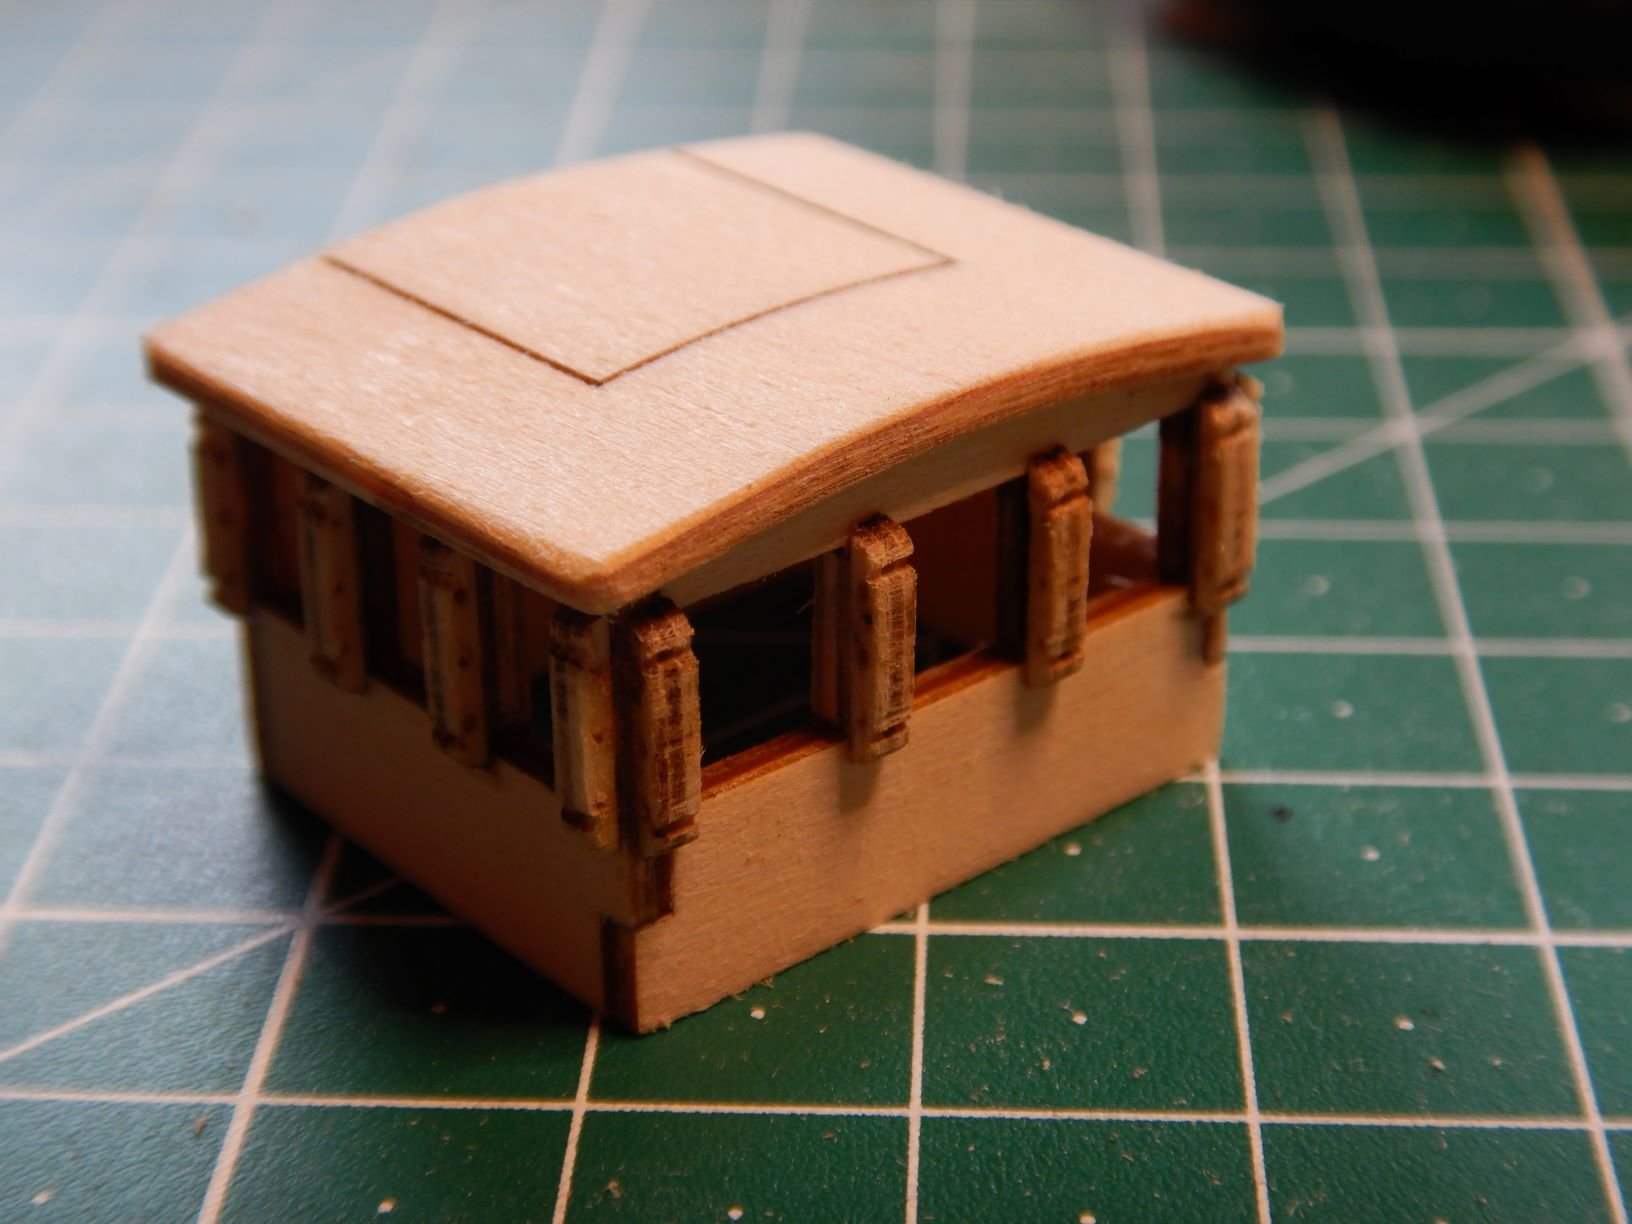
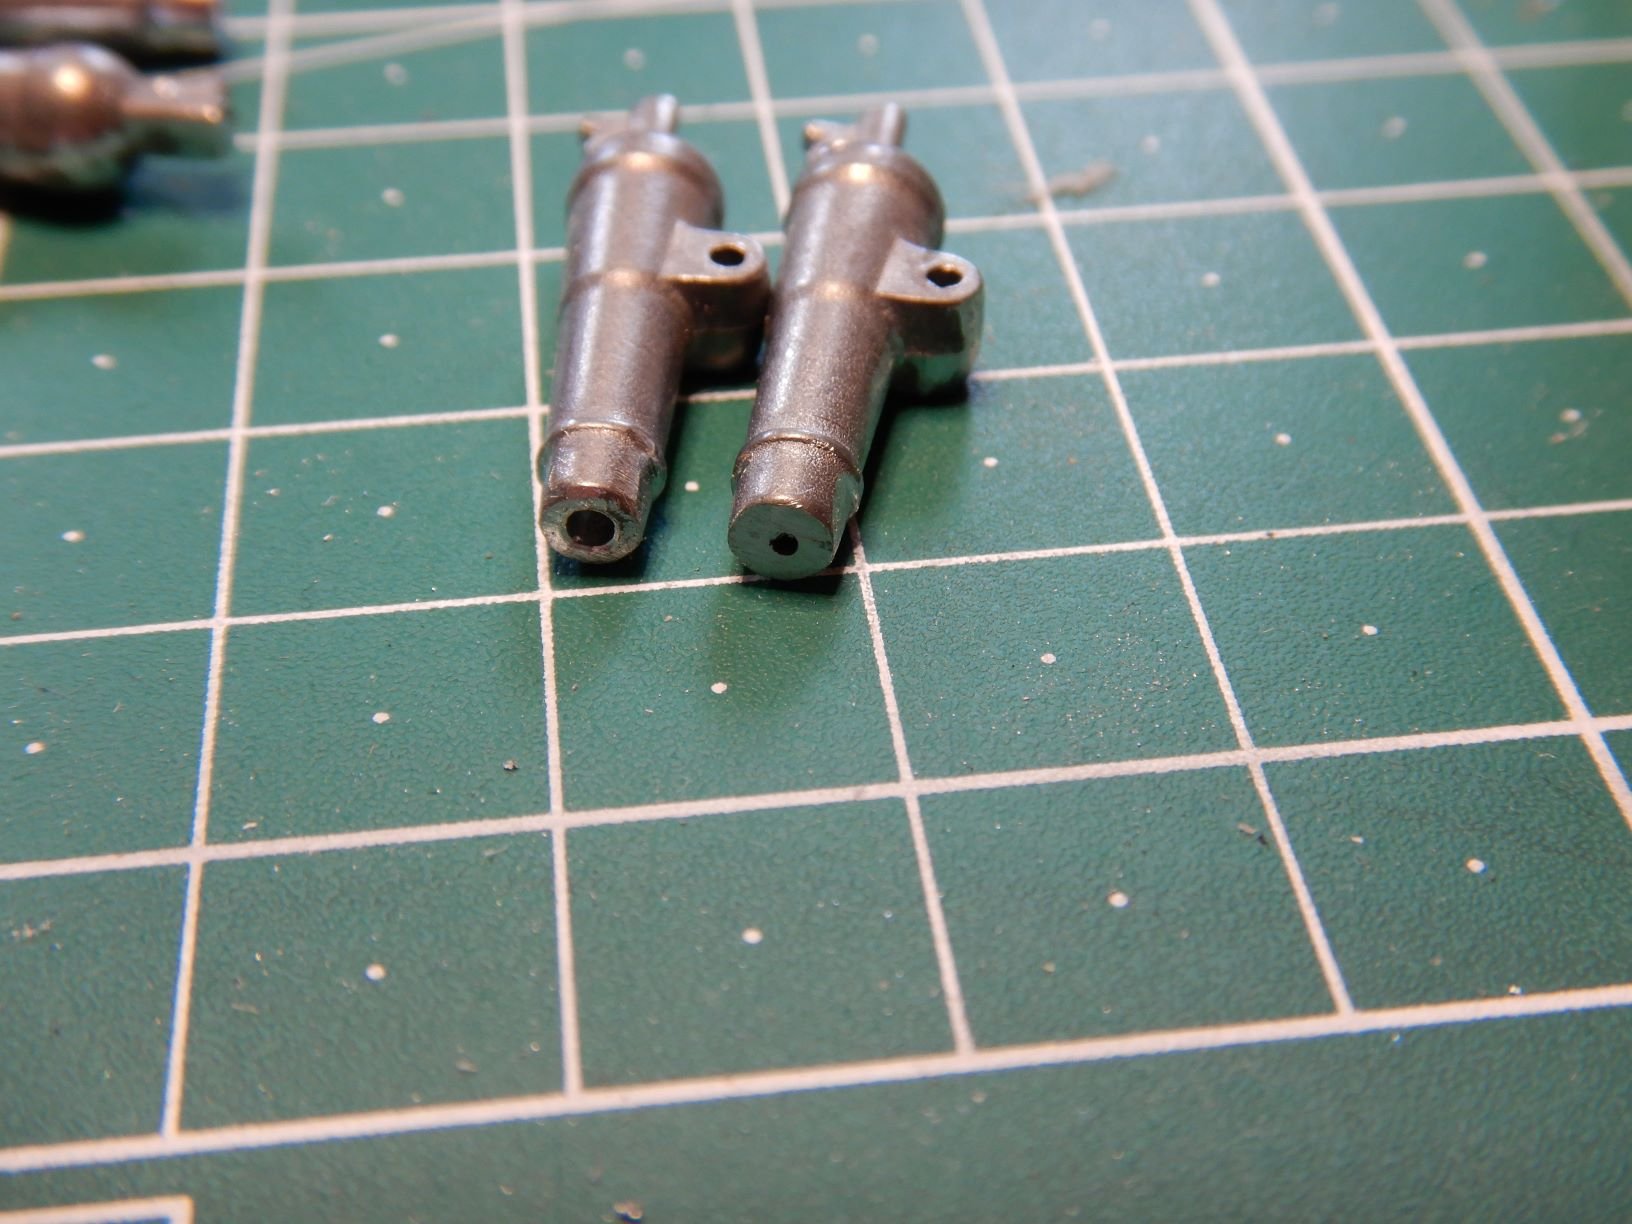
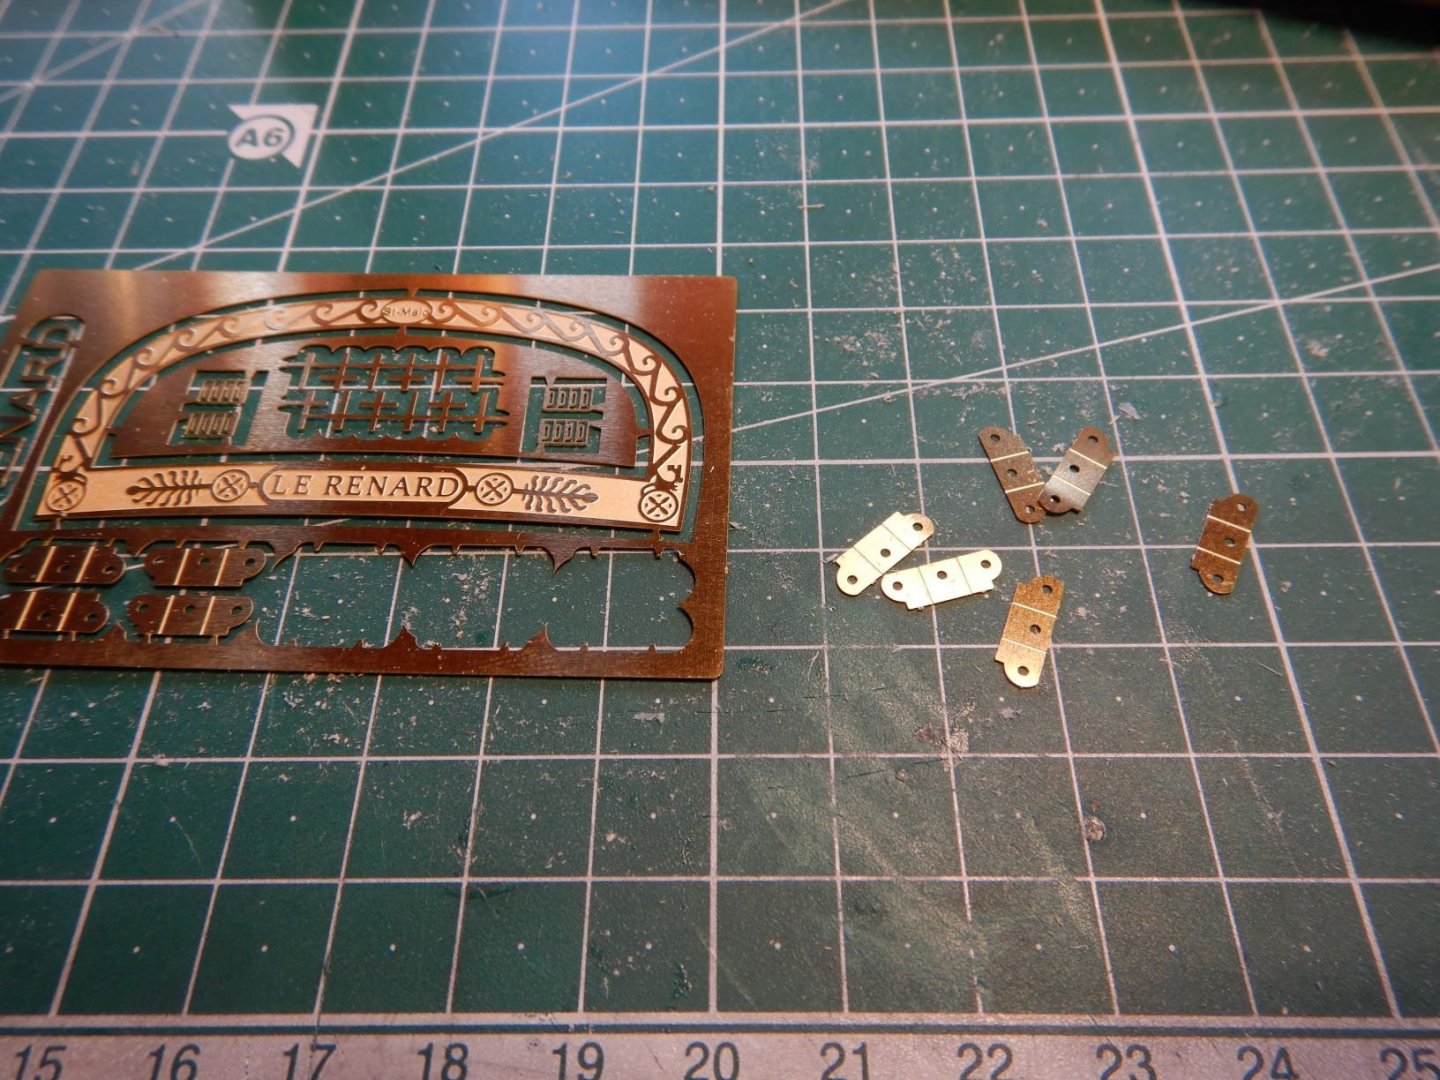
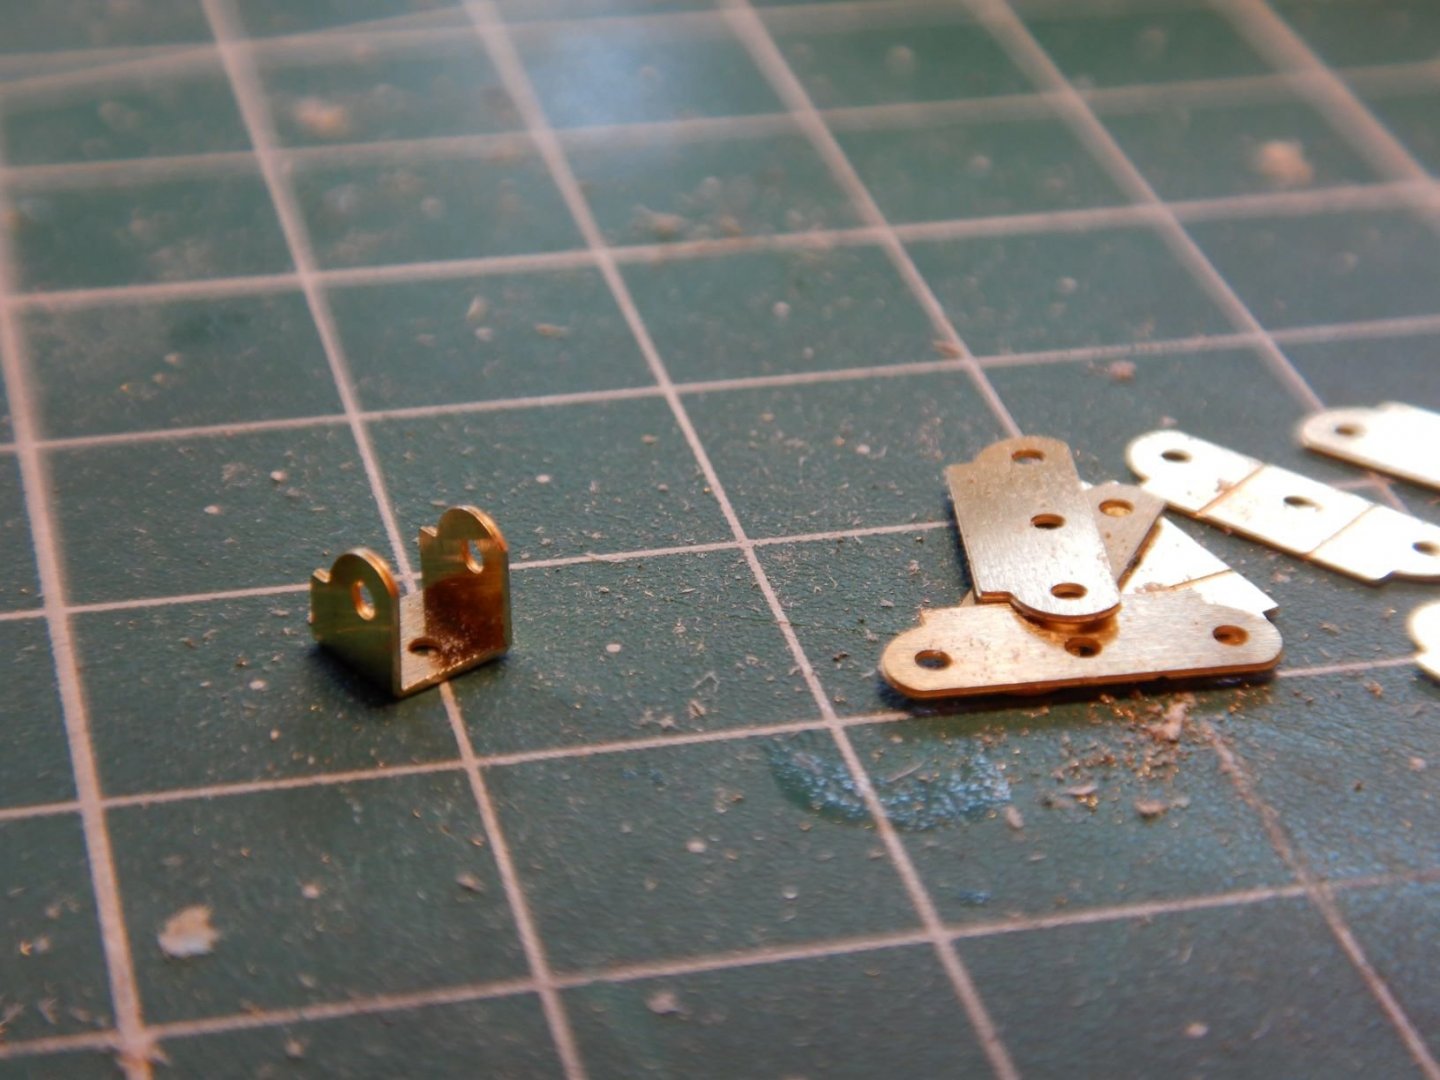
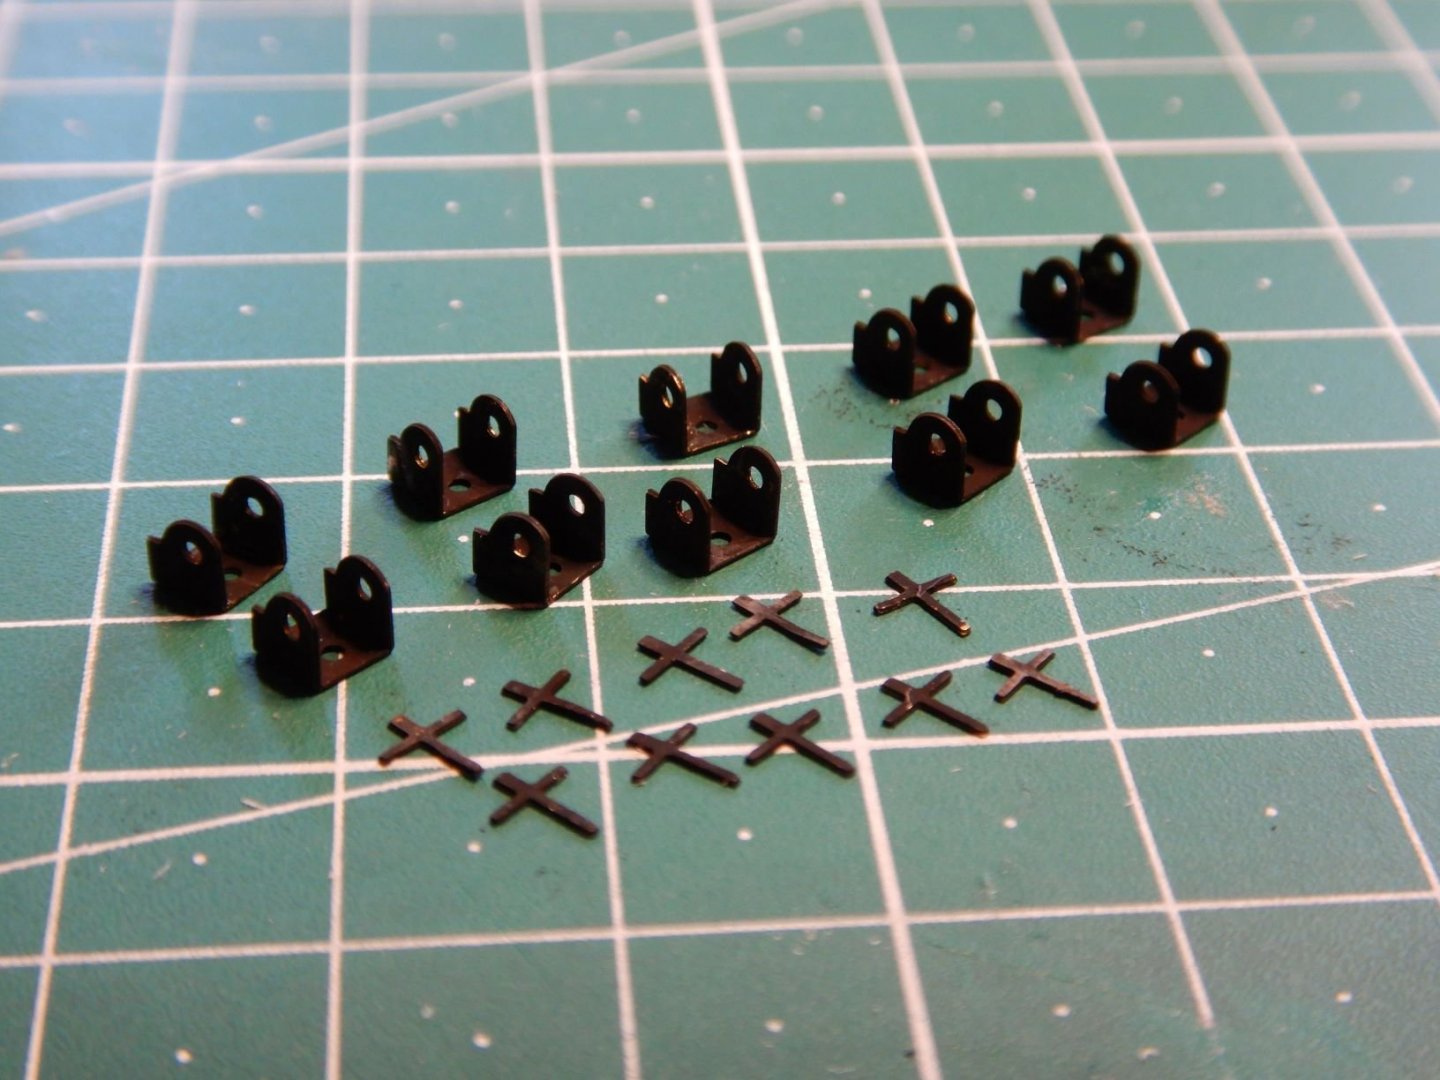
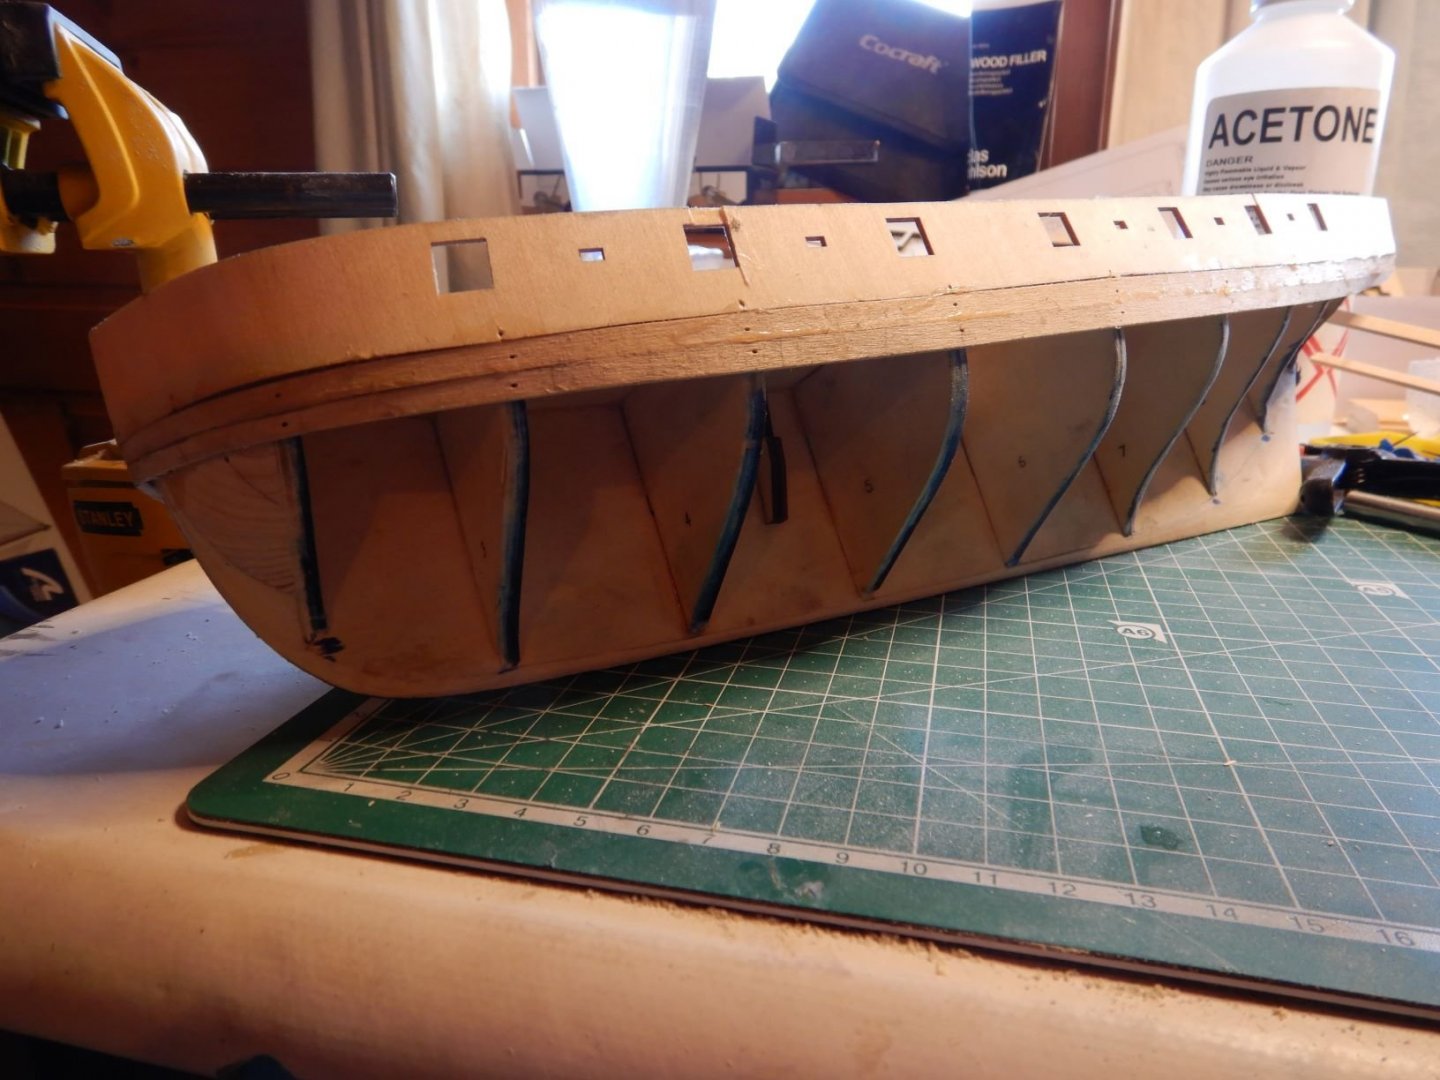
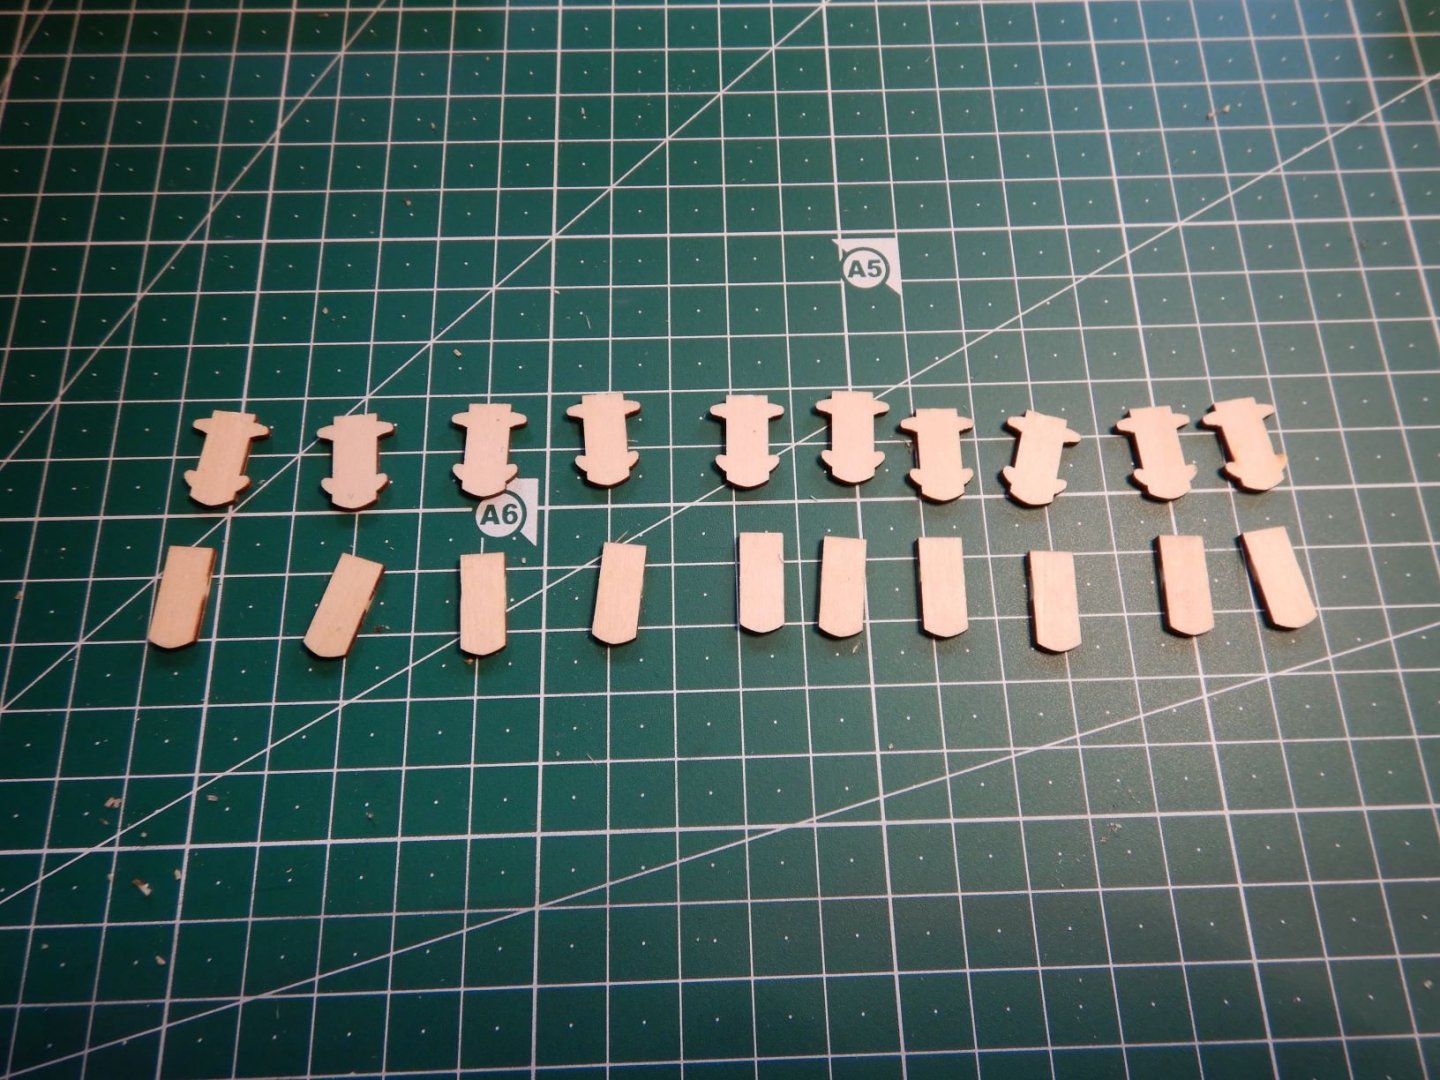
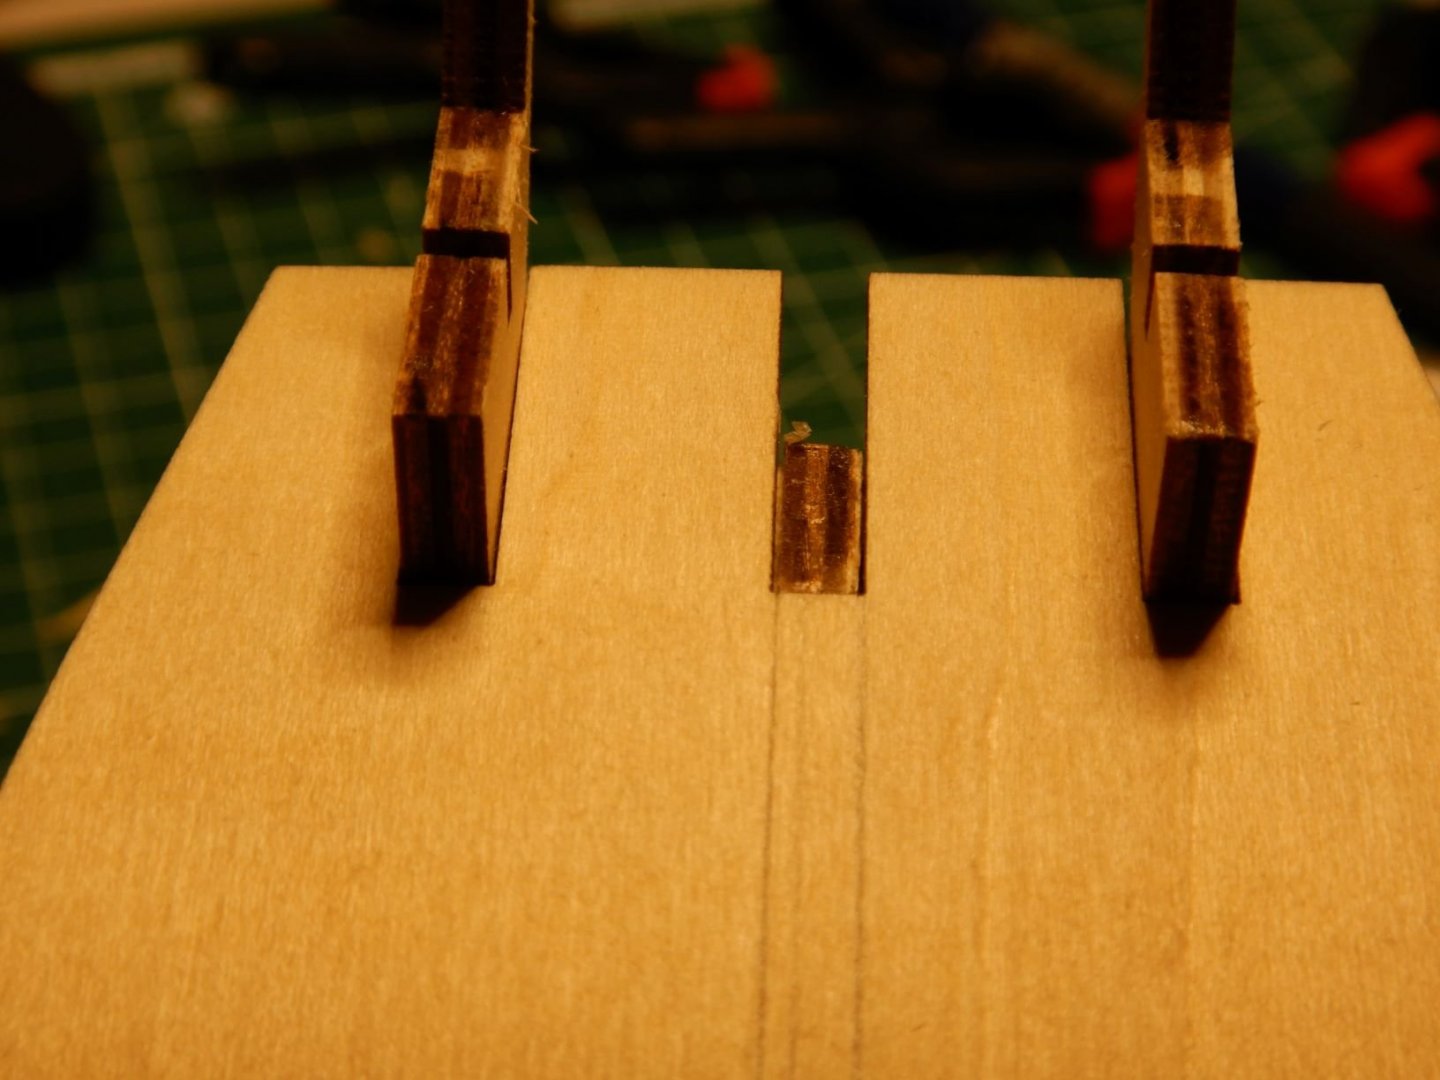
 The planking continues.. Got four more planks on both sides. Eight in total. It's going slow but steady! Not the prettiest planking, but I think it will smooth out when sanded. The camera seems to highlight all the bumps and edges... In between waiting for the planks and the glue to dry I've continued on the cannons. Or carronades? There is some photoetched brackets that I cut loose from the sheet and "folded" and blackened. The little crosses are the back supports/adjusters to hold the backend of the barrel to the carriage. I'm not too sure I like those.. When mounting the gun barrel to the bracket I got a problem with the gunbarrel tab being too wide to fit.. So I have to file down the sides of the tab on my newly painted barrels.. 😟 Oh well. It's one of those little setbacks that's a part of the hobby I guess! That sounds like an interresting scratch build project! It will be a big model! Between planking and guns I also started at the deckhouses/skylights. These are pretty simple affairs of lasercut plywood that fits together pretty well. I'm jumping a little back and forth in the manual, but it's all gonna be done at one time or another. The main deckhouse is all that got captured on "film" 😆 That's it for now. Next update coming soon! Gaffrig.


- 110 replies
-
- 7
-

-
- le renard
- artesania latina
- (and 1 more)
-
Hello. That’s a good idea to use the glue. That would mean no pin holes in the planks. And it’s probably faster to plank that way. I’m a newbie at this so I like to take the plank off after it has dried to shape and sand a bevel so it fits against the previous plank as best I can. But it’s definetly a good idea that I’ll put in my toolbox fore future use! Gaffrig.
-
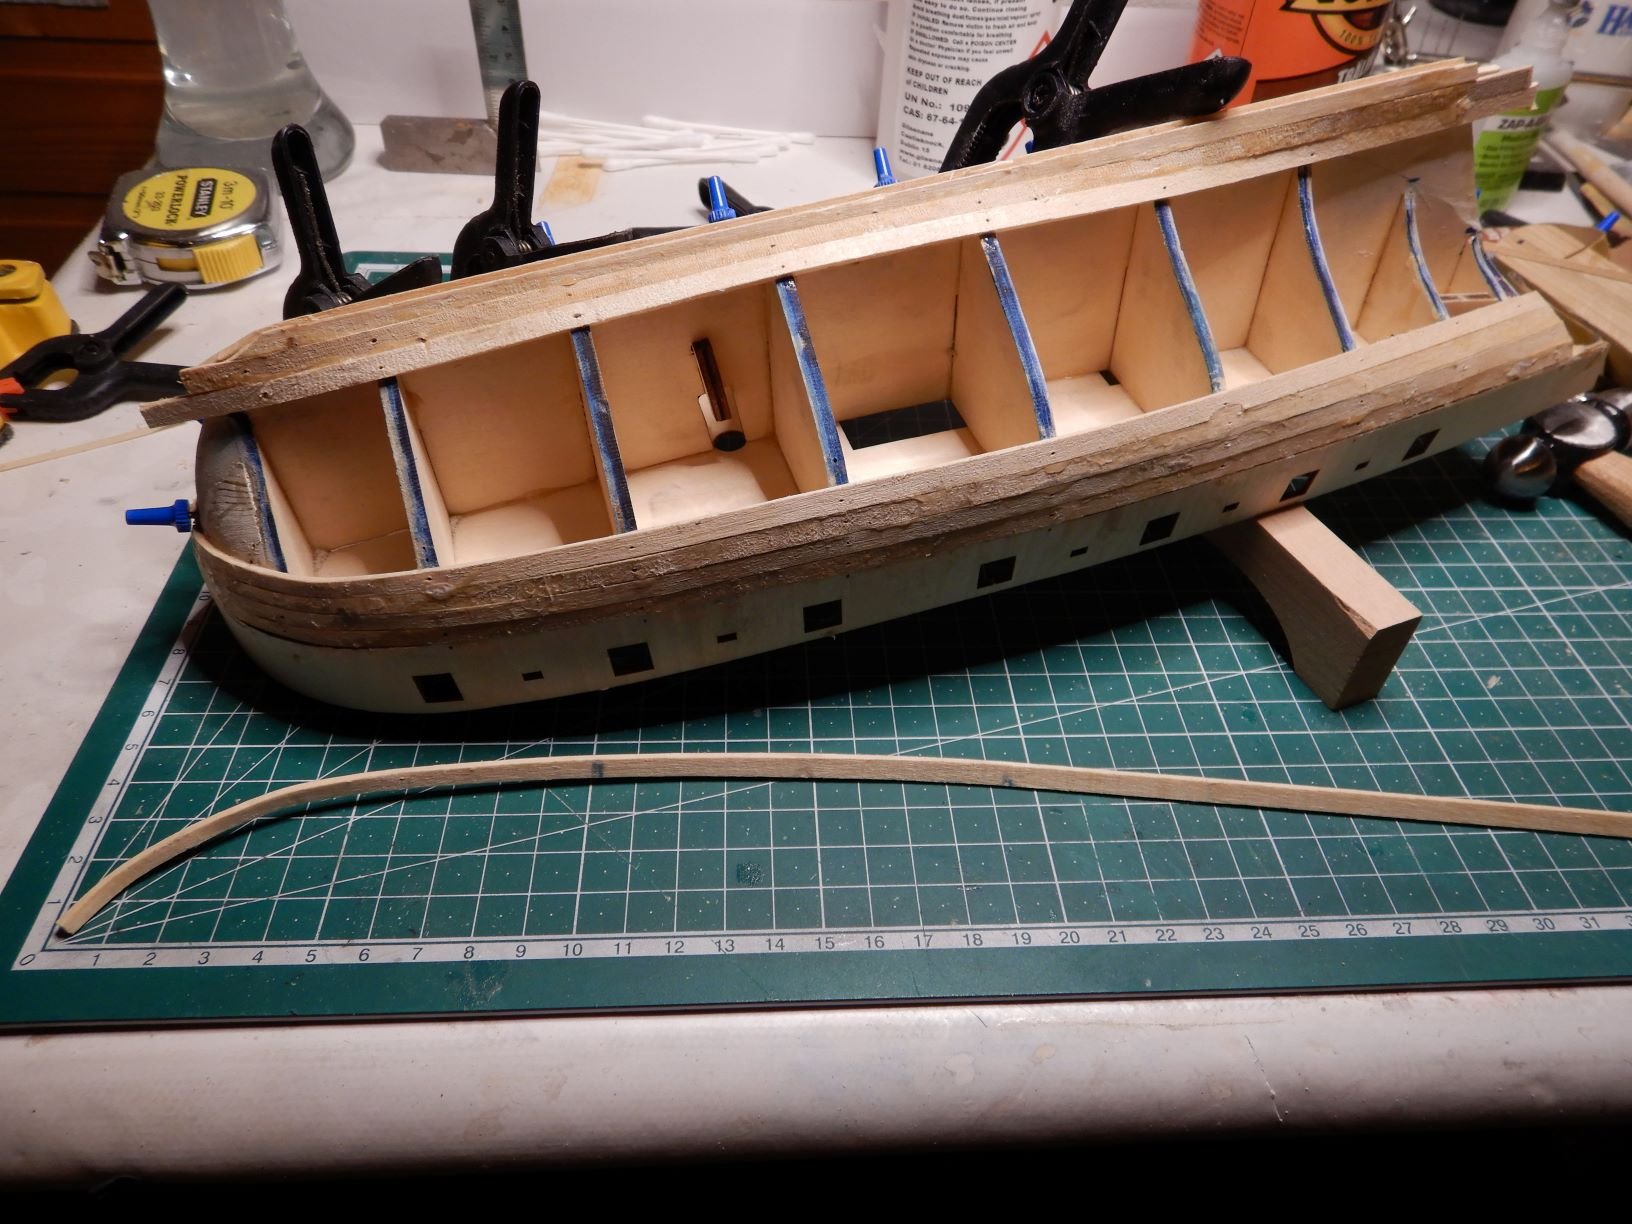
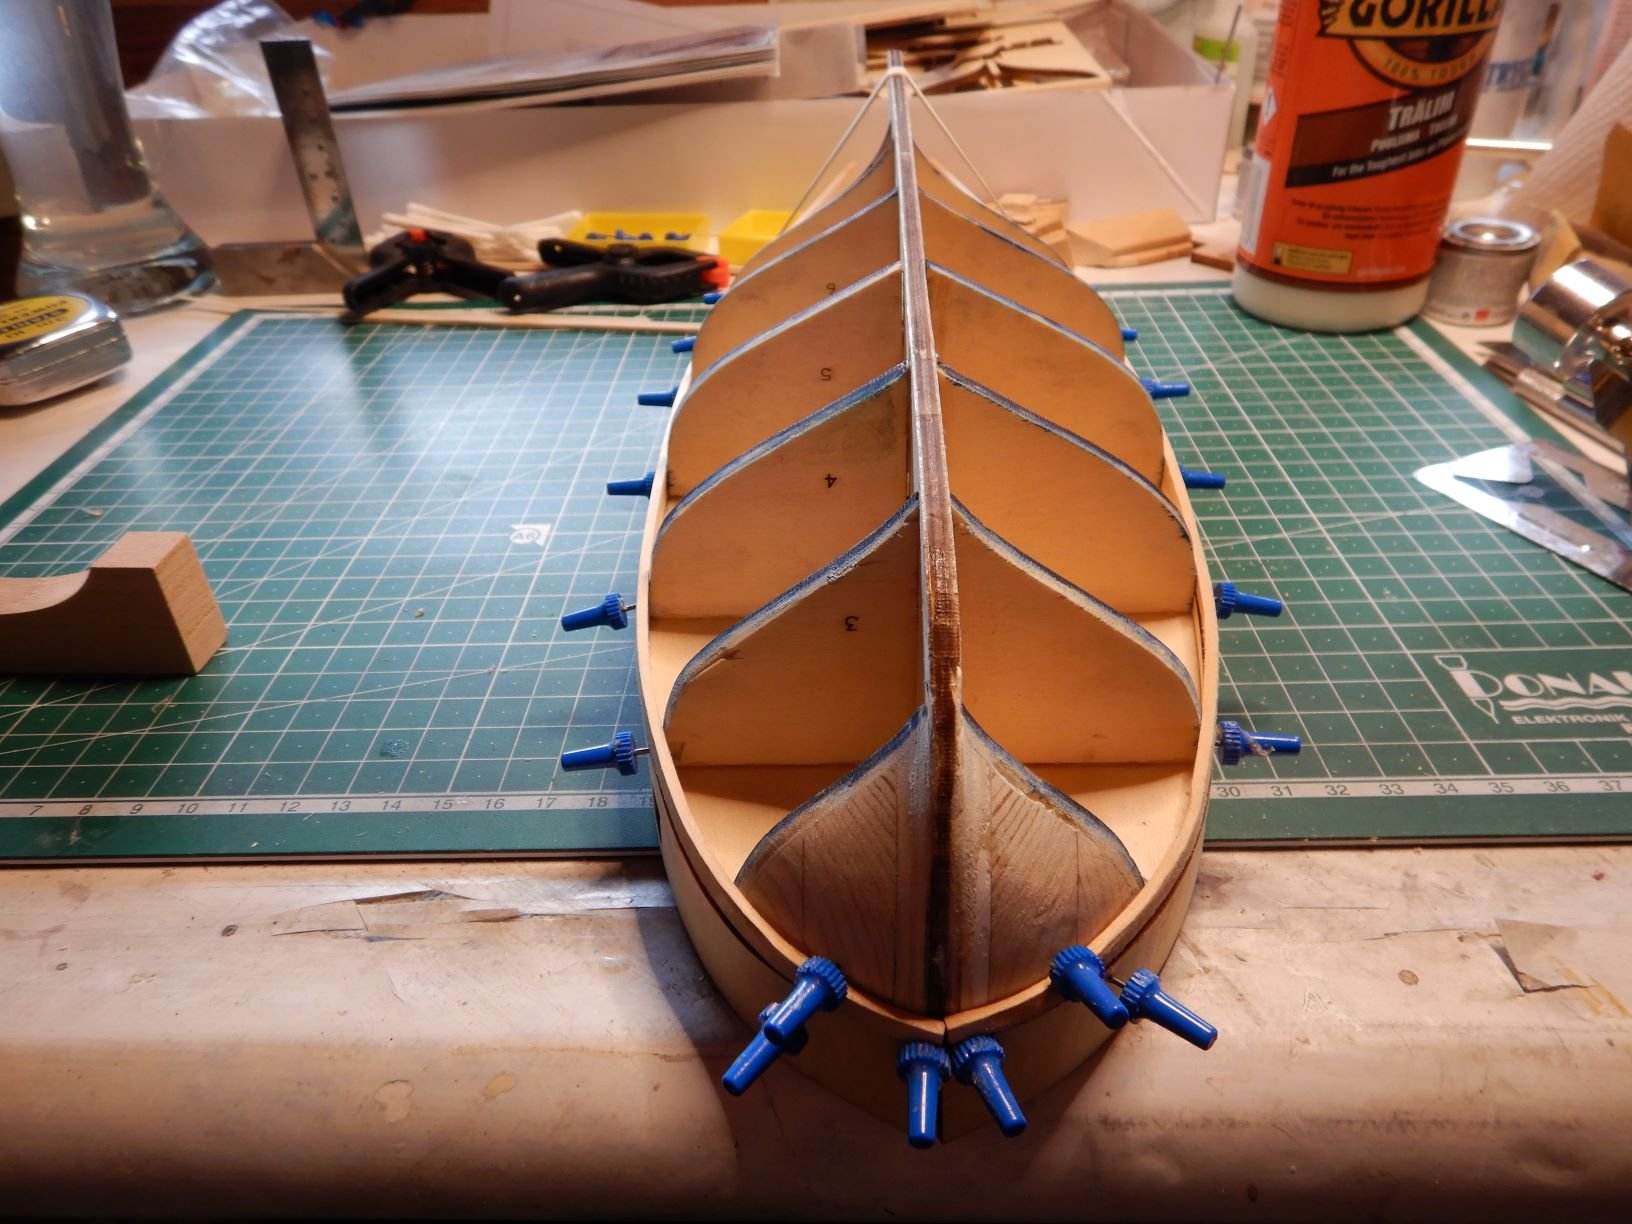
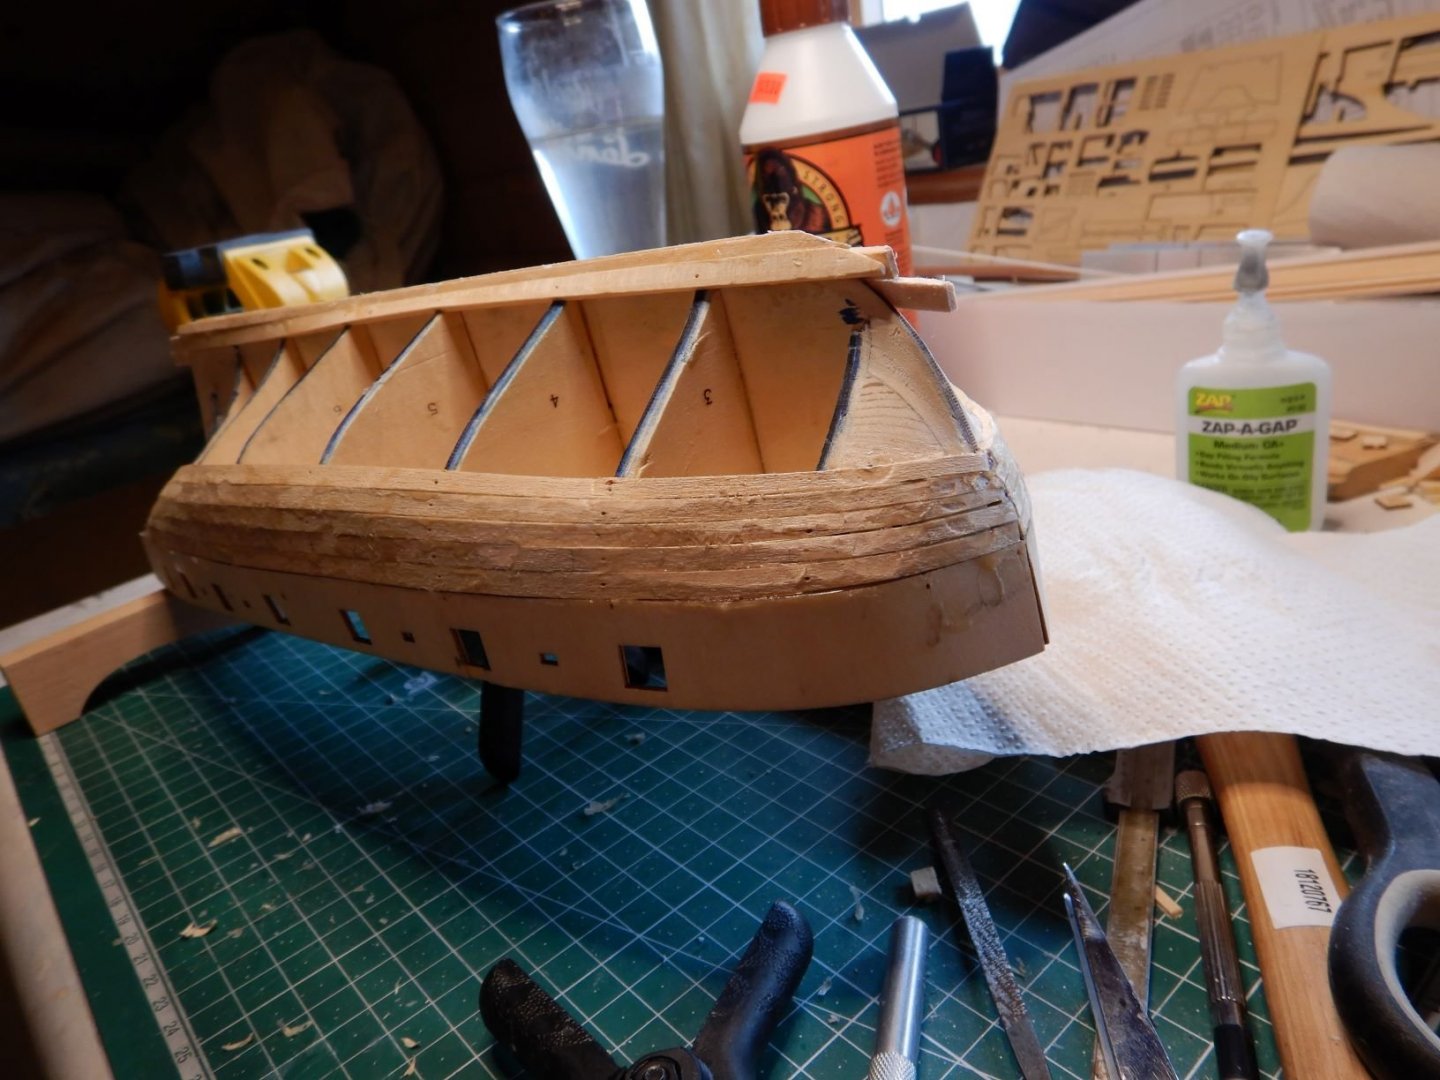
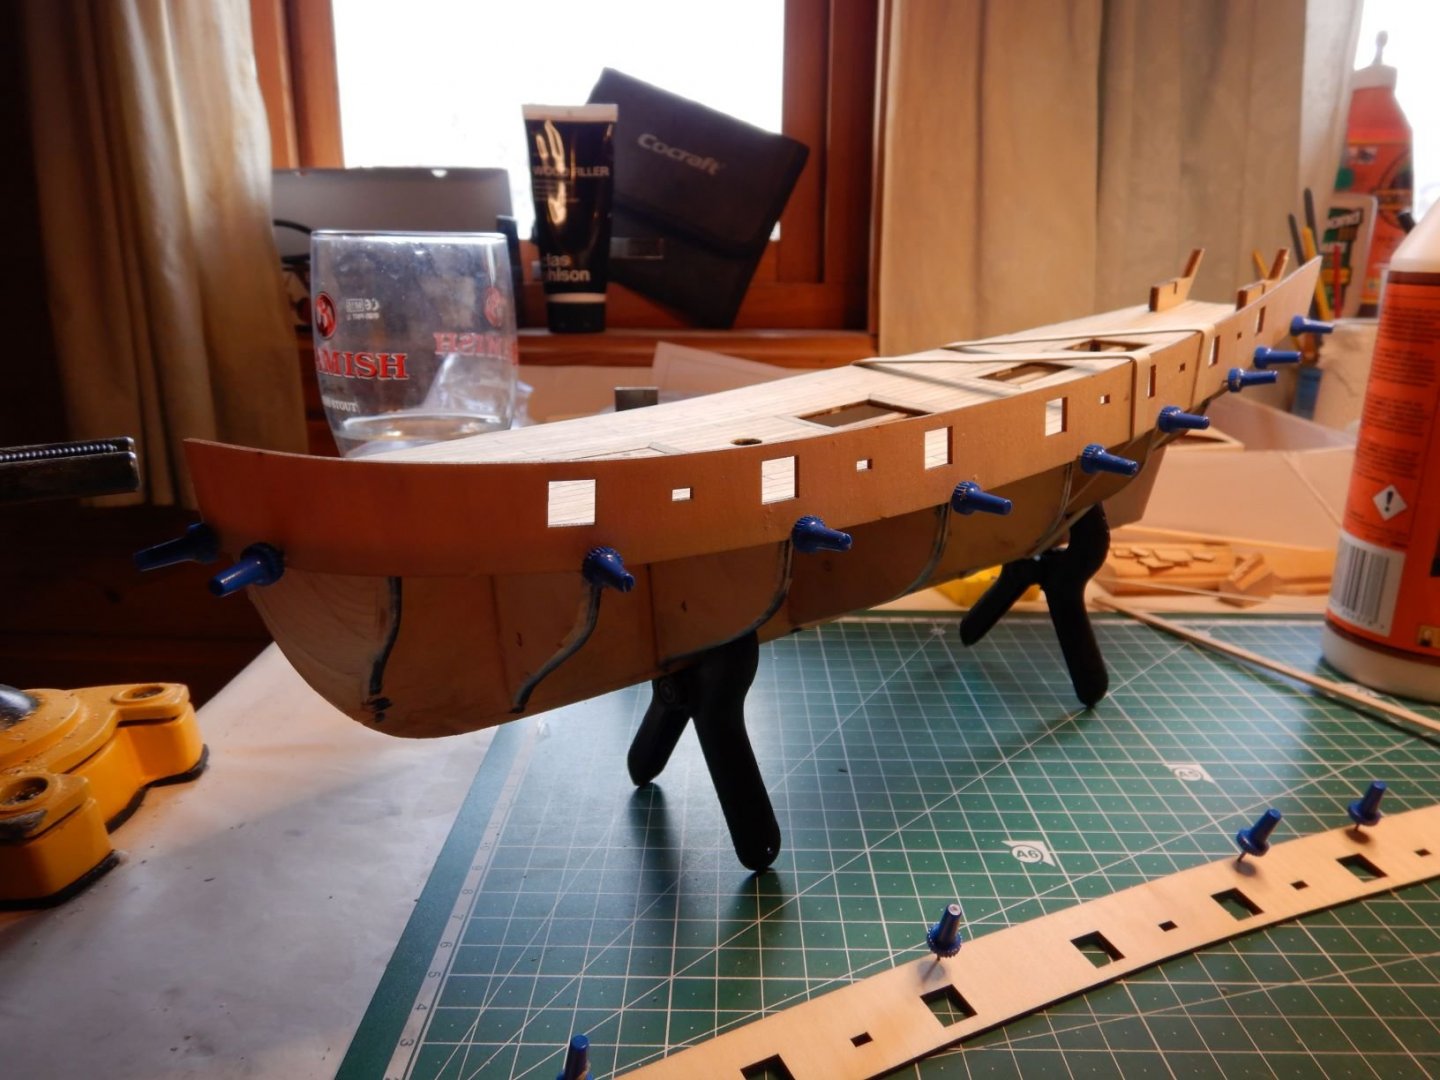
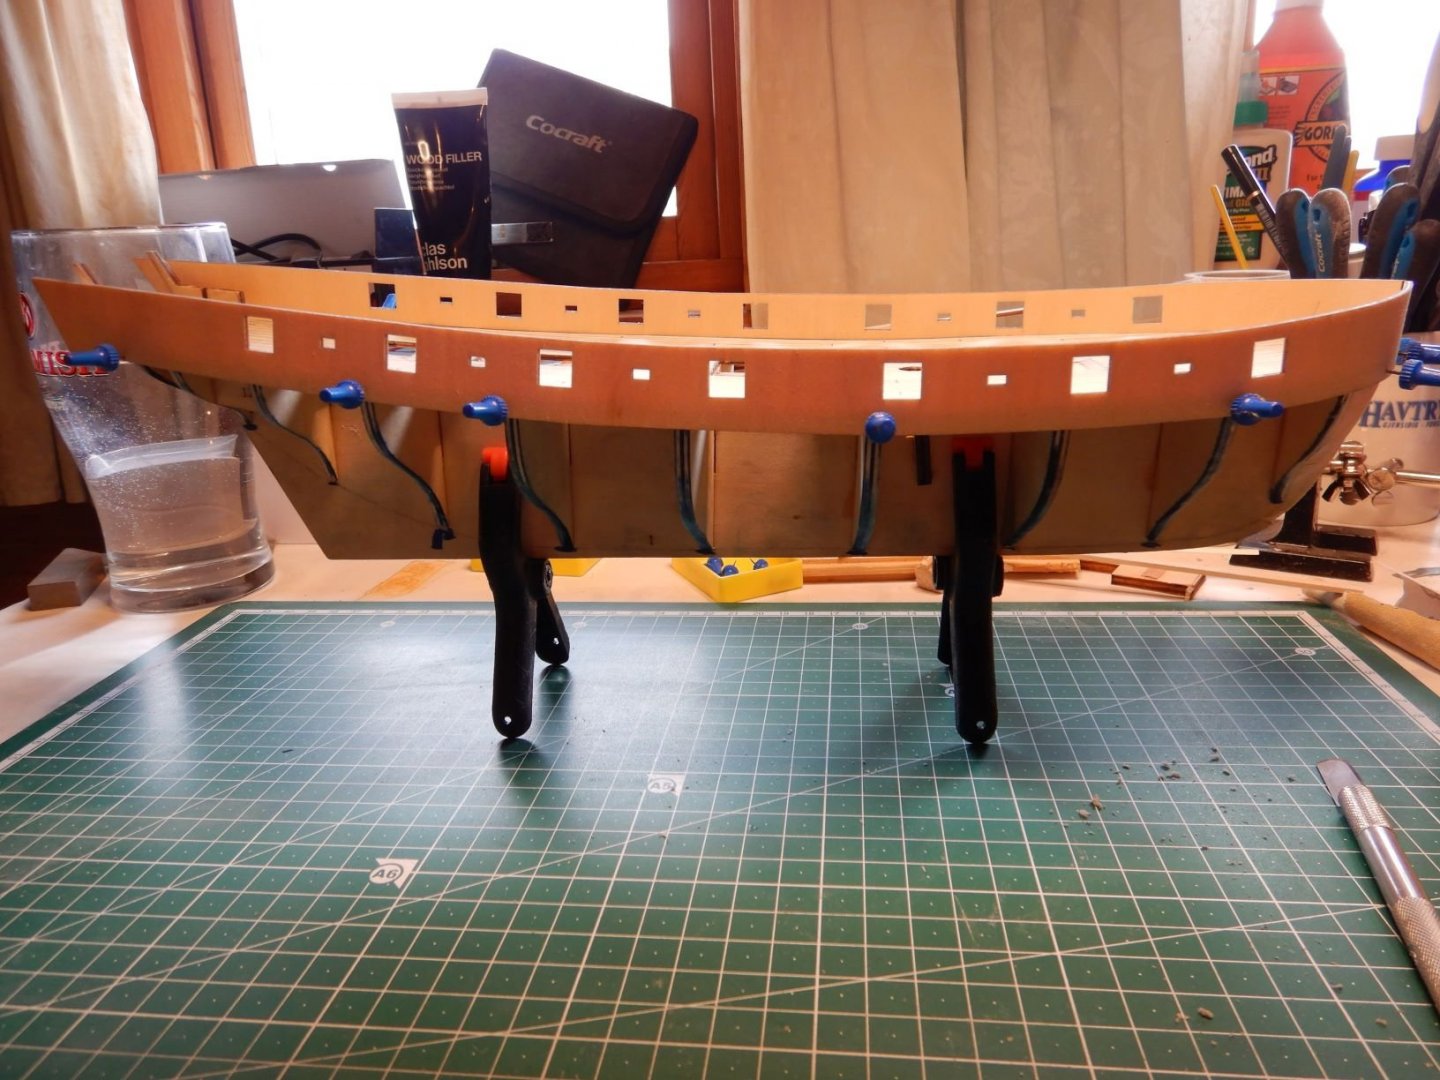
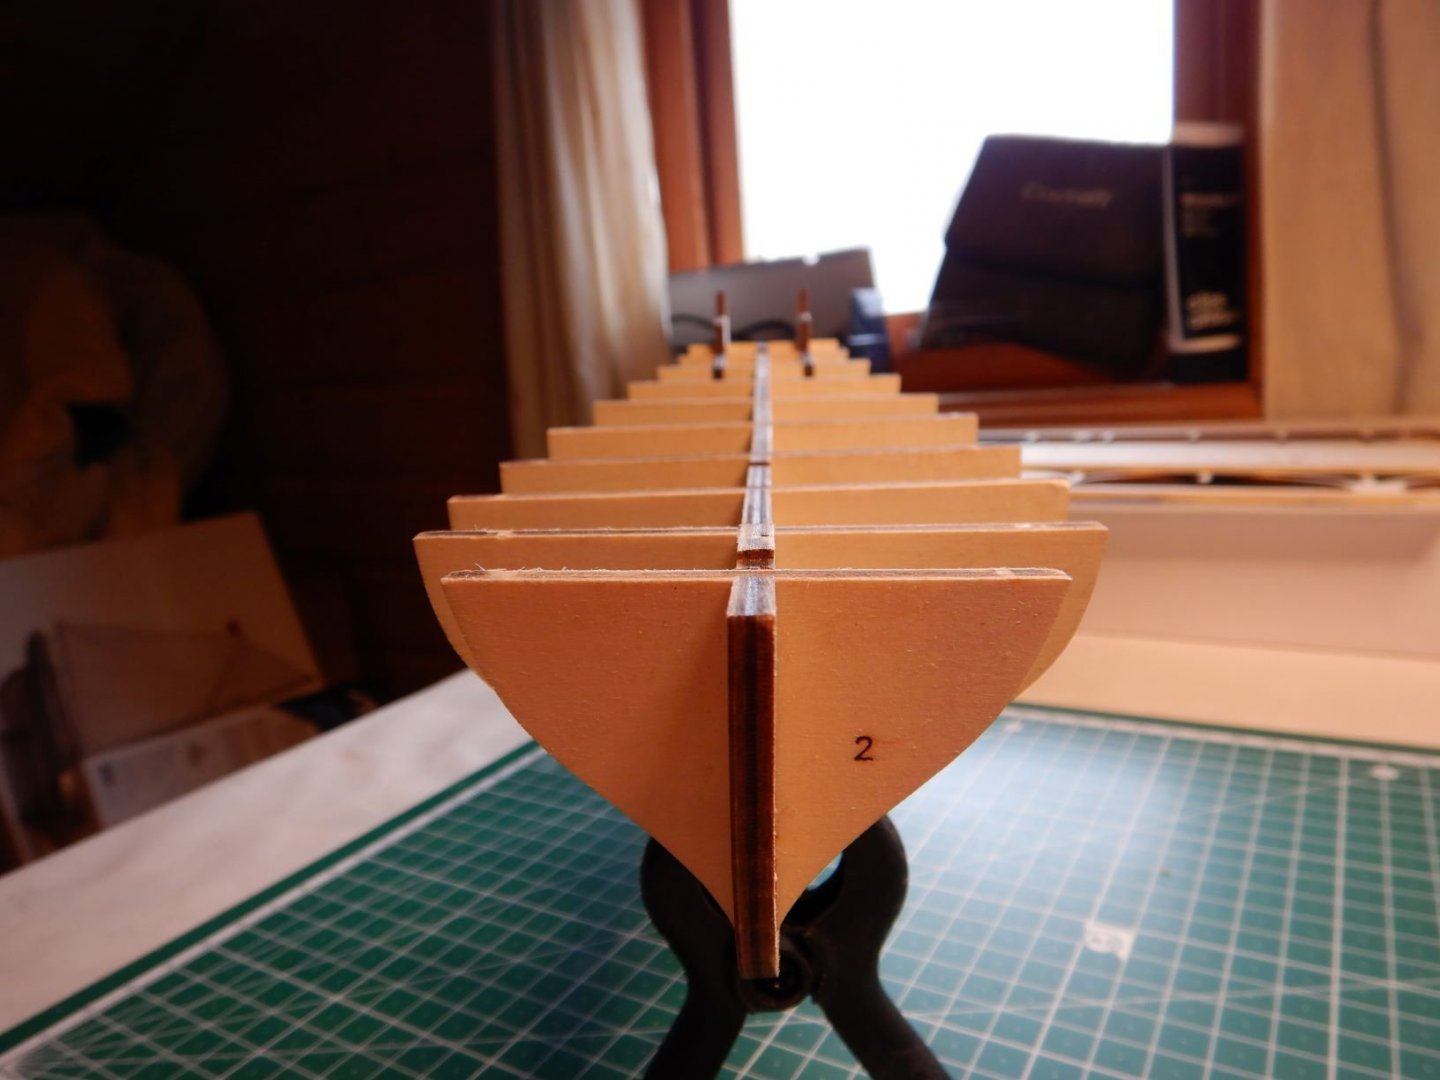
Thank you all who have been reading the log and giving it a thumbs up! On with the planking. The kit supplied materials are 2 x 5 mm battens of what I think is limewood. They are a lot stiffer than the ones supplied in my Bluenose kit, and since this boat has a bow that's a lot more blunt than the Bluenose I think I will need to soak and heat the planks for this build. This was not necessary on the Bluenose. Le Renard has a single planked hull, as did the Bluenose. So I measured the bulkheads, and divided so I ended up with 16 planks. This gave me a taper from 5 down to 3,2 mm in the bow, and nothing in the stern. I tapered the first two, soaked them for about 15 to 30 minutes and bent them roughly in shape with the electric plank bender from amati. Then I clamped them on the hull and left them to dry. Once dry I took them off and gave them some fine adjustments and glued them on with the same gorilla wood I used before. I keep forgetting to take pictures once I get going, but here I have two planks on both sides glued on. I've sanded the keel to imitate a rabbet and have glued on the garboard strakes. There will be cut a grove in the garboards later to accommodate the keel. Now it's "taper, soak, heat, shape, dry, glue and repeat" for a few days, and hopefully I'll end up with a planked hull! Take care! Gaffrig.


- 110 replies
-
- 5
-
-
- le renard
- artesania latina
- (and 1 more)
-
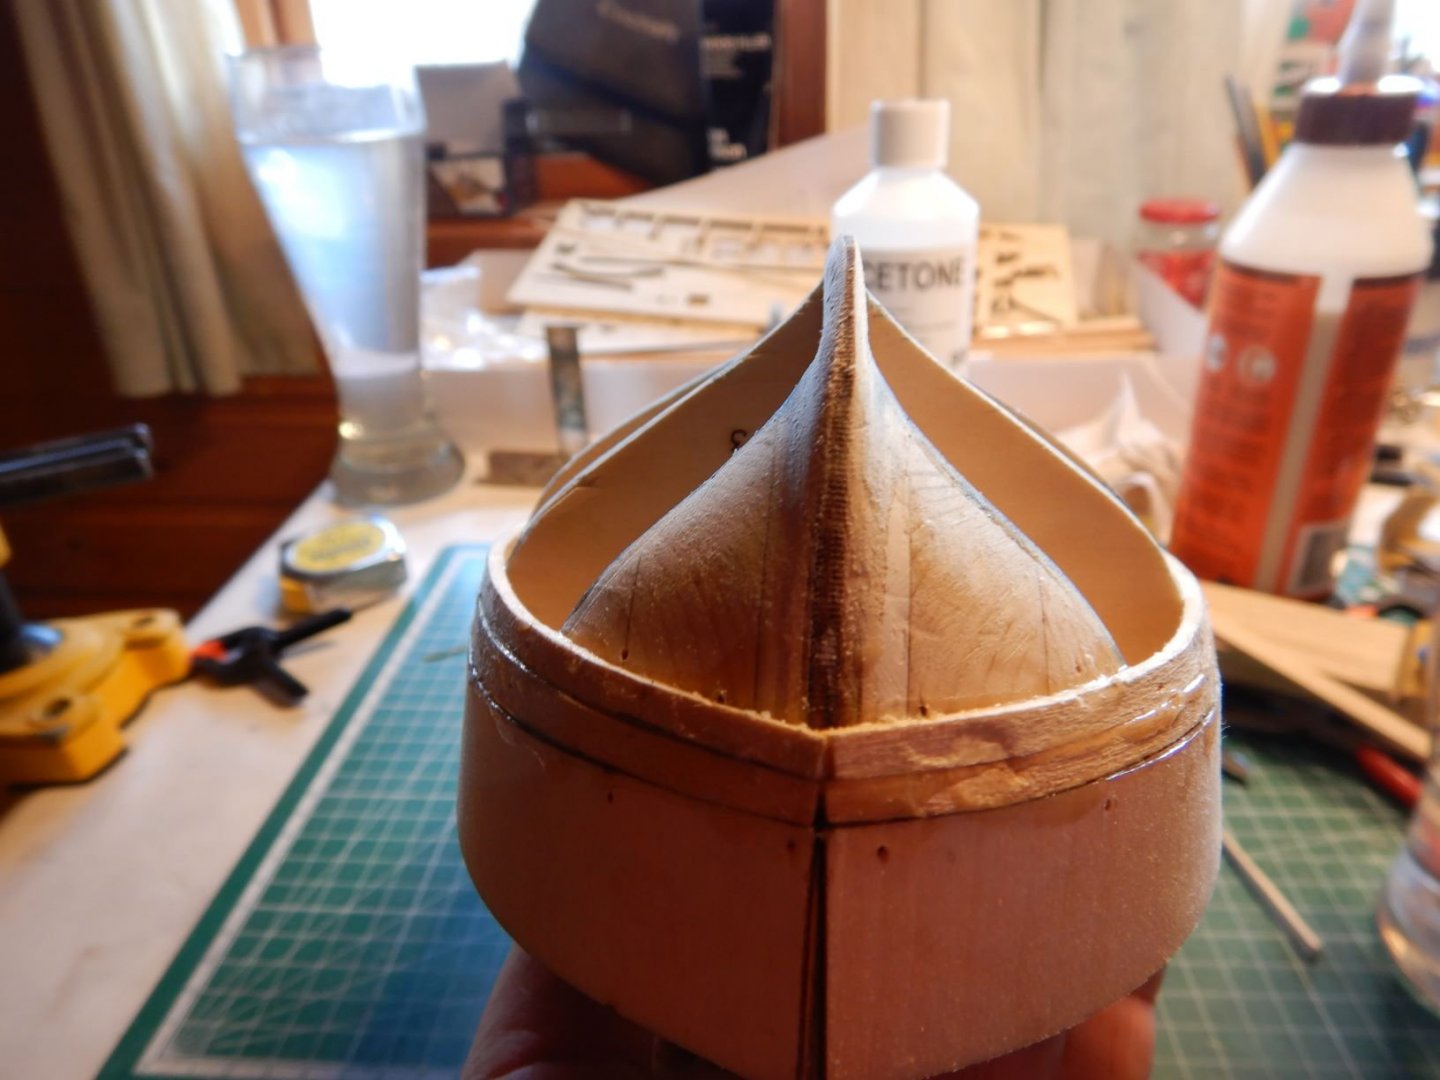
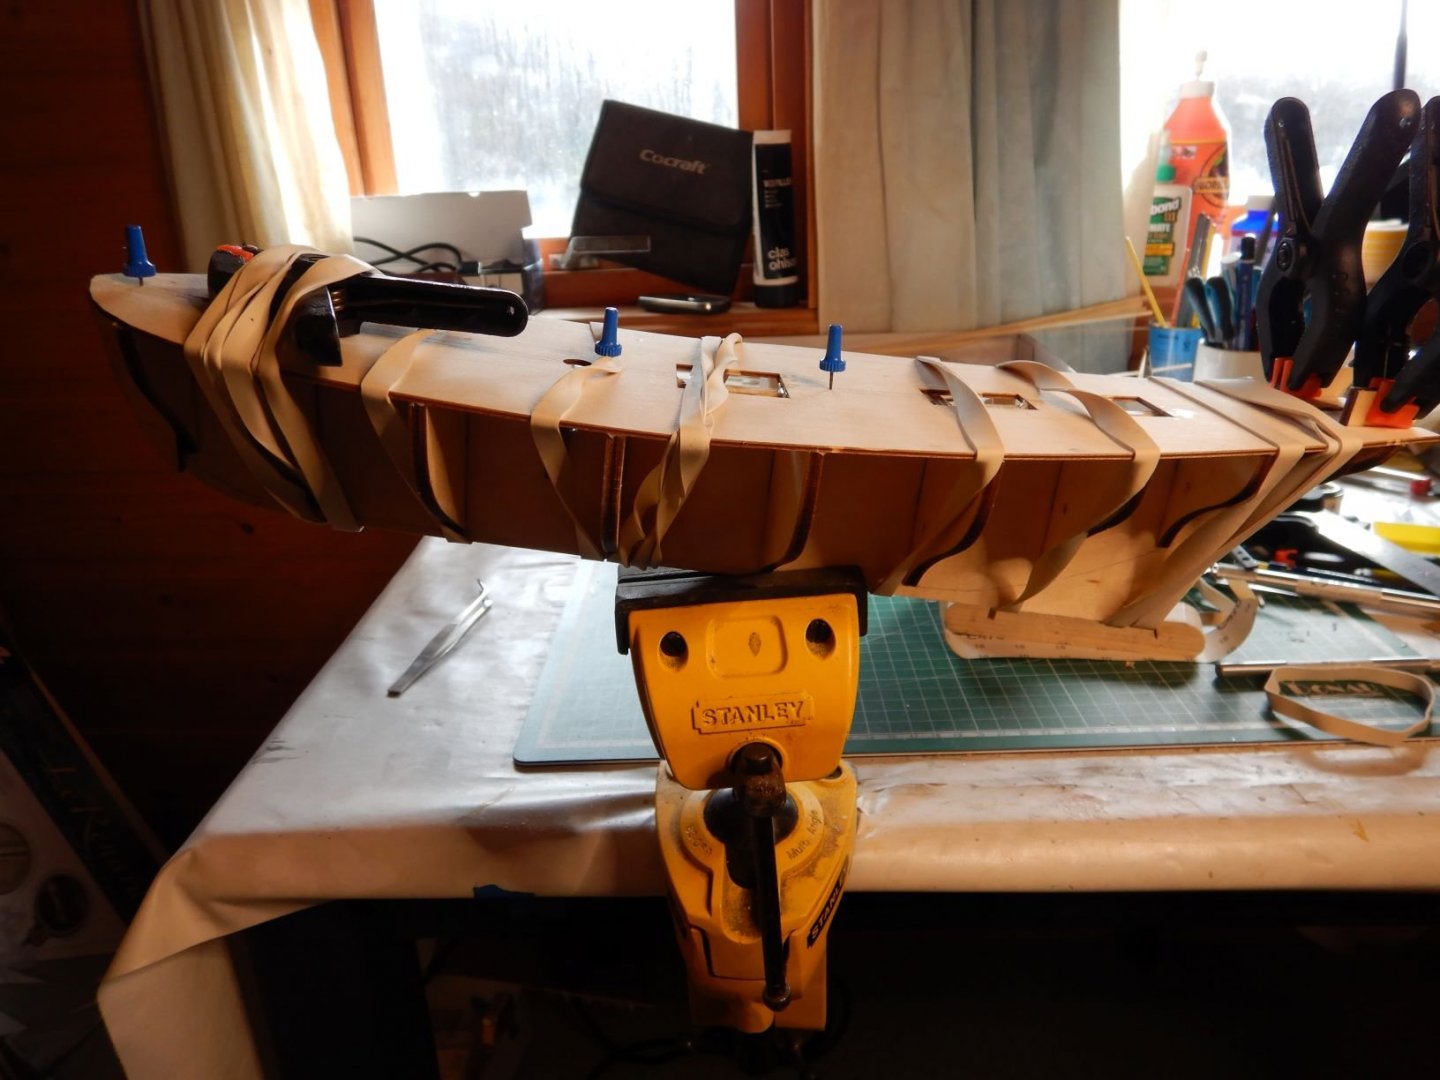
So off they came, and back on again with glue.. 🙂 Making sure it's nice and snug along the deck and the bulkheads. One side first, then the other. There we are! Starting to take on the shape of a boat! Now to wait for the glue to dry! Gaffrig.


- 110 replies
-
- 7
-
-
- le renard
- artesania latina
- (and 1 more)
-
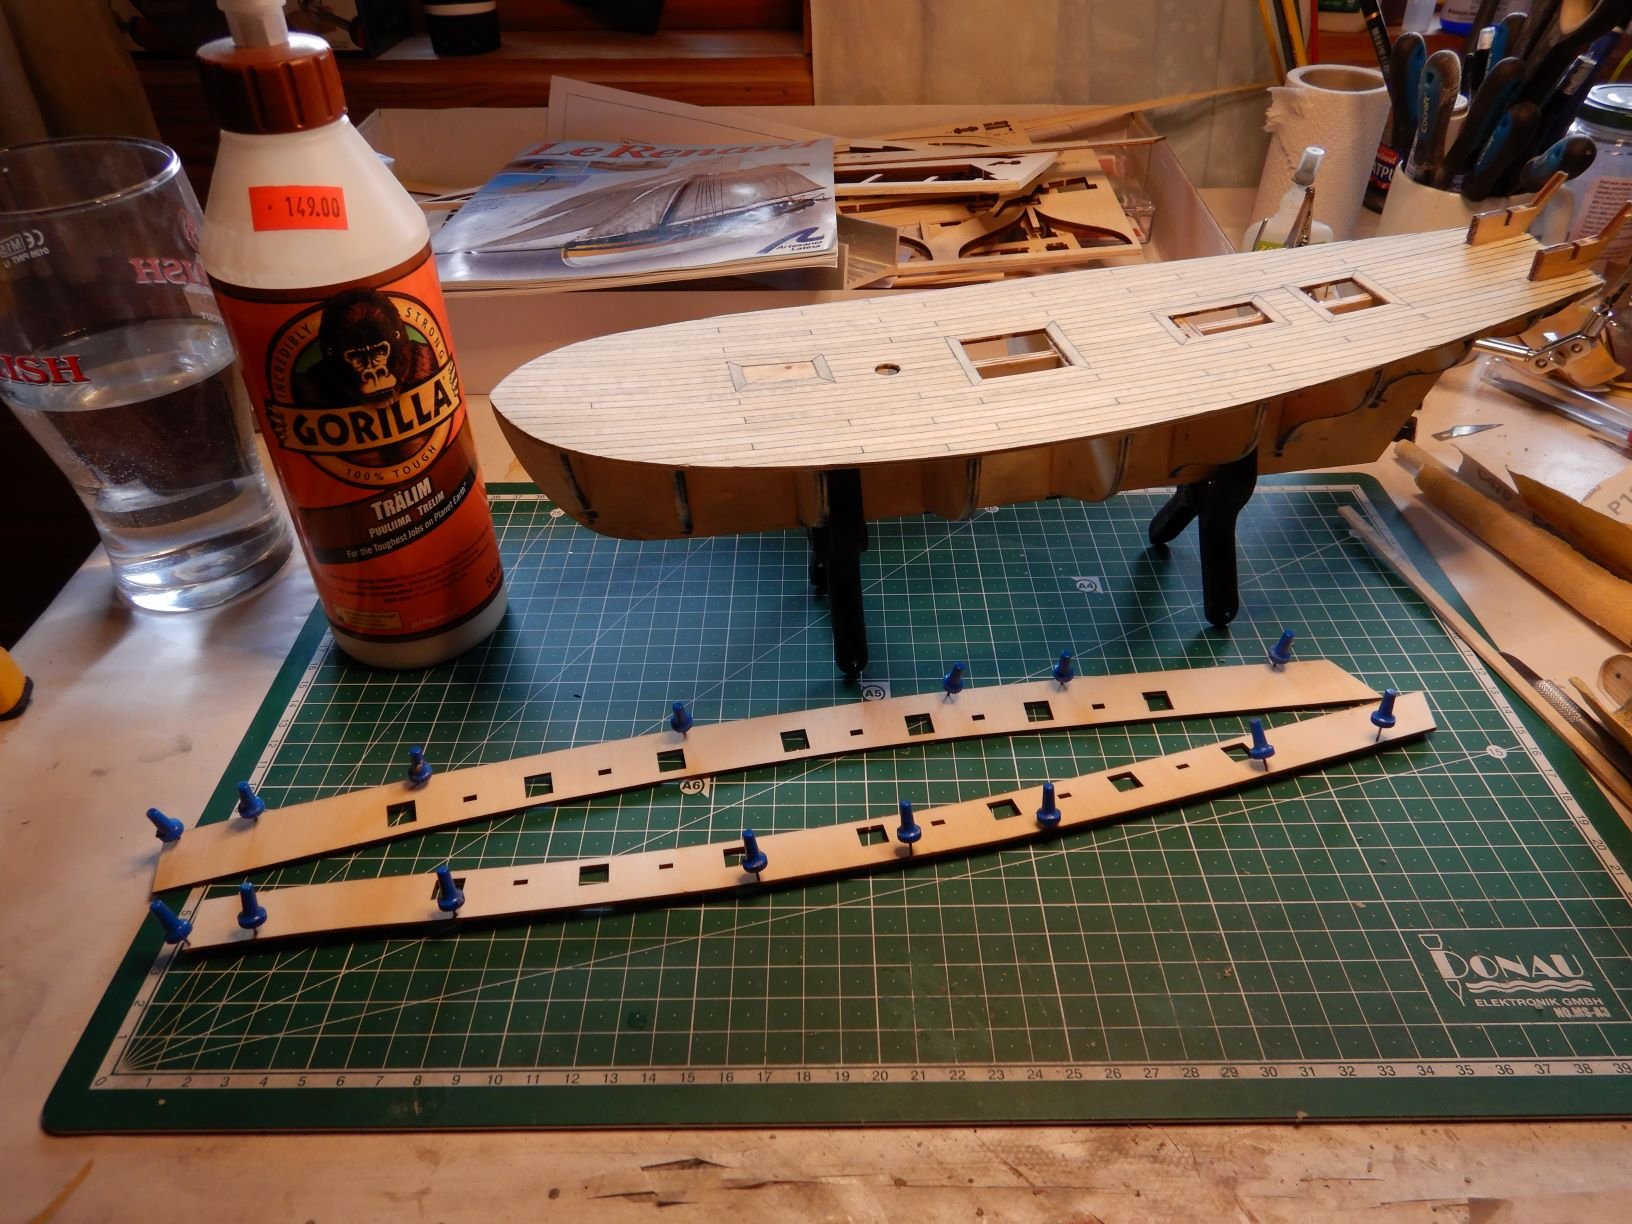
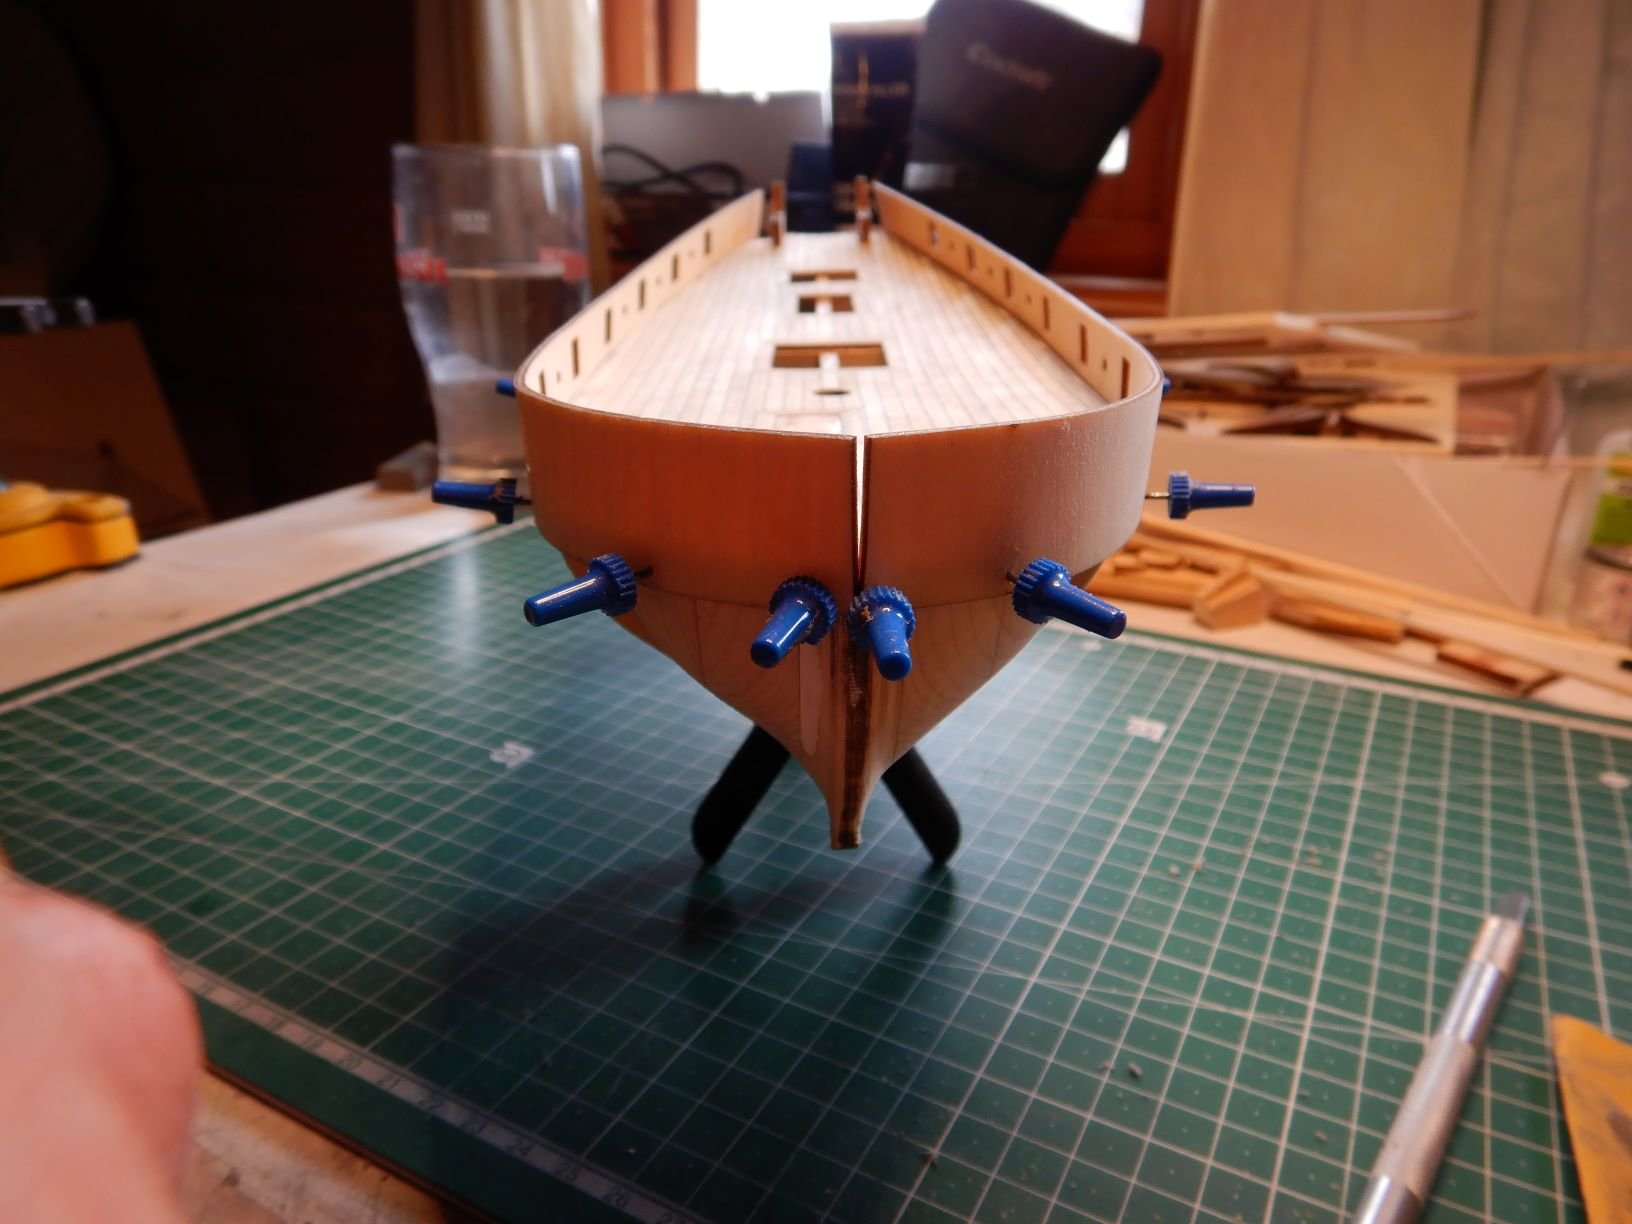
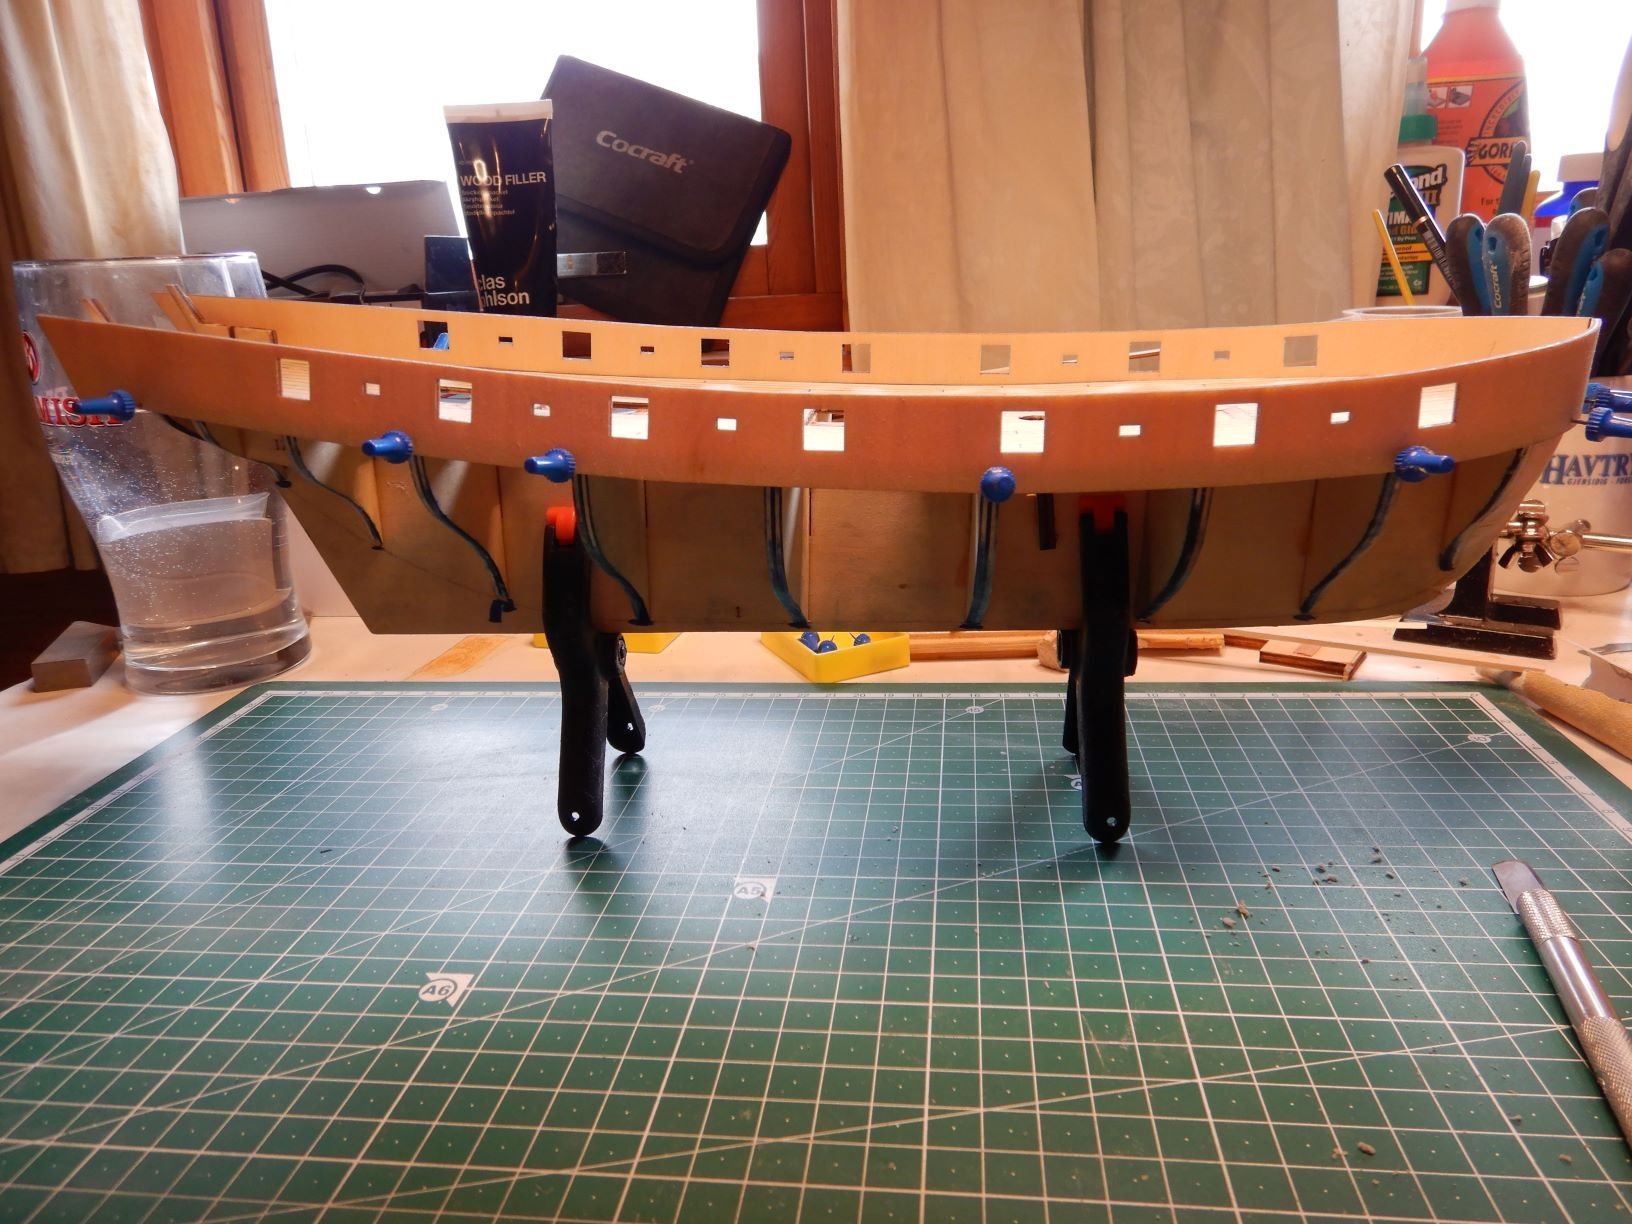
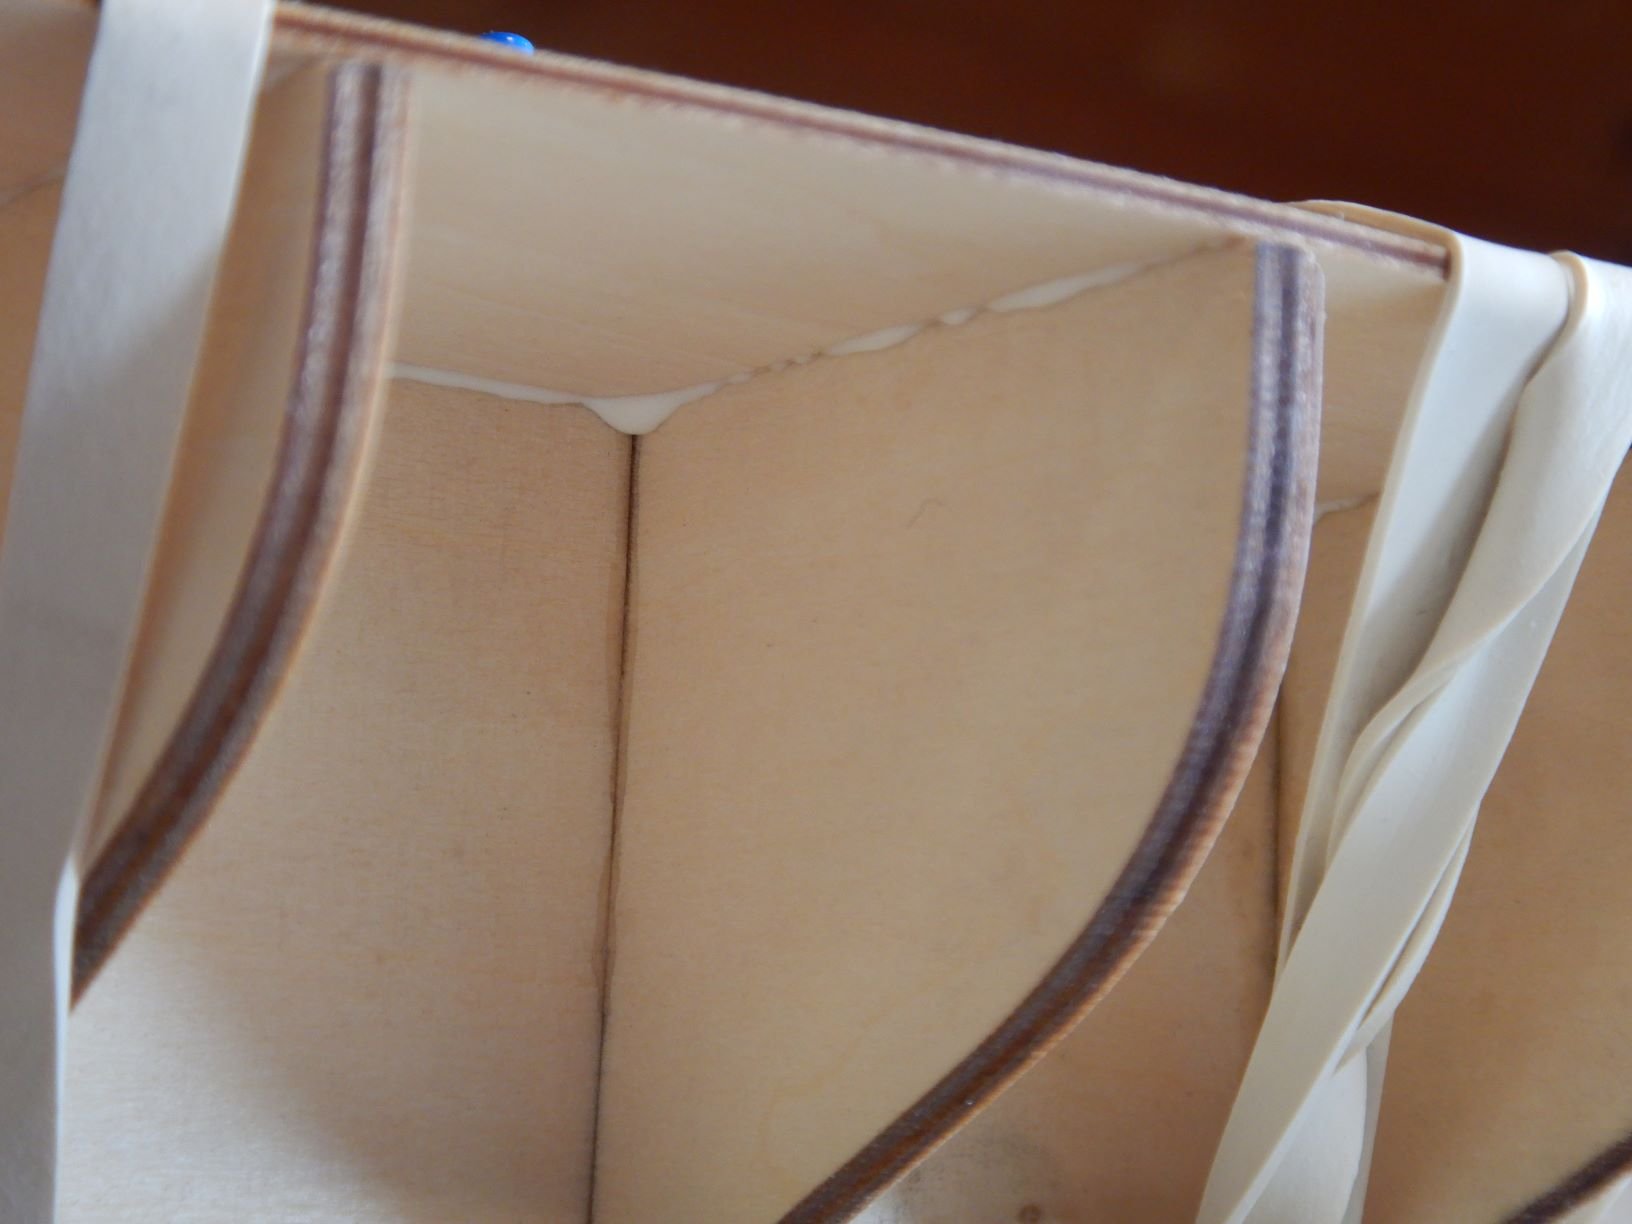
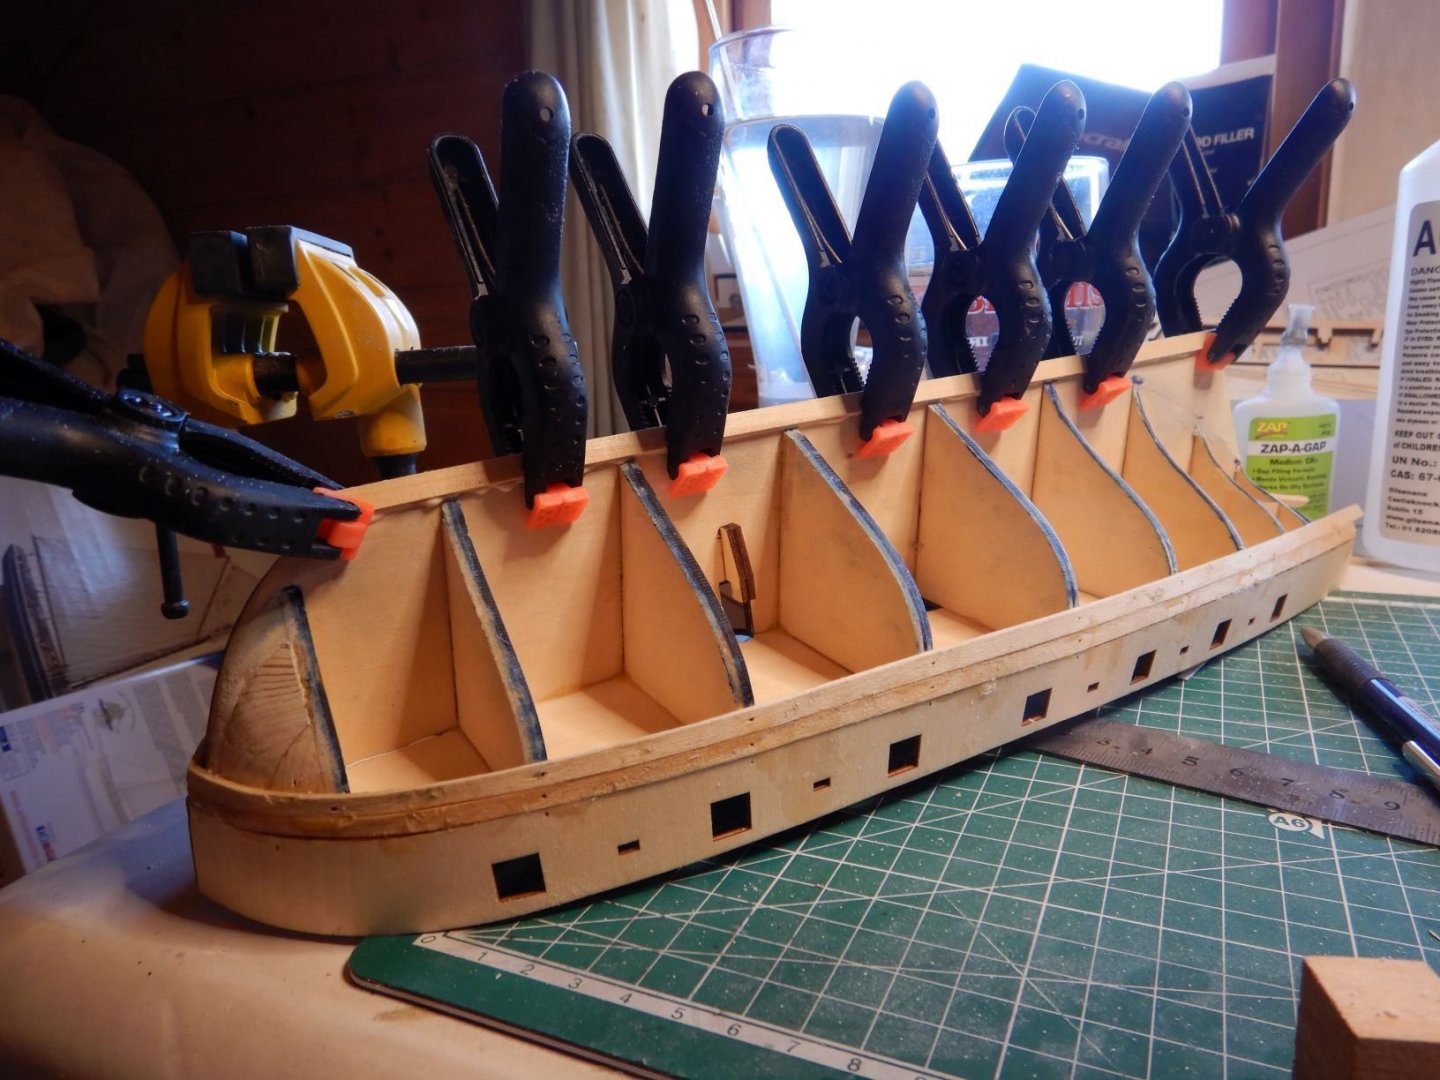
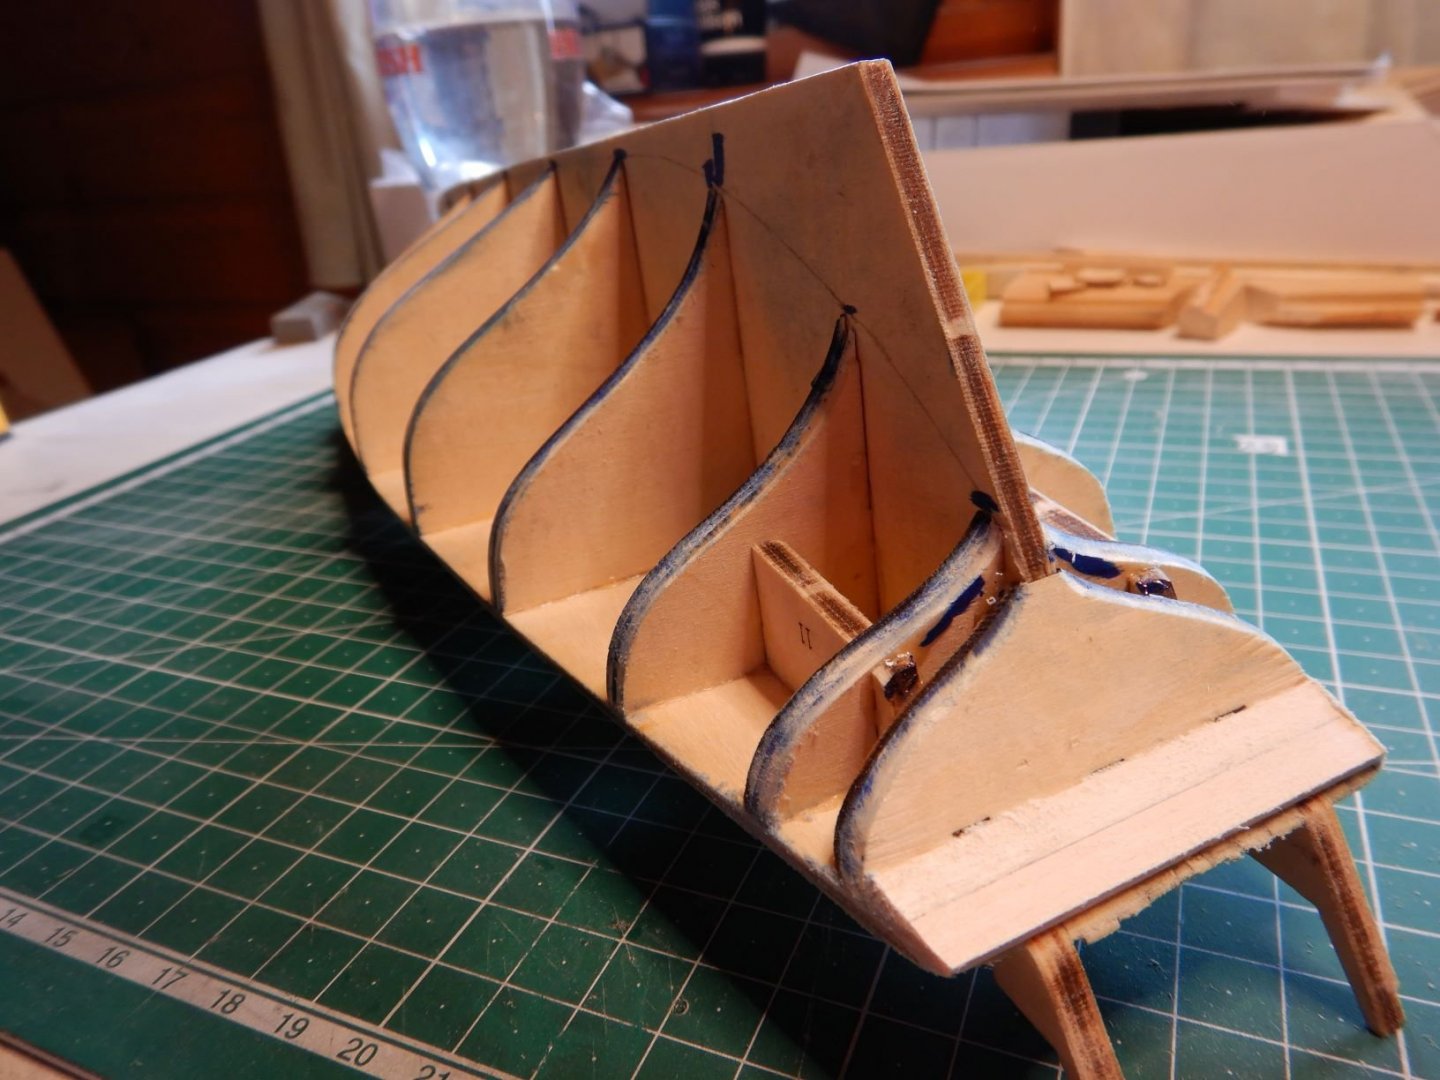
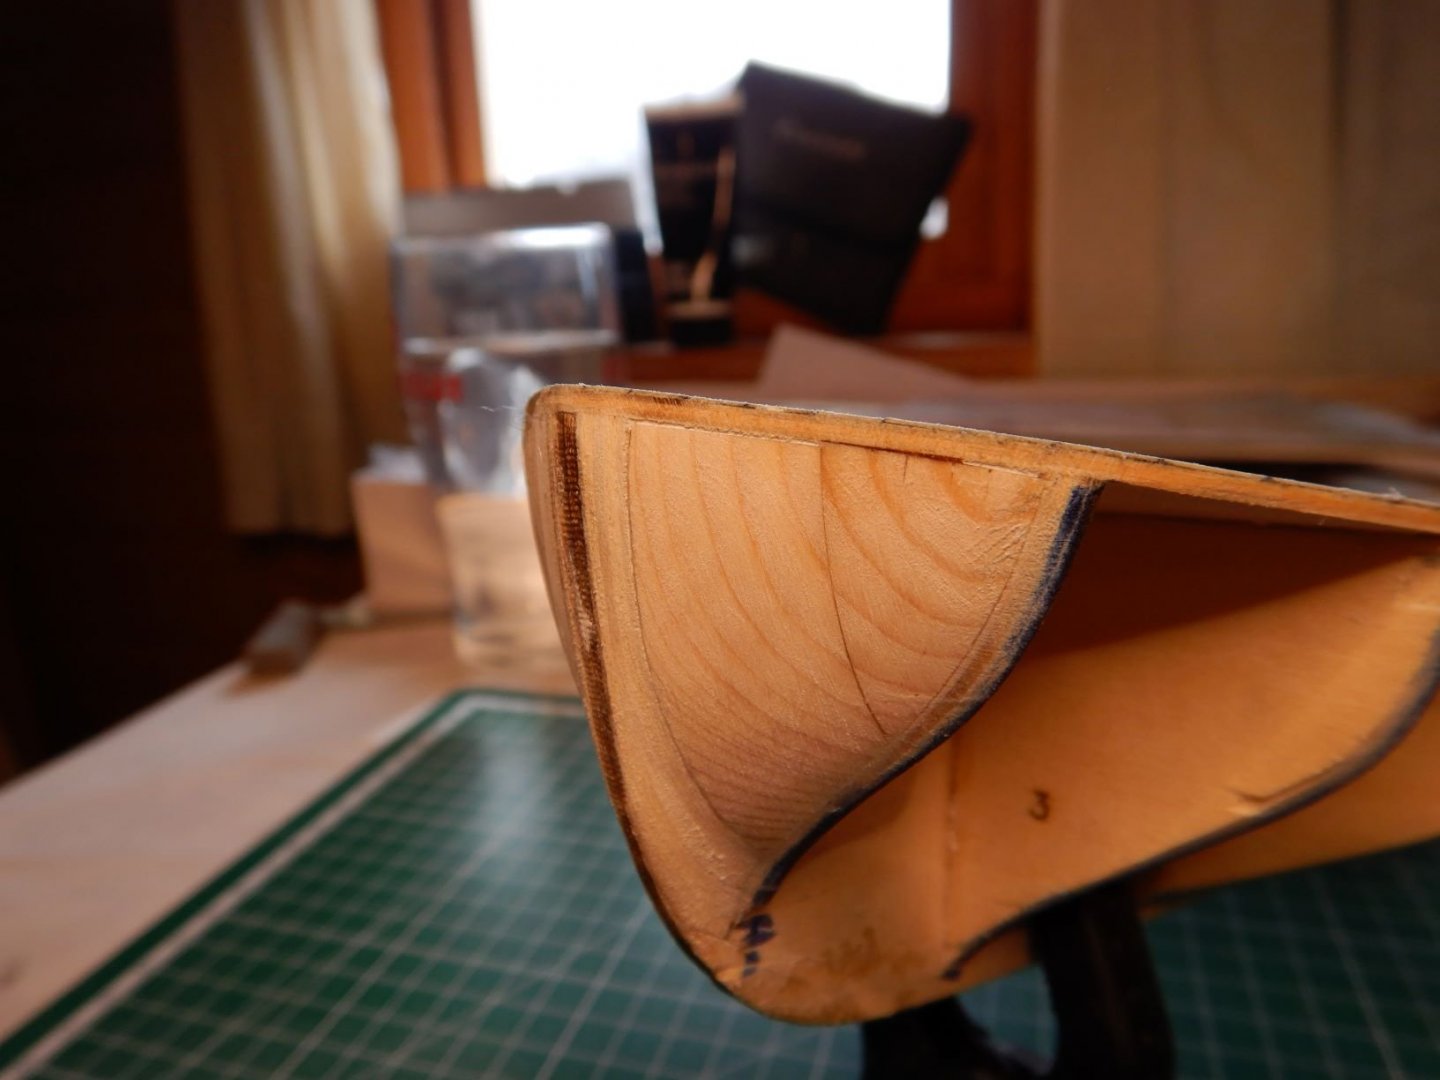
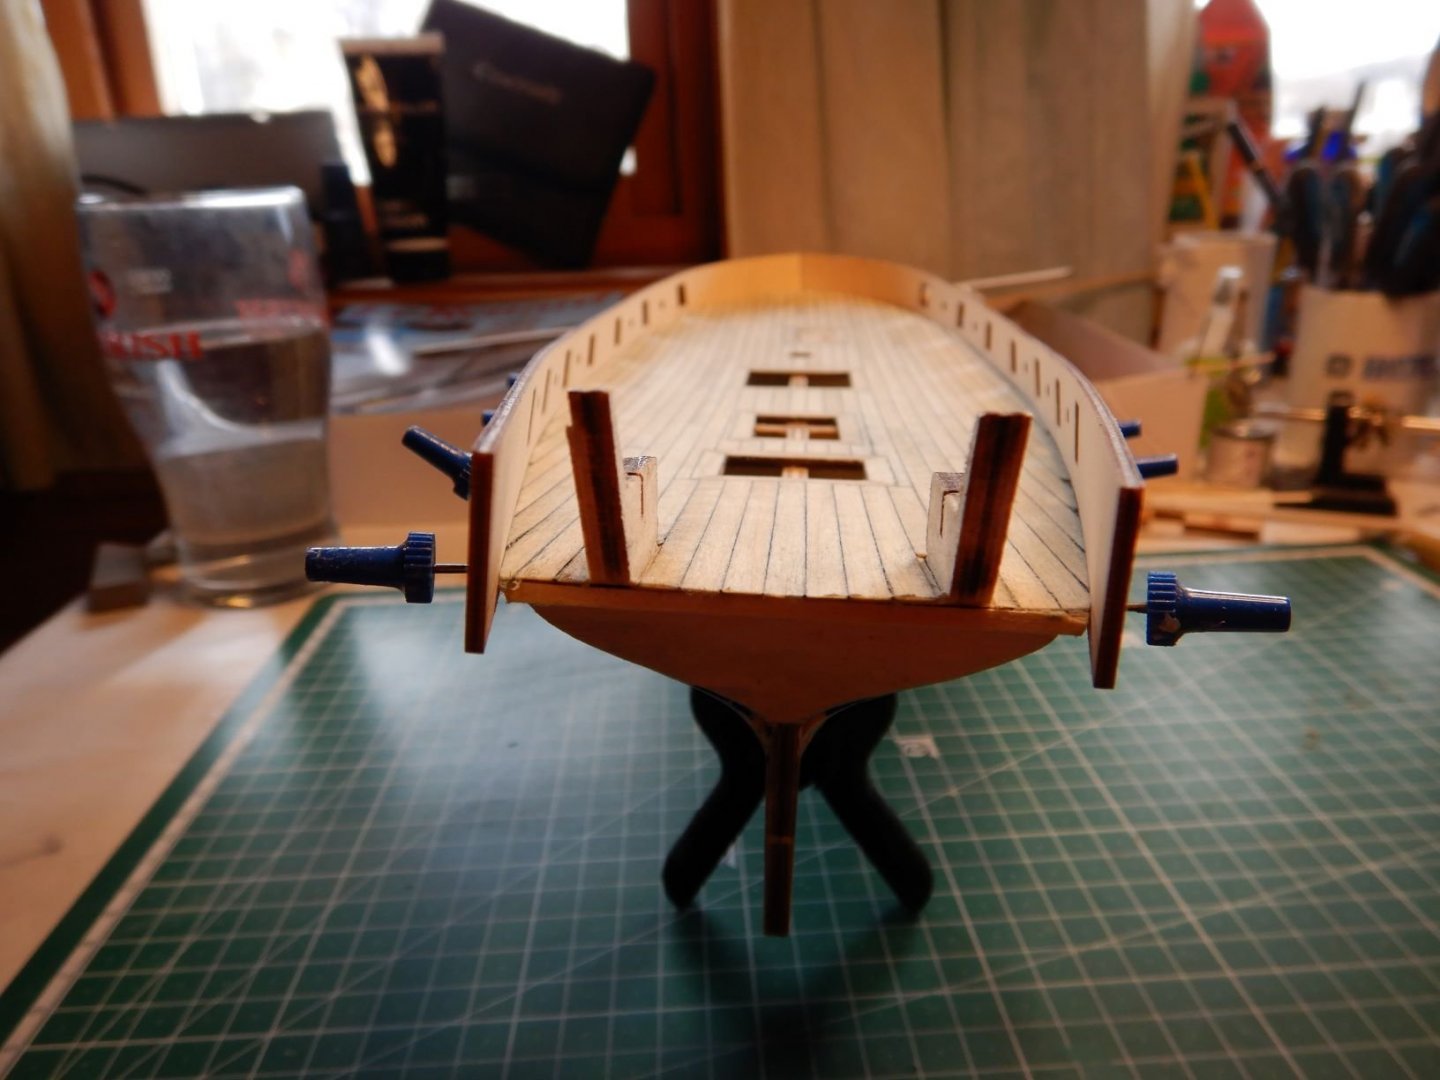
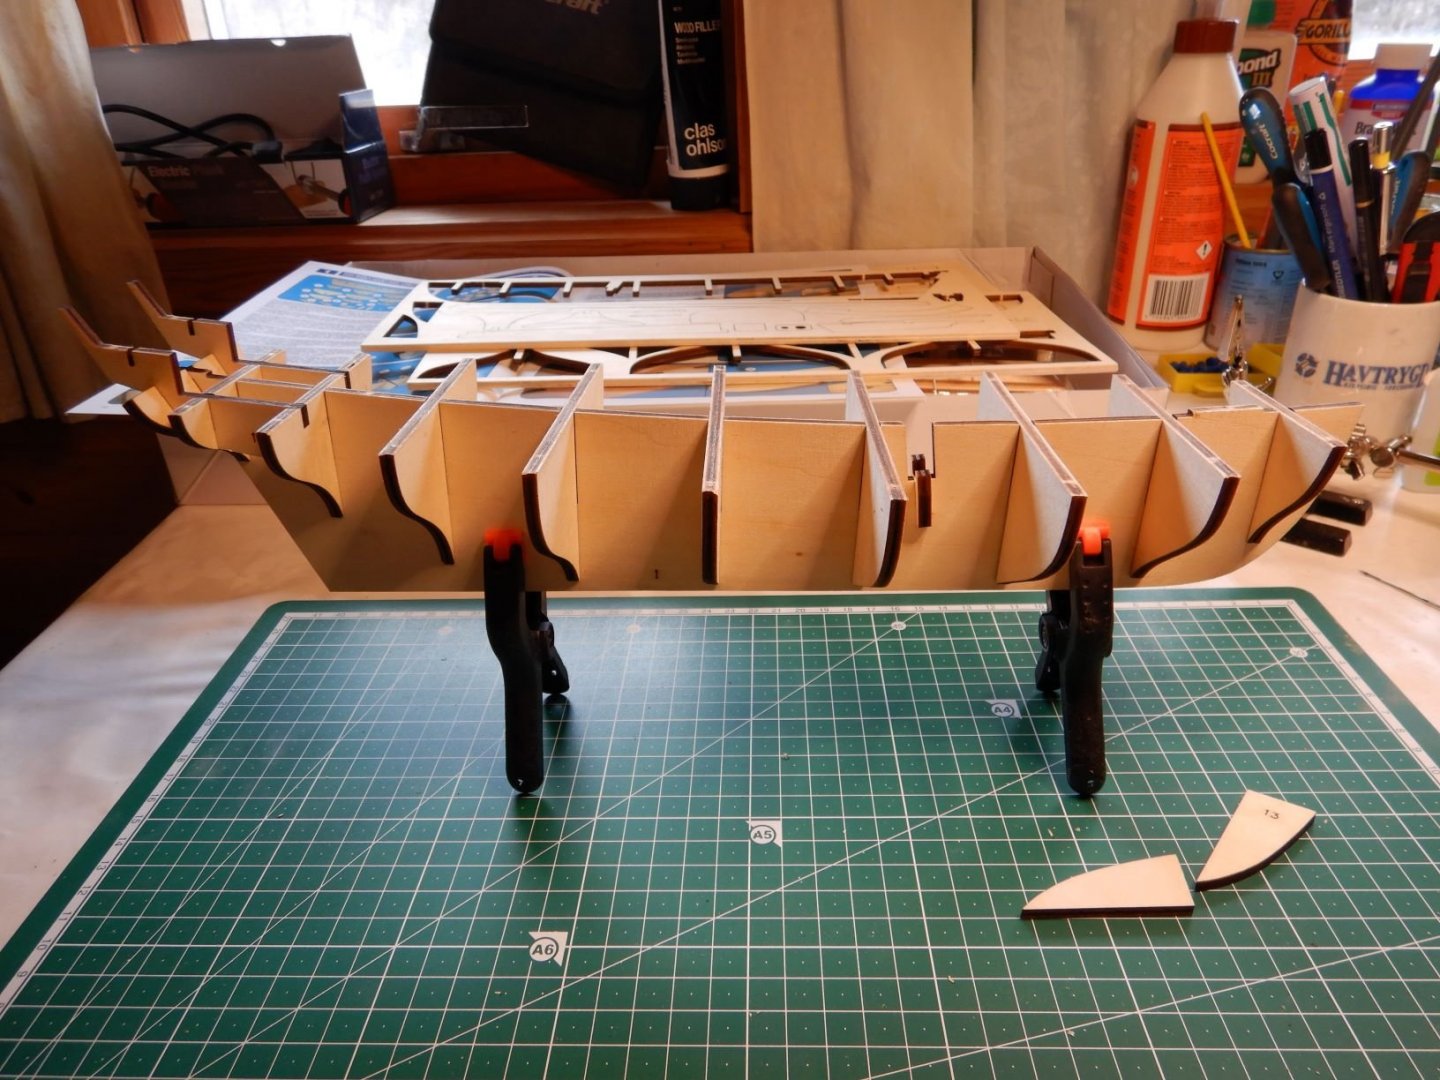
Onwards with planking. In preparation for planking I faired/beveled all the bulkheads using one of the hull planks as I went to see that it would lie nice and snug on every bulkhead. I marked the bulkheads with a permanent marker first, to ensure that I didn't take off too much. I used a scalpel to take the most of it and then sanded. I decided to use filler blocks in the bow between the stem and the first bulkhead. I didn't have any balsa, so I used a piece of cedar for this. Both the trick with permanent marker and filler blocks is something I have picked up here at this wonderful forum! 👍 Before I start the planking the instructions say to mount the plywood bulwarks. This because the bulwarks go past the deck and down on the bulkheads by 4-5 mm. Then the planking starts from the bulwarks. Dryfitting of the bulwarks. These are made from 2 mm plywood and was surprisingly easy to bend. No soaking needed, just bend around the hull and clamp. There is a second inner bulwark of the same 2 mm plywood that is glued to the inside later. This is first clamped to the outer one with the top flush, and a line is drawn on the outer one so you have a line to follow along the deck when mounting it to the boat to get the correct height. (hope this makes sense) I'm using push pins to hold it in place. Once I'm satisfied with the placement I'll remove them and glue them on with wood glue. Looks pretty nice and straight, I was a little worried about this step as there are no tabs sticking up from the bulwarks to help me keep them in the right place. Time for glue! Gaffrig.


- 110 replies
-
- 4
-
-
- le renard
- artesania latina
- (and 1 more)
-
No, I just removed the picture from the text, and clicked save. Clicking the little trashcan did the trick! thank you!
-
I seem to be getting a picture or two at the end of each post that shouldn't be there... When I try to remove by editing the post, it keeps reappearing... Anyone know why this is?
-
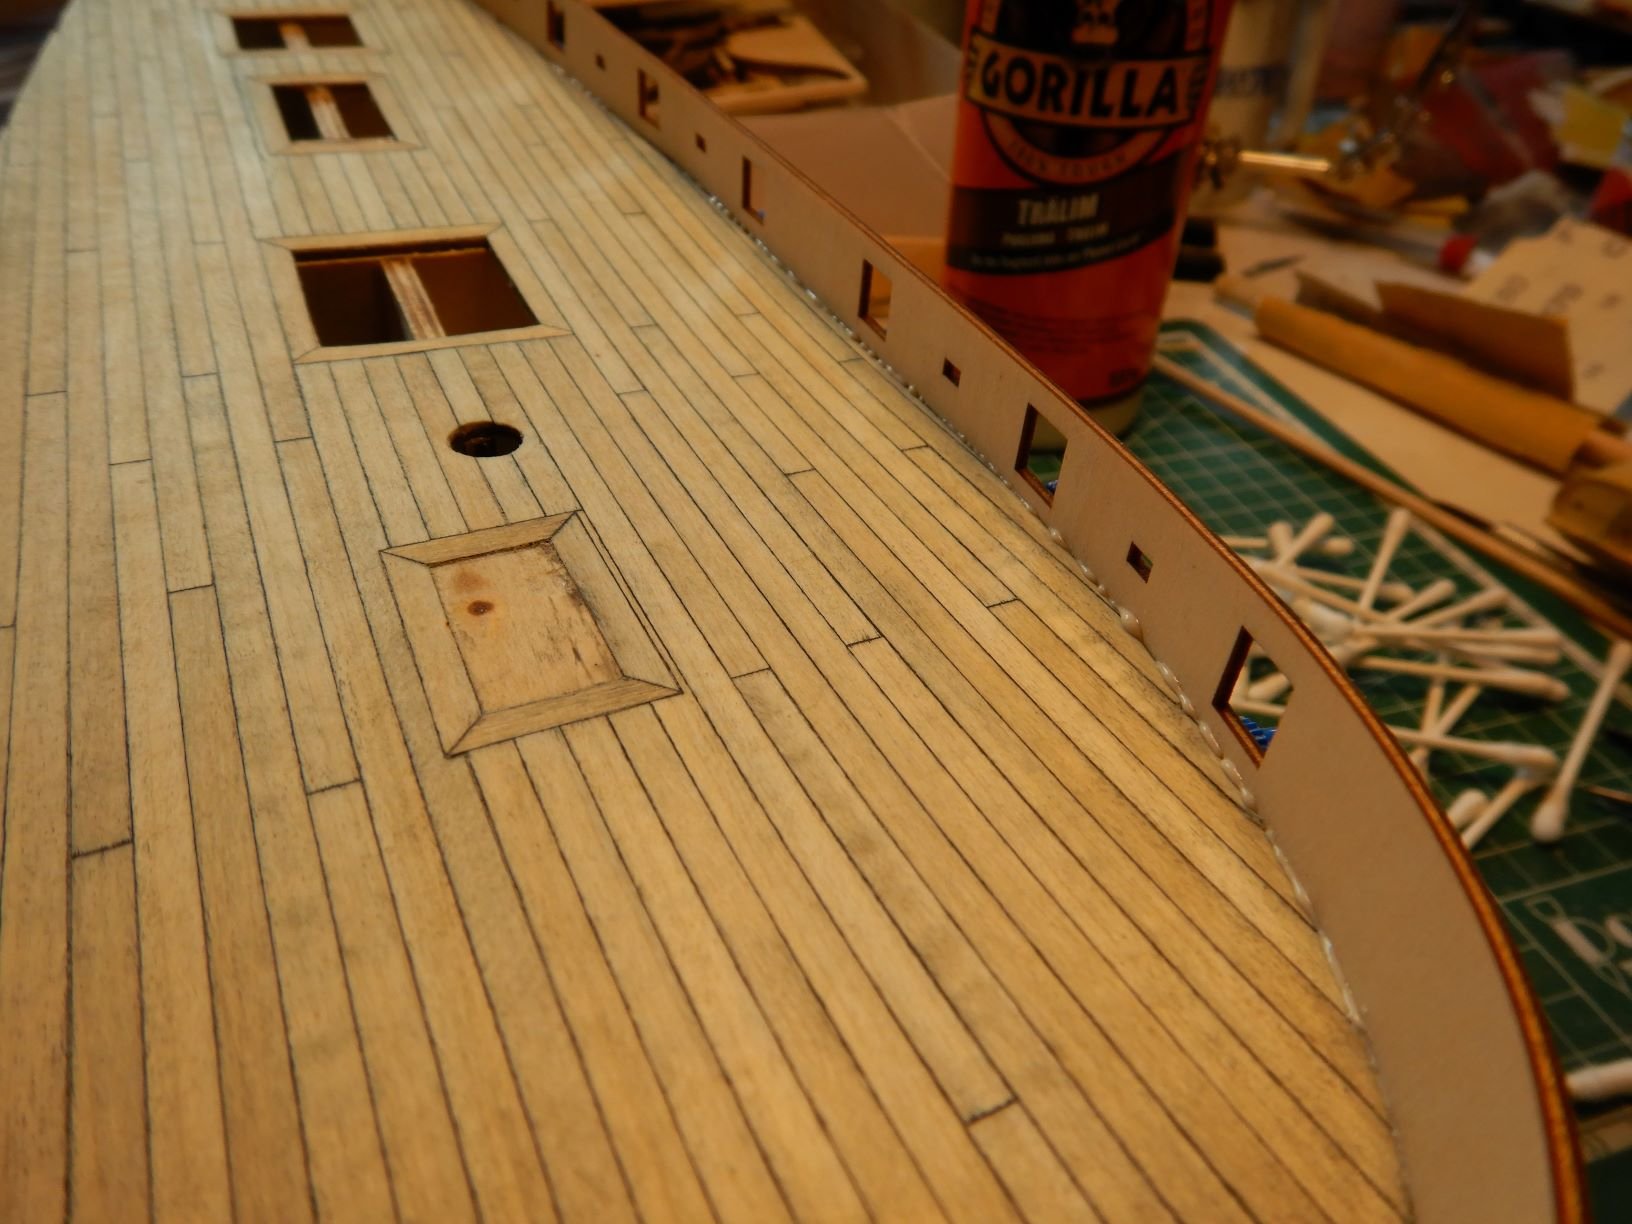
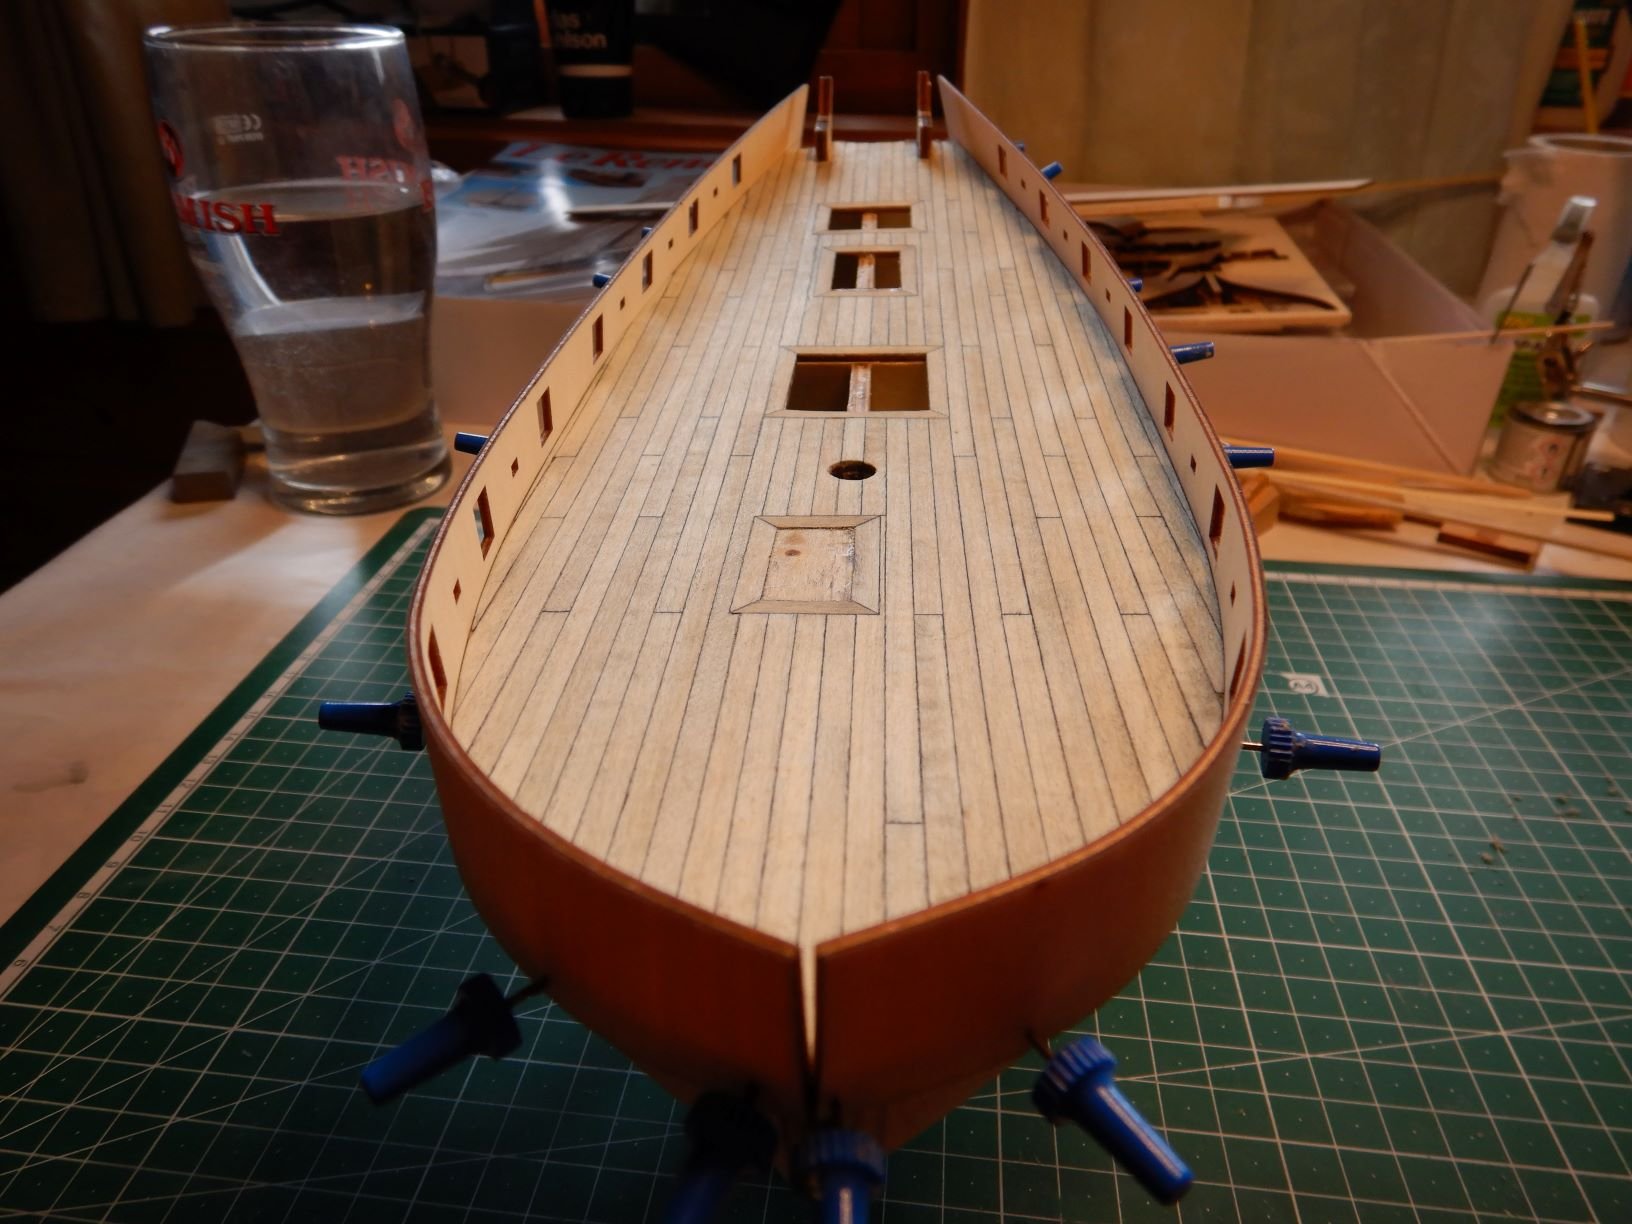
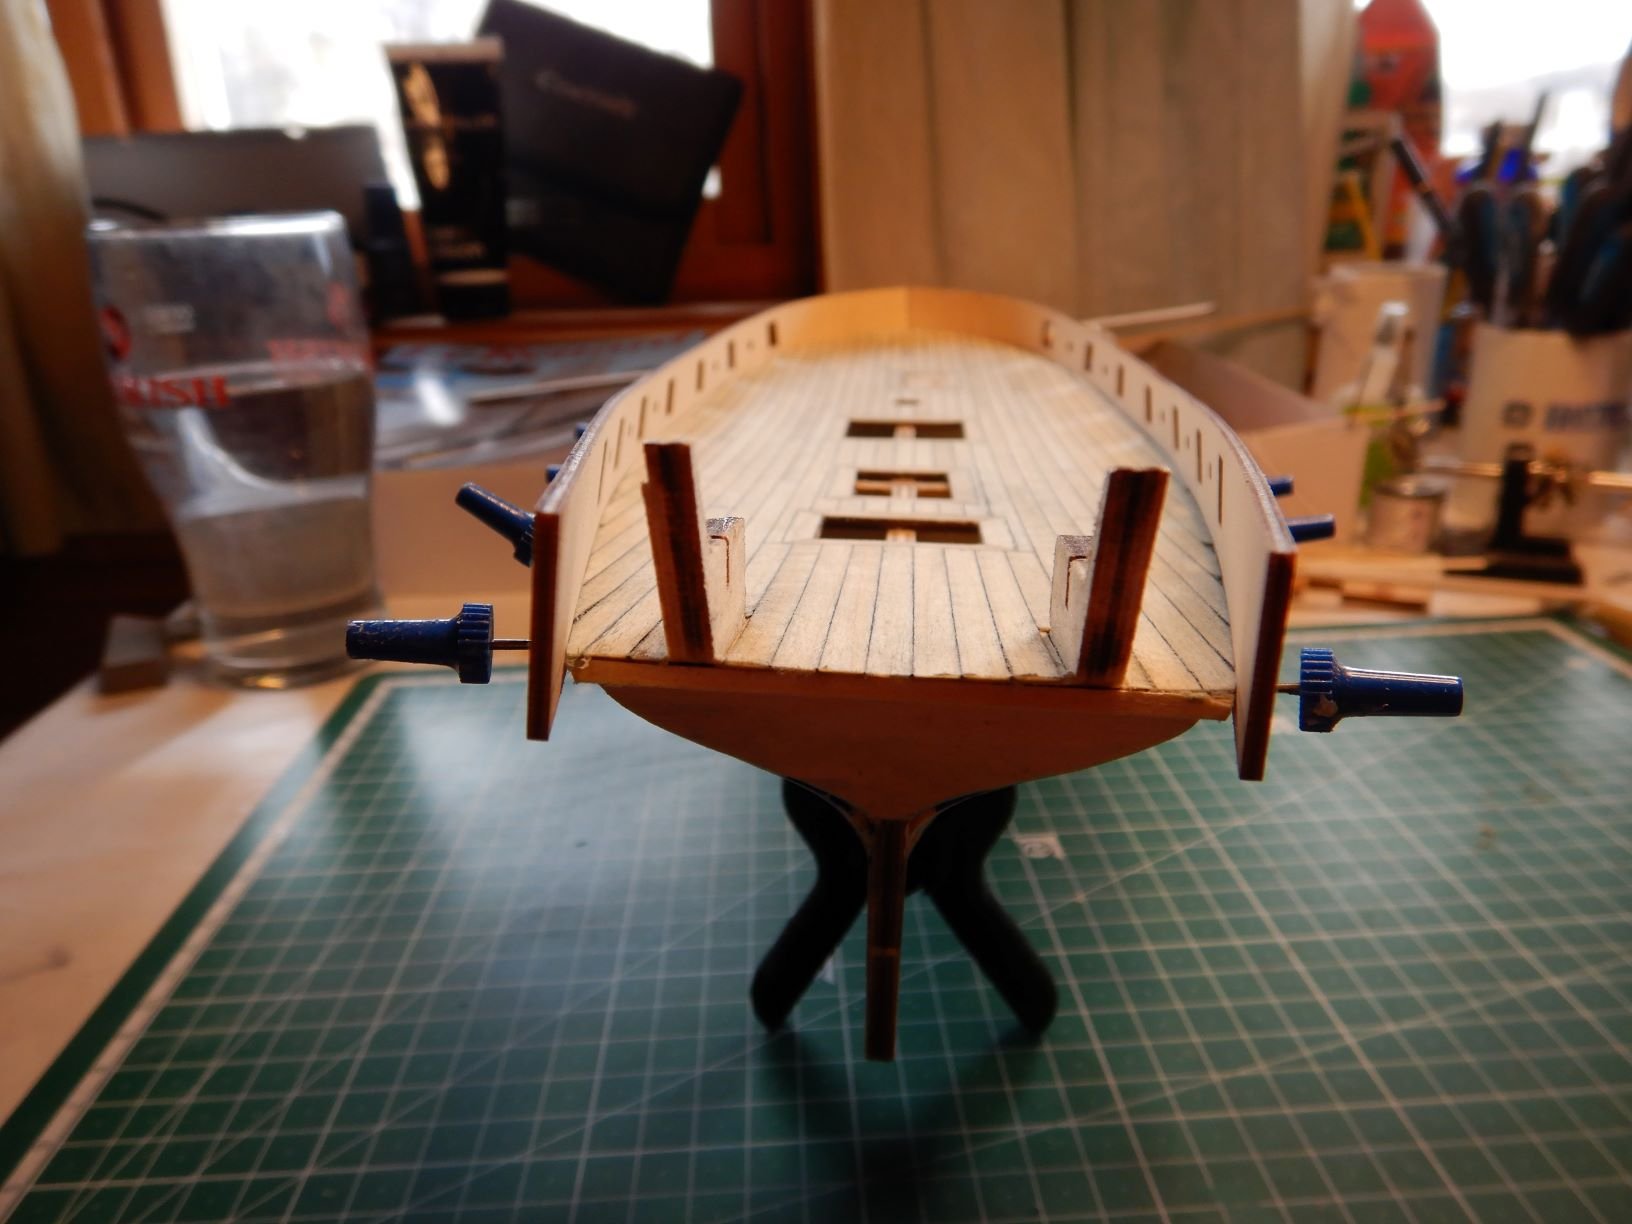
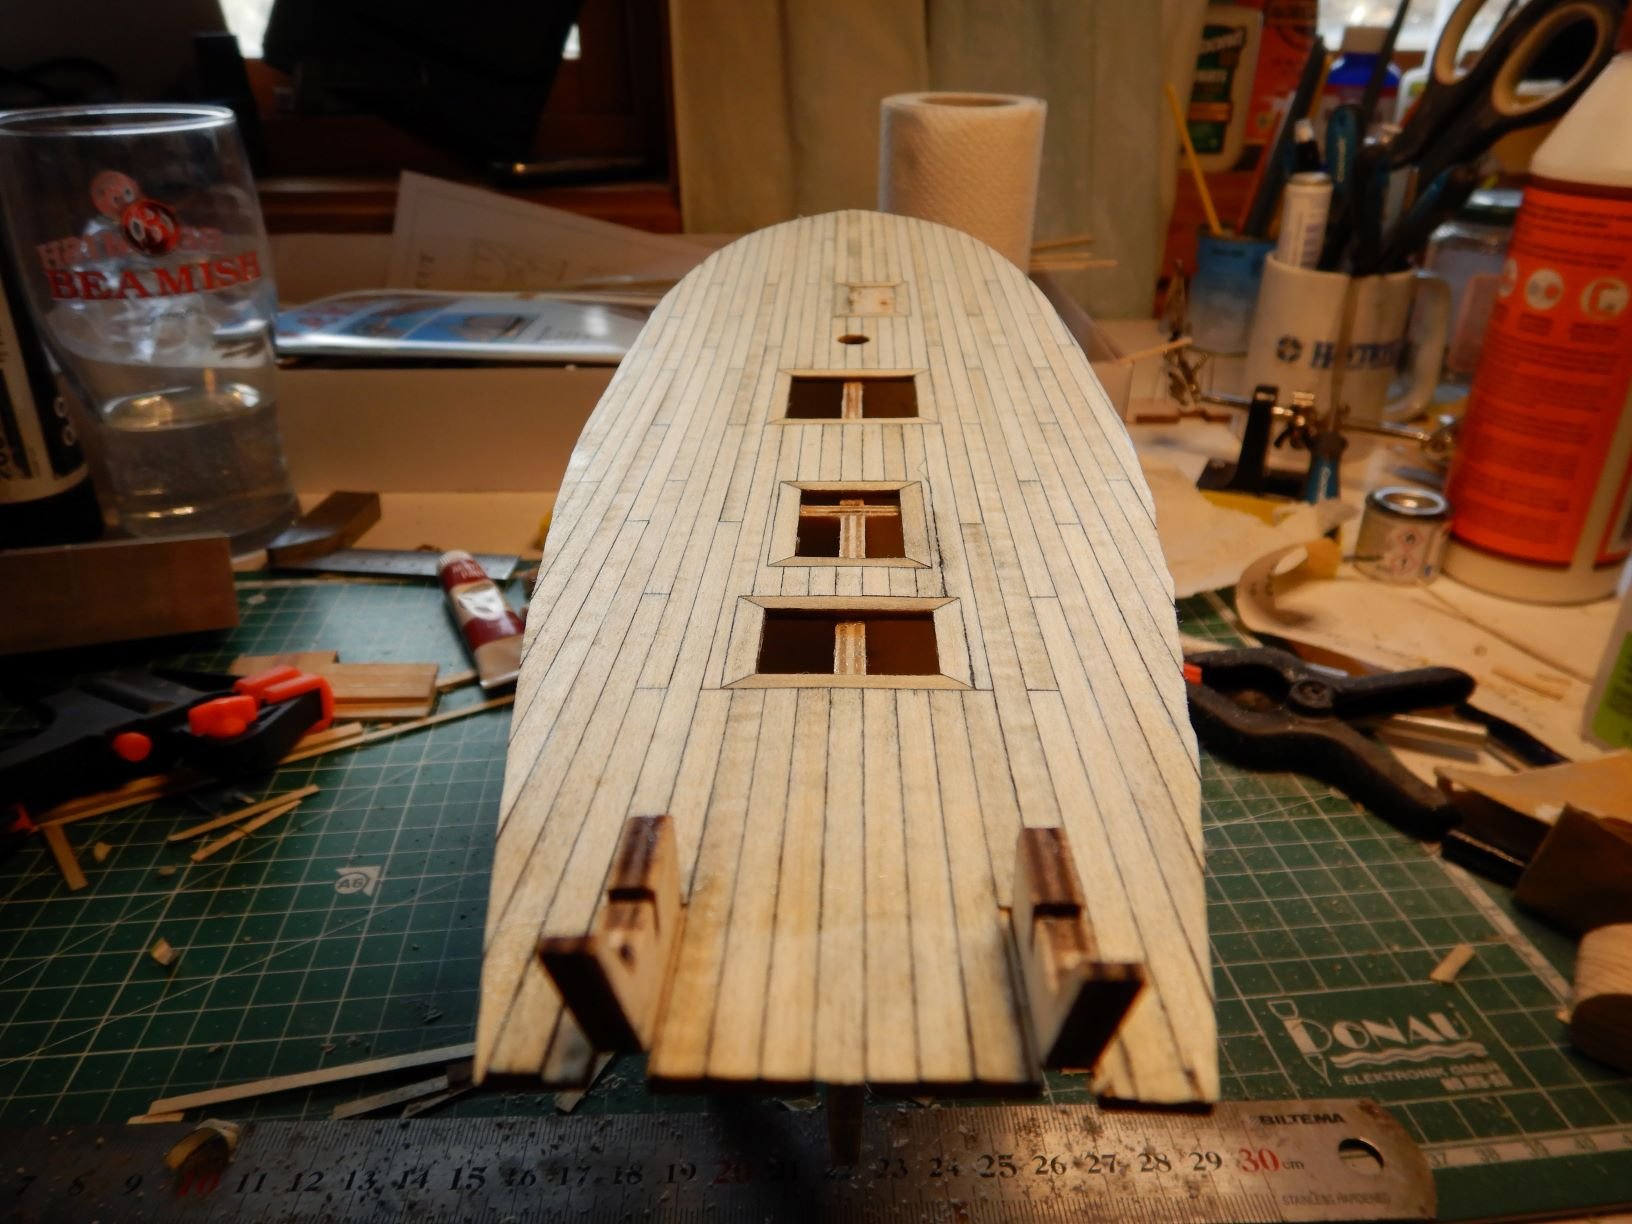
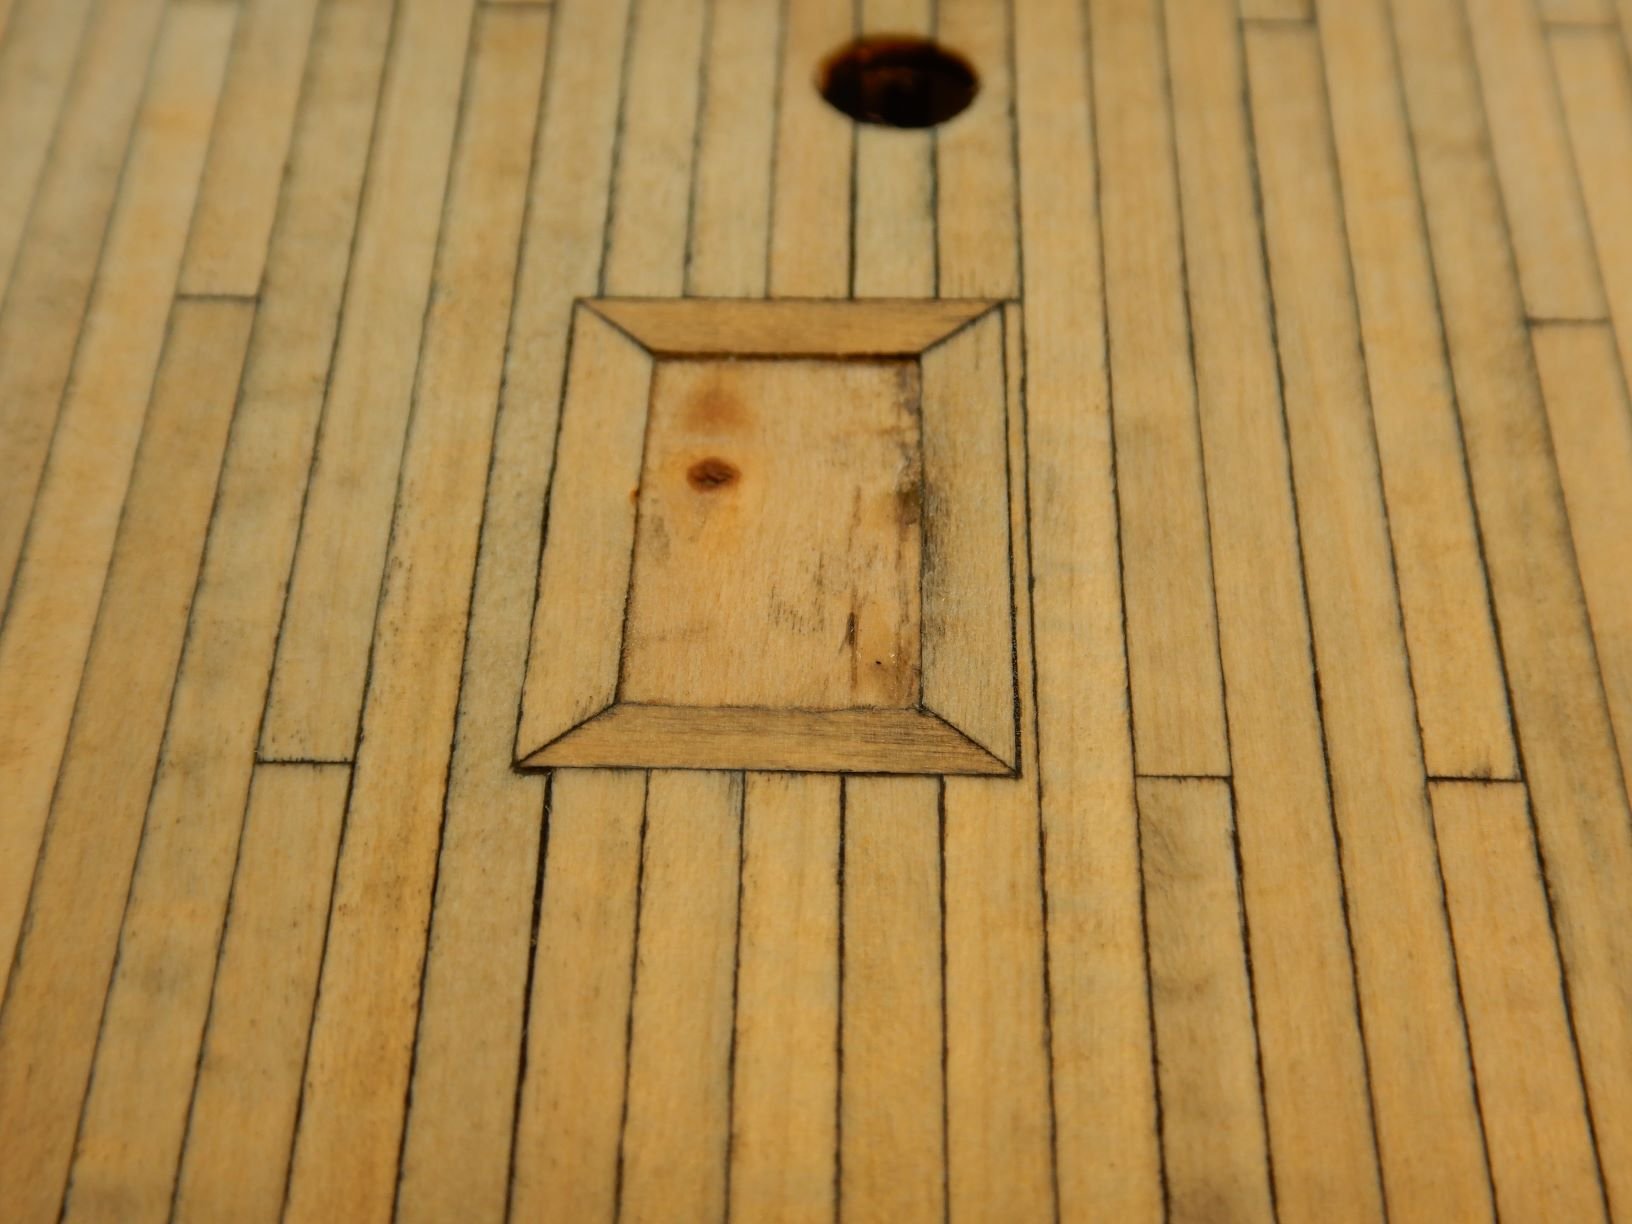
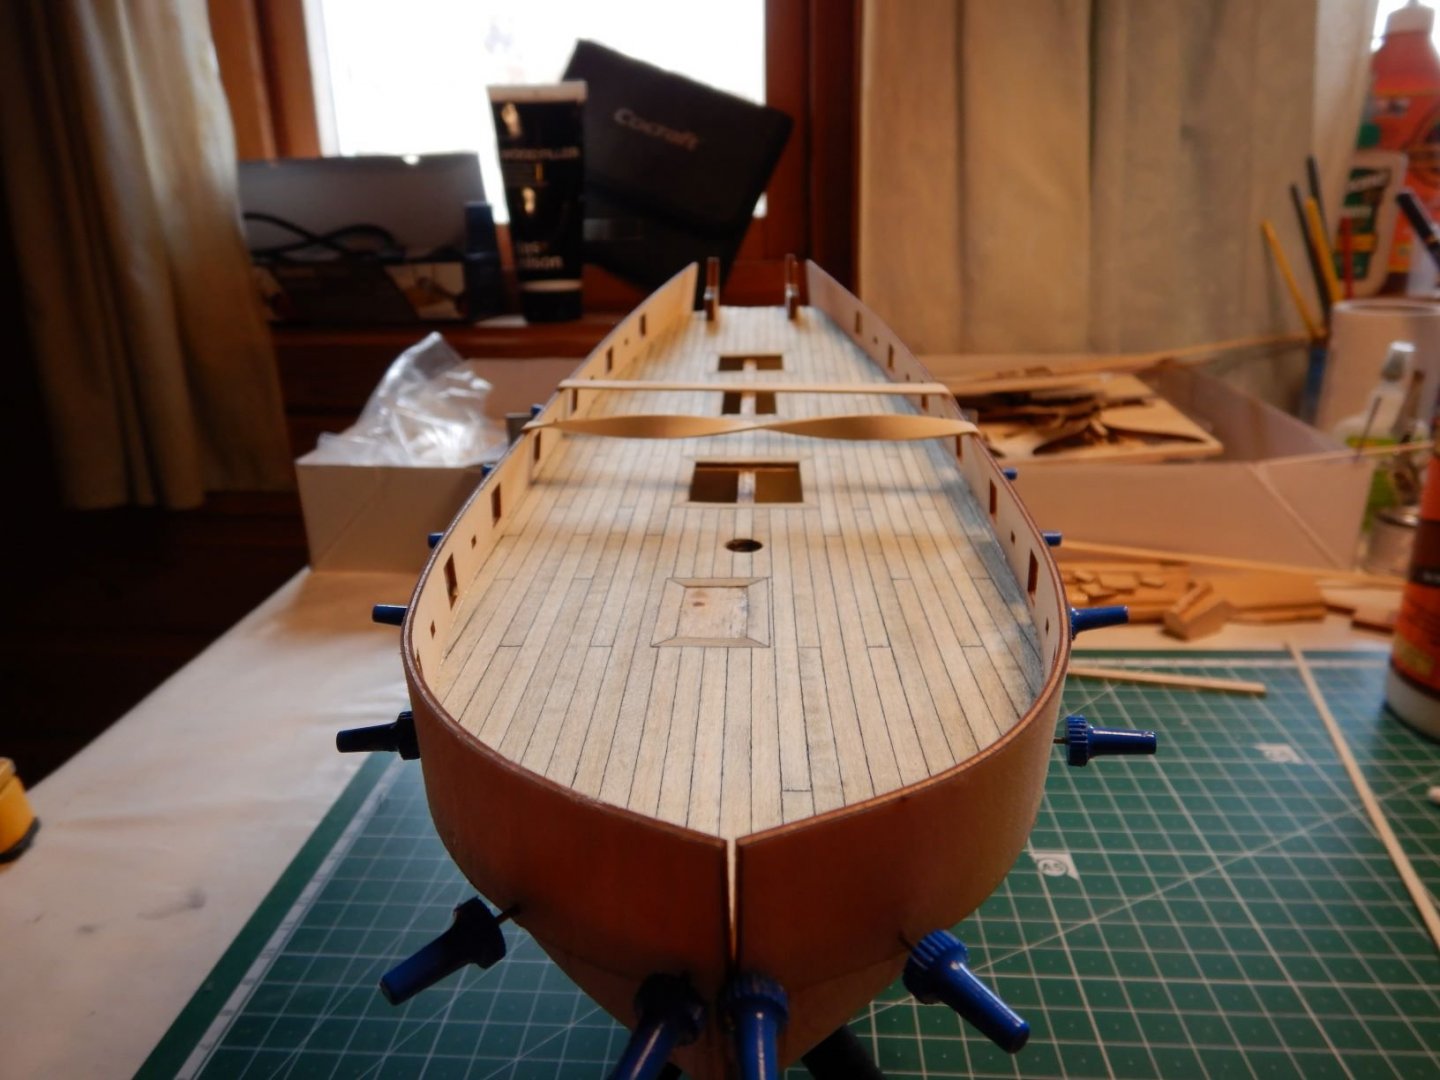
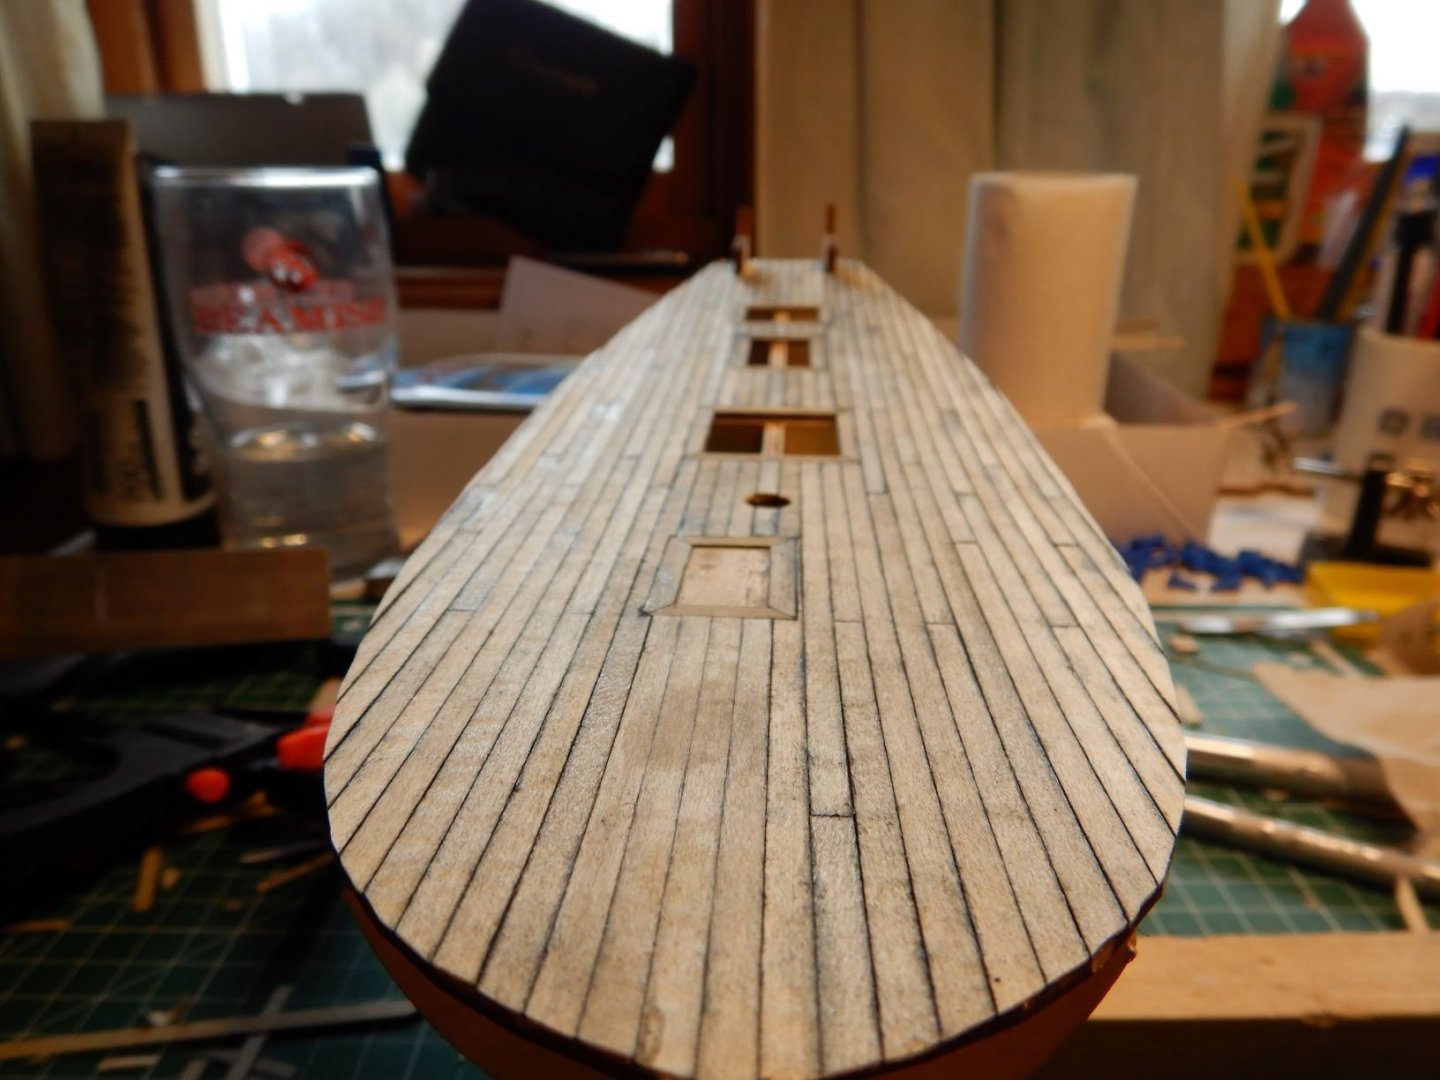
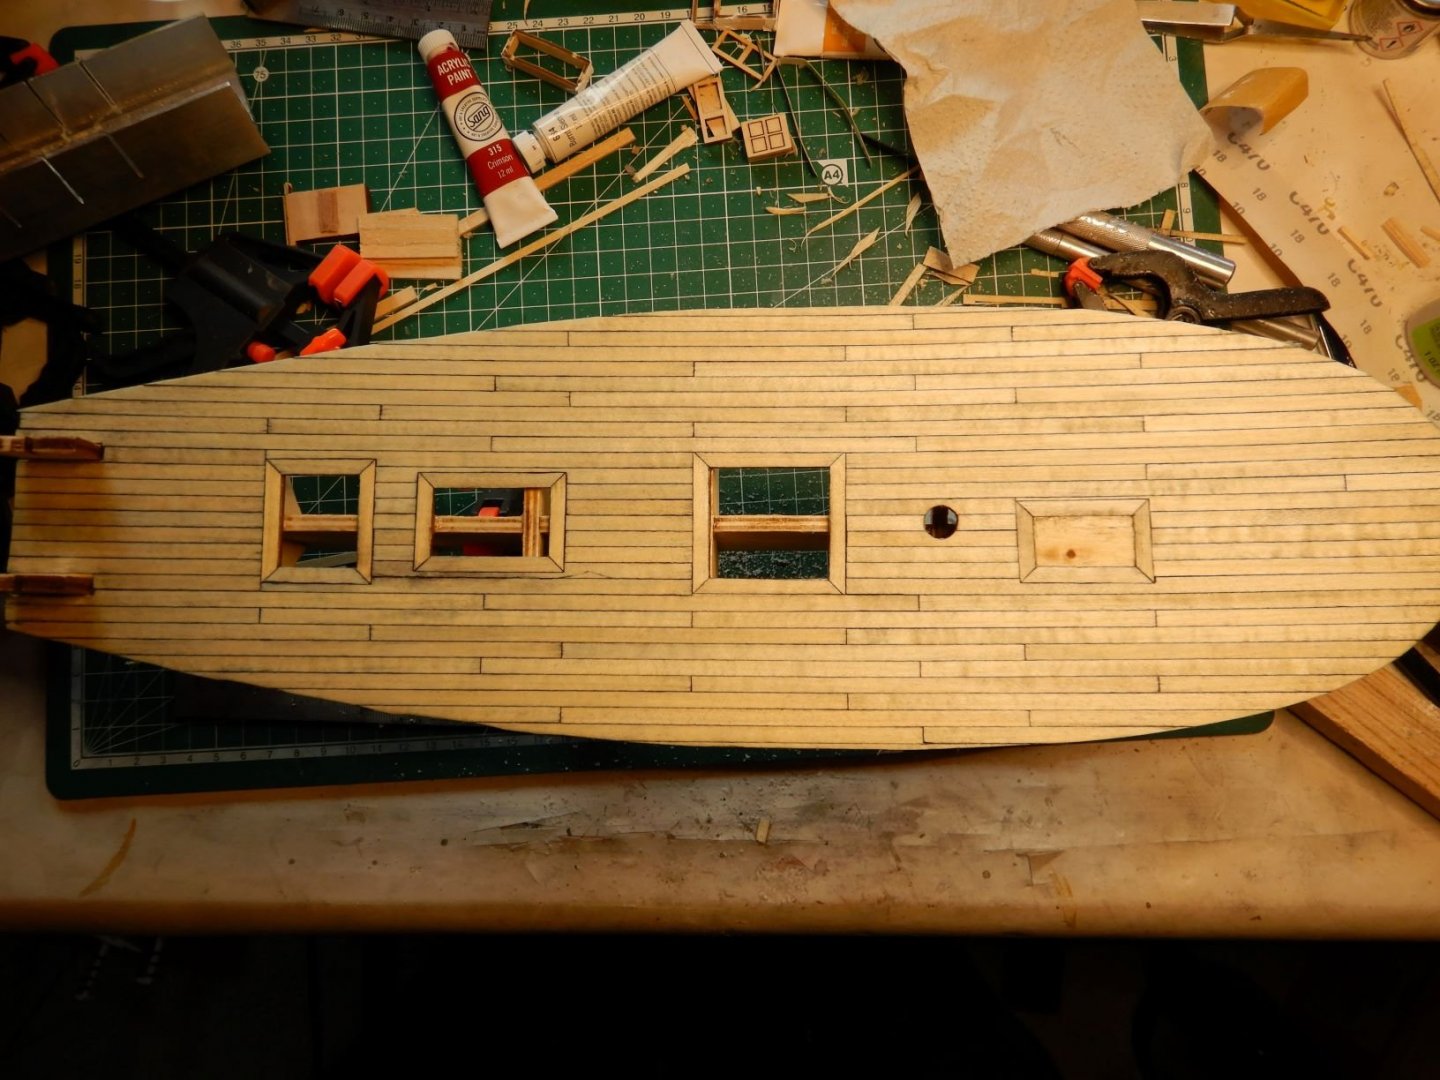
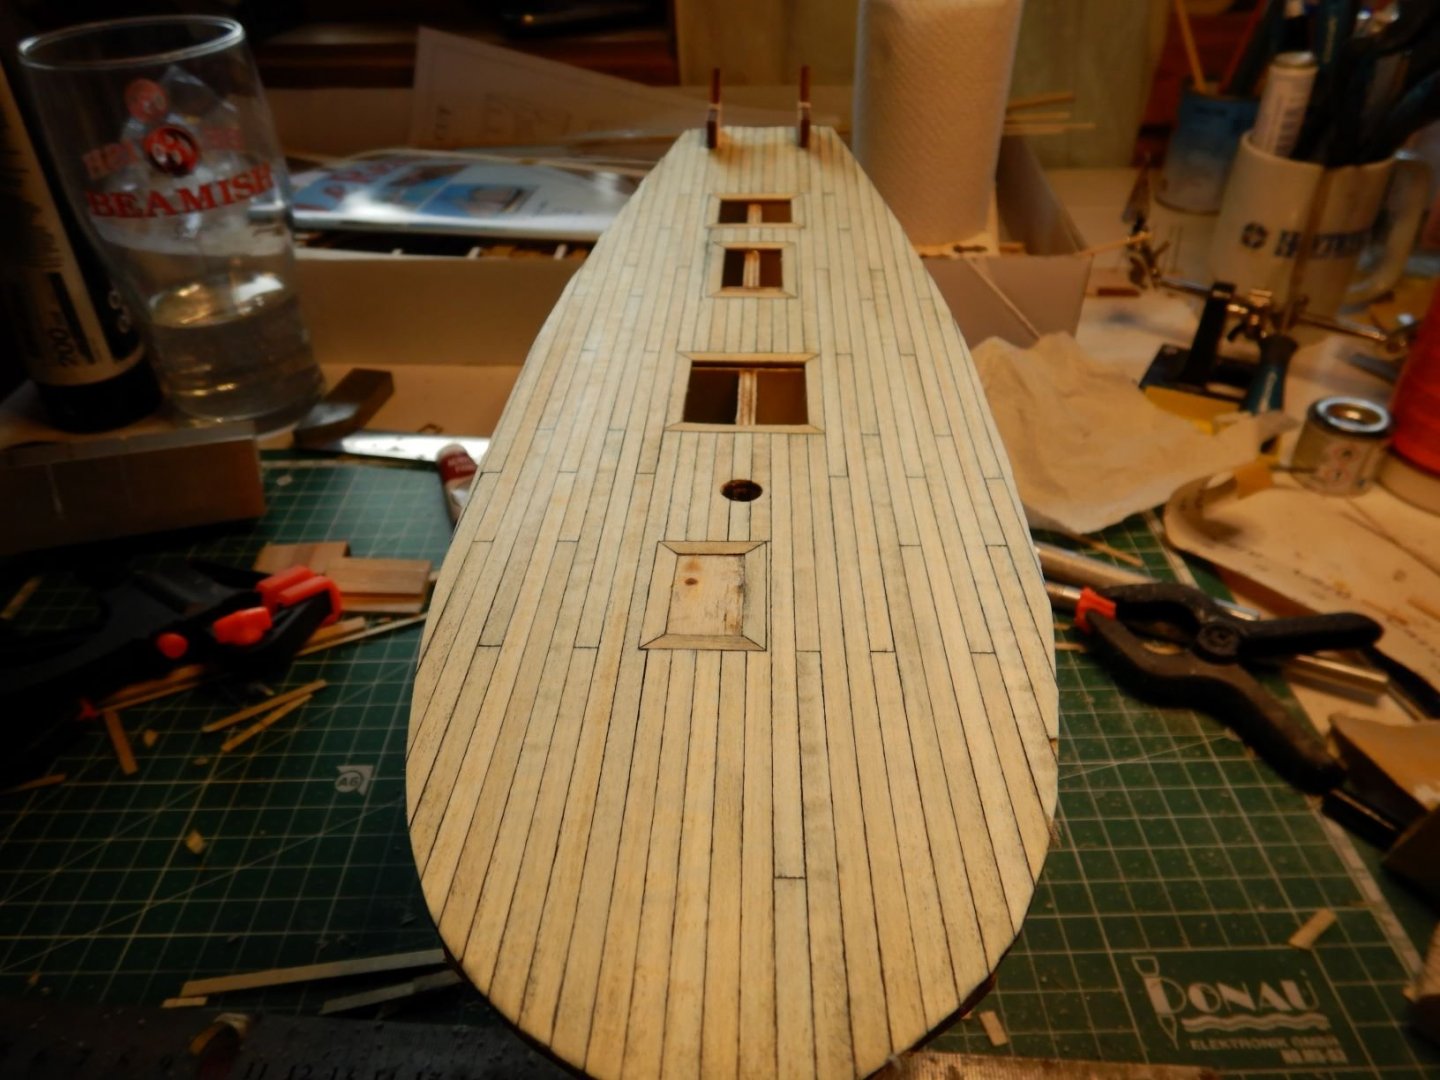
Time for the deck. When the glue for the plywood subdeck had dried, I started laying the deck planks that I had prepared. I started with one plank along the centerline as the kit suggests, and worked from this and outwards on both sides. I decided to make "frames" around the hatches/skylights as I think this will look good. I had a little problem as the instructions didn't give a exact measurement of where the forward companionway hatch should be. But looking at pictures throughout the manual I could guesstimate by measuring from other things. This is where I would really like to have a fullsize plan... I cut the deck planks at a length of 120mm as this would be 6 m in fullsize at 1:50 scale. I am using zap a gap ca glue to glue to the subdeck. I don't know if this is the best glue for this, but it seems to work ok. I am putting the butt joints at places where there would be deck beams on the real boat. Like fore and aft of hatches, the mast and so on. Done planking! The charcoal dust gets everywhere, next time I'll probably use a regular pencil instead for the caulking. Hopefully it will clean up in the sanding.. Edges trimmed away and ready for sanding. After sanding, and it looks a lot better! Got rid of most of the charcoal dust! After sanding I gave it a thin coat of linseed oil. Haven't decided yet if this will be the final finish, or if I should go for a flat varnish of some sort. Not perfect by a long stretch, but acceptable for my first try! Next step, planking... 😎 Gaffrig.


- 110 replies
-
- 10
-
-
- le renard
- artesania latina
- (and 1 more)
-
Hello. I am also new to the forum and I follow your build with great interest as I am building Le Renard which is very similar. It is interesting to see that a big difference in the kit construction is that my bulkheads don't have any tabs to support the plywood bulwarks while gluing these on. It will be interesting to see ho that goes. Your work looks great and I'm looking forward to see the model come together. Gaffrig.
-
Hello. Thank you all for the welcomes. The more I look around this site, the more impressed I am by all the amazing models and skills on here. I have now started a buildlog for my Le Renard build. Have a good modelling weekend! Gaffrig
-
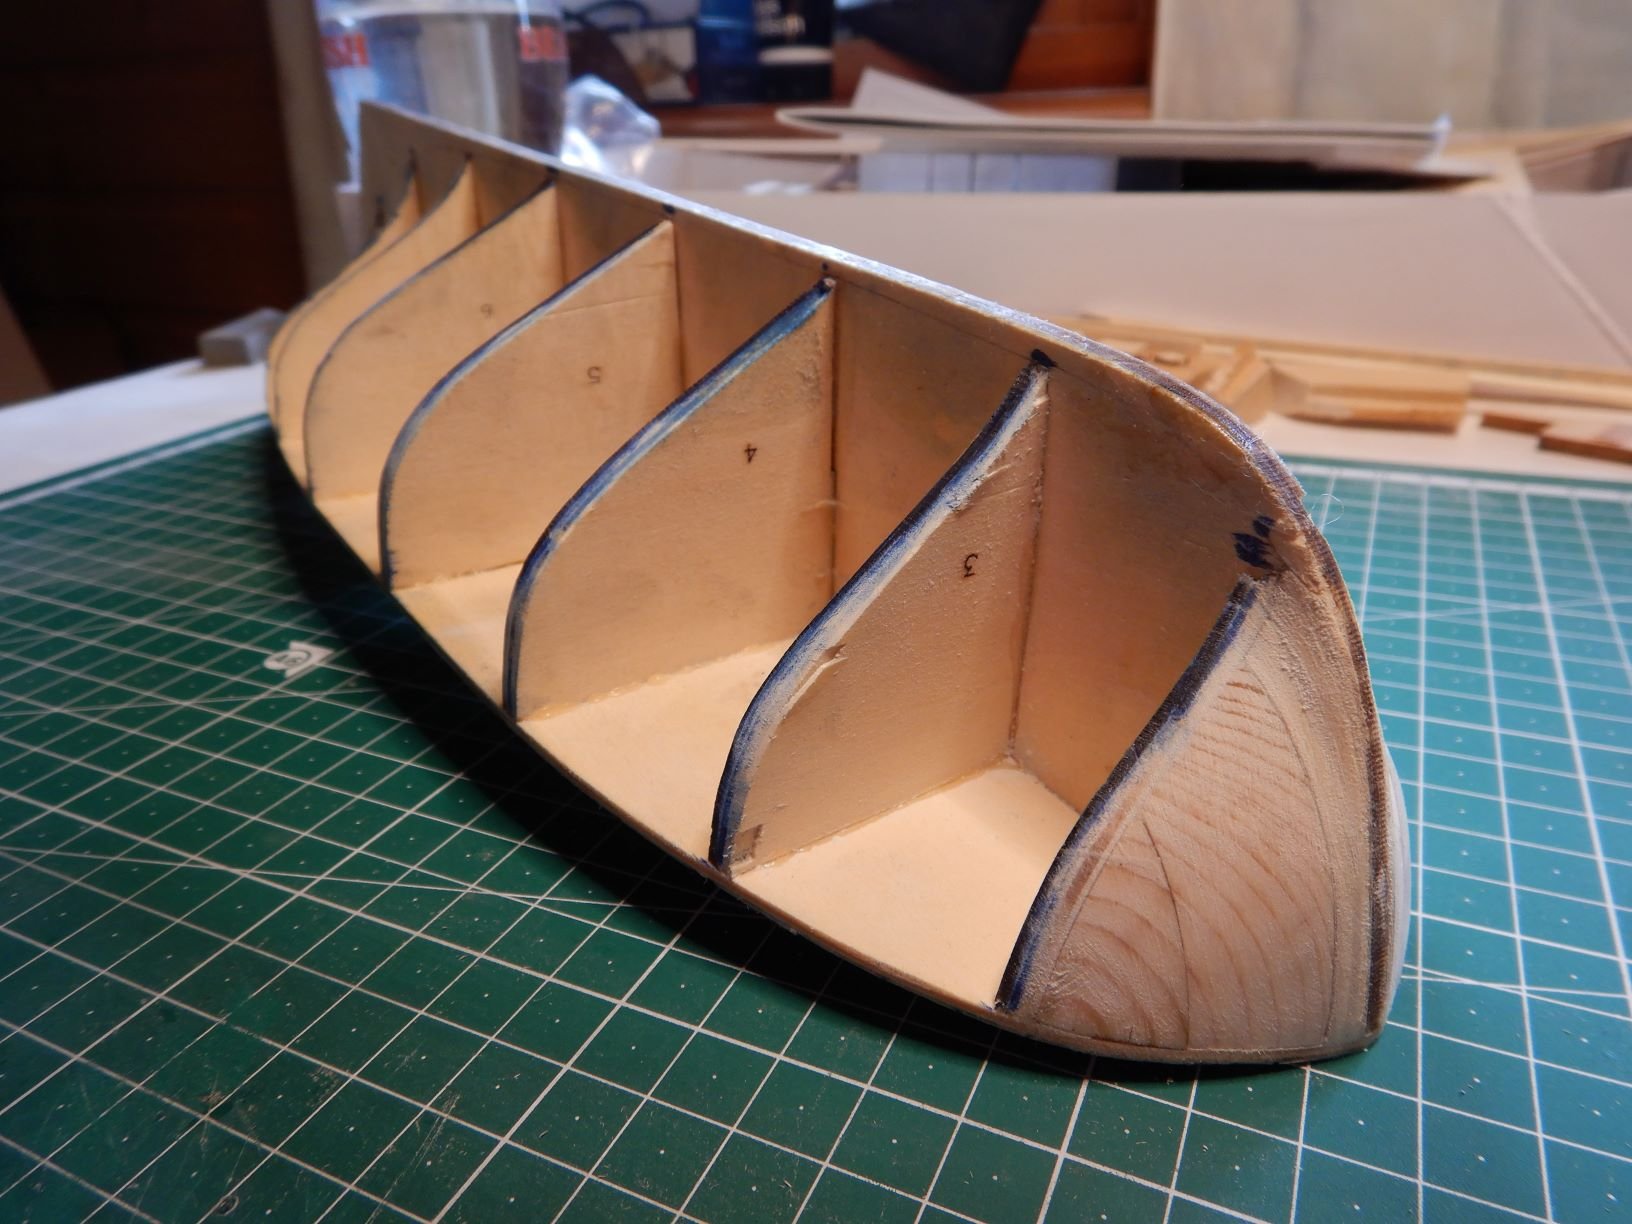
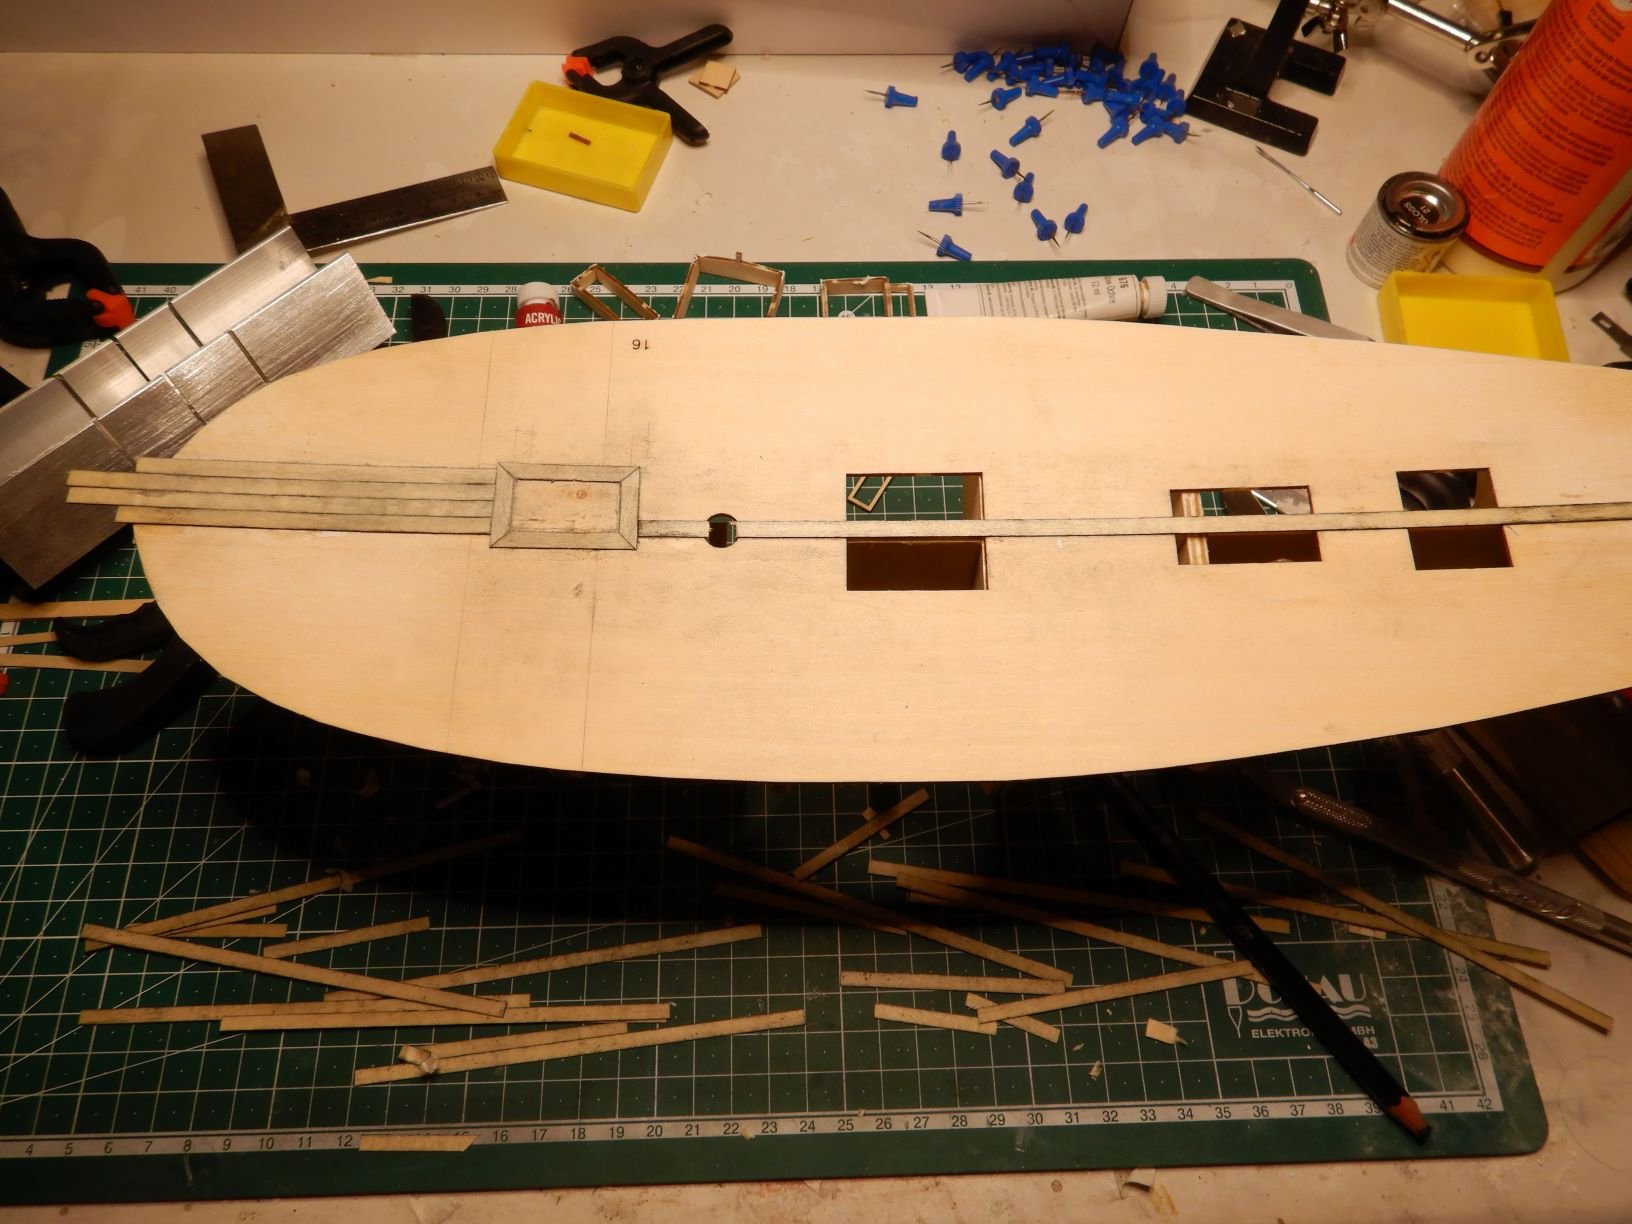
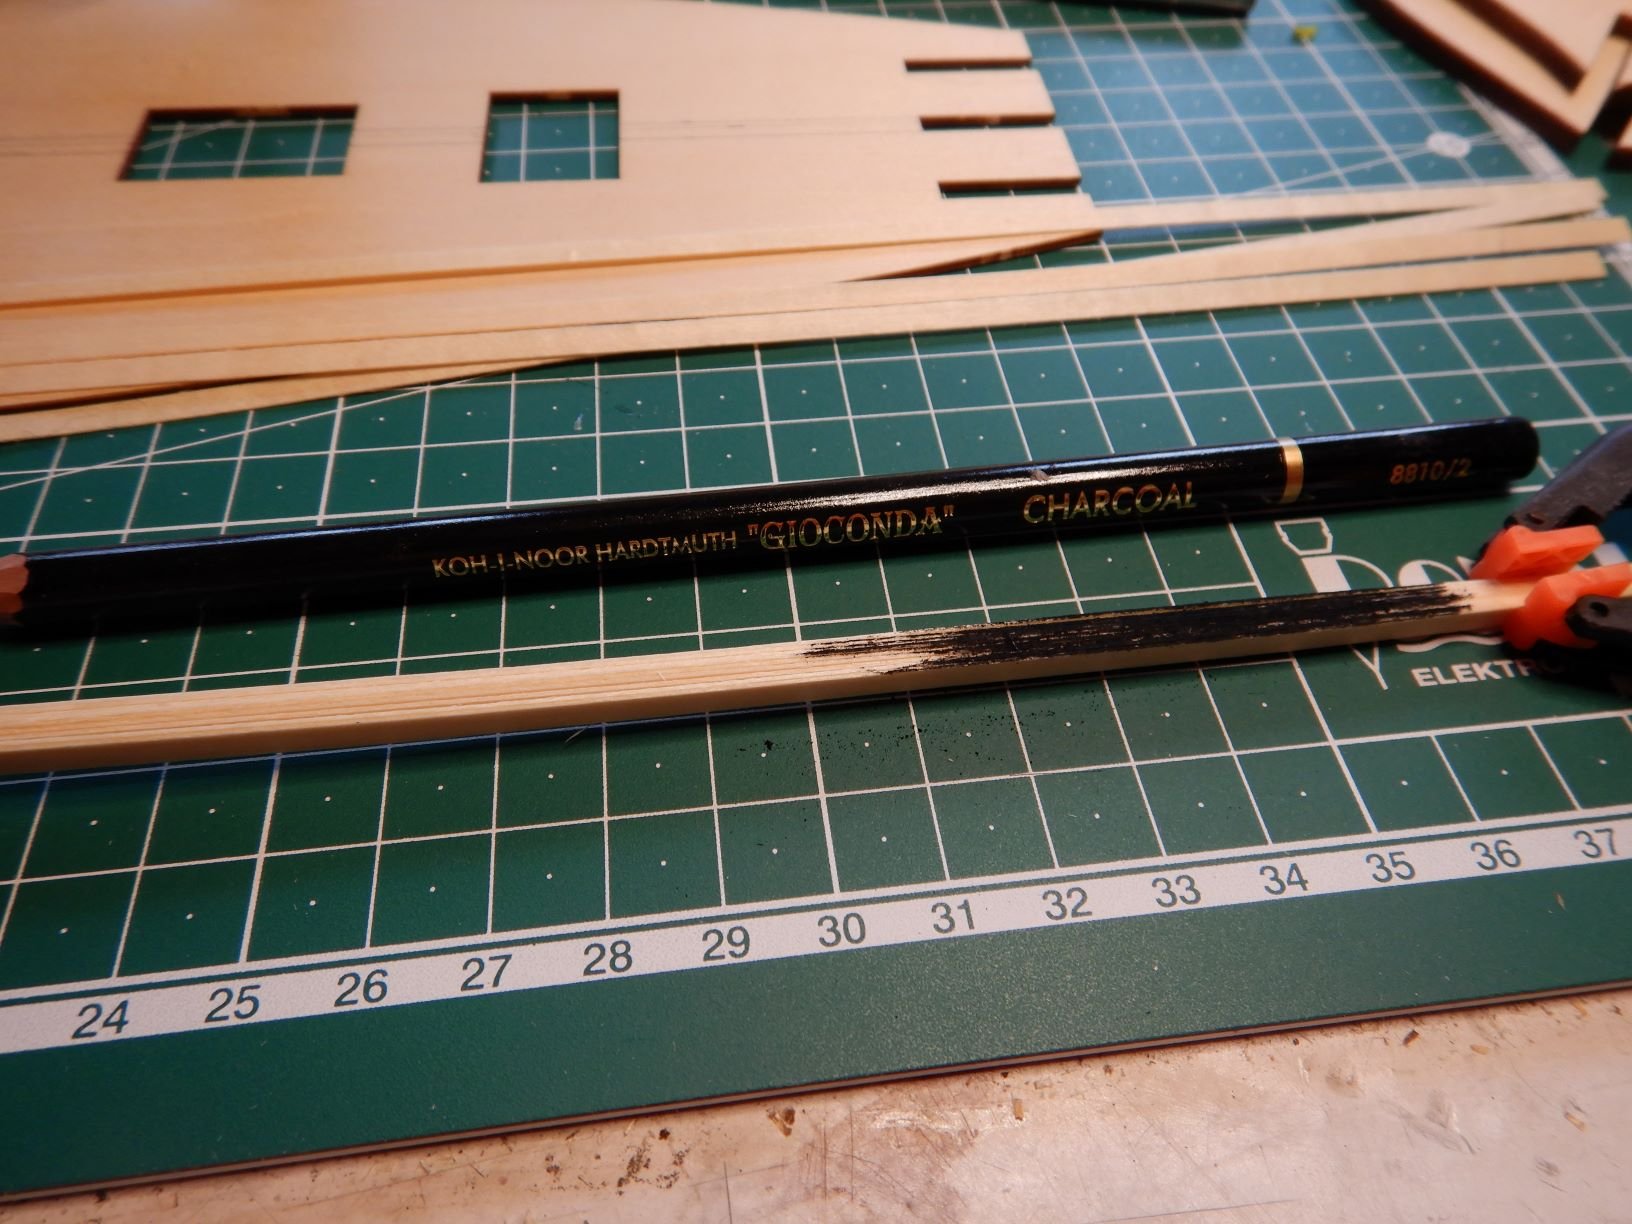
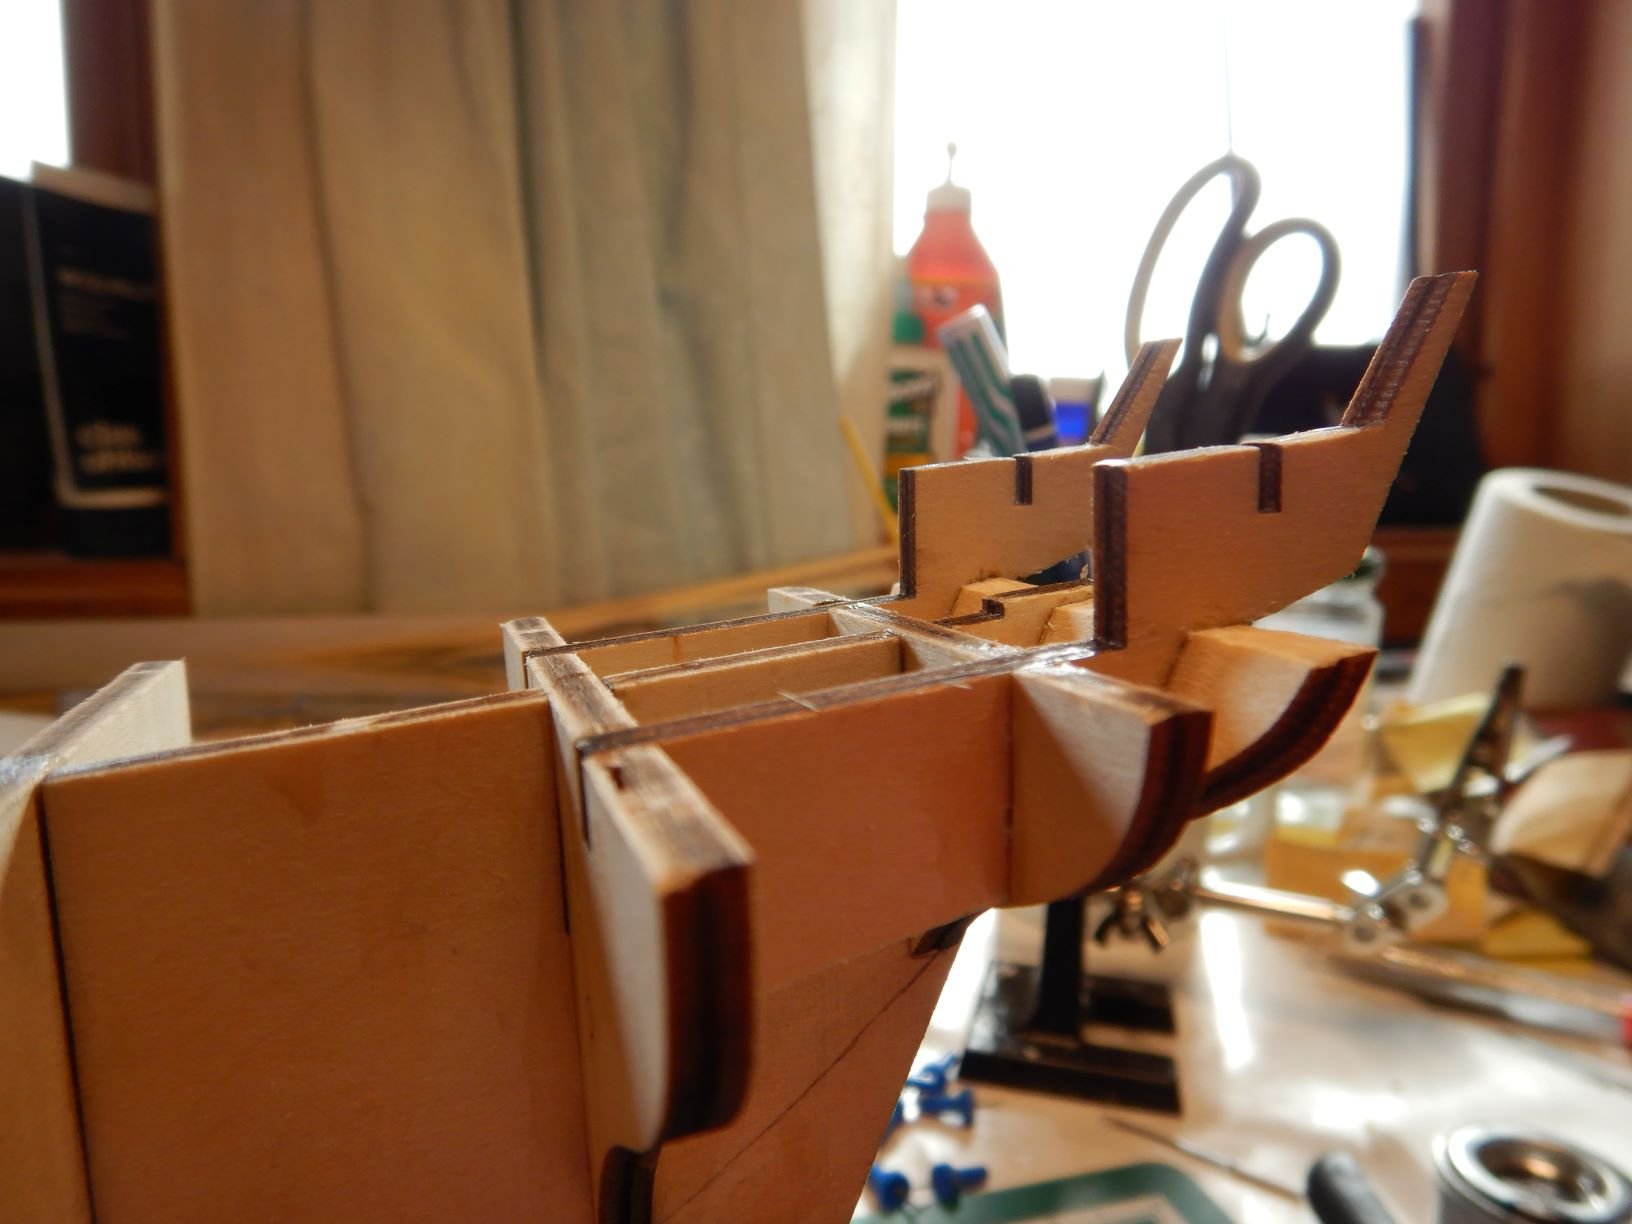
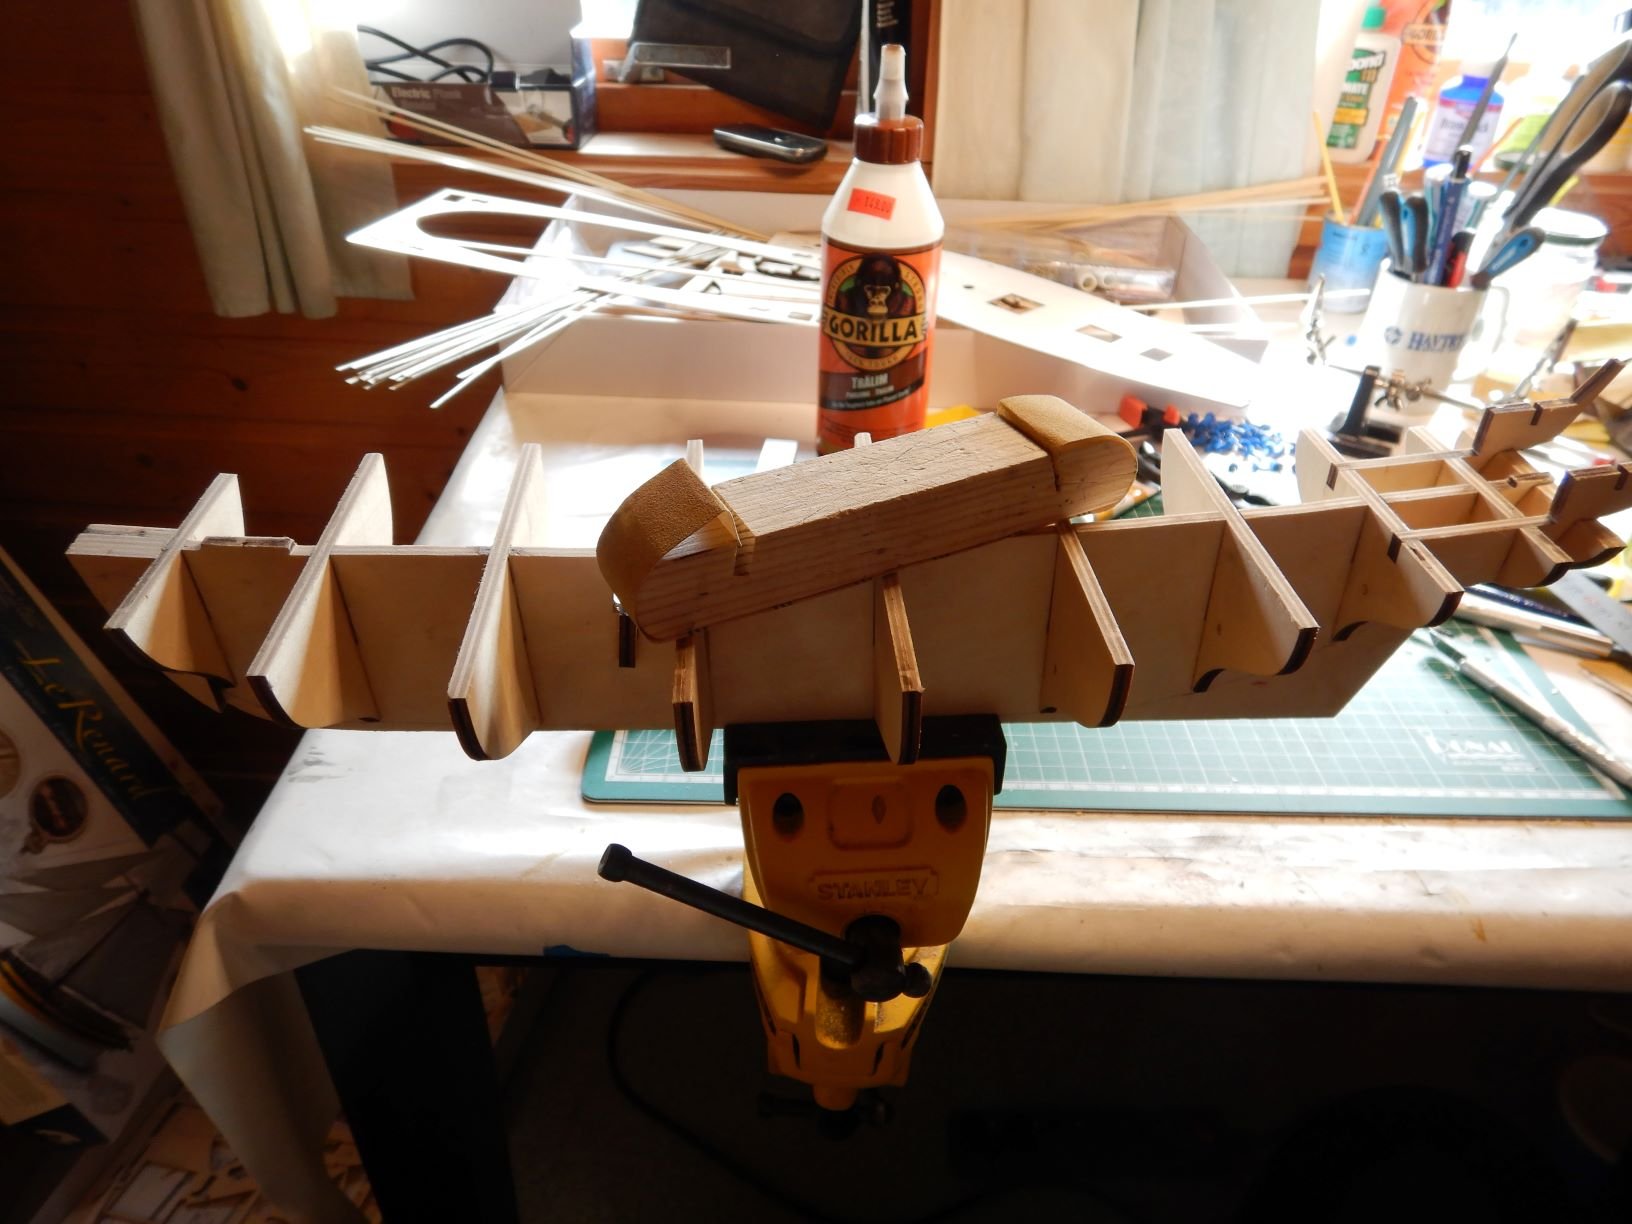
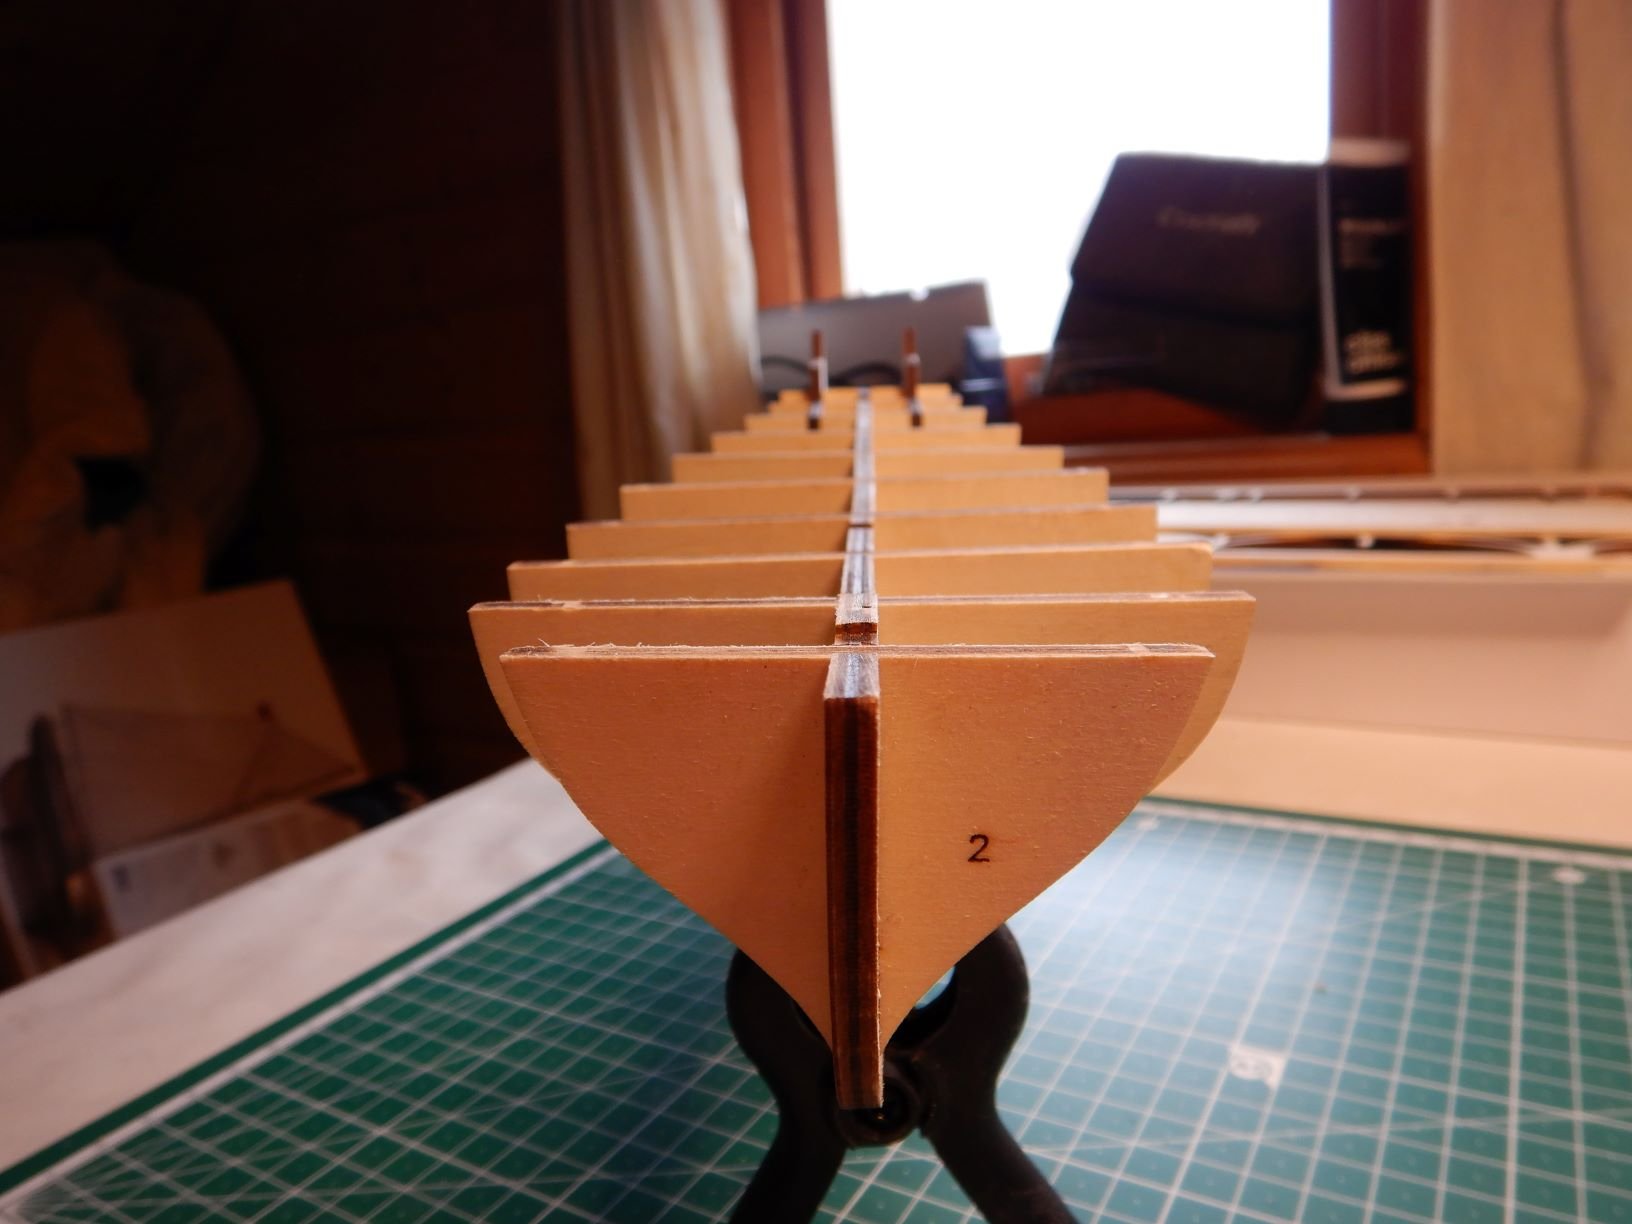
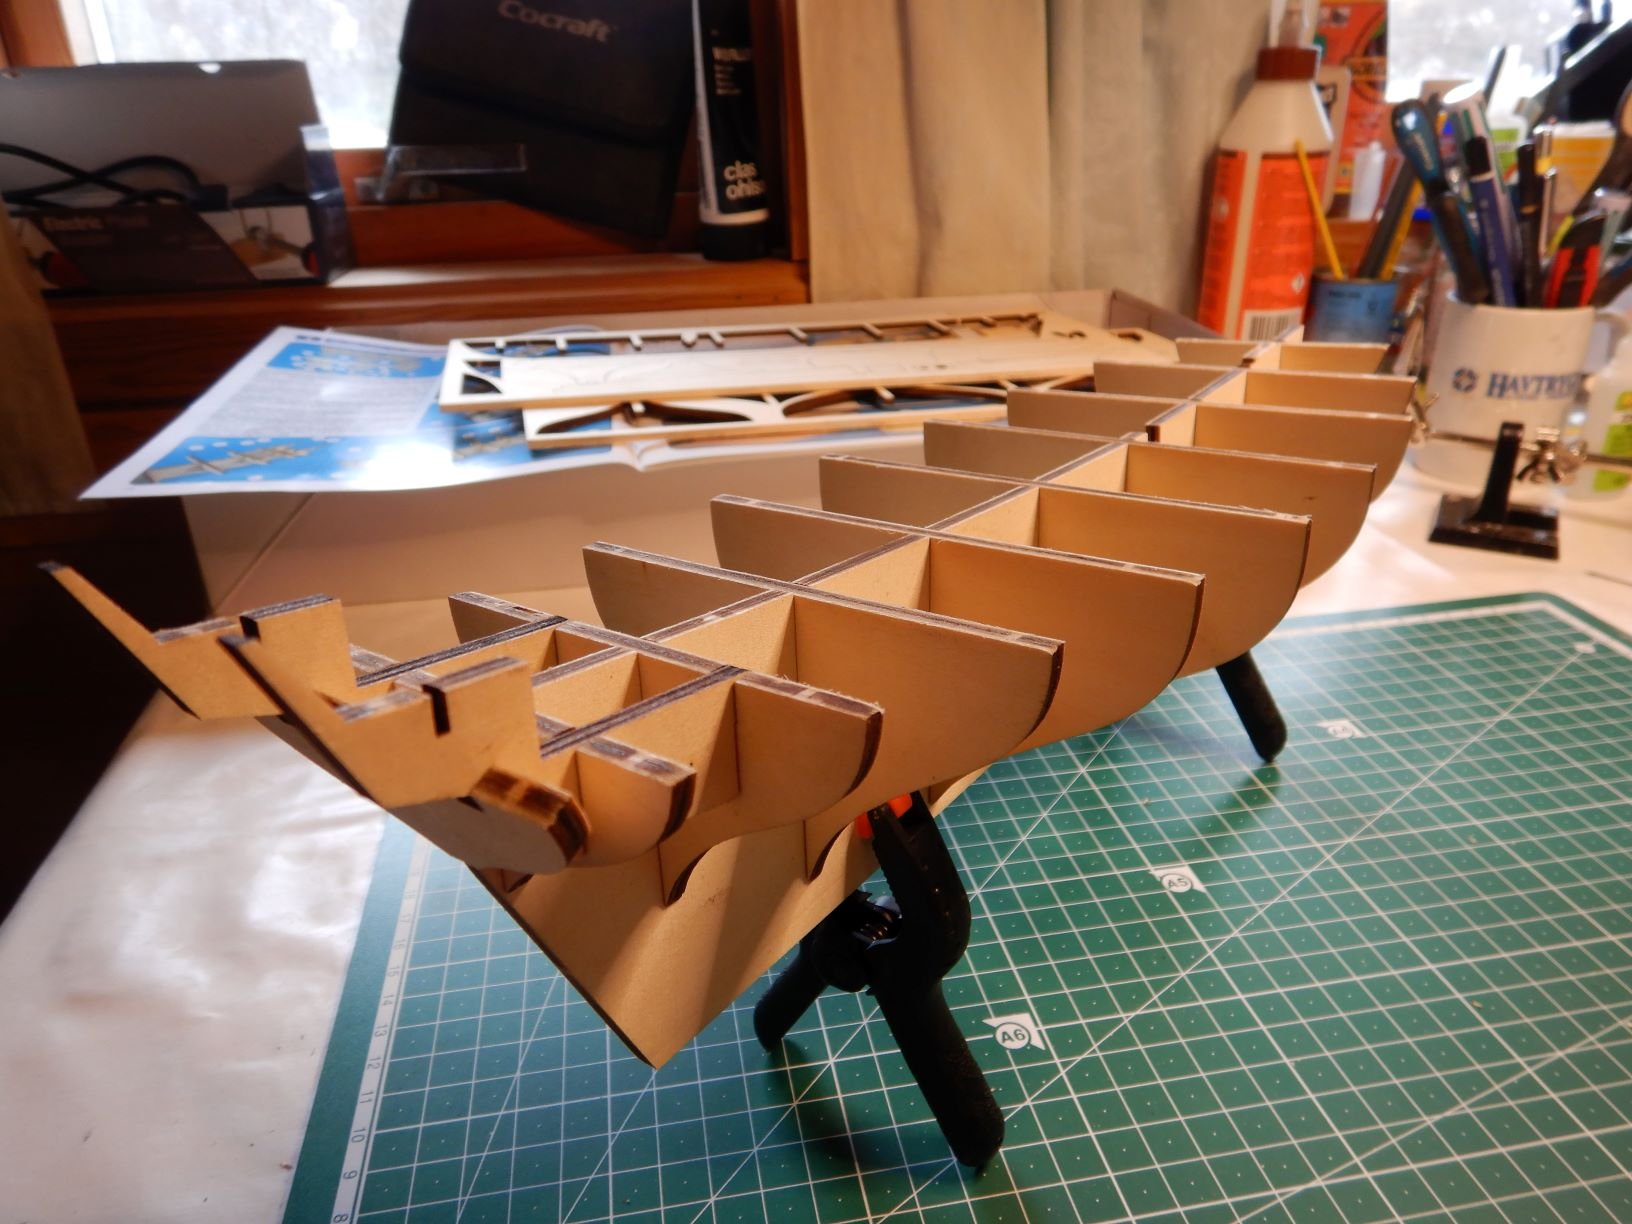
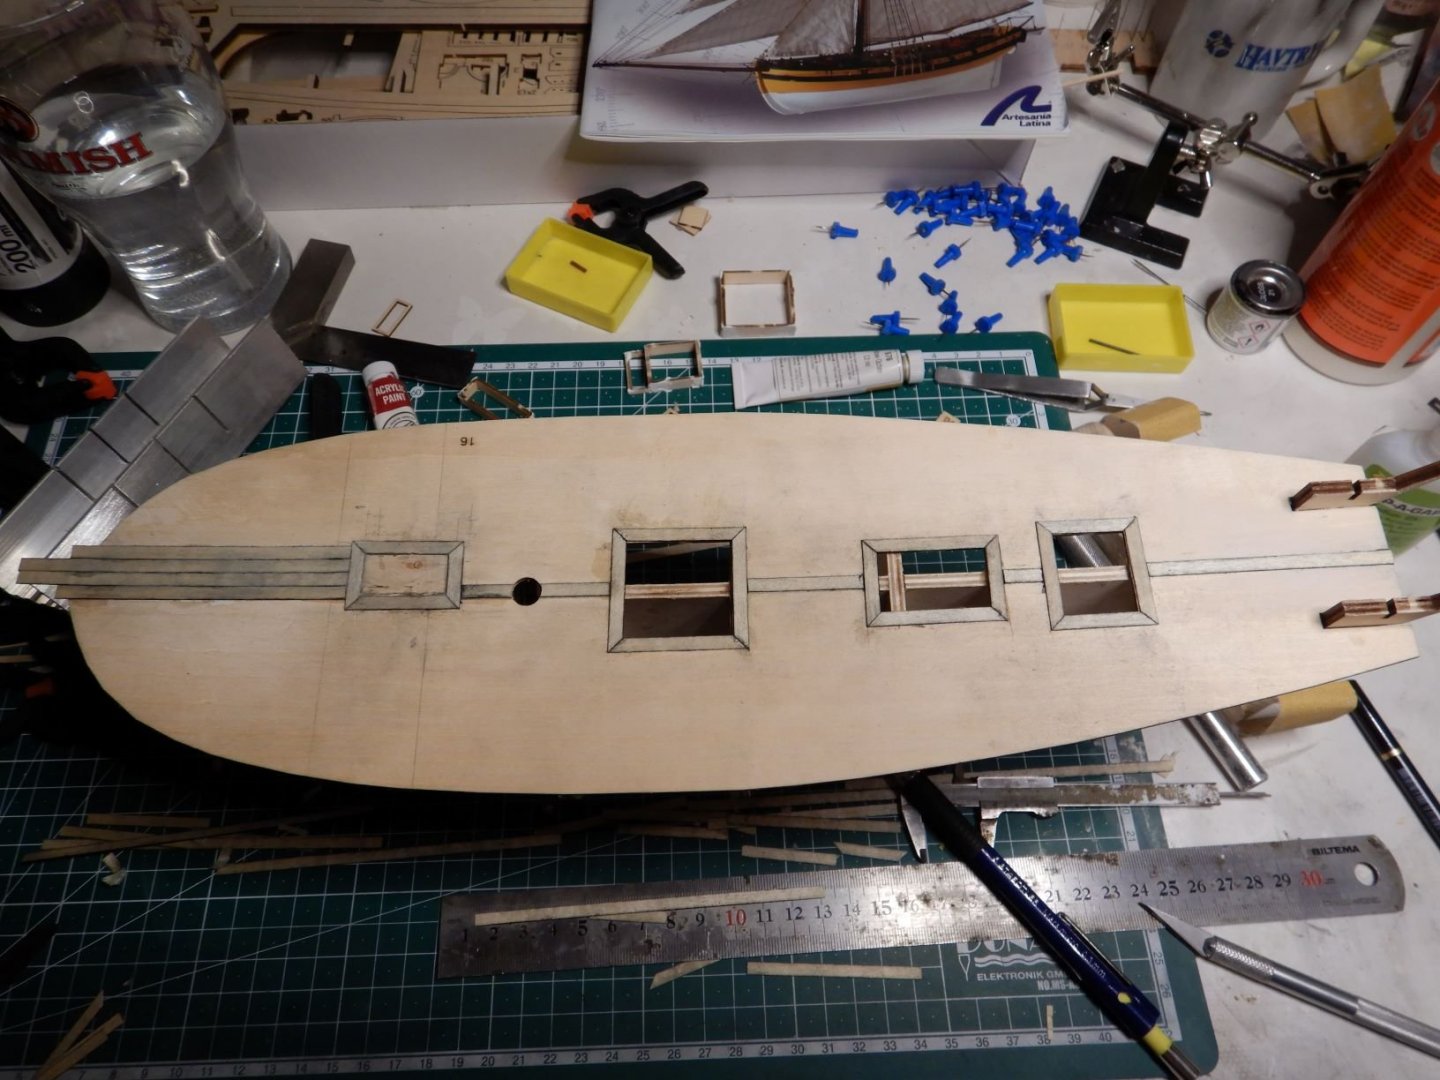
The build continues.. I've glued on all the bulkheads, one at a time using a square and clamps while the grue sets. I'm using gorilla woodglue for this. Everything seems square and true so far! While waiting for the glue to dry, I've started to prepare the deck materials as the deck is the next step in the build. These materials are 0,5 x 4 mm and I clamped 8-10 pieces together, gave them a light sanding and marked the edges with a charcoal pencil to simulate caulking. I also started to prepare the gun carriages. These are to plywood pieces glued together without wheels. Then I prepared the guns, which are metal castings that needed some filing of burrs and marks from the casting. I also gave them a little bigger bore as I think the original bore seemed a little small. So they are all ready for painting. Le Renard has ten guns. When all the bulkheads had been glued, I sanded the top of the bulkheads along the sheerline of the boat to get a good surface for the plywood subdeck. Especially the transom needed a lot of sanding to take the plywood deck. Then I hit my first snag. The plywood subdeck has a notch that fits over a tab in the keelpiece in the stern. All well in that end... The keelpiece also have a tab in the bow end, but the deck has no notch. In the instructions there is no tab on the bow... 🤔 So what to do? First I thought I'll just remove the tab, but when my little brain had started working (this took awhile.. 😵) I decided to cut a new notch in the deck, as this would help me keep the deck in position while gluing and clamping. (for some reason I don't have a picture of this) This worked fine and I glued the deck in place with the gorilla woodglue and kept it in place with rubberbands. and a couple of pins, making sure that the deck was pressed down on the bulkheads all the way. So when the glue dries I'm ready for laying the deck. Hope you all get a nice modeling weekend! Gaffrig.


- 110 replies
-
- 10
-
-
- le renard
- artesania latina
- (and 1 more)
-
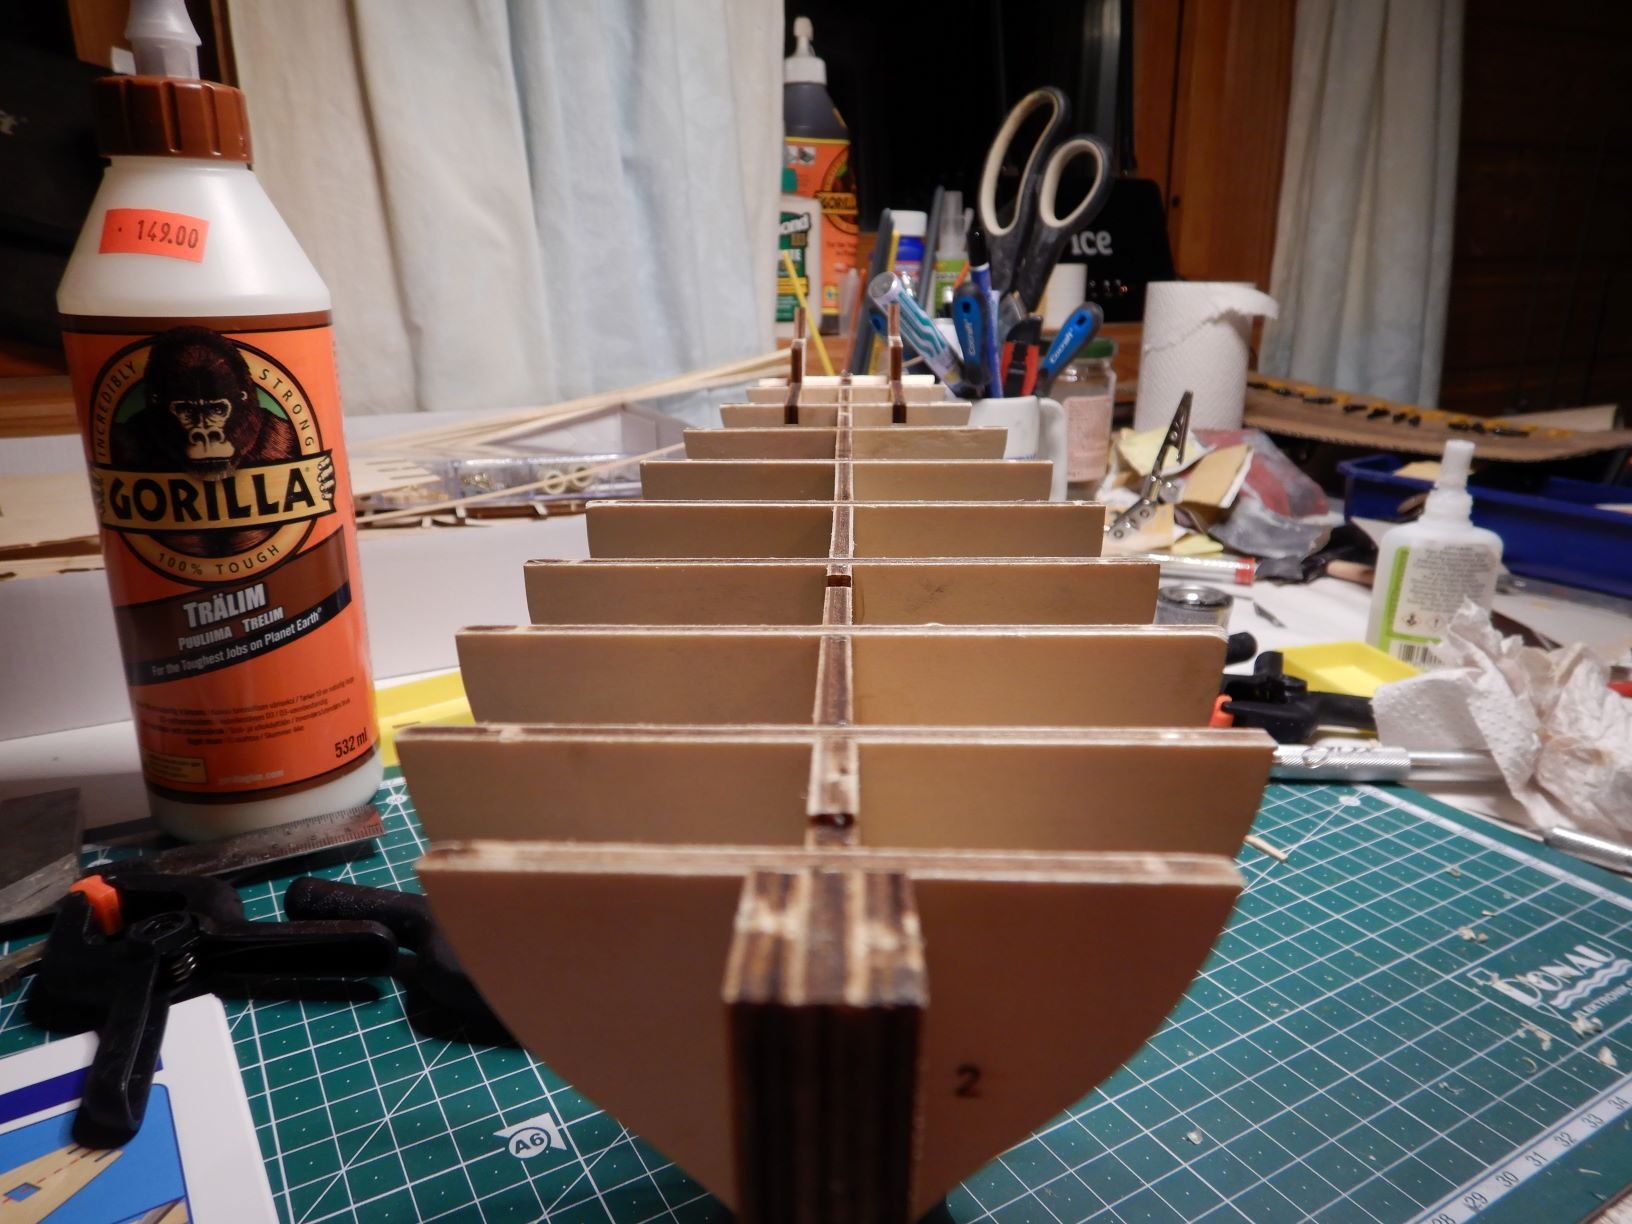
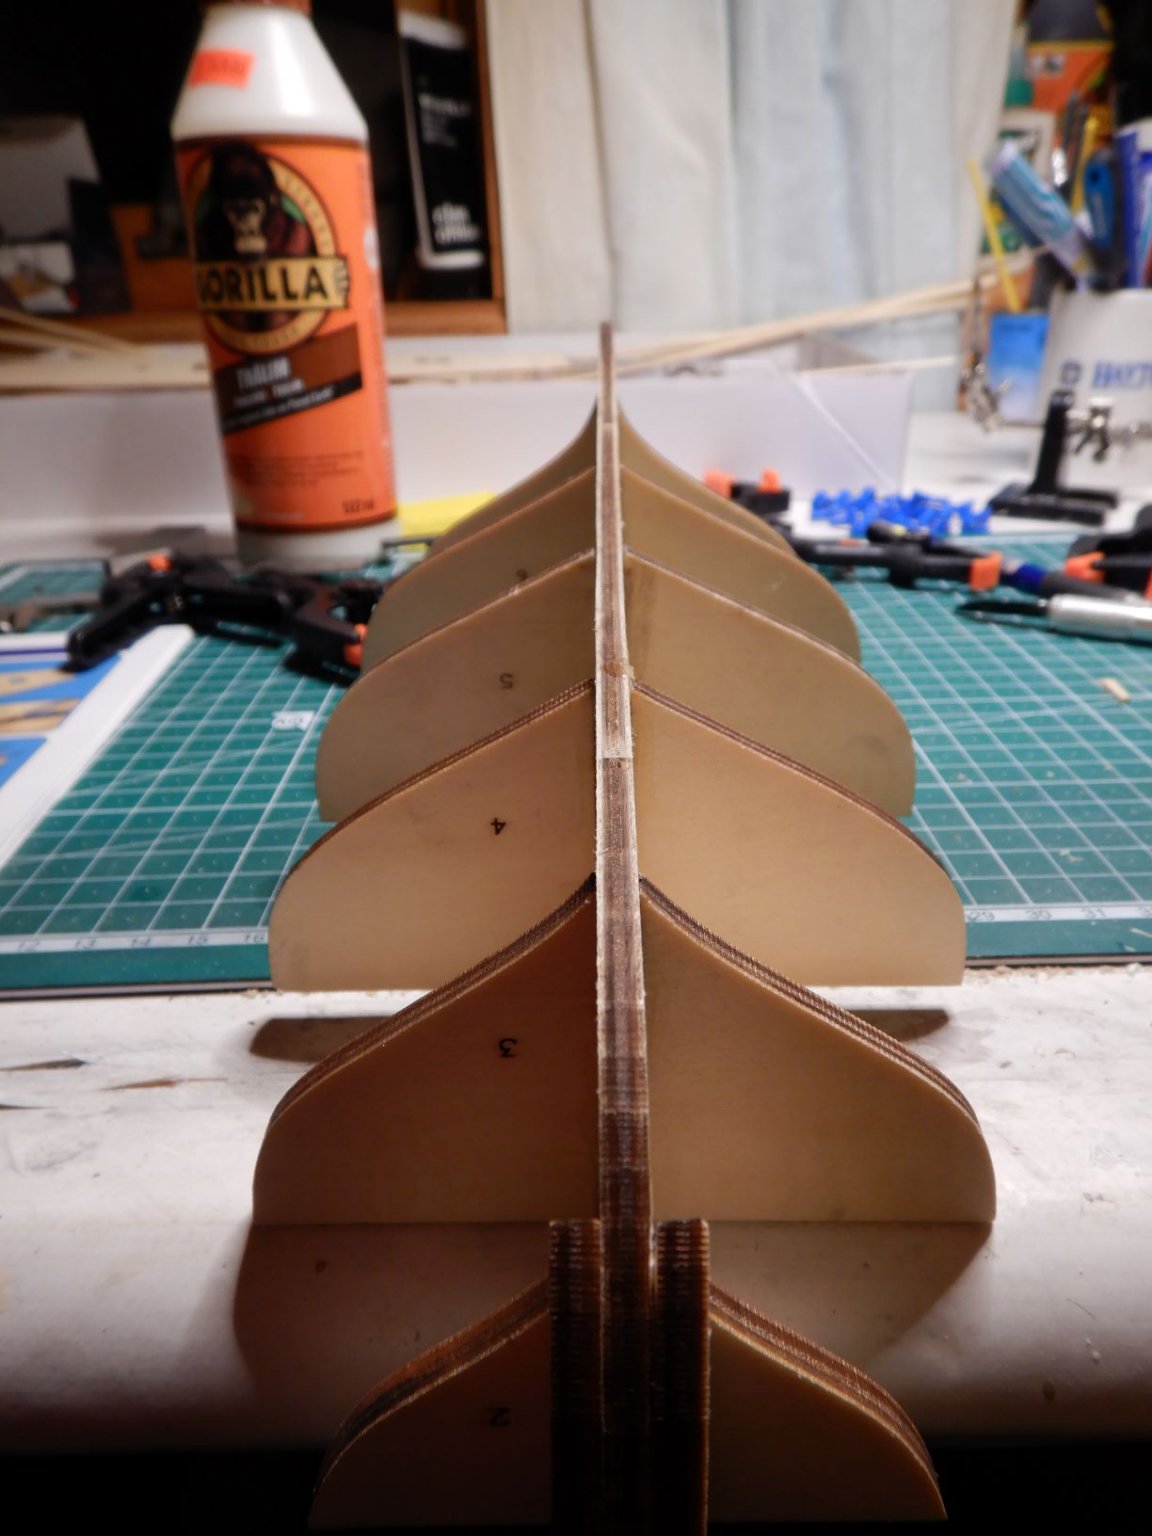
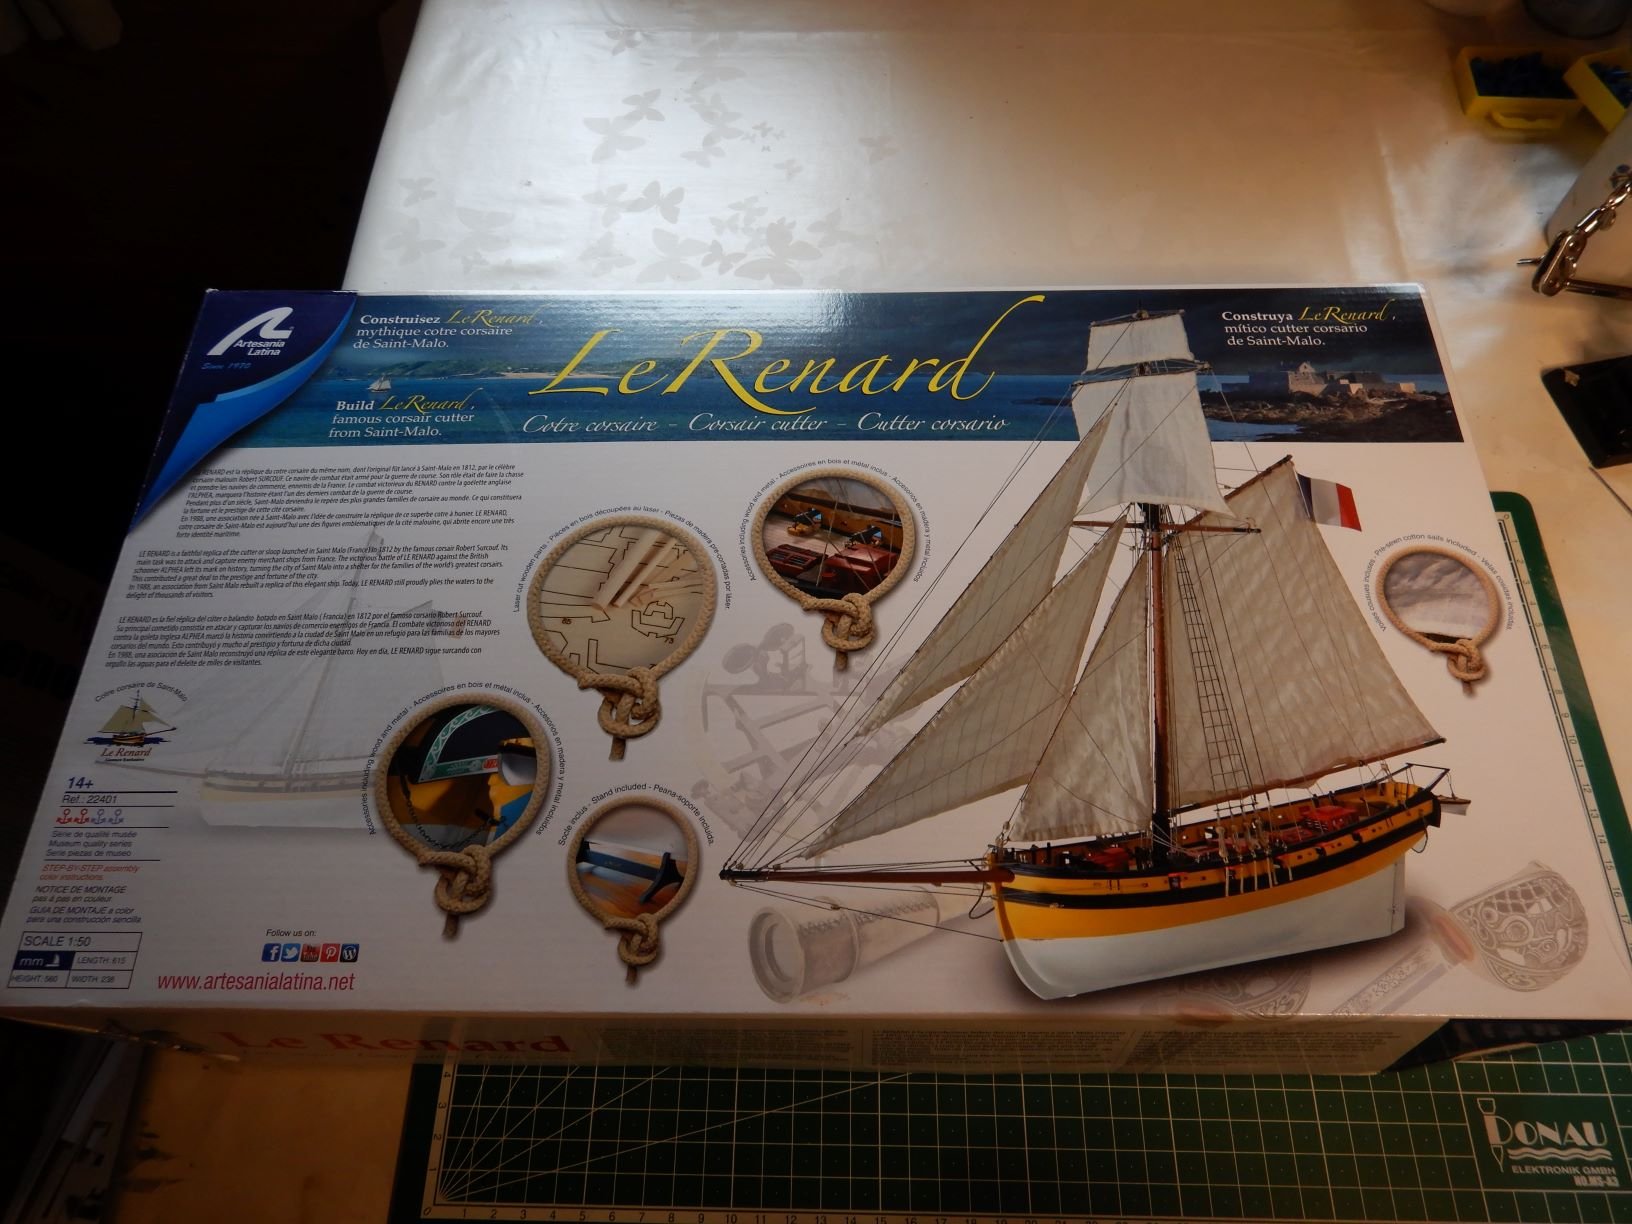
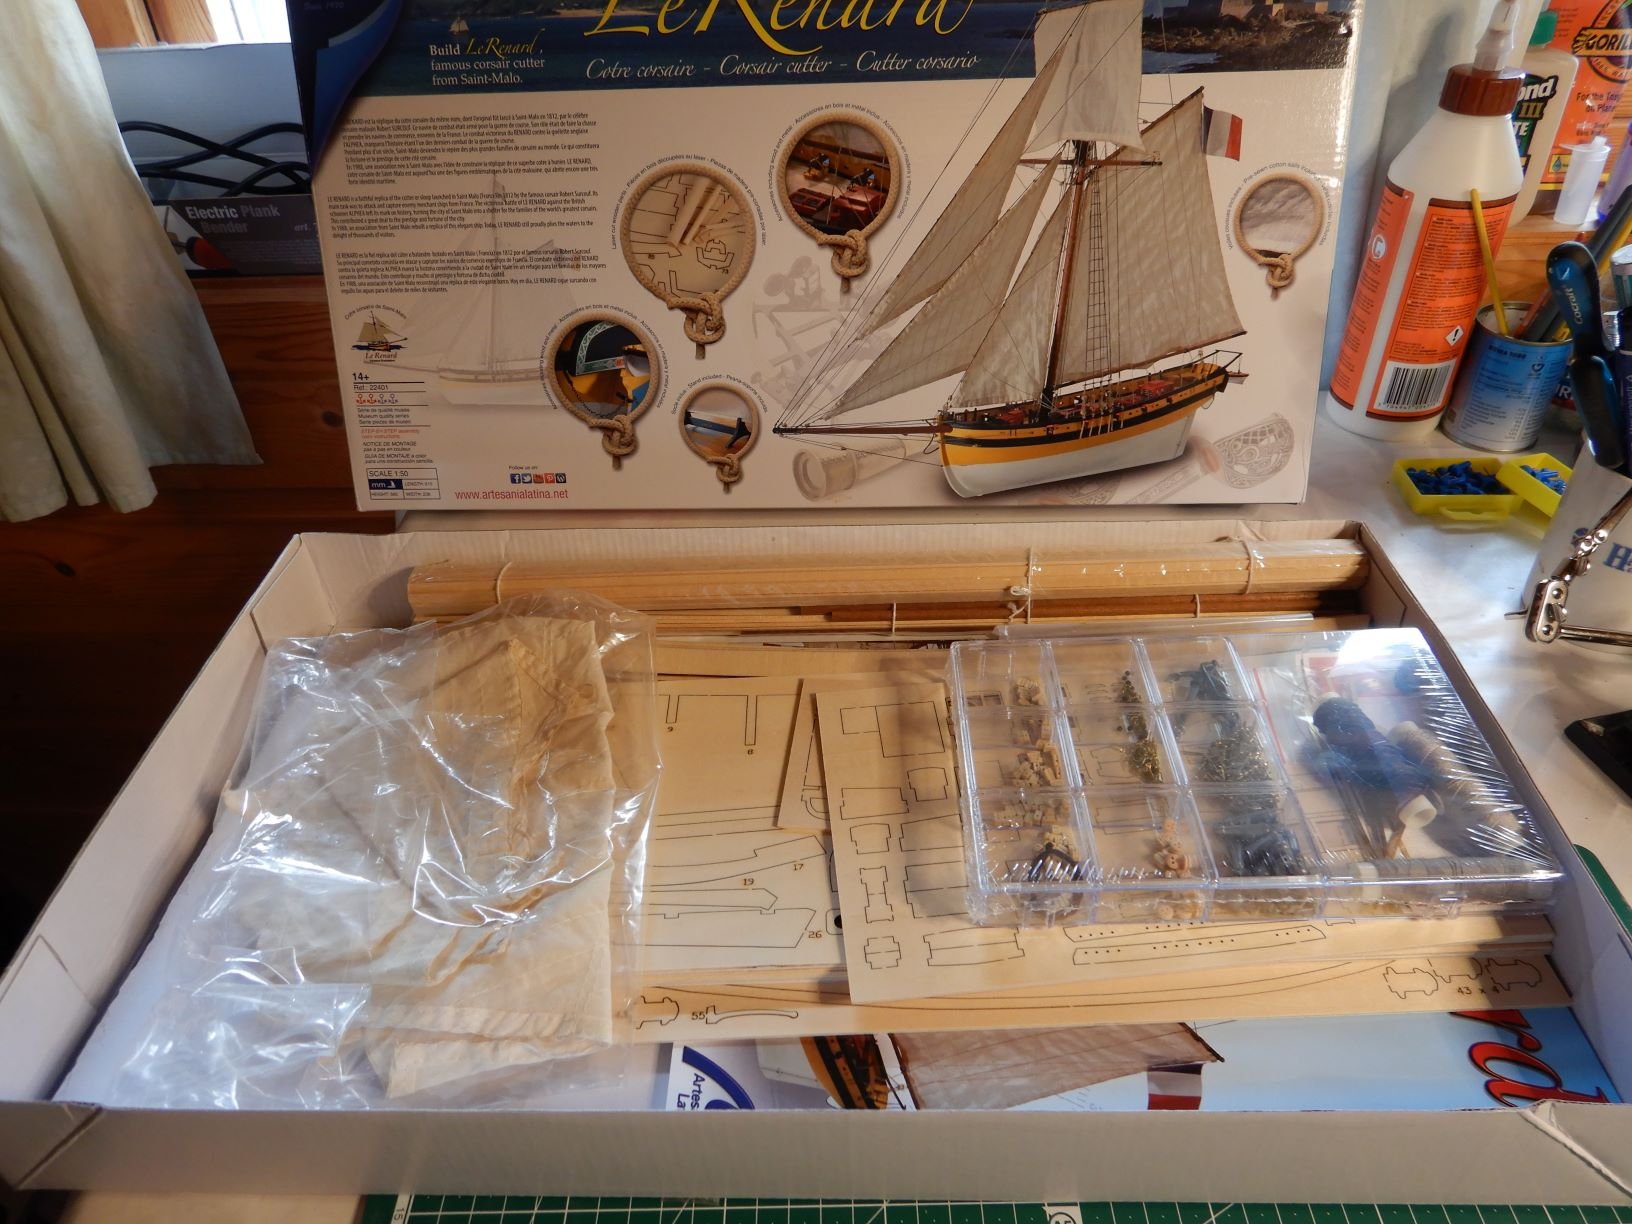
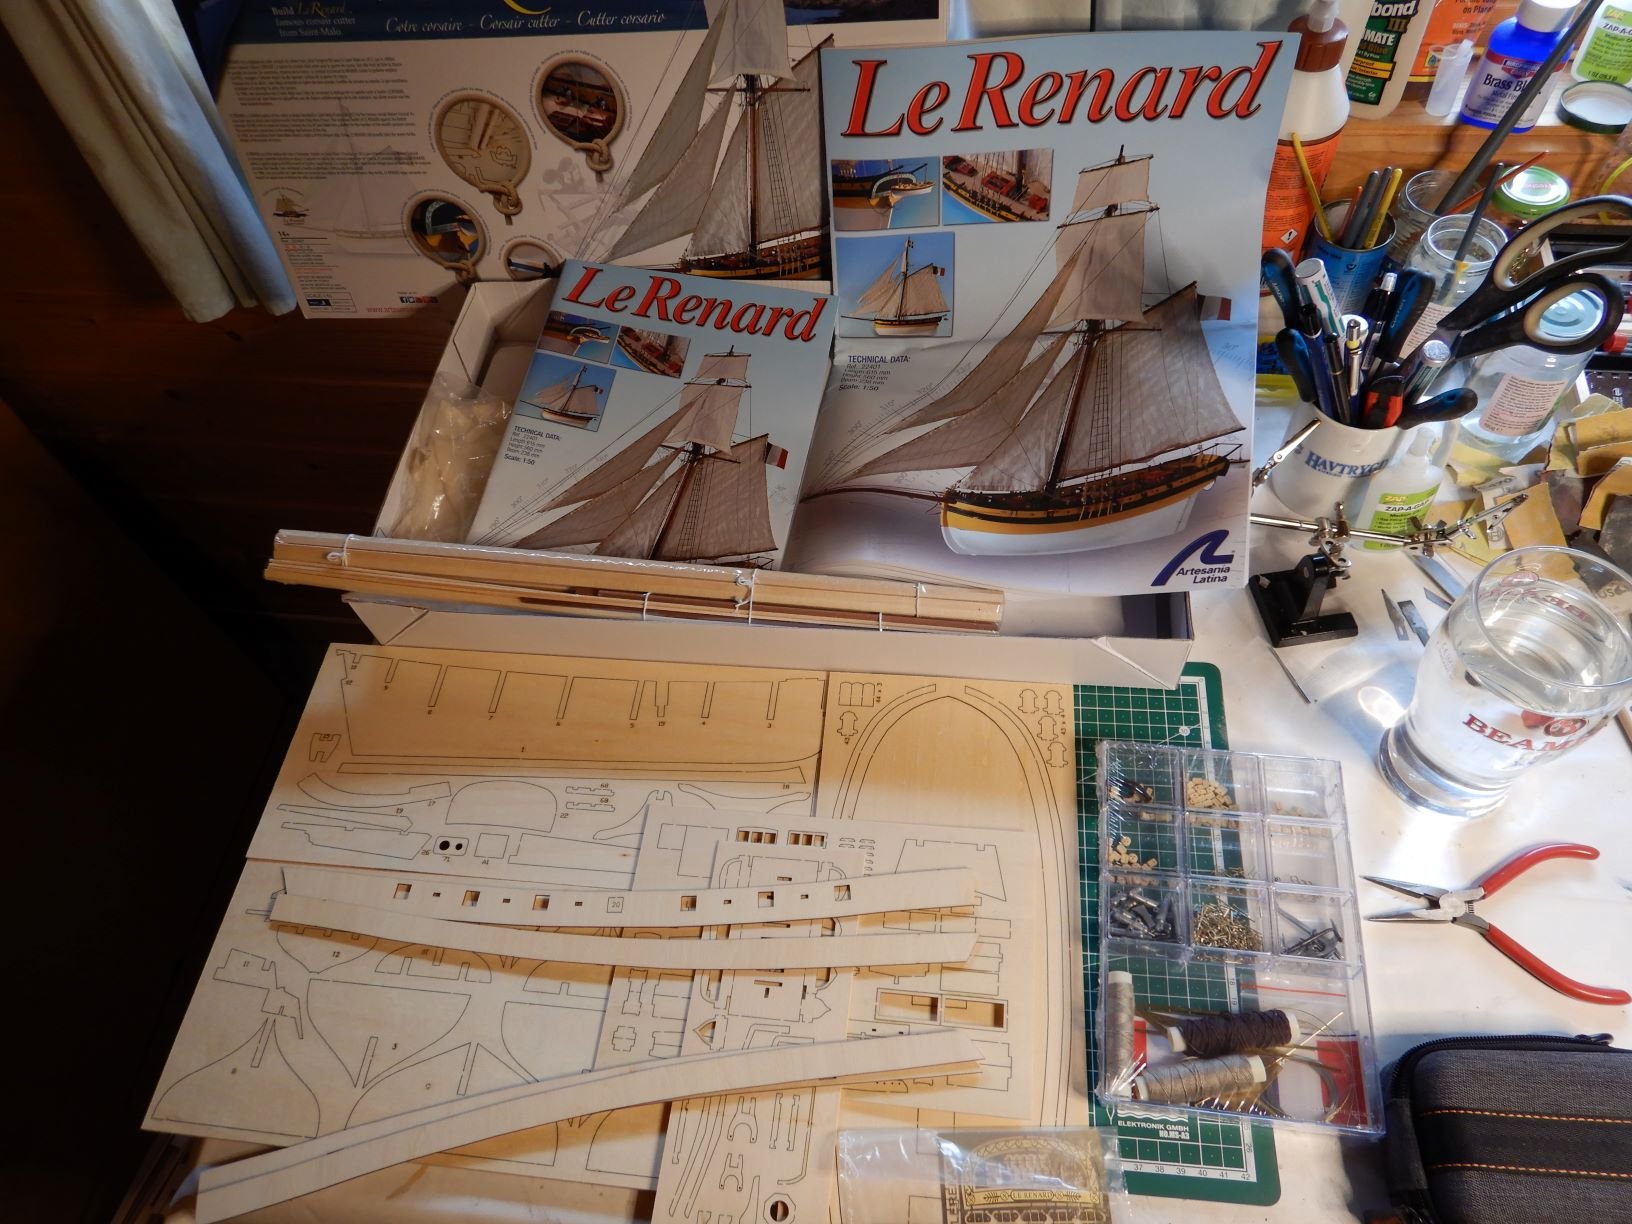
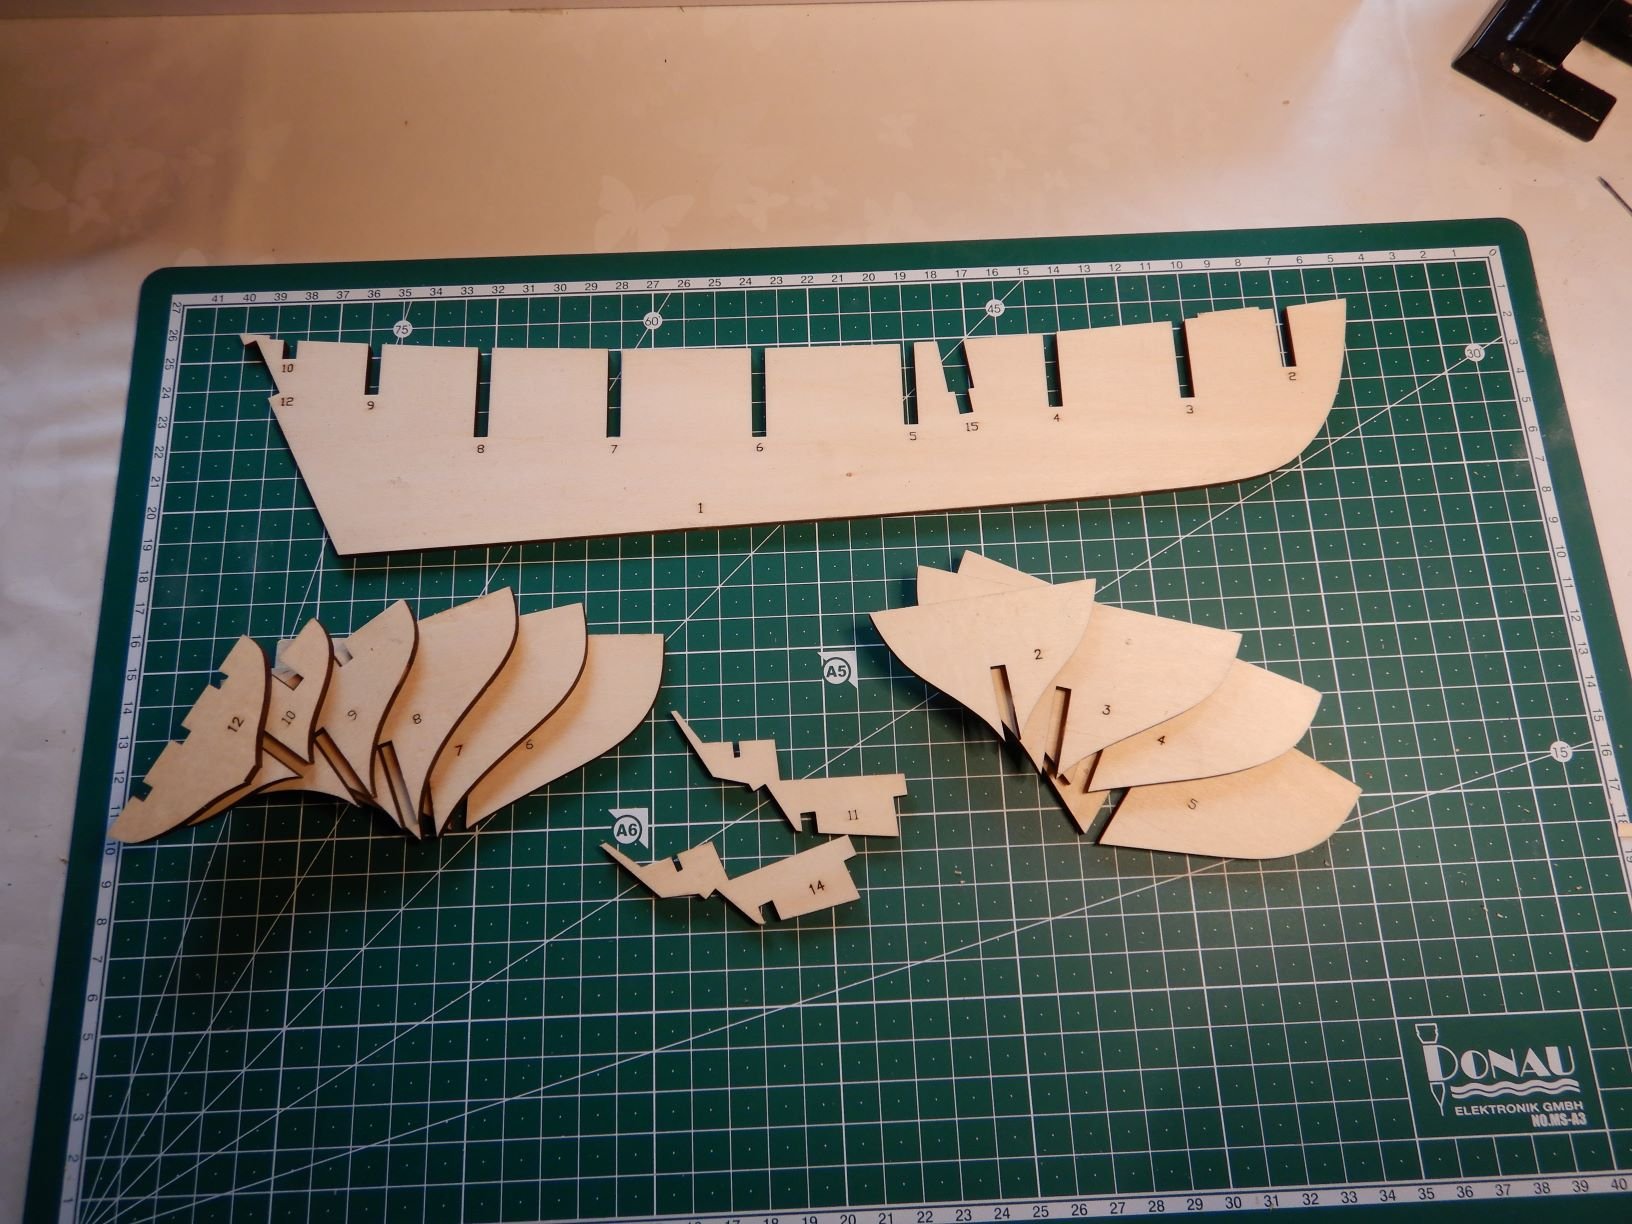
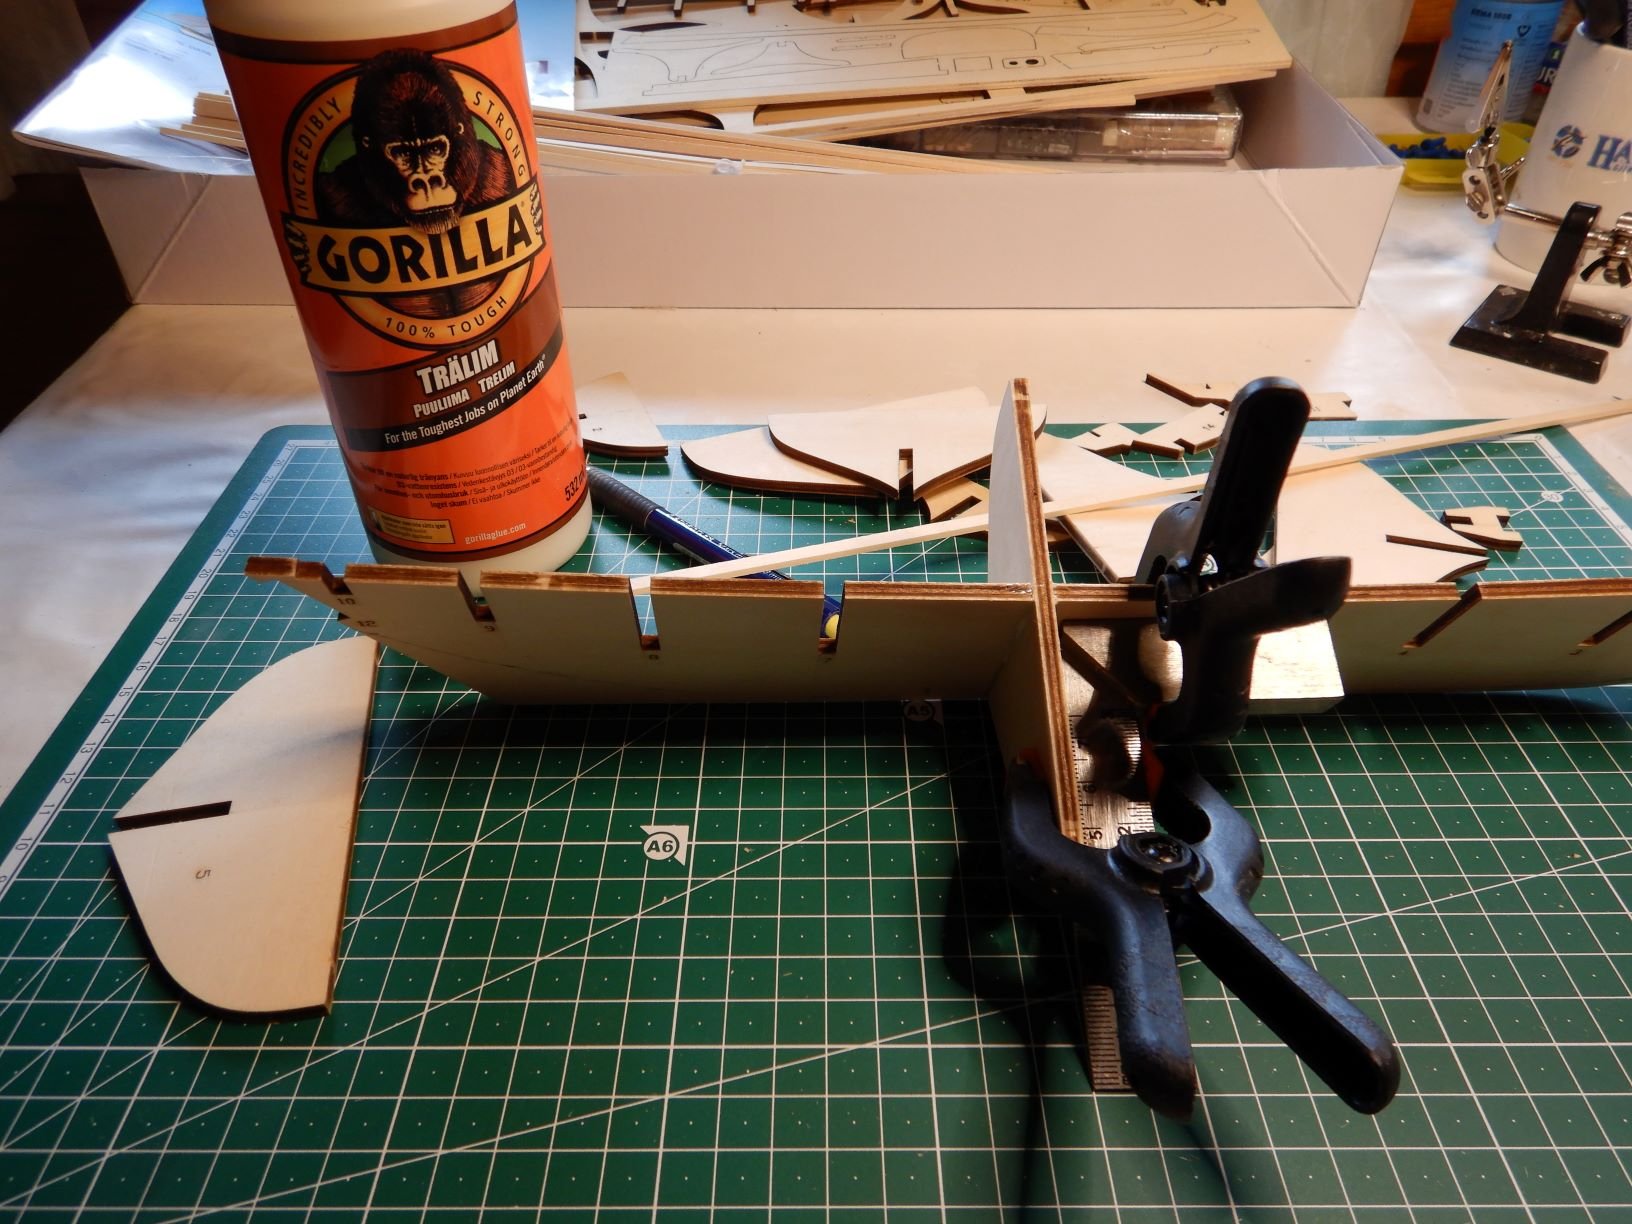
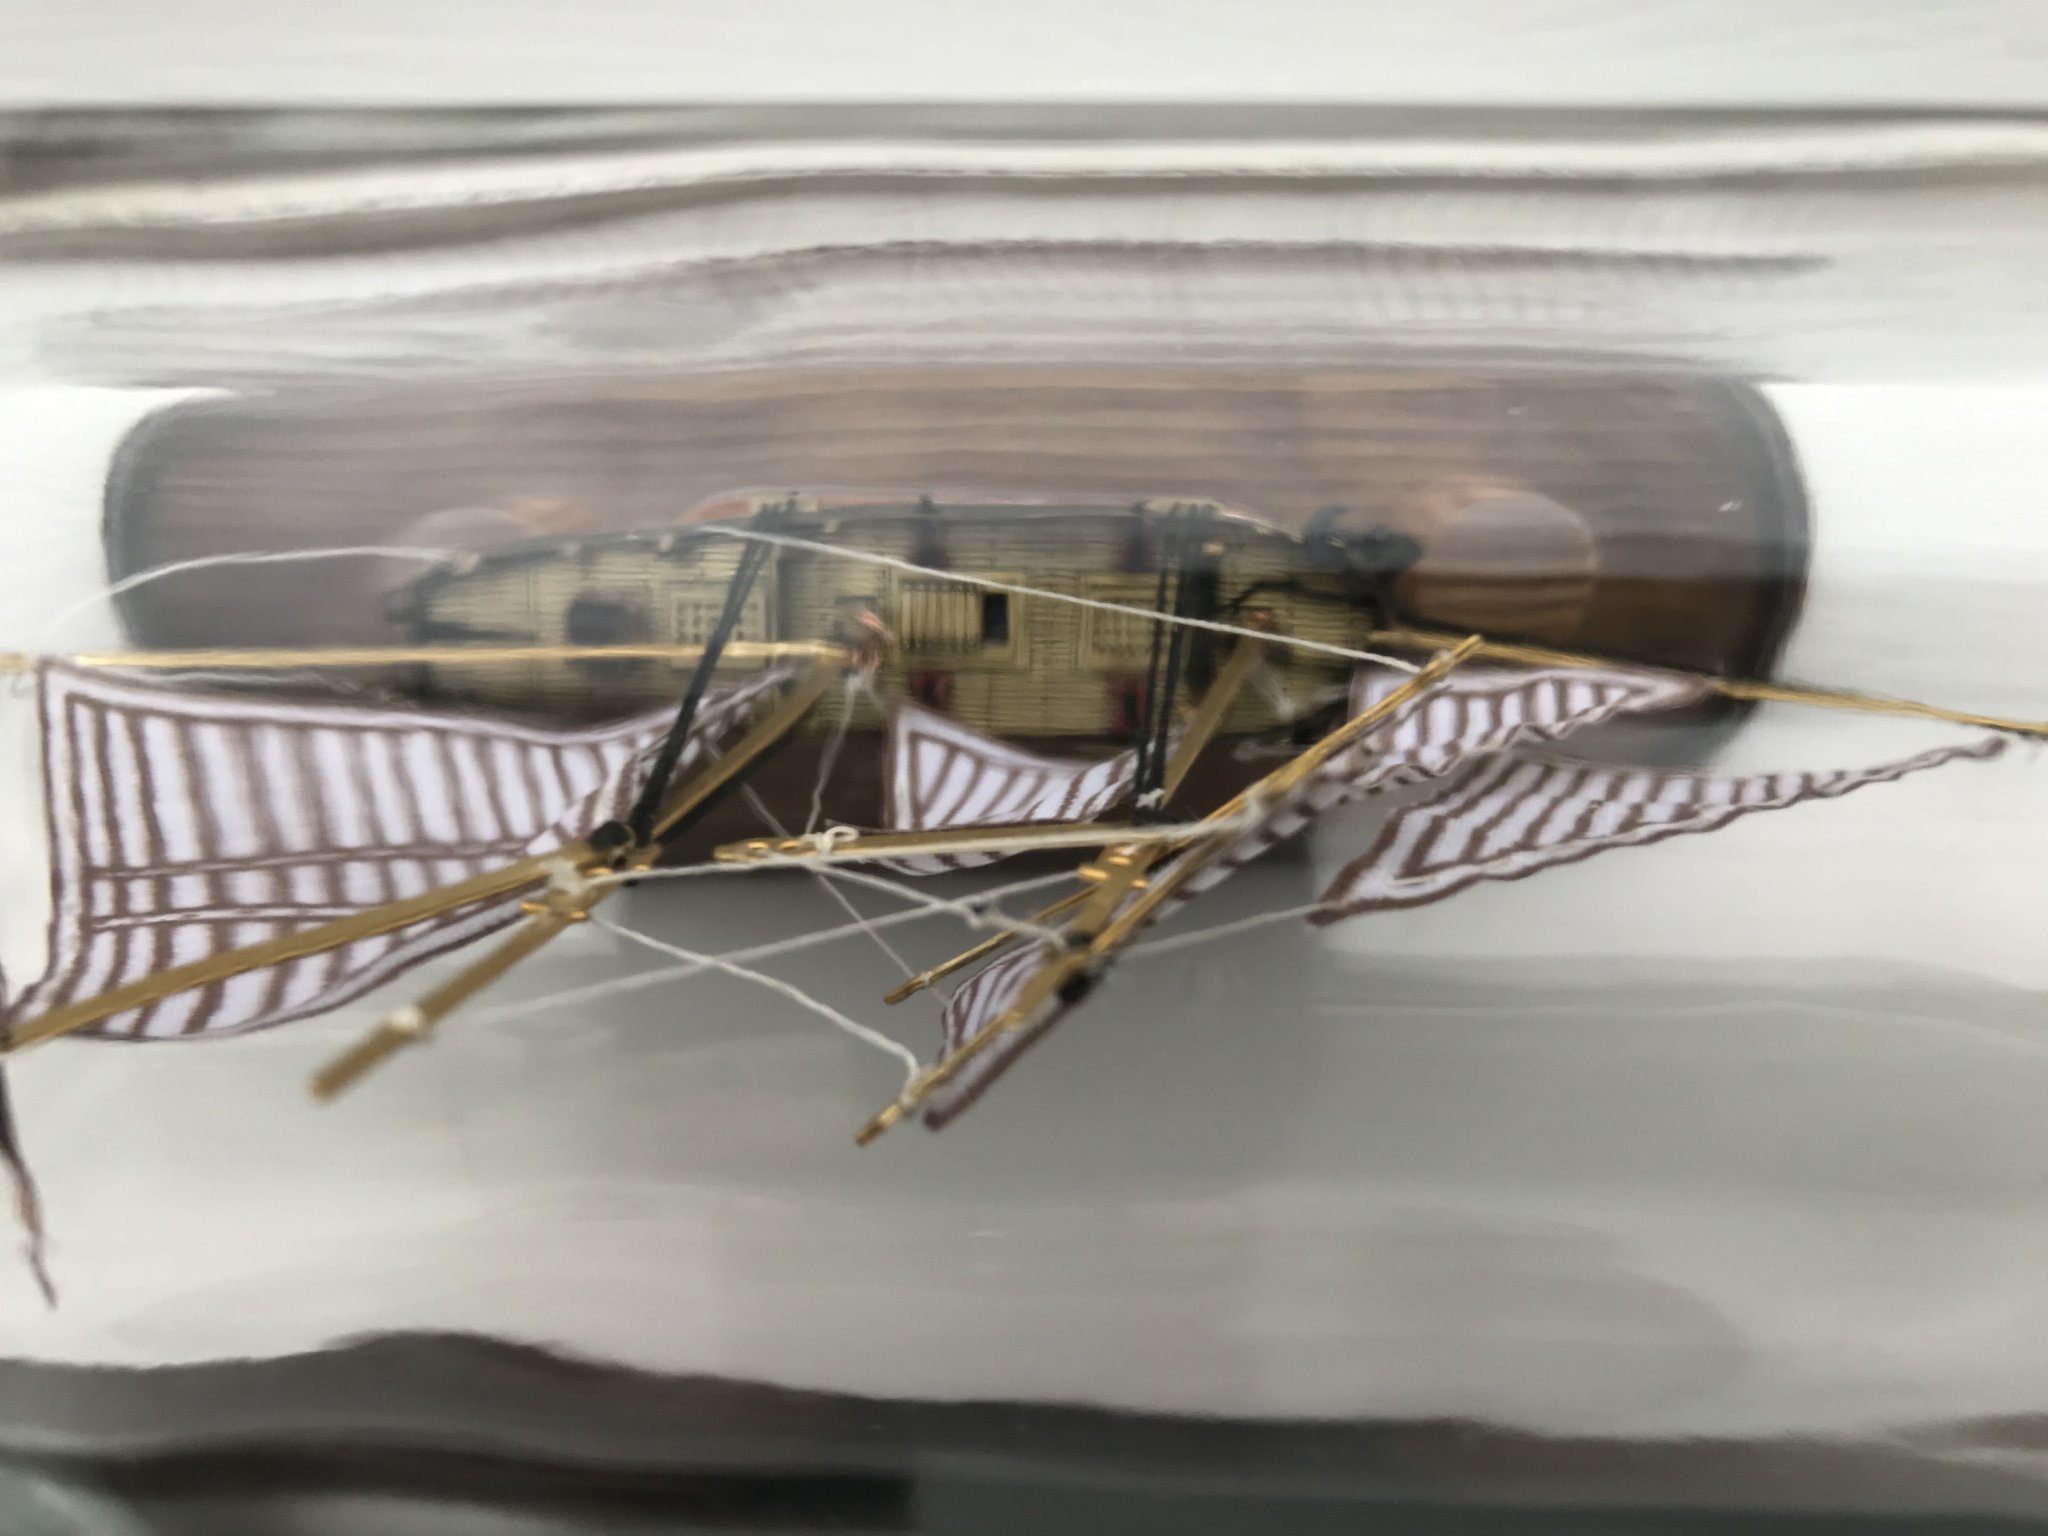
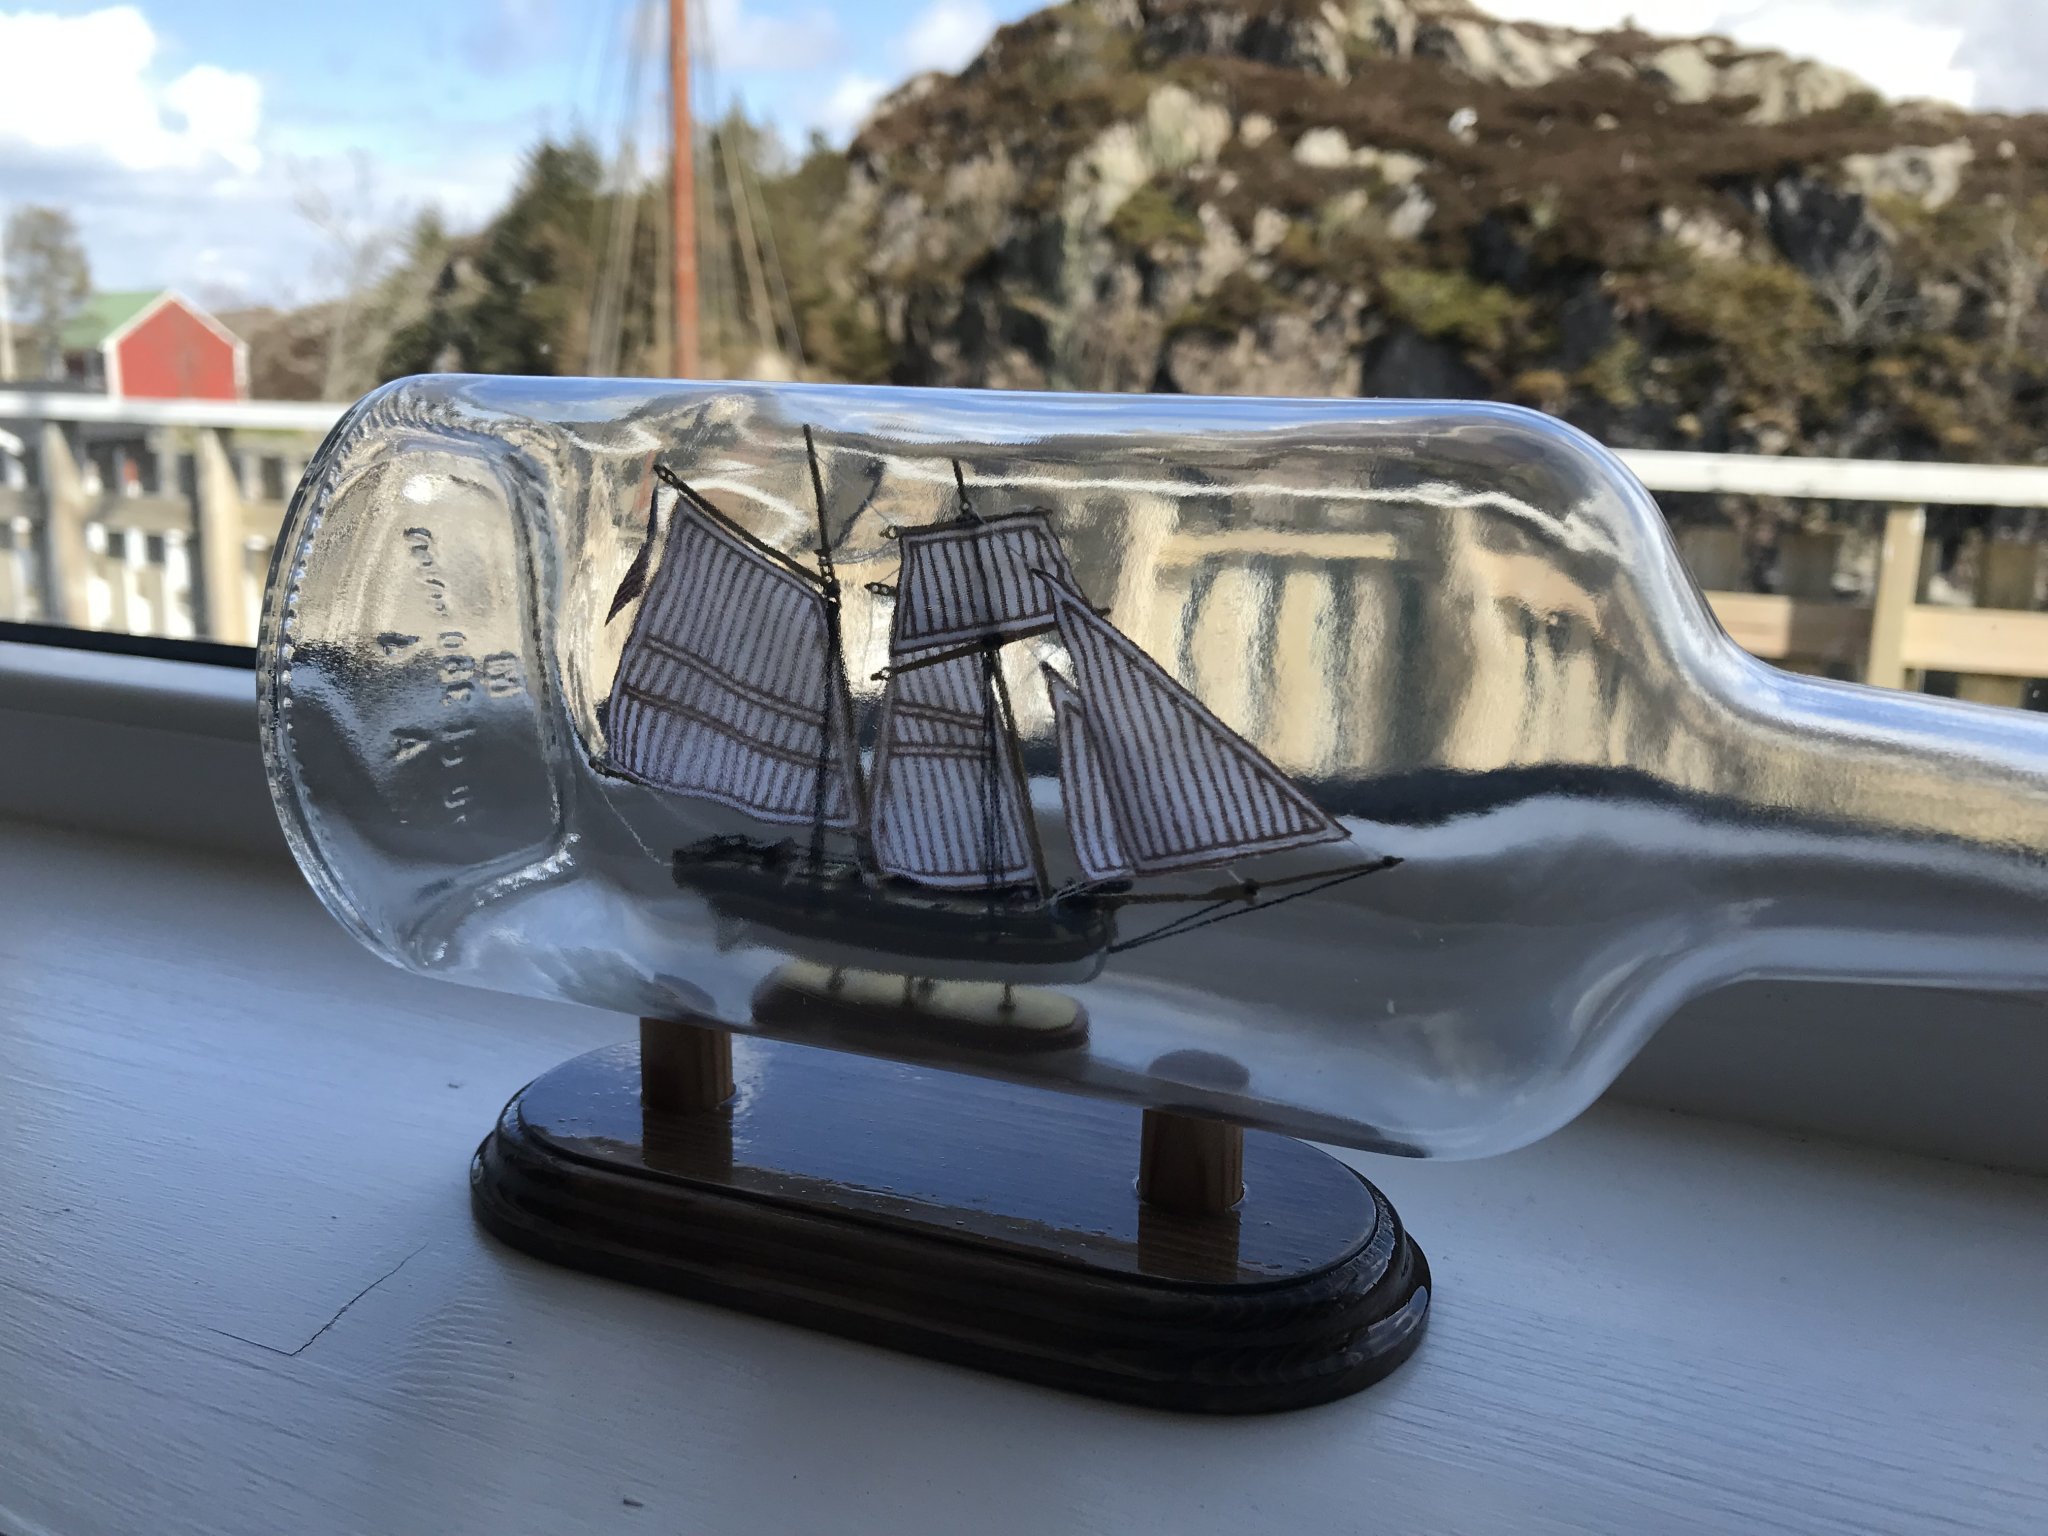
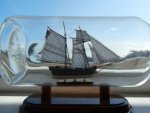
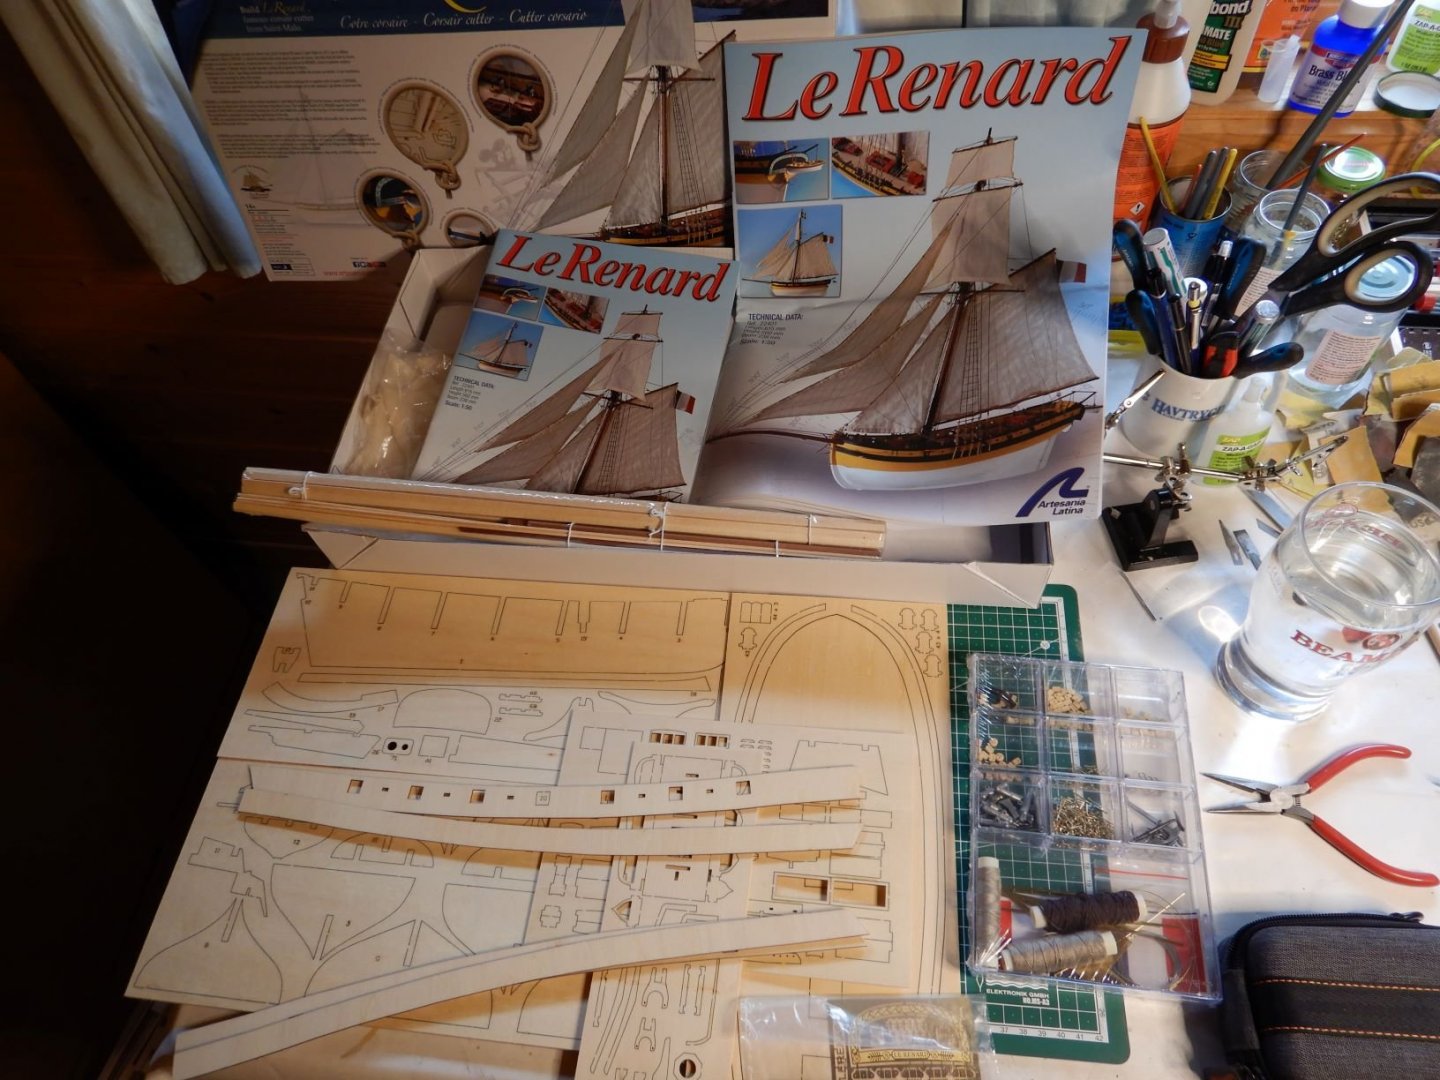
Hello to all. This is my first attempt at a build log for my current project. This will be my third build, the first is the Bluenose by Billing Boats which is currently waiting for deck materials. My second build was the Hannah ship in a bottle which is finished. So while waiting for the Bluenose deck, I have started on Le Renard. So, here we go! First a picture of the box. And it's contents.. Everything looks very good, no warped or cracked parts, and everything was well packaged. The instructions looks great, one for the hull and one for the rig. There is no fullsize plan though. So I started at page one, and that is with the basic hull skeleton assembly. First I removed all the bulkheads and keel from their cutouts(?) and sanded off the little points that hold them. One of the bulkheads had a little fault from the production of the plywood sheet itself. I'll fill this with a thin piece of wood and glue.. Then dryfitting of all the parts, all the slots were a little loose, so the bulkheads will need clamping with a square while the glue dries. As seen here the bulkheads lean left and right due to the loose fit. At least the loose fit will give room for glue. Everything seems to fit together, and it looks kinda like in the instructions, so time to open the glue bottle. Don't you just love that new glue bottle all clean and shiny, and say to yourself, "this time I'm gonna keep it clean and the tip nice and open" Yeah, at least I know how long that's gonna last..😁 First bulkhead glued in, all square and true! Not a whole lot done, but I think it's a good start! Stay safe out there and enjoy your models! Gaffrig


- 110 replies
-
- 14
-
-
- le renard
- artesania latina
- (and 1 more)
-
Thank you all for the welcome! My wife says the same thing, «all you’re doing lately is sit and fiddle with those models» 😎 Well, you said to find a hobby, right? 😆 Anyway, off to fiddle some more to satisfy the urges!
-
Hello to all, and thank you for all the welcomes. I haven’t been taking much pictures of the Bluenose or the Hannah, but I’ll post some pictures of them when finished. I think I’ll start a log for the Le Renard though. Therapy for shipaholics might be just the right thing for me, you may very well get a new patient soon!🤒
-
Thank you very to the very kind person who moved the topic to the correct forum. My first post, and I get it wrong. 🥴 One might say I’m techologically challenged...😆
-
Yeah, I didn’t realise it would be this bad. I mean when you open the box, it’s just some sticks and plywood.. and maybe some string. 🙄
-
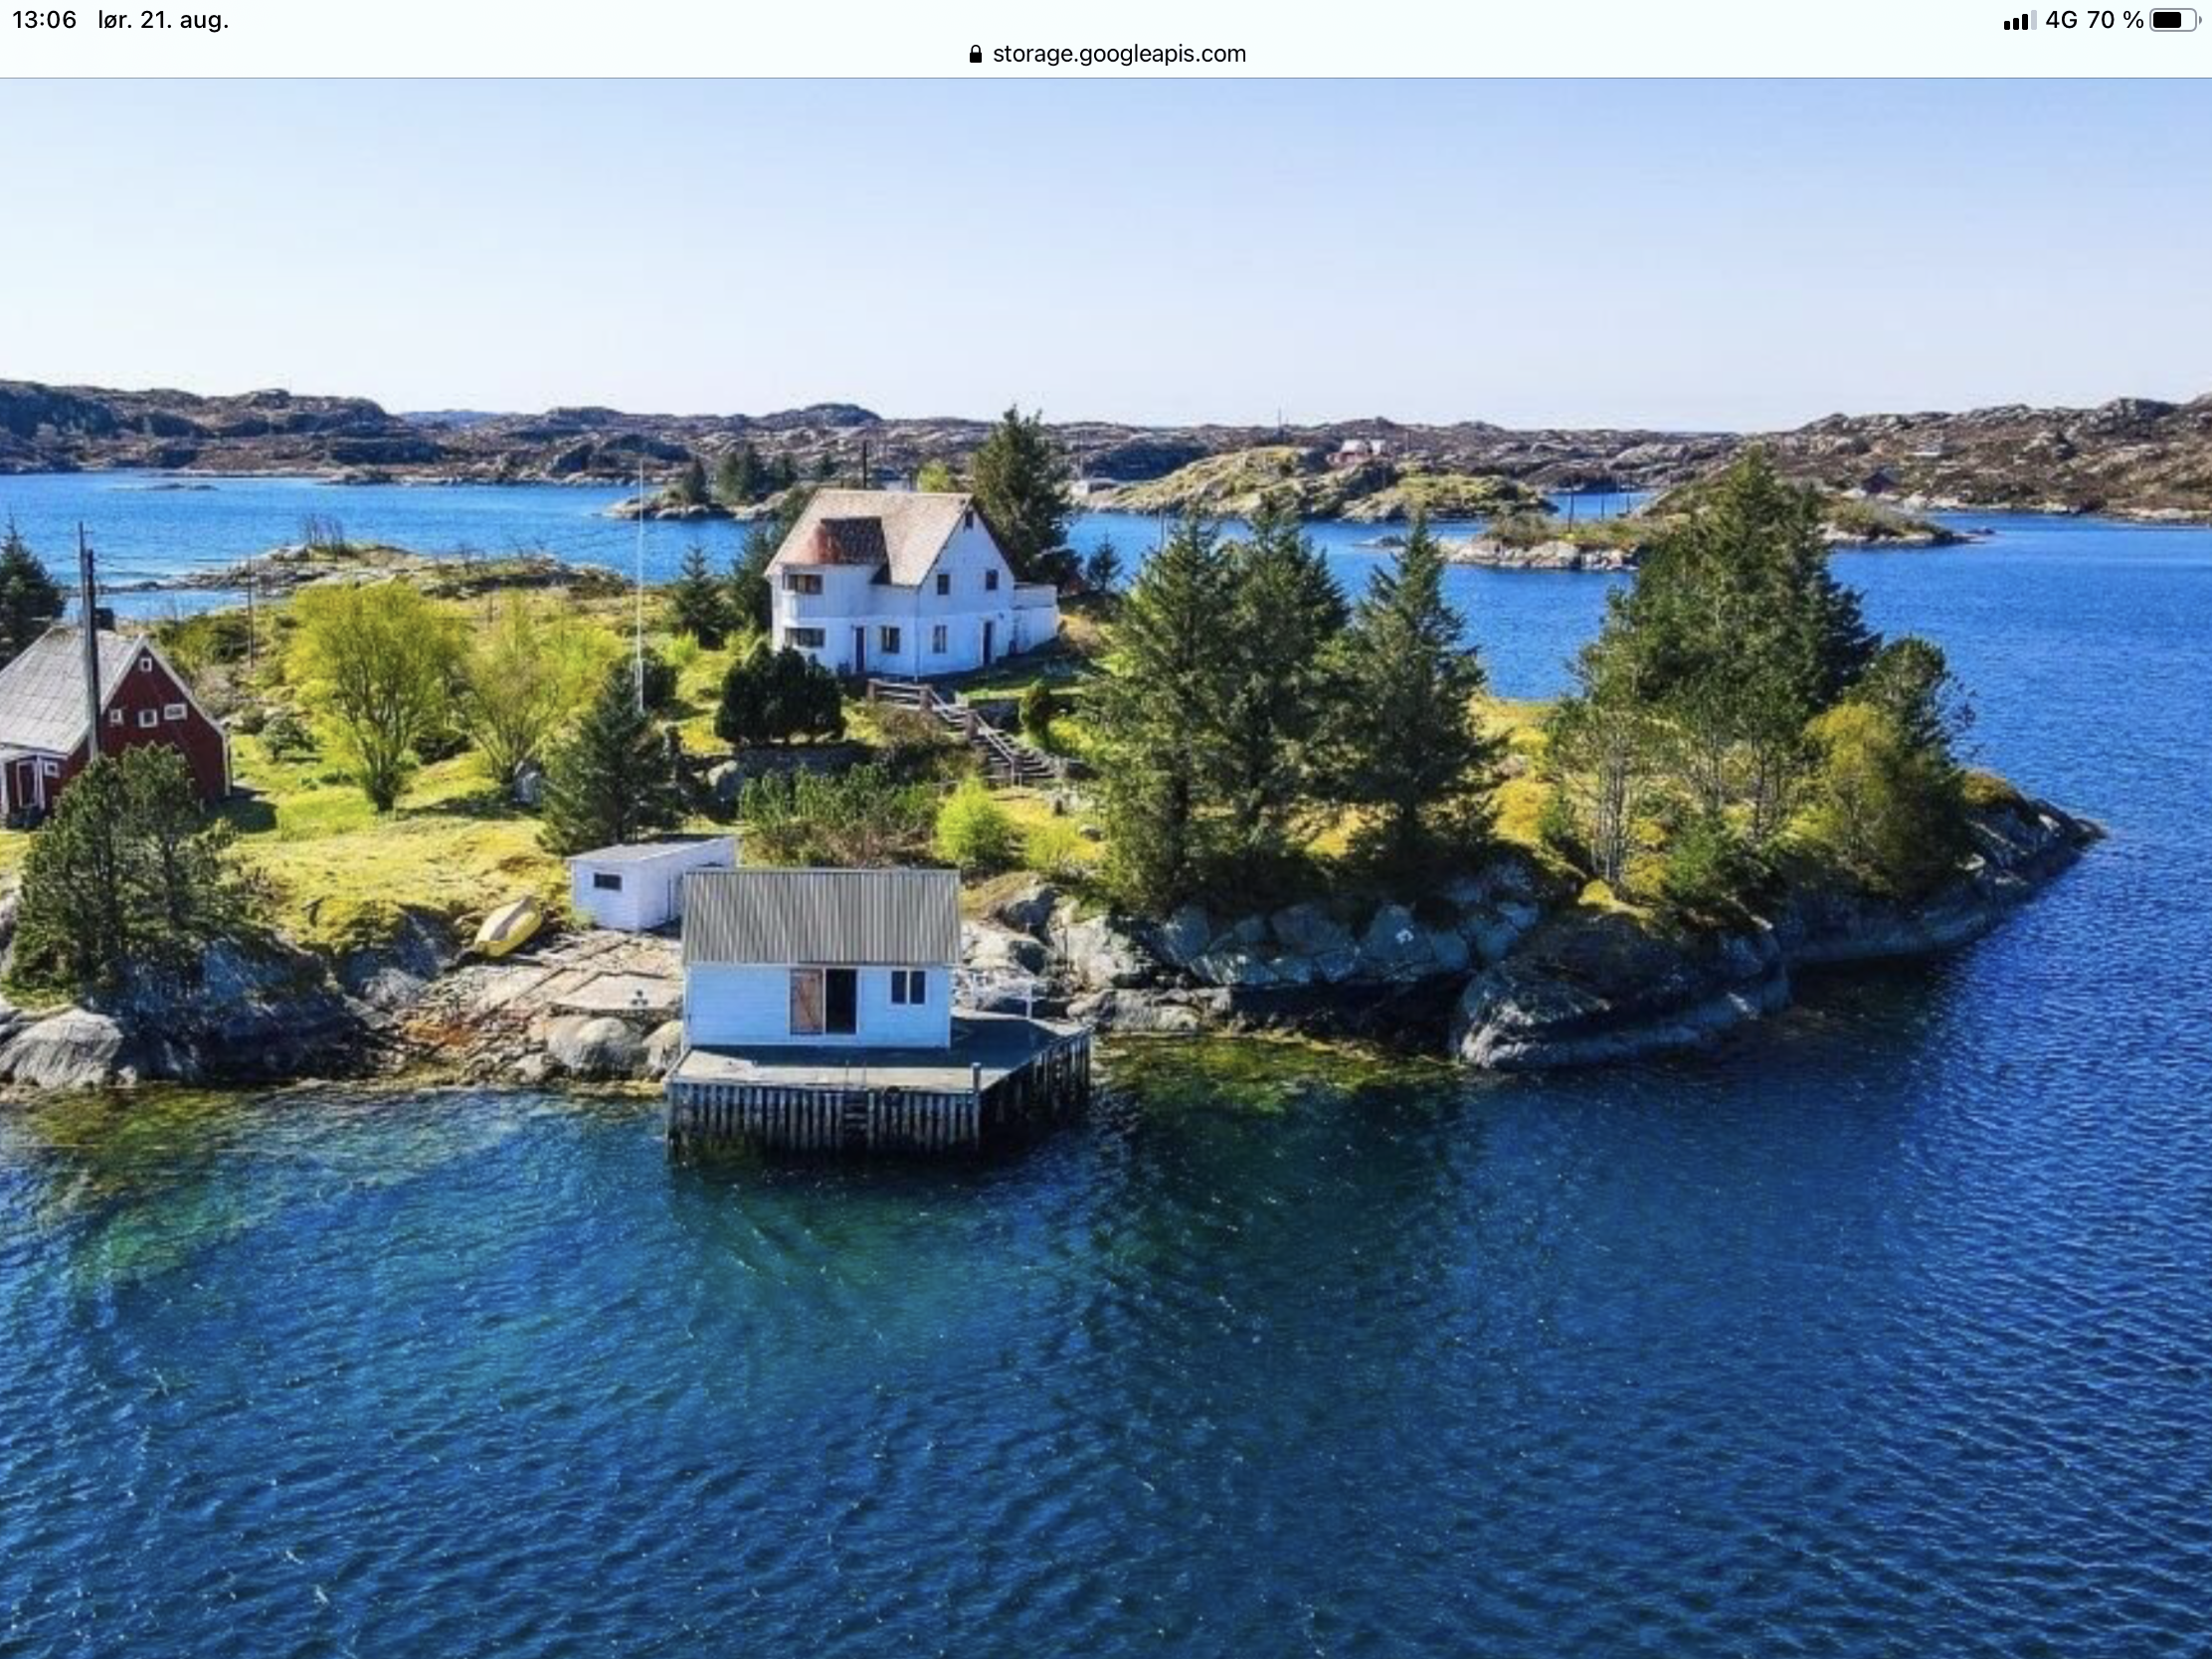
Hello. I started building the Bluenose, kit from billing boats i february and searching for something online I stumbled upon this site! What a great forum and what amazingly much experience and info there is to find here! I registered back in march sometime and have been lurking around until now. I used to build RC model airplanes from balsa and plywood when I was a kid/teenager. Also plastic static models like airfix kits. I built a boat called Artur by Igra which was plank on bulkhead that I rigged with RC when I was around 13-14 years. So starting modeling again now some 25 years later I see myself as a complete beginner. I live on an island on the west coast of Norway. The Bluenose build was coming along well, but I didn’t wanna use the supplied mahogany for the deck, and I have been waiting for weeks for limewood strips to arrive in the mail. So in the meantime I started a second build... Maybe not the smartest but I finished it yesterday! The ship in a bottle kit hannah by amati. Still waiting for the deck, I started a third build... (this stuff is really addictive, maybe its the glue?) The le Renard by Artesania Latina that I bought at a discount. This is just started and I’m thinking of starting a build log for this. Anyway, this was a littlebit about me, looking forward to be using this site in the future. Good modeling to all!