DONATION DRIVE - SUPPORT MSW - DO YOUR PART TO KEEP THIS GREAT FORUM GOING!
×

Unegawahya
-
Posts
179 -
Joined
-
Last visited
Content Type
Profiles
Forums
Gallery
Events
Everything posted by Unegawahya
-
USS Constitution by mtbediz - 1:76
Unegawahya replied to mtbediz's topic in - Build logs for subjects built 1751 - 1800
Using the plexiglass for the spar deck sounds like I great way to show off all the work you put into your wonderful gun deck! My question is, would you cut it into planks and plank it like a normal deck just clear. Or would you try to make it in just one peace. I was also thinking of the admiralty models where they leave sections of the deck with no fittings open. You could use the plexiglass there instead of leaving it open and that may reduce some of the dust falling into the gun deck. It would also give a good surface for the fittings and guns to rest on. -
Looking at the picture, I see it now!
-
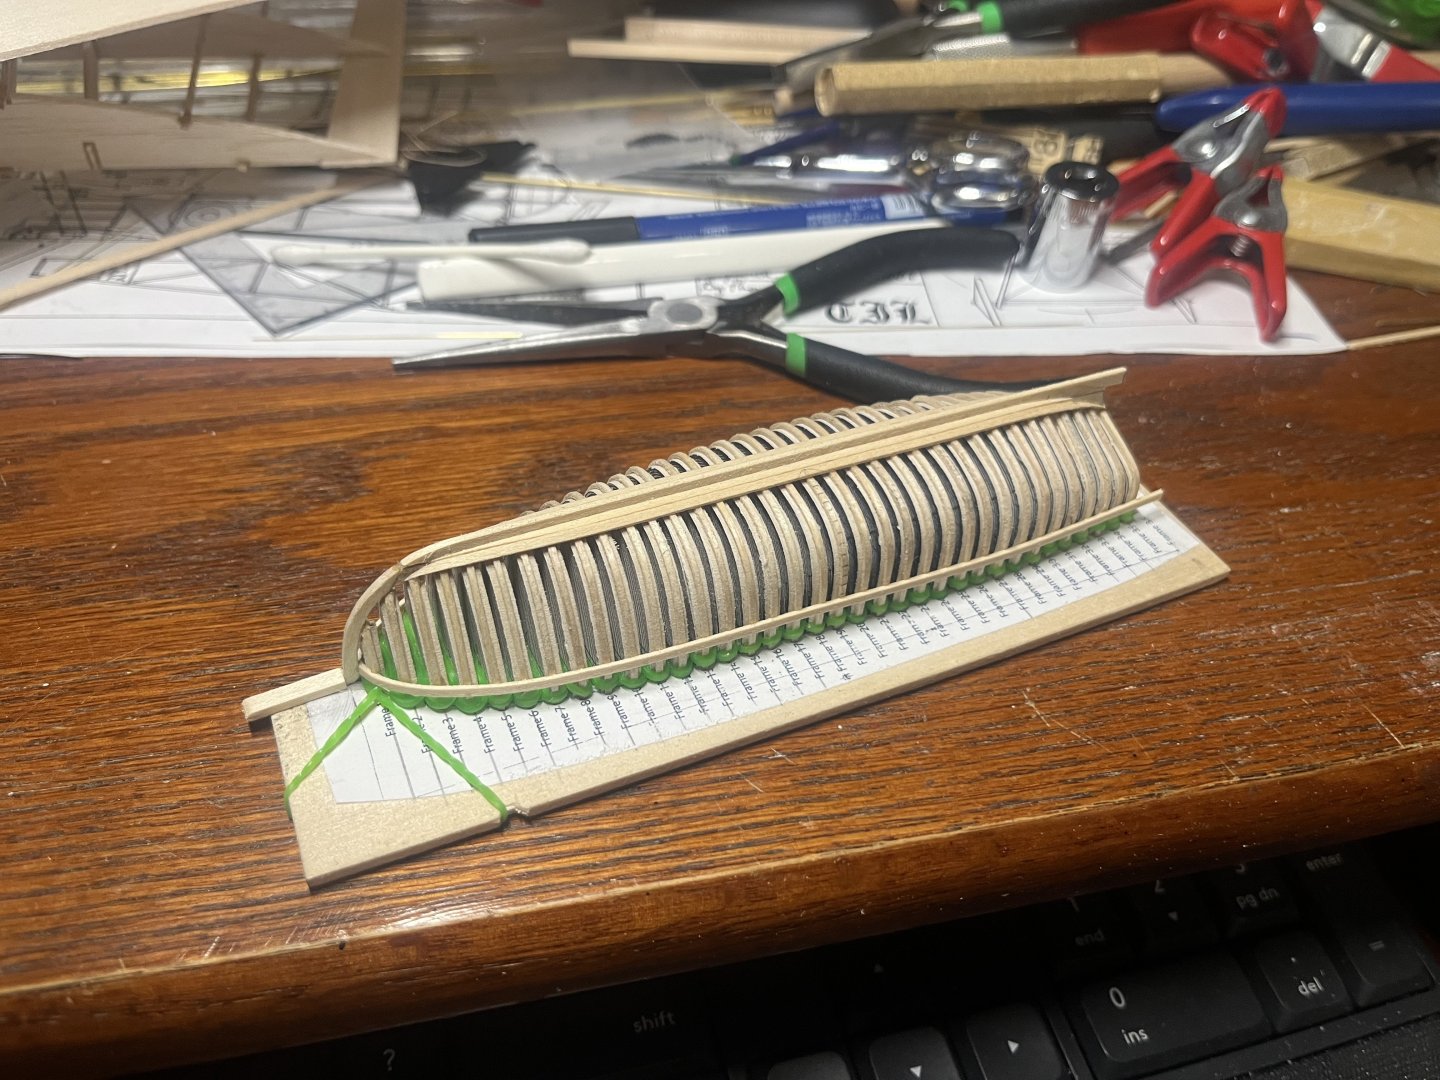
lol No it’s the full hill from the gunnels to the bottom for shaping and setting the ribs.
-
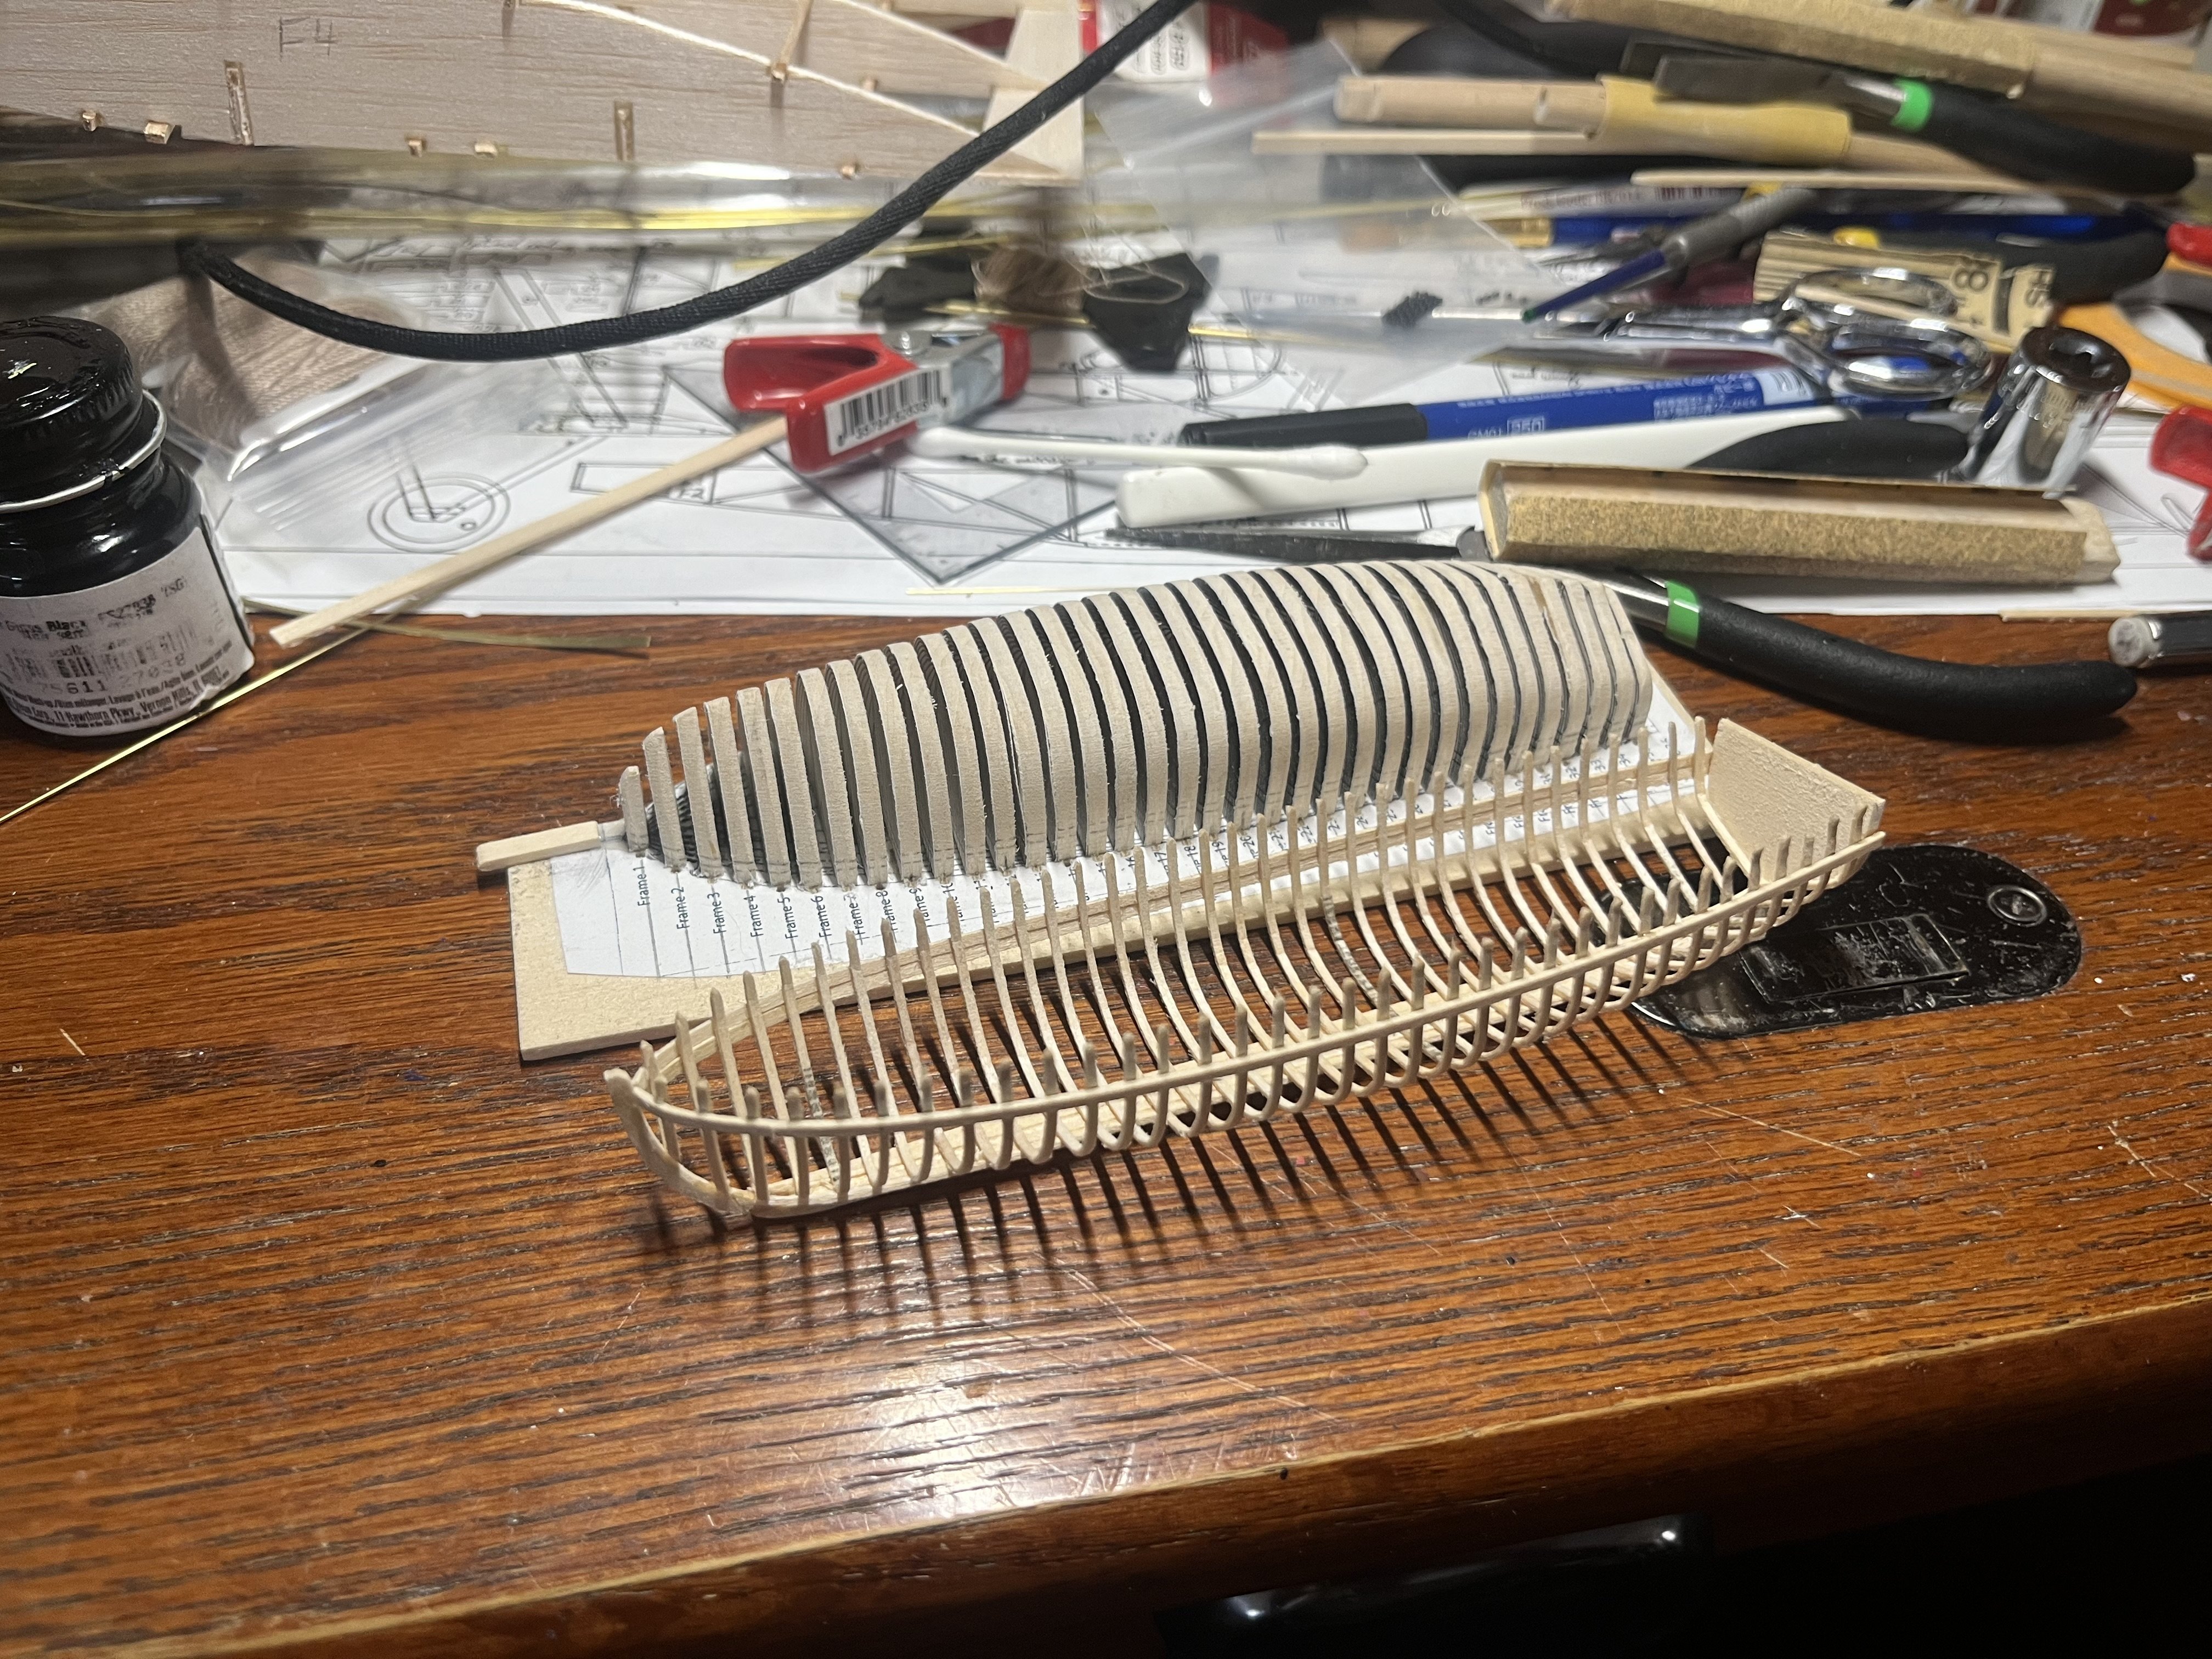
lol. The last I remember, you said to hold off on the ships wheel. But I understand. i made the molds for the ships boats because I’ve never really been a fan of the supplied parts for the ships boats. Unless the builder was going have their boats covered. So, I used photoshop to make a frame mold to shape and place all the frames. All three of my molds have a wide side with the frame numbers and a small hole for the 1/32 bass wood to thread into. The other side has notches for the other end of the ribs to pass through. I used the rubber bands to hold the ribs in position wile they dried after bending and wile I got the first couple of planks on. I was worried about removing my hull from the mold because I didn’t treat the mold with wax like I was intending. But that worked out! I also have JSGerson to thank for the layout for the 36’ pinnace!

-
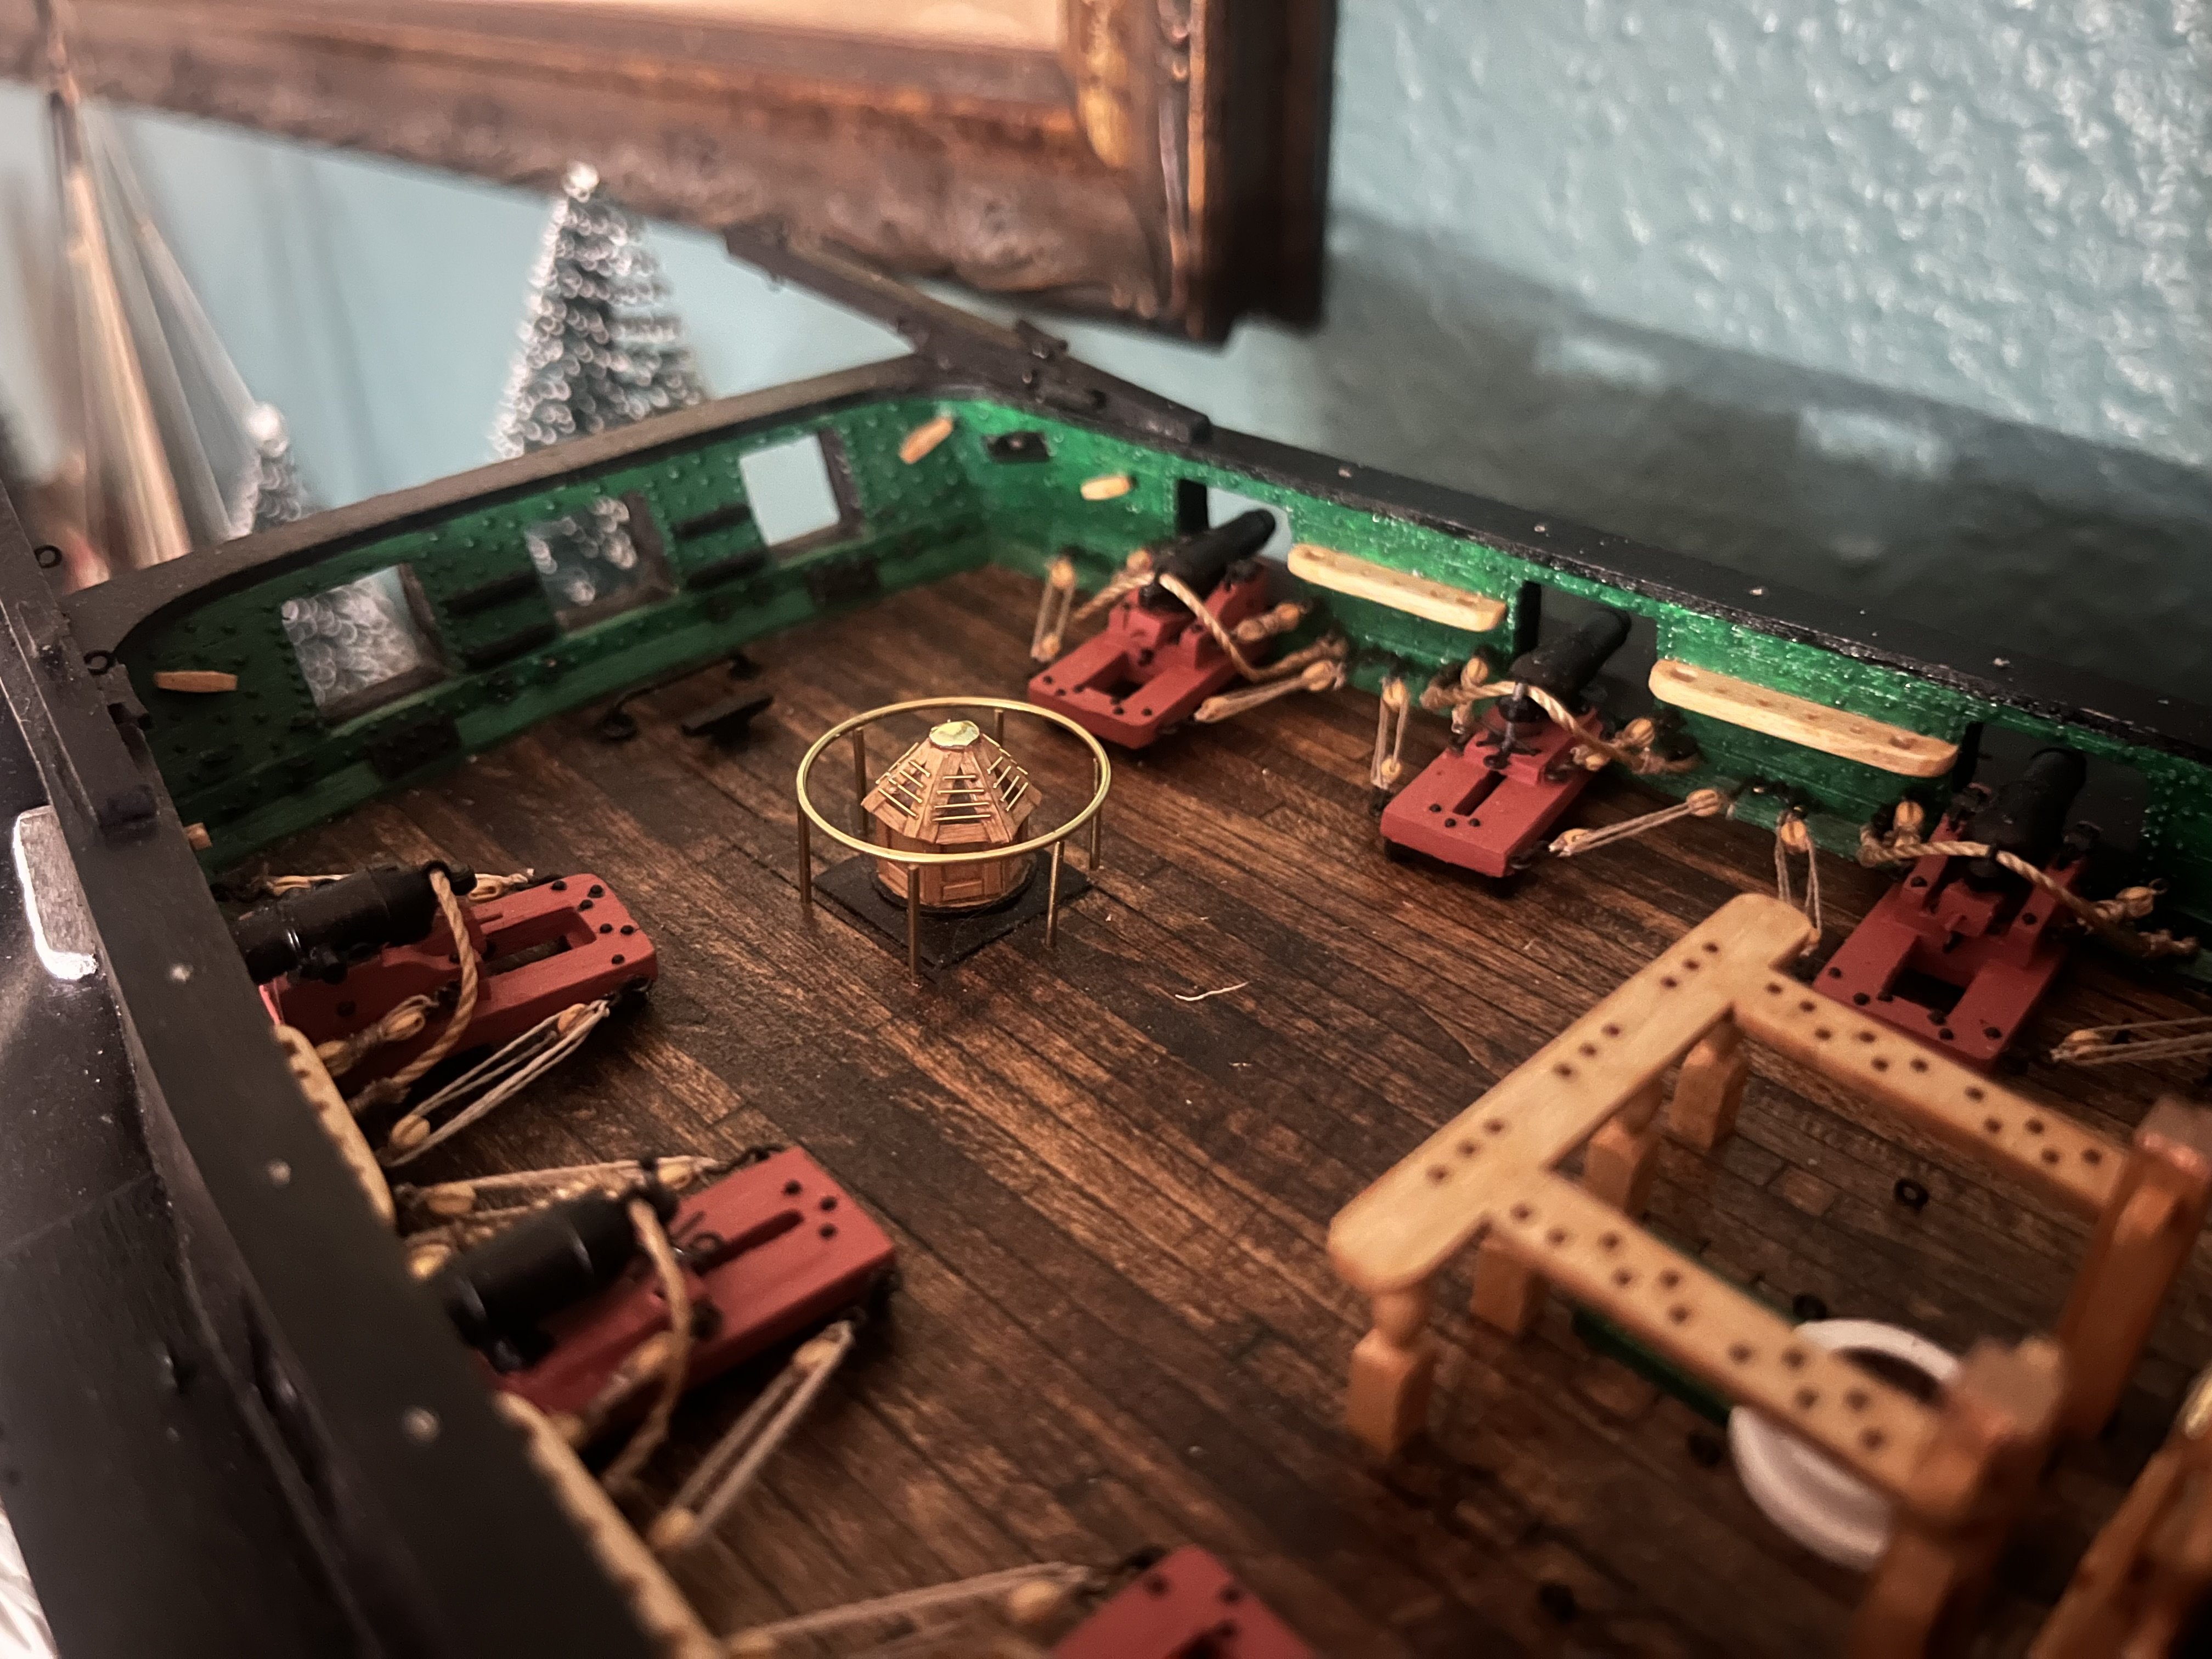
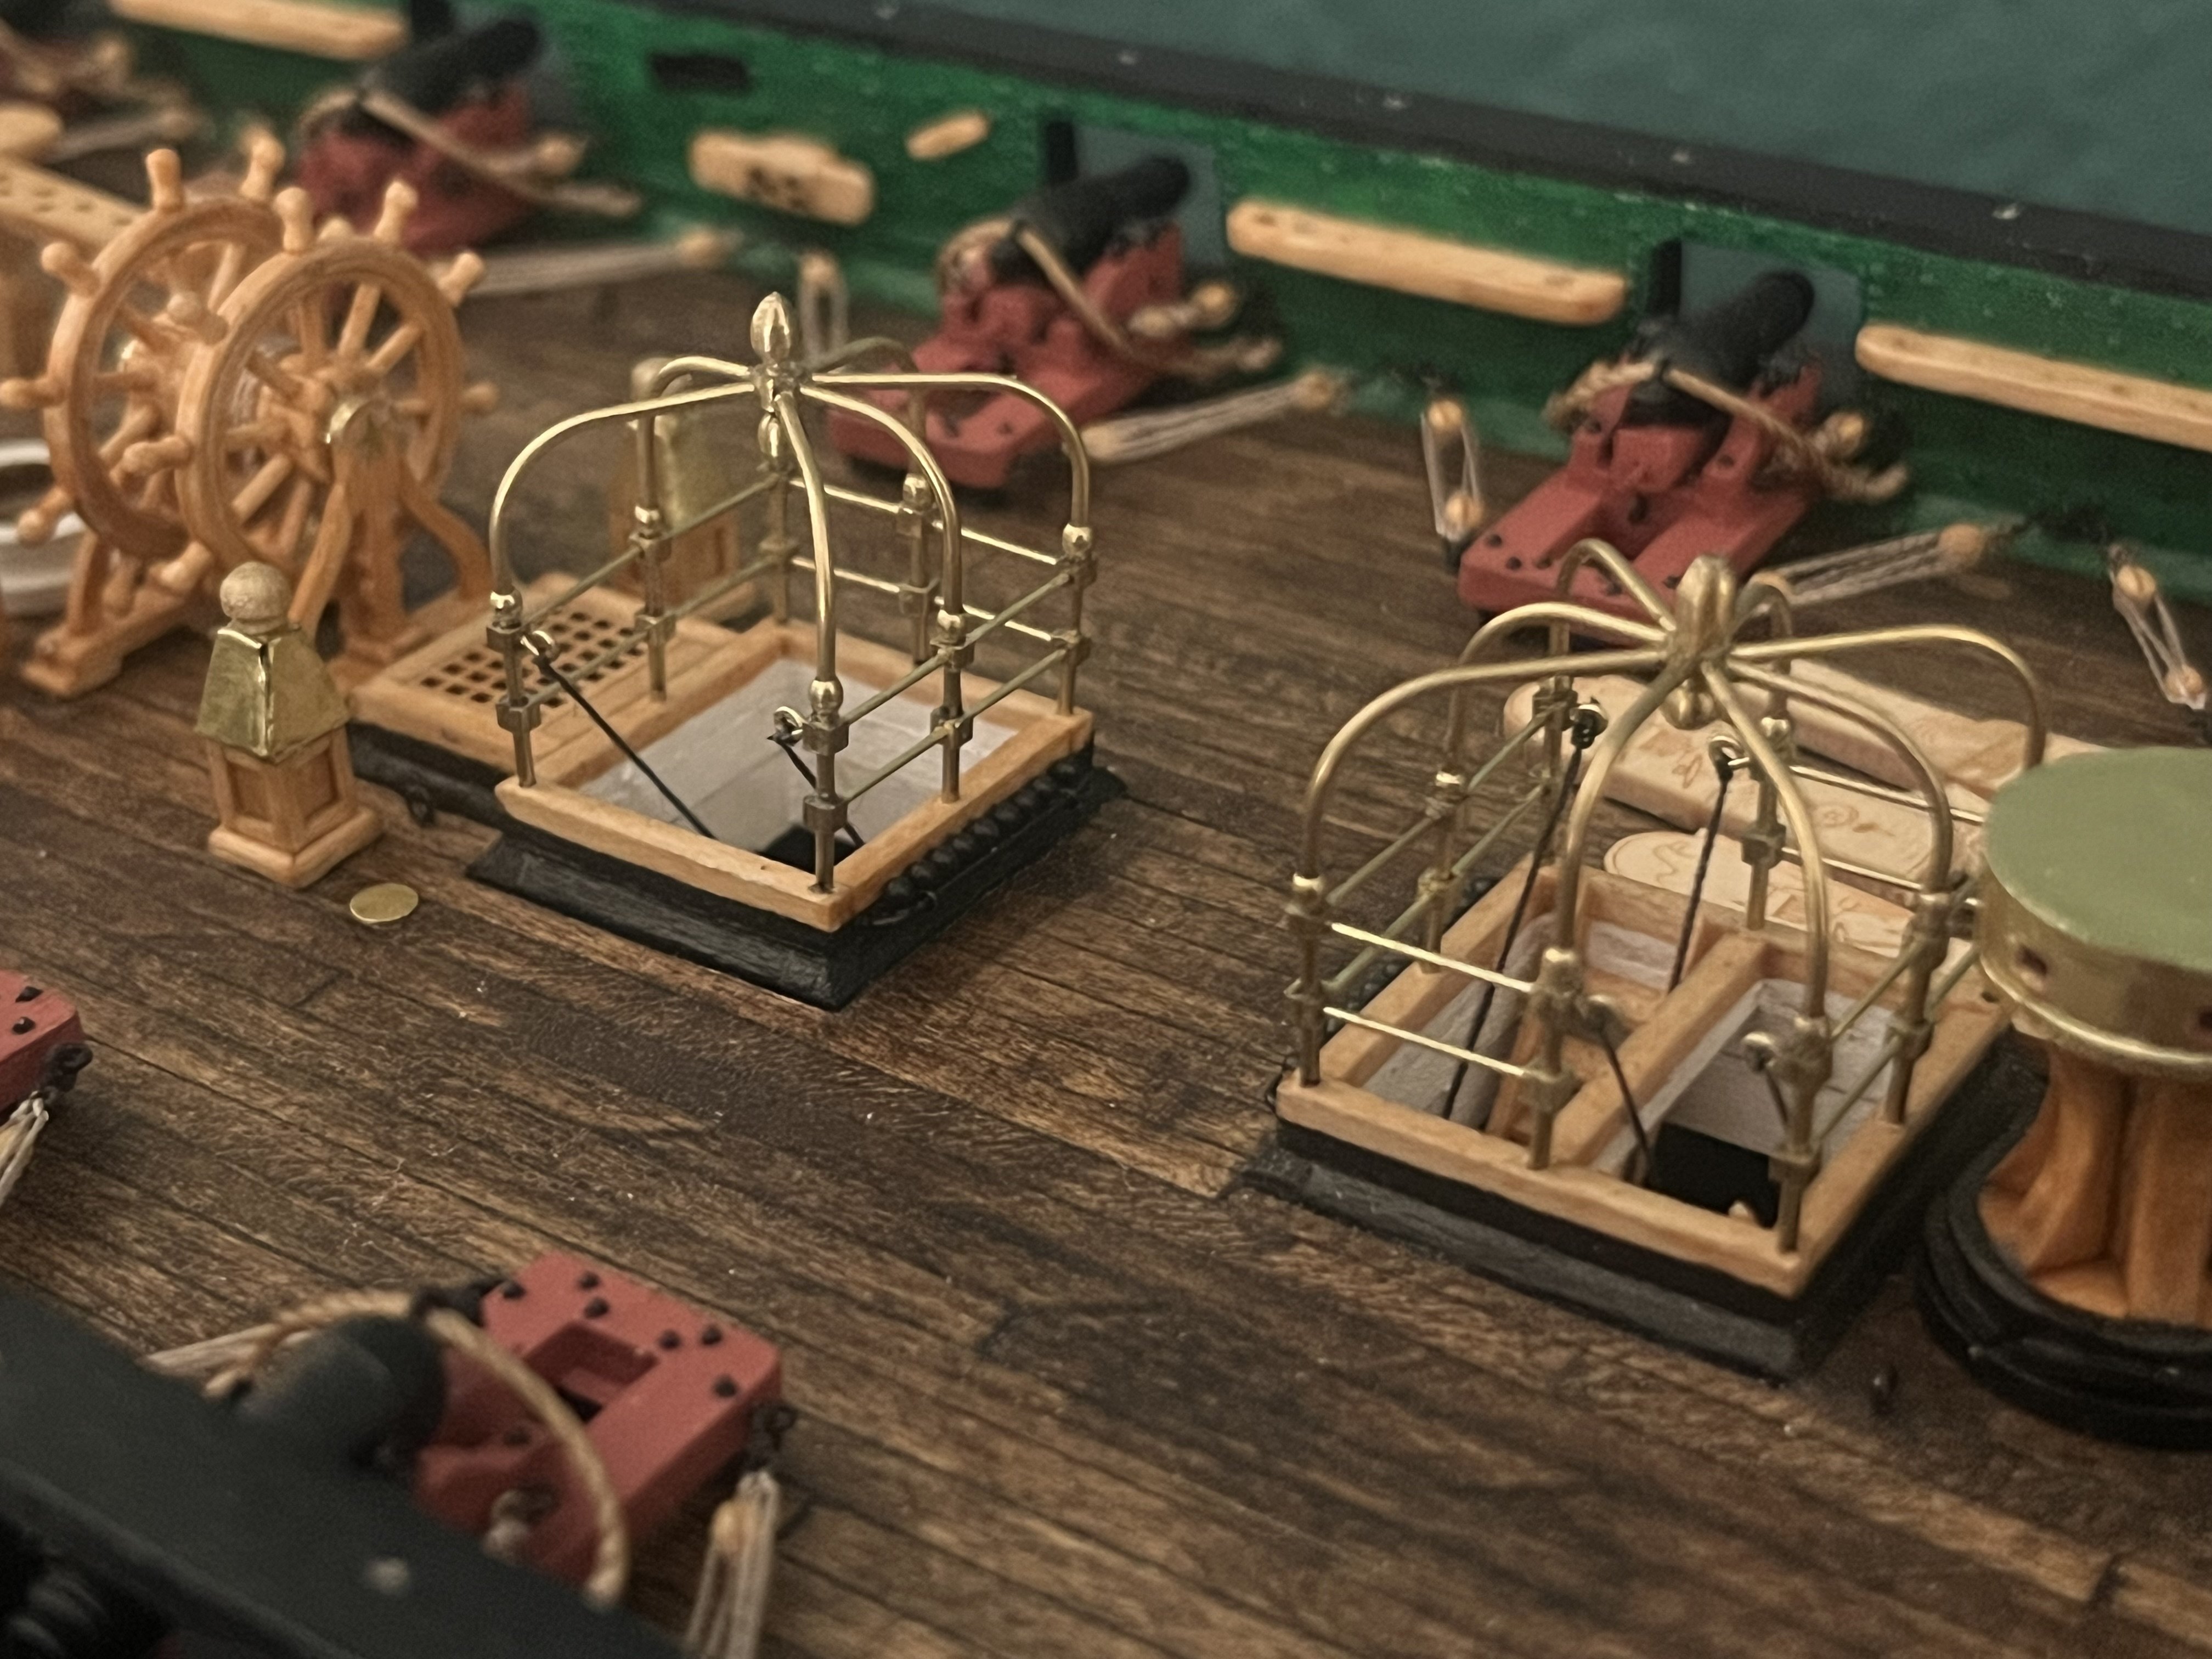
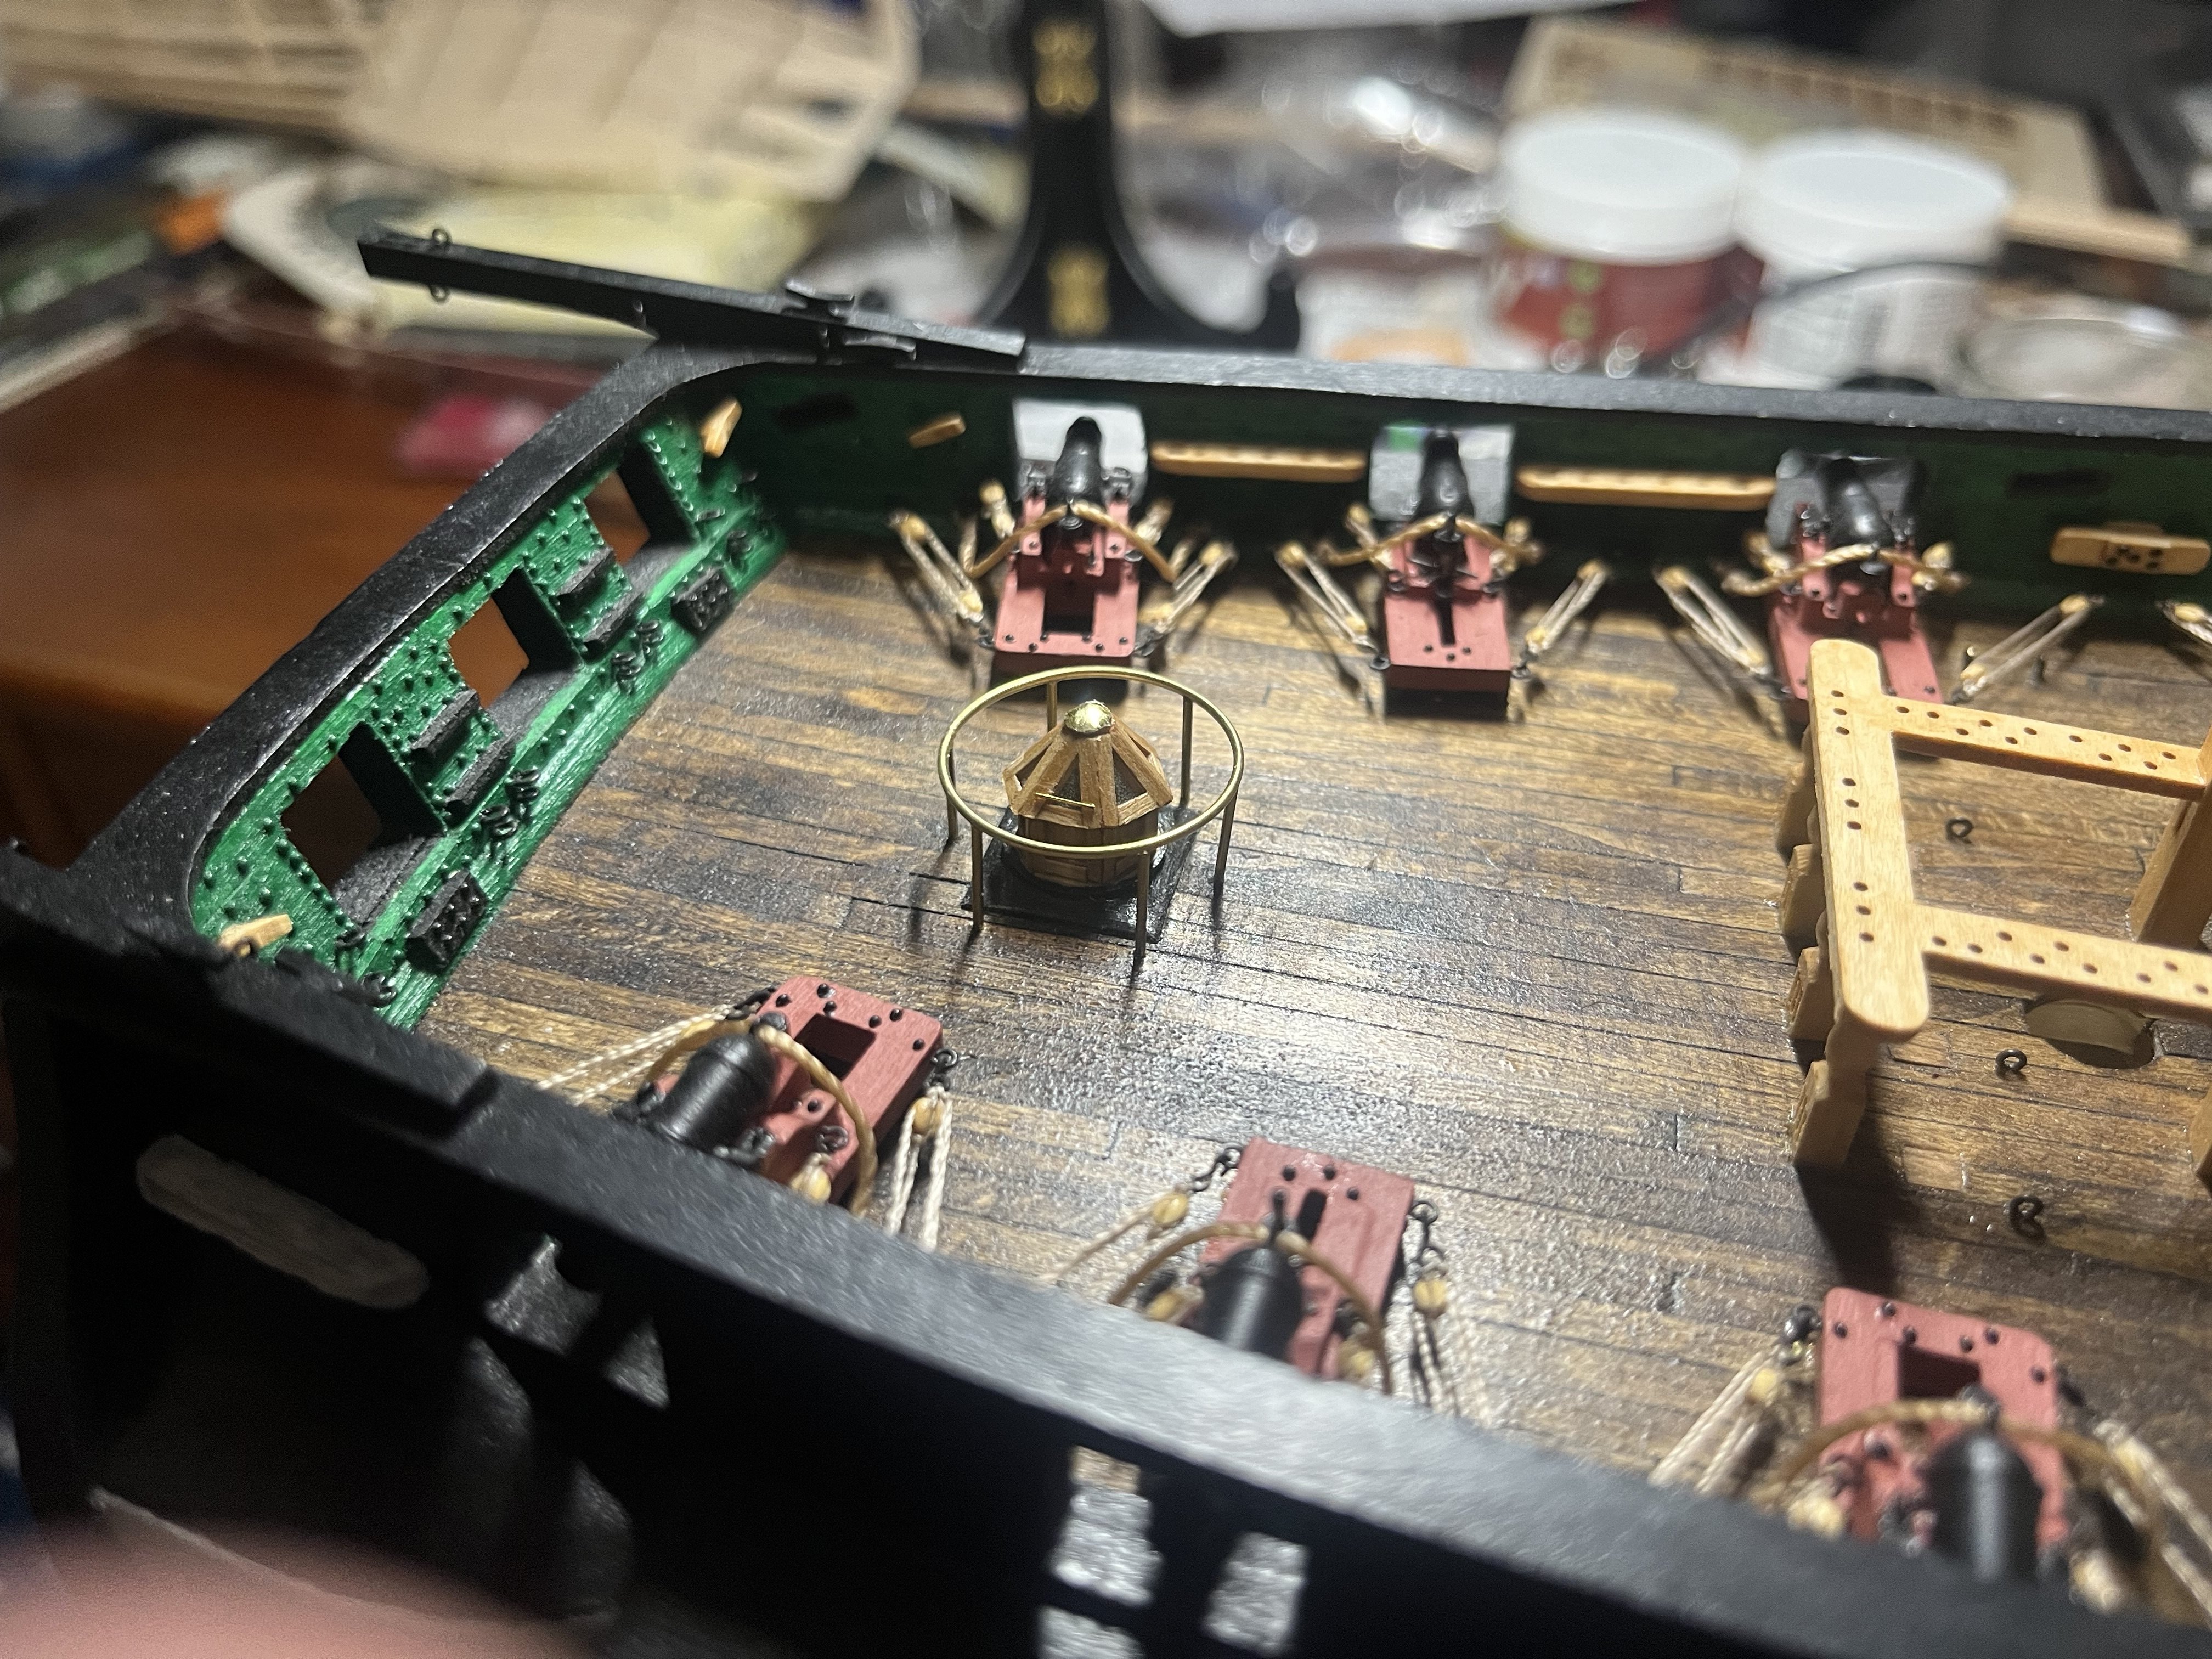
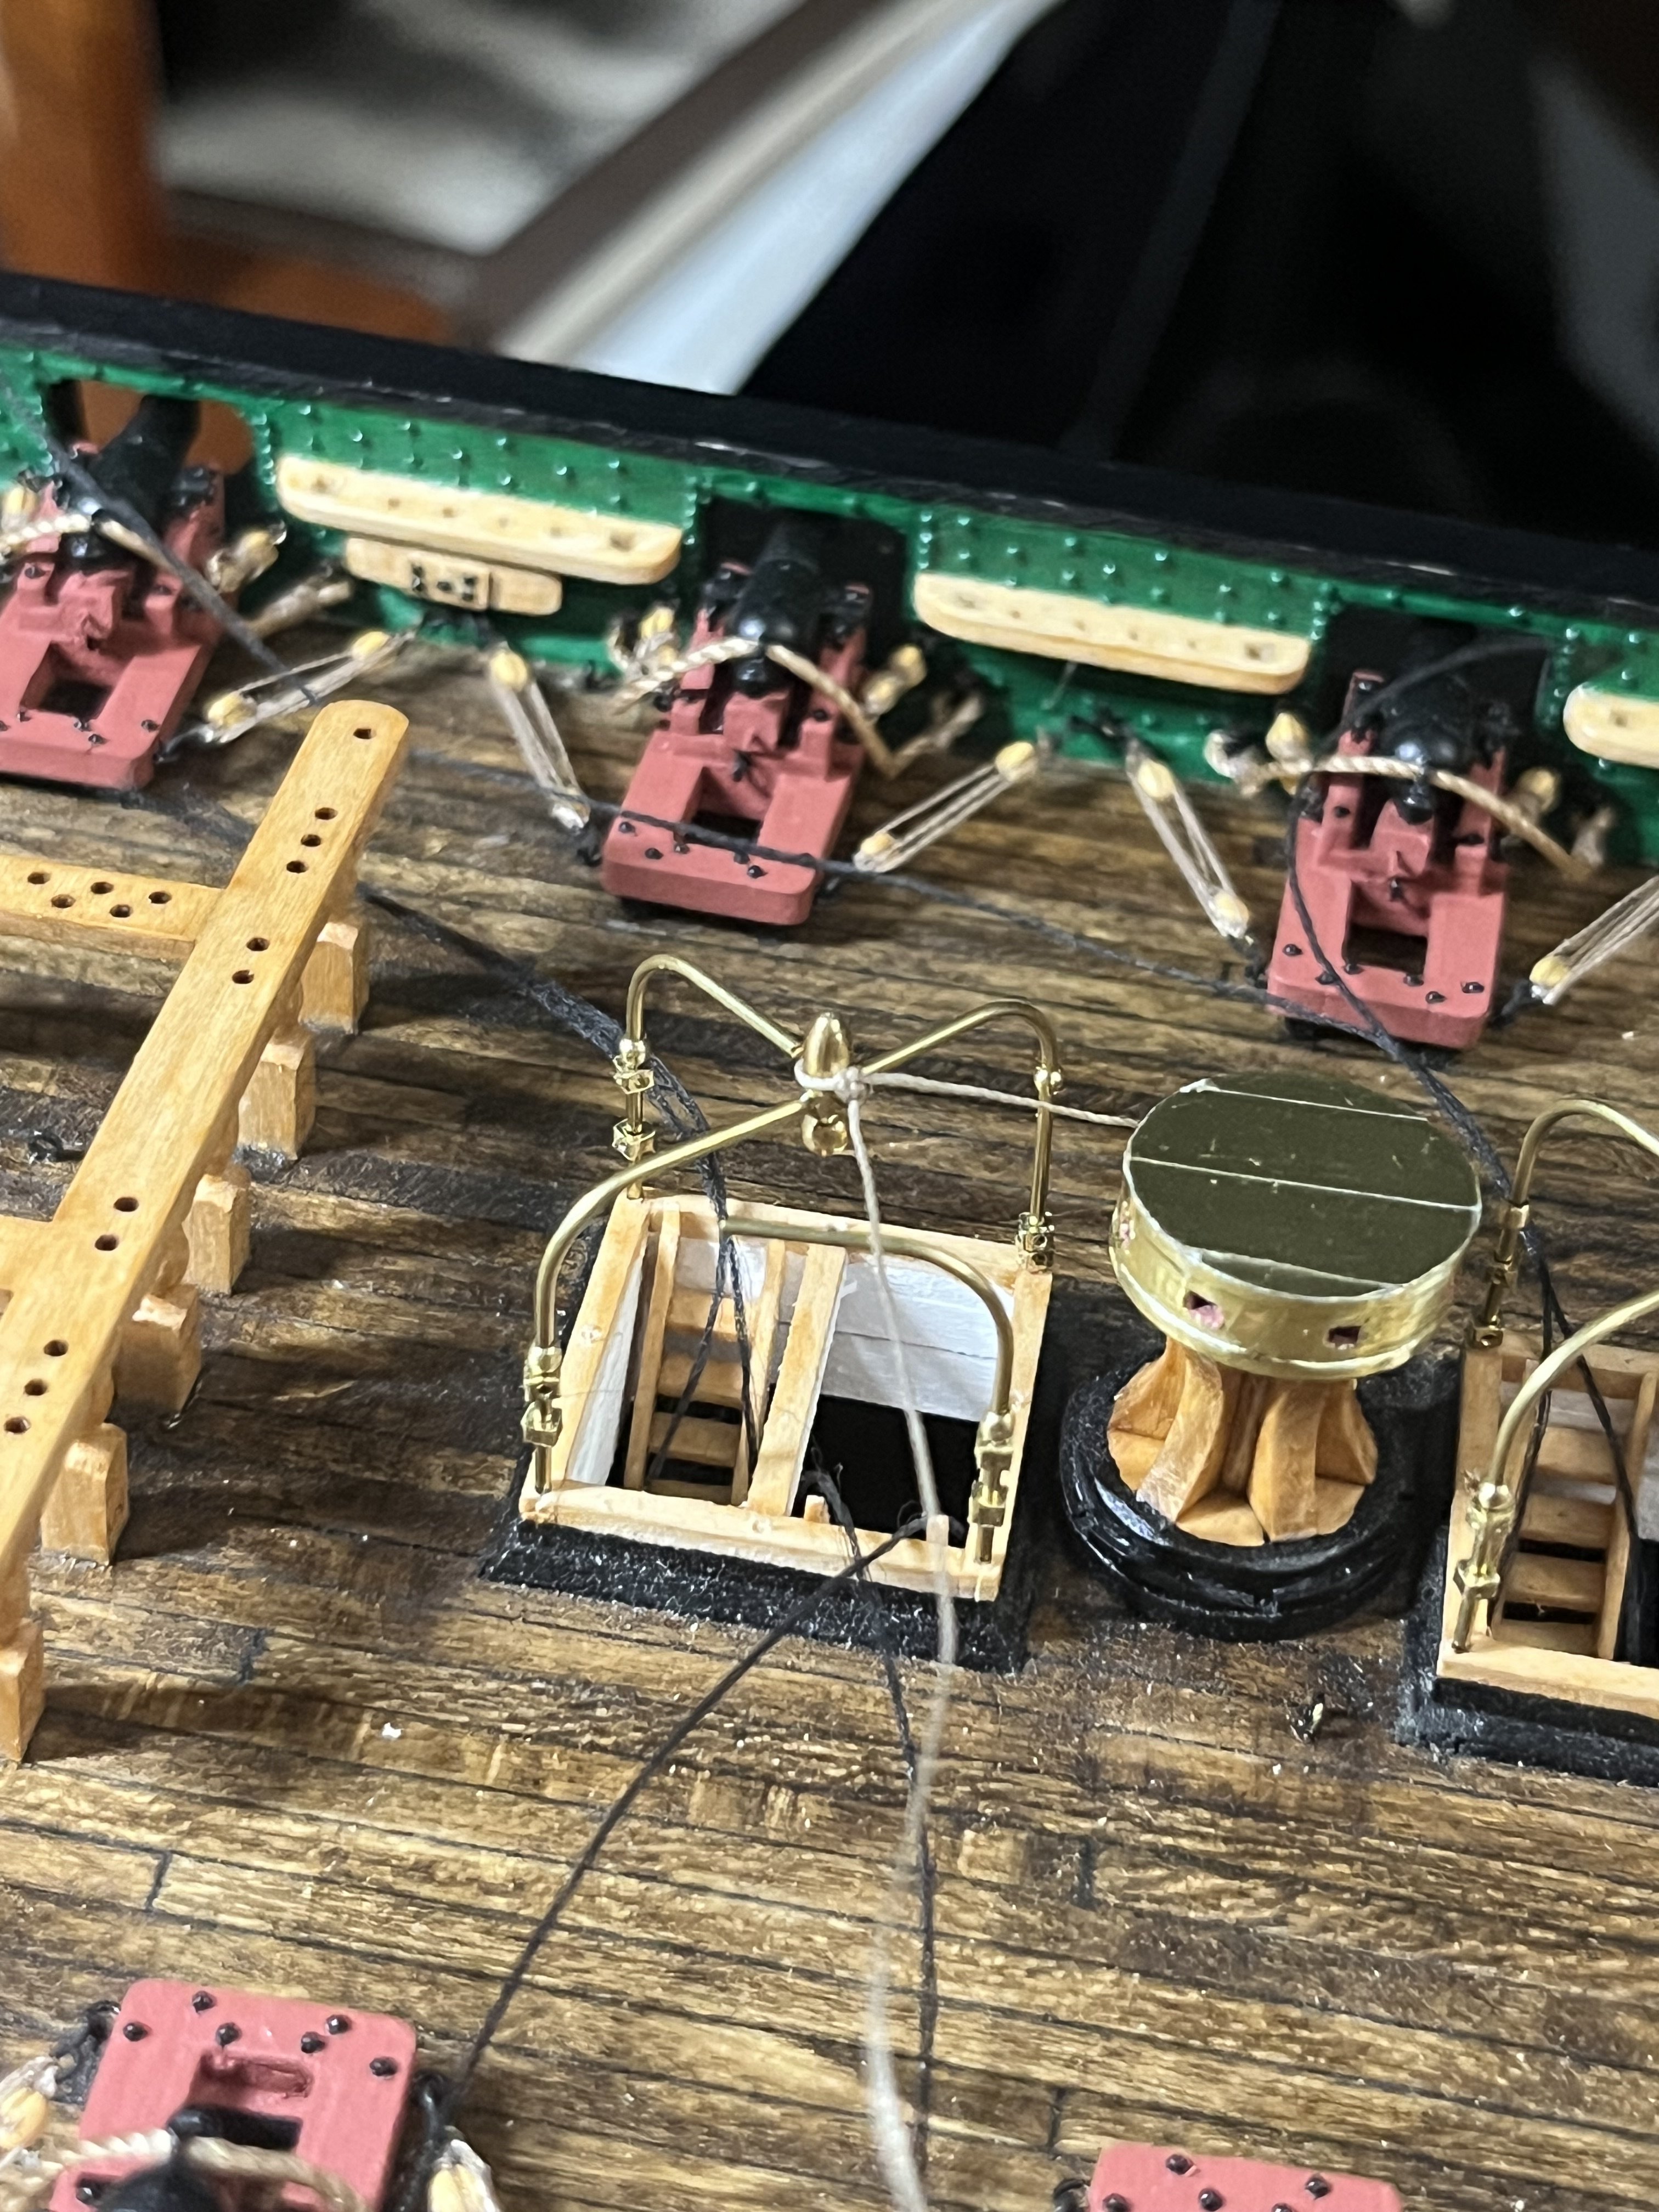
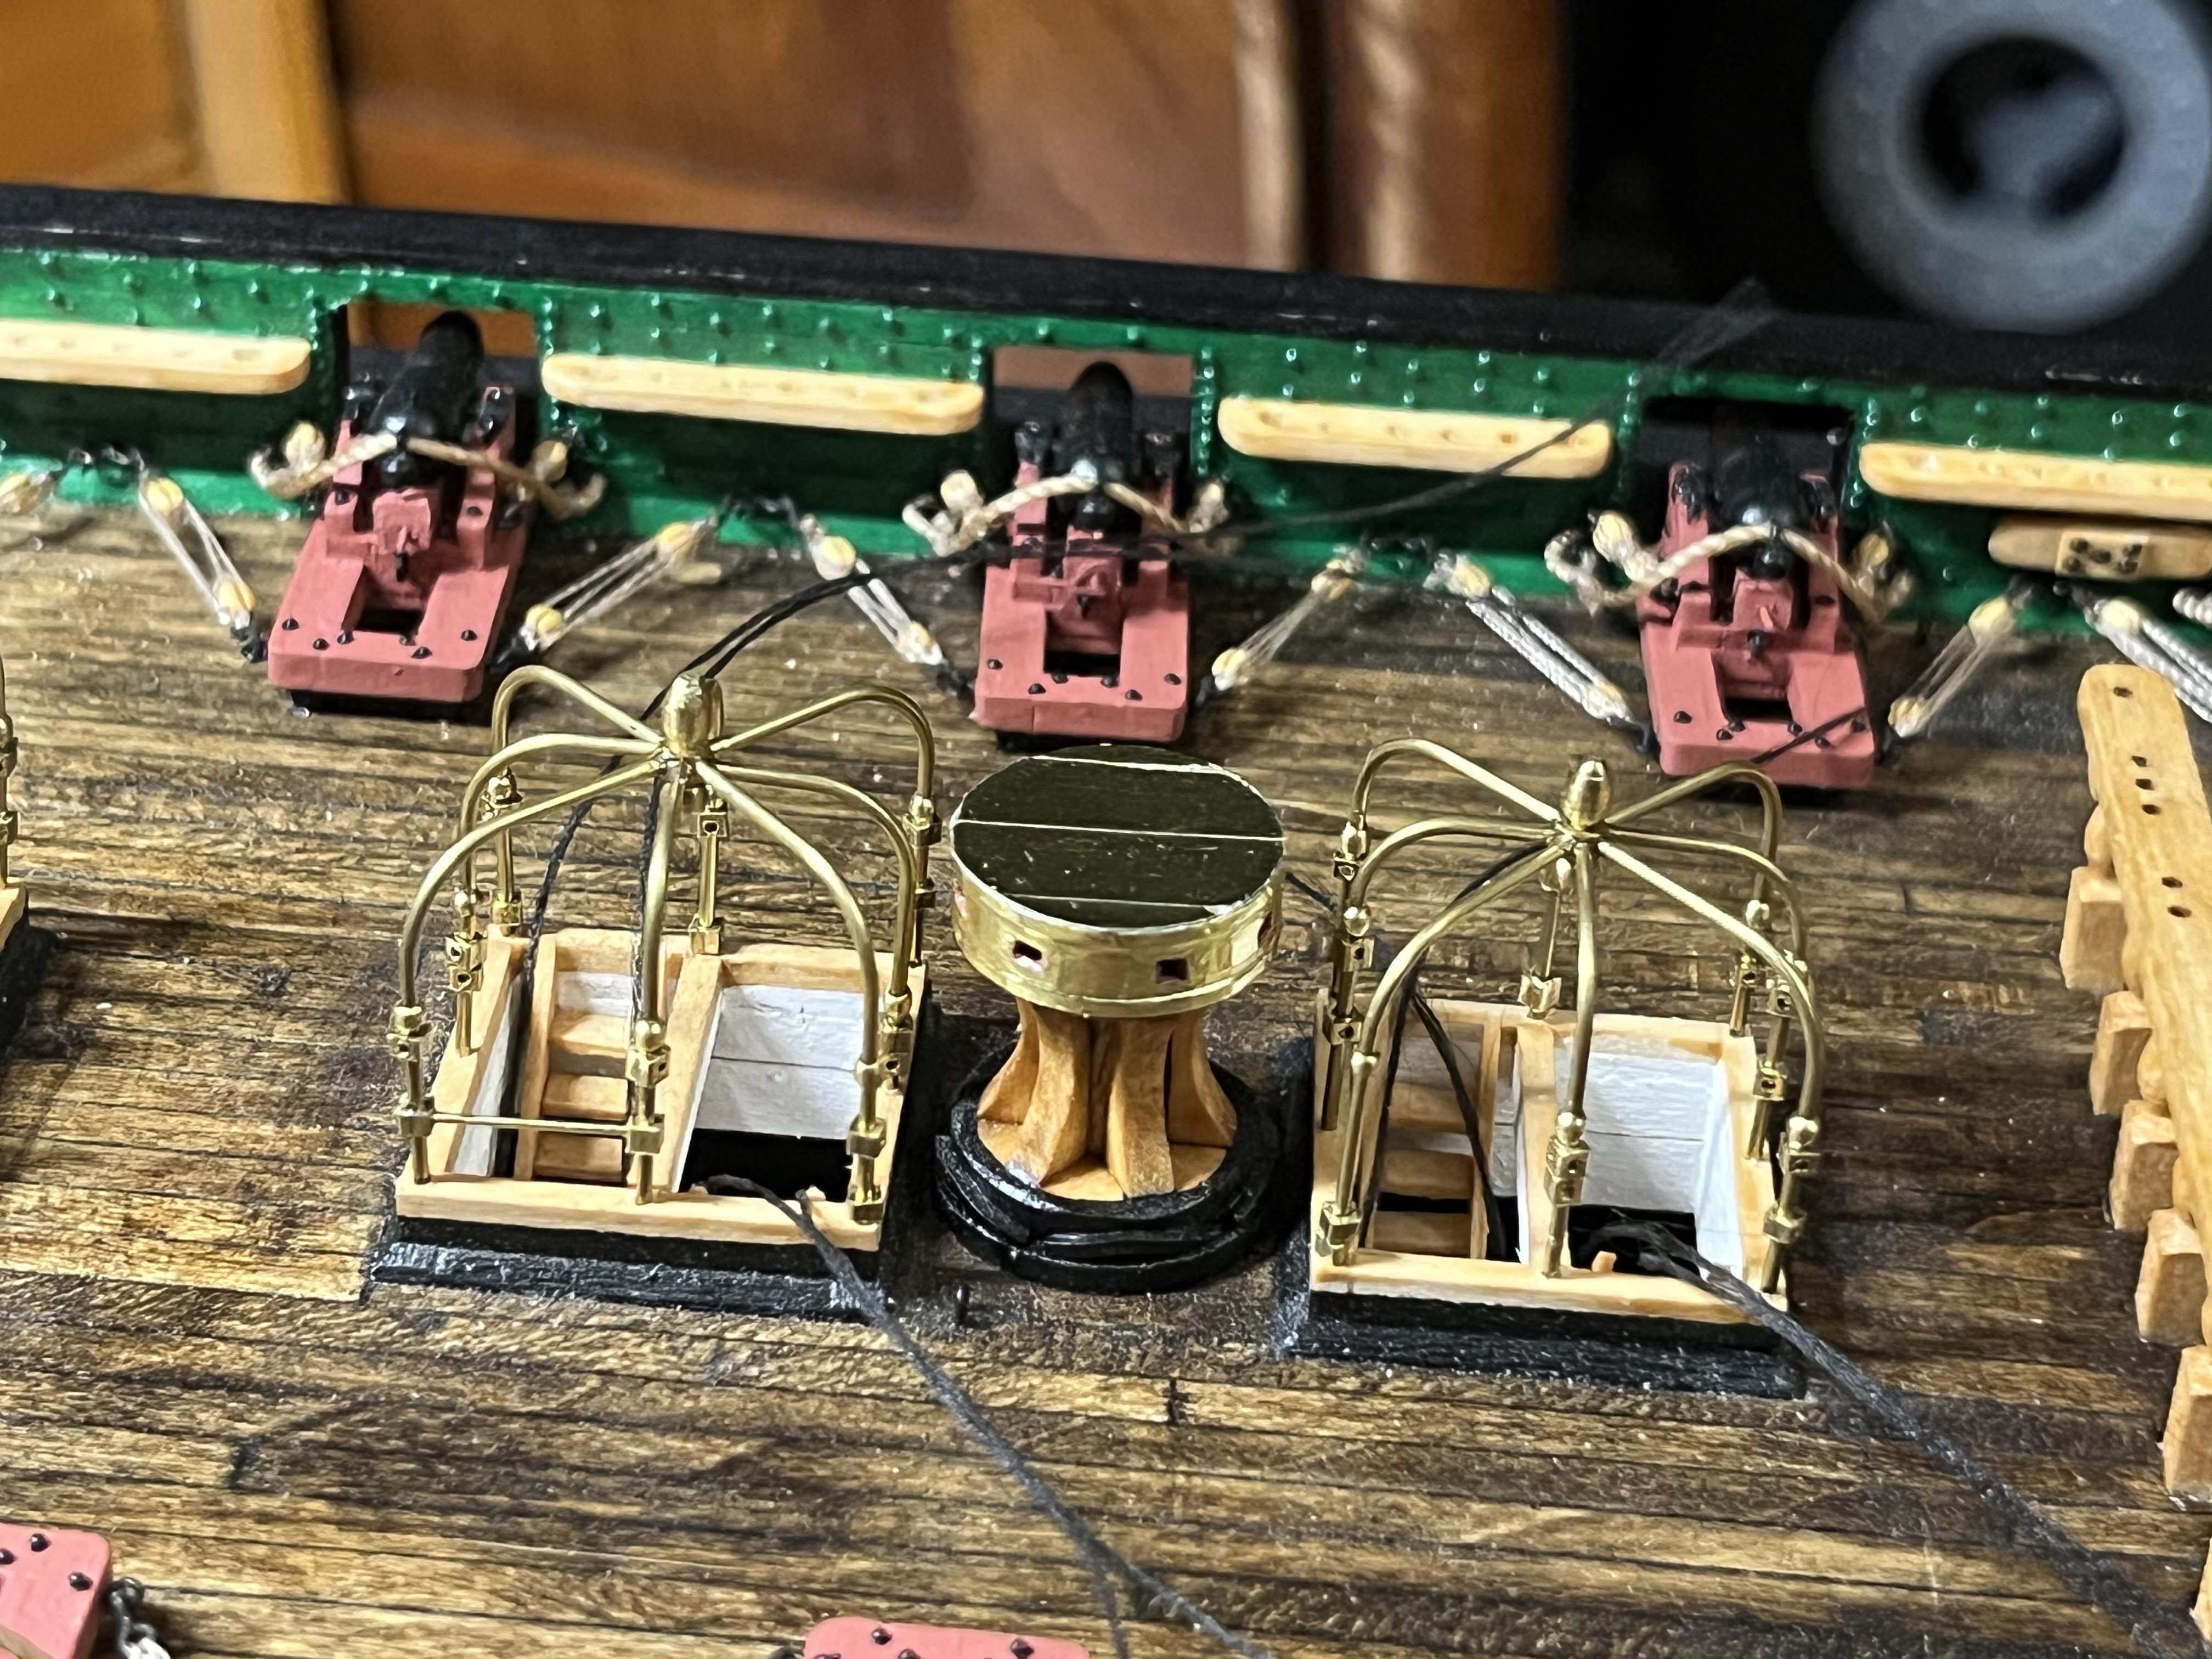
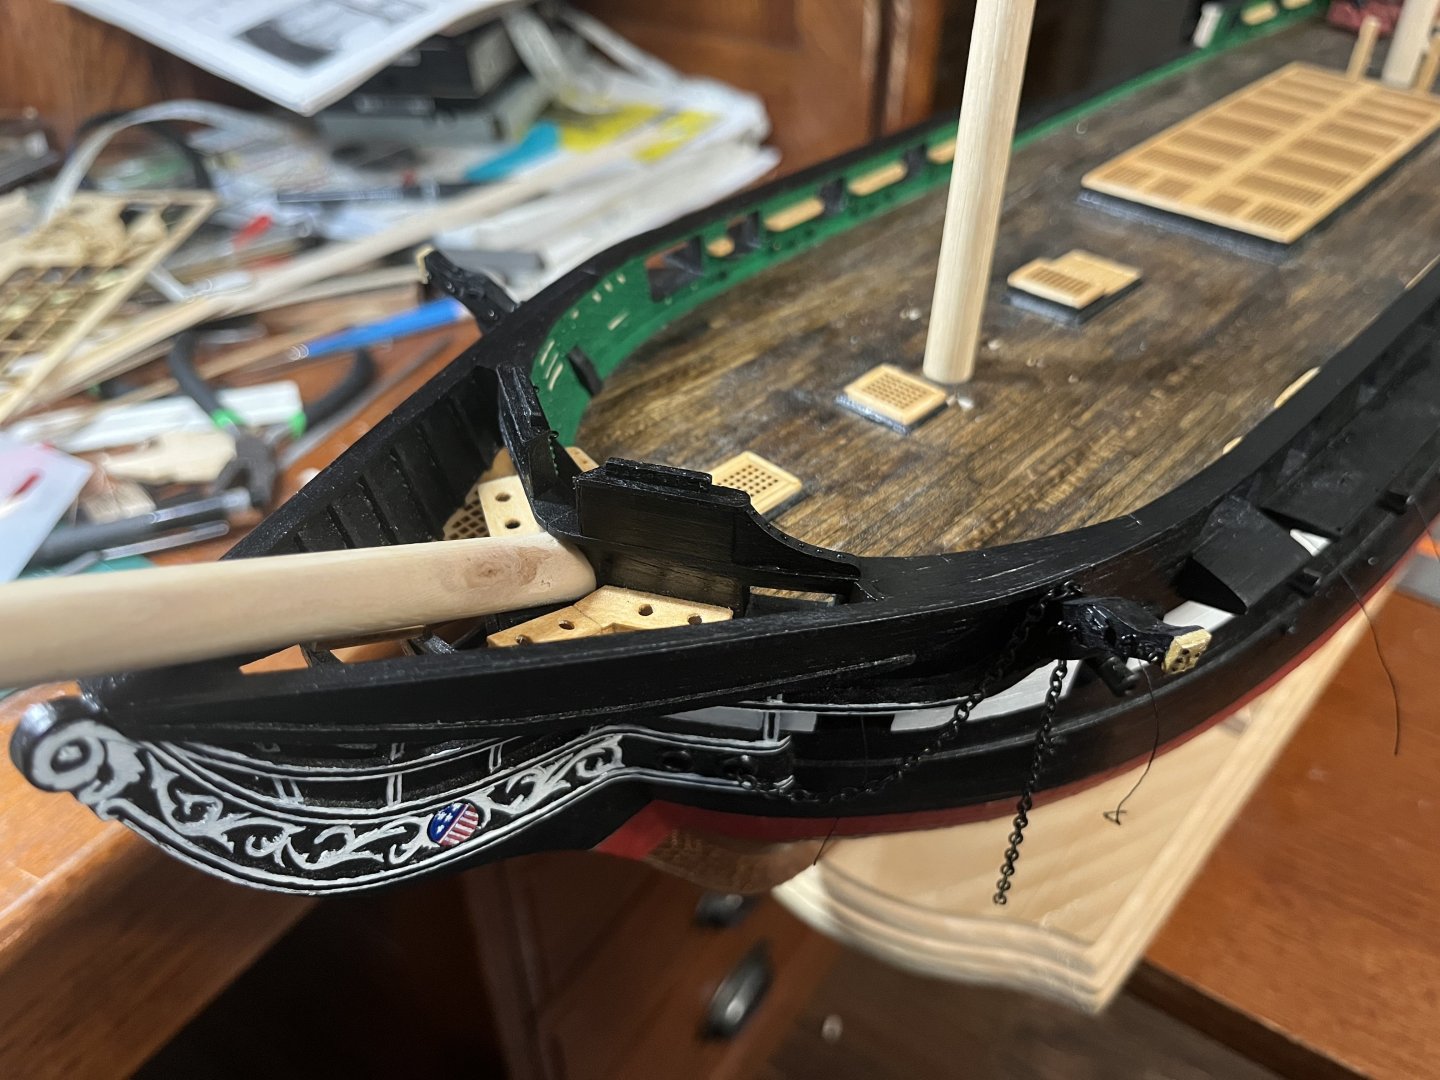
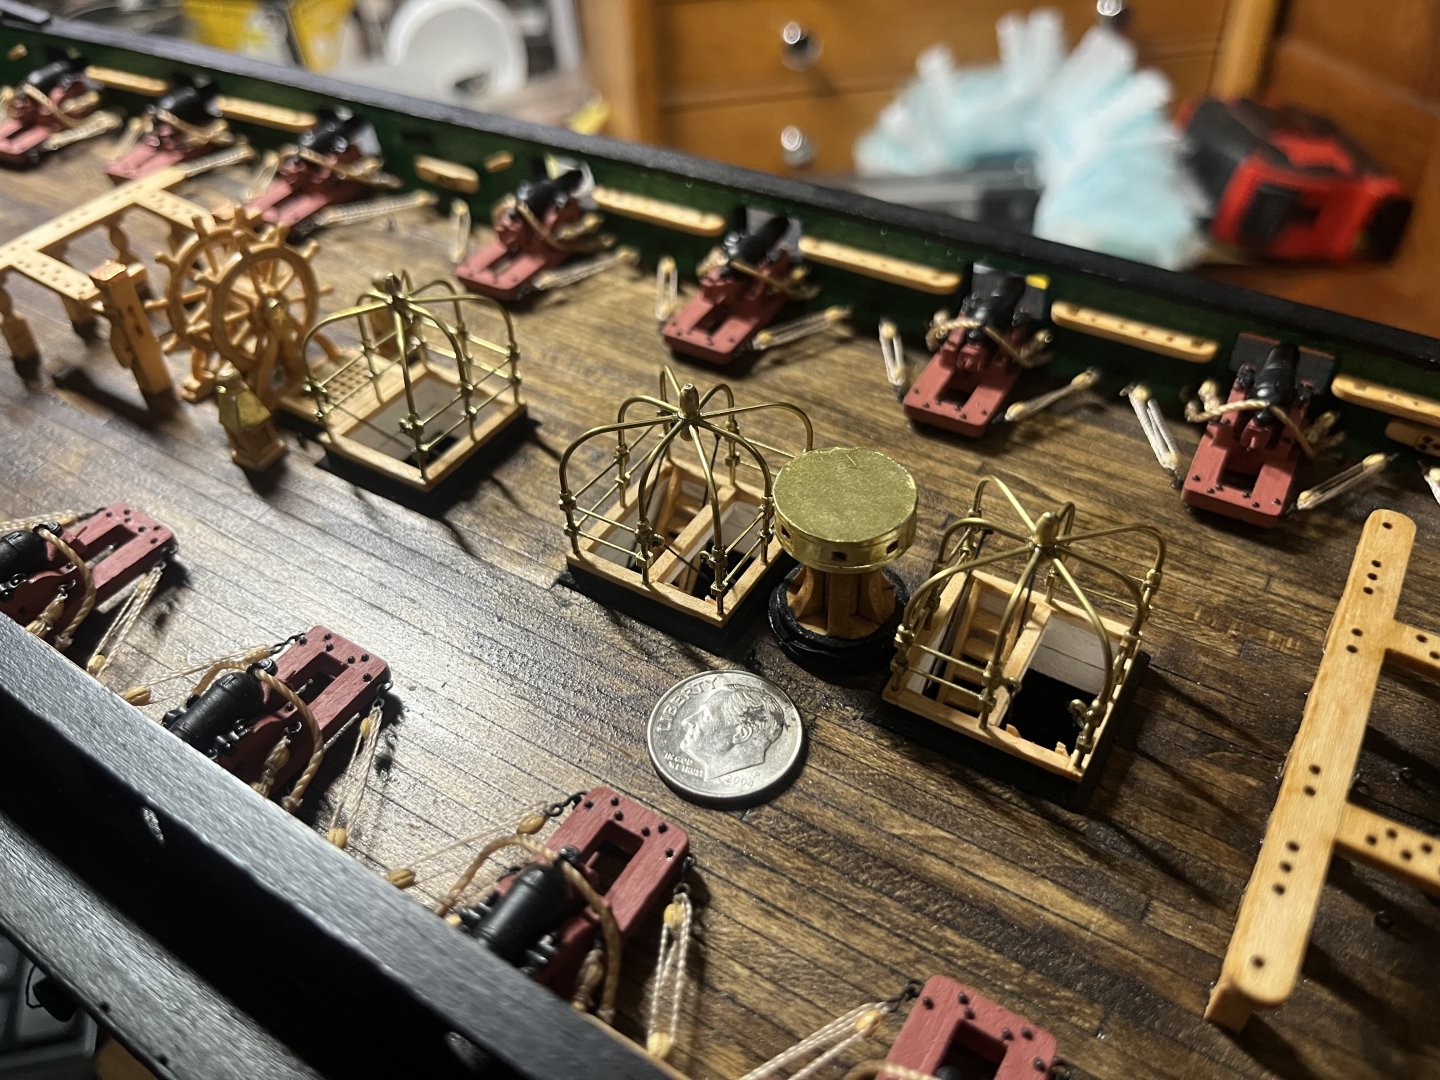
I’ve had a little time over that past week to work on some more of the little things! I got the brass bars on my skylight!I finally got my wheel attached!I got my shot racks done!Last I started my custom build of the 36’ Pinnace started. I made a hull jig for all three types of boats so I can shape the bass wood strips to the rib shape and then hopefully remove the boat from the mold once the planking is on.


-
USS Constitution by mtbediz - 1:76
Unegawahya replied to mtbediz's topic in - Build logs for subjects built 1751 - 1800
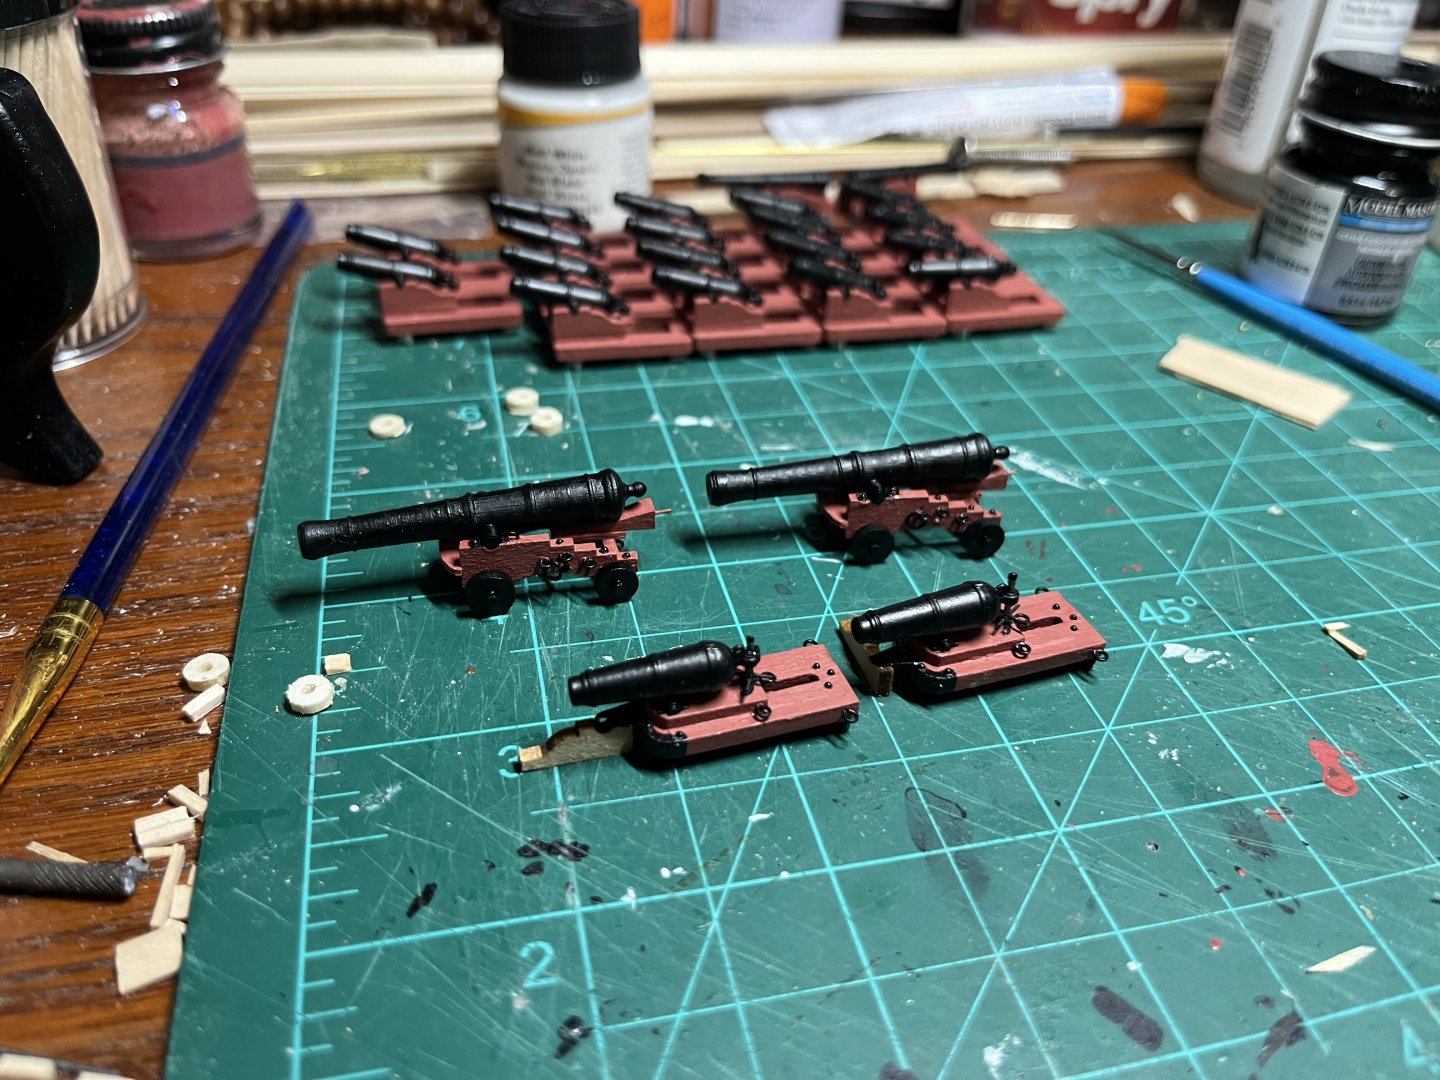
I think the dark gray is better just everyone else. lol It gives your guns a weathered look! -
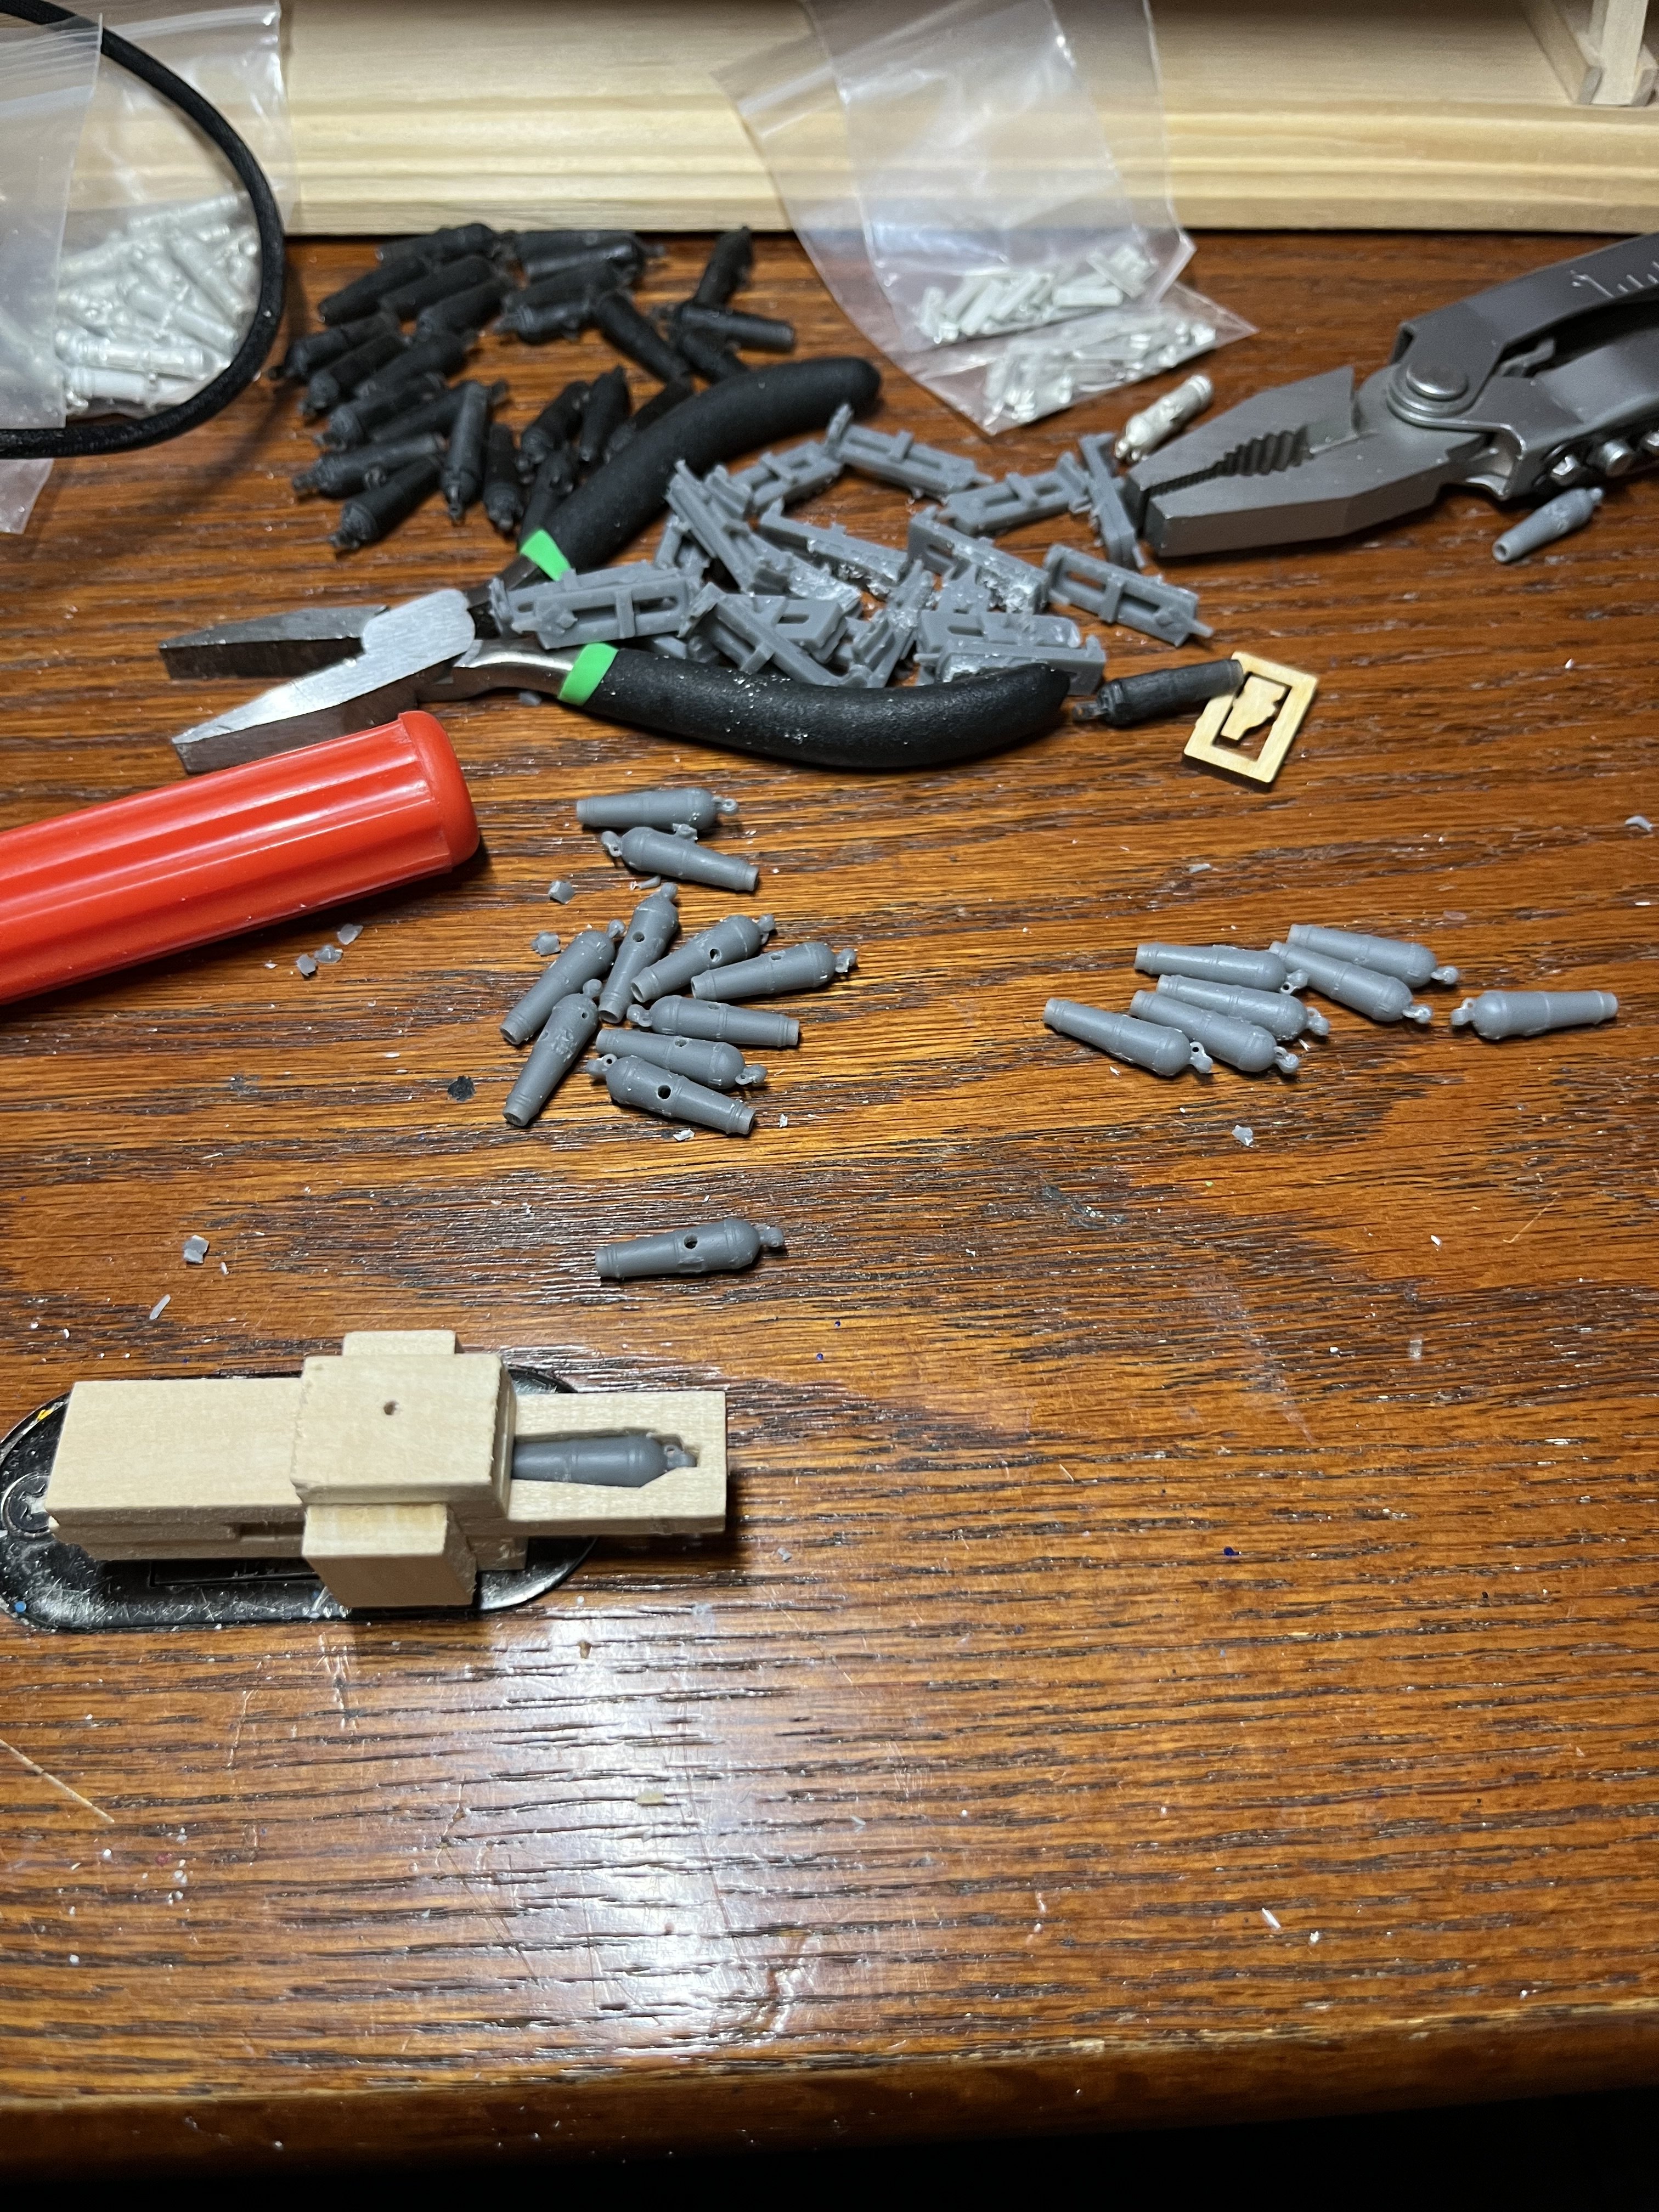
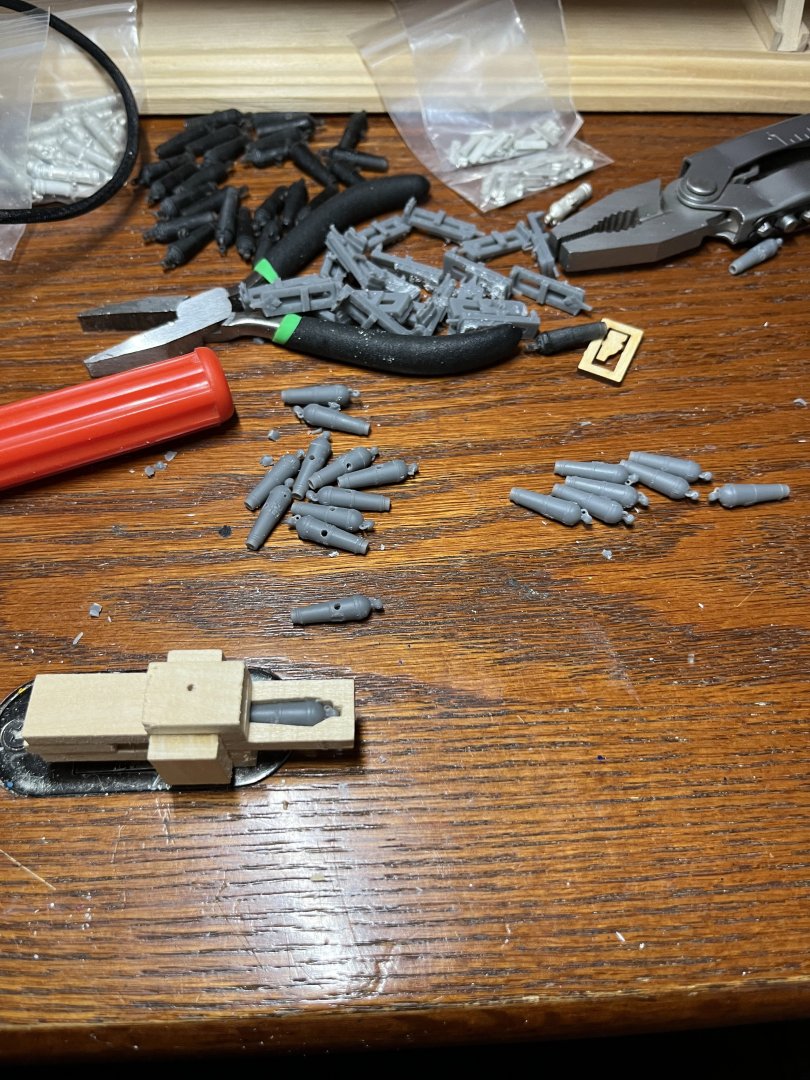
If I remember correctly I cut the carriage around the mount and then sanded the excess flat to the mount. The wedge type I just used snippers to cut the mounting it self.
-
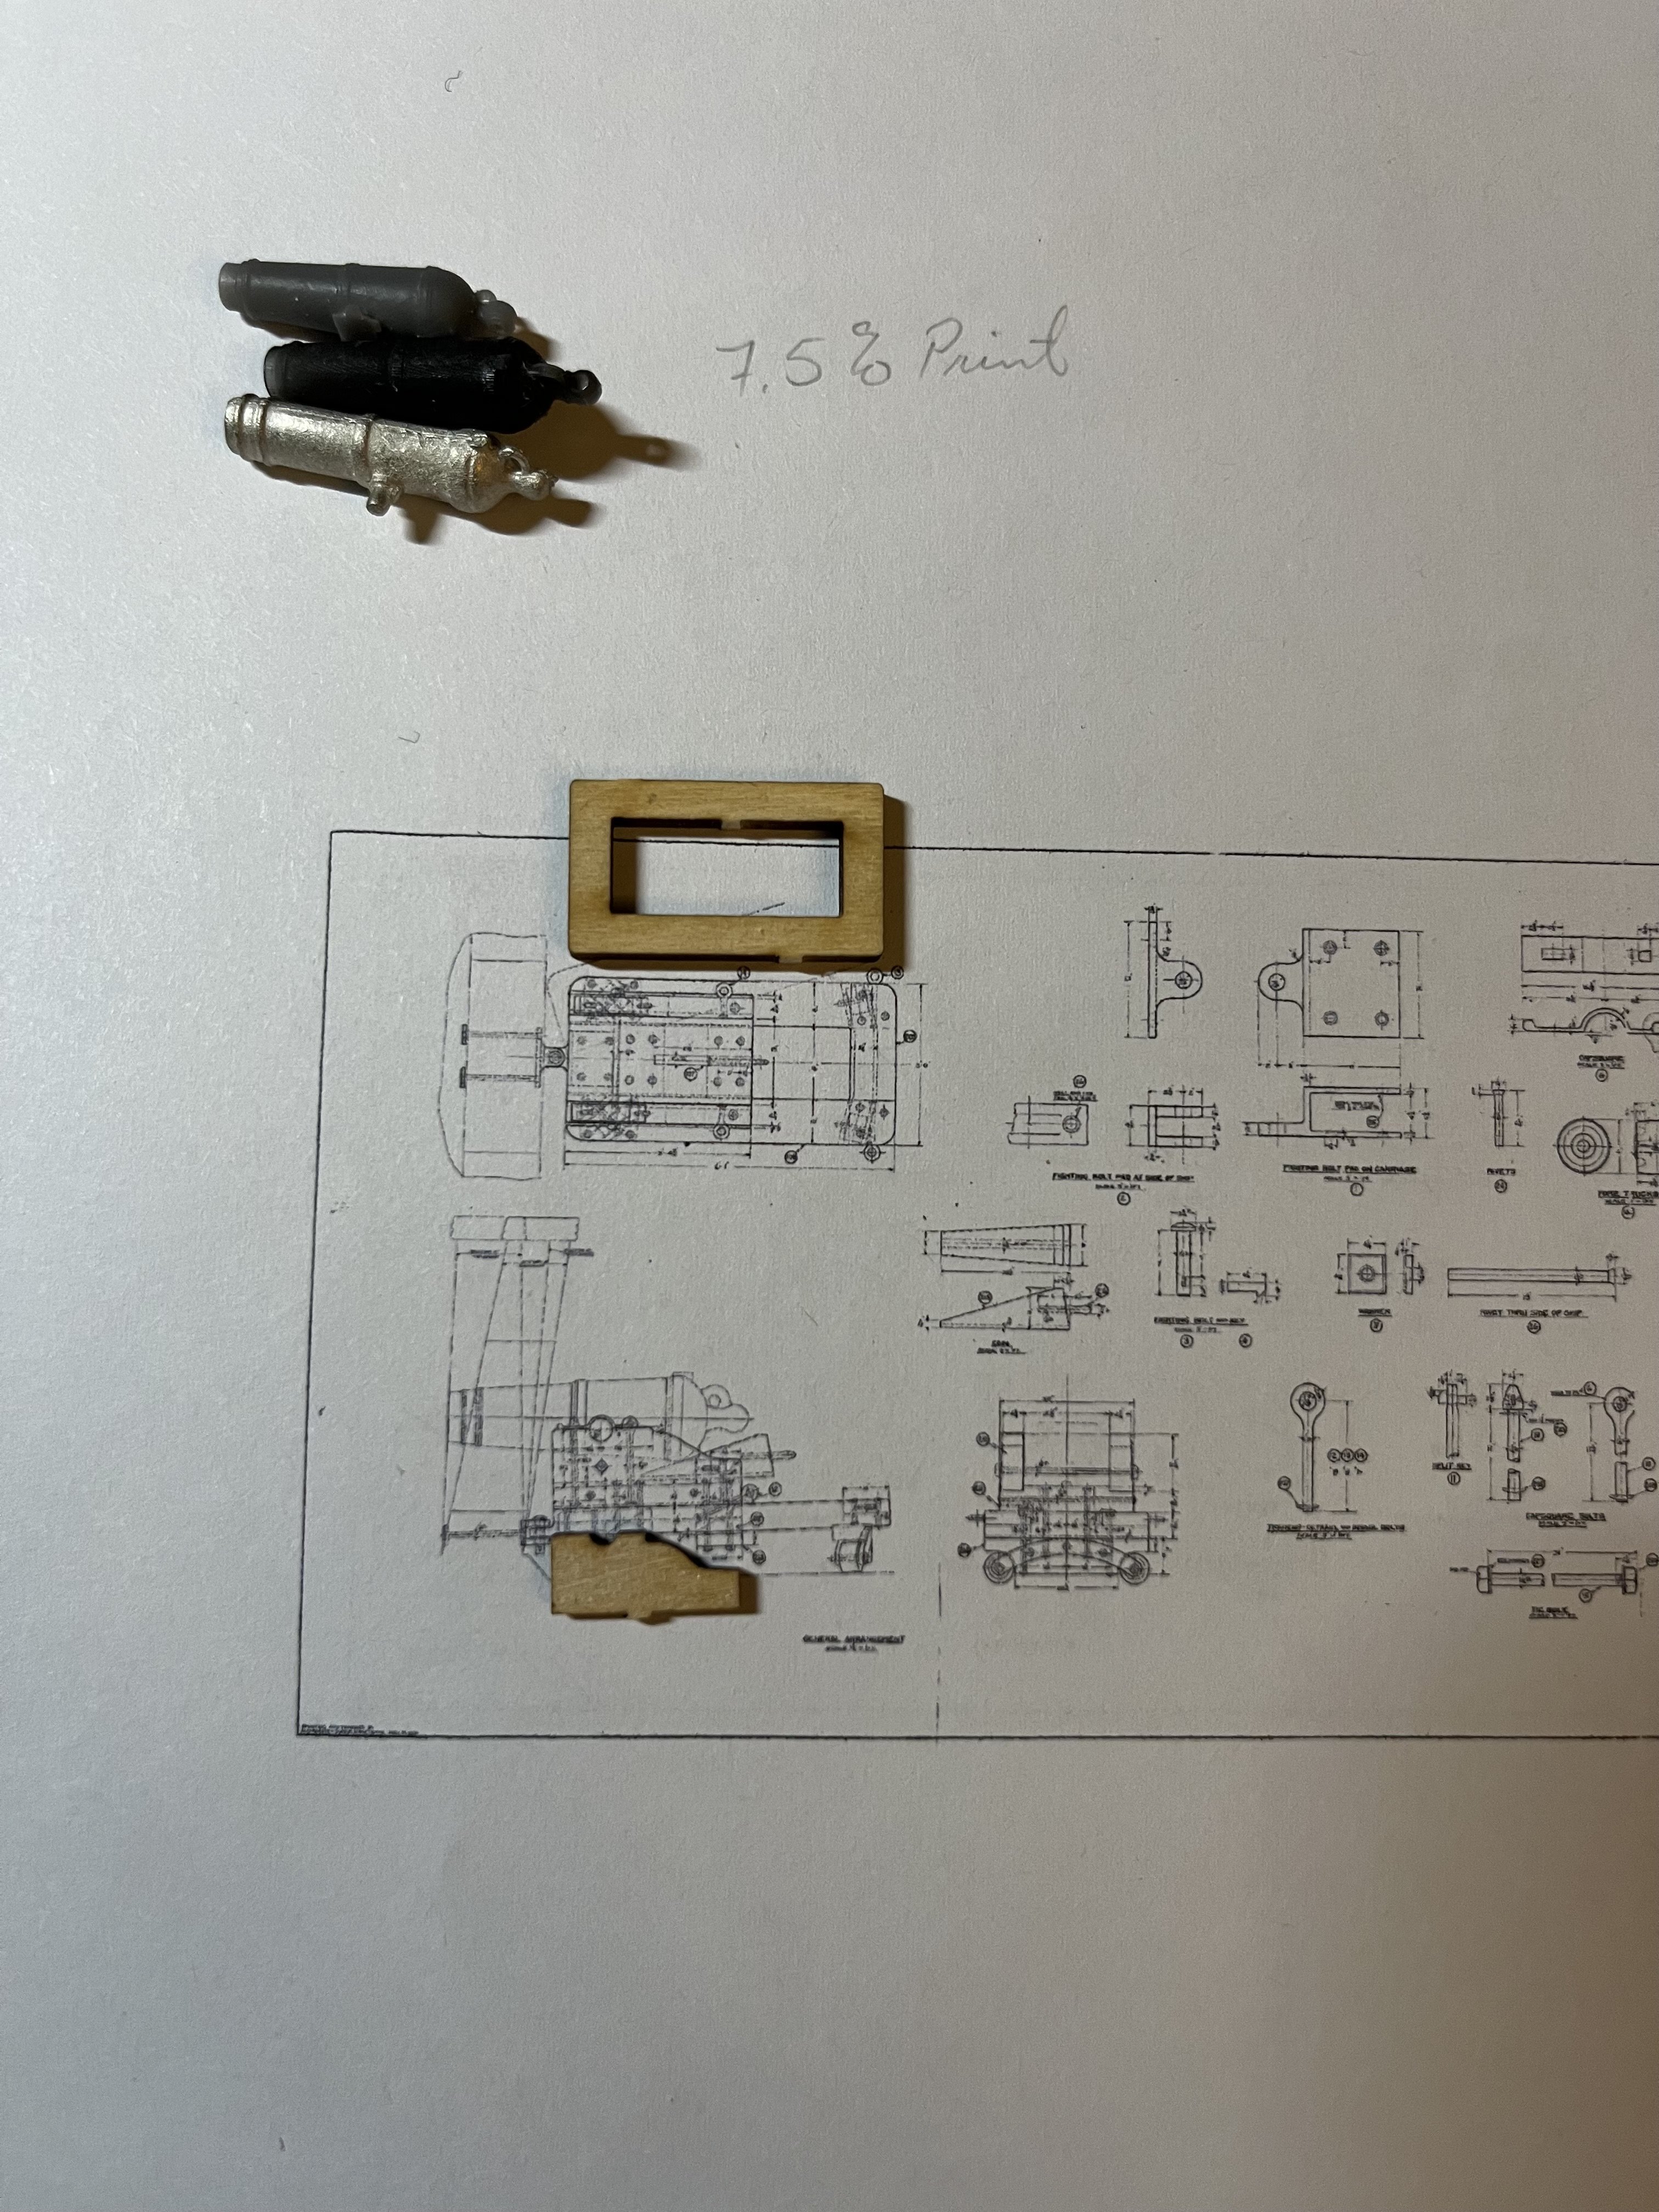
I got the same carronades! I was able to split them from the bases and I made a jig to drill the holes for the trunnions. I also kept the mounting for the two screw elevation types.
-
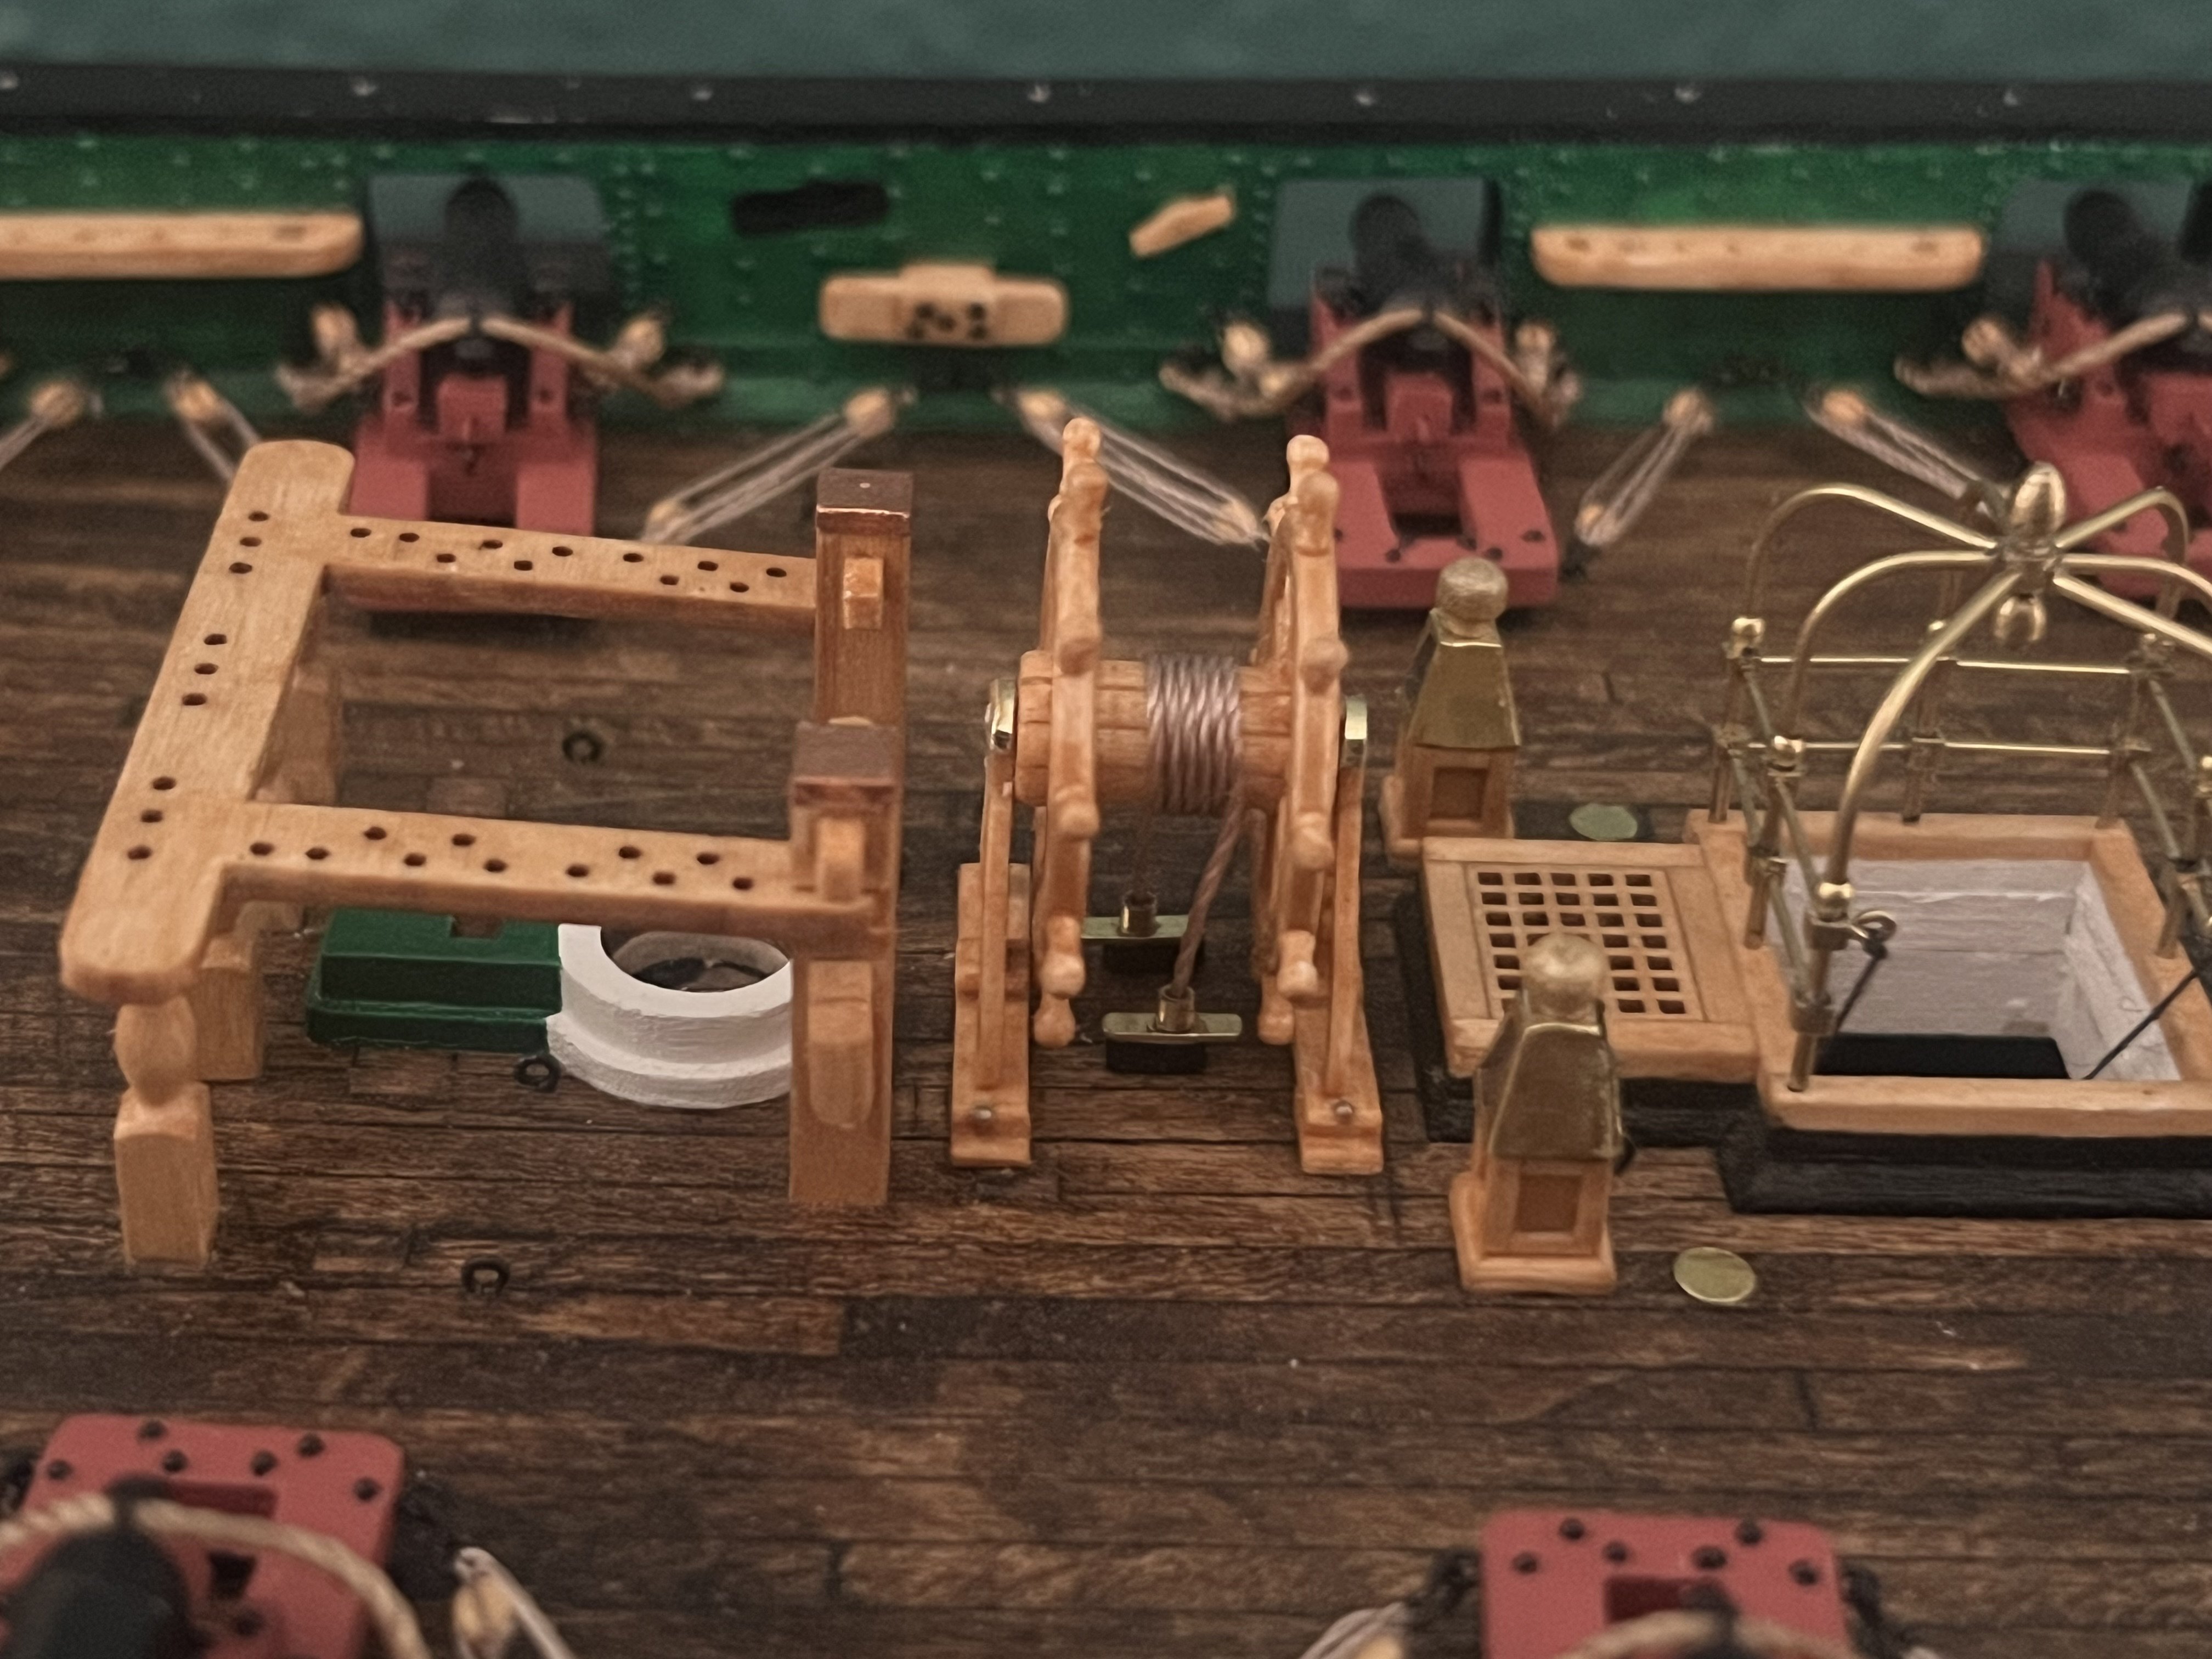
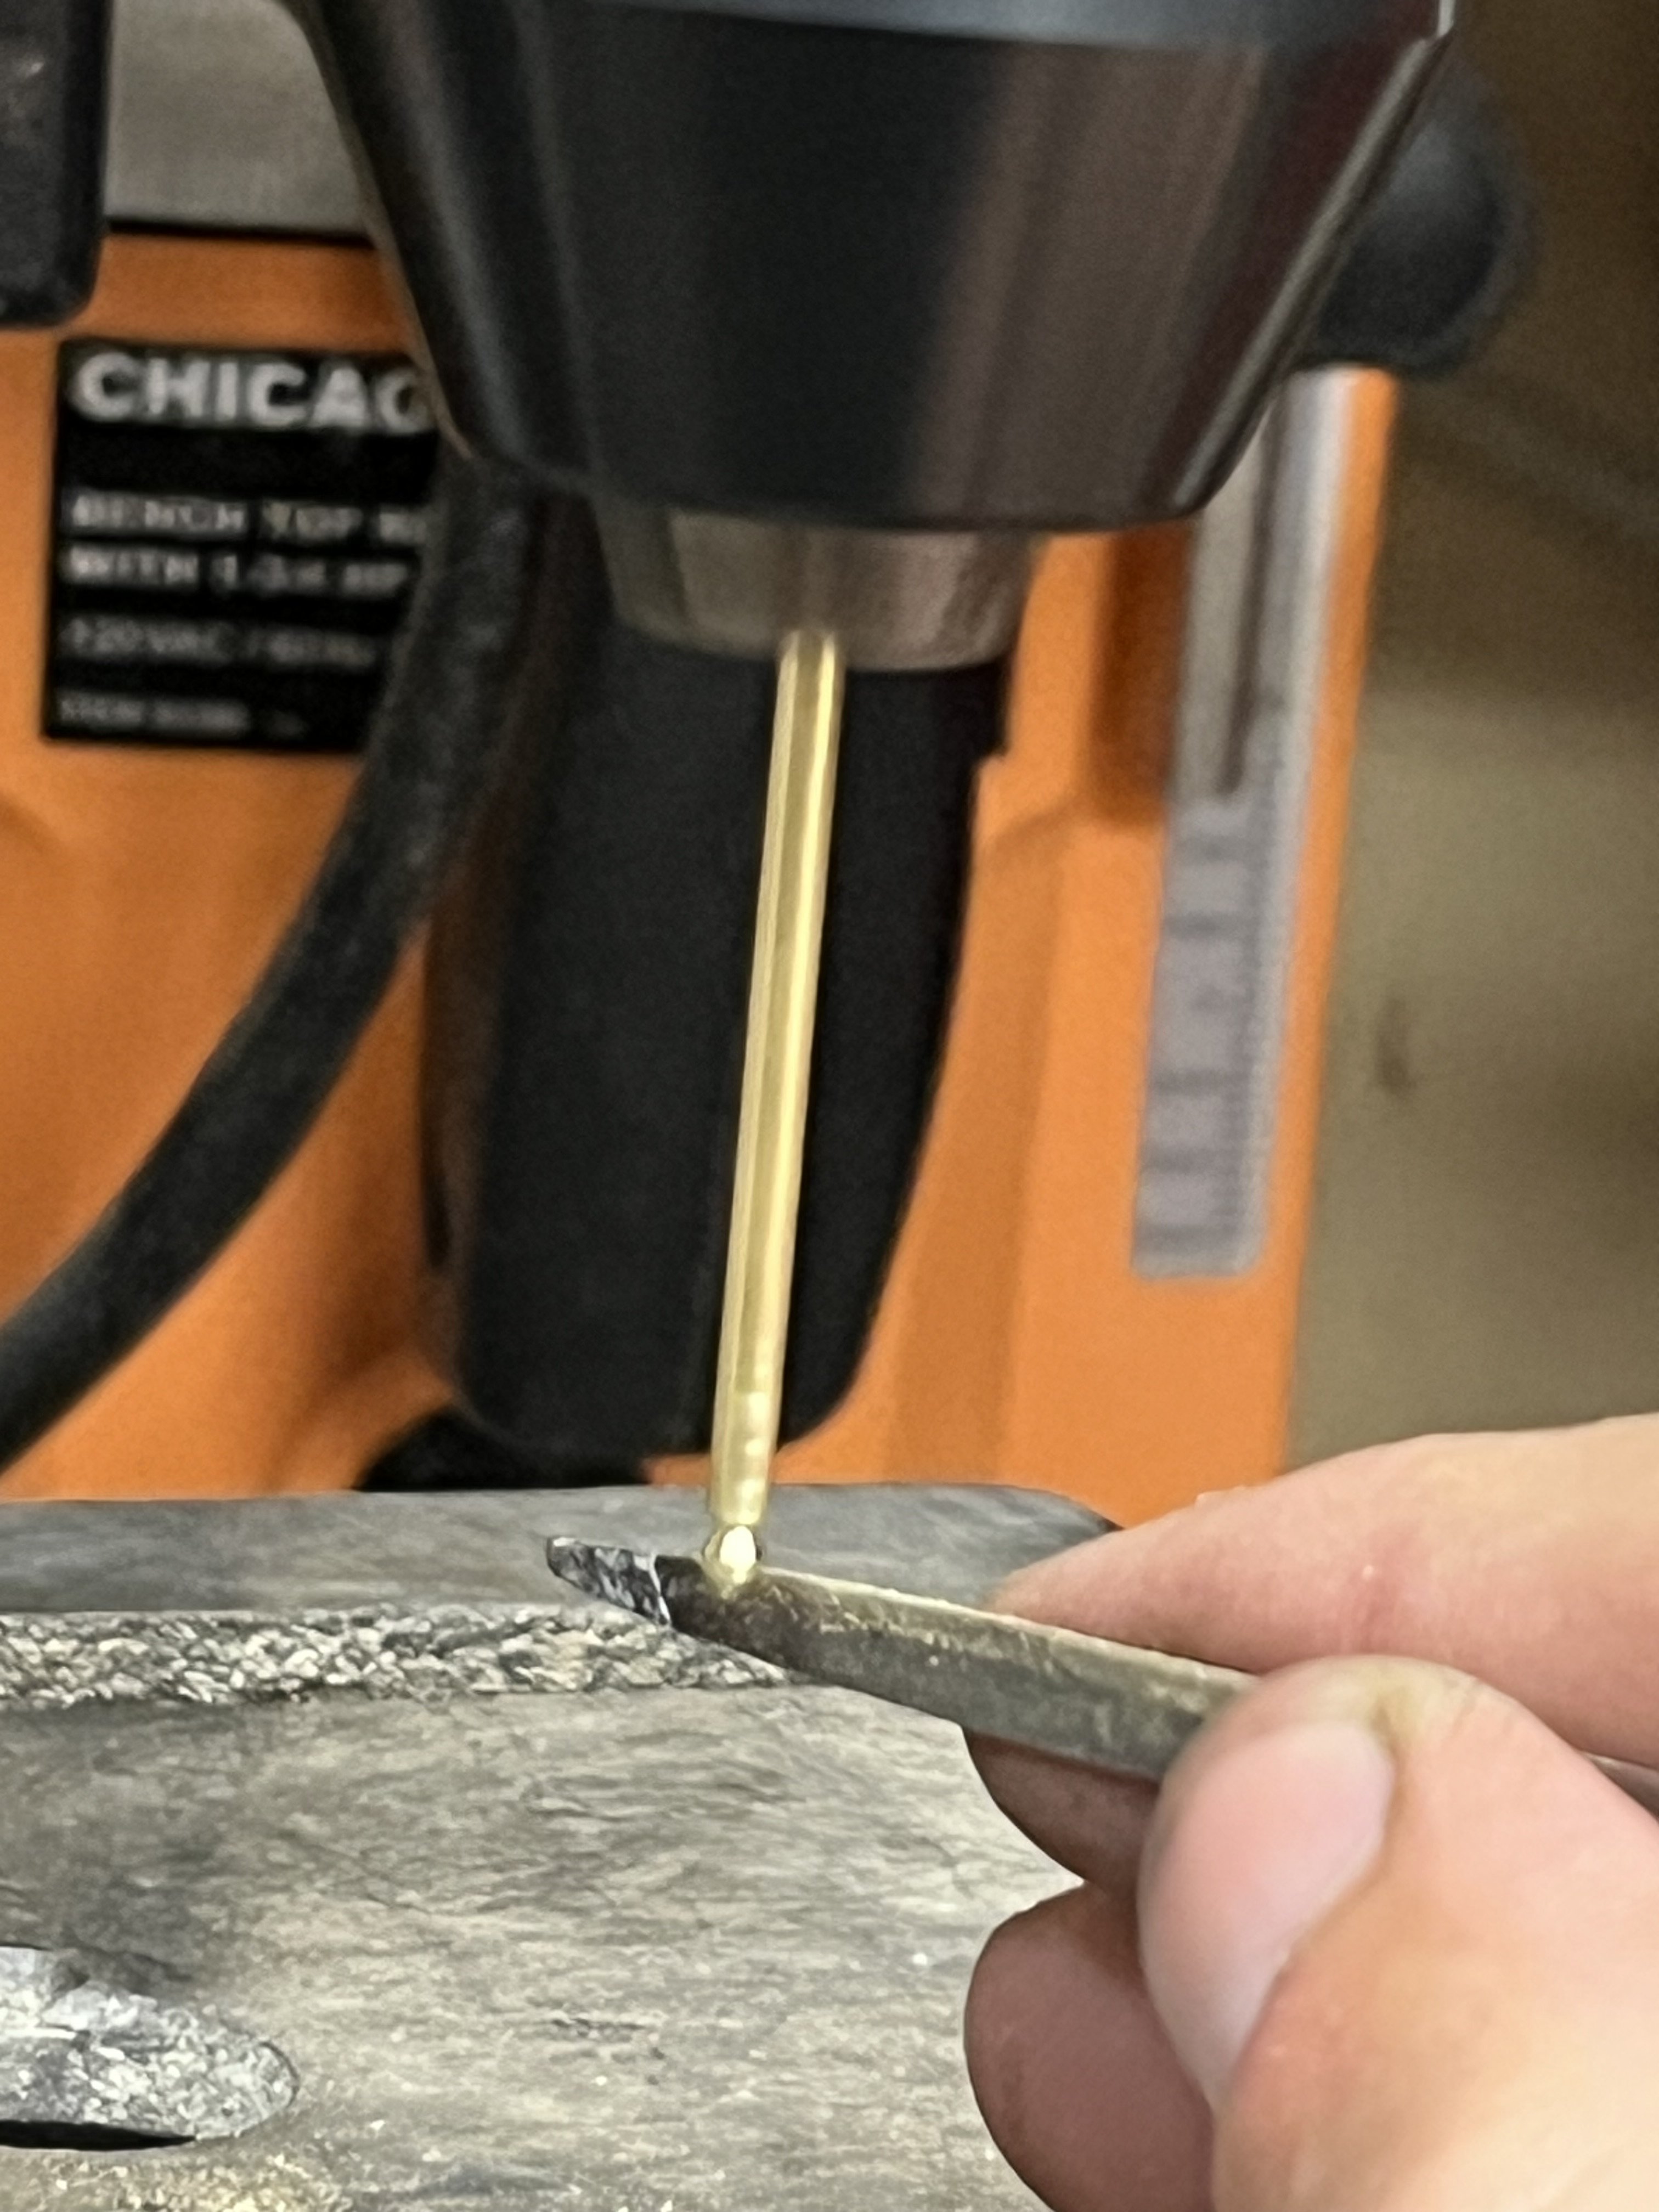
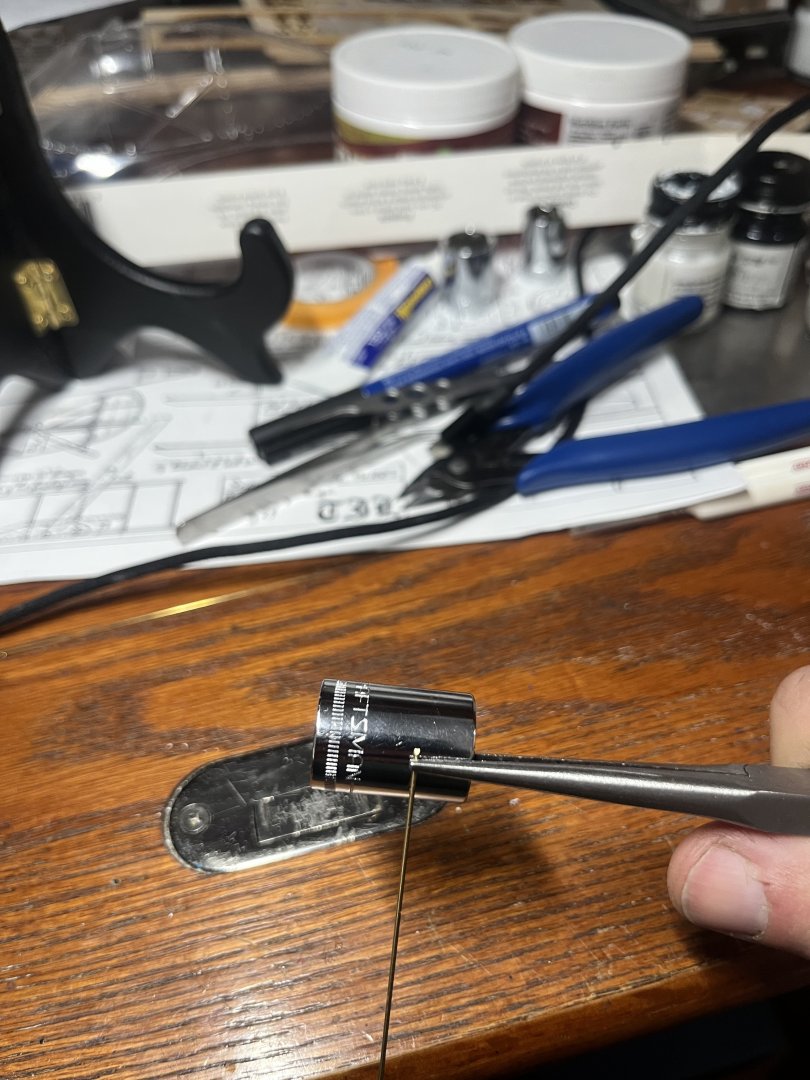
Now that the site had decided that I’m not spam… I can share pictures again! This is how for lack of better terms, I made my dig jump ring. I hadn’t to use a smaller socket than the size of the ring because the brass bill spring back a little after coiled around the socket. I would also suggest getting a Gundam panel line pin for marking the brass. It is basically a .5mm sharpie and you can see it better than pencil and it’ll rub off but not too easily.
-
To get my ring, I used my long pliers to hold the wire on my 13mm socket and I tightly coiled the wire 1.25 times around the socket. The I trimmed about 4mm off where the pliers where using my 0deg snips. Then I made the second cut to mach the first as close as possible. Last parts was to align the two ends to meet and glue them together once they were close enough. It took me a couple of times to get the ring close enough and I had to play with it for a wile to get the two ends to mach. Once I had the ring made, I used it as a template to mark my holes for the post. With the ring in position around my skylight I would make a small dent with a pencil to mark where to drill my holes for the posts. I cut and marked all the posts to the same height. When I installed the posts I didn’t glue them in so I could adjust them with the rig balanced on top. After all the posts where in position I used thick CA glue on the tops of the posts to glue the ring on.
-
I had a little more time yesterday to finish my starboard bow and start some of my small details. I got the handrails done for my skylight. For the skylight handrail I made the ring with 1/32 brass wire that I coiled around a 13mm socket. (I think I should have used a 12mm because the ring was just a hair too big.) The legs for the skylight are the same 1/32 brass wire and I drilled small holes in my spar deck using the handrail ring as a guide. After getting everything lined up I glued the handrail to the supports.


-
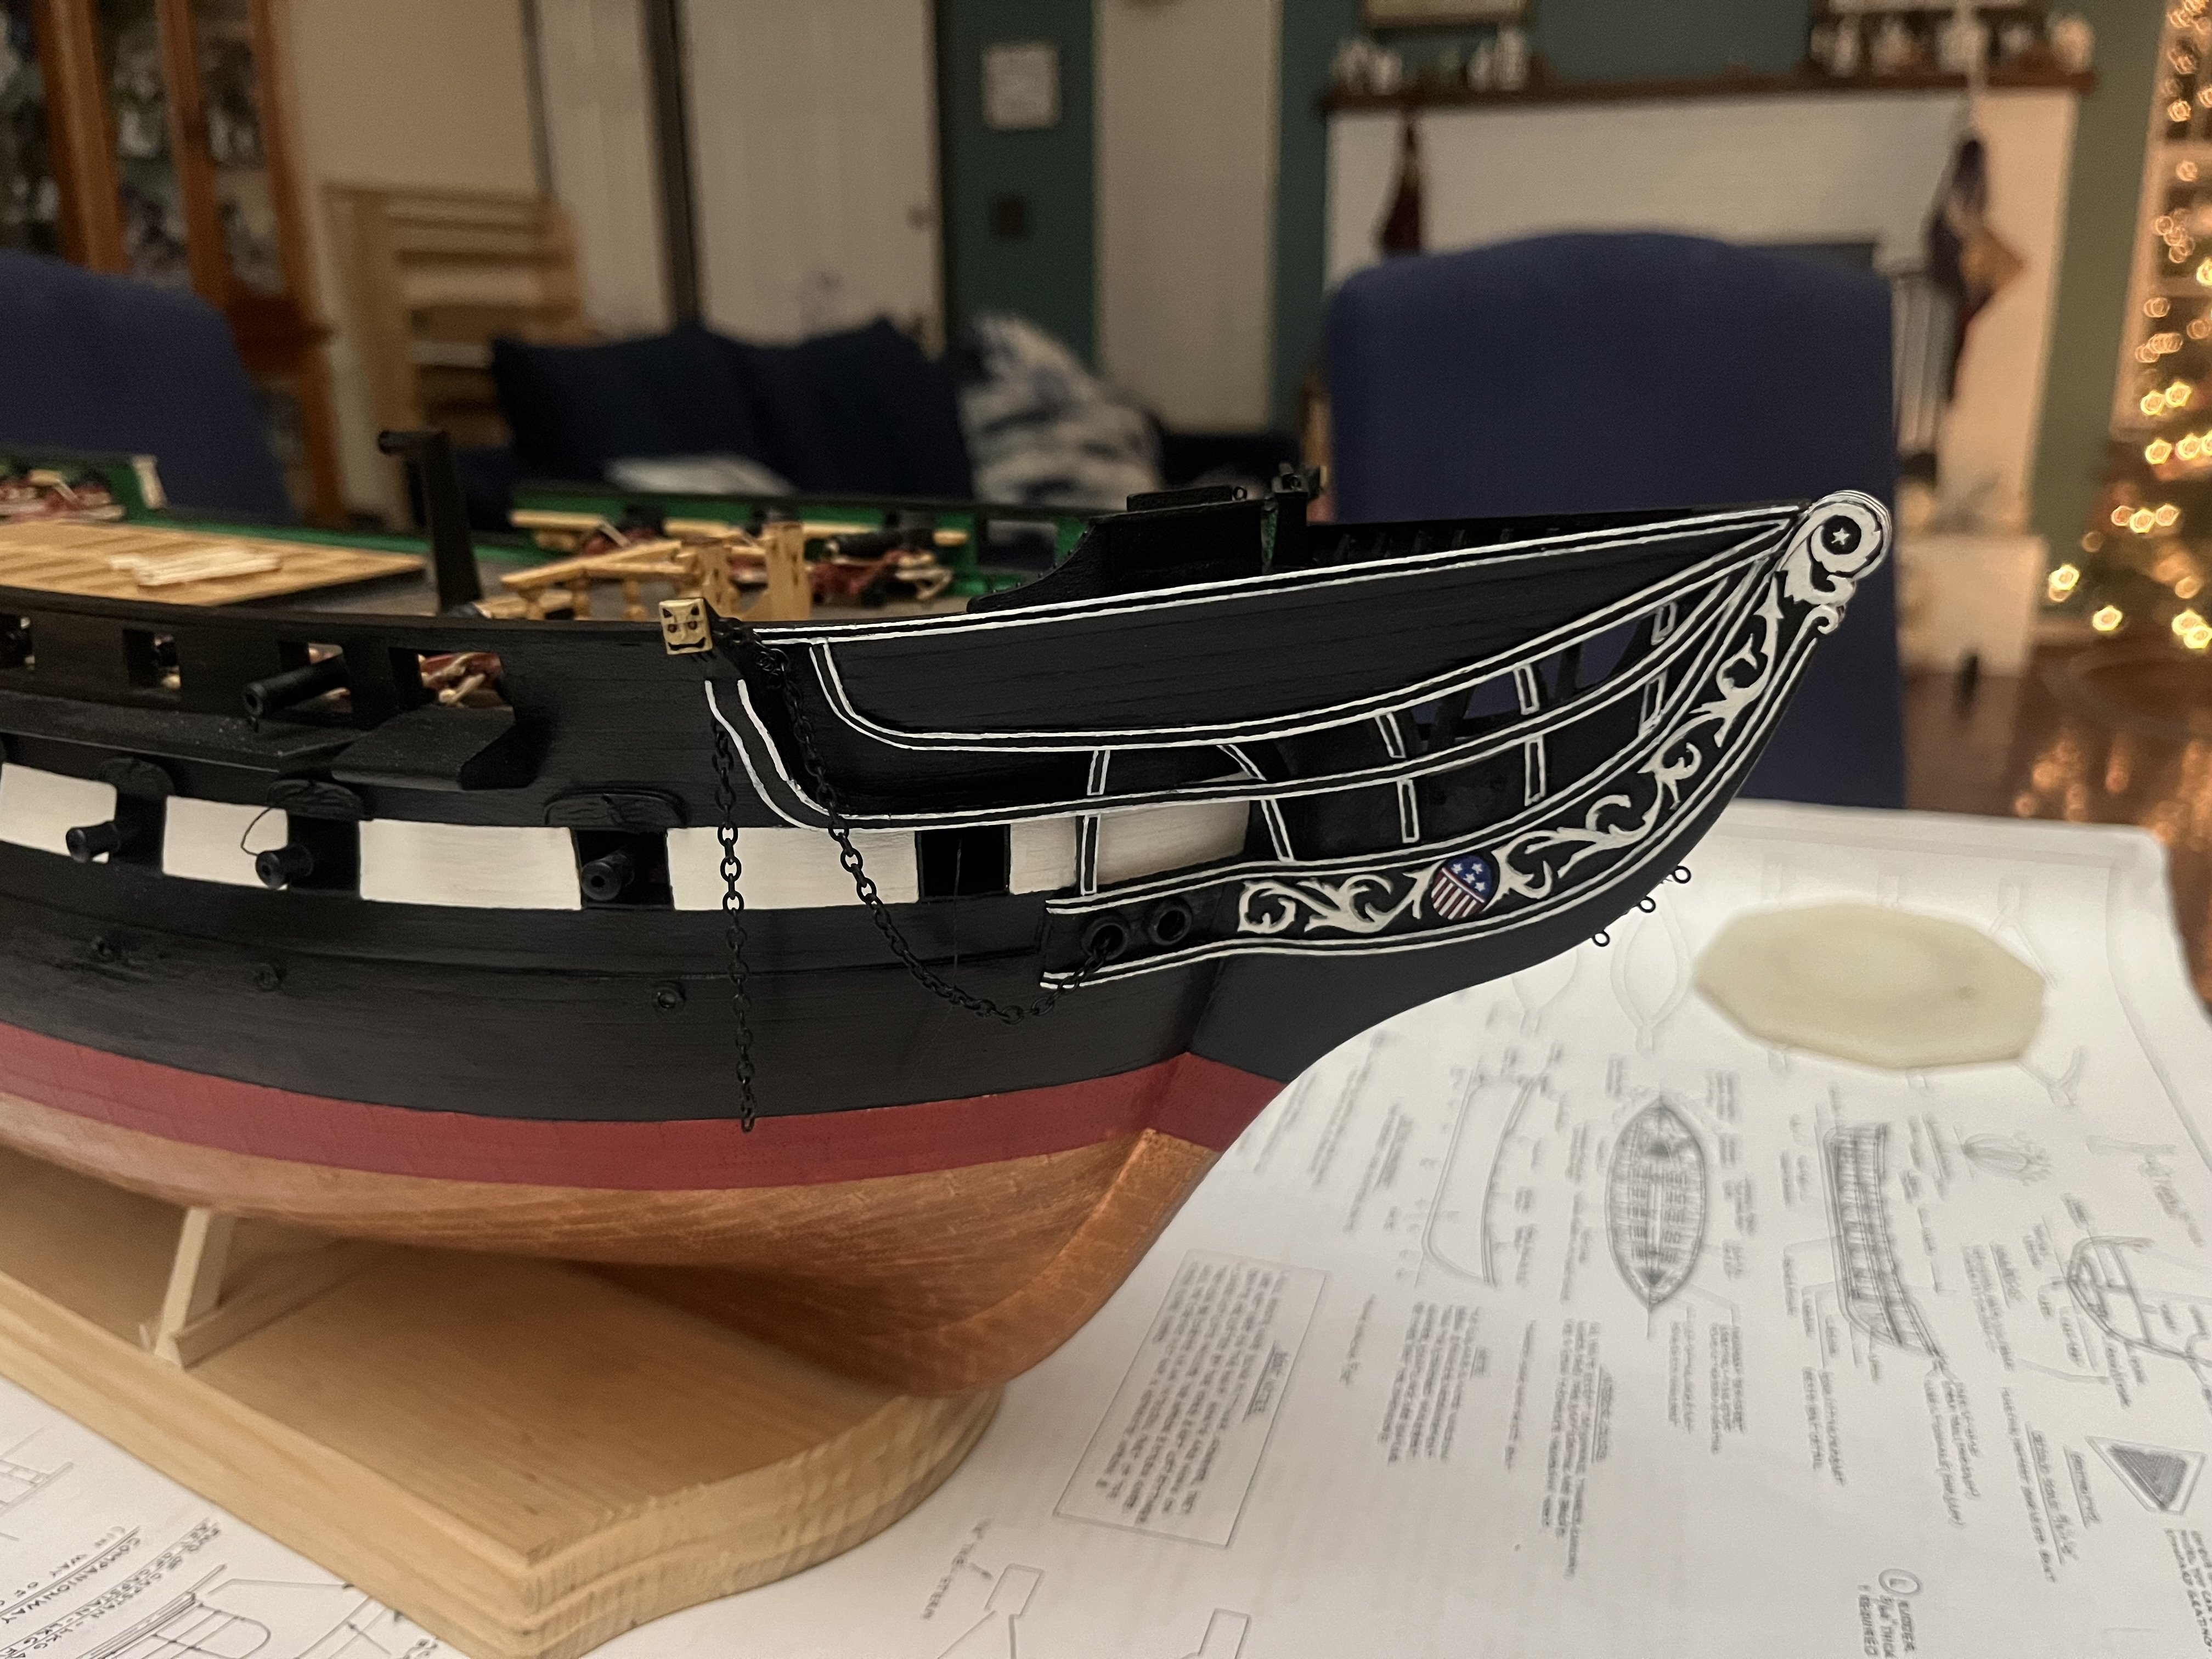
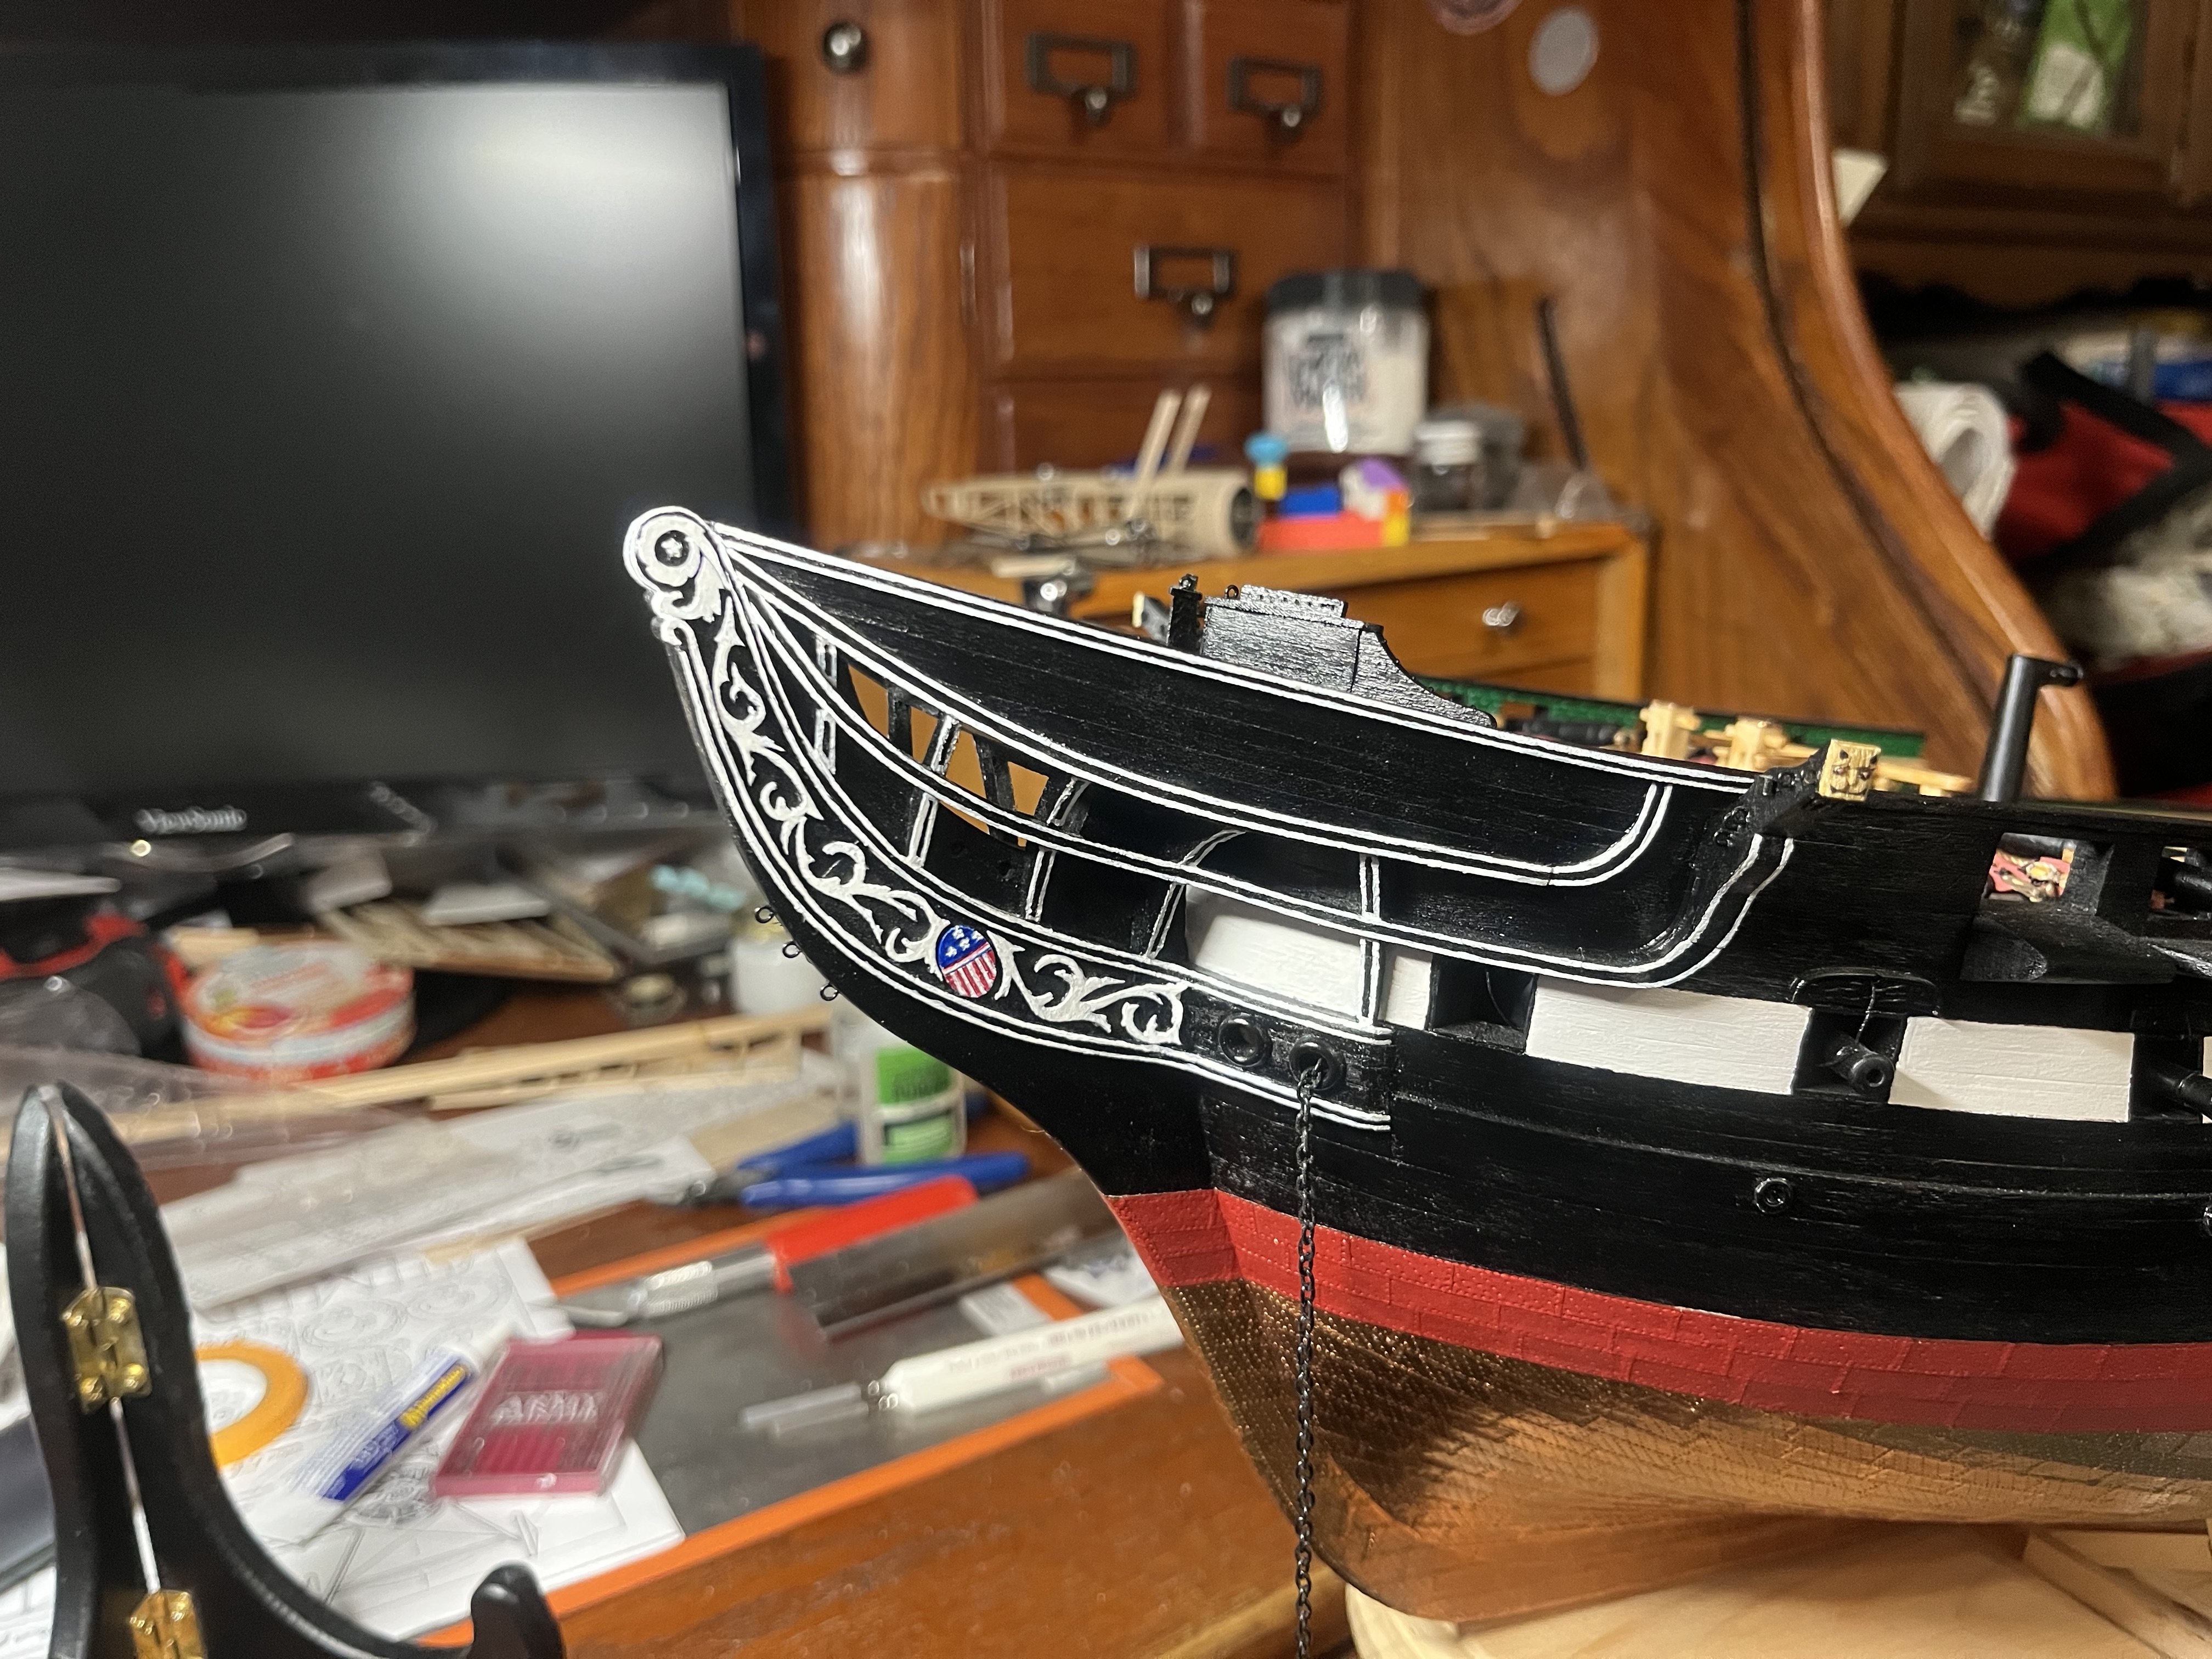
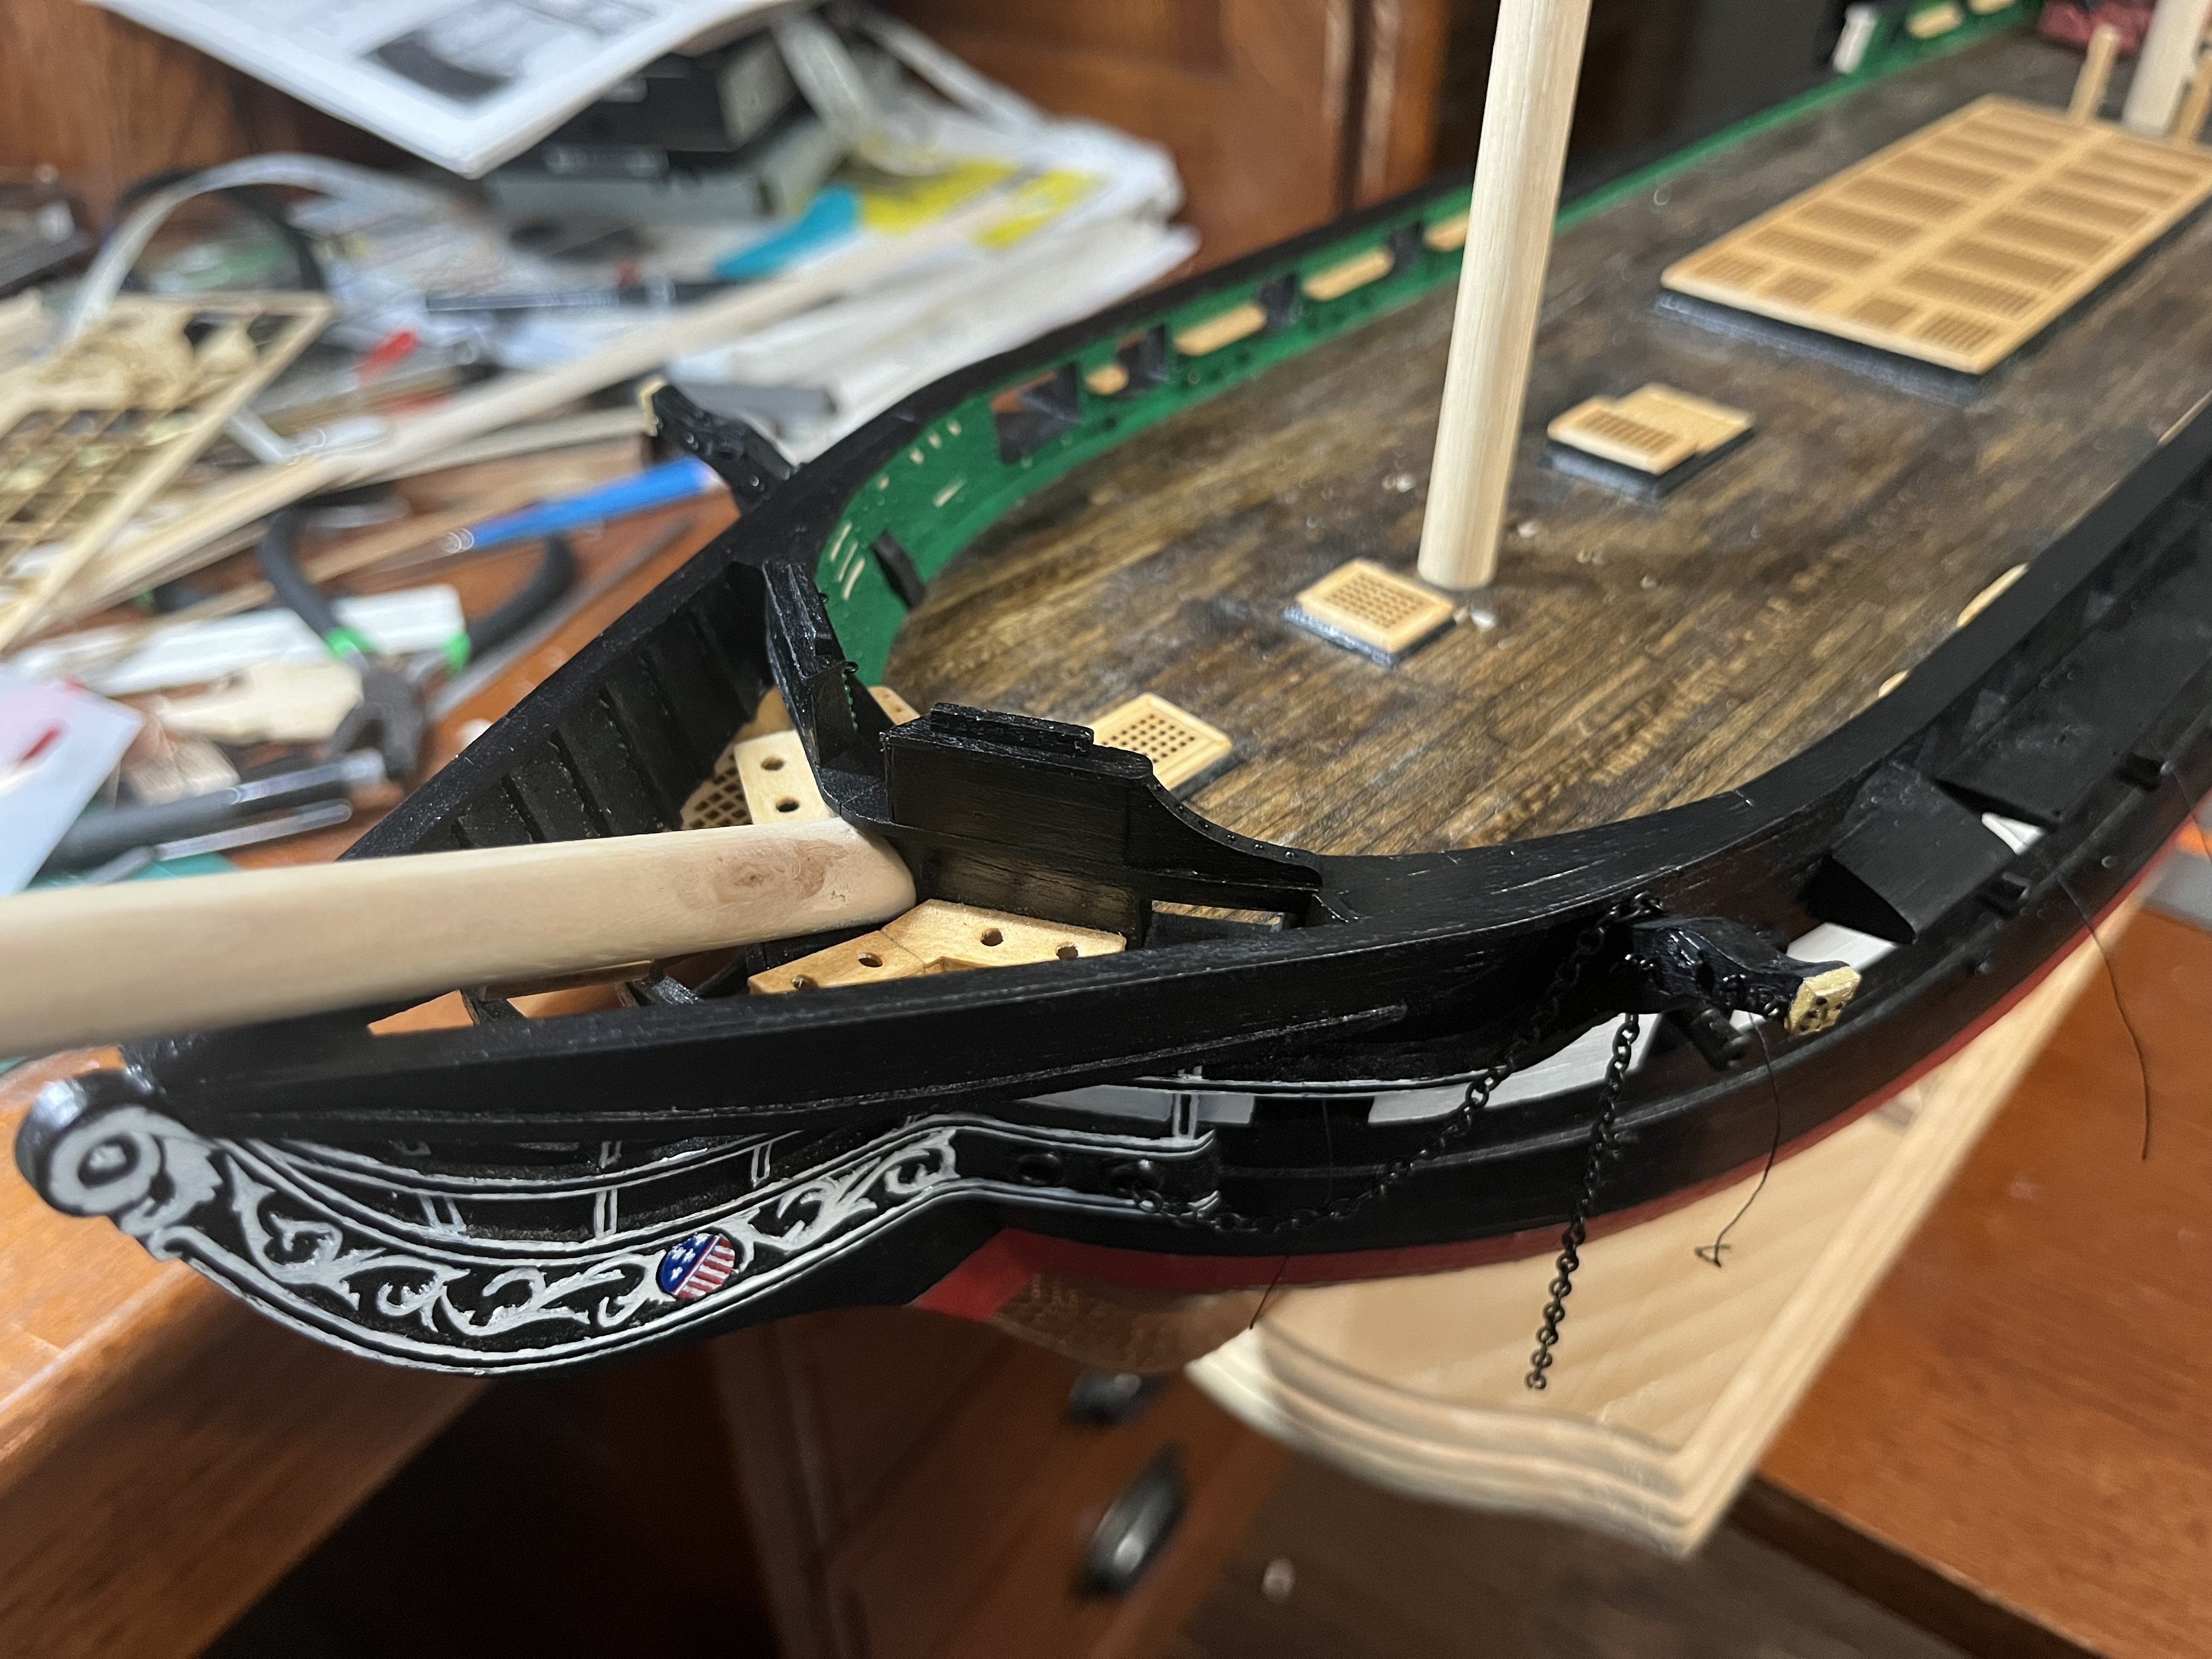
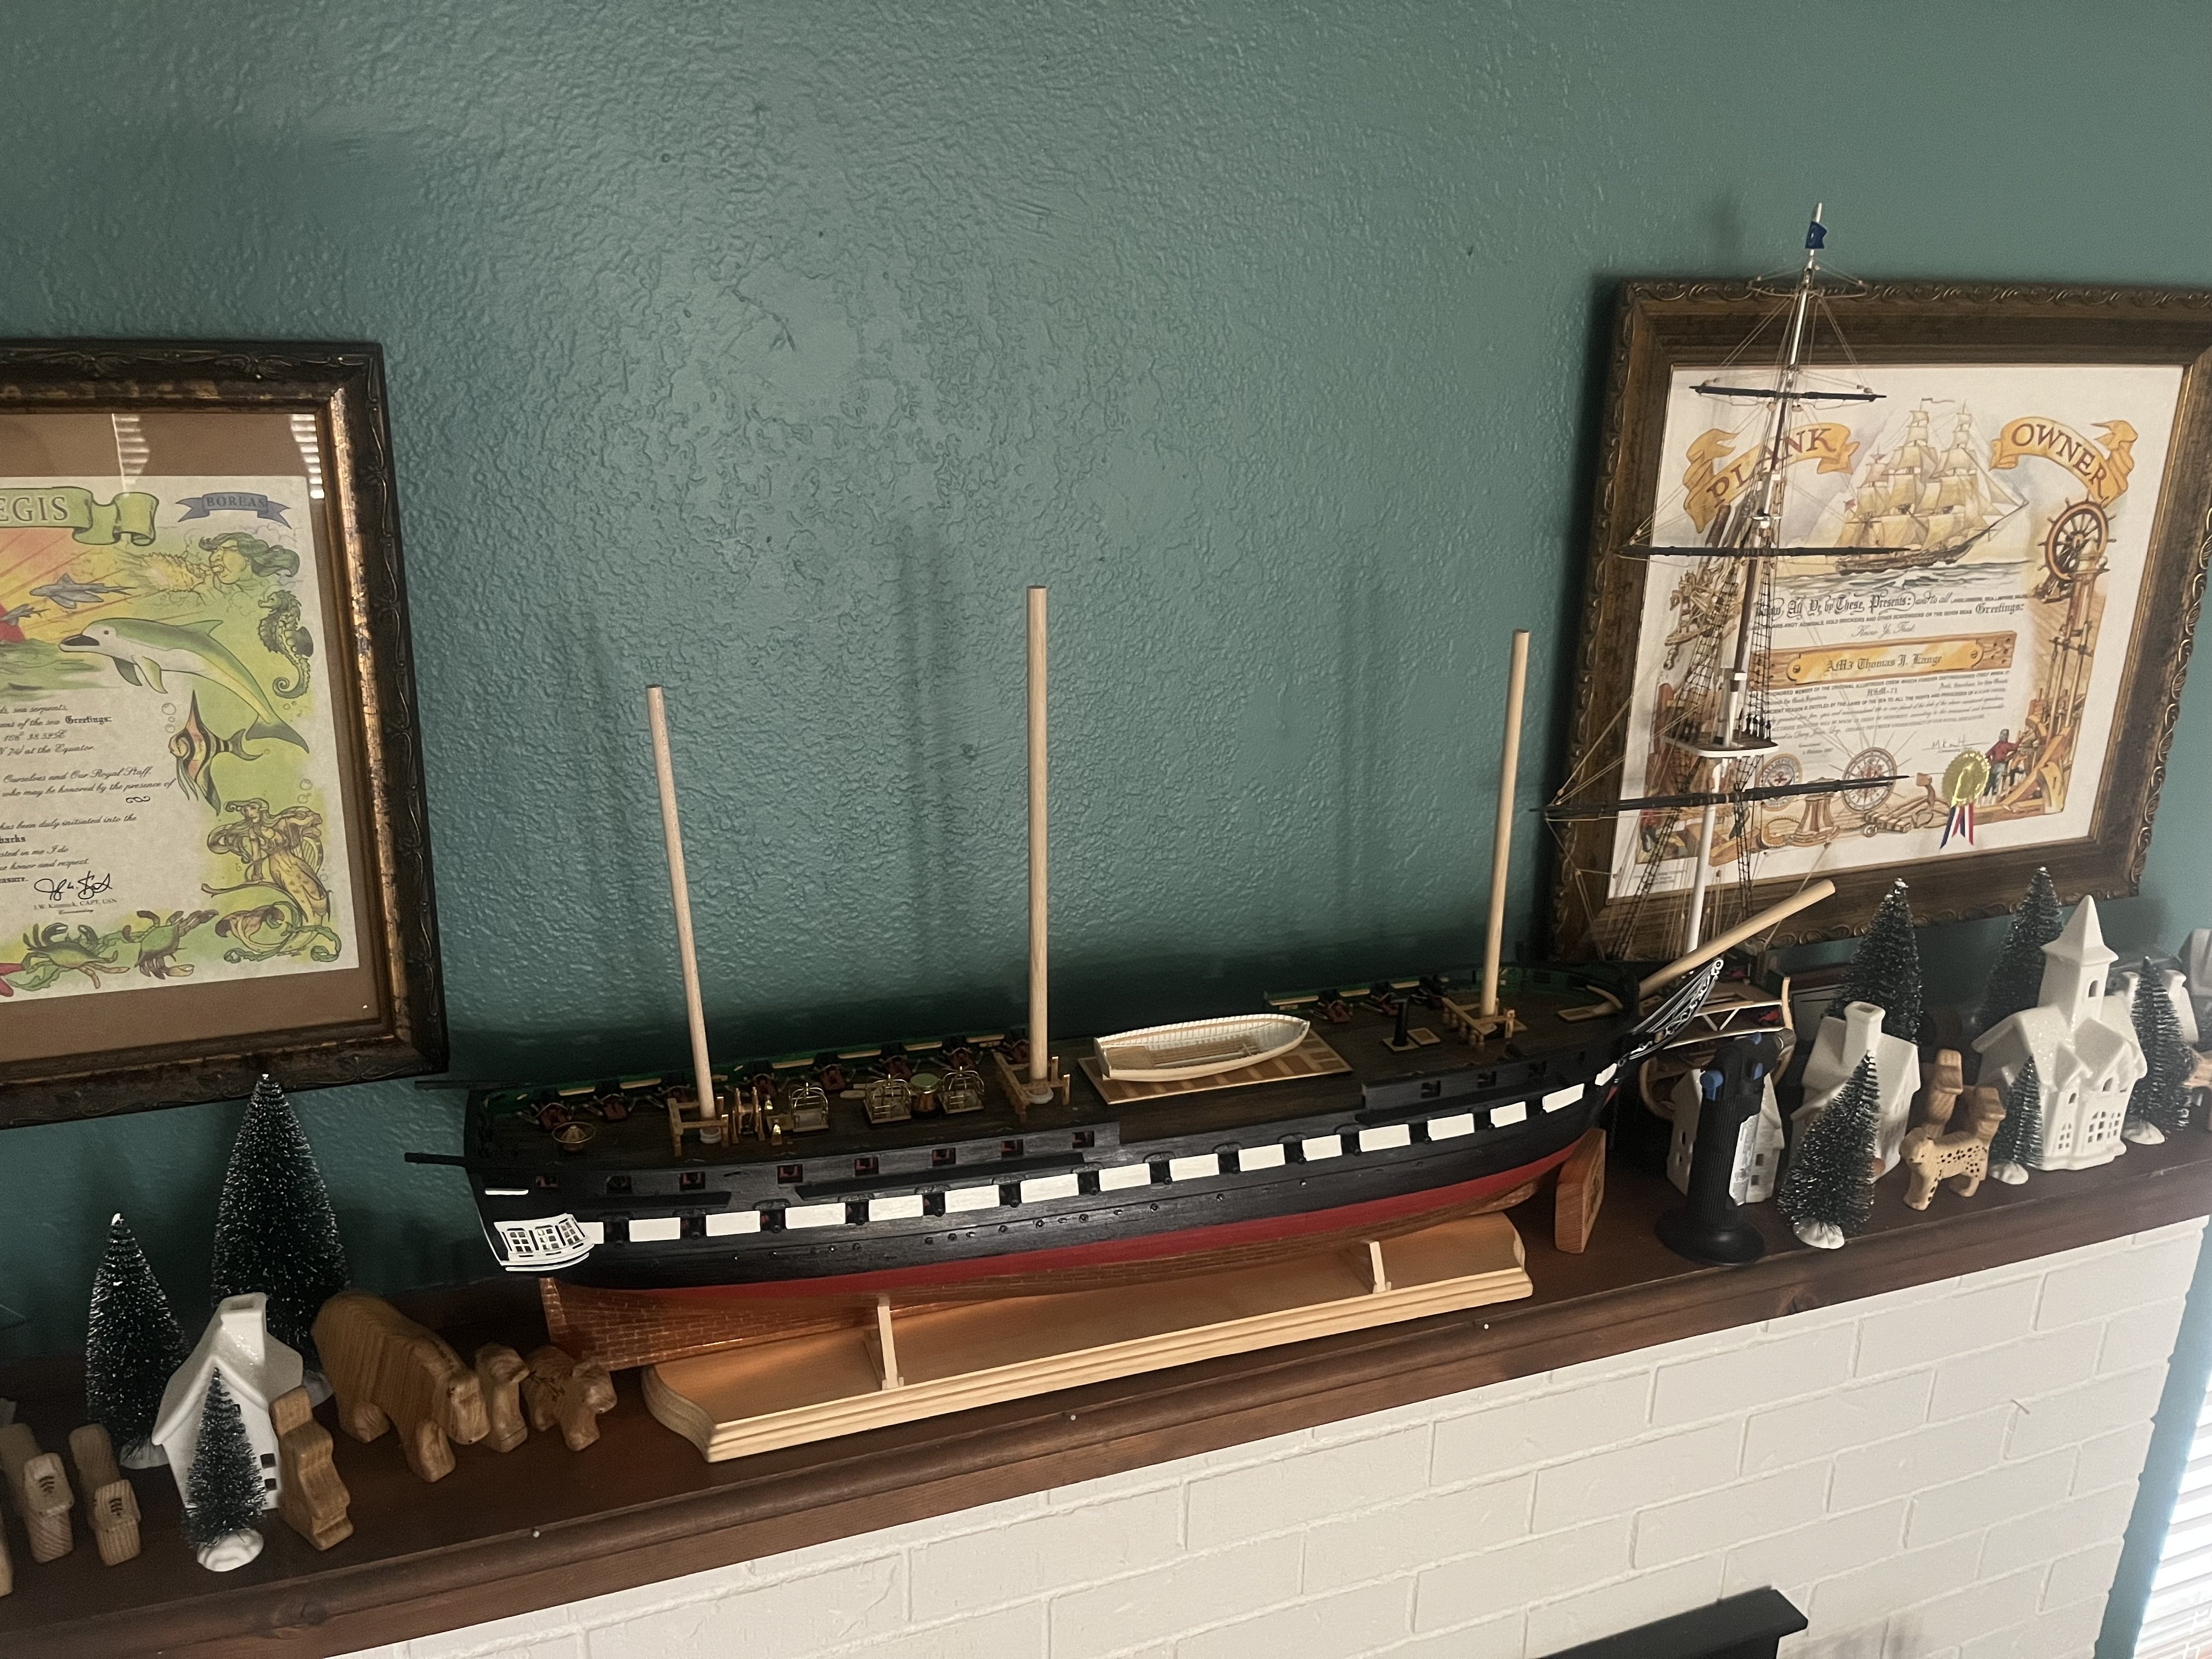
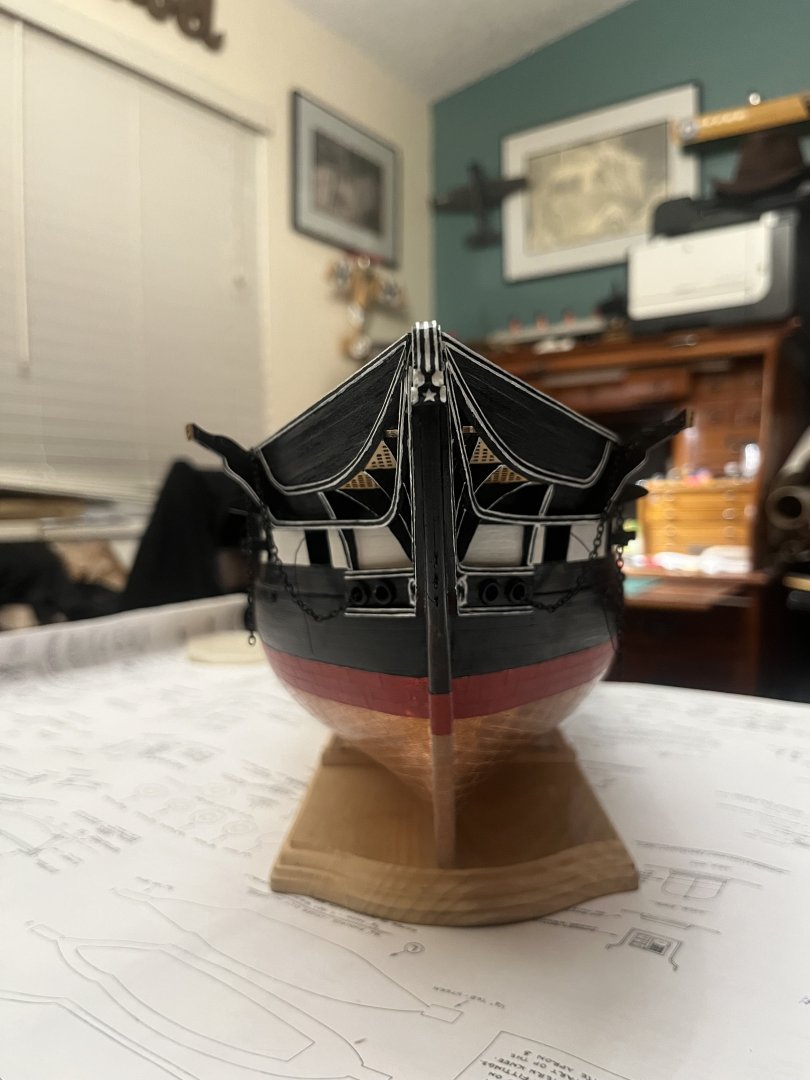
After years of looking at my Connie’s bow and saying I need to finish that and thinking I’ll do it later, I finally got the port side done! After finally finishing the painting! A long time ago showing what I had left.

-
I worked slowly with an extremely sharp #11 razor blade. I have an extreme tendency to sharpen my razor blades or at least hone them to as sharp as I can get them. I worked in small sections from the inside out and if a peace chipped or split I was careful to keep all of the parts in the order they belonged. I did have some splits that I then had to peace back together. Just keep in mind to stay inside the laser cut and work in small sections. The other way that I didn’t think of till I had mine cut out would be to gently sand the back to make it as thin as possible. Then the cutting would possibly be easier. I didn’t try this way and I don’t know if it’ll work!
-
I’m going to have to chime in too! I also agree with leaving the beautiful stain job you did! I couldn’t do that because my build has too many spots where the stain wouldn’t take! I like the look of just wood enough that I put a wooden steering wheel in my pickup!
-
I completely understand! Mine is 5 years in the making!
-
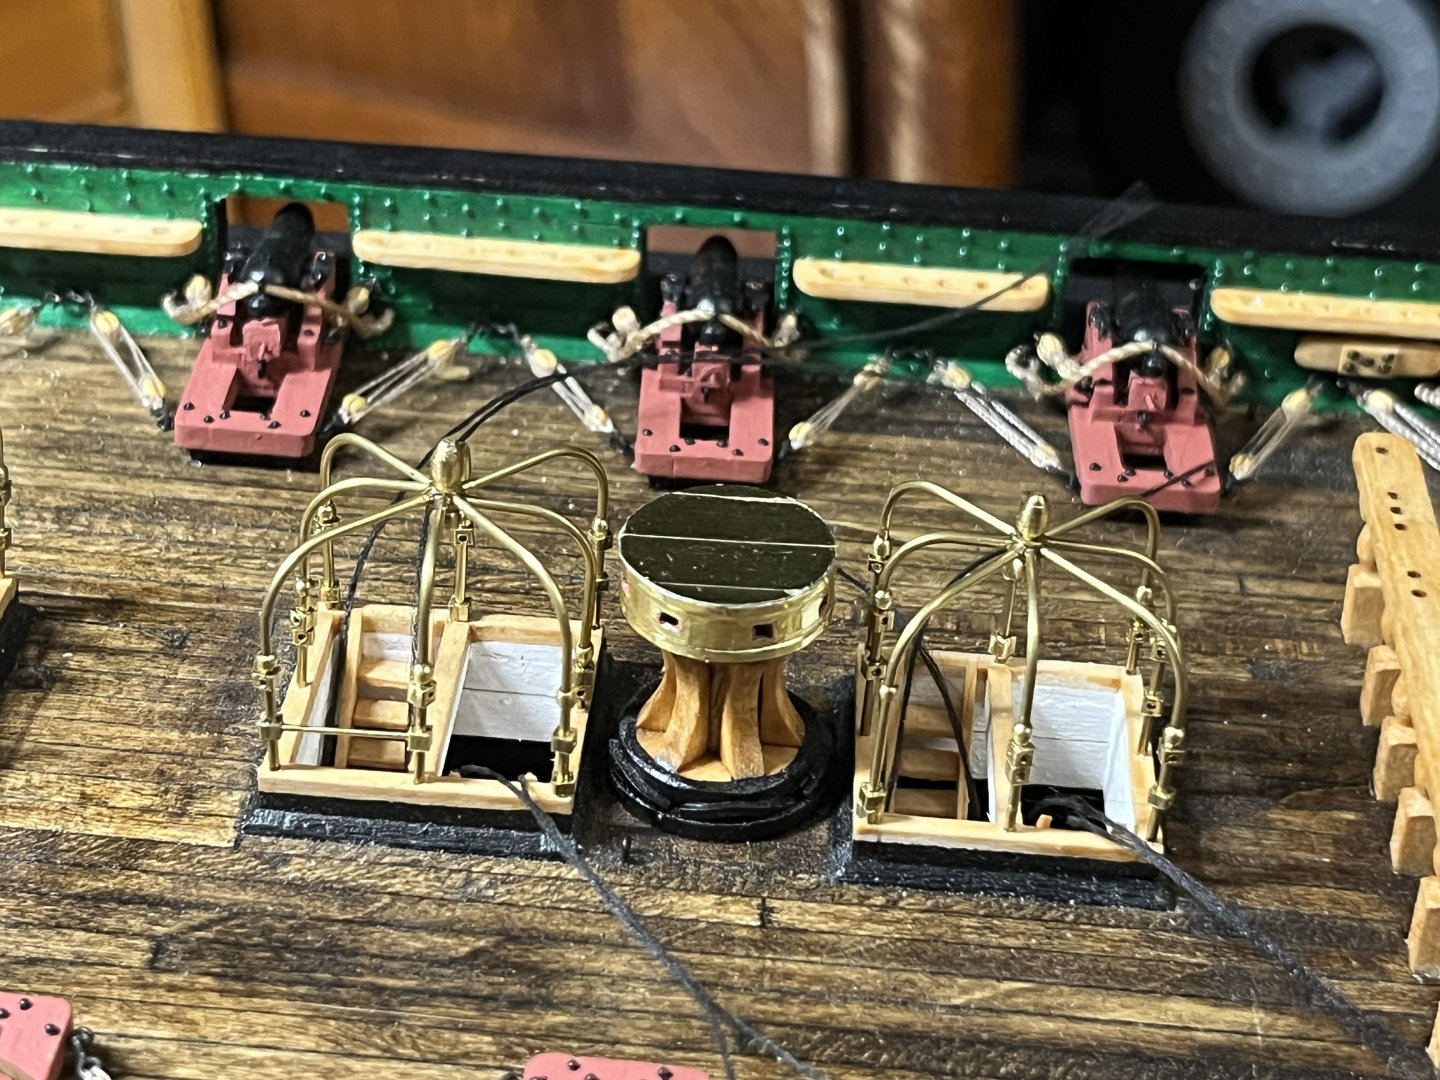
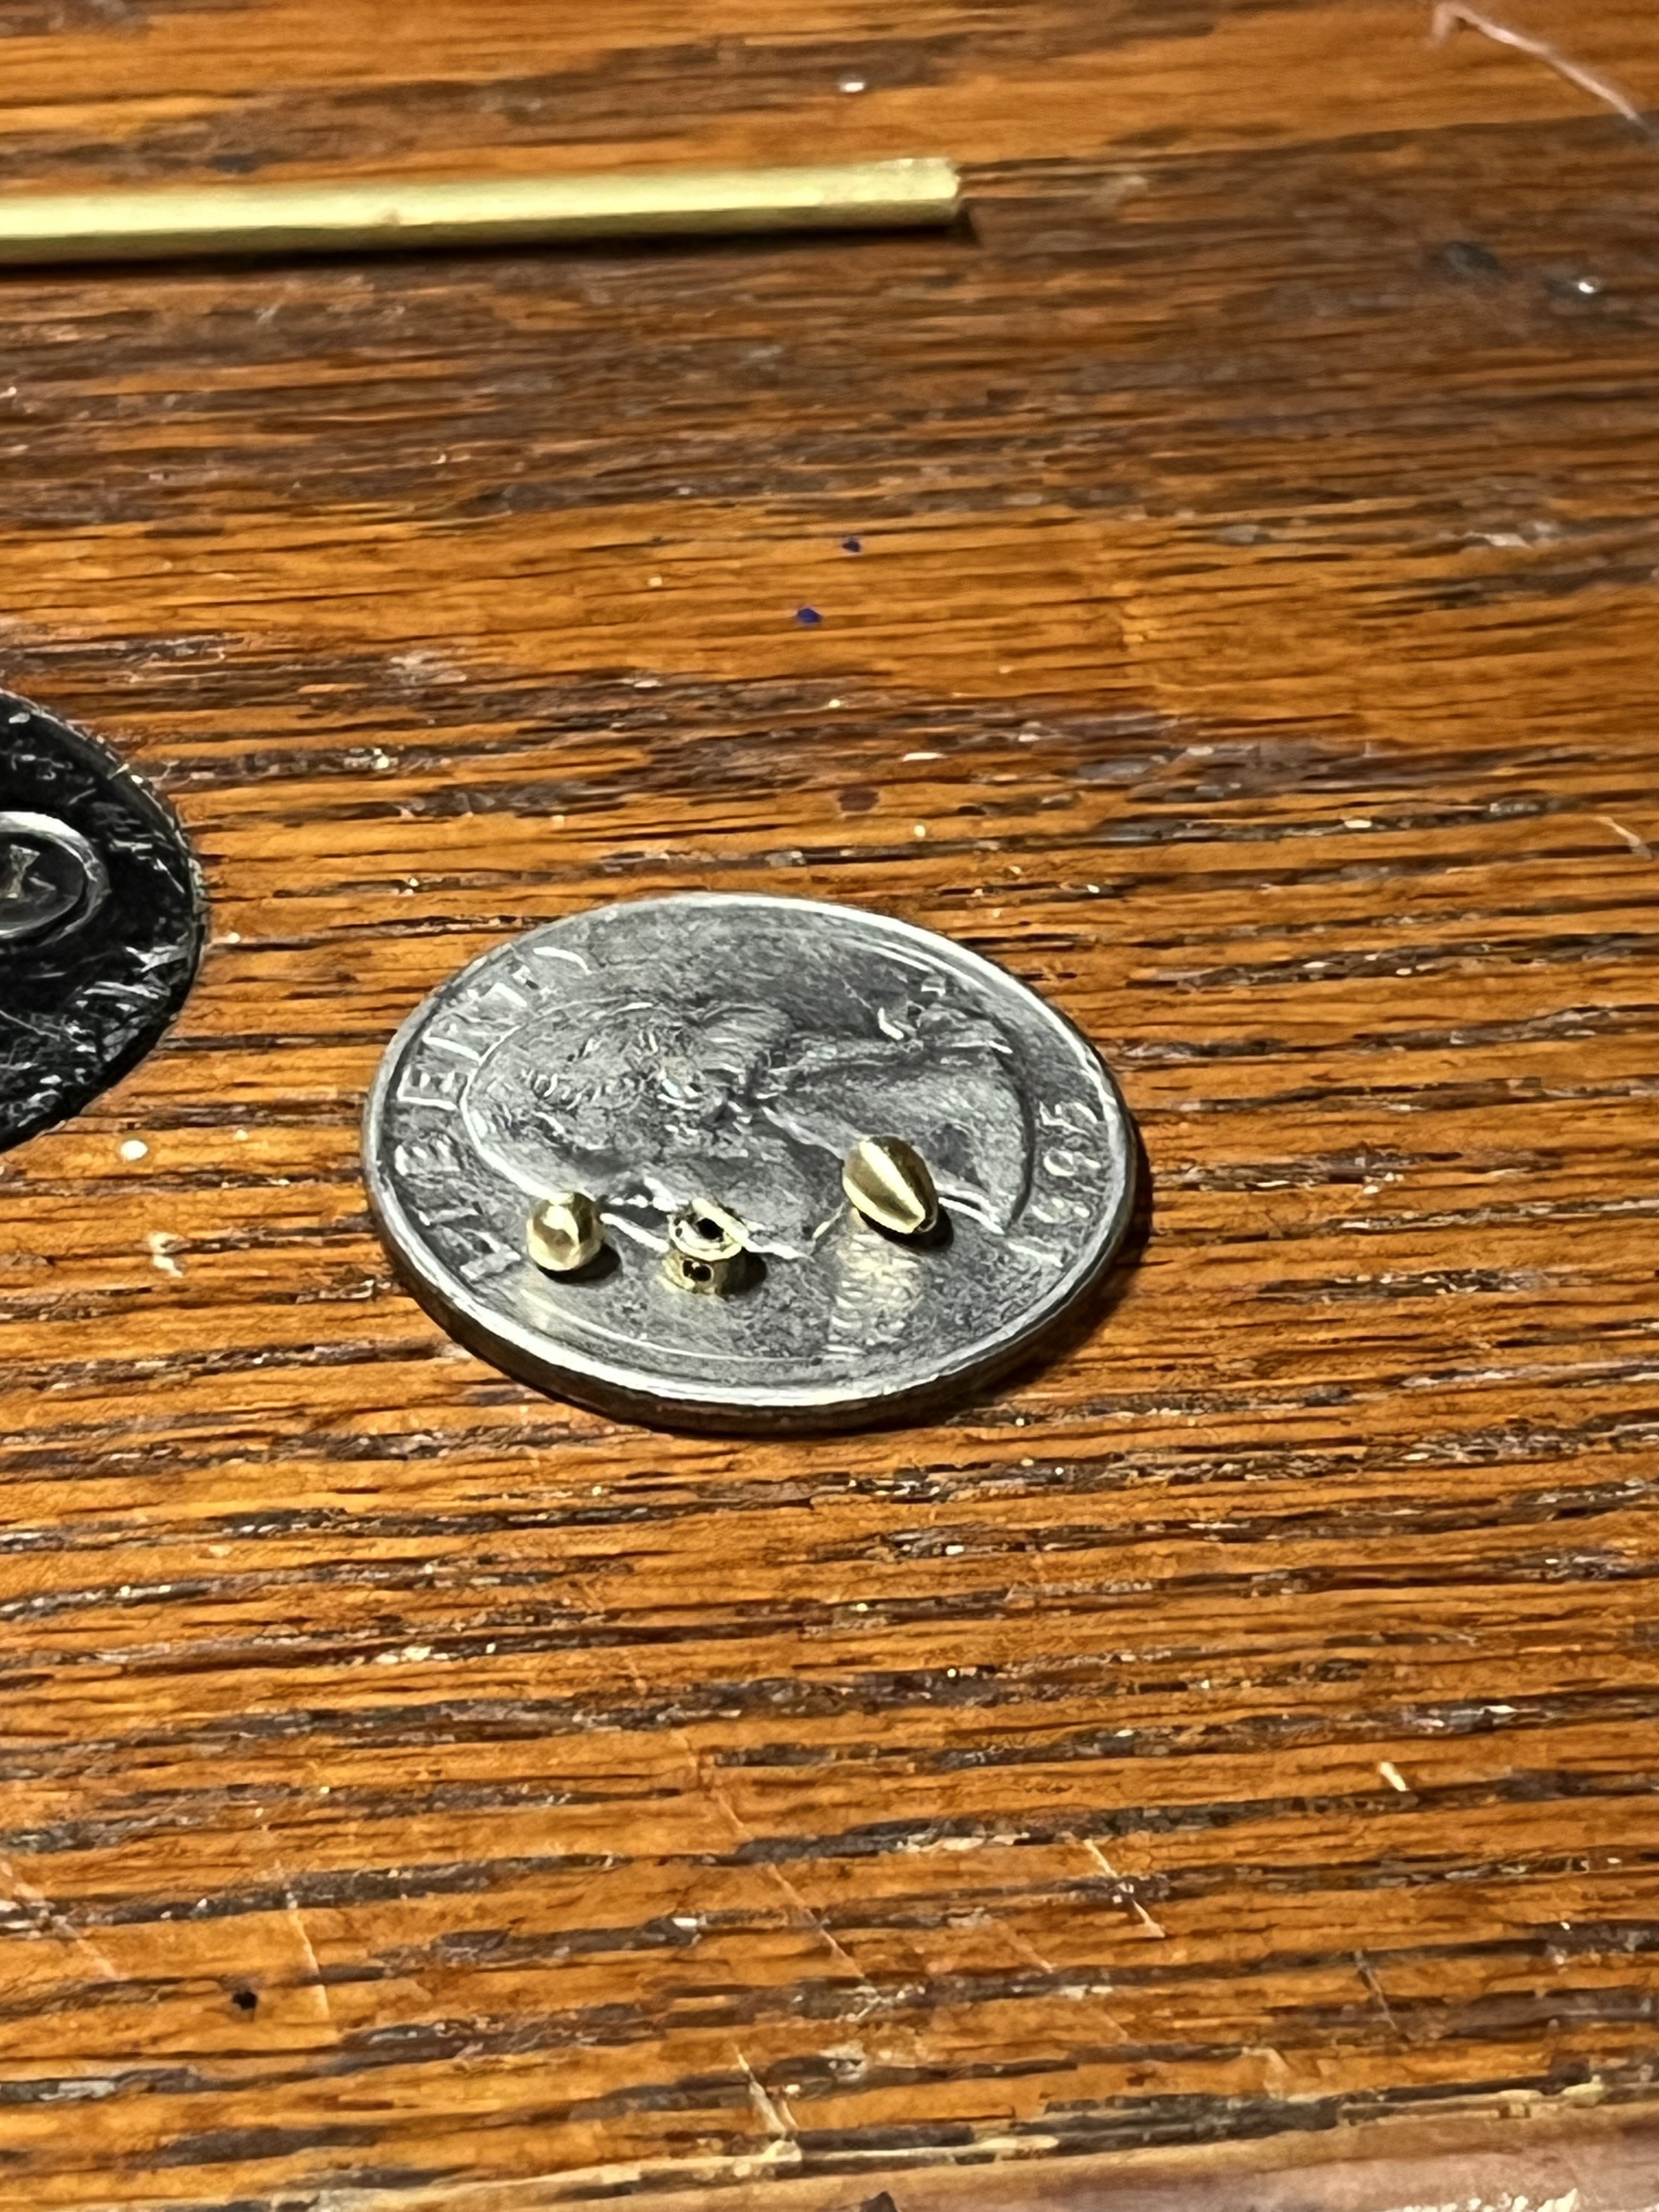
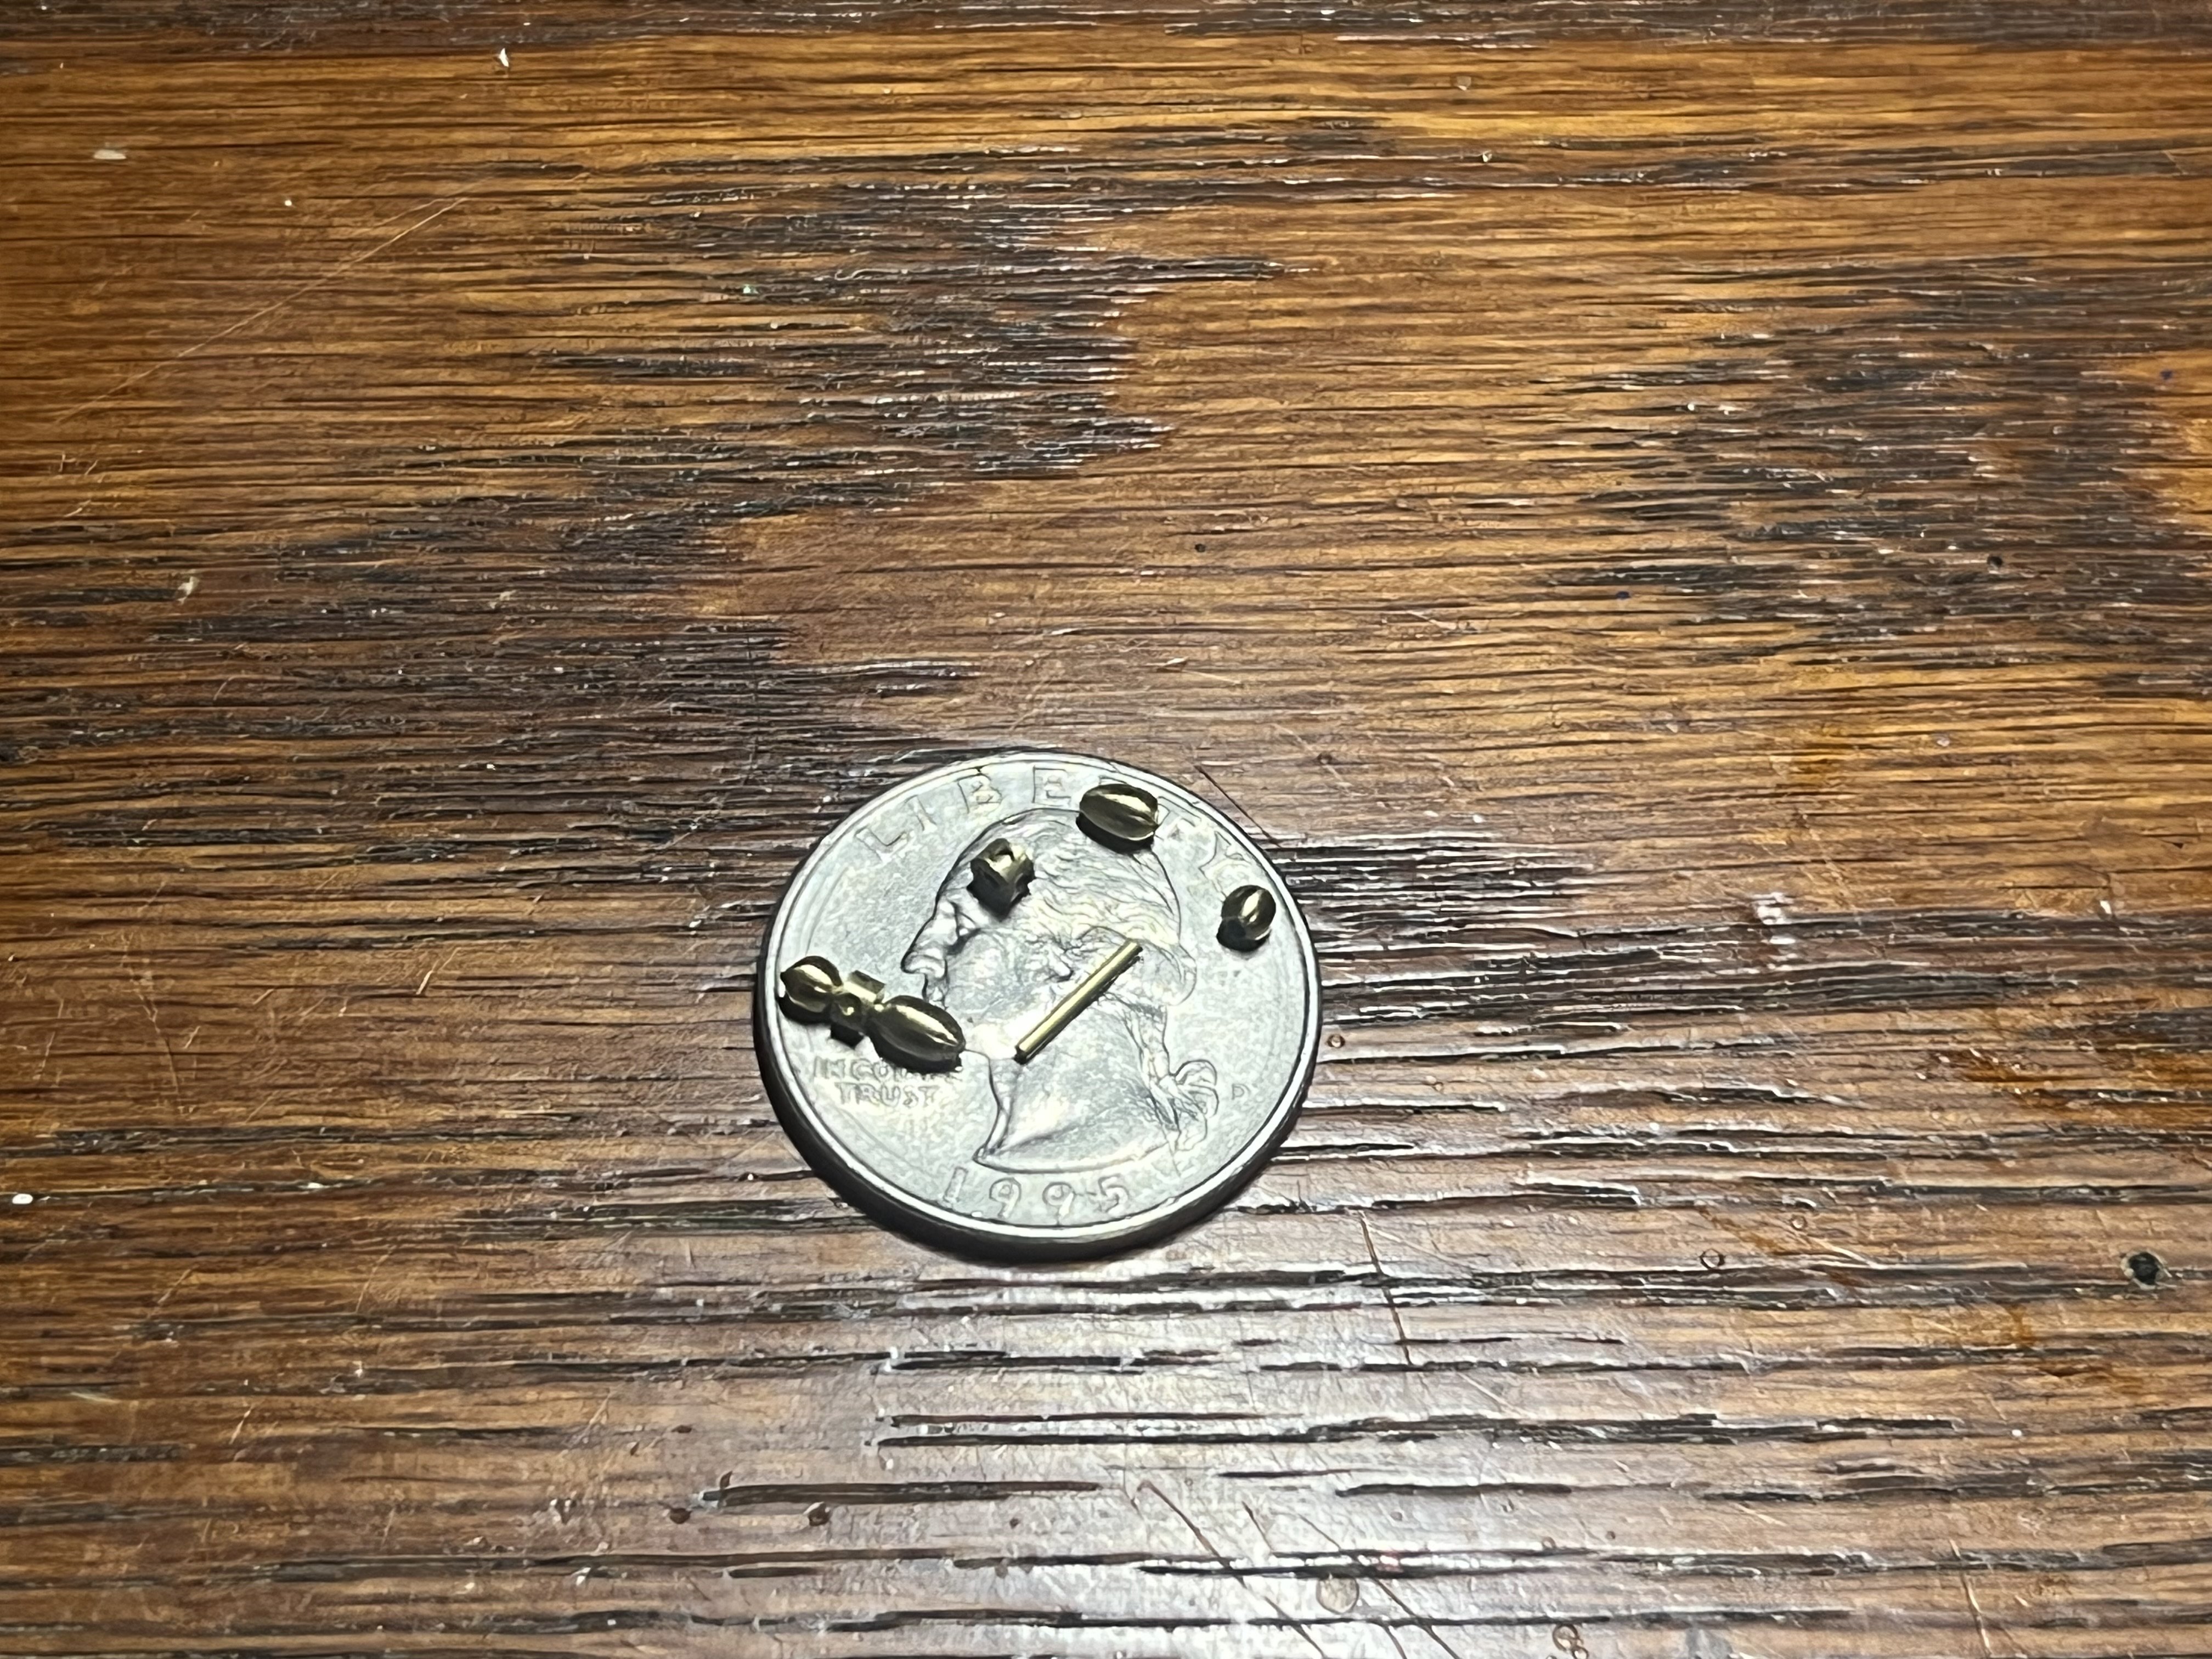
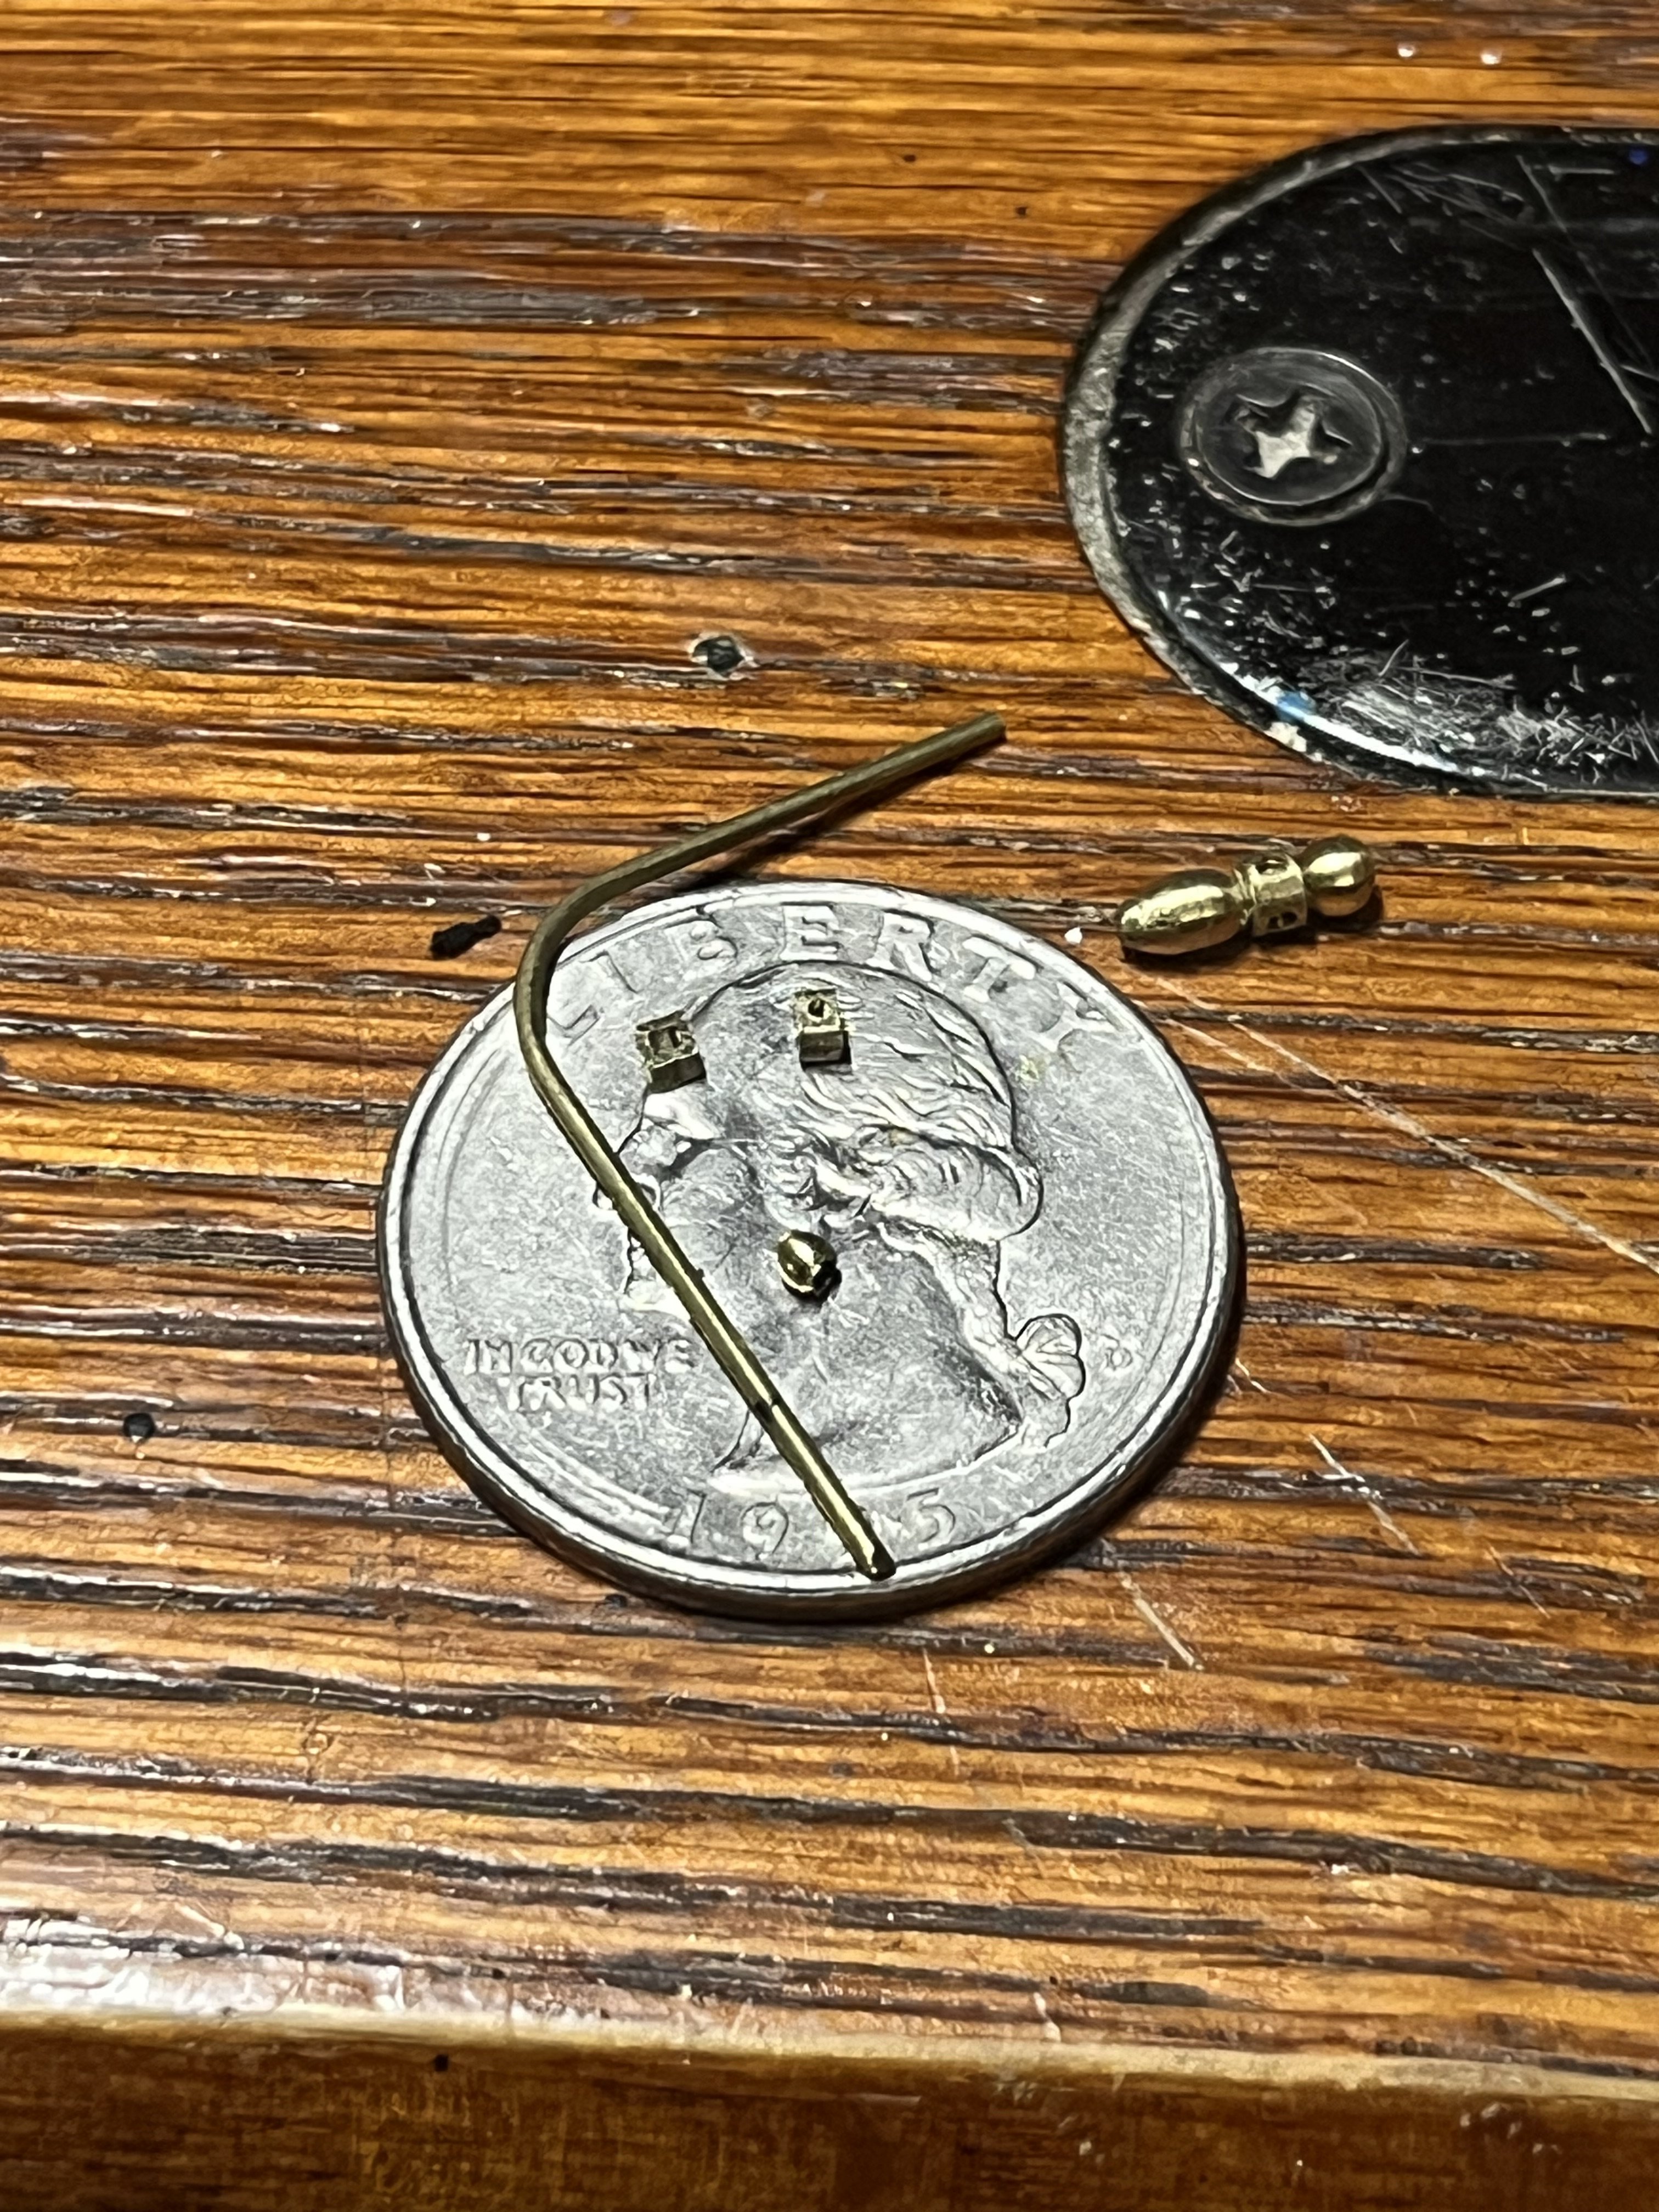
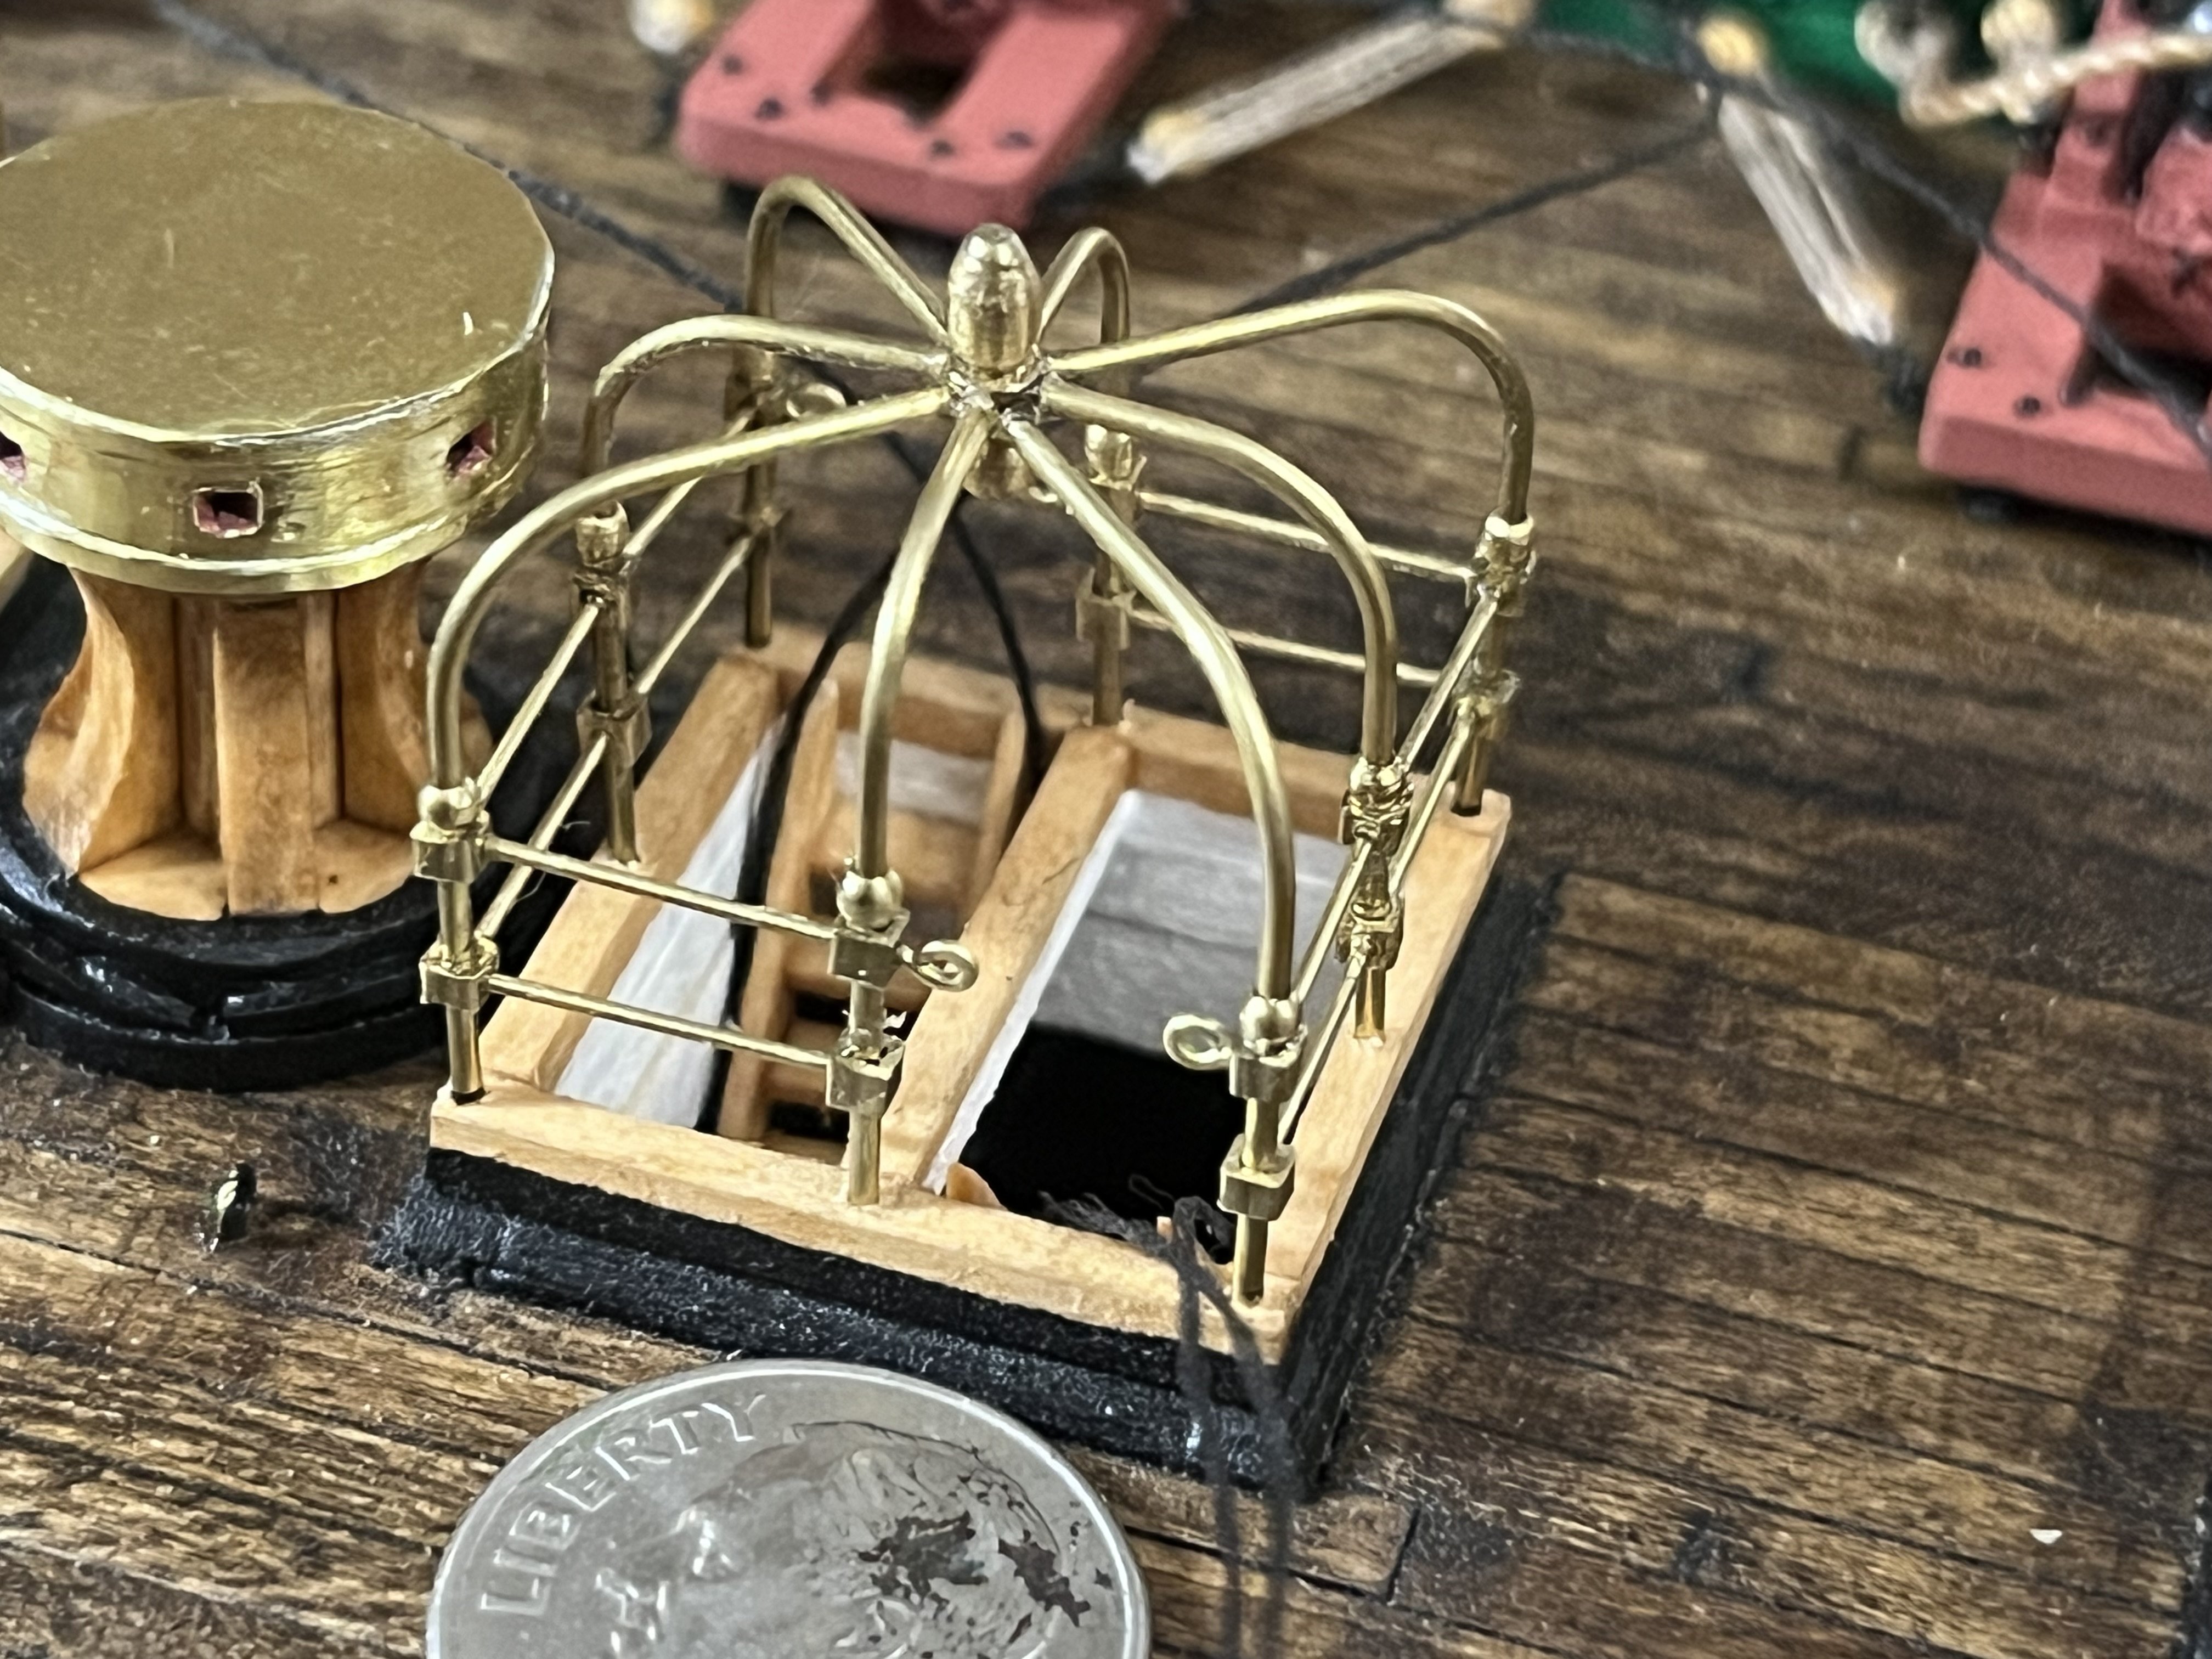
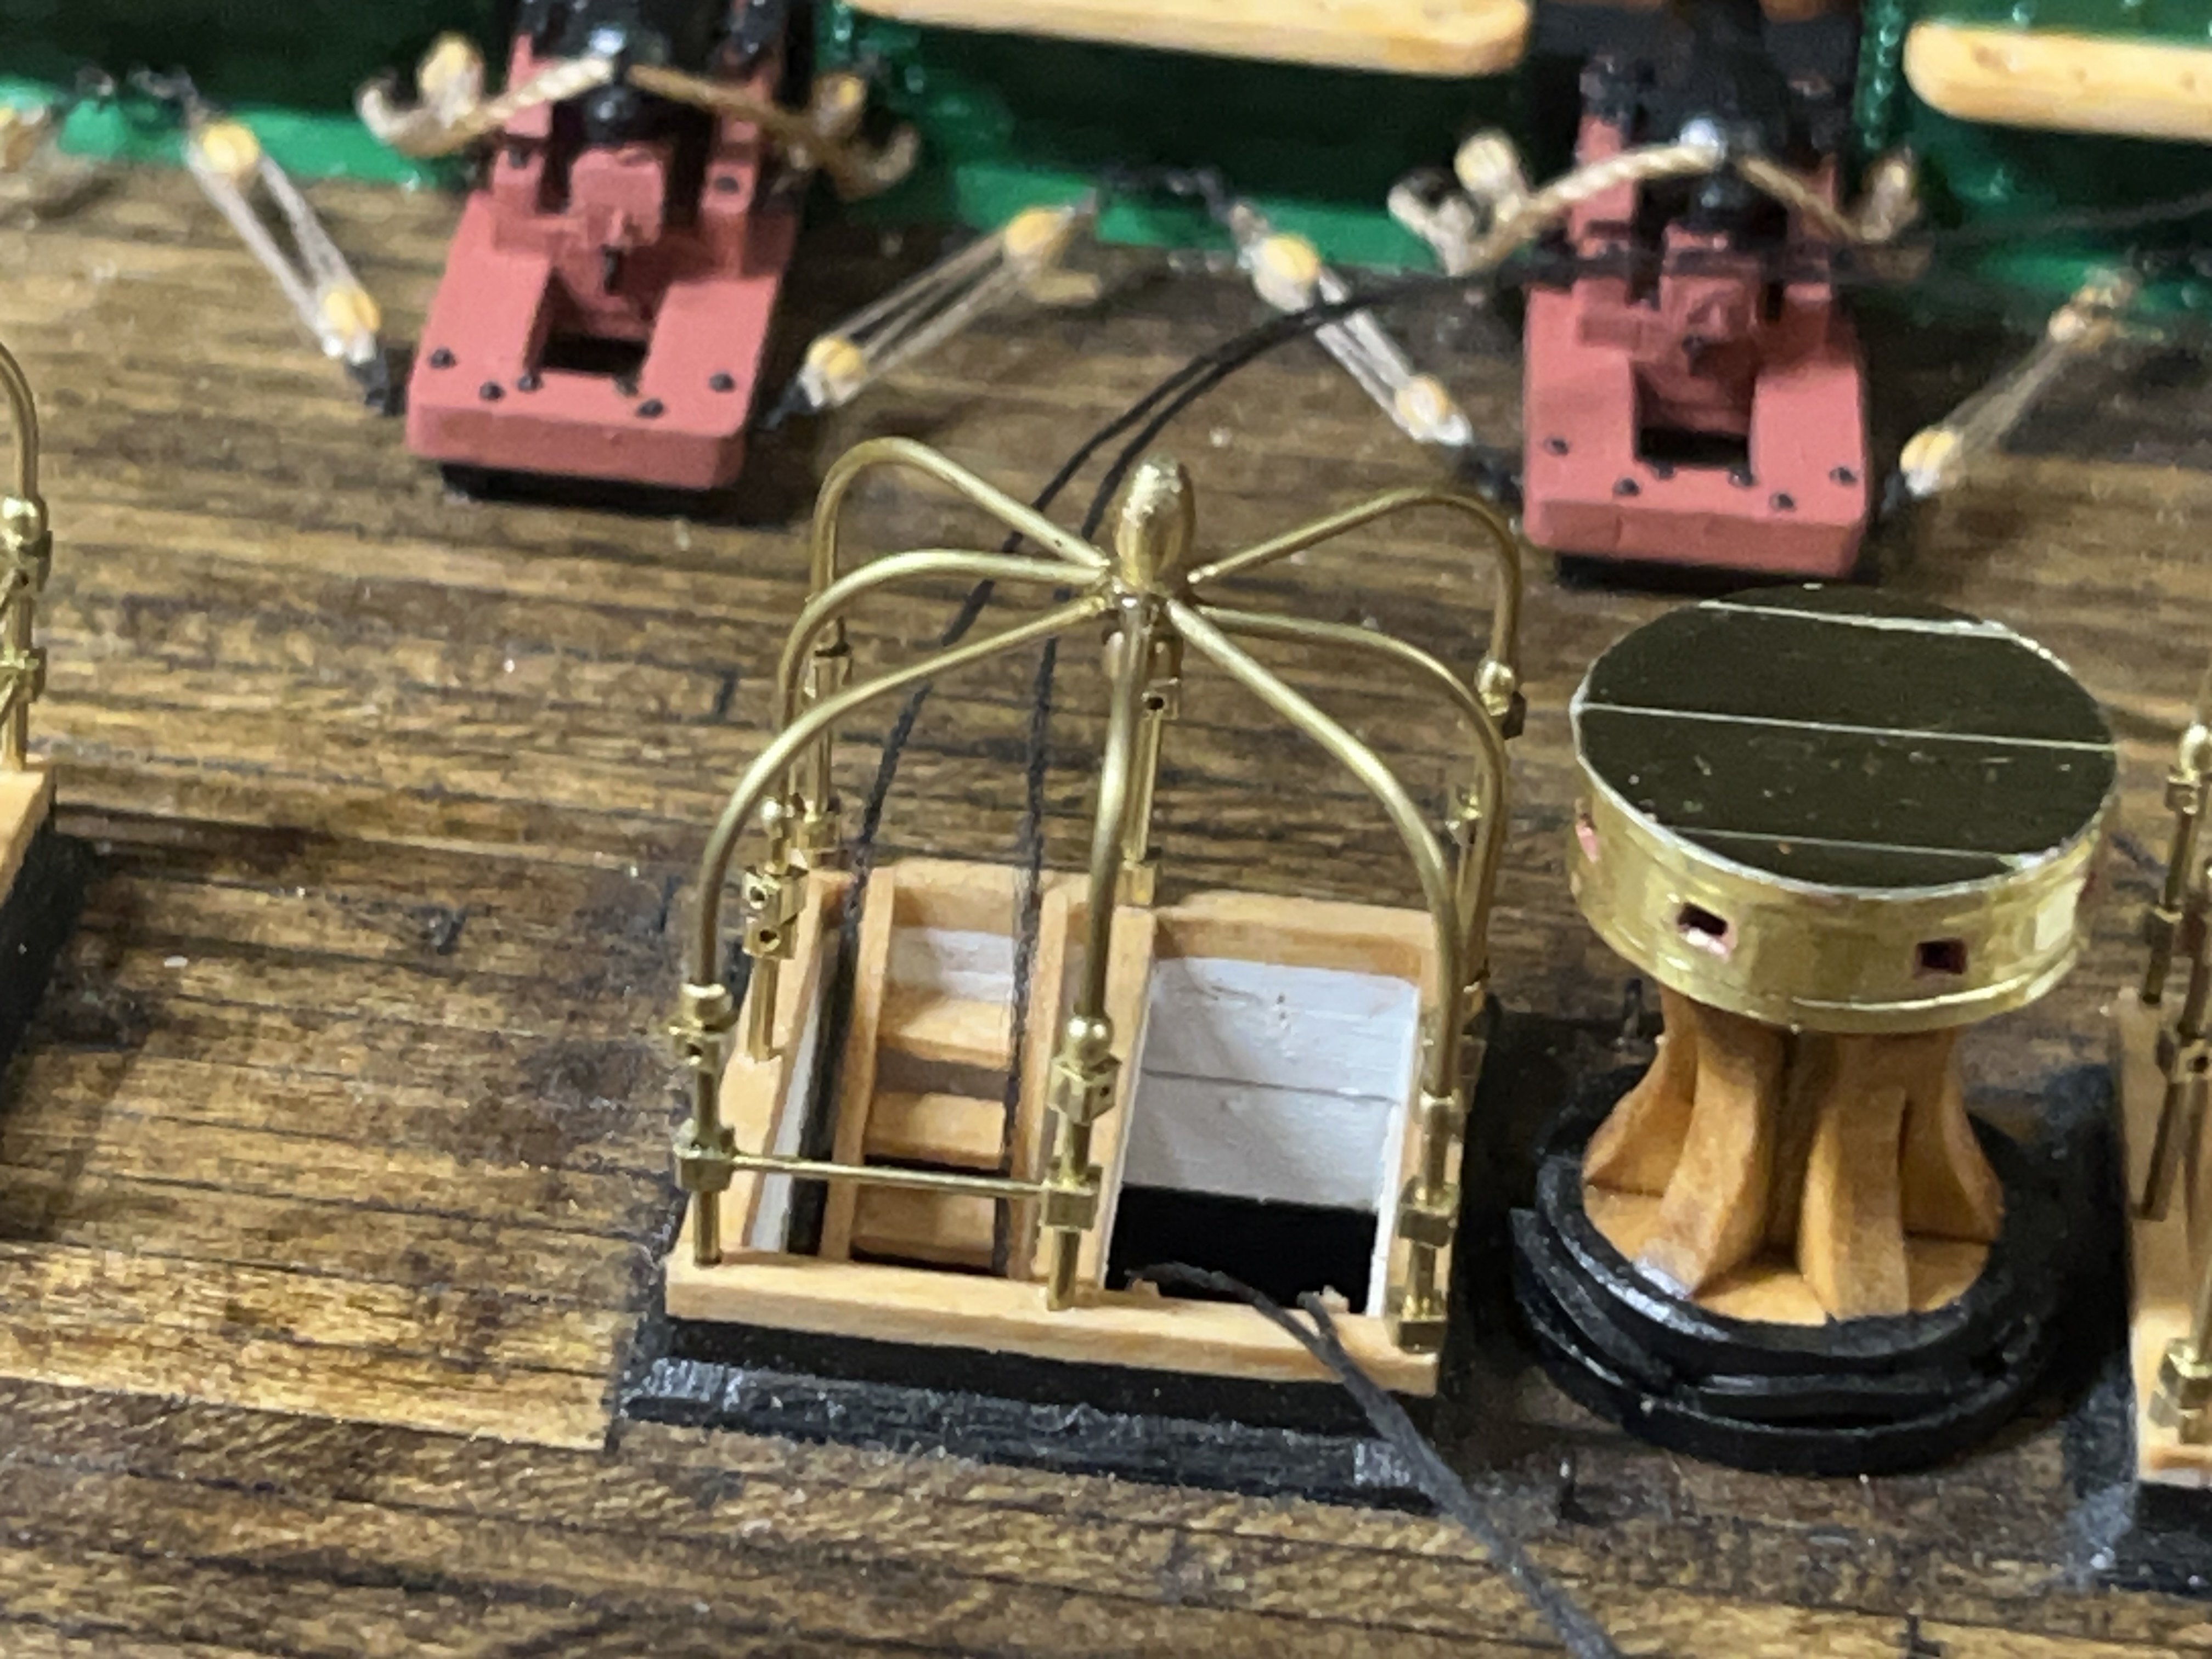
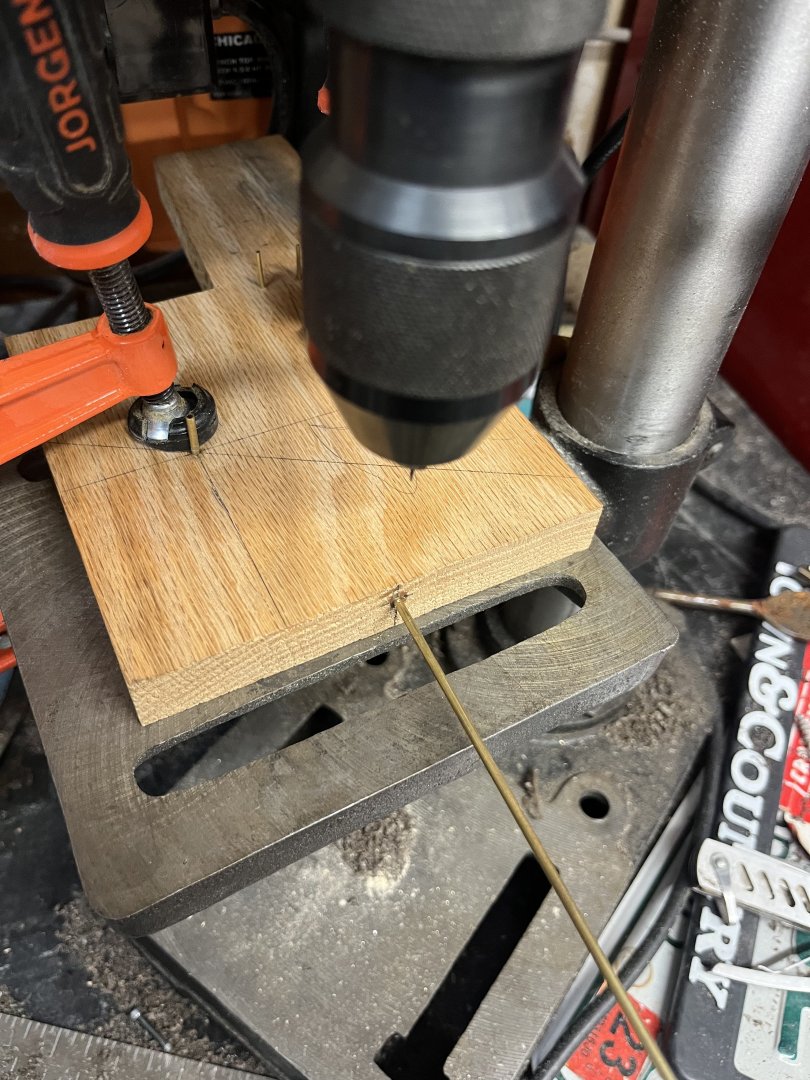
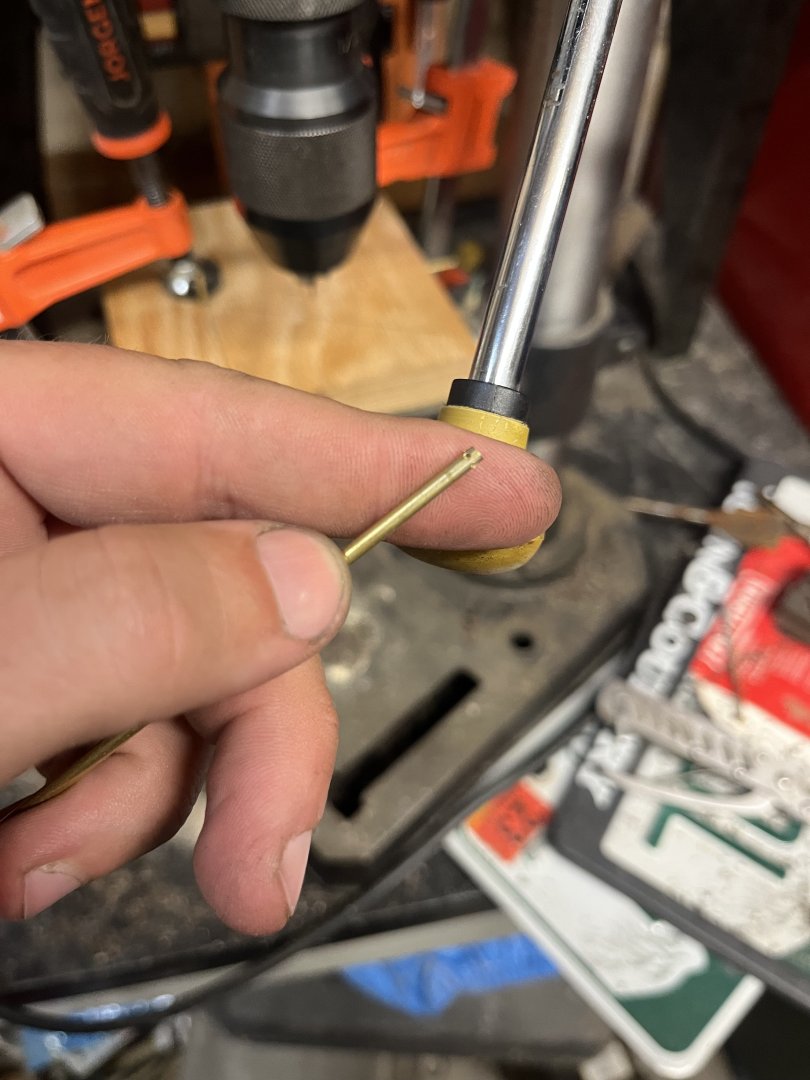
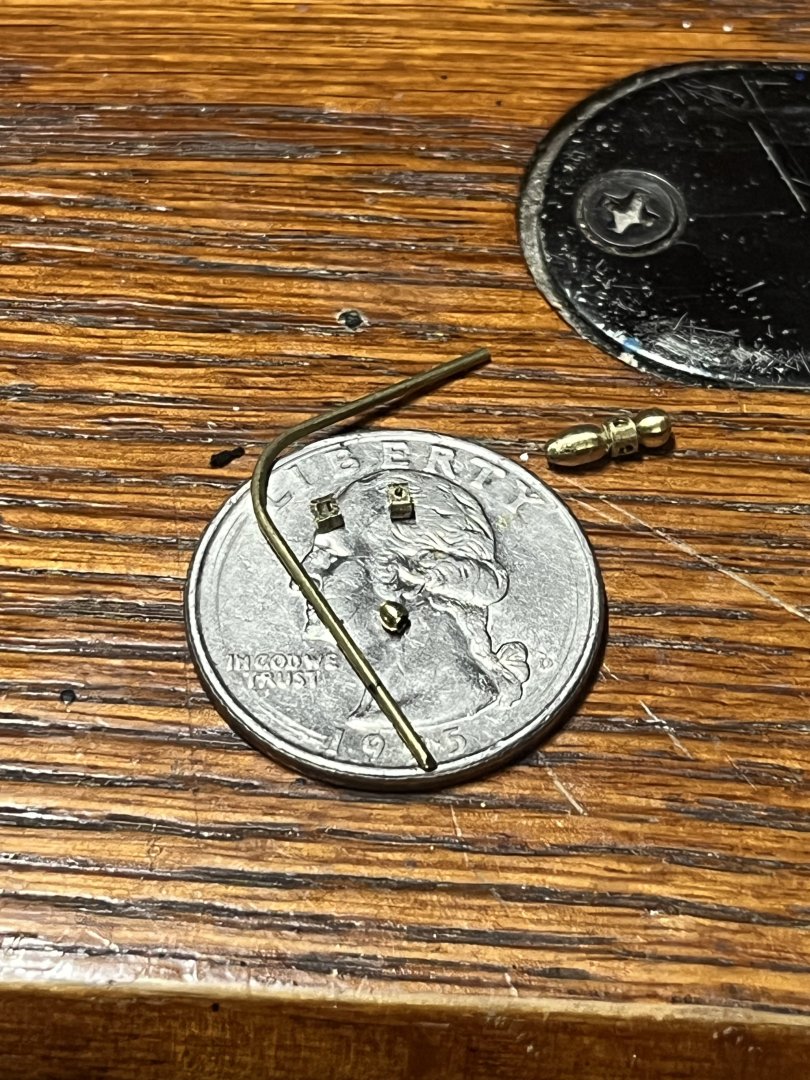
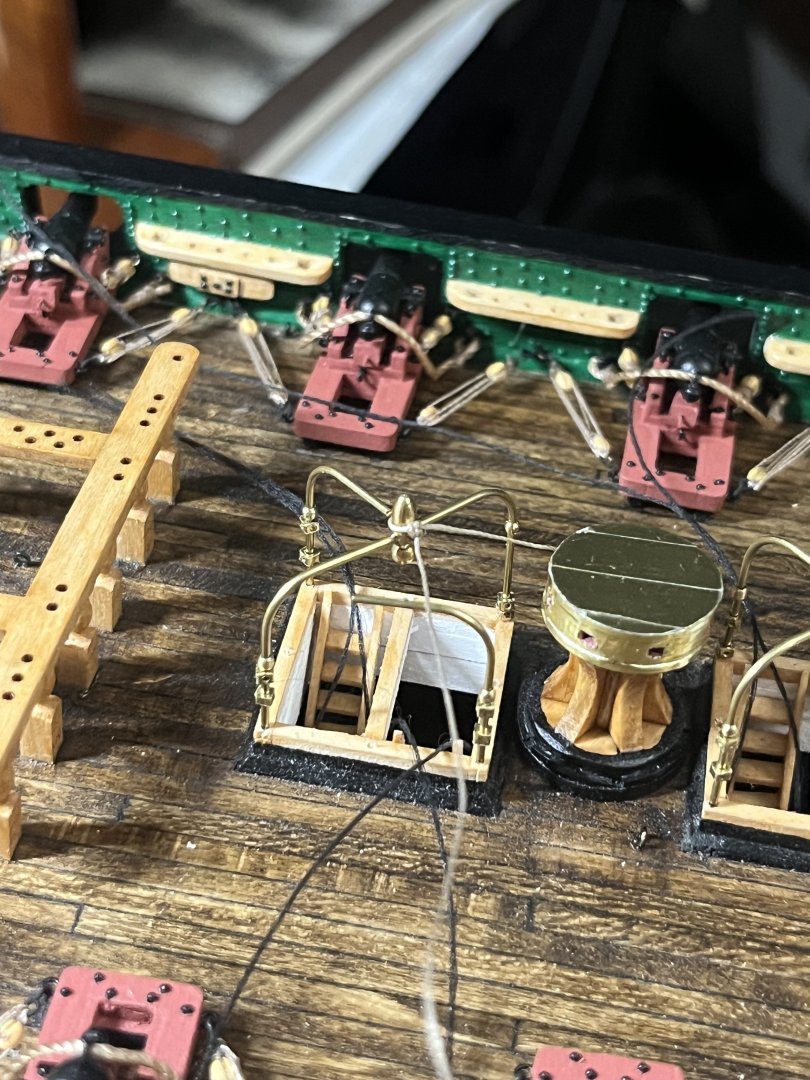
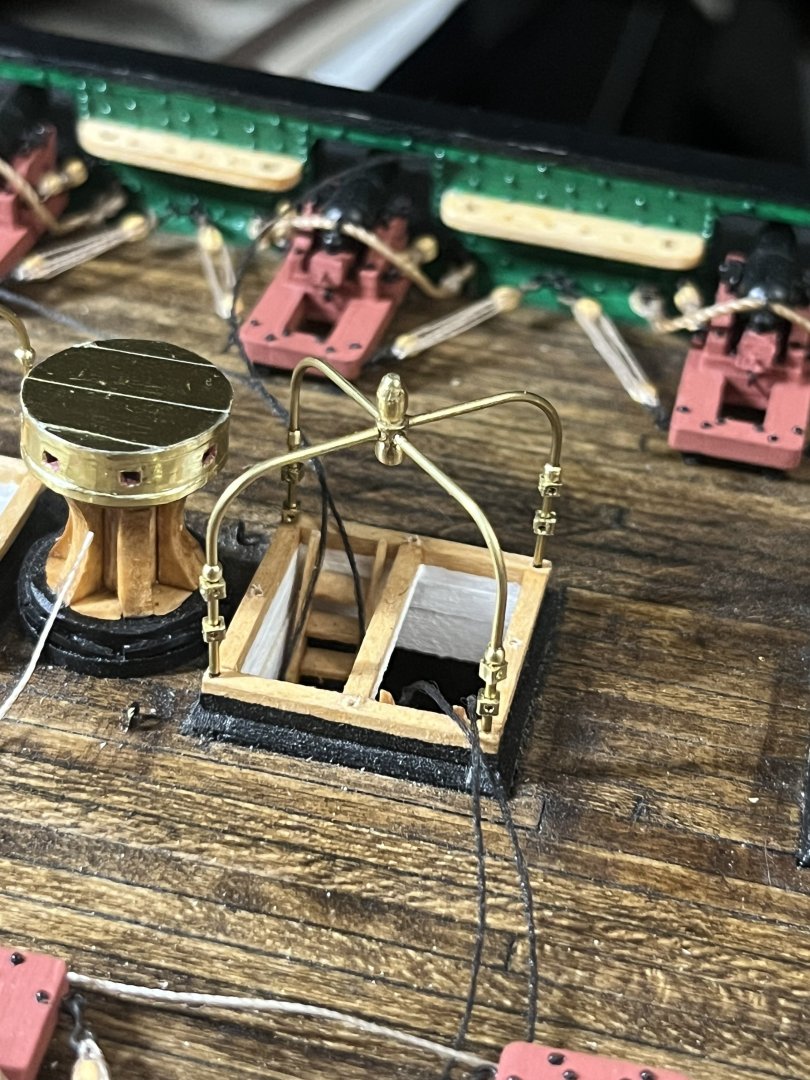
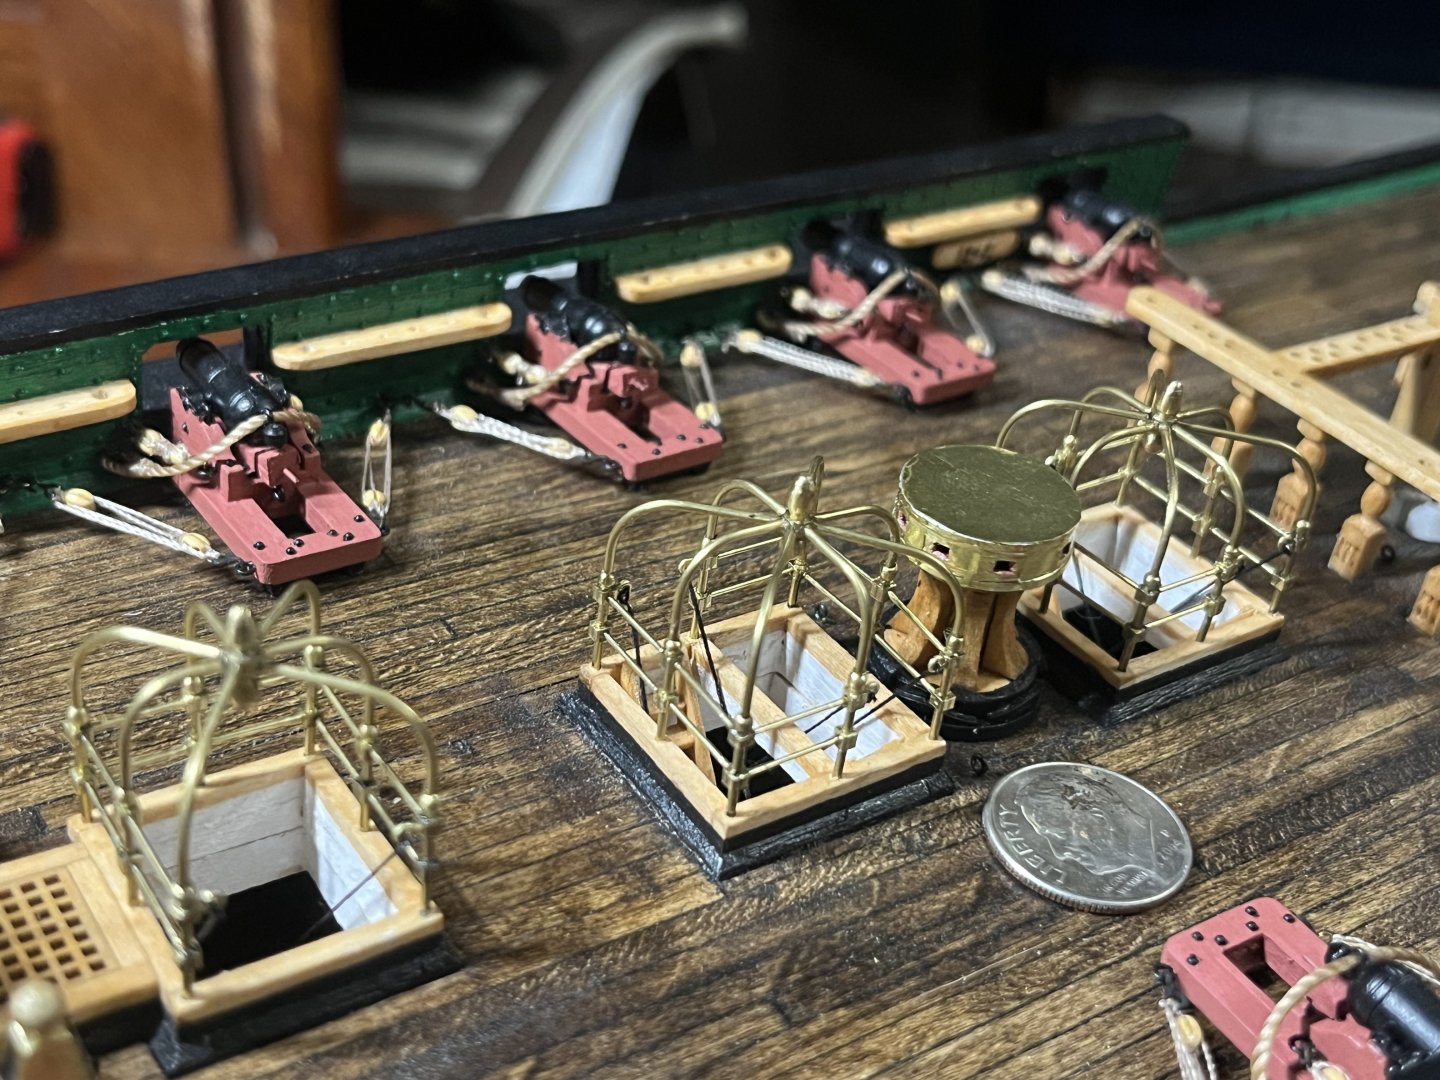
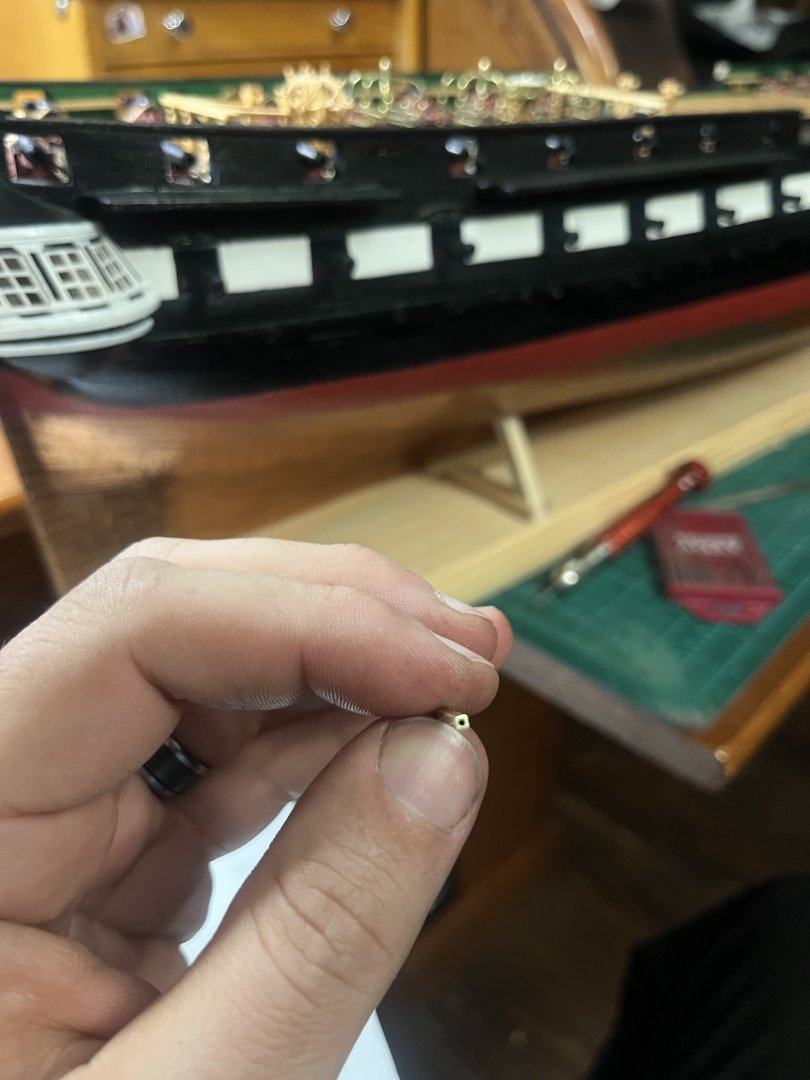
Here we go! My process for making my Companion-way Canopy frames. All brass is from K&S Precision Metals #8149 SQ. BRASS TUBE 1/16x.014 for all of the side rail connection points. #8160 BRASS ROD .032 for vertical supports and center shaft of the finial & hub. #8159 BRASS ROD .020 for the side rails. #8125 RND BRASS TUBE 1/16x.014 for inside of the finial, hub, ball, and the ball above the square connectors #???? RND BRASS TUBE 3/32 for the outside of the finial, hub, and ball. I started by making a jig to drill the 4 corner holes for my hub in the 3/32 tube. Once the holes where drilled I added the 1/16 tube to the out side of the hub.By adding the 1/16 brass tube to the inside of my hub it got the inside diameter down to about 1/32.I then glued about 2” of the 1/16 brass tube inside the 3/32 to give me a good length to use on my 8” drill press with files to make the finial and ball for the tops of my frames. The finial hub and ball is held together with a peace of 1/32 brass wire. With the stanchions I started with the corner ones that will be glued into the holes made previously in the hub. The stanchions are the 1/32 brass wire bent to shape using the plans. Each stanchions has a ball that sits directly above the top square connection that I made from the 1/16 brass tube using my drill press again. Each stanchions has two square connections for the crossbars that I used the 1/16 square tube for. The connections where left loose to make the addition of the crossbars after all the stanchions where installed. I drilled a 1/64 or .5mm hole for each side where there would be a crossbar and one extra hole for the eye for the hand rope that has been in my way for what seems like forever. I also marked the stanchions for the level of the top of the hatchway.Once I had all for stanchions made the the connection points on. I stuck them into my predrilled holes in the hatchways and trimmed them to fit the holes in the hub. Wile I was installing the hub with the finial attached I tied a string to the finial so when I eventually dropped inside, I wouldn’t lose it. The 4 center stanchions are made the same as the corners. They are just glued to the side of the hub.After all the stanchions where installed, I marked my needle tweezers for the height of the connection blocks and started adding the crossbars from the bottom to top. The crossbars where made from the .020 brass wire. Once I had each crossbar in place I would check the height and then glue the connections. Then I would move to the next crossbar and turn the next lose connection to hold the crossbar.Once all of the crossbars where in place and glued I made the eyes for the top of the hand ropes with the .020 brass wire using my jewelry pliers. When the glue was fully cured I was able to tie the hand ropes on and set the knot with glue to prevent it from unraveling. The hand rope was installed when I put the ladder in before I planked the spar deck.


-
Yes the finial and the spoke hub are about 4 pieces. I need to sit down and make a post on the method I used. I’m hoping I may have time today to get it done!
-
After a lot of other distractions and work I’ve finally gotten my companion way canopy frames done!
-
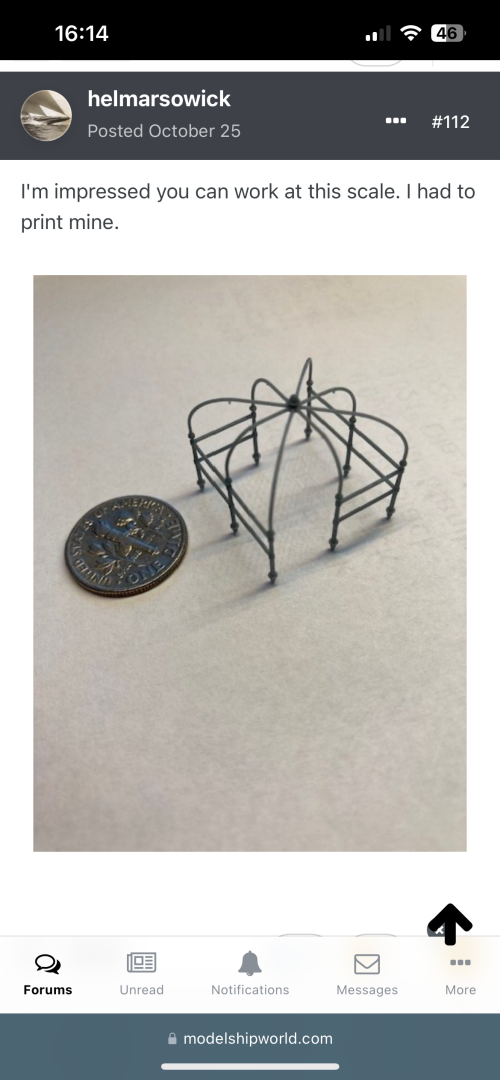
I also had this beautiful 3D printed stanchions recently shared to my page. That may be another way!
-
You are correct. The inside diameter is about 1/32”. I was using 1/32” brass wire for the vertical supports for for my stanchions and the horizontals I used #8159 .020 (.51mm). I’m sorry I didn’t keep the containers previously, I know that would help a lot.

-
🤦♂️ I apologize for that. Your right. Here is the link for ace hardware. If you have a one where you live they may have them in stock. https://www.acehardware.com/departments/hardware/metal-sheets-and-rods/brass-tubes/5172622 I also looked and I don’t think the inside of mine have a round hole. I’m thinking it’s just the way I’ve been cleaning the cut edge.
-
Sorry for the delay in responding! I’ve driven about 1100 miles in the last two days at work. I found the 1/16” brass square tubes on the Hobby Lobby website! They also have then online at Ace Hardware. https://www.hobbylobby.com/crafts-hobbies/hobbies-collecting/tools-blades/brass-tubes/p/bt74474
-
I’ve bought all of my brass from True Value and our local hobby store Hobby Hut. It should be the same manufacturer as the brass you ordered.
-
This was my tool set for drilling all of the squares for my stanchions and my hand payed the price. Also, all of my square joiners were hollow. Because they were hollow it made it easier to drill the holes then cut that section off of the rest. I apologize if I wasn’t clear about that earlier.
-
I finally got all of the connecting joints done on my USS Constitution Campanion-way Canopy Frames! I just have all of the cross bars to now put in.