Papa
-
Posts
1,305 -
Joined
-
Last visited
Content Type
Profiles
Forums
Gallery
Events
Everything posted by Papa
-
 One never has enough space.
 -
The layout has grown from micro to small shelf. The micro was too limited.
-
I used CA. I generally file the spots to be glued a bit to make sure they are even. It is also important to just use a tiny drop of CA
-
At the moment I am sick of ships. I have returned to HO scale model trains.
- 40 replies
-
- 2
-

-
- Nautilus
- Heinkel Models
- (and 2 more)
-
I had trouble figuring that out also. I just tied lines where I thought they made sense.
-
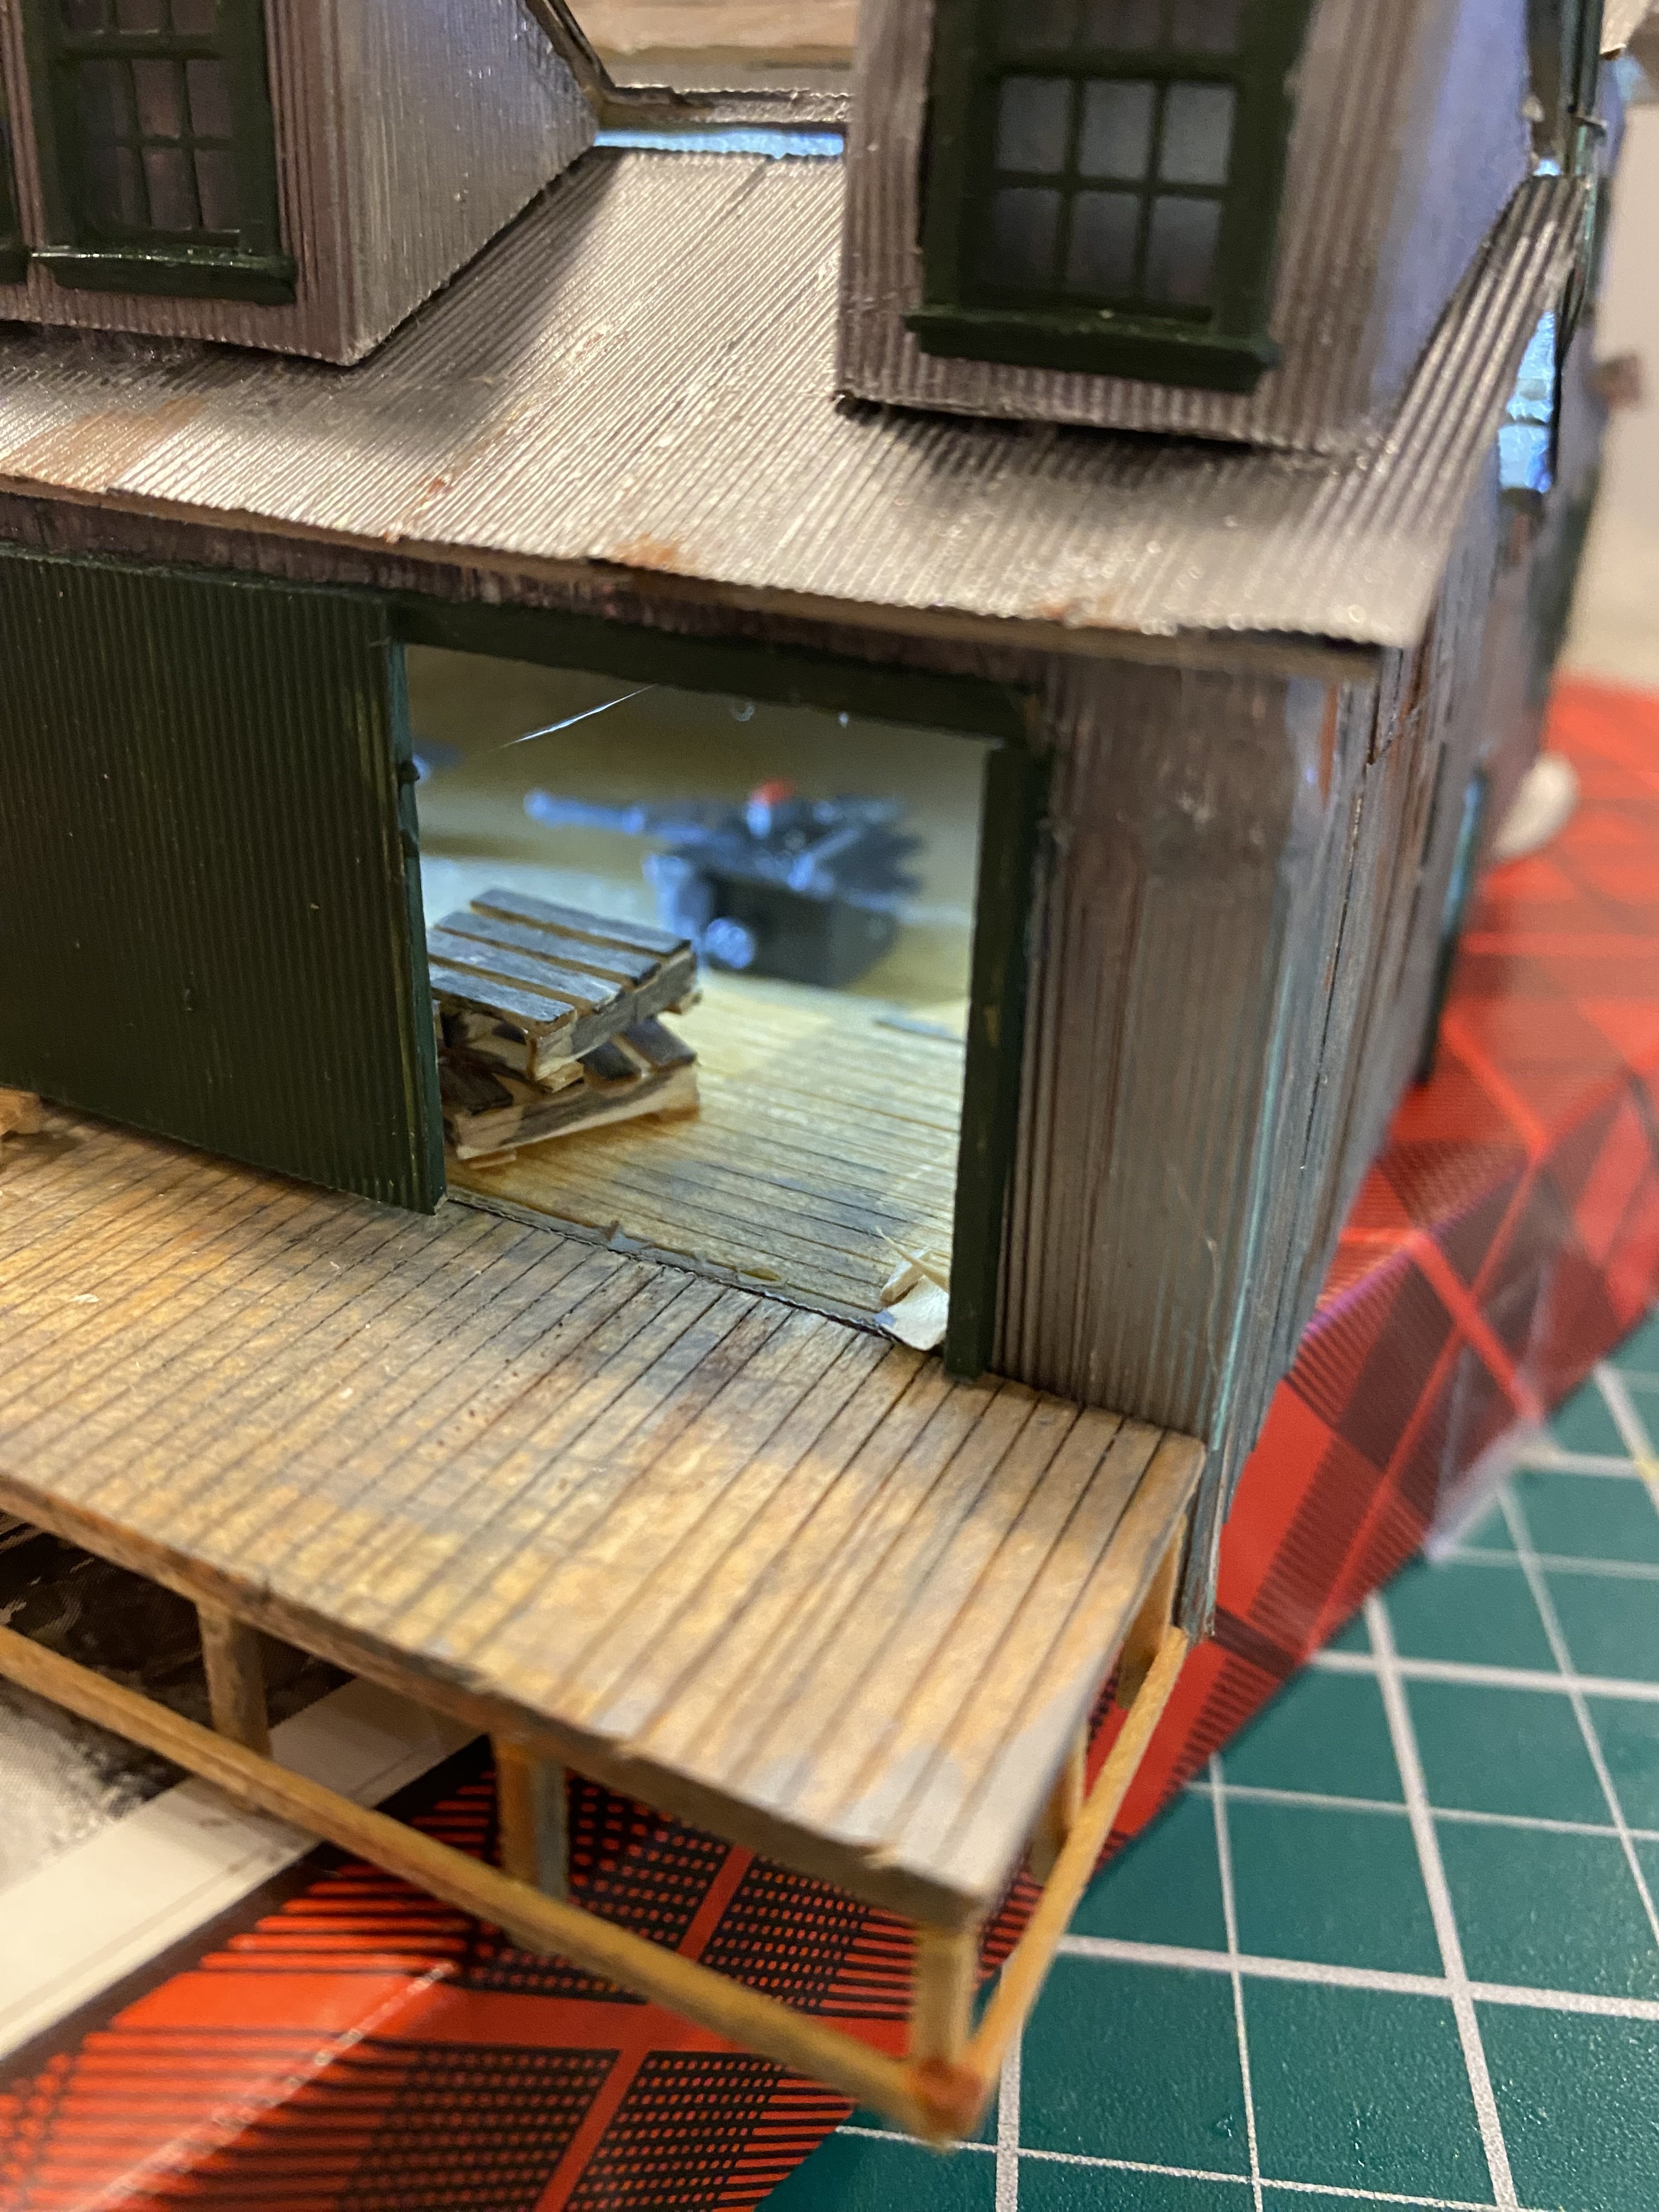
Ayer’s Chairs is going to be a furniture or cabinet maker whose name I haven’t decided. Like the flop house, it is intended for my micro layout. I plan to add more details once it is in place.


-
- 9
-
-
The "river that flows both ways" is the Hudson I assume?
-
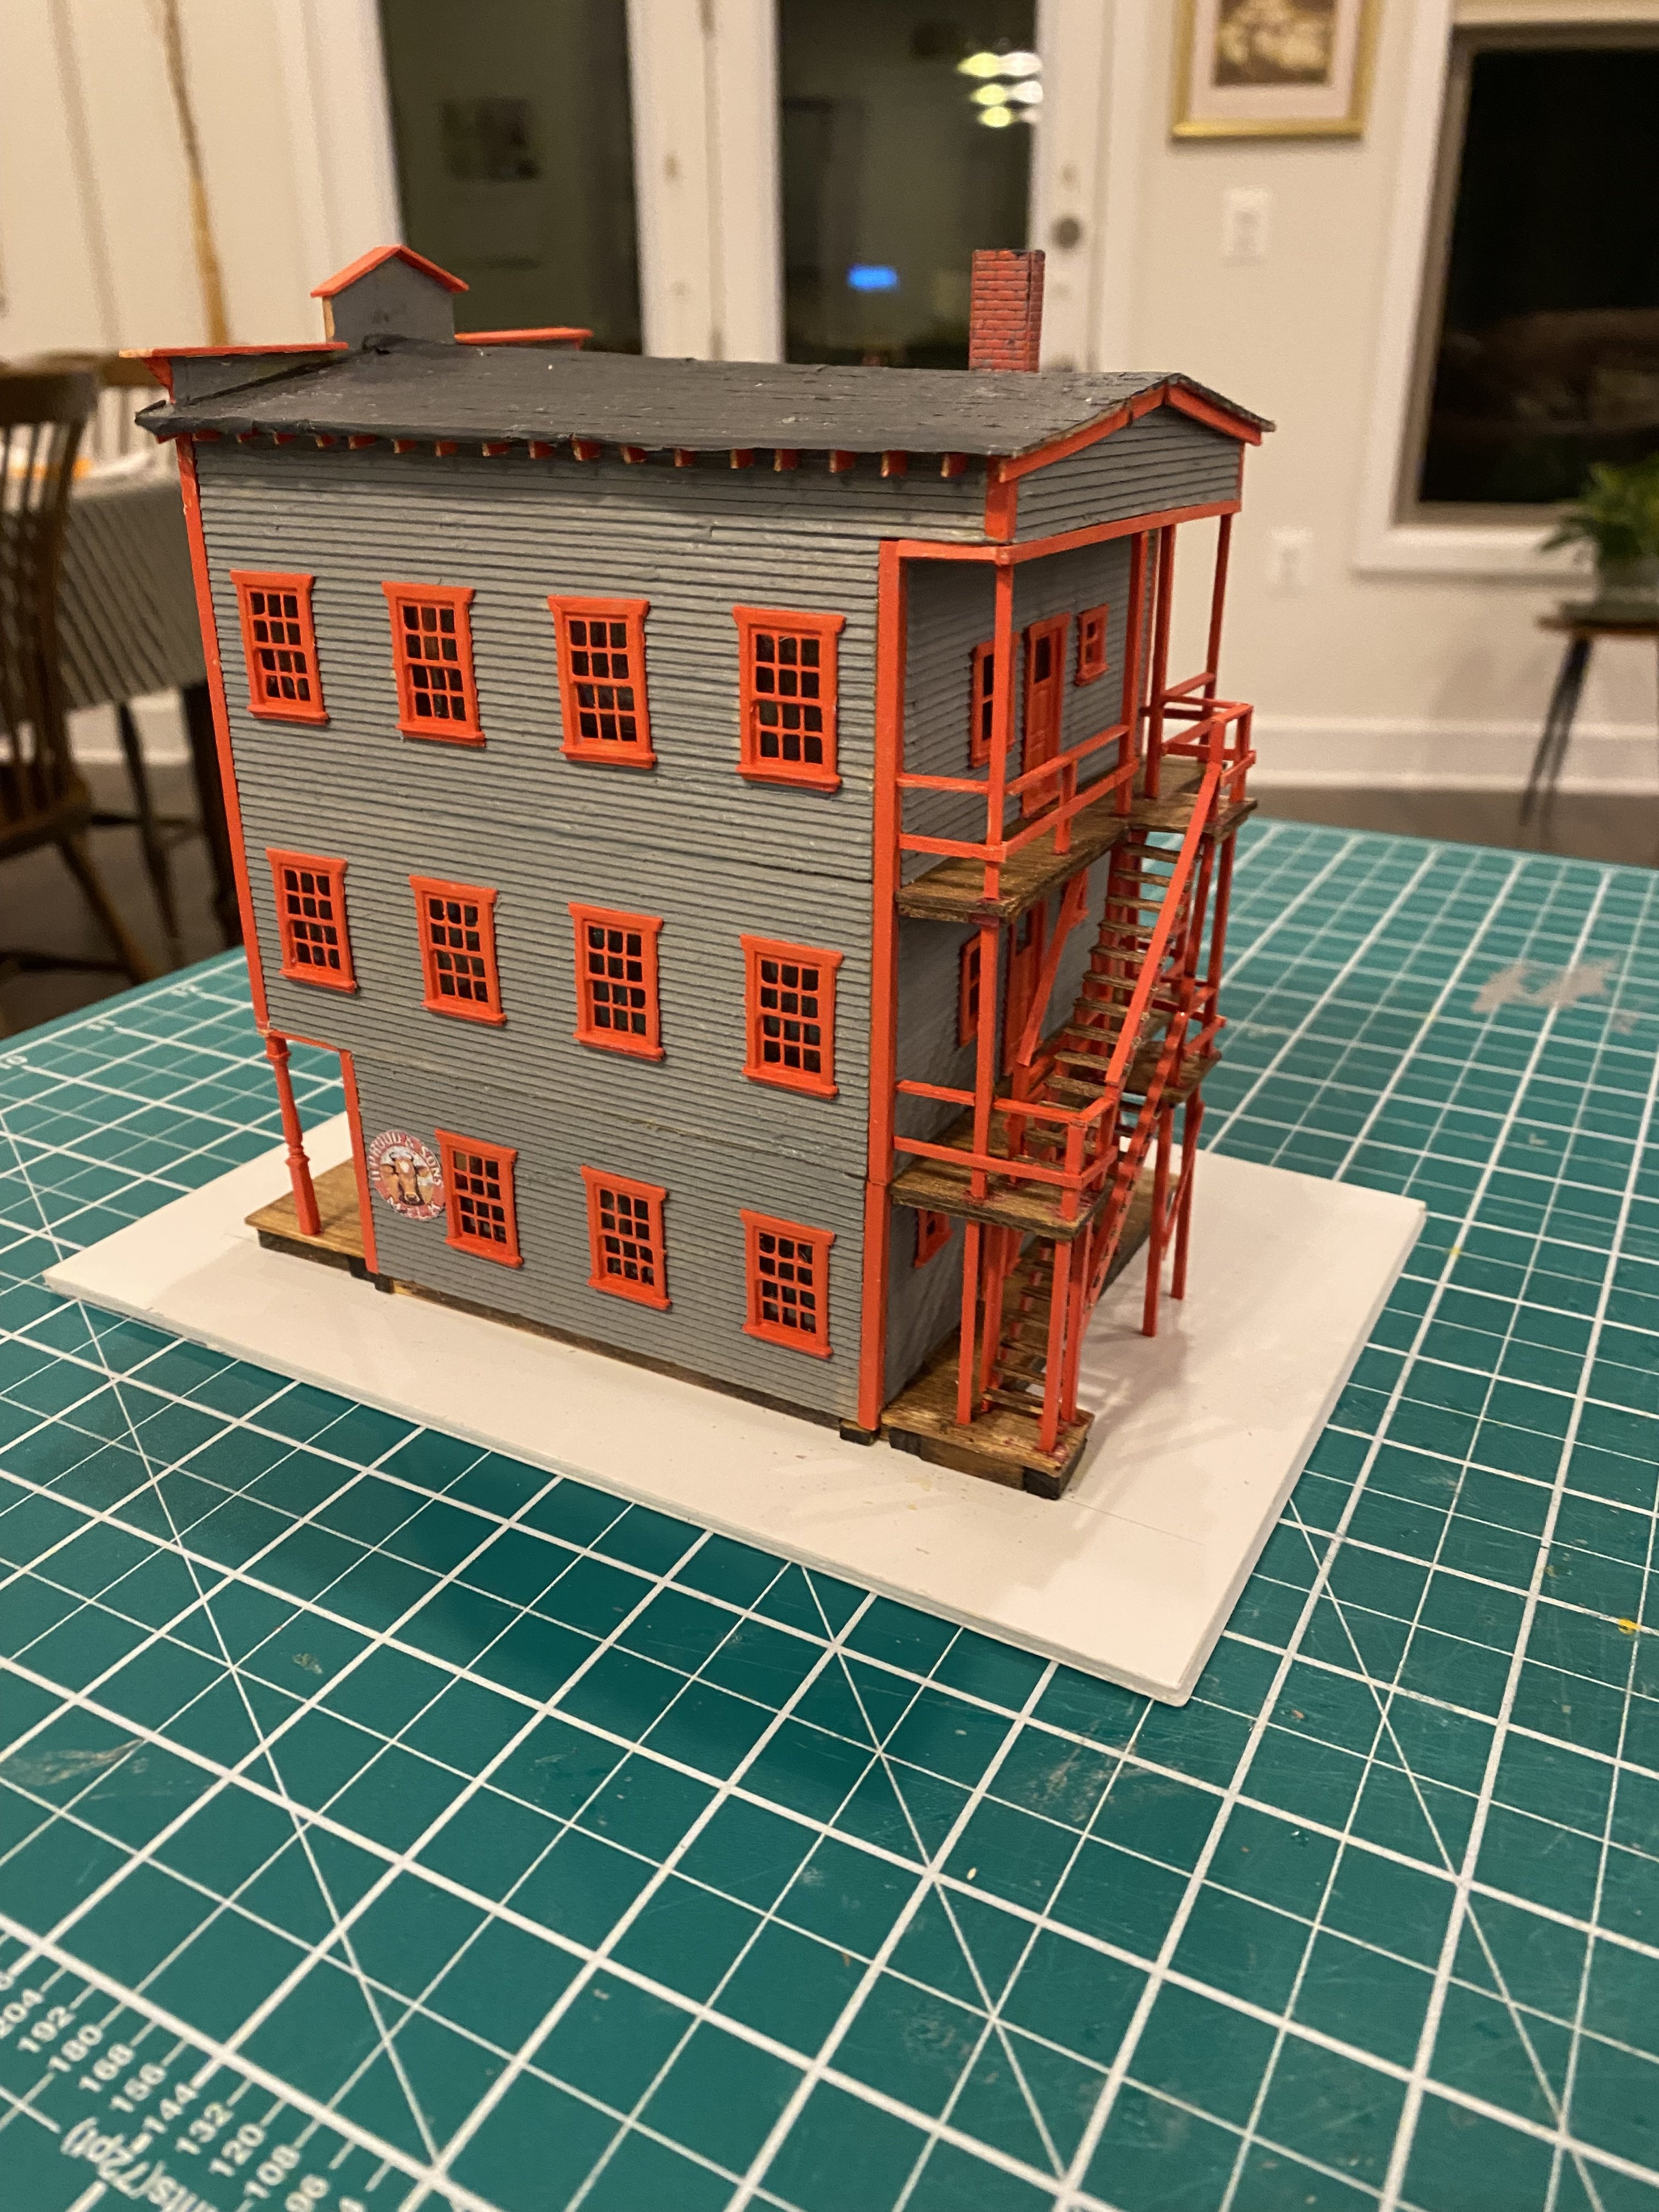
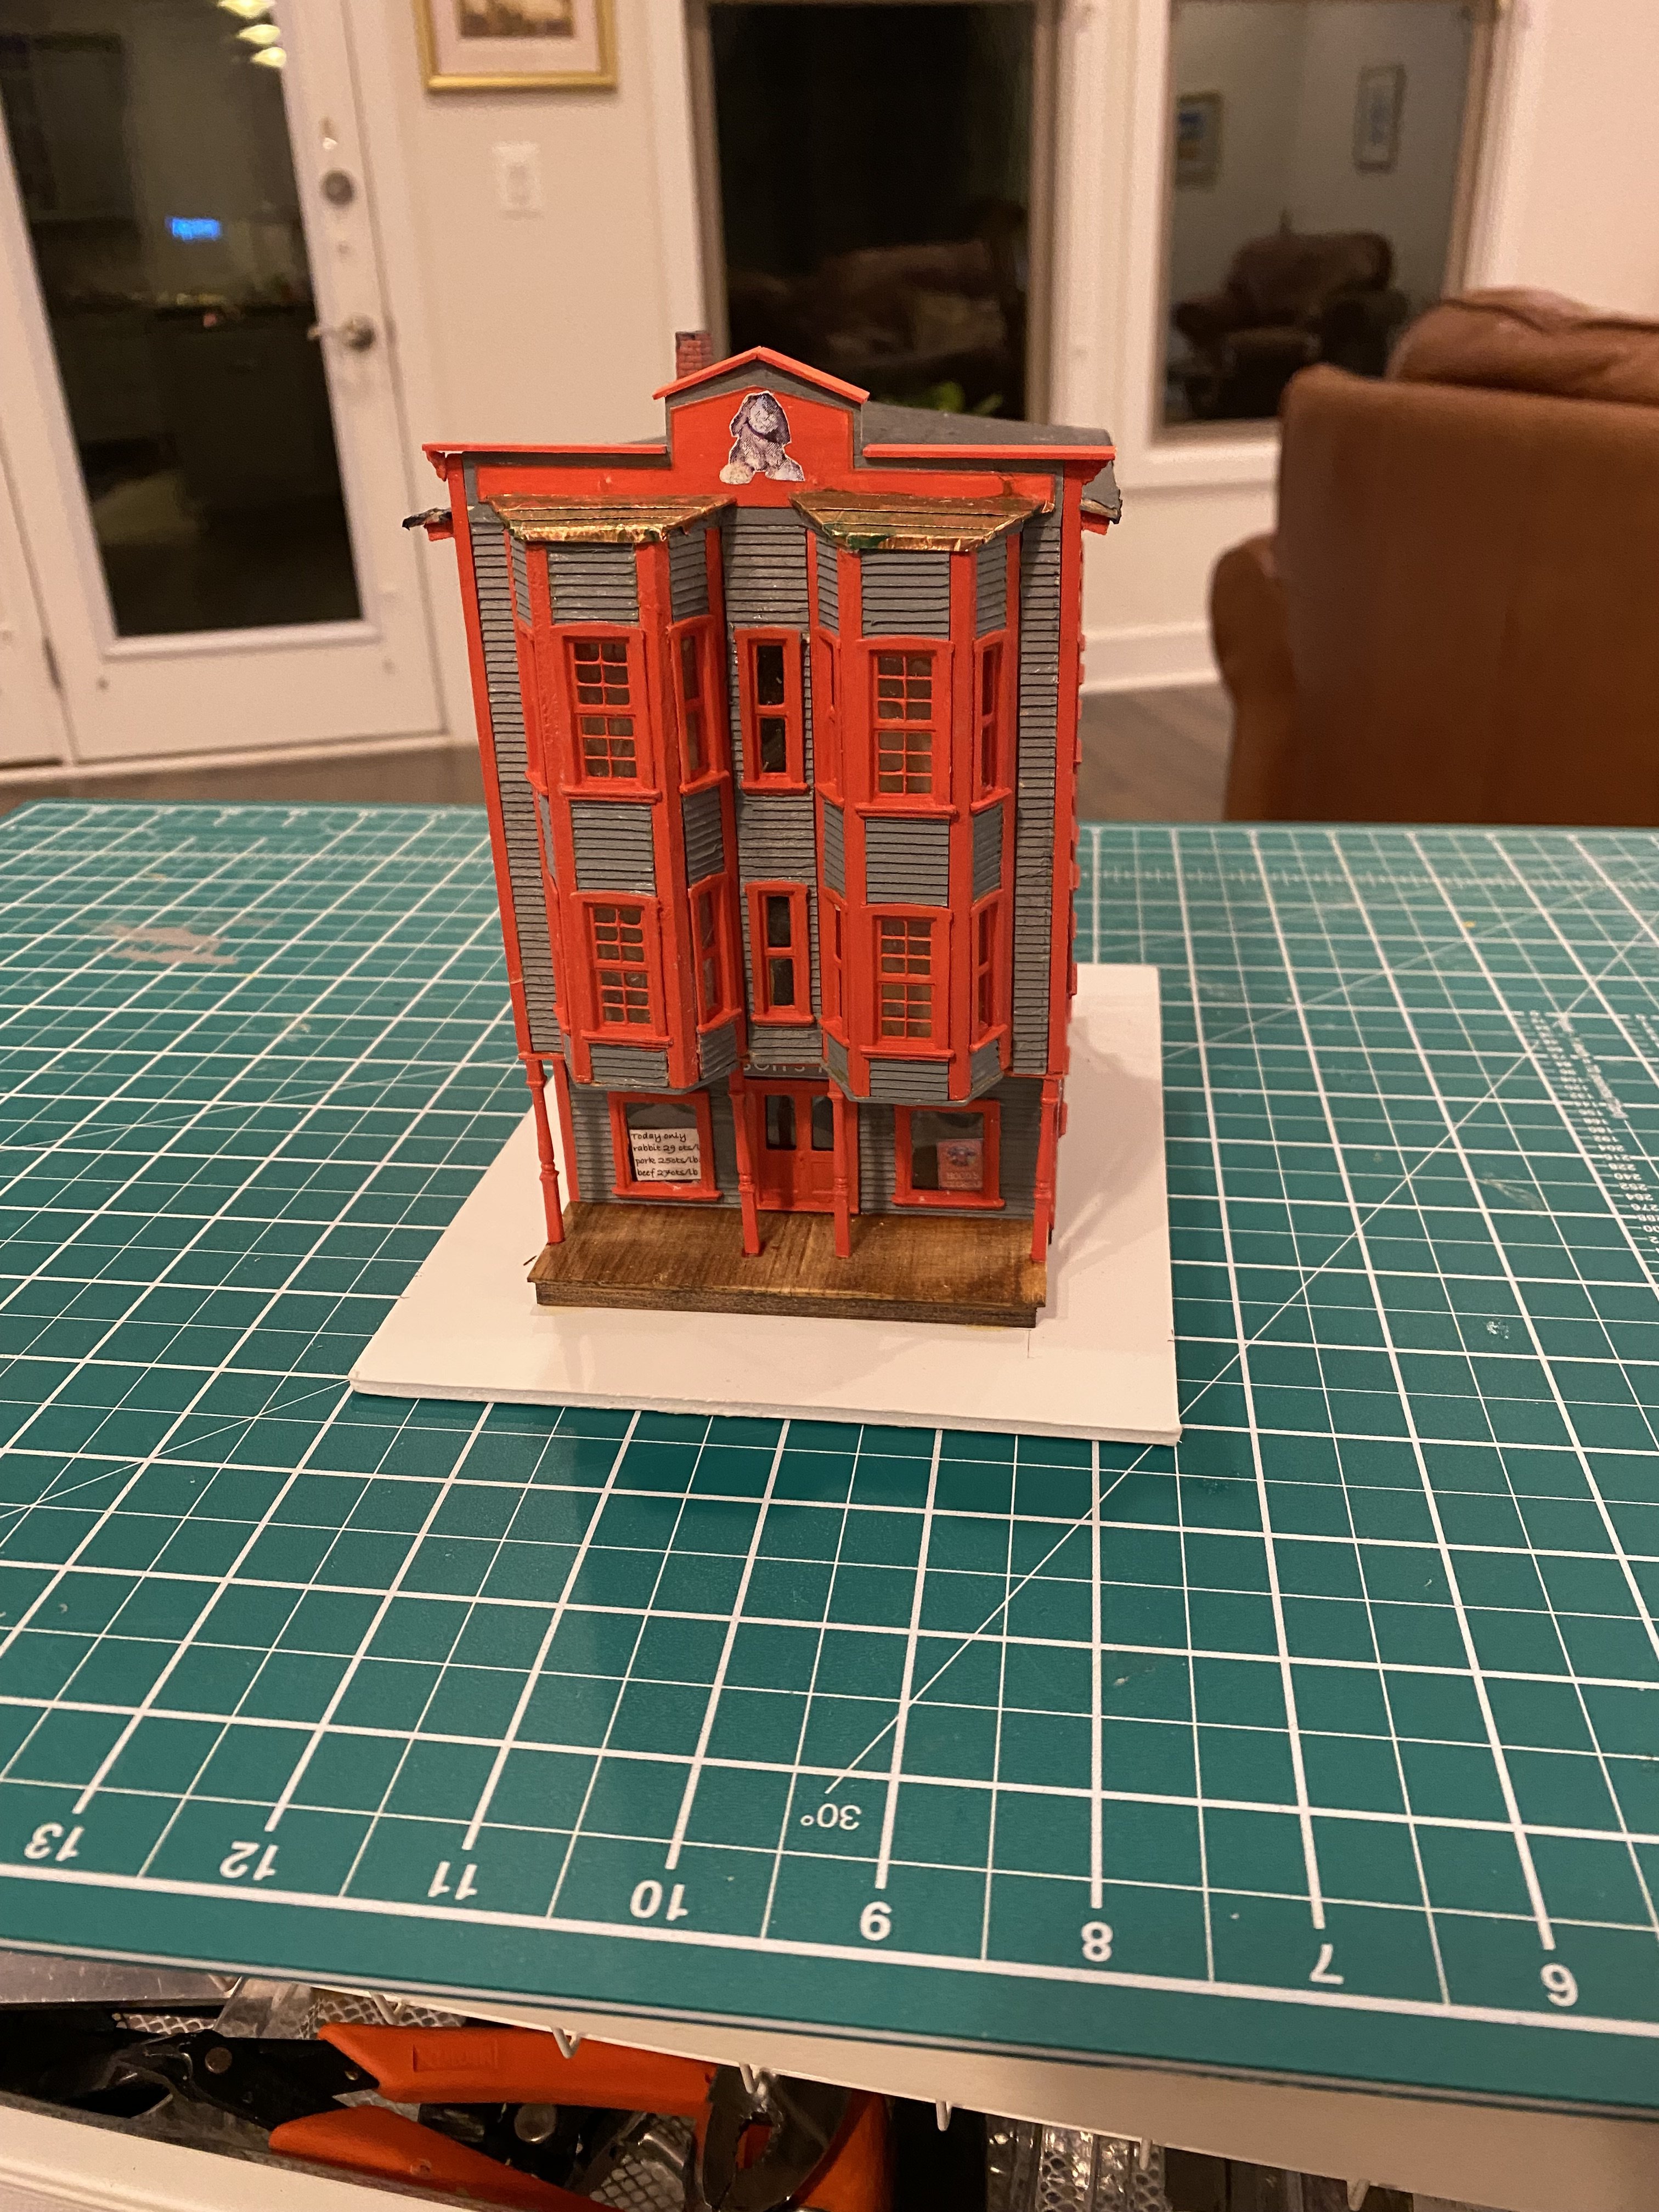
Flop houses were common near railroad terminals to provide a cheap place for the train crews to rest over night
-
Thank you to all for the nice comments. I really enjoyed this build!
-
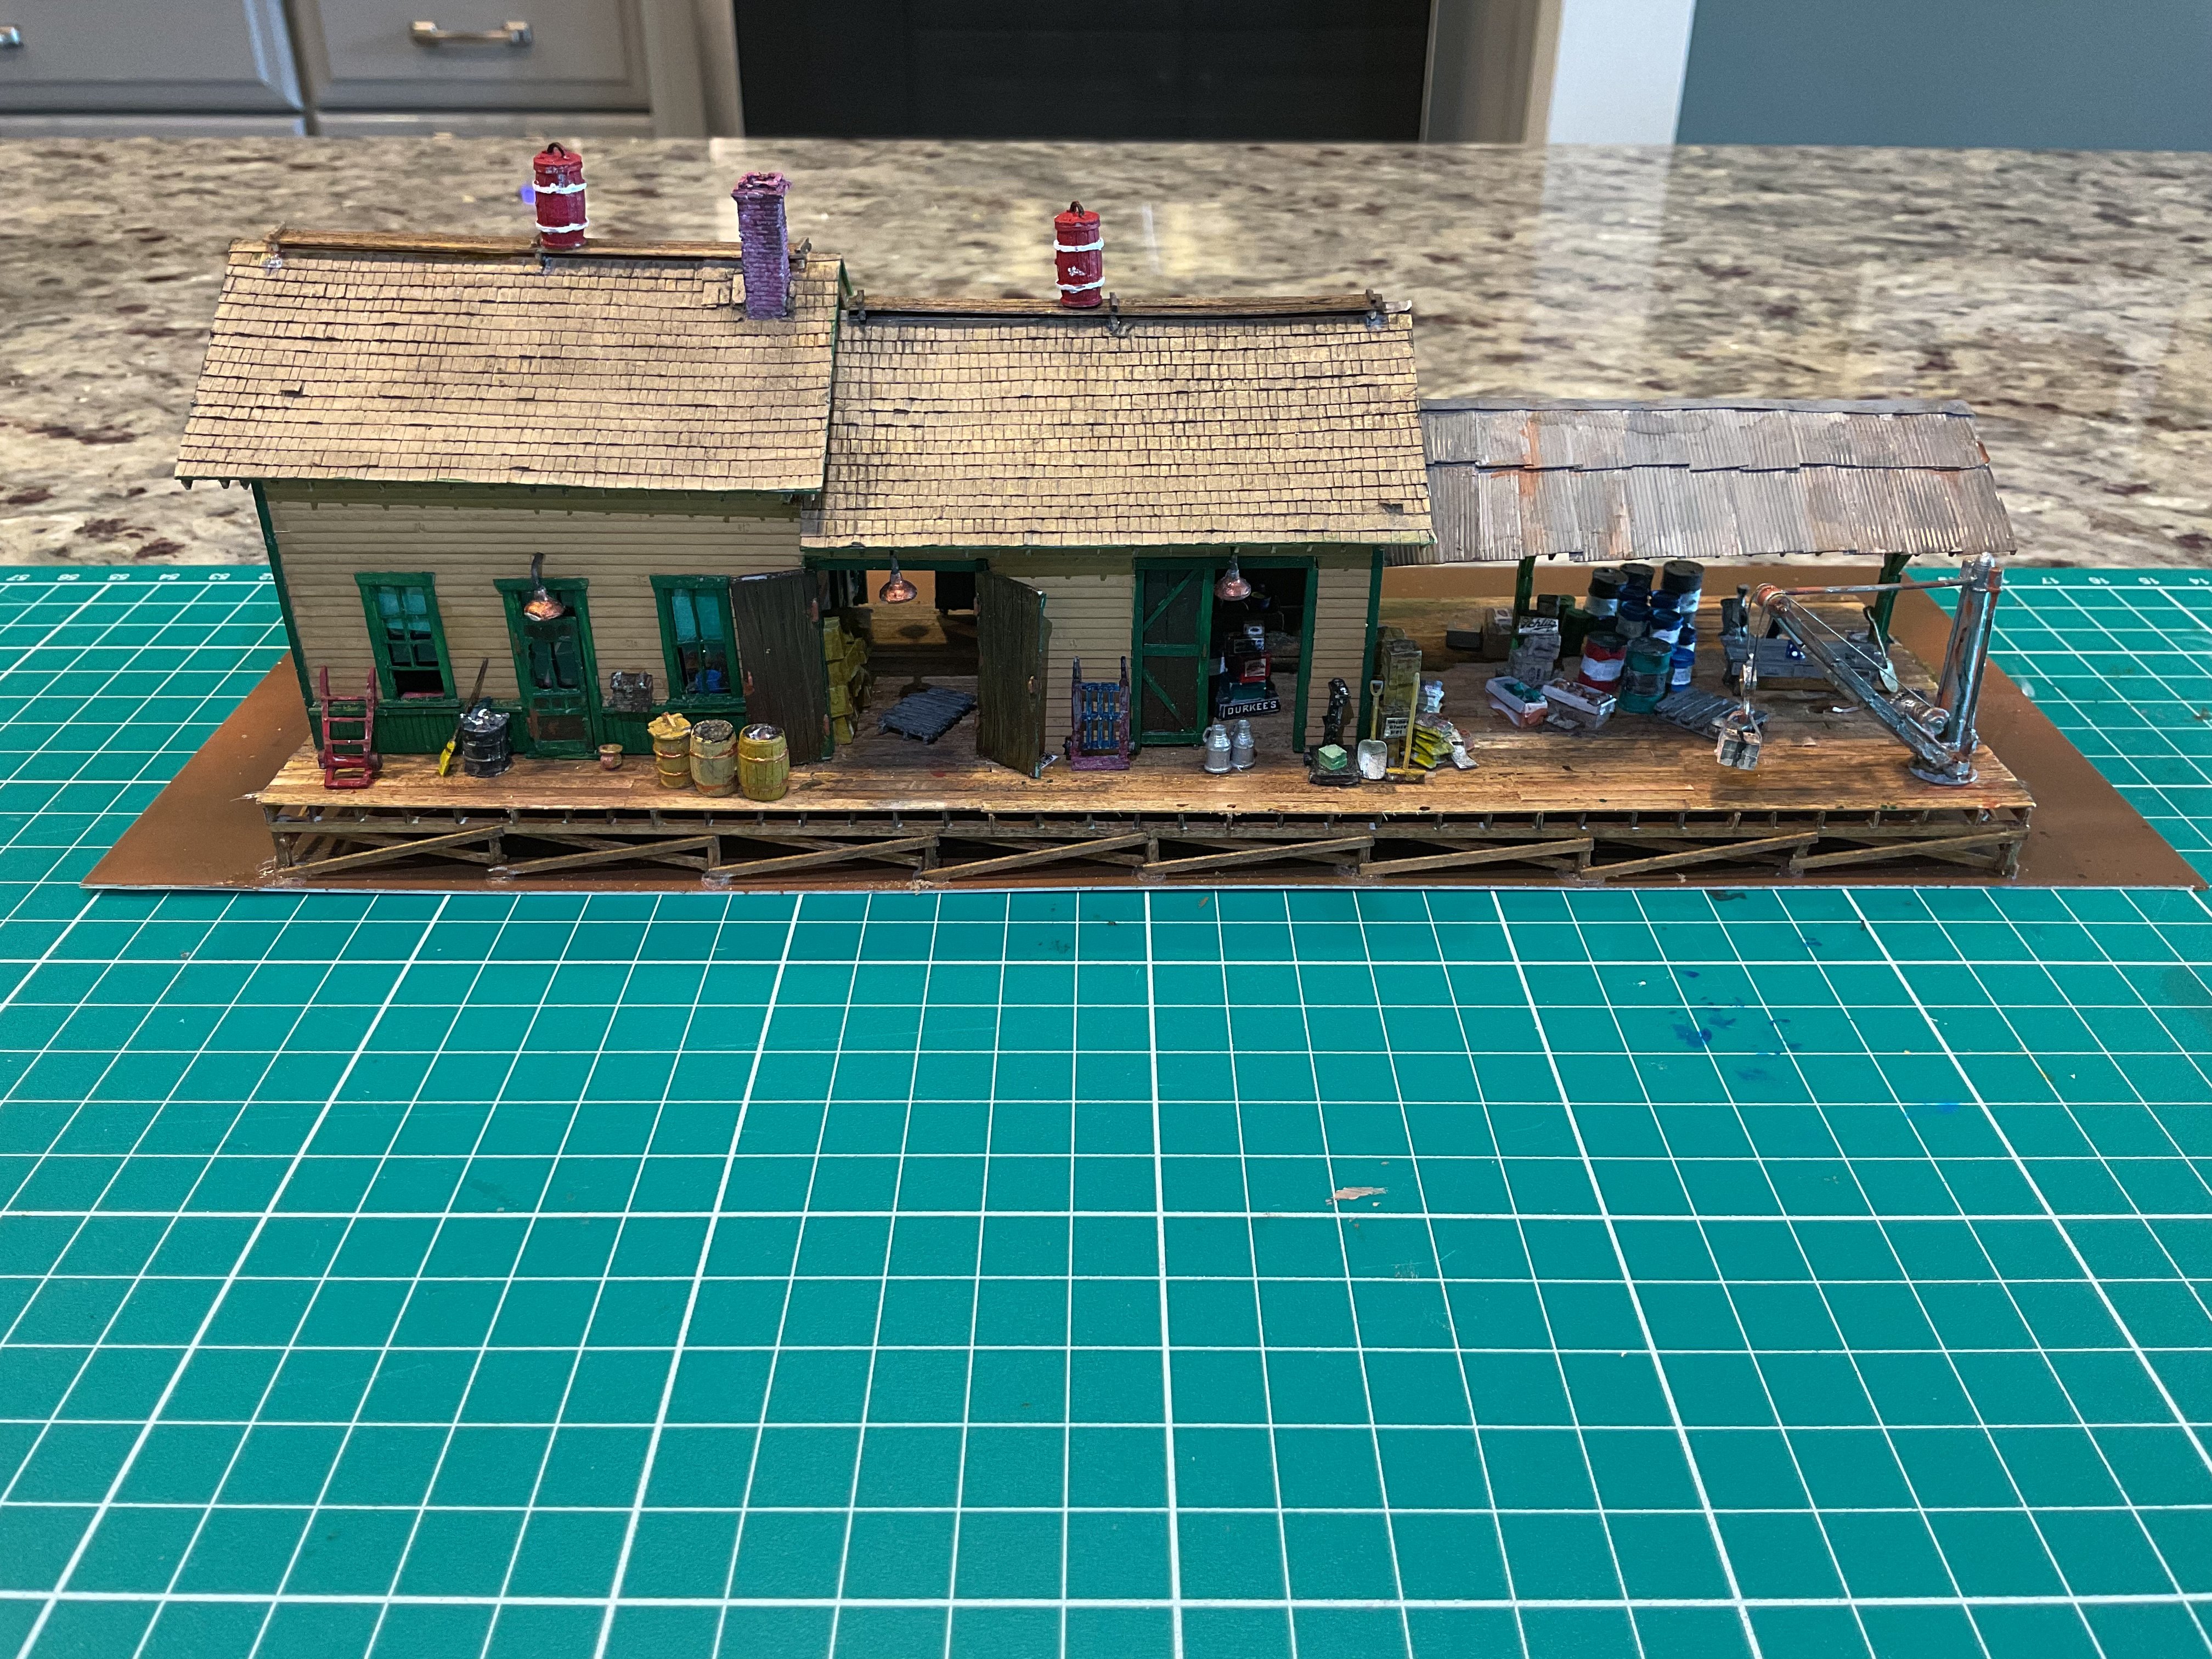
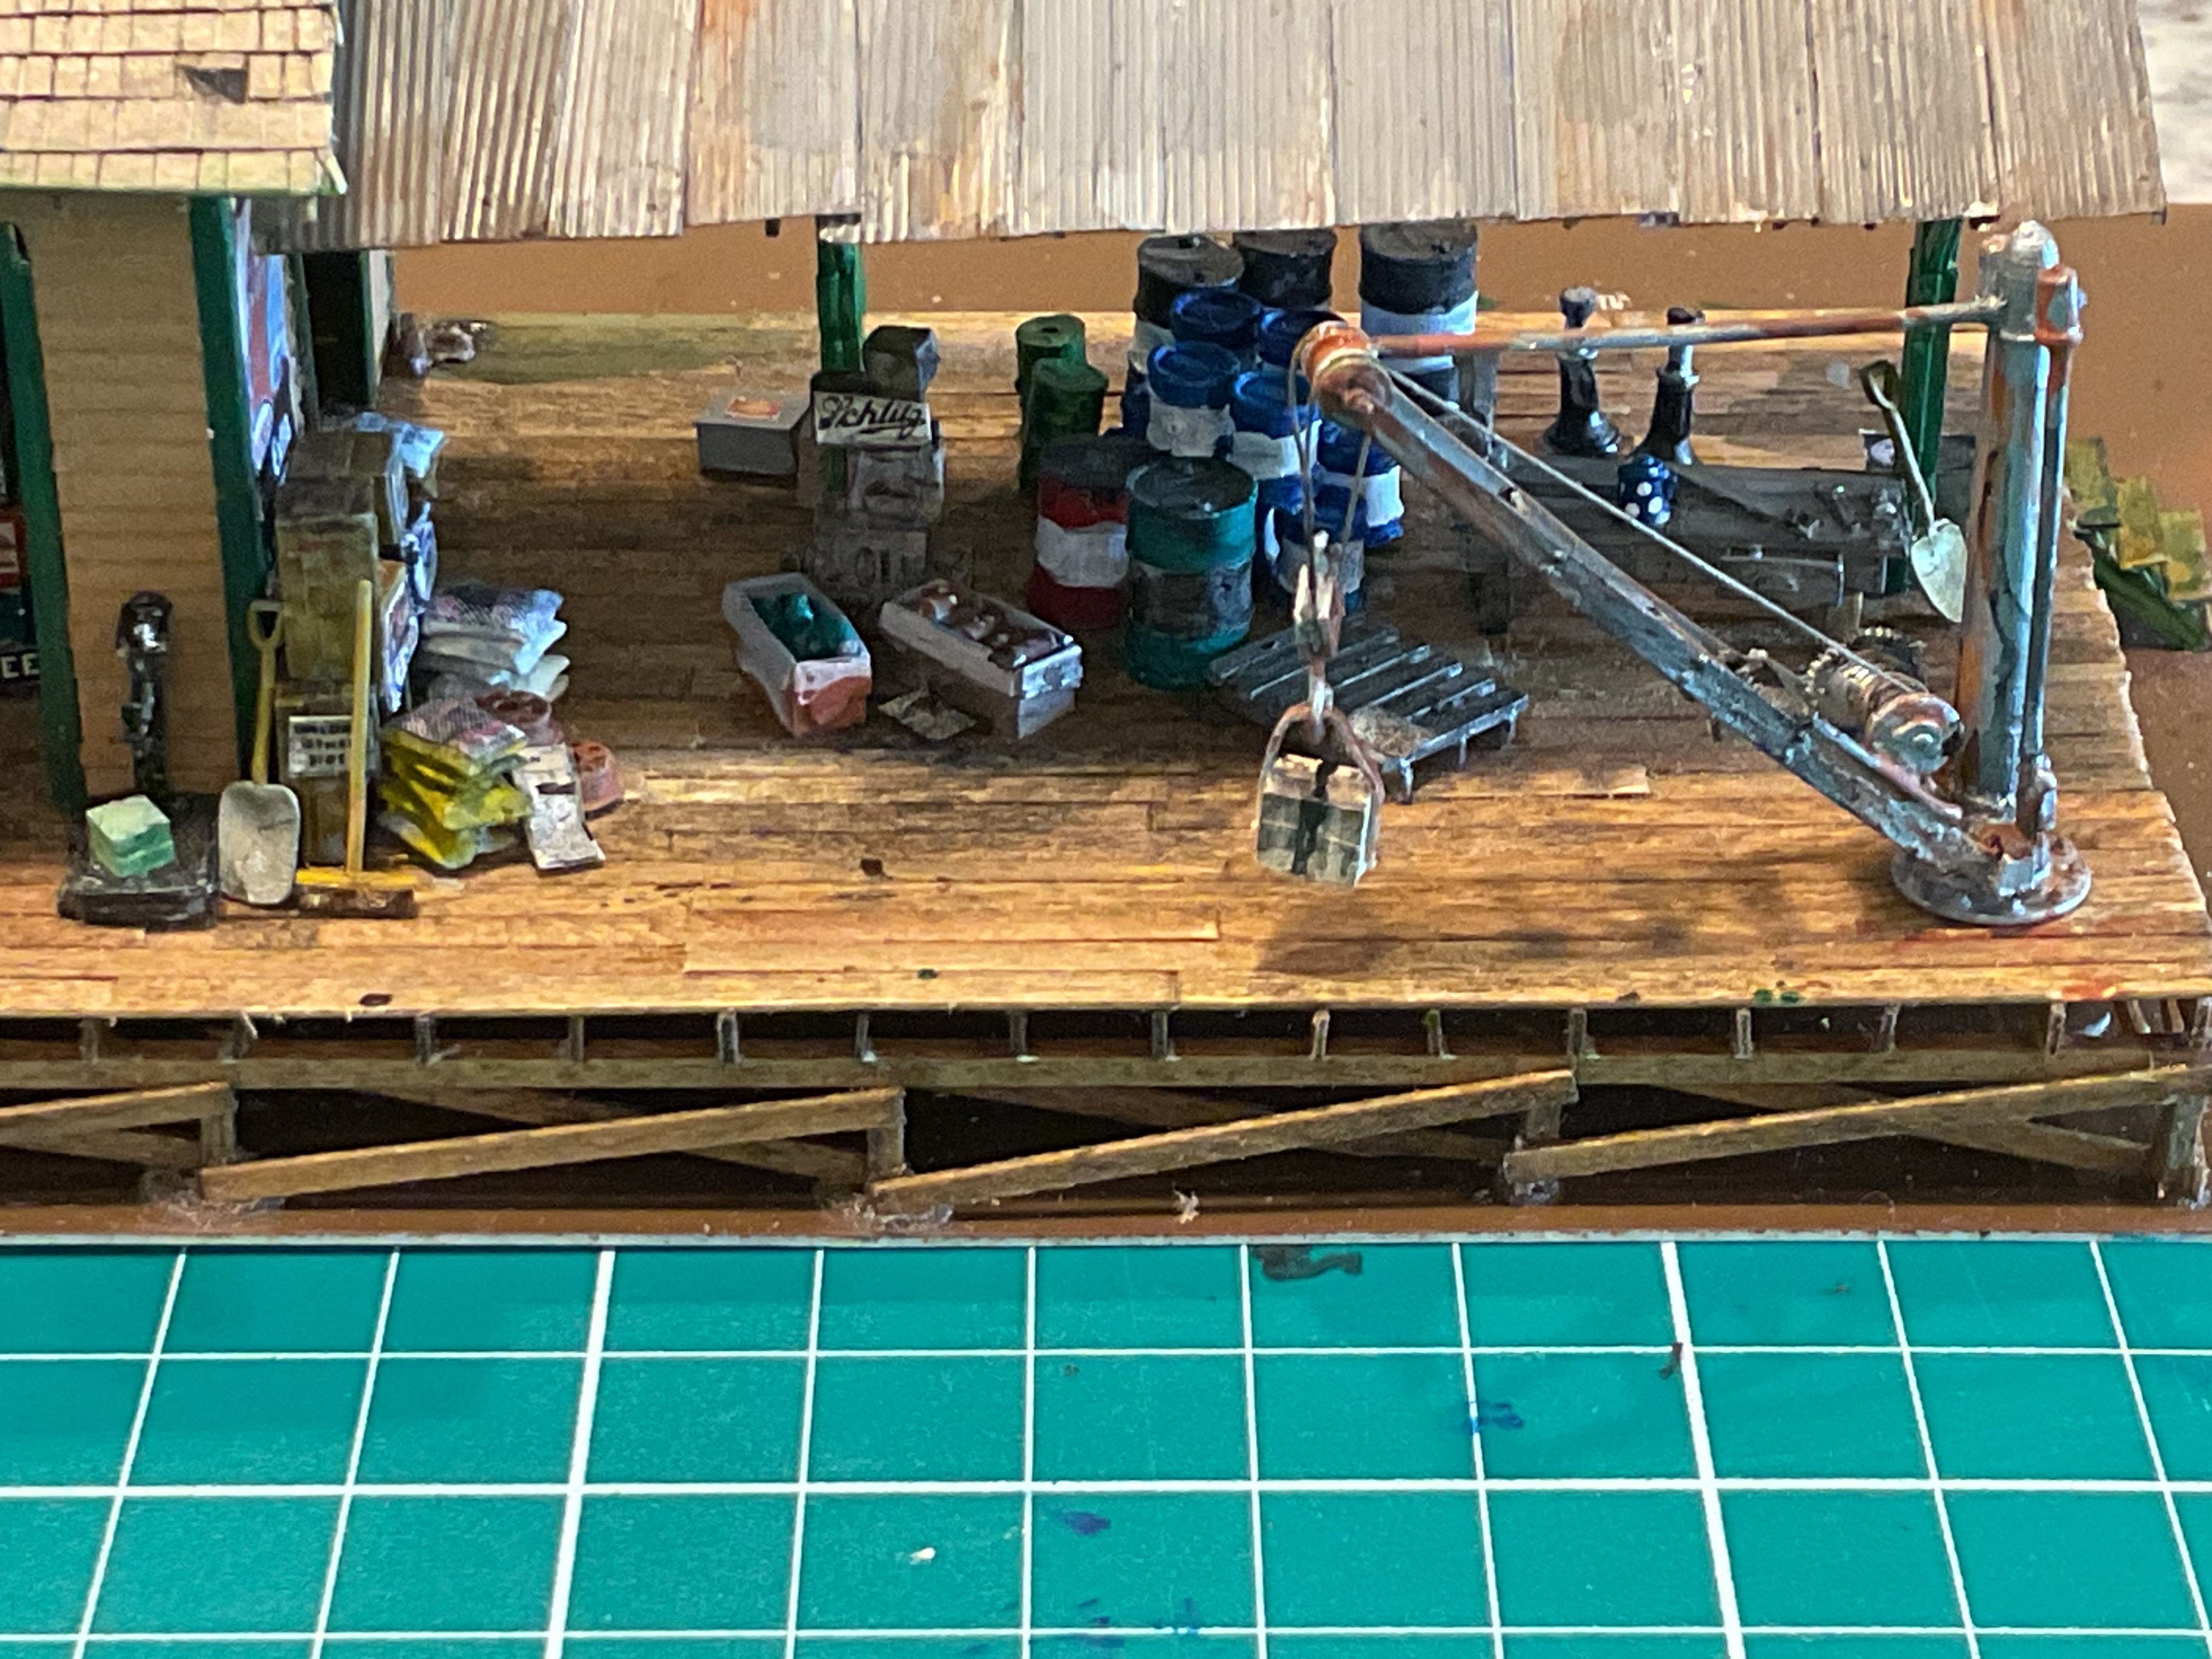
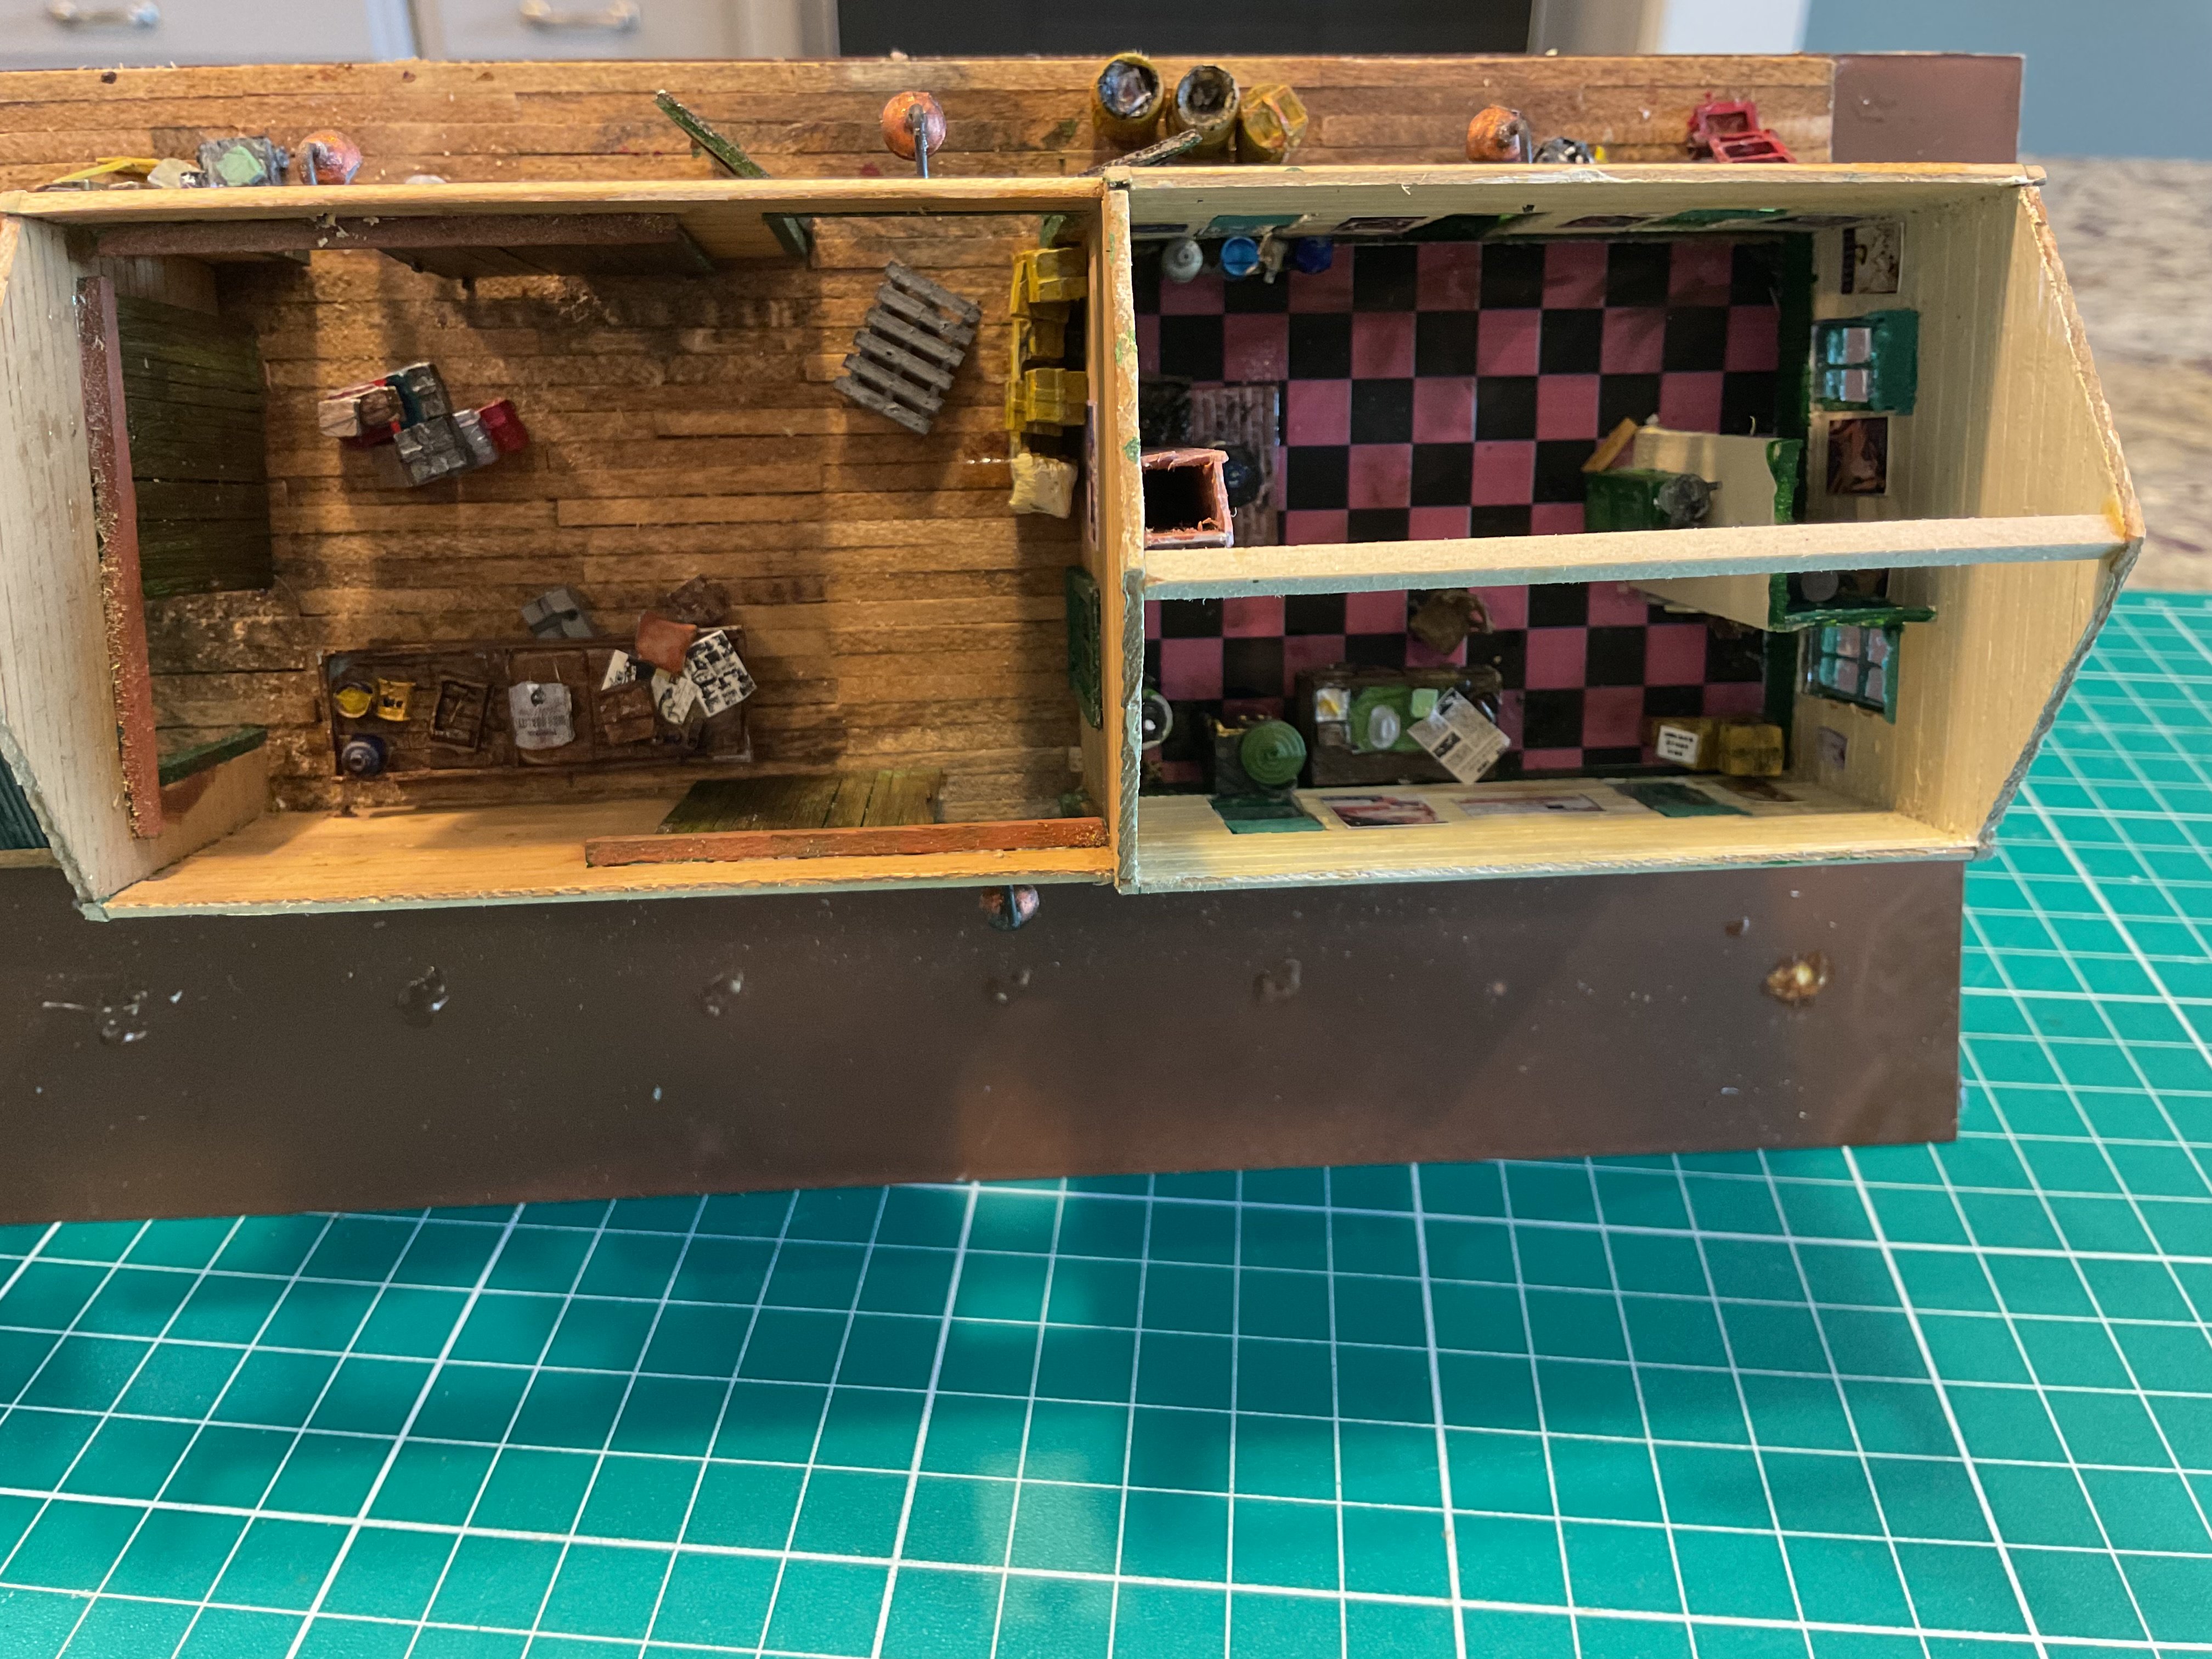
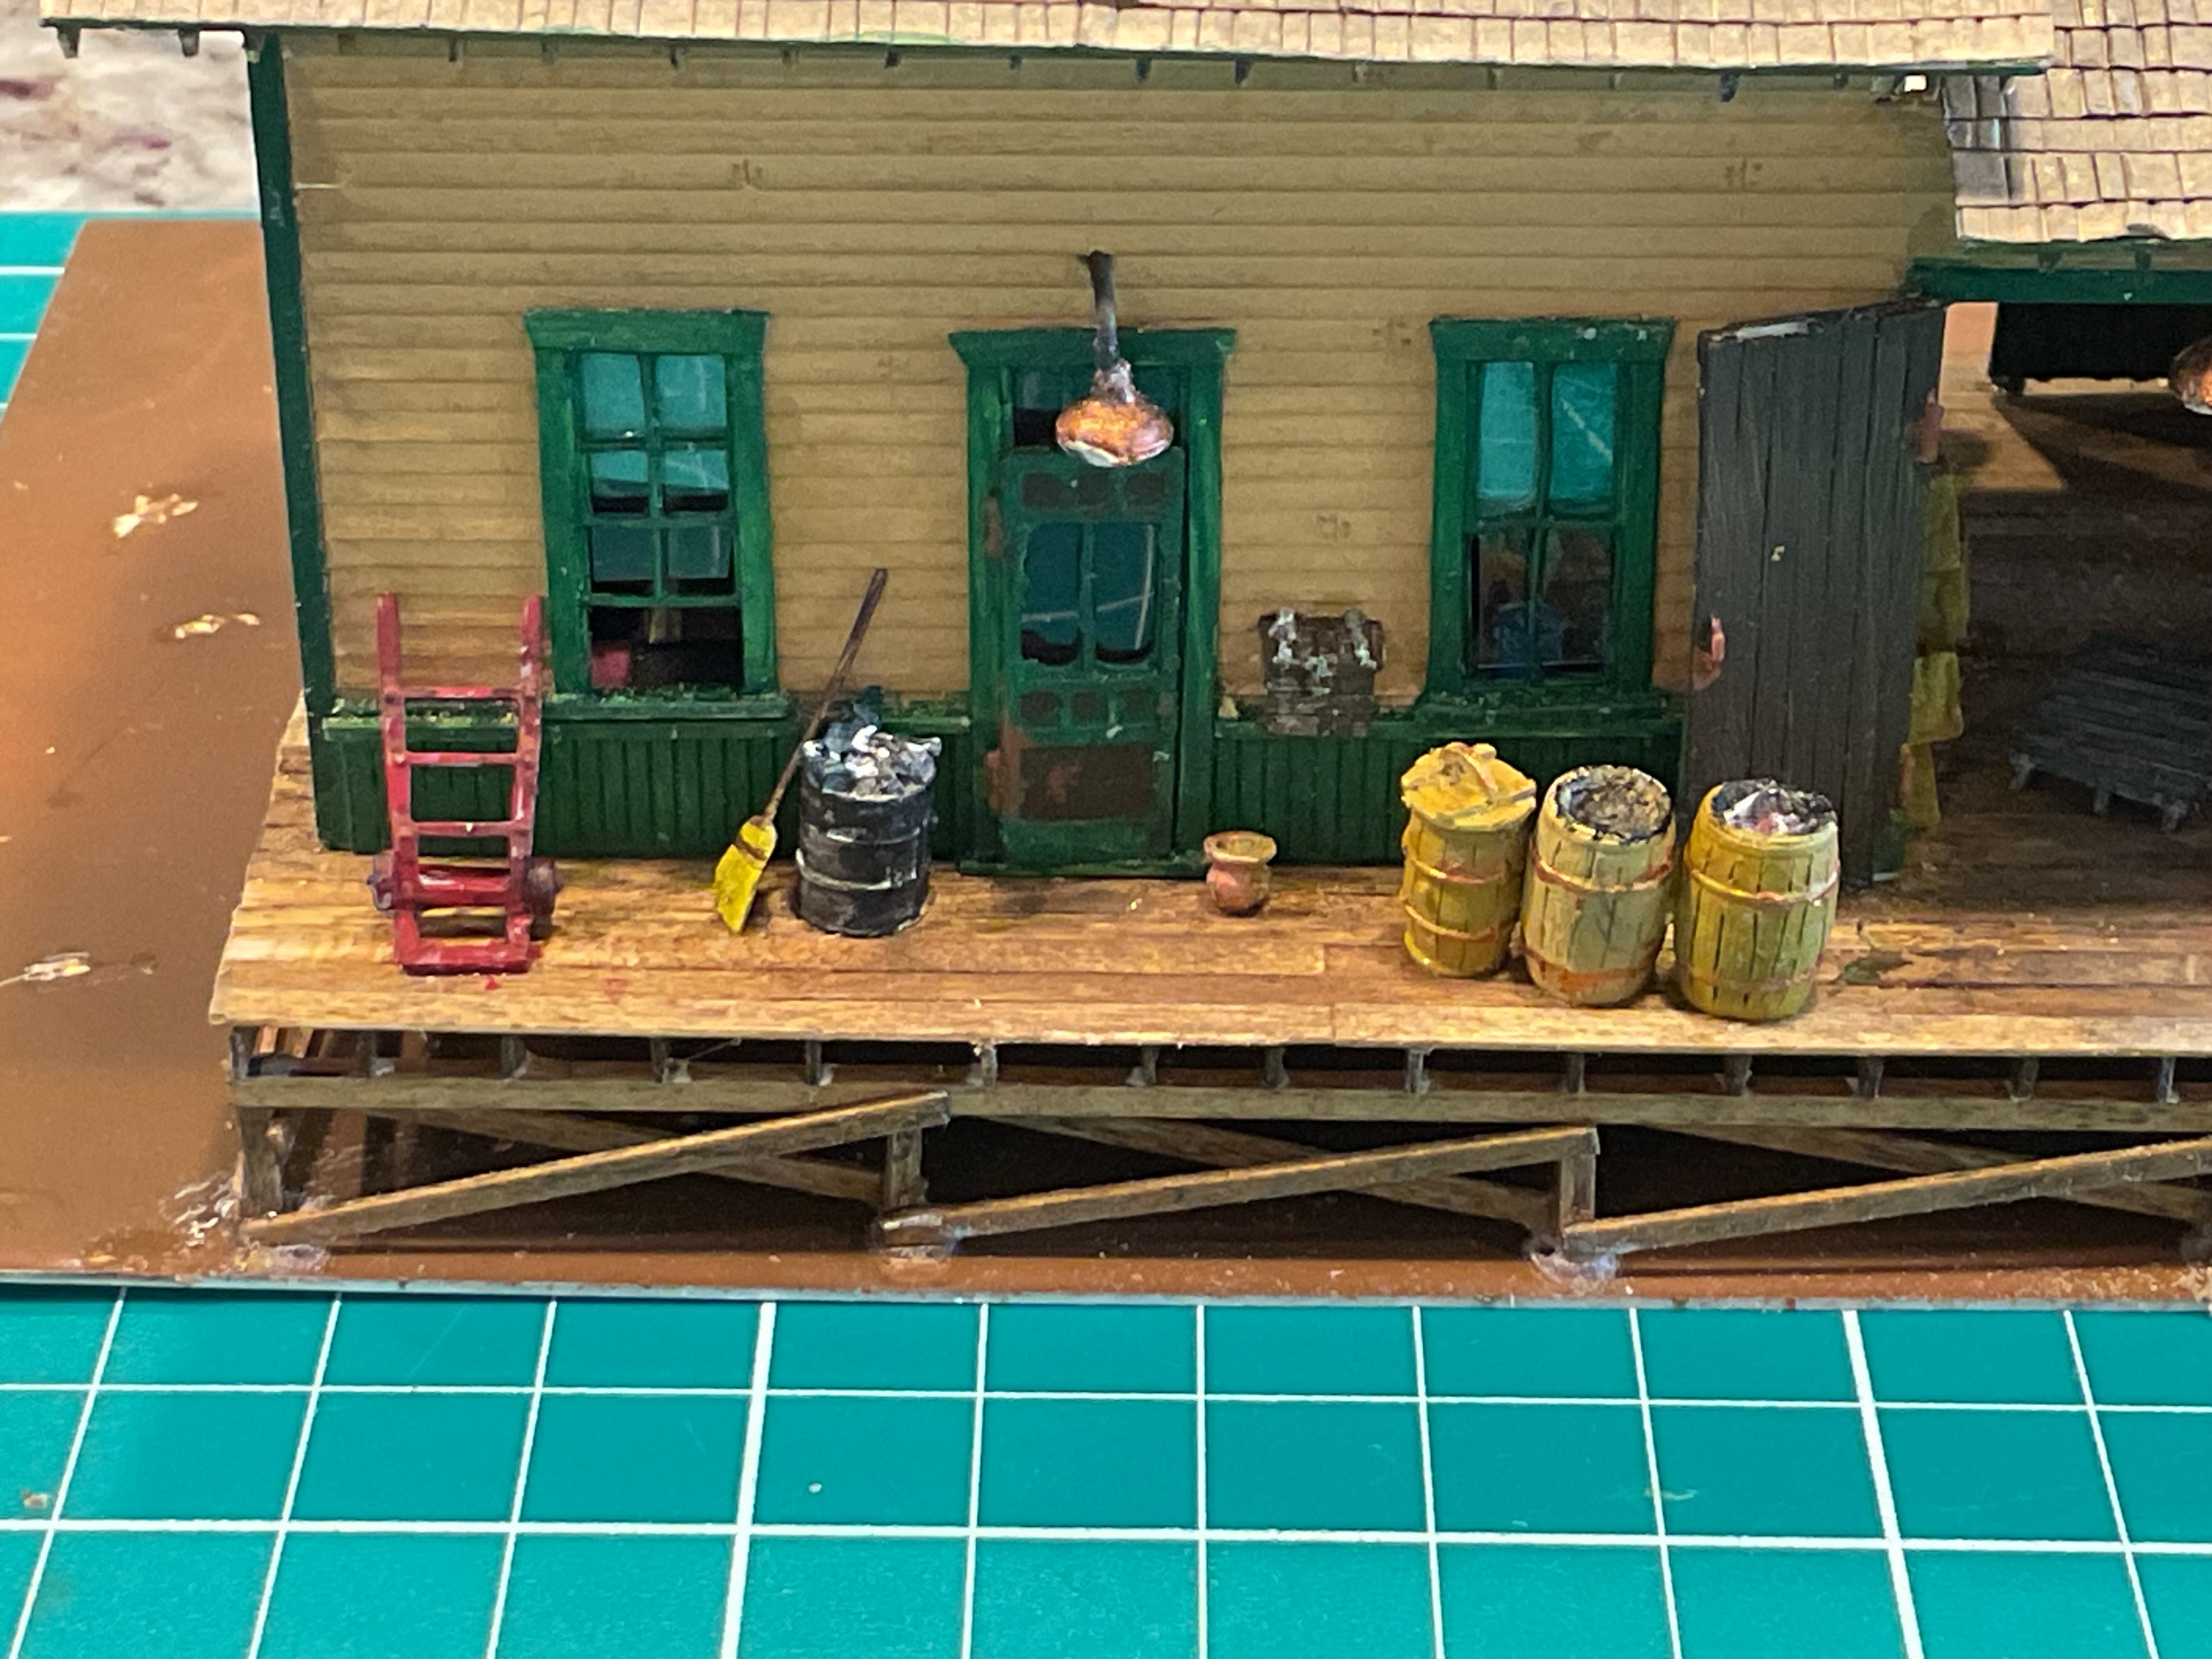
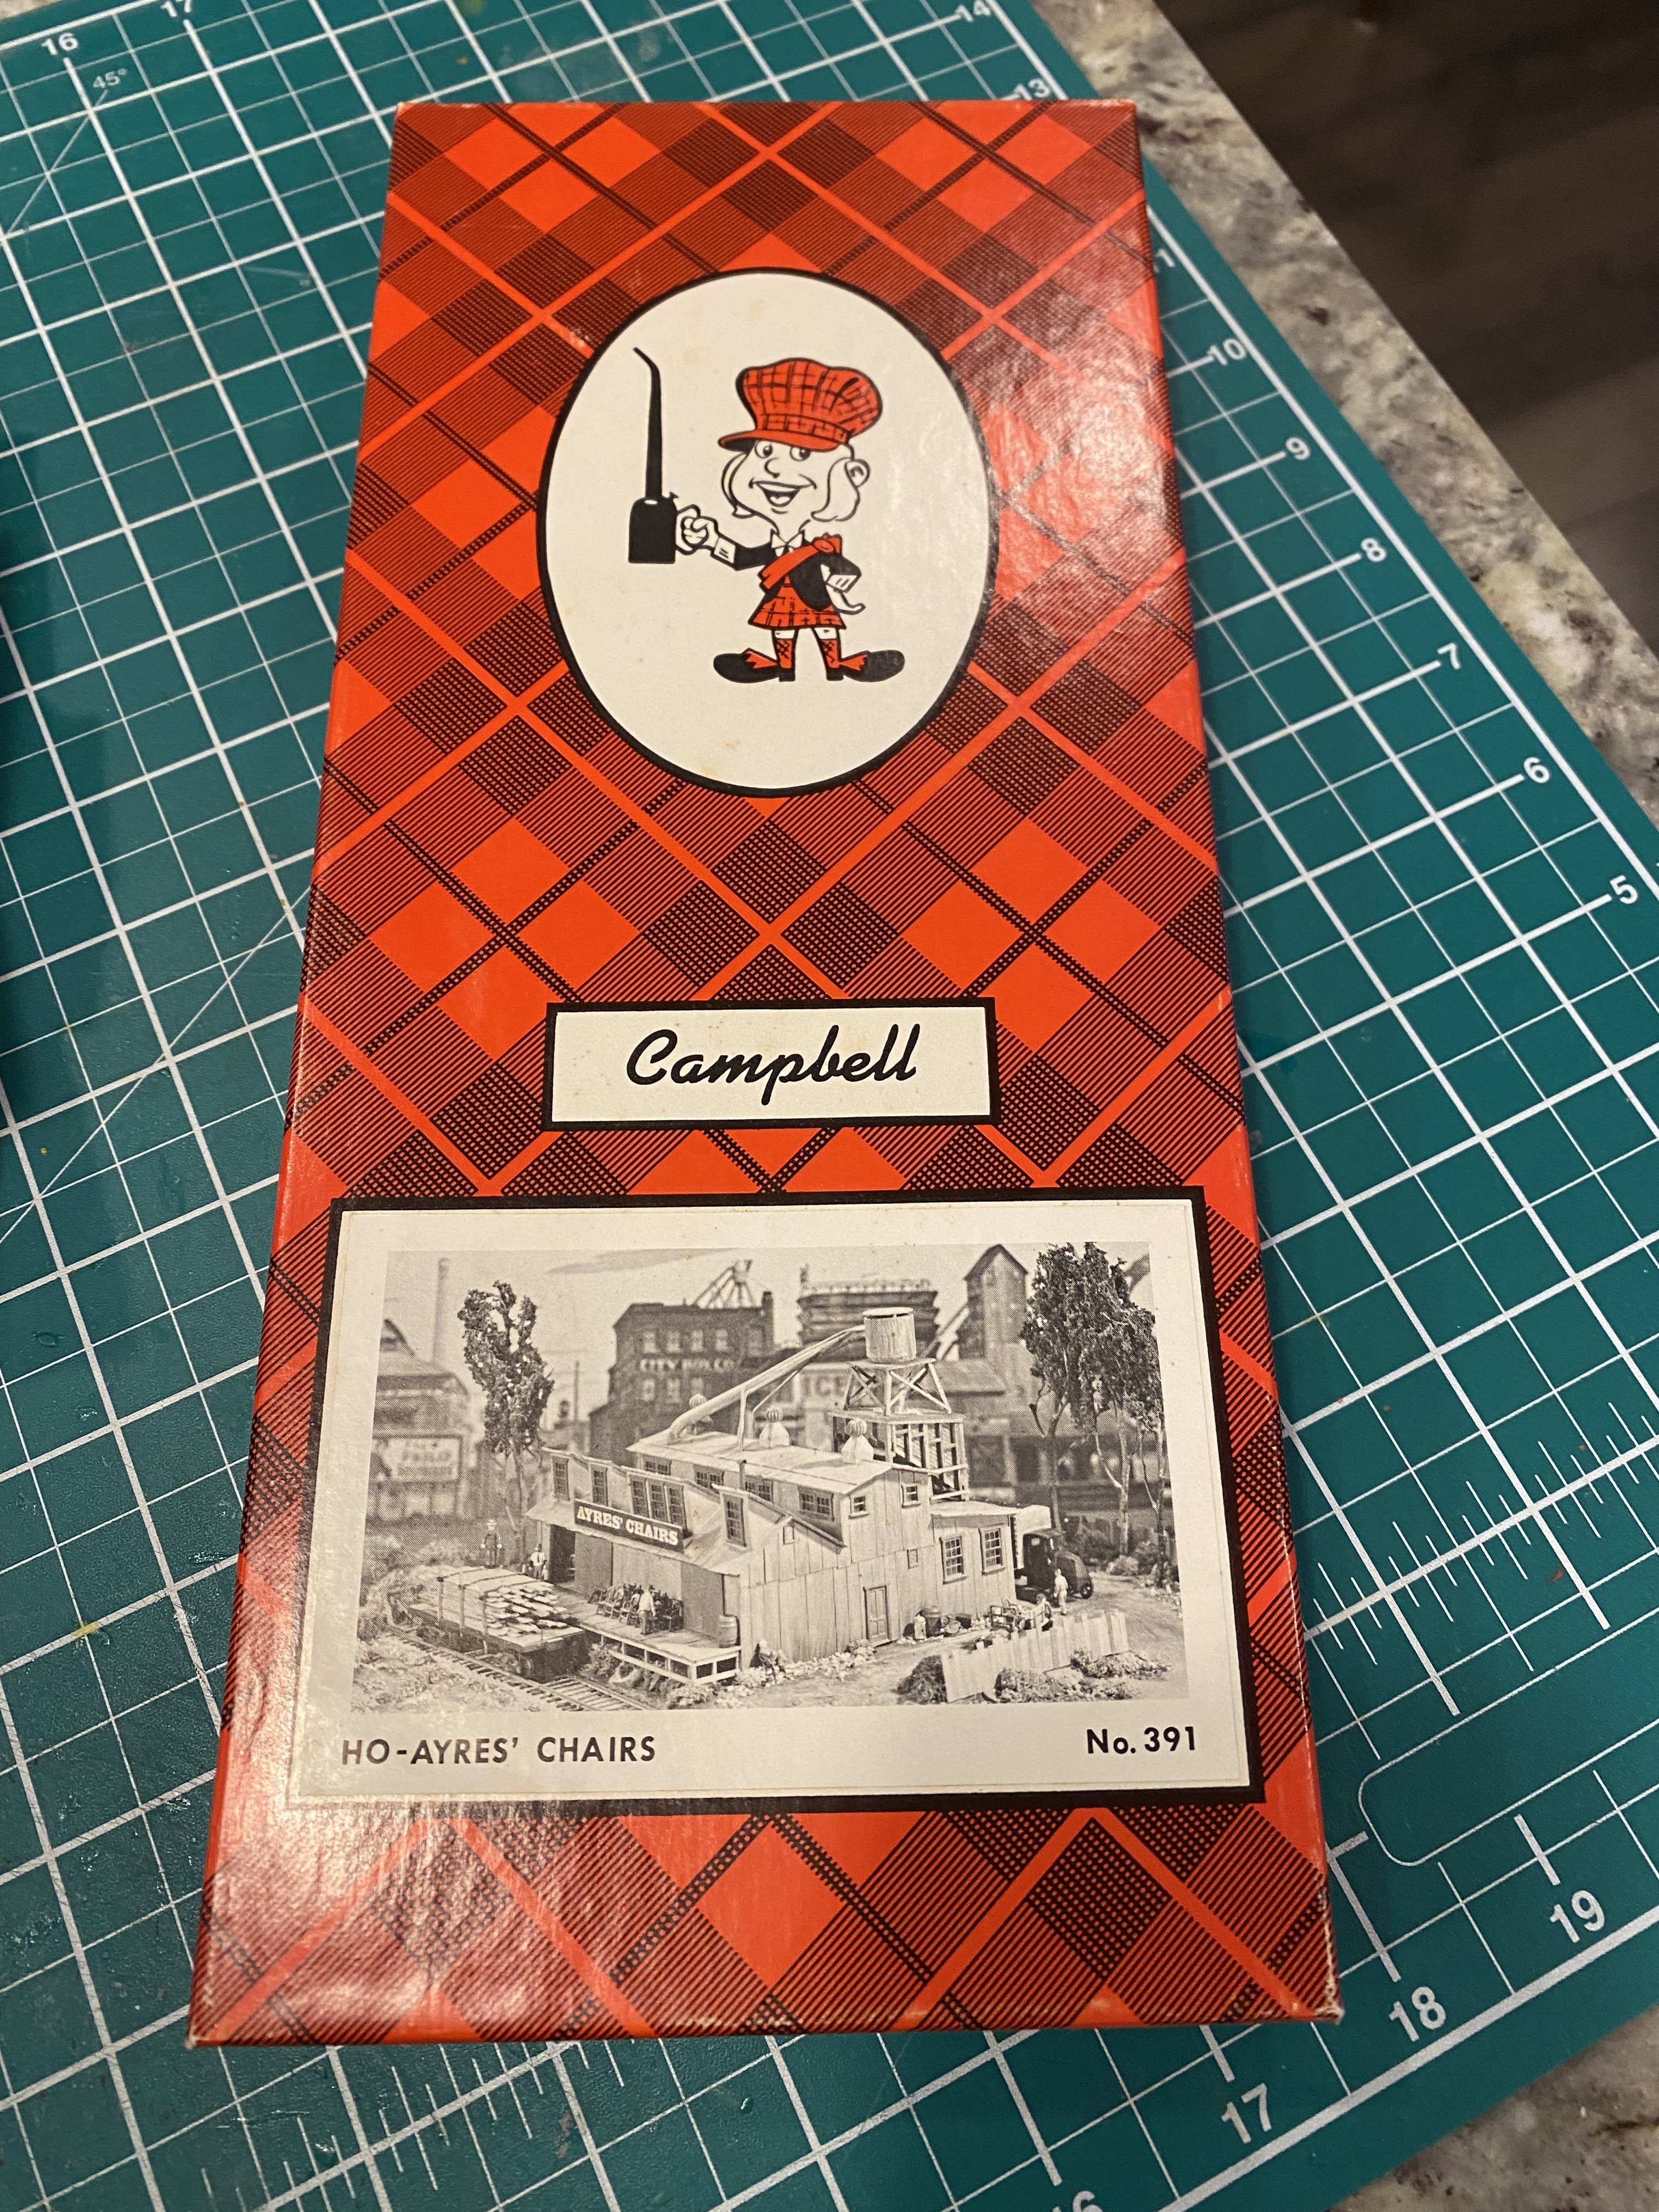
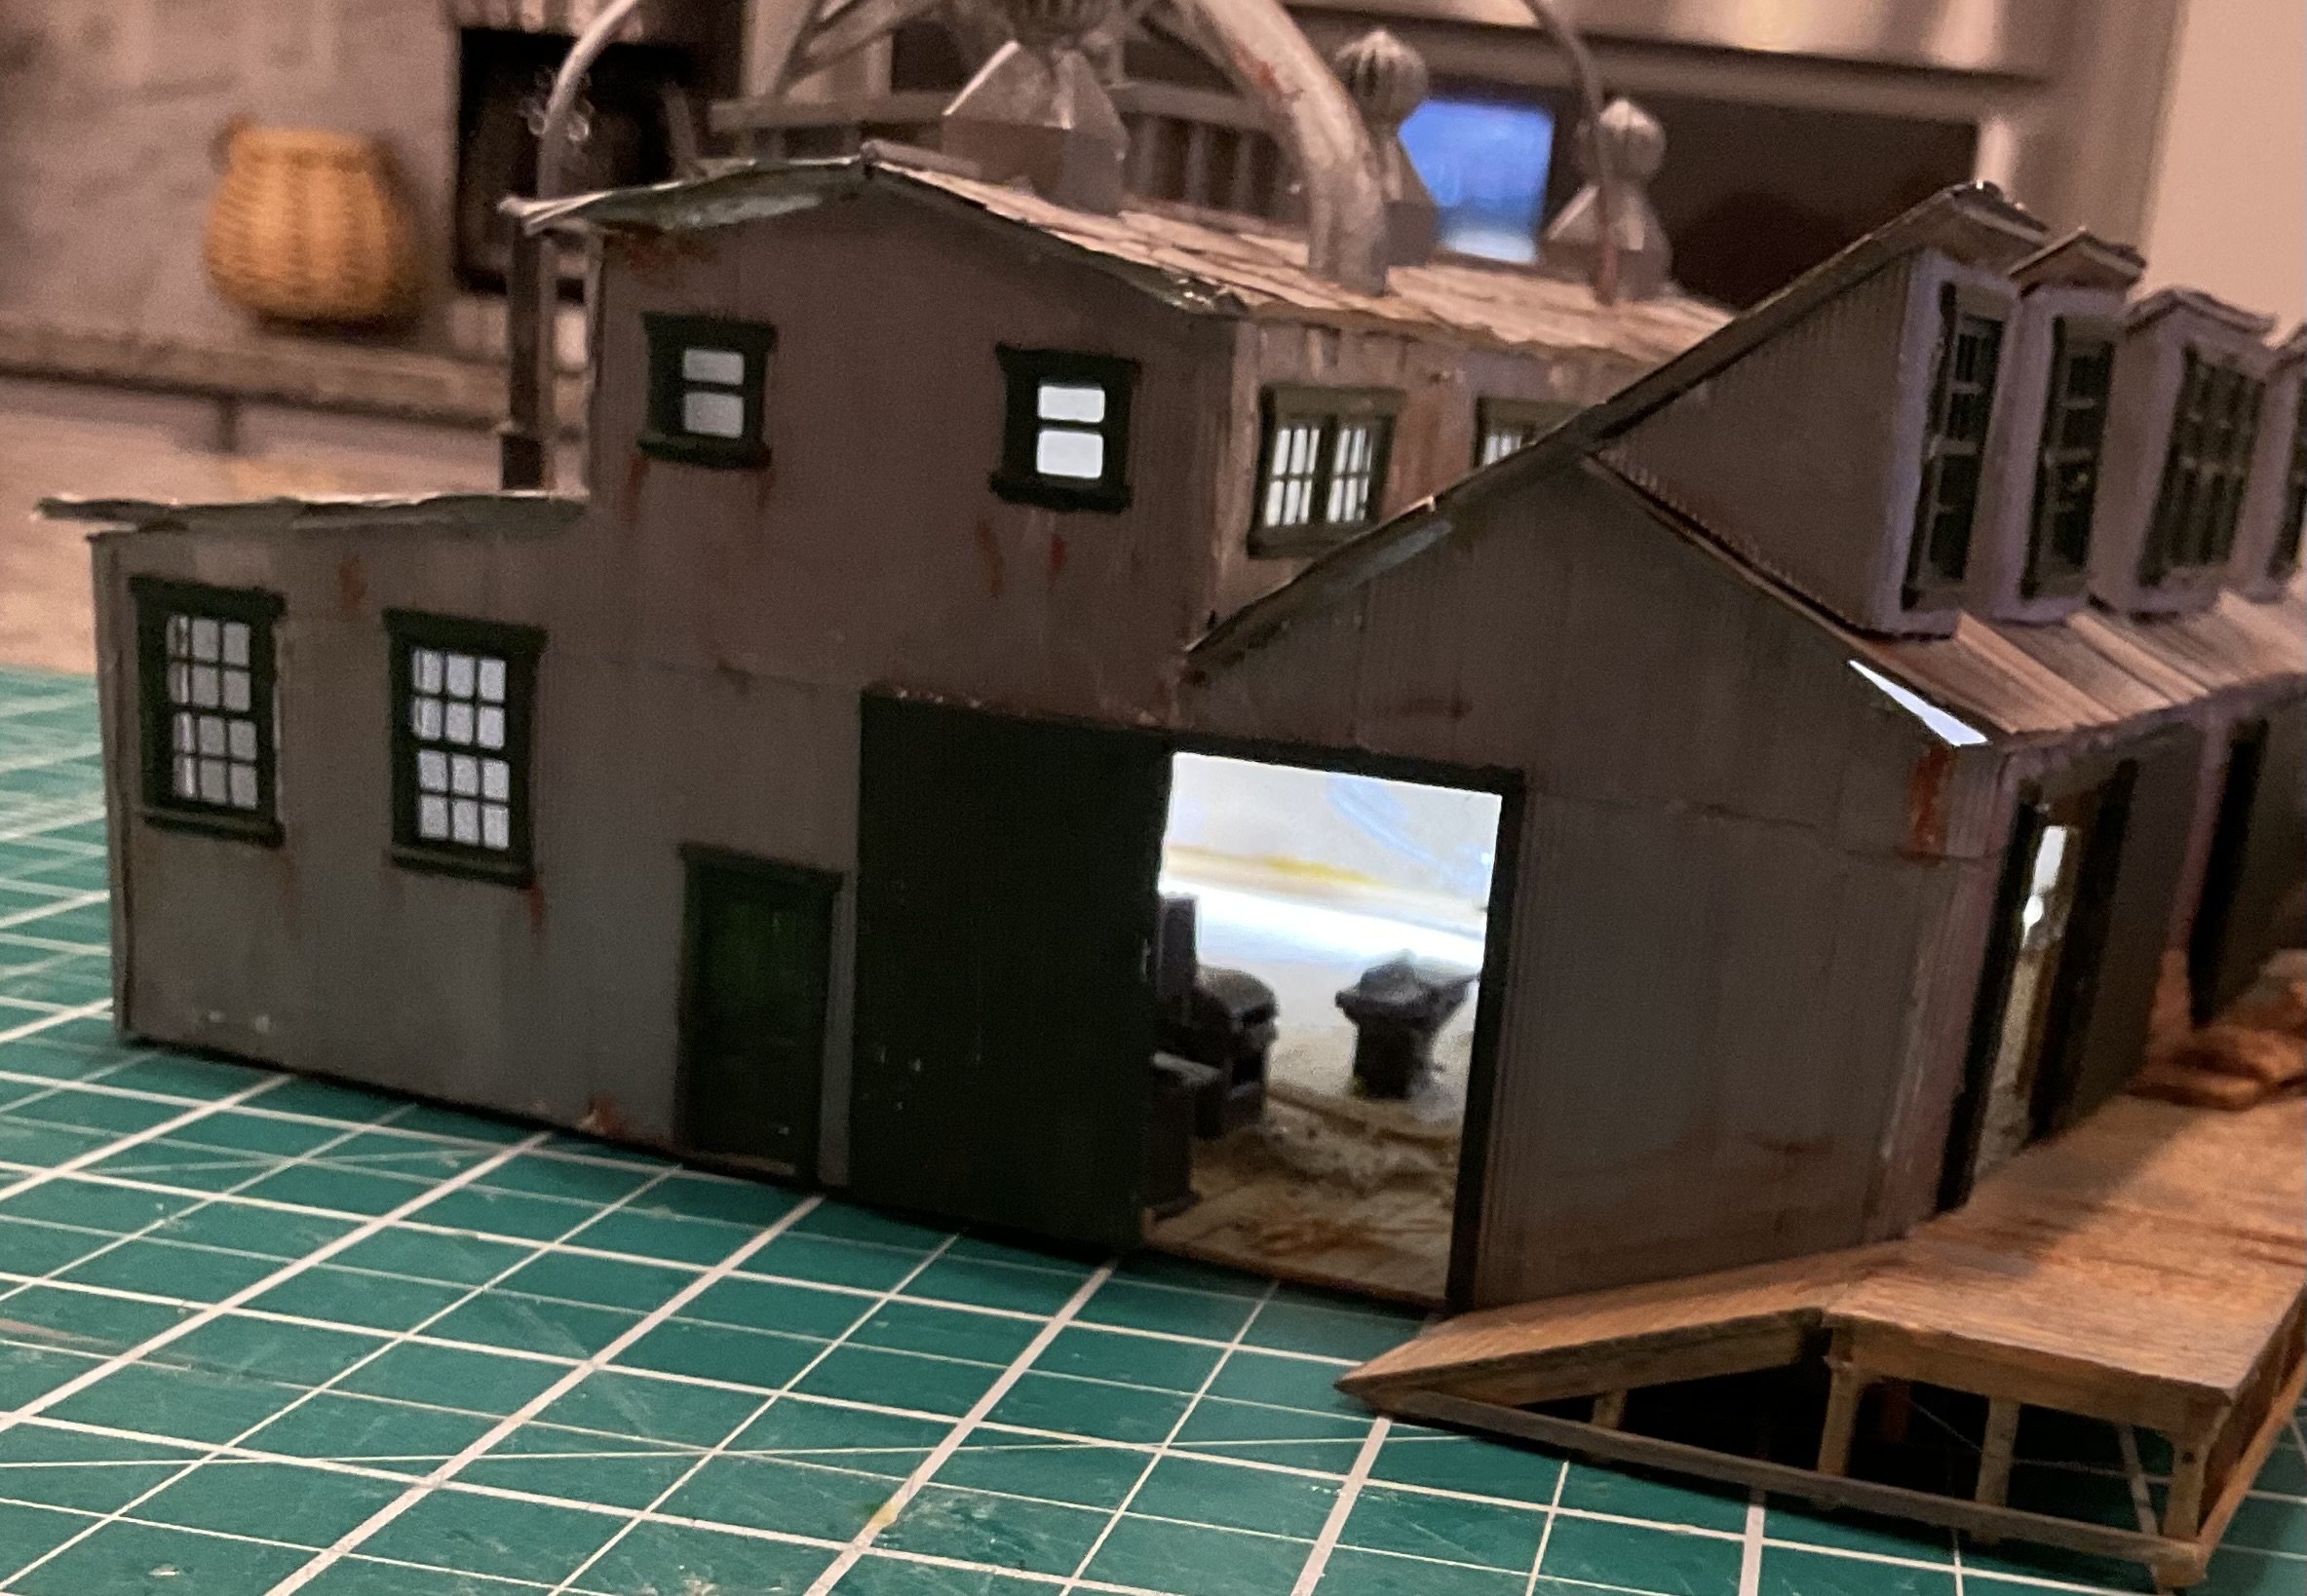
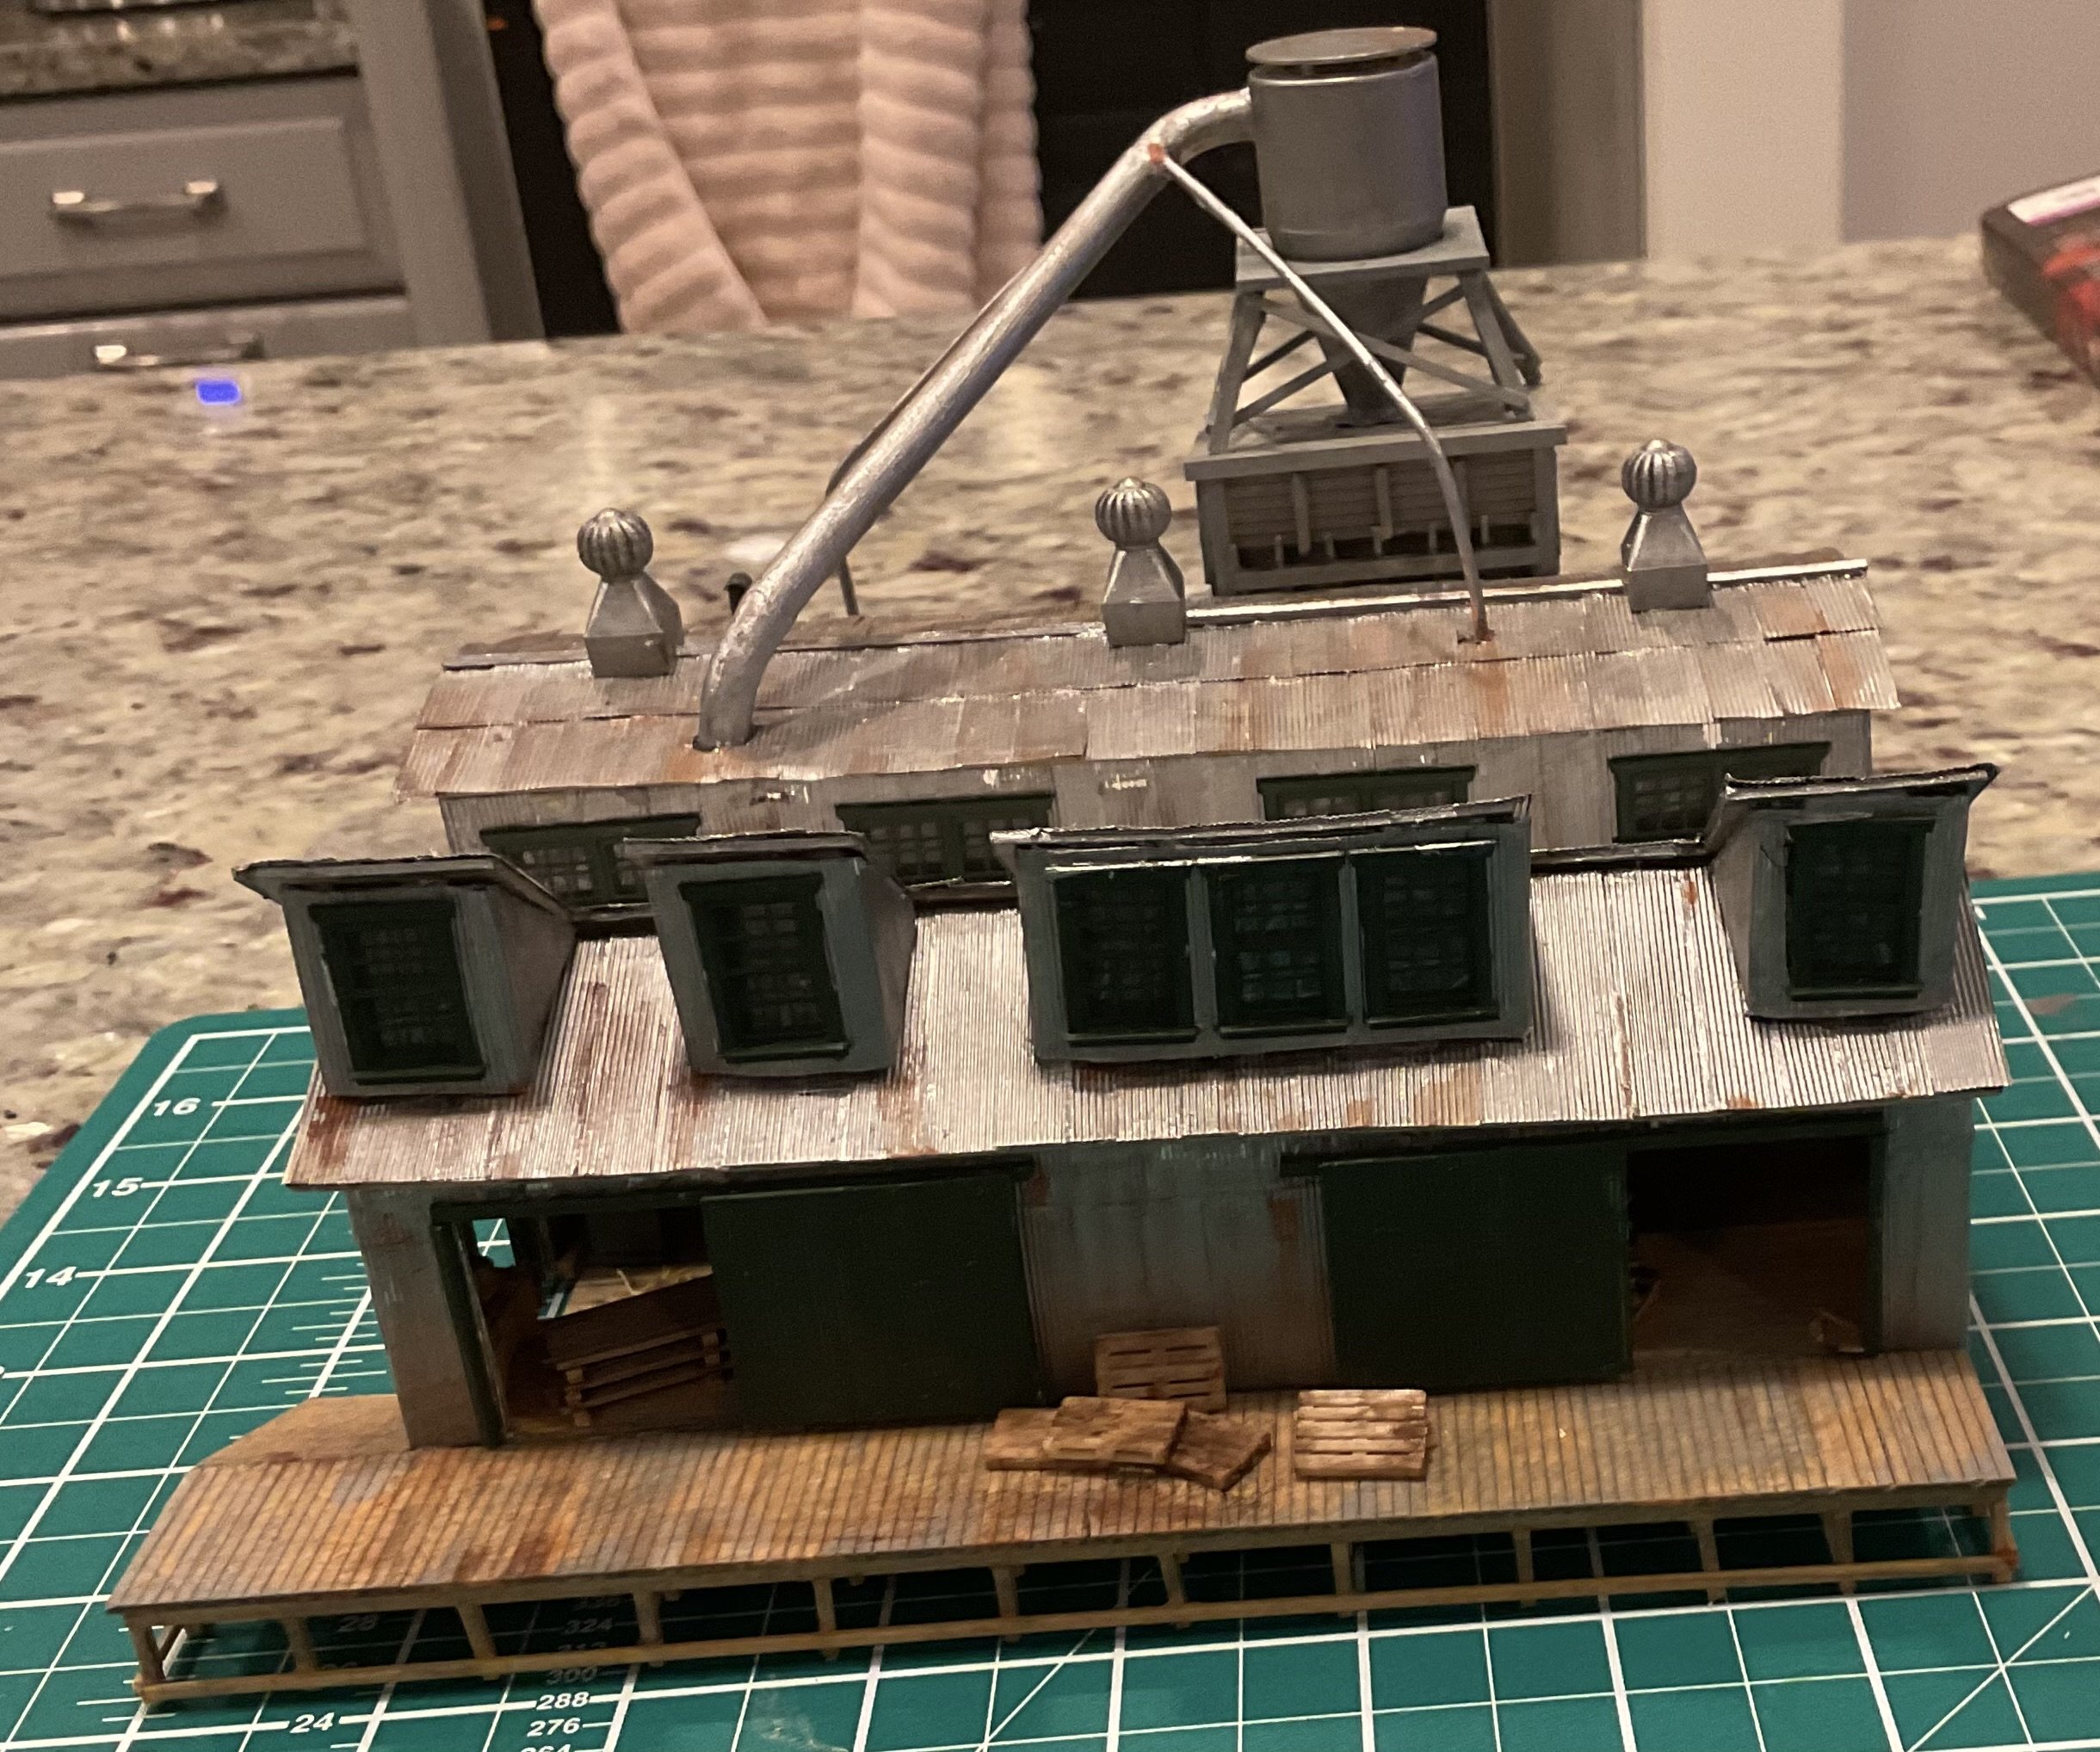
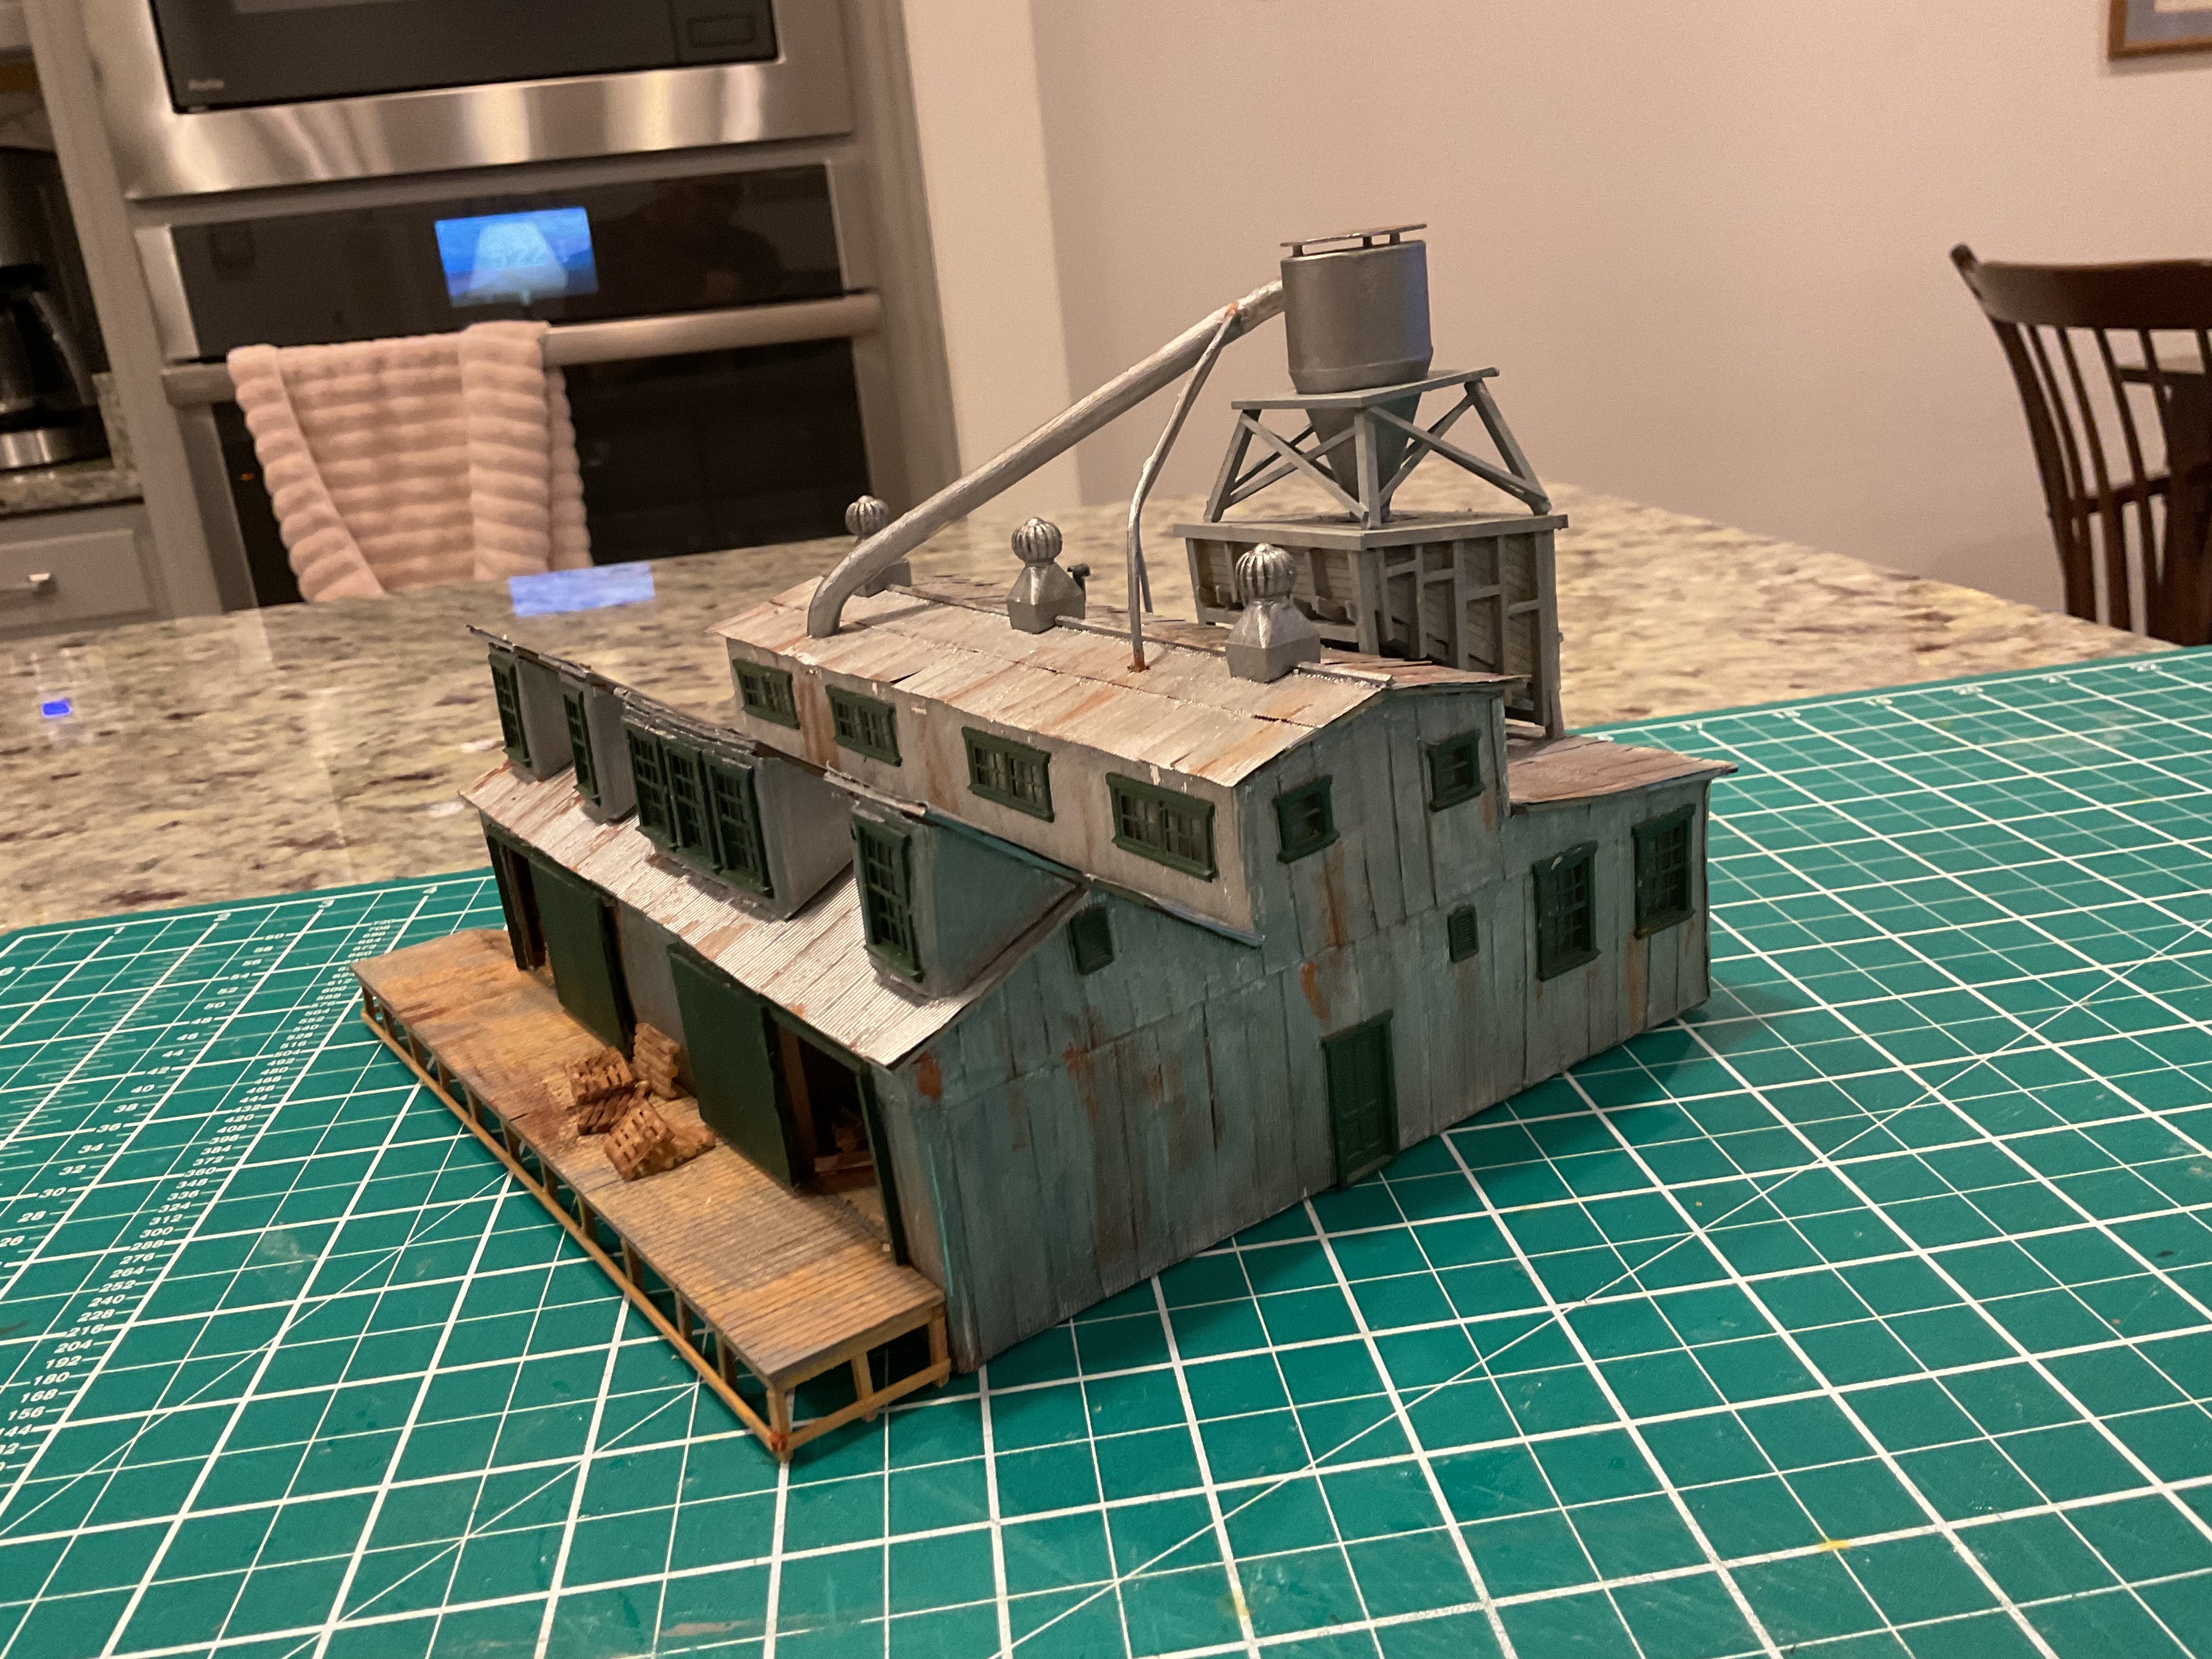
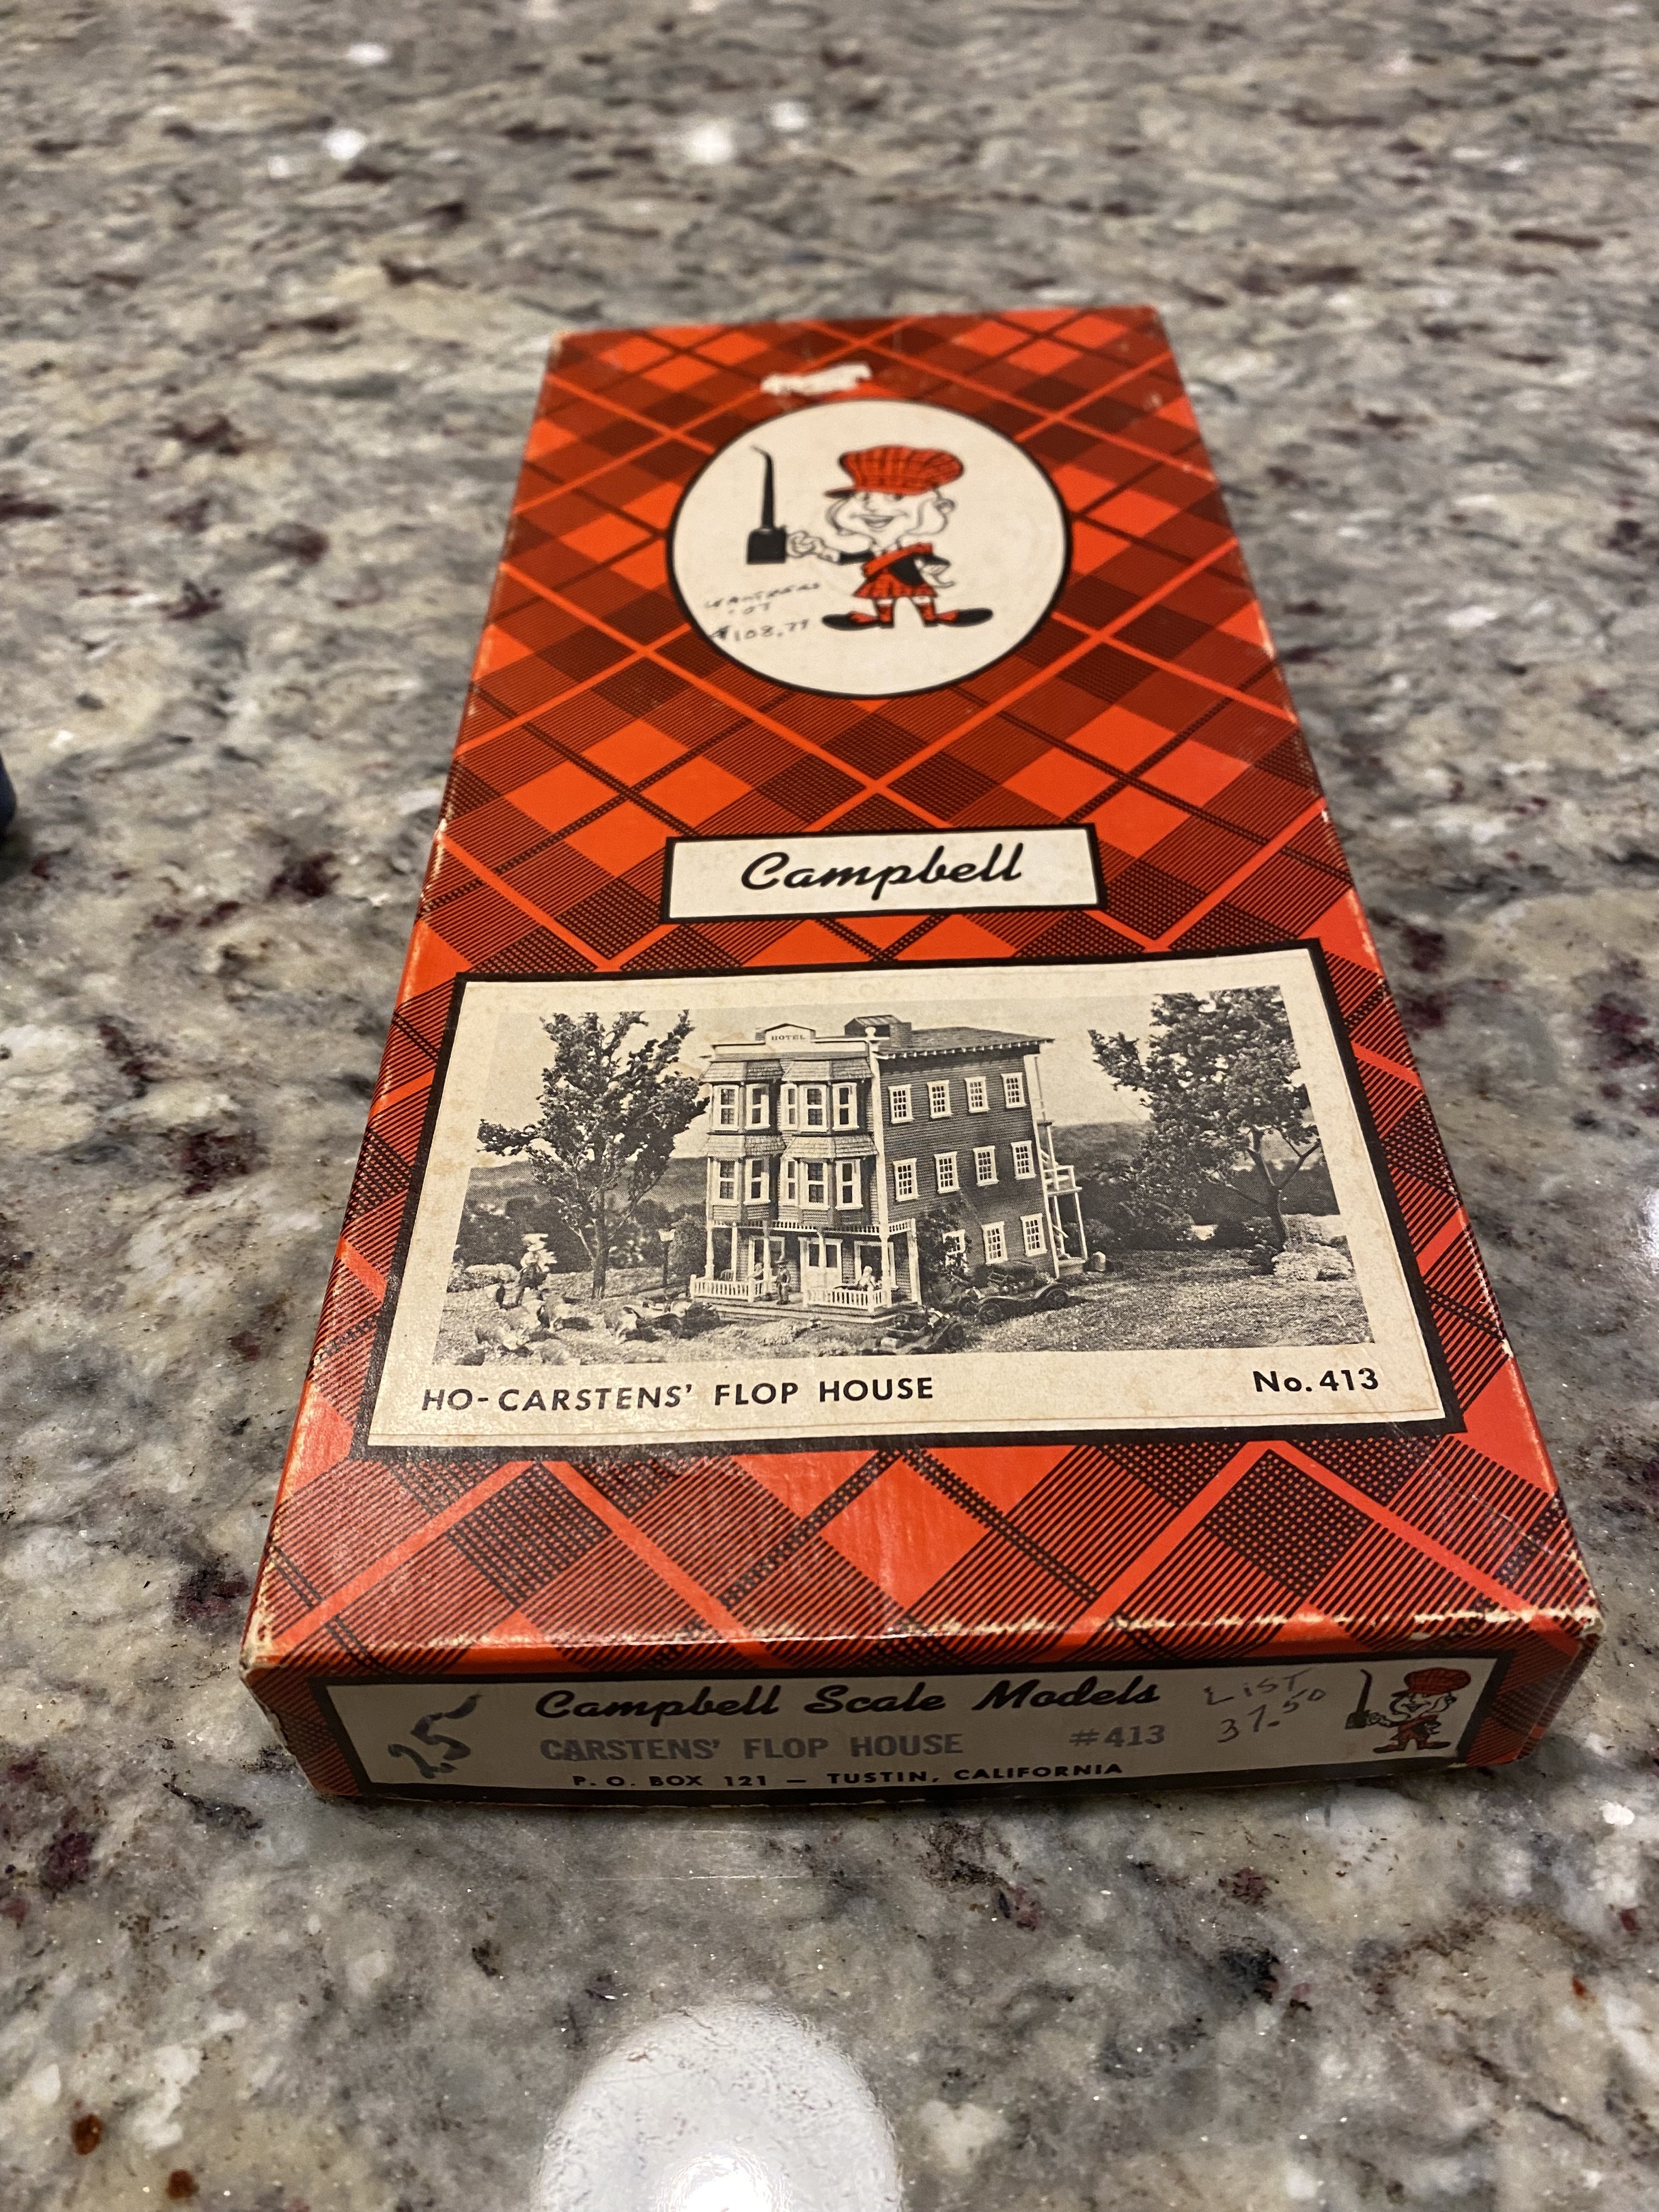
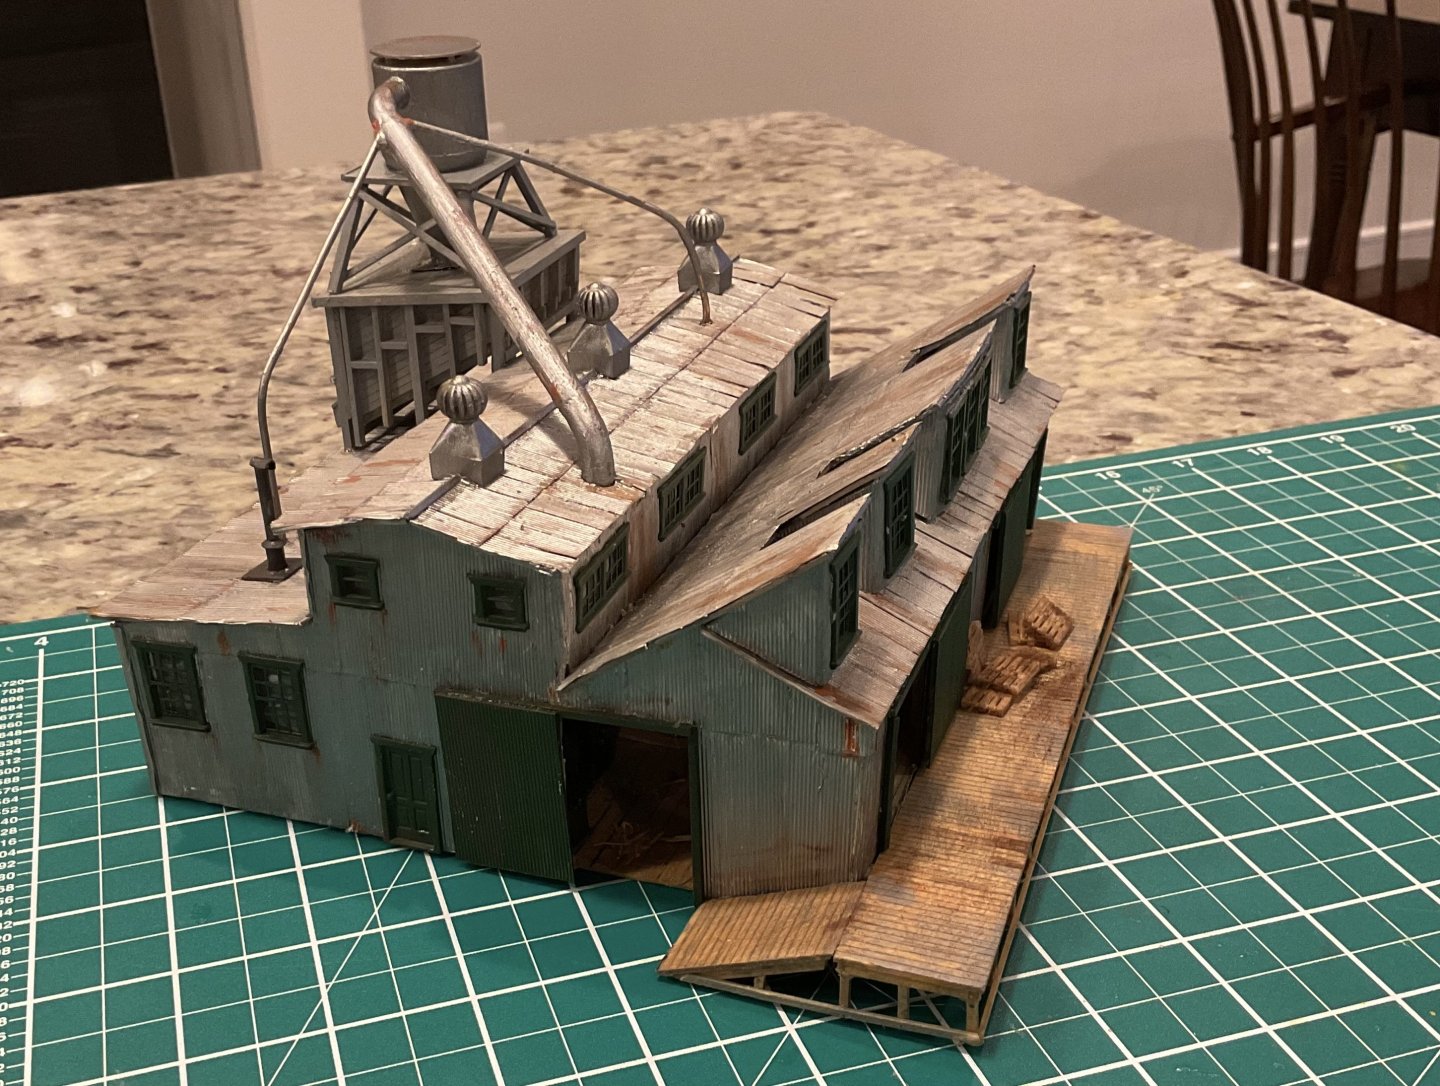
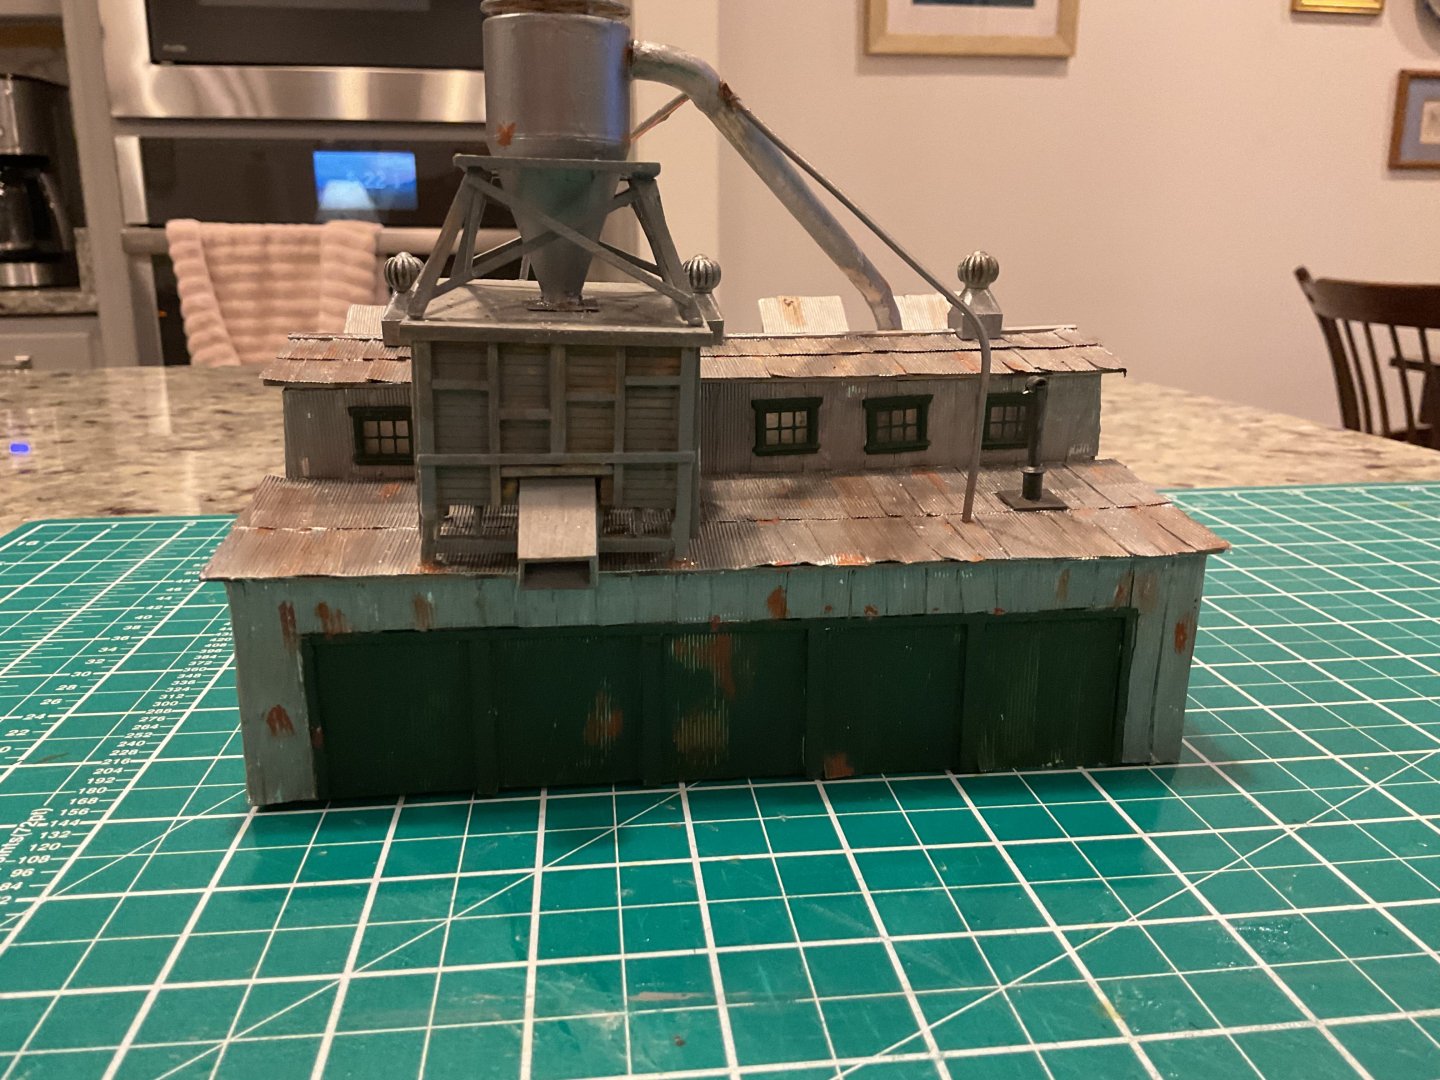
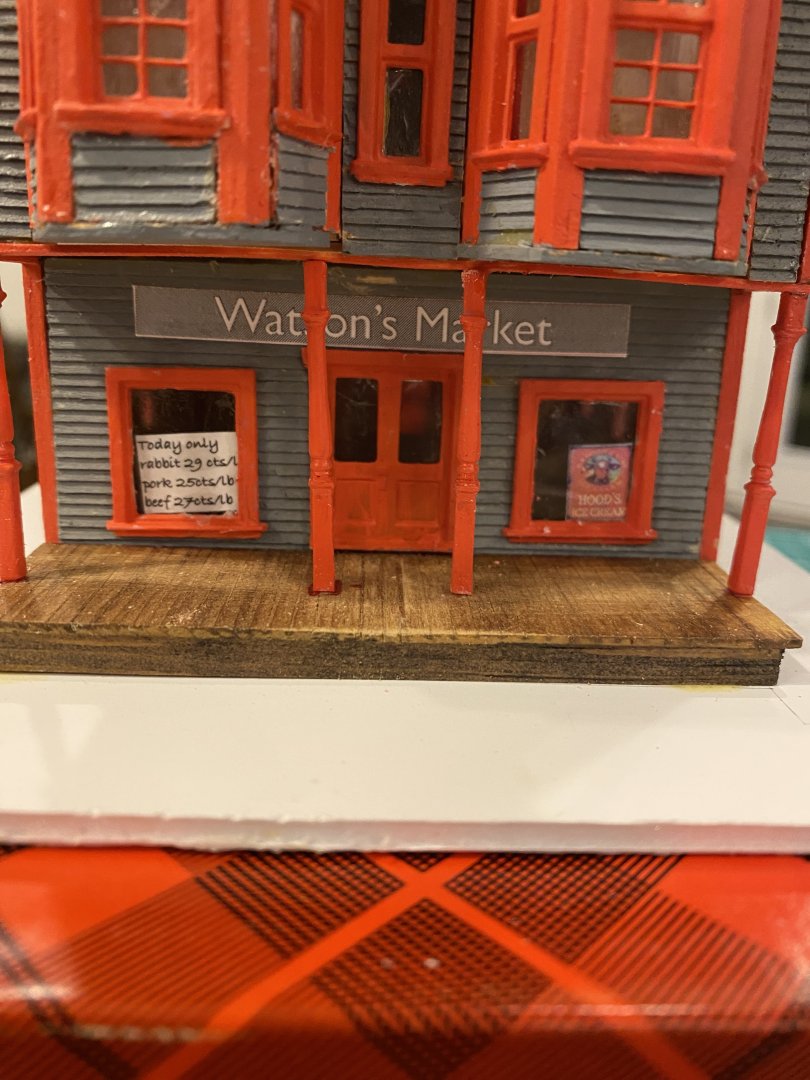
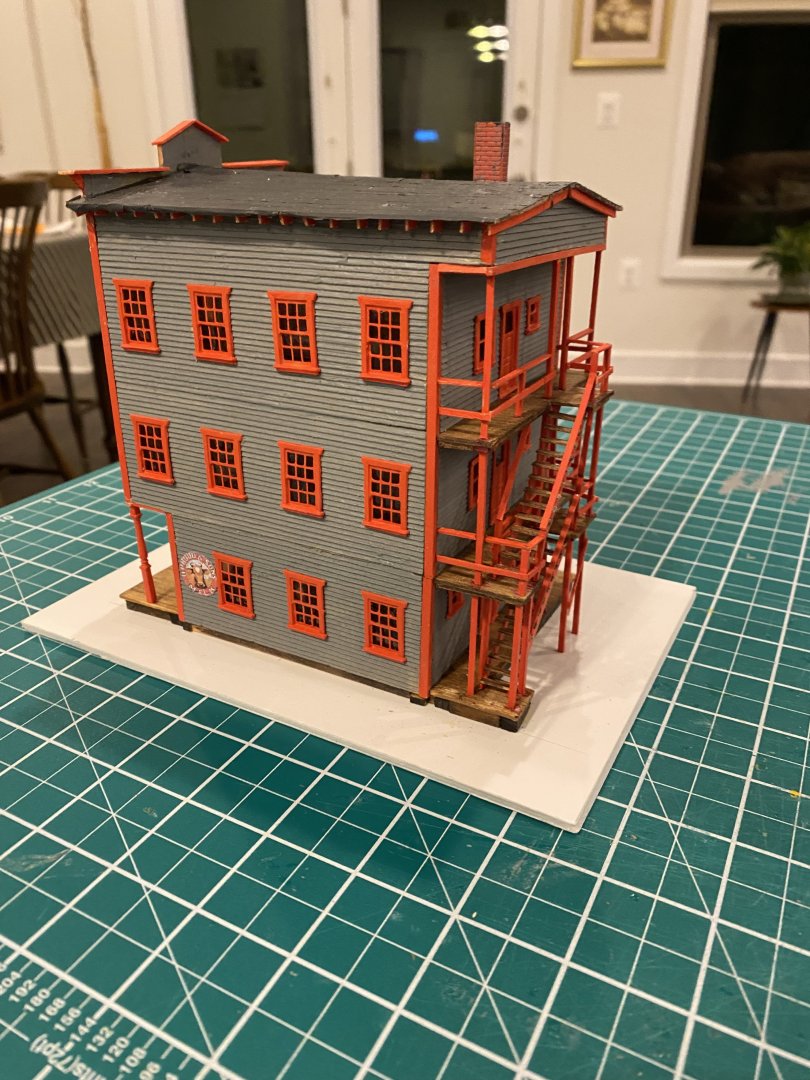
Campbell has been out of business for quite a few years but many of their kits are available on eBay. I am in the planning stages to build a micro layout in HO scale. By convention a “micro layout “ should be no larger than 4 square feet but have a reasonable operating purpose. This is my first structure for the layout, though not my first Campbell kit. I repurposed the building to be a small market with the owners living above. I left off a lot of the gingerbread and added a small loading bay on the rear left. As I was typing I realized that I hadn’t installed the vent pipe on the roof.


- 11 replies
-
- 14
-

-
-
Thanks. No interest yet. Would like the kits to go to someone who would build them. Money is not an issue.
-
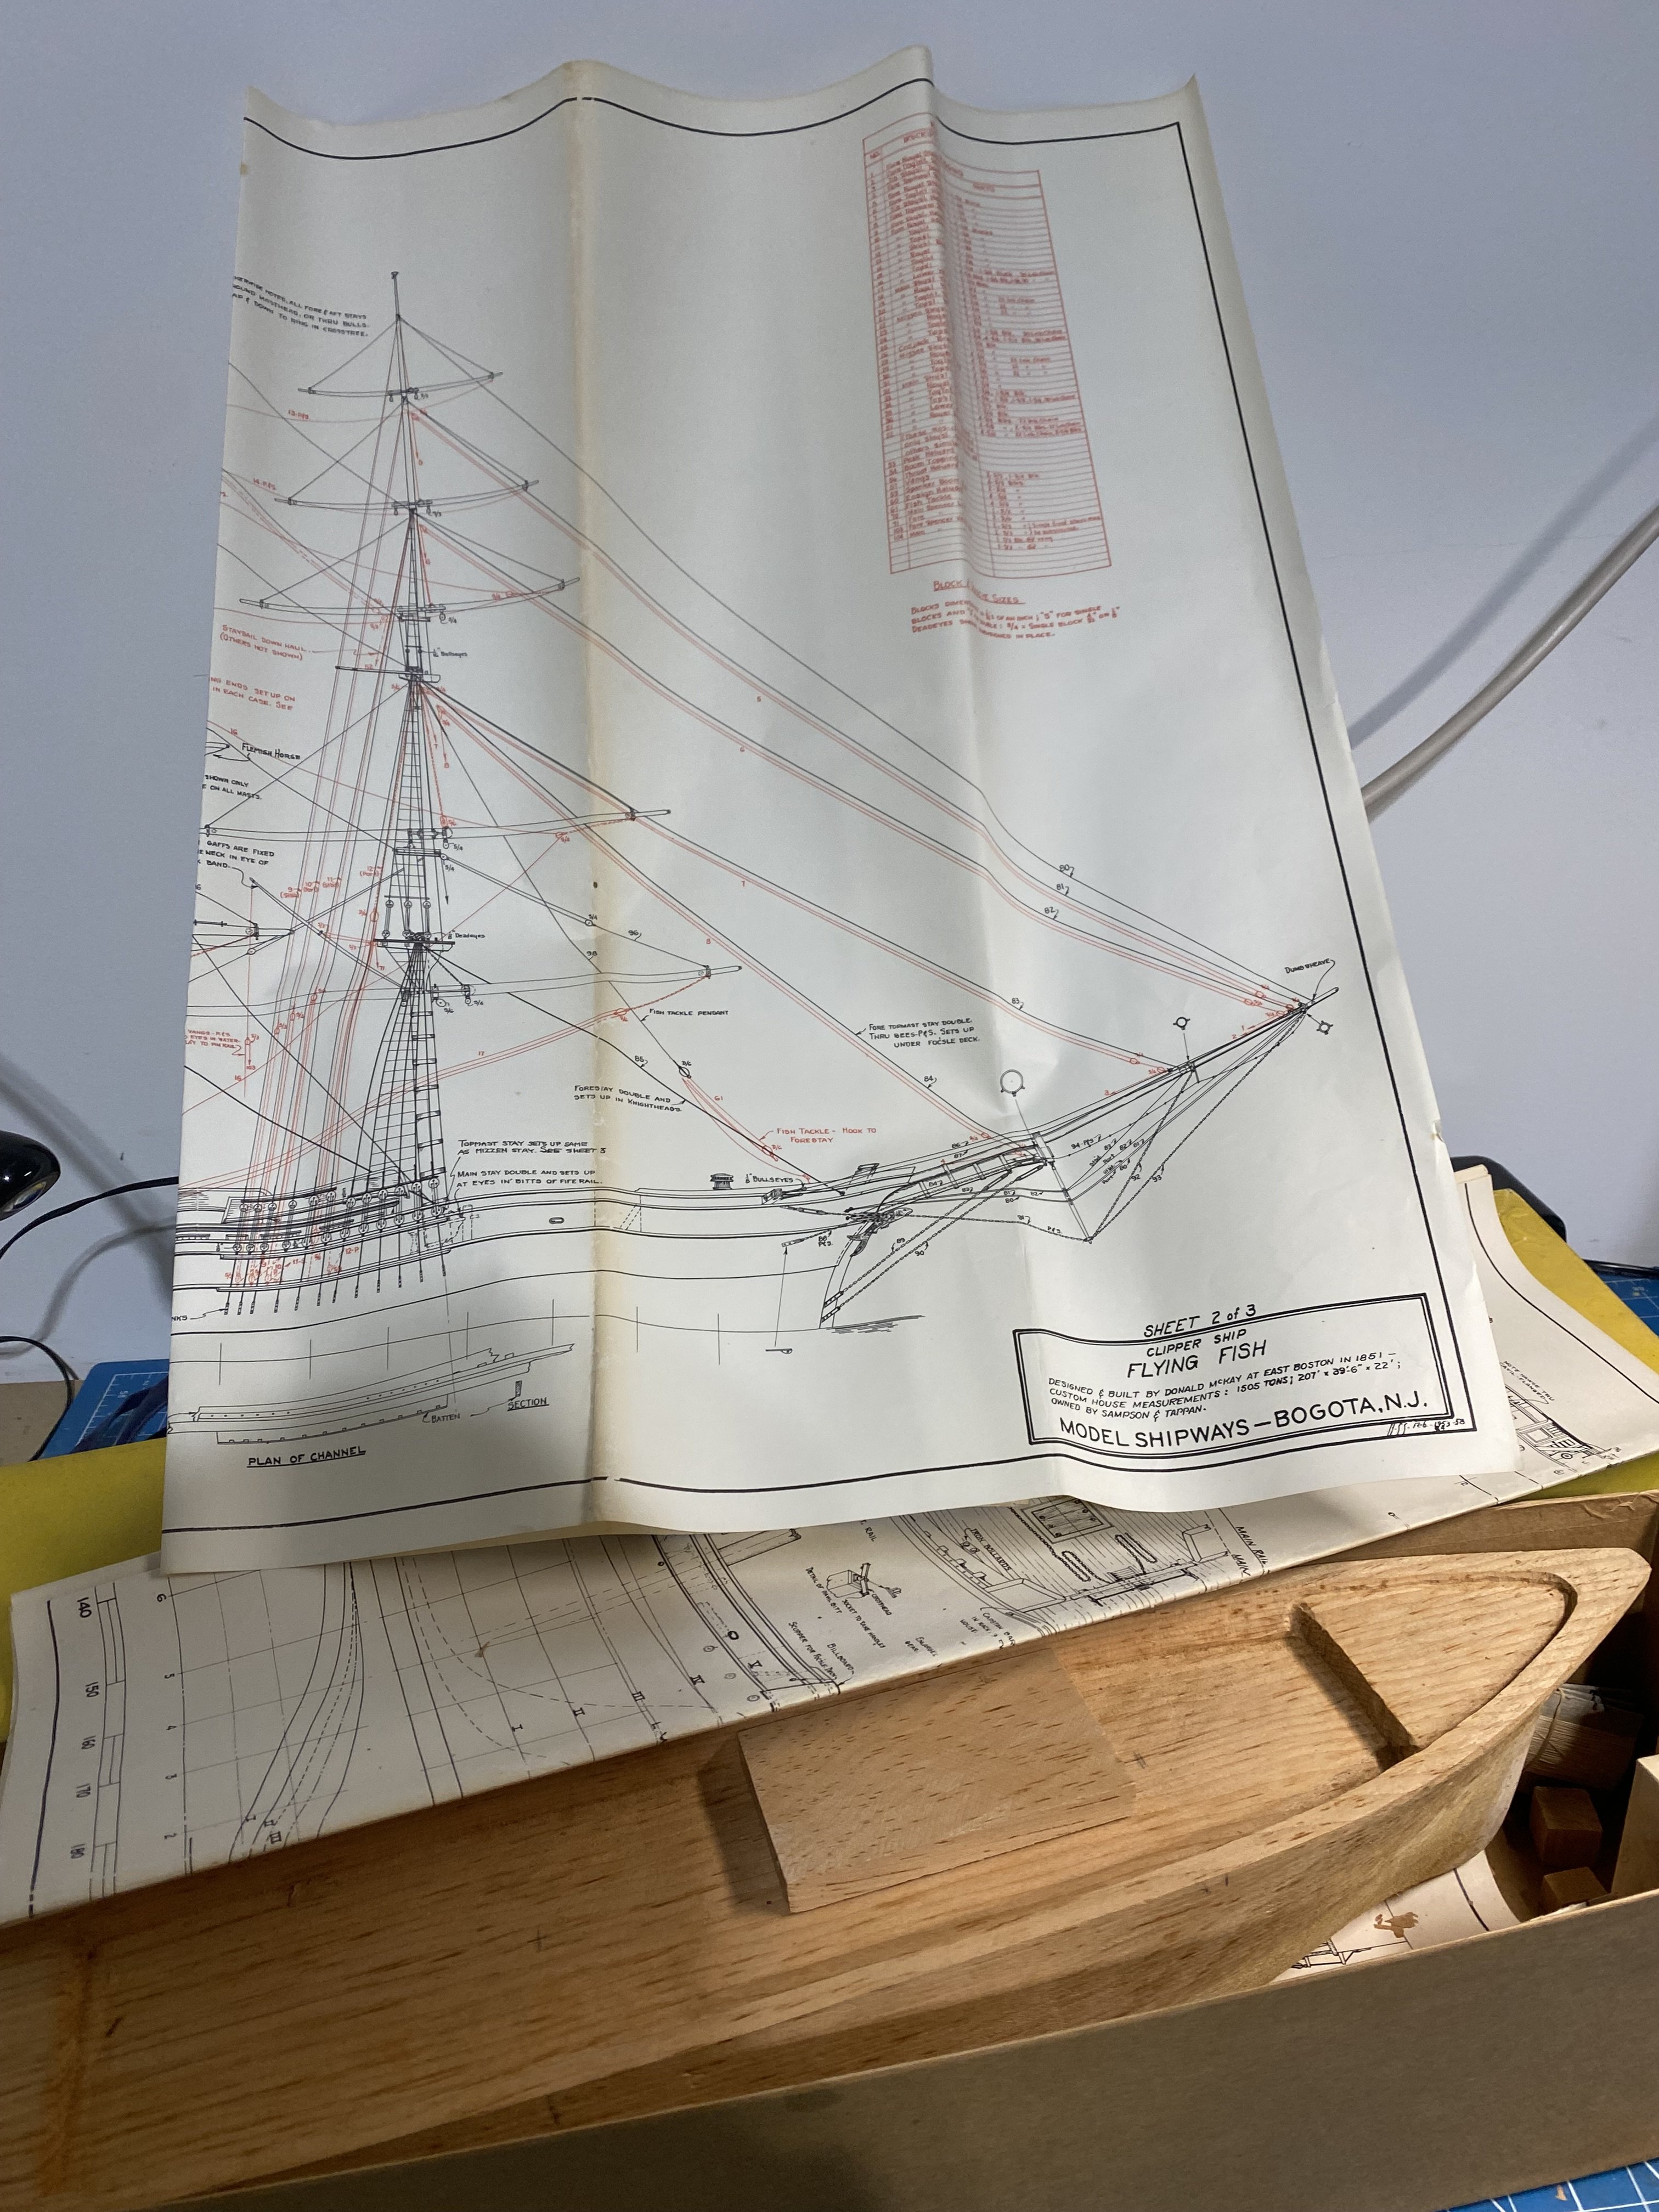
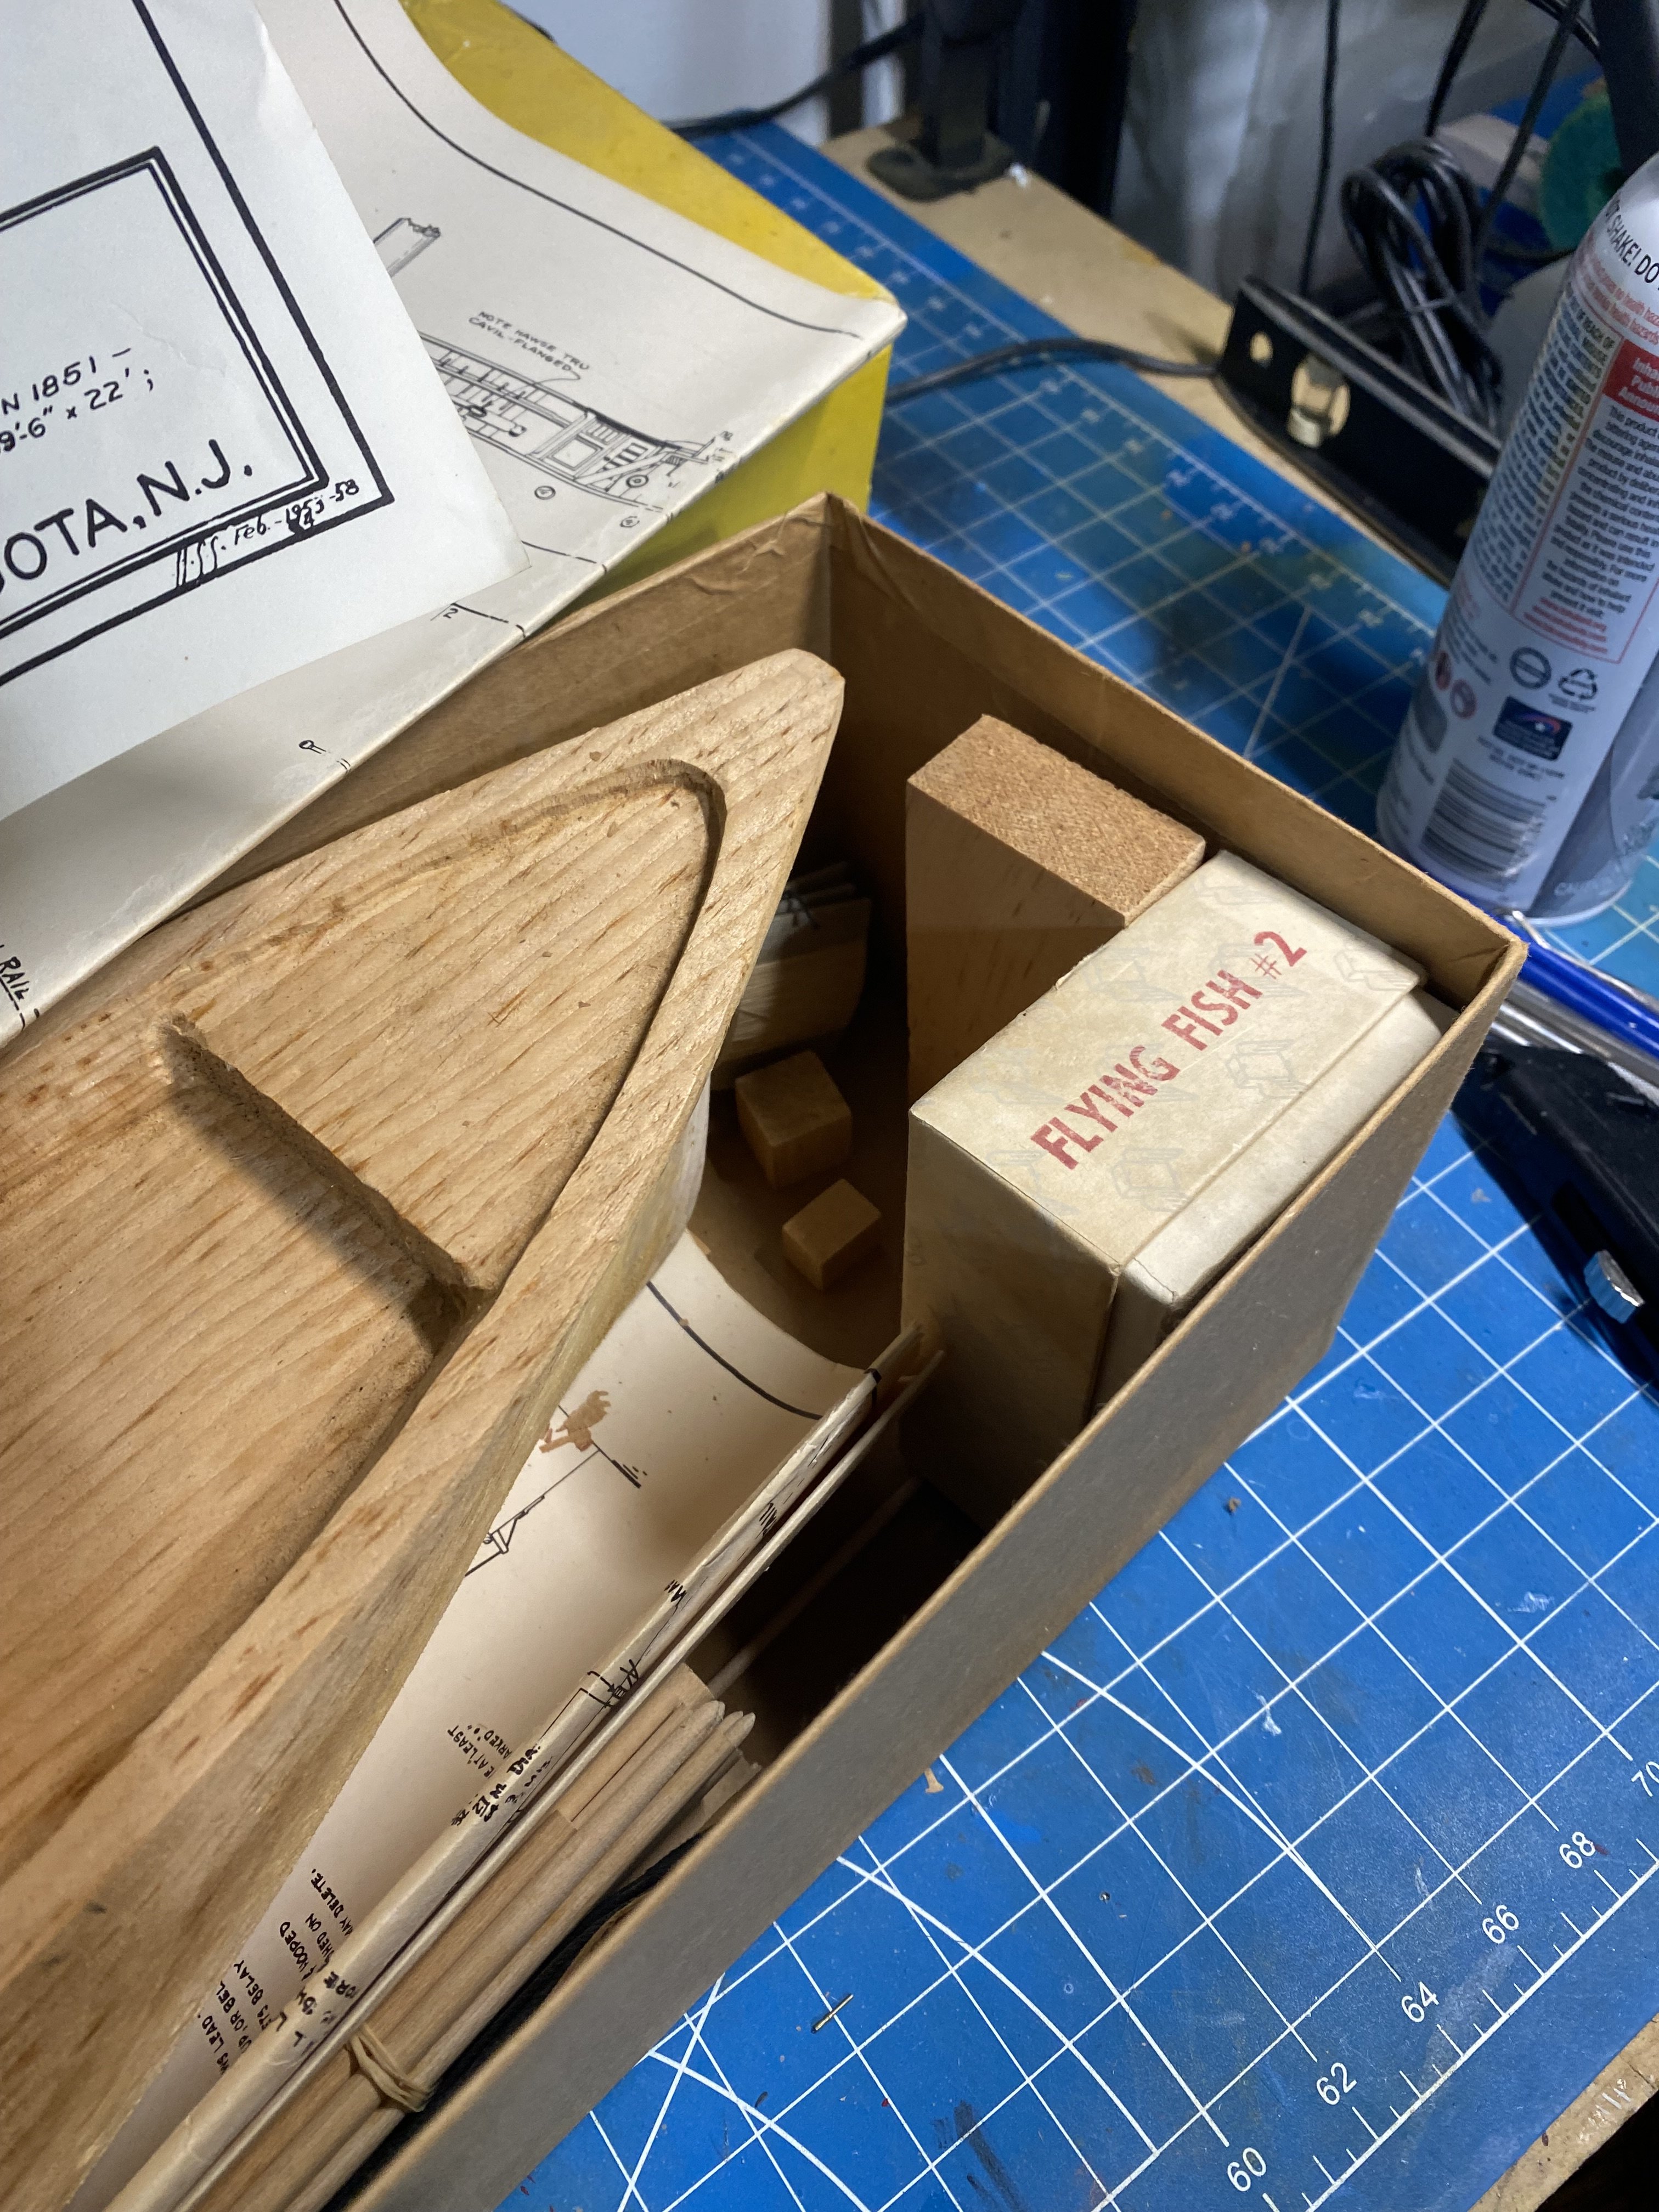
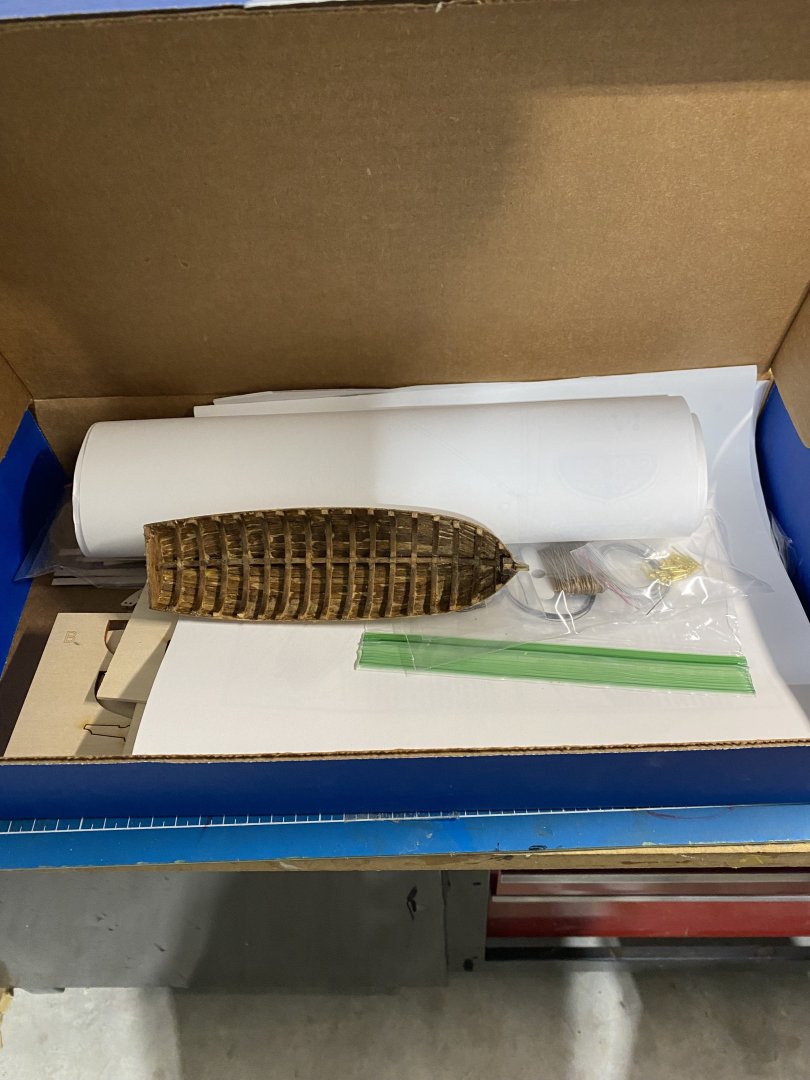
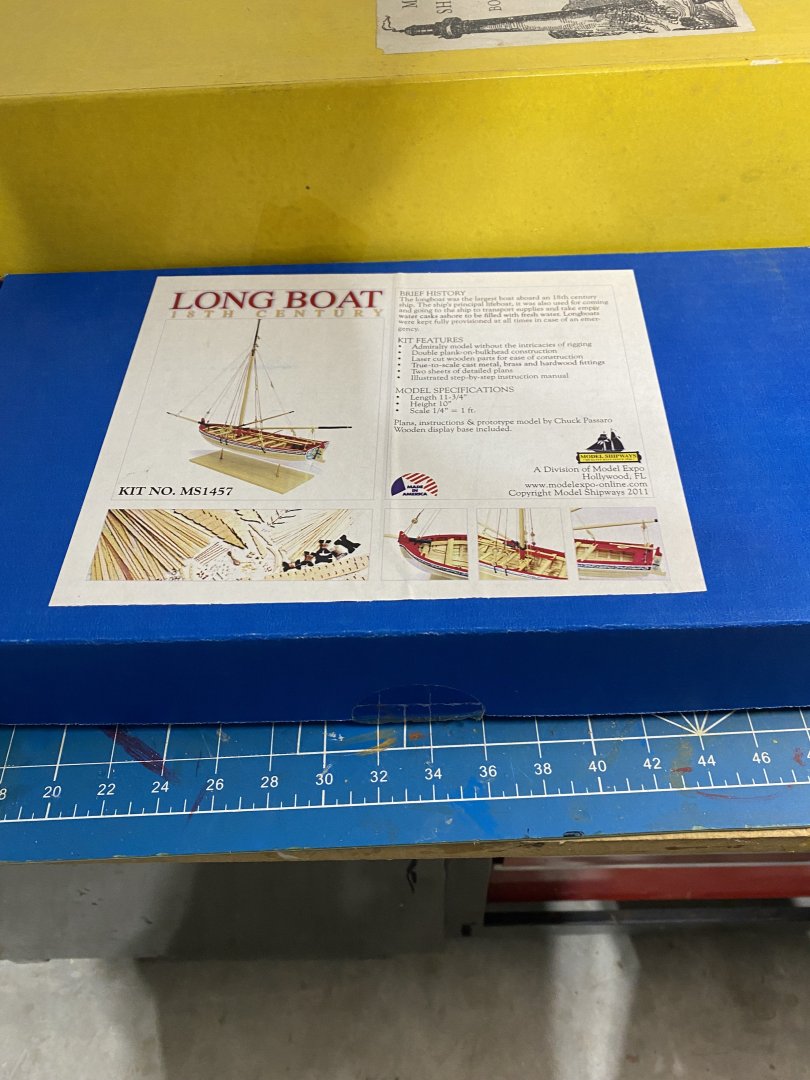
Some more items: see photos Yellow Box “Flying Fish”. I bought this on eBay a number of years ago and never started it. It appears to be complete but I can’t guarantee that. There are some pencil marks on the hull so a previous owner must have started it. I see this kit on eBay asking $180-$299. The box is heavy and I expect shipping to be $30+. Someone want to make an offer? started Long Boat. I made a mess of the hull when staining so I will let it go for the price to mail it Hobby Zone building slip. This is too bulky to ship. $20 if someone wants to pick it up. I live in Ashburn Va, DC suburb.


-
It is mainly ships that I am fed up with. I am planning on returning to a long lost love of model trains.
-
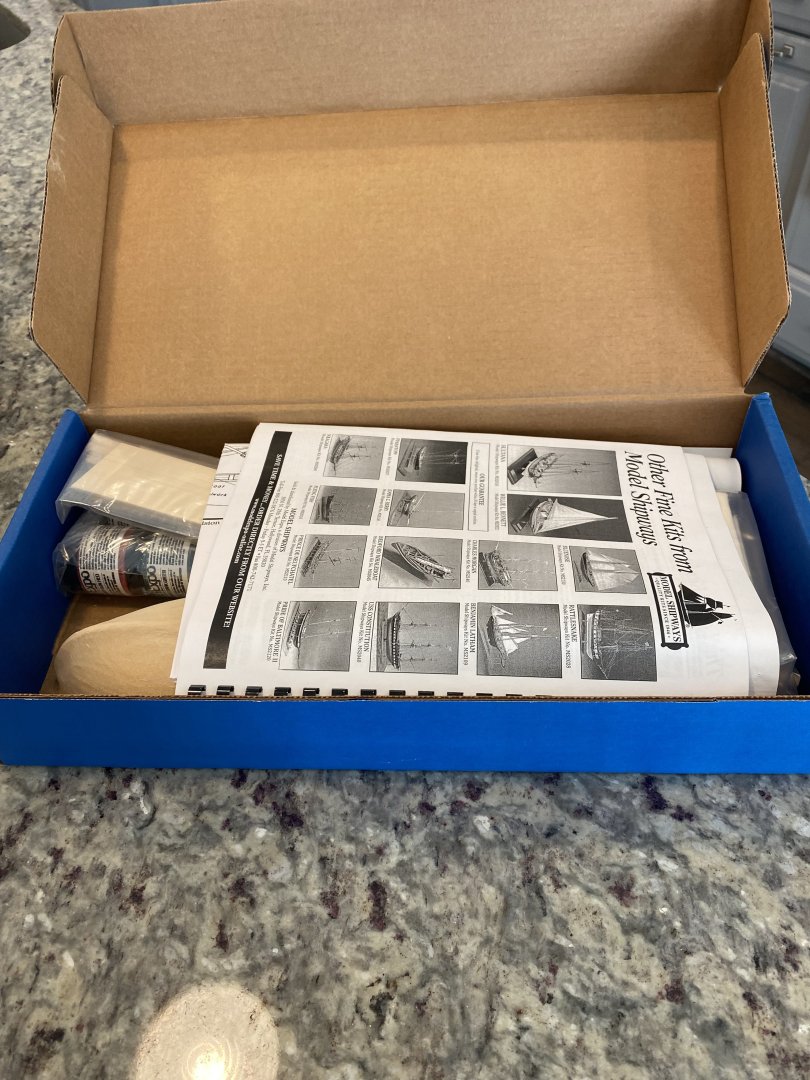
I have no more room to display any more ship models and my last 2 builds were no longer enjoyable. So I am done with ship models and am going to clear out my small stash. First up is Model Shipways Katy of Norfolk with the paints included. I do not remember what I paid for it but based on prices I see on-line I think $100 plus shipping ($10 -$20 I think) is a fair price. Or make me an offer. If interested send a message. thanks for reading. I have a number of books that may be of interest and a yellow box Flying Fish kit that I will post soon. Ron Gove

-
Thank you. It is very fragile. Joints were popping until the very end.
-
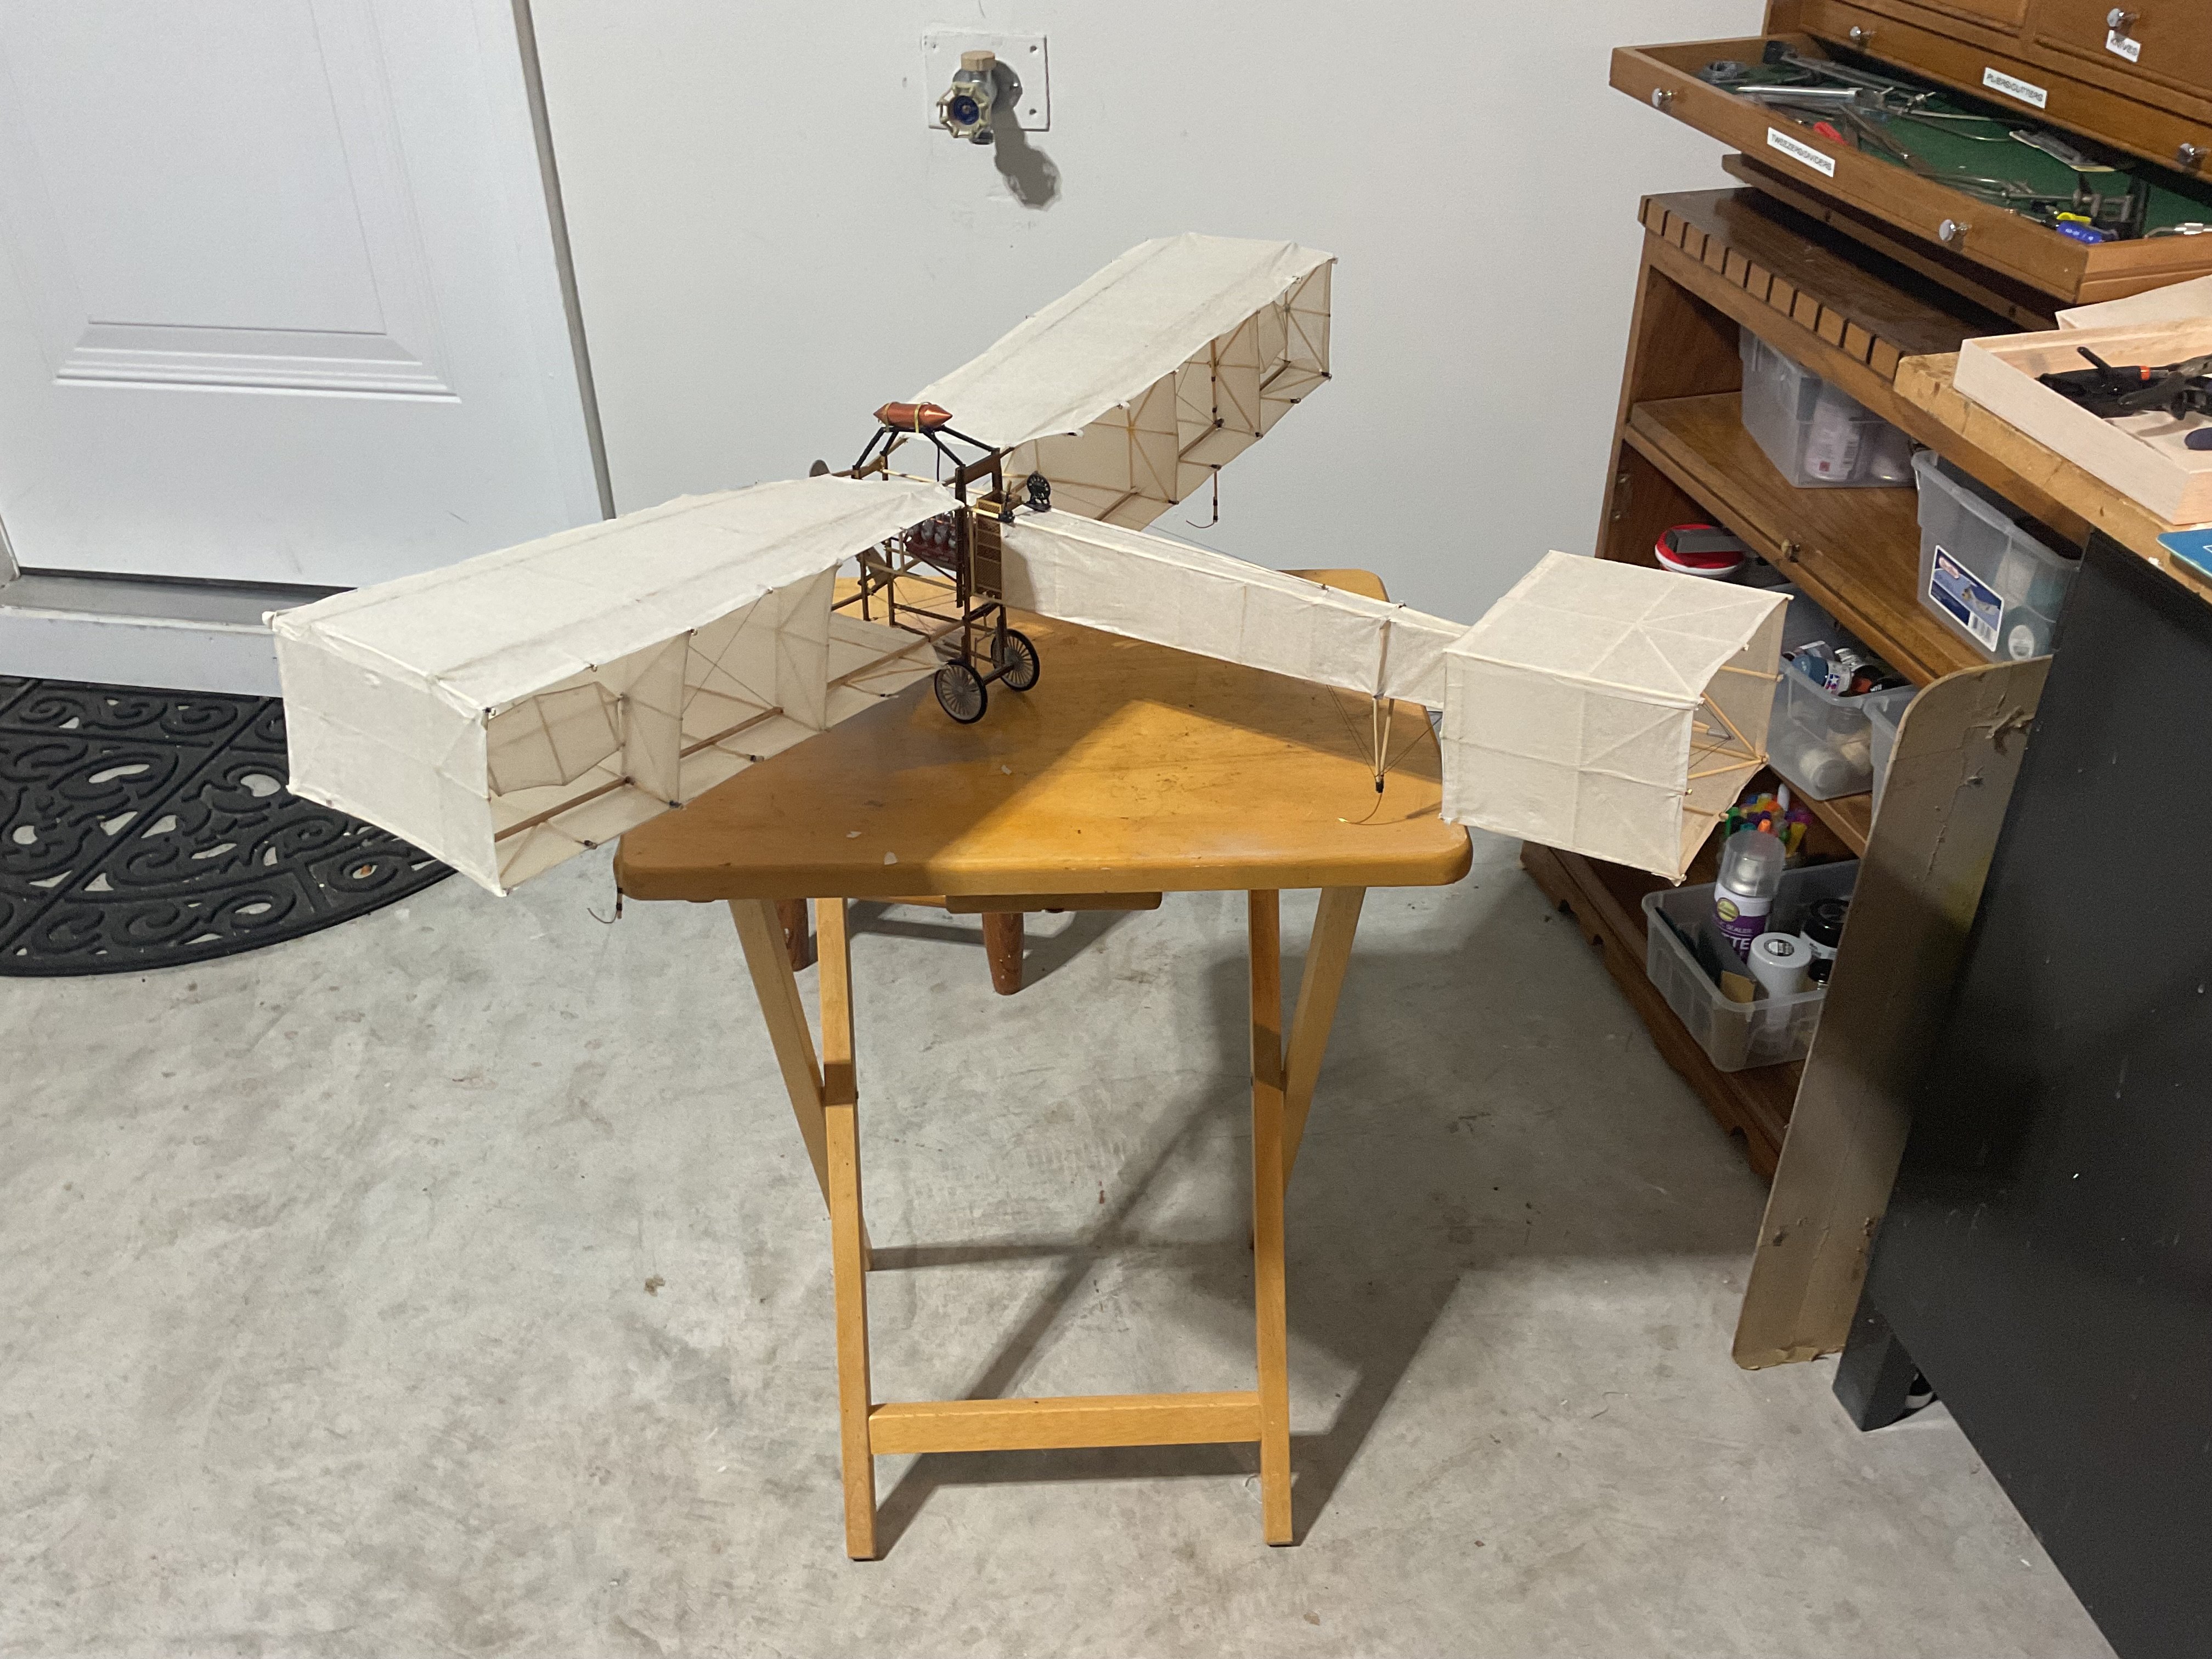
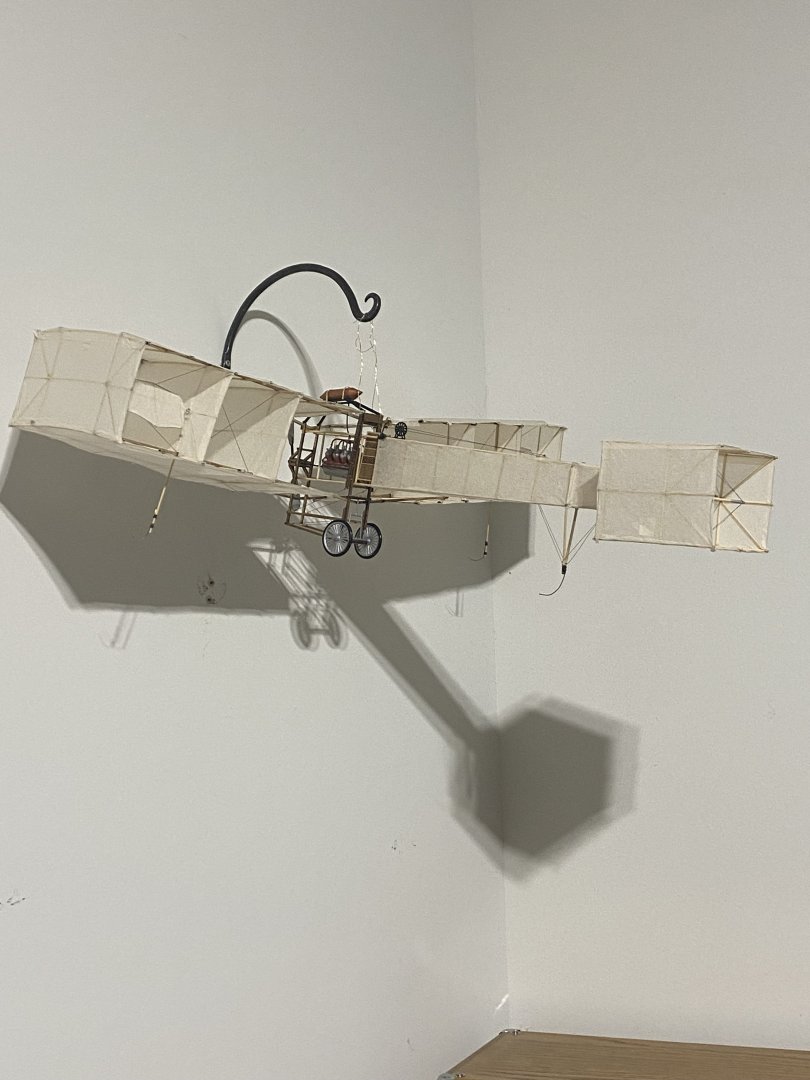
I ended up hanging it in the garage. A simple wall hook I had held it out far enough to suspend it from the front of the nacelle.
-
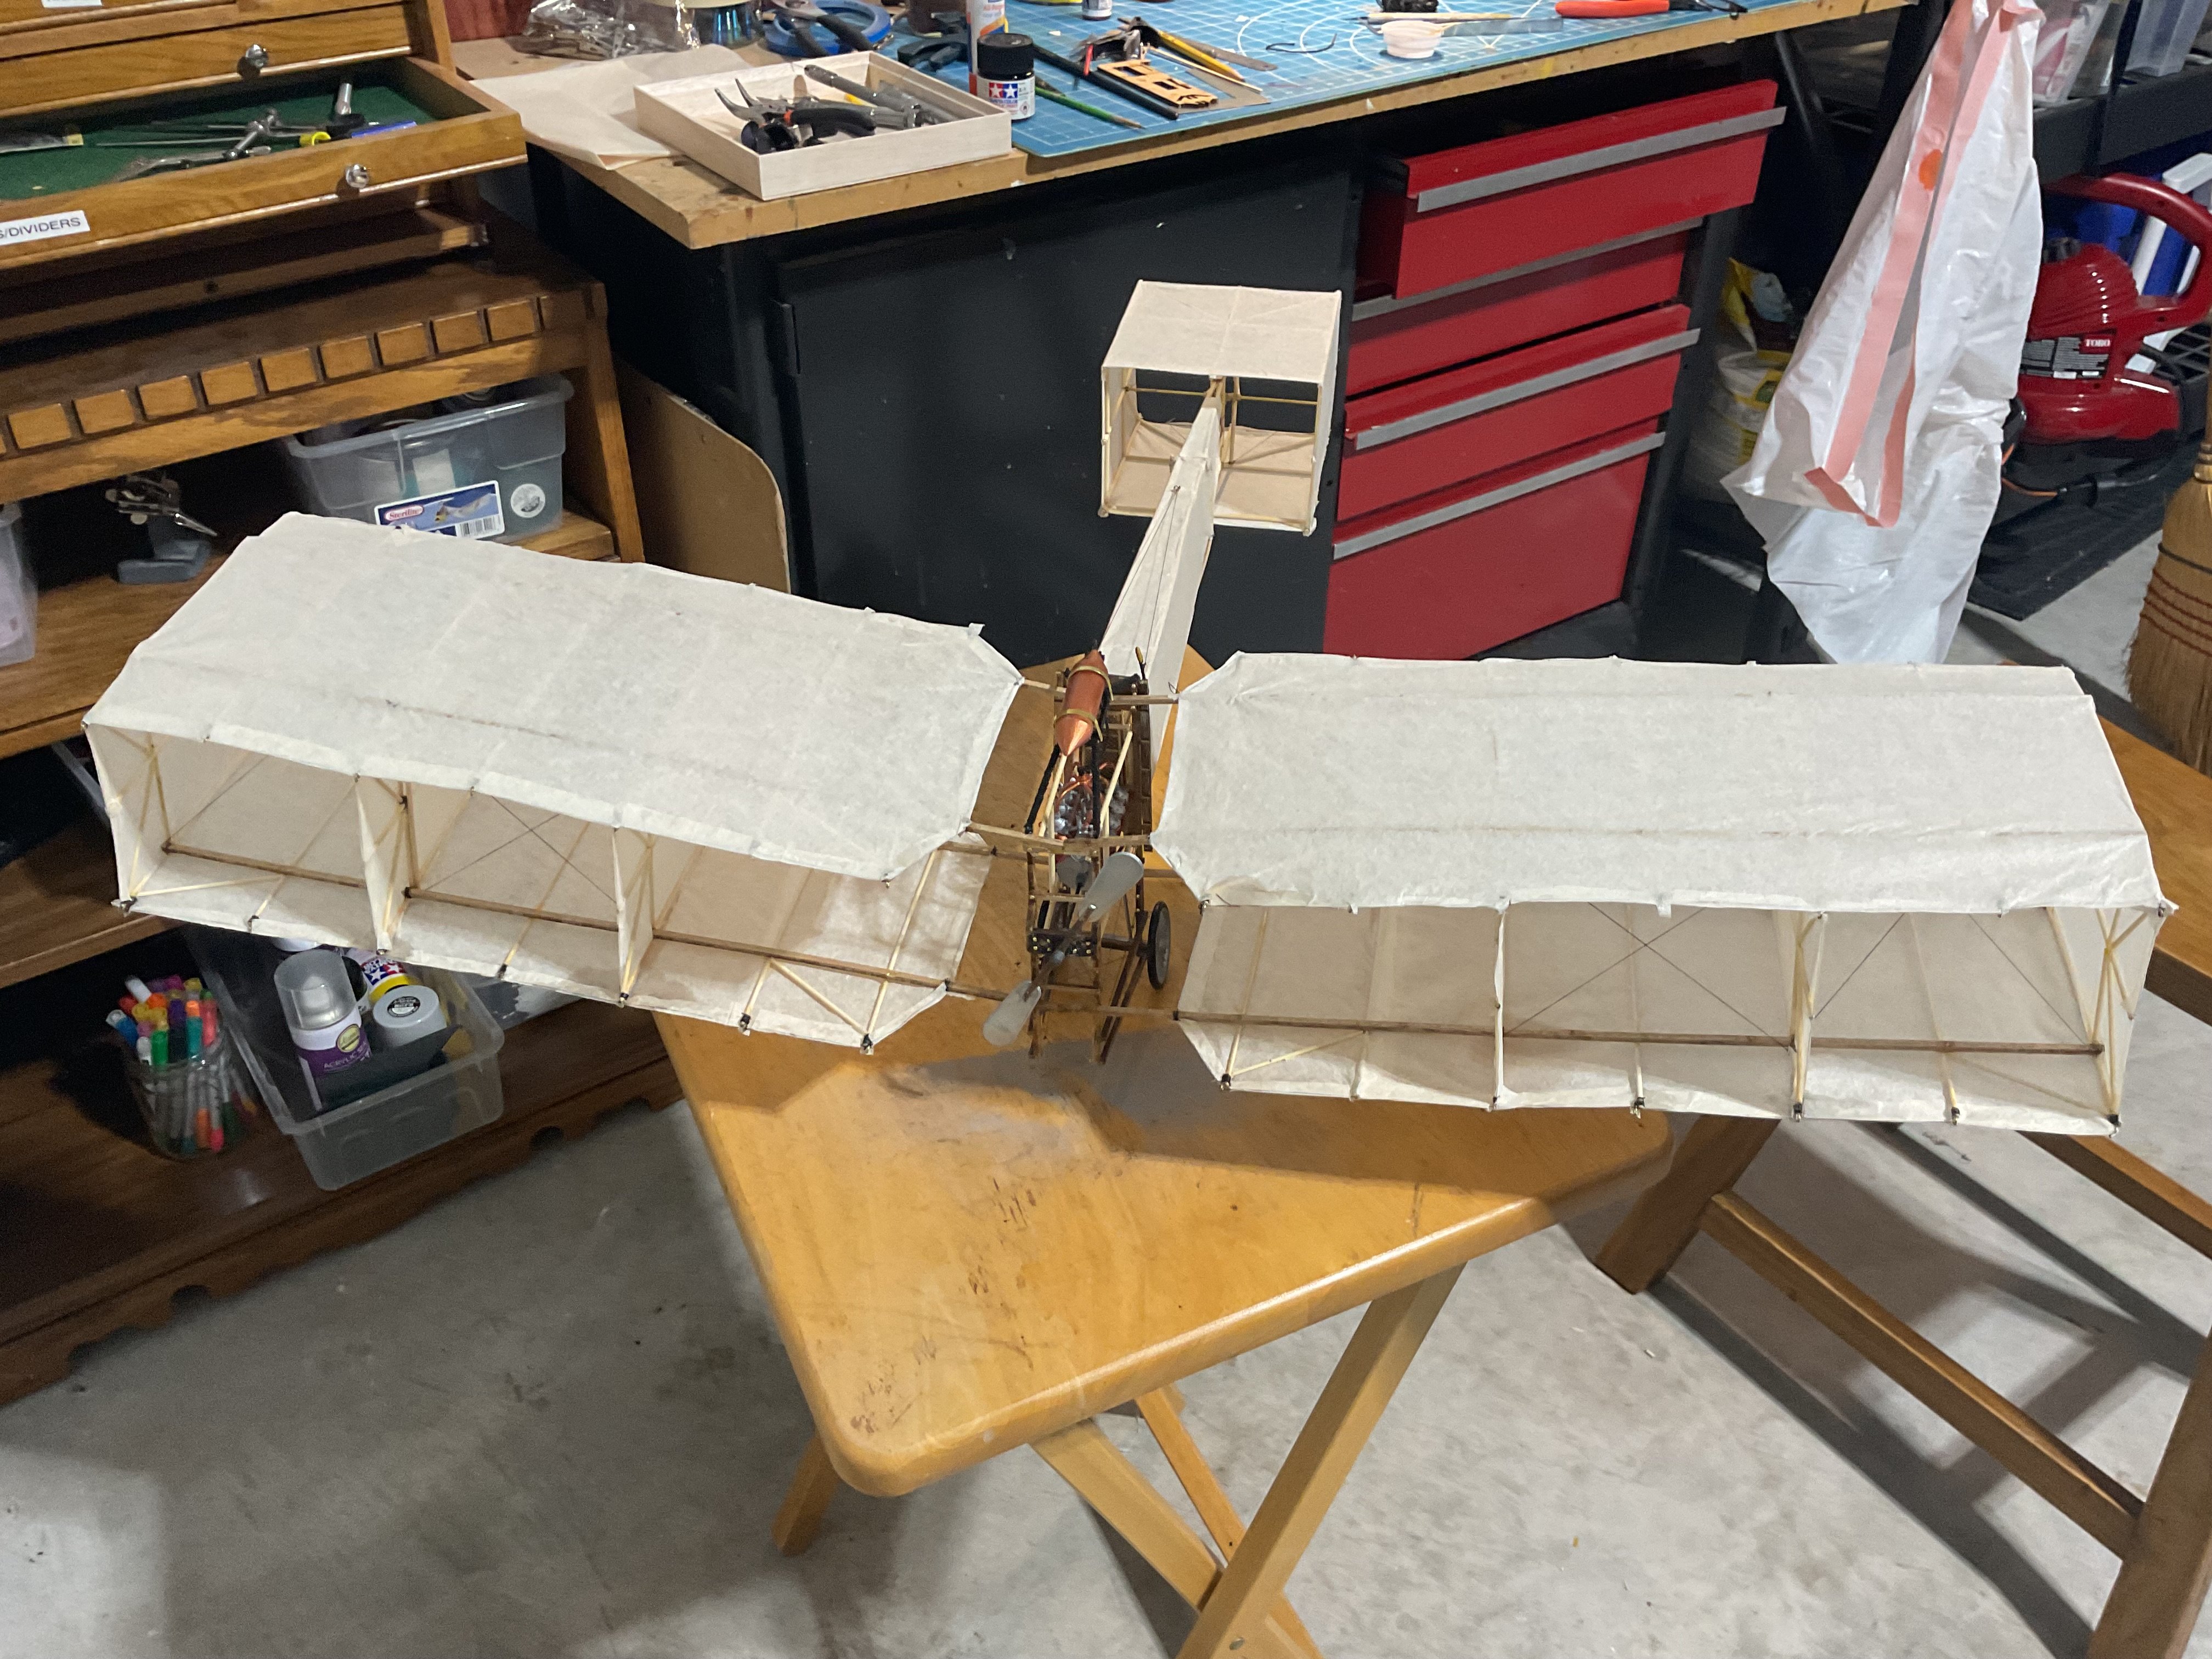
Finished mostly. It is a big model and I don’t know where I can put it. I had to take it into the garage to finish. Hanging from the ceiling is not an option, admiral’s orders.


- 162 replies
-
- 12
-
-

-
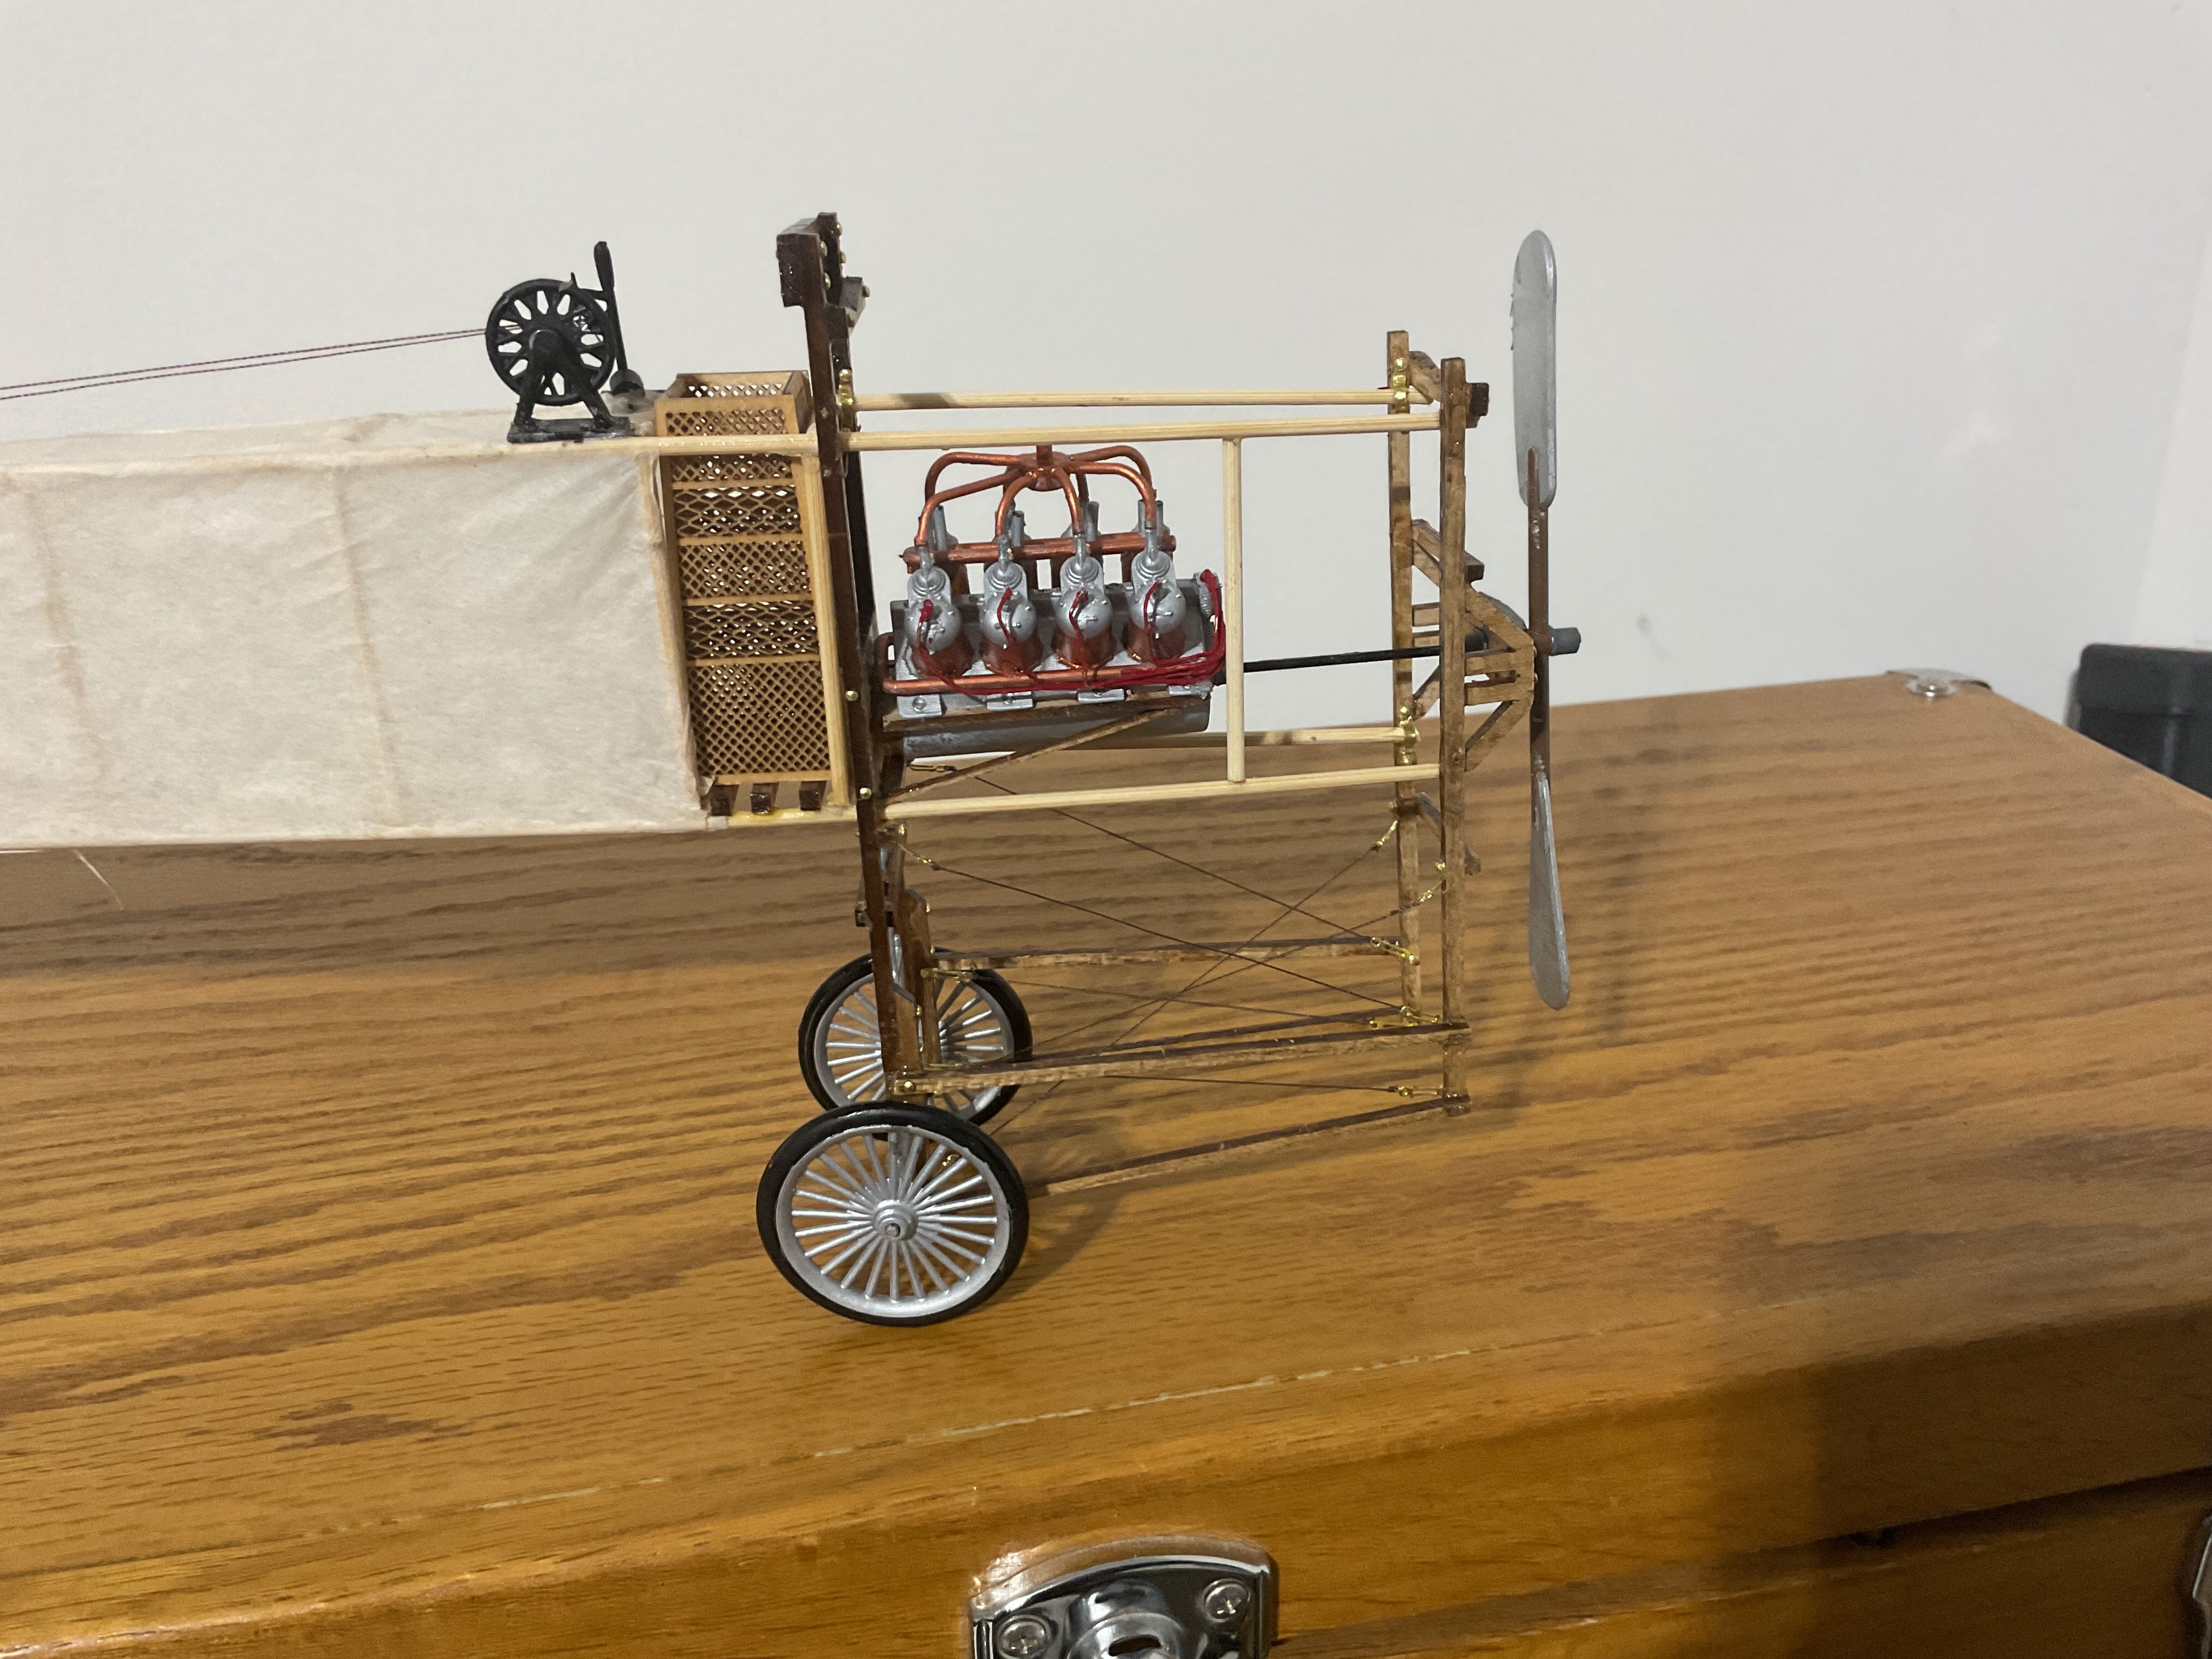
Thanks. This photo also shows the wing covered closer to the nacelle than the illustration in the instructions. I will have to add more tissue. I do think there are more engine supports in the photo than the kit provides. Watch this space for the finished photo of my bis. Coming soon!
-
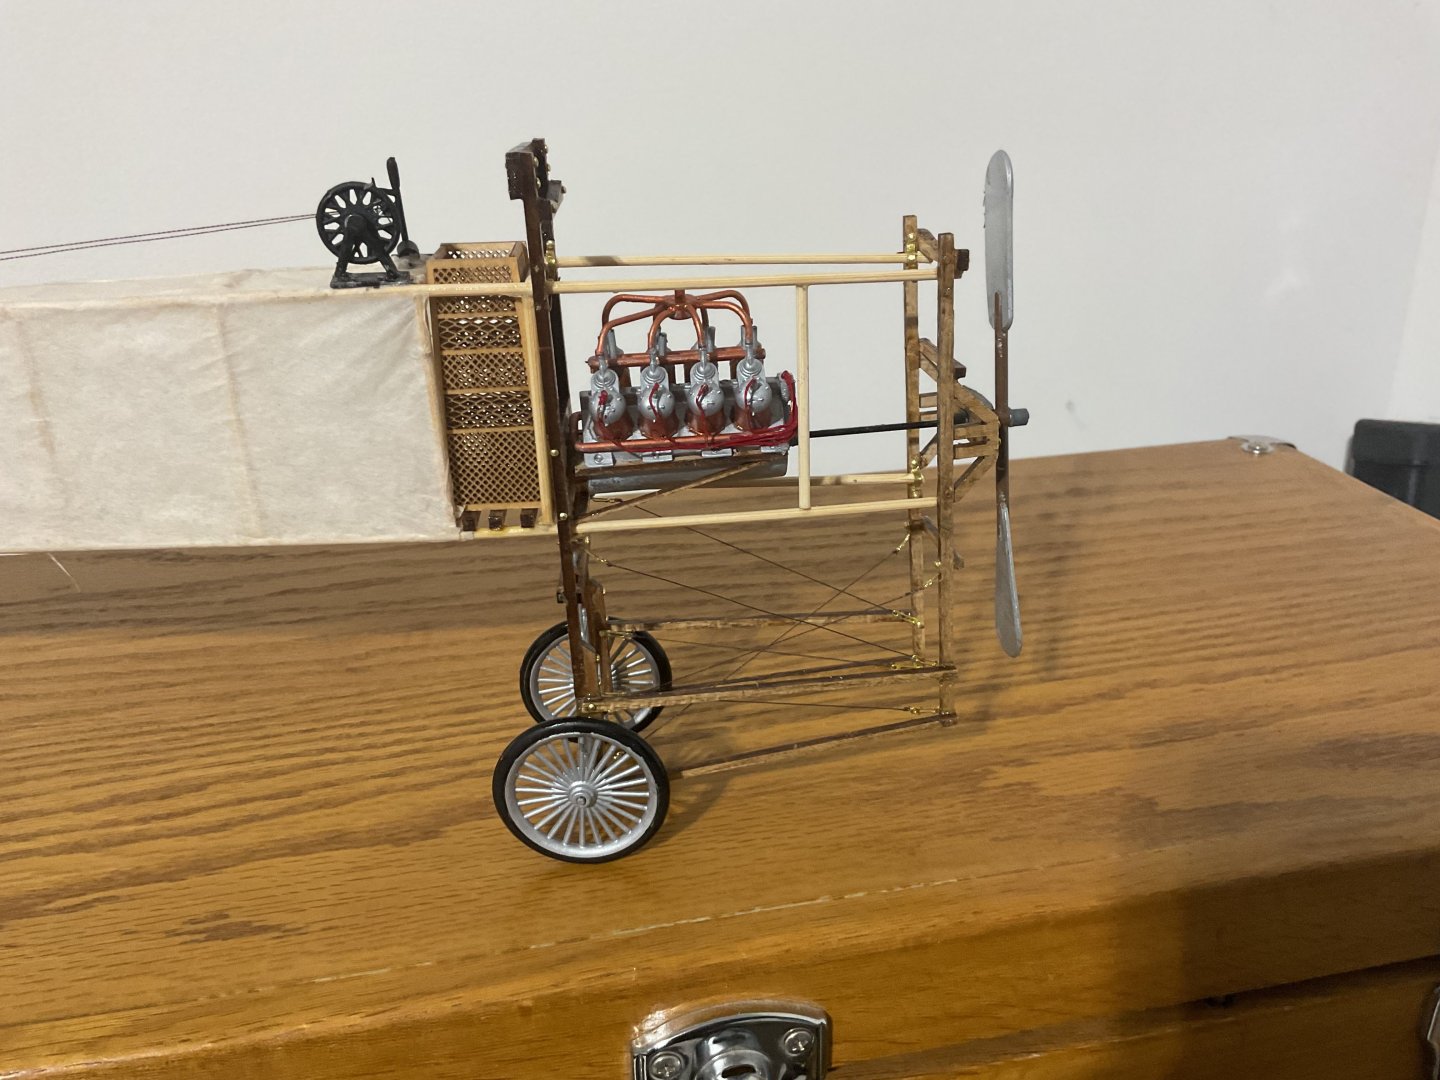
Working on the engine. I question whether the real 14 Bis could have supported the Antoinette engine with the flimsy bracket arrangement modeled in the kit. Mine couldn’t support the model engine for sure. I had to glue the kit engine to the firewall and put in the brackets after the glue had dried. Also, using the plan’s placement for engine mounts I found that the drive shaft would not line up with the propeller. It took a lot of fiddling to get everything lined up and I think the engine is still a tad crooked.
-
I have covered the fuselage and canard. I also started on the wings.

-
I made the same mistake and made 12 panels. I was able to undo the surplus panels and use some of the pieces of the 1.5 mm bamboo but still ran short. I ask ME for a replacement and they sent more 2.5 mm! I was able to reduce the diameter by about 0.5 mm with a draw plate to use where the smaller dowels were specified. The difference is not really noticeable. I really question the rationale for using “the same materials as the original “. The bamboo is very difficult to work with and I have had to re-glue joints innumerable times. Butt joints with round material is just plain dumb. Also, as in a previous post, the wing panels did not fit into the jig very well. The jig width and panel width are essentially the same. The instructions are also quite poor. The method for building the nacelle does not account for the fact that the front and back different widths. I had to assemble and take apart and reassemble about 3 times to get things correct. I could go on and on. A very stressful build all in all.
-
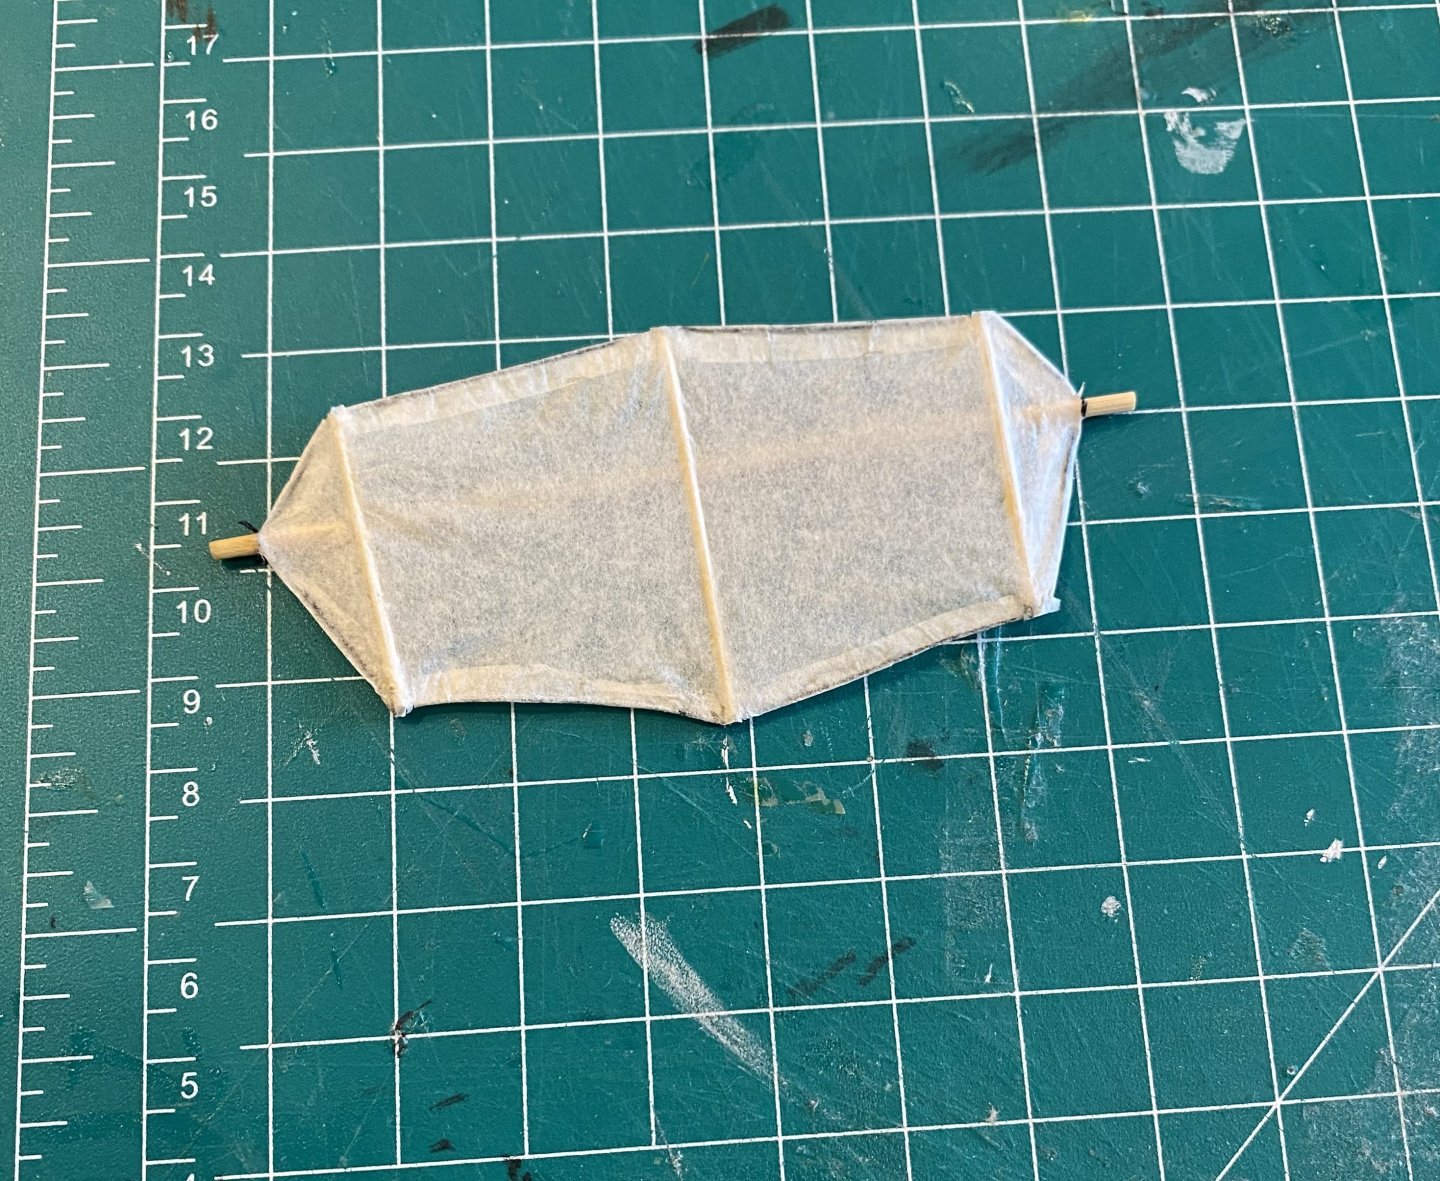
Here is a test covering of one of the ailerons. The tissue is MT. FUJI Japanese Tissue, linen color from EasyFly models
-
I find the instructions very confusing in places.
-
I have a question about the wings. All the illustrations seem to show that the higher part of the wind is forward and the lower part aft. However, the jig for the right (starboard) wing would require this right wing to be on the left (port) side of the aircraft to maintain this relationship and vice versa. i am guessing that the directions were from the perspective of looking to the front of the aircraft. My “right” is the aircraft’s left.