Papa
-
Posts
1,305 -
Joined
-
Last visited
Content Type
Profiles
Forums
Gallery
Events
Everything posted by Papa
-

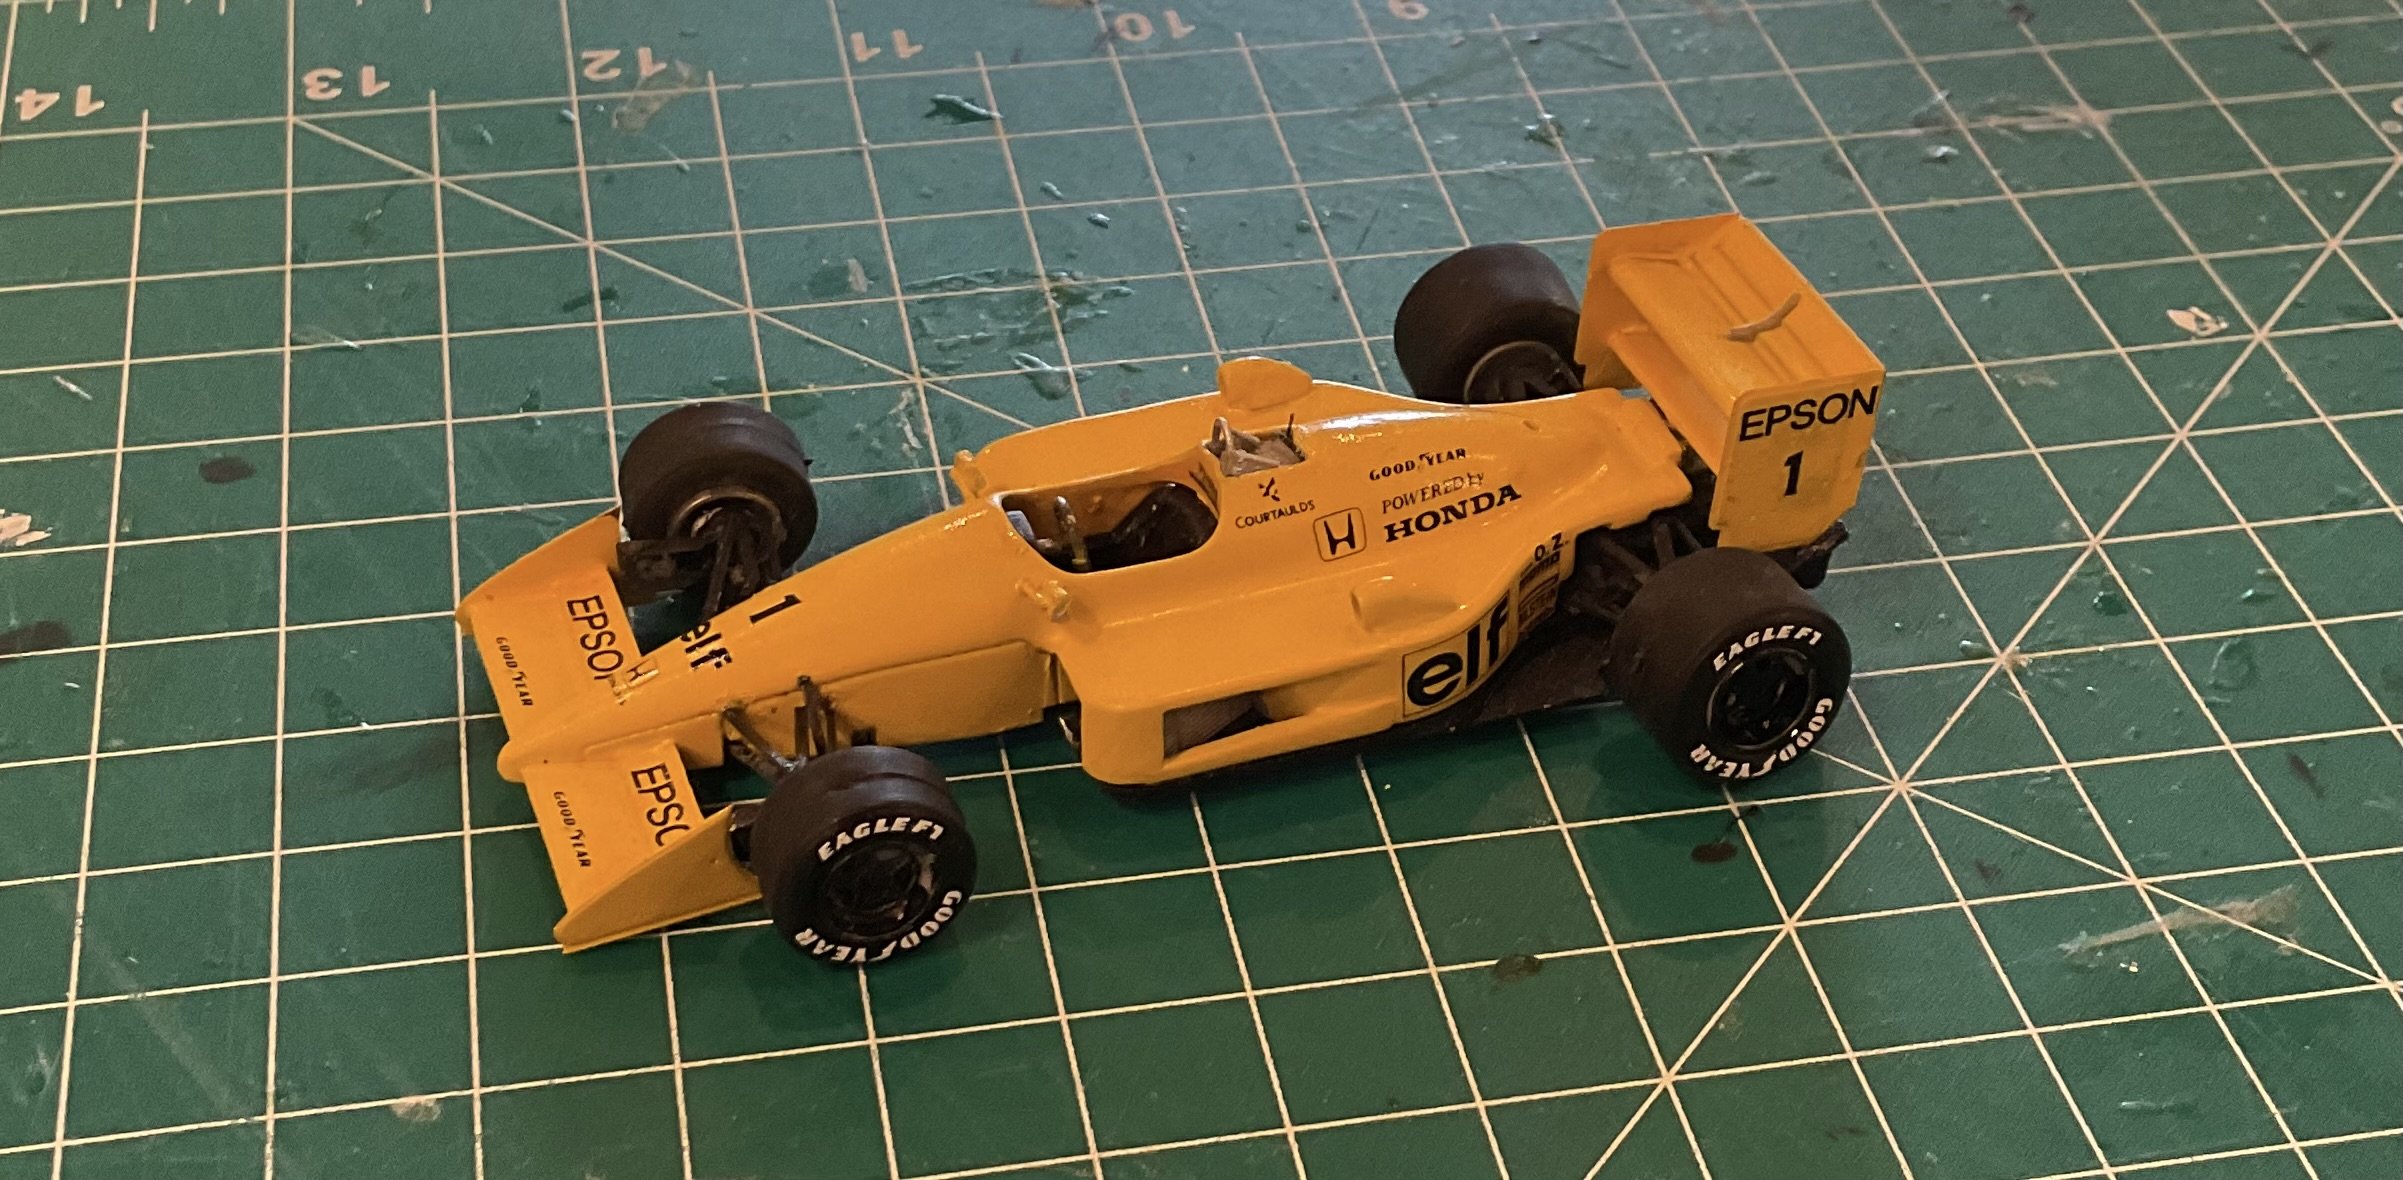
Lotus Honda 100T by Papa - Tameo - 1/43 - METAL
Papa replied to Papa's topic in Completed non-ship models
Looks great. -
I had always wanted to try one of these metal F1 kits, so a few months back I purchased one on sale at Model Expo. One is enough! At 1/43 some of the PE pieces are about the diameter of a human hair. If you have fantastic eye sight and access to that mysterious place where so many small parts end up then perhaps one of these kits is for you. The instructions are 1 page with an exploded image numbering the parts and suggestions as to where they go. Some obvious, others not so. Page two identifies the photo etched parts and where to place the decals. The decals are excellent. They released quickly and didn’t tear. There are videos on YouTube that show how to build the Tameo kits, but I didn’t find one specific to this one. They are helpful.

- 3 replies
-
- 10
-

-

-
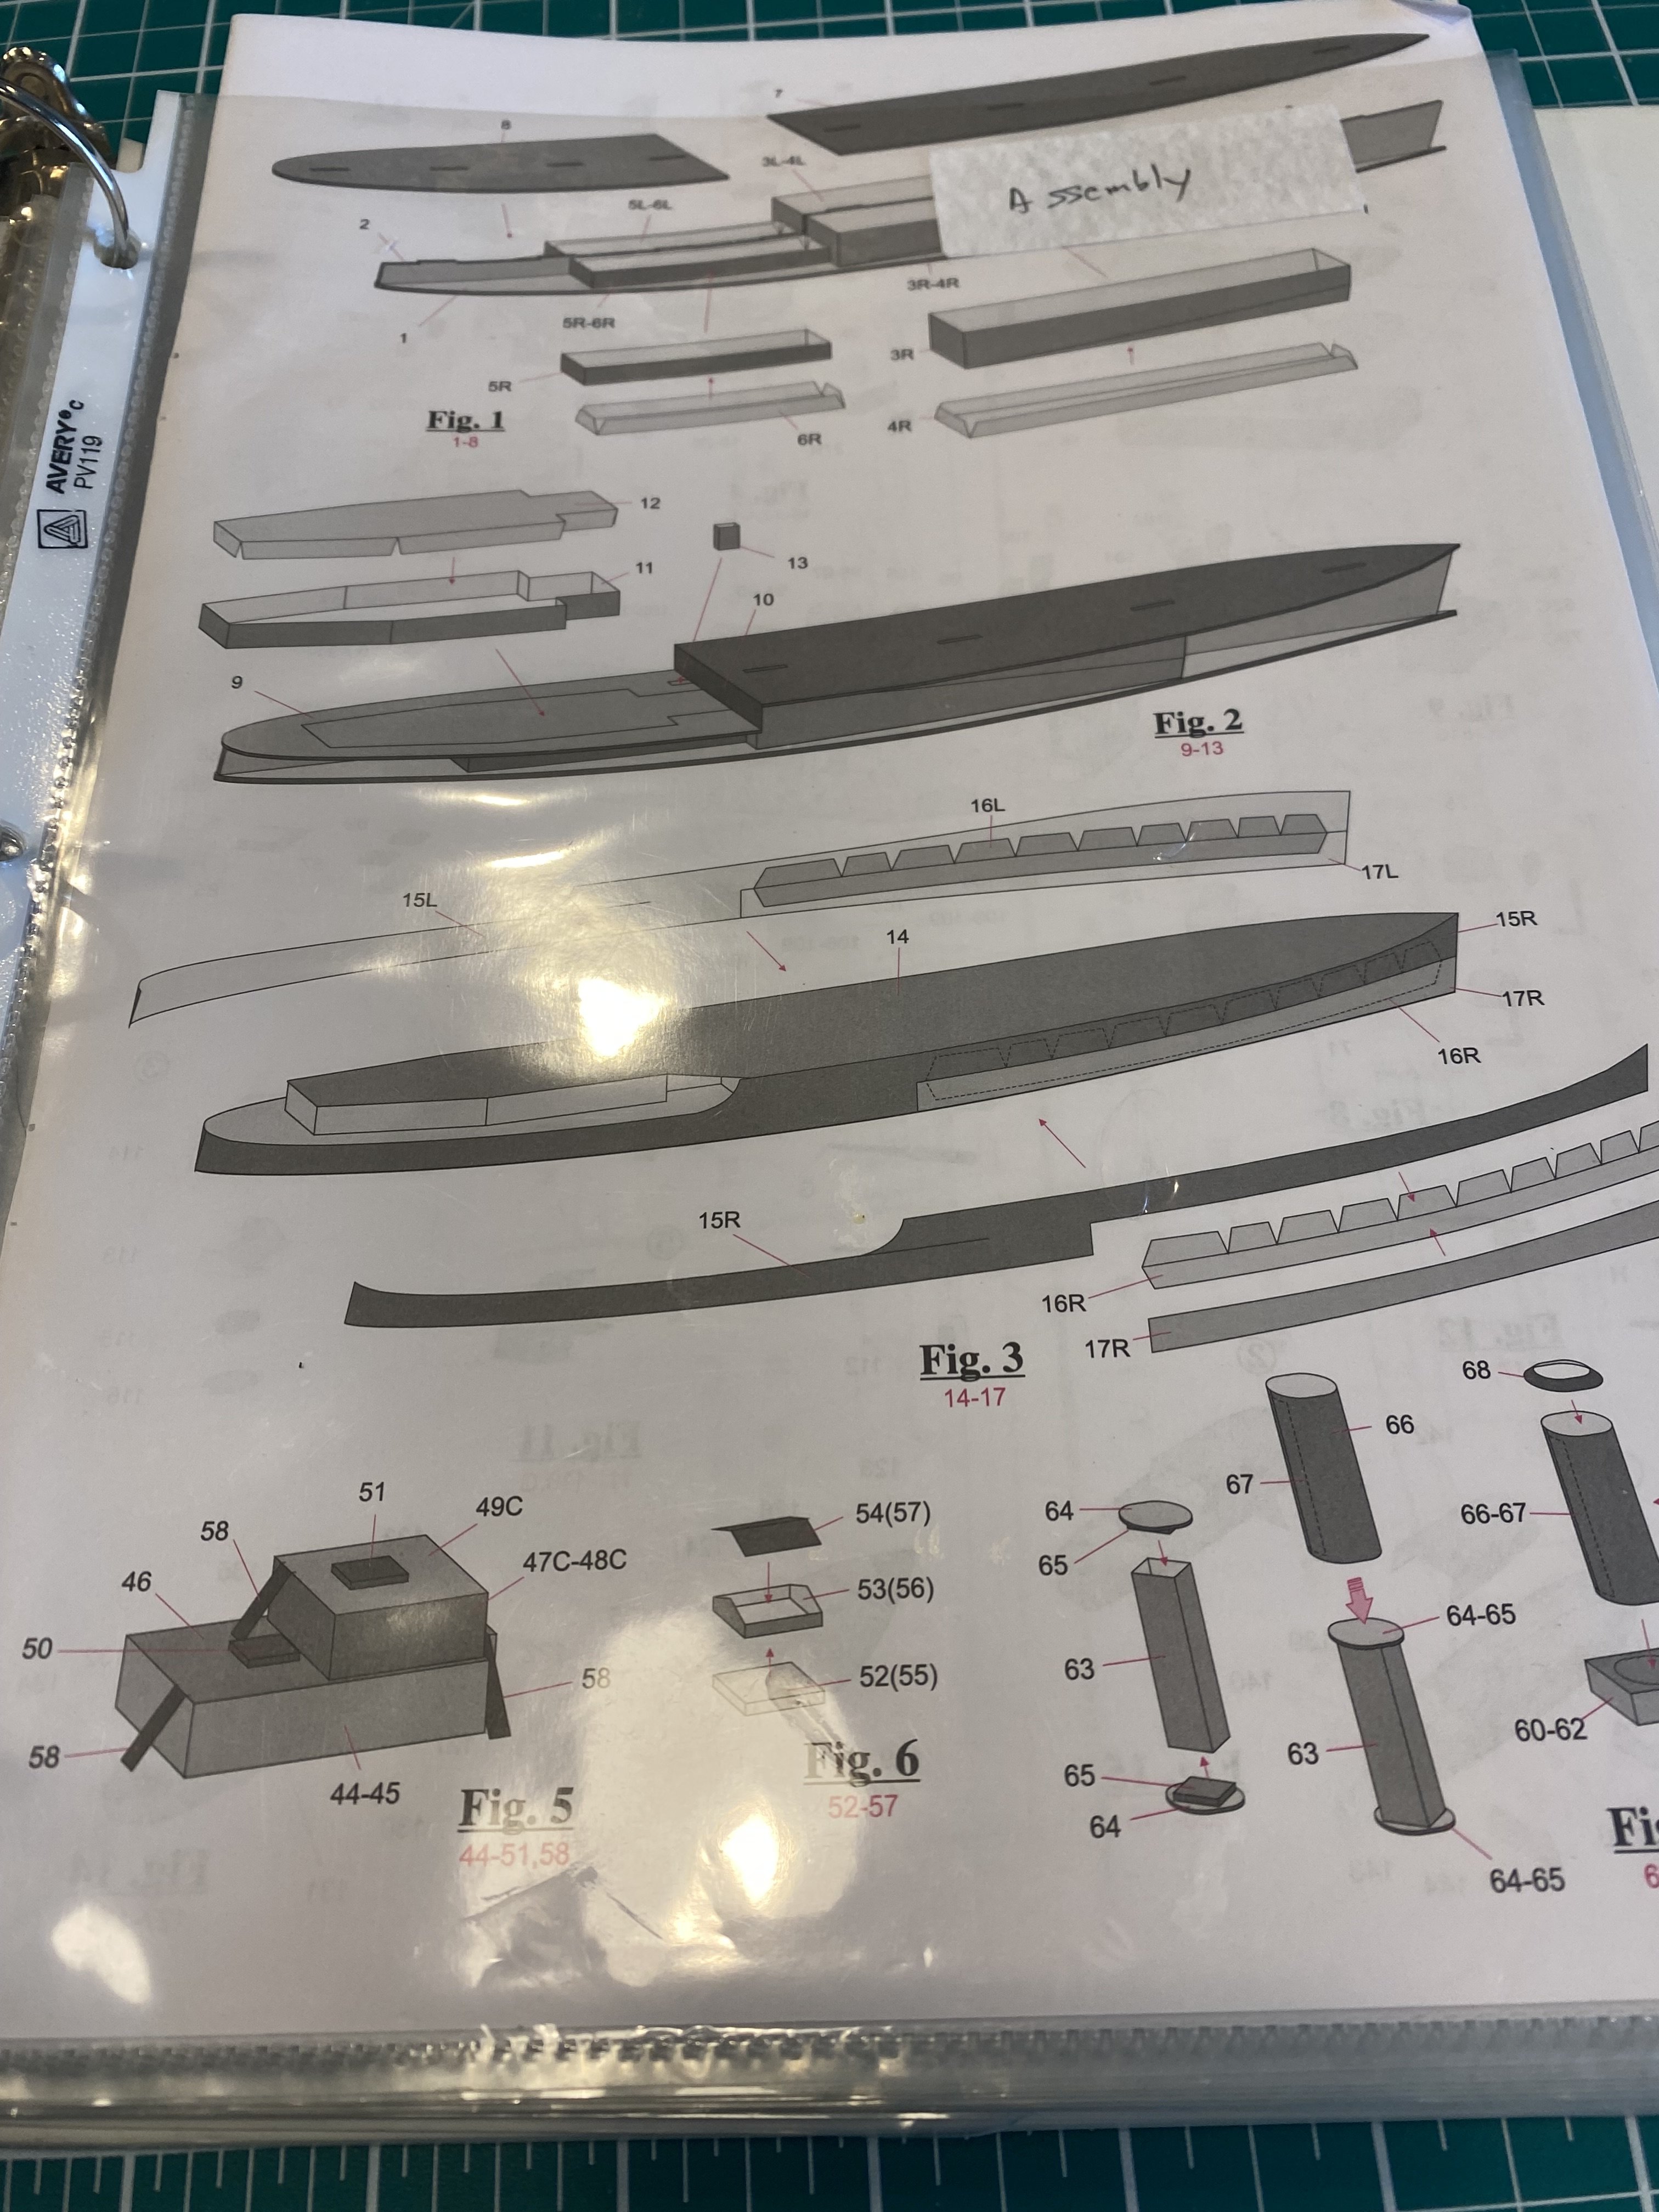
I am currently attempting to build the "14Bis". This is not an easy kit. I have had to re glue the wing frames multiple times. Butt joints do not hold up well. Right now I have the 3 right wing frames in the assembly jig with the longitudinal pieces glued. I don't have the patience to simulate the bamboo,so I am considering covering the frame with tissue or some appropriate covering when it is completed, like the classic stick and tissue models I built as a child. Has any builder done this? Should I do it? Recommended material? Ron Gove, AKA Papa
-
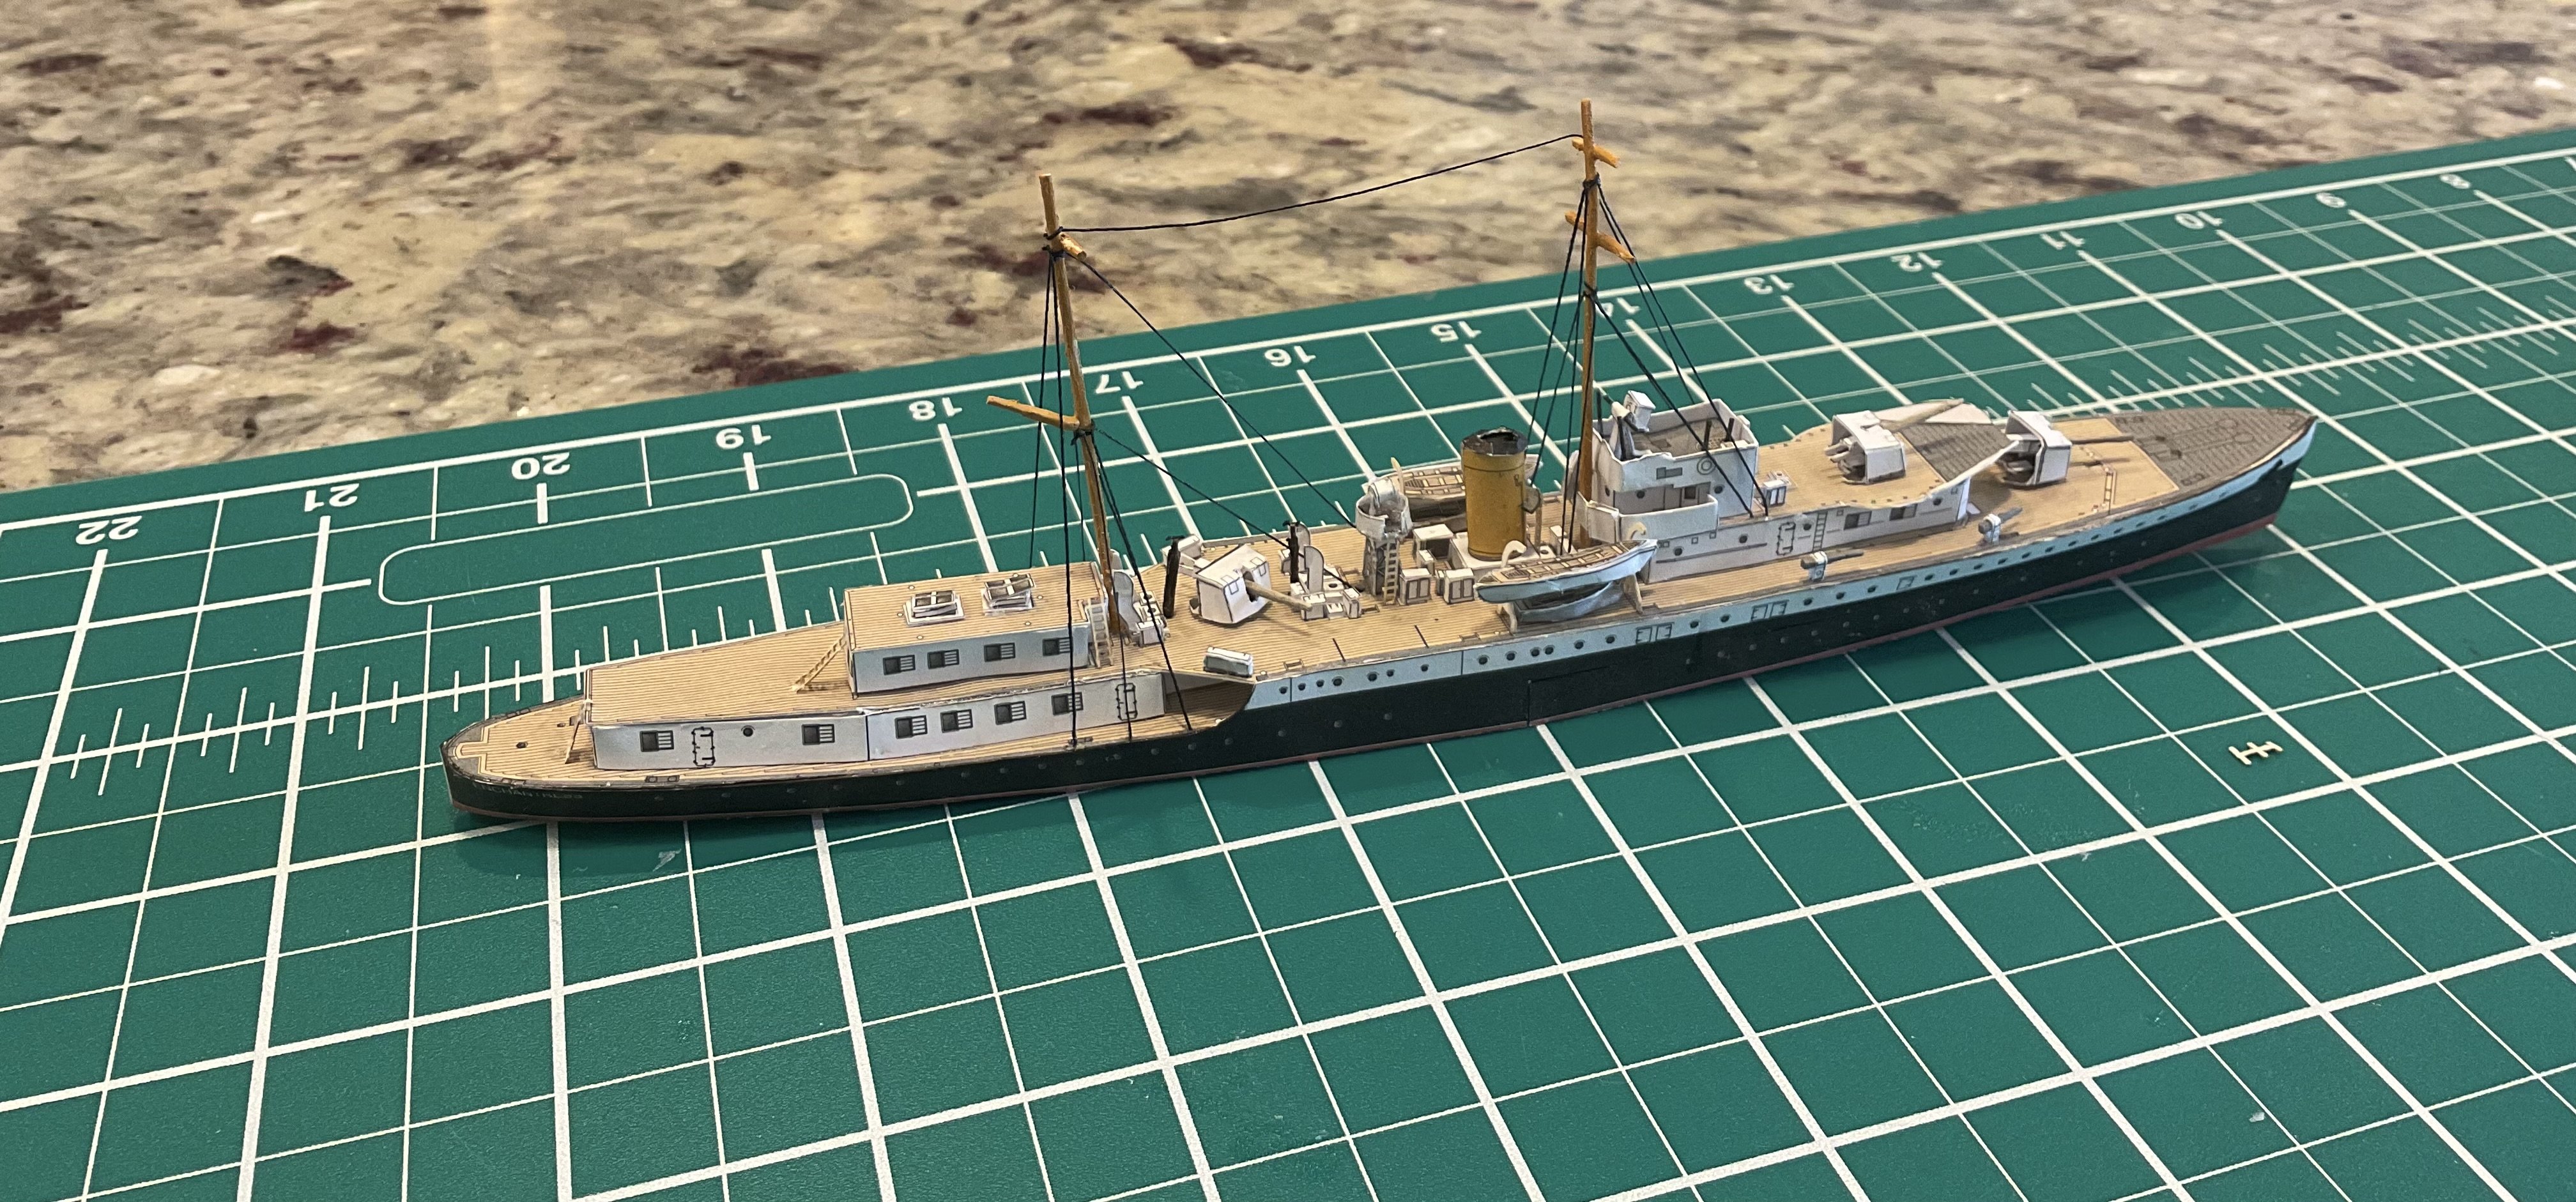
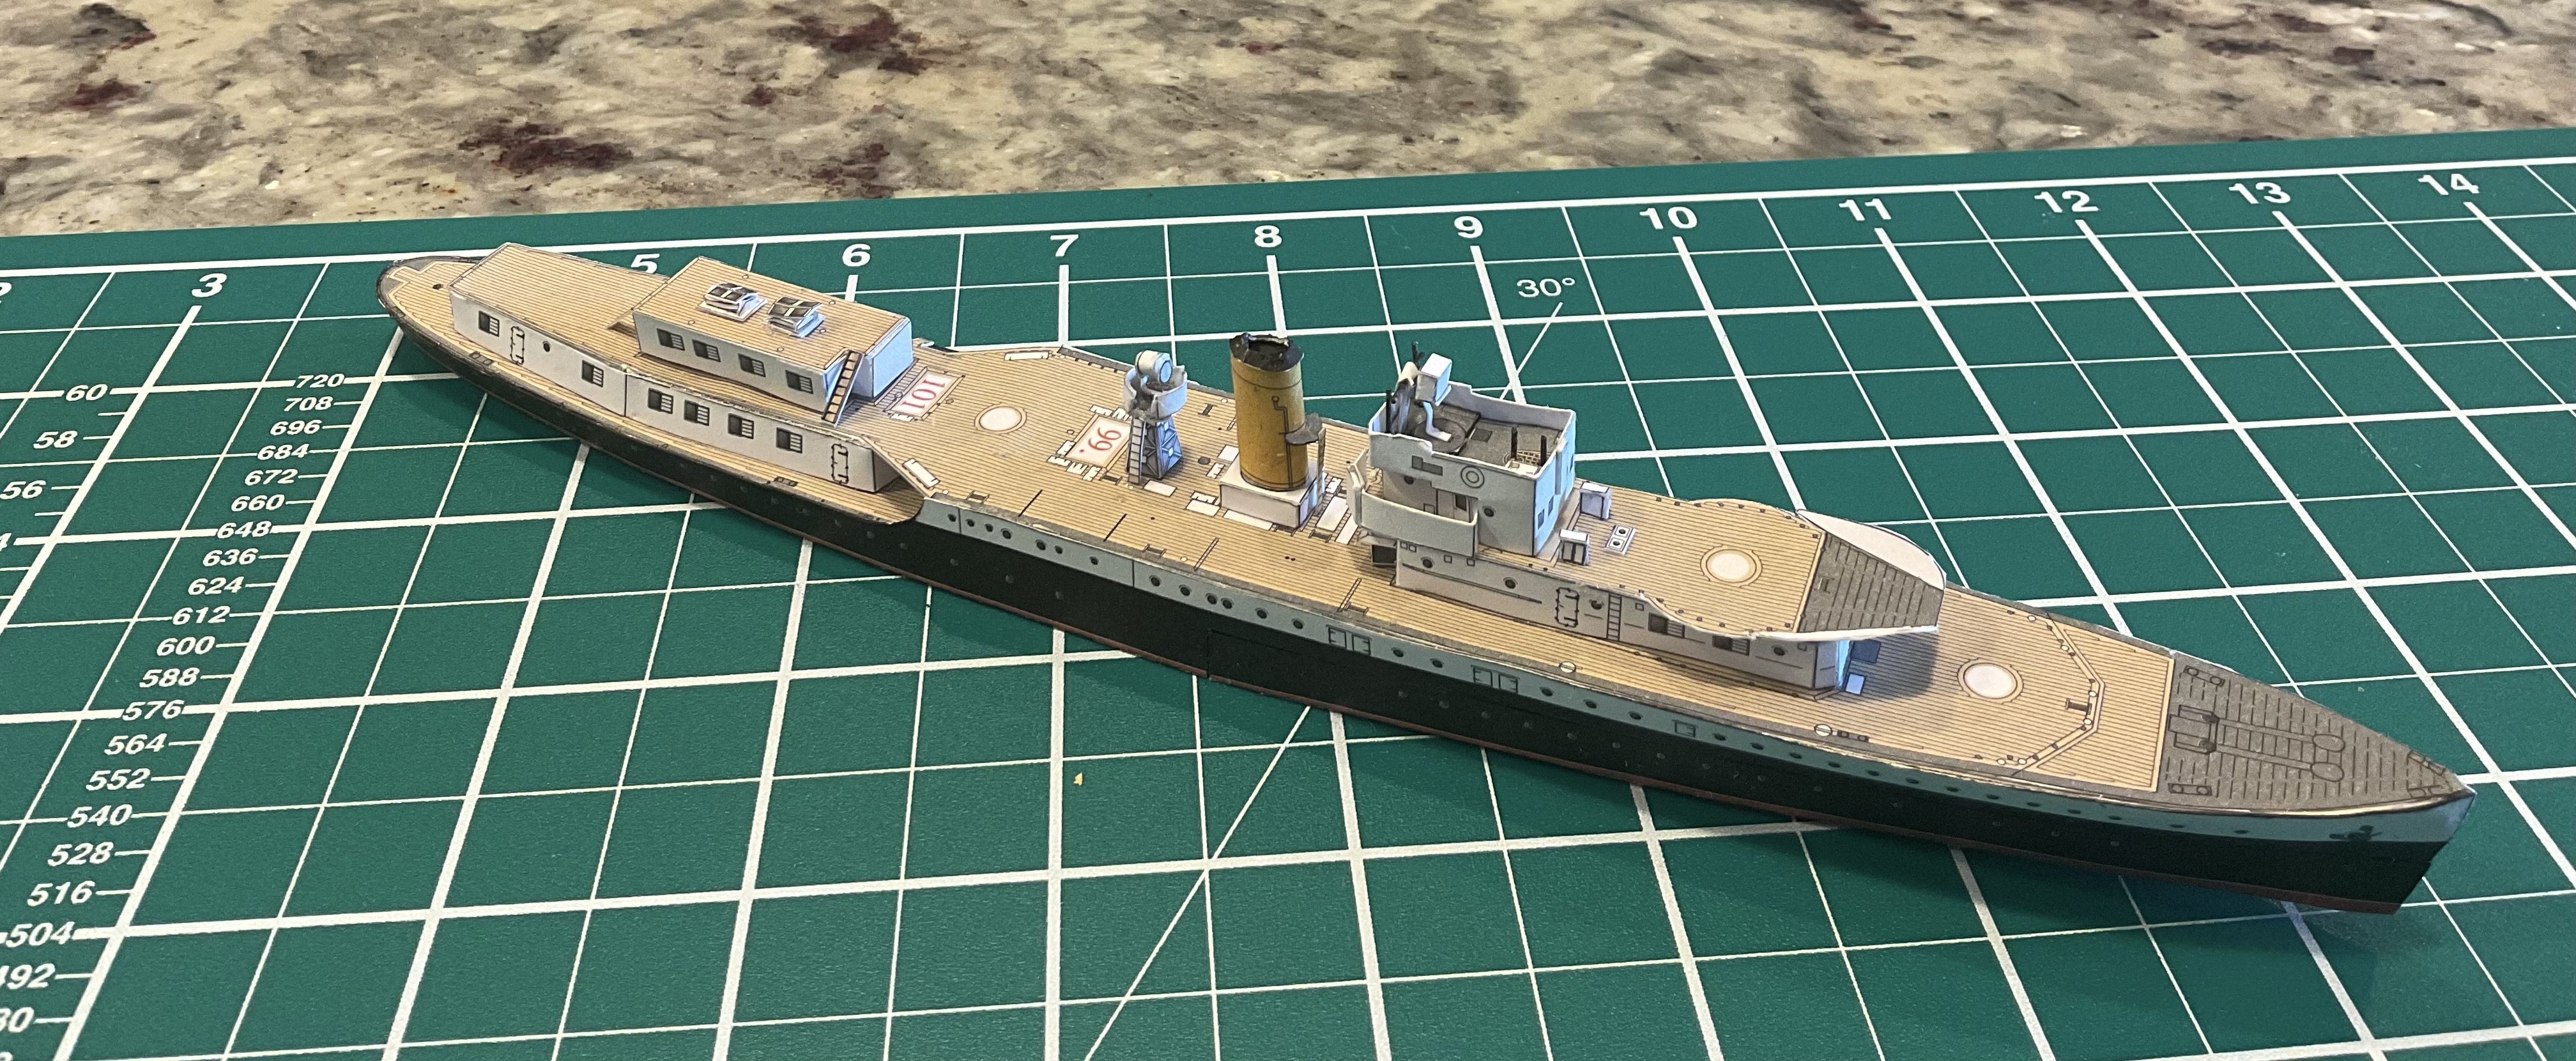
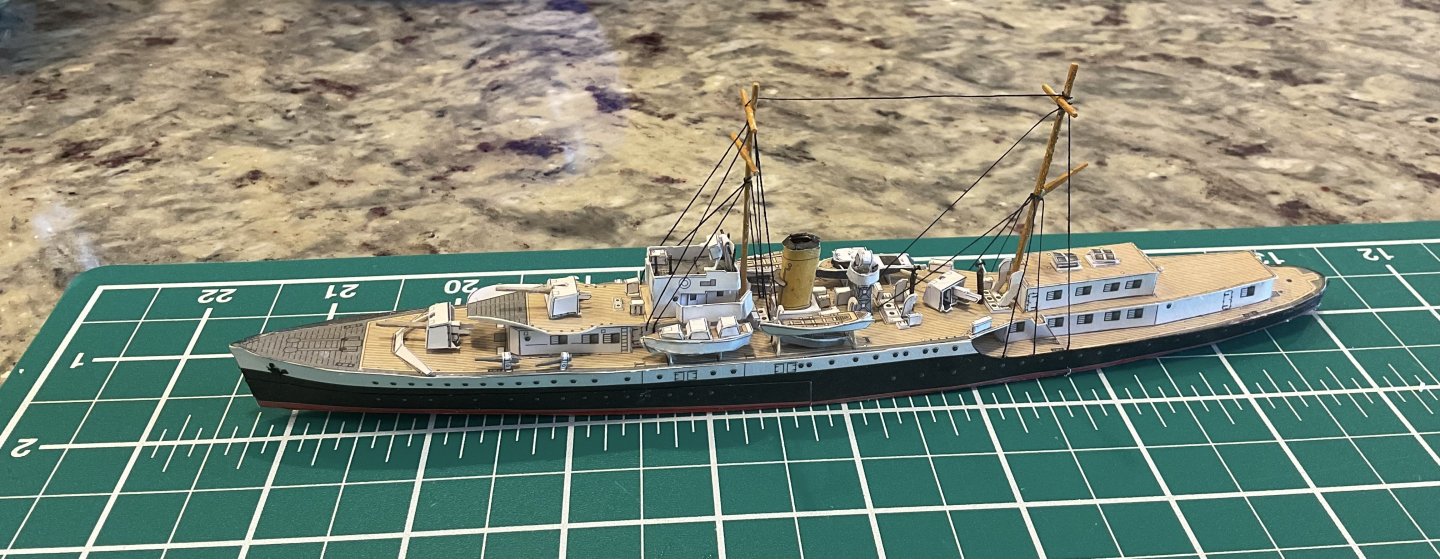
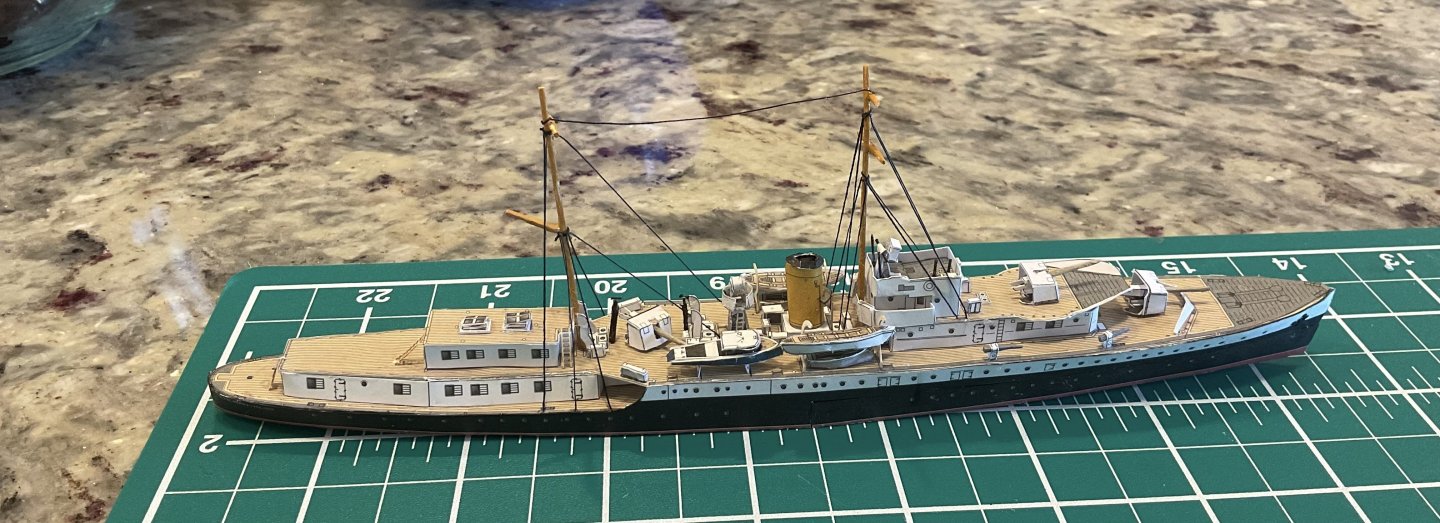
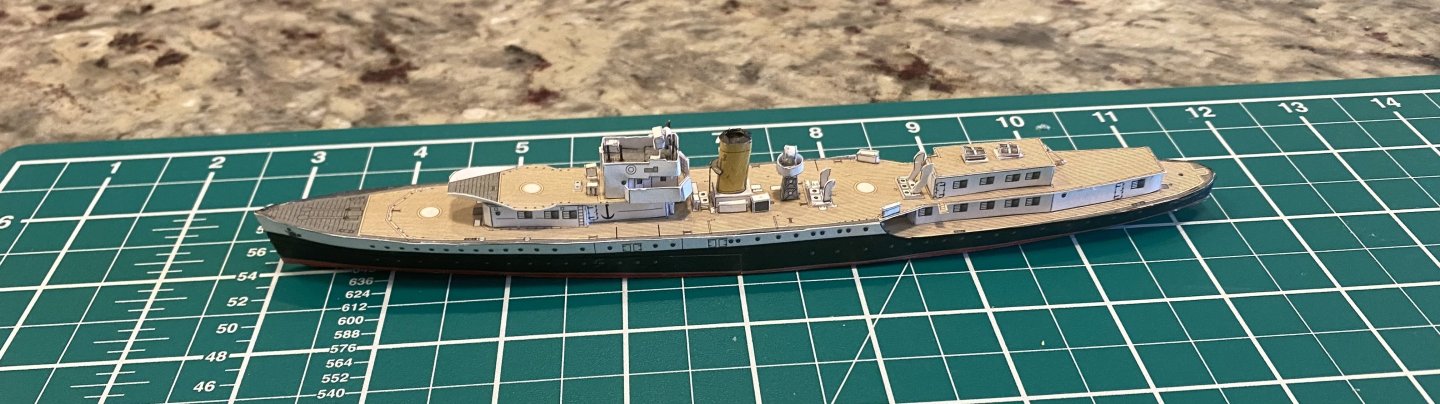
The Enchantress is finished as I can achieve except for railings, which are on order from JSC. There are a few deck fittings that are just too tiny for me to assemble so she’ll go without. A very challenging build. And I doubt I would try another card ship at 1/400 scale.
- 22 replies
-
- 4
-
-
- Enchantress
- JSC
- (and 1 more)
-
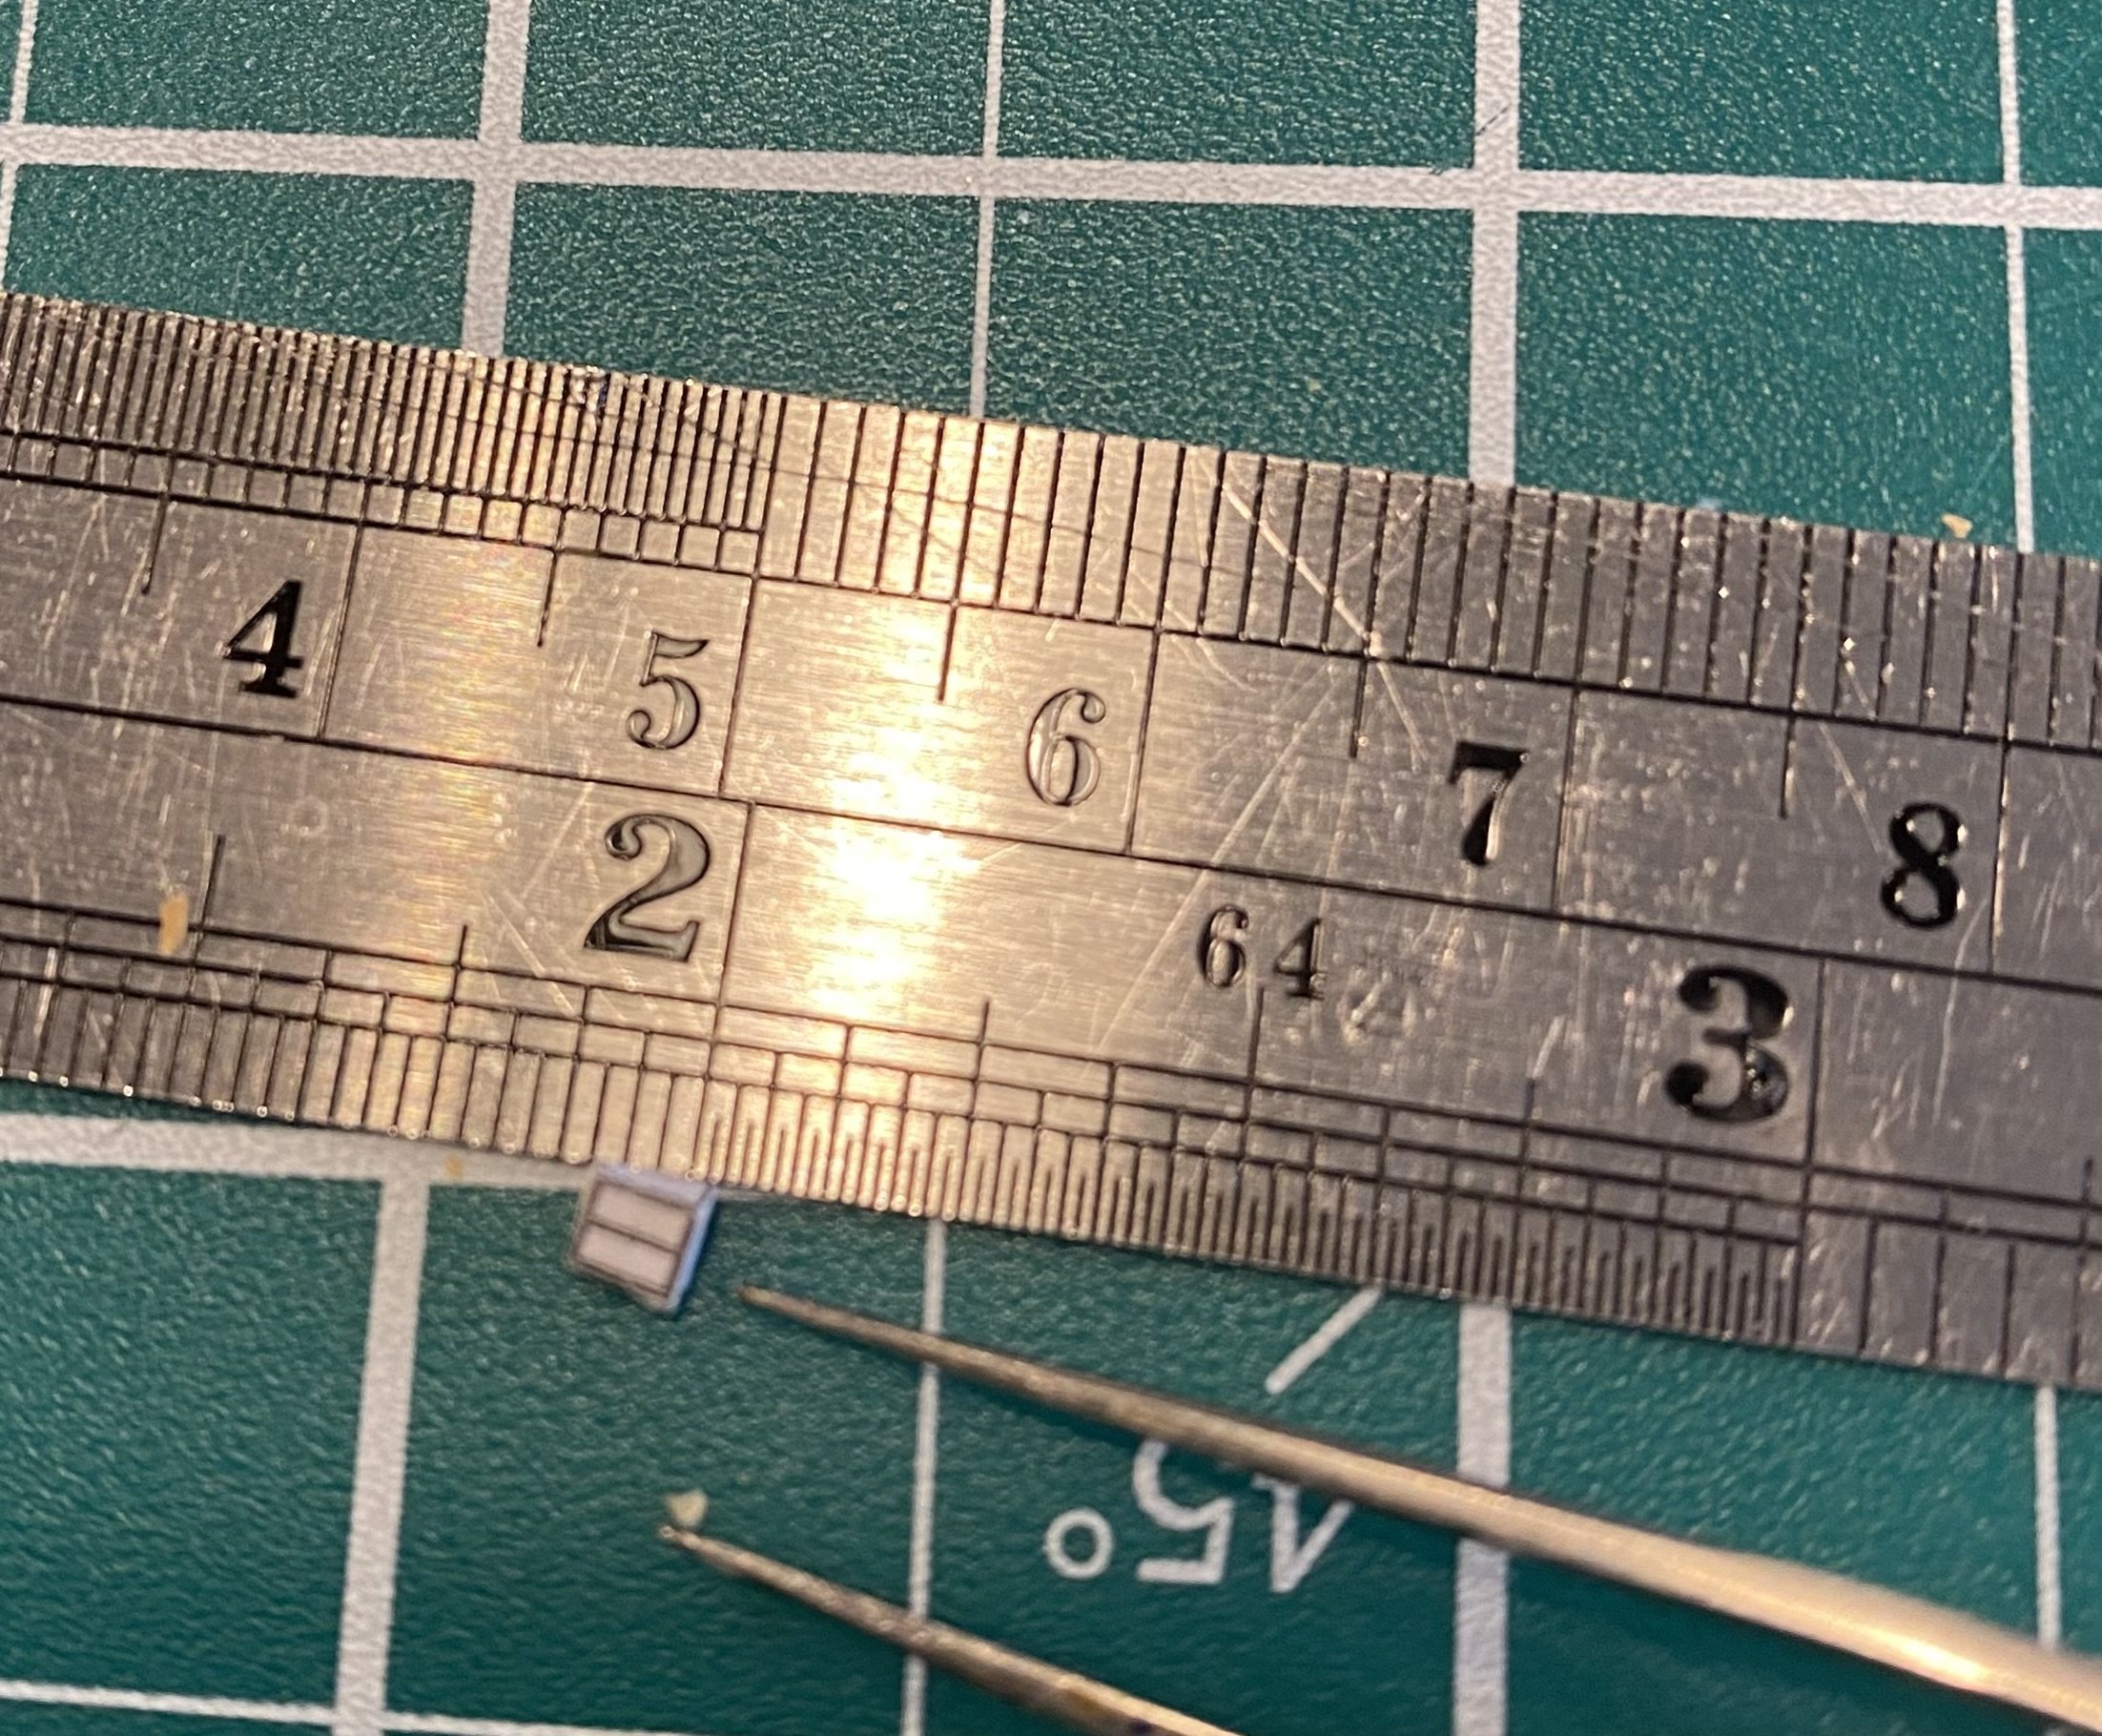
I have 4 of the ship’s boats built and installed. 2 dinghies and 2 whalers. JSC provides some tiny pieces to build the interior of each one and I tired to do that but it was just too small for me to get looking good. I used their alternative method that consisted of a flat piece with the interior of the boat printed on. The dinghies are on the deck under the whalers. In the photo on the green mat there is a tiny laser cut detail of 3 seats for the dinghy. I think one would have to work under a microscope to assemble these.

- 22 replies
-
- 4
-
-
- Enchantress
- JSC
- (and 1 more)
-
Working on masts and rigging. The masts ended up a tad wonky. It must have been the heavy seas in the channel during Churchill’s last trip.

- 22 replies
-
- 3
-
-
- Enchantress
- JSC
- (and 1 more)
-
I just looked at their site and didn’t see them. Update 6/24: JSC advised me on the proper rails and I ordered a set. Also thought I would try a paper aircraft and ordered their Spitfire.
- 22 replies
-
- 1
-
-
- Enchantress
- JSC
- (and 1 more)
-
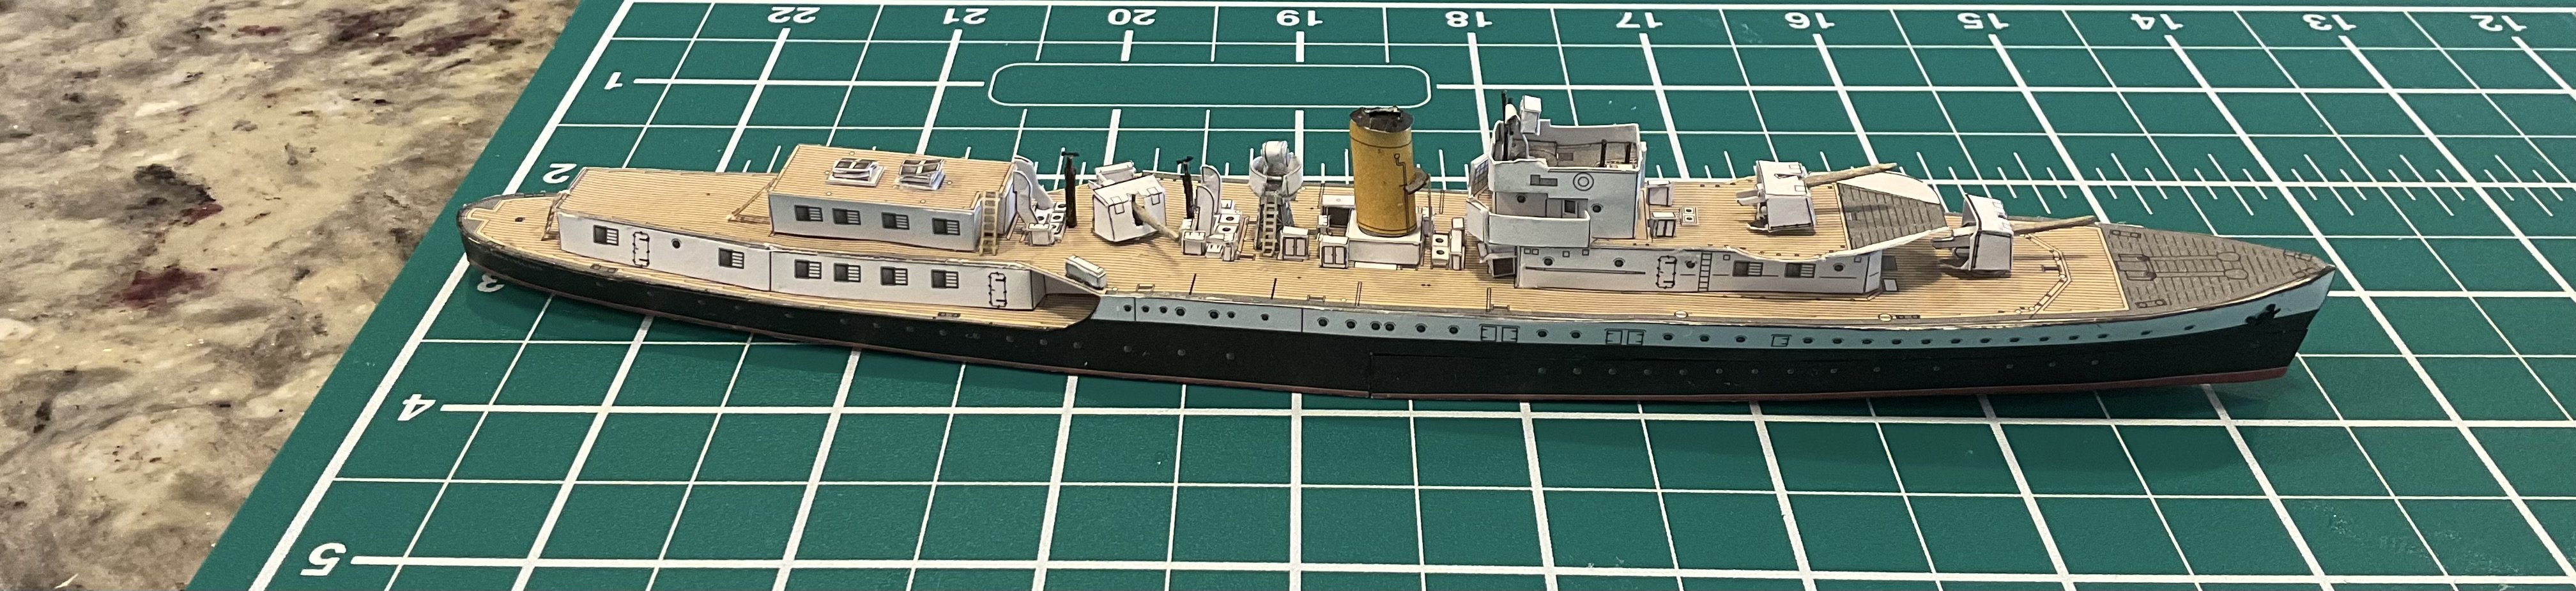
She is getting close to the end. Need to add the saluting guns, masts, boats and davits, and some remaining deck equipment. The kit didn’t come with railings and I am wondering if I should find some 1/400 photo etched railings for her.

- 22 replies
-
- 4
-
-
- Enchantress
- JSC
- (and 1 more)
-
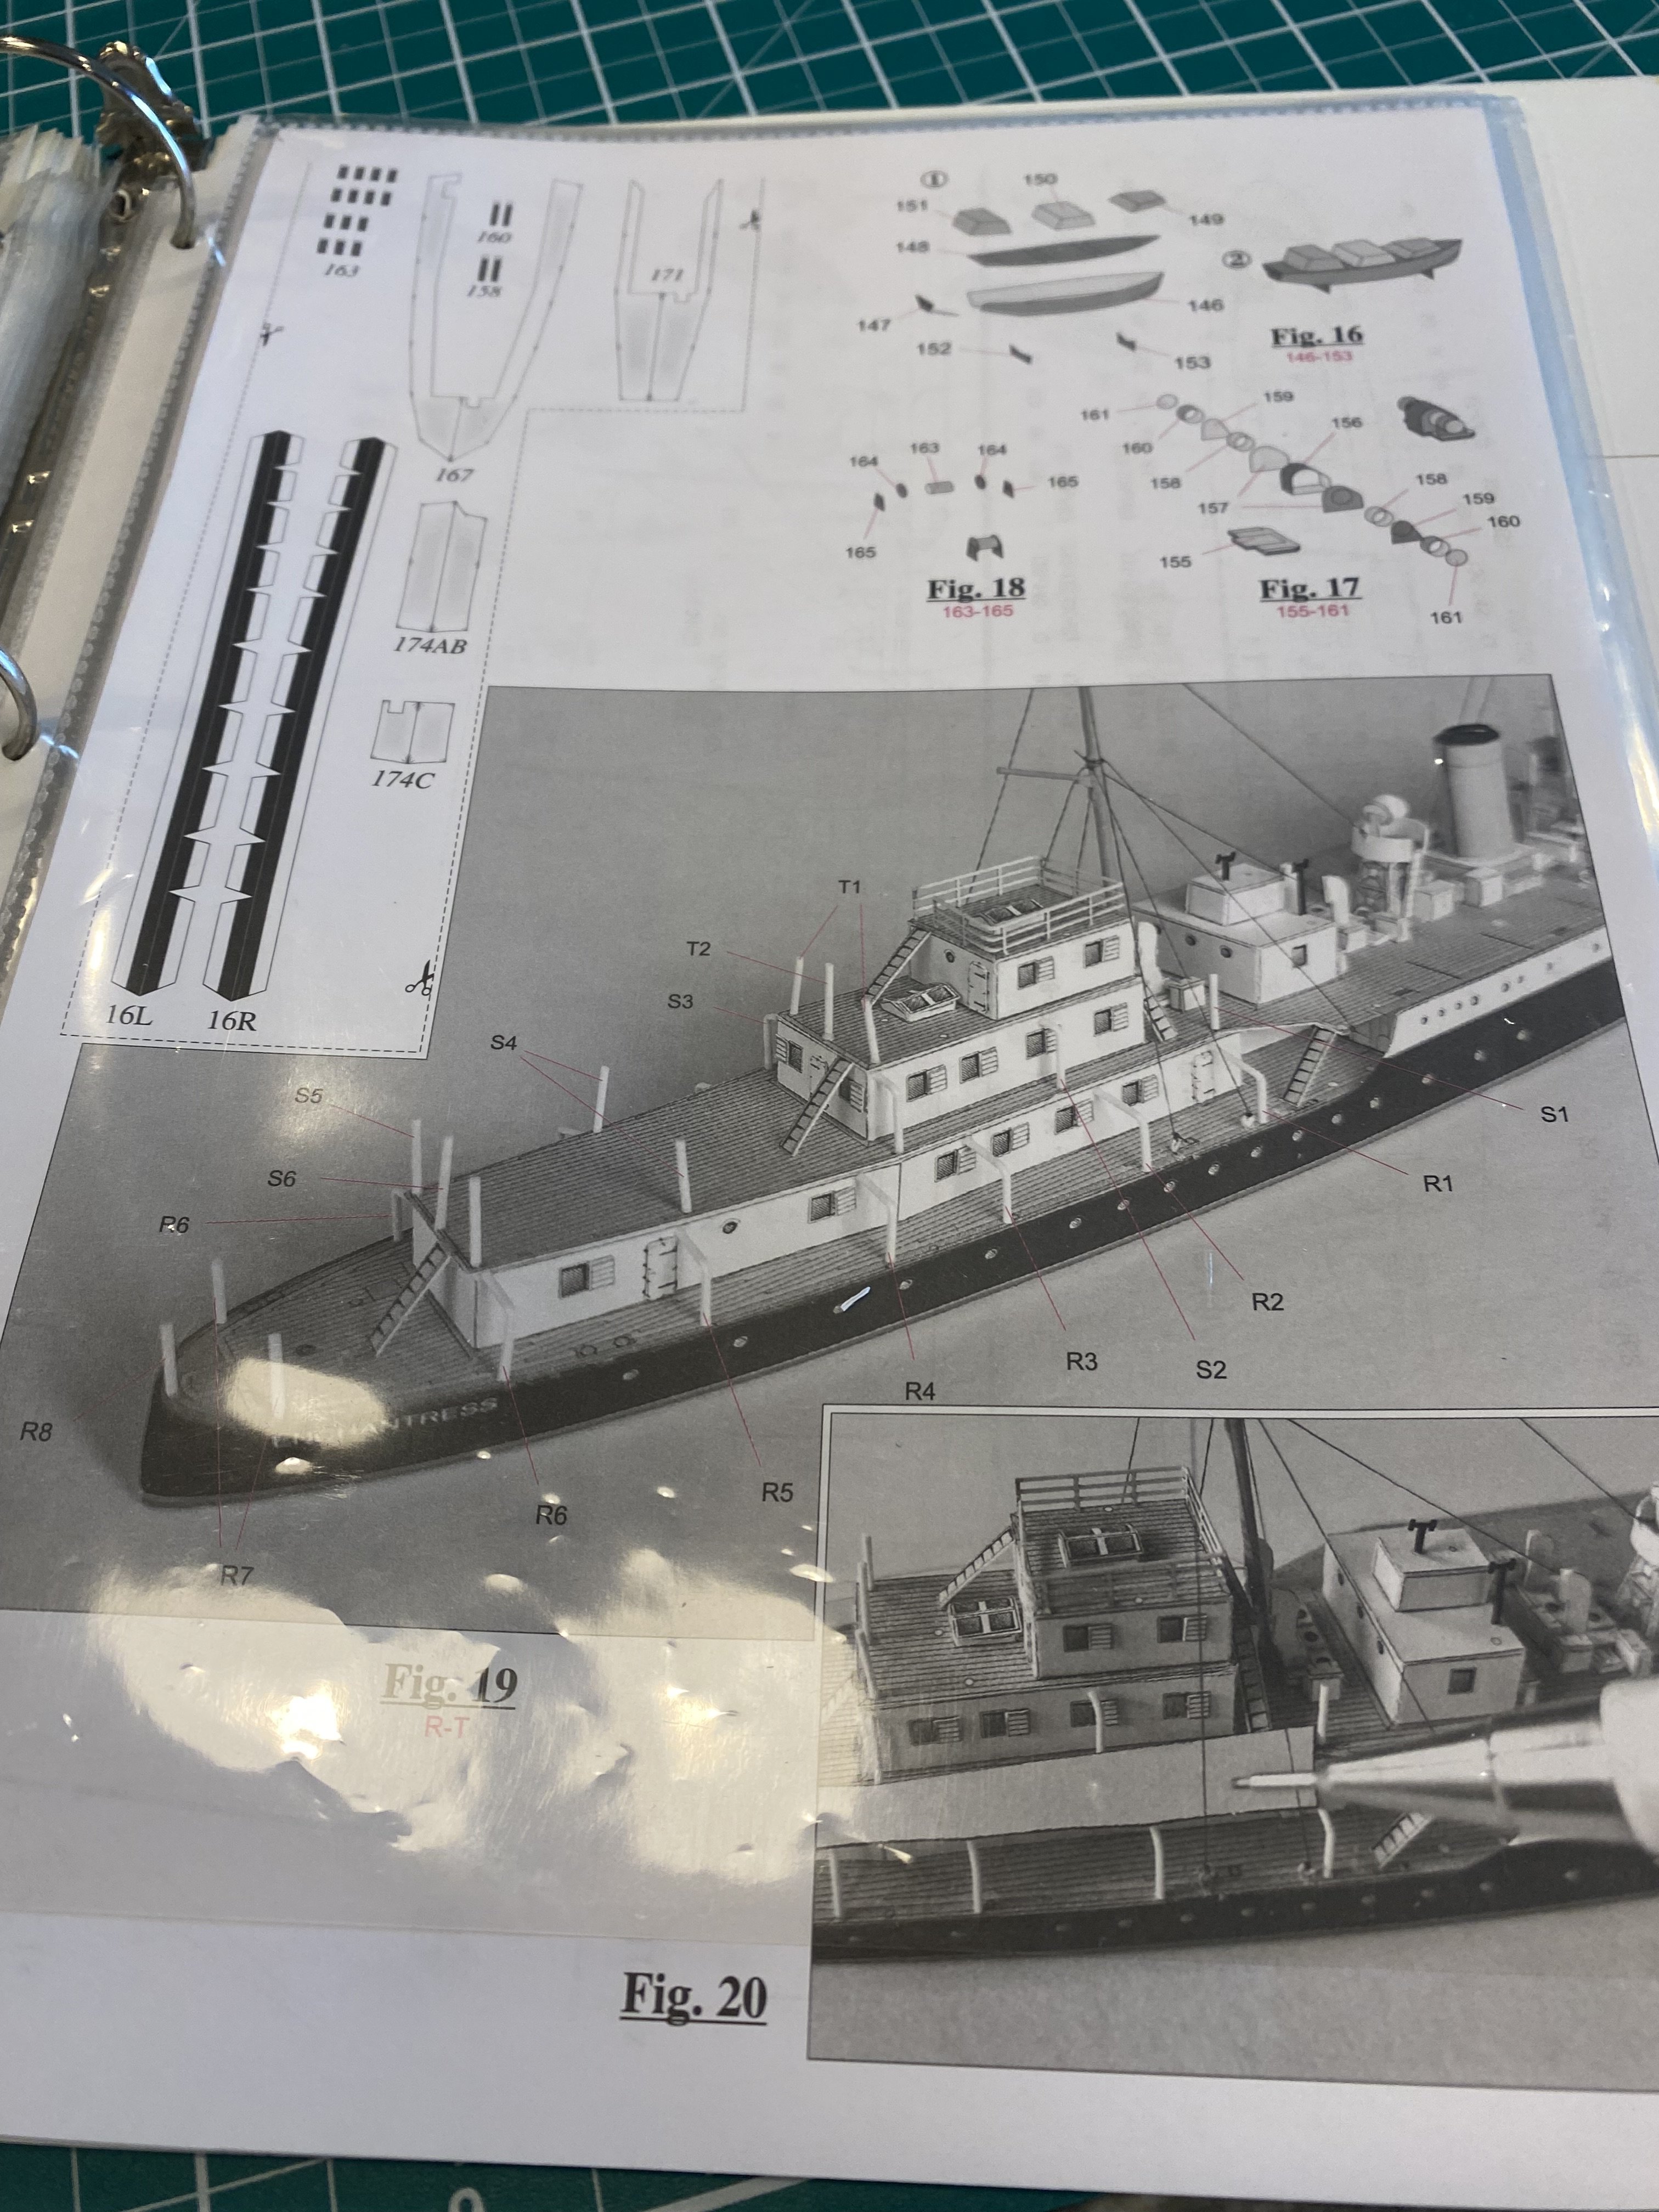
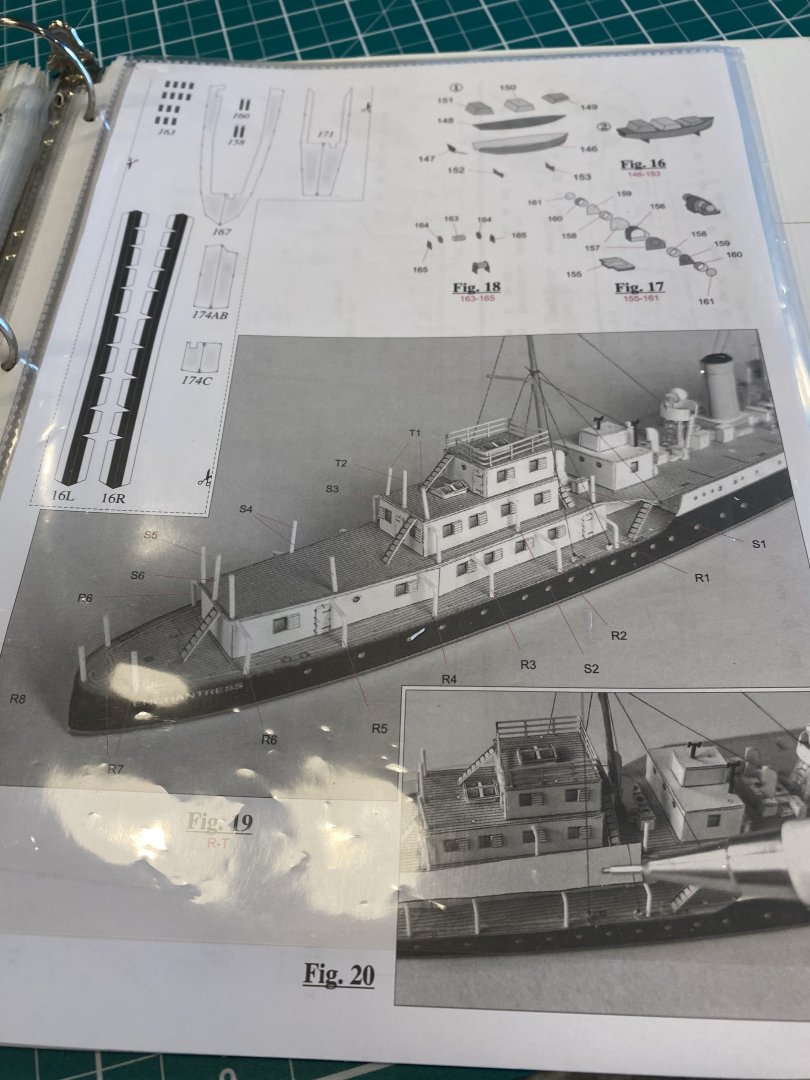
A lot of tiny boxes on this ship. Also, the instructions with the detail set stated that the main instructions indicated which parts had laser cut versions. If they did I missed them and missed a few ladders. I replaced the card ladders and marked all the part numbers that had laser cut details. The only part I can’t fix is the search light tower. The card tower is not coming off without damaging the deck.
- 22 replies
-
- 4
-
-
- Enchantress
- JSC
- (and 1 more)
-
To be honest I didn't pay any attention to the scale. I seemed like an interesting ship. If I thought about what 1/400 really meant I might have hesitated. The details are at the limit of my vision!
- 22 replies
-
- 2
-
-
- Enchantress
- JSC
- (and 1 more)
-
A lot of the work now has to be done with tweezers! The little deckhouse in the tweezers went under the overhang forward of the funnel.


- 22 replies
-
- 4
-
-
- Enchantress
- JSC
- (and 1 more)
-
I am sure that space is awash with tiny blocks, deadeyes, and other bits
- 22 replies
-
- 3
-
-
- Enchantress
- JSC
- (and 1 more)
-
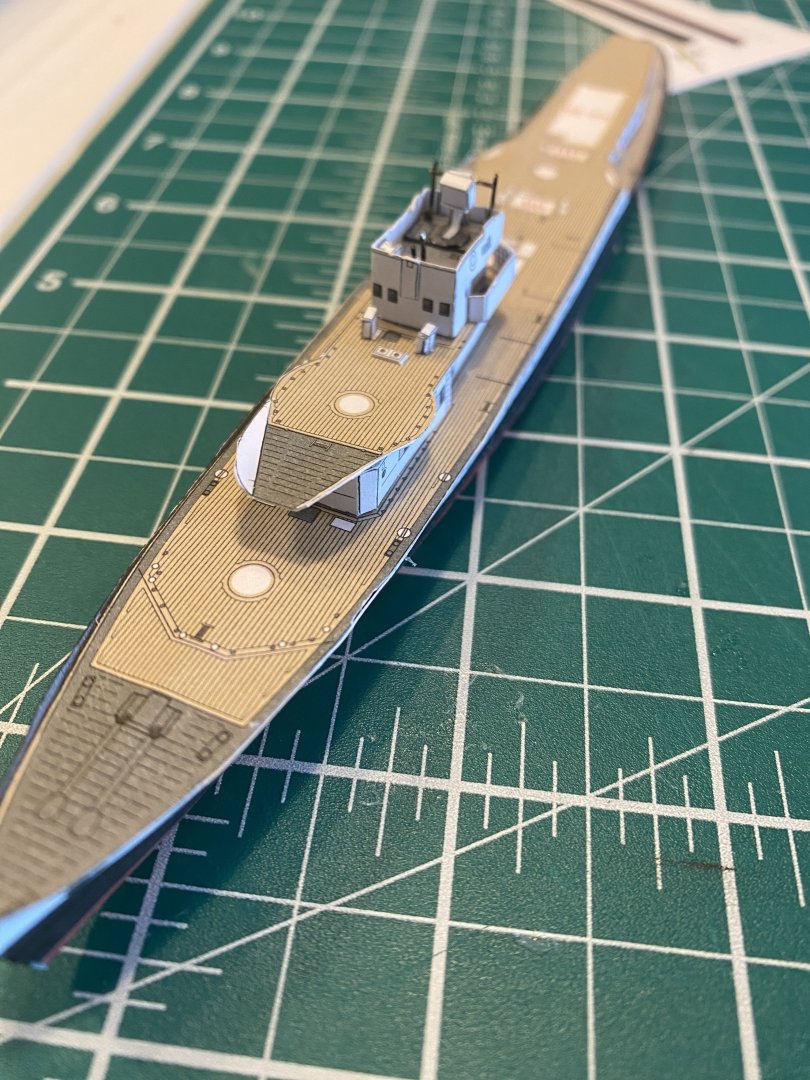
I now have the front superstructure in place. This involved some very tiny structures. One card piece snapped out of my tweezers and ended up in the 4th dimension apparently. Fortunately its absence isn’t noticeable.
- 22 replies
-
- 6
-
-
- Enchantress
- JSC
- (and 1 more)
-
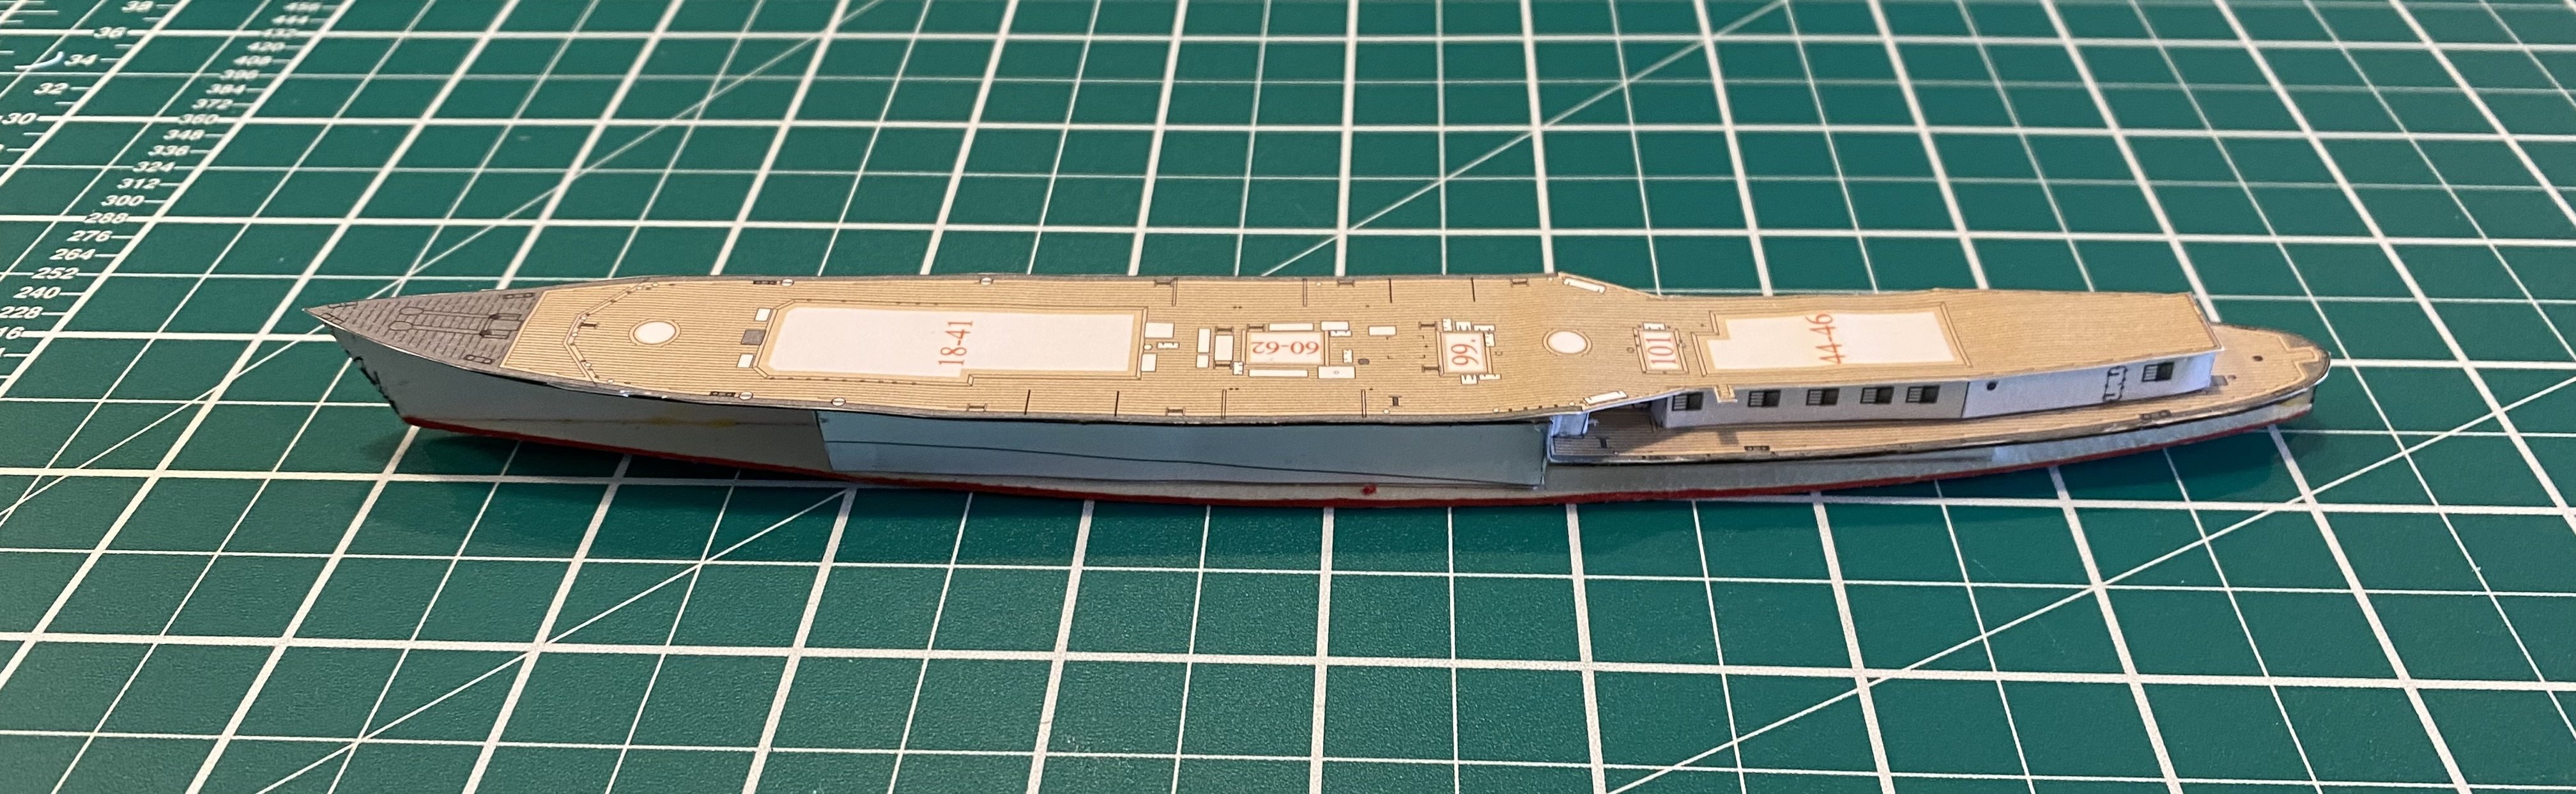
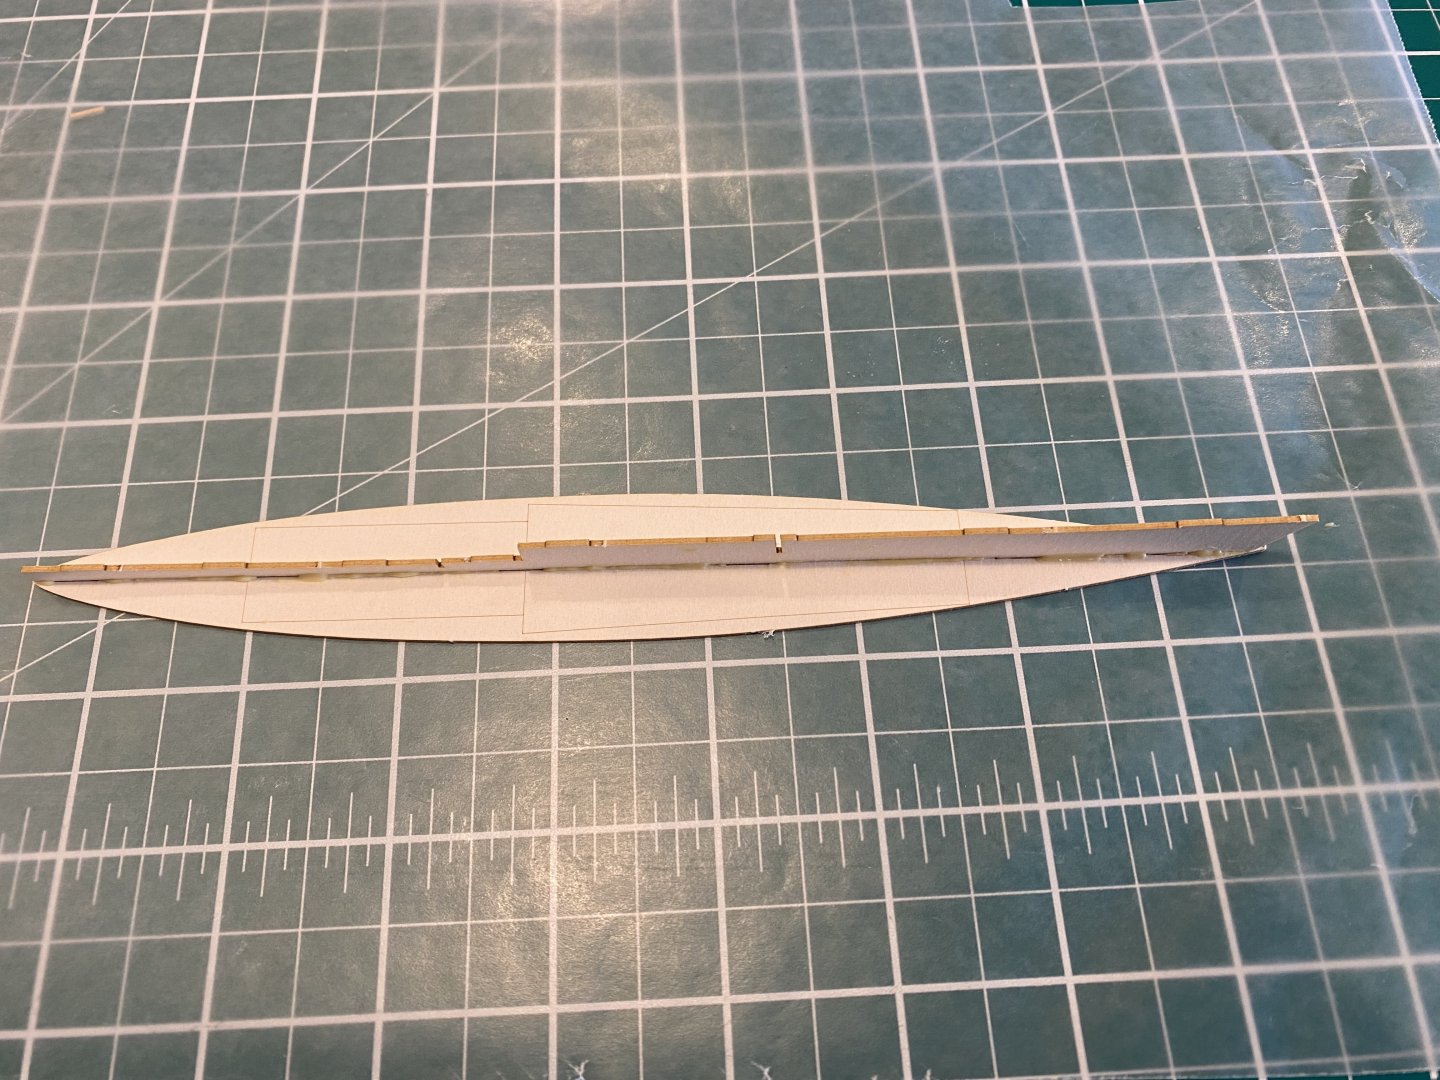
The instructions say to apply the hull sides starting at the stern. When I did that the curve at the step in the deck didn’t line up. I had to remove the side, and ruined it in the process. Fortunately there are parts for different versions and I was able to switch to the B version (middle years, I was doing A, as launched). This time I started the sides at the step.

- 22 replies
-
- 5
-
-
- Enchantress
- JSC
- (and 1 more)
-
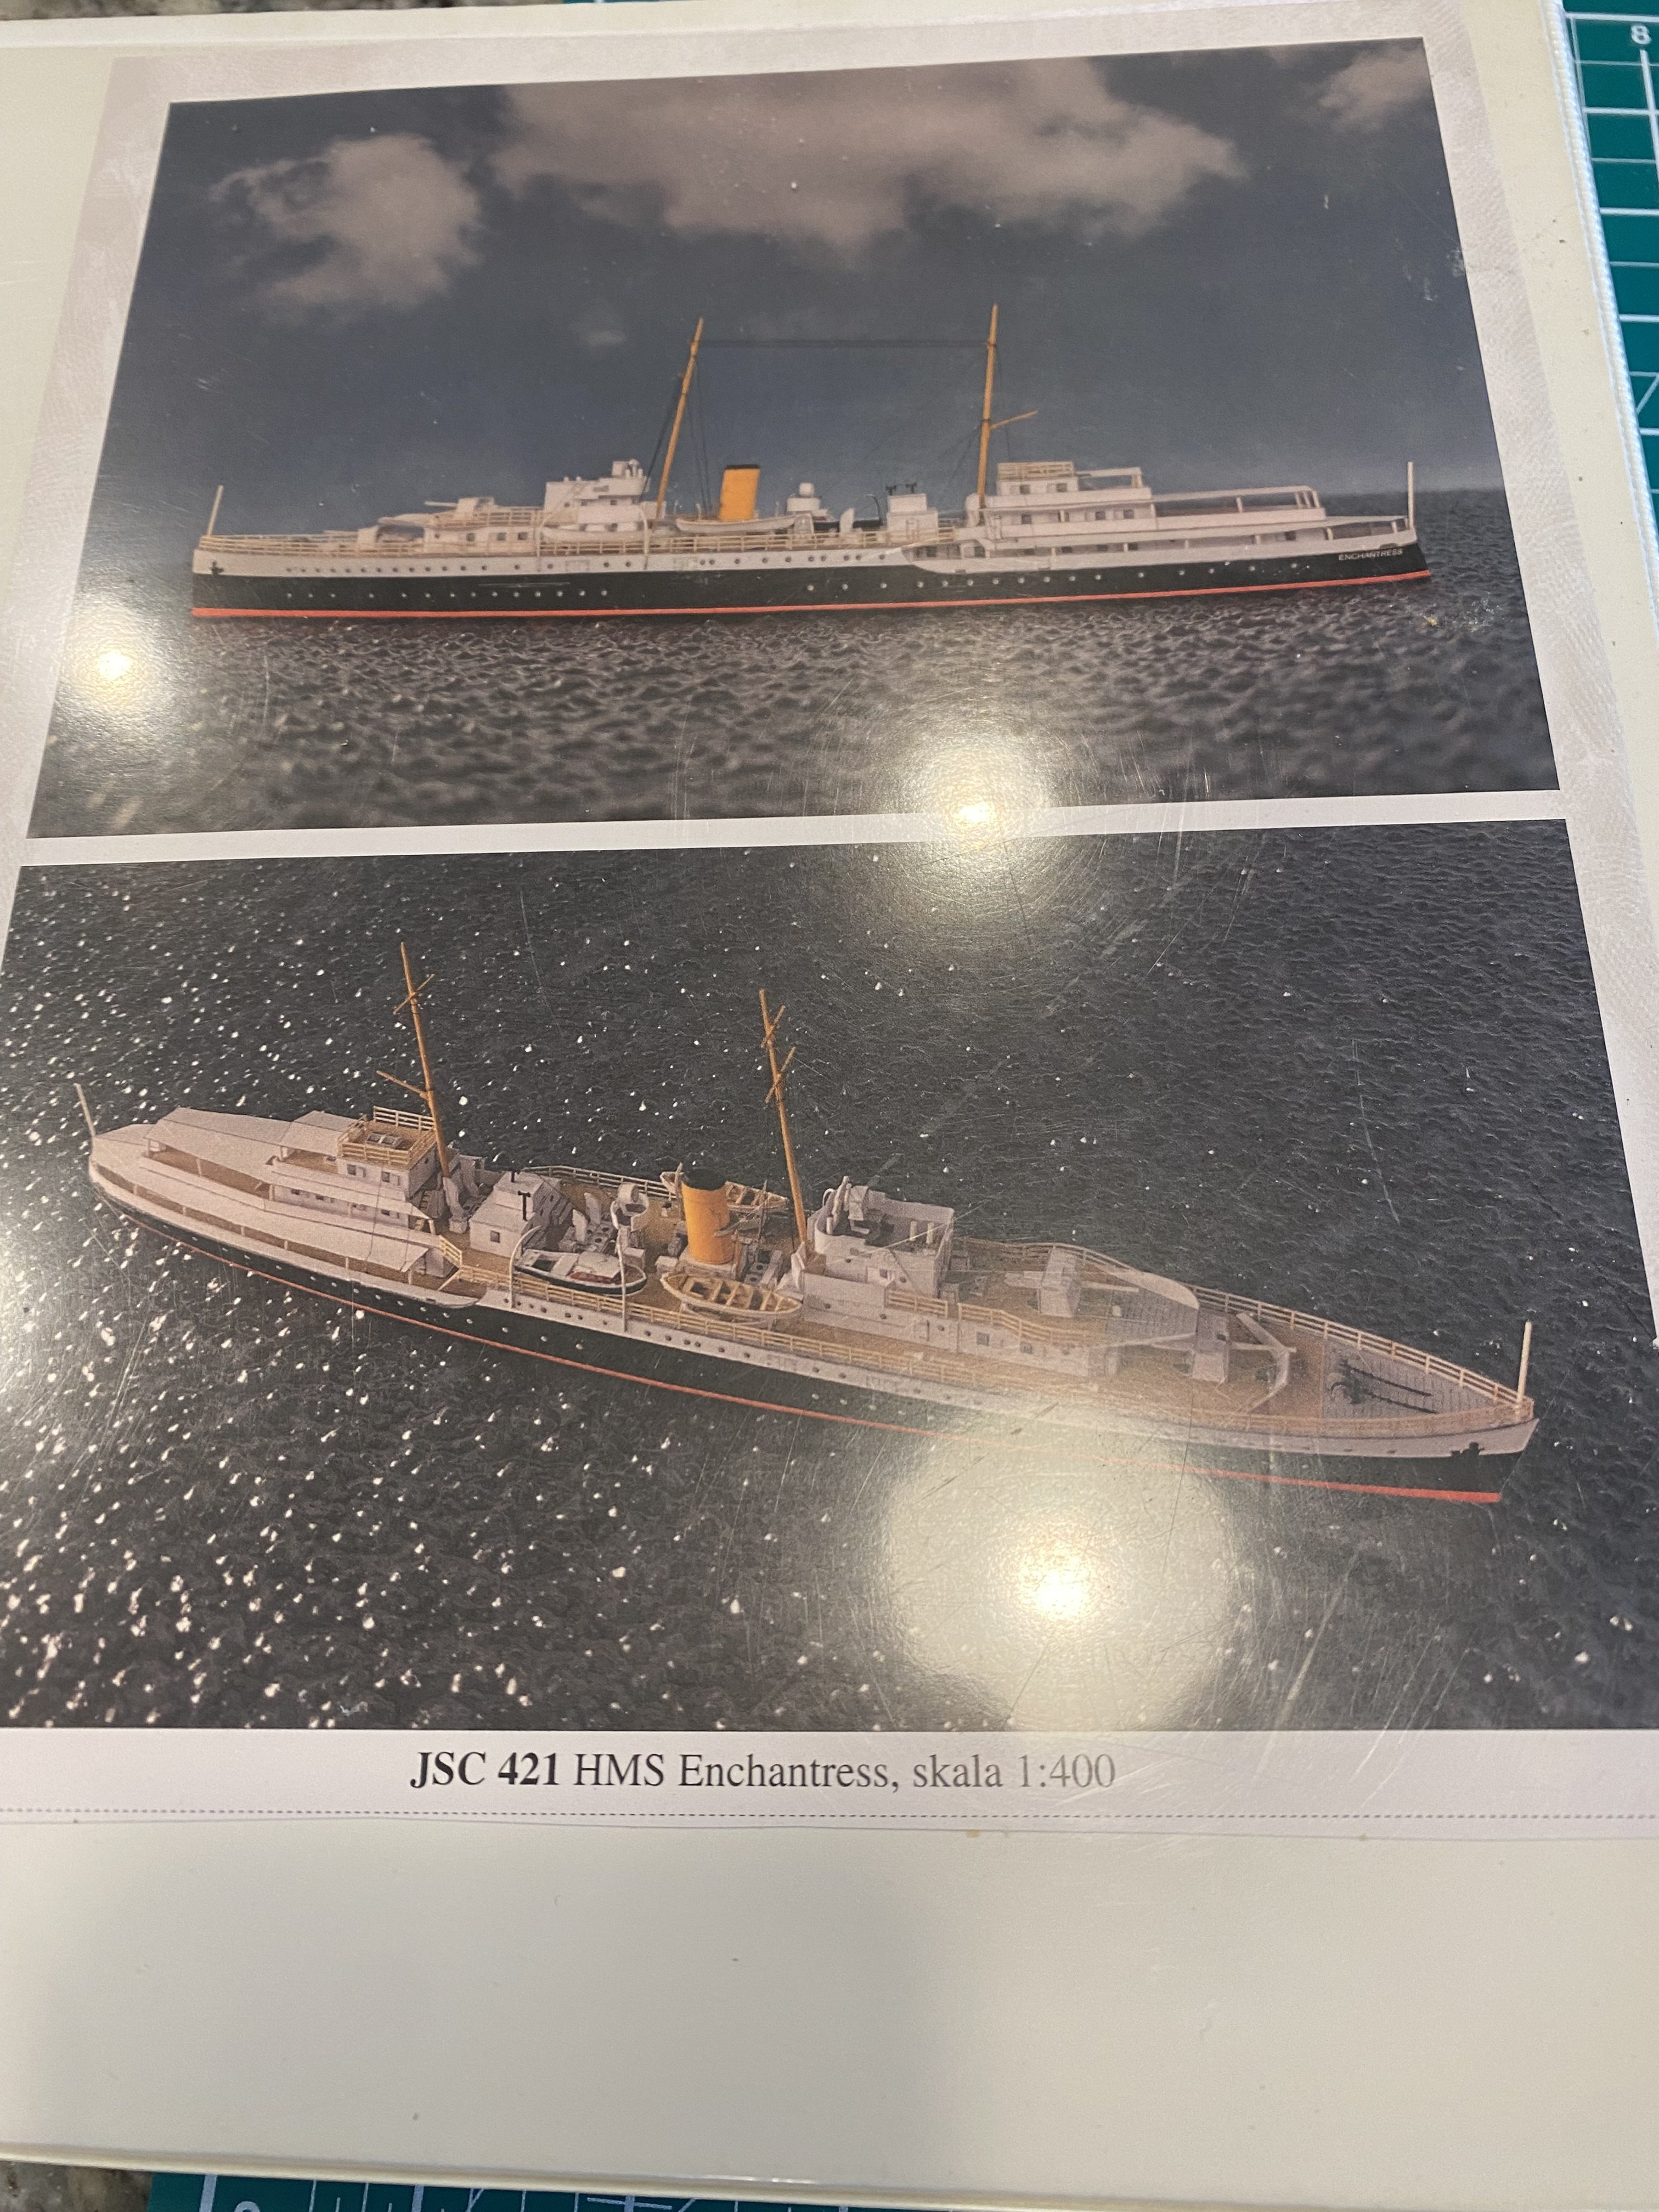
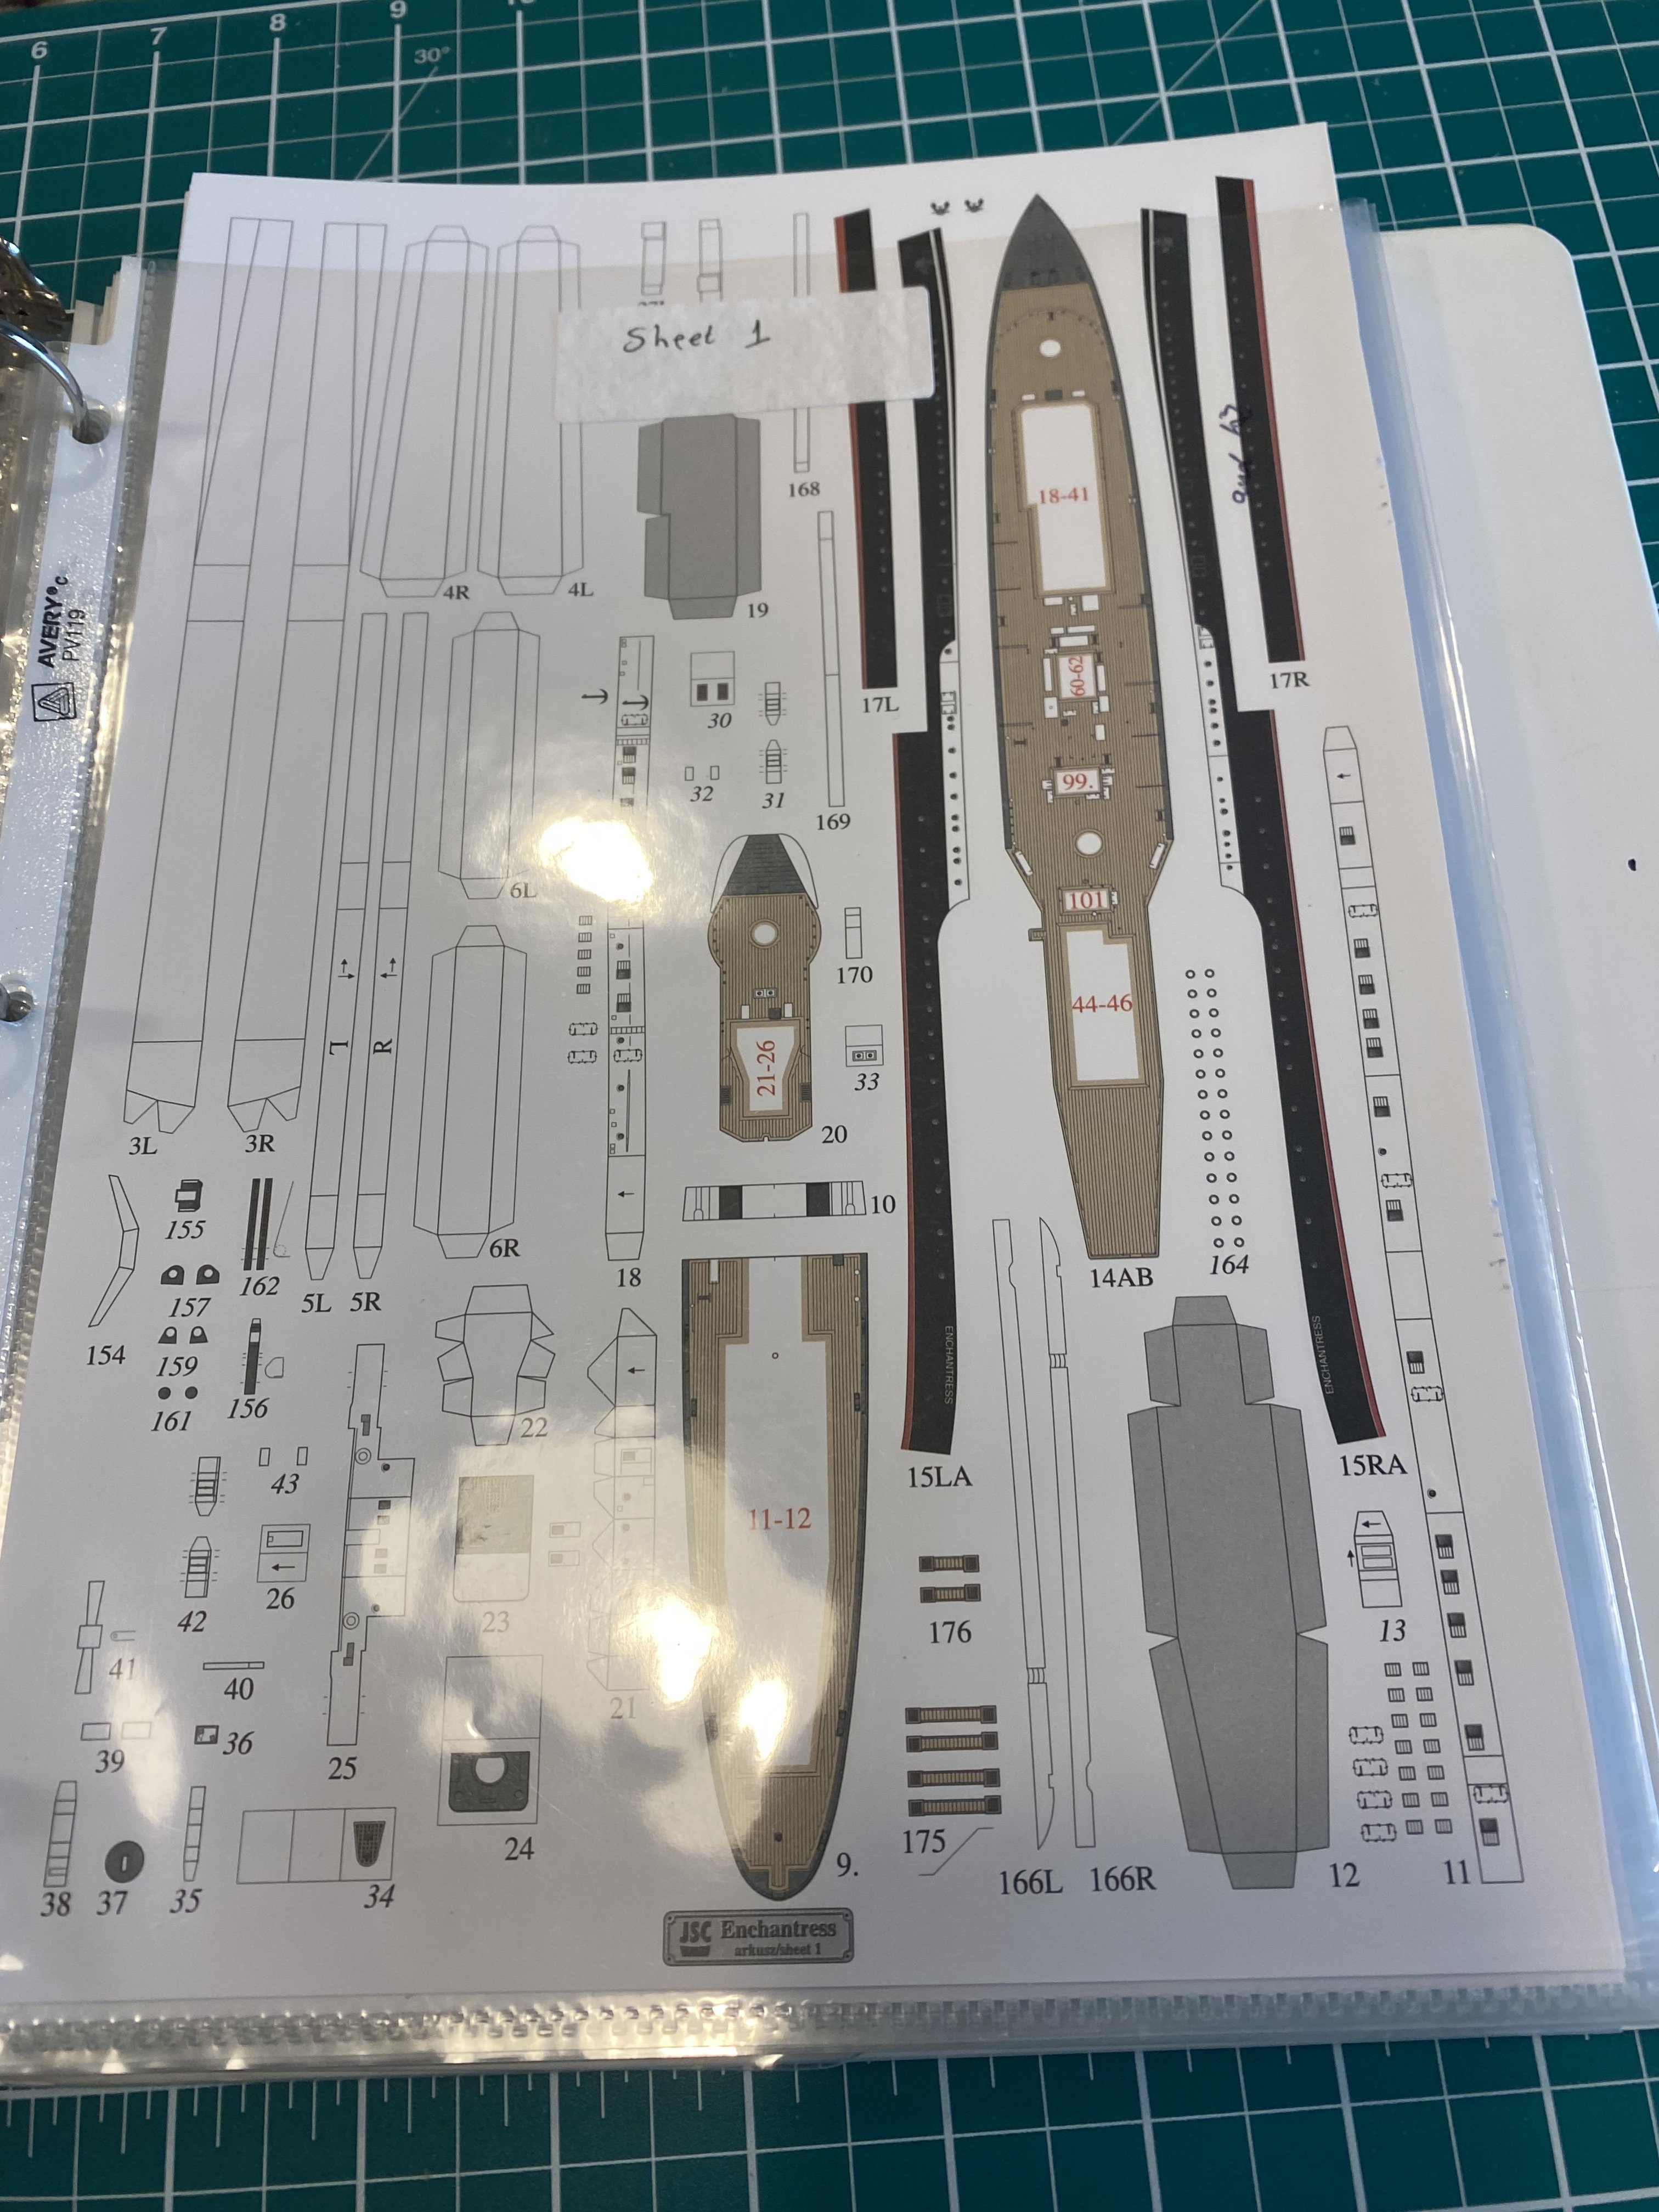
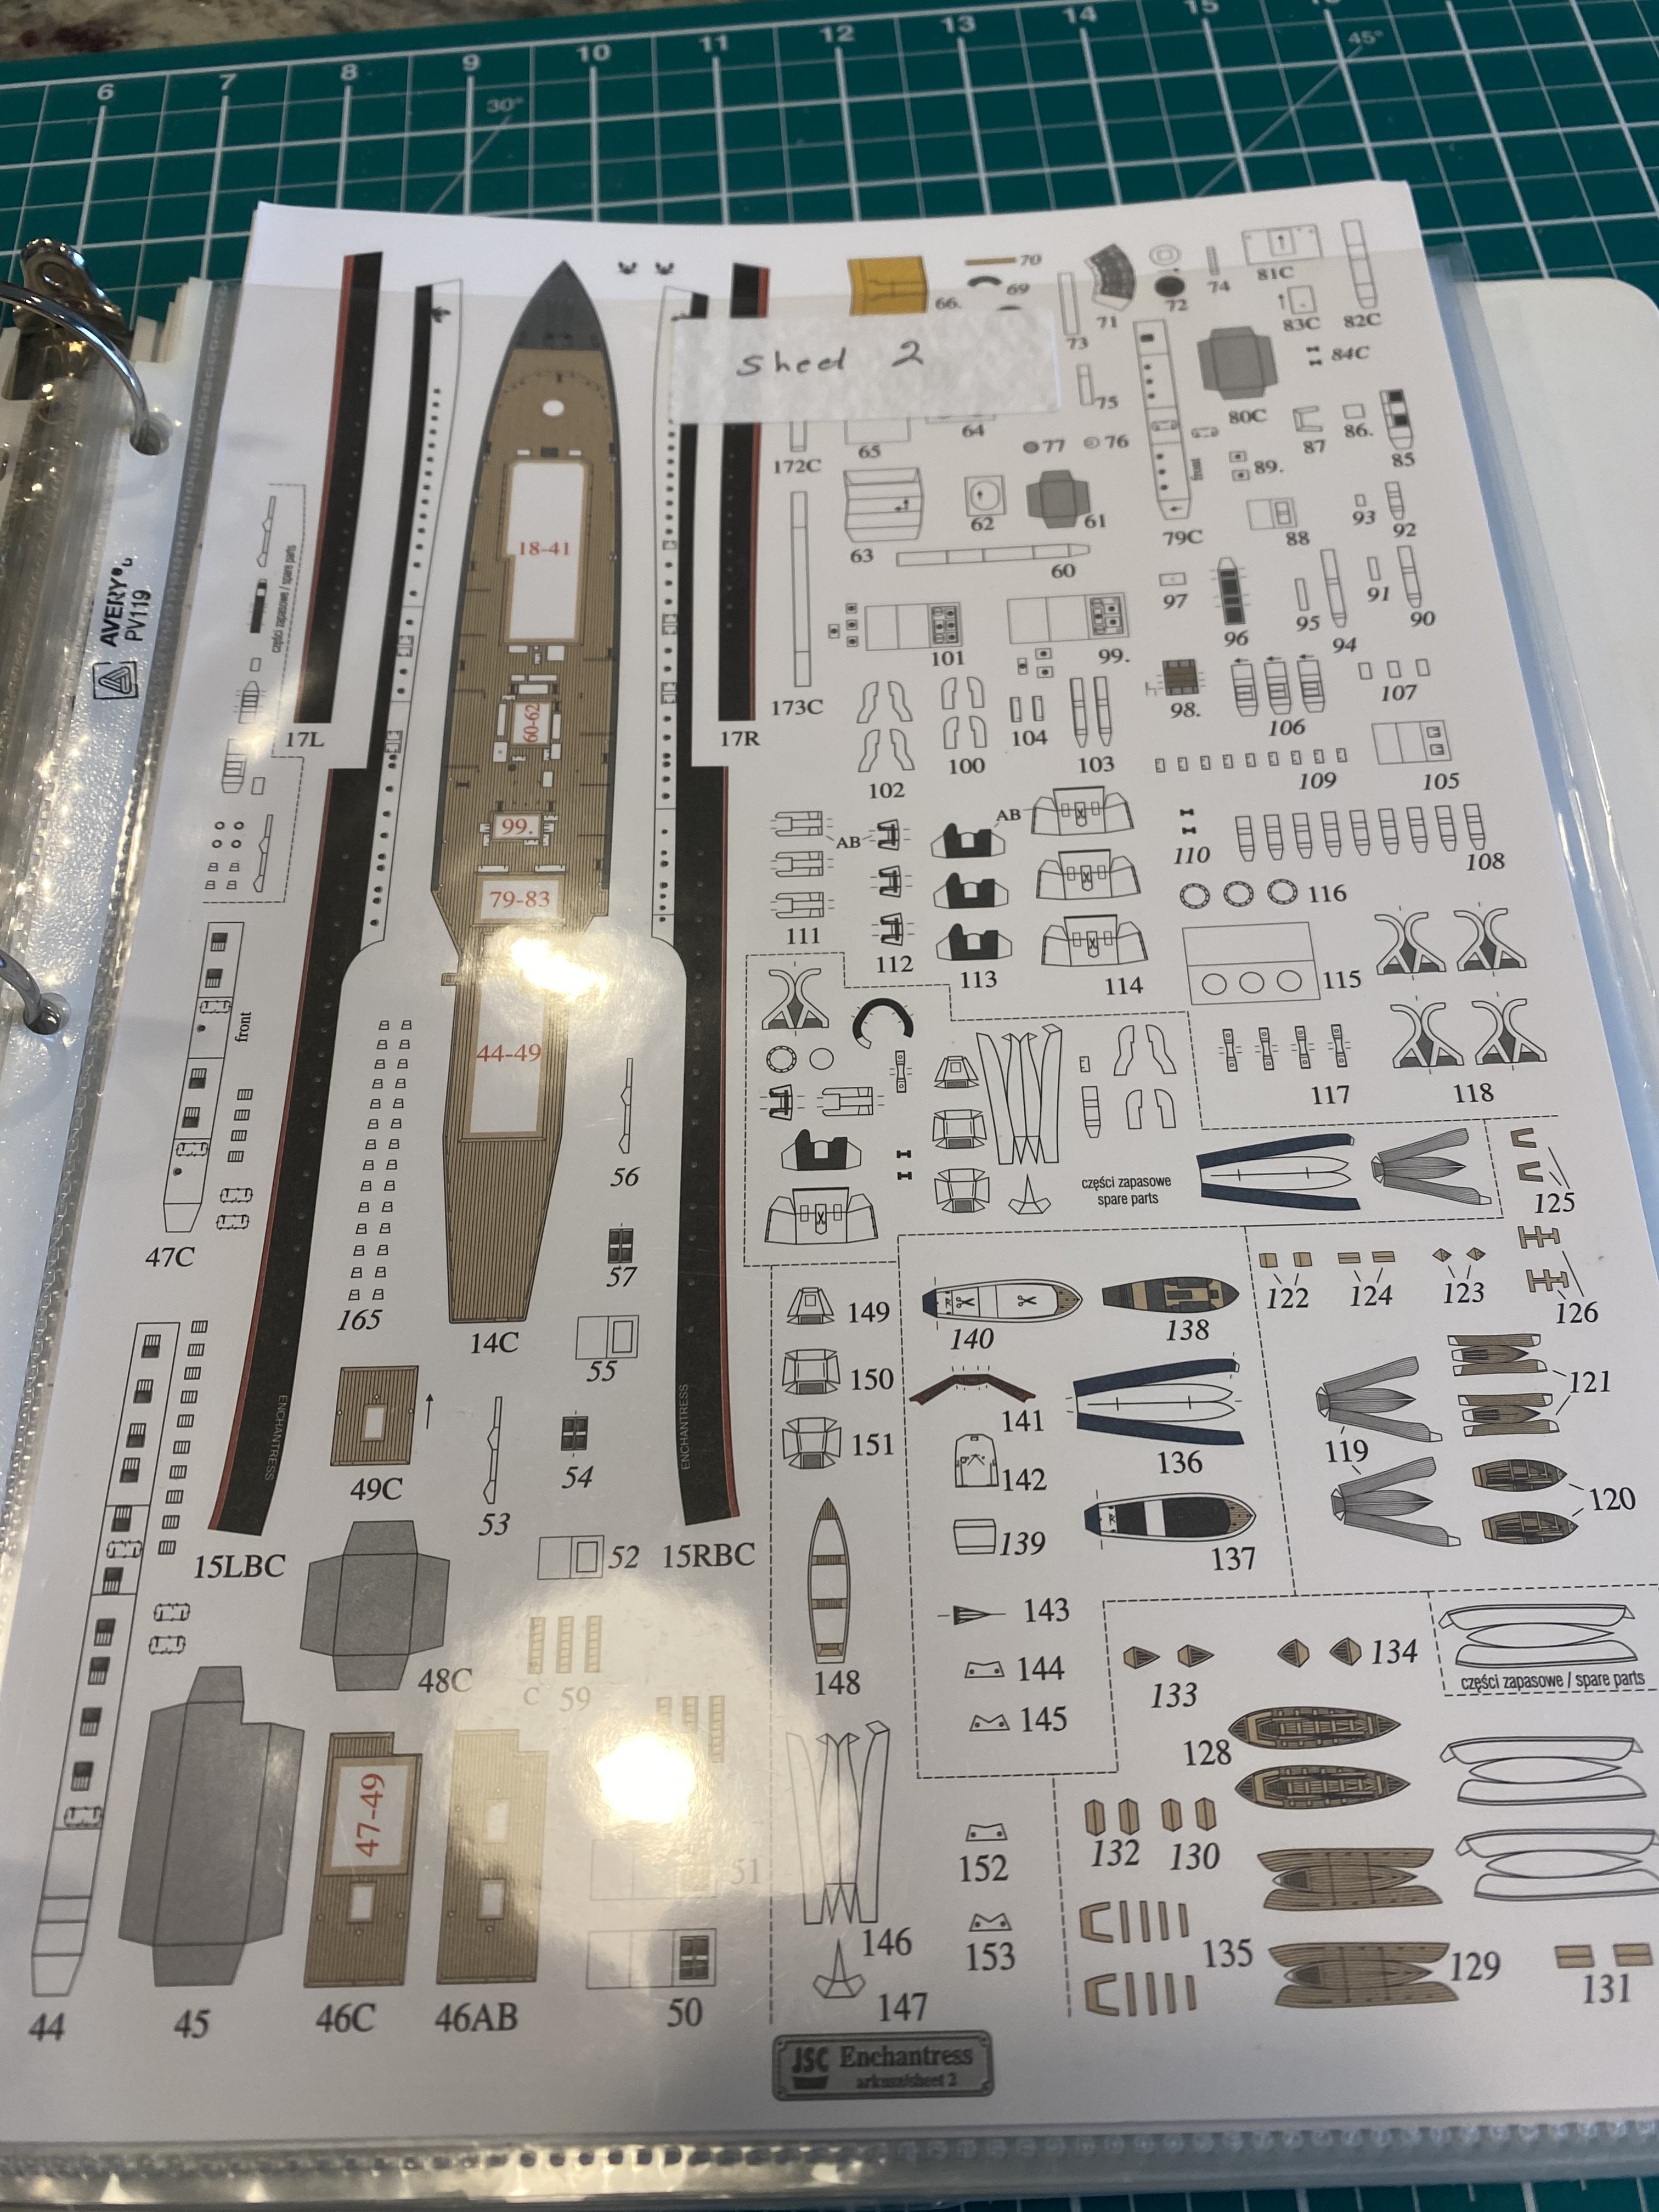
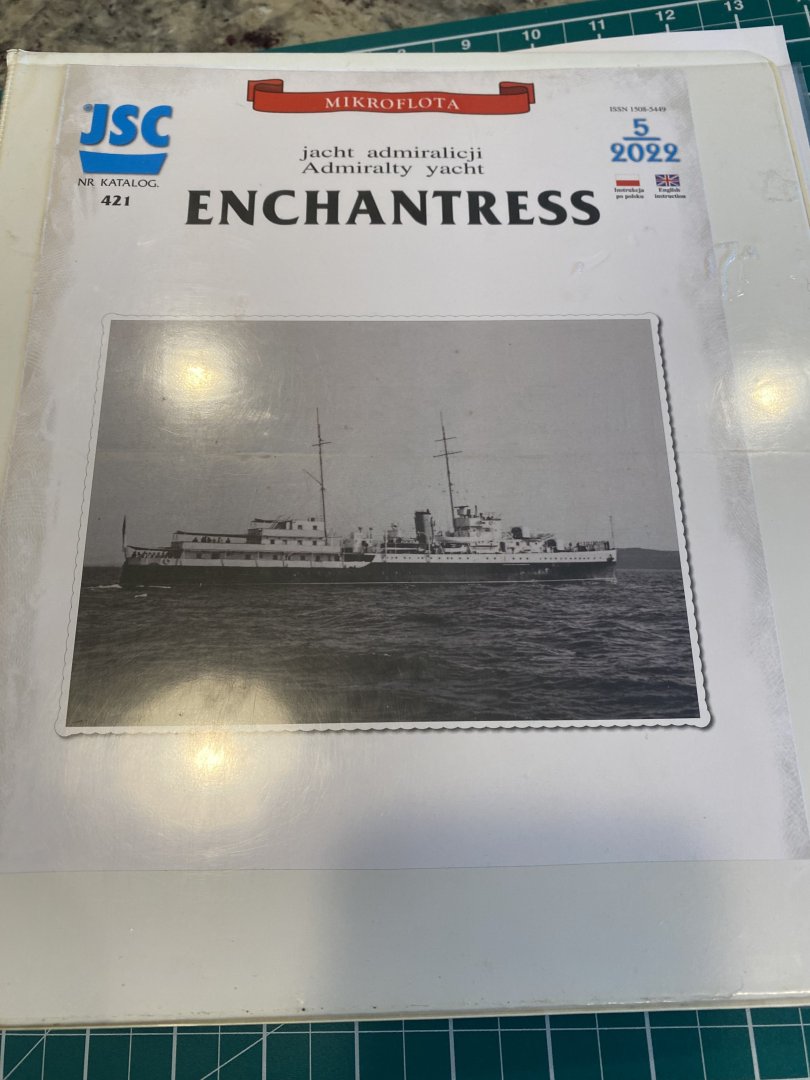
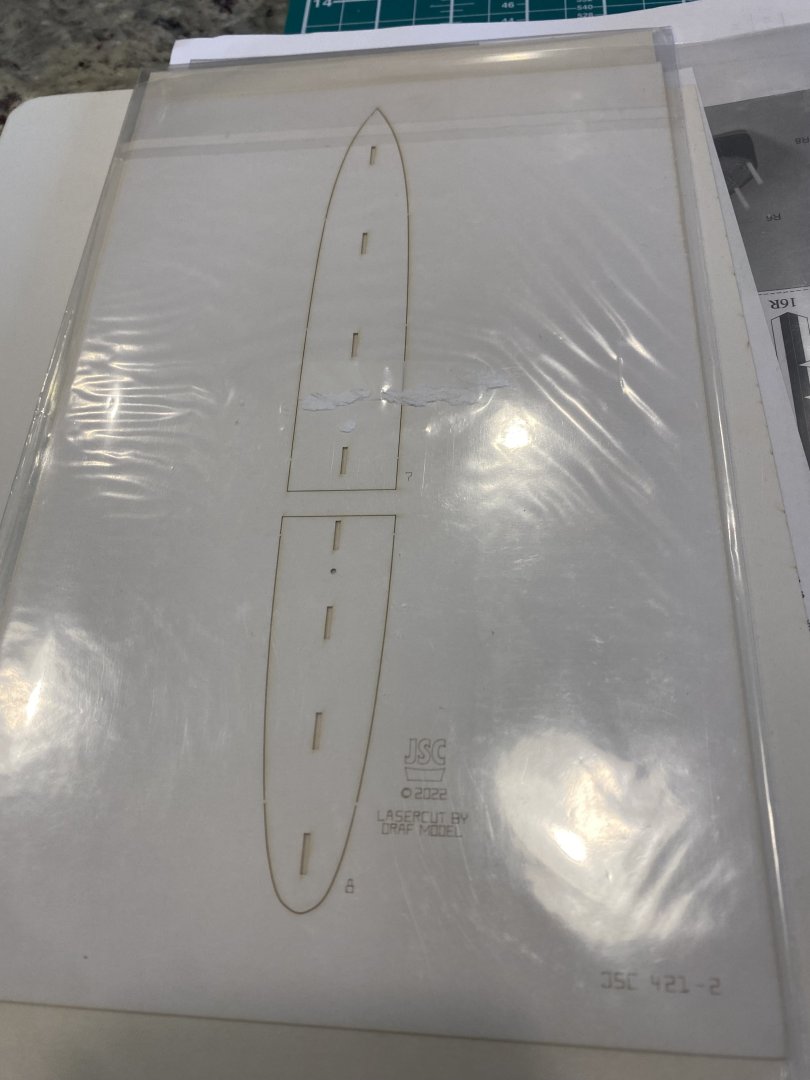
The Enchantress was built at the J. Brown shipyard in Great Britain. Originally designed to be a convoy escort named Bittern, her purpose was changed during construction to an Admiralty Yacht and her name changed to Enchantress. She was launched December 21, 1934 and entered service on April 8, 1935. This is a card model from JSC and comes in booklet form. The basic kit has laser cut parts to form the hull and I also purchased a laser cut detail set. I separated the pages and put them with the instructions in plastic sleeves. This keeps everything neat makes it more difficult to misplace parts.


- 22 replies
-
- 7
-
-
- Enchantress
- JSC
- (and 1 more)
-
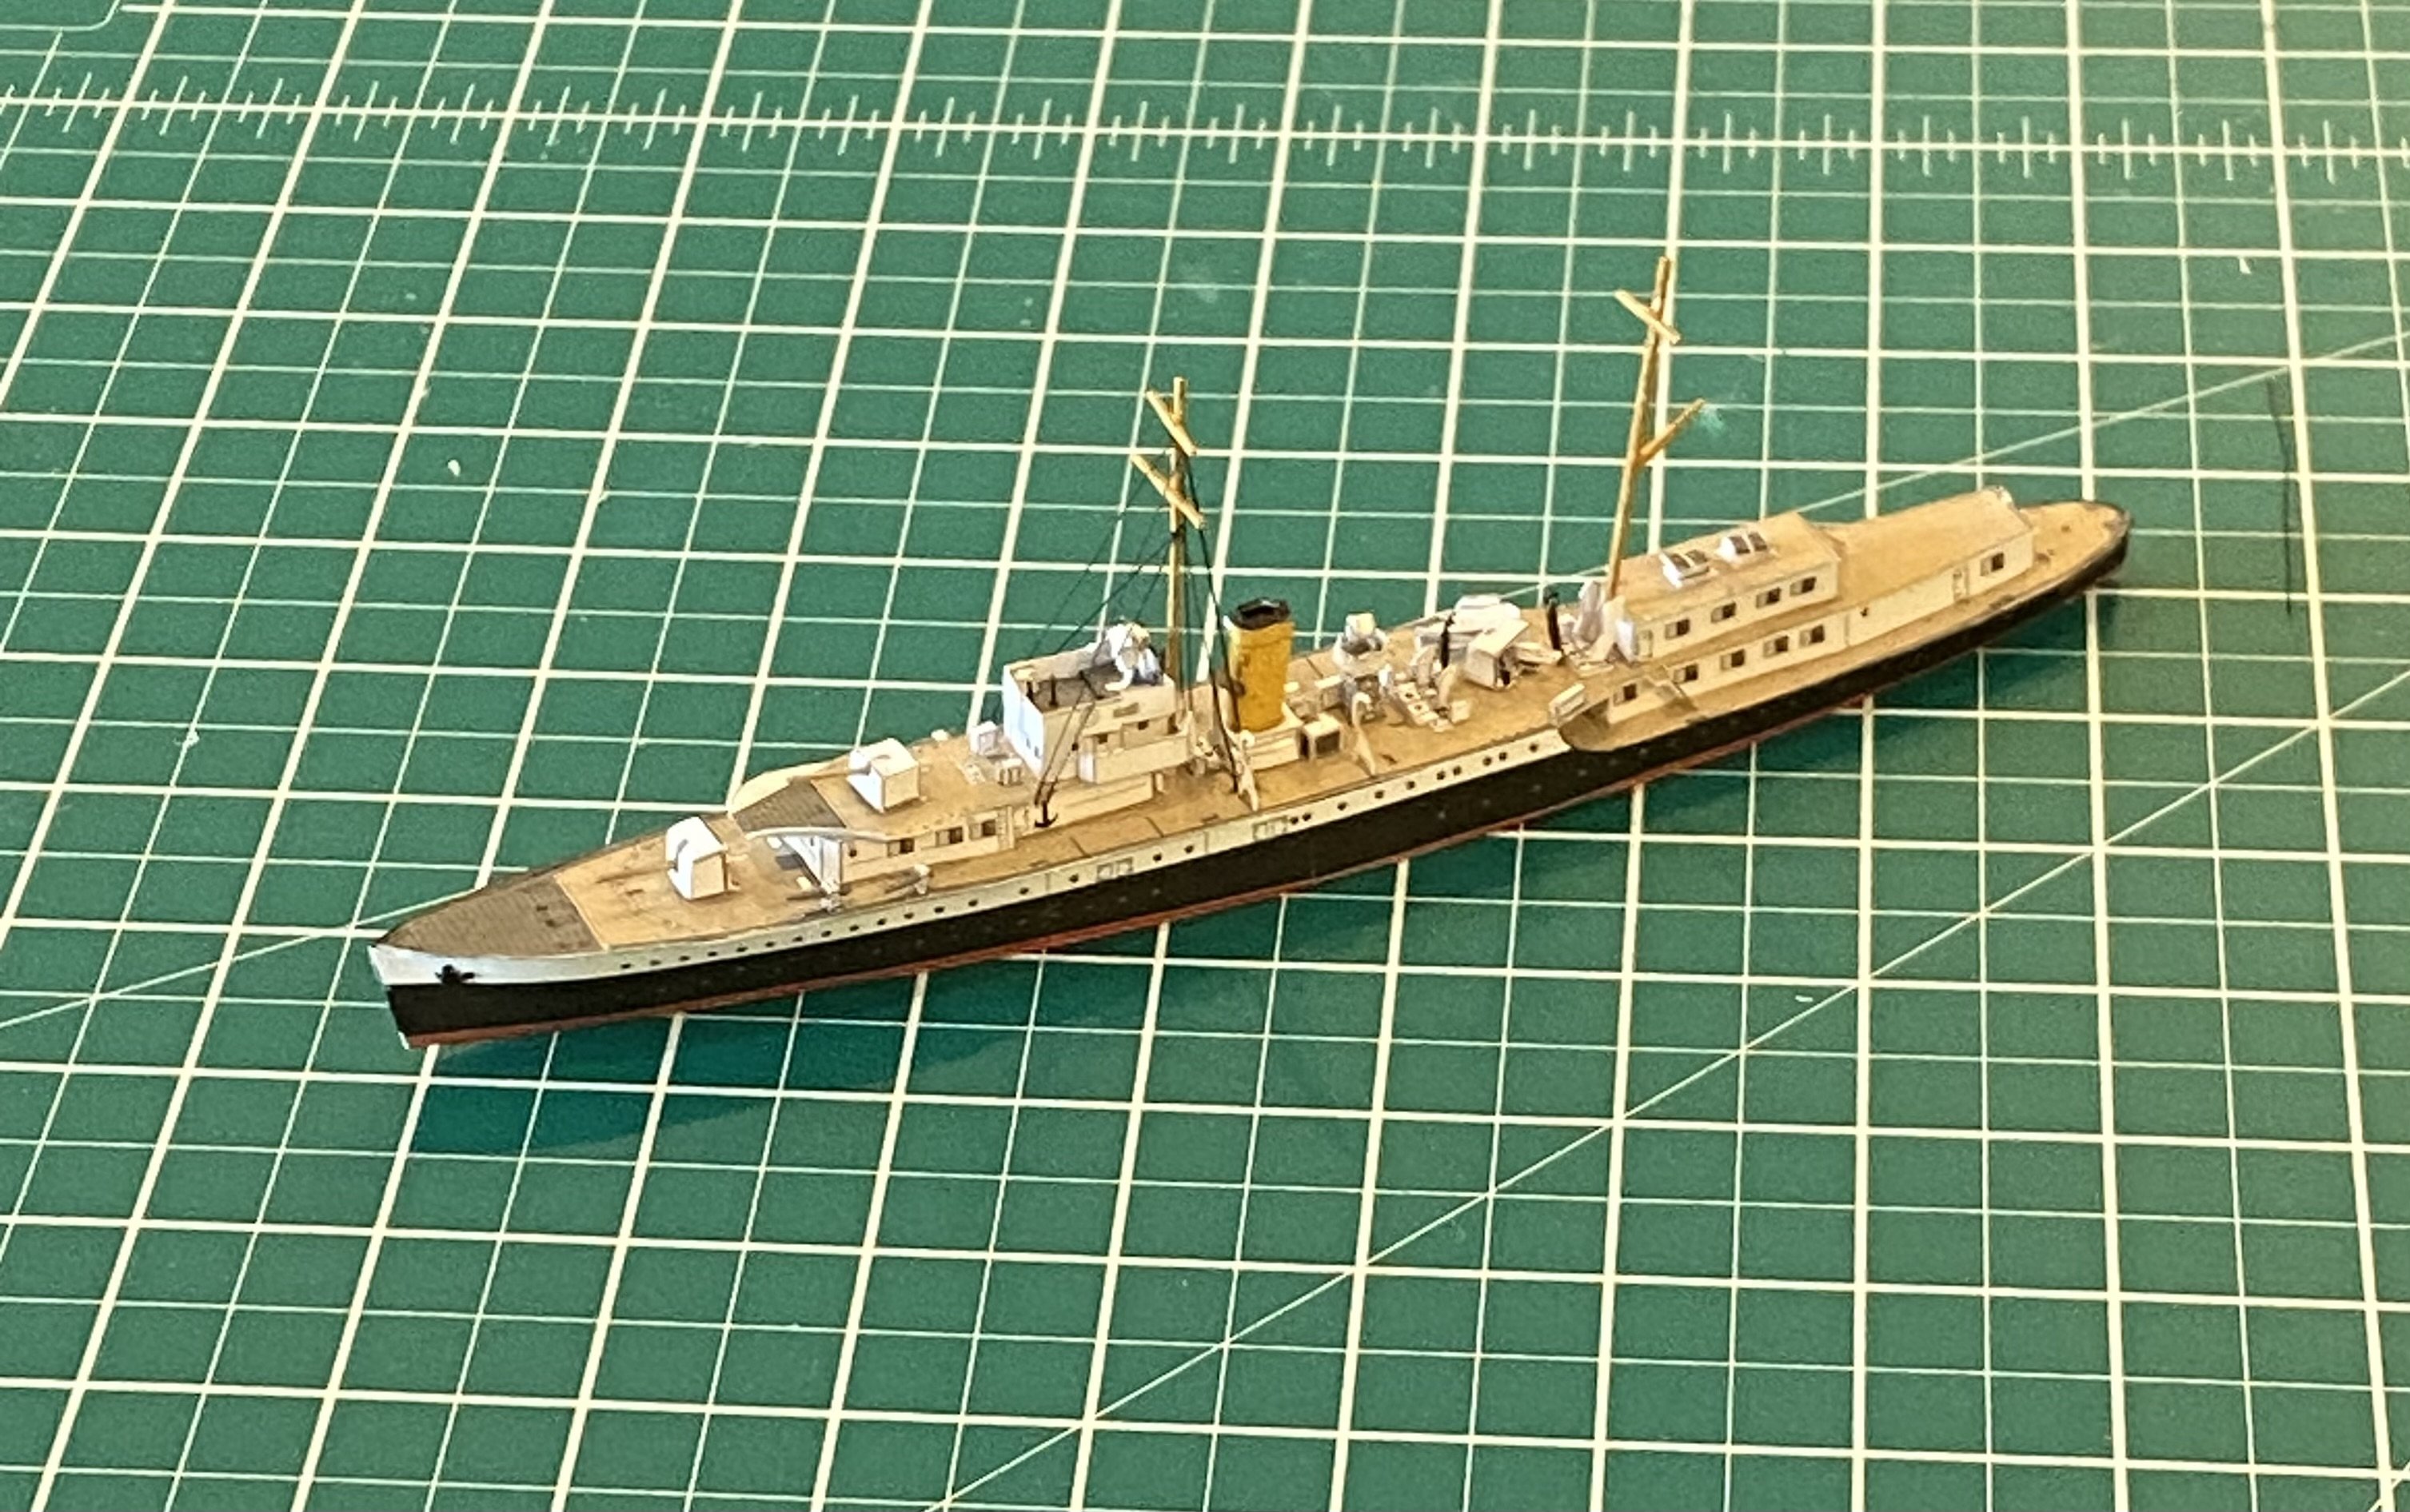
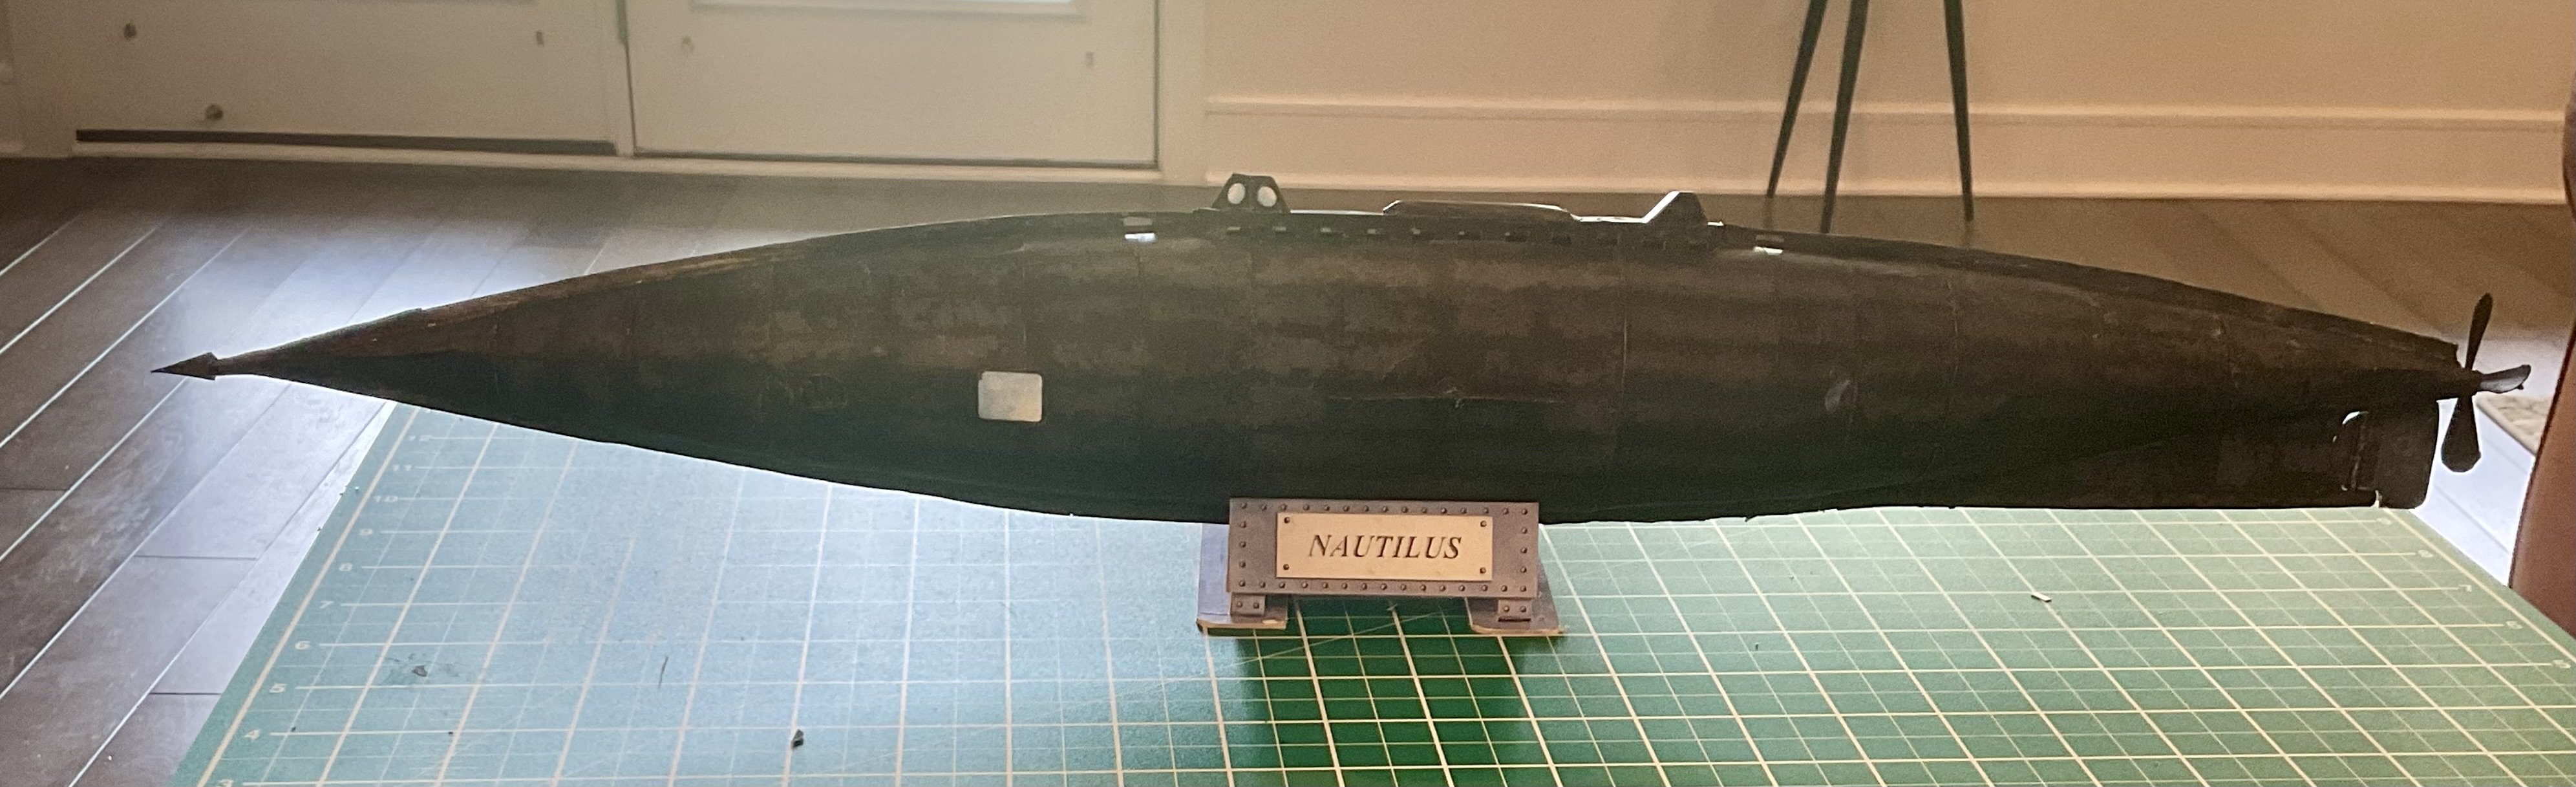
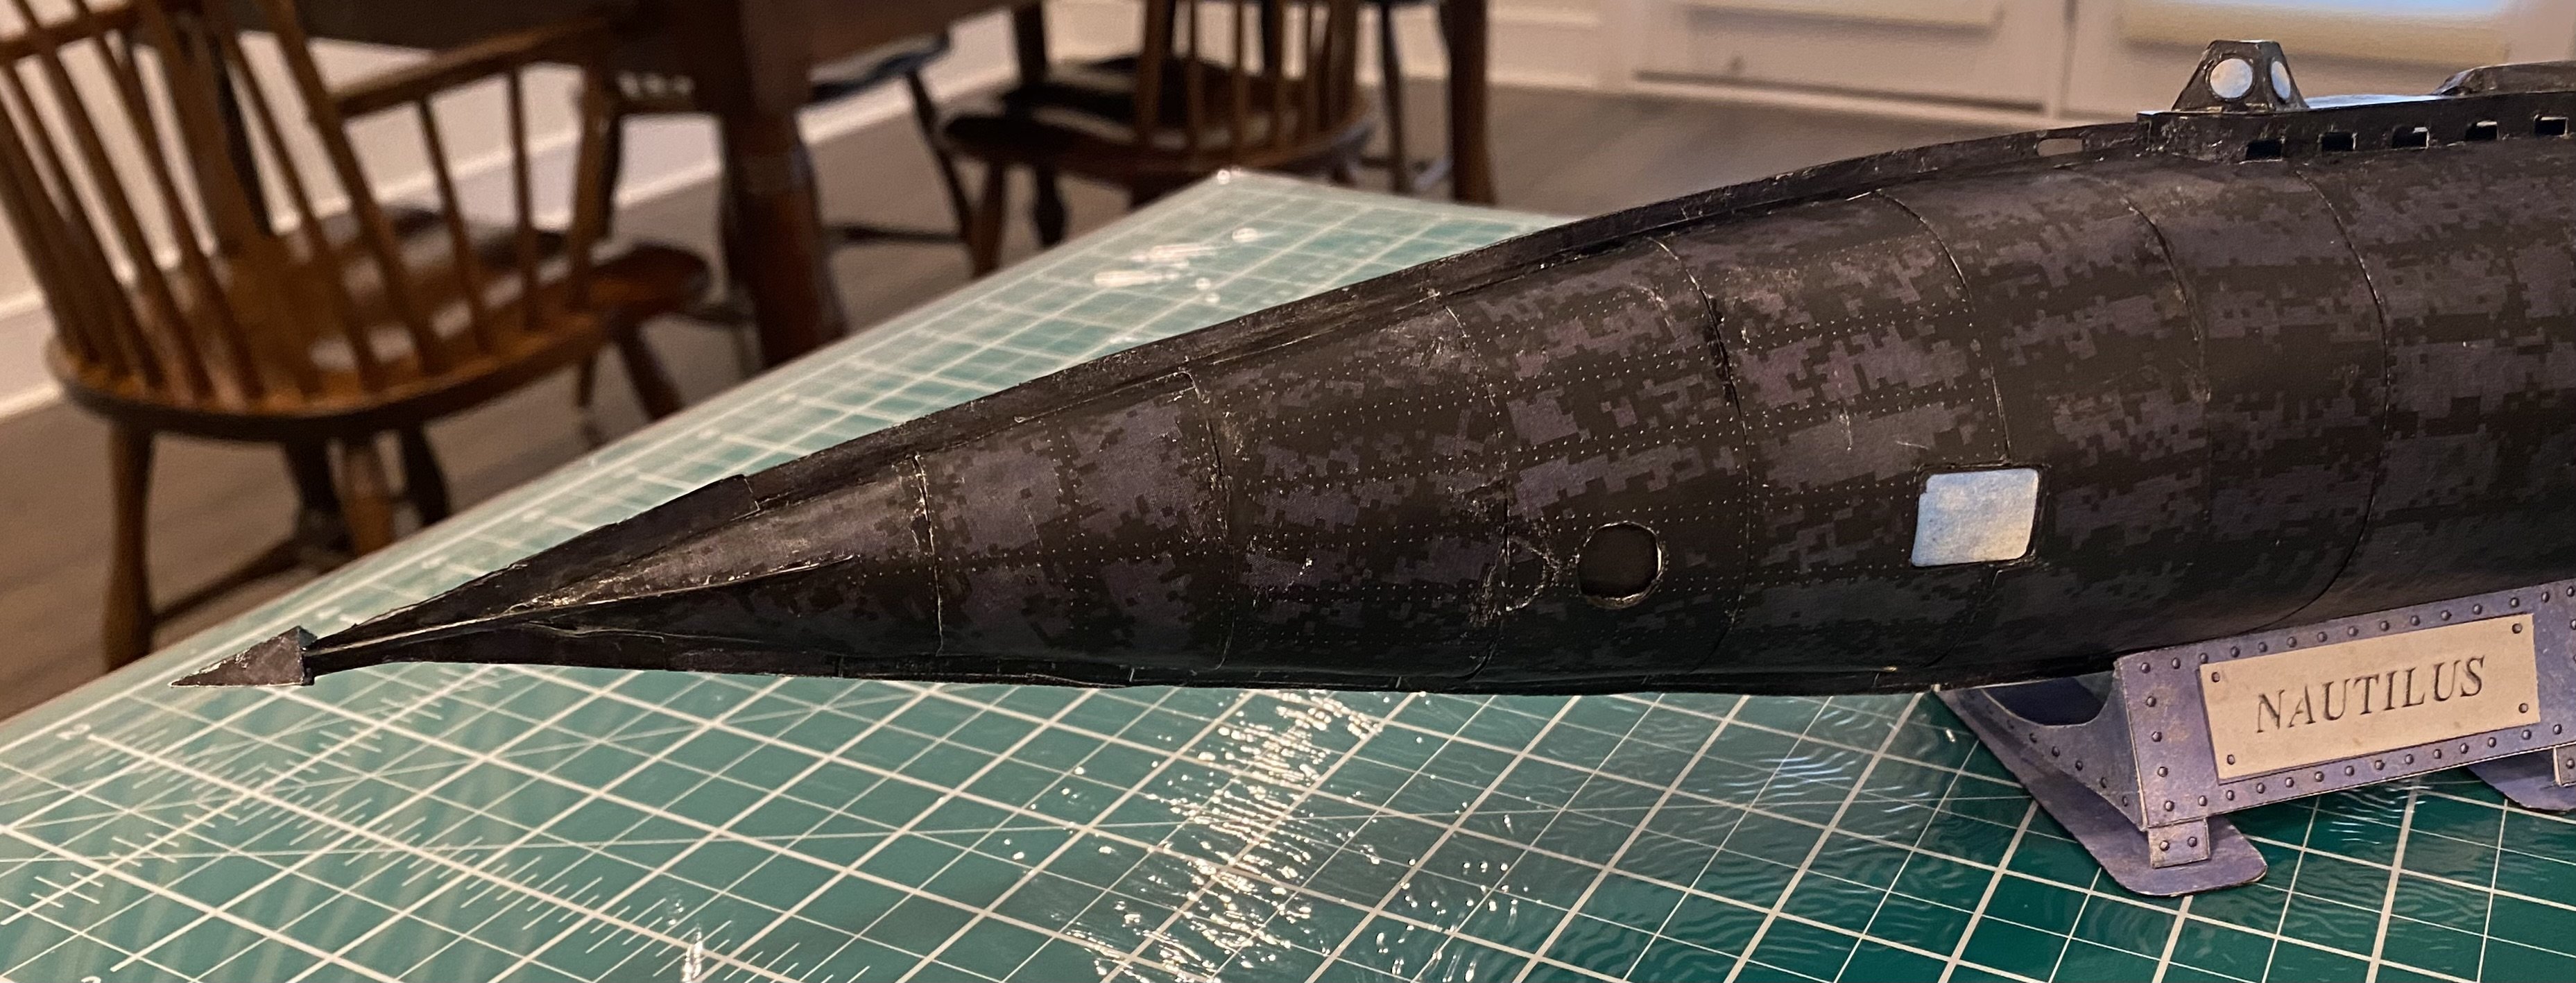
She is finished. I chose not to install the railings as I think they spoil the look and I don’t recall Verne mentioning them. I also remade the stand using basswood and applying the card pieces onto the basswood.

- 40 replies
-
- 13
-
-
-
- Nautilus
- Heinkel Models
- (and 2 more)
-
Kit review Belle Poule - Occre - 1/90 - review by kevin
Papa replied to Kevin's topic in REVIEWS: Model kits
Would the camber even be noticeable at this scale? -
I managed to get the wedge shaped ram on the bow this afternoon.

- 40 replies
-
- 8
-
-
- Nautilus
- Heinkel Models
- (and 2 more)