Papa
-
Posts
1,305 -
Joined
-
Last visited
Content Type
Profiles
Forums
Gallery
Events
Everything posted by Papa
-
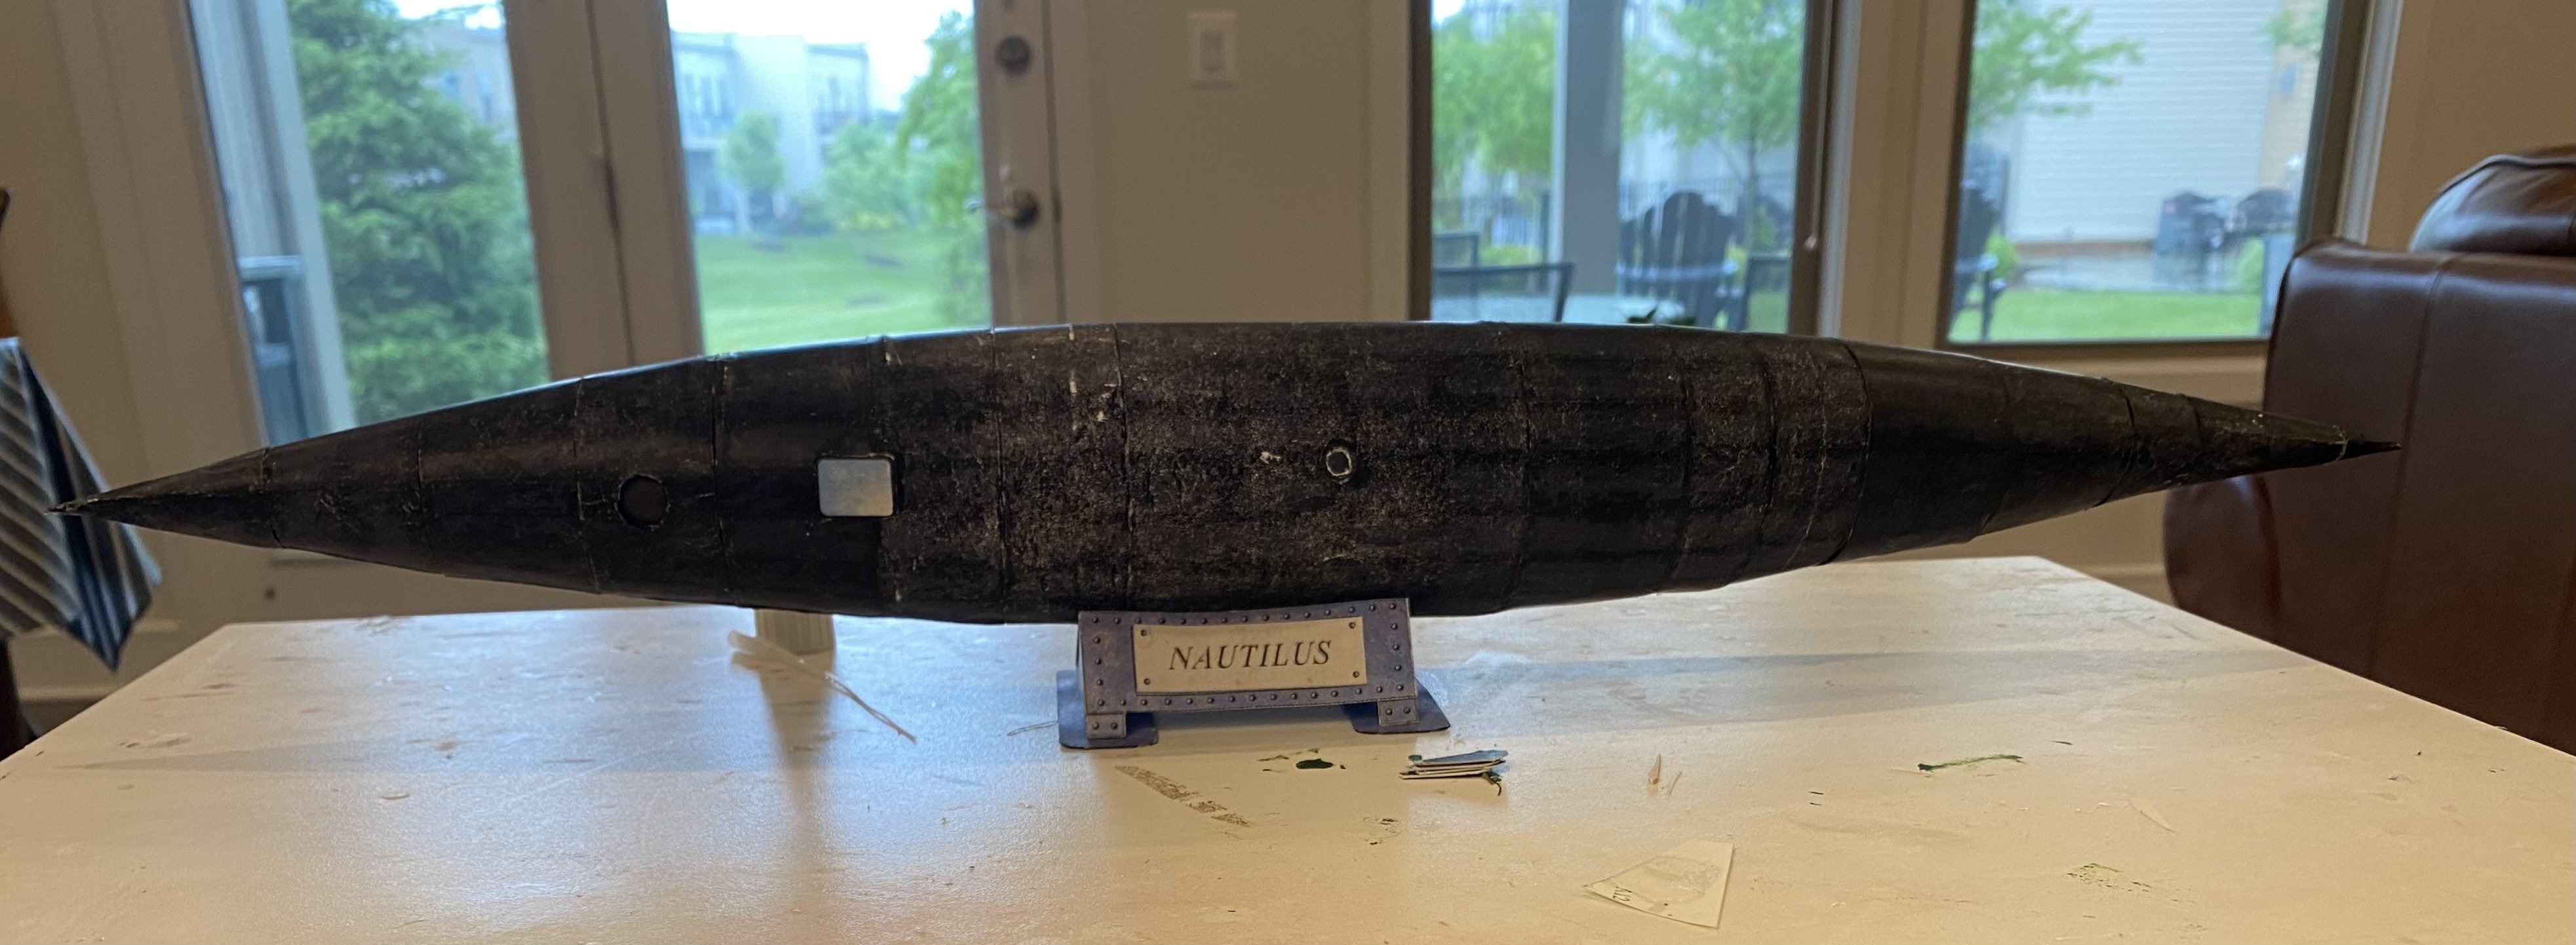
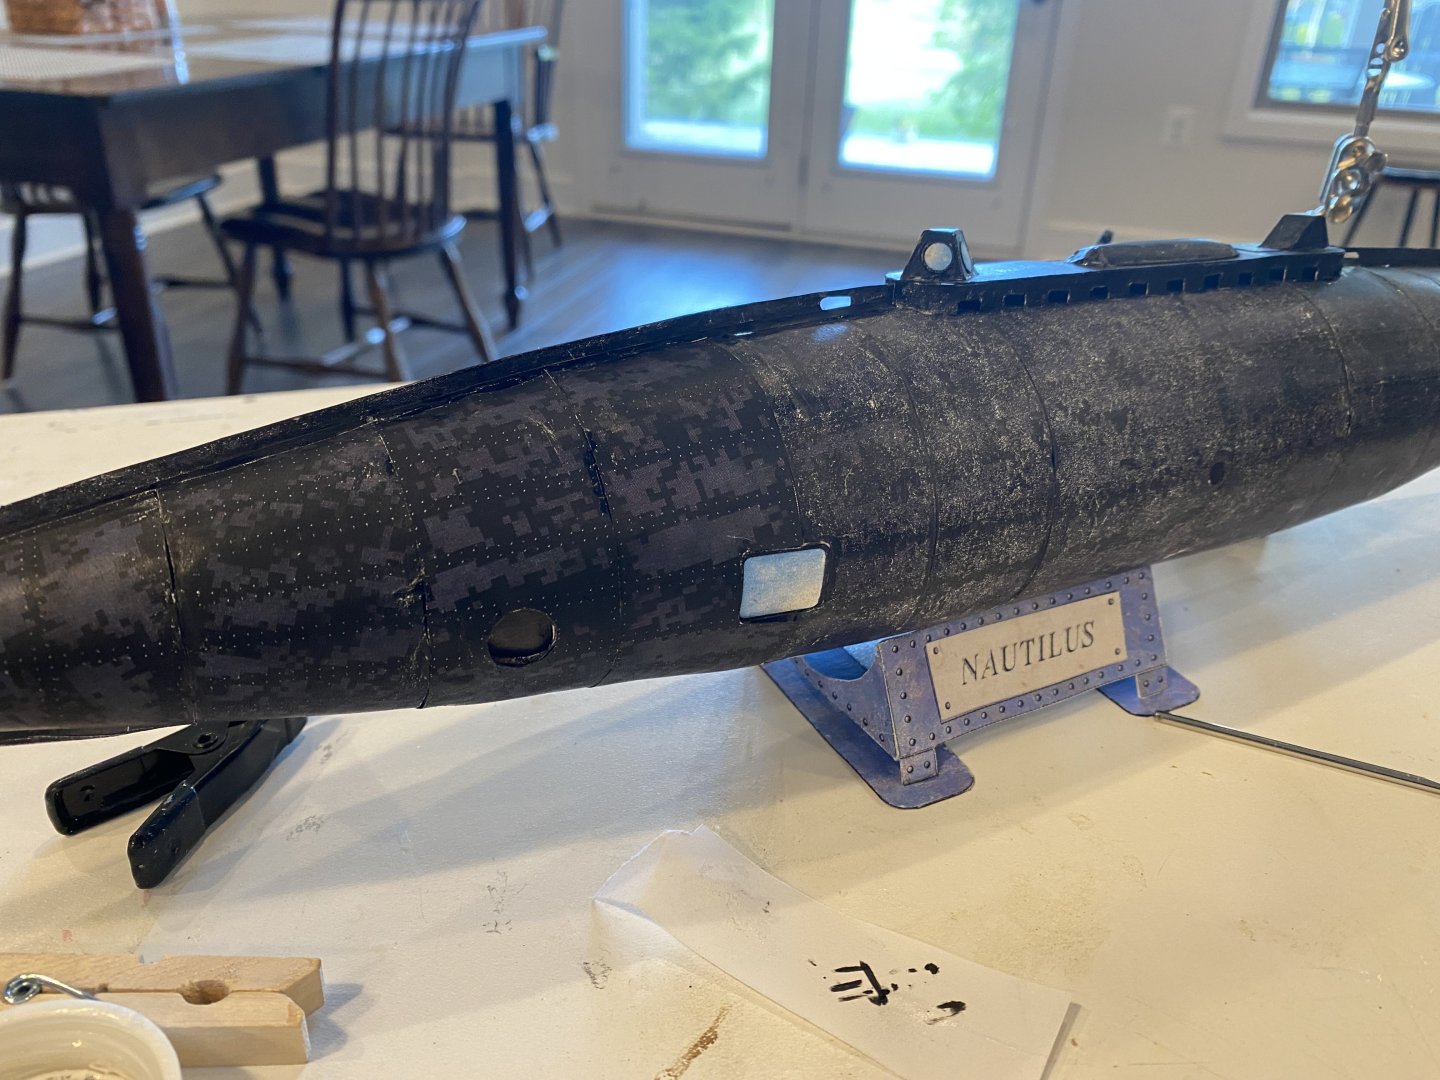
 The Nautilus has been reskinned. The ink holds up so much better on paper than on the card stock. There are more details to add and some white spots to ink in. Far from a perfect build but it doesn’t look bad at a distance. I may do another in the future if I get inspired.
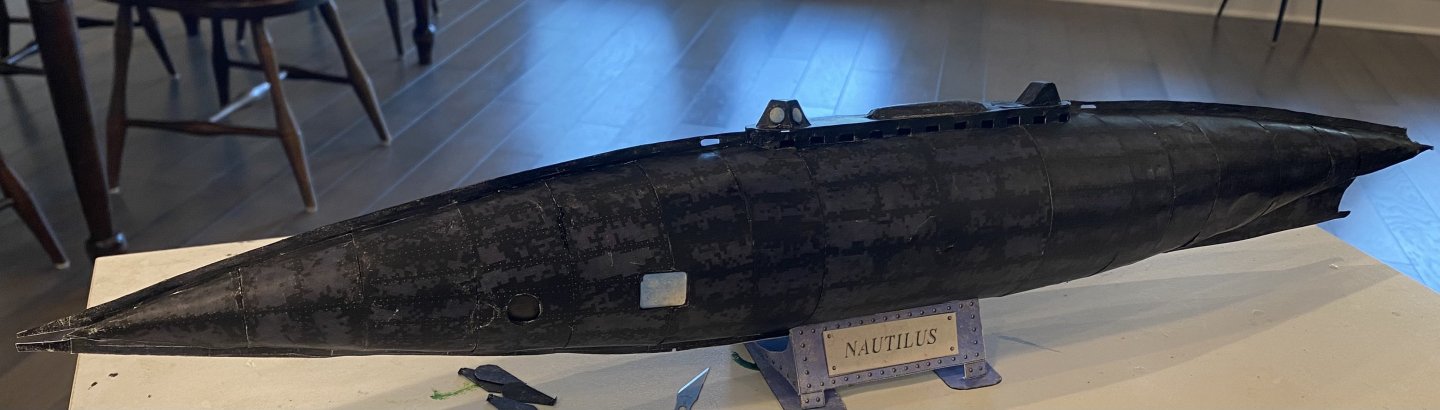
- 40 replies
-
- 11
-

-

-
- Nautilus
- Heinkel Models
- (and 2 more)
-
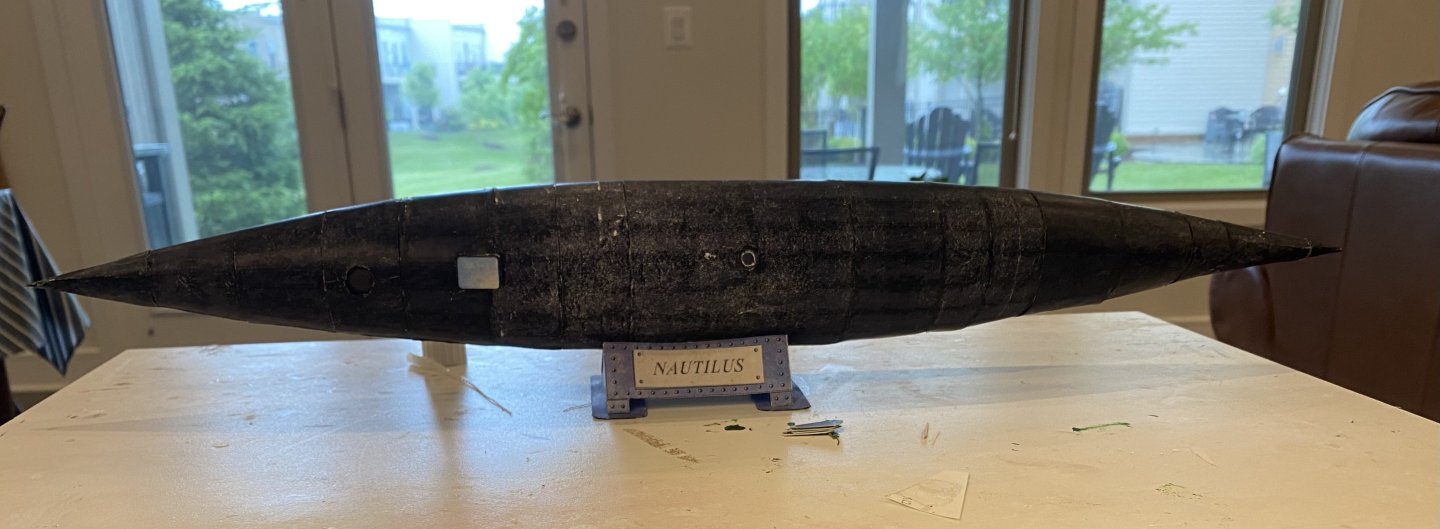
I have been able to fix the mottled look by printing new segments on plain paper rather than card and gluing the new skin on. I am up to the window on the port side.
- 40 replies
-
- 10
-
-
- Nautilus
- Heinkel Models
- (and 2 more)
-
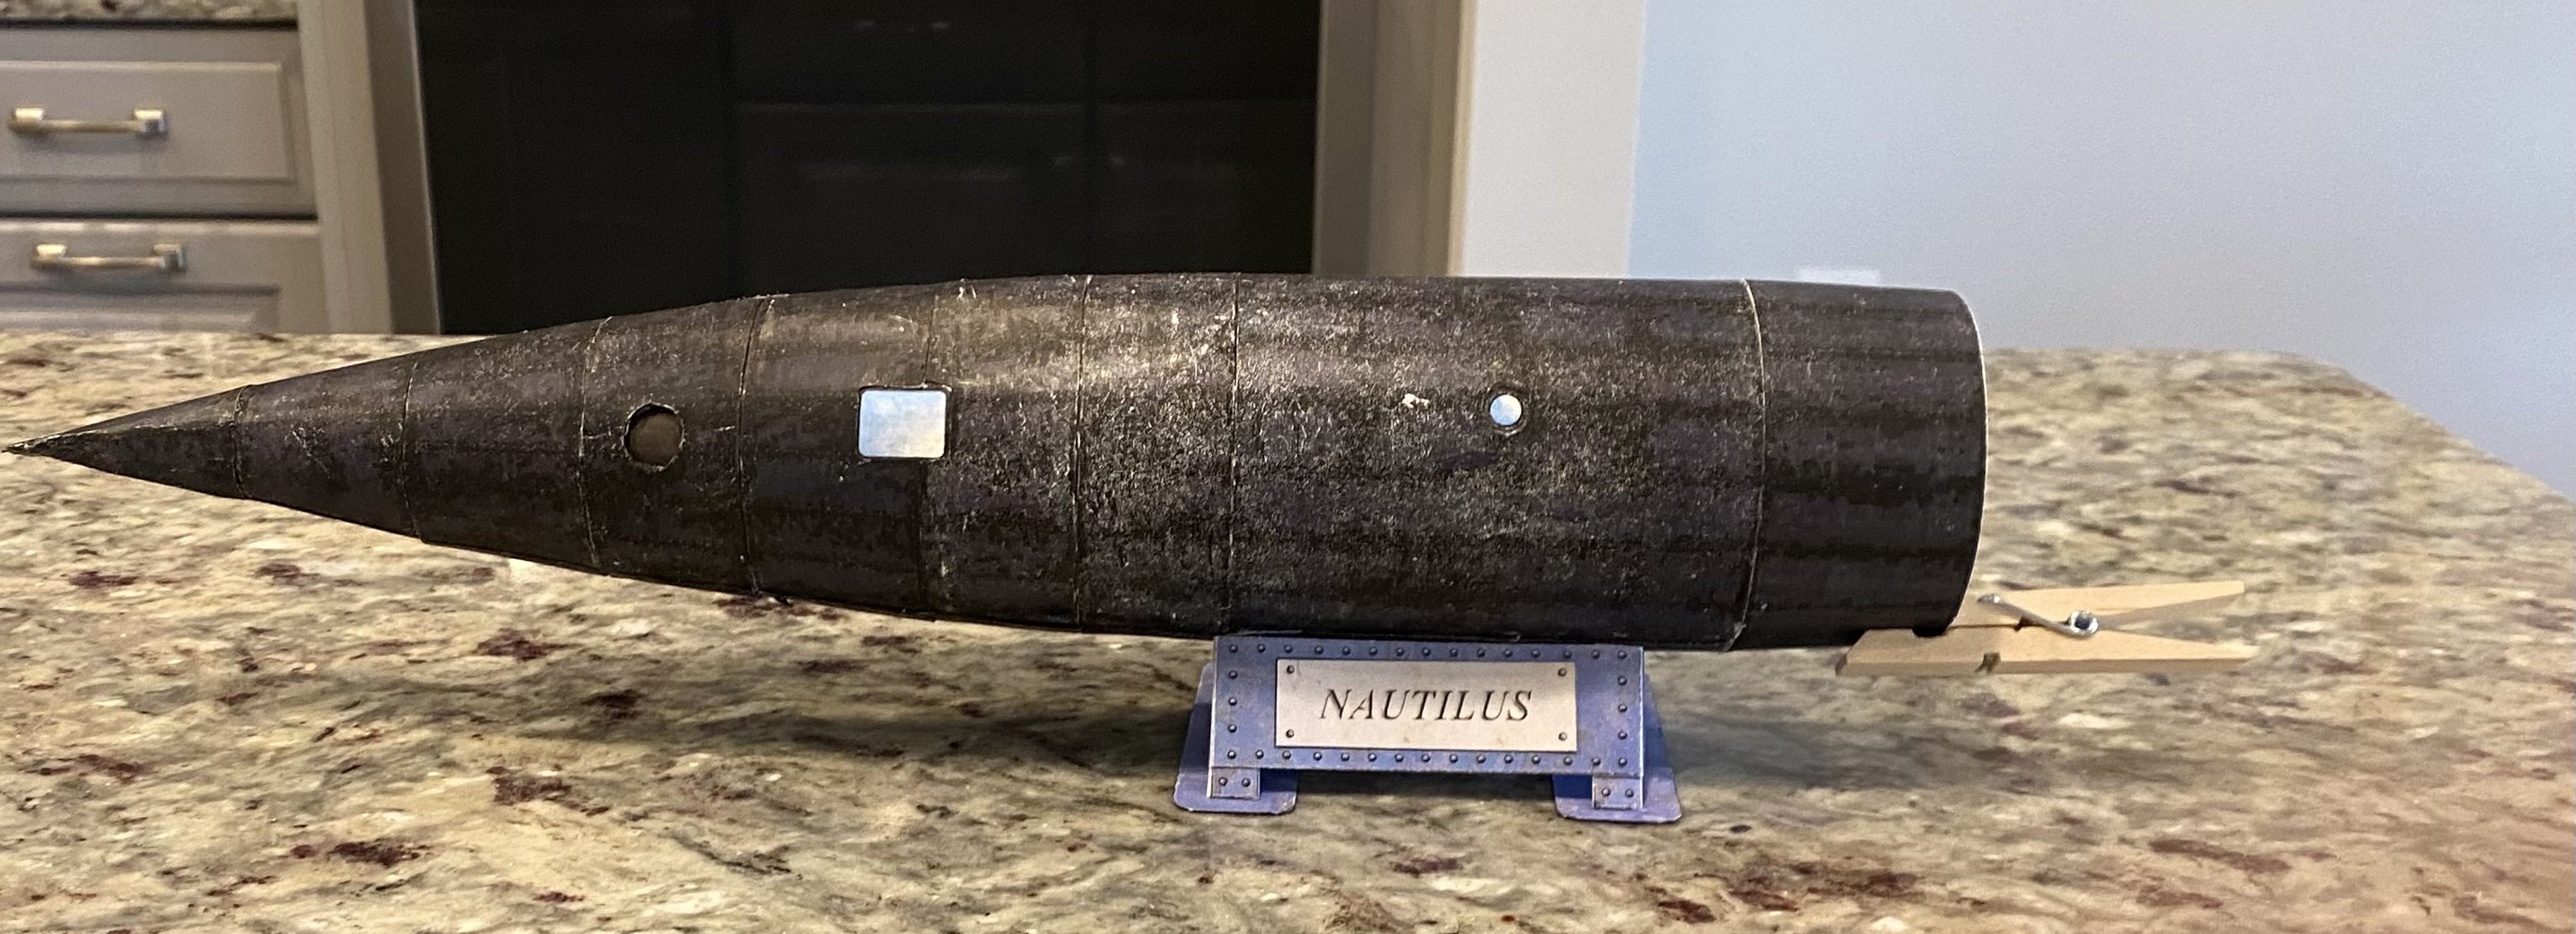
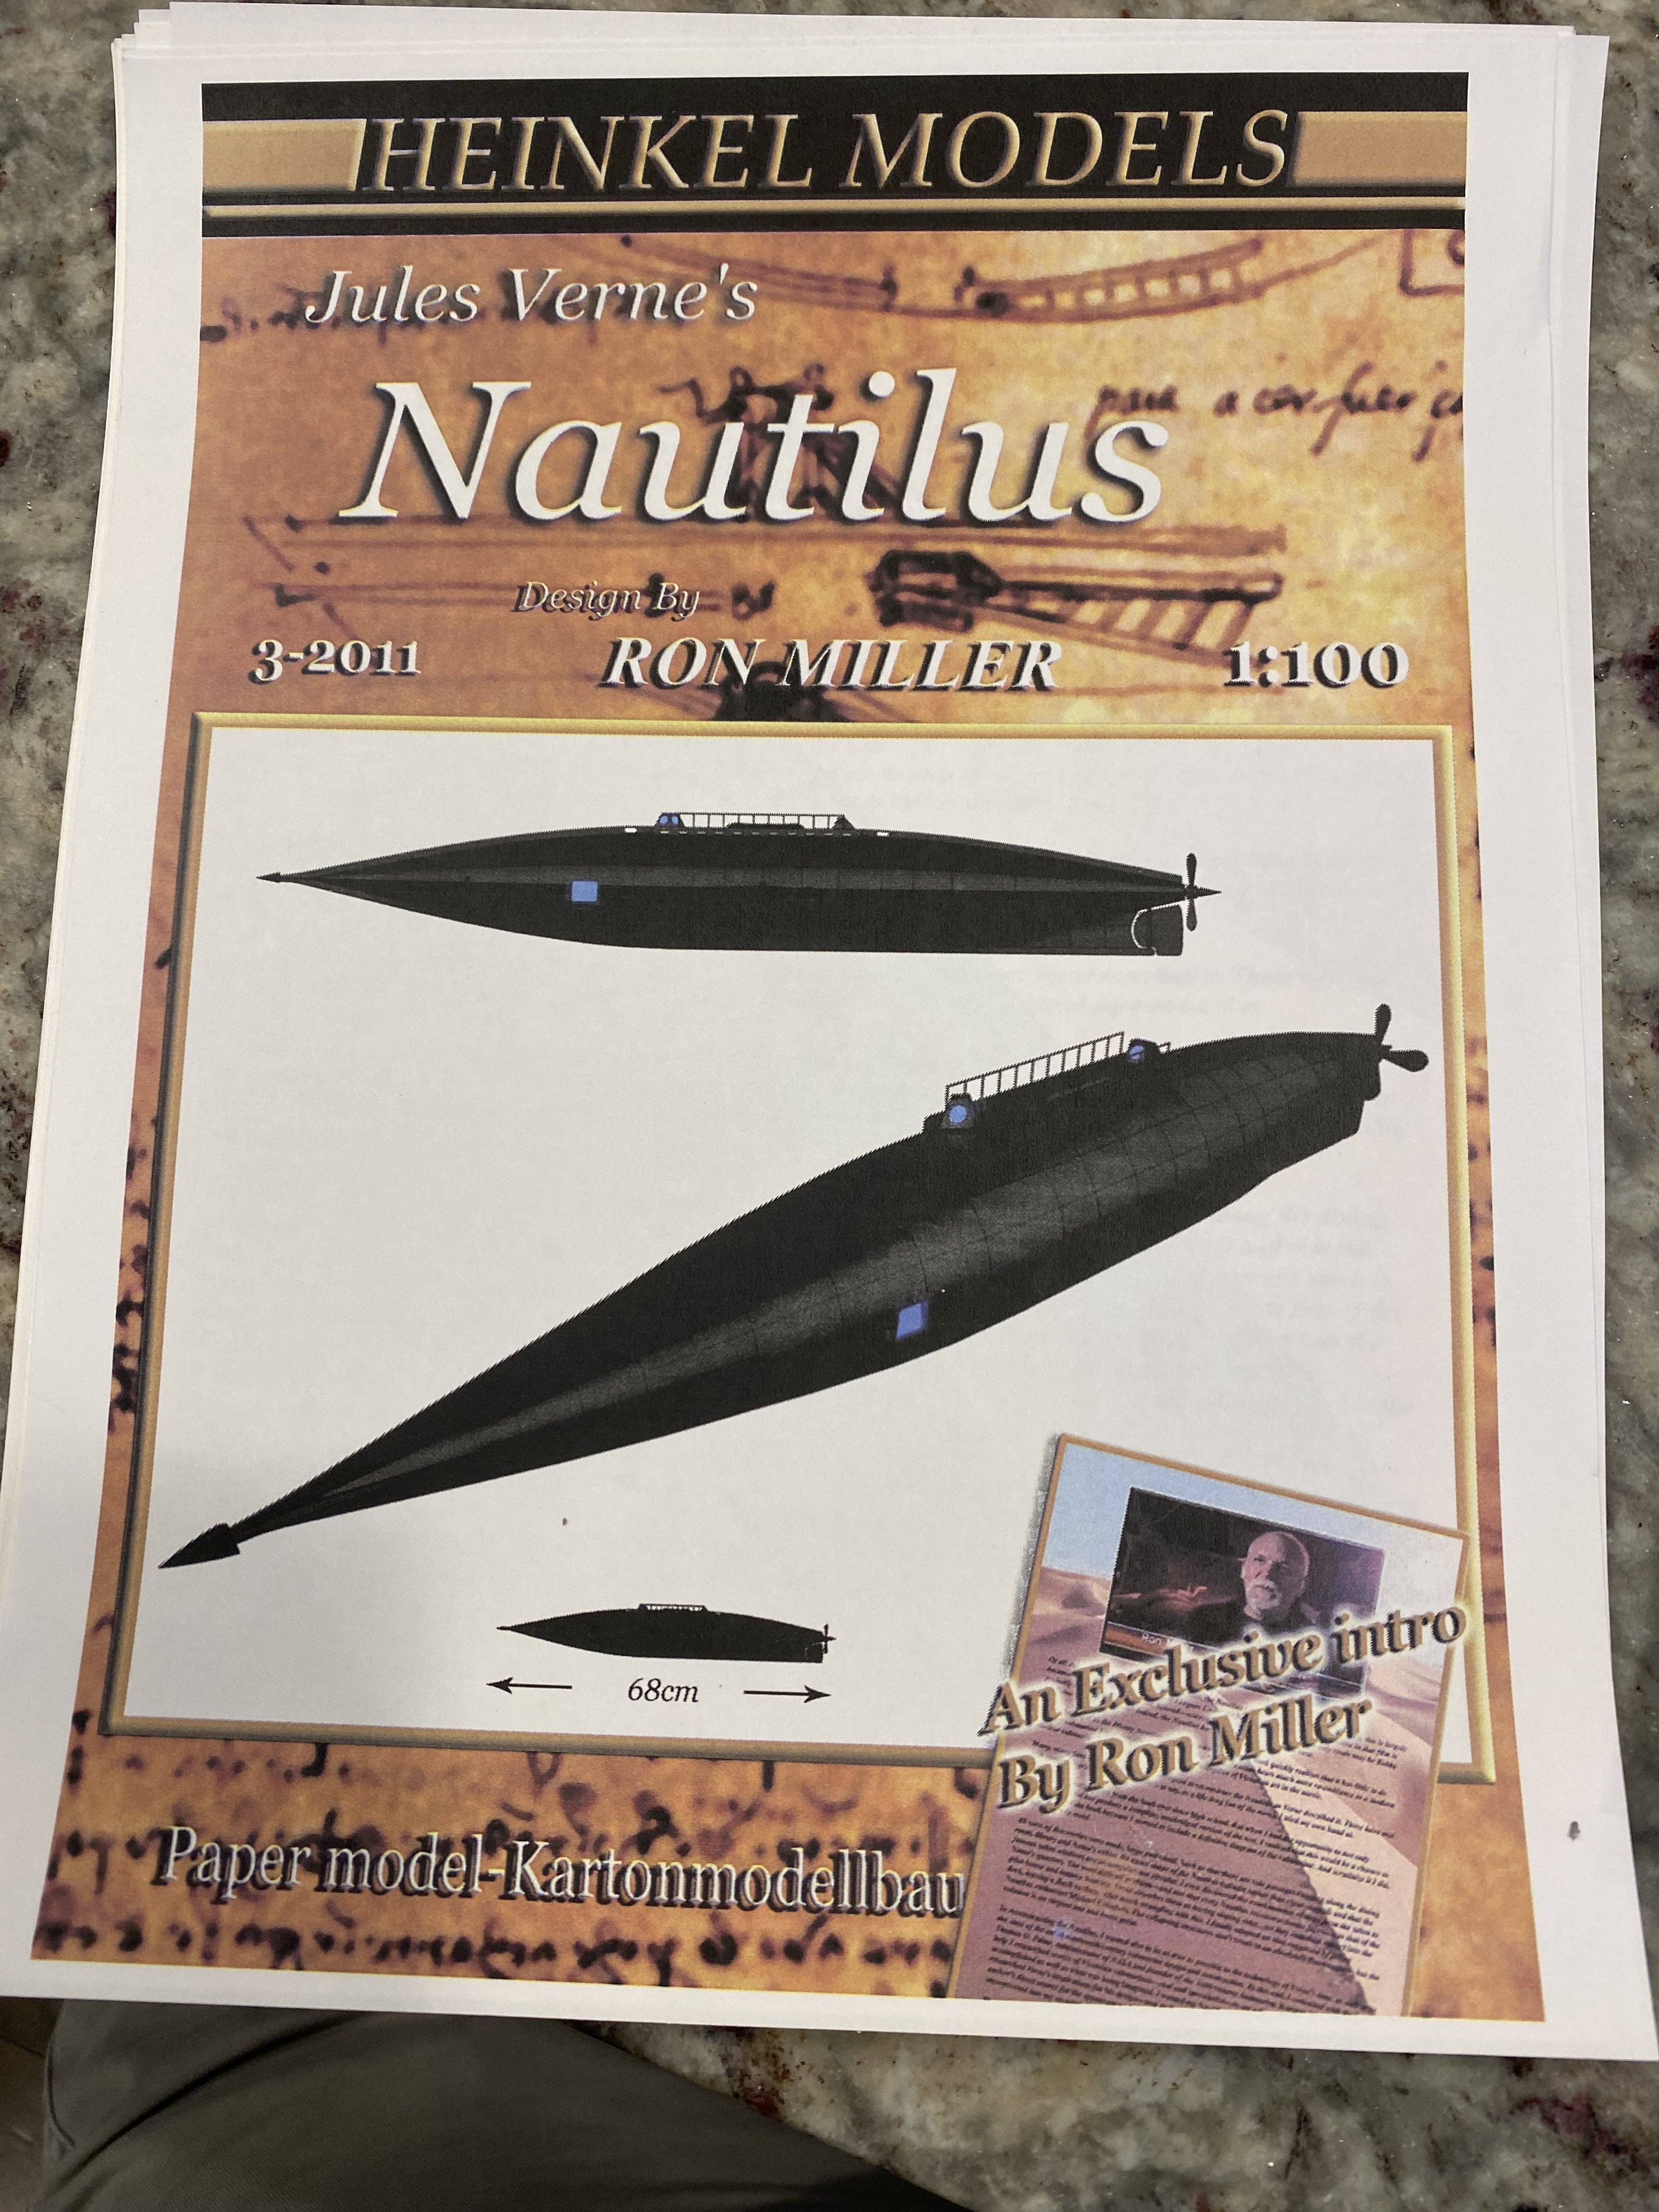
The mottled effect was the result of the printer ink not holding up under curling and folding. Right after printing the colors were excellent. (A photo of a newly printed page is below ) I now know that I should have sprayed the printouts with something. If someone can recommend a good sealant I would be thankful. I think the mottled look gives the Nautilus an aged look so I am not too unhappy with it. the model was designed for US letter size paper so that is what I used

- 40 replies
-
- 5
-
-
-
- Nautilus
- Heinkel Models
- (and 2 more)
-
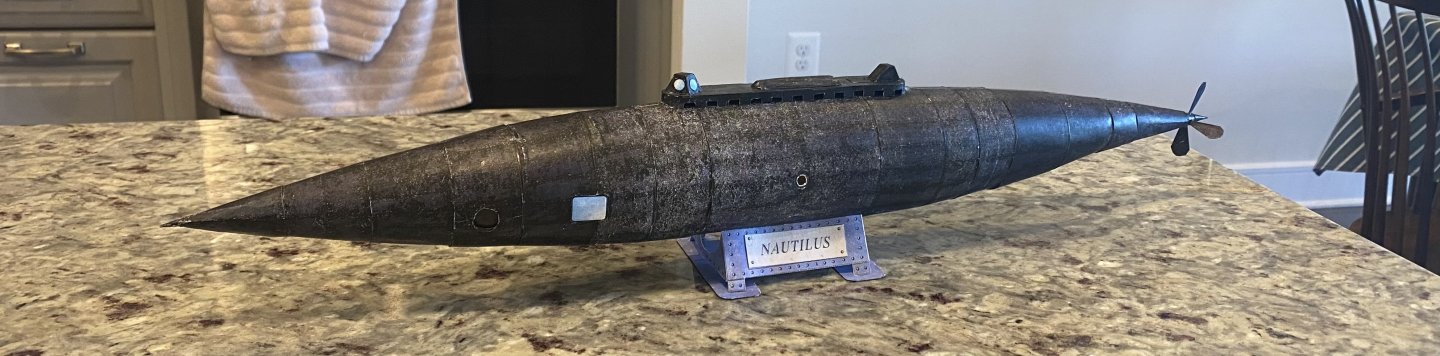
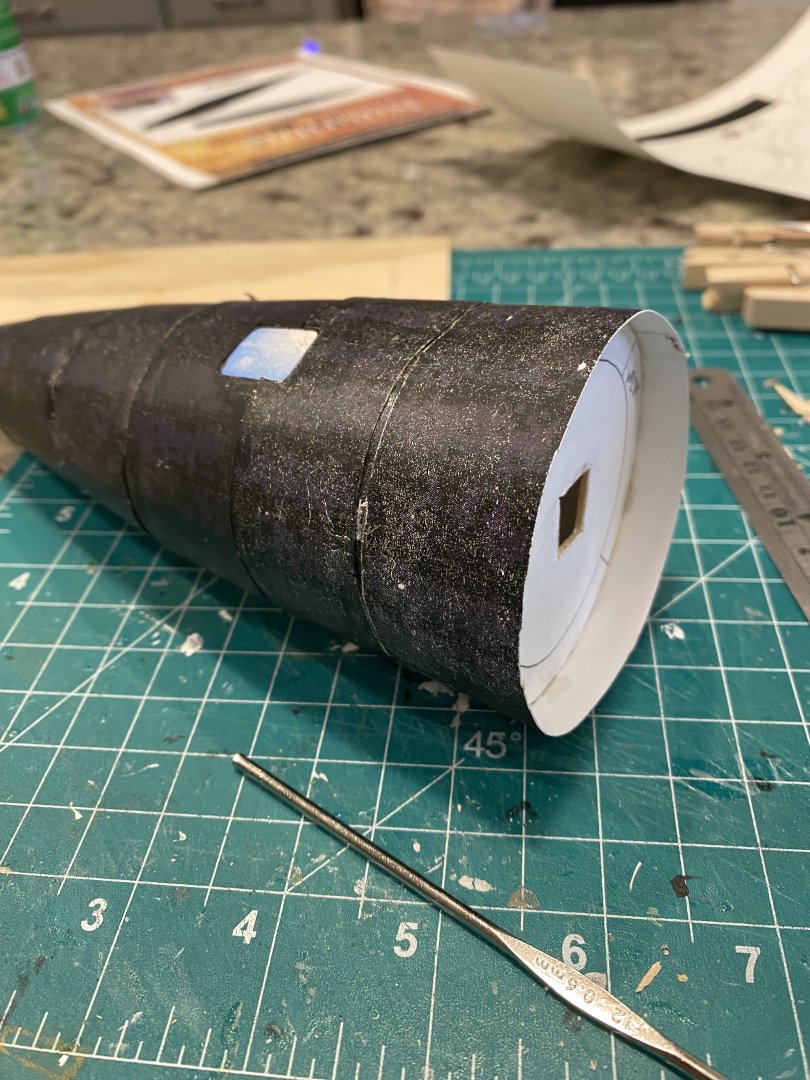
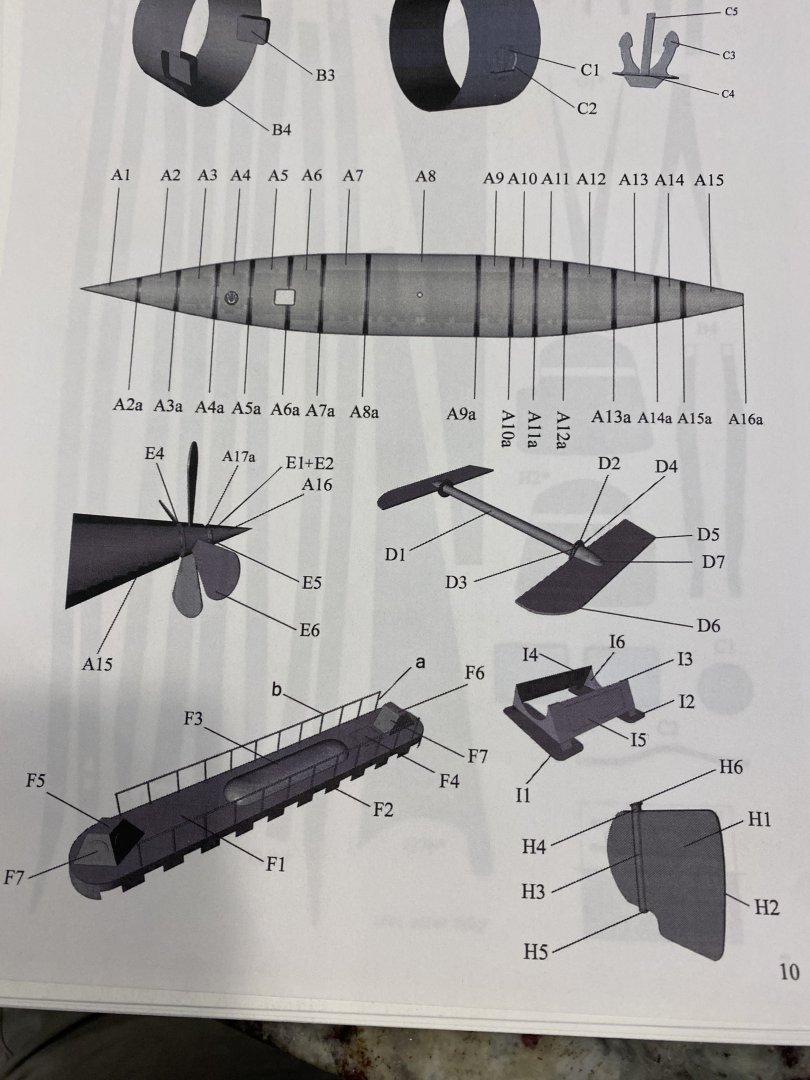
The hull is finished. I discovered that what I thought were portholes on the side are actually for the shaft for the diving fins. See parts marked D1-D7 on the diagram in my first post. The fins are not shown in the assembly drawings and are barely discernible in the photos. I finally figured this out by referring back to some websites of the Nautilus.
- 40 replies
-
- 9
-
-
-
- Nautilus
- Heinkel Models
- (and 2 more)
-
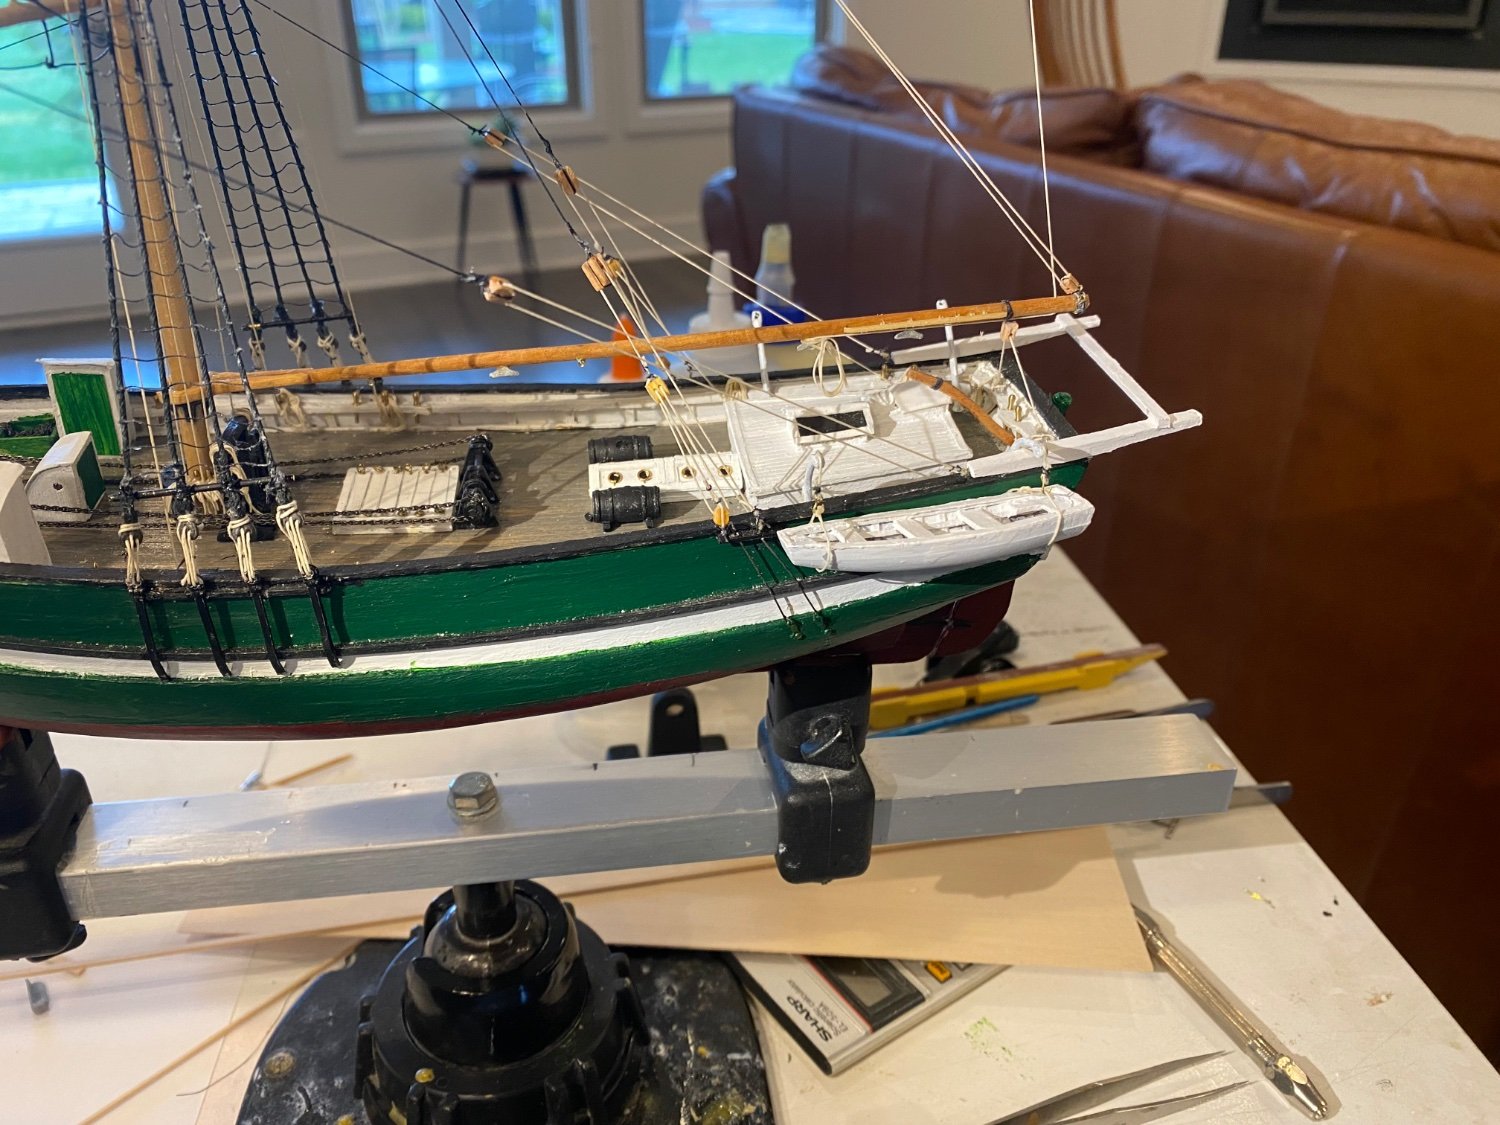
Your rigging looks terrific. The 1/8" scale Newsboy kit was my second MS model some 52 years ago. After several moves it was damaged beyond repair.
-
This is what I am finding on the Nautilus. I found that the JCS card model had much better instructions.
-
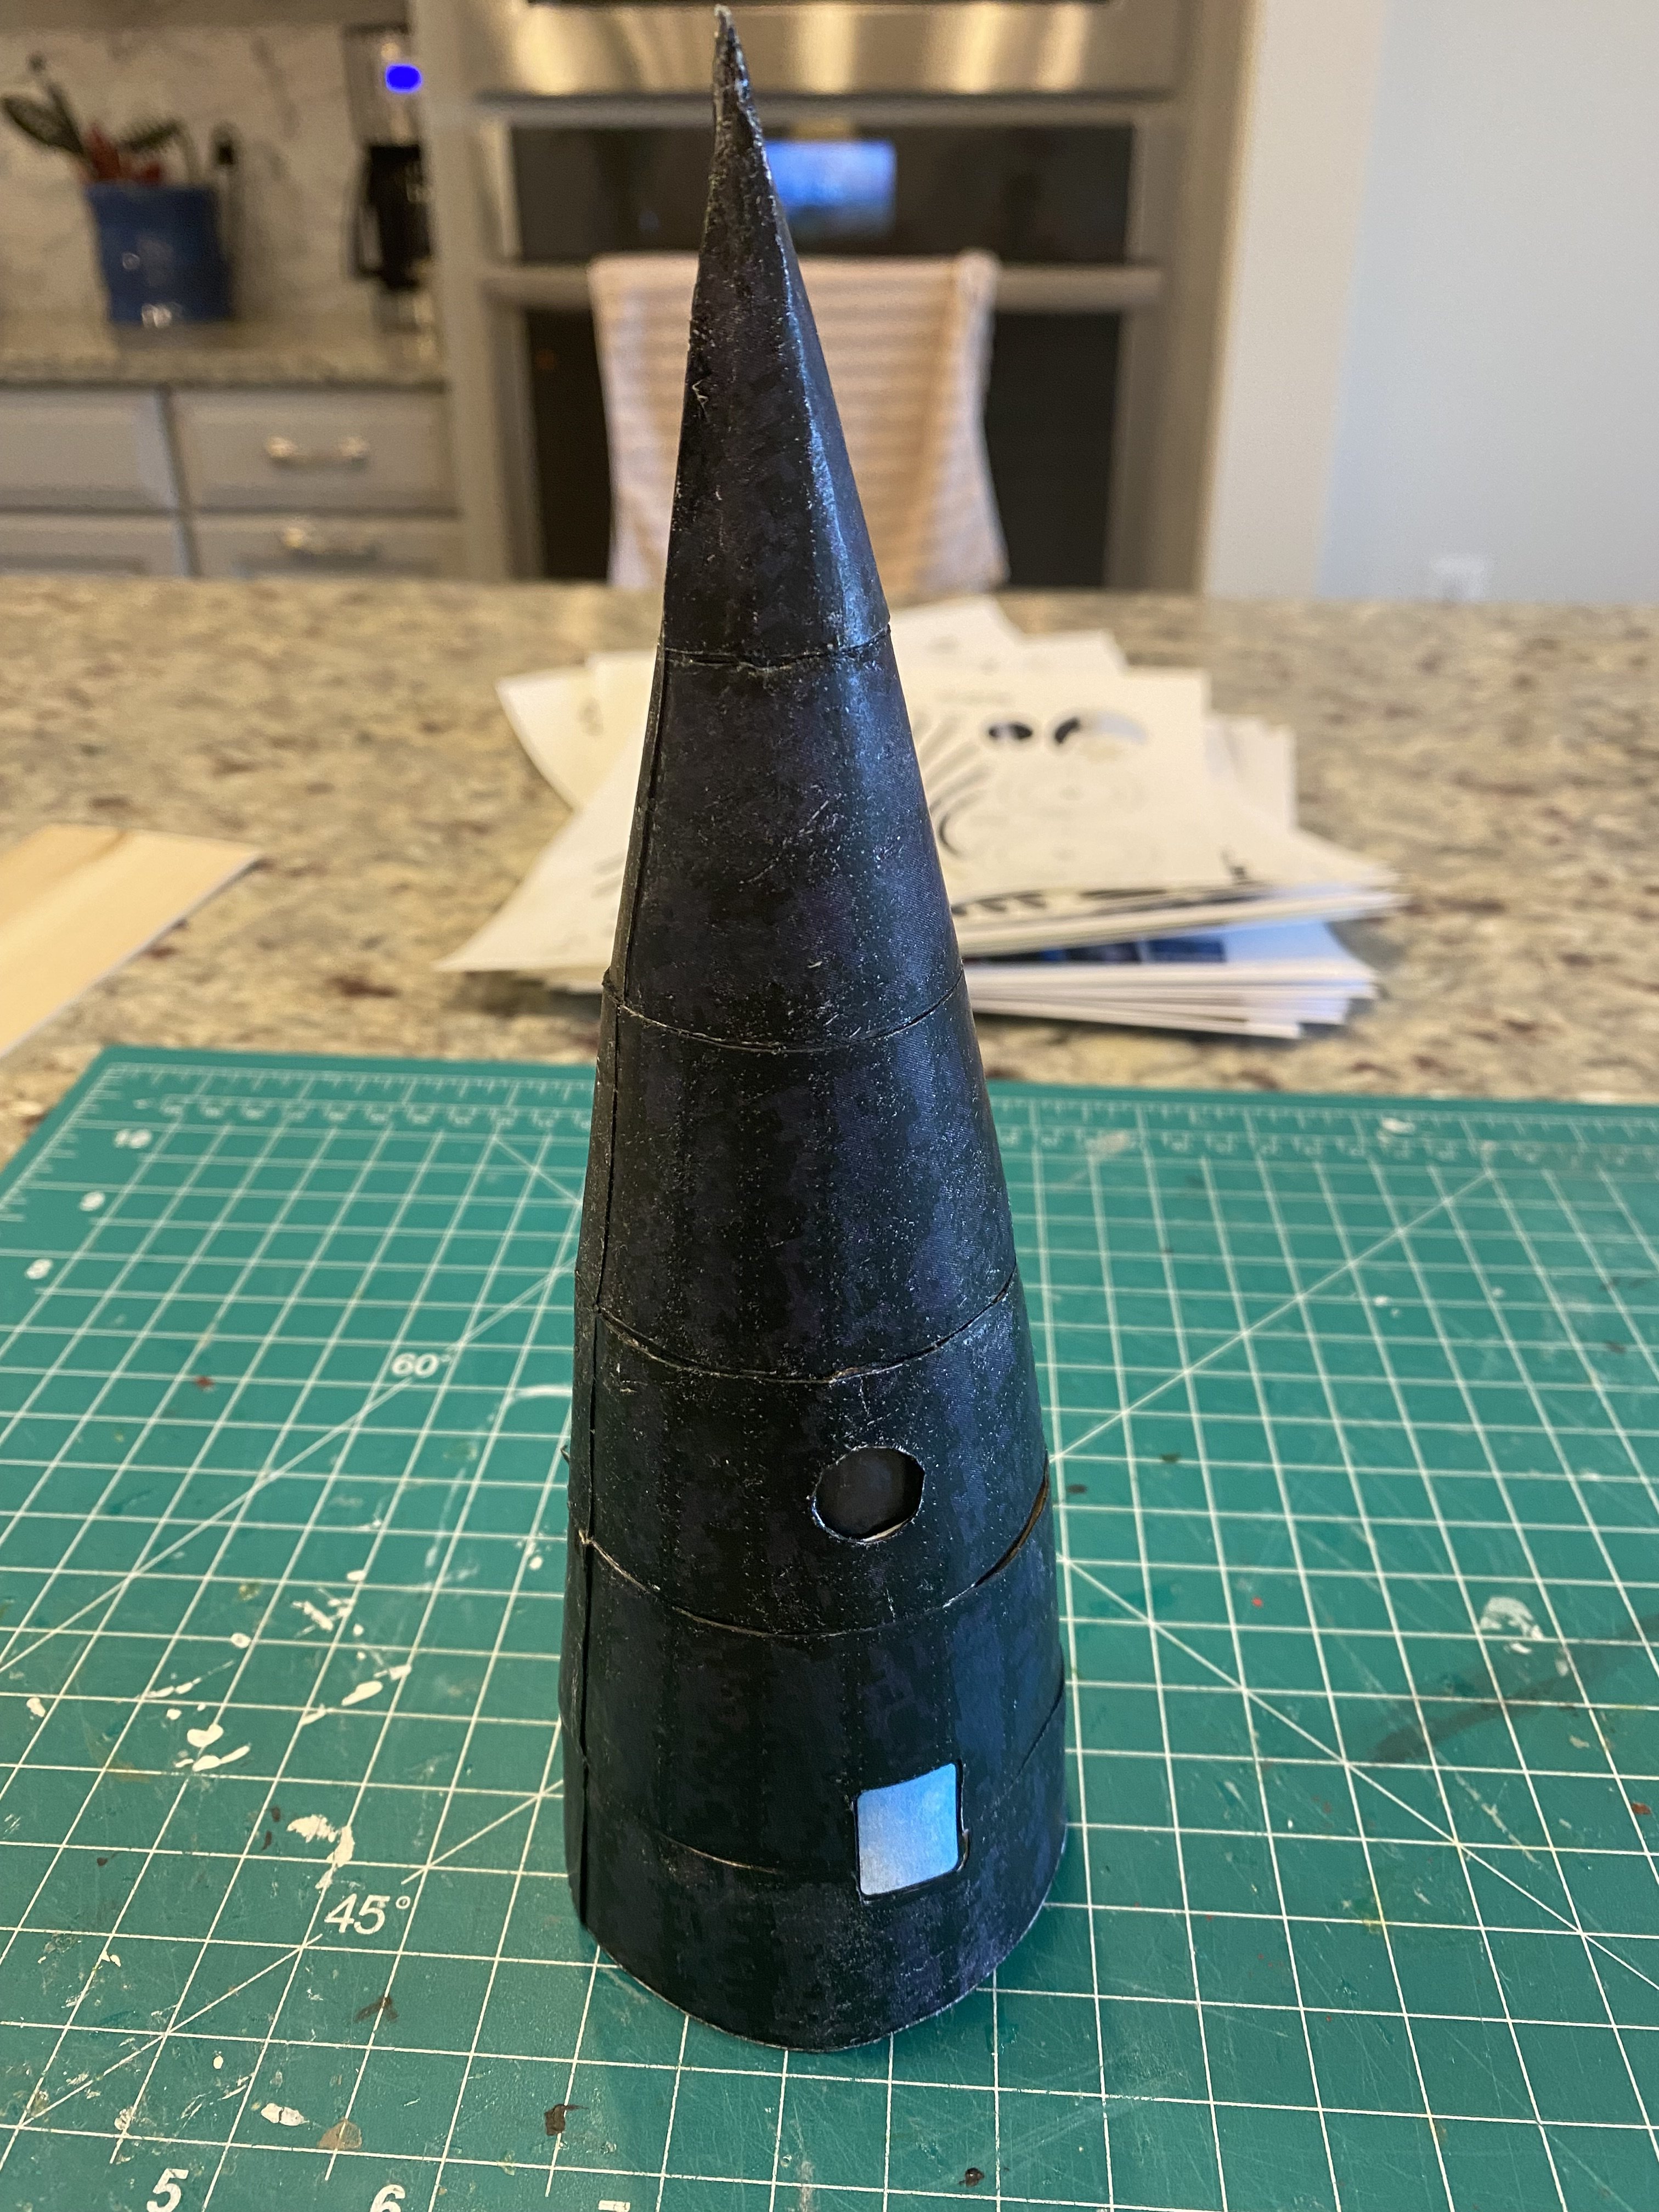
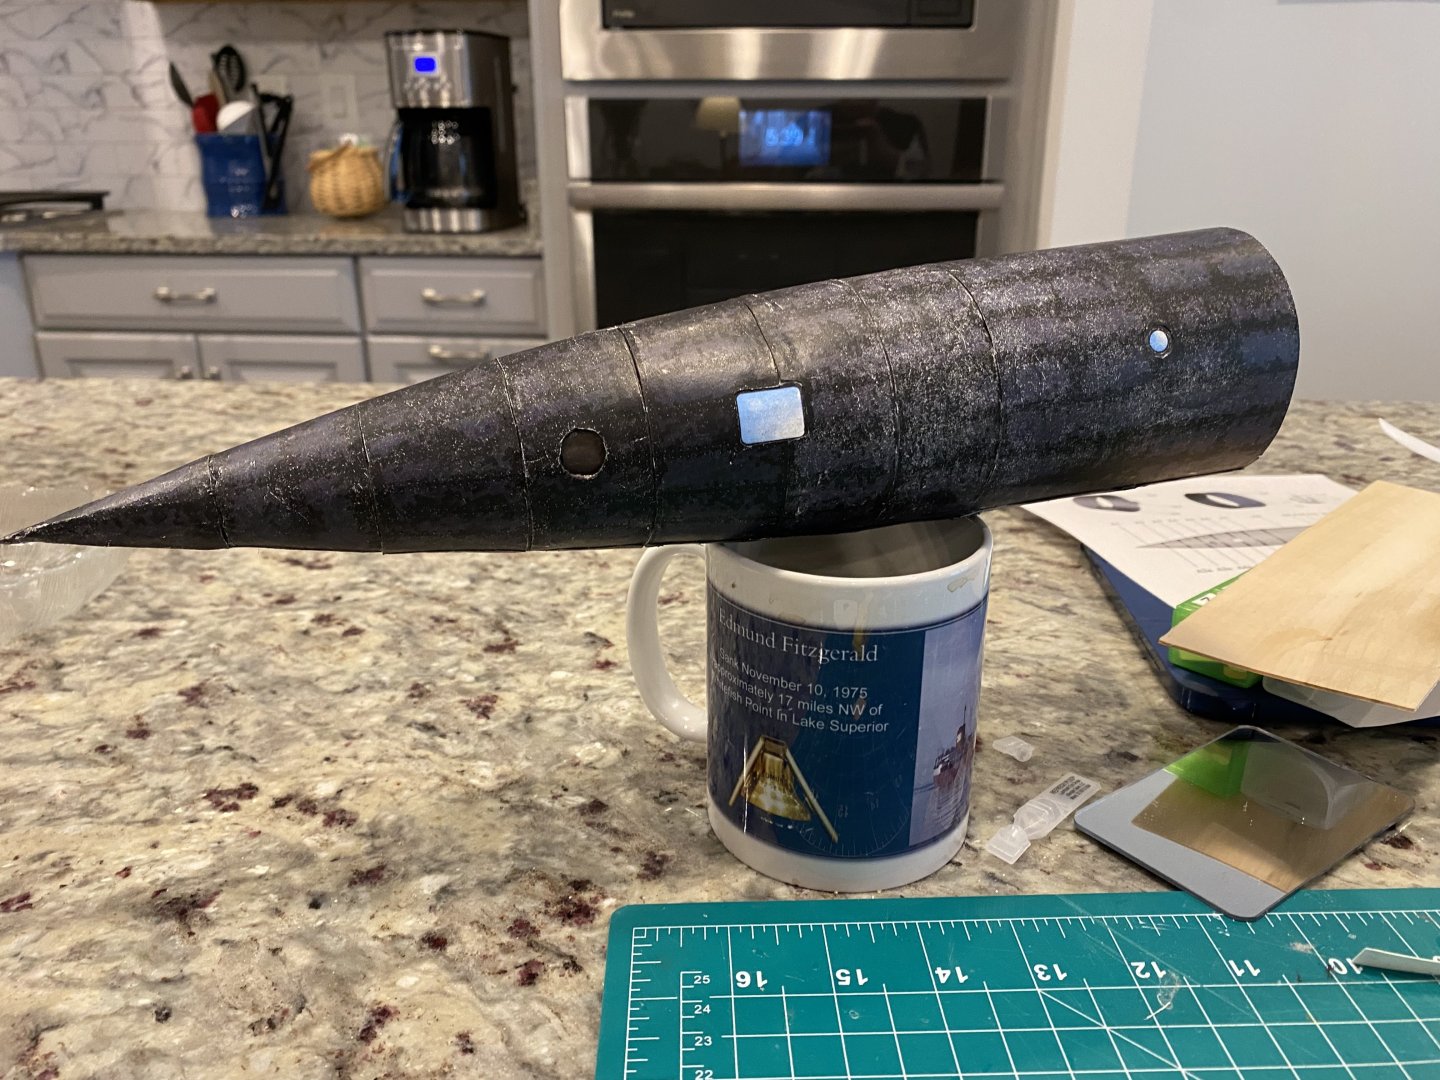
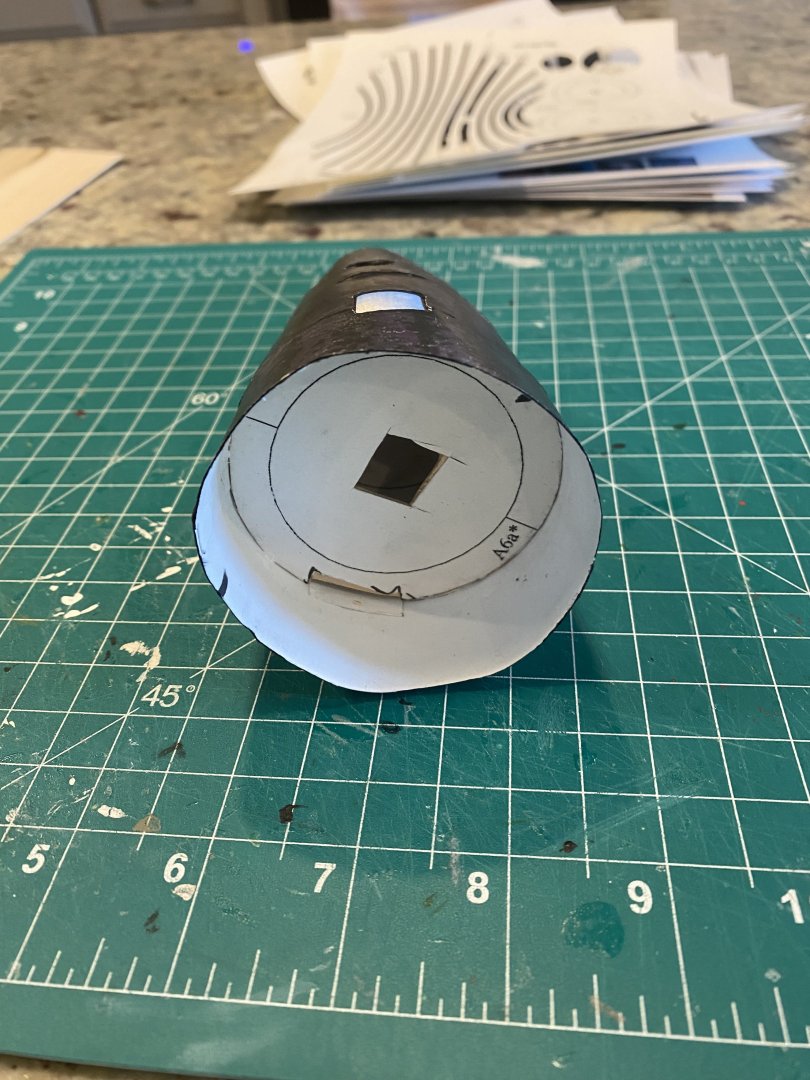
Latest status. Note the small round port. This port (and its mate on the starboard side) are shown nowhere in any of the “instructions” or illustrations of the model. Moreover, the blue lens is significantly smaller than the marked cut-out and required careful application of black marker to blend in. Finally, the internal circular support is too large for the actual diameter of this mid section. I think it is about time to assemble the stand, rather than balancing her on a coffee mug.
- 40 replies
-
- 9
-
-
- Nautilus
- Heinkel Models
- (and 2 more)
-
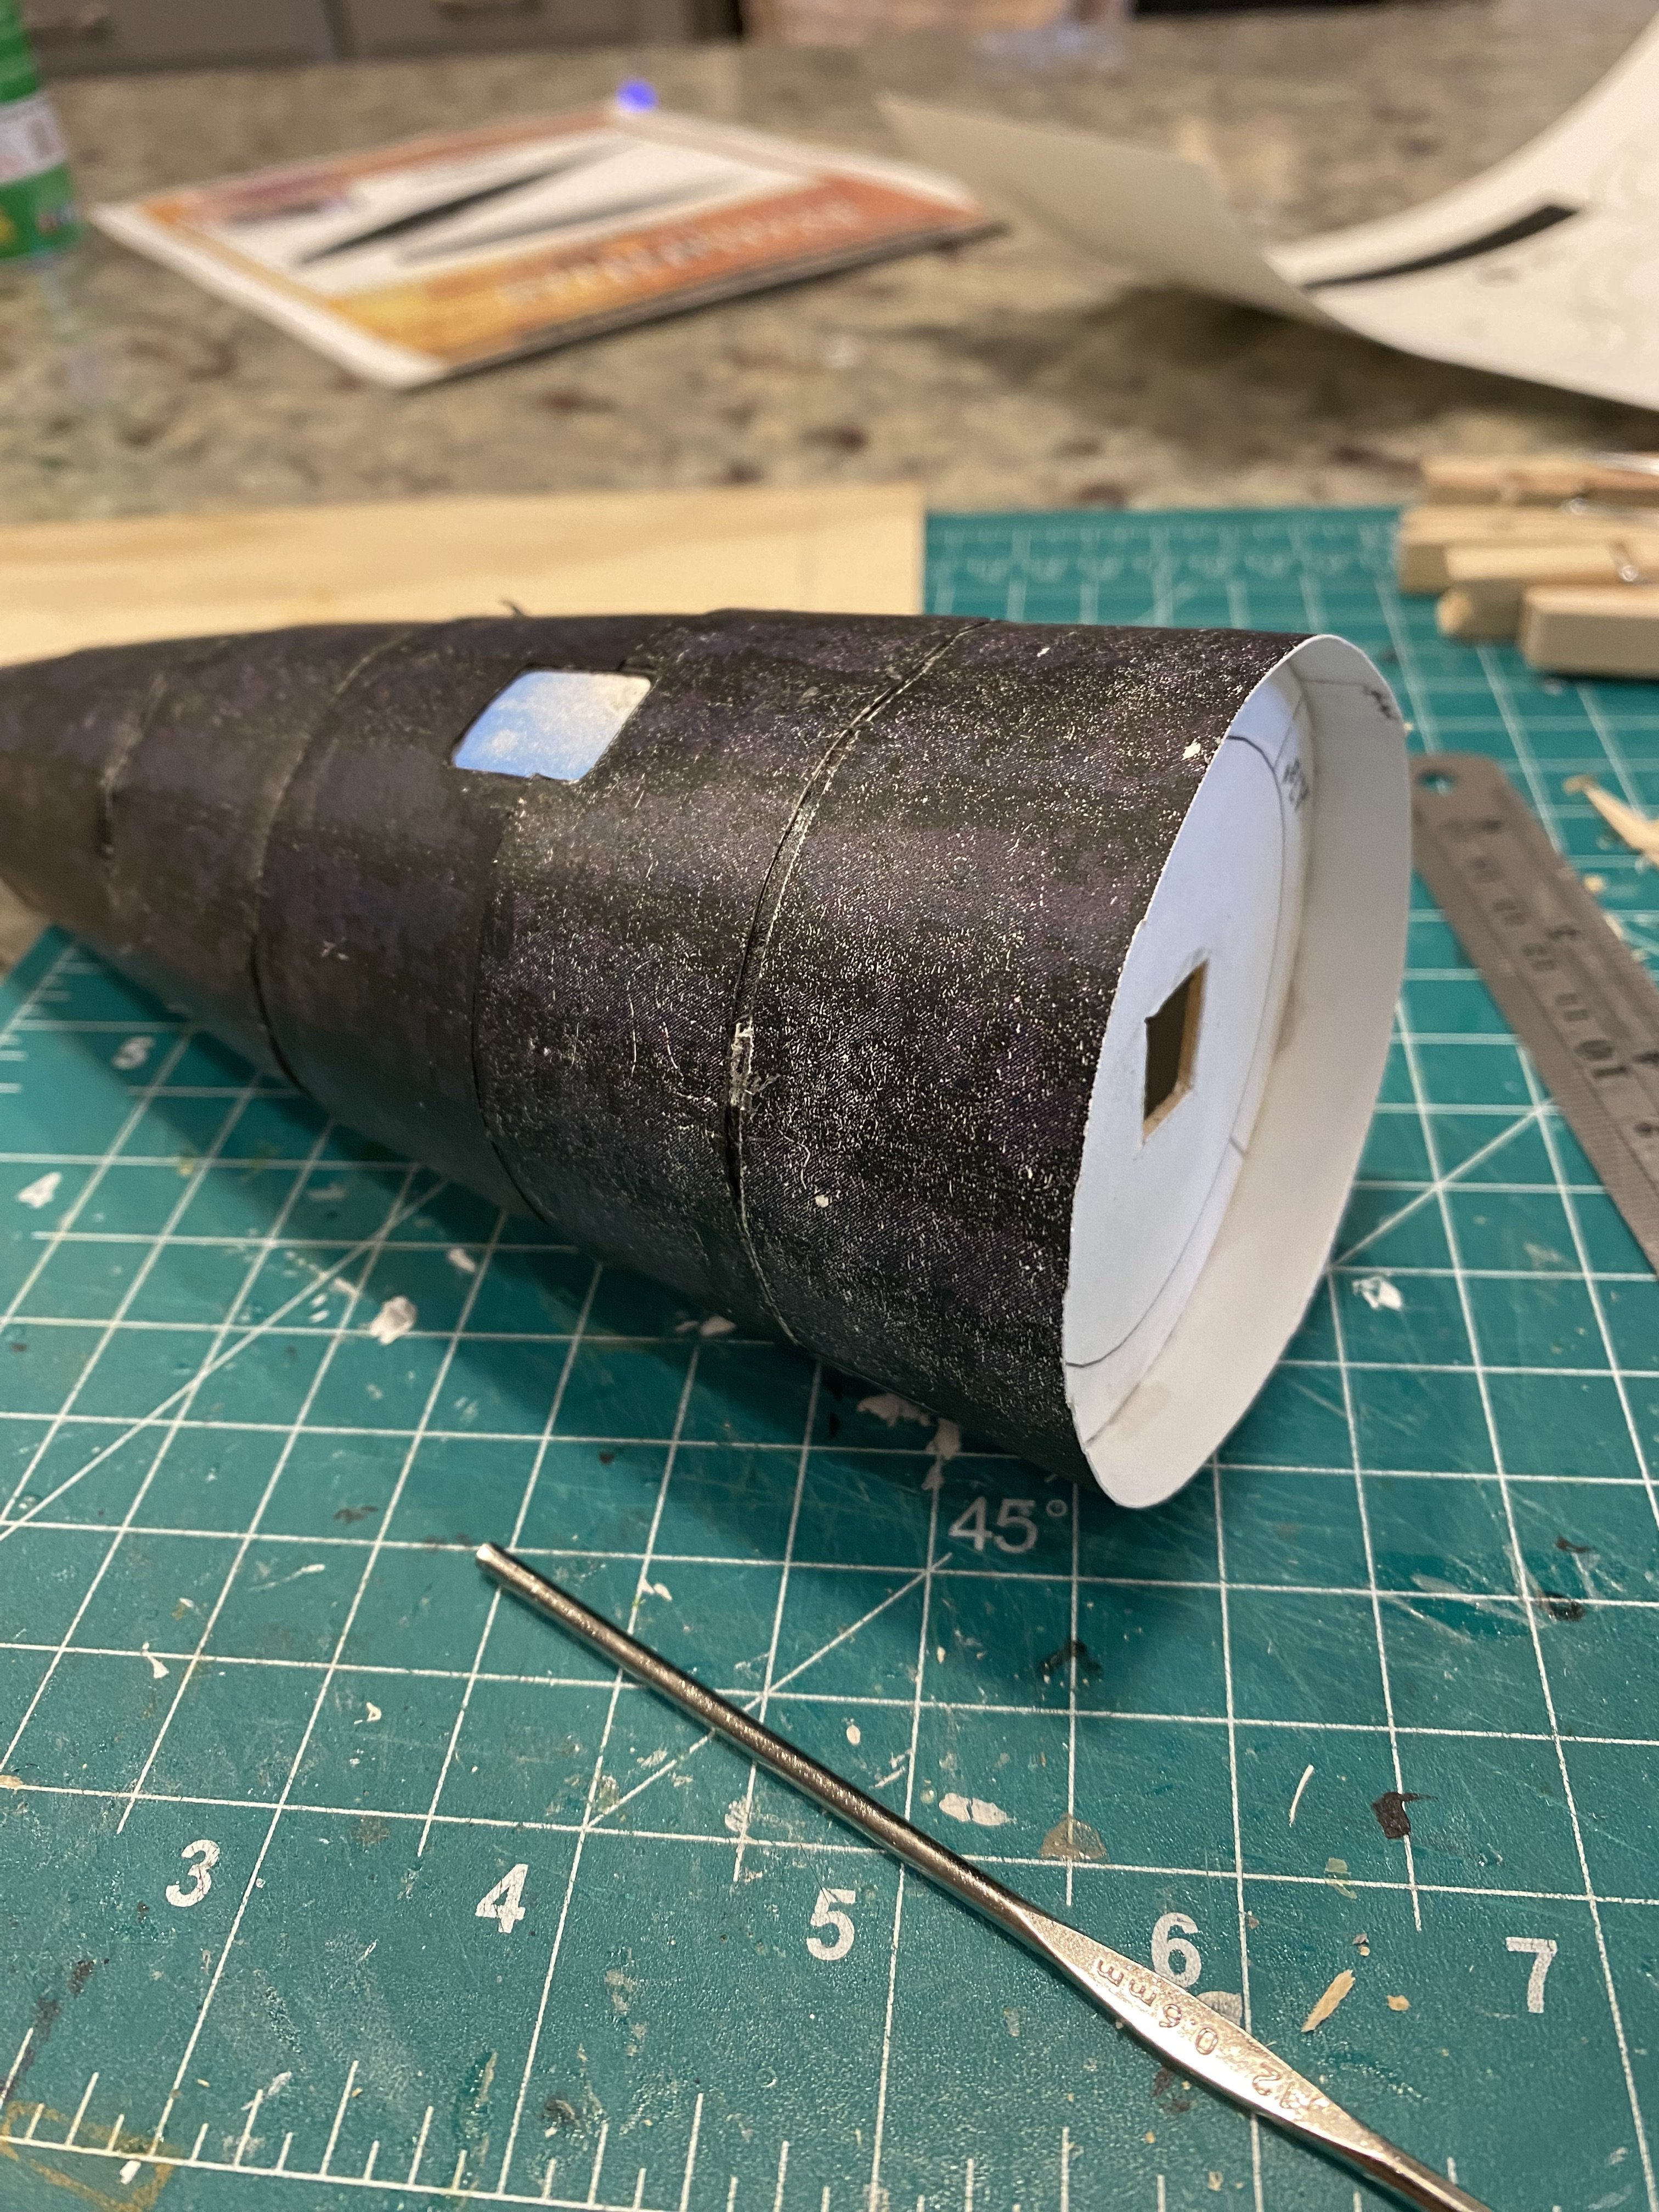
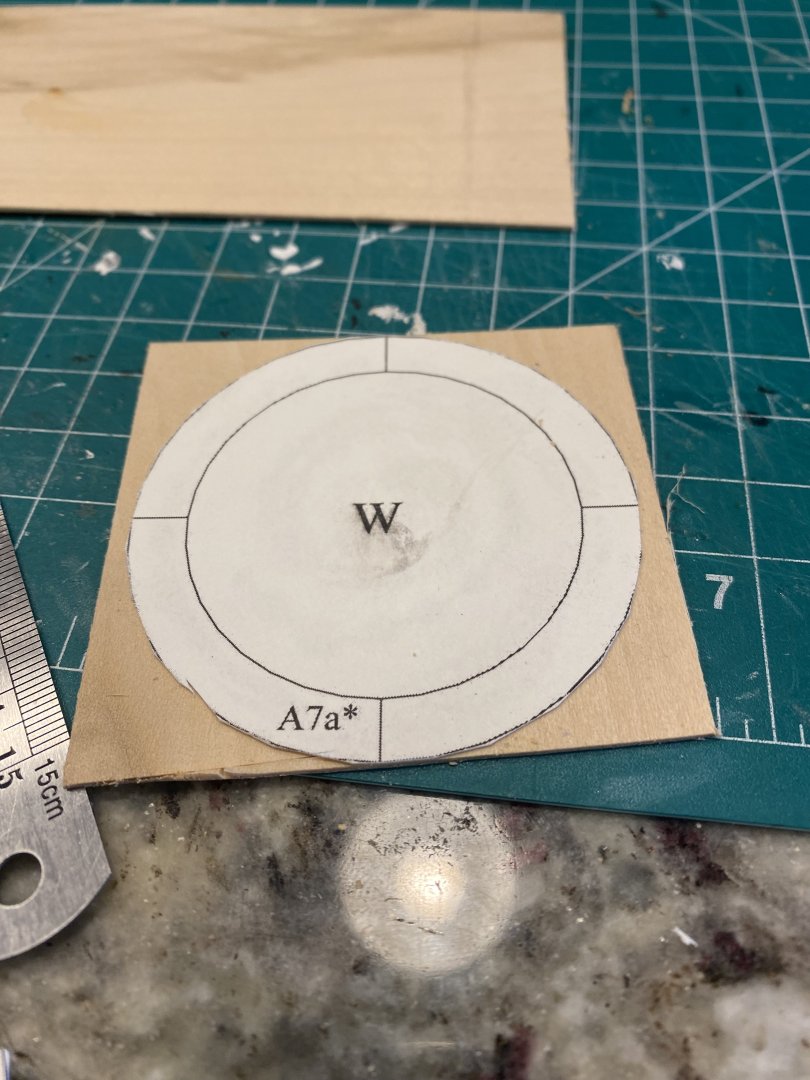
The instructions did not say how one was supposed to use the circular pieces that look like internal supports. They weren’t even to be printed on card stock. Eventually I decided to glue them to 1/32 thick bass wood and cut them out. I inserted the first few after having assembled 4 of the sections. Now I do them as I proceed. Also if one cuts the windows out as printed there is no gluing surface. ( discovered the hard way). Reprinted the windows and cut them leaving extra card around the windows so there was something to glue to. Hopefully the attached pictures will may some of this clear. Also to get a better fit, rather than gluing the cylinders and then attaching, I wrapped them around the glue edge to get a perfect fit.

- 40 replies
-
- 8
-
-
- Nautilus
- Heinkel Models
- (and 2 more)
-
I decided not to reprint and restart. I am continuing with what I have just being more careful in fitting. I should have more pictures later today. It has been a busy week with several medical issues. There are no directions for the kit, just a few pictures. So I am just guessing at some of the assembly.
- 40 replies
-
- 5
-
-
- Nautilus
- Heinkel Models
- (and 2 more)
-
This model is more difficult than it looks. I am getting some unsightly gaps where the sections are joined. I am going to reprint the affected pieces and start again.
- 40 replies
-
- 3
-
-
- Nautilus
- Heinkel Models
- (and 2 more)
-
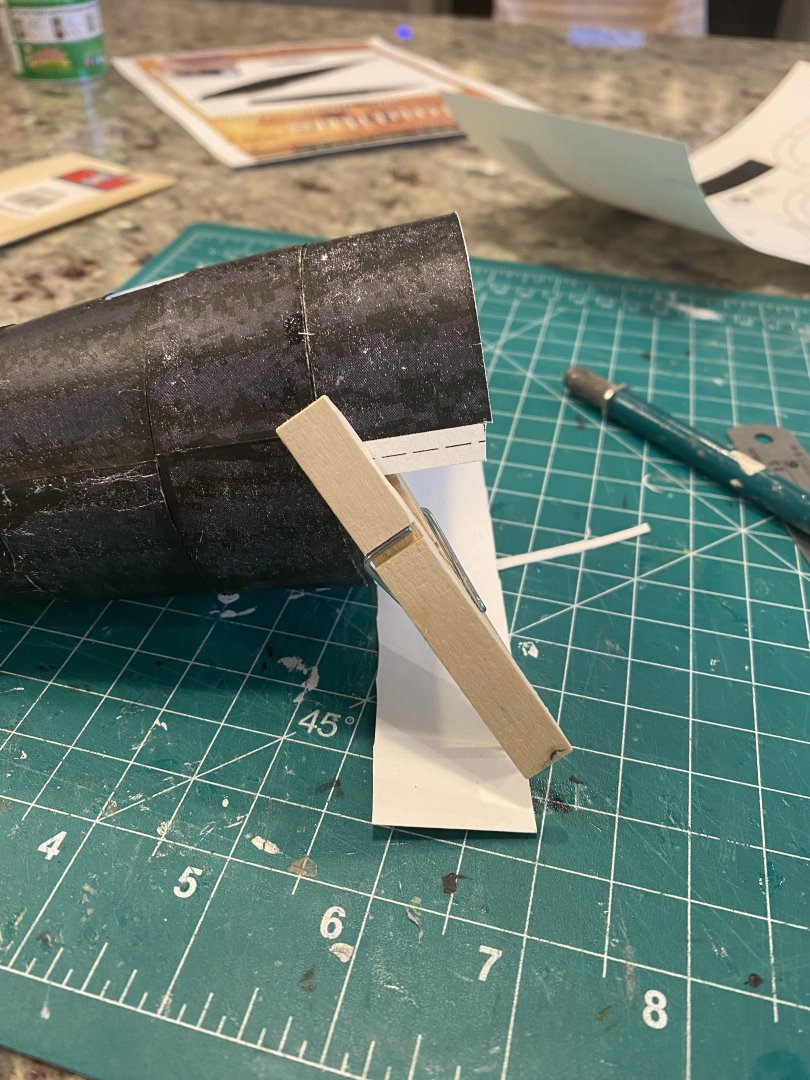
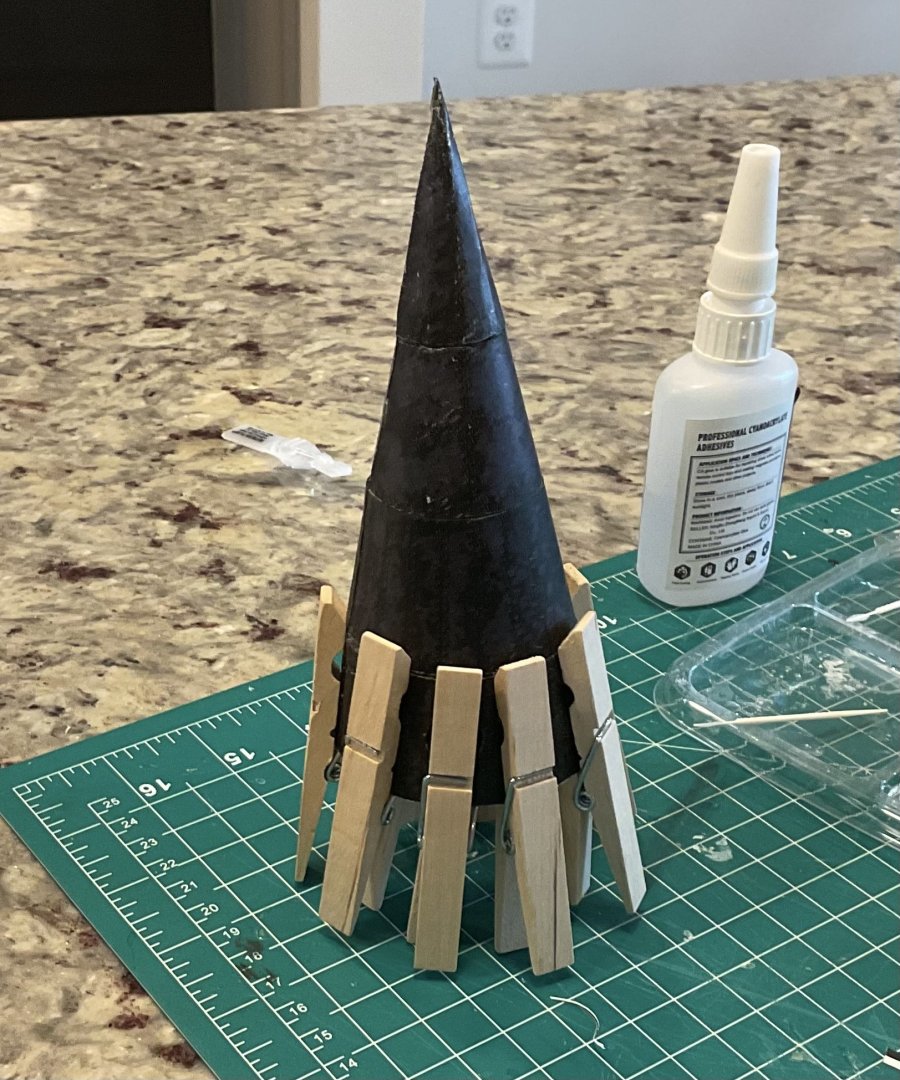
Getting the fourth truncated cone to conform to the previous required a few clothespins
- 40 replies
-
- 7
-
-
- Nautilus
- Heinkel Models
- (and 2 more)
-
From Wikipedia: Ron Miller (born May 8, 1947) is an American illustrator and writer who lives and works in South Boston, Virginia. He now specializes in astronomical, astronautical and science fictionbooks for adults and young adults.
- 40 replies
-
- 3
-
-
- Nautilus
- Heinkel Models
- (and 2 more)
-
This link https://www.vernianera.com/Nautilus/ provides a vast catalogue of interpretations of the Nautilus.
- 40 replies
-
- 3
-
-
- Nautilus
- Heinkel Models
- (and 2 more)
-
The Disney artists designed a great Nautilus, but it was nothing like what Verne described. I guess his wasn't photogenic enough
- 40 replies
-
- 5
-
-
- Nautilus
- Heinkel Models
- (and 2 more)
-
This is a card model available for download from ecardmodels.com. It consists of an introductory page, 2 pages showing how the pieces go together (but leaving out a lot of detail) and 7 pages of parts to cut out and assemble. This is the only model of the Nautilus I have been able to find that is true to Verne’s description in the novel. So here we go:


- 40 replies
-
- 10
-
-
- Nautilus
- Heinkel Models
- (and 2 more)
-
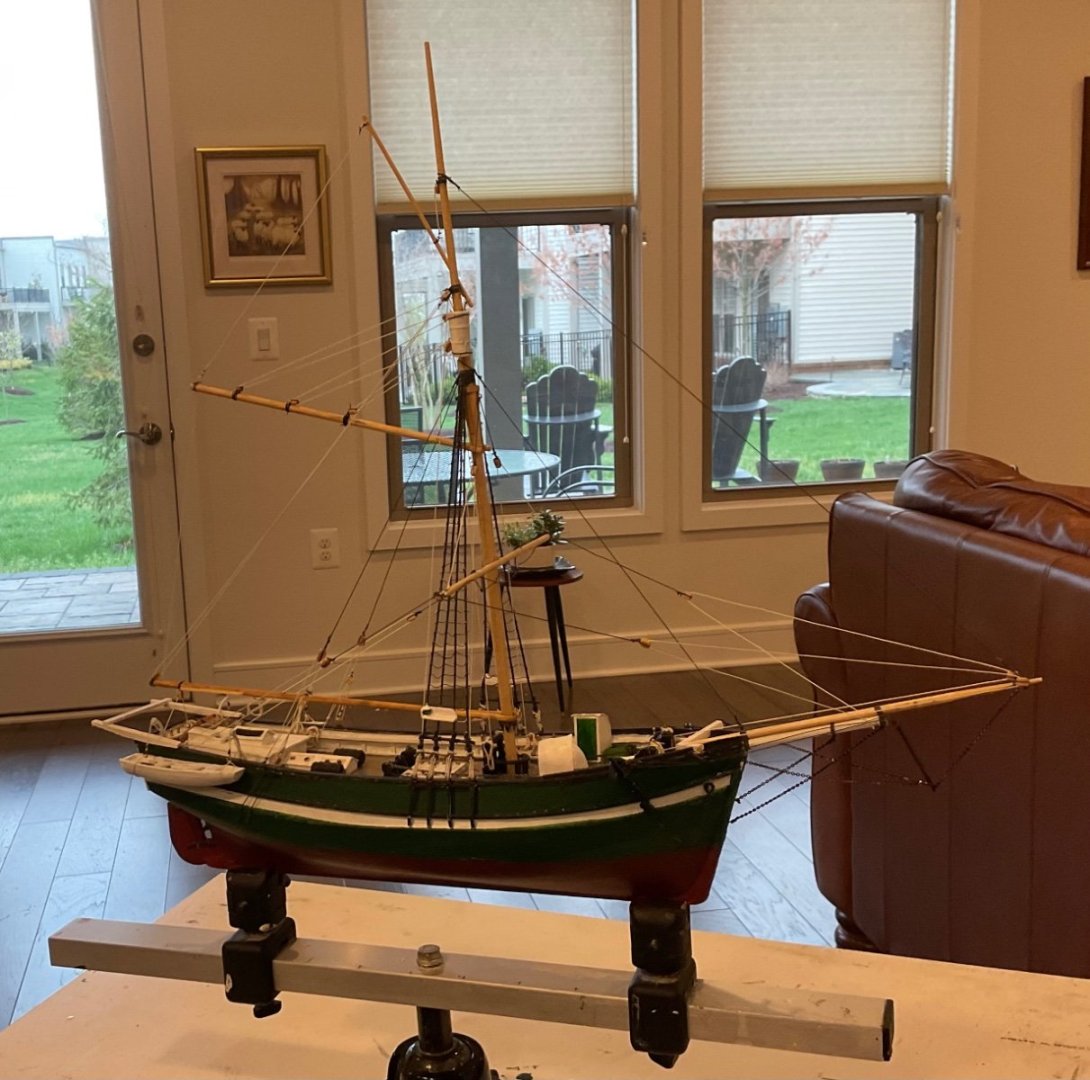
That’s a keel clamp to hold a ship model under construction. I will probably just get some brass pedestals but I do like launching way mounts.
- 27 replies
-
- 1
-

-
- Gjoa
- Model Shipways
- (and 1 more)
-
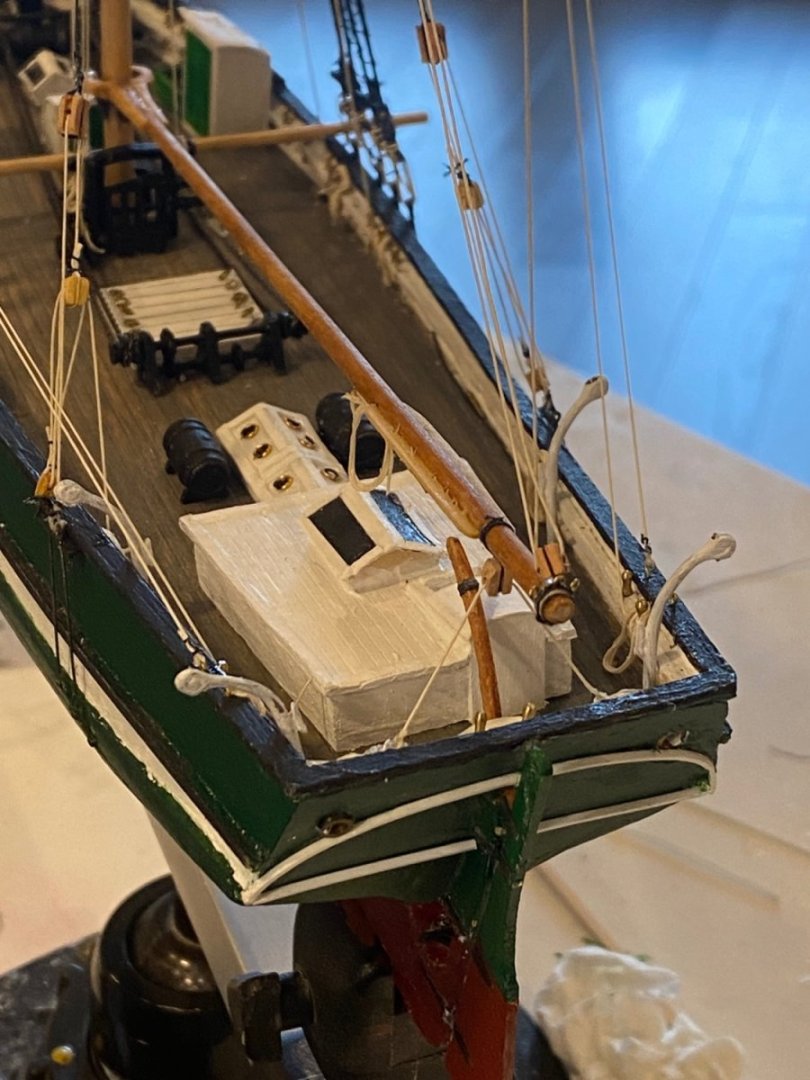
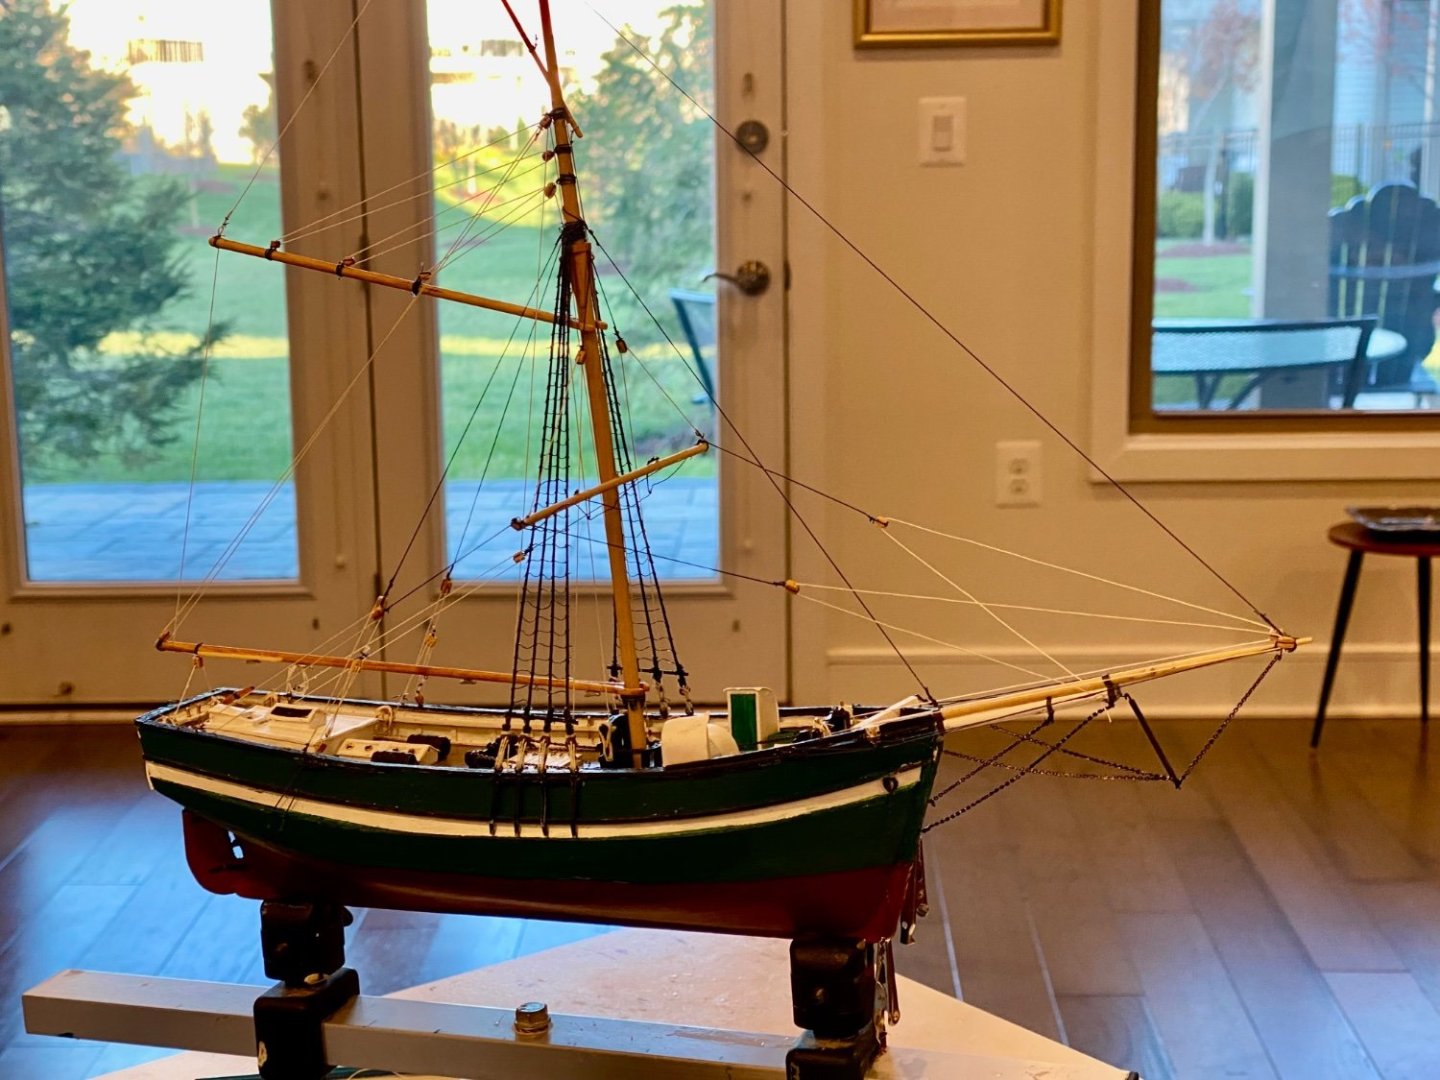
Finished. Just need to add 2 name boards and decide how to mount her.
- 27 replies
-
- 7
-
-
-
- Gjoa
- Model Shipways
- (and 1 more)
-
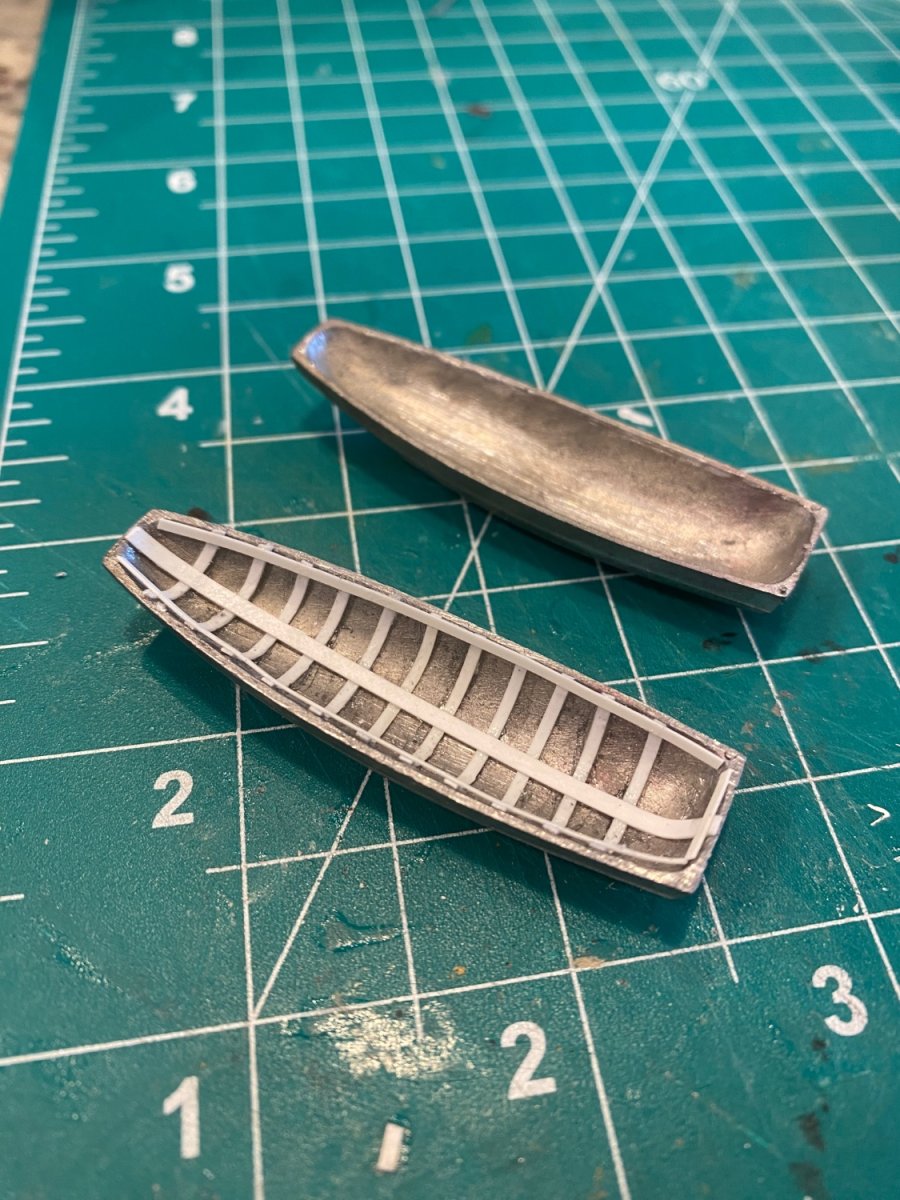
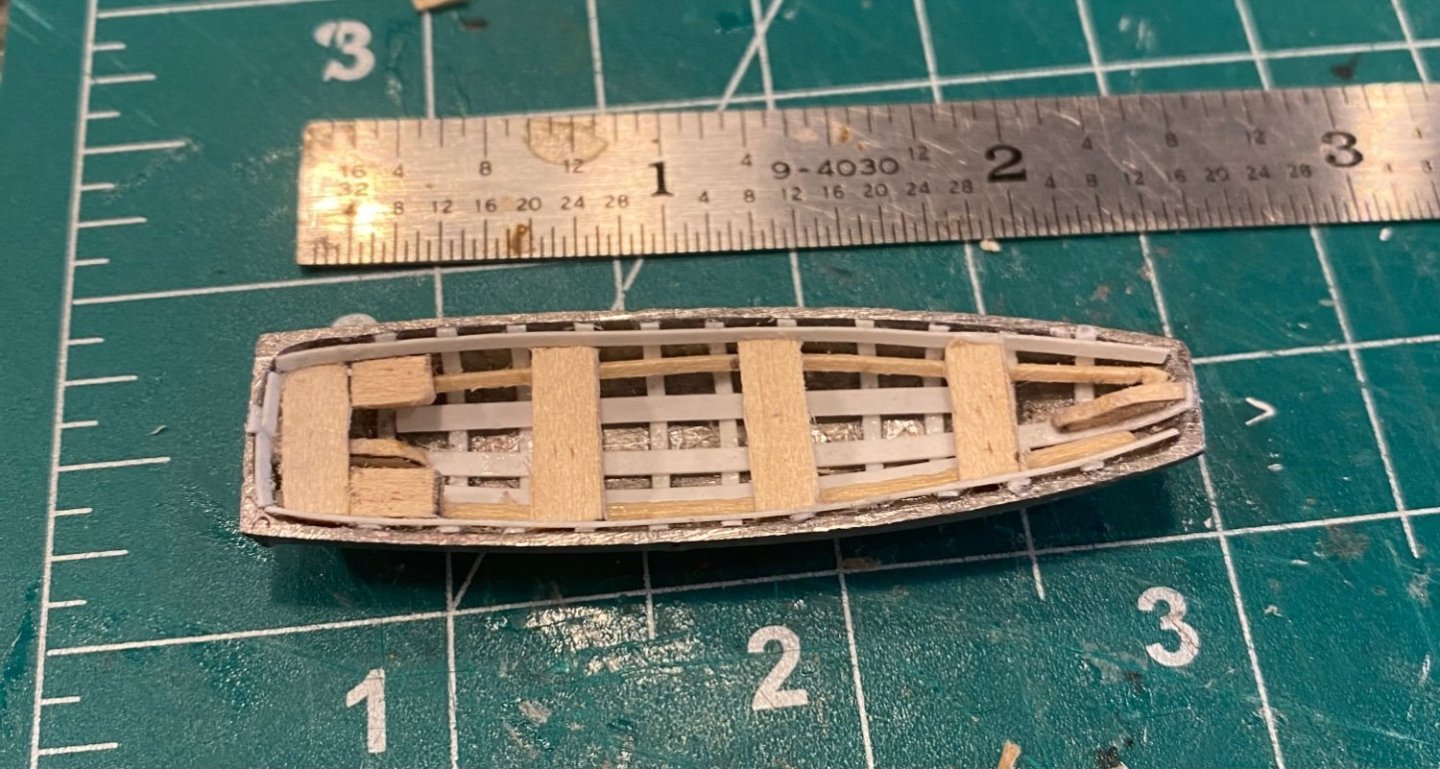
I managed to get the port side pram hung from the davits.

- 27 replies
-
- 4
-
-
- Gjoa
- Model Shipways
- (and 1 more)
-
Nice work. I am glad that I found this log as I am waiting for my own 14 bis . This build log will be a great help. Ron Gove (aka Papa)
-
My drill bits must be dull. It took about 30 minutes to drill a hole in the pulley at the top of each davit! I am also adding detail to the prams which were simple castings.

- 27 replies
-
- 2
-
-
- Gjoa
- Model Shipways
- (and 1 more)
-
The rigging is about done. Next up are davits and the boats. I learned the hard way on the Morgan that installing davits before rigging is an invitation to break the davits.
- 27 replies
-
- 5
-
-
- Gjoa
- Model Shipways
- (and 1 more)