Bill97
-
Posts
2,731 -
Joined
-
Last visited
Content Type
Profiles
Forums
Gallery
Events
Everything posted by Bill97
-
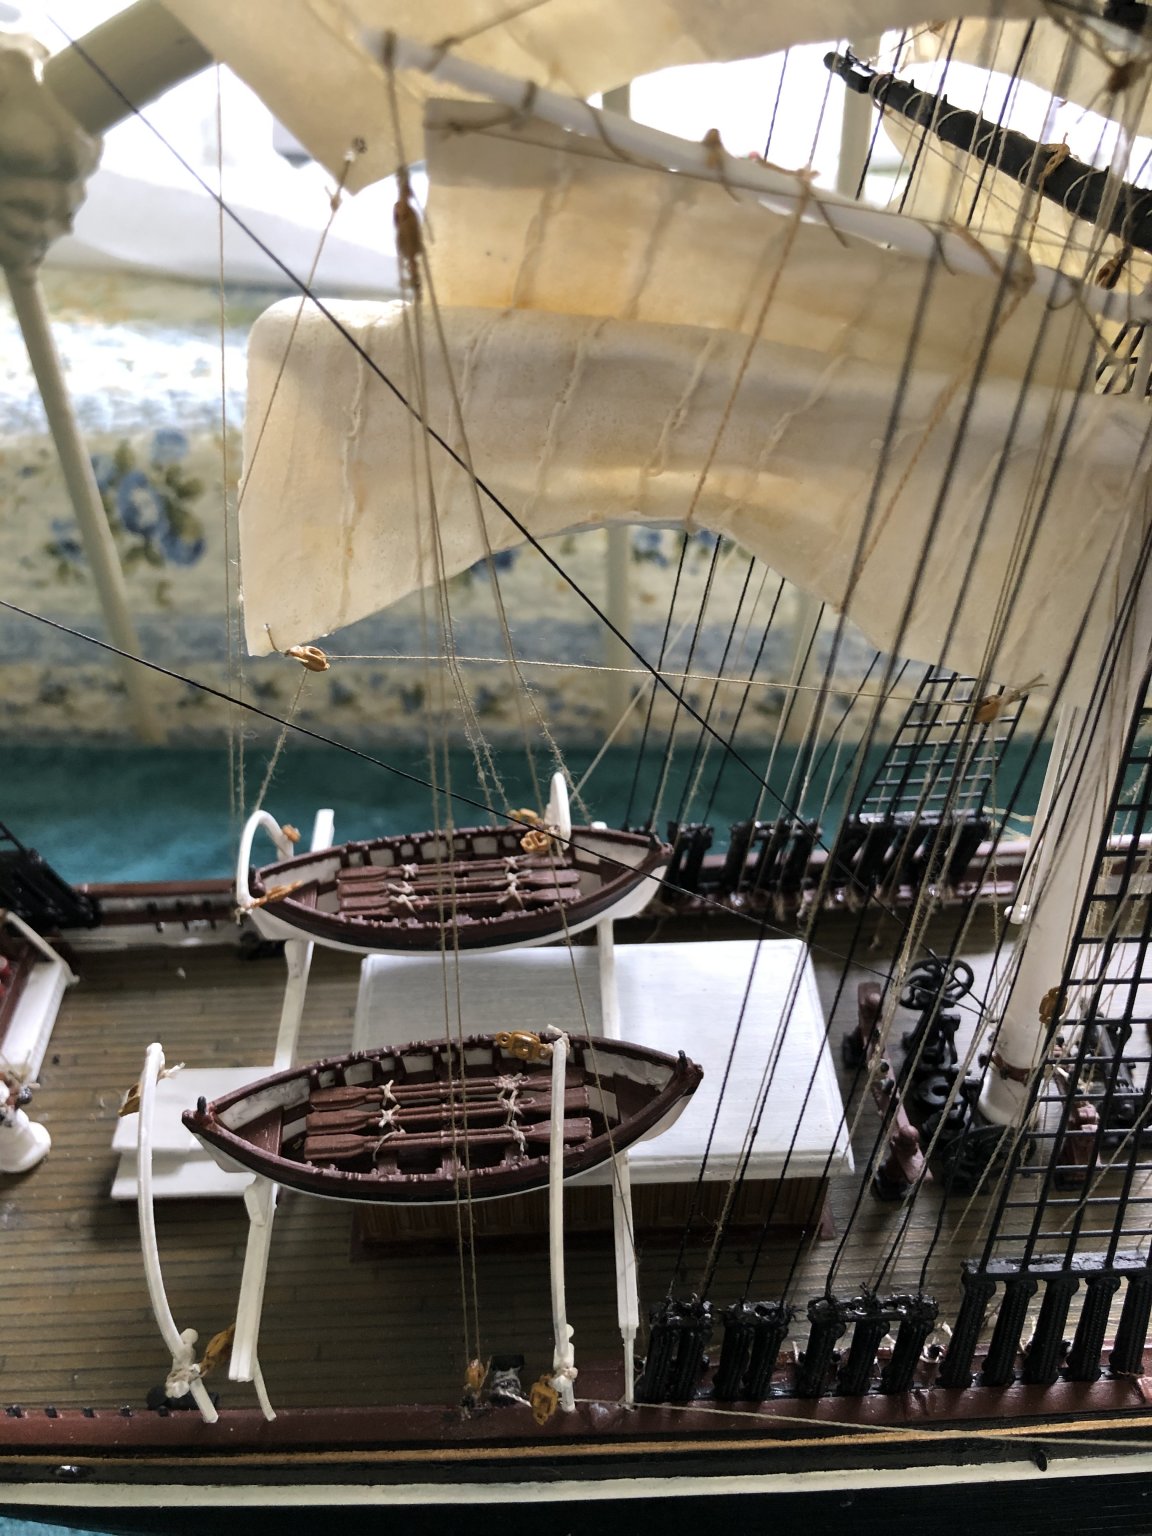
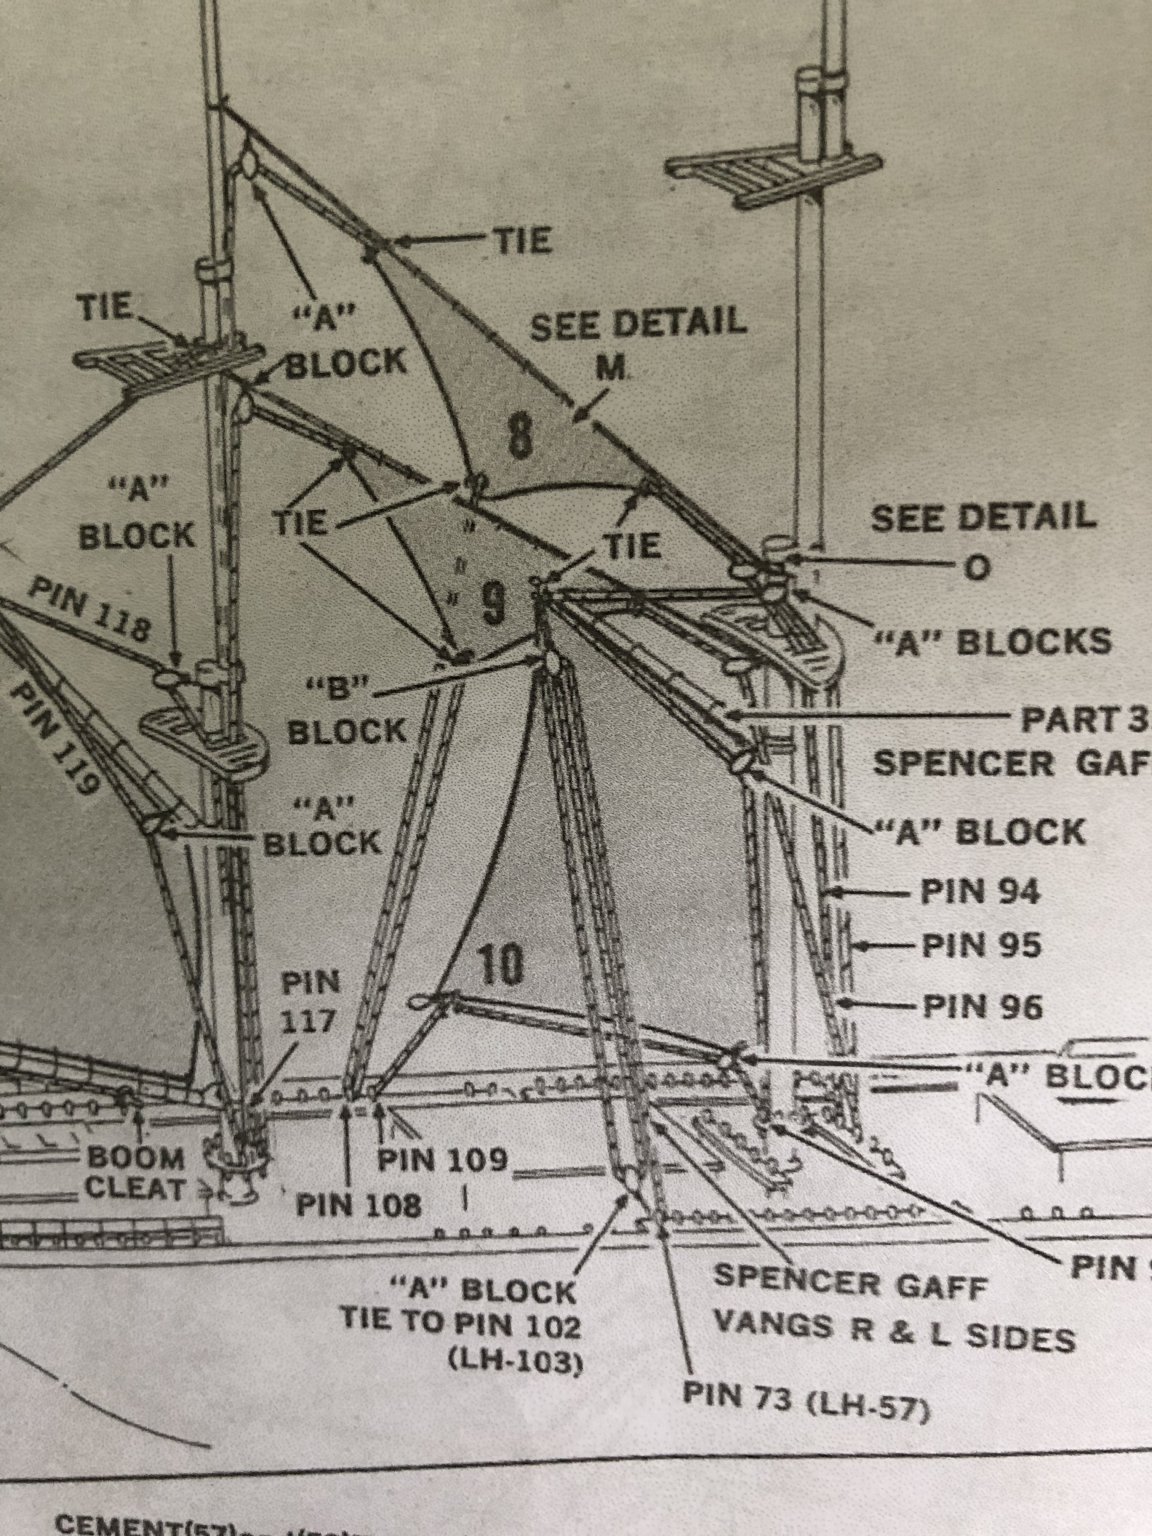
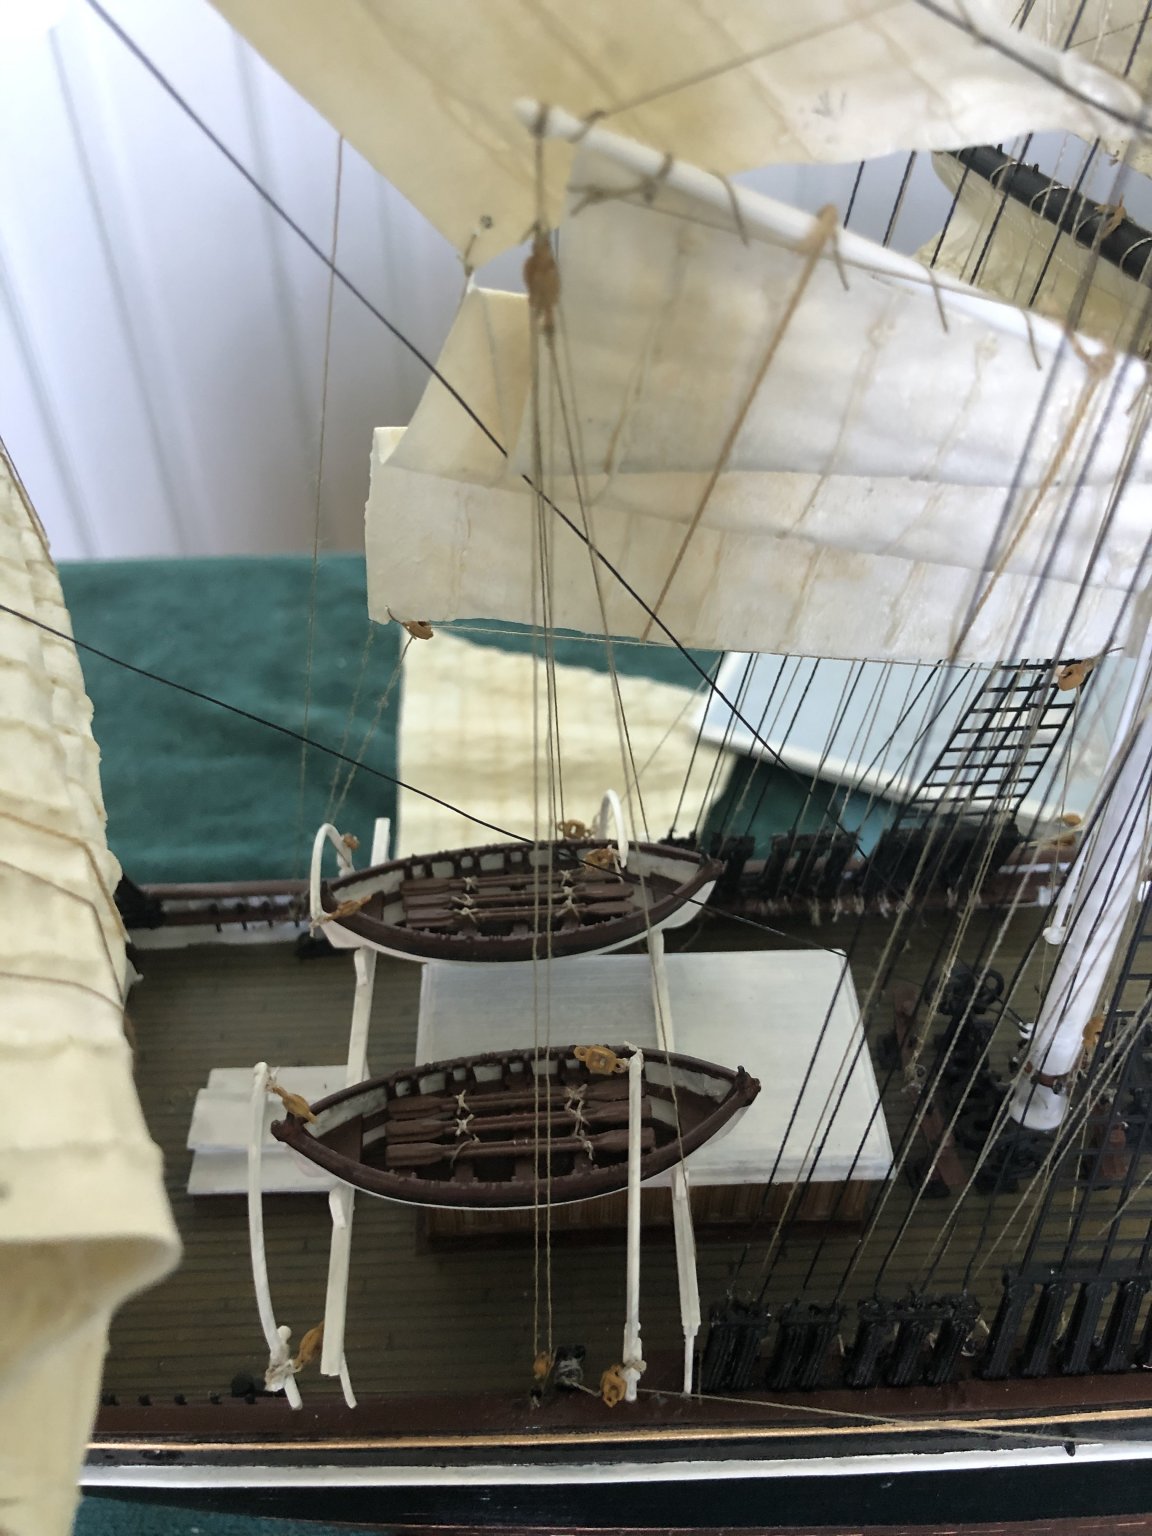
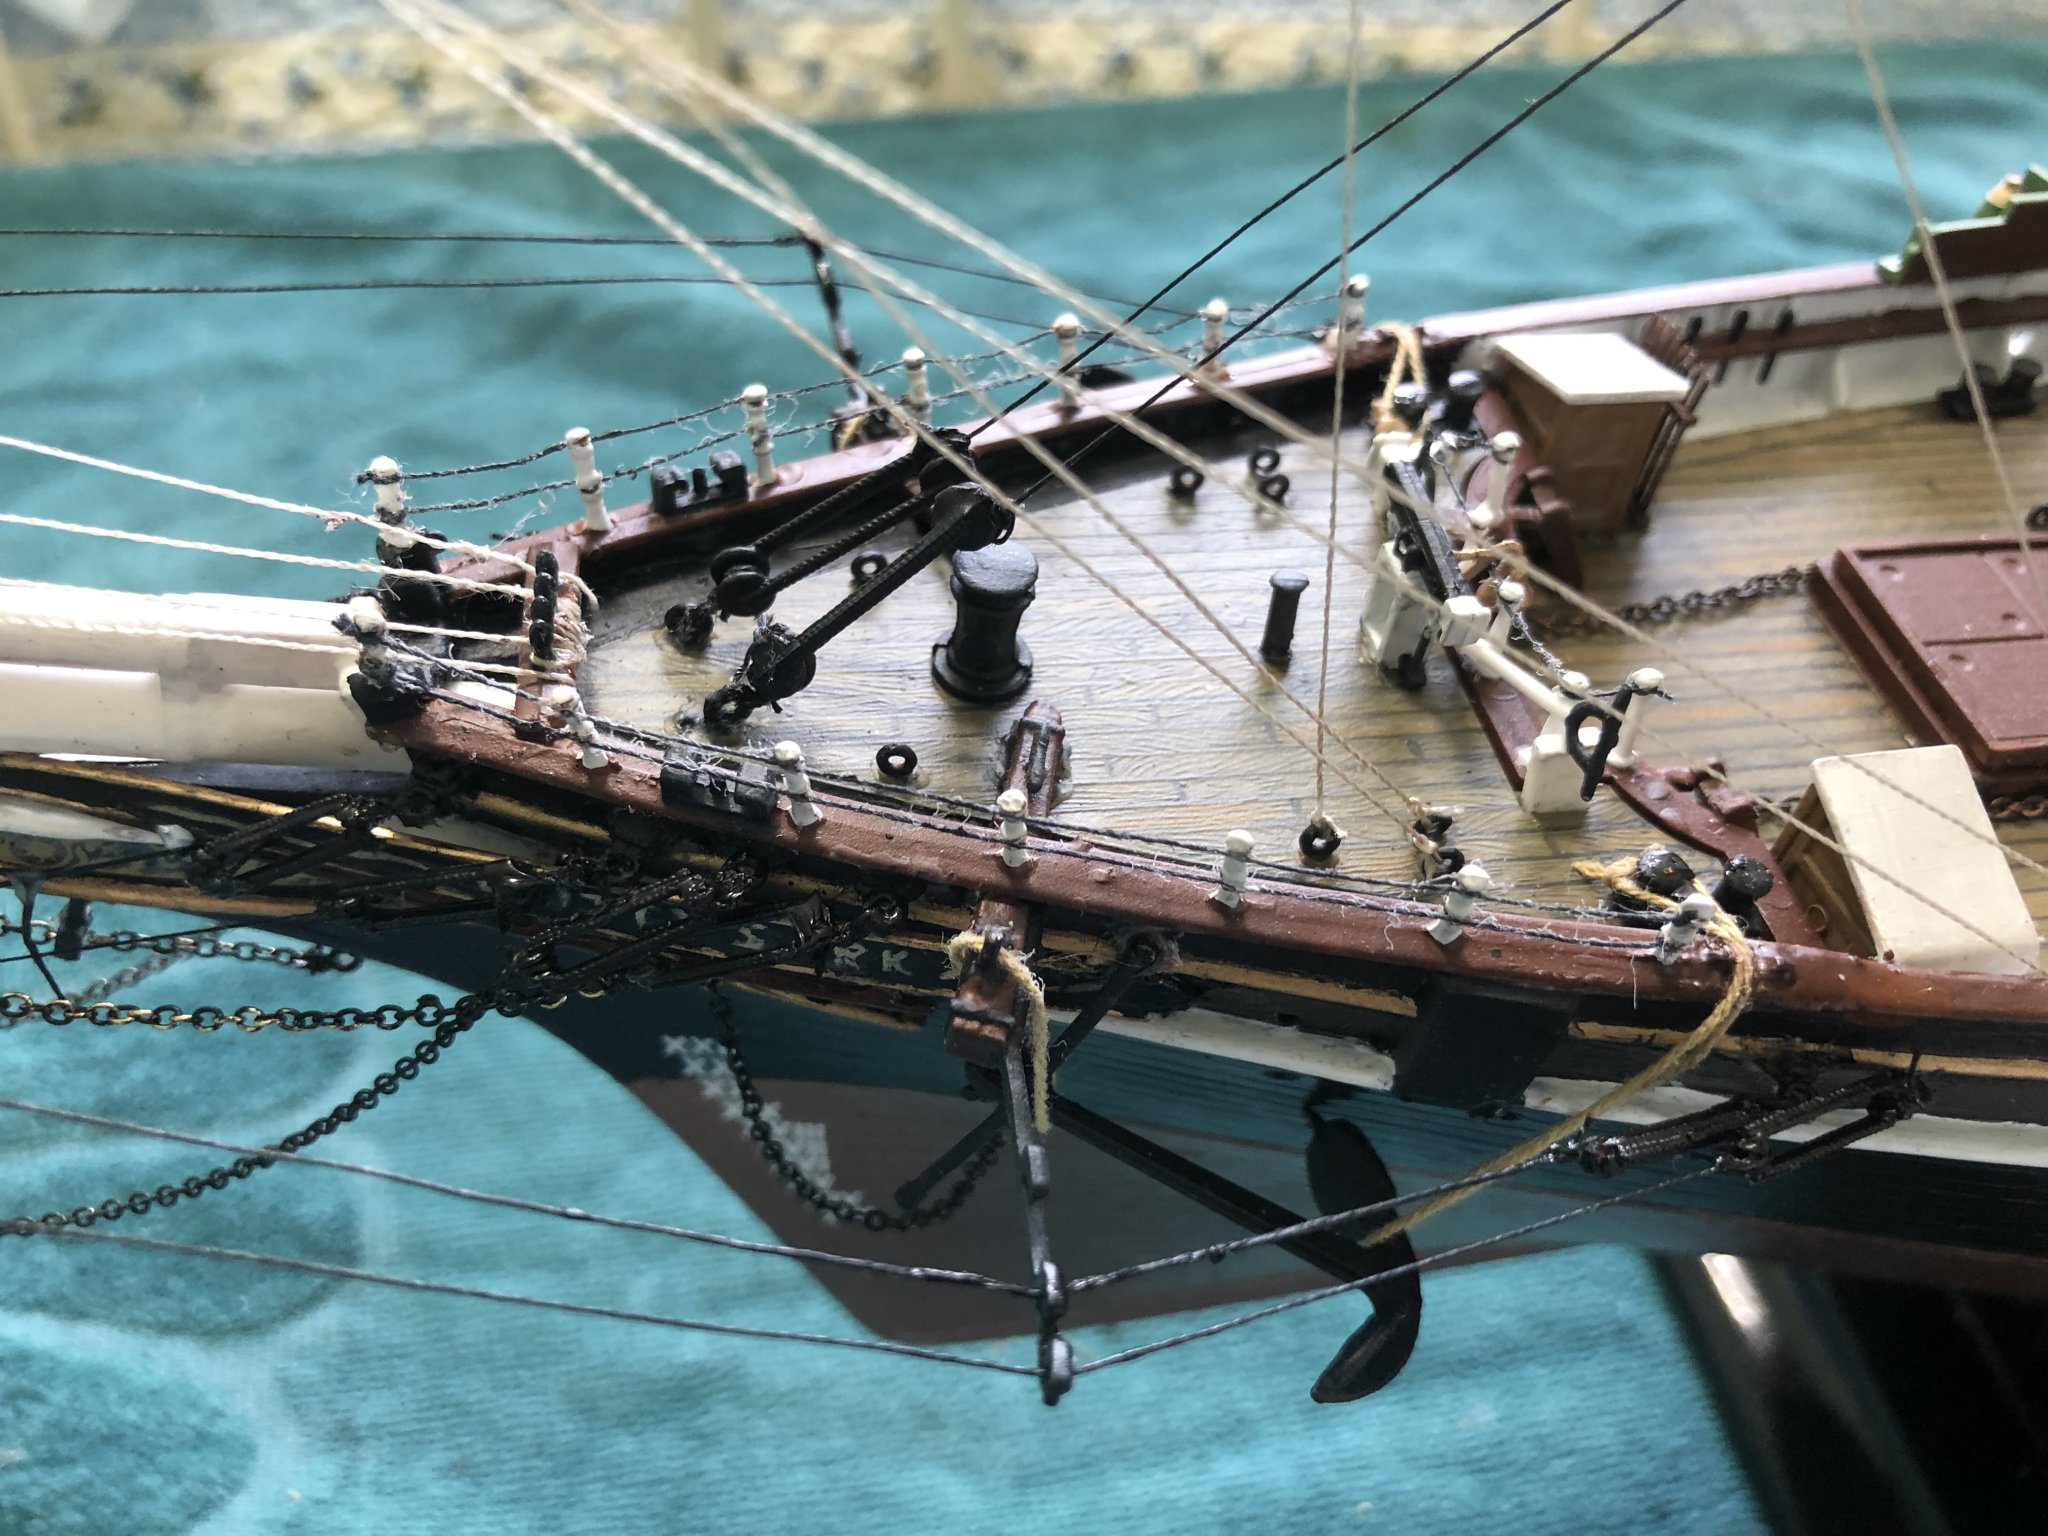
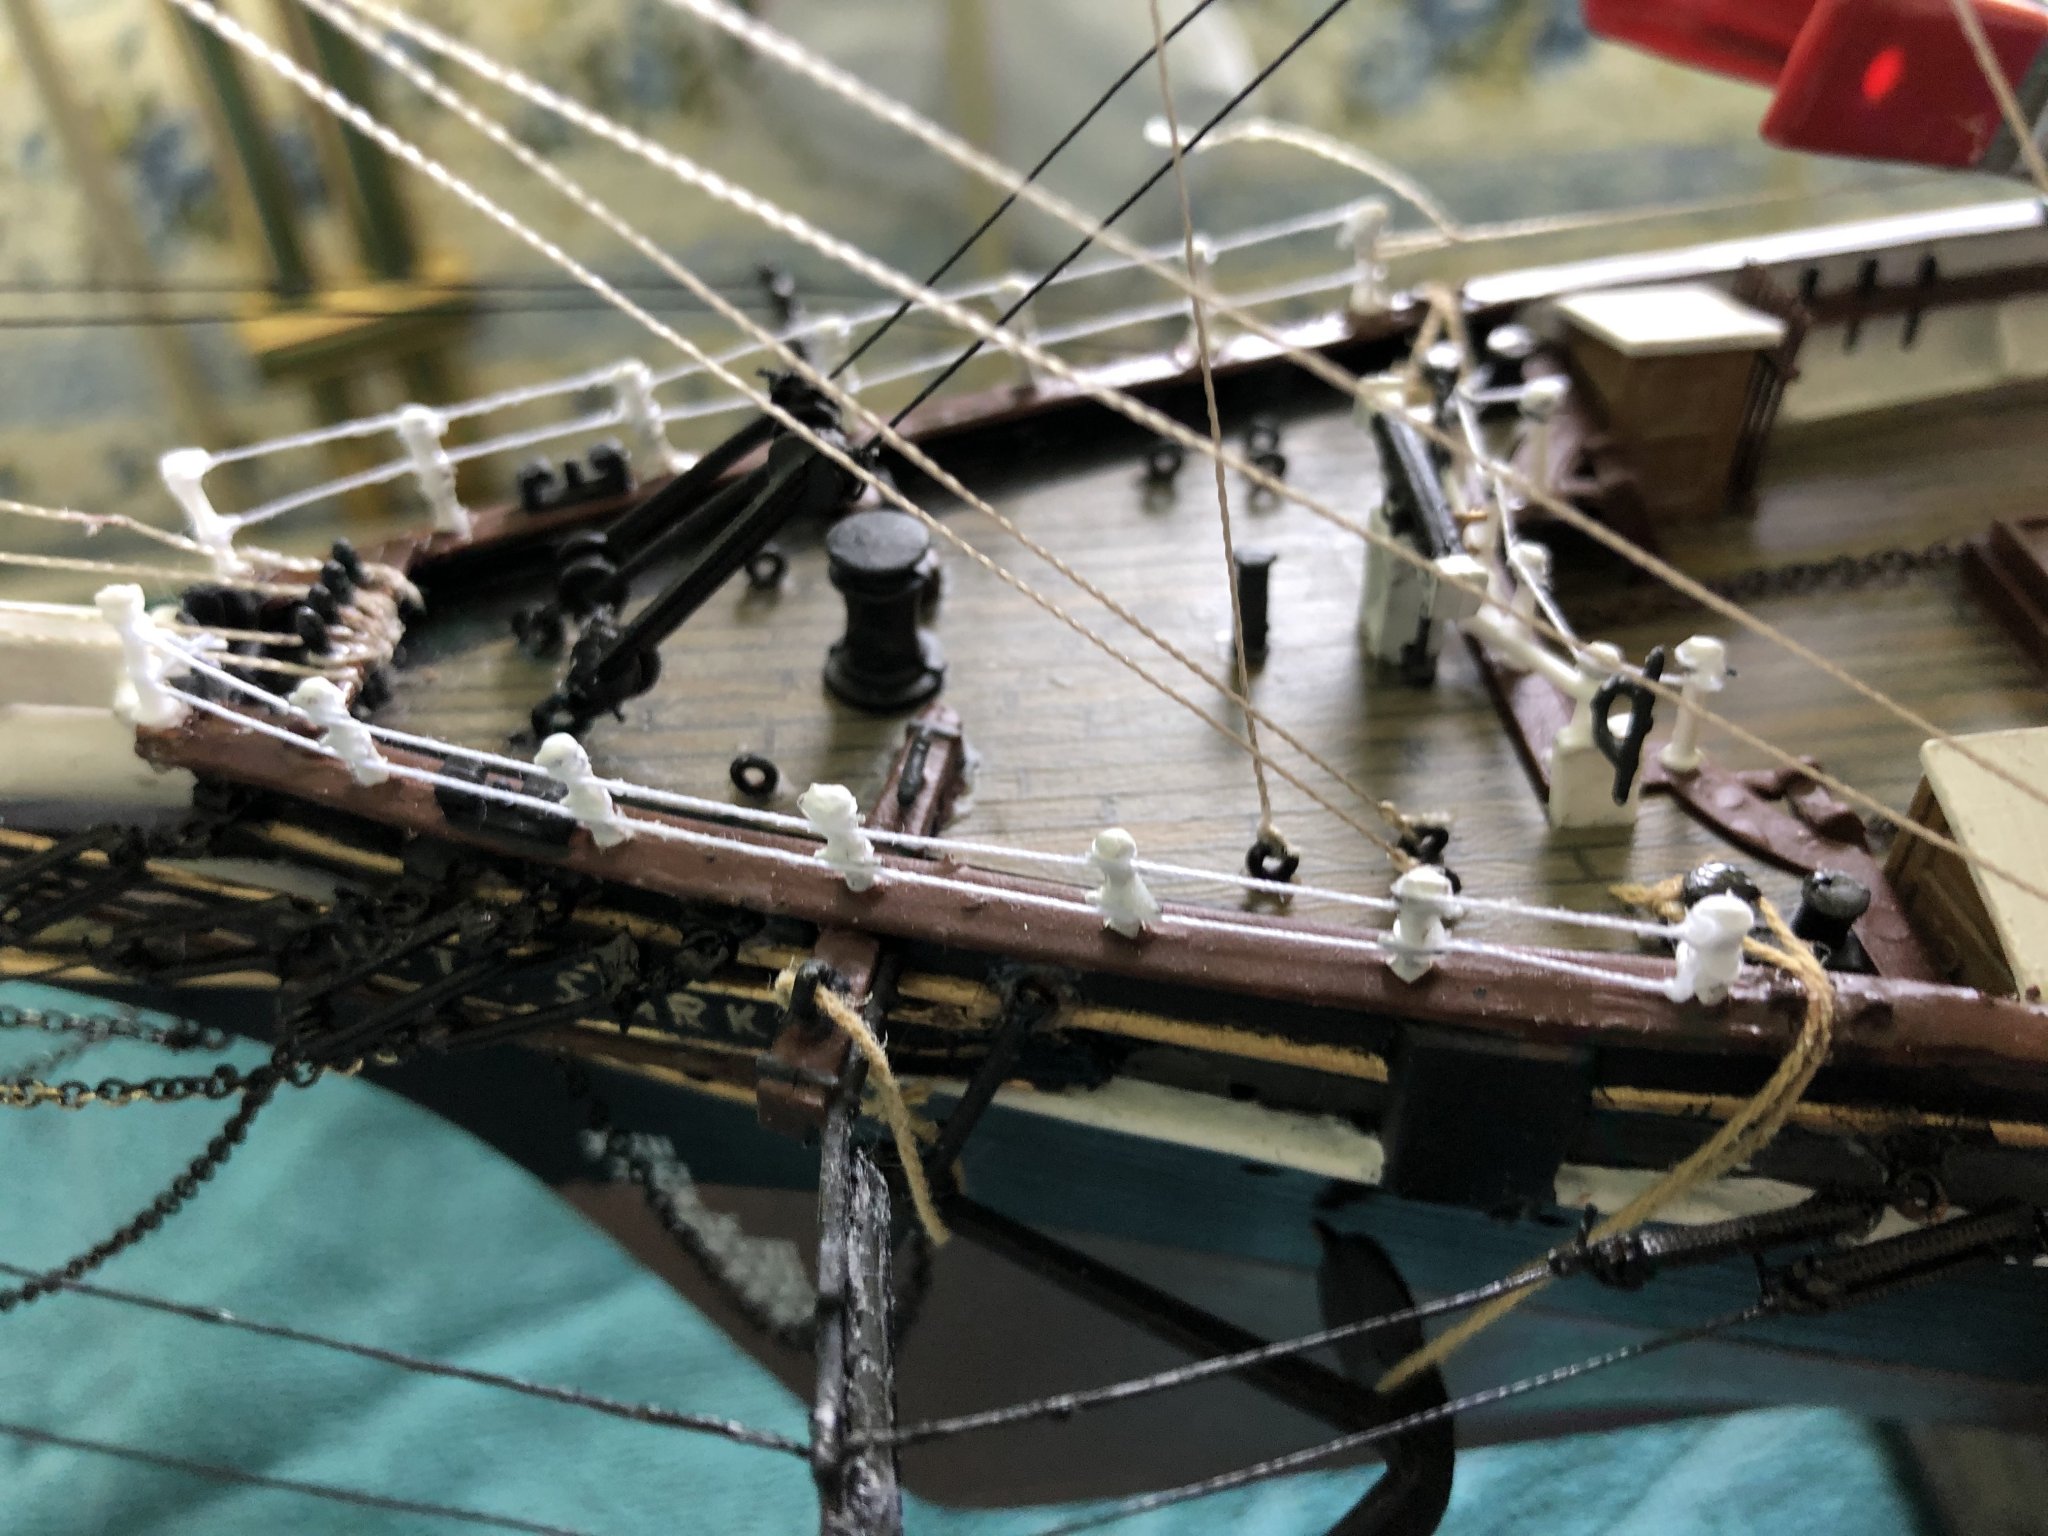
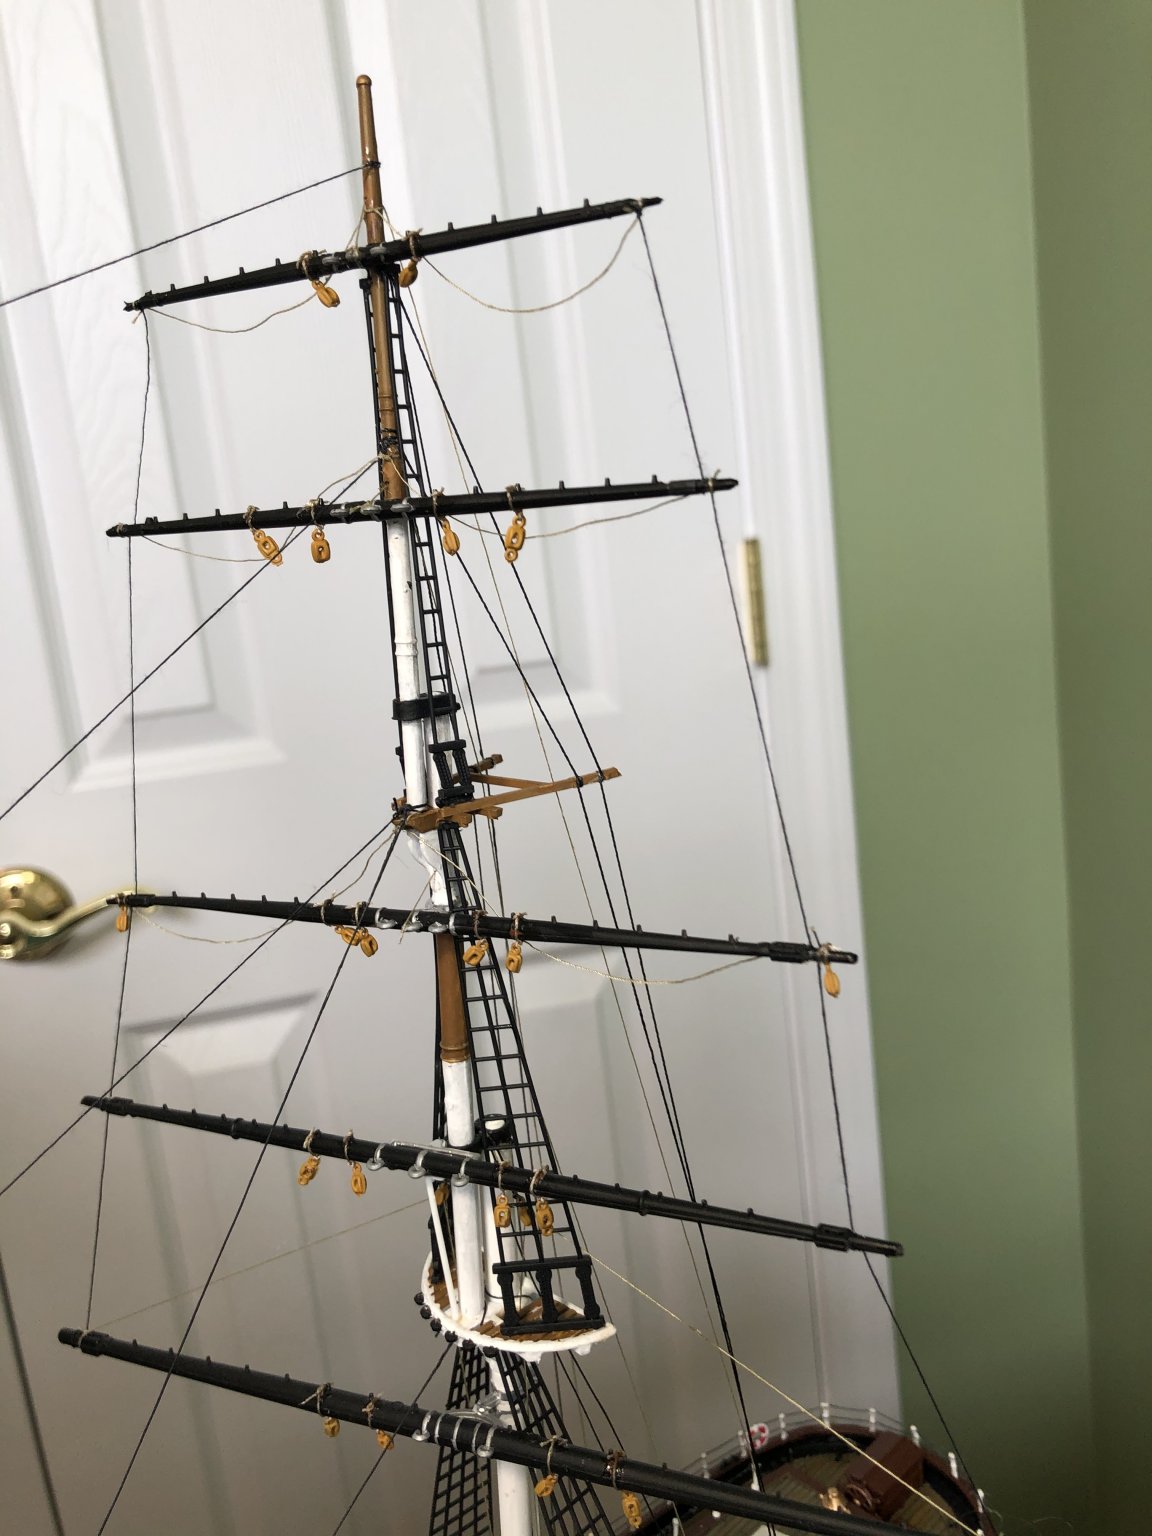
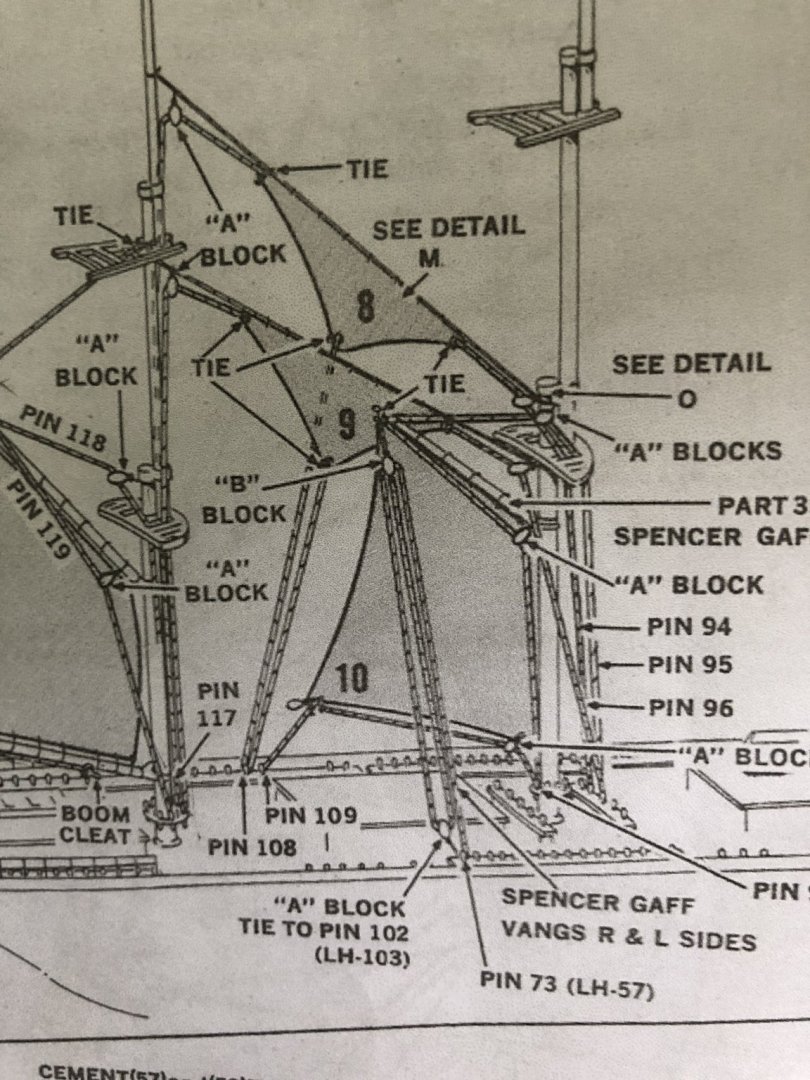
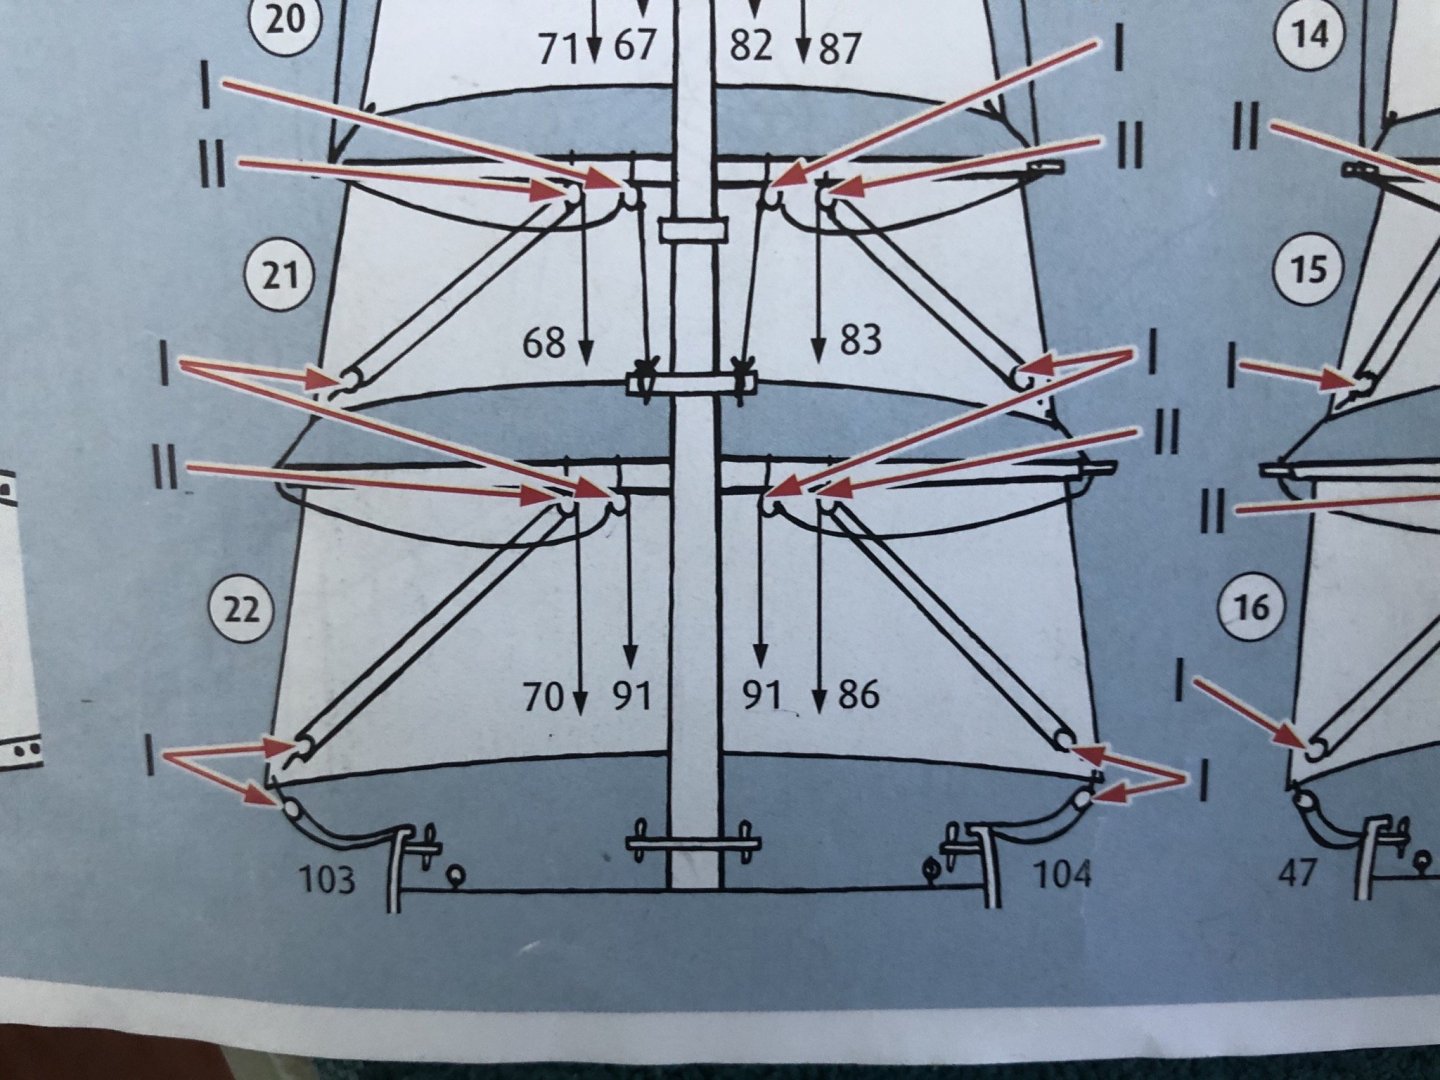
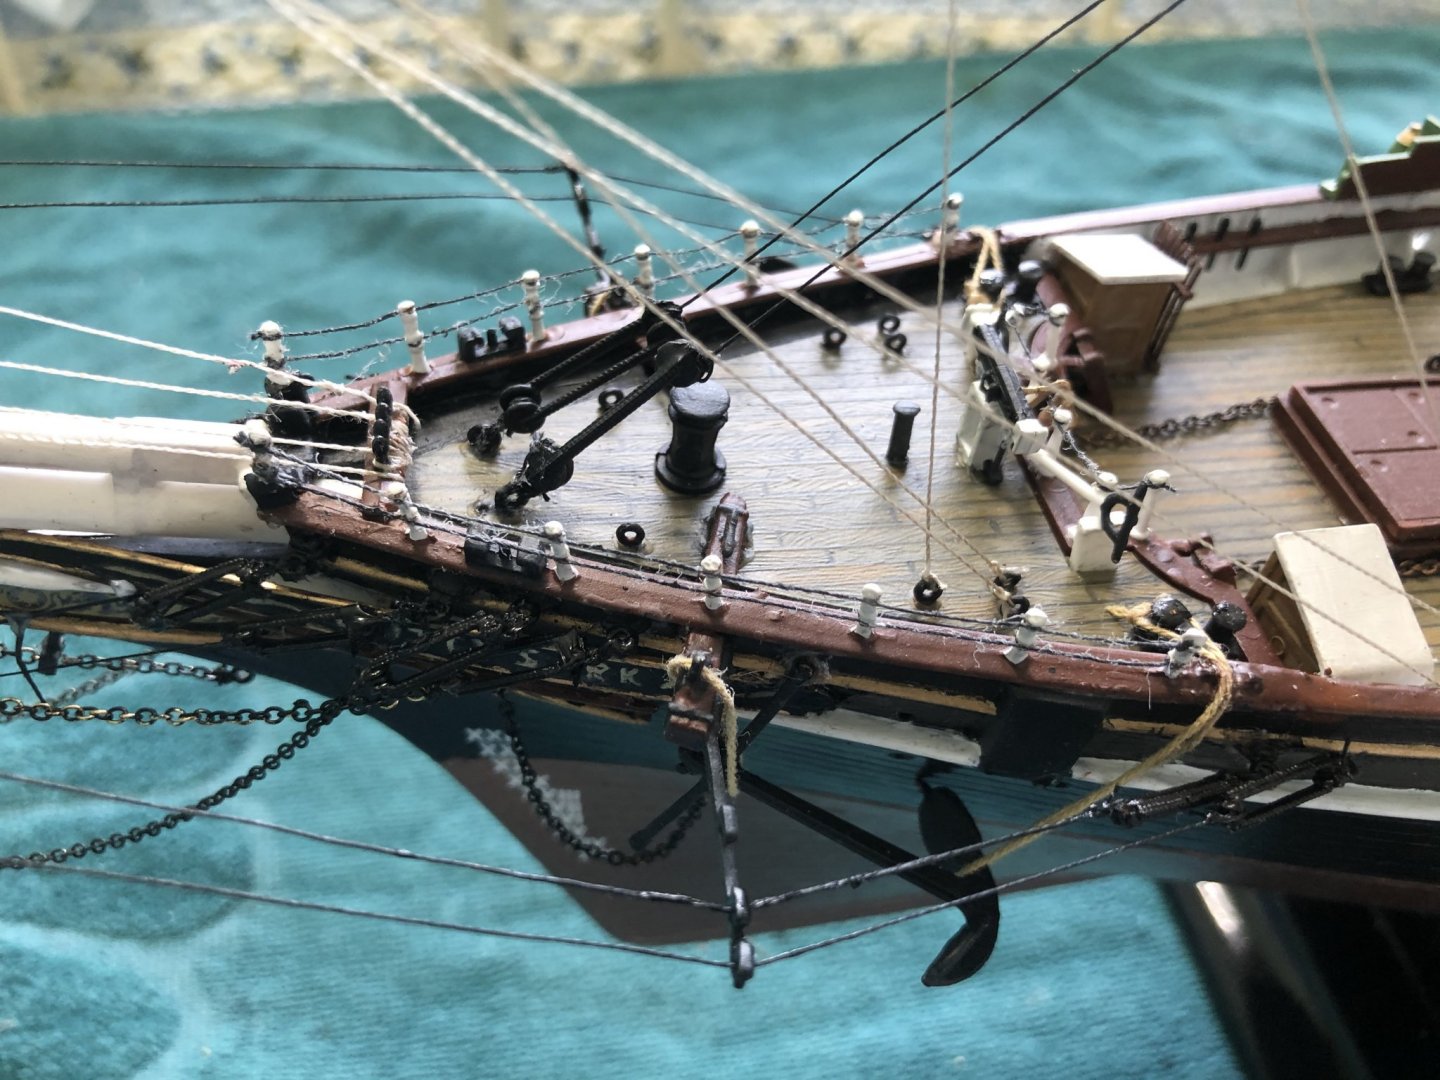
The Spencer Gaff rigging. As you can see in the instructions, it is to be tied off at blocks on pins 102 and 103 on opposite sides of ship. Those pins are right between the lifeboat divots.

-
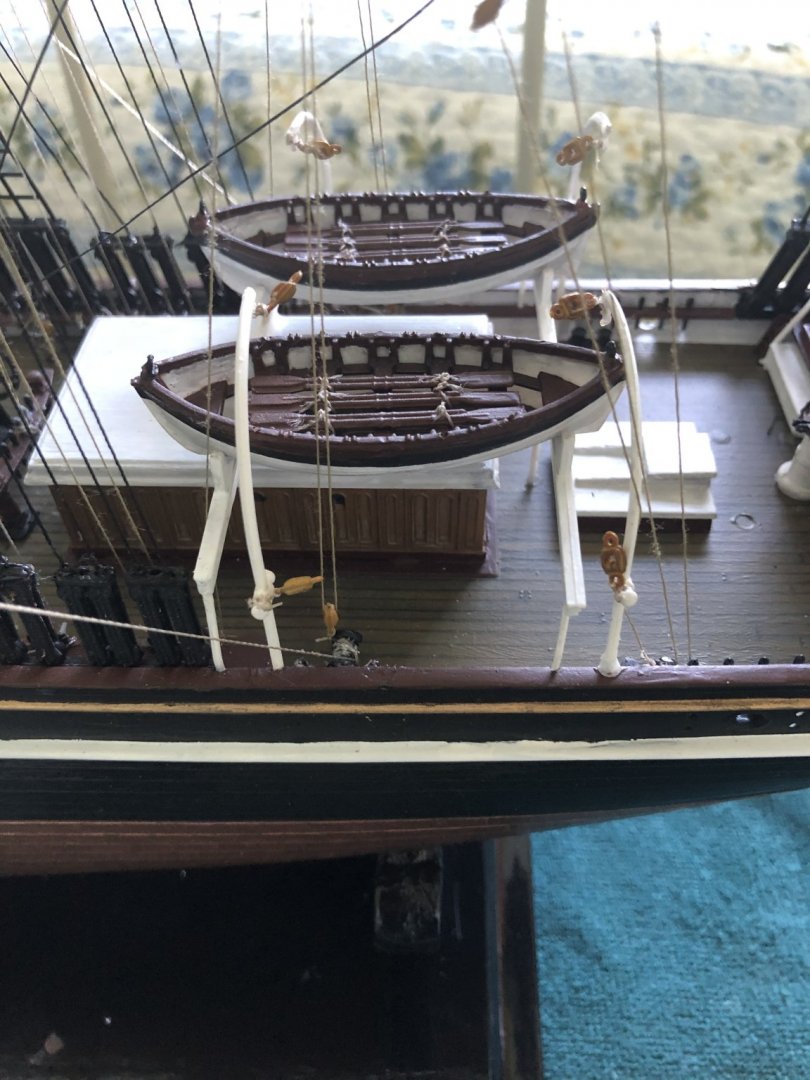
I previously said that was my last question so I guess I need to call this a curiosity maybe. On rigging the main course sail (bottom sail on main mast) and the main spencer sail, the instructions have me tie off to pins and the winch drum on both sides of the ship. Which I did as instructed. Those pins and winch drums are between the life boat davits. I have not rigged the davits yet. Waiting until I finish the running rigging. Curious if is going to look odd for the sail rigging lines to run through the davit rigging lines? And in actuality, not interfered with lowering the life boats?


-
Perfect John. Thanks. Now I see exactly what you explained.
-
John if you or anyone stumbles on a picture I would greatly appreciate it. Going to wait a few days to put on the sail to until I know for sure how it looks.
-
Thanks John. That helps a lot.
-
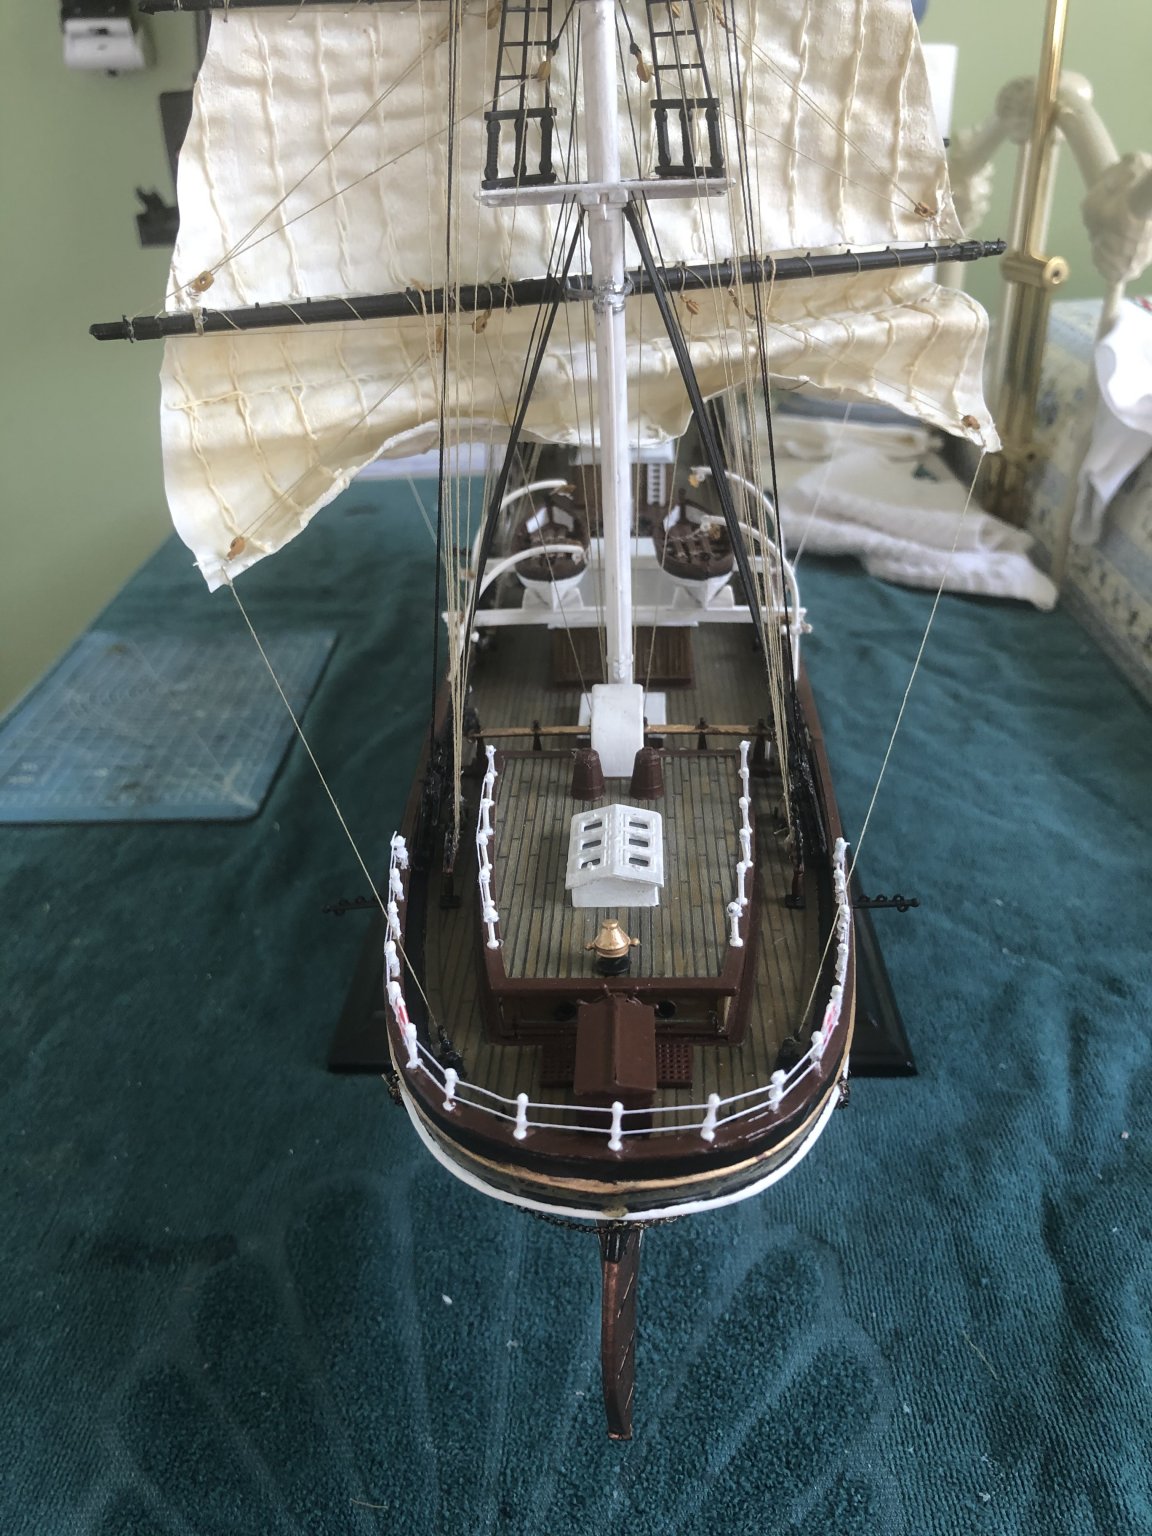
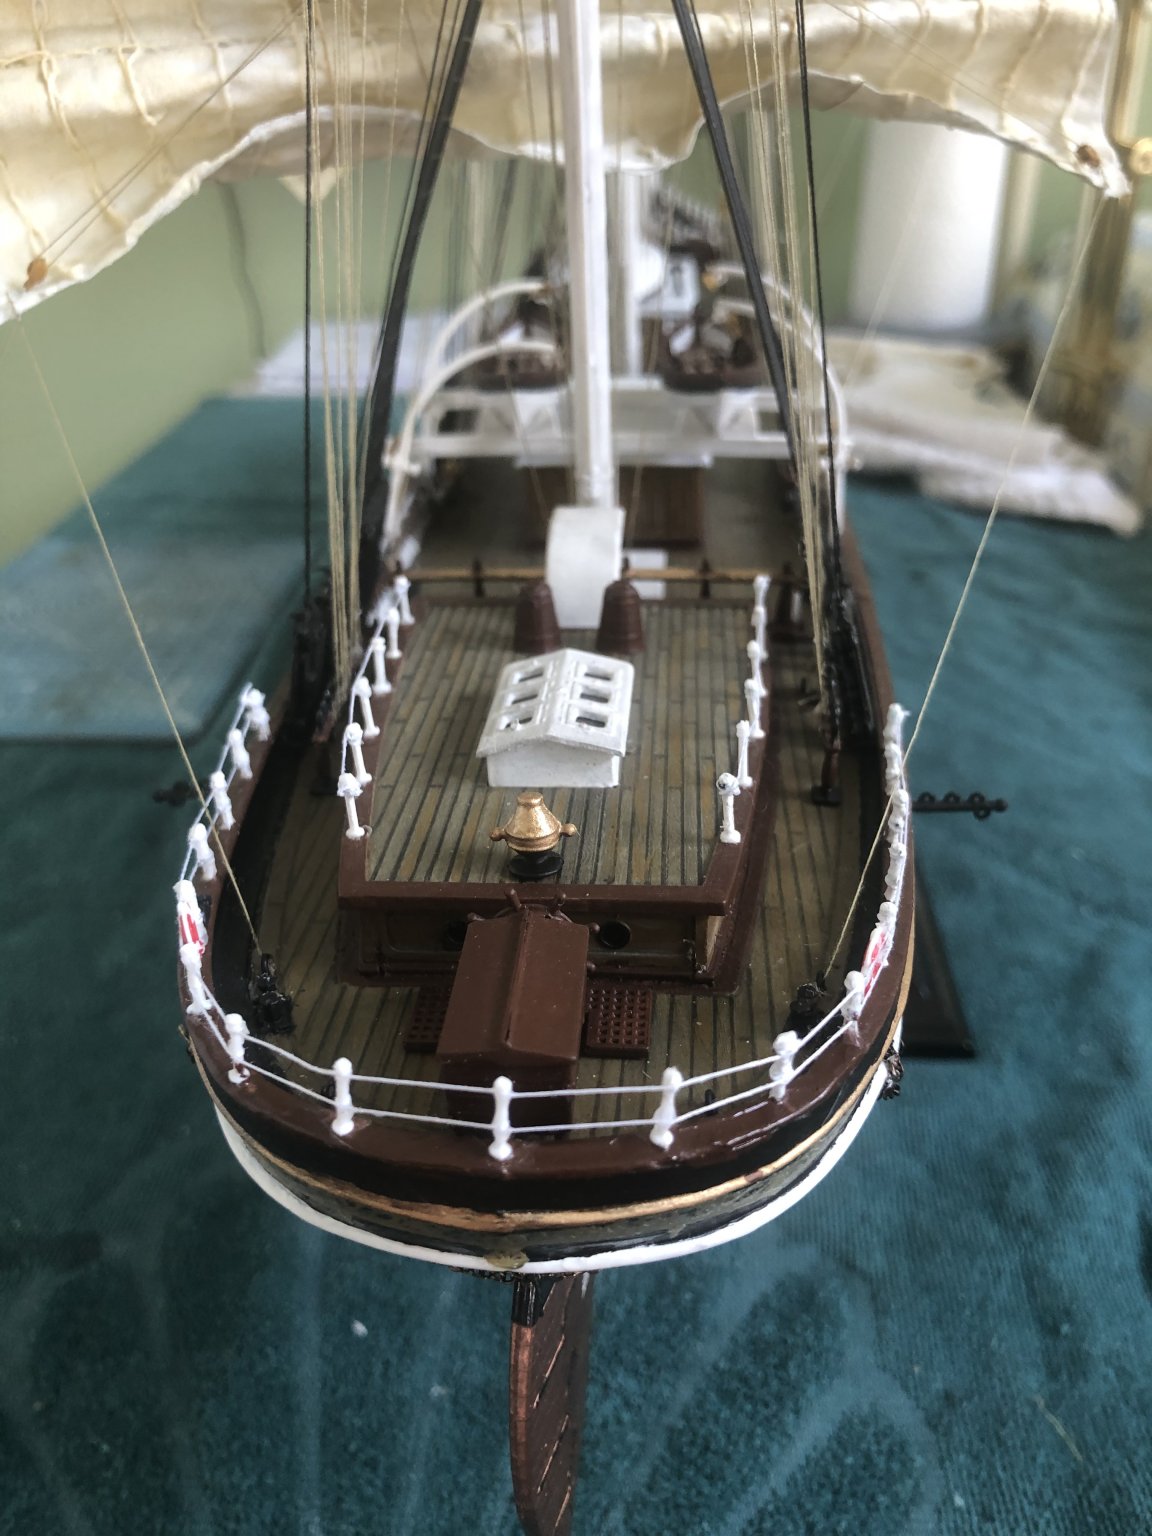
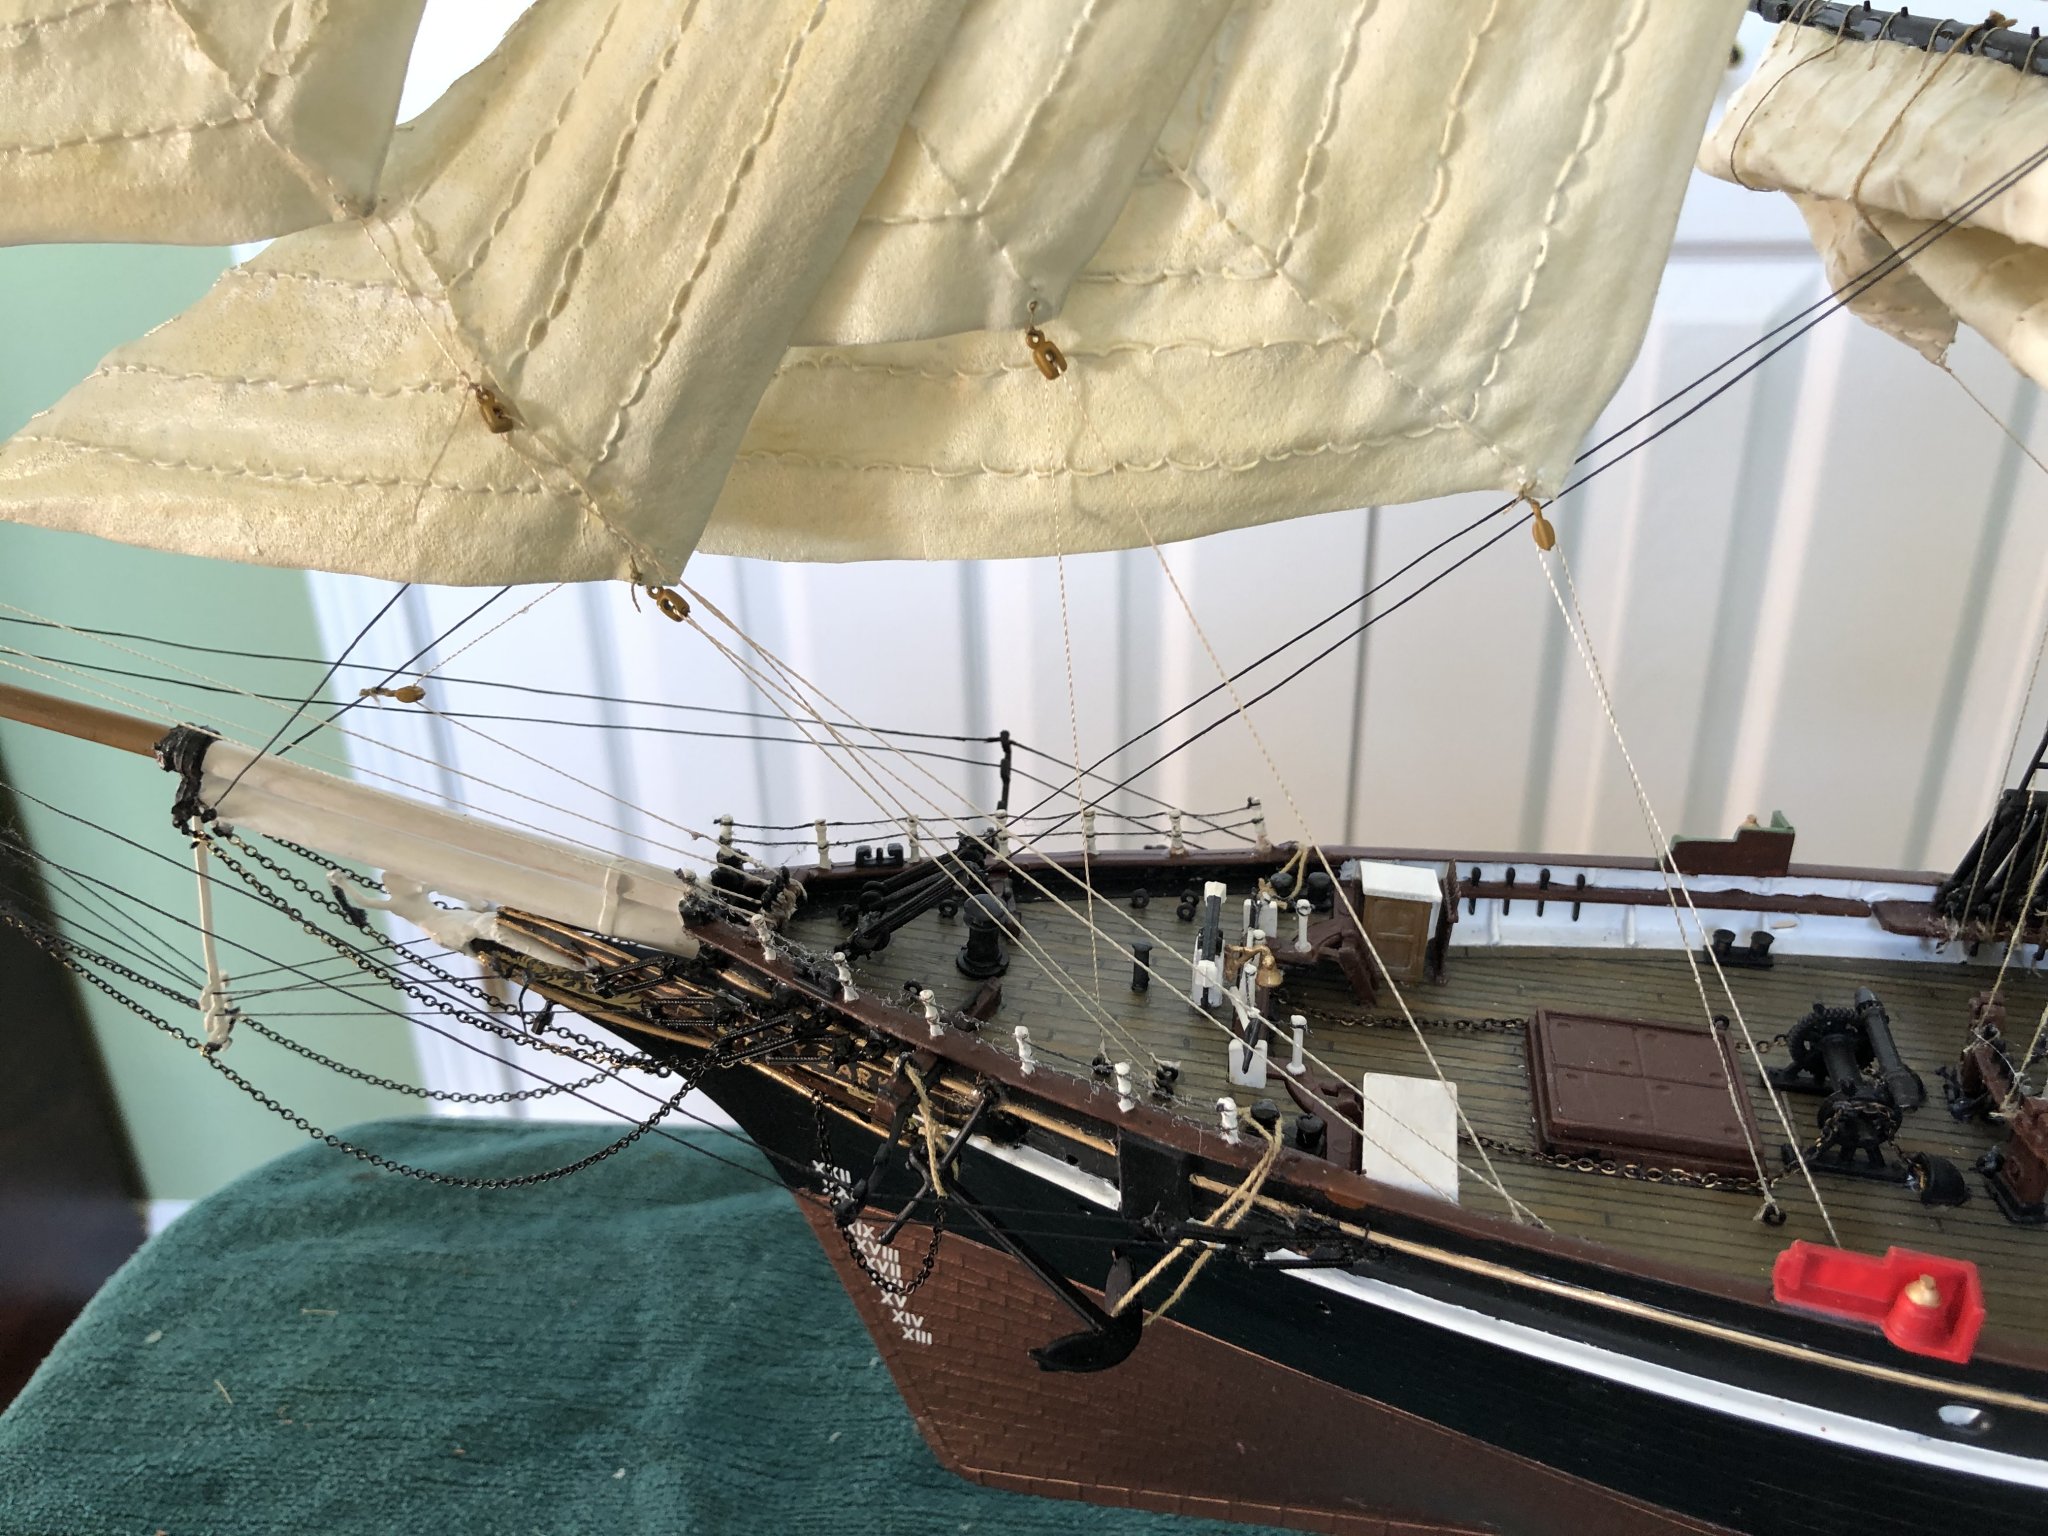
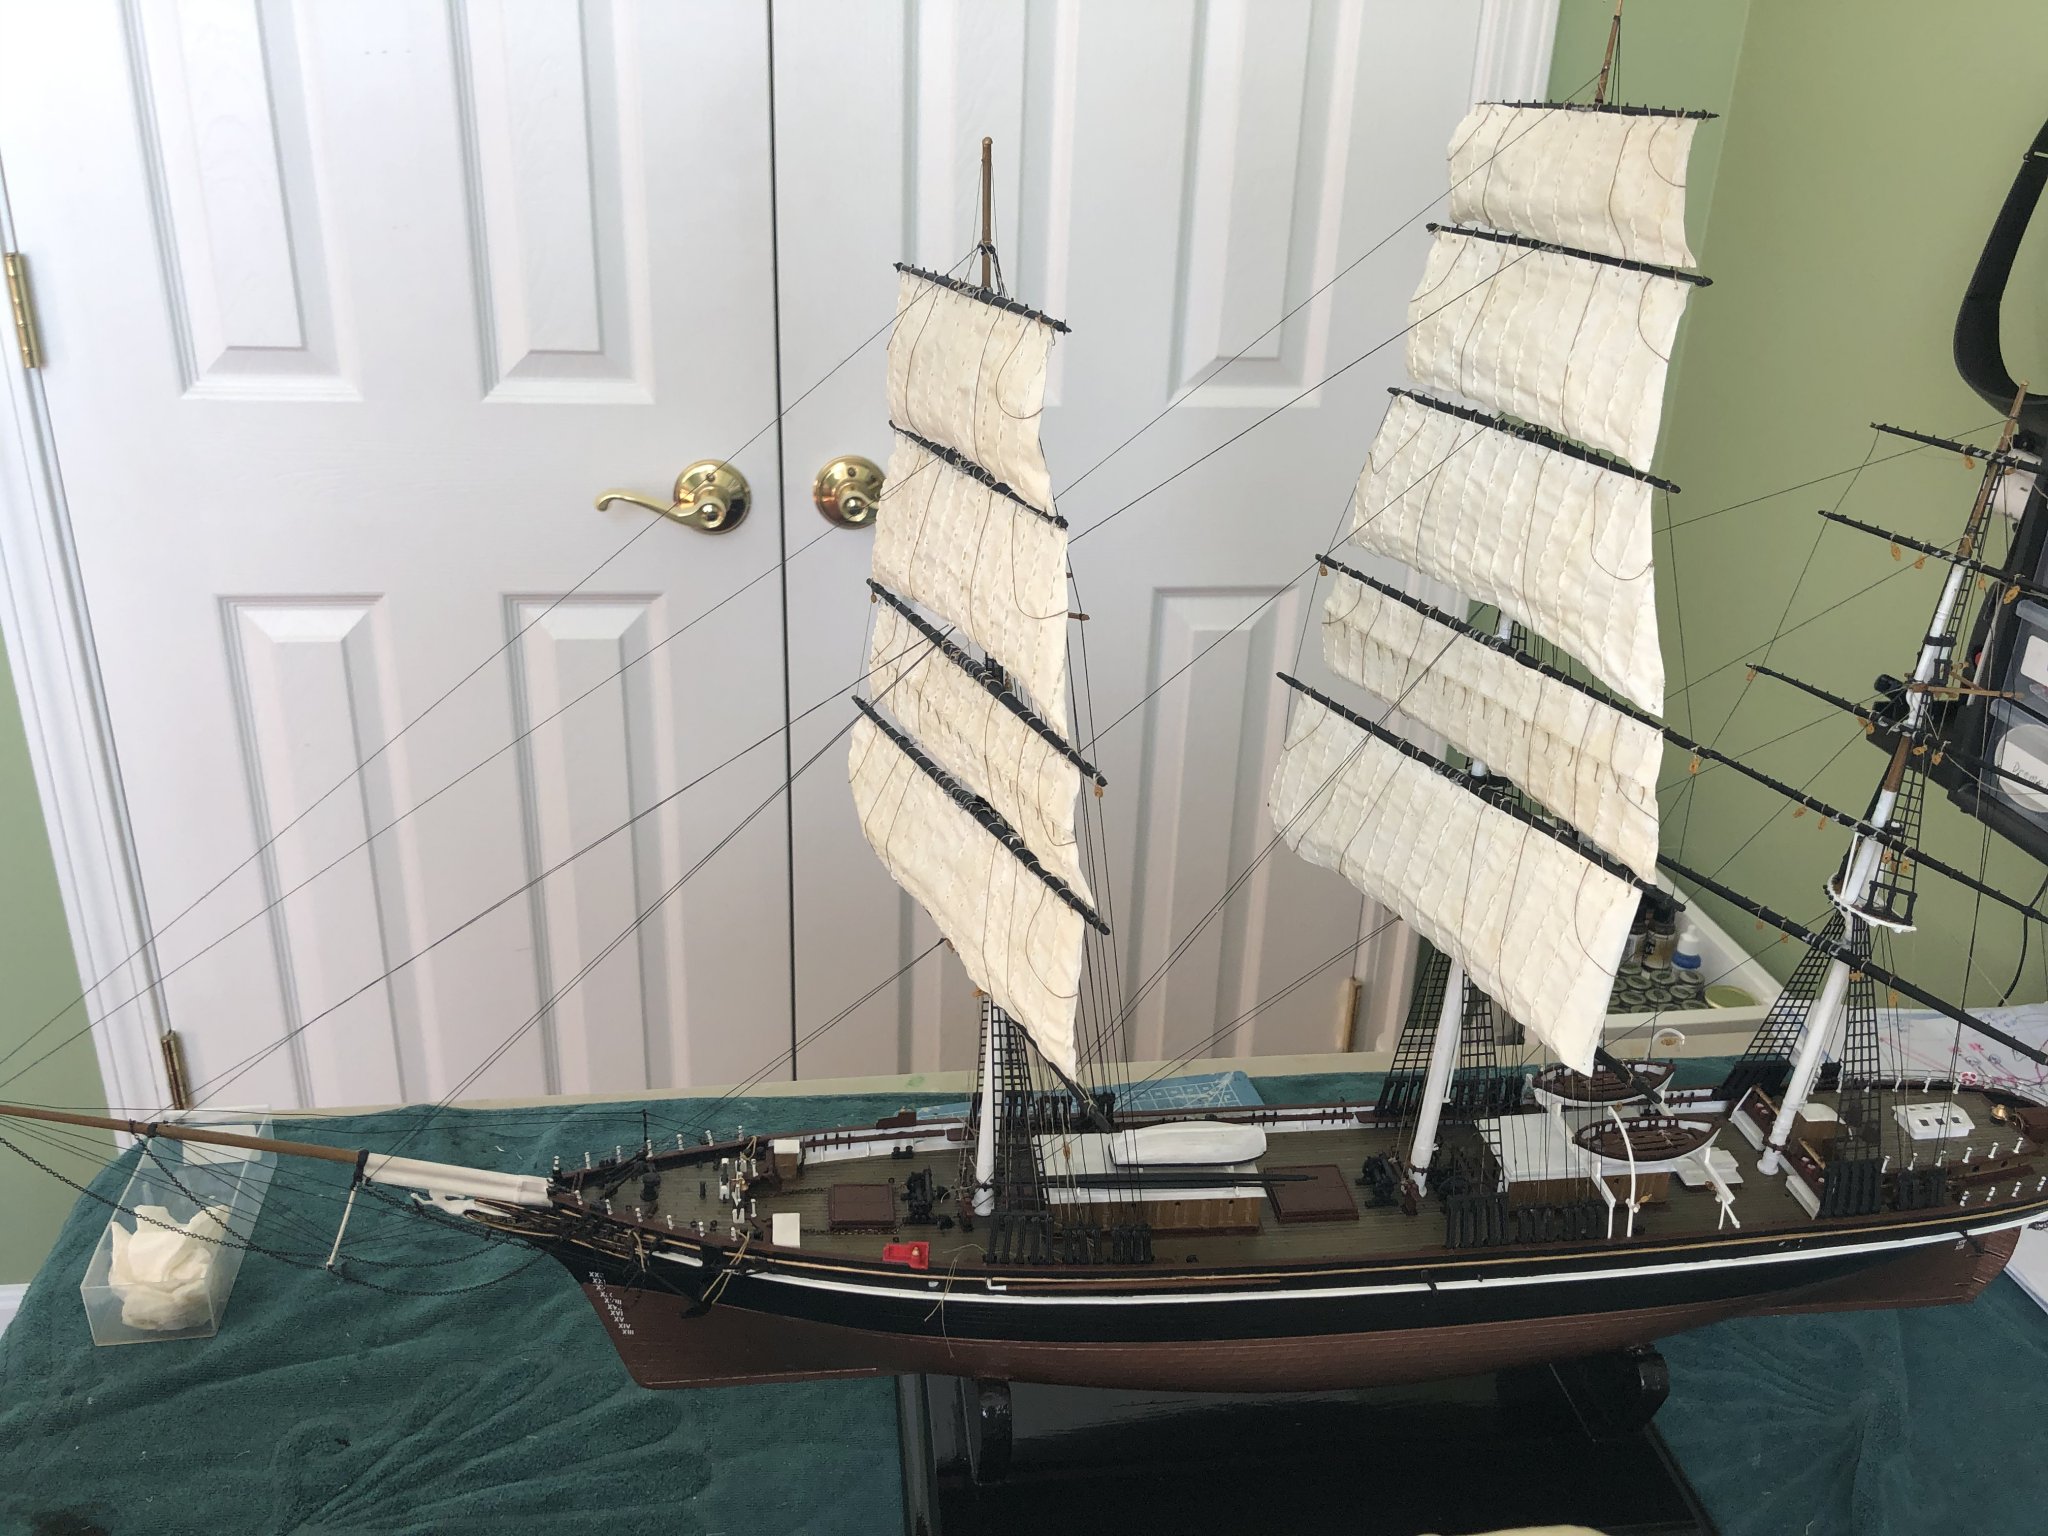
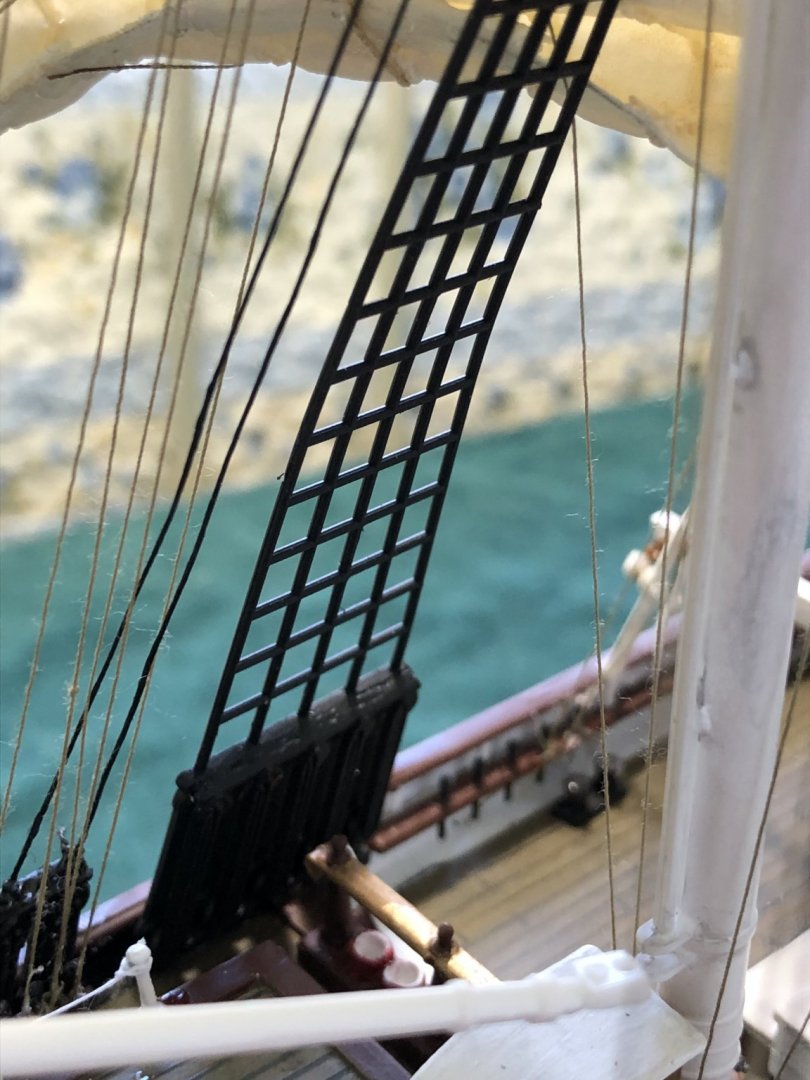
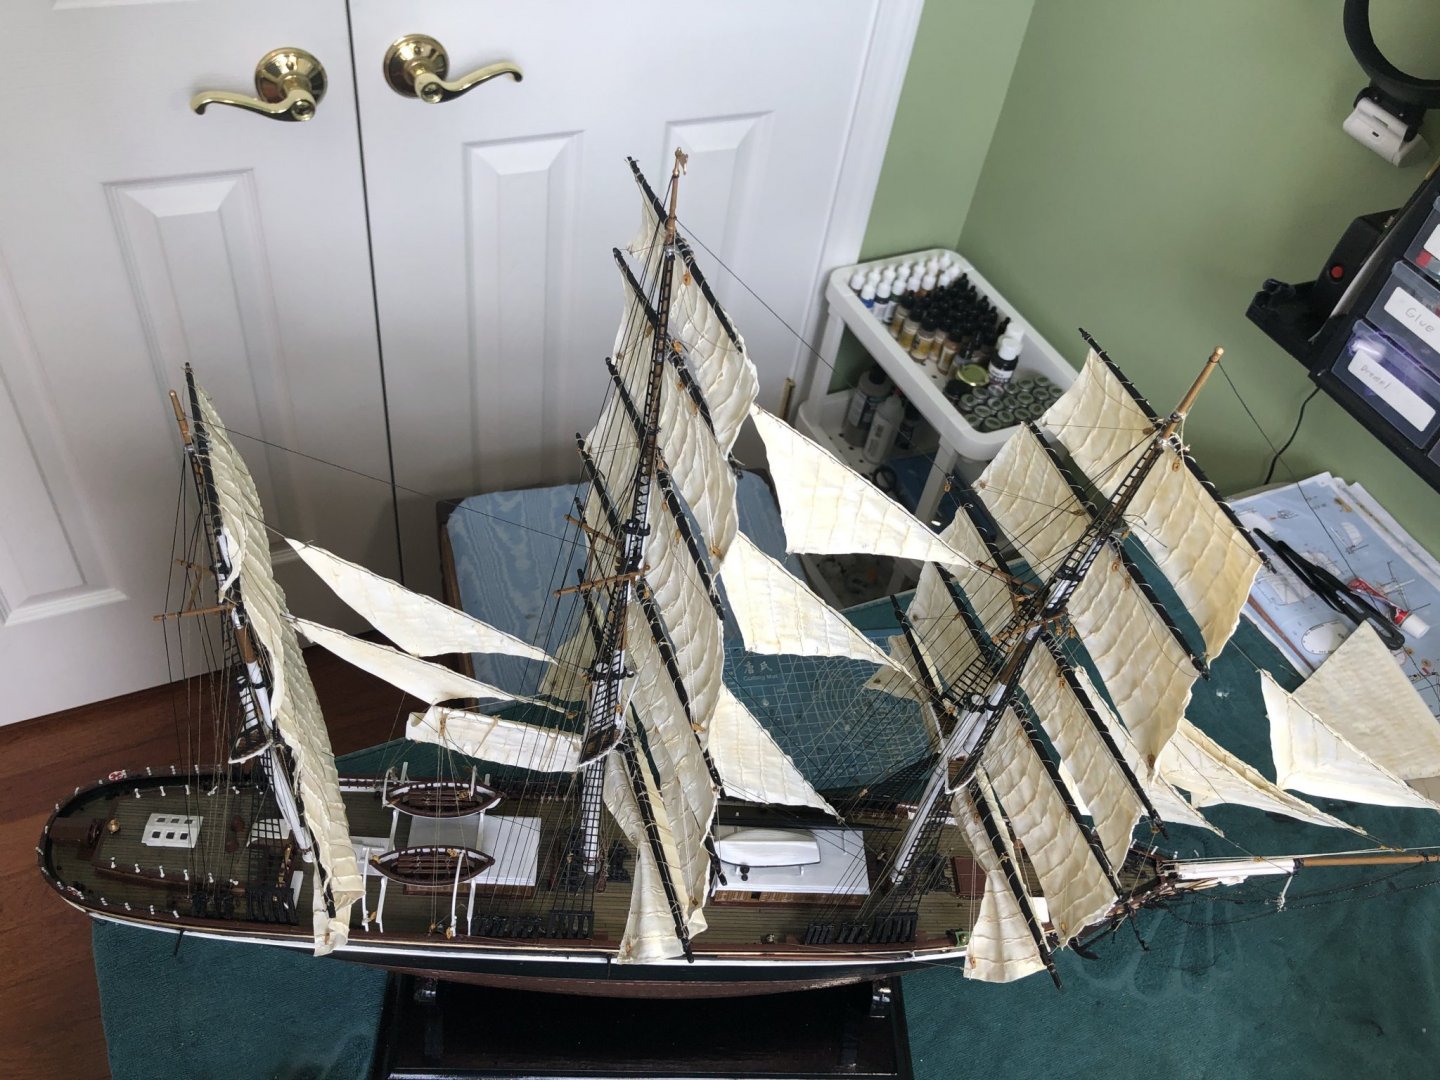
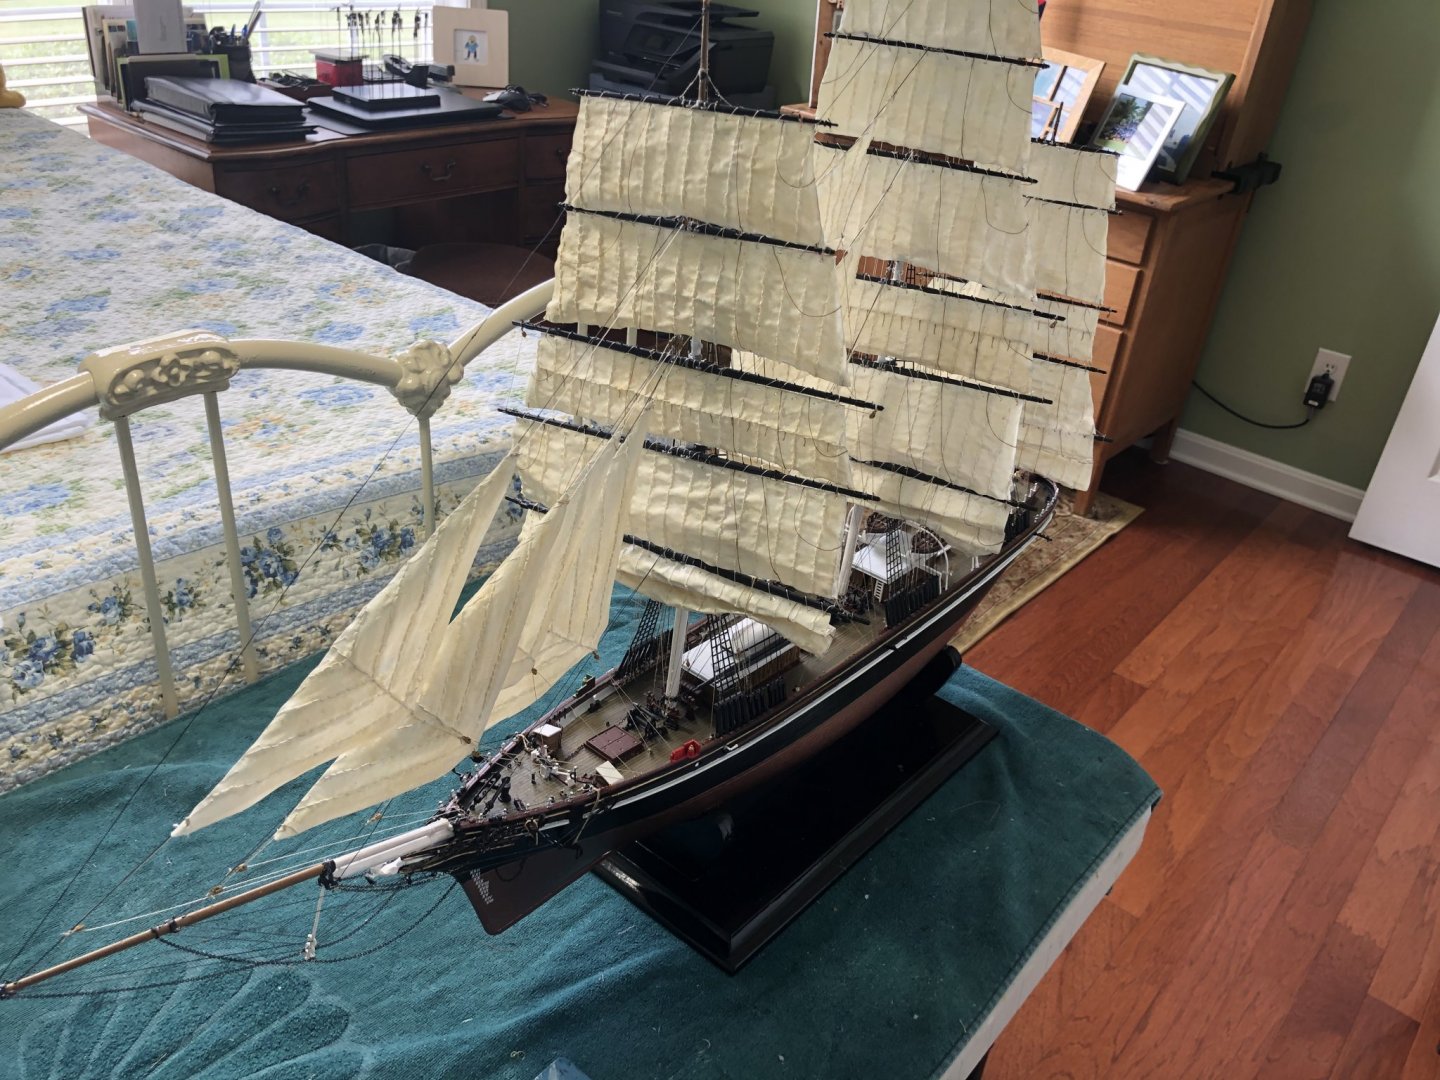
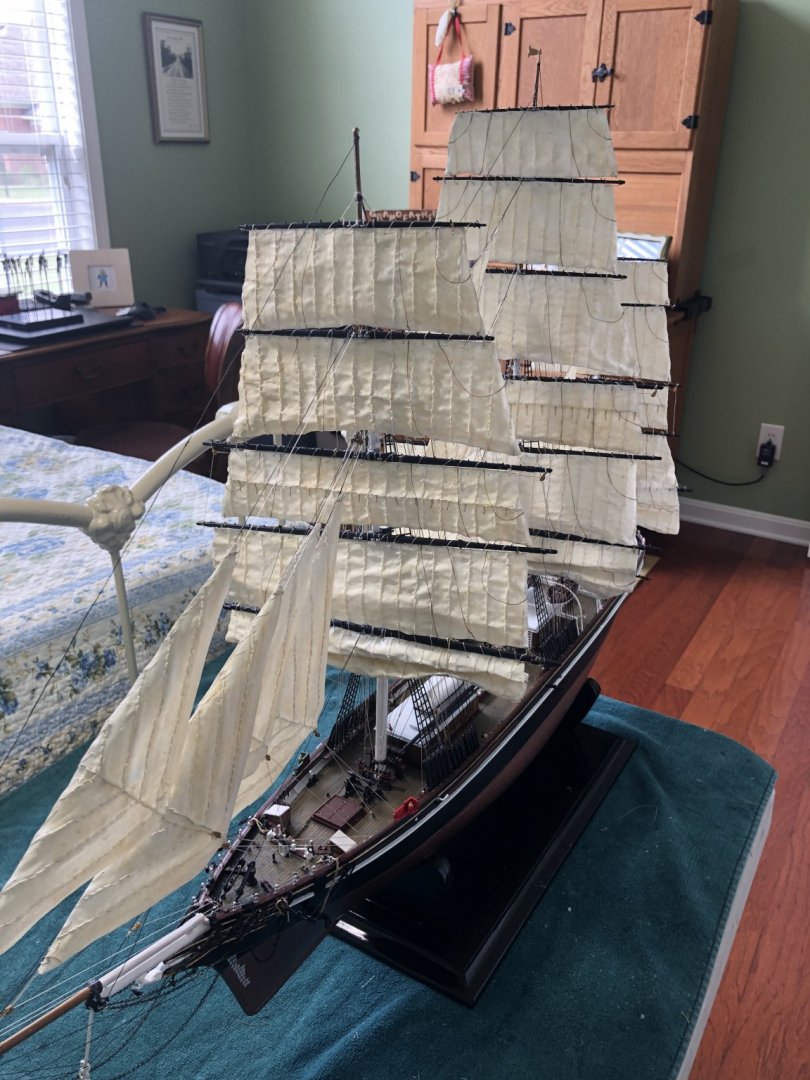
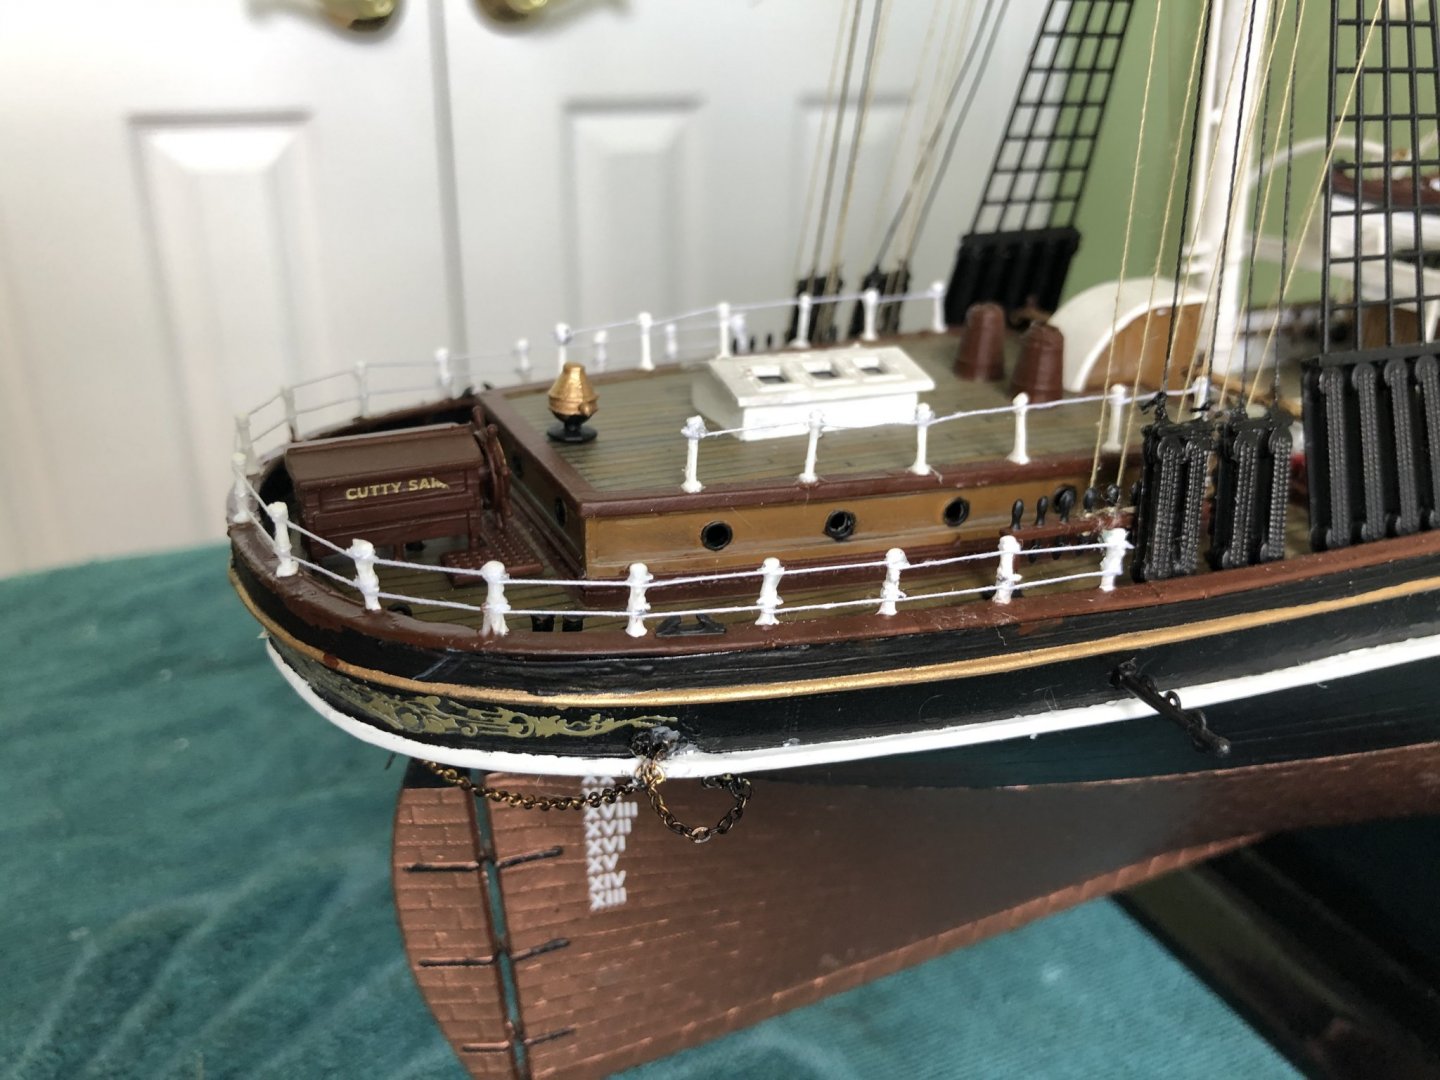
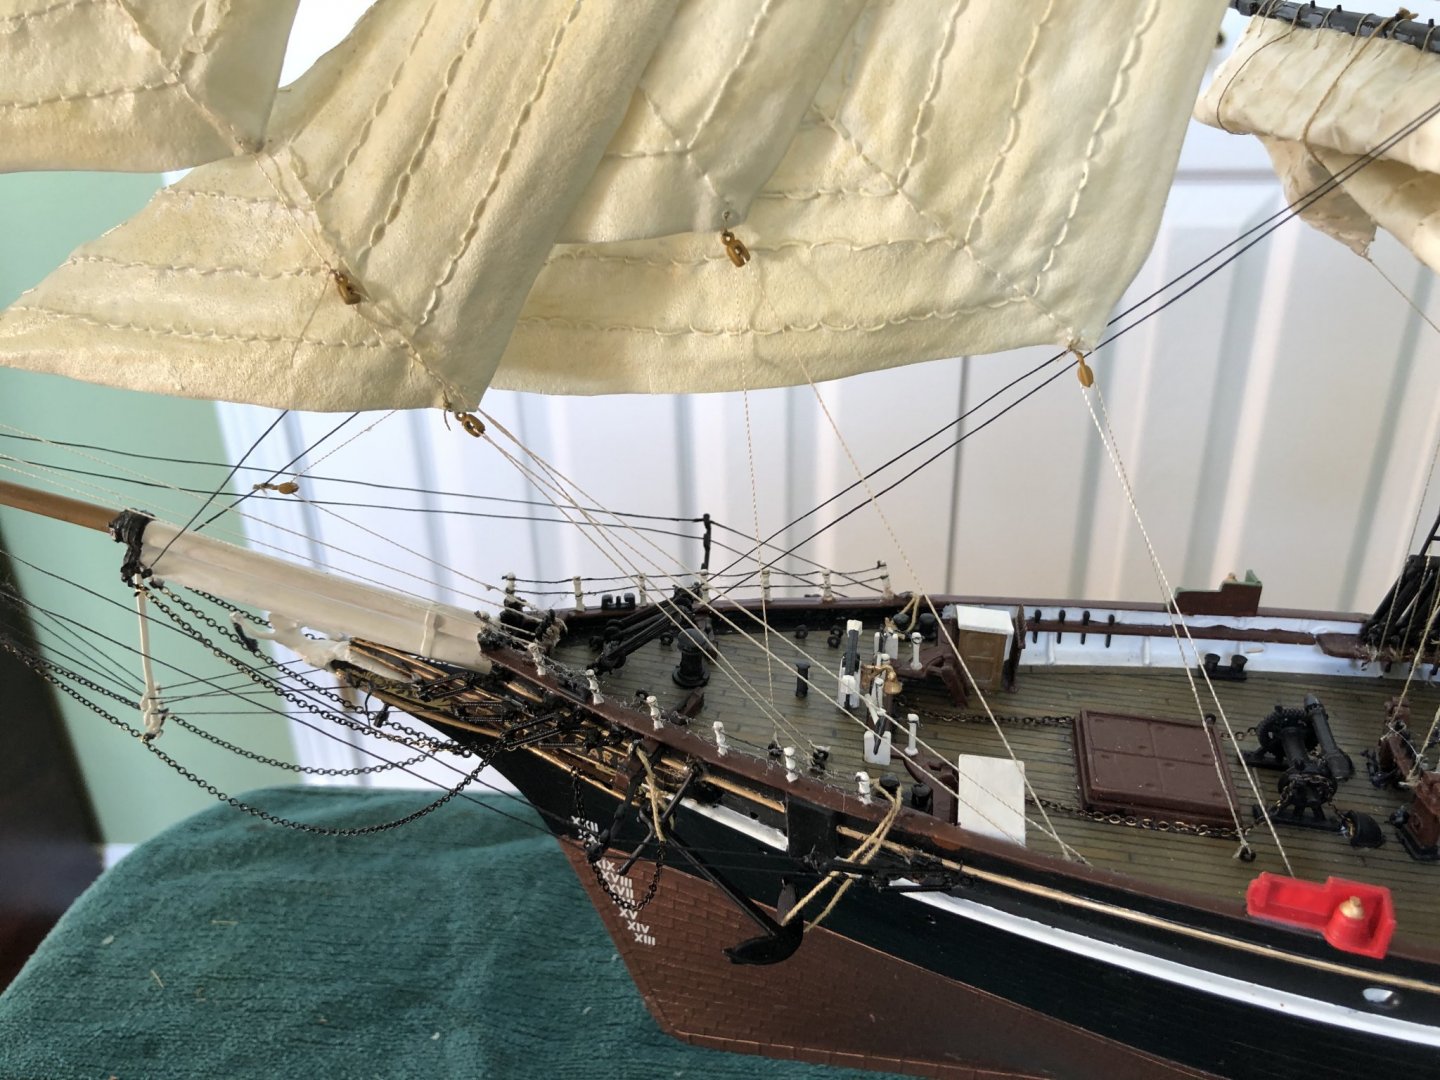
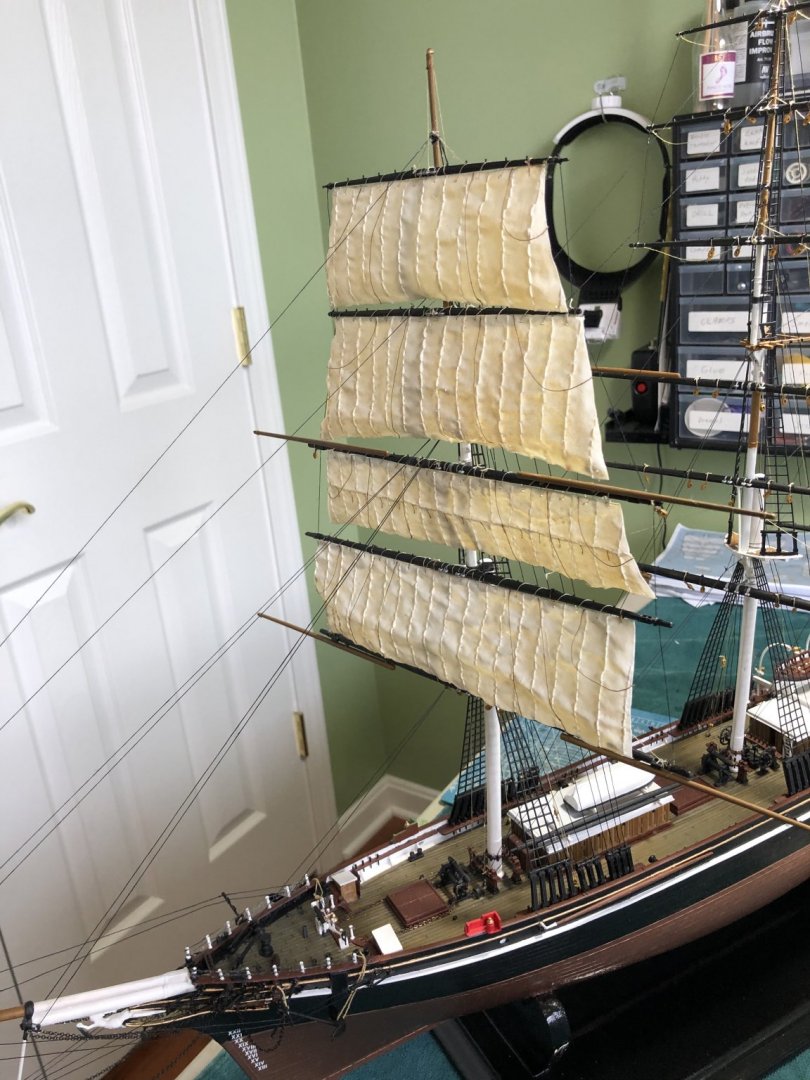
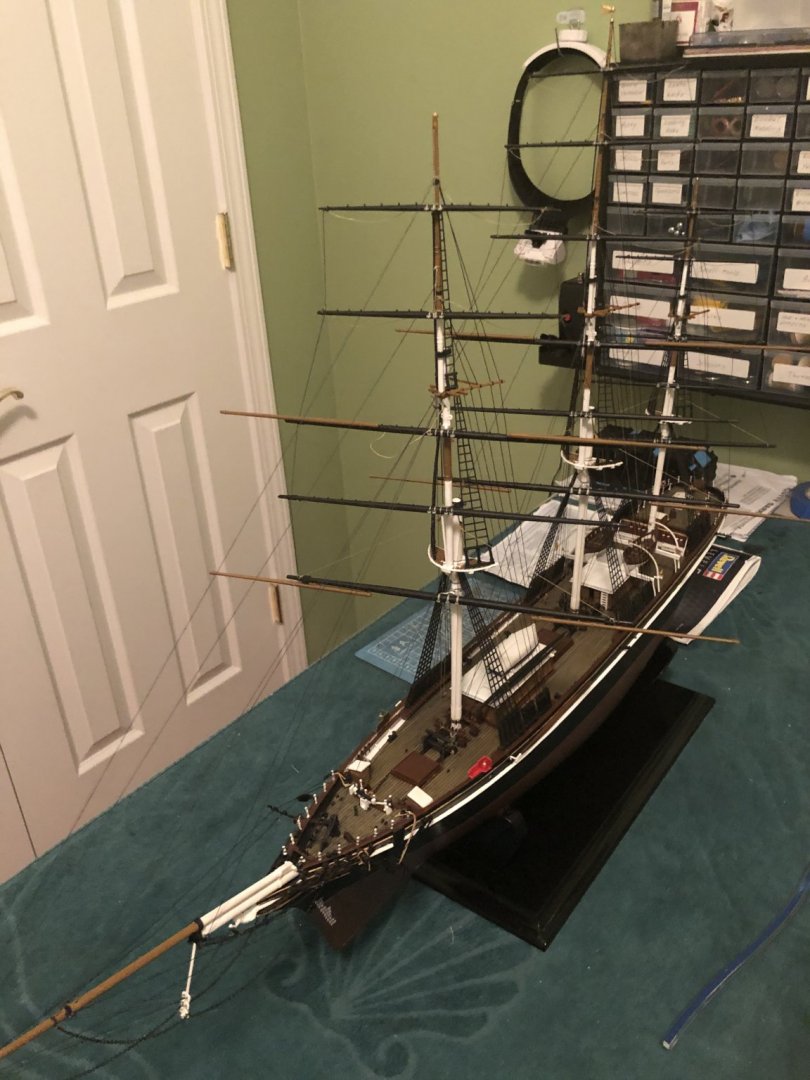
Ok my model building friends. I have one last question as I am bring my Cutty Sark to the finish. As you can see in the photo I attached I partially furled the bottom sail on each of the mast and the spencer sail. I did this, even though it may not be historically accurate, so that detail on the deck will be more visible. I want to finalize all the sails by also partially furling the spanker sail on the back. My question involves the spanker boom. Since the spanker sail is attached to the spanker boom do I just move it further up the mizzenmast and stay in line with the bottom of the sail, or do I not attach the sail to the boom? There is a connection point at the bottom of the mast for the spanker boom so I am not sure the right way to accomplish this.

-
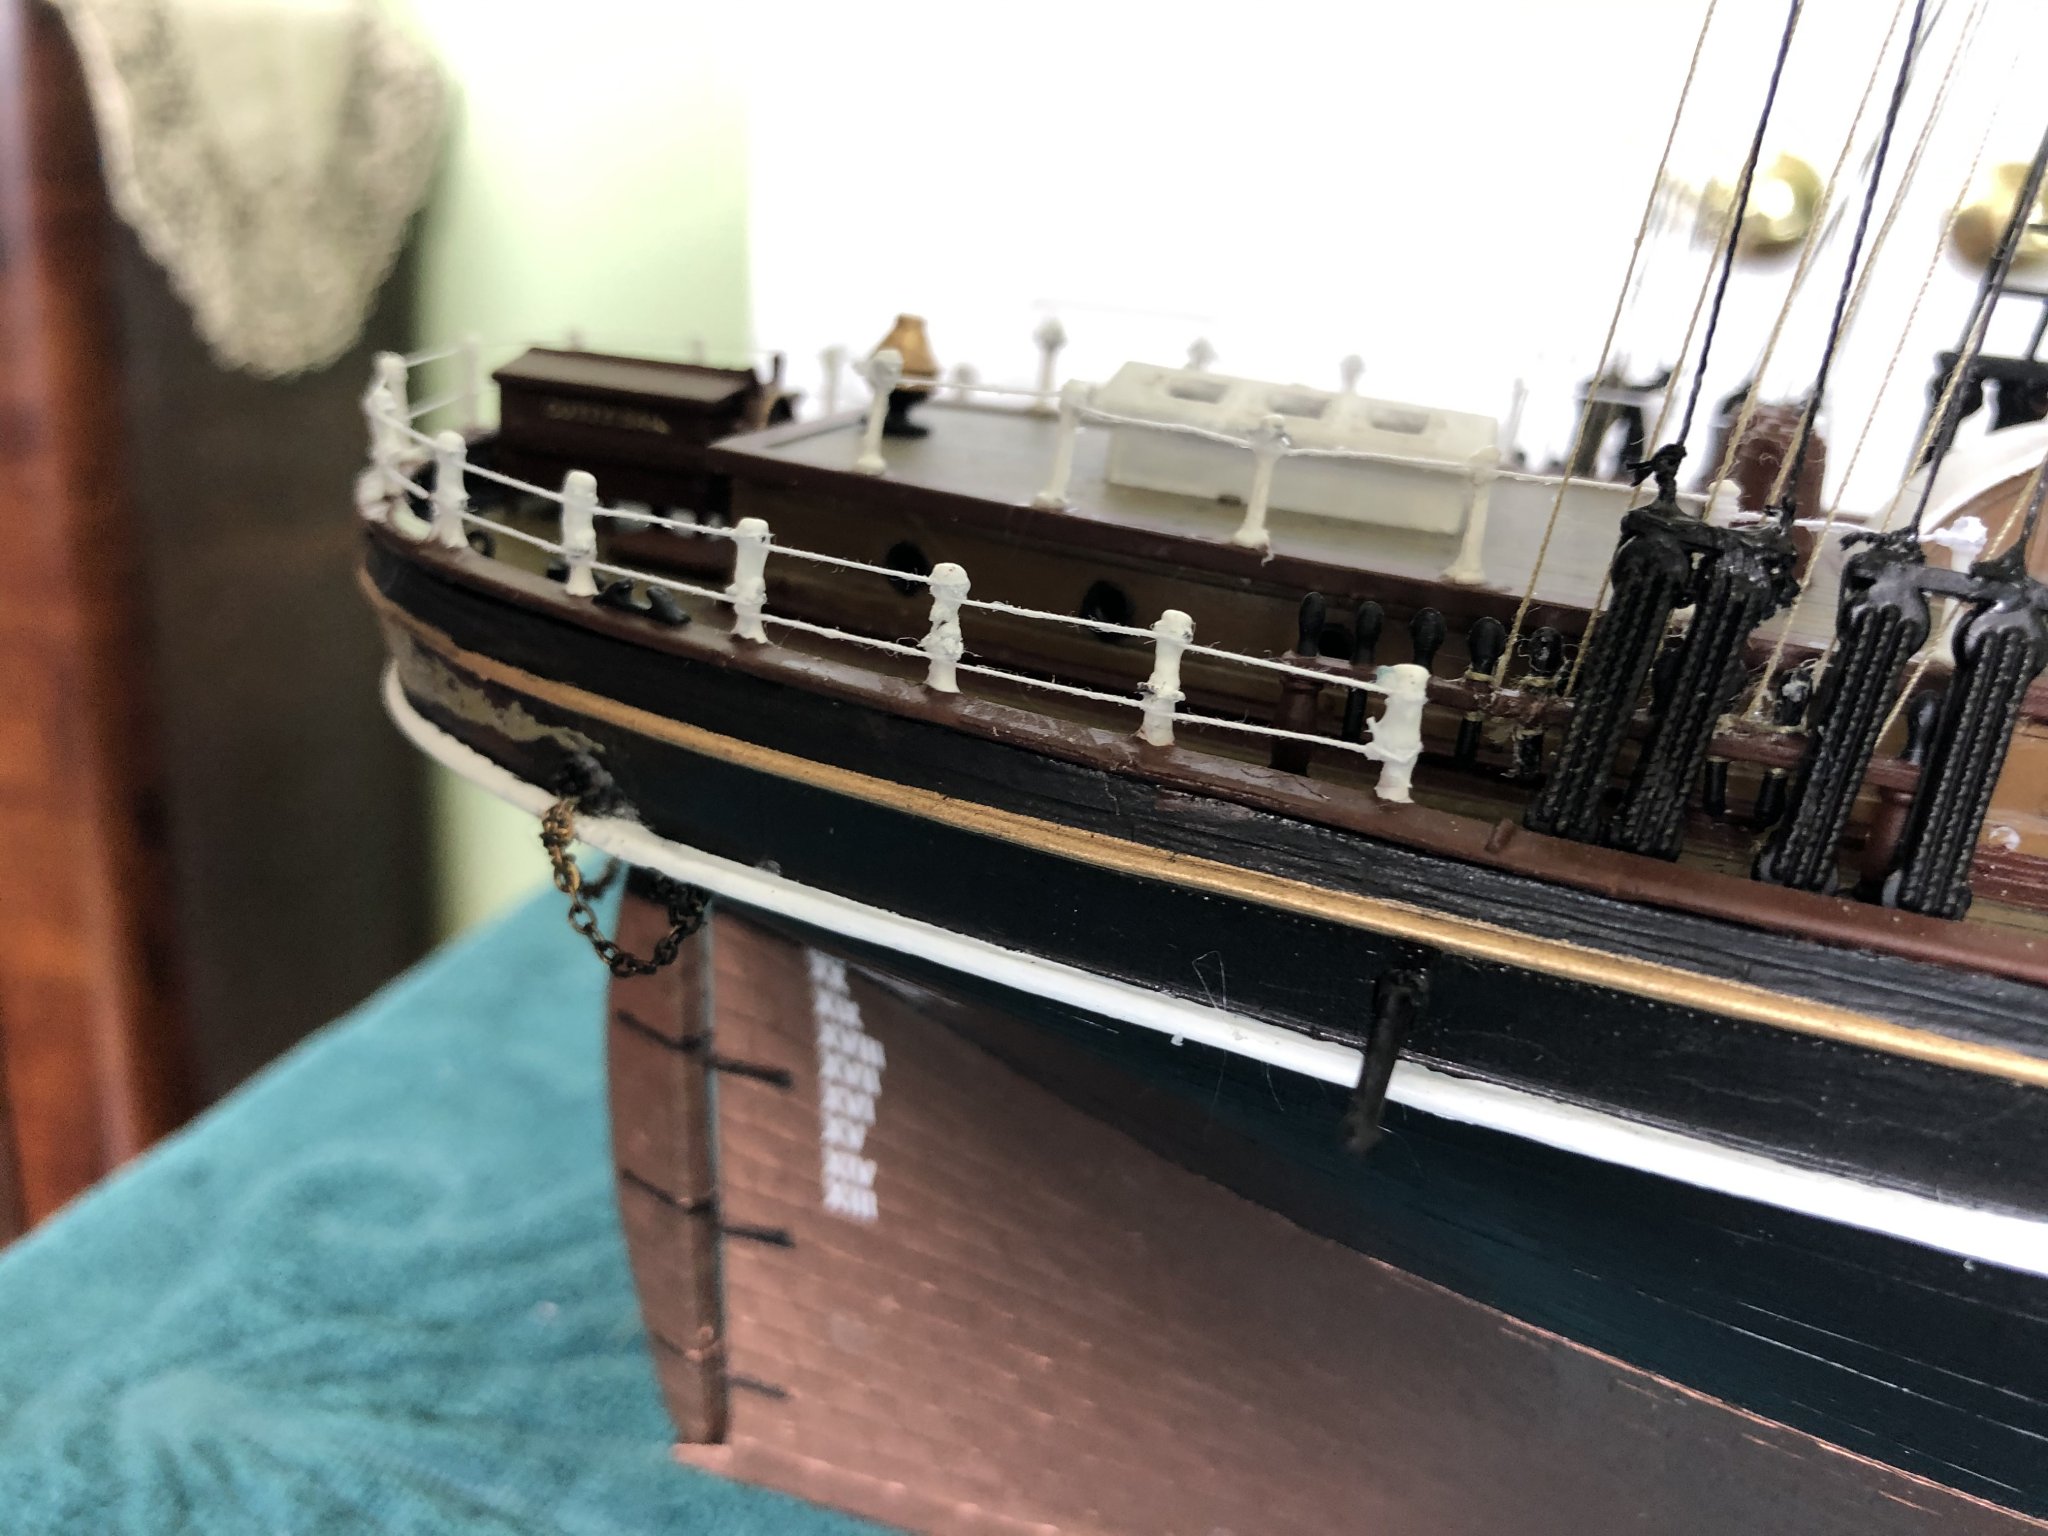
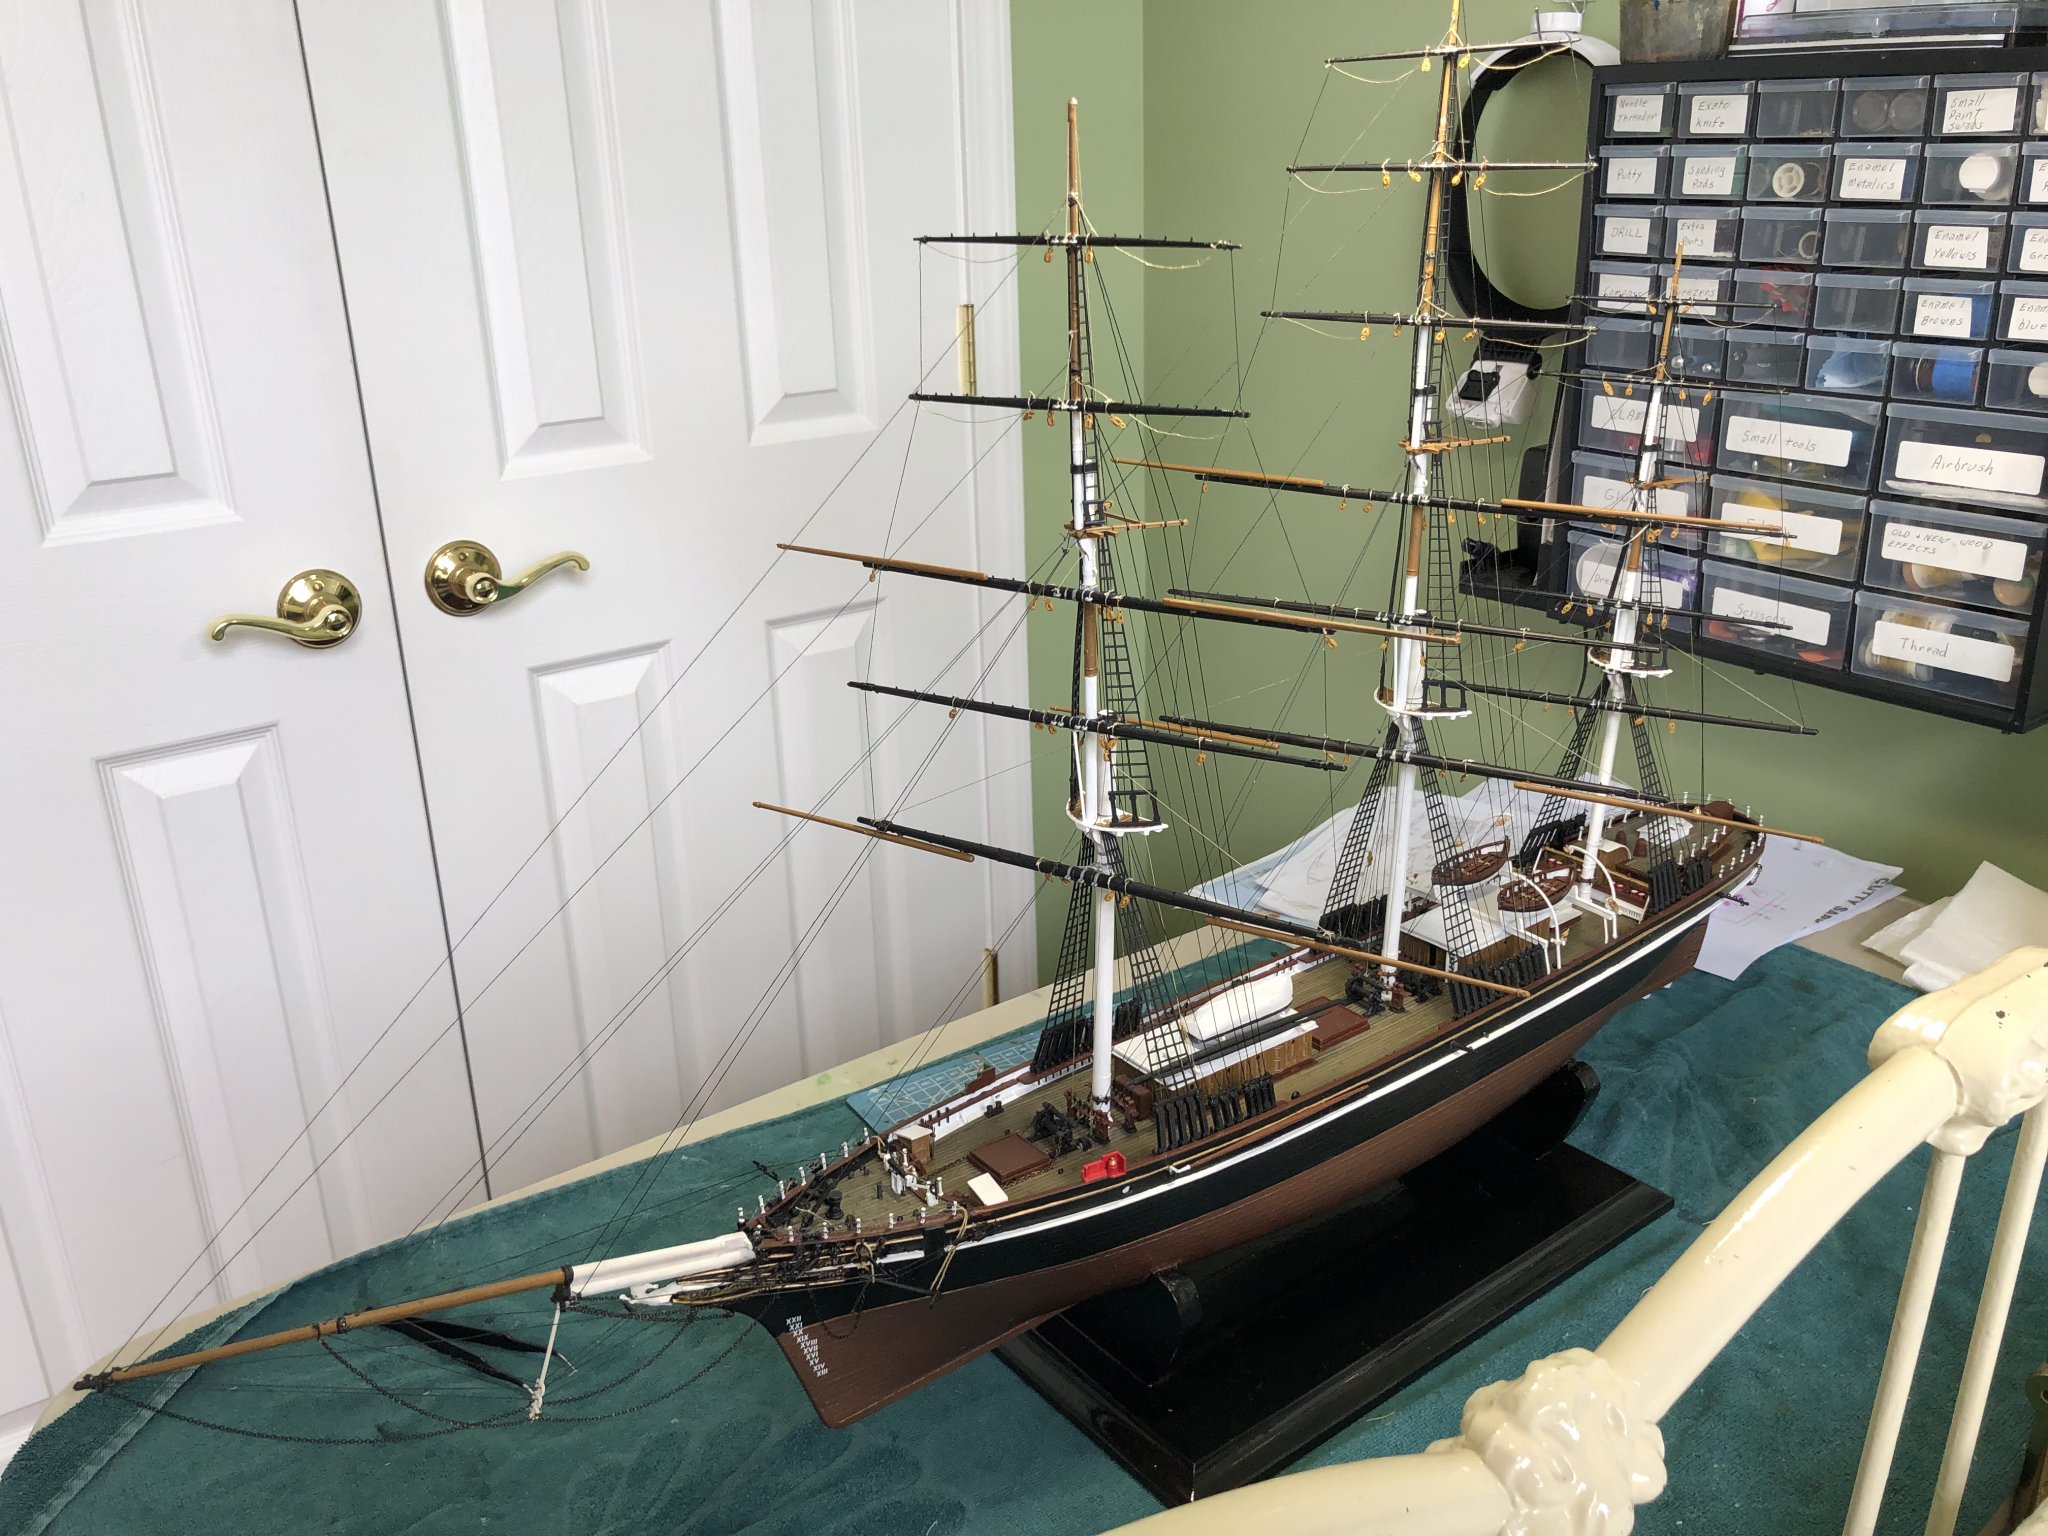
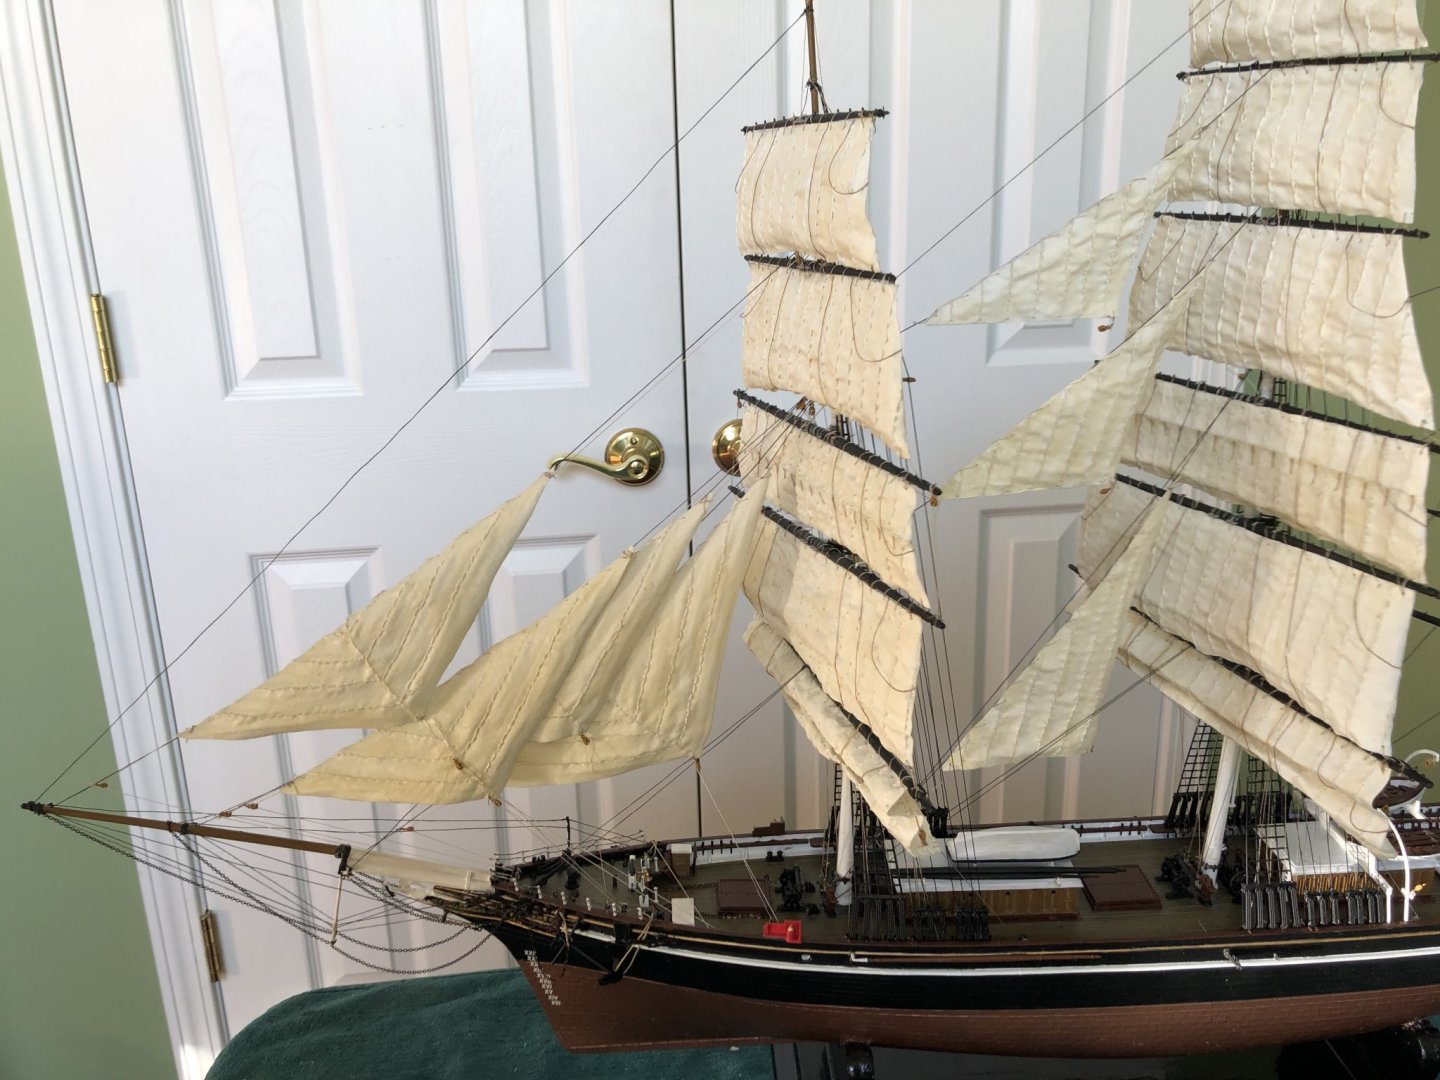
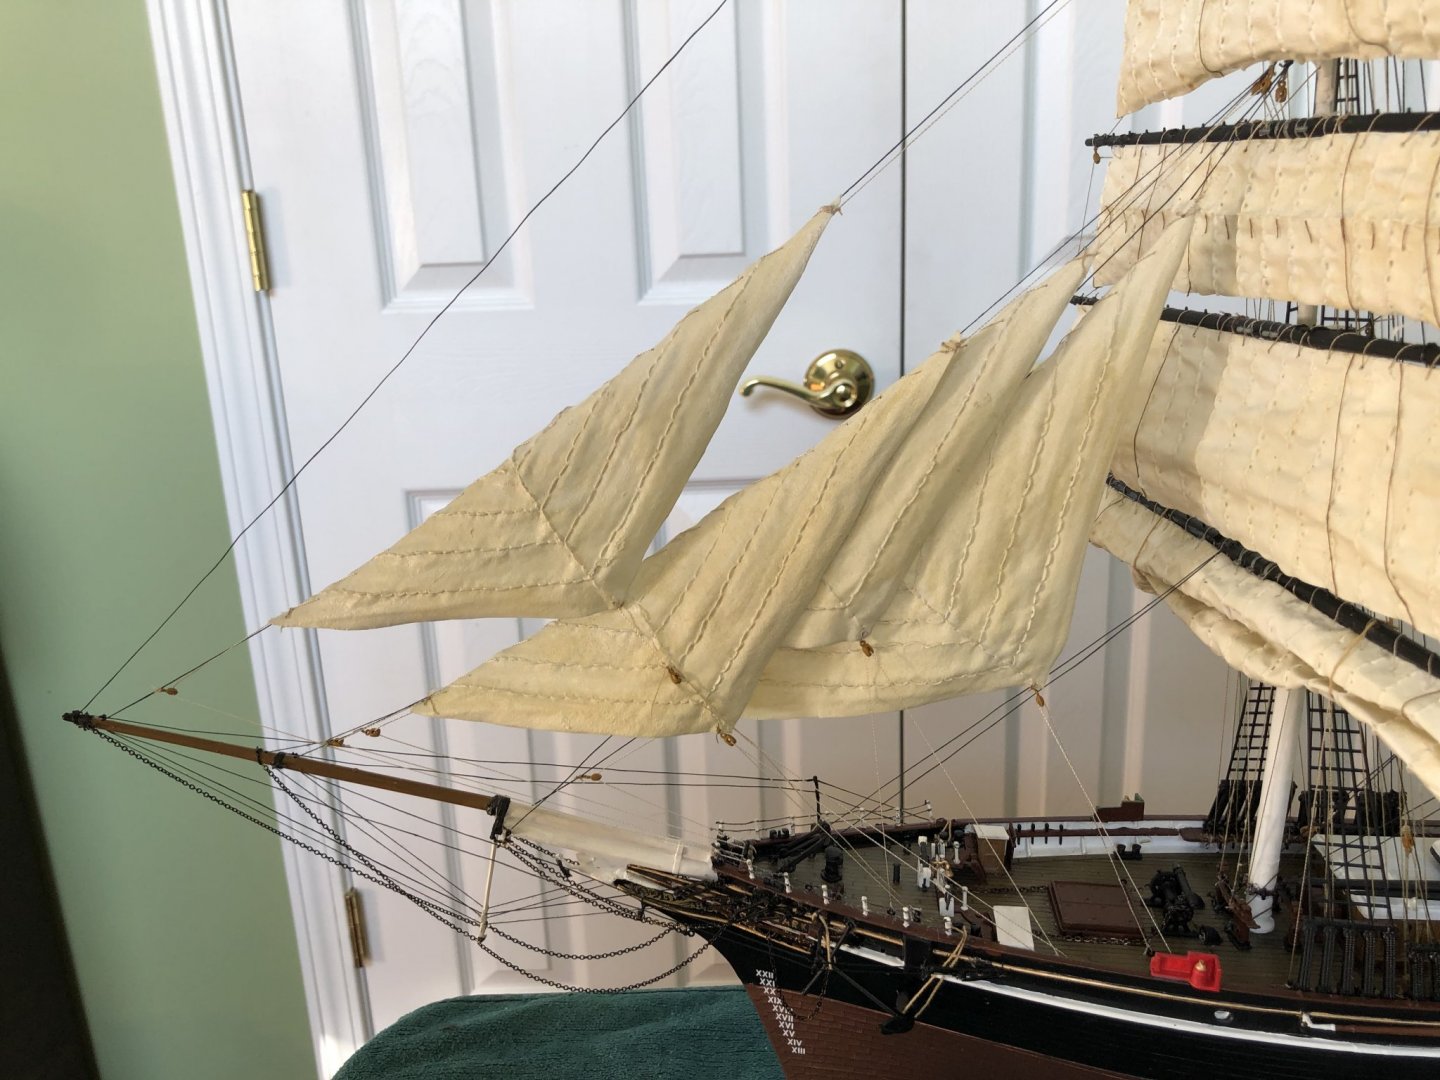
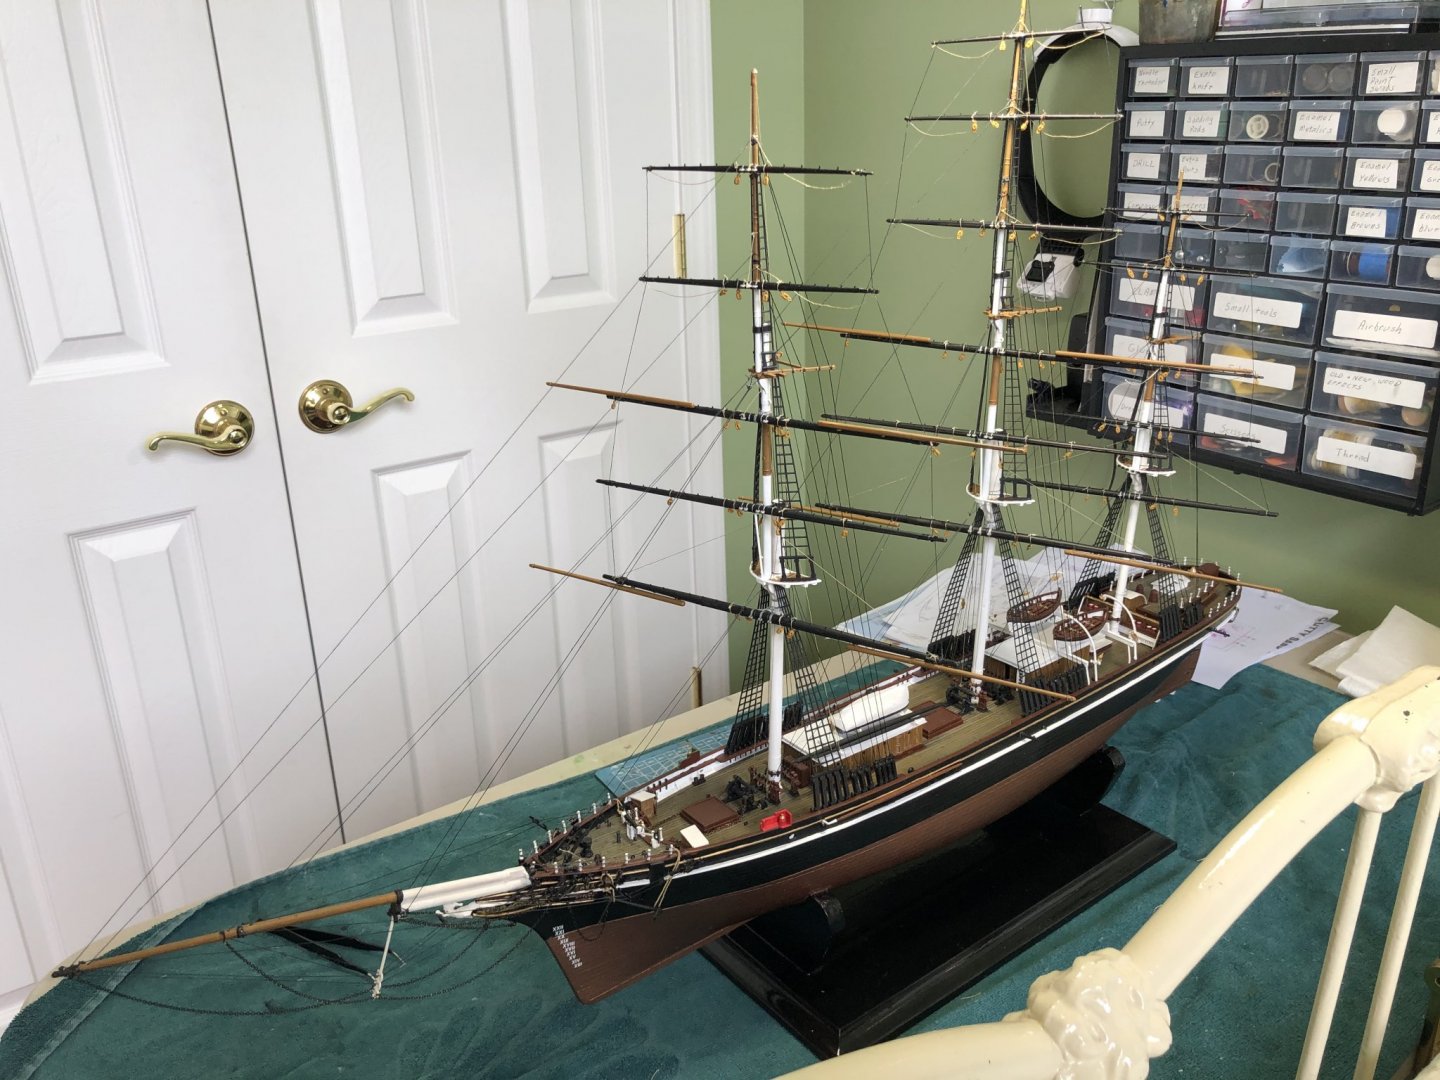
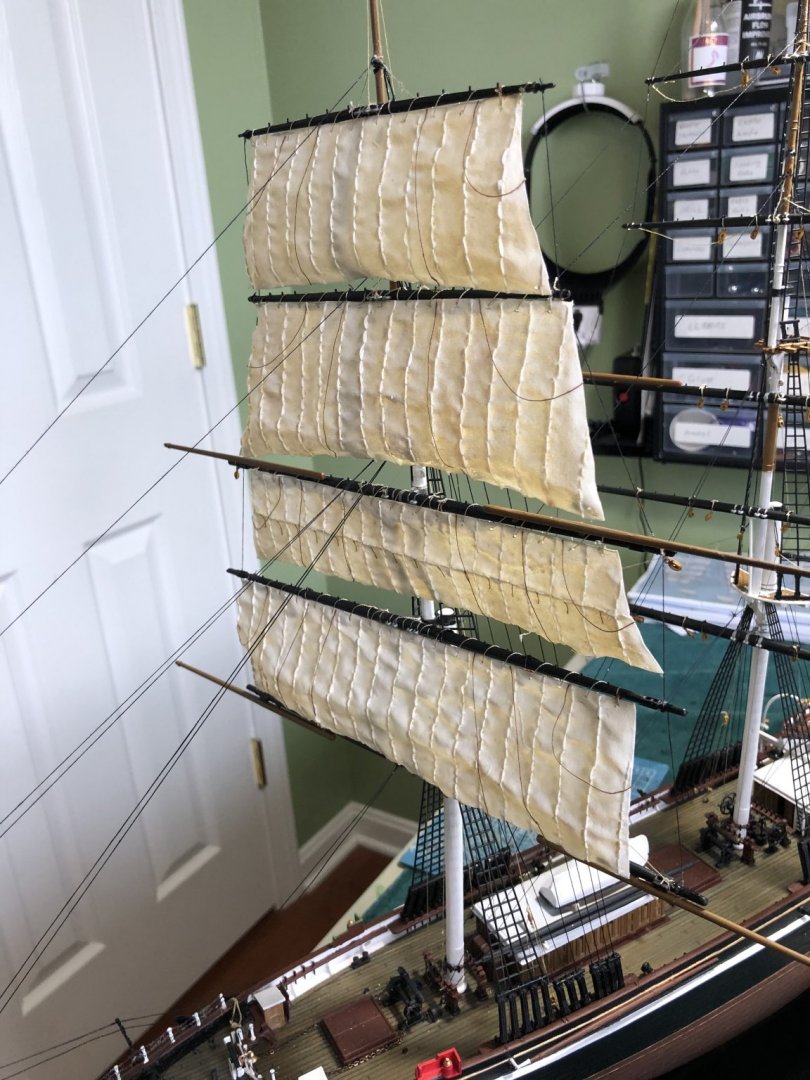
Thanks Dave. Yes that is exactly the way I repaired the jib boom. Did not think just gluing it would have held. Drilled both pieces and used a match stick. Finished rigging the 3 masts with all sails. Furled the bottom sails. After seeing other builder’s take on the Cutty Sark, I really like the white railing on the back and front instead of black. I removed the black thread, repainted the posts, and replaced the thread with white. Like it much better.


-
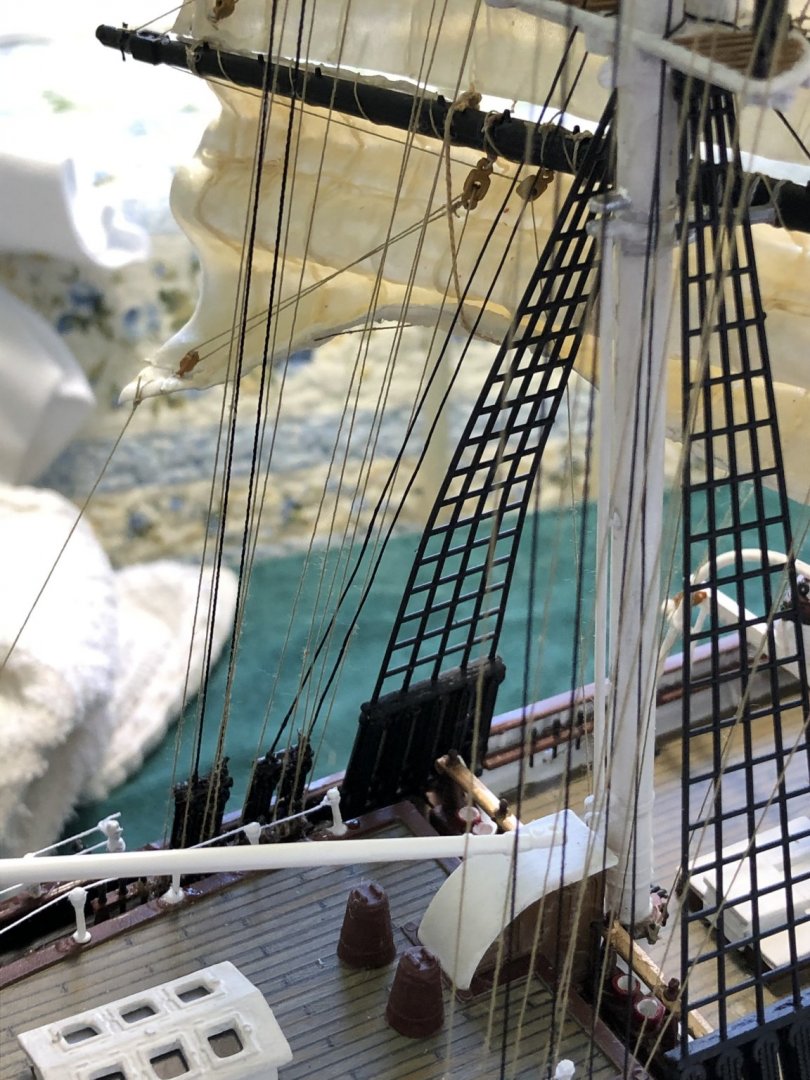
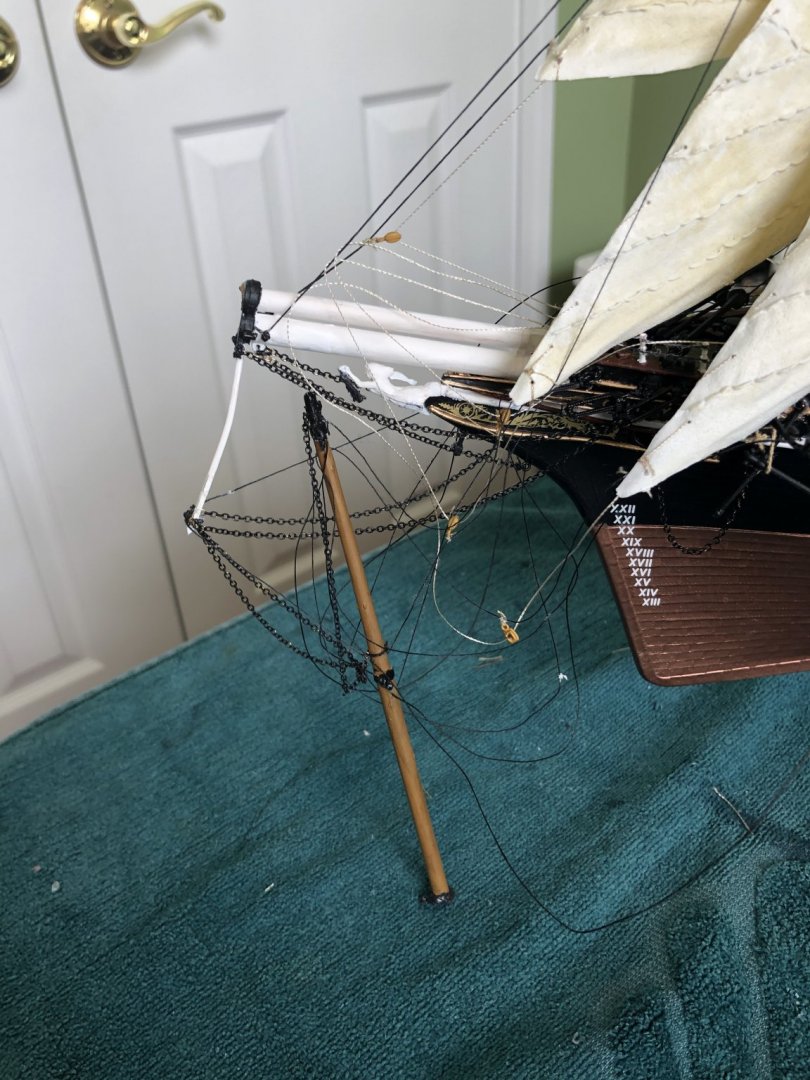
After a mild disaster where I accidentally hit and broke off the job boom 😫(which I was eventually able to untangle the chains and ropes in order to repair) I have rigged the jib sails and some of the staysails. Moving right along with my progress.
-
Robert here is mine ready to go once I finish my Cutty Sark. I will for sure refer to your build for tips as I go along. I have already been comparing your color palette and the one in the instructions for ideas. Now that she is finished what is next on your horizon?
- 165 replies
-
- 2
-

-
- english galleon
- revell
- (and 2 more)
-
Great John. Just general working clothes for people who work outdoors. Probably just basic colors like black, brown, etc. Nothing colorful like military uniforms.
-
Thanks John. Will research ordinary working clothes of the day and the blue serge uniform jacket. Bill
-
Here is an interesting question maybe someone knows the answer too. I have tried Google and other sources but can’t find a good answer. What uniform did the crewman on the Cutty Sark wear? I enjoy painting the little crewman characters that come with the kits. Give me a fine tip brush and lighted magnification lens and I am good to go for a few hours. When I recently built the USS Constitution I was able to research military uniforms (Navy and Marine) for the area and easily found color pictures I could refer to. I know the Cutty Sark was a civilian ship with a crew of around 25-30 civilian crewman. Need color references if anyone has an idea.
-
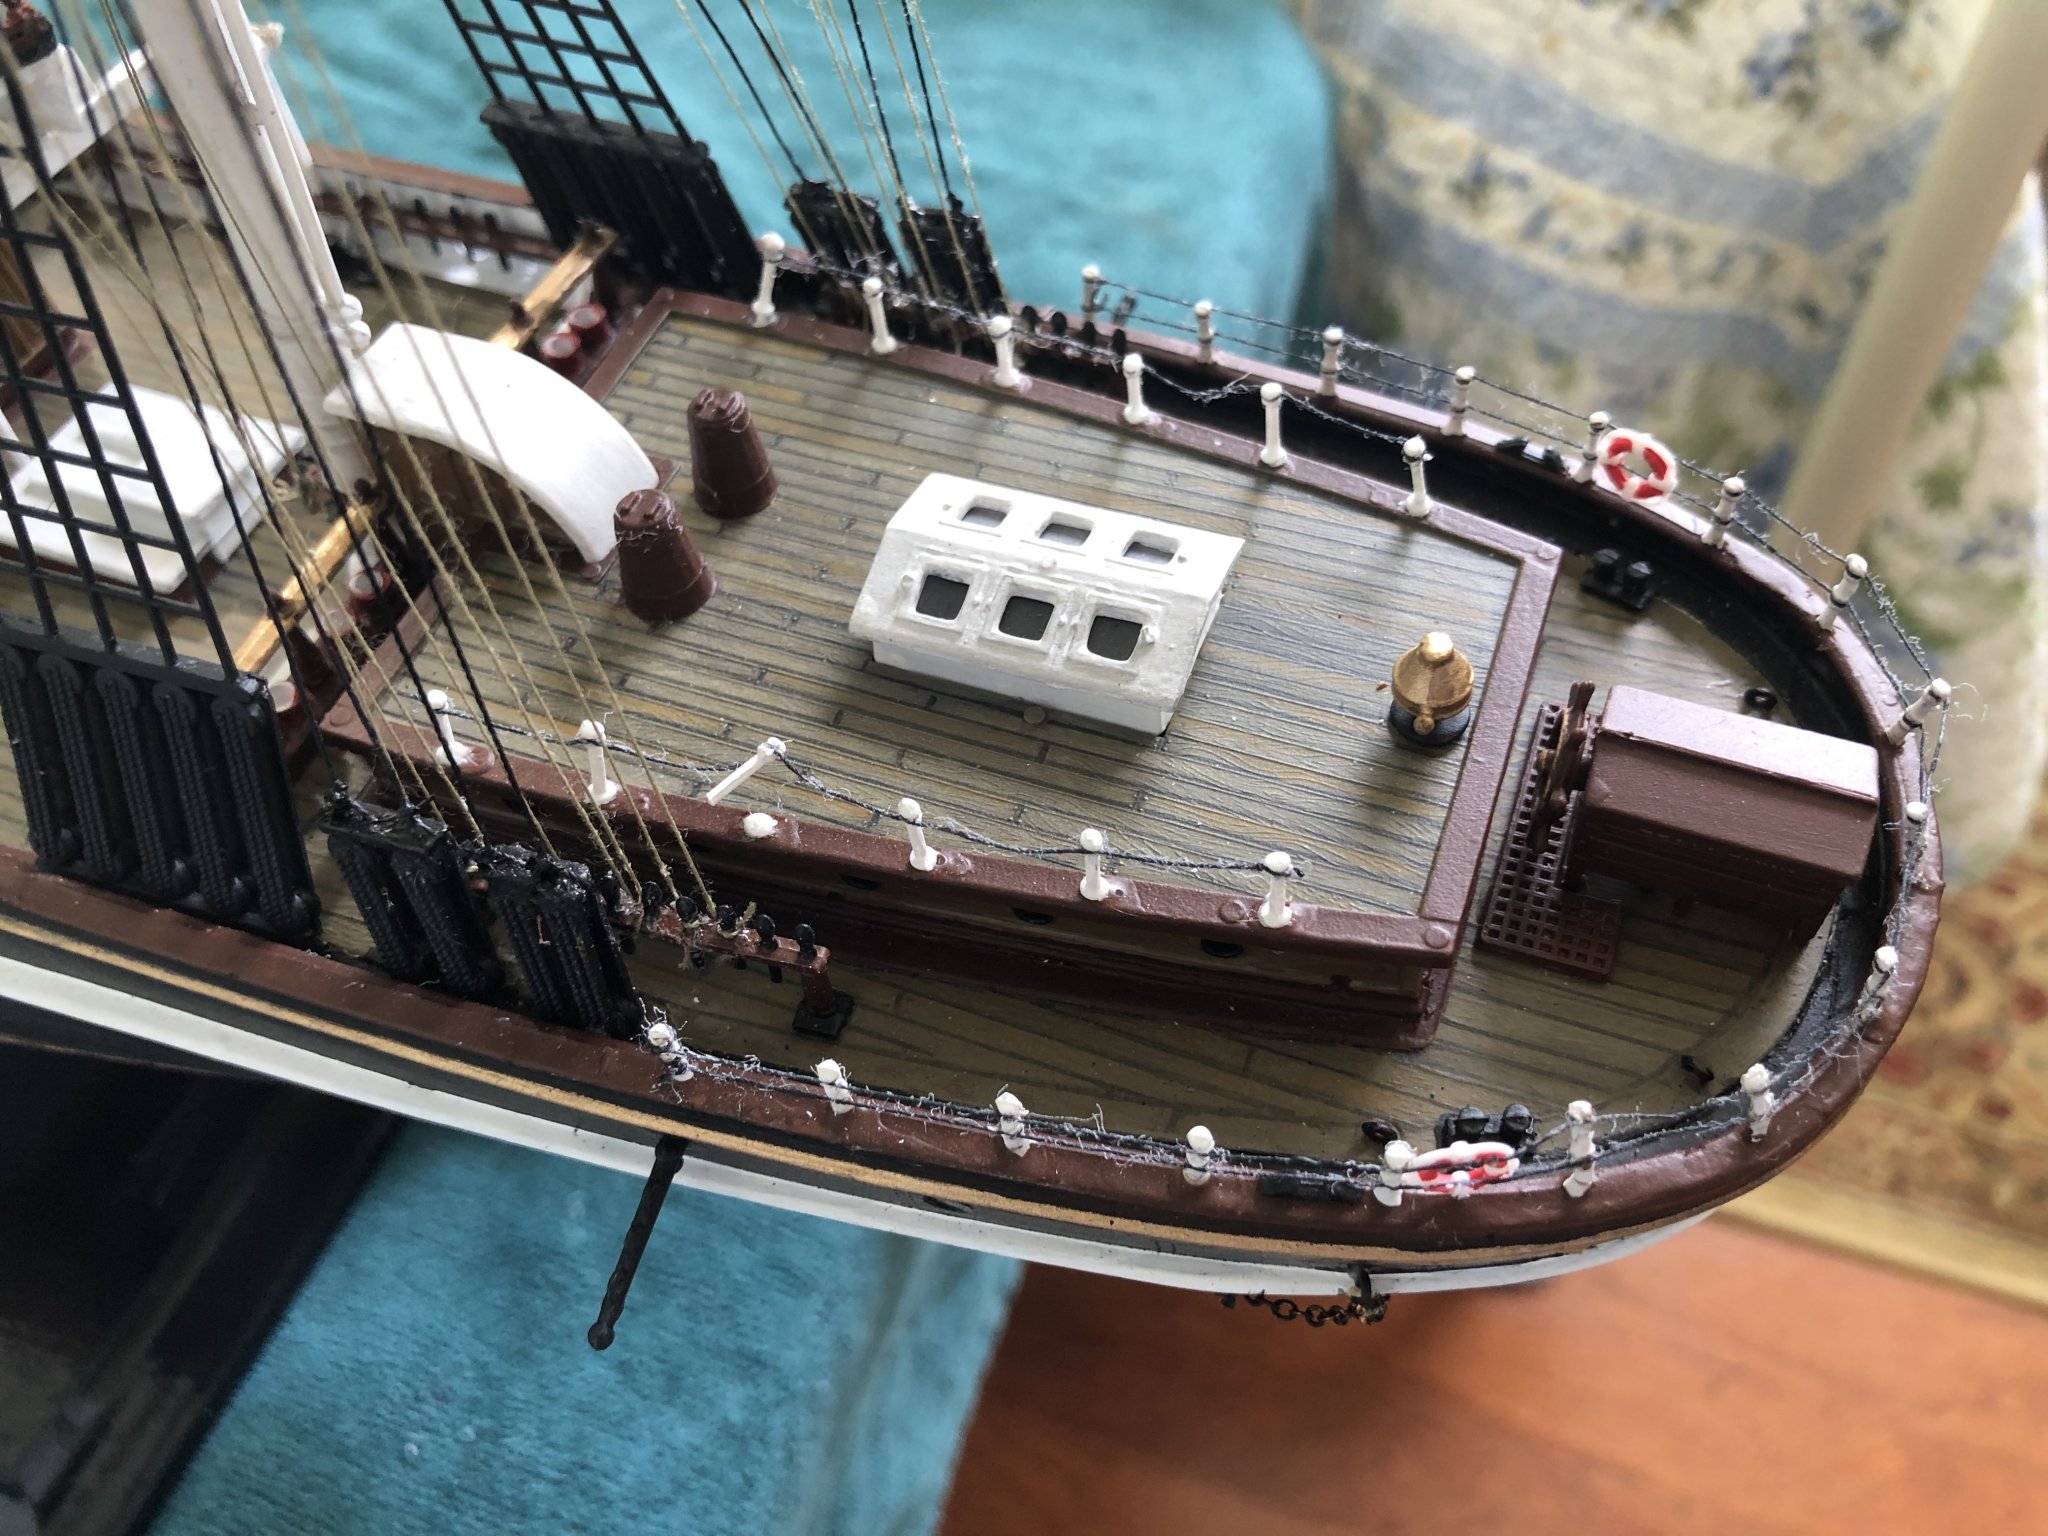
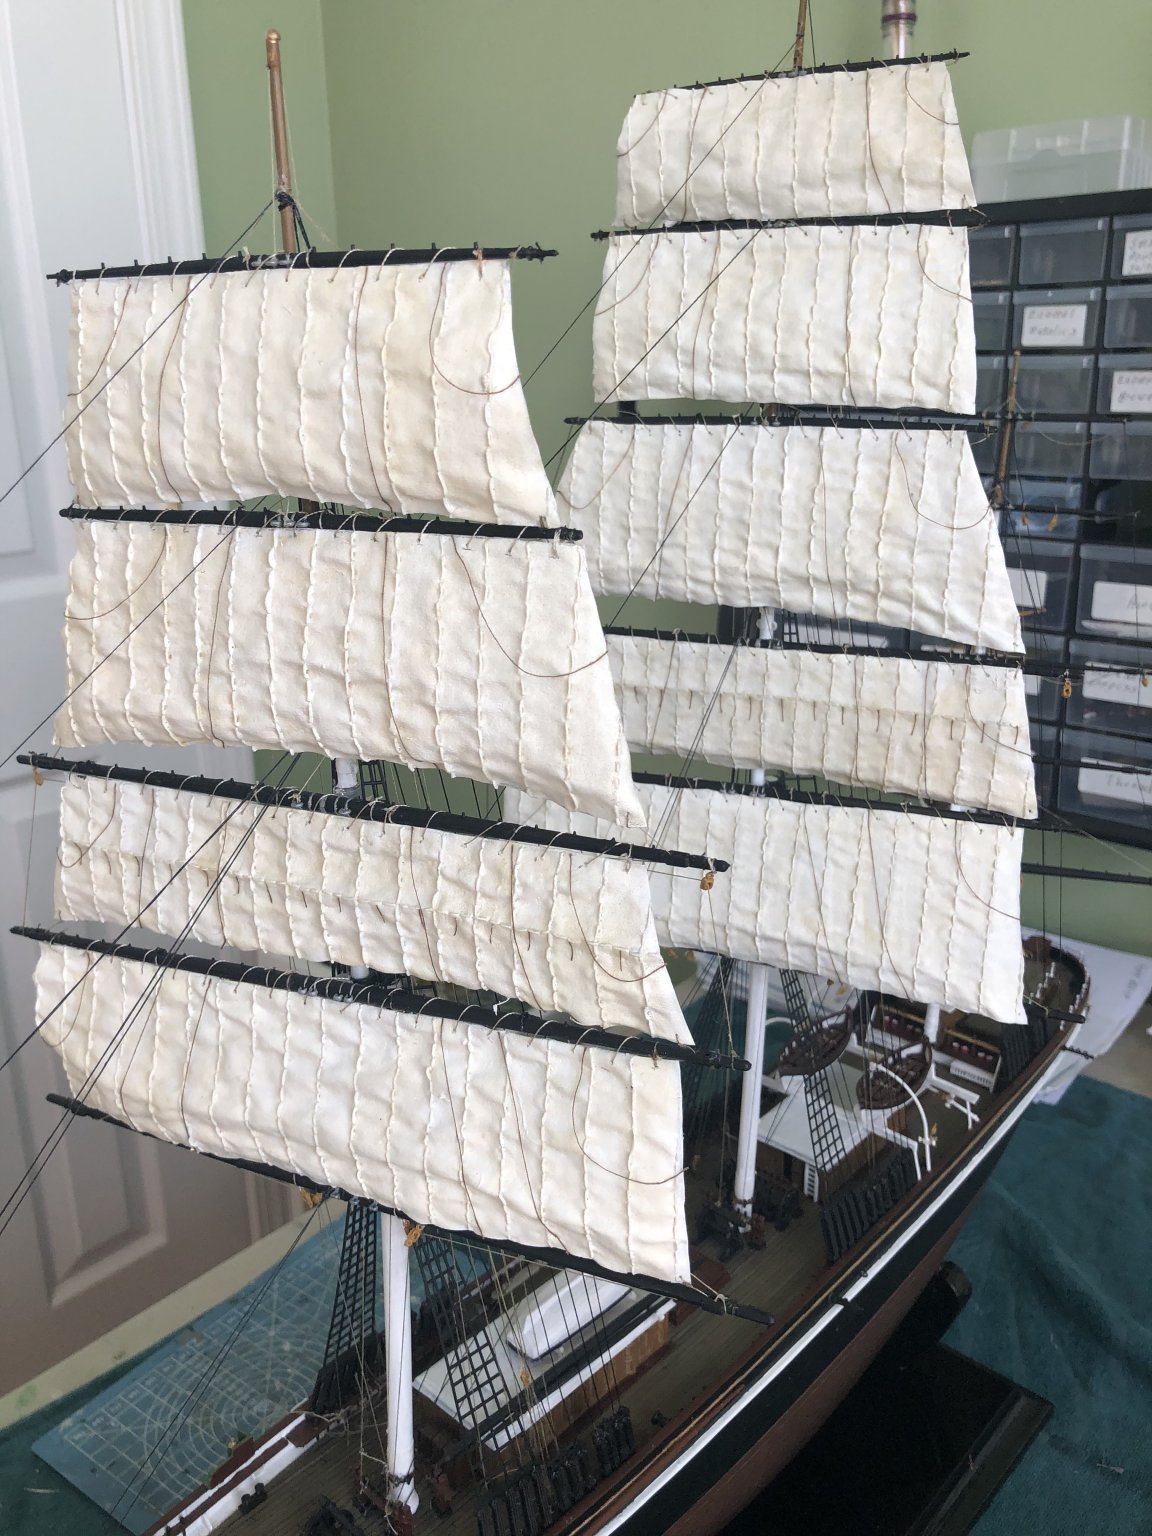
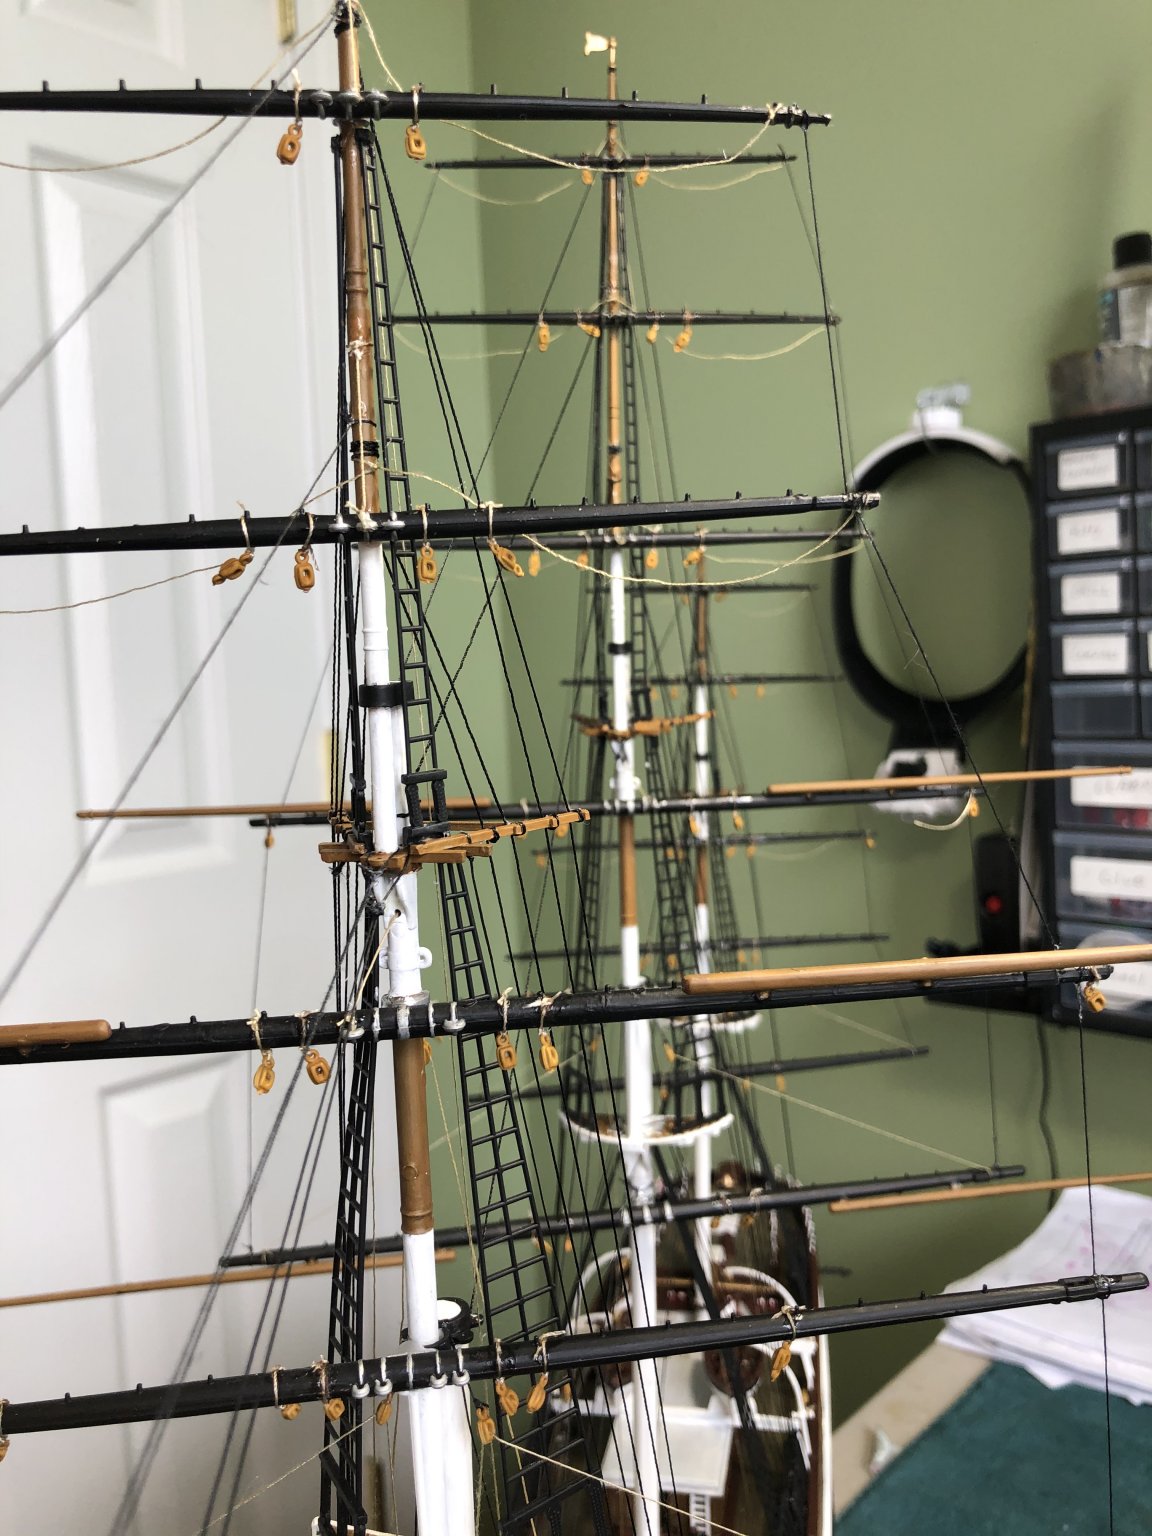
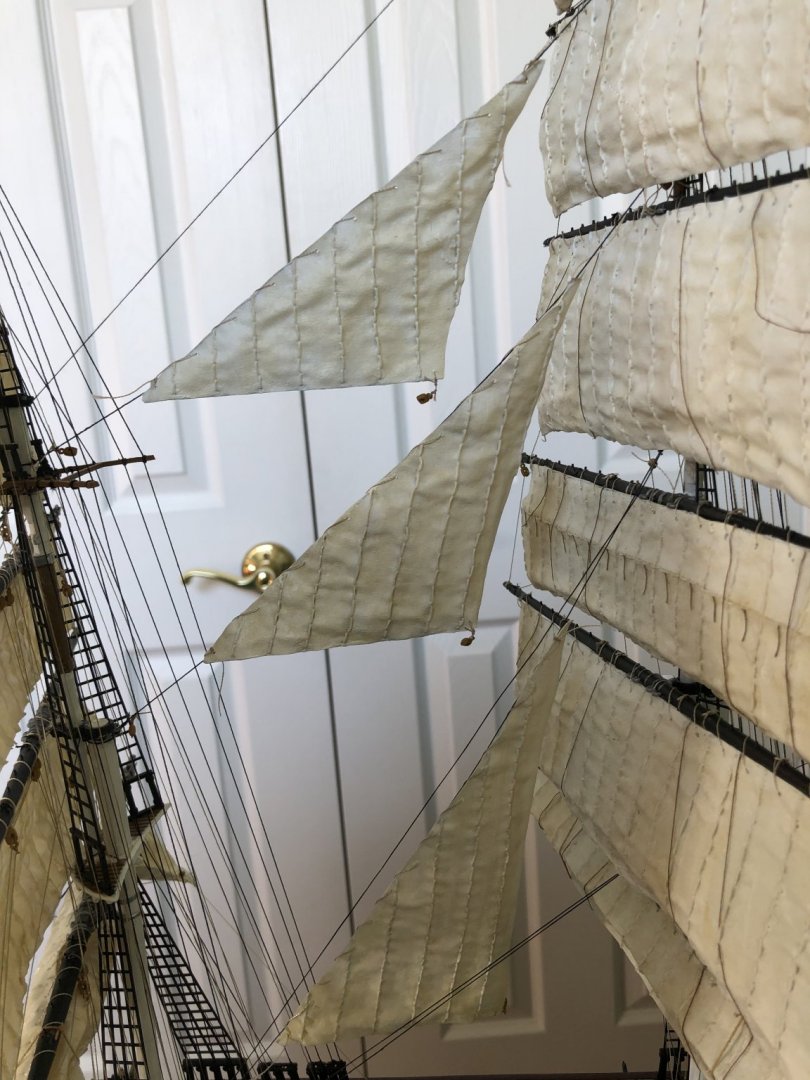
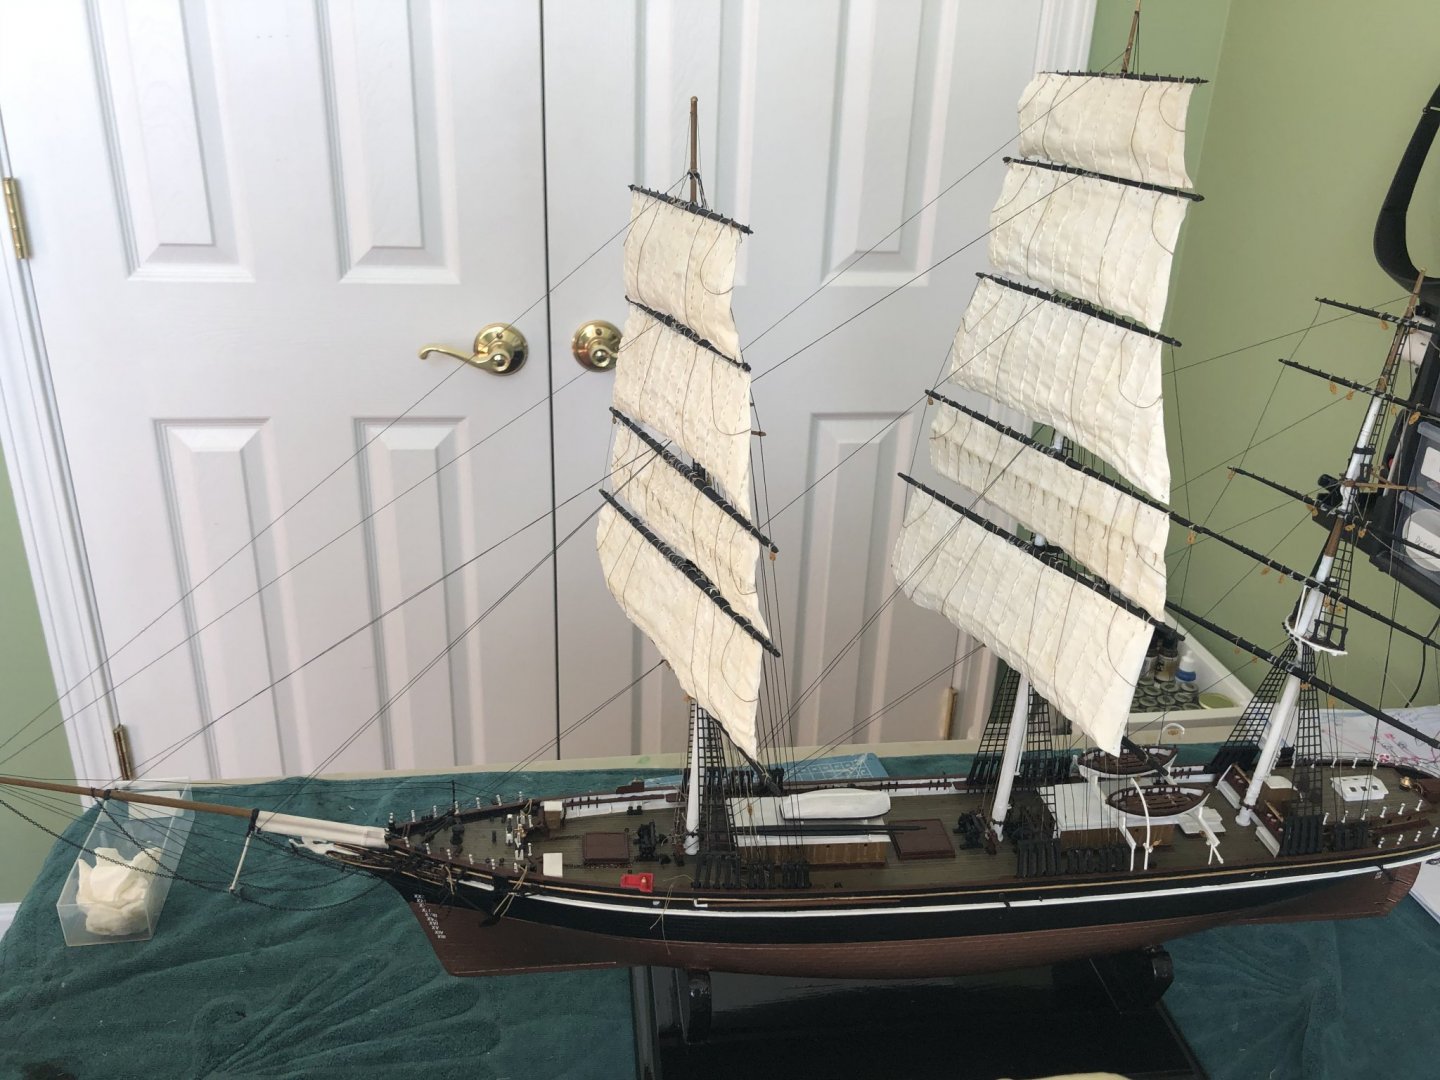
Decided to move the studding sail booms inboard since I will not be adding those sails. Removed them from the yards and now debating if I will reattach them in the inboard position or just leave them off all together. Completed the running rigging on the backside of the foremast sails and began attaching the mainmast sails. Have yet to attach the bottom sails on both masts since I am thinking I may furl them.

-
Here is an interesting question maybe someone knows the answer too. I have tried Google and other sources but can’t find a good answer. What uniform did the crewman on the Cutty Sark wear? I enjoy painting the little crewman characters that come with the kits. Give me a fine tip brush and lighted magnification lens and I am good to go for a few hours. When I recently built the USS Constitution I was able to research military uniforms (Navy and Marine) for the area and easily found color pictures I could refer to. I know the Cutty Sark was a civilian ship with a crew of around 25-30 civilian crewman. Need color references if anyone has an idea.
-
Thanks marc and popeye, I already have the yards set (glued) at about 25 degrees so I can’t really change that. I had the booms previously set in the outboard position since I originally planned to rig those sails. Now that I am going to leave the studding sails off I removed the booms today. I will reset them inboard, or just leave them off all together. Marc I will need to check out what you are saying about the spanker, mizzen, and spencer. Interesting. I have the sails I made, except for the bottom (course sail) mounted on the foremast. My plan is/was to furl the bottom sails on all three mast to add a little visual interest and improve viewing of the deck area.


-
Thanks mtaylor. I just made a command decision today and did just that.
-
Ok MSW friends I have another question on my Cutty Sark build. Simply because of the space where I plan to put the shelf to display the ship when complete, and the case I intend to make for it, I am limited on the desired width of the final build. As a result I am going to leave the 8 studding sails off. The 4 on the foremast and the 4 on the main mast. With that as my plan I am curious about the Upper and Lower Yard Studding Booms. For authenticity do I need to mount them inboard on the yards as if without sails or can (should) I just remove them from the yards? I am rigging the ship with sails except for studding sails.
-
To add sails or not? What is your preference?
Bill97 replied to Bill97's topic in Masting, rigging and sails
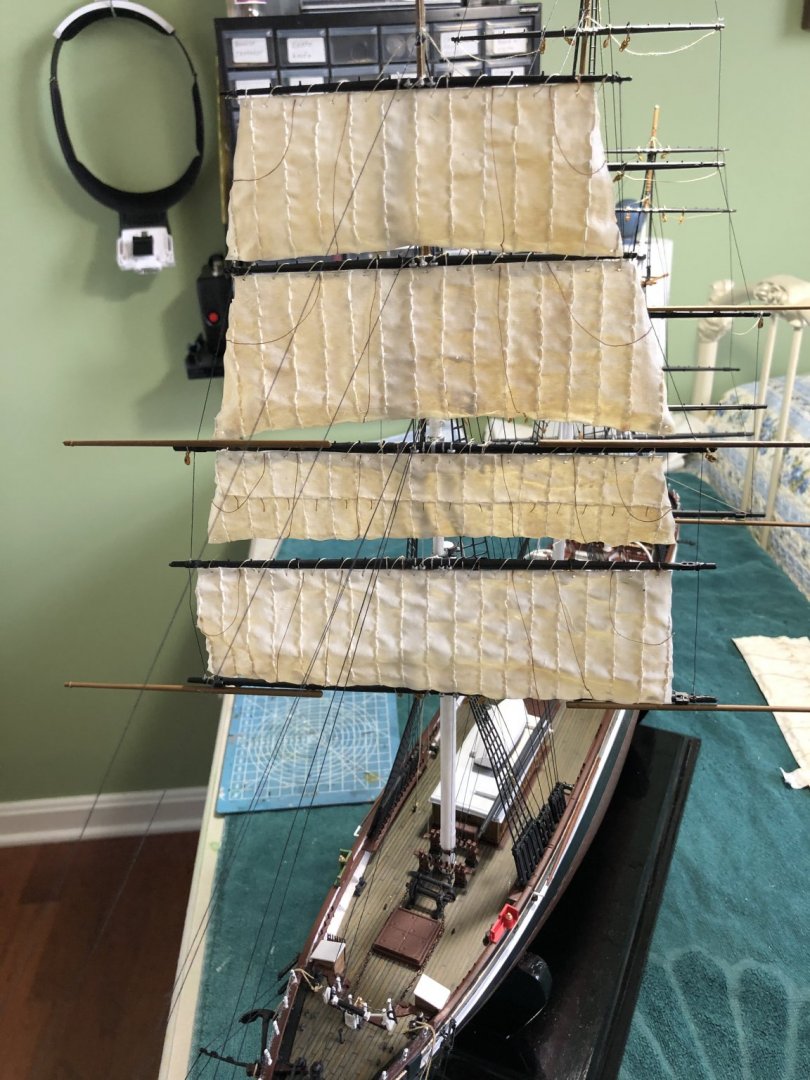
Added all the blocks to the yards today and began attaching my hand made sails to the foremast. Left the bottom (fore course) sail off for now. Thinking about maybe a fueled sail at the bottom of each mast. If I go with that idea I will need to remake those 3 sails. Pleased with my first time making my own sails.


-
Spent a good part of a couple days modeling time adding all the blocks to the yards for rigging the sails. After all the blocks were added I touched up a few marks and blemishes on the yards and then began attaching my handmade sails on the foremast. I left the bottom (fore course) sail off for now. Debating maybe furled sails at the bottom of each mast. Not sure yet. If so, will need to remake those 3 sails furled instead of unfurled.


-
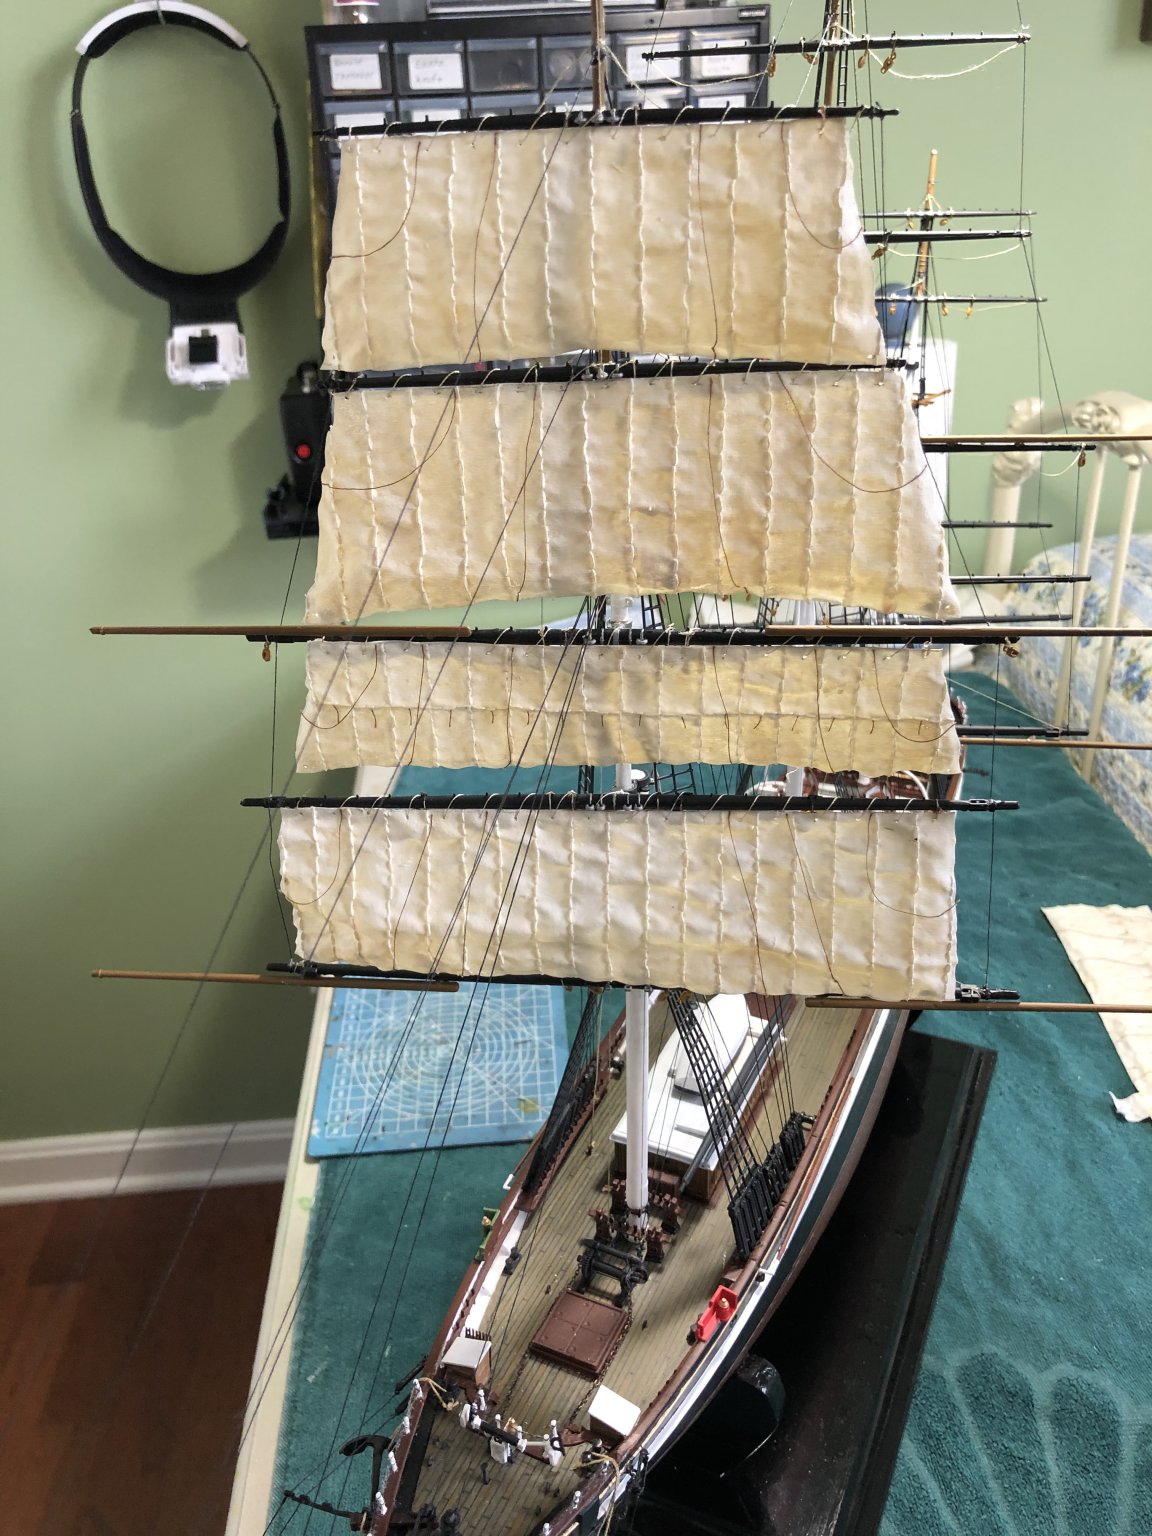
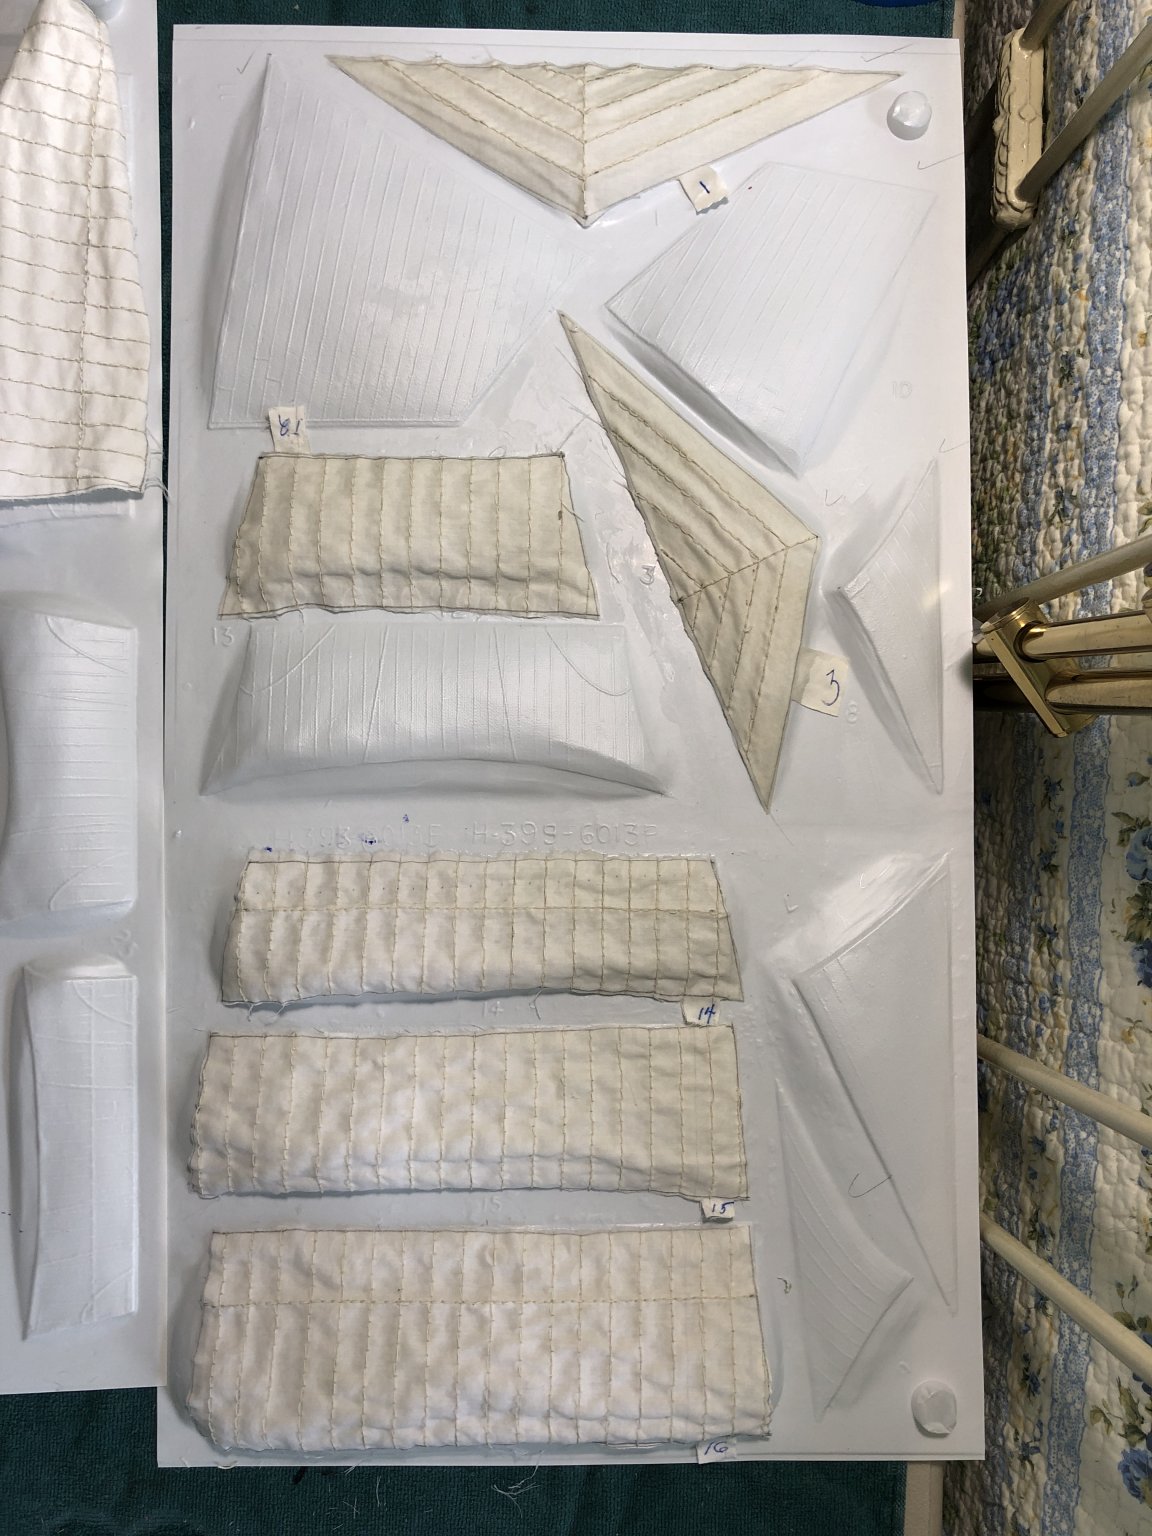
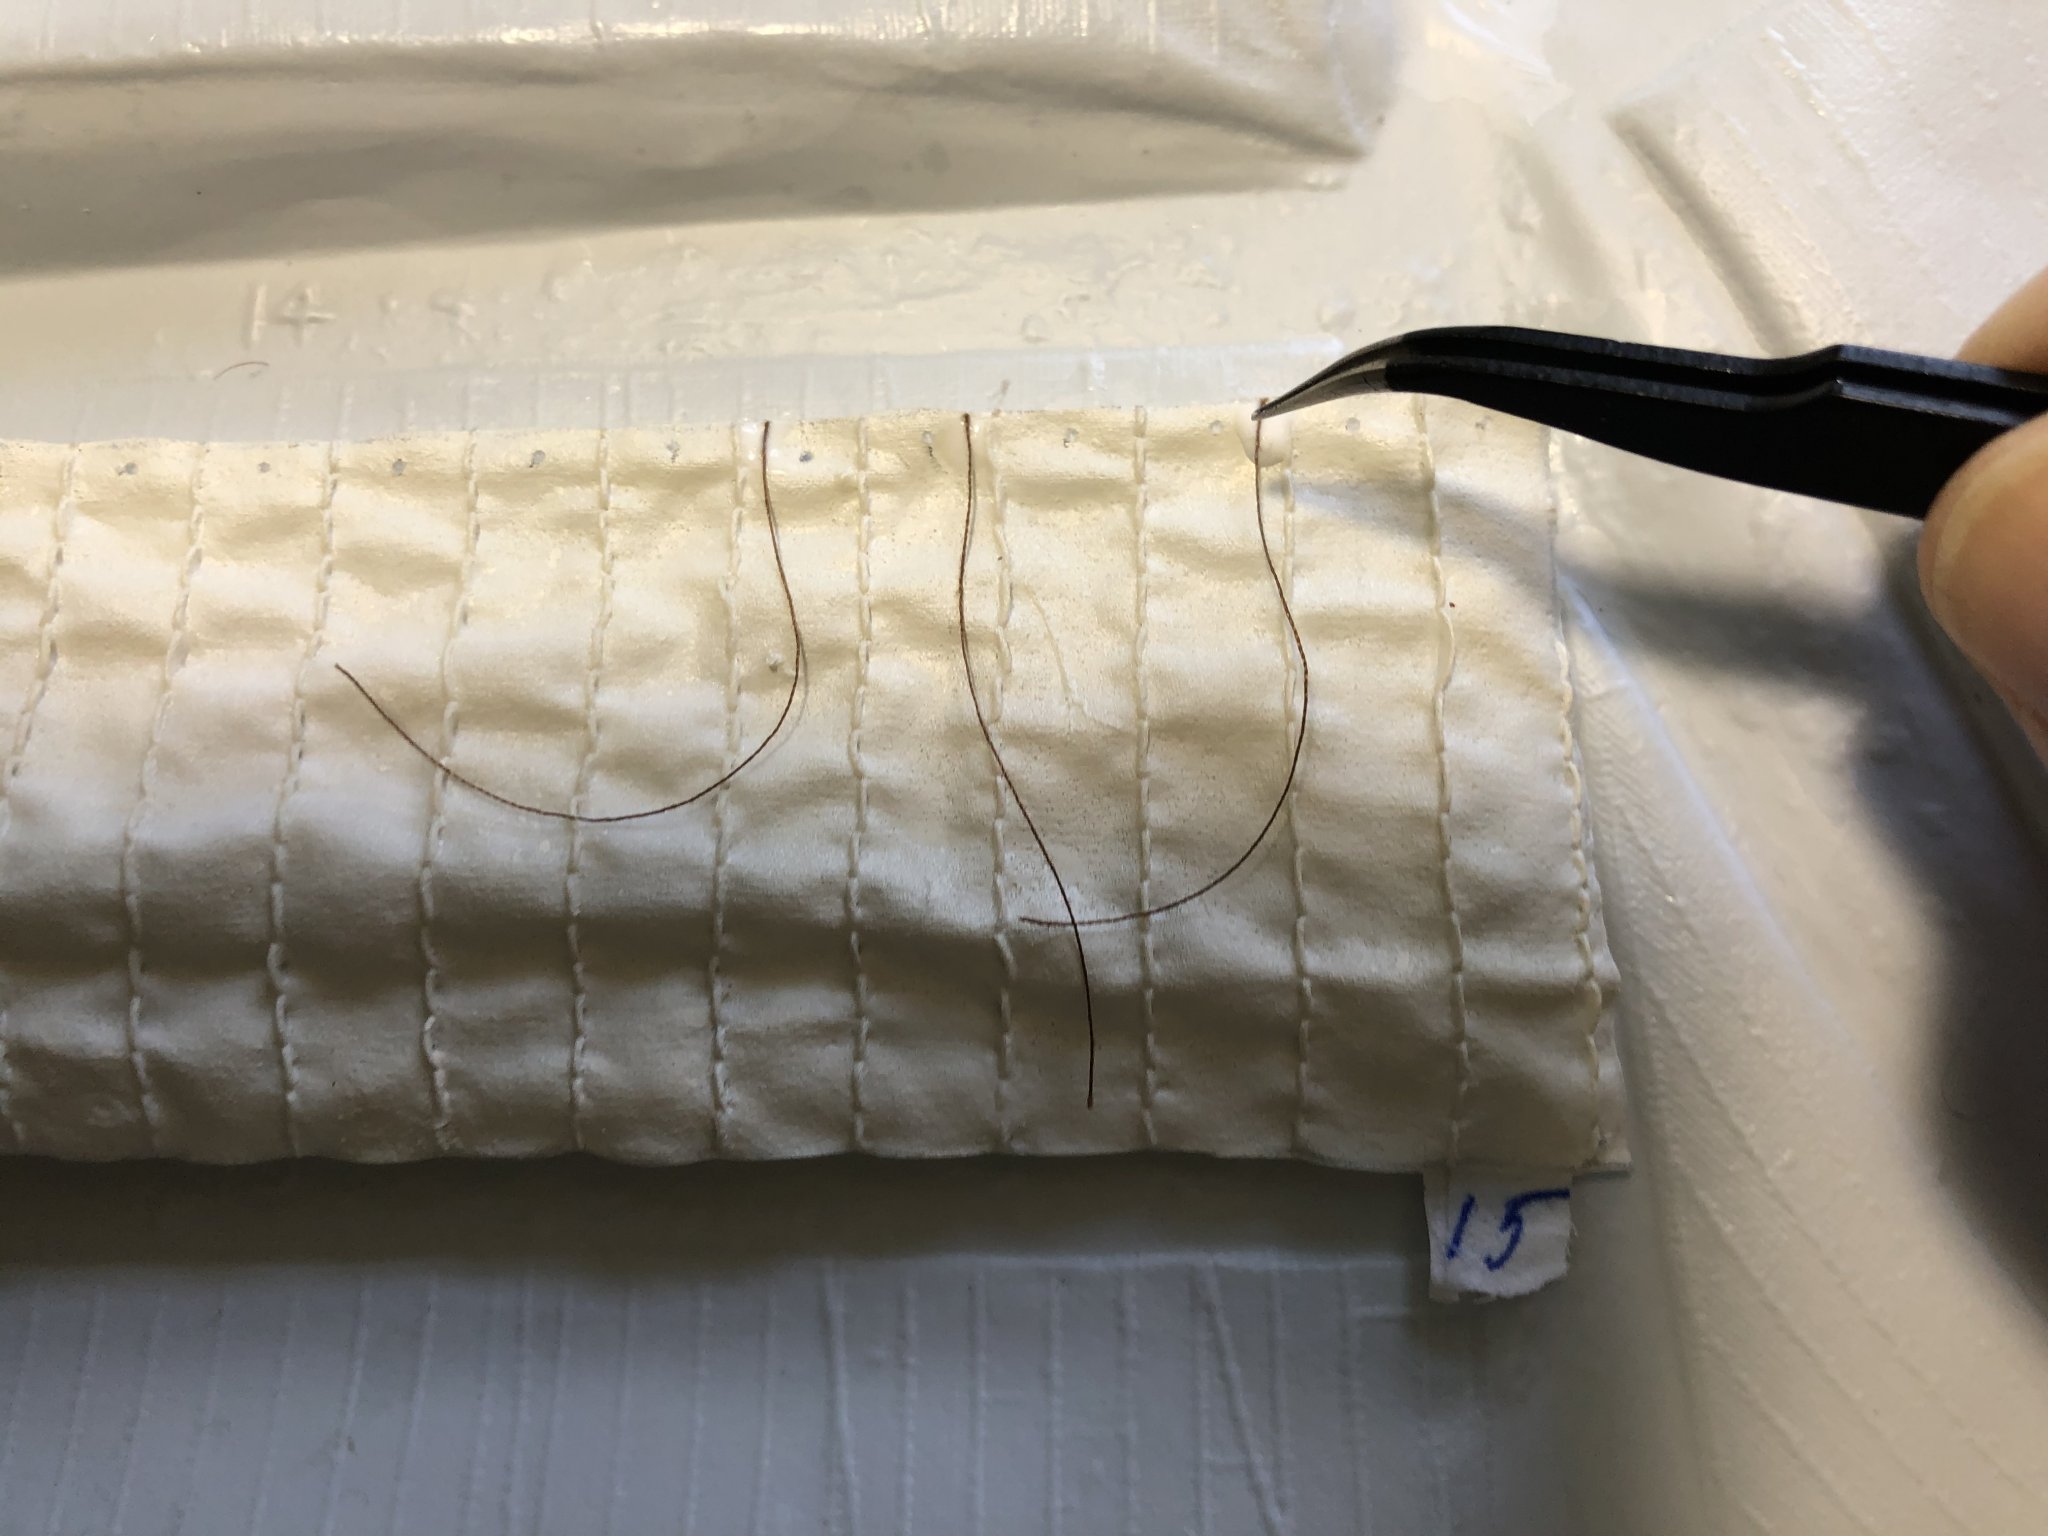
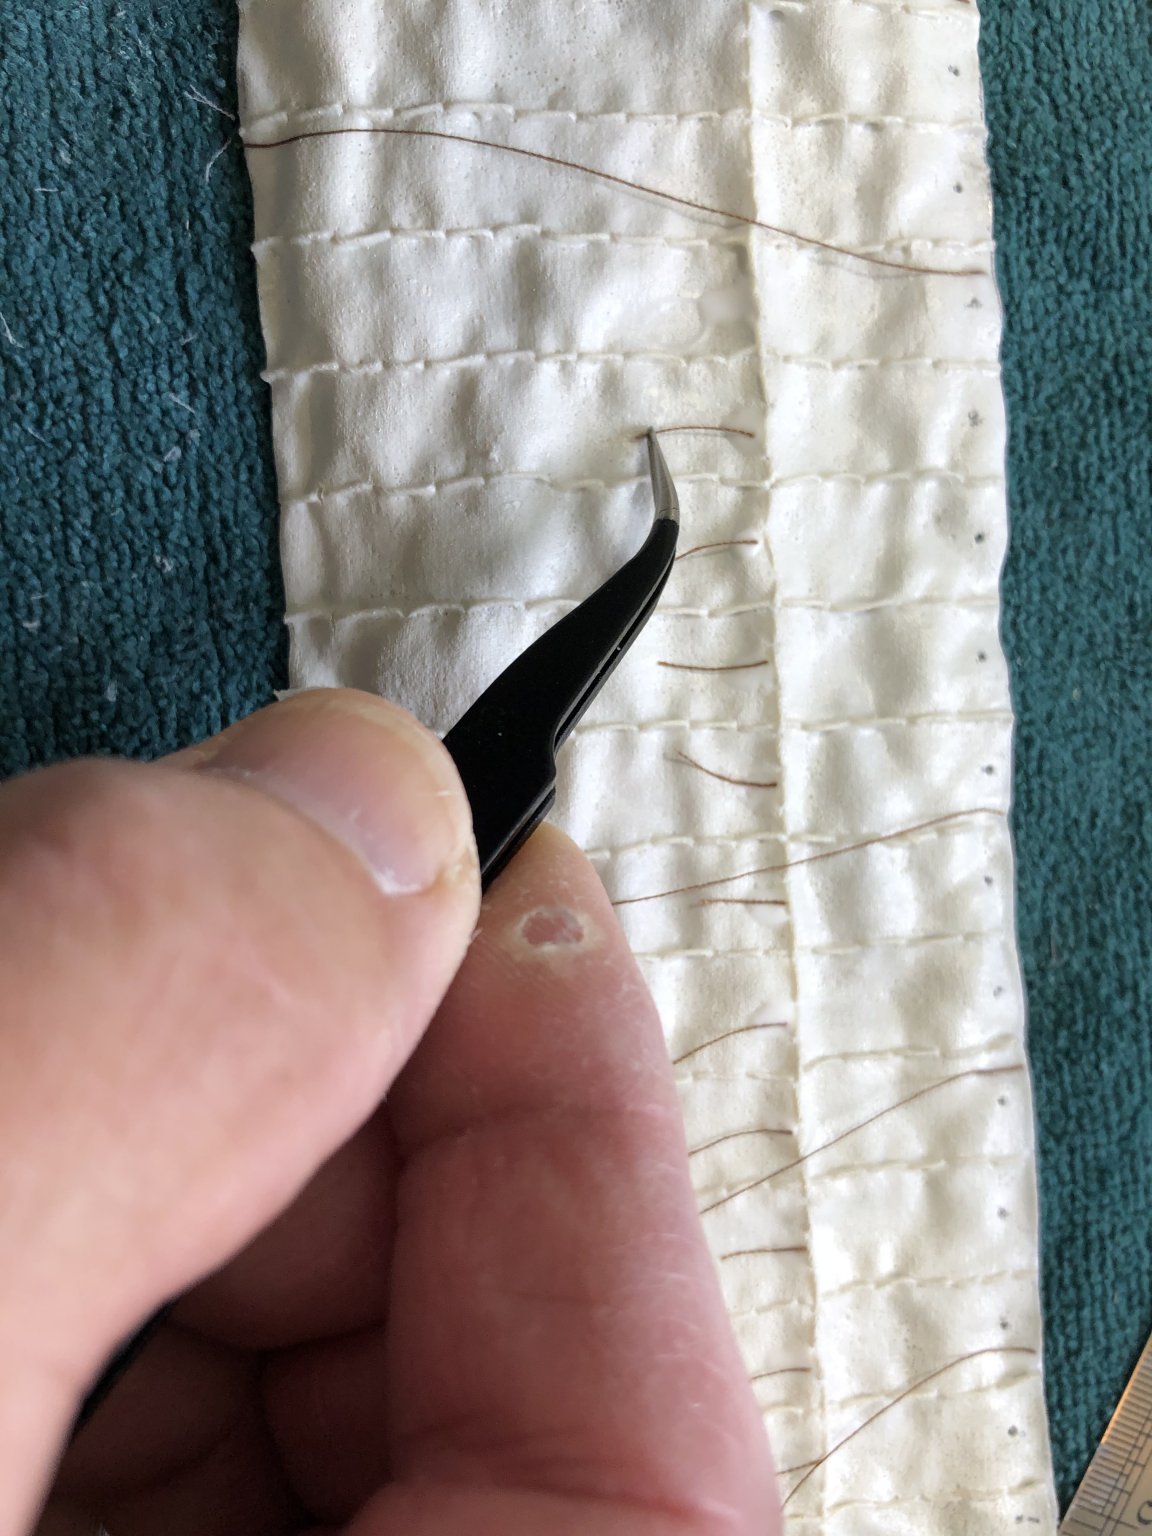
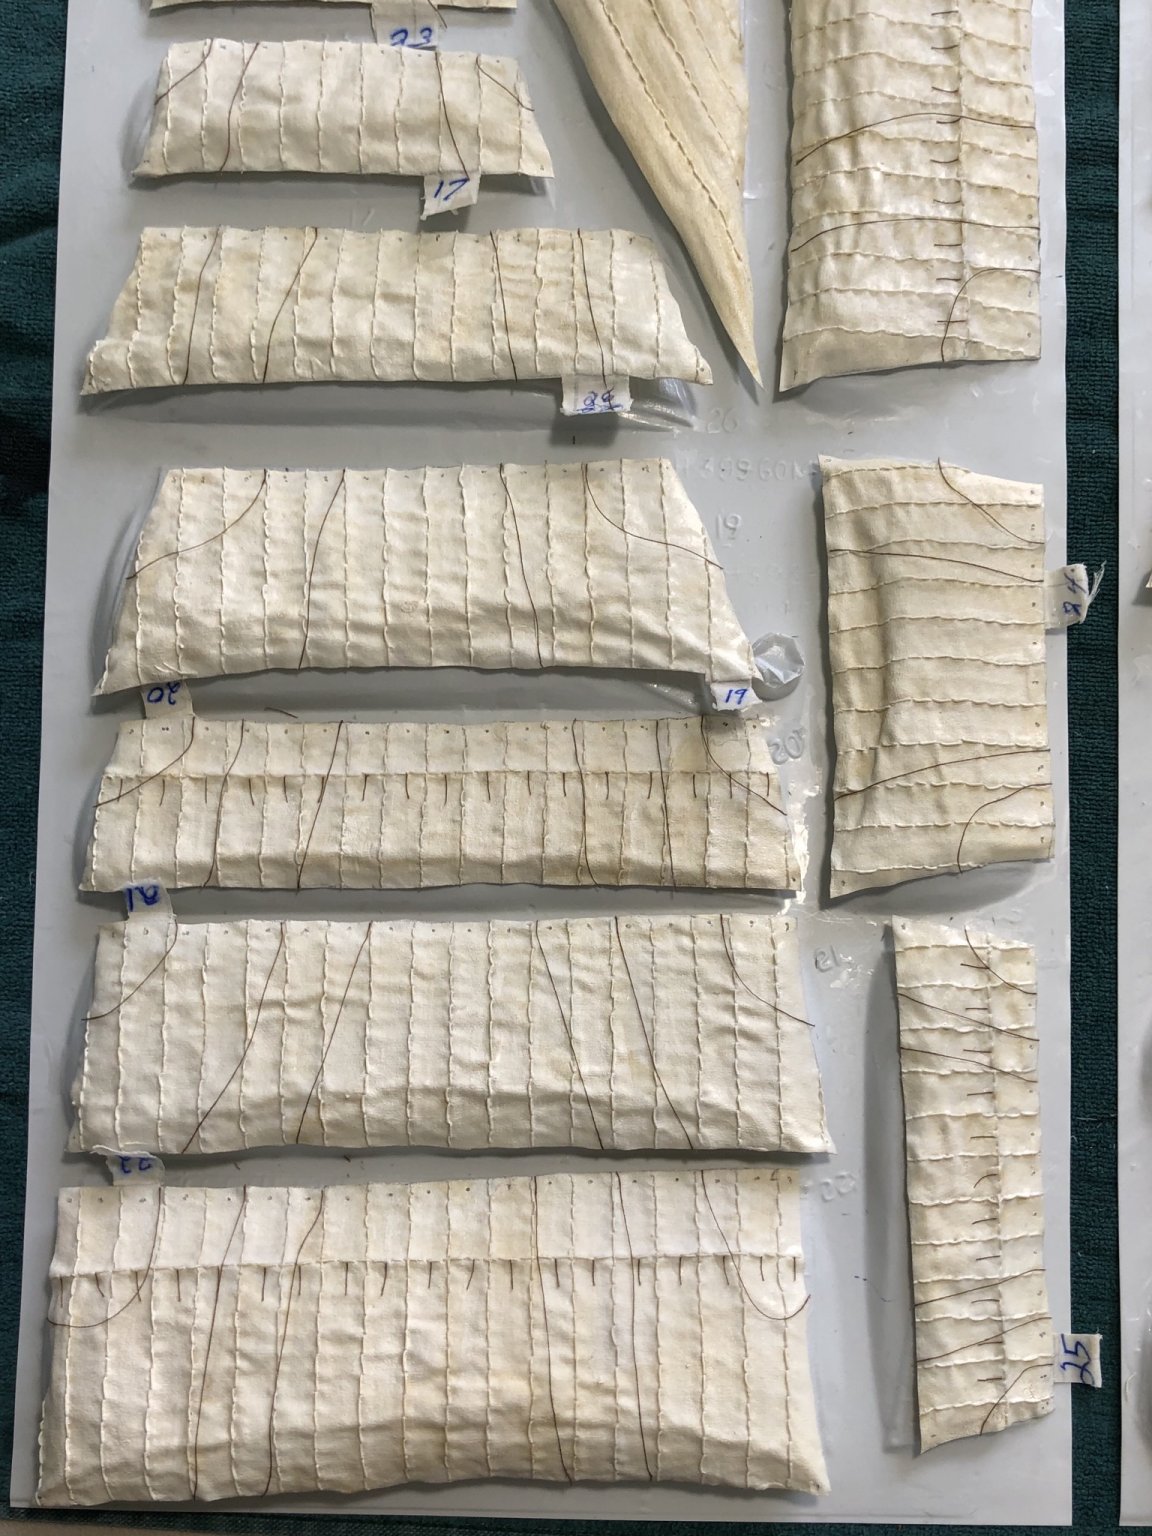
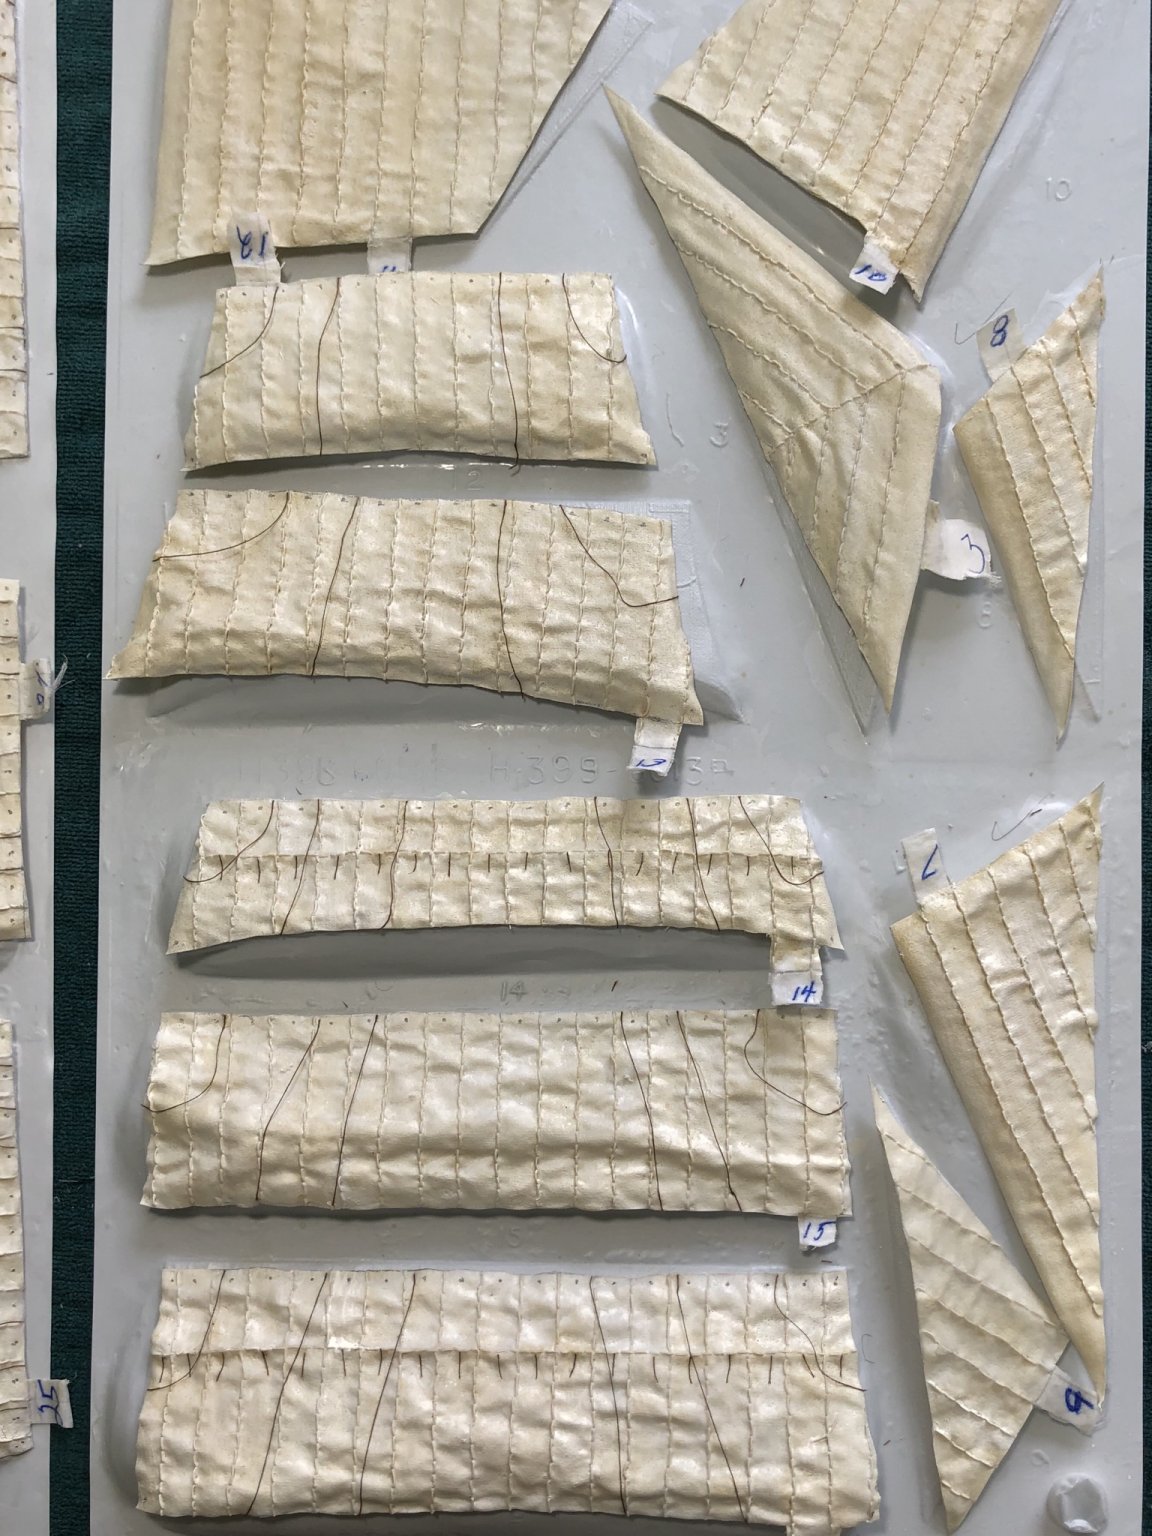
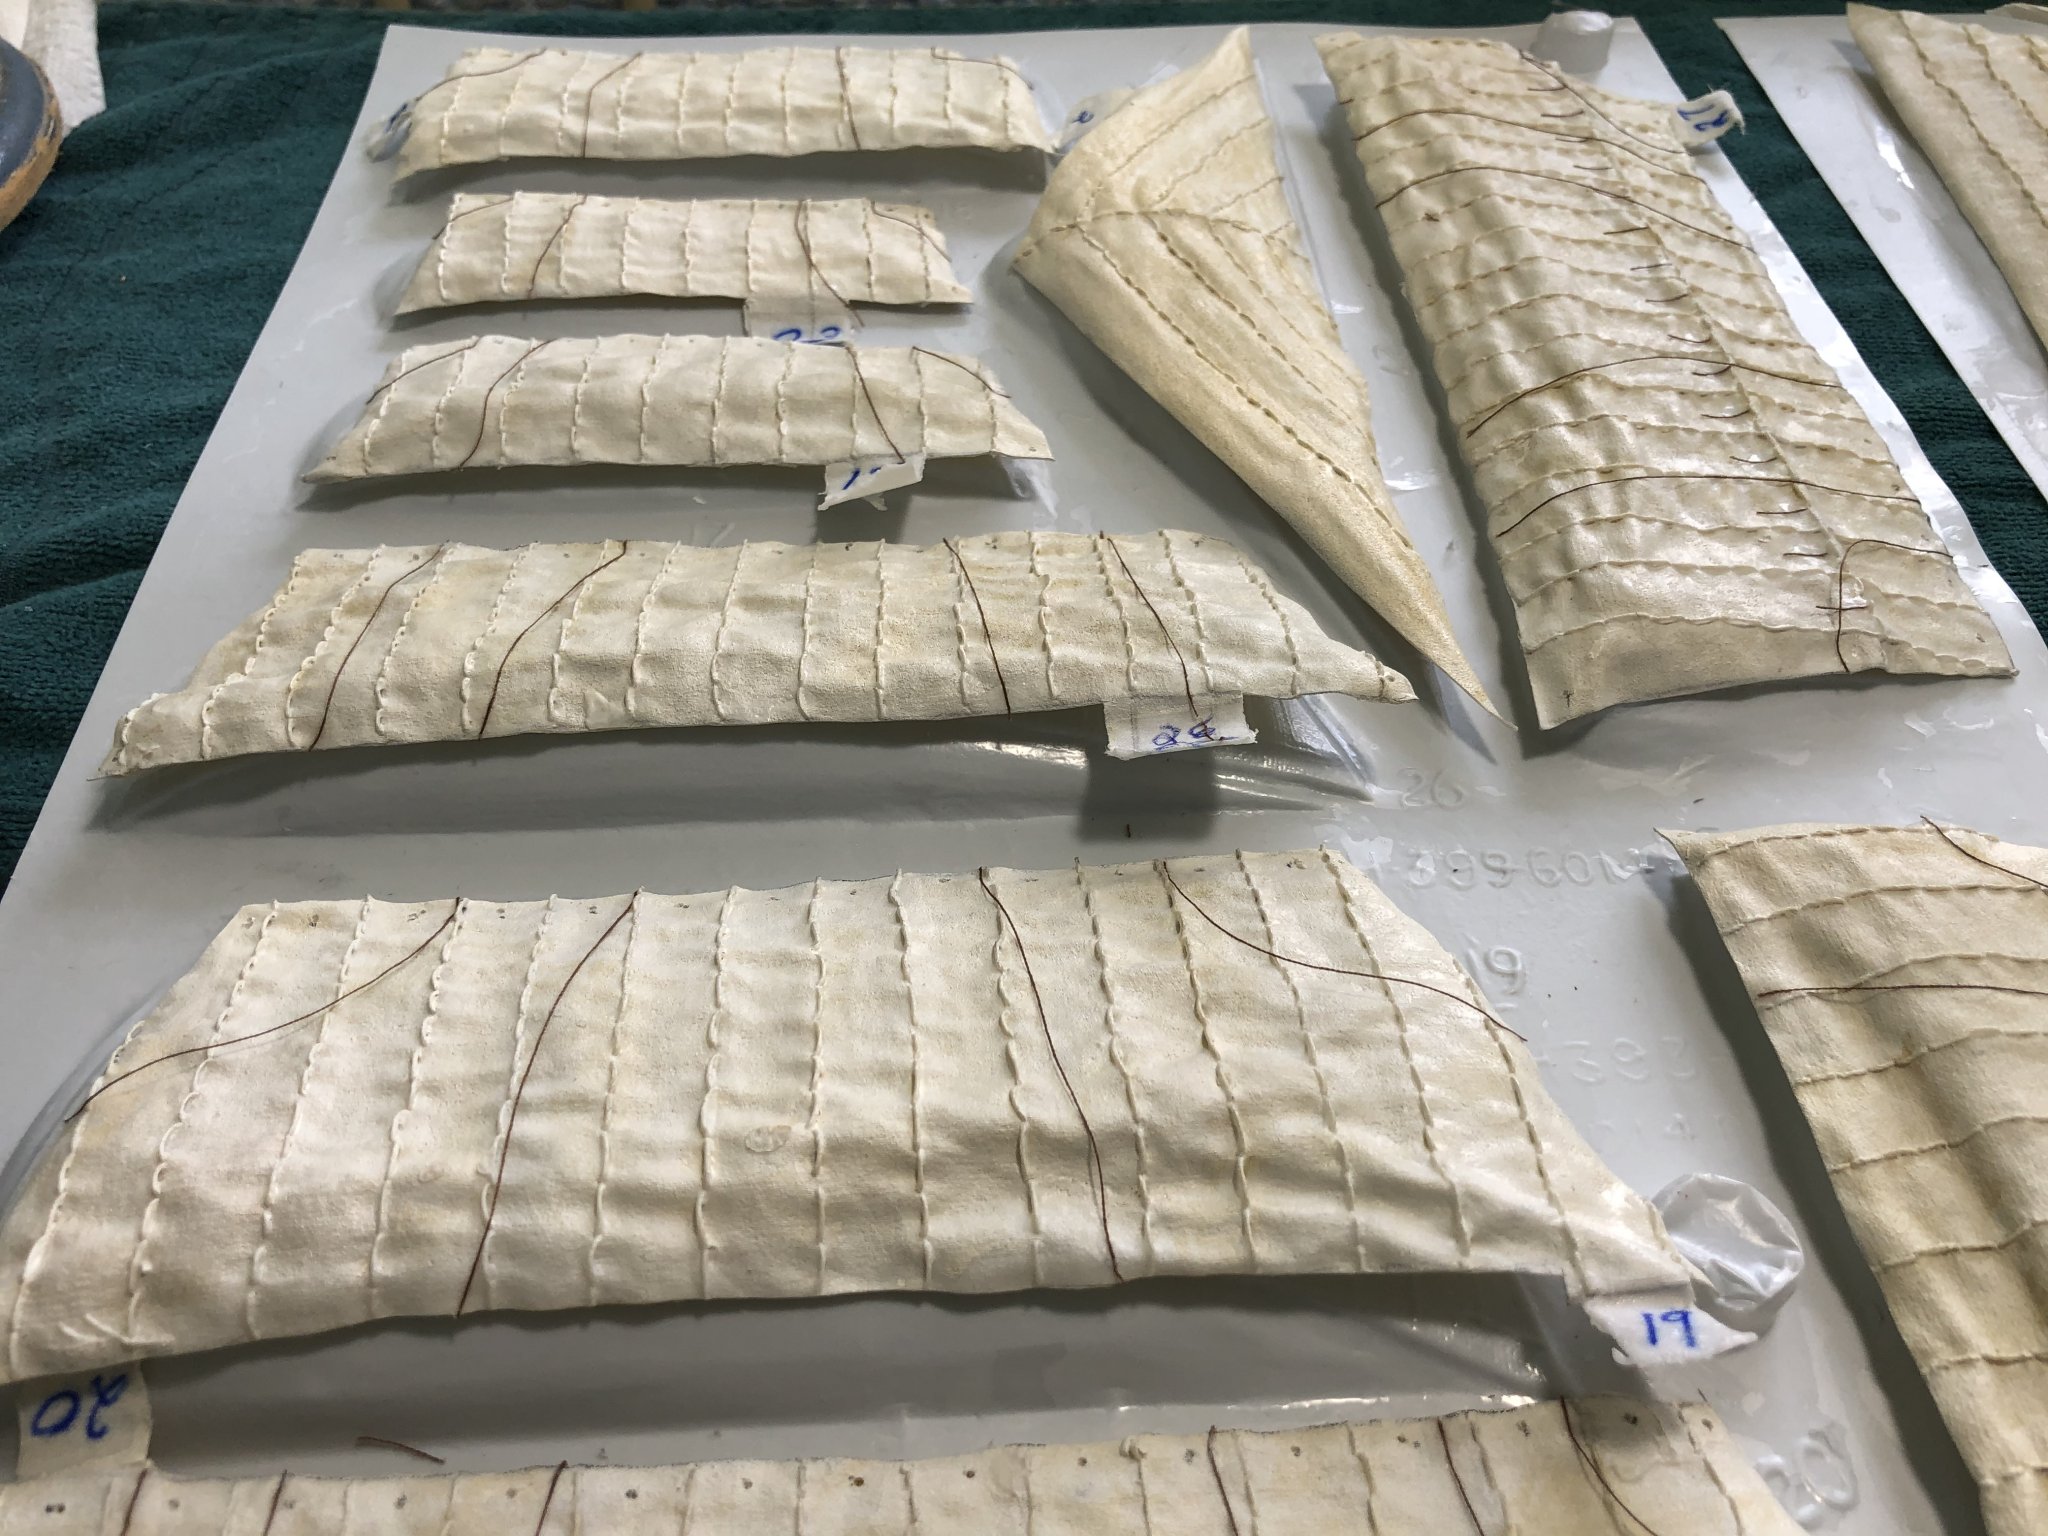
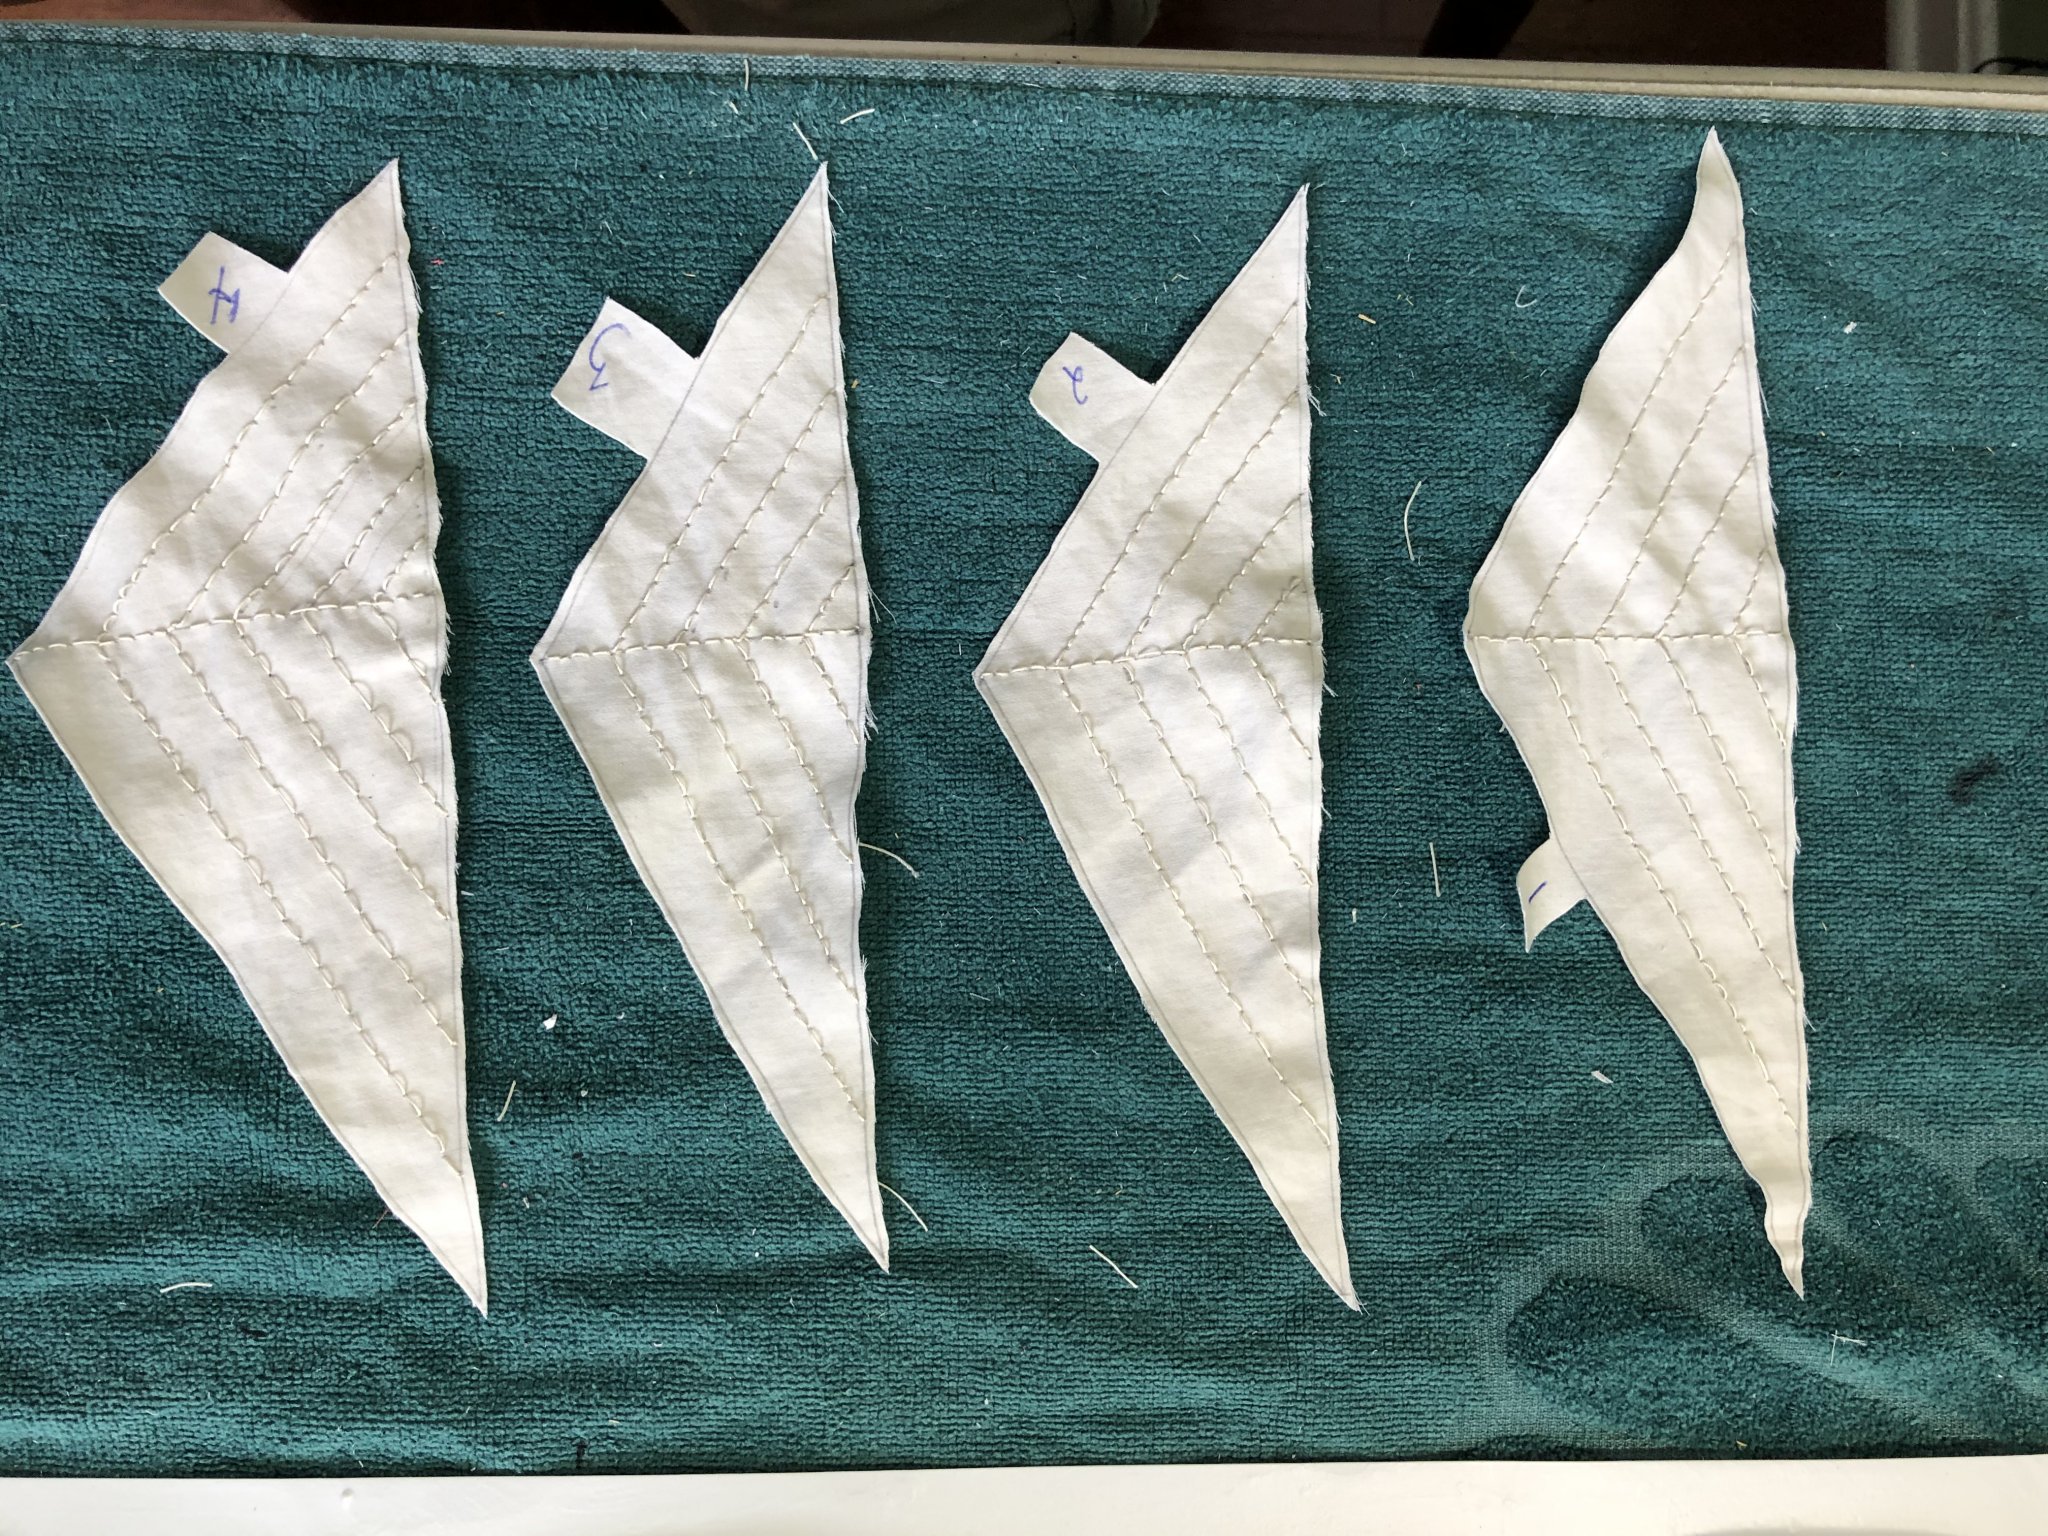
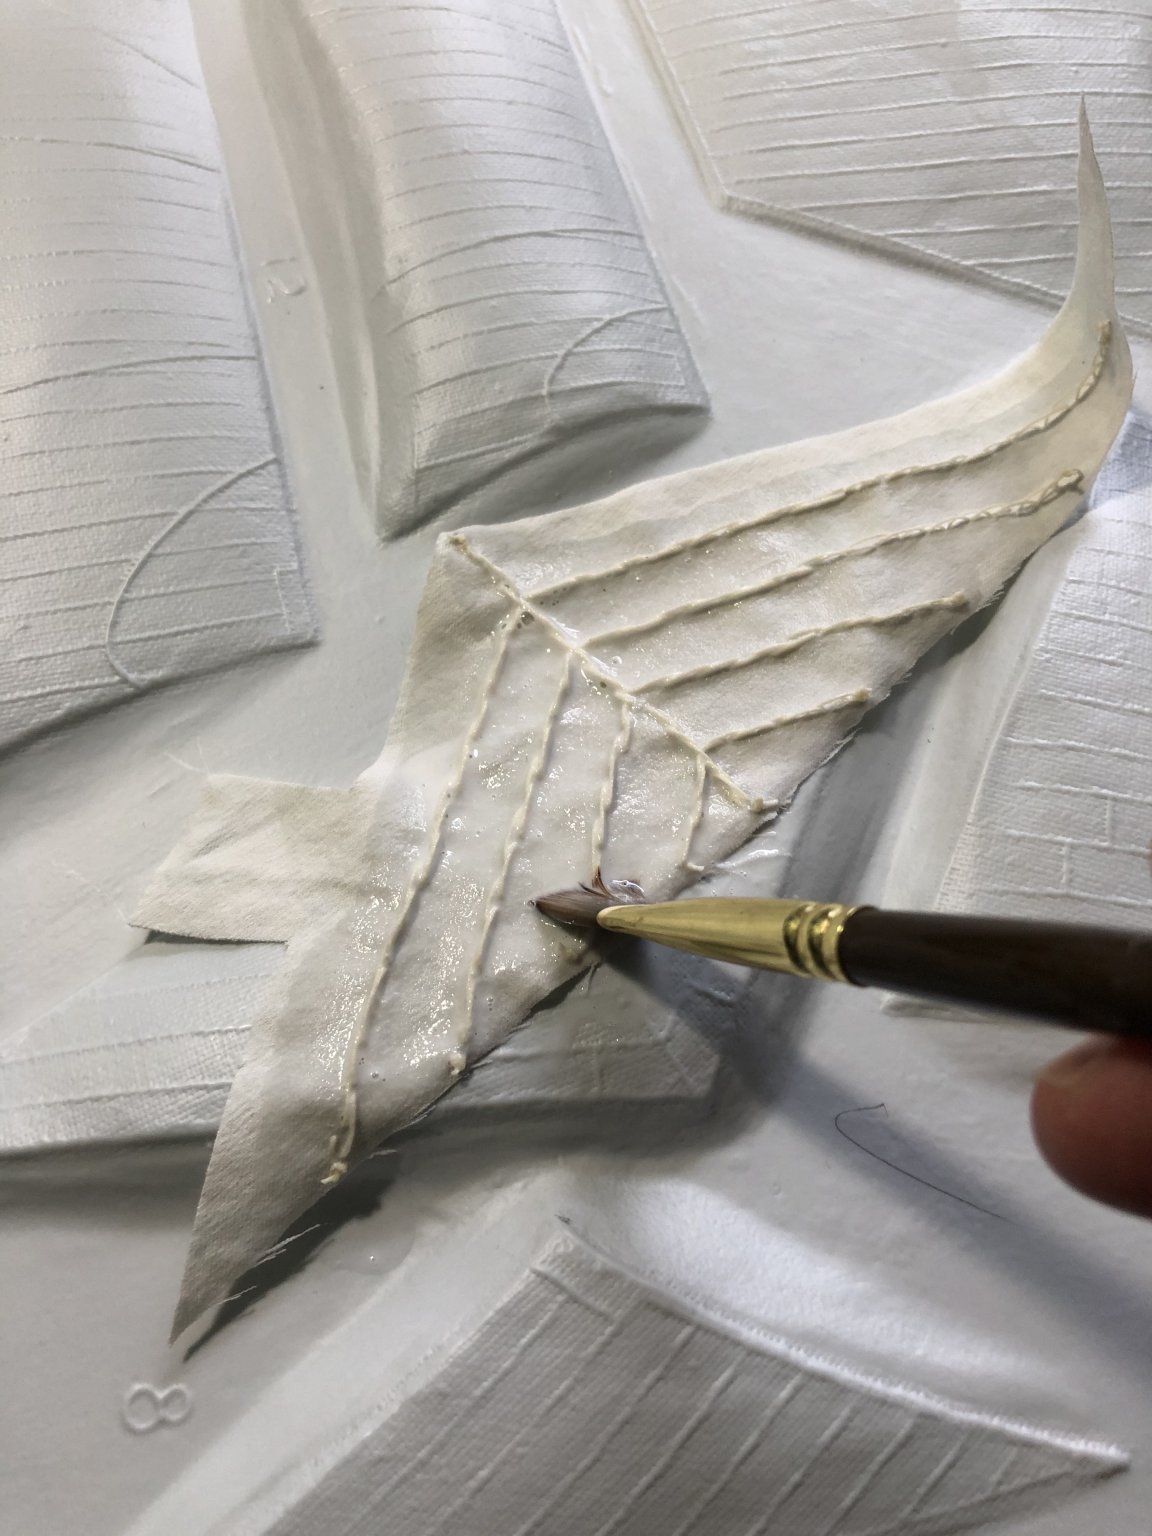
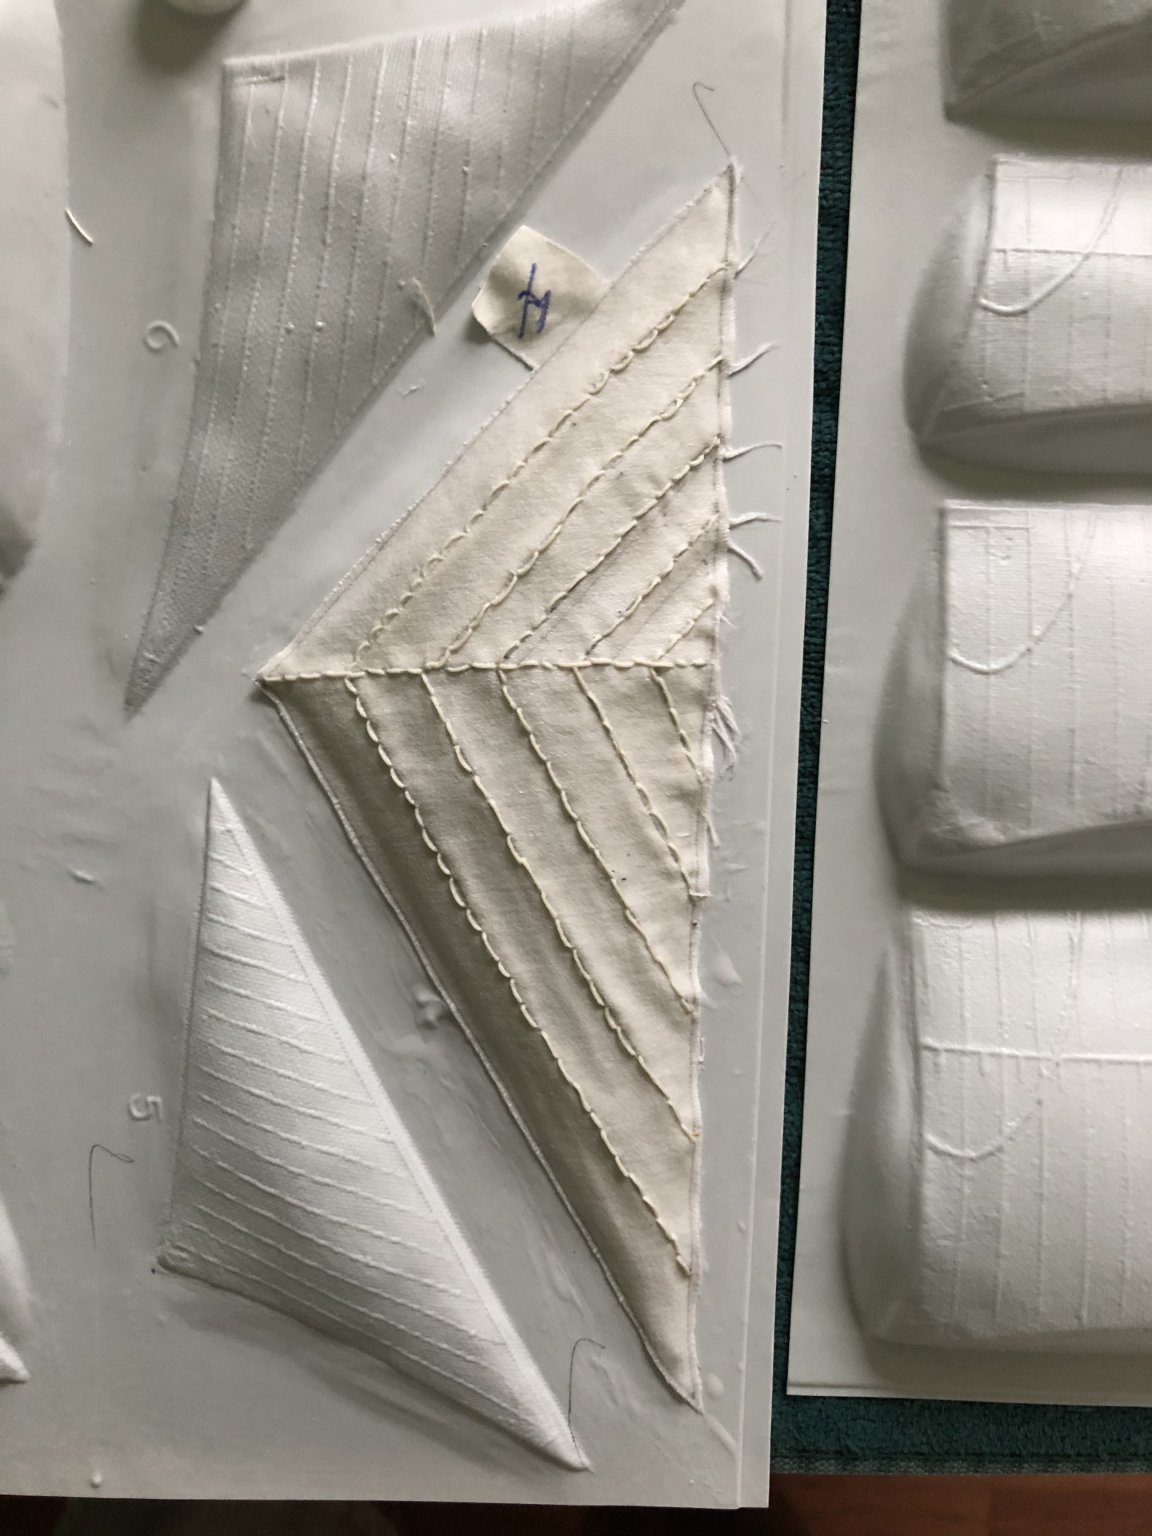
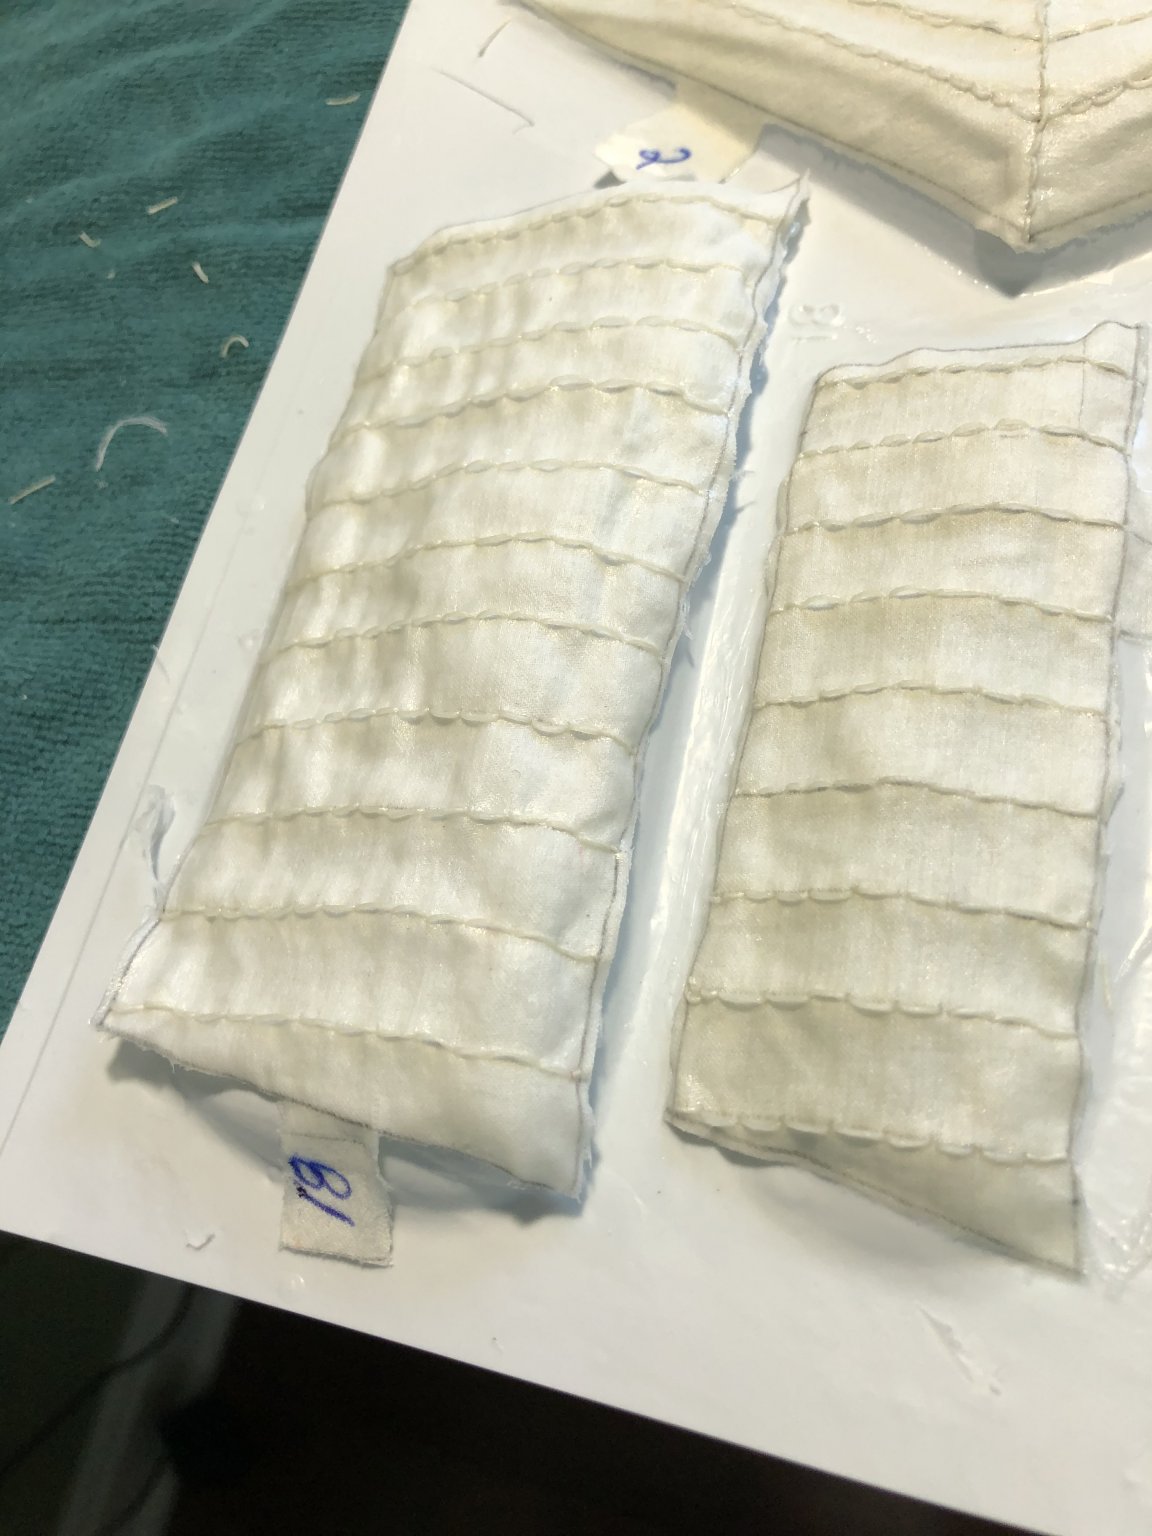
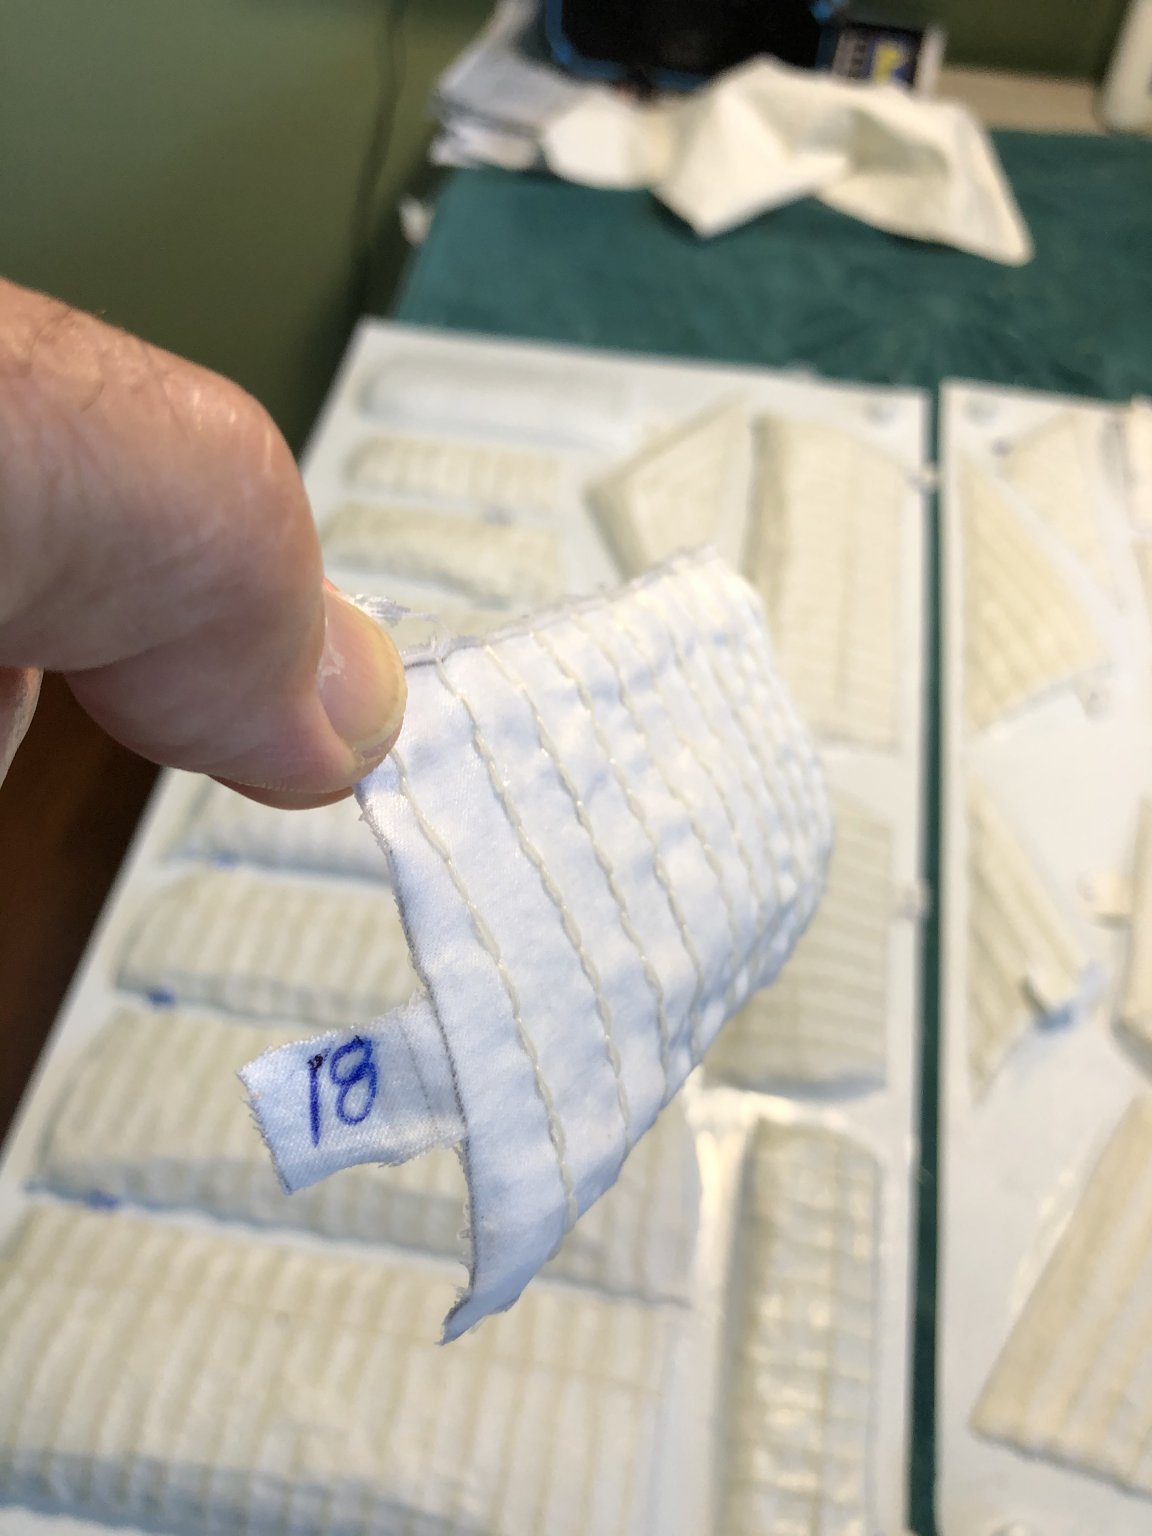
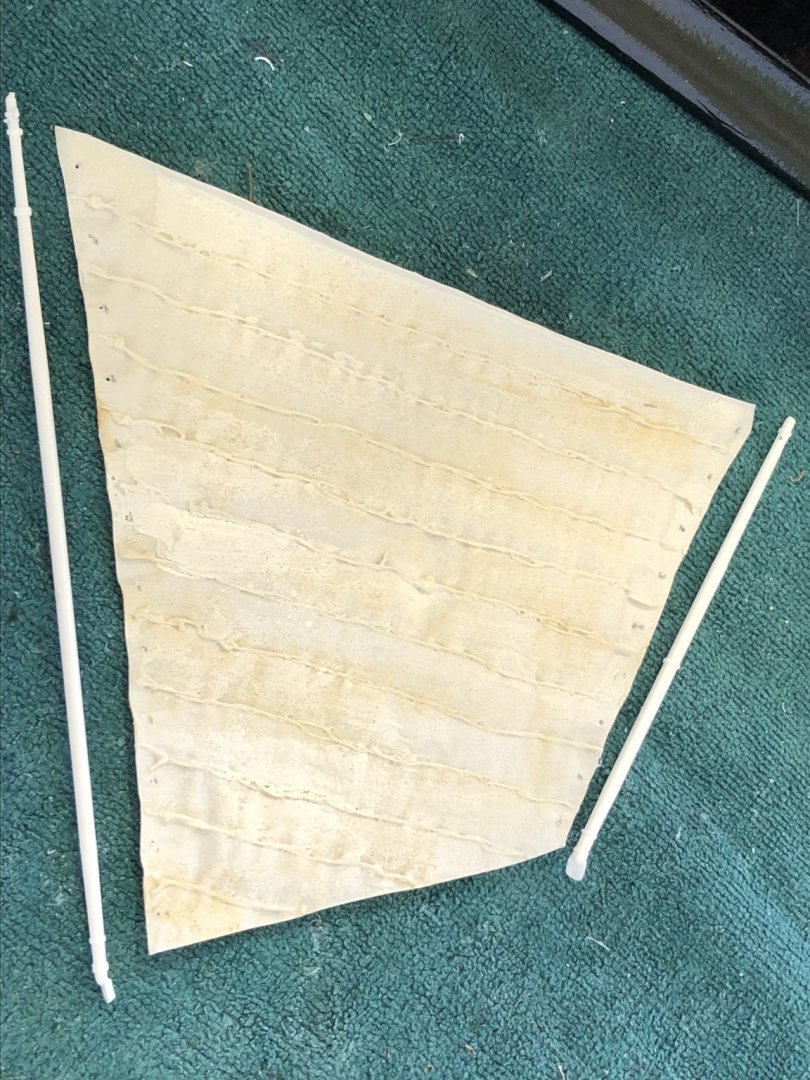
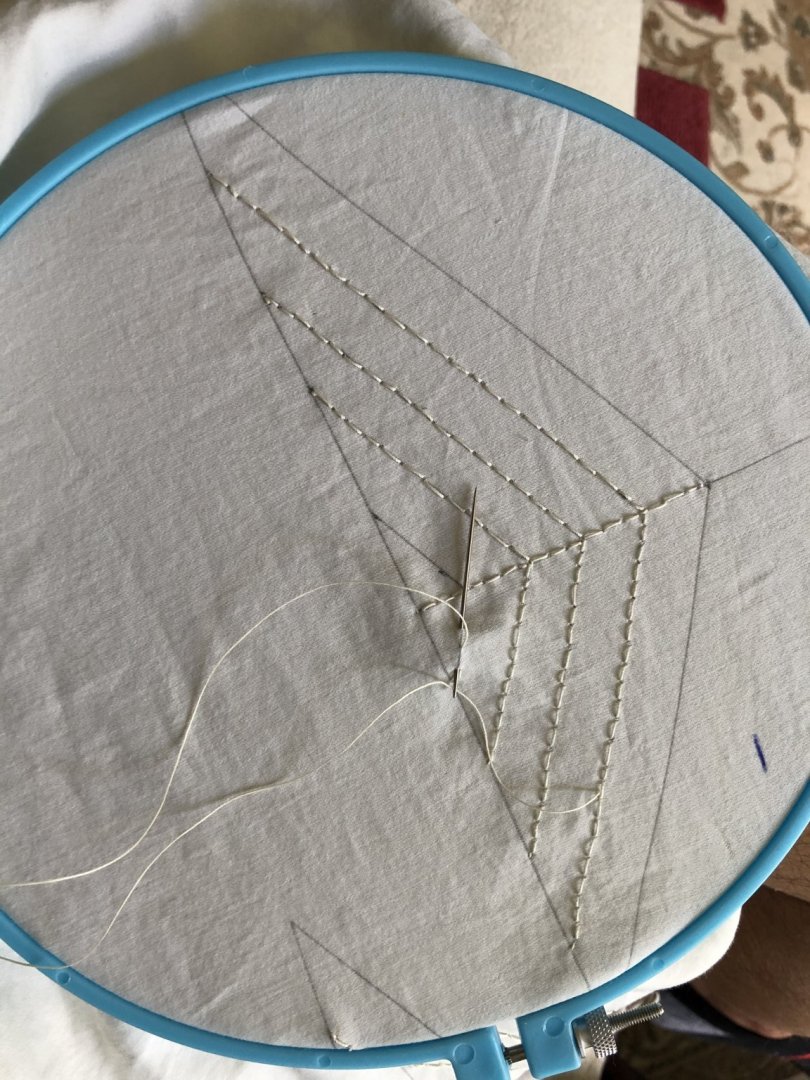
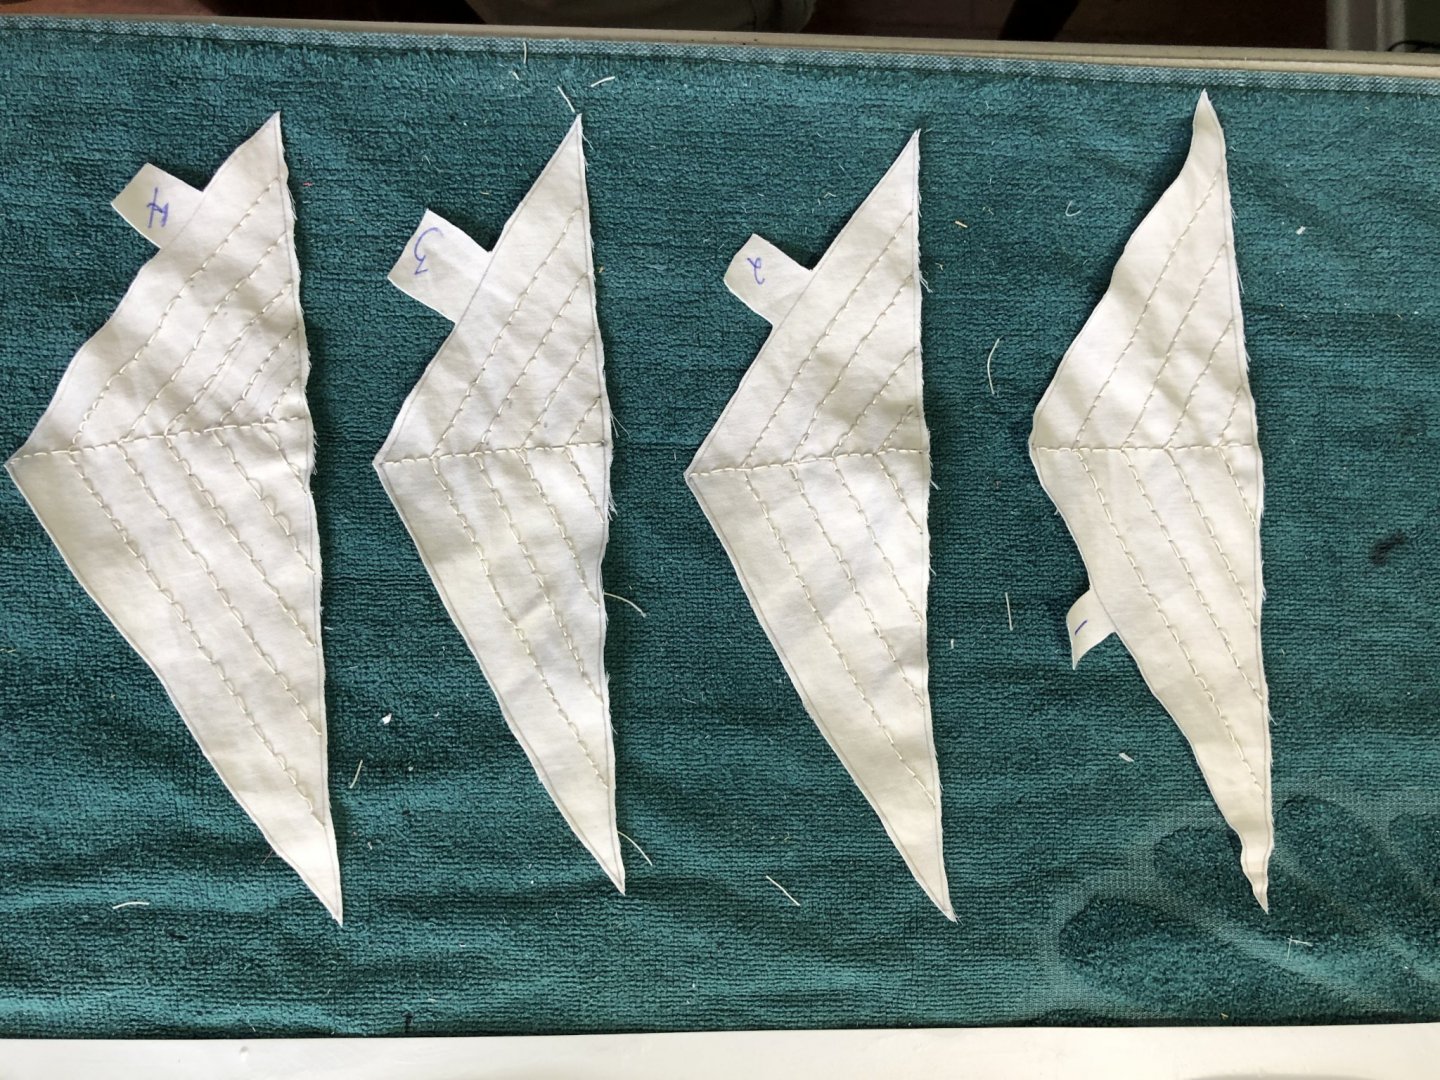
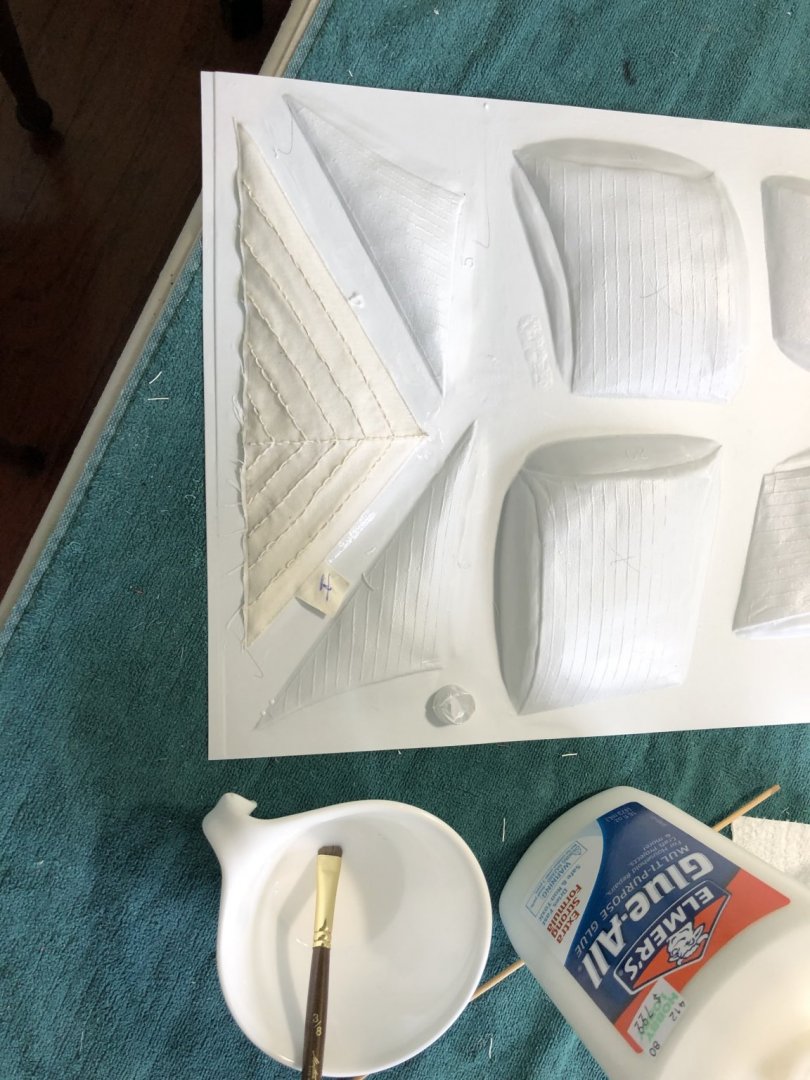
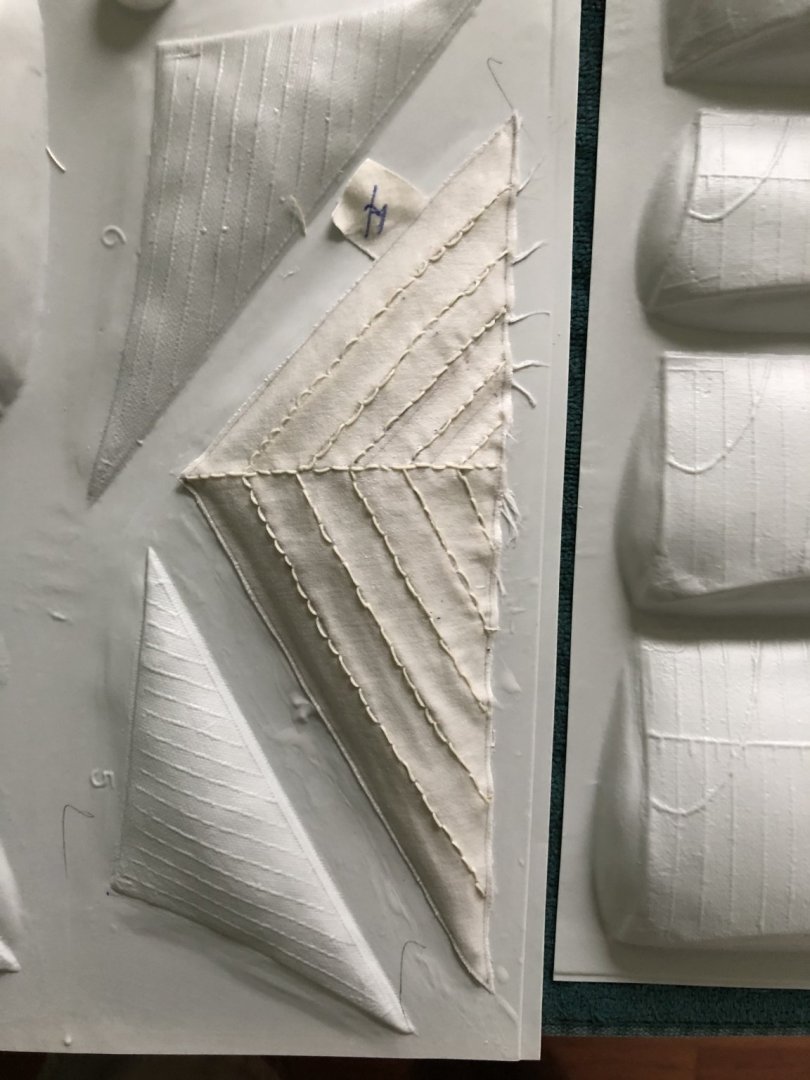
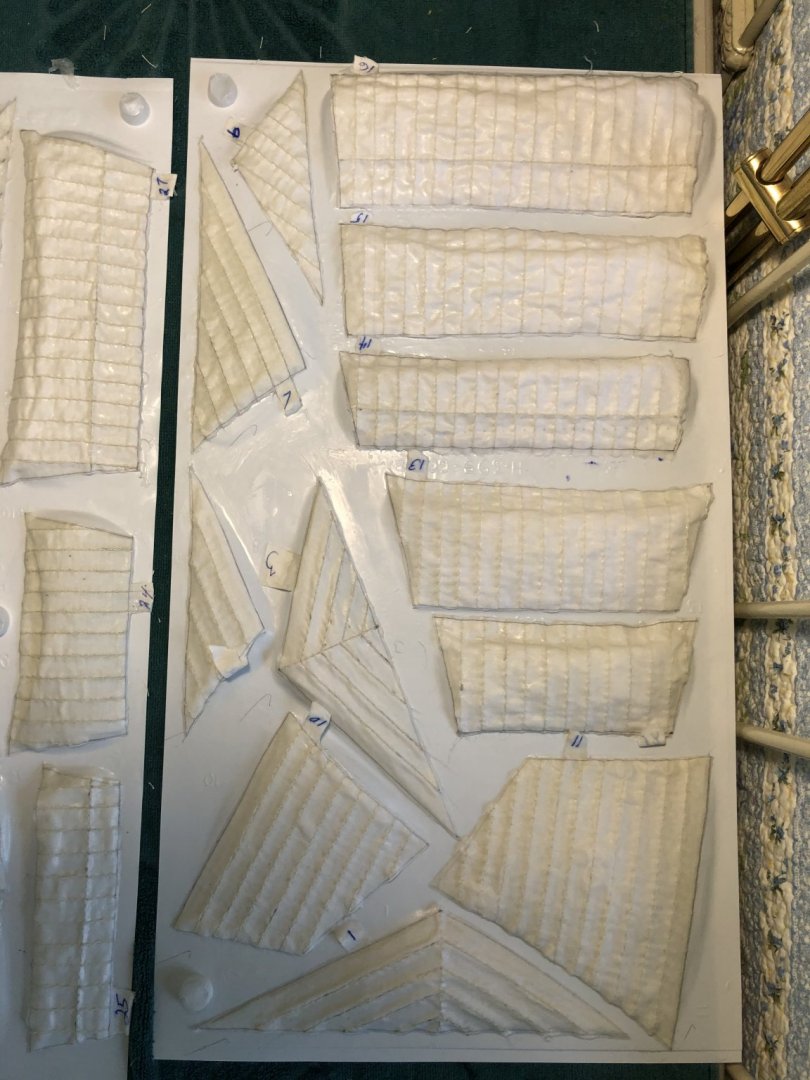
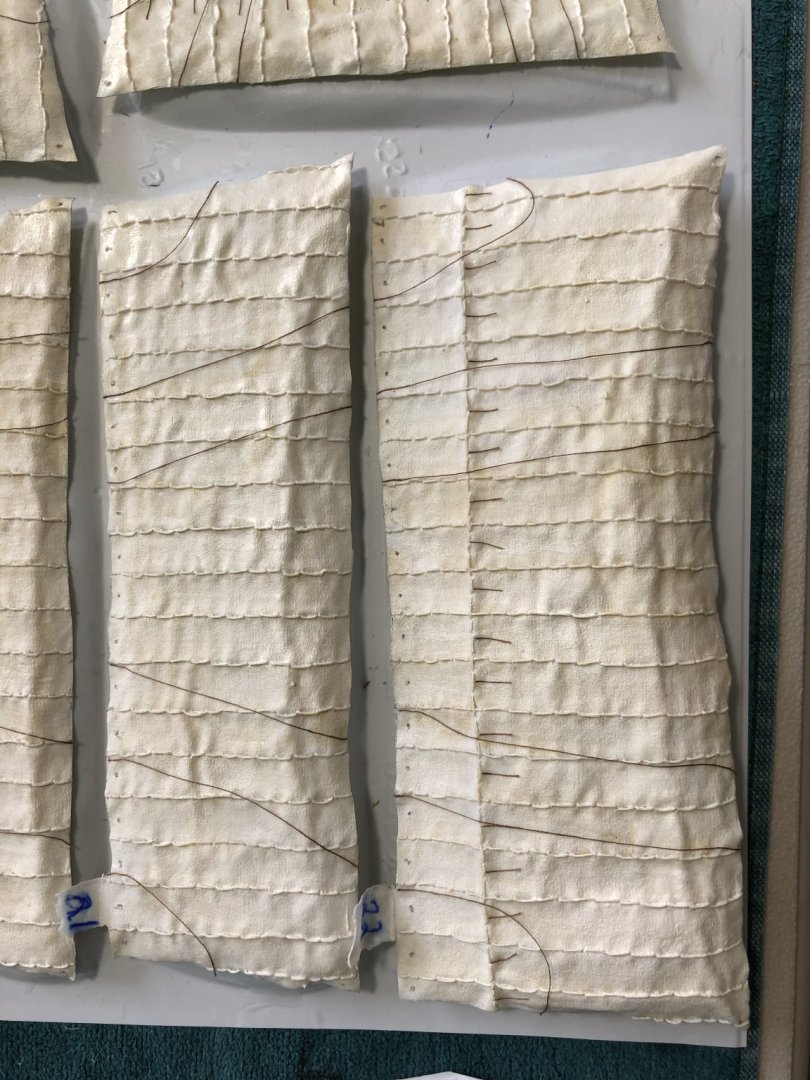
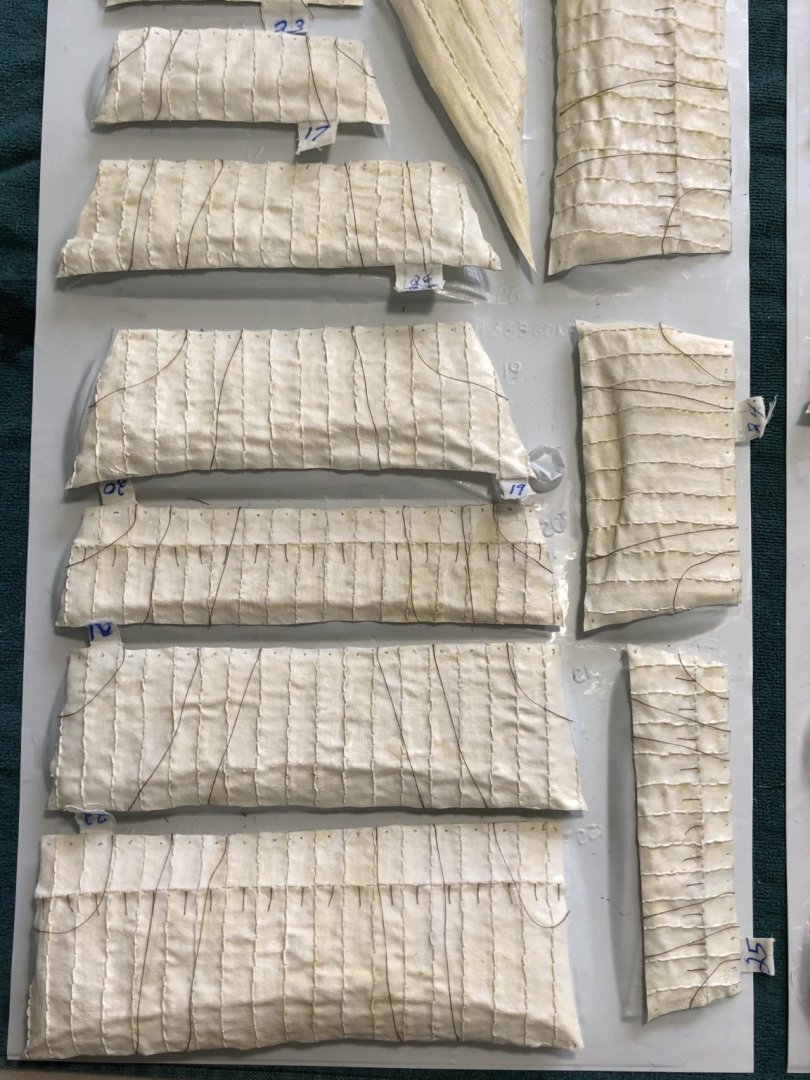
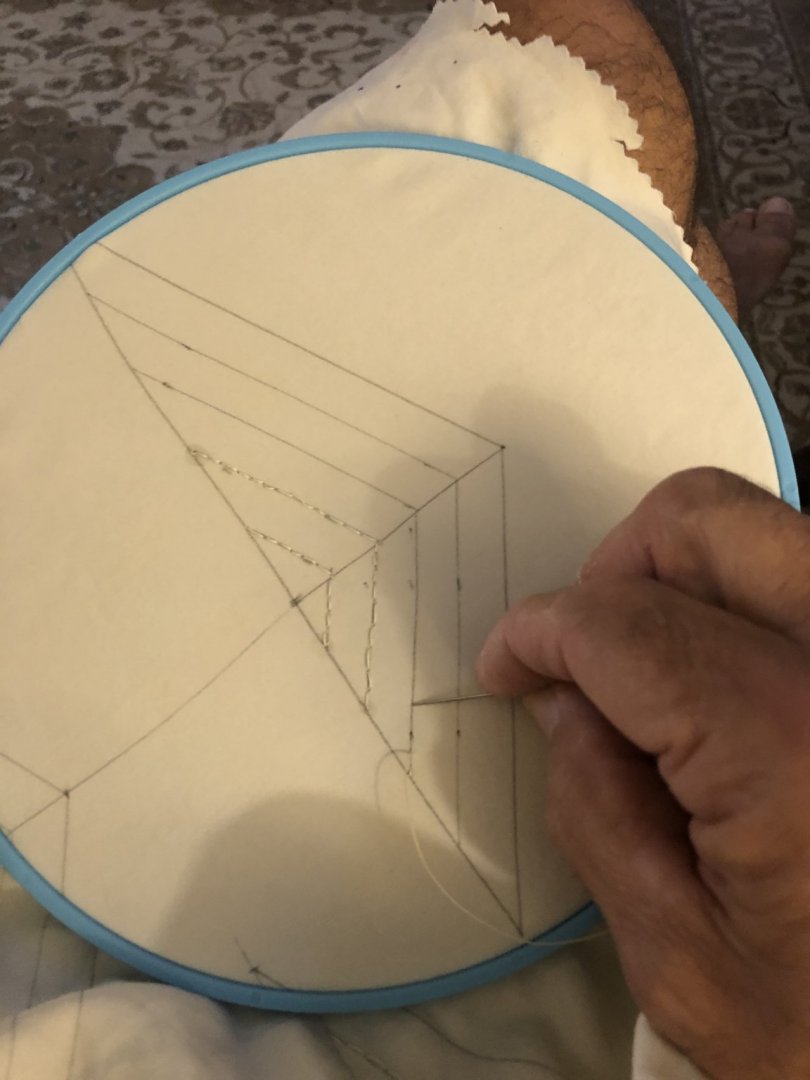
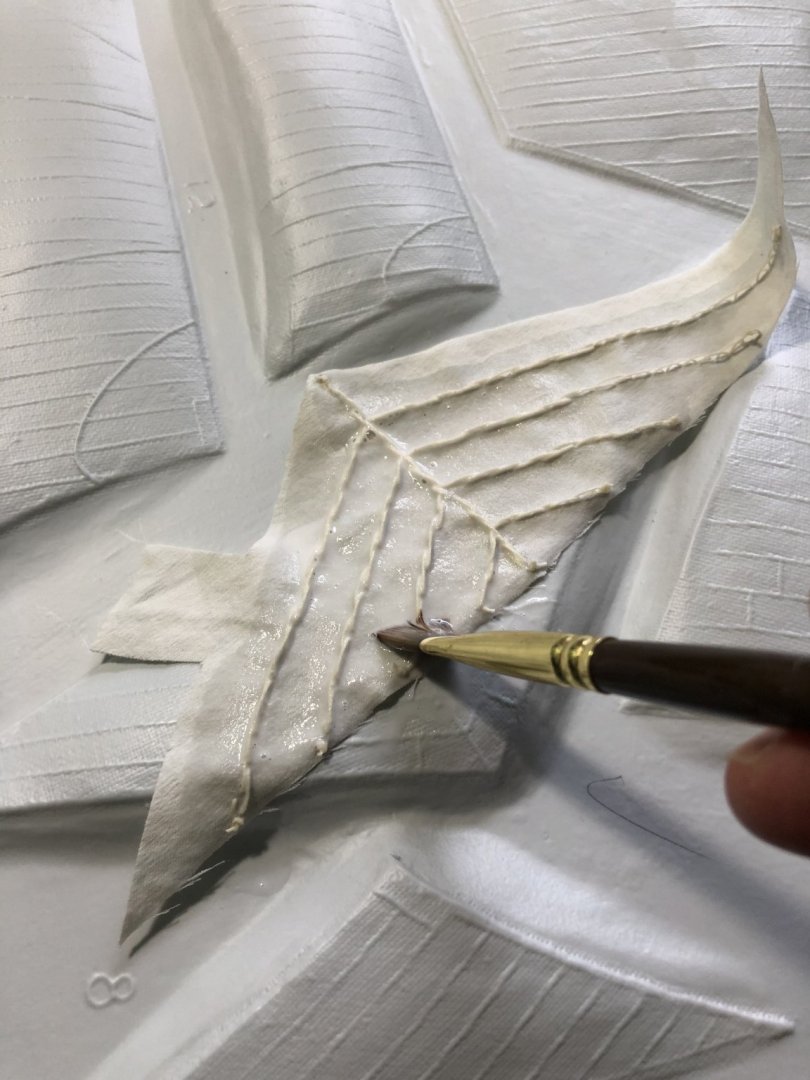
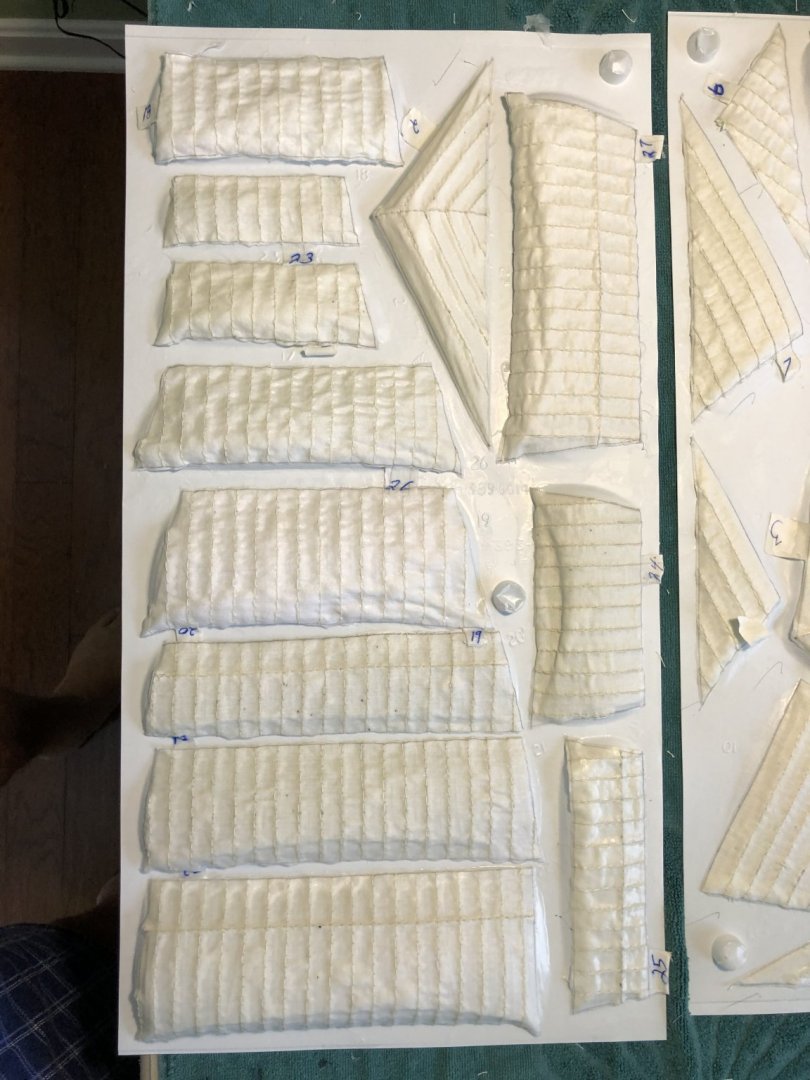
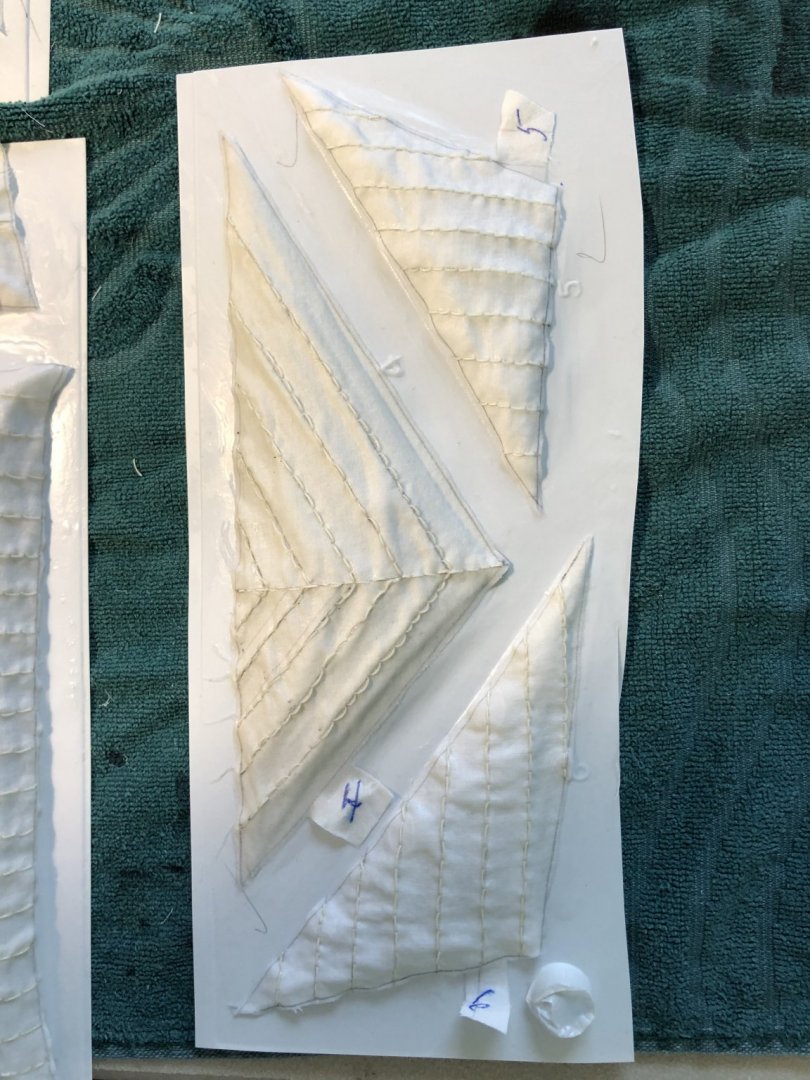
Ok after experimenting with the different sail making techniques, both paper and cloth, I settled on cloth. I drew out and cut paper patterns for each sail on the plastic form including the lines. I found an old cream colored bed sheet and stretched it out tight. Next I drew in long rolls of lines On the sheet with pencil matching the spacing on the patterns. For a bit of simplicity I spaced the lines a bit further apart then the molded forms. Next I drew all the patterns on the sheet matching the paper and cloth lines and included the sail number on a side tab. Then in a time consuming process I hand stitched all the lines within each pattern. After I finished sewing all the lines I cut out each sail. Using a 3 to 1 dilution of water and white glue I painted each sail formed over the plastic molds. When the glue dried I had a perfectly molded sail. I waited 24 hours to make sure sail was solid. I will now come up with a satisfactory color to lightly hit them with my airbrush. I think I will reinforce the bottom corners for rigging before I attach them to the yards. I am happy with them. As a purest I know the stitching is out of scale but I am willing to except that.


-
Robert I am so sorry to hear about your sick family member. Went through a very similar time in the past year. Even though I only know you through this blog I feel like we are friends, at least friends in modeling. Hang in there. Later when it is more appropriate I will let you know my final decision on my sail making. Right now for you i am sure it is not very important.
- 165 replies
-
- 1
-
-
- english galleon
- revell
- (and 2 more)
-
To add sails or not? What is your preference?
Bill97 replied to Bill97's topic in Masting, rigging and sails
Finished the sails today. Added all the lines and a little antiquing. Now to start adding the blocks and getting ready to rig them on the ship.


-
To add sails or not? What is your preference?
Bill97 replied to Bill97's topic in Masting, rigging and sails
Ok after experimenting with the different sail making techniques, both paper and cloth, I settled on cloth. I drew out and cut paper patterns for each sail on the plastic form including the lines. I found an old cream colored bed sheet and stretched it out tight. Next I drew in long rolls of lines On the sheet with pencil matching the spacing on the patterns. For a bit of simplicity I spaced the lines a bit further apart then the molded forms. Next I drew all the patterns on the sheet matching the paper and cloth lines and included the sail number on a side tab. Then in a time consuming process I hand stitched all the lines within each pattern. After I finished sewing all the lines I cut out each sail. Using a 3 to 1 dilution of water and white glue I painted each sail formed over the plastic molds. When the glue dried I had a perfectly molded sail. I waited 24 hours to make sure sail was solid. I will now come up with a satisfactory color to lightly hit them with my airbrush. I think I will reinforce the bottom corners for rigging before I attach them to the yards. I am happy with them. As a purest I know the stitching is out of scale but I am willing to except that.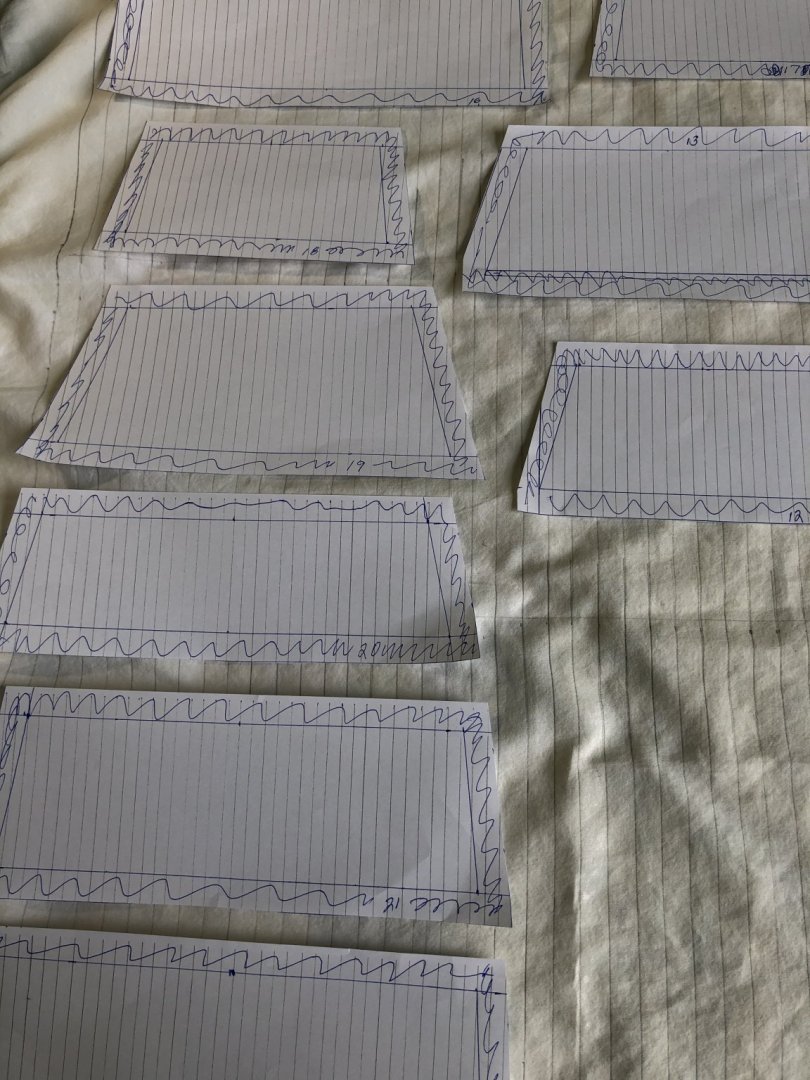


-
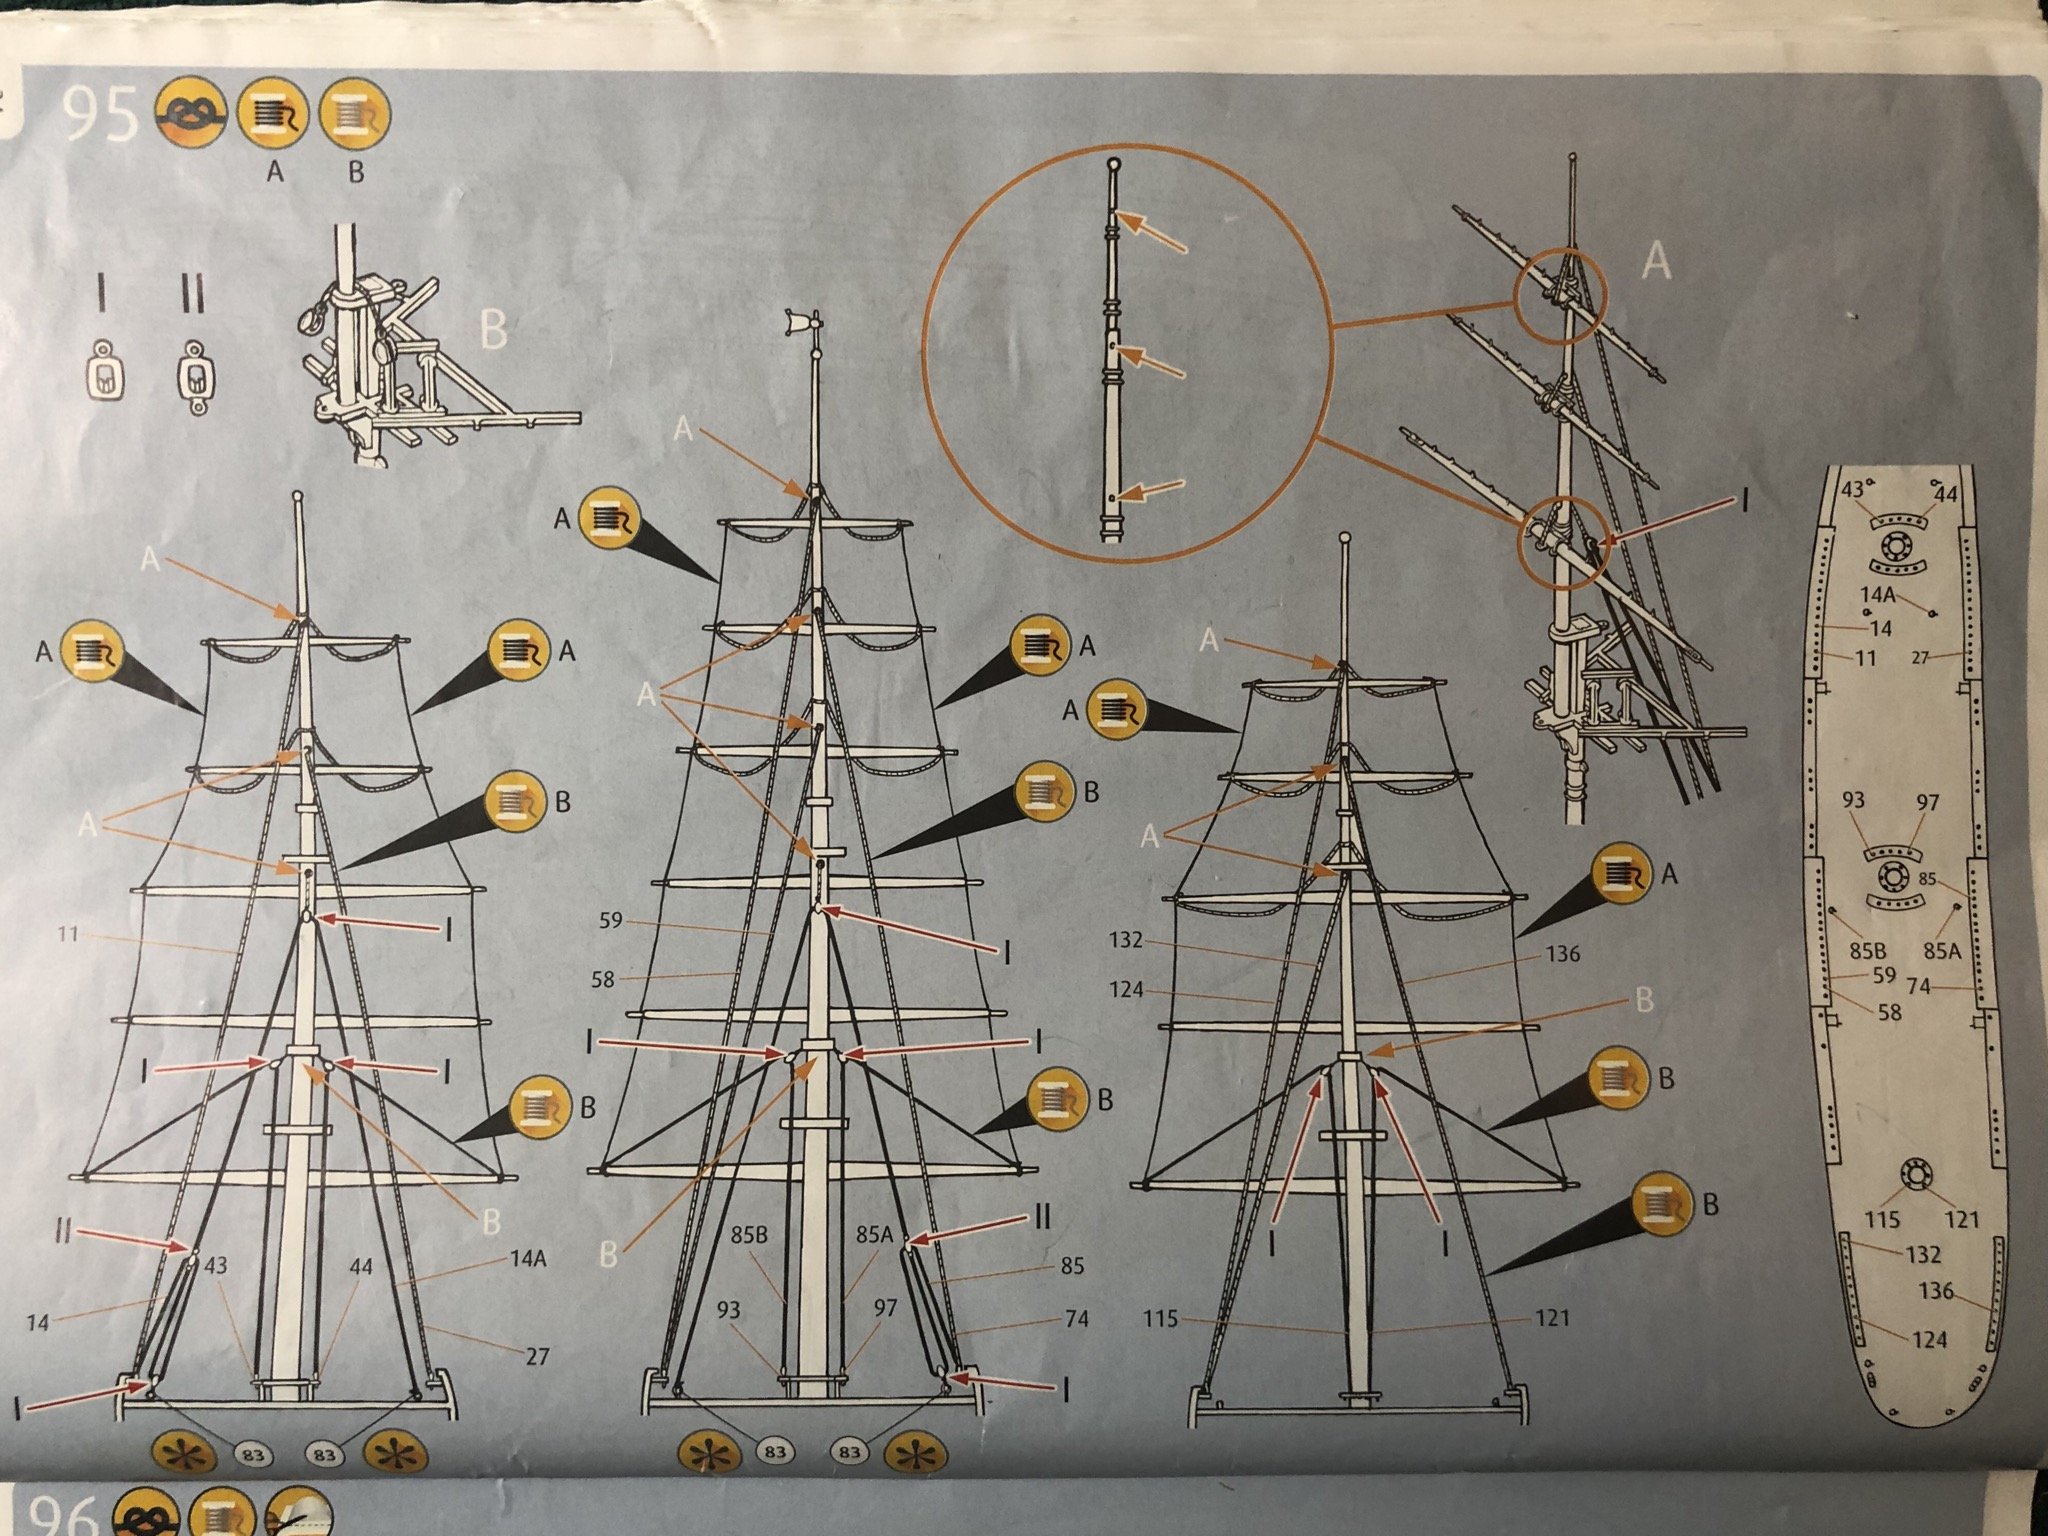
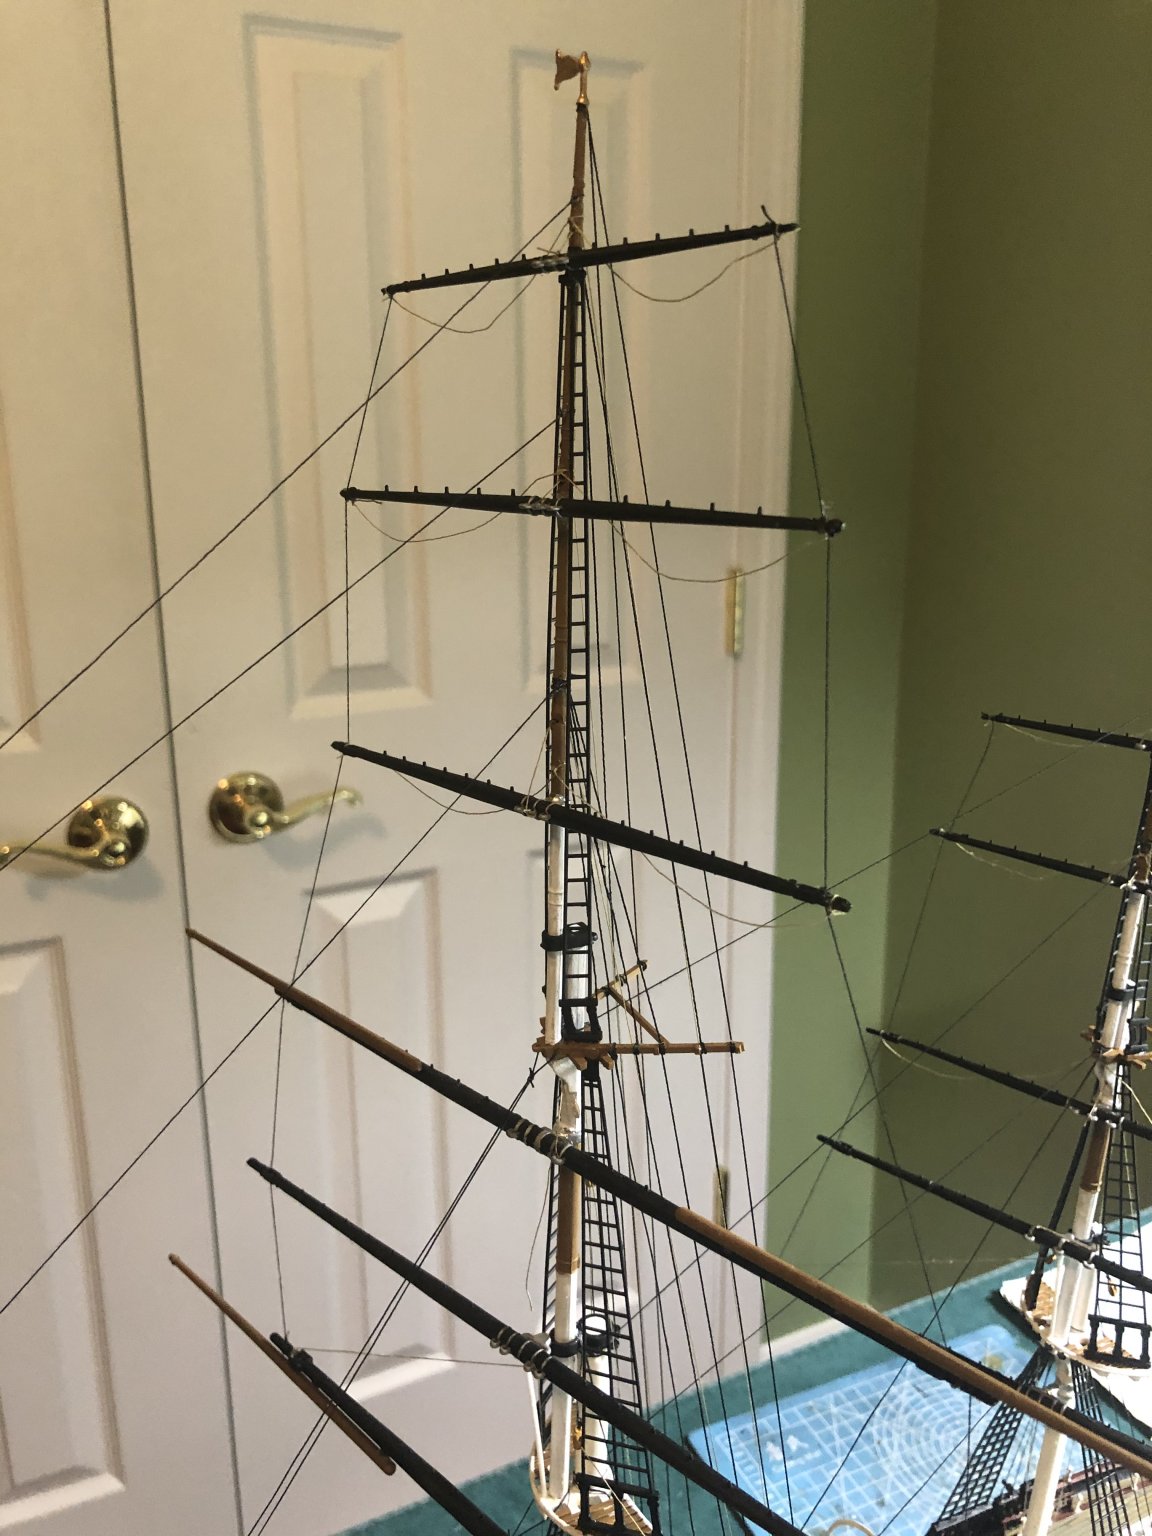
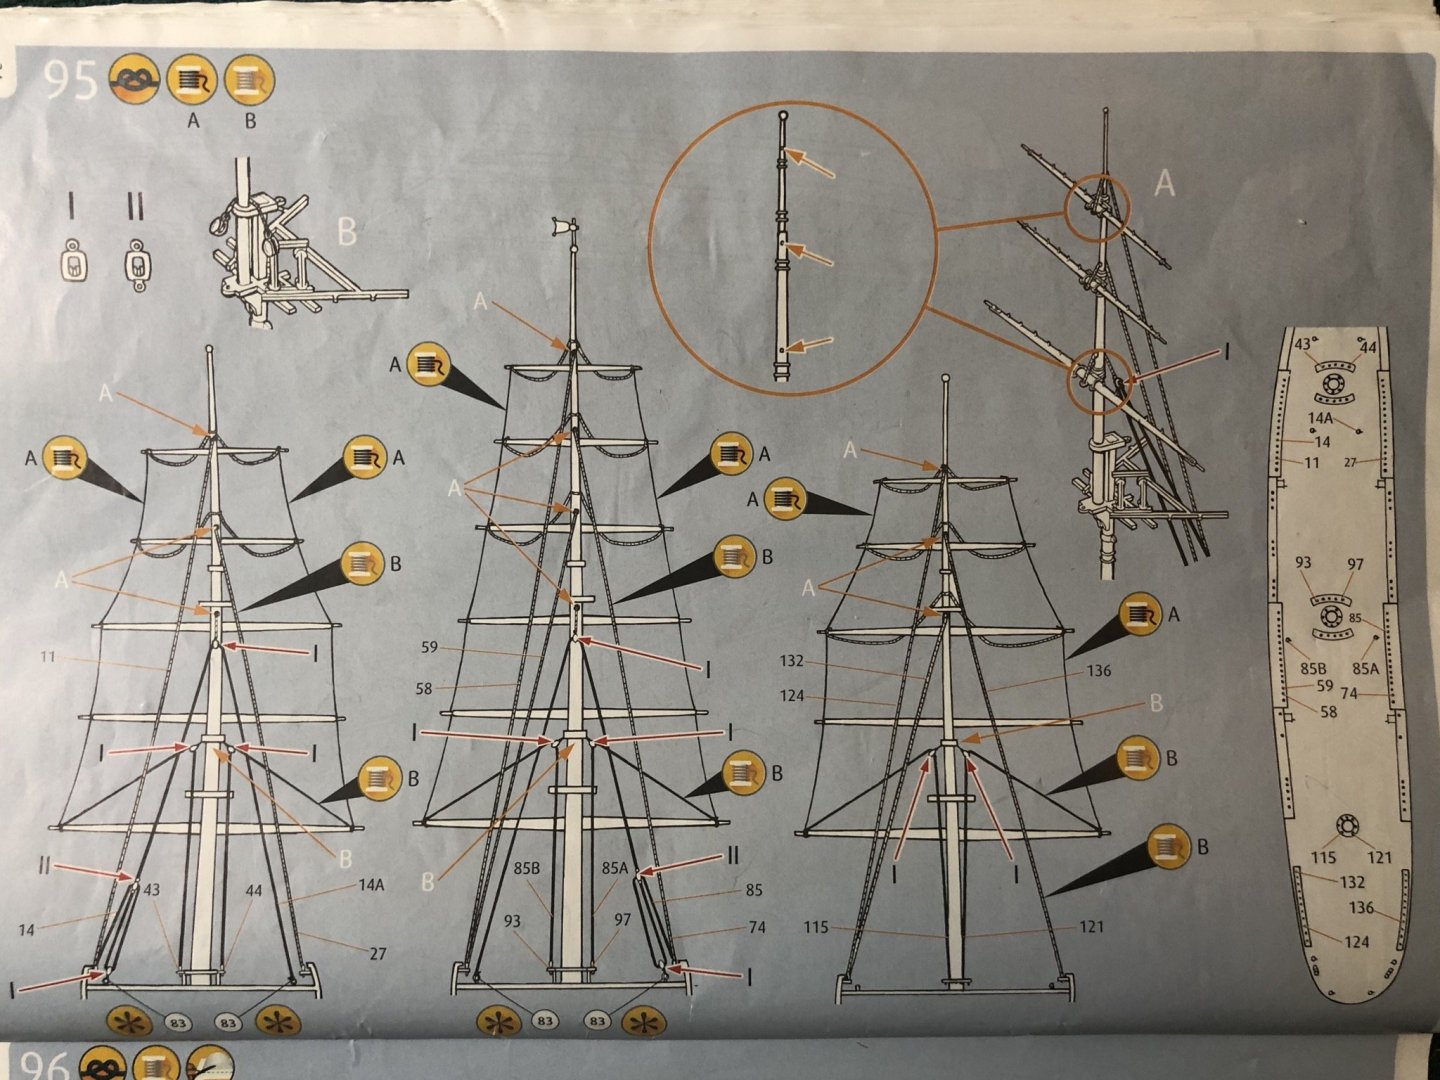
Hello Bruma. How is your build coming along? I have set mine aside for a few days while I work on making my own sails. Once they are done and ready to go I will start the running rigging. I also have the old rigging instructions which, like you said, are a bit more understandable. Those are the ones I plan to use. I looked at the Campbell instructions. Wow! That is intense. One thing I noticed right away when I started the rigging was in the new instructions In Step 95 you are instructed to tie the ends of the yards together with black thread. That step is not in the older instructions, and it does not seem to carry over in subsequent steps. I did it and for now it has been helpful keeping the yards parallel, but I wonder if I will need to remove it later.

-
Great Robert. Will let you know how my attempt goes.
- 165 replies
-
- 1
-
-
- english galleon
- revell
- (and 2 more)