Bill97
-
Posts
2,716 -
Joined
-
Last visited
Content Type
Profiles
Forums
Gallery
Events
Everything posted by Bill97
-
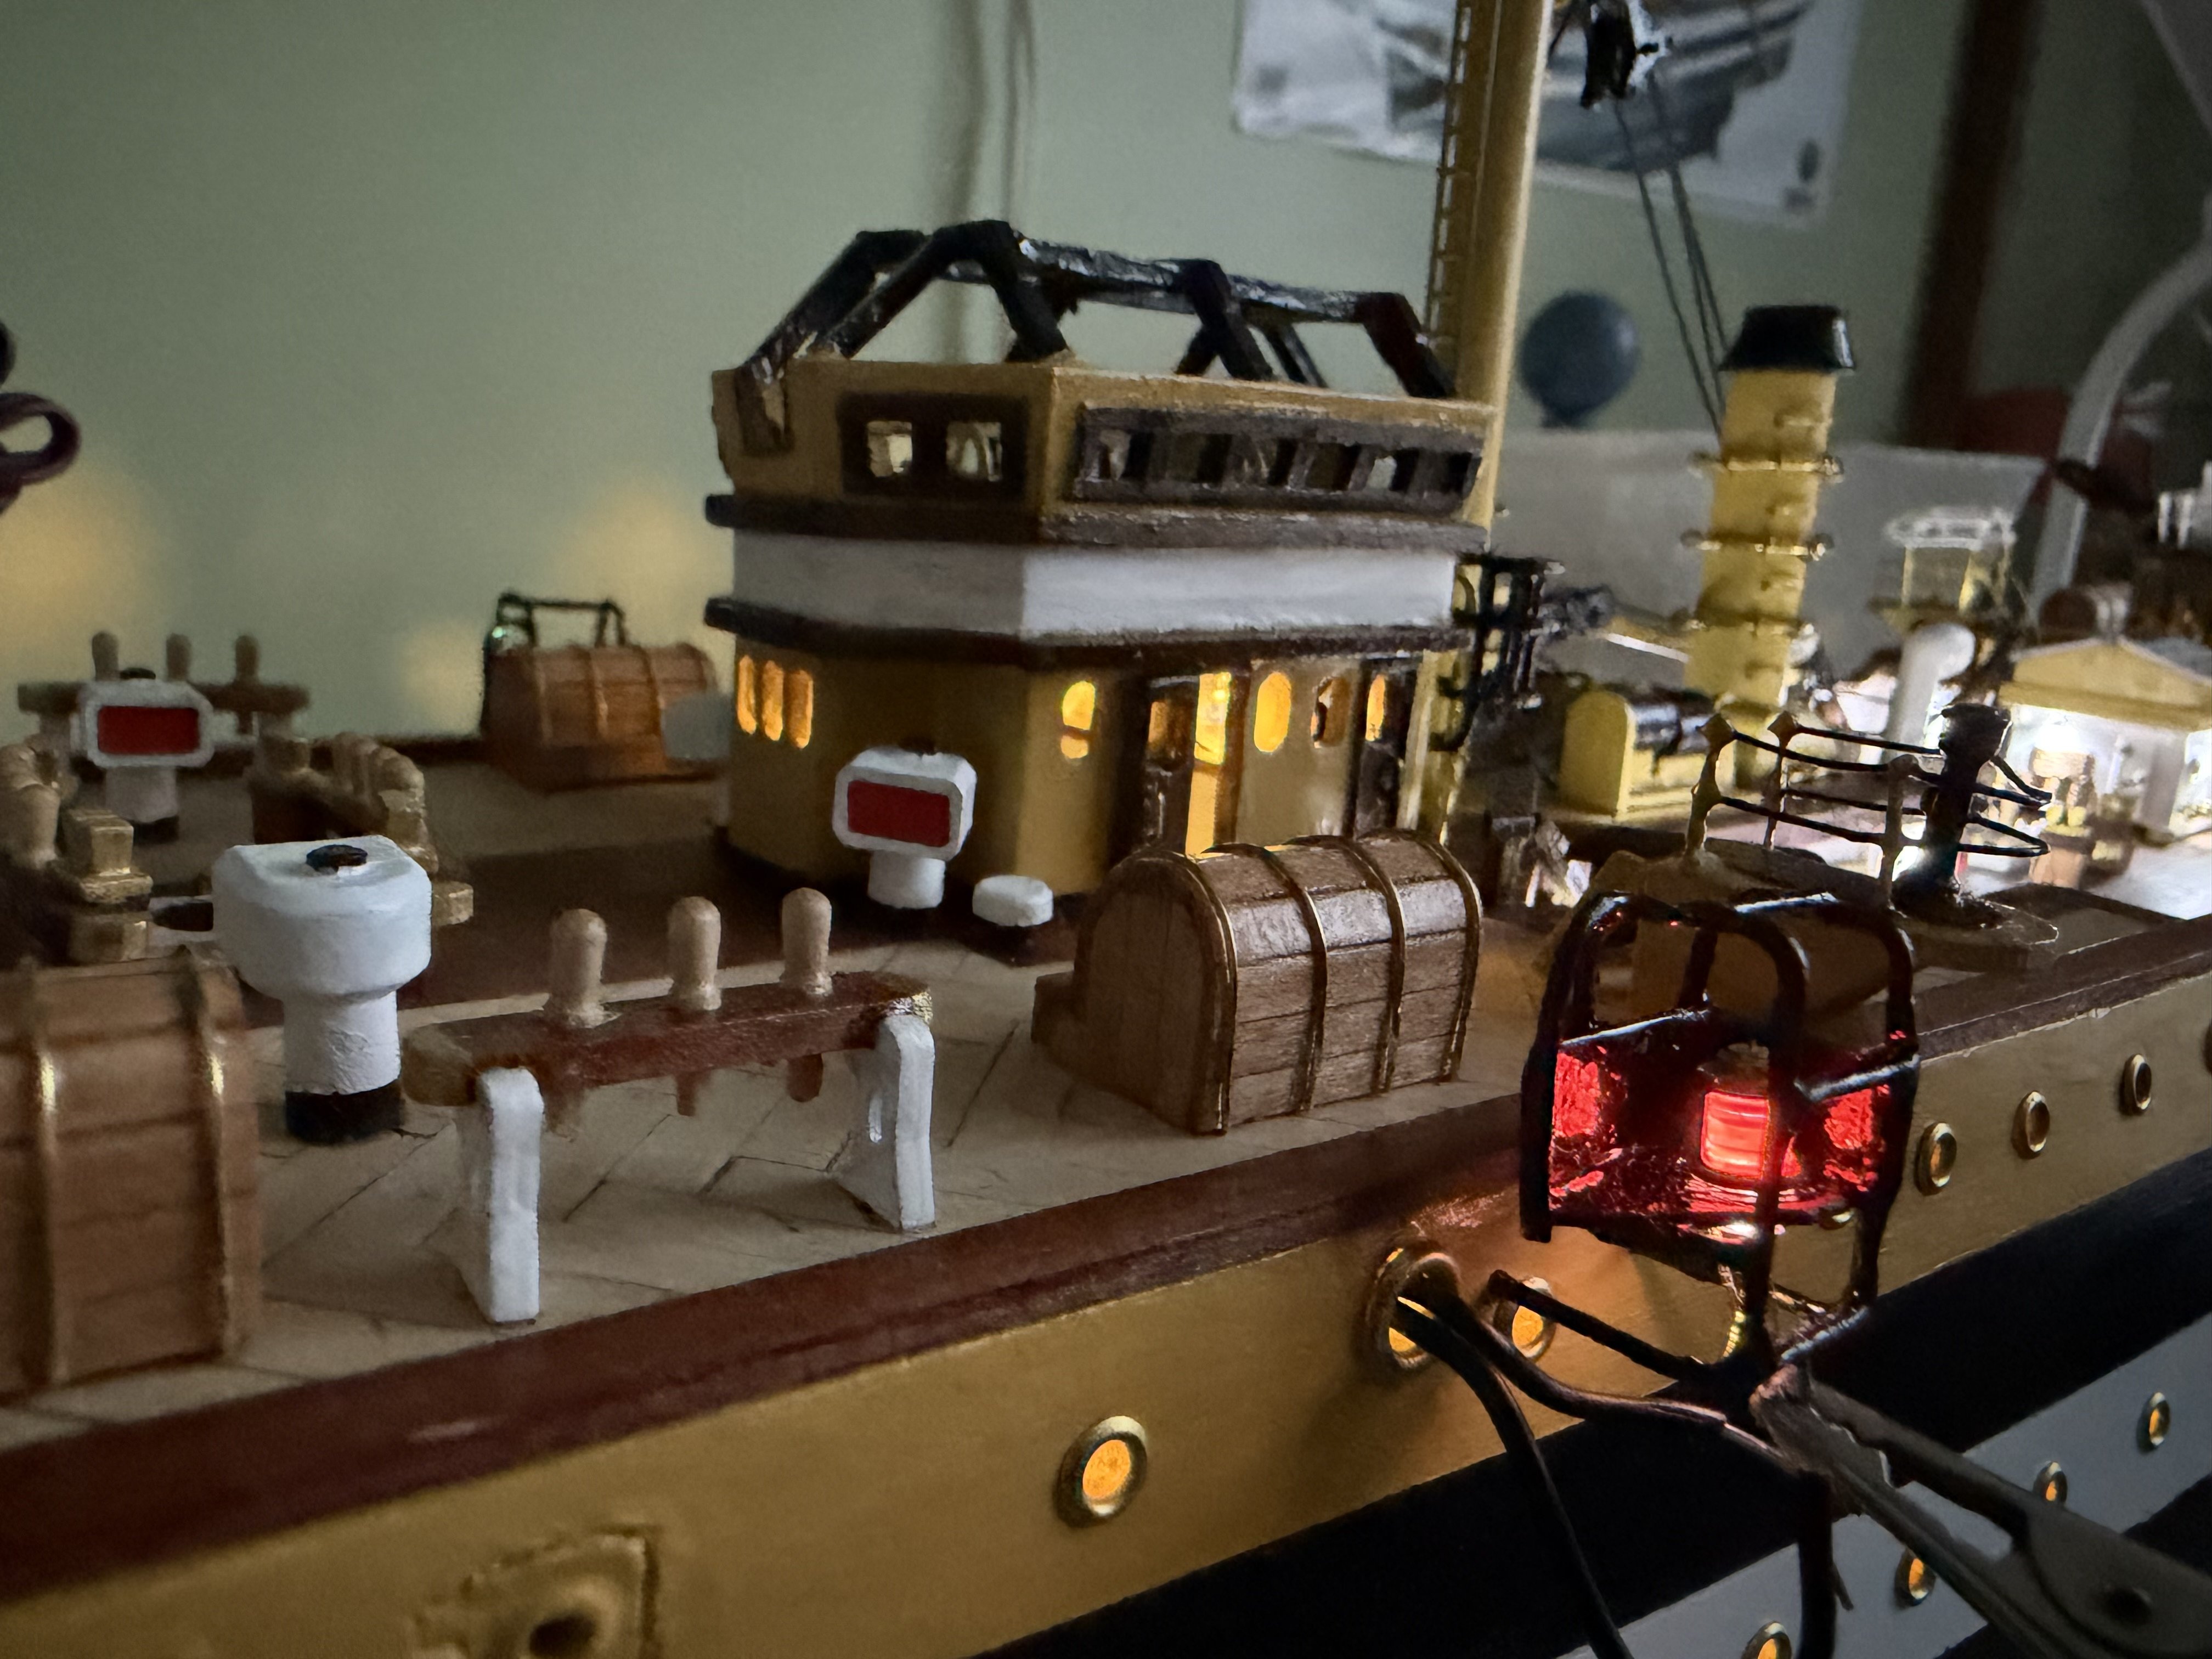
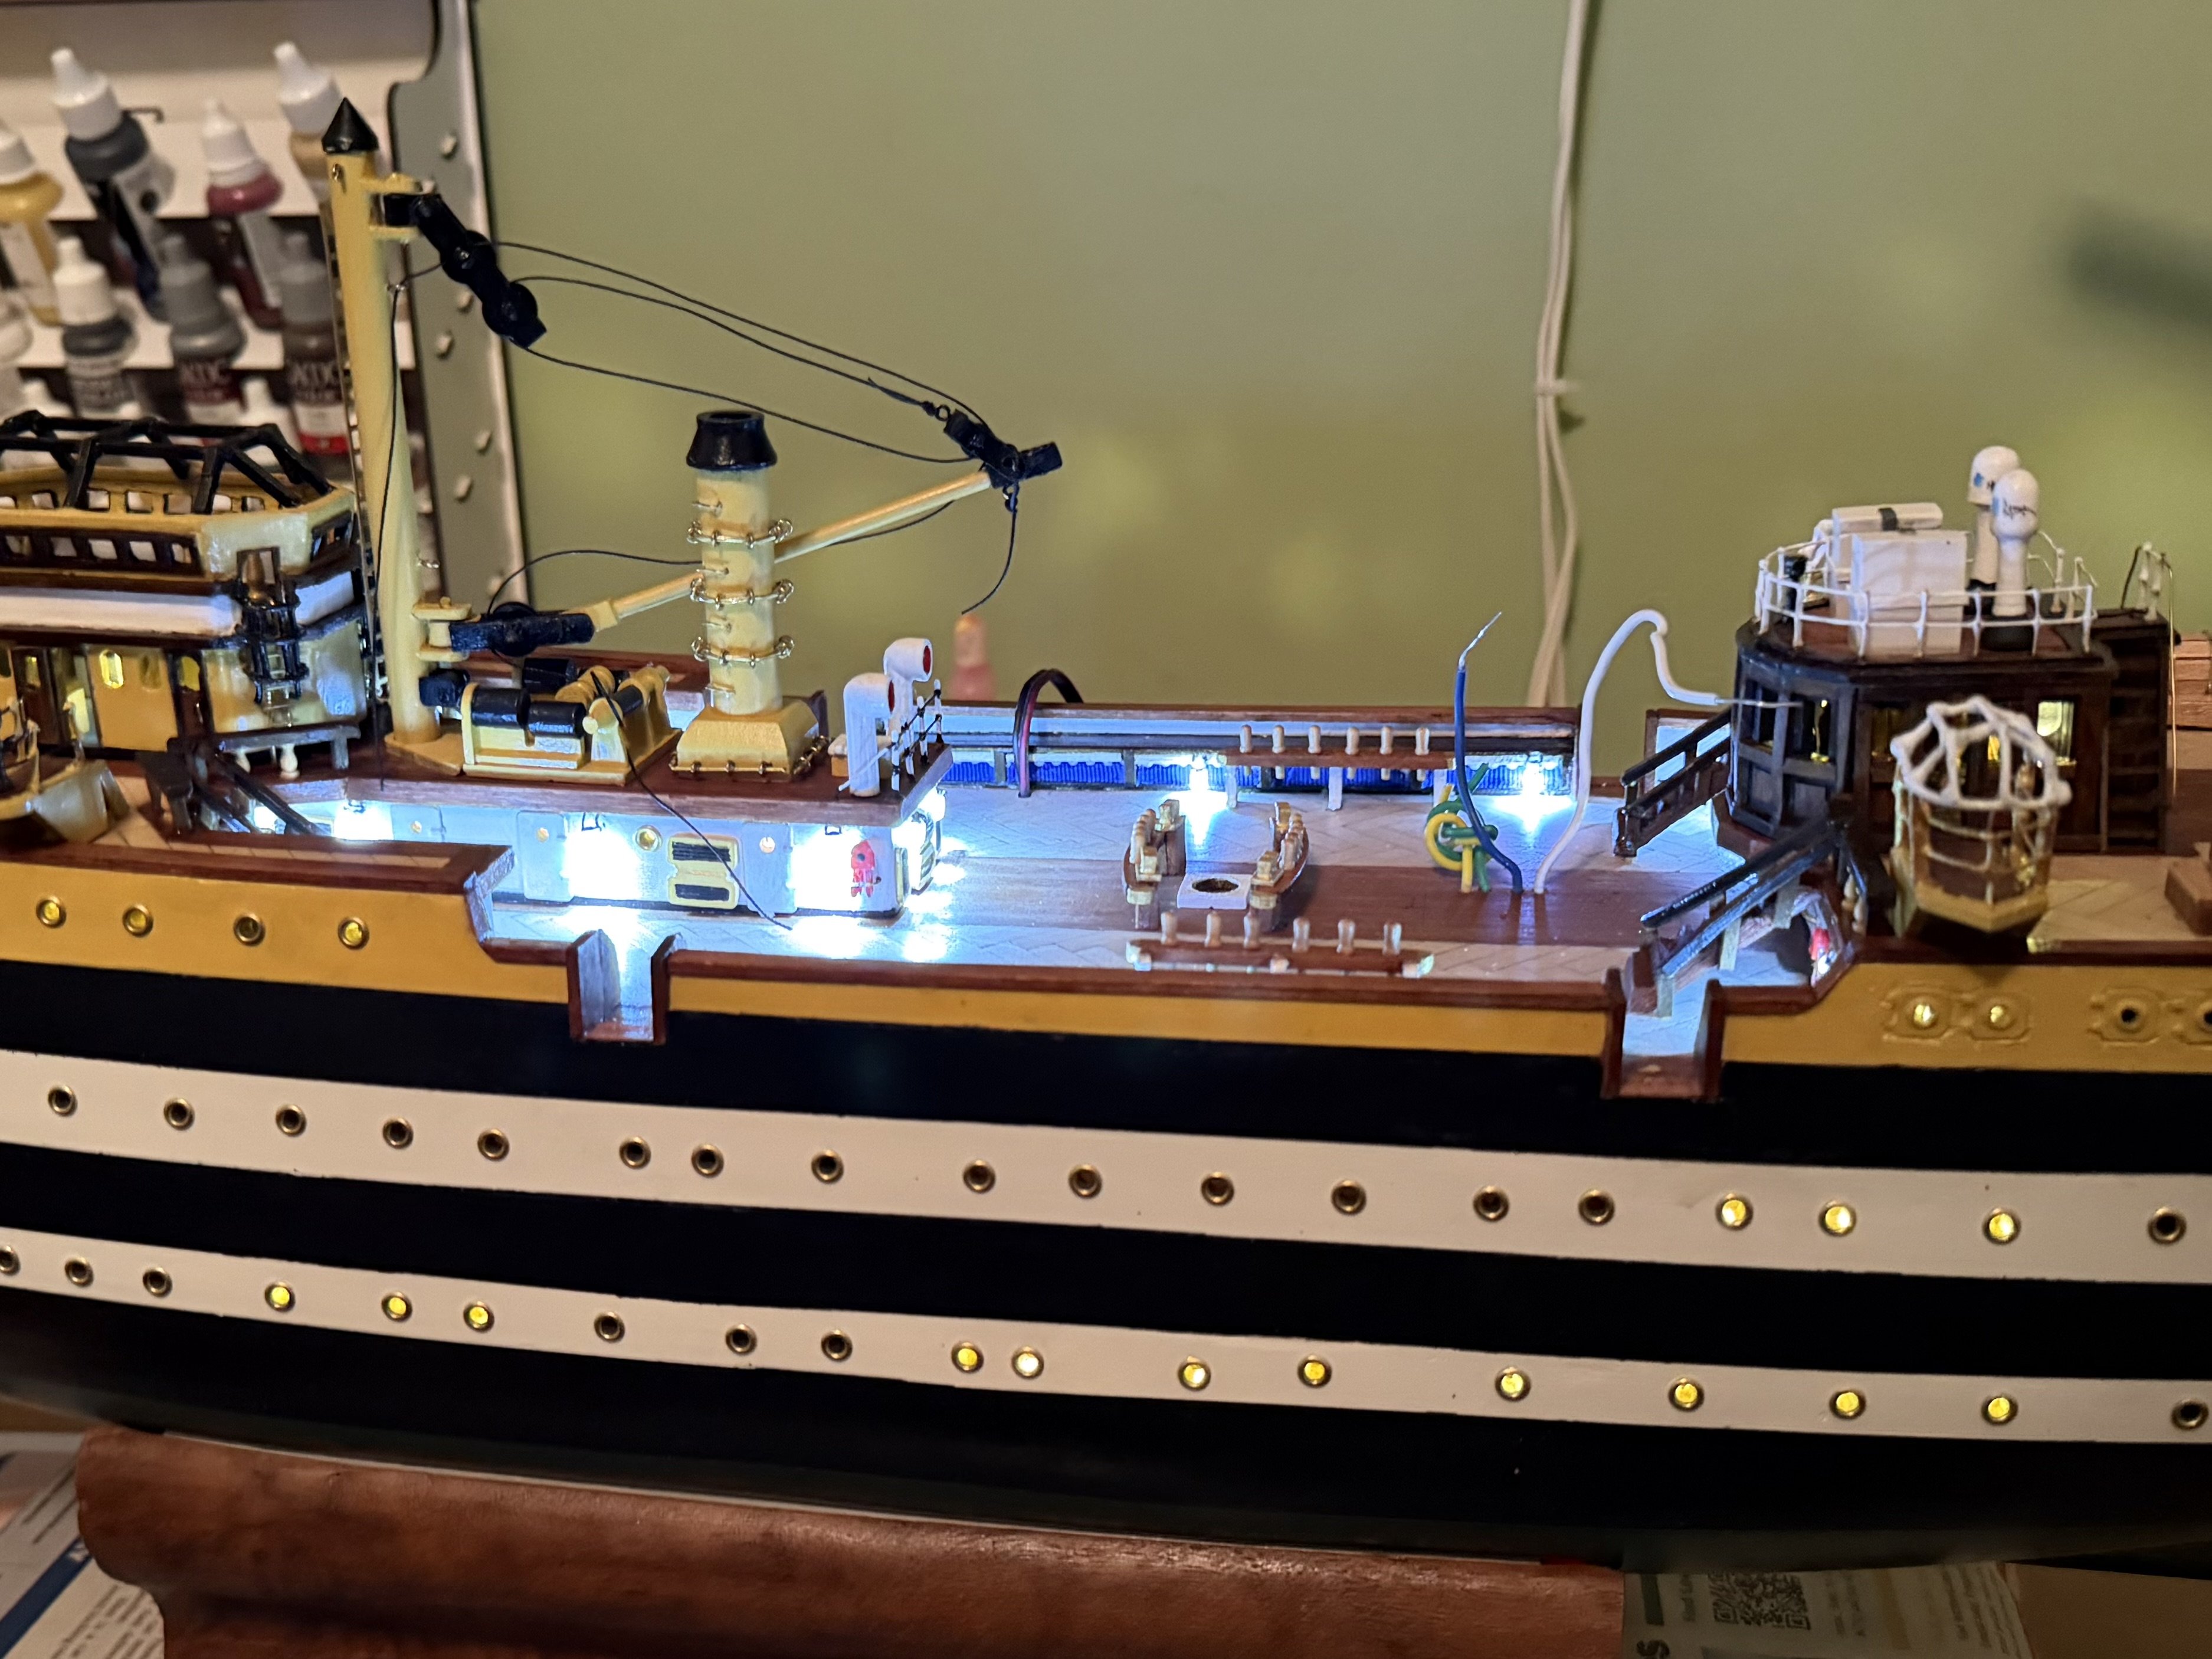
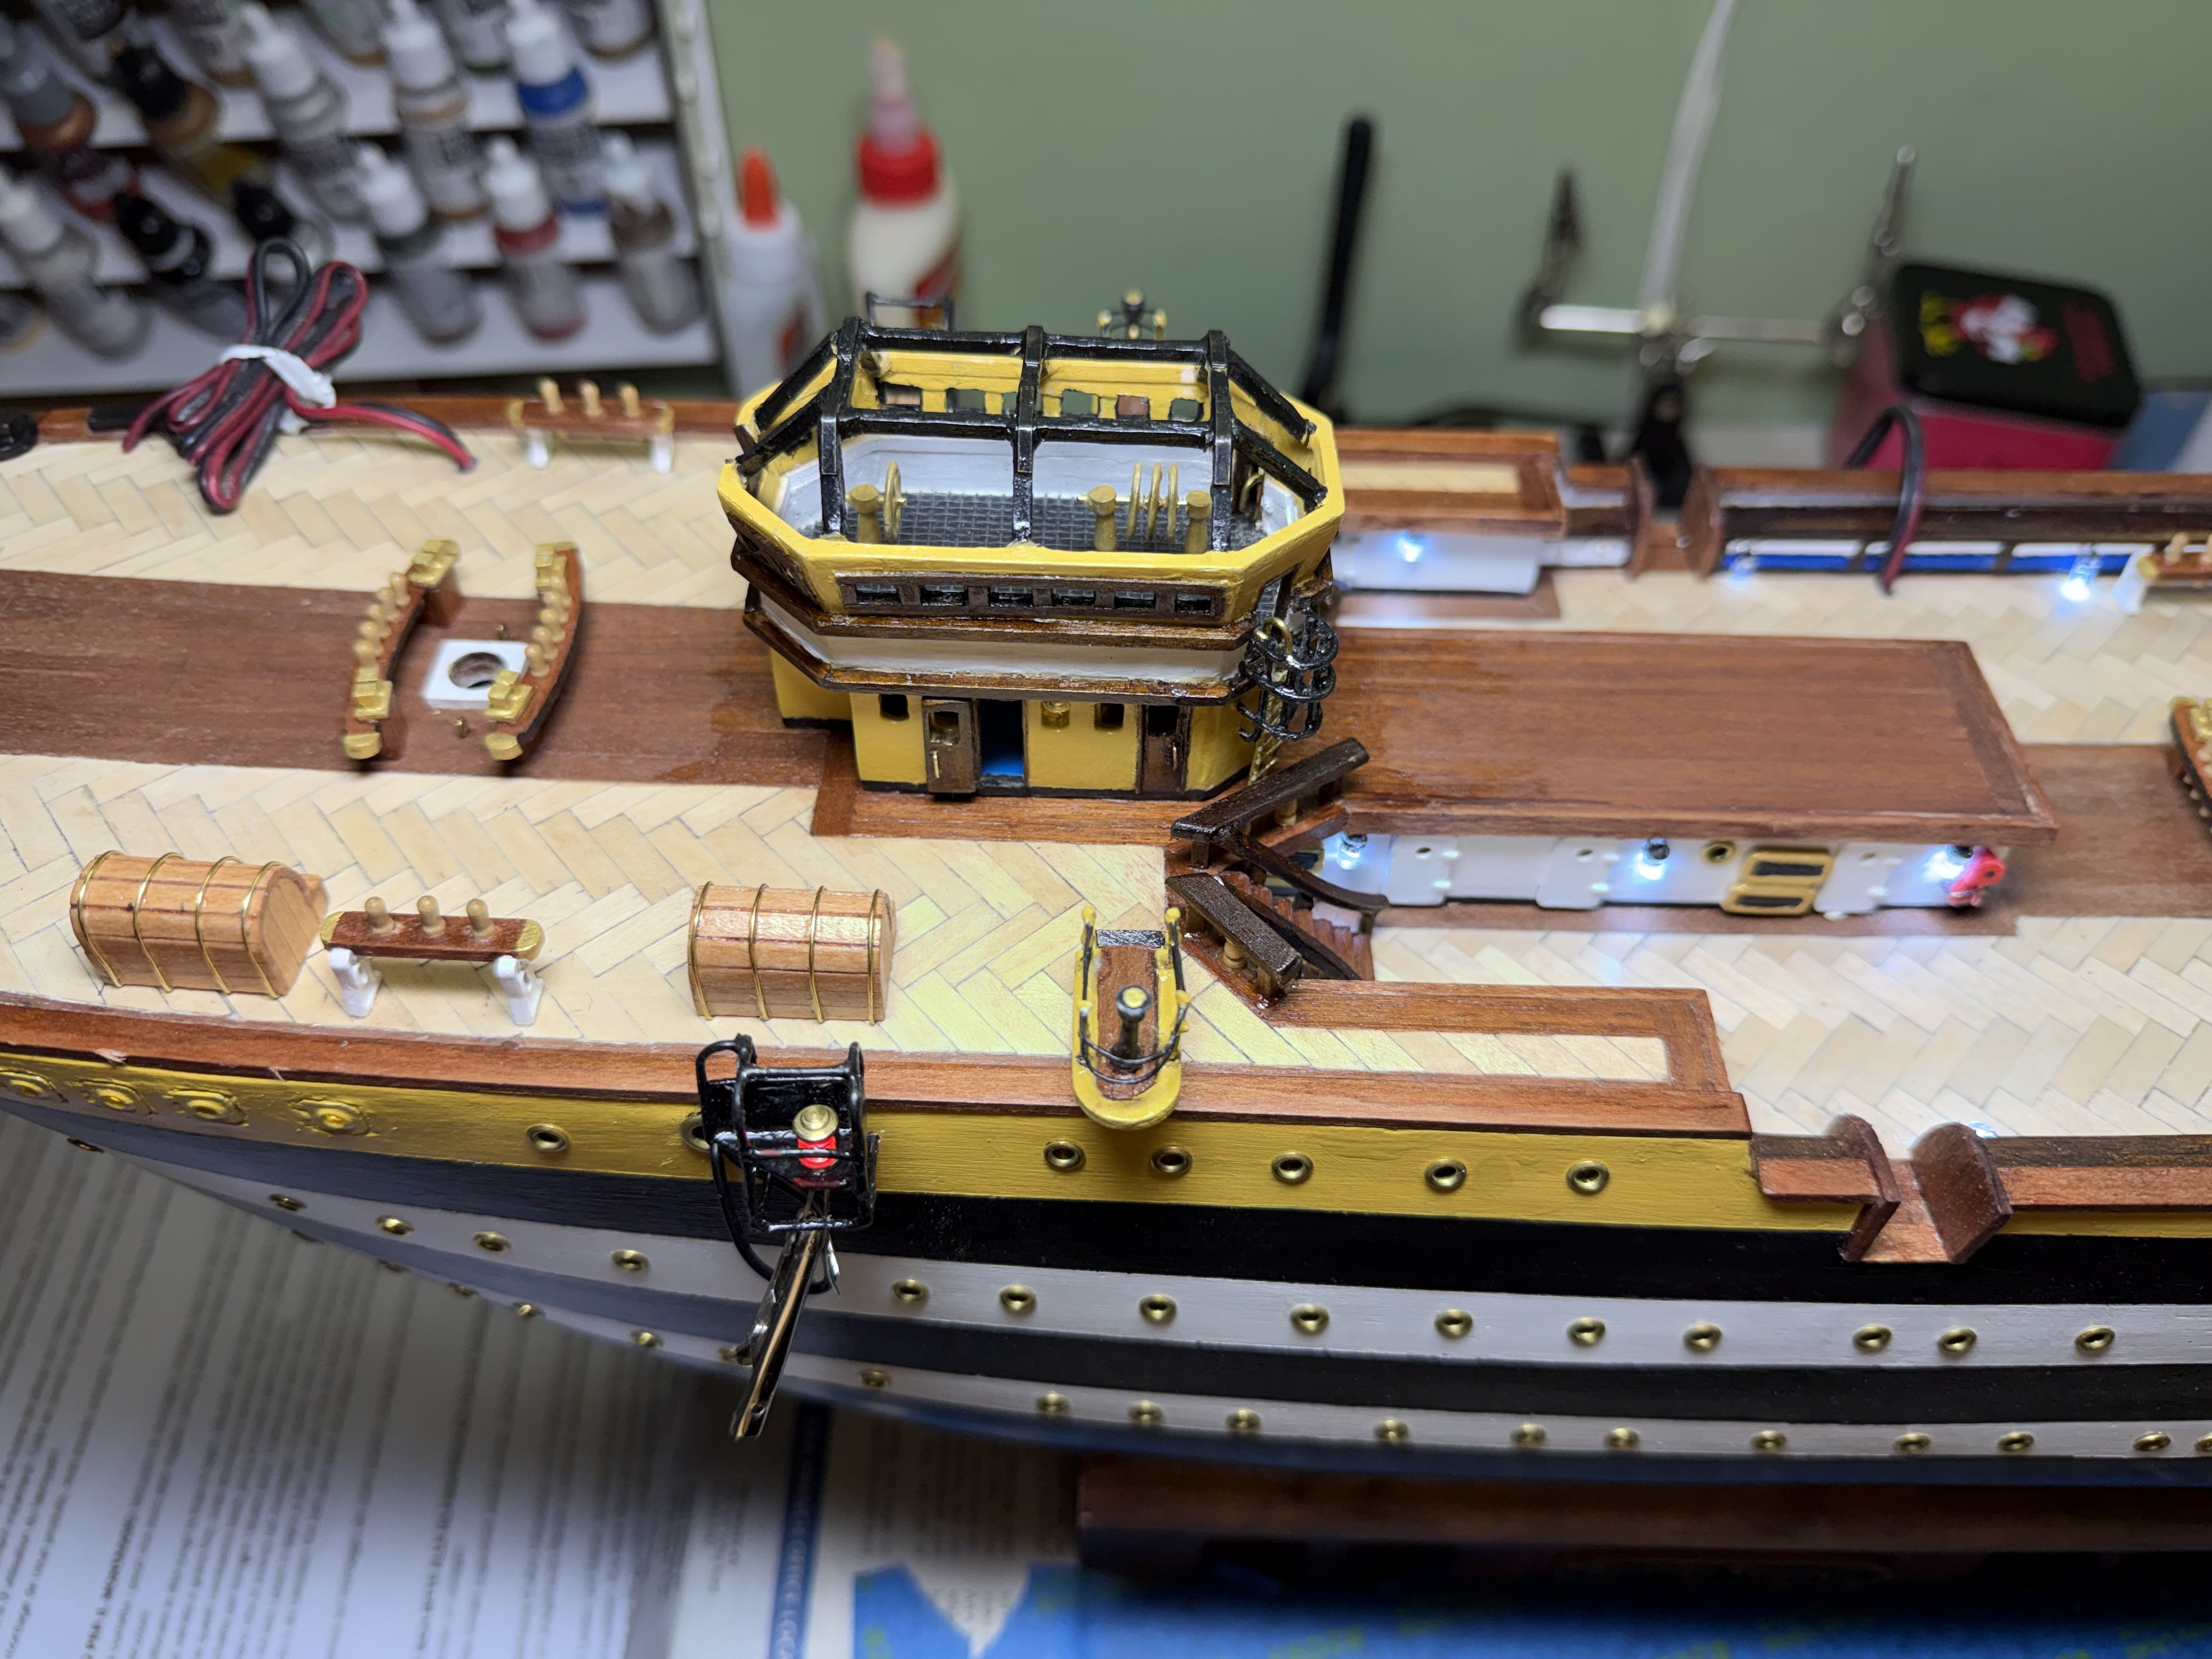
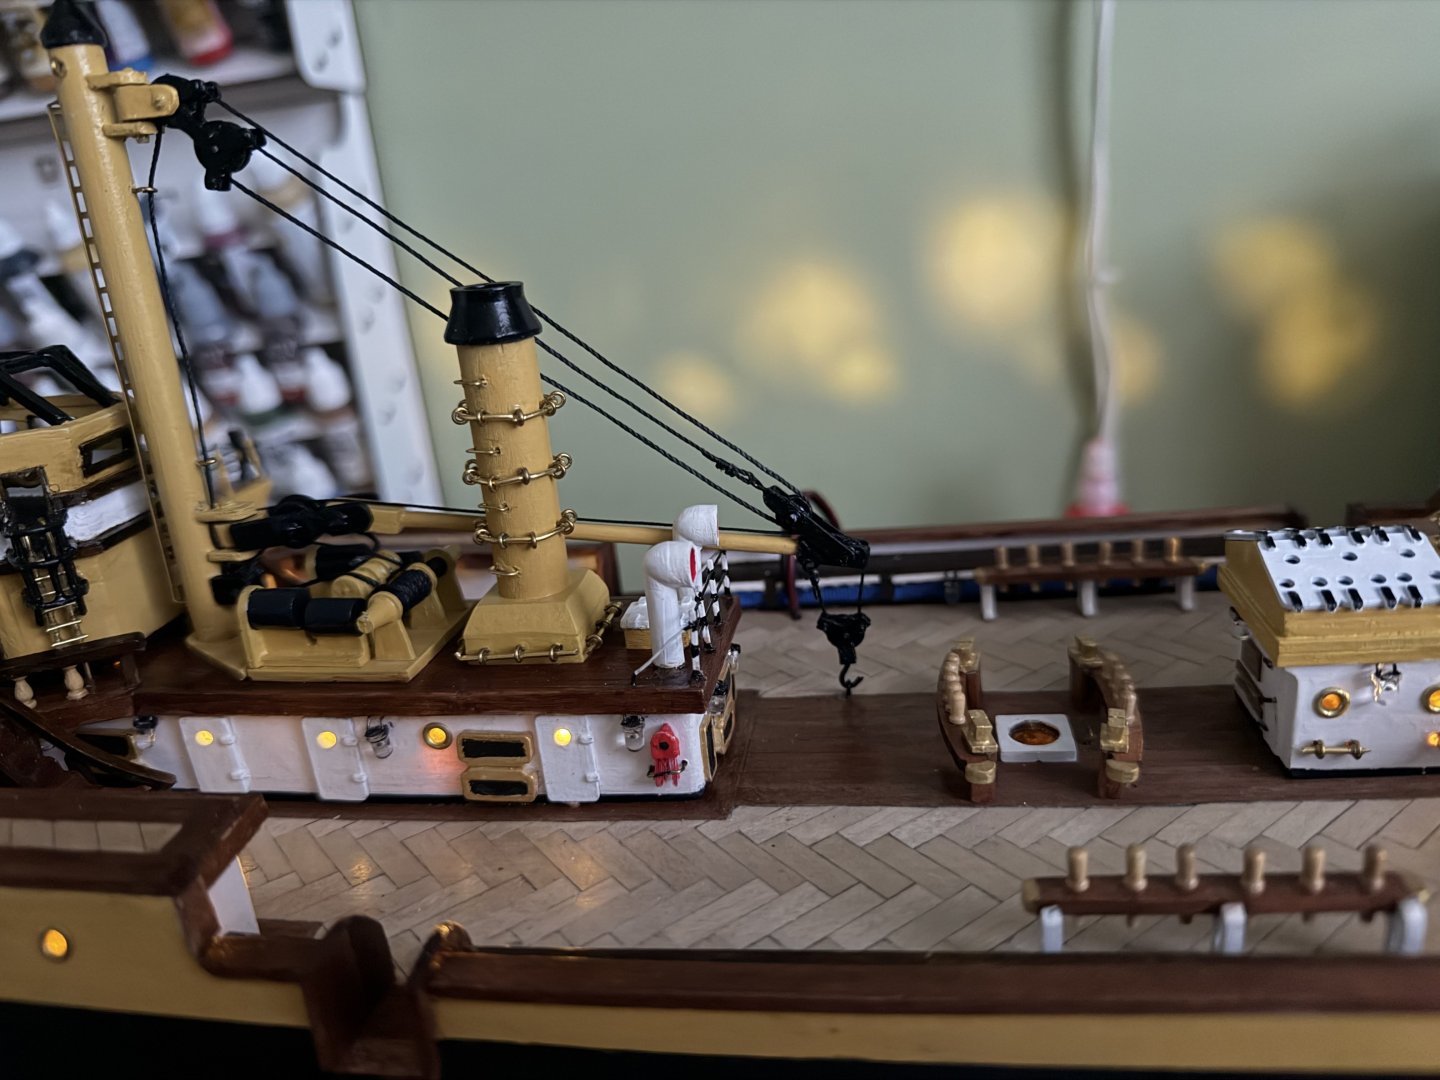
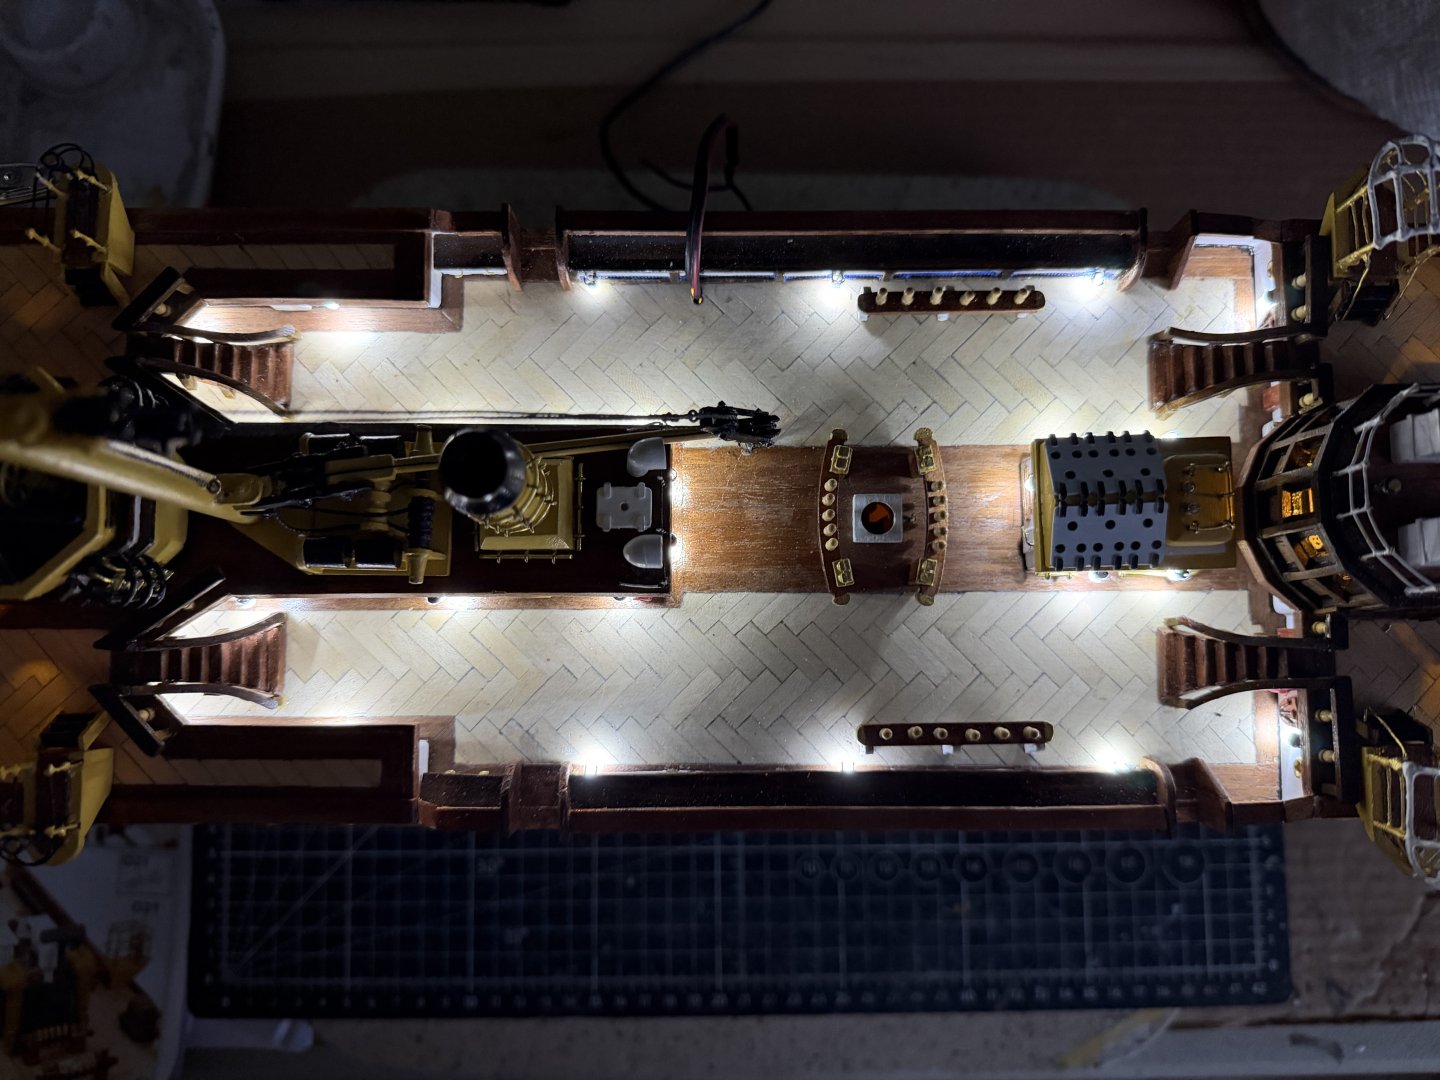
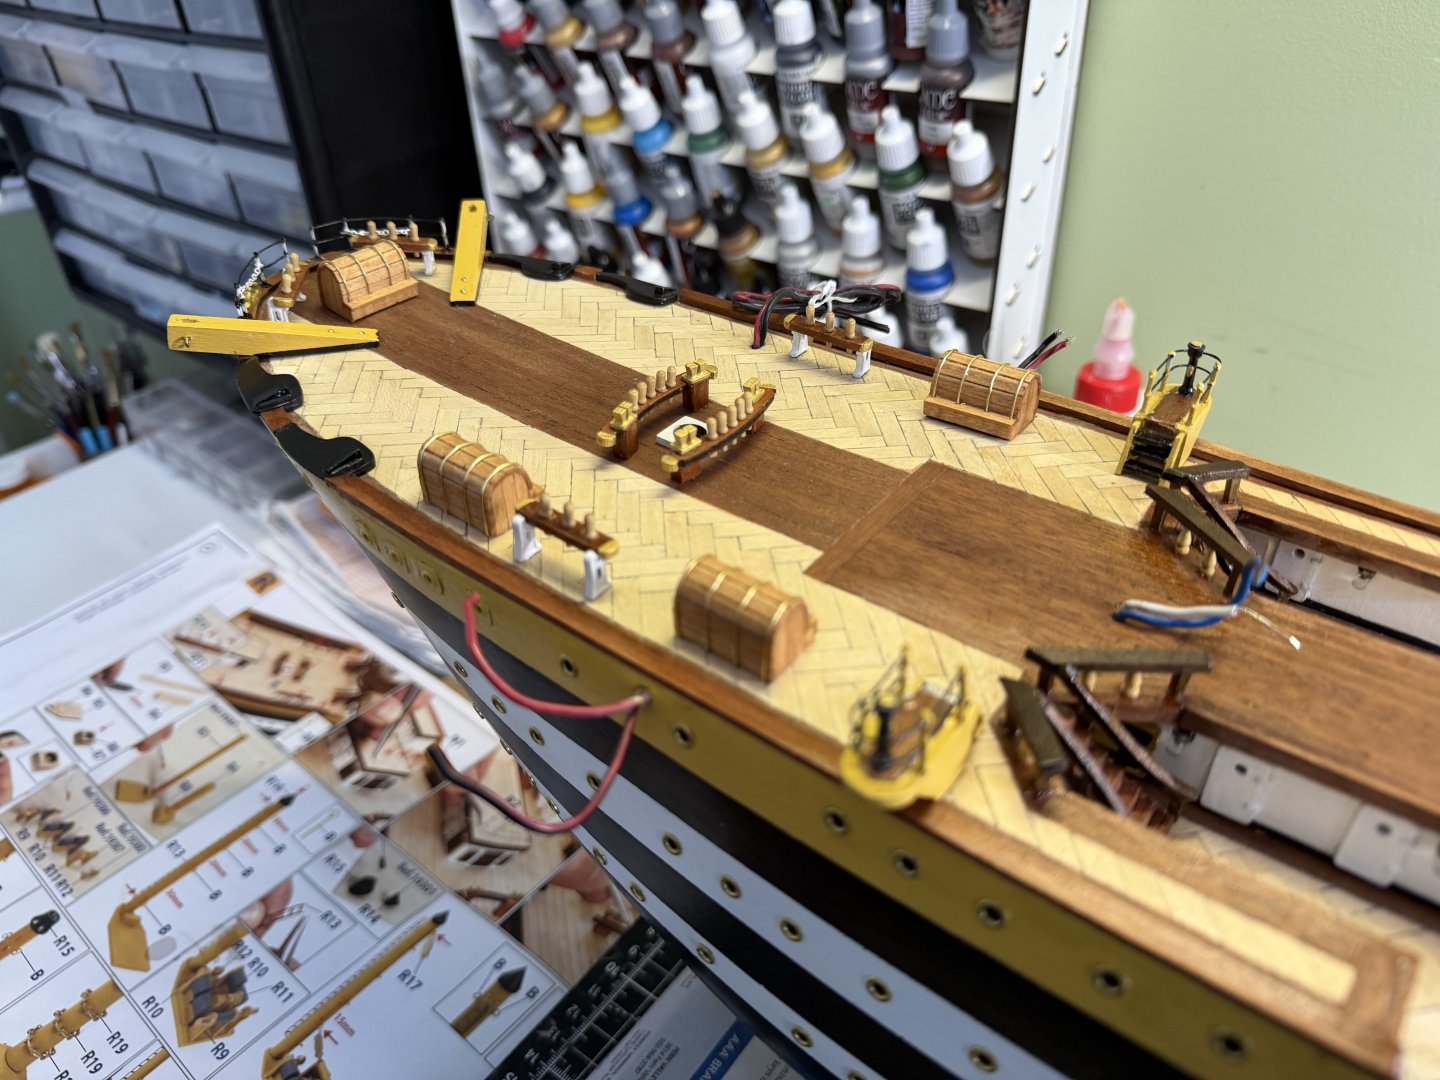
Have spent a good amount of time painting all the small “doo-dads” that are placed on the deck around the ship. I opened a couple of the hatches and added lock down wheels (I guess that is what they are called). I made small brass rings to go over all the holes in the different items to match the porthole rings. I fashioned some vent open/close wheels that place on top each vent. I covered the three round bench type items at the stern with stripes of alternating veneer. Most of these are in accordance with the actual ship. I still have to tinker with and paint the capstans.


-
Ian check your email. I sent you an inventory list.
-
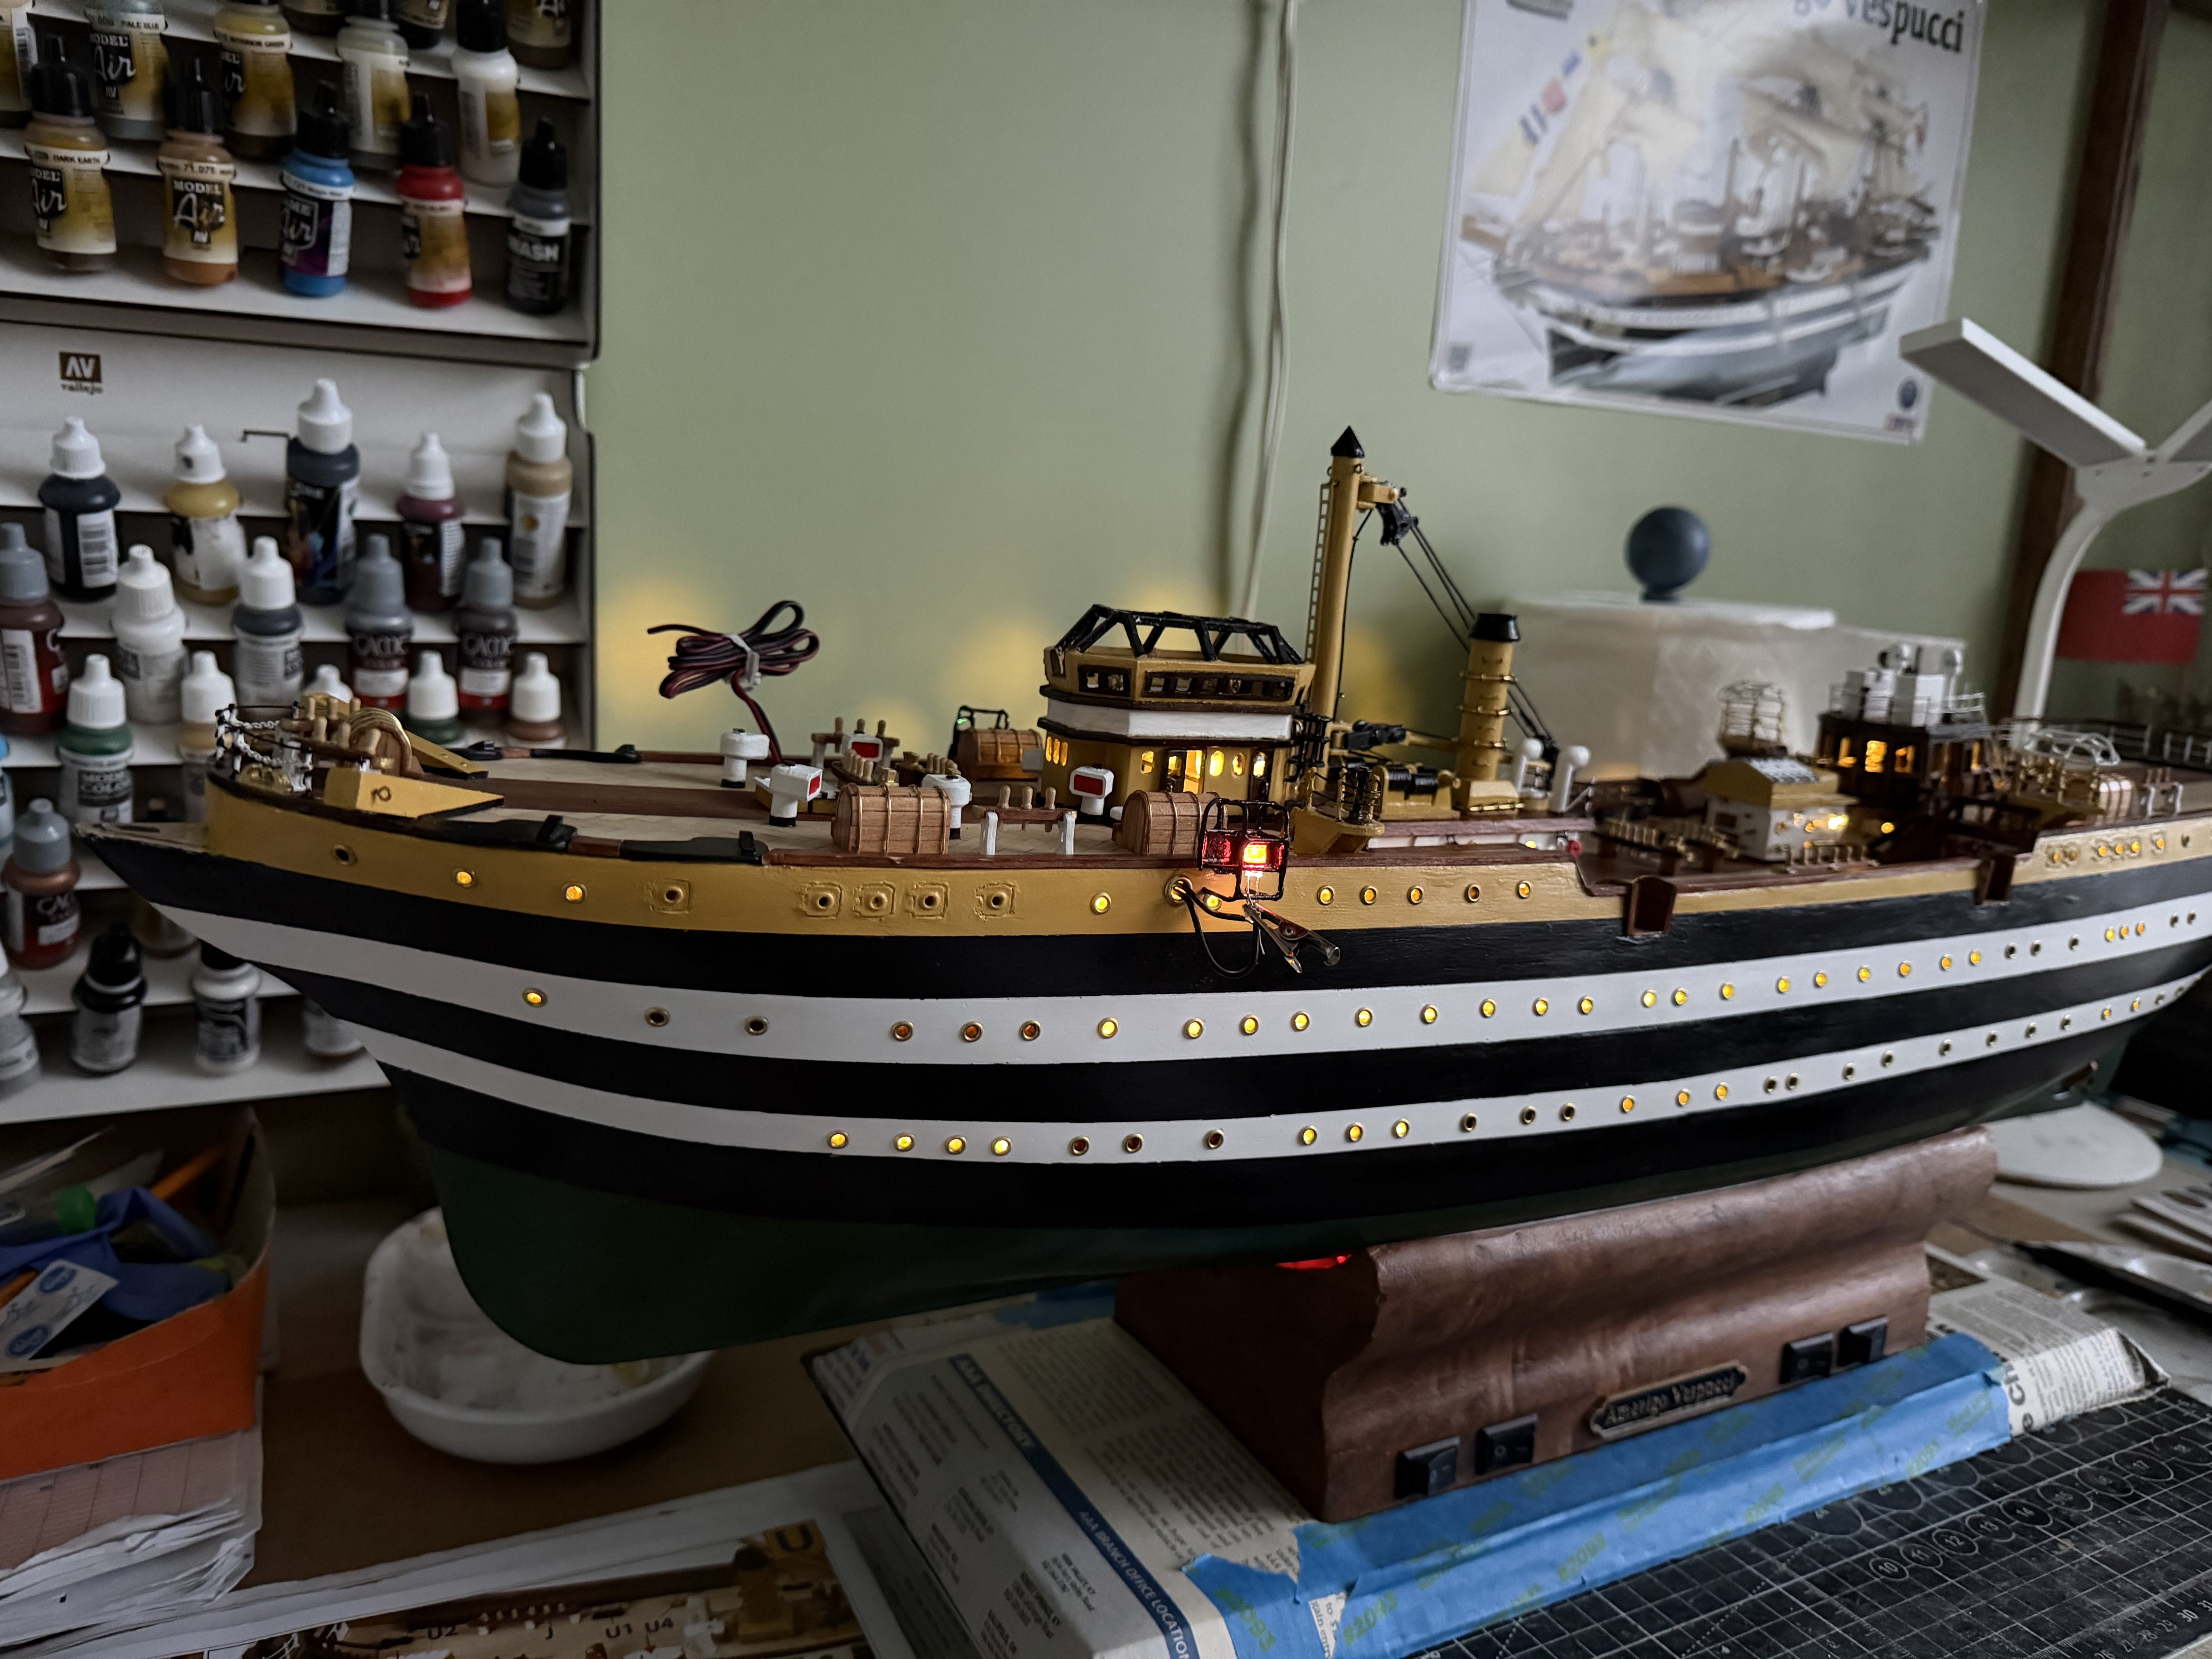
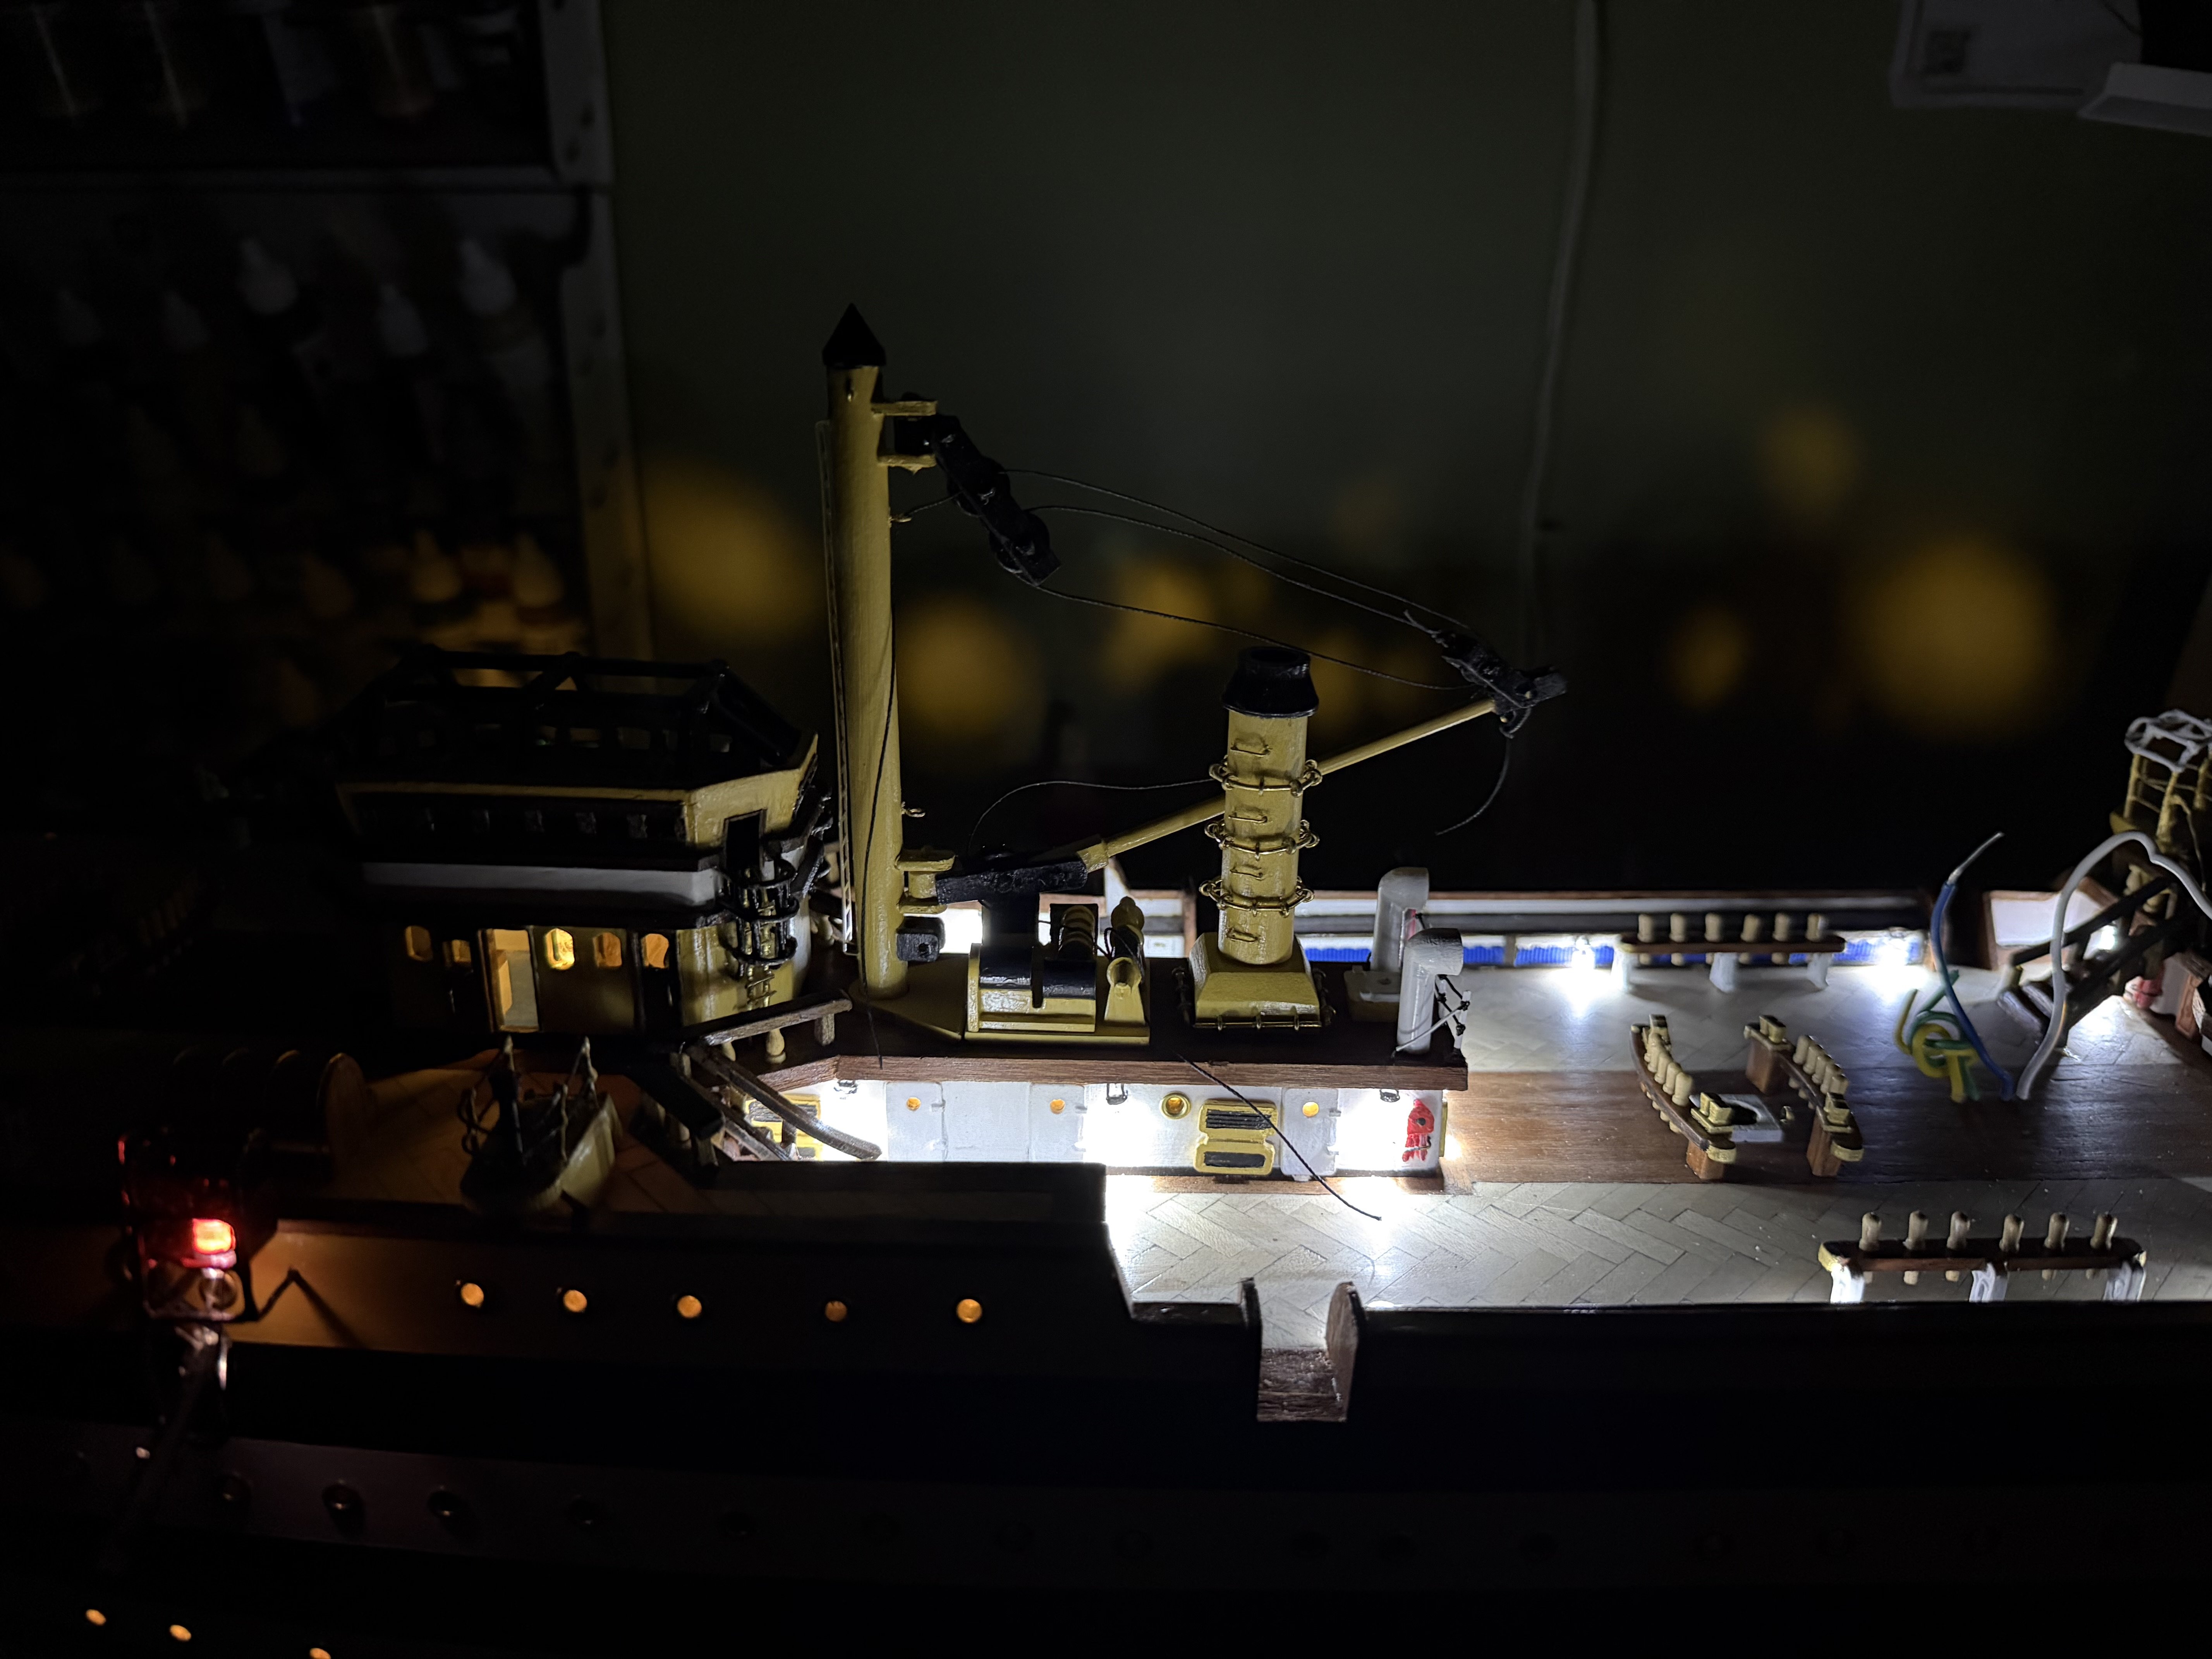
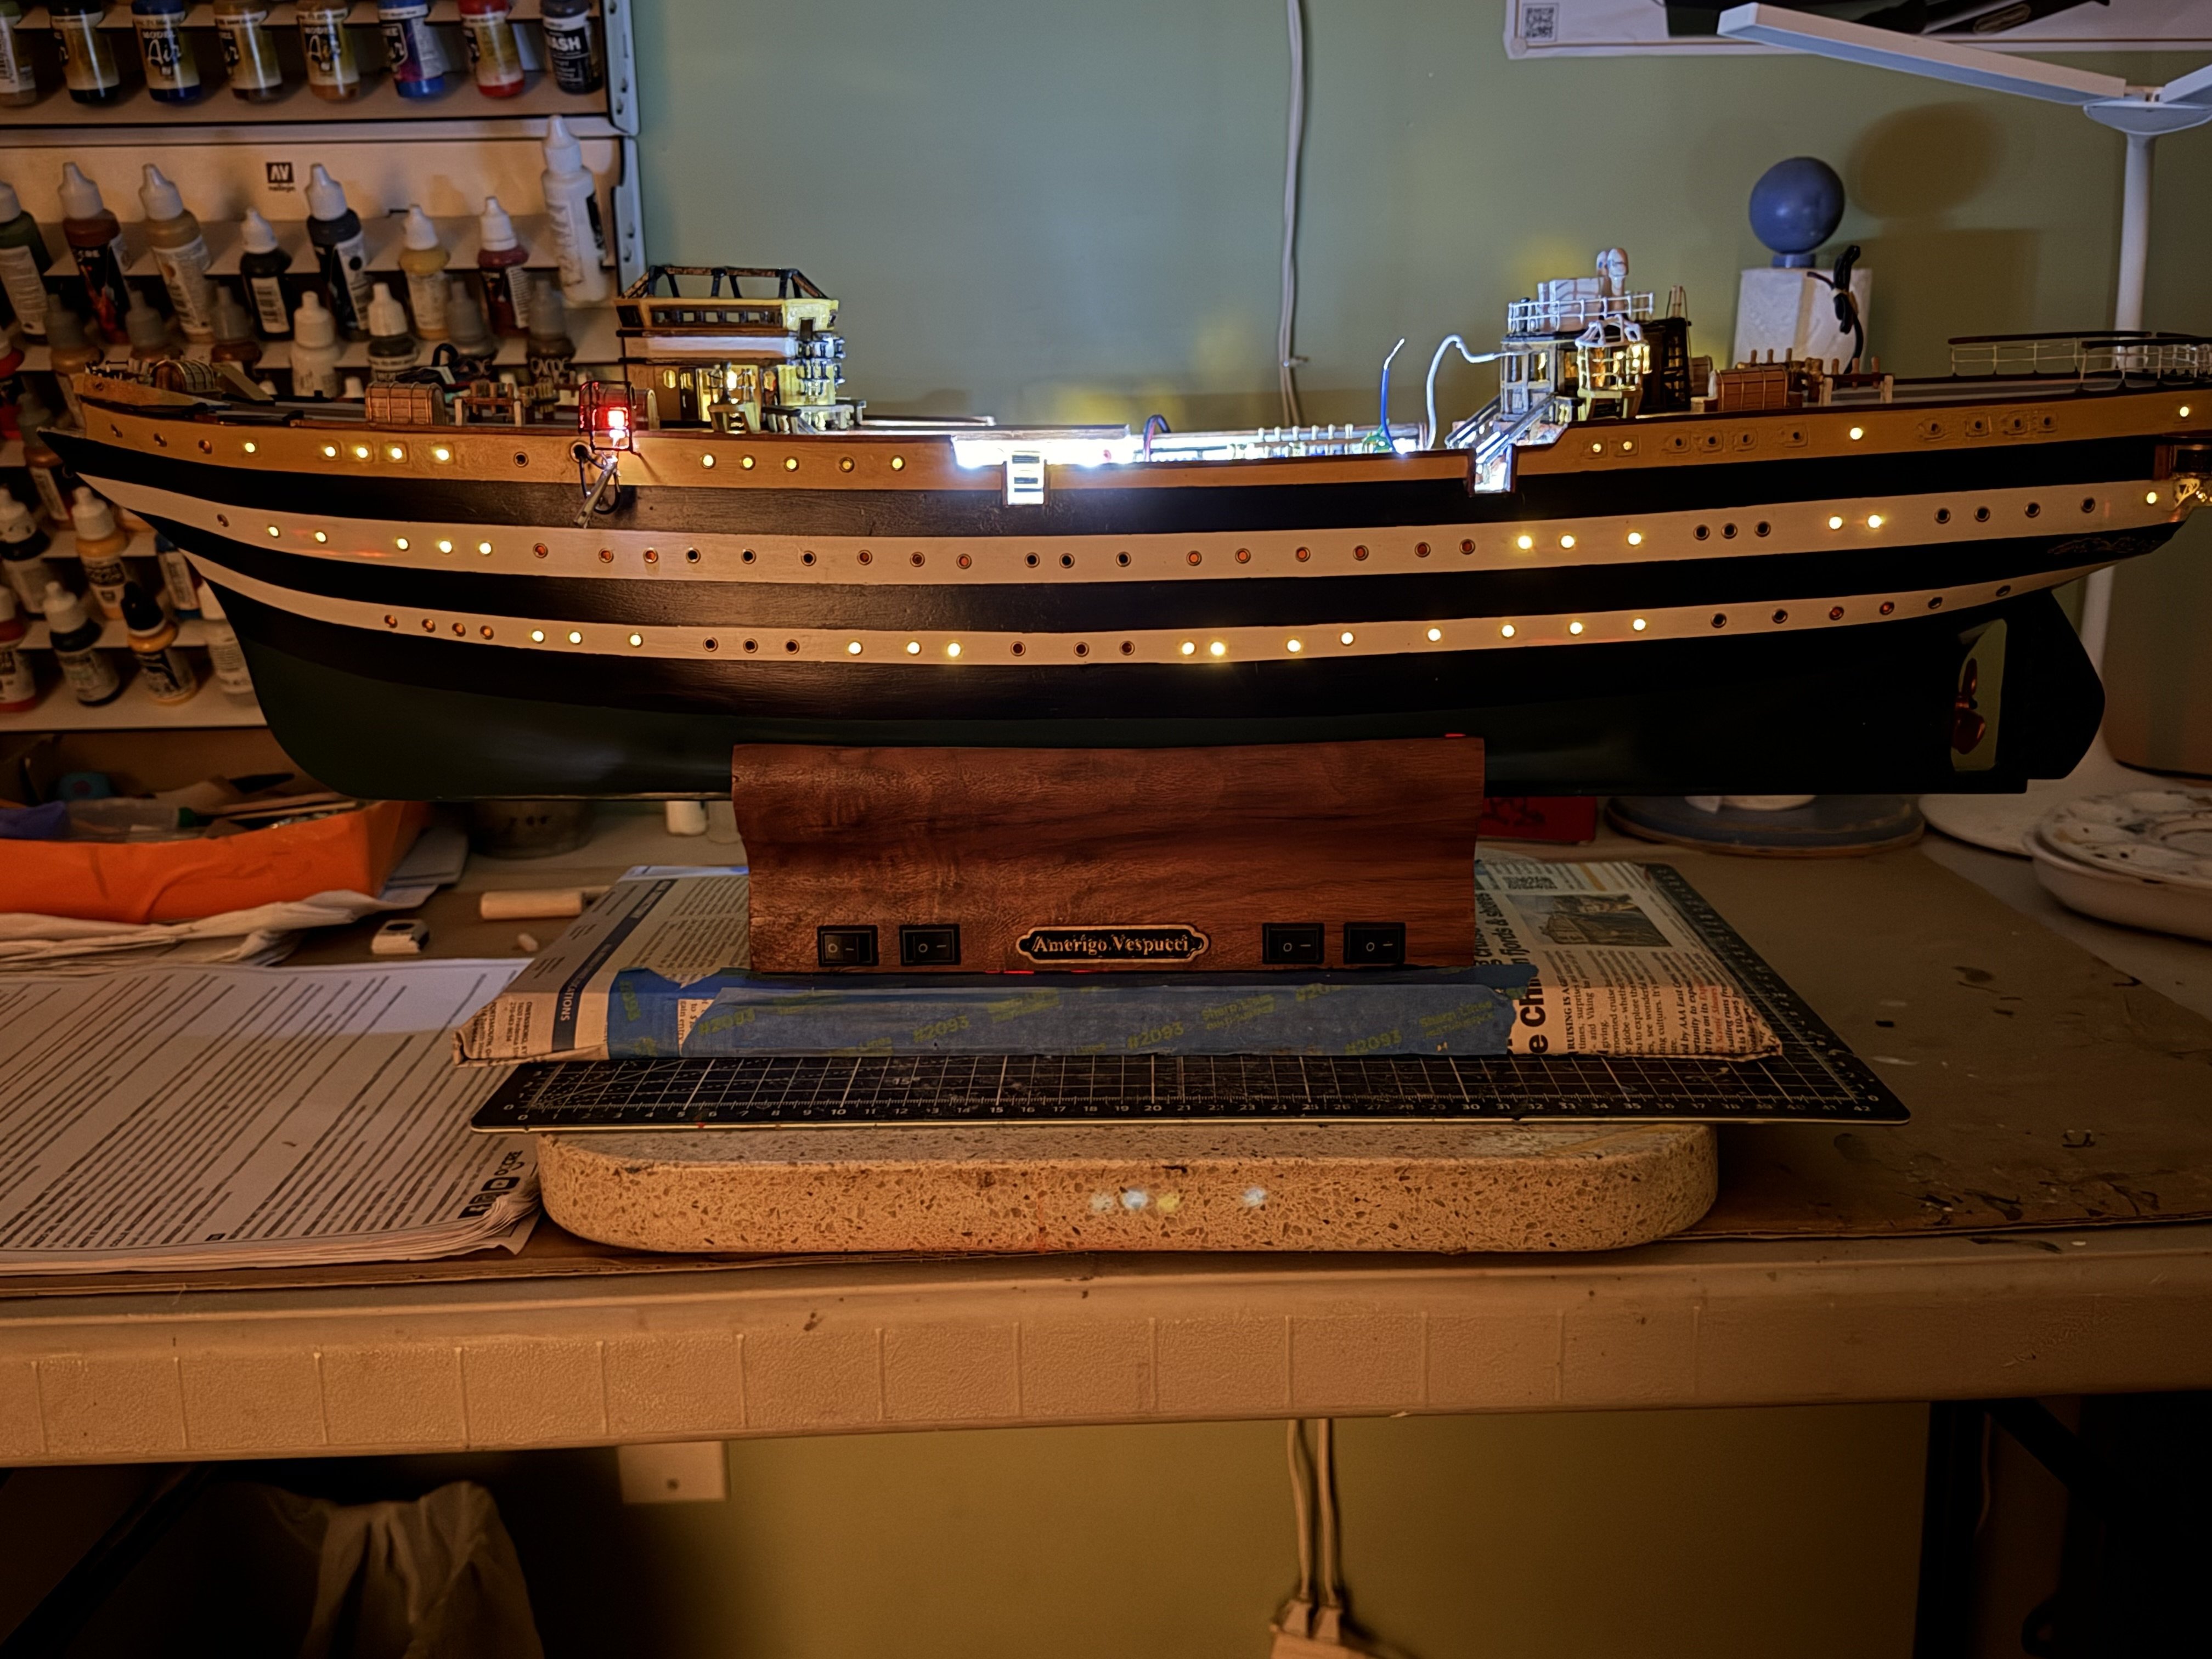
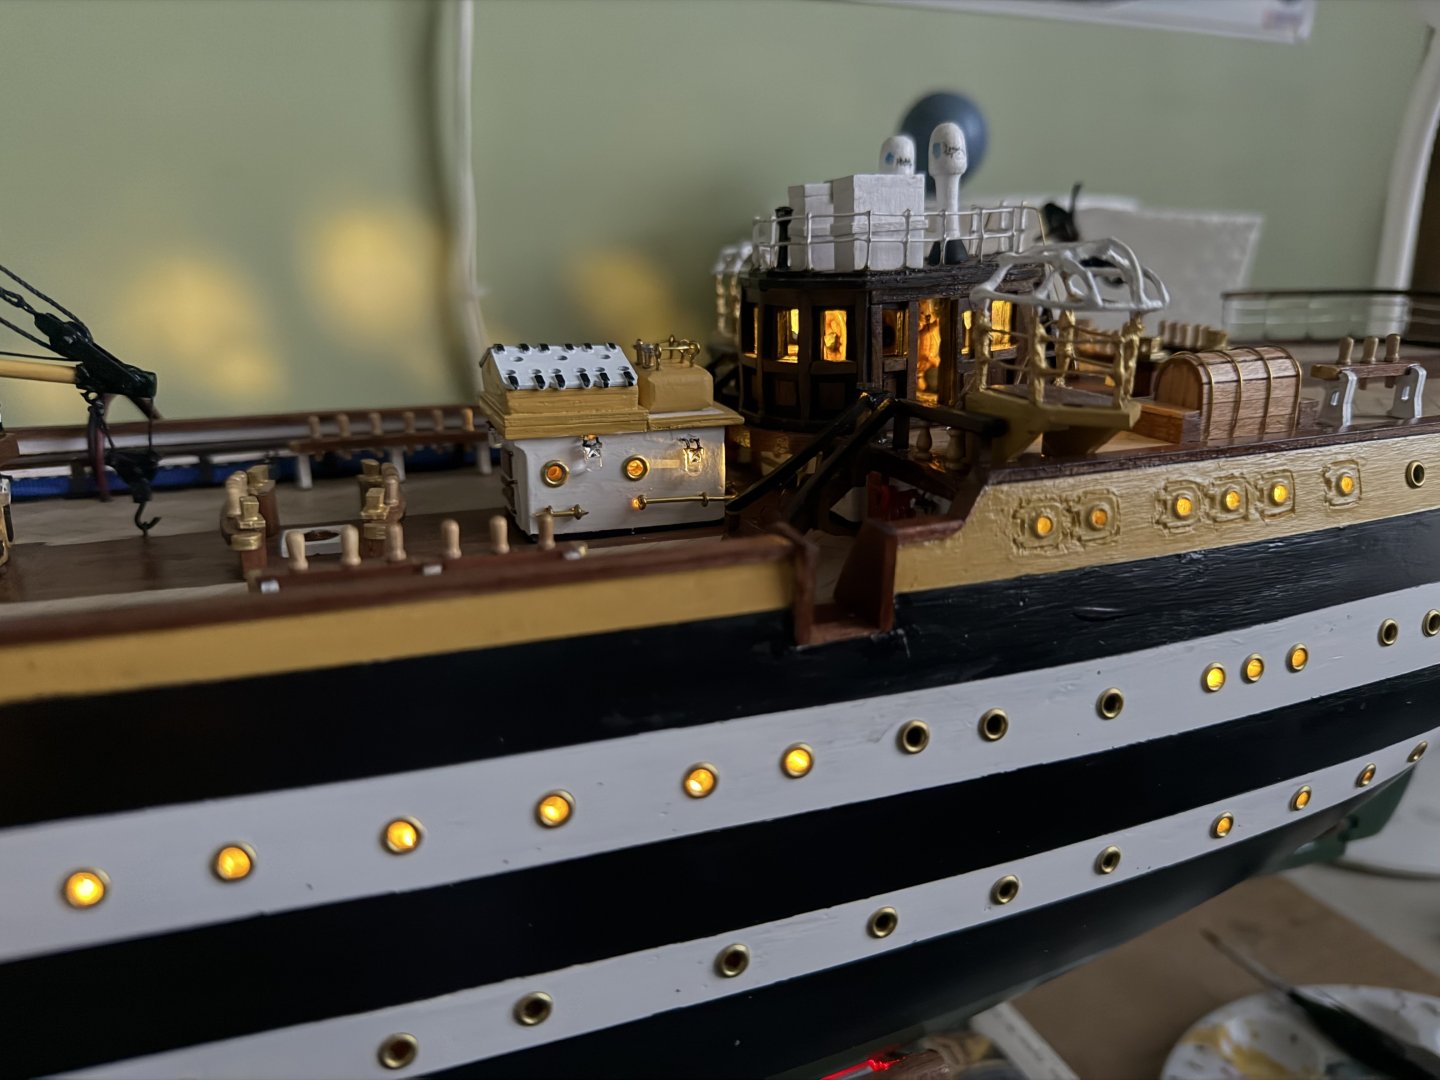
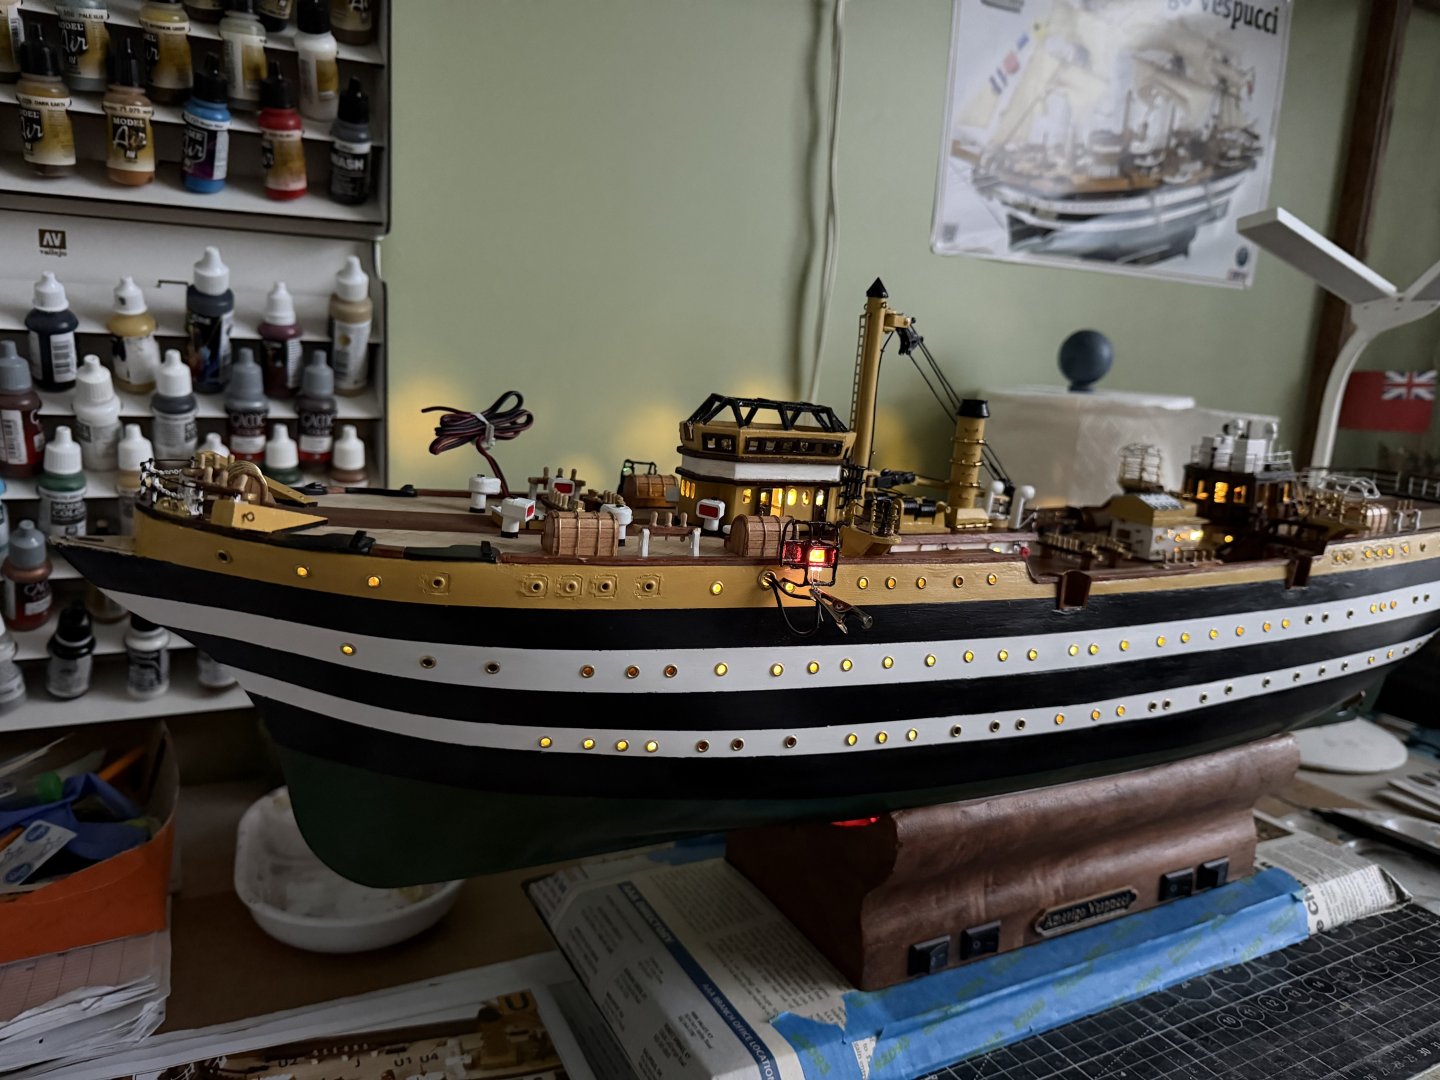
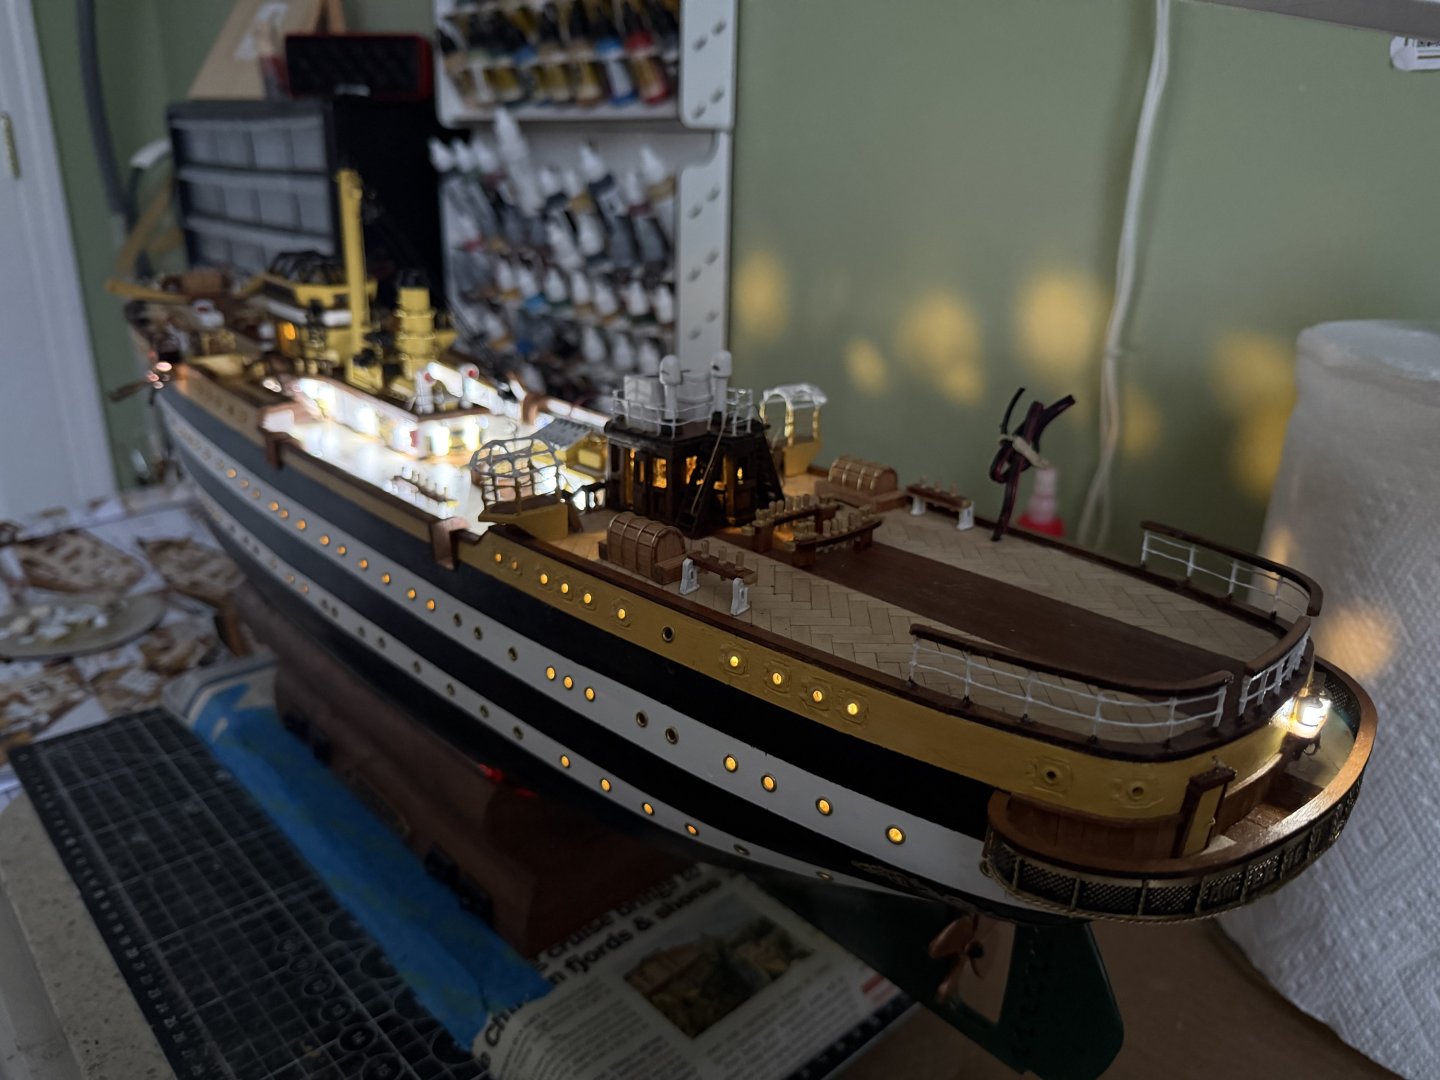
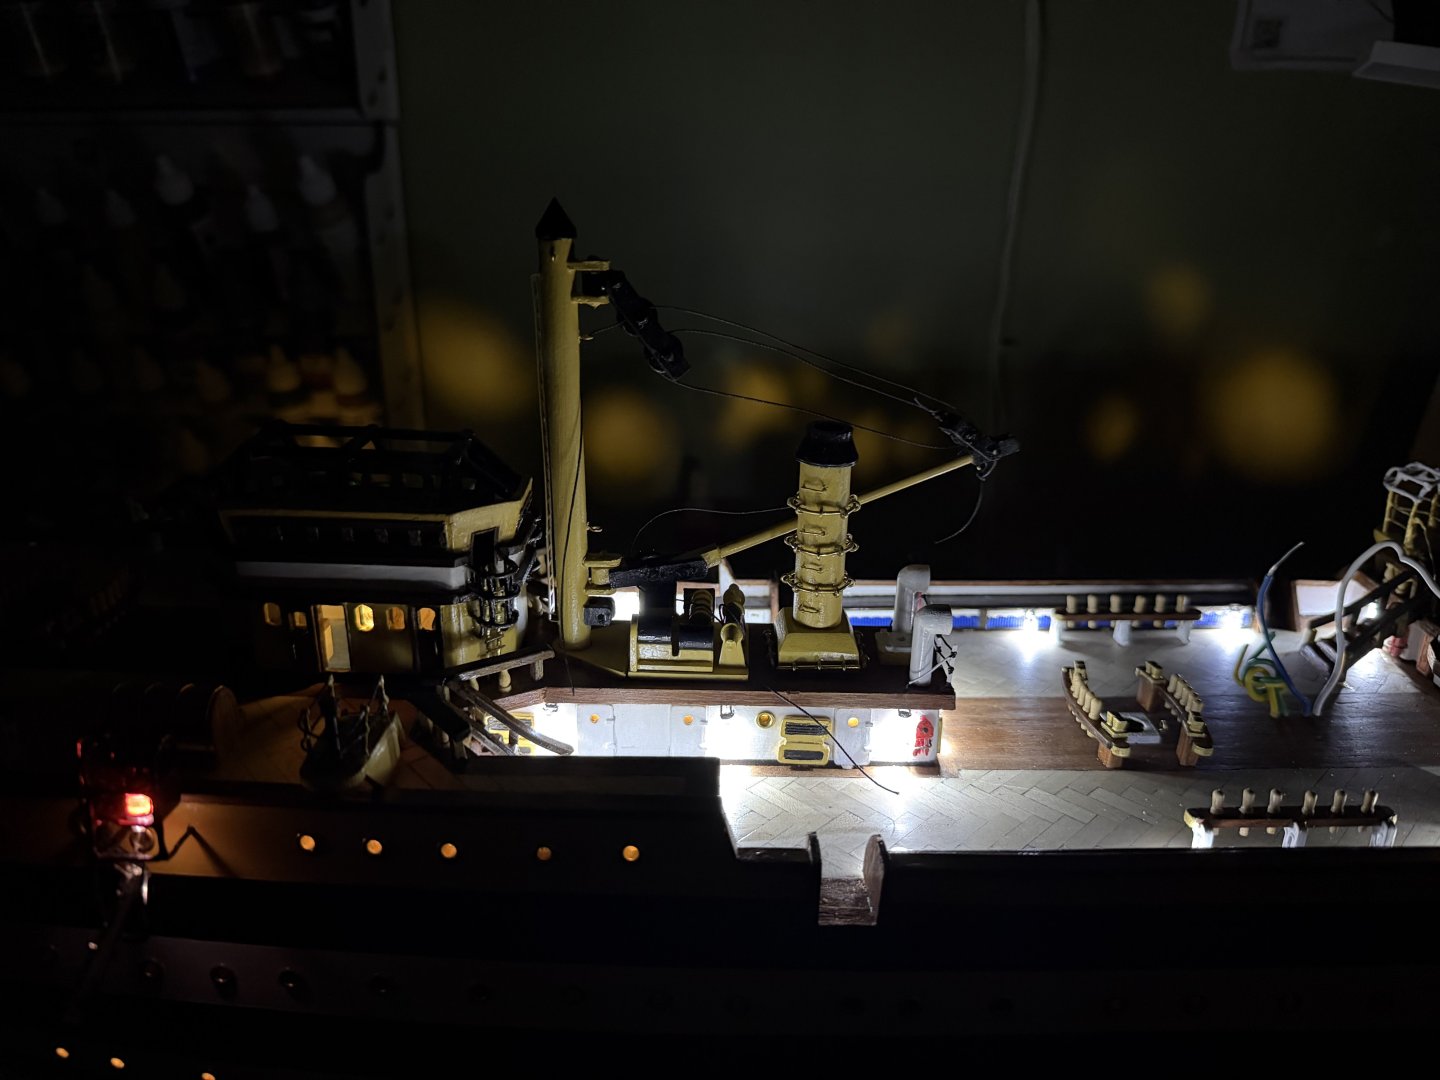
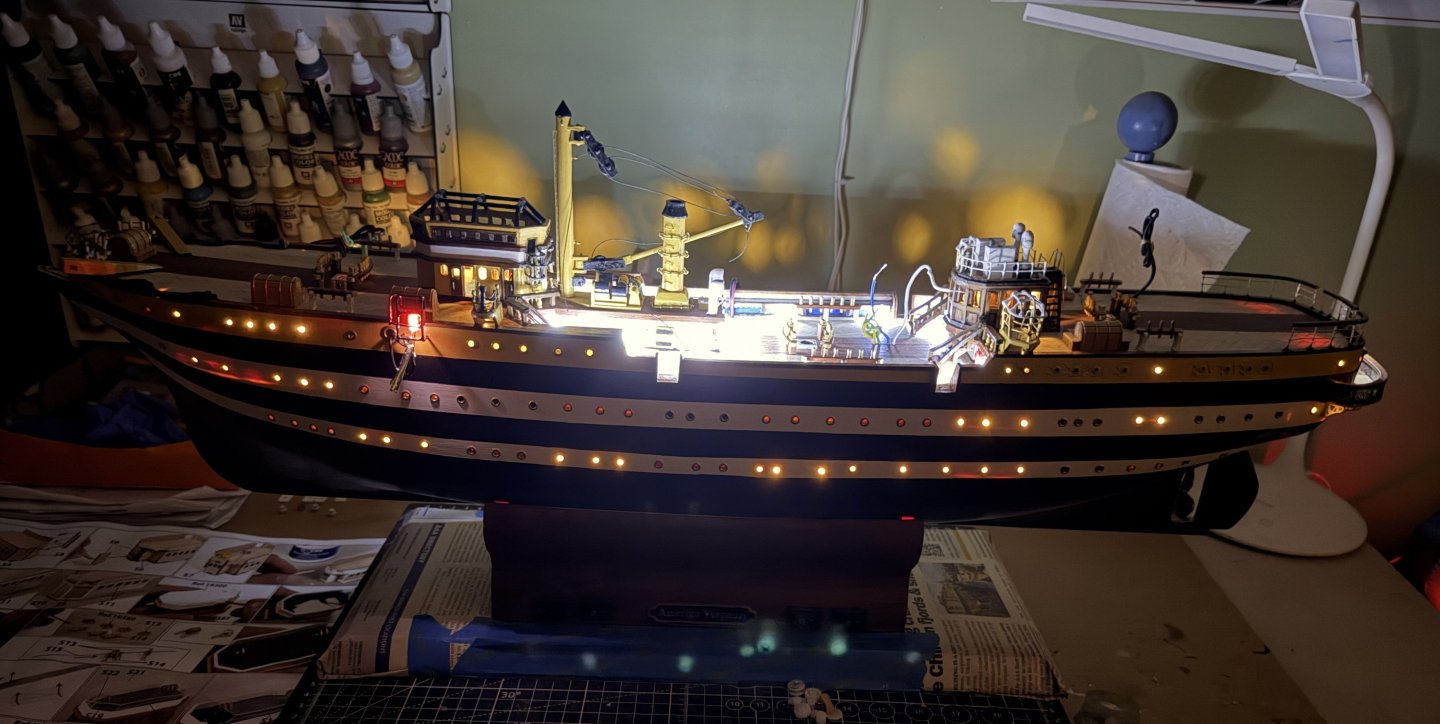
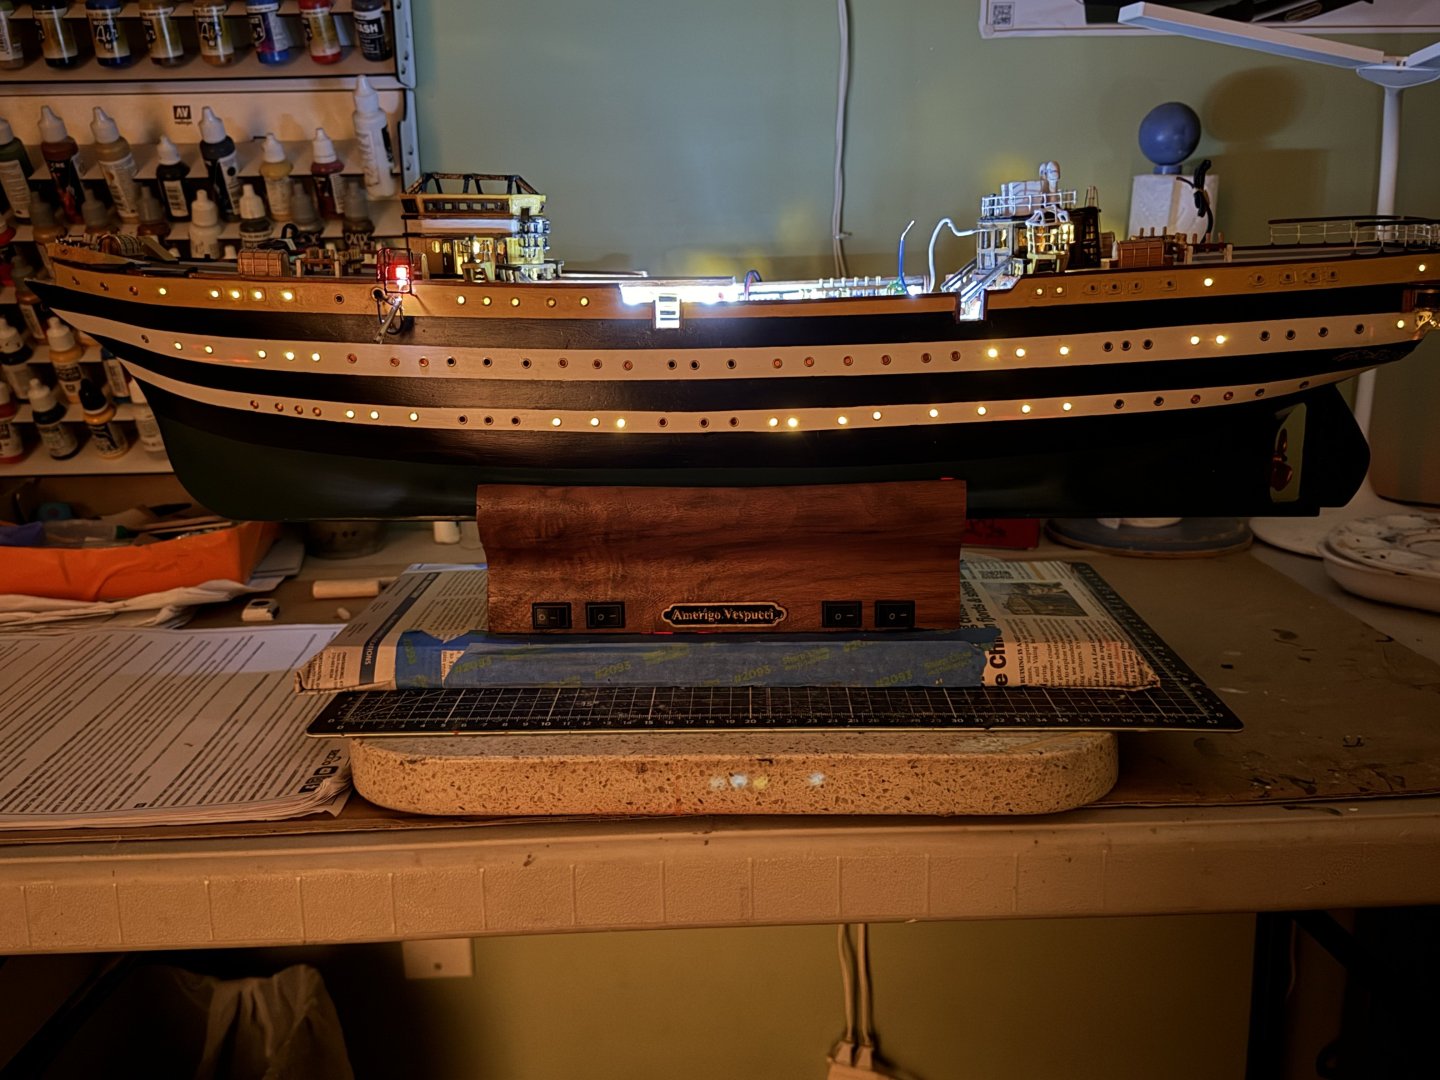
Ian for the lights inside the portholes and the 3 structures on the deck I used 5mm warm white. For the deck lighting I used 3mm white. For the red, green, and yellow navigation lights I used 3mm white LEDs and found brass covers to slip over them to present the colors.
-
Thank you Ian. Happy New Year to you as well. I am working on installing the last of the structures on the deck with LED lighting as well as all the small metal odds and ends that go on the deck.


-
Beautiful work!! Your 3D design and painting are exceptional.
-
Great Daniel. Will be eager to see your results. I have made my own sails for most of my builds. I have a couple furled sail videos I use if interested. I am still way behind you on my AV. Still working on all the deck fittings. Like you discovered I wish I had put LEDs on the crane. Would add them but don’t know of a way to get current to them.
-
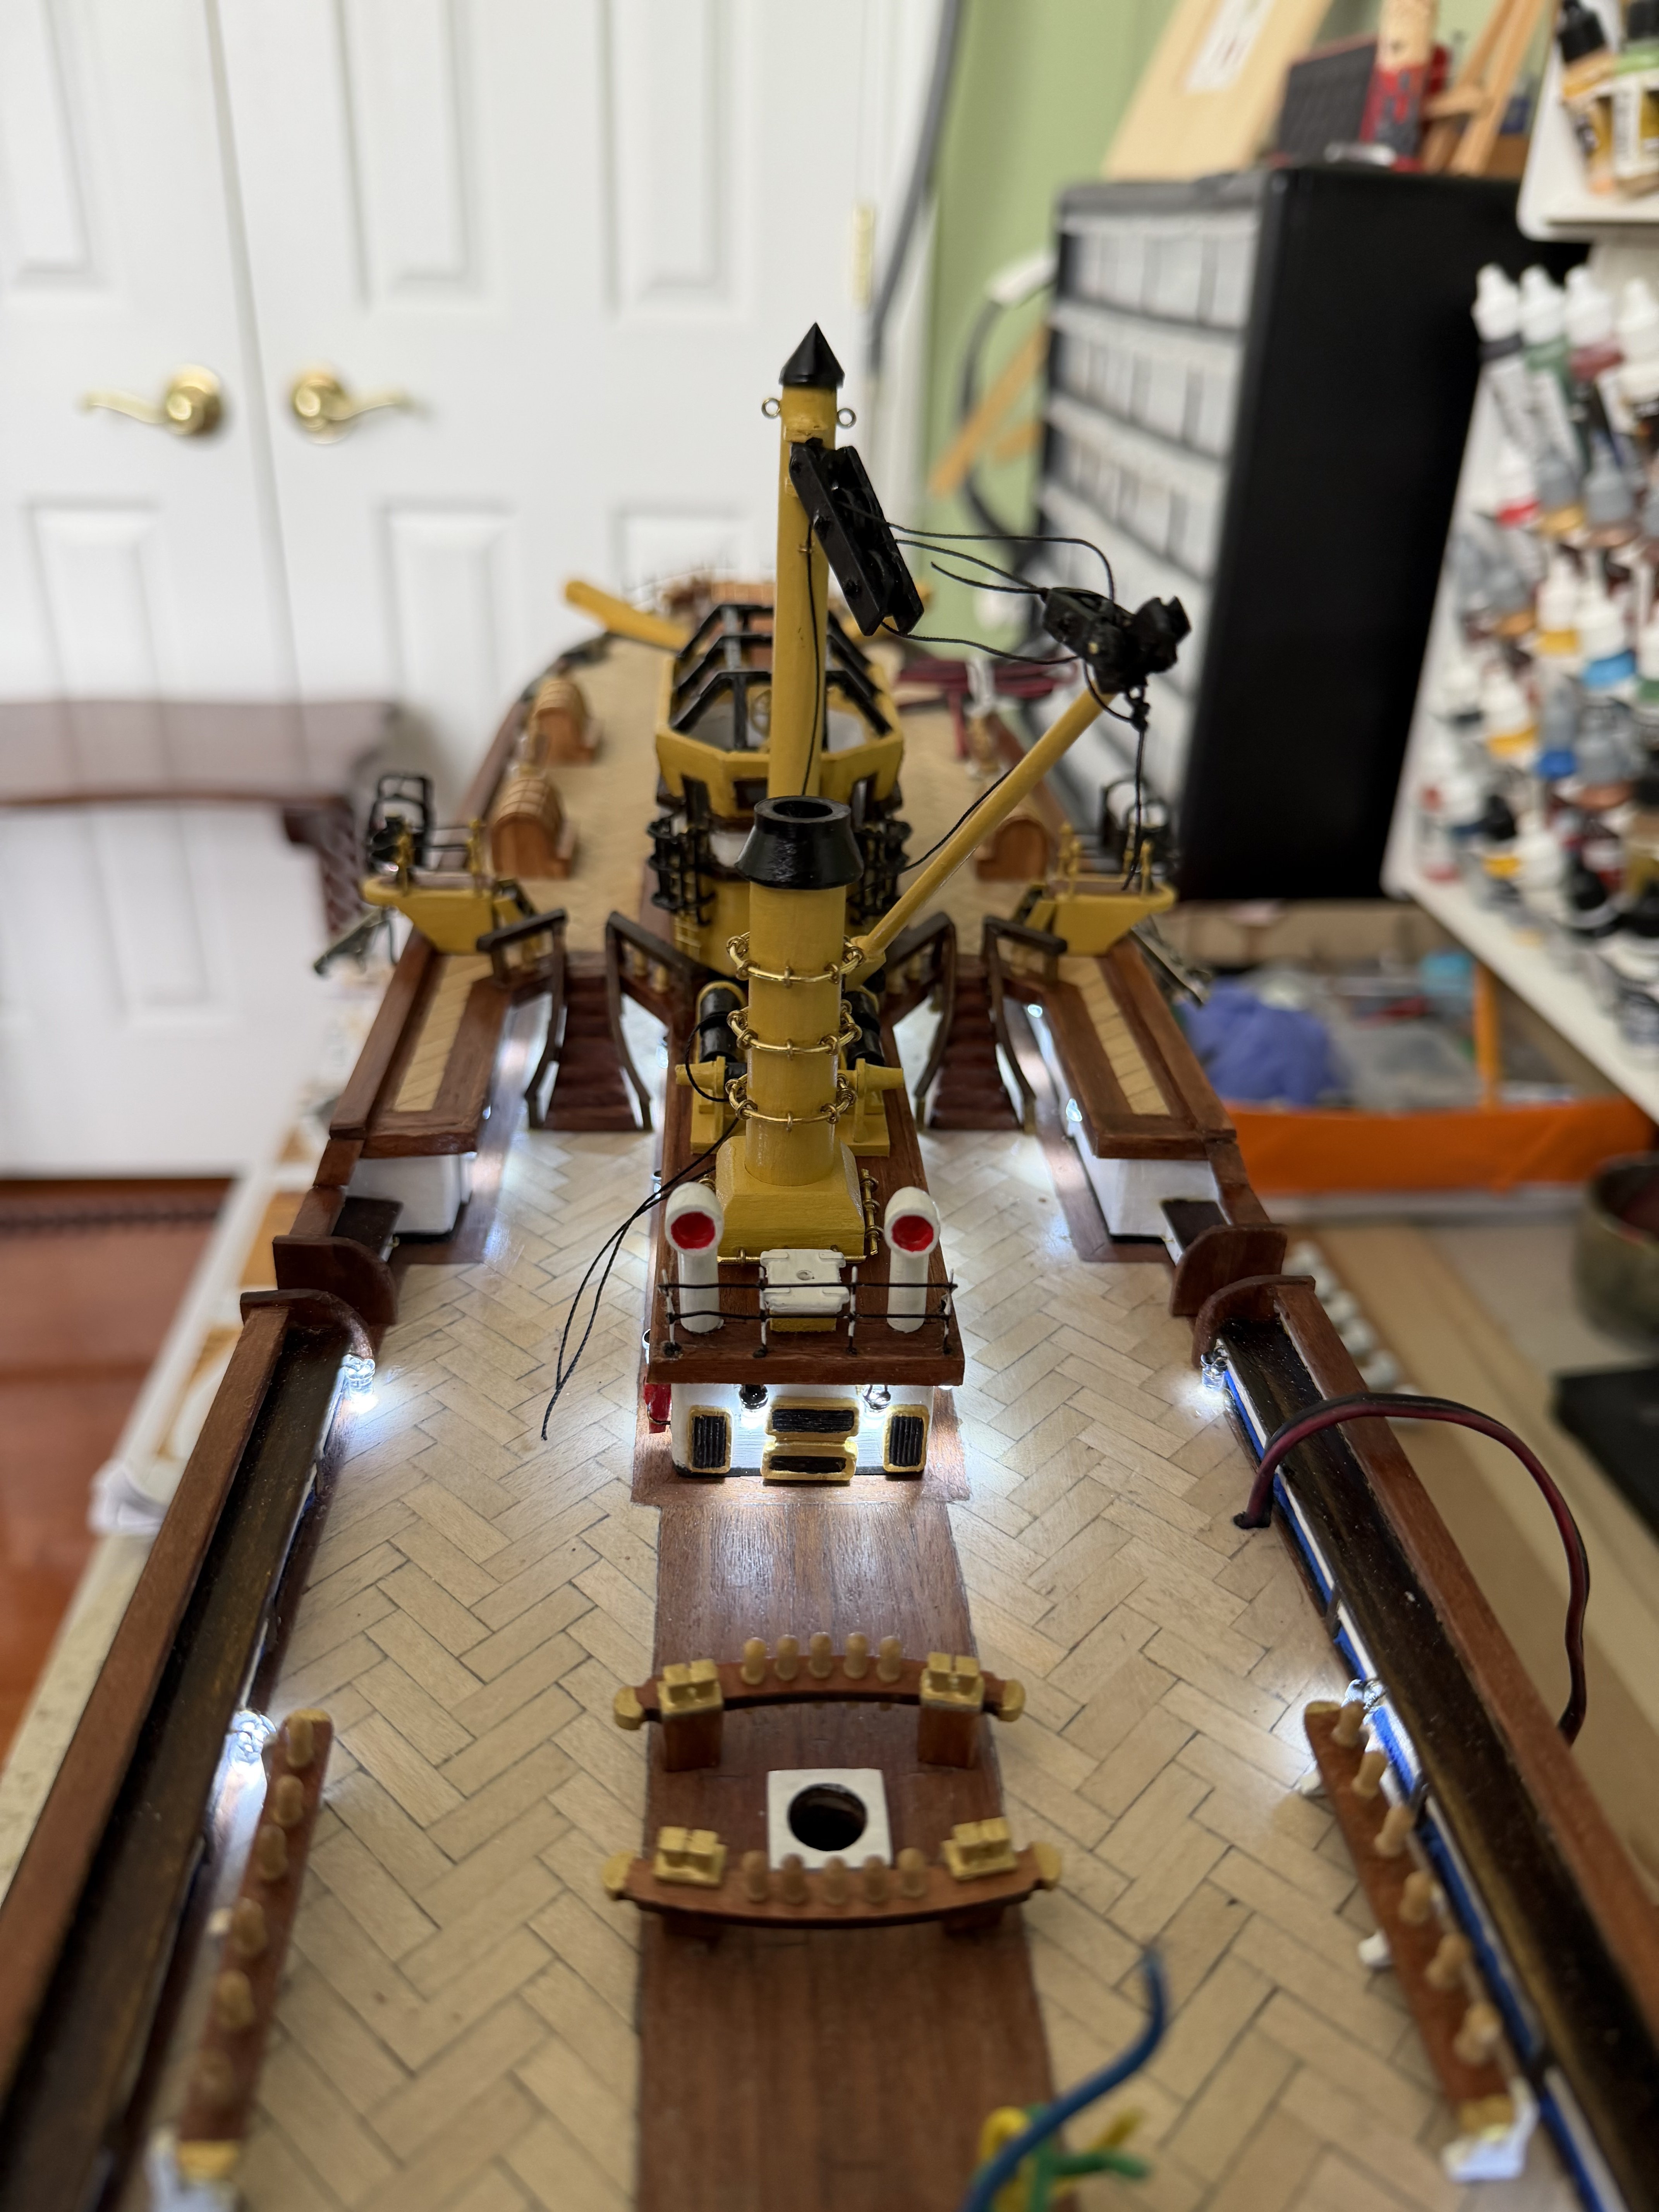
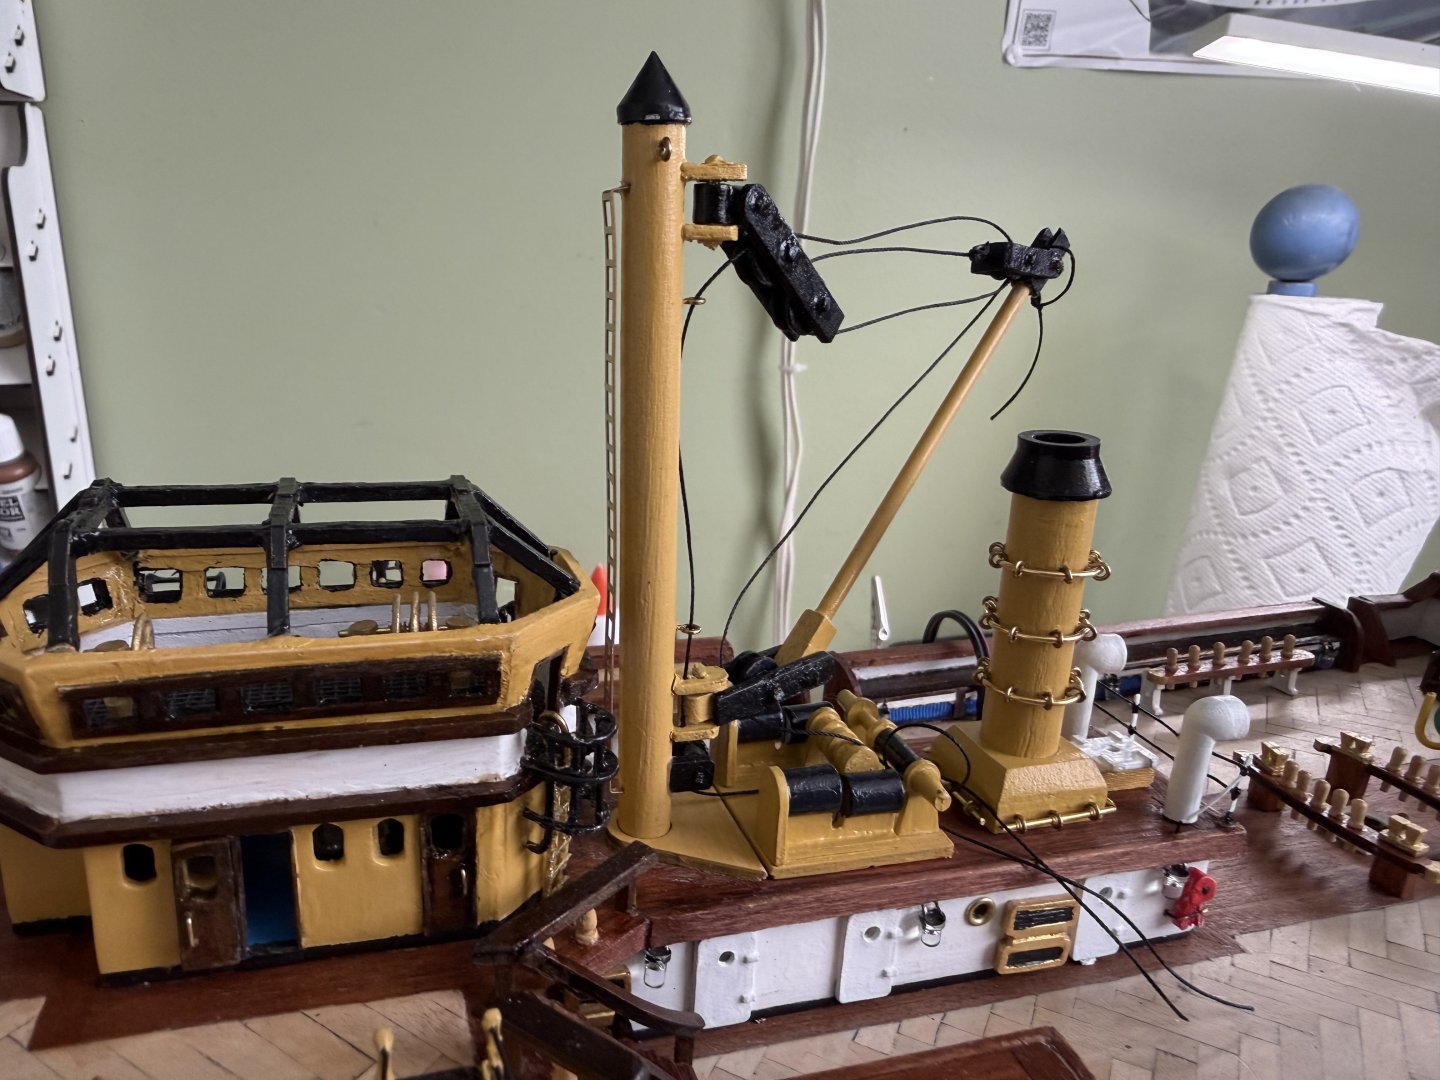
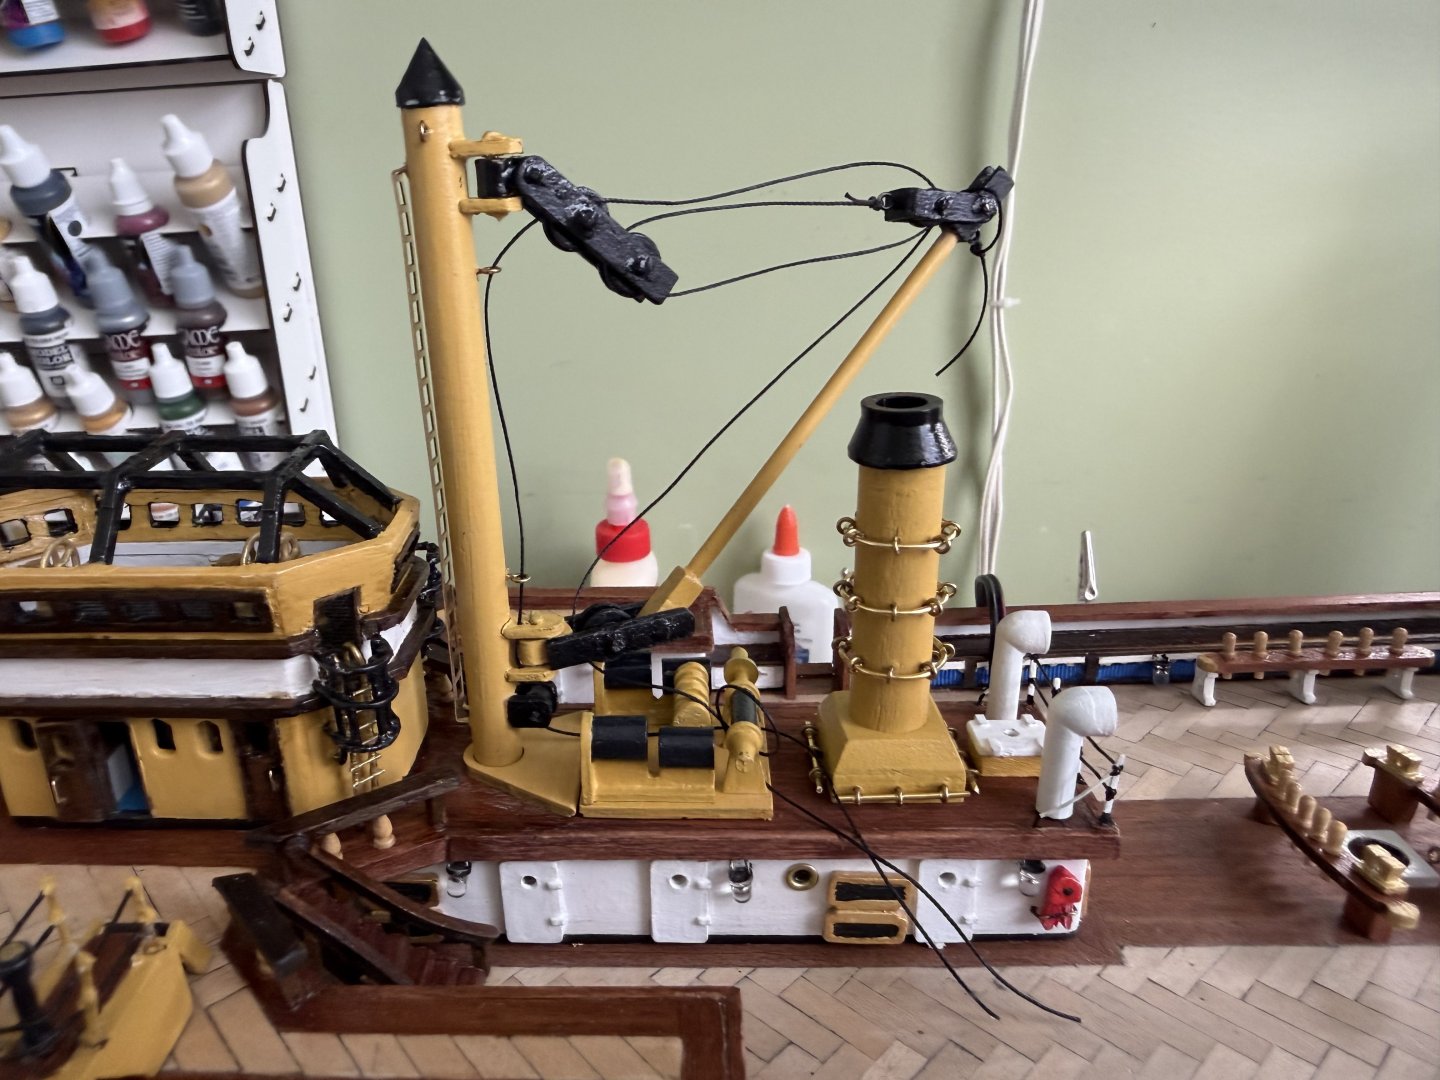
Daniel how is your build coming a long? Not seen a photo in a while since you completed all the yards. Hope all is well. I am spending time perfecting my main crane. I had it up but was not totally satisfied with how the machinery looked so I took it back down. Such is the life when you attempt to change what the instructions direct.
-
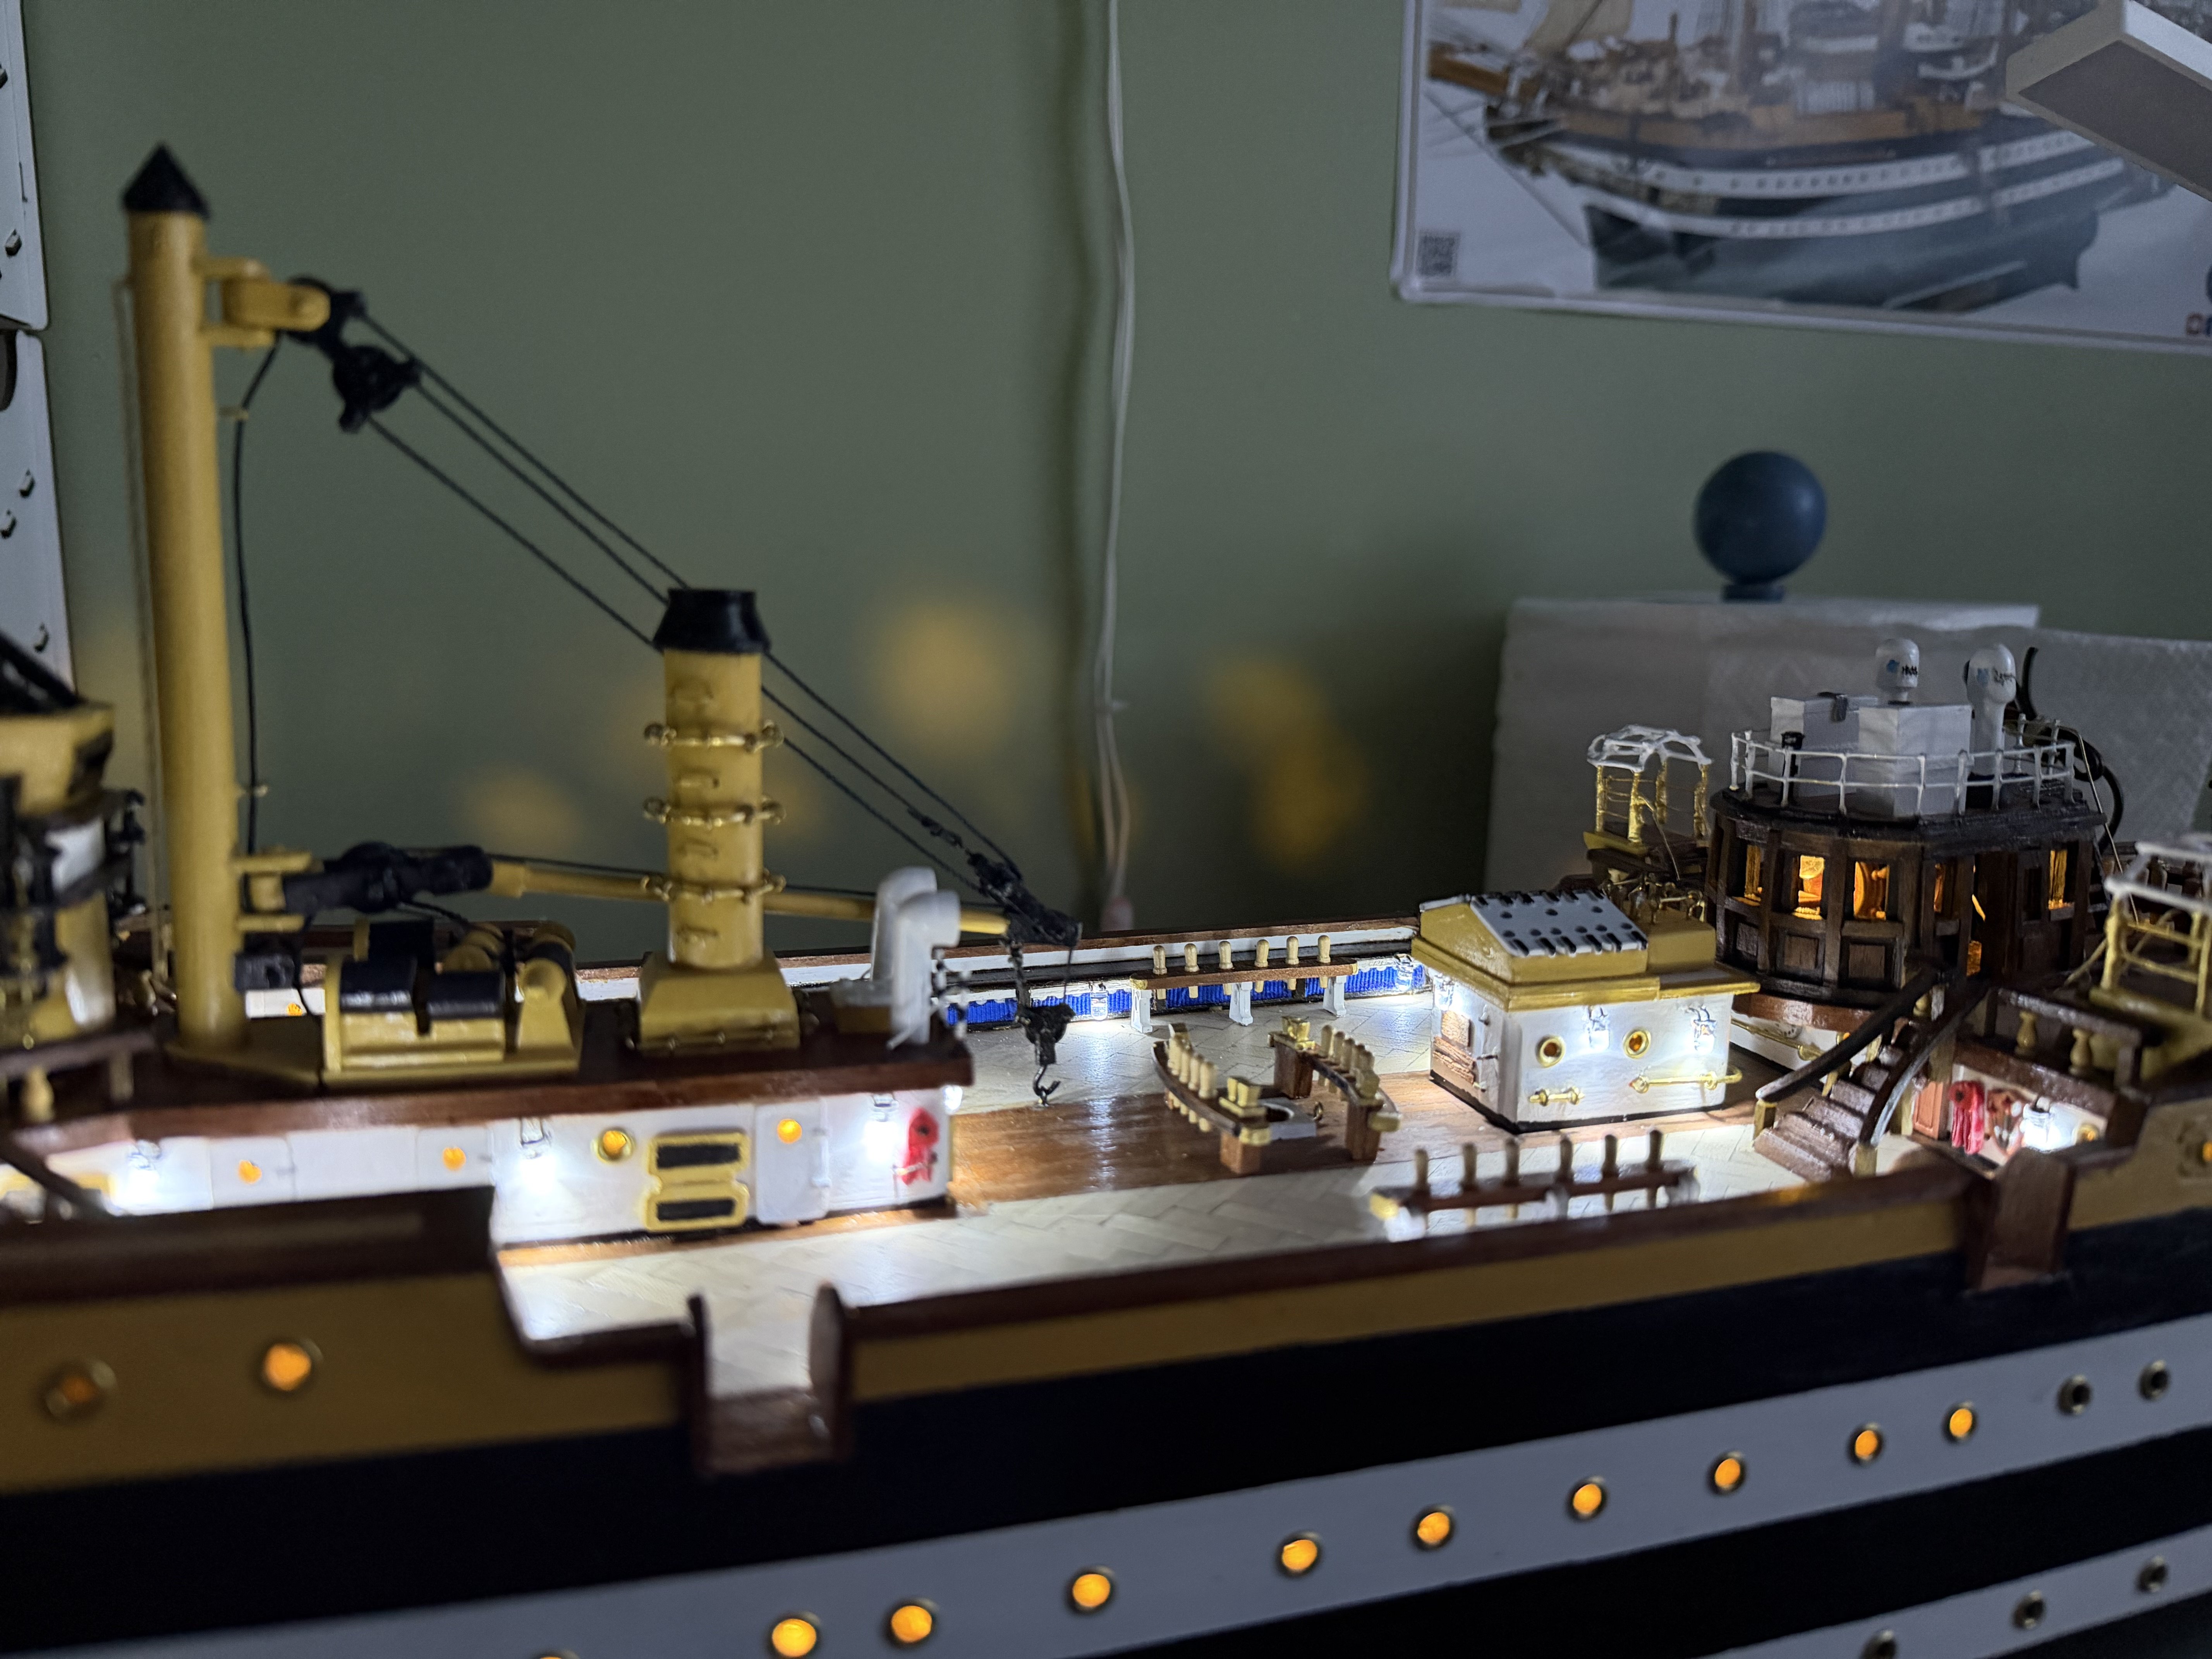
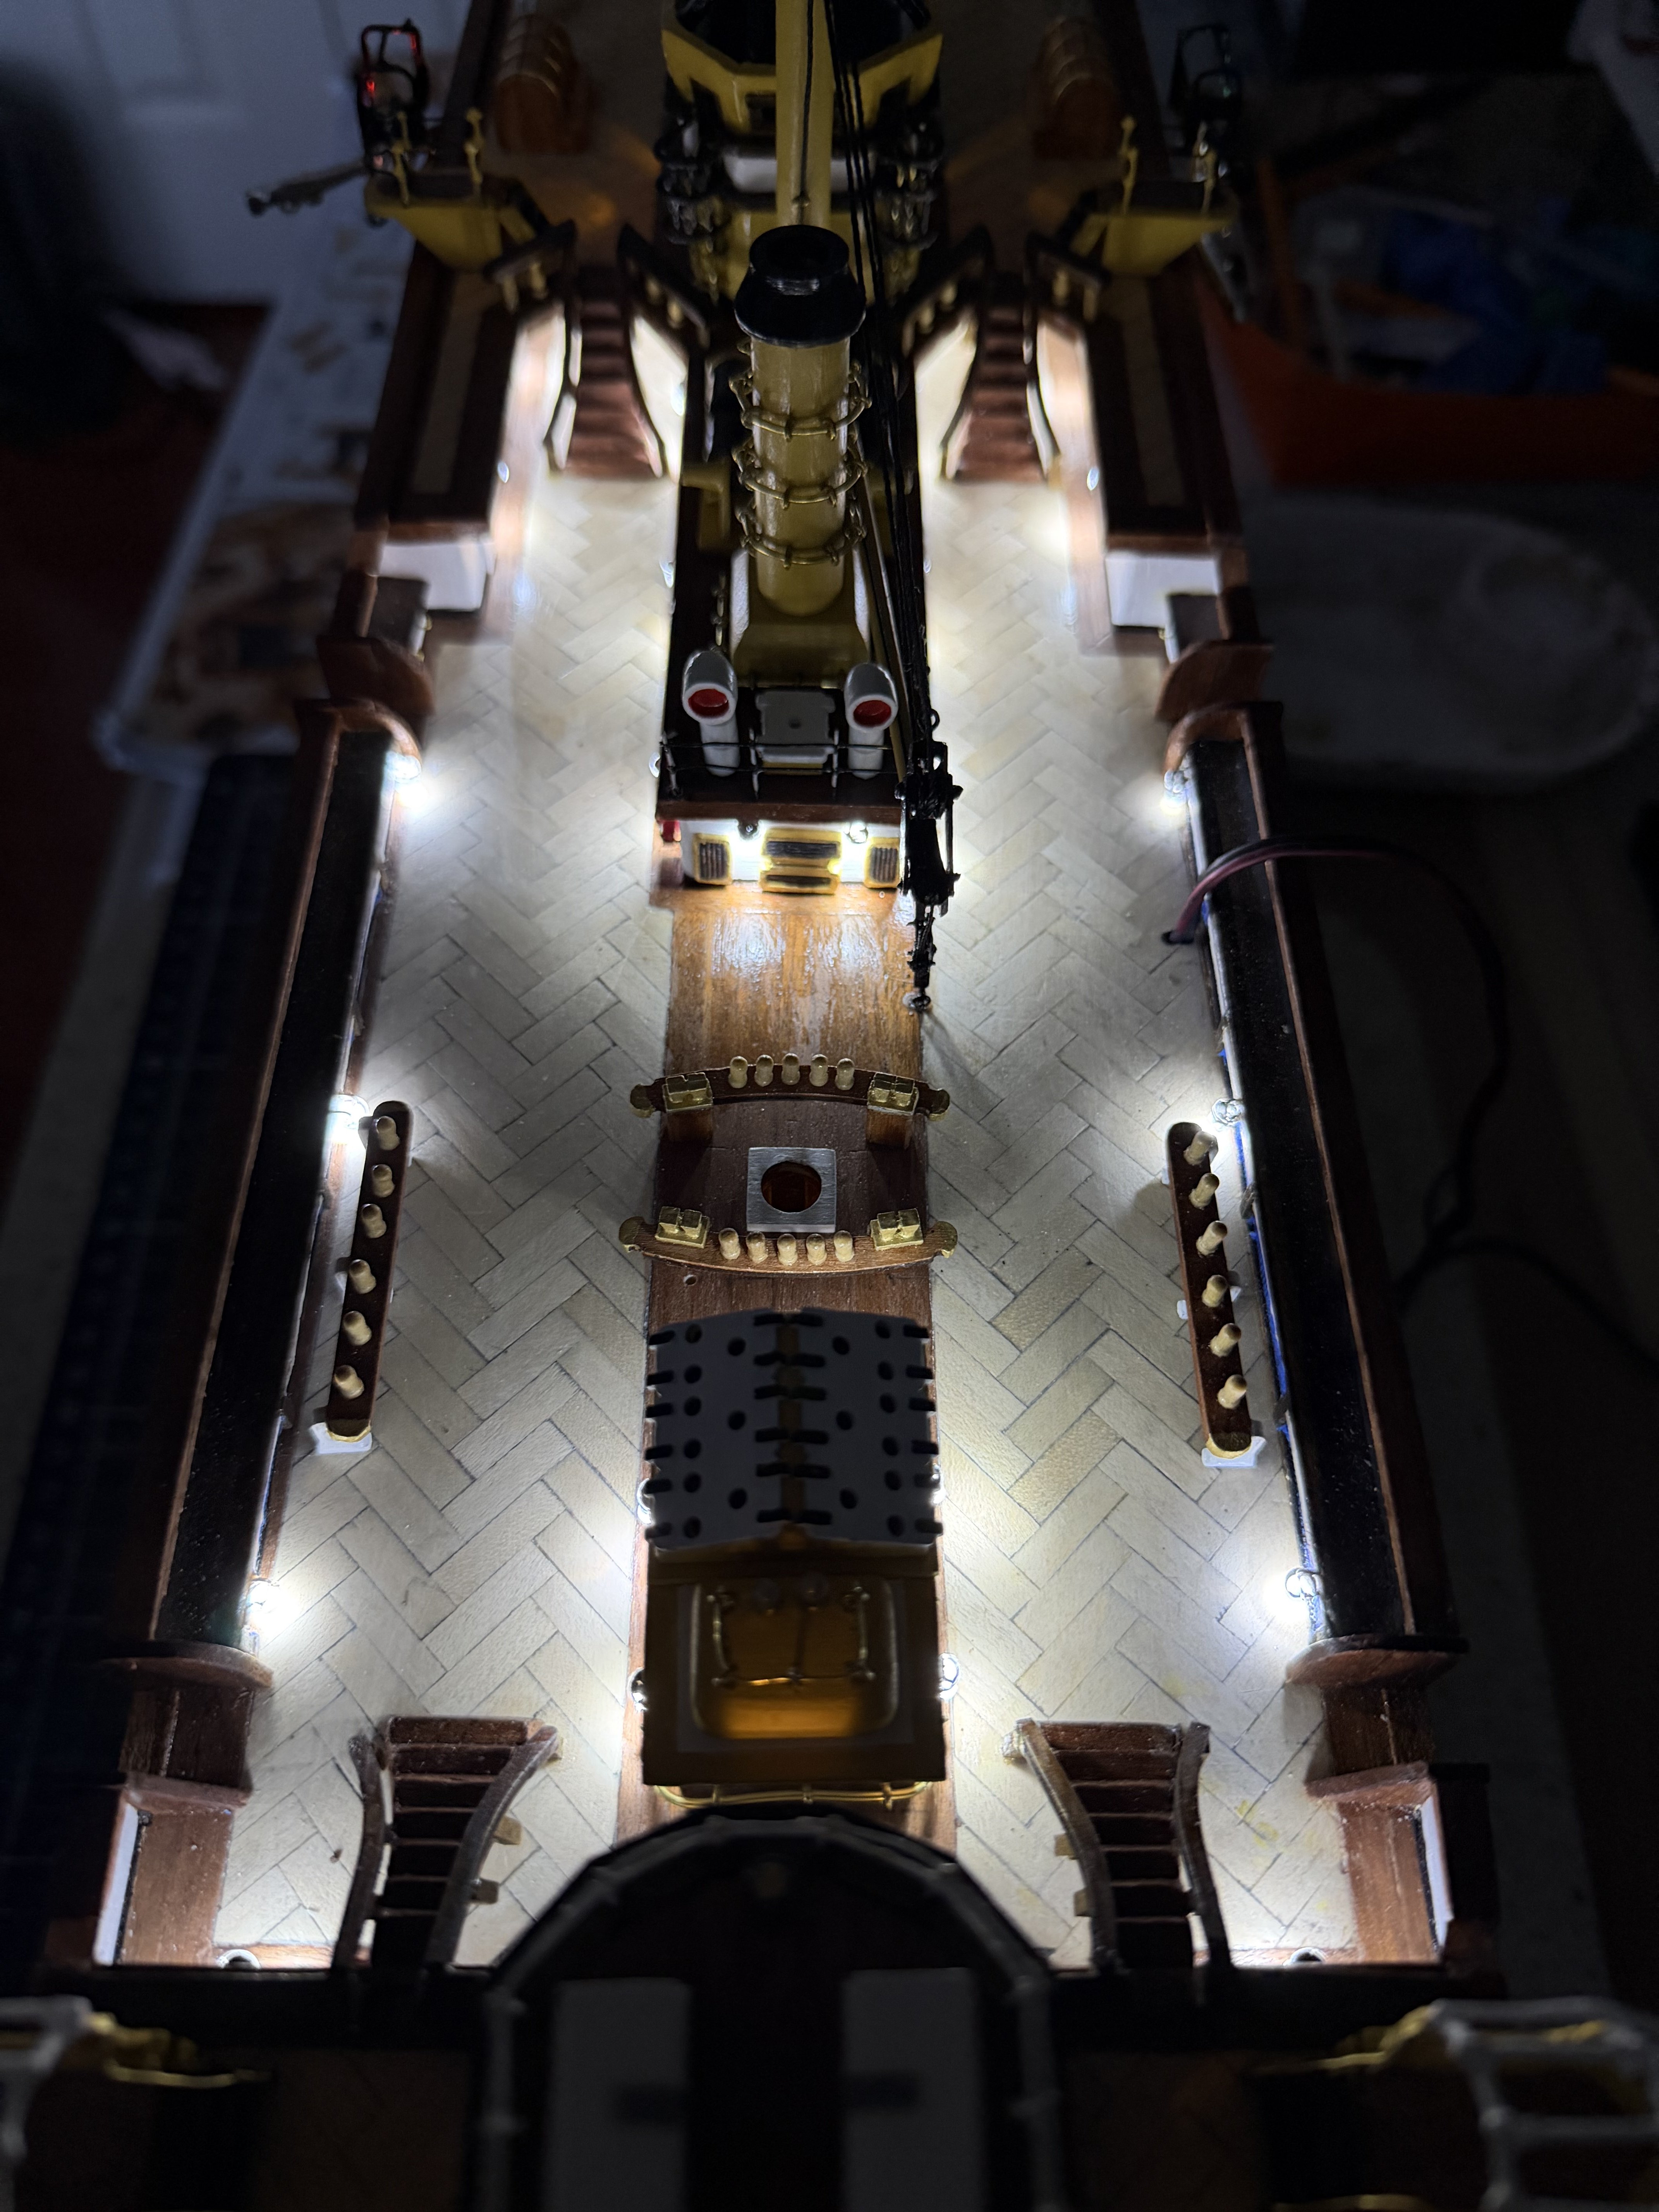
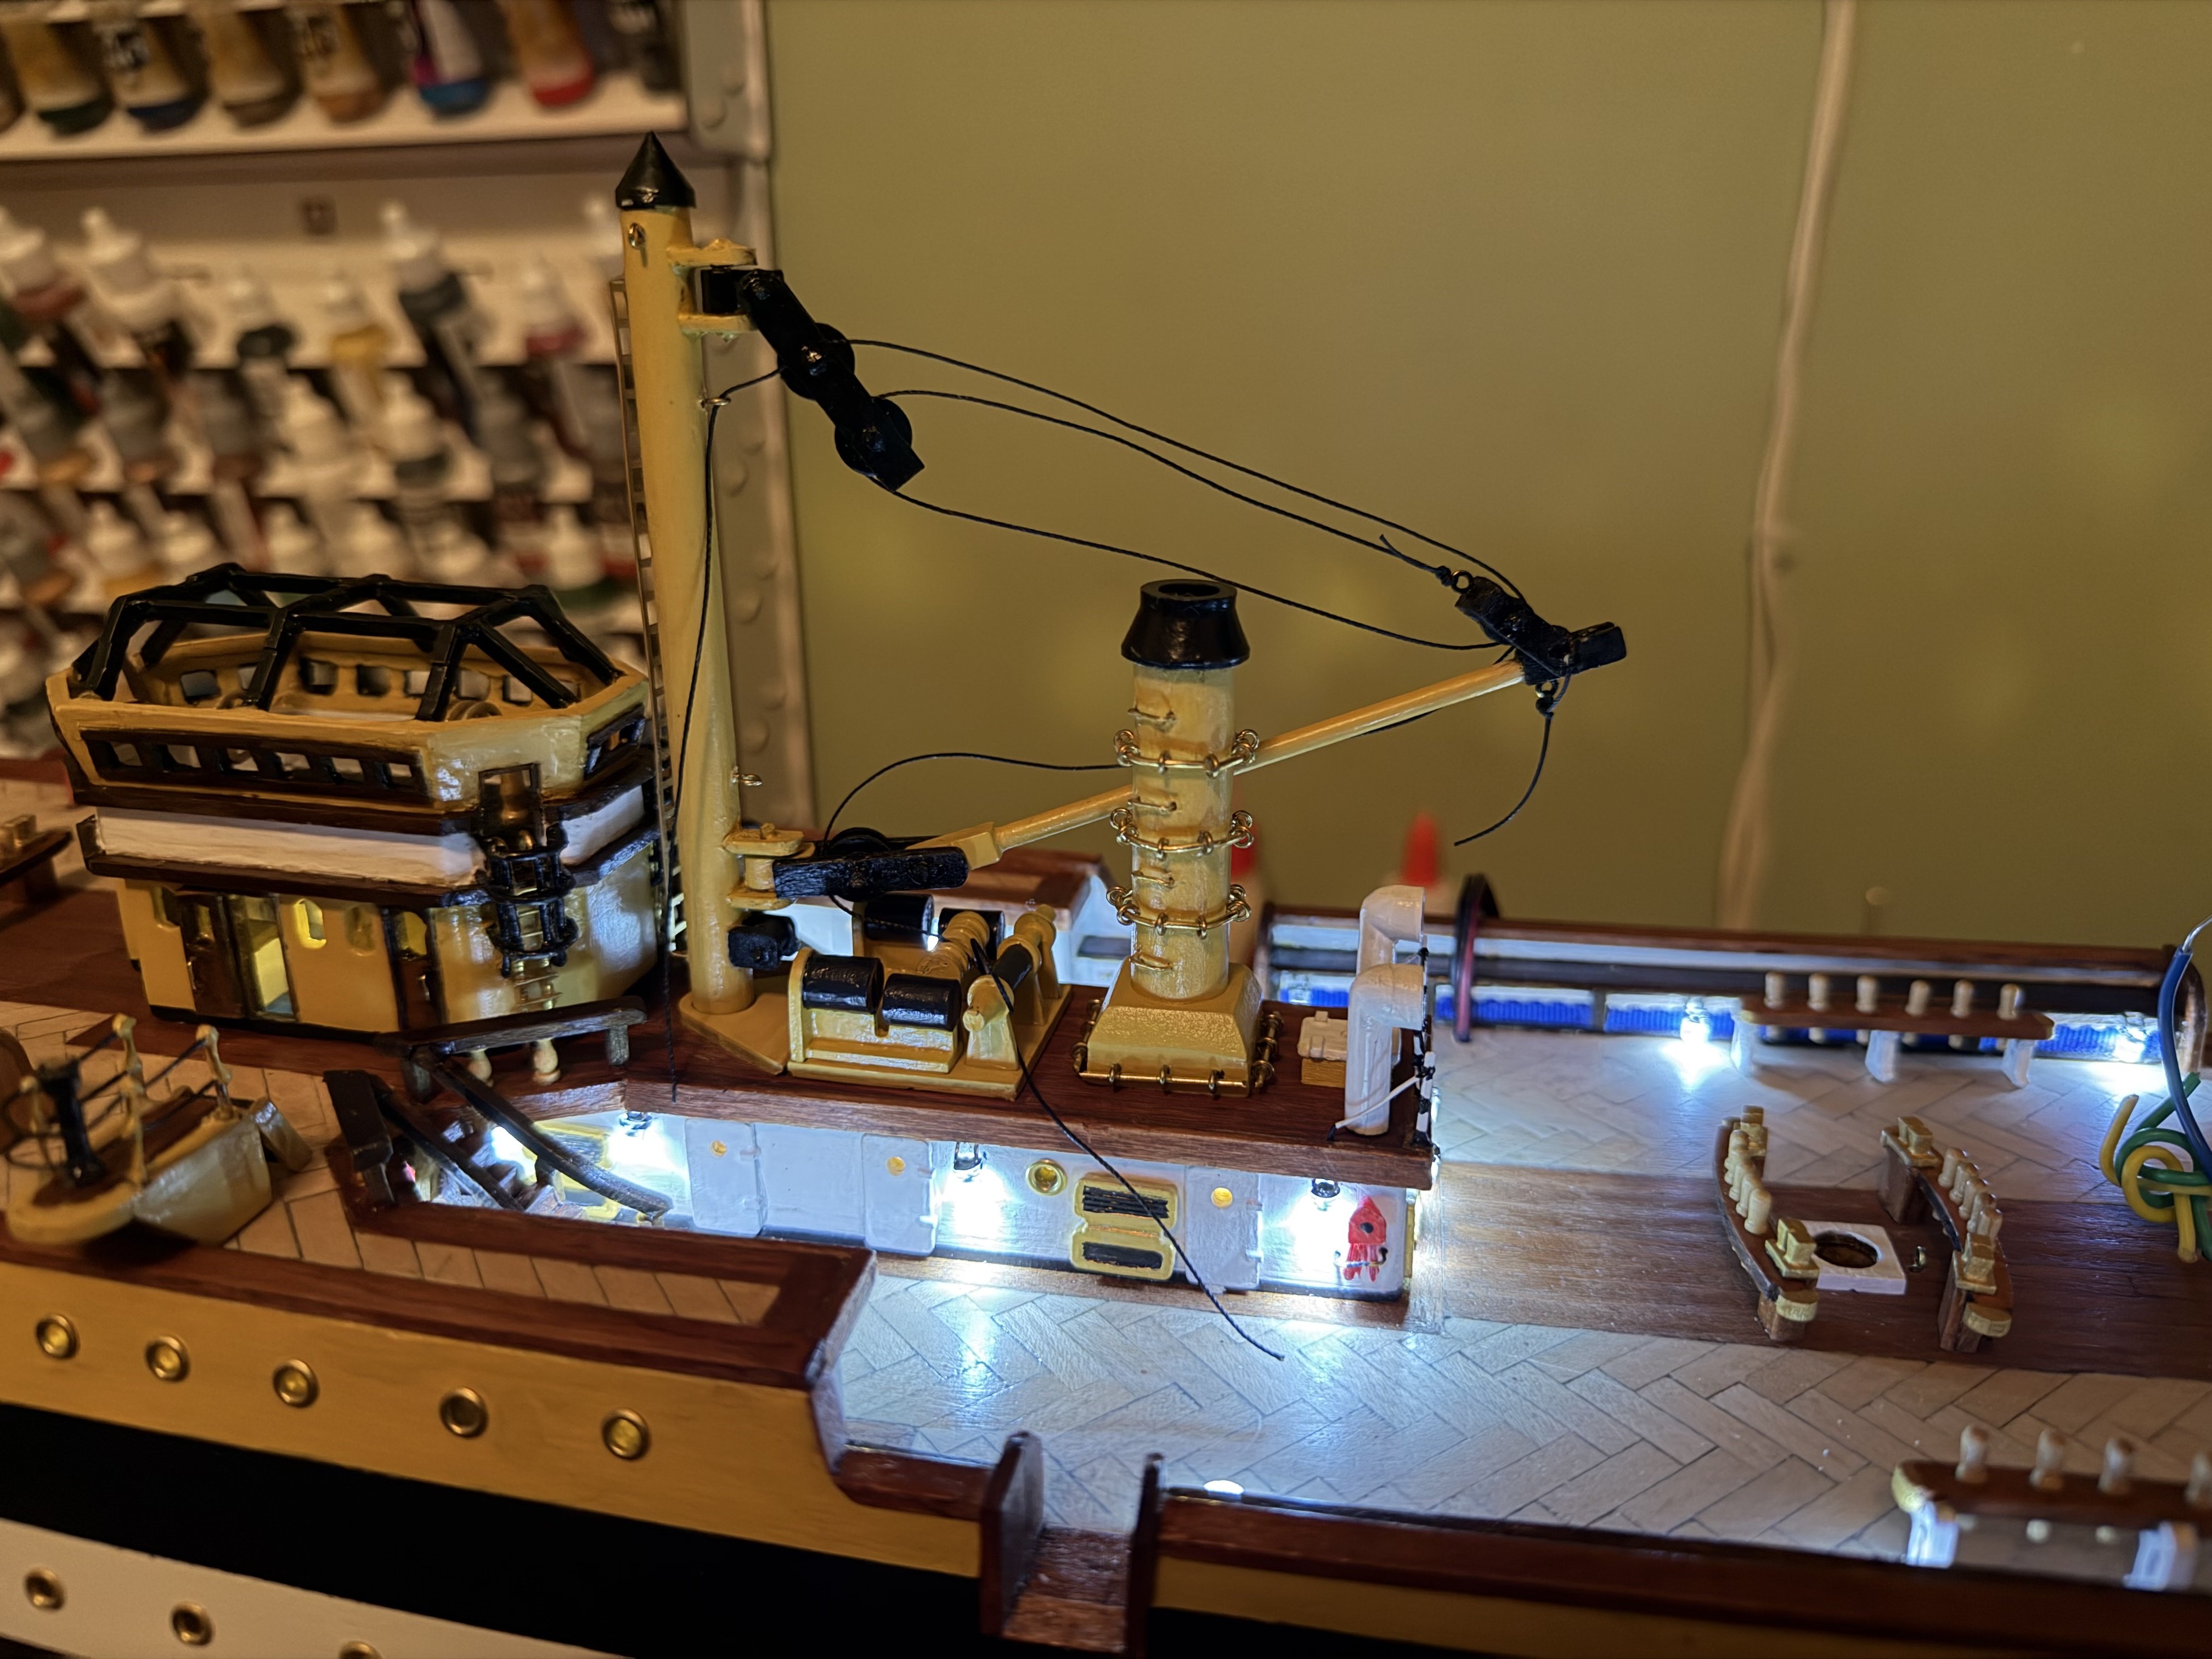
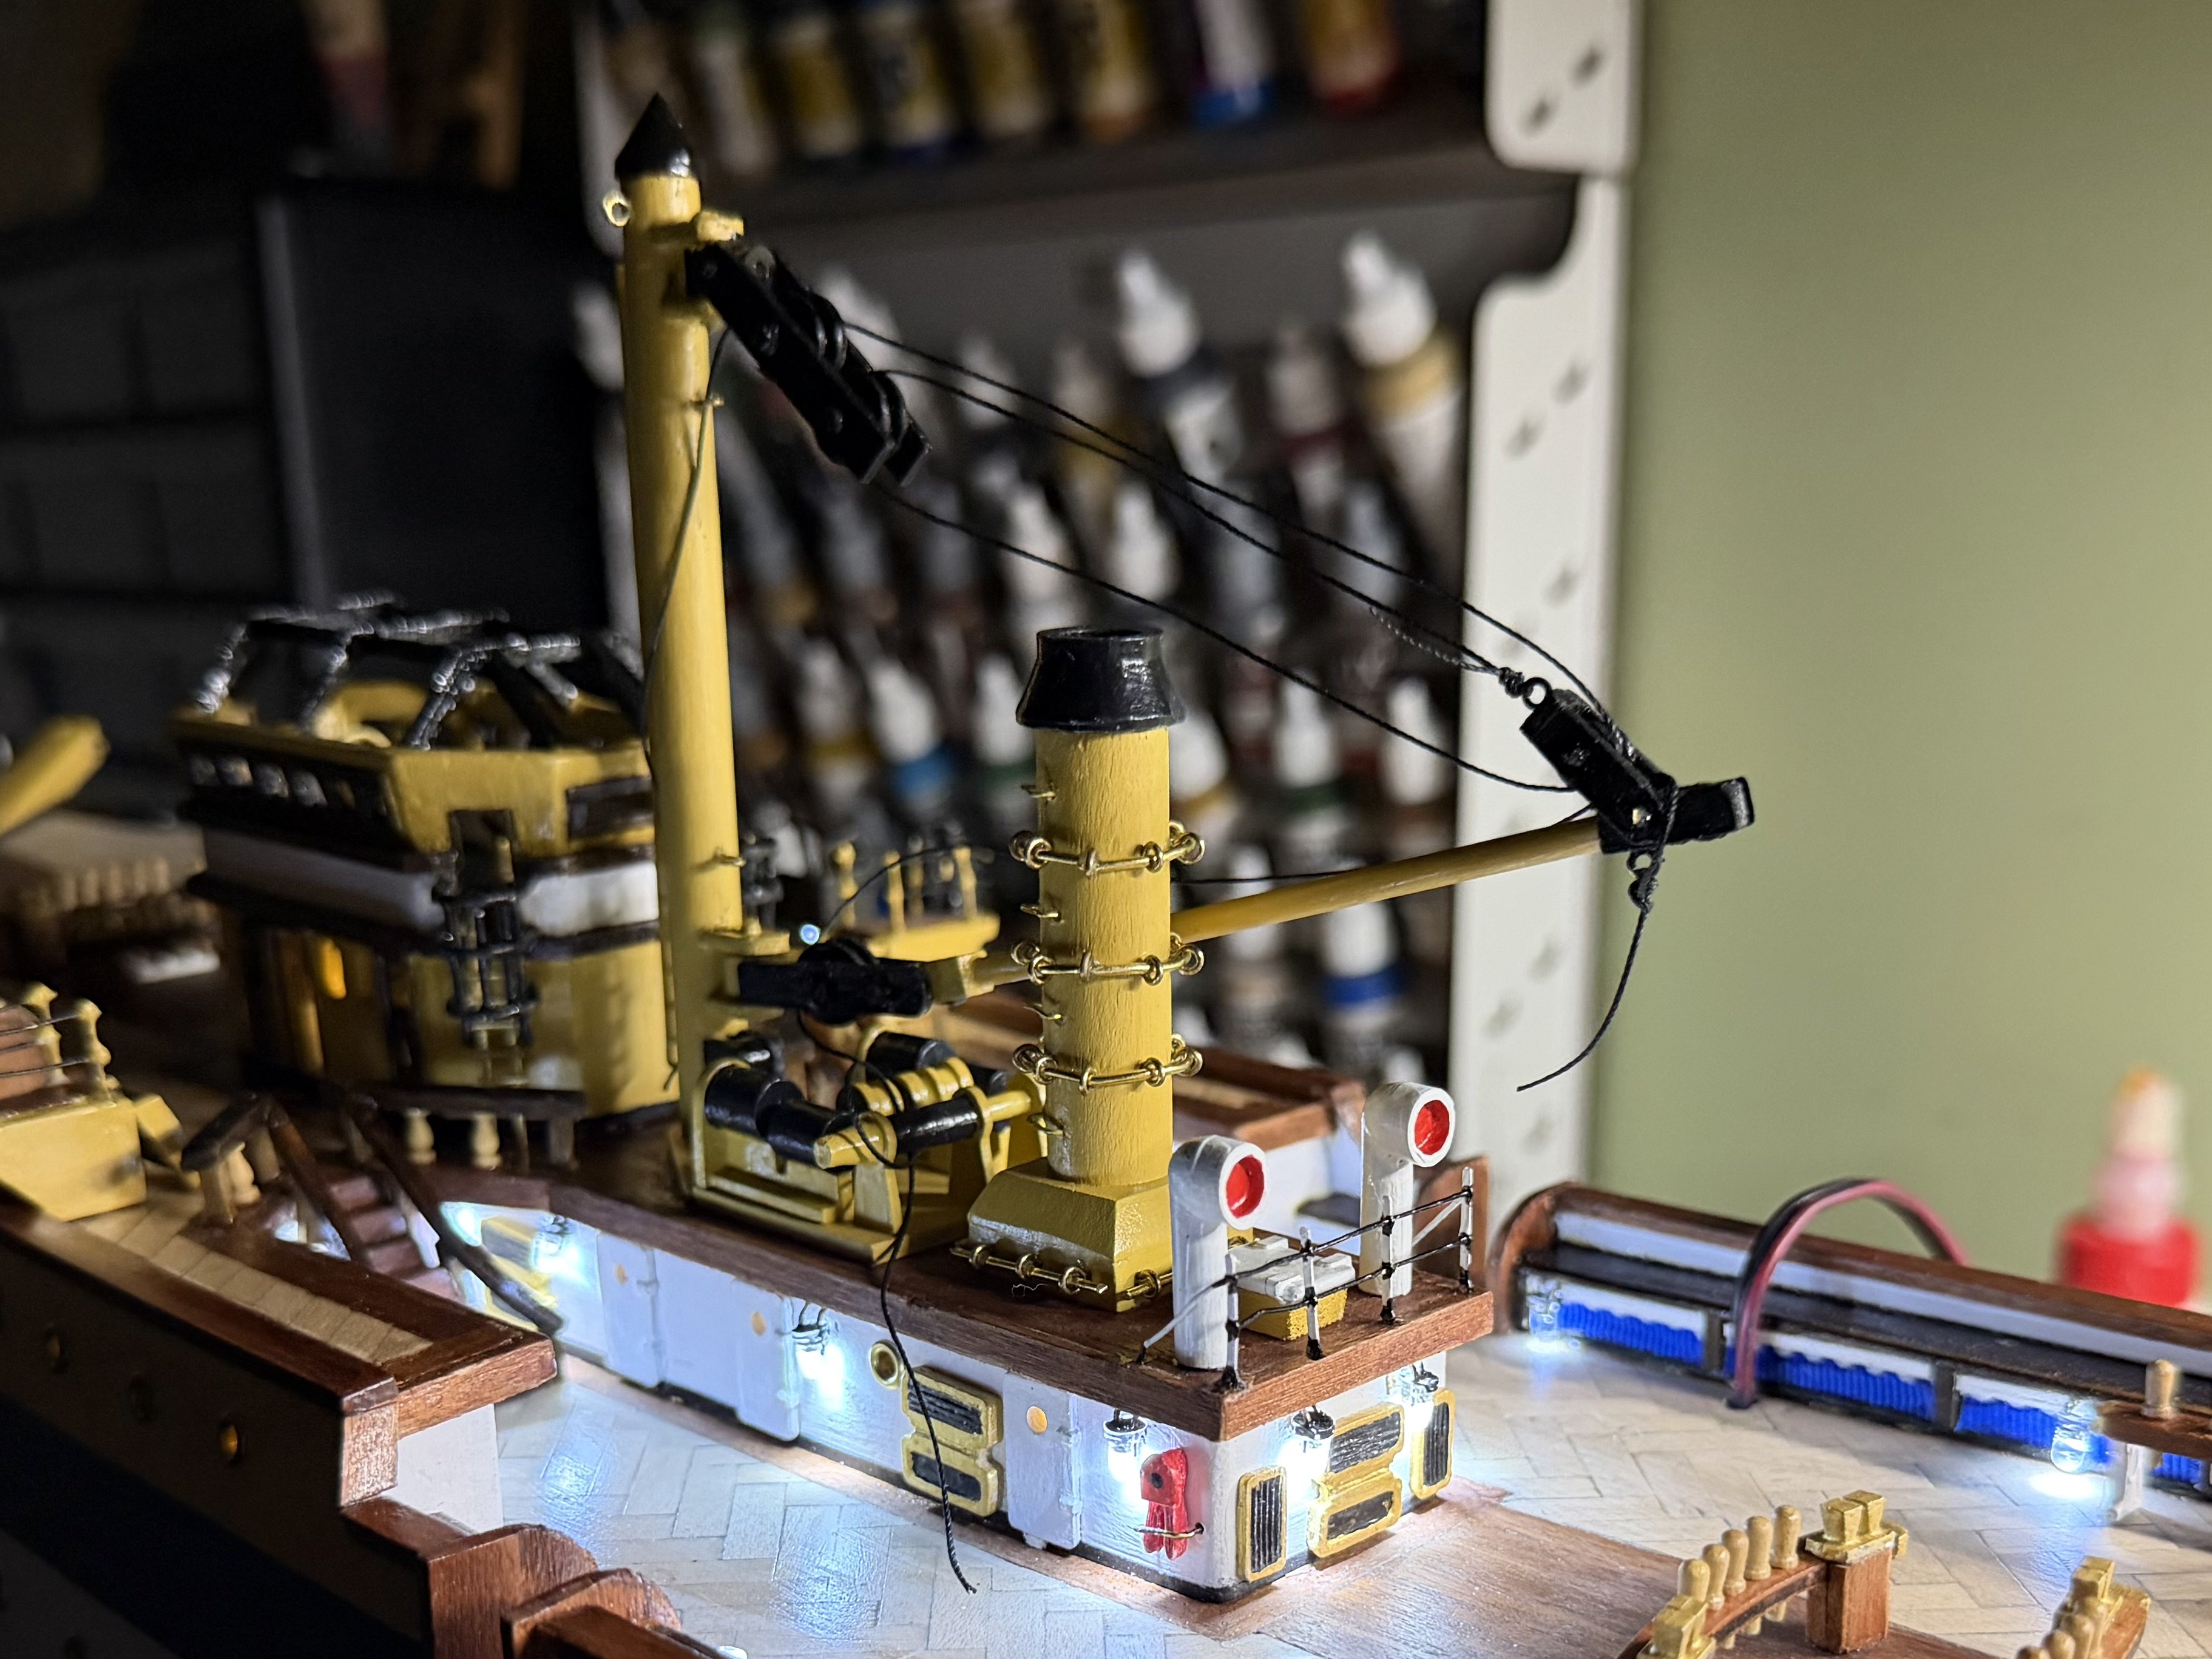
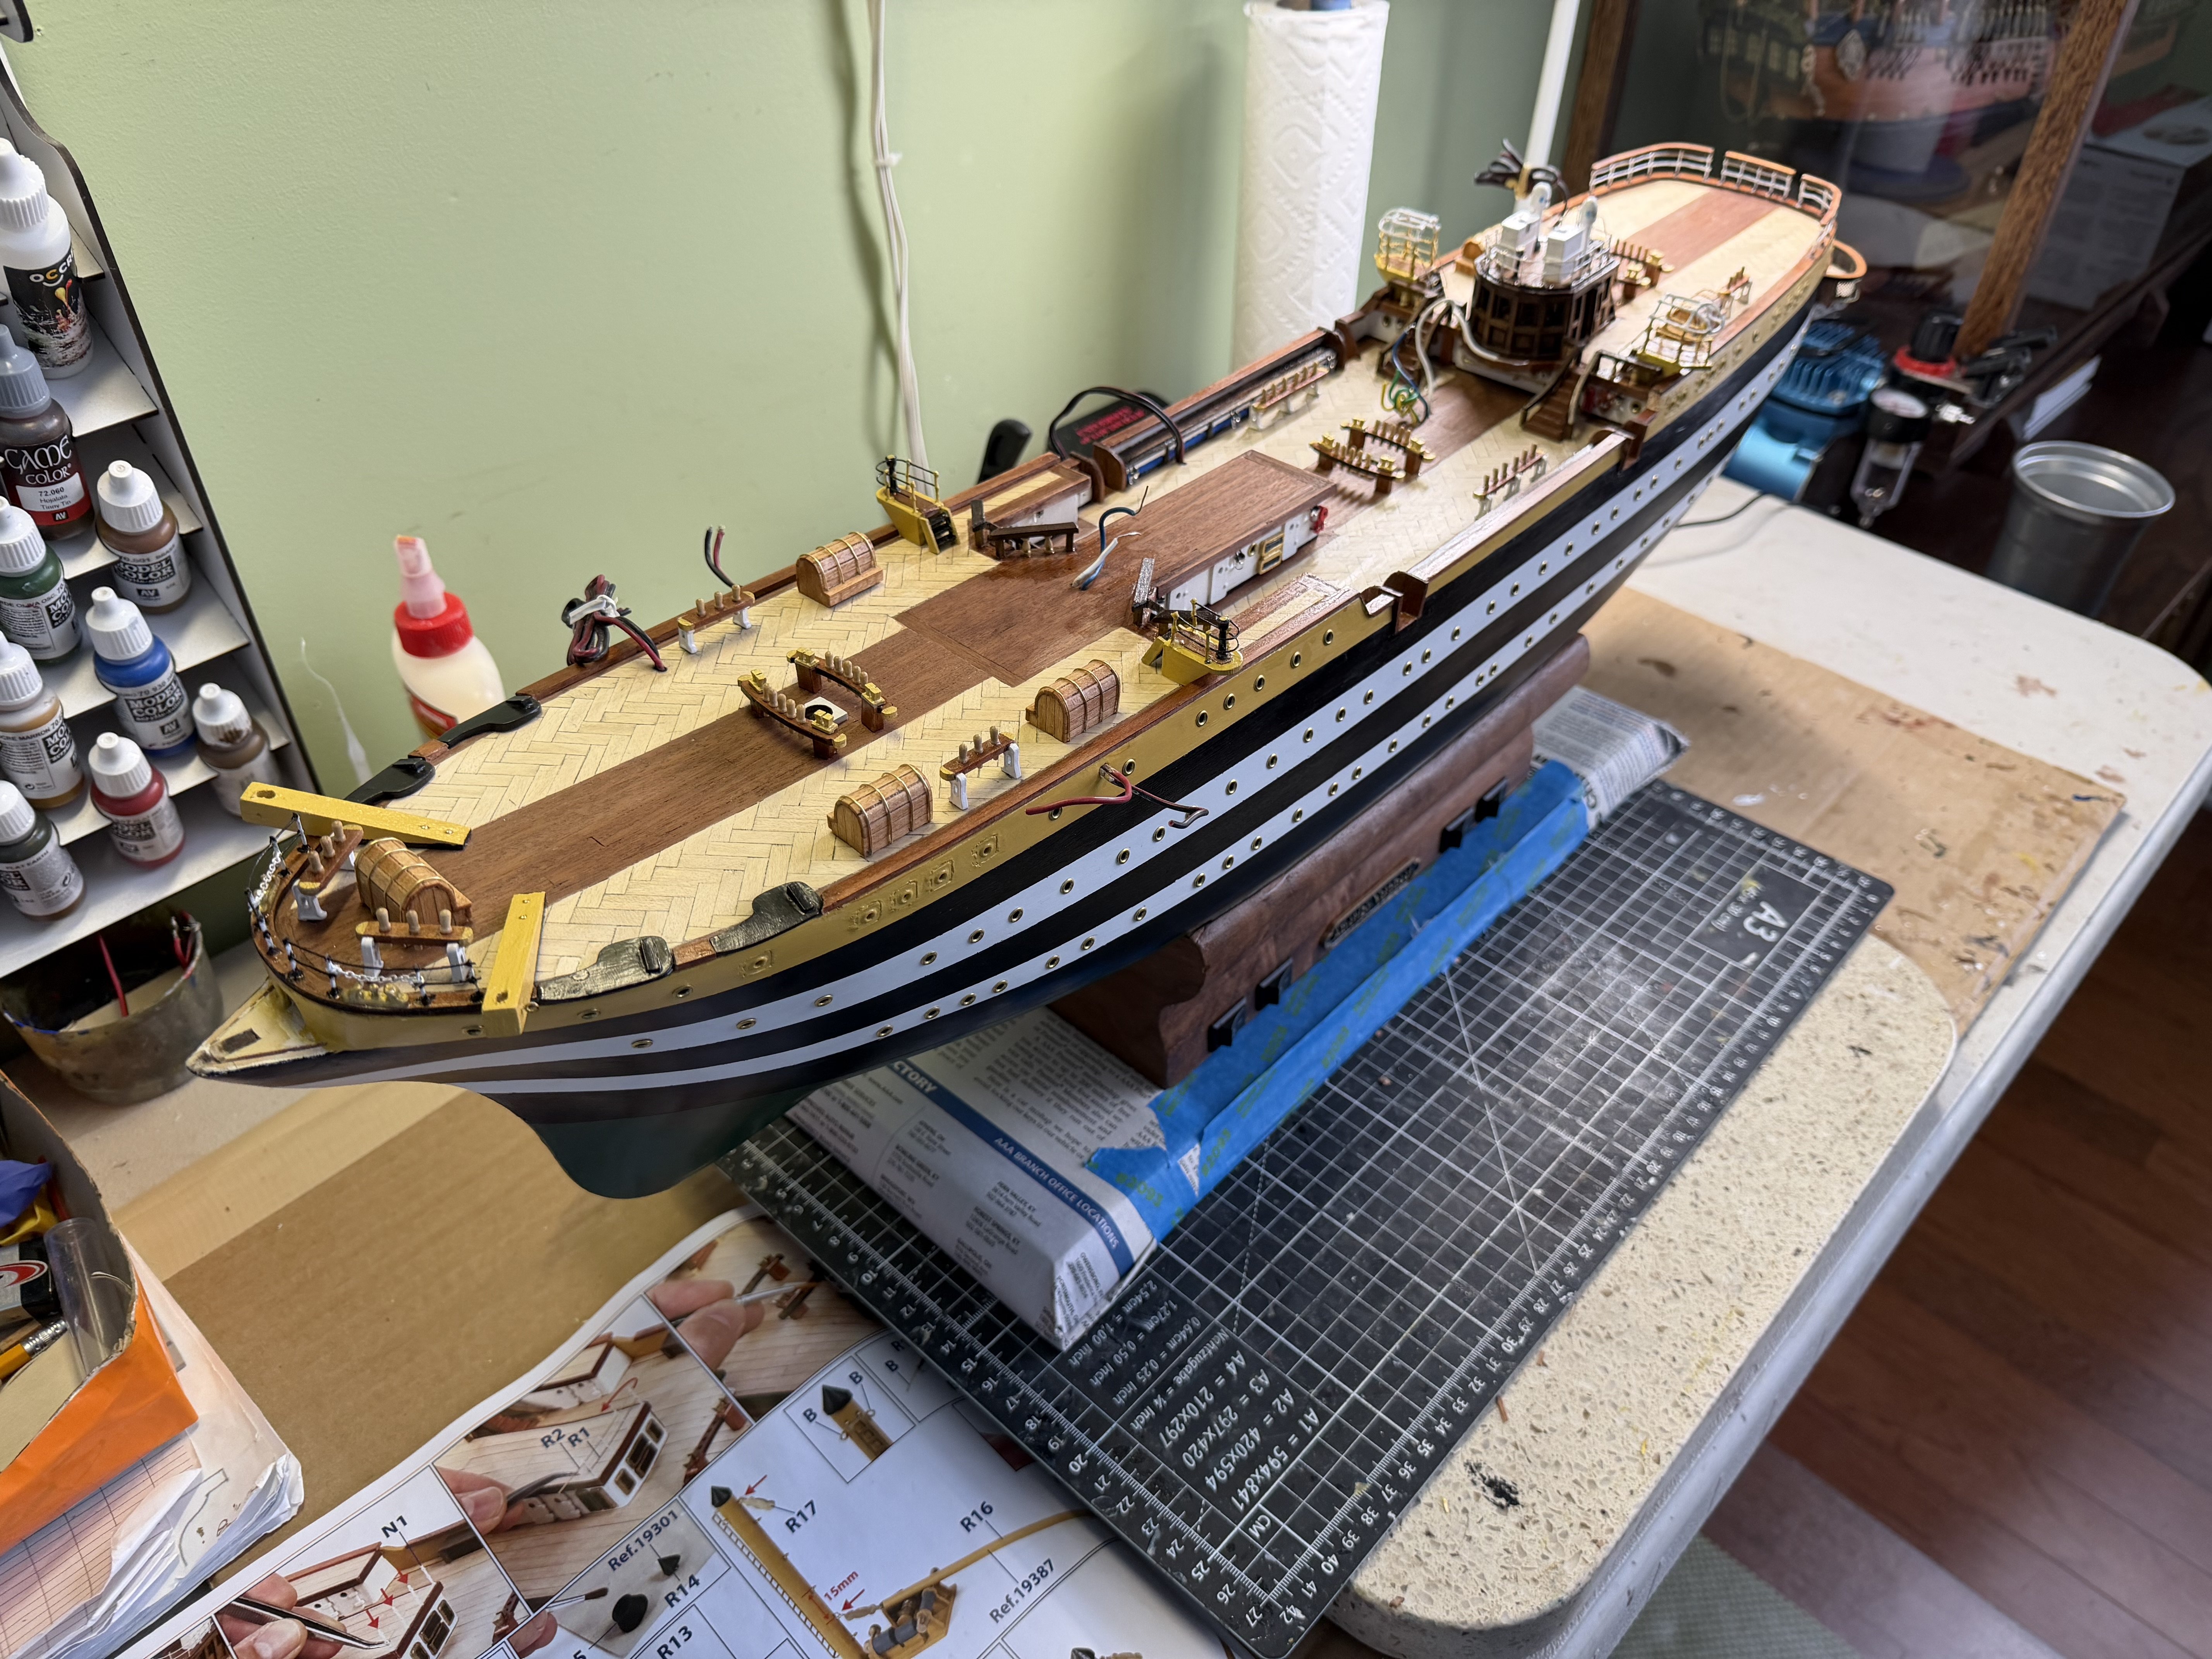
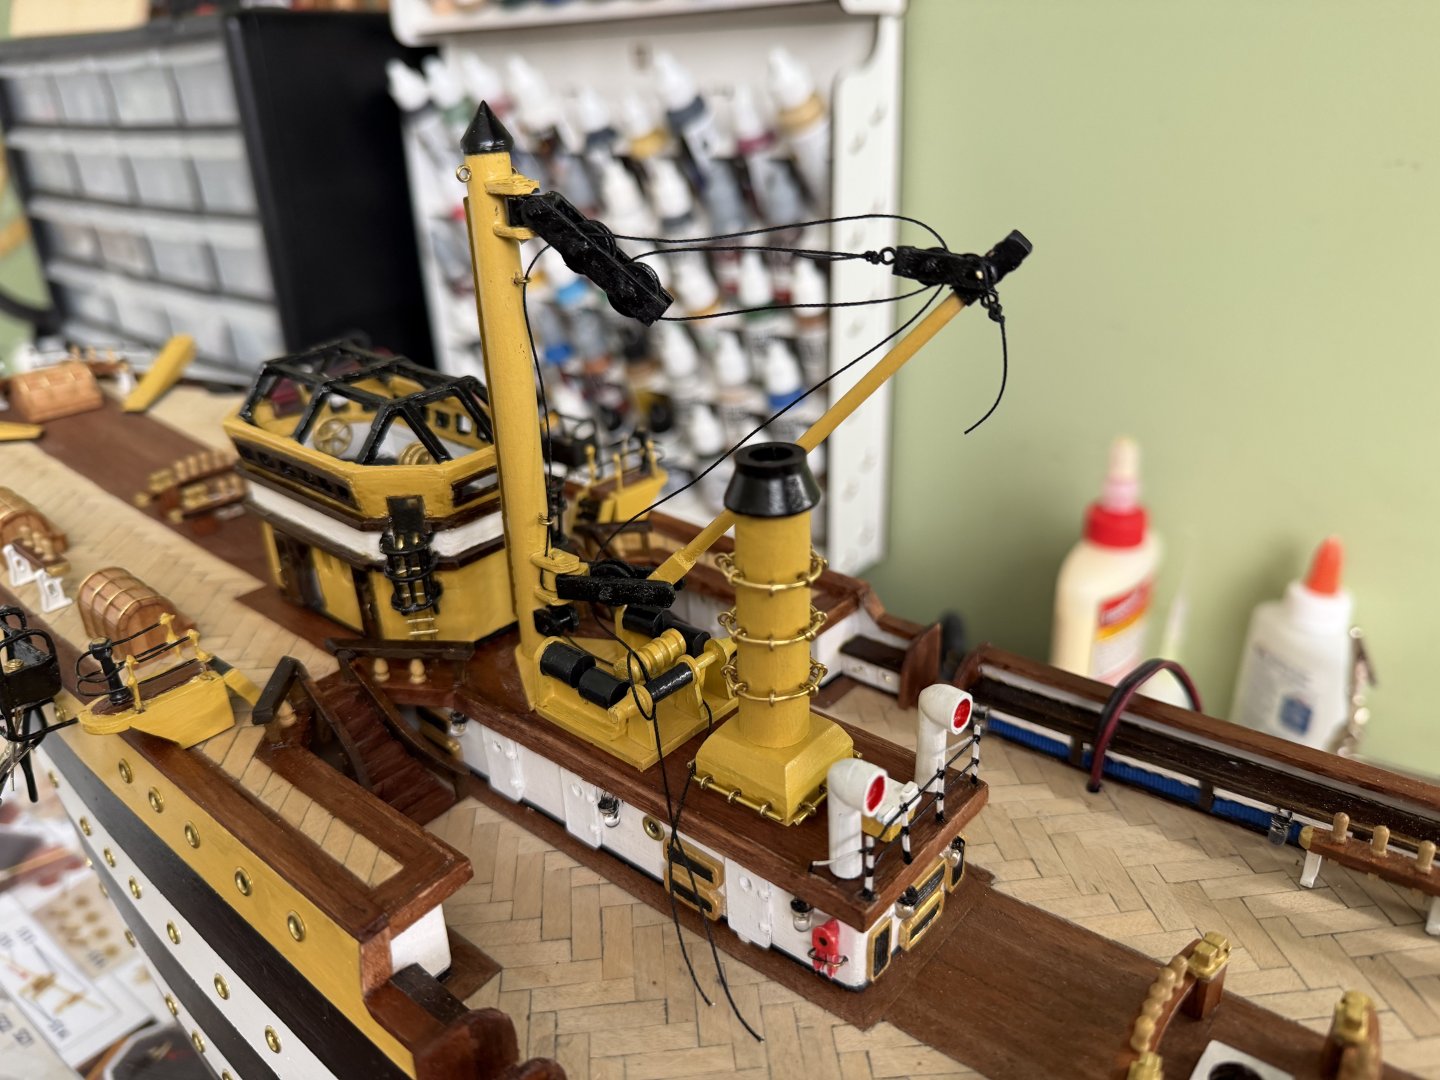
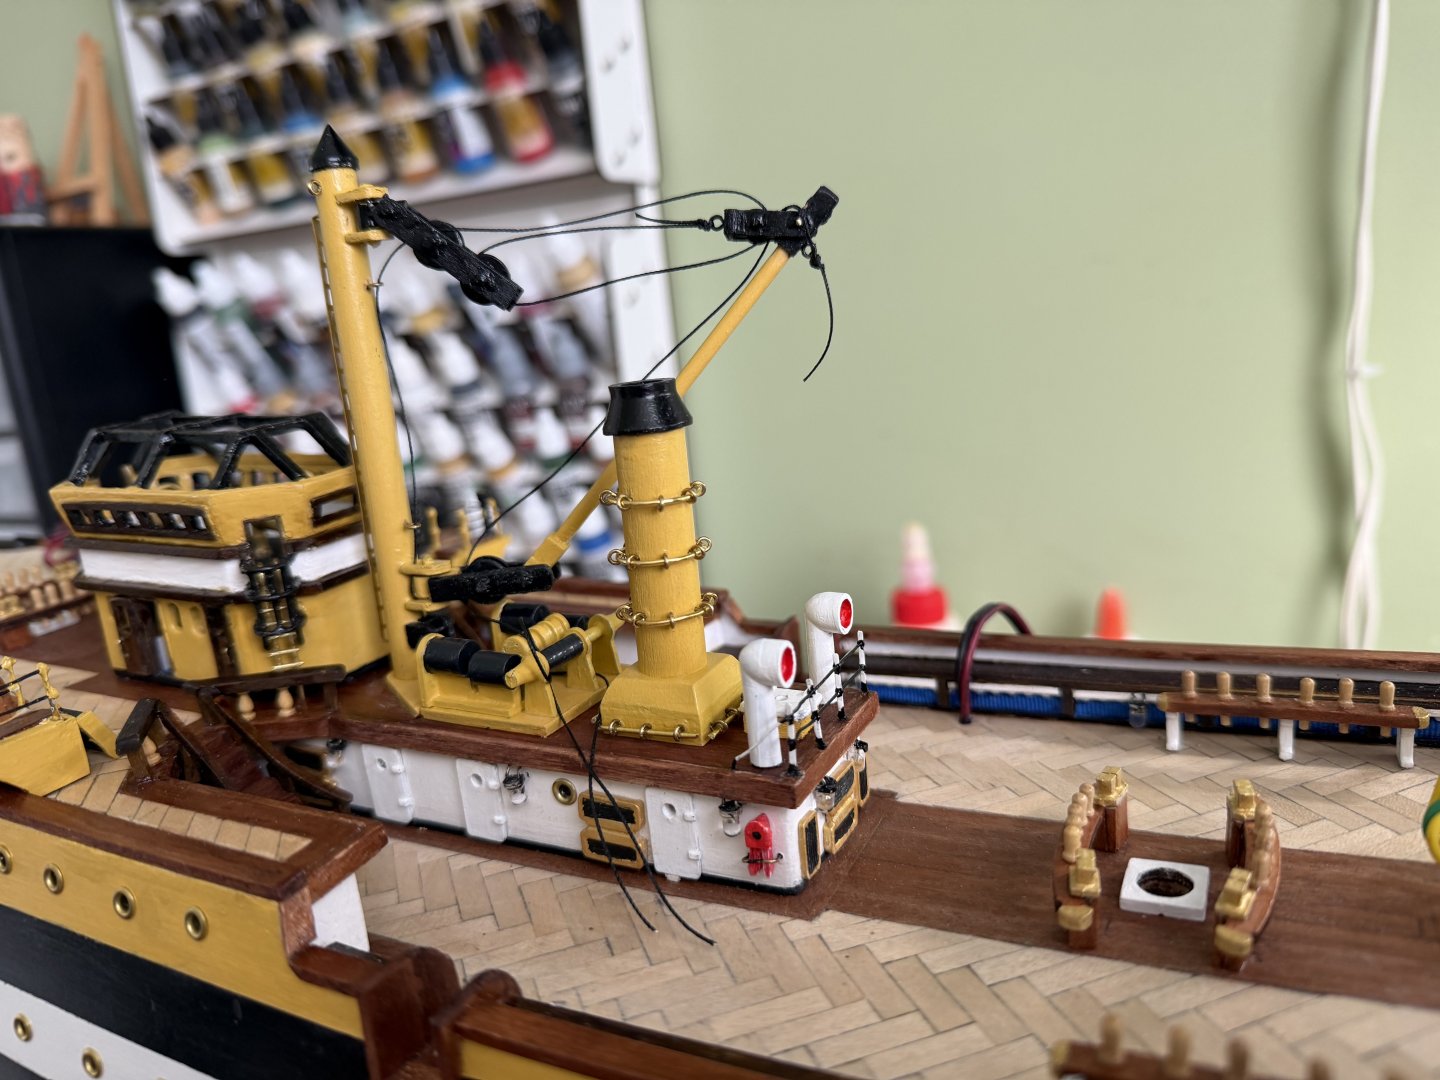
Back to the shipyard now. Hope all had a nice Christmas. Got a bit more time to work on my AV during the holidays then I originally thought I would. Spent most of the time working on the mid deck area. This included the main crane, the motors that operate the crane, the smoke stack, and a couple funnels. DanielD did a fantastic job on this part of his ship especially the crane hardware and the motors. I use his build as inspiration but my abilities fall short of what he did. My goal is to land somewhere between the OcCre instructions and what Daniel did.


-
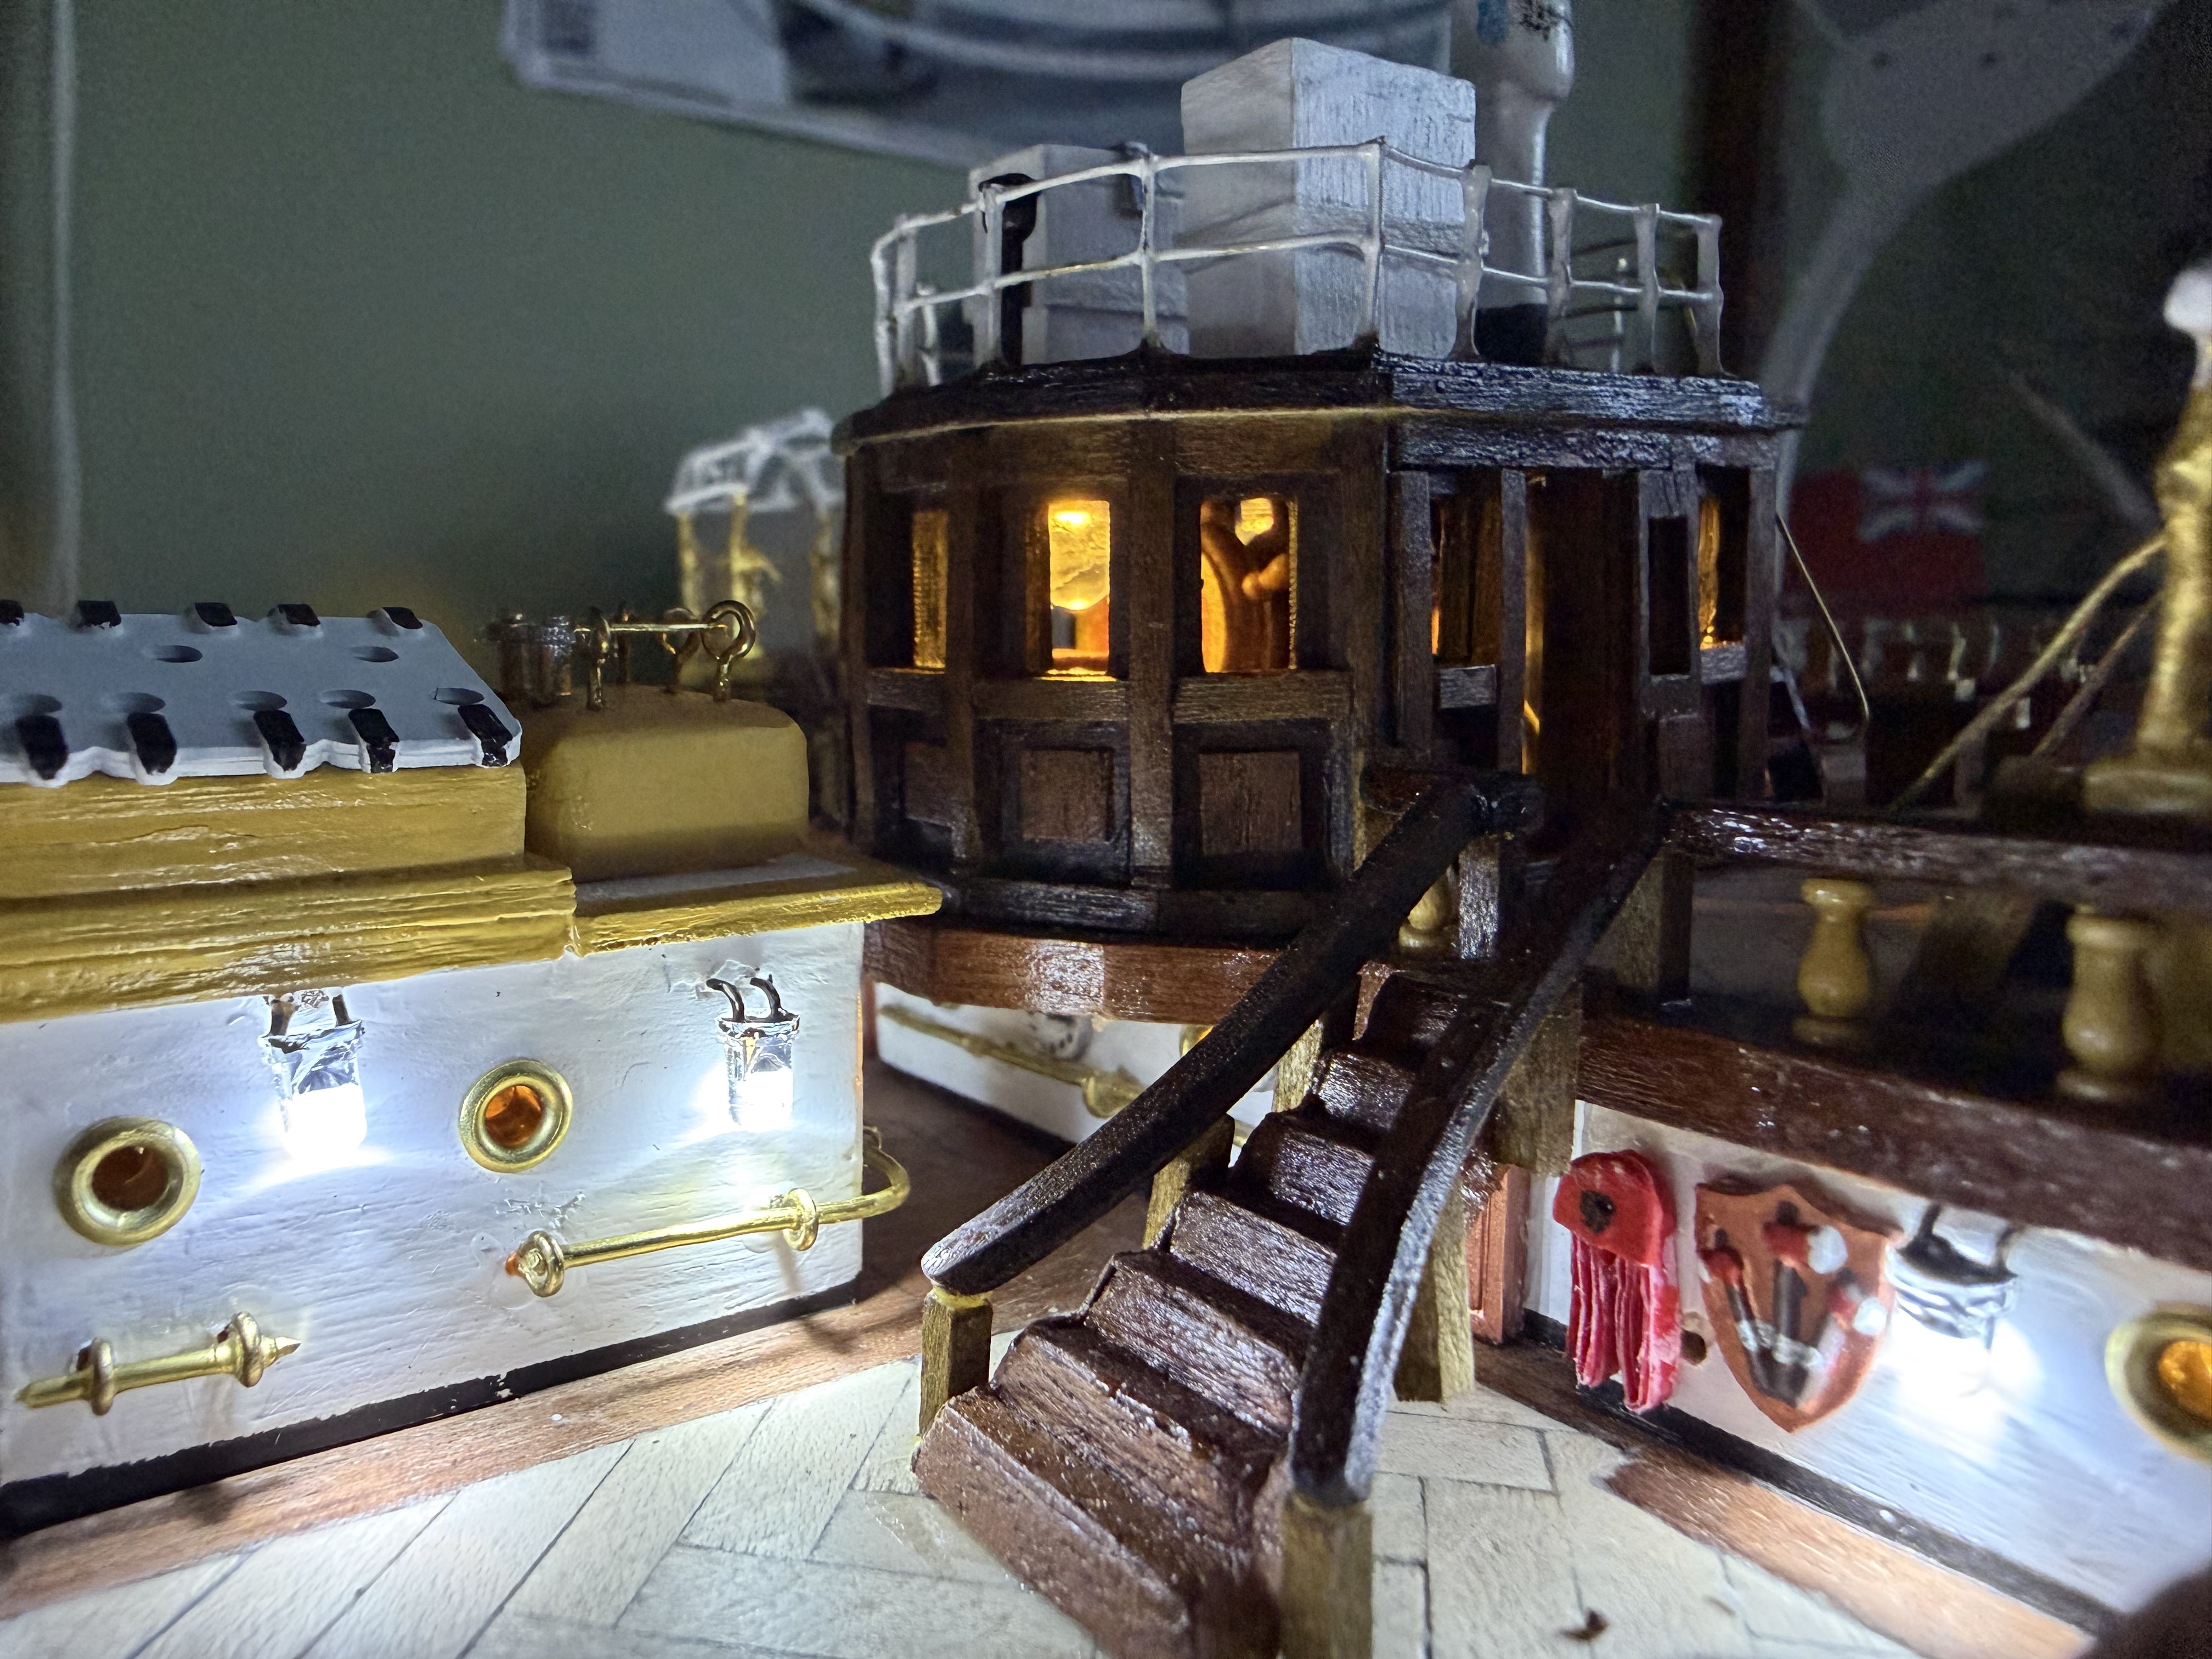
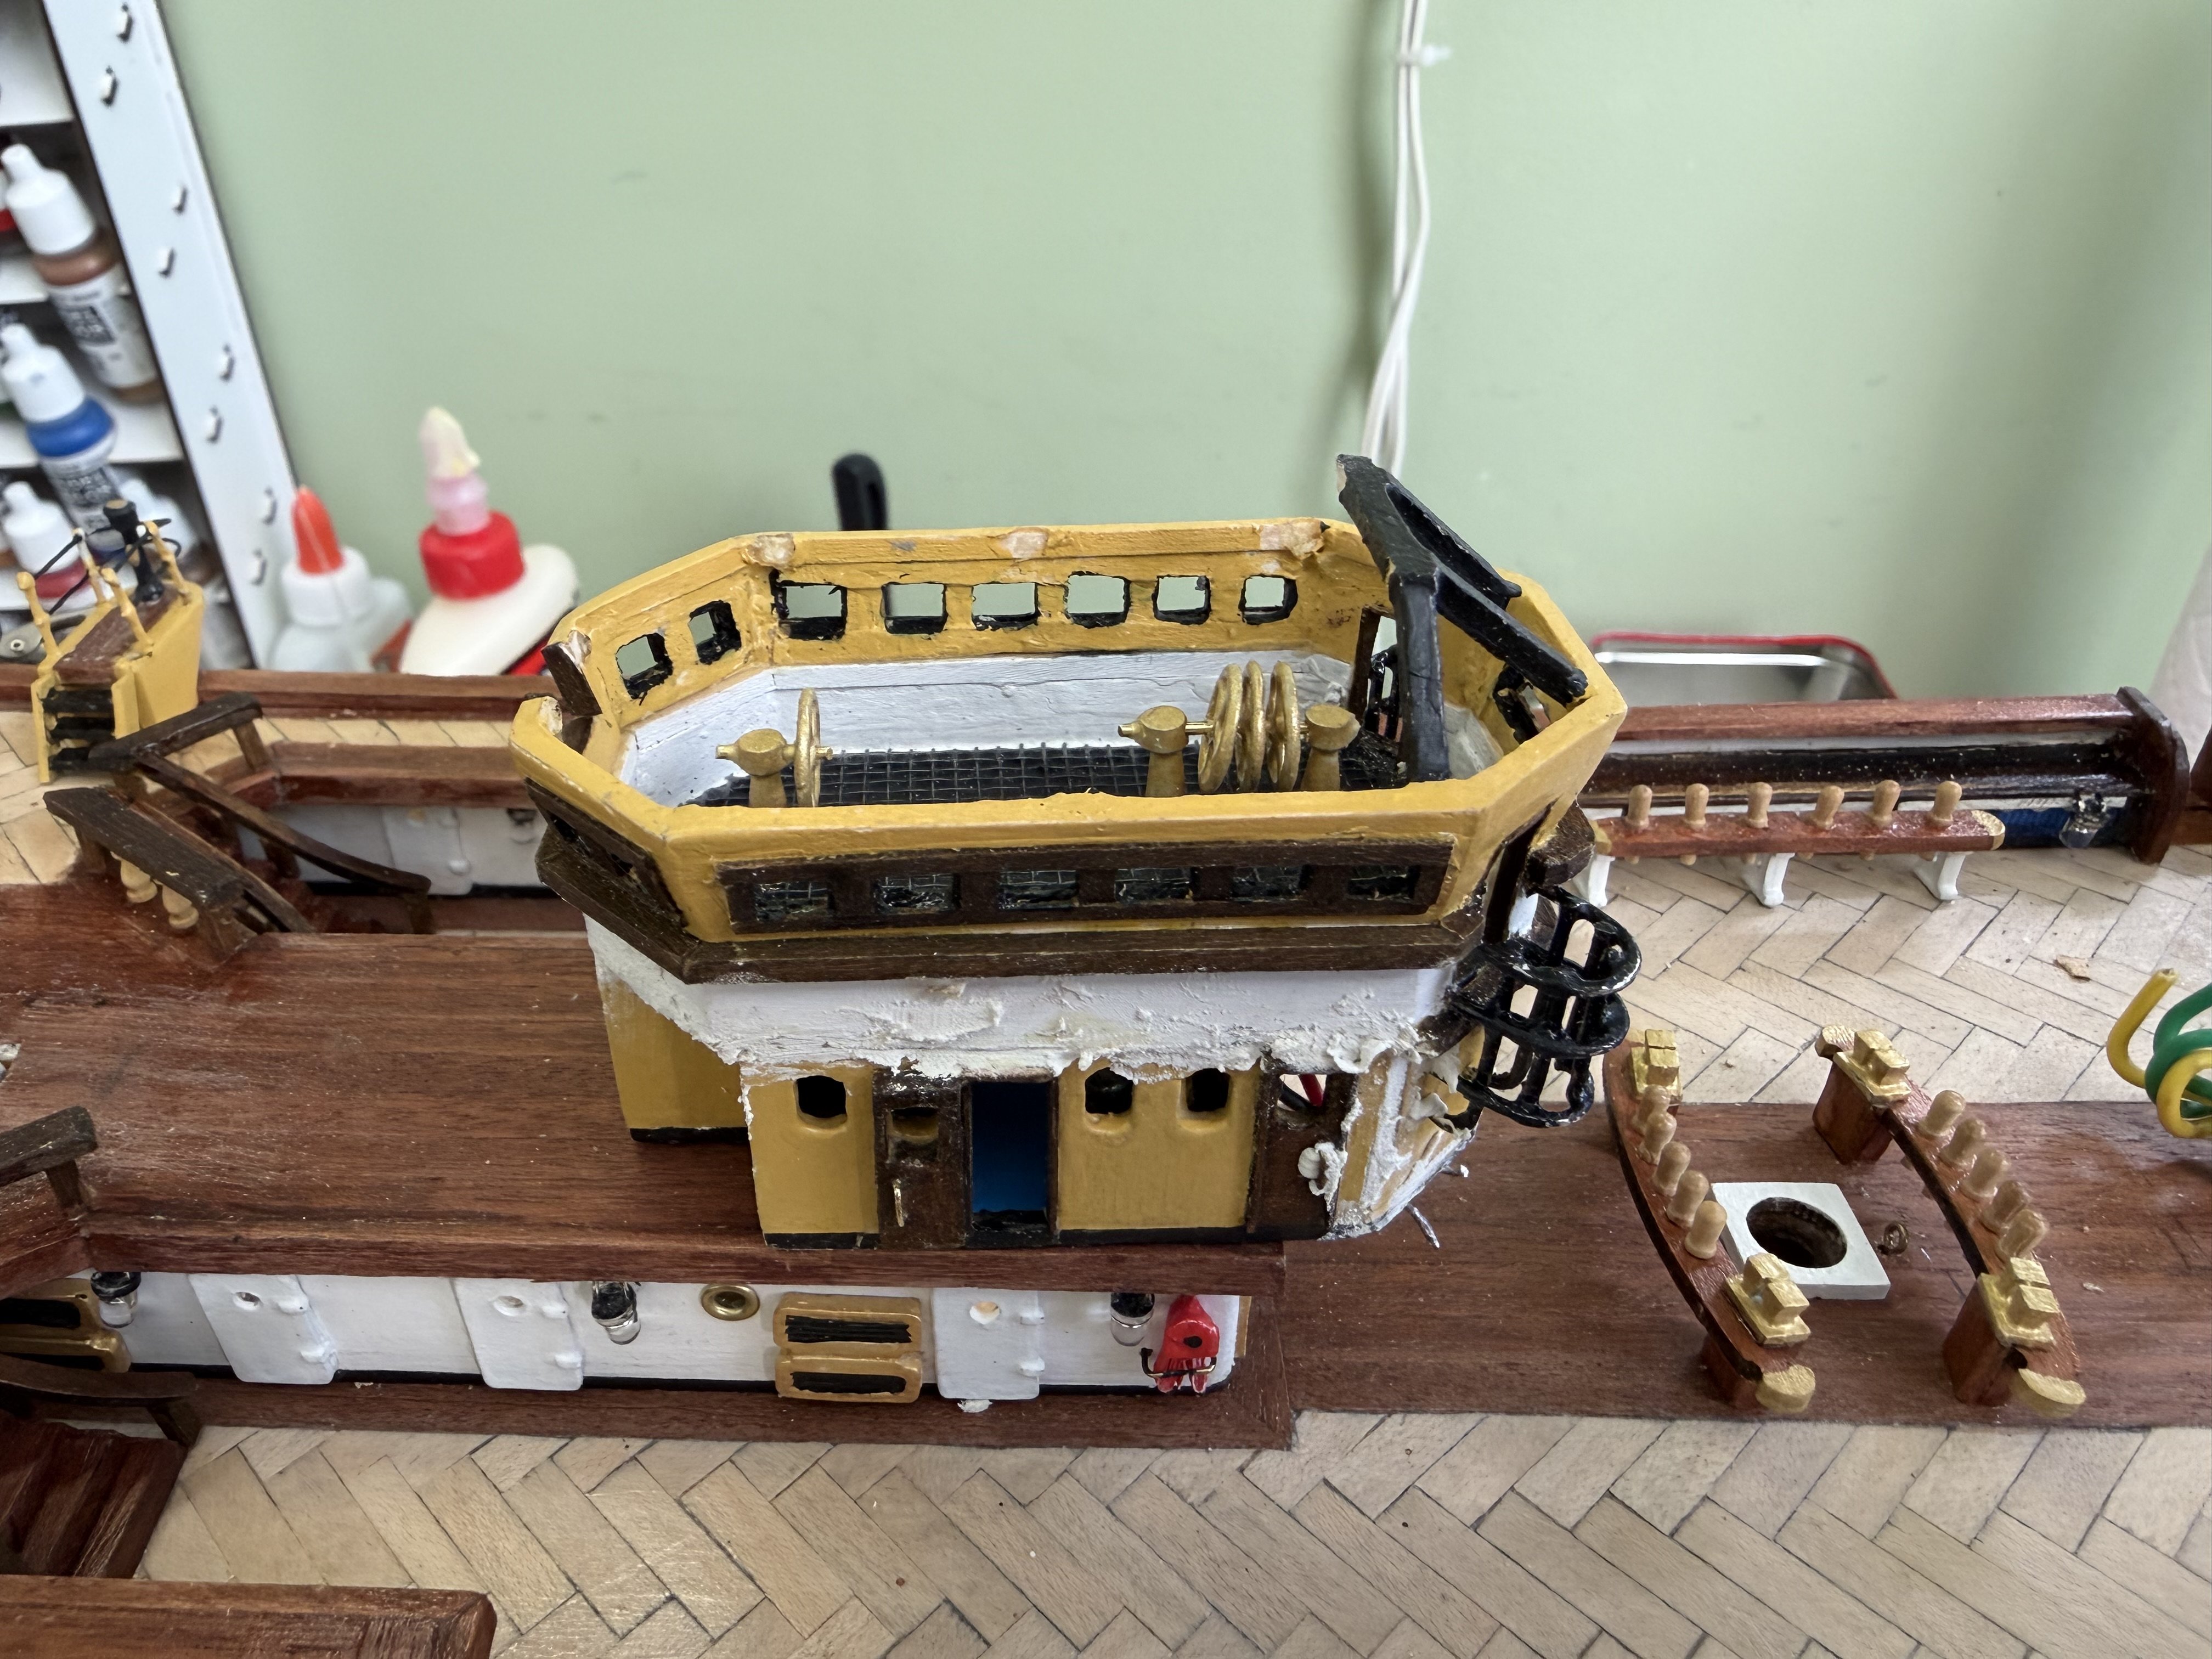
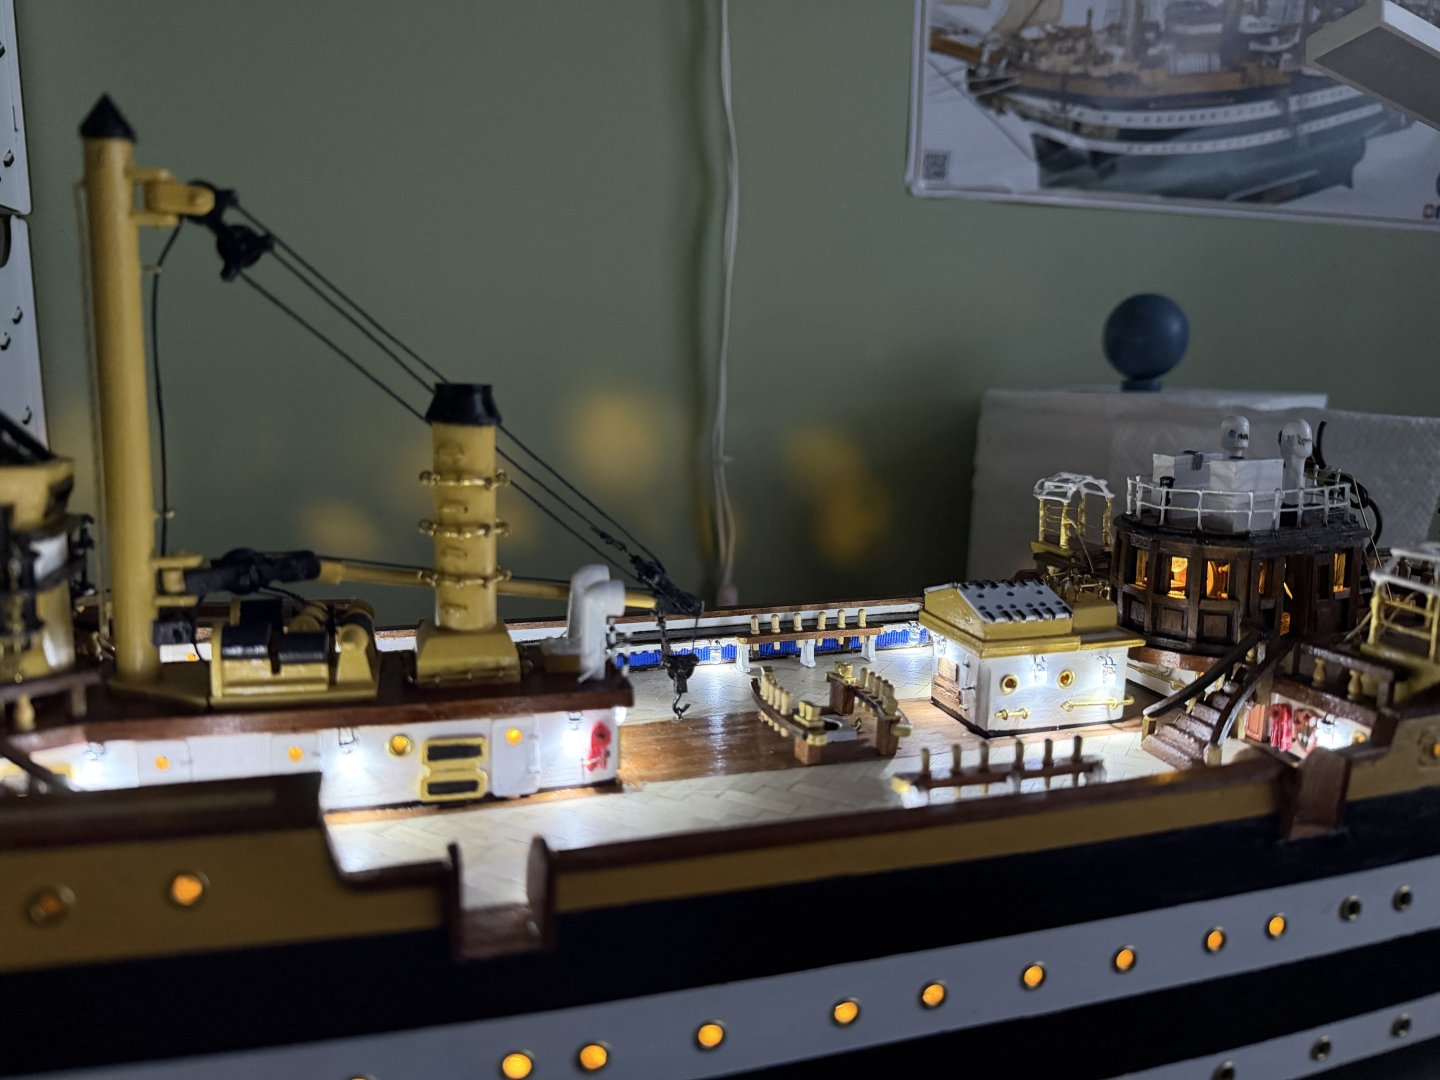
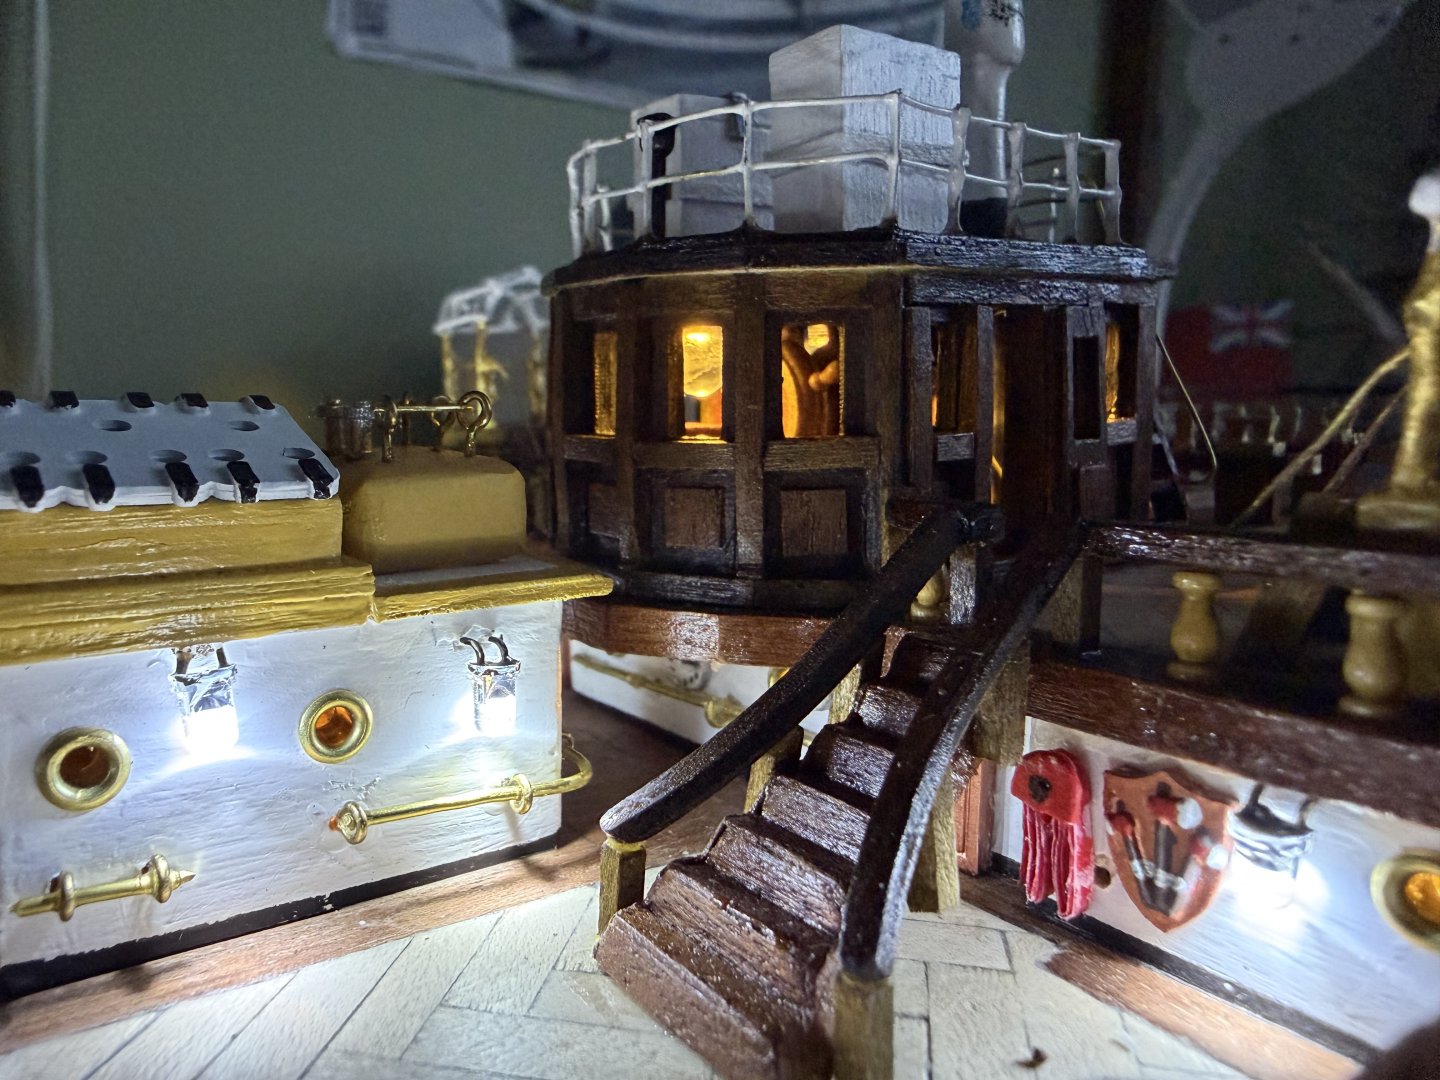
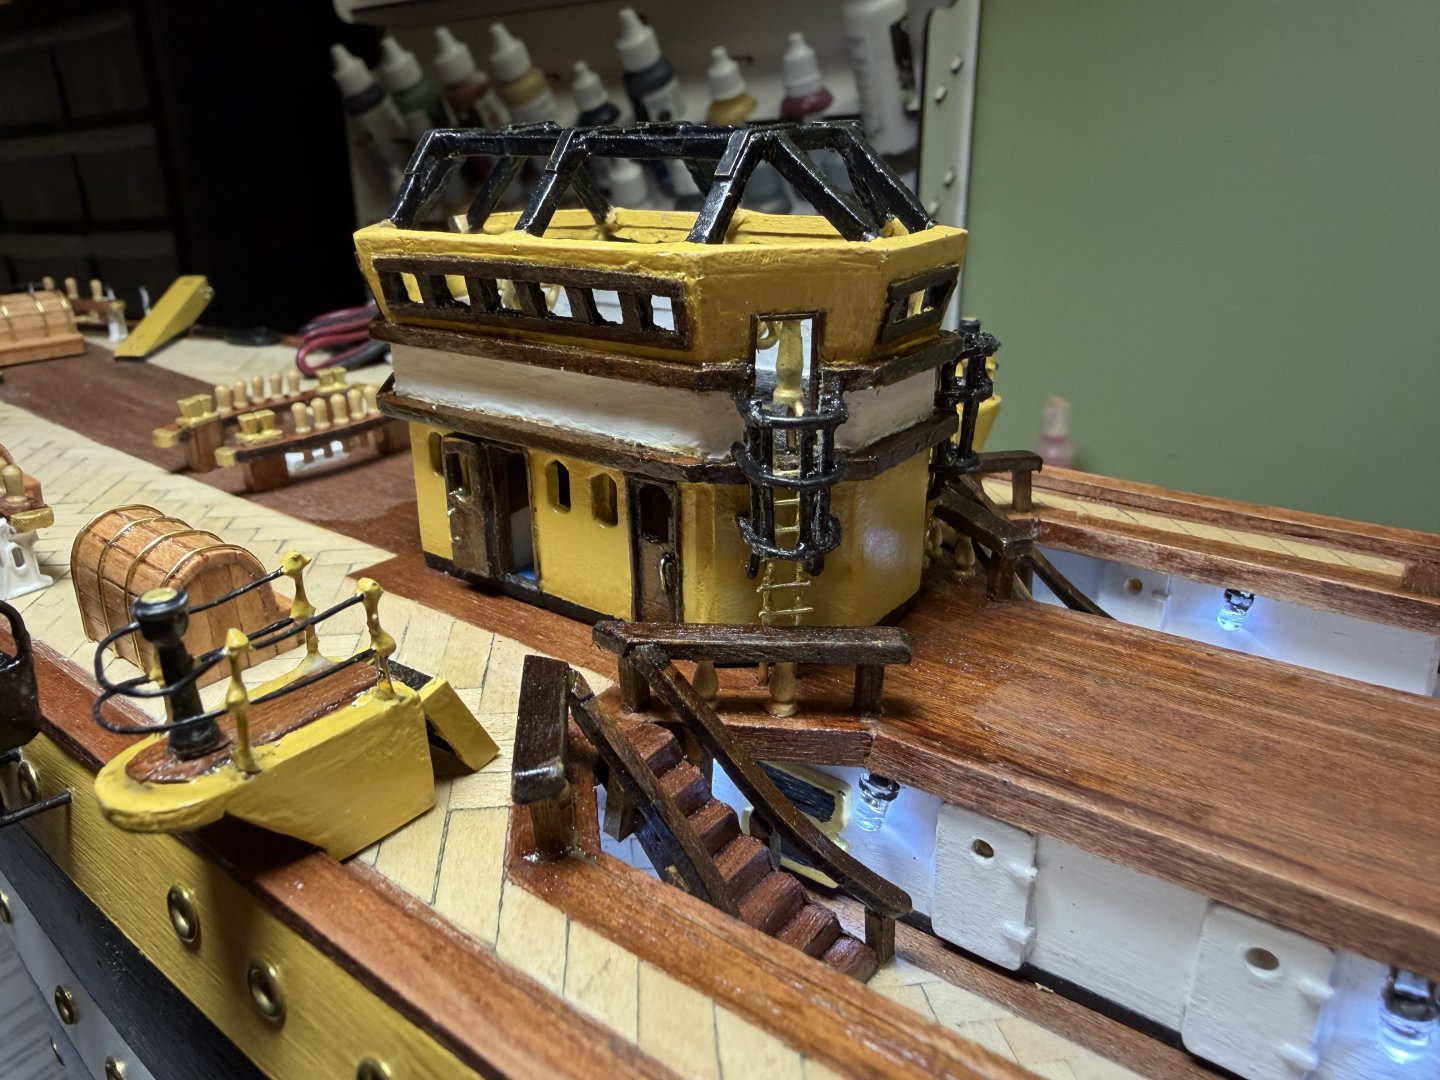
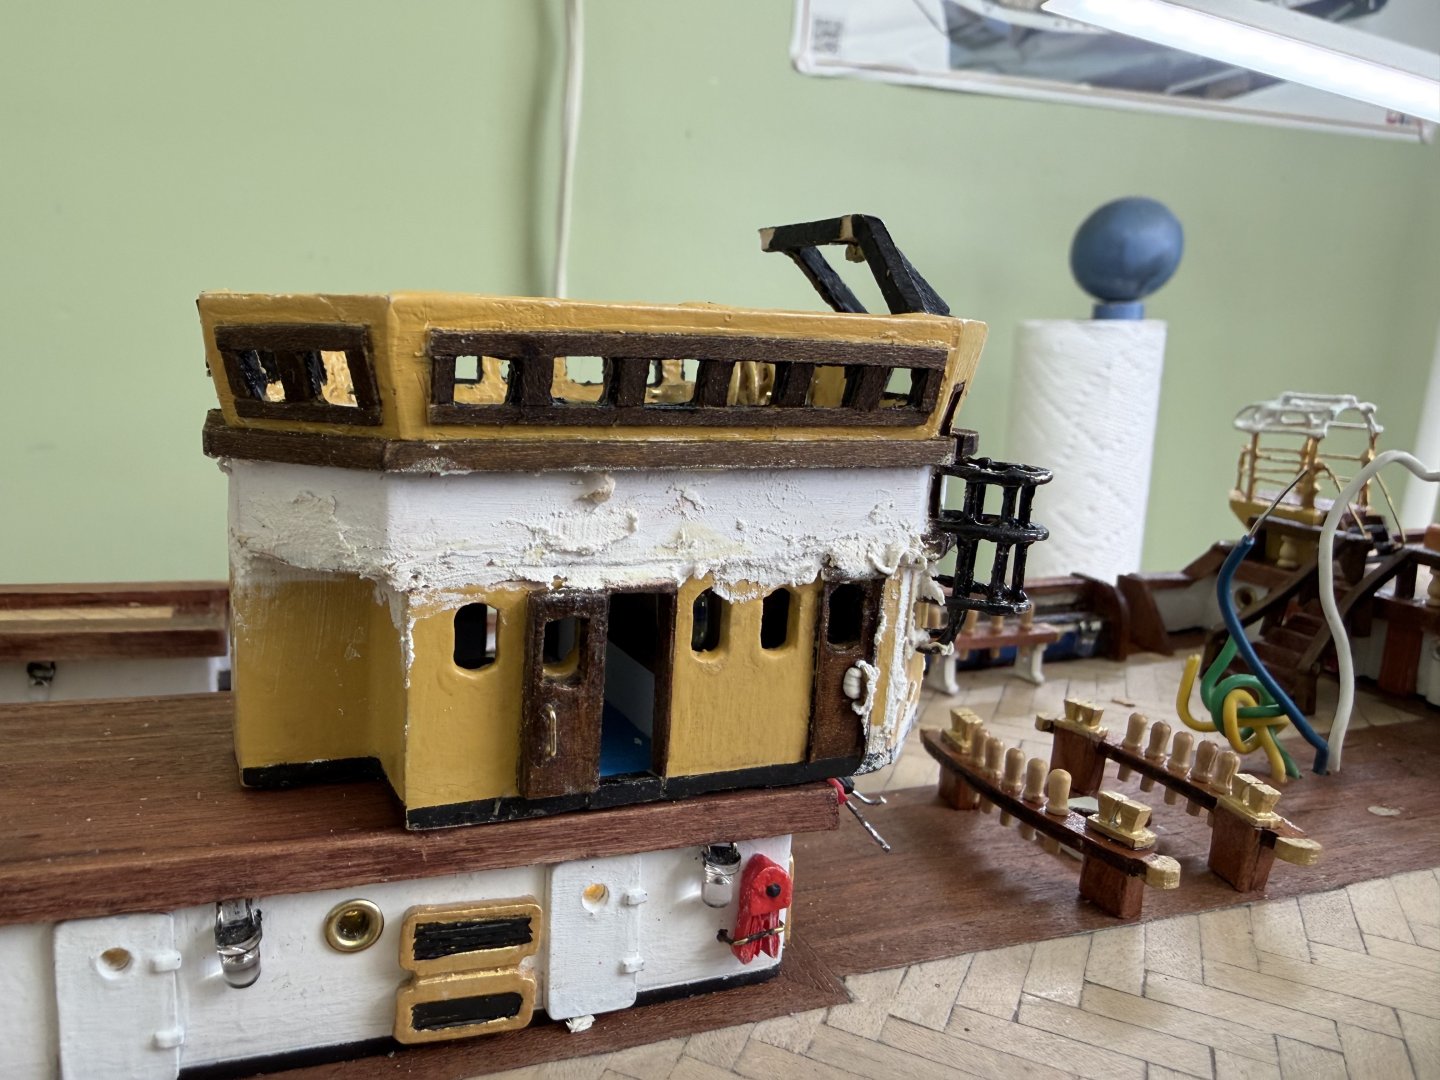
I got the structure rebuilt and paint touched up. The lights inside work fine now. I left the clear plastic out of the dome top. I had previously left the plastic out of the windows in other places and structures because I wanted a clear surface. I have never been able to put that plastic in my models and have it look good. I usually get a drop of glue here or there, a scratch or blemish, or whatever that disappoints me. So I just leave it out. I added the safety cages and ladders to the upper level openings. When I zoom in tight on the structure I can see there is more paint build up in some areas than I like but I am pleased I got it back together. Now on to the next exciting part of this build.


-
Daniel I wondered if when I drilled the holes for the safety cages that go up to the openings if I hit a wire. They worked perfectly before.
-
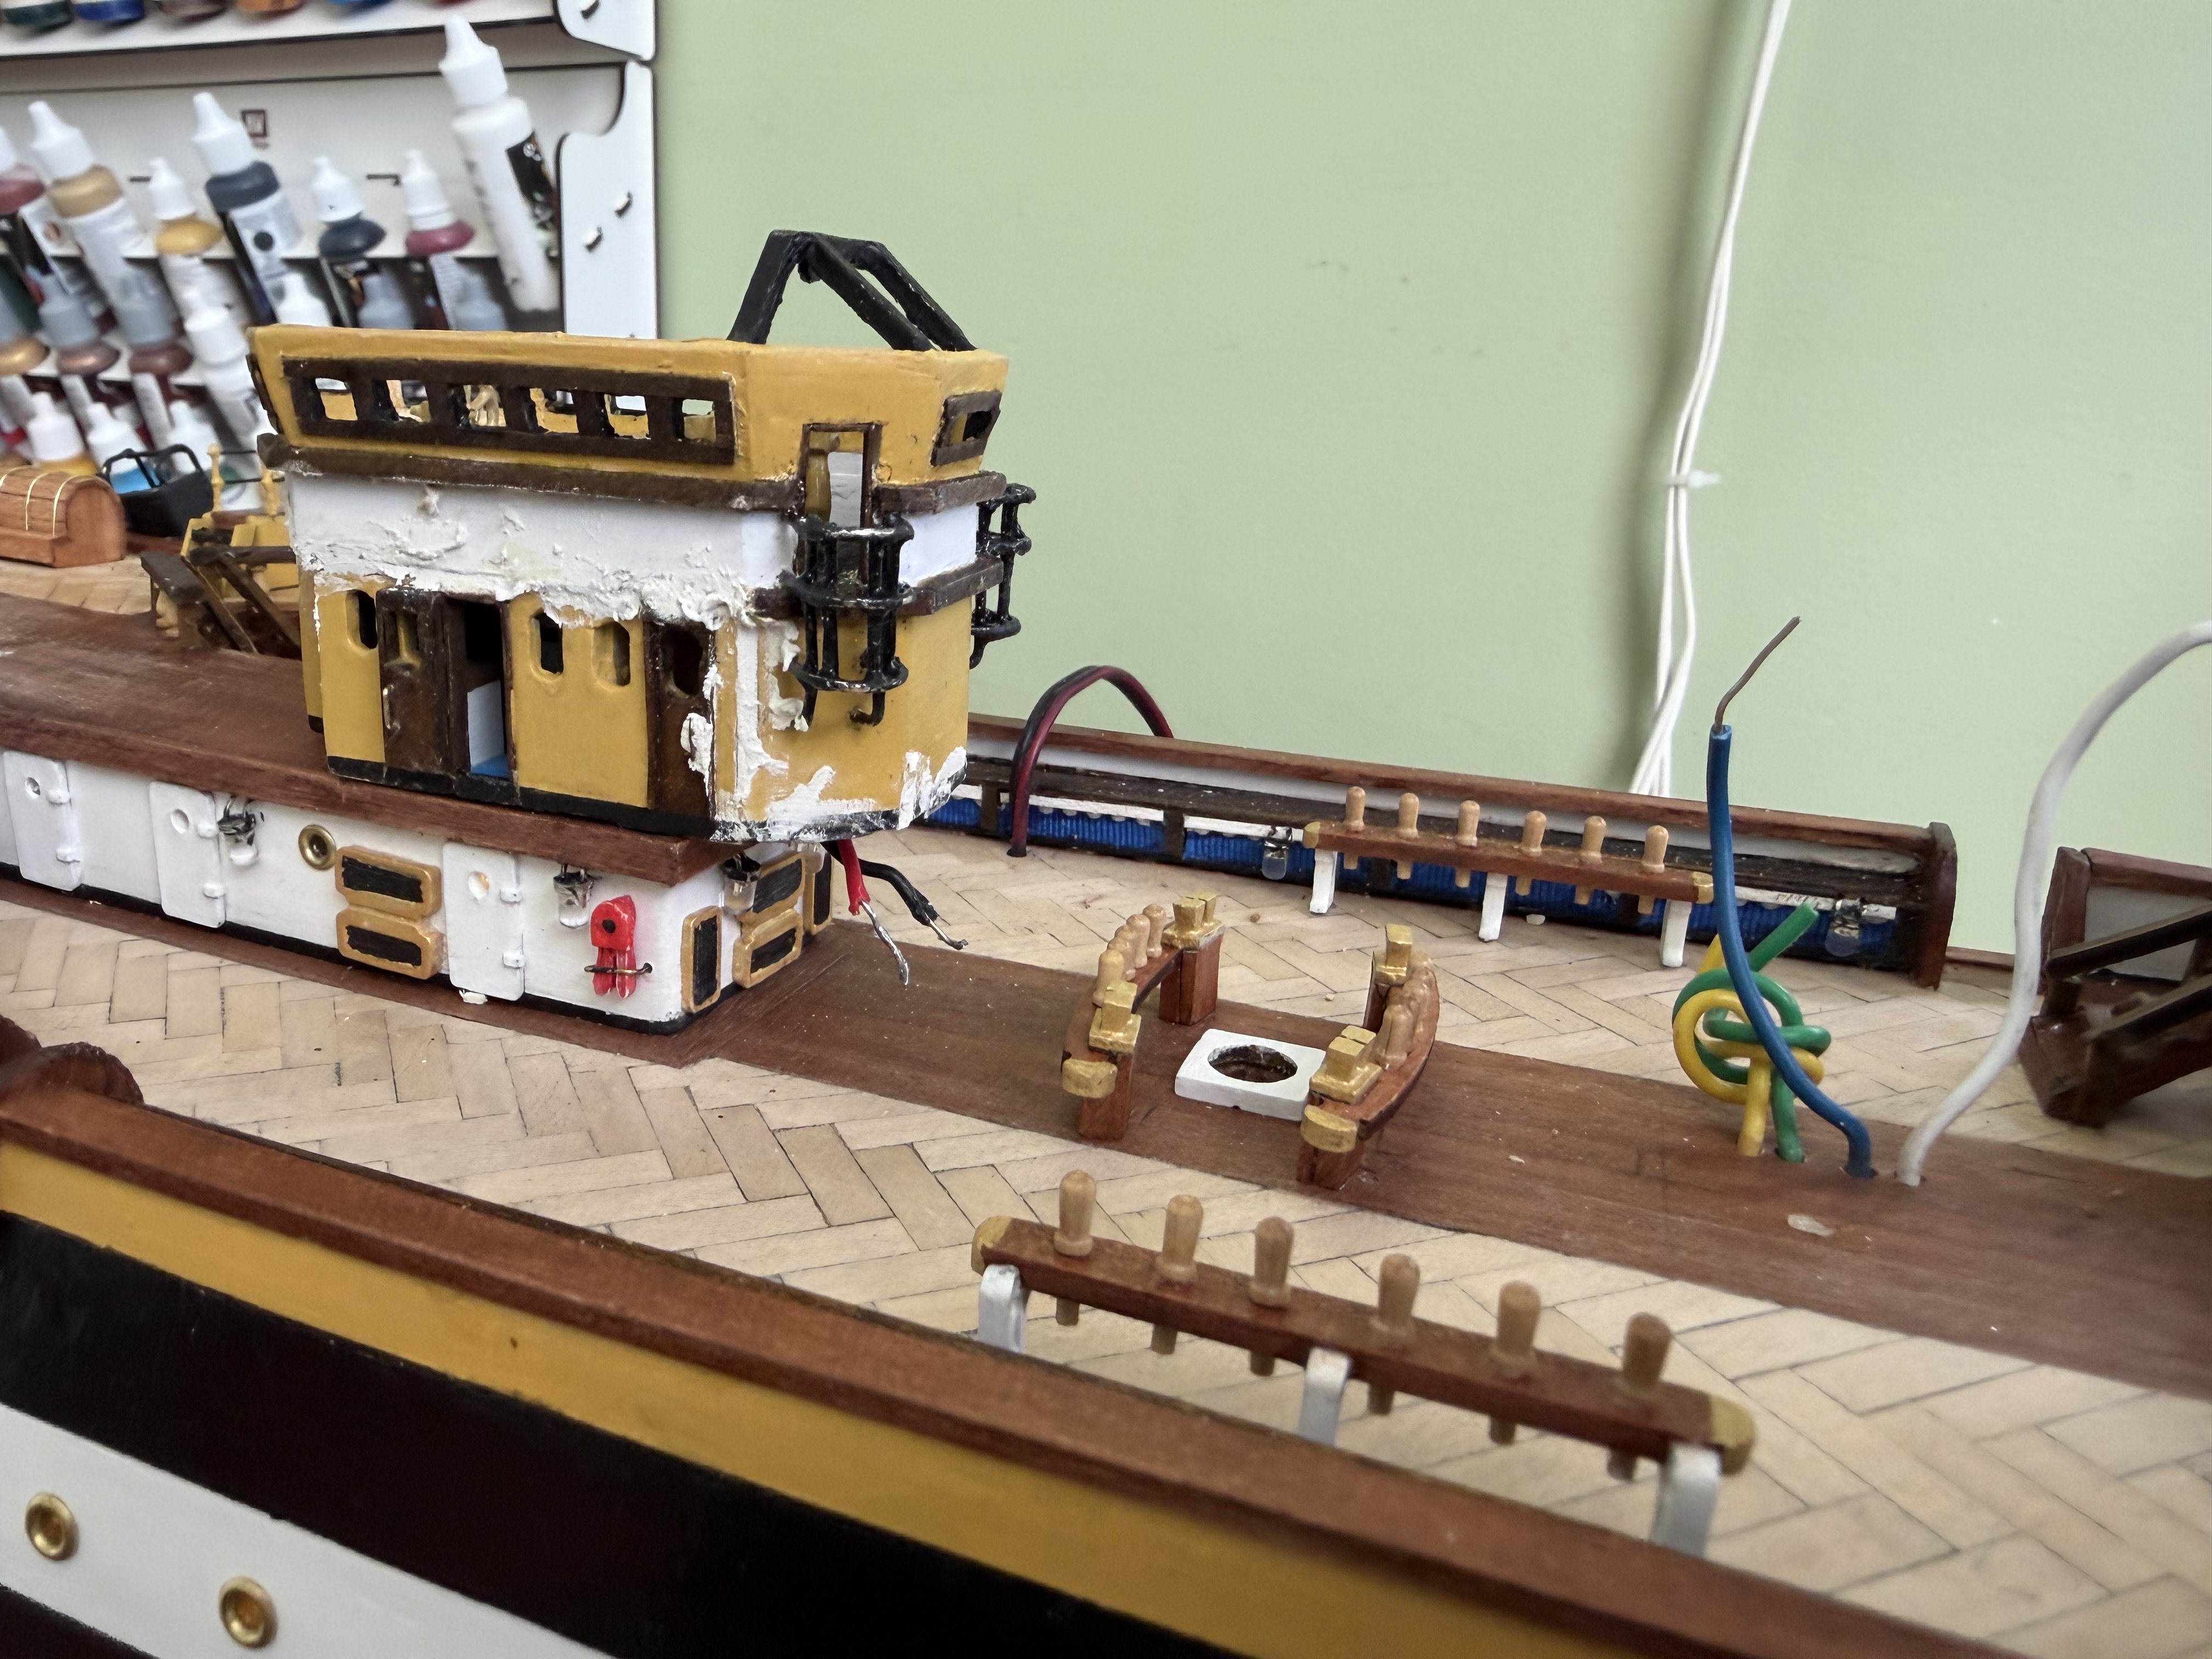
So I had my first major “oh s- -t” today. I had the deck structure in the below photo completed and ready to mount on the deck. I was pleased with how it looked. Thus structure has two sections (rooms if you will). I have LED lights in school room. I connected the wiring and glued it down in place on the deck. I turned on the circuit that powers these LEDs and was pleased to see through the windows that the lights weee glowing. However within a few minutes I noticed one of the 5 LEDs in the structure was flickering. Decision time. I knew it was most likely a loose connection. Do I just live with it? An option I knew I could not live with. Or do I try to get inside the structure to solve the problem? I picked the option of fixing the connection but soon determined there was no way to find the issue and then fix it through the little windows. I decided to cut out one of the doors to give myself more room. Still no way to get in enough. Eventually I decided to cut the structure open to expose the LEDs and wiring. I found the problem, soldered it again and tested it. All was good. Now I had to glue the structure back together and apply wood filler. Once it sets up I will redo the sanding and painting. Hopefully get back close to how nice it looked before. In the process of cutting it open I unfortunately collapsed the dome structure that sets on top. I will have to remake it. Fortunately the wood glue had not fully set where I glued the structure to the deck. Had I waited till tomorrow to test the lights I would have had a serious problem. Probably not solvable.


-
Thanks my friend. Merry Christmas to your family as well.
-
Well it is looking like my shipyard workers are demanding time off until Christmas. Only want to work limited part time with so much other stuff going on and needing to be done. So I guess my available time working on my Amerigo Vespucci will be somewhat limited the next couple of weeks😢
-
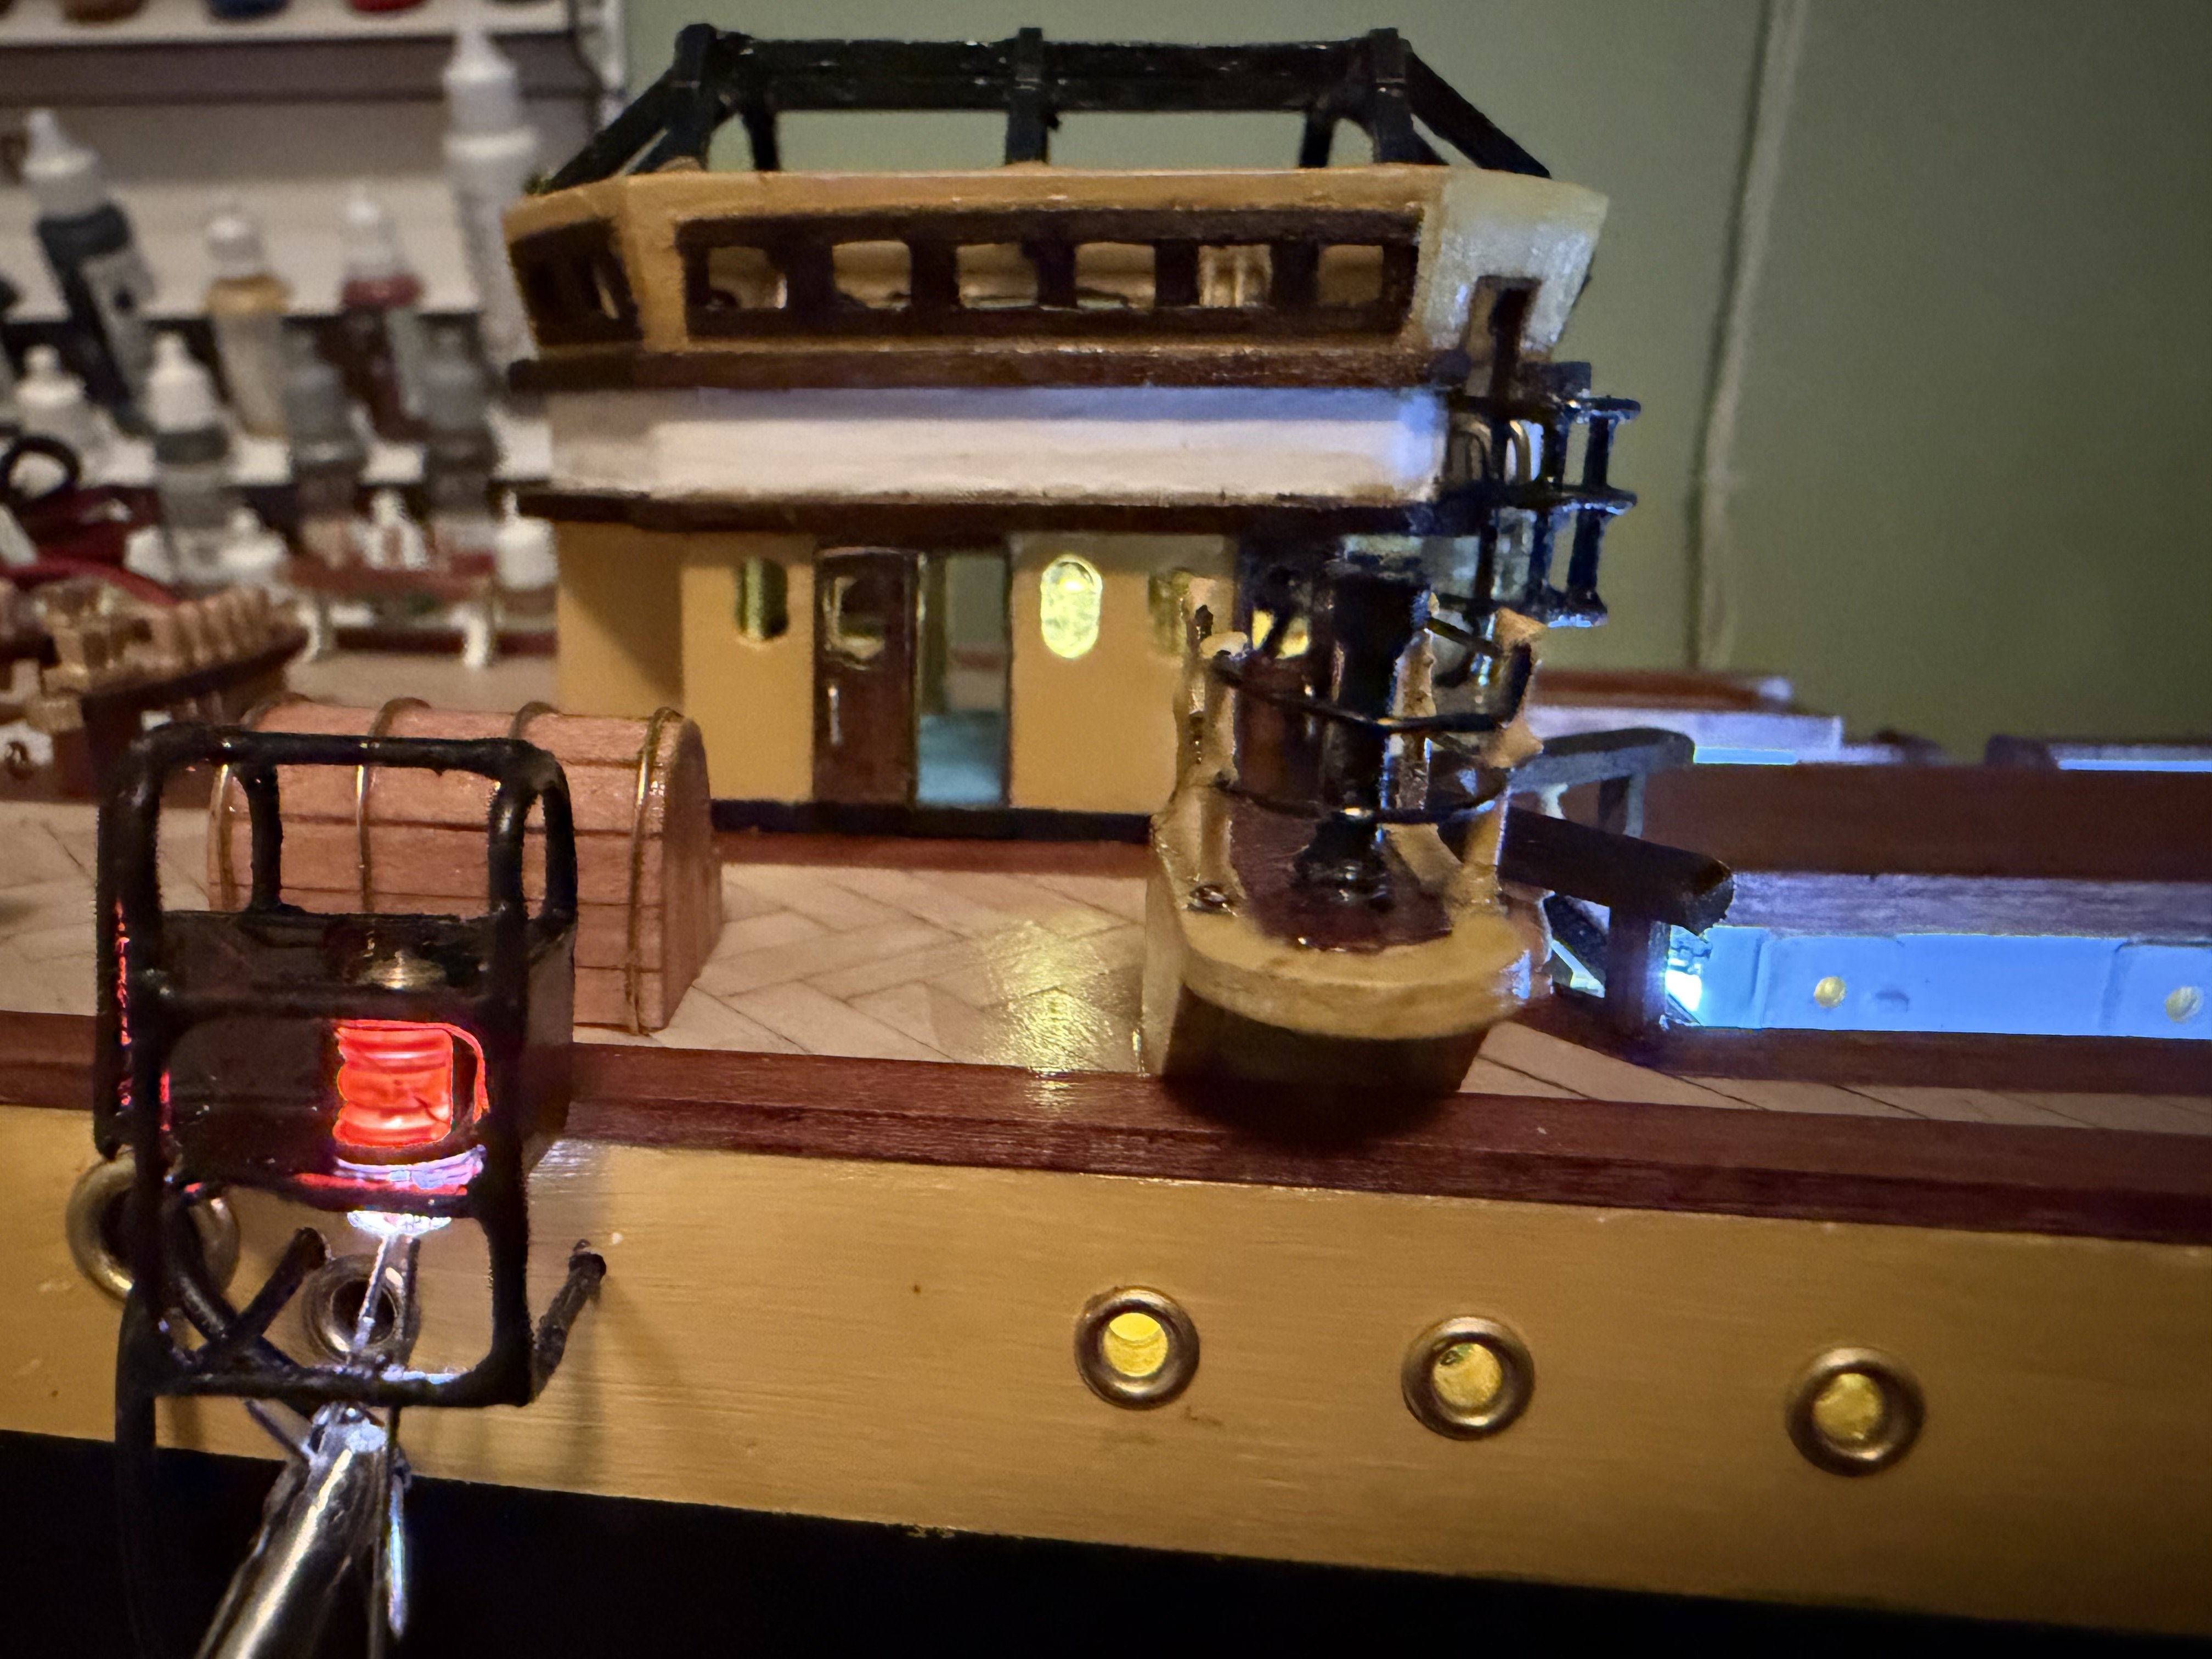
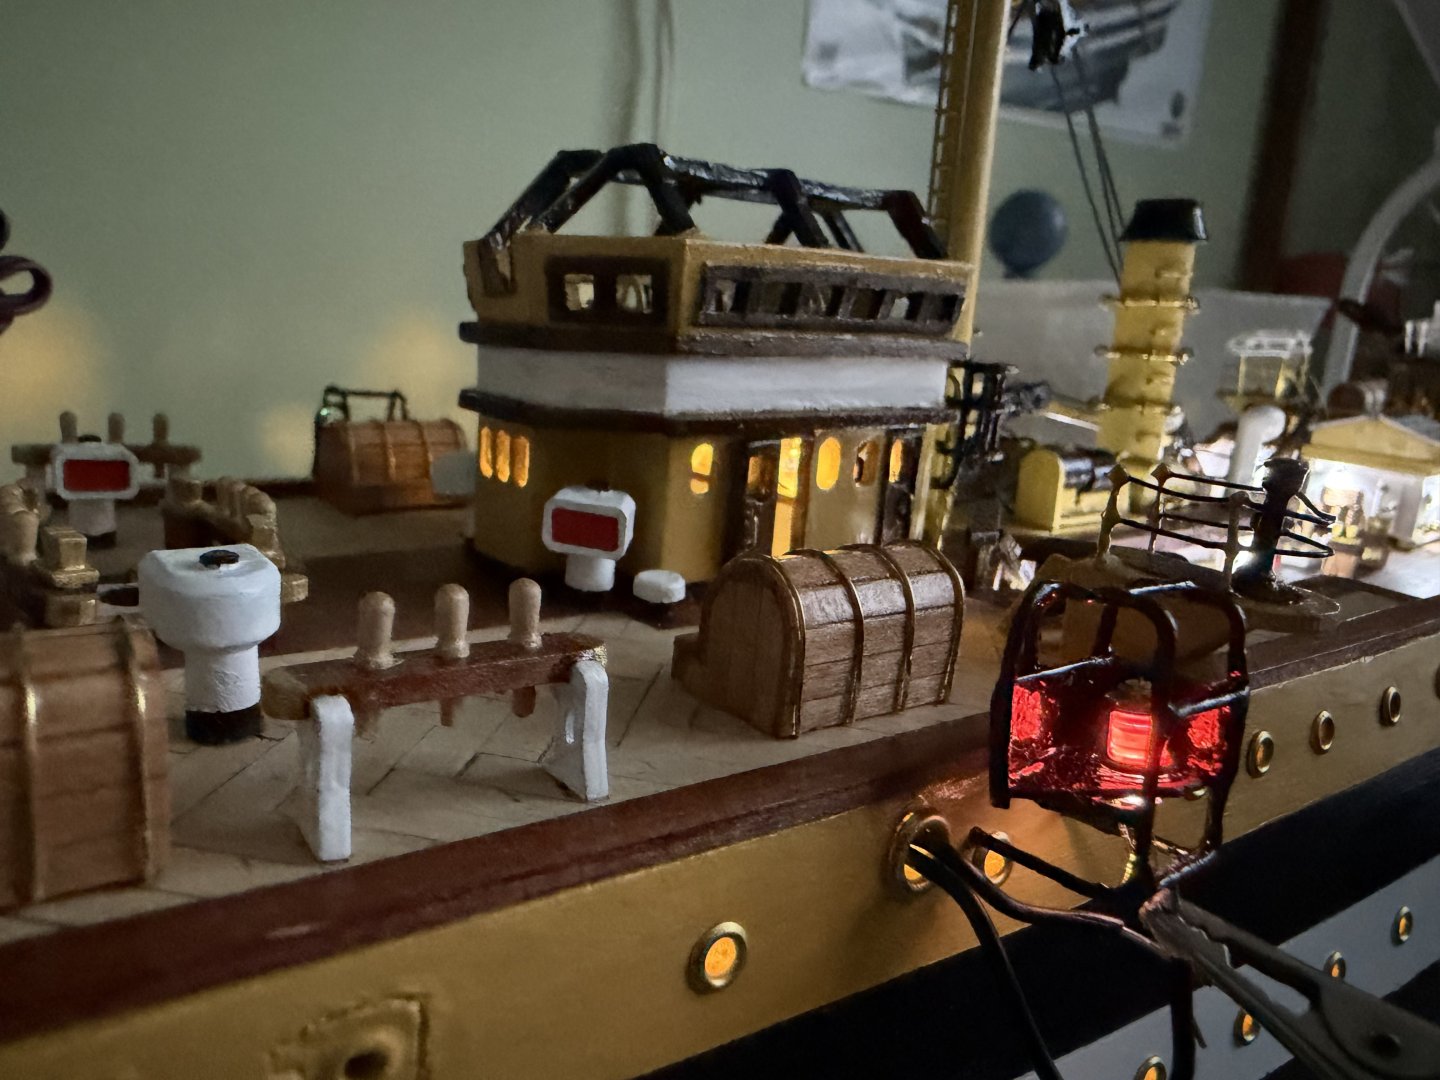
Brilliant young man!!! What did you do to keep the little cover on top the LED? The red/green and brass covers fit perfectly over the top of the bulb but can slip back off. Thought a dot of supper glue but then it is locked in place forever. However there may not be a problem with that.
-
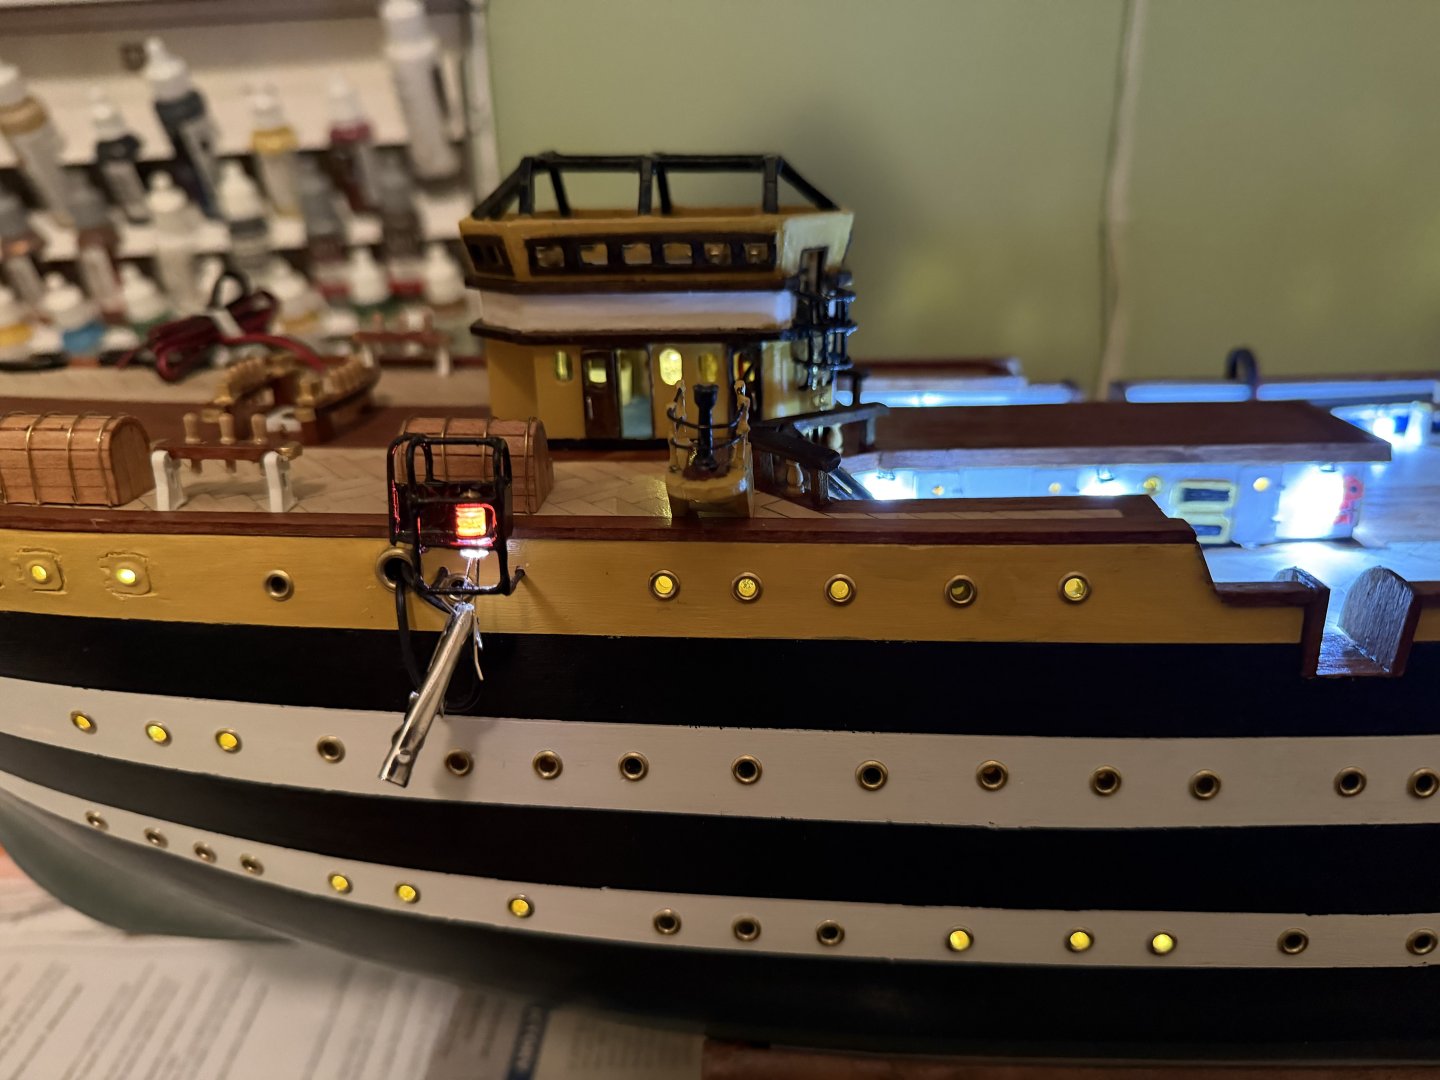
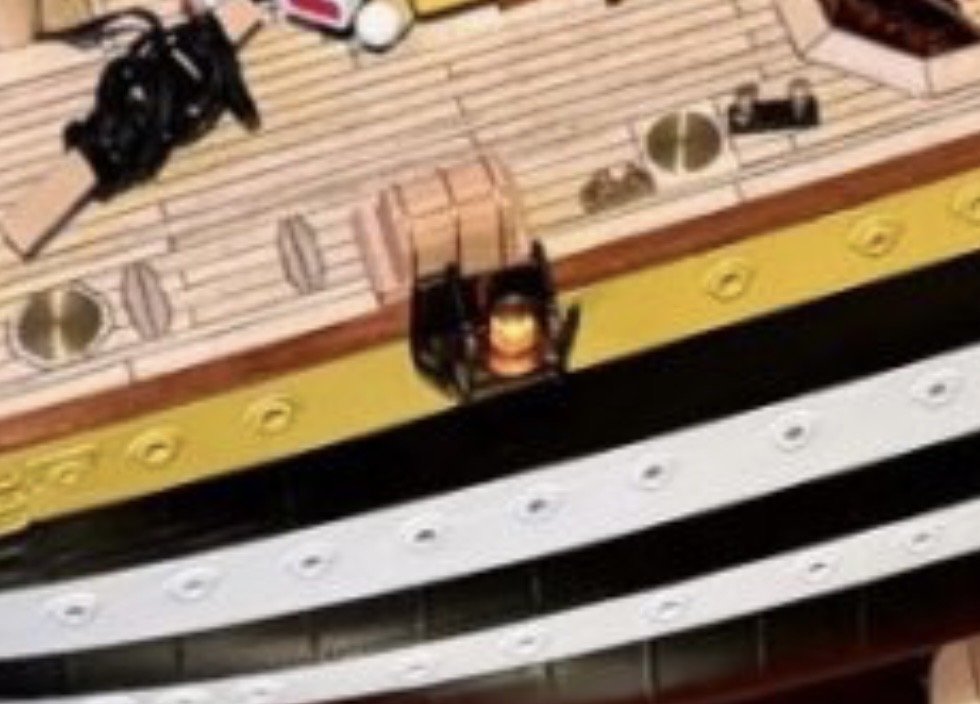
Perfect Daniel. Now the next thing I am looking at reference these little guys that maybe you had as well. You can tell by my photo that I made them from a piece of brass I had. Actually a piece of old piano hinge. Since they are brass they obviously will conduct electricity. After I paint them black I need to put the prongs of the 3mm LED through the hole to begin the assembly. I need to prevent the positive lead coming in contact with the bracket. I have a couple ideas to try. Will see what I find to work.
-
Great idea Daniel. I believe that is the route I will take. Then also change the protective cage to stop at the bottom of the bracket instead of going on down to connect to the supports which would no longer be there?

-
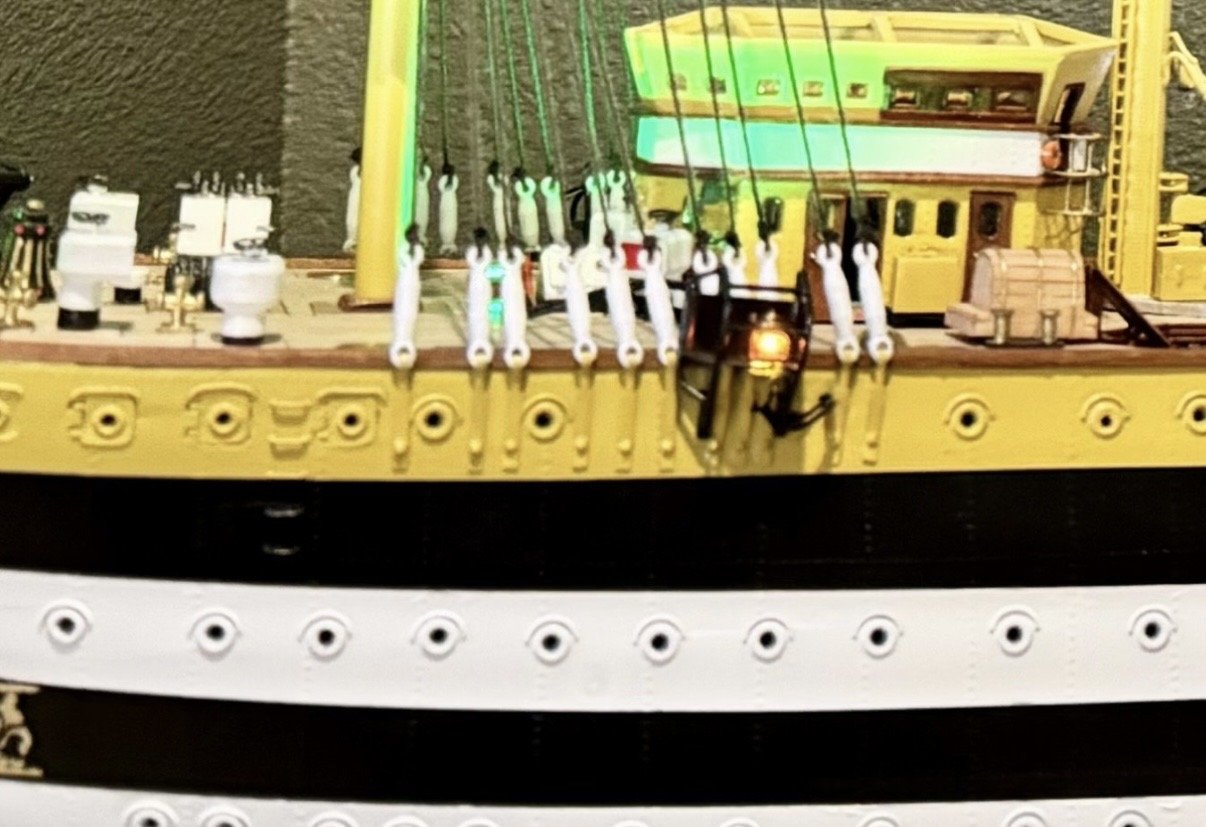
Daniel another logistical question on your build. I am crafting the holders/brackets for the side red and green navigation lights. I have a shape/design that I am pleased with. Very similar to your’s which is no doubt since I used photos of your’s to design mine. I am very curious about your installation. In the first photo you show them mounted in the side of the ship. In the second picture the brackets from the lower shrouds pass behind the navigation light fixture. Would you care to share what you did here?
-
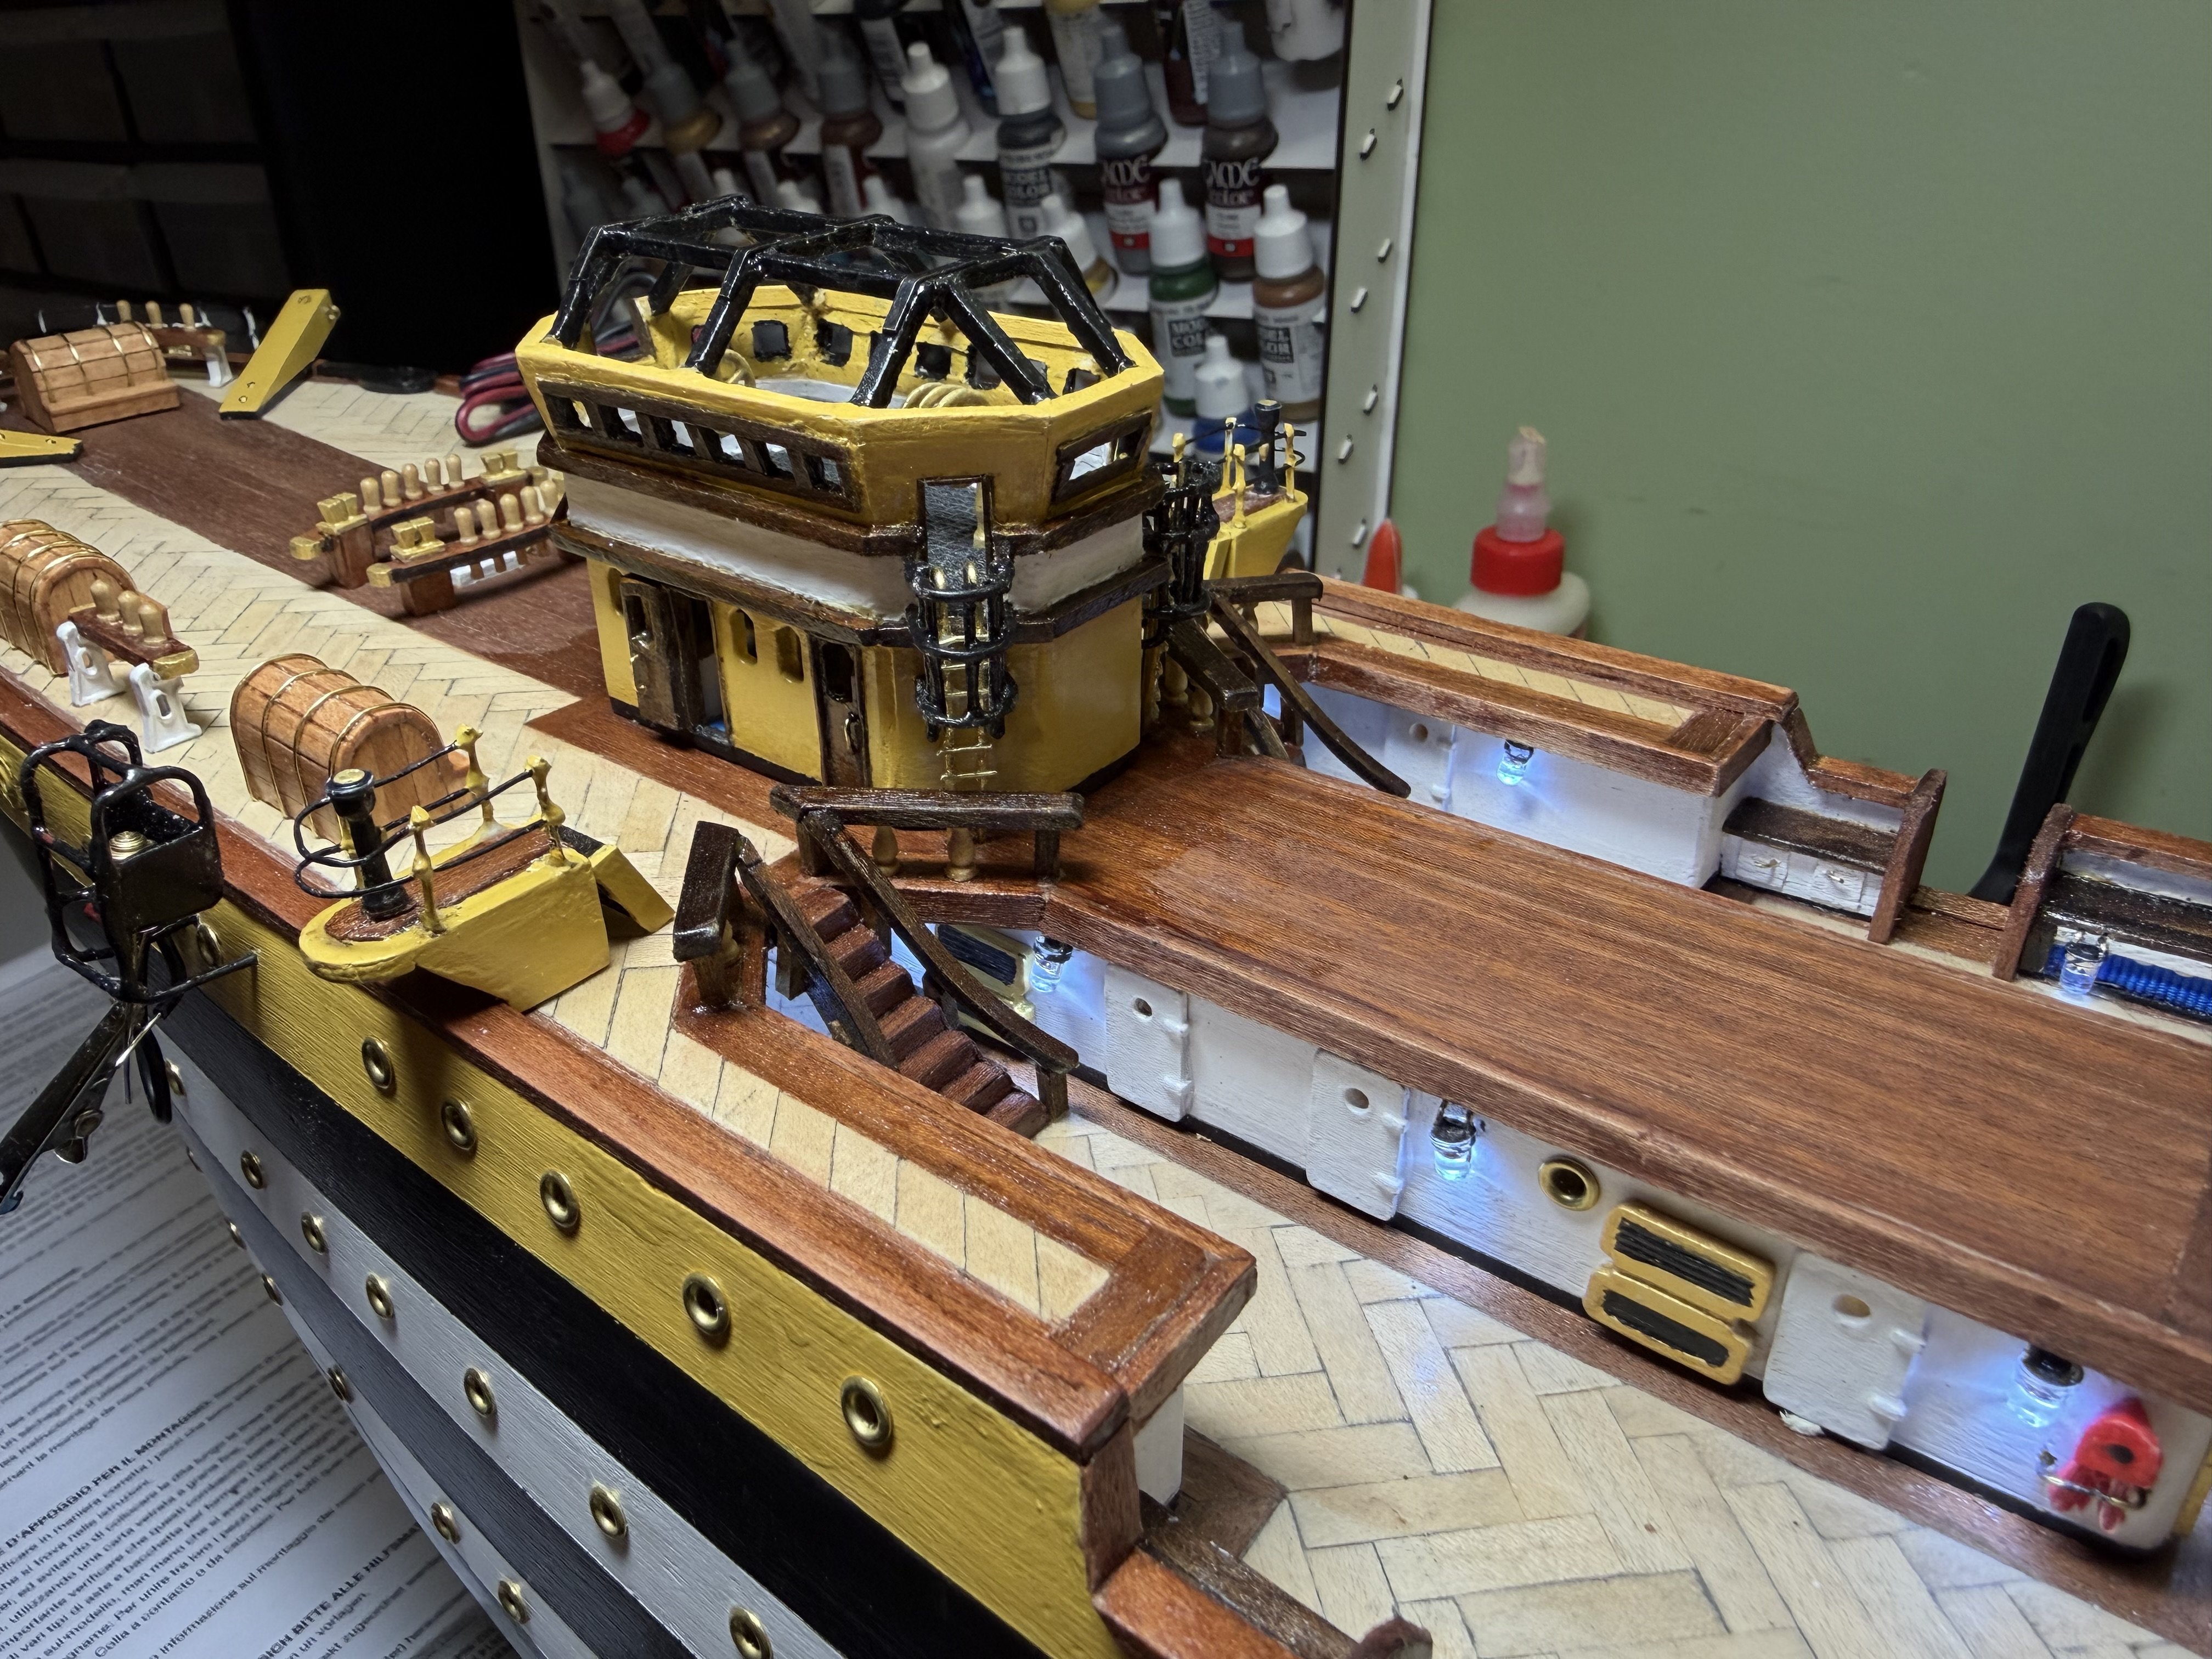
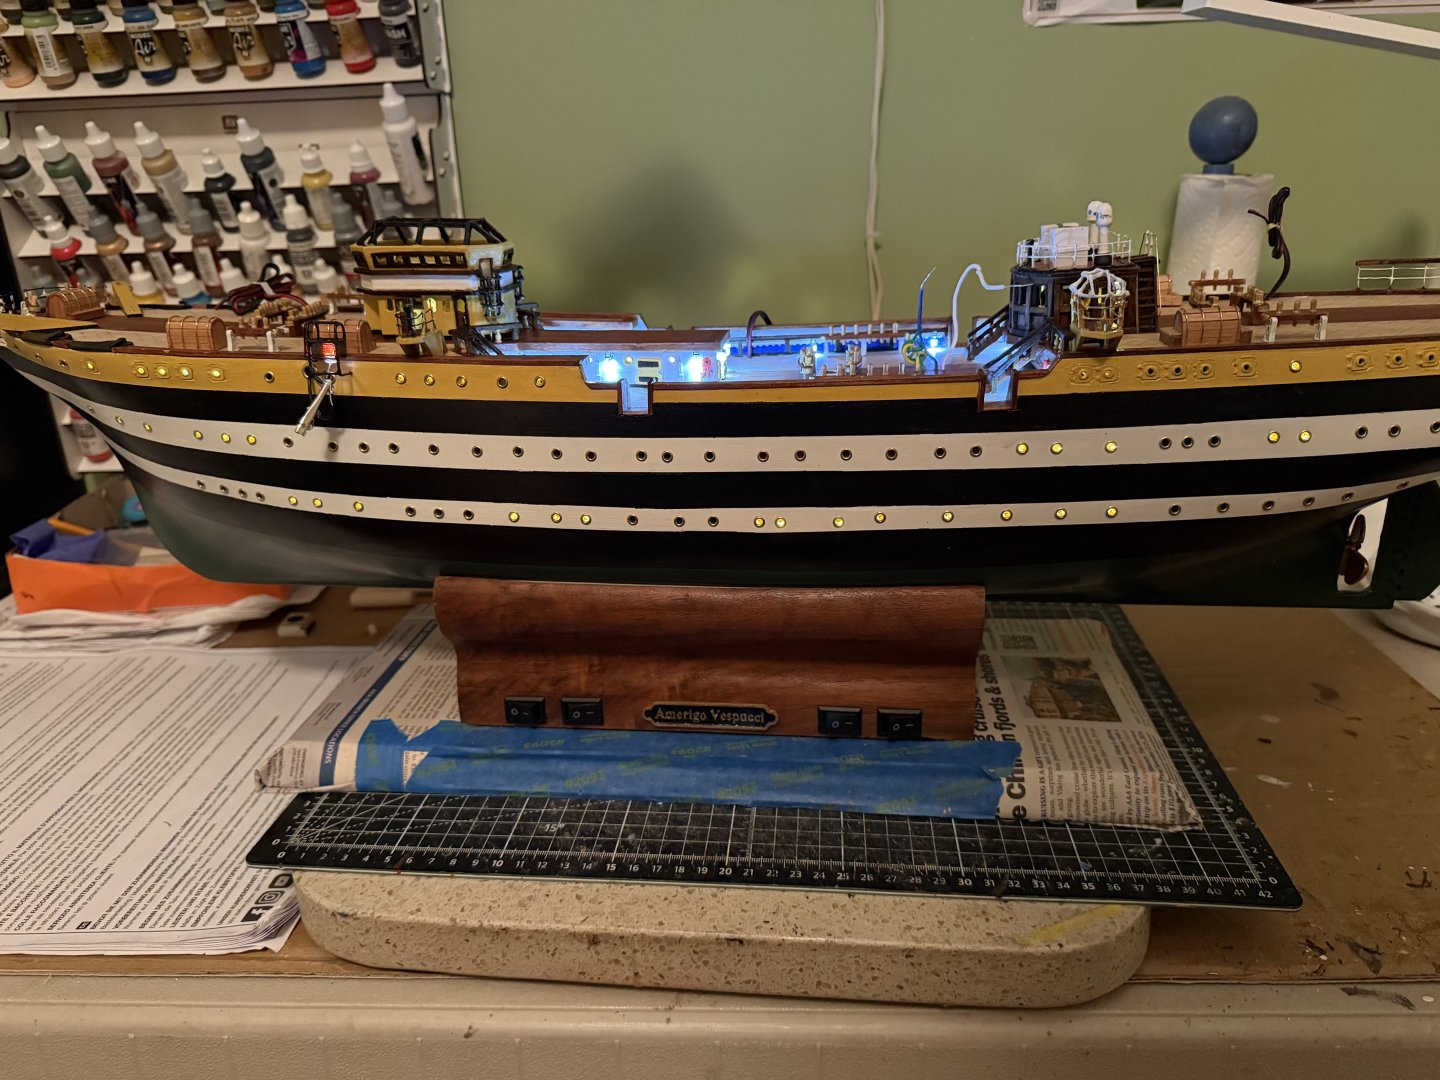
Added the pin rails around the ship. The pairs at the bottom of each mast and the straight rails that circle the outside of the deck. The supports for the pairs of rails at the mast came with metal supports supplied with the kit that were to be painted to resemble wood. Similar to the four staircases I decided to cover them with wood veneer.


-
A little slow but steady progress since last update. I now have all 4 staircases installed. I have the 4 raised watch platforms with ladders I made to replace the ones provided in the kit. I also have made the 6 storage chests, 2 with bench seats. Reinforcement bands placed around them as on the actual ship.


-
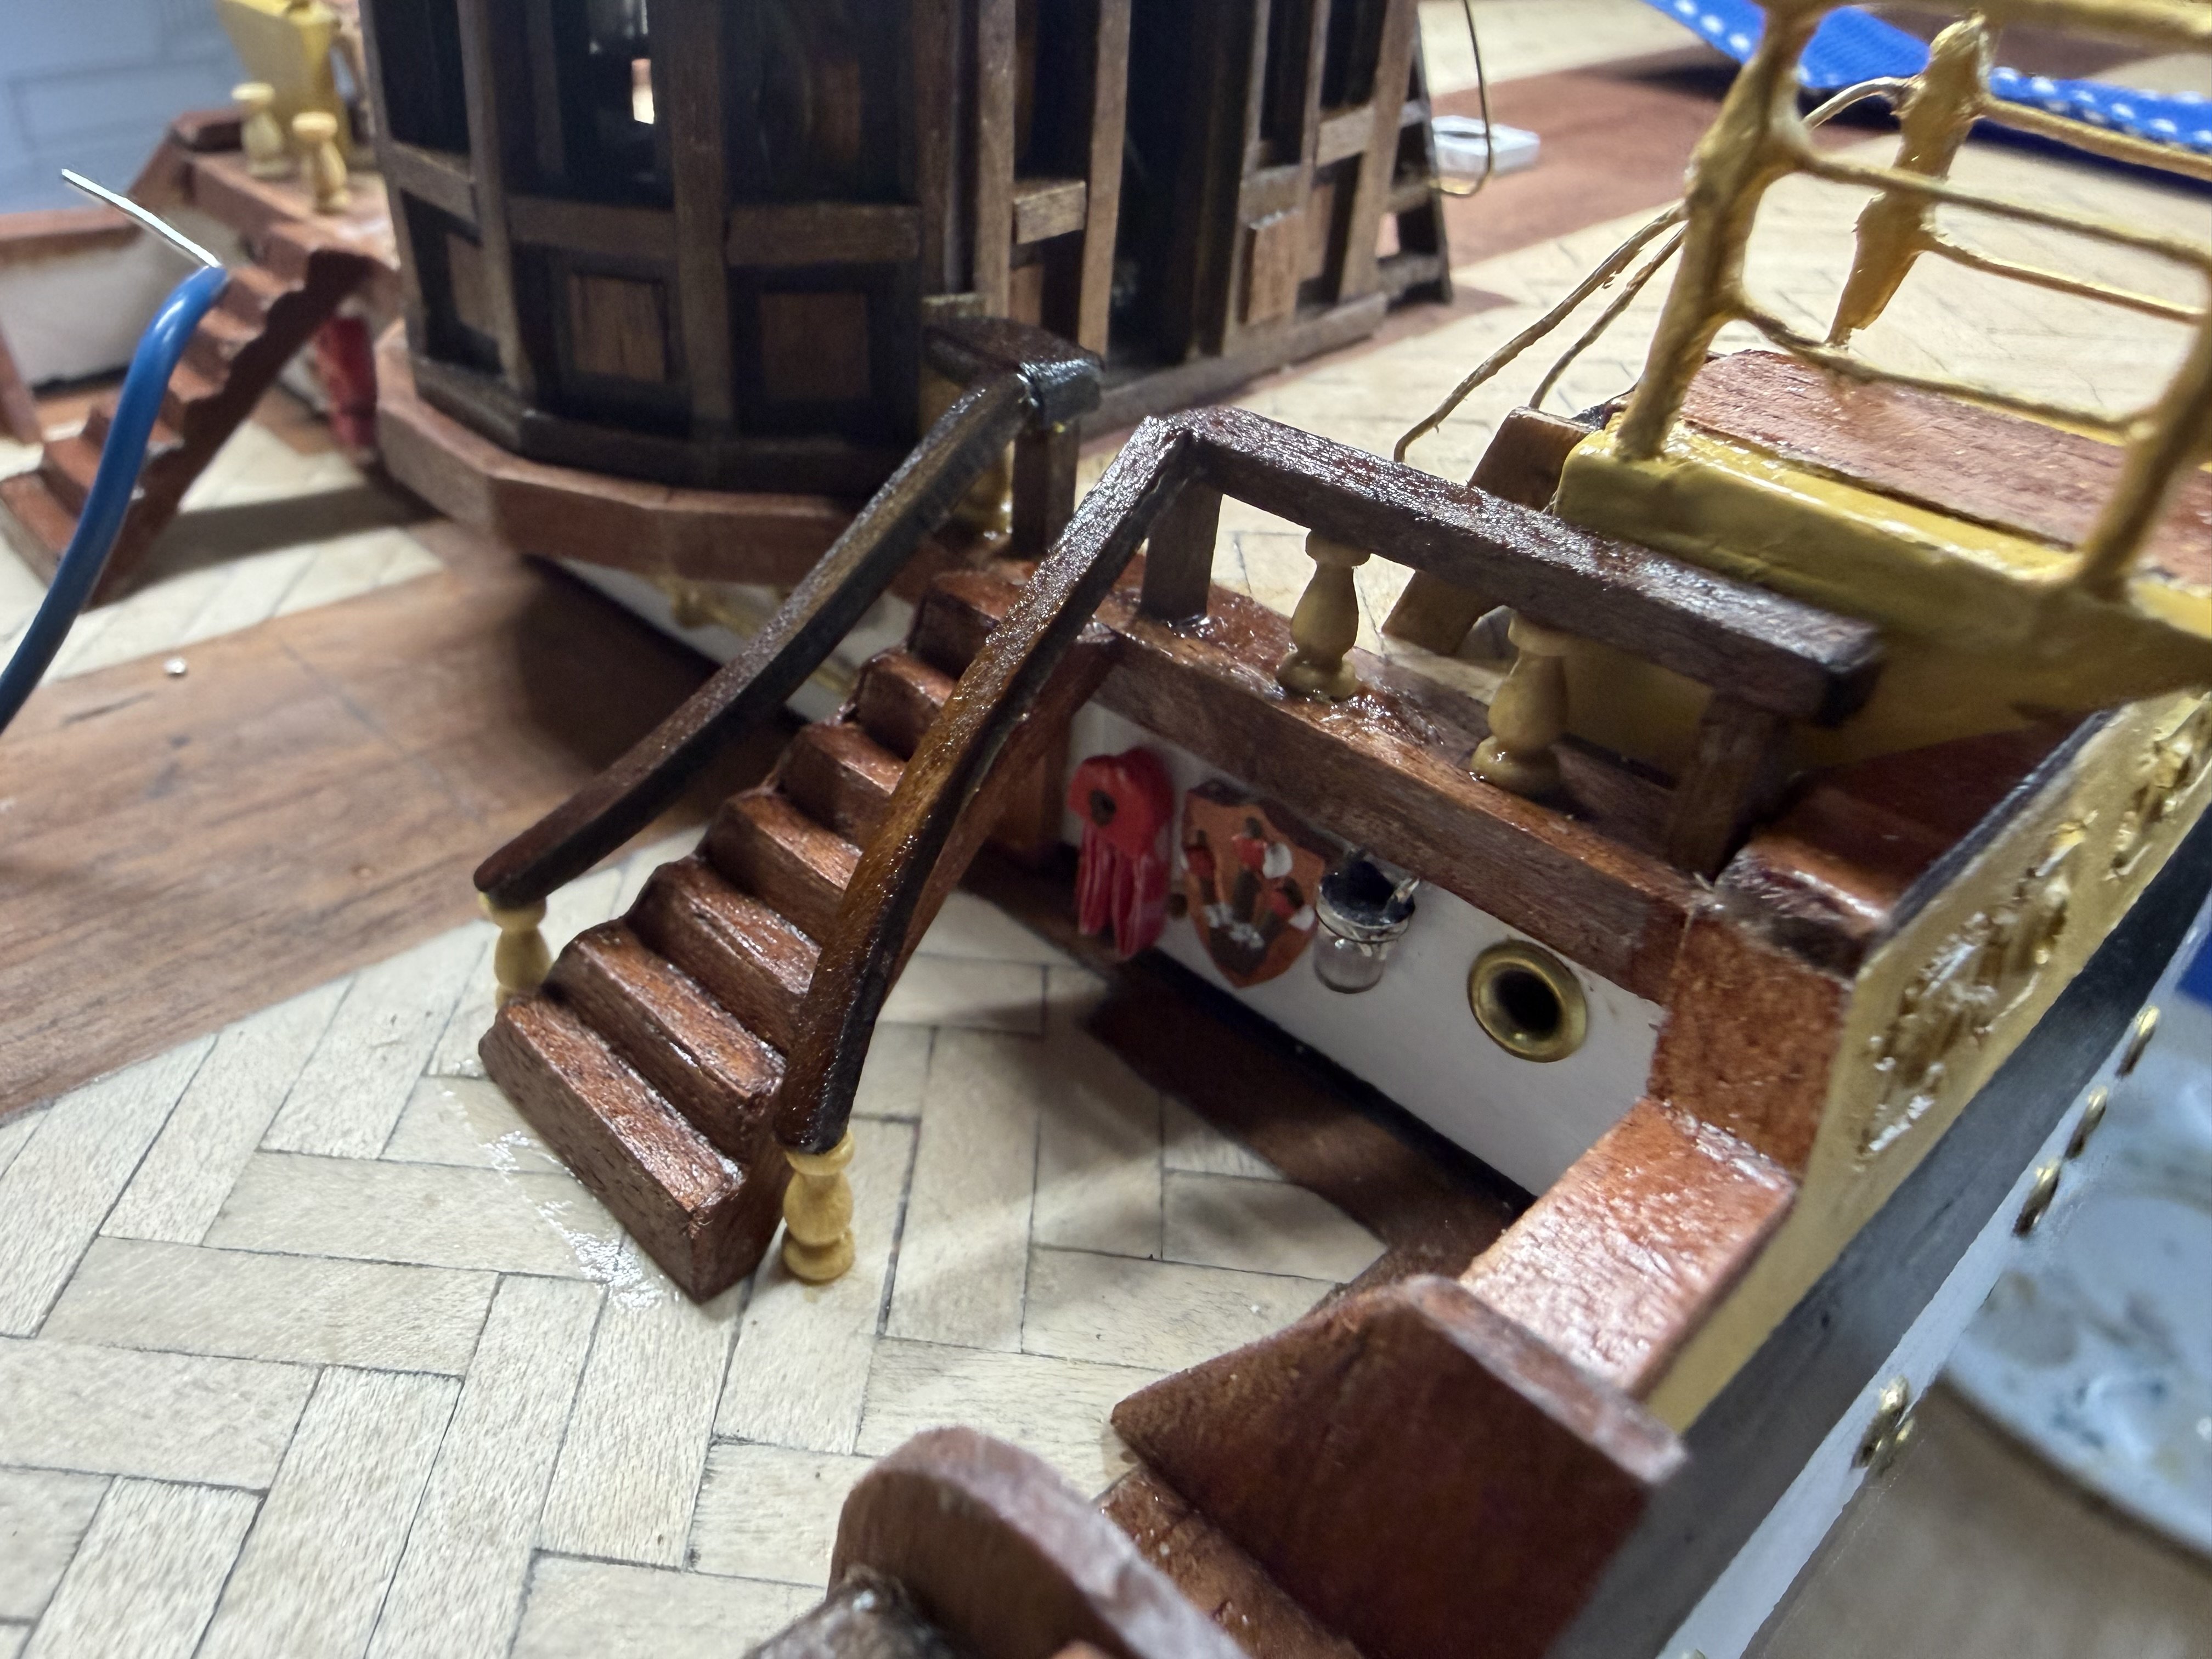
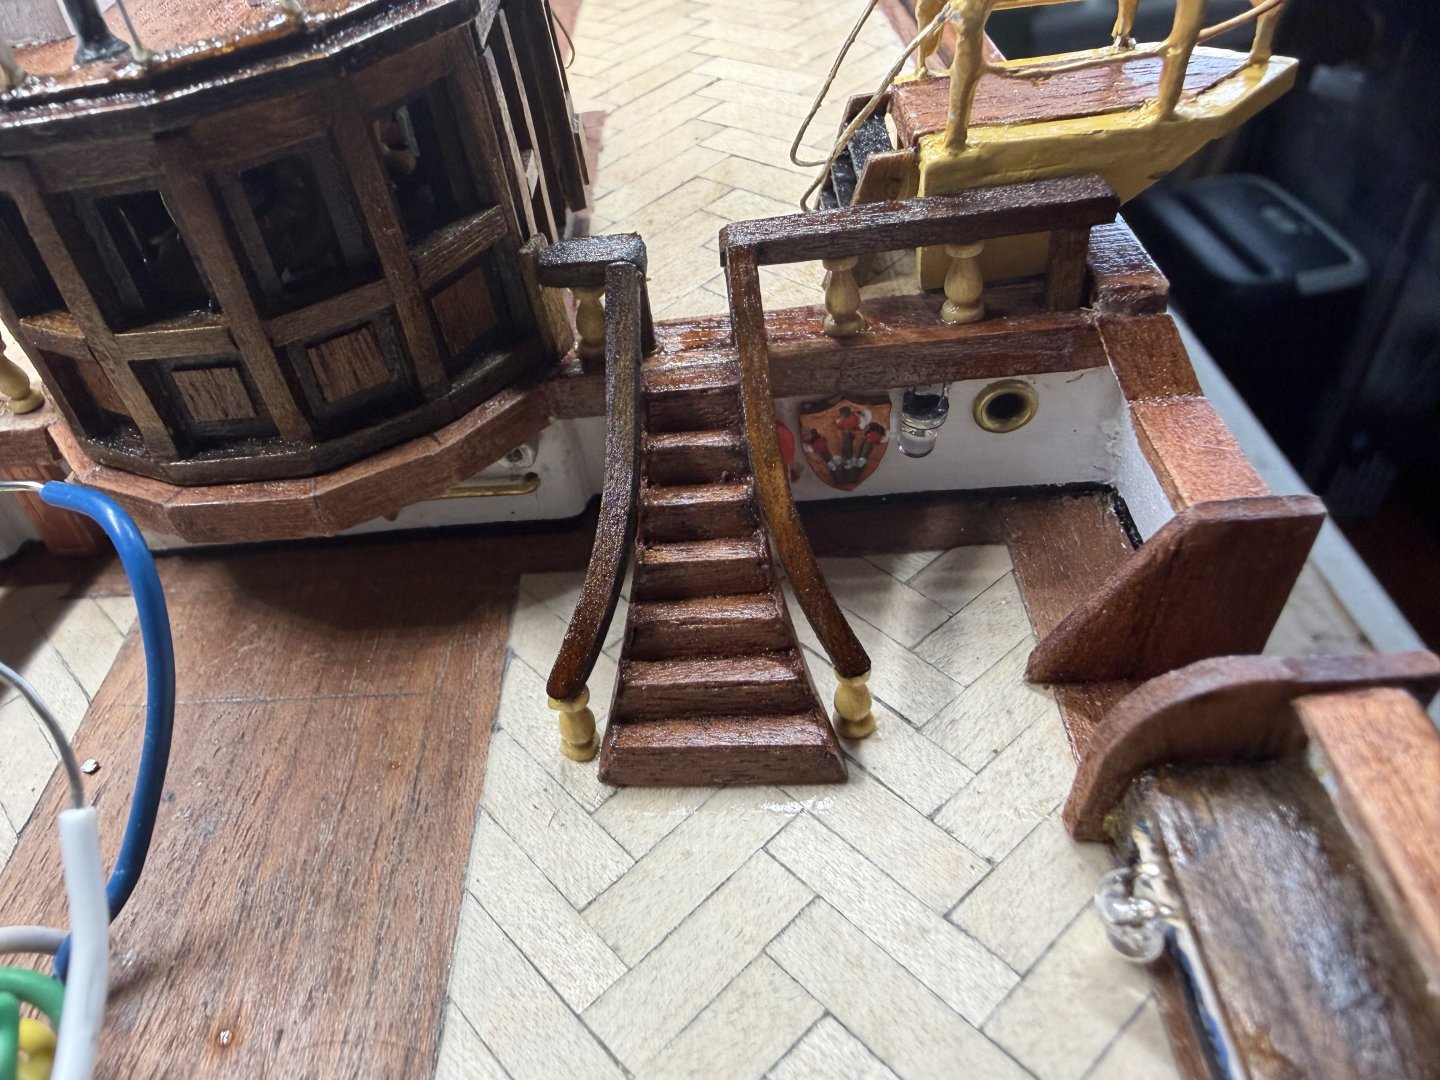
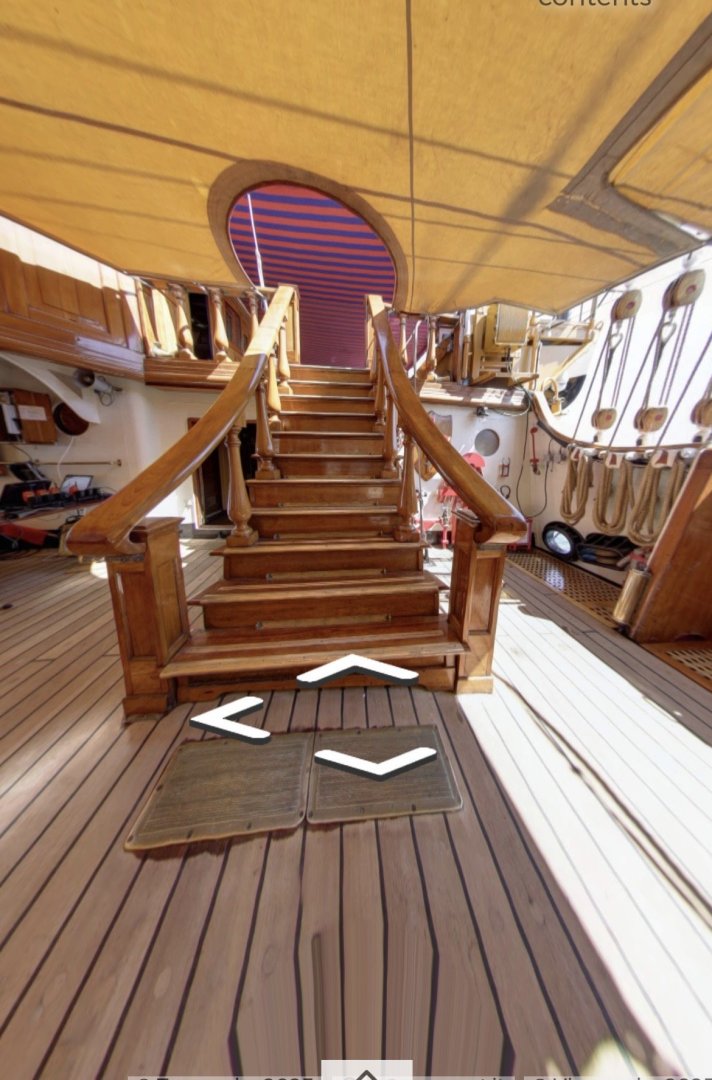
First of 4 grand staircases and a photo of the same stairs on the actual Amerigo Vespucci. I have the stain a little darker than the actual.

-
Been a bit since my last update so I would catch up with what I have been doing. Have spent my available time in the shipyard making small items that will be added to the ship. OcCre supplied metal stairs for the four main stair cases that were to be painted like wood. I did like the appearance much so I decided to cover them with veneer, stain, and varnish. Still need to make the handrails. Also started making the elevated watch platforms, two for each side. Used copper wire and solder to form the rails and canopy cages. Will still need to file down the joints. And finished up the bridge adding rails, stairs, storage cabinets and radar units.


-
Thanks Daniel. I have the rigging line chart from my 1/100 HMS Victory. It is close enough scale that I will most likely use it to determine rope sizes for the AV. The different lines on the Victory should be similar to those on the AV so whatever size it said to use for a particular application I will use in that application on my AV. The Victory had numerous sizes from .2 up to 1mm. I will most likely use just 3-4 sizes like you did of light beige for the running and black for the standing. The block sizes on the Victory also varies for the different applications but I will most likely do what you did. I very much like your idea and plan of using the higher quality non fuzzy thread over the OcCre supplied.
-
Daniel I am preparing my Christmas wish list and looking for ahead at my future rigging. I plan to replace the rigging thread OcCre supplied and most likely the blocks. I want to use a higher quality (not fuzzy) light color thread for running and black for the standing. I also am looking at using various size and types of blocks. I have done some research to see if I could find the actual rope and block sizes that I can do the scale conversion but am coming up blank. I am assuming looking at your build log that you made some decisions in this area. Do you have a source you used or did you just guesstimate on sizes?
-
I will chime in here as well to my agreement with everything said. I will further add the comradery that develops among builders. I have never met face to face with anyone from MSW but over the years feel I have created friendships. I am moving slowly through a section of my current Amerigo Vespucci build. Still find time every day but not always enough visual progress to warrant an update here. Sometimes I think I need to post some update are you guys may think I, like some often do, have given up the hobby. I, as well, believe it takes patience and perseverance. I often hear from those I invite into my “shipyard” that they don’t have the patience or the may ask how long does it take to finish one of these? My shipyard is my happy place and where I go to create with no (I gotta get this done) thoughts allowed.
- 2,699 replies
-
- 3
-

-
- heller
- soleil royal
- (and 9 more)
-
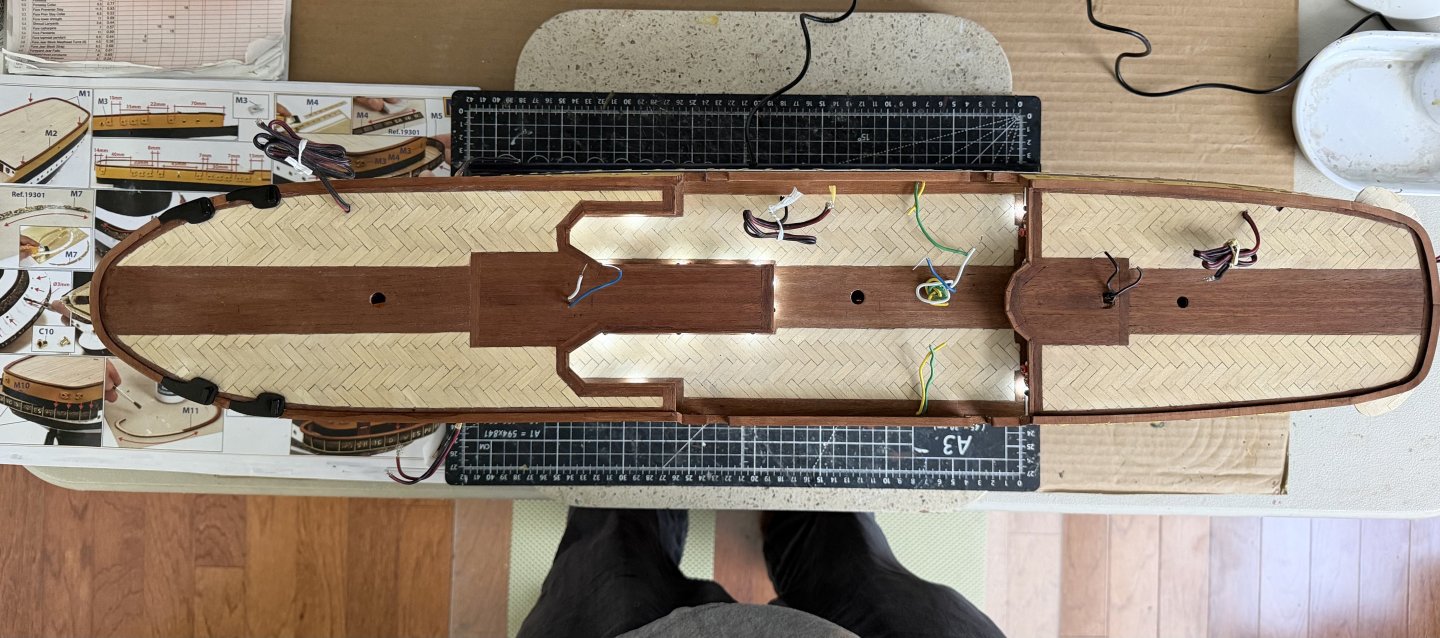
Unfortunately as you can see in my photo I have the 3 wires coming up through the deck. One at each mast. So in my case I guess I will just include a resistor in each little box with the LED. I still need to come up with the size and design for the 18 (6 each mast) little boxes.