Rodolfo Bigoni
-
Posts
118 -
Joined
-
Last visited
Recent Profile Visitors
671 profile views


-
 Rodolfo Bigoni reacted to a post in a topic:
De Zeven Provinciën 1665 by Dražen - Scale 1:45
Rodolfo Bigoni reacted to a post in a topic:
De Zeven Provinciën 1665 by Dražen - Scale 1:45
-
 Rodolfo Bigoni reacted to a post in a topic:
Bireme by Loracs - Amati - 1:35 - Greek Warship c.480 B.C. (completed)
Rodolfo Bigoni reacted to a post in a topic:
Bireme by Loracs - Amati - 1:35 - Greek Warship c.480 B.C. (completed)
-
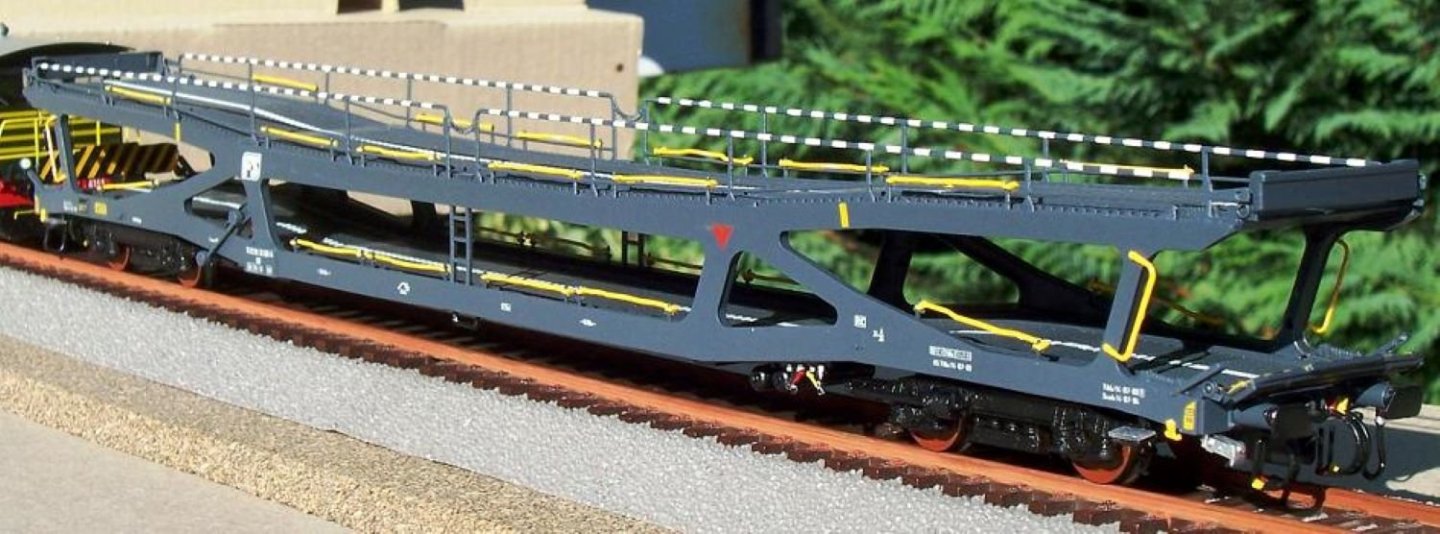
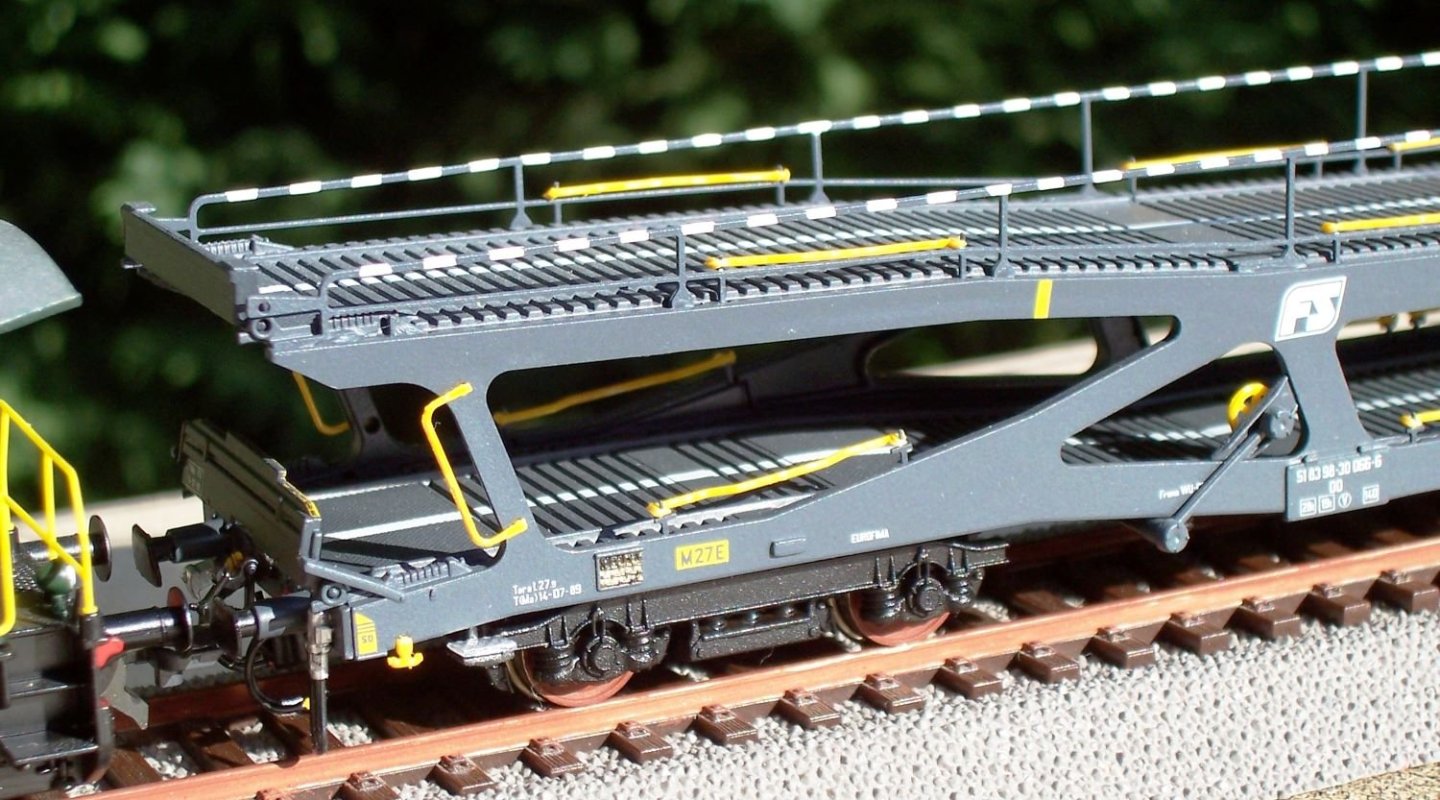
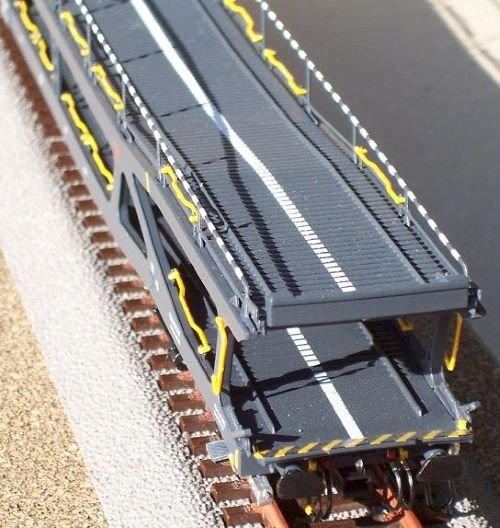
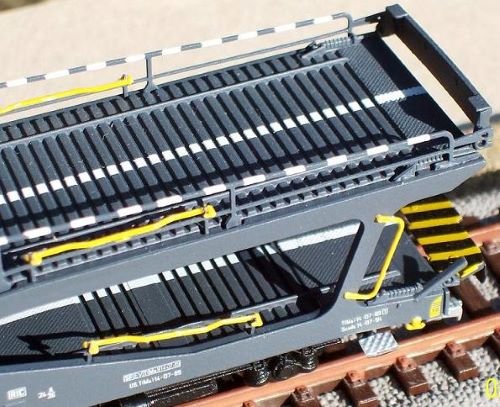
 The railway carriage: The rail car after modifications See you later! Rodolfo
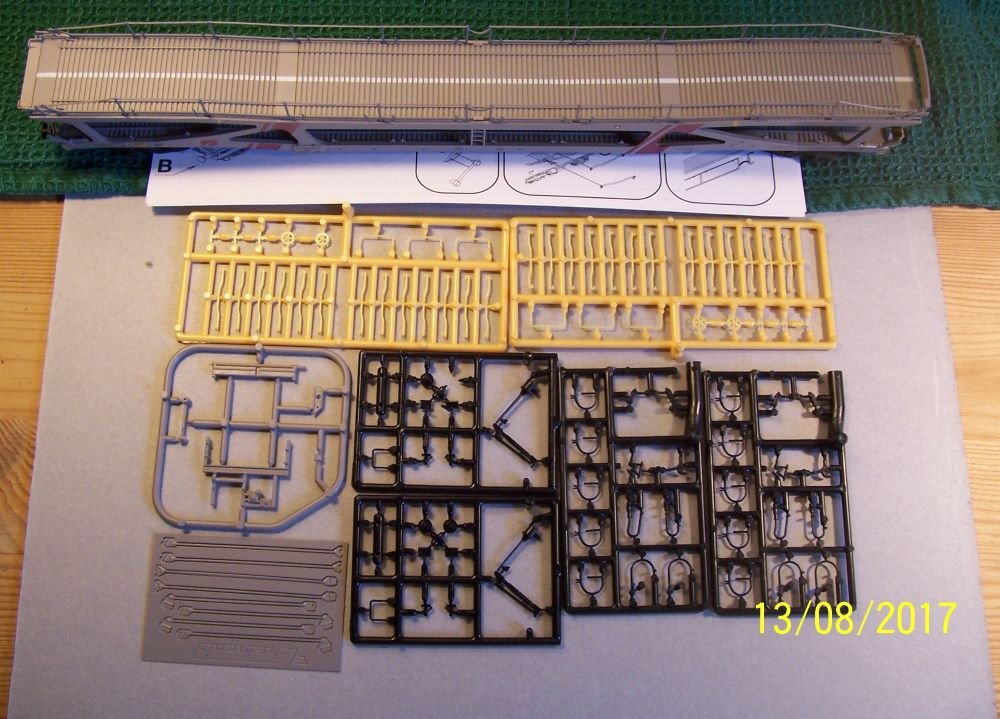

3.thumb.JPG.03859692603b1bc7e1fc1348324cd85b.JPG)
.JPG.ba8feb34a8ab239ef9642275cd544b36.JPG)

.thumb.JPG.df25b1af028c5dc3dfa05eadc033faca.JPG)

-
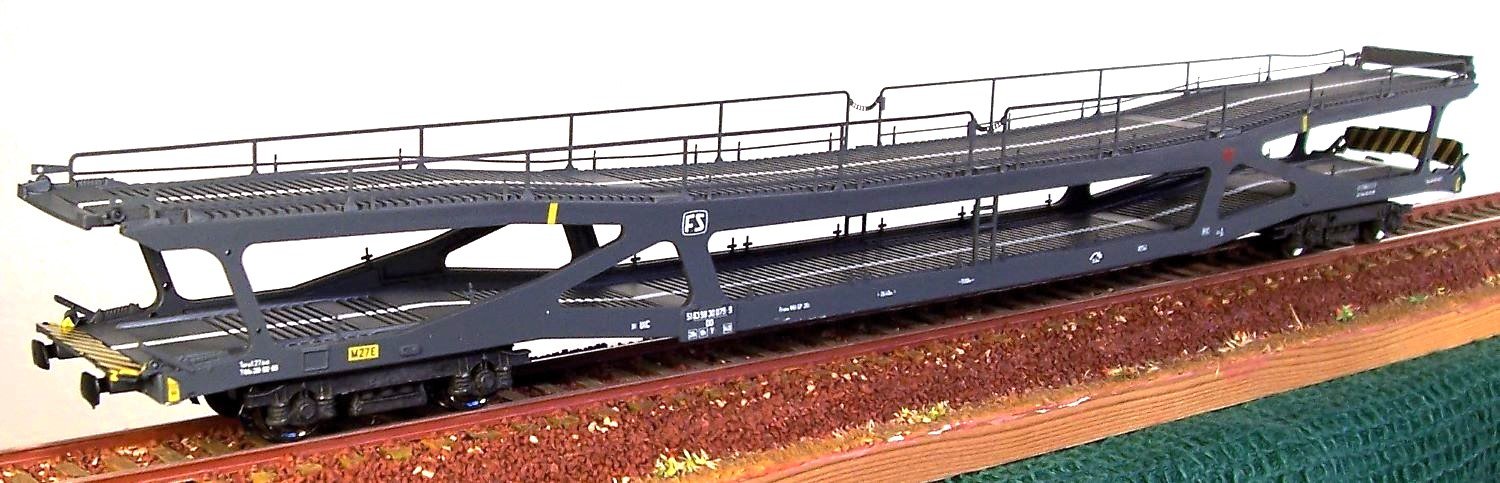
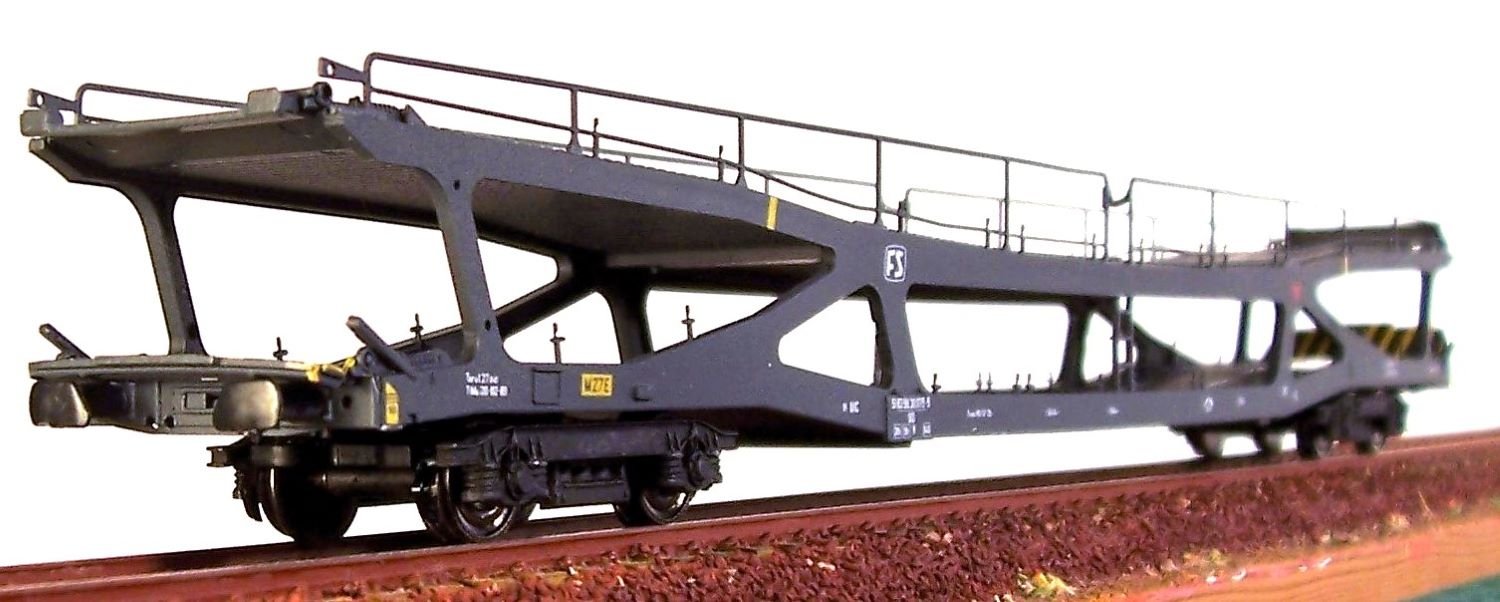
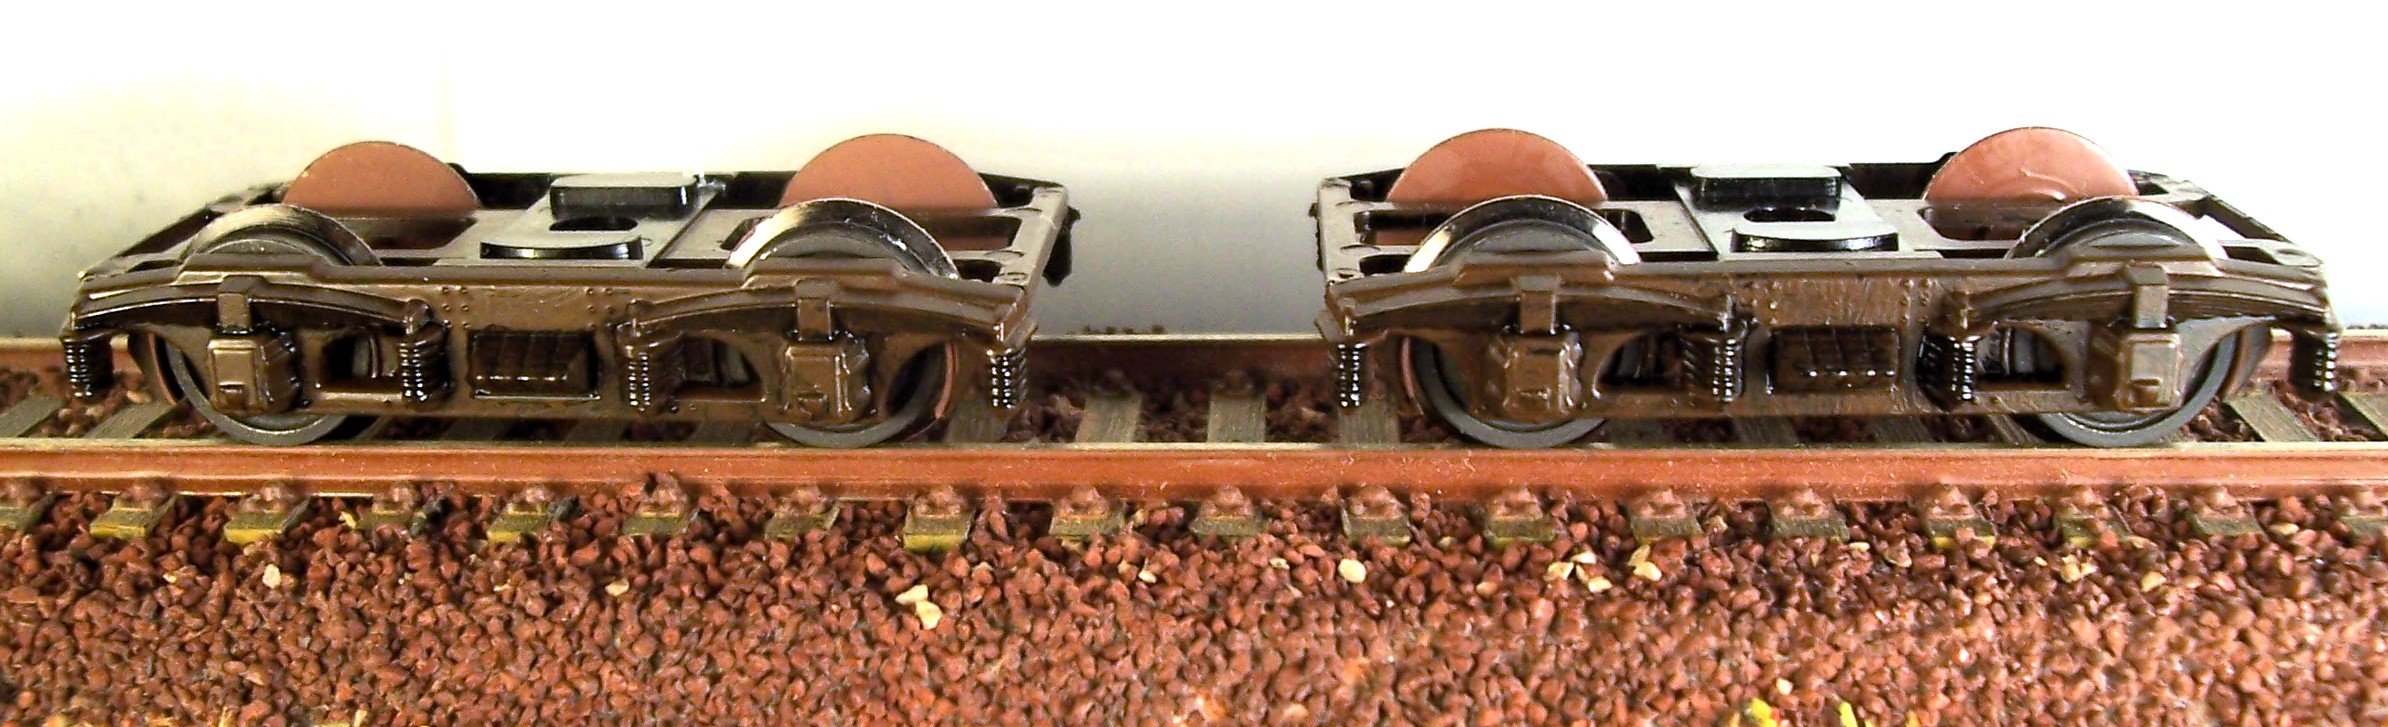
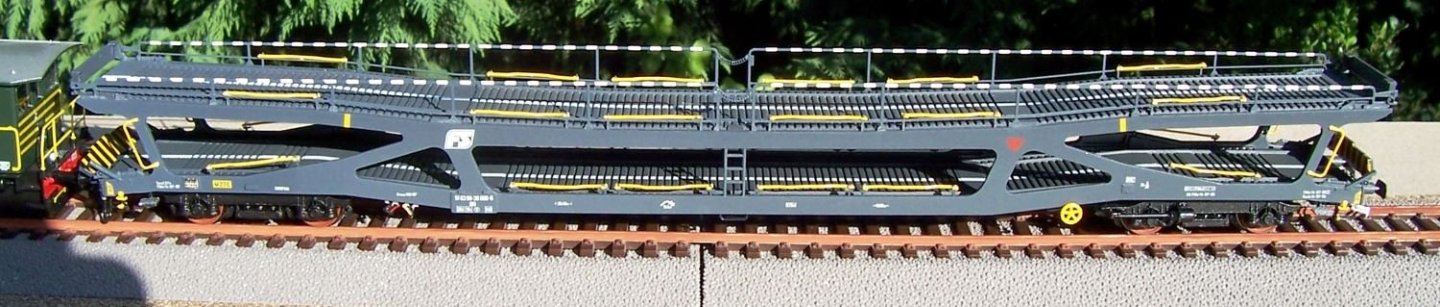
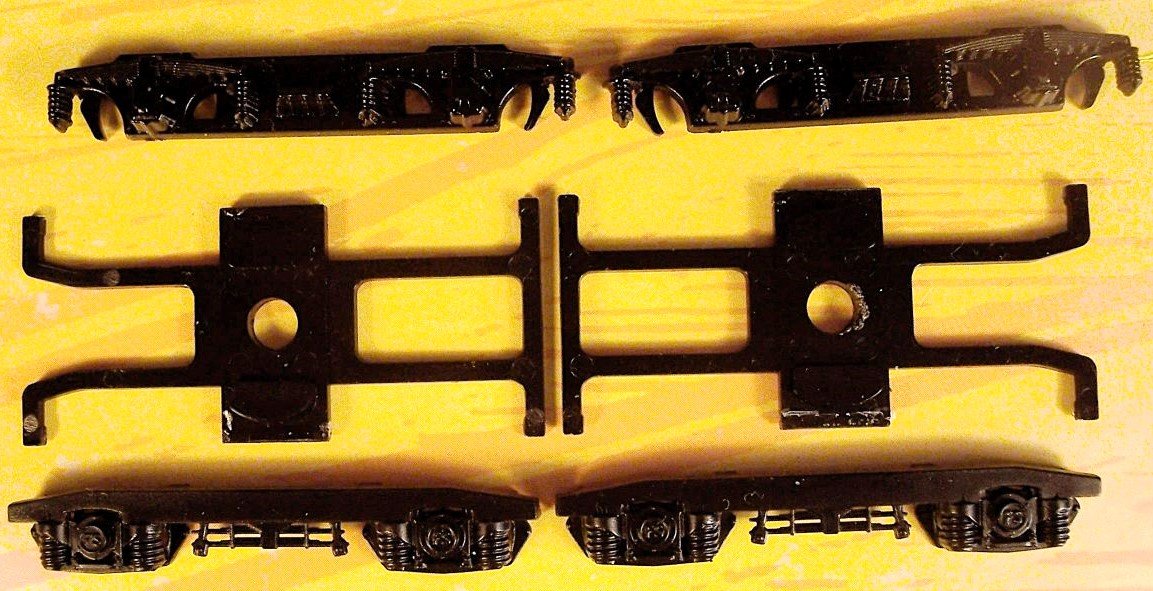
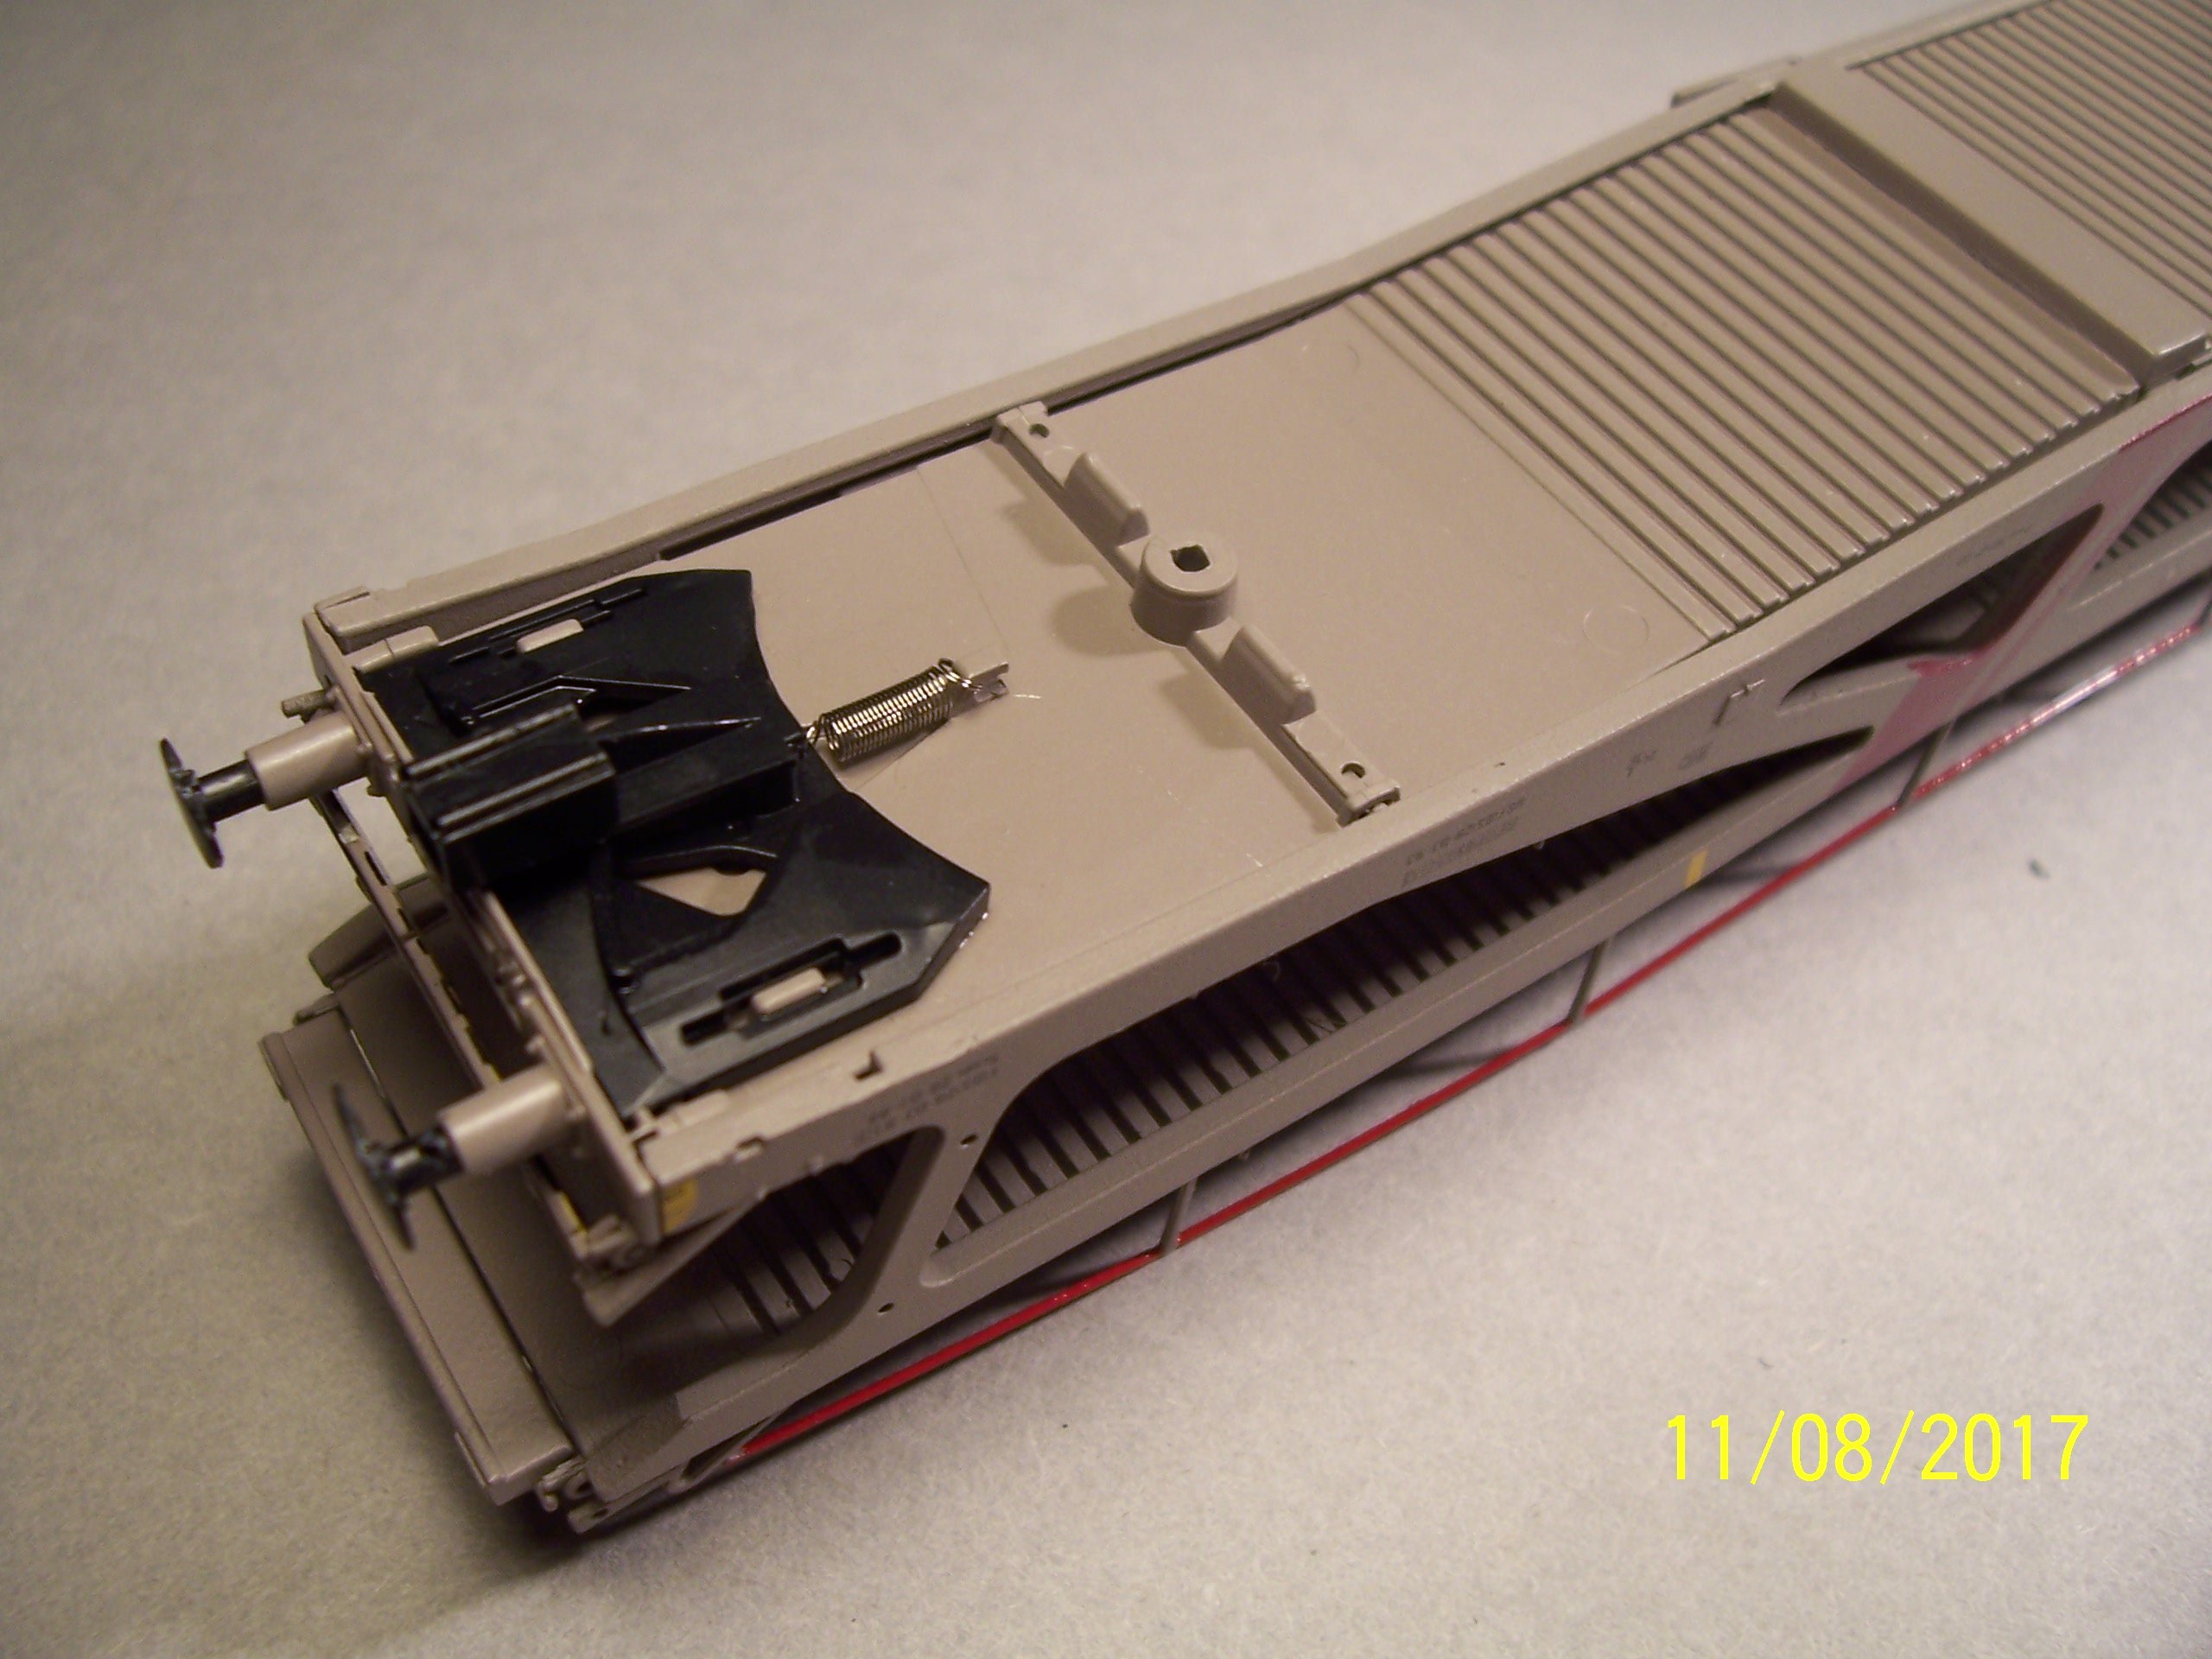
The following carriage is more recent and therefore it belongs to era IV. After removing the bogies, the kinematic mechanism for short coupling can be seen: The bogies have movable sides; being black, they should be painted in the correct color: Of course, realism can be improved by adding traces of oil and rust. Rodolfo

.JPG.792b4cbaf5ffd3f8dfe55ce37031cfb0.JPG)
.thumb.JPG.4182670a1ba586930e692b23882b4312.JPG)
-
Rodolfo Bigoni reacted to a post in a topic:
Costa Passenger Coach by yvesvidal - OcCre - 1/32
-
Rodolfo Bigoni reacted to a post in a topic:
Golden City by Louie da fly - Scale 1:50 and 1:25 - solid hull - Paddlewheeler
-
Rodolfo Bigoni reacted to a post in a topic:
Golden City by Louie da fly - Scale 1:50 and 1:25 - solid hull - Paddlewheeler
-
Rodolfo Bigoni reacted to a post in a topic:
Golden City by Louie da fly - Scale 1:50 and 1:25 - solid hull - Paddlewheeler
-
Rodolfo Bigoni reacted to a post in a topic:
Golden City by Louie da fly - Scale 1:50 and 1:25 - solid hull - Paddlewheeler
-
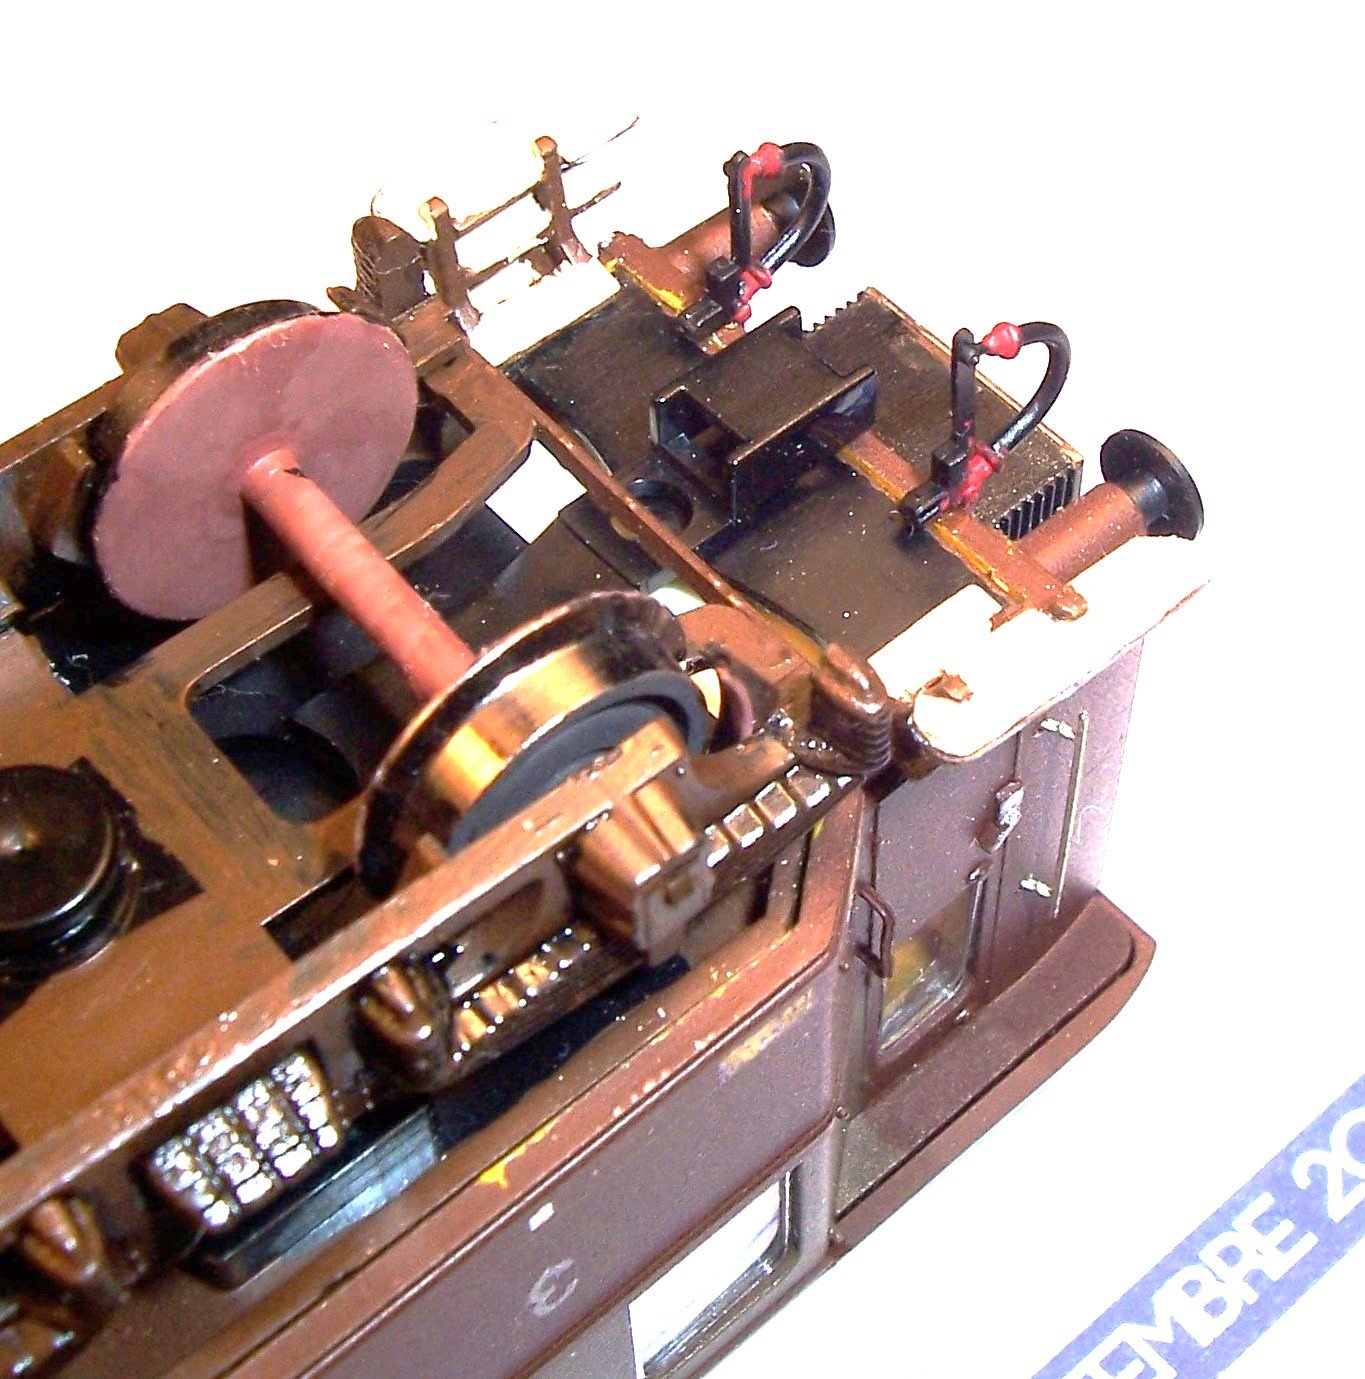
Hi Steven, In my experience,, building railcar is more easy than building coach that are more easy than building diesel loco that are more easy than building electric that are more easy than building steam...really I began to build a steam one, many years ago but I've yet to solve some problems on chassis and wheels... The locomotive in the picture is Italian (FS = Ferrovie dello Stato = Italian Railways) like the coach. Here you might see the work I made about maintenance and body improvements: https://www.chimicaone.it/le-locomotive-fs-gr-835-nel-modellismo/ and theyr history (unfortunately in Italian): https://www.chimicaone.it/gr-835-la-locomotiva-fs-da-manovra/ Have a nice Sunday! Rodolfo
red.thumb.JPG.b1a66f342cb750111837367bee8e668b.JPG)
red.thumb.JPG.d36404ff490a577b7090dc41feec3d99.JPG)
-
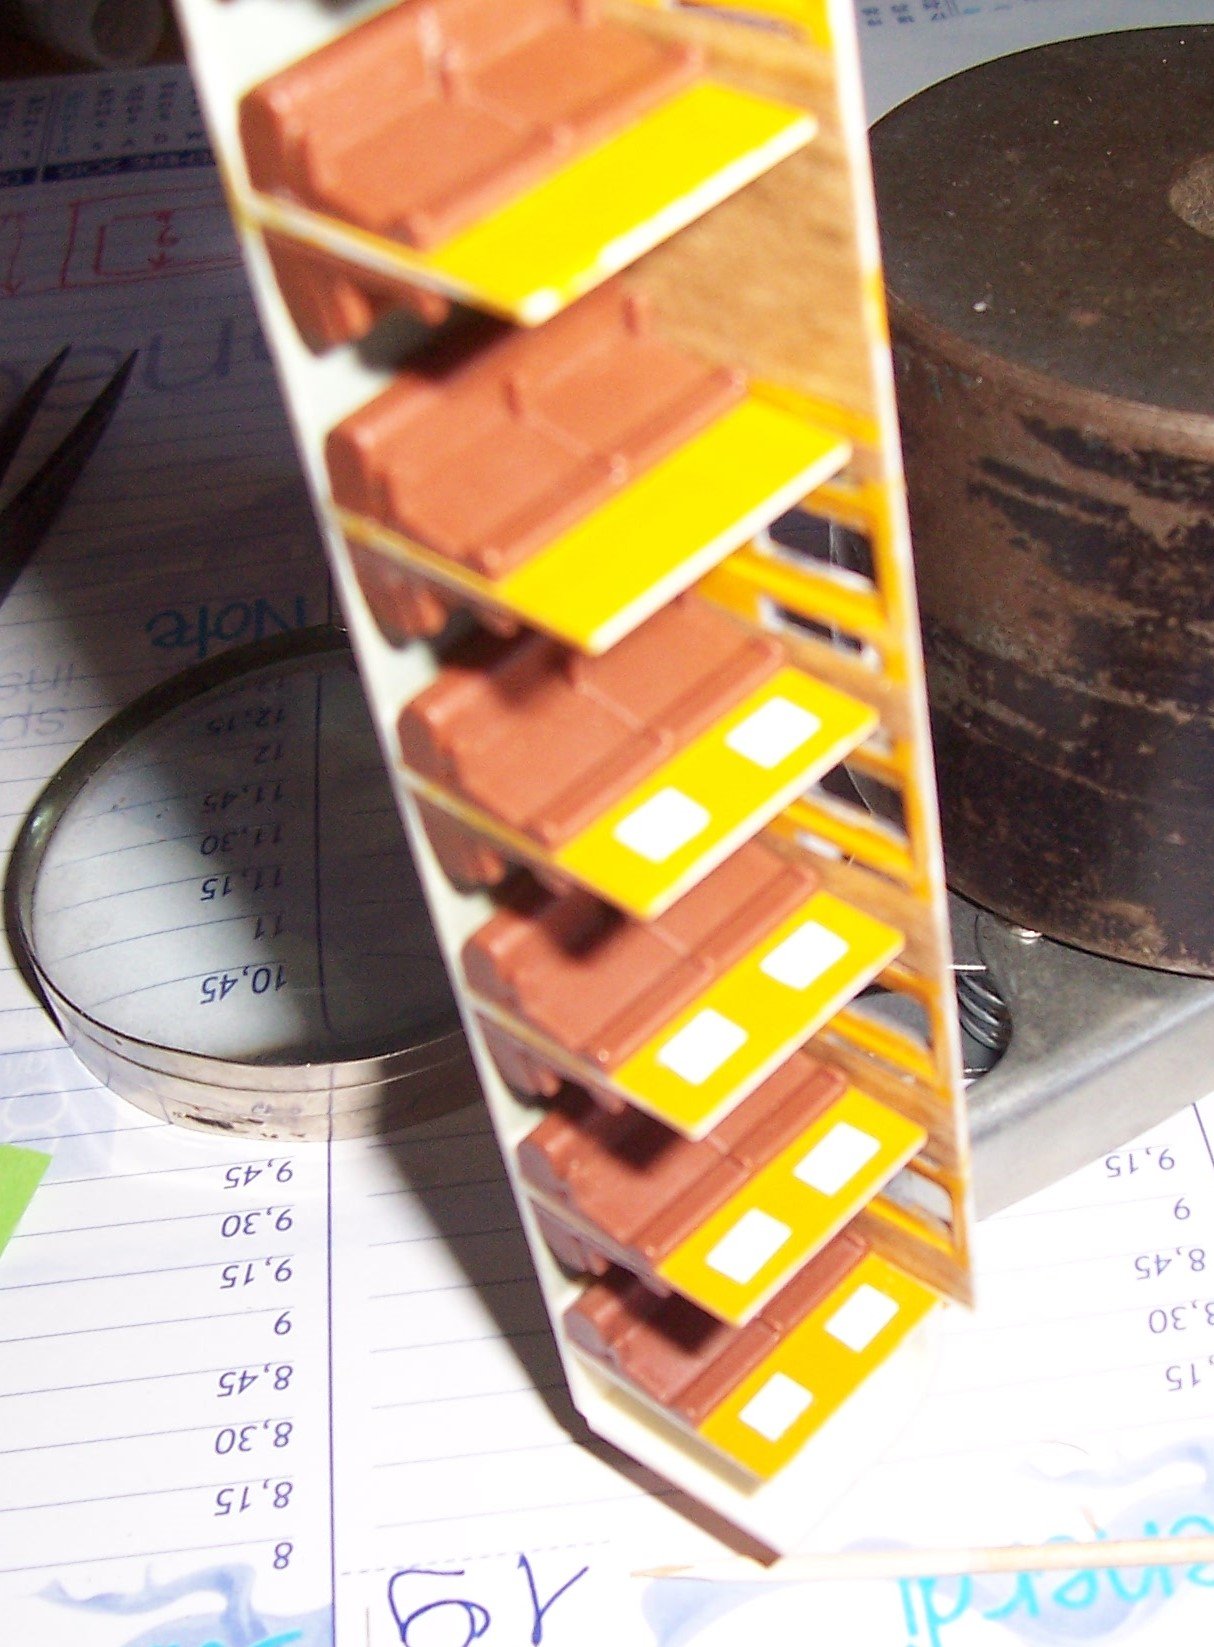
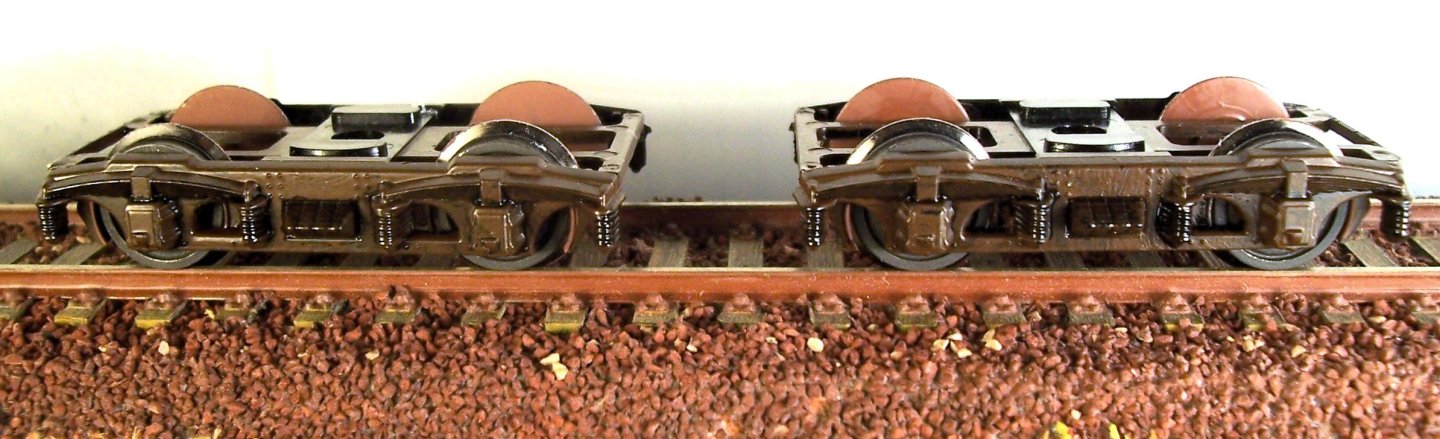
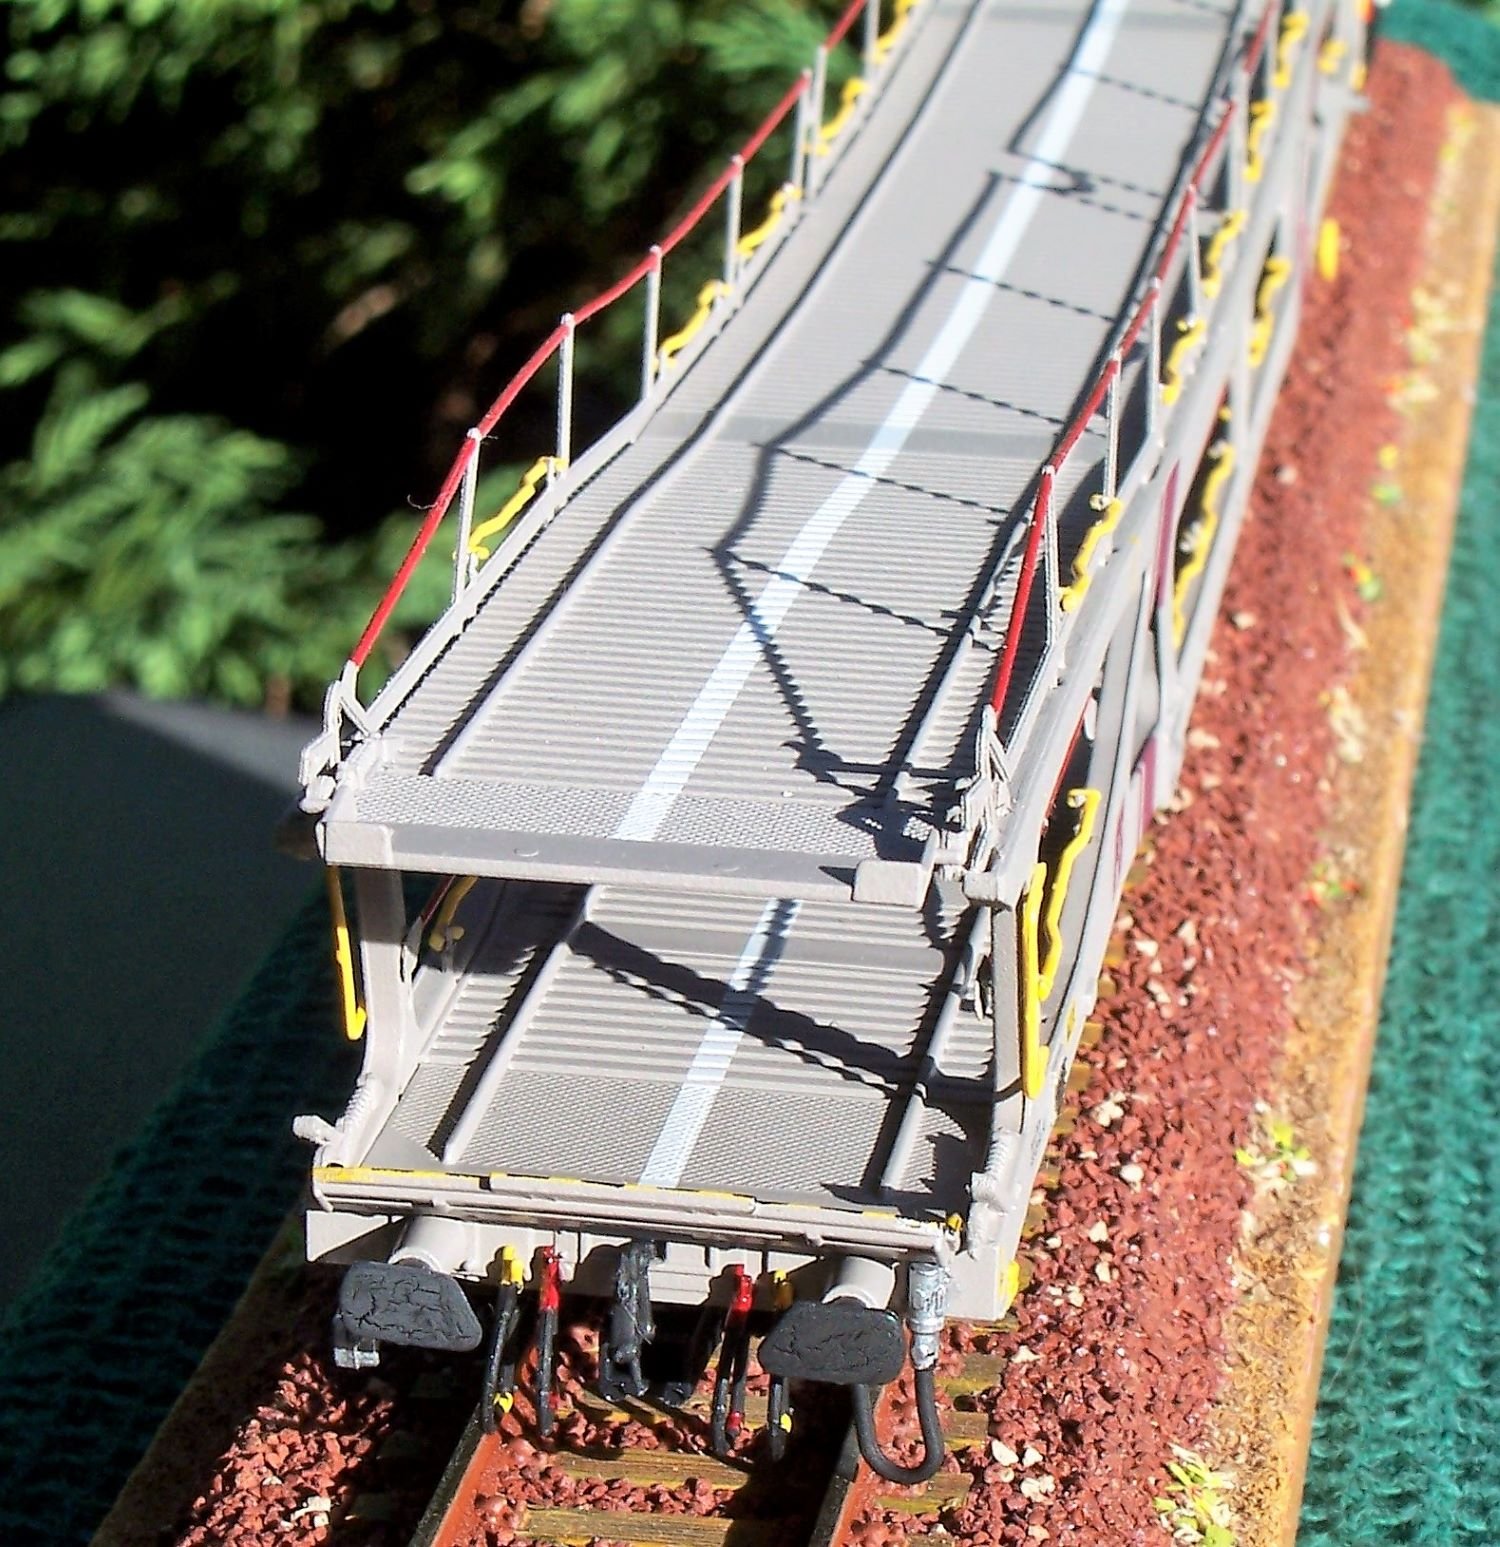
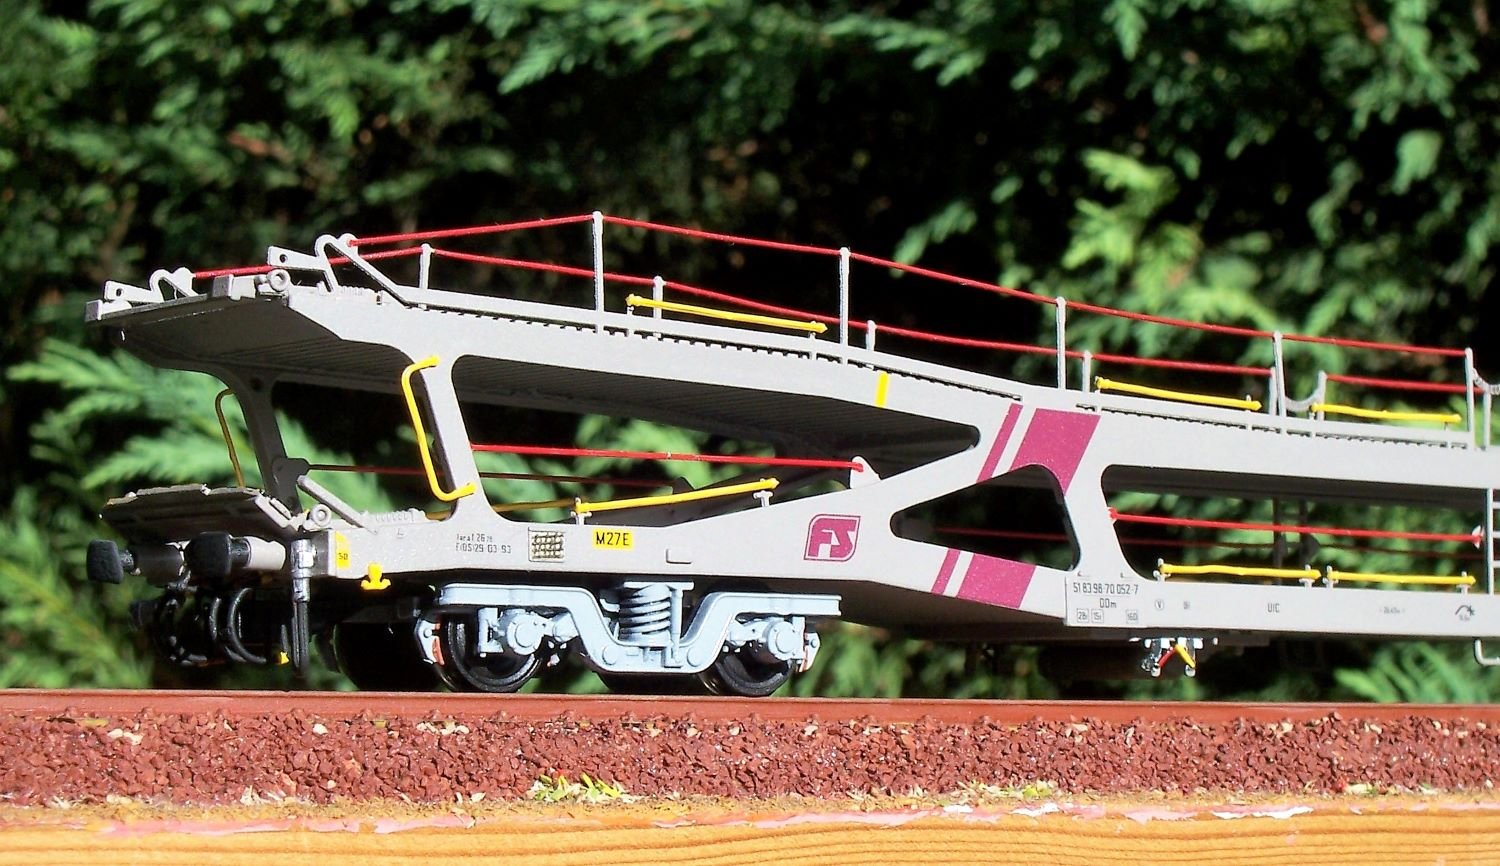
White zebra striping of the handrails is done by holding the van against a ruler and painting it with very opaque white dye at regular intervals: Car stops, side handholds, anchoring hooks, and the five-spoke hand wheel are painted yellow: Bogies are painted with matt black and wheels in rust. Next time, the bogies and the railwagon in Era IV. See you later, Rodolfo
- 4 replies
-
- 10
-
-
-
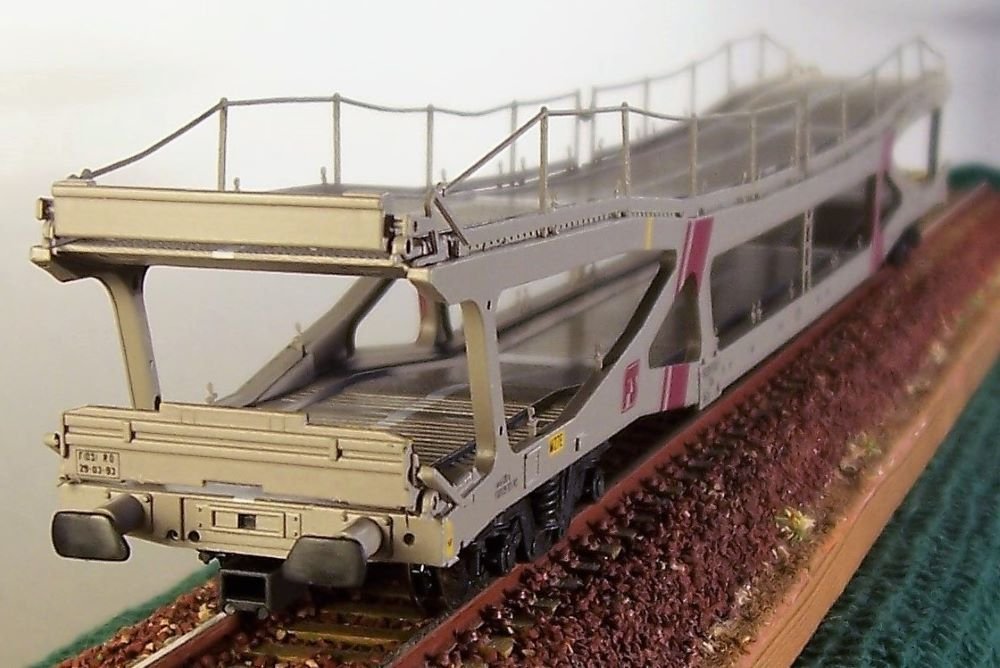
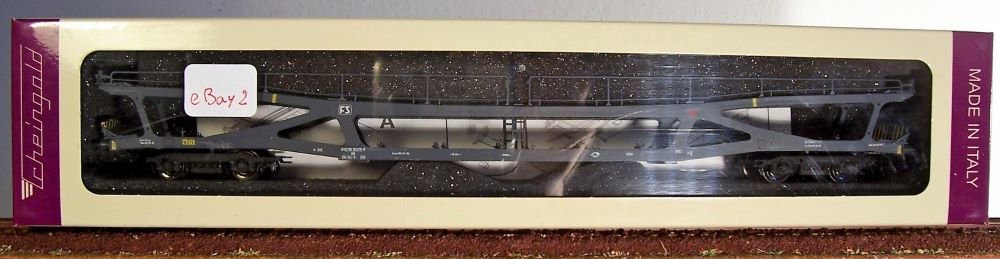
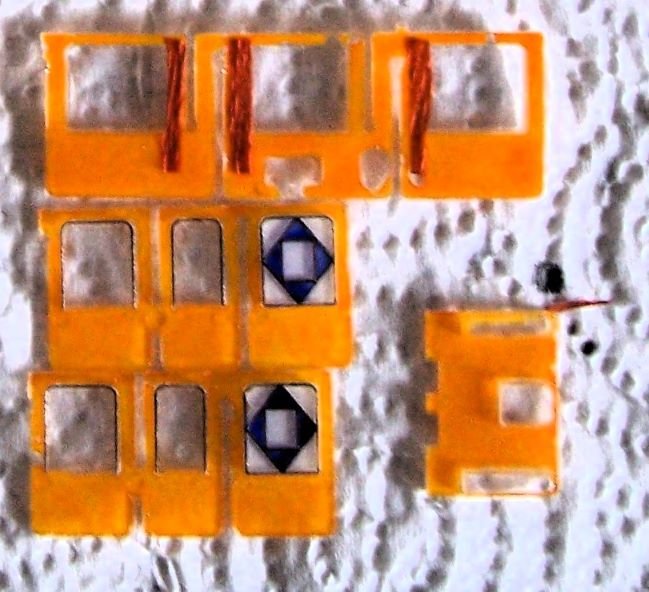
Dear friends, these wagons were inserted into passenger convoys to transport the cars of travelers. We will examine three versions, slightly different from each other. First, the version in Era IIIb (1956-1968). For the history and other details of this railway rolling stock: https://www.chimicaone.it/carro-furgone-ddm-delle-fs/ The box: The railcar: After the presentation, we'll begin the modifications. See you later, Rodolfo


-
Thank you Mark and greetings to all friends. I will be back soon with more model railroads! Rodolfo
-
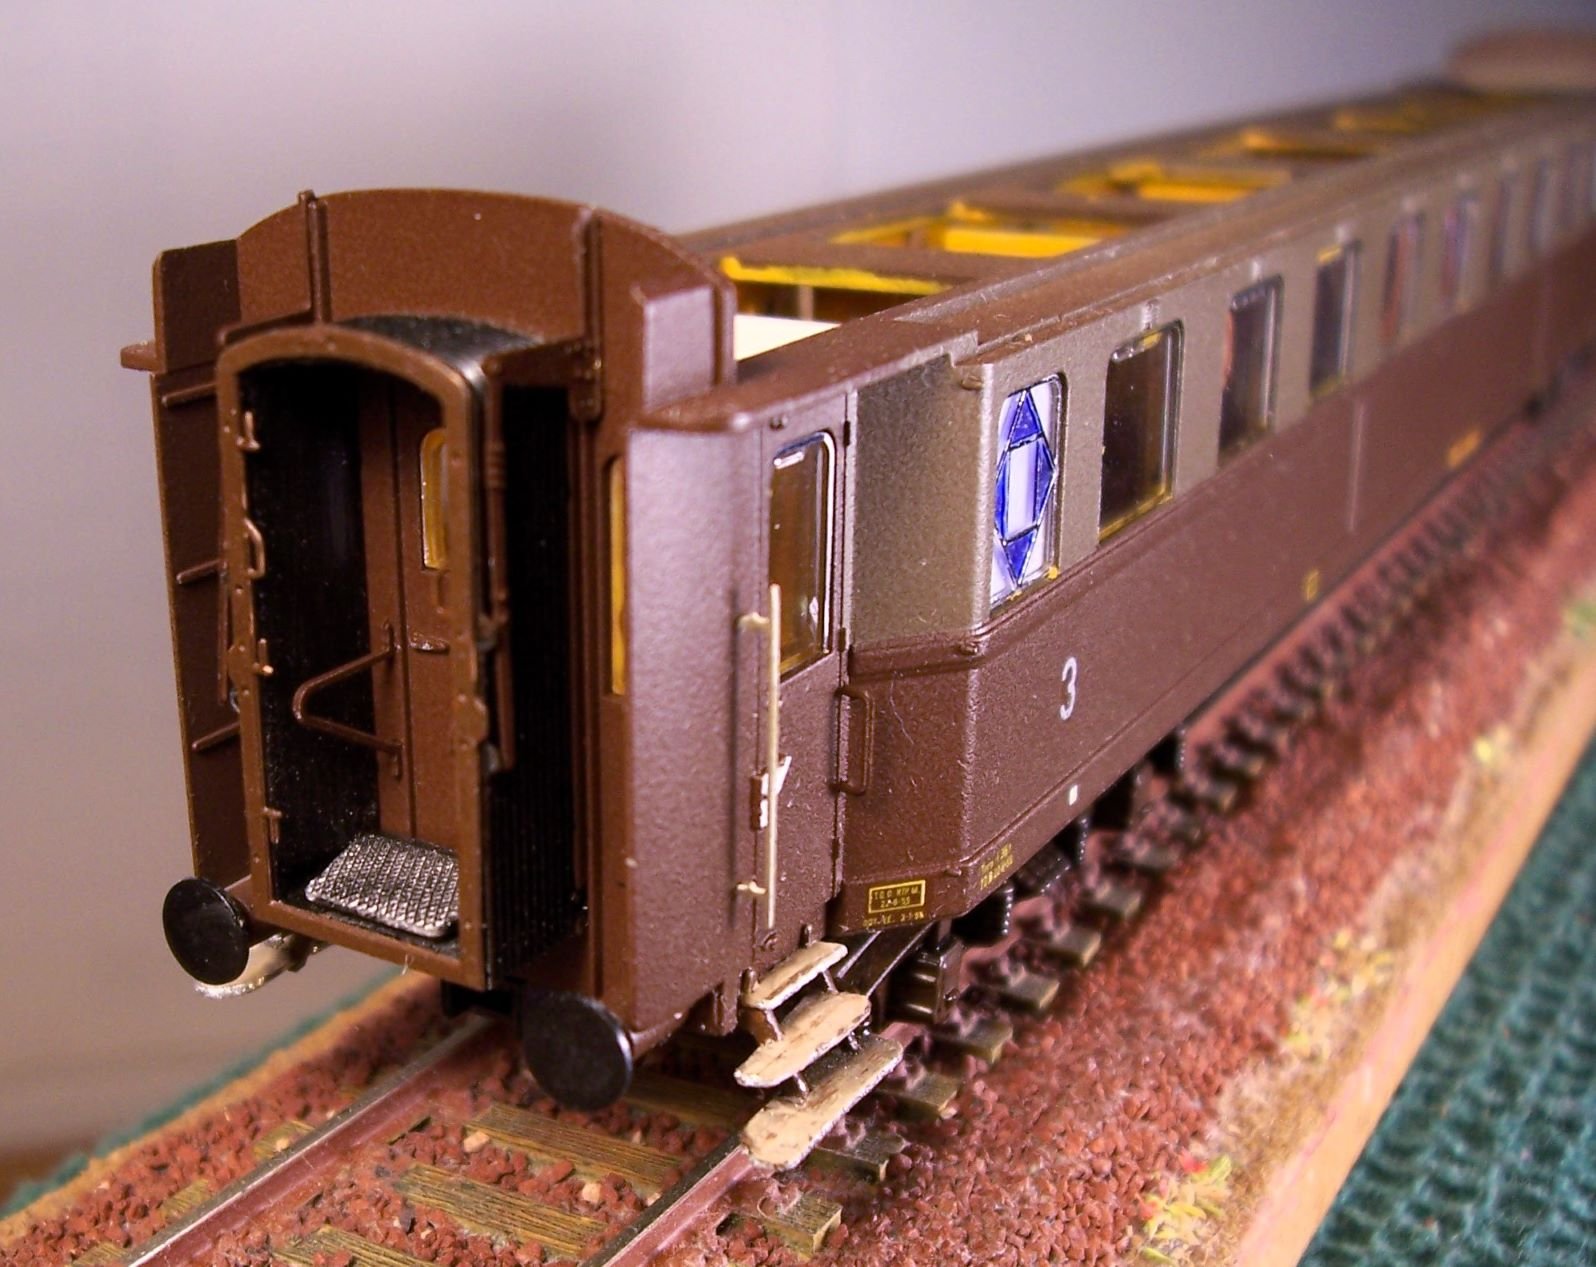
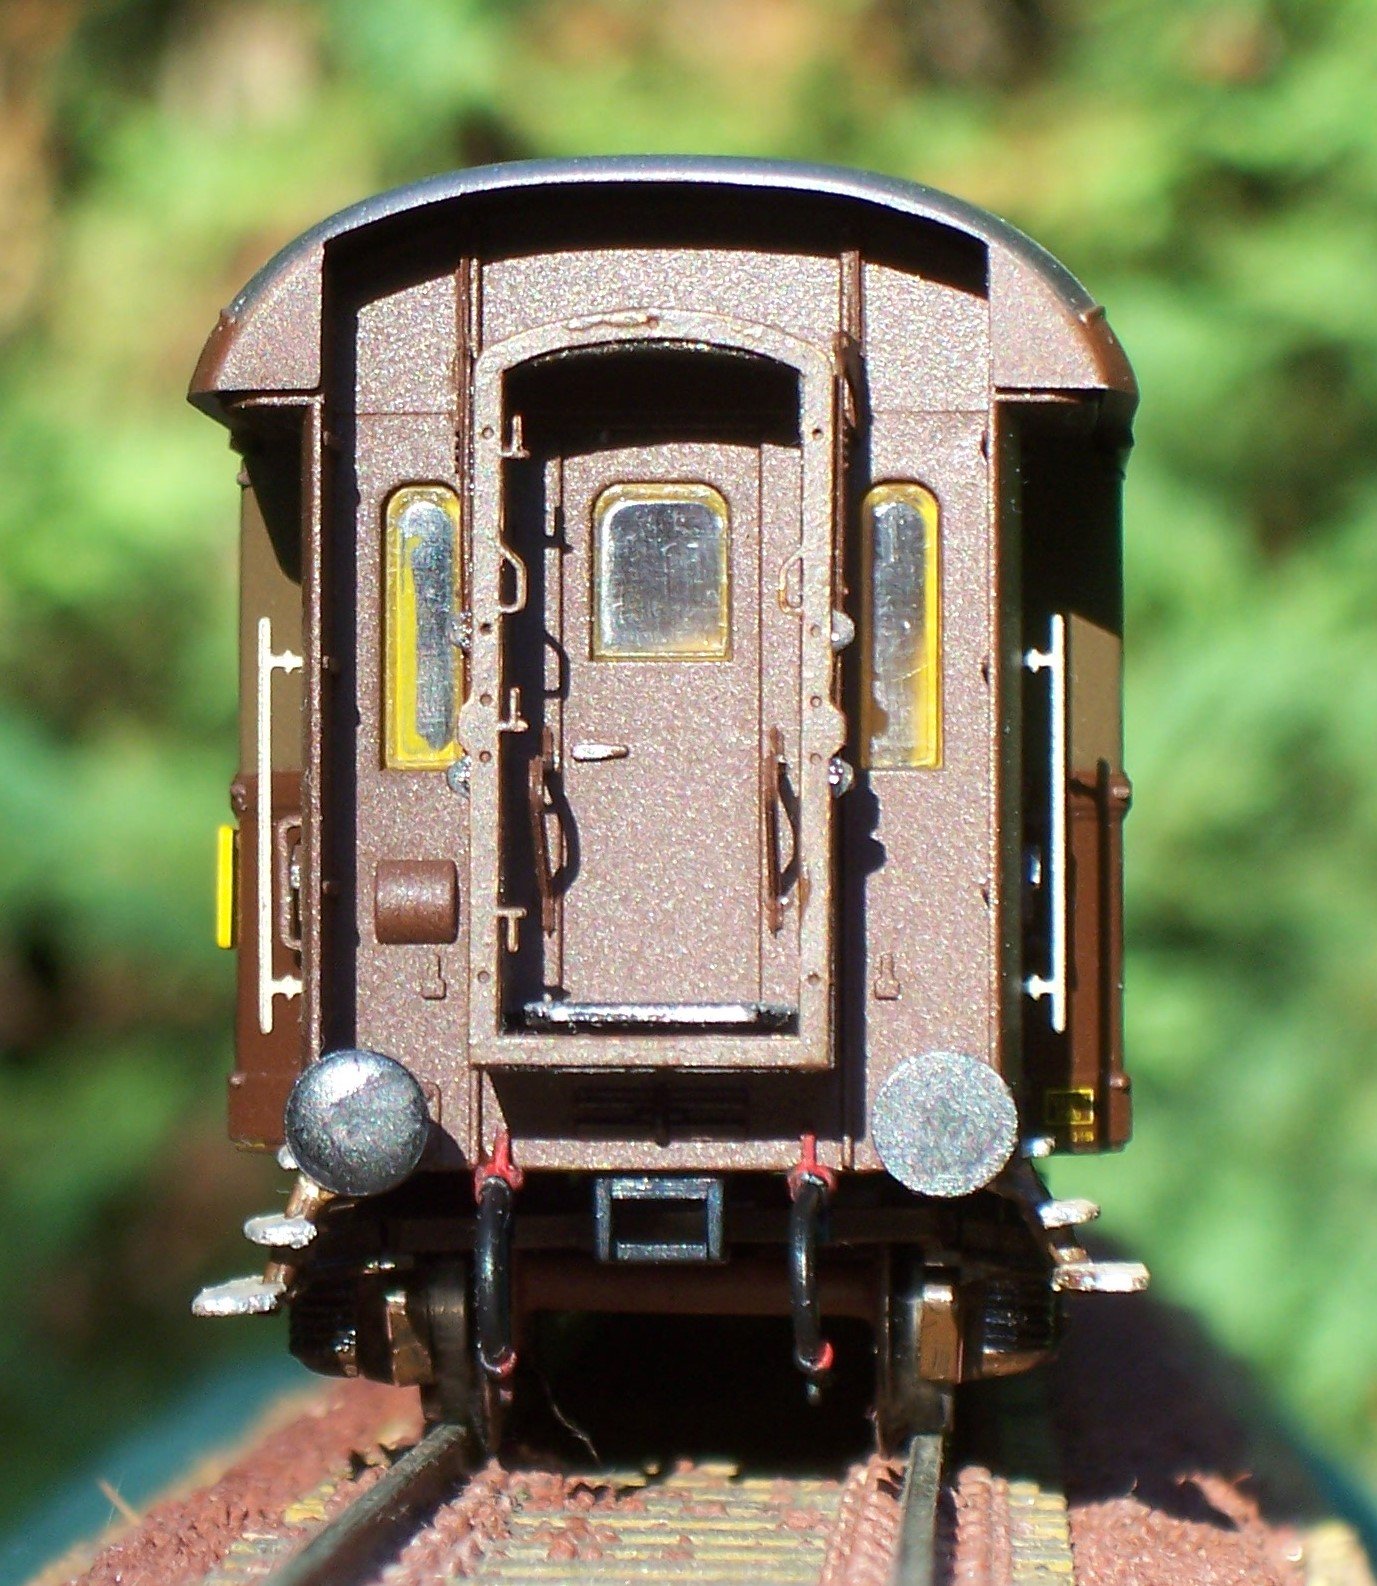
The air-couplers have been glued: Roof insertion and the carriage is finished! A warm greeting to all the modelers! Rodolfo


- 9 replies
-
- 13
-
-
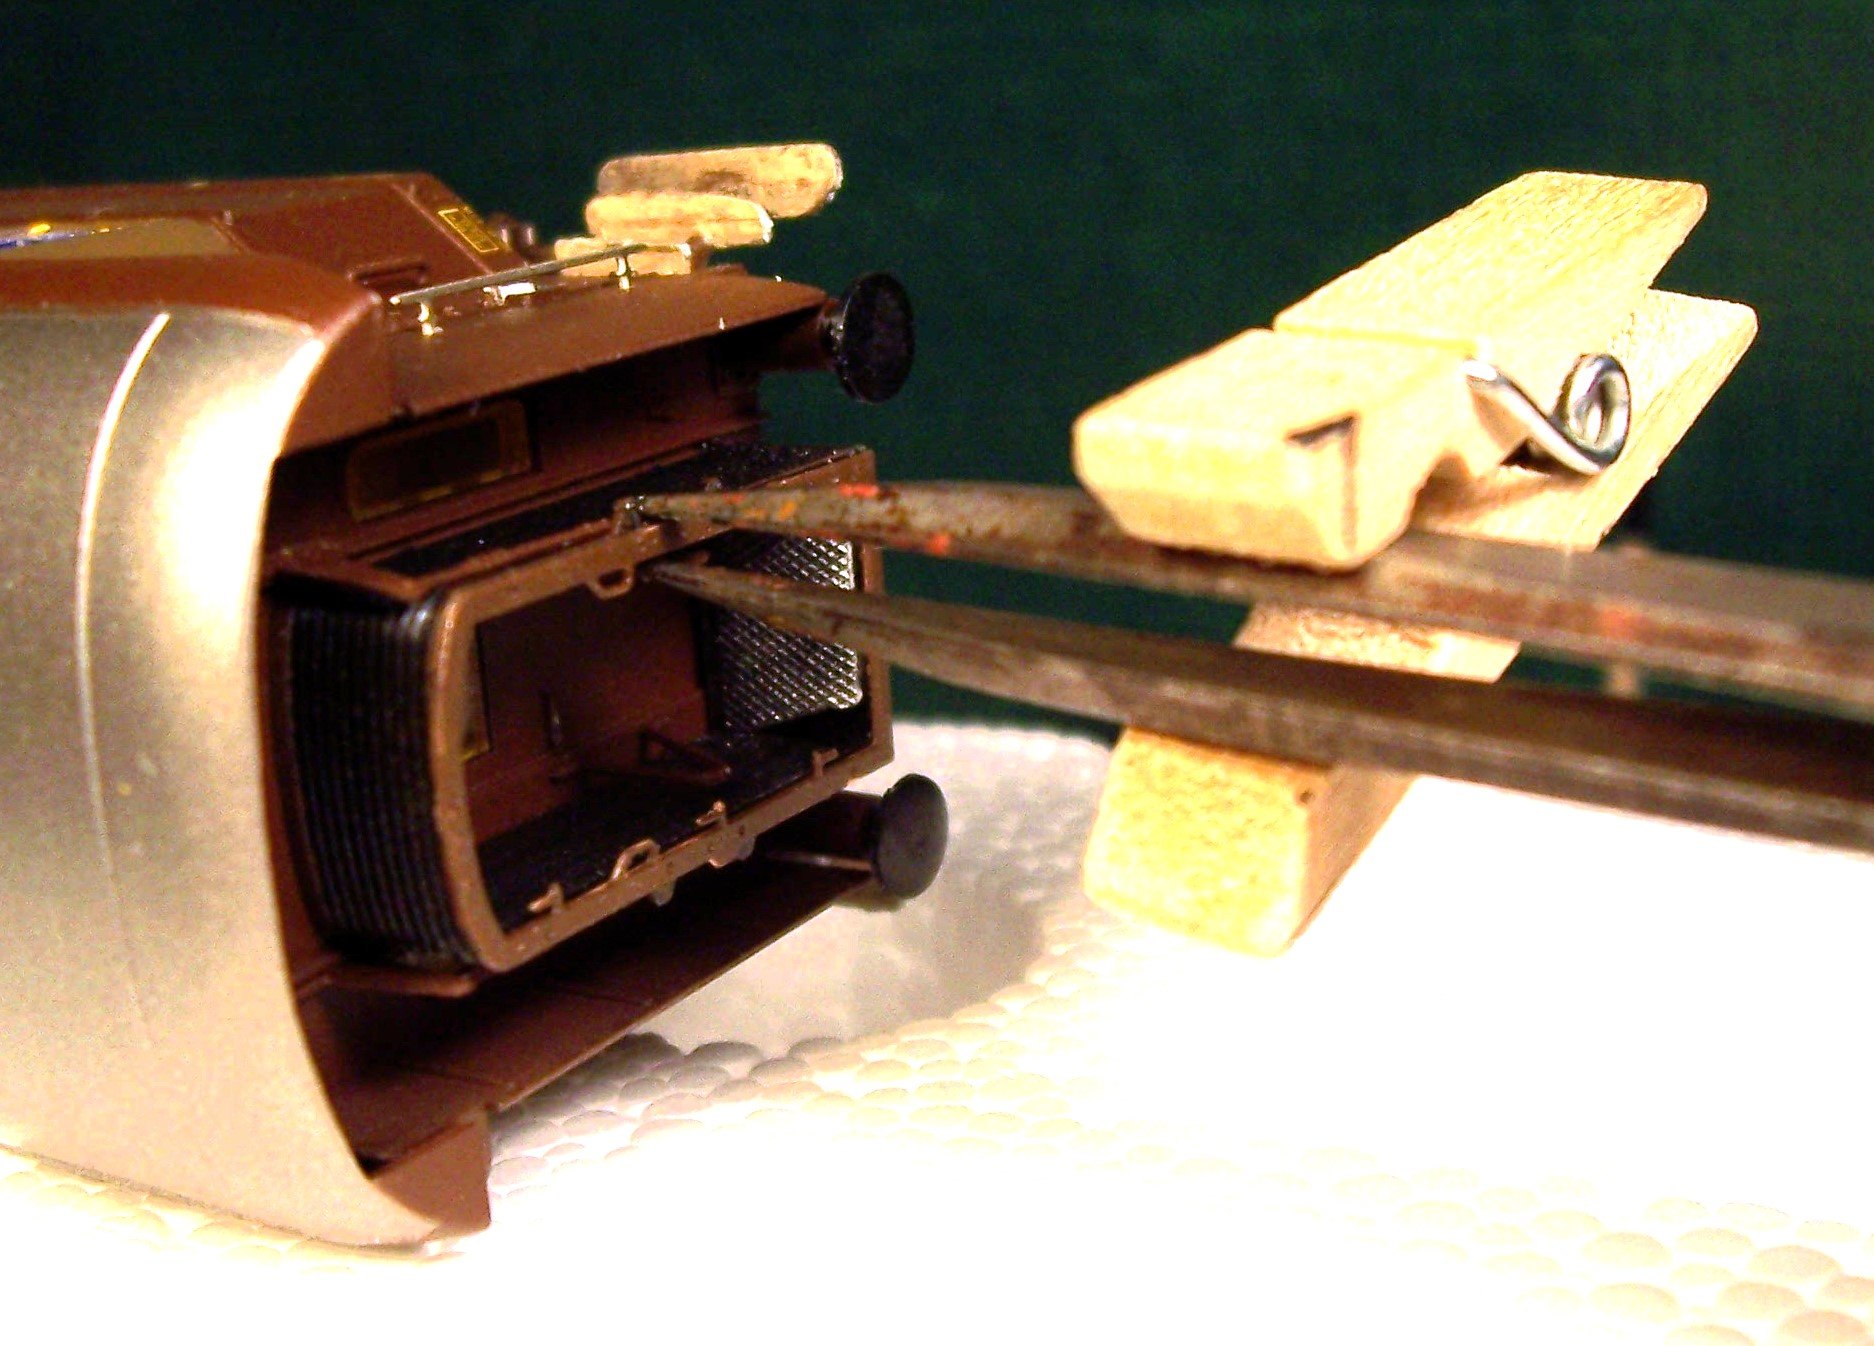
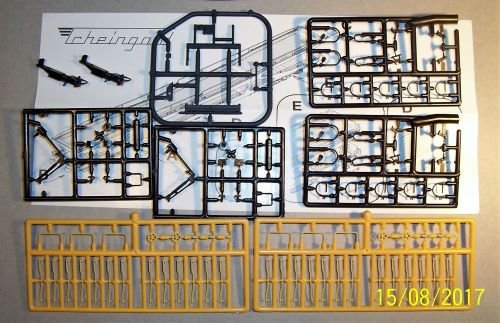
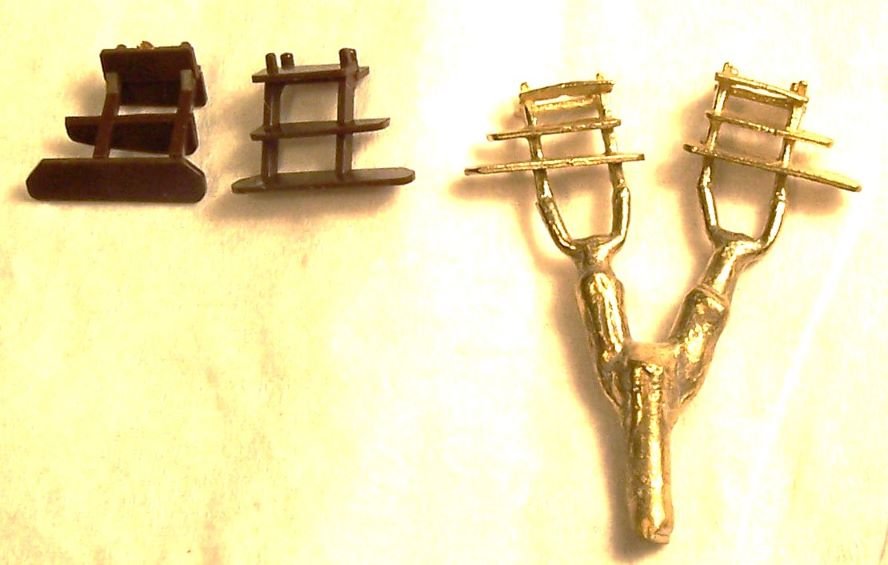
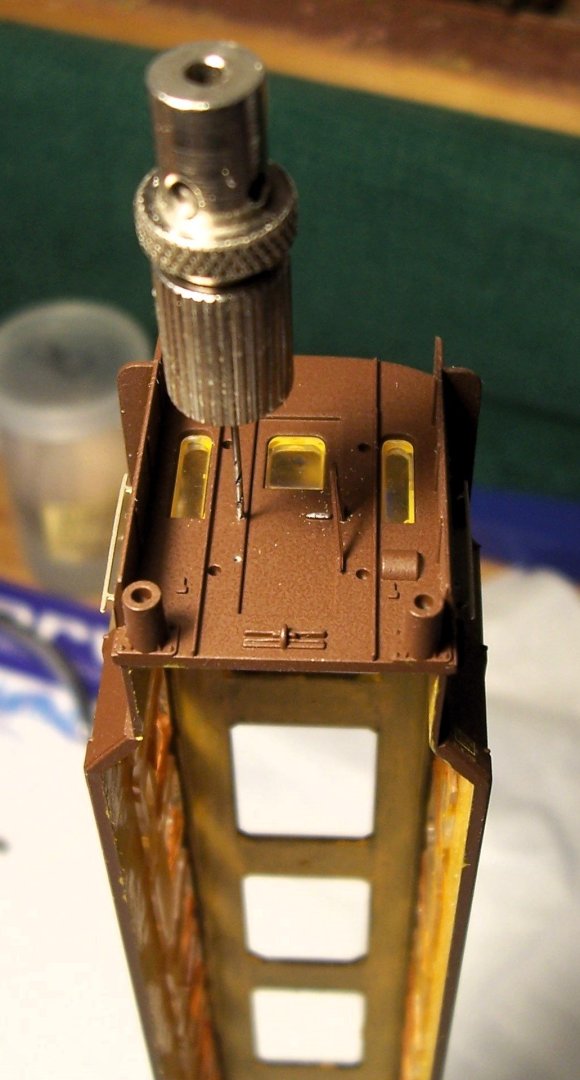
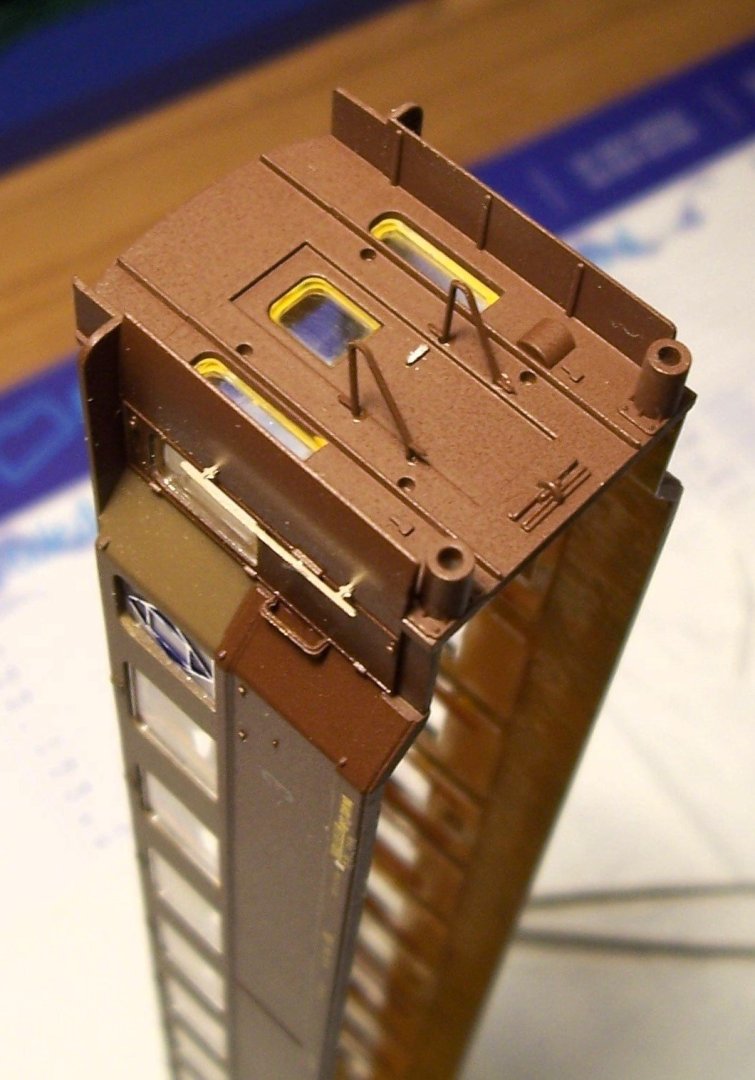
The ladders: there are two type; here we'll use the metallic ones (found on the internet): Insertion of ladders, puffers and bellows tie-rods: A whole image at this stage: Next step we'll finish this carriage. See you later! Rodolfo

- 9 replies
-
- 10
-
-
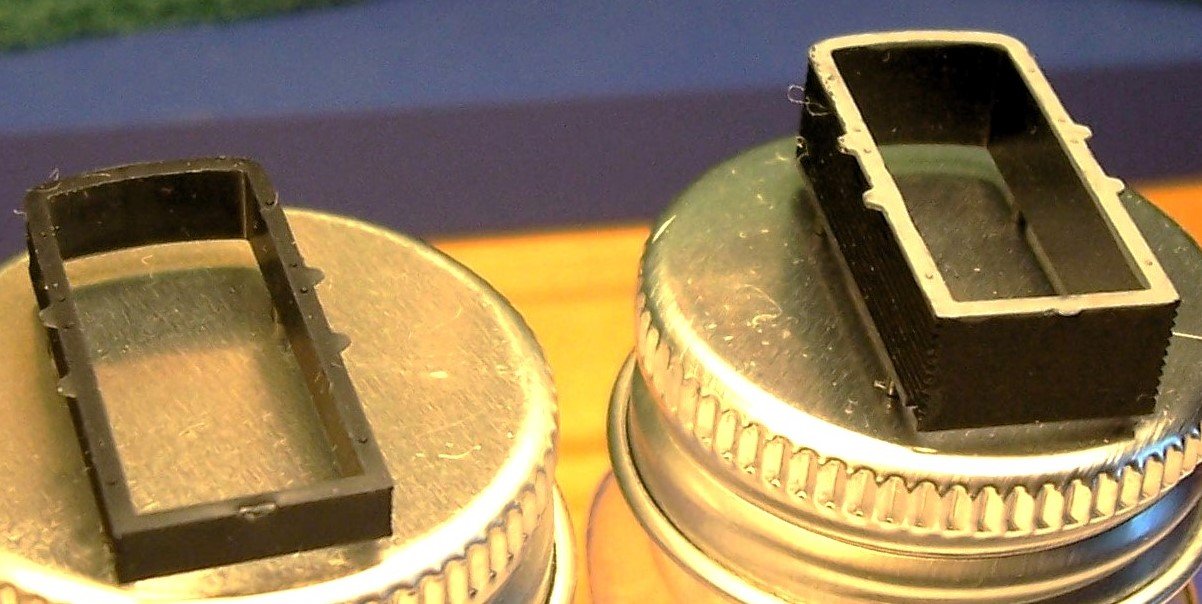
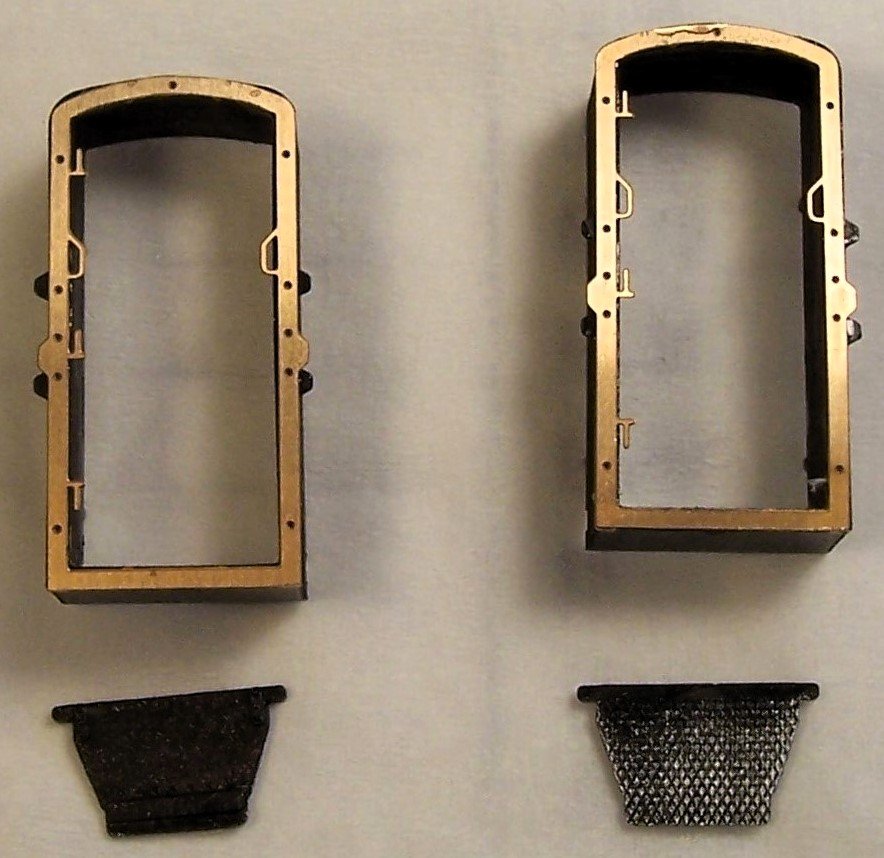
The windows: Drilling the holes: The bellows open and closed: We'll use both the open ones: Next step: ladders and bellows tie-rods. Rodolfo

-
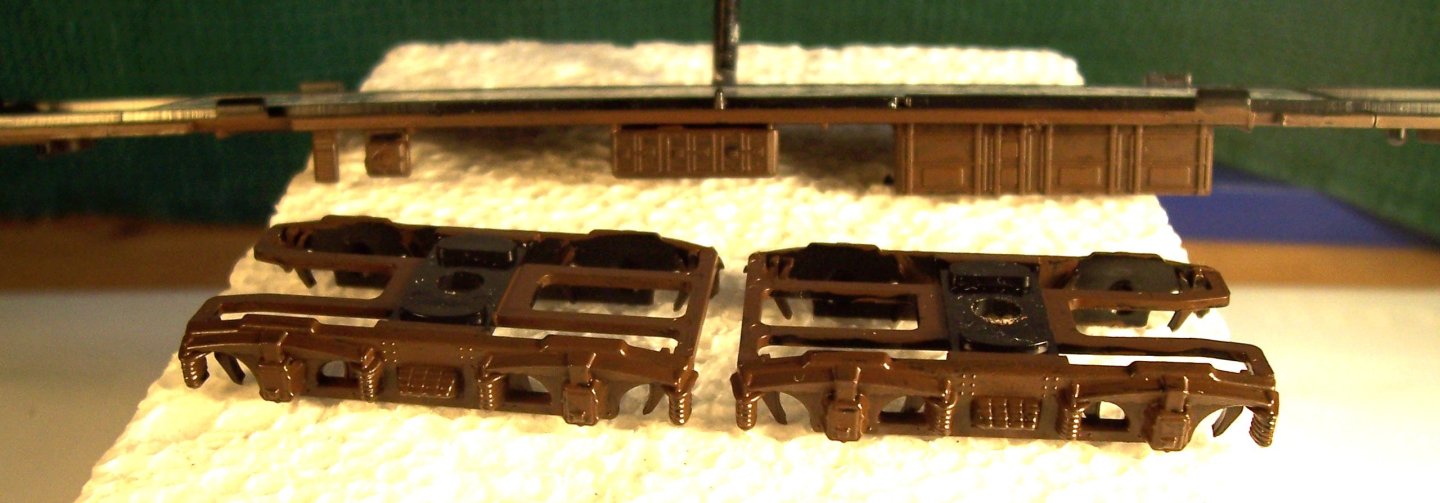
And now, the bogies; there are old and new bogies: For this coach the old ones were chosen and painted in clear brown: The finished bogies: Next time: the windows and the heads of the carriage. See you soon, Rodolfo
- 9 replies
-
- 11
-
-
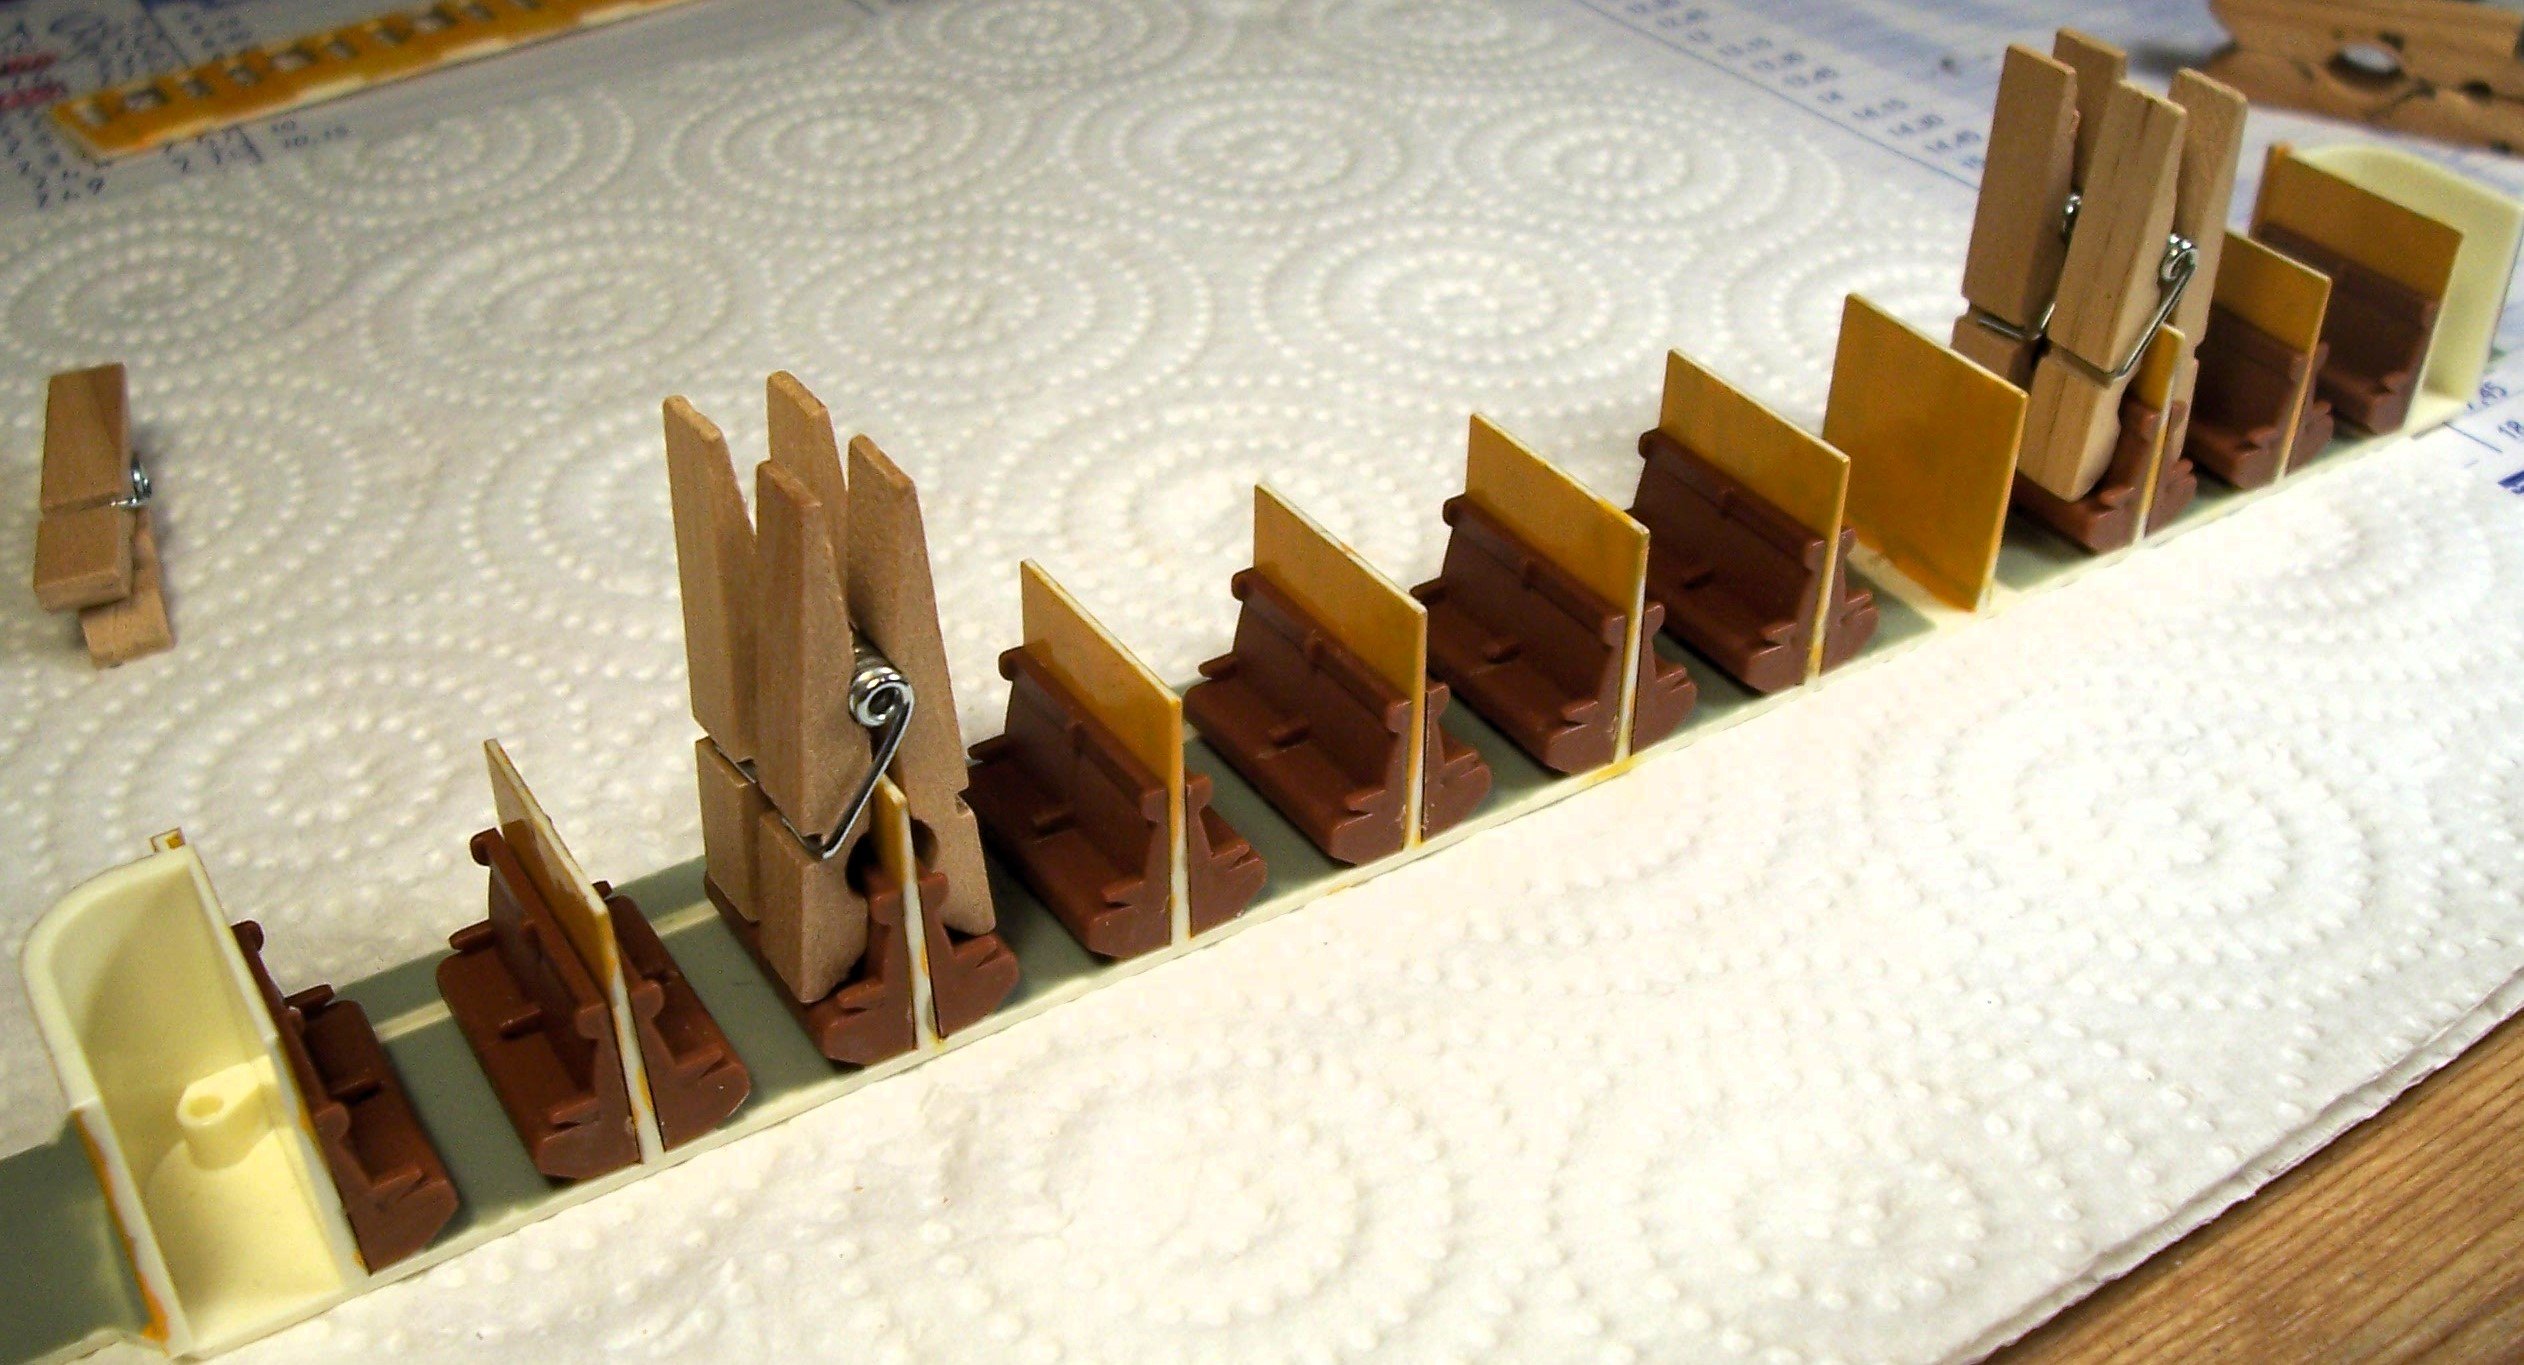
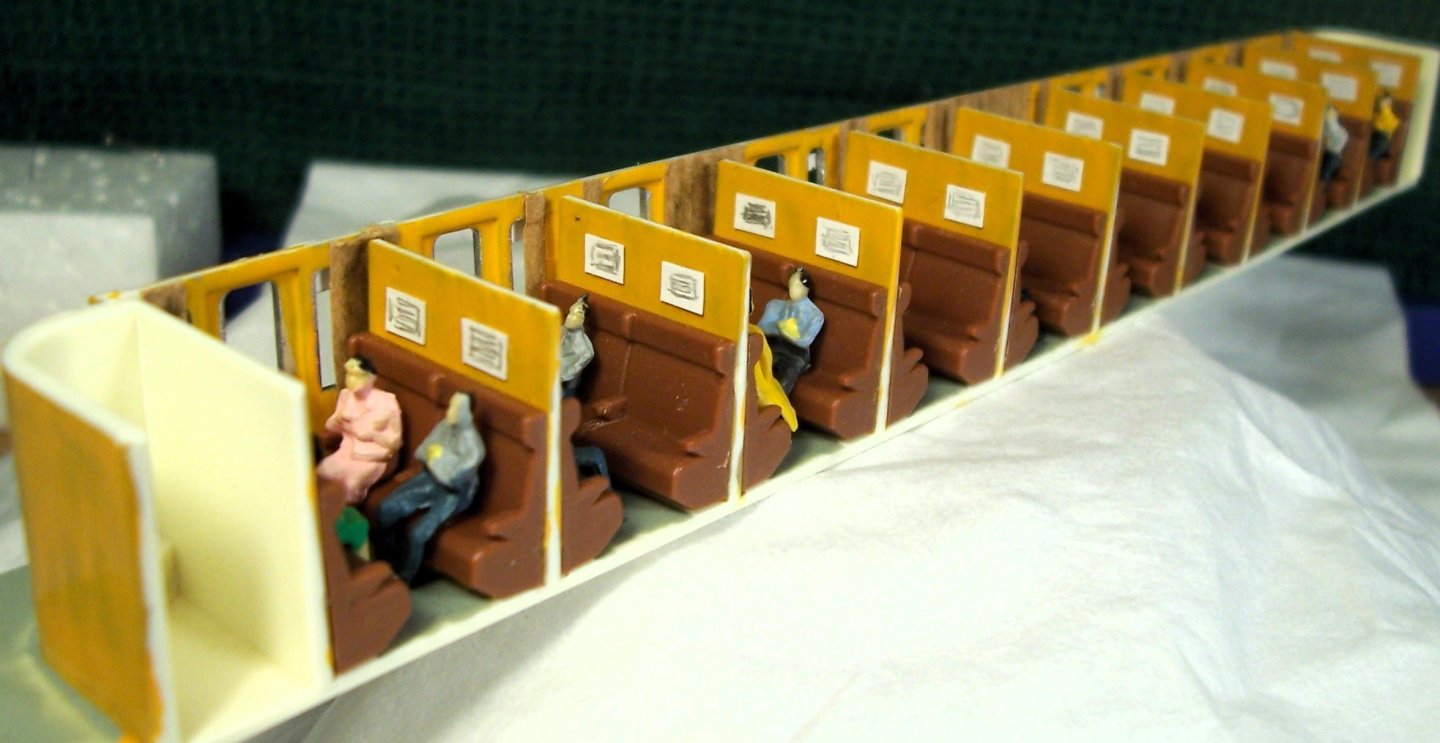
Dear friends,below are some photos of interior arrangement:


-
Rodolfo Bigoni reacted to a post in a topic:
Mosquito B Mk IV - FINISHED - Revell - My next non-ship project
-
Rodolfo Bigoni reacted to a post in a topic:
Mosquito B Mk IV - FINISHED - Revell - My next non-ship project
-
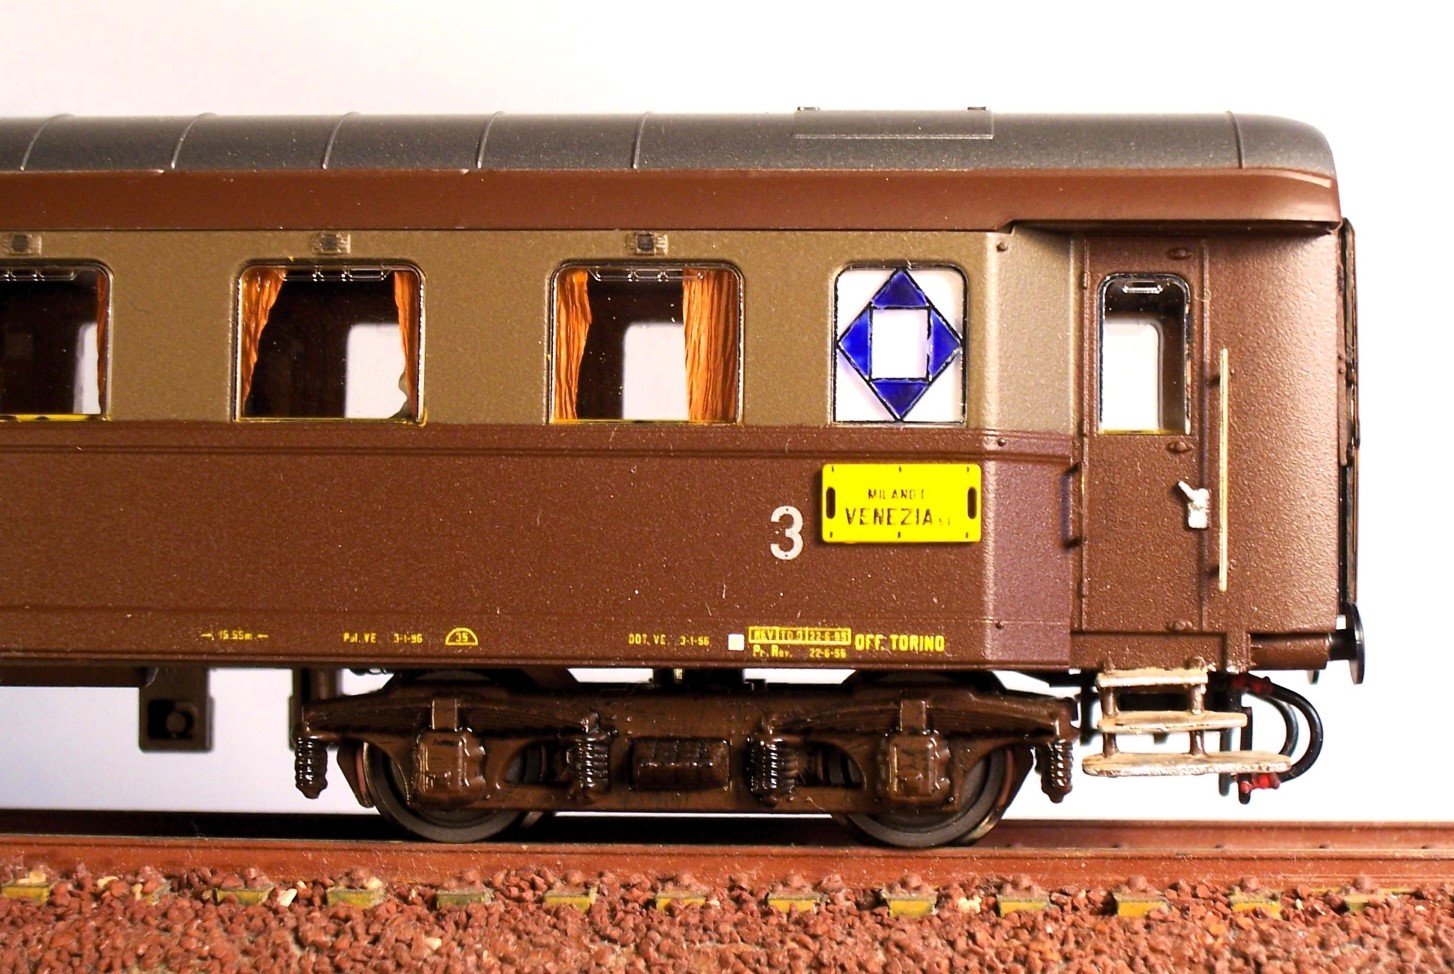
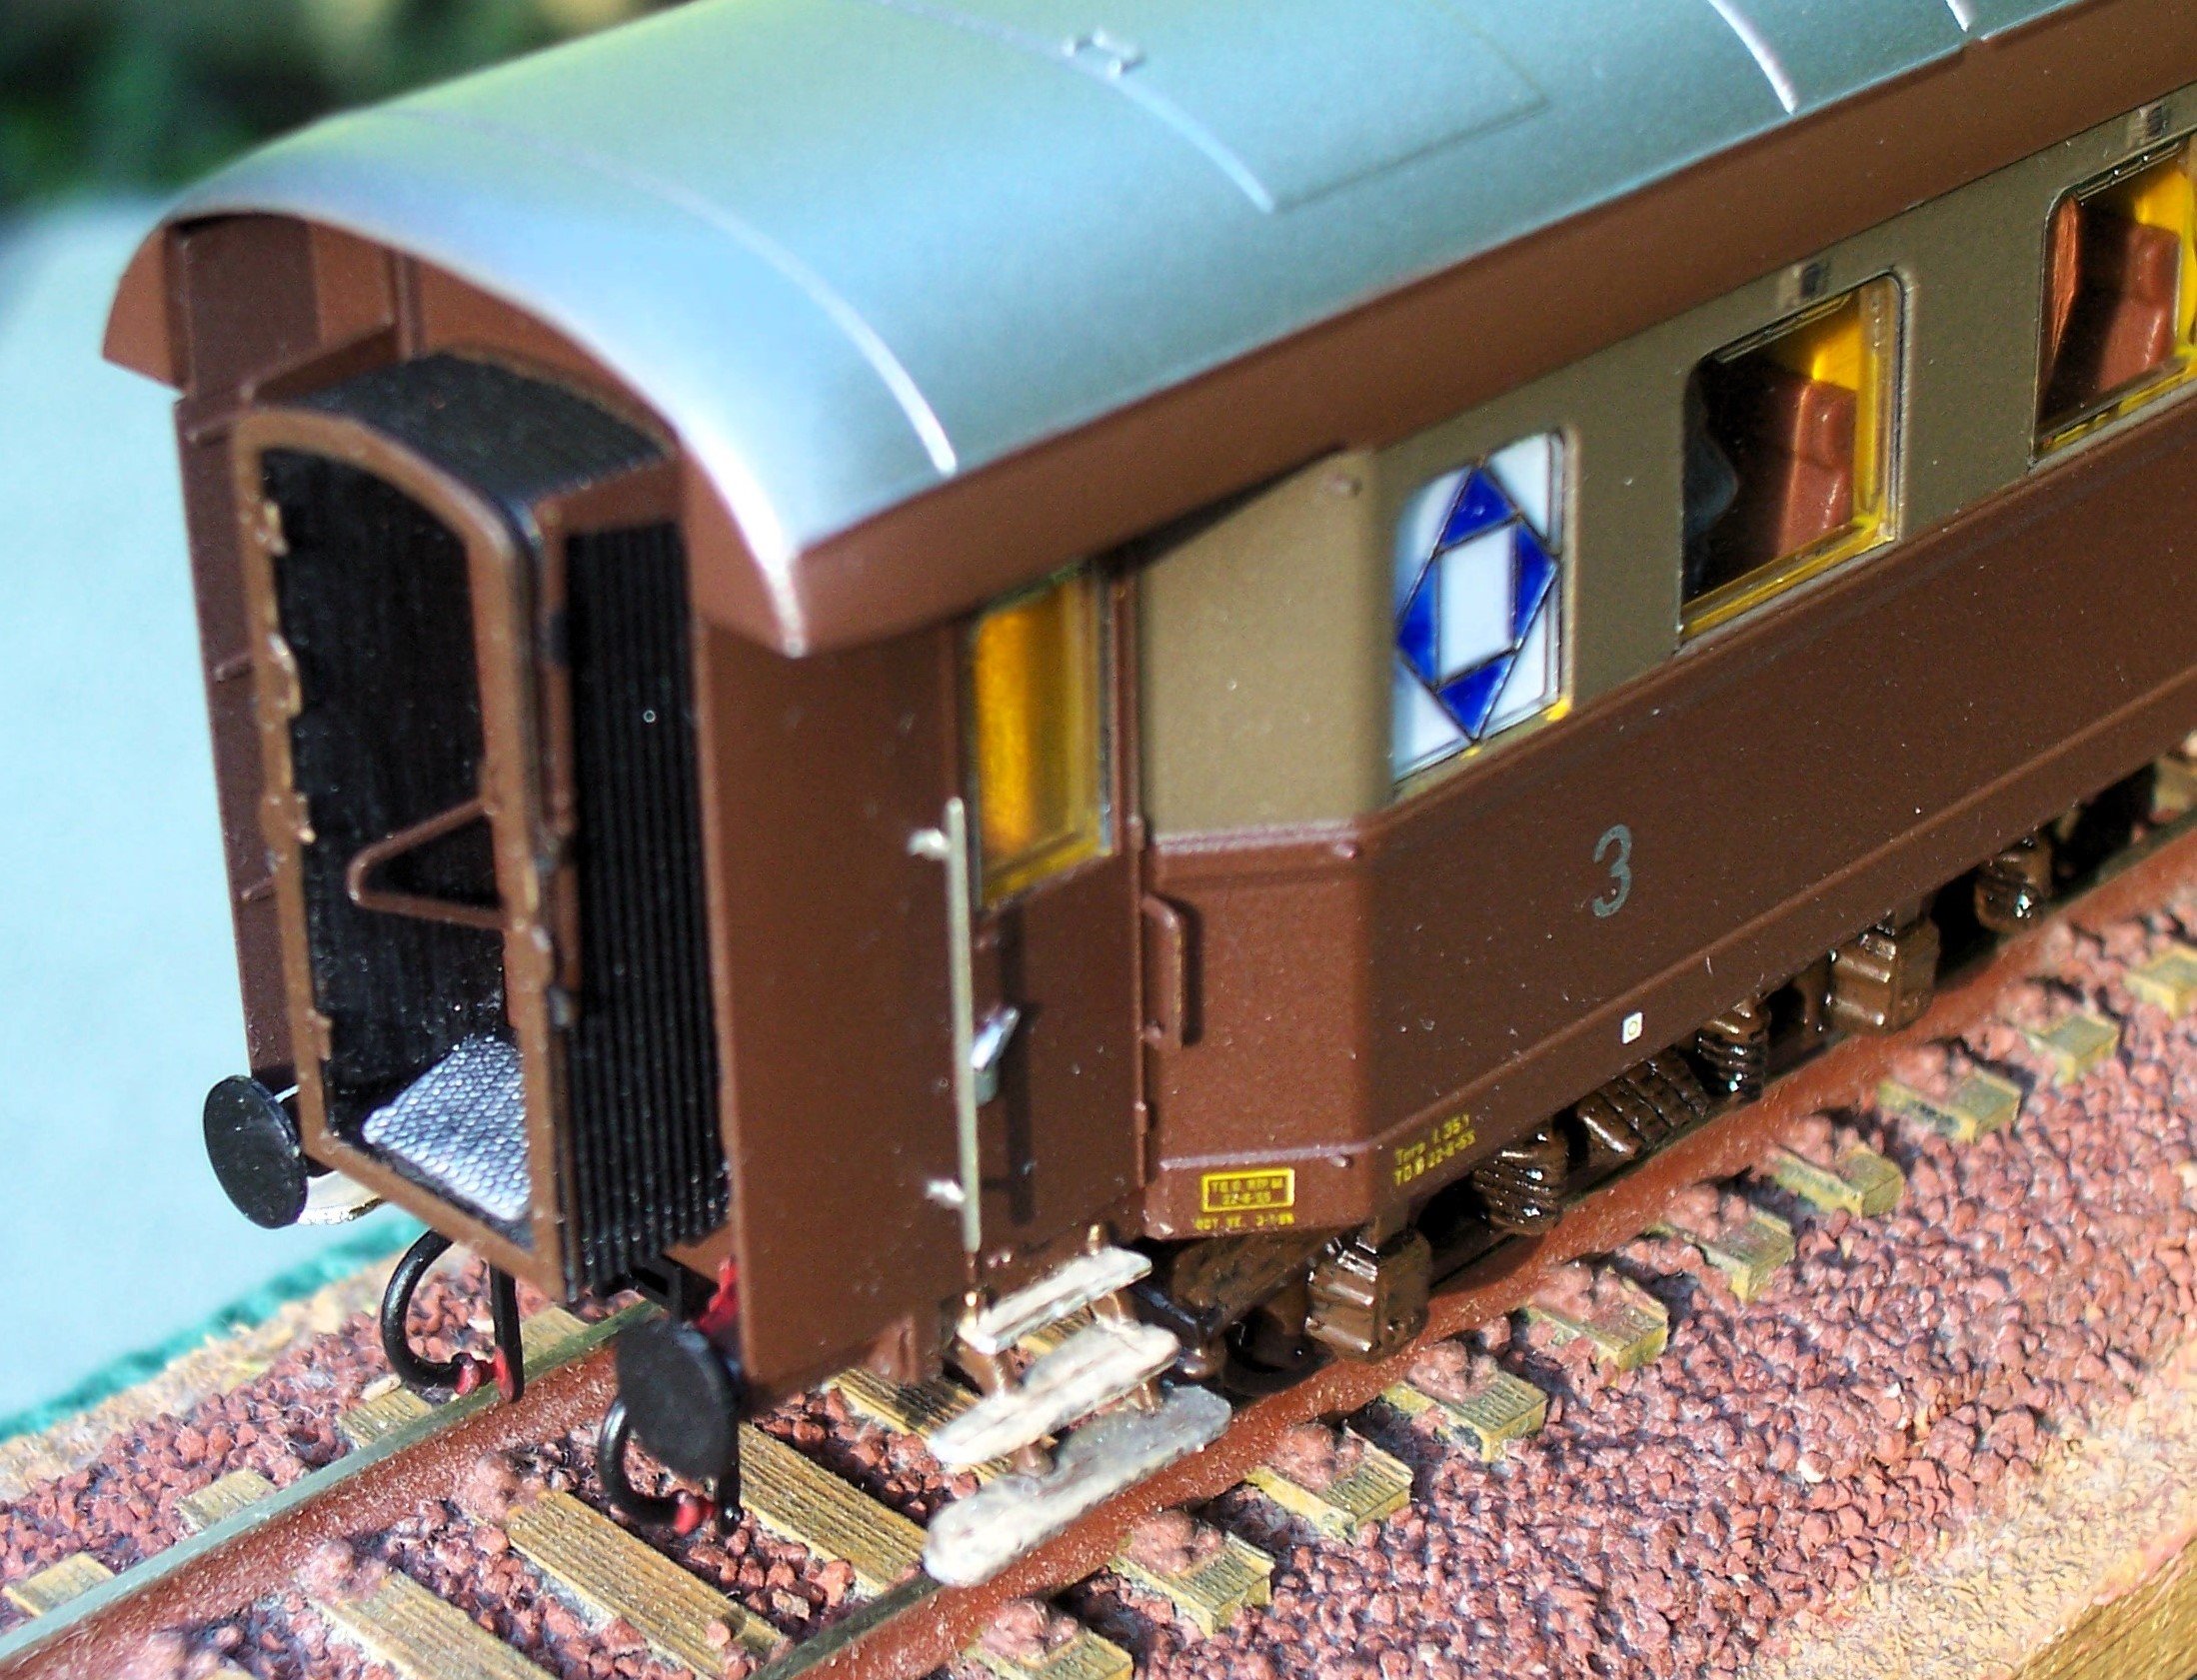
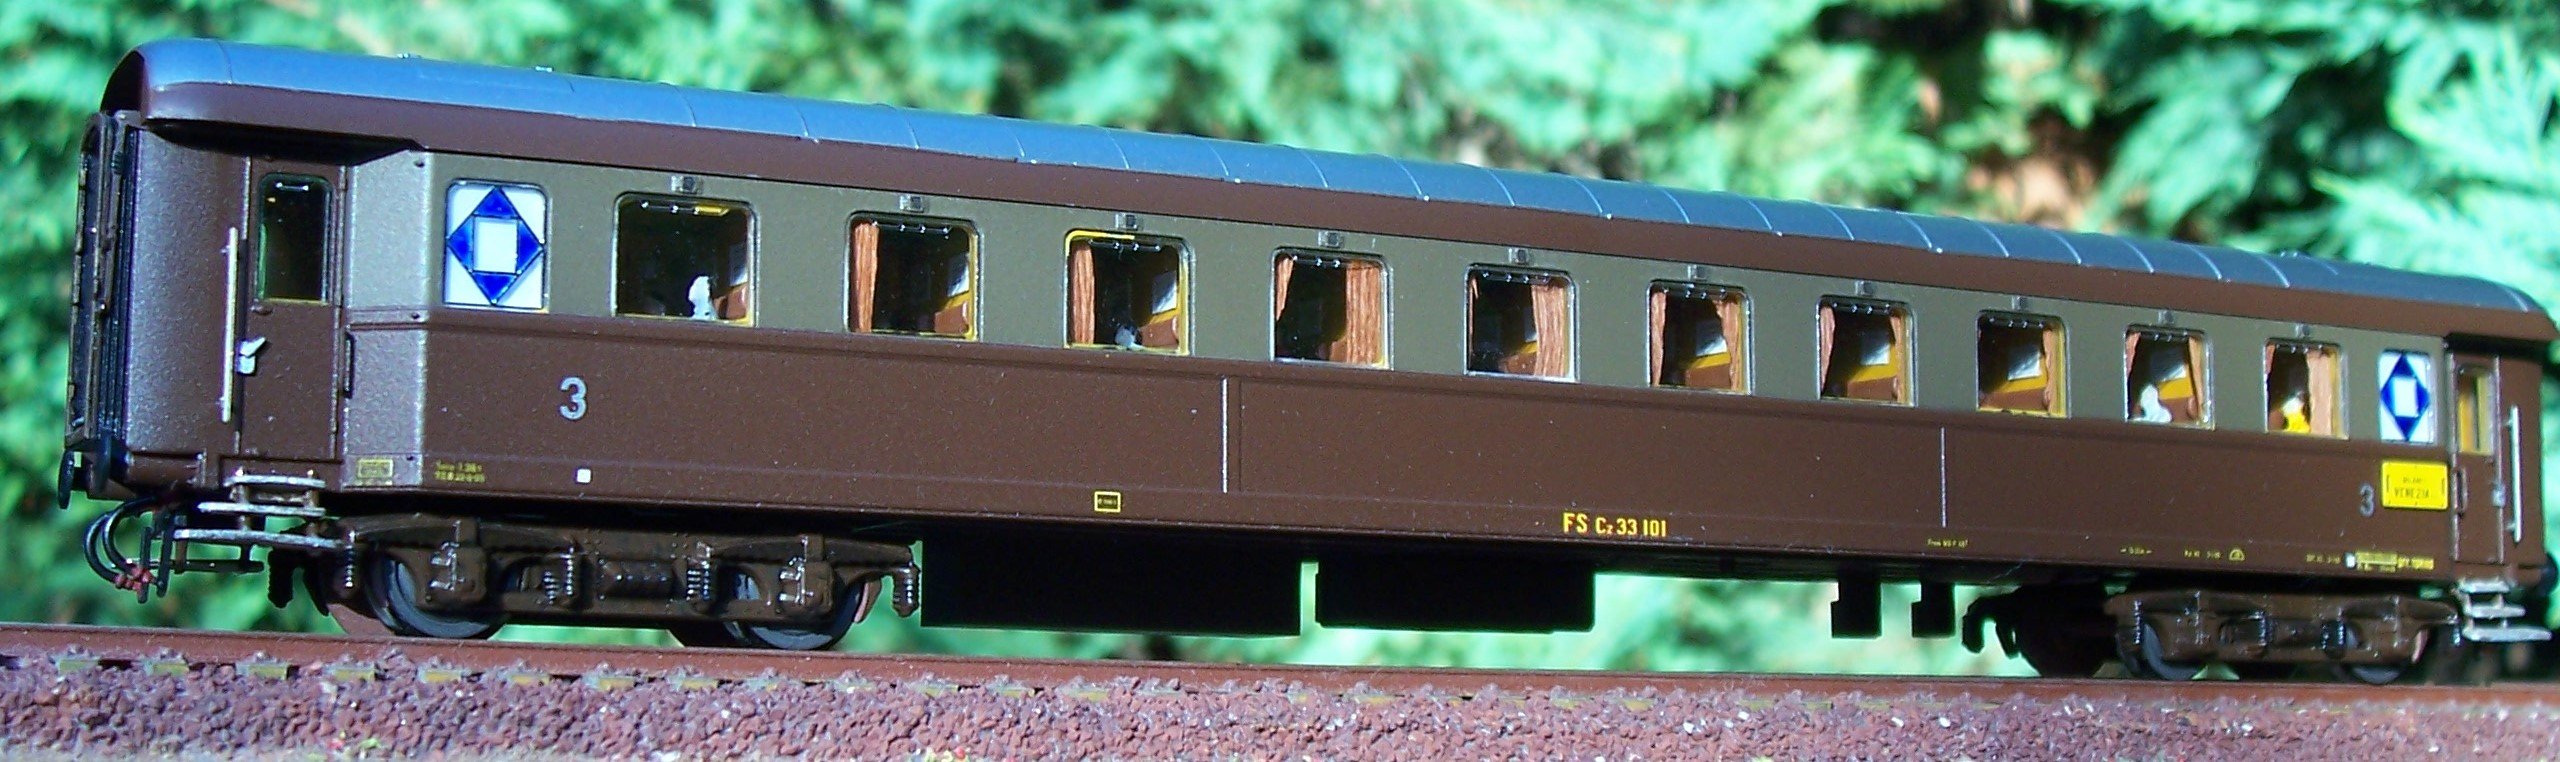
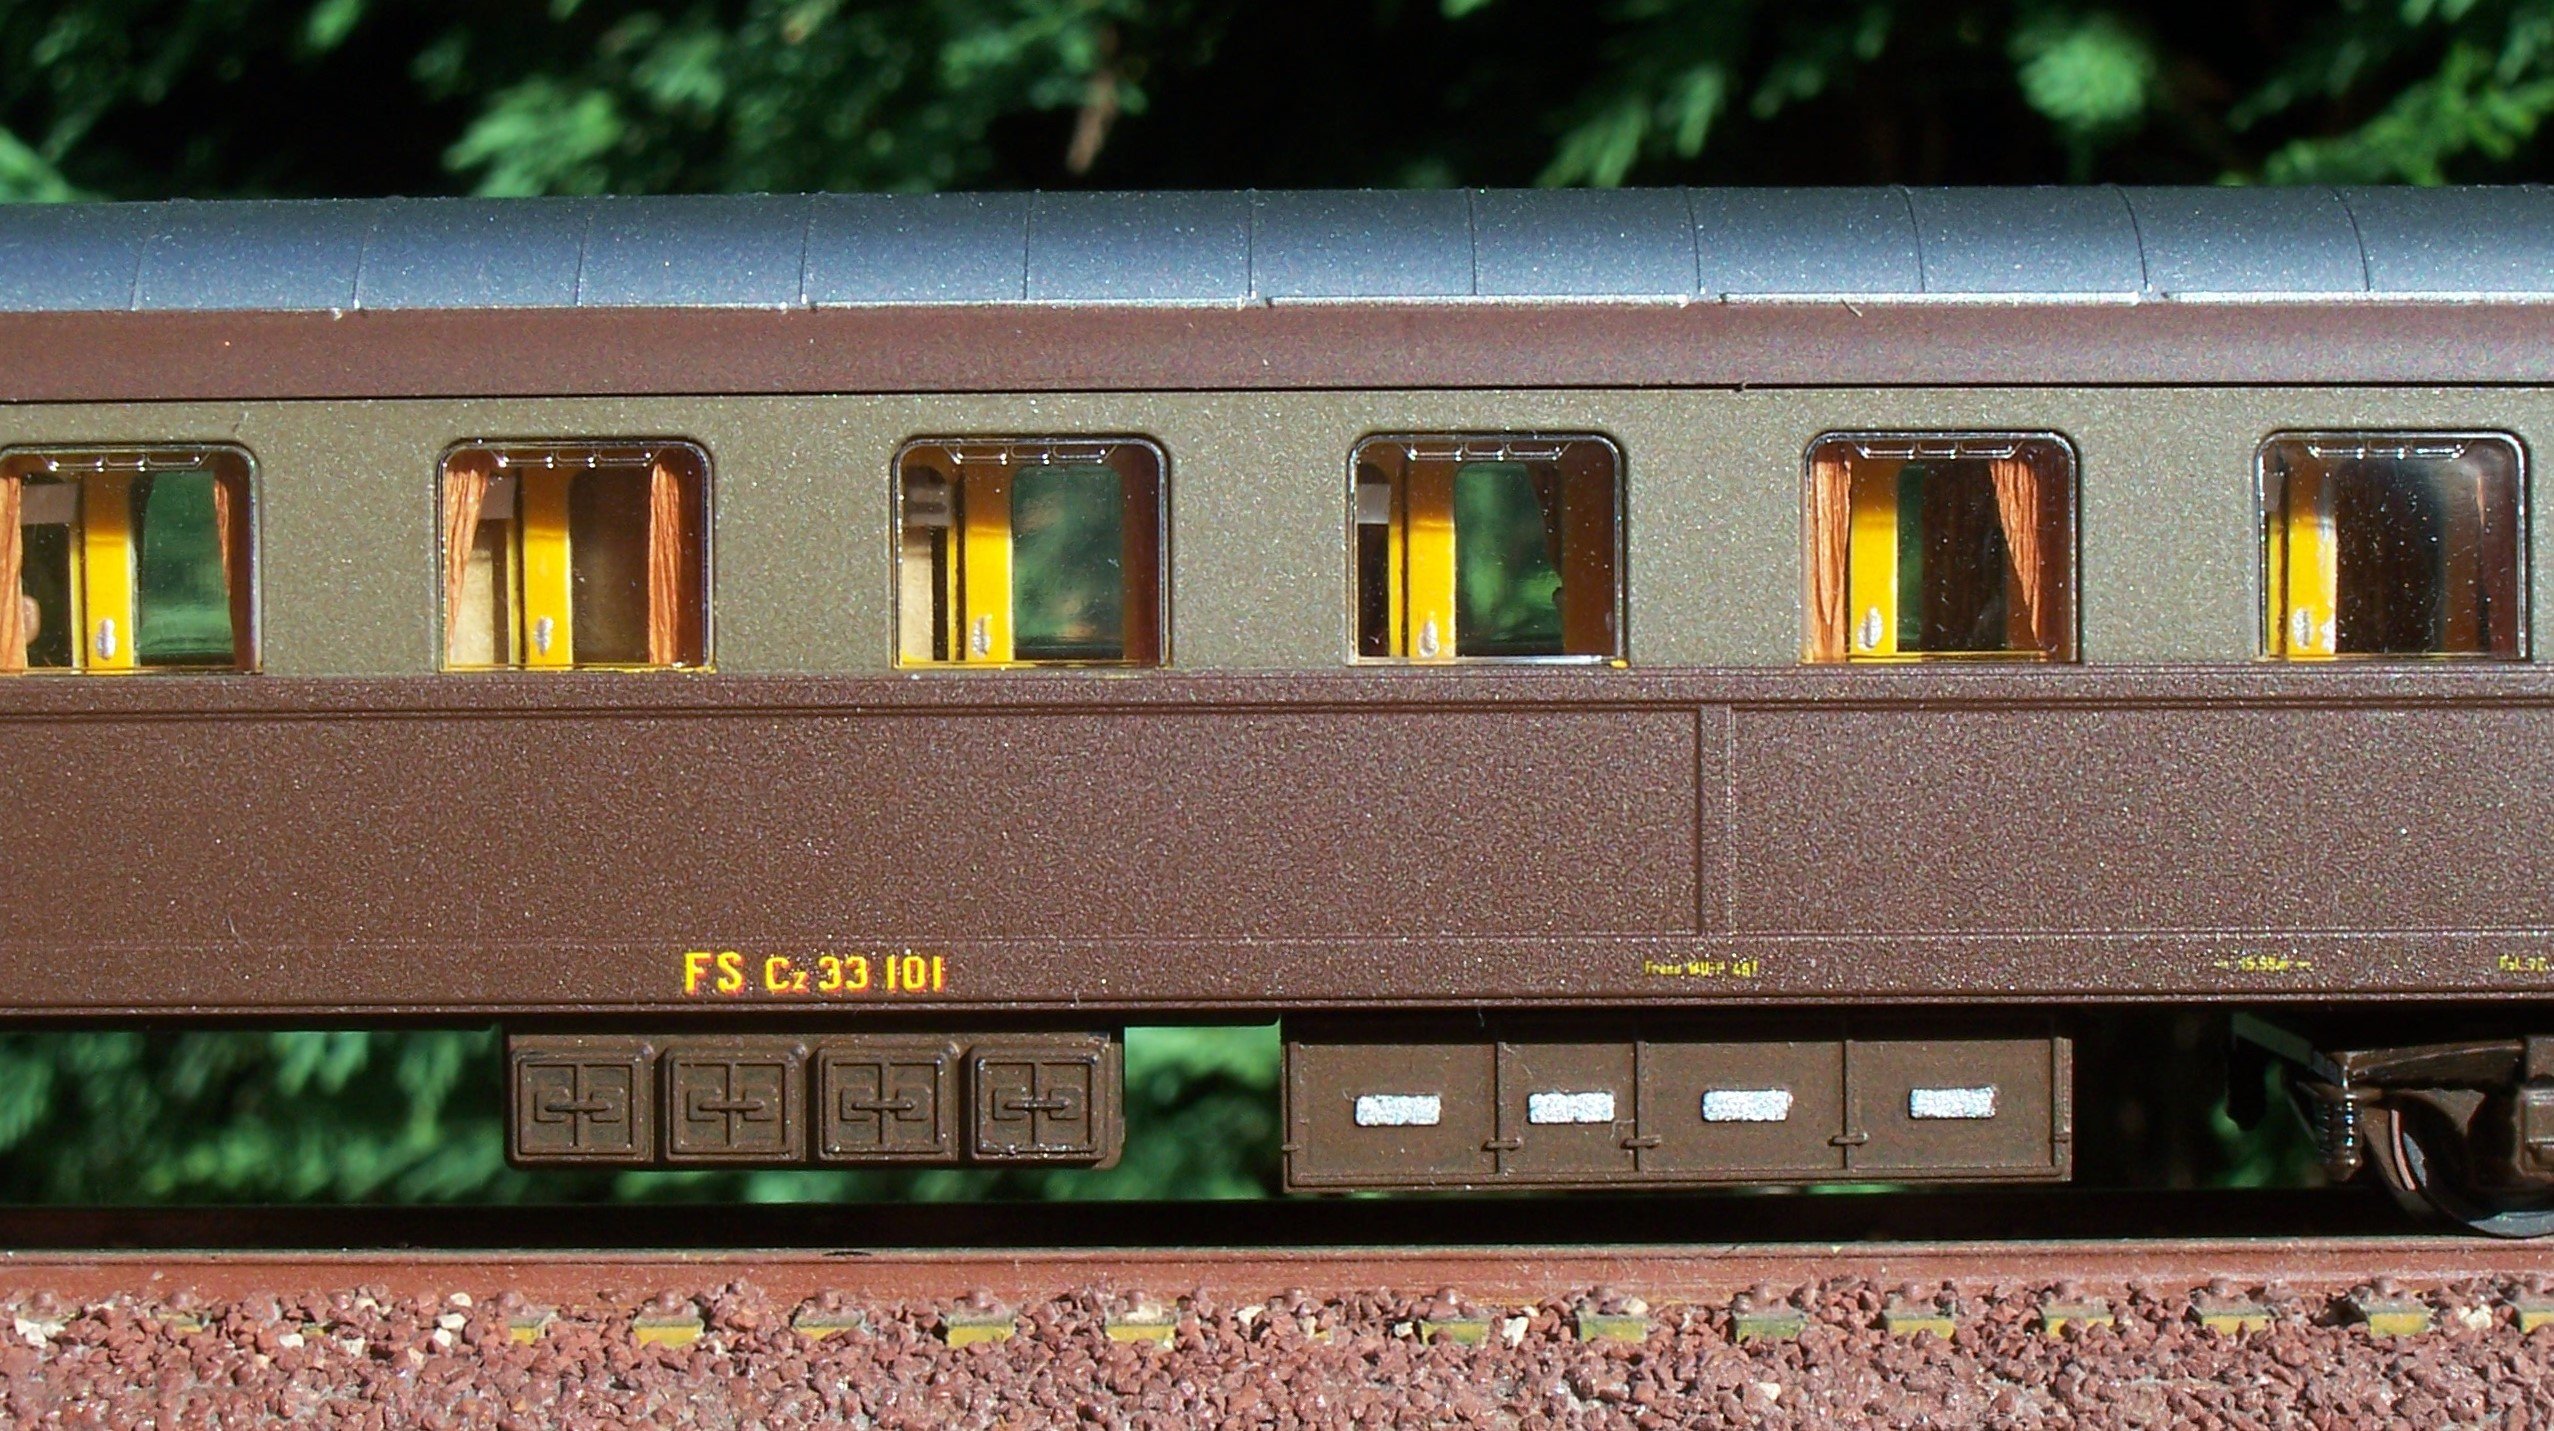
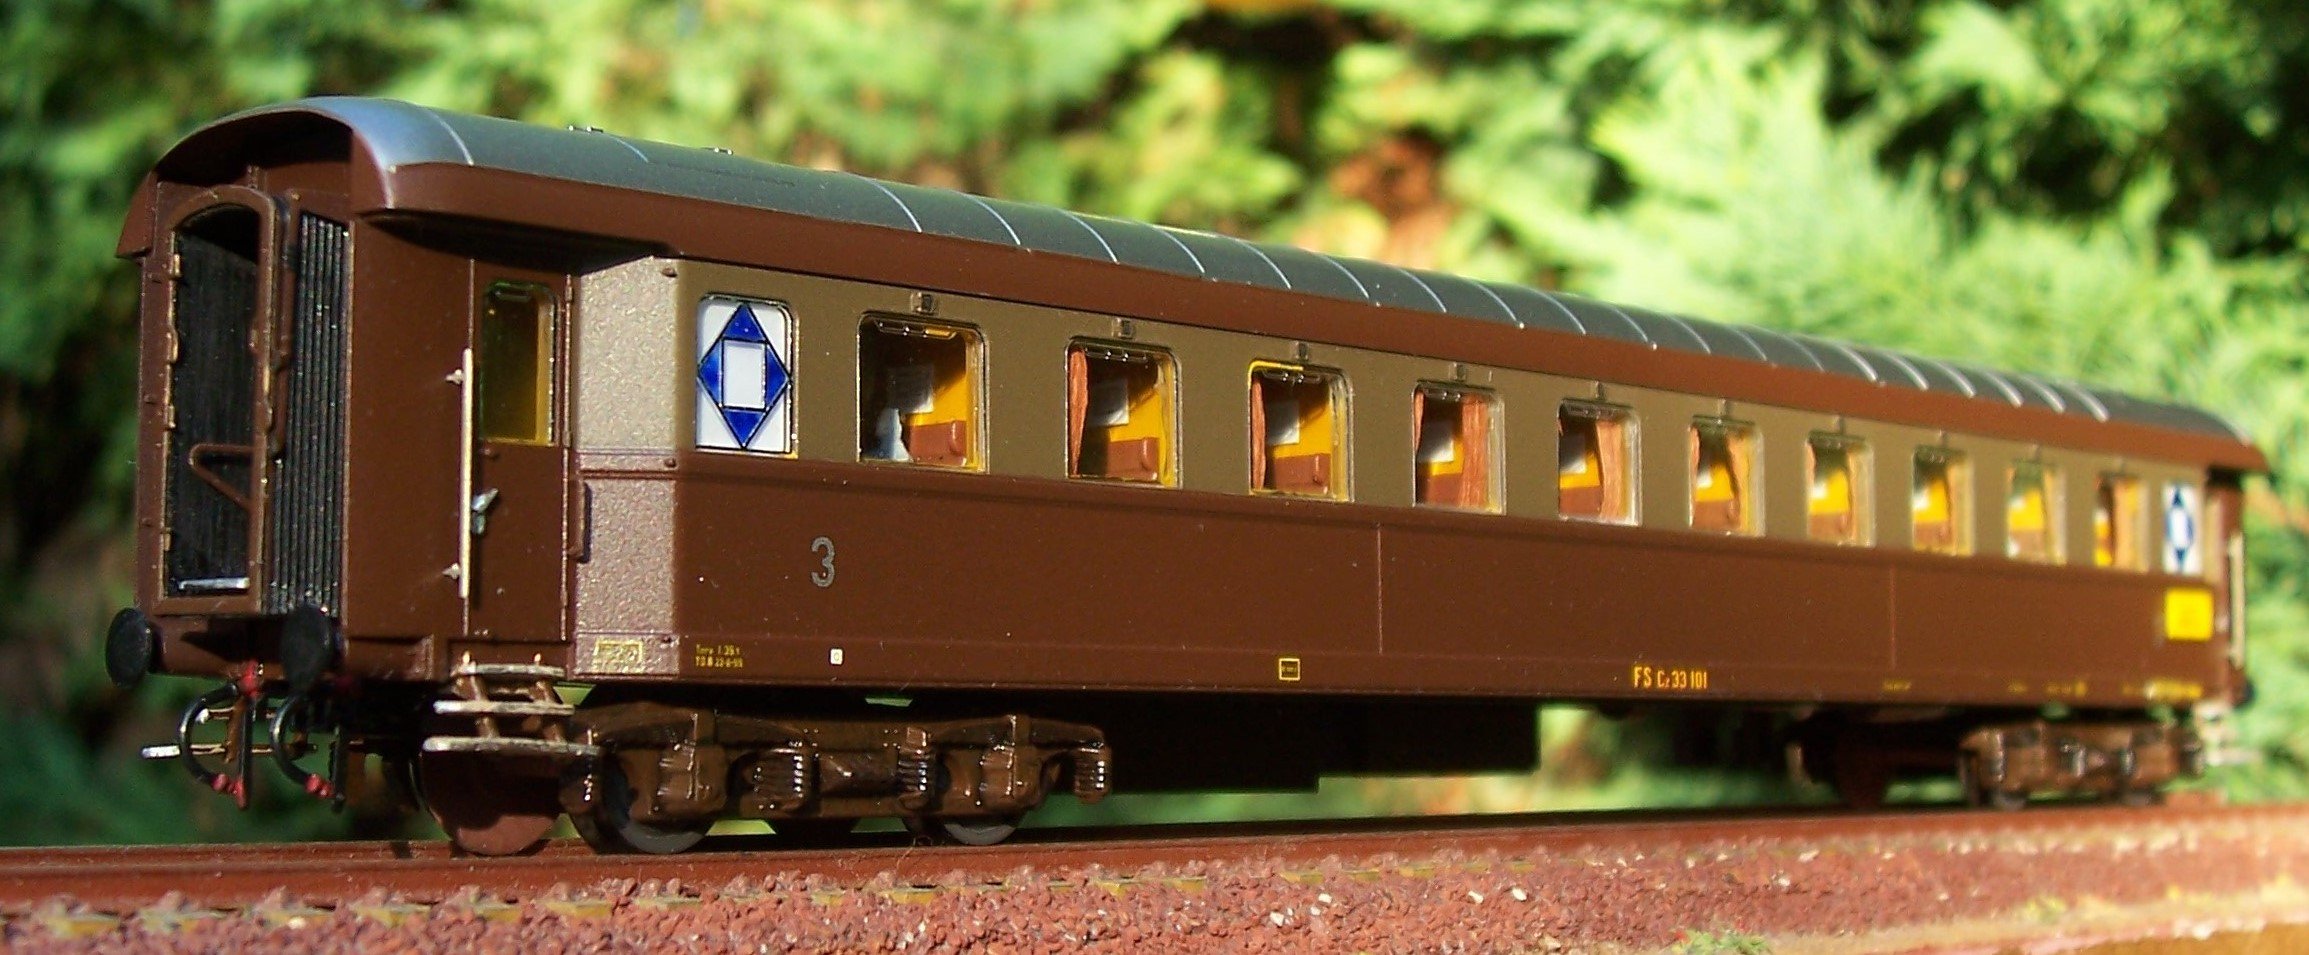
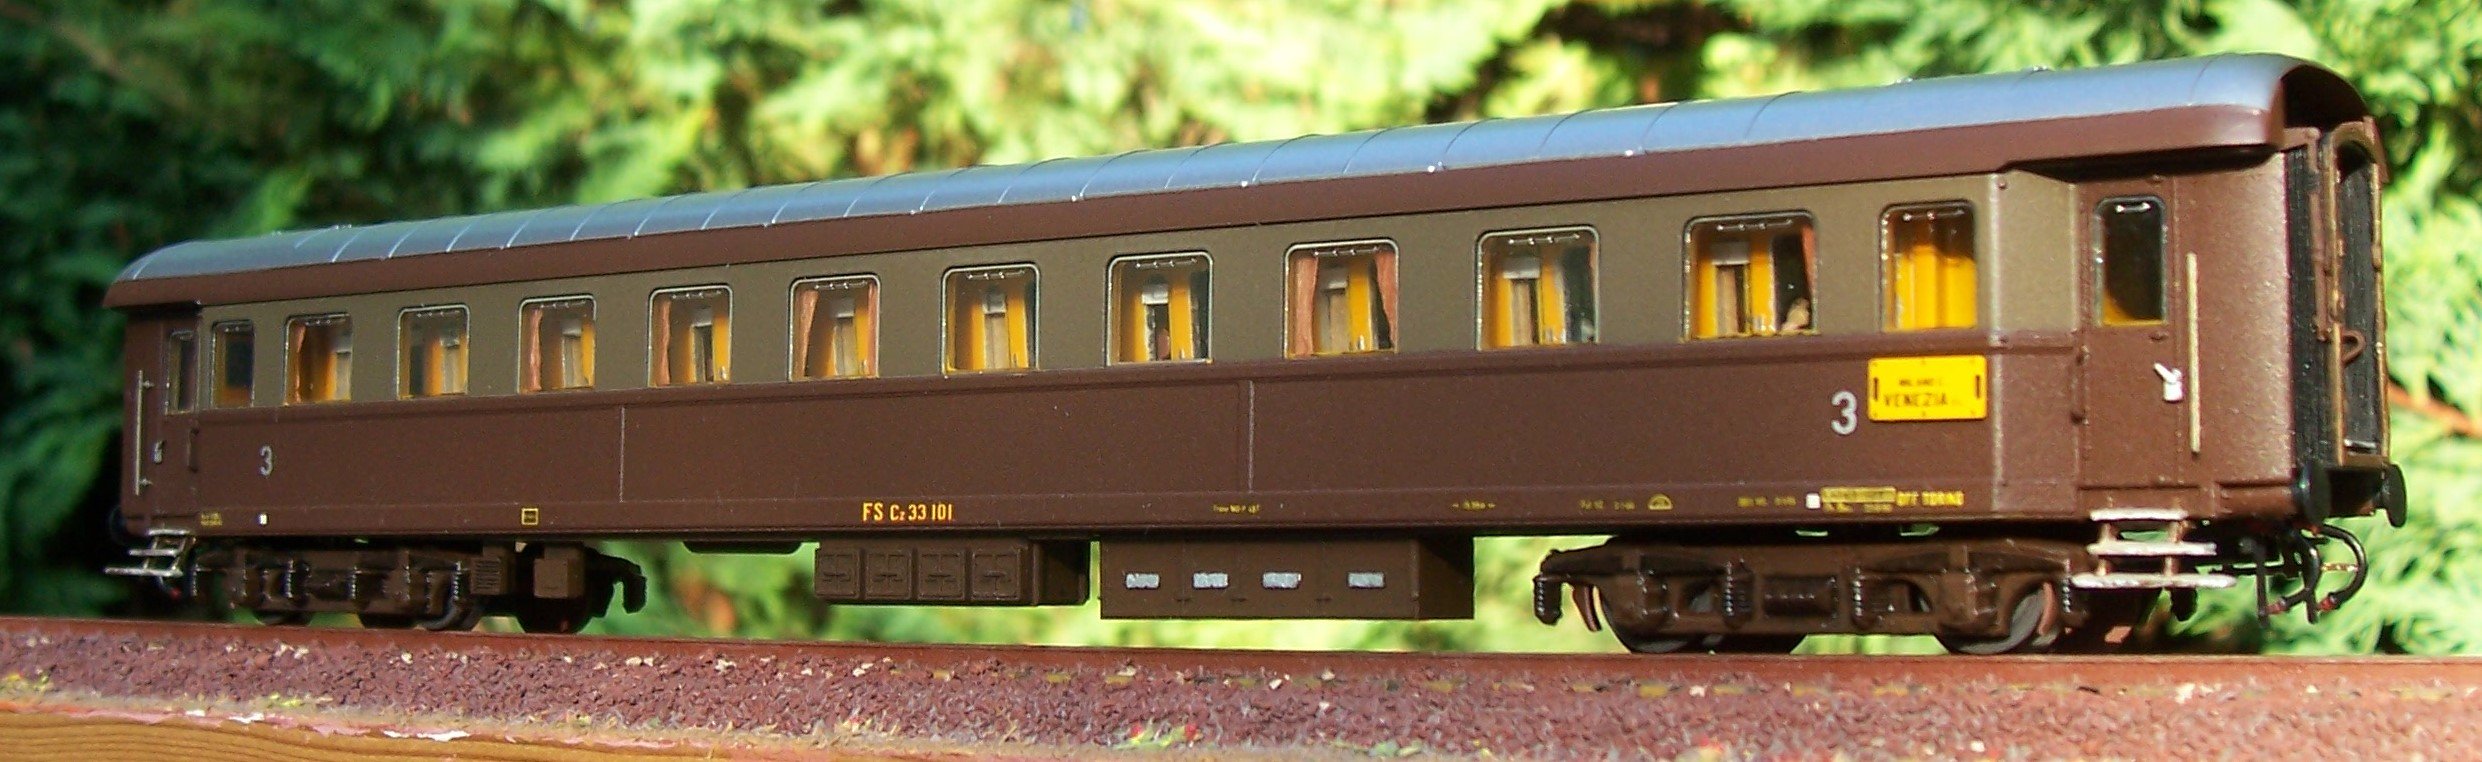
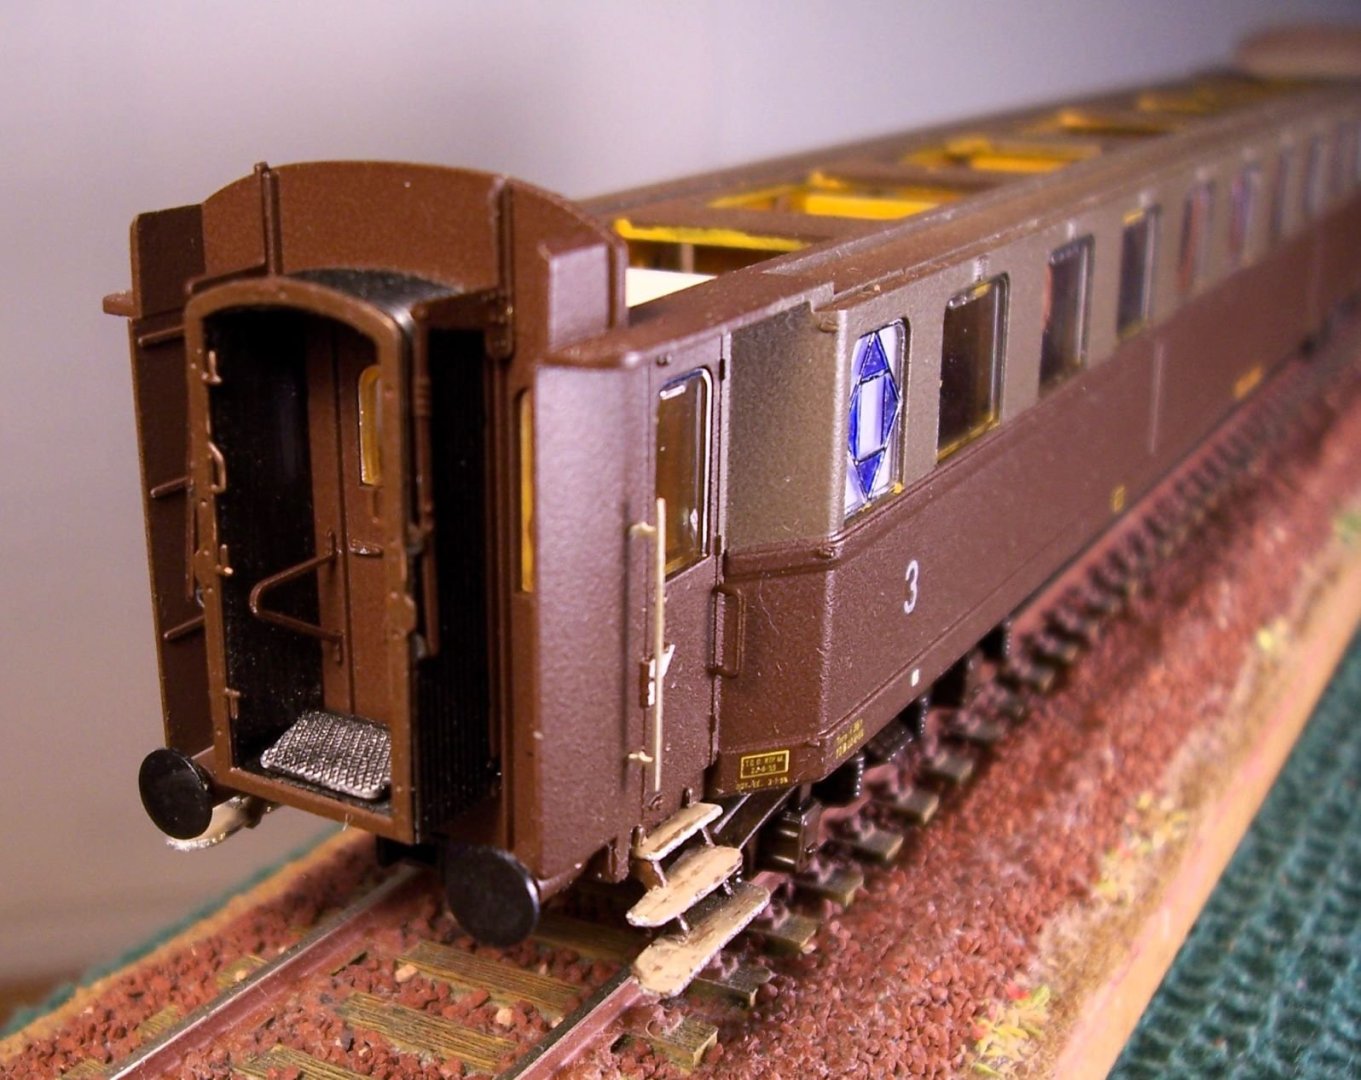
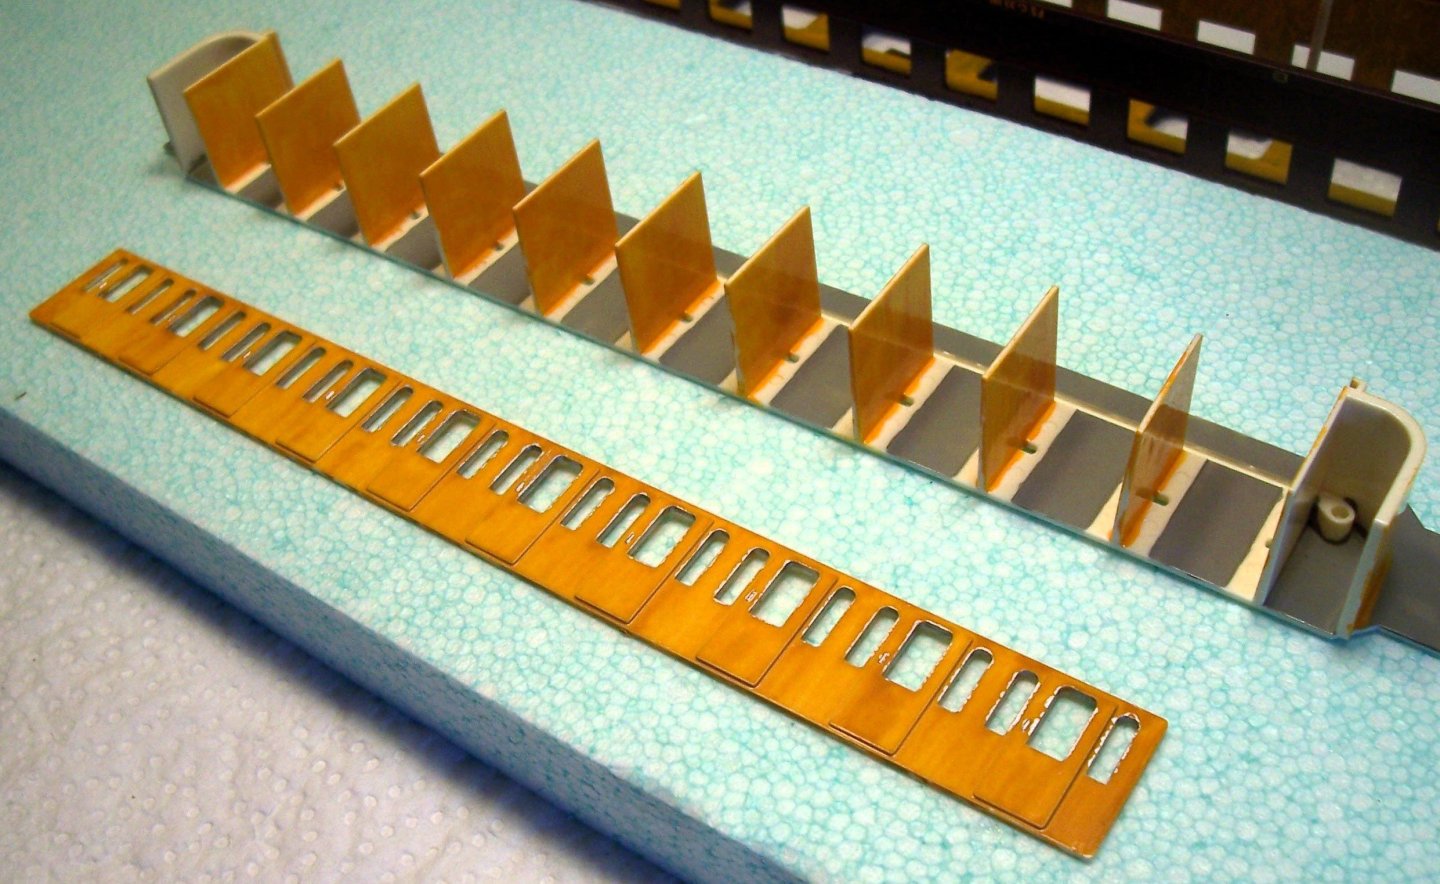
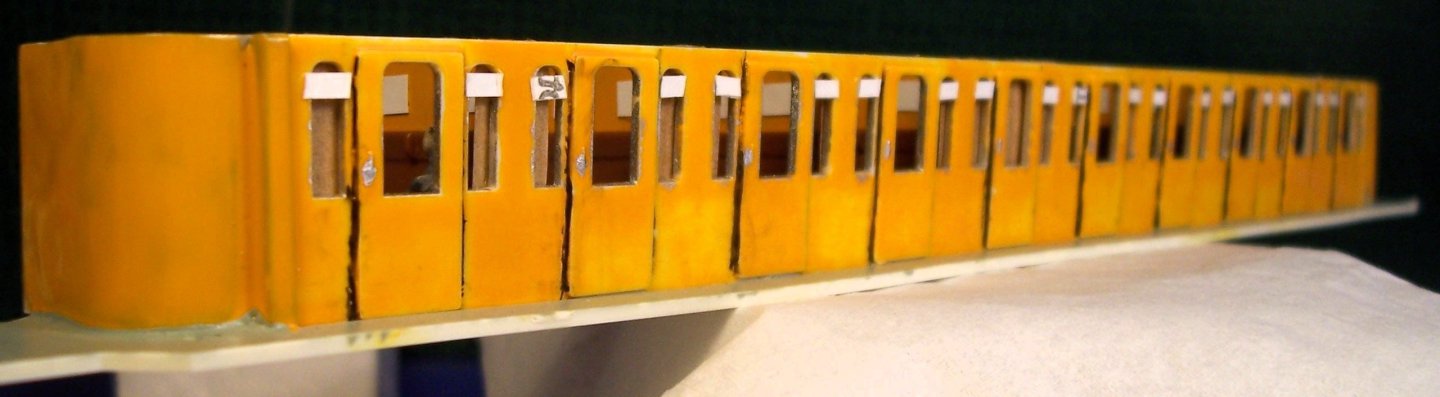
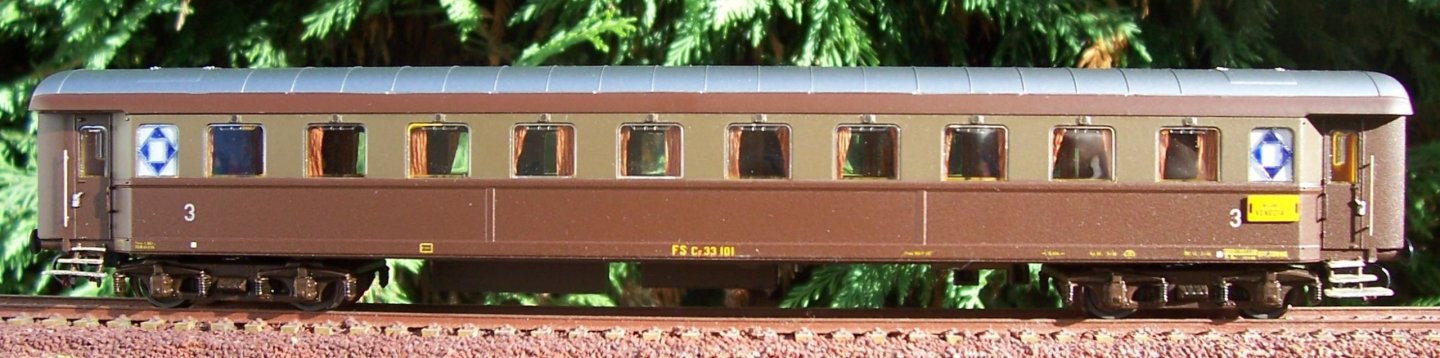
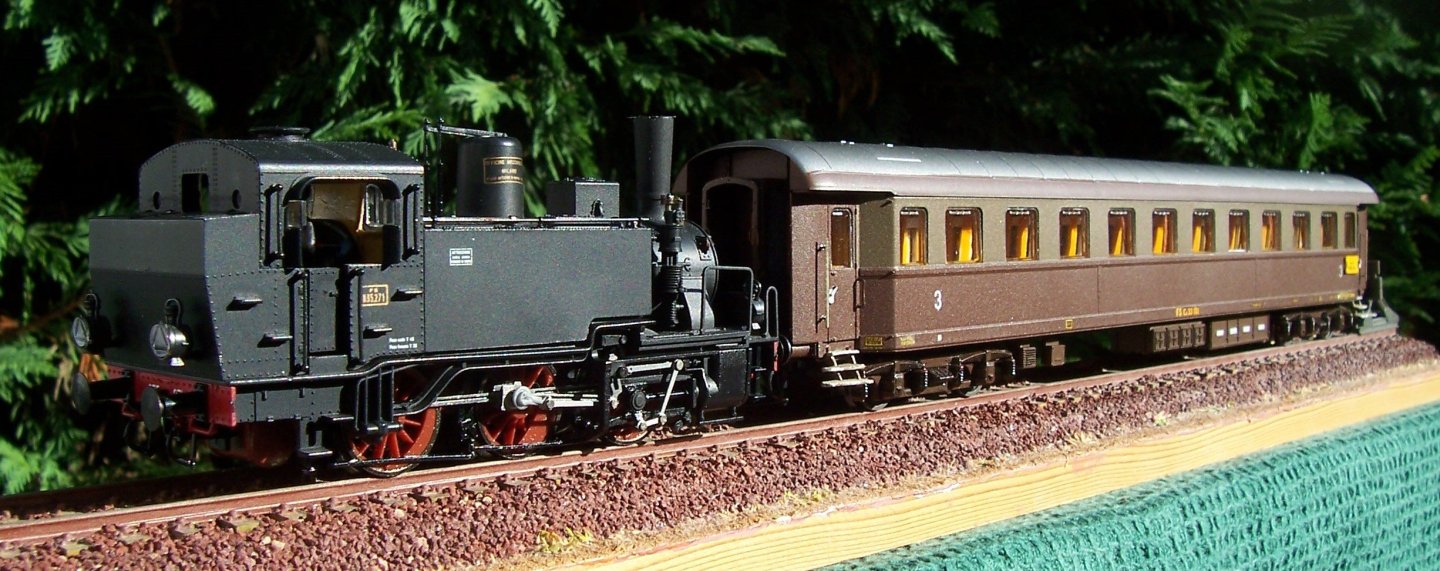
Dear modeling friends, I post below pictures of the construction of a carriage of the Italian State Railways: Railway carriage Type 1946, 3rd class - brown isabella, Scale H0 (1/87) Since I have no knowledge of technical railway terms in English, I cannot describe the step-by-step work, but the pictures should be sufficient. A description in Italian can be found here . Below are pictures of the carriage in its wholety: The coach pulled by a shunting locomotive: Coming soon, some more photos with further details. Rodolfo


- 9 replies
-
- 10
-
-
-
Thank you Steven, Johnny and Bob, For Steven: maybe starting right away with a locomotive as the first model was a challenging choice, a wagon or a railway carriage would have been easier to start with. I will now follow your advice to post some photos in the “Non-shipbuilding” section of MSW; this is an anticipation: A fond farewell to all of you ship modelers, I hope to return soon with a new shipyard! Rodolfo
-
Many thanks, Steven. The scale of the railway coach is H0 (1/87) You're right, I could put up these pictures in the "Non-Ship categorised builds...after sixty-five years I've tons of material...
3.JPG.592db57ba737115b938028c85b1f2b8f.JPG)
.JPG.8d830957dbc83b28efccfa08e2f78245.JPG)
.JPG.4e2f89592066440fc1df91623fbfa78f.JPG)
red.JPG.97eecd340314bdcf6d842c4796d97681.JPG)
red.JPG.2e5778b28d1bdf755b3cce54f98fb3c2.JPG)