HOLIDAY DONATION DRIVE - SUPPORT MSW - DO YOUR PART TO KEEP THIS GREAT FORUM GOING! (Only 13 donations so far - C'mon guys!)
×


drumgerry
-
Posts
96 -
Joined
-
Last visited
Content Type
Profiles
Forums
Gallery
Events
Everything posted by drumgerry
-
I'm just finding my feet and learning what's what Chuck so seeing those pics clarifies laying out the hull really well for me. I did buy artists/pin striping tape from ebay and I tried to use it in the layout but it wasn't sticky enough. I managed after a fashion with it to lay out a couple of planking bands but no doubt with a bunch of mistakes. Like Spyglass says this is the first planking layer of a double planked hull so none of what I'm doing just now will actually be seen. I'm treating it as a learning exercise though and I really appreciate any and all help that people such as yourself and the others on my build log have given. I think I might have a go at laying out the hull as in your pics for the second planking with threads. Did I read on one of the planking tutorials a little dab of hot melt glue at a couple of points is used to secure the threads? The whole garboard area is still pretty much a mystery to me Spyglass. Over the course of the next 10 or so ship models I'm hoping it becomes clearer! Cheers, Gerry
-
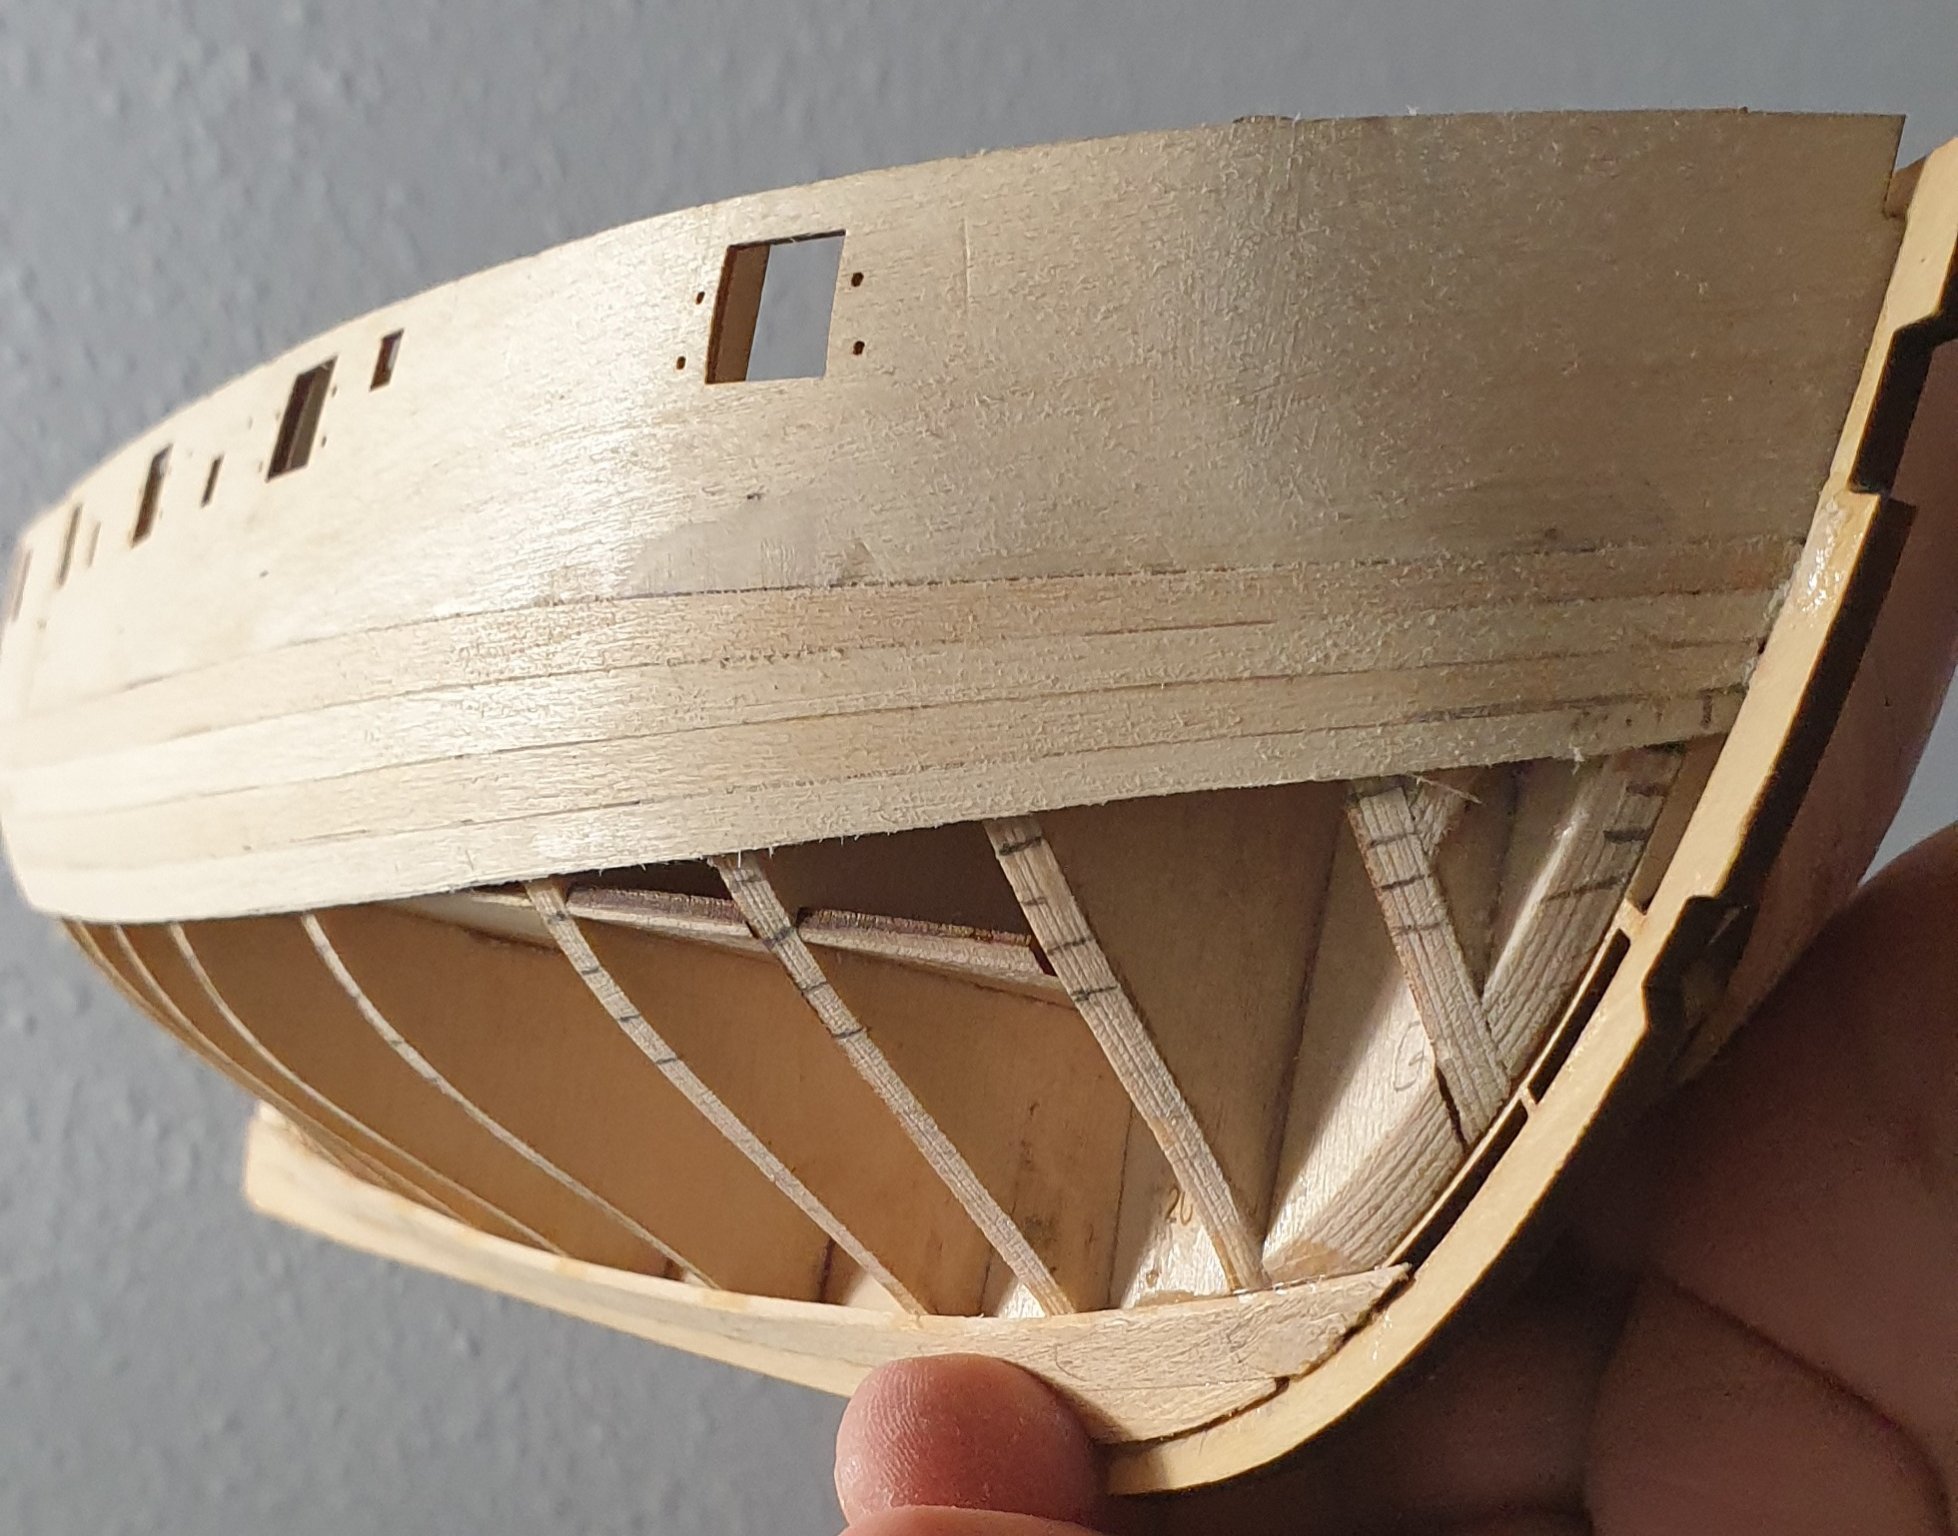
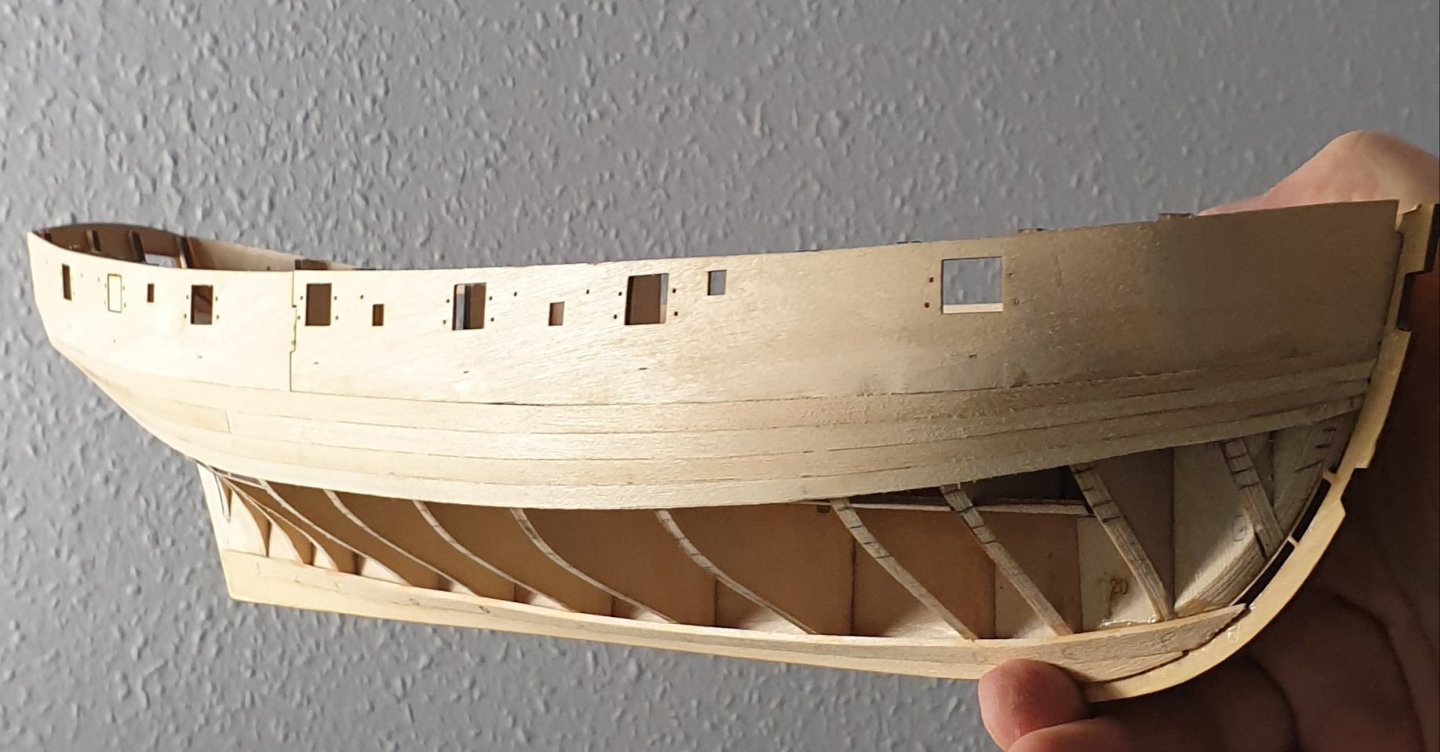
Not to sound corny but using your skills to build something beautiful is music of a different kind. I think you're right Glenn about the taper at the stern. I tapered to 2.5mm from the full width plank of 5mm and I think, as I begin to see how large is the space at the stern that I have to fill, it would have been better to take those planks to 3.5mm or 4mm. But that's information I can take into the second planking so I've learned something from doing it. I thought about the planks at the bottom and decided to leave as is. I just know I'd have made a mess and been unhappy with the outcome. Right now I'm turning my mind inside out trying to come up with a way to plank the stern area. I've remade my tick strips and plank templates and I'll plank down the sides a bit more then re-assess. No matter what the space will have to be filled - elegantly or not doesn't matter. I do though want to maximise what I learn from the first planking so that I can make as good a job as poss of the second layer. I'll need to go off and read your Cheerful build for some more info I think. Thanks again to all Gerry
-
If I make a mess of it Spyglass I'll know who to blame! Just joking!
-
It's looking great Sjors! Hope mine looks as good at that stage. Cheers, Gerry
- 164 replies
-
- 3
-

-
- vanguard models
- flirt
- (and 1 more)
-
Just commented on your thread Spyglass. These things are sent to try us. It rises a bit high at the bow? Ok....I could make a pig's ear trimming it "on model" perhaps. Or remove it altogether. Hmmmm......could I get away with it do you think as is? Cheers, Gerry
-
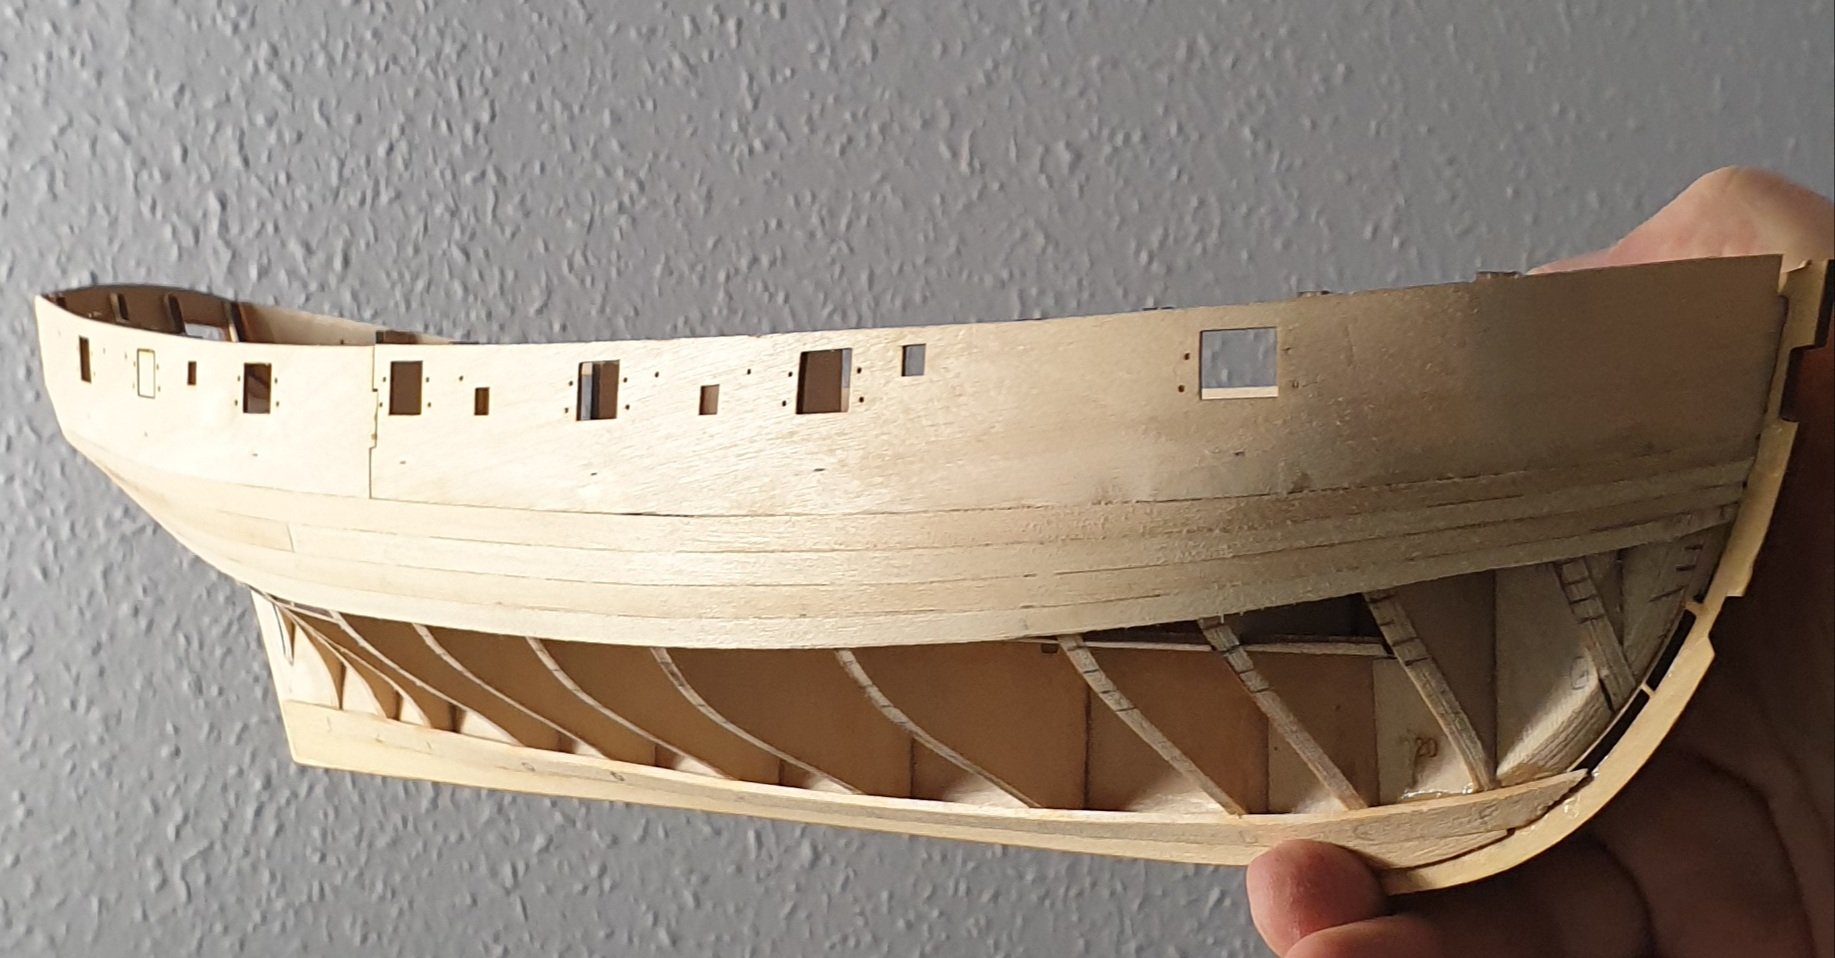
Again guys thanks for the words of encouragement - really appreciated. Yep Spyglass I'm going to try to make a gradual fade into the stem with the first planking and keel - hopefully it'll work out. Glenn - I know you're just pulling my leg a wee bit but I hope you don't think that I think I'm all that because of the guitar building thing. The truth is I'm in awe of the skills displayed on the forum. The ingenuity, the detail - truly inspiring. I don't think instrument building would trouble a lot of the people on here if they were so inclined. And yep the bending iron is from that arena - seems silly for me not to use it. It has temp control and I'm used to it like you say. Edge bending is ok with it but you need to apply the heat at the back edge of the plank as the wood fibres get compressed and if you bent it across it's width a gap would result. The heat transfers so it works out. My original templates are not giving me a perfect fit 7 or so planks down so new templates required I think. One of the good things about the bending iron is you can easily adjust the curves up or down or lengthwise at any point. Worrying about how I'm going to cope with planking the lower hull area. After this band of planking I'm going to be left with a gap of about 6 planks width at the middle bulkheads but at the stern area the gap will be about 7-8 planks width. I'm thinking stealers will be required. At the bow I might have to taper the planks down too much so I'm thinking a drop plank there? More new techniques for me to learn woohoo! Cheers, Gerry
-
Thanks Sjors and Bob! We'll see if you're still saying that when I finish the planking hehe! Cheers, Gerry
-
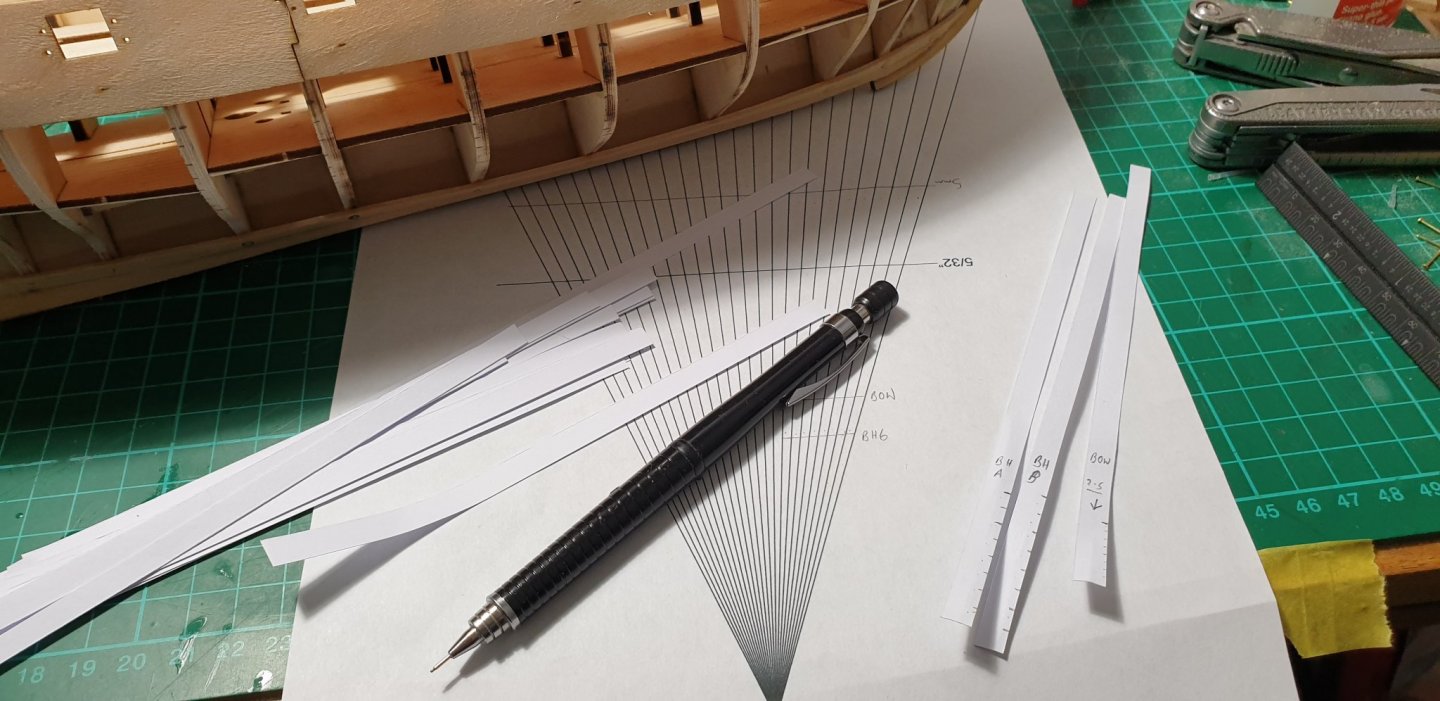
Haha Edward. Yes it does everything from guitar sides to model ship planks! Actually marking out the between bulkhead distance wasn't so difficult after all. I made a masking tape template of the plank shape I needed with the bulkheads all marked on it - used the tick strips to mark the size needed at the various bulkheads directly on to the plank. One template for port and one for starboard although I'm going to make new ones for the garboard up to the place where I finish this band of planking. Not sure if that'll work in the same way as the stern area is a more complex shape. - sort of seeing how it pans out as I go! I'm also bevelling the top edge of each plank where it fits to the plank above and I'm getting a good fit between them - I only cottoned on to this a few planks in so the fit is getting better the further down the bulkhead I'm getting. In the areas in the middle bulkheads I'm only sanding the inside top corner to get a good fit between planks - this is a technique transferred directly over from musical instrument building (specifically adding binding to instruments). Thanks for the kind words guys - much appreciated. Cheers, Gerry
-
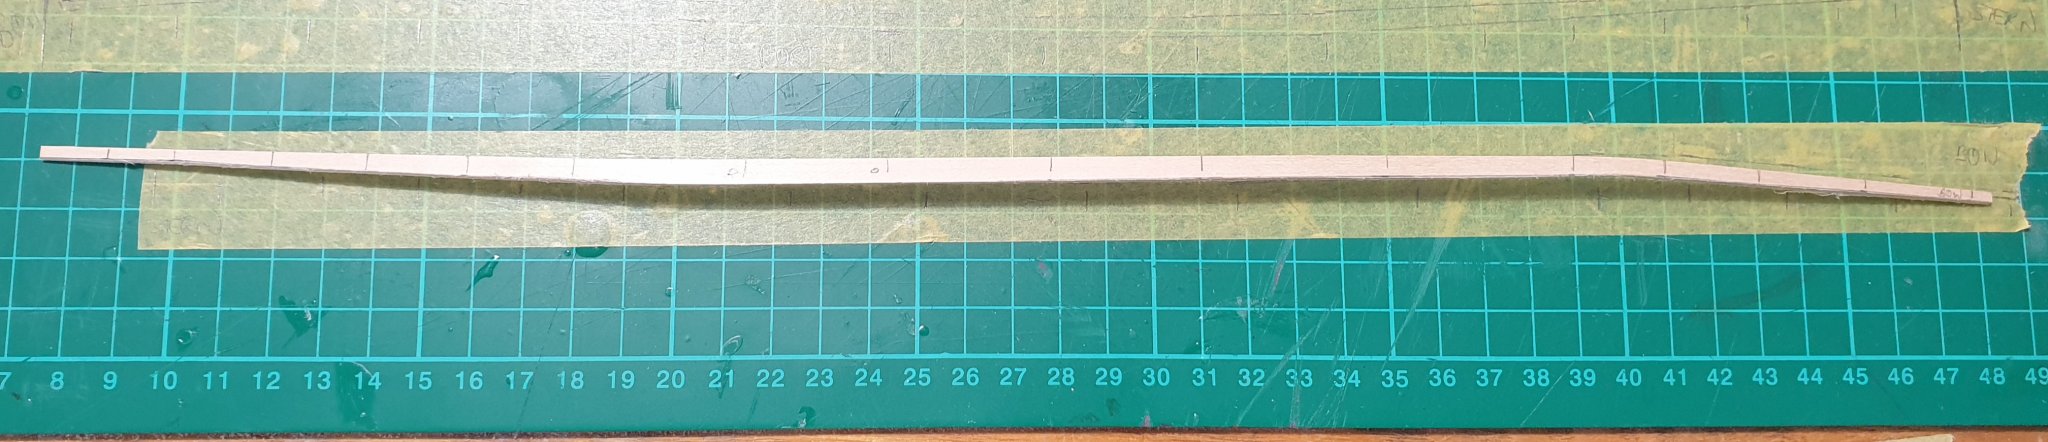
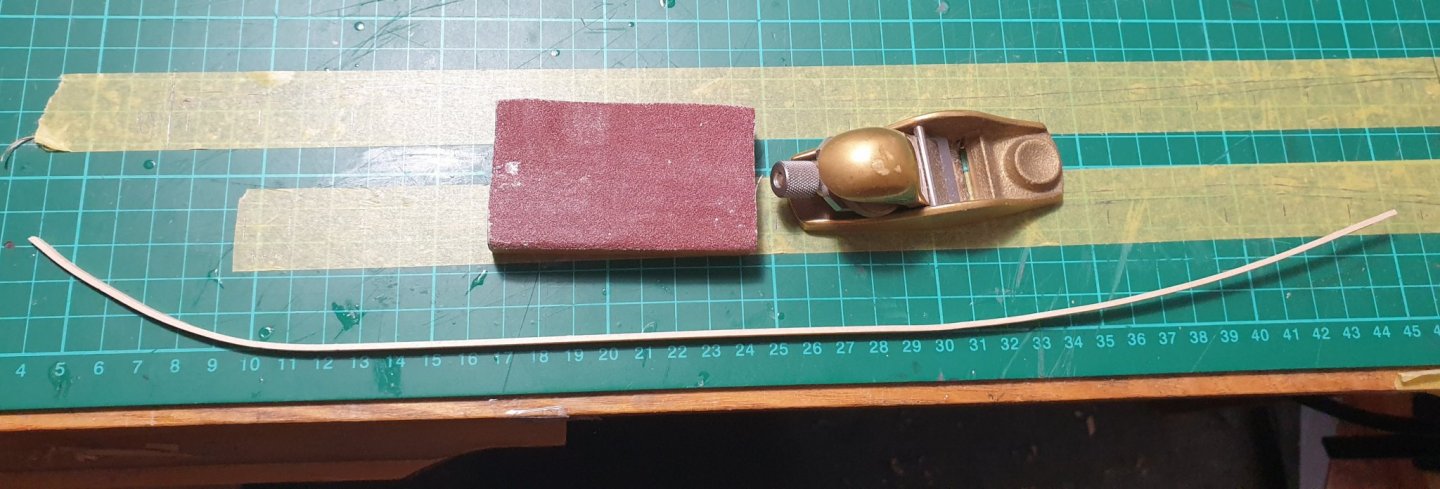
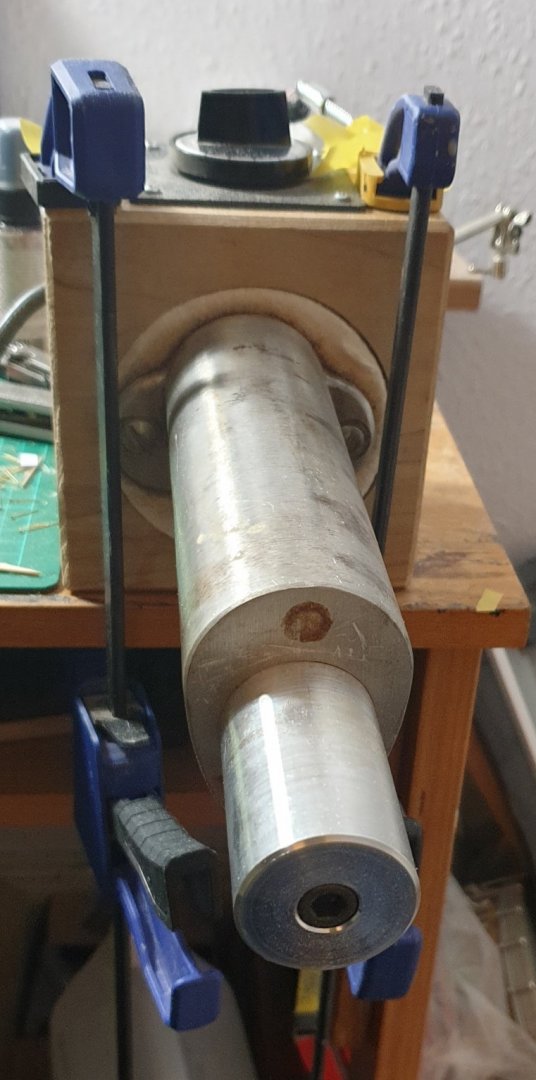
Progress has been sloooowww...never mind. I'm learning something new and for me that's not a quick process. There's also a fair few steps in my version of this method so there's that as well. Anyway here's a few pics from what I've been doing. The big metal beastie is my bending iron! Cheers, Gerry


-
Great to see another Flirt build! My logic in doing a build log for my Flirt was much the same as yours - a reason to keep going, a place to get advice (which I've already had the benefit of). Just hoping I don't embarass myself with the final result!
-
No time like the present Bob! Ps - if anyone has any tips for transferring the tick strip marks from the tick strips/bulkheads to the plank itself I'd be forever grateful. Is it just a question of measuring the distance between bulkheads and marking out the points on the planks? Cheers, Gerry
-
Trying to learn something today. Not necessary for first planking but a good chance to try it out..... Cheers, Gerry
-
I think the CA deterioration thing is a myth perhaps resulting from the purchase of cheap stuff which didn't stand the test of time. I should add that for guitars etc that and gluing frets in are the only jobs I'd use CA for - joints that are under stress like those for braces, the bridge, joints in the neck etc I'd use Titebond original or hide glue. Cheers, Gerry
-
Thanks Glenn. I'm going to use first planking as a chance to practice. I need to figure planking out and this will be a good opportunity to do so. I'm with you on the CA. As I said above I also build musical instruments. One of the common modern techniques (which I use) to glue instrument bindings to guitars etc is to use water thin CA and wick it into the join as you go. Works fine if you're careful and I have instruments coming up on 20 years old done this way which are showing no signs of the CA deteriorating. Instrument bindings (the wooden kind) are typically about 6mm x 1.5mm which is not unlike the planks most kits seem to use!
-
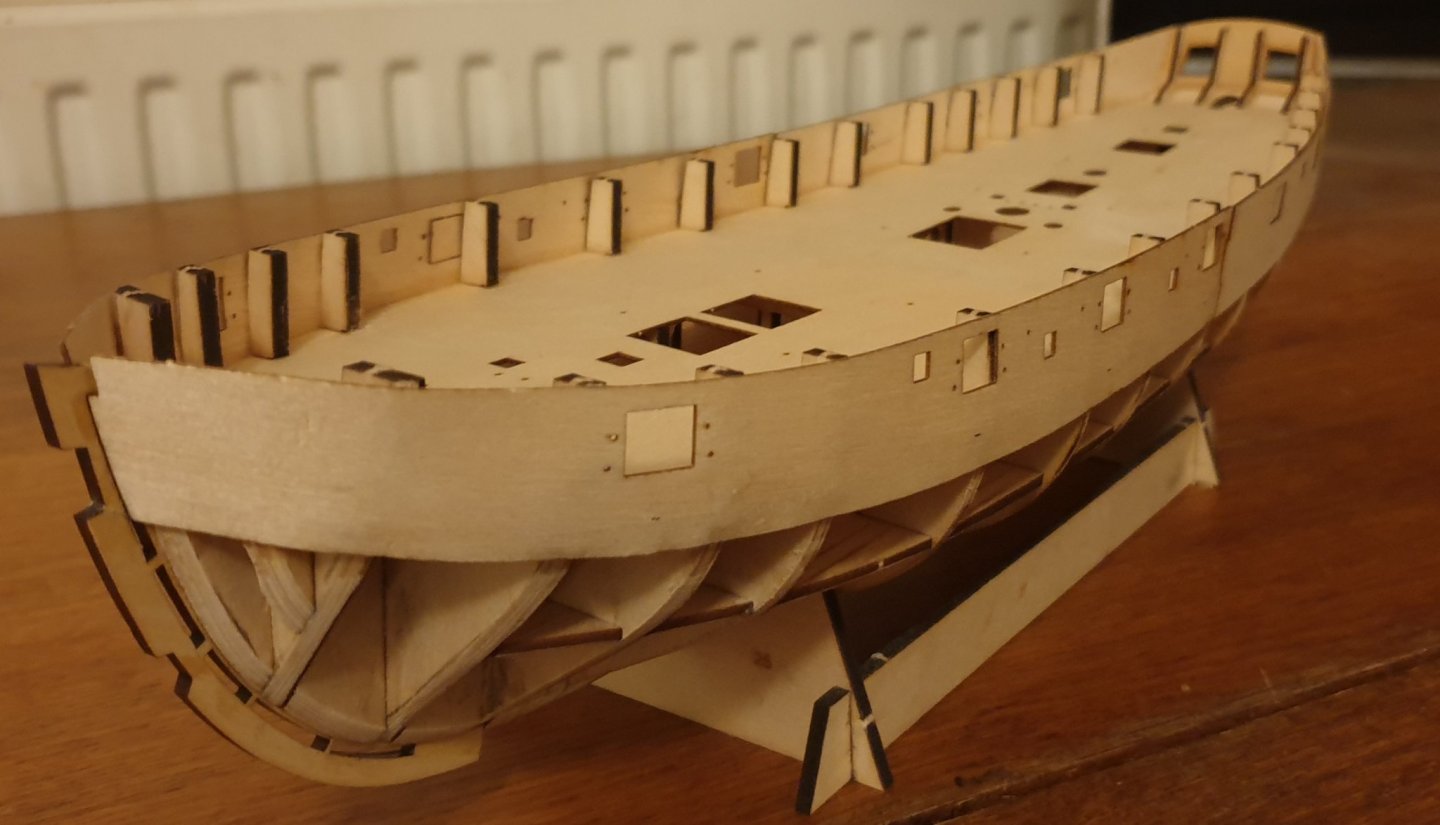
Again great advice gents. I'm beginning to see that I need to be better informed about planking before going at it in earnest. Derek - I have thinned the keel area at the stern down to about 1mm as in the instructions. I think in order for the second planking to give me a total of the 3mm I need in that area (keel thinned to 1mm and two widths of 1mm second planking either side of the keel there) I need to create a blended area where the first planking stops a little short of the stern, the dead wood area and the stern. I've got that clear in my mind at least! Spyglass I've been investigating the nature of stealers and I see you can have blunt ended ones and ones cut into planks above and below - sounds like fun! As it is I've made a bit of progress and have the gun port strips glued on. It was a bit of a faff and they are a little bit wavy at the bow but, even though they're only 0.8mm thick, it's nothing that a bit of sanding can't take care of once the first planking is in place. Cheers, Gerry
-
I'm thinking that I want to try to do the first planking as if it's a single layer hull. Not sure I can pull that off but I feel that I'll learn more doing that and hopefully make the second layer an easier task. I'd be interested to hear what you mean by "fancier spiling" at the stern Spyglass. What sort of options are there apart from stealers? I think I really need to slow down for a bit of study time. Read more about planking and get some proper understanding before ploughing on. Lucky you with your rigged ships etc! I live not far from the Moray coast in NE Scotland but it's all trawlers and yachts here. There is a boat festival at Portsoy every year but I've yet to make it there and it certainly won't be going ahead this year in light of Covid. Cheers, Gerry
-
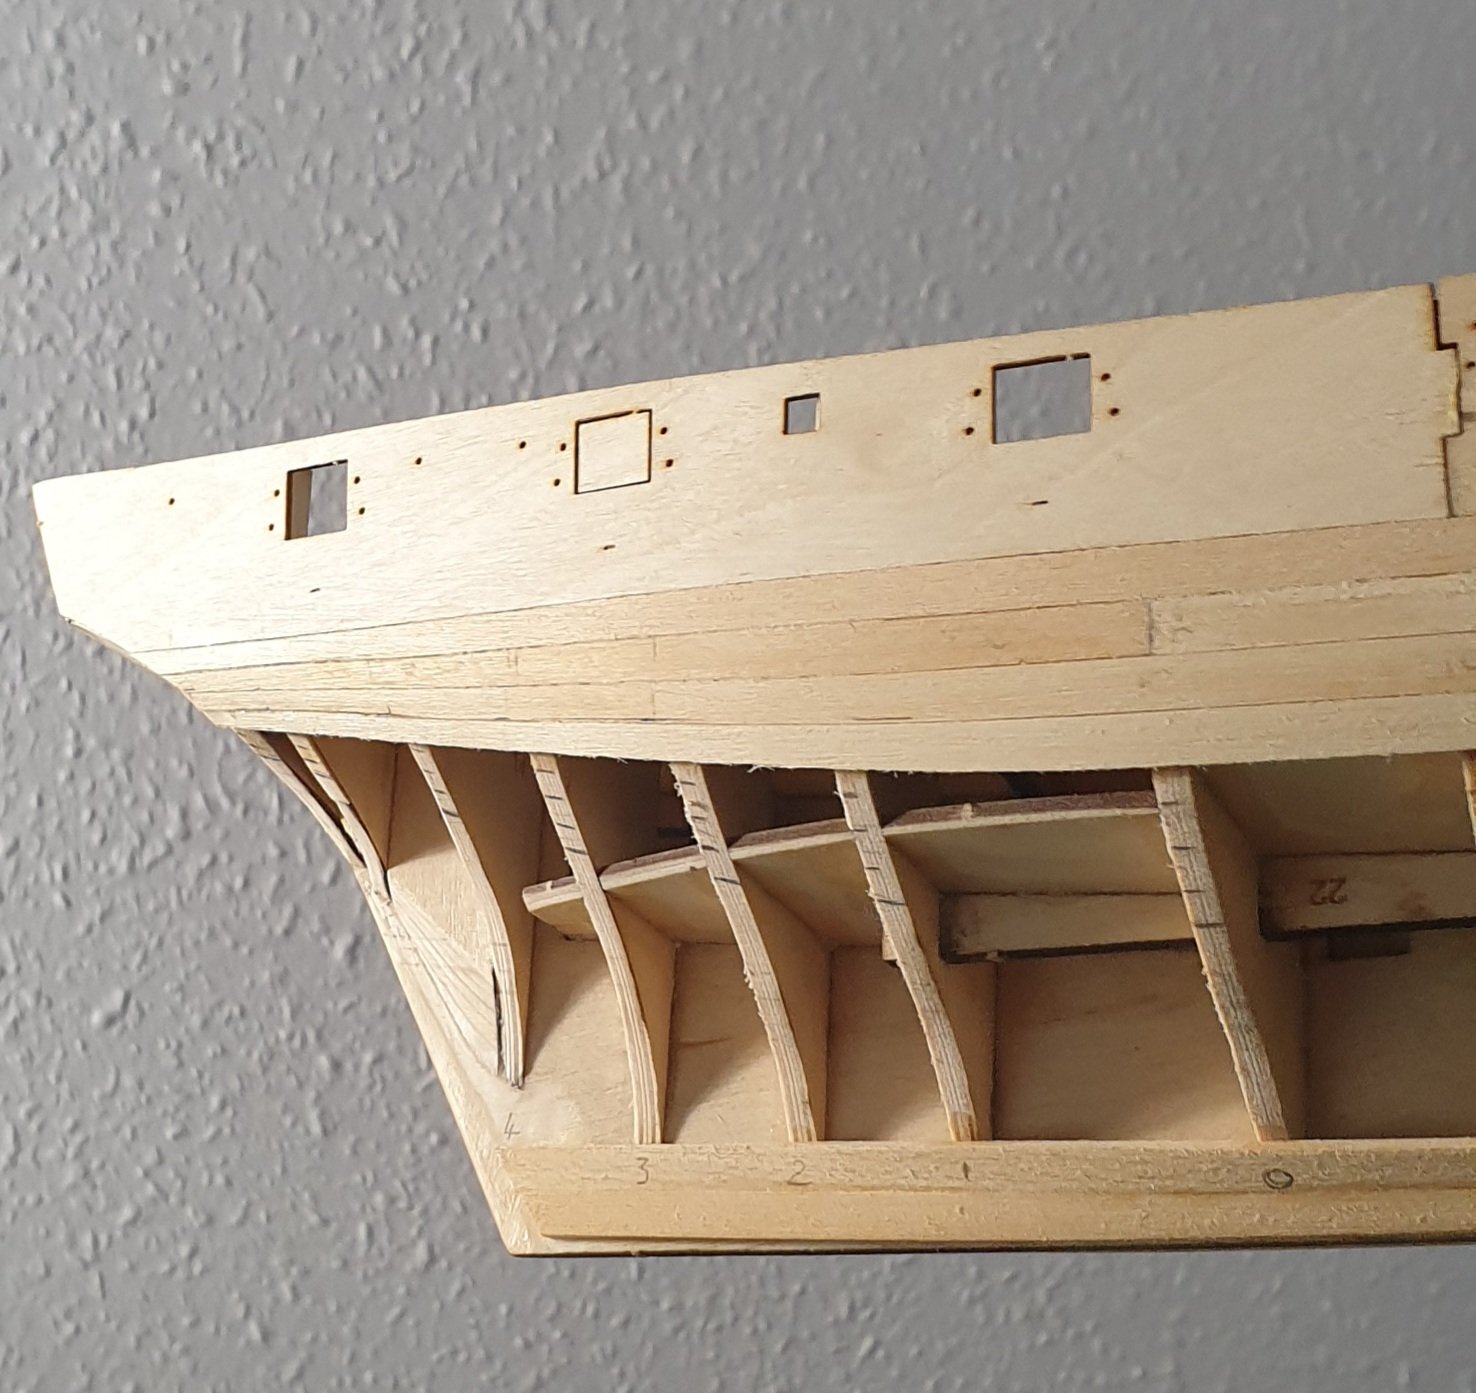
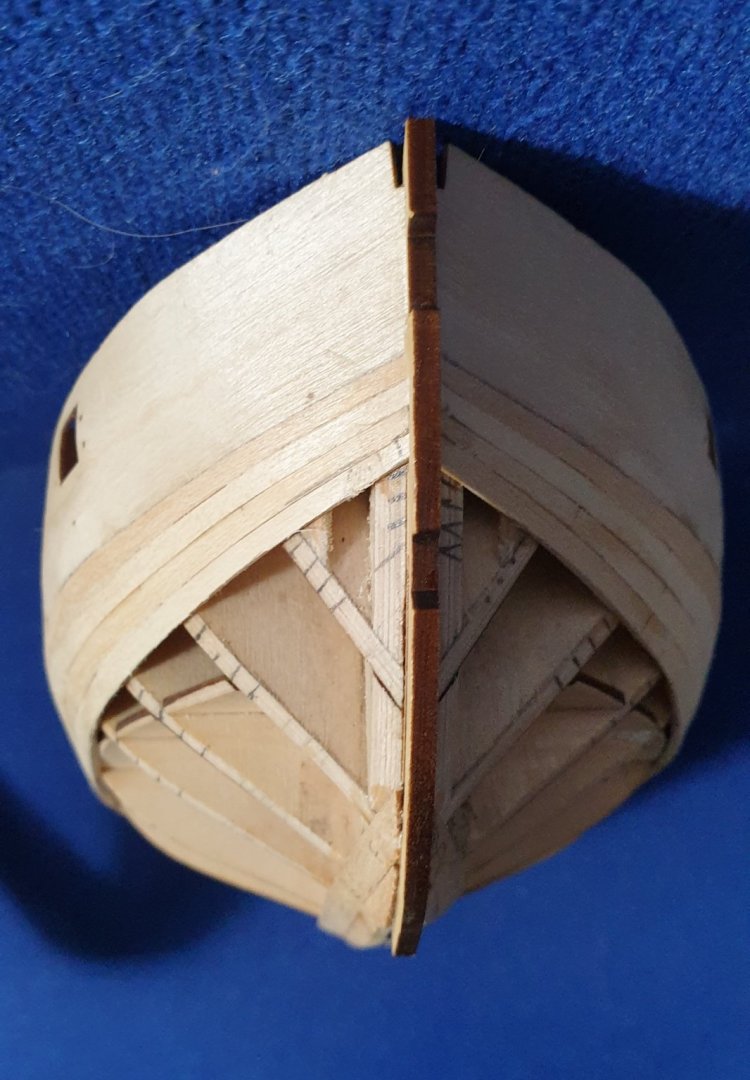
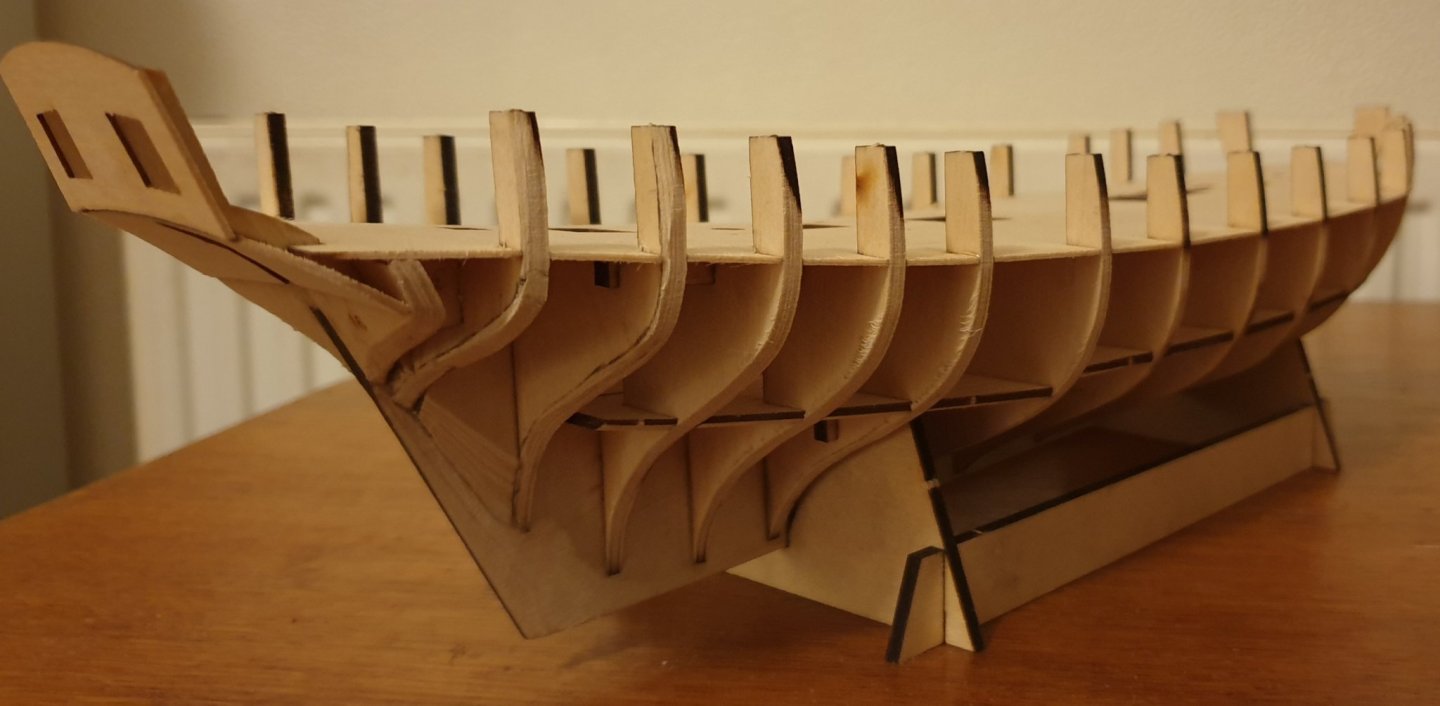
Thanks for taking the time to share that wealth of information guys. I can't tell you how helpful it is. Firstly Spyglass yep I can see that I need to fade the very bottom of the bulkheads into the keel a bit better. Those little bits of laser char still showing there are a giveaway! The garboard - I think I can see what's happening in the pics. There seems to be a long curve at the bow end with the intention of having the plank lie as flat to the keel as possible. At the stern end you both seem to have left an unplanked gap to the bottom of the keel. My reading of this is you're simulating the garboard being wider there and later adding a stealer to fill that gap. Please correct me if I'm totally off course here! My next question is what do you do in that area on second planking when you're trying to avoid stealers? Does Chuck's method of using little strips of paper to get precise tapers for each plank and therefore the same number of planks filling the space at stern and bow take care of this? Cheers, Gerry
-
I think I'm going to try to figure out how to do just that with the first planking Derek. One thing that has me a bit perplexed is the garboard plank (or is strake the correct term?). What shape should it be? Or is a question of just taking a plank that is of even width and bending it to shape?
-
Thanks Spyglass - it does really help to see how things fit together at a slightly advanced stage from where I am. I can see what you mean about the second from last bulkhead.. Maybe I didn't go massively wrong then. As it is I think I'm pretty much done with fairing and that bulkhead got veneers glued on both sides to make up the gap I was seeing. Not really an issue I don't think. Once I start planking I'm sure to discover something else I've done wrong! Cheers, Gerry
-
I didn't notice there were any marks. I have the ply bulkheads rather than the mdf. Am I right in thinking that the marks are a guide as to how much to bevel "off ship"? I added a bevel "off ship" to the forward most and rearward most bulkheads as in the instructions. It worked out fine except for that single bulkhead. It's a bit of a head scratcher as I didn't think I'd taken much off but I guess I must have gone too far with that one.
-
Thanks! Probably as well to get something a bit cheaper if it's likely to get some rough attention from kids😁. You can buy kits of semi-made ukes if you fancy being more adventurous - check out Stewmac for example.
-
I build guitars, mandolins and ukes. Lots of the skills from model ship building are very similar I'm finding. Problem (of my own making!) solving seems to be the main one for me at the moment. There's a few pics of my latest mandolin build on my introduction thread if you're inclined to look James. Cheers, Gerry
-
Thanks James! It helps that I have a fair few scraps of veneer kicking about as I use it in my musical instrument making quite a lot. But it's handy as it's a known thickness and very flexible. Believe it or not that's flamed maple veneer glued on to the bulkhead there!
-
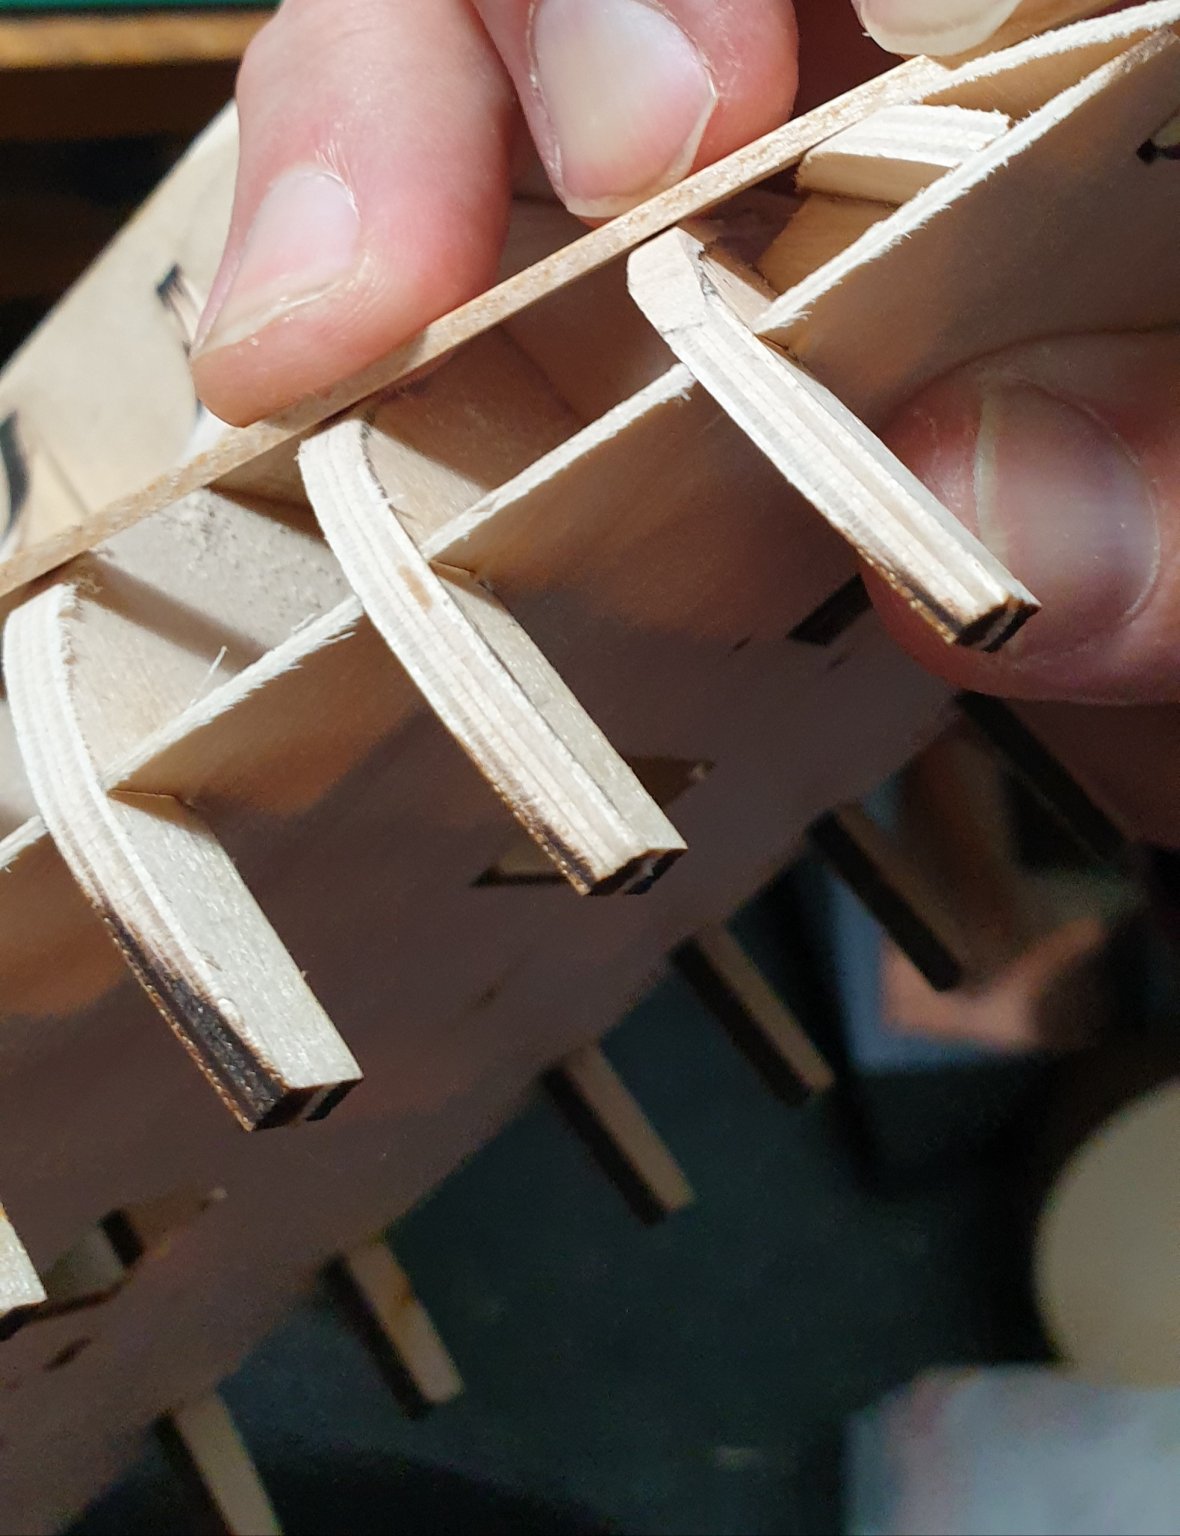
I think it's the same Glenn from what I can tell. At the top it follows the angle of the false deck as it tapers back toward the stern if that makes sense. I think I'm good now though. I did end up adding two layers of veneer (1.2mm in total) and I think that's what I needed to do. I was going to have to take too much off the rearmost bulkhead to close that gap. Another pic.... (apologies for all the intrusive fingers/fingernails in this afternoon's pics!). The gap you can see here closes with light finger pressure - I couldn't close it and take the pic at the same time though!

-
I think if I'm honest it might be down to over zealous pre-bevelling of those bulkheads or at least me putting the wrong angle on to them. Sanding in earnest needs to commence I think and hopefully I'll not ruin things in the process. Thanks for the help guys - much appreciated. Gerry