MORE HANDBOOKS ARE ON THEIR WAY! We will let you know when they get here.
×

PJG
-
Posts
117 -
Joined
-
Last visited
Content Type
Profiles
Forums
Gallery
Events
Everything posted by PJG
-
 Thanks Chuck, Mike...the positive feedback is appreciated!
 -
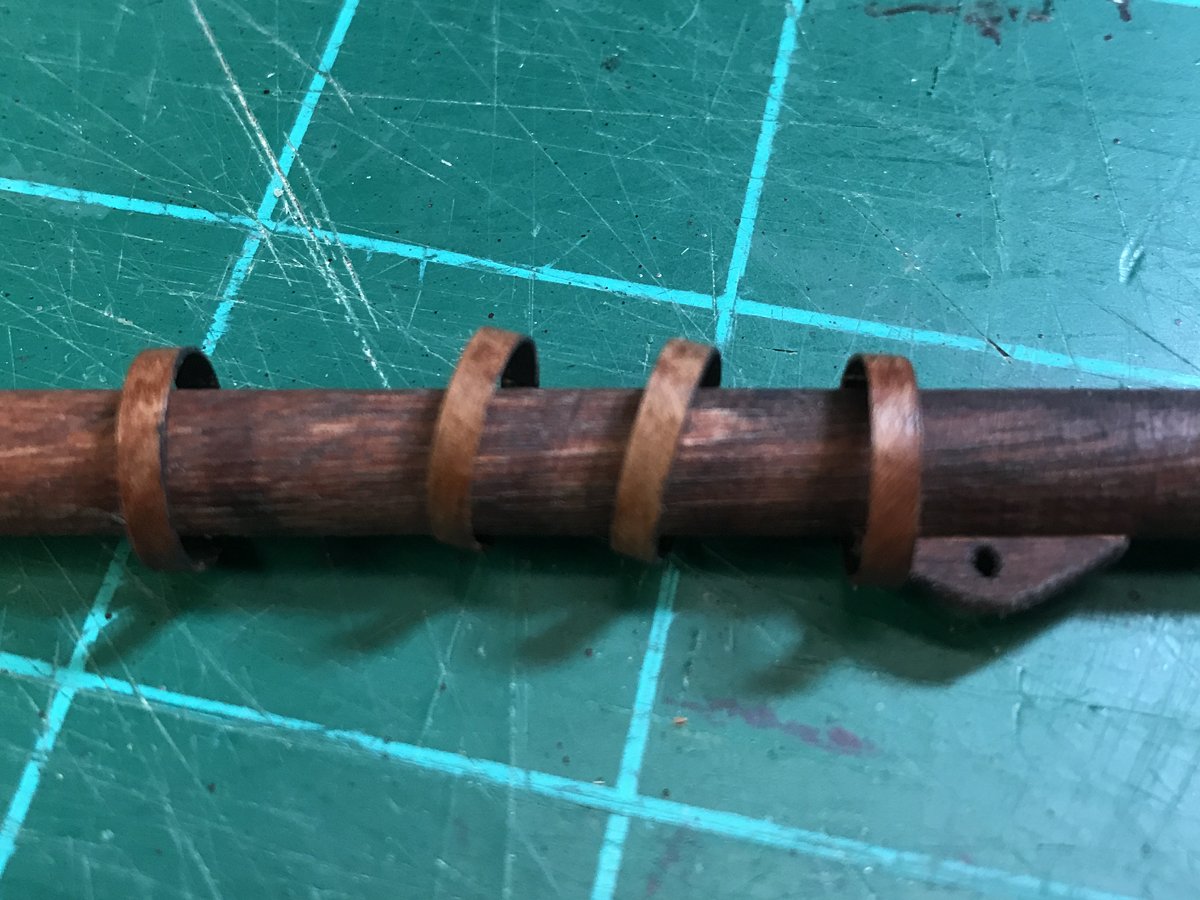
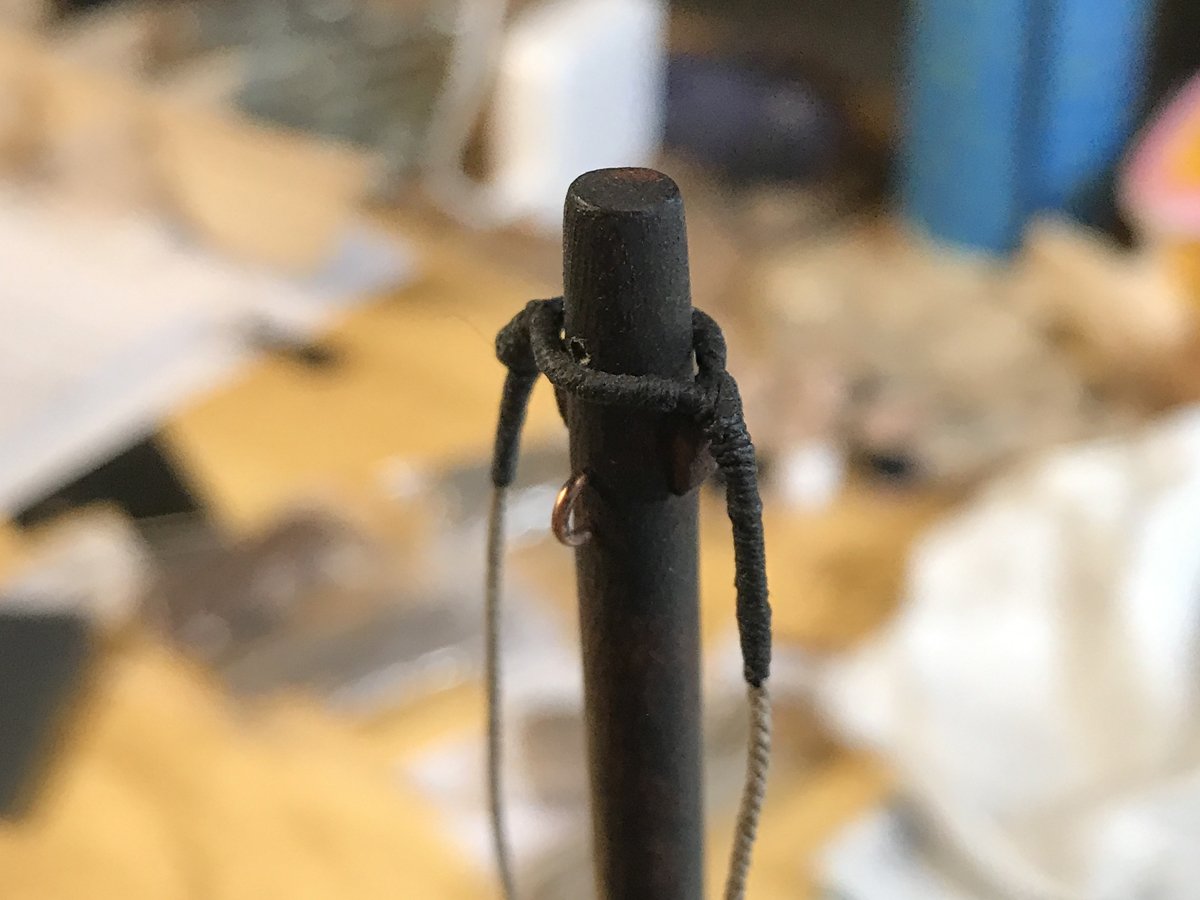
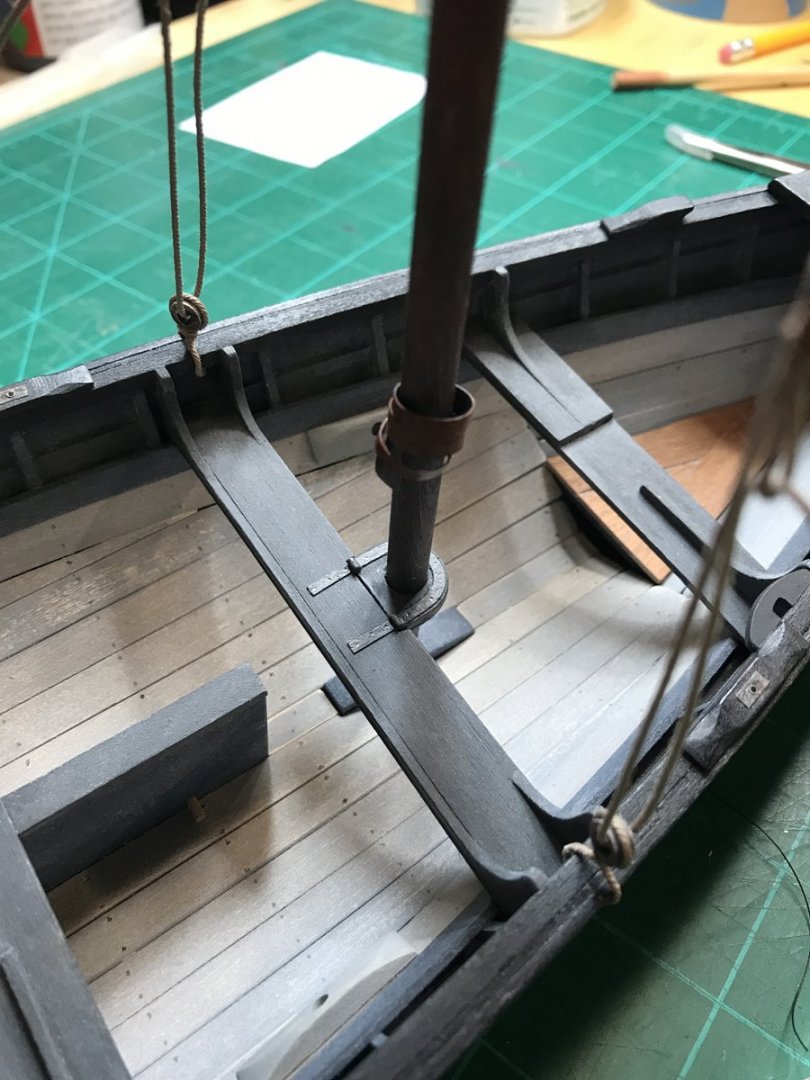
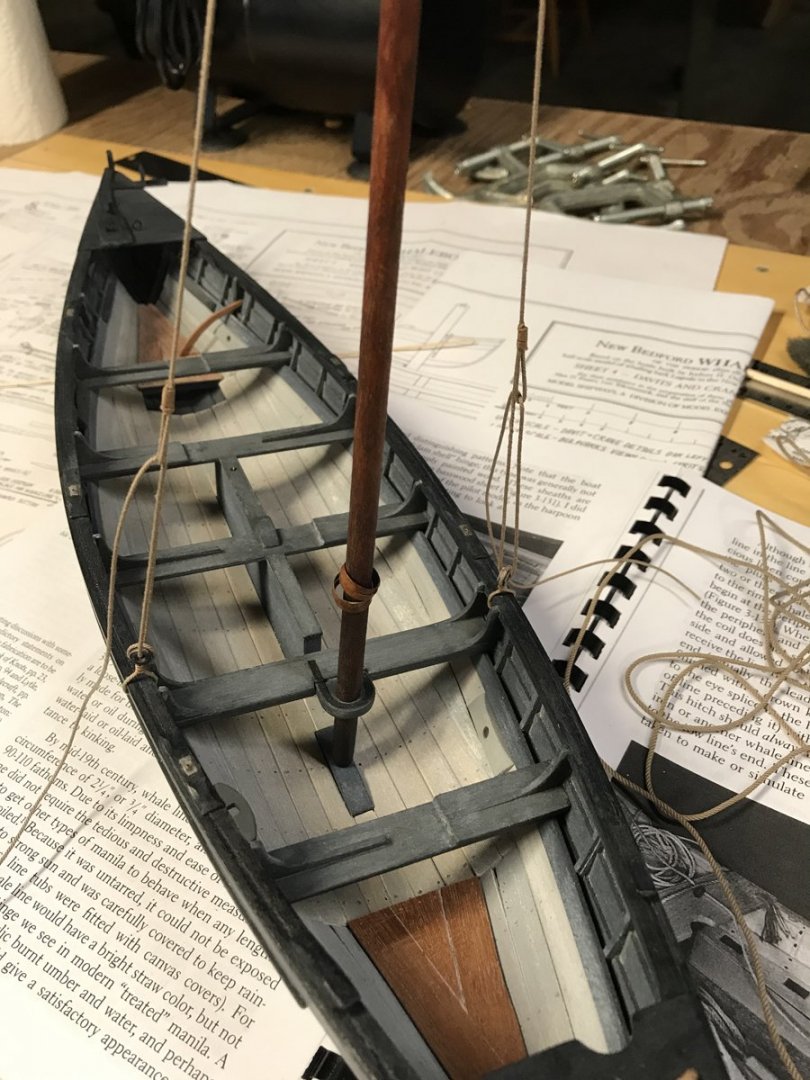
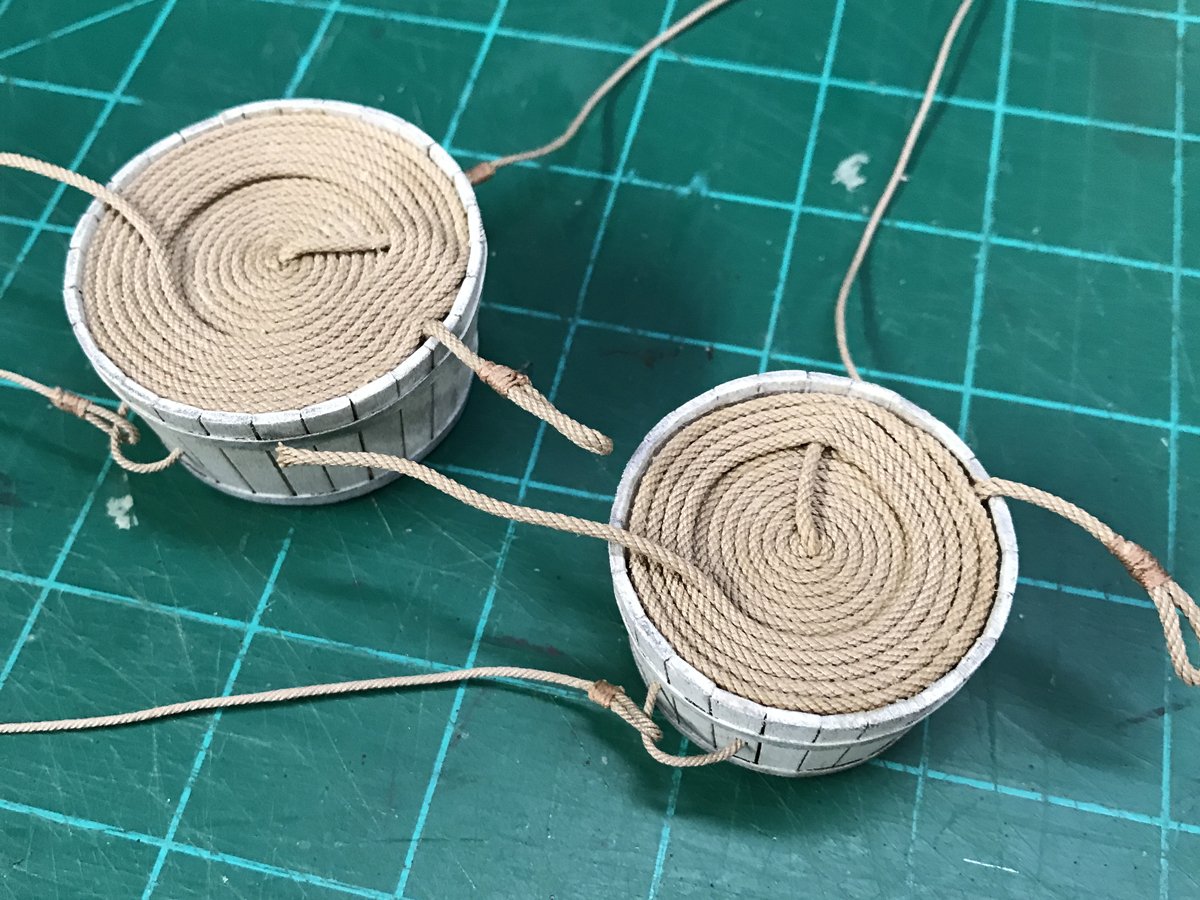
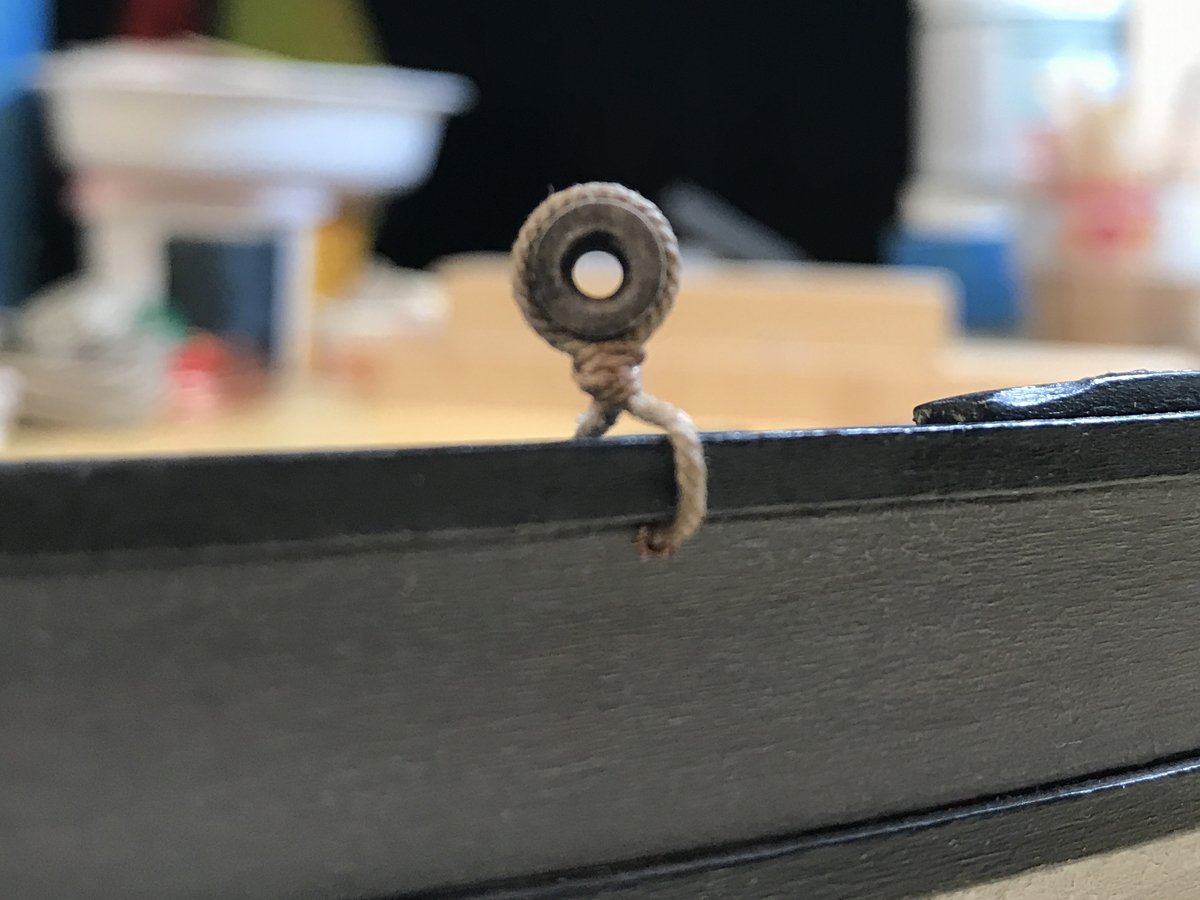
Mast, mast rigging and line tub rope: The dowel provided for the mast was warped like the others in my kit so I used a 1/4" piece I had in my scrap box. I'm not 100% sure what species the wood is but it took a lot of sanding to get it thinned and tapered to match the plans. Drilling holes by hand took time as well. On the bright side, it's perfectly straight. I made my "wooden" mast hoops with paper. I have a limitless supply of paper sample books from 35 years as a graphic designer and take advantage of the various textures and weights to make all kinds of things. After applying my wood paint job I added a 50/50 wood glue/water mixture to stiffen and protect them. The shrouds are one long piece with a served hoop in the middle that slips over the top of the mast and rest on the shoulders. The shrouds/stays (not sure which, if either, is the correct term?) run through the thimbles and back up to a loop that's spliced into the line. Everything is tightened with a slipped hitch later. I made my mast hinge hardware less bulky than the photo-etch provided in the kit simply because the reference photos I've looked at seem to indicate something more subtle. I knew I was going to bang it up a little and paint to a wrought iron finish so photo-etch wasn't going to work. The hinge hardware and the oar lock inserts are also paper, same as the mast hoops. A better look at the mast rigging. Adding the lovely Syren rope to the line tubs. The stuff in the kit is awful. I made sure to place the tubs in the boat to be sure the line was entering and exiting in the correct positions. The tubs will be lashed to the thwarts so making sure those lanyards are positioned correctly when everything is finally staged is important.
- 52 replies
-
- 10
-

-
- model shipways
- new bedford whaleboat
- (and 1 more)
-
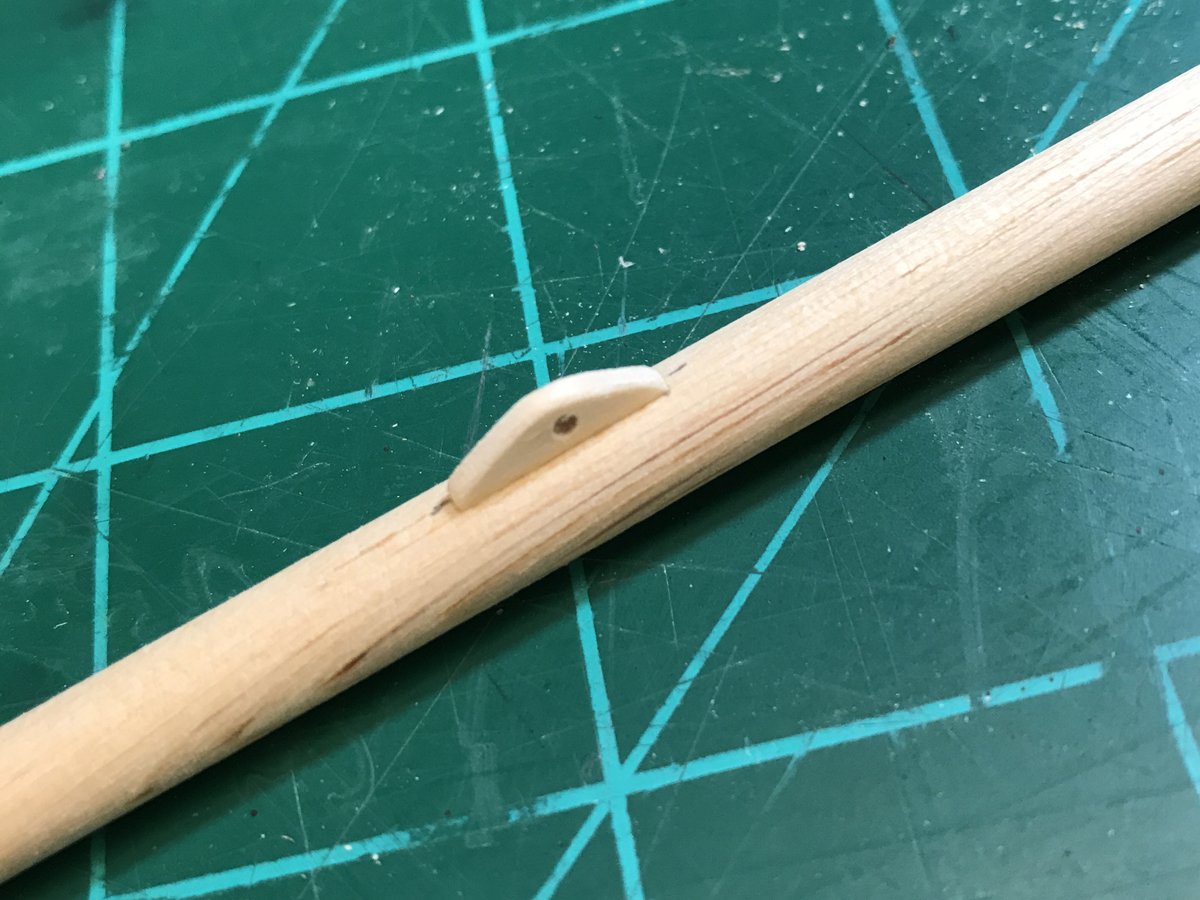
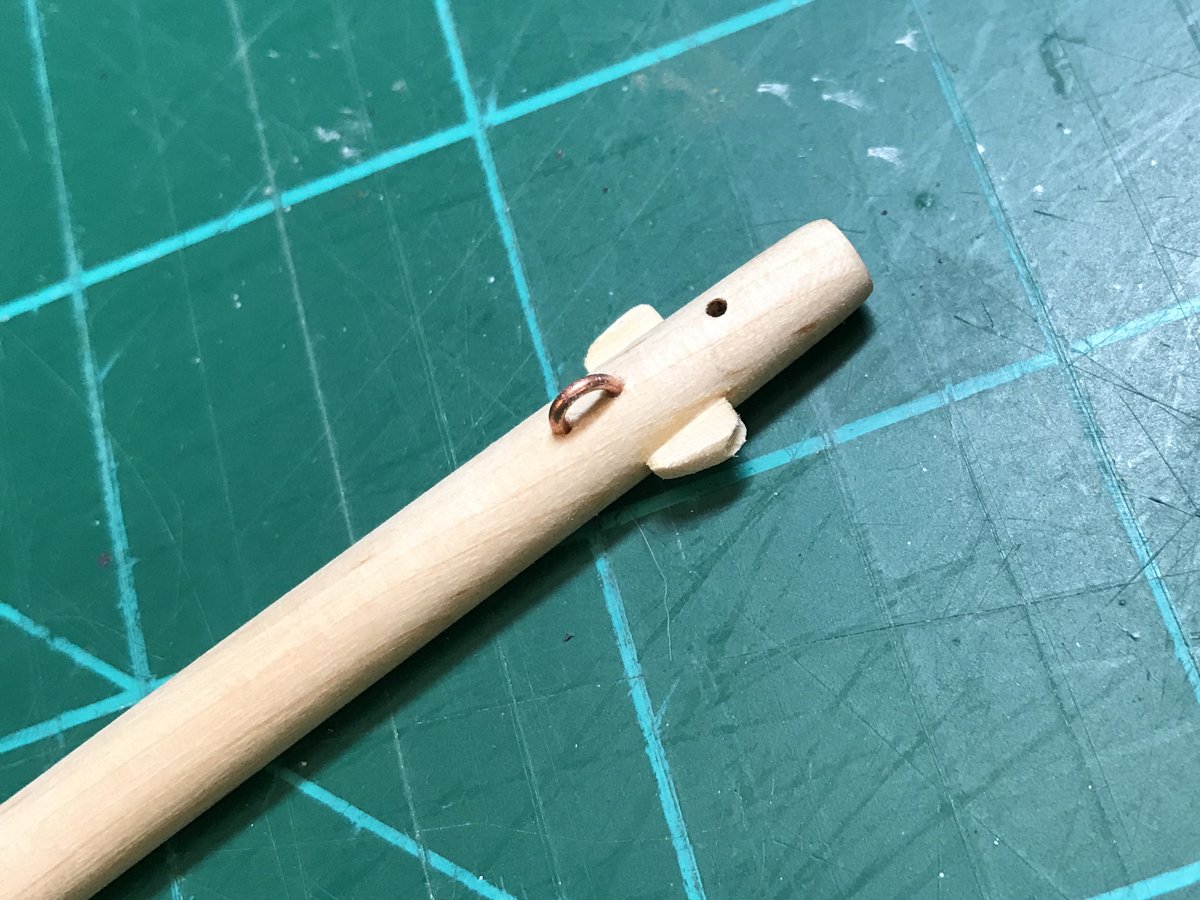
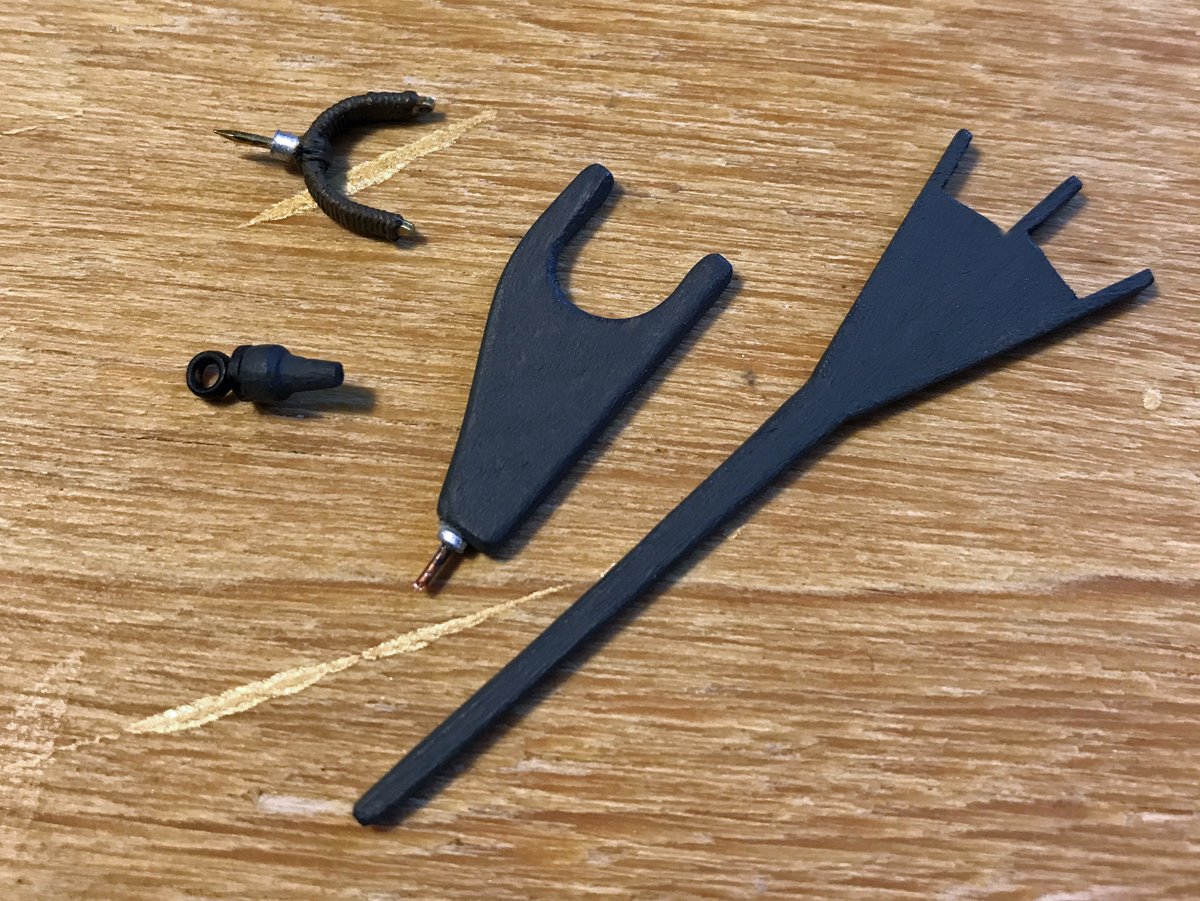
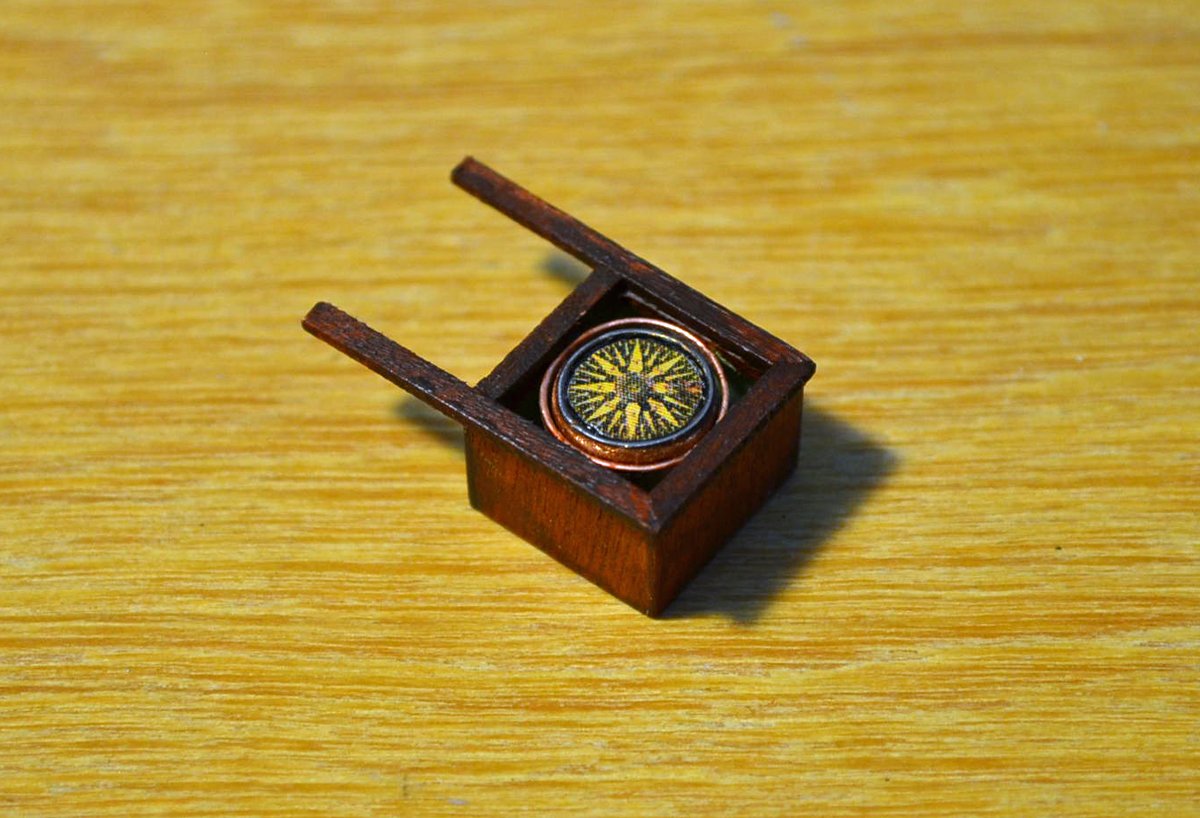
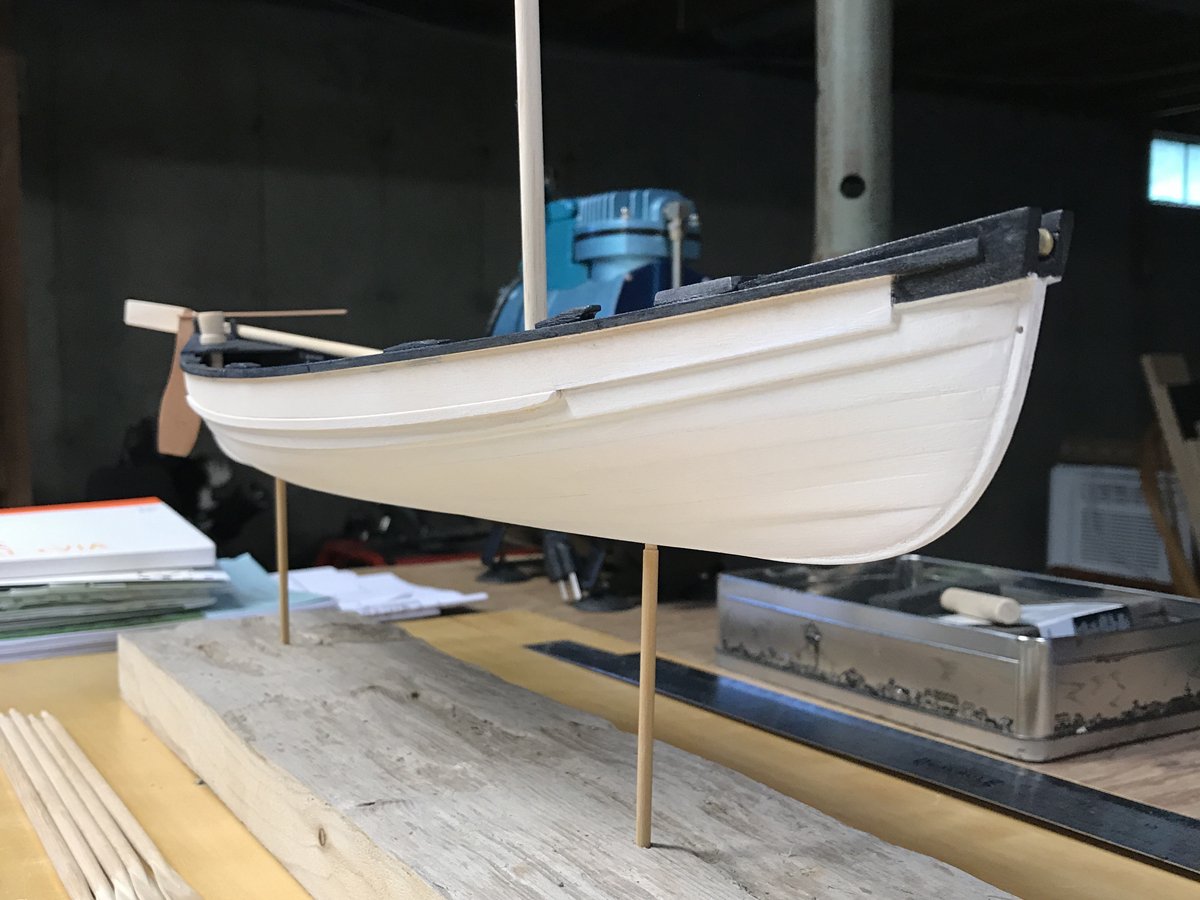
Wrapping up details and a few more decisions as I head for the finish: The finish line is in sight but several small items and a decision on how to handle the sail are still in the works. I'd like to show the mast up but the sail in the process of being raised but haven't quite come to grips with how I'll deal with that. I'm pretty sure I'll be using different material than what's provided in the kit for the sail but what exactly that'll be, I'm not sure. Stay tuned. On to the small stuff. Here are a few of the detail pieces that aren't overly glamorous but necessary. There's no mention of the actual boat plug in the plans or book (unless I missed it) so I just guessed. Given what an important little item this is, I made mine with a ring so a lanyard can be attached to keep it from rolling under the ceiling planks if it comes loose. The tub oar and harpoon crotches are straight forward as are the standard oar locks. The plans call for brass thimbles but I made mine with Sculpey clay and weathered them to a finish that has a certain whale bone look (sorry for the blurry photo). Probably not historically accurate but they feel right to me with this color scheme. On to the compass: I made the compass from scratch using wood rather than the cast bowl in the kit. I found a mid-19th century Robert Merrill box compass rose online that was commonly used on east coast boats and ships. I added some clear varnish to simulate glass. Despite using a high resolution (1200dpi) print of the image, my iPhone and Nikon dslr cameras couldn't get a moire-free image. It's too bad because in person the rose looks very sharp and clean. I'll see if I can get a better photo later.


- 52 replies
-
- 6
-
-
- model shipways
- new bedford whaleboat
- (and 1 more)
-
The compass looks great...I had a feeling you'd pretty much reproduce the real thing! I just completed my compass and will be posting shortly. We seem to be heading for the finish line on the same schedule. Any thoughts on your next build?
-
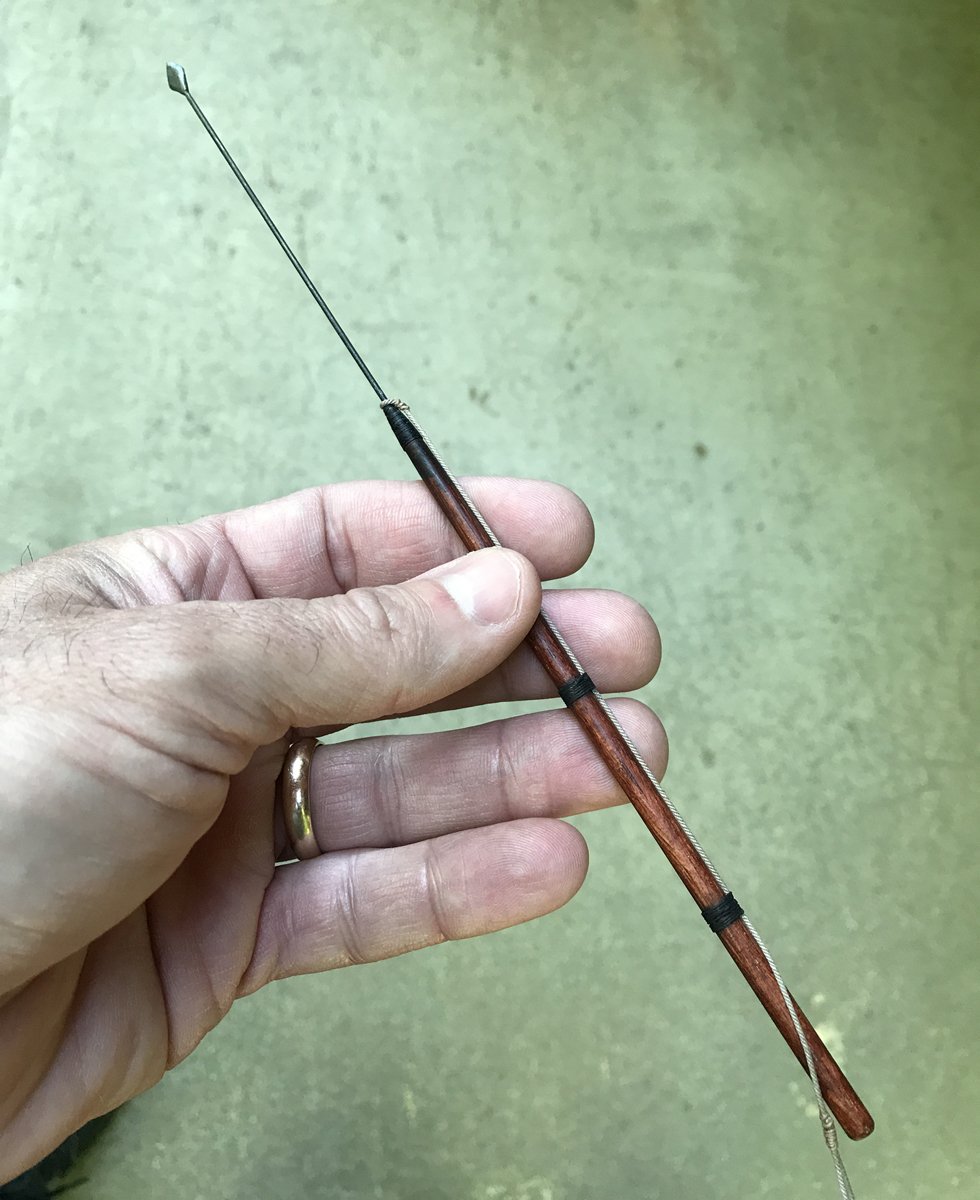
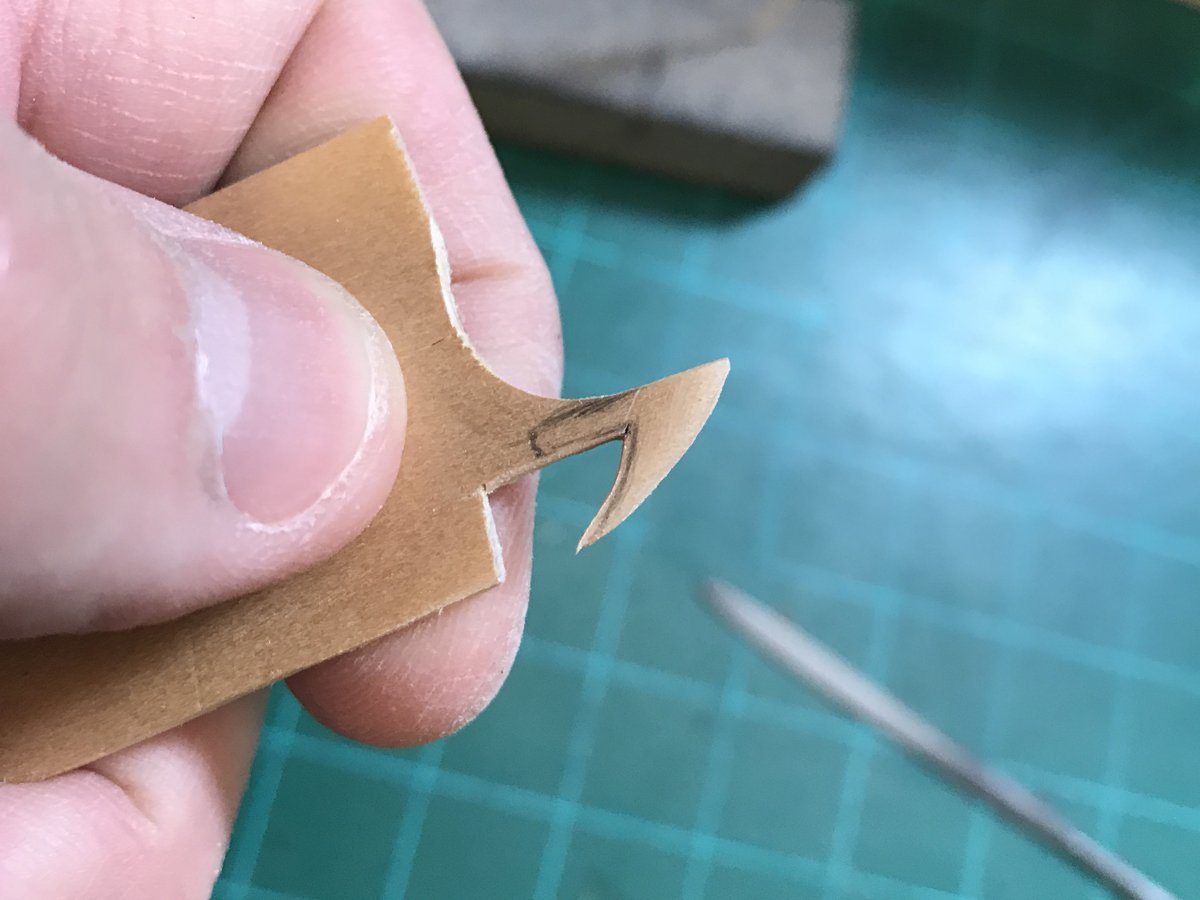
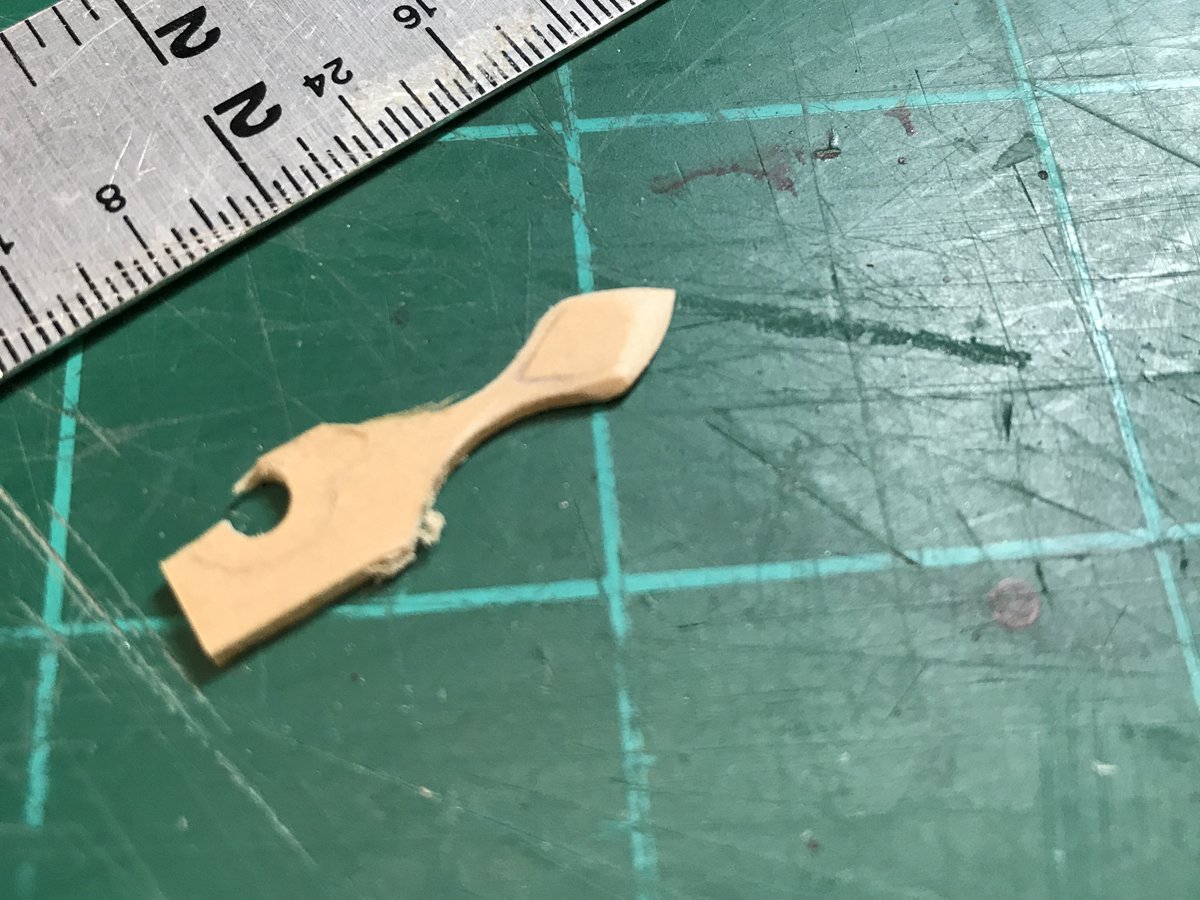
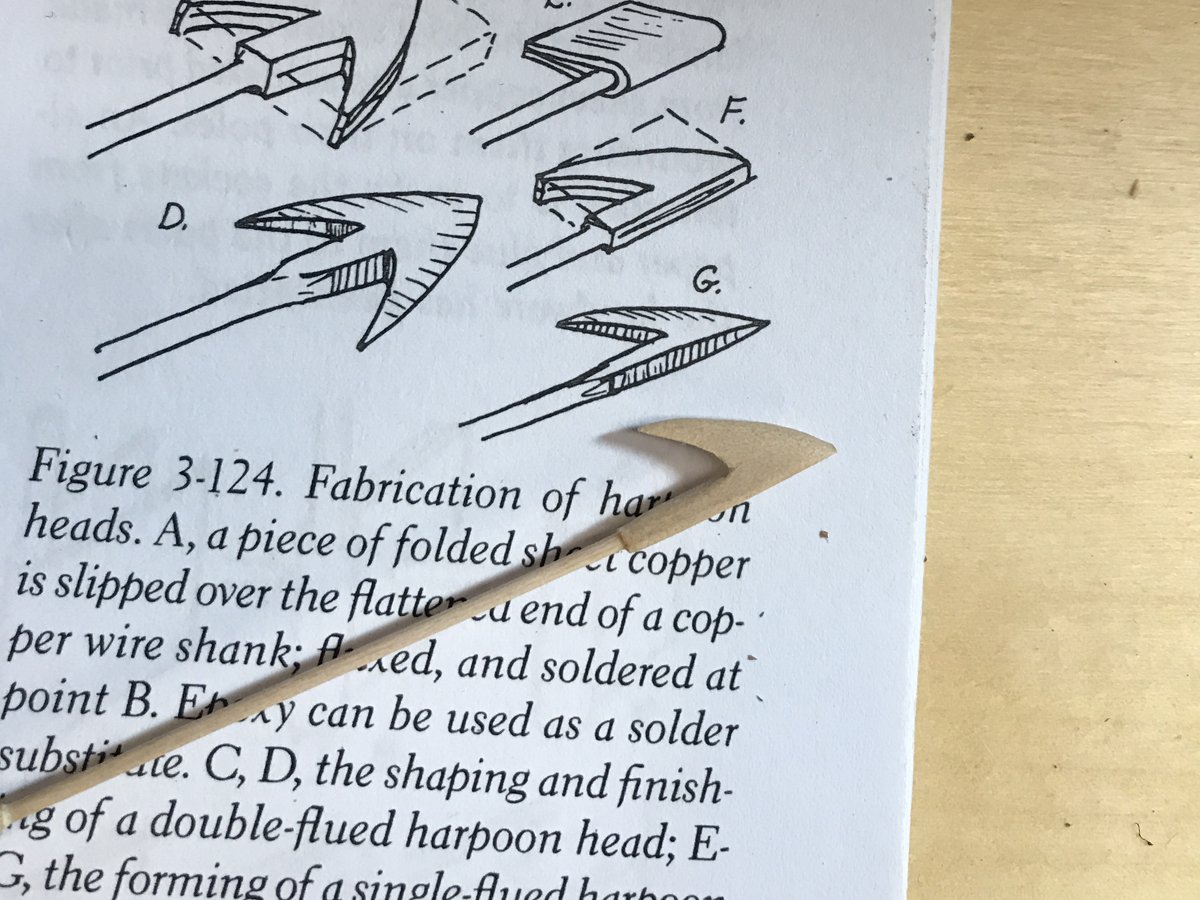
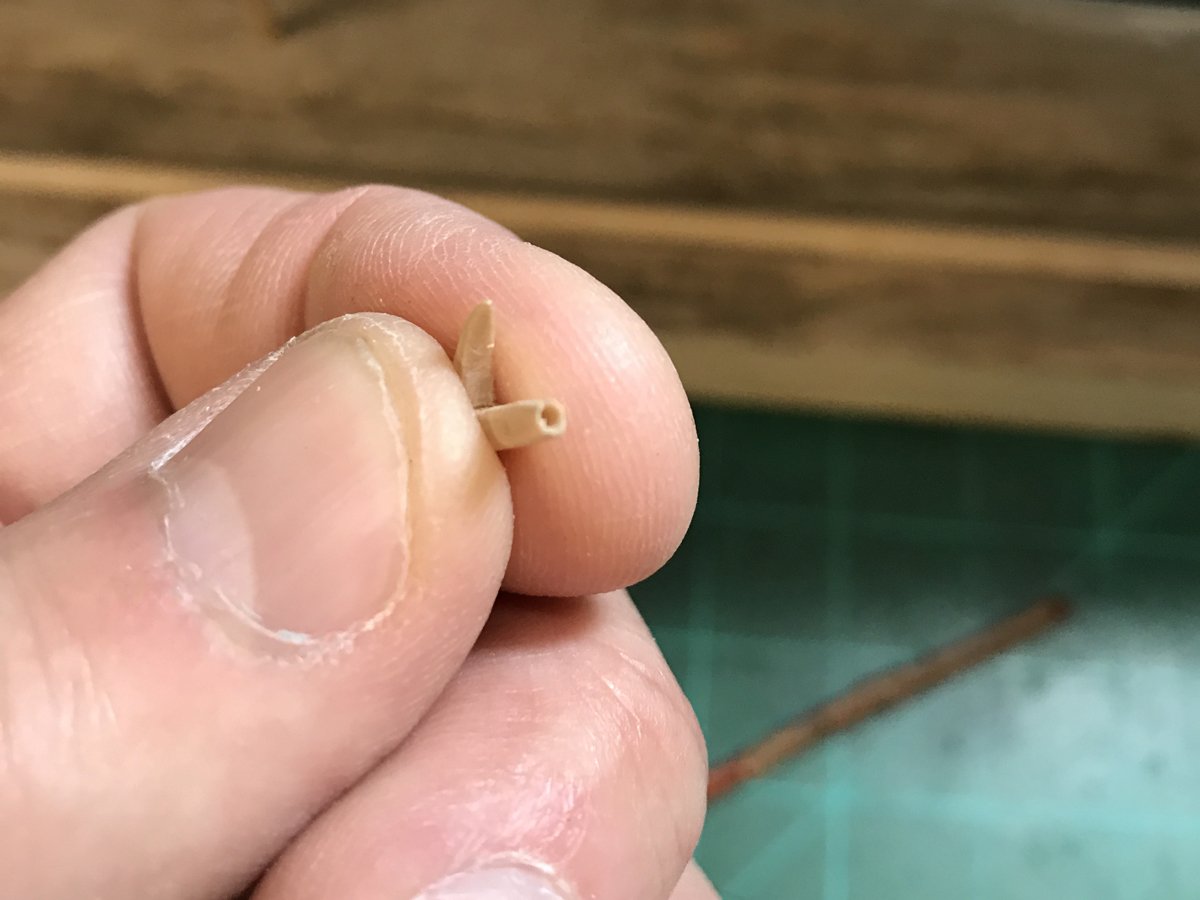
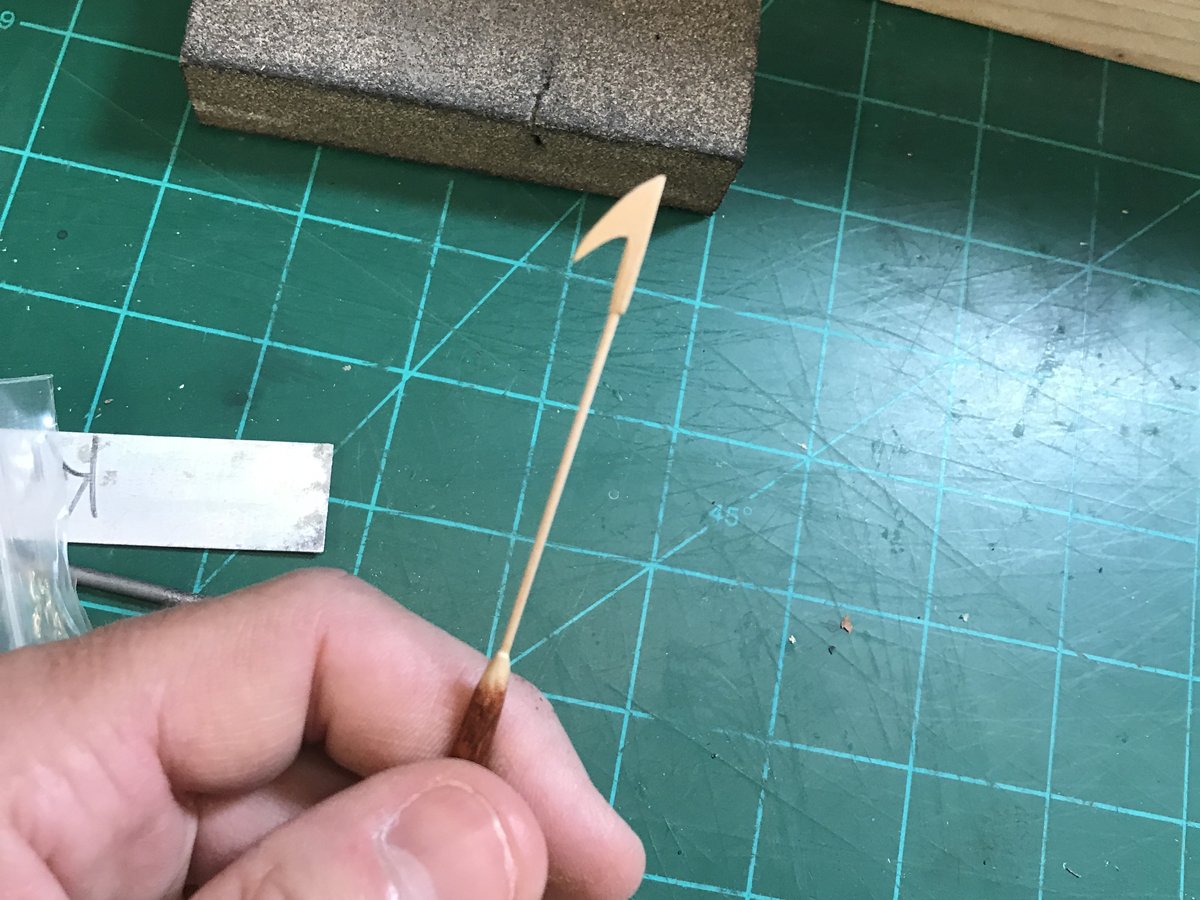
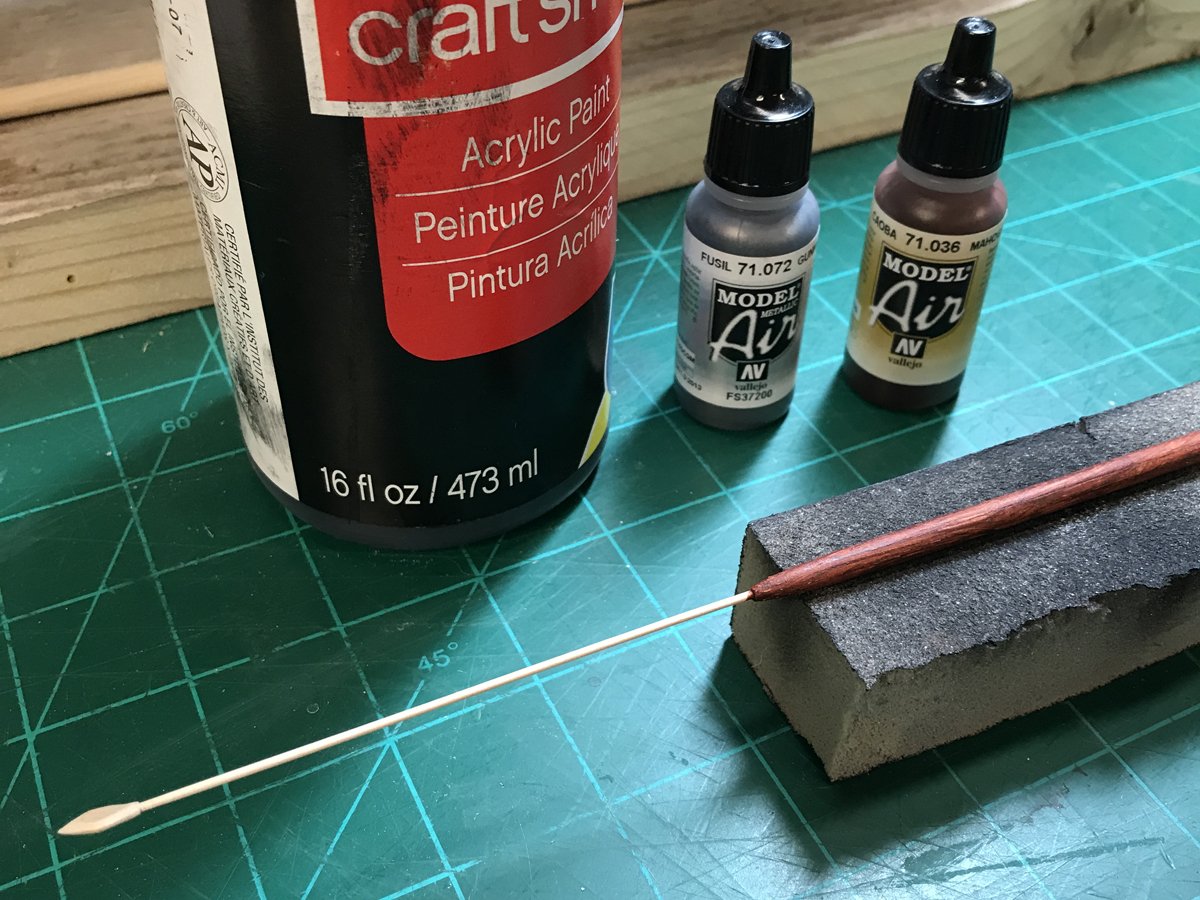
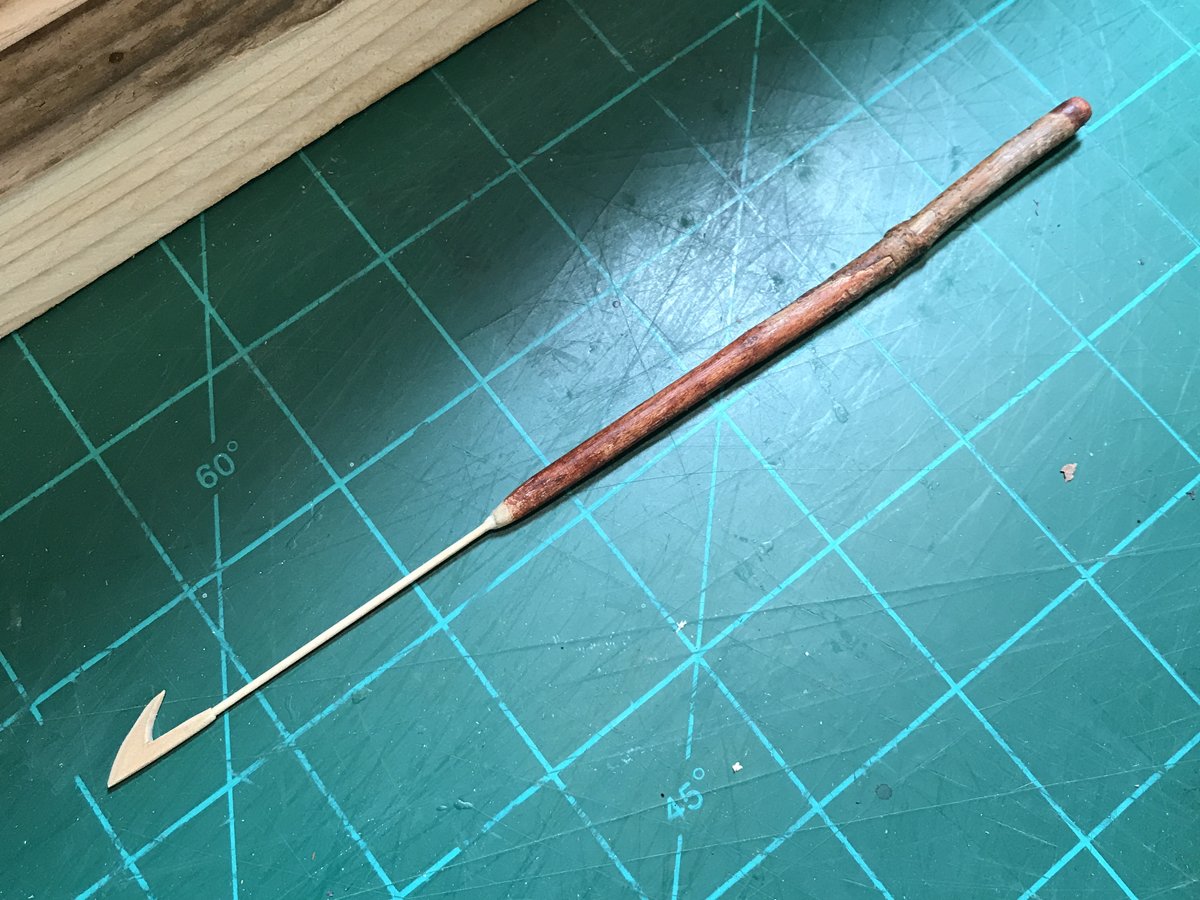
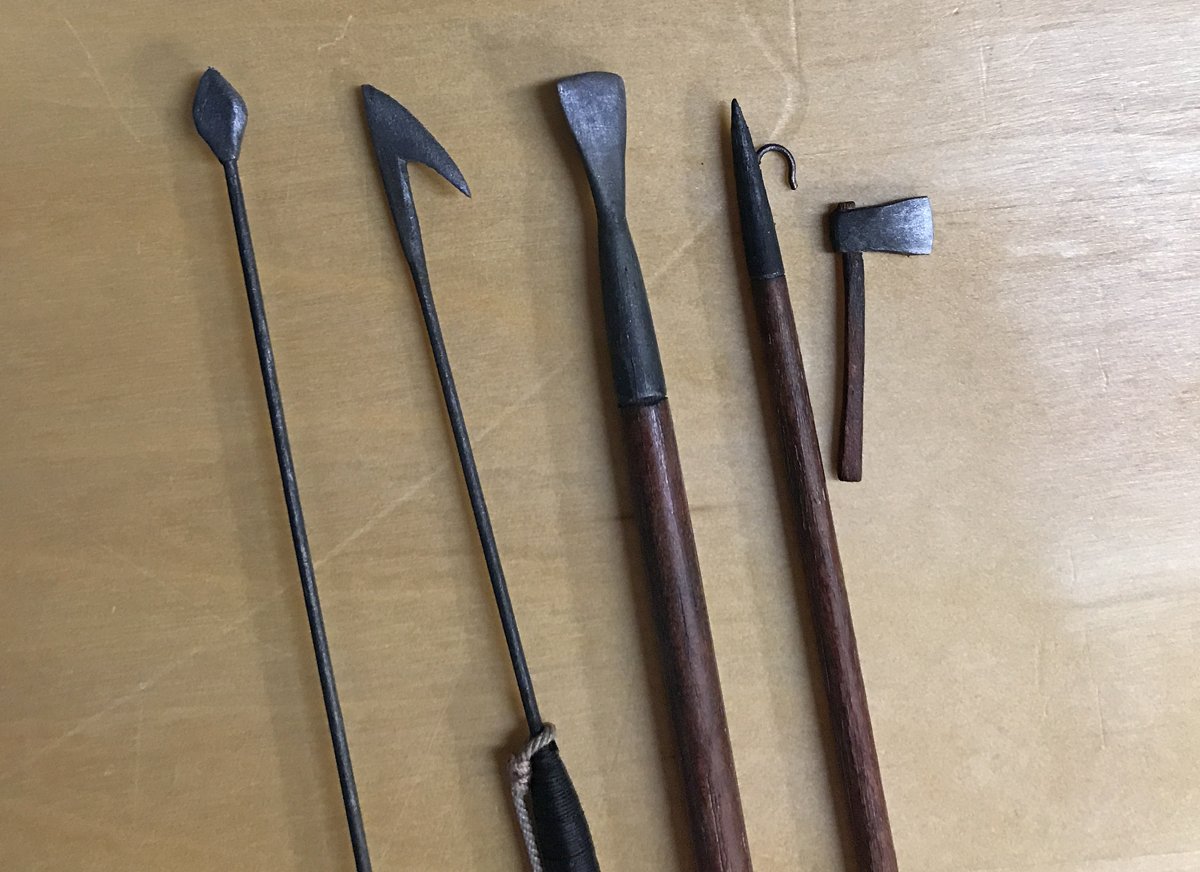
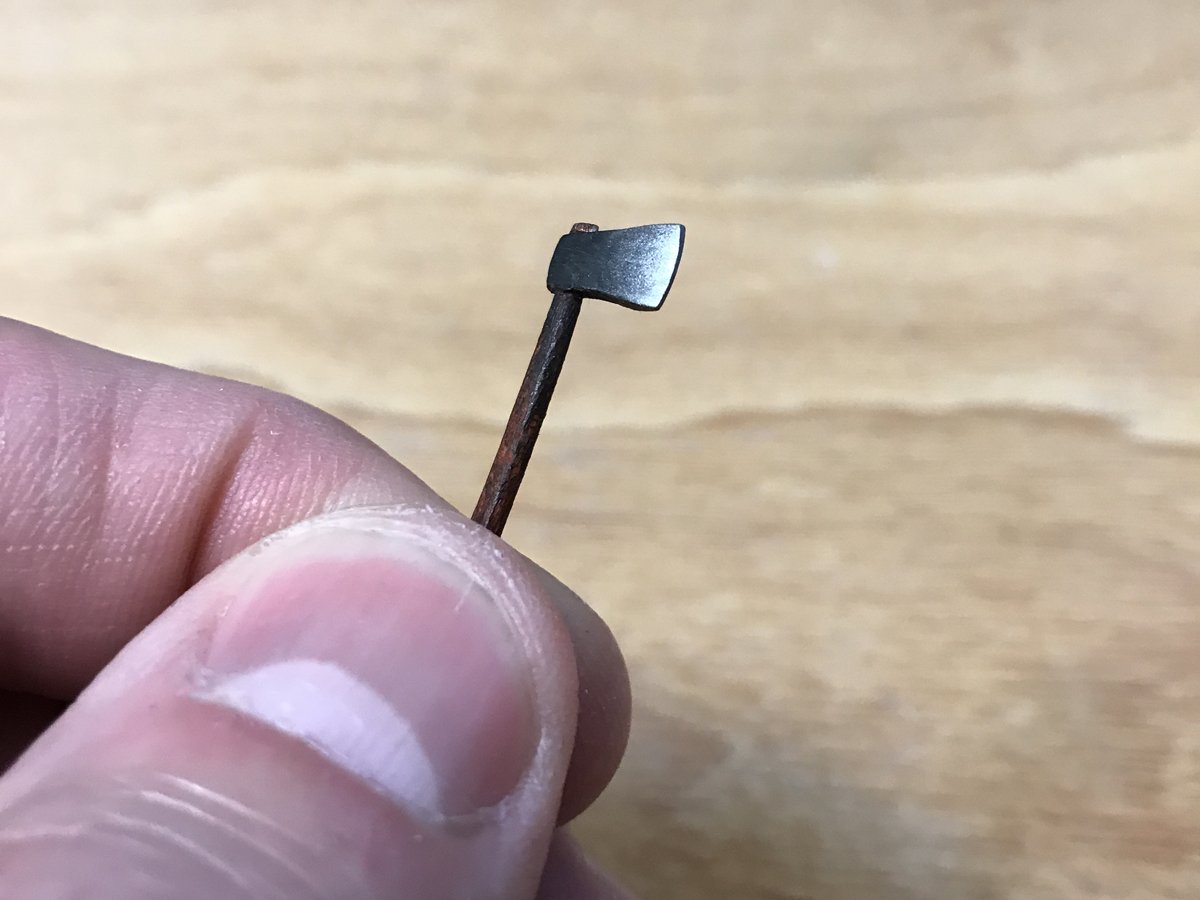
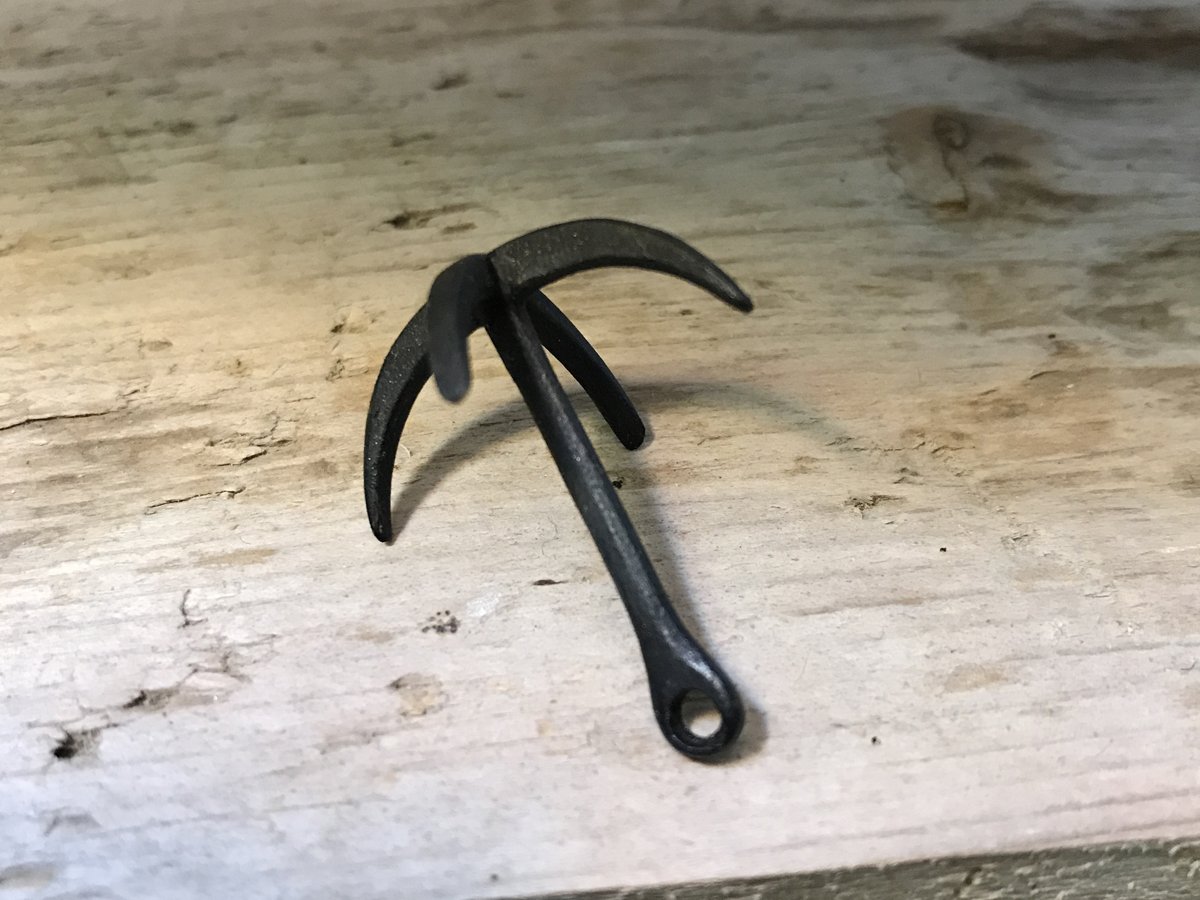
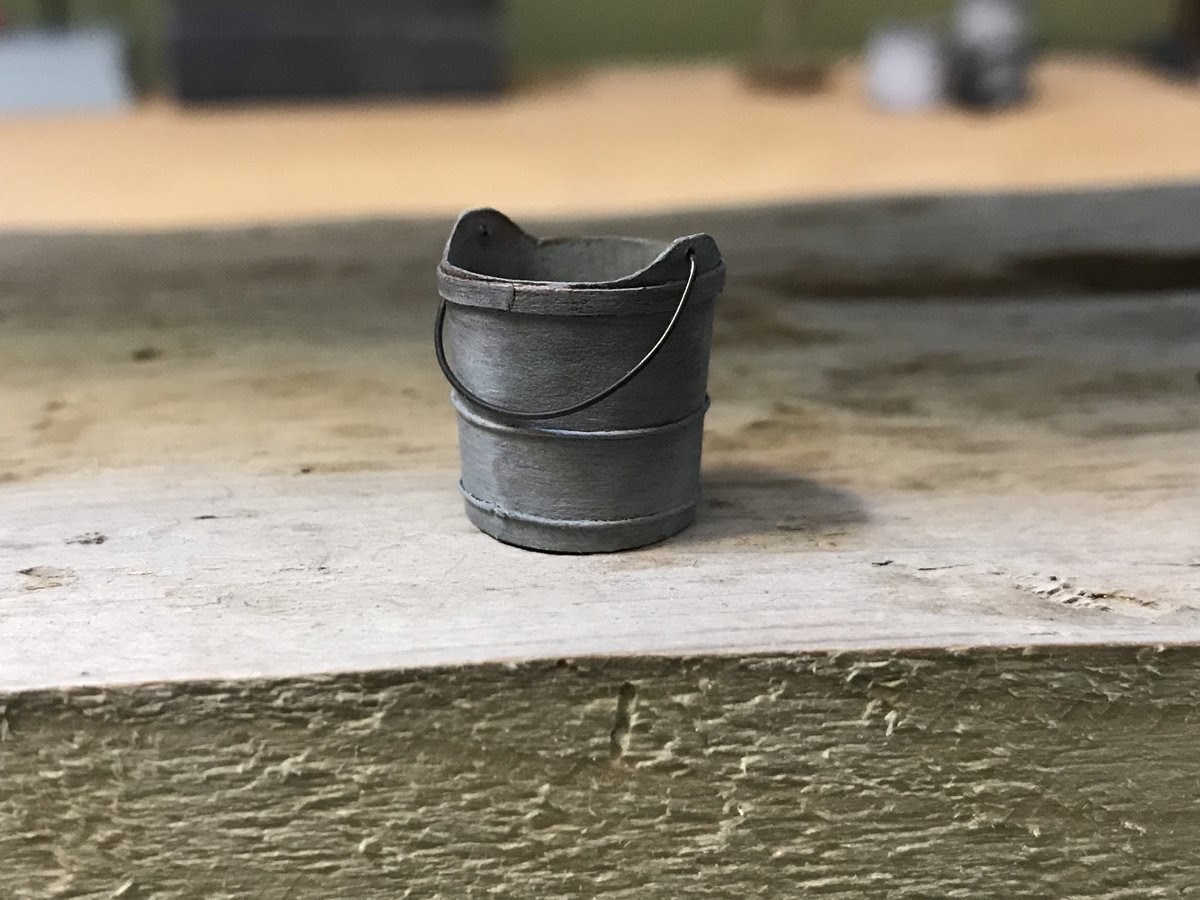
Tools of the trade: First, I have to say that being back to the office for two weeks and the wasted time of a long commute has really thrown a wet blanket on my build progress. Nonetheless, I do have more of the progress I made while happily working from my home bench for nearly three months. I really enjoyed making the various bladed tools for this kit once I figured out I could do a better job with wood than the photo-etch parts included in the kit. I don’t own a soldering iron (yet) so other than getting one and taking a crash-course on how to use it, I didn’t have much of a choice. It was also another chance to try my hand at miniature carving. I'm not sure what species of wood this stuff is, but I really like the way it carves. I think I may have salvaged it from old mini-blinds. You never know when something that nearly went to the trash will be perfect for something down the road. I went with what I considered the most iconic harpoon shape. I used wood for the metal shafts as well. The lance and harpoon almost ready for paint. All that's left to do is refine the transition from shaft to blade. And finally, a reasonably believable finished product. The curved piece on the boat hook is the only metal I used on these items. I still need to "sharpen" the harpoon blade with a little dry-brushed steel. All of these items tend to lose their realism when singled out and studied carefully but as details of the whole I think they do their job. I also made a grapnel from the same wood as the other items. I made a "metal" bucket from paper to add something visually different than the coopered bucket in the plans.

- 52 replies
-
- 6
-
-
- model shipways
- new bedford whaleboat
- (and 1 more)
-
Hi Mike...the metal work on that lantern is phenomenal! The high-end craftsmanship just keeps on coming with this build. Very impressive.
-
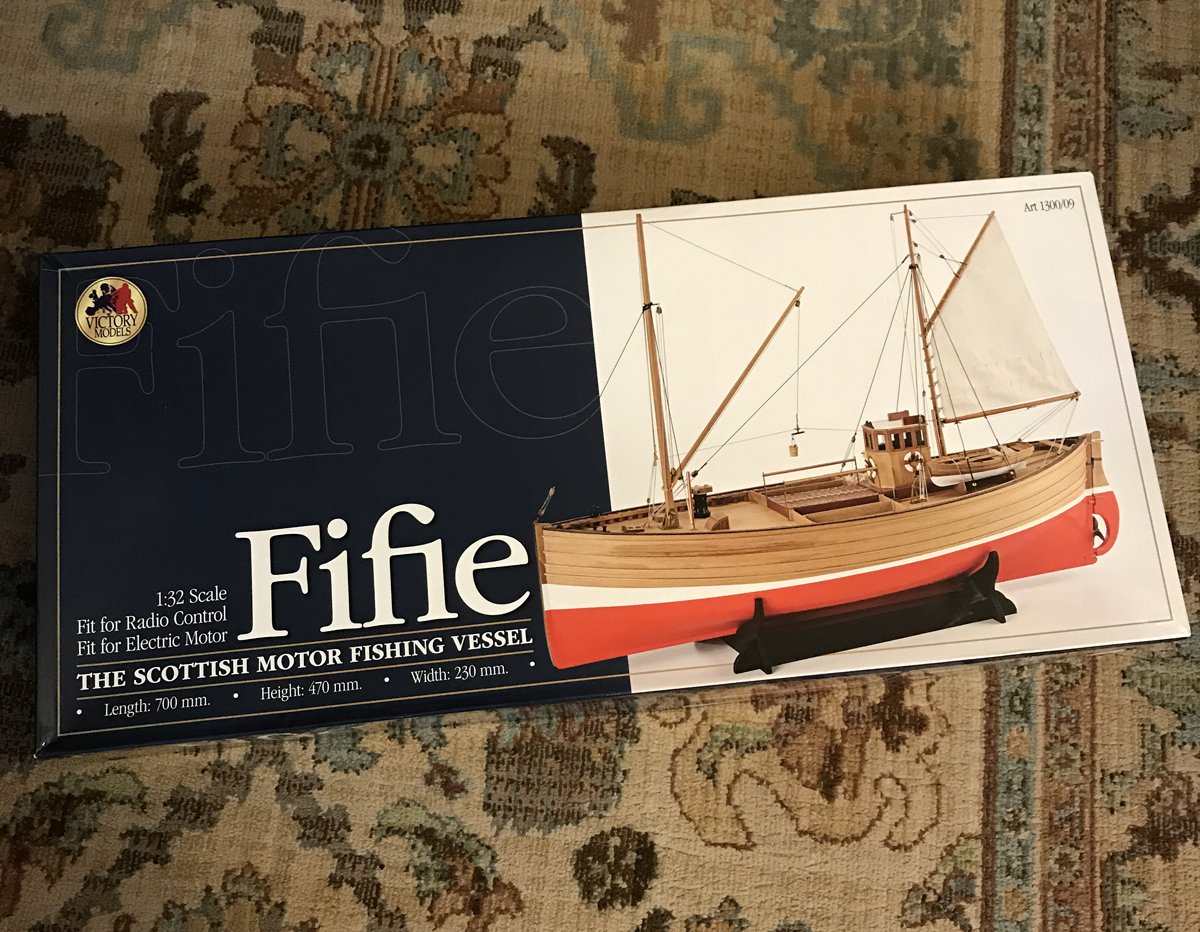
Wow...I'm on the tail-end of my first build with a 1/32 Amati Fifie on deck (looks like a wonderful kit itself) but this model looks absolutely spectacular. Way out of my league at my current skill level but spectacular nonetheless! Can't wait so see this beauty built when James tackles it.
-
Forgive the off-topic post but the next build has arrived and the pressure to complete the current one is intense. I'm already kicking around ideas in my head on how to make piles of 1/32 scale herring 😂 I can't imagine what it's like for you guys/gals that have 10 kits beckoning from the stash!
- 52 replies
-
- 6
-
-

-
- model shipways
- new bedford whaleboat
- (and 1 more)
-
Hi Rich...thanks again for the nice comments and encouragement! I can't imagine trying to make the contents of one of these boats at 1/64 scale. I can barely see this stuff at 1/16!
- 52 replies
-
- 1
-
-
- model shipways
- new bedford whaleboat
- (and 1 more)
-
Hi Ernie...thanks for taking the time to check in and the kind comments. I'm a big fan of small work boats and may need to add a dory to the list of future builds.
-
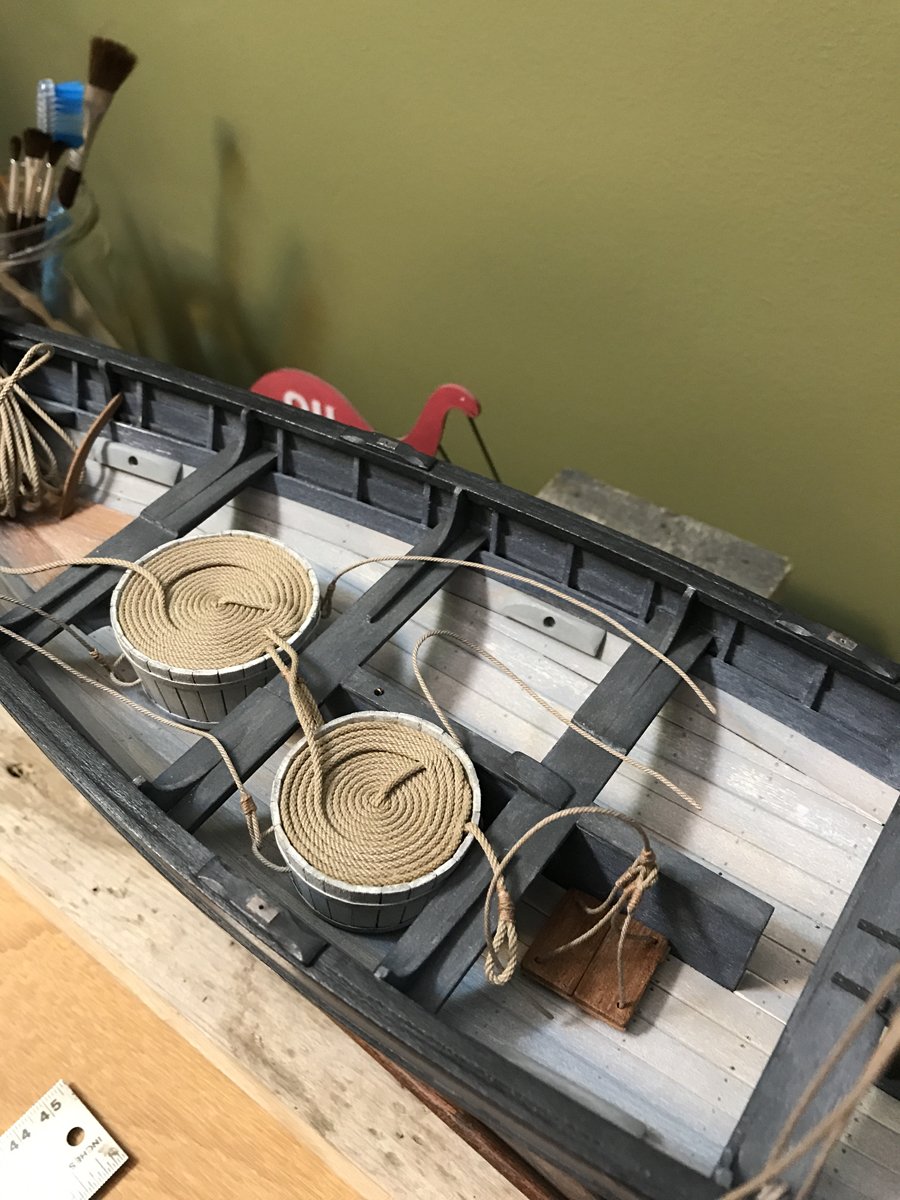
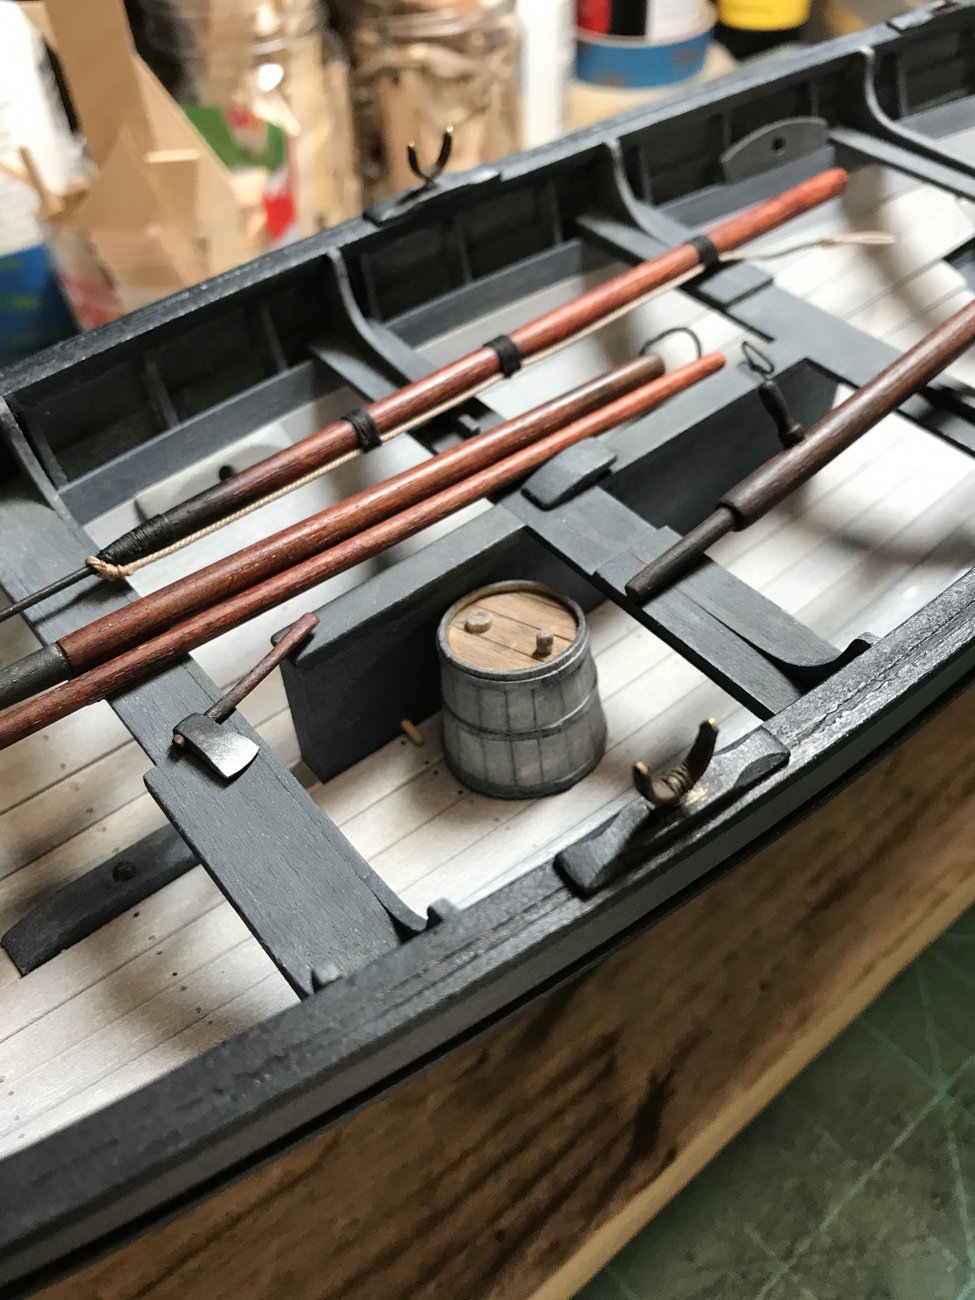
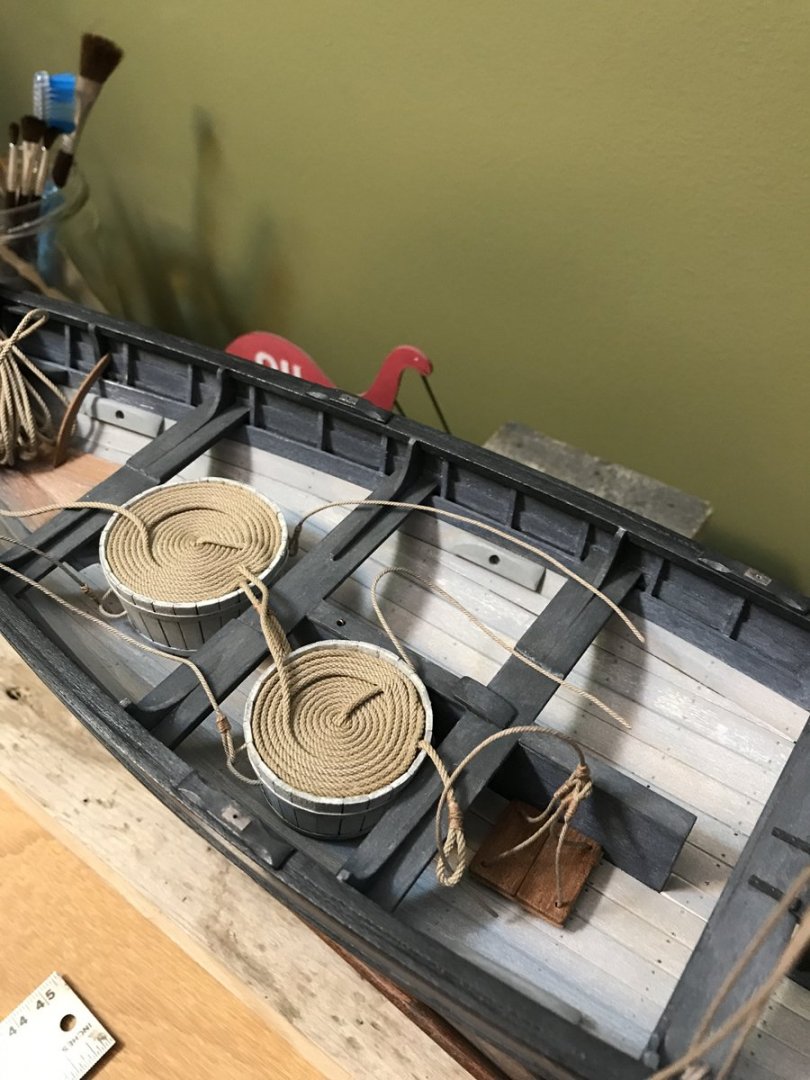
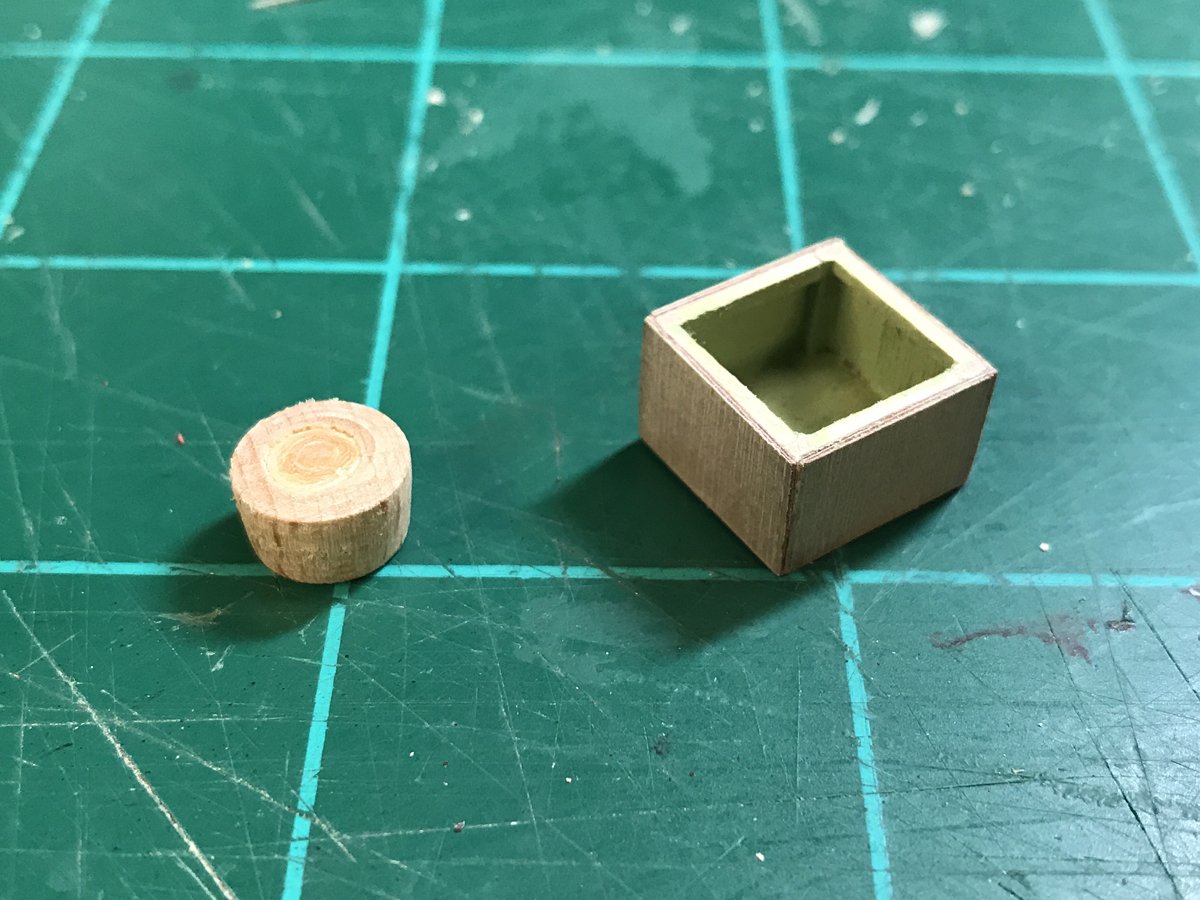
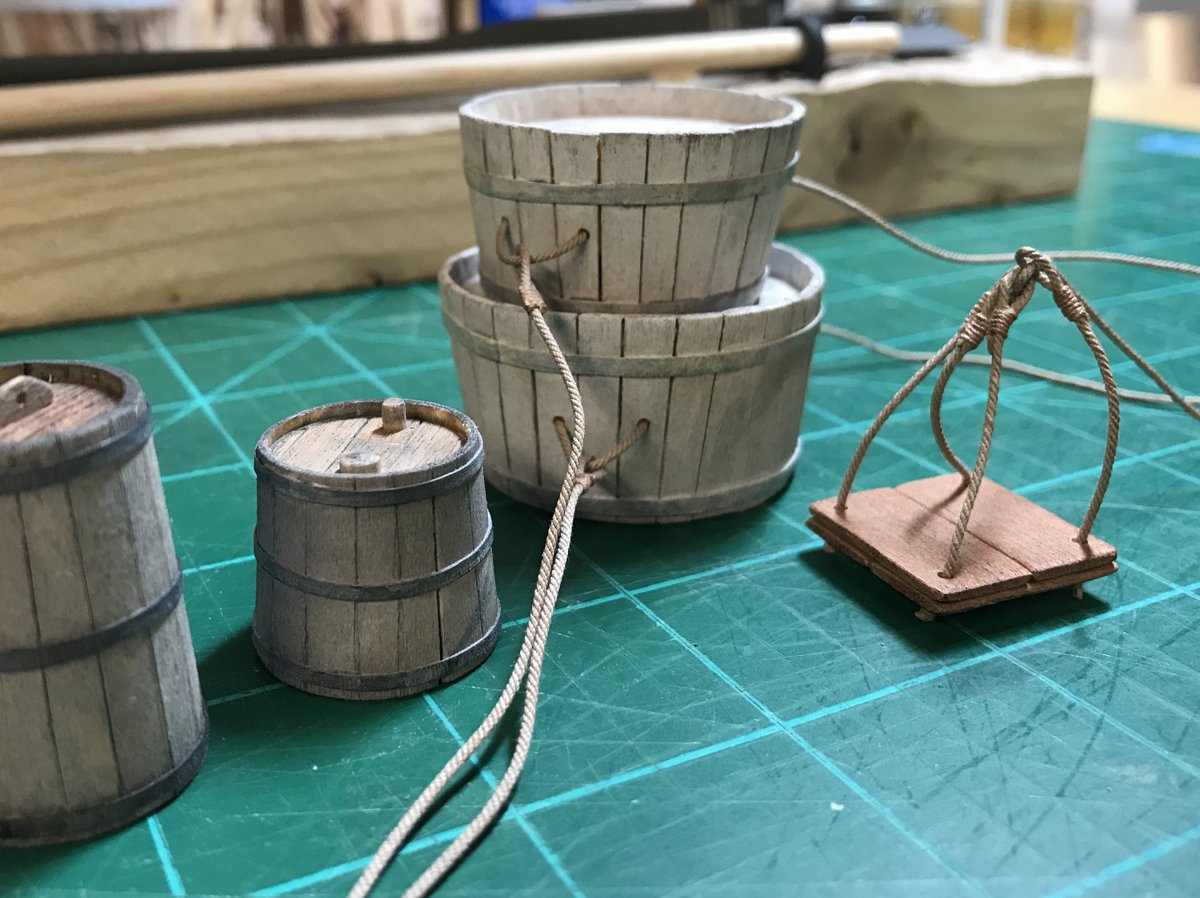
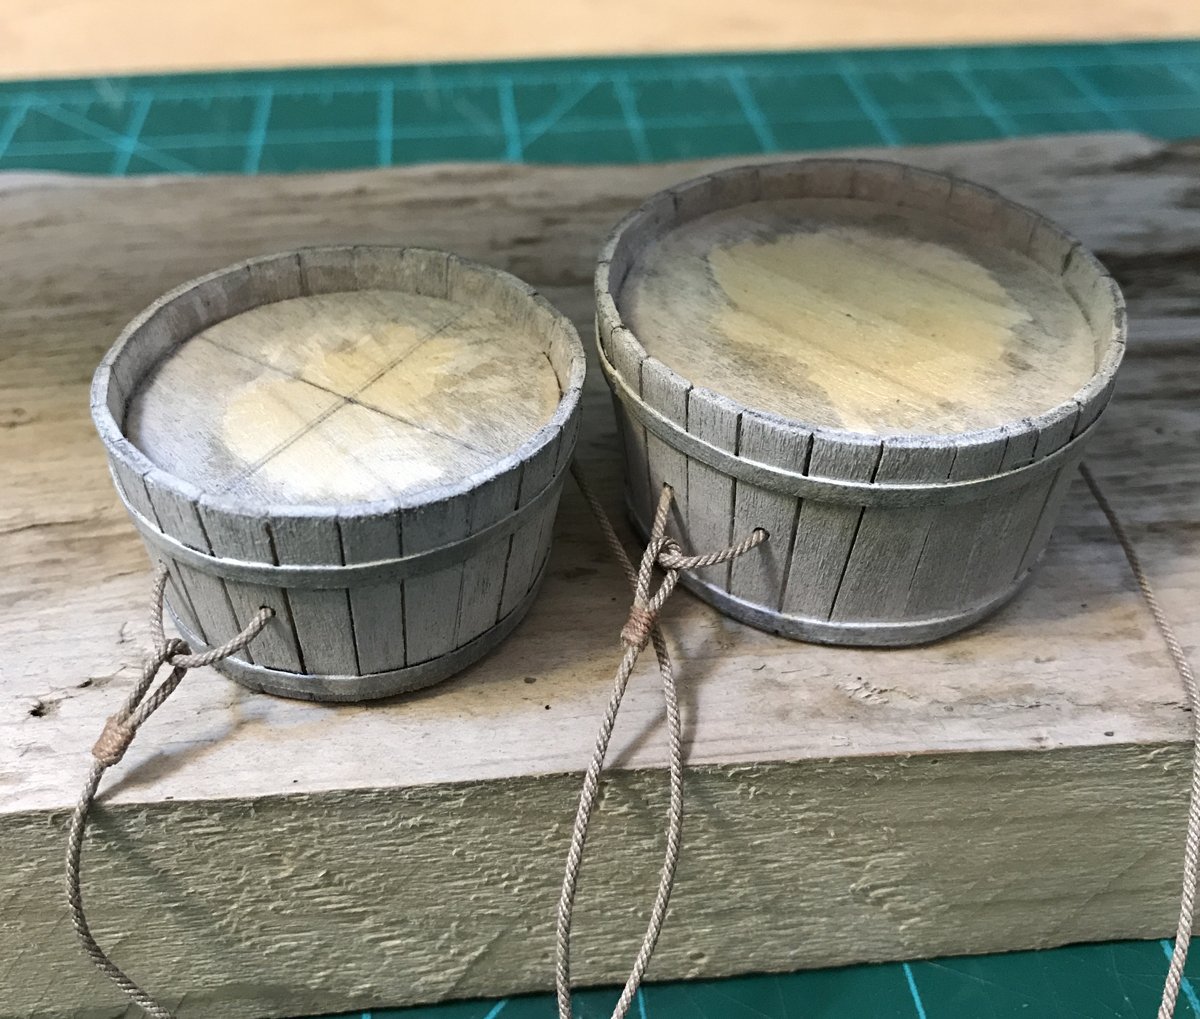
Tubs, kegs, bucket and drogue: For me, the line tubs and the rope carefully coiled within are amongst the most interesting focal points of the model. While the boat itself was lucky to survive a full voyage, I’m assuming some of these tubs put in long careers (assuming they float!). I tried to depict mine with multiple coats of whitewash over both the staves and iron hoops. Like everything else on the boat, I’m guessing they got dirty and wet. Continuing that theme, I treated the fresh water and lantern kegs similarly. I went with the square/simple drogue simply because there was such an abundance of round/coopered items on the boat already. I opted for a copper bucket because the thought of making another set of individual staves, particularly that small, made my head hurt! I opted to do these items from scratch using individual staves rather than the suggested method in the instructions. I'm not sure if all the extra work made much of a difference but there you have it. As I said, the square drogue was an entirely aesthetic choice and I happen to have a nice supply of lovely Syren rope to show off on it.
- 52 replies
-
- 5
-
-
- model shipways
- new bedford whaleboat
- (and 1 more)
-
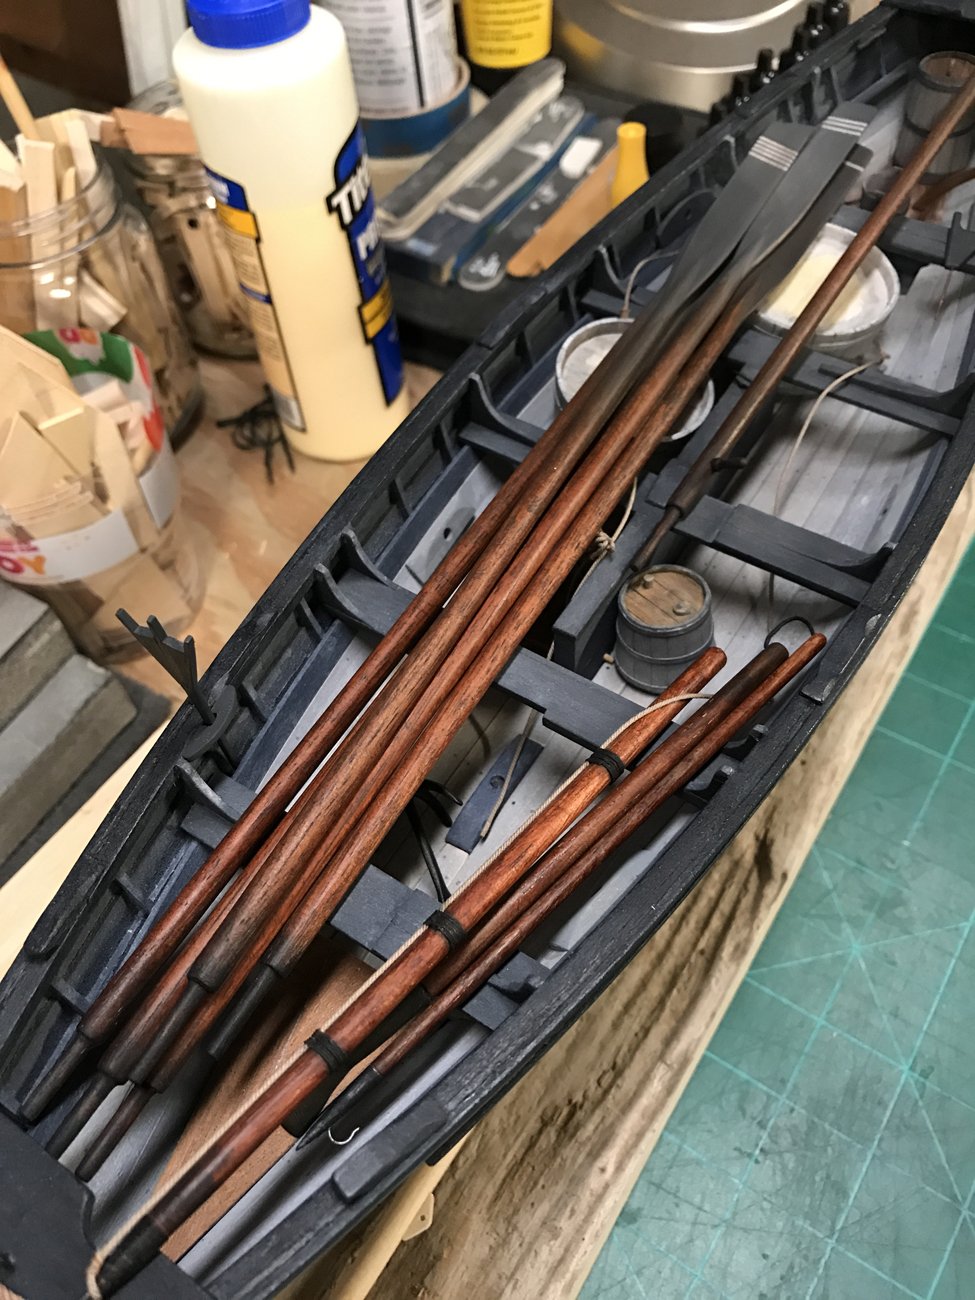
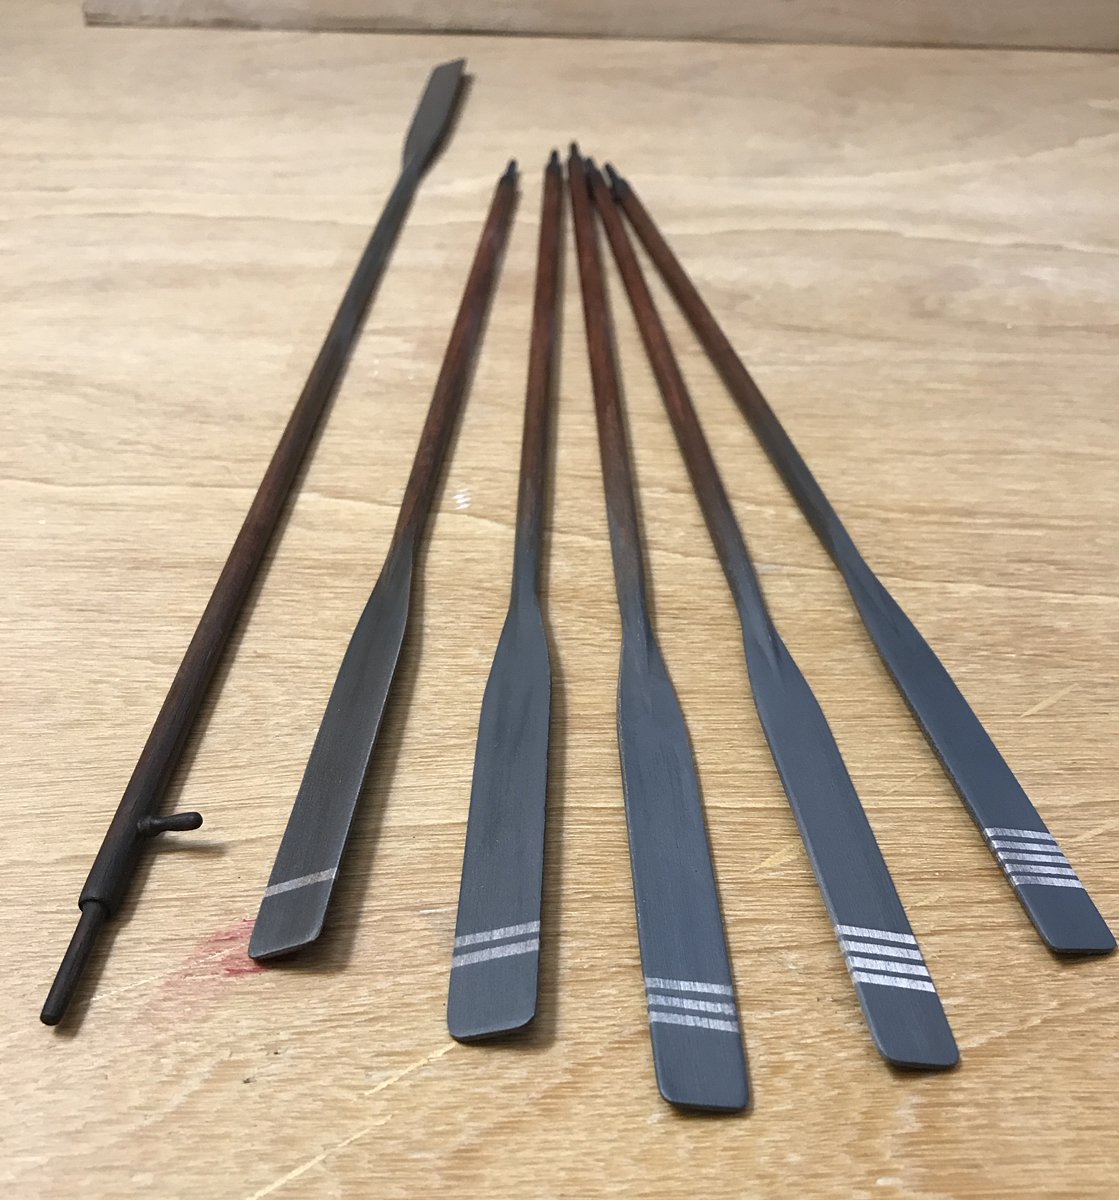
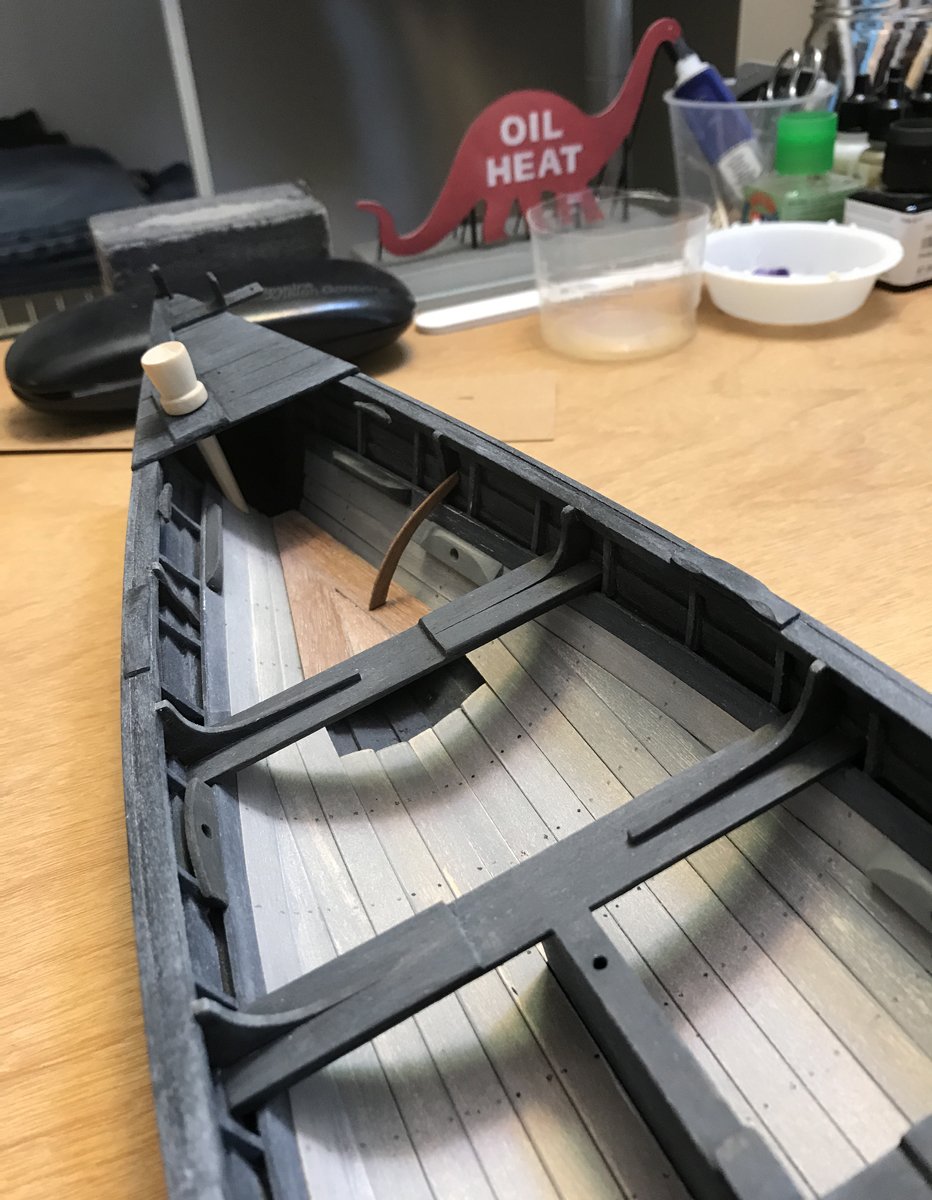
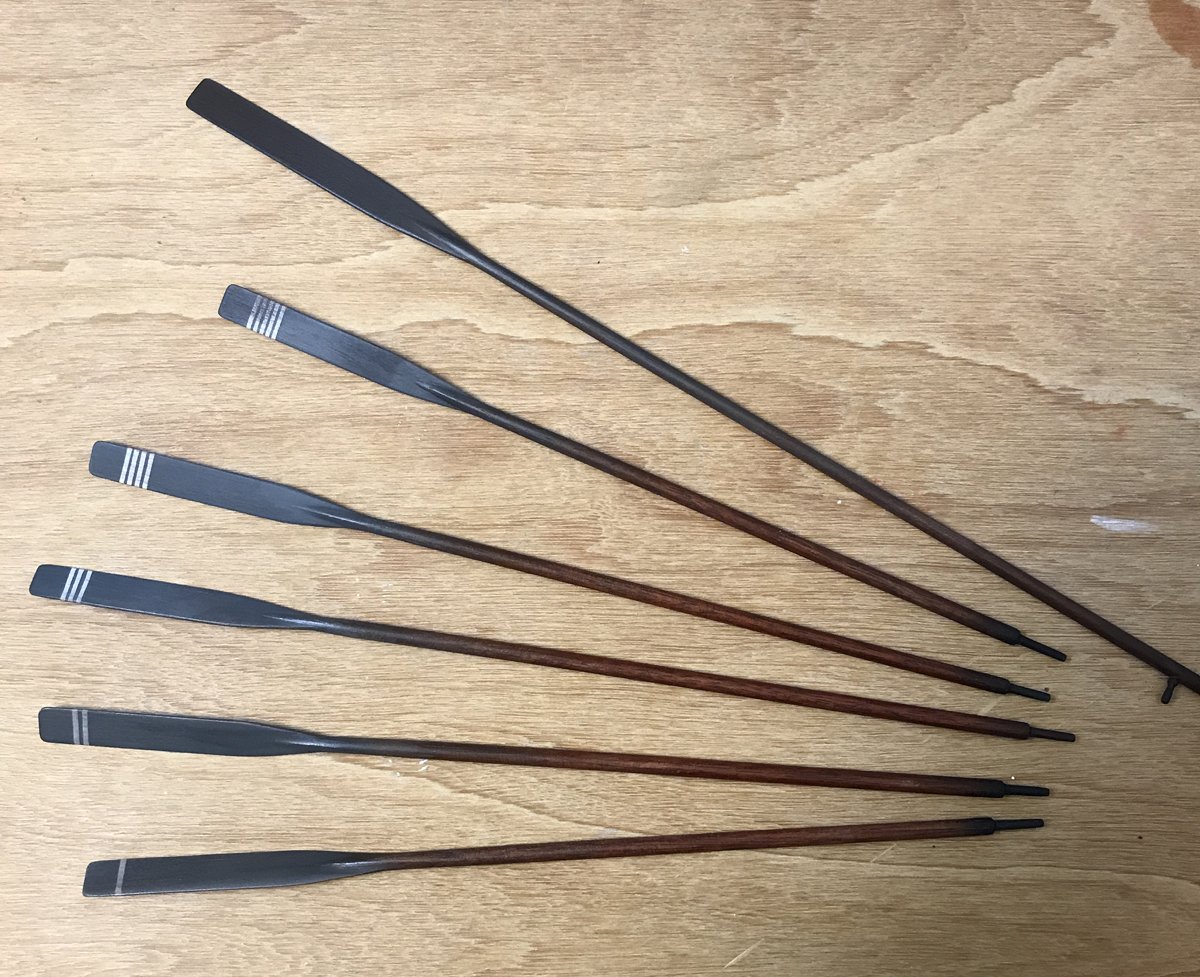
Whaling gear, boat equipment and aesthetic choices: It’s really quite remarkable that 5 men could be squeezed into one of these boats given the sheer amount of stuff that was brought along for a hunt. Once I got a sense of how packed with gear the boat would be if I included everything accounted for in the plans, I decided to do a little editing. I have no doubt that all the aforementioned stuff was present when these boats were sent into action but my goal was to strike a reasonable compromise between stuffing the thing so full of things (as historically accurate as they might be) that the boat itself was lost in the chaos or focusing on the items that offered the most visual impact. For instance, the book suggests that five harpoons were brought along on a hunt. I have no doubt that’s true but felt depicting one at the ready tells the visual story sufficiently without finding space for 4 more. There are great examples out there of boats with all the gear laid out around them in a diorama-like setting but for space/display purposes, I need to keep everything I plan to show in/on the boat. As you can see, the boat starts getting chaotic pretty quickly, even partially filled. Fooling around with visually interesting ways to stage select items. Pretend you didn't see any of the items yet, they come later! Oars: I made a couple of the oars with the dowel included in the kit but just wasn’t satisfied with the “feel” of the material or the fact that most of them were noticeably warped (probably my fault for storing them on the basement workbench). The die-cut material provided for the blades wasn’t going to work for me either. Once again, I turned to my scrap heap and found what I thought were better options for both the blades and shafts. If studied carefully you can see that the transition from shaft to blade isn’t always consistent but the overall feel seemed reasonably believable. Given the amount of wear and tear the real things must have taken from filthy hands, constant rubbing on oar locks and endless cycles of soaking and drying in salt water I weathered these accordingly. While I have no proof whatsoever that it was actually done on the real things, I painted the oar blades gray to better contrast the identification stripes. A completely aesthetic choice that I think adds some visual interest. The second time's the charm. I recycled my first attempts but take my word for it, they were awful.


- 52 replies
-
- 8
-
-
- model shipways
- new bedford whaleboat
- (and 1 more)
-
Really impressive work Mike...glad to see this build continue.
-
Thanks Voyageur...the positive feedback is really appreciated!
- 52 replies
-
- 1
-
-
- model shipways
- new bedford whaleboat
- (and 1 more)
-
Hi Mike...thanks for checking in! I'm familiar with your excellent build...the craftsmanship is superb. One of the most cleanly/accurately executed versions of this boat I've seen. I'm glad to hear you'll be completing it and can't wait to follow it to the finish! Thanks for the heads-up on the cooperage. I started work on those items recently and agree they need to be handled more delicately than the materials supplied in the kit allow. I've been painting with both traditional brushes and the airbrush in layers. I do base coats with the airbrush and weather with a traditional brush over the top. I'm still playing with techniques...this build is the great experiment. Hi Rich...thanks for checking in and the kind words. I actually decided to do this particular boat because I was spending a lot of time on the New Bedford Whaling Museum web site researching family history in their excellent database of whale voyages and ship crews. It turns out I have ancestors on both sides of the family who were active in the early whaling industry. One did several cruises on the Morgan. Interesting stuff!
- 52 replies
-
- 3
-
-
- model shipways
- new bedford whaleboat
- (and 1 more)
-
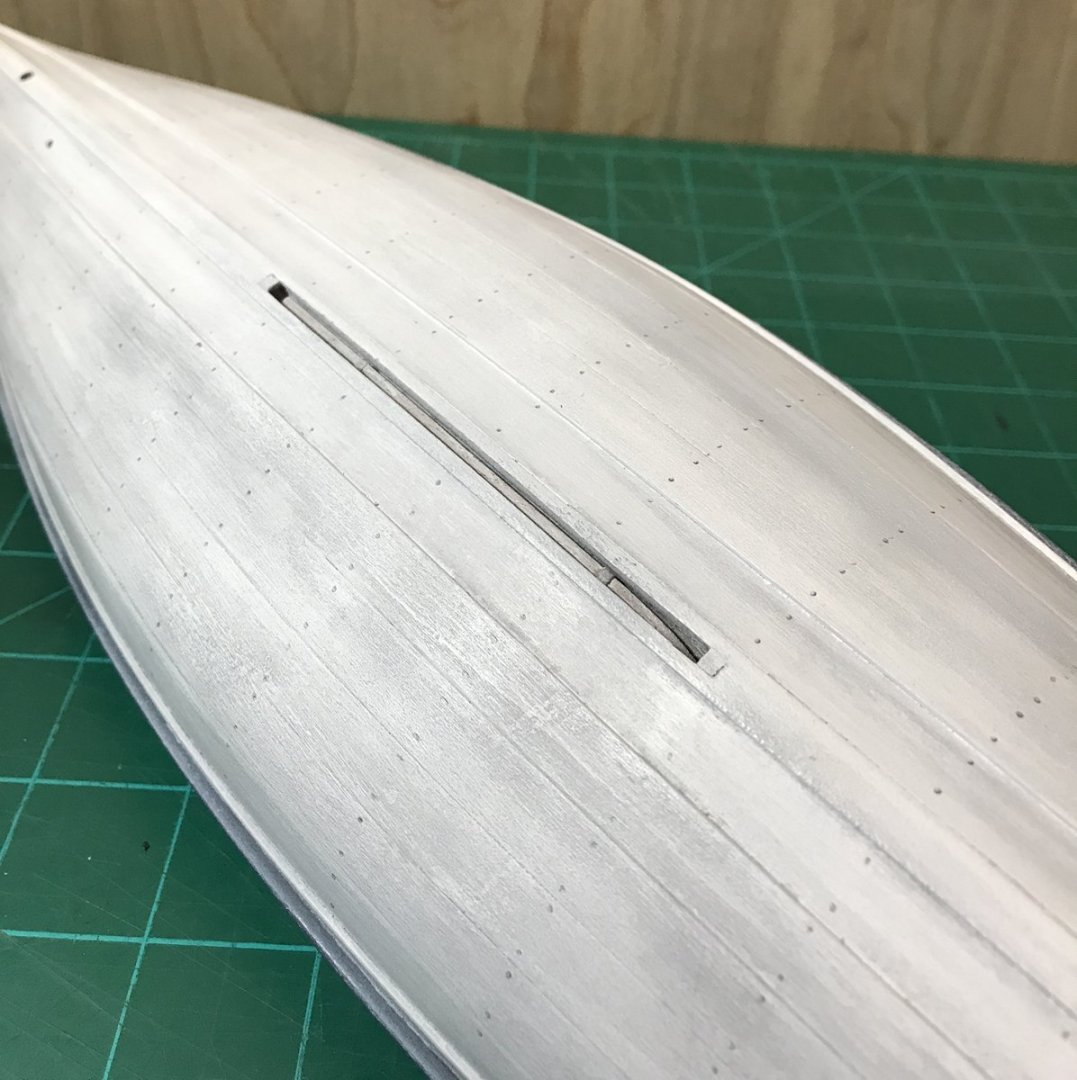
Painting the hull: I started with a base coat of flat white which actually did a pretty good job of hiding my many mistakes/imperfections and for the first time really showed the beautiful lines of these boats. Even I couldn't screw that up! Given that I had already done a certain amount of weathering on the boat's interior, leaving this clean outward appearance wasn't going to work. I had always planned to depict a boat that had been well-used, so it was time to add some grime. The Ronnberg book indicated that the nails on the exterior of the hull were puttied over and painted, thus making them invisible. This may well have been the case fresh out of the shop but having looked at countless vintage photos (see below) of real boats on the New Bedford Whaling Museum web site, the nails are often quite visible. There's nothing subtle about it so I opted to add them.


- 52 replies
-
- 8
-
-
- model shipways
- new bedford whaleboat
- (and 1 more)
-
Hi Ryland...thanks for checking in and taking time to leave positive feedback!
- 52 replies
-
- 2
-
-
- model shipways
- new bedford whaleboat
- (and 1 more)
-
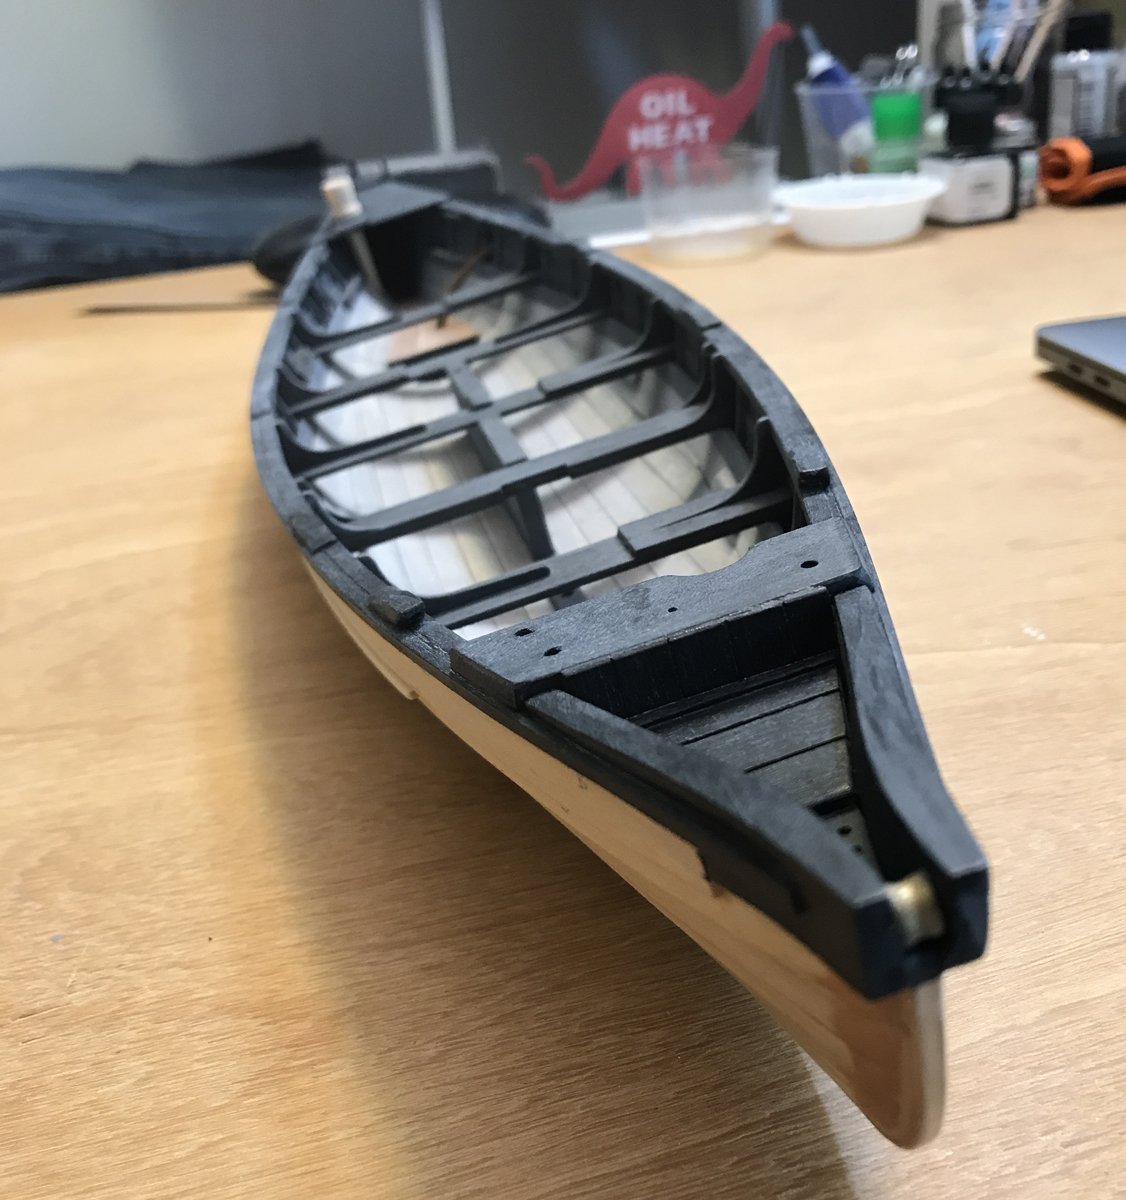
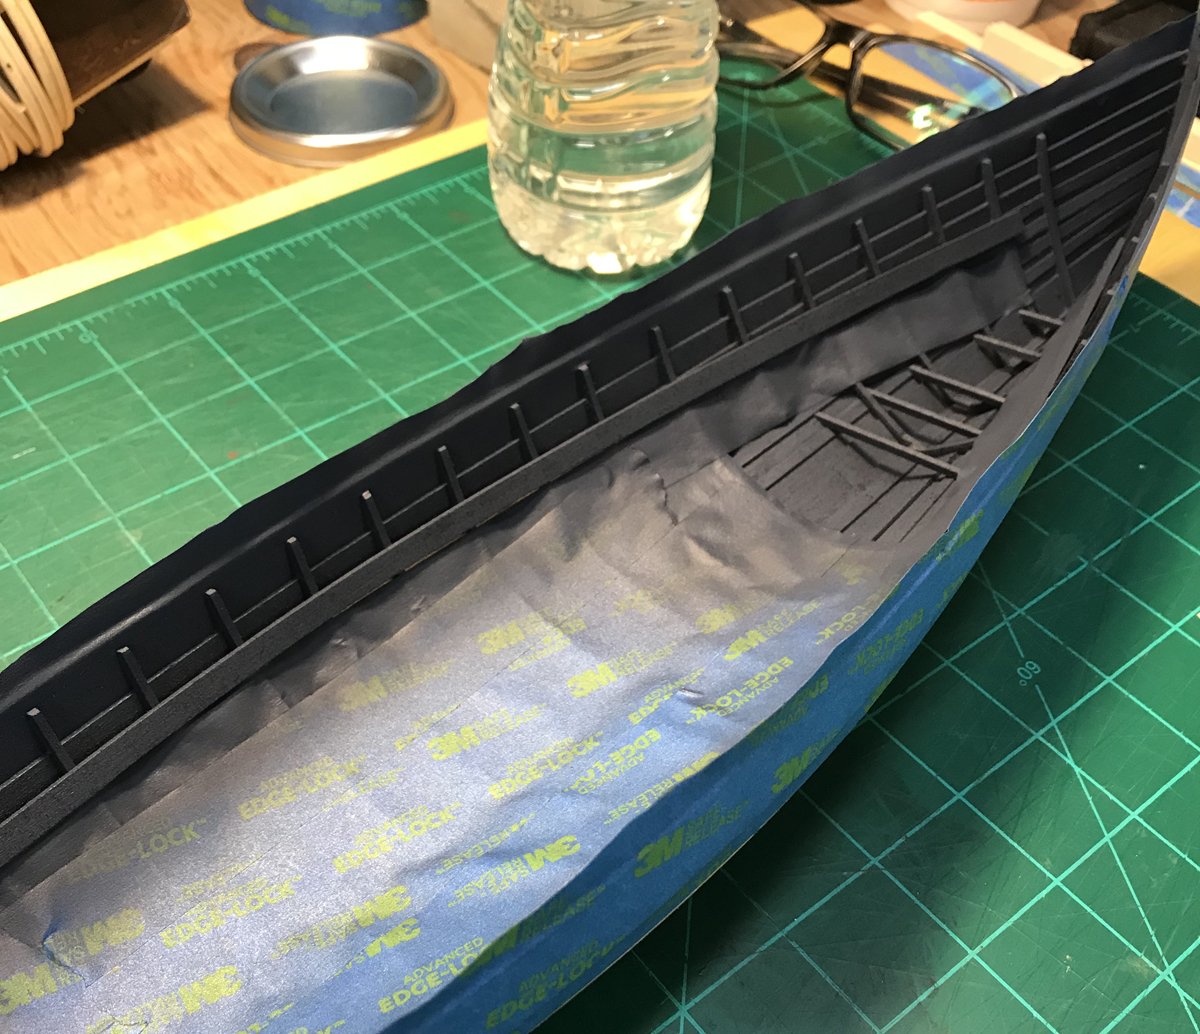
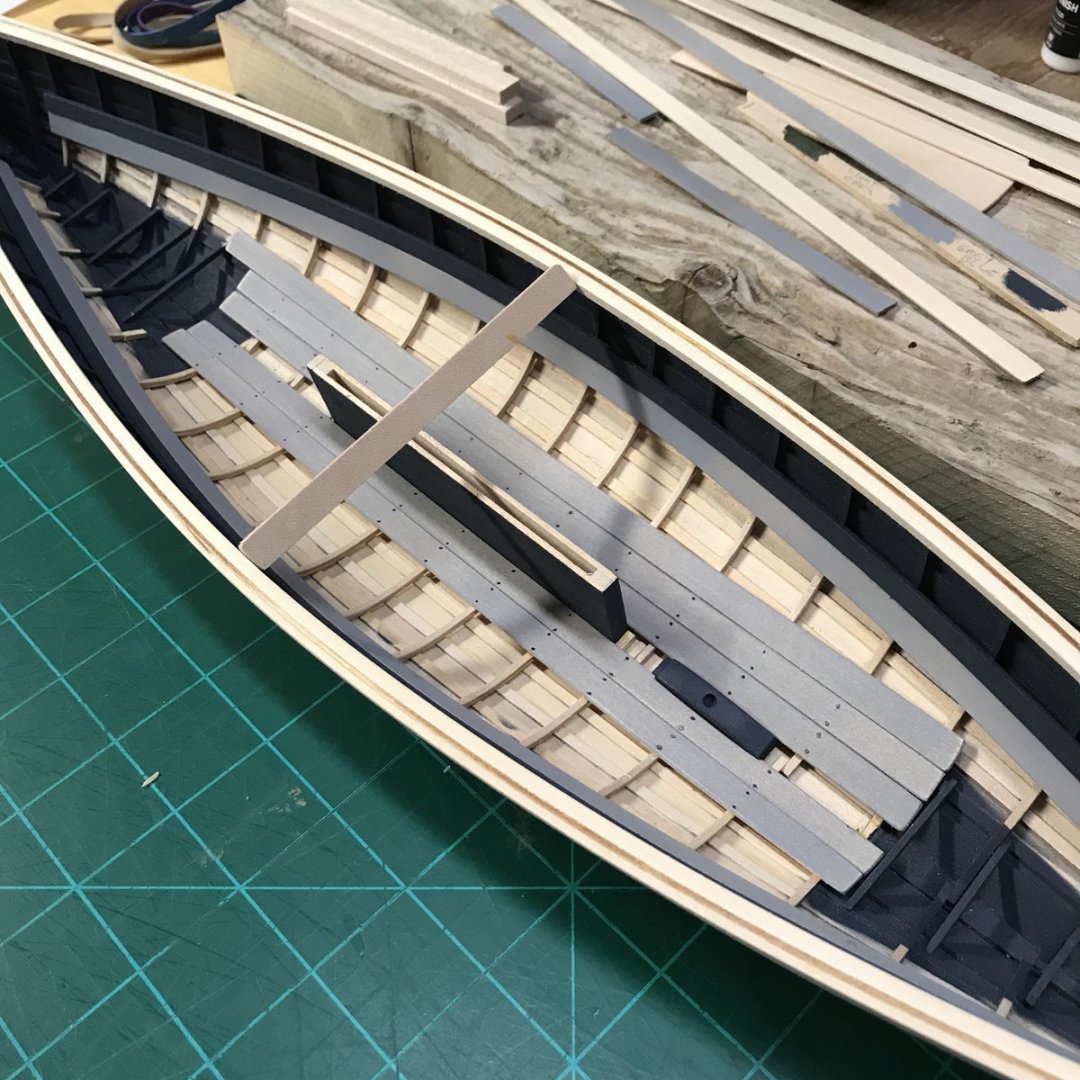
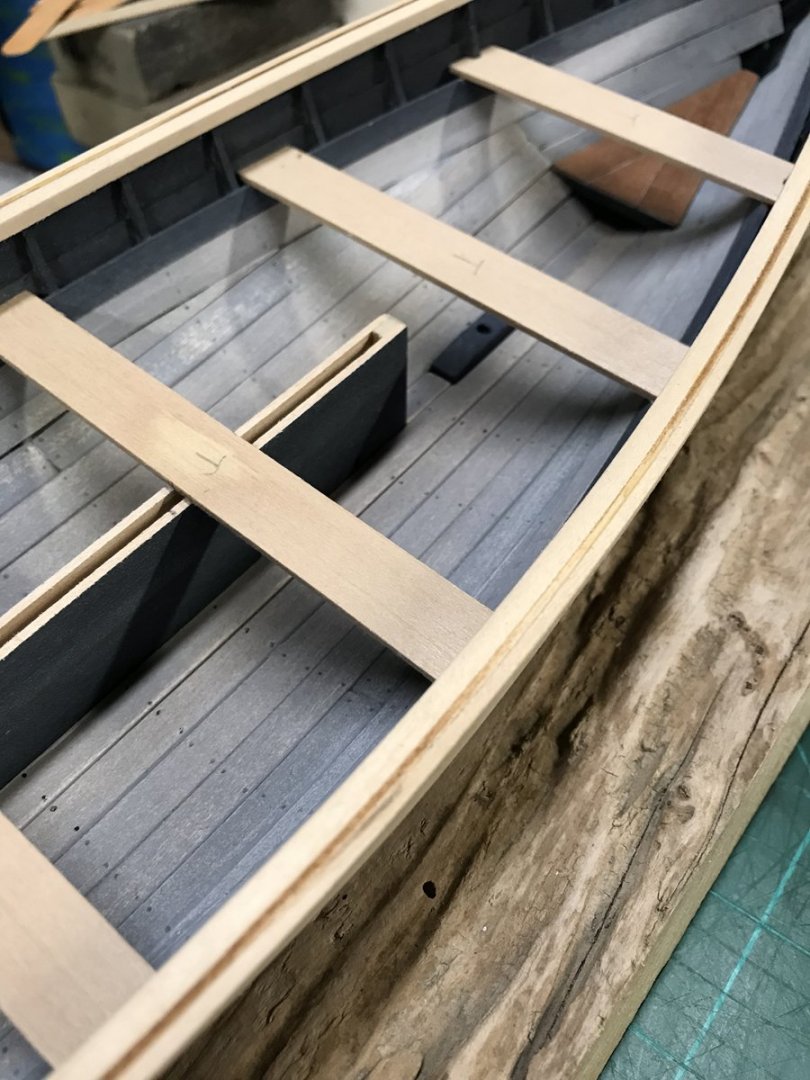
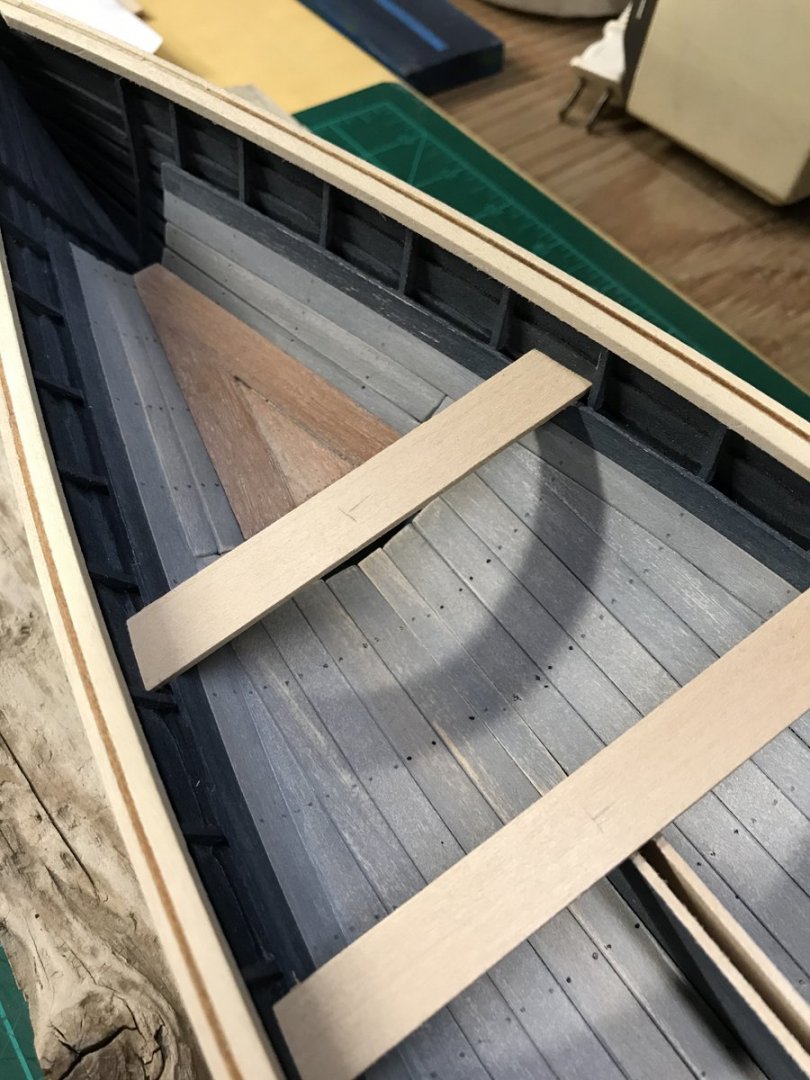
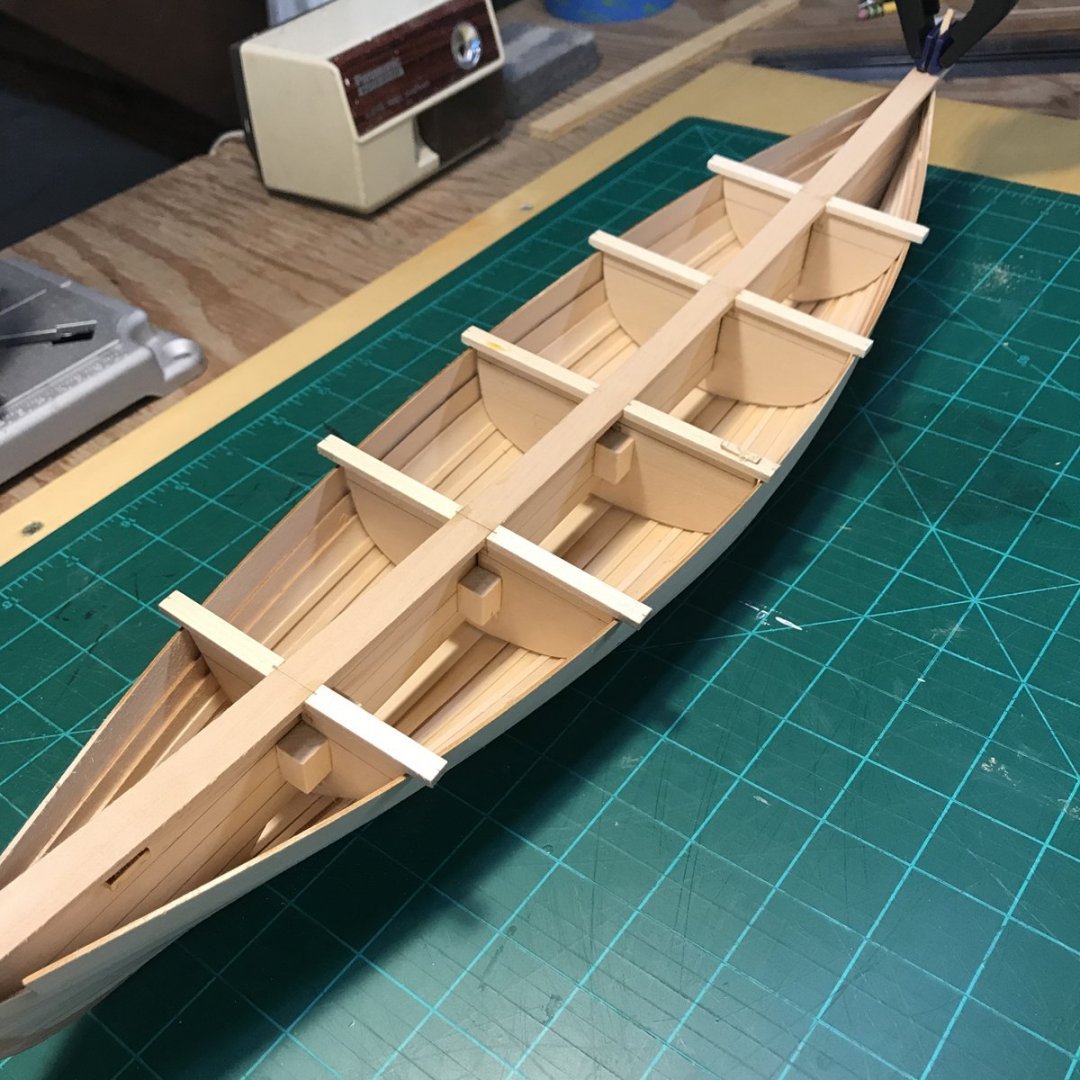
Thwart risers, some interior painting and ceiling planks: I made one easily avoidable mistake here that careful reading of the plans and instruction book could have prevented. The thwart risers are intended to be slightly thicker than the ceiling planks that start under them but I failed to take note of this and used the same thickness of material. I’ve noticed this in several other builds so I can see that it’s an easy detail to miss. If I had realized this before installing the thwarts themselves I would have added a thin strip to fake the extra thickness. Oh well, another lesson learned. The ceiling planks went on mostly without a hitch other than having to improvise some hidden support here and there where a plank ended and the frame it was supposed to terminate on happened to be somewhere else. The great frame disaster strikes again! I added the first coat of paint before installing the ceiling planks but added some weathering later when I had a better feel for the overall color scheme. I decided to go with a dark blue/grey for the interior of the hull, thwarts and risers. These areas will be weathered to a lighter, sun-faded color eventually but my overall color scheme will be dark blue, black, various shades of grays, and white. Nobody seems to be able to pinpoint any particular combination of colors beyond the primer coats new boats were delivered with so I did my own thing. Given the jobs these boats were designed to do and the relatively short lives they were expected to do it in, I concluded that utility was probably much higher on the list than adventures on the color wheel. Distinguishing your boat from that of another ship seems to be a reasonable criteria when considering how colors were chosen. I installed the first ceiling plank with the light gray paint I intended to use on those to get some sense of how the scheme would work. I knew everything would be toned down considerably with a little weathering so I settled on my choices. Before the ceiling planks could be installed in the bottom of the boat the centerboard case and mast step needed to be added. Painting these the dark blue rather than gray was probably something that would have been considered a waste of time in a real boat but I liked the contrast and the fact that they were installed before the ceiling on the real thing made it somewhat plausible. I didn't use fasteners on this build so I made a test of simulating nails with paint early on. I didn't think these looked overly convincing so I ended up scraping them away with a sharp blade and using a simple number 2 pencil instead. With a little weathering I thought the results were much better. With the ceiling complete and some subtle weathering applied (in my opinion) I was satisfied to move on to test-fitting the thwarts. With the interior mostly complete and painted, all 5 thwarts were fitted in position as per the plans. According to Ronnberg's book, the bow and stern sheets weren't painted so I resisted making them light gray. As you can see, the forward-most thwart ended up with a misplaced frame right in the middle. It should have rested between two frames. I could have moved the thwart forward and maybe gotten away with it but I decided to stick to plans from this point forward no matter what. The great frame disaster strikes again! Fast-forward and a whole bunch of other interior details get done! All of this work took several months to complete. Carving the cheek pieces, bow chocks, loggerhead, oar locks, peak cleats and various other parts was time-consuming and educational. I thought carving was going to be my achilles heel but turned out to be something I rather enjoyed. If a particular step/activity seems intimidating, just give it a shot. You may discover you had nothing to be afraid of.


- 52 replies
-
- 13
-
-
- model shipways
- new bedford whaleboat
- (and 1 more)
-
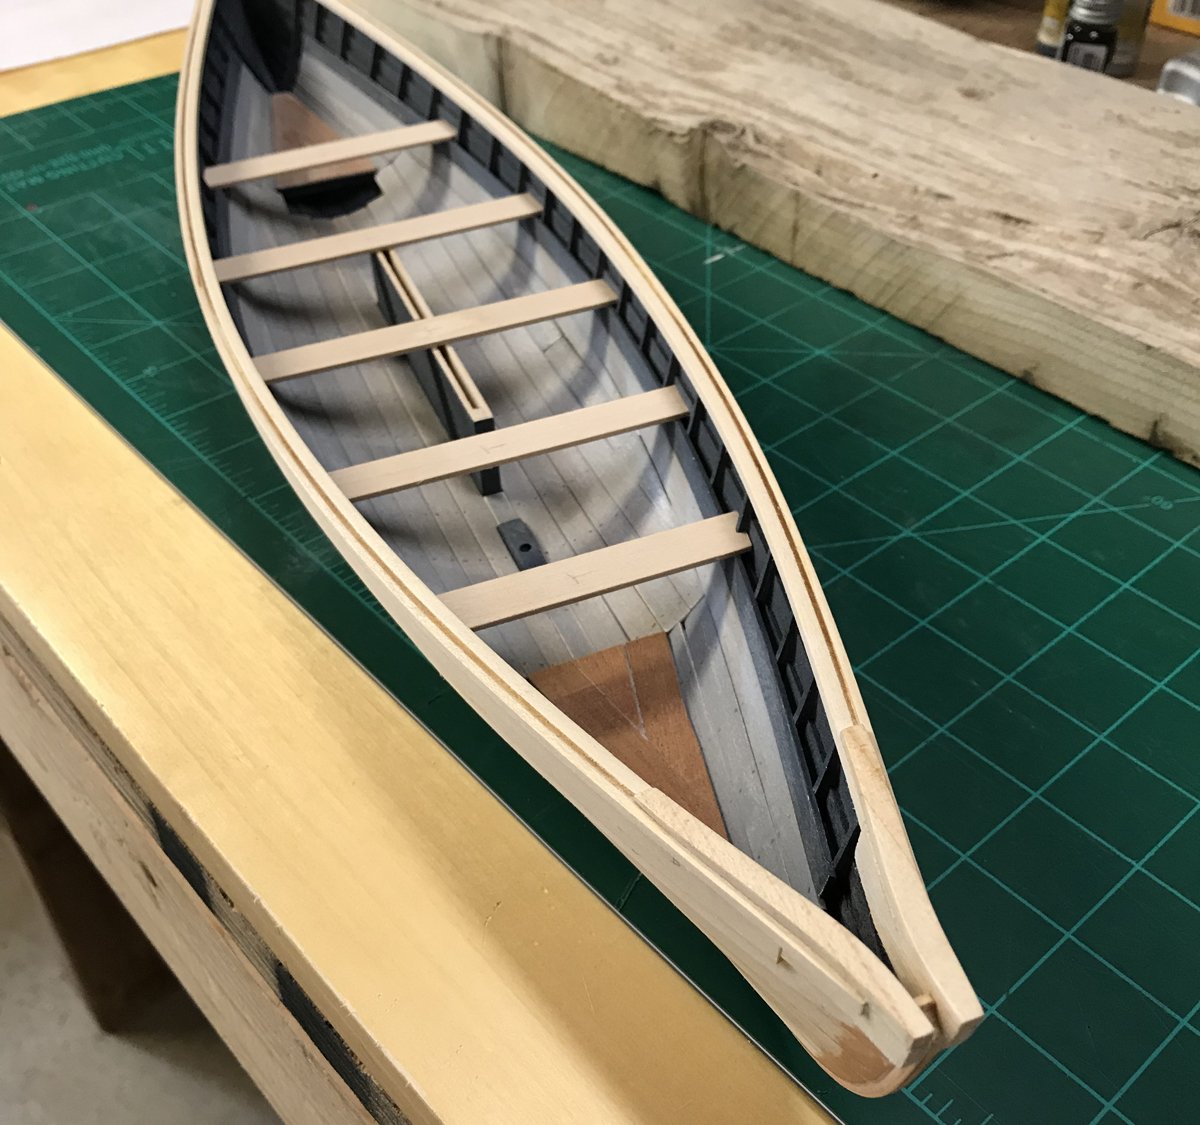
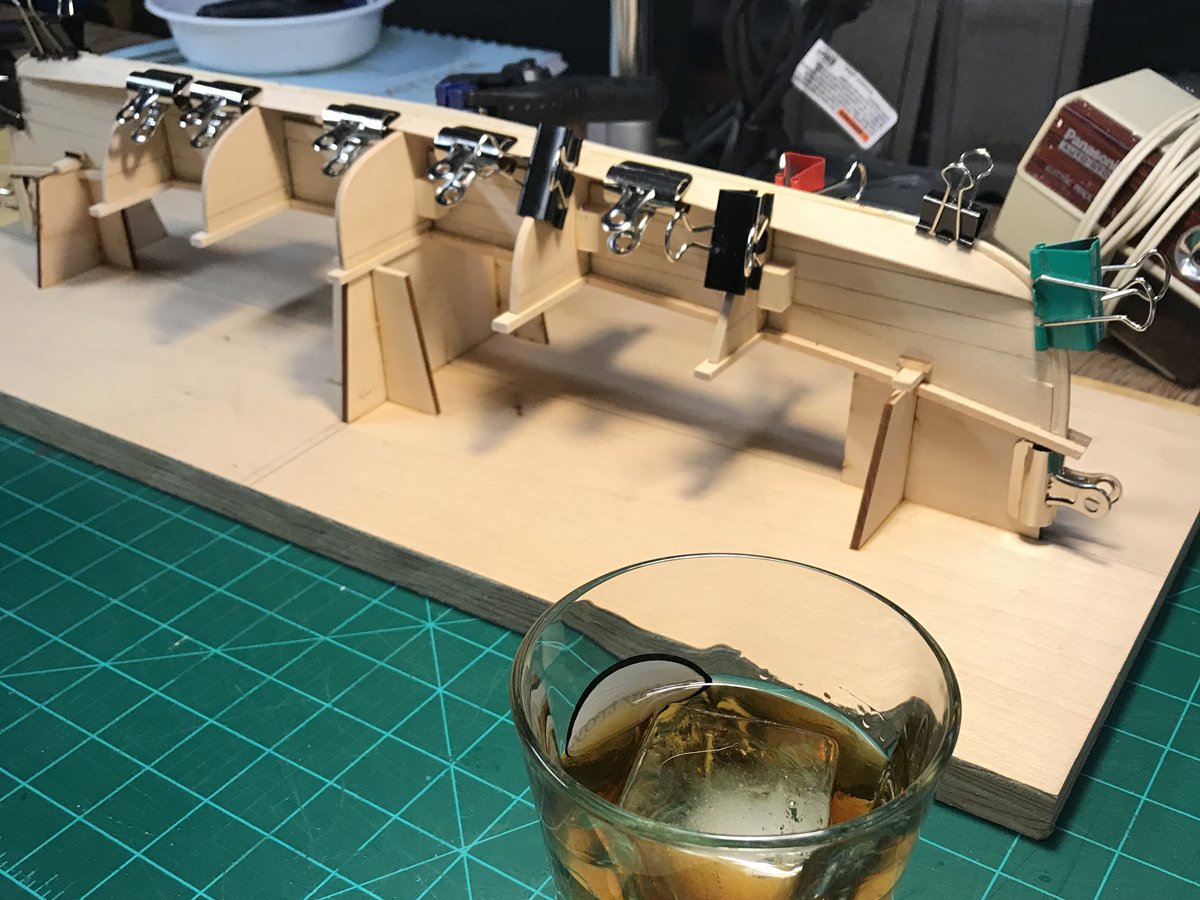
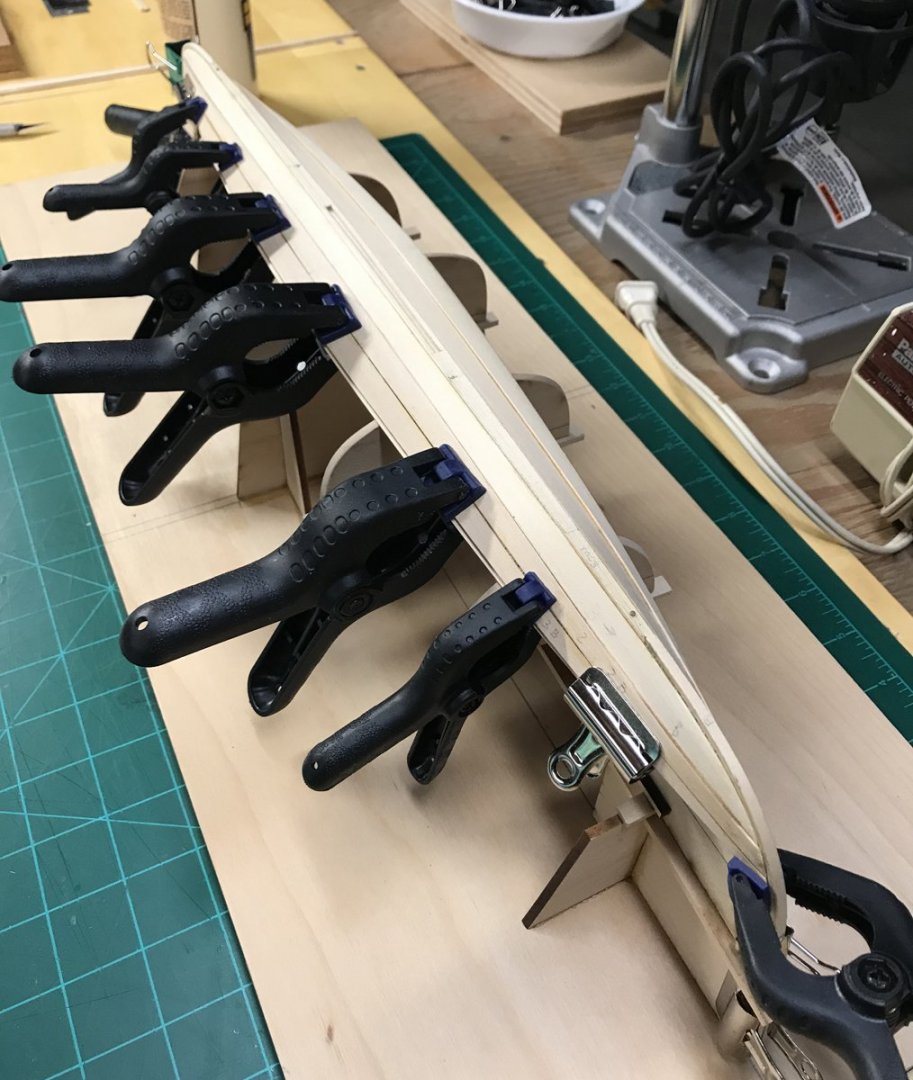
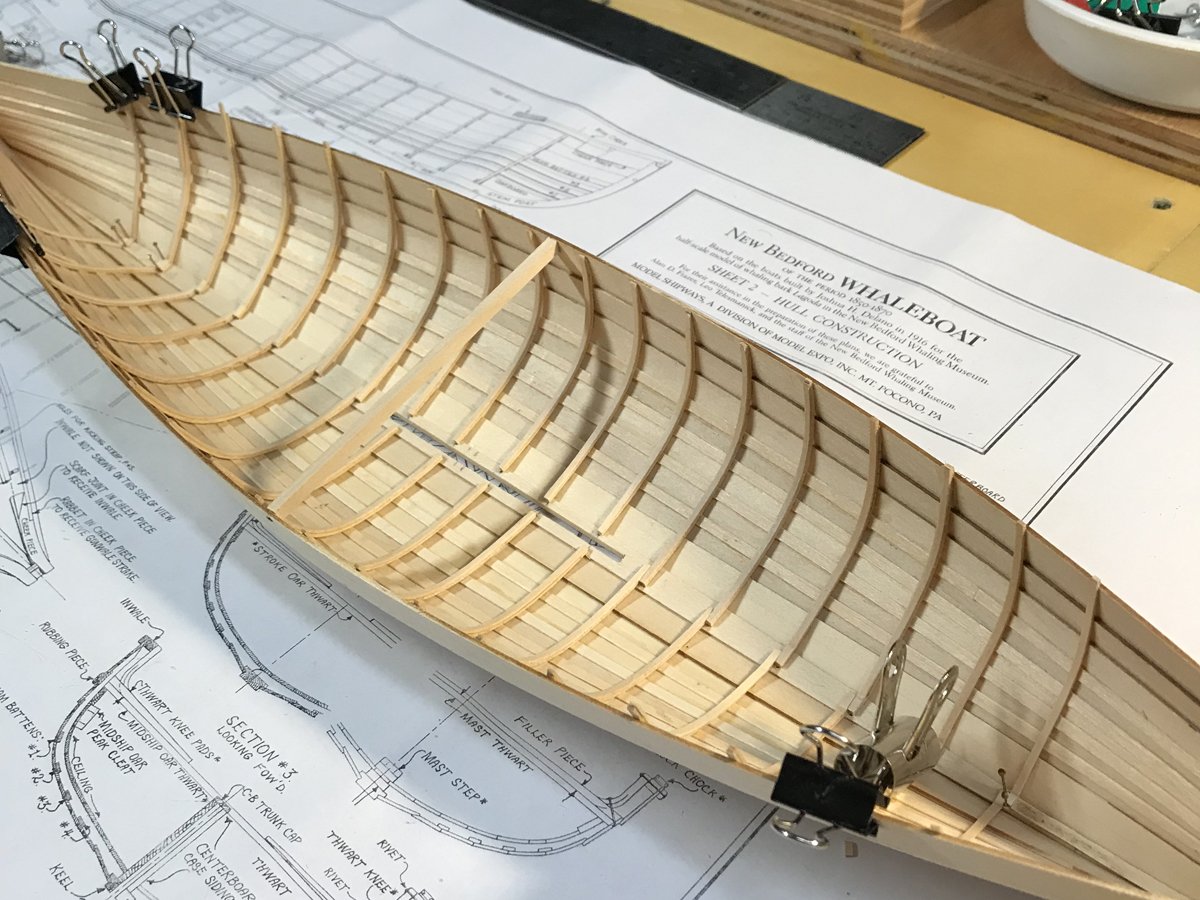
Planking the jig: This process went much smoother than I had anticipated and reassured me that modifications I made to the jig didn’t hurt and may have even helped set the stage for pain-free planking. If your jig matches the plans, your planking should go on without a hitch. I probably could have done a more precise job of beveling each plank to create nice tight joints up and down the hull but I had intended to paint the model from the start so a little filler here and there wasn’t the end of the world. The biggest area of concern for me was getting the planks to transition properly into stem and stern posts . This is something I’ve noticed about several builds I’ve seen of this boat on the internet. The planks appear to rest on top of the stem and stern posts creating a ledge rather than merging into them. With that in mind, I made sure to overkill the depth these rabbets while building up the laminated stem/stern posts and still allowing enough gluing surface to complete the laminations. As it turns out, my version of overkill still wasn’t enough! I needed to thin the planks quite a bit to get a somewhat smooth transition. It wasn’t the sharp/clean result I had envisioned but it wasn’t horrible either. Live, learn, move forward. Starting the planking process with a little help from my friends at the Albany Distilling Company. So far, so good. Mission accomplished. Interior frames: So my completed hull came off the planking jig as advertised with surprisingly little glue seepage inside. Joy to the world! On to the frames. These are made by laminating 2 thin strips together and conforming the lamination to the insides of the hull at regular intervals. The instructions recommend soaking the strips in water first for ease of bending but I used heat instead which did the trick nicely and saved me from having to sand a lot of unsightly “fuzz”. Bring on the first major mistake: For reasons I can’t really explain given how carefully I had measured things to that point, I pretty much eyeballed the placement of the frames as if I’d been building these things for years. I hadn’t and the results made that clear. Inaccurate frame placement isn't apparent at first, but trust me, it makes itself known later. Amazingly enough, the plans are far more accurate than my eyes and the issues this would cause turned up after the majority of the ceiling planks were glued in and tearing everything out just wasn’t in the cards. For 99 out of 100 people who might actually see this boat in person, the great frame disaster would hardly be noticeable. For me, however, it was very close to the moment I introduced the project to the wood stove. Instead, I put the kit aside for several weeks and went about formulating a plan to salvage things as best I could. While taking some time to reread the Ronnberg book I was heartened to discover that Delano himself had laid the frames for the 7 half-sized Lagoda boats for the New Bedford Whaling Museum inconsistently, even going as far as to have different numbers of frames from one boat to the next. If a guy who built the real thing for 50 years wasn’t fretting over frame consistency, I certainly had no business doing so. Vindicated! Feeling slightly less stupid (just slightly) for not taking simple/accurate measurements, I moved on to another issue with this kit I felt was worth fixing. If you look at builds of this kit you’ll notice that there are gaps along the insides of the frames and the planked hull. This is caused by both the battens between several of the planks and the overlap of planks in areas where there aren’t any battens. On the real boats, the frames were cut to conform to all the intricacies of the inner hull so those gaps are neatly filled. Given that I intended to paint the frames where they were visible above the ceiling planks as well as in the bow and stern, I decided to take the time to close these gaps with wood filler. If you’re planning a natural finish, this technique would probably be too noticeable to get away with. It’s a small detail in the grand scheme of things but I thought it was worth doing, especially at this scale. With the frames installed it was time to move on to thwart risers and ceiling planks. Measure frame placements carefully. I didn't and lived to regret it. The gaps that I mentioned between the inside of the hull planking and frames are clearly visible here. I closed these with wood filler where they would be visible.
- 52 replies
-
- 4
-
-
- model shipways
- new bedford whaleboat
- (and 1 more)
-
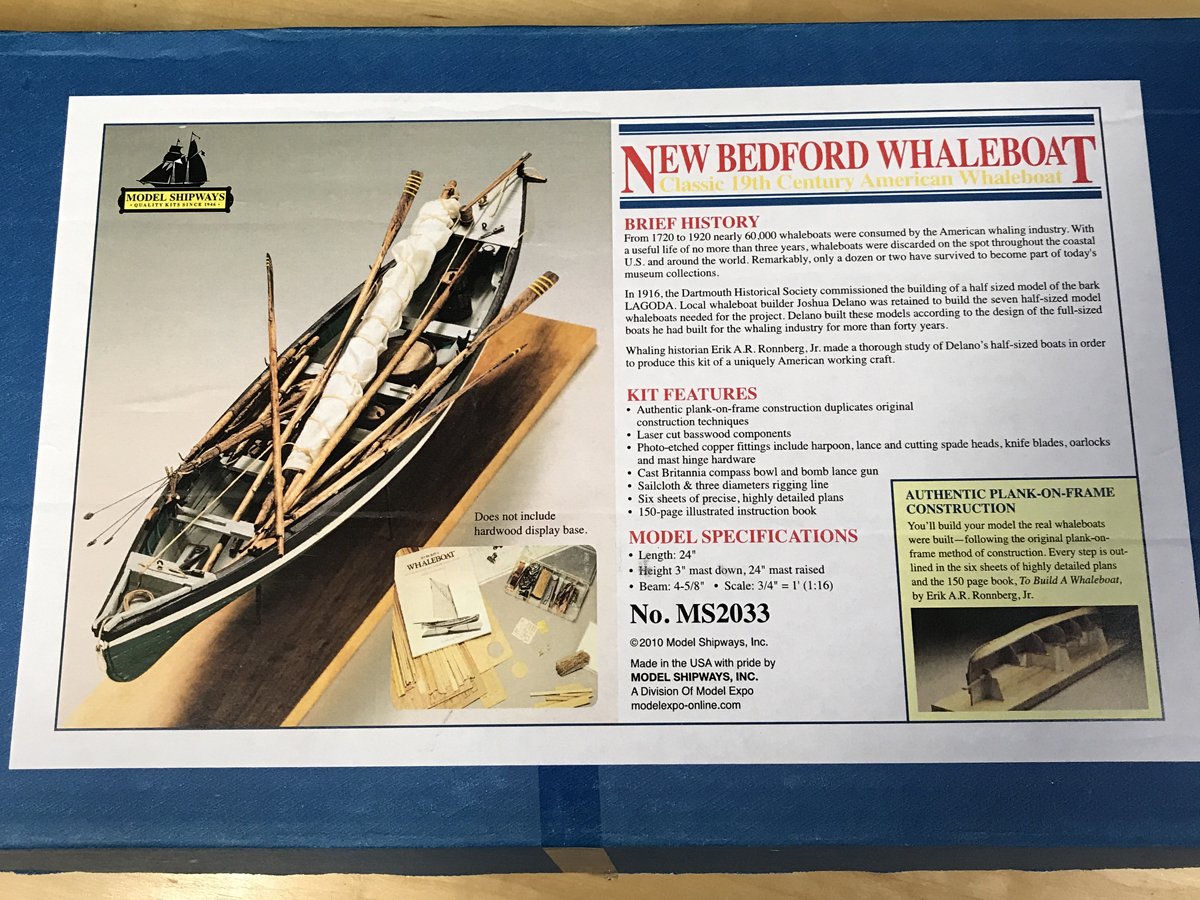
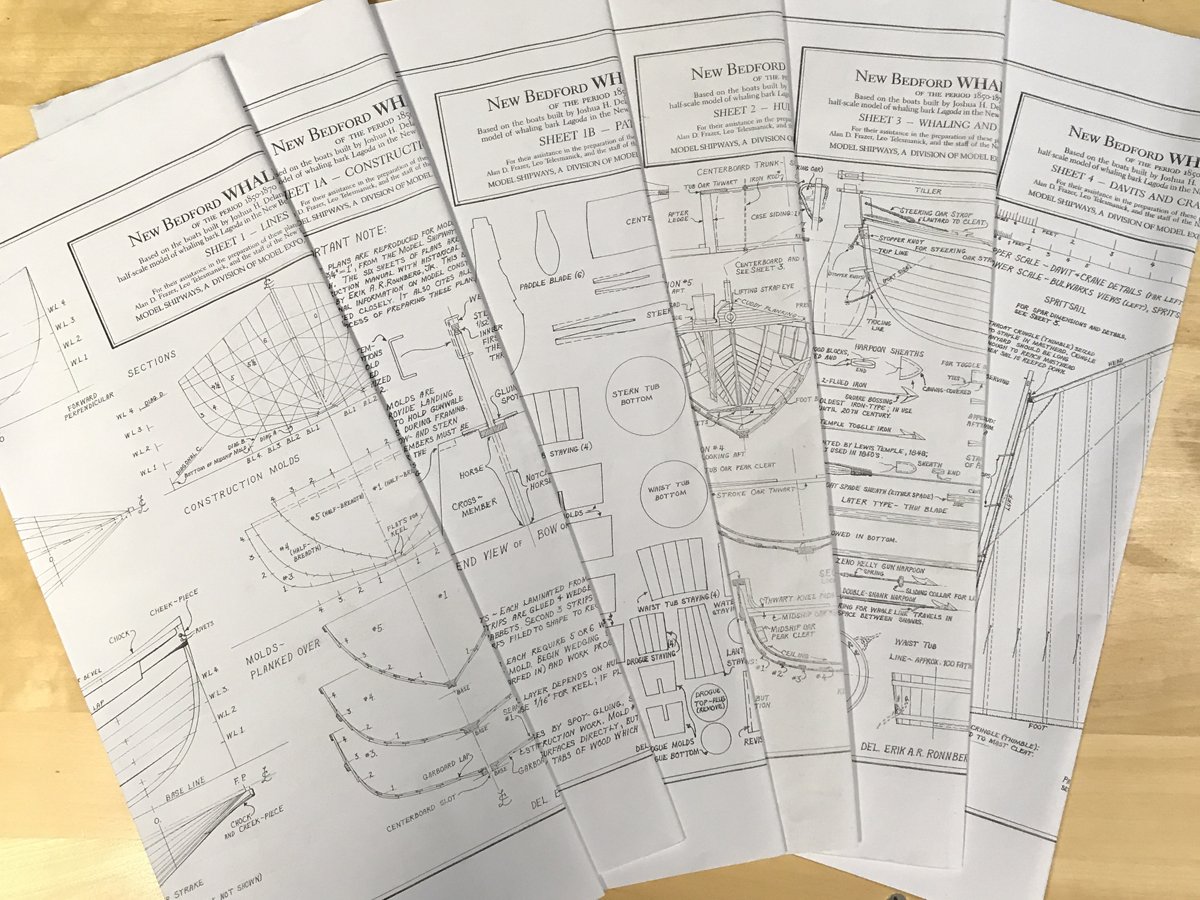
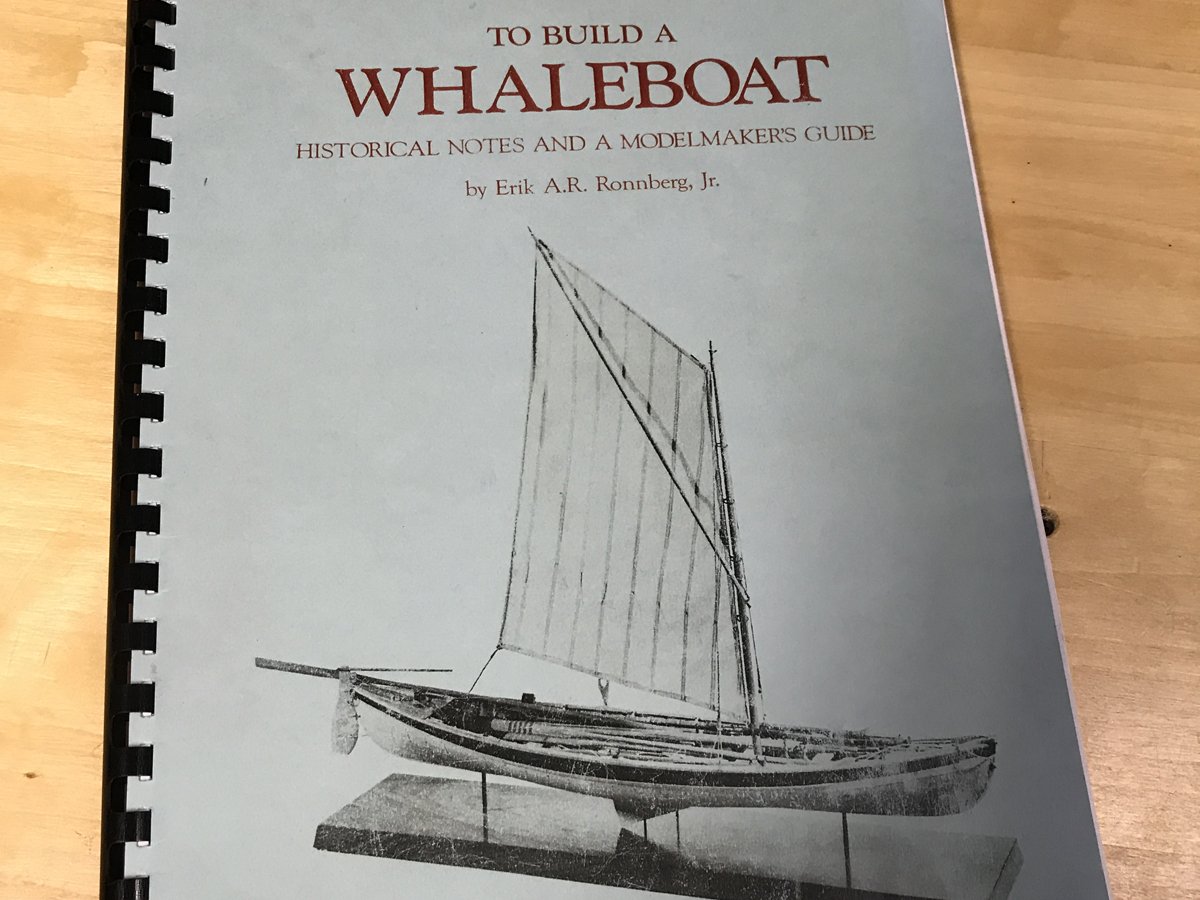
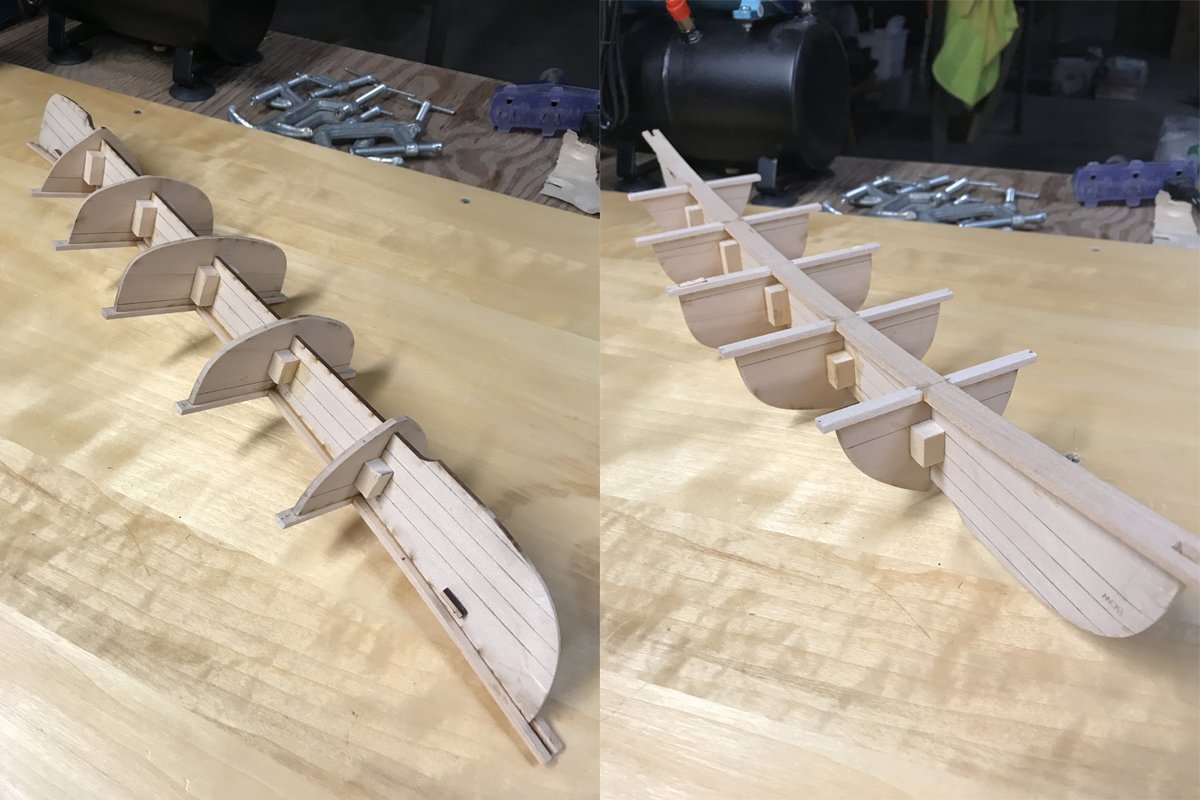
I started this boat last Fall before I was a member here so I’m actually somewhere in the neighborhood of 80% finished. It's my first nautical build so what might appear to be lightning fast construction is really just a lot of catching up on already completed steps. When I get to the stuff I’m doing now you’ll notice a rather dramatic slow-down! My photos of the early stages of the build are hit and miss and the quality leaves a lot to be desired. It's casual documentation at best. Fortunately, lots of good logs for this boat are already available on this forum so all the nitty-gritty of actual construction techniques have been covered quite thoroughly by far more accomplished builders than I. While this build log certainly isn’t necessary in terms of critical new information, I thought it would be a good opportunity to get familiar with actively using the forum and share some of the things I did differently on my build. My next build log (1:32 Amati Fifie) will be a much more professional endeavor with photos from my “real” camera rather than a phone…I promise! Thoughts on the kit: If you plan to build this kit entirely from what’s in the box, you should be able to get reasonably good results. My kit was missing a few items but nothing I couldn’t make myself so I didn’t pursue replacements. Other than the planks and building jig, I didn’t use much of the die-cut material provided in the kit. Given that I was looking for a little more “texture” out of my weathered boat than the smooth basswood the kit provided, I turned to my bottomless supply of scraps from various projects I’ve done over the years. I wasn’t overly excited about the look of the rope that came with the kit given what an important part of the overall visual impact it has on a boat of this scale (or any scale really) so I opted for the excellent stuff available from Syren Ship Models instead. It’s a dramatic improvement for such a small investment. This kit comes with 6 sheets of what I consider clear/excellent plans and Ronnberg’s book “To Build a Whaleboat” which is half instruction manual and half a history of the whaleboat in general. For me, these items alone are worth the cost of the kit. I was a little surprised that Model Shipways used such a crudely built version of the boat on the box cover. It doesn't come close to accurately representing the quality of the kit and really would have made me think twice about my purchase if I had seen it in person. Your results will most definitely be far better than what you see on the box! 6 sheets of wonderfully detailed plans. Ronnberg's excellent instruction book. The building jig: If I had any advice to offer on this build as a boat/ship modeling novice, it would be to take your time on this particular step. It’s tempting to hurry through setting up your building jig and getting on to the fun part but everything that follows depends on accuracy here. My kit had quite a few small and not-so-small discrepancies between the plans and the laser cut parts so be sure to compare the two and proceed accordingly. Trust the plans rather than the die-cuts. If I had assembled the building jig “as-is” it clearly would have caused issues during planking. This is probably a no-brainer for people with a few builds under their belt but I was a little perplexed as to why the die-cuts wouldn’t be dead-on. I know better now. I would also recommend strengthening the building jig if the slotted joints feel sloppy/loose like they did with my kit. I added small blocks to strengthen and align the joints overall and I think it was worth the minimal effort invested. I may have just gotten a little unlucky with my particular kit but I suspect this is a common issue. The final thing worth noting as it pertains to the jig is investing in a good quality piece of flat material for your building board that’s not likely to deform with changes in humidity. Dead flat and staying that way is a must if you want the bow and stern horses to sit properly and receive the frames without modifications. The frame after it had been removed from the horses. Note the use of small blocks to square up and stabilize things. The planking process puts a lot of stress on this thing so sturdy is good.
- 52 replies
-
- 3
-
-
- model shipways
- new bedford whaleboat
- (and 1 more)
-
Hi Jack...thanks for taking the time to say hello. It's good to see people from the neighborhood (relatively speaking) here!
-
Hi Jonny 07...I appreciate your kind words and encouragement. I'm in the process of going through my whaleboat build photos to see what I have from early on. I'm hoping to start a build log shortly.
-
Yes, I was digging around in there last night and appreciate the heads-up! Thanks again...
-
Thanks Ryland, druxey... and to mtaylor for pointing me in the right direction if I decide to post more building pics on the forum. I had a feeling there might be an appropriate place for them to live and that I'd end up putting them someplace else! Now on to that build log...
-
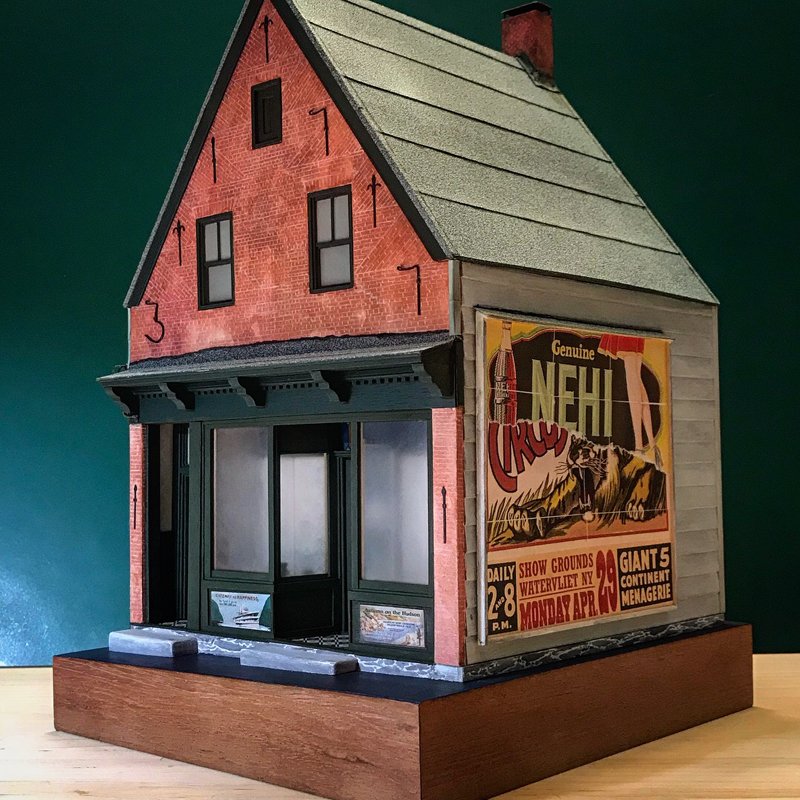
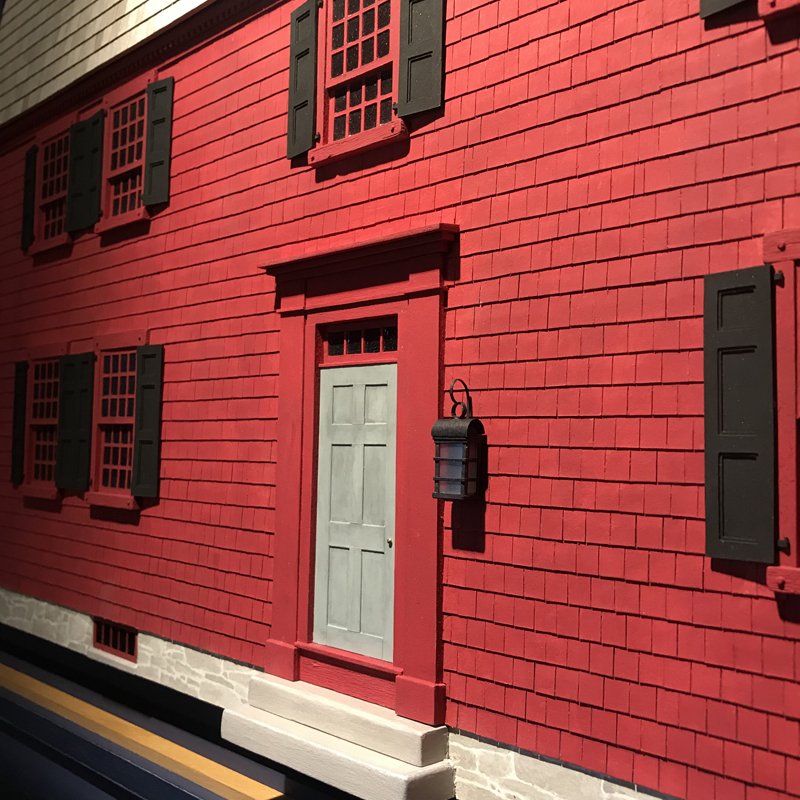
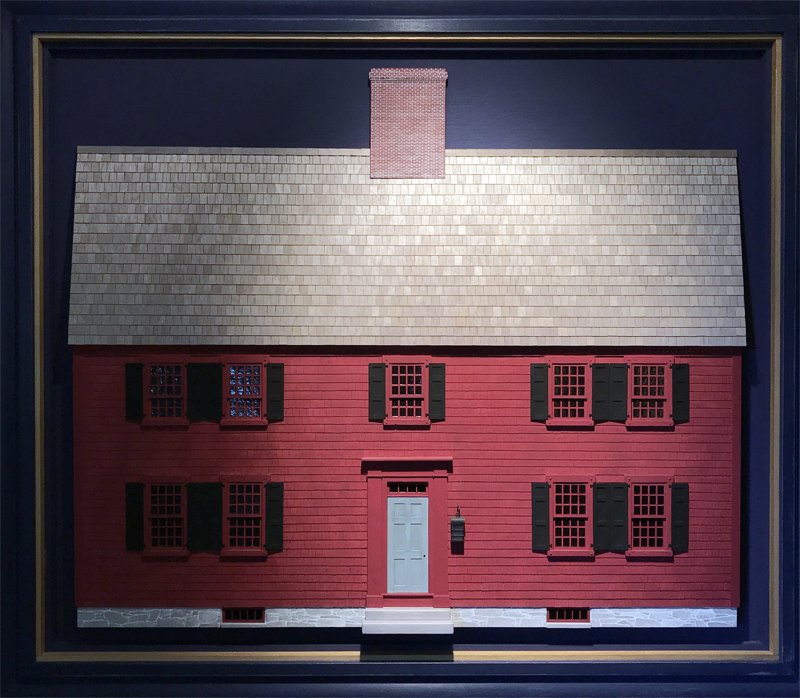
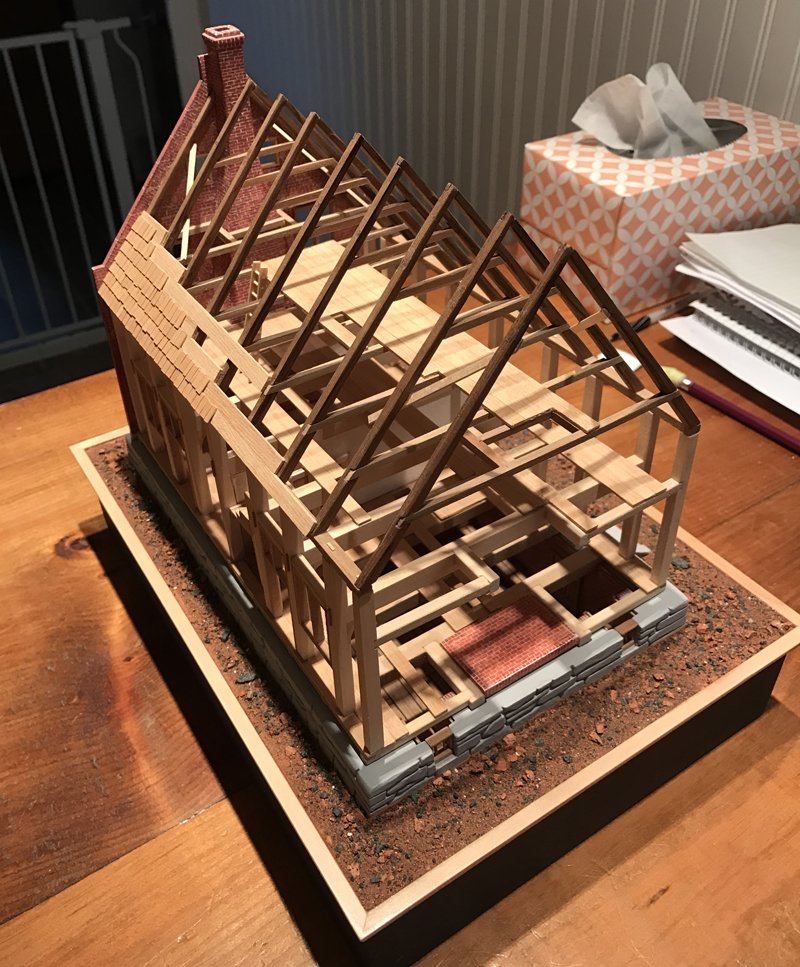
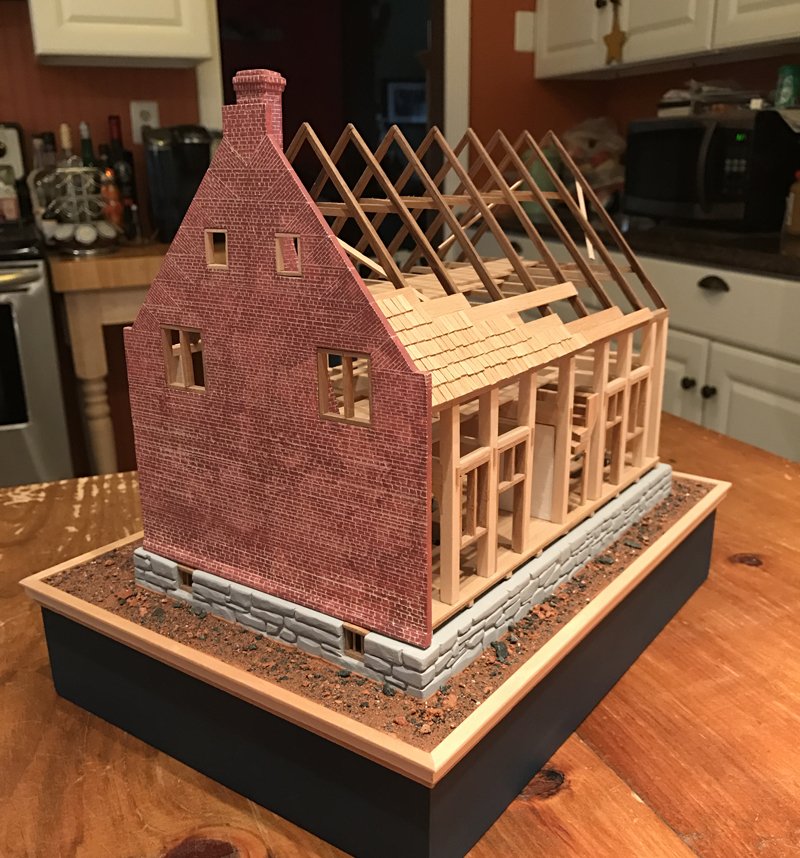
Thanks guys, sounds like a plan. You're right EJ_L, if I wait for my next build it could be a while! Hi Ryland...I'll attempt to post some of my historic building pics now. The subjects I choose are usually local (Albany and Rensselaer counties in NY) and almost always have some kind of personal connection. One represents the building as it appeared when built (Sherman farmhouse, Pittstown NY), one as it appeared shortly before it was torn down (early 18th century Albany Dutch home in the 1940s) ) and another "exploded" view to show how the Dutch used brick veneer on timber frames (Van Alen house, KInderhook NY).